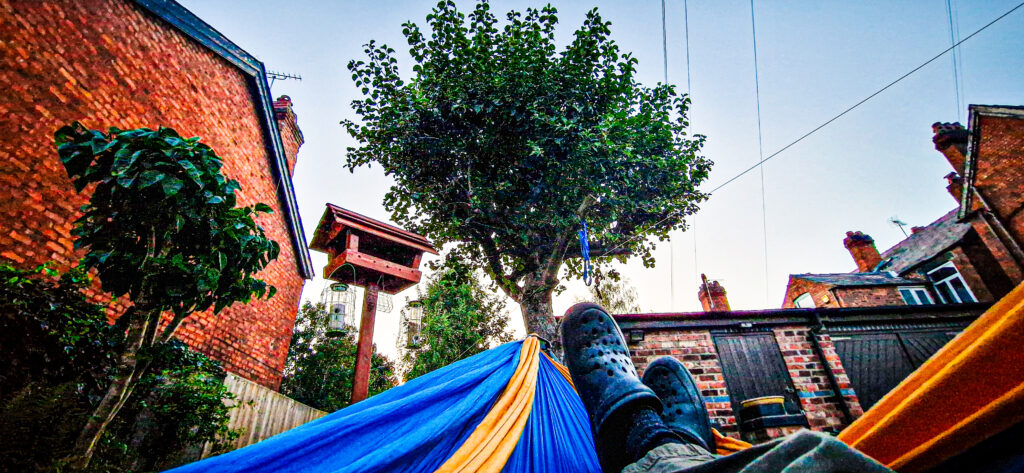
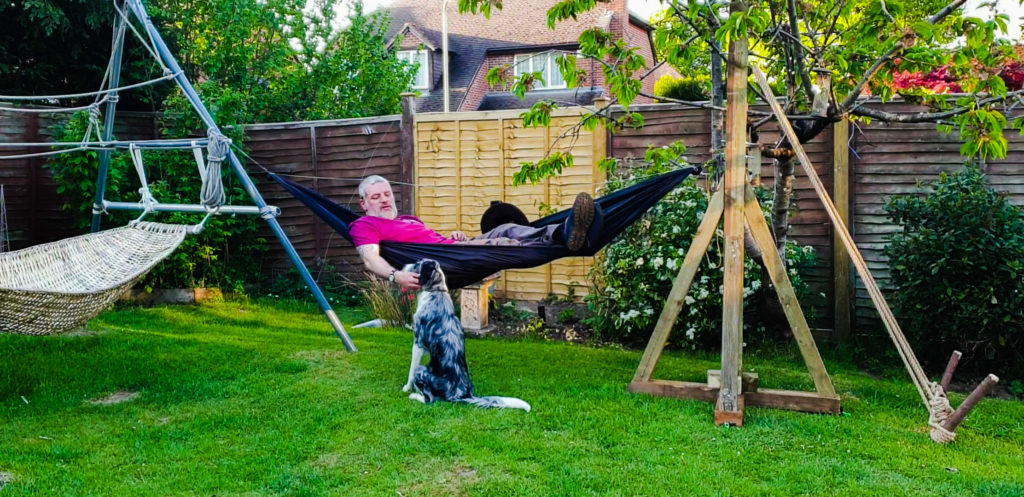
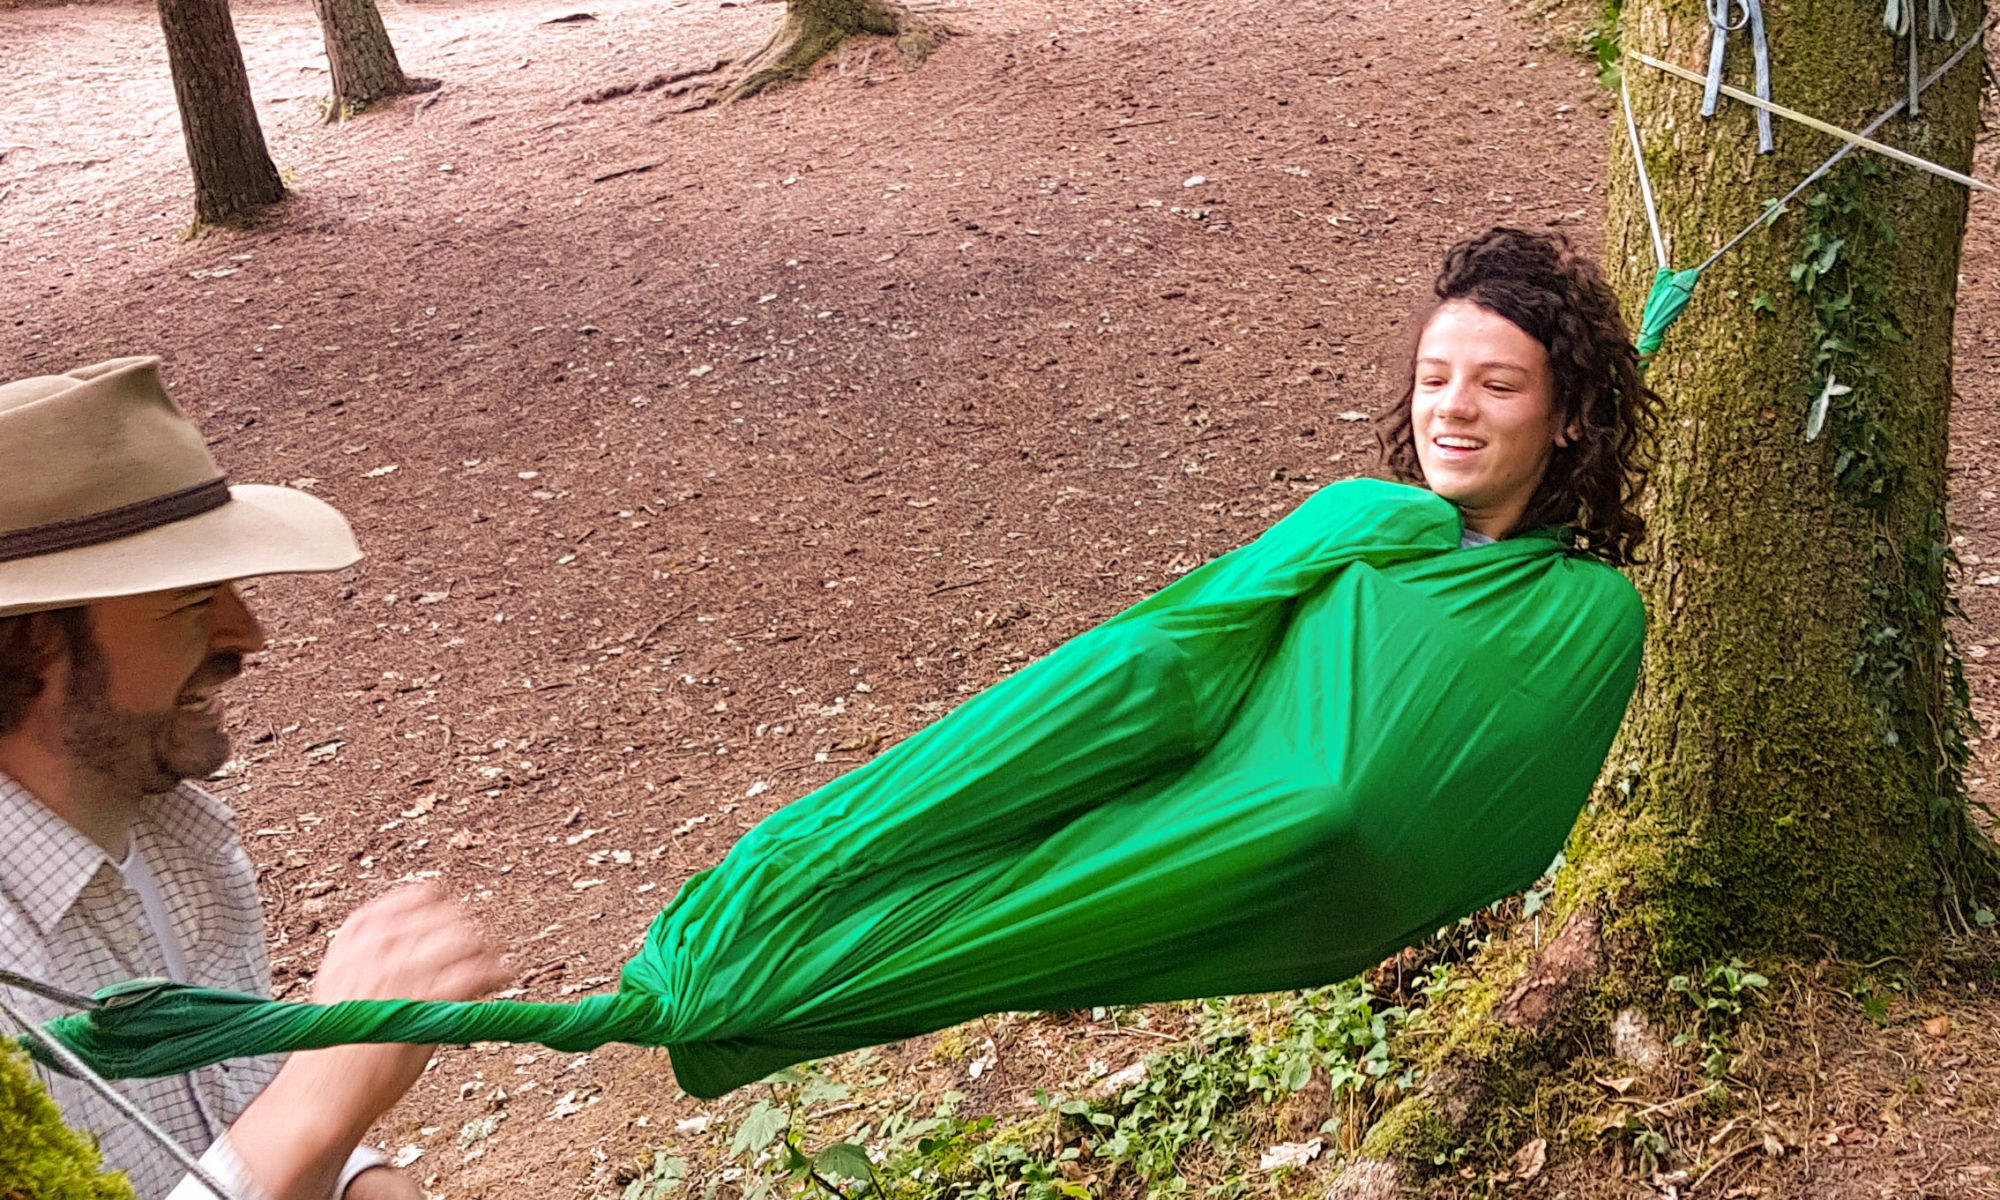
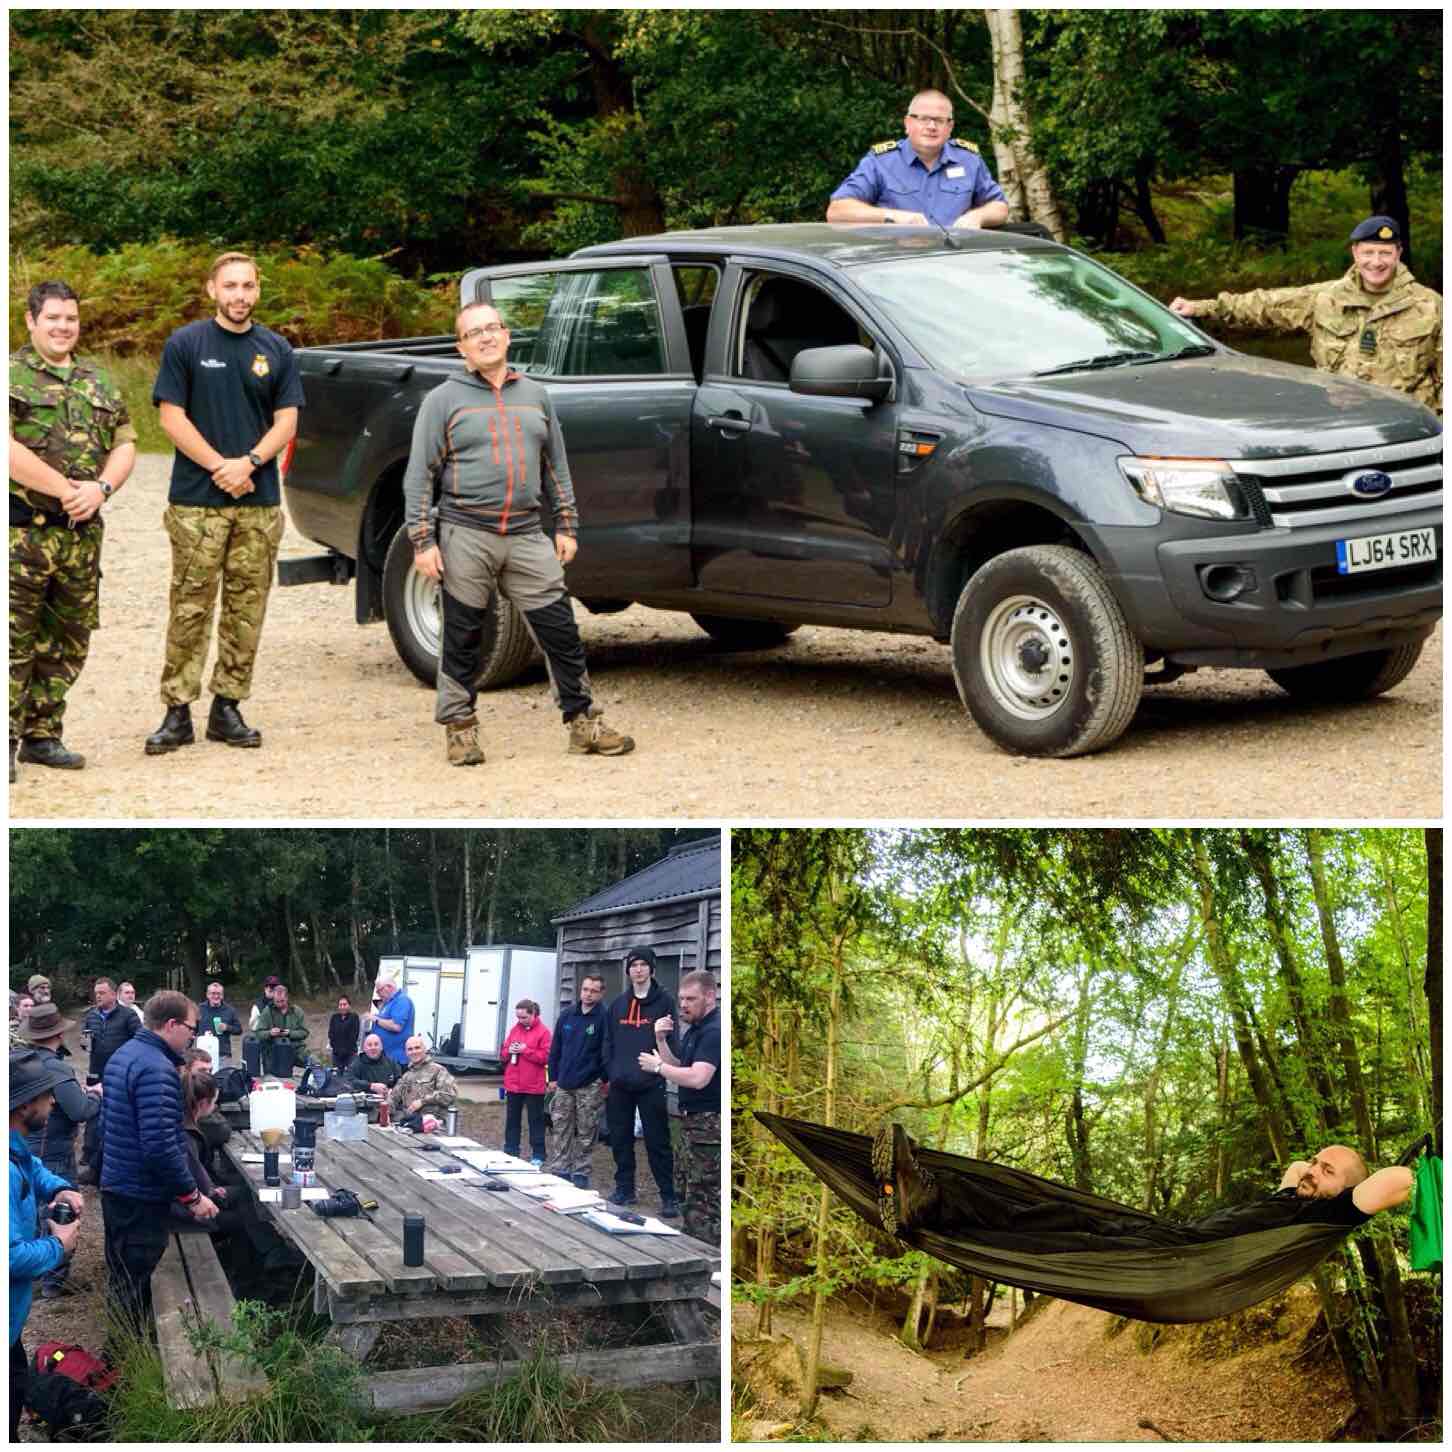
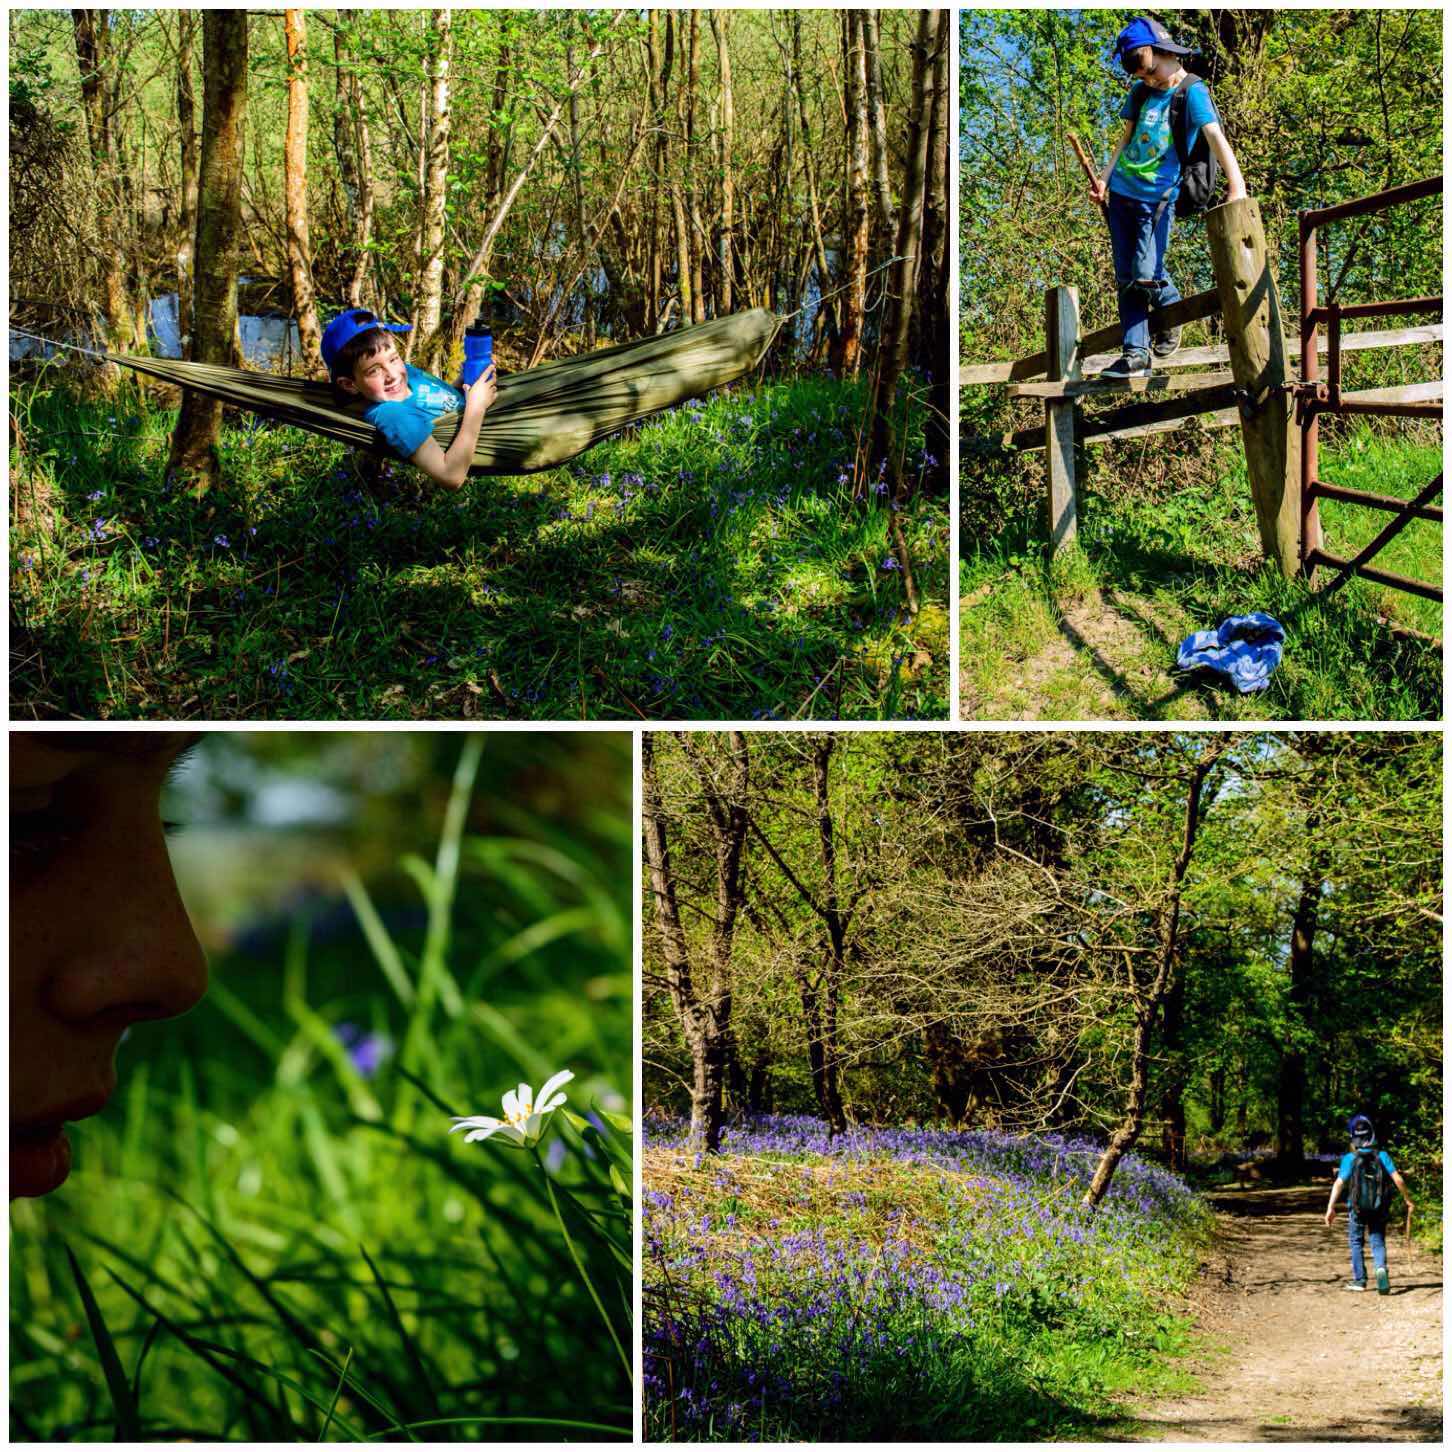
Currently, I am in the hammock in the garden – it struck me while here my blogging has gone out the window these last few years – I suppose that I should not feel surprised at that as I am no professional writer and am easily distracted.
Contemplating the toes
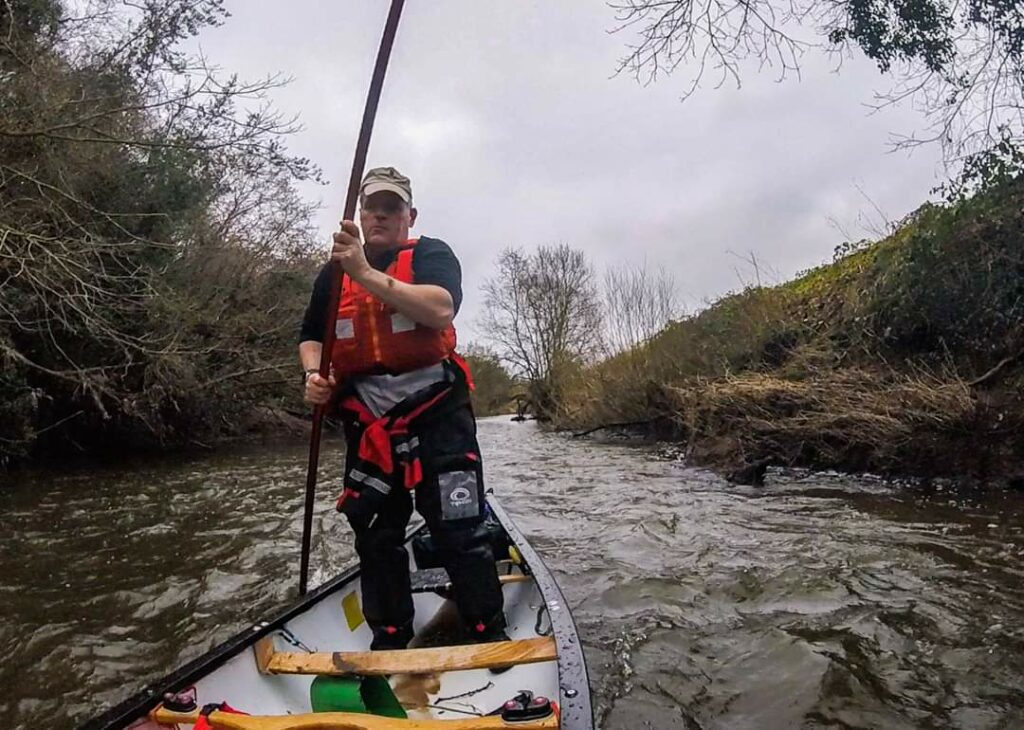
Bushcrafting has been always ticking along for me however these last few years I have been distracted with the world of Canoeing once again.
Poling on The Weaver
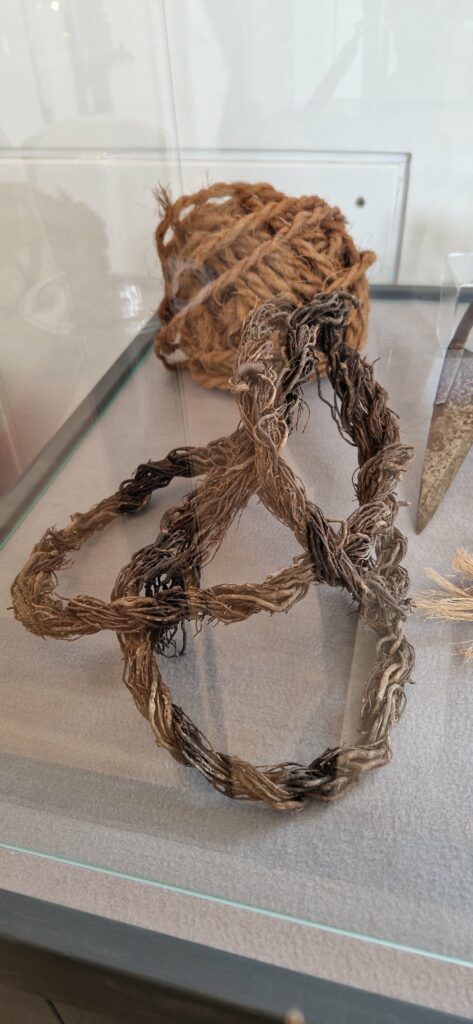
Have a lot to catch up on here with Bushcraft but here is my latest little piece of Bushcraft experimenting – using a Thrawhook to make rope.
The Thrawhook
So hopefully I will figure out how to finally make Heather rope. This was used extensively for centuries all over Scotland and seems to be quite a lost art.
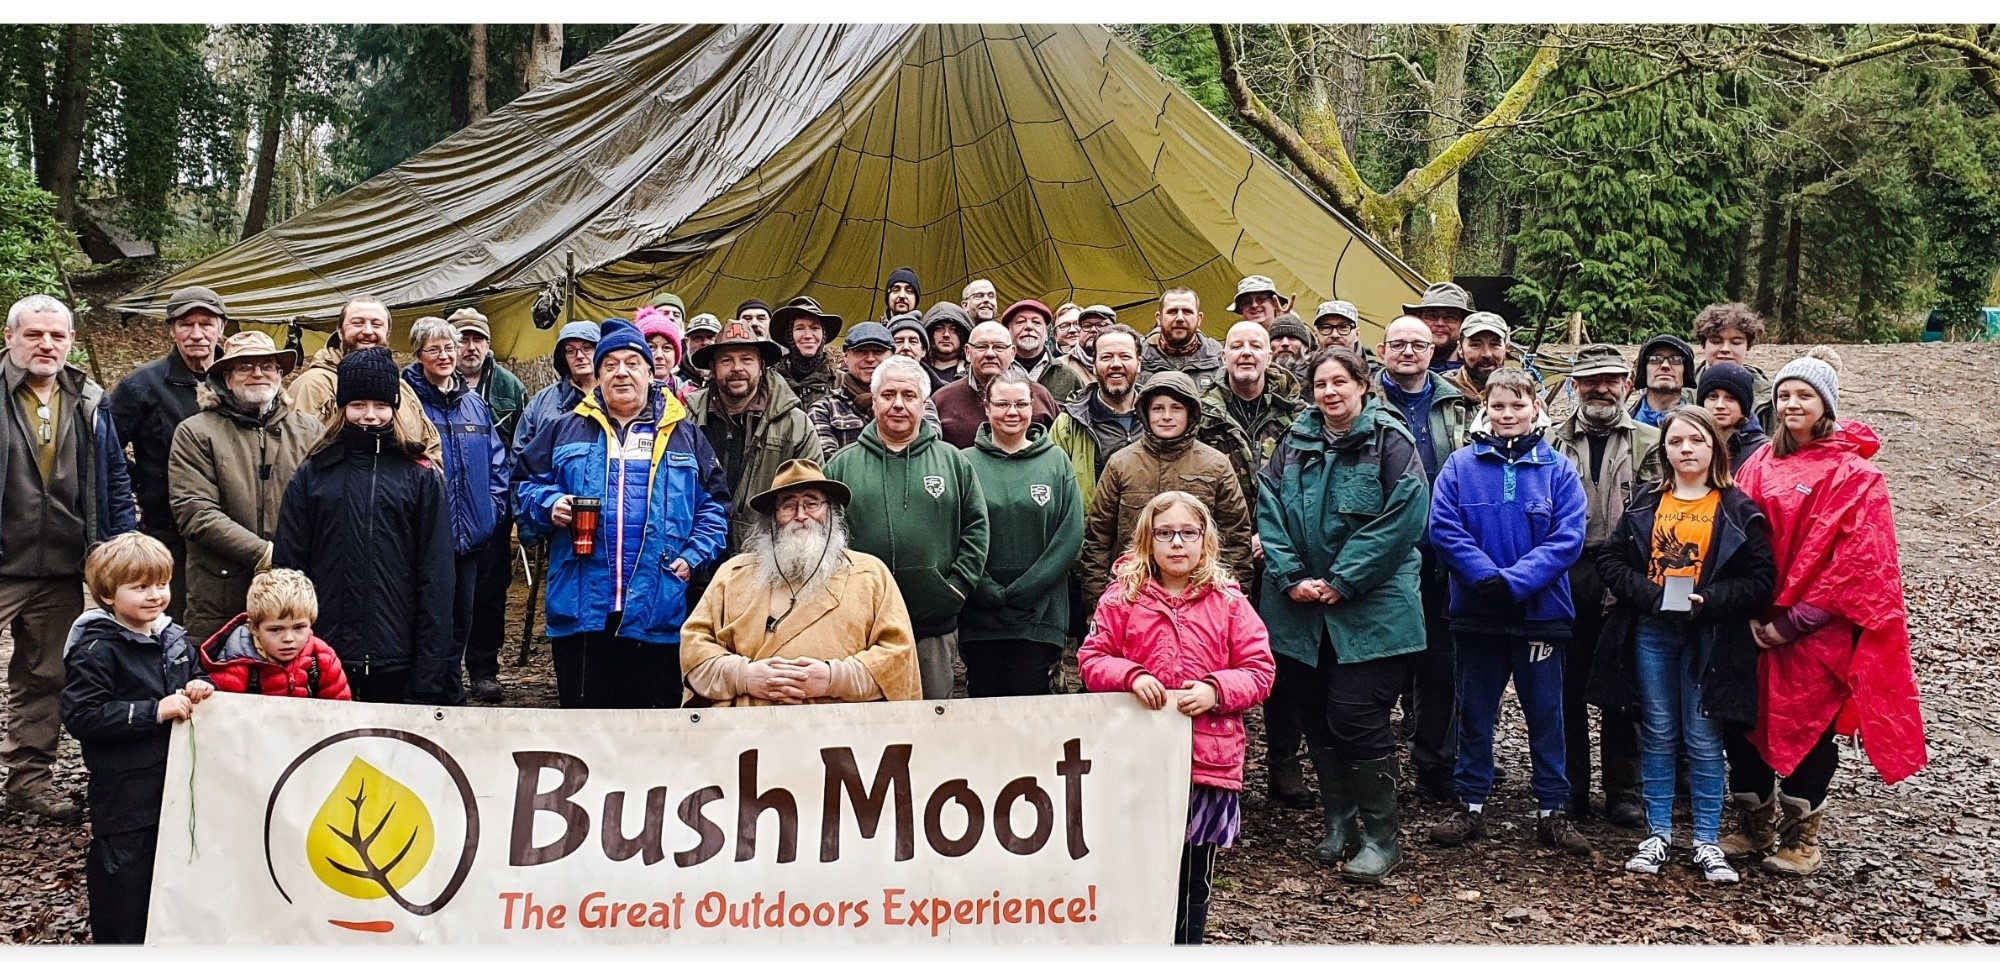
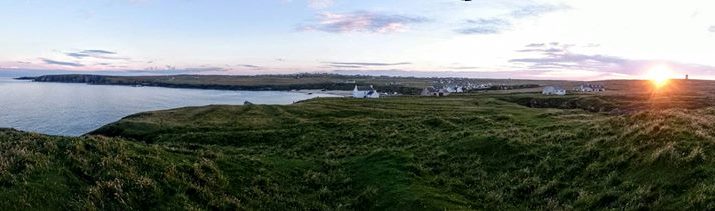
Currently I am on holiday in the North West of England. I was reflecting on the fact that the 2020 Bushcraft UK Bushmoot had to be cancelled due to Covid when I suddenly realised that I had never got round to writing a blog on the 2020 Wintermoot that took place last February – pre-Covid, of course. I had published plenty of videos from the event but not actually written it up – probably due to the fact I was still digesting the enormous amount of food I had eaten in that week 🙂
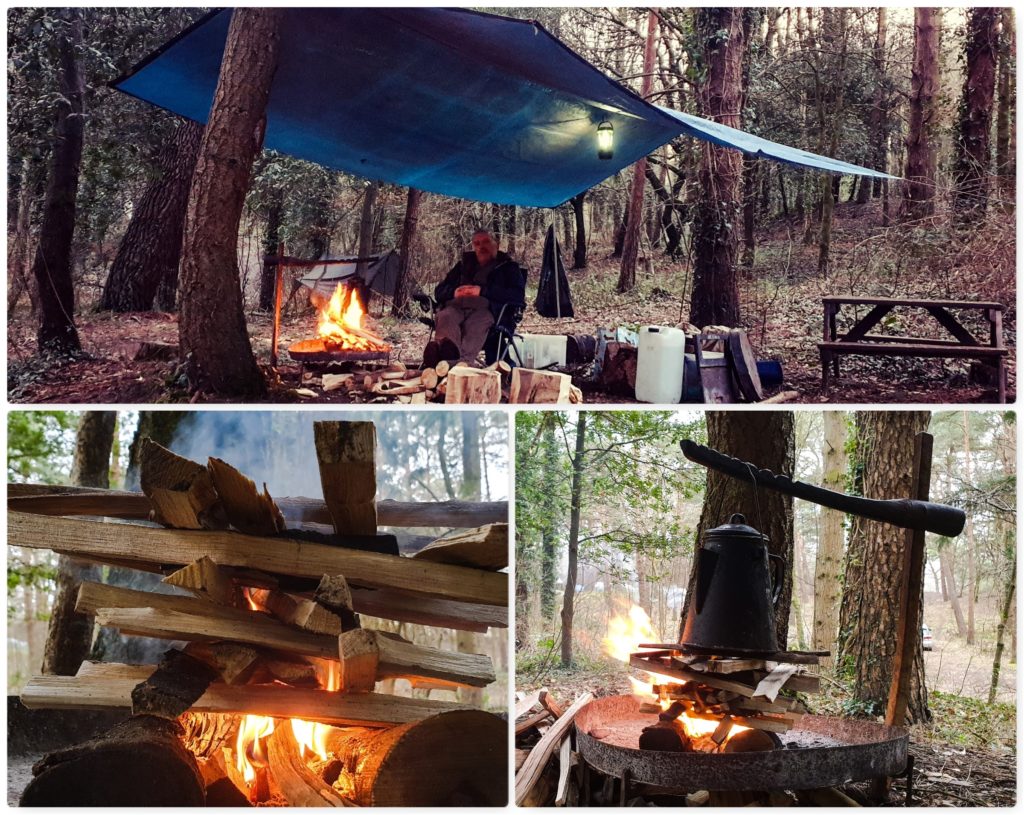
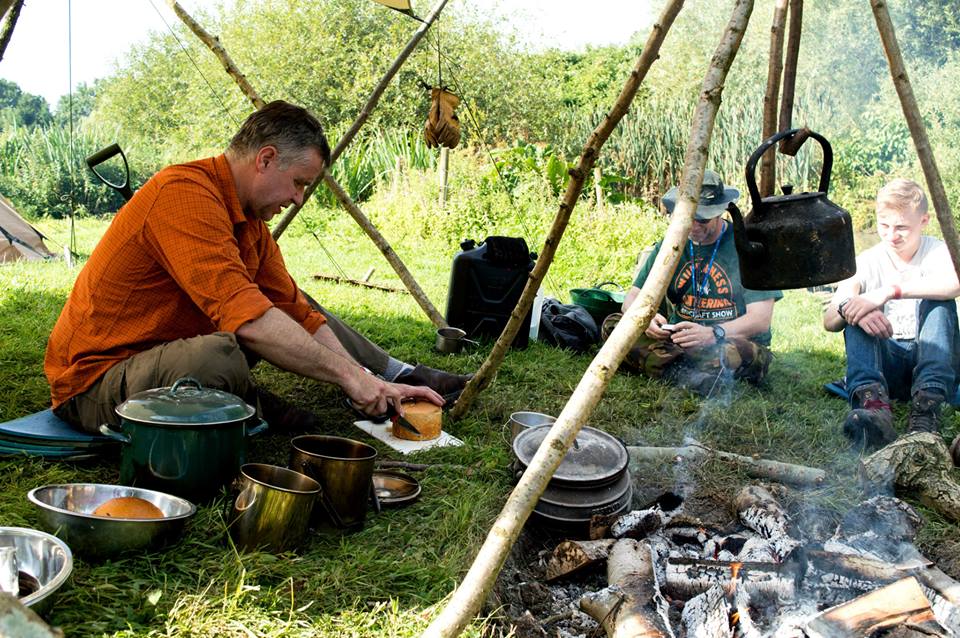
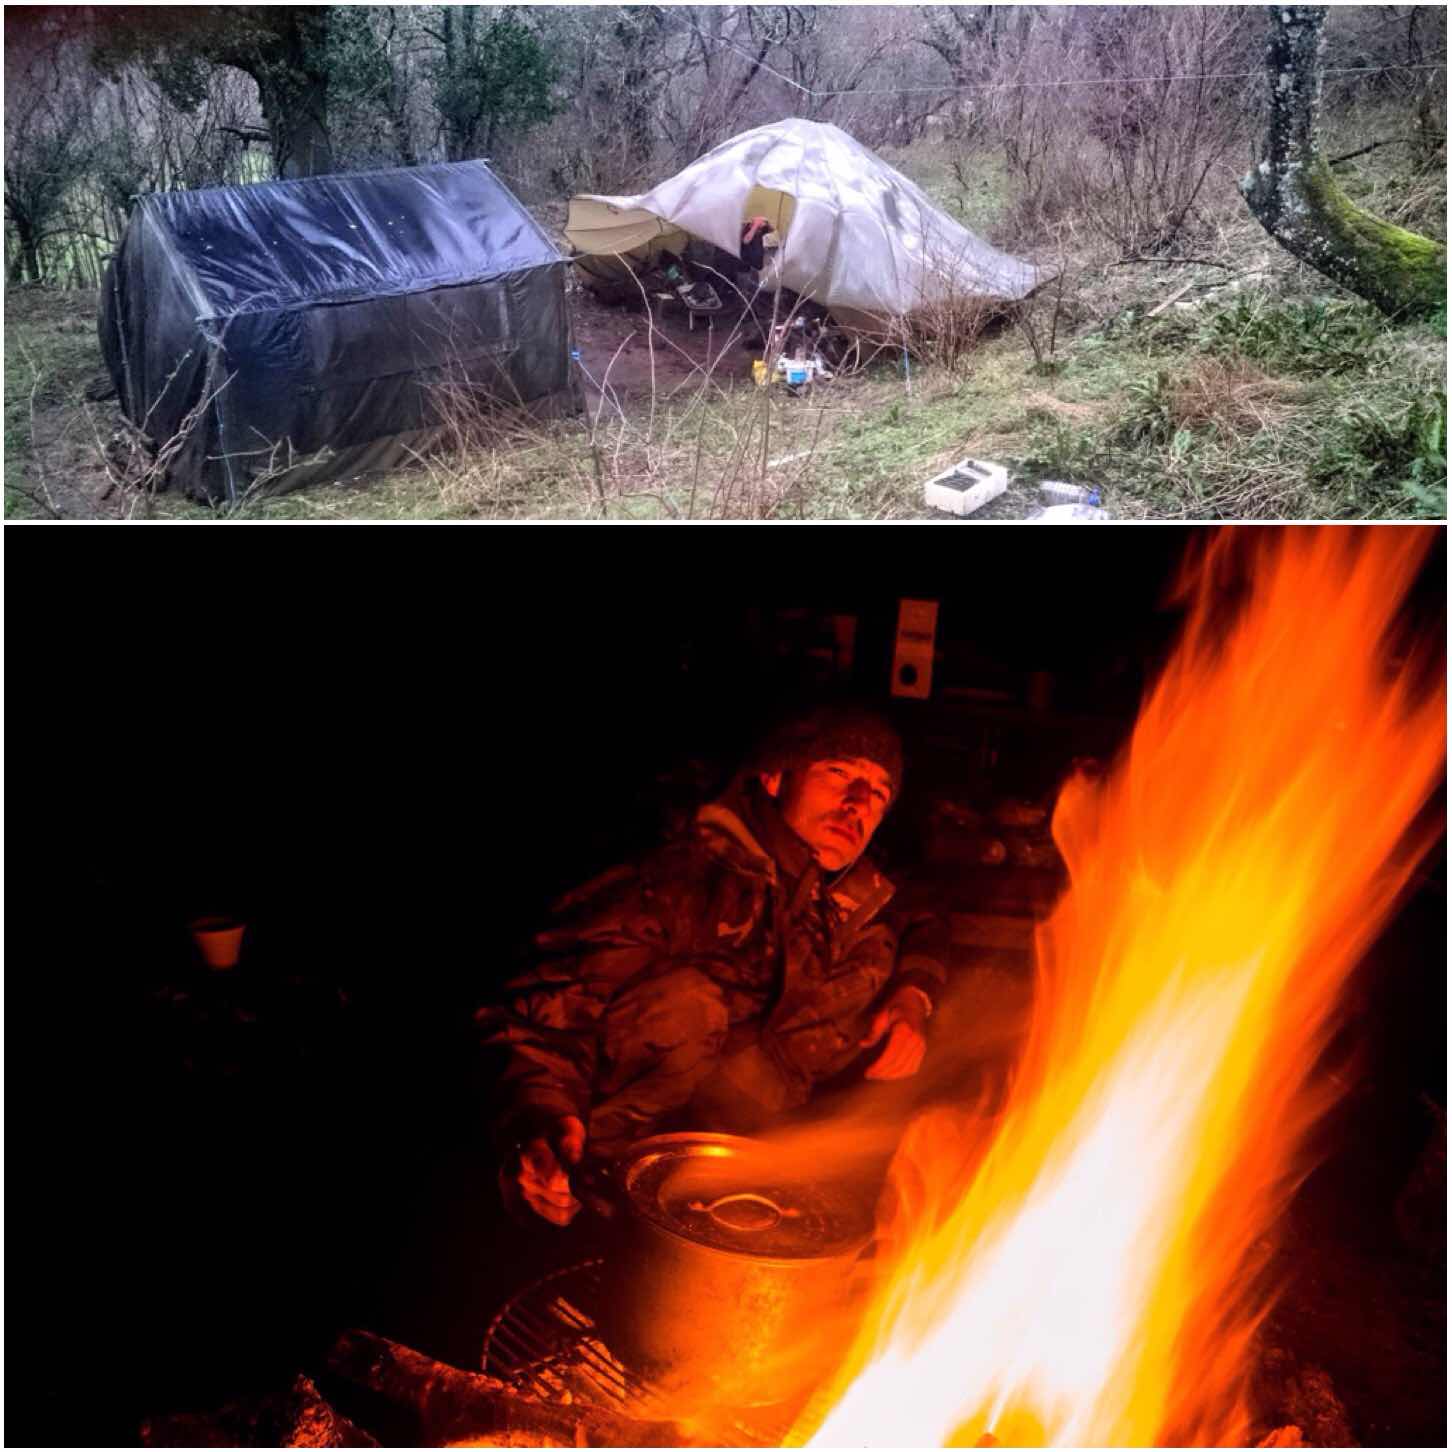
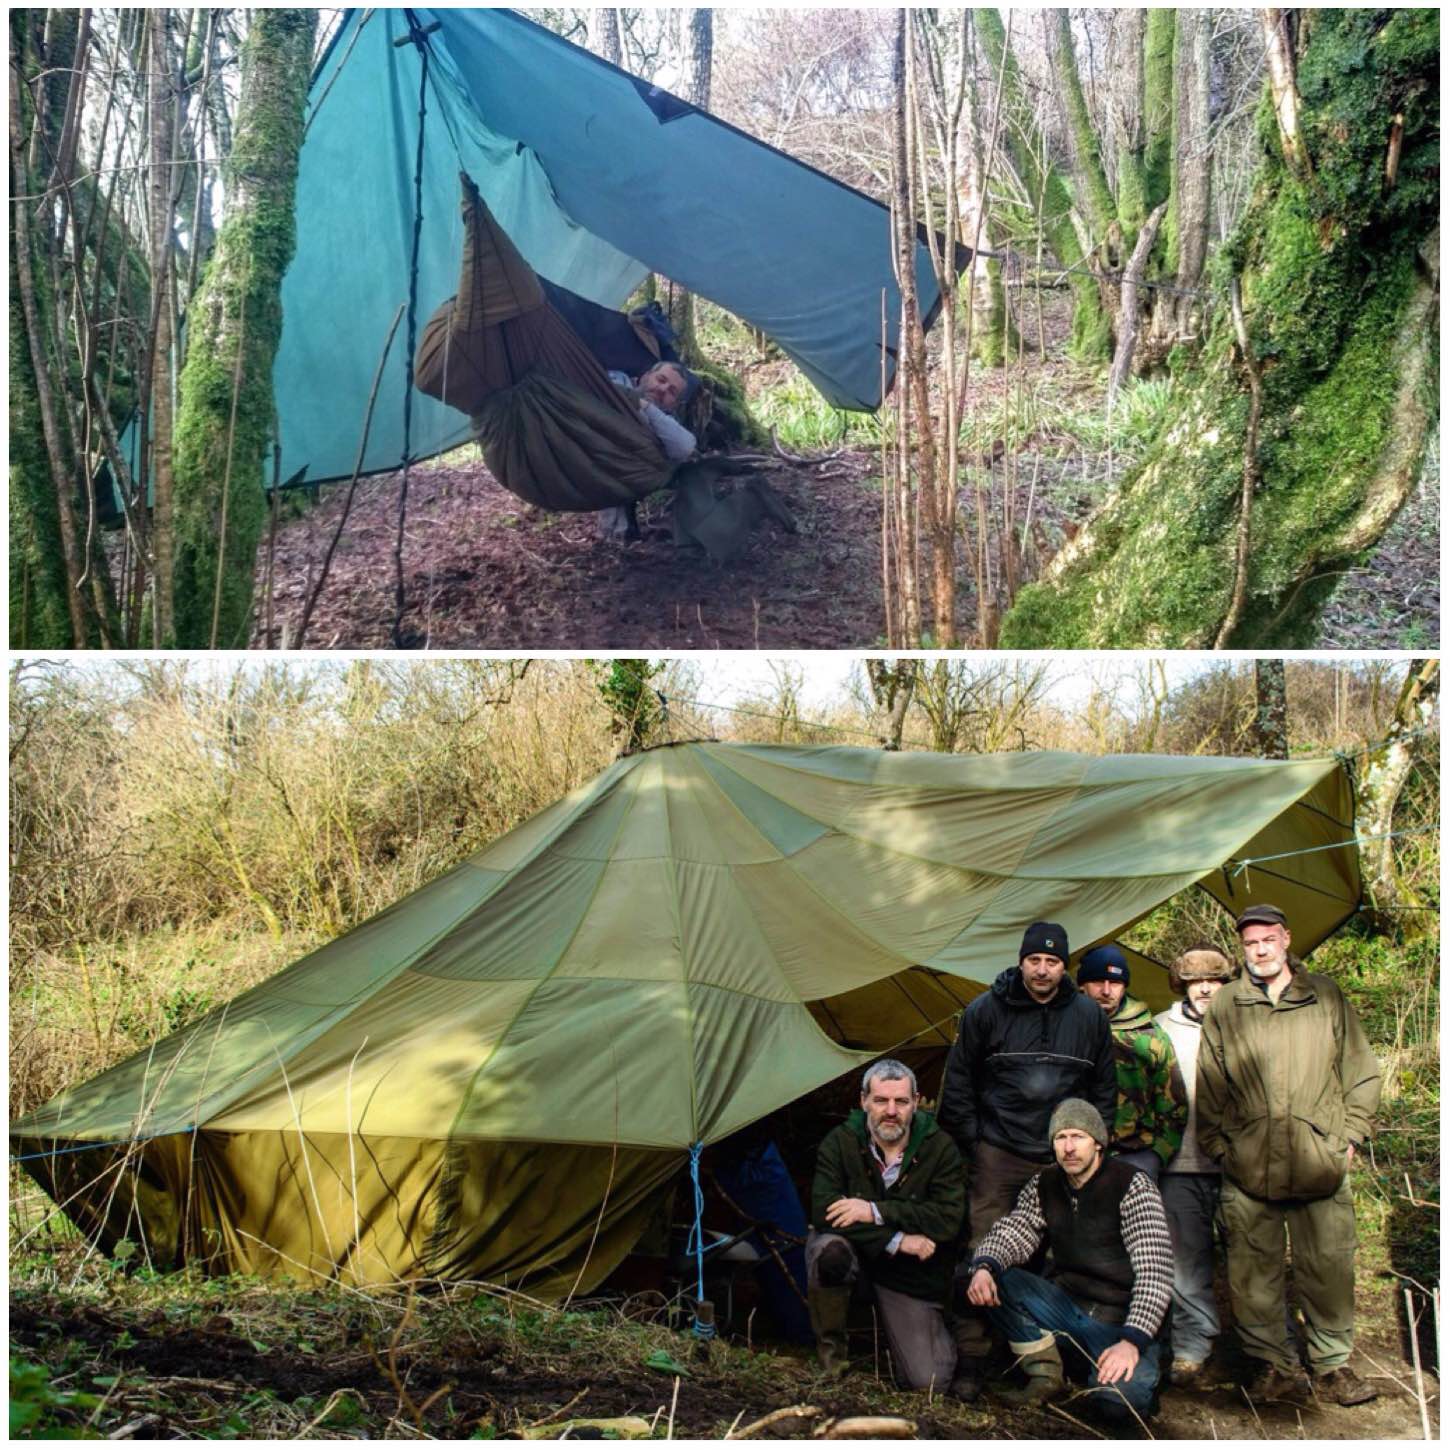
The Wintermoot is held at the same place as the summer Bushmoot, at Merthyr Mawr in South Wales, and as it is a smaller affair (around 45 folk in comparison to the 200-300 at the summer event) it feels very homely. I soon had my camp set up (seemed strange with no leaf cover over me and no family with me) and the kettle on.
Home Sweet Home
Set Up
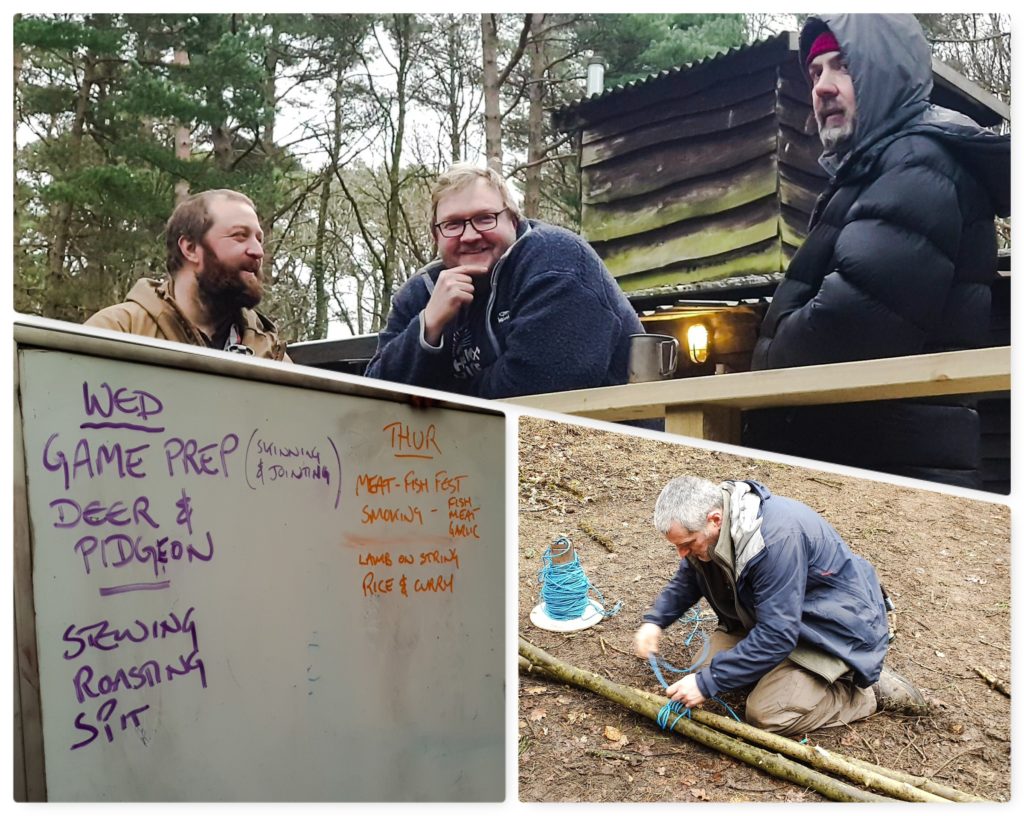
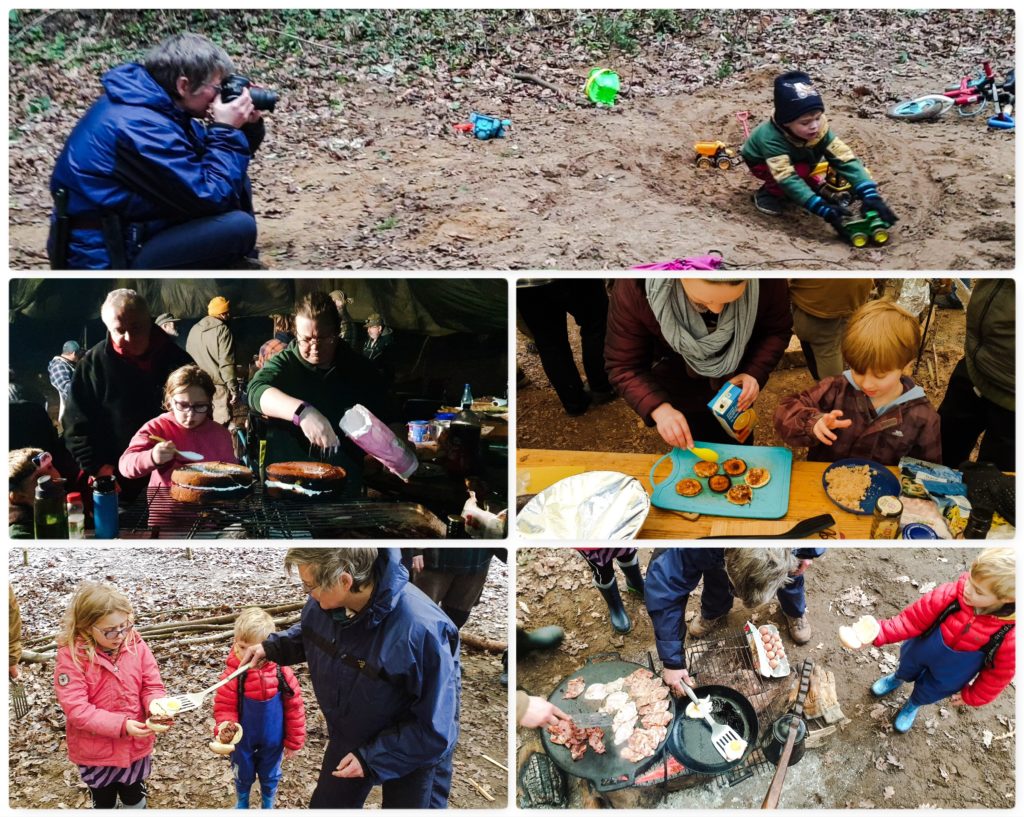
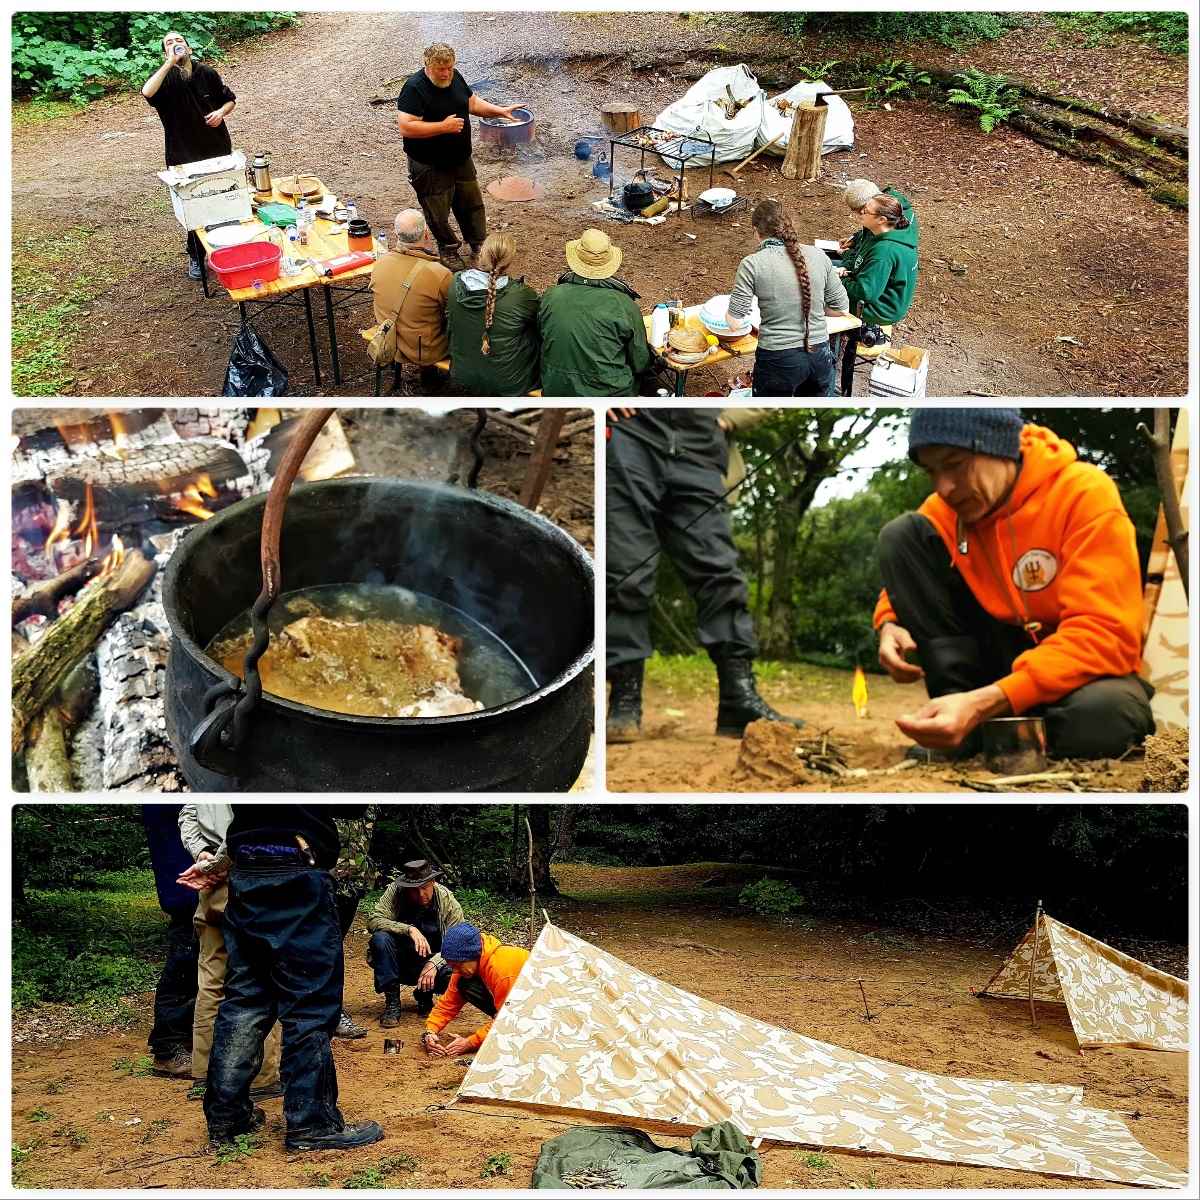
Tony – the boss – settled on two main areas for cooking and food preparation and after a bit of strange rope work (in terms of the kitchen tent on the right) we were soon set up and the fire lit. Folk arrived over the first two days and prepared to get on with the cooking – well not me personally (I just do not have that artistic sort of mind) – my focus was on photography, video work and building campfire cooking constructions.
ArrivalPreparation , Planning & Pausing 🙂
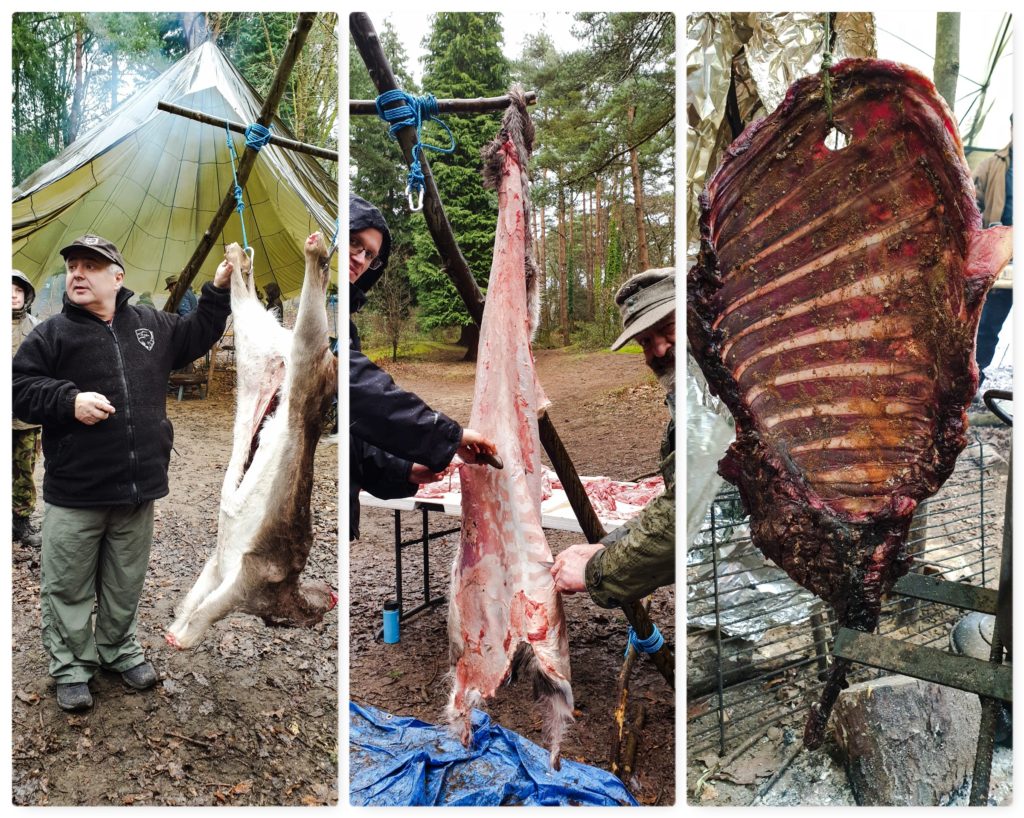
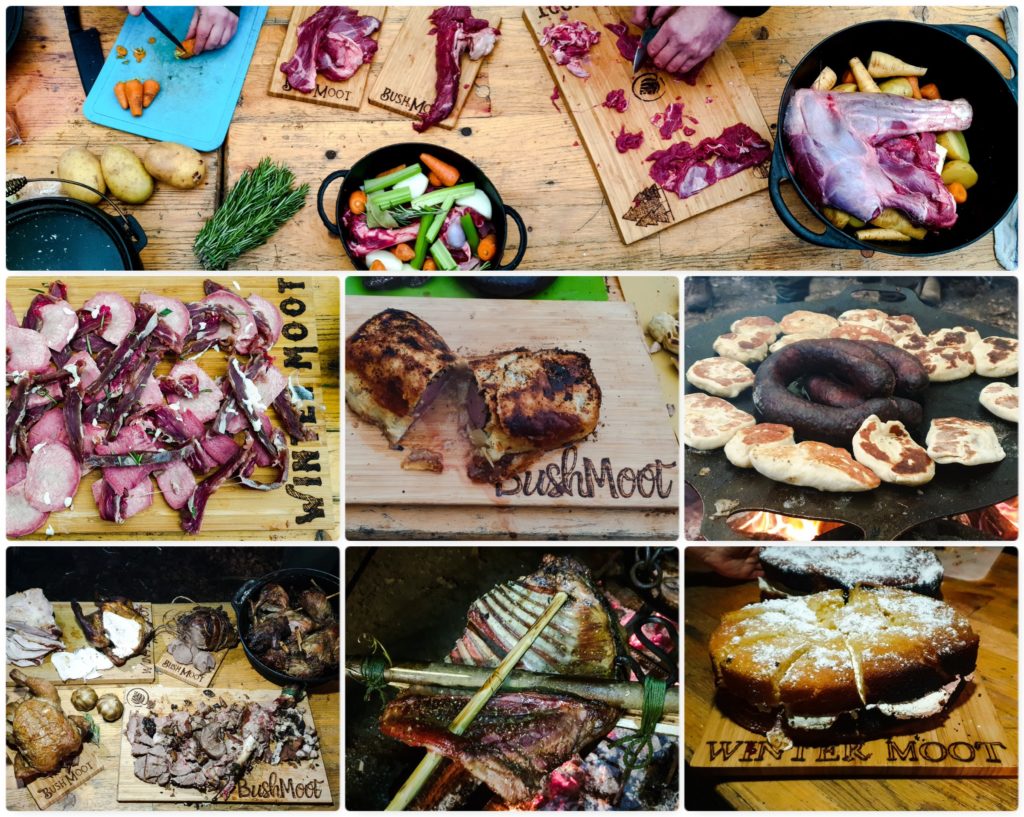
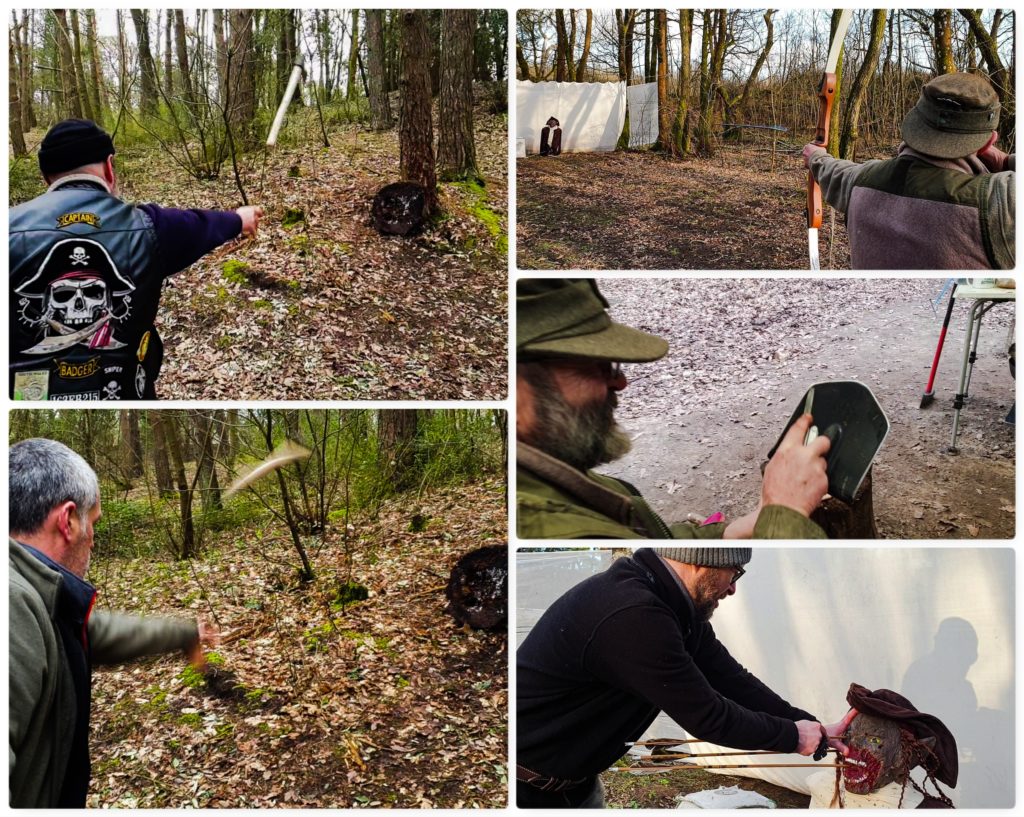
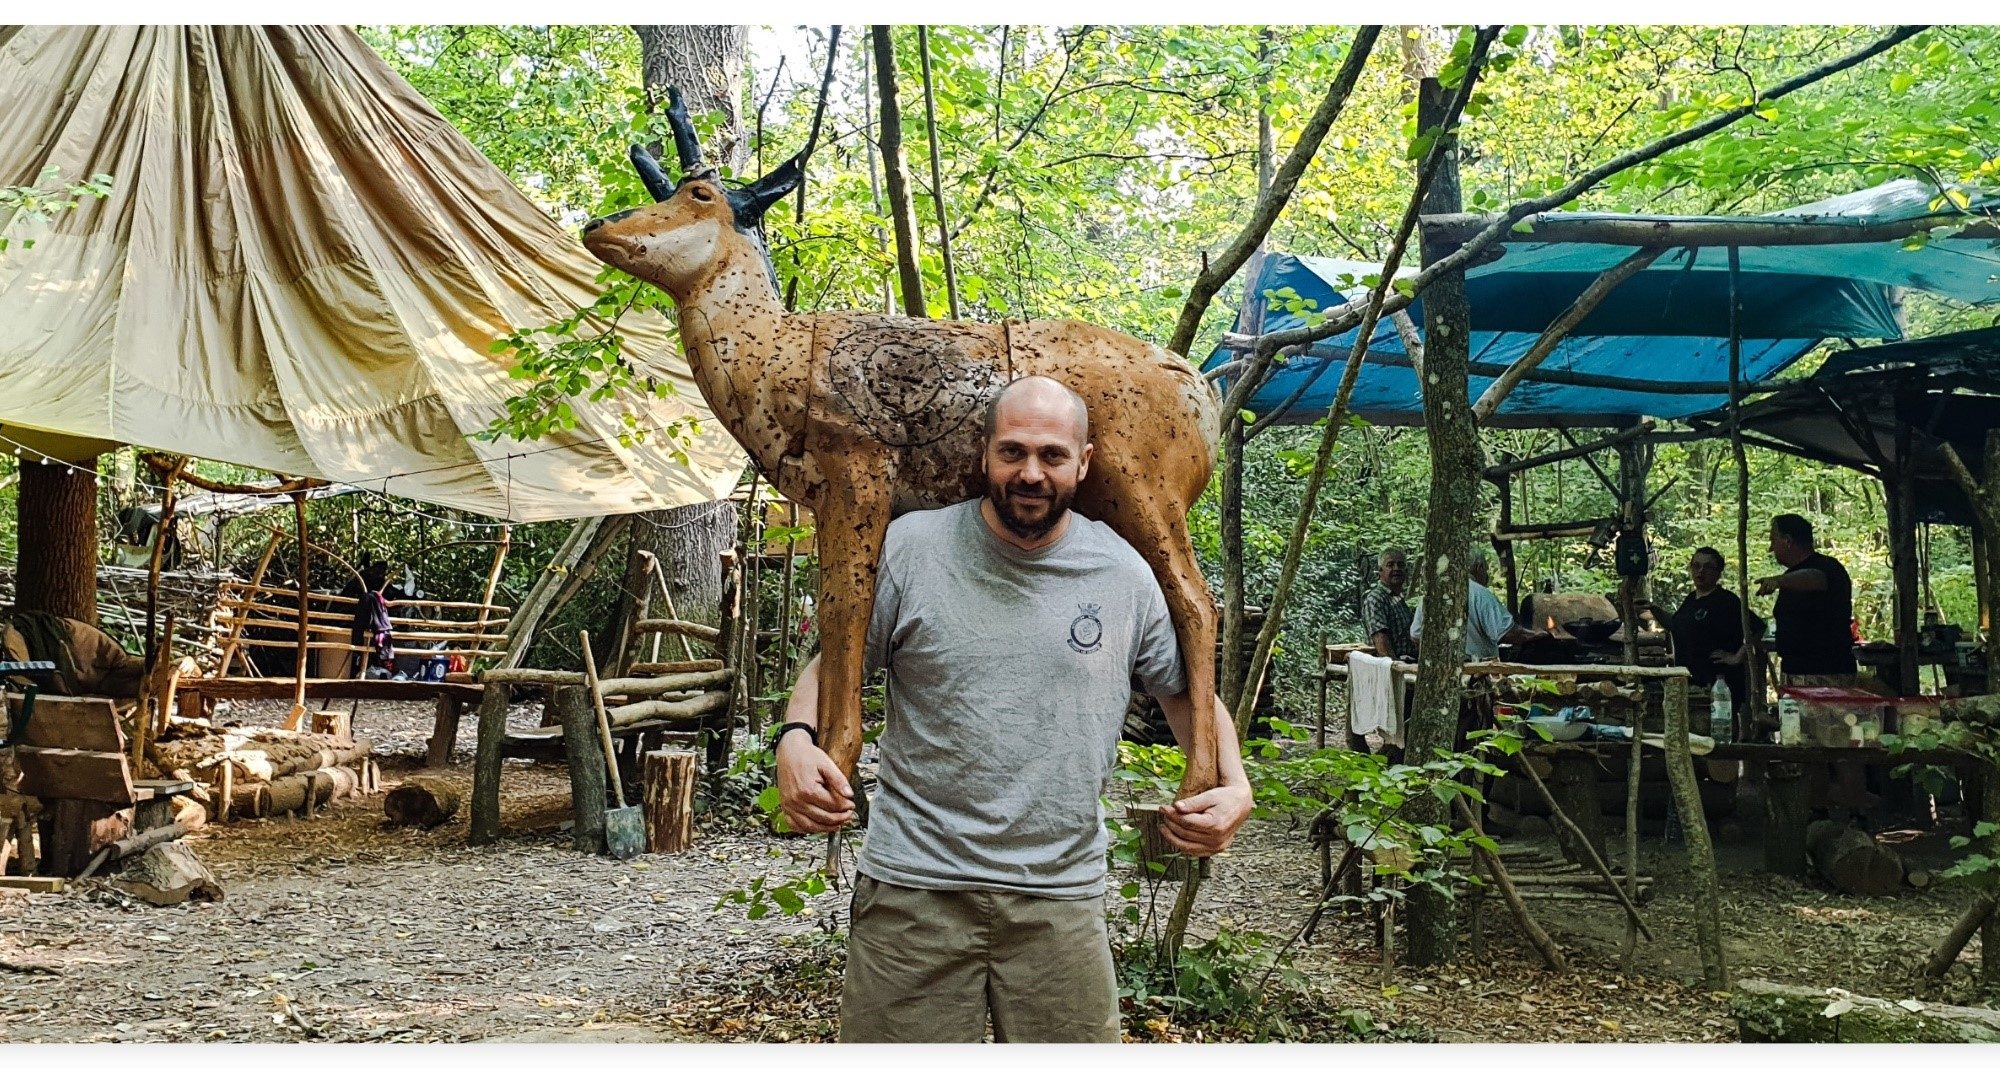
The Deer
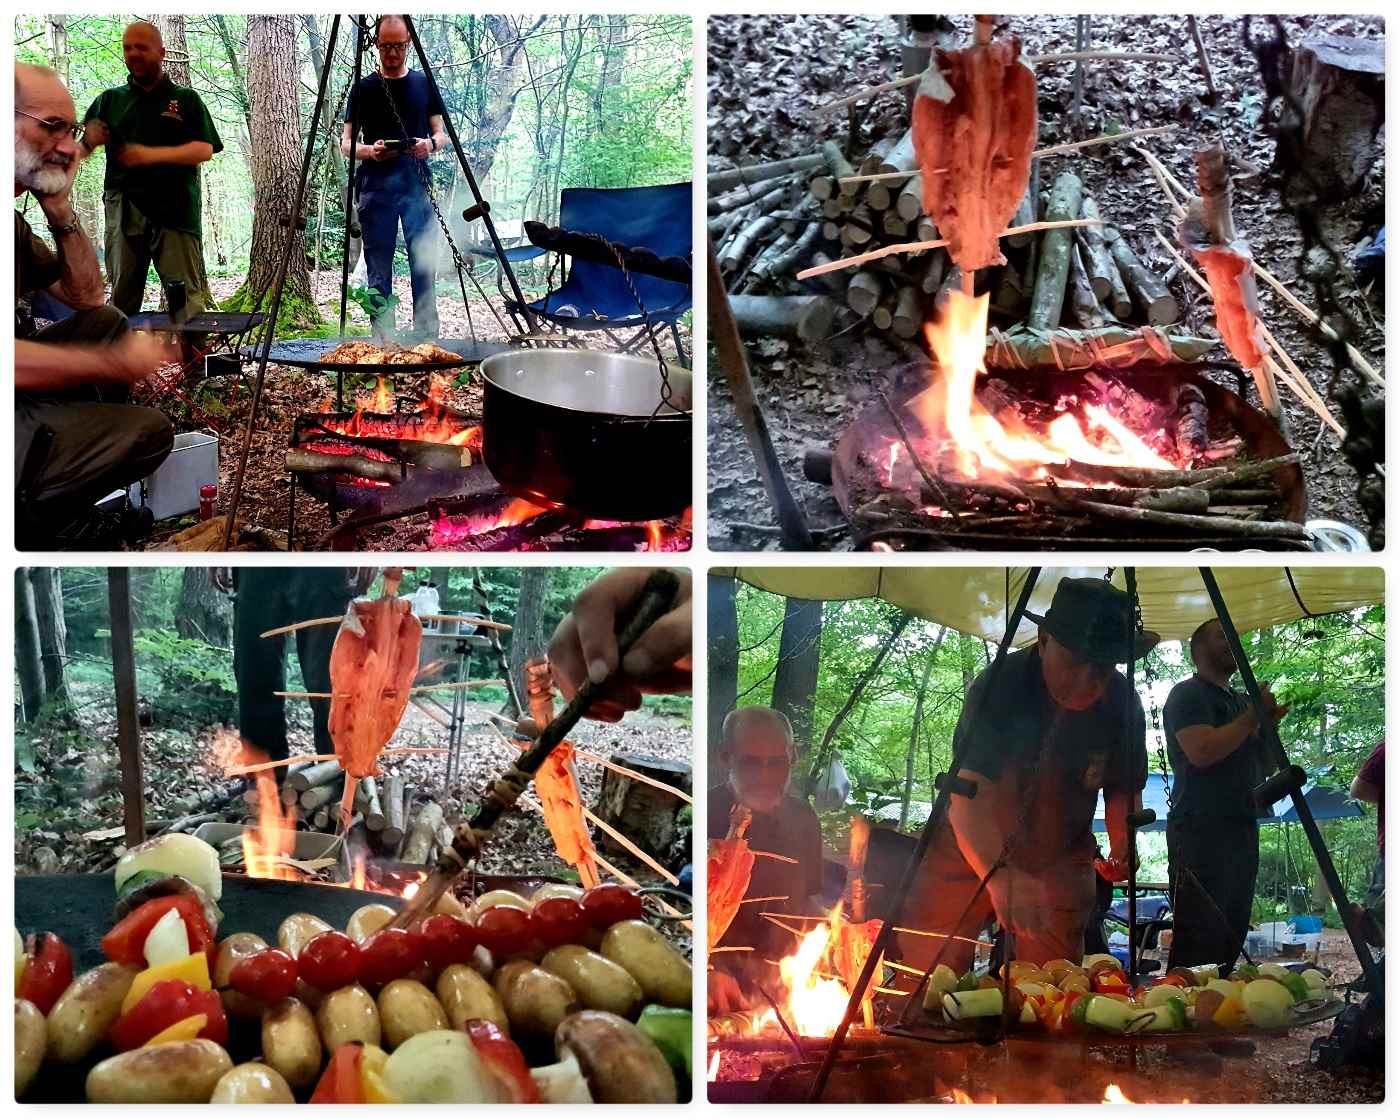
Not sure who obtained the deer for us but after setting up the tripod it turned into a butchery class (led by Wayne) and then a shorter class on preparing the hide for tanning. Before long the ribs were slowly roasting over the fire on the rotisserie.
It was great to see everyone getting involved and trying out new skills.
Deer Prep
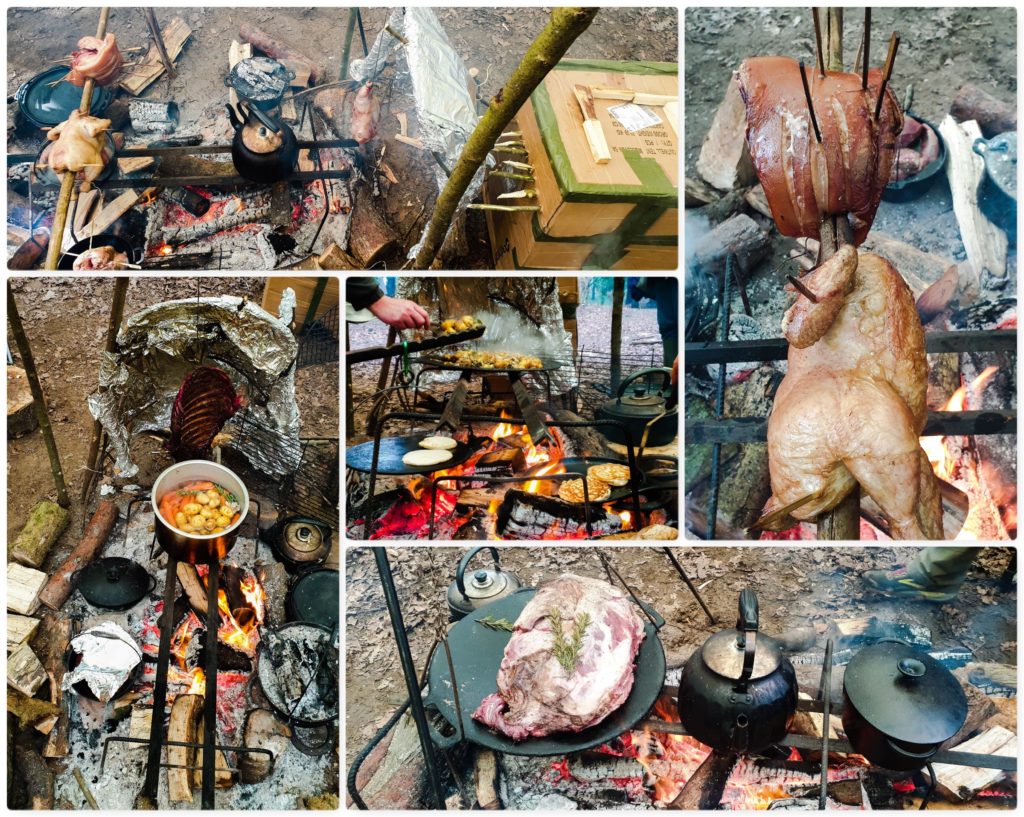
Cooking Contraptions
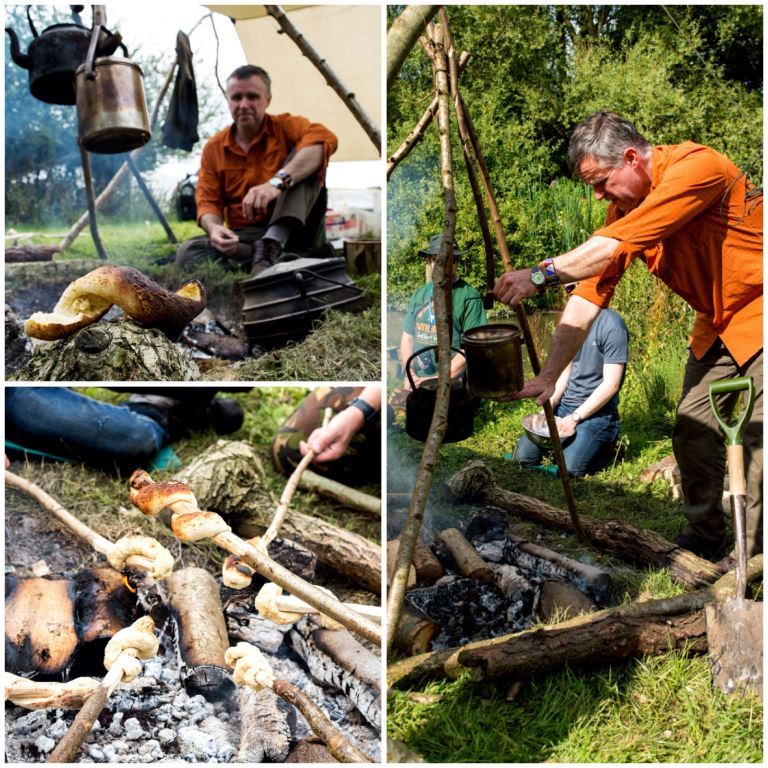
Throughout the week I had fun alongside a few others coming up with different set ups for cooking.
These included:
A Rotisserie with reflector
A Hot Smoker
A Spit
A Campfire Crane
An Asado
All these alongside the usual cooking with Dutch ovens, skillets, frying pans and in foil.
Great Cooking Constructions
Family Time
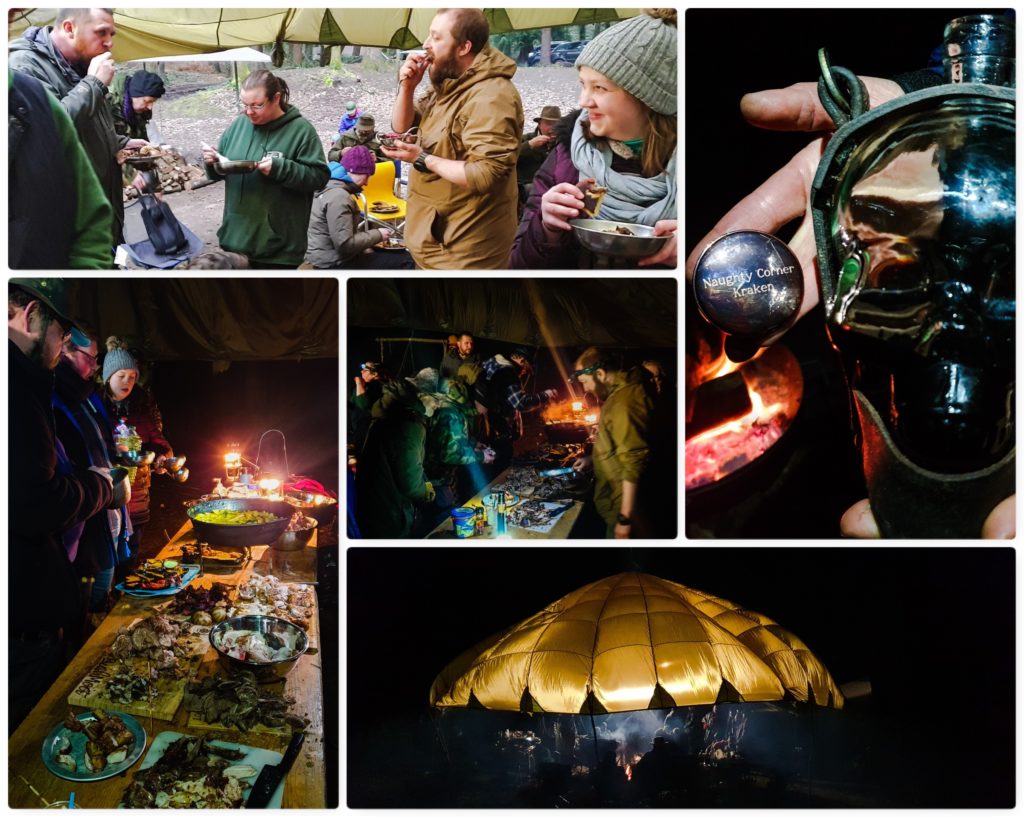
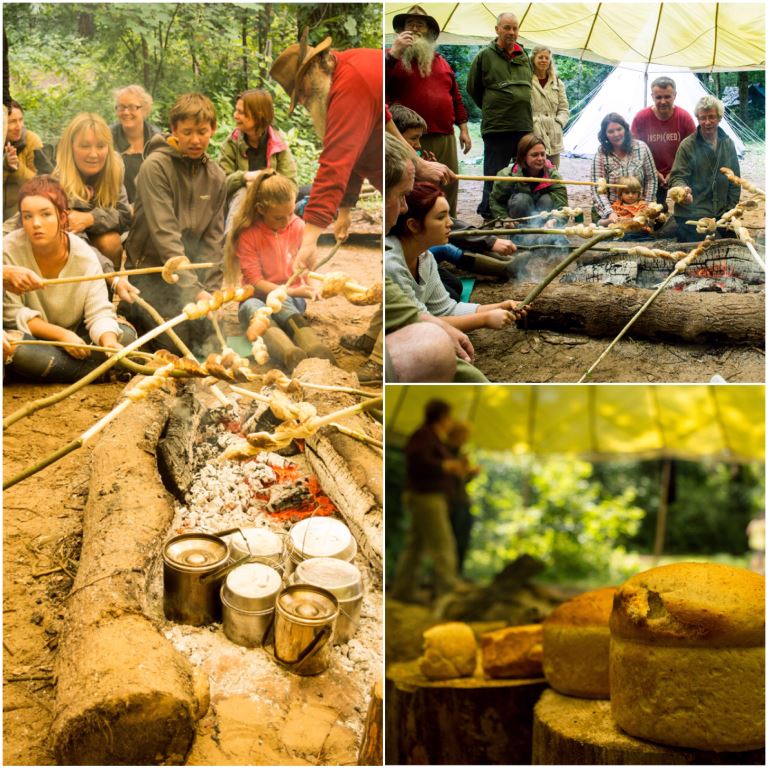
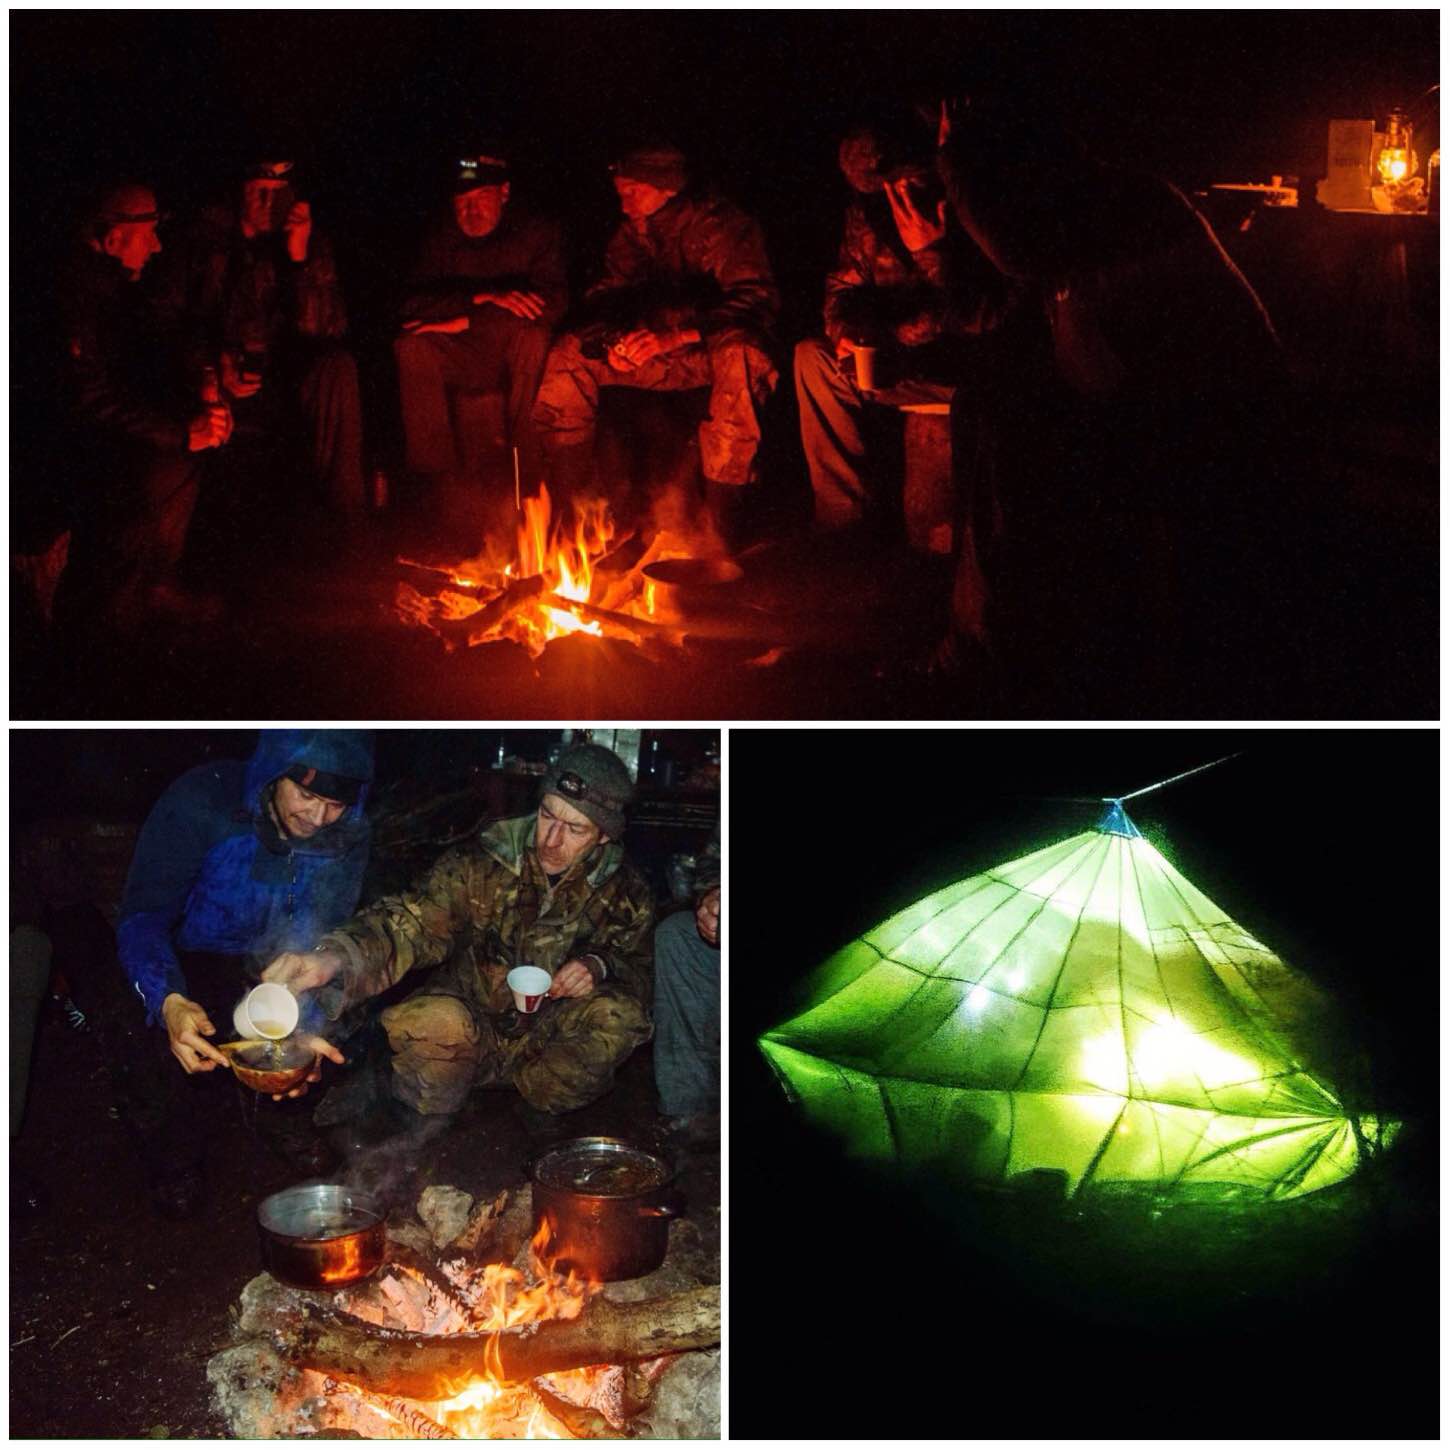
The Wintermoot, like the full Bushmoot, is family orientated with lots of chances for the kids to get involved if they wish. Even without any snow the February temperatures were low but everyone was kept warm with the great food on offer.
Fun with the kids
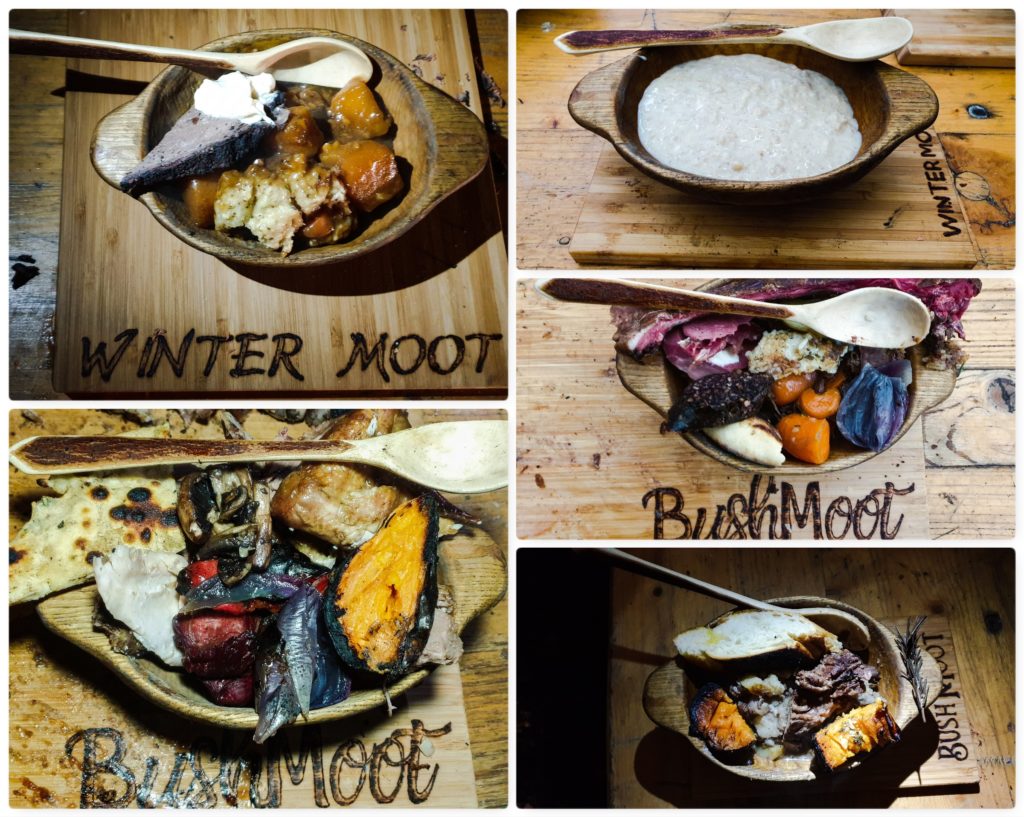
Great Dishes
As I am no chef I struggle to describe these different meals – I can but try with my photography skills – as an experienced eater I can say they were brilliant 🙂 – Lots of people helped out with the cooking but special mention must go to Beth Shepheard, Andy Illsley and Wayne Jones – as well as cooking continuously they demonstrated butchery, baking and food preservation.
Great Dishes
Fun EveningsFull Plates
Other Fun
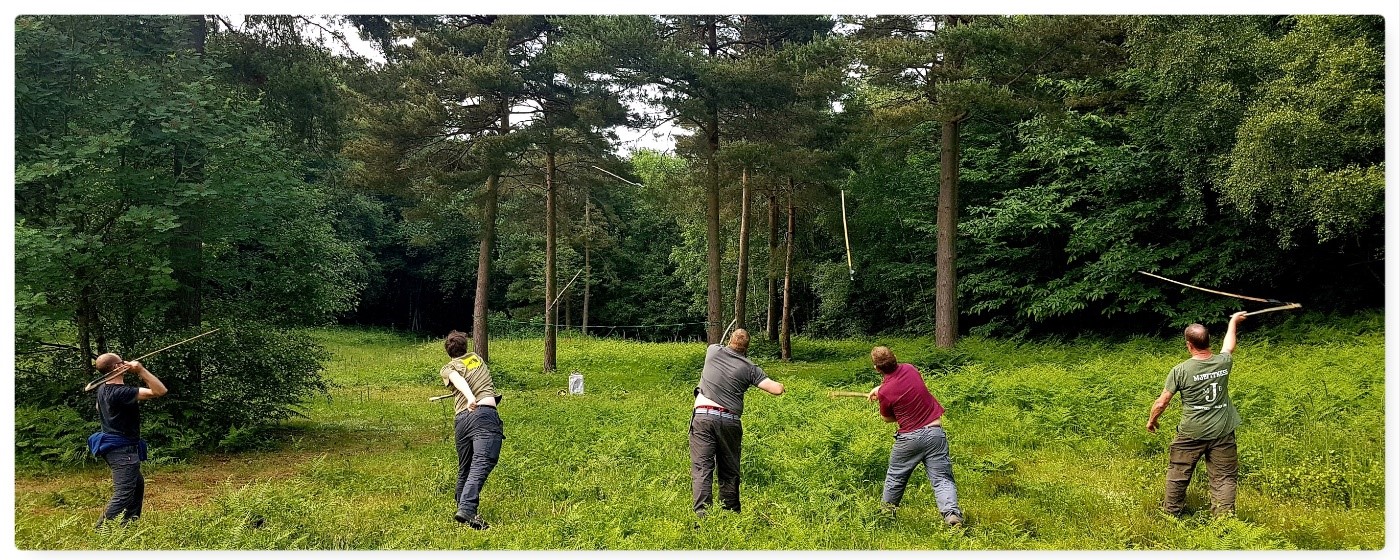
In amongst all this cooking and eating we managed a few other activities including fun on the range, constructing a Windlass and a bit of Jedi training.
As it is a long time until next year’s Bushmoot I do hope we can have another Wintermoot next February.
Stay safe and hopefully see some of you next year.
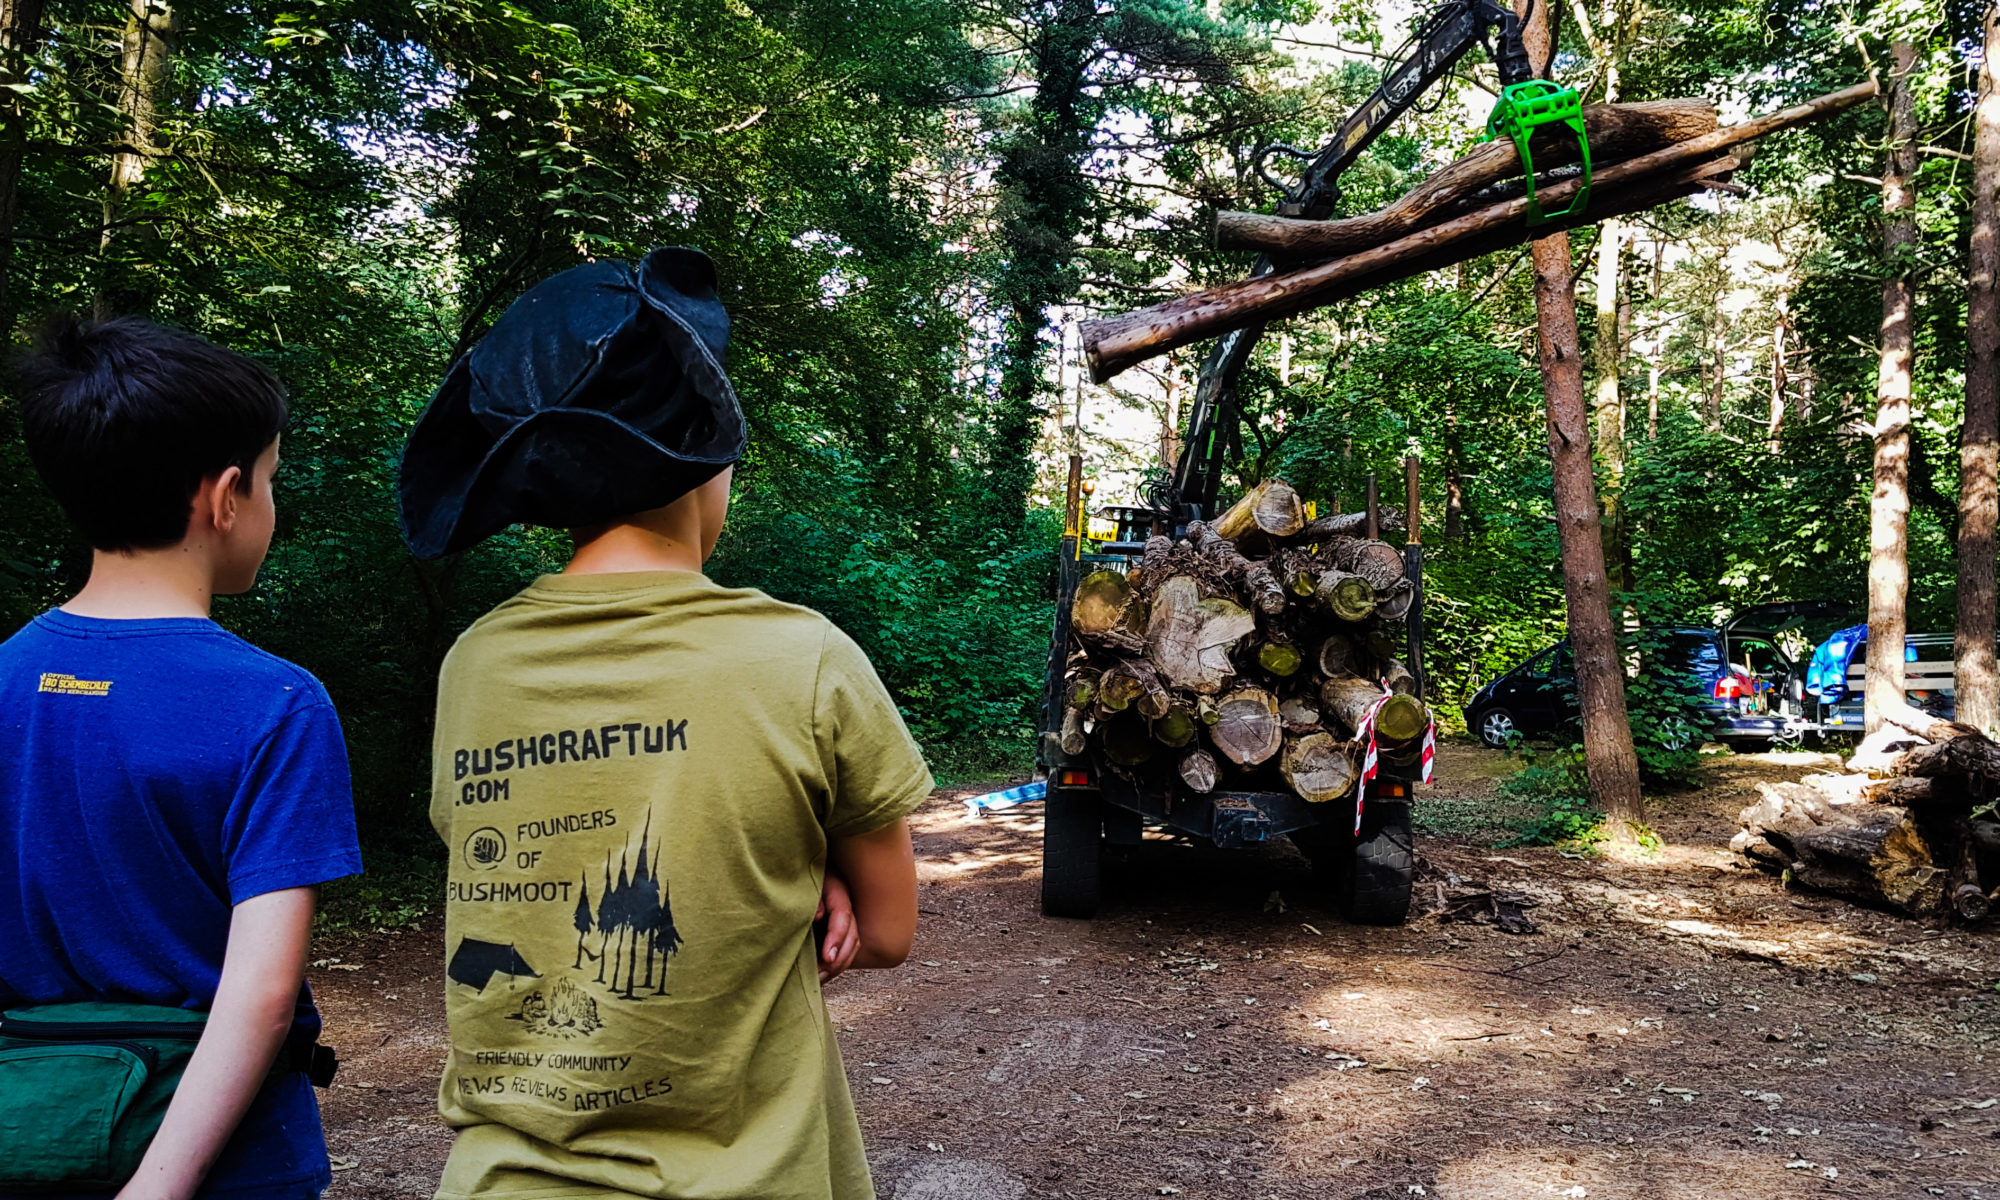
The Bushcraft UK (BCUK) Bushmoot was supposed to be held this August however like many other big events had to be cancelled due to worries around Covid.
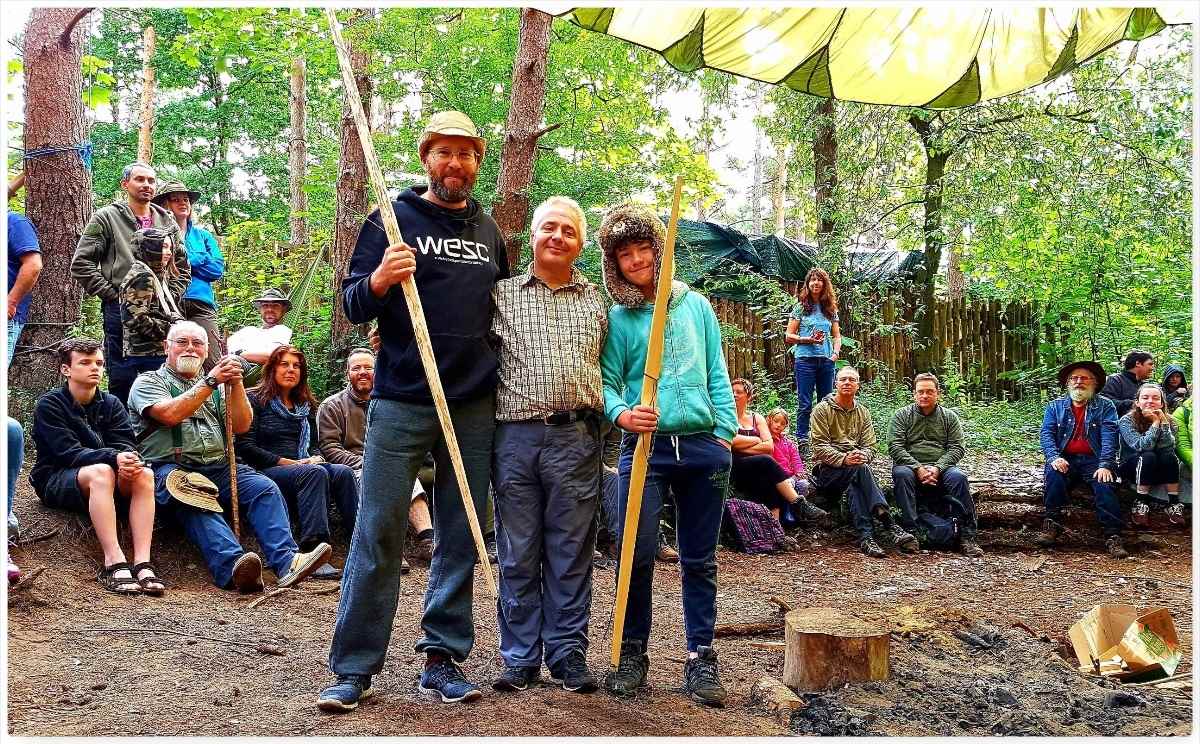
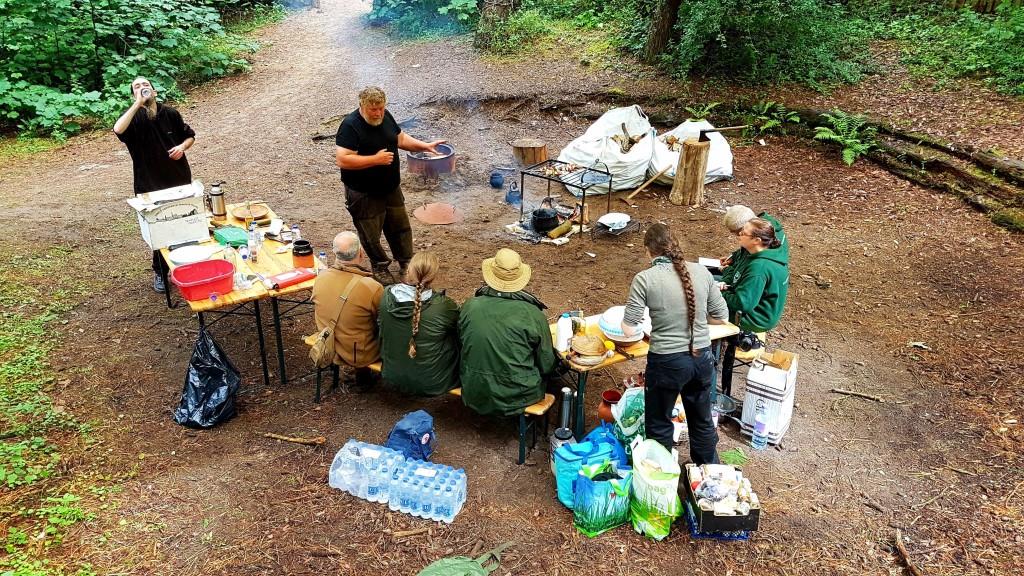
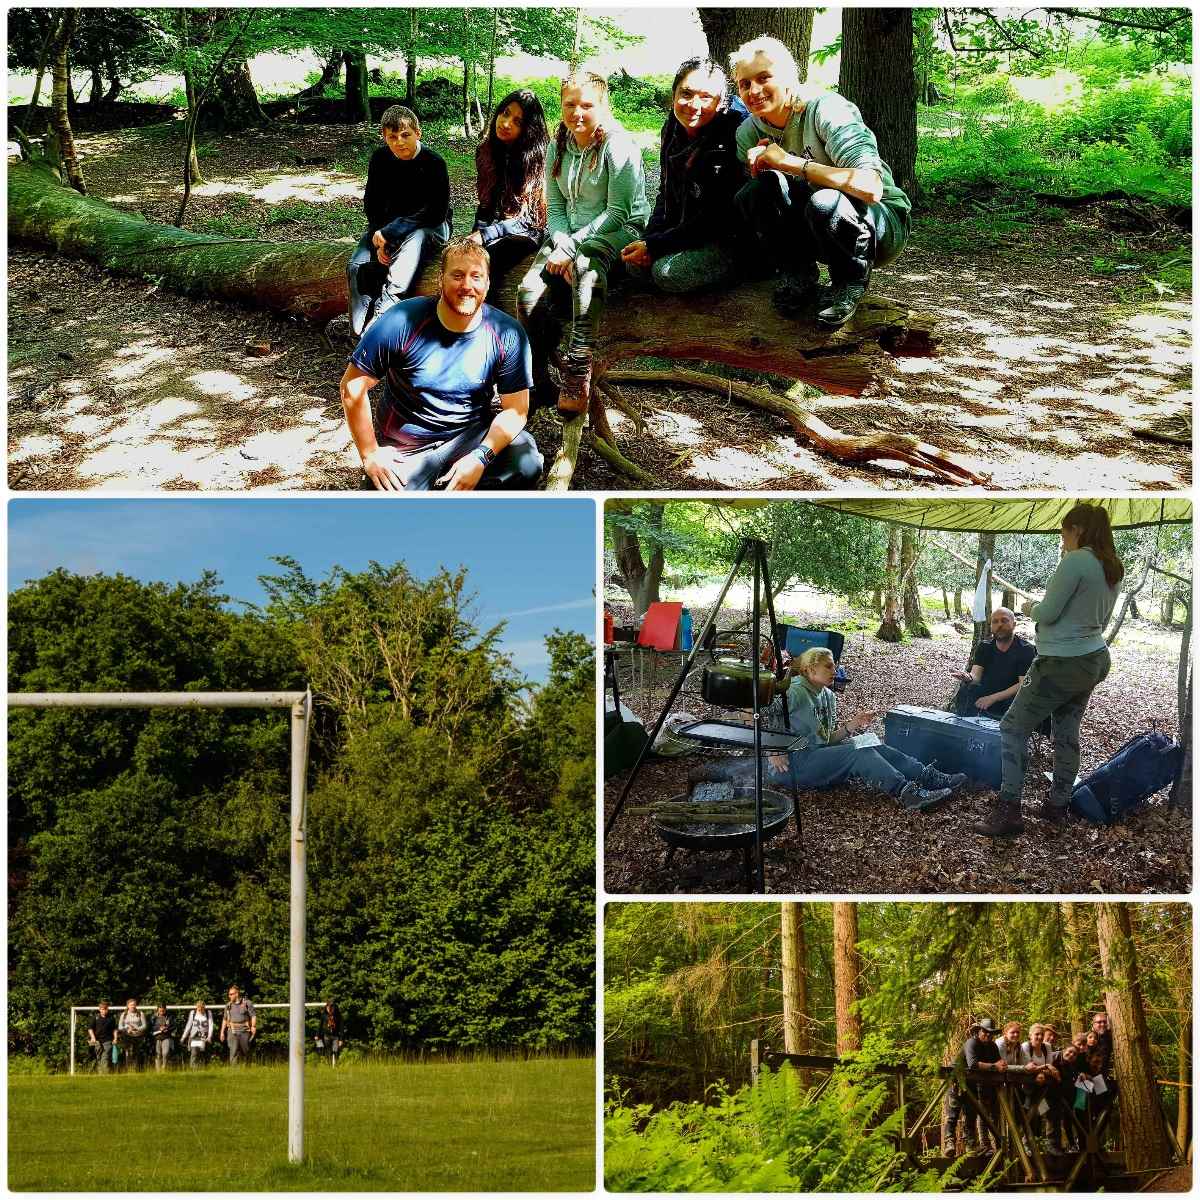
Wayne Jones from Forestknights Bushcraft (a fellow BCUK Moderator) along with his co-worker Beth Shepheard offered to run a small (for 20 to 30 people) Minimoot at his woods near Arundel for anyone who felt they could make it.
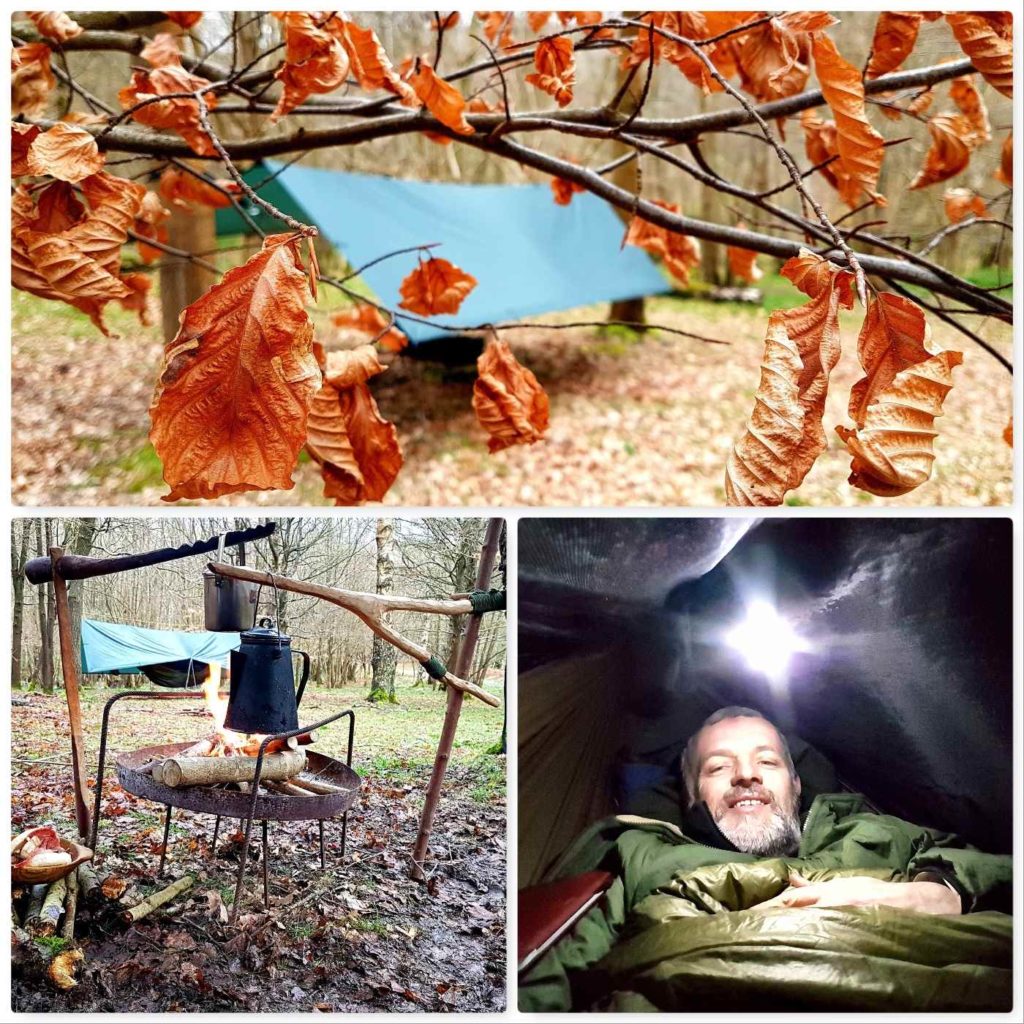
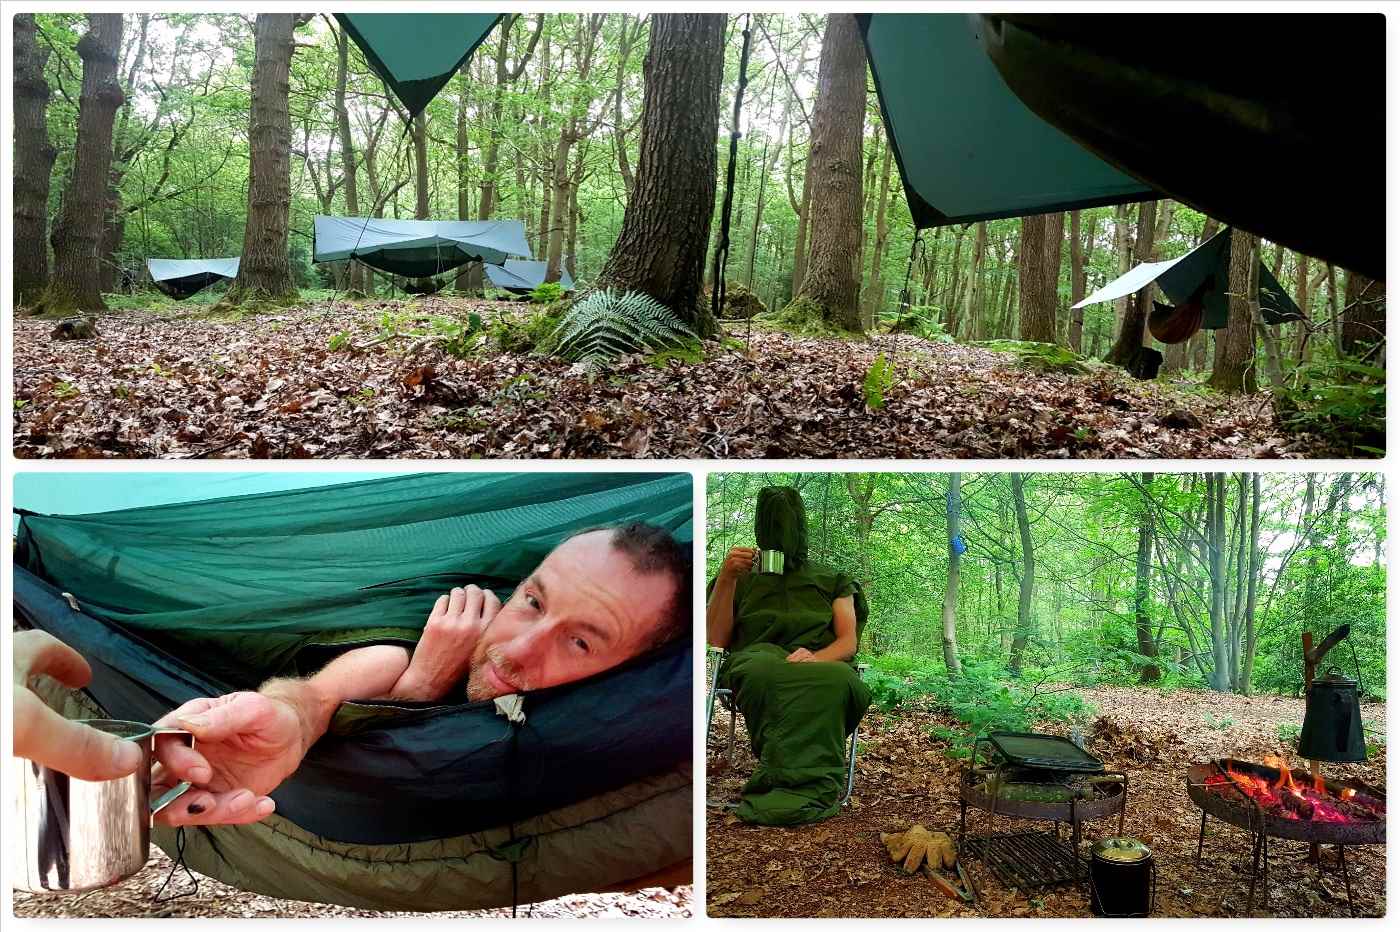
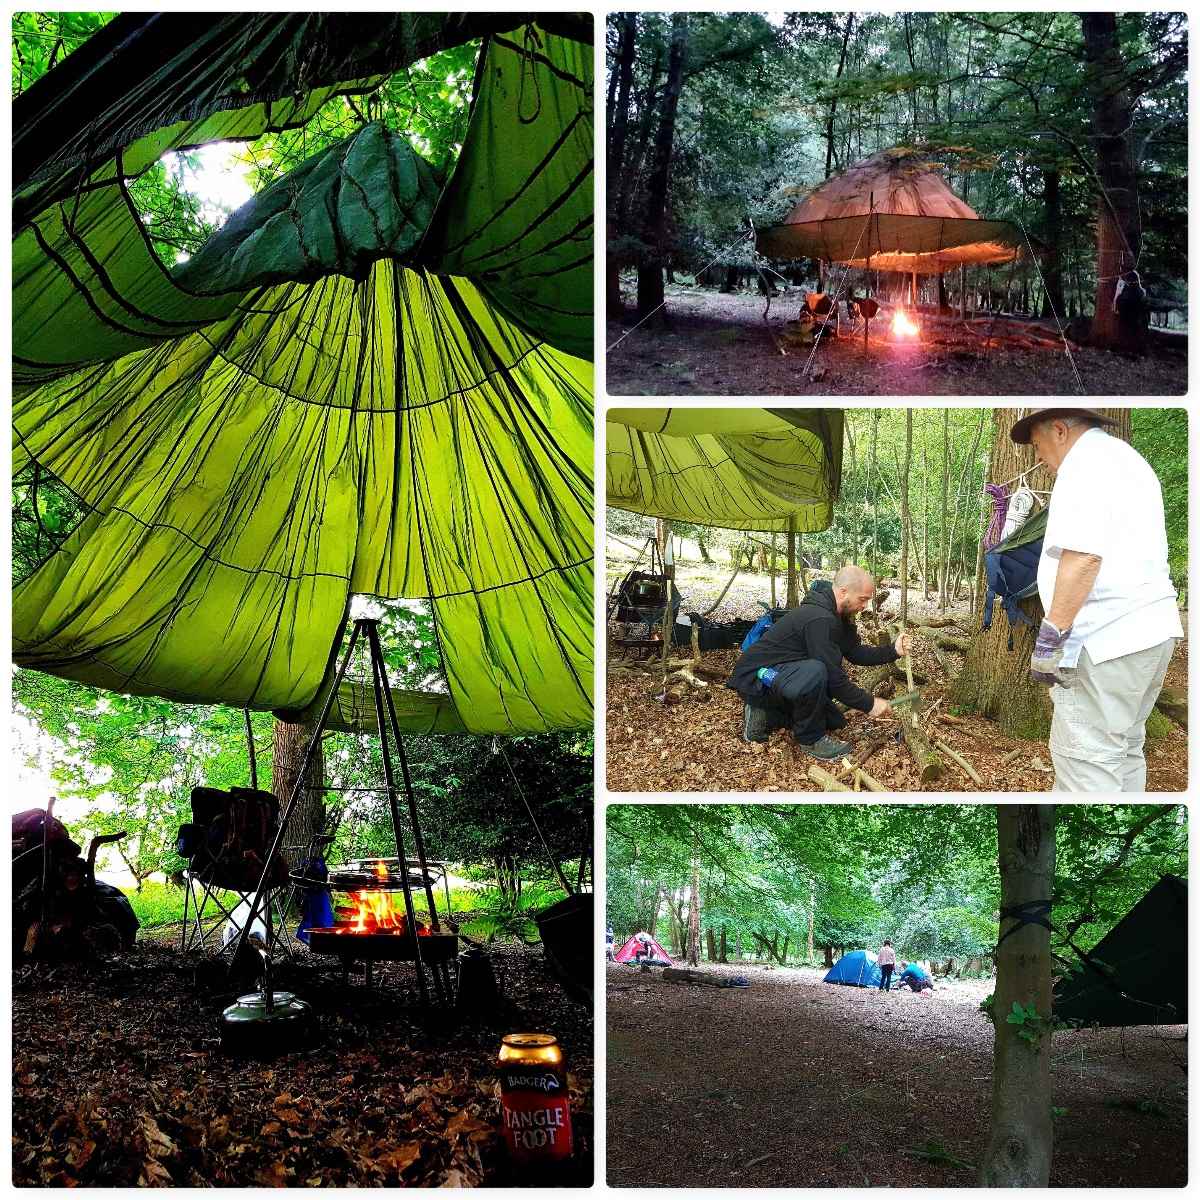
Home in the woods
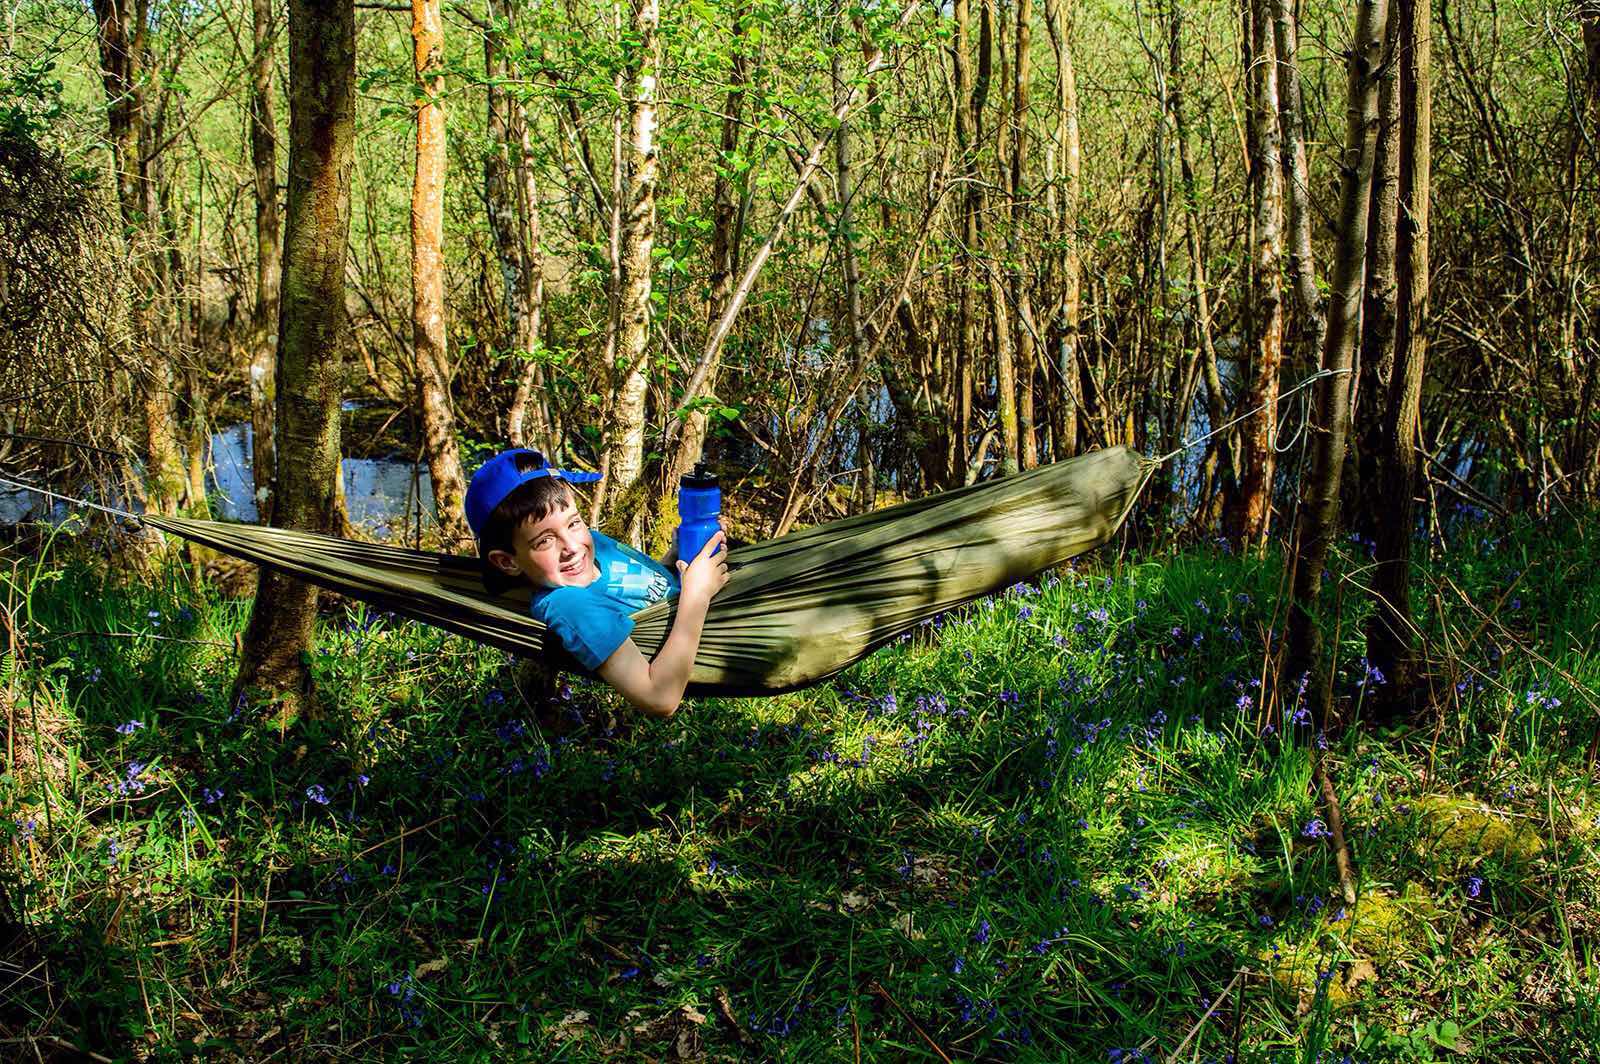
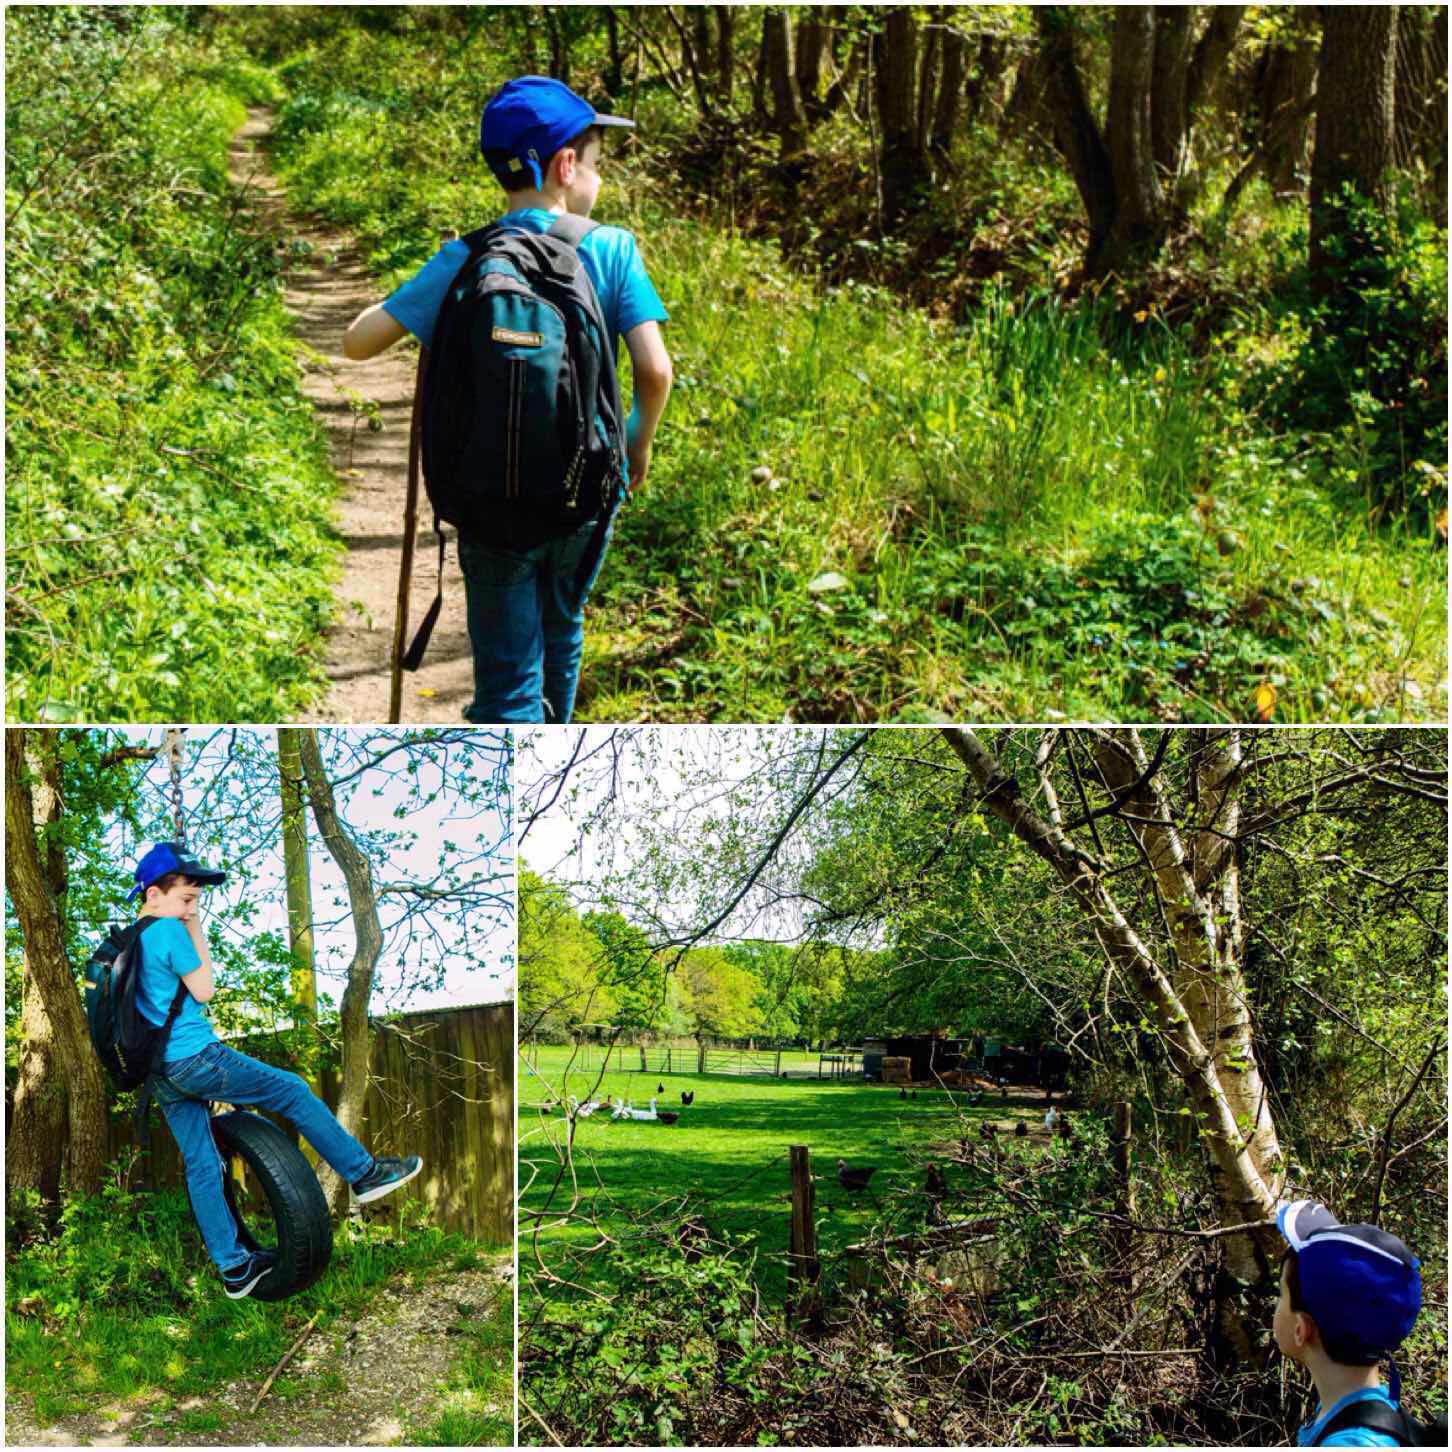
This was proper camping (no cars anywhere in the woods) and after a few trips back and forth with the trolley we soon had our hammocks up. I was joined by my son Finlay and our friends Dave and Alan.
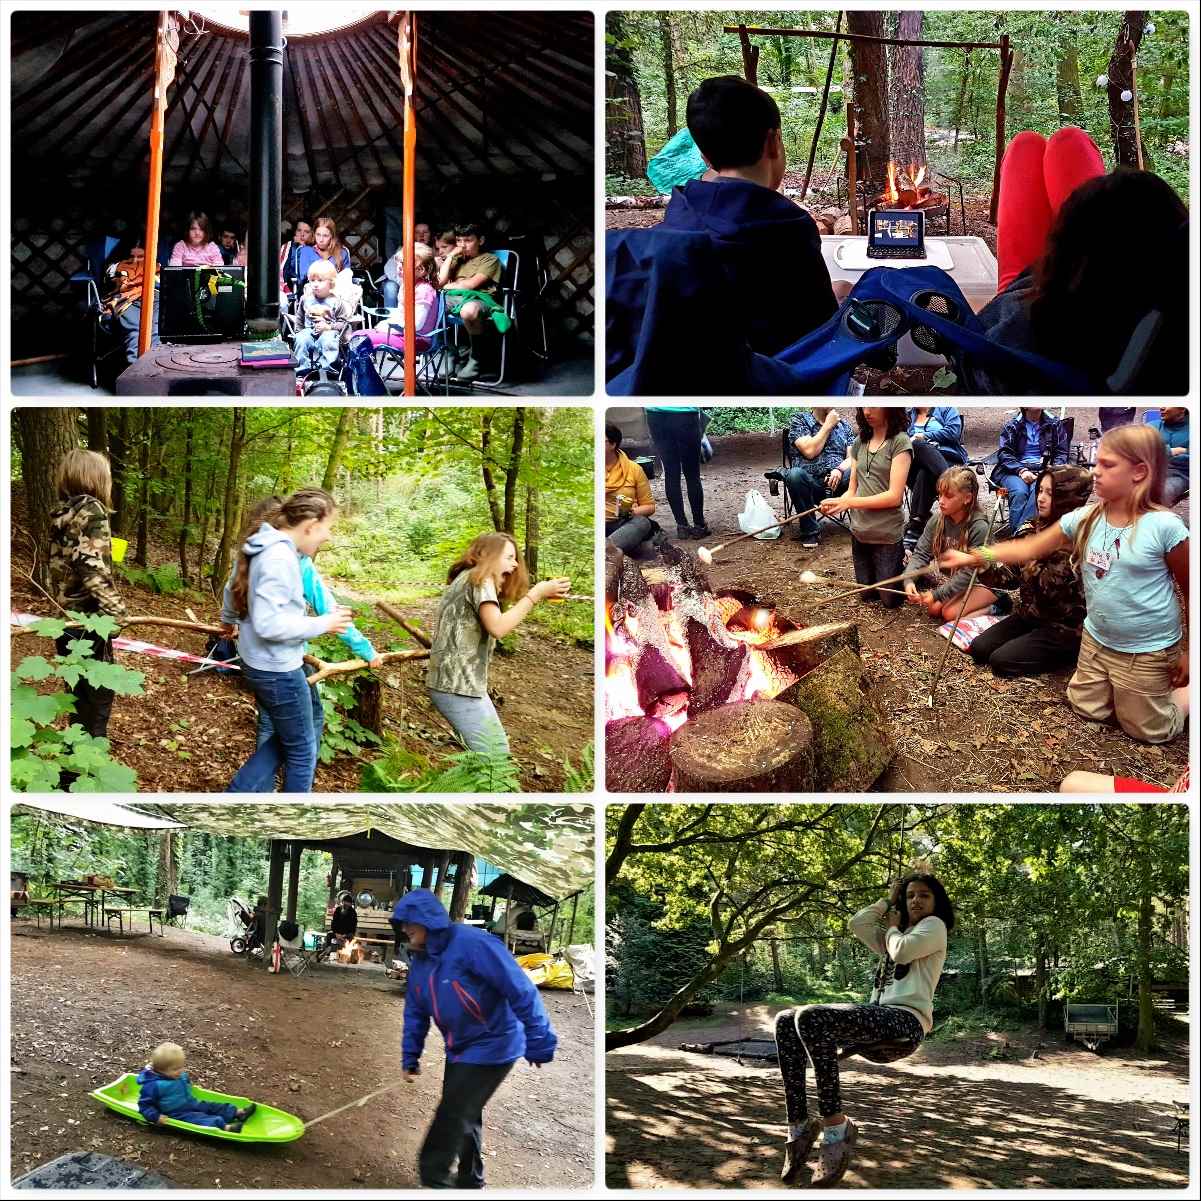
We had a communal cooking area and Fin managed to sneak a movie in each evening around the fire (got to make allowances for this day and age).
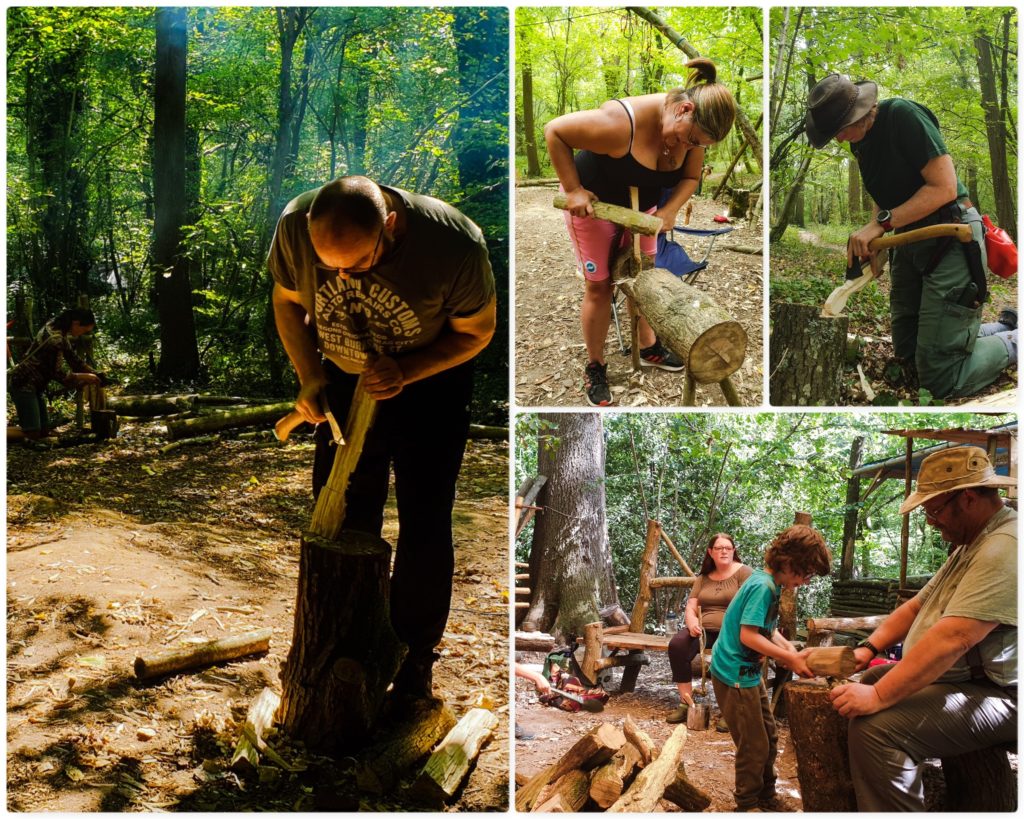
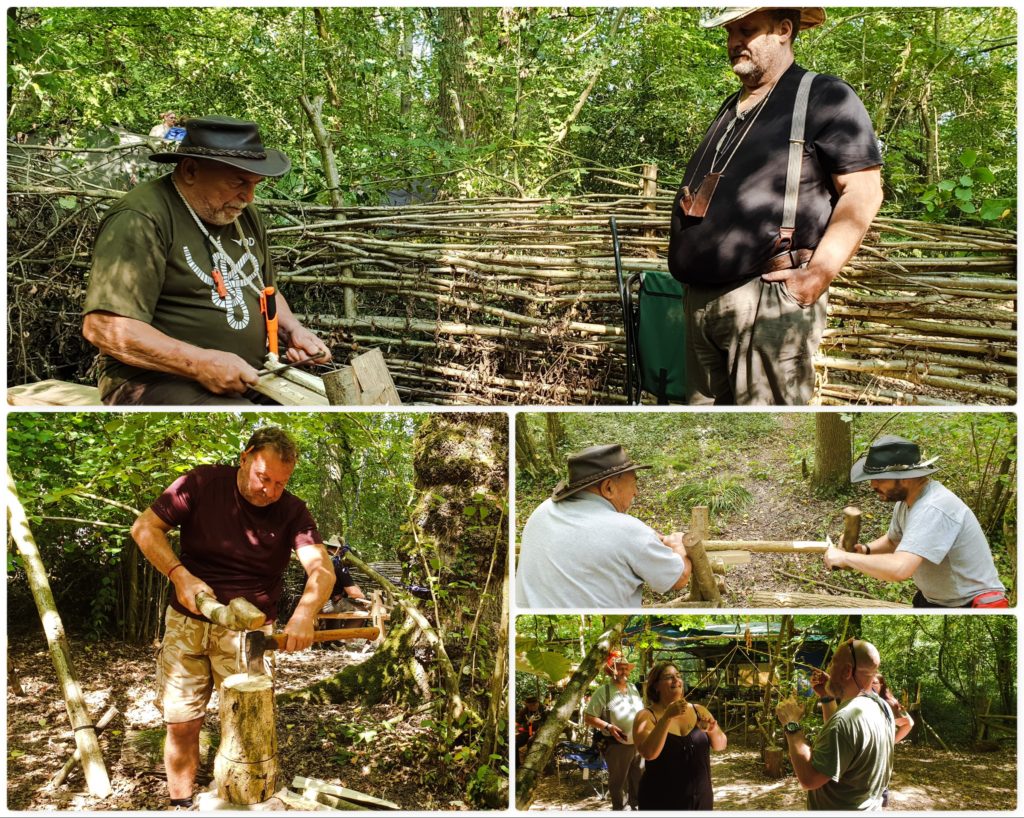
A little bit of whittling
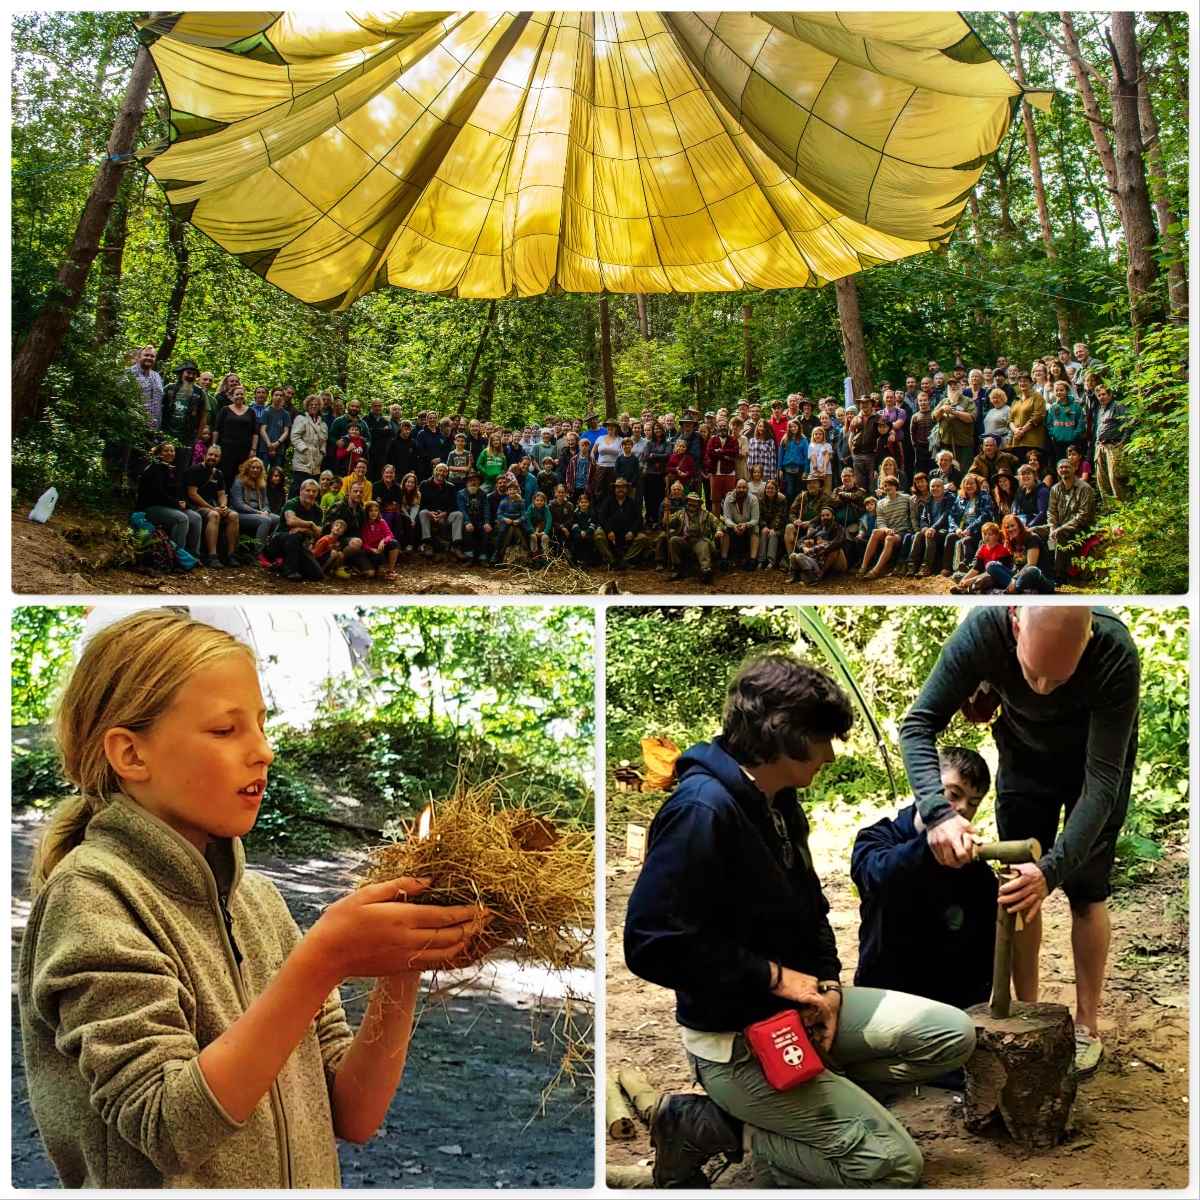
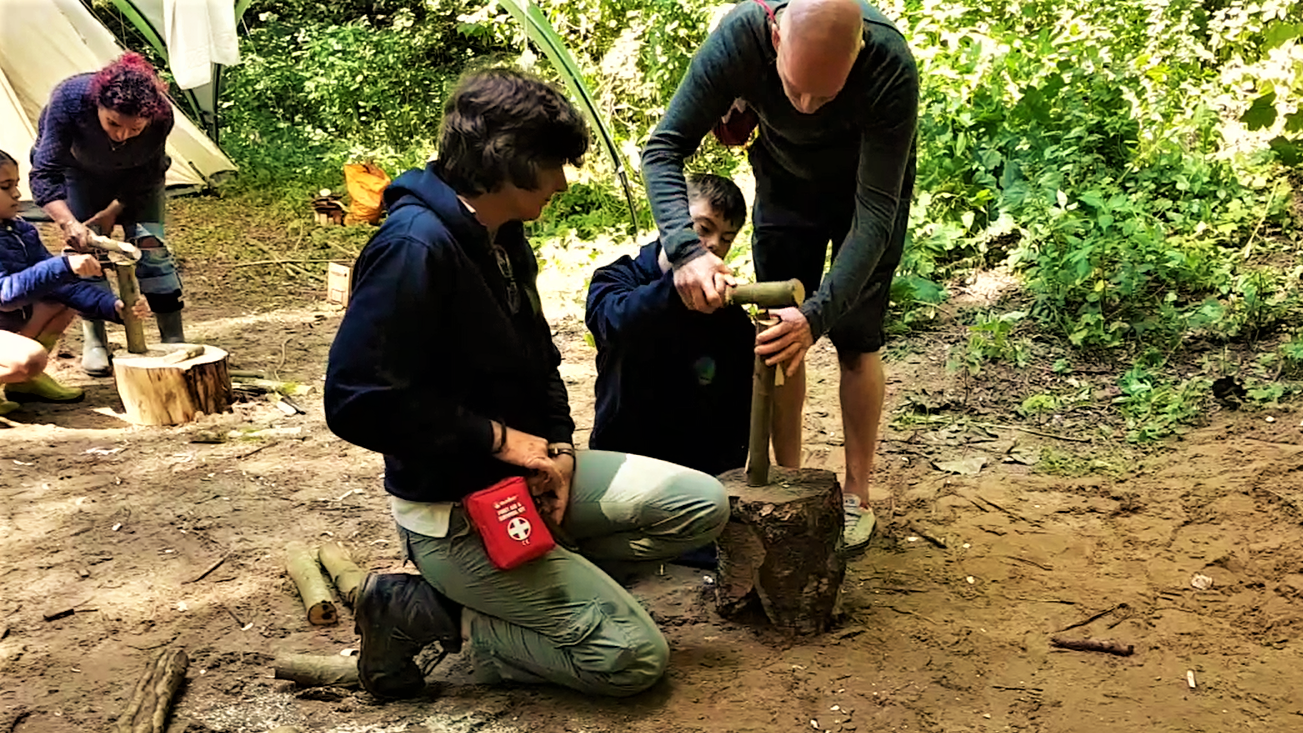
The Minimoot, like the Bushmoot, was a relaxed affair however there were a few classes. One of the first that many asked for was spoon carving – this one went to Wayne to organise with all ages involved – it was great to see all that knowledge being shared.
Multi activities
If spoon-whittling didn’t appeal, we had a lot more going on over the weekend including;
Net needle carving
Log rockets
Nordic braiding
Campfire cooking constructions
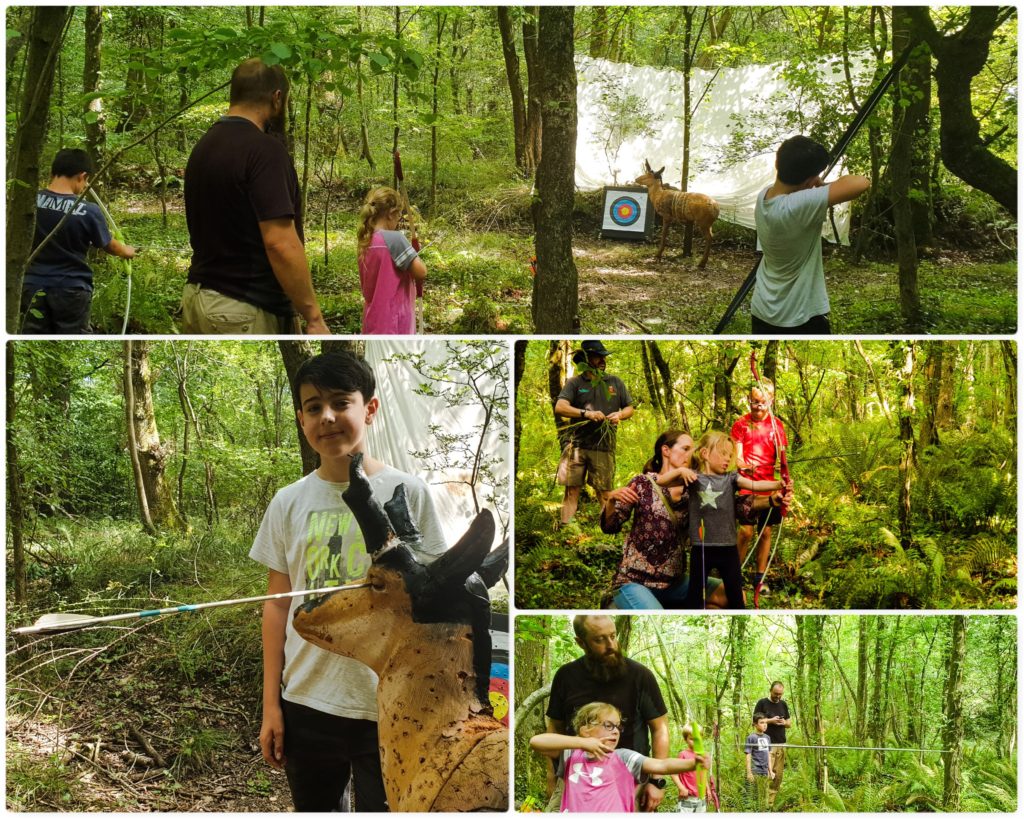
Down on the Range
Usually in the afternoon we had the range up and running – we had all sorts of bows to choose from and Finlay was happy to be shooting some Mint Imperials down the range from his catapult.
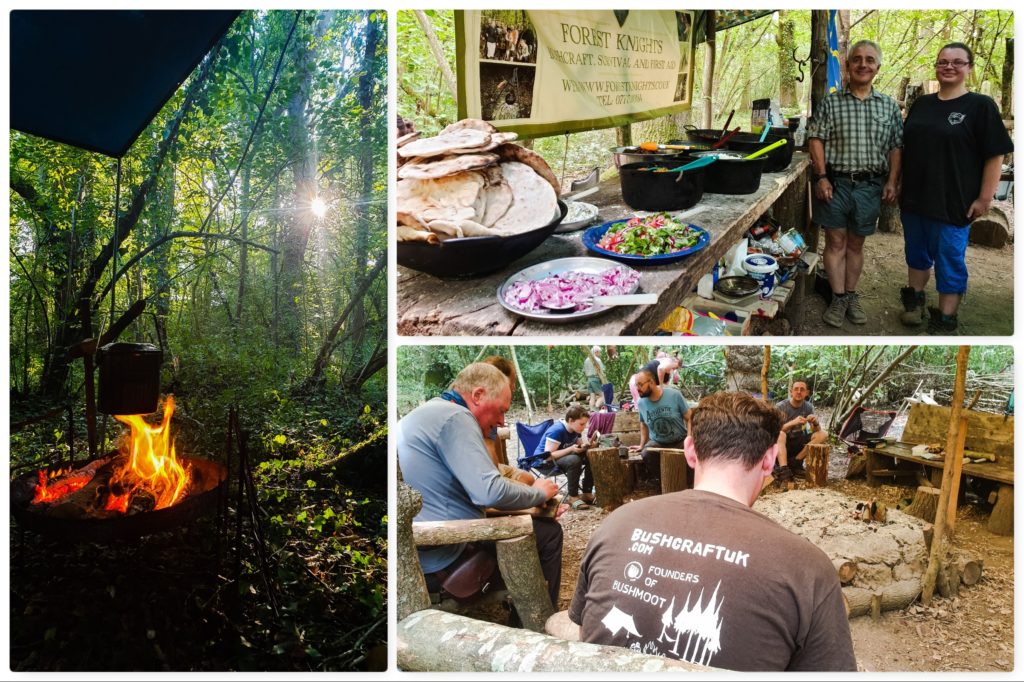
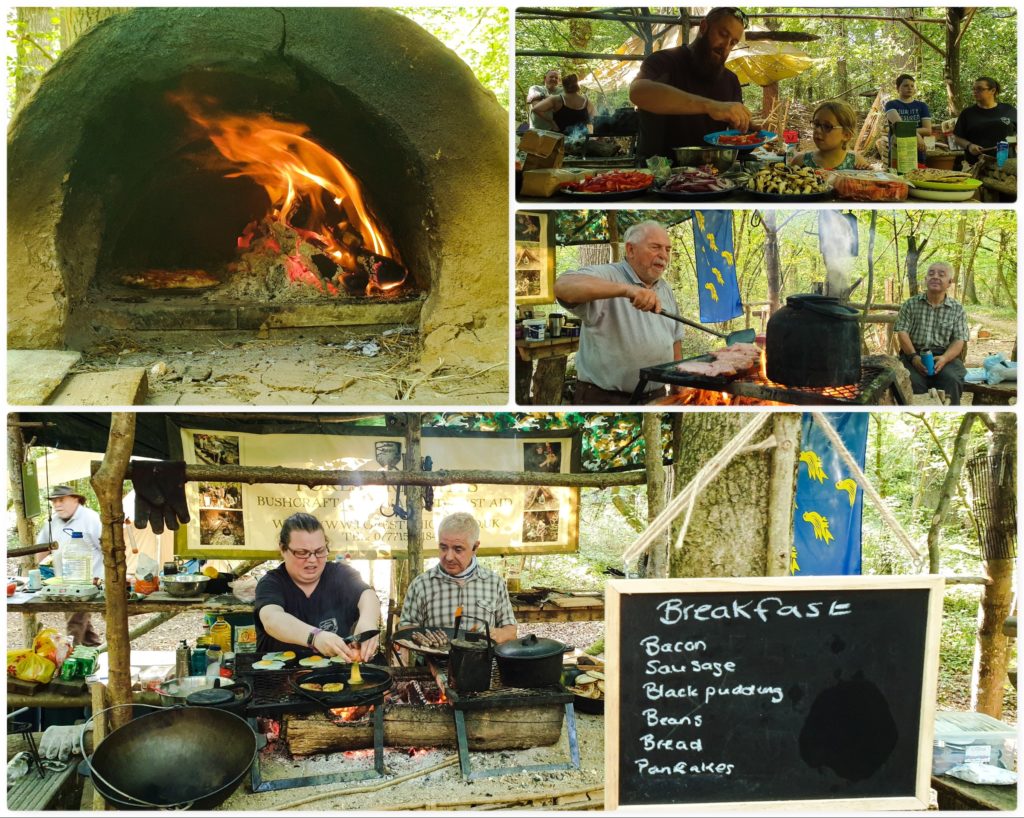
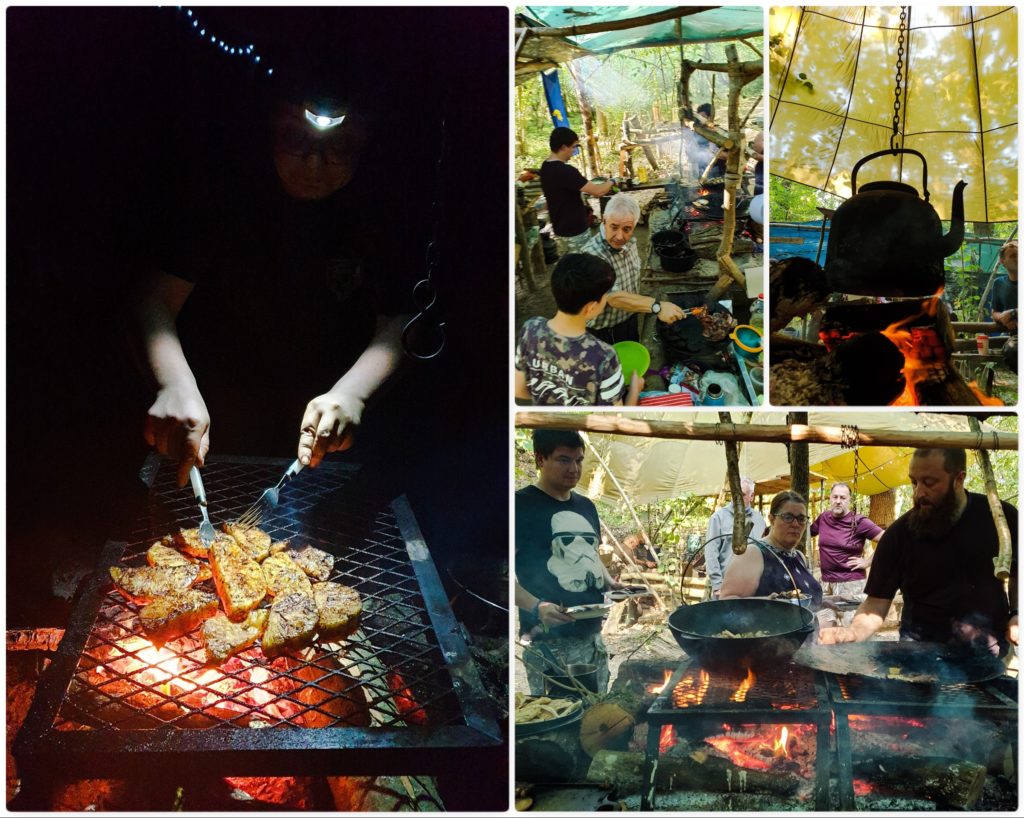
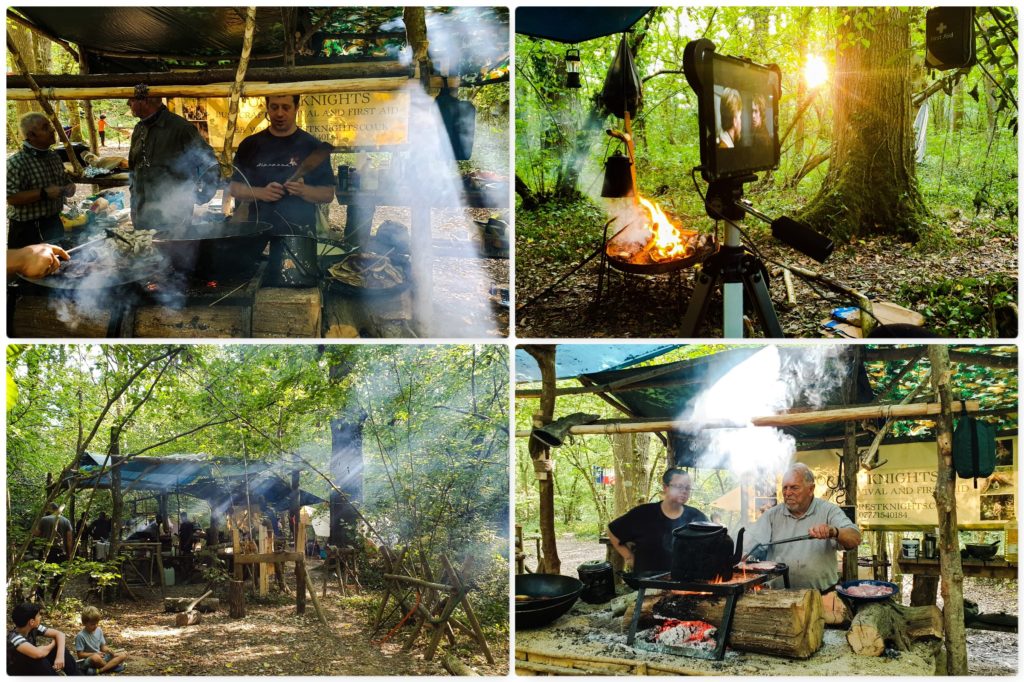
Food – Glorious – Food
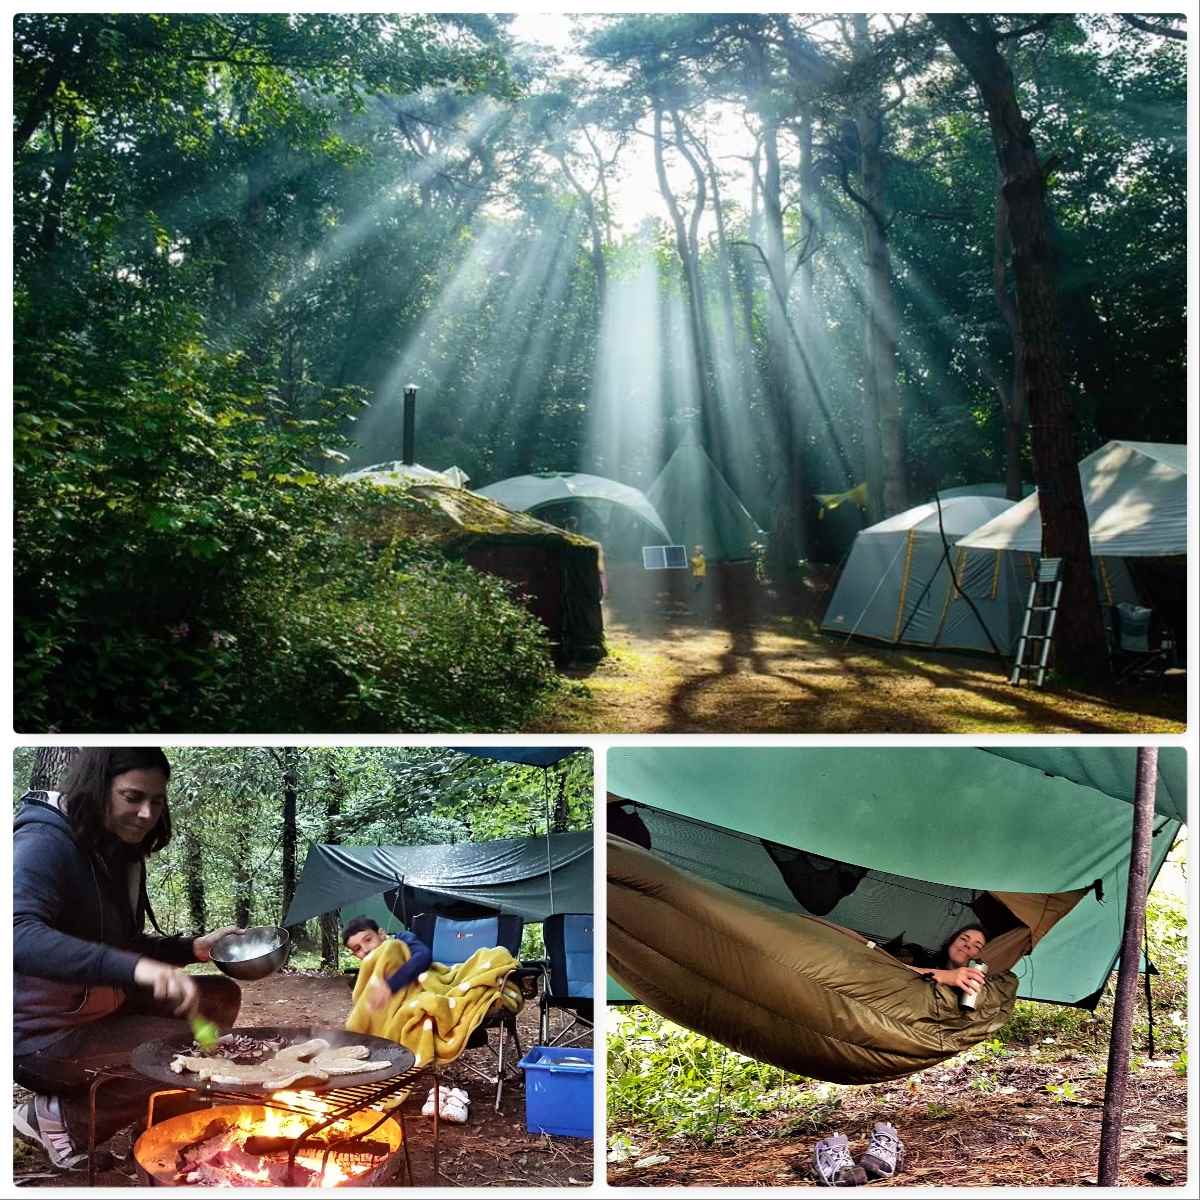
One thing that did not happen on this weekend was going hungry – Beth and Wayne (I will put them in order of priority here) are renowned for their cooking skills around a campfire. They cooked a mega breakfast every morning, a curry on the Saturday night and had the pizza oven fired up on a number of occasions.
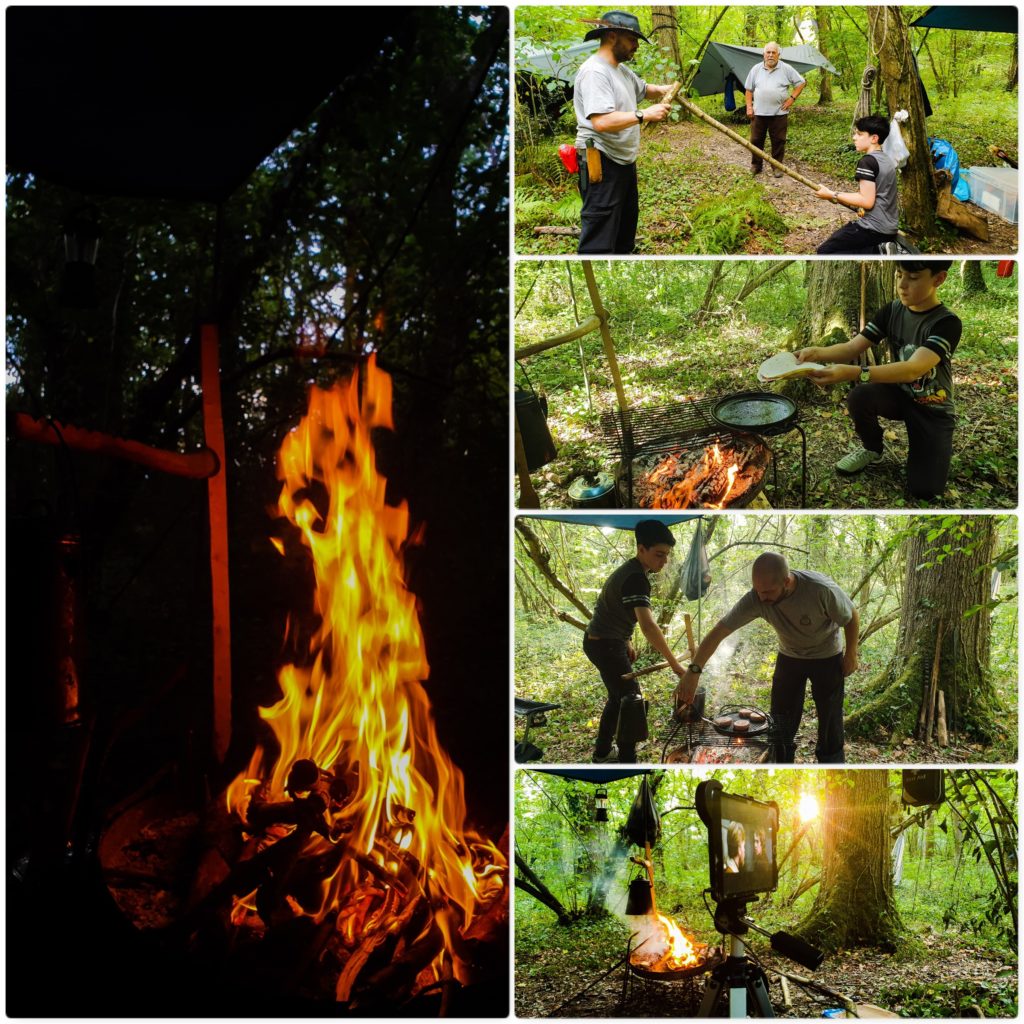
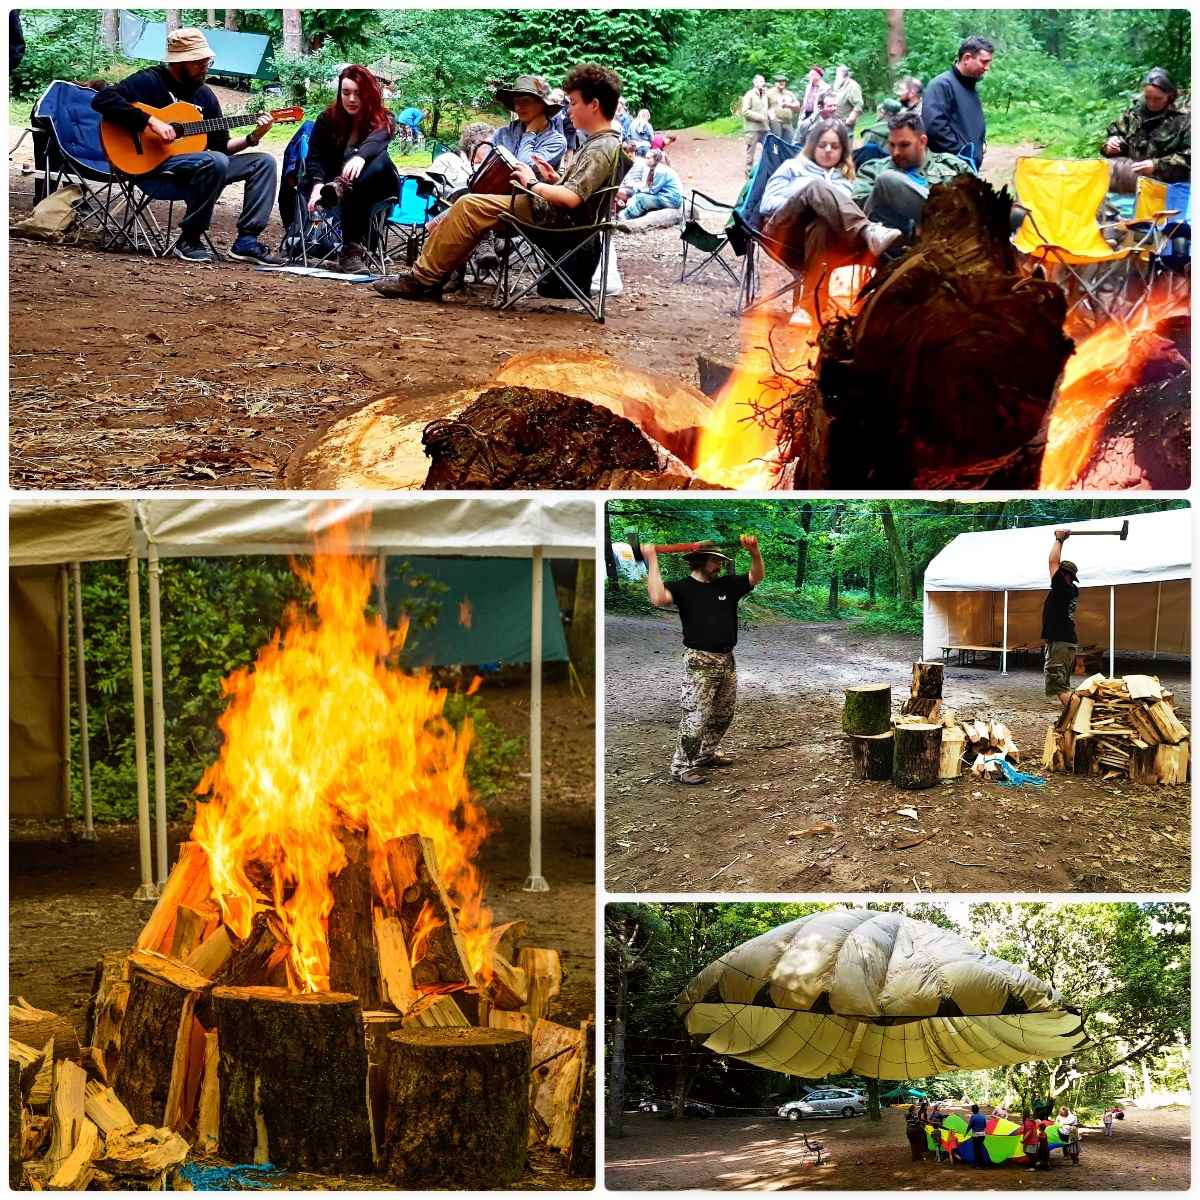
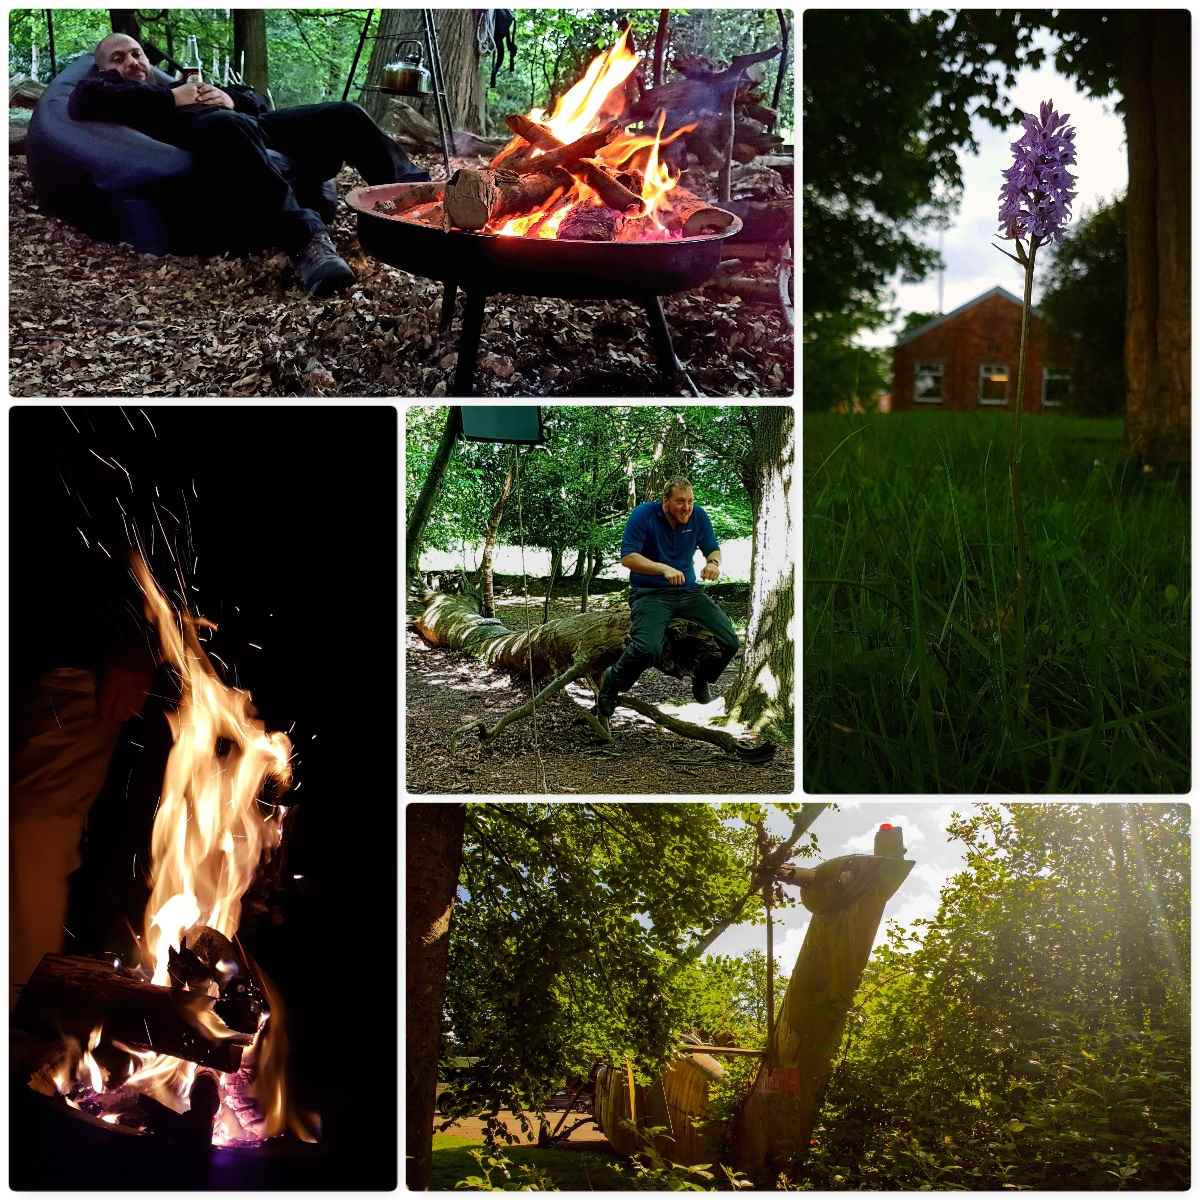
Life around the fire
It was not just Beth and Wayne around the fire – eveyone got stuck in. My son Finlay loved making pizzas and Alan (being a cheffy-type person) loved the raised firepit – I was happy to stick the kettle on every now and then 🙂
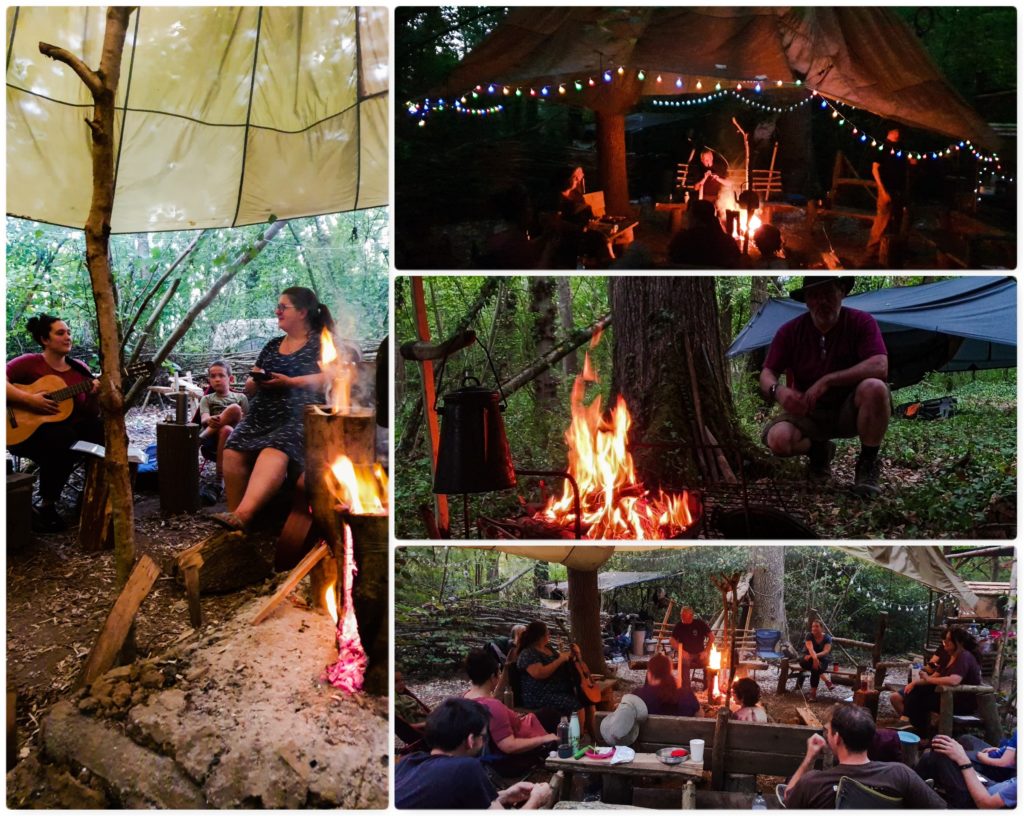
Evening Relaxation
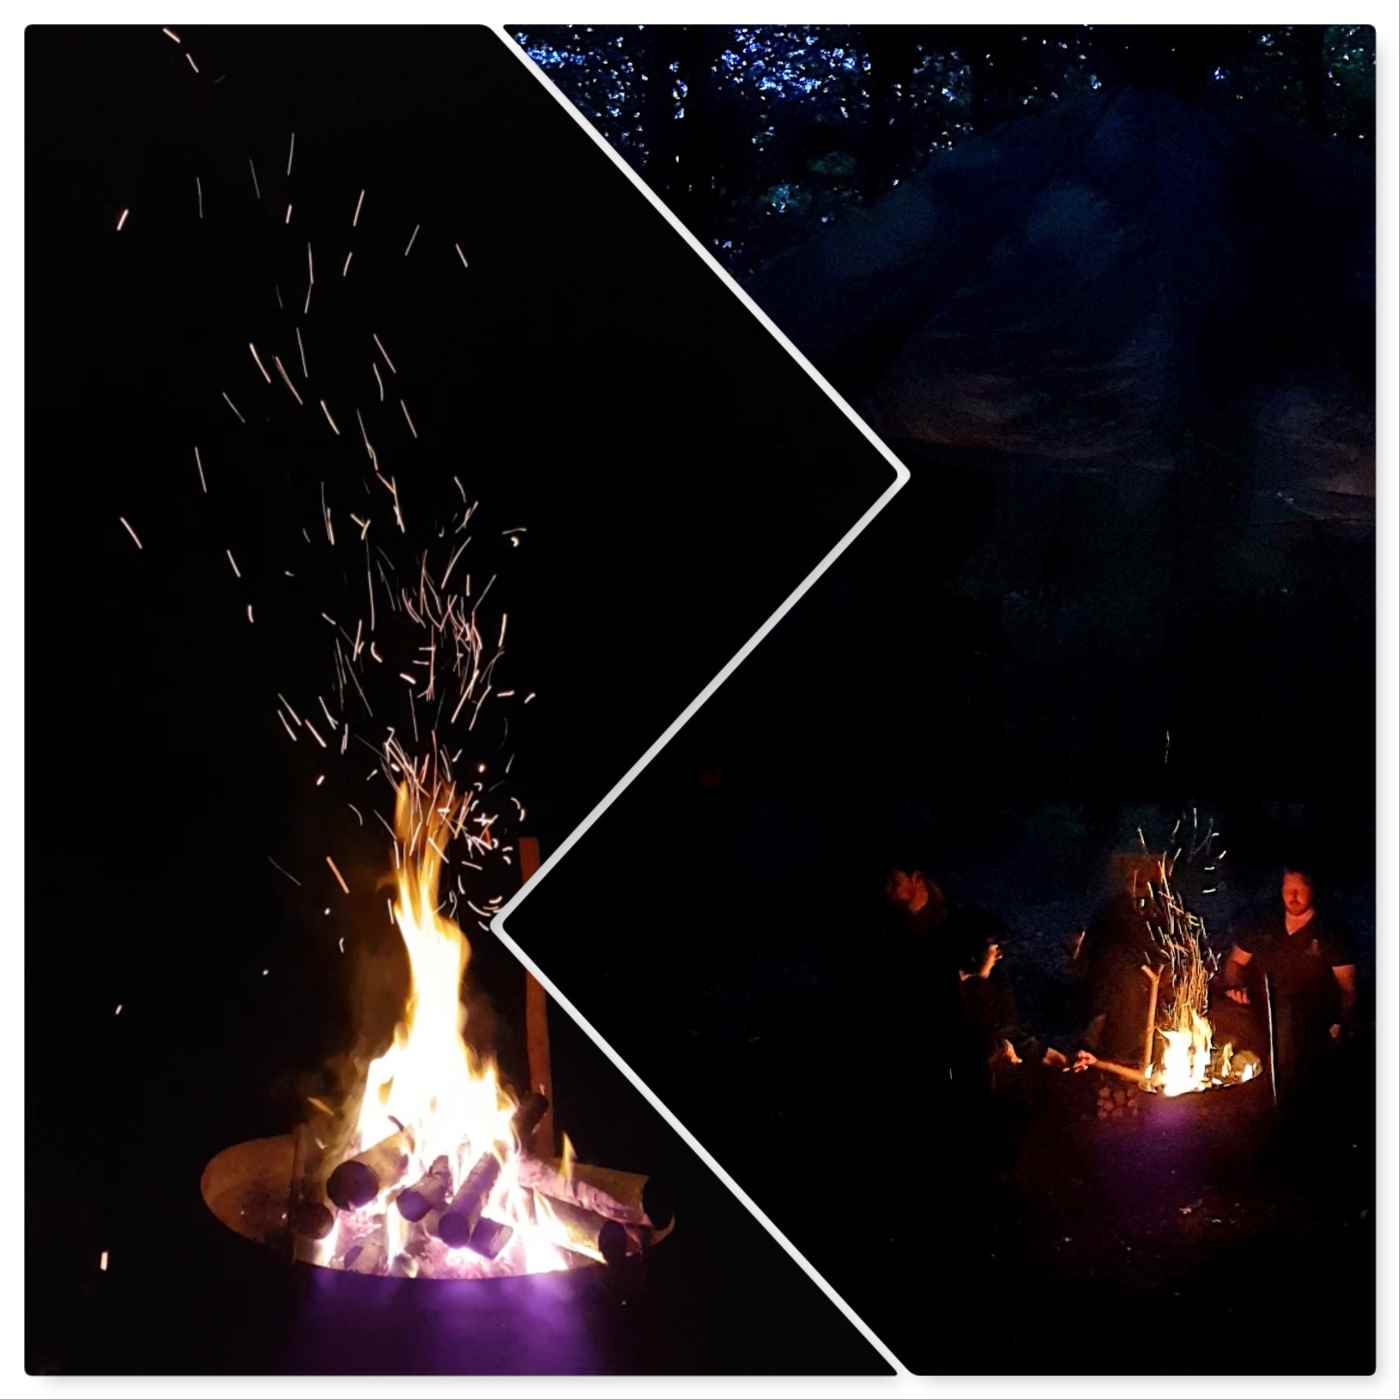
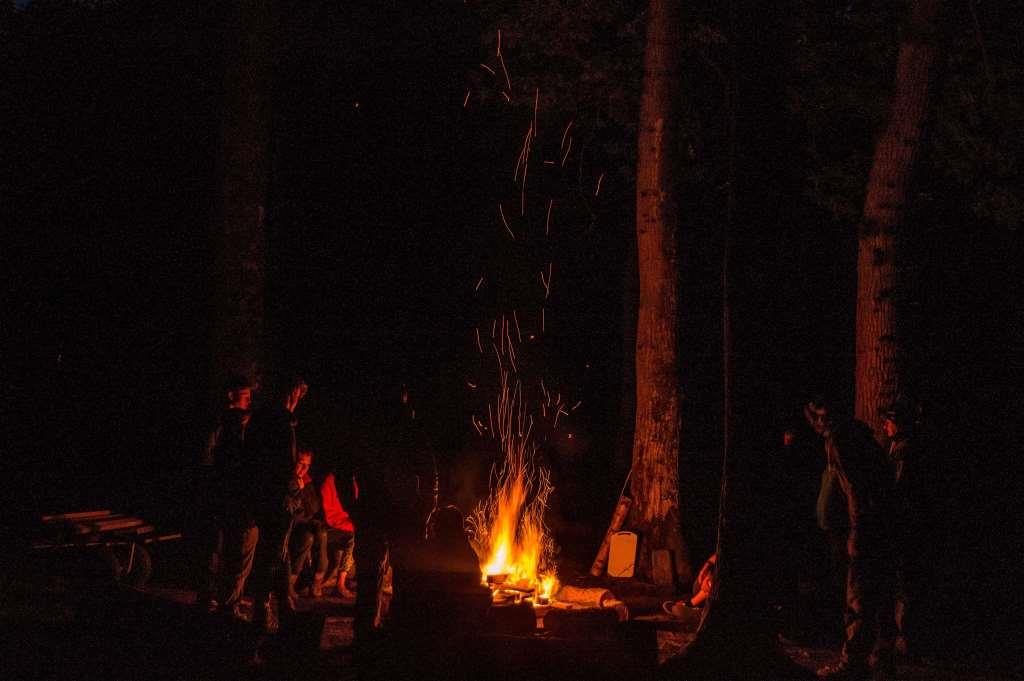
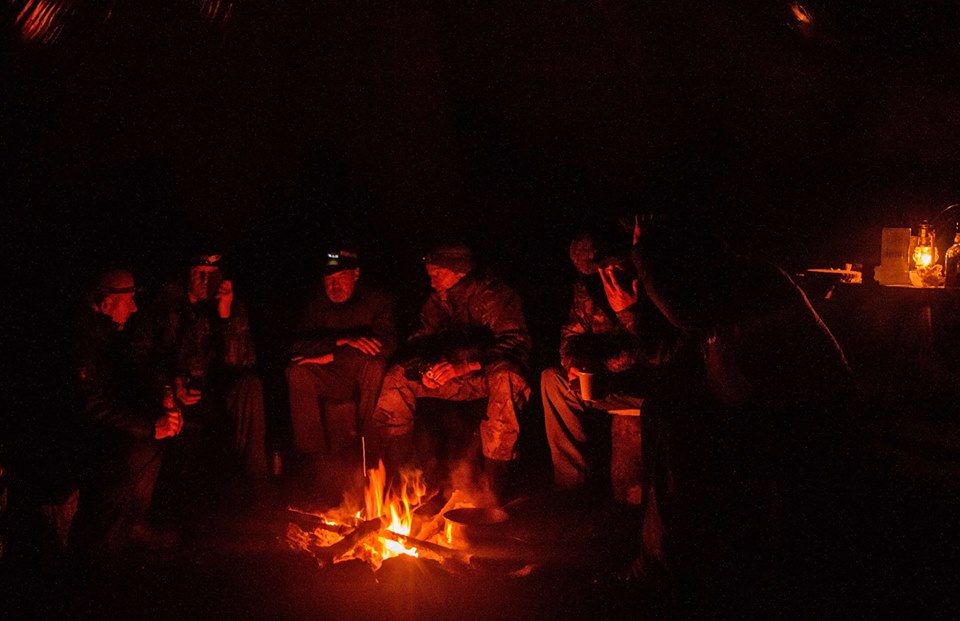
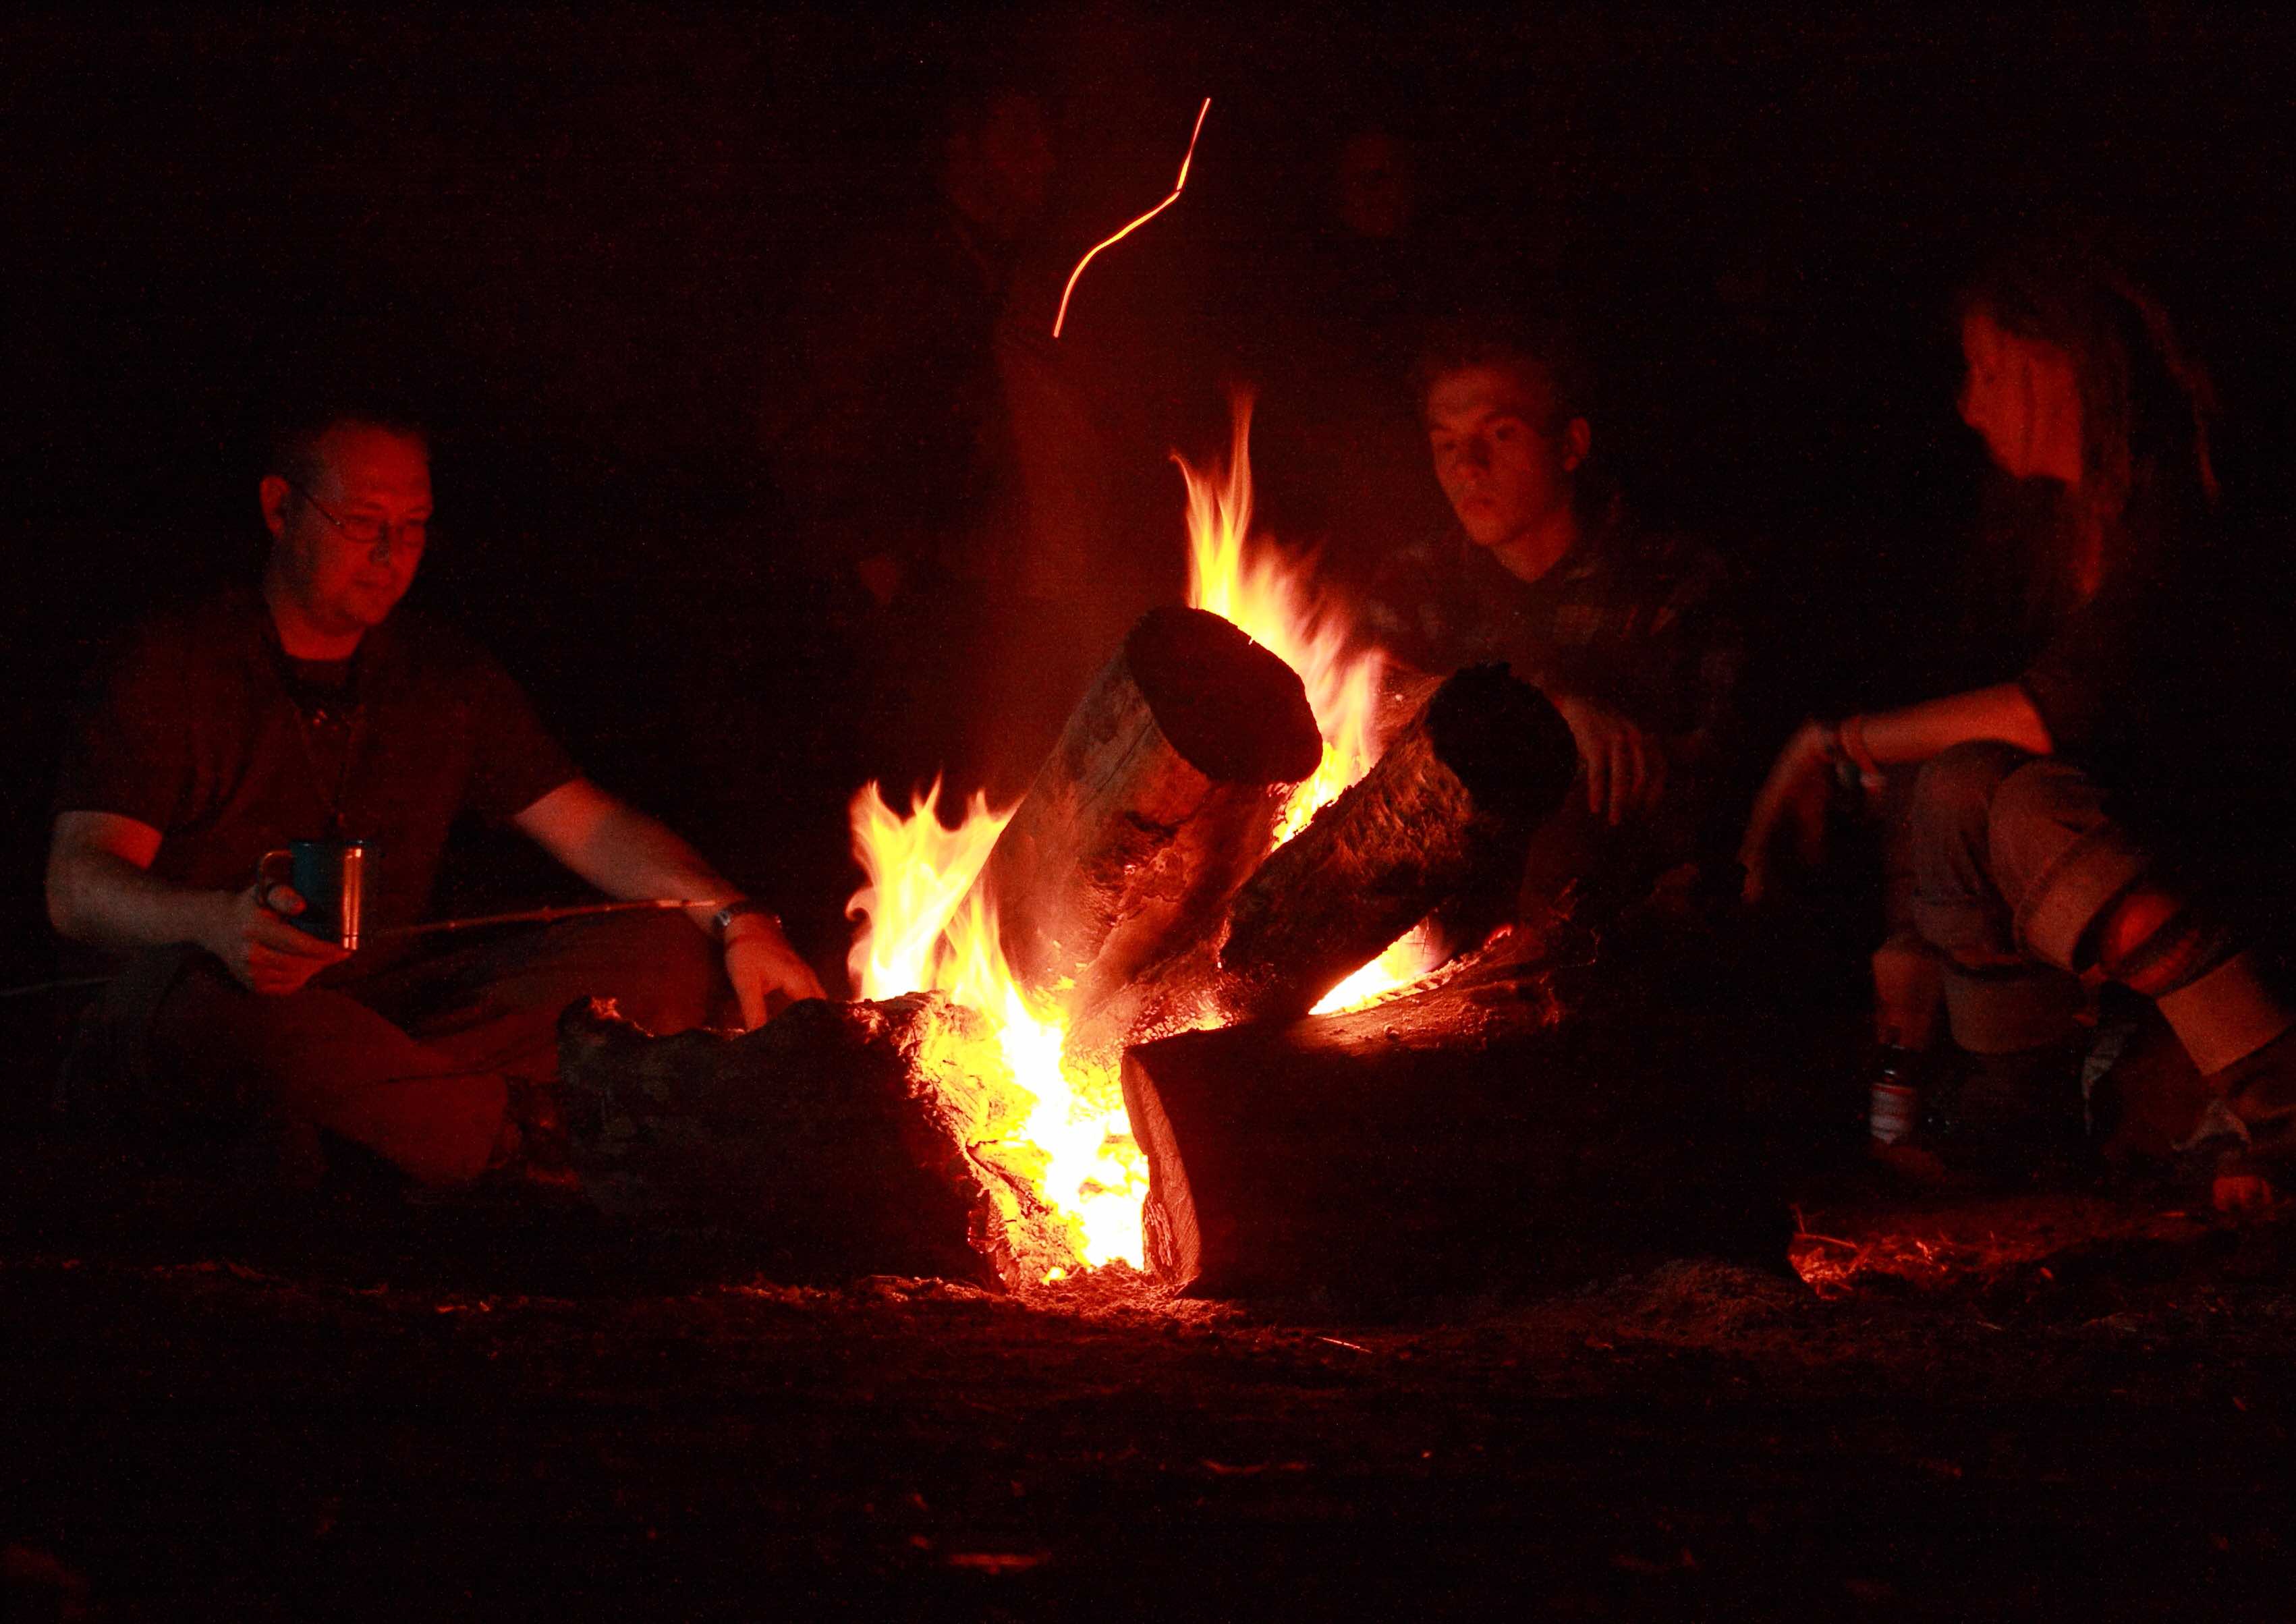
It was not all hard work (though that heat really made doing simple chores twice as hard as they actually were) and in the evening we would sit around our campfire before joining a socially distanced group fire when it was fully dark.
Most evenings you could hear the penny whistle from the likes of Stephen Crump and on the Saturday we had great singing (and guitar work) from Ruth and Mel.
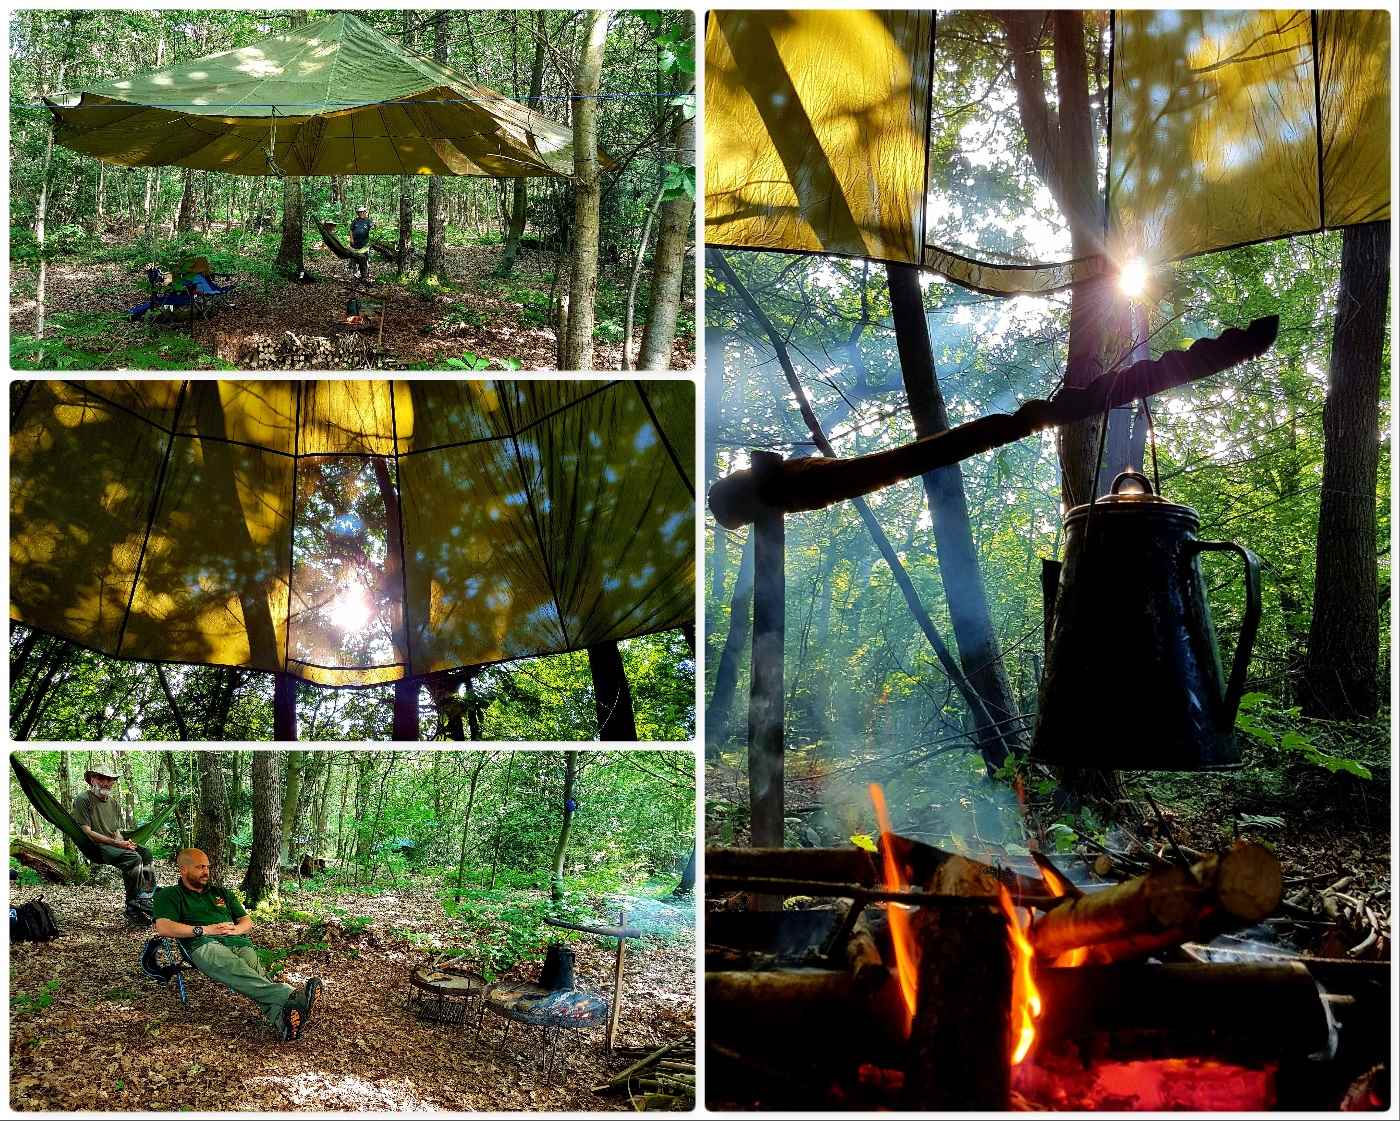
Glorious light
As a photographer I usually struggle to get good shots in the woods with my phone camera and have to rely on the big old DSLR. But on this weekend the light was fantastic, so my DSLR never left my rucksack. Loved seeing all these rays through the canopy with the smoke from the cooking fires.
Thanks again to Wayne and Beth for hosting the Minimoot – the first camp I had attended since lockdown. It was great to see some friends again in a relaxed and socially responsible way – there was plenty of room in these woods.
Cheers (and look forward to future Minimoots alongside the main Bushmoot), George
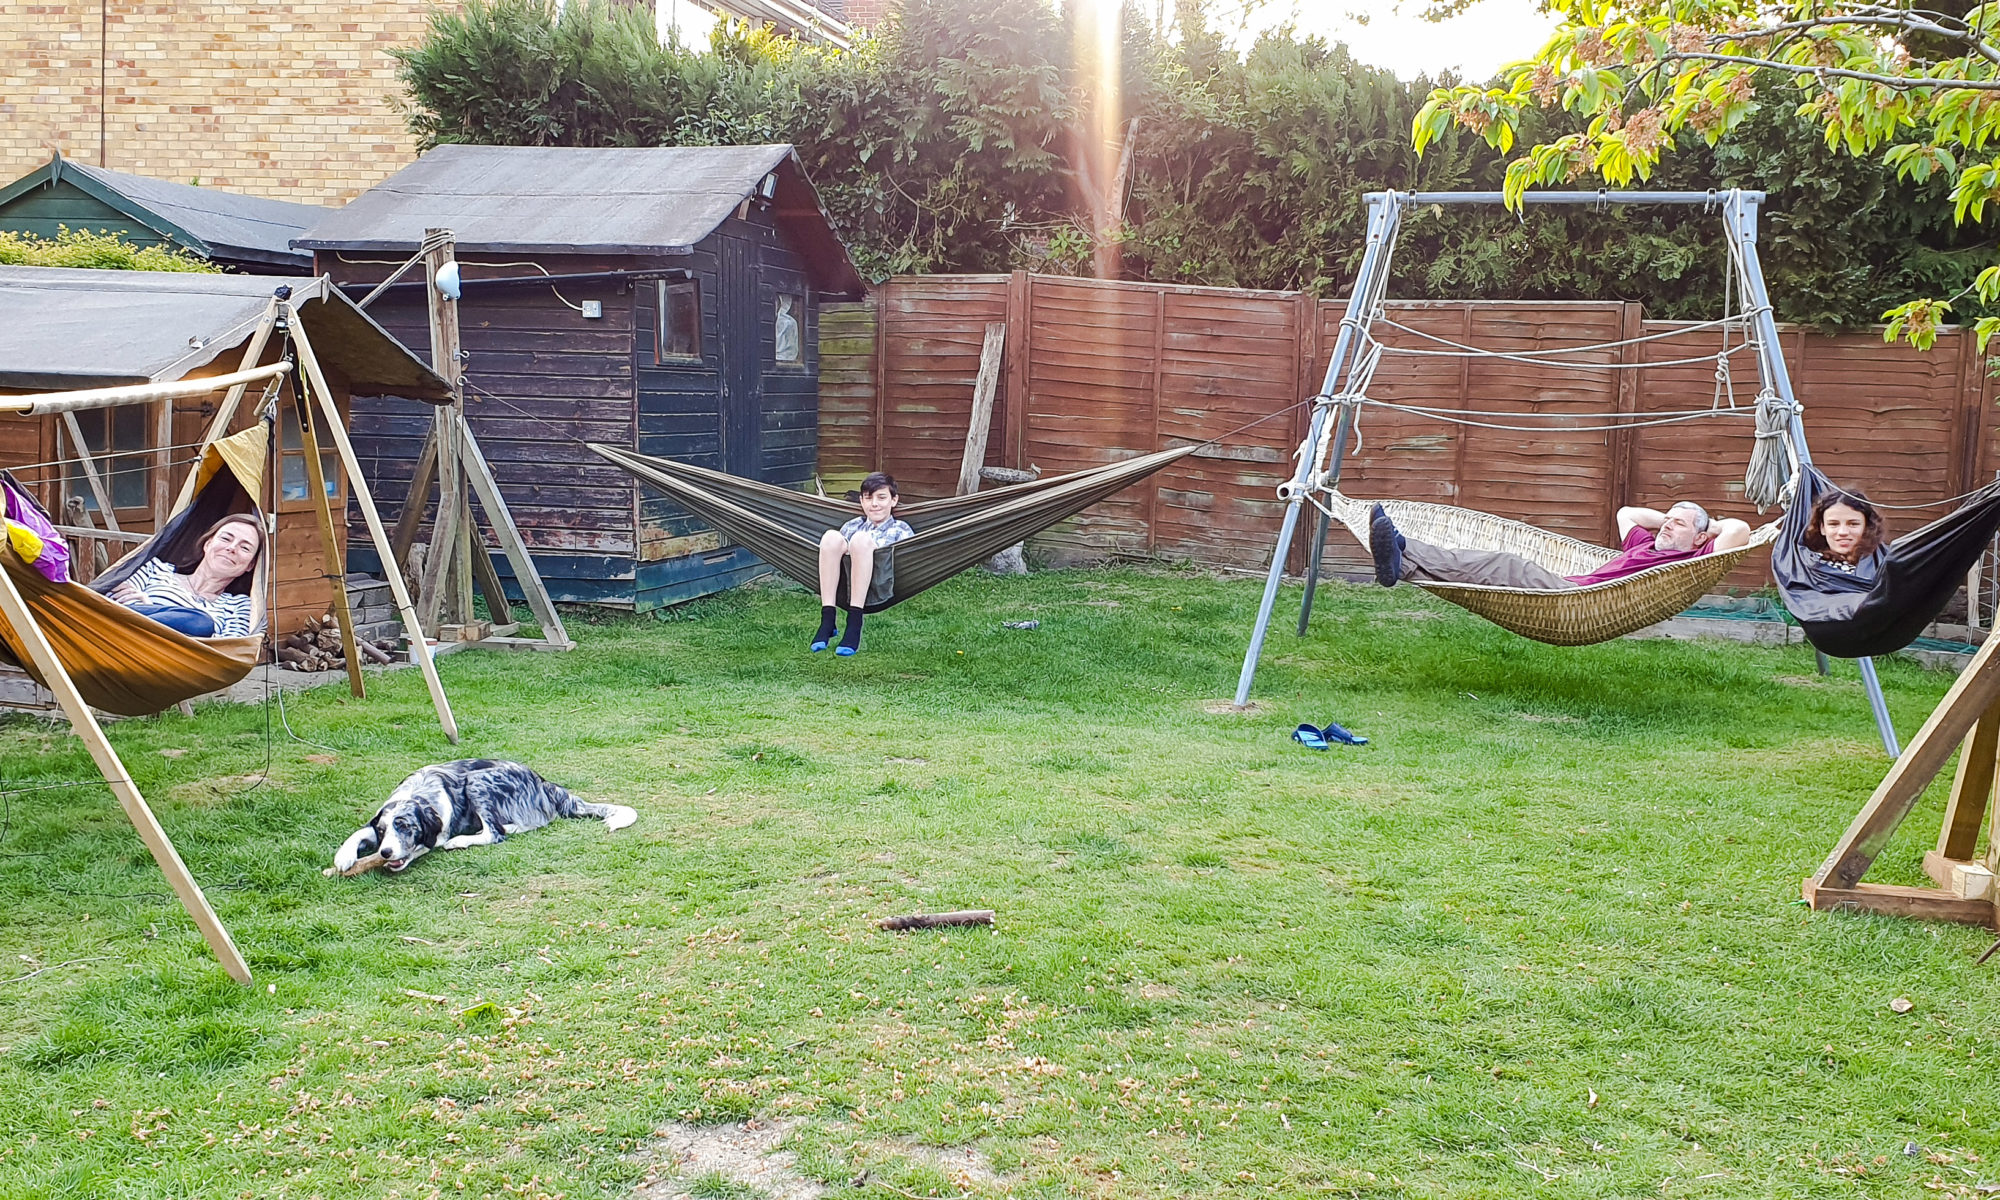
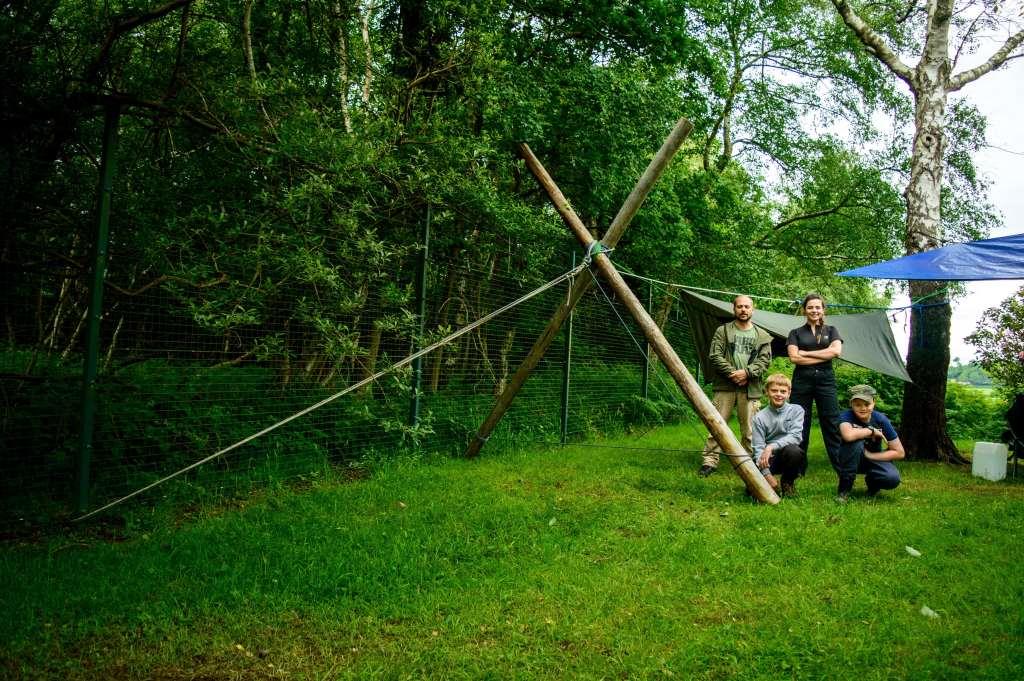
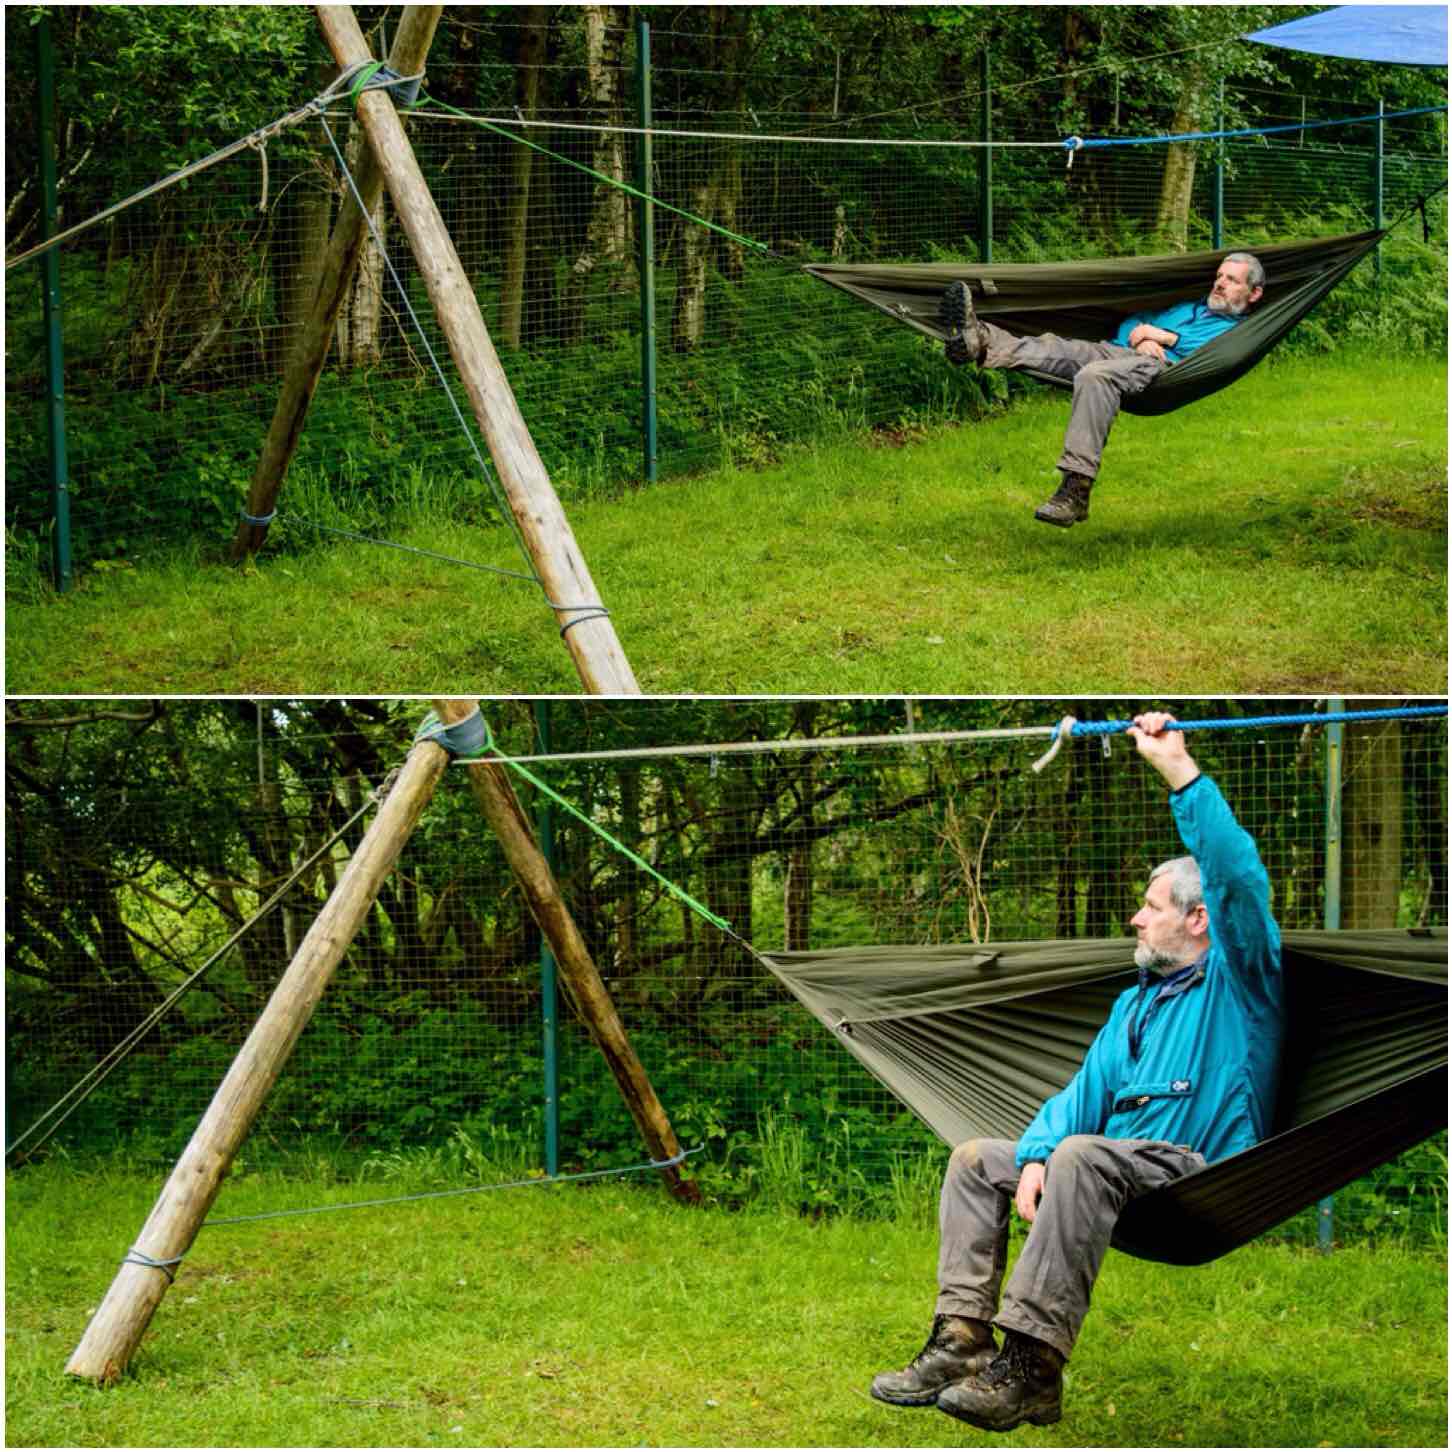
Over the years building hammock stands have really intrigued me.
My Freestanding Hammock Stand is great for popping up in the garden or putting in the back of the car to take to events – however I have only one and with this current Covid crisis found I have been spending more time in the garden – so more hammock stands were needed. I did not have all the wood I needed for another Freestanding Hammock Stand however I found I had a lot of old fence posts that could be turned into something.
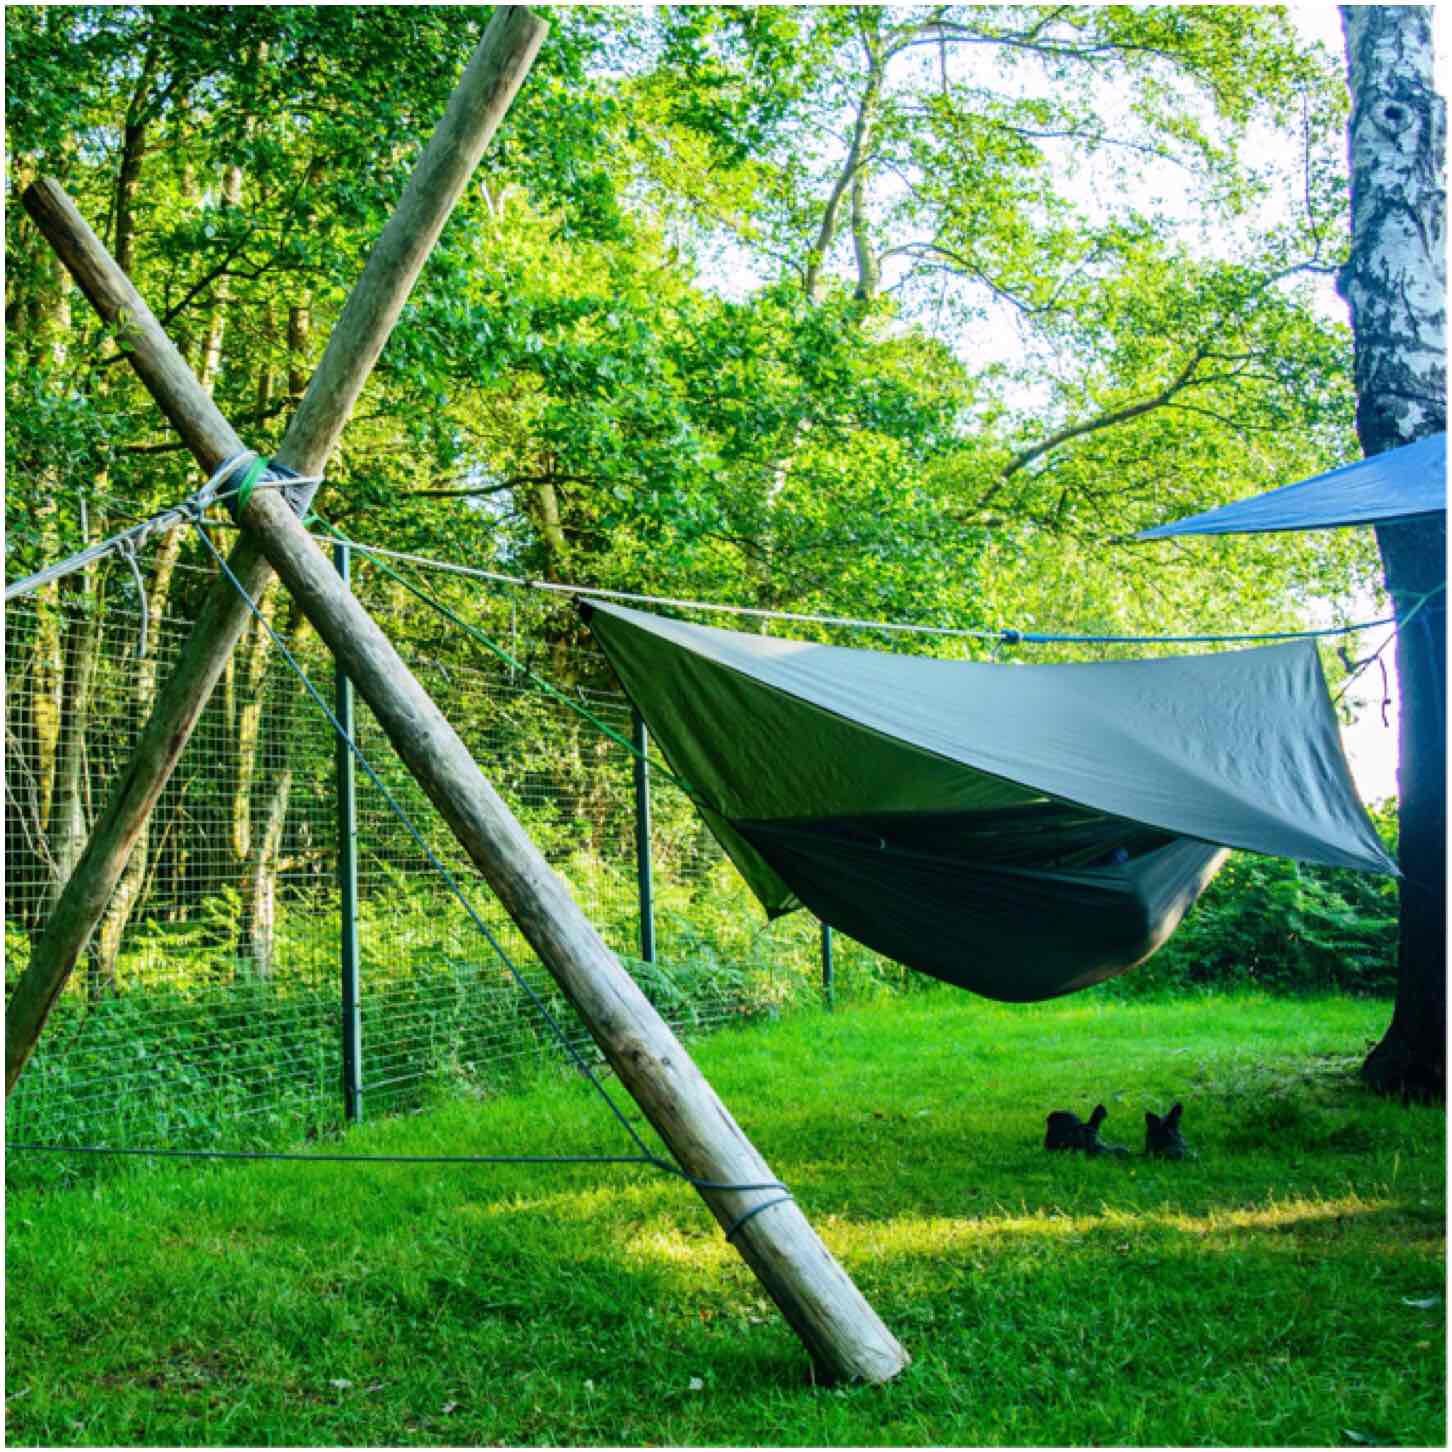
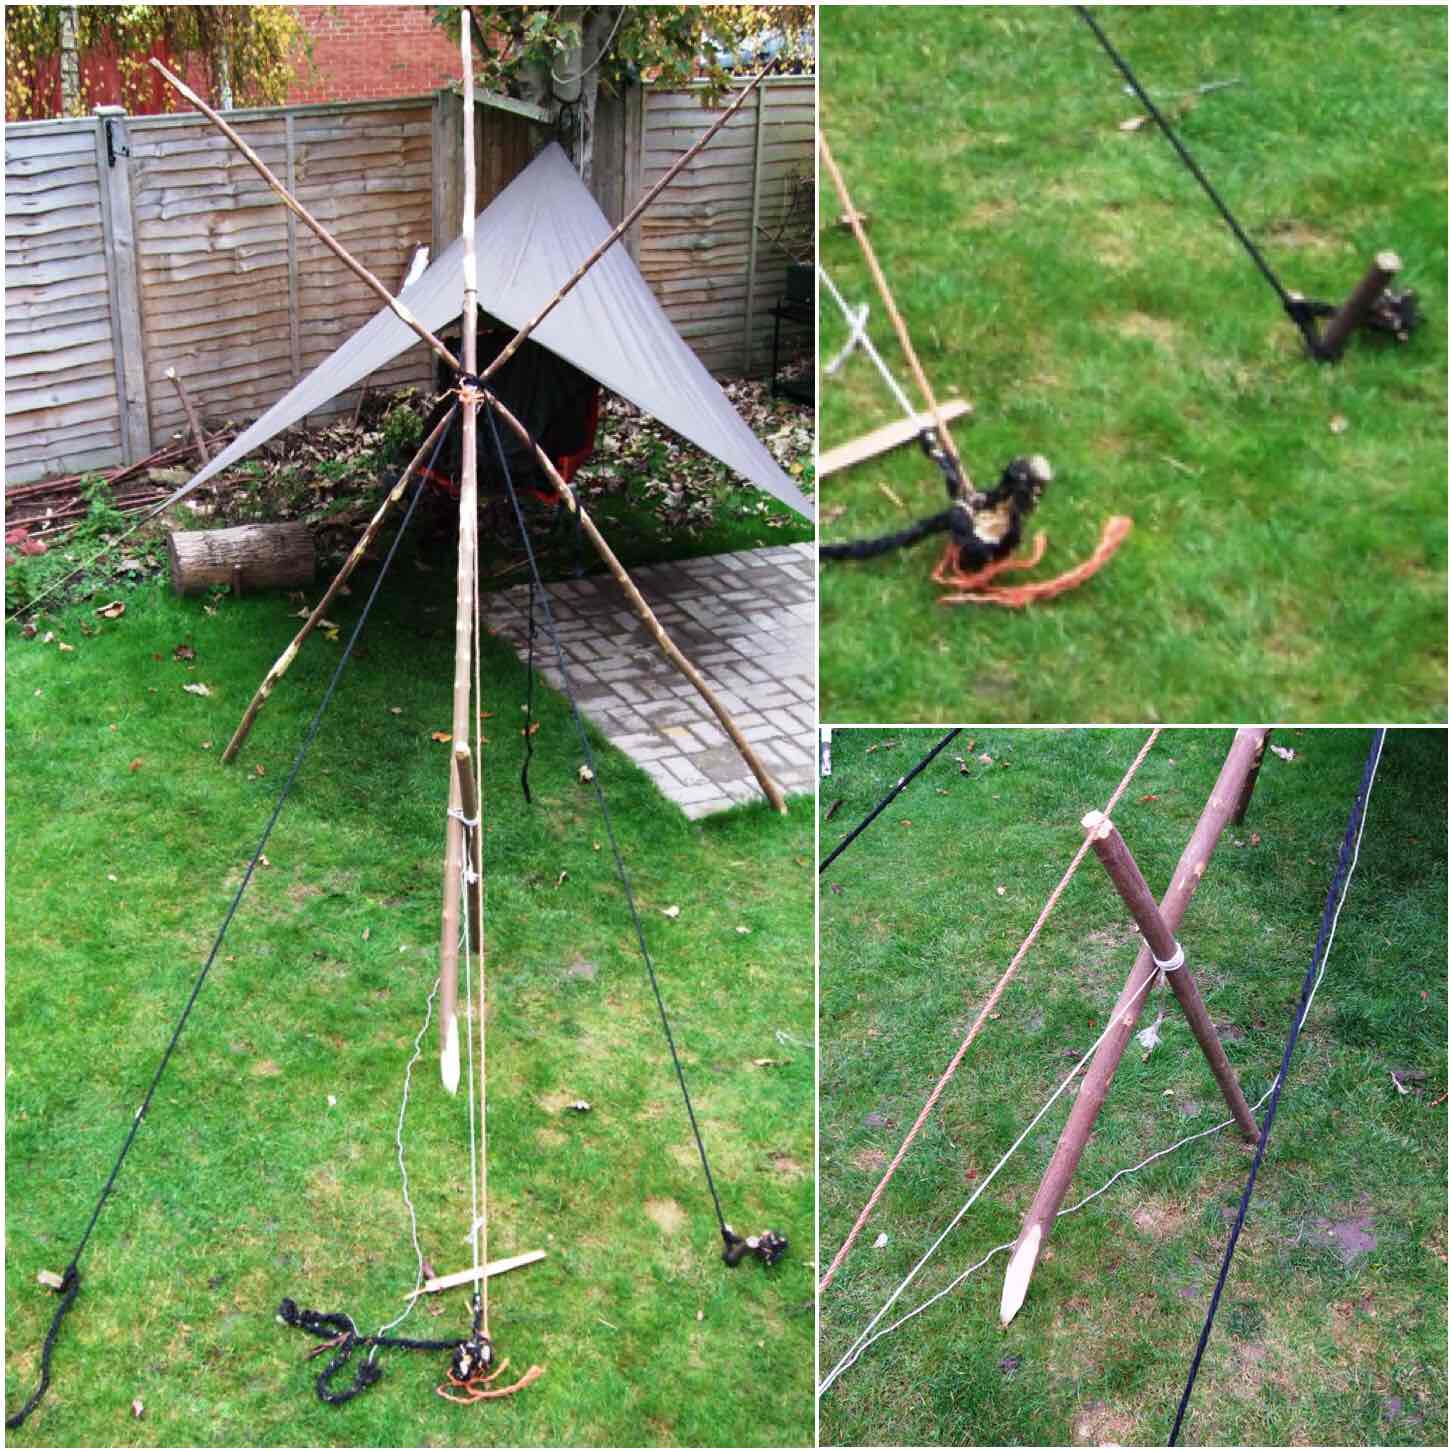
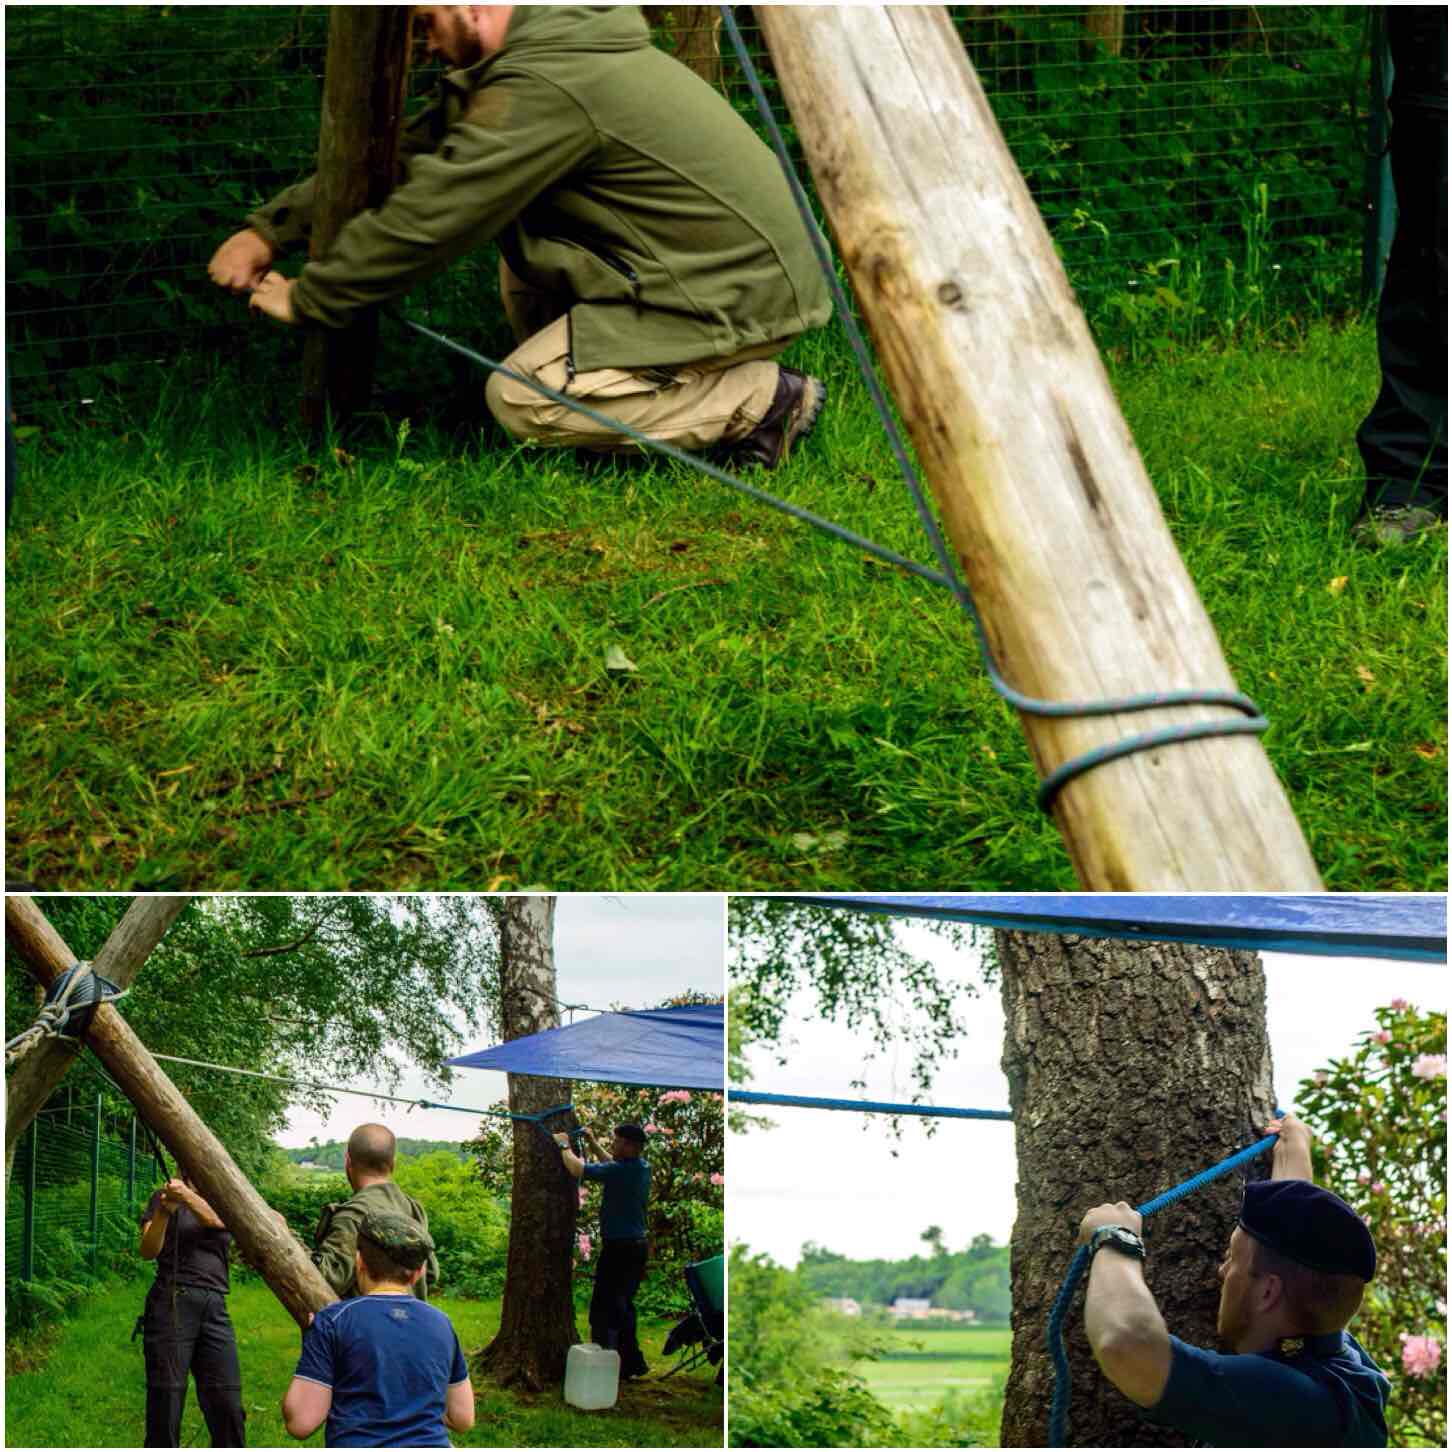
I have only one decent tree in my back garden and an old swing frame (they are too far apart to use together) that I can hang a hammock off so I needed some kind of ‘Hammock Upright’ that did not need to be dug into the ground.
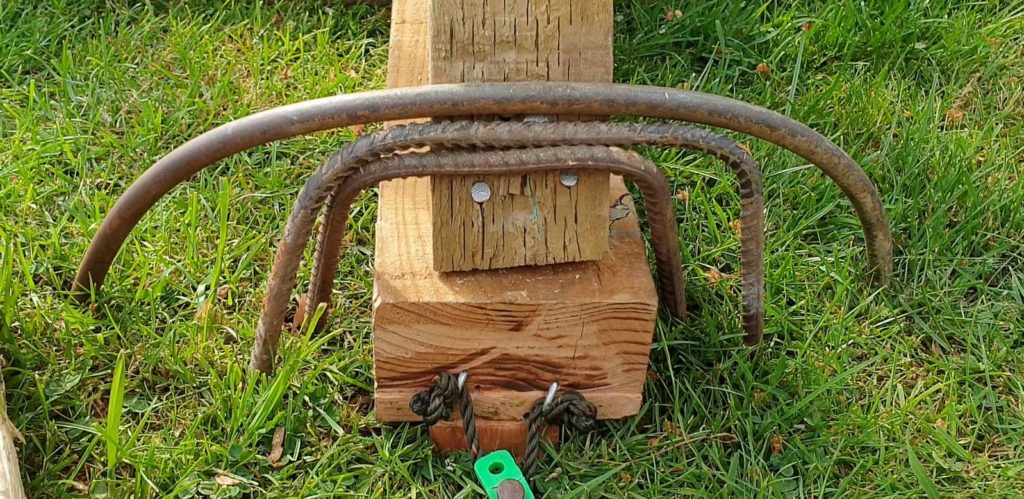
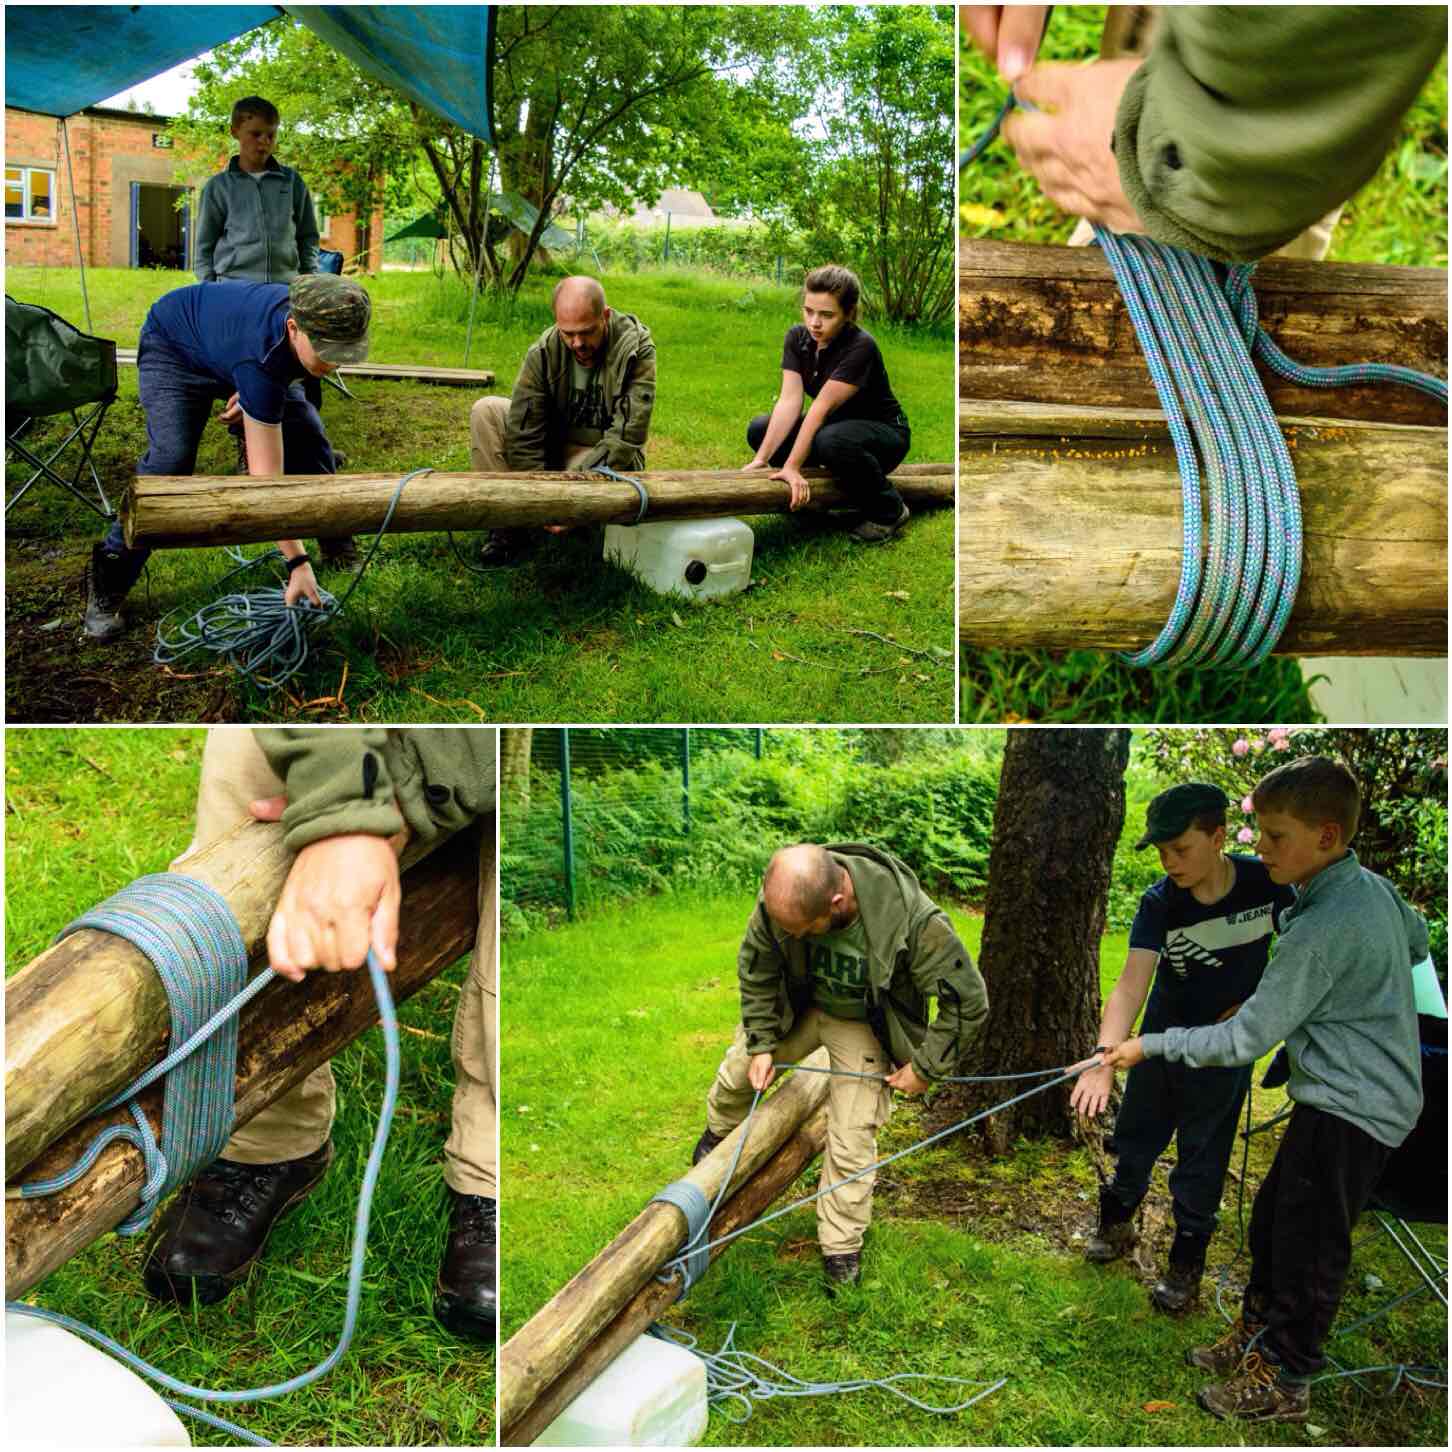
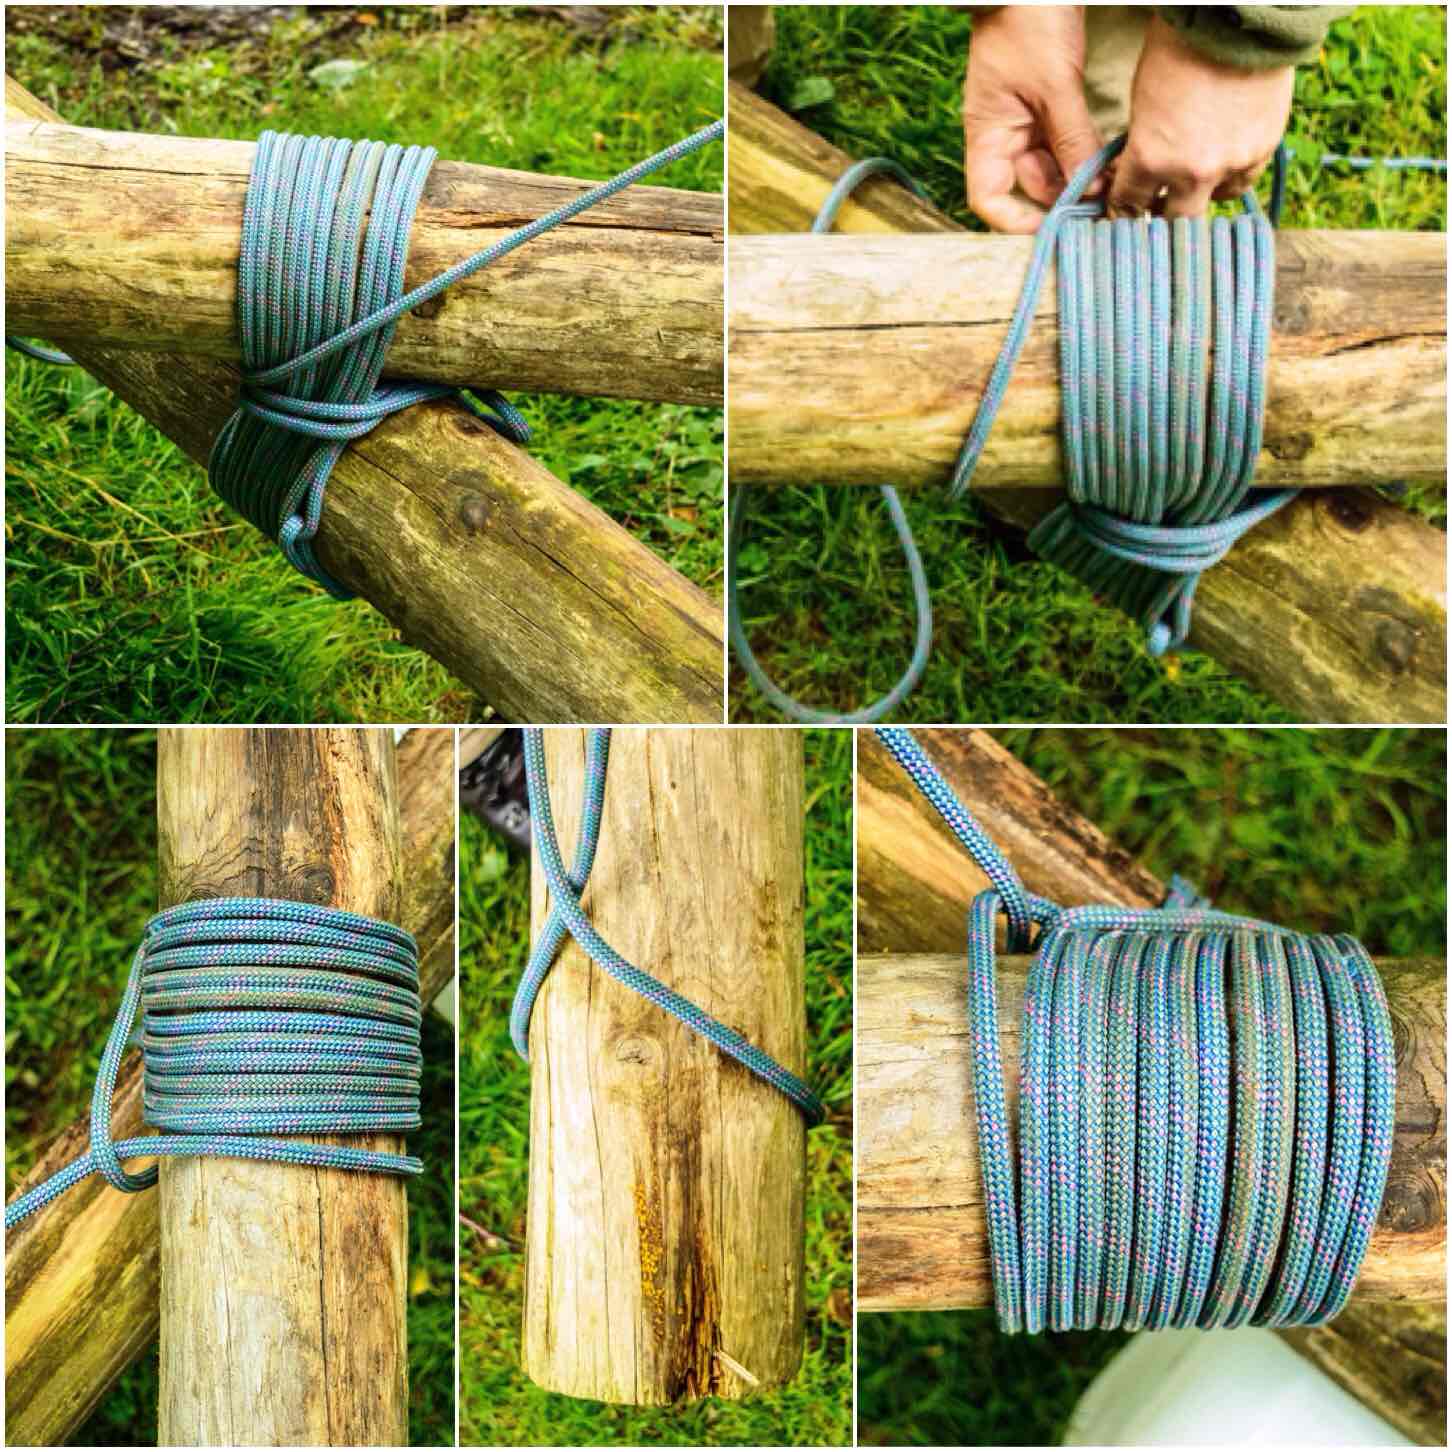
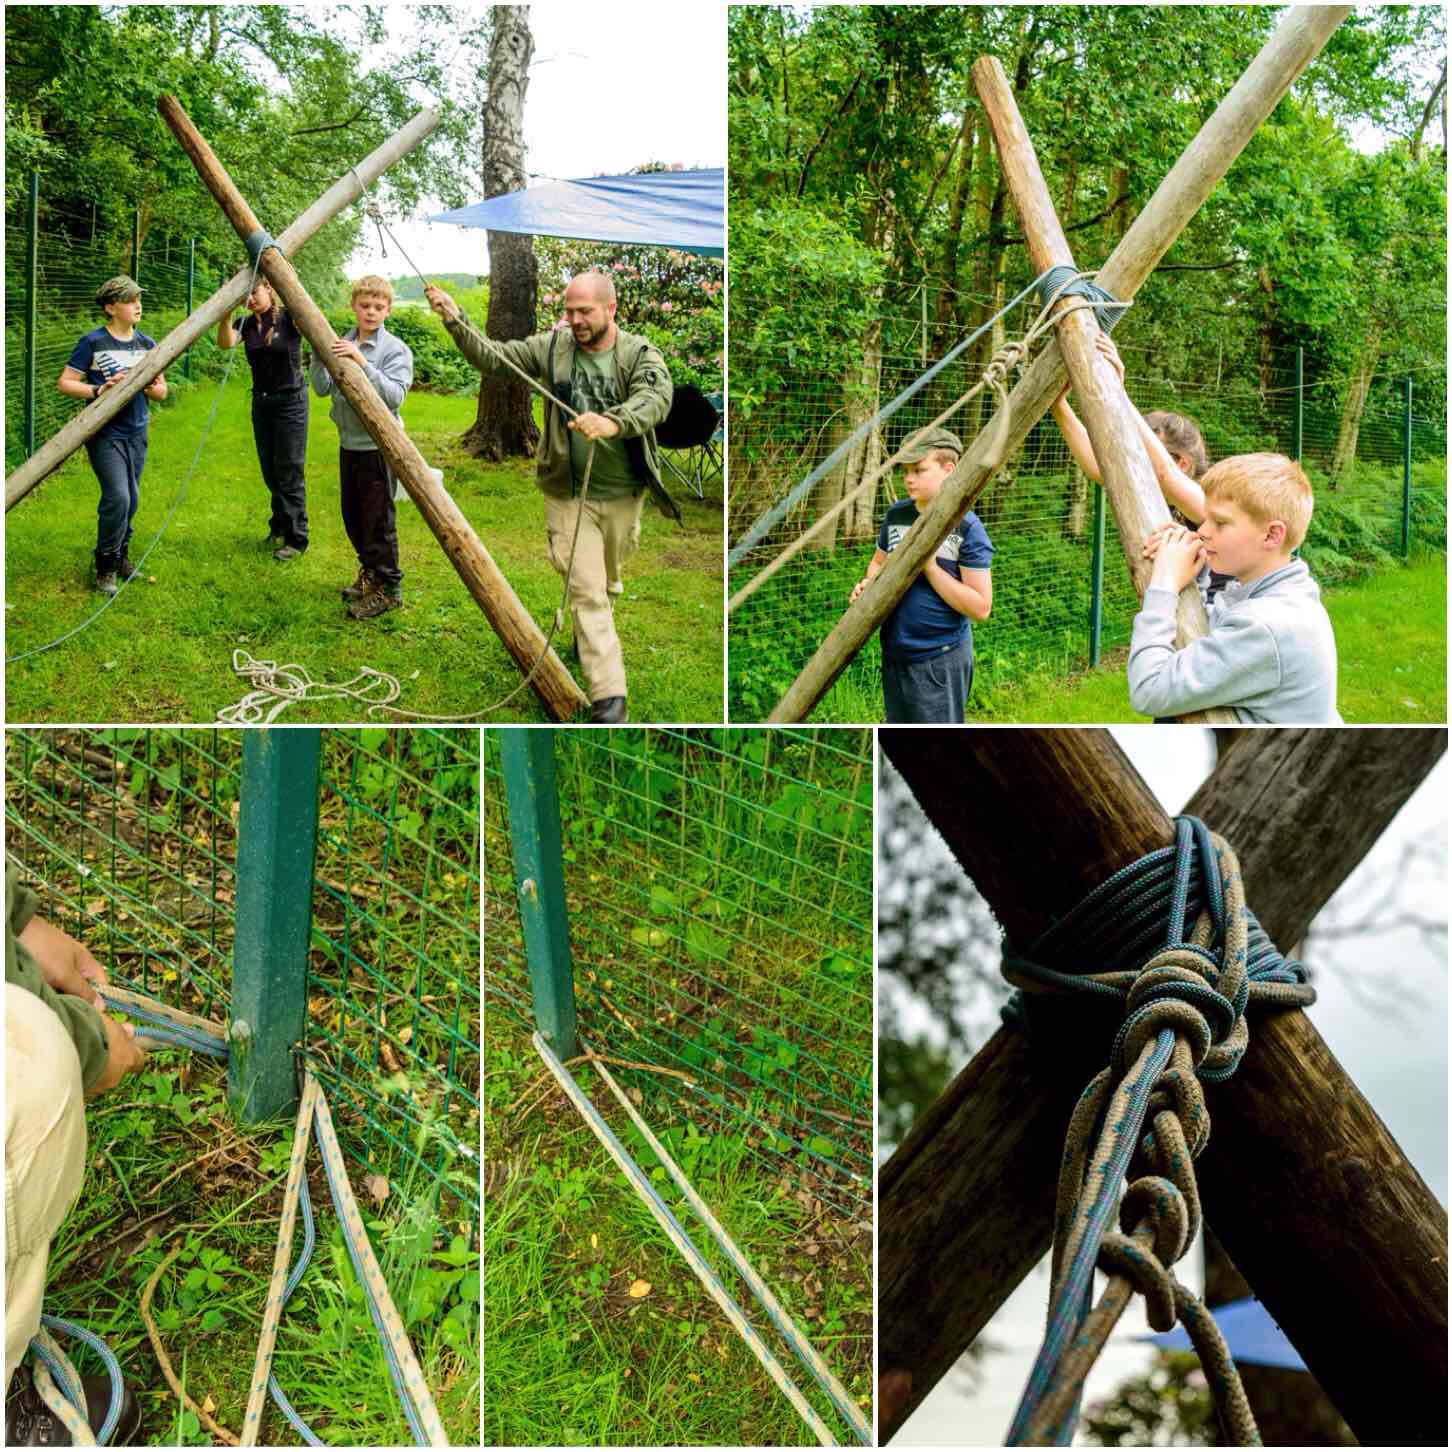
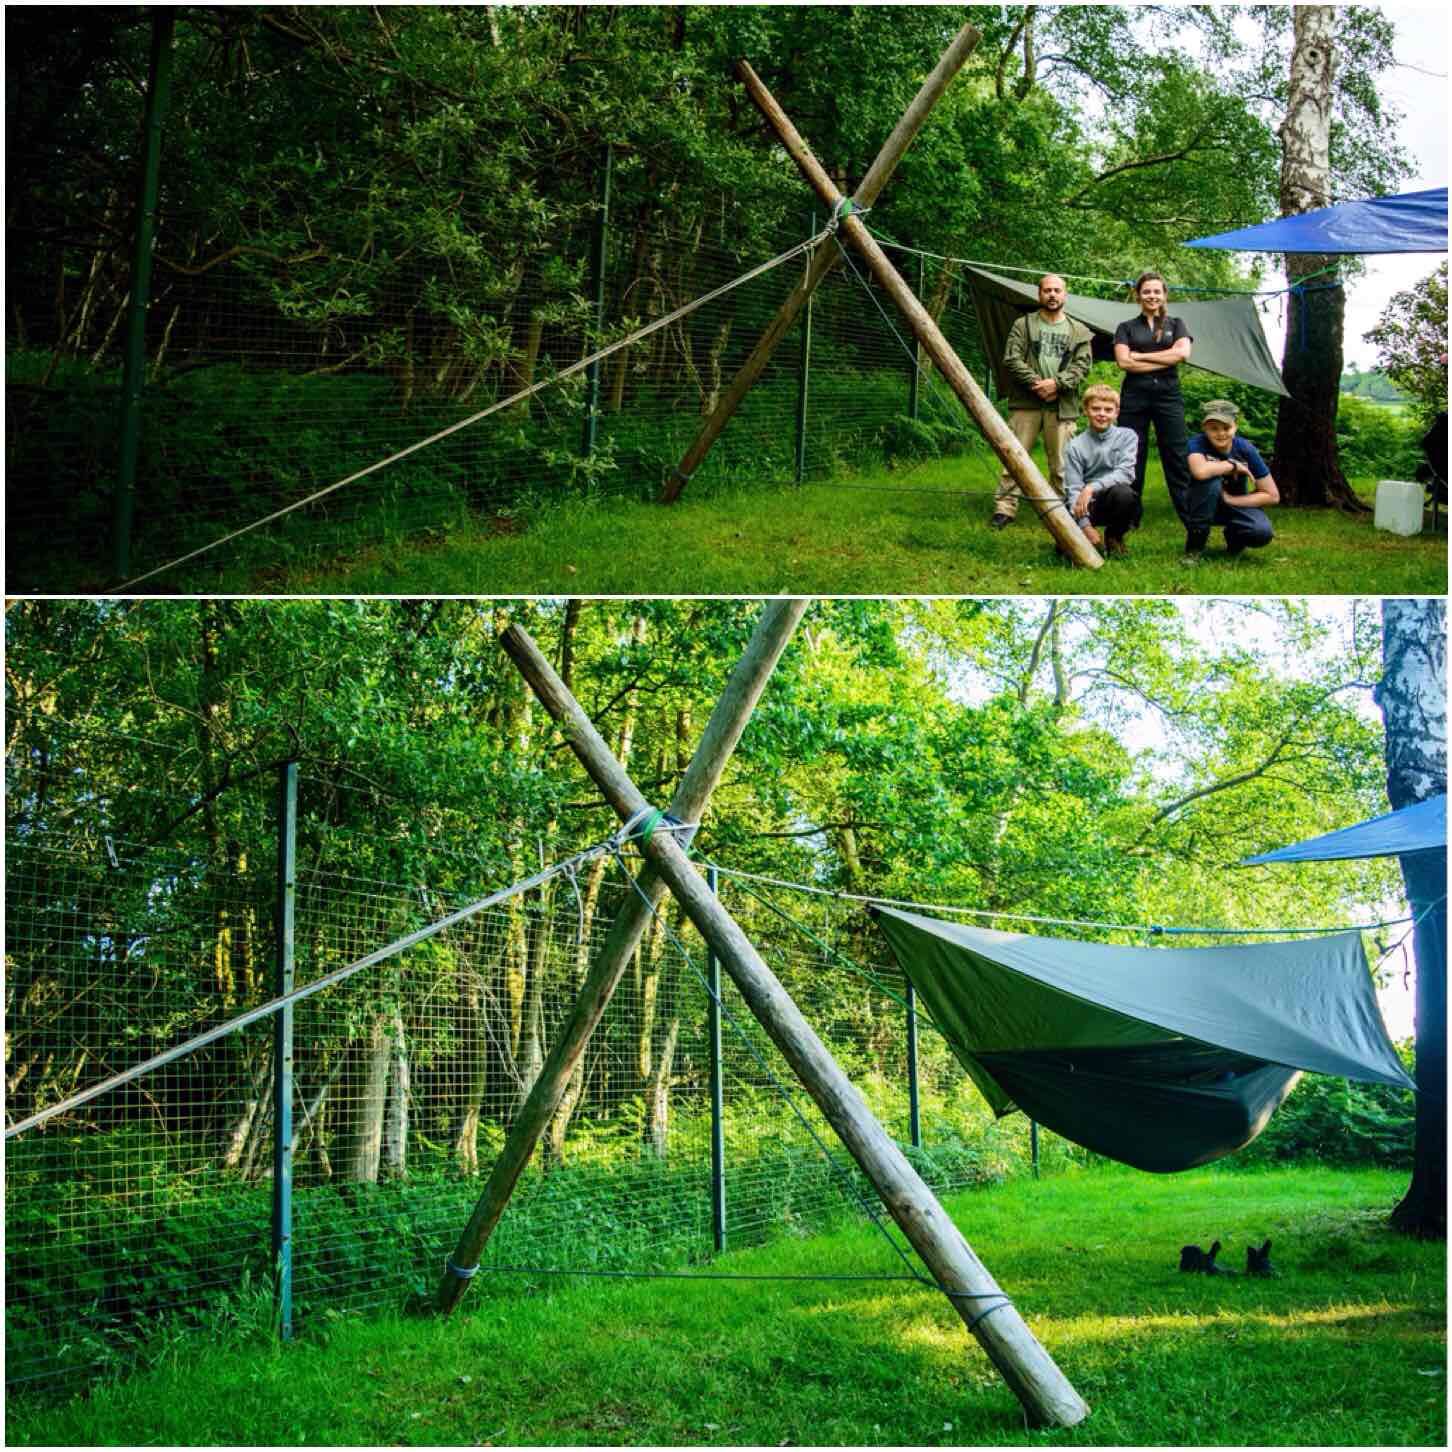
The ‘Hammock Upright’ you can see below is the one I built and it shows it being secured by land anchors. It is not portable (well I can move it around the garden easily) but it is robust. I know that there are ways to make them lighter however I wanted to use the wood I had on hand.
Land Anchor Secured
While making a video on the upright it struck me that iron pins would do the same job as the land anchors.
Iron Pins
So to see how it is all built have a look at my video below.
Cheers, George
Update (02/05/2020) – Brought the two uprights together and used pins on both.
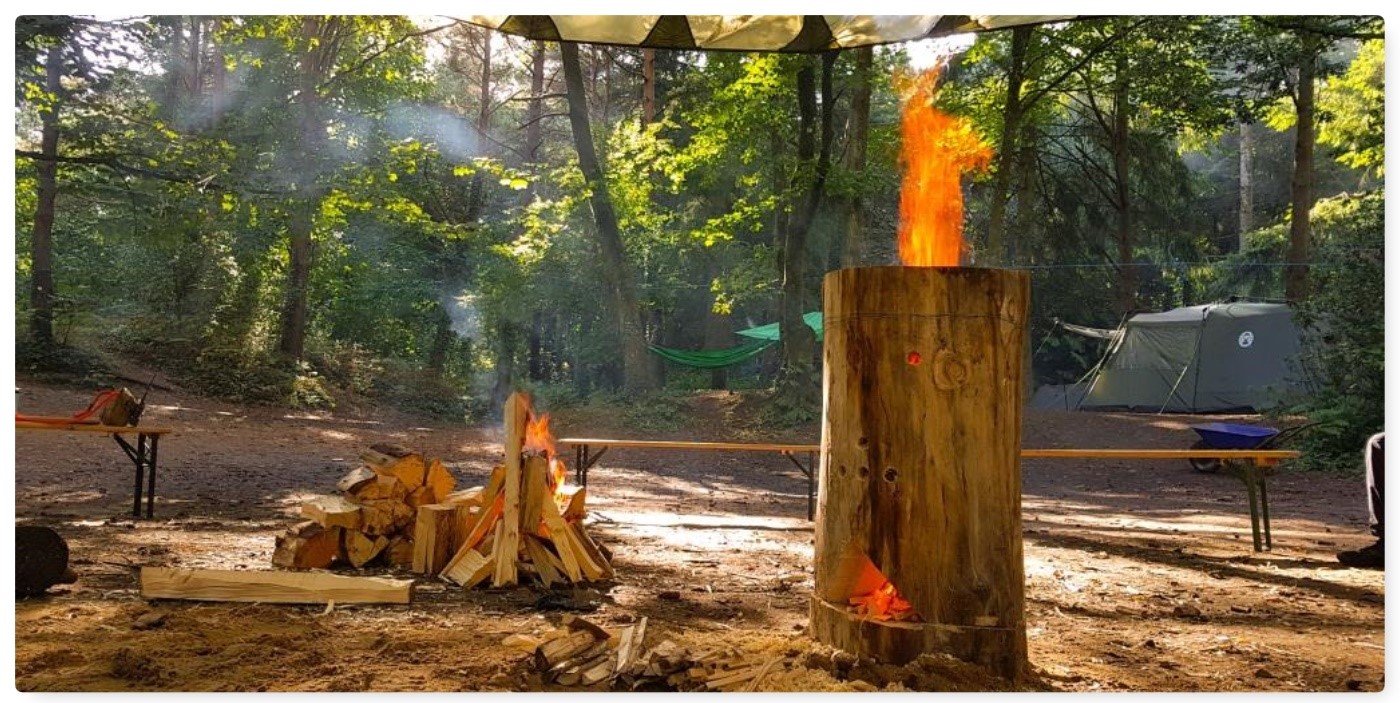
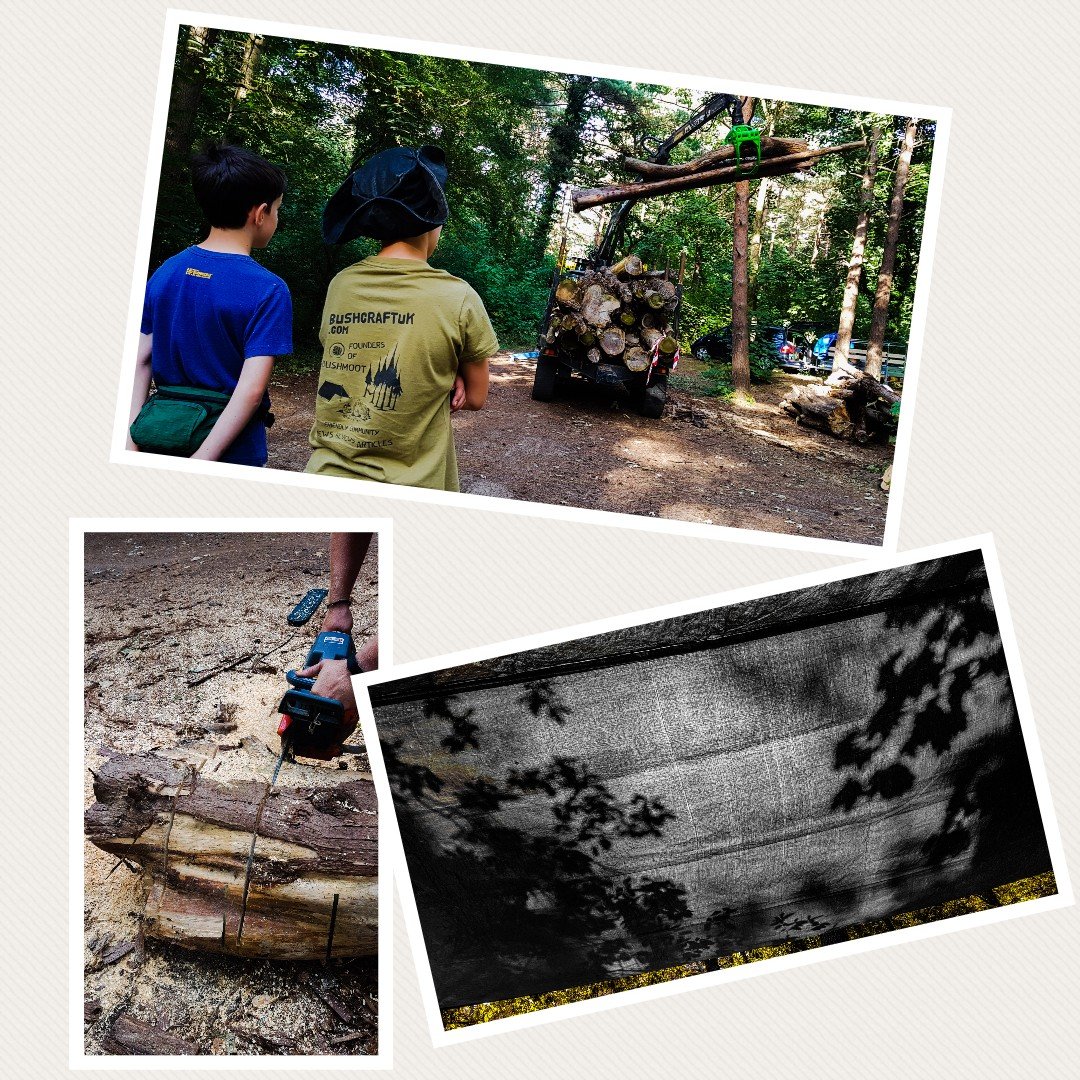
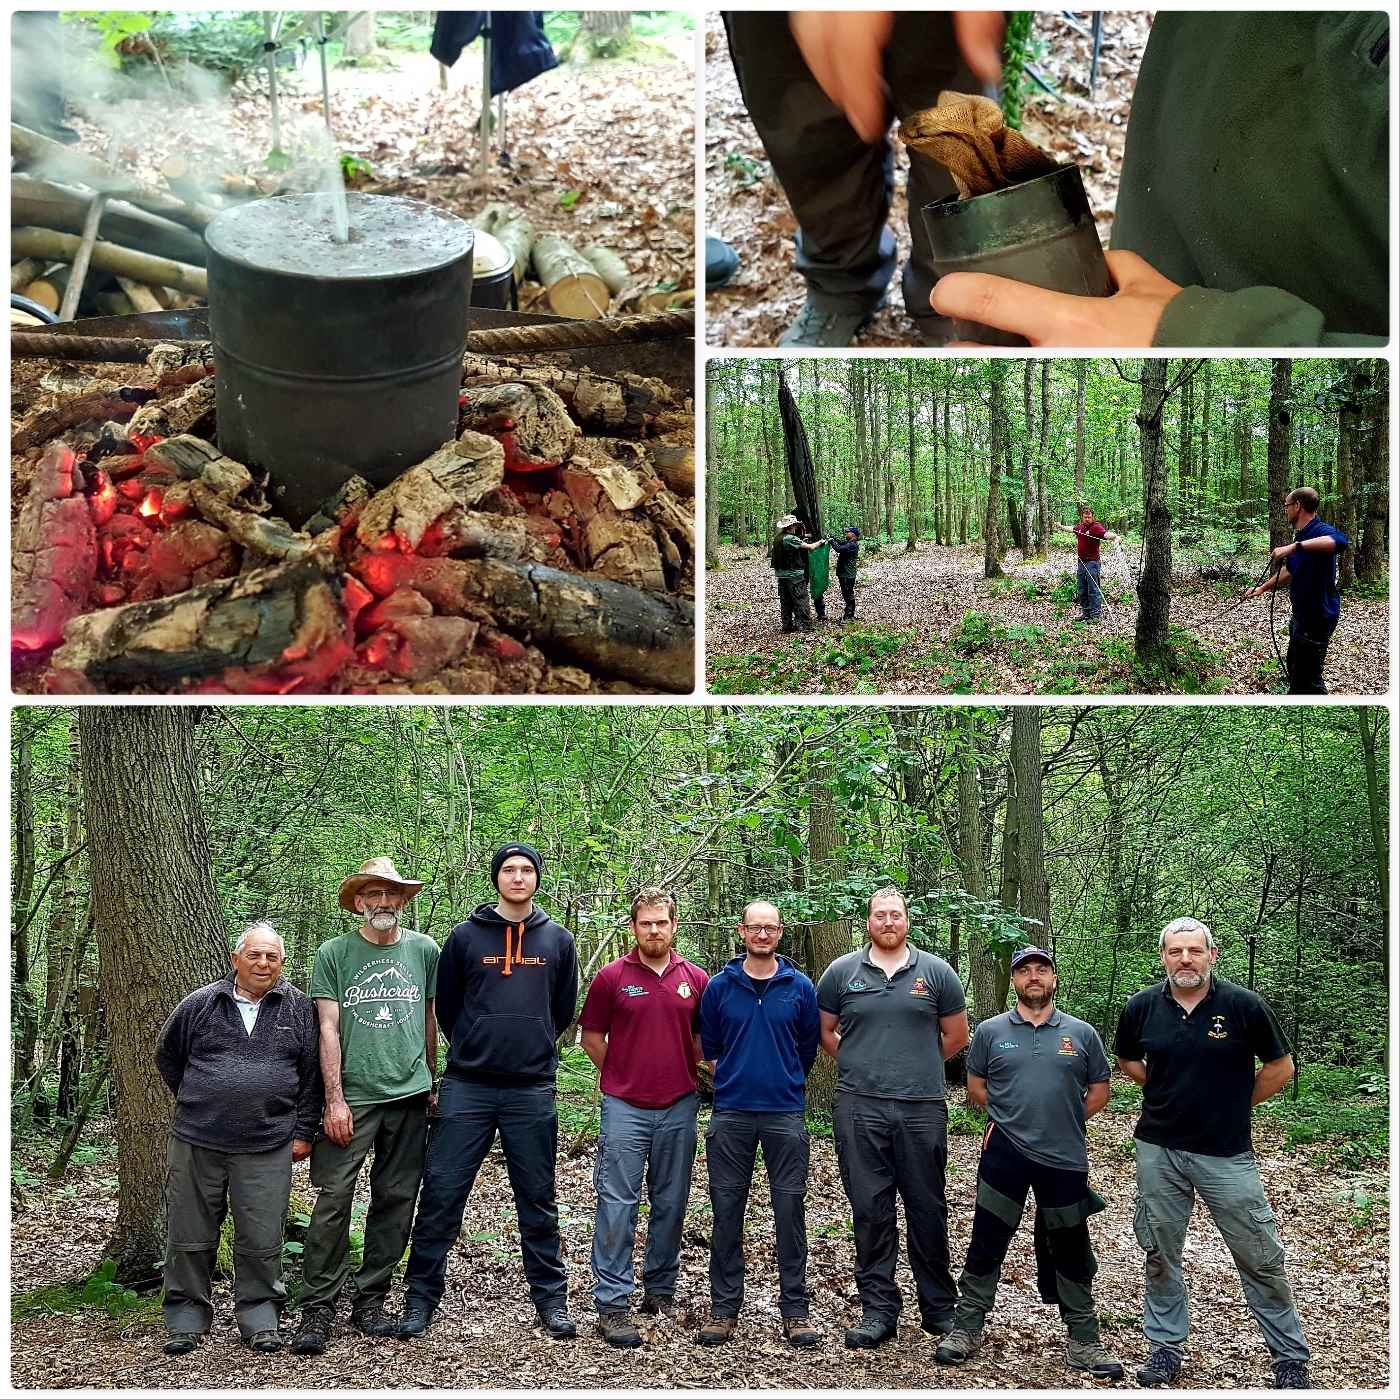
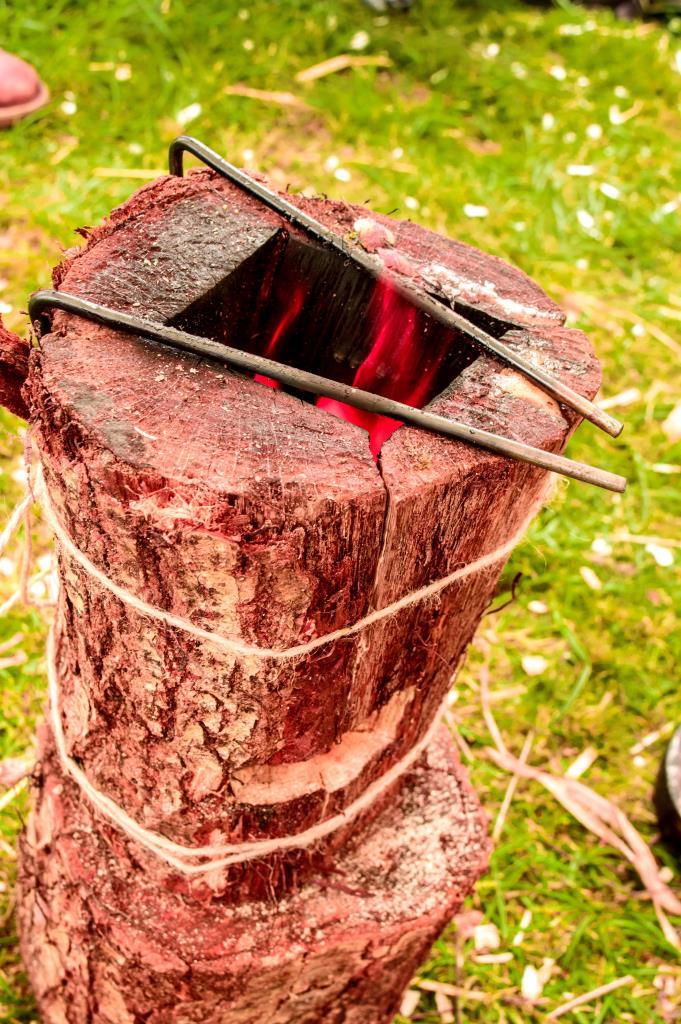
Over the last few years I have written a fair bit about carving Finnish Candles or Log Rockets using just the tools I would carry in my bergen (saws, knives, axes etc) so I thought it was time to see what could be done with a chainsaw.
I decided to opt for the Log Rocket as I thought there has been plenty written about using Finnish Candles (referred to sometimes as Swedish Candles/Torches). At the Bushcraft UK Bushmoot last year I asked my friend Rob Nash if he was willing to carve a large log rocket for me using his chainsaw.
For those of you who just like to watch a short video on its construction here it is – for those of you who prefer detailed instructions there are loads of pictorial steps after the video below.
The Log Rocket
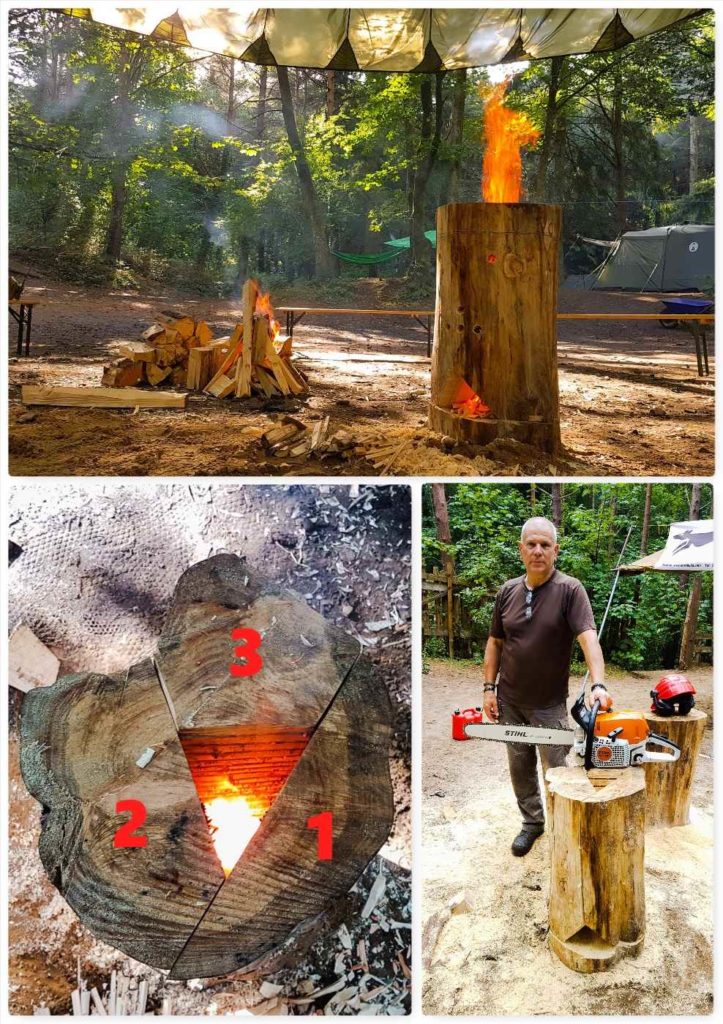
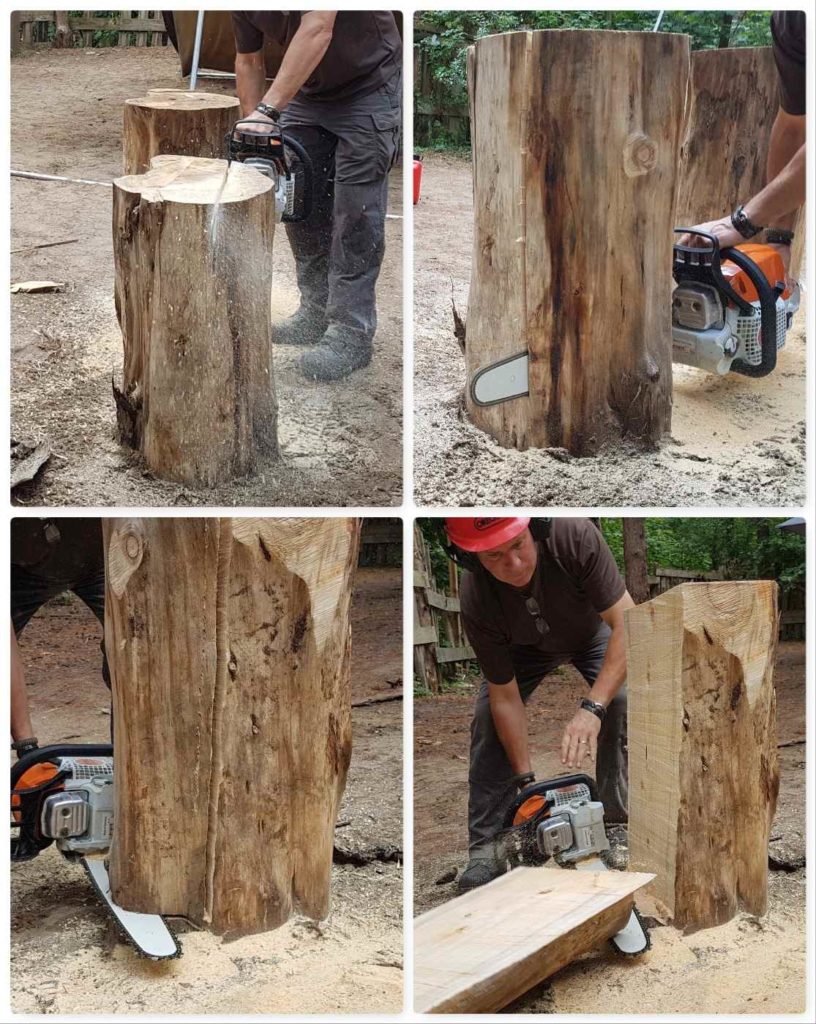
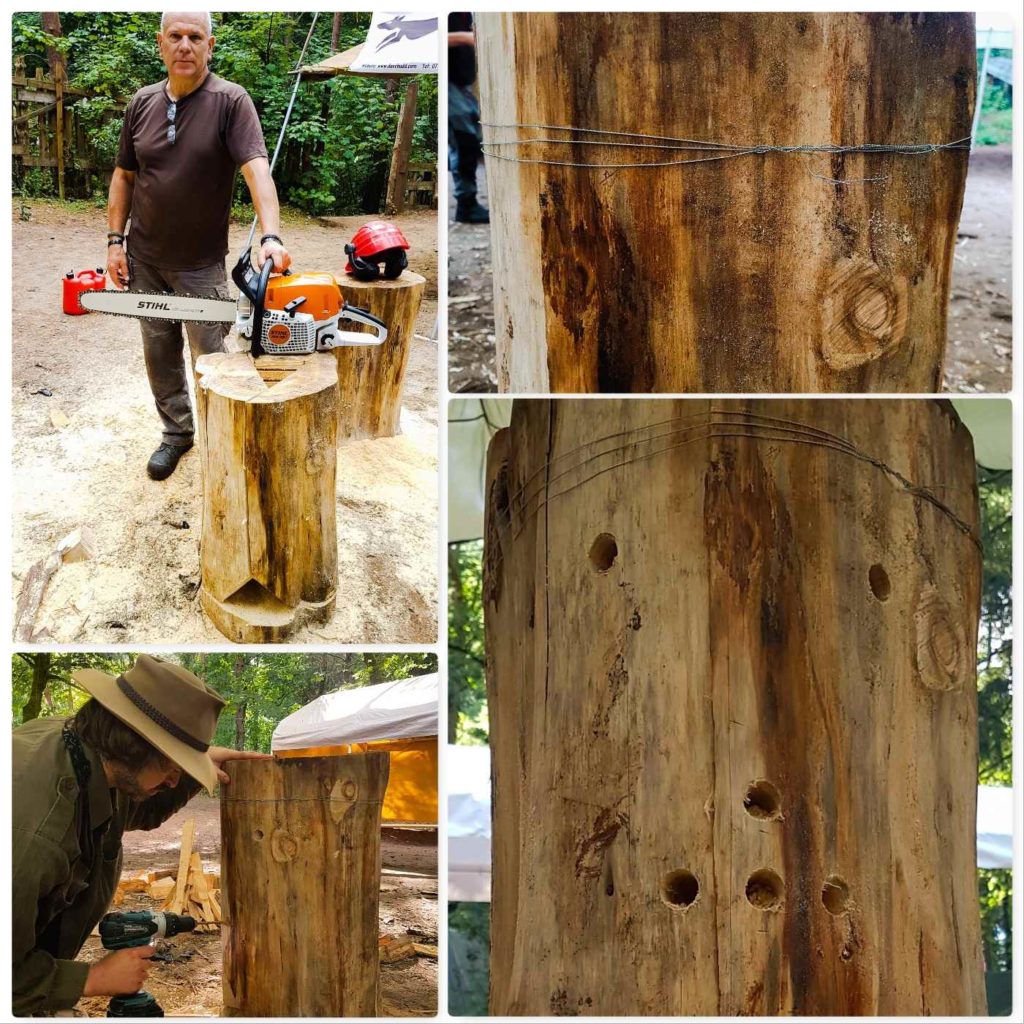
The log rocket worked spectacularly and you can get a sense of scale (forgot to measure it) from the picture of Rob standing next to it.
I chose a large piece of piece of what I think was Spruce (hard to tell when there is no bark and it is seasoned). I will be referring to the 3 parts of the log rocket as you can see in the bottom left picture below.
The Giant Log Rocket
Section 1
Rob took out a slice of the log (approx 1/3 of the log) and stopped the cut about 15 cms from the bottom. Then he cut in from the side at the bottom of the log to remove Section 1.
Cut 1
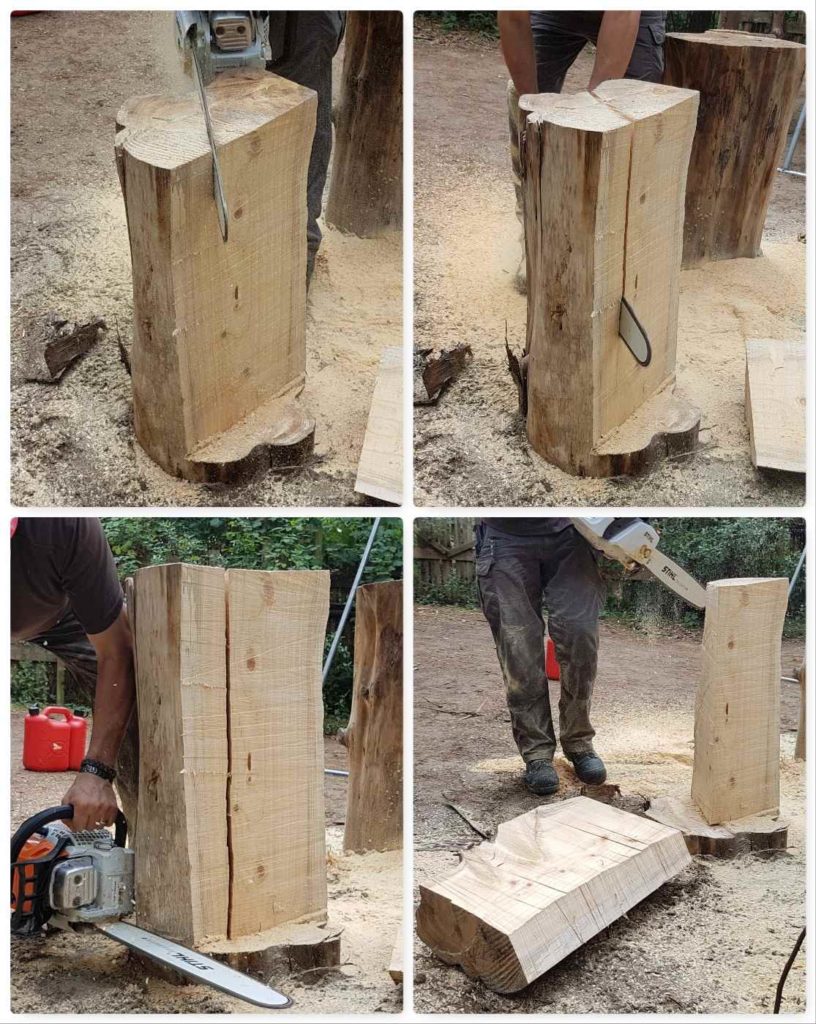
Section 2
To describe this cut is quite difficult so refer to the picture above in which the pieces are numbered. The aim was to leave Section 3 with a point that could be removed to form the chimney. Again it was a case of cutting down to about 15 cms from the bottom and removing section 2 by cutting in from the side.
Cut 2
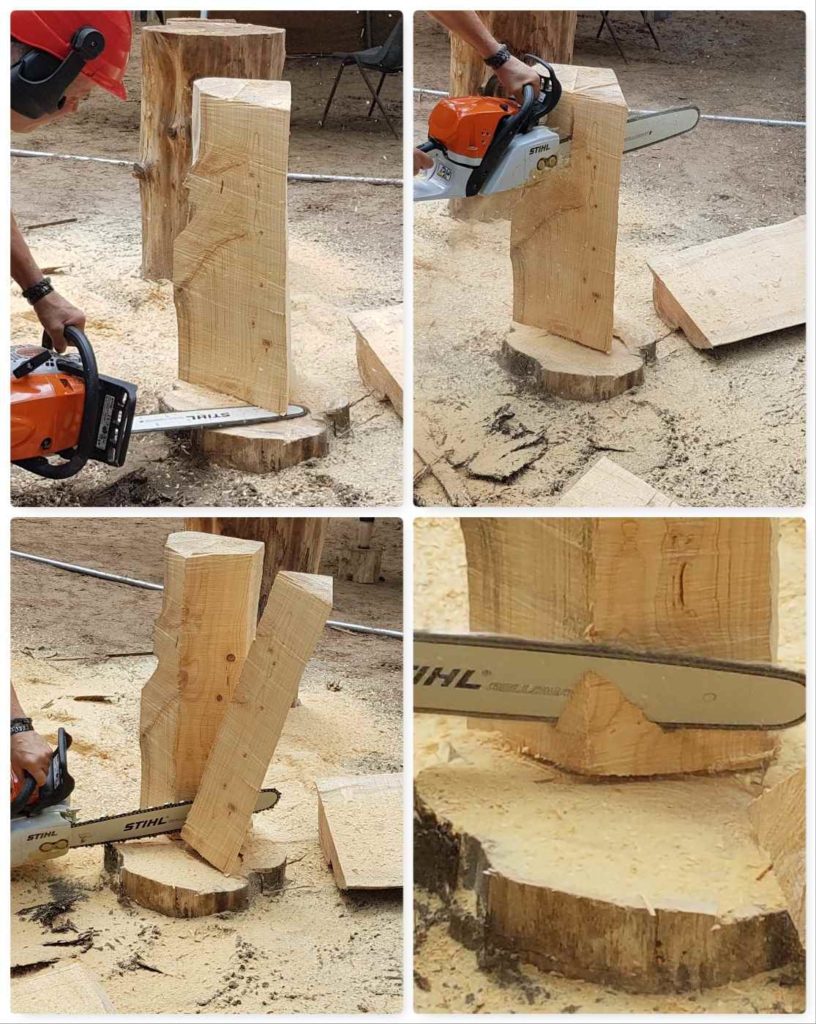
Section 3
You can clearly see the point left on Section 3. Rob made an undercut at the bottom first this time and then removed the ‘Point’. This is the area that would form the chimney. The triangular-shaped piece of wood from the centre point was split down further with an axe to form the kindling to get the log rocket going.
The final step here in the bottom right picture shows Rob cutting out a piece of wood at the bottom of Section 3 to slightly enlarge the ‘firebox’ area.
The chimney
Firebox opening
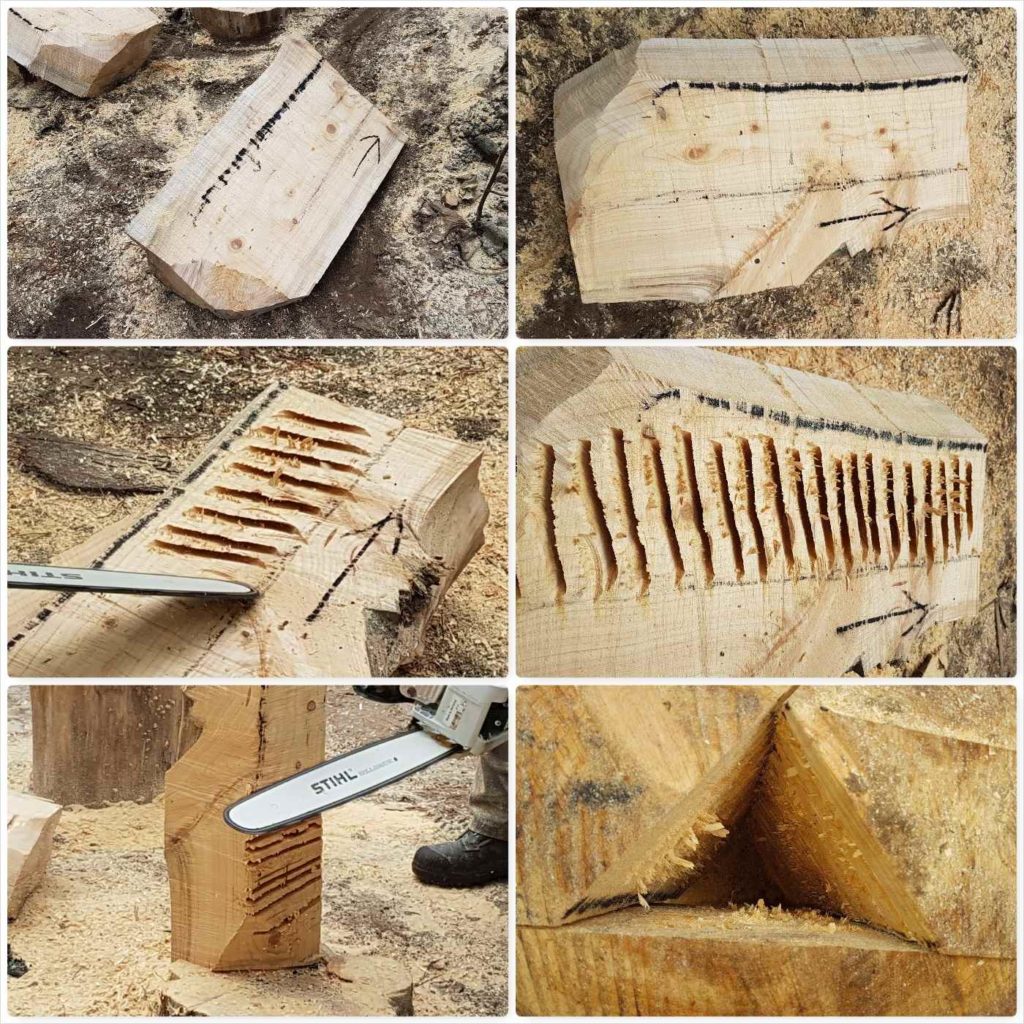
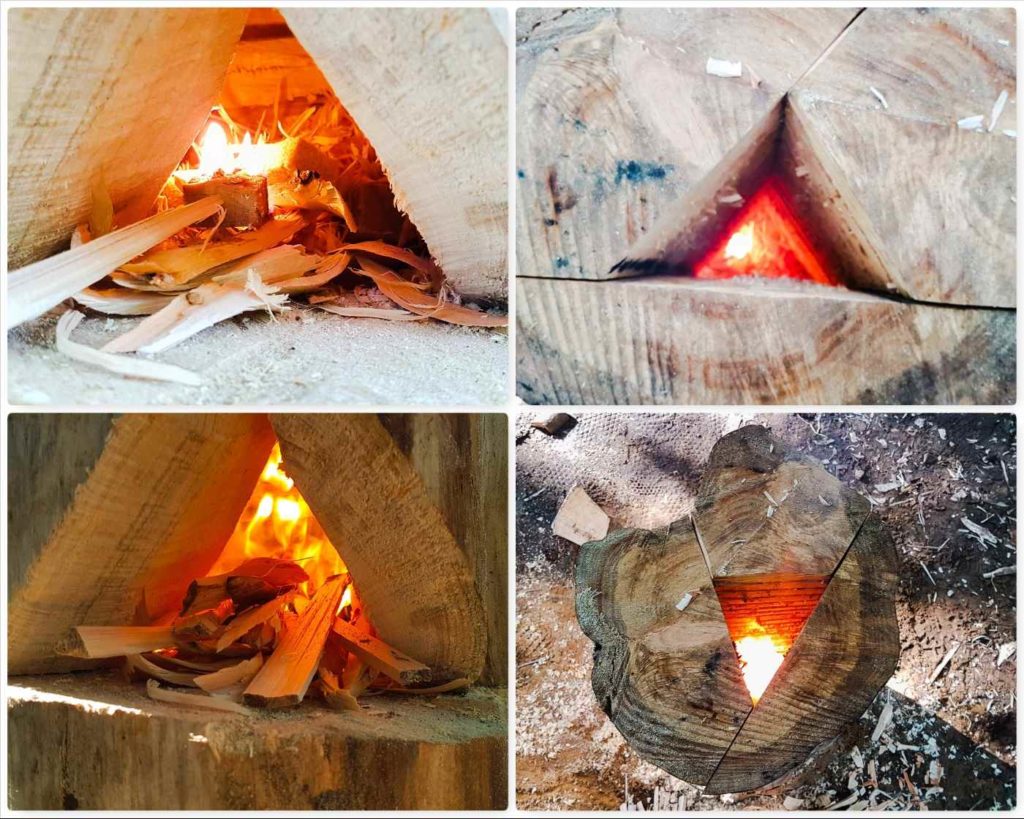
I have shown the final look of the firebox opening in the top left picture below. Rob created this firstly by re-assembling Sections 1 & 2 with Section 3. The he marked the corners of Sections 1 & 2 that needed cutting to form the firebox opening (that might sound overly complicated, but it’s important if you’re not to cut the wrong corners).
Once he’d cut off the corners he shaved off more wood from the ‘Shoulder’ of the opening so as to enlarge the firebox area.
The Firebox
The Raappanan Tuli cuts
To increase the surface area of the chimney and help the log catch light more quickly I asked Rob to makes some cuts in the flue area. I got this idea from researching different types of log fires – this style of cut comes from the Raappanan Tuli log fire.
These cuts are particularly useful when you have a damp log as the increased surface area greatly increases the chances of the fire taking properly.
Ribbing the chimney
Final touches
I used strong wire to hold all the pieces of the reassembled log together – an alternative would have been to make some dovetail joints and join them together with green wood pegs – see here for more details – How To…. Build a Dovetail Log Rocket Stove.
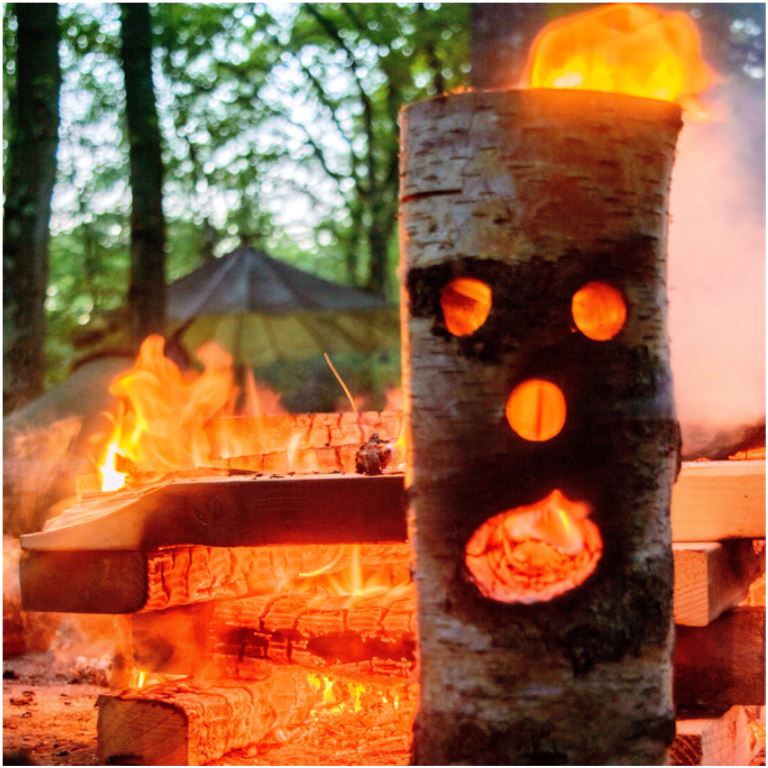
Finally my friend Mark used his drill to give the log rocket a face (which also helped provide a bit more ventilation).
Final touches
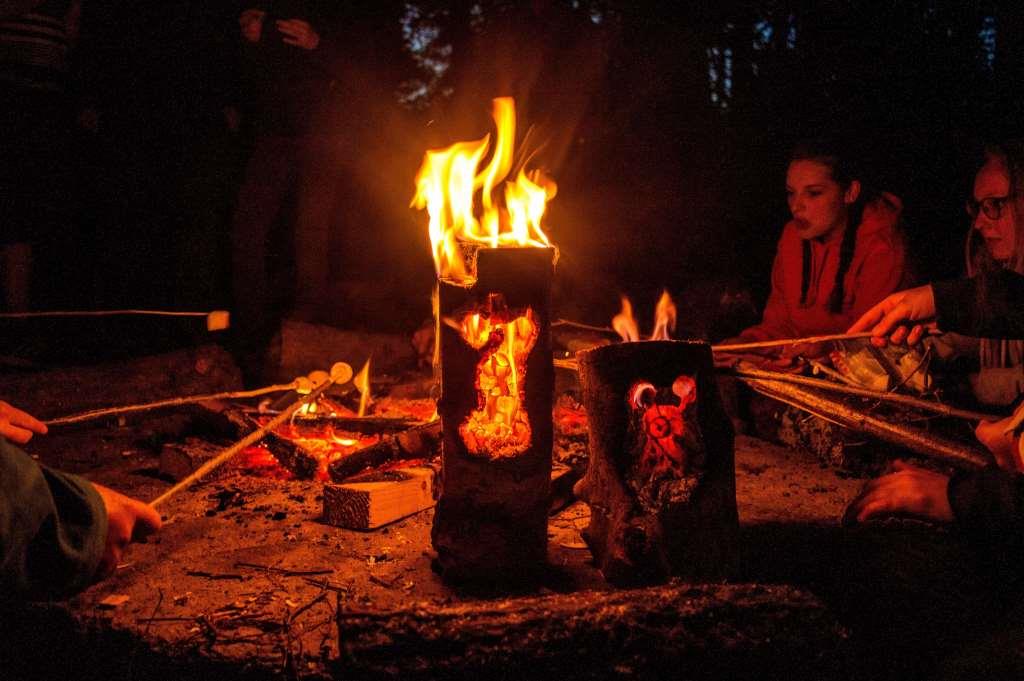
Firing up
I used slivers of the central section Rob had cut out of the log as kindling and lit it all with a lollistick lighter (a firelighter pierced on a sharp stick – have a look here – Lolli Stick Fire).
Firing up
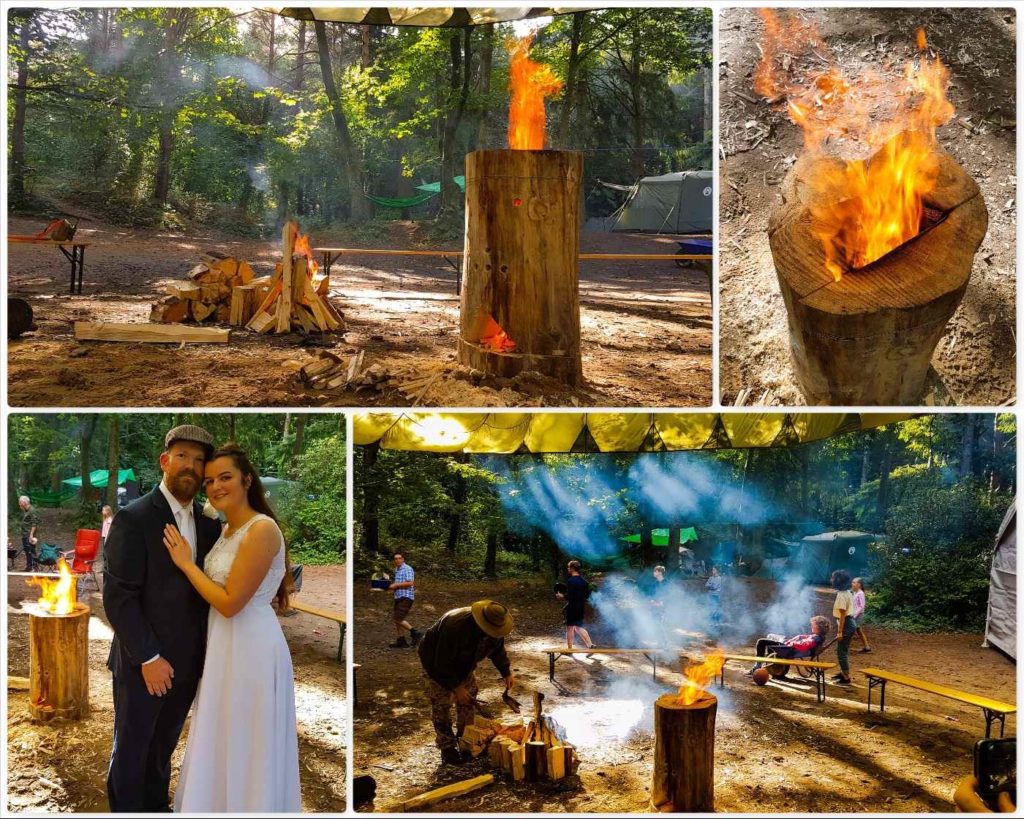
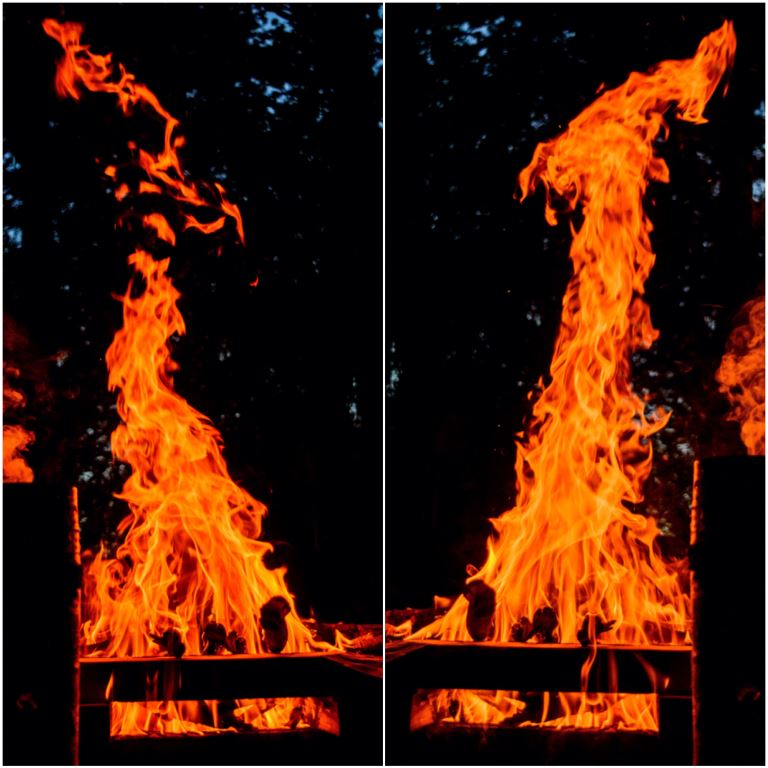
Party time
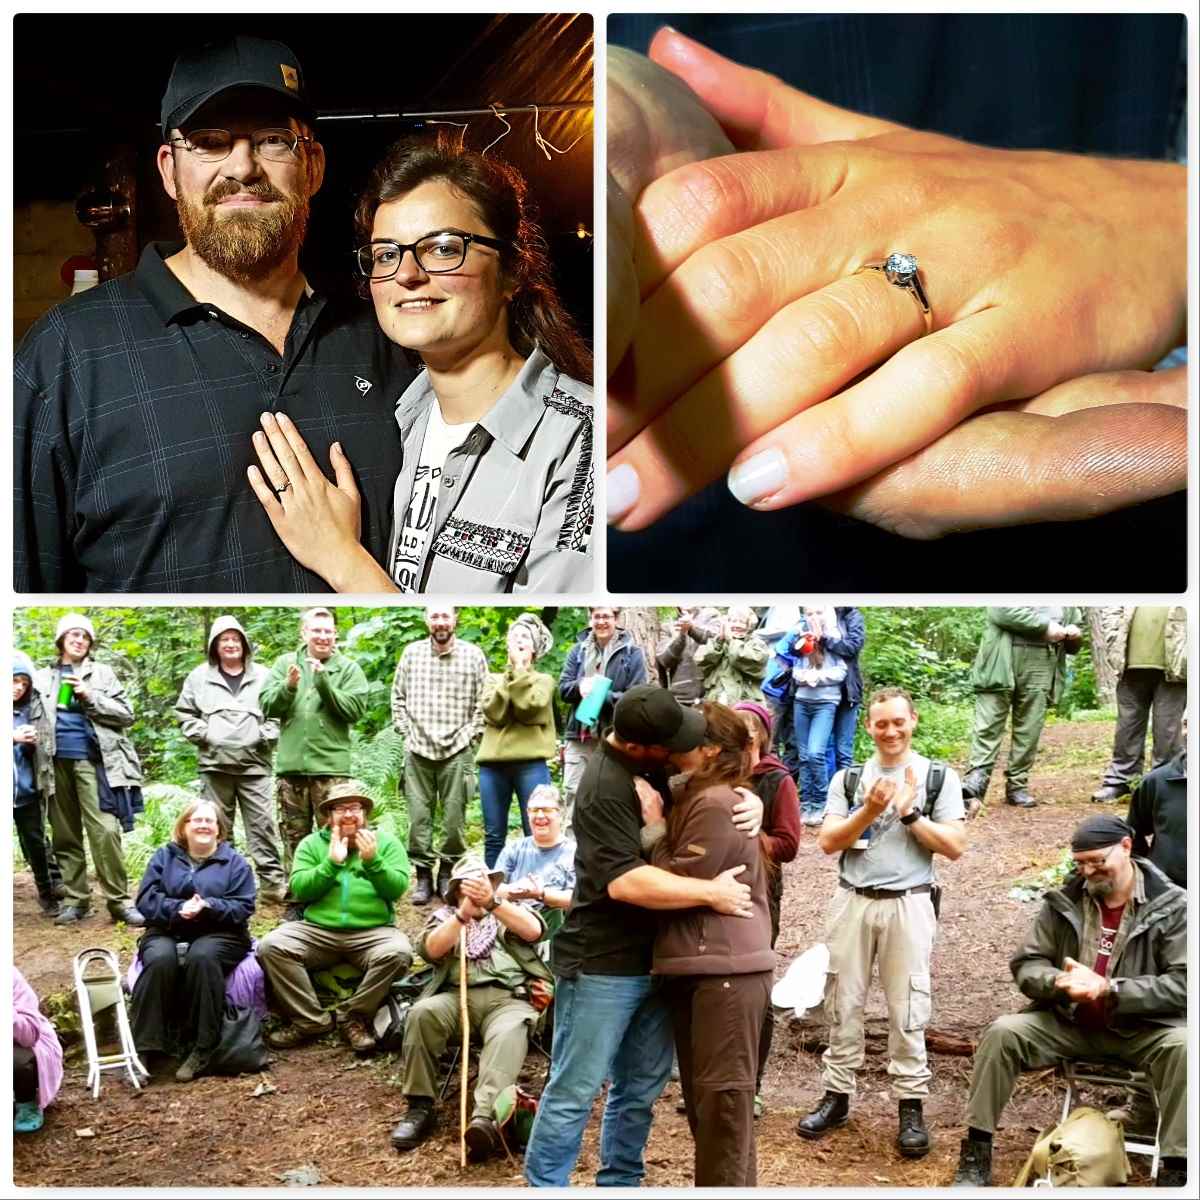
The log rocket was a stunning central feature for everyone to sit around in the evening and we even used it as a backdrop in a wedding photo (Magdalena and Phil renewed their vows at the Bushmoot).
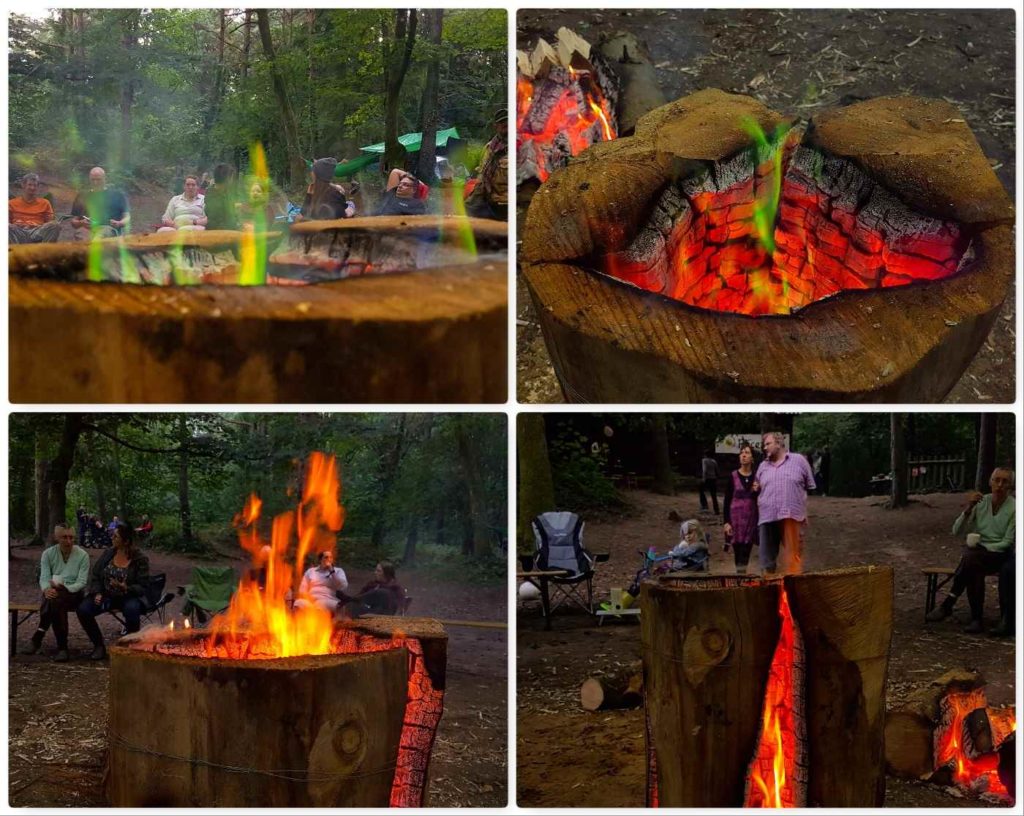
Why it is called a Log Rocket
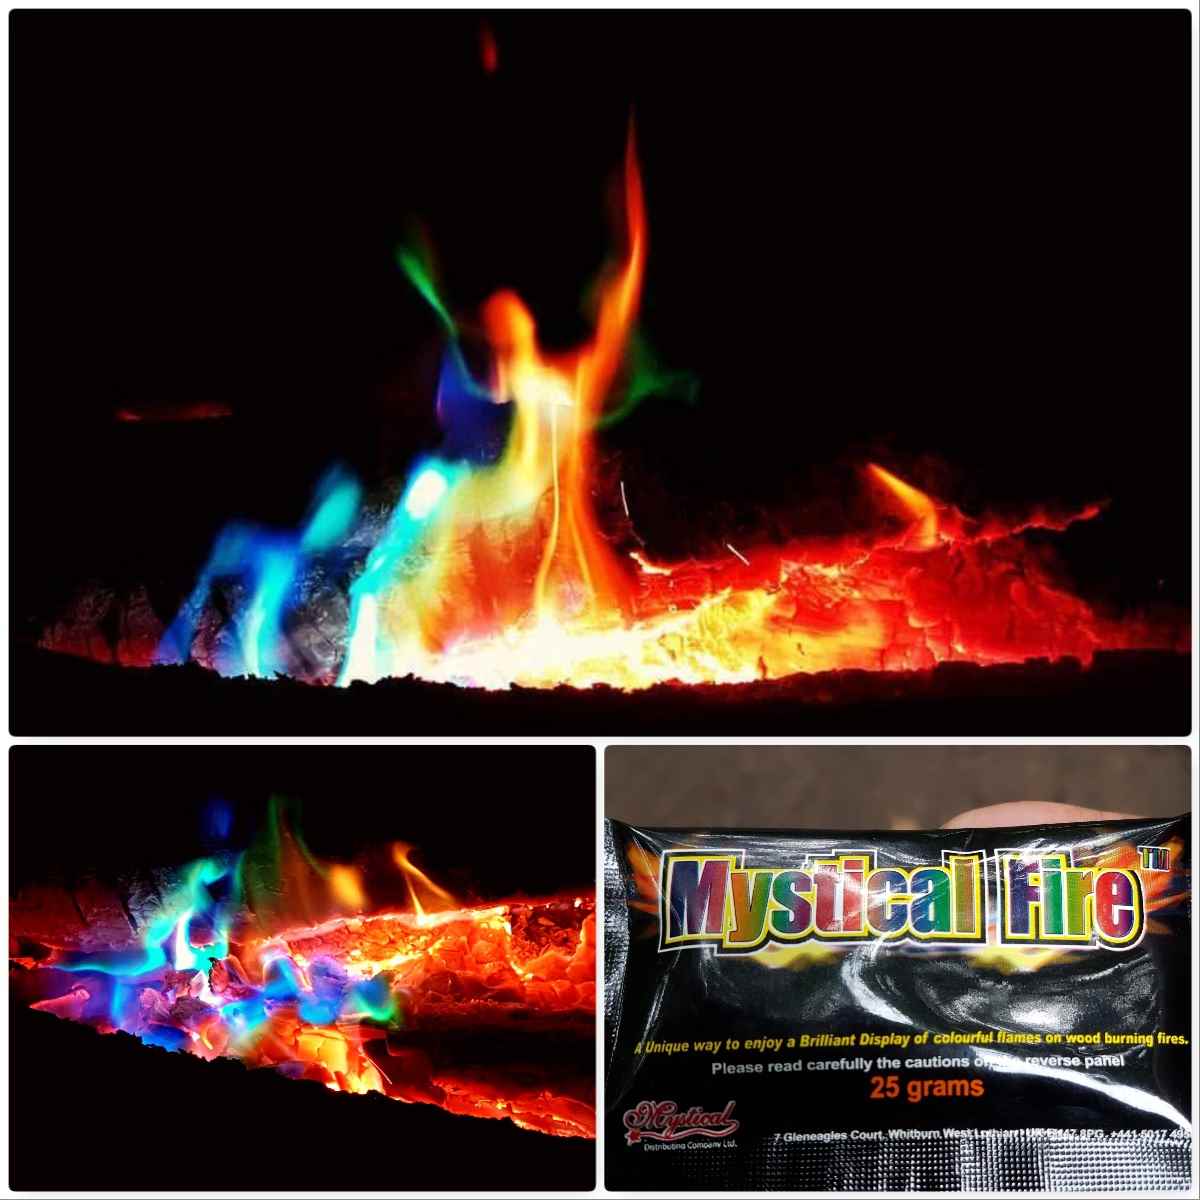
We even added a little bit of Cap’n Badger’s magic Rainbow dust to ‘mix the colours up’ a bit.
Some Magic Dust
When I looked at the log rocket the next day (over 14 hours after it was lit) the base was just a mass of burning embers – quite a log rocket, I would say.
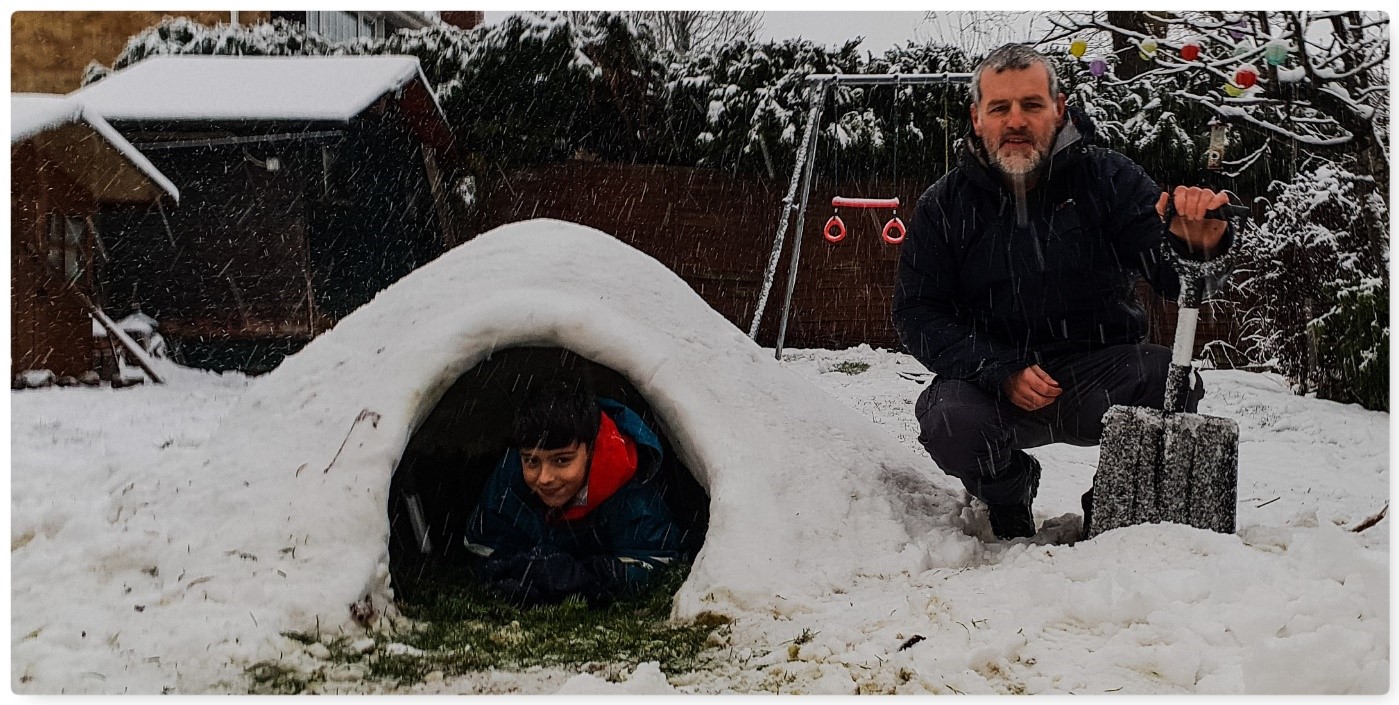
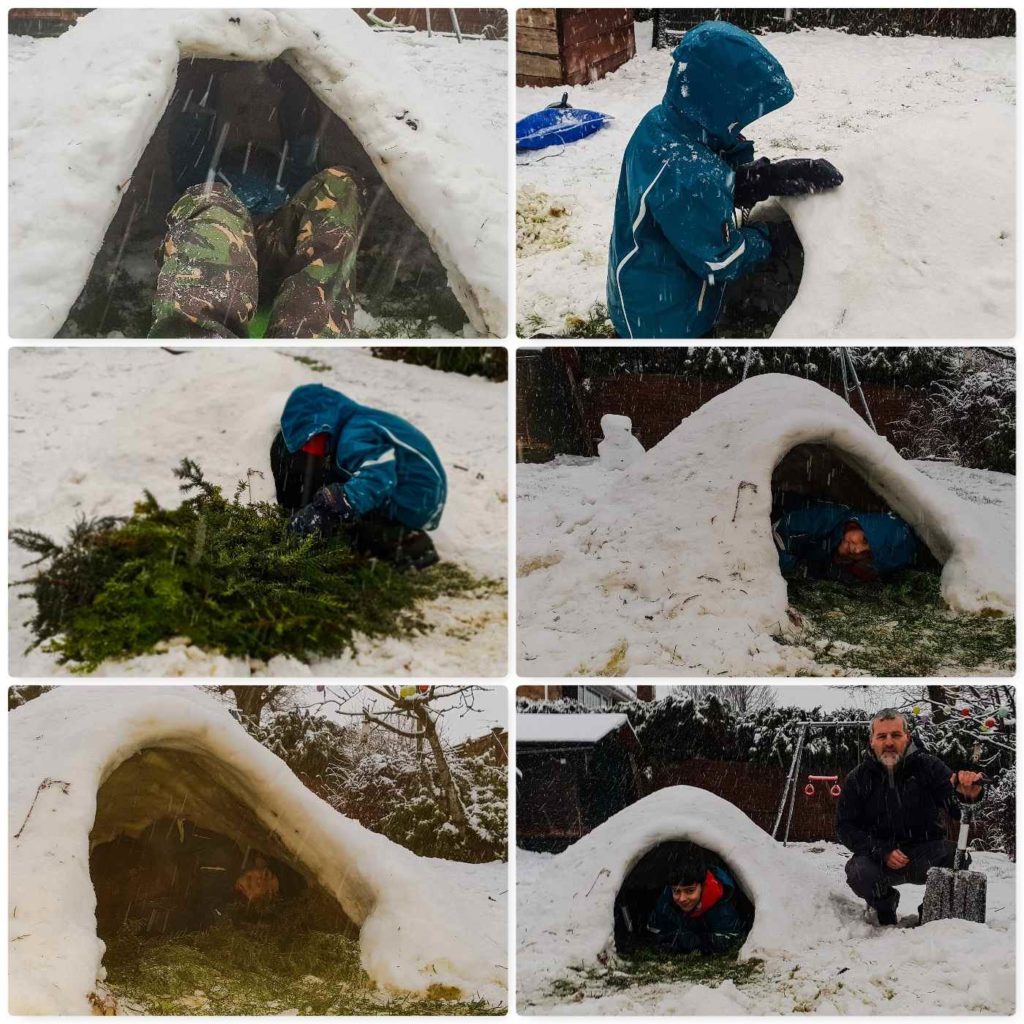
With the fair bit of snow we had last Friday here in Hampshire I decided to get out and have a bit of fun in our garden with my lad Finlay. We decided to build ourselves a little Quinzee snow shelter. We had built one years ago and Finlay wanted to see if he could remember all the steps.
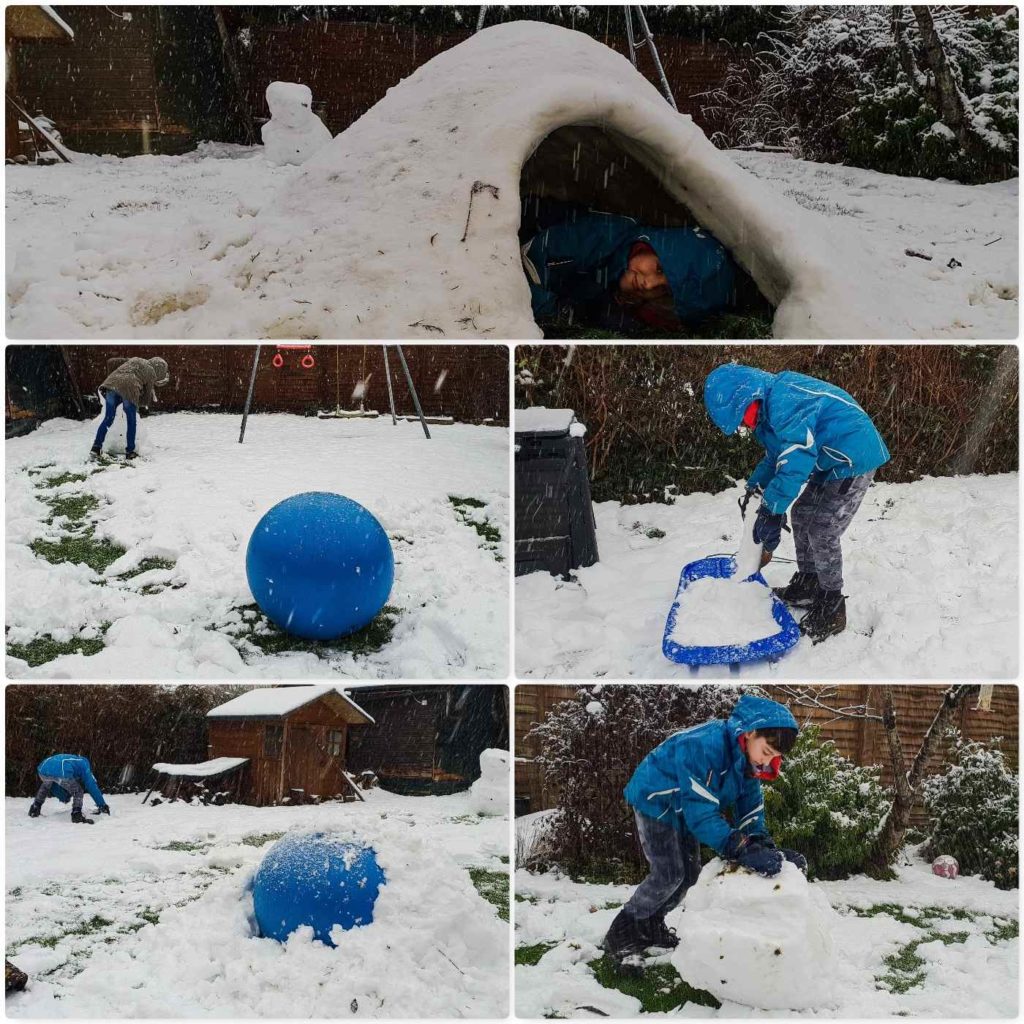
The snow was coming down fast however we did not think we had enough snow to make a massive pile. Normally I would pile rucksacks, brash, logs or rocks into a pile, cover it in snow, pack it down and then pull out everything from the centre from what would become the door – we did not have anything like that so we managed to beg the use of my wife Alison’s pilates ball – did the job 🙂 Granted I would not have the ball out on a trip but needs must and all that – you decide what you want to put in the centre of your Quinzee (saves digging out a lot of snow as well).
We tried lots of different methods of collecting snow, from using a spade, the sledge, the rake and rolling up massive snowballs. They all worked to different degrees however the giant snowballs were pretty efficient.
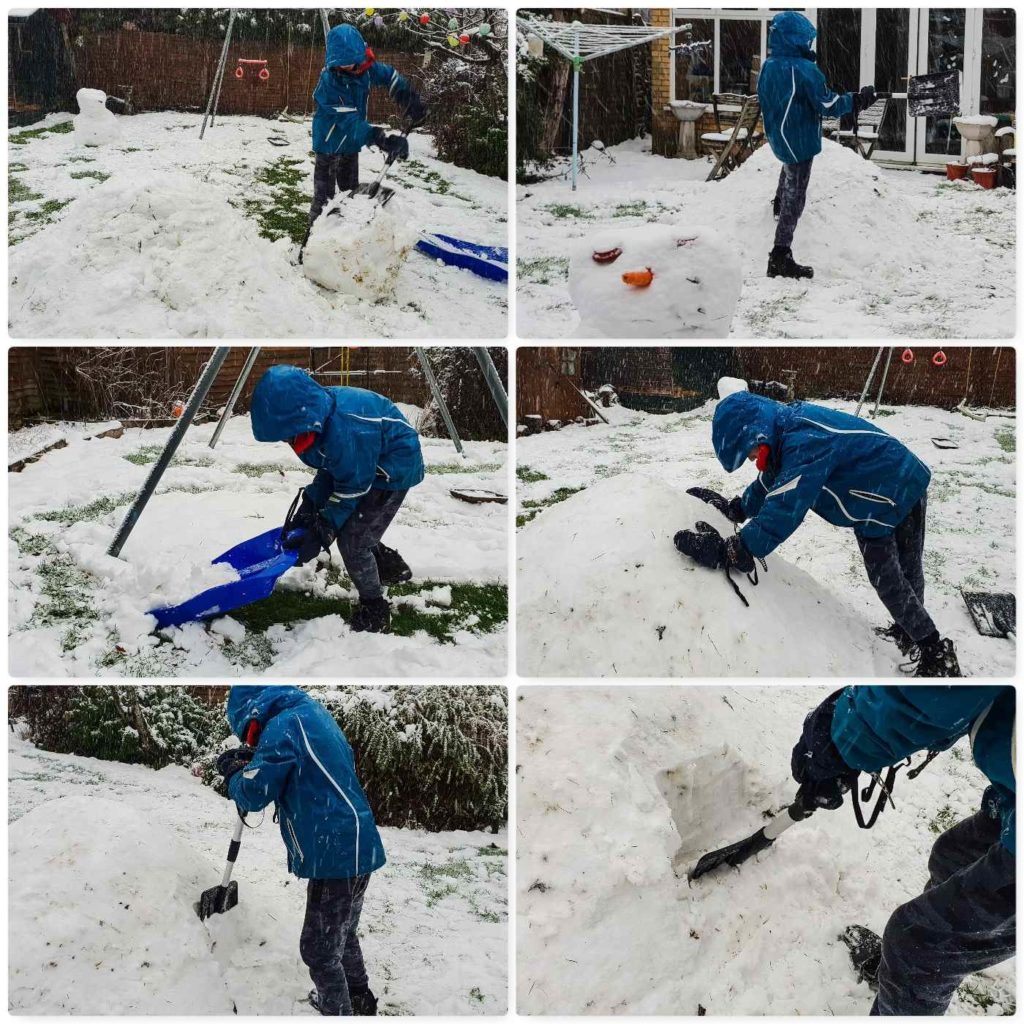
Once we had collected enough snow we used the spade to pack the snow down really well and smoothed the whole thing down with our hands.
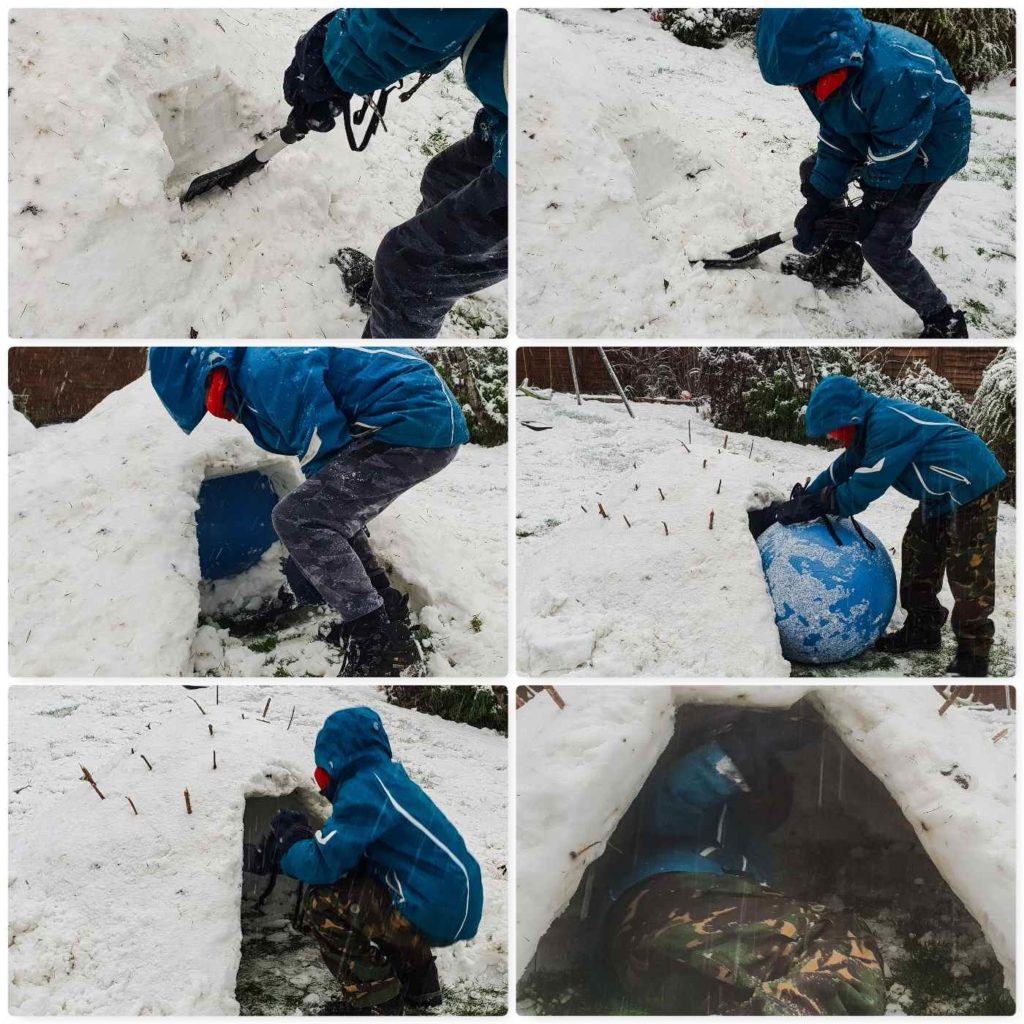
Both Finlay and myself took it in turns to dig out the ball – it did not take long and as the snow was well packed it did not destroy the walls of the doorway as it came out. At this stage I would normally be pulling out the rucksacks, rocks etc.
I also pushed a lot of twigs into the top of the Quinzee where it was thinnest to a depth of about 10cm’s. These twigs are a safeguard for when you dig out more snow from the middle.
Once insided we had plenty of room to enlarge the shelter. We used our snow shovel but I have done this with just a piece of wood before. As soon as a twig appeared we left that area alone and carried out excavating elsewhere. Soon we had a space big enough that either of us could curl up in. I do not like to make these Quinzees to large as a small space is easier to keep warm than a large one is.
Finlay finished the Quinzee off by smoothing off the inside walls with his hands, making the entrance smaller and lining it with conifer branches.
All the snow is melting now (48 hrs since we built it) however it is still standing and looking good. We could have spent a little while longer making the doorway smaller however hot chocolate was calling and we took our final snap and headed indoors.
It was a good project to work on with Finlay (some good Father and Son time) and I was proud to see that he stuck it out in some heavy snow conditions to the end.
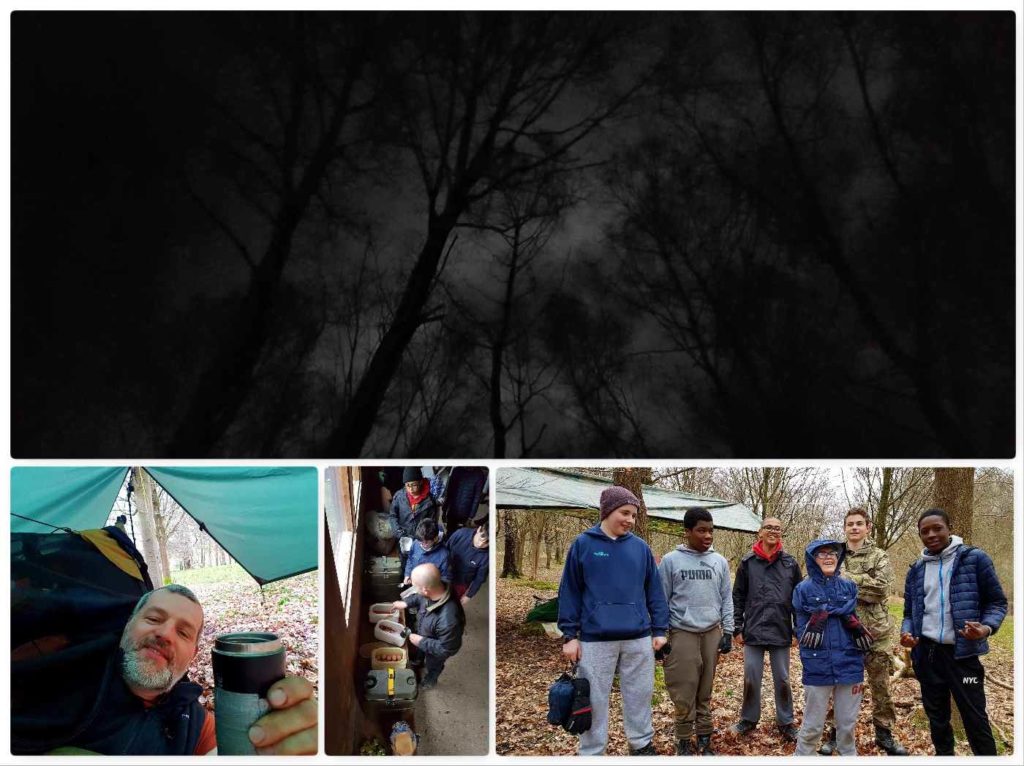
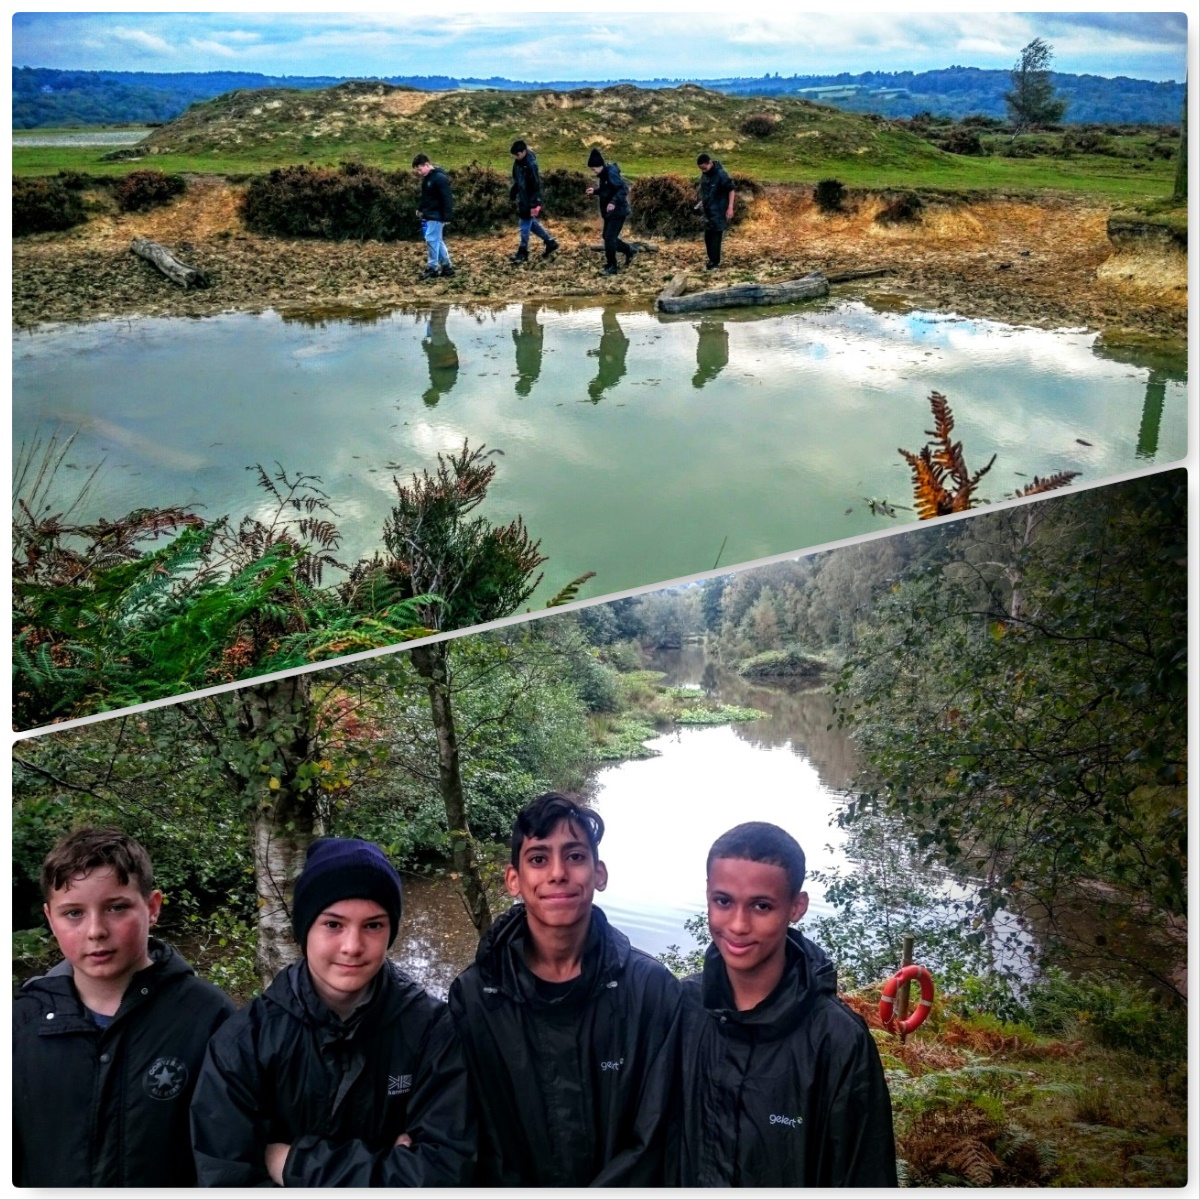
Seriously behind on my blogging now – life has lots of distractions for me at the moment (trying to learn Coding and French to name two). Looking back on my photographic filestore I came across some pictures of a cadet campcraft come bushcraft weekend from last Easter.
Friday
The Sea Cadets were only joining us on the Saturday so the Friday was a relaxed day of set up in the beautiful Pippingford Park in the Ashdown Forest. I was working with my friends Dave, Alan and Jess.
Friday set up
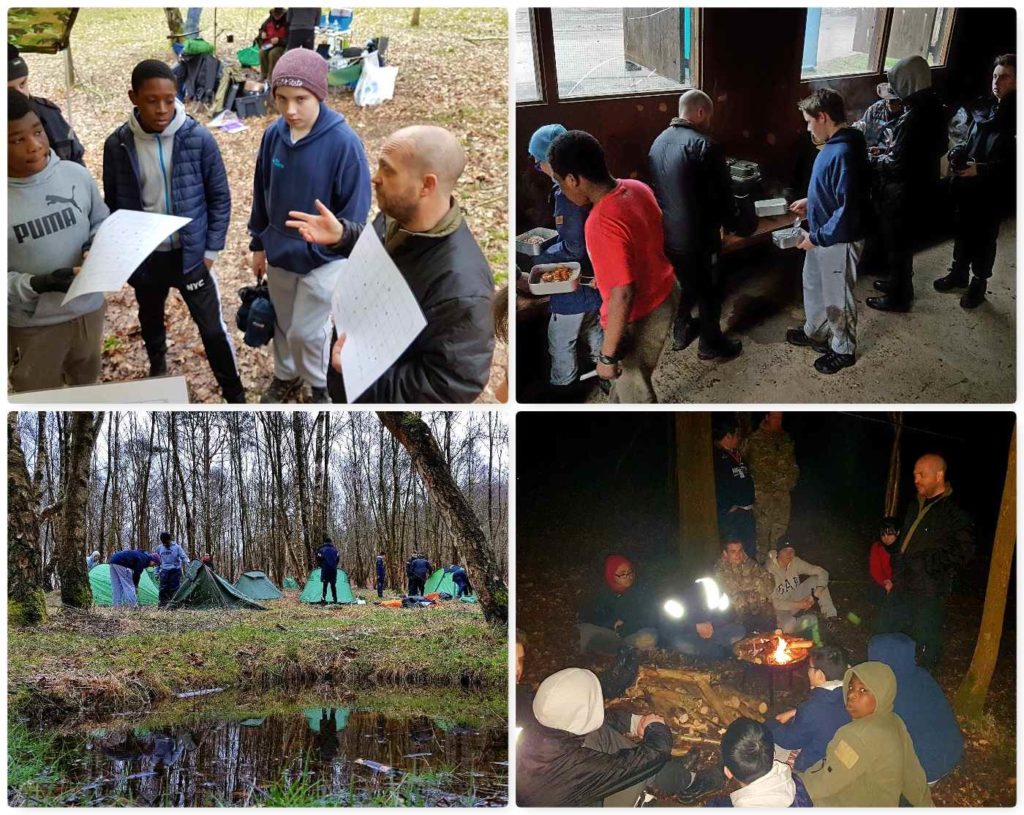
Saturday
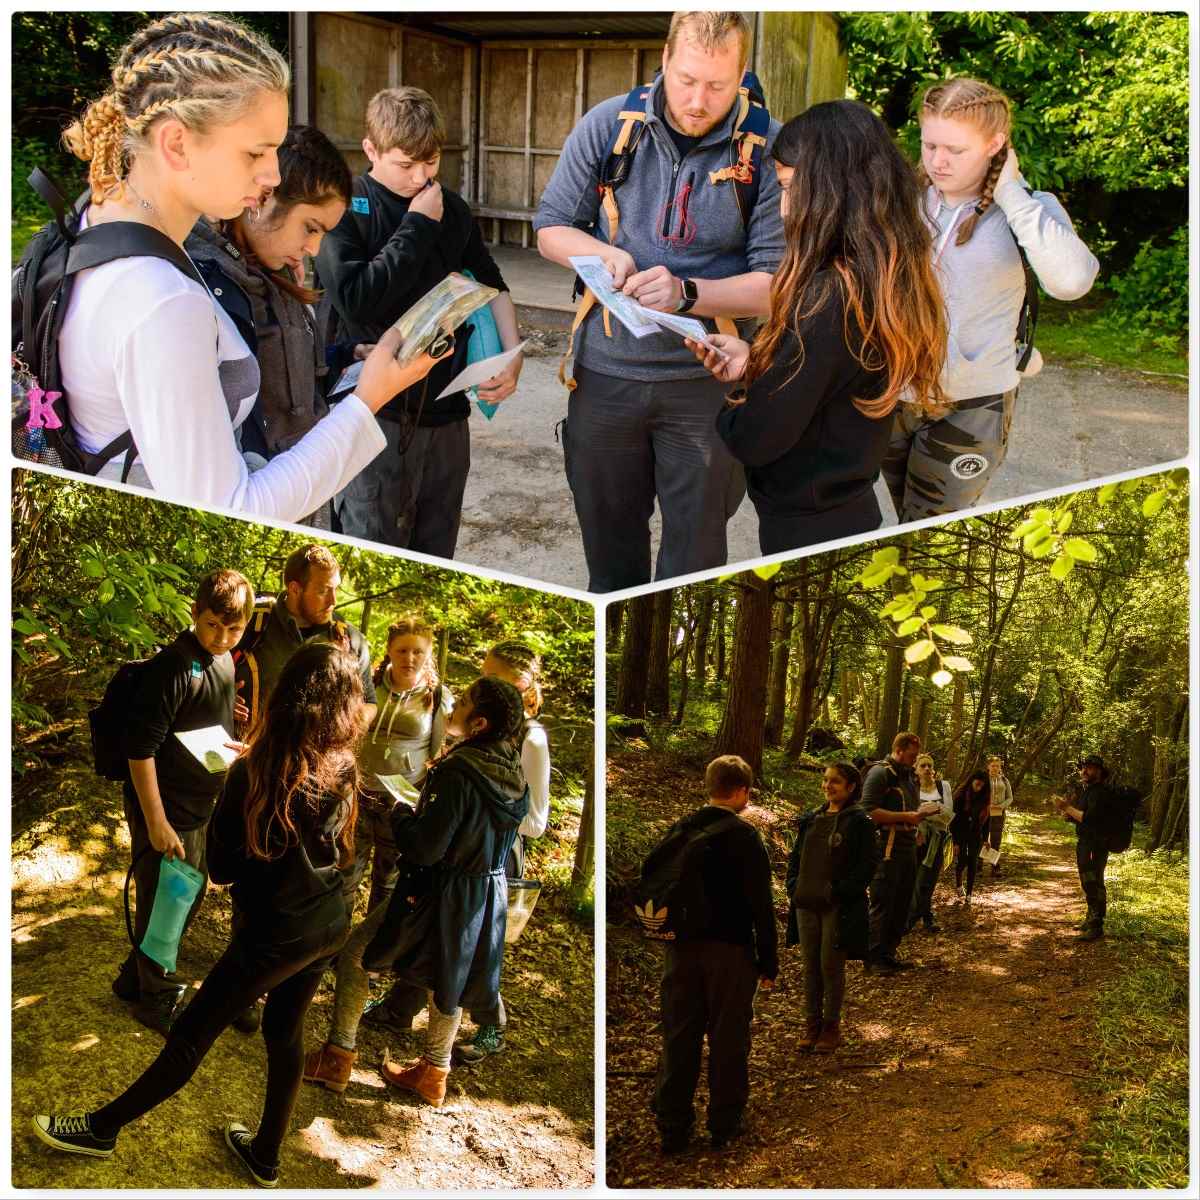
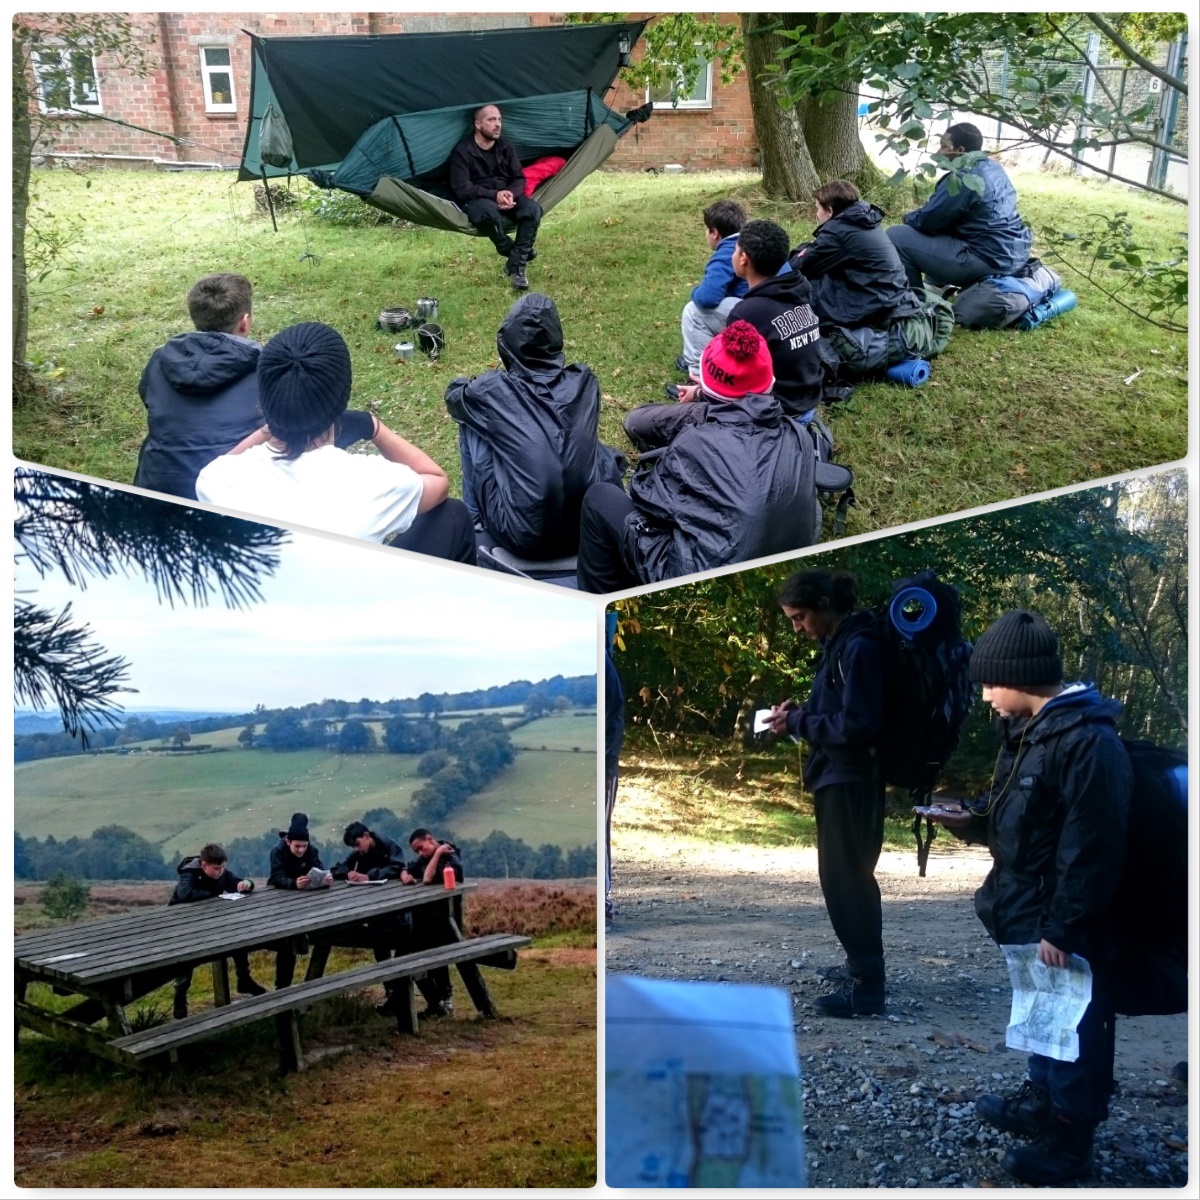
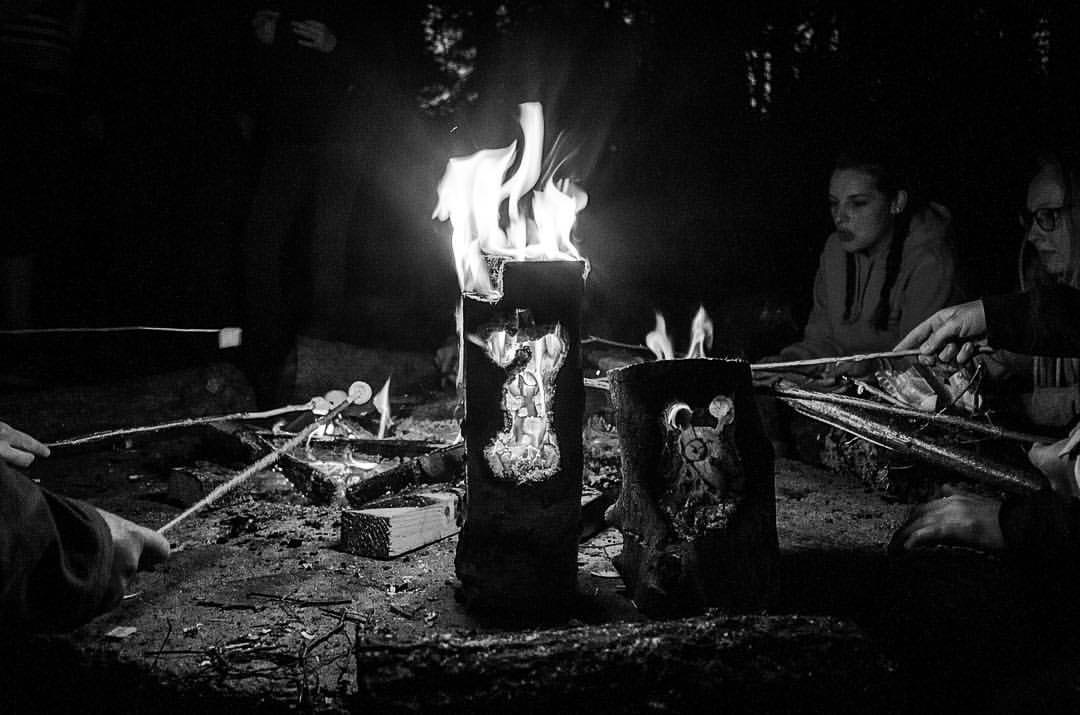
The cadets joined us first thing and thankfully brought the breakfast along with them – courtesy of the camp chefs. Then it was straight down to classes such as erecting tents, mapwork and kit. Evening time was spent around the campfire – these introductory campcraft weekends are for some cadets the first time they have ever slept out in the countryside.
Cadet time
After the cadets had bedded down for the night I tried out a little night time photography with my Samsung phone camera – I was surprised that the lens captured all the detail of the tree tops.
Sunday
Early Sunday morning found me with a cup of coffee in my hand – supplied by our very own Warrant Officer – Dave Lewis – not often a Petty Officer receives such an honour – I did think he was after something 🙂
Settling in
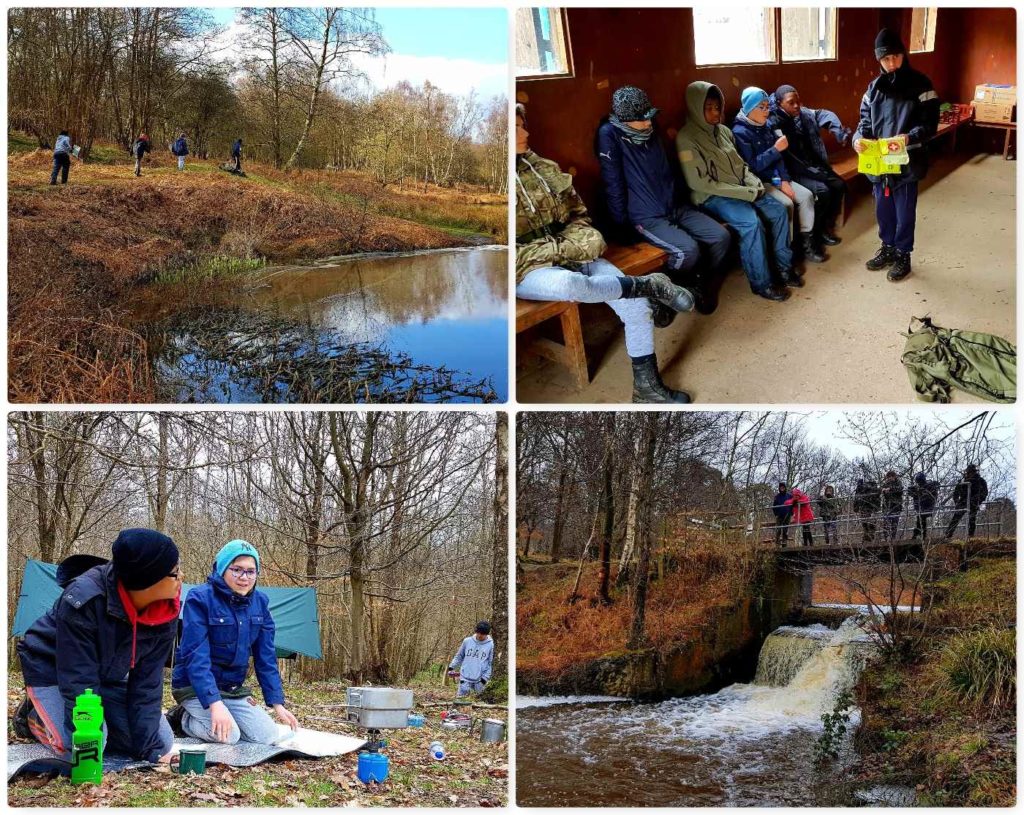
Straight after breakfast it was back into class. The cadets covered some First Aid, cooking on stoves, packing kit away and some more nav.
Classes and more classes
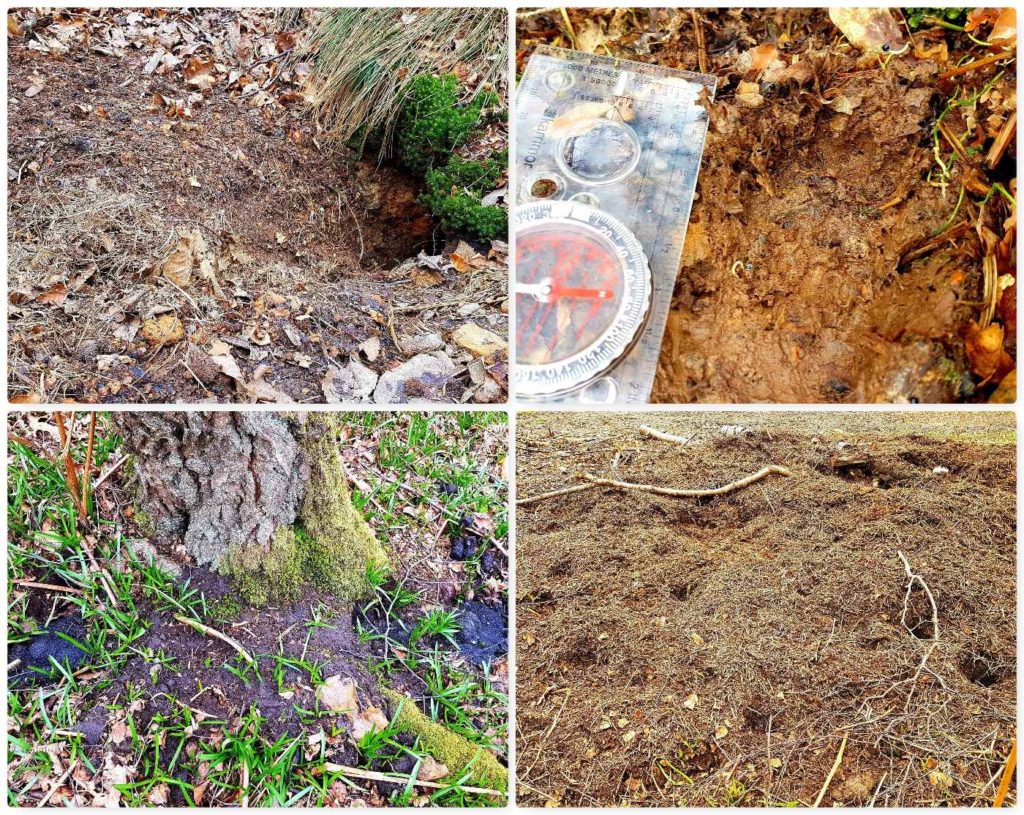
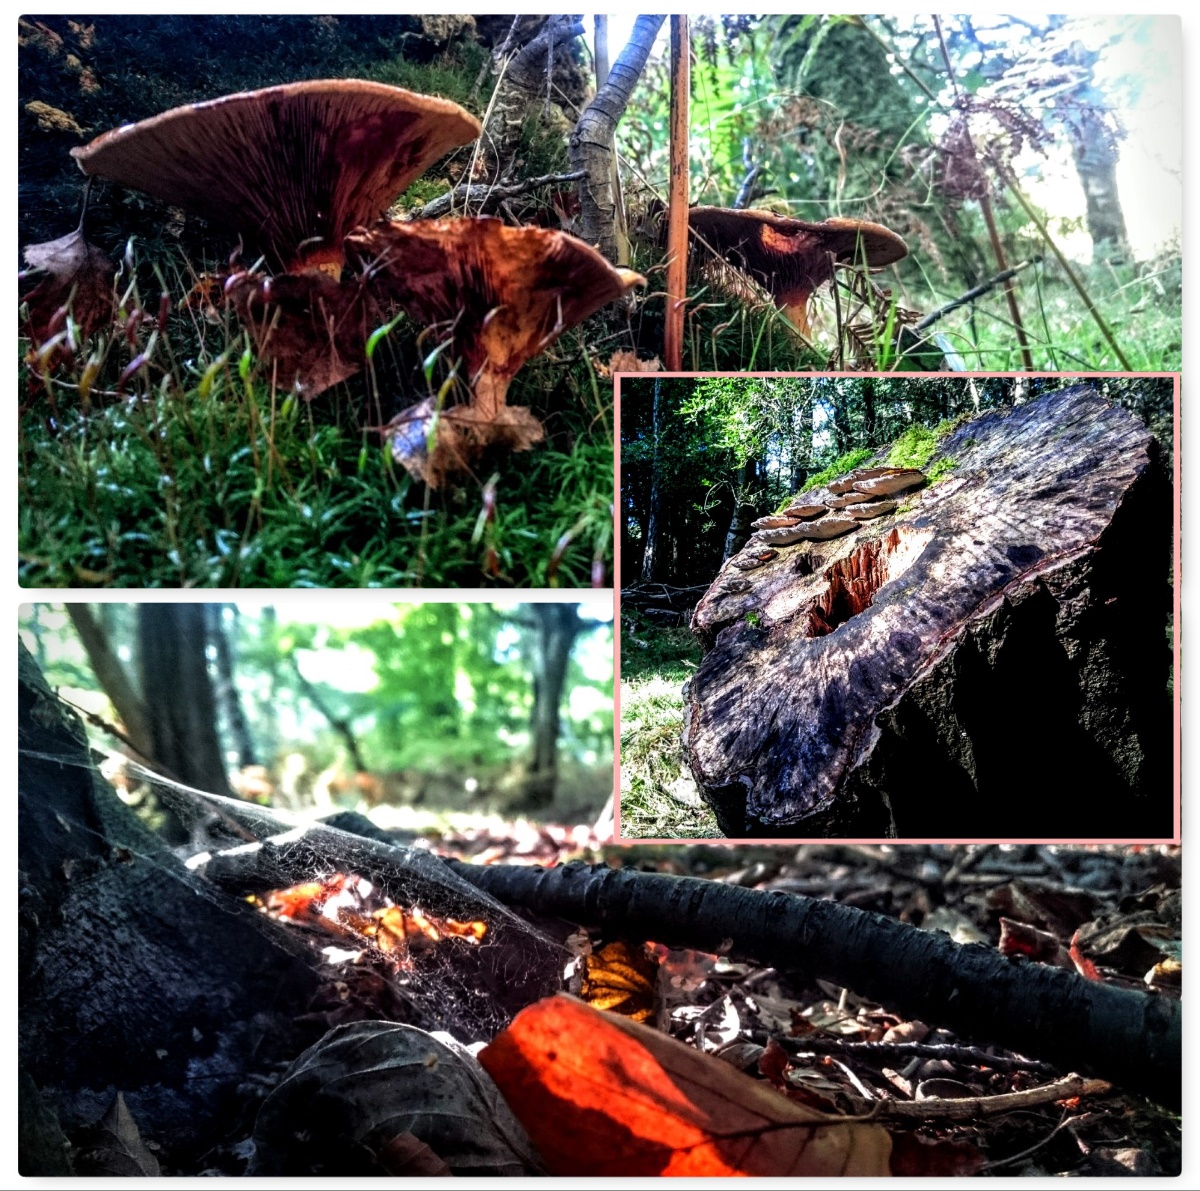
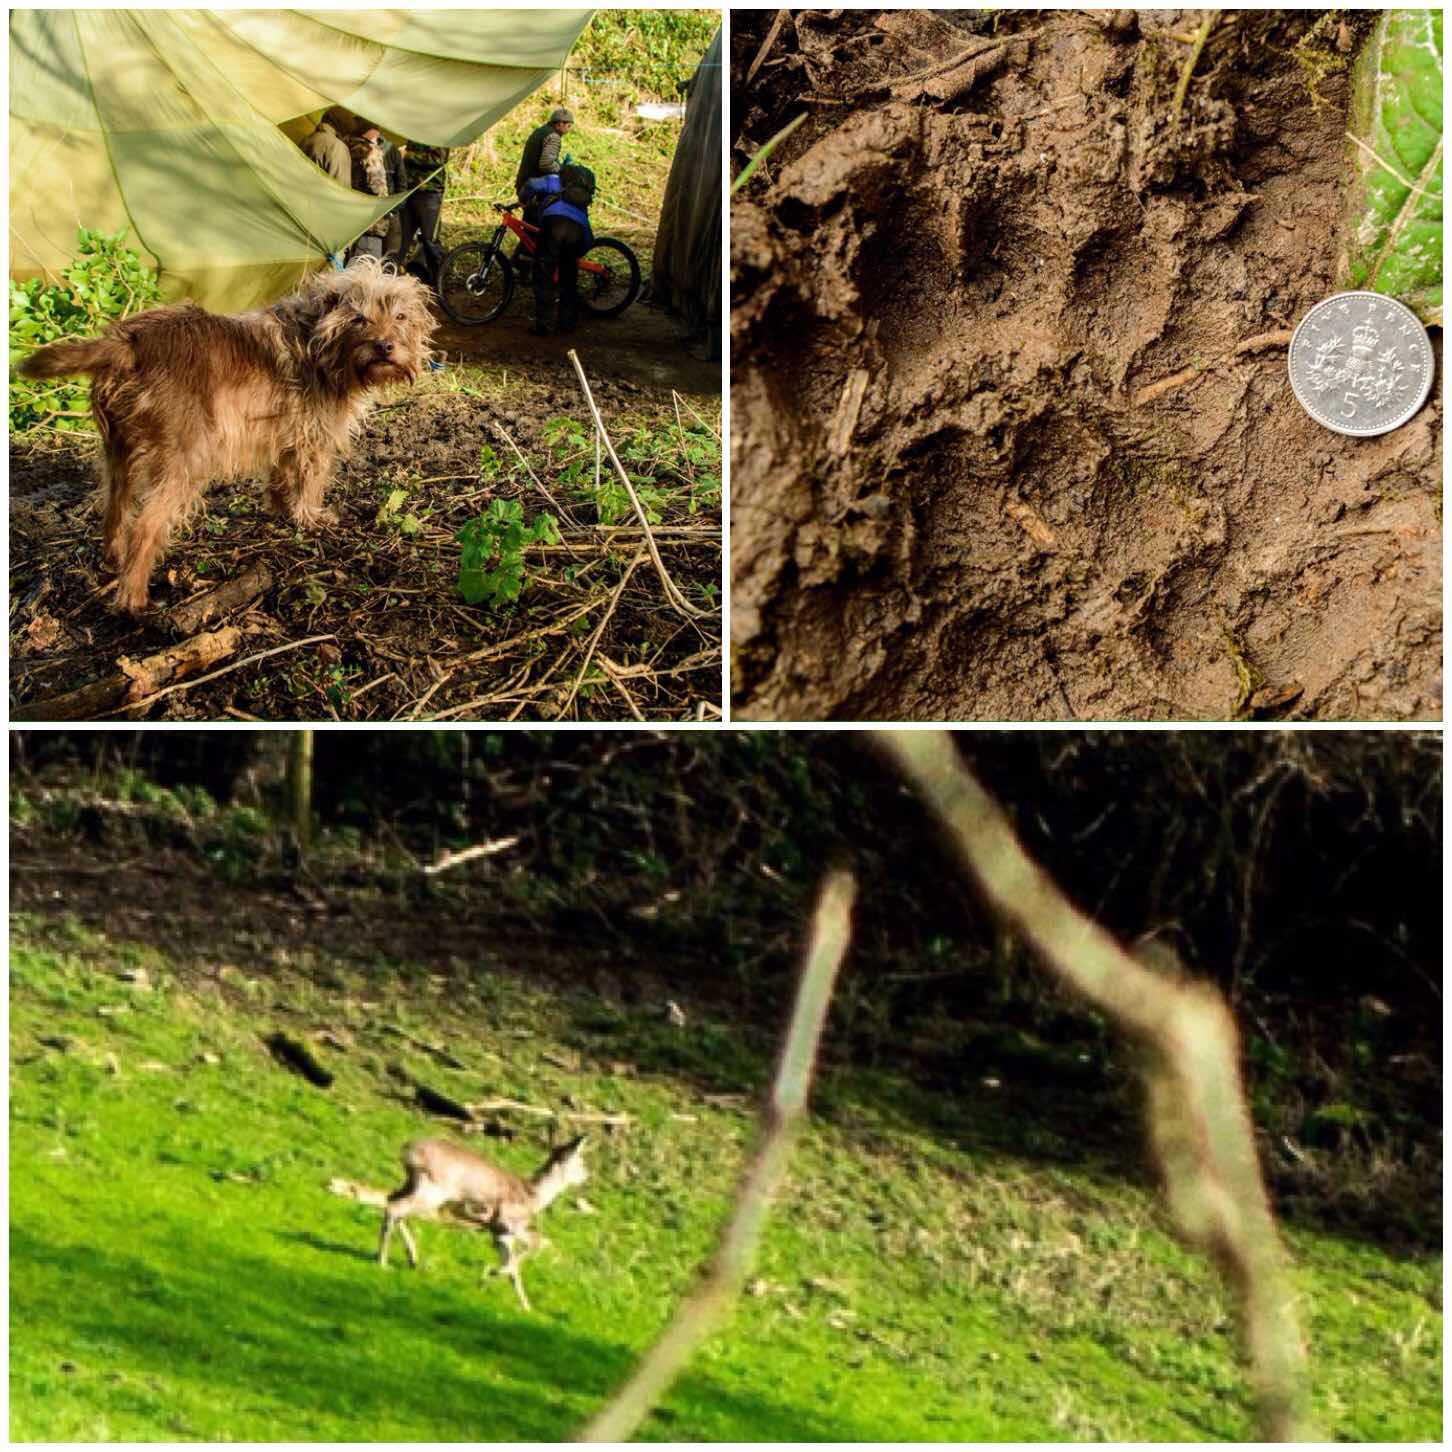
A Bit of Bushcraft
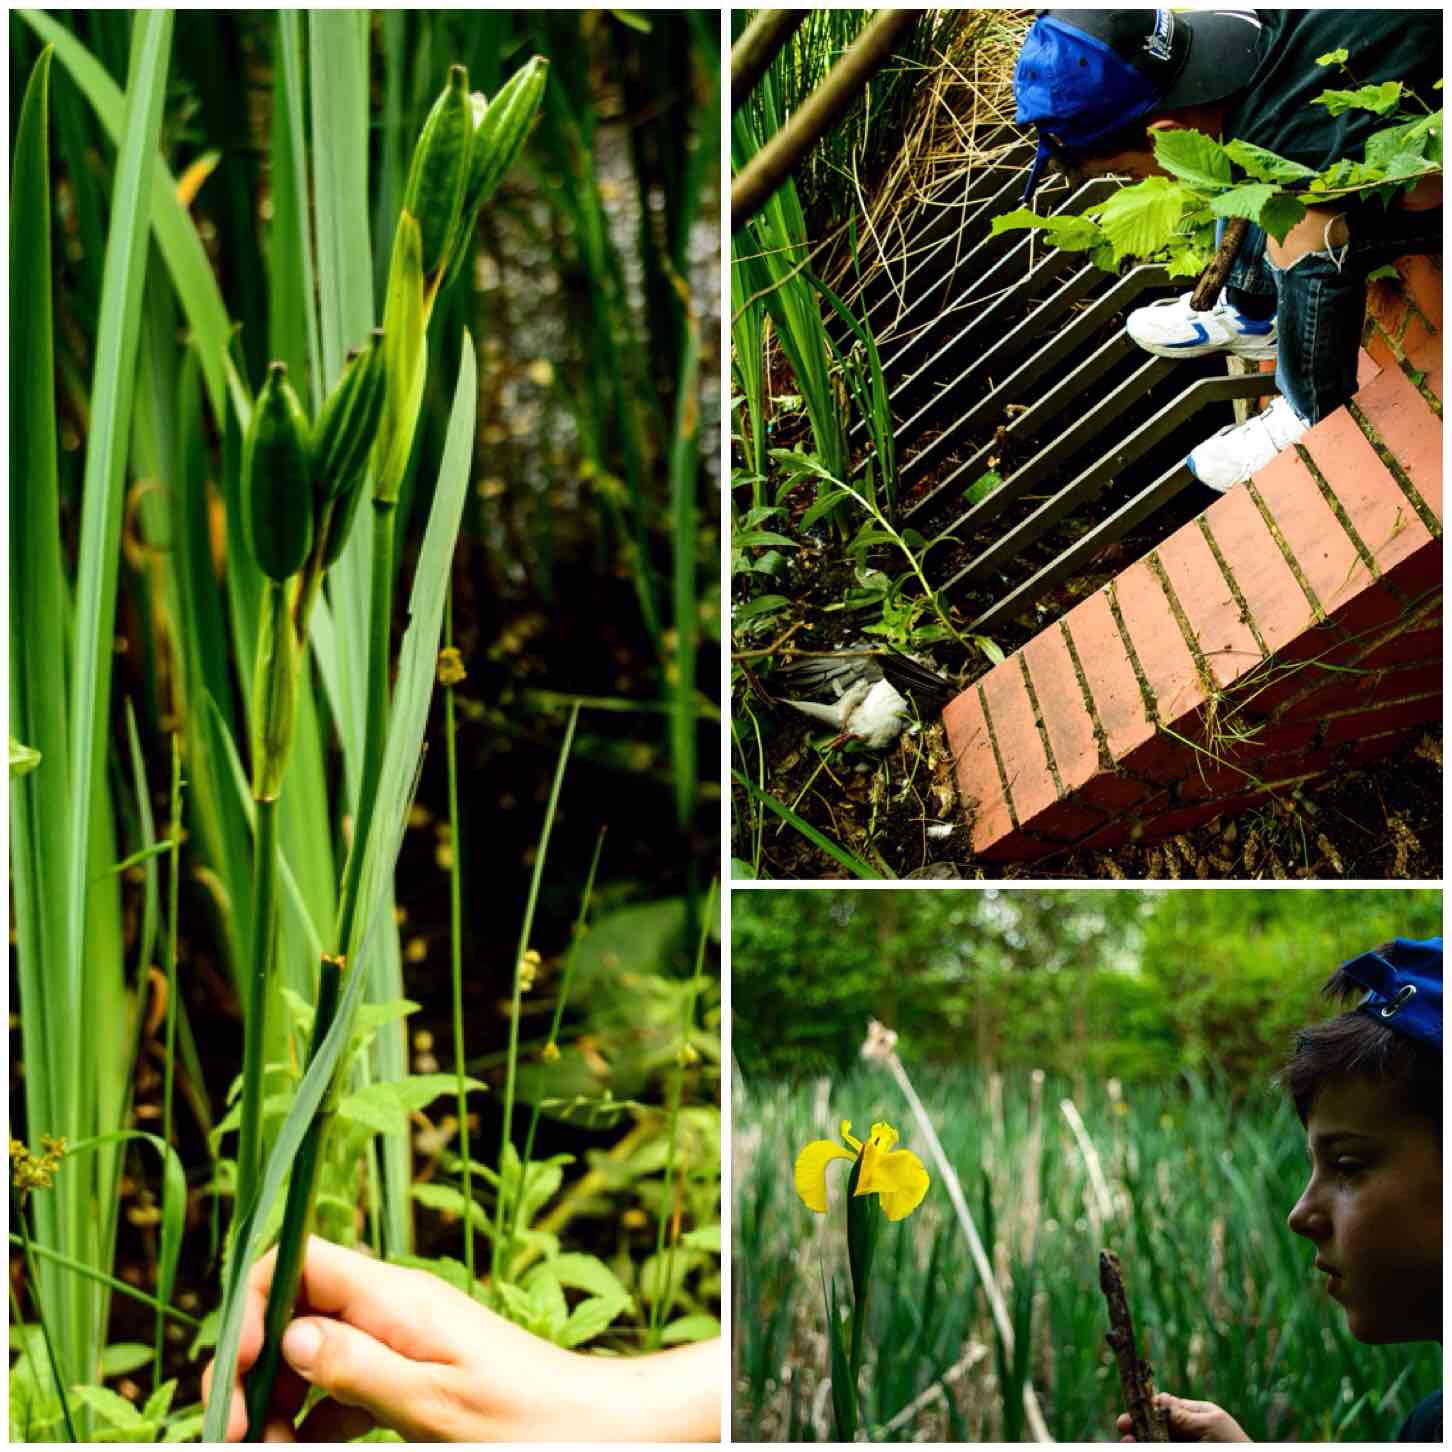
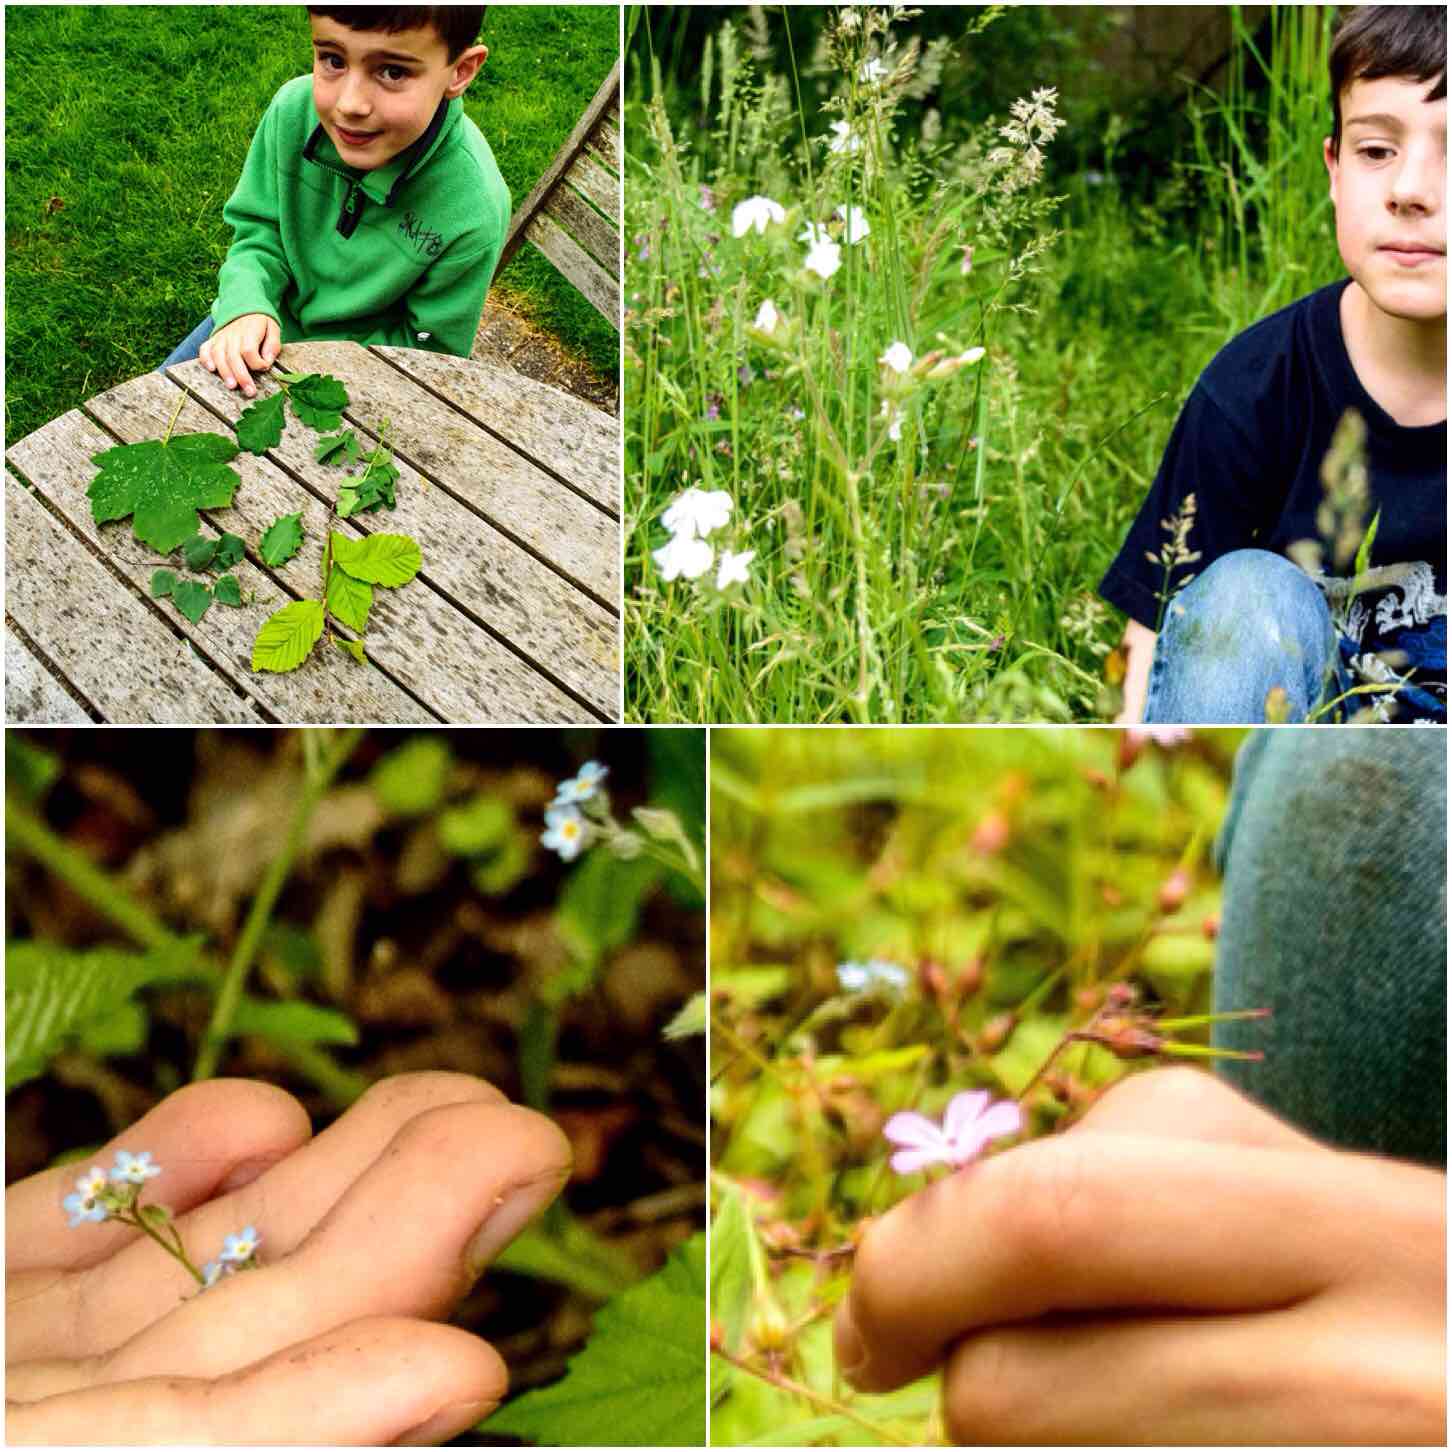
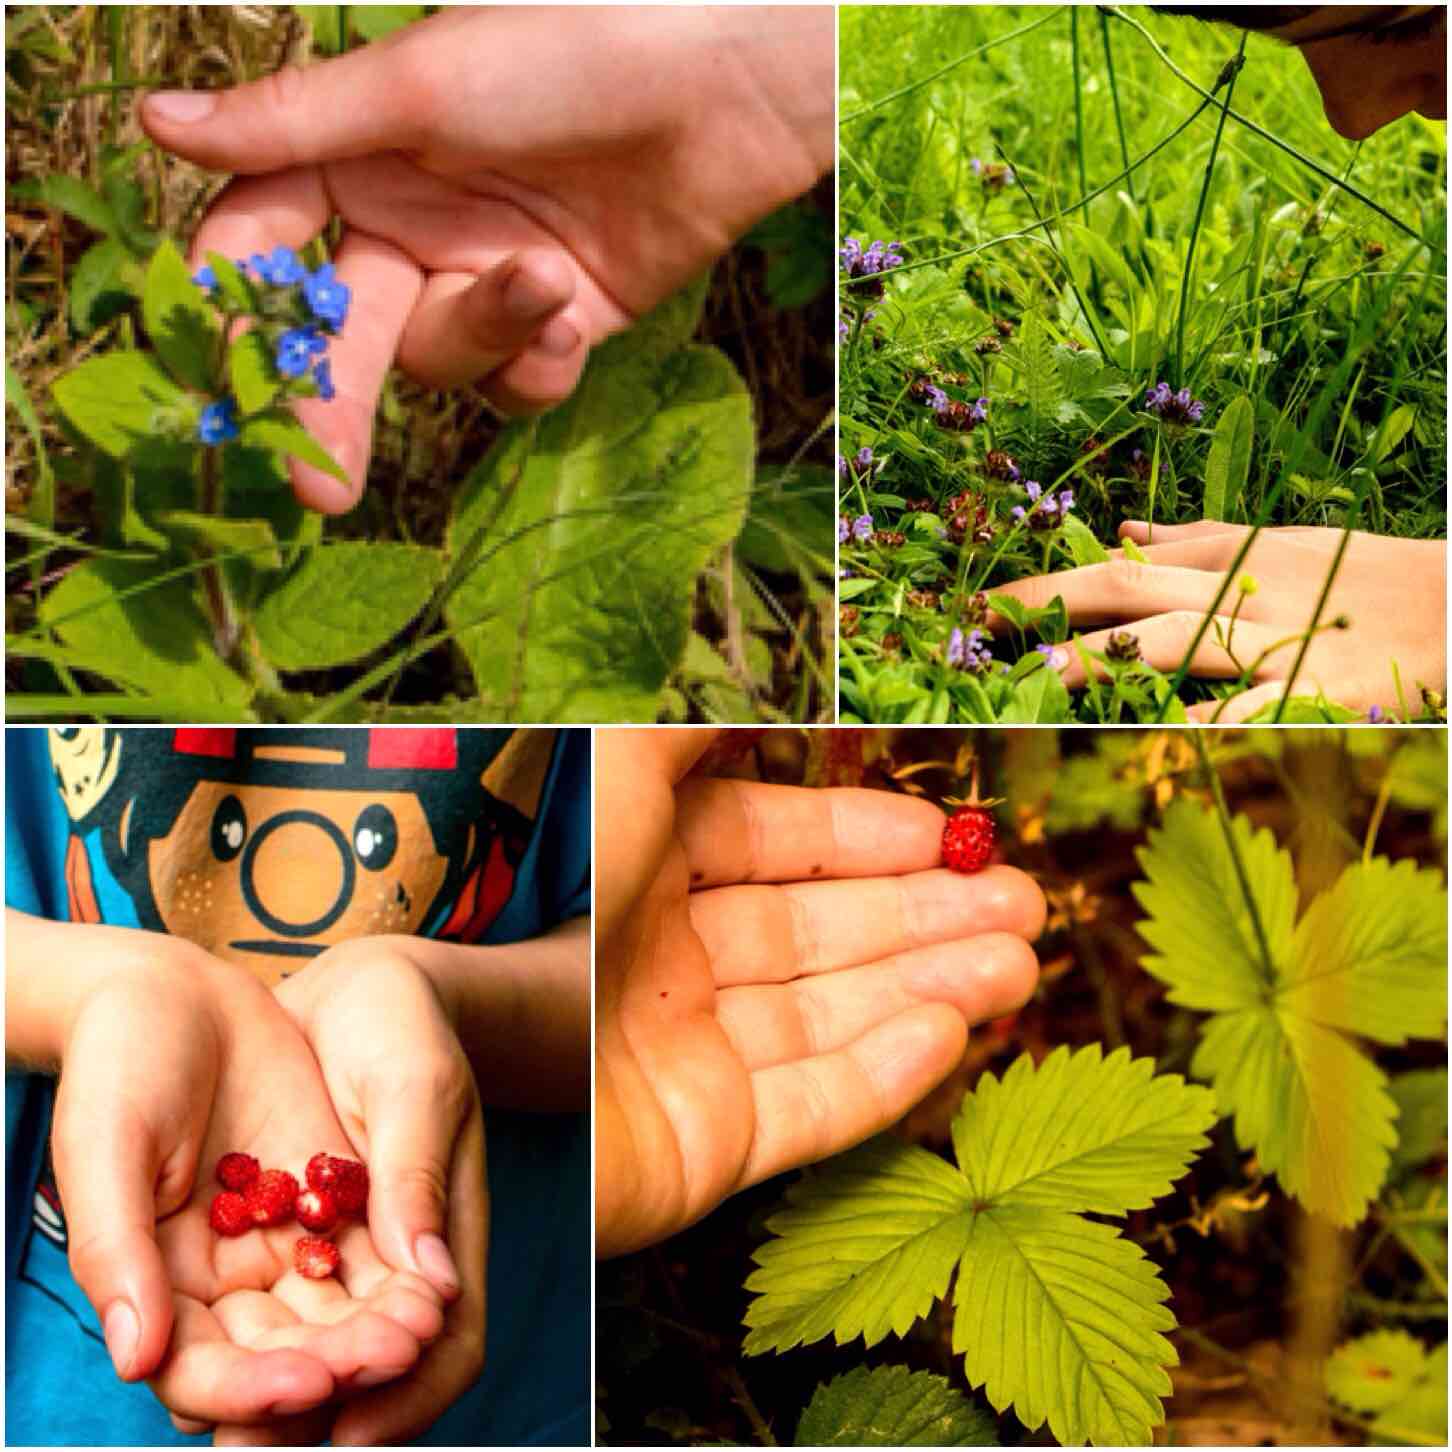
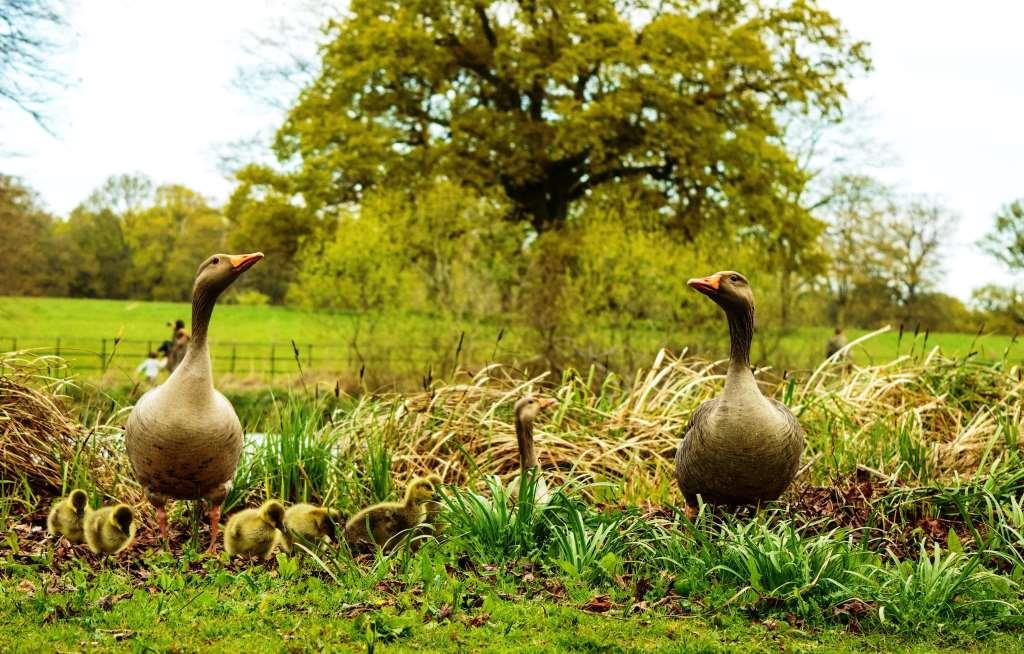
While out and about I did come across a Badger Set that was covered in tracks and other sign. The other sign included spotting their latrine and the snuffle marks their snouts leave in the humus layer.
Badger time
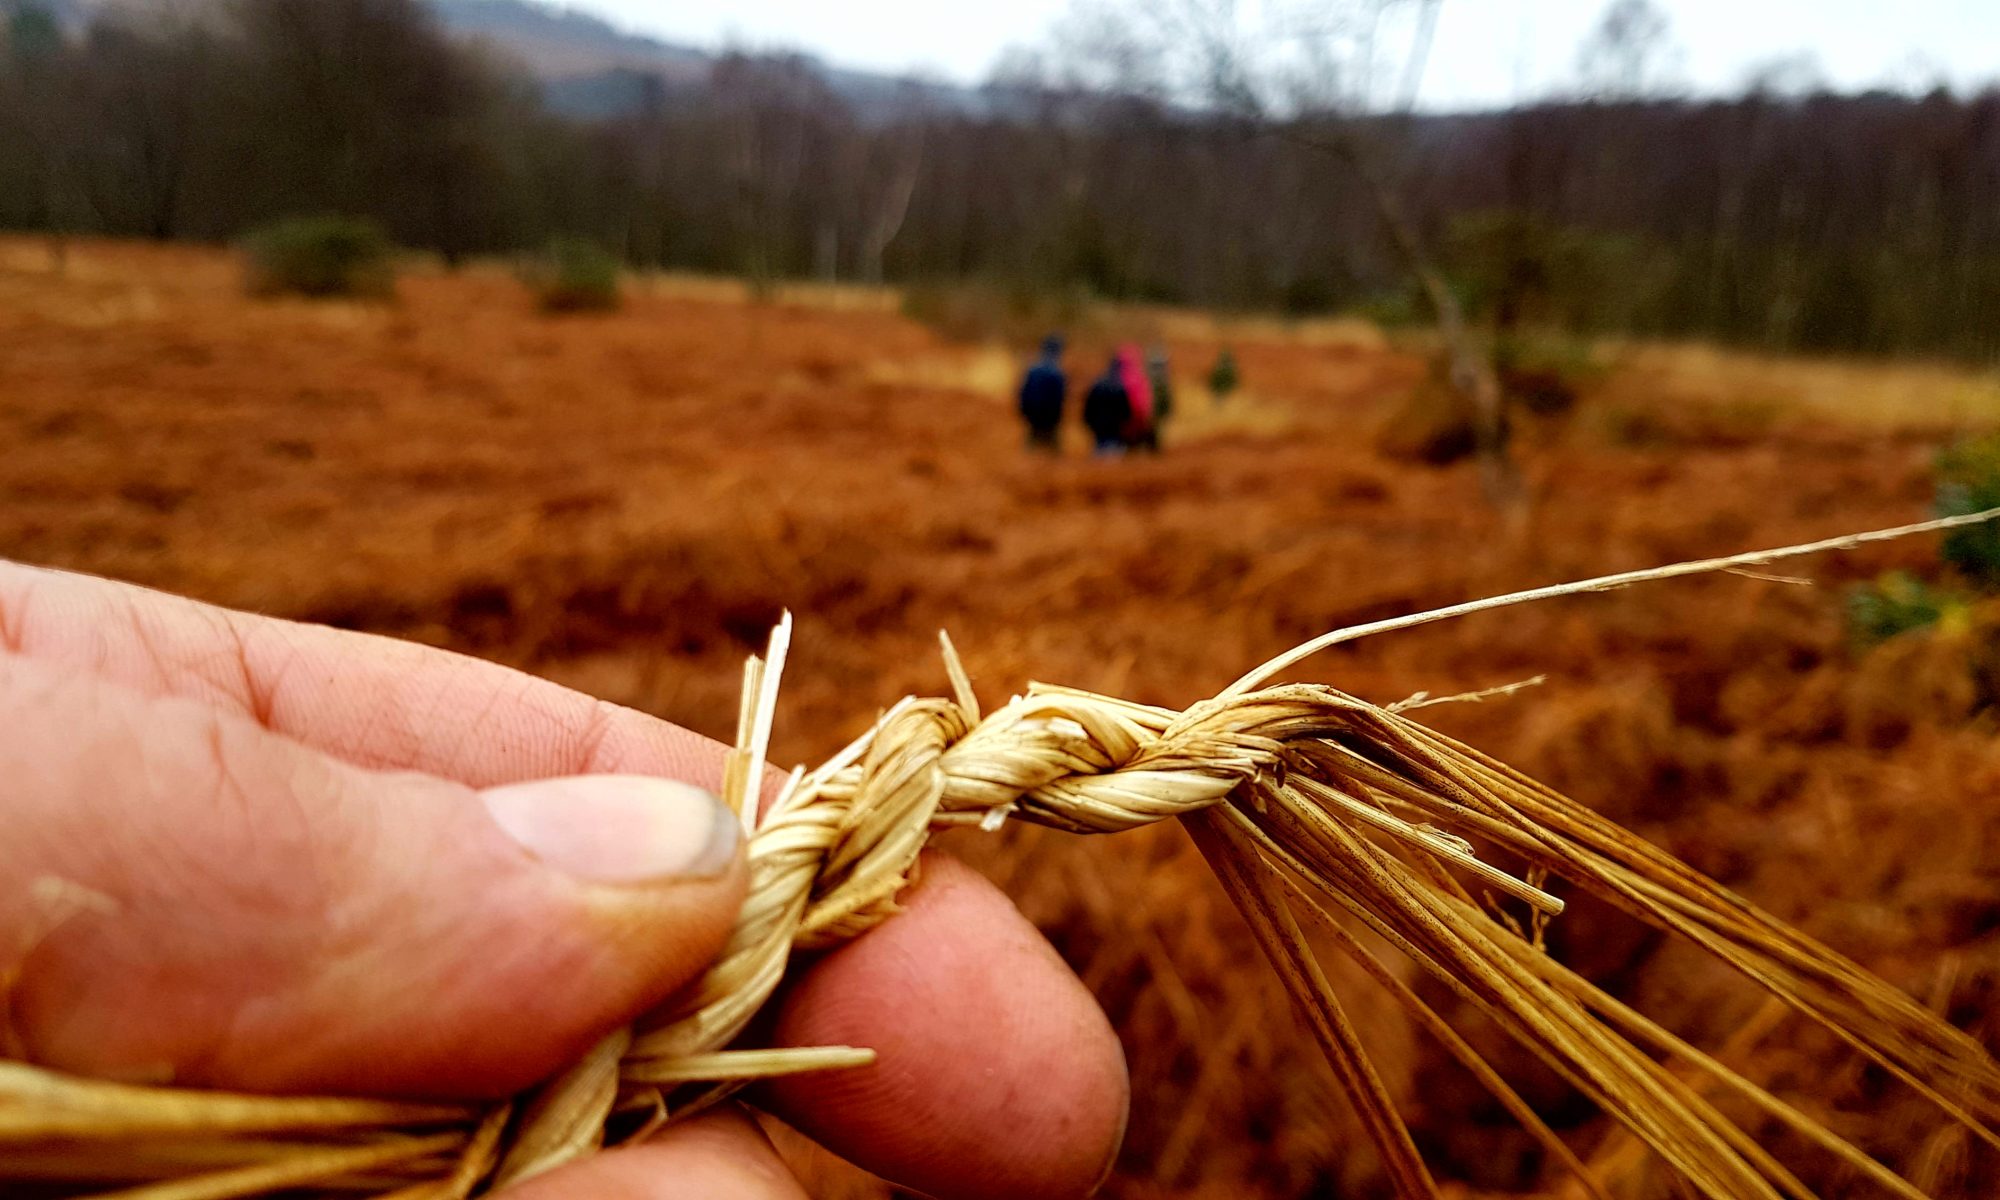
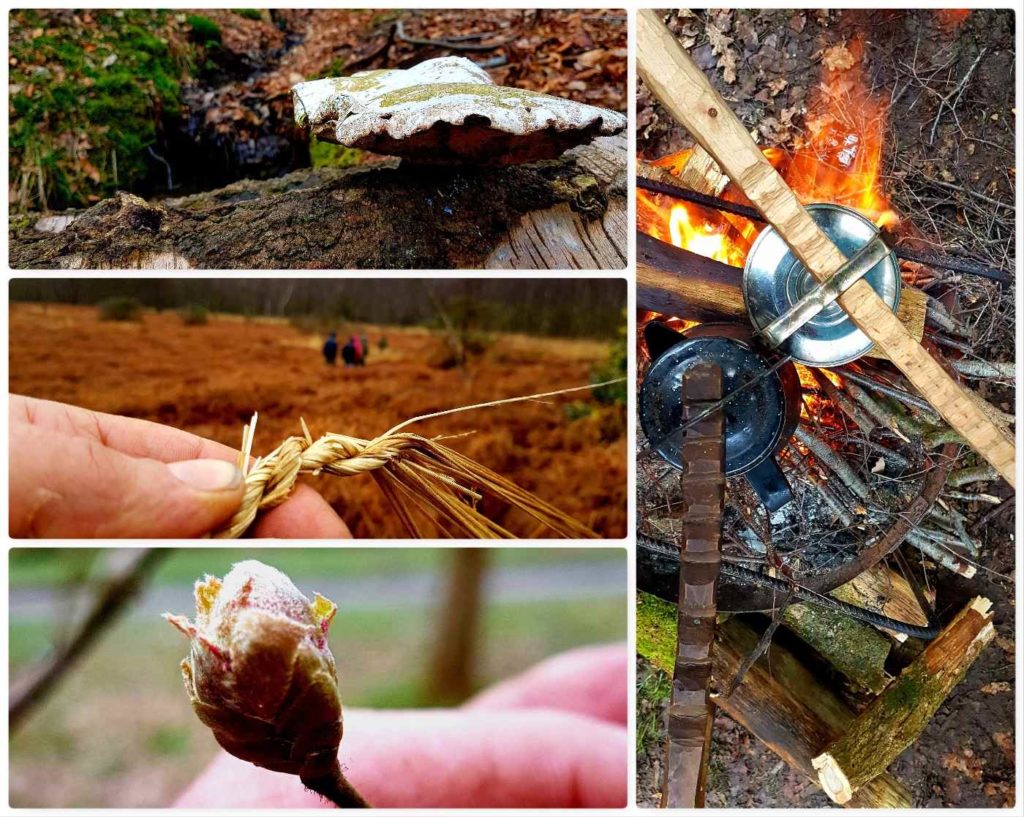
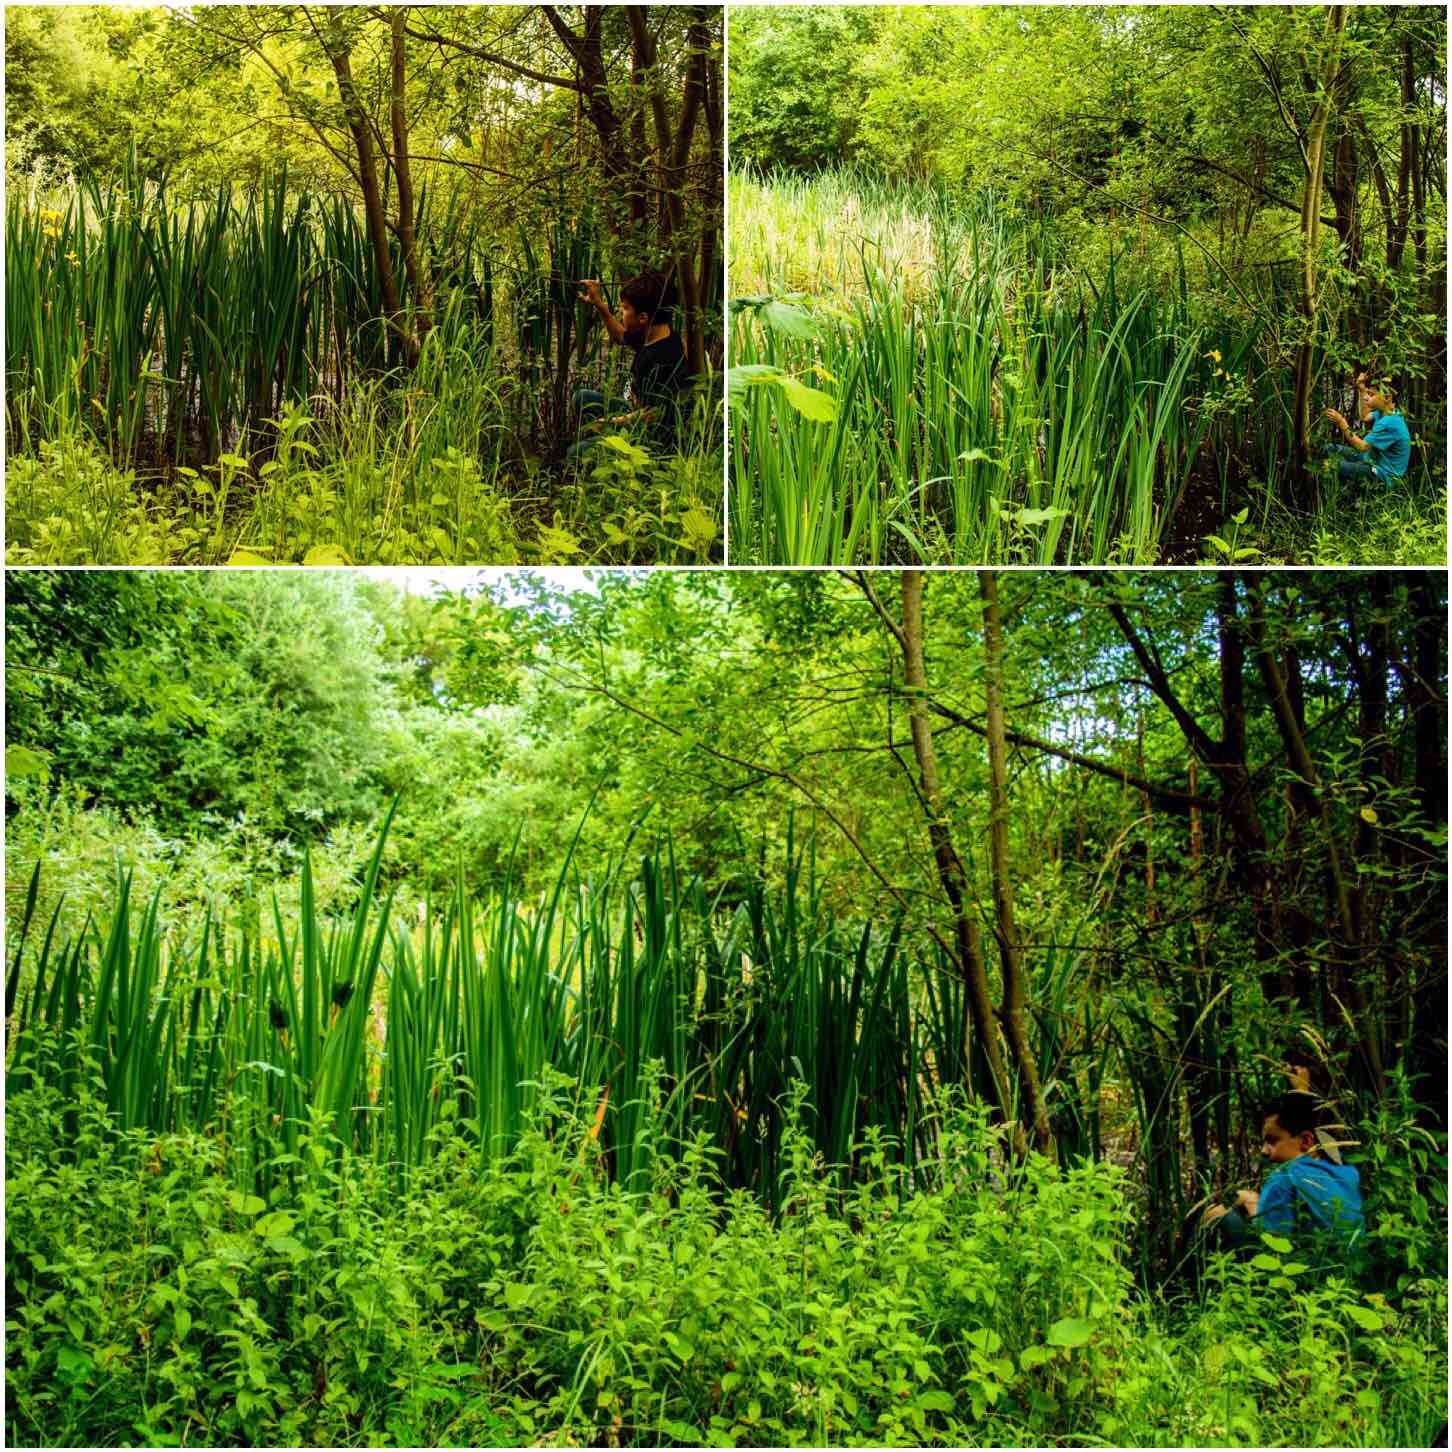
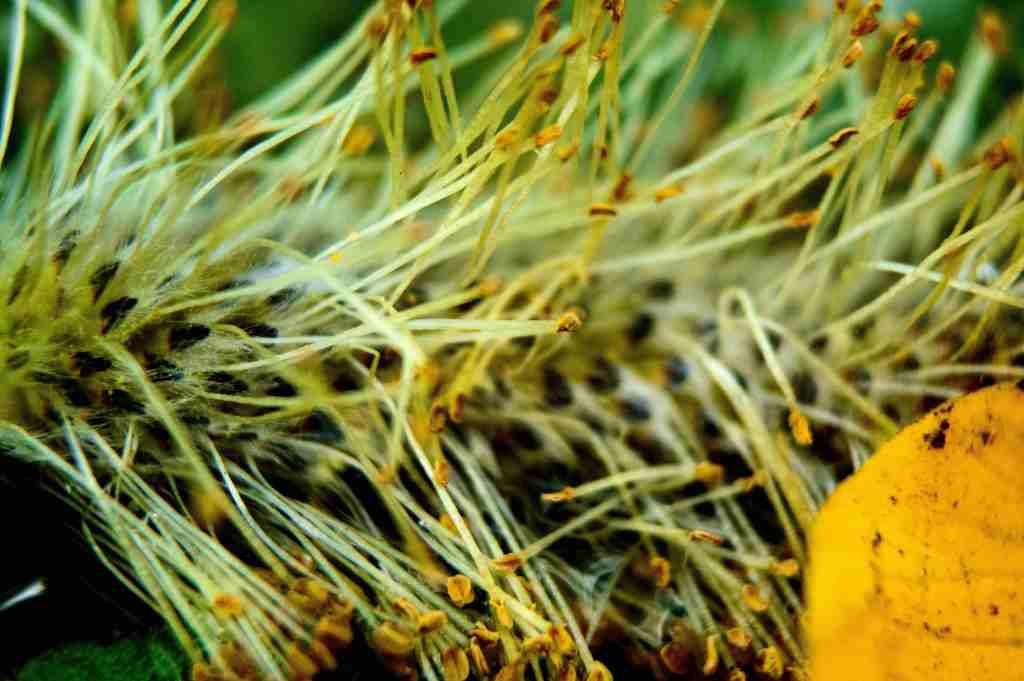
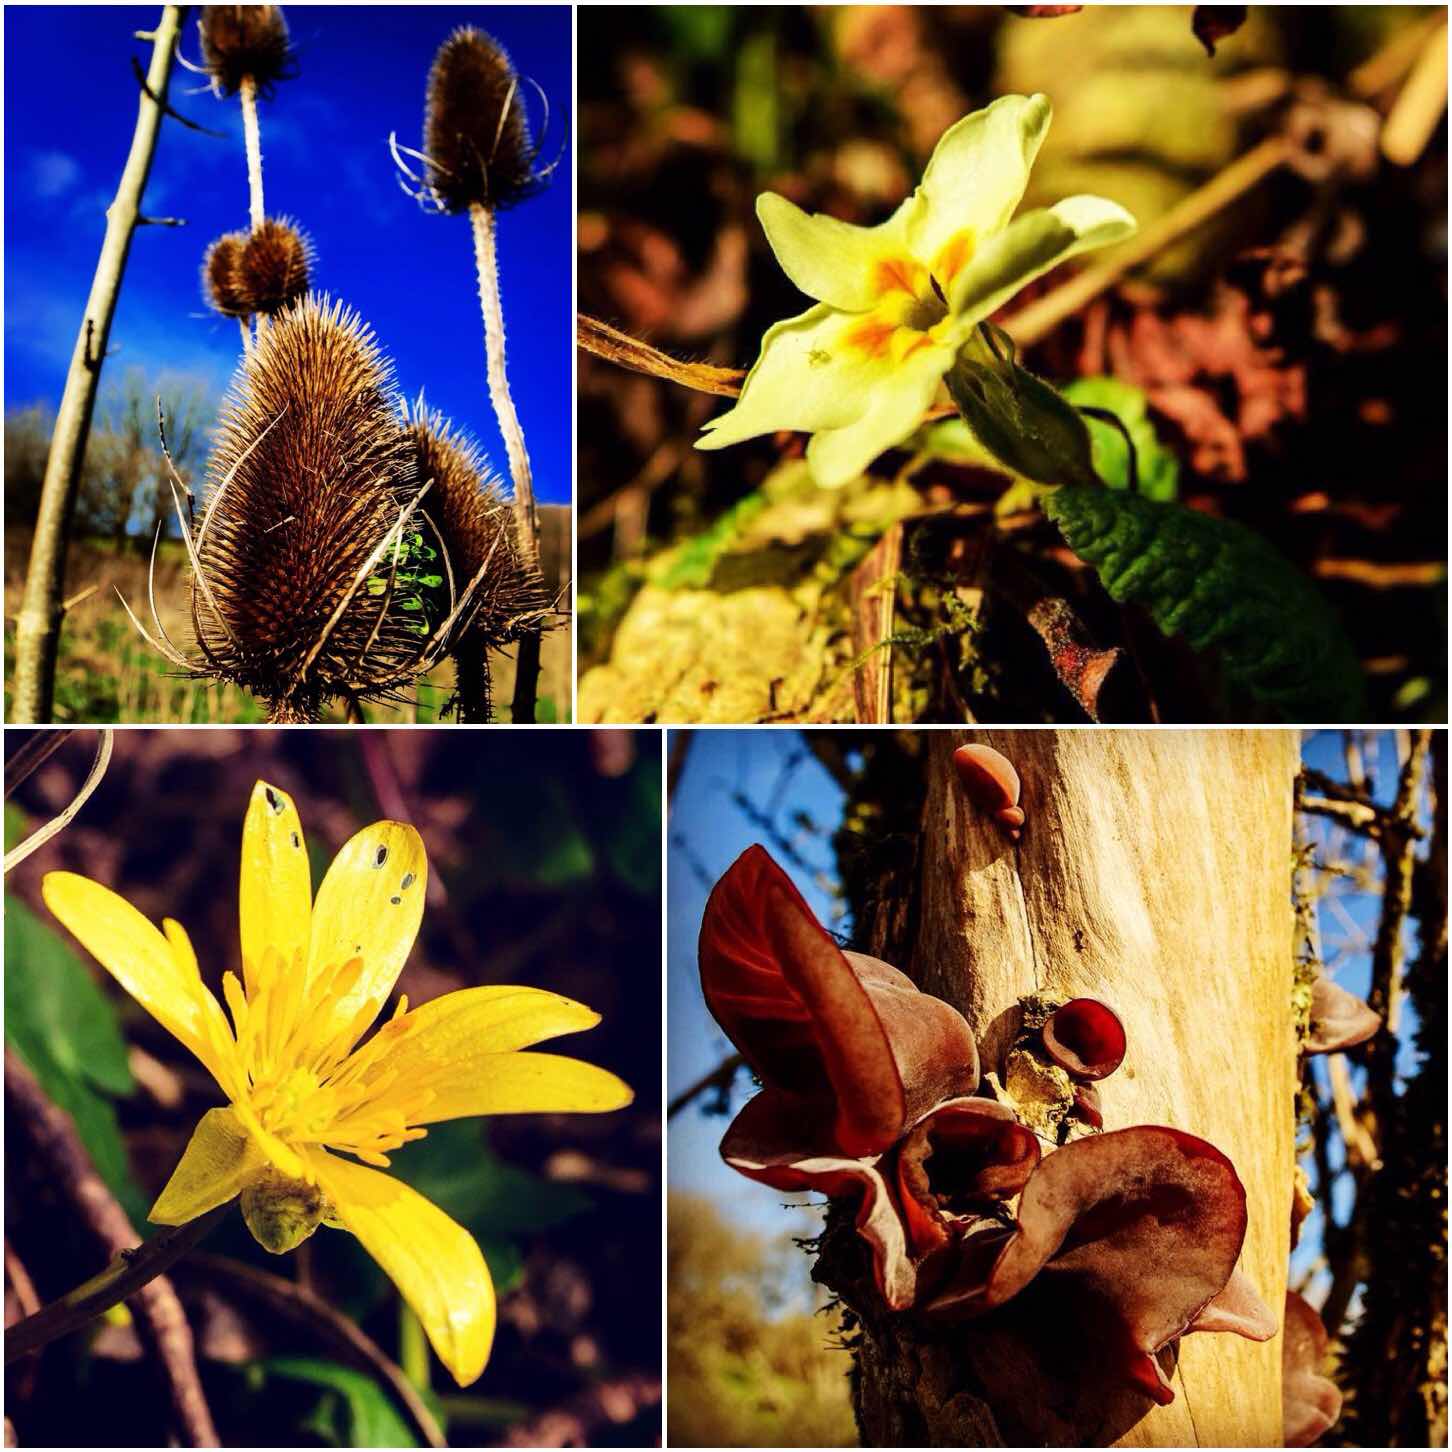
There was little in the way of fungus at this time of year except for the big Bracket fungus and the Birch Polypores. I also spent time turning grass into rope and looking out for early buds starting to poke out.
As per usual there was time to have a brew (and gave me an excuse to use my cranes).
Keeping my hand in
It will not be long to the next cadet camps in 2019 however I am told it will be an Advanced Campcraft course in the mountains of North Wales – looking forward to that one.
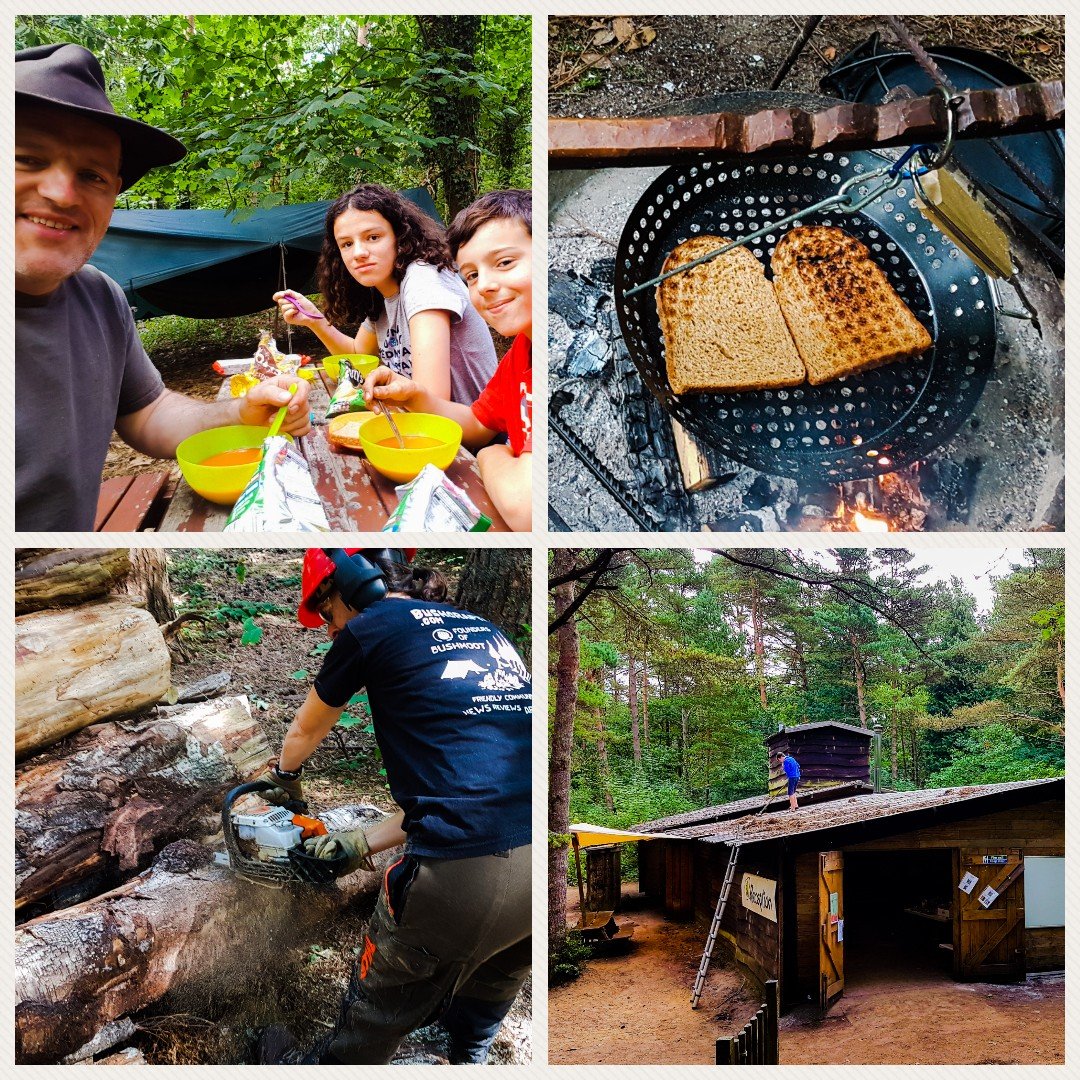
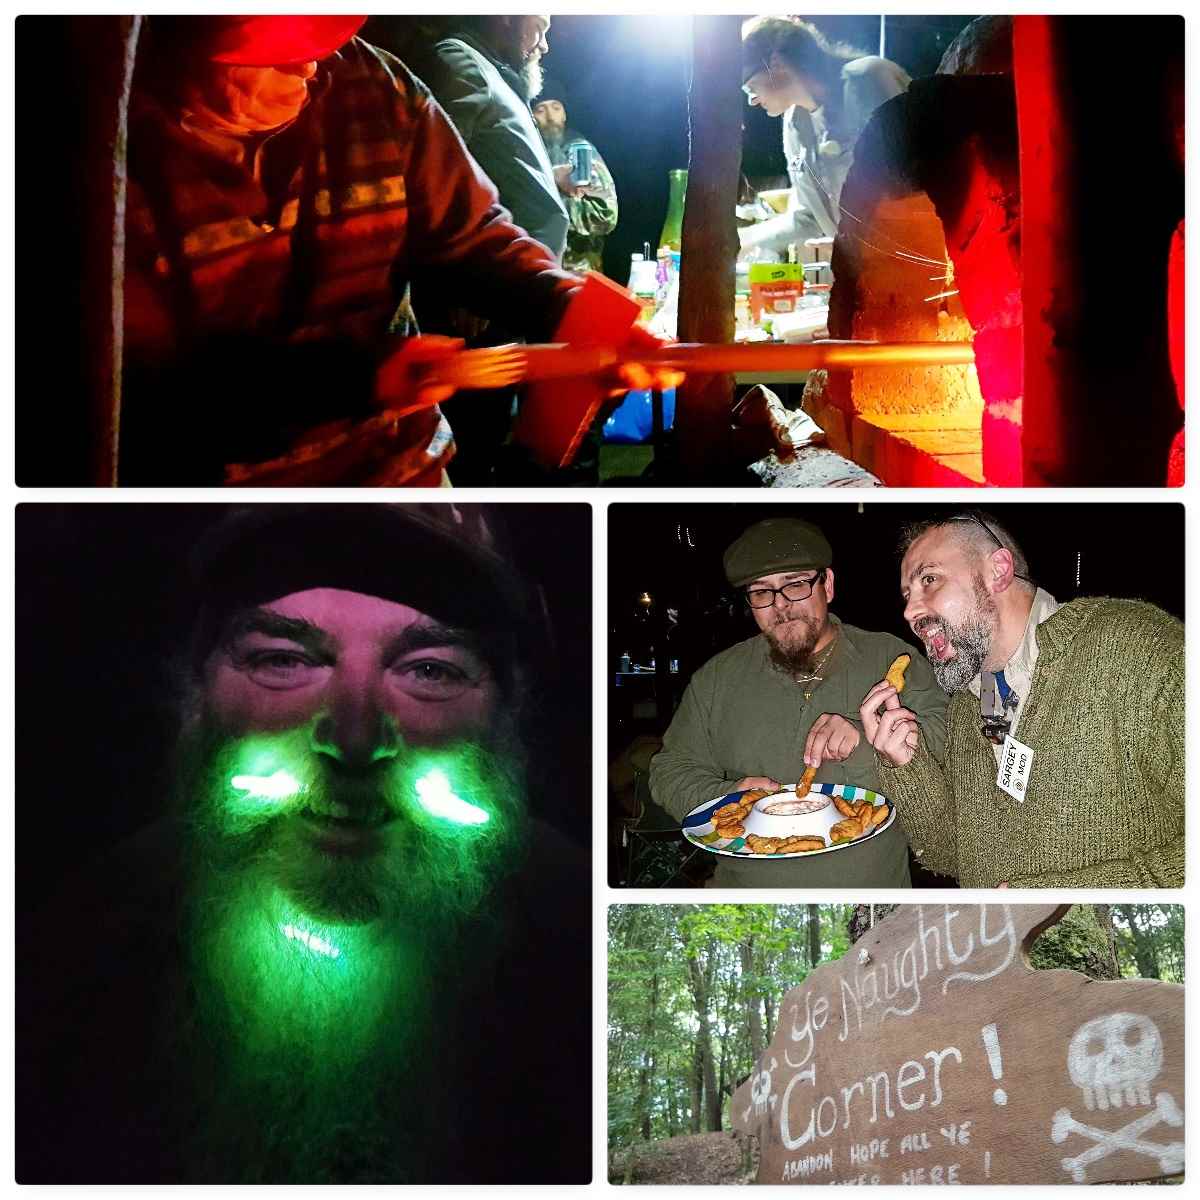
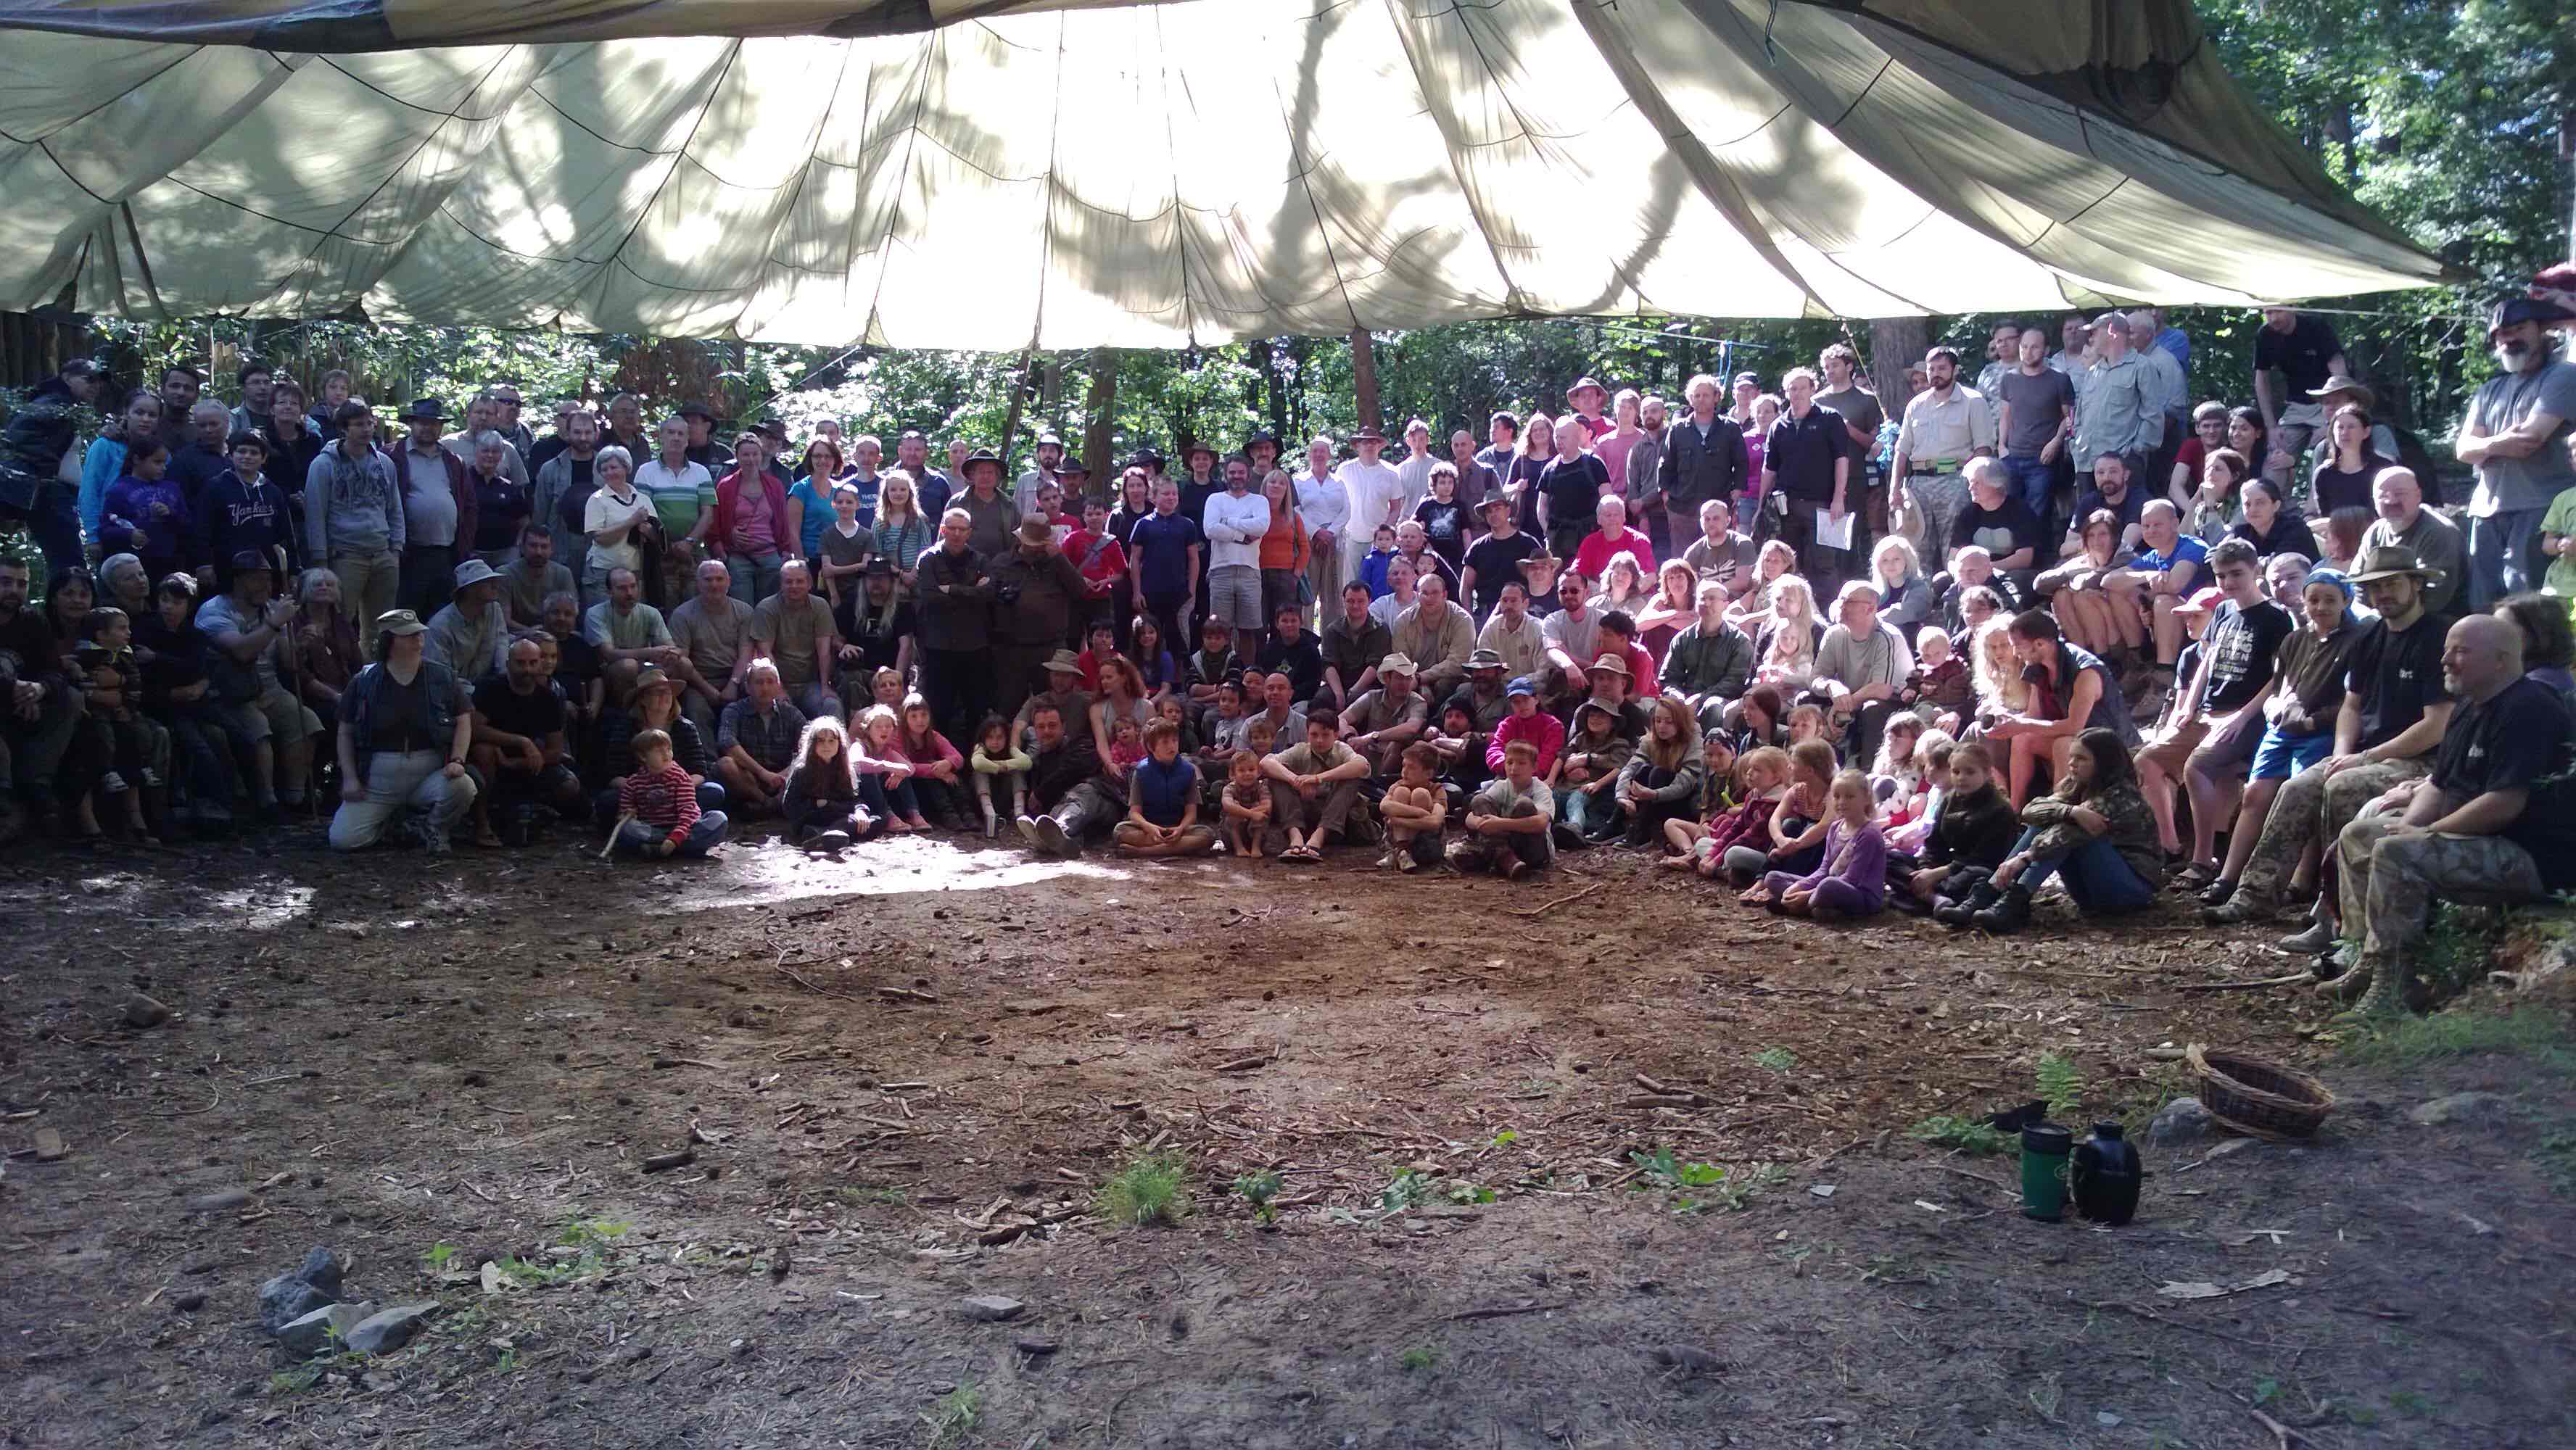
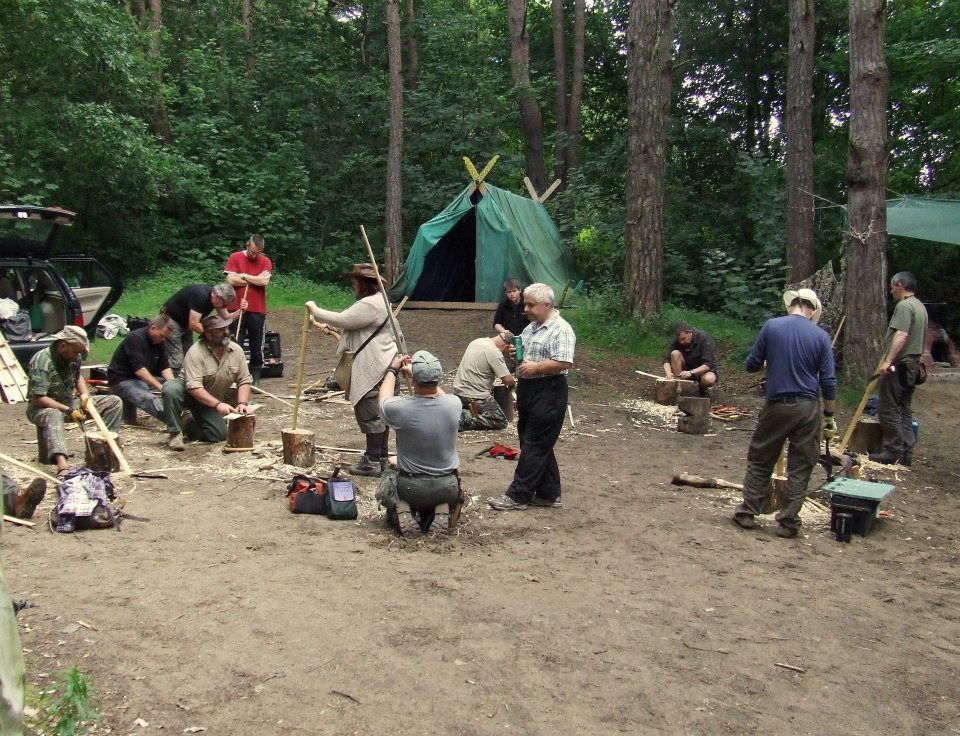
Things have been settling in here at the Bushcraft UK Bushmoot here in Merthyr Mawr.
Took time out to test out my new barbeque pan – well tested it out as a toast rack really – works a treat so everyone is happy 🙂
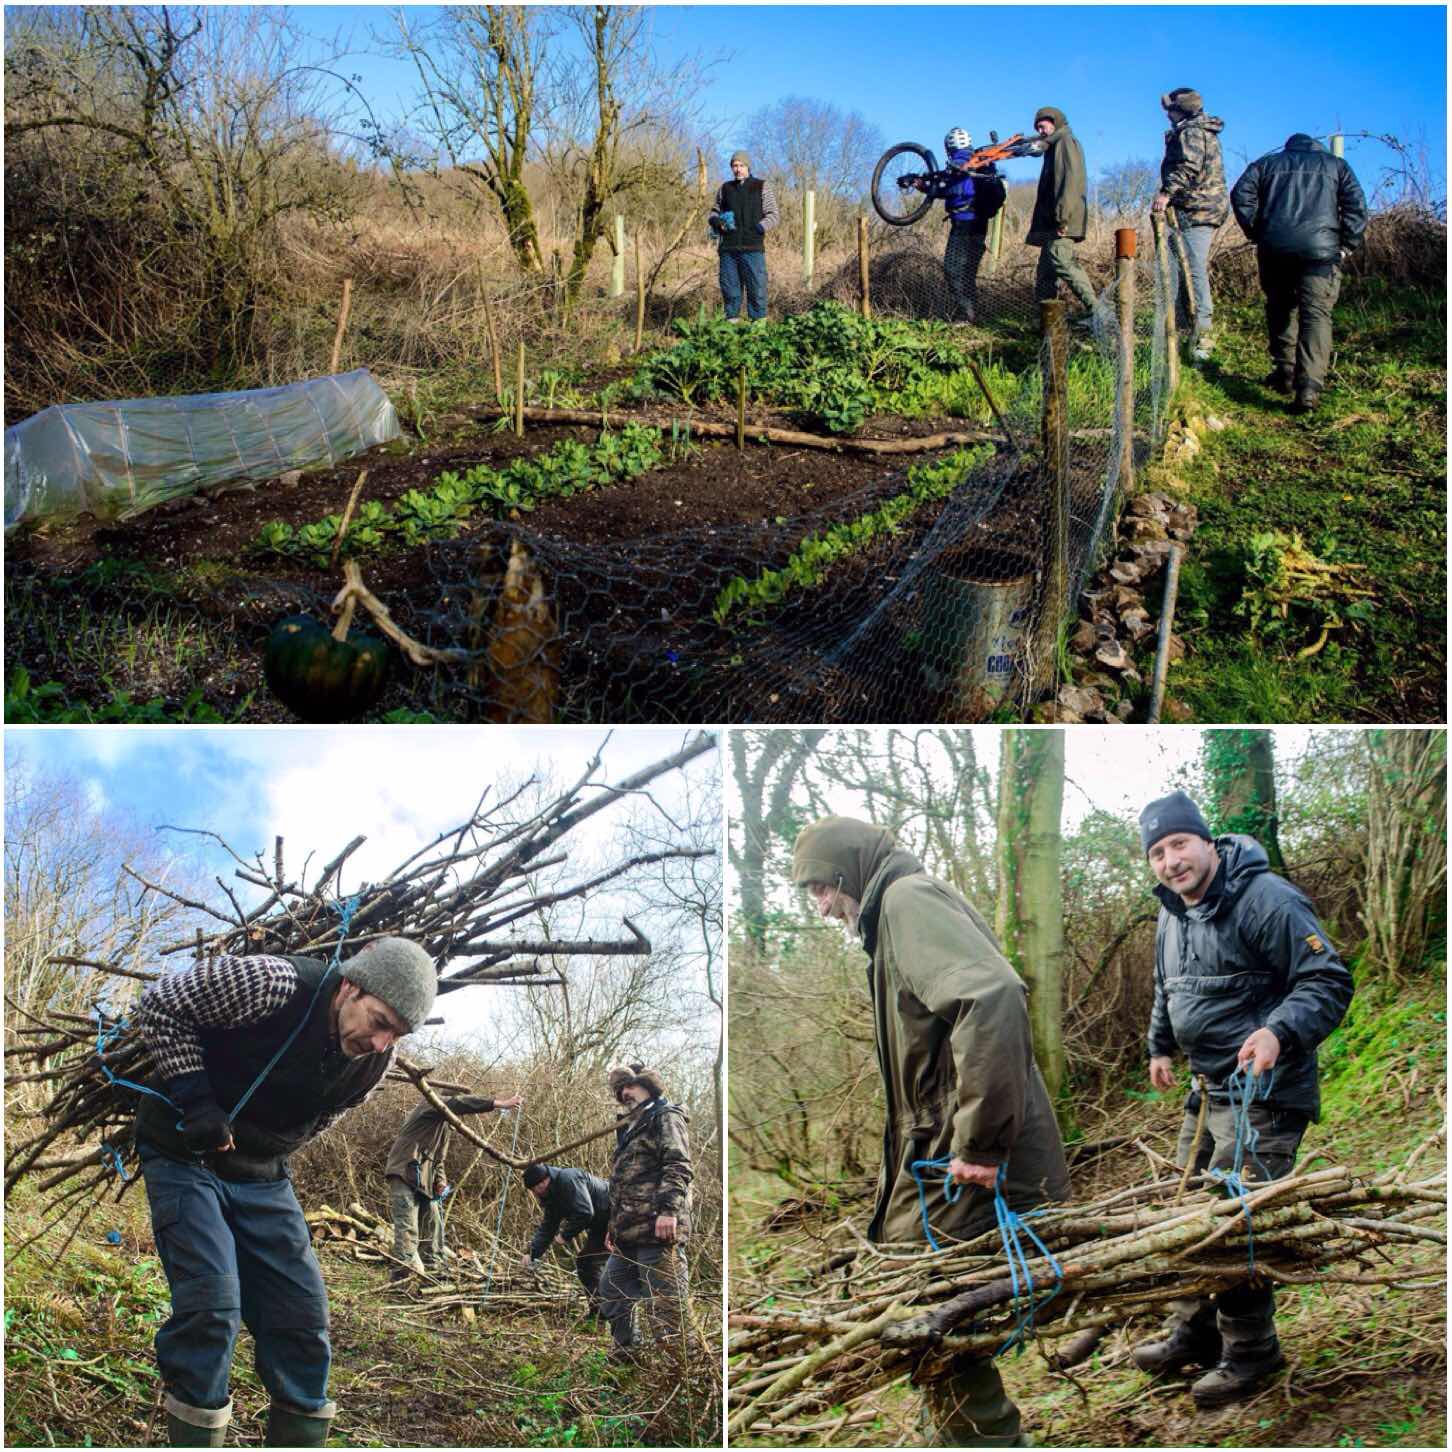
There was much to do in terms of getting the site ready for all the visiting Bushcrafters so we were all soon getting stuck into the prep.
Getting Started
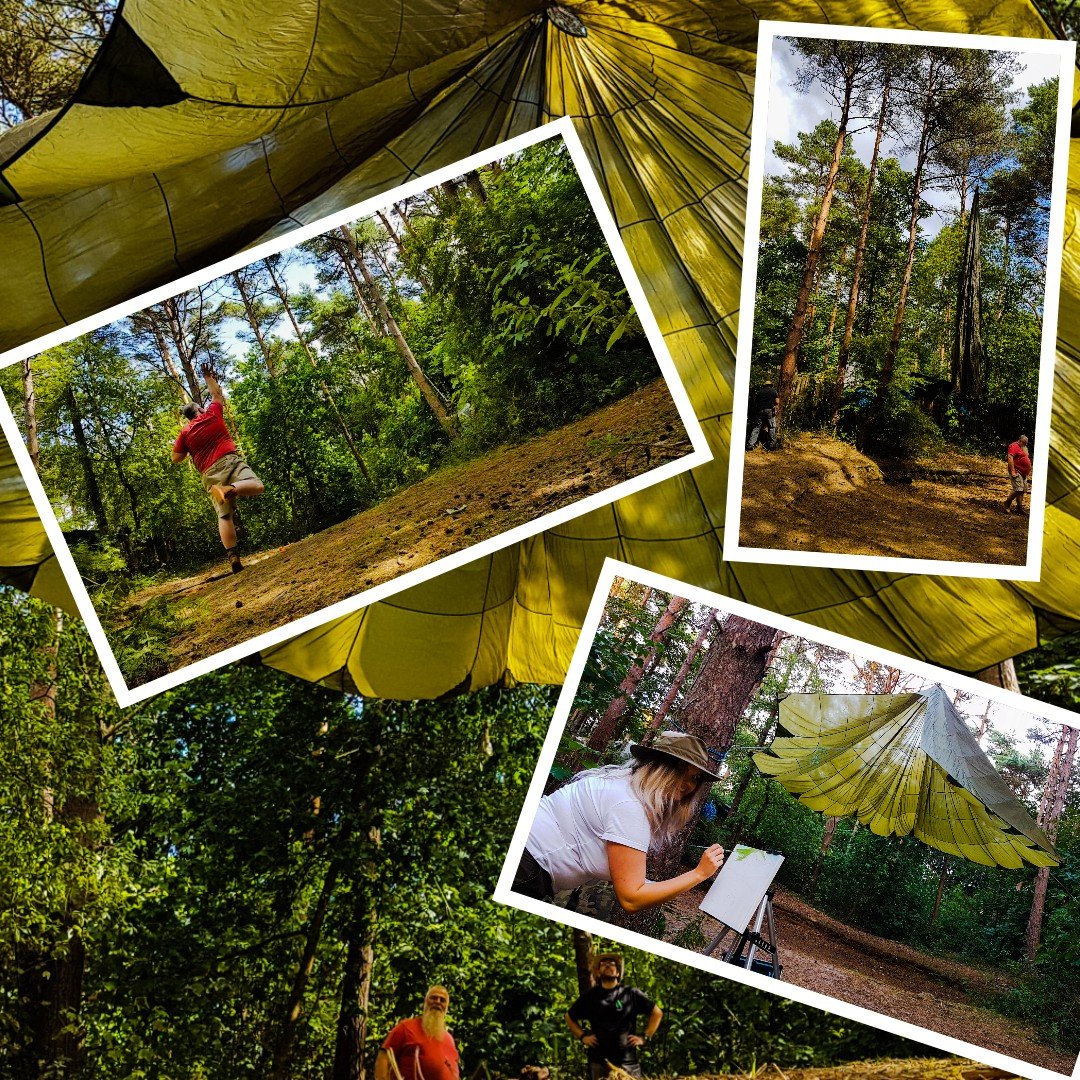
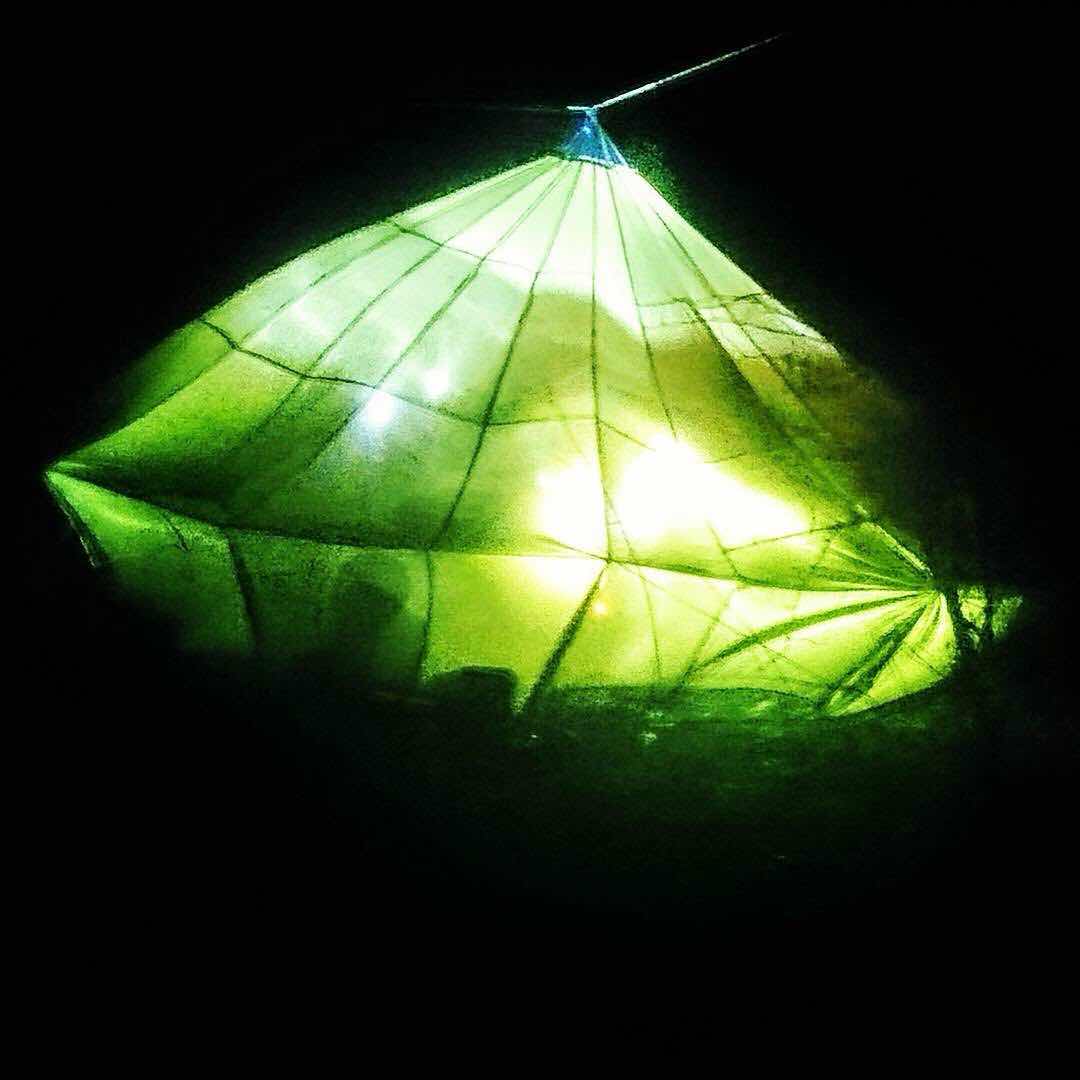
A favourite of mine is helping out getting all the chutes up. Our secret weapon ‘Pete’ is a dab hand at shooting a line high into the trees.
Later that day I spotted that our handiwork was receiving some attention in terms of some art work.
Parachutes and more parachutes
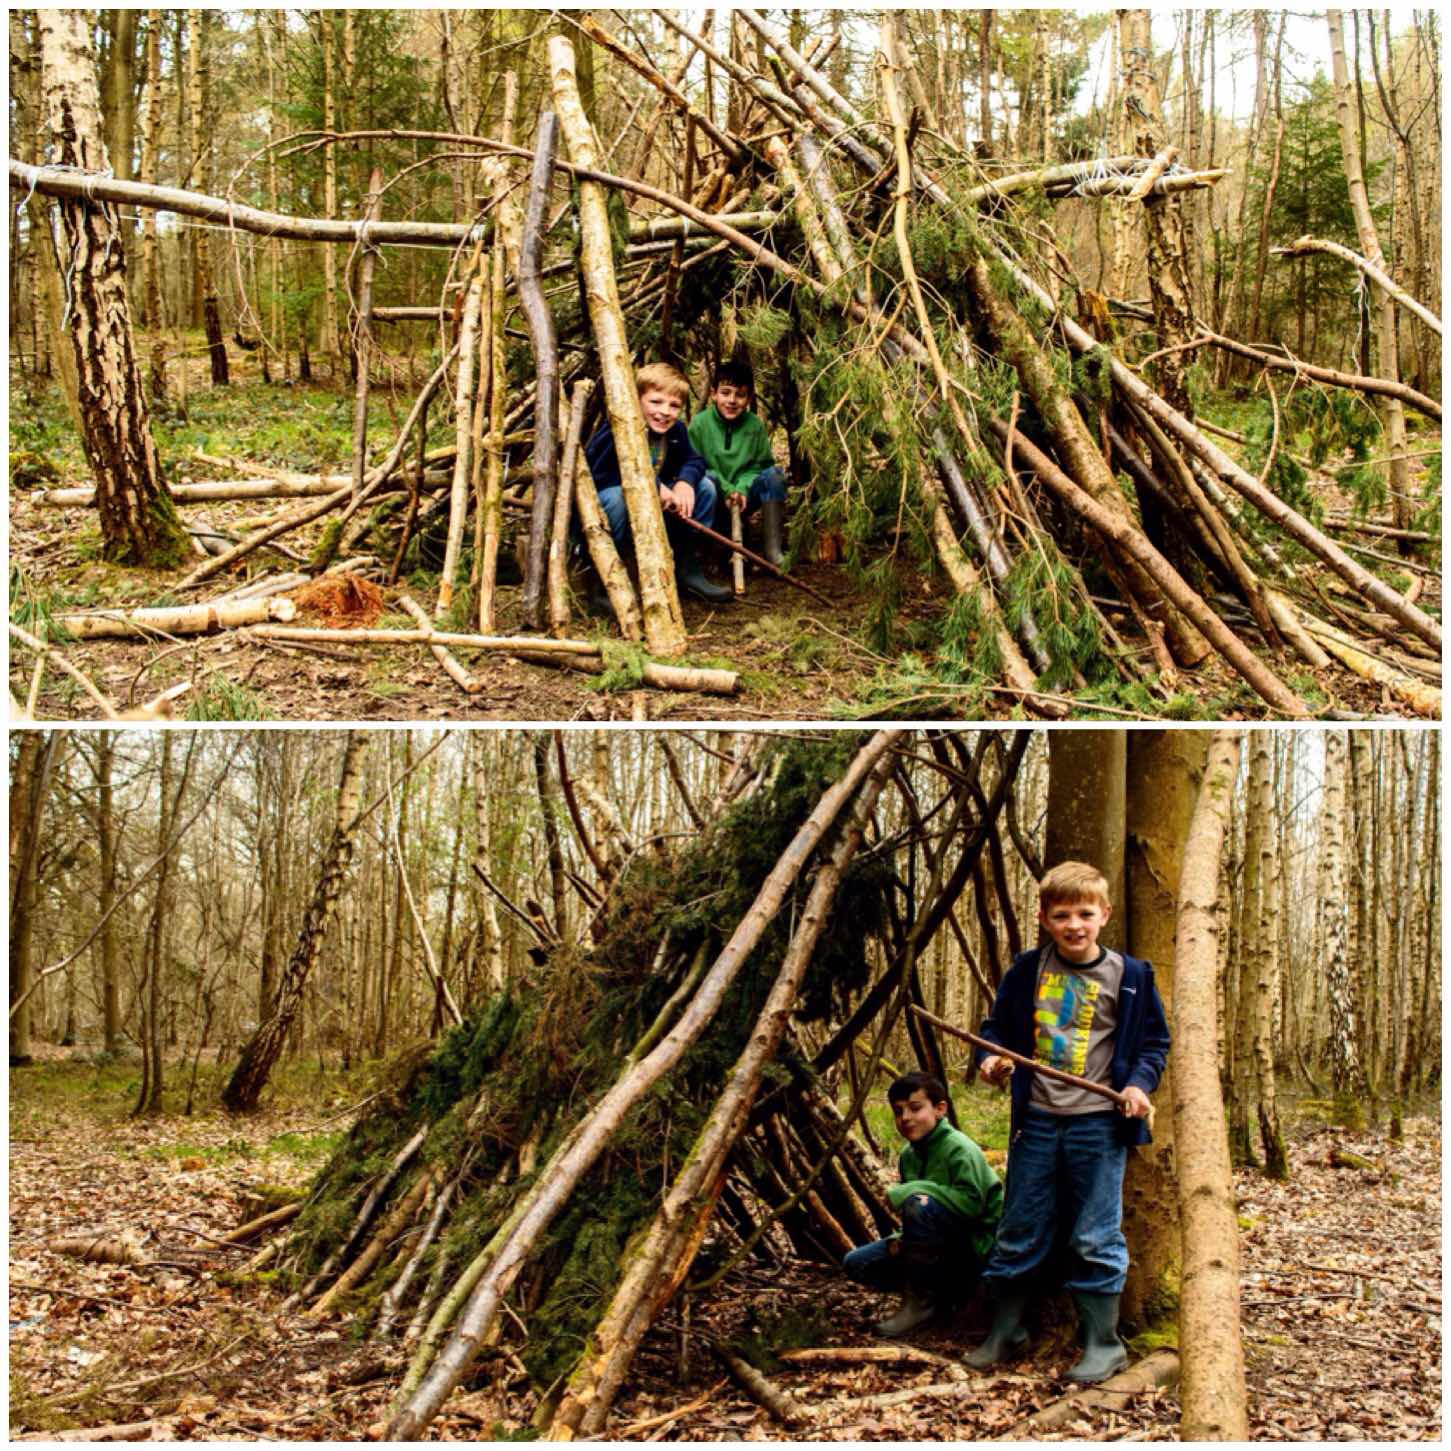
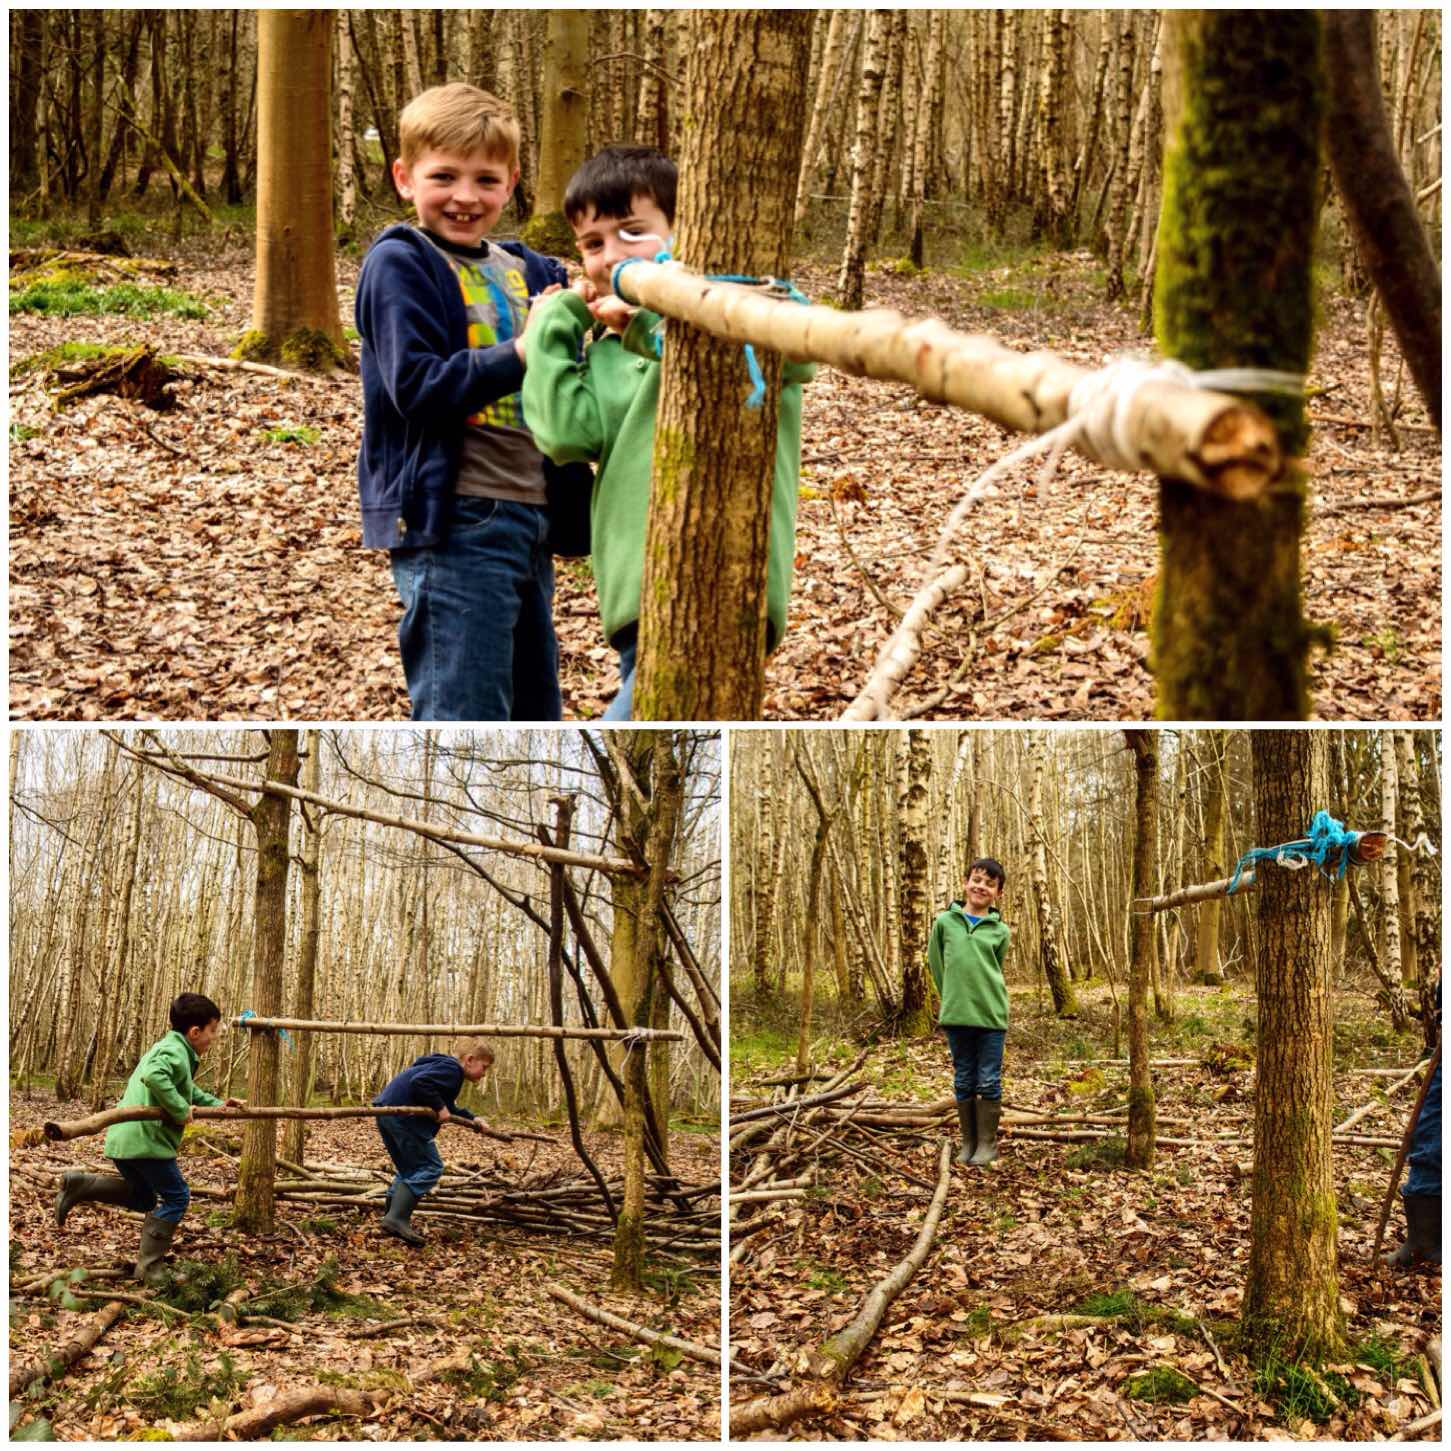
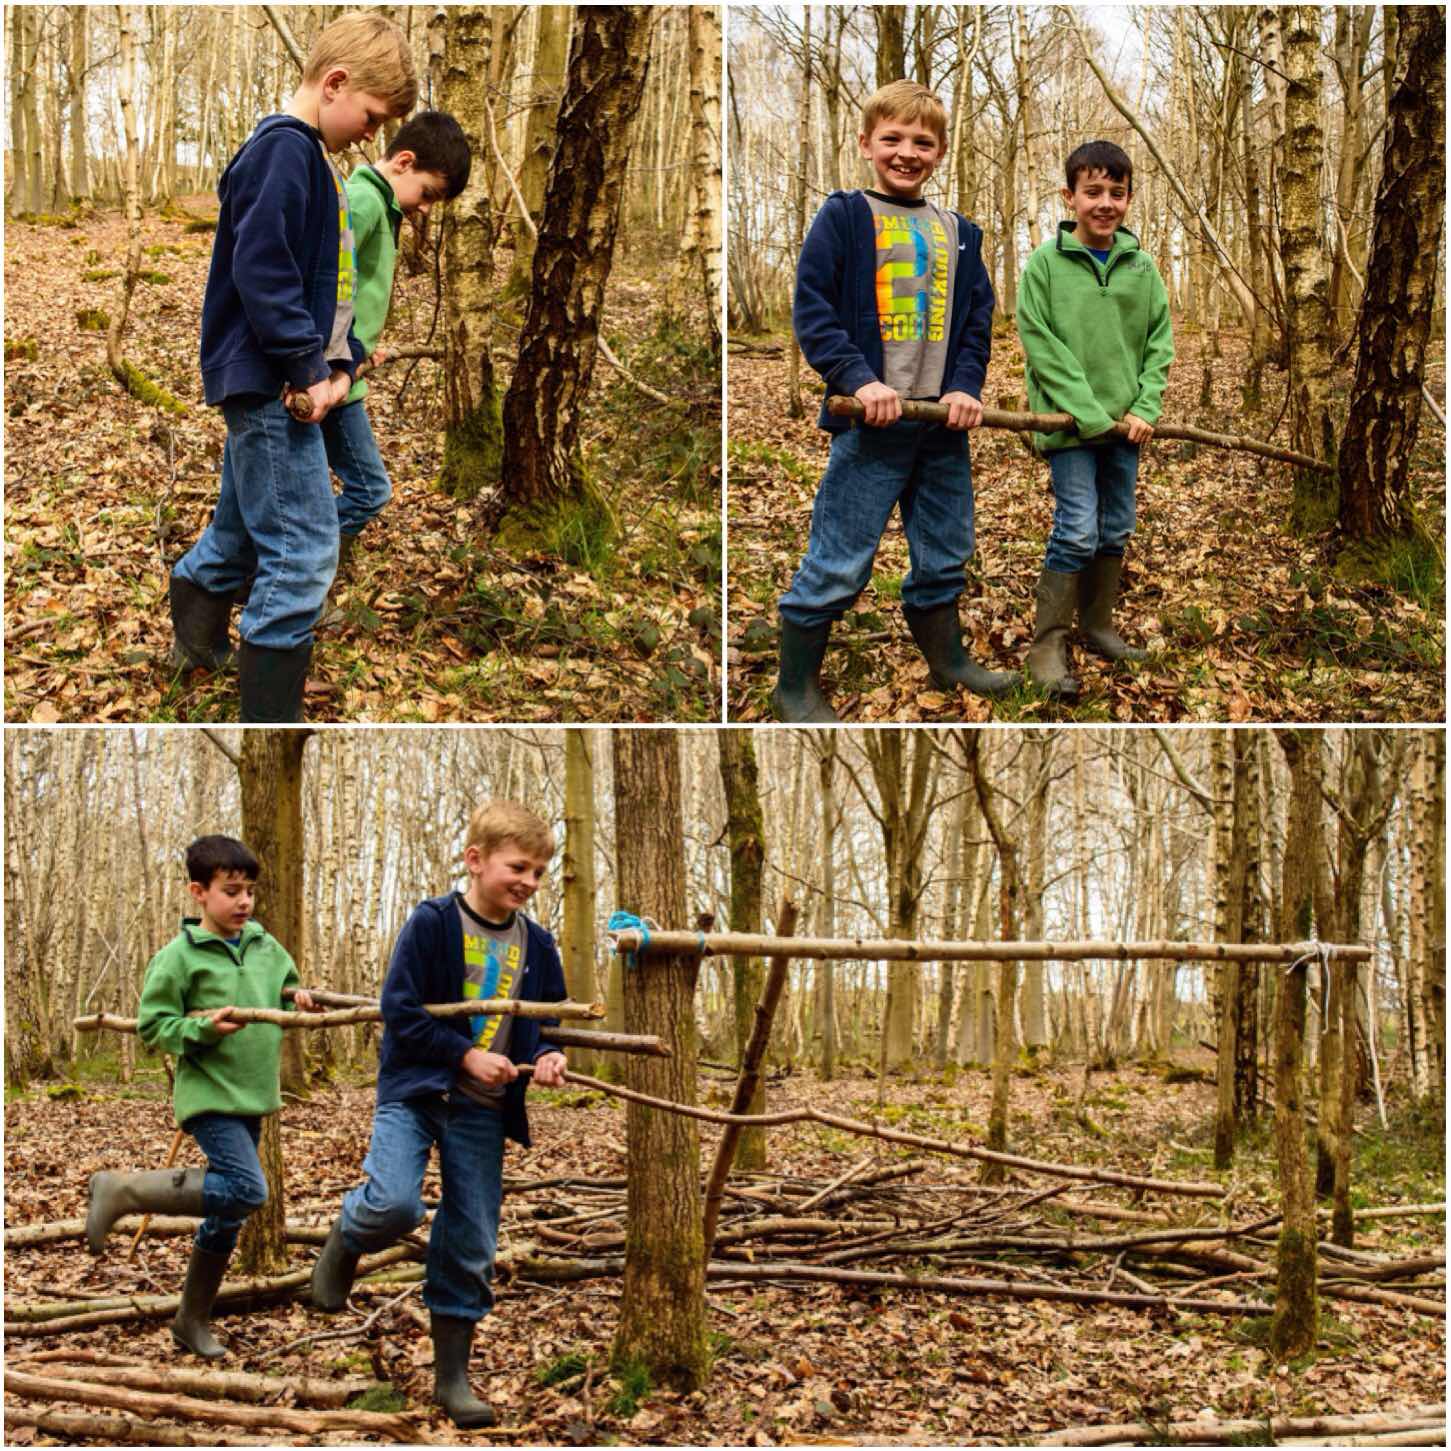
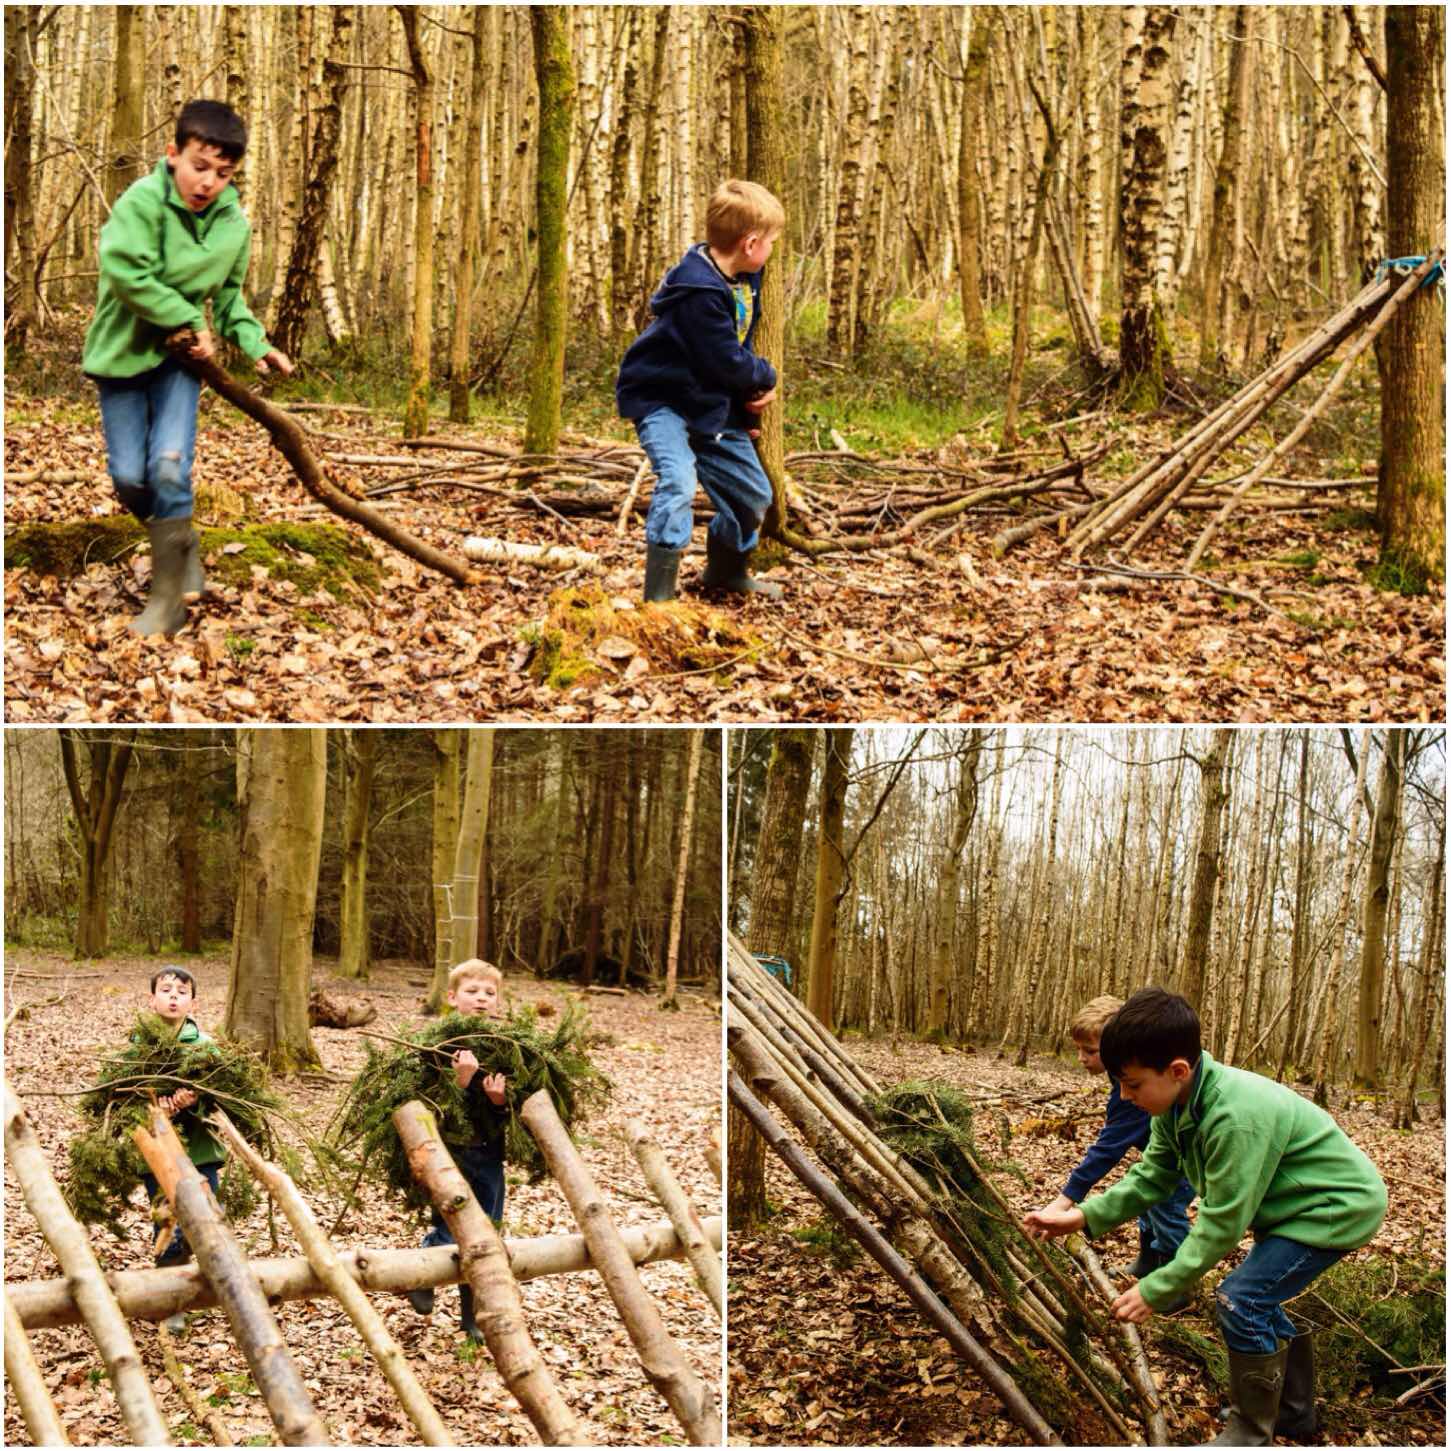
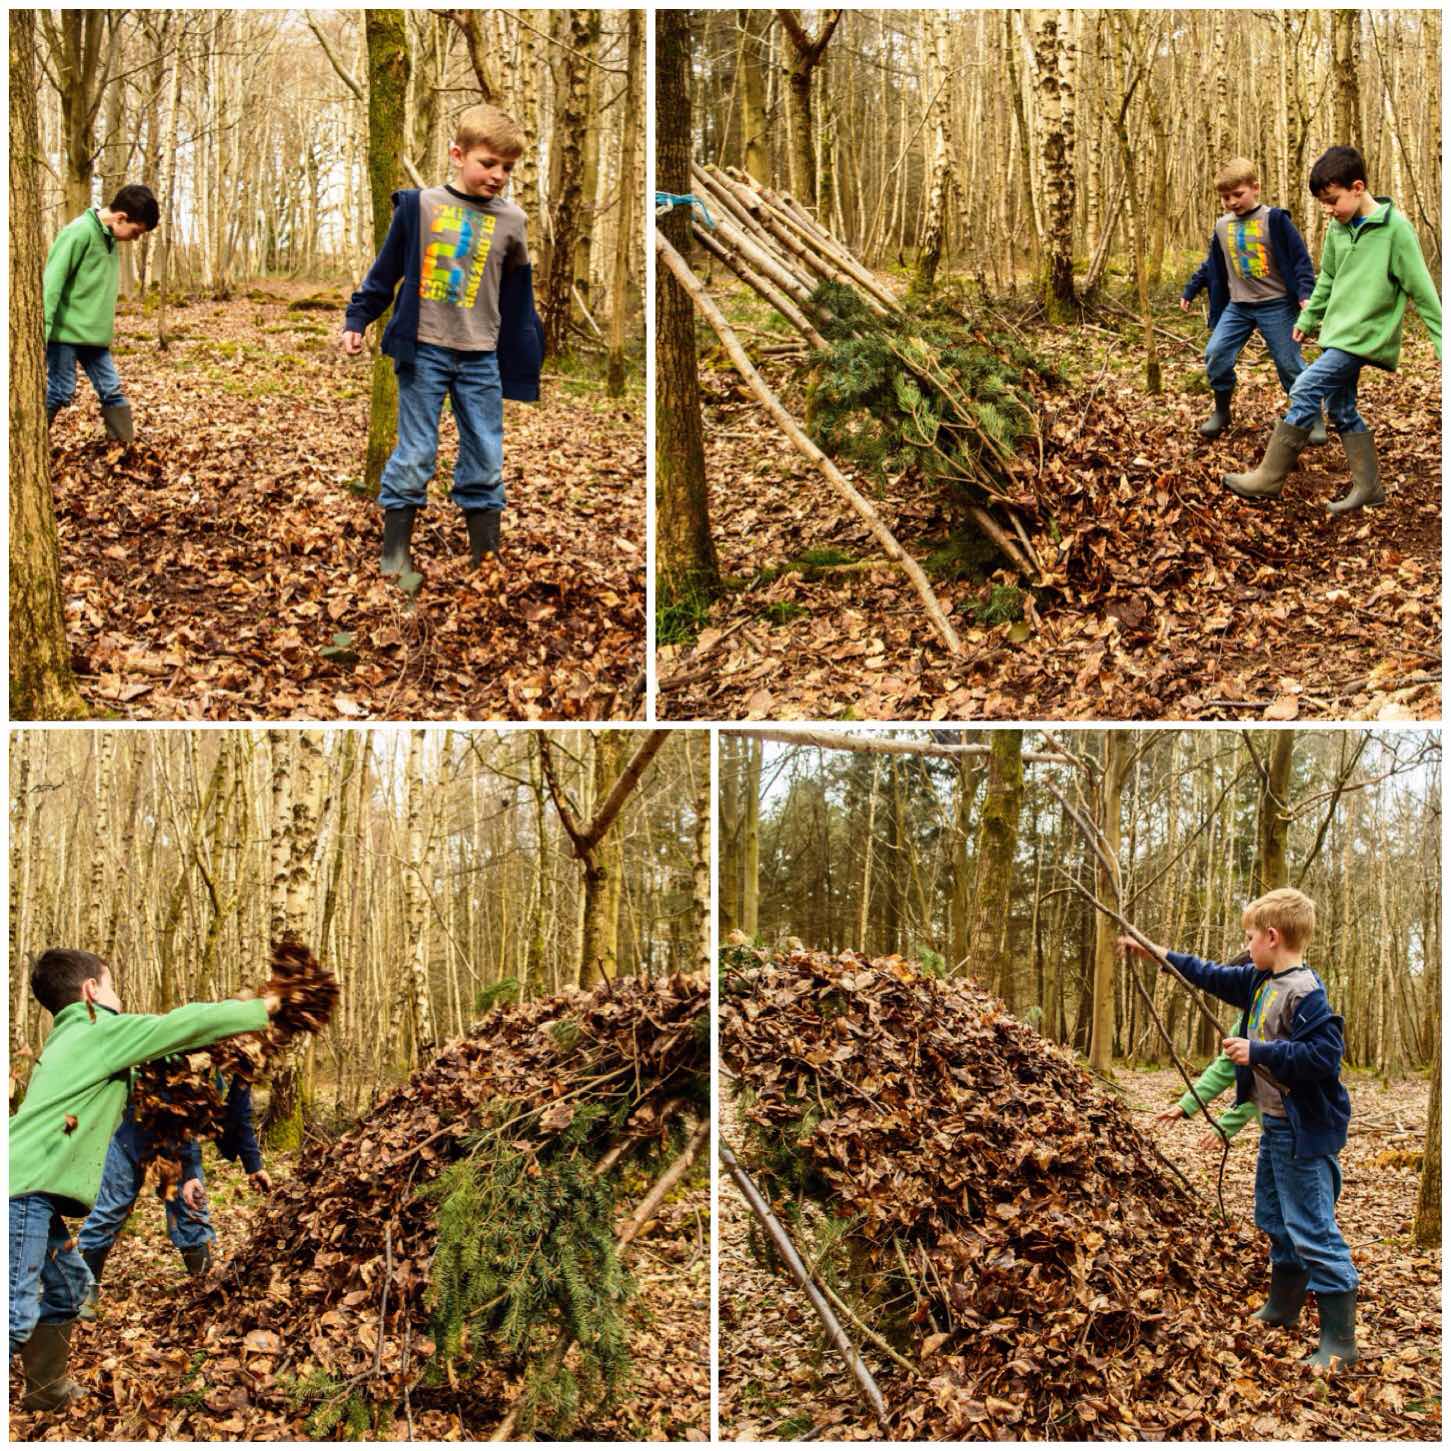
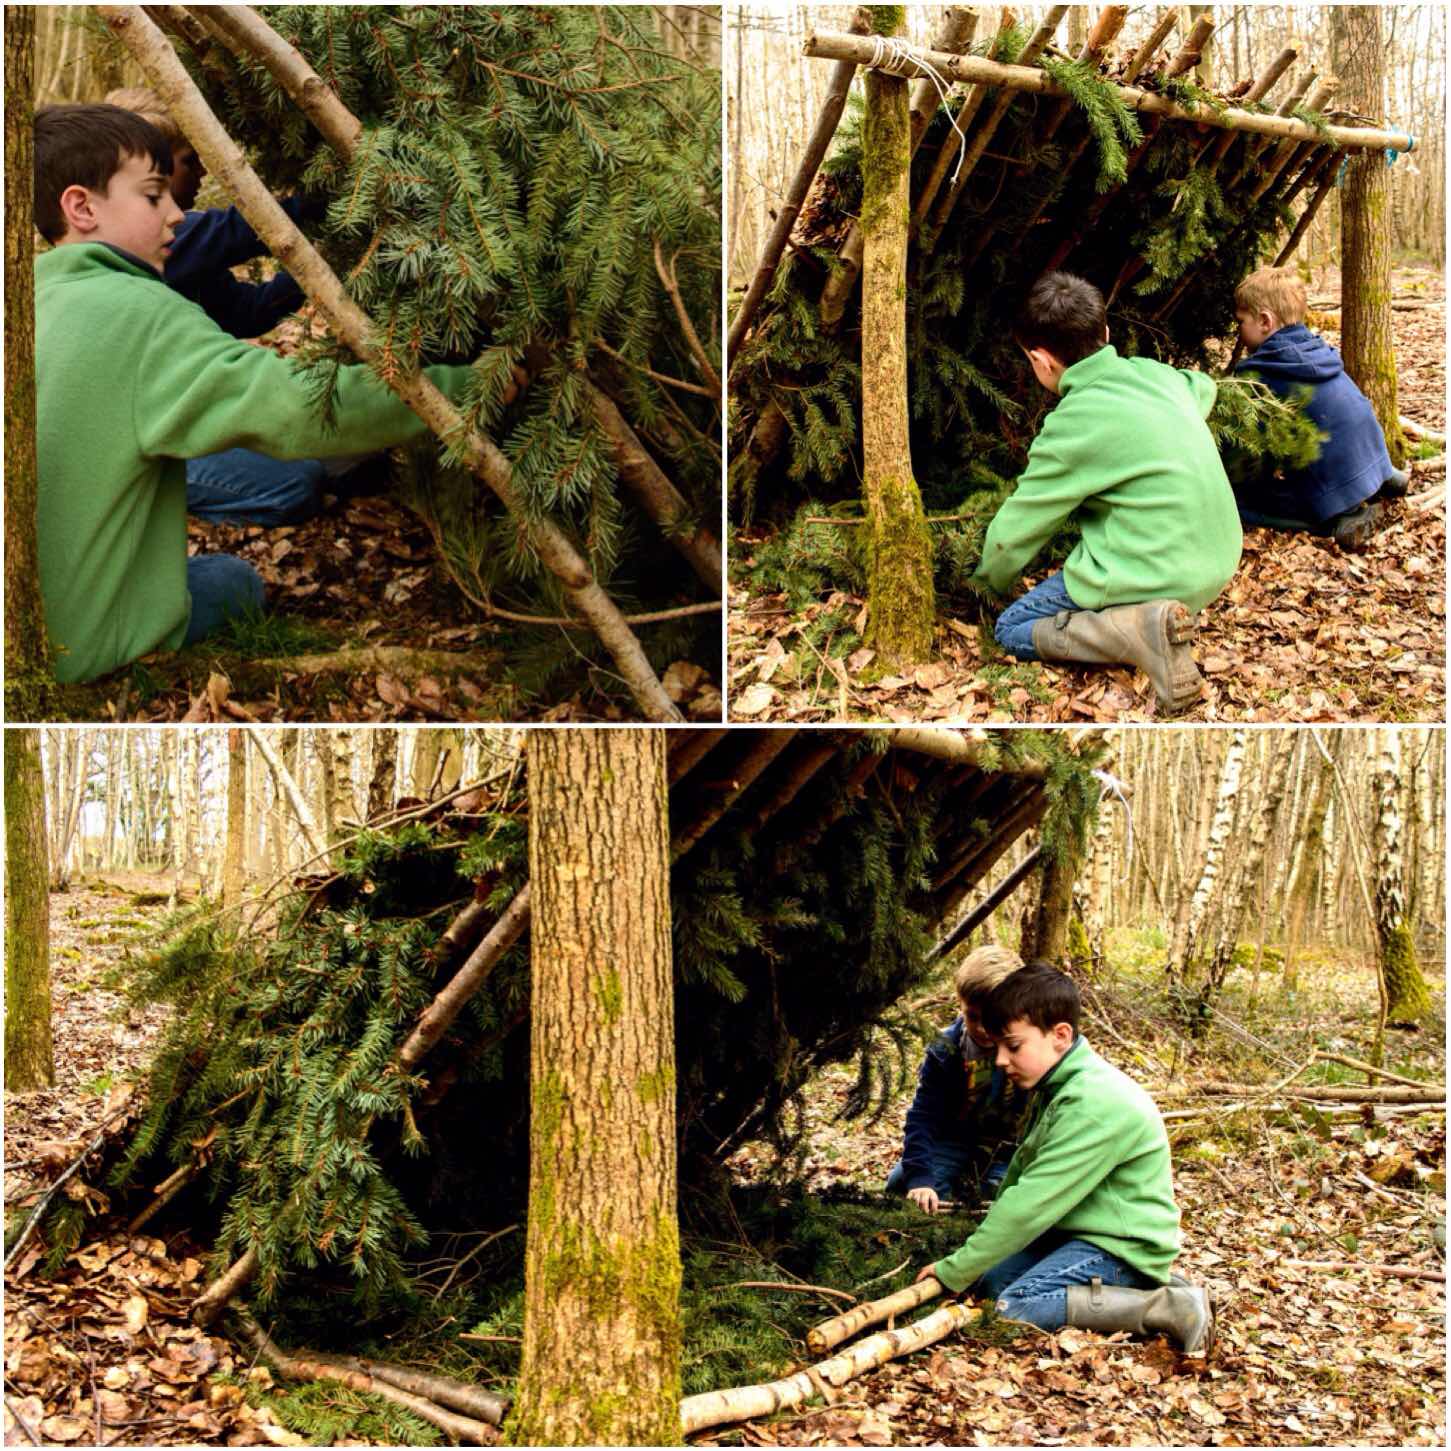
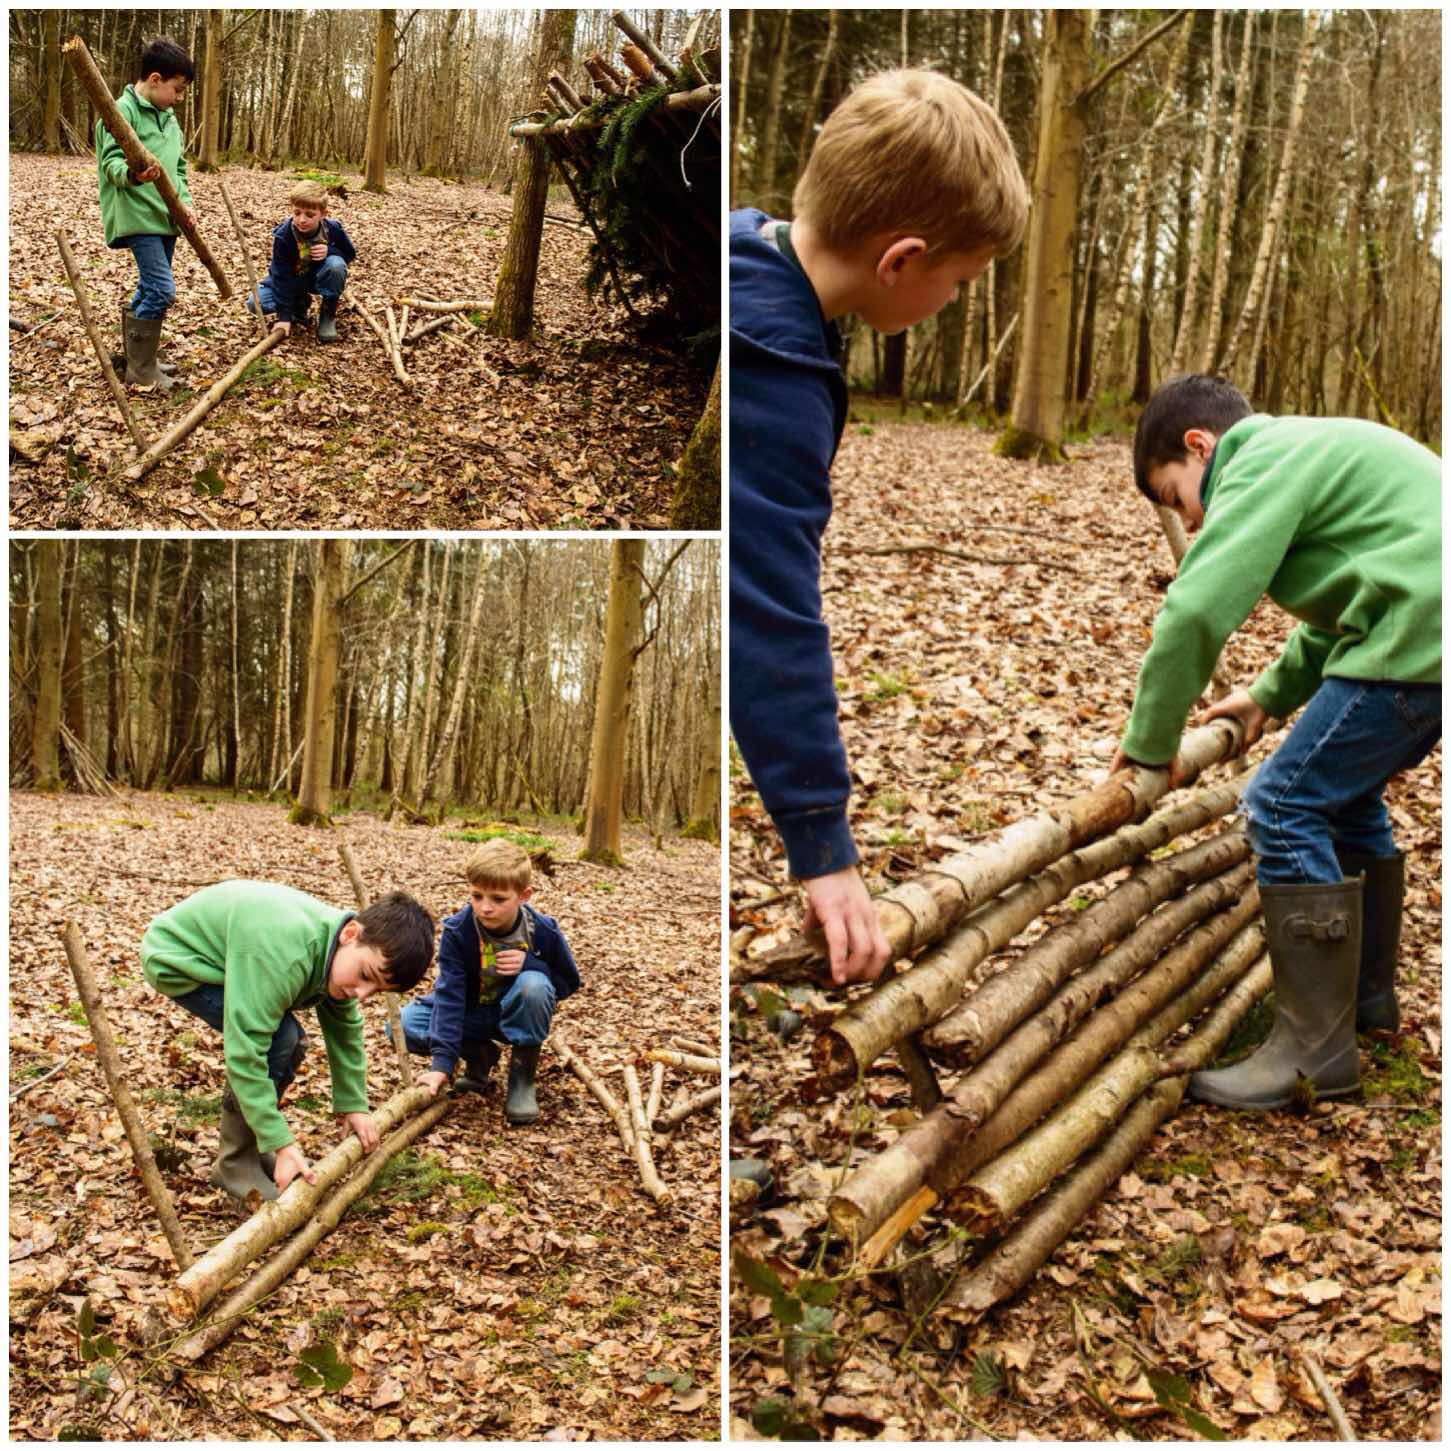
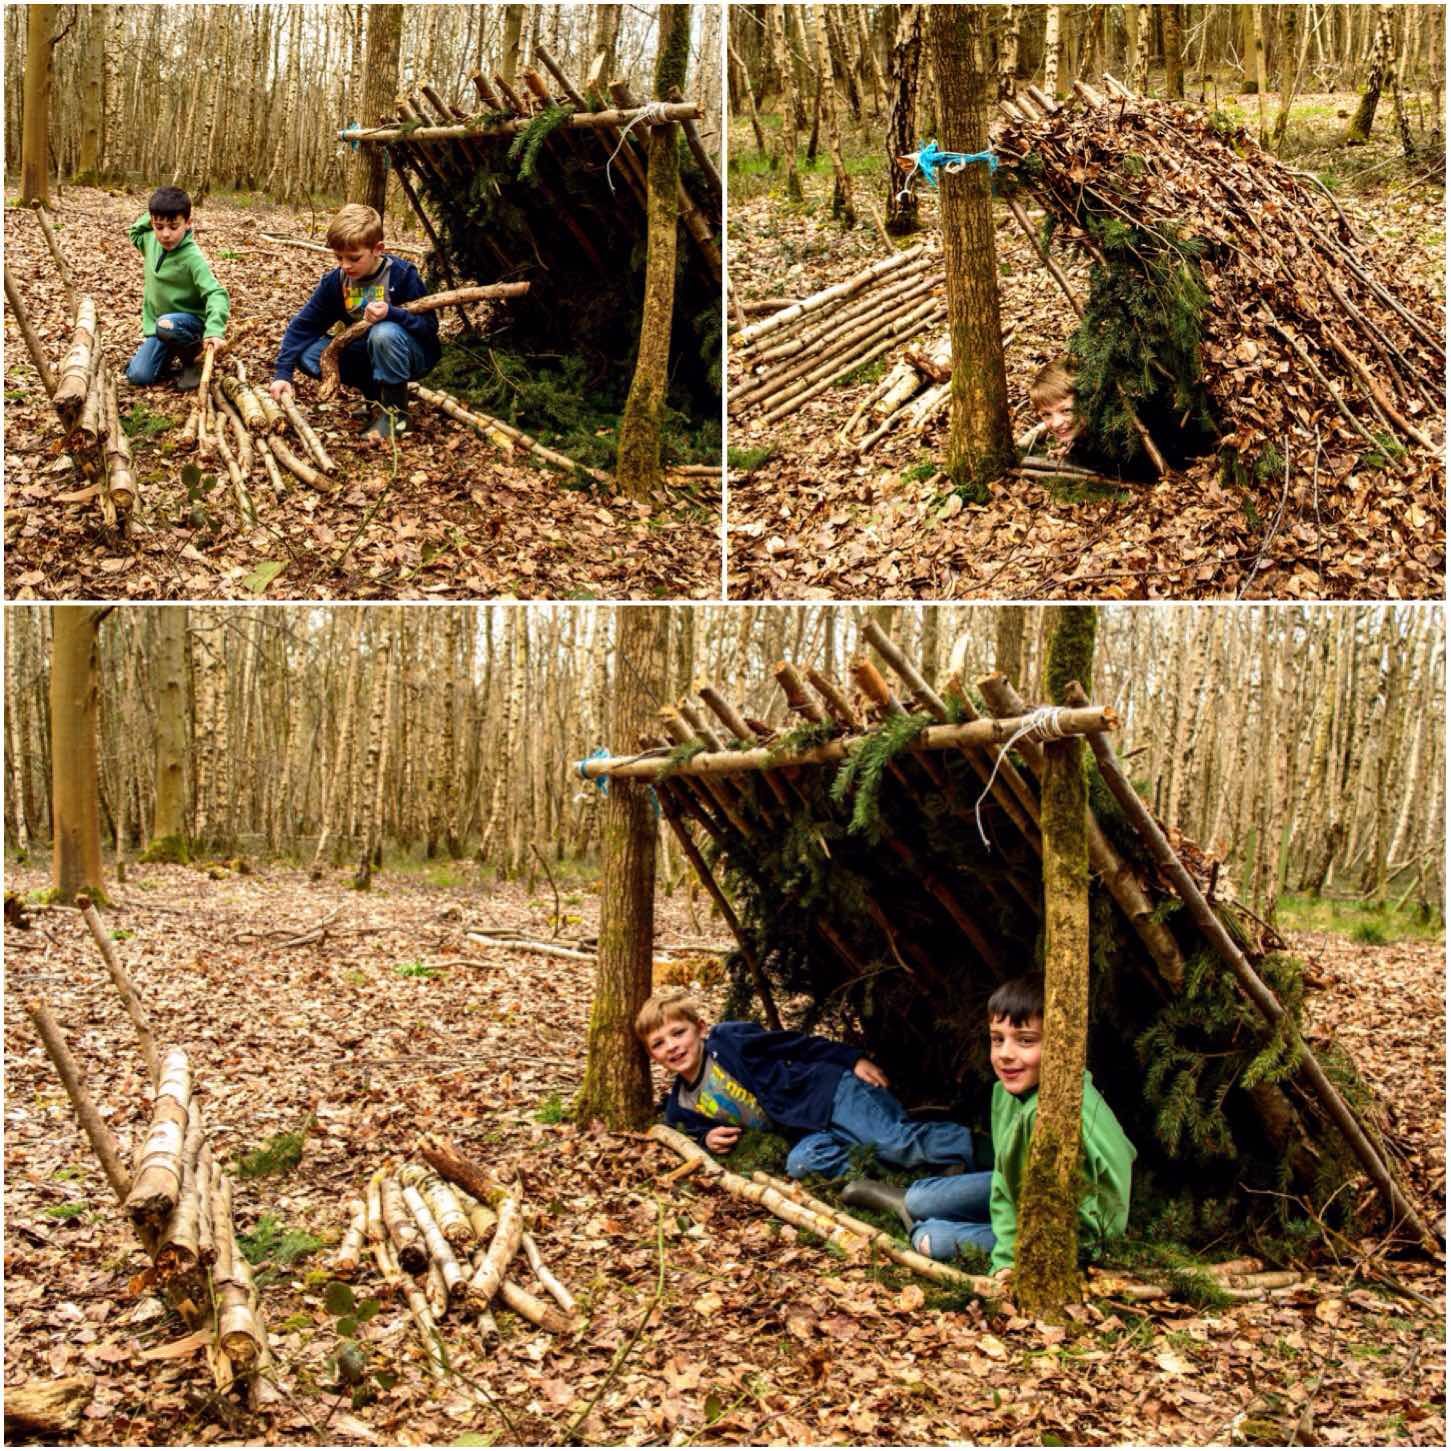
My kids did help out a little however they are on holiday and soon got into the swing of things. They have been out playing every day getting dirty, crafting and generally having a great time.
Kid time
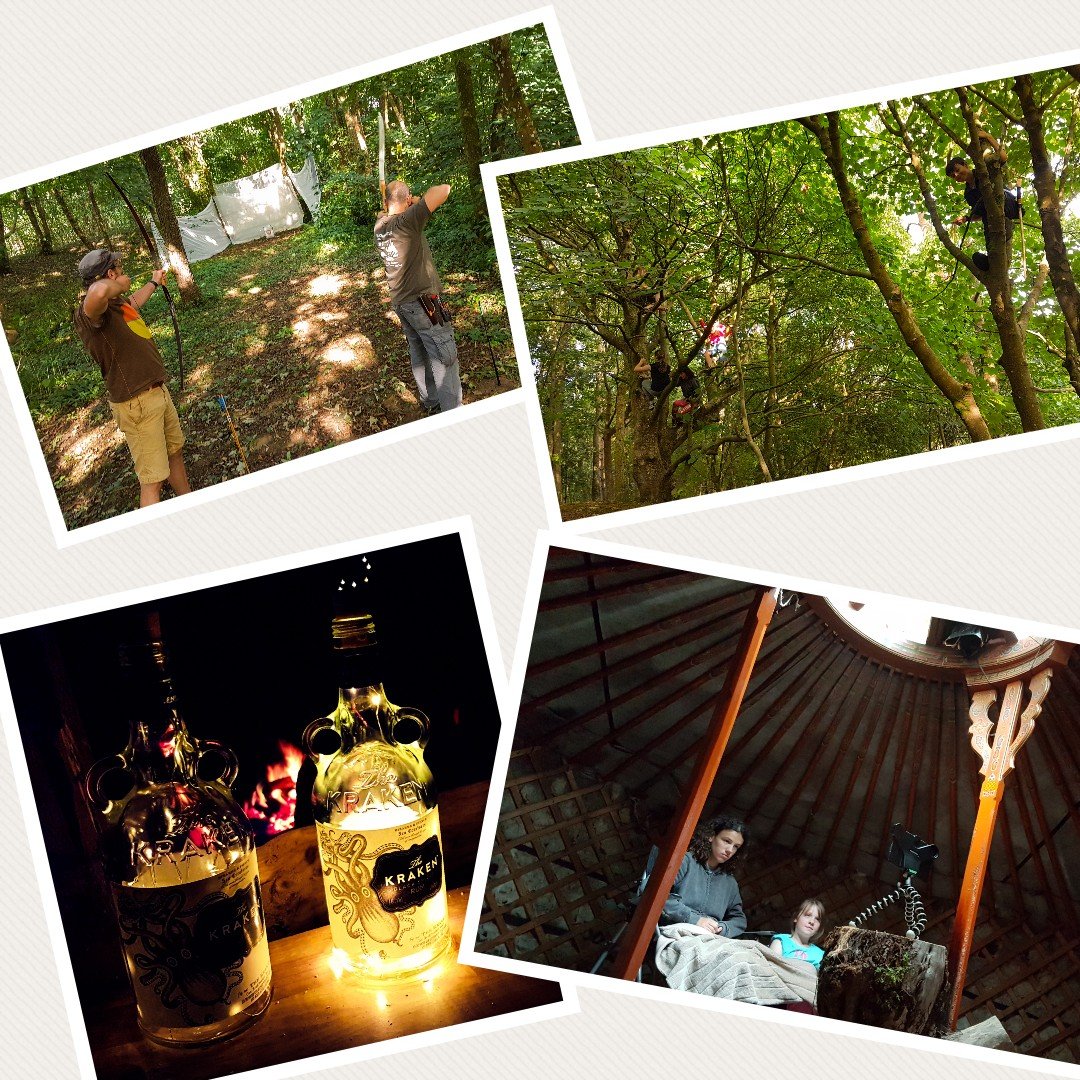
We got the range set up and it was soon on use. We will use it every day and have our annual competition next week.
Later in the evening I let the kids watch a movie and I spend a little time up at the Naughty Corner.
Evening time
Things are well set up now and we have everybody arriving – more on that in my next post.
We arrived at the Bushcraft Uk Bushmoot (Merthyr Mawr in South Wales) on Sunday evening. I am here for the next week and a half working with the Mootley Crew on what is what I call – My Busmans Holiday.
Sunday night was a busy one with all the set up of the family campsite – 3 hammocks, one tipi for kit, one tent for daughter and the main tarp for the kitchen/fire area.
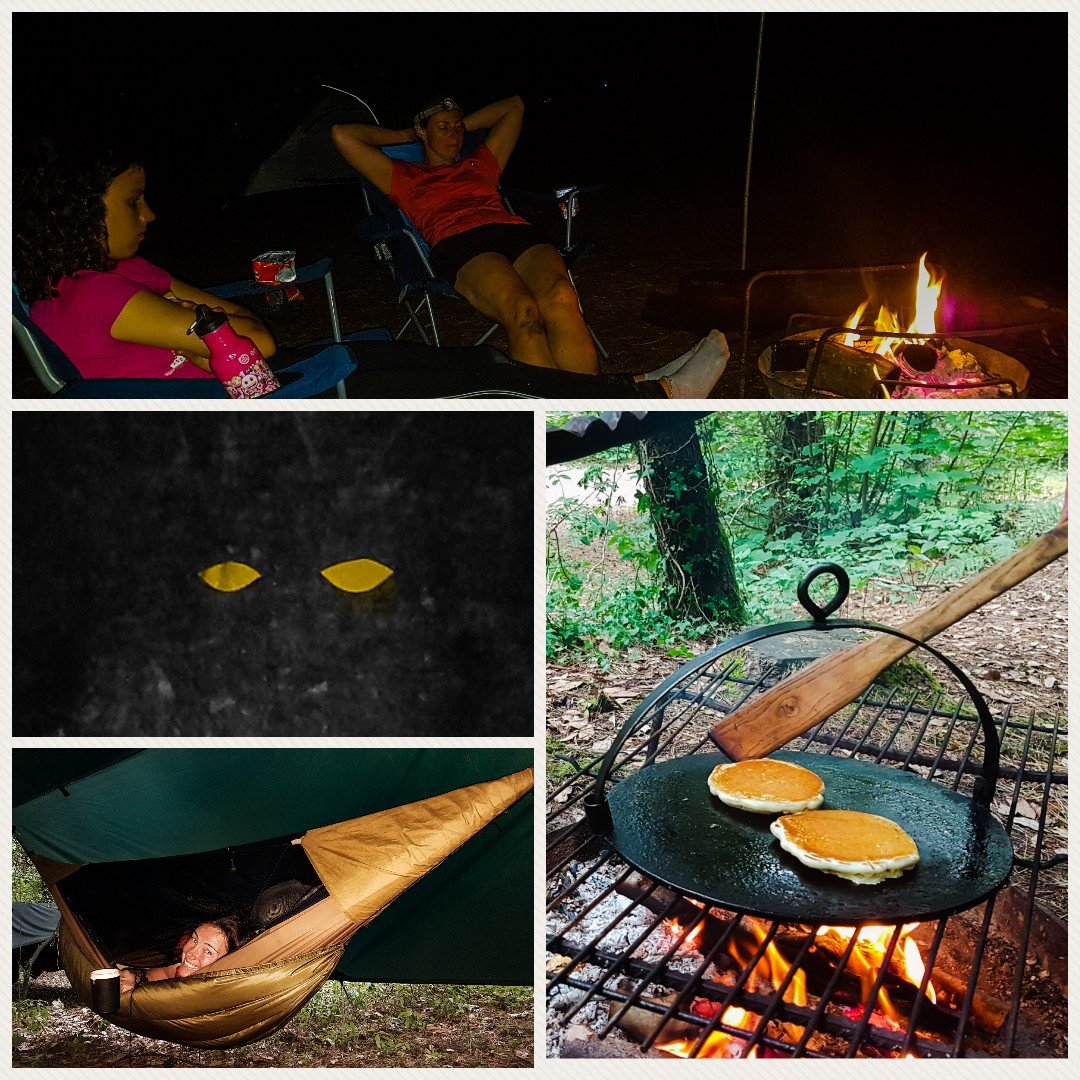
Late evening/Early morning
Needless to say we relaxed when it got dark and had an early night (Not before spotting all the Ooglie eyes on the trees).
Alison got her customary coffee in her hammock and we all got out customary pancakes – fair trade I think.
It was good to catch up with everyone as they started to arrive on the Monday. I did get a bit of relaxation time and spent it snoozing under the main tarp – woke up to some lovely shadows dancing above me.
Busy Monday
Alison headed off on Monday evening but thankfully she will be back later in the week.
It is all busy now setting the Moot up so I will finish here and catch up with you all later.
Over the last year or so I have found that my Bushcrafting has been taking a bit of a backseat to my other Adventure Training responsibilities so it was great to get back to some Bushcraft with fellow instructors from London Area Sea Cadets at one of our regular Multi Activity Staff Training (MAST) weekends.
It was a bit of CPD weekend for some and a bit of a new adventure for others. We took our time setting up camp on the Friday in the Mereworth Woods training area we had been given access to as the students were not due to join us until the Saturday morning – a kind of calm before the storm you could say.
Back to Bushcraft
Saturday
The weather was on the whole kind to us with no major showers but the tarps were up just in case. Graham got his cuppa in bed that morning (being an officer and all that) and then modeled his Buffalo sleeping bag for us by the fire – I have no idea why the thing has a full face zip – weird 🙂
Morning Sir
Along to help out and do some CPD were Dave, Alan, Charlie and Graham. The instructors from the Adventure Training team looking to learn the basics of Bushcraft were Ben, Lee, Sam and Gary. We like to run these Bushcraft courses from time to time to expand out Expedition Leaders skill set so that they can pass the knowledge onto their cadets.
Time for Tea
Before they were allowed to have a cuppa on the Saturday morning the students had to learn about lighting a fire. Off they went to learn about gathering dead standing wood, processing and grading it before learning to use firesteels – needless to say the tea and coffee was soon brewing.
Brew Time
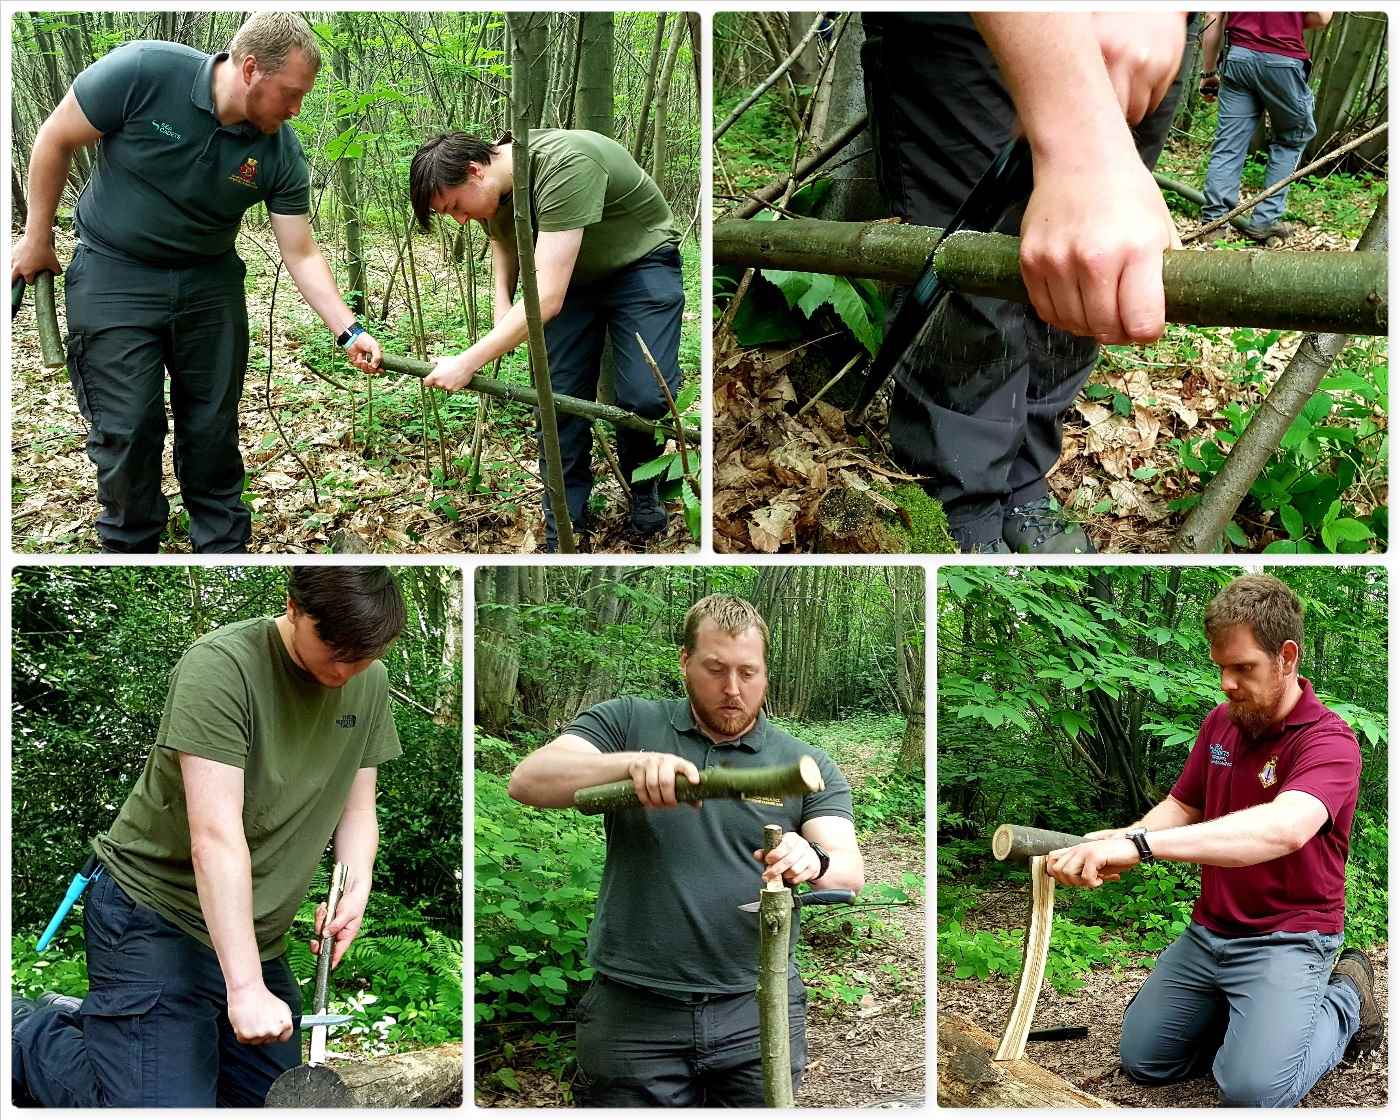
Saw and Knife use
After their brew it was time to learn how to use saws and knives safely. Once the wood was gathered they learnt about safe knife cuts and battoning. I like teaching in this way as there is no need to get axes out (and we did not have time to cover them anyway). The students produced some strong tent pegs and looked at the techniques for making feather sticks for fire lighting.
Saws and Knives
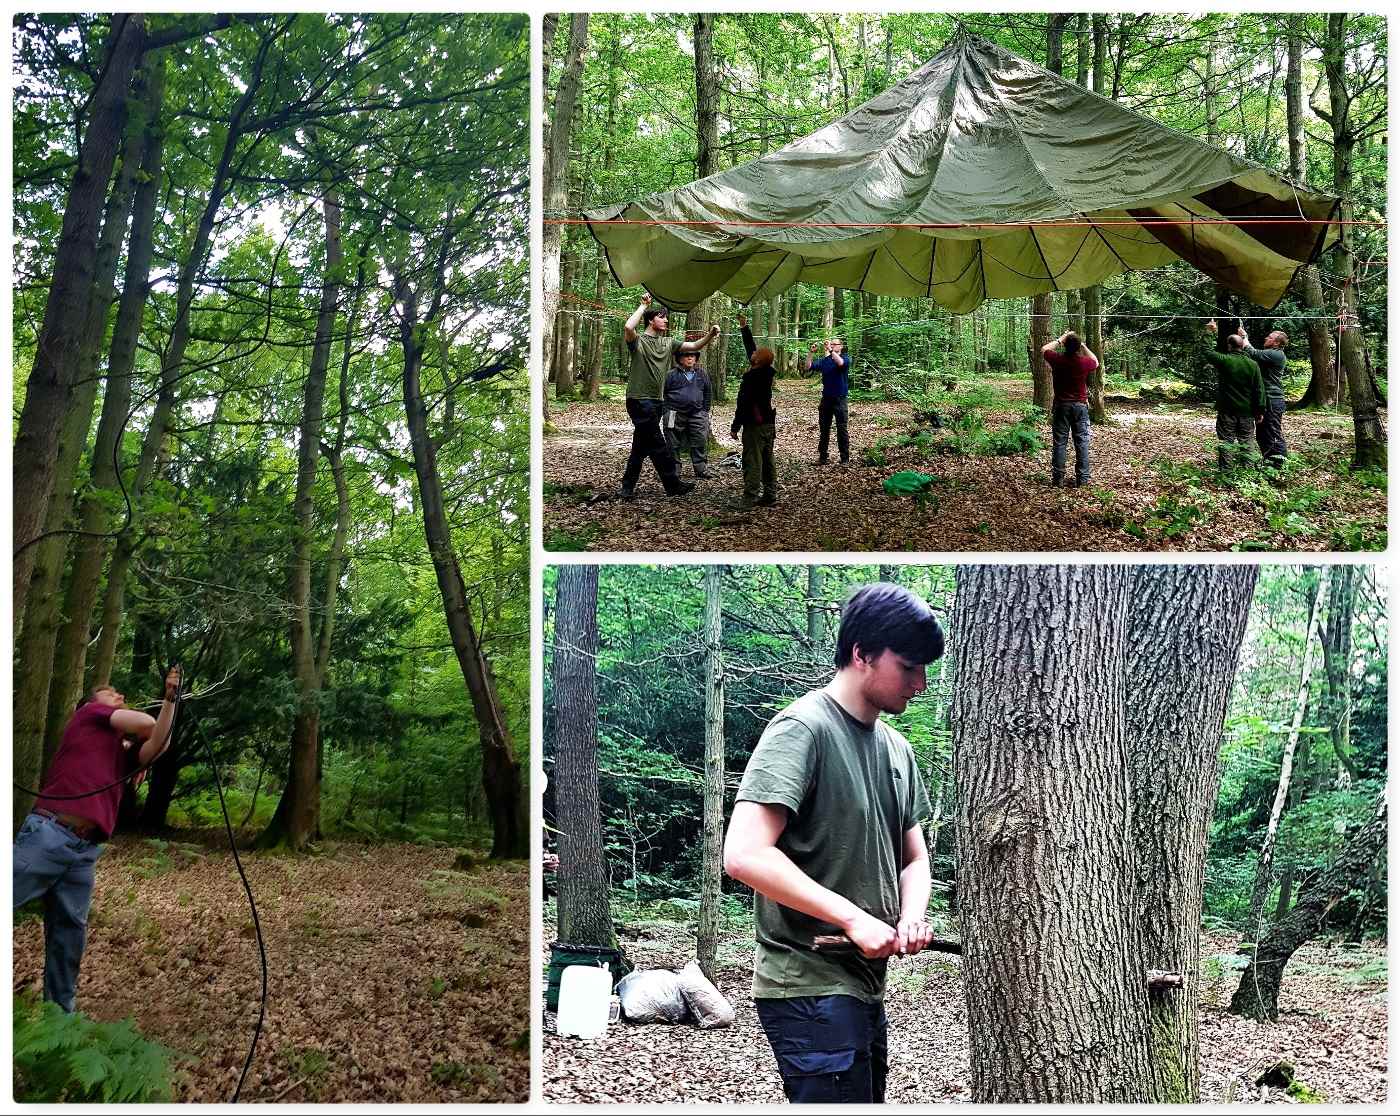
Camp Set Up
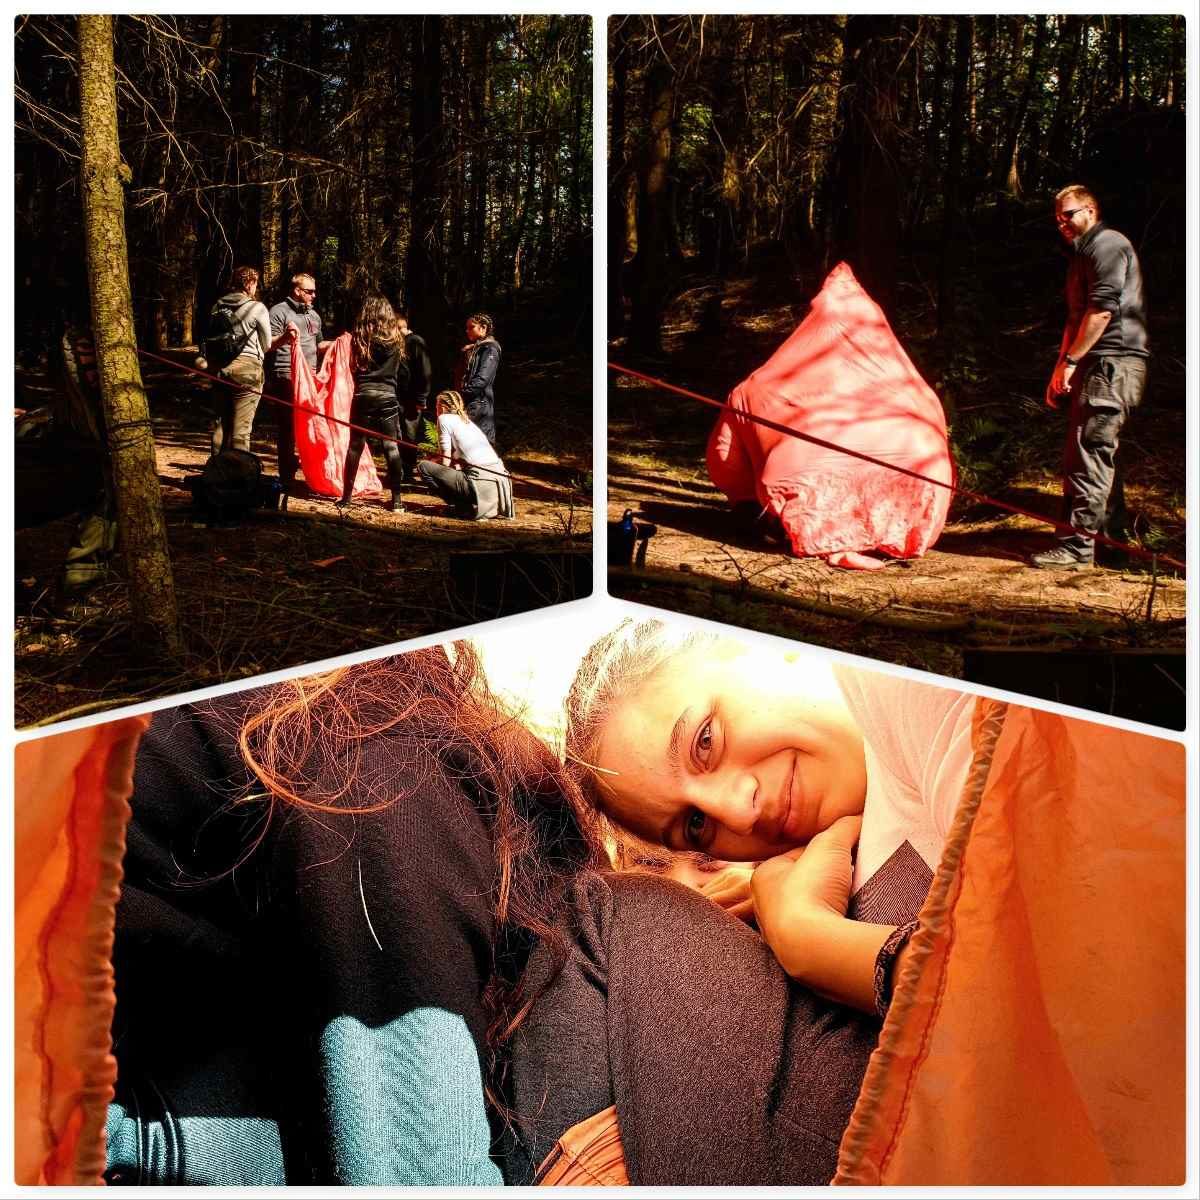
One of the things I wanted the students to do over the weekend was to set up their own camp. They learnt some of the basic Bushcraft knots with Charlie and how to throw a line through the trees. Soon they had their parachute up and firewood collected. Once that was all done they spent time with Dave and Graham learning how to put hammocks and tarps up (no ground dwelling on this weekend).
Camp Set Up
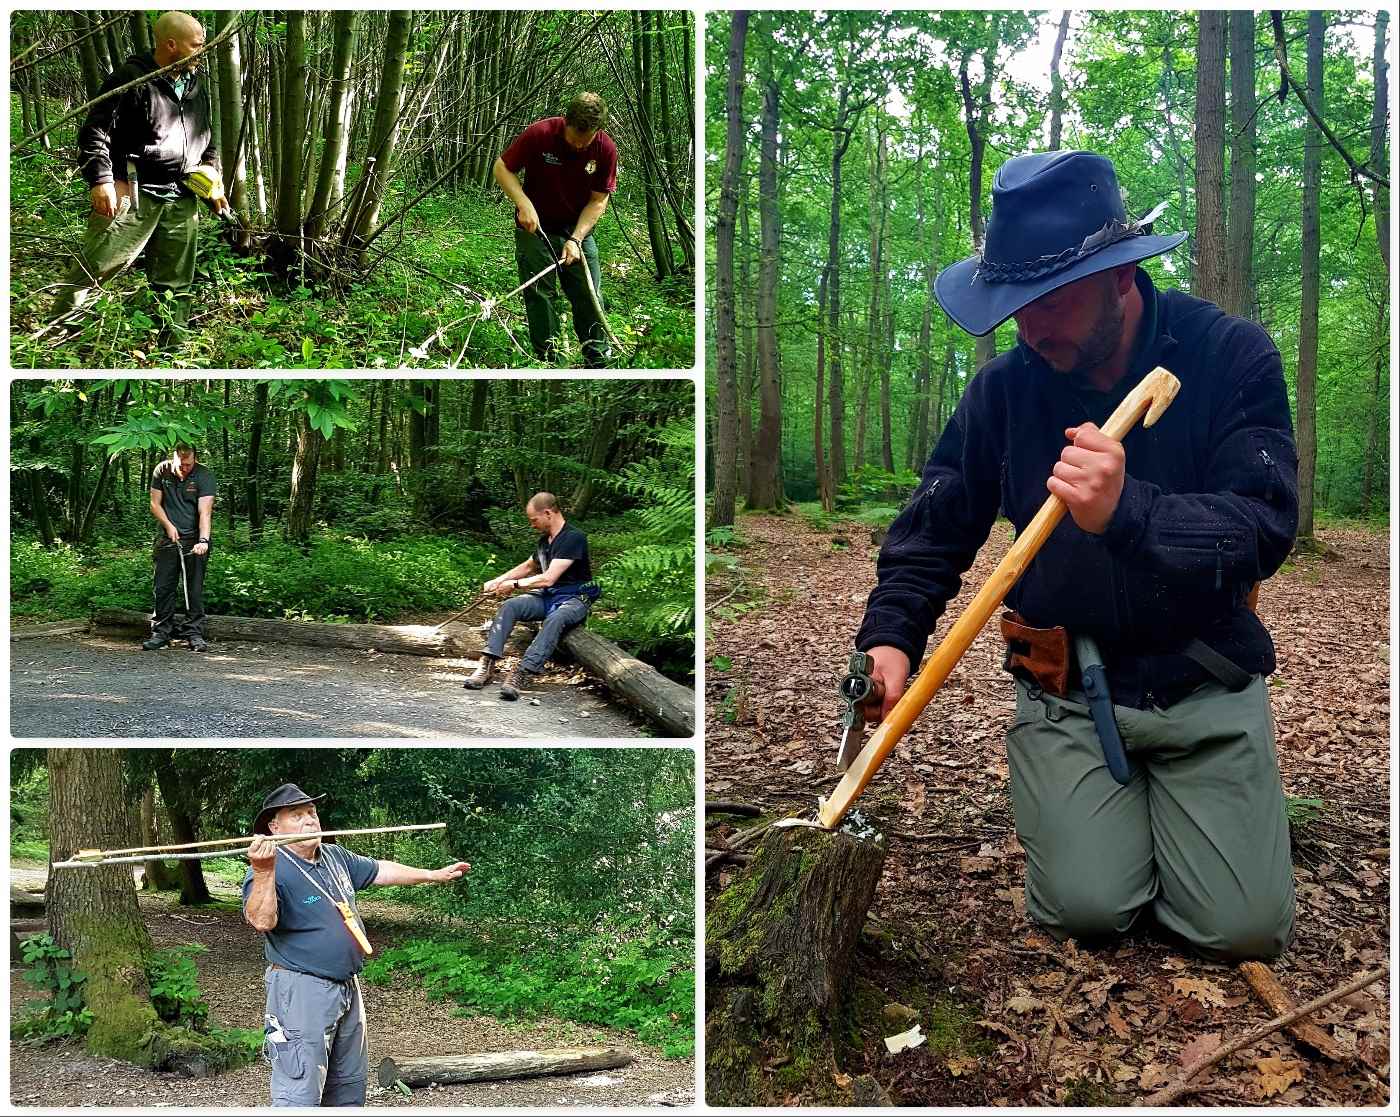
Atlatl Carving
A popular activity at cadet camps is Atlatl dart throwing so Dave and Alan spent a couple of hours with the students getting them to carve their own Atlatl throwers. All the skills that they had learnt in the morning with the saws and knives were used here with some finer knife cutting technique thrown in to get the points done.
Atlatl Carving
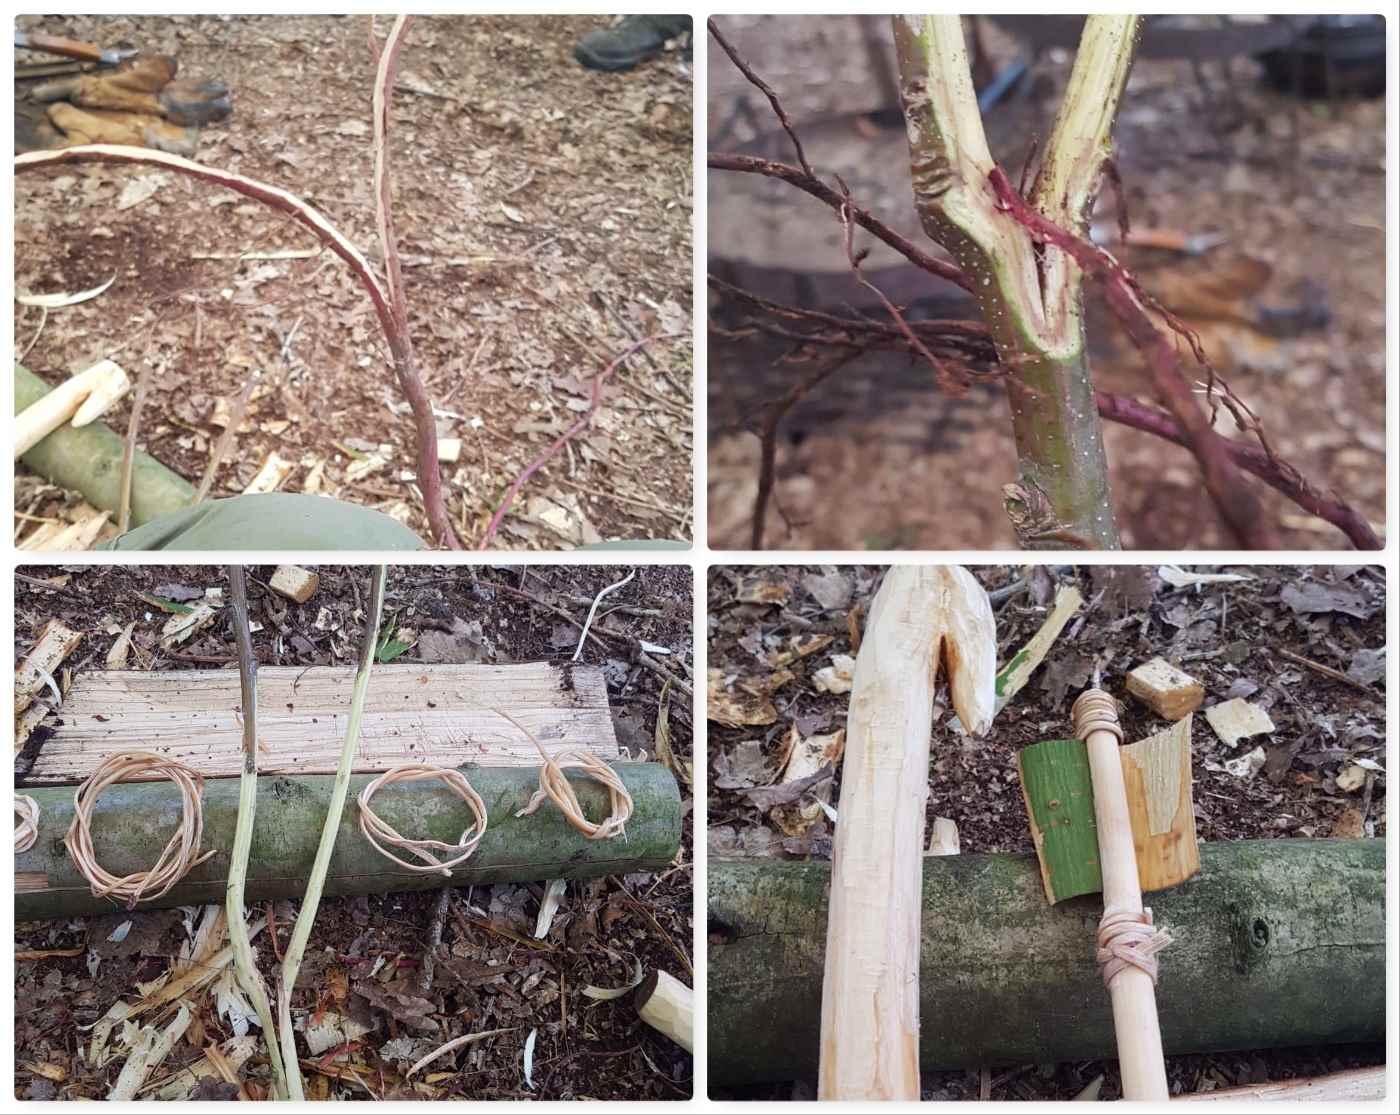
As this was CPD time for the experienced instructors Dave went off earlier on the Saturday and experimented with Spruce roots as cordage. After digging up a little he split them down and removed the bark (with the forked stick) before using it to bind his demonstration Atlatl dart for his class. He also used Sweet Chestnut bark as a flight for his dart – worked perfectly well.
Natural Cordage -pictures courtesy of Dave
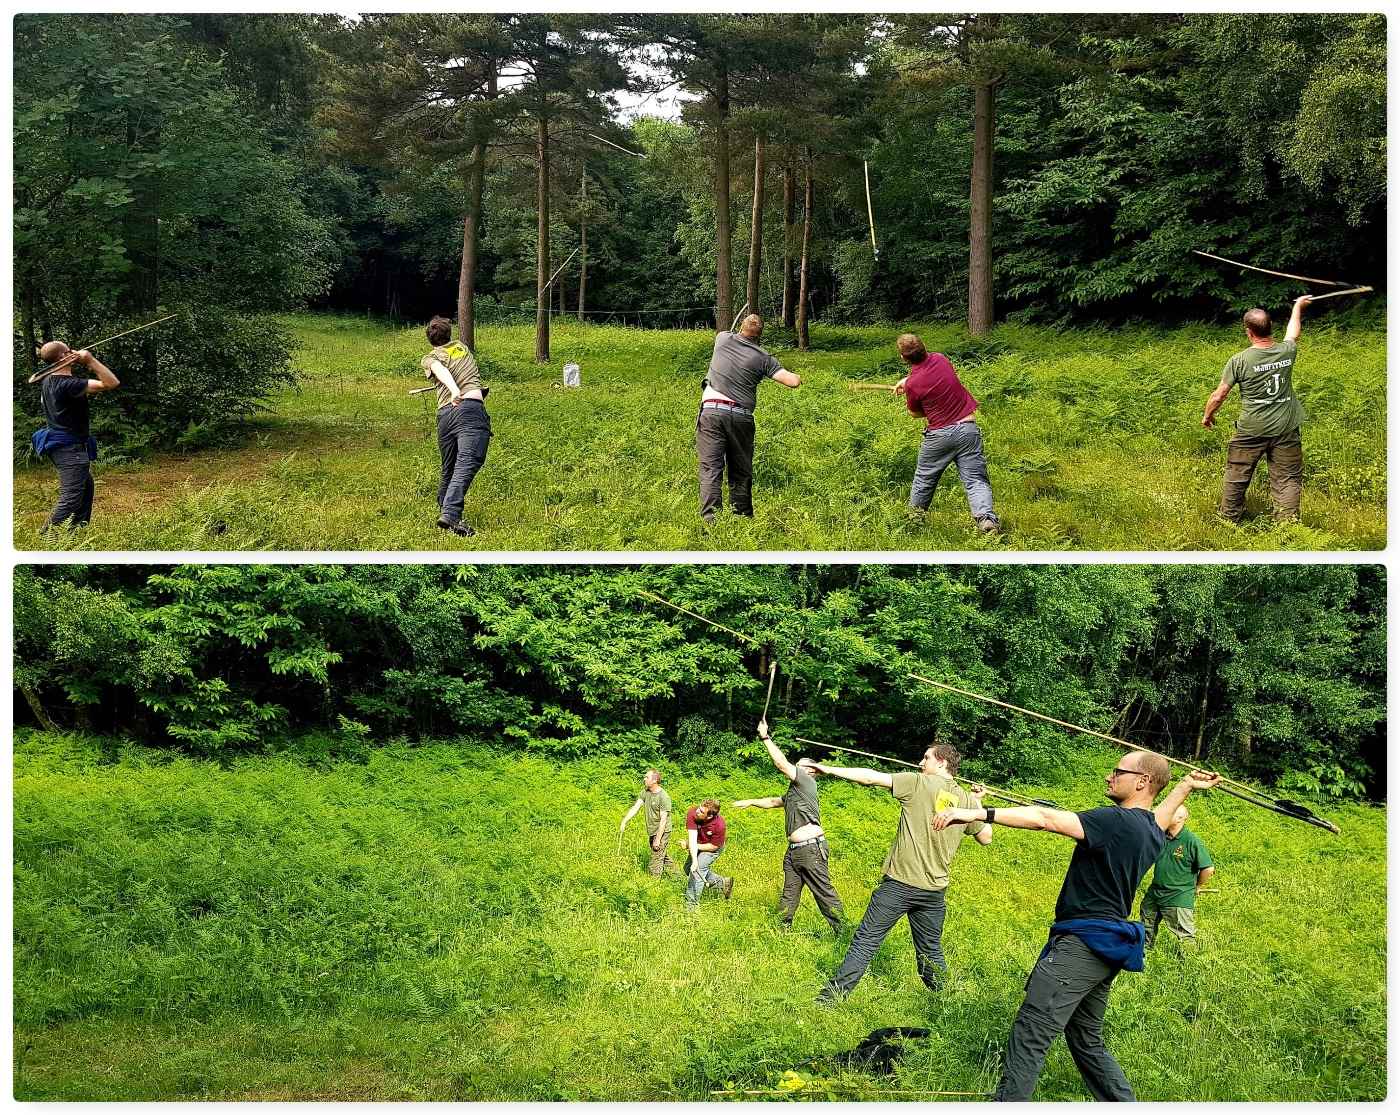
We had a nearby glade that was soon set up as arrange and the darts were soon pinging away. I have used Atlatls for years and shown hundreds of people how to use them – they never fail to intrigue people and offer hours of fun either in their construction or use.
Time on the Range
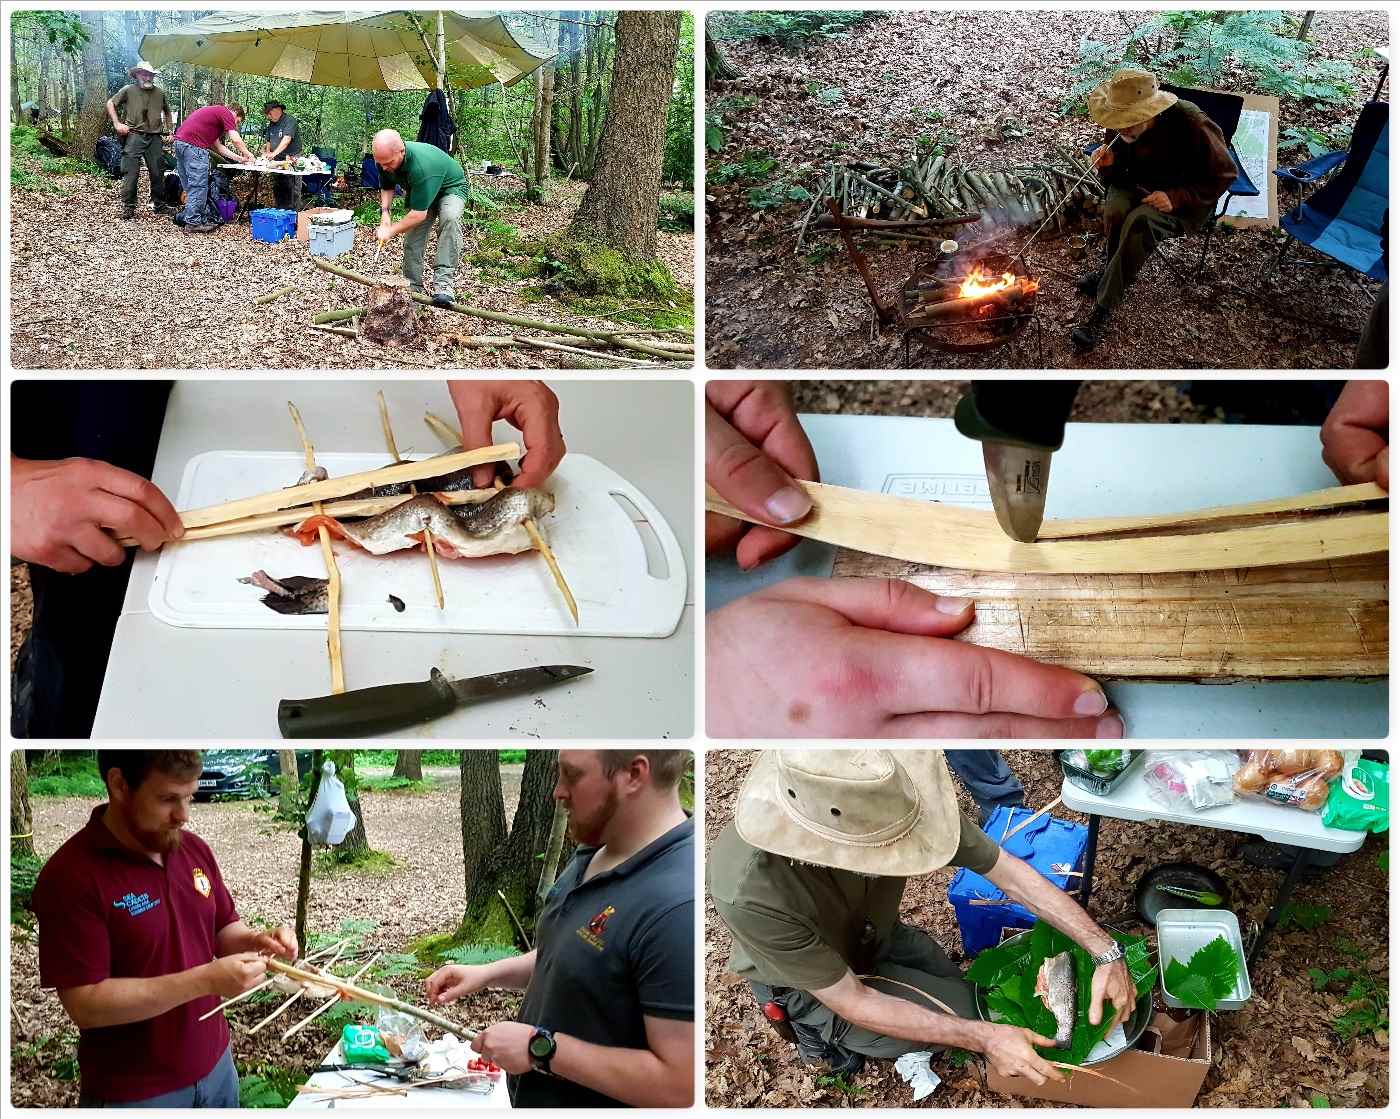
While Dave and Graham ran the range I went back with Charlie and Alan to help gather the material for ponassing some fish. Dinner was to be Trout, Chicken and Vegetable Kebabs. As well as ponassing we wrapped and bound one Trout in Sweet Chestnut leaves (these were the biggest we could find) and its inner bark. The fish was then cooked over the open fire when the coals were nice and ready.
Dinner Prep
Alan ran our little galley and had the students helping him out on all the stages. It was not long before everything was cooked and even less time until everything was eaten.
A Busy Galley
We retired to the students parachute for the evening to watch the fireworks display – Sweet Chestnut wood sparks fantastically. Luckily we did not get one of the many thunderstorms we could hear nearby pass over us, so we remained dry while we watched the fireworks.
Kick Back Time
Sunday
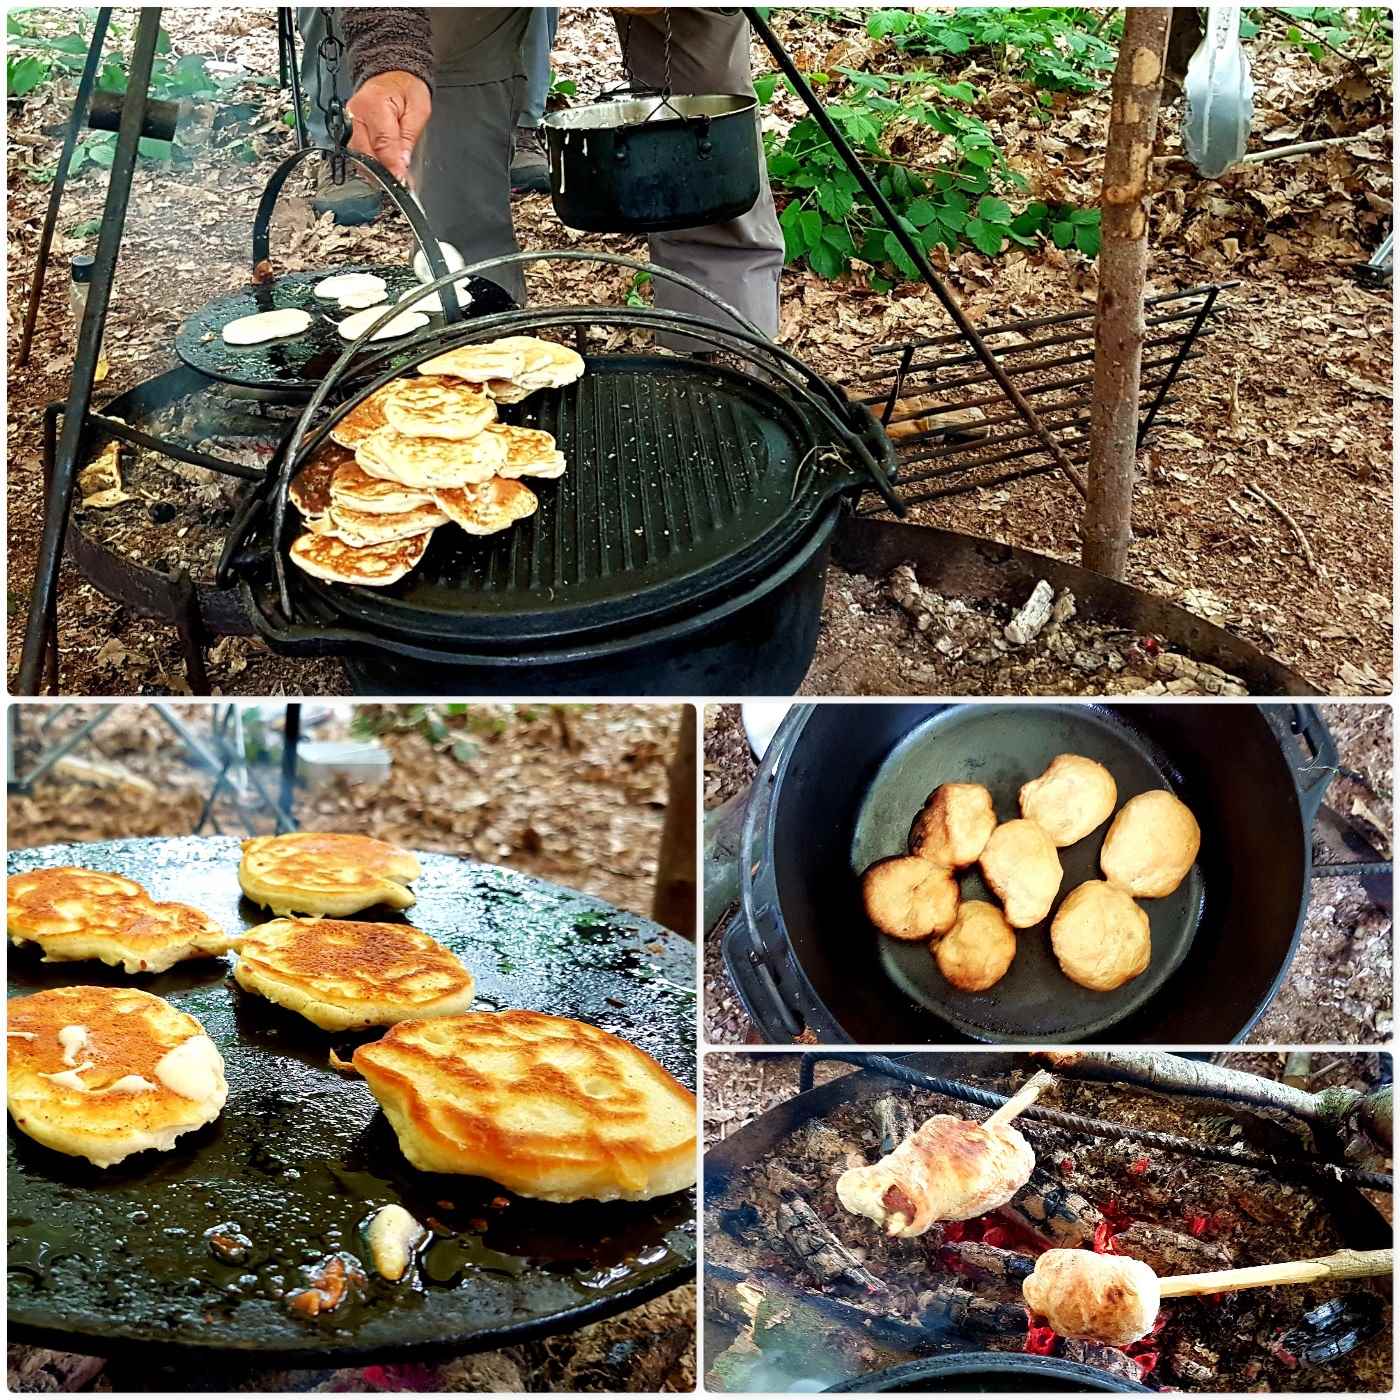
After a good nights sleep it was time for the breakfast feast. My wife Alison had made me up a pancake mix and Alan soon had the skillet working hard cooking pancakes (with a few rolls baking away on the side in the Dutch Oven). As well as pancakes we had the students cooking fresh sausage rolls over the fire (another great cadet pastime.
Breakfast Delights
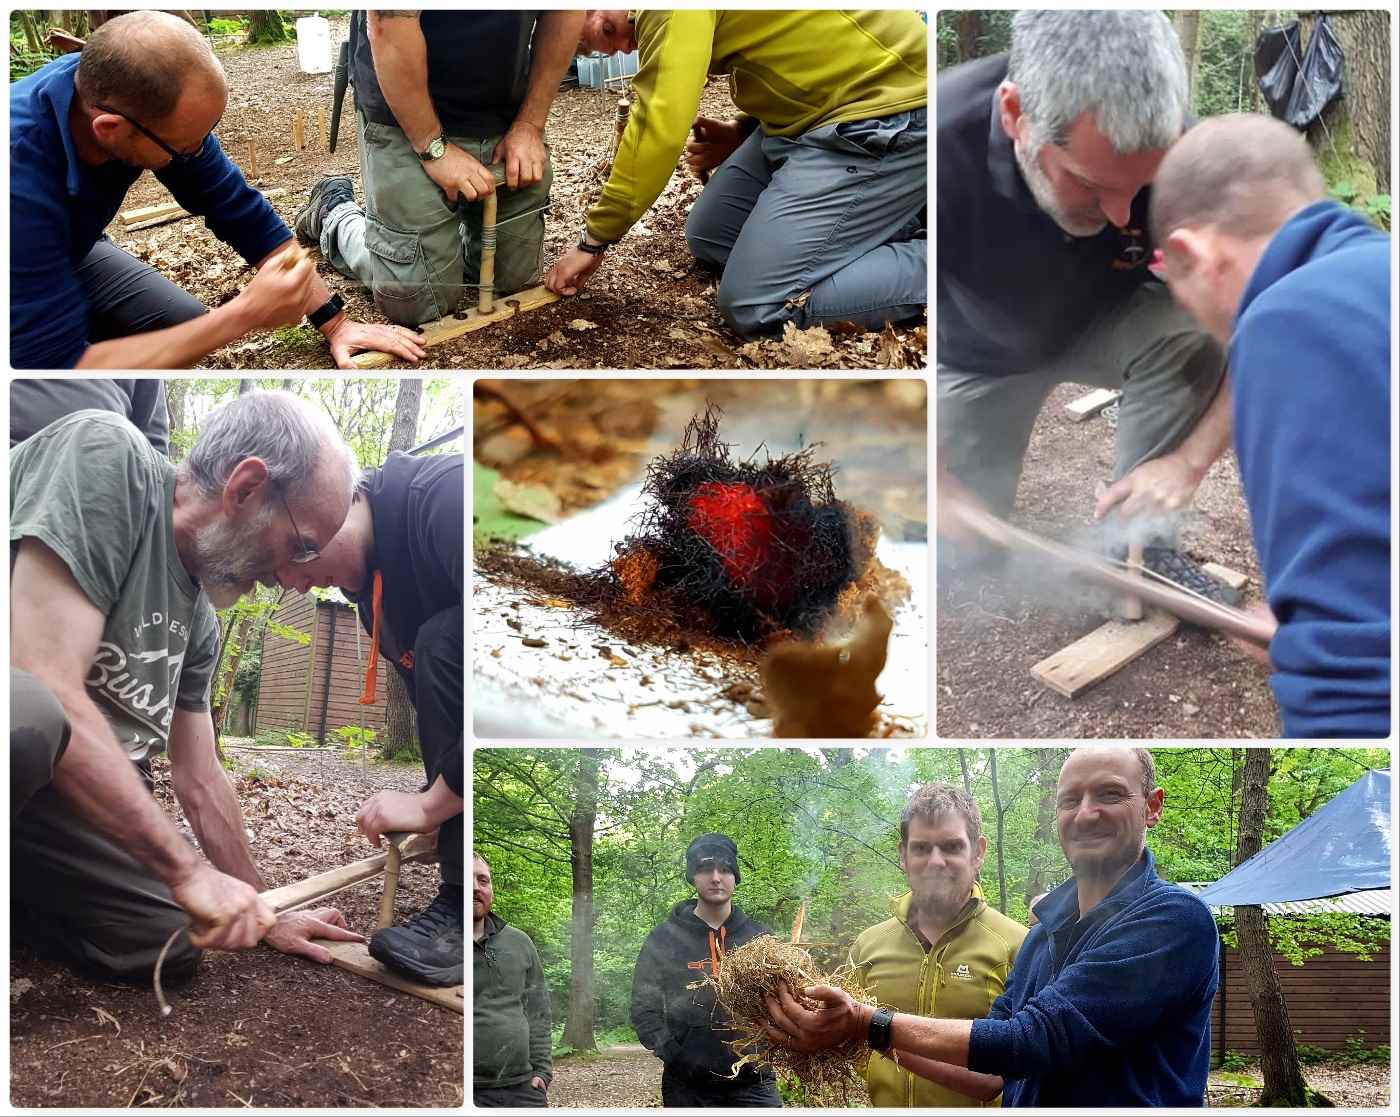
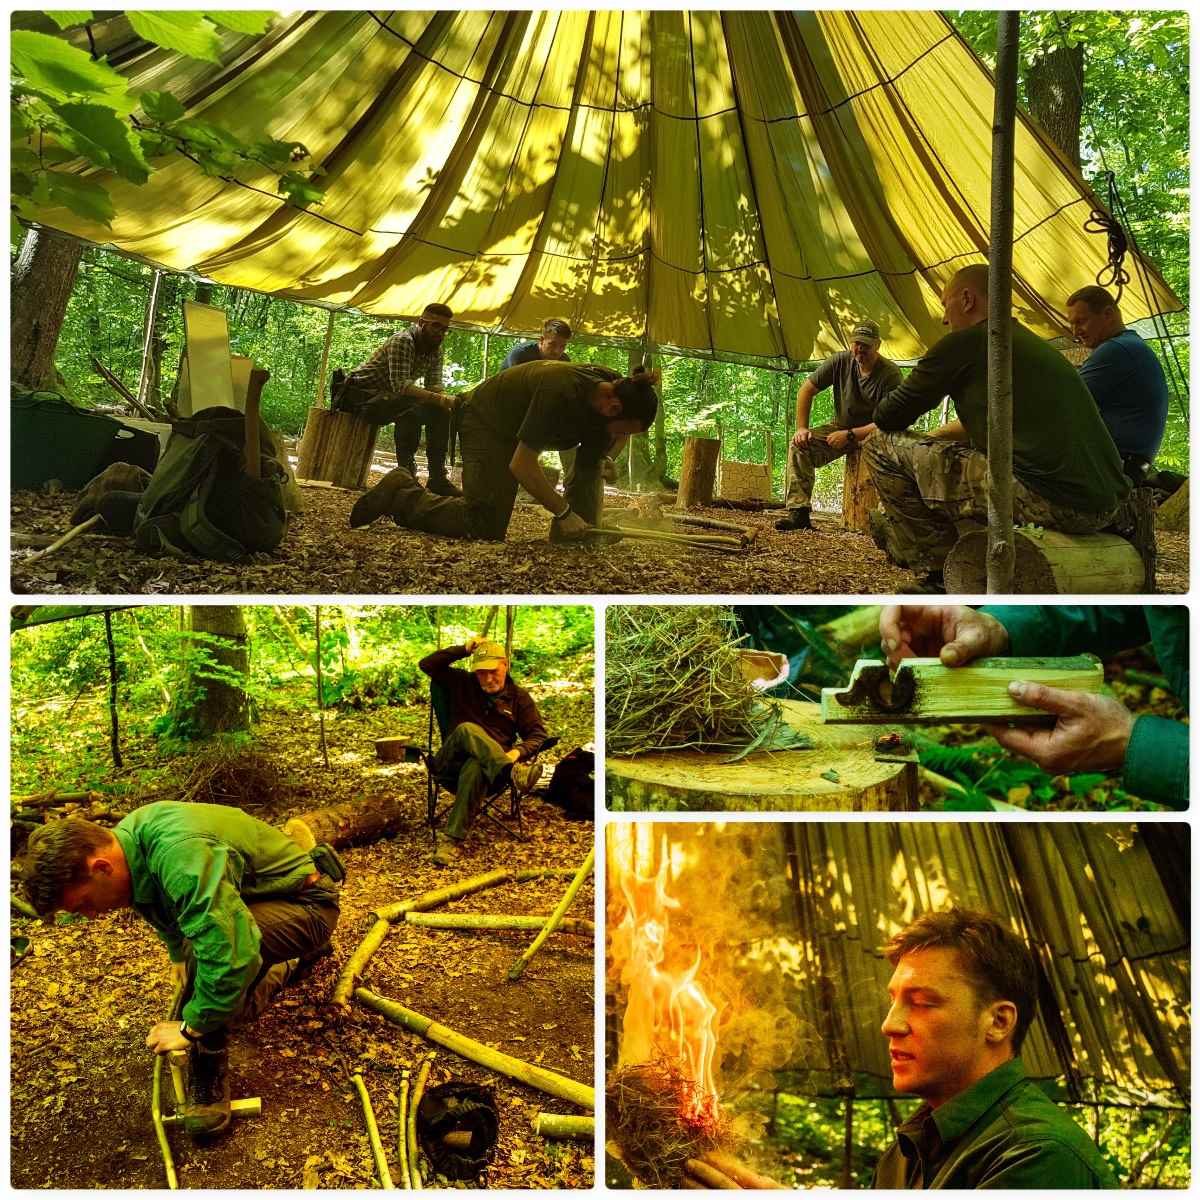
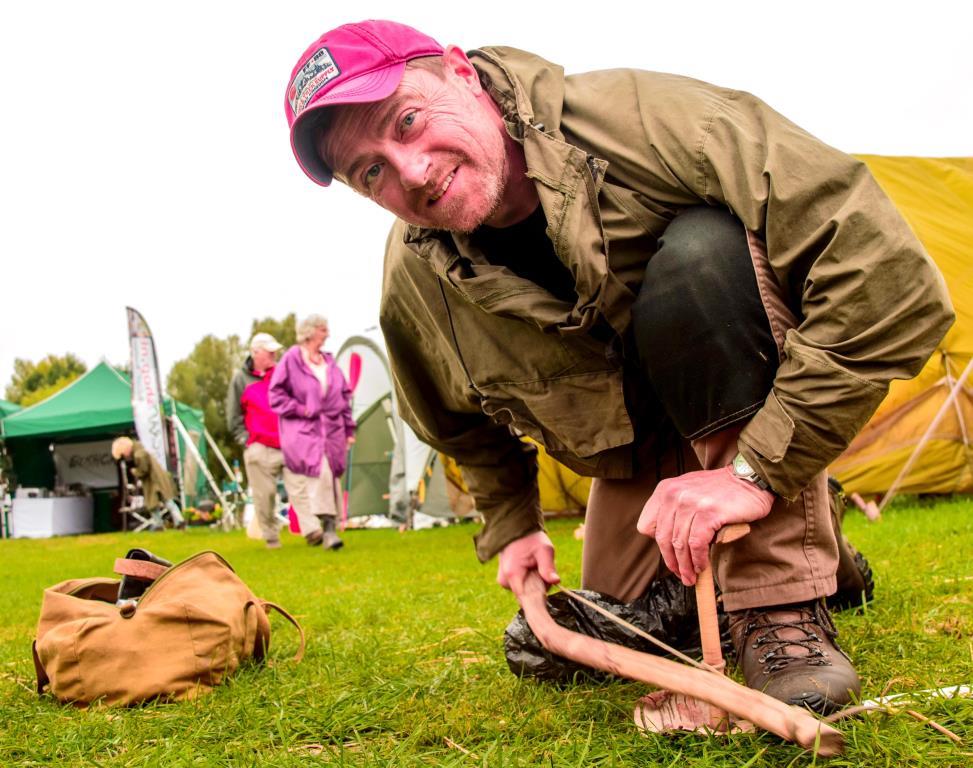
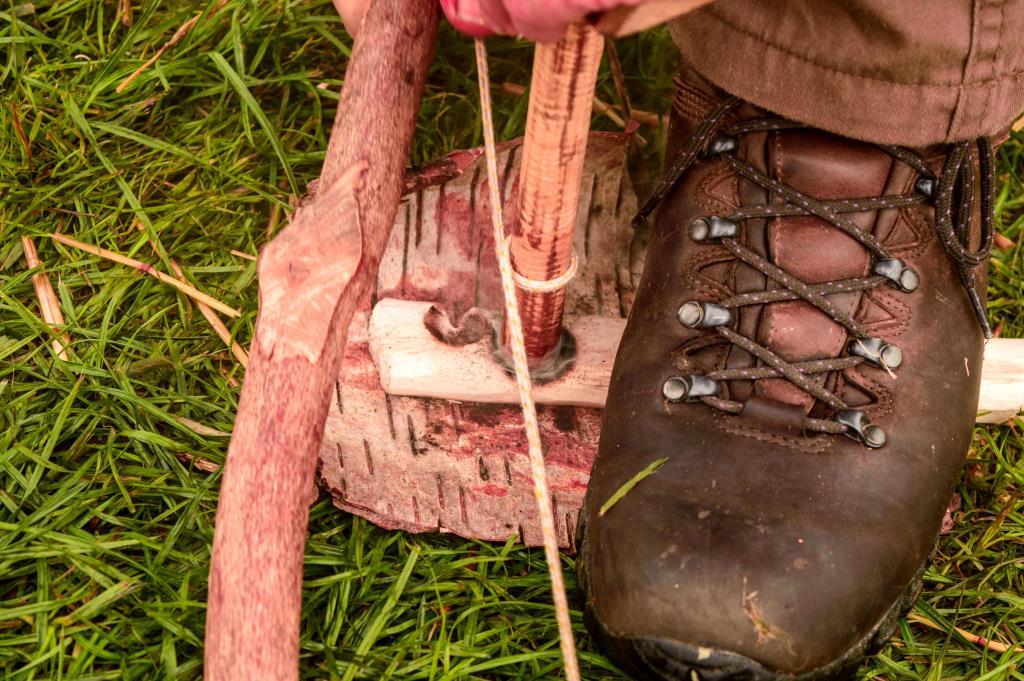
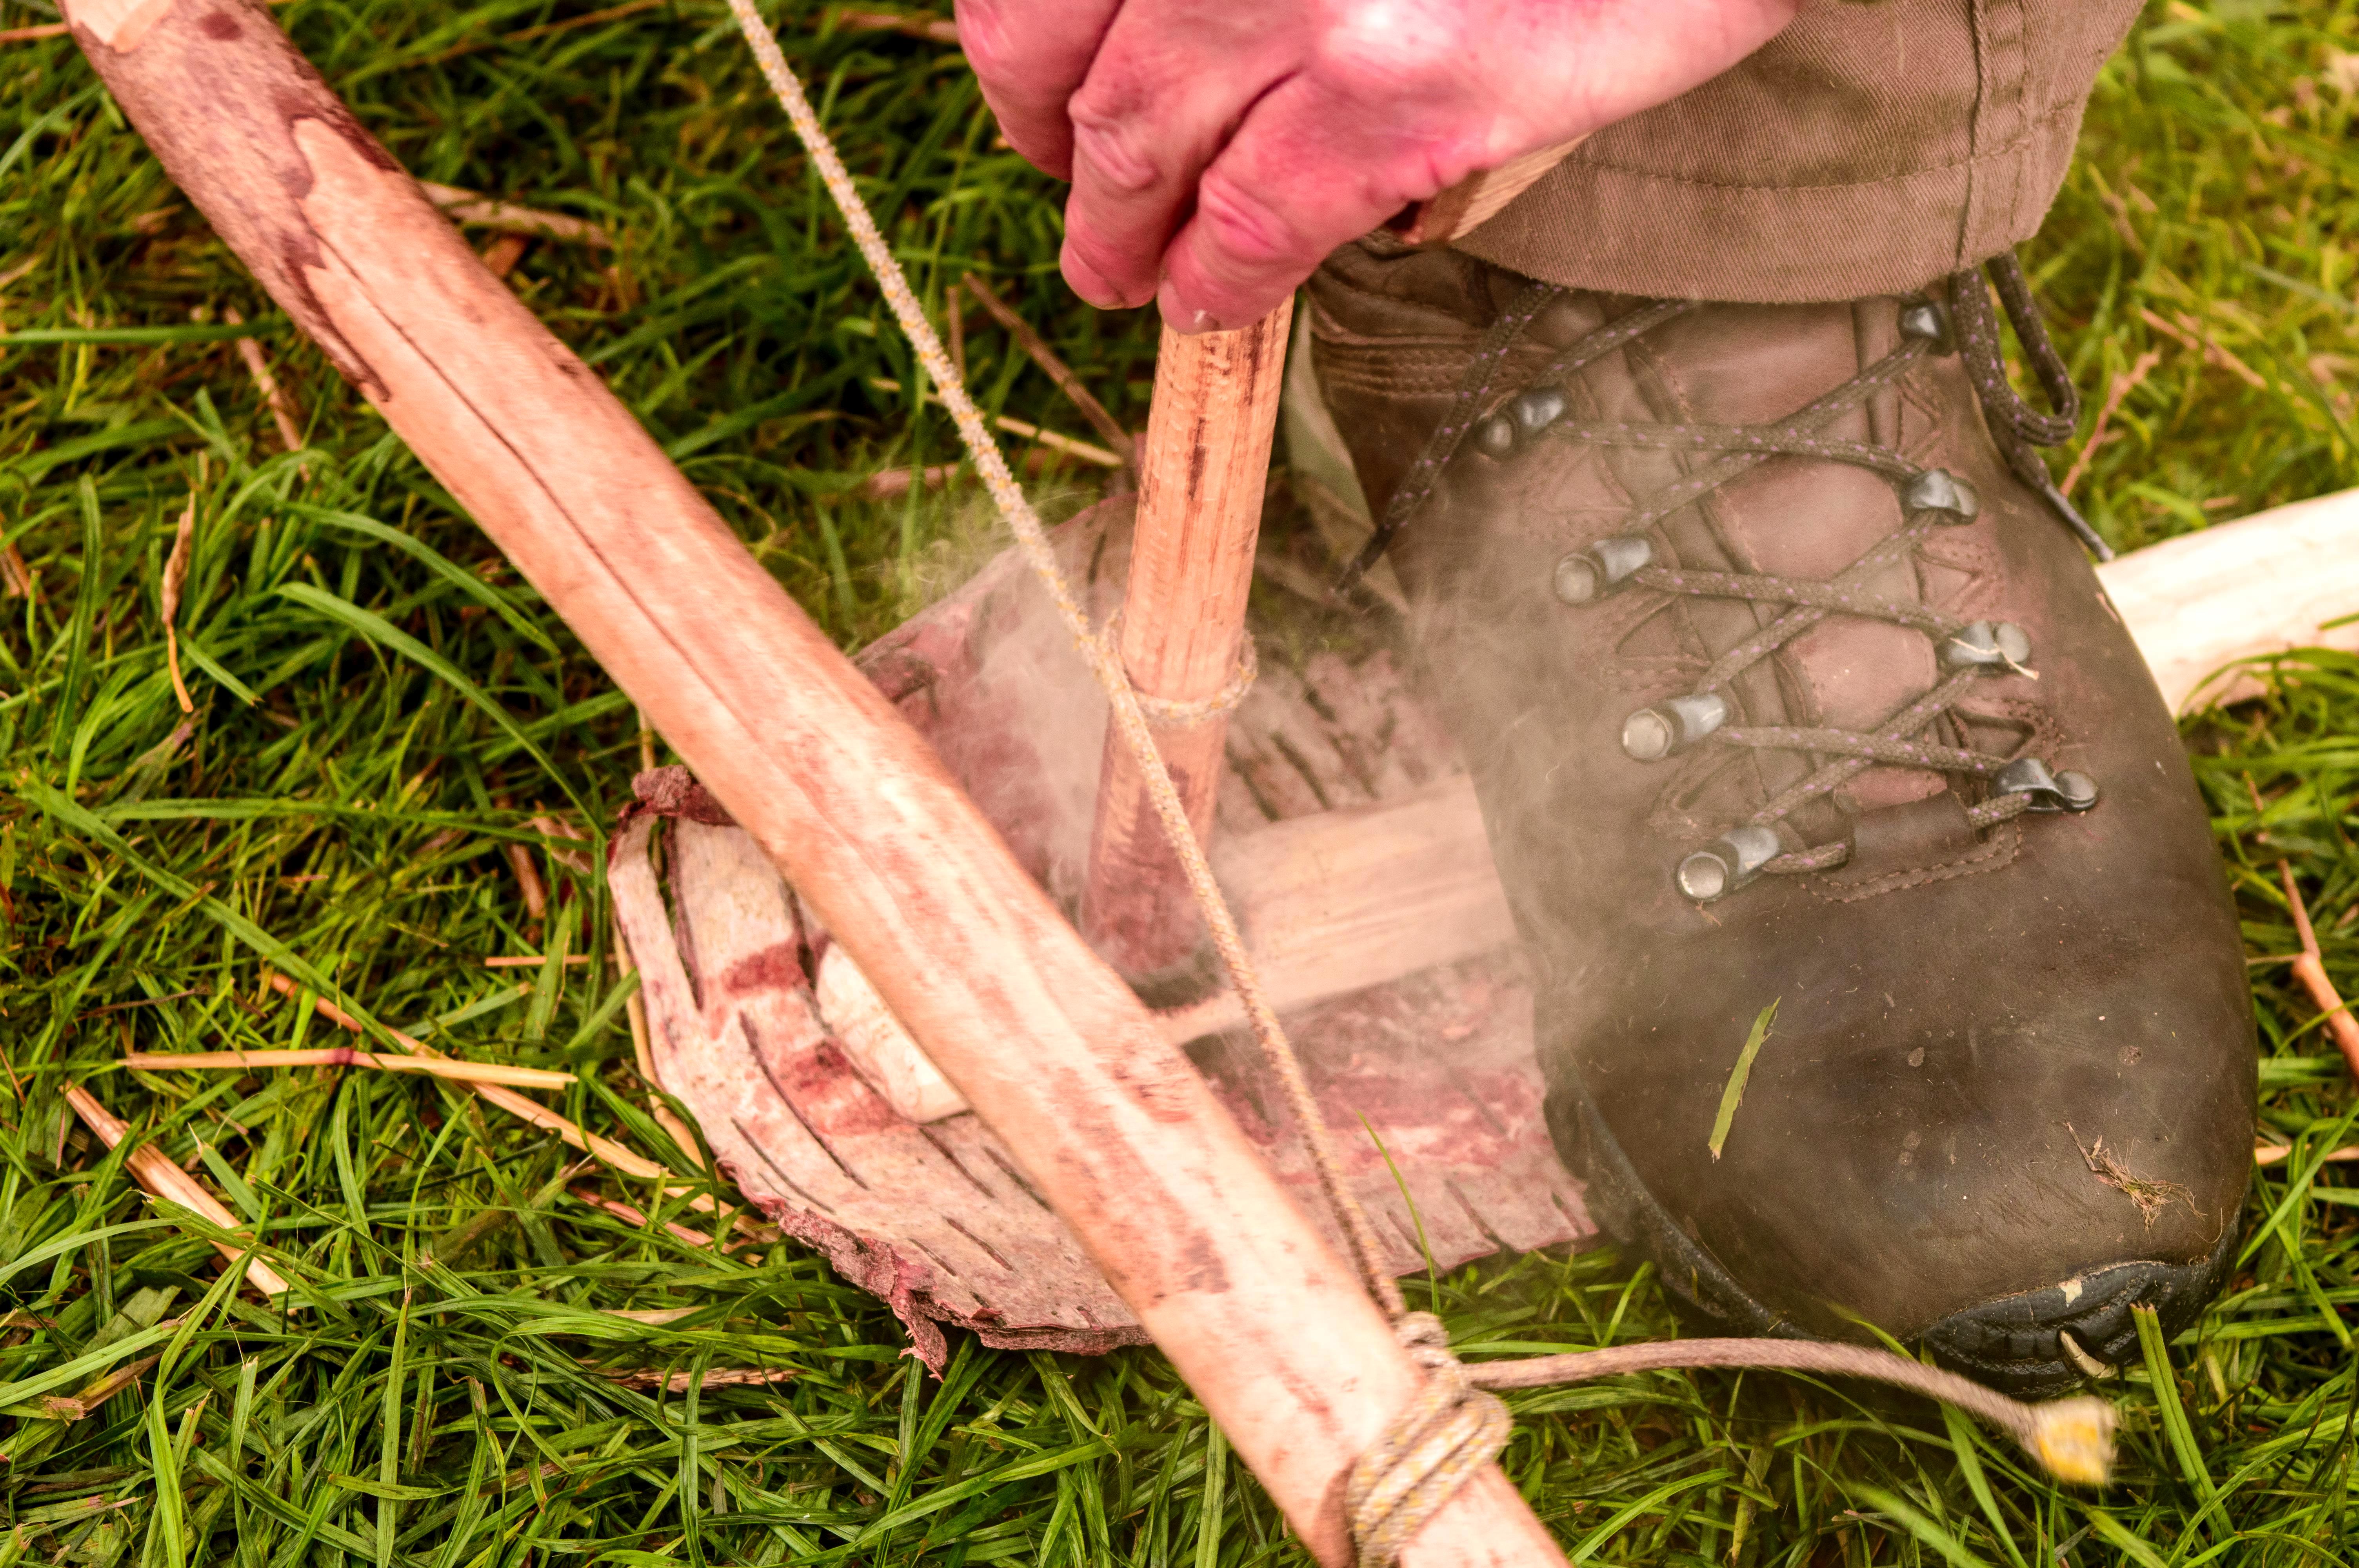
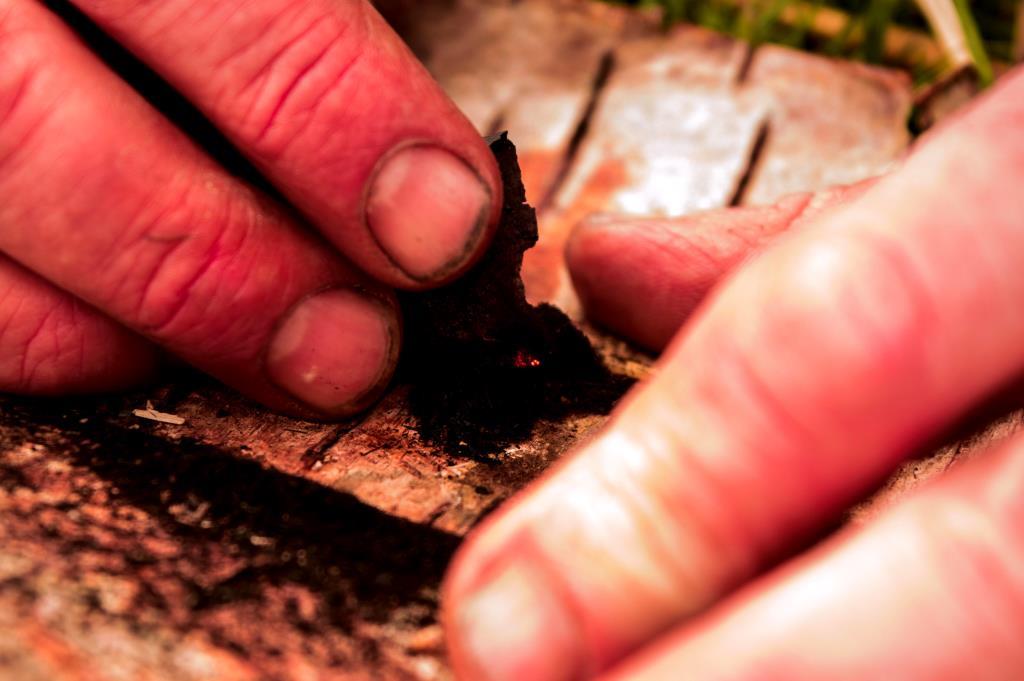
Bowdrill
Straight after breakfast – out came my bow drill kit. This was not a full on bowdrill workshop but a taster to show how ‘assisted bowdrill‘ works. When we do this activity with cadets we always do it with the assistance of an instructor (or as a group of four or five) due to a lack of time usually. We used a couple of different methods and got good embers every time.
Bowdrill Techniques – pictures courtesy of Dave and Ben
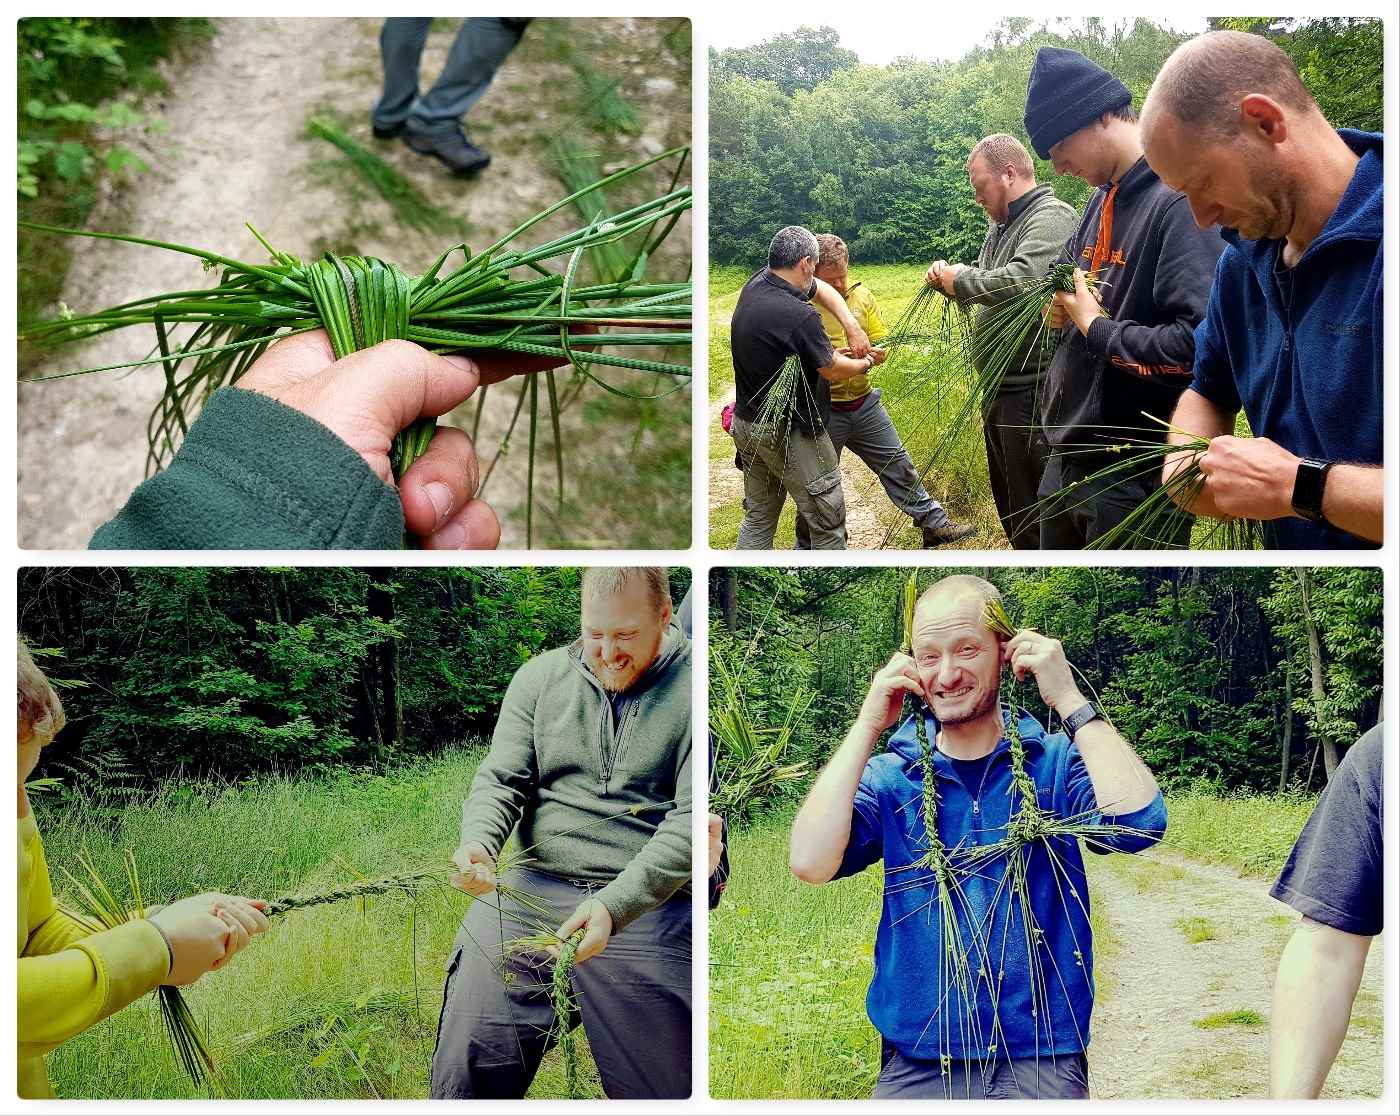
Grass Rope Making
In the Sea Cadets we work with ropes a lot (seamanship and all that) so I showed the guys how to make rope using grass. This is a fast rope making technique and we can create enough (with the right material) to make enough rope to do a seamanship class if needed (or just make earrings).
Rush Rope
Char Cloth
To finish Dave showed the students how to make some char cloth in a tin – we did not have time to finish it all off but they got the principles.
It was soon time to pack everything up and head home. Normally it is just the instructors that do most of this work so it was great to see all the students getting stuck in to put everything away in the correct manner so that it can be deployed quickly the next time we run a course.
A bit of Charcloth and Wrap Up
It was great to be back out doing Bushcraft again and sharing knowledge on the subject. I hope some of the guys are with us in a few years helping to deliver this course as having a good understanding of Bushcraft really enhances their skill set for teaching cadets. I hope to be back running another course at MAST next year.
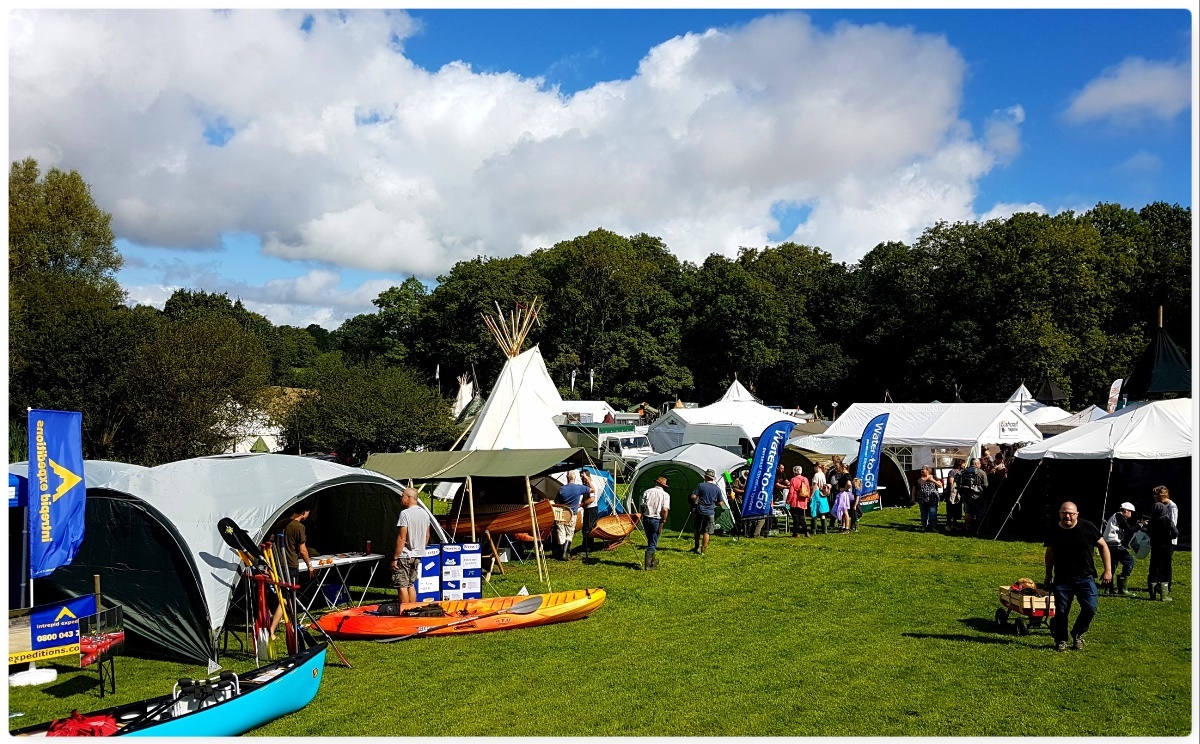
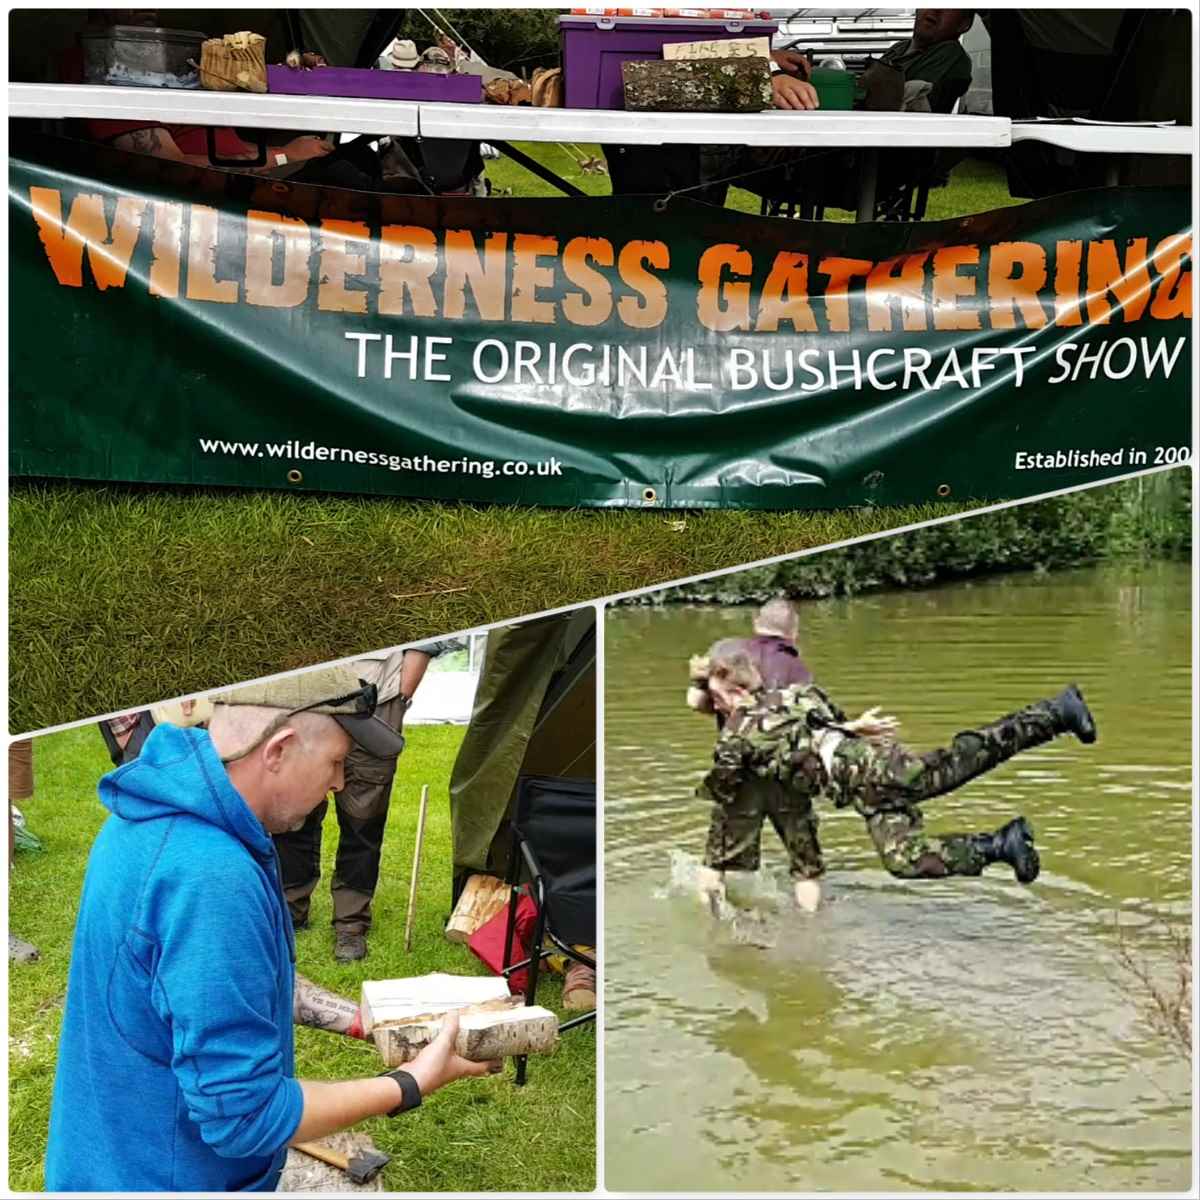
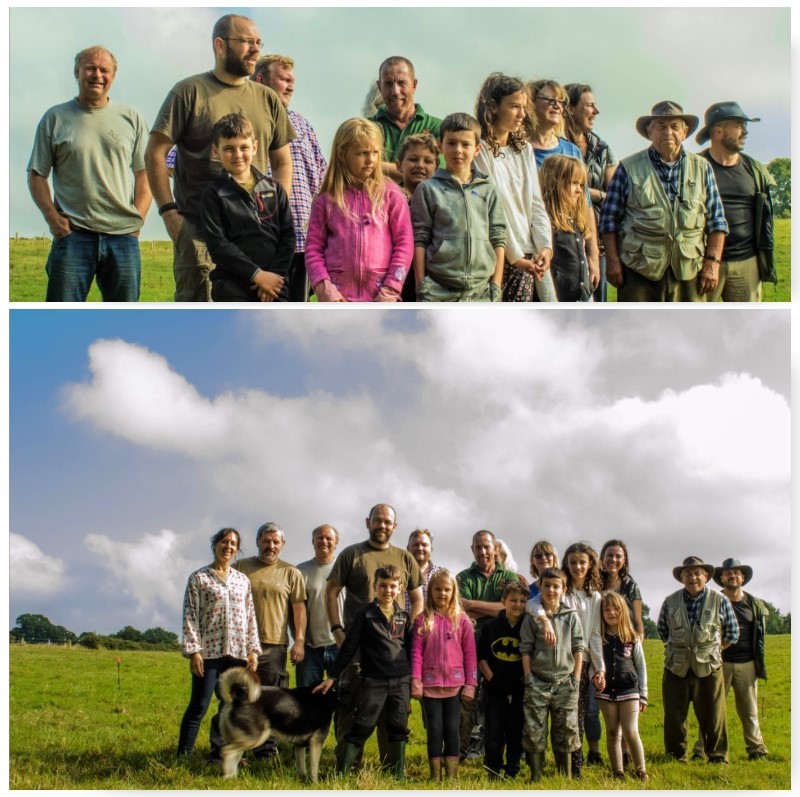
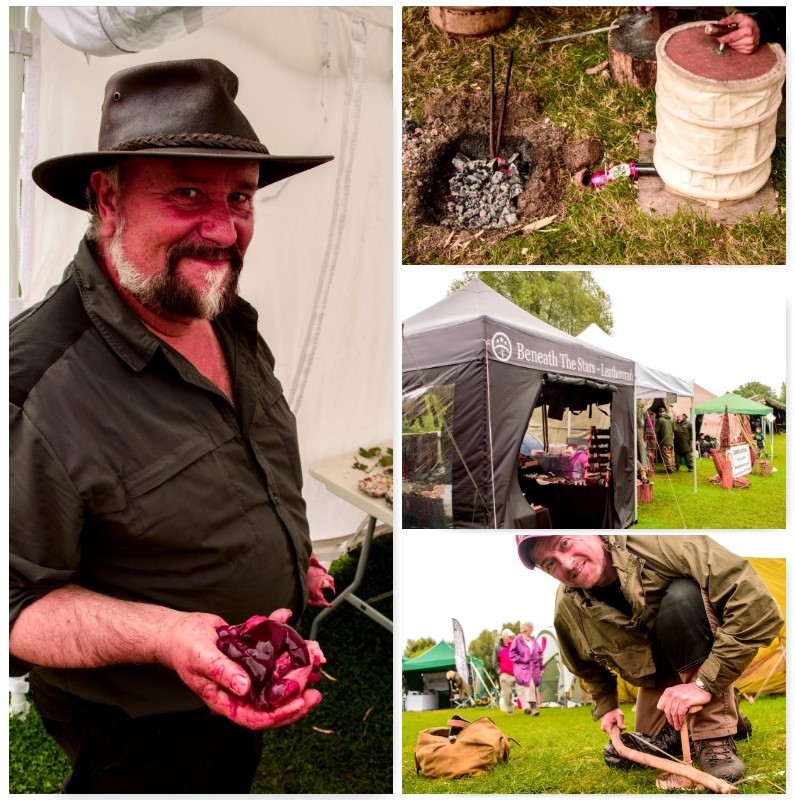
This August I went to the Wilderness Gathering to help out my friend Fraser Christian of Coastal Survival with the running of his stand. It was a busy stand however from time to time I ventured out around the show and spotted some real gems.
Wilderness Gathering 2017
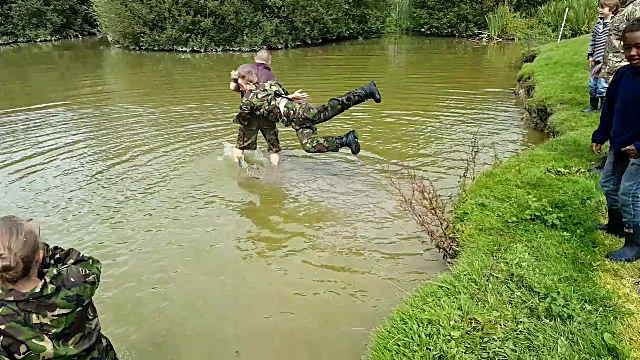
Starting at the end of the Wilderness Gathering I got tipped off that JP from Woodlife Trails was going to get ambushed by the Coyote Kids – Needless to say the tip off was spot on 🙂
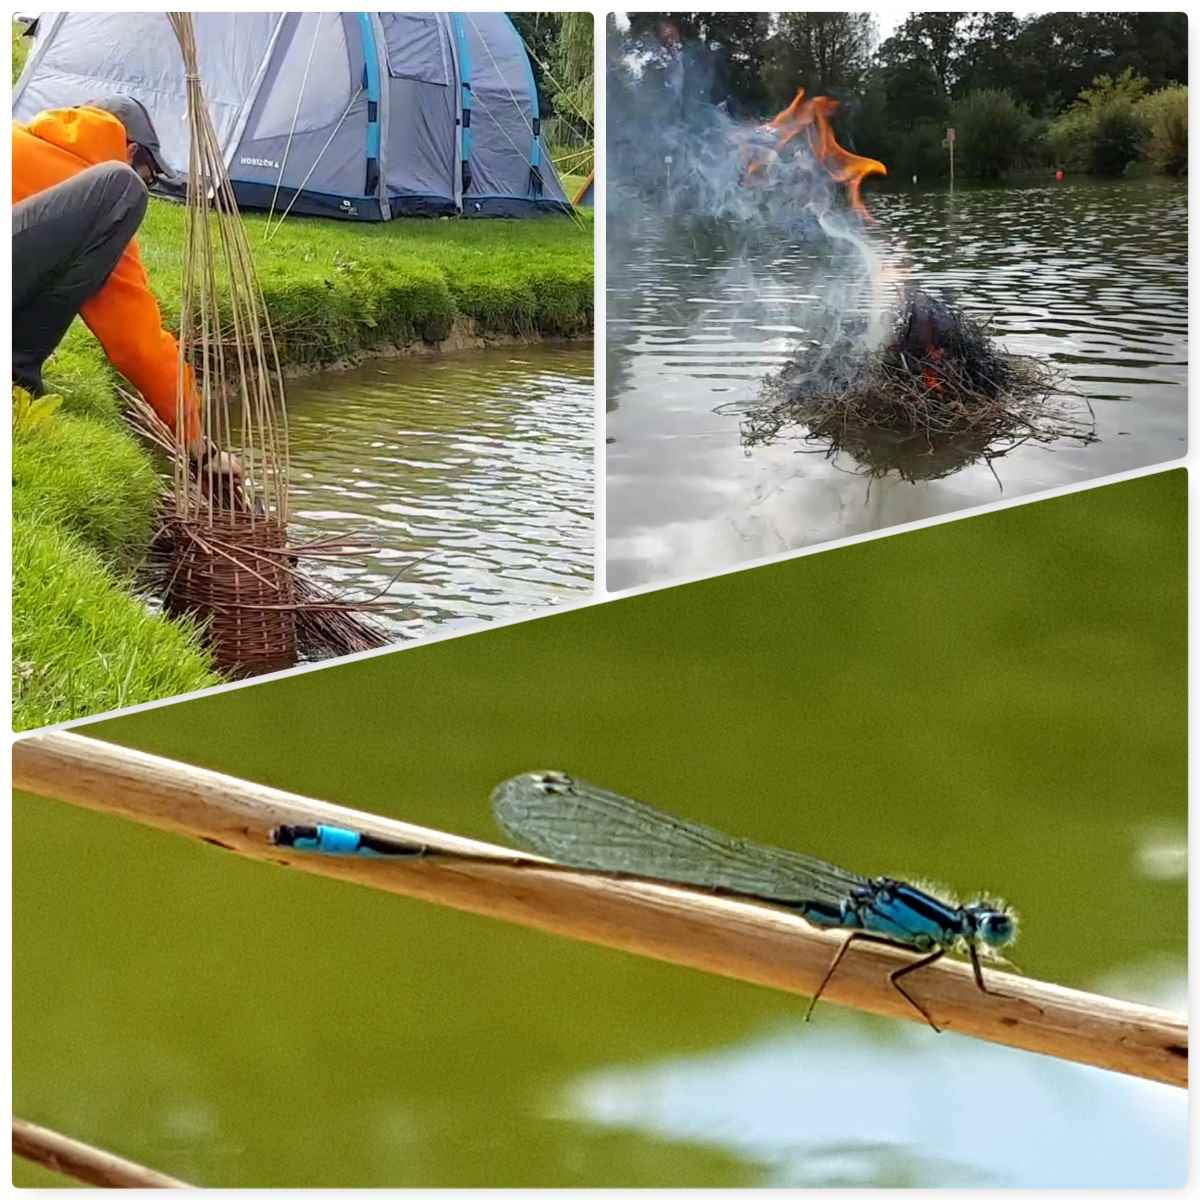
Just off to the main area of the Wilderness Gathering is the pond. In here the canoeists have fun, we soak our willow for our fishtraps and I like to sit here watching nature go by. This year my friend Jason Sears decided to use it as a platform to light his tinder bundles – more of this in the last video in this post.
Life on the pond
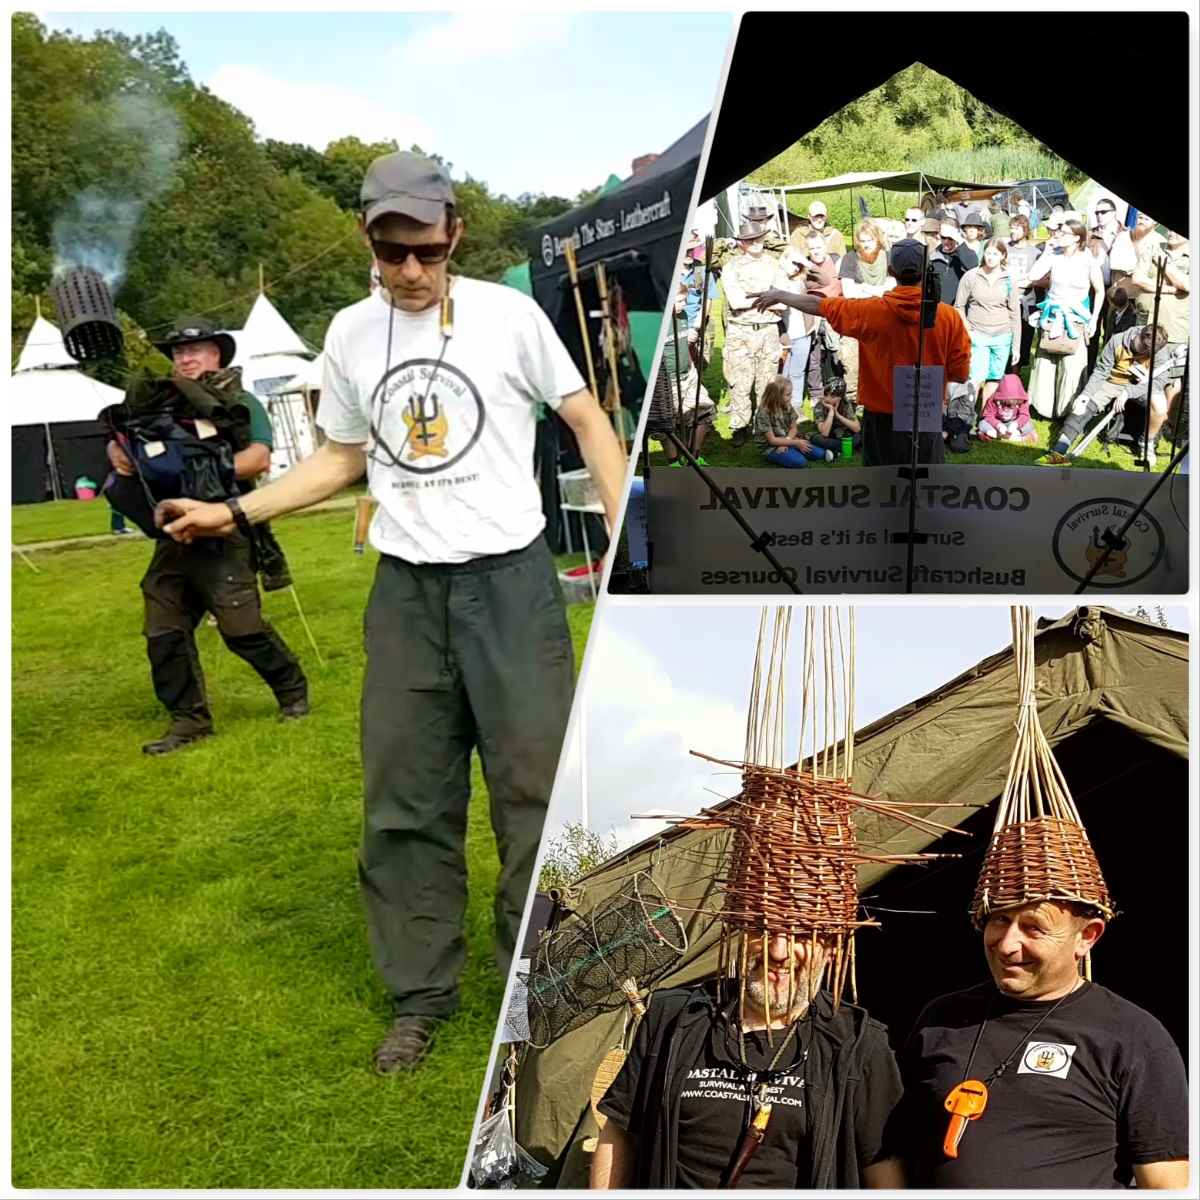
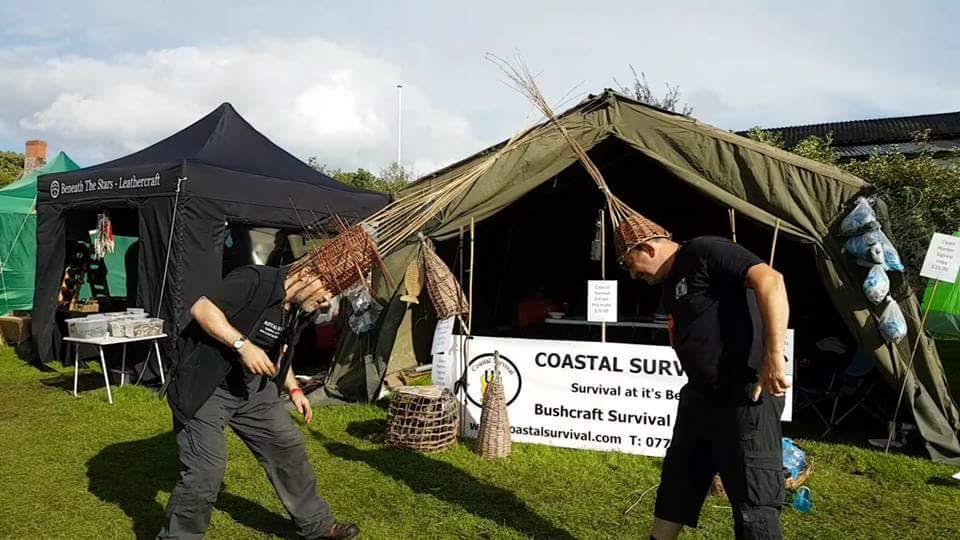
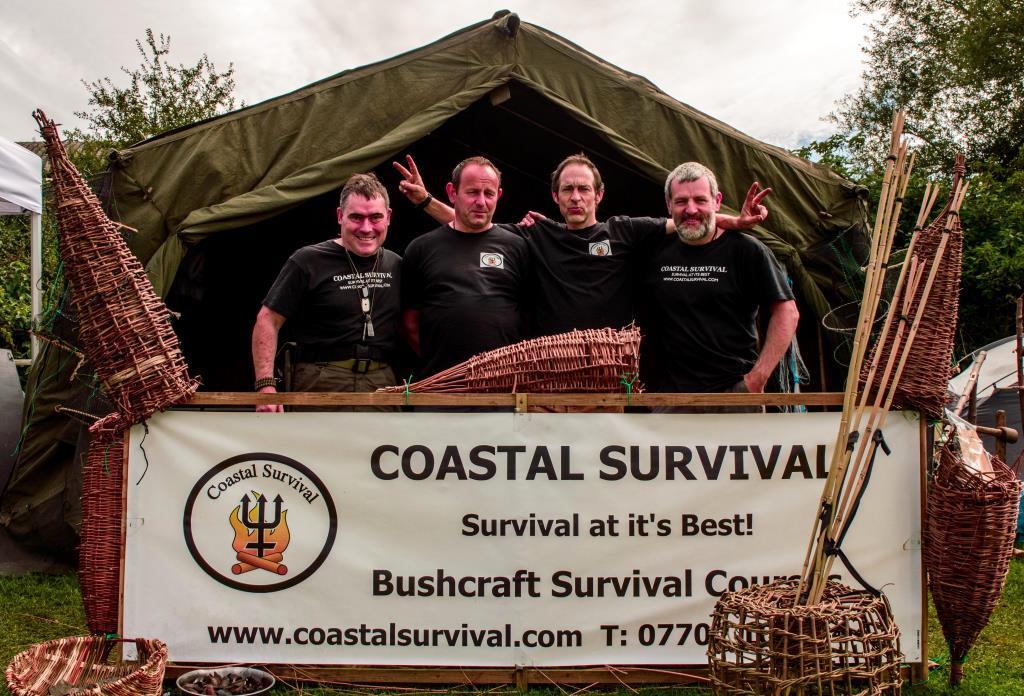
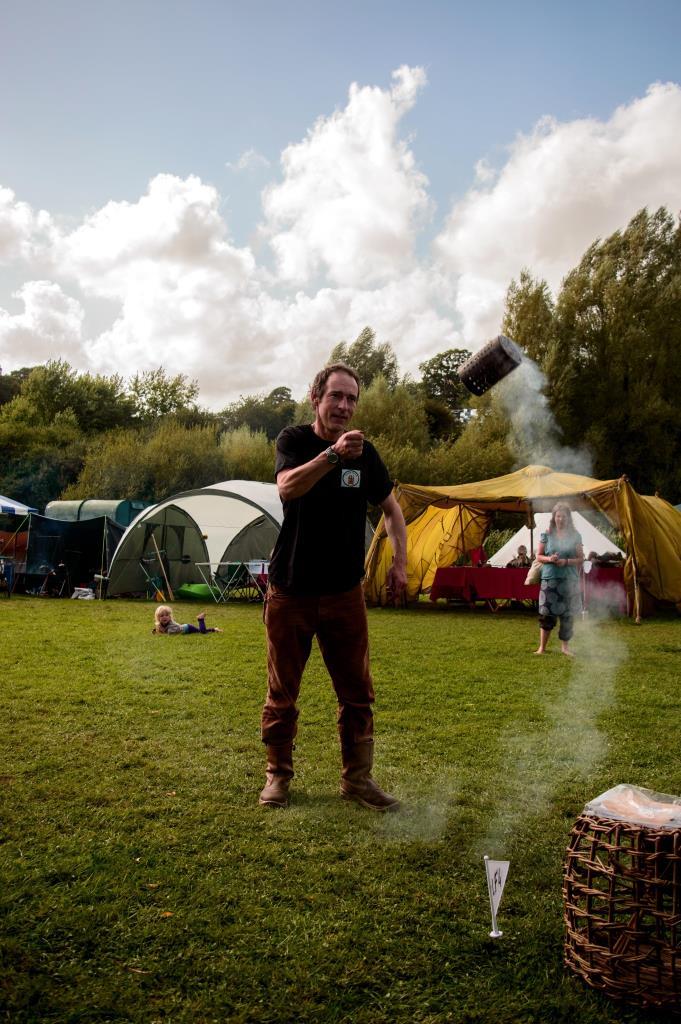
The Coastal Survival stand was busier than any time I can remember. The crowds gathered outside the stand when Fraser was demonstrating food prep and his hot smoker were fantastic.
Obviously Danny and myself were very professional and serious at all times:-)
Time with Coastal Survival
I shot quite a bit of video this year and made a video of some of the activities we at Coastal Survival got up too – including the ancient and near forgotten art of Basketeering!!!!
One thing I love to look out for at the Wilderness Gathering is all the art – I use the term art here to describe the beautiful work that is always on display.
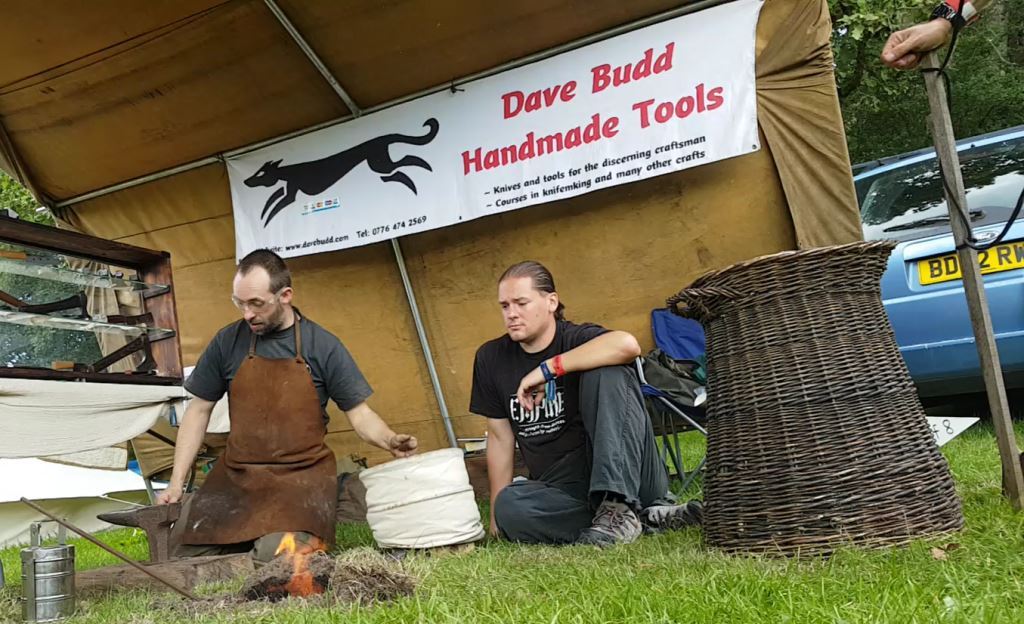
Below are the stunningly sculpted Kuksas from Jon Mac, the intricately carved spoons by Giles Newman and the finely twisted bottle opener by Dave Budd.
Beauty in many forms
The bottle opener I spotted being made by Dave Budd as I strolled by. Dave was making one as part of a one2one training session and it did not take him long to craft it.
The bottle opener now lives in France with a friend of mine.
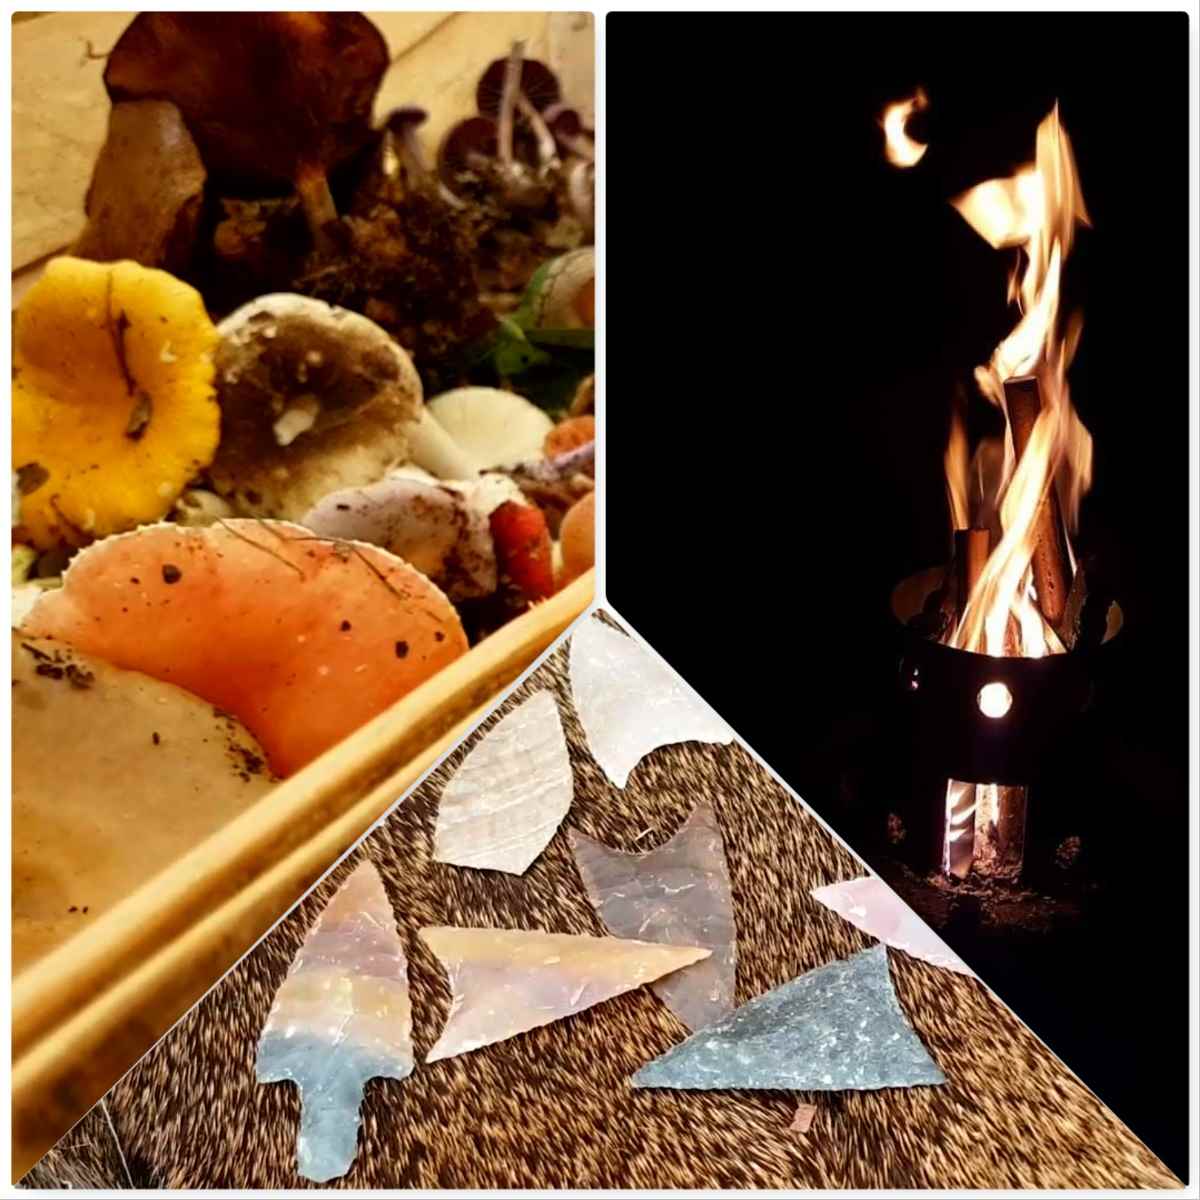
Still on the lookout for art I was taken by these three scenes. The first was a basket of beautifully coloured mushrooms on the Bushcraft Magazines stand. The second was spotting this Roman Centurions profile in the flames of our fire (it is something I do looking for fire faces). The last one was all the colours in the flint arrow heads I spotted on the Bushcraft Journal stand.
Art in many forms
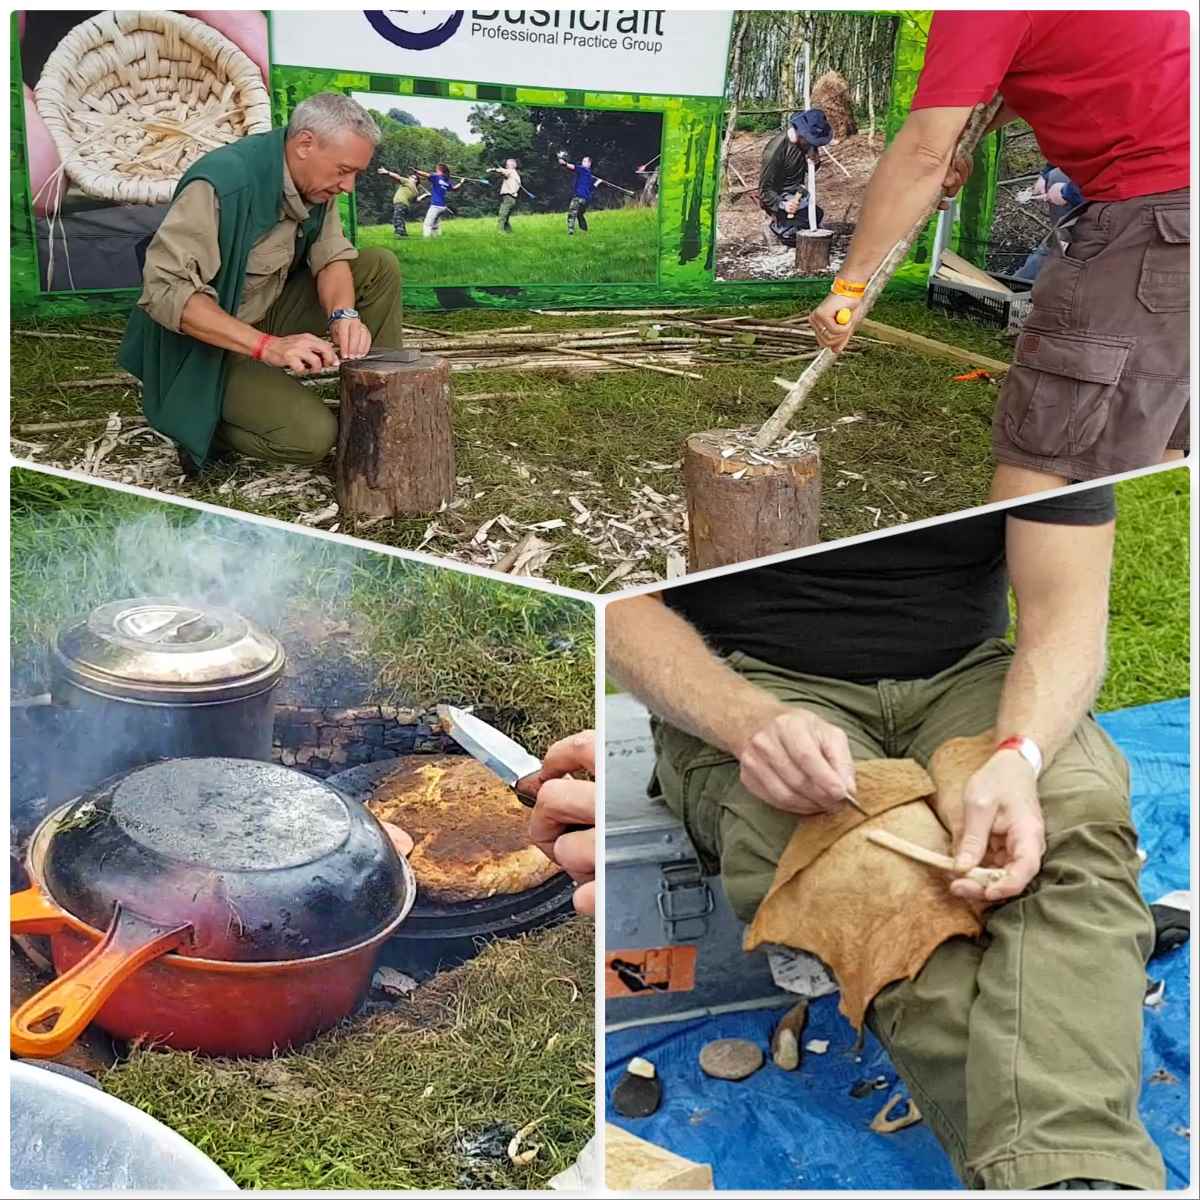
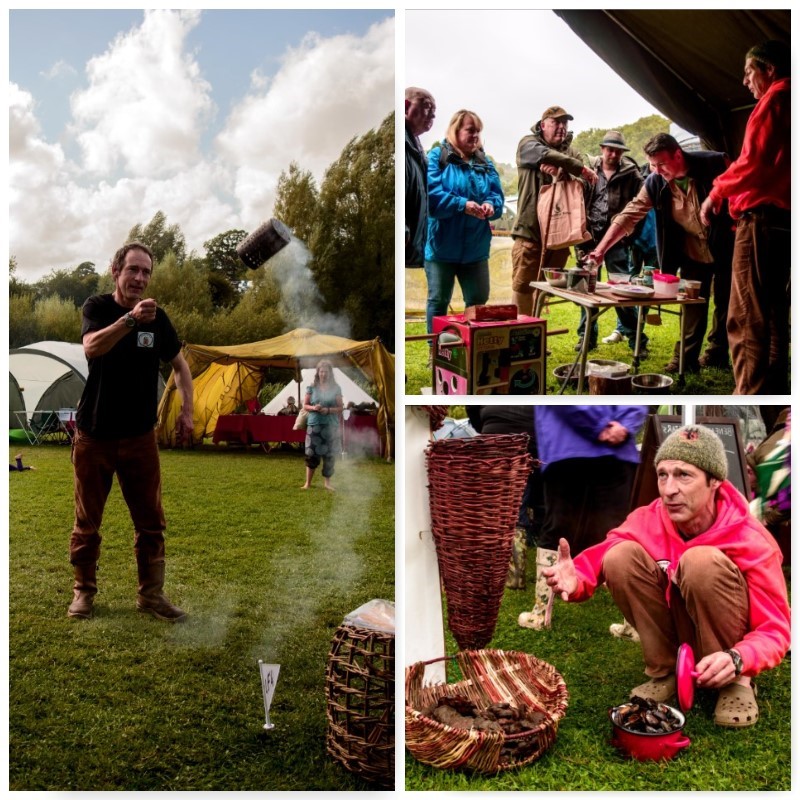
Further on on my strolls I came across loads of other sites where learning was going on. This was in the form of demonstrations, one2one’s or class work. I could only spend only a short time away from the stand but my time strolling always threw up little gems of learning.
Loads of Learning
A particular favourite subject of mine is building Log Rocket Stoves and my friend Des Cattys shares this passion. I spotted him one day starting a demonstration and decided to hang around to see how the class went (always looking for new ways of building these stoves)
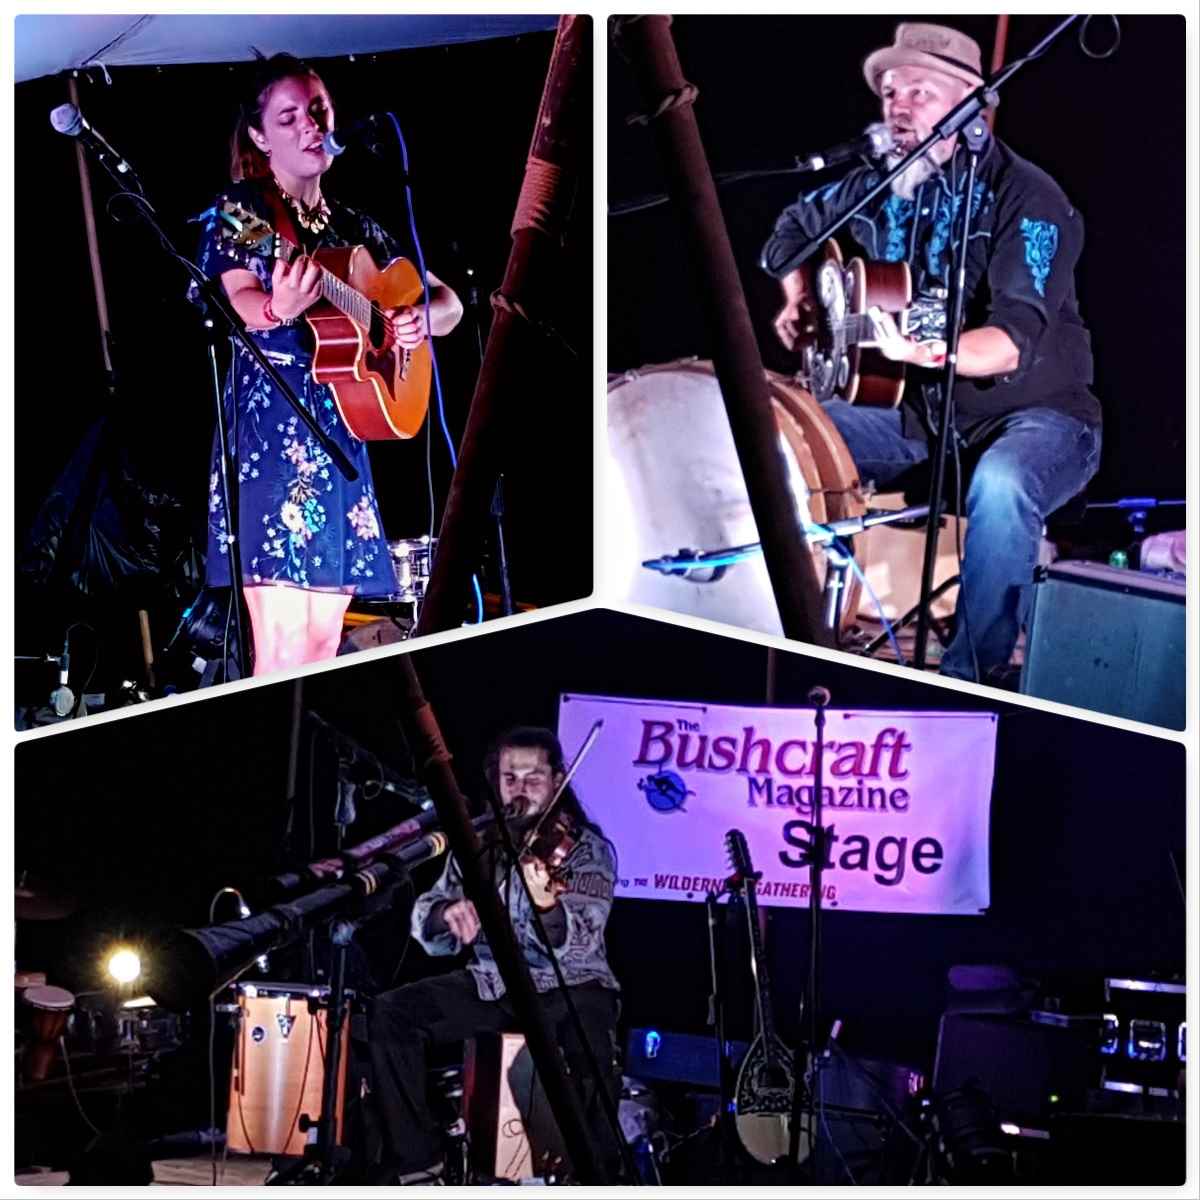
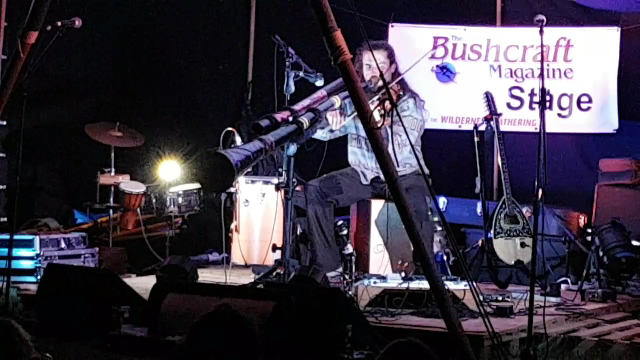
In the evenings the music got better and better each night. There was a wide variety of artists and a particular favourite of mine was Vojta. Bushcrafters are not normally known for their dancing abilities but the front of the Bushcraft Magazine stand was buzzing each night with revellers.
Night Time Music
After listening to a couple of Vojta’s songs I decided to record his last one of the night and I am glad I went with that gut feeling – a great session.
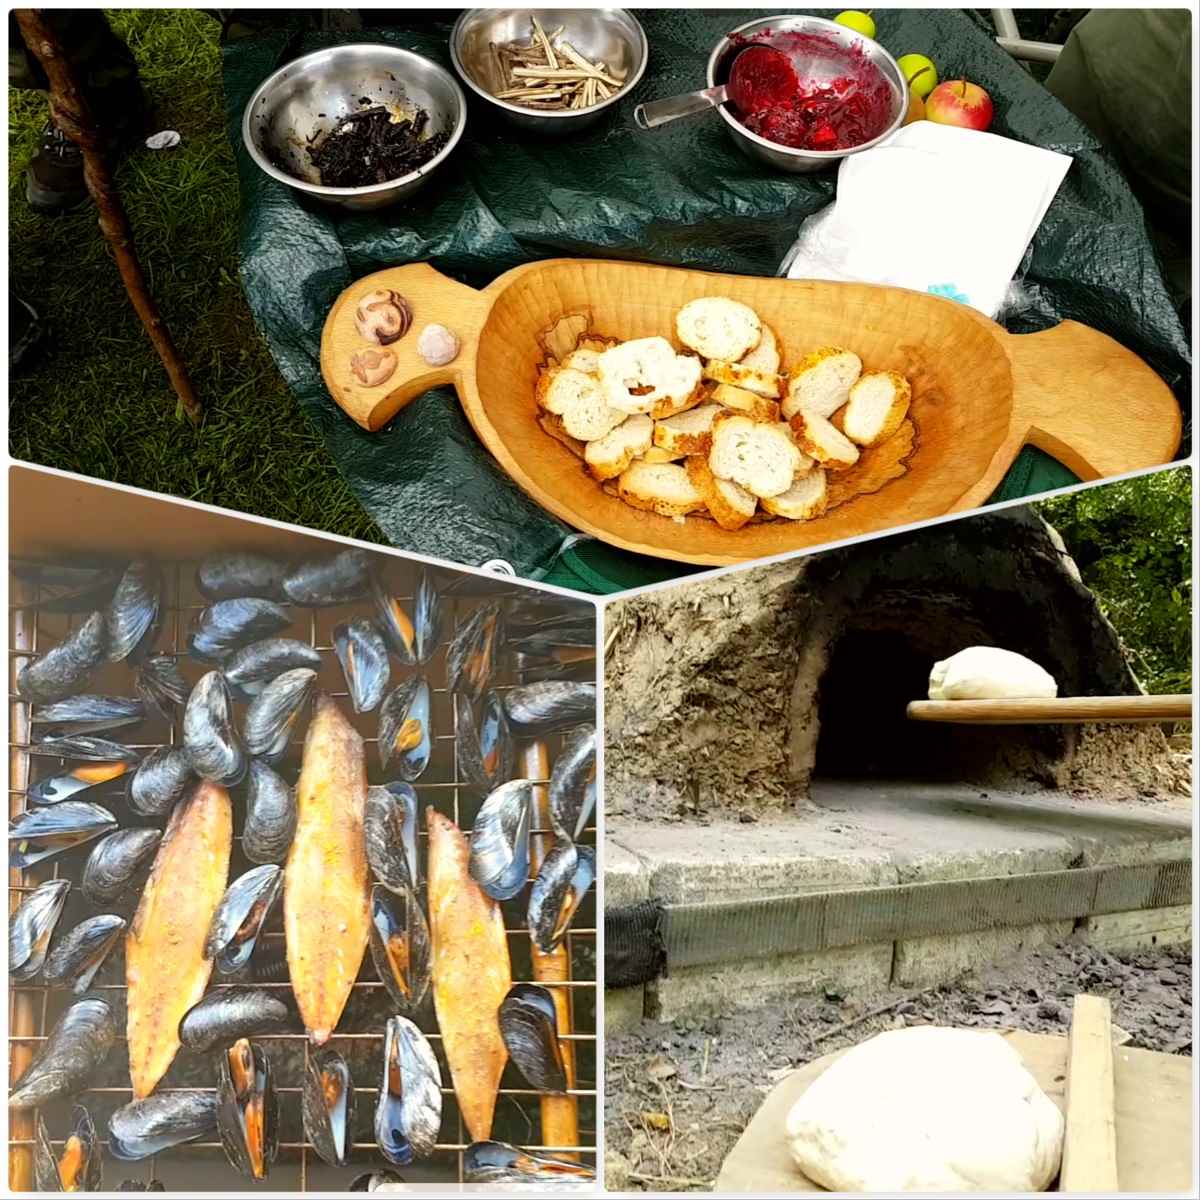
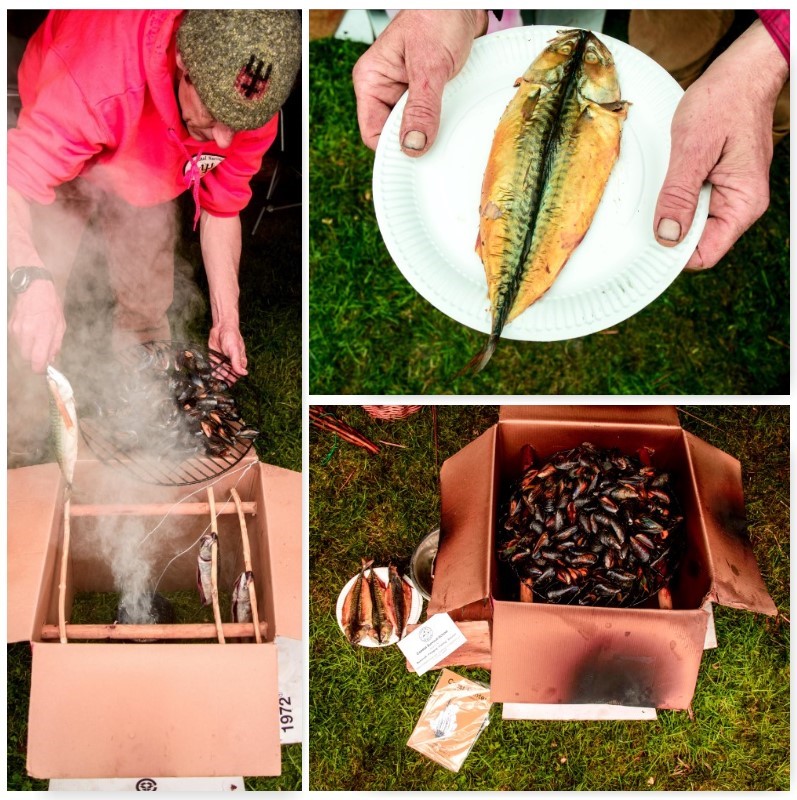
If you are patient while out and about at the Wilderness Gathering you can usually get a treat or two. The wild food tasting at the Bushcraft Magazine stand kept me hanging around for ages, Fraser’s great smoked sea foods were as usual highly sought after and I got to observe Roli Jones in action baking large loaves in his oven.
Wonderful food
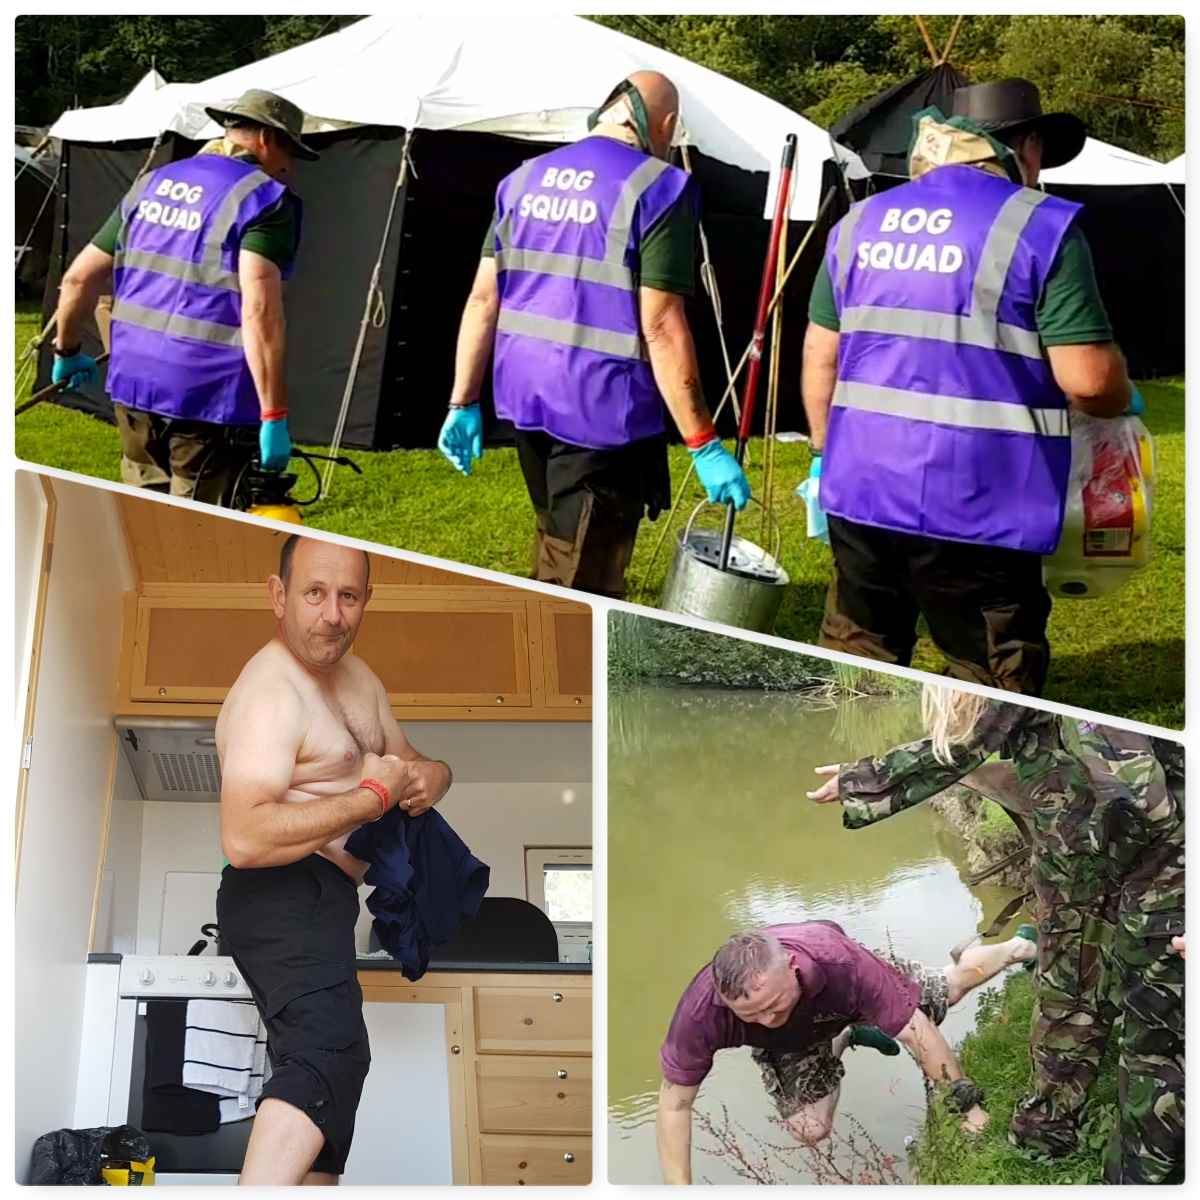
In amongst all this learning and art you will come across the odd and the unexpected. The Scout instructors were the ‘Bog Squad’ and worked hard to keep our loos in clean and working order – I take my hat of to you guys. As they walked by in formation I had to get this shot.
My friend Danny got a soaking while canoeing one day and decided to show off his fine ‘manly’ form to us all – I will leave it to you to judge this 🙂
The final unexpected moment relates back to my first video of JP being ambushed – I captured the moment he was turfed into the pond by the Coyote Kids and is one of my favourite pictures of the whole event.
The Unexpected
My final video was put together to try and capture the essence of the Wilderness Gathering.
Last August I had a fantastic 5 days helping my friend Fraser Christian of Coastal Survival at the 2017 Wilderness Gathering. I did a heck of a lot of video this year so here is a short film of some of our antics 🙂
I still have another video to put together of the Wilderness Gathering as a whole so will be back with some more soon.
A ‘Brilliant Moot’ is how I would summarise this year’s Bushcraft UK Bushmoot. It was action packed from start to finish for me as I juggled my time between looking after my kids, running workshops and doing a lot of filming.
I will let the pictures and video do most of the talking so will keep the text to a minimum.
Bushmoot 2017
The first few days for us ‘Mods’ (forum moderators) were all about setting up the Bushmoot so that everything was in place for everyone arriving later in the week. We did not rush things as it was a holiday for us as well but over a few days the Bushmoot was soon set up.
Set up
There are some great places to camp at the Bushmoot which makes for stunning photography. The Mods’ corner is great to photograph on a sunny morning.
I have used the same camping spot for a number of years now and even though a year passes between each visit it feels as if I have never been away when I return.
Camp life
Early Workshops
There were a couple of early workshops this year – Open Fire Cooking with Neil and a 48hr Survival Course with Fraser from Coastal Survival. Both courses covered a lot of different areas so my photos are just a snapshot of their content – needless to say on both courses all the students eat well.
Early workshops
Videos
I put a short video together of this early part of the Bushmoot – including a scenario where my son pretends to chop my head off with an Ivy sword 🙂
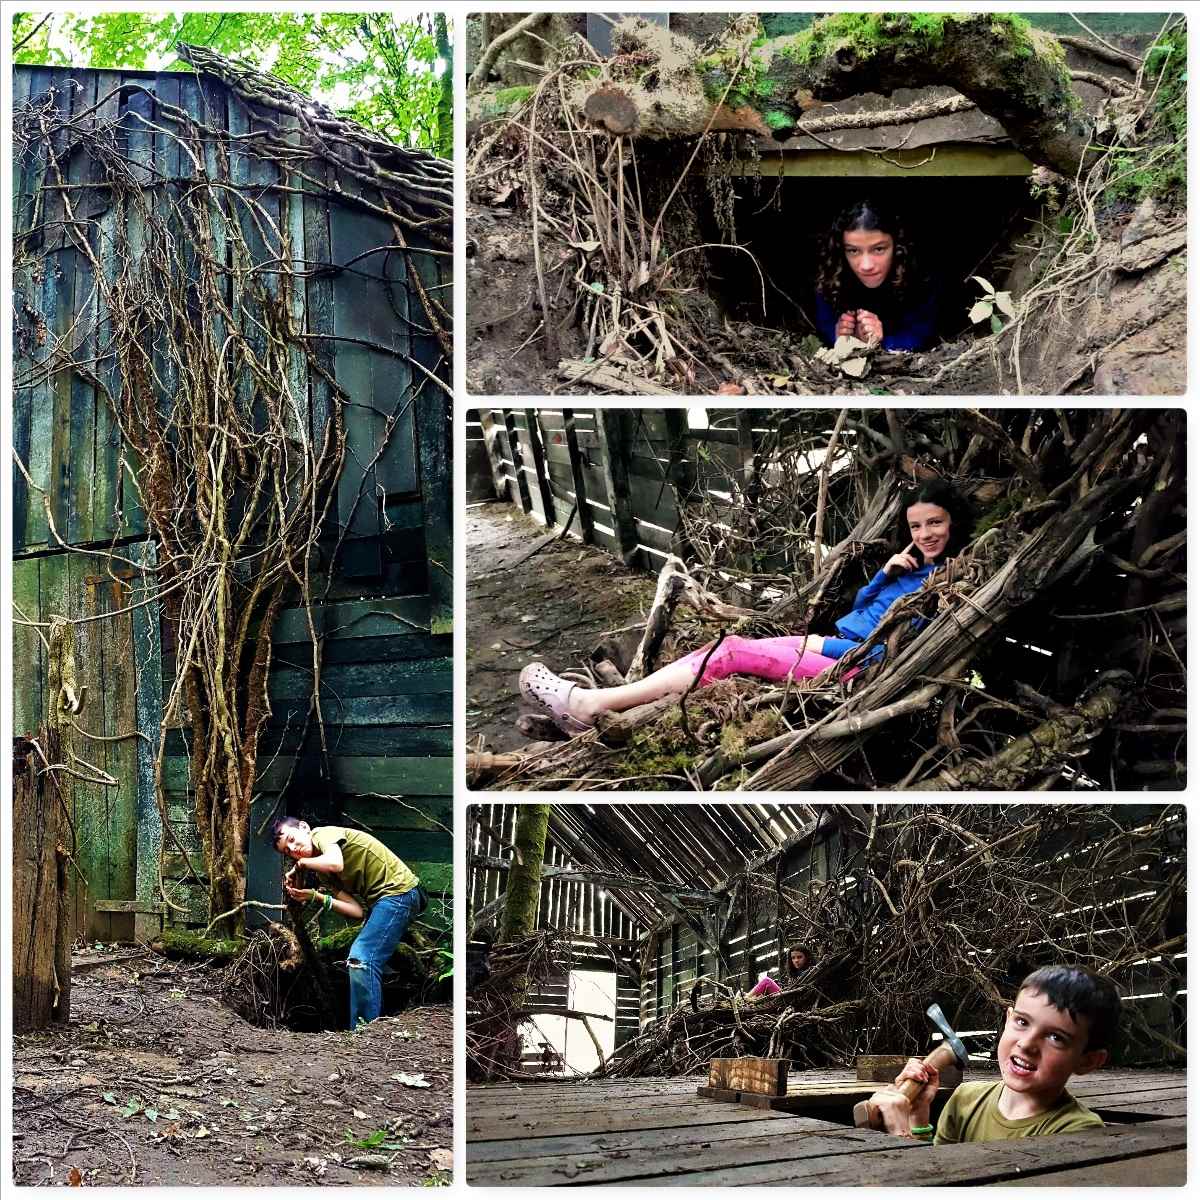
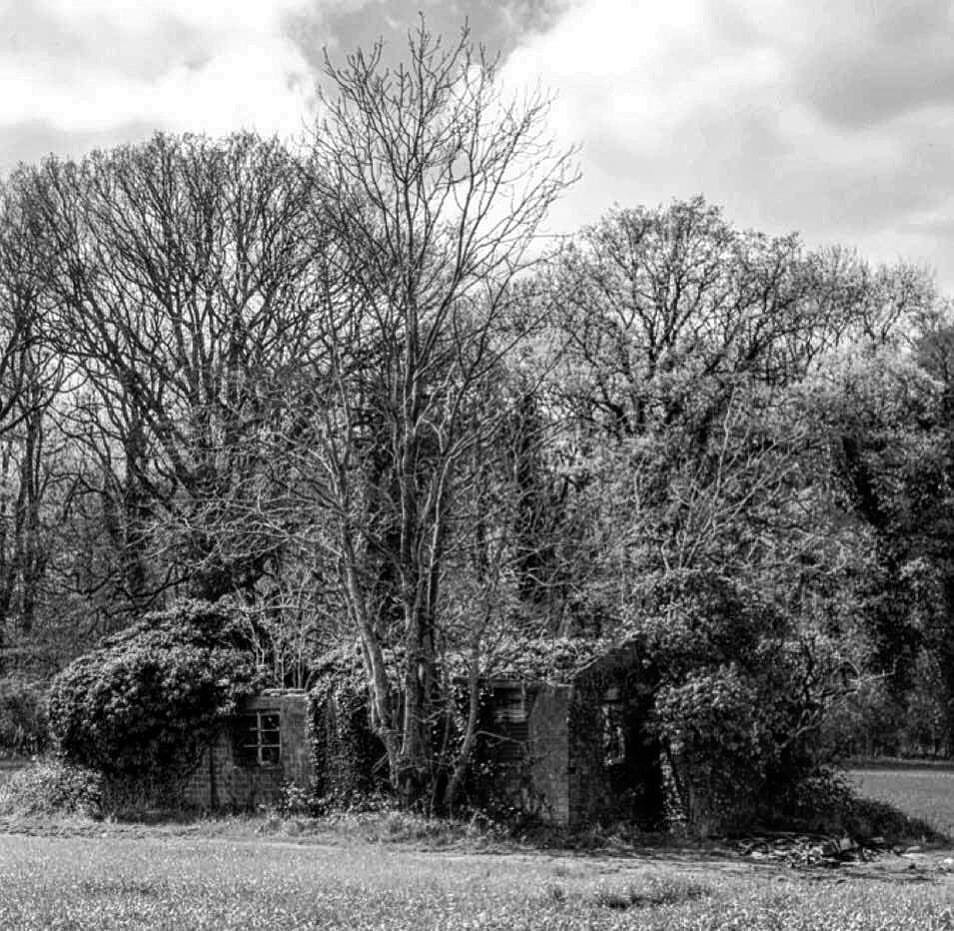
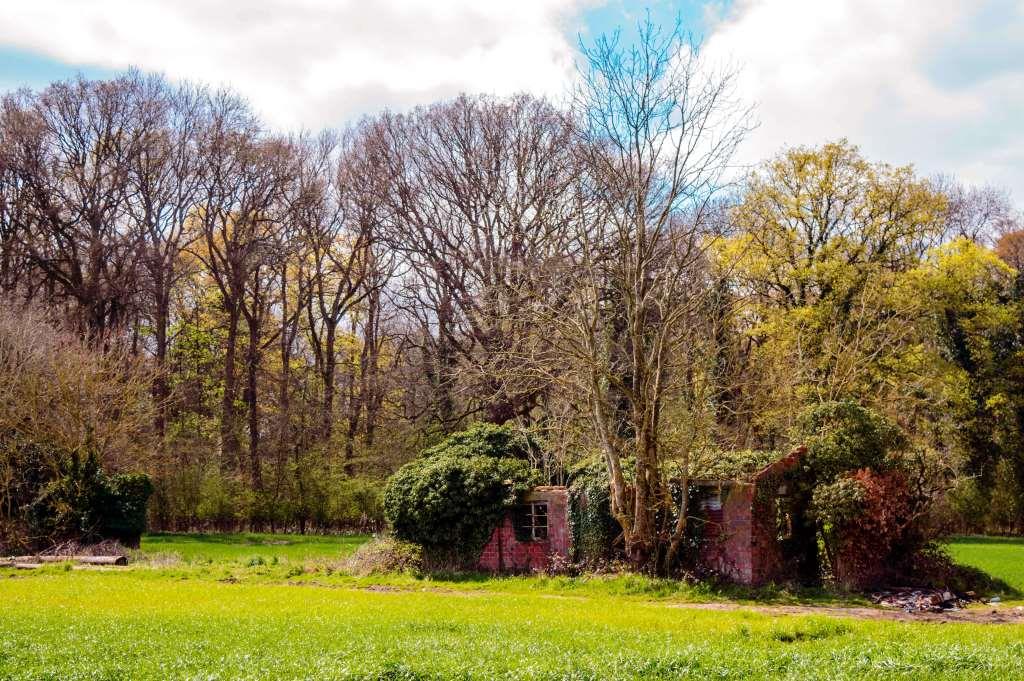
In amongst all these workshops and general setting up my kids took themselves off exploring. I went with them on one jaunt and they took me to the ‘House of Doom’ (as they referred to it). I think film companies use the site and they had left this massive Gothic barn – quite beautiful but eerie at the same time (the axe was for posing with only by the way).
Exploring
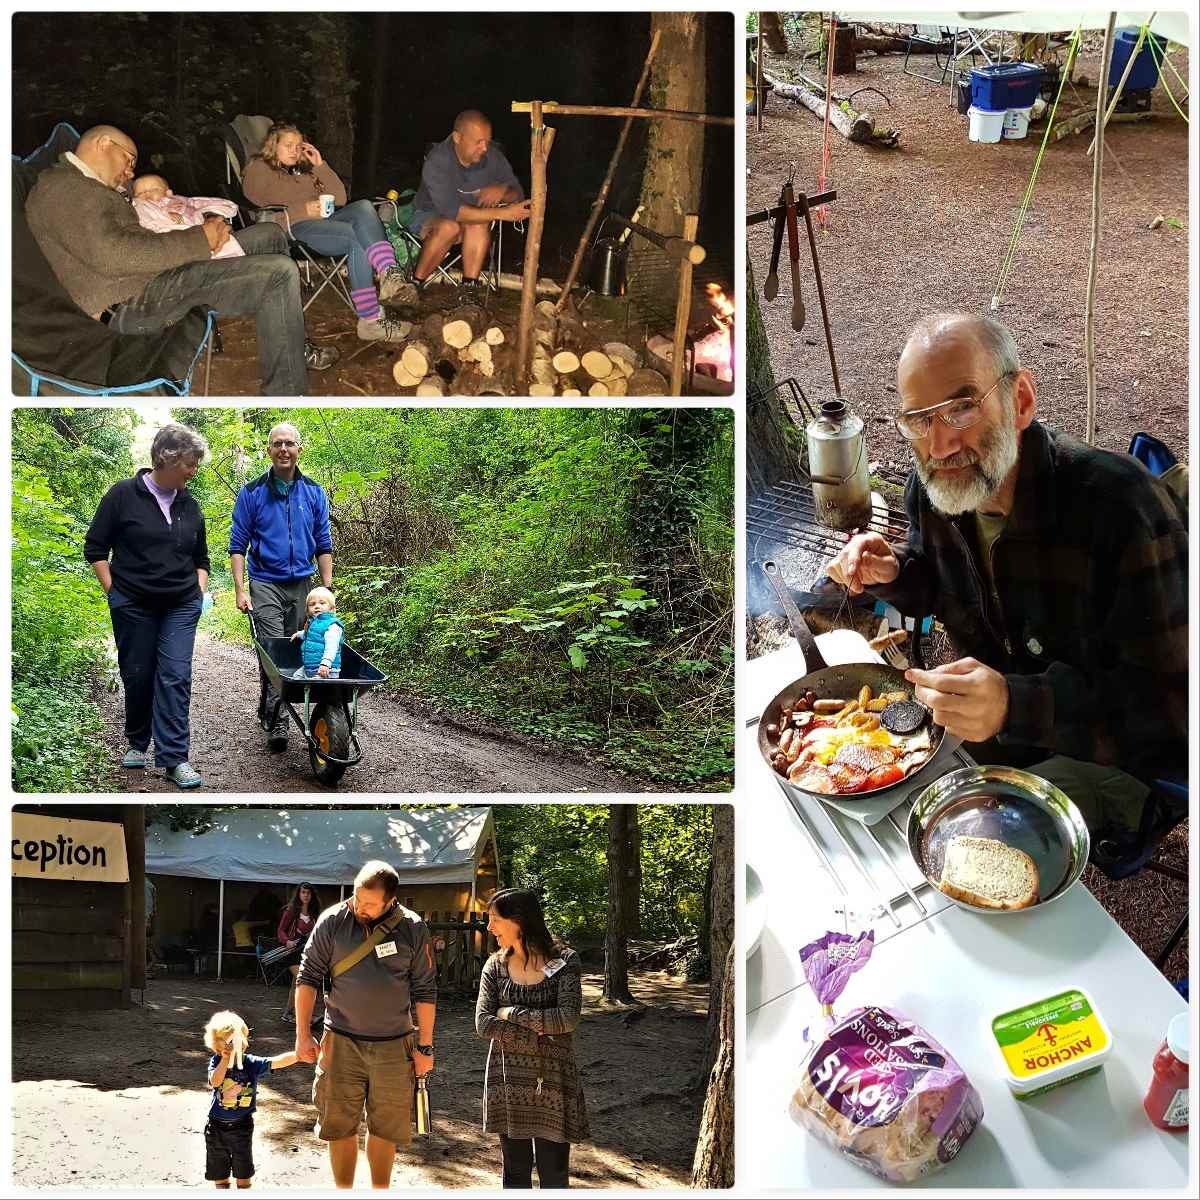
The Bushmoot is all about ‘Family’ as far as I am concerned – this family extends out to all my Bushmoot friends I see time and time again as I return each year.
Friends
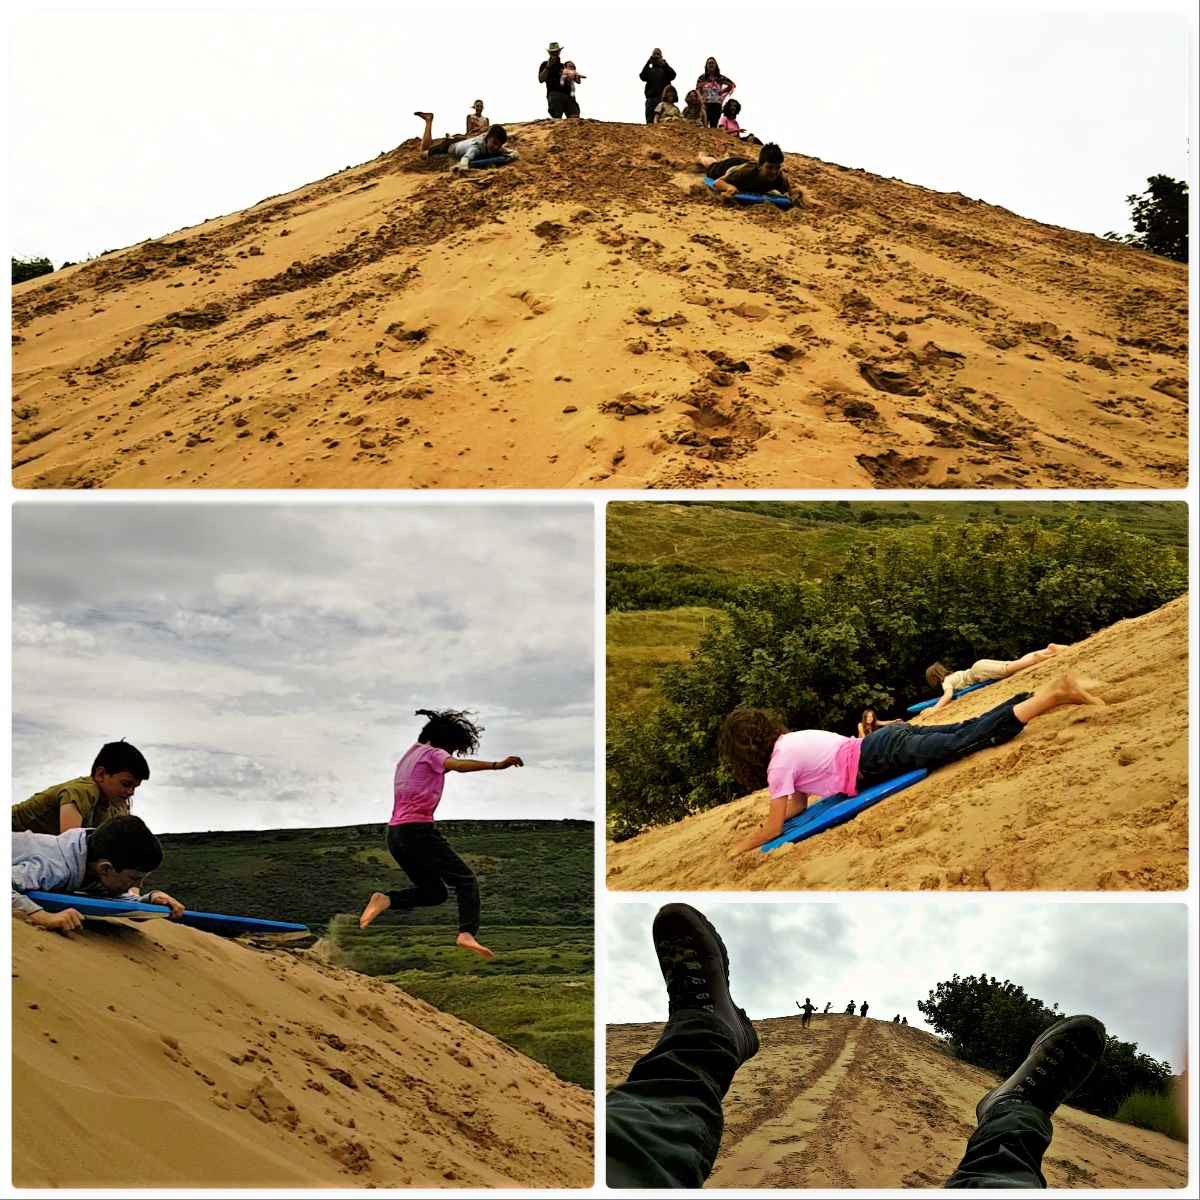
Getting out of the woods one day with my friends Ian, Catherine and Liz (and assorted kids) we went Dune Diving. Merthyr Mawr sand dunes are the second highest dunes in Europe, apparently, and there is one dune in particular that the kids love.
Needless to say I joined the kids as they threw themselves down the dune – great fun even for a 50-year-old kid like me.
Dune riding
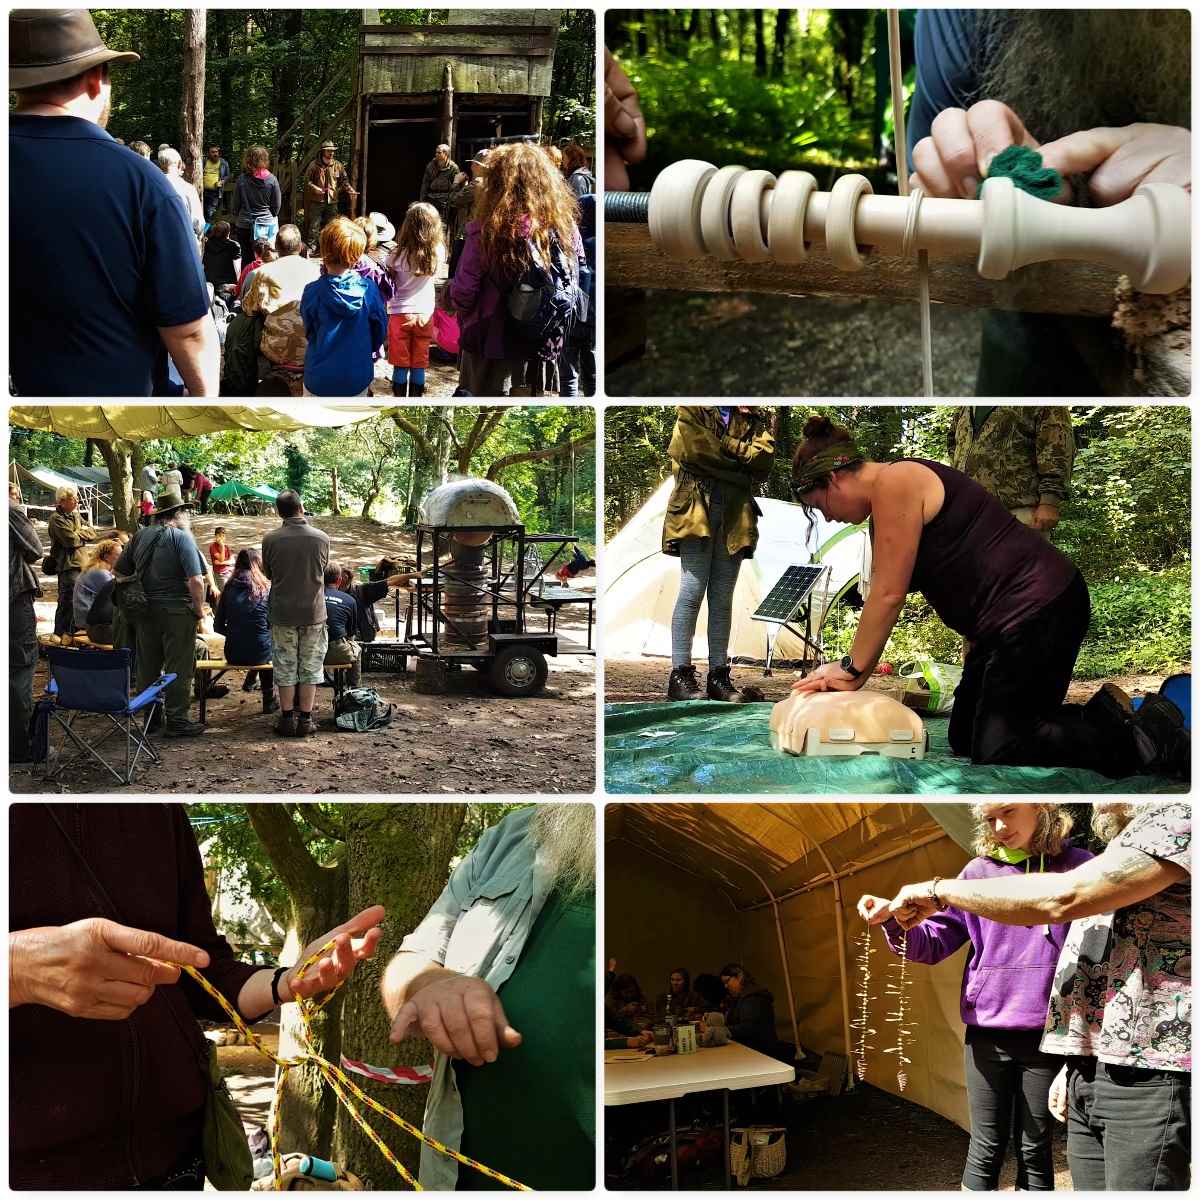
Core Day Workshops
I have no idea how many different workshops we ran this year and I only photographed or filmed a small number of them. We always start with a tool safety presentation (normally three different groups) before starting the main workshops.
Core days – part 1
Fire lighting in its many different forms is a staple of the Bushmoot and this year was no different – below are pictures from the bowdrill, the damp tinder and the flint and steel workshops.
Core days – part 2
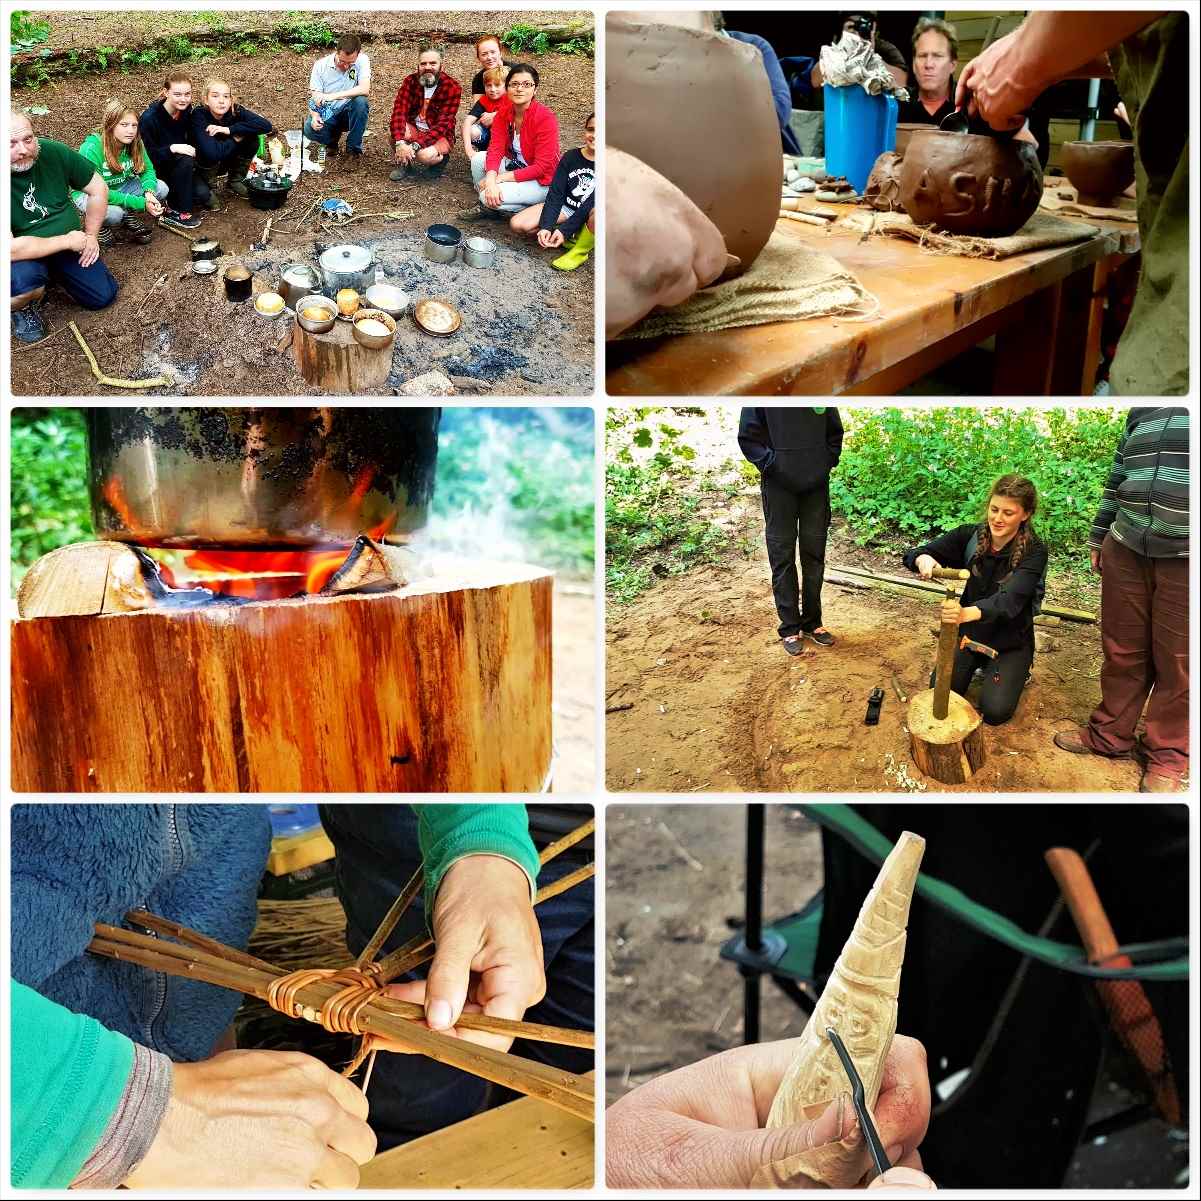
Other workshops included Baking, Pottery, Rocket Stoves, the Starter Course, Basketry and Wood Spirits (to name just a few).
Core days – part 3
Watch the video to get a feel of the subjects we cover at the Bushmoot.
Bushmoot Life
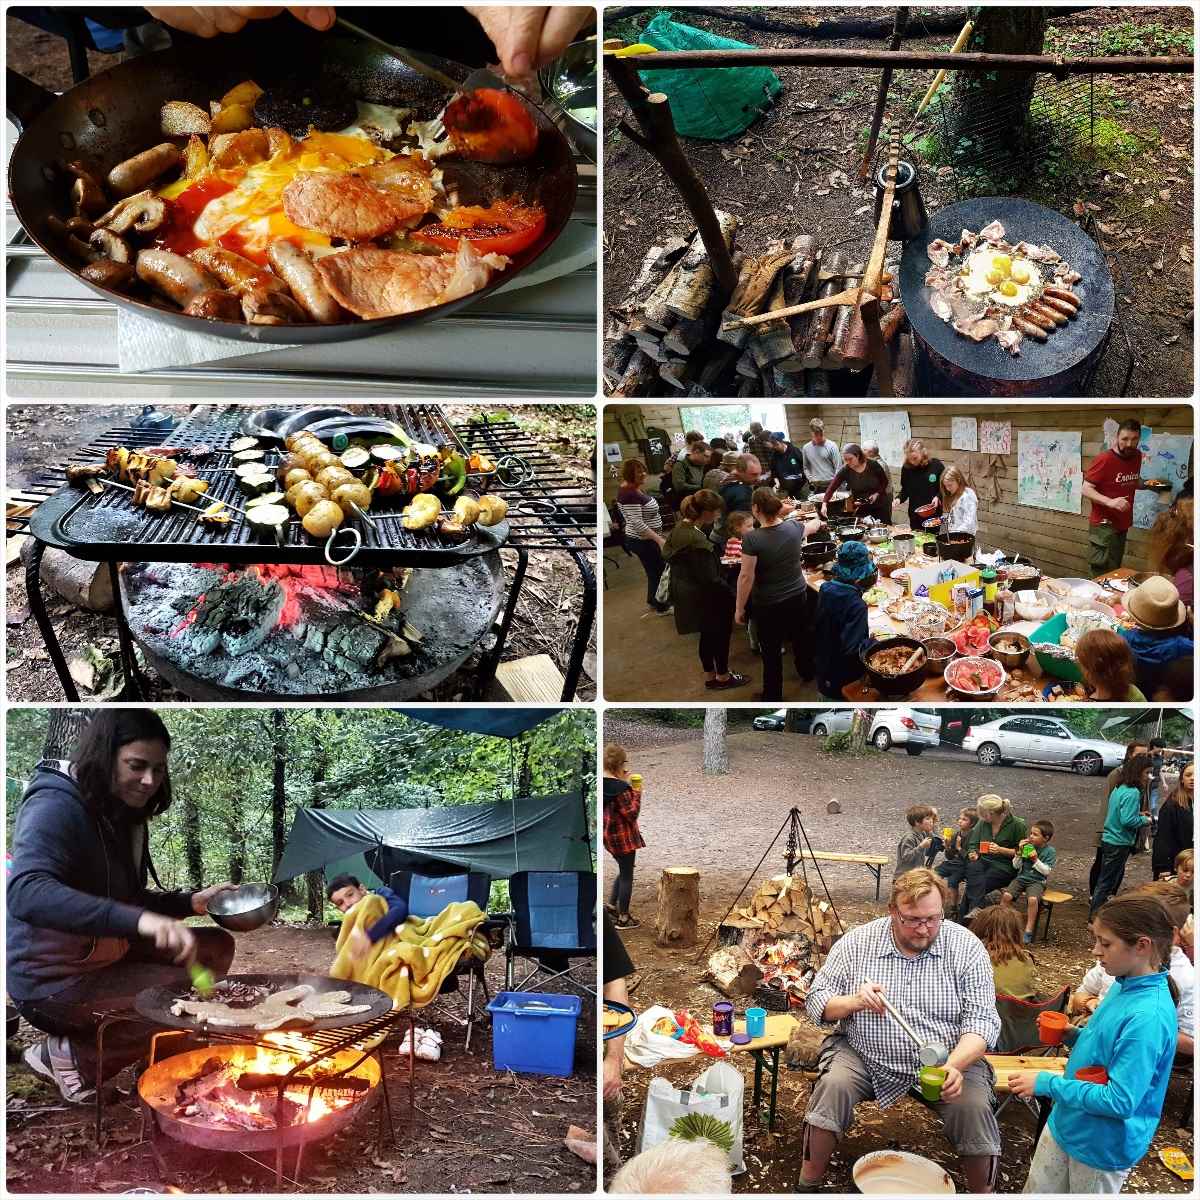
Outside of all these workshops and background work life goes on at the Bushmoot – food I can tell you forms a big part of that life 🙂
I am no great chef (tend to prefer building Campfire Cooking Constructions) but can when needed put something together – thankfully though there are plenty of people around like my wife Alison willing to put together a good spread for the kids and myself. Highlights of the Bushmoot are the Group Meal and the Hot Chocolate evening.
All things food
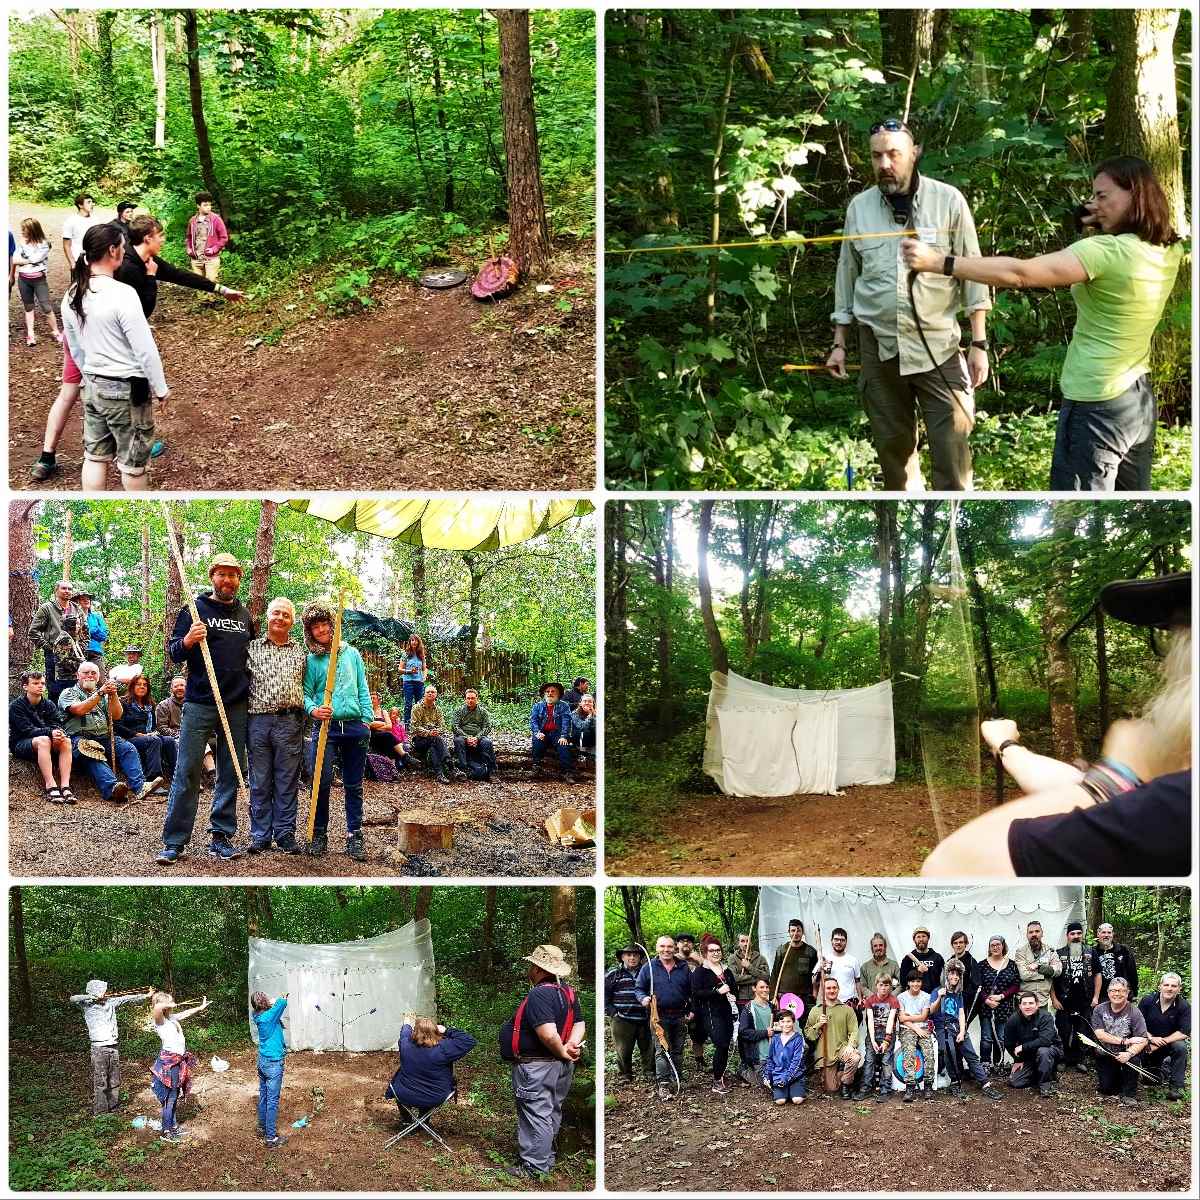
A favourite of mine has always been the archery range. We had another great competition this year. The winners from last year (Marek and Louey) were also presented their made-to-measure bows from Wayne Jones of Forest Knights.
This year we also had a catapult competition run by Steve (Mesquite) Harral and a workshop from David Colter on the Pellet Bow. Around the site we had various smaller ranges for axe, spade and pin throwing.
Down on the range
The Naughty Corner
No Bushmoot would be complete without the Naughty Corner and I try to get up to it for an hour or two each evening. This year my friend from the Sea Cadets Alan Lewis joined me at the Bushmoot for the first time and as he is a chef found himself drawn to the pizza oven.
Phil and Magda as usual kept us well fed each evening and Cap’n Badger made sure we were all not too naughty 😉
The Naughty Corner
The Sand Pit
The evening socialising is not restricted to the Naughty Corner – usually for a couple of evenings lots of folk congregate under the big chute by the kids sandpit for a bit of a shindig.
We were supposed to have a band along one evening but for some reason they failed to show up – thankfully Marek and Gemma with some others started their own musical session that lasted well into the evening.
Sandpit evenings
The Main Chute
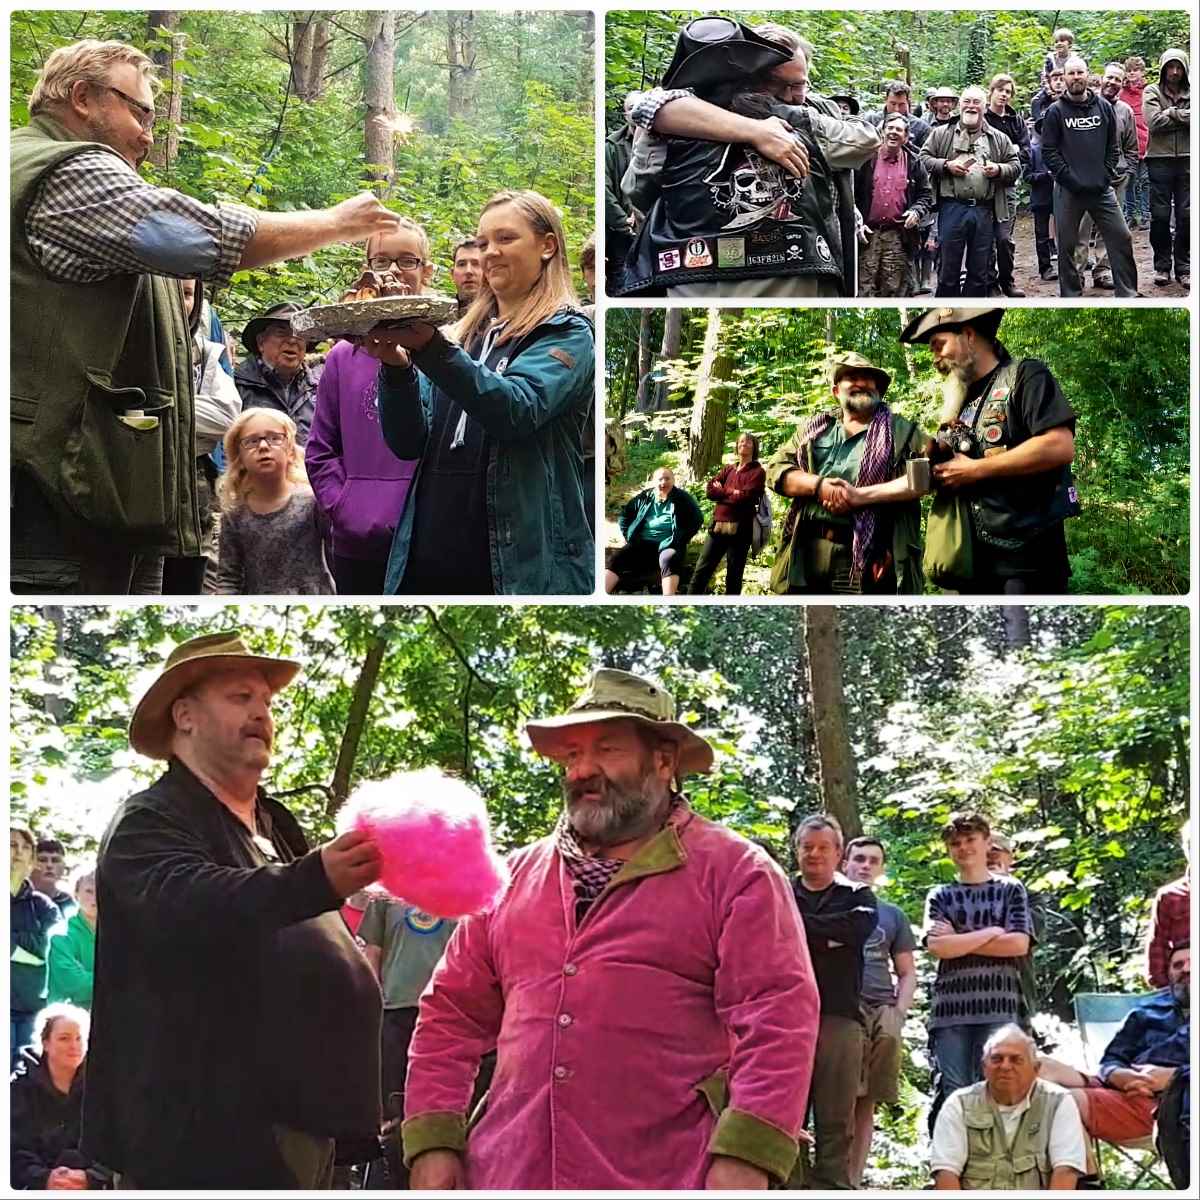
This is where we meet each day, talk about what will be happening, answer questions and celebrate people.
The Bushmoot is run by Tony and Shelly Bristow (along with us volunteer Mods) and as often happens the Bushmoot coincided with Tony’s birthday. We also remembered our dear friend Drew who passed away so tragically at a young age in 2013. We do this by giving each year an engraved Swiss Army Knife to the person we feel has contributed most to the Moot.
Our good friends John Fenna and Steve Harral raise money each year for Cancer charities. Steve gets John to dress up in a different pink outfit each year and we make lots of donations in various ways. Also John has an award he gives out called the John Fenna Award (a Teddy Bear with lots of bushcraft kit) and this year it went to Cap’n Badger for dedicated service to running the Naughty Corner – or undetected crime as I hear 😉
Life under the main chute
Kids’ Fun
All this talk of fun would not be complete without mention to what we organise for the kids (I mean the young ones here). We are not against technology and I am happy to let my kids watch a movie in the evening by the fire (gives me a breathing space to get on with camp chores).
The Bushmoot is a family friendly place and there are always workshops and games planned in for the kids. When there are no planned activities the whole estate is their playground and it’s great to see my kids roam free as I once did as a kid growing up in the Western Isles.
Kids – old fun and modern fun
My last video on the Bushmoot looks at this ‘Bushmoot Life’.
A Celebration
When I popped up to the Naughty Corner one night I got chatting to our chefs Phil and Magda and found out that they had just got engaged – Phil had popped the question to Magda that day down on the beach and she had said yes.
The next day we got Phil and Magda to announce the engagement to everyone under the Main Chute – congratulations guys.
Congratulations
Me
I am mostly to be found behind the camera lens so you do not see many pictures of my silver mop at the Bushmoot. Over the last 10 years I have really embraced photography and am always on the look out for something unusual to snap.
Fire Faces are a favourite of mine – spotted the BFG in one snap I took this year – but there is always something interesting to photograph at the Bushmoot.
Just me
A bit of Magic
This year at the Naughty Corner it was hard to miss the fact that the fire was making a good impression of a Rainbow. It turns out that Cap’n Badger had acquired some Mystical Fire and popped it into the fire. I took a few snaps of the flames and caught a lovely shot that I call ‘The Dancer’.
My kids loved the stuff and so we popped a couple of sachets on our campfire one evening while they watched a movie.
Rainbow flames
Alison
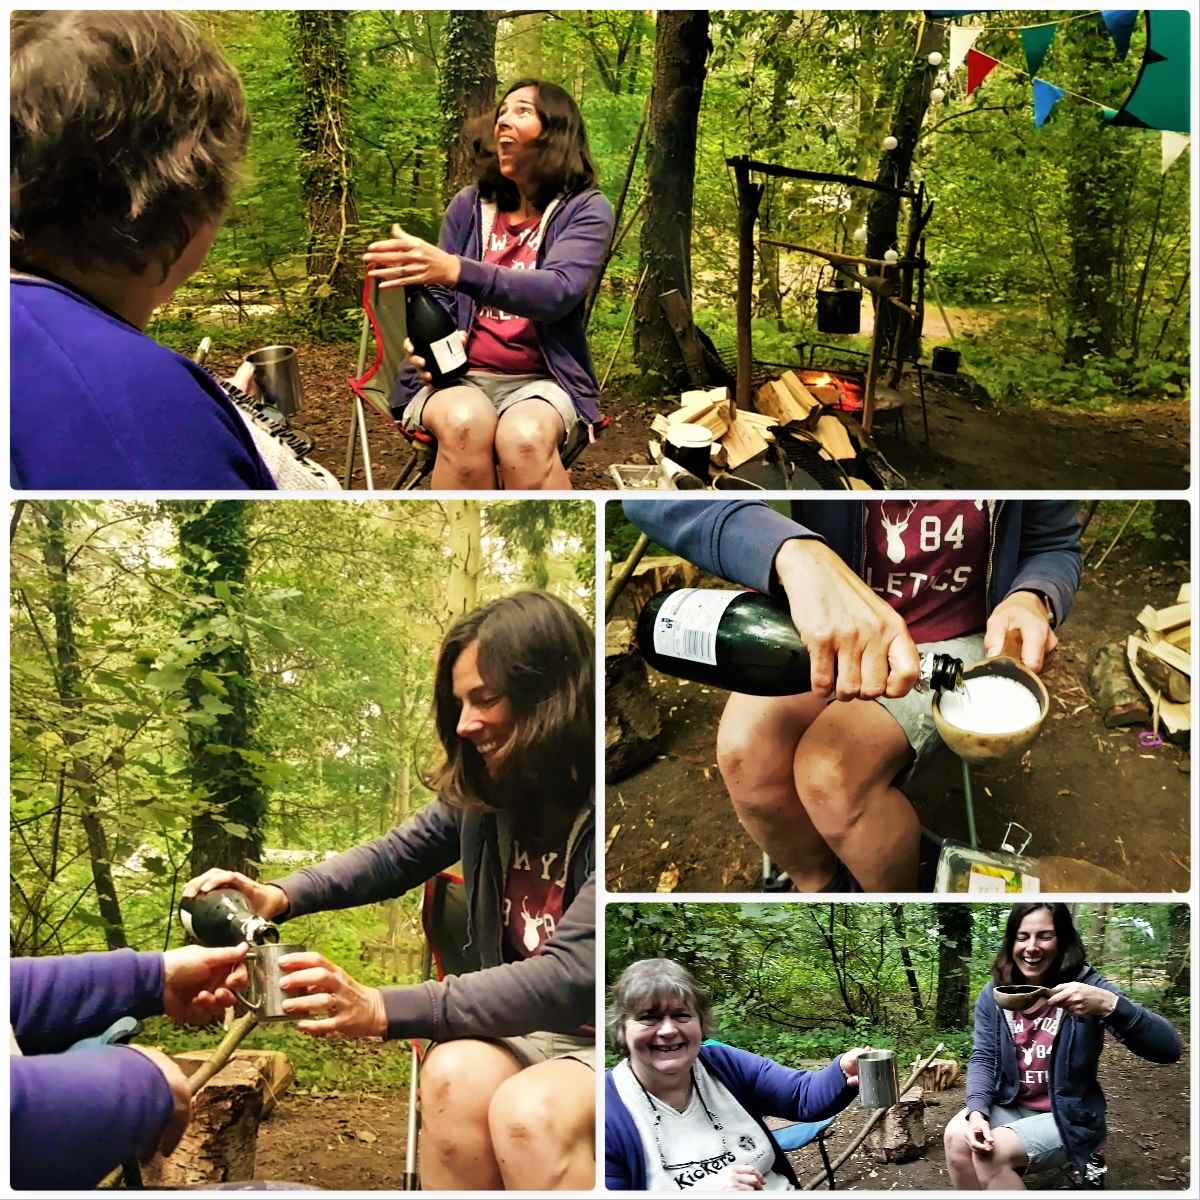
My wife Alison did not attend the whole of the Bushmoot (she pops back and forth from home over the fortnight) as she runs her own publishing company and this year was focused on finishing the first draft of her own book while we were at the Bushmoot.
Needless to say when Alison returned at the end of the Bushmoot she did so with a bottle of bubbly to celebrate the fact that she had finished her first draft – well done darling 🙂
Congratulations Alison
That is it from me on the subject of the 2017 Bushmoot. Thank you to Tony, Shelly, all the Mods and all the other helpers who organised everything and helped make it such a magical two weeks.
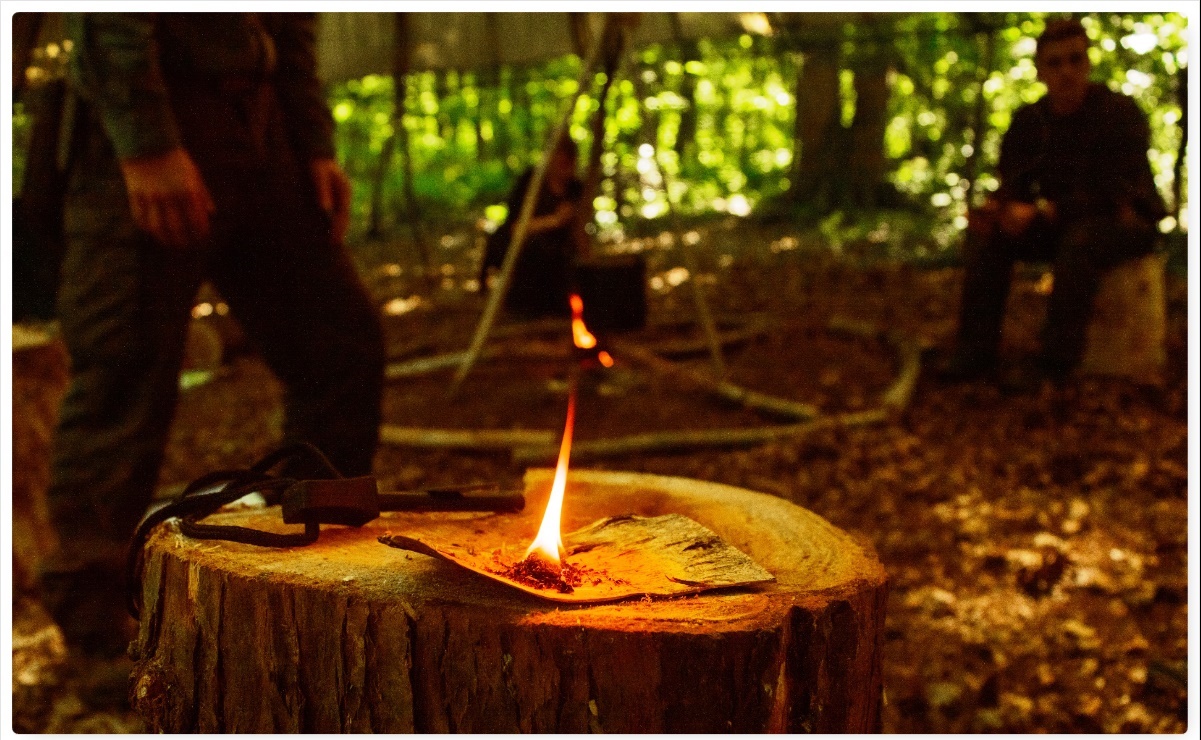
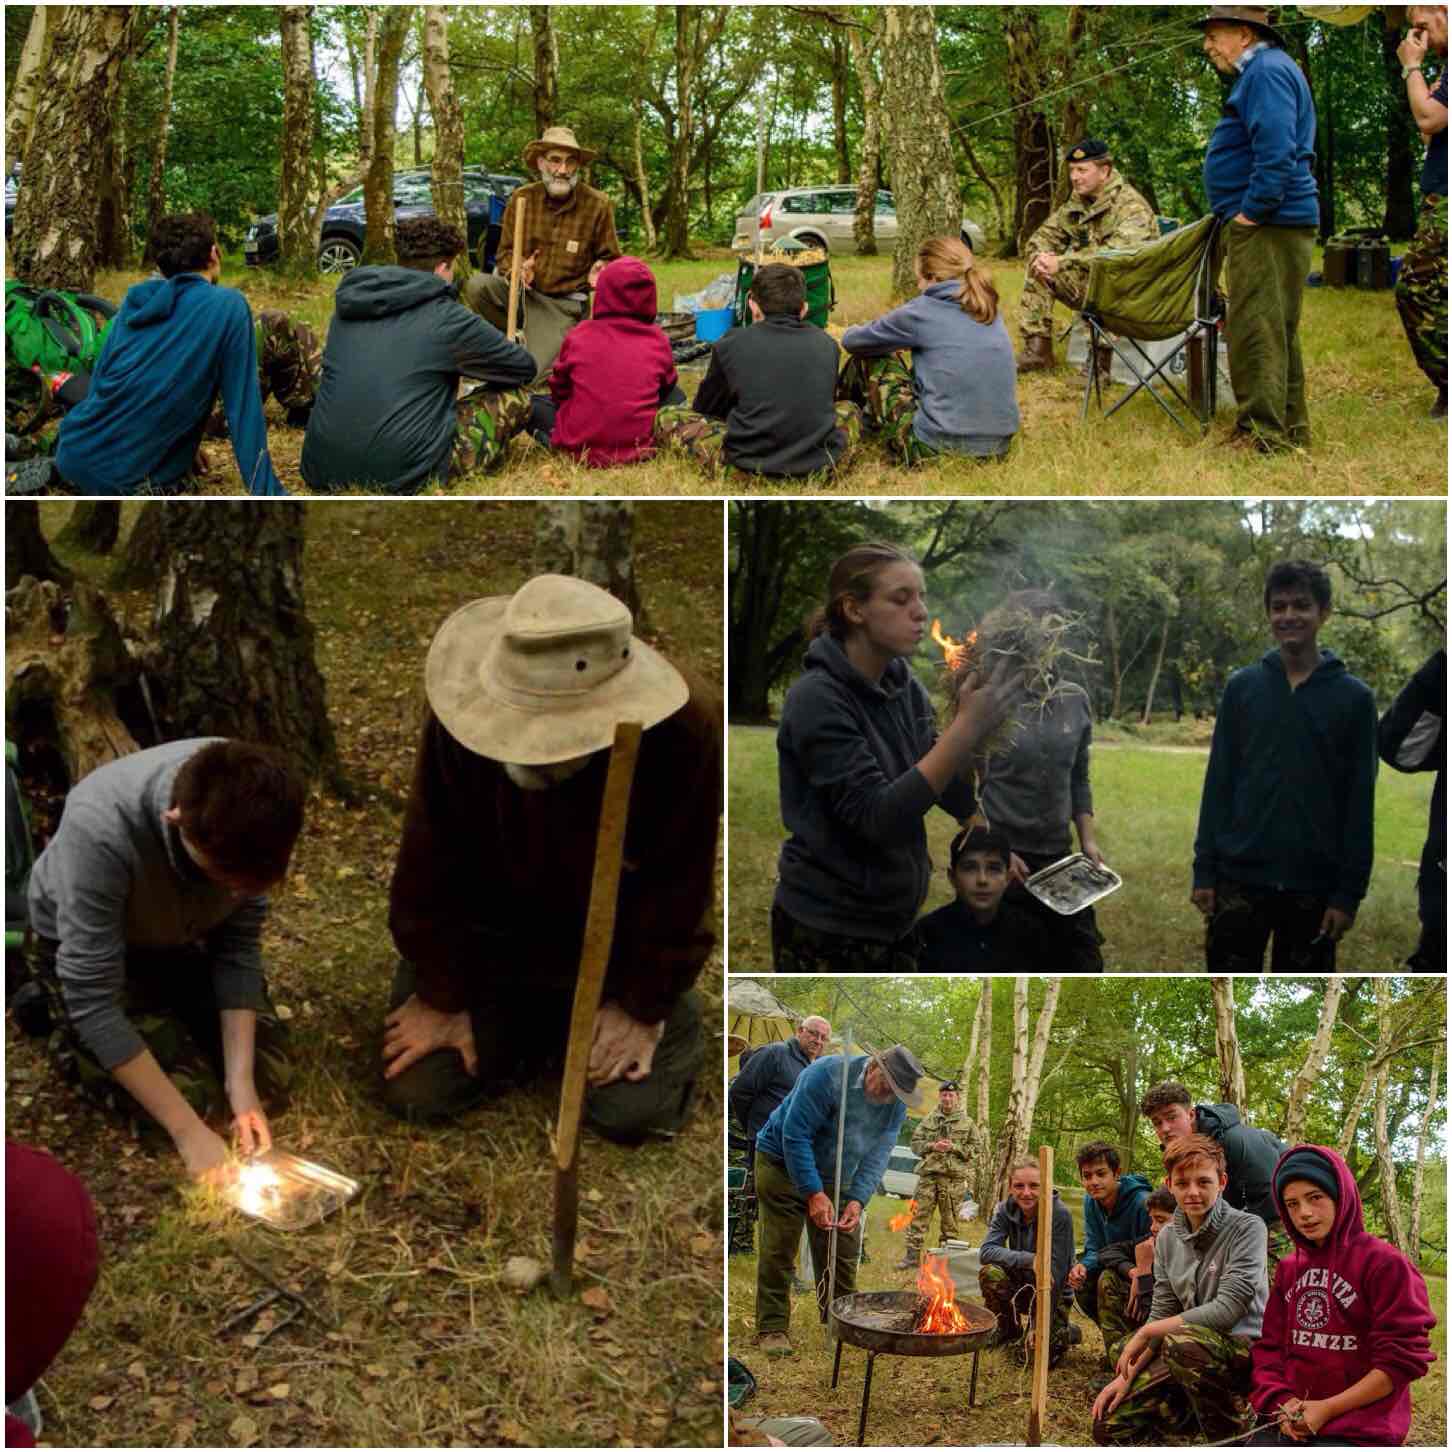
There is no rocket science here or fancy skill to learn – just down right common sense.
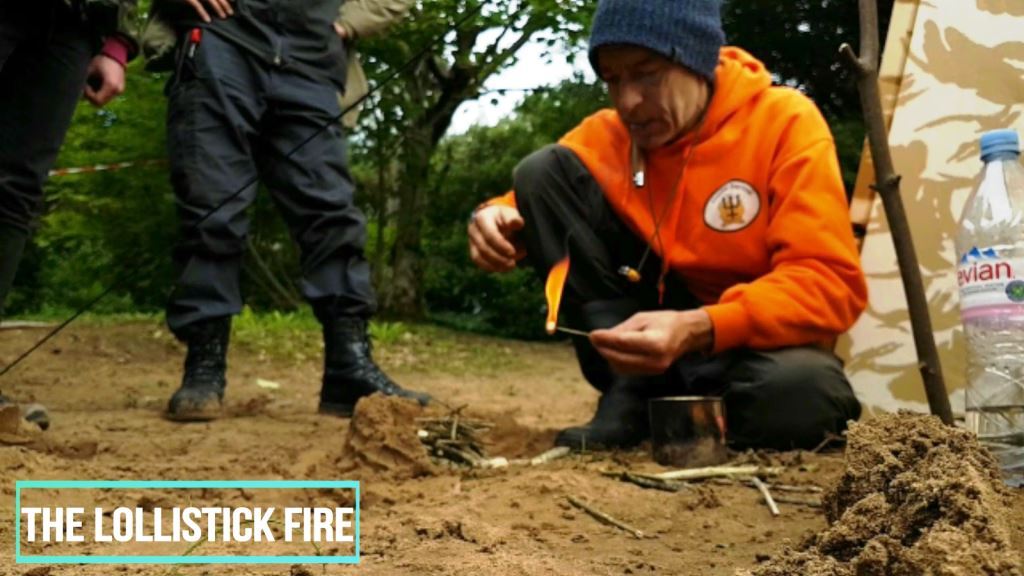
When you have limited resources and the elements may be against you, then you may wish to consider the ‘Lolli Stick Fire’.
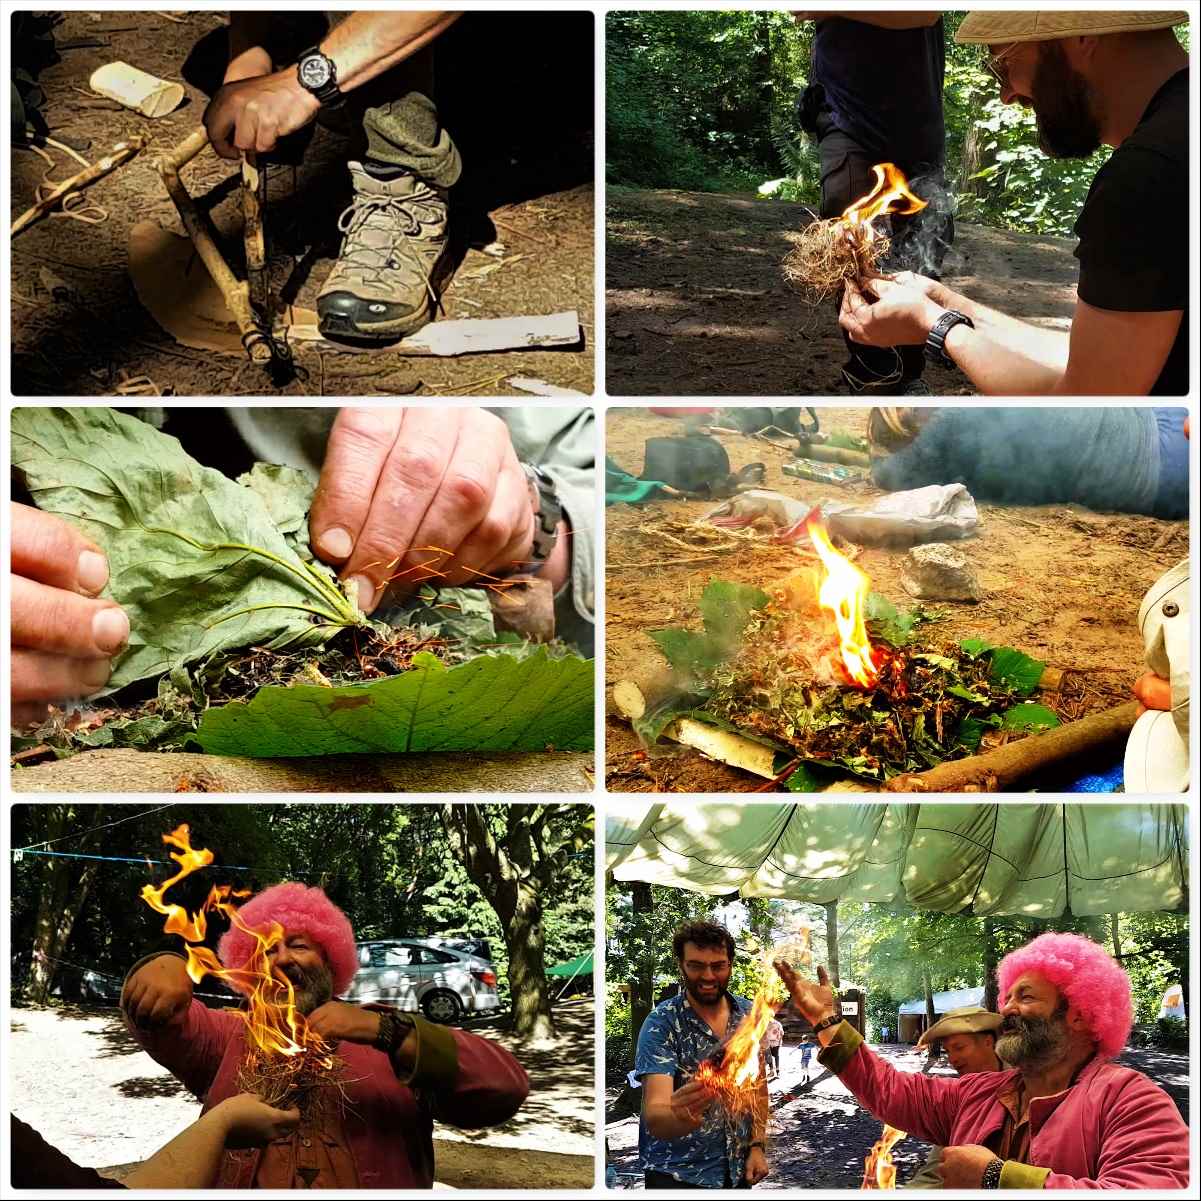
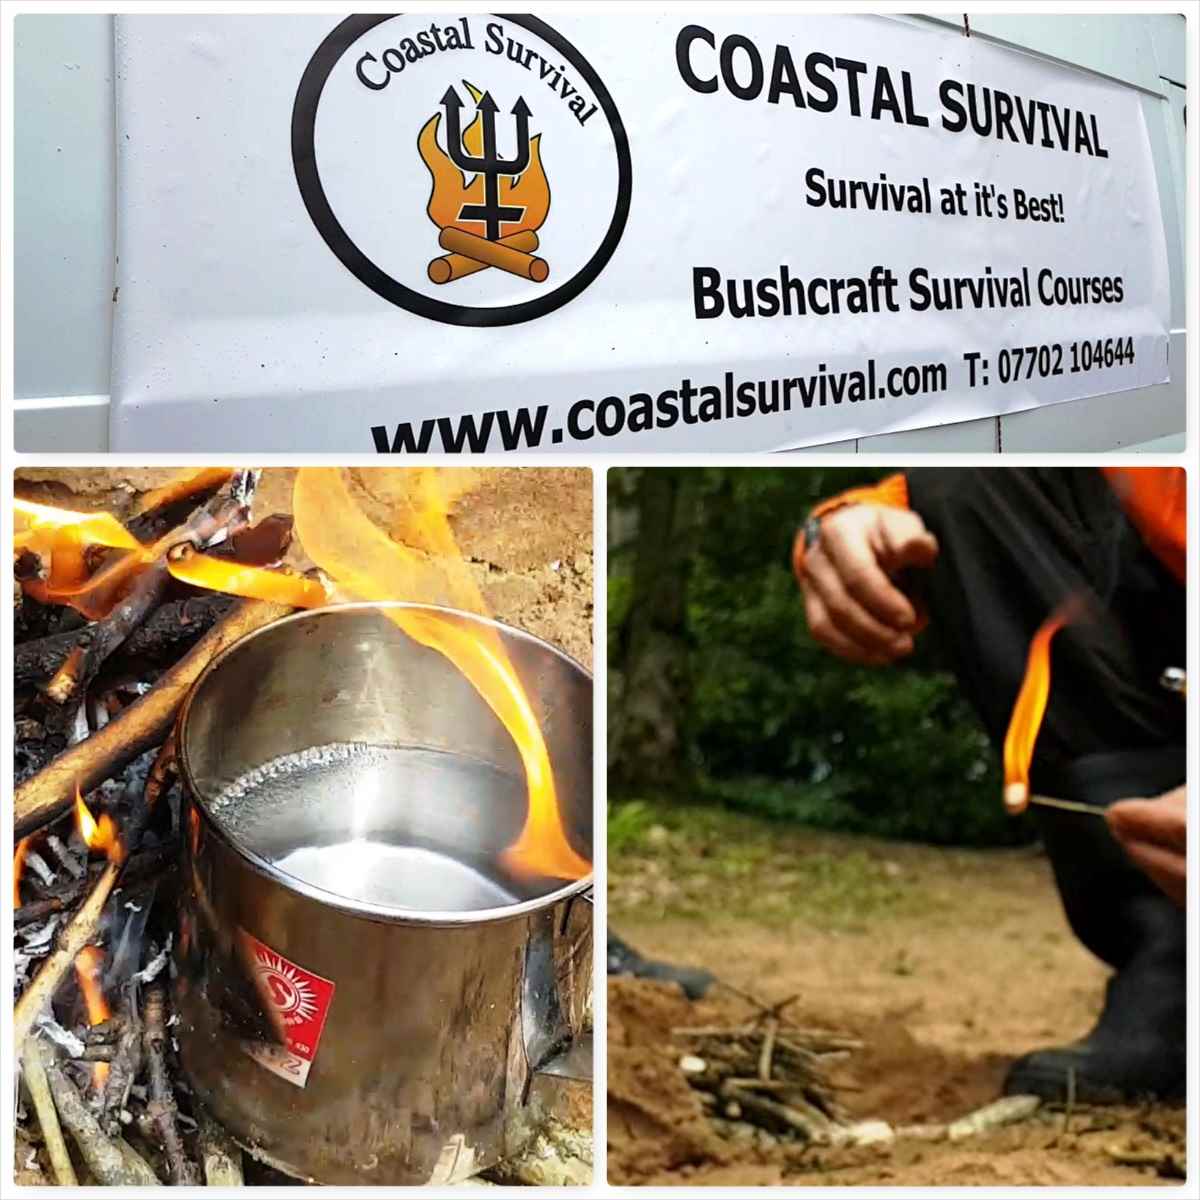
At the 2017 BCUK Bushmoot my good friend Fraser Christian from Coastal Survival was running a 48hr workshop on Coastal Survival. One of the classes was on lighting a fire on the beach in windy conditions with very limited resources – he called this the ‘Lolli Stick Fire’.
The ‘Lolli Stick’ Fire
There is no rocket science here or fancy skill to learn – just down right common sense.
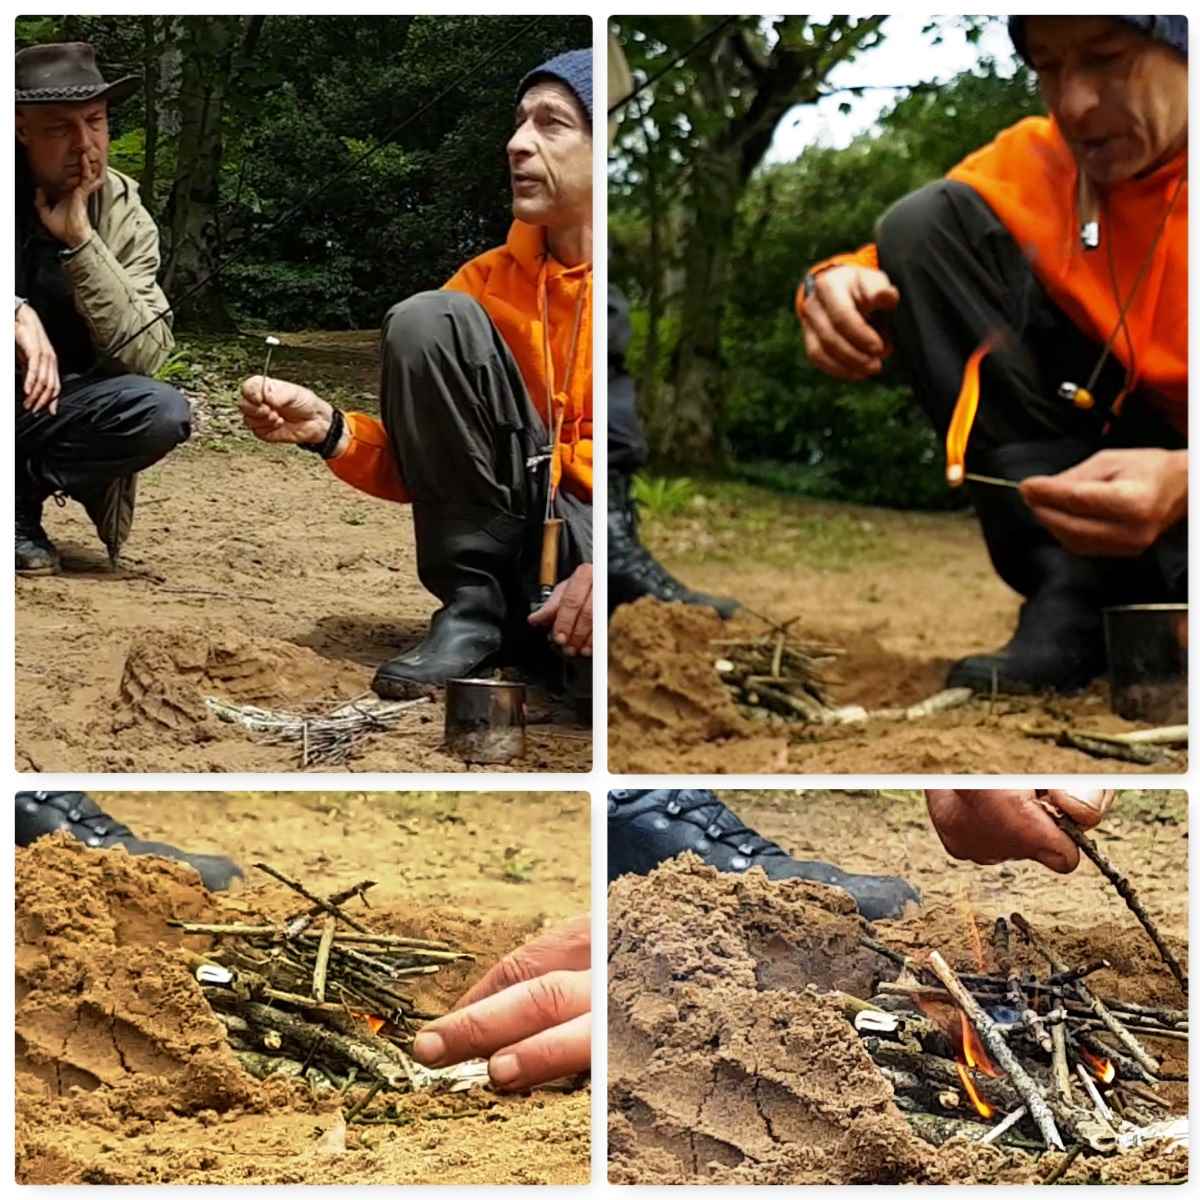
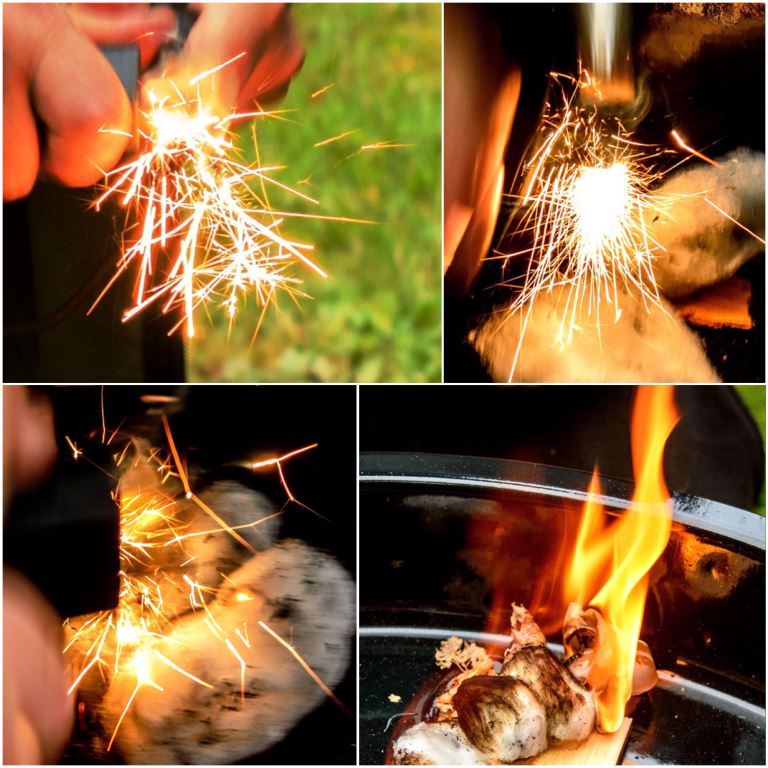
Fraser built using sand a little reflector wall in a horse shoe shape and within it he laid a platform of dry dead twigs. On the surface of this platform he laid three loose piles of twigs in a ‘U’ shape. On top of this ‘U’ shape he laid a further pile of loose twigs making a roof. This shape left a hole in the side to add a firelighter.
Rather than using a whole firelighter Fraser cut a firelighter into 8 pieces and stuck one of these small pieces onto a thin sharp twig (and here likened it to a ‘Lolli Stick’). He lit this in the shelter of his tarp and easily popped it into the middle of his twigs.
Minimal resources
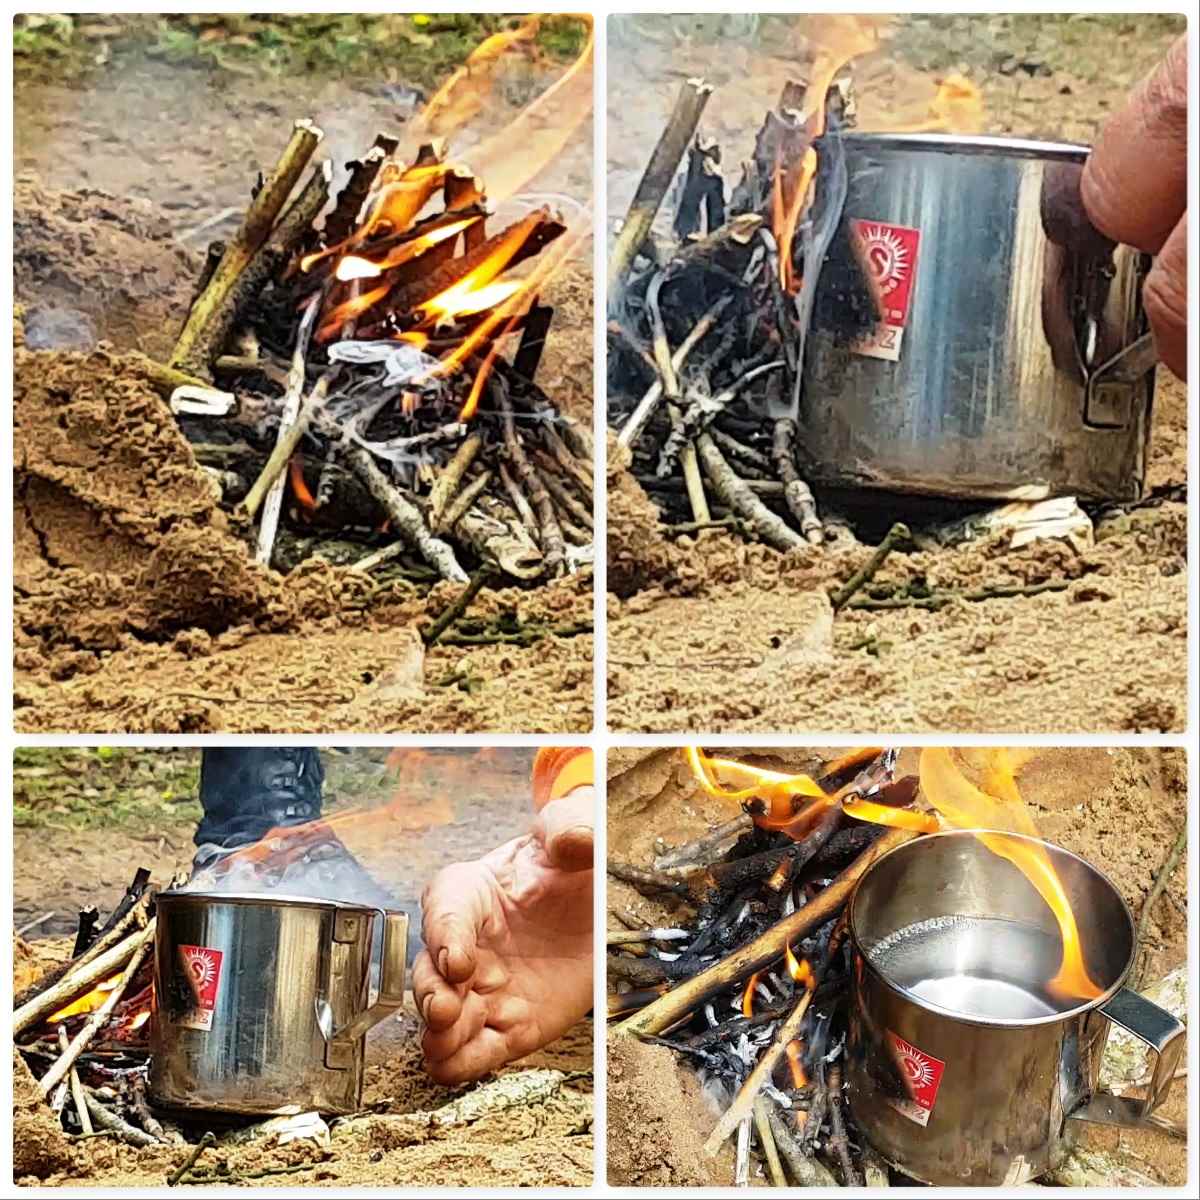
The flames spread through the twigs very easily as they were loosely laid and Fraser topped them off with further twigs to get the fire going really well. This process only took around a minute and he soon had a cup of water pushed up against the side of the fire.
Enough for a brew
The small reflector wall helped bounce the heat back onto the cup and so boil the water quite quickly.
You can see it in action in the short video below.
Fraser uses this technique on the coast as the reflector wall protects the fire from the fierce winds and because of the minimal resources needed to light and maintain it. I incorporated this technique into our Starter Course at the Bushmoot and everyone easily got there fires going with it with very limited resources.
The ‘Lolli Stick’ is safe to handle, requires only an eighth of a firelighter and is easy to light – as I said before ‘down right common sense’.
Over the last few years as I have made videos of the BCUK Bushmoot I have noticed I tend to video the workshops. Looking at the footage I shot this year I saw that I had captured so much more.
This is the 3rd and final video in my Bushmoot 17 trilogy focusing on ‘Bushmoot Life’ outside of the workshops and is dedicated to my wife Alison as she completed the first draft of her latest book during the Bushmoot – Congratulations Alison and look forward to reading it.
This year at the Wilderness Gathering my friend Des Cattys was showing his love of Log Rocket stoves to visitors. I decided to drop in on one of his sessions to watch how he constructs one. Like Des I am intrigued by these stoves and I am always looking to improve on their construction so watching someone else at work building one is a chance not to be missed.
If you want more detail on making one of these stoves have a look at my How To…. on building a Log Rocket stove. There are many variations on them and I have included some of them on my Bushcraftdays blog in my How To section.
Over the last few years one of the changes I have seen at the Wilderness Gathering is the quality of the music in the evenings – this year it was particularly great.
Roger Harrington of Bison Bushcraft and Dom Harvey (they run the Wilderness Gathering) had great music playing each night however I was particularly struck by one young musician – Vojta. He is a violinist at heart but somehow brings in many other instruments to his sessions.
Here is the last number he played at this years Wilderness Gathering.
It only seems a short time ago I was havering about making videos – I plucked up the courage eventually to load a video onto YouTube and now here I am on my 100th YouTube video 🙂
This last week I have had a great time at the Wilderness Gathering here in the UK with Fraser Christian of Coastal Survival. I will write a more detailed report on the Gathering later but just wanted to share with you today a little video I grabbed just before I left.
I was approached by Ian Cresswell from Lonescout Bushcraft and told that he had heard that the Coyote Kids group had planned to ambush our friend JP and dunk him in the lake. So at the appointed time I was on hand to see the snatch and witness the dunking – enjoy the video 🙂
Every now and then a nice little weekend comes along – this trip to Crowborough Army camp with the Sea Cadets was one of them (not often you can say that with Crowborough). My friends Dave and Alan Lewis had already set up camp when I pulled up ( I had been at Woodcraft School that day so was running late).
We had a group of 5 senior cadets and a party of Junior cadets to train in campcraft over the weekend.
All set up
There was other training going on in the camp but we were separate from all that in the woods. Along with us was Gary Brodie-Barratt who is under training for his Basic Expedition Leadership award. Under supervision from Dave, Gary led a lot of the classes covering subjects such as kit, clothing and tents.
Early start
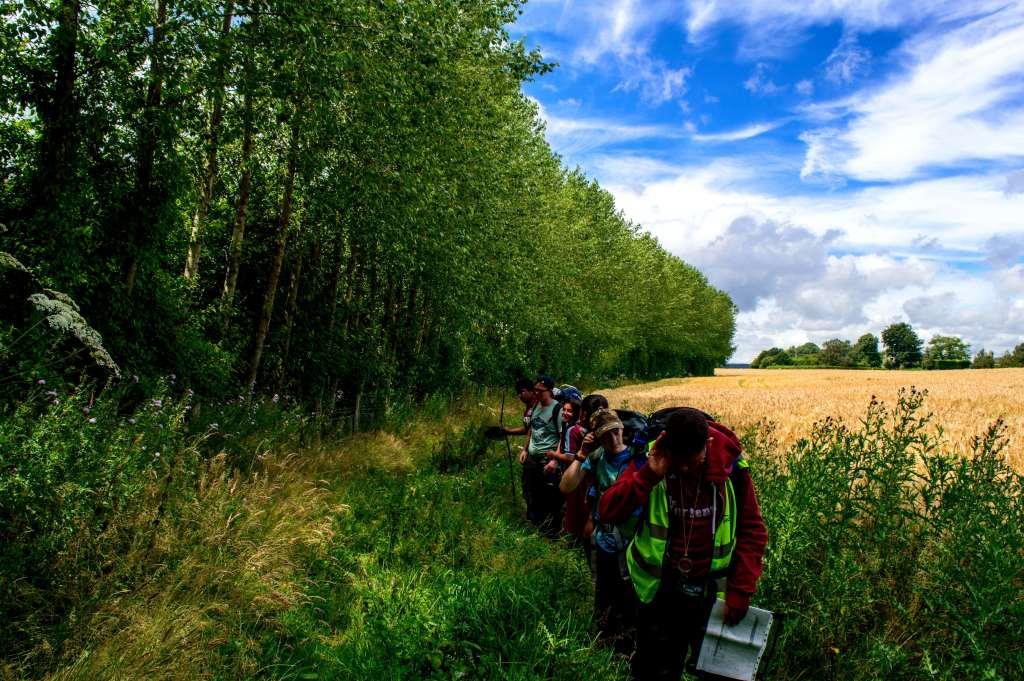
While they were cracking on with these classes Alan and myself were preparing for an influx of Junior cadets later that afternoon. I did though get out with Dave and Gary when they set off to do some navigation.
Some of the cadets were learning map reading for the first time and some were on our intermediate course which focuses on compass work a lot more.
Focus on Navigation
Everyone though gets to play with the bothy bag – this little bag is a real life saver when you are in very exposed conditions. The cadets learn how to use one in a safe and controlled manner so that if they ever need to use one for real they will know how to deploy it correctly.
Practising for those emergencies
After lunch the Juniors arrived and the peace and tranquillity of our camp was shattered 🙂 These Juniors are so keen to learn that it is a pleasure to teach them.
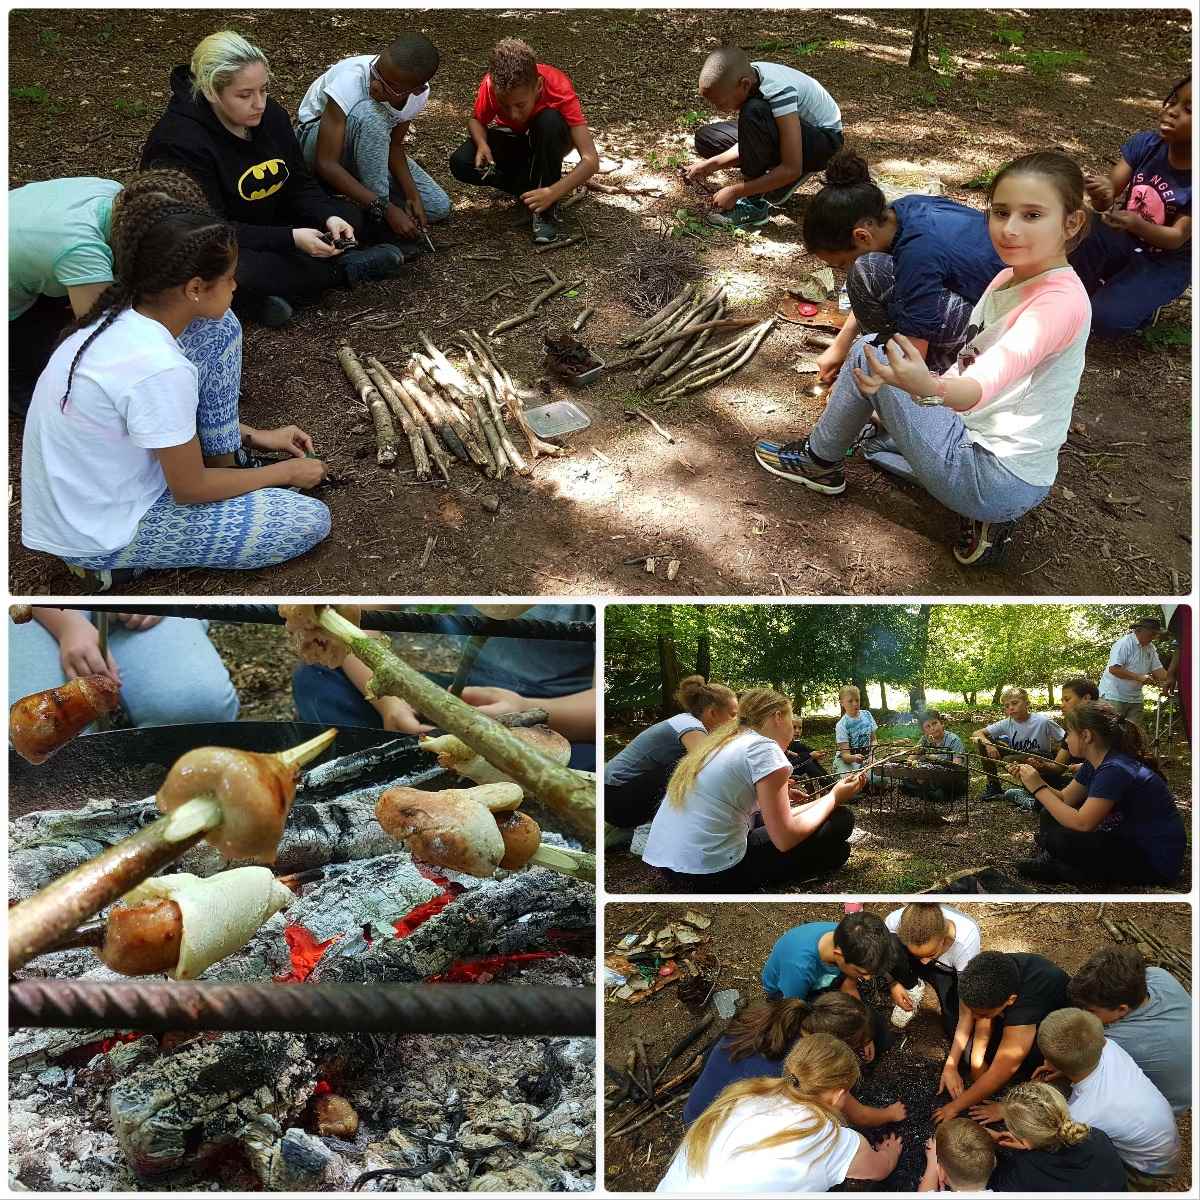
We got them fire lighting first and soon had sausages, bread and marshmallows on the go.
Junior time
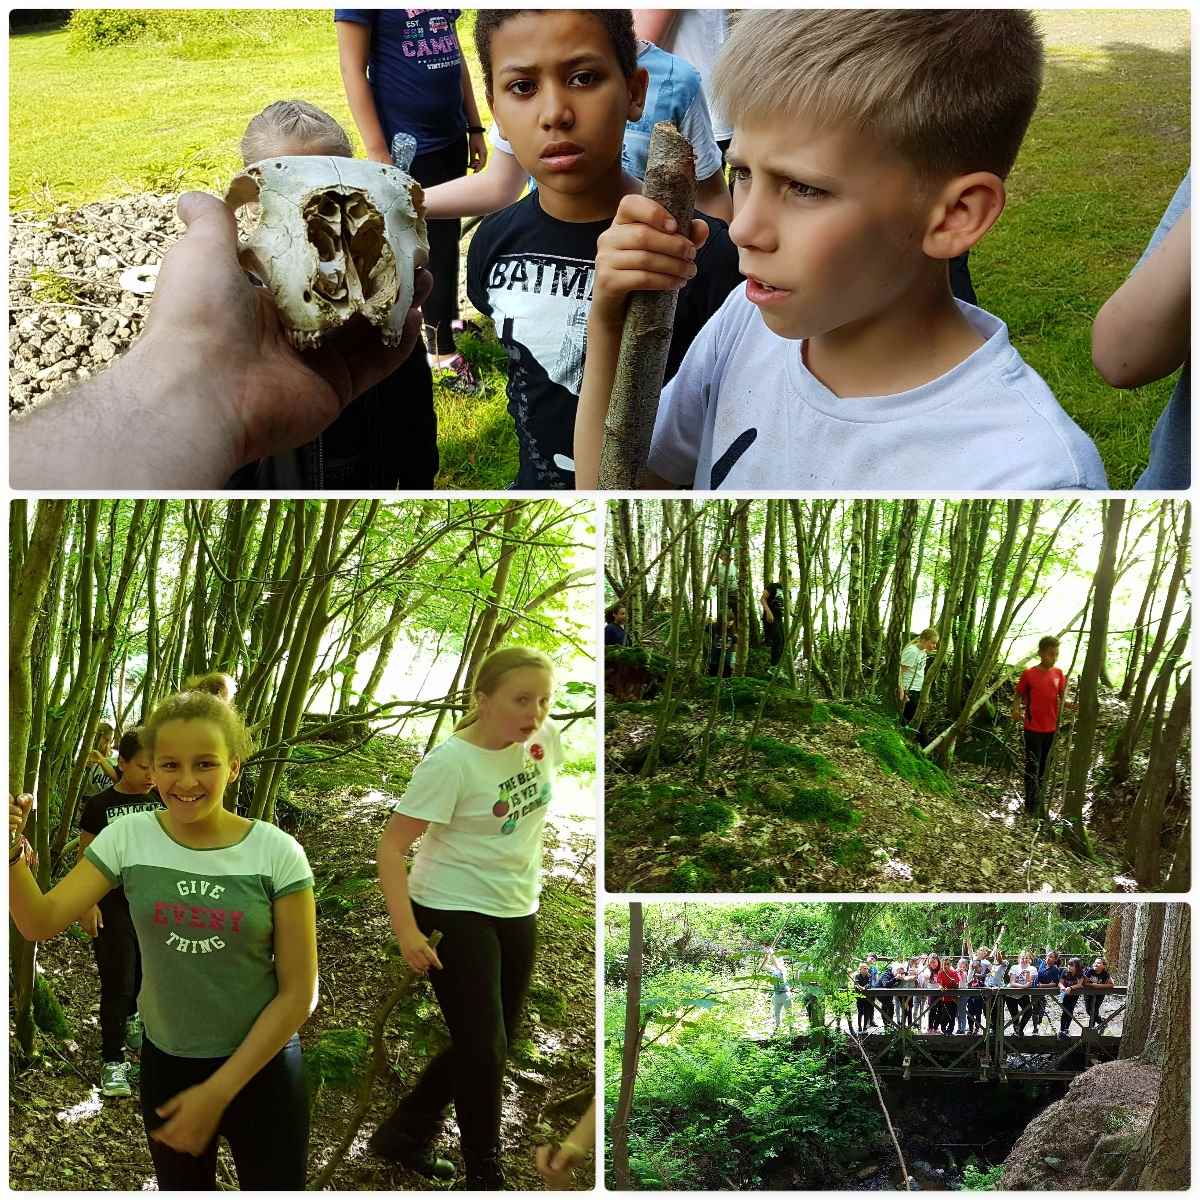
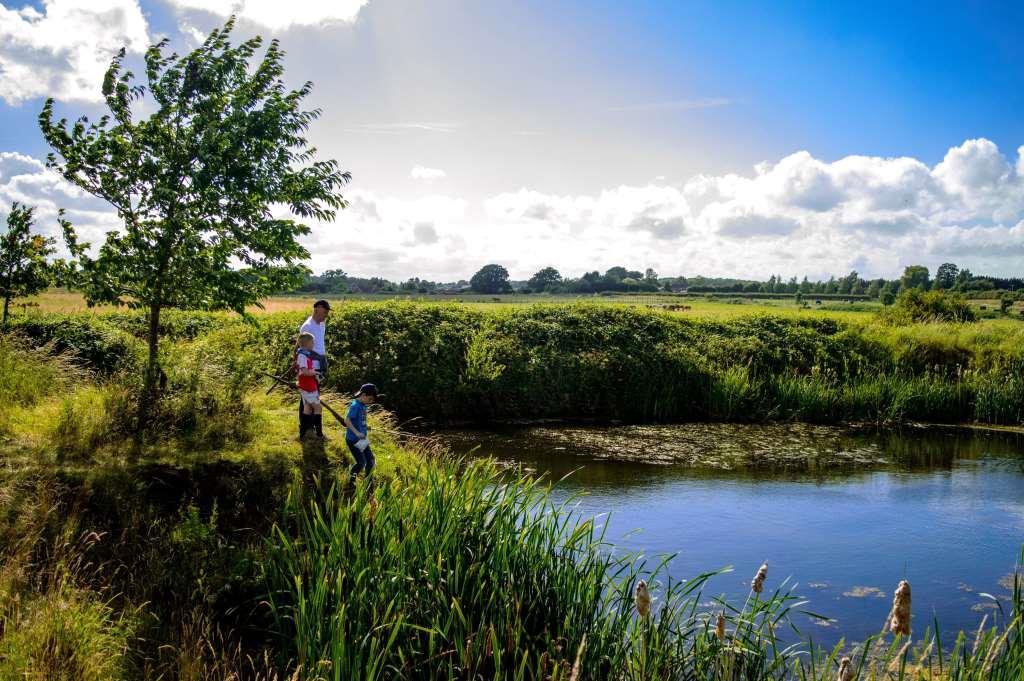
Later on I took them on a nature walk (with a little bit of navigation thrown in) down through the old World War 1 training trenches running beside the camp.
Exploring the trenches
We had cracking weather all weekend, did not have to share the woodland with any other groups (always a bonus) and for once had plenty of staff on hand – all in all it made for Happy Campers.
All things campcraft
Below are my favourite shots of the weekend (so want one of these blow up seats).
Mt favourites
Maybe next year I will get one of these weekends again 🙂
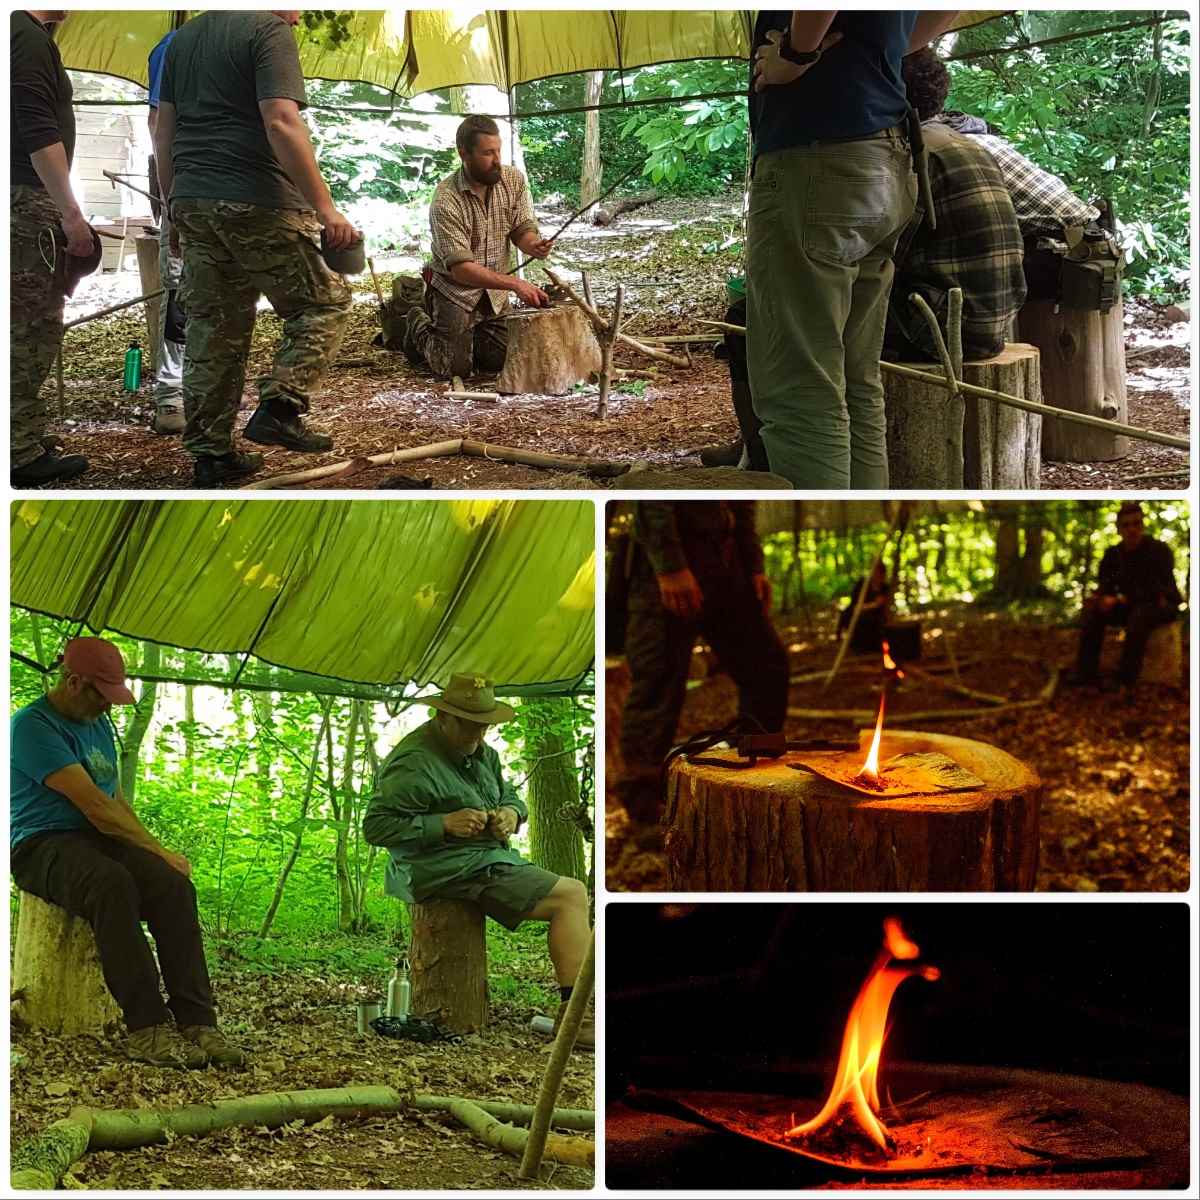
it was about 9 years ago or so that I was coming to the end of my Bushcraft Leadership course with John Rhyder at Woodcraft School. With my fellow students we had to prepare a couple of weekends training to visitors to prove we had mastered our bushcraft skills and also that we could pass these skills onto others – in May of this year I was back down at Woodcraft School but as a visitor this time with this years students.
Fire By Friction
I had received an invite and so popped down one morning in late May. All the classes had been set up and after a quick chat catching up with John it was time to get cracking. There was a class on bowdrill by Jack which was great but I was not. I failed to get an ember – excuse – I was not allowed to use my knife to make adjustments as I had not done that class yet 🙁
There were classes on campfire cranes (a particular favourite subject of mine loyal readers will know), safe carving techniques and different methods of using a firesteel.
Cranes, Carving and Birch Bark
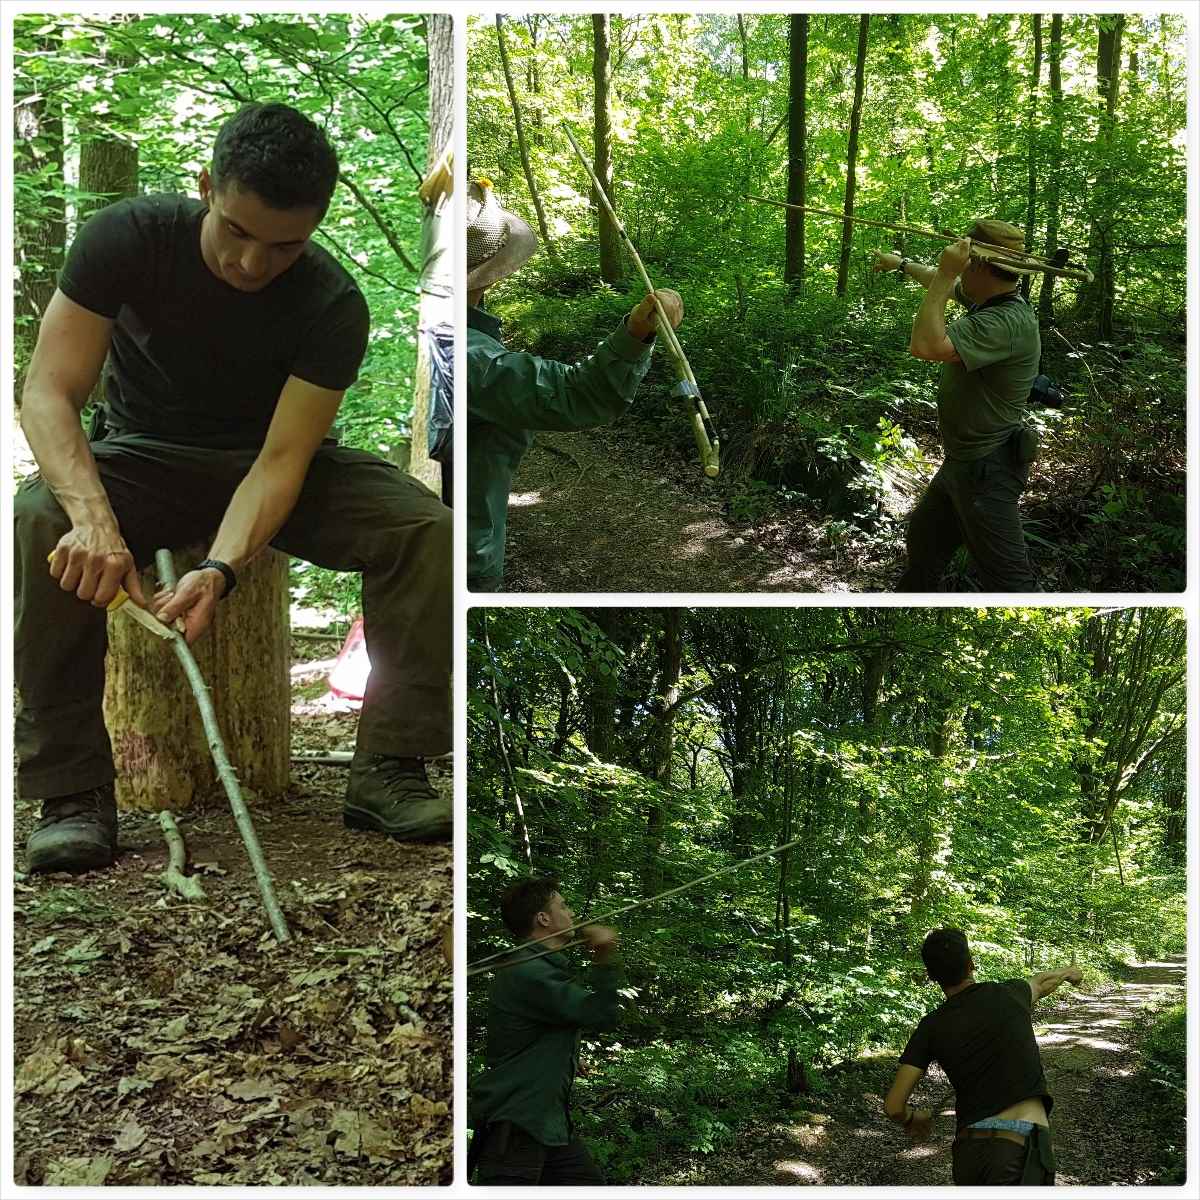
Another favourite of mine is the Atlatl (I think I was one of the first students on John’s courses to teach this). We carved our own Atlatl and were soon pinging darts down the range.
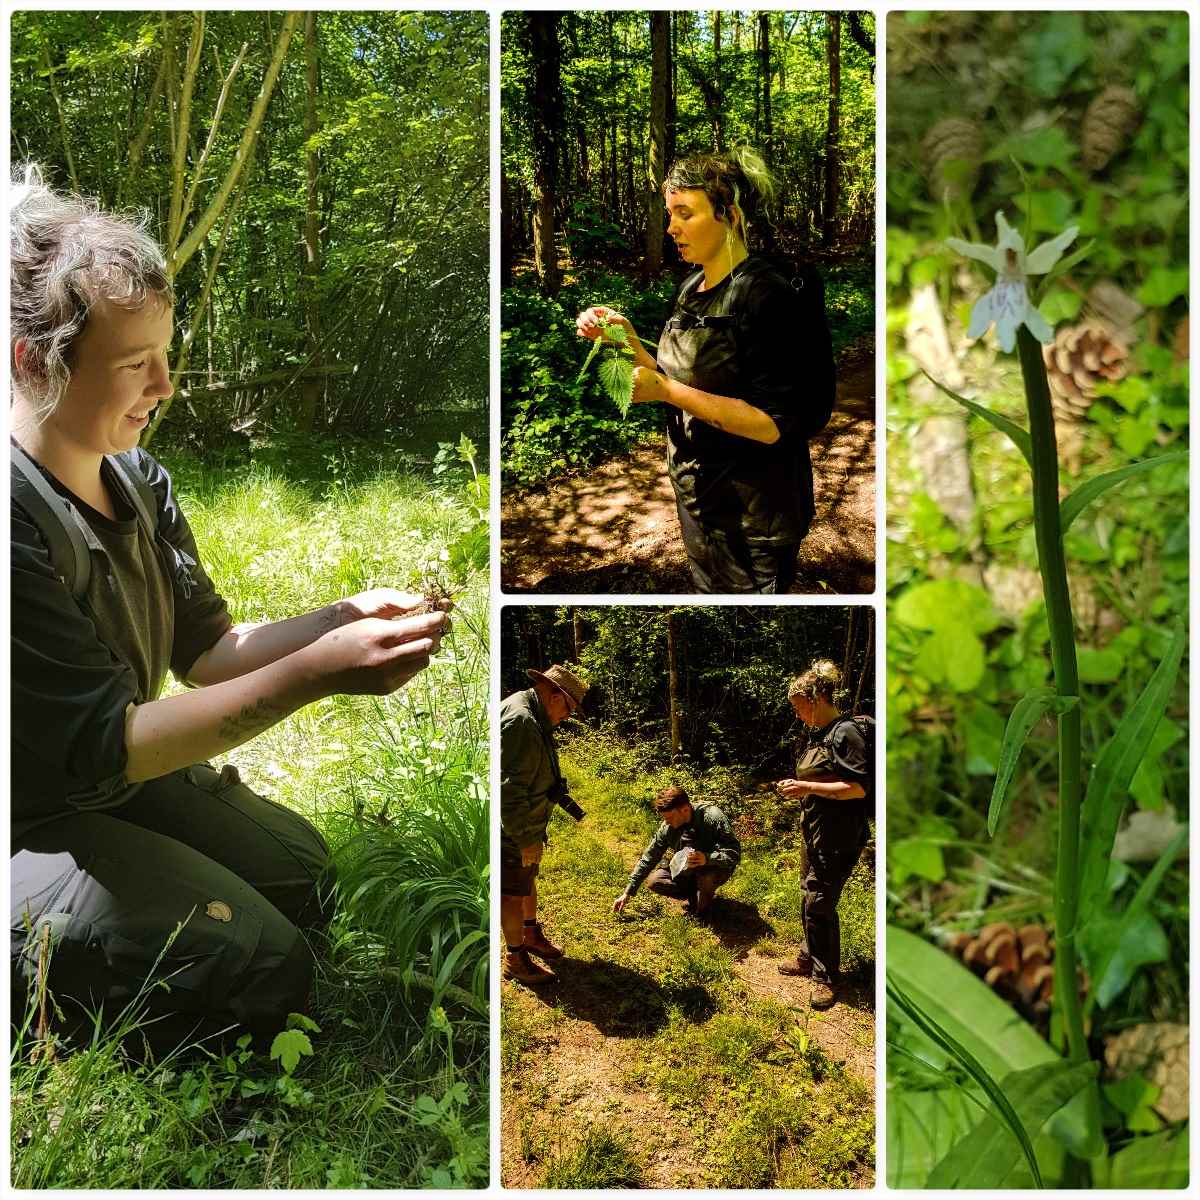
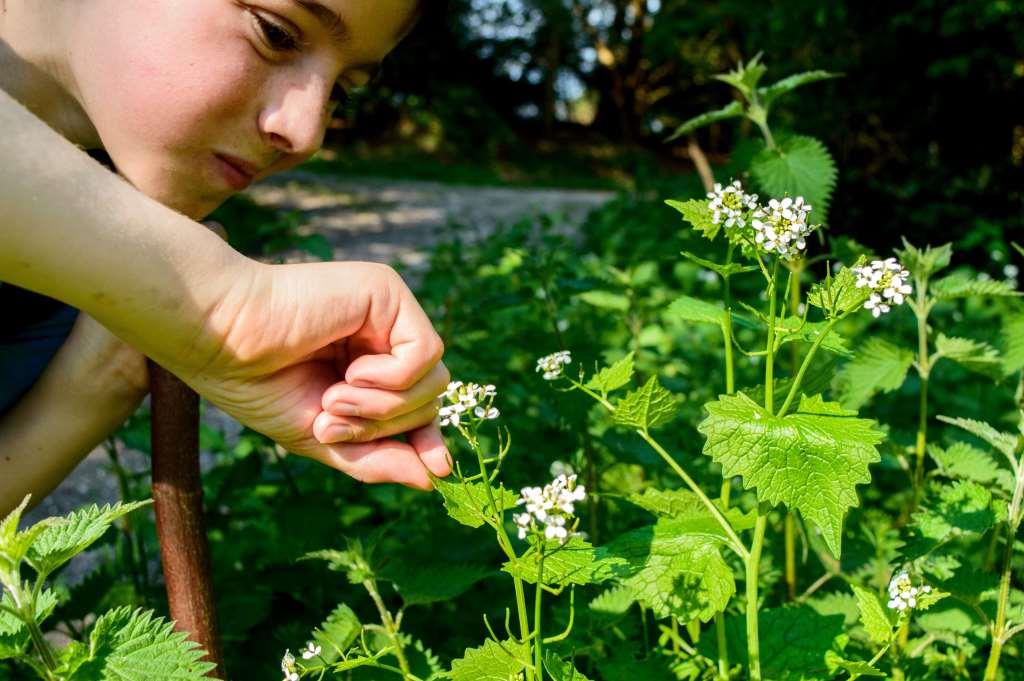
Then it was time for a stroll in the woods looking at useful plants. John runs an Ethnobotony course (which I hope to attend one day) and Lucy our instructor had completed this very in depth course previously – her knowledge on plants and their uses really came through on the day.
Ethnobotony
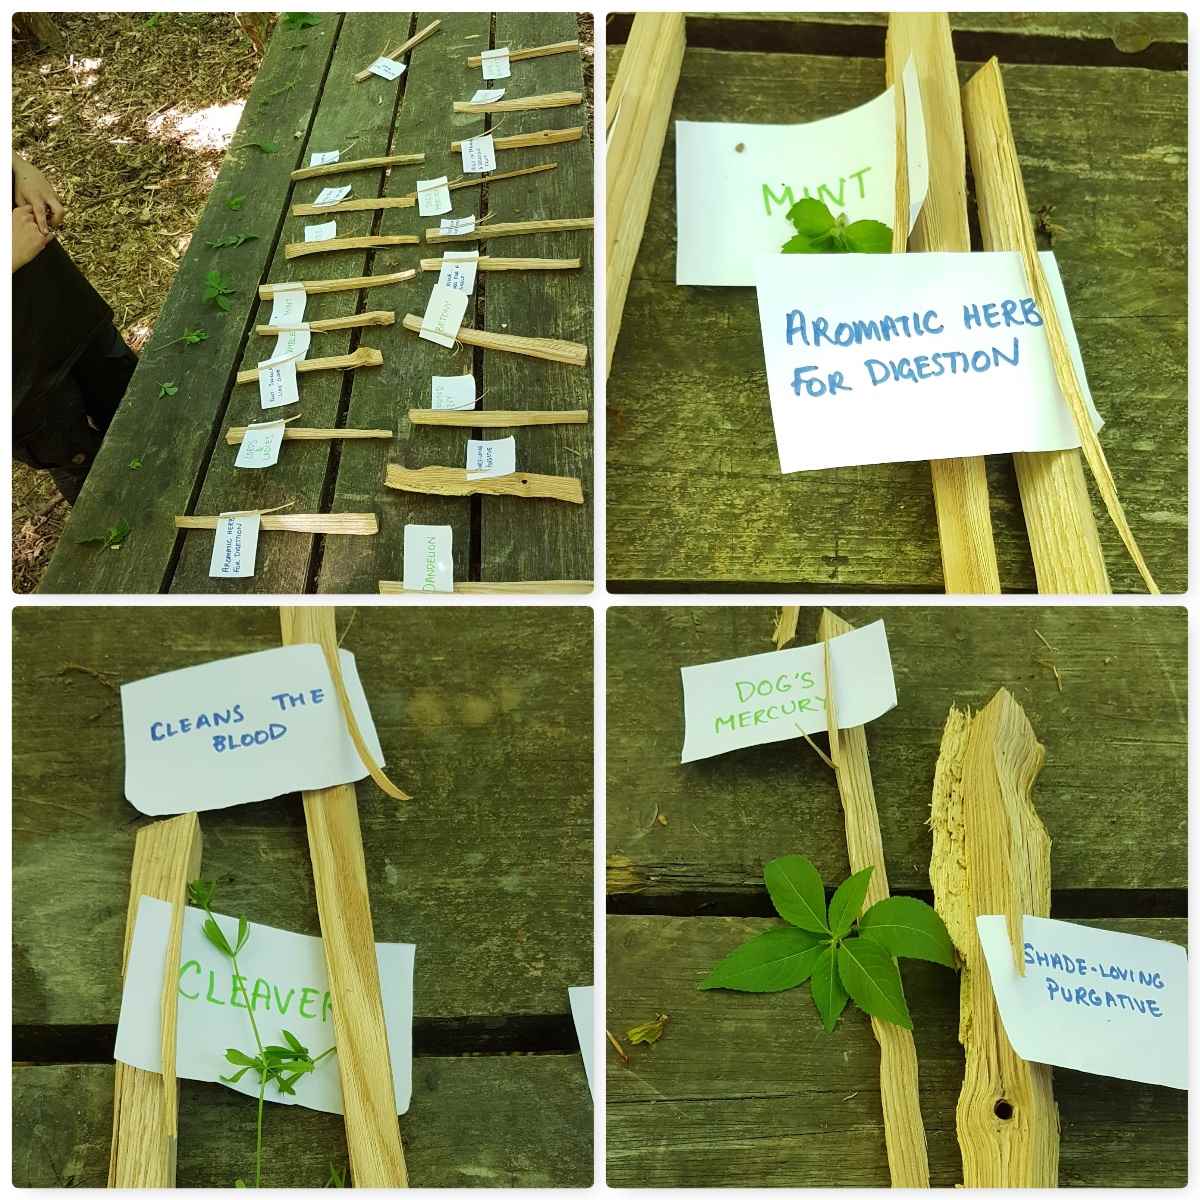
Back at camp Lucy had prepared about 15 plant specimens and we had to identify each plant and note its use correctly – tough but we got 100% after a bit of conferring 🙂
Time for a test
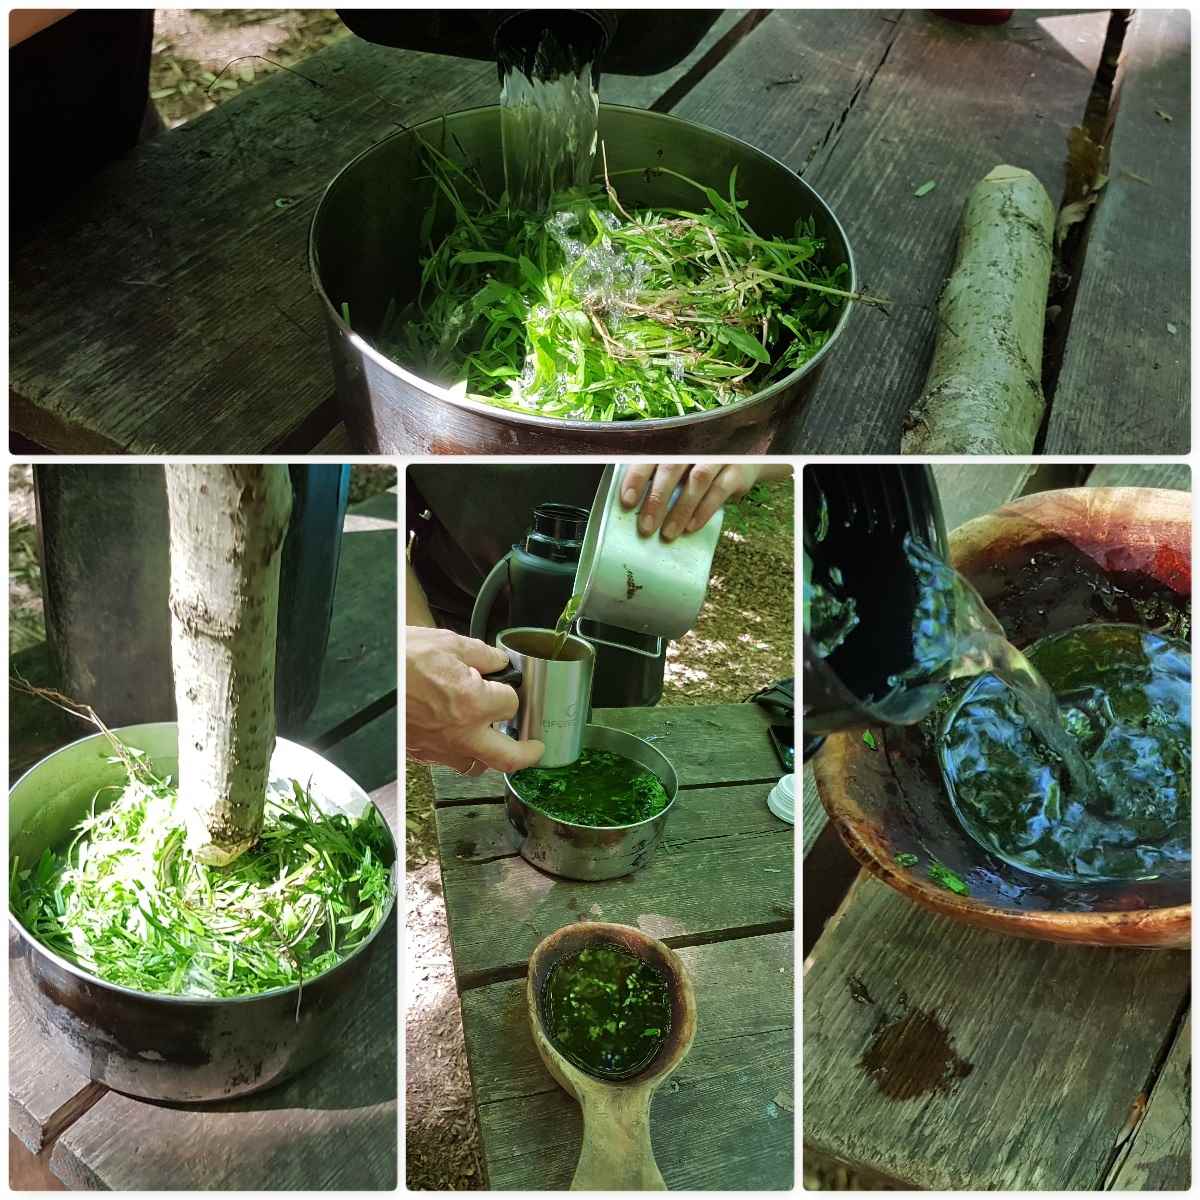
Lucy had also collected up some cleavers which she crushed up and boiled to make a green tea – this was really enhanced with some Elder flower cordial she had made earlier.
Cleaver Tea with a twist of Elder Cordial
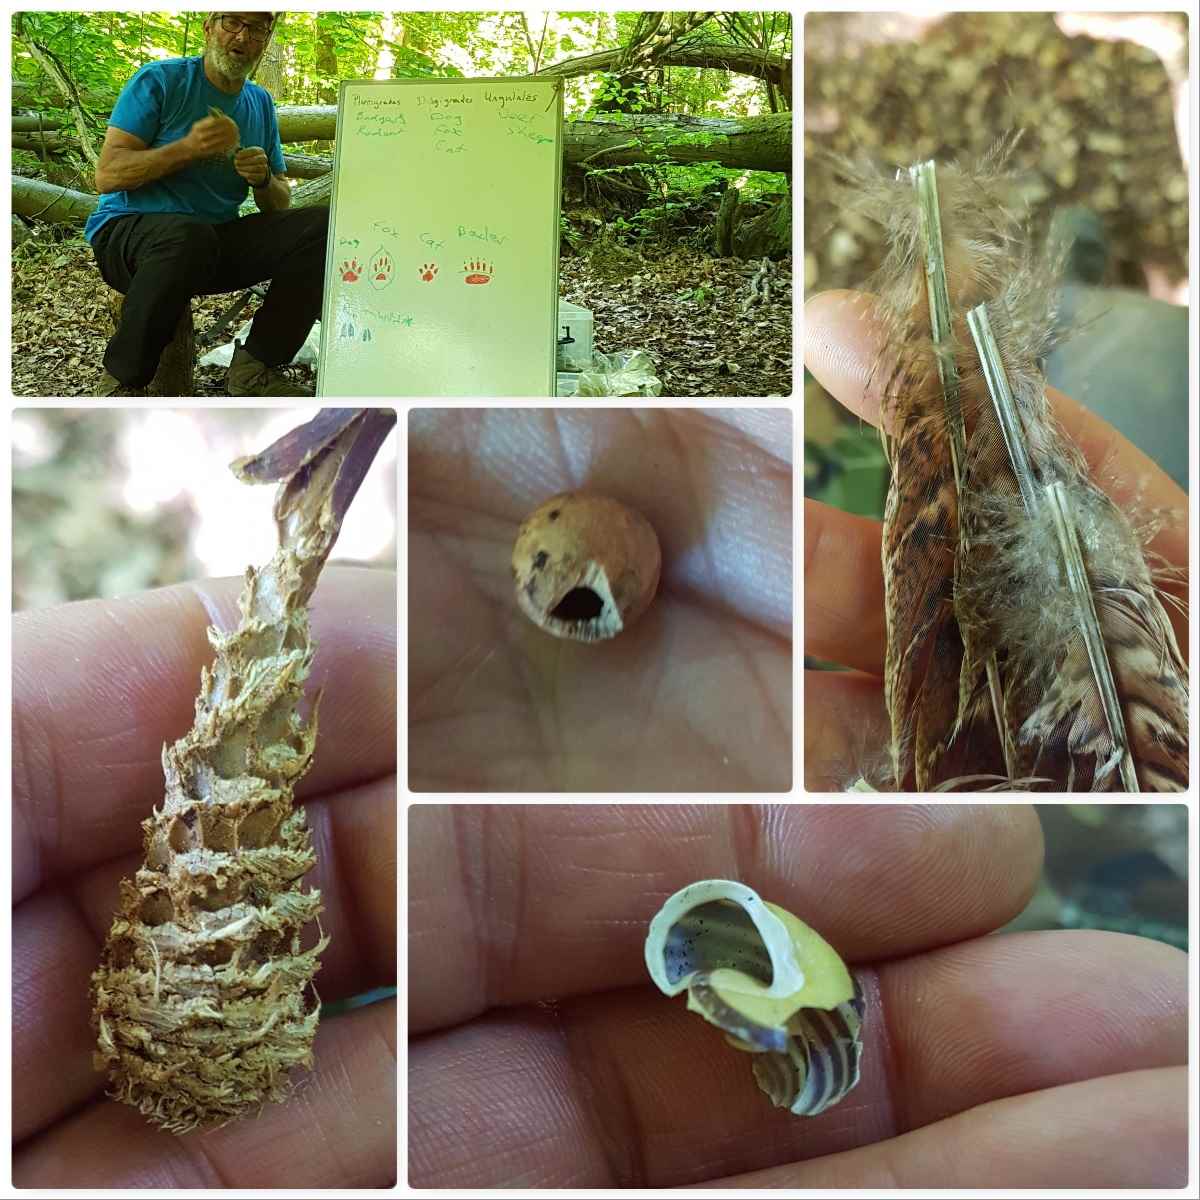
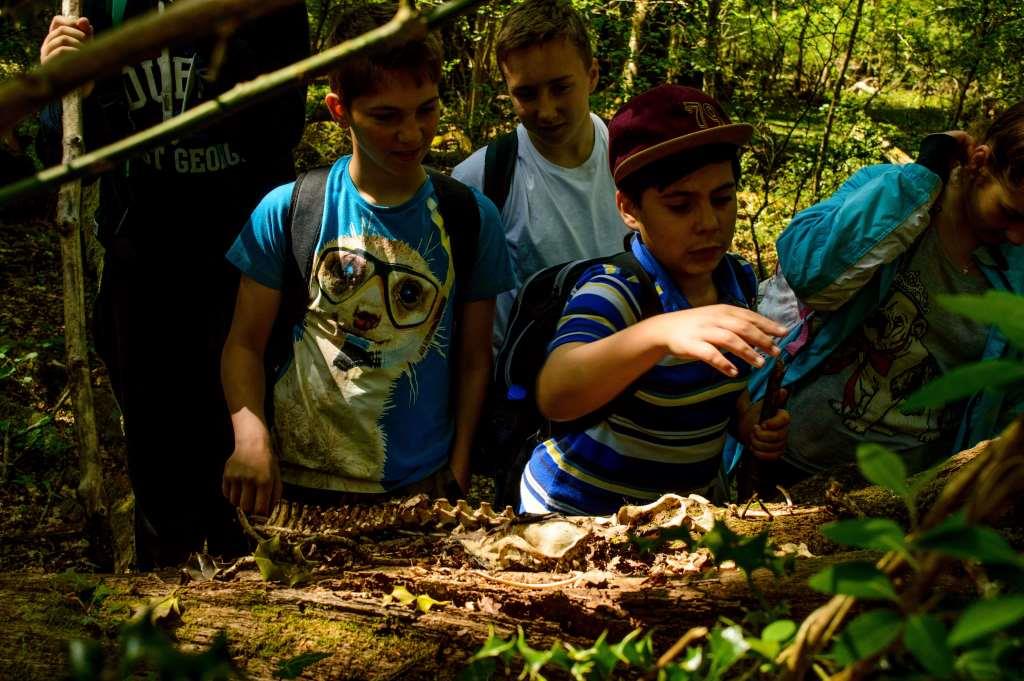
My final class was with Lee looking at animal tracks and signs. Lee certainly knew his subject however I had to leave (to run one of my own courses) early and did not get out on the tracking walk he had planned.
Tracking & Signs
It certainly was great to get down to see John and the students at Woodcraft School and I wish all the students well for the future – as to you John, thanks for the invite and as per usual a job well done I think.
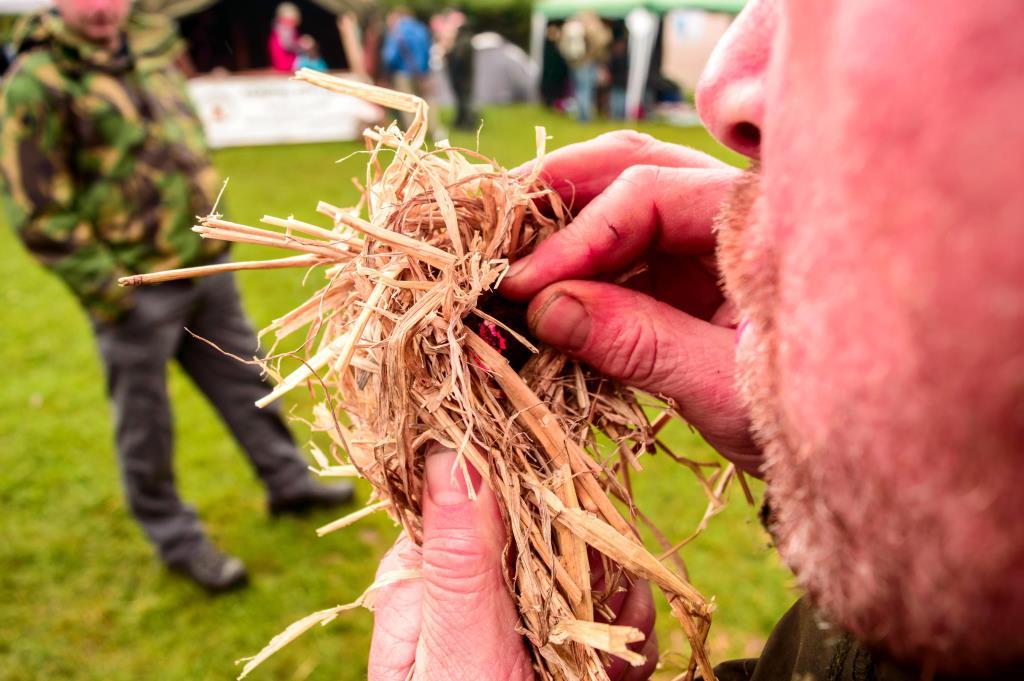
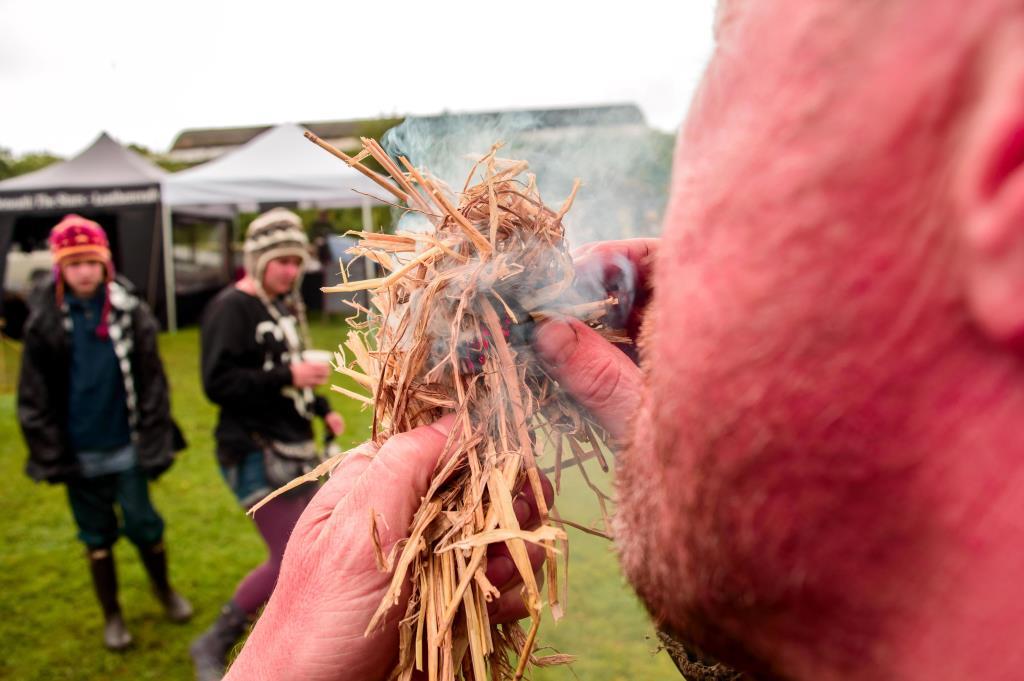
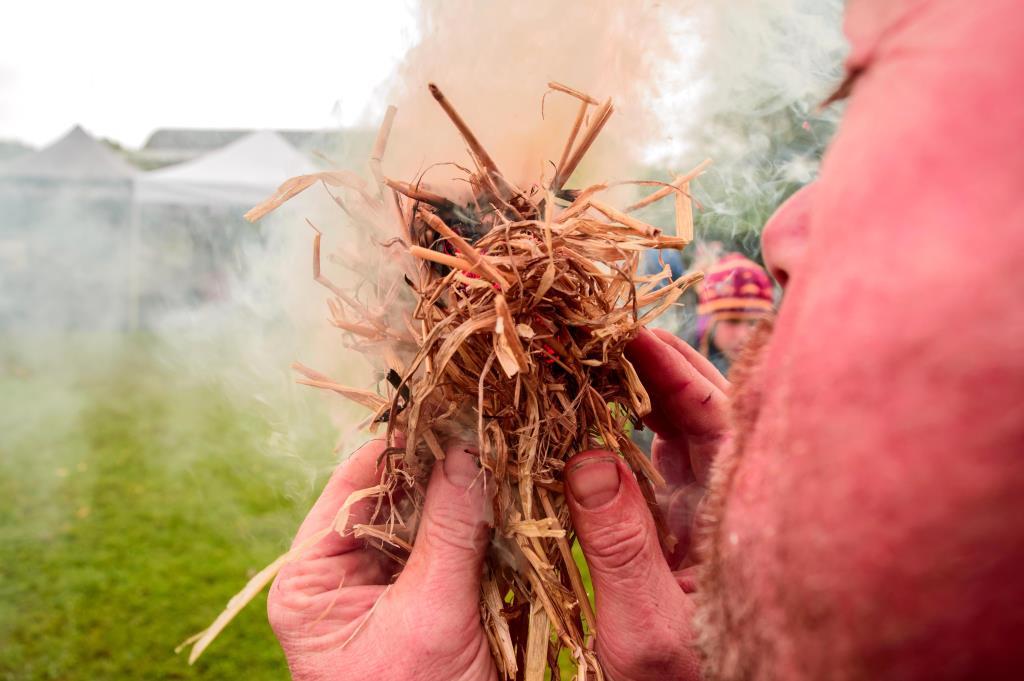
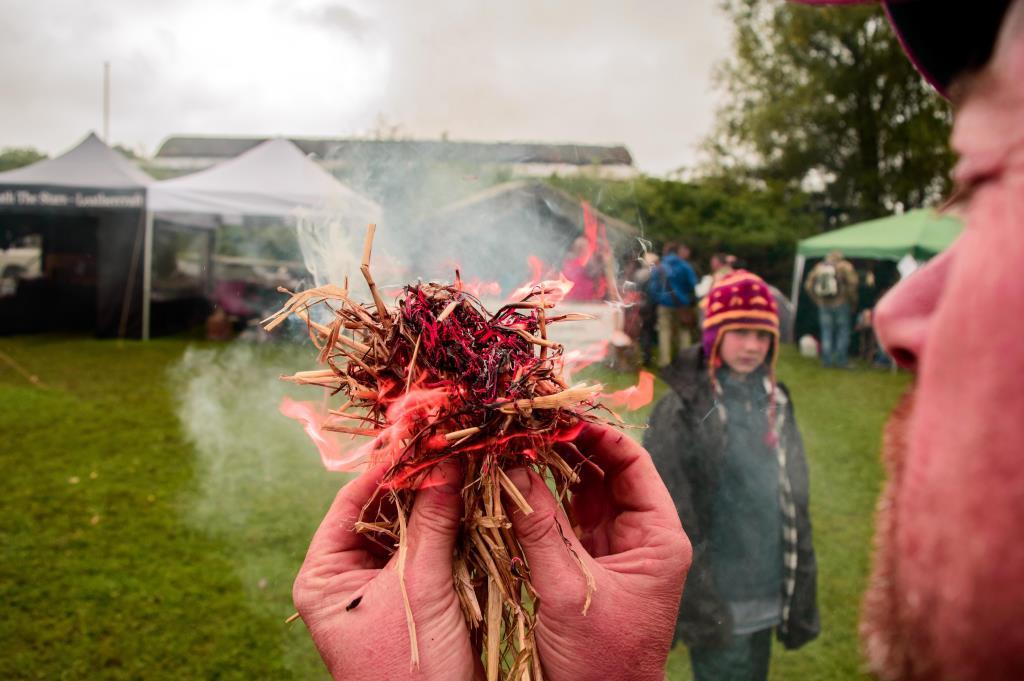
A number of years ago my friend Rich59 from BCUK taught me how to get a fire going using damp tinder found on the forest floor. This short video goes through the process – I will post a detailed How To…. on this shortly.
Apart from making baskets and sheaths out of bark I have been experimenting these last few years with weaving bark into natural firelighters. I came across a post on Bushcraft UK by a member called Woodwalker on these firelighters from 2010 – he called them Woven Kindling.
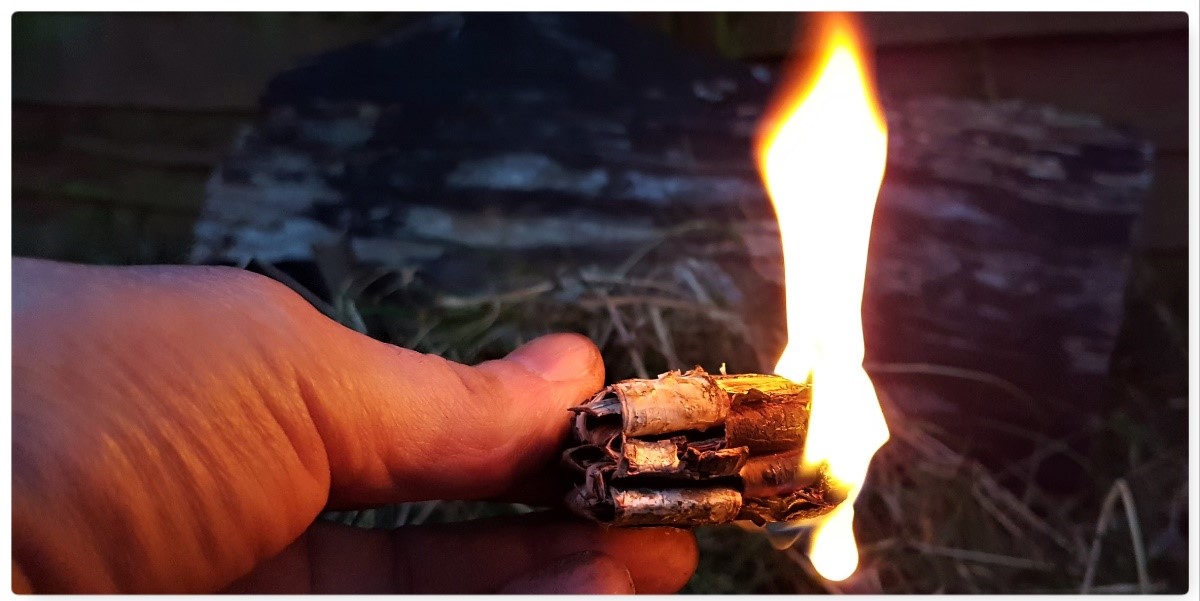
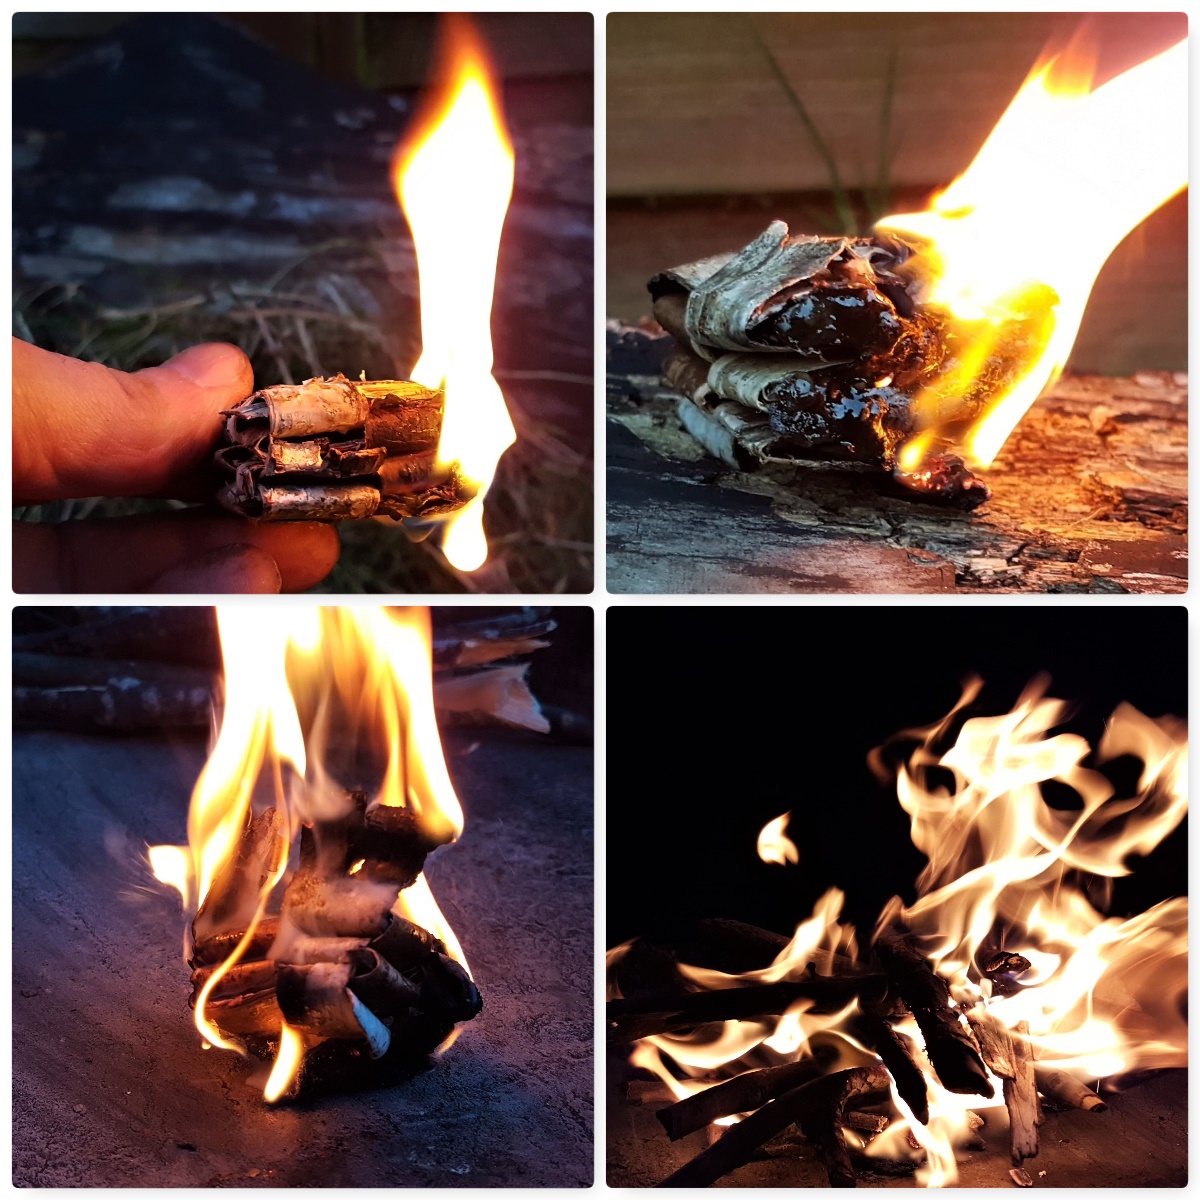
I have since added spruce resin to mine and liken them more to Natural Frelighters as they burn long and fierce. This is the second part in my two part series on natural firelighters – the first being my post on Birch Bark Fire Fans.
The Birch Bark Firelighter
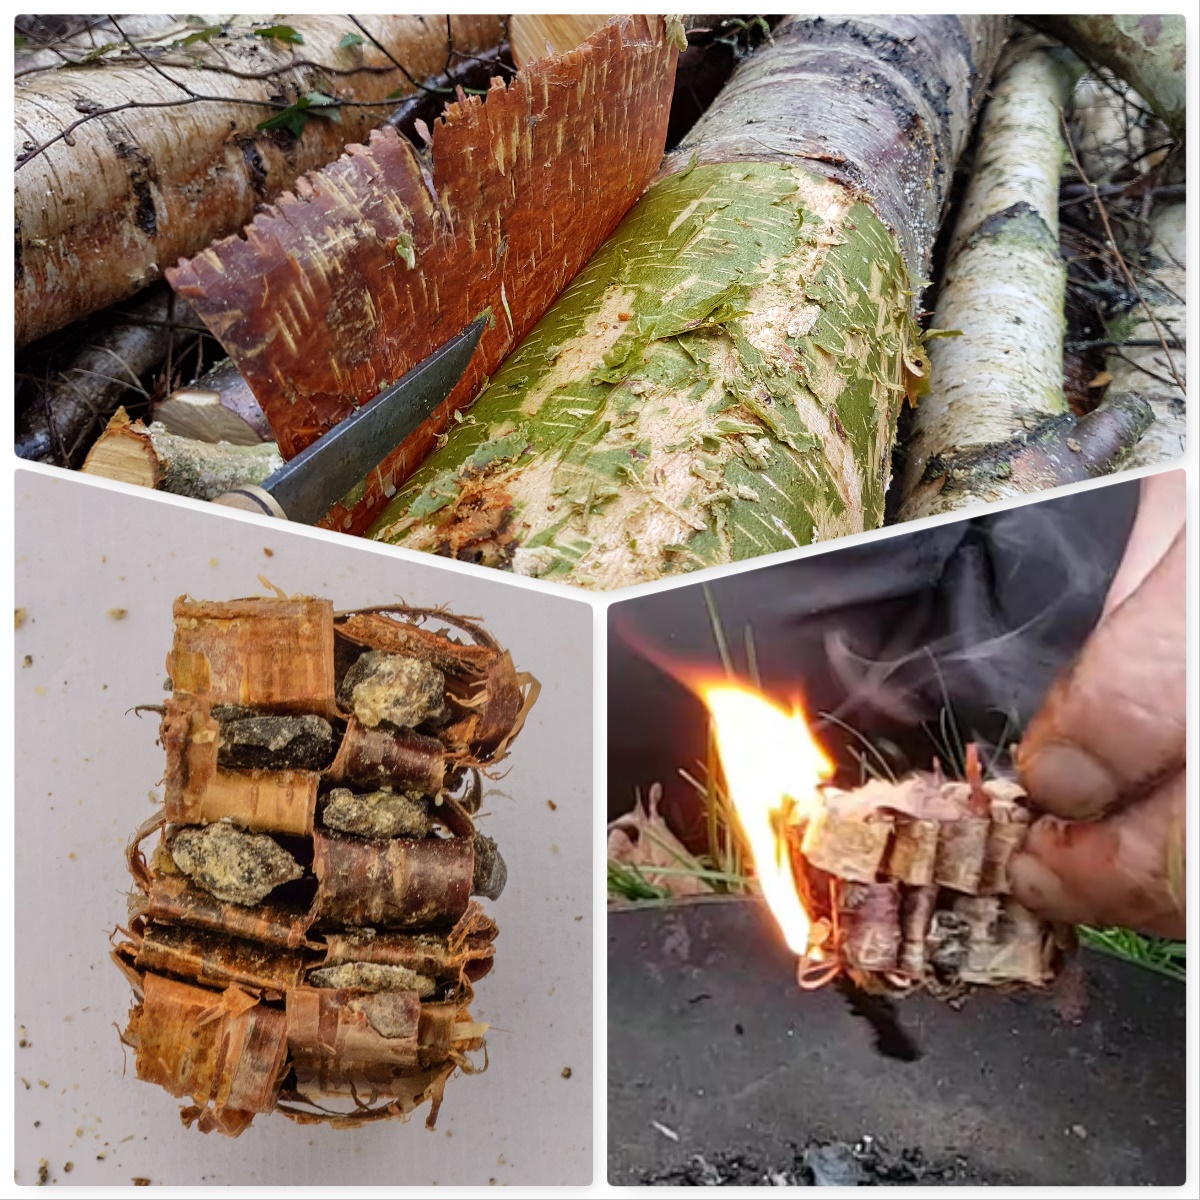
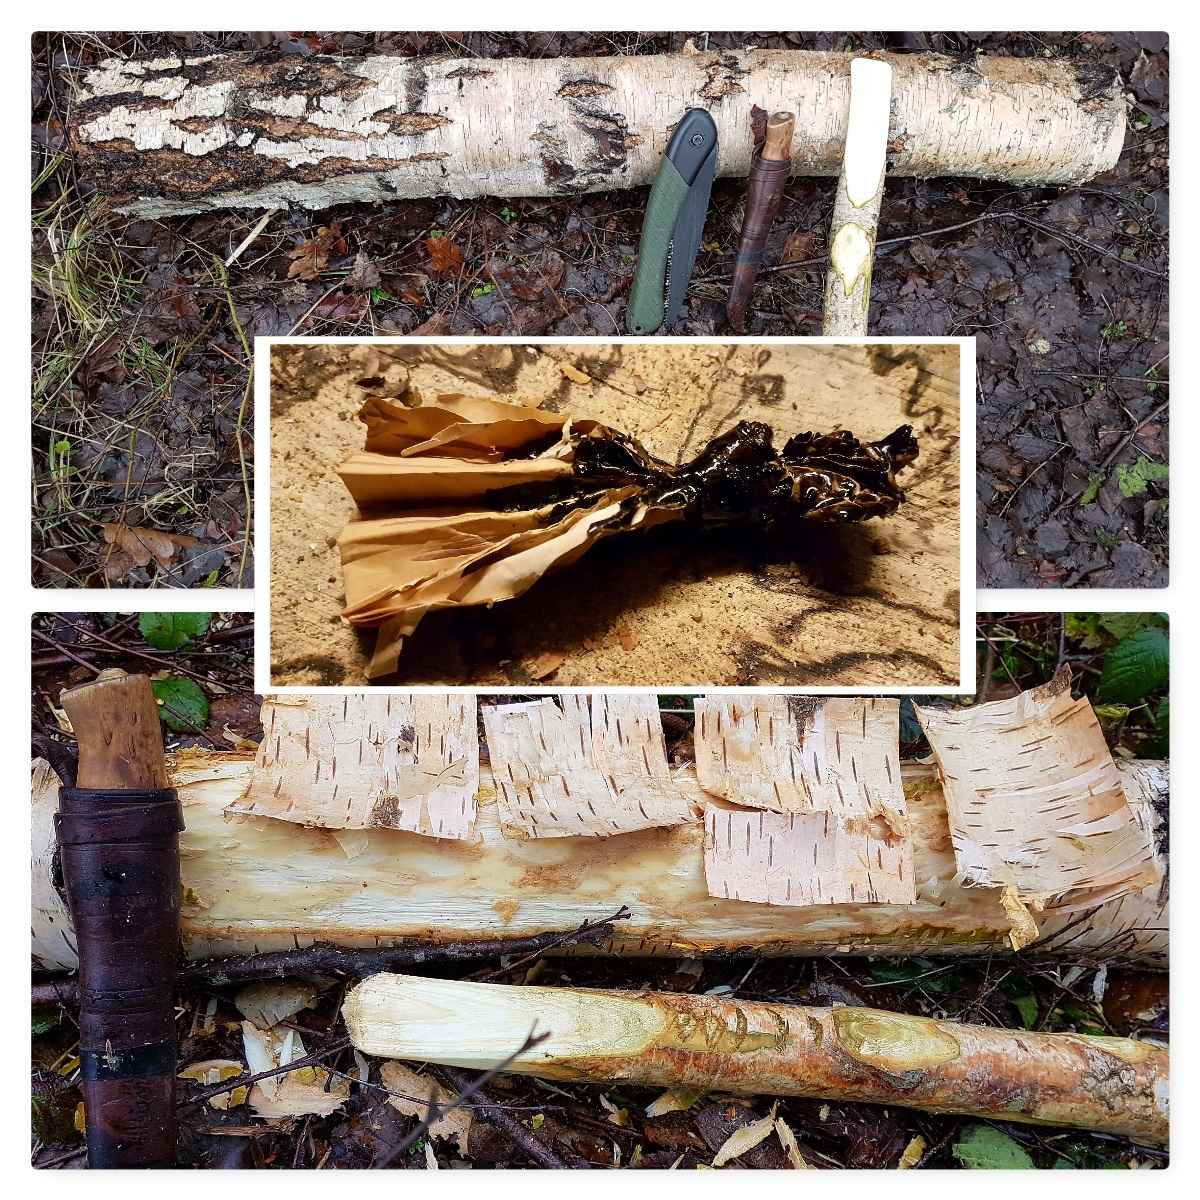
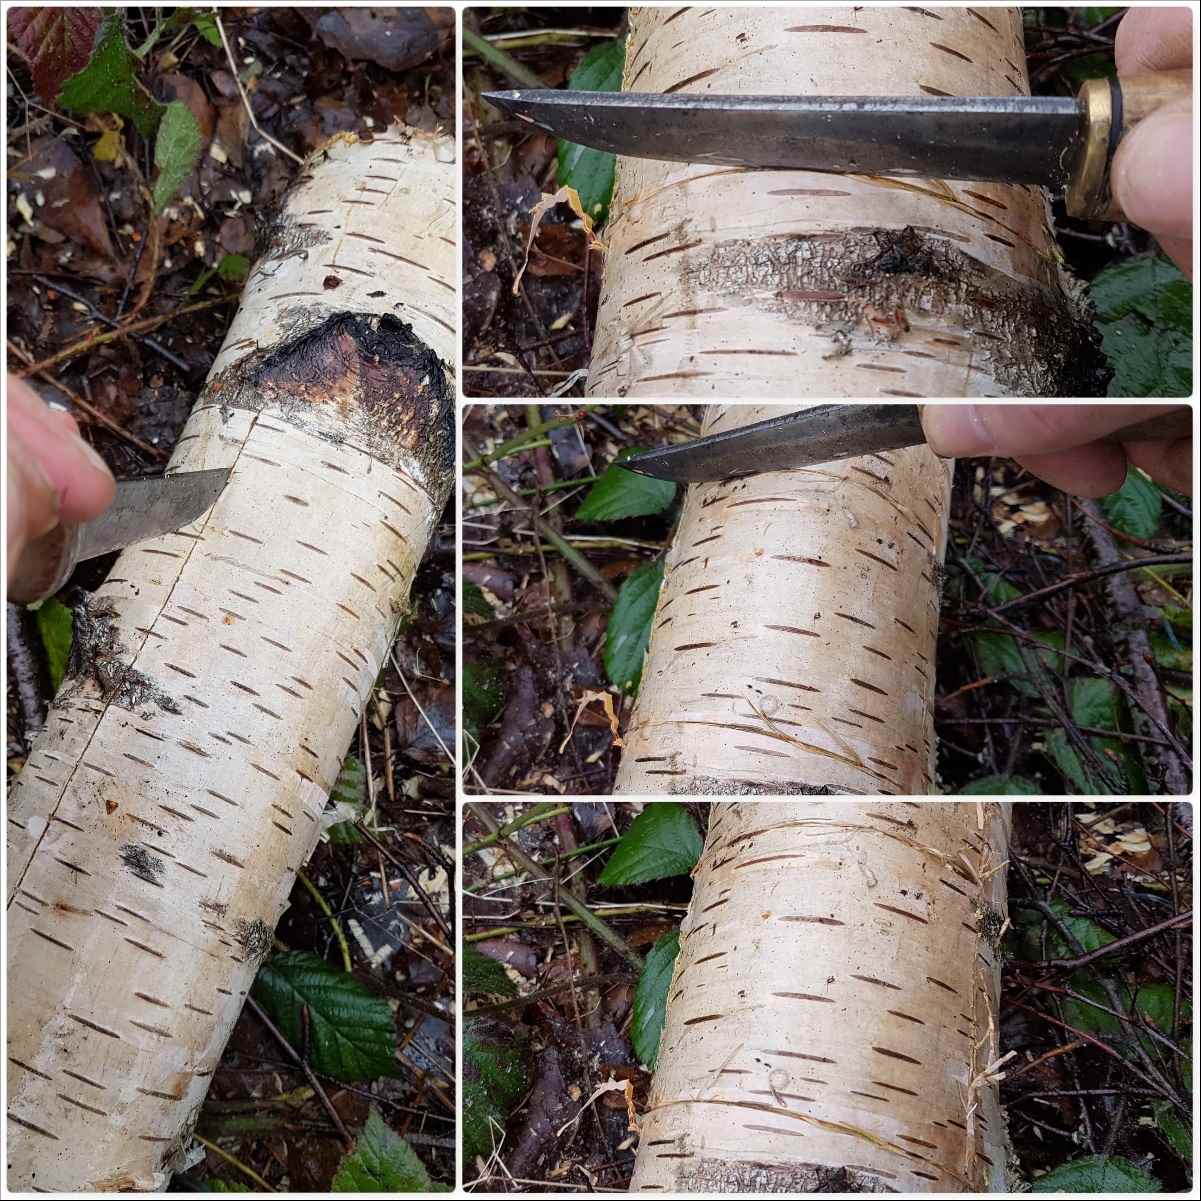
Removing the bark
If you can find a semi rotten fallen birch log the bark tends to come of easily so just pull of the what you need. If you use semi rotted logs just take a little piece from as many different logs as you can as these logs are home to many different invertebrates.
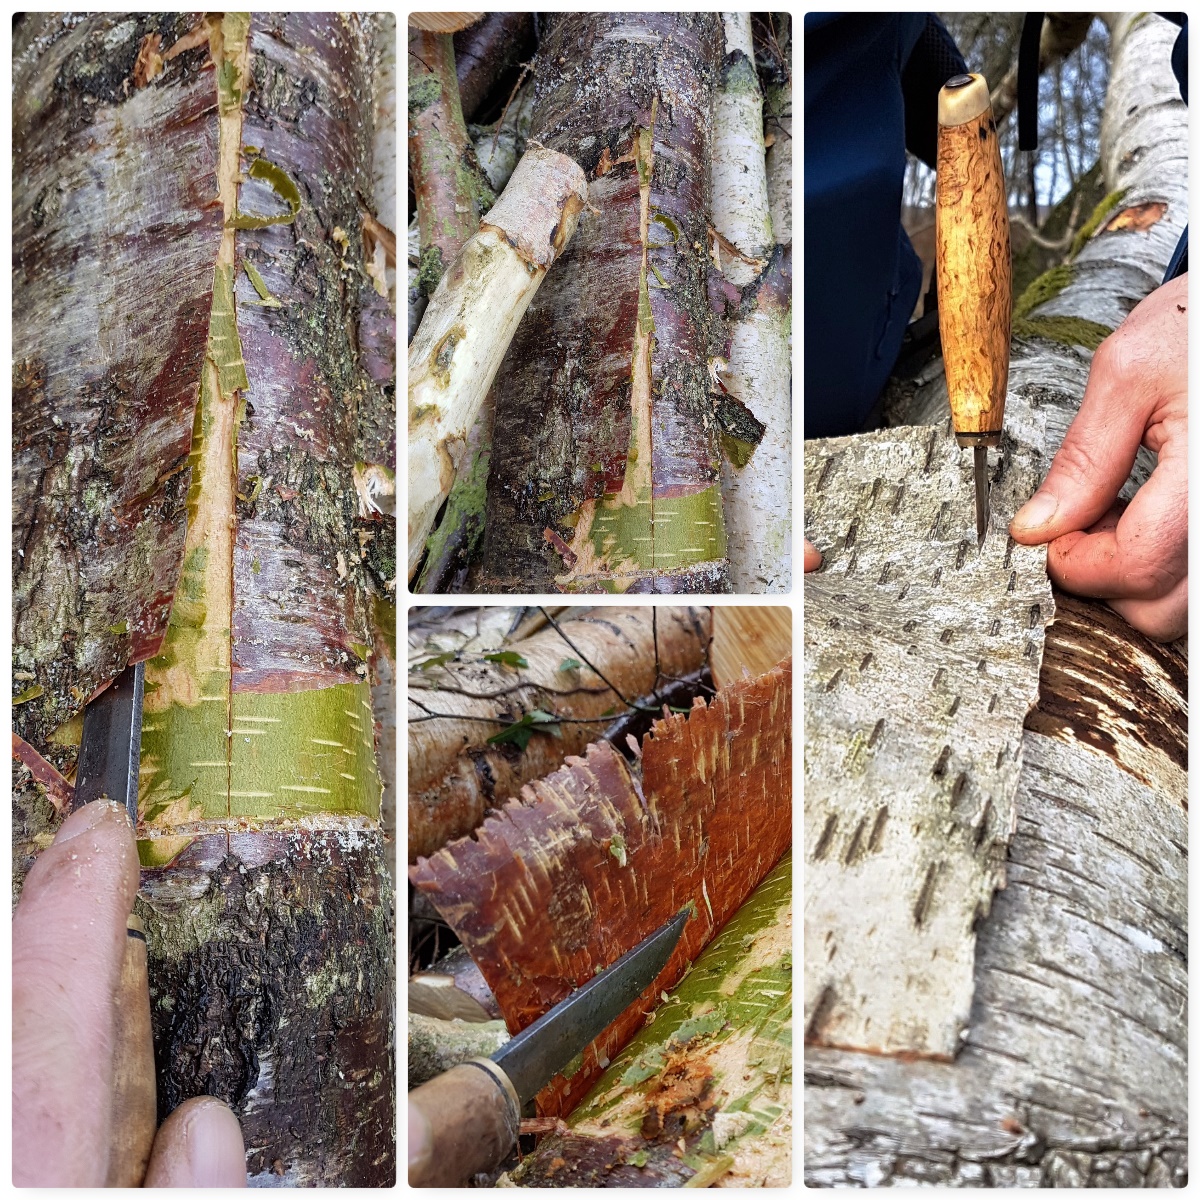
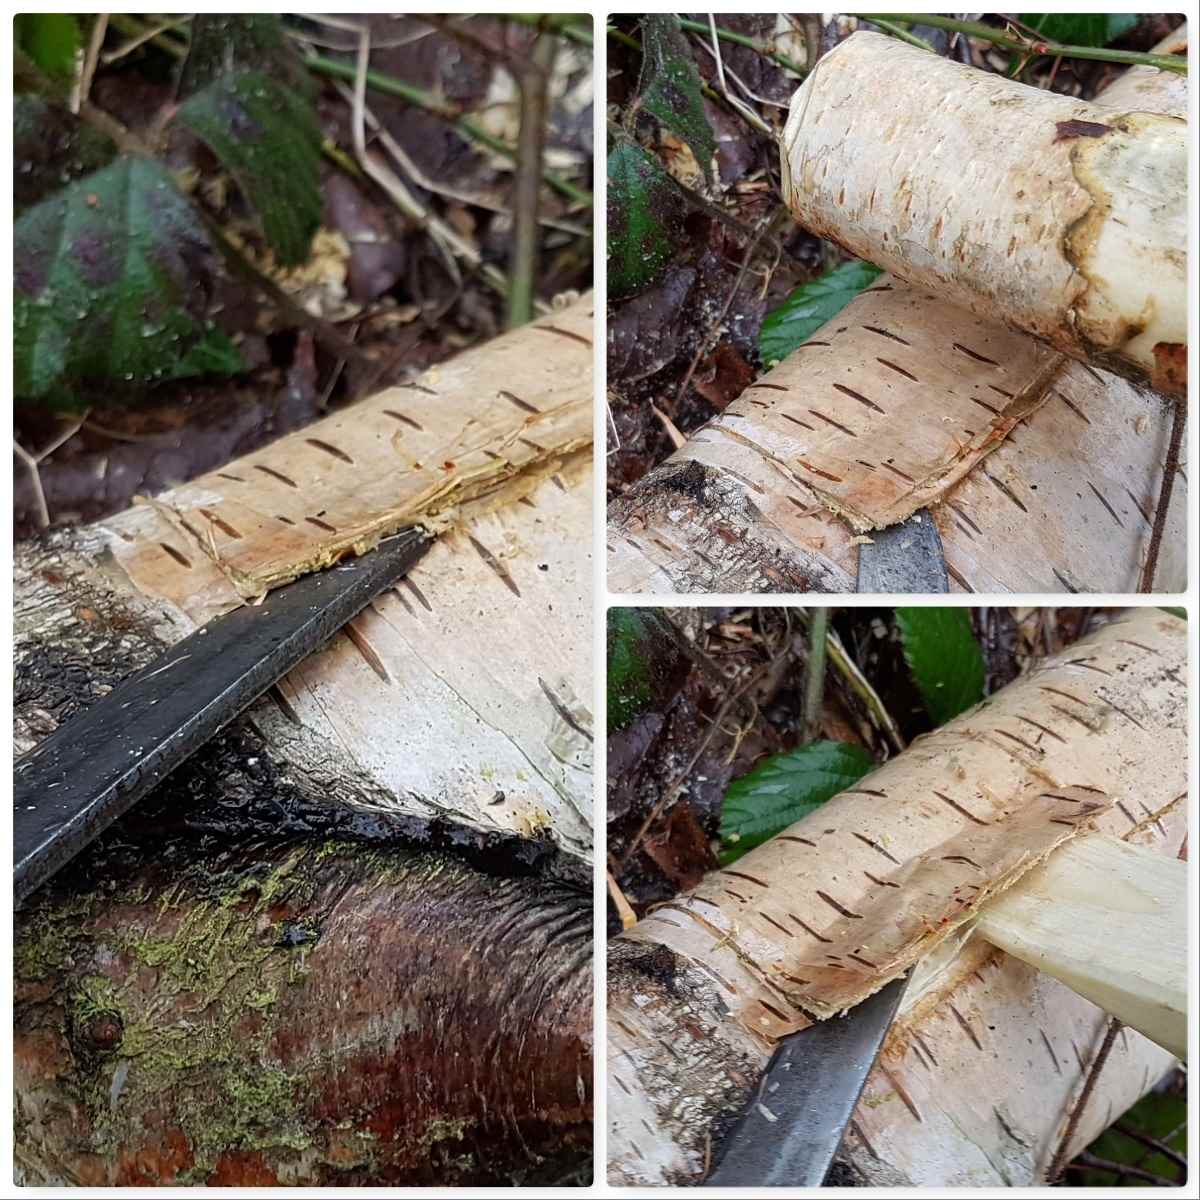
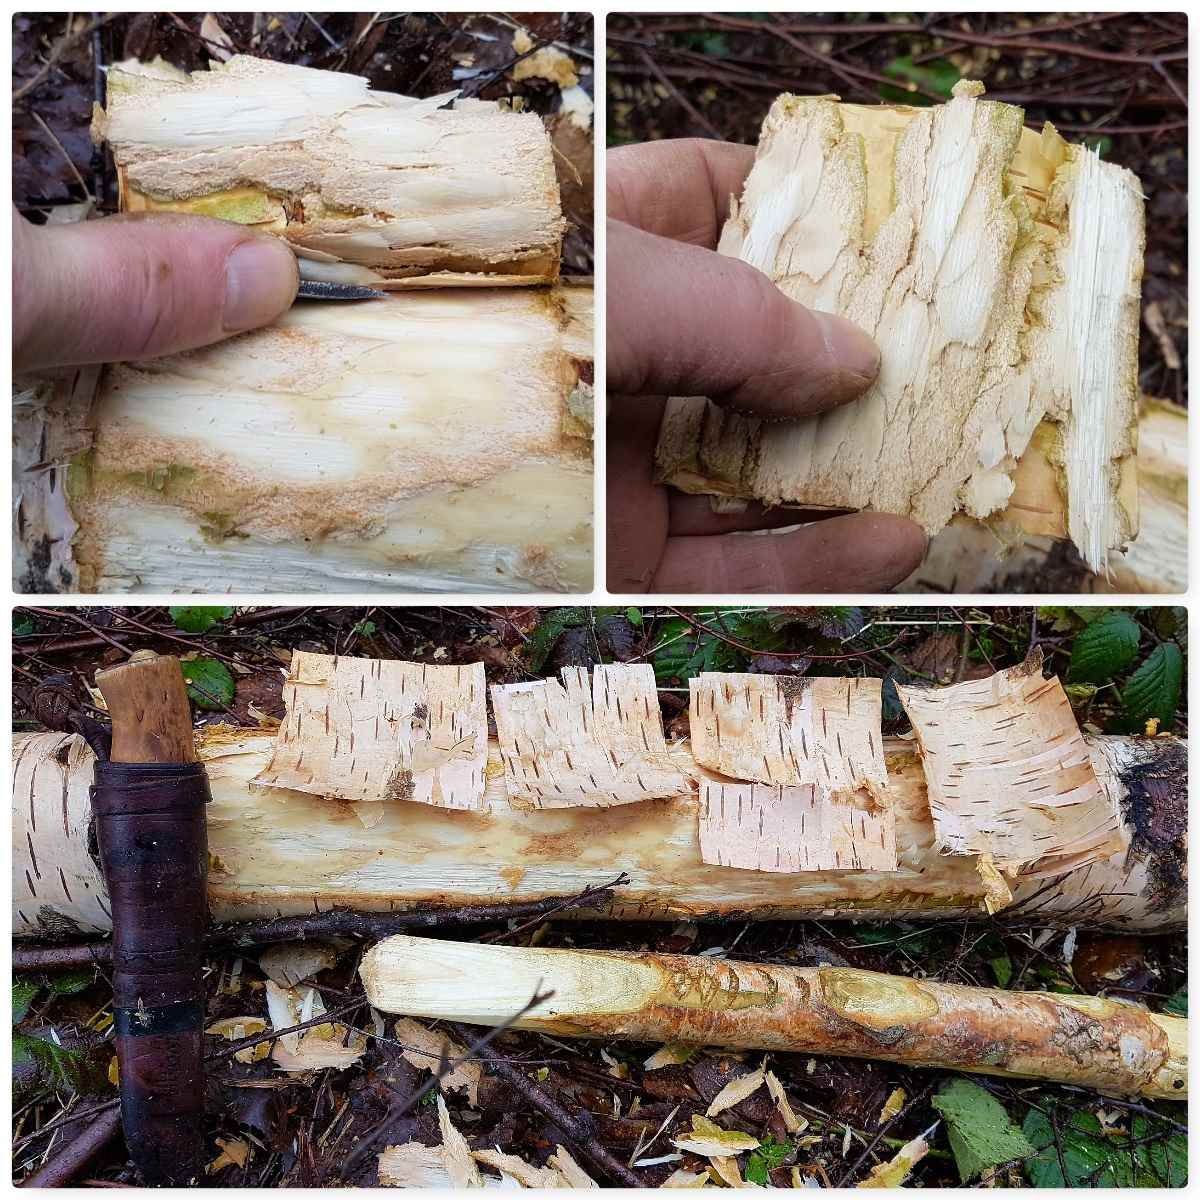
If the logs are freshly fallen then I use my knife to score out the area I want to cut out (ensure it is a smooth an area as possible). If the bark does not peel off easily I batton it with a small log to loosen everything up before prising it off with my knife. I go into the specifics of removing the bark in more detail in my post on the Birch Bark Fire Fan. The main thing is to take your time when the bark does not come off easily.
Stripping the bark
Once I have my section of bark I will either peel it by hand into strips of about 1 cm in length or if I am feeling the need to be very accurate I will tap my knife into a log and use that as a tool to cut the bark into even strips.
Locking the strands together
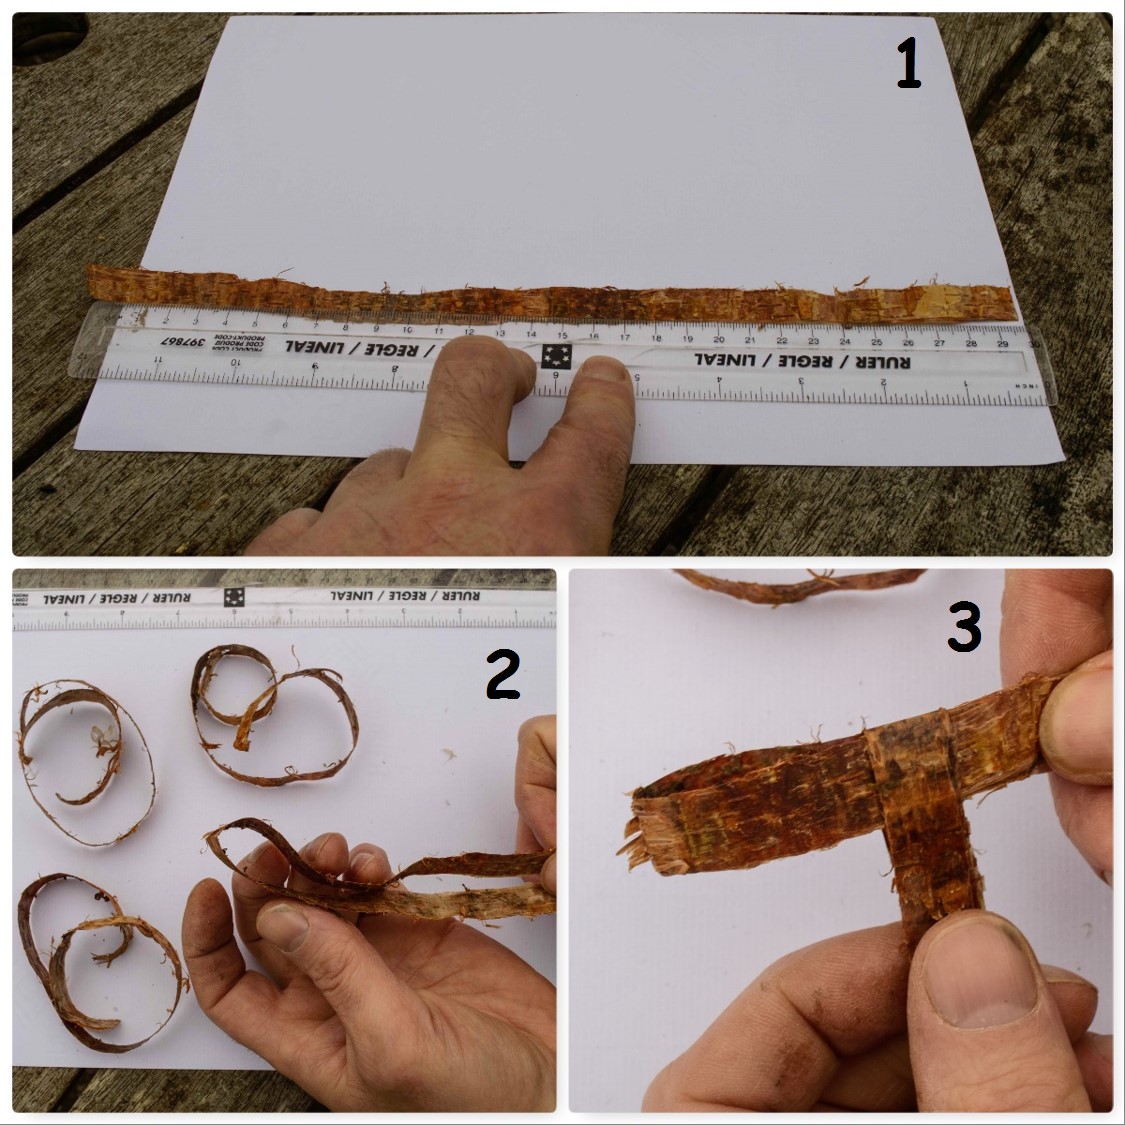
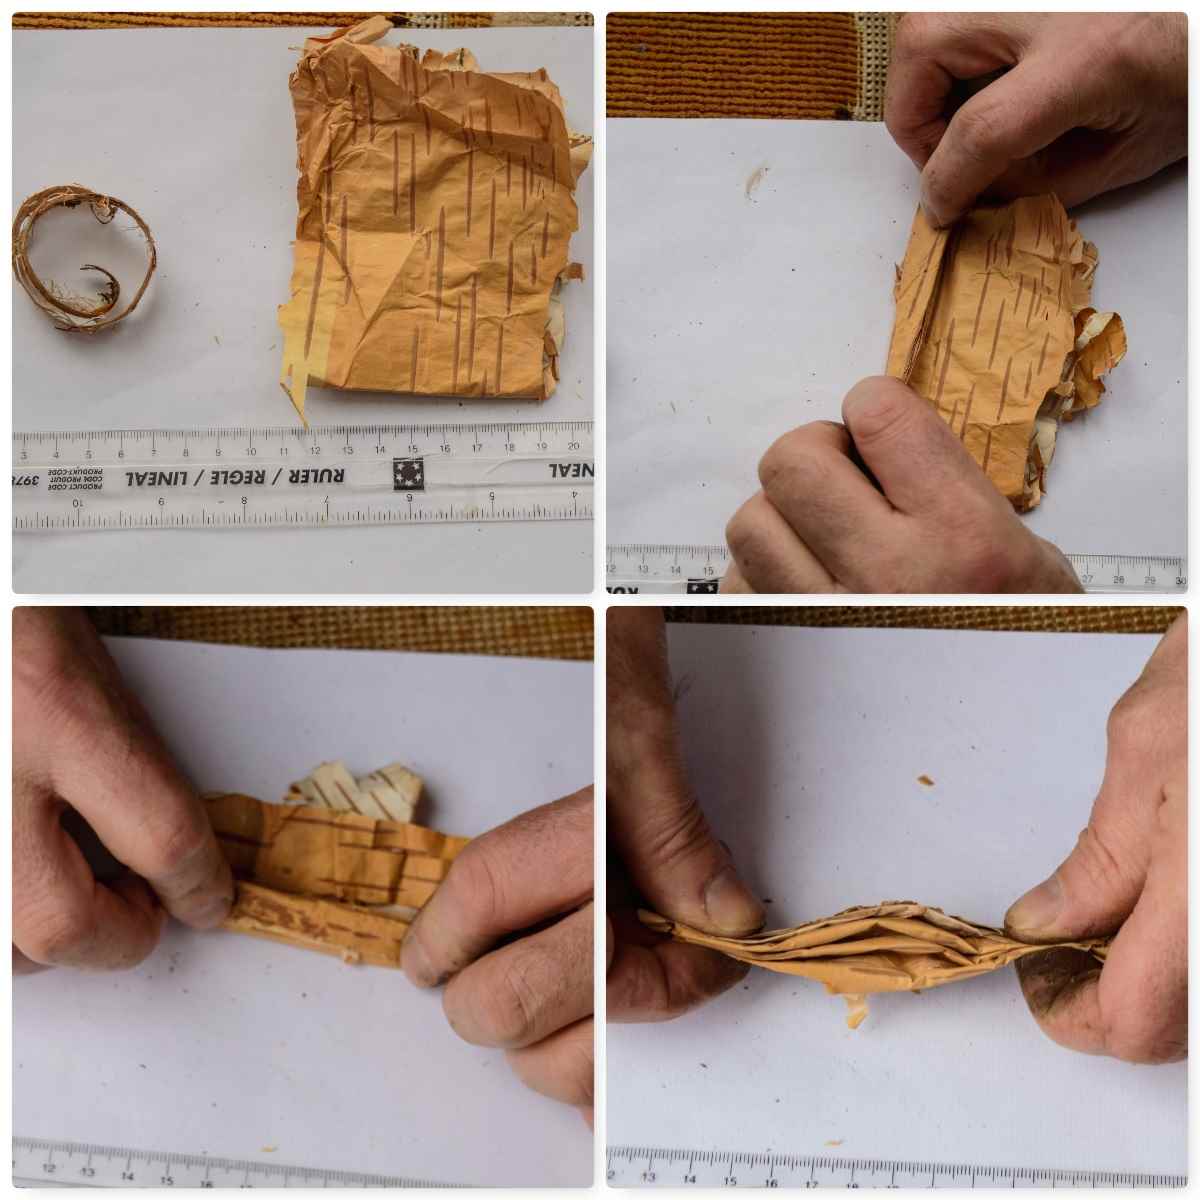
1. To make one firelighter you need four strips of birch bark. I use strips about 30 cm’s in length and 1 or 2 cm’s width.
2. Fold each strip in half – the folded end is called the closed end and the end with the two tails is called the open end.
3. Slide one closed end between the open end of another strip so it sticks out by 2 or 3 cm’s. In the picture below in section 3 you can see a T shape is formed.
Folding – Open – Closed
4. The closed end of a third folded strip is added to the upright part of the initial T shape to lock it off.
5. A fourth folded strip is added to the third strip to lock it off and the tails are threaded through the protruding loop of the first strip.
6.All the strips should now be locked off.
7. Pull everything in tight.
Locking in
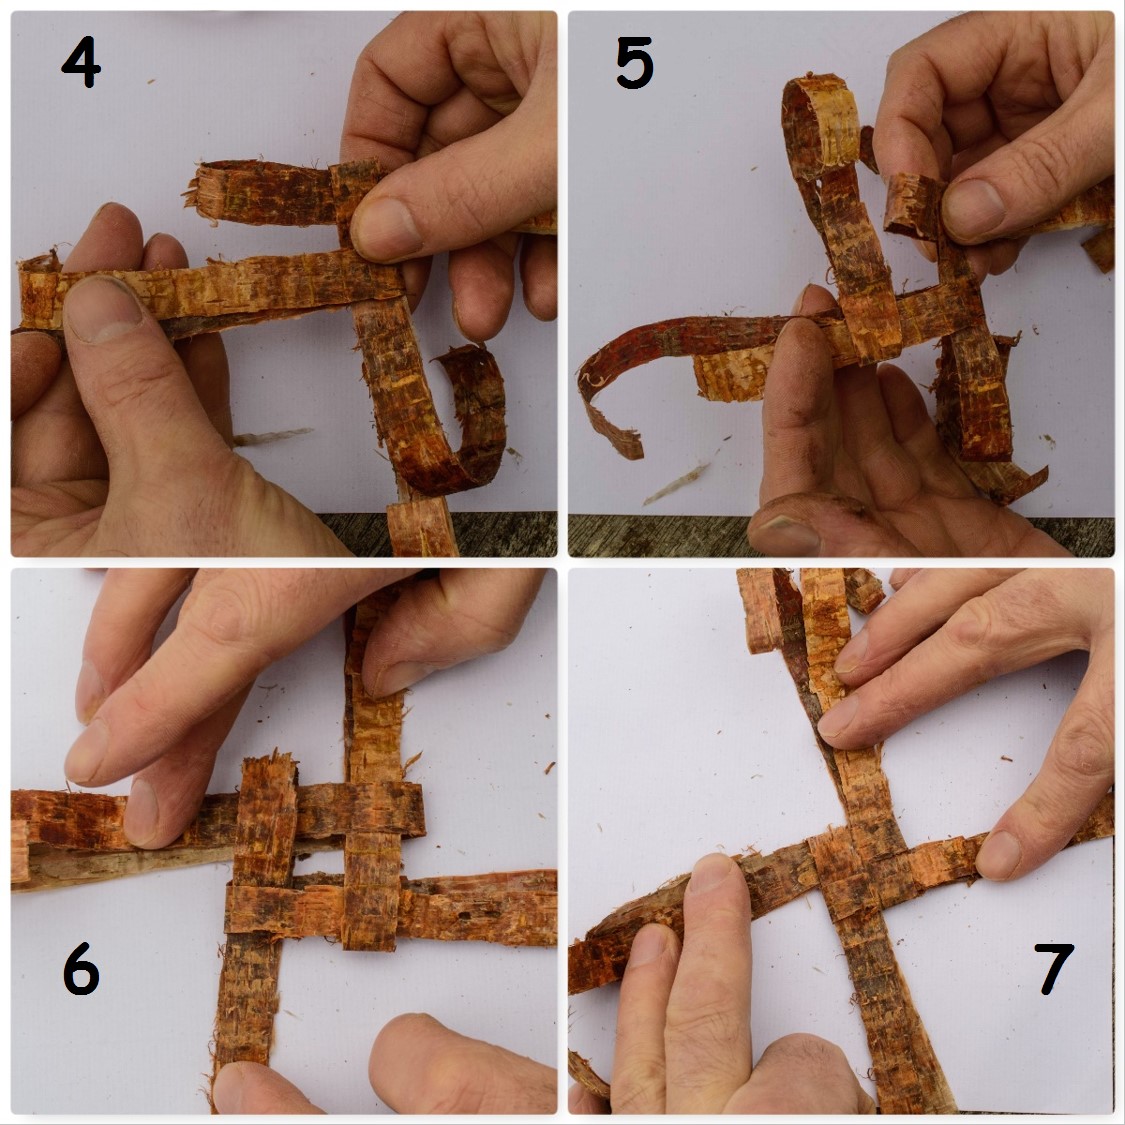
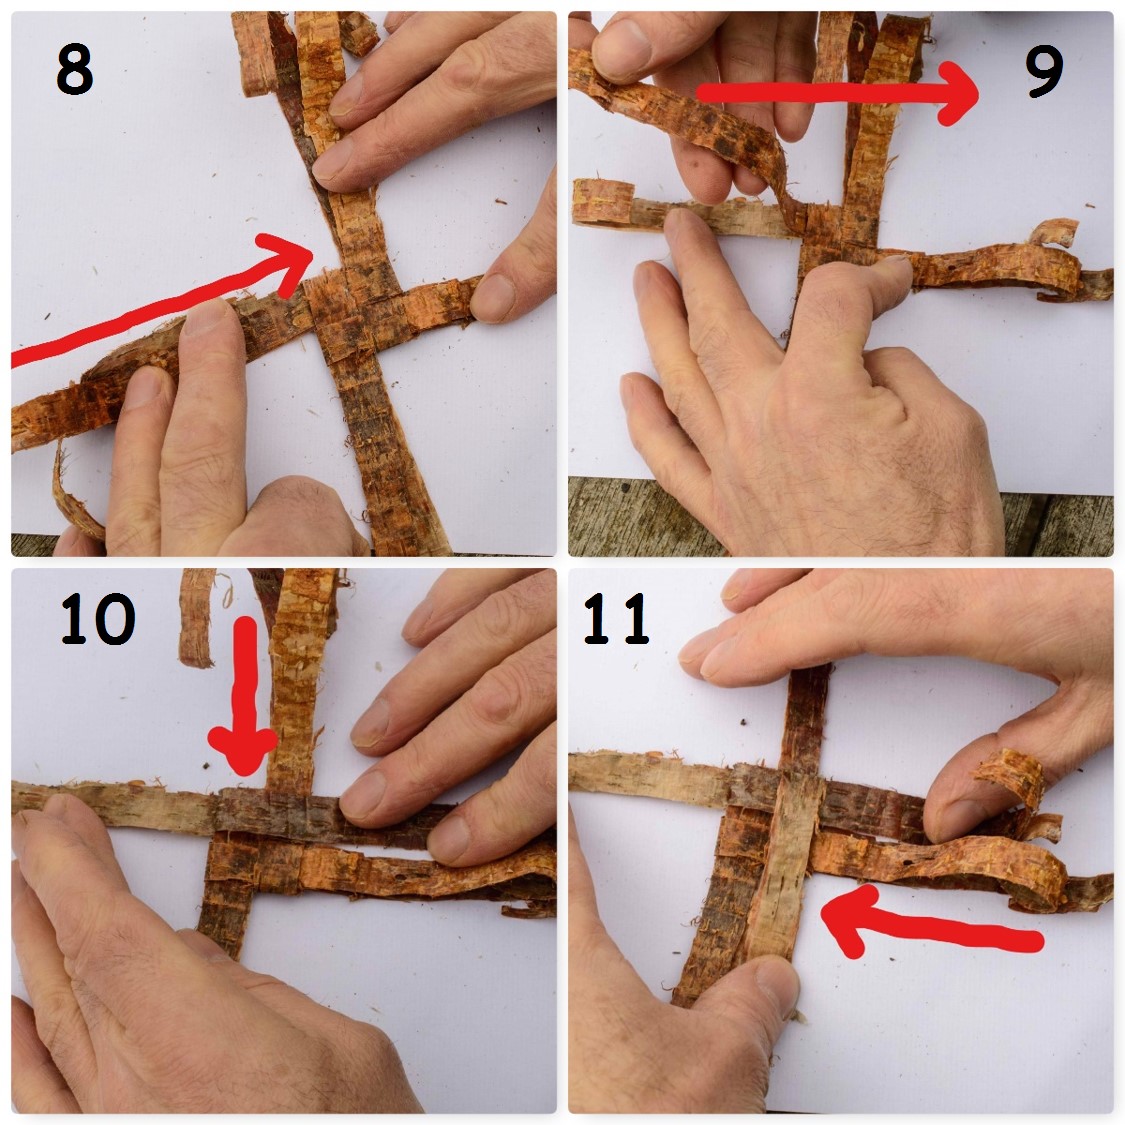
The Four Strand Crown
The firelighter is formed by weaving a Four Strand Crown knot. I have added the arrows to help you visualise what I am doing. Important – There will be two strips of bark at each open end. Only use the top strip of each open end when you begin the weave
8. To begin the knot fold one of the strips over. In section 8 I chose to fold the top strip on the left over first.
9. The strip is folded over to the opposite side.
10. To secure that strip in place I folded the strip at the top over this first strip to secure it in place.
11. This top strip (now at the bottom) was secured in place by folding the right hand strip over it.
Four Strand Crown Knot
12. To secure the fourth strip loosen the first strip slightly so that it forms a small loop by its fold – known as an eye.
13.Feed the tail of the fourth strip into this eye.
14. Pull the tail of the fourth strip in tight.
15. Repeat from step 8 to 14 again to form another layer of weave.
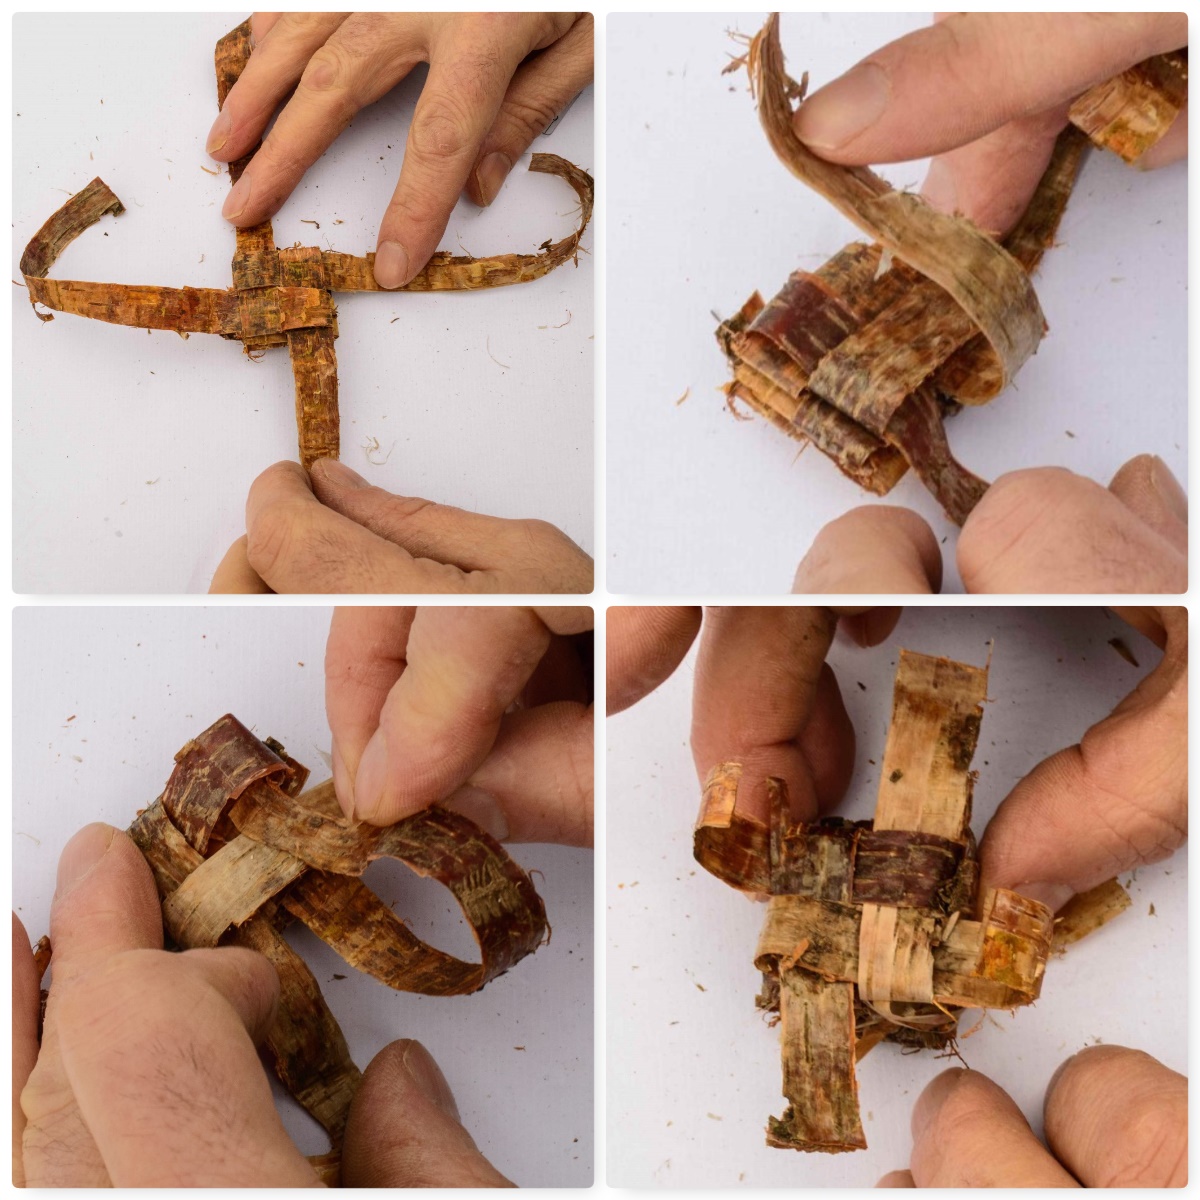
Building the layers
Flip the whole piece over and begin the weave on what were the bottom strips. Once you run out of bark to fold over tuck in the ends into a suitable slot or trim them off with your knife.
Repeating on the other side
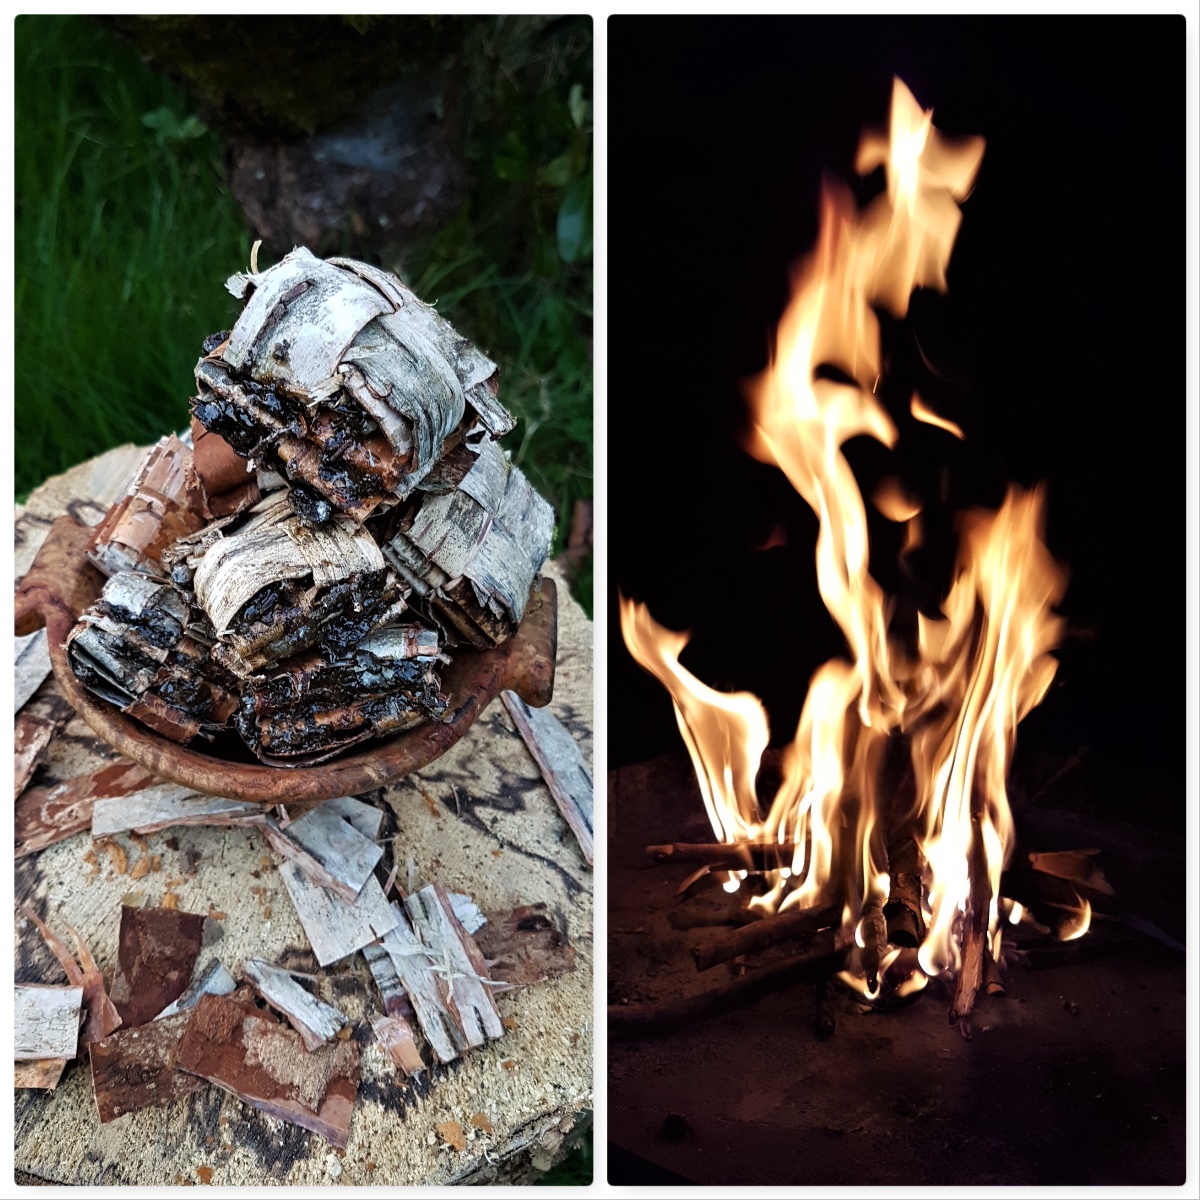
The Resin
These little firelighters take only a minute or two to make but they can burn for far longer if you add some resin to them. I use spruce resin as it is plentiful here in the UK (again I discuss harvesting resin in my post on the Birch Bark Fire Fan in more detail).
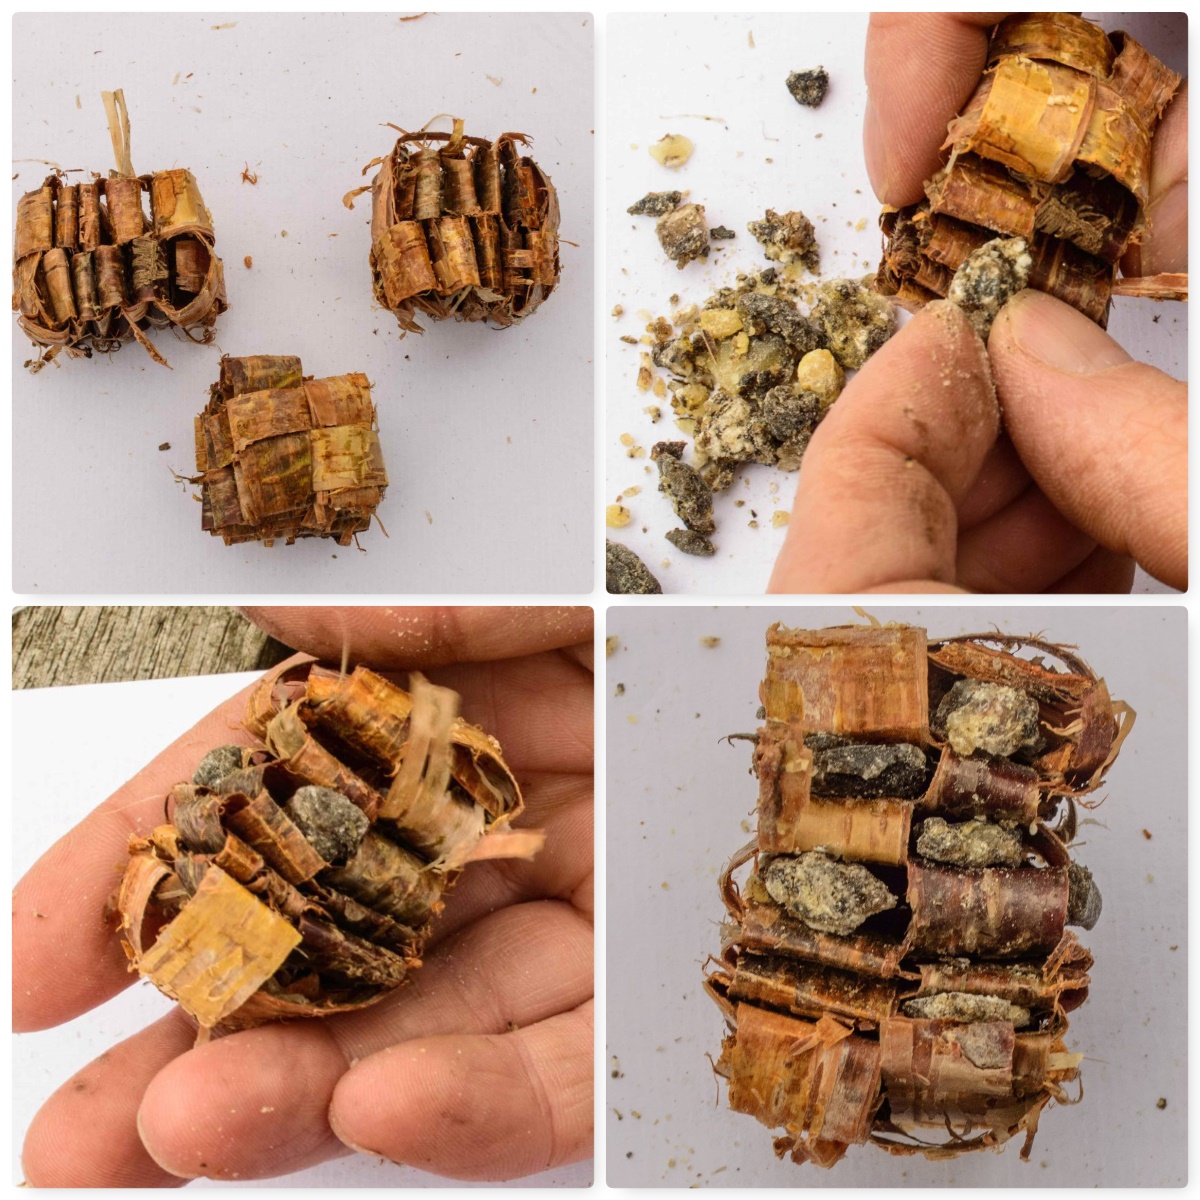
I break of little blobs (it can get messy if the resin is runny) of resin and insert them into the little slots formed by the weave and that is basically it (use as much resin as you can).
Add the magic ingredient
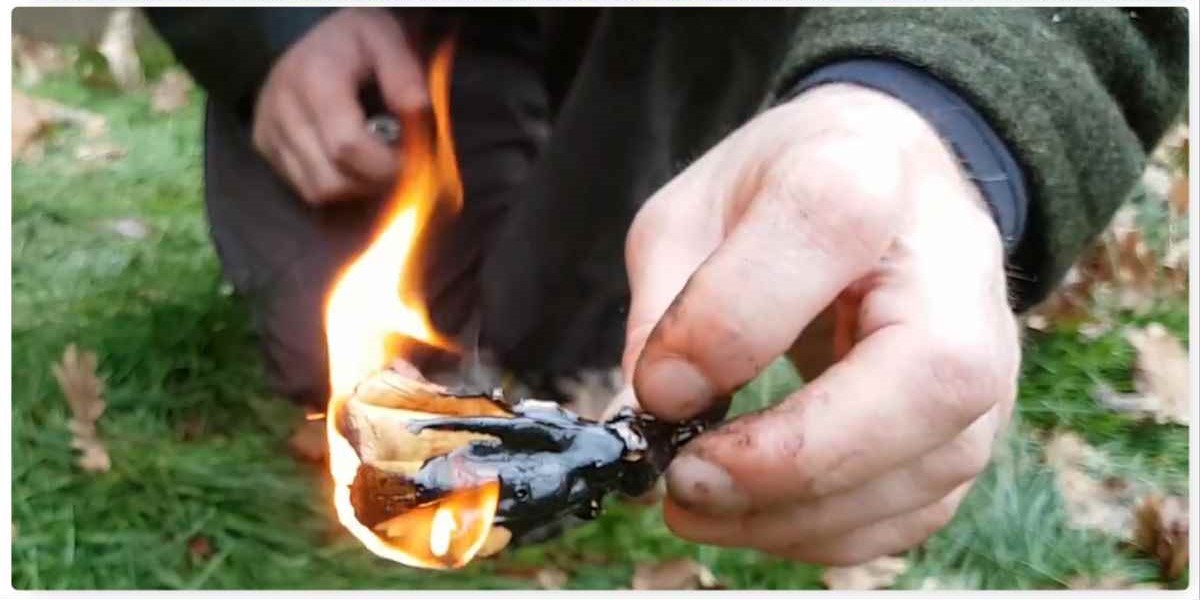
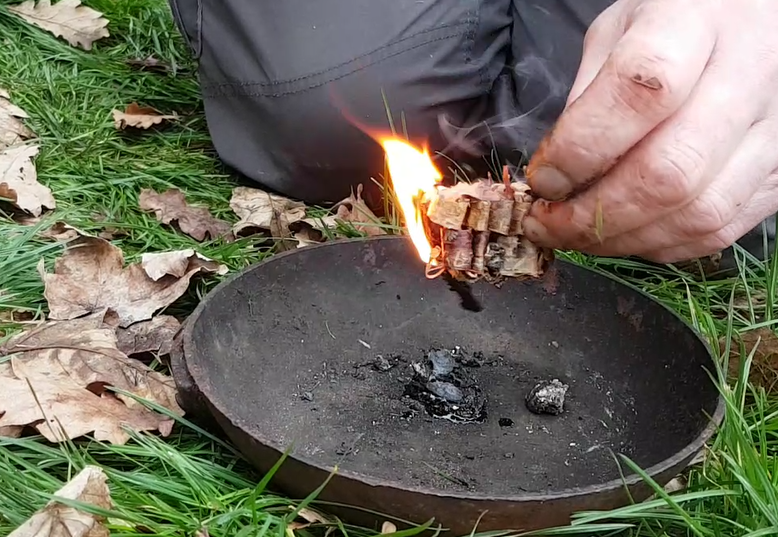
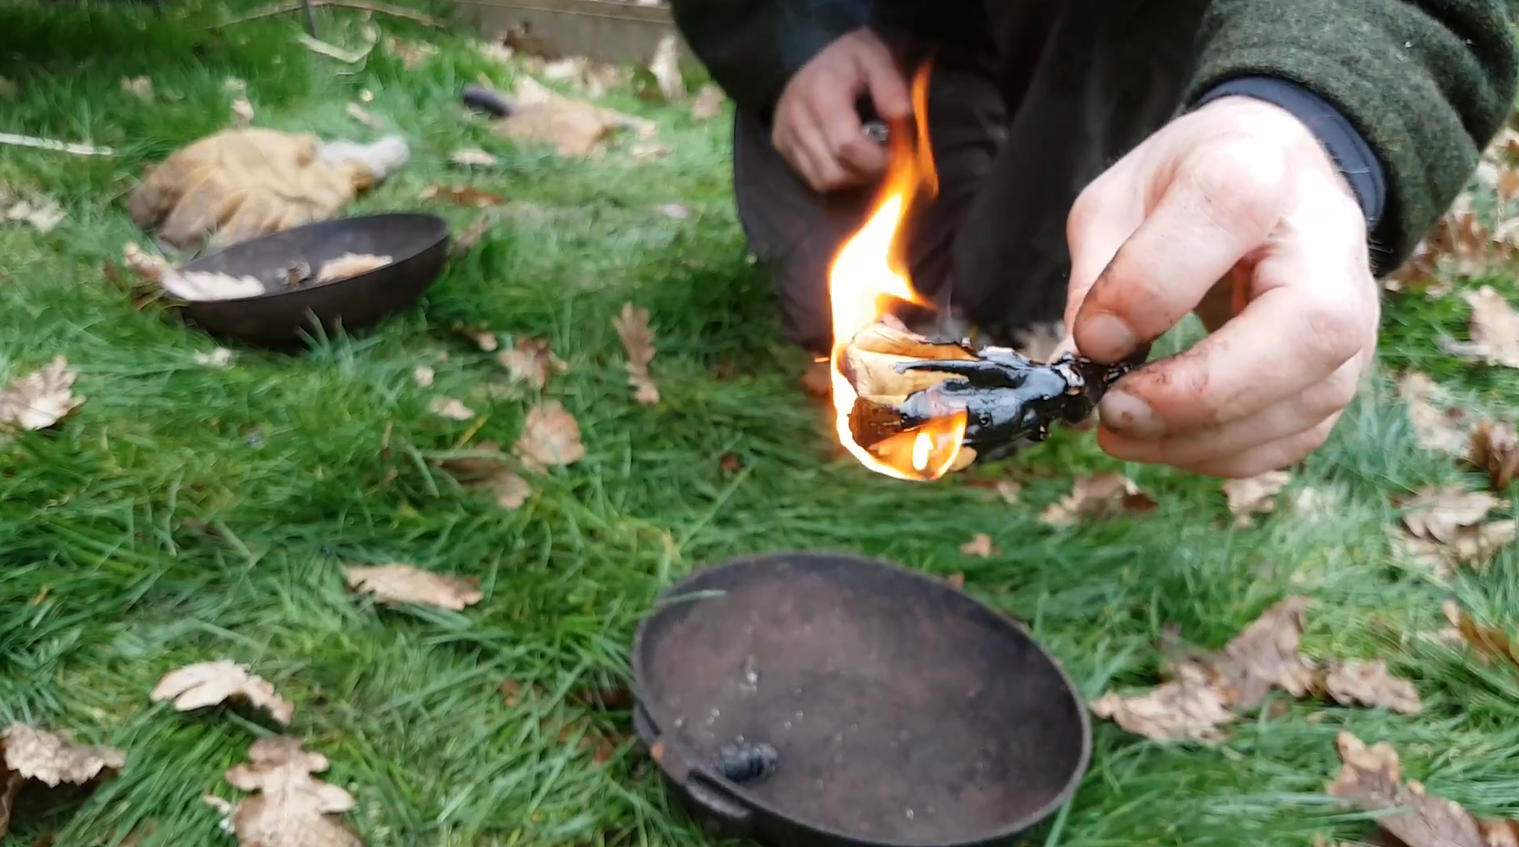
When lit these firelighters burn easily for over 5 minutes so giving you time to build your fire without resorting to using fine tinder and just small twigs. I can easily hold the firelighter for the first minute before it becomes to fierce to hold.
Once it gets going and the resin is well lit then it I go no where near it with my fingers. I like to use them first thing in the morning when I do not want to faff about with collecting tinders and just get a brew on.
Ready to go
I prep mine in the evening while sitting around the fire and pack them away for when I need them. If you are looking for a viable alternative to modern firelighters then these are ideal – if you are always a purist and insist on foraging for your tinders every time you light a fire then maybe they are not for you.
Quick to make and lasts for ages
For those that like a video intead of the step by step I put this short video together to explain the process.
Ever find yourself relying on using non-natural firelighters a lot due to their convenience? I do as I normally have a lot to organise before courses and using natural methods every time when I have a class can be time consuming when things are damp.
This is the first of two blogs on natural firelighters I like to use and how to make them. I like to prepare them well in advance of trips, pack them away in my bergen and use them instead of the likes of cotton wool and Vaseline (my usual non-natural method).
The Birch Bark Fire Fan
I came across a number of years ago a small section in Ray Mears book Essential Bushcraft on using a Birch bark fan. Ray recommended folding pieces of bark into a fan shape to stop the bark curling up quickly and becoming impossible to handle when it was lit.
I teach this method to my cadets however if I have time I like to add some melted spruce resin to these fans. This really extends the life of the fan giving me a better chance to get my fire going (great for these damp days) and because the resin soon hardens the fans they do not fall apart or deform so much when carried in a bag.
Removing the Bark
If you have a semi rotted birch log then the bark should come off easily however if it is a freshly felled log things may get a little more difficult for you. Here in the UK the birch bark can be quite thin and more difficult to remove than the thicker bark of birch trees you would find in more northern climes.
Mark out the squares
I mark out small squares with my knife and if the bark does not peel off easily I use a small batten to gently hammer the bark. This gentle hammering helps to loosen the inner bark from the sapwood.
Also having a wooden wedge helps to peel the bark of but mostly I tend to just use the curved part of my knife. Some folk say it is better to use the back of the tip of your knife but I find the curved part works well for me. The main thing is to take your time and remove the inner and outer bark from the sap wood.
Tap and Peel
Remove the Inner Bark
When I have removed a small square I gently remove the inner bark. Again do this job slowly removing the inner bark in small pieces. It is very easy when using thin bark to rip the outer bark.
Carefully strip off the inner bark
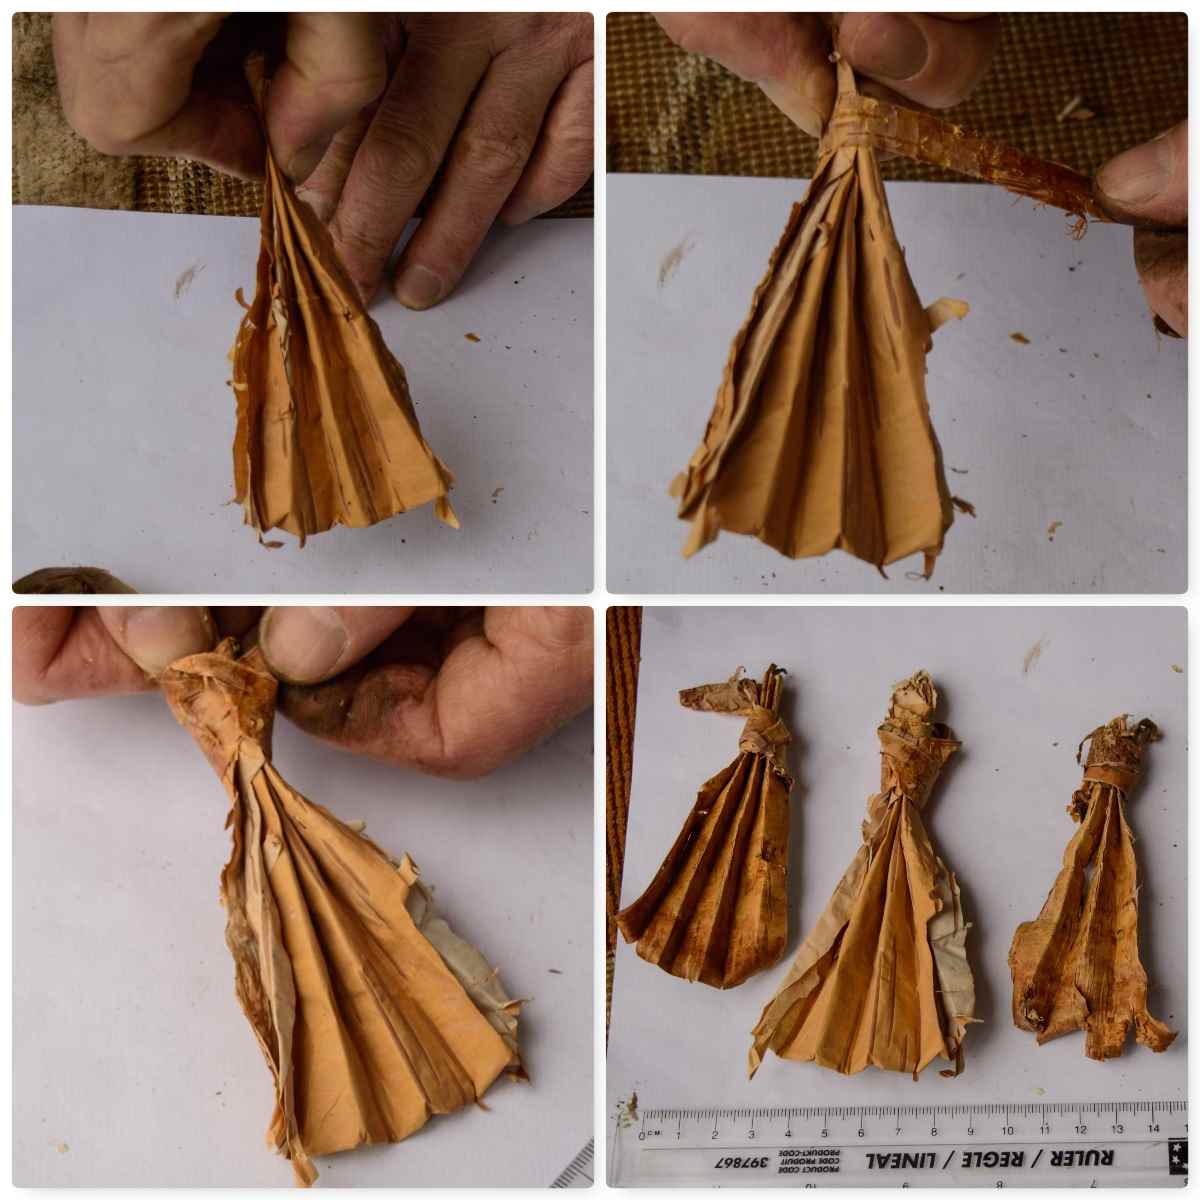
Folding the Fan
To make your fan start folding your square as if you were making a very small fan – not much more you can say about that 🙂
Fold like a paper fan
Keep a hold on one end and with a strip of bark tie off the other end. They do not take long to make and are soon ready for the resin.
Tie a tail
Spruce resin
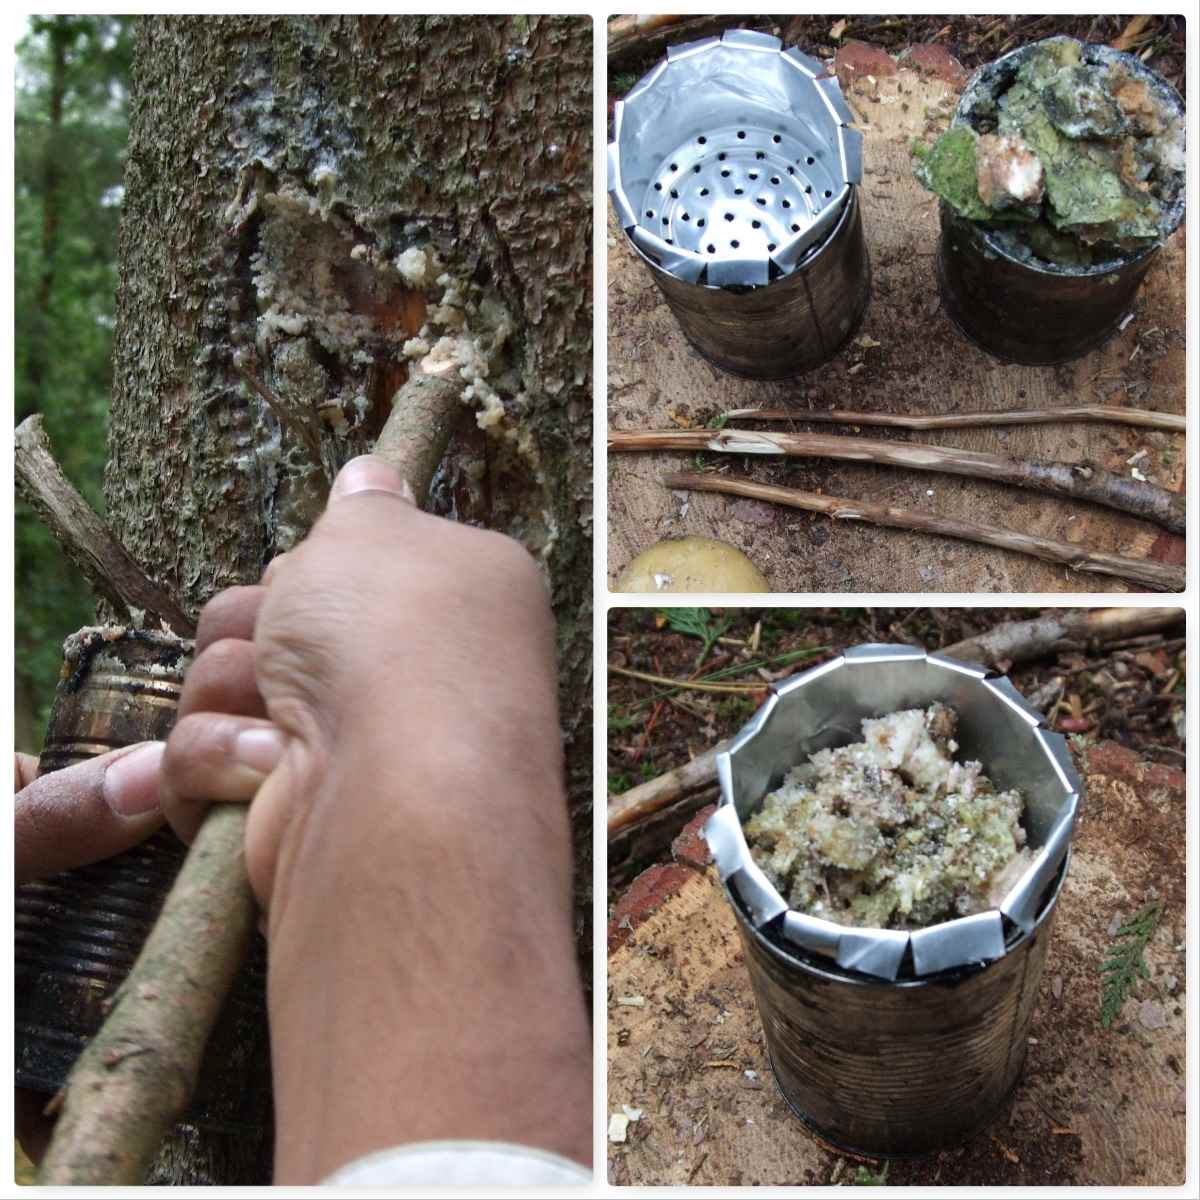
Here in the UK a handy and plentiful resource is Spruce resin. There are lots of conifer plantations where I live and a common tree in them is the Spruce. I keep an eye out for areas where the foresters have been using tractors to thin out the spruce as they tend to damage lower branches on trees they pass by.
To help heal itself the trees produce copious amounts of resin and this is full of oils that are flammable. By taking a little from different sites (I use a stick to scrape the resin) I can soon have plenty to melt and coat the Birch bark fans and leave plenty for the trees.
Harvest some resin
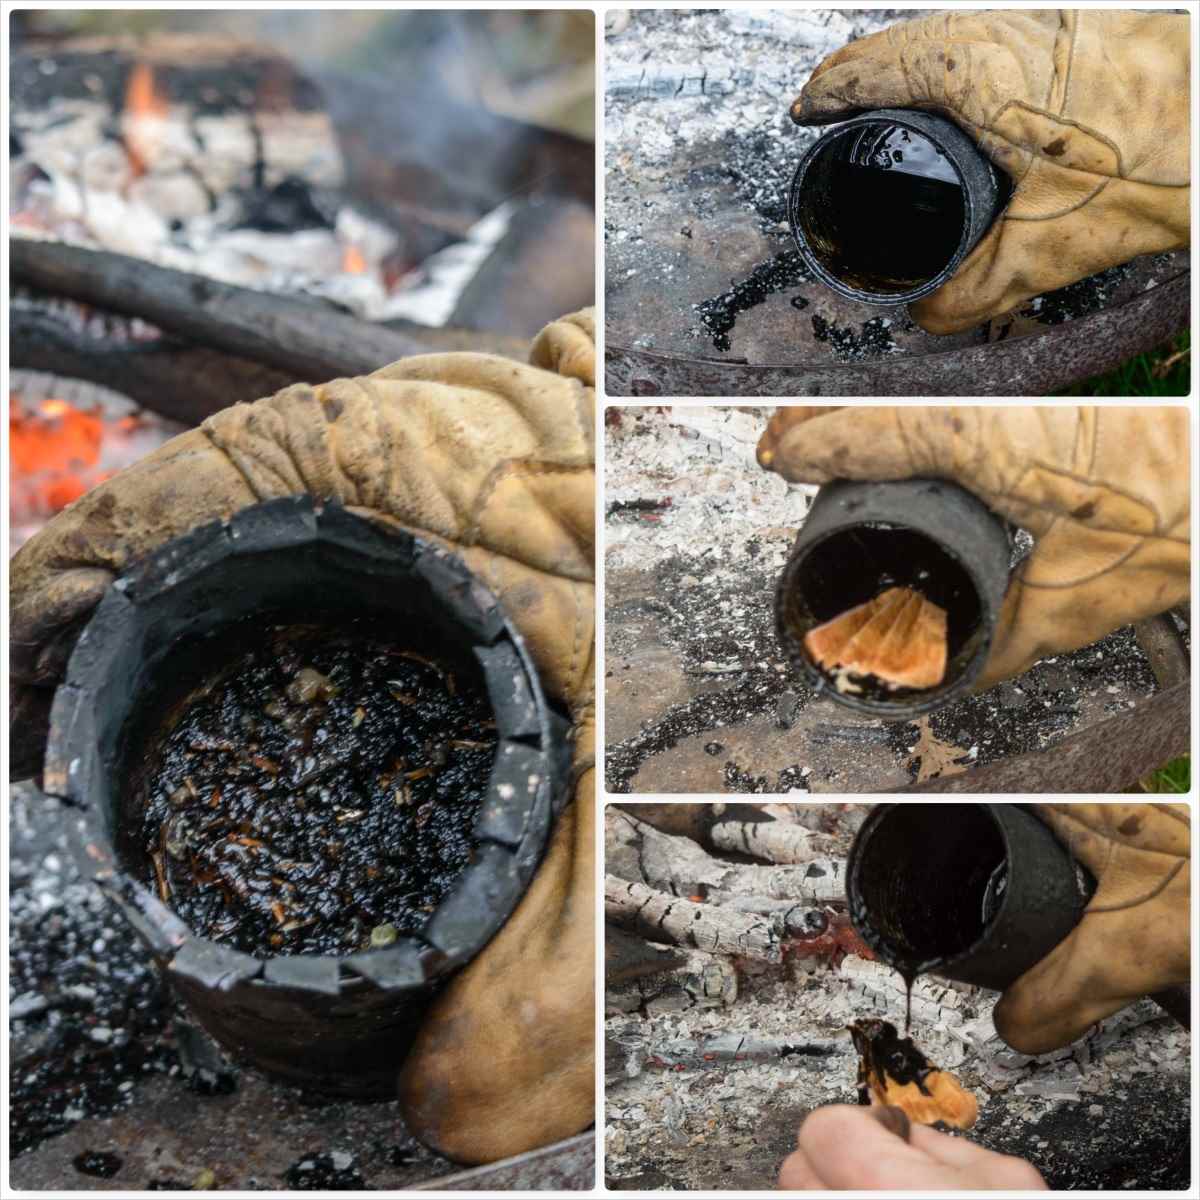
I just use a couple of tins (the inner tin has lots of little holes) to melt the resin by my campfire (I have documented this process in How To…. Spruce Pitch in a Tin Can) and dunk the tail of the fan into this hot liquid (good gloves or tongs are required here).
Once the tail is covered I pour some of the resin onto the area of the fan by the tail leaving the top of the fan clear of resin.
Melt, dip and pour
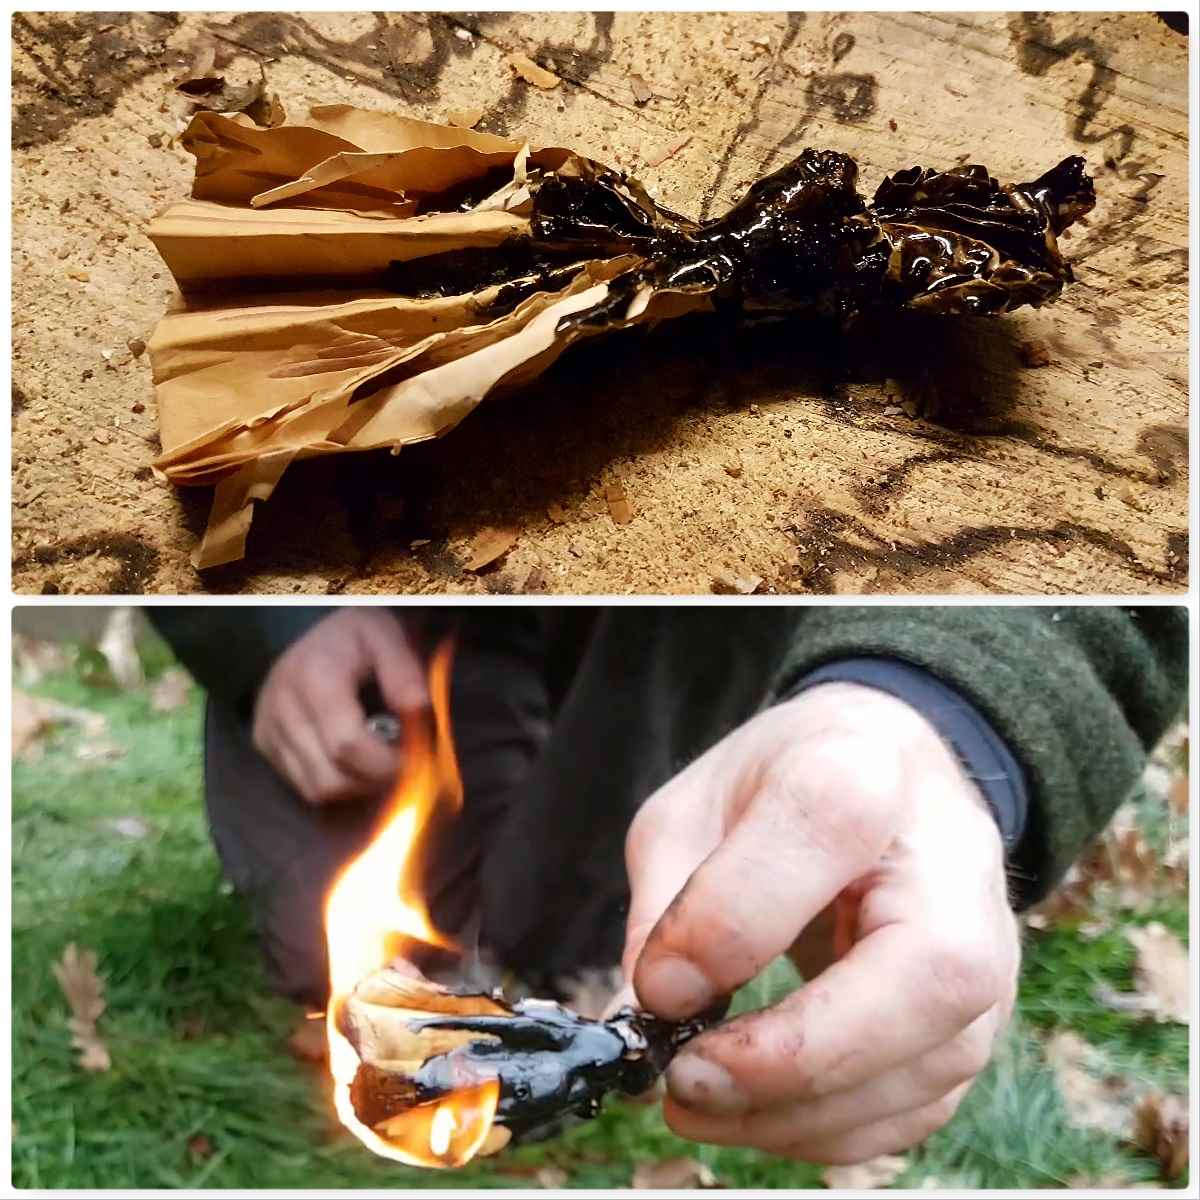
I find this combination works for me as the folds stop the bark from curling straight away and when the flame reaches the resin it burns for far longer.
One excellent fire lighter
I put a little video together on this to show you the process from start to finish.
The next post in this short series will be on making a woven Birch bark firelighter (again with Spruce resin).
I will post a full How To…. on harvesting the Birch Bark and making the fans but for now here is a short video post on an excellent bit of homemade bushcraft kit.
OK – when I say we had a ‘Boys Own Weekend’ it was not through choice – sometimes it just happens that way and no girls had booked on the course.
Last October I spent an excellent weekend with my friend Dave Lewis teaching some Sea Cadets more advanced navigation techniques. They had all completed their basic campcraft skills and so the focus was on the use of the map and compass.
Lots of Nav
We were based in the Ashdown Forest here in the UK (Winnie the Pooh land) and really tested the lads out with their navigation. We had access to Pippingford Park training area so we were not continually bumping into people as you would do in the open access areas of the forest.
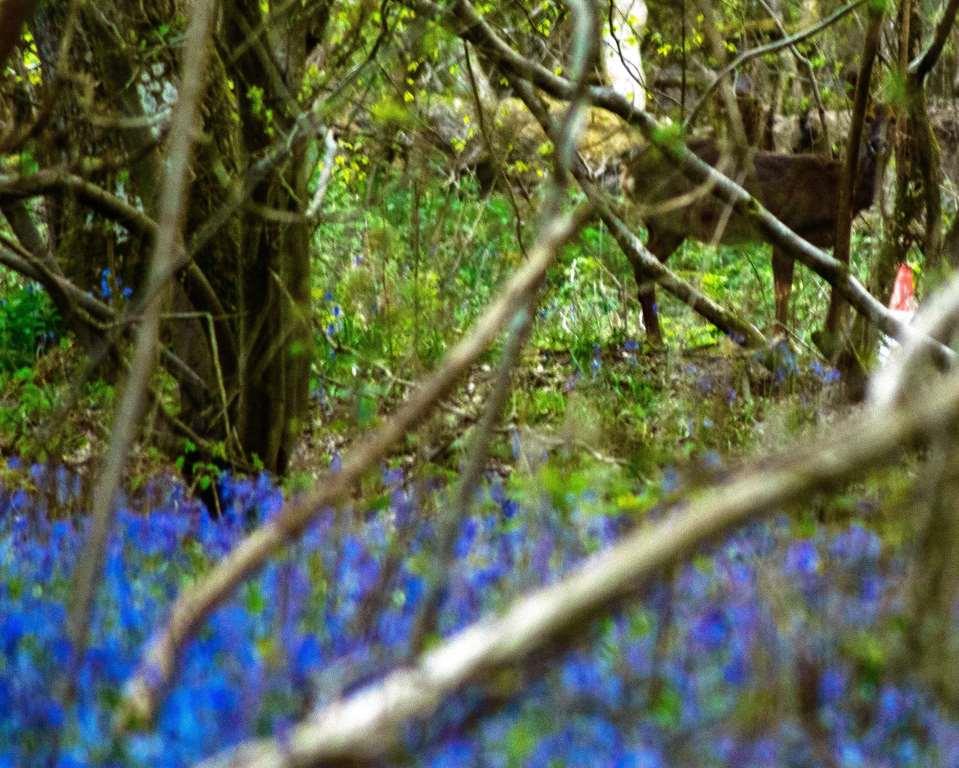
Pippingford Park has a wide variety of habitats from heathland, woodland and wetlands. The park also has many deer and wild horses roaming its interior making it a special place to visit.
Up High – Low Down
We camped in the park on the Saturday evening and soon had a good fire going. Even though it rained a lot we got the marshmallows out and I started to spot loads of fire faces in the flames.
Fireside Fun
The colours were quite beautiful that weekend with all the fungi out and the leaves on the ground. Every time the sun came out so did my camera as that is when the colours came alive.
Autumn Colours
It is weekends like these where there are only a few of us that I really enjoy teaching. More focus can be given on the advanced skills and more time can be given to the instructors to relax 🙂
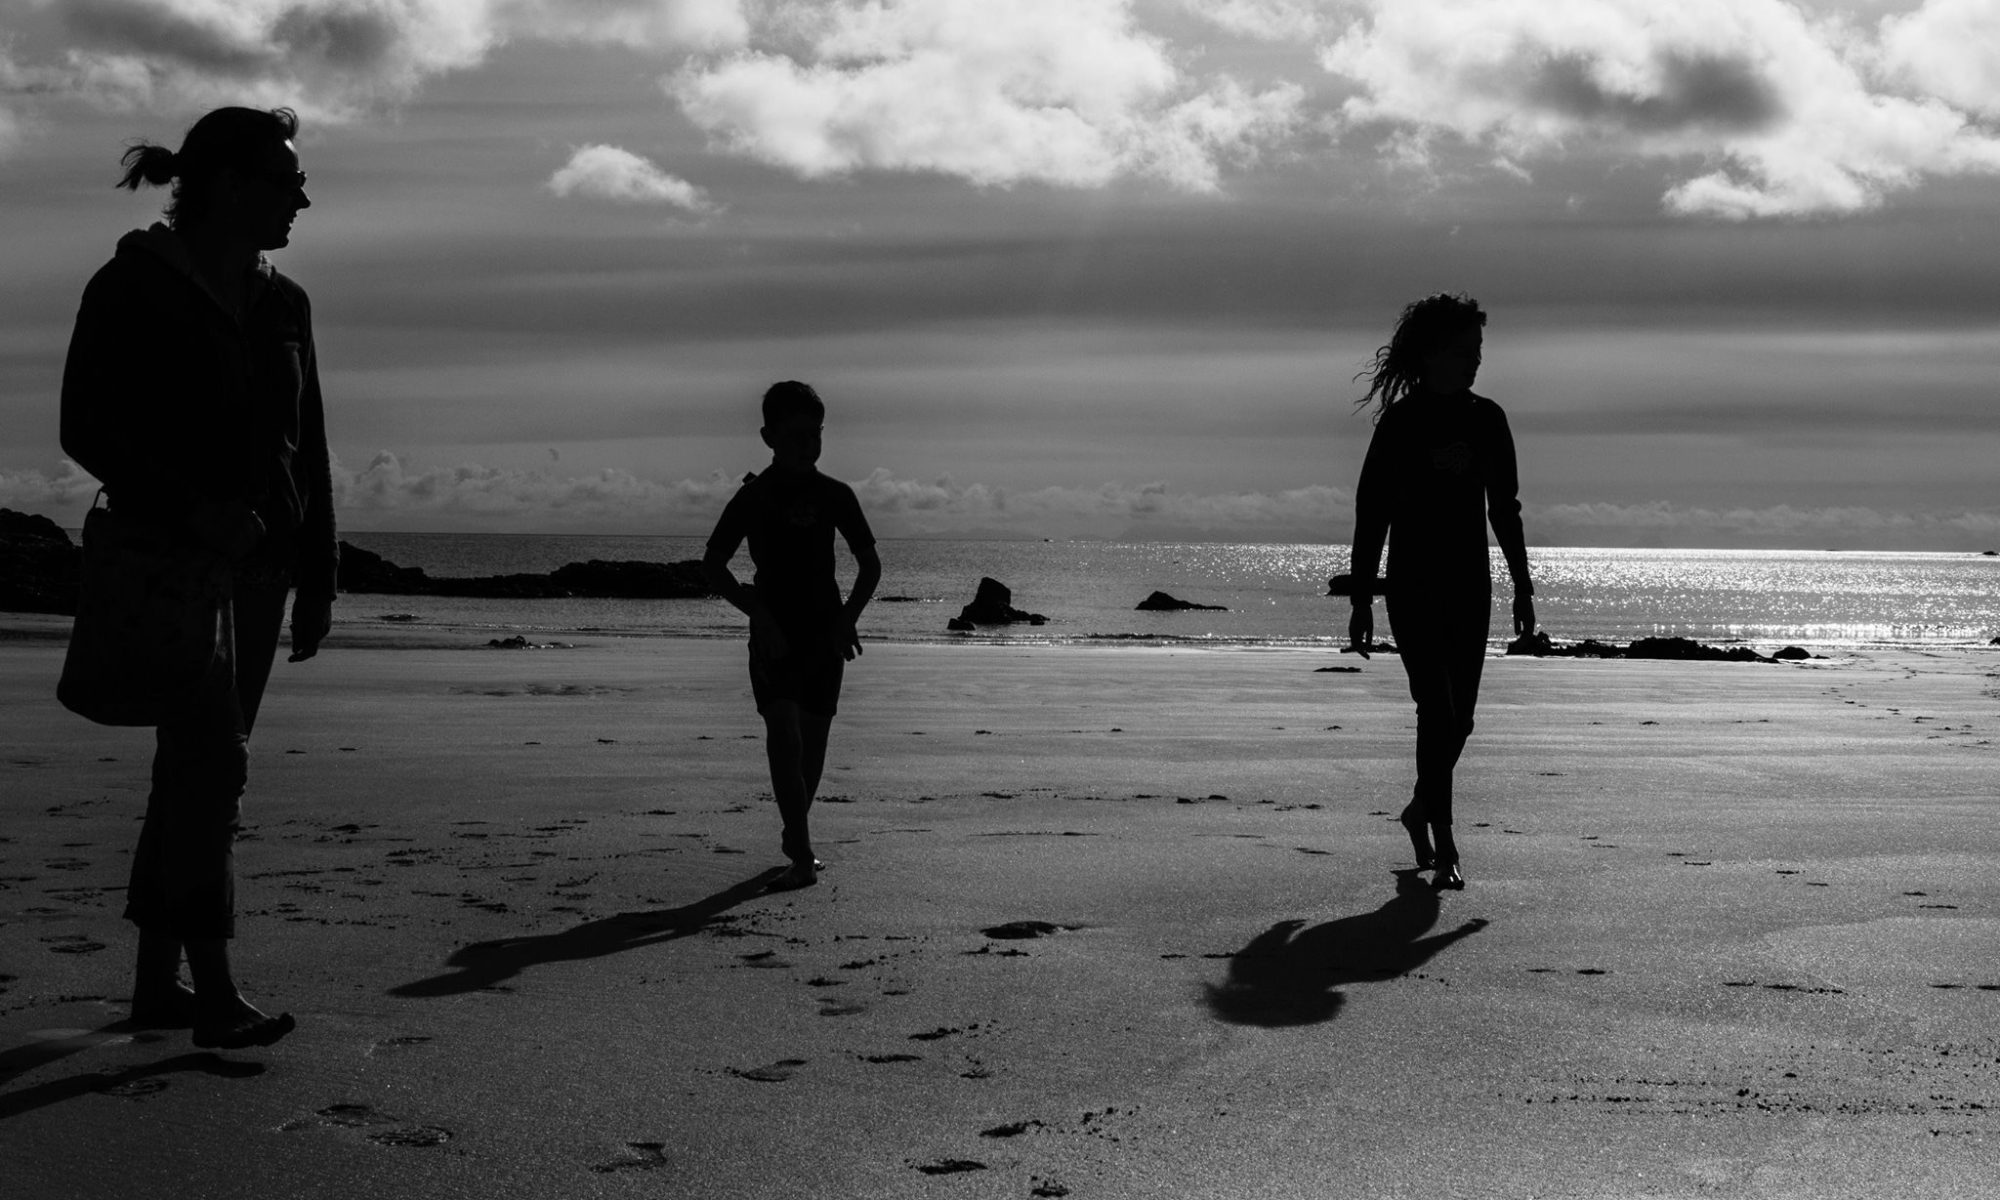
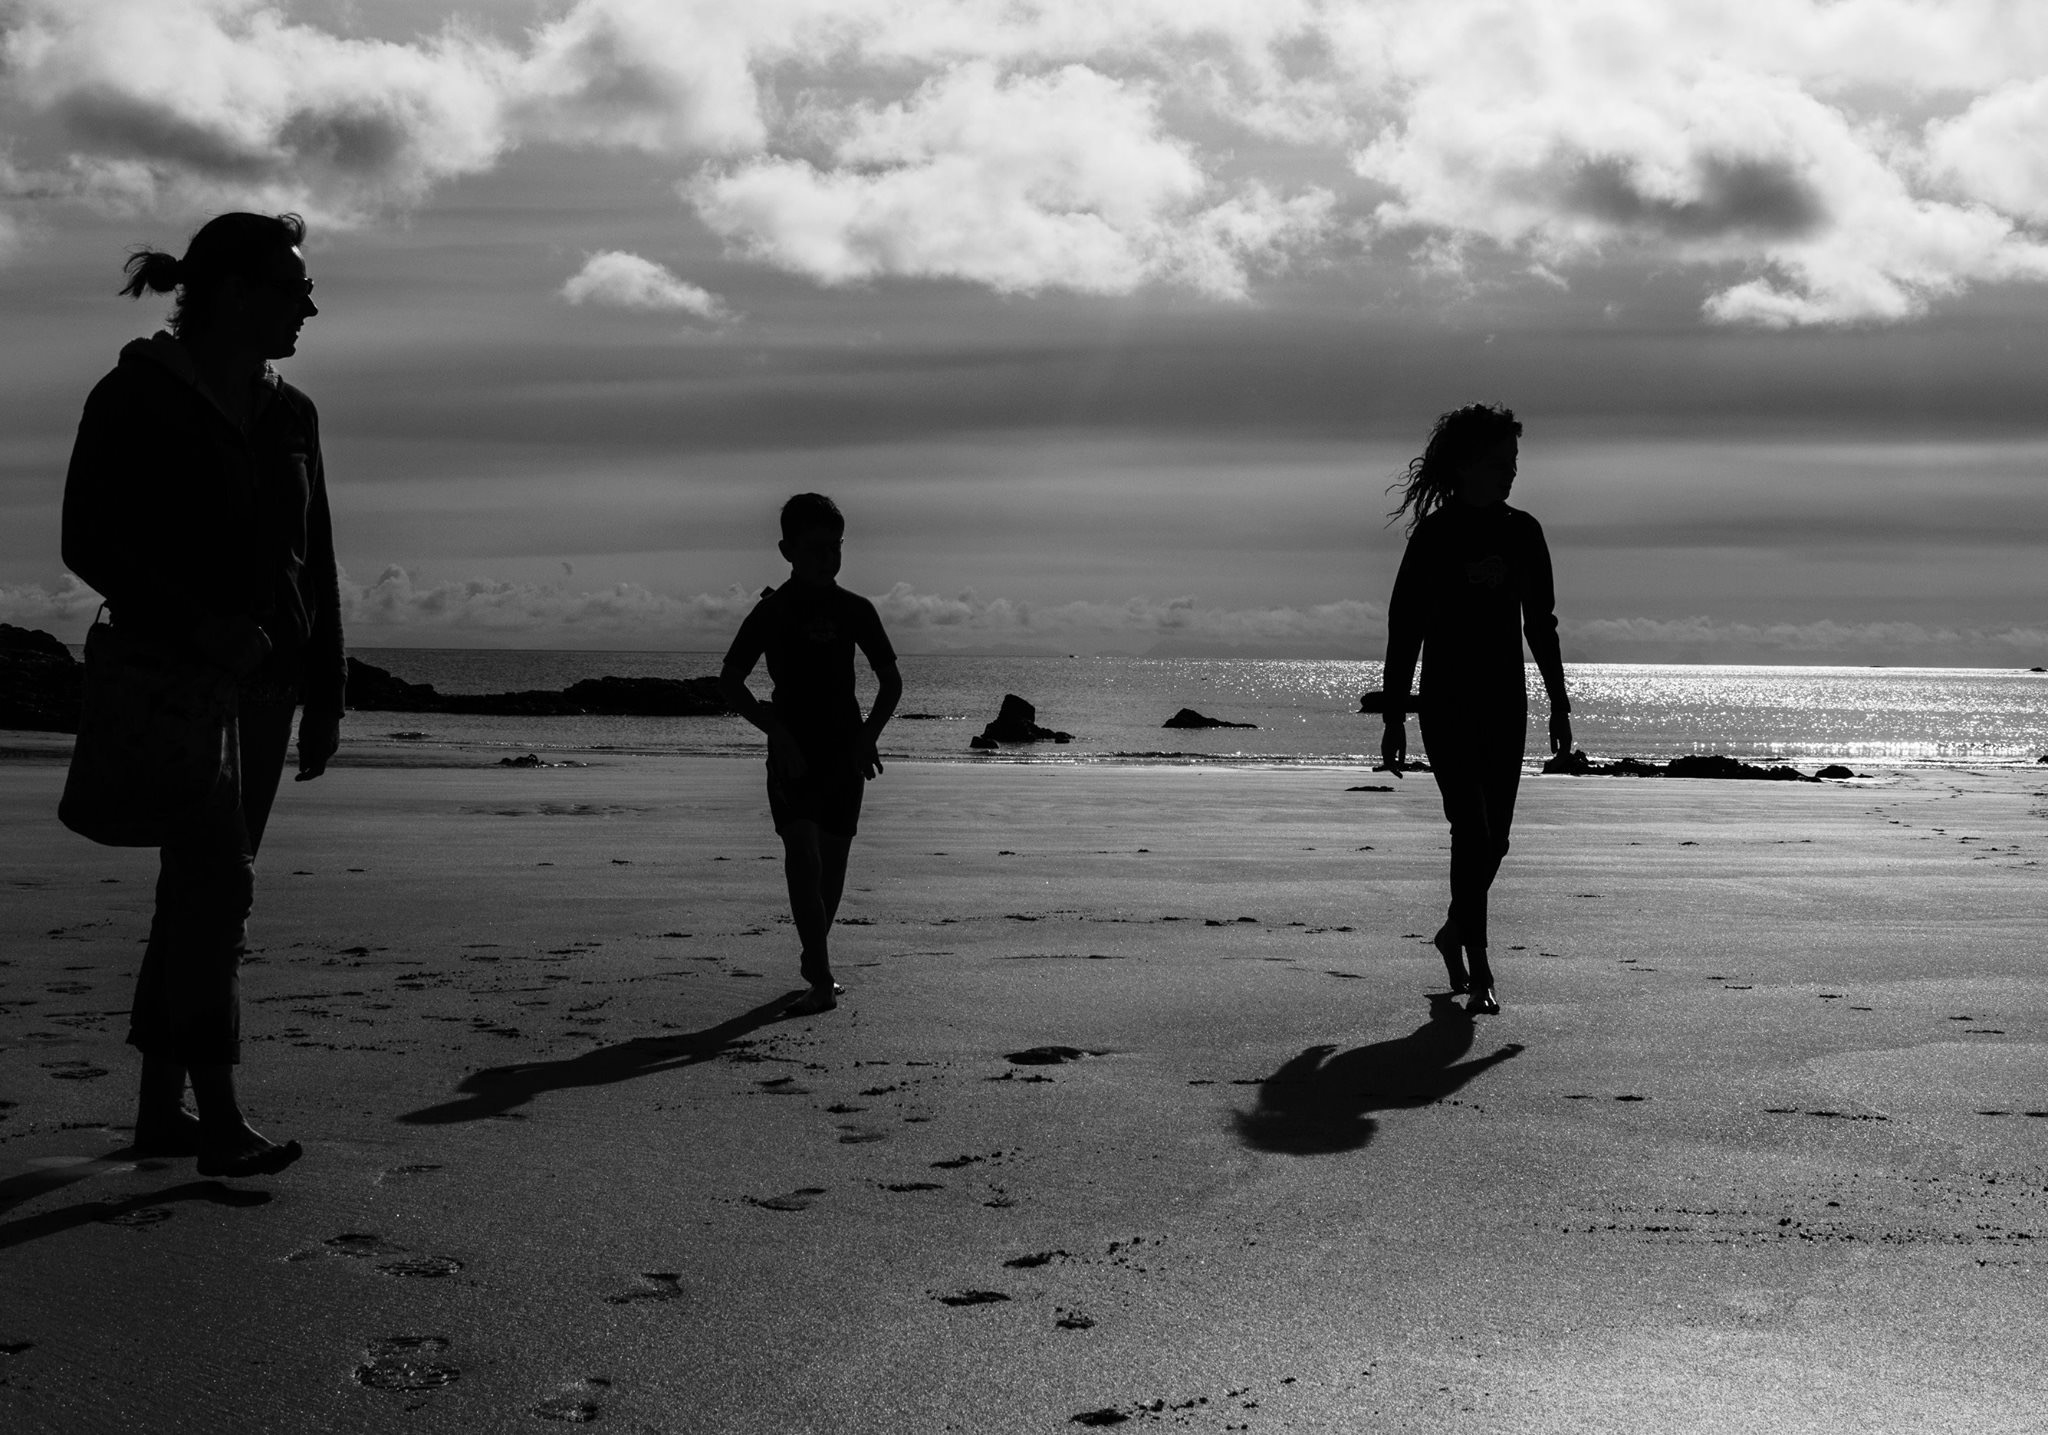
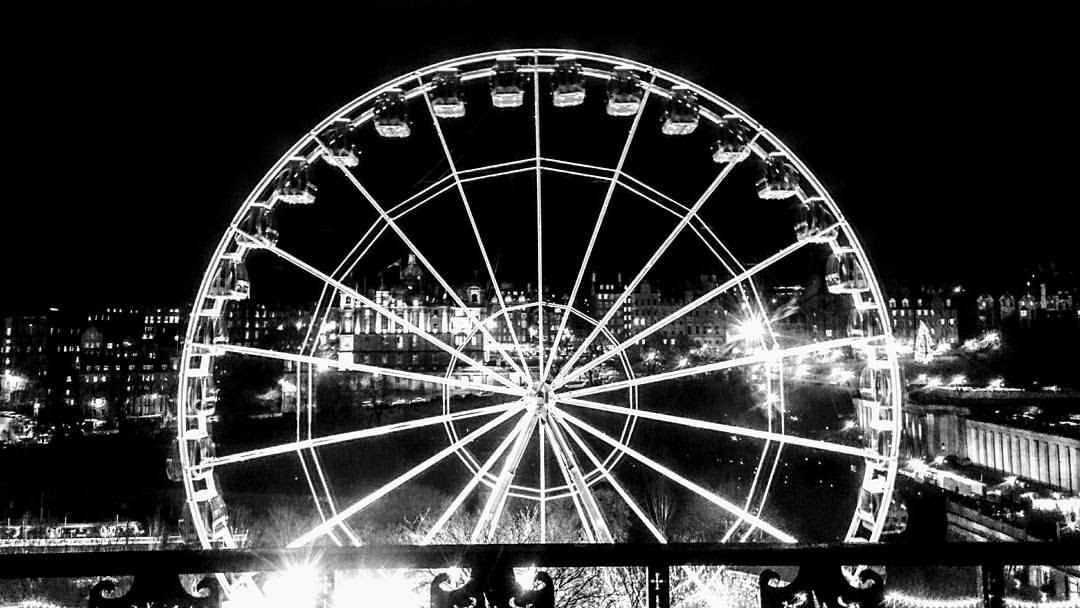
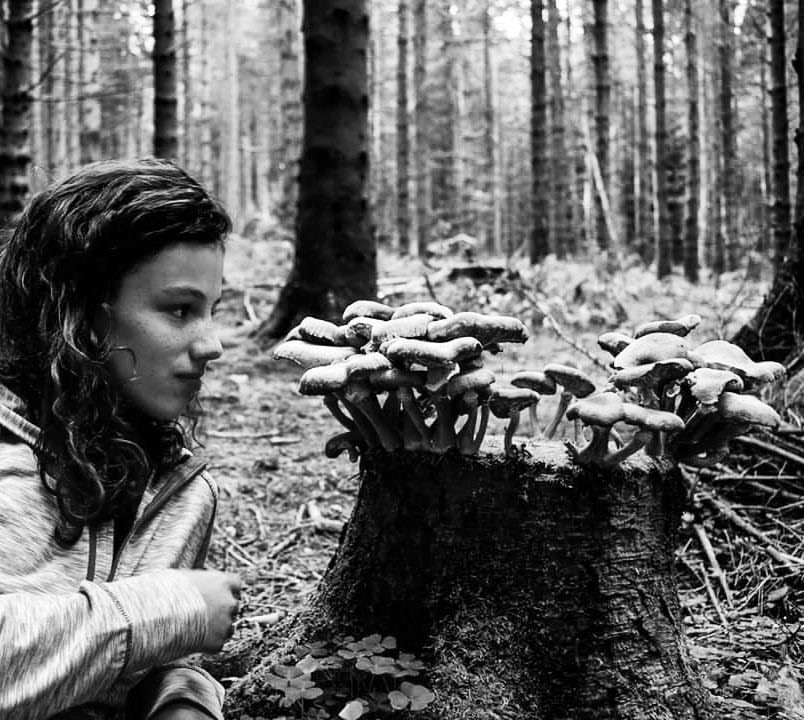
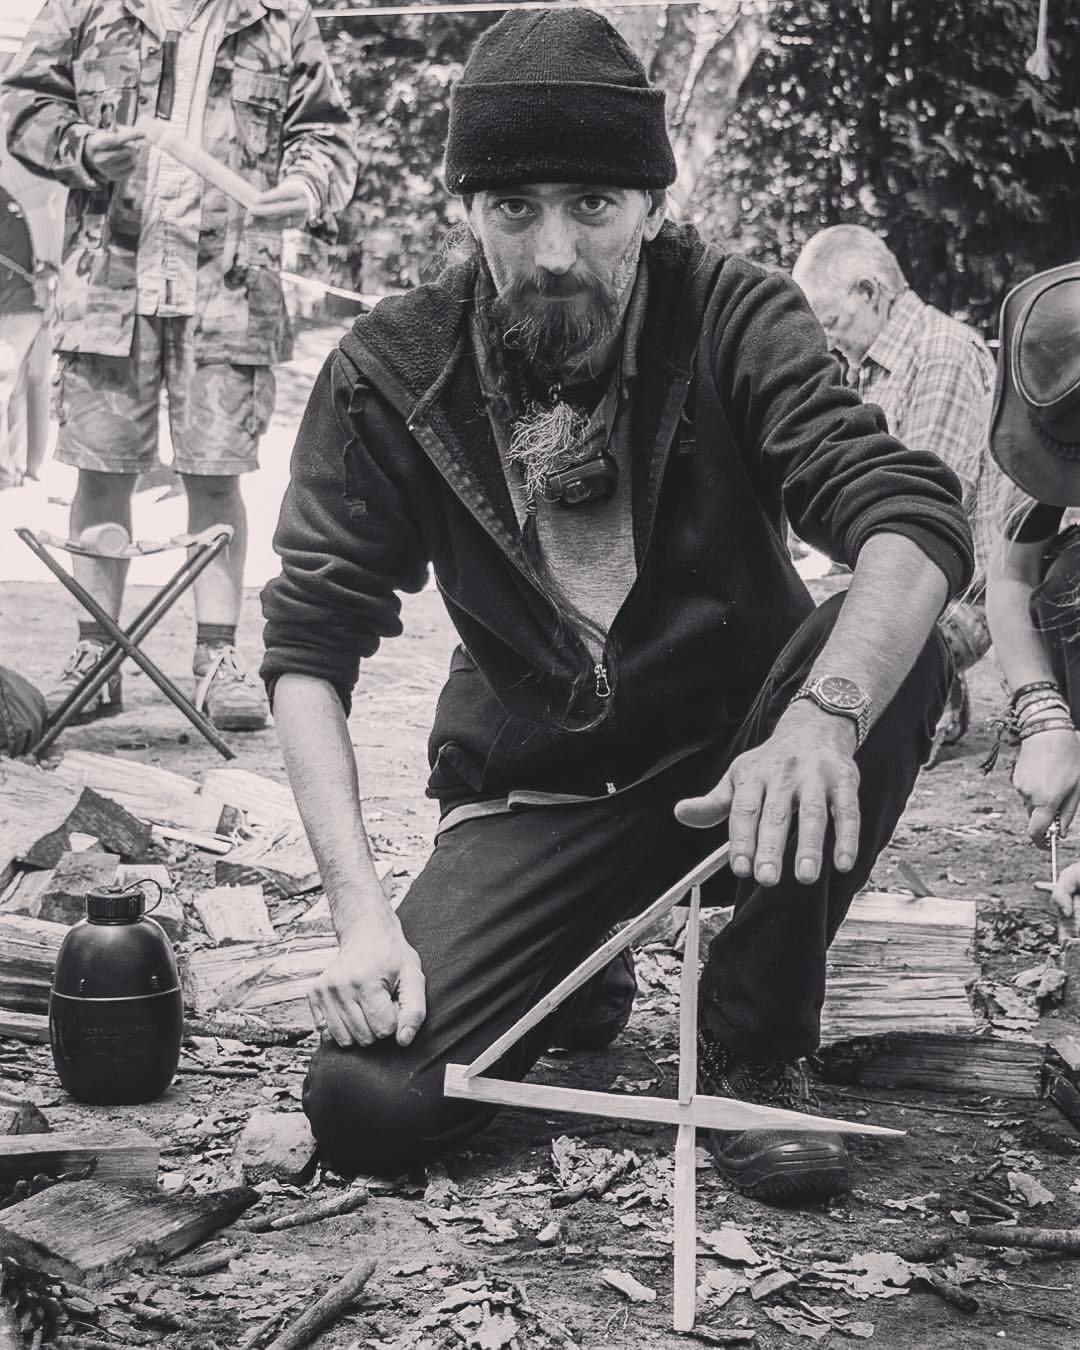
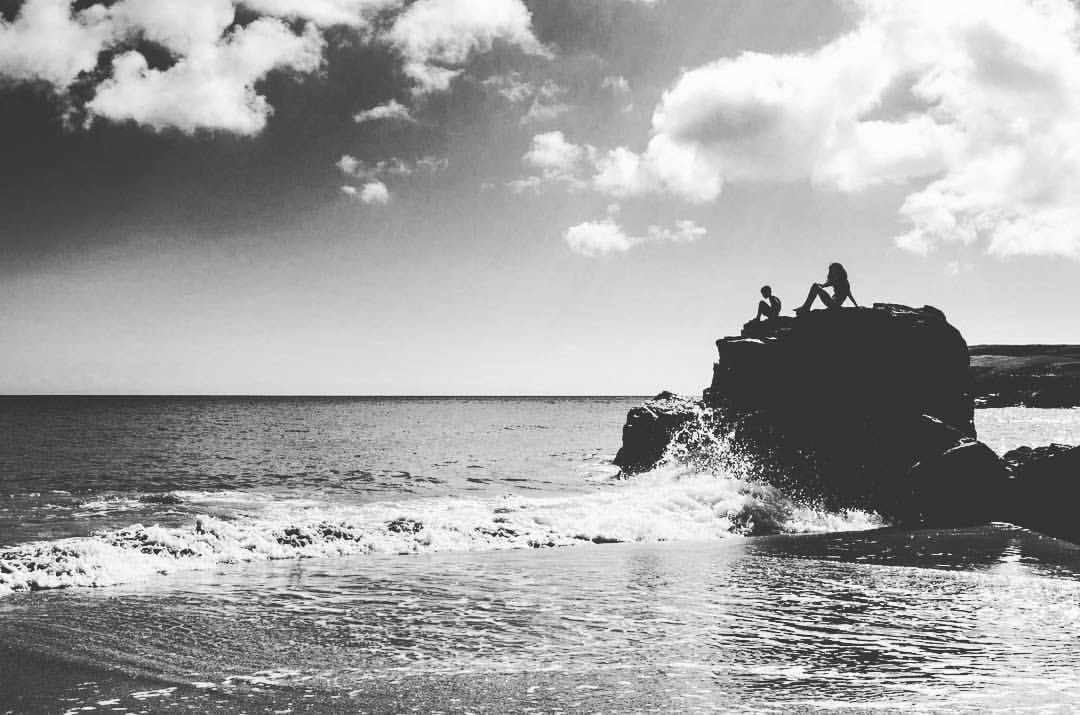
Over the last year I have dabbled with some of my pictures to see how they they fared in Black and White. I did look for pictures that gave me good shadows and high levels of contrast. I have no idea if that is the best way of going about it but I had fun along the way.
I hope you enjoy the pictures and wish you all a Happy New Year.
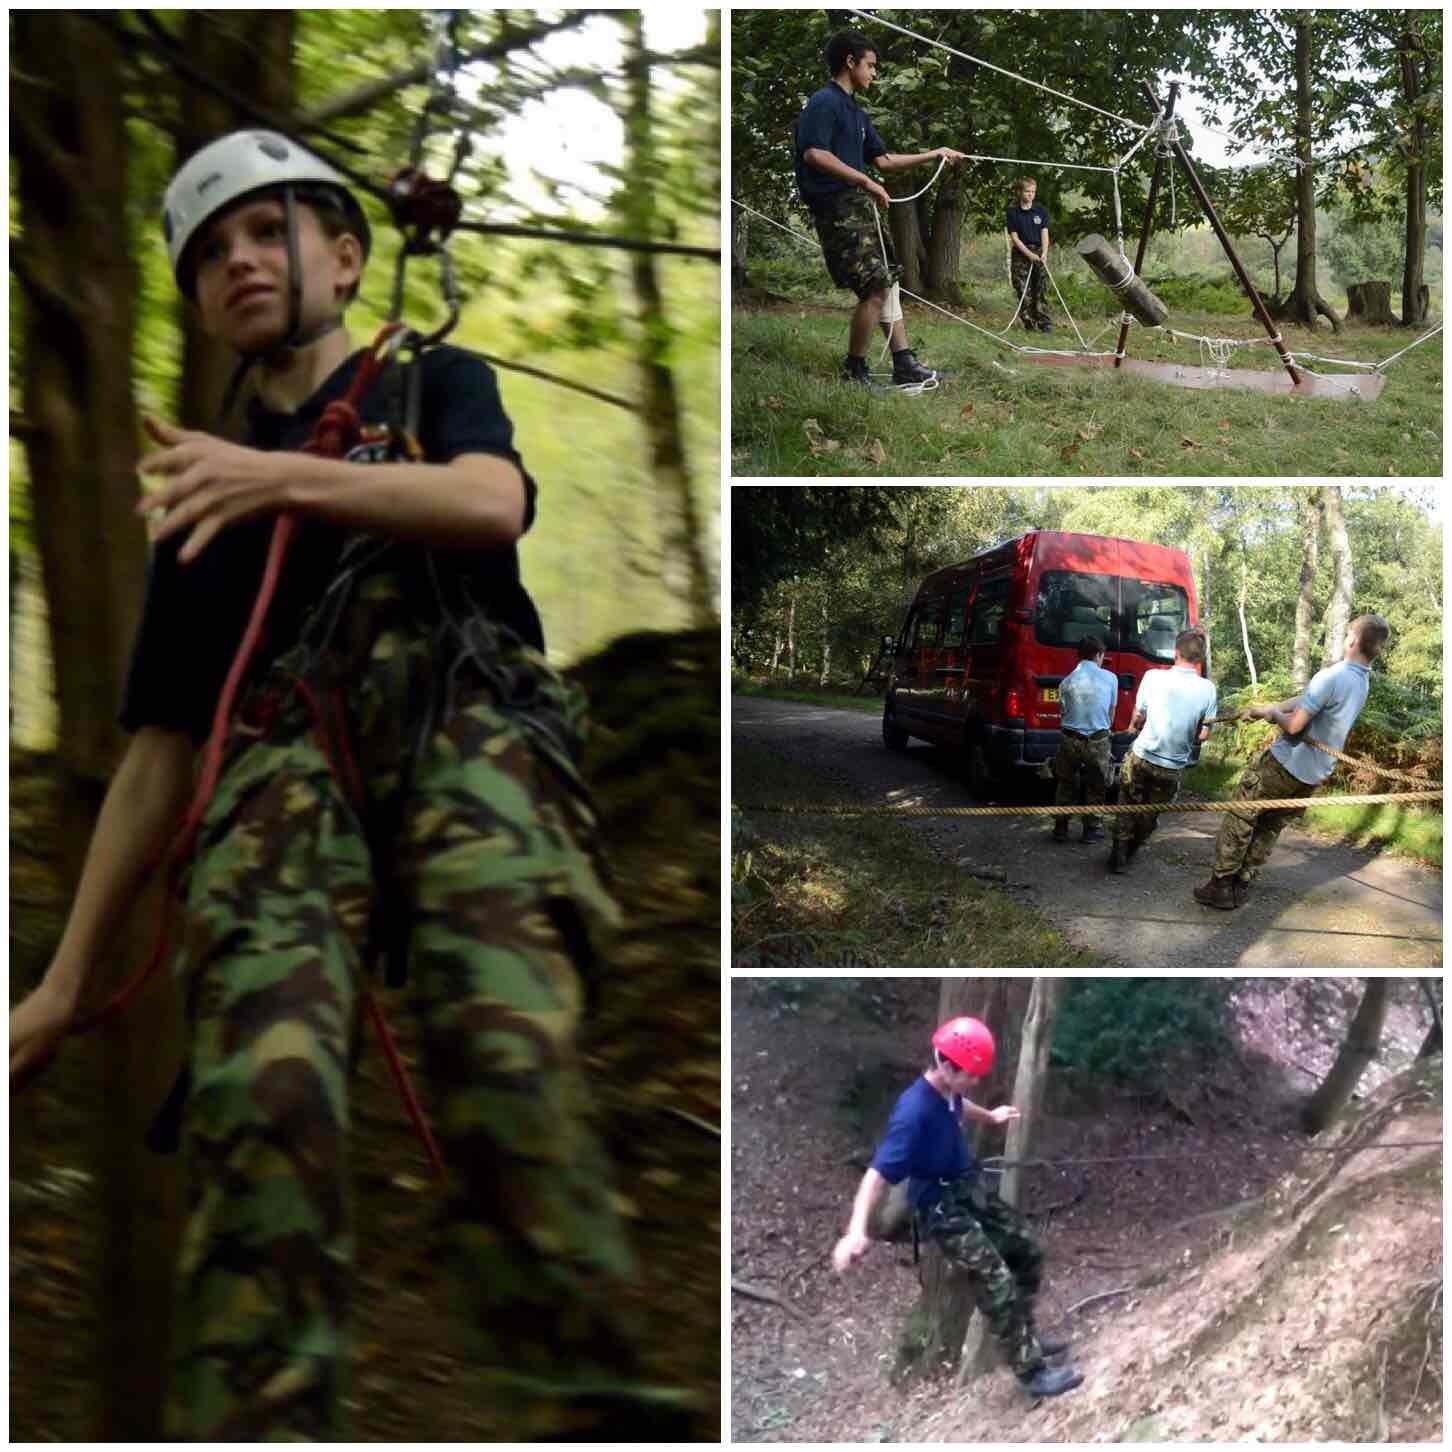
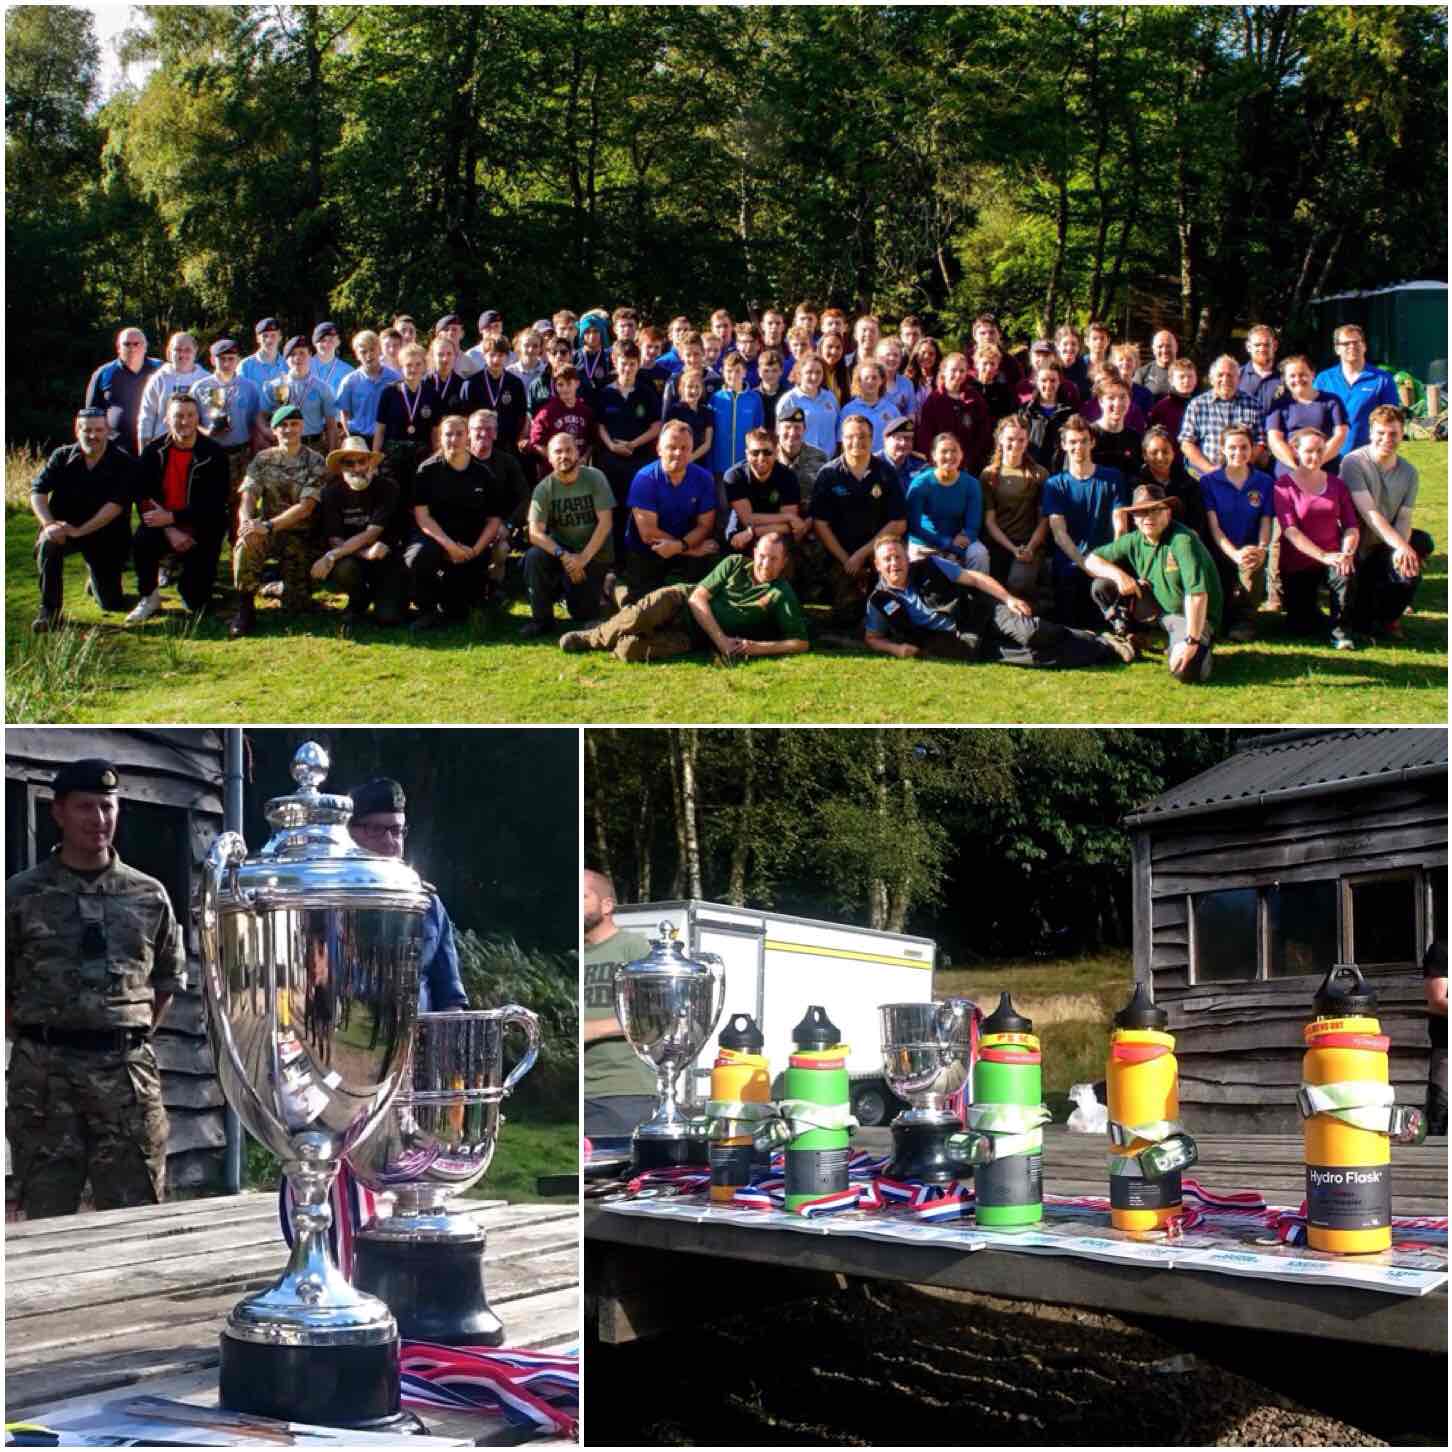
The London Area Sea Cadets annual Chosin Cup competition is one event I look forward to every year. Since 1999 I have been attending this event and this year may not have been the hardest in terms of the weather but it sure was hard due to the sheer number of different tests the cadets had to undertake.
Friday
Kick off is on the Friday night (late September) with the cadets marching in to their bivvie sites and working on their route cards. The staff though were up into the early hours prepping everything for the weekend.
Saturday
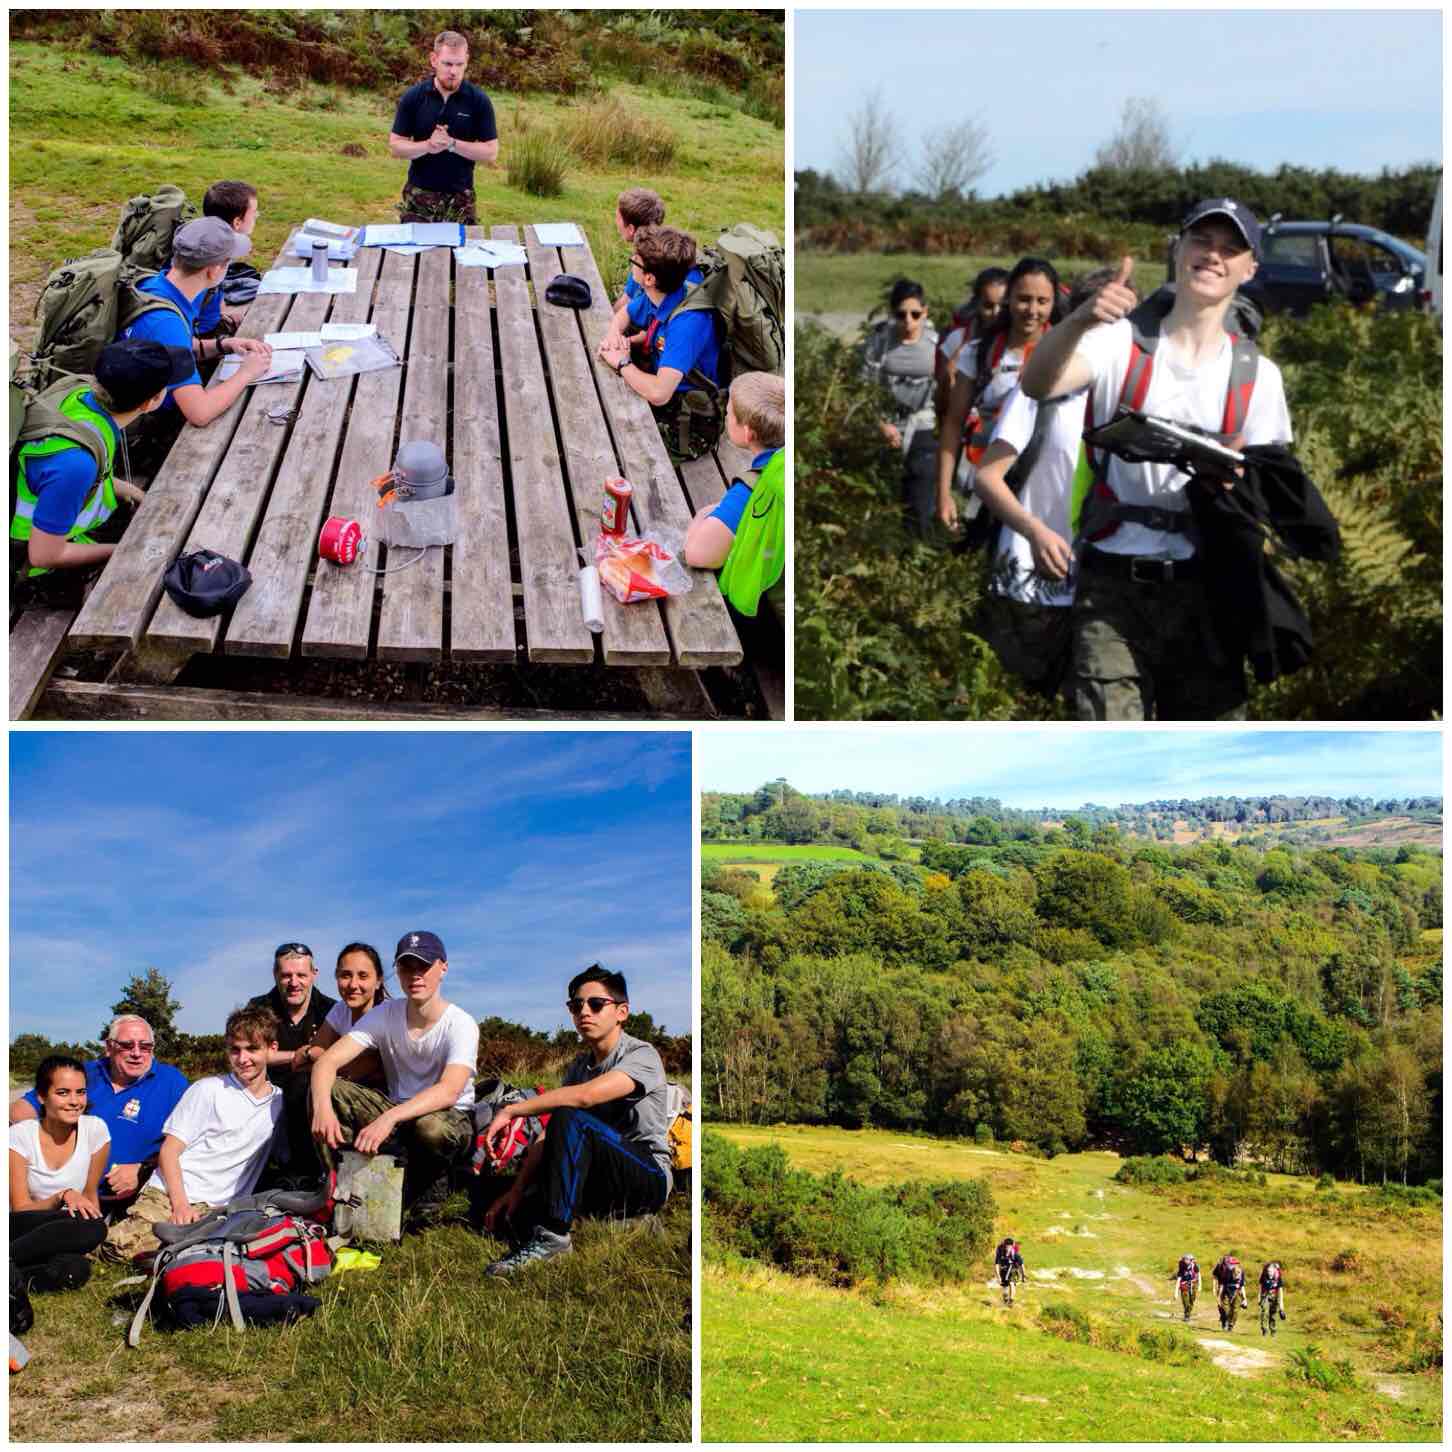
First thing on Saturday morning they were briefed in their teams and then they were off. They needed to navigate a route inside and outside Pippingford Park military training area (located in the beautiful Ashdown Forest in the UK).
Out and about
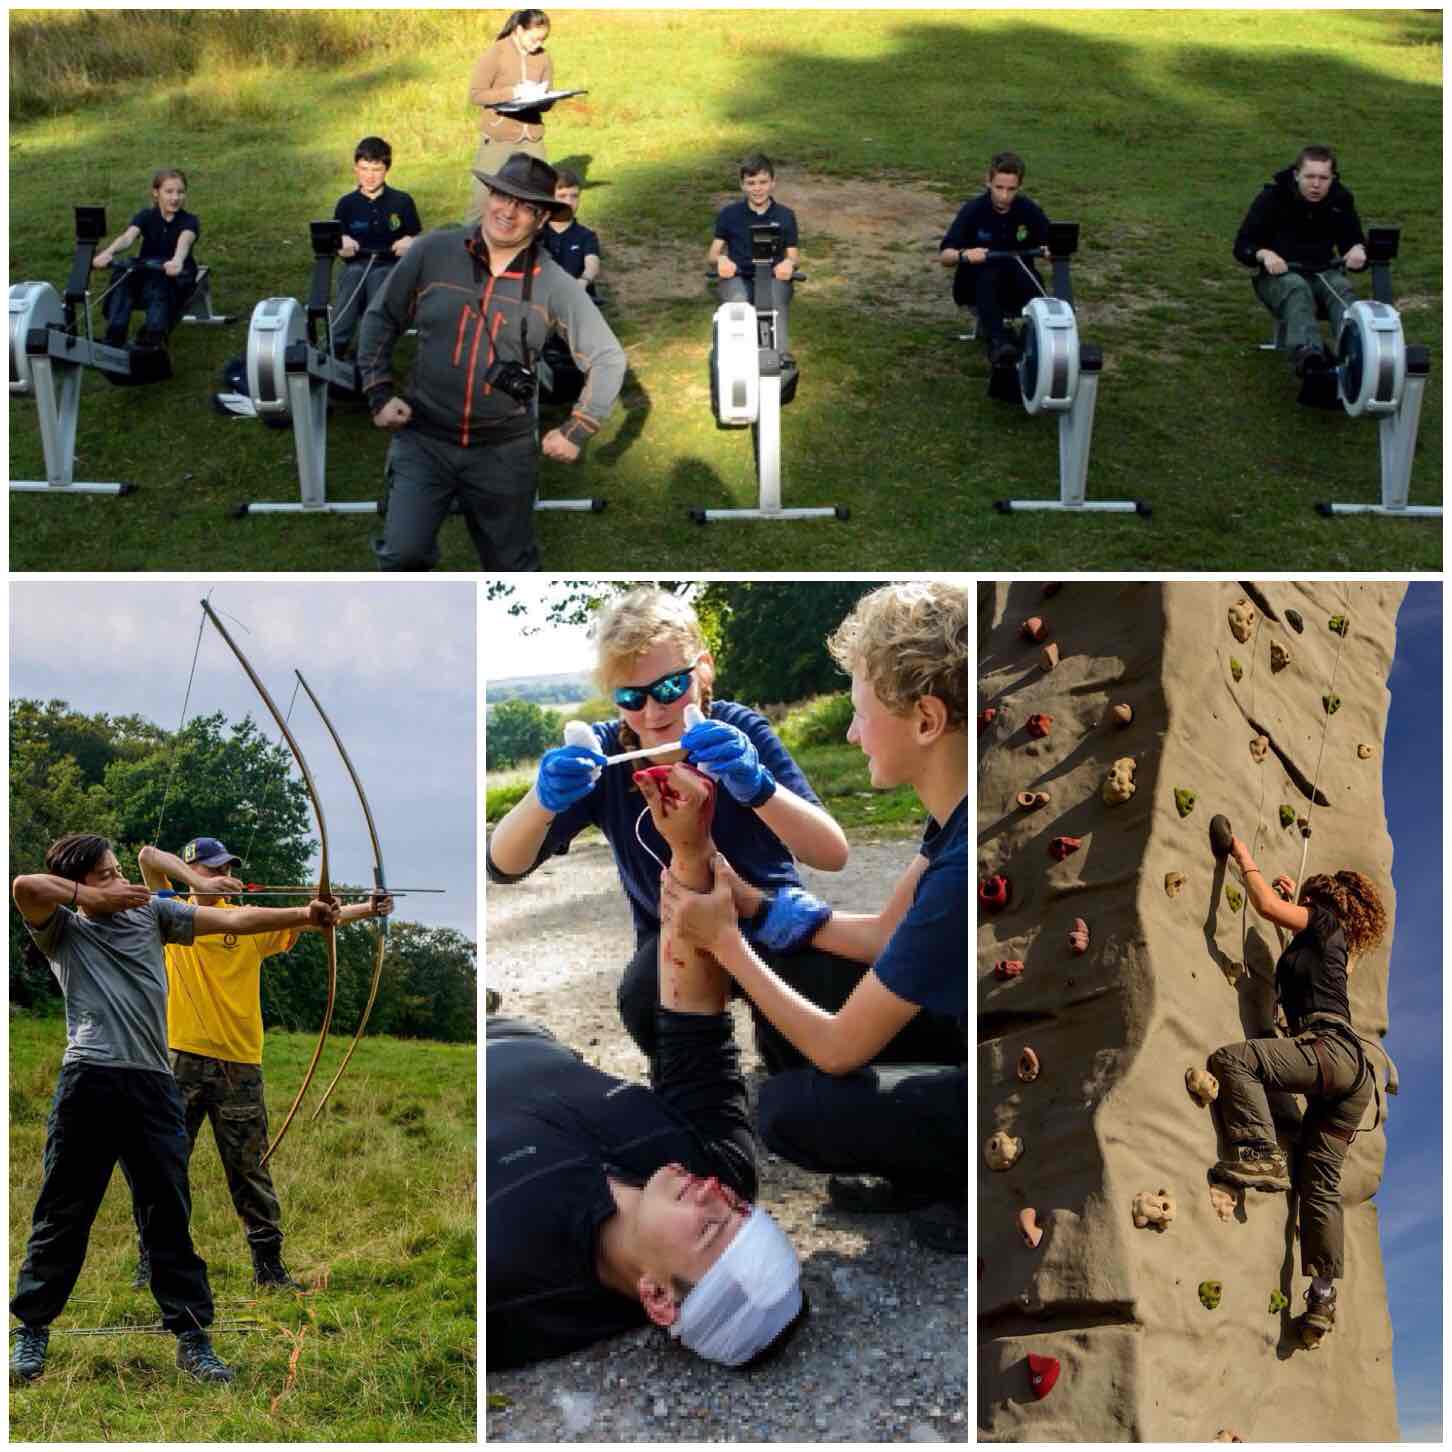
This year the Chosin Cup was run by our ‘soon to be‘ new Area Staff Officer Ben MacDonald. Ben is keen to really test the cadets and brought in some new activities for them to try out.
Cliff Lewis was in his element running the timed rowing race, there was plenty of archery to test the keen eyed ones, loads of fakeblood for the hardy at heart to stem and a fantastic climbingtower to let the cadets scurry up.
Multi activities
In between each stance the cadets had to keep navigating and pushing themselves to get to each one as quickly as possible.
The TyroleanTraverse and the Minibuspull tested the cadets teamwork and strength while the Seamanship stance worked on their core Sea Cadet skills
Skills and Stamina
In between all this tooing and frowing of cadets the staff were busy running the stances (well some got a bit of R&R in between) and we had a visit on the Sunday from the Senior London Area officers (that kept us on our toes).
Busy Staff
As for myself I was in the enviable position of being the roving safety officer/official photographer (my car ended up totally covered in dust from all the dirt tracks).
I put together a couple of short videos of the weekend and below is the first one with snippets of the Saturdays activities.
The Saturday night was not a quiet affair, as soon as it was dark, they were off again. This time on a night navigation excercise working from point to point using compasses and maps – they all made it and were soon safely back at camp.
Sunday
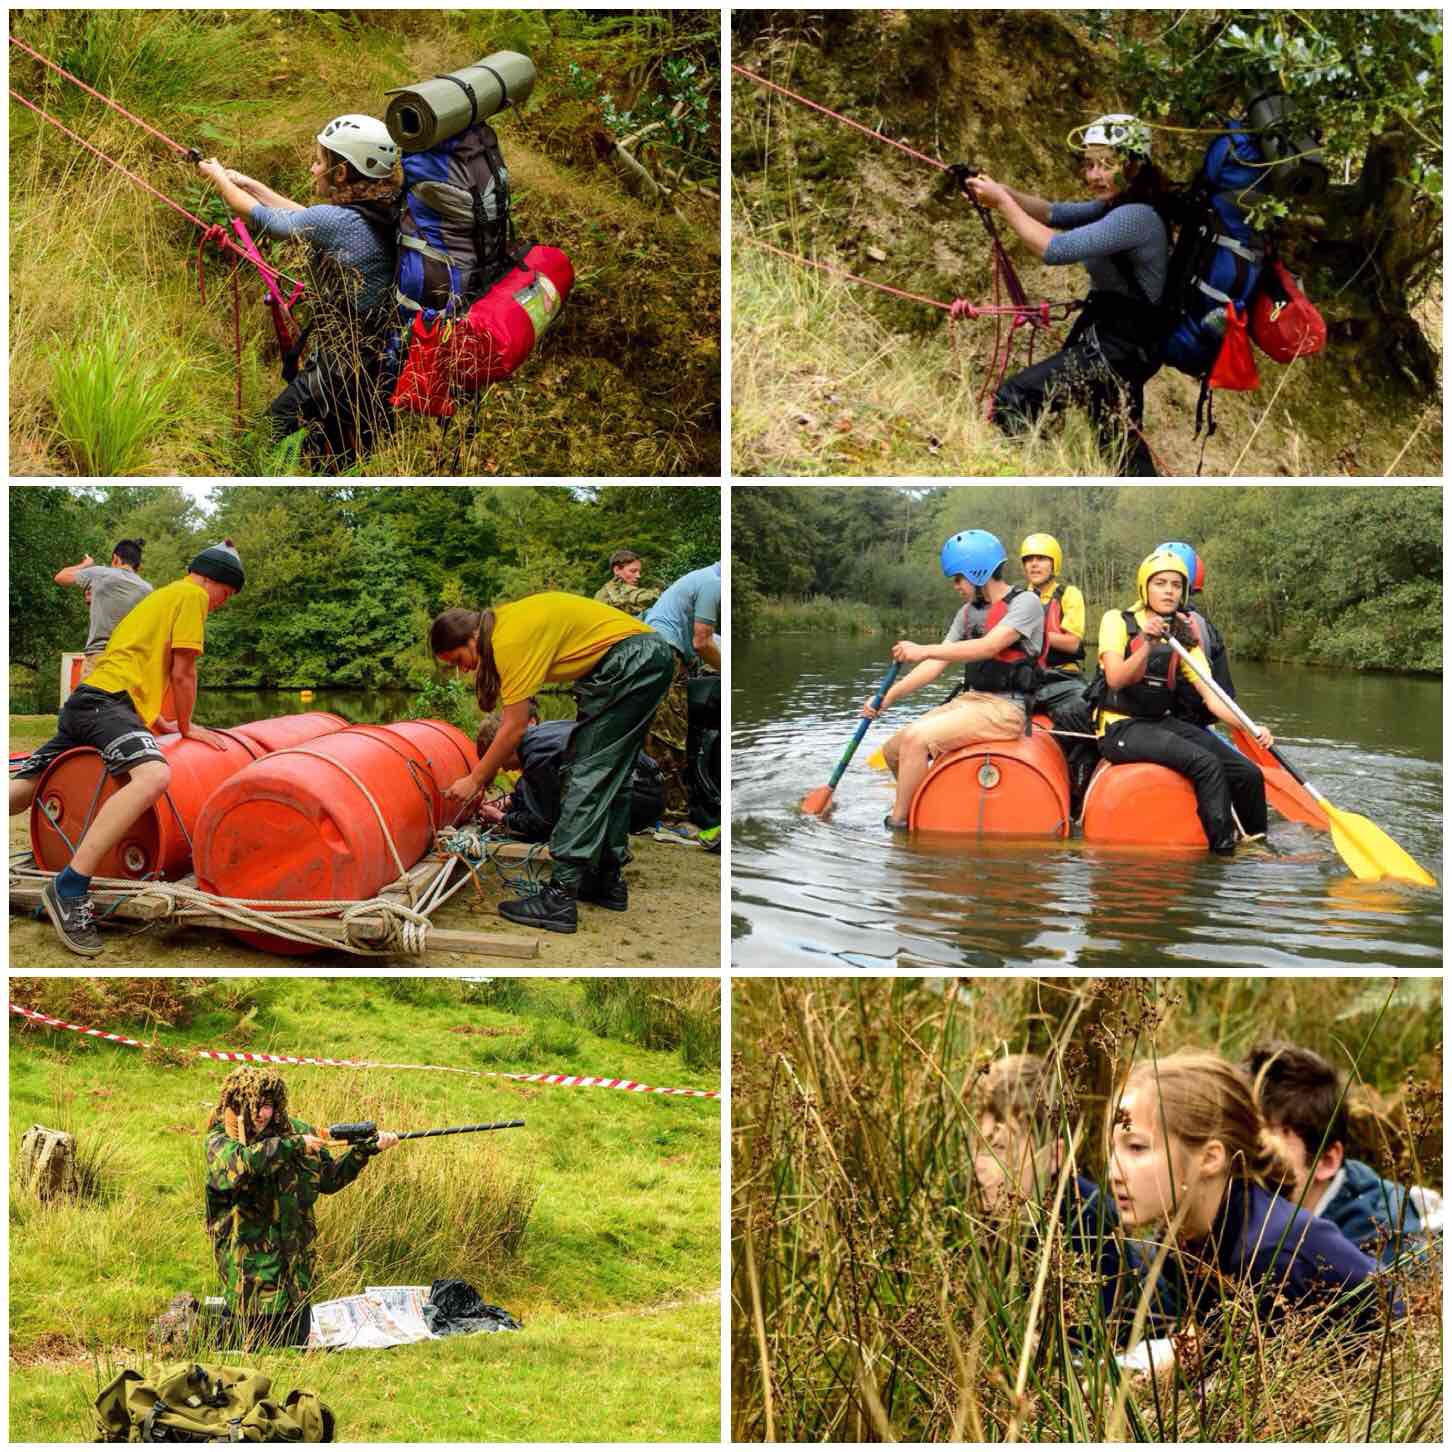
All the activities on the Sunday morning were located within the confines of Pippingford Park (no hardship there as it is a beautiful site) and so after a good breakfast it was time to get started again.
The cadets were kept busy hauling themselves and all their kit up steep inclines, building rafts (a few did come apart) and stalking the enemy 🙂
Sunday morning activities
My friend Charlie Brookes ran the Fire Race. This involves collecting different tinders and twigs then lighting them (using a firesteel) and getting the flames high enough to burn through a suspended horizontal rope – not as easy as you might think.
Fire Race
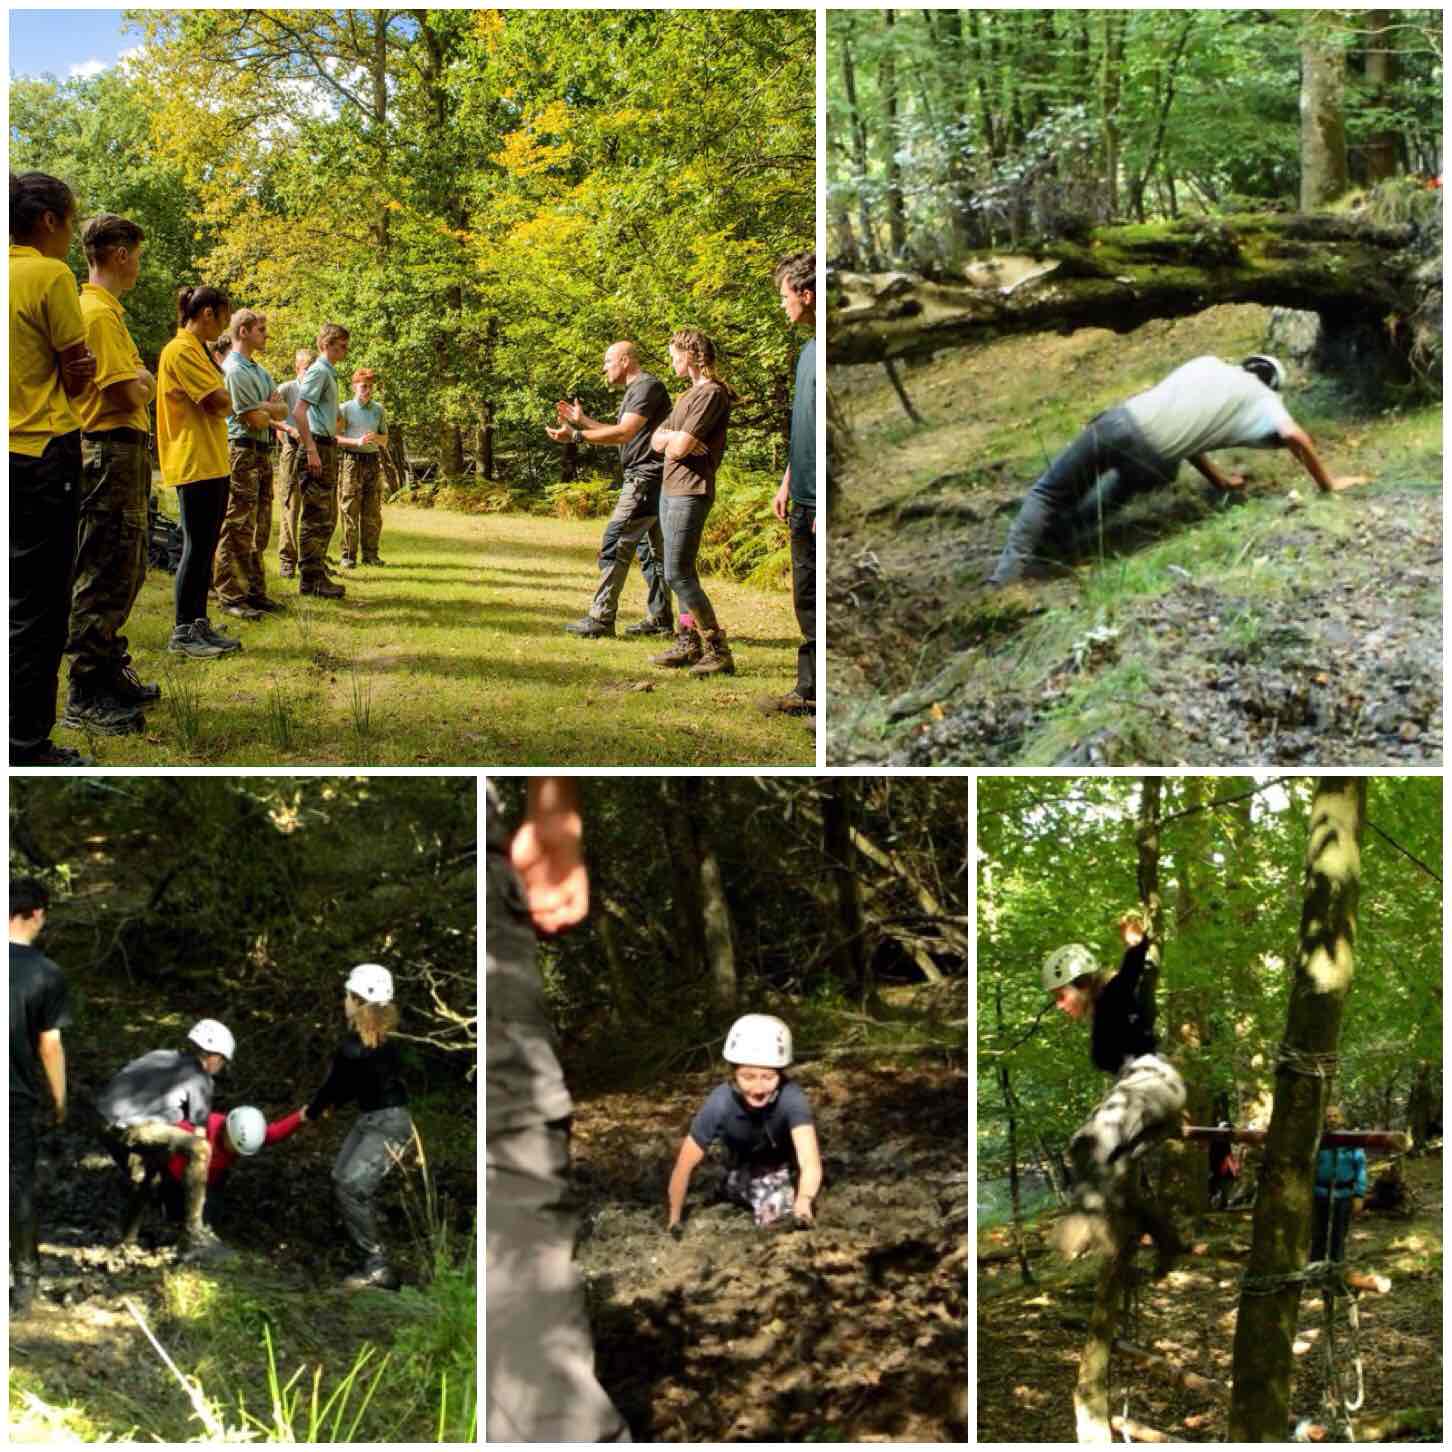
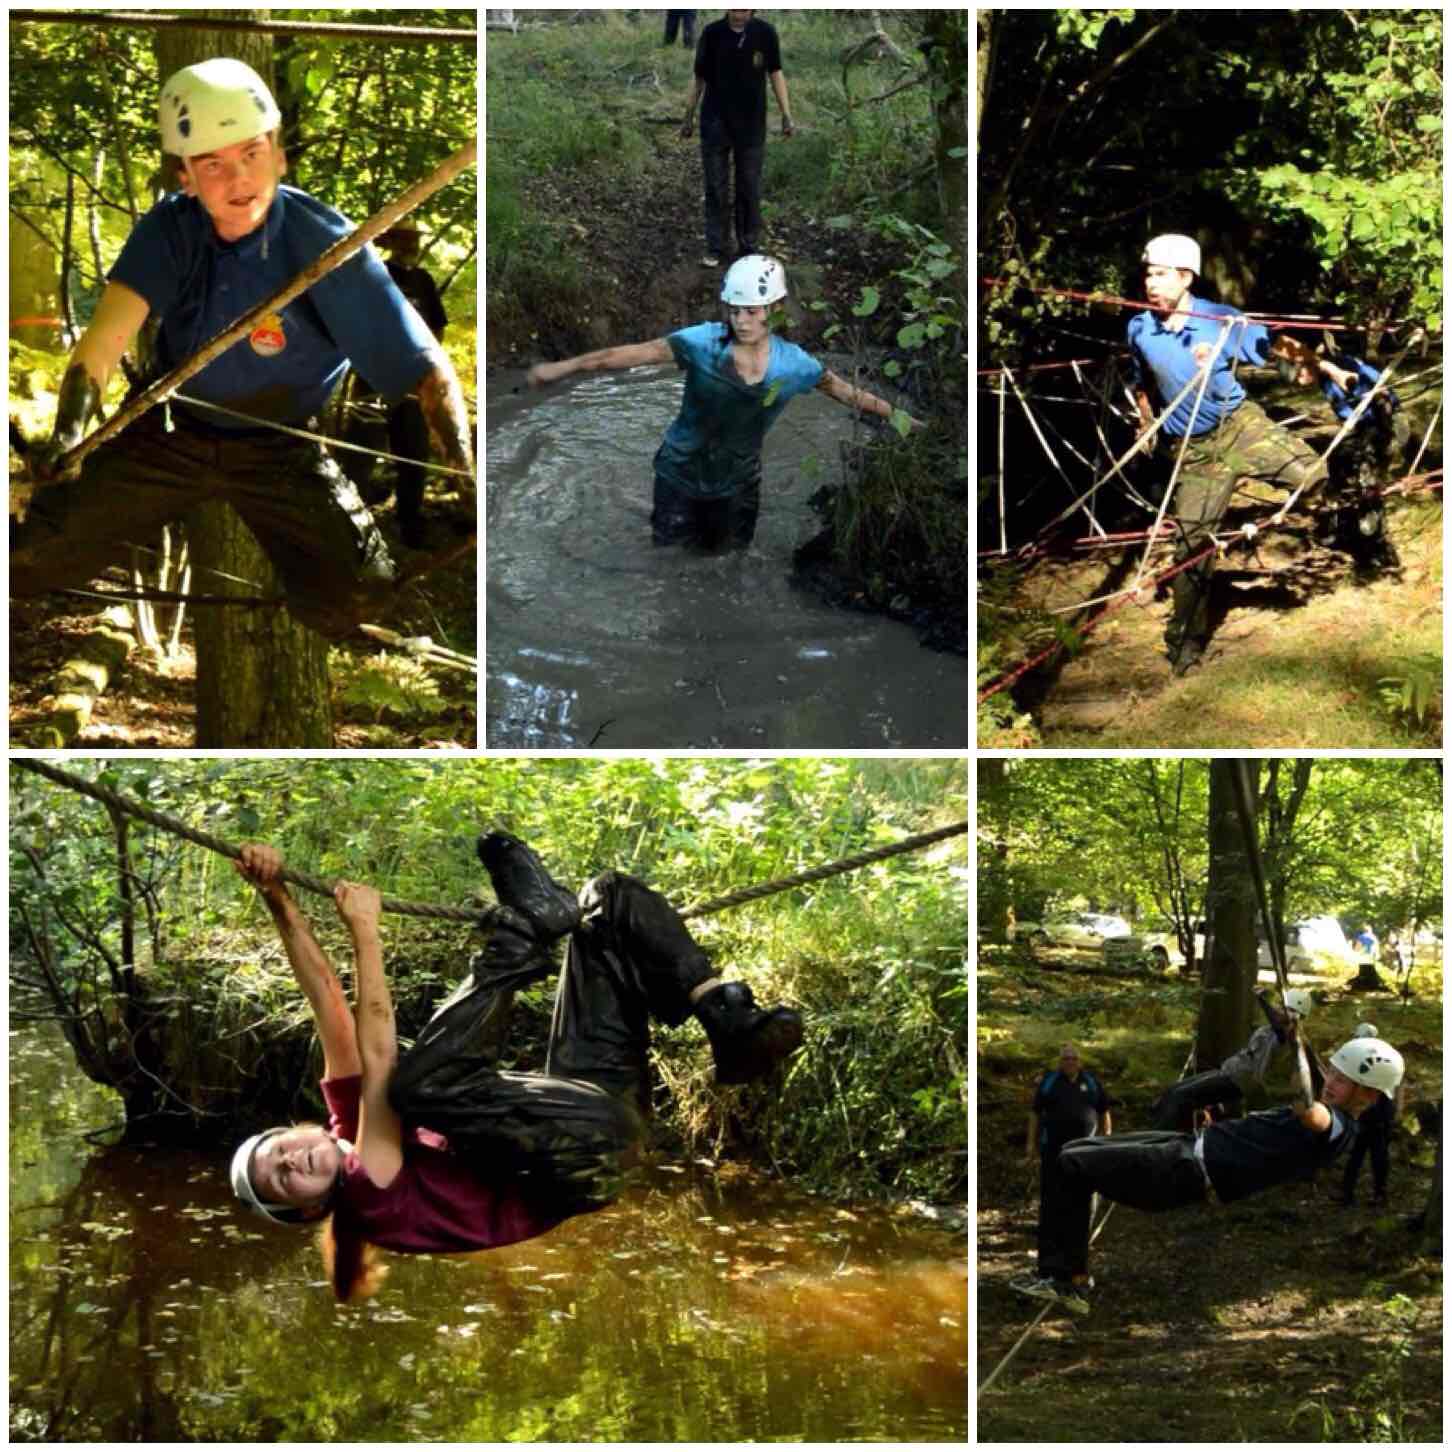
The event culminated in each team having to run the EnduranceRace. This was set up by our friend Kev Lomas from Southern Area Royal Marines Cadets and he knows how to set a tough race (he knows his stuff as he runs a company called Muscle Acre).
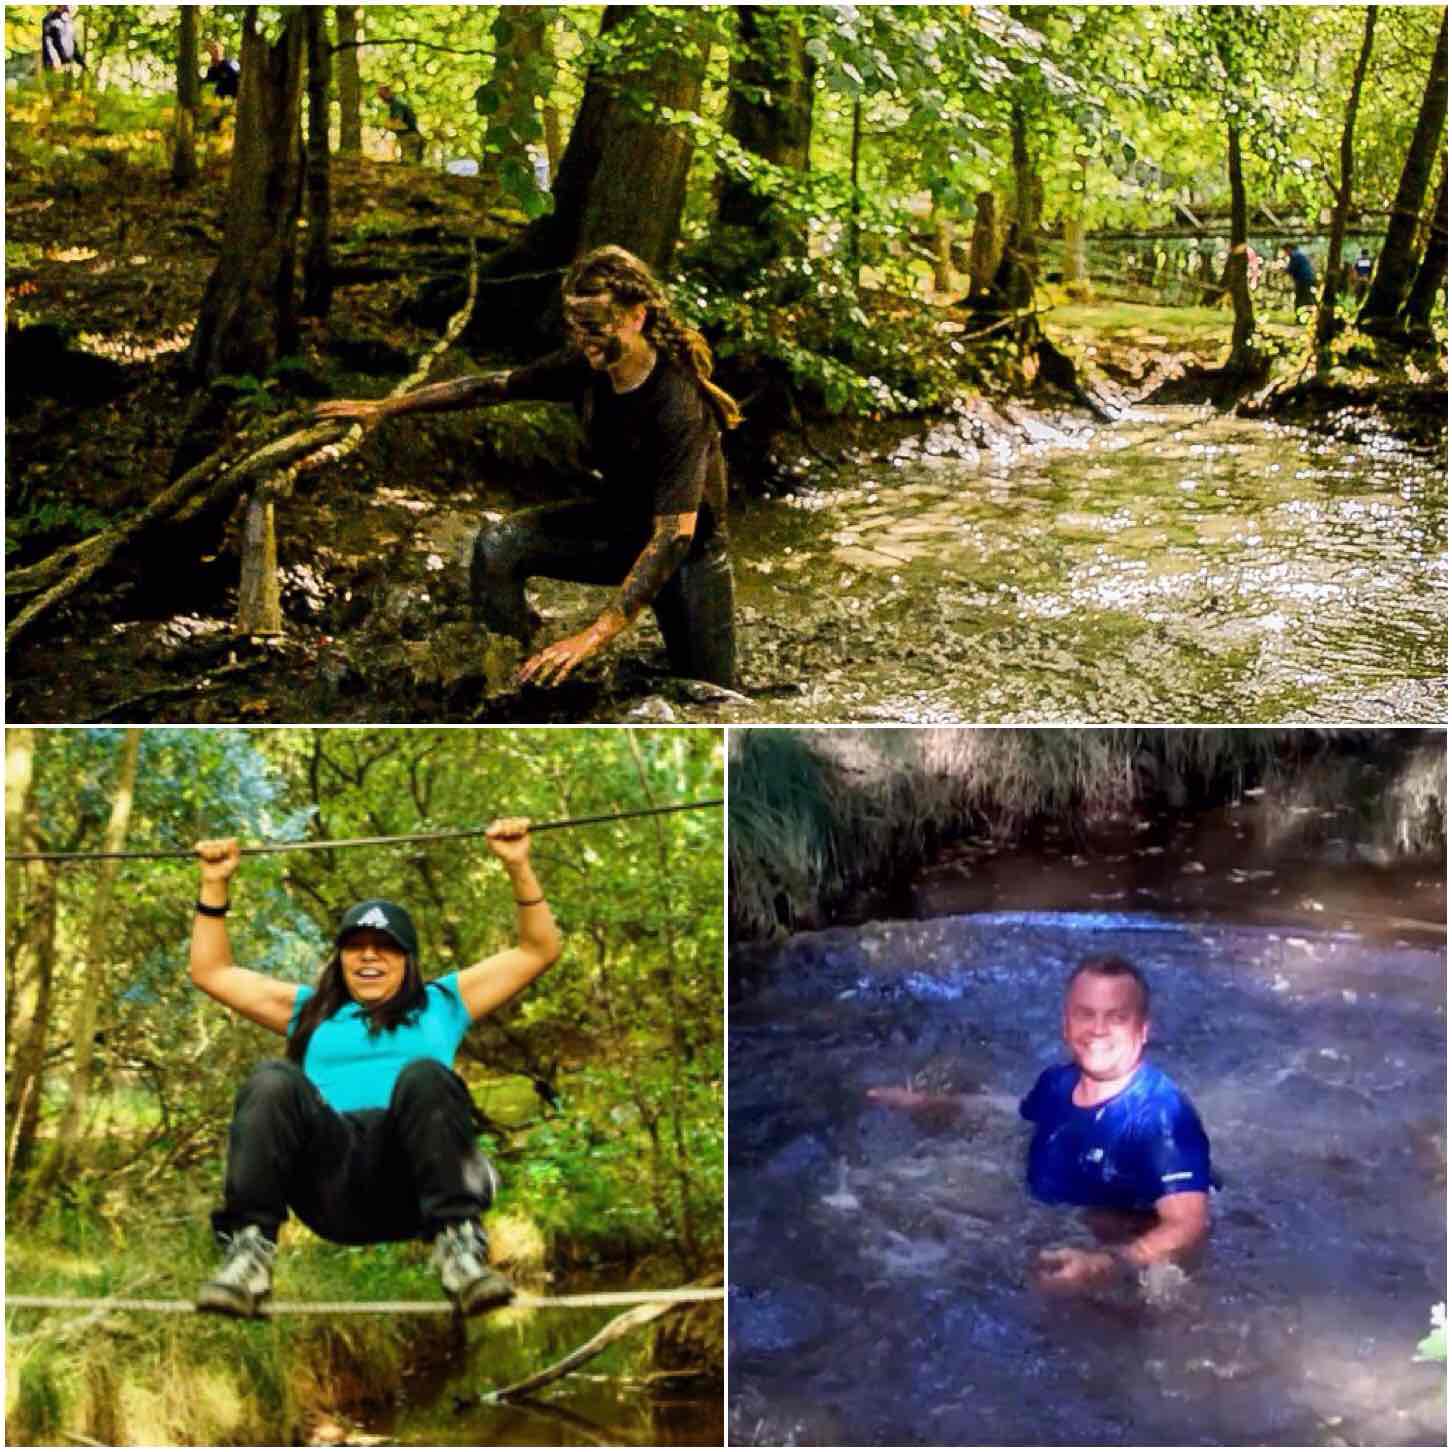
After a briefing they were off – each team took about 15 minutes to complete the race. It was a mixture of natural and man-made obstacles but the general theme was mud, ropes and water.
Start of the Endurance Race
It was great to watch the cadets pushing themselves over the race and really come together as individual teams. There were staff located all around the site to encourage the cadets and ensure they were always safe. It was hard for them but the looks on their faces when they finished showed that they really enjoyed themselves.
Pushing On
For many years I have run with the teams around these races however this year it was time to let others have a go and as the official photographer I encouraged/poked/prodded some of the other staff to have a go so I could film them (you have to have some sort of R&R when you reach 50!!)
The staff having a go
Below is the second of my videos showing the Sunday activities including the Endurance Race.
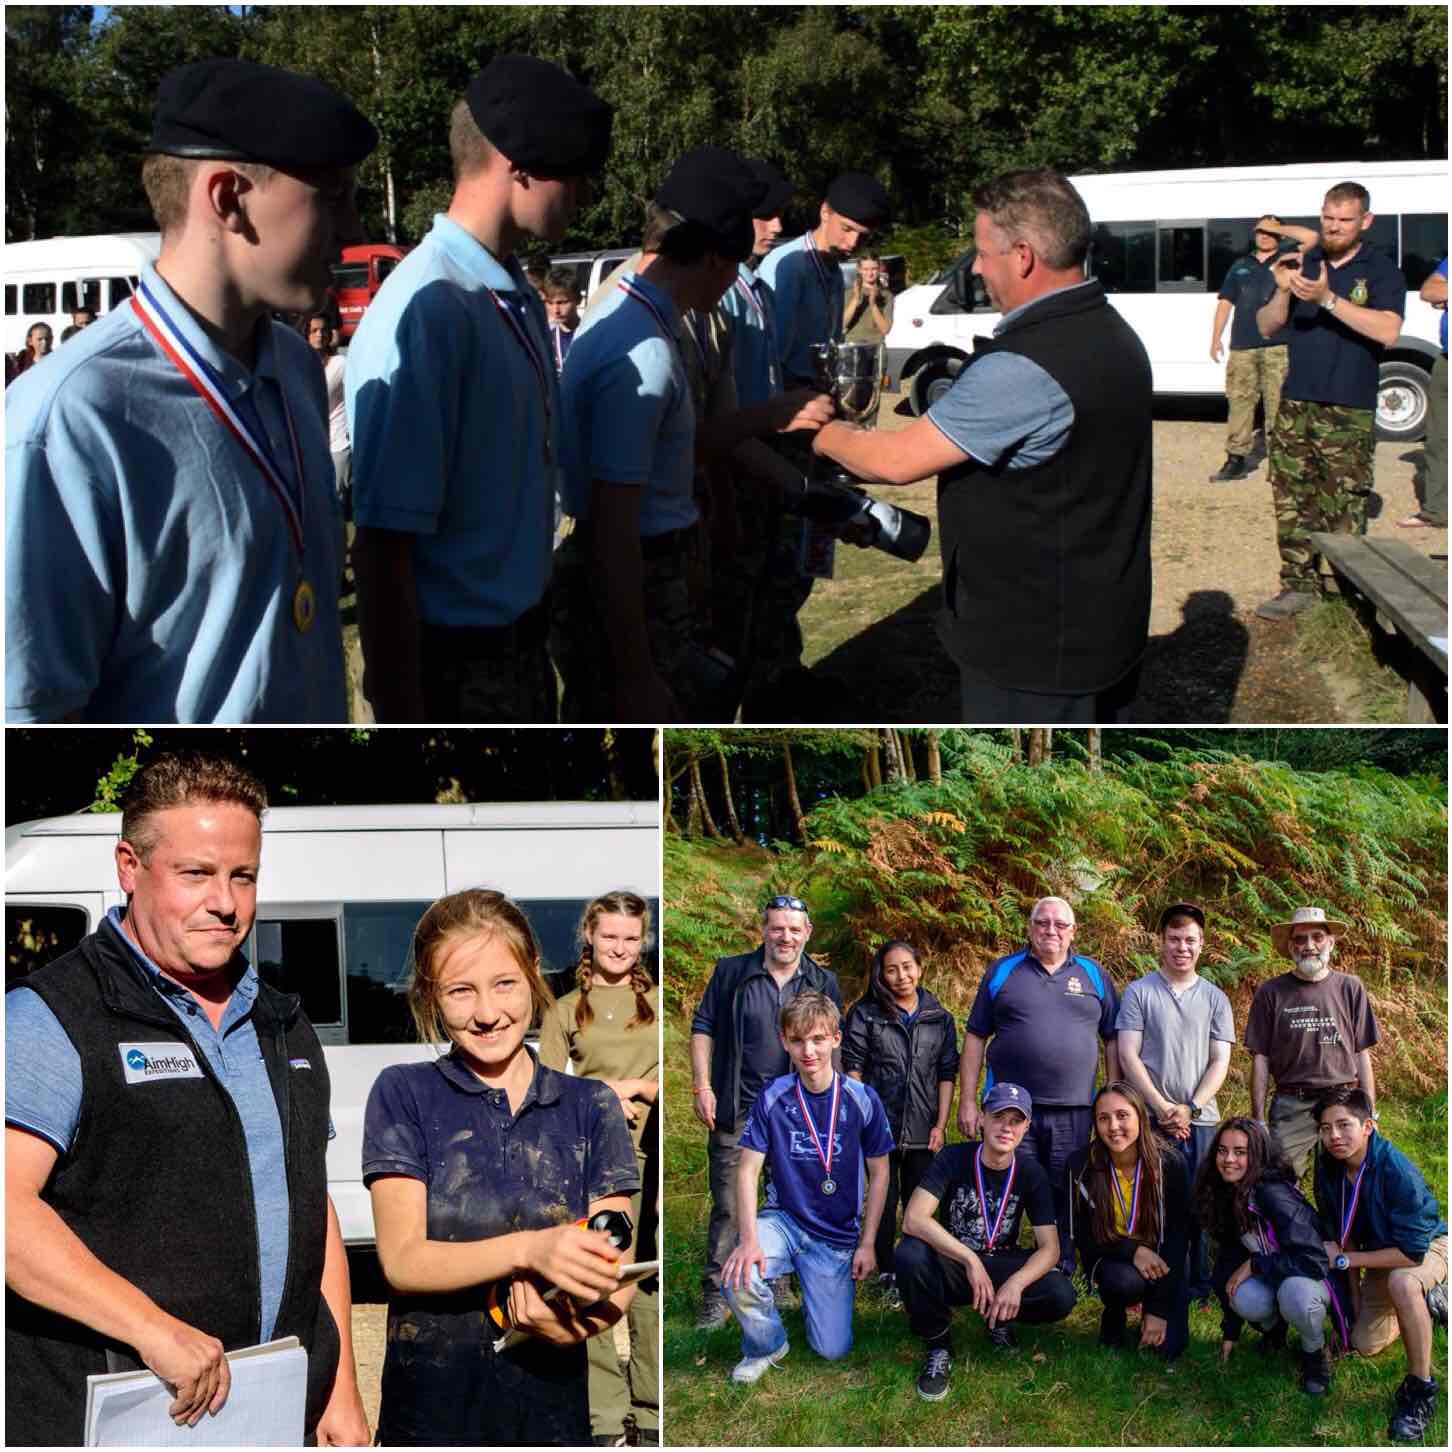
After a quick wash up it was time for the awards. There were 9 teams entered in the event this year and a close run thing it was too.
Merton Unit came 3rd, City of London came 2nd and the winners were Maldon Unit – BZ guys.
The Awards
For many years the Chosin Cup has been overseen by our two Area Staff Officers Perry Symes and Graham Brockwell. They are standing down now to make way for some younger members of staff such as Ben MacDonald to take over and test themselves. This post then, I am dedicating, (like my videos) to these two stalwarts of the Adventure Training world in the Sea Cadets – Perry and Graham.
Chosin Cup
The weekend could not have been run without all the staff that volunteered to come along and run it so thank you to each and every one of you.
Thanks to all the cadets that came along and really tested themselves in what I regard as the toughest competition the Sea Cadets and the Royal Marines Cadets run.
Finally thanks must go to Ben MacDonald for putting it all together and making it a fine one for Perry and Graham to bow out on.
There has been a lot of skullduggery going on in the Aitchison-Jones household recently and it all came to a head in September 🙂
My wife Alison made sure that a certain weekend in September was kept well clear in my diary. I was told to pack for a family camp to celebrate my 50th birthday (location unknown) – hard to believe I have reached such a lofty age, I know 😉
So after packing we set off on a magical mystery tour that stopped off at the Arrivals lounge at Gatwick Airport. Passing through the gates was ‘Darling Barney’ all the way from Southern France to celebrate my birthday with us.
The pictures in this blog are a mixture from Tony Bristow, Ian Woodham, Alison Jones and myself.
The Bushcraft Birthday Bash
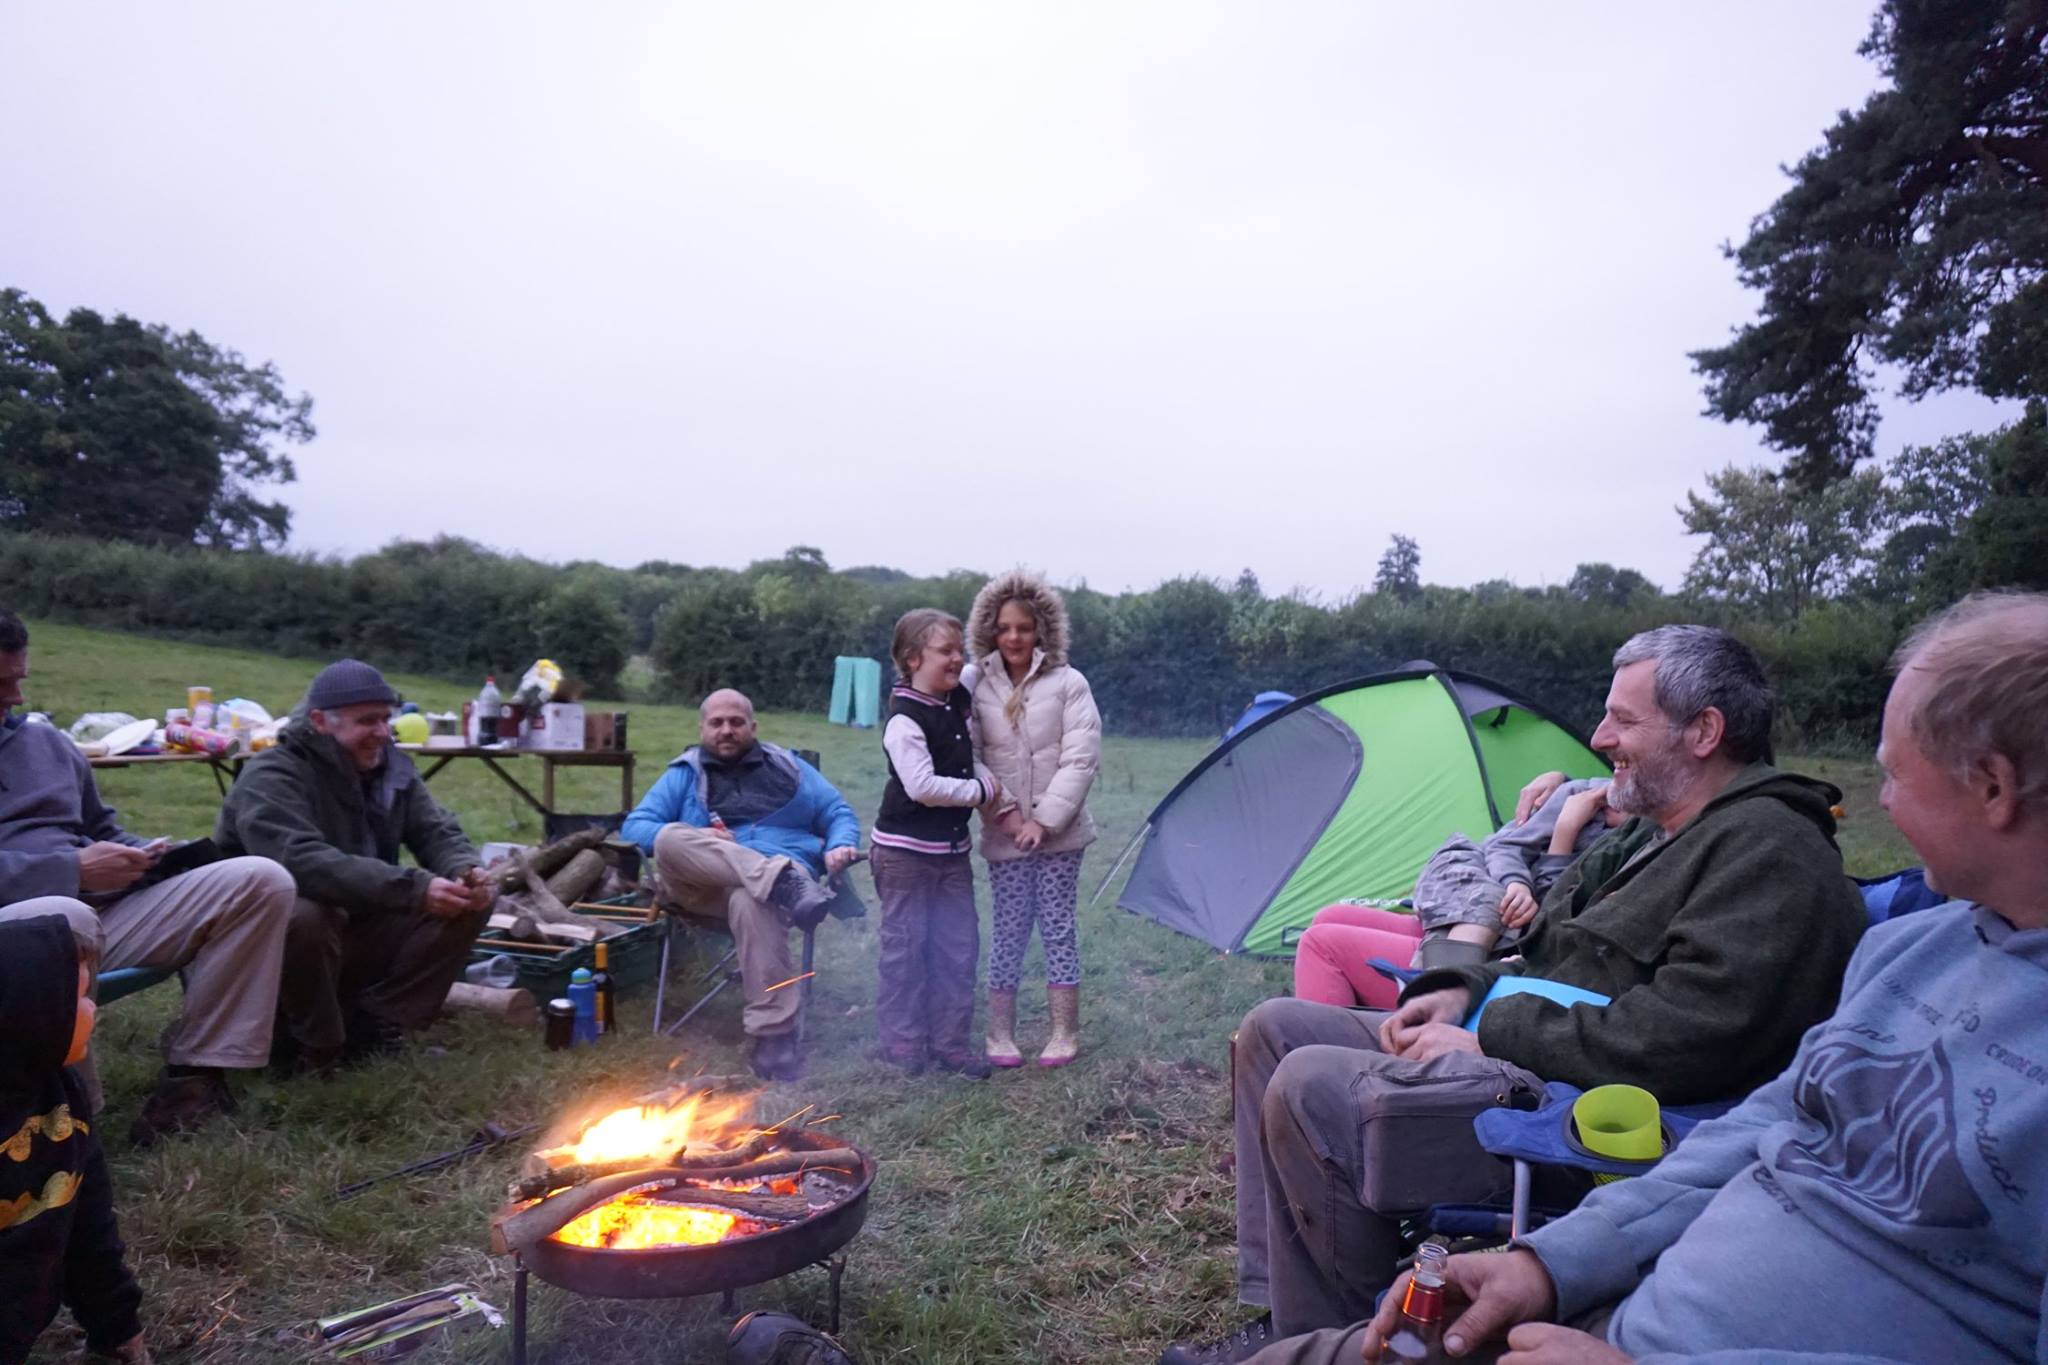
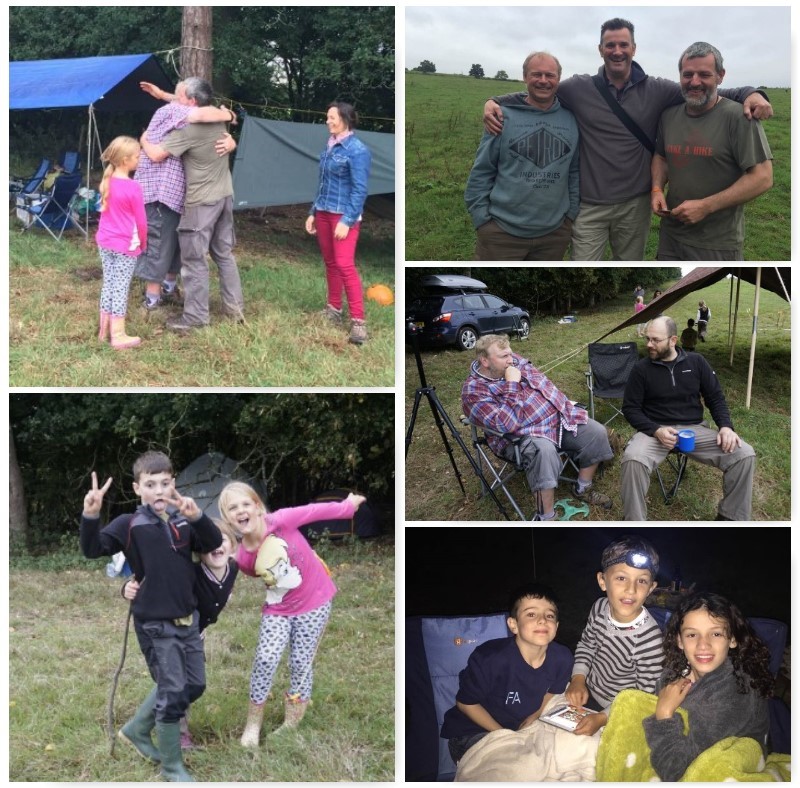
The magical mystery tour continued to our friends Philippa and Phil’s farm just outside Dorking in Surrey. I was directed to a field to set up camp and we soon had our hammocks up and fire on. That night Phil came down to join us around the fire, there was a Harvest Moon and real ale and I was happy as Larry.
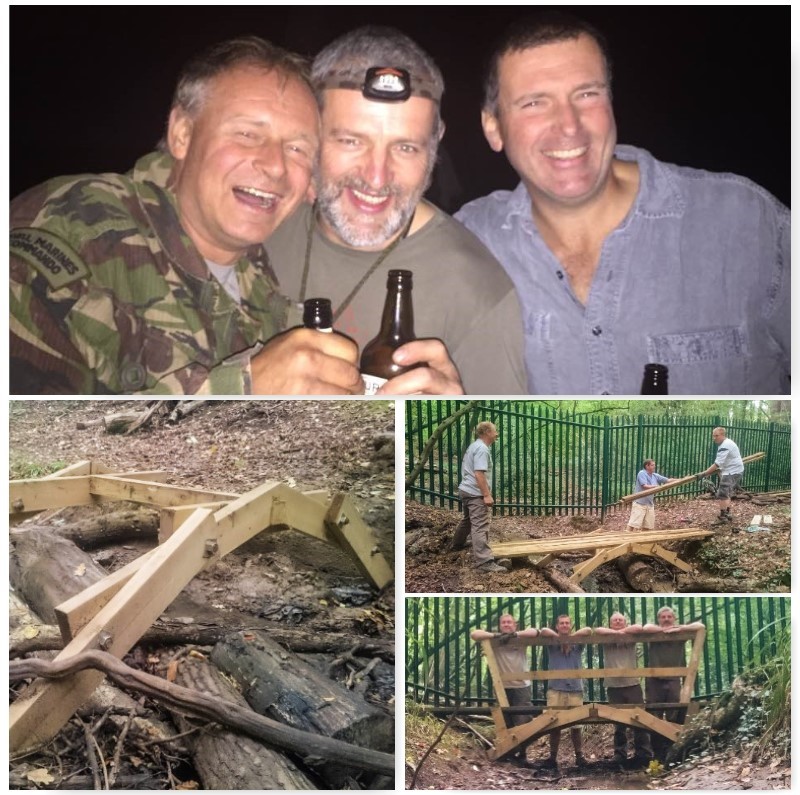
Phil asked Barney and myself if we could help him and a couple of friends complete a bridge at his girls school the next morning. I thought nothing of this as I normally help out Phil’s farm when I camp there and Barney is a carpenter/cabinetmaker anyway so his skills were needed.
Friday Night – Saturday Morning
It was a good morning mucking about in the mud building the bridge and we even stopped off for a couple of pints on the way back.
Unbeknownst to me Alison had set up a secret Facebook page and invited lots of my friends to the bash. While I was away folks started to arrive and needless to say that when I was in the car coming back down the field to the camp I was feeling slightly bemused.
There followed a lot of hugging and generally turning around with a startled look on my face as more and more folk popped out of the wood. These Saturday morning arrivals were friends from various parts of my life. Barney and Steve from Raleigh International, Liz, Rick, Stu and Gordon from Crisis, Alan and Dave from the Sea Cadets, Tony, Shelly, Robin, Jenna, David, Ian and Archie from Bushcraft UK
More Surprises
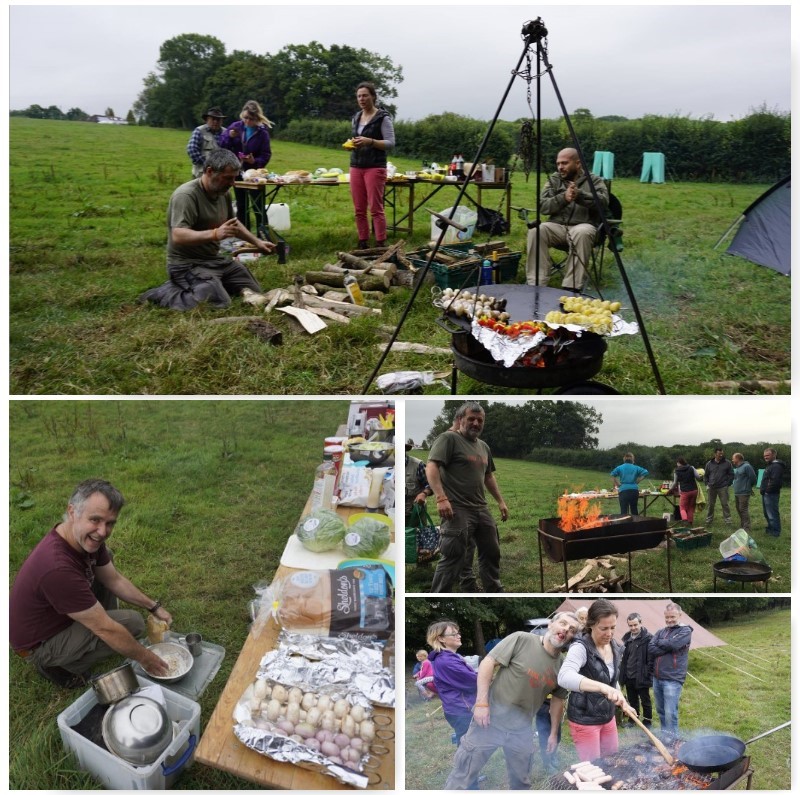
Alison had arranged for a delivery of groceries to be dropped off at the farm and a feast was quickly prepared. David Willis (Bushcraft With David Willis) used his bushcraft baking skills to make bread and our resident Sea Cadet chef Alan Lewis got on with prepping the skewers for the barbie.
I had gone from quite chilled out (must have been the two pints in the pub) to frantically running around getting the fires going, maintaining them and trying to chat with everyone who arrived. Those of you who know me personally know that multi tasking is not my strong point.
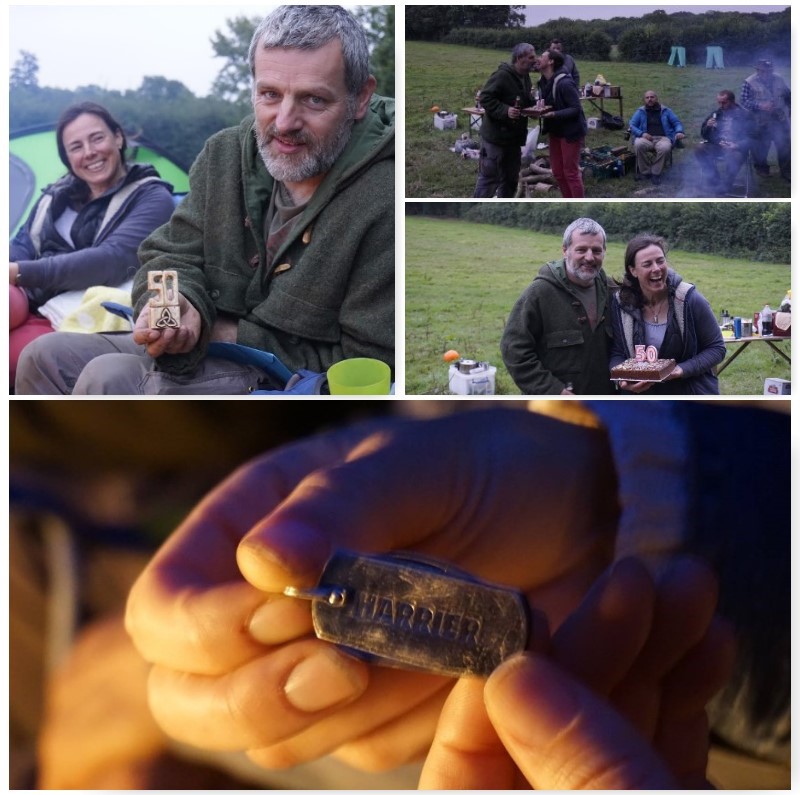
Added to all this confusion my friend Graham was spotted coming down the hill carrying a massive present all wrapped up. He told me I could not open it until later that evening around the fire.
The Feast
After a few more beers (I kept opening one, putting it down, chatting, losing it, opening another……and so on, repeating the process) the food was ready and a lovely birthday cake produced.
Thanks to everyone who brought a present along – every one was appreciated and I am still working my way through all the single malts you brought along Rick, Gordon, Stu, Dave and Alan.
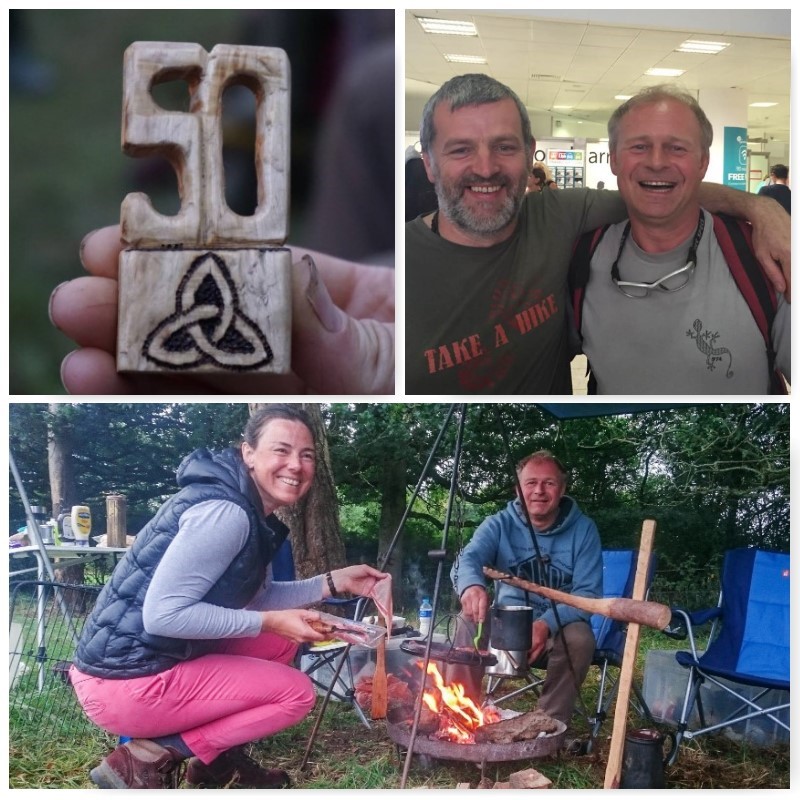
The wooden ’50’, Cliff, sits with my medals and other personal bits and bobs. It is a lovely piece of carving buddy.
Still not used the old military canteen, Barney, in case I damage it – it too will live on my bits and bobs shelf.
As for the Harrier knife carving, that log Graham that may take a while. (The massive present Graham brought me turned out to be a rare Harrier stamped knife together with a log from which to carve my own twelve-piece dinner service).
Thanks Phil and Philippa for the lovely honey you had just jarred 20 minutes before. As fresh as you can get I would imagine.
Thanks for all the Go Outdoor vouchers – I spent a happy couple of hours in there getting some extra kit.
Lastly to Alison for getting me that rather nice laptop I was really looking for (cheers for organising that Dave). It works a dream and I can process pictures so much quicker now.
Partying
The rest of the evening was spent chatting and from time to time Alison managed to extract some stories from folks about myself – many had the ending of me being hit in some way 🙂
A real highlight of the evening was listening to Robin and Jenna singing Happy Birthday to me in Welsh – I am not normally an emotional person but that moment will stay with me for the rest of my life.
A surprise evening arrival to the party were my good friends John and Caron of Woodcraft School (apologies I did not get a picture of you at the party). They just sort of appeared out of the dark while I was chatting away (just when I was sure there were no more surprises I was proved wrong).
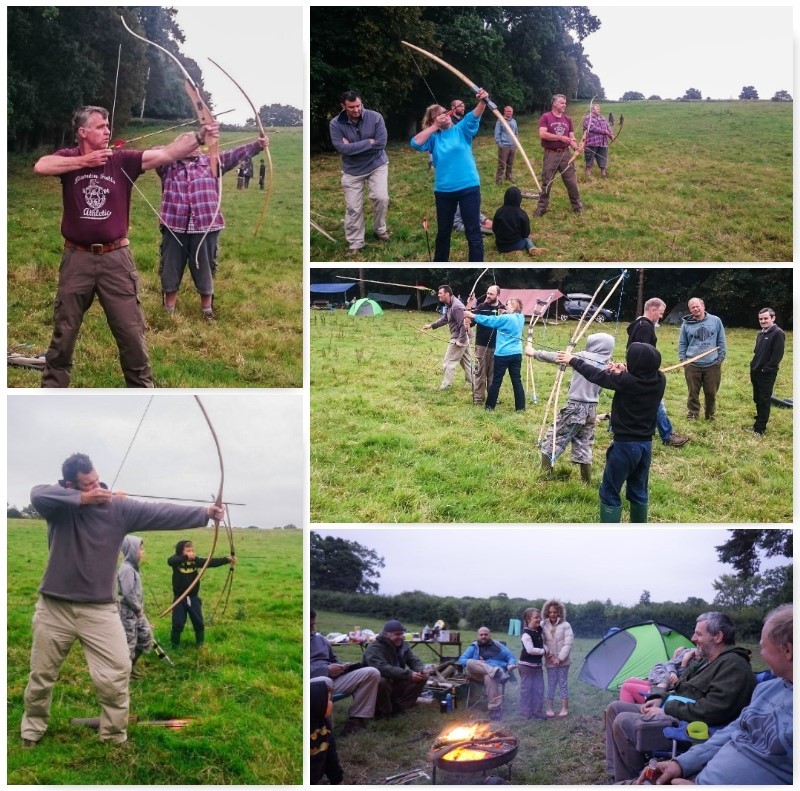
Activities
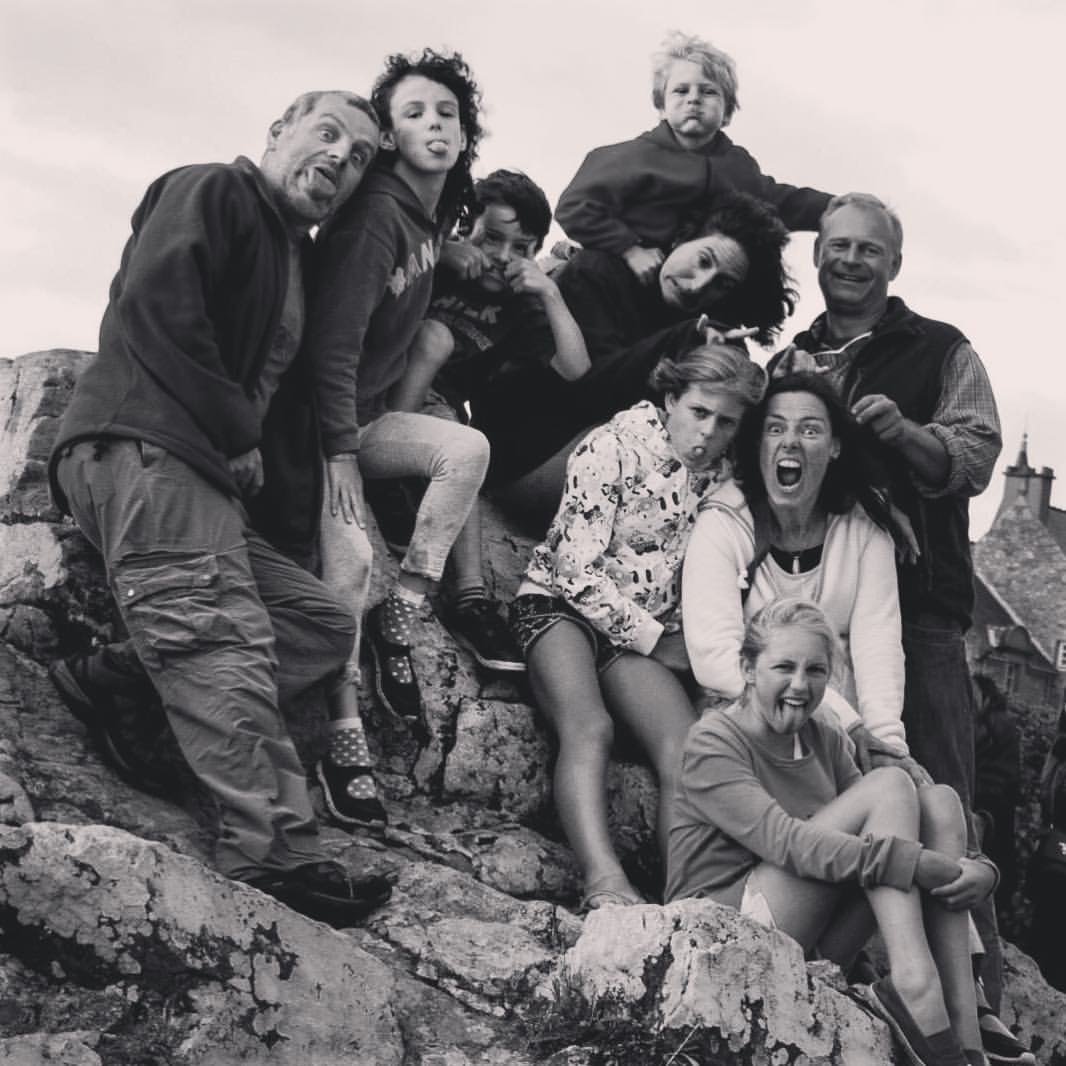
Sunday morning soon came and those that had decided to stay for the night rose to a breakfast of bacon rolls and sausages before cracking on with some archery and Atlatls and posing for a Survivors’ picture.
Packing up was a sad business as everyone prepared to travel back home but I was still reeling slightly in a happy way from the whole surprise party.
Survivors Photo
I am still amazed at the distances people travelled to come to the party – France, west Wales, Leeds and more. Some came for the day and others stayed overnight. Thank you to all those who could not make the weekend but sent me there heartfelt wishes instead.
Thank you everyone who came and a special thanks to Alison and Philippa for all your organisational skulduggery 🙂
Catching up with friends, learning skills and getting some new kit – that is what the Wilderness Gathering is to me.
Coastal Survival has been attending The Gathering for quite a few years and this was a busy one for me as they went. I could tell that as most of my pictures this year were of what we were up to and not about what everybody else was up to. I was working alongside Fraser Christian, Danny Stocks and Chris Lundregan (we were also joined by Lorna Stocks).
Food and skills were the order of the day for us at this years show.
At The Gathering
Over the weekend we kept a hot smoker going producing smoked mussels and mackerel. This kept a steady stream of visitors coming up to the stand. So much so that I did not get a great deal of time to wander around the rest of the show.
Food on the go
There is something quite beautiful about the simplicity of smoking food that is attractive to folks that makes them want to just come in and try some – it certainly is not for our good looks 😉
A busy stand
There was some time to get out though and catch up with folks. I missed Steve’s class on prepping rabbits but by the look on his face it went well.
Dave Budd was as usual working away but unusually he was having to be his own pump monkey on the forge – Where were you Emily? He needed you 🙂
Our neighbours at the show were Sonni and Angela from Beneath The Stars Leathercraft – the nicest set of neighbours than you could wish for.
Also spotted frequently was Jason bowdrilling away for the visitors. I sat beside him for one of his demonstrations and got some cracking pictures that I made into their own blog – Jason and the Ember Extender.
Catching up with friends
Regular readers will know I am a fan of Damp Log Rocket Stoves and Des was there this year firing them up. This particular Log Rocket was very damp but he persisted and soon had a hearty stove that produced plenty of brews.
Log Rockets with Des
As well as producing smoked food we spent time giving various classes such as this one on making a Bamboo Fishing Spear. This simple device does not take long to make and really packs a punch.
Building a quick fishing spear
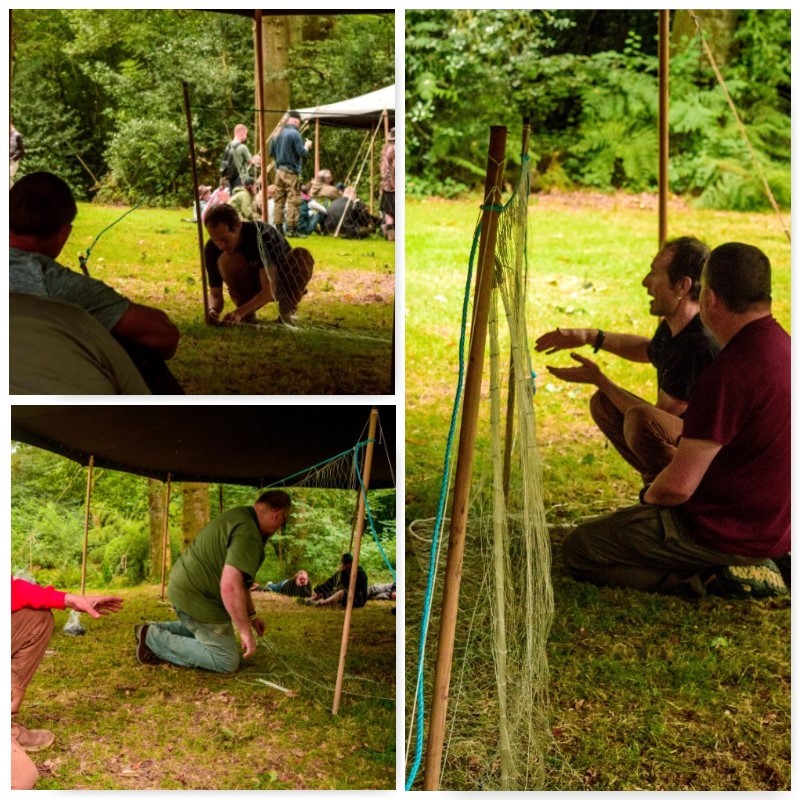
No Coastal Survival course would be complete without a bit of net making. Once again Fraser was up in the classrooms demonstrating his skills and getting the audience netting – I was meanwhile back tending shop – except for sneaking out to take some pics 🙂
Net making
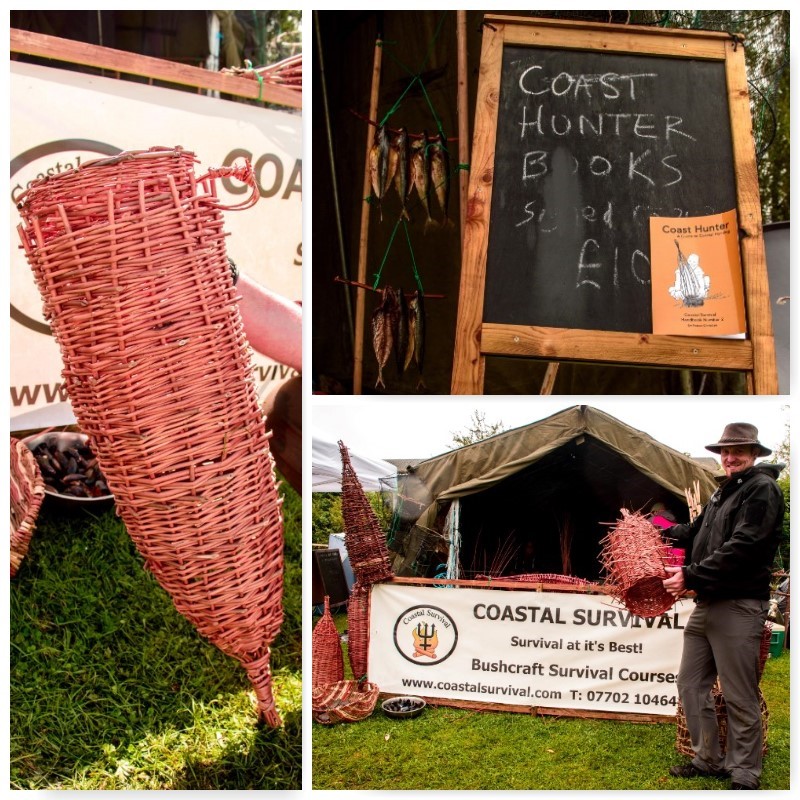
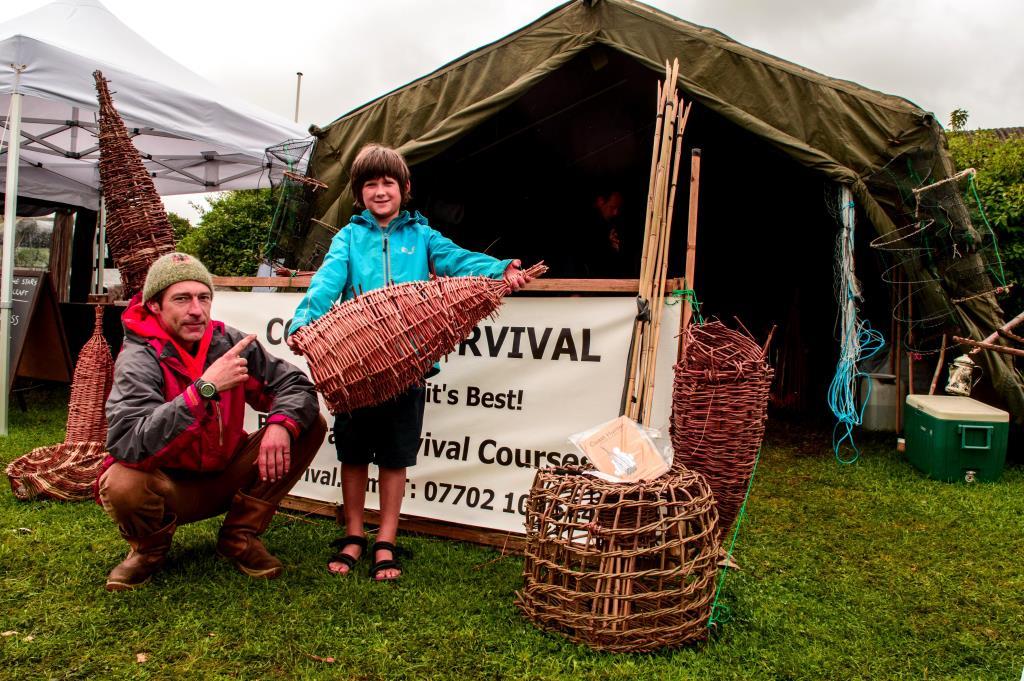
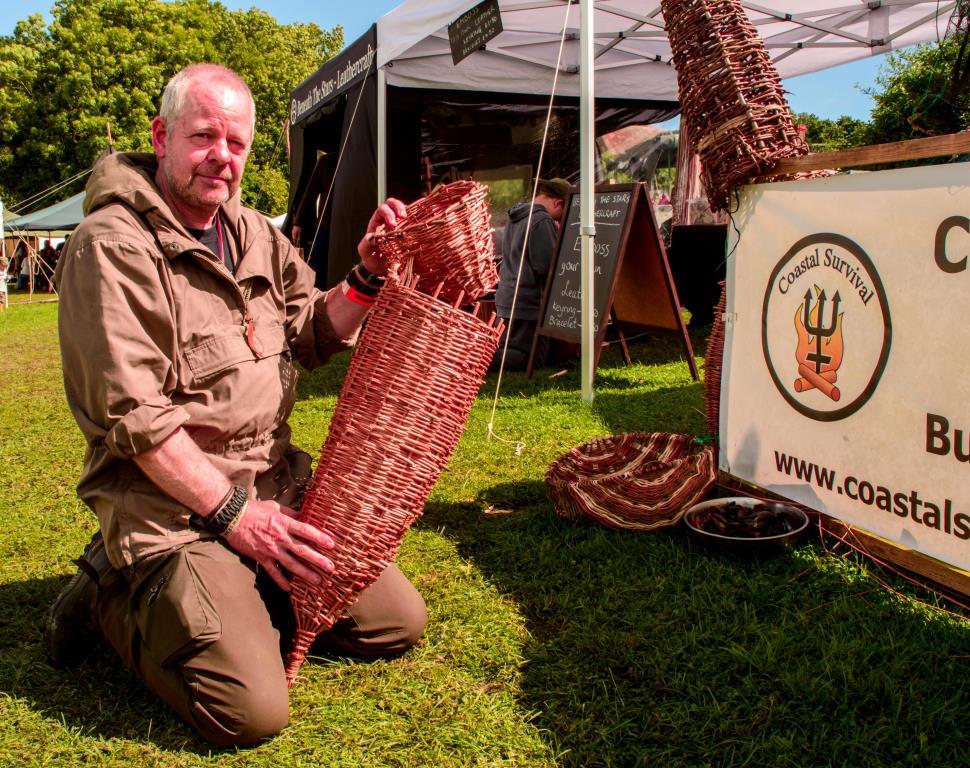
The Masterclass this year was on constructing a Stick Fish Trap. This was planned to take 3 hours but it took most of the day for the students to complete (and for some part of the next day) but it was worth it, These traps are designed to work and do the job of catching your dinner.
Stick Trap making
These Stick Fish Traps are featured in Fraser’s new book Coast Hunter. This is the 2nd book in his coastal series and his copies sold out at the Wilderness Gathering. Look it up in Amazon if you are interested in all things coastal hunting.
The new Coast Hunter book
I have been attending the Wilderness Gathering every year since 2005 so here’s to seeing some of you there in 2017 – An extra day I am told for next year 🙂
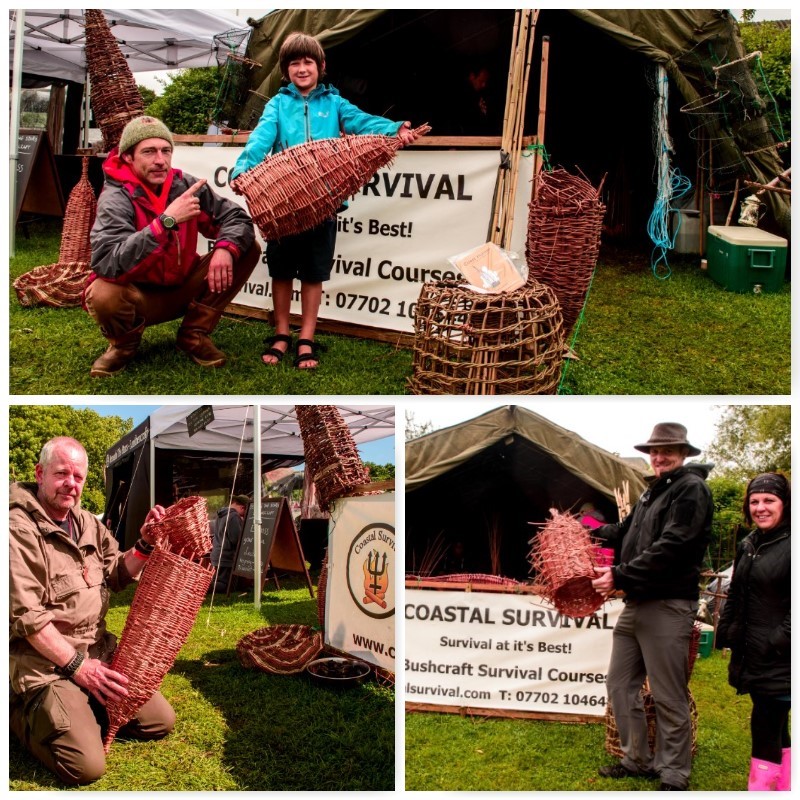
These traps are not just for show but tools for living as comfortably as you can on the coast
Last August found me at the Wilderness Gathering here in the UK with my good friend Fraser Christian of Coastal Survival. Fraser ran a Masterclass at the Gathering for about 8 people in how to make a stick fish trap.
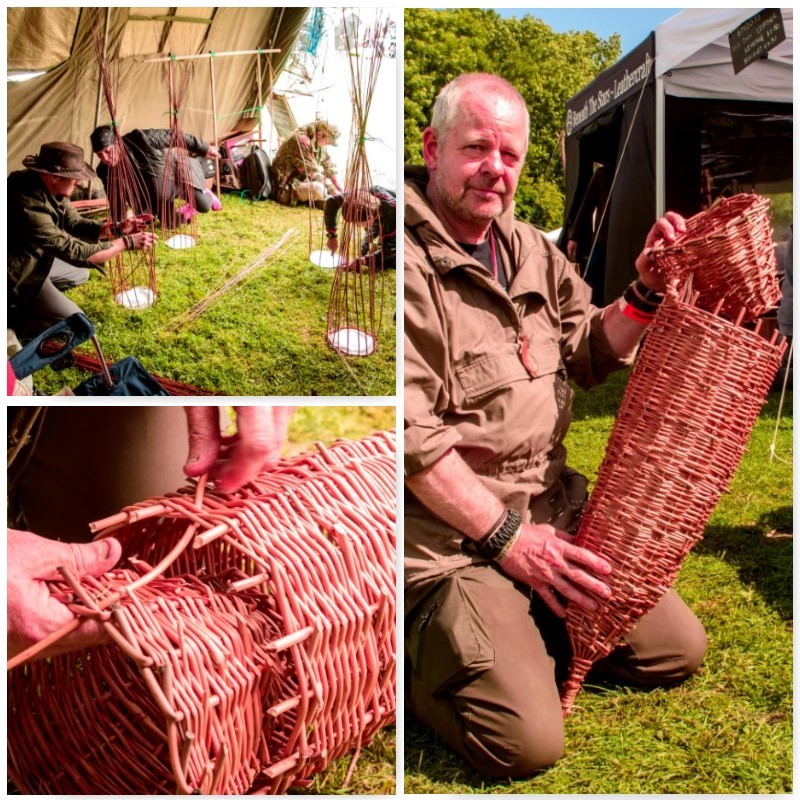
Willow Fish Trap
Fraser has a couple of books out now called Eat the Beach and Coast Hunter (he is currently working on his third book called Castaway on the Seashore). In the book Coast Hunter Fraser goes into detail on many coastal hunting techniques (including making this trap) and I encourage you to get a copy of these books if you are interested in the art of coastal survival.
Fraser uses this type of trap on the coast weighted down with stones in the inter-tidal zone to catch fish, crabs and lobsters. You can make the trap with many different woods found in the woods and hedgerows – just make sure it is pliable. As he was running a class for 8 people he brought in some commercial willow from Musgrove Willows.
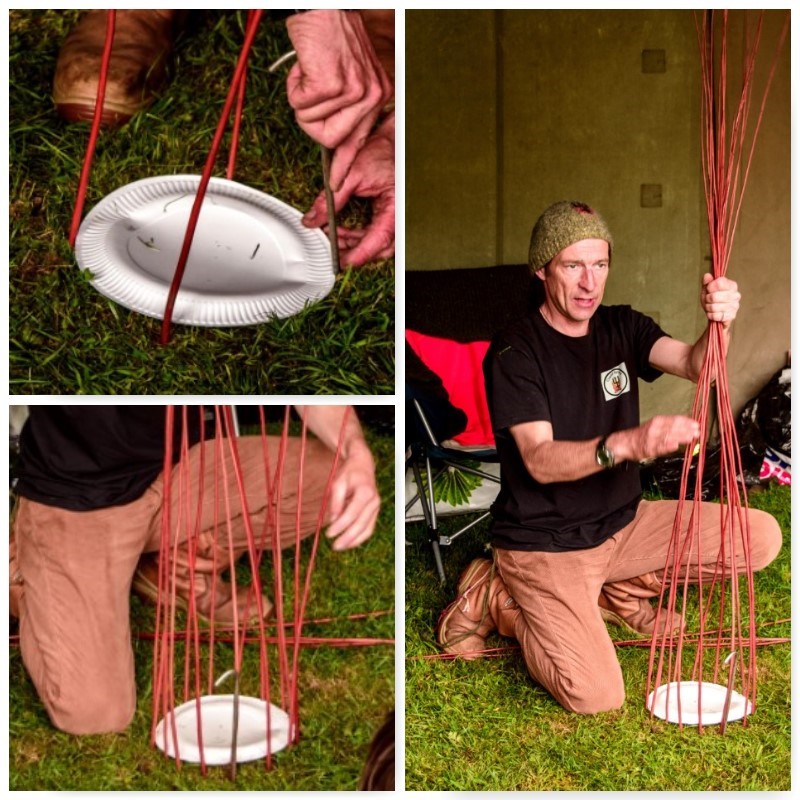
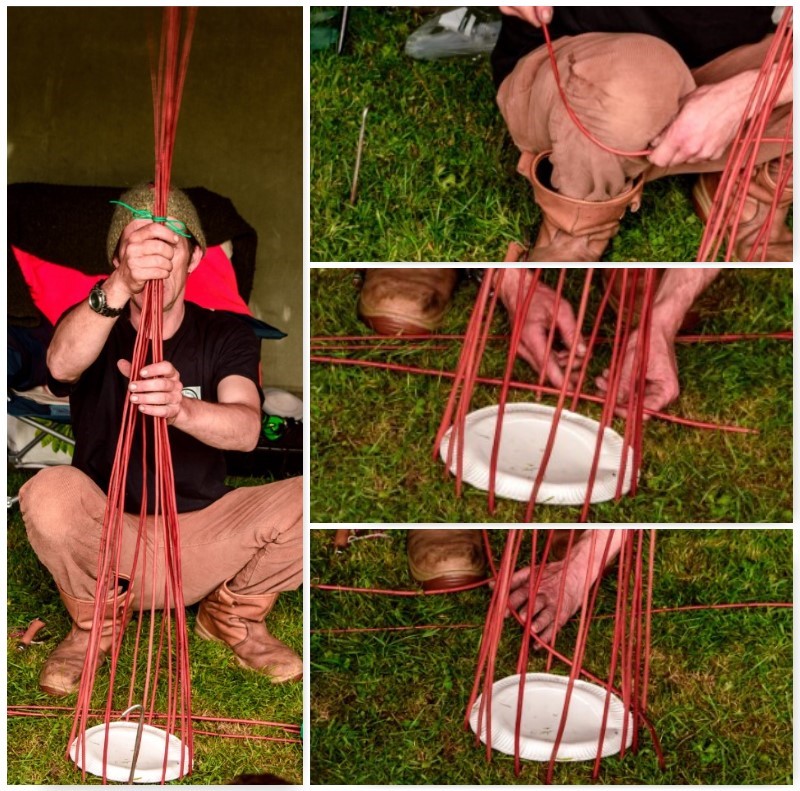
Step 1 – Set Up
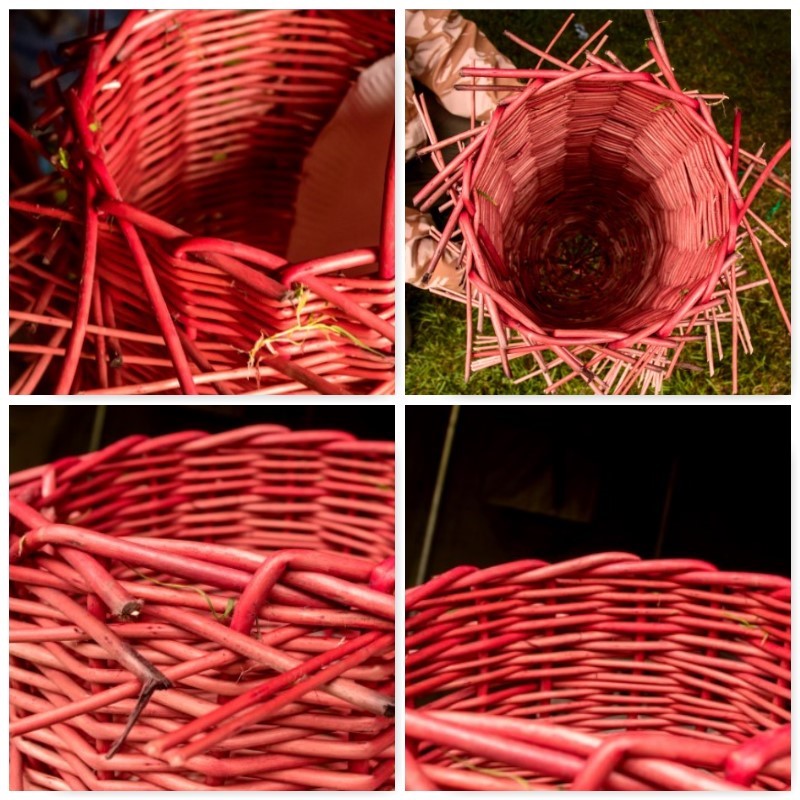
I will go through the steps as I saw them on the day but for more detail on this trap have a look inside the Coast hunter book. To form the shape Fraser used a paper plate and a tent peg to create a circle of willow. He tried to maintain an even distance (about two fingers width between each piece of willow) as he inserted the willow (thick ends) into the ground, They were pushed in about 10cm’s and the tent peg really helped as the ground was hard.
Set Up
Once the willow was secured in the ground he tied of the top ensuring the willow sticks all came in at the same angle.
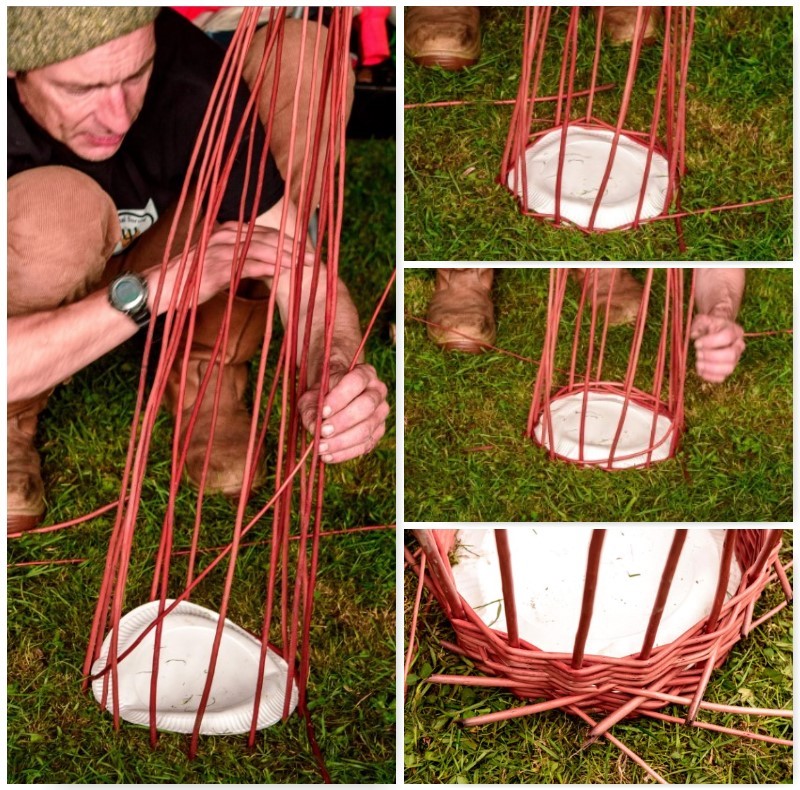
Step 2 – Weaving
The willow had been left overnight in a lake to ensure it was as pliable as possible however to make sure Fraser pulled each piece of willow he would weave with around his knee. This makes the weaving process so much easier and less tiring on your hands.
Starting with the thick end of a piece of willow he threaded it in and out between 4 or 5 uprights, Once that was secure he raised up the thinner in to carry on that in and out weave (raising the tip of the thinner end really makes the weaving easier).
Weaving
In the picture in the bottom left you can clearly see that raised thin end being woven in and out of the uprights. He stopped the weave when he judged that part was too thin (the excess would be trimmed off later).
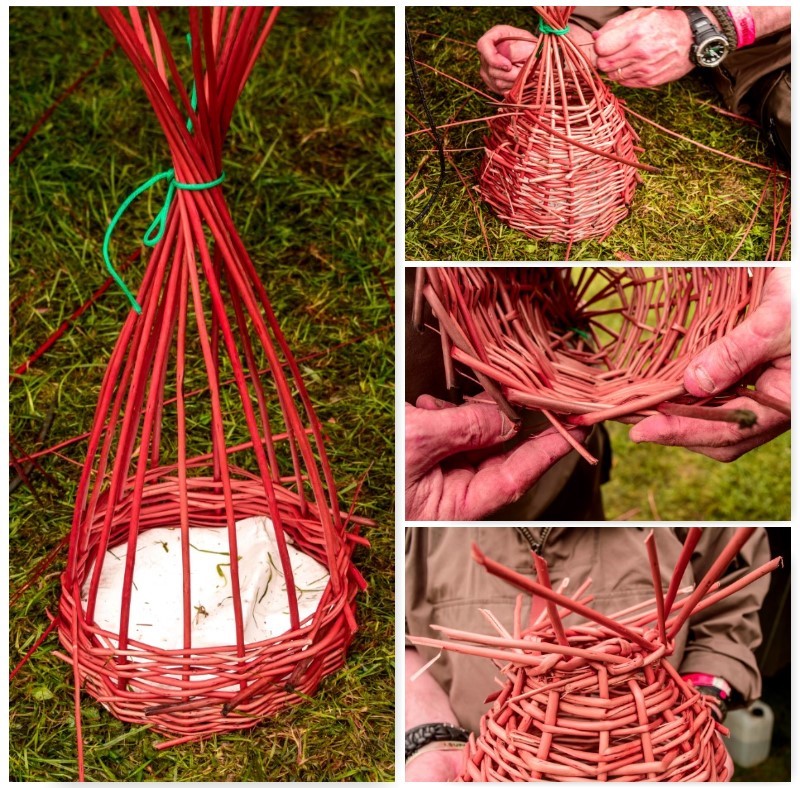
Once one piece was finished it was a case of repeating the process with a new piece of willow but from the next upright along. You can see in the picture in the bottom right below these staggered start points. Frase ensured that the ends stuck out proud so that they would not slip off the first upright while weaving. These would be trimmed down later.
Staggered
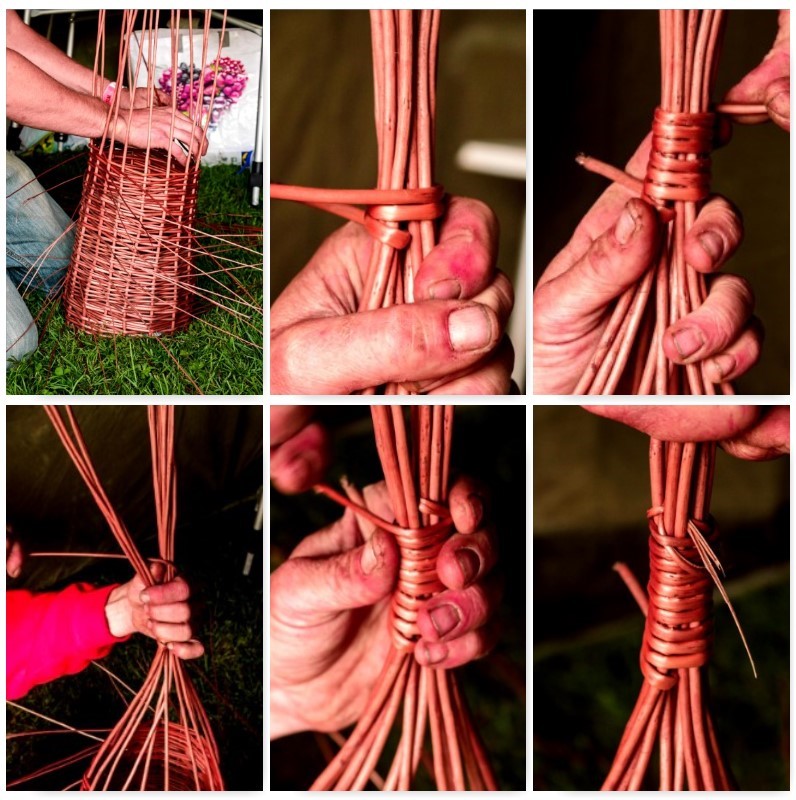
Step 3 – Wrapping the Top with willow
Over time the trap started to develop (a height of 50 or 60 cm’s) and the string at the top was replaced with willow. I have put the steps for you below. The thick end was slid through the middle of the uprights then wrapped tightly around the uprights for about ten turns, through the uprights again, a couple more turns and back through once more to finish.
Tying off the top
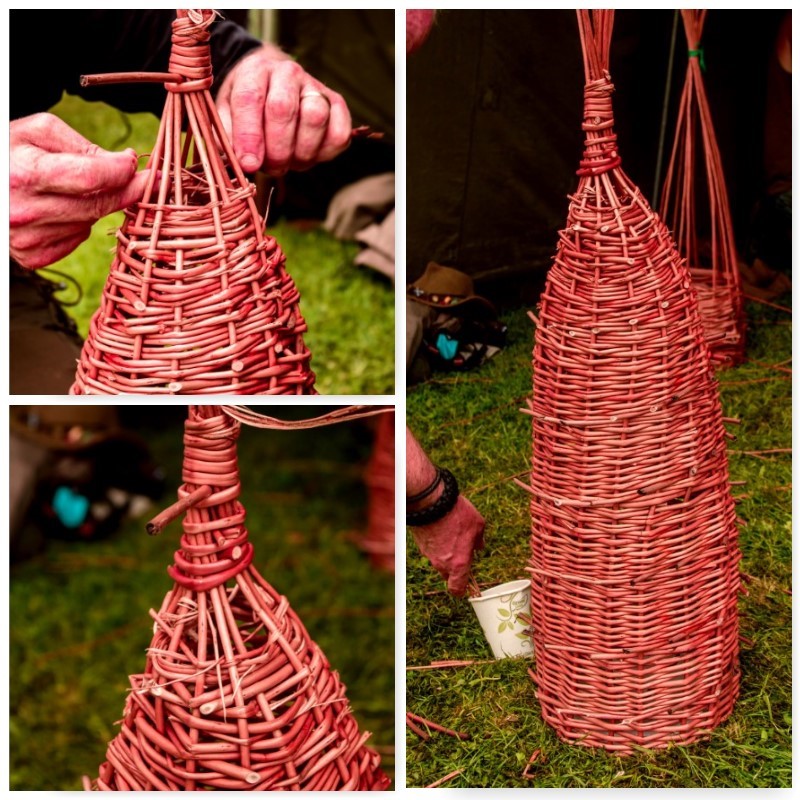
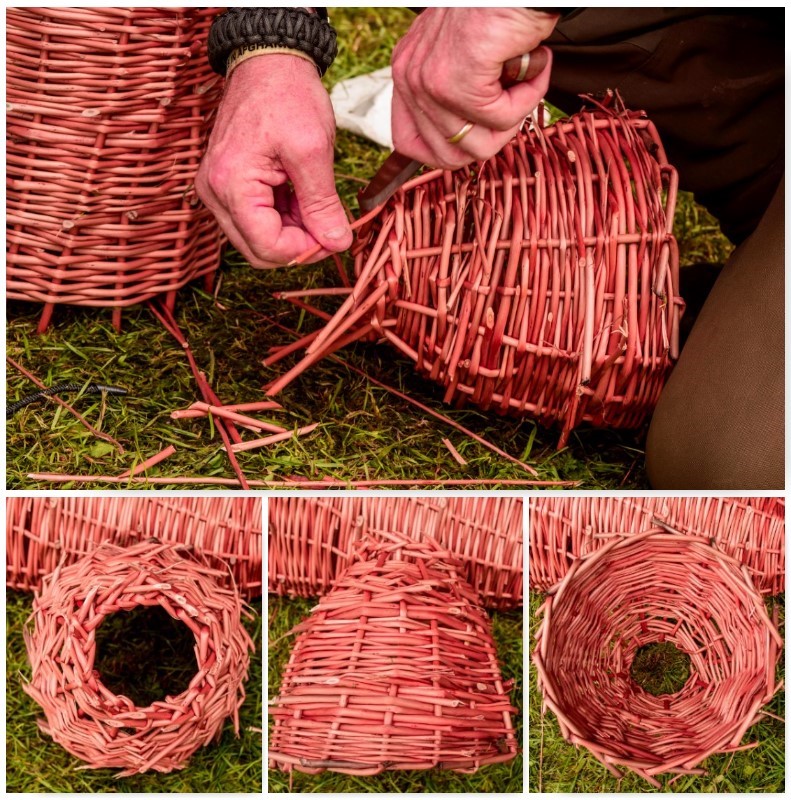
Step 4 – Closing the Gap
Finishing the top section can be quite difficult as you have less room to push the willow in and out of the uprights. Make the willow as pliable as possible and experiment with smaller thinner pieces and with starting with the thin end and threading through the thicker end.
Depending on what you are hoping to catch will decide how much of a gap to leave but ideally the gap should only be a couple of centimetres.
Closing the gap
Step 5 – Locking off the Opening
When the top has been finished pull the trap out of the ground slowly and it is time to lock off the uprights around the opening.
Take one upright and bend it over in front of the one directly to its right but behind the 2nd one on the right. Repeat the process with the upright on the right and so on. Before long you will be left with just one upright standing vertically. Twist it back and forth and you can thread it easily through the laid uprights to its right.
Look closely at the pictures below and you will see how this works.
Locking off
Step 6 – The Lid
The lid is about a third of the size of the main body of the trap however the opening is the same size. Use the paper plate, peg and string in the same fashion as before to set up the skeleton of the lid and weave in the exact same way as with the main body of the trap.
The difference though is that the top is not tied off but left open as this will become the opening that your catch will enter the trap through. When the hole in the top is about the size of your fist repeat the process of locking off at Step 5. You will also need to lock of the rim around the bigger opening when it is pulled out of the ground.
The Lid
Step 7 – Trimming
When you trim off the ends of any piece of willow when making this type of trap try to leave about a cm or so sticking out so that the end of the willow does not slip inside the trap. The outside should be quite prickly but the inside should be smooth.
Trimming
Step 8 – Attaching the Lid to the main body of the Trap
The lid should sit in the opening of the main body of the trap with the small opening in it well inside it. We split and soaked some willow (soaked in a cup of water) to make it really flexible and used that to tie the lid and the main body of the trap together.
They were tied together at one point only to ensure that the lid stayed attached but could be opened easily to remove any catch or to place any bait.
Attaching the Lid
This project would take a confident weaver/basket maker a few hours to make however our students took most of the day (and one or two came back the next day to finish off) to complete theirs.
These traps are not just for show but tools for living as comfortably as you can on the coast. If you are interested in making these traps under a bit of guidance do contact Fraser at Coastal Survival.
Happy Weavers
As with any trap do check out whether it is legal to use it in the place you want to set it. In the UK check out the Environment Agency.
Last August I was at the Wilderness Gathering here in UK with my friends from Coastal Survival. Just across from us was my friend Jason Sears demonstrating the use of a bowdrill to visitors.
Meet Jason
Jason is passionate about fire lighting and passing this skill onto others. I decided to sit back and watch his progress. I cannot remember the combination of wood types he was using but he did spend a minute gently warming everything up with some slow rotations of the spindle.
Warming up
Once he felt everything was a dry as he could get it where the spindle meets the hearth board he really powered up to produce a hot ember. The day had been really wet so all this preparation was essential – all the while he was talking to the visitors explaining what he was doing.
Powering in
To help himself along in getting his flame Jason had a piece of Cramp Ball fungus (Daldinia concentrica) on hand. He gently laid the piece of Cramp Ball beside the glowing ember to get it alight. This is a handy trick to remember in damp conditions as the ember created from the bowdrill can easily die out if you are not careful.
A small coal with a touch of cramp ball fungus
After a few seconds and a few puffs of breath the Cramp Ball was well alight then………………………
Well lit and very stable
He added to some straw and huffed and puffed for a bit 🙂
Easy to control
Jason’s straw was also a bit damp so he spent a few moments just drying out the area around the cramp ball by gently blowing into it. It is at this stage that many embers disintegrate if you are not careful or they simply die out as they are too small to overcome the damp material.
Spreading the heat
After a minute the centre of the straw was well dried out and smouldering nicely. Normally, I notice a sudden increase in smoke at this stage and the colour changes slightly telling me I am about to get a flame………………………
The straw is smoldering well
Which he did – one impromptu looking candle in fact.
Flammage
It is always a pleasure to watch Jason at the Wilderness Gathering teaching visitors fire lighting, so if you are thinking of coming along next year check him out.
Having a wonderful trip touring around Scotland these last two weeks with my family visiting family and friends. Currently we are staying with our friends Kate and John in Banchory (Aberdeenshire).
Kate mentioned that she had heard on Twitter that KT Tunstall (Scottish singer) had spotted some salmon leaping at the ‘Thundering Falls of Feugh‘ – so off we went to investigate. The falls were not thundering today and we spotted no salmon but this little fella popped up.
Popped up and Popped out
Talk about getting excited. The otter appeared directly below us in the falls, disappeared and then popped up again. He or she was soon scooting up the side of the falls diving in and out of pools and the main flow.
Up and around hunting
Before long the show was over as we were treated to a big slide down the side of the falls and all was as we had first found it when we arrived.
Quick as a flash and away
I only had a standard lens on my camera so the shots are not the best however I really enjoyed watching the otter playing and hunting.
Currently I am sitting in my mothers house in Port of Ness on the Isle of Lewis on holiday with my family. I have had a very busy summer however I have had a very fun summer as well. Over the coming weeks I will catch up on writing up all my trips however I have realised I have not posted in over a month so thought I might just summarise the last few trips.
Bimbles
I spent many a day over the summer wandering around my village of Bramley exploring all its nooks and crannies with my kids and their friends.
Bramley Bimble
The Sea Cadets
The middle of July found me in East Sussex with the Sea Cadets and our annual Adventure Training competition. Even amongst all this navigational competitiveness we found time to spend listening to the rustle of the Poplar trees.
Sea Cadet time
The Bushmoot
The first two weeks of August I spent with my family at the annual Bushcraft UKBushmoot in South Wales at Merthyr Mawr. We calculated that we had ran about 110 bushcraft classes in that two week period so the odd cup of freshly brewed coffee over a log rocket stove proved a must.
The Bushmoot
The Wilderness Gathering
Soon after the Moot I found myself helping my friend Fraser Christian from Coastal Survival at the Wilderness Gathering in Wiltshire. It was a weekend of wind, rain, sun and great fun as we helped our friend run all his classes.
The Wilderness Gathering
The Isle of Lewis
Straight after the Wilderness Gathering I set off with my family up to the Isle of Lewis in Scotland. So far the weather has been great and my kids have been down swimming in the sea every morning. I am hoping for a few more great days before striking out to visit other friends on this trip across Scotland.
The Isle of Lewis
On my return I will be posting up more detailed reports on each of the trips but for now I will end with the hope that everyone else is having a busy and fun summer as well.
For the last three months I have been out on regular bimbles with my son Finlay to observe and learn about nature for his Naturalist badge at Cubs.
This is not an easy badge to obtain and takes three months to complete with a number of different standards to meet (some of the standards have different options to choose from).
The standards/options Finlay chose to do were:
Observe a natural area over a three month period a number of times to observe and record changes in nature
Learn to identify six trees and six wild flowers
Learn the Country Code
Build a Bug Hotel
Rather than just observe one natural area we spotted three good areas around the village to observe. We visited each area five times over three months to observe the changes occurring in nature.
Area 1 – Scrubland
This site was next to one of his playgrounds and initially seemed very promising (in the hope we would see a variety of different spring flowers) with all the Dandelion seed heads. They were still there on our second visit however the thick grass seemed to be inhibiting the growth of many of the spring flowers we were hoping to see.
Area 1 – Scrubland – Visits 1 & 2
Over the following visits we spotted a few White Campion flowers and some Green Alkanet however it was the grasses, Docks and Cleavers (Sticky Willy) that seemed to dominate in the end. Finlay seemed happy with that as I usually found loads of Cleaver strands stuck to my back when we got home 🙂
Area 1 – Scrubland – Visits 3, 4 & 5
Area 2 – The Pond
I have been observing a particular pond in our village over the years and knew it would be good for Finlay to observe changes in nature.
The pond is full Reedmace (aka Cattail), Iris, and ringed by Marsh Marigolds and Mare’s Tail. Initially all the growth was very subdued however you can see in the second picture below (2nd visit) that there was far more shade as the plants had started to grow. Finlay is in the same spot in each picture to observe and act as a measure to the growth.
Area 2 – The Pond – Visits 1 & 2
There is always something happening at the pond with wildlife. Usually we disturbed a duck or two but we did spot plenty of frogs and insects. One visit we found a dead pidgeon by the side of the pond and noticed that the Iris had started to produce its seed heads near the end of our visits.
Area 2 – The Pond – Spots
Over the last 3 visits the Iris and the Reedmace soon came to dominate the pond and the outer ring of Marsh Marigolds generally died back.
Area 2 – The Pond – Visits 3, 4 & 5
Area 3 – The Stream
We have a culvert near our house and there is a good patch of Reedmace growing beside it. This spot I thought ideal to show Finlay how quickly this plant grows.
Initially it was the last years growth that dominated the stream with a lot of Hedge Garlic growing beside it. Over the subsequent visits the spring flowers all died off and the Reedmace shot up.
The growth you can see below happened over a two and a half month period.
Area 3 – The Stream – Visits 1 to 4
On our last visit we spotted that the pollen spikes of the Reedmace had appeared. These are a great plant for any bushcrafter as the young spikes can be boiled and eaten, the roots are edible as well as the young plant shoots.
As this plant grows frequently beside (as seen by the pond) its lookalike poisonous neighbour – Iris, learn to 100% identify both plants before attempting to forage Reedmace.
Area 3 – The Stream – Visit 5
Trees and Flowers
Over the last three months we studied our trees and wildflower as well as Finlay had to learn to identify six trees and six wildflowers.
For trees we focused on Oak, Hawthorn, Sycamore, Beech, Holly and Hazel. We started this on our first forage way back in in May when we went out on our first foraging hike together – Foraging with Finlay. He is pretty confident with most of the trees now however he still has to think about some of them. We remember them by shapes i.e. the star for Sycamore, ear lobes for Oak, spikes for Holly etc.
Some of the flowers we saw regularly included White Campion, Forget-me-nots and Herb Robert. I think he struggles with White Campion as that one disappeared early but then again not many people can easily identify it.
Trees and Flowers
One he does remember easily is Green Alkannet (something to do with the blue flower and it having the word ‘Green’ in its title I think), Self Heal and Wild Strawberries. The white flowers of Strawberries he remembered well, in anticipation of the feast we had on the last visit.
Flowers and Foraging
It was not all learn, learn, learn as we had lots of fun along the way. Sometimes his sister Catherine joined us, there was lots of time spent in the parks , some beautiful insects were spotted and best of all we got muddy and spent quality time together.
Extras
The Countryside Code
We spent time talking about how we treat the countryside while out and about. When I was a young lad we all had to be able to recite the country code however that list has now fallen out of favour now. The main aims now are to ‘Respect, Protect and Enjoy’ the countryside. Our trips would touch on these aims and a good pamphlet on the current code can be found here at the Peak District website.
The Bug Hotel
The last standard for the badge was to build something for nature. We opted for a Bug hotel in the garden. Finlay, Catherine and one of his friends (another Finlay) spent a long time collecting and building their Bug hotel. I wrote a separate post on this titled – Building the Bug Hotel.
The Bug Hotel
It has been great fun working on this project with Finlay. He really deserves his Naturalist badge now and I look forward to working on some of these more challenging badges with him in the future. One day he will no longer need me to help him but in the meantime I intend to get out and about with him as much as possible.
This is a post that came about because someone decided to chop down a tree. On a recent Sea Cadet training weekend we ended up with one instructor (Jess), one hammock and one tree – my friend Dave and myself had bagged the other trees for our hammocks :-). Not an ideal situation for Jess you could say.
We could not camp elsewhere and there was nothing in the way of available natural material to help us (we were on a military camp). Thankfully my friends Alan and Dave spotted some old poles (used for team building exercises) at the back of of a building. So Dave with Jess as his assistant in true Seacadet style, set out to apply their seamanship talents to our problem.
Shear Leg Stand
The Shear Lashing
They collected some assorted pieces of rope and a couple of cadets to help out. The poles were quite long and thick so they decided to tie the poles together about two thirds of the way along their length. The poles were tied together using a shear lashing (I will be using Grog’s Knots to help describe how they did this).
To start the shear lashing they attached the rope to one pole using a timber hitch and then wrapped the rope a number of times around both poles (this is known as wrapping). To make this easier the poles were raised slightly of the ground and the cadets helped to pass the masses of ropes around the poles.
Wrapping
Once the wrappings were completed the lashing was tightened by being frapped (nothing to do with Facebook). Frapping is the nautical term to describe the tightening of a rope or cable. Dave did this by completing a number of turns around the centre of the lashing and pulling it all in tight.
To finish the lashing off he secured it with a clove hitch to the pole without the timber hitch. There was plenty of rope left over as well to help with anchoring the shear legs down.
Frapping
Anchoring
Though the poles were large they were surprisingly light so they were soon standing vertical. A spare piece of rigging line was looped over the pole with the timber hitch on it and with the spare rope from the shear lashing the legs were securely anchored by wrapping both ropes around base of a solid fence post.
Both ropes were then tied off around the shear lashing on the poles to make it all secure.
Anchoring
Alternative Anchors
If you do not have a handy anchor like our fence post you can make your own. In the past I have had shear legs and tripods for hammocks anchored safely with three large wooden stakes.
Alternative Anchors
Securing
If you cannot drive your shear legs into the ground I would advise you to tie them together near the bottom so that they do not inadvertently splay out. Dave used the last of the lashing rope (it was a rather long piece of old climbing rope) to do this.
Finally, to finish the set up the shear legs were tied securely to our single tree using a top line. This top line as well as securing the shear legs was to act as a line to hang Jess’s tarp off.
Securing
Testing & Set Up
I did a bit of testing after we had hung the hammock. I figured if it took my weight then Jess would have no problems. The top line went slightly slack when the system took my weight so that was re-tightened while I was in the hammock.
Testing
After that it was a simple case of rigging the tarp and Jess setting up home for the night.
Setting up home
This was a great solution from Dave to our missing tree problem and took less than an hour to complete. Jess slept the whole night soundly in her impromptu sleep system and I was chuffed that I managed to capture most of the stages in its construction.
A Good Nights Sleep
If you are interested in making a slightly smaller and more mobile hammock stand yourself have a look at my two other posts on this subject,
Flammage – A phrase I heard for the first time at Woodcraft School when I was studying for my Bushcraft instructors certificate. I love the word as teaching firelighting has always been a passion of mine. Over the last couple of months I noticed I had gotten some excellent flammage shots.
I teach firelighting using many different methods however when you have lots of kids to teach and not much in the way of time then firesteels do the trick. They do make for some cracking pictures as demonstrated below by my friend Dave Lewis at a recent Sea Cadet camp. When teaching firesteels to very young children I liken them to fairy lights and you can see why below.
Fairy Lights
Now it is not all just one big firelighting fest as we do teach everyone to respect fire and how to be responsible in using it. Charlie got the kids in the picture below to use firesteels to strike onto char cloth and then blow it all into a flame using some dried grass. The resulting fire was kept contained in a fire tray and soon produced plenty of tea and chocolate cakes.
Flammage
Some flammage fun here – we were given some offcuts of soft wood to burn by one of the other Sea Cadet instructors and I had brought along a pre-drilled fire face log rocket stove. With a criss cross fire lay and a well lit log rocket with the parachute in the background taking a picture seemed like a good idea.
Log rocket fire face
I can spend hours watching a fire and when I think the flames are right out comes my camera and I start snapping away. I may take a hundred pictures in the hope that something will appear in the flames.
I call these pictures Fire Faces and in the two below I spotted two old men of the woods – see if you can spot them?
Old men of the woods
I have plenty of pictures of the cadets and my own kids sitting around a fire toasting marshmallows and this simple act is something I never tire off. This evening though really stands out in my memory with the Fire Faces adding that bit of extra light and ambience.
Marshmallows by candelight
Taken in late spring down at my friend Fraser’s (Coastal Survival) during a rather stormy night was this picture of a bunch of hairy bushcrafters sitting snugly around the fire. Needless to say a dram or two helped pass the evening along nicely.
Stormy nights
My favourite fire picture of the last couple of months though is this one. It is the fire the cadets were sitting around and I played around with the settings of my camera to try and capture the picture as best I could without a flash. I then just waited until a piece of wood split in the flames to capture all the sparks spiralling upwards.
Woodland TV
No doubt there will be a few more Flammage pictures coming up over the summer as the Bushmoot and the Wilderness Gathering approach so I will leave you with these for now.
Over the last few months I have not done much in the way of bushcraft so there has been a slight lack of How To …. tutorials coming out. I plan to change that after the Moot (where I will be looking for inspiration) however I have been getting out on little trips recently to photograph nature.
This post is just to record some of the moments I have had over the last few months. Starting with an accidental shot of a very wet and bedraggled willow catkin. It was a damp day and I was trying to get a close up of a bug but after looking at the picture found the catkin to be of more interest.
Pussy Willow
Not long after ripping a muscle in my calf I hobbled out into my garden and applied the 20 metre rule. That is stand still, kneel down, sit down and lie down but continually look around you for approx 20 metres and you should see something worth shooting. When I eventually laid down I came up close and personal to these beautiful little Forget-me-nots
Forget-me-nots
There was a re-wilding theme on the BCUK website a couple of months ago and I was stuck for ideas. Not long after the closing date I remembered this place outside our village. Proper re-wilding you could say 🙂
Re-wilding
Back in April I went out for a walk with my kids in Morgaston woods and the bluebells were just coming through. I spotted this slightly thicker patch and after getting the kids to lie down (it was a job with all the pricklies) I got this rather nice shot. The angle of the shot made the bluebell patch seem much thicker than it actually was.
Peek a boo
Another one from my garden during my hobbling period. I was particularly taken with the water droplets on the primroses.
Spring days
My son has been undertaking some nature observations for his naturalists badge at cubs. we have been getting out and about as much as we can identifying trees and flowers such as these lovely Ramsons.
Naturalist badge – IDing the Ramsons
Spring would not be the same without a picture or two of some fluffy creatures. I thought this Greylag geese family looked particularly impressive at The Vyne National Trust property.
The Greylag family
This was a ‘face off’. I spotted this deer in the shadow of the woods while out looking at the bluebells. I had to change the lens on my camera as she was a fair distance away. Normally they run off by the time I change lenses but this one kept me square in her sights the whole time.
Staring contest
We moved on from just identifying plants for Finlay’s naturalist badge to tasting them as well. We tried out a whole range of leaves including the likes of these Jack by the hedge plants.
Naturalist badge – IDing the other garlic – Jack by the hedge
Some of the best finds were literary stumbled on like this complete fox skeleton in the New Forest. It was found by some of my Junior Sea Cadets and we laid it all out onto this log to get a real good look at it. Many of these kids have never been out of the city before so this was quite a find for them.
A Foxy find
I spotted this little butterfly sitting on a Herb Robert flower while visiting my friend Fraser from Coastal Survival a couple of weeks ago. Normally these little devils are away before you can get near them but this one just seemed to be soaking up the sun.
Delicate beauty
One of my favourite pictures was taken last weekend at The Vyne National Trust property. I heard a splash by the side of the lake and turned to see this Coot with a large Signal Crayfish in its beak.
The joy was not to last for the Coot though as another Coot came along and stole the crayfish away – such is nature sometimes I suppose.
A top spot
So although I have not been out doing practical bushcrafting much I have been getting out and observing nature with a keen eye – so you could say it was the more nature based side of bushcrafting.
Here’s instalment number 10 in the ‘10 Reasons to Bushmoot‘ series. For those of you who have been following the series so far you will have gotten a feel of the wide range of activities on offer at the BCUK Bushmoot. Some of you have contacted me to say you will be attending for the first time this year, which is great, however if you still have not made up your mind then don’t just take my word for it.
I contacted a number of BCUK members and asked them to send me their favourite picture(s) of the Bushmoot (either one they took or from someone else) and to say why it was their favourite.
Charlie Brookes’s favourite – picture taken by George Aitchison
Charlie –This picture fully sums up the most important thing about the Bushmoot for me, which is the welcoming family. I first attended the Bushmoot in 2007 and that was only on a last-minute decision. Having been encouraged by the willingness of the BCUK members to welcome you to the forum and share knowledge, I decided to take the plunge and attend the Bushmoot. It was with a feeling of apprehension that I drove down the lane from Merthyr Mawr. This feeling soon disappeared on booking in, where I was made most welcome by Tony and Shelley. What followed was one of the most enjoyable few days I had spent in a long time, everyone you met made you welcome and they were willing to pass on skills. I can only hope I can continue to make newcomers to the Bushmoot feel as welcome as people made me feel.
Ian Woodham’s favourite picture
Ian –When I was asked by George to look through my photos and send him something that says why I enjoy Bushmoot, my first thought was to my boy. He and all the children play continually, coming back to camp only for food. There is always something going on, and in an age of computer games, you never hear a child say “I’m board” when spending two weeks away from electricity.
Wayne Jones’s favourite picture
Wayne (Forest Knights)-The photo shows the spirit of the Bushmoot. Sharing skills with other bushcrafters from the novice to seasoned instructors. All come with a willingness to share their skills and learn from each other. Teaching Bhutanese bow making in such a beautiful location is a privilege. It is a joy to be part of the team.
Cap’n Badger’s favourite picture up at the Naughty Corner – the ‘Mammock’
Cap’n Badger – He chose this picture but cannot remember who took it (I think it may have been Lindsey Dearnley) – I remember I was chilling in the sunshine with Darsha one afternoon when the life raft was stuck into the ‘Mammock’. Also I remember it being spun around with some of the girls inside..lol..and getting thirteen people in it! I’m surprised that little tree took the strain…
Susannah Parsons’s favourite picture
Susannah –The photo of a group of people toasting marshmallows reminds me of a couple of great things about the Bushmoot.
Firstly, woodland TV. There’s nothing like a fire for socialising, quiet contemplation and a general feeling of well-being. I do nearly all my cooking over a communal fire for the entire week, even my breakfast coffee, I love the smell of woodsmoke, sharing food around the fire and the flavour – everything seems to taste better!
Secondly, this picture was taken on a night-time photography course in 2009. What you can’t see, is that this group of people had kindly allowed around 15 paparazzi to surround them and their fire to practice taking night time shots – a great testament both to the range of courses you find yourself doing and to the friendliness and helpfulness of the people you meet.
George Aitchison’s favourite picture
George –I put this little collage together after asking Mors Kochanski to sign my Bushcraft book at the Bushmoot. He asked me what I wanted written in it and I said whatever he felt like. Apart from his signature line of ‘The more you know the less you carry’ he signed it to ‘a fellow instructor’. That one line has stuck with me ever since.
I worked at both Bushmoots Mors attended and as well as me attending his classes he visited some of mine too. We spent many an evening sitting around the fire shooting the breeze and drinking beer.
Tony Bristow – Collage from BCUK Members’ pictures
Tony – The Moot is a happy place, it’s also a relaxed place where we’re involved in sharing and creating, discovering and growing while making friendships and memories, where else would you get a group of guys excited about sewing machines, the loveliest pizza hand delivered and kids (actually it’s probably all of us) that go to bed tired, happy and looking forward to the next day of adventures.
Well that is it for me in this series. As Tony said the Moot is a ‘happy place’ so I am looking forward to once again attending this year with my family, seeing my ‘Bushmoot Family’ and having a few adventures along the way. Maybe I’ll see you there.
Last weekend found me in the New Forest here in Hampshire in the UK. I was with the Sea Cadets and we were running a full on weekend of Adventure Training activities and we were based at Ferny Crofts Campsite.
My picture of the week though goes to a more relaxed moment as some of the cadets were sitting around the campfire toasting some marshmallows under the watchful eye of these fire faces.
Fire Faces
I will be writing a full report on the weekend sometime soon however I thought I would share just a little bit of what was a magical weekend with you.
My little lad Finlay is a member of the Bramley Cub pack and when he was invested recently we received a little book on all the badges they can work towards.
There are badges for hiking, navigation and nature observation (amongst many others) so we decided to get out last Sunday and start earning some.
Not the usual bimble
Now this was not a usual bimble around the village but a proper hike. Finlay packed his rucksack with water, food, suncream, waterproofs, map, compass and a first aid kit. The manual stipulated that the hike needed to last for at least three hours and have a purpose.
Our hike was to be around Wasing Wood near Tadley in Hampshire and our purpose was to learn to navigate and to forage (and throw in lots of fun in the middle).
Our hike around Wasing Woods
Very soon we spotted a clump of white flowers which turned out to be three-cornered leeks ( the leaves have three distinct corners) and some very fresh-looking beech leaves.
At this time of year the leaves of certain trees are quite edible, beech being one of them. Over the years Finlay has often foraged with me so I was not worried about him having any sort of reaction to anything he would be nibbling on. The walk was more about him learning the key features of certain plants for future safe identification. We left the leeks alone but had a munch on some of the really fresh beech leaves.
Leeks and Beech – Spring greens
One tree that Finlay knew well was the oak, but to help him remember its leaf shape we likened its lobed leaf structure to that of his ear lobe. Also we investigated the very fresh-looking gall we found on one of the oaks. There was no hole in it so we concluded that the gall wasp had not hatched yet.
The next tree we came across was the hawthorn and Finlay’s first observation about it was that the leaves were much smaller than the oak leaves and had smaller and sharper lobes. As this is an edible leaf we were soon munching again.
Edible and non edible
I introduced Finlay to the Ordnance Survey map for our area and soon he was busy identifying different features on it and tracking our route. We looked at setting the map using features on the ground and using the compass. Also we discussed the scale of the map and features we would expect to find along our route.
We devised a route that was on public footpaths around Wasing Wood (and which had been well documented in a local guide book) however it soon became apparent that the footpaths we were using had been used little recently. The path was overgrown with hawthorn trees and it had also been cut in half by a local business as a testing area for diggers. Soon we were well off our intended route but by looking at the features around us we were able to keep track of where we were.
Map reading and adventuring – The path that disappeared
It was not all hard work as the hammock seat came out when we stopped for a snack (Finlay got it, not me). As well as trees we spent time identifying flowers.
There were plenty of bluebells, a few wild strawberry flowers but we did get down close to look at some Greater Stitchwort – a beautiful little white flower that has medicinally been used to help with the treatment of broken bones.
Strangely, when we were crossing a stile we came across a pair of boxer shorts lying on the ground. Not sure what to make of this, we hurried quickly along :-).
Strange and beautiful sites
Now no trip out into the woods is complete without a little extra iron. There were plenty of new-growth nettles around and we picked a few ‘tops’ (the smallest leaves from the very top of the nettle), rolled them up to kill off the needles and munched away.
Finlay is happy to eat nettles now (he takes delight in doing this in front of other kids) though I am still working on him collecting them himself without gloves.
A little extra iron
Nettles though have a habit of biting you if you do not keep an eye on them 🙂 Finlay was picking a leaf from a ‘Jack by the Hedge’ plant for a little nibble when one of them sneaky nettles popped up and bit him on his arm.
Now a number of years ago he would have let out a loud wail and run about looking for a dock leaf. Now he knows to simply tell me he has been stung and I will grab a couple of the bigger nettle leaves and squish them up to a pulp. It is the juice of the nettle/plantain/dock (to name just a few) leaf that negates the sting – not just rubbing a dry dock leaf on a sting, which I have seen countless people do.
First Aid and final leg
Before we knew it we had been out for over three and a half hours and diner was calling (Alison had insisted we be back in time for tea as we were expecting visitors). Out came the compass and after another quick lesson we were off through the woods and back to the car.
Tired but happy
Finlay had collected a few of the leaves from the trees we had studied but they soon wilted with the sun because they were so fresh. He collected holly, oak, hawthorn, birch, beech and sycamore leaves and spotted bluebells, stitchwort, leeks, wild strawberries, Jack-by-the-hedge and nettles.
The purpose of our hike was to study some trees, flowers and learn about the map and compass. I think you could say we managed that.
Recently I came across a video on You Tube from my friend David Willis who runs his own company called Bushcraft with David Willis. David teaches outdoor living skills, natural history and woodland crafts. I thoroughly enjoyed the video so decided to write this blog post, share the video and tell you a little about this excellent fellow bushcrafter.
David Willis
I have known David for a number of years now and met him at a re-union of student who studied under John Rhyder of Woodcraft School fame.
Last year at the BCUK Bushmoot David ran a number of classes for us and the Backwoods Baker class proved to be a hit. I was photographing lots of classes that morning but kept on coming back to David’s class just to take in the smell of the baking and get the odd morsel or two.
The BCUK Bushmoot
A week later at the Wilderness Gathering I met David once again and he asked if I could take a few pics of him running a class on Backwoods Baking – needless to say I readily agreed, got some great pictures and some lovely bread.
The Wilderness Gathering
Keep an eye out on David’s website for his free Family Friendly Guided Woodland Walks. They are becoming increasingly popular and David will guide you through the beauty of the Chiltern Hills.
I am hoping that I’ll see David back once again at the Bushmoot and the Wilderness Gathering but in the meantime here is the video on one of his Backwoods Baker courses to enjoy.
Last weekend I went for a walk in the woods with my lad Finlay and his friend William. I was planning a bit of a hike however I spotted a glade in our local woods where an area has been set aside for kids to build dens.
This post follows the steps I talked the lads through the principles of shelter building. This is not a full on How To…. guide to shelter building but more of an introduction to the principles of it all.
The principles of shelter building
We had a wander around some of the shelters that had been left up by other groups and talked about the positive elements of each shelter. I find that this focuses the mind on what has worked well and how these elements can be incorporated into any other shelter.
We looked at how high a shelter needed to be, how many walls were really needed, how much thatch was needed and what was needed to keep them warm dependent on different weather conditions.
The positives
I told the lads that we only had time to build a small shelter (Sunday Dinner was calling) so they found some rope and wood and I showed them how to tie everything together to form a spar. We had no tools at all so had to work with what we had.
Setting out
After a chat they opted to go for a simple lean to shelter as this they felt would take the least amount off time.
I told them they would need lots of sticks to lean up against the spar (more than they thought) and that they needed to be roughly the same size. After a quick demonstration on how to snap wood using the base of two tree trunks that were close together they were soon hard at work.
Sizing up
We put a pole on the ground to roughly mark out where each pole should be driven in and soon they had the basic skeleton of the shelter formed.
The Skeleton
One of the hardest things to get across to them was the need to always have a tidy working area. we had lots of dead wood lying about so I made them clear it all away from the shelter so we had a safe area to work in.
Once that was all done we had a good forage around for some spruce boughs. There were plenty lying around that had been cut down by the foresters for the kids to use (I wish all woods had an area like this).
Tidying and foraging
After layering some of the spruce boughs onto the skeleton of the shelter I got the boys doing the penguin walk. This is the way I get the kids to gather up lots of leaves in a very short space of time. They would quickly make little piles of leaves and throw them over the spruce boughs.
Once the bottom half was all done they got some more spruce boughs for the top and covered that in leaves as well. Finally to keep the leaves in place they laid a load of small sticks over the leaves (to try and help stop the wind from blowing it all away).
The layer system
Once they had finished the outside it was time to sort out the interior design. They spent a little while weaving back in all the loose (well some of them) spruce needles back into the thatch.
Once that was done they foraged for some more spruce and made themselves up a little bed to keep themselves off the cold earth.
Interior design
We did not have permission to have a fire in the woods but that did not stop us from pretending – after all that is what we kids do 🙂
I got them to build themselves a heat reflecting wall in front of the shelter (about two paces from the shelter). They just pushed two sticks into the ground and stacked some logs up against them.
Reflector wall
All that was left for them to do was construct their long log fire (one step away from the shelter) and relax.
Fire and finish
This took us about one and a half hours to complete and managed to have fun along the way as well.
As I said this was more about the principles of shelter building (done really to help towards one of their Cubs badges) and not a full on How To…. to building a shelter. If we had more time we would have put about 3 times as much debris over the top, the bed would have been raised up with a much thicker mattress of spruce and the sides would have been closed in.
At the beginning of February this year I drove down the A303 towards Dorset here in the UK in ever worsening weather conditions.
My good friend Fraser Christian of Coastal Survival had organised a meet up of some of the guys who help him out at various events throughout the year. By the time I got to his village the weather had deteriorated to storm conditions.
The pictures below show his parachute getting a right battering and even later on in the shelter of the parachute the airflow really helped shoot the flames of the fire up.
A Stormy Night
Before going to up to Fraser’s woodland location I met some of the the guys – Fraser, Steve, Si, Danny and Nick in the local pub to have a few beers (and to dry off from the drenching I got from walking from the car park to the pub).
Even though the weather conditions were still extremely poor when we got to Fraser’s woodland site we soon made ourselves comfortable. The food and mulled cider were soon on and I even managed to get a picture of the parachute looking like some sort of downed UFO.
We were joined later in the evening by Tom who is one of the other Coastal Survival instructors. He had cycled his way through the storm to get to us but seemed happy to be out there in the wild conditions (I think that it is a pre-requisite of any outdoors pursuit instructor to show they can be comfortable outdoors whatever the weather throws at them).
Snugness
Due to the high winds the flames of the fire kept shooting up, so as usual I had my camera out grabbing some shots of fire faces and figures in the flames. If you look closely you will see a few faces. I can also see a deer and a water buffalo in the left hand picture below.
We spent the evening listening to the wind, catching up on the year gone by and planning trips for the coming months. Around about 10pm the wind dropped sufficiently I felt it safe enough to venture out and put my own hammock and tarp up.
Fire Faces
I slept for a full ten hours that night and woke the next morning feeling calm and refreshed. The guys already had the kettle on the go so all I needed to do was fill my cup and wait for my breakfast from Fraser.
One thing about working with Fraser is that you never go hungry and I will never get in the way of an expert chef wanting to cook me breakfast :-).
A calm morning
As part of our bed and board for the night we agreed to get out and collect some of the brash wood Fraser had stored around his woodland to replace the wood we had used the night before.
We said goodbye to Tom at this stage before stringing up the brash wood to take back to camp.
Morning re-supply
Once the chores were done I set off on my own to see what flora and fauna were about that morning. Little Tinker always makes for a great shot but I soon found an excellent badger print in the damp ground.
I spooked a deer on my travels through the wood but managed to get one decent long range shot of her as she ran across a field.
Local fauna
Even though this was early February there was a dash of colour about with the plants.
The teasel was looking particularly majestic with new seeds sprouting within the previous years seed head. I spotted a number of primroses for the first time this year at Fraser’s and the lesser celandines were sunning themselves nicely.
Finally I spotted an elder tree covered in some lovely looking jelly fungus.
Local flora
It was soon time to head home again however the drive back was a delight due to feeling refreshed and the sun was out 🙂
Thanks to Fraser for hosting us for the weekend and the rest of the guys for being such good company.
For a while now I have been making Log Rocket Stoves in different ways.
The ones I make in the workshop are easy as all you require is a drill however if you make one in the woods things become more complex. A common theme about these woodland Log Rocket Stoves is that you need something like string or wire to hold everything together.
I thought about this a lot recently and came up with this adaptation of the Log Rocket Stove using green wood dovetail joints.
I will post a full step by step tutorial in the near future in my How To…. section.
Ok, I know it is supposed to be one picture every week however I thought I needed to zoom in on this one a bit more so I added another for detail.
Many of you know I love to tinker with log rocket stoves so today found me once again working on another design.
Dovetail Log Rocket Stove
I came across an old Swedish design for a log rocket called the Schwedenfeuer (Swedish fire) however like many other log rockets all the parts were held together with wire. As these stoves are supposed to date back to at least the middle ages they had to be held together with something else then.
I came up with the idea to use green wood wedges carved into the stove in a dovetail fashion. They worked perfectly, I got my coffee made and also a video (to follow). I will also be popping a How To…. blog post soon to show how to make one.