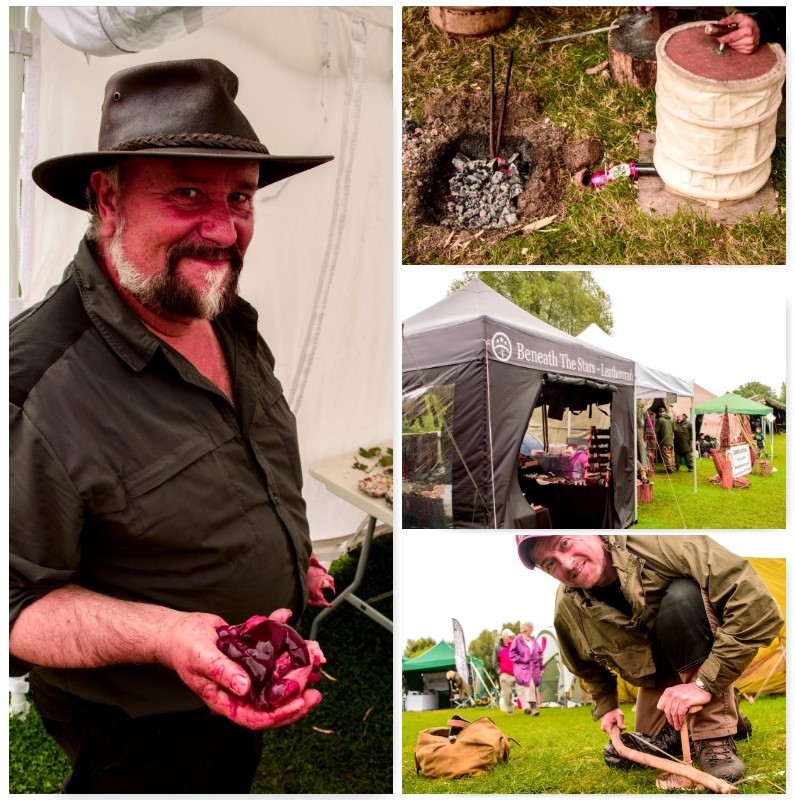
This year at the Wilderness Gathering my friend Des Cattys was showing his love of Log Rocket stoves to visitors. I decided to drop in on one of his sessions to watch how he constructs one. Like Des I am intrigued by these stoves and I am always looking to improve on their construction so watching someone else at work building one is a chance not to be missed.
If you want more detail on making one of these stoves have a look at my How To…. on building a Log Rocket stove. There are many variations on them and I have included some of them on my Bushcraftdays blog in my How To section.
Catching up with friends, learning skills and getting some new kit – that is what the Wilderness Gathering is to me.
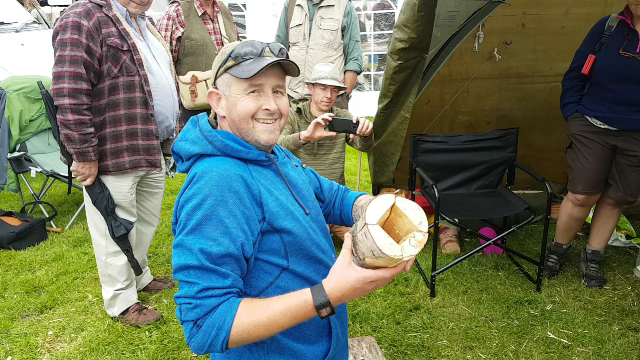
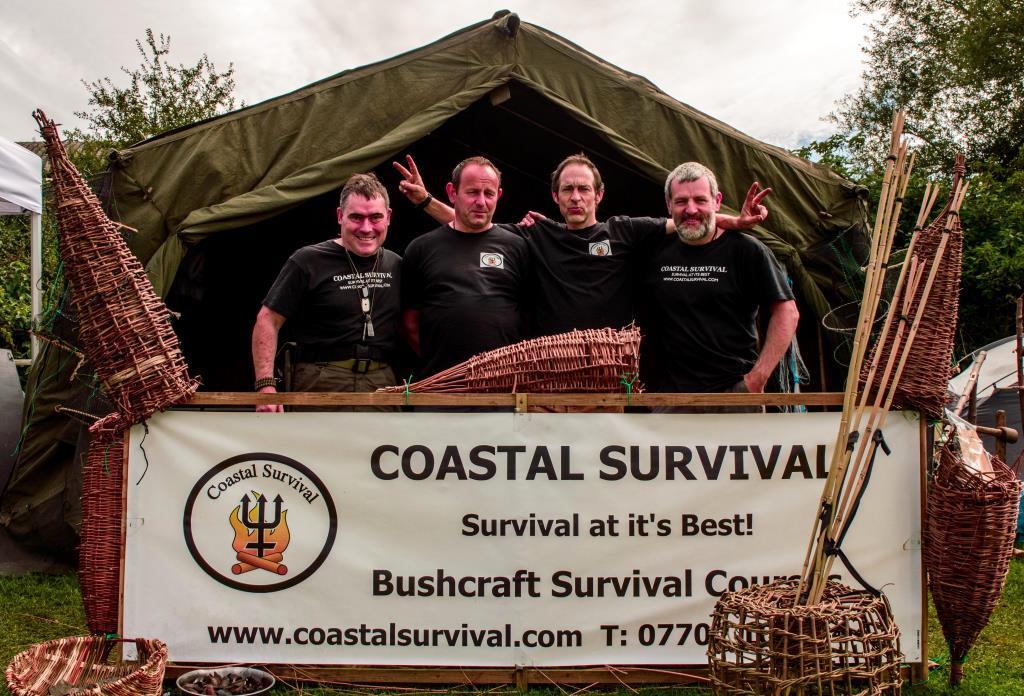
Coastal Survival has been attending The Gathering for quite a few years and this was a busy one for me as they went. I could tell that as most of my pictures this year were of what we were up to and not about what everybody else was up to. I was working alongside Fraser Christian, Danny Stocks and Chris Lundregan (we were also joined by Lorna Stocks).
Food and skills were the order of the day for us at this years show.
At The Gathering
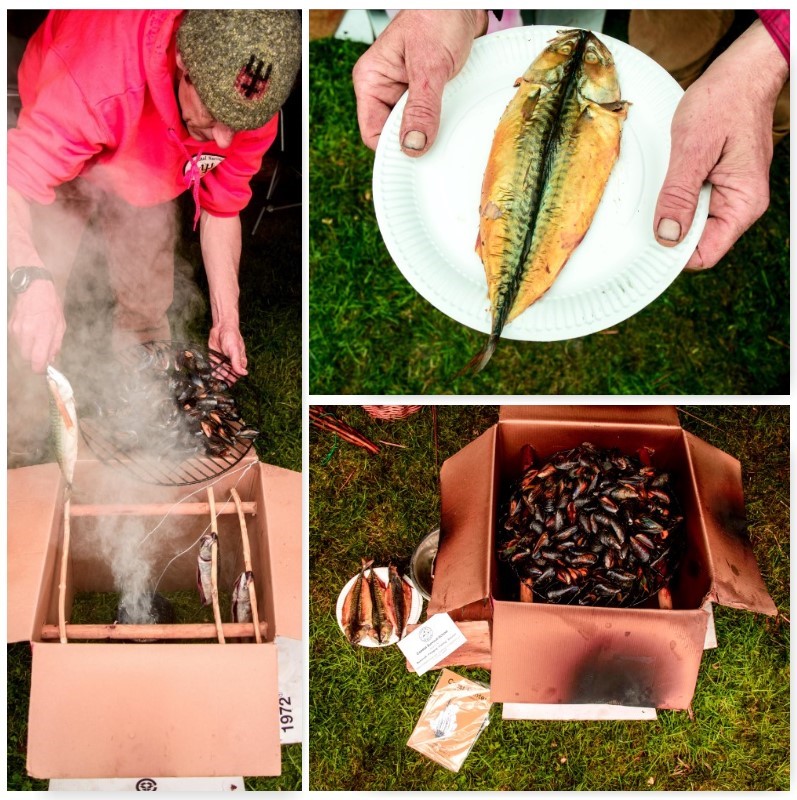
Over the weekend we kept a hot smoker going producing smoked mussels and mackerel. This kept a steady stream of visitors coming up to the stand. So much so that I did not get a great deal of time to wander around the rest of the show.
Food on the go
There is something quite beautiful about the simplicity of smoking food that is attractive to folks that makes them want to just come in and try some – it certainly is not for our good looks 😉
A busy stand
There was some time to get out though and catch up with folks. I missed Steve’s class on prepping rabbits but by the look on his face it went well.
Dave Budd was as usual working away but unusually he was having to be his own pump monkey on the forge – Where were you Emily? He needed you 🙂
Our neighbours at the show were Sonni and Angela from Beneath The Stars Leathercraft – the nicest set of neighbours than you could wish for.
Also spotted frequently was Jason bowdrilling away for the visitors. I sat beside him for one of his demonstrations and got some cracking pictures that I made into their own blog – Jason and the Ember Extender.
Catching up with friends
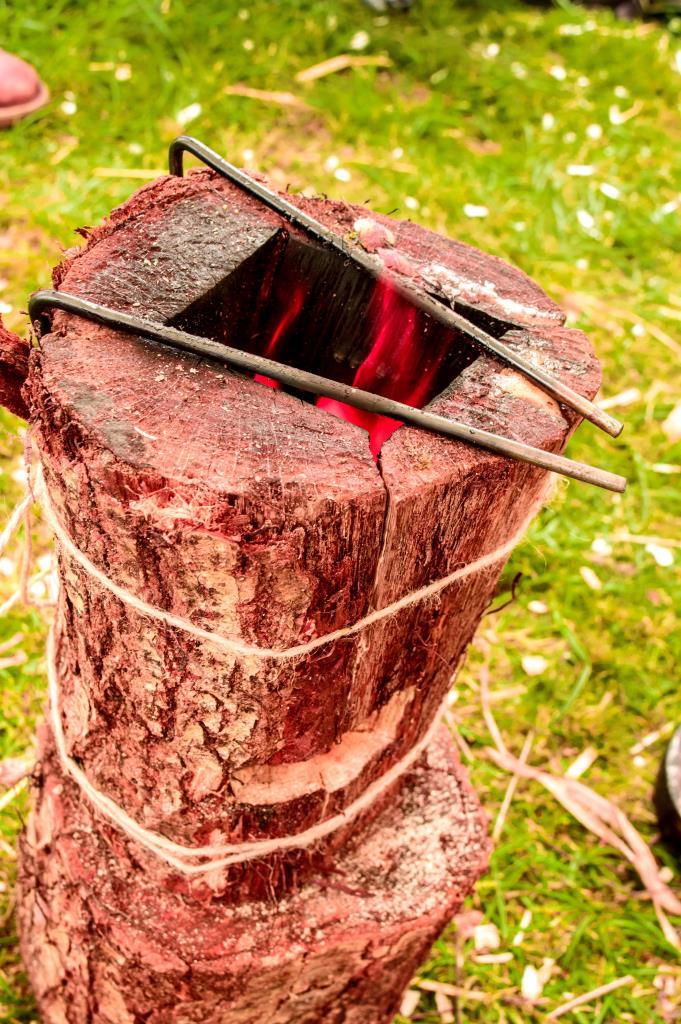
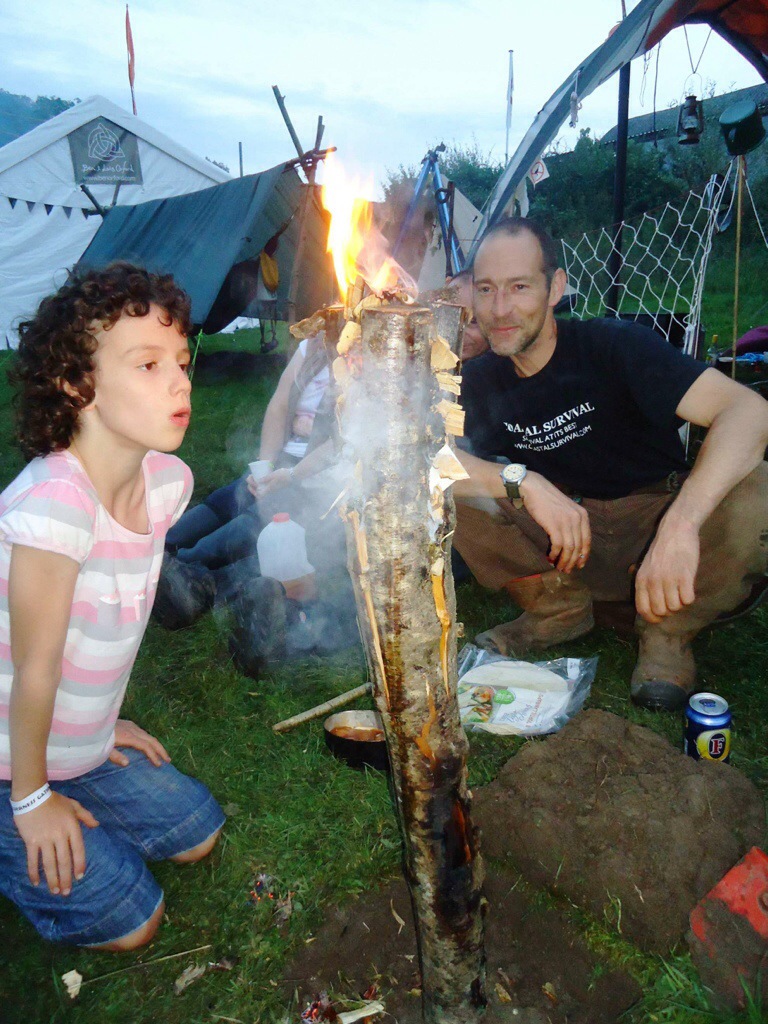
Regular readers will know I am a fan of Damp Log Rocket Stoves and Des was there this year firing them up. This particular Log Rocket was very damp but he persisted and soon had a hearty stove that produced plenty of brews.
Log Rockets with Des
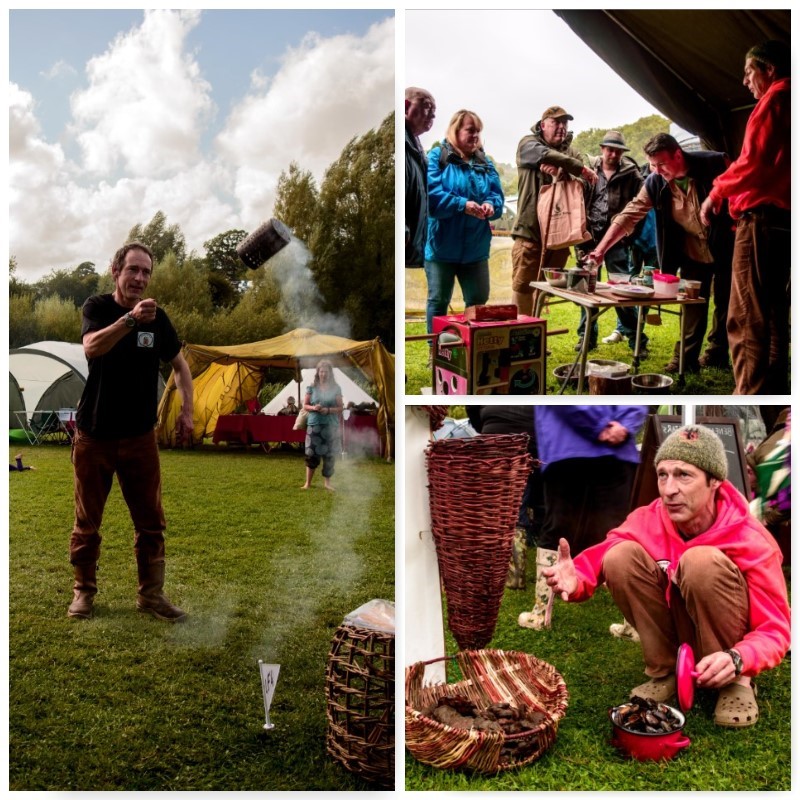
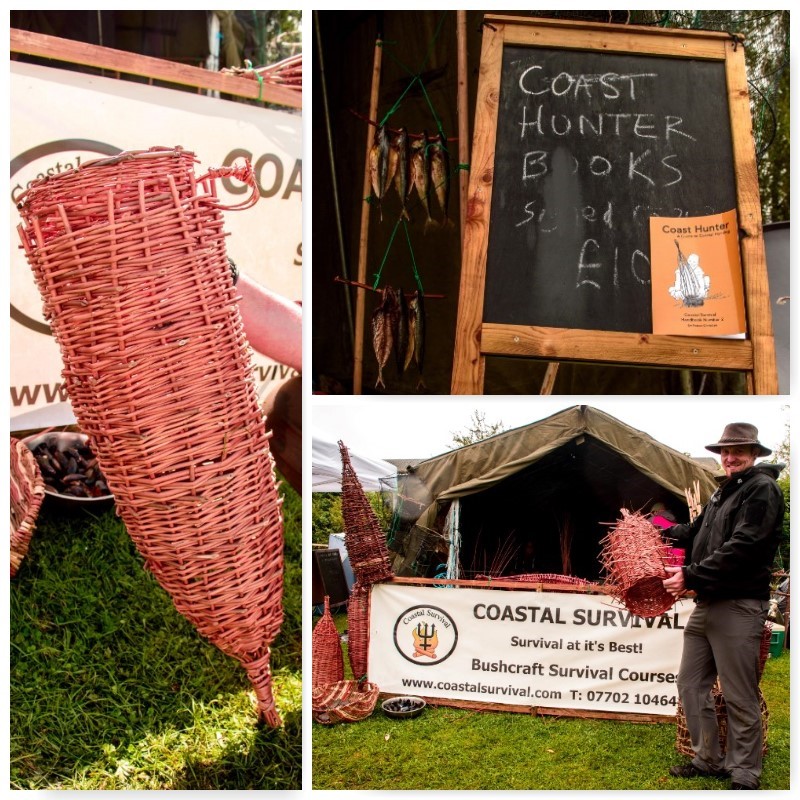
As well as producing smoked food we spent time giving various classes such as this one on making a Bamboo Fishing Spear. This simple device does not take long to make and really packs a punch.
Building a quick fishing spear
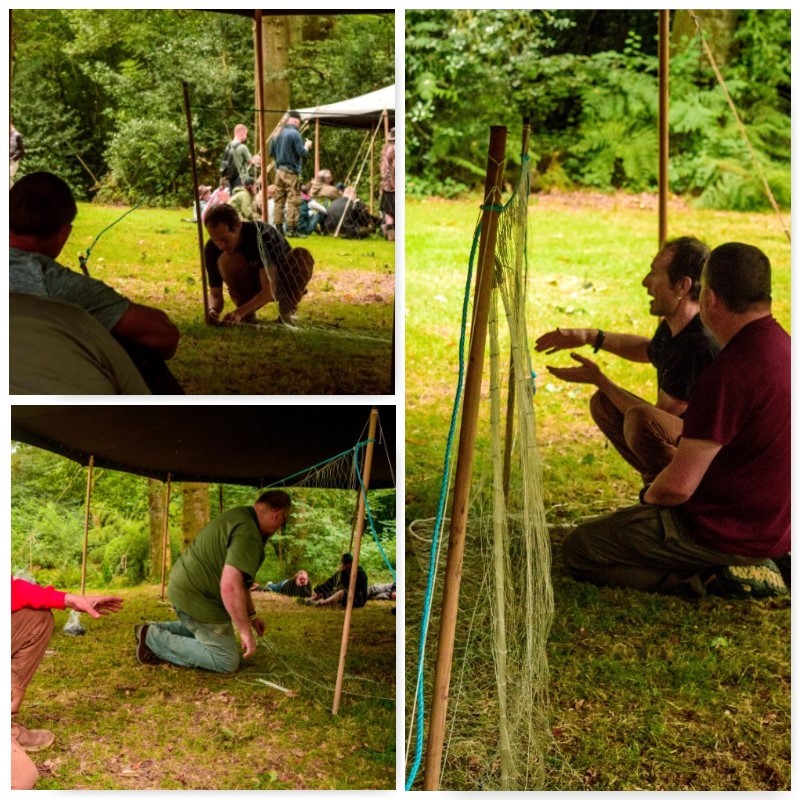
No Coastal Survival course would be complete without a bit of net making. Once again Fraser was up in the classrooms demonstrating his skills and getting the audience netting – I was meanwhile back tending shop – except for sneaking out to take some pics 🙂
Net making
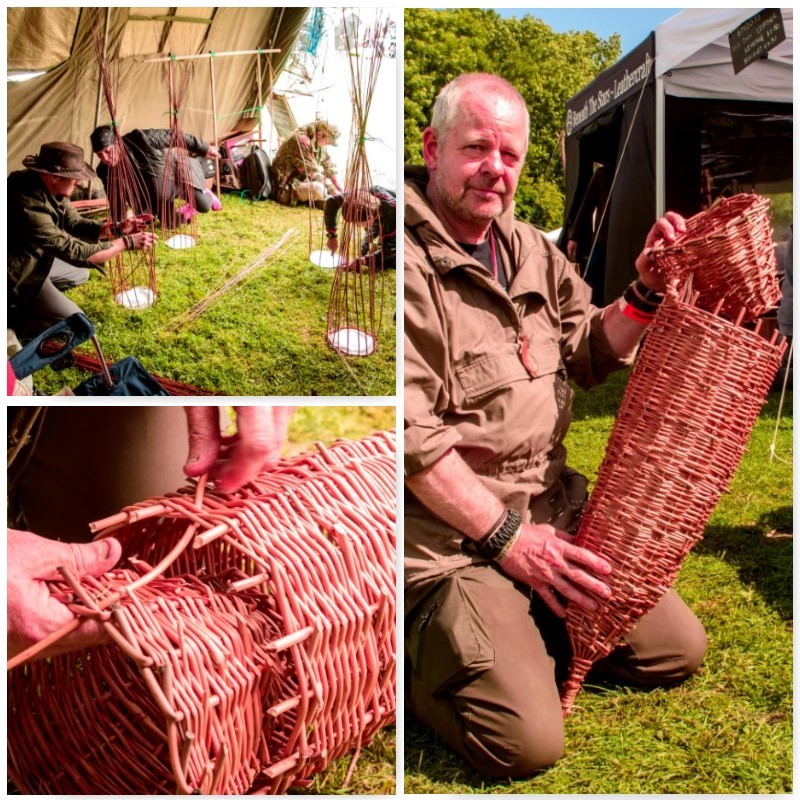
The Masterclass this year was on constructing a Stick Fish Trap. This was planned to take 3 hours but it took most of the day for the students to complete (and for some part of the next day) but it was worth it, These traps are designed to work and do the job of catching your dinner.
Stick Trap making
These Stick Fish Traps are featured in Fraser’s new book Coast Hunter. This is the 2nd book in his coastal series and his copies sold out at the Wilderness Gathering. Look it up in Amazon if you are interested in all things coastal hunting.
The new Coast Hunter book
I have been attending the Wilderness Gathering every year since 2005 so here’s to seeing some of you there in 2017 – An extra day I am told for next year 🙂
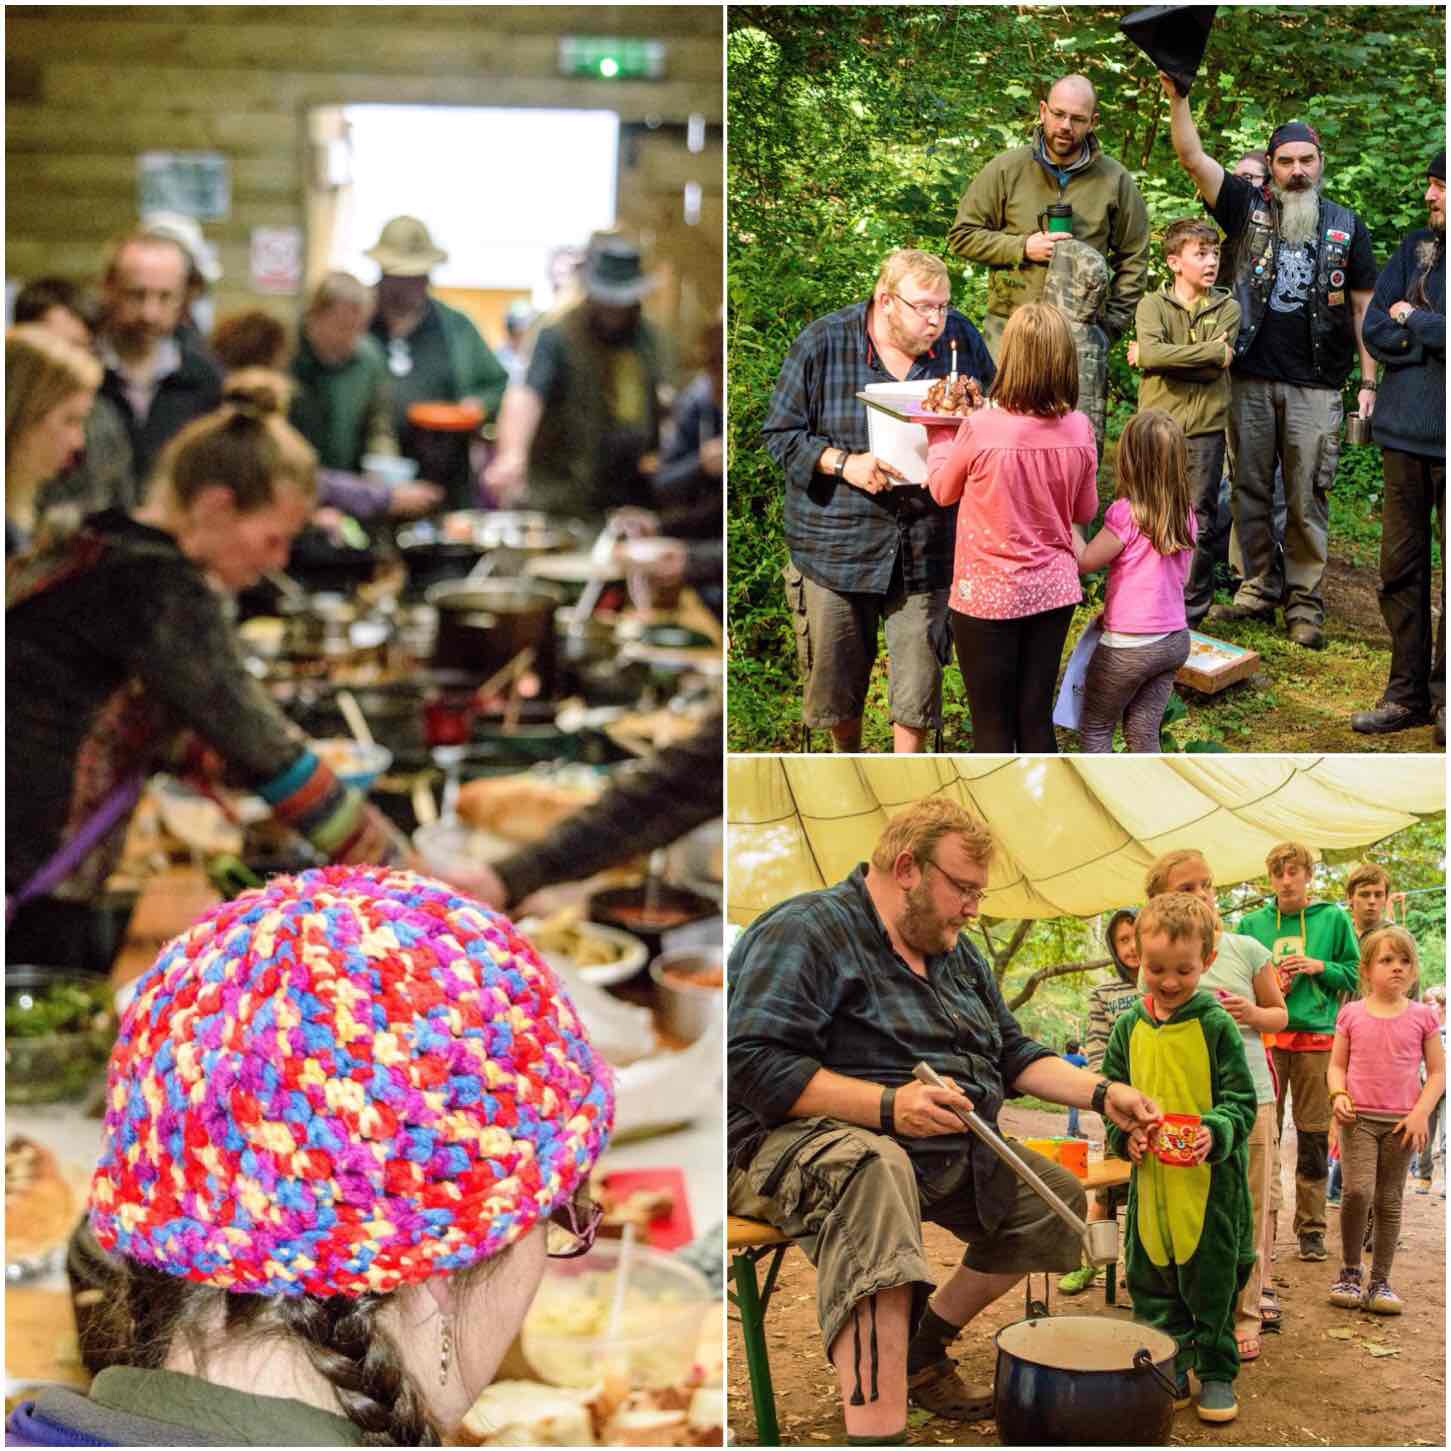
As family holidays go the BCUK Bushmoot is hard to beat. It has it all, with activities for all ages, a stunning location and people who are happy to share their knowledge with you.
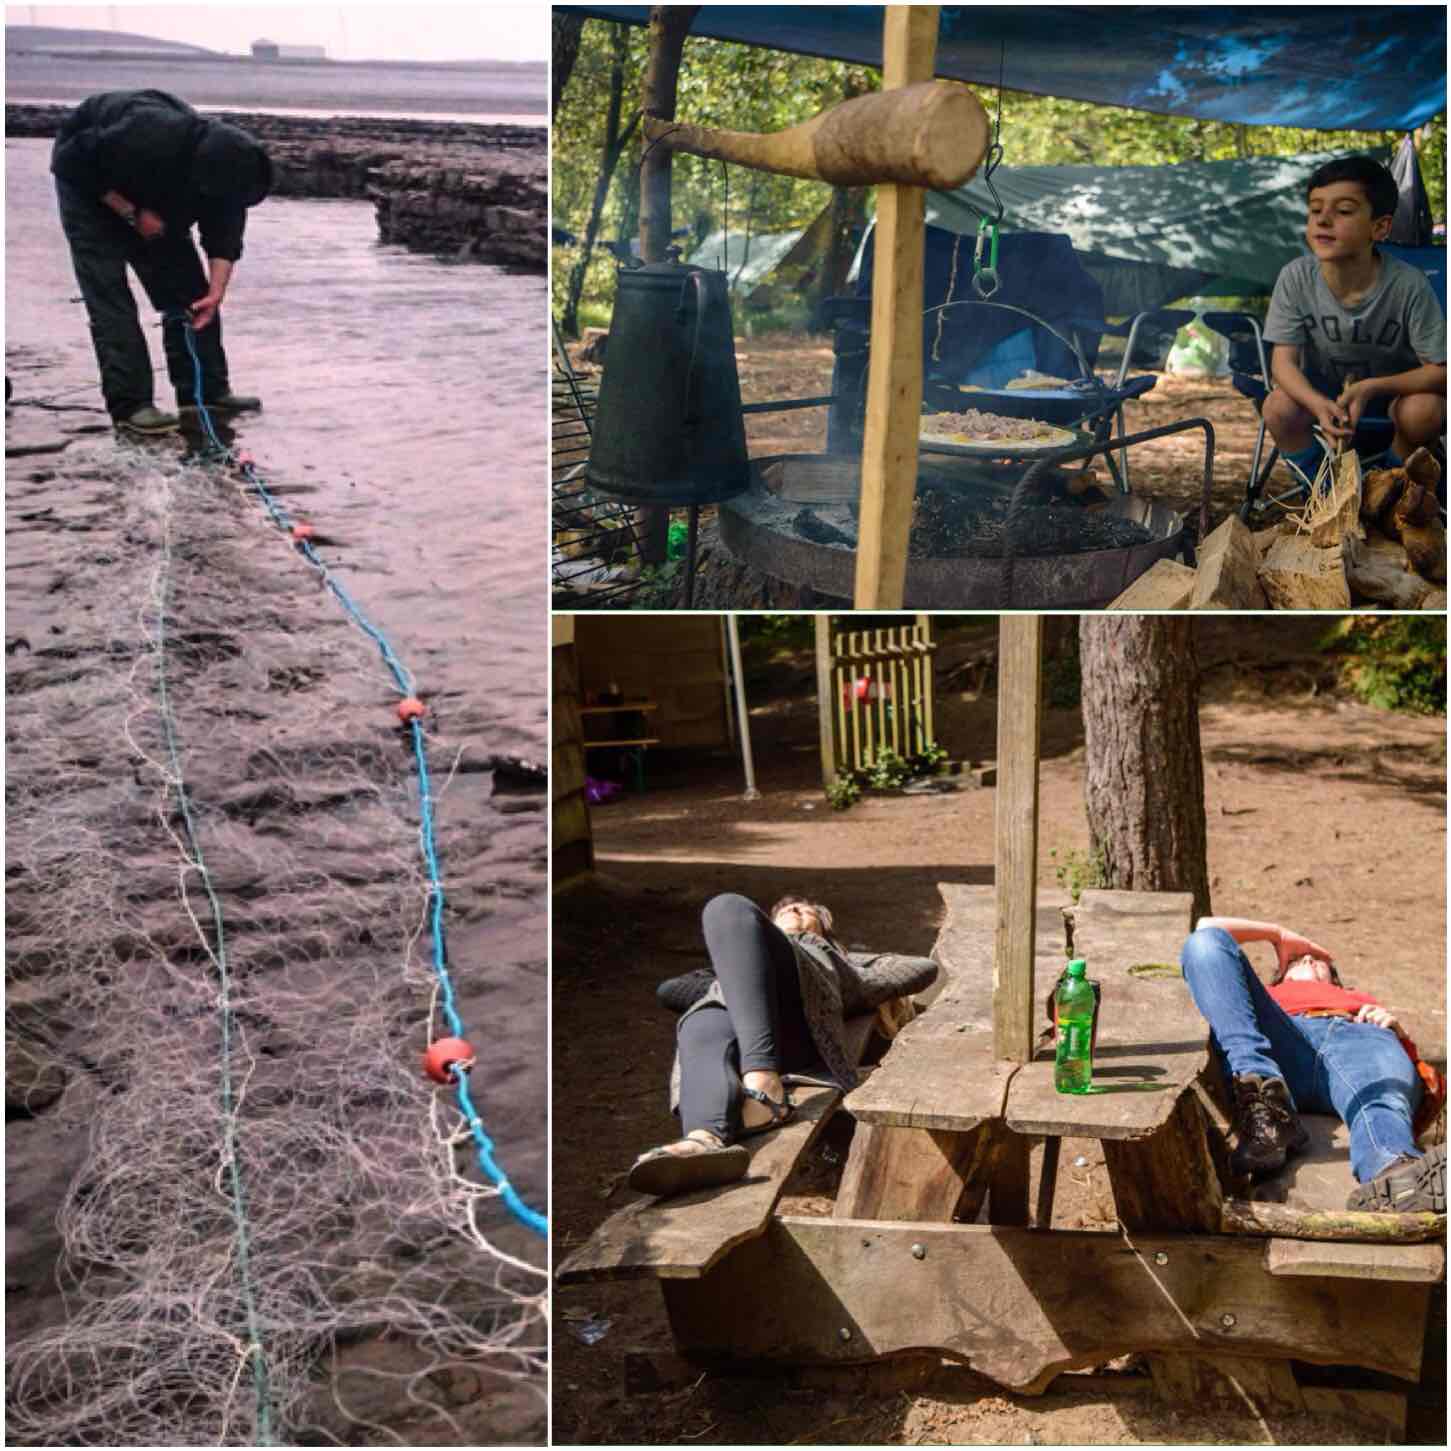
The week started with three days of wet weather however that did not stop us getting out and about. I spent one day with my friend Fraser Christian (Coastal Survival) setting nets and lobster pots out on the coast for a class he was running.
Beginnings
My family spent two weeks at the Bushmoot in early August and the kids cannot wait until next years return trip. The Bushmoot is held on the Ogmore Estate by the beautiful Merthyr Mawr sand dunes in South Wales here in the UK.
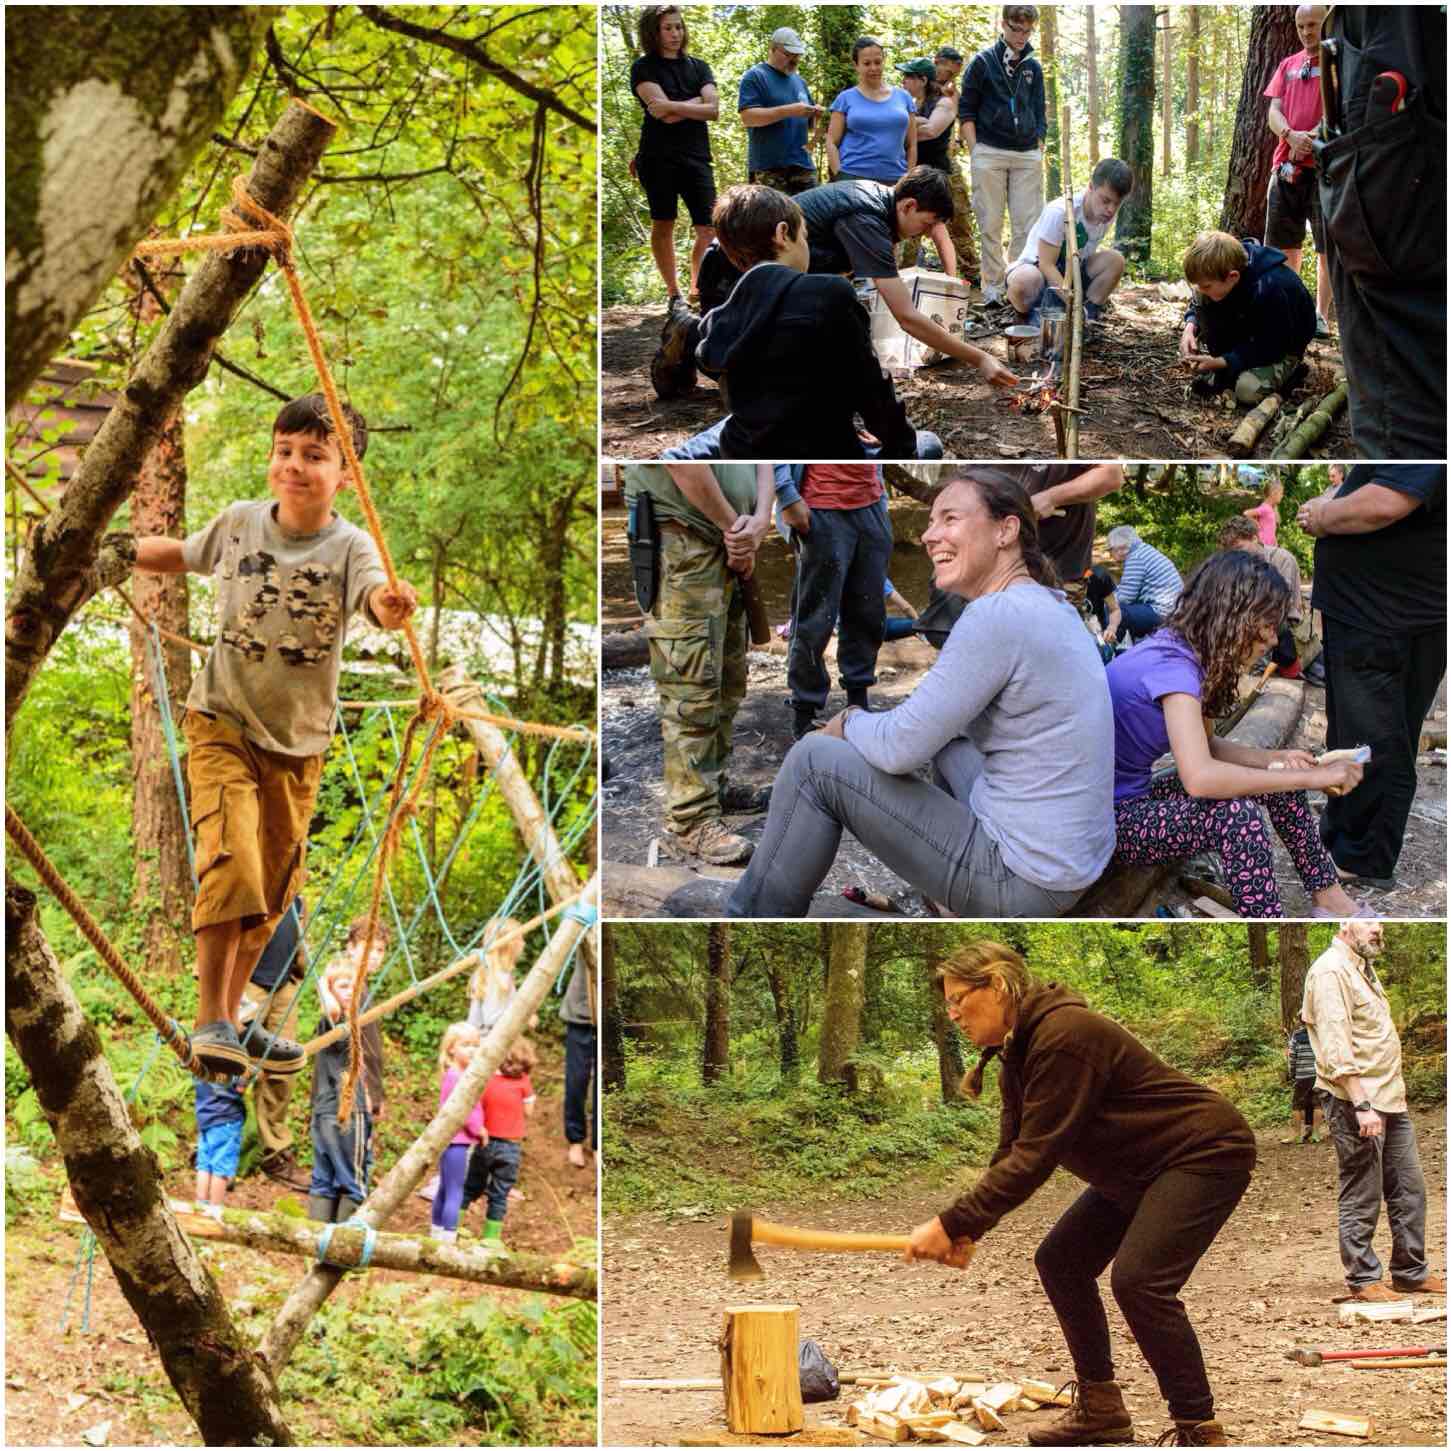
While the kids were off playing I was busy with running or attending classes. Once again this year we ran a Starter Course for anyone new to Bushcraft. Alison decided though to crack on with some more spoon carving this year with our daughter Catherine under Deans watchful eye while Finlay got on with climbing everything he could find..
Play for some – Work for others
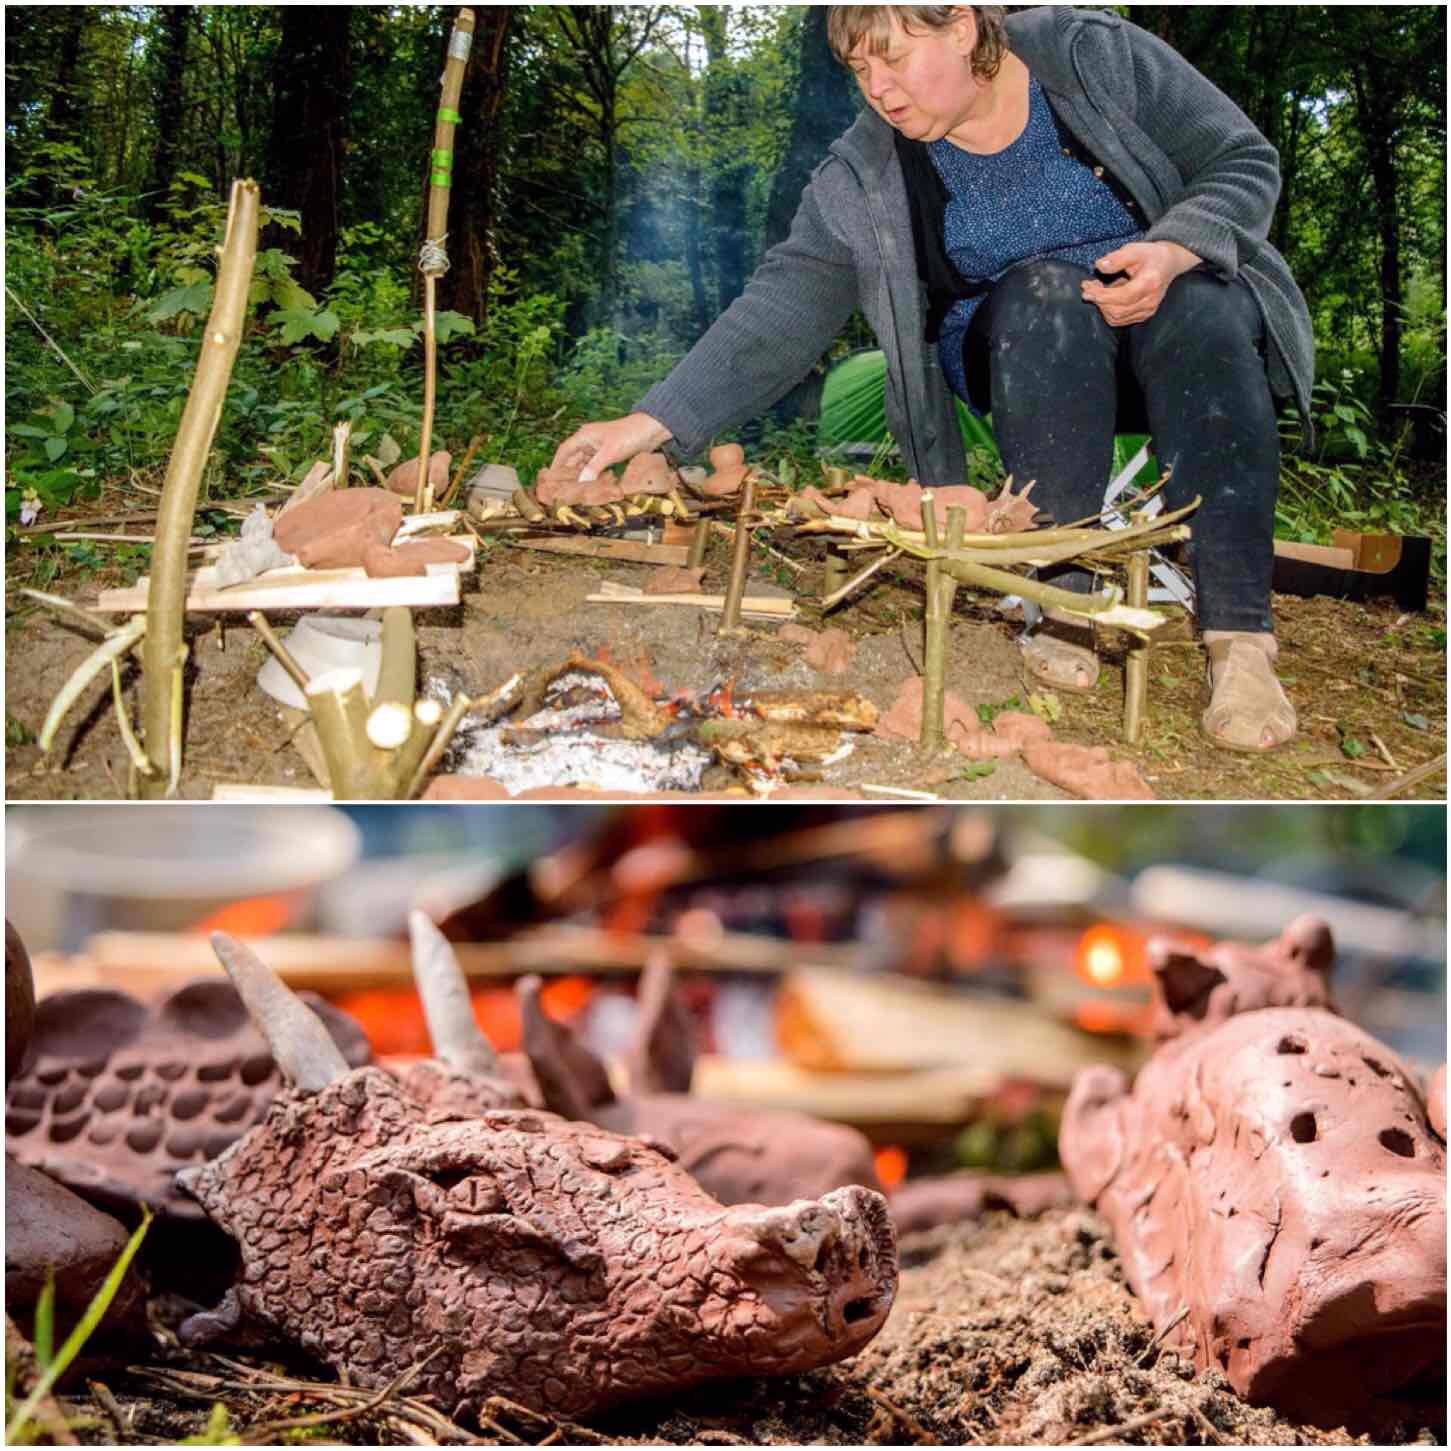
This year I spent some time with Anita (our resident potter) discussing how to make a primitive pot for extracting birch bark oil. Anita came up with a design for me which I am hoping to try out in the winter. Anita ran a number of sessions and a particularly popular one was making clay whistles.
The picture of the clay dragon whistle shown below won the August heat of the BCUK Bushmoot competition – It was a cracking bit of craft
Pottery Art
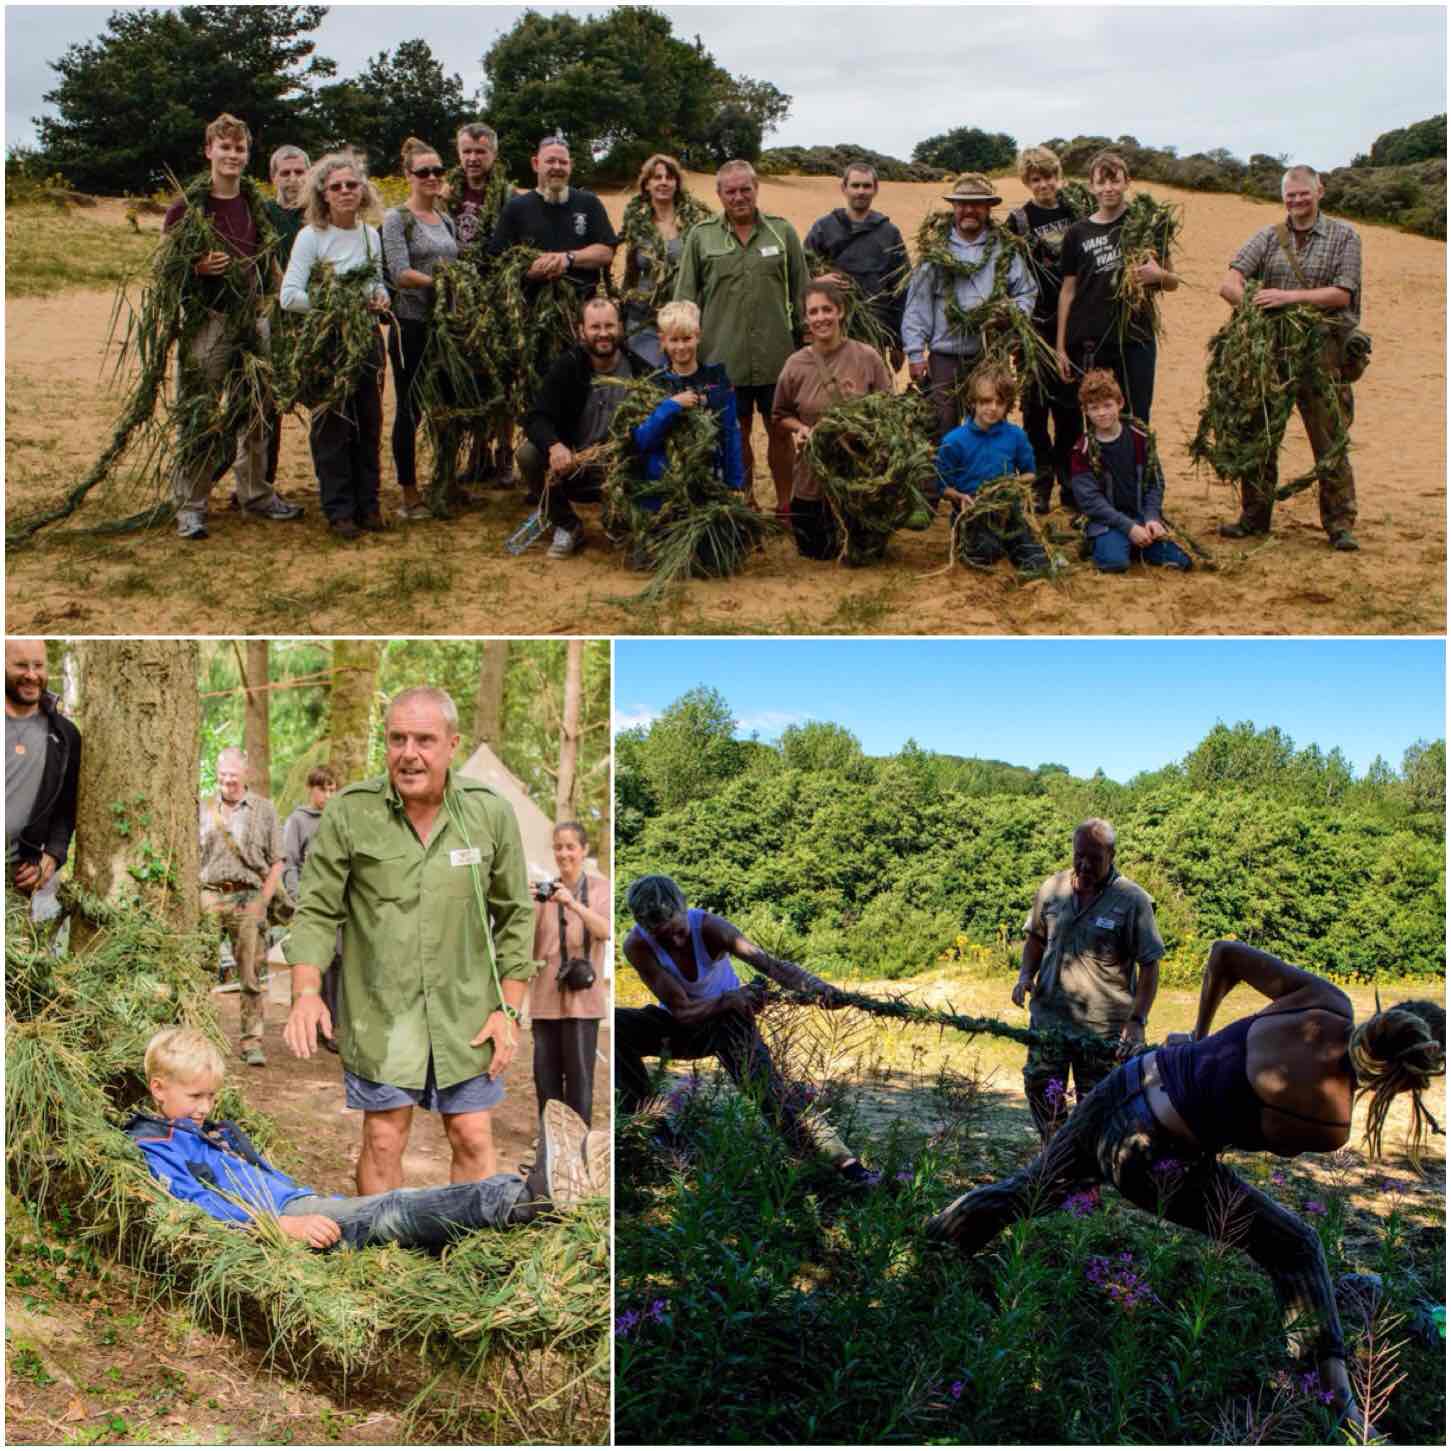
A course I thoroughly enjoyed this year was Perry McGee’s (National Tracking School) grass rope making (I had attended last years one as well). I really like Perry’s style of teaching – it is relaxed in one way however he really does make you work :-).
The whole group made enough rope from grass to make a hammock that took the weight of anyone in the group, This is a skill I have been looking into more after seeing rope that was made out of heather recently up on the Isle of Lewis.
Grass – comfy and tough
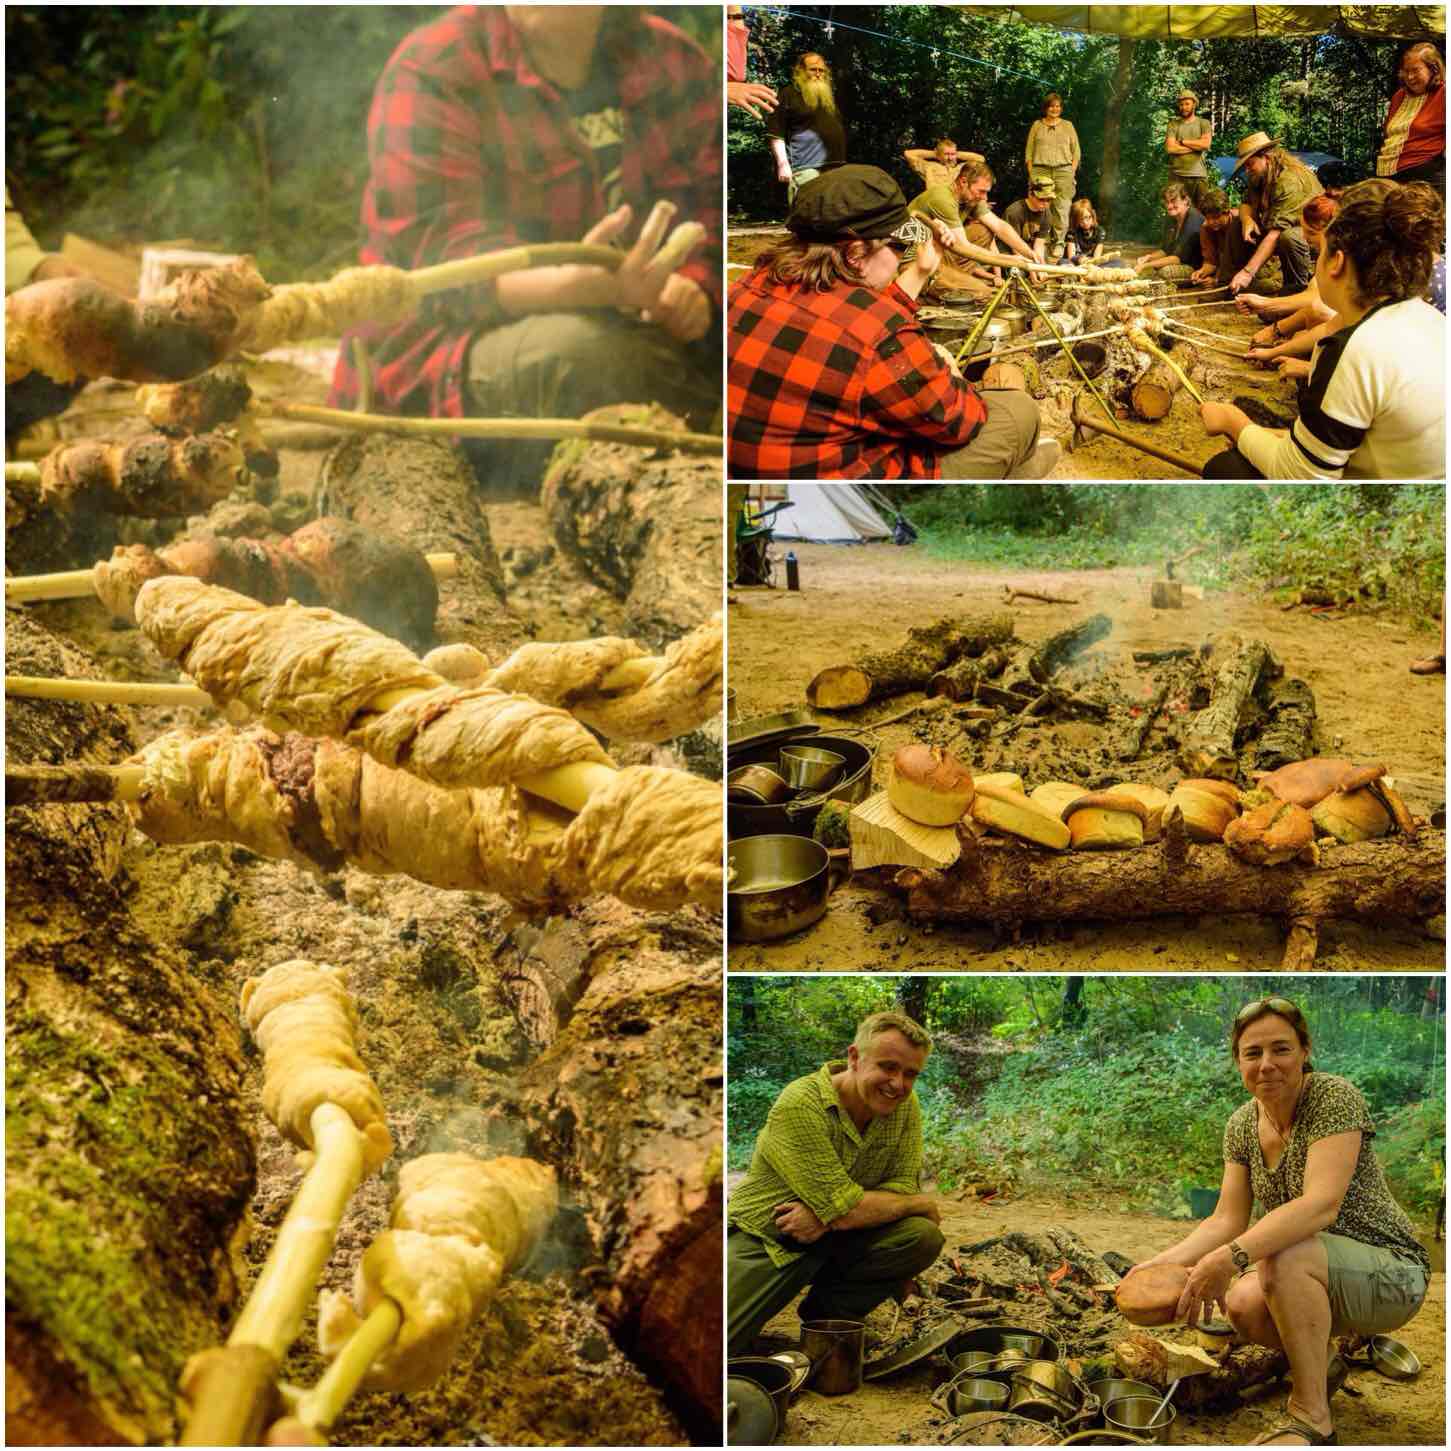
David Willis (Bushcraft with David Willis) attended once again this year and his class was packed. The smell of fresh baking bread could be detected from afar and I made sure I swung by the class a few times.
Alison attended the class and we were well set up for bread for the next couple of days.
Beautiful Bread
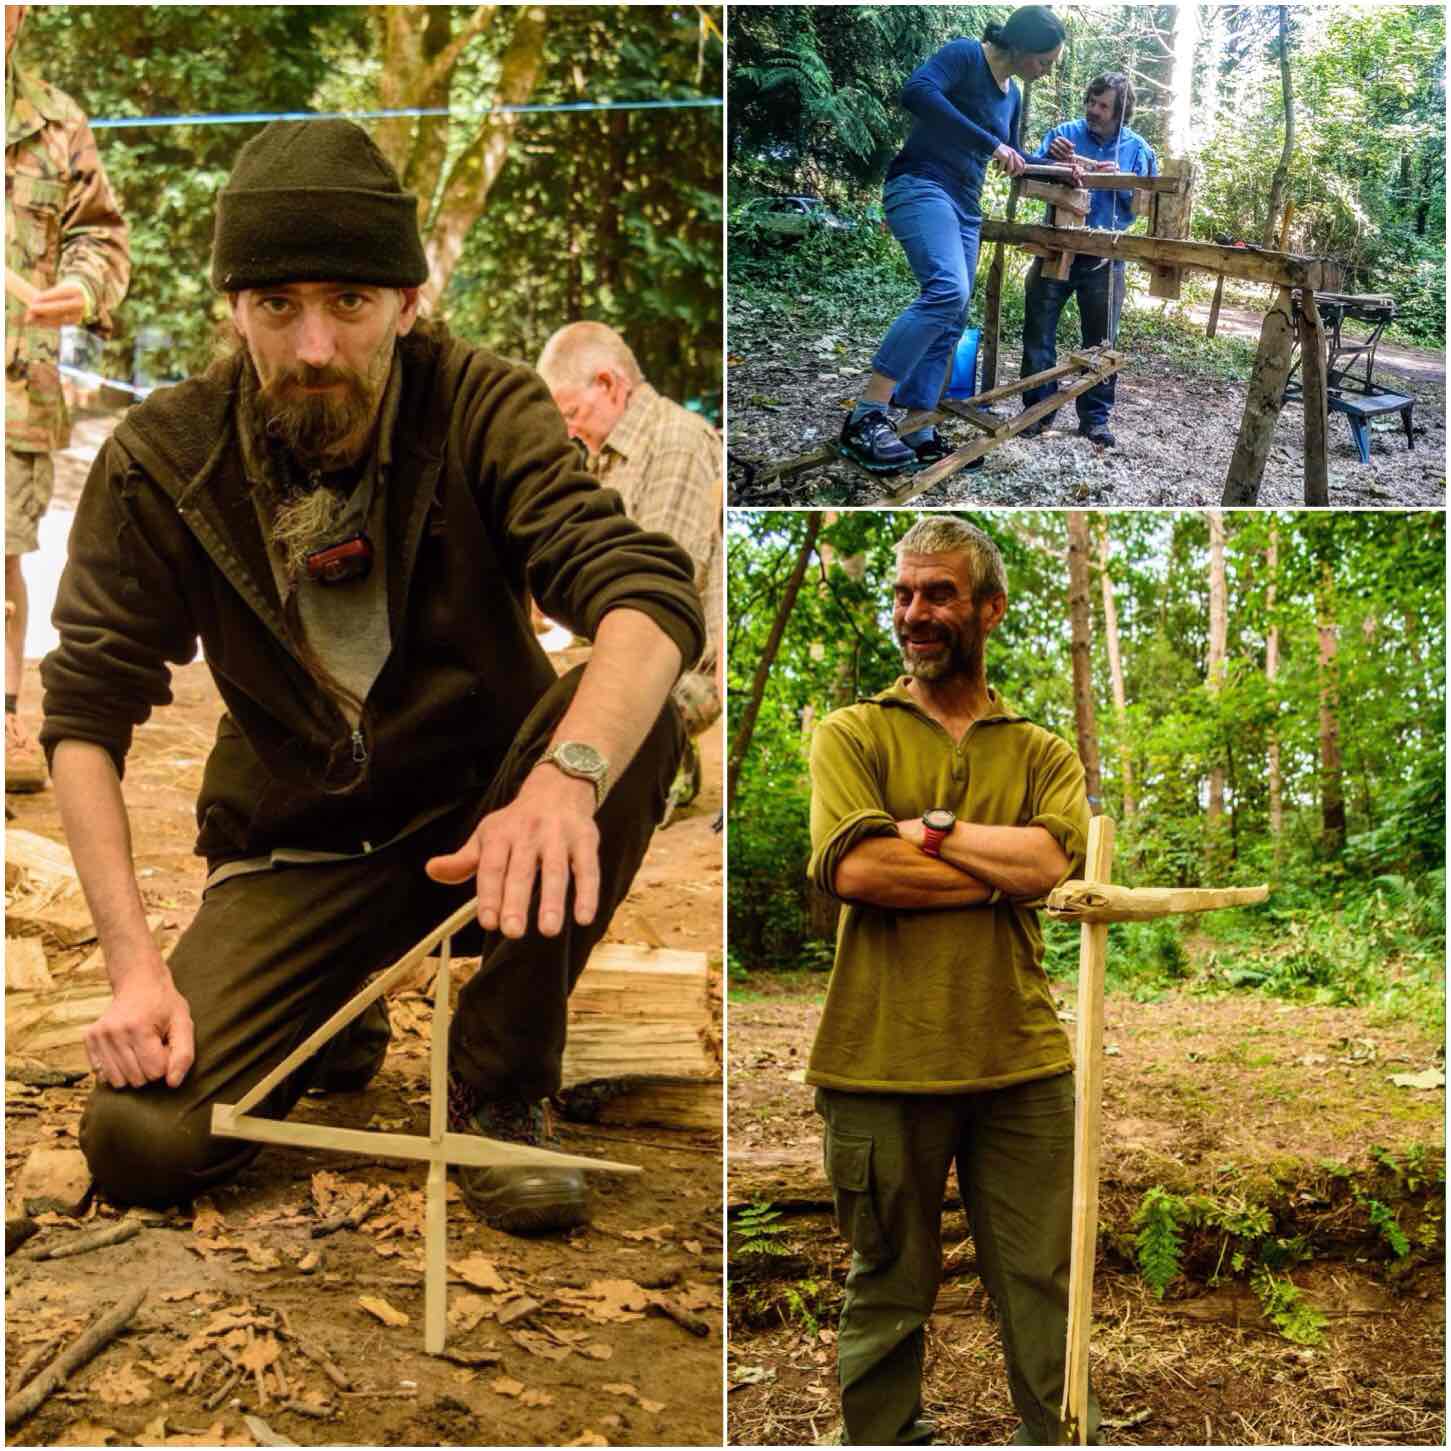
There was plenty of wood working going on as usual this year. Ed Livesy ran a busy class on carving a Figure Four Deadfall mechanism, Roy Budd was running the pole lathe continuously every day (where he got the energy I do not know) and I ran for the first time the Dovetail Campfire Crane class.
This class on the crane I will run again next year as a lot of people have never heard of it and became very interested in it after seeing what my students created. It is basically an adjustable crane made out of one pole.
Wood Skills
Food as usual plays a big part in the life of the Bushmoot. The communal meal was a great success again, Tony got himself a lovely birthday cake and the kids enjoyed a few evenings supping hot chocolate around the fire.
Top Scoff
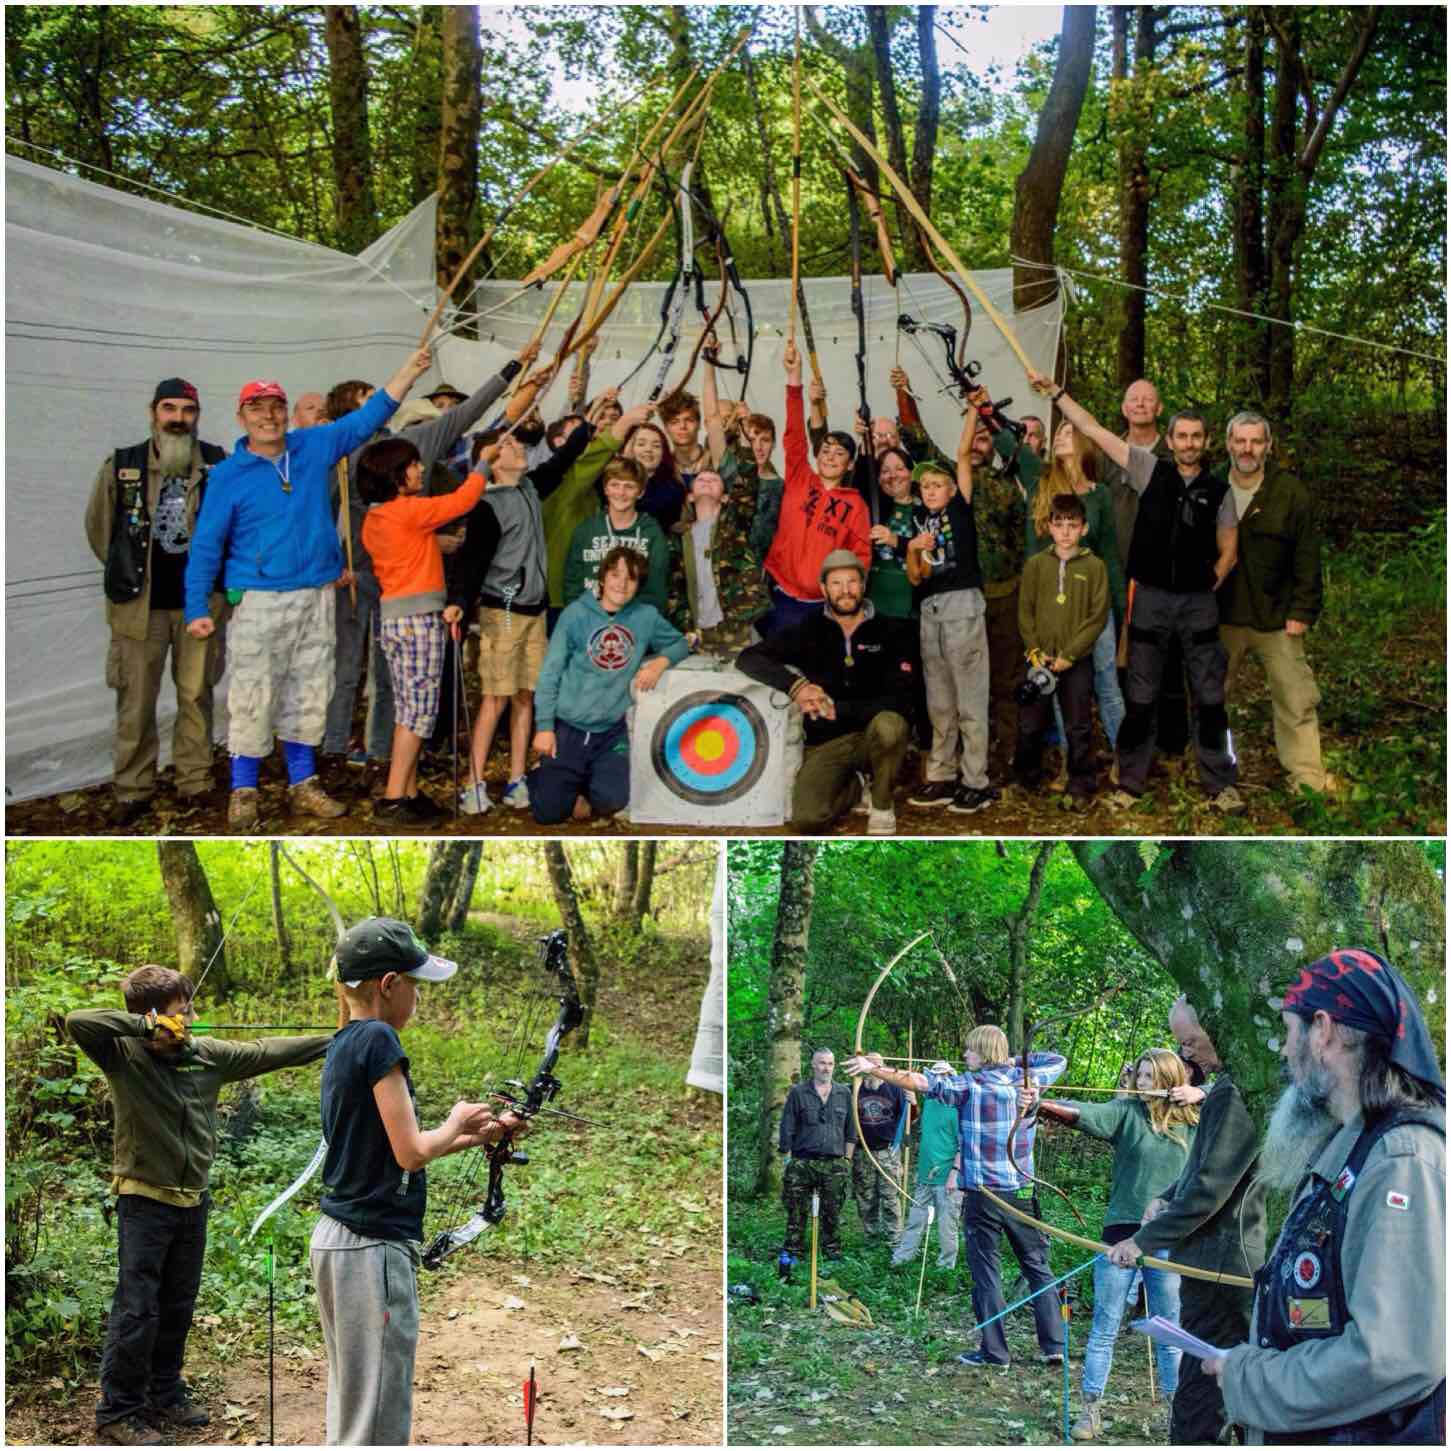
It must be getting on 6 or 7 years we have run the archery range with the competition later in the Moot.
We have sessions run most evenings and the competition is broken into two parts (kids and adults). I received many great presents to give away as prizes so thanks to all who donated. The winners are each to receive a handmade bow from Wayne Jones (Forest Knights).
On a down side my Holmegaard bow snapped this year at the Moot. It has been a trusty bow since I made it 8 years ago and it has been used by hundreds of people on my courses. I did though get an Elm stave from Chris Claycomb – so that is a project for the winter.
Down on the Range
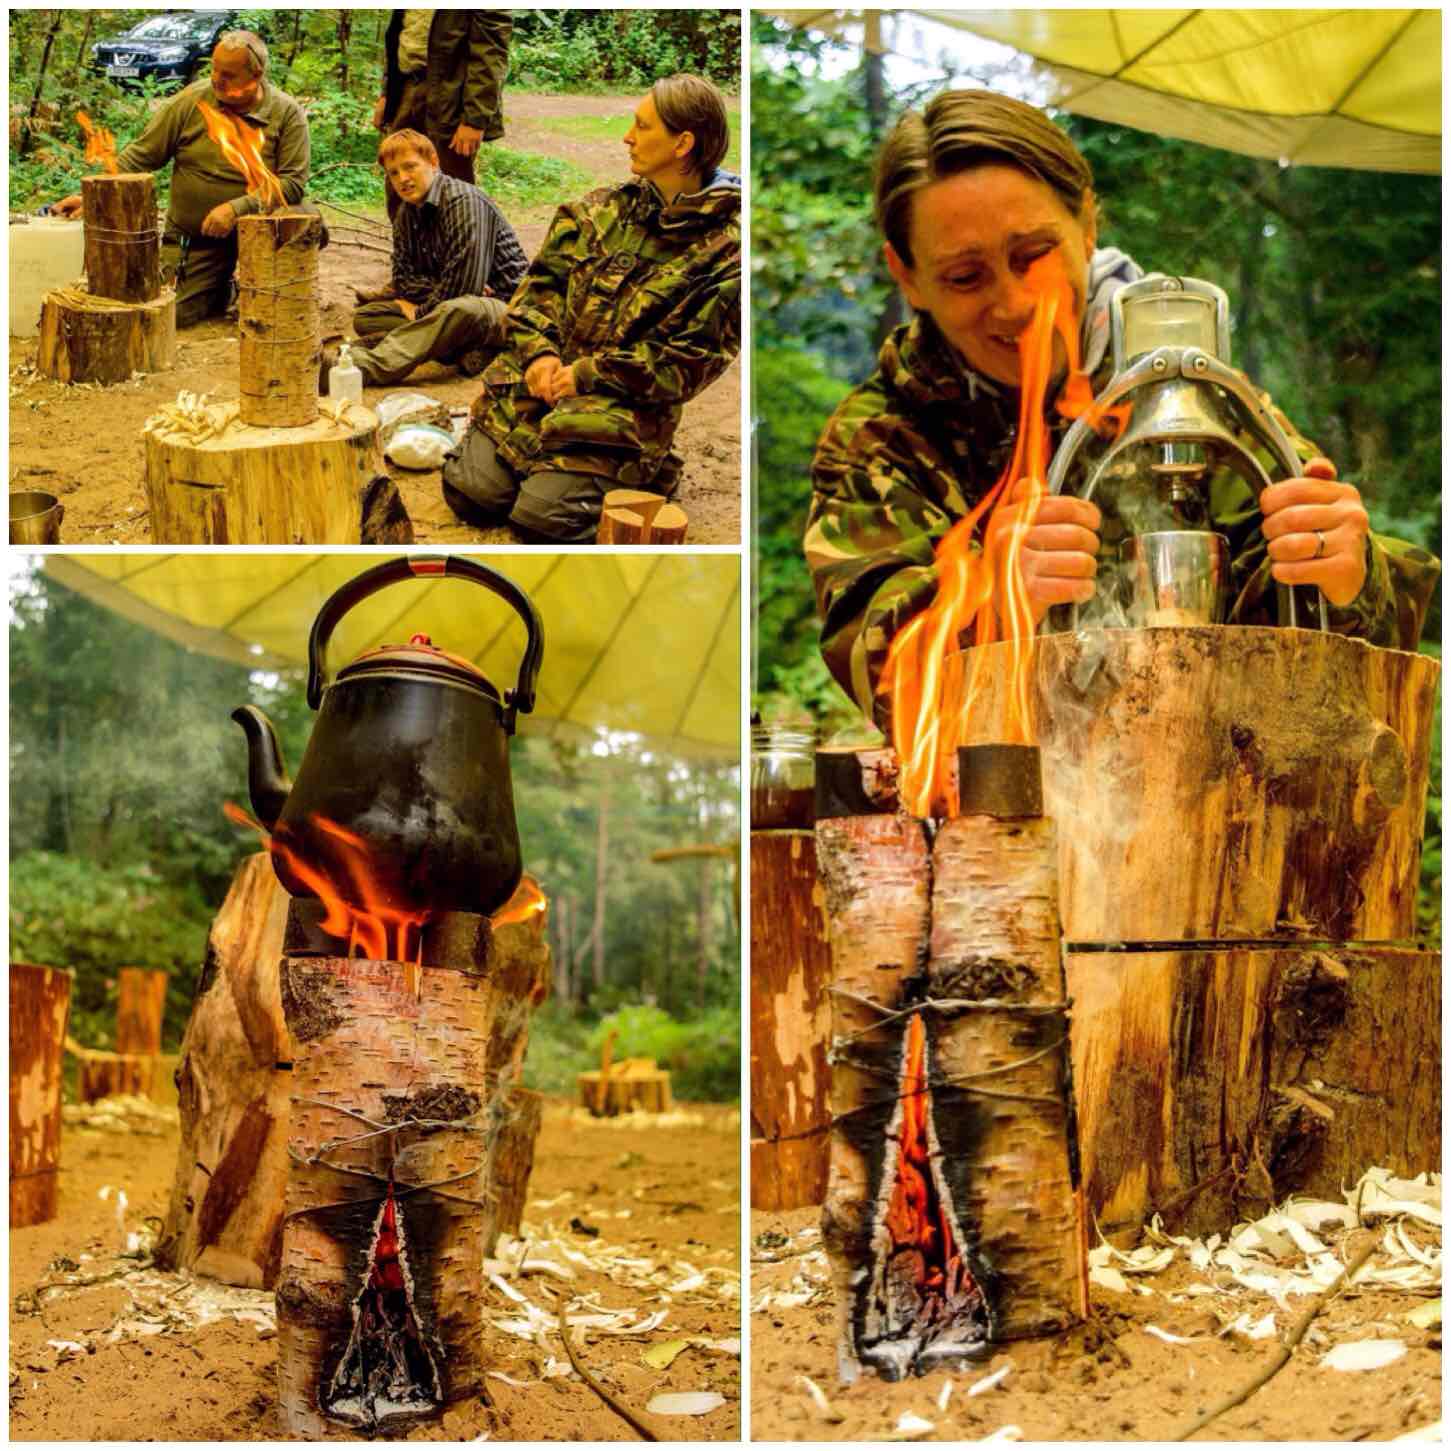
Another first for me was running the Damp Wood Log Rocket stove class. The rain we had earlier meant that all the logs were damp (the spray was hitting us in the face when we split them) so it was great to see after all their hard work all the students managed to get their log rockets fired up.
The coffee I can tell you was brilliant 🙂
Proper coffee from Damp Log Rockets
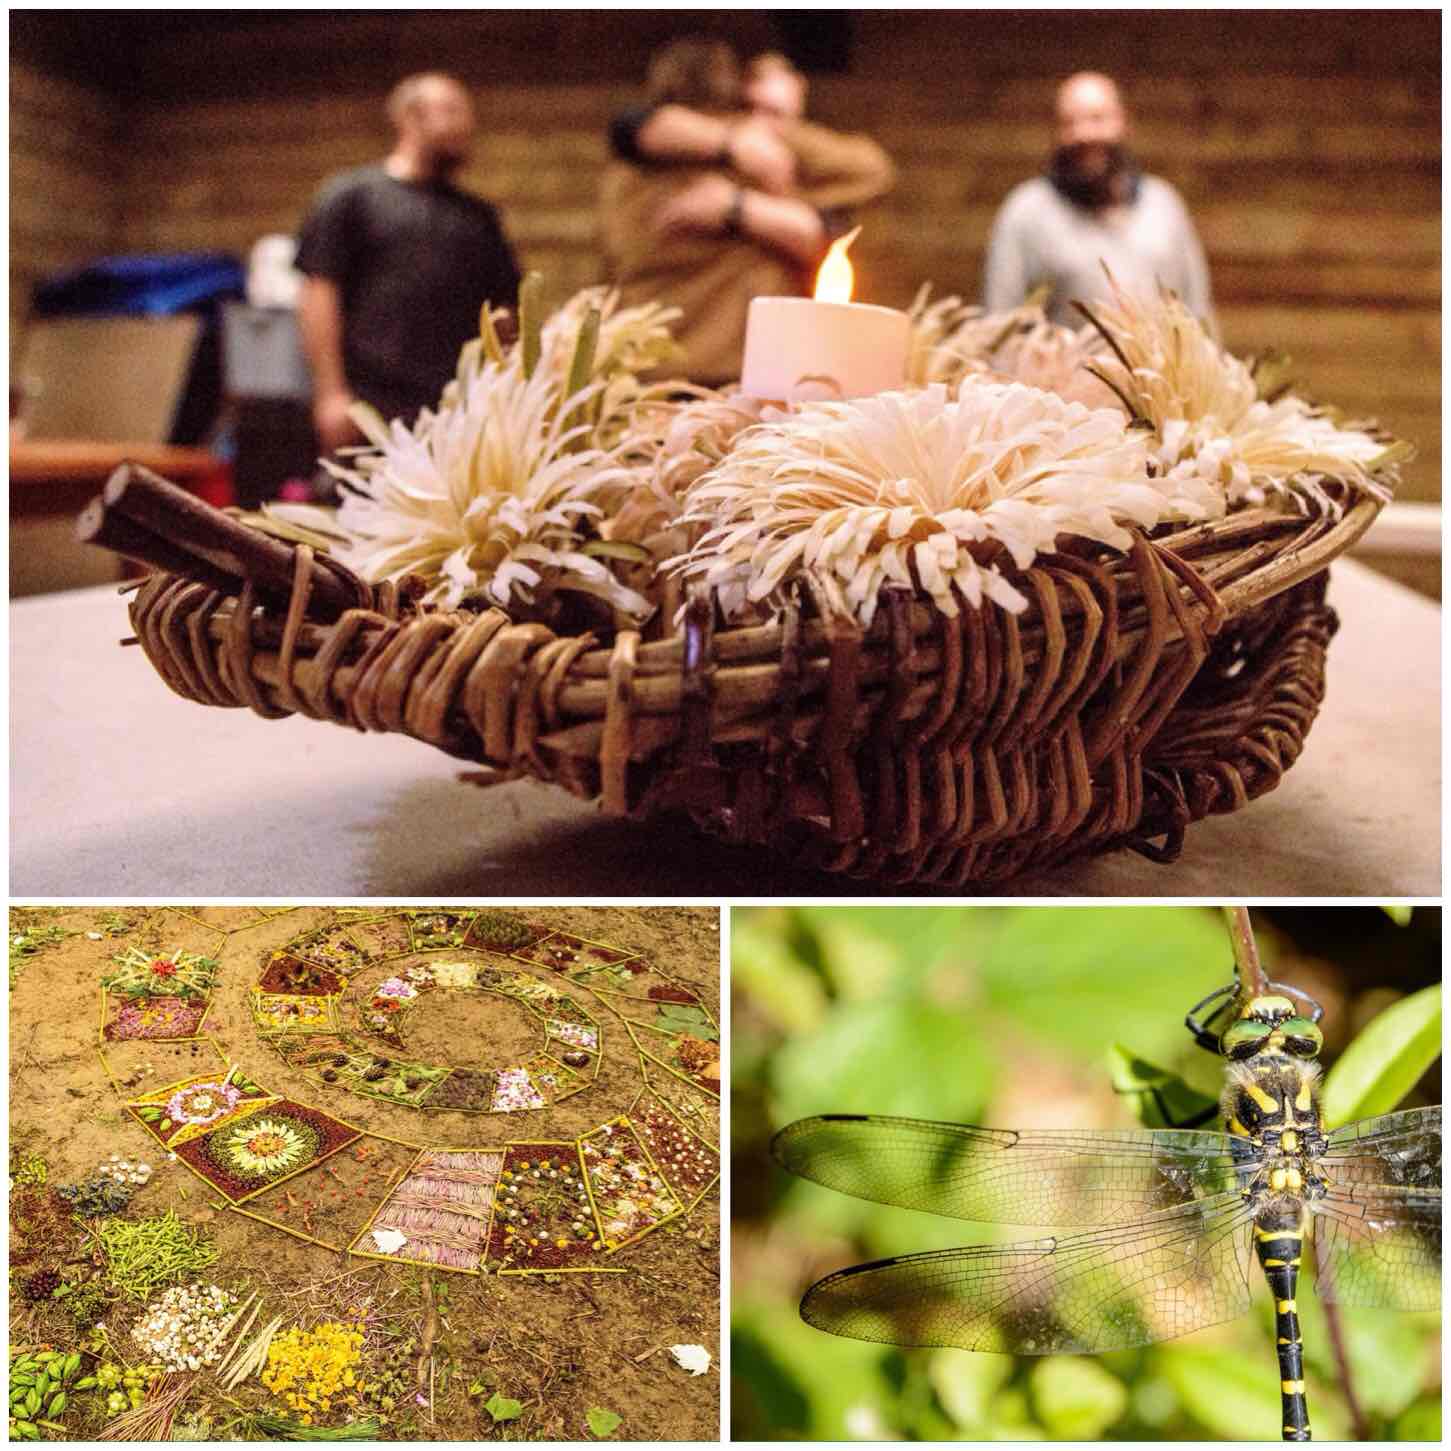
As you can see I did take a few pictures at the Bushmoot however there were a few special ones to me. Below are three that I really was glad they turned out so well.
The first one was a moment I captured when taking a picture of the battery candle sitting in basket of carved flowers. Mark was just saying goodbye to Tony with a manly hug when I pressed the shutter.
Next was sitting beside the beautiful artwork created by Keith Beaney. Every year Keith comes along and patiently creates these works of art for us all to enjoy.
And finally one day someone pointed out to me a dragonfly sunning itself next to the shower block. This little fella was not moving for anyone and really let me get up close and personal to photograph him.
Special Moments
There were too many workshops run to be able to attend them all (approx. 110 were run over the core days) however keeping my trusty Nikon with me I managed to capture a few moments from just some of them.
Wayne was busy teaching knife throwing, Theresa ran a very busy workshop on flint knapping and Stuart spent two days splitting the most twisted trunk in the world without using metal wedges. There were many, many more workshops run by different instructors, I saw some, photographed some but missed many – that is the nature of the Bushmoot for you.
Passing On By
After the core days were over we spent time dismantling lots of the classrooms, mooching by the fire and taking long relaxing walks down to the beach,
Winding Up
During the Moot I finished off doing my 22 Day 22 Push up challenge and videoed it each day. In the video below you will see in the second half of it lots of Bushmoot locations, finishing up with pushups in the swash zone in the sea at Merthyr Mawr,
So if you are into activity holidays that do not cost the earth then head on down to the Bushmoot next year.
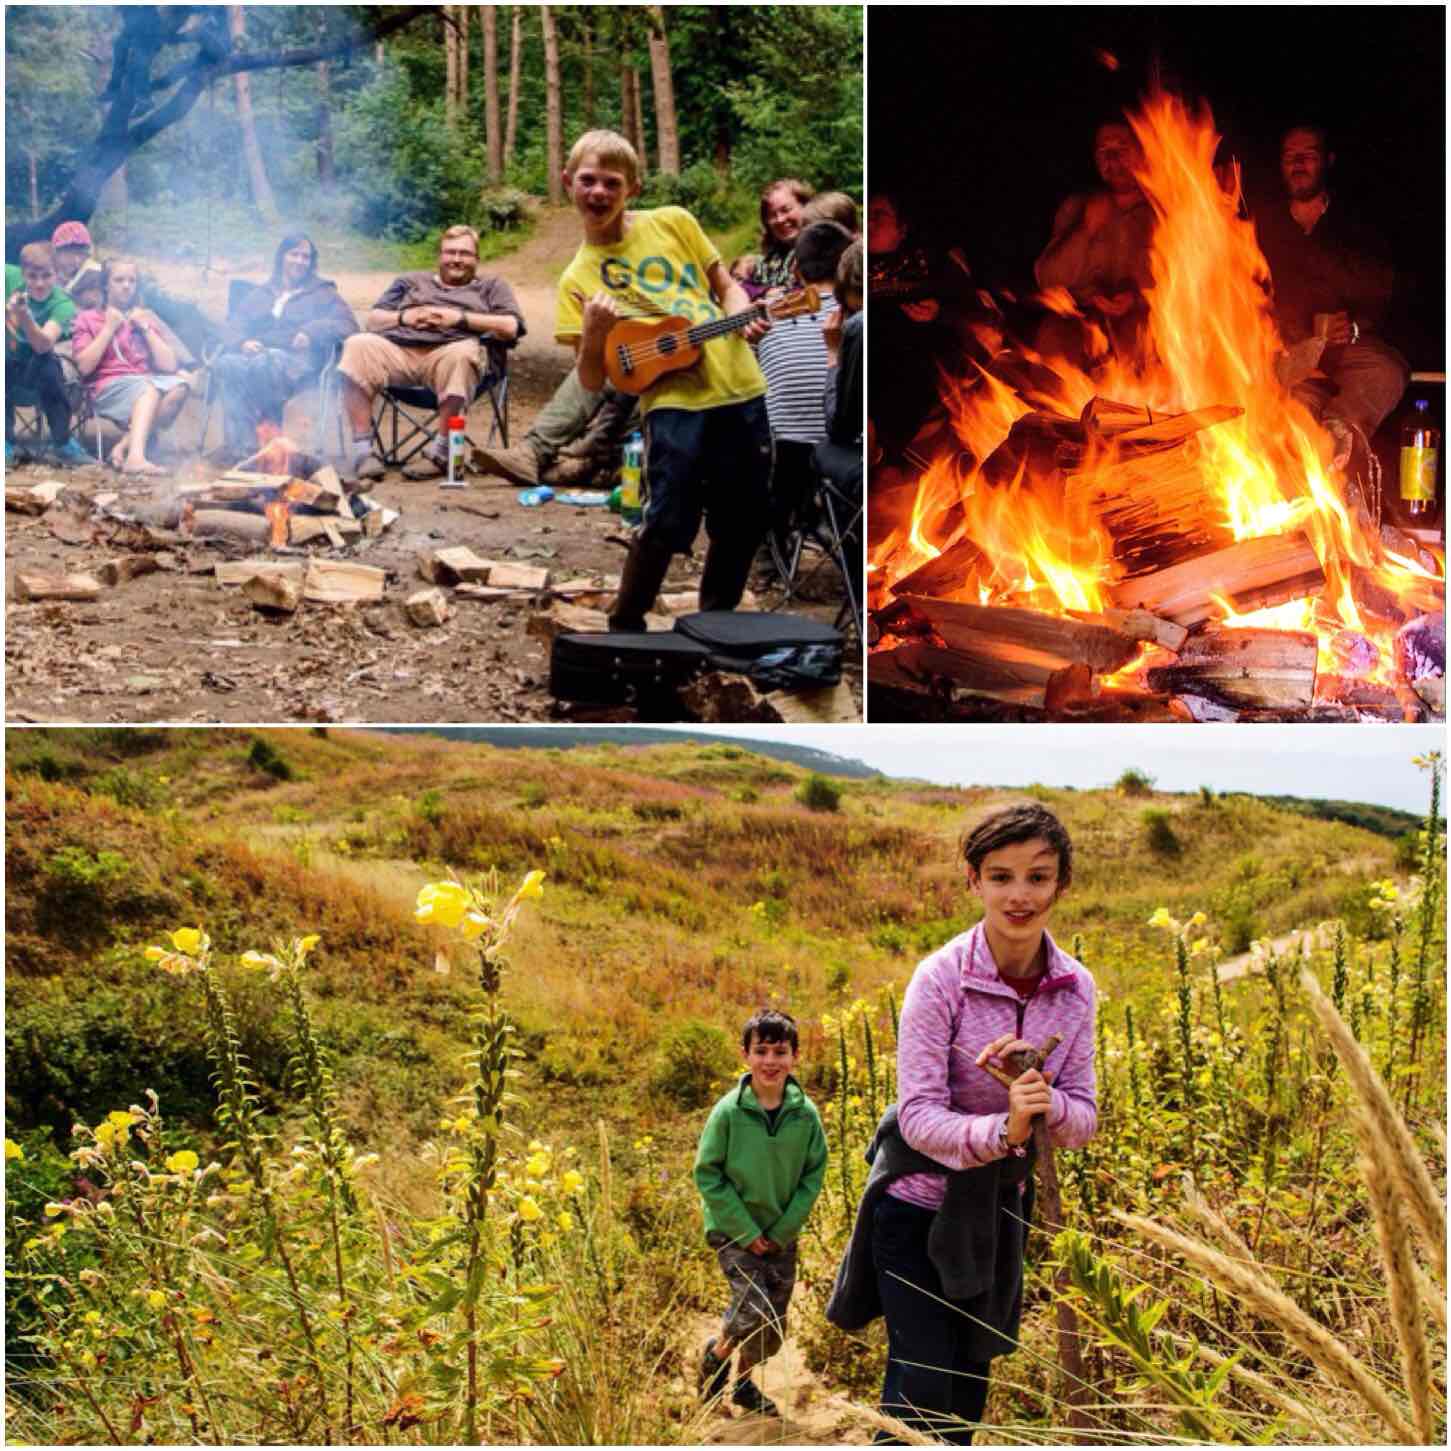
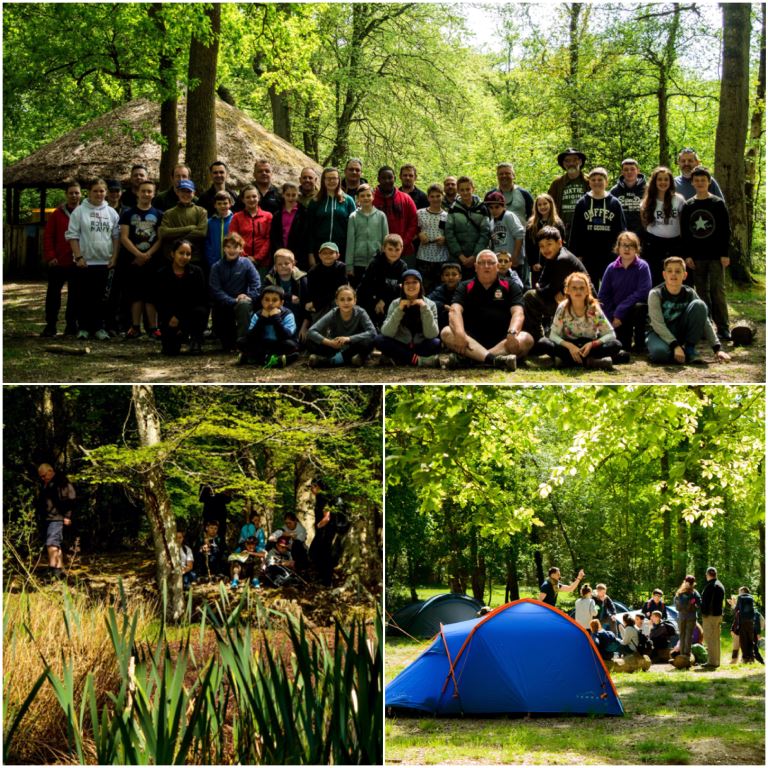
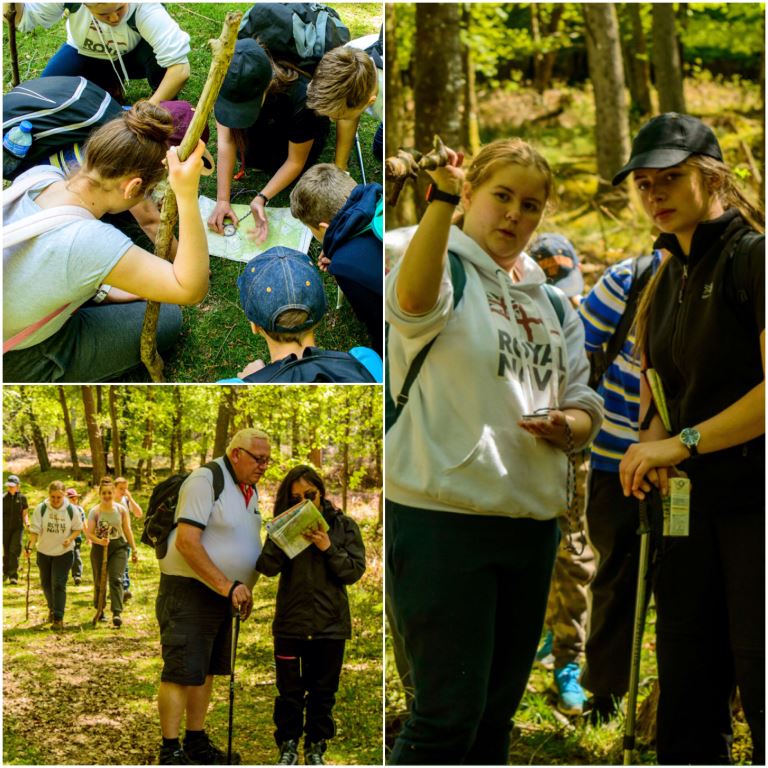
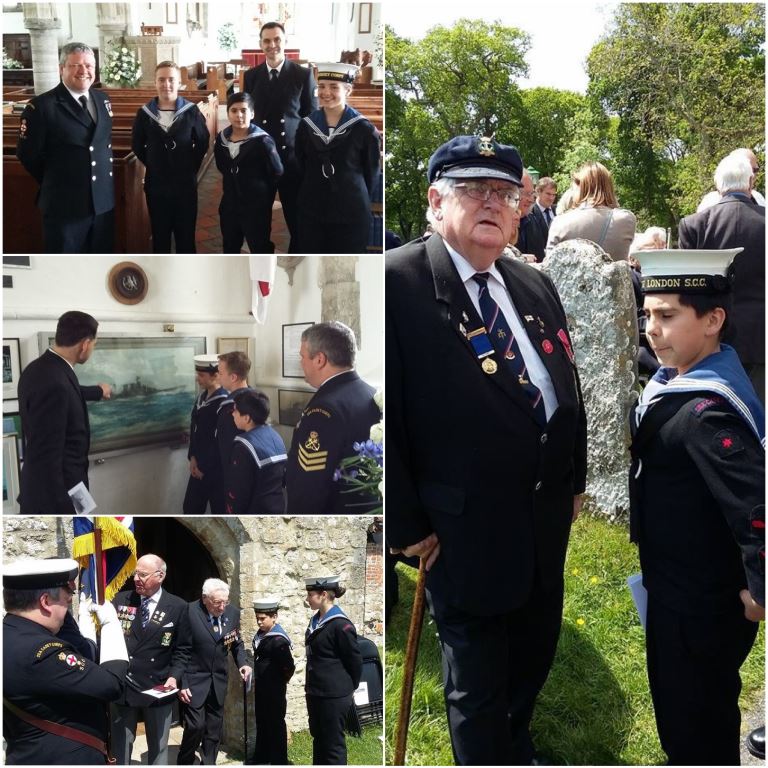
Recently I have been reading a lot on social media about how kids and adults seemingly do not interact enough with nature. This is now the fourth year I have written about our annual trip to the New Forest so I would like to say that whoever writes these general stories has never been out with the Sea Cadets. We immerse both our cadets and staff in nature, so much so that they keep coming back for more. This is the story of just one of the many expeditions we run throughout the year.
This particular expedition is arranged each year so that we can skill up our cadets and staff in Adventurous Training (AT) activities and also to support the annual HMS Hood Remembrance Service at Boldre church in the New Forest.
The Crew
The weekend is organised by Chief Petty Officer Paul Townsend (City of London Sea Cadets) and we have cadets and staff attending both from London and Southern areas.
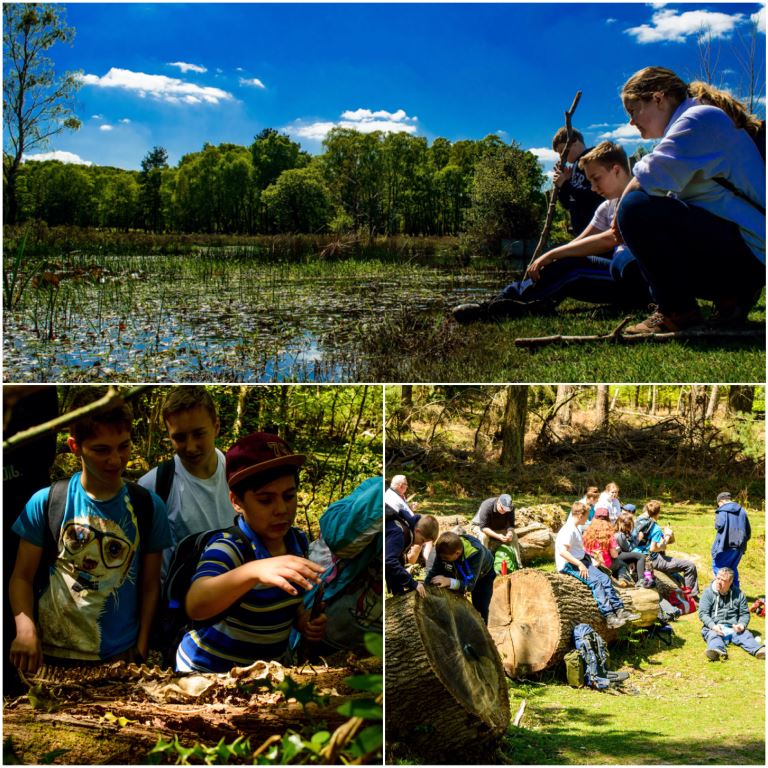
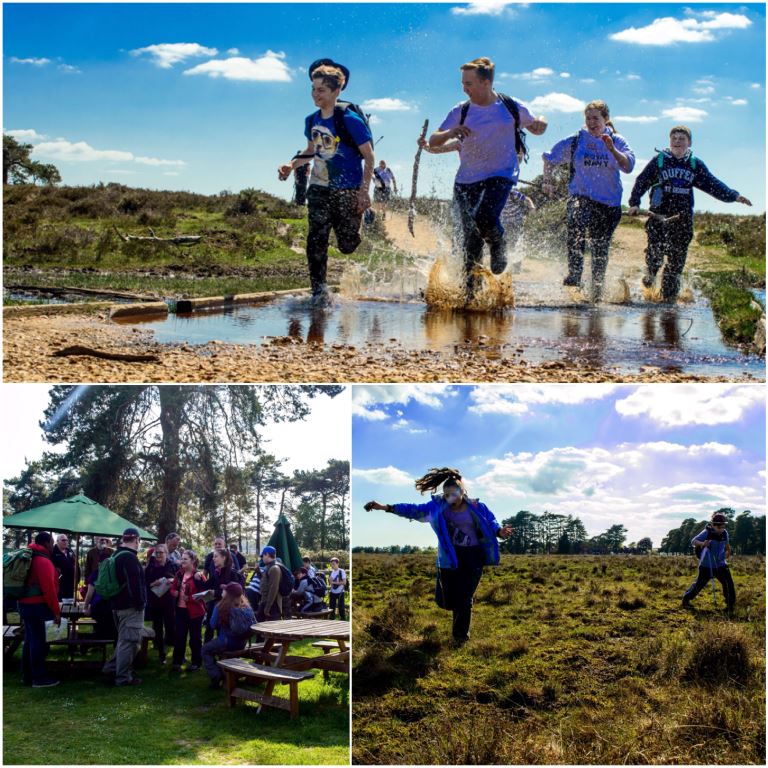
Our aim is to immerse everyone fully in nature as well as teaching them the traditional AT activities such as map reading, compass work and camping. This weekend saw the cadets finding the skeleton of a fox, observing pond life and scrambling all over the woods.
Relaxing and Exploring
We have various groups set up over the weekend focusing on different skills. There was a group for the Juniors, various groups for the older cadets and a Duke of Edinburgh’s (DofE) group out as well.
I took out a group with Paul, Jess and some of the older cadets, The cadets were looking to gain various camping tickets and Jess was under training for her Basic Expedition Leaders (BEL) award. This requires her to have a high level of navigation skill however it also requires he to have the skill to pass that knowledge onto others.
Map and Compass work
Now it is not all hard work and no play by any means. Soon the cadets were flying through the puddles and we took time to rest up on the Saturday afternoon at the hotel near Beauly Rd station. On the way back to the campsite at Ferny Crofts the way got pretty boggy so it was fun watching the cadets trying to keep there feet dry. They soon learnt how to select a good route along the way.
Fun for all ages
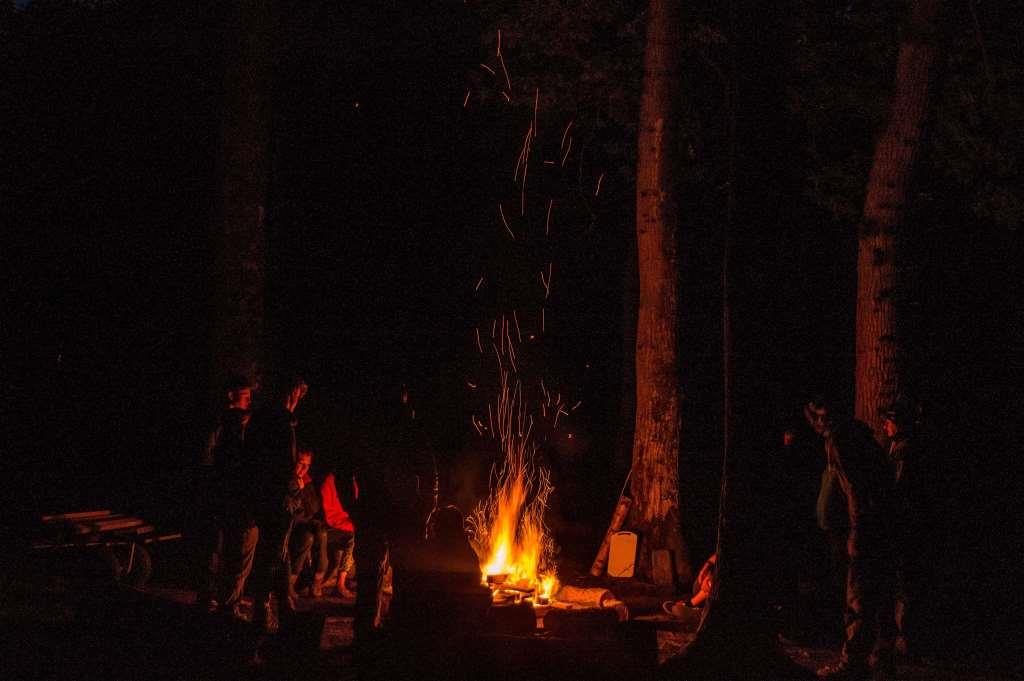
Evening activities involved the usual football, netball and run out games before it was marshmallow time.
We had enough wood this year for the cadets to have their own fire and soon it was sparking away merrily.
Woodland TV
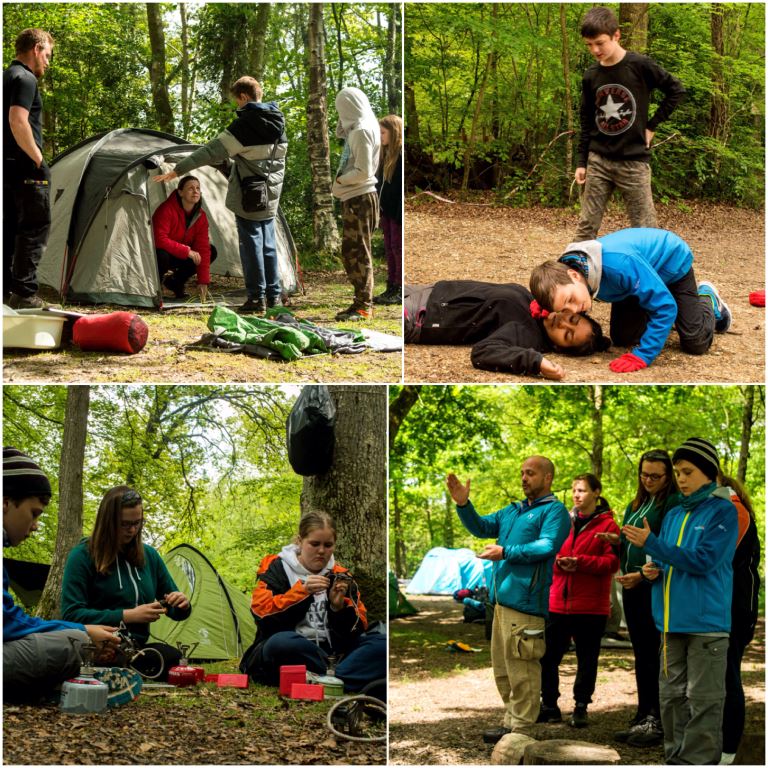
On the Sunday morning a group of cadets go off to the remembrance service at Boldre church while the rest of us get on with the mornings activities.
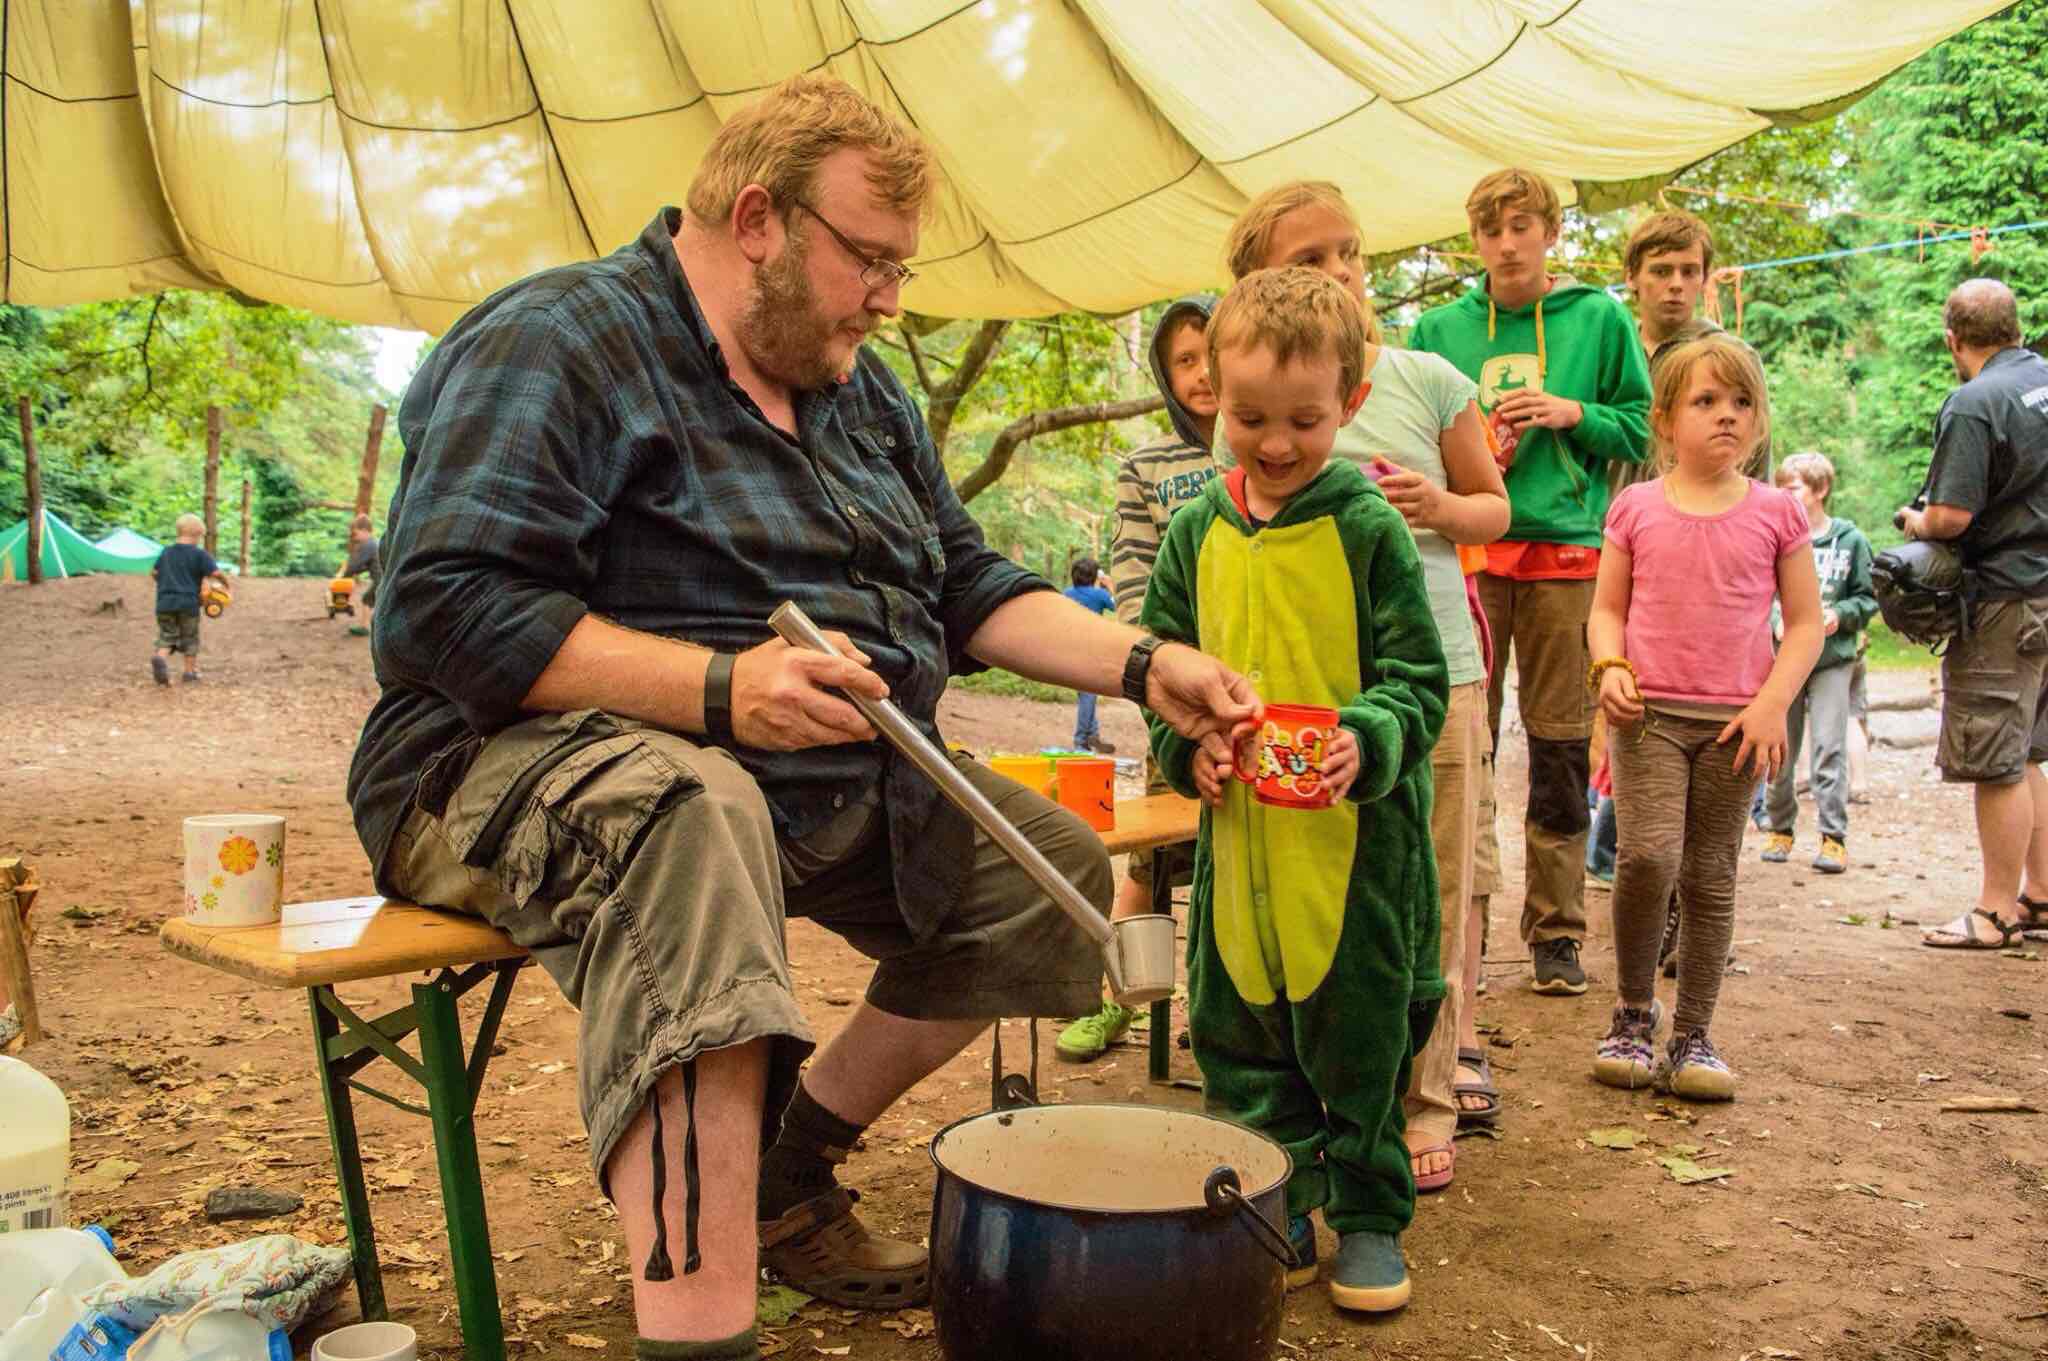
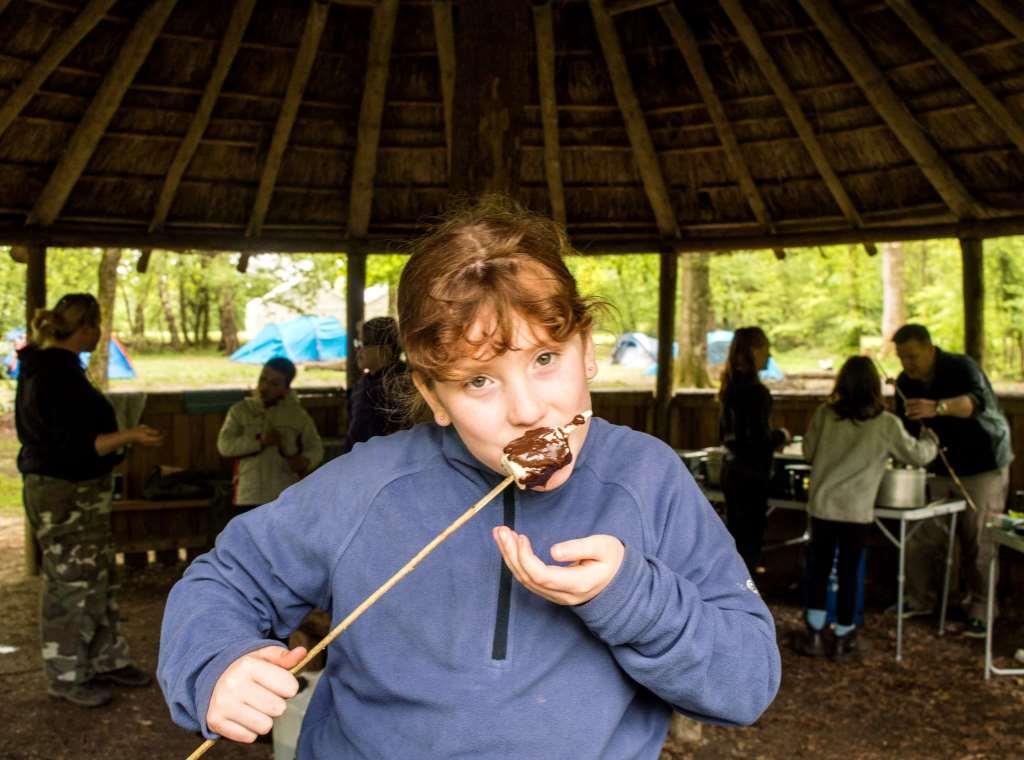
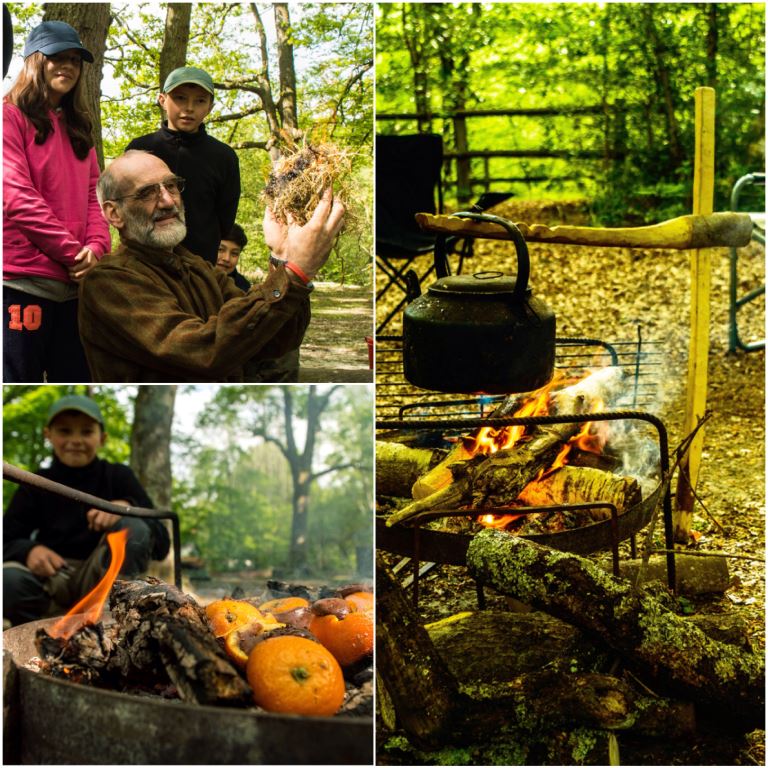
Simon was thankfully with us again this year and ran the galley in the roundhouse. He certainly can make some great meals with very little in the way of ingredients. The Juniors meanwhile cracked on with firelighting with Charlie and cooking with Chrissie. I enjoyed some giant toasted chocolate marshmallows however the orange cakes were left in the embers for a little too long I think 🙂
Sunday Morning Feast
The rest of the staff and the older cadets cracked on with lots of classes. This allowed the trainee instructors like Sarah, Jess and James to gain some valuable time teaching AT skills while training up for their BEL award.
Classes included tent pitching, first aid, bag packing, cooking and compass work. I did not see much of the DofE team as they were out on their expedition on both days however reports back were that they all successfully completed the weekend.
Adventure Training classes
While all this was going on on the Sunday morning the group at Boldre church put on a fine parade and learnt a bit more about HMS Hood. In all my years going to the New Forest for this trip I have never managed once to get to the parade – mind you that would involve me putting a uniform on 😉
2016 HMS Hood Remembrance Service
As I get older the years seem to pass quicker however each year has been packed full of fun. I am looking forward to many more years of visiting the New Forest and passing on my knowledge of nature to others so that they can continue this skilling up cycle.
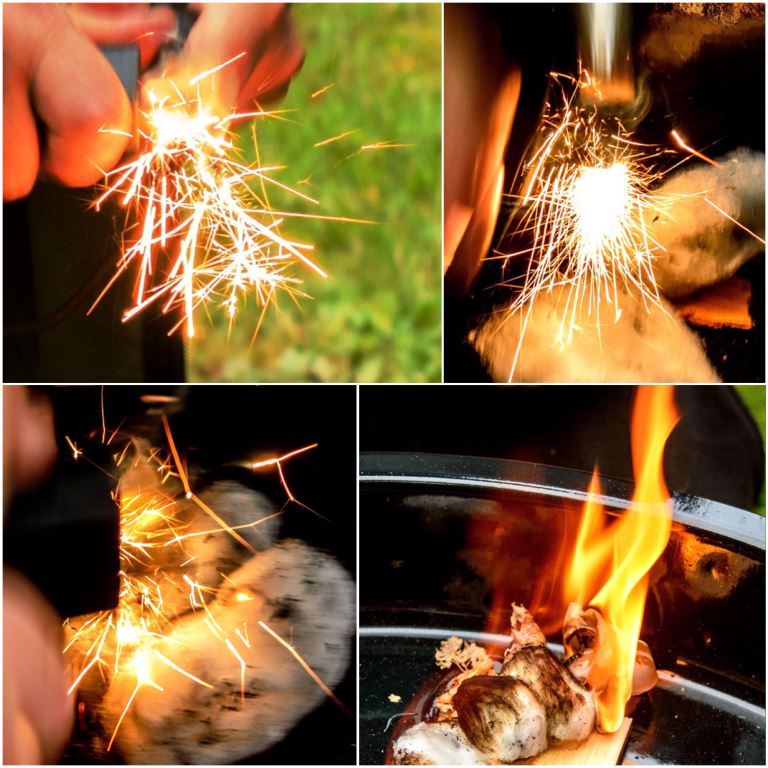
Flammage – A phrase I heard for the first time at Woodcraft School when I was studying for my Bushcraft instructors certificate. I love the word as teaching firelighting has always been a passion of mine. Over the last couple of months I noticed I had gotten some excellent flammage shots.
I teach firelighting using many different methods however when you have lots of kids to teach and not much in the way of time then firesteels do the trick. They do make for some cracking pictures as demonstrated below by my friend Dave Lewis at a recent Sea Cadet camp. When teaching firesteels to very young children I liken them to fairy lights and you can see why below.
Fairy Lights
Now it is not all just one big firelighting fest as we do teach everyone to respect fire and how to be responsible in using it. Charlie got the kids in the picture below to use firesteels to strike onto char cloth and then blow it all into a flame using some dried grass. The resulting fire was kept contained in a fire tray and soon produced plenty of tea and chocolate cakes.
Flammage
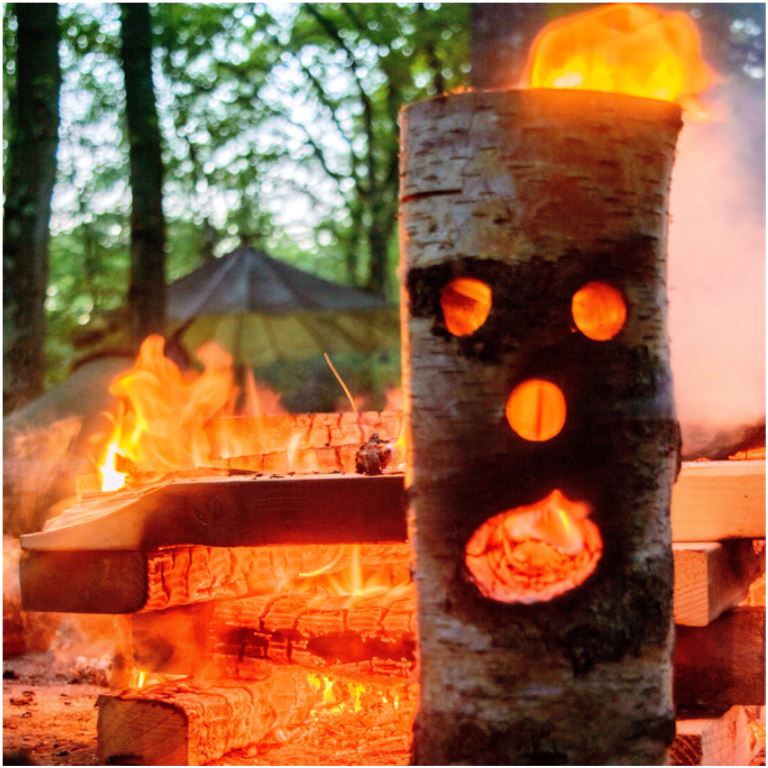
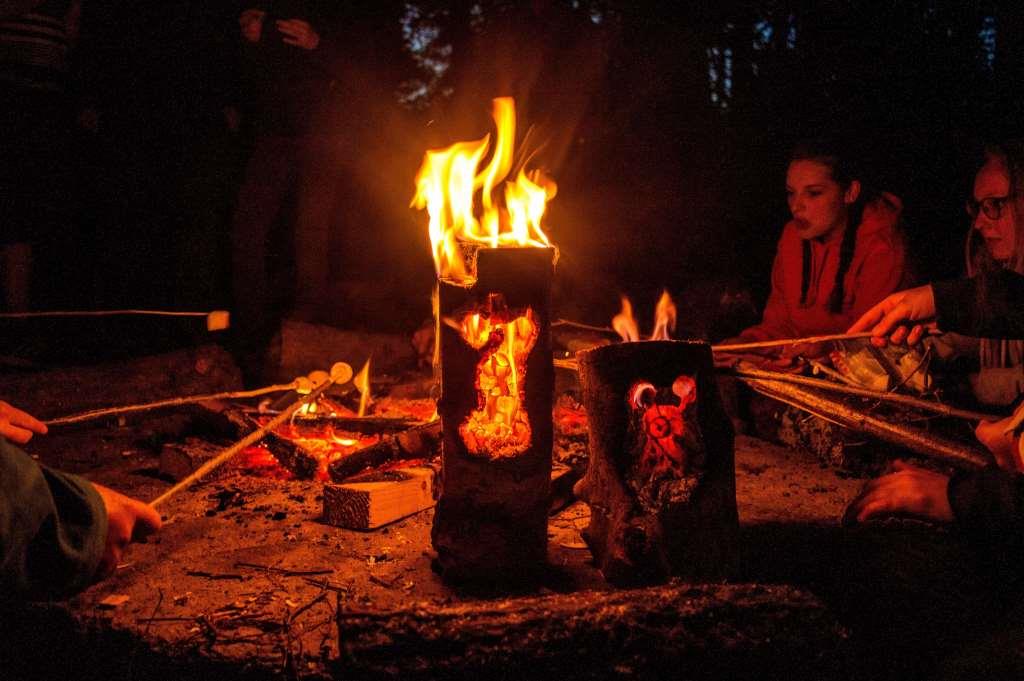
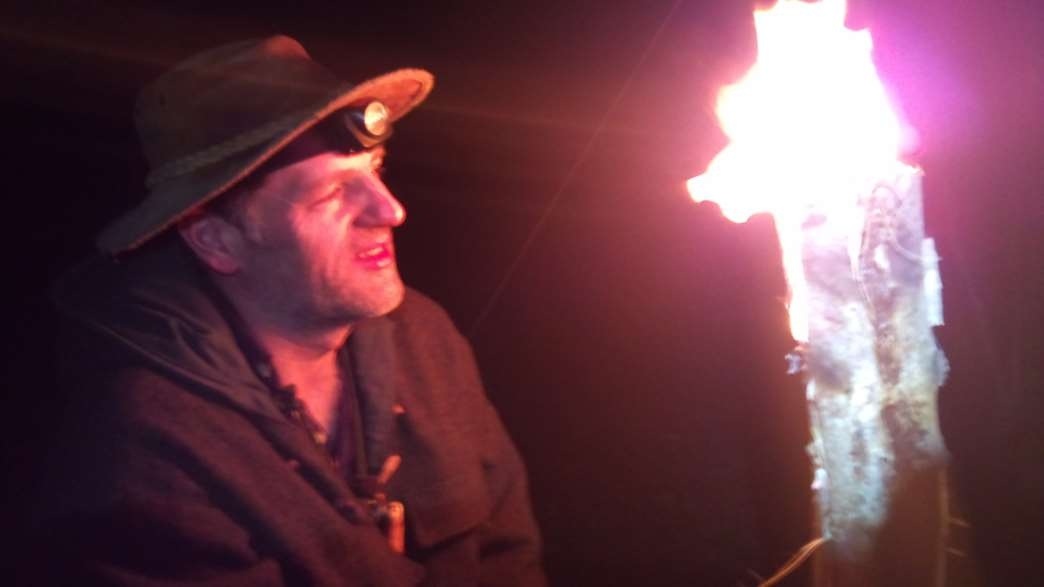
Some flammage fun here – we were given some offcuts of soft wood to burn by one of the other Sea Cadet instructors and I had brought along a pre-drilled fire face log rocket stove. With a criss cross fire lay and a well lit log rocket with the parachute in the background taking a picture seemed like a good idea.
Log rocket fire face
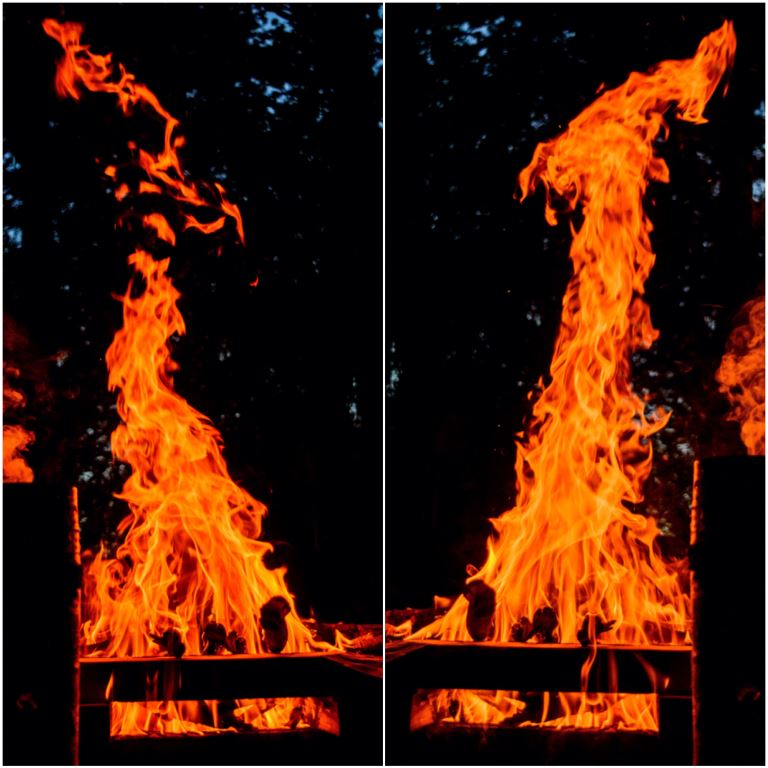
I can spend hours watching a fire and when I think the flames are right out comes my camera and I start snapping away. I may take a hundred pictures in the hope that something will appear in the flames.
I call these pictures Fire Faces and in the two below I spotted two old men of the woods – see if you can spot them?
Old men of the woods
I have plenty of pictures of the cadets and my own kids sitting around a fire toasting marshmallows and this simple act is something I never tire off. This evening though really stands out in my memory with the Fire Faces adding that bit of extra light and ambience.
Marshmallows by candelight
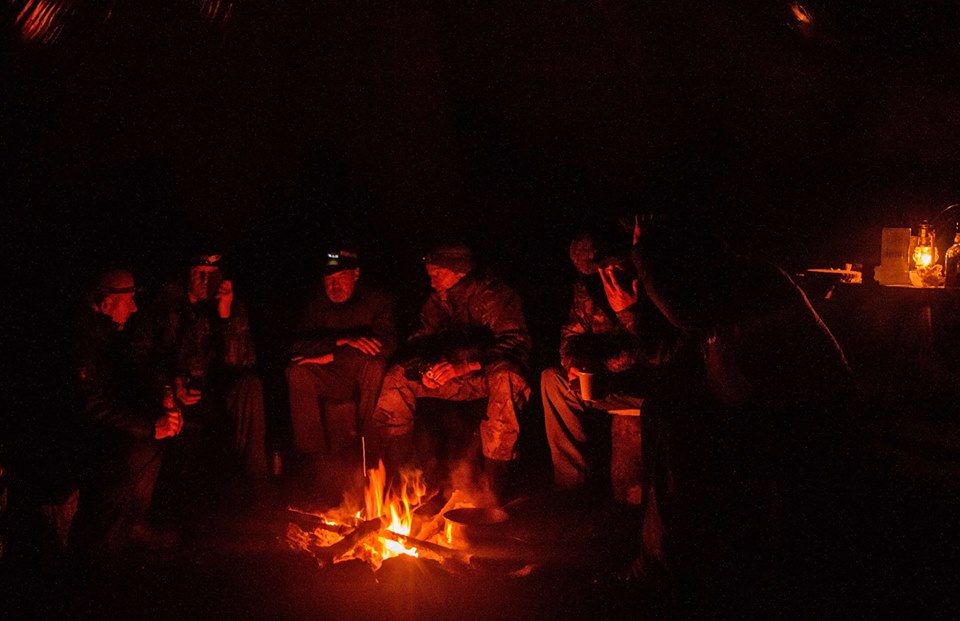
Taken in late spring down at my friend Fraser’s (Coastal Survival) during a rather stormy night was this picture of a bunch of hairy bushcrafters sitting snugly around the fire. Needless to say a dram or two helped pass the evening along nicely.
Stormy nights
My favourite fire picture of the last couple of months though is this one. It is the fire the cadets were sitting around and I played around with the settings of my camera to try and capture the picture as best I could without a flash. I then just waited until a piece of wood split in the flames to capture all the sparks spiralling upwards.
Woodland TV
No doubt there will be a few more Flammage pictures coming up over the summer as the Bushmoot and the Wilderness Gathering approach so I will leave you with these for now.
Last weekend found me in the New Forest here in Hampshire in the UK. I was with the Sea Cadets and we were running a full on weekend of Adventure Training activities and we were based at Ferny Crofts Campsite.
My picture of the week though goes to a more relaxed moment as some of the cadets were sitting around the campfire toasting some marshmallows under the watchful eye of these fire faces.
Fire Faces
I will be writing a full report on the weekend sometime soon however I thought I would share just a little bit of what was a magical weekend with you.
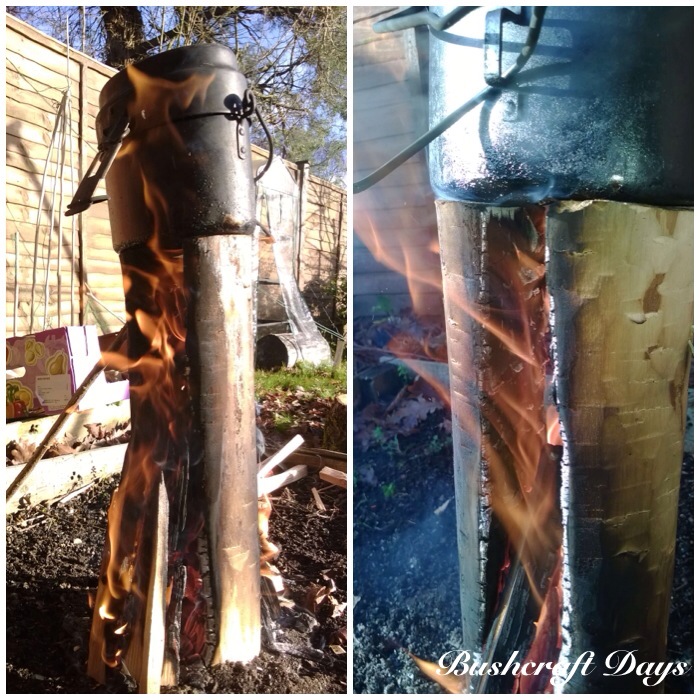
For a while now I have been making Log Rocket Stoves in different ways.
The ones I make in the workshop are easy as all you require is a drill however if you make one in the woods things become more complex. A common theme about these woodland Log Rocket Stoves is that you need something like string or wire to hold everything together.
I thought about this a lot recently and came up with this adaptation of the Log Rocket Stove using green wood dovetail joints.
I will post a full step by step tutorial in the near future in my How To…. section.
Ok, I know it is supposed to be one picture every week however I thought I needed to zoom in on this one a bit more so I added another for detail.
Many of you know I love to tinker with log rocket stoves so today found me once again working on another design.
Dovetail Log Rocket Stove
I came across an old Swedish design for a log rocket called the Schwedenfeuer (Swedish fire) however like many other log rockets all the parts were held together with wire. As these stoves are supposed to date back to at least the middle ages they had to be held together with something else then.
I came up with the idea to use green wood wedges carved into the stove in a dovetail fashion. They worked perfectly, I got my coffee made and also a video (to follow). I will also be popping a How To…. blog post soon to show how to make one.
It has been a dream of mine to one day head on over to Scandinavia to practise my bushcraft skills, particularly in winter time. Time and money have so far not allowed me to do that however that has not stopped me from researching some of the ways of lighting fires in the snow or wet conditions.
I have seen many a Scandinavian (sometimes referred to as Swedish candles though Finnish seems the origin for many ) candle at bushcraft meets that have been carved using a chainsaw however I do not own one. My research showed me that chainsaws were not required and there are many other ways to light a fire in the snow or on wet ground other than candles, such as long fires and log rocket stoves.
This post brings together all my posts over the last couple of years on this subject. You will find if you click on the title for each section it will bring you to a more detailed post on making these fires.
Trawling You Tube one evening a few years ago I came across a video titled the Log Stove from Hobbexp. Up until that point I thought to make a candle you needed a chainsaw. Hobbexp showed me that you could make a perfectly good candle with just an axe and some kindling.
The one below was made using a birch log and stuffed with birch bark and spruce resin (and a couple of battoned-down pieces of green wood to keep the splits open). These candles can burn for a good couple of hours, are easy to set up and look great. I have no idea how many I have made over the last couple of years.
I got another idea for a candle during my research once again from You Tube from ‘bushcraftmyway’ titled the swedish torch/stove – my way. I liked this stove as it could be made from damp wood (ideal in the UK).
I tied some seasoned but damp birch rods together with bramble strips and willow bark then stuffed in tiny pieces of kindling and Vaseline-coated cotton wool. I decided to use the Vaseline and cotton wool so as to give the damp wood a chance to dry out.
After a bit of tender care the wood started to dry out and I easily managed to boil a kettle on it. This is an excellent way to get a fire going in damp/wet conditions. The remains of the candle after it had burnt down provided me with a great bed of coals to maintain a more traditional firelay.
All this research led me to compare this rod style of candle with the more commonly split log candle. I set up the rod candle this time with very dry rods and split a spruce log with my axe into a number of wedges.
I tied them all together with natural cordage and lit them. The rod candle took off very quickly as it was stuffed full of very fine kindling however the split log candle lasted longer as it took longer to fully get going.
Again I managed to easily boil a kettle on both of these candles. Both are simple and easy to make.
The idea for this one came from Perkele’s Blog Spot but the post is no longer available. I think this candle is regarded by many as the original Finnish Candle.
A log is split from top to bottom and pieces from the central core are then axed out to act as kindling. Lots of cuts are made into the inner faces of the candle to give the flames plenty of surface area to catch onto.
It took me a while to get the flames self sustaining, but once they’d caught the candle worked well. It looked precarious as the two pieces of wood are not lashed together but they stayed upright till the end.
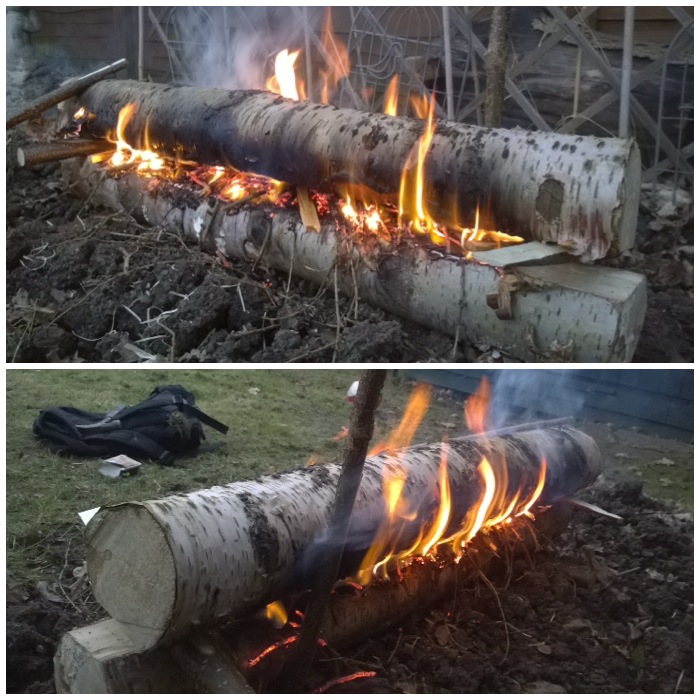
The Rakovalkea Gap fire hails from Finland and I was taught a similar method by my friend Kevin Warrington (Laplanders Natural Lore) back in 2007. I came across the term Rakovalkea around about 2011 after seeing pictures of this fire being made by the Finnish army on the internet.
This is a scaled-down model I made however it was fully functioning and its set up makes for a long burn time with easy adjustment to increase or decrease the flames. This has proved to be the most most popular post on my website.
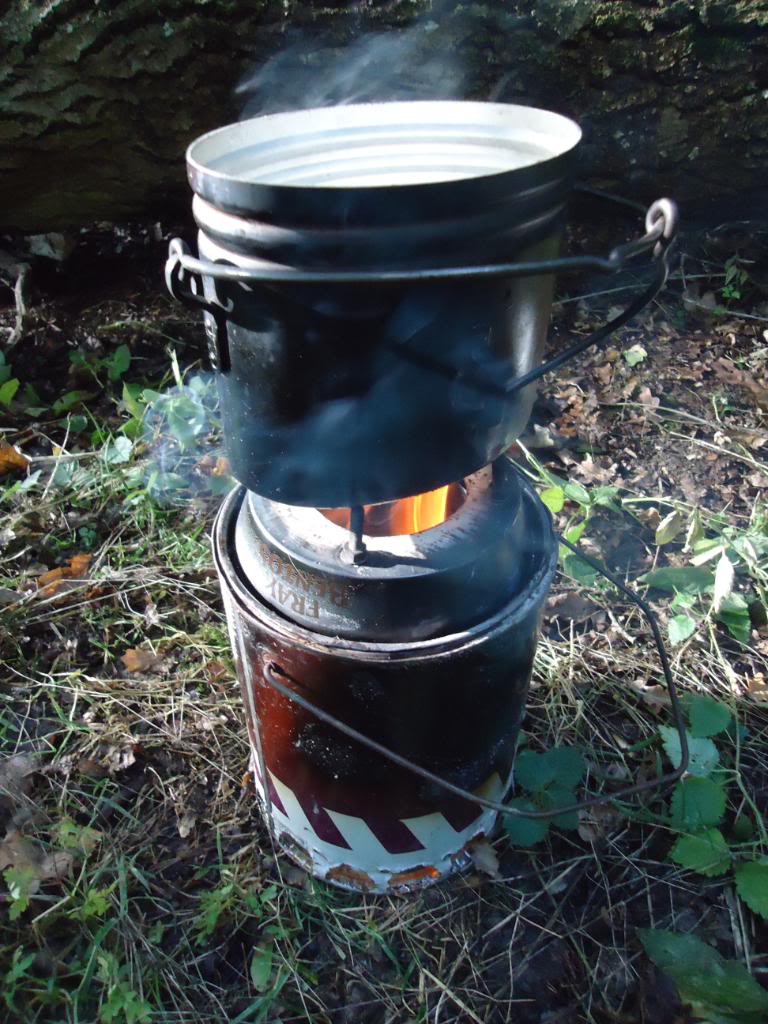
I decided to include this little fella as it is excellent for cooking in damp or wintry conditions. It is a wood gas stove and burns very efficiently. I was shown this by my friend Ian Woodham back in 2011 at the Bushcraft UKBushmoot. As soon as I got home I made one up and documented it on my blog.
I made this out of a metal paint pot, a large dog food tin, a Fray Bentos pie tin and a few bits and bobs. It works a treat and needs very little fuel to keep it going. I like to use dry seasoned pine/spruce/larch cones in the stove as they burn for a good length of time.
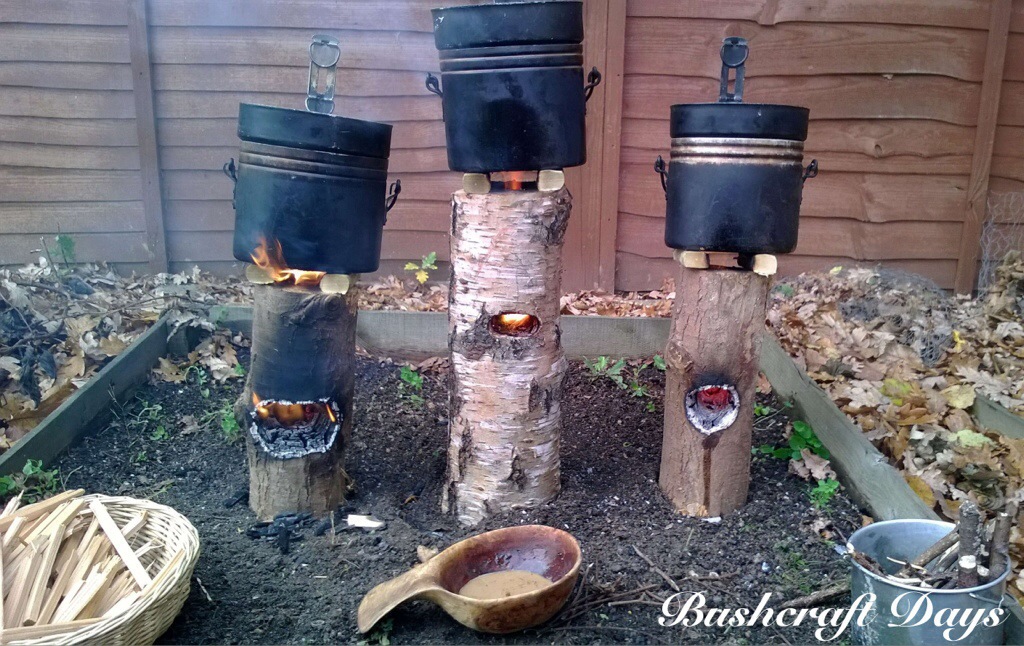
The next type of candle I came across was what has been termed the log rocket stove. I spotted a video by James Hookway and soon set to work in my workshop creating 3 stoves from different woods.
Log rocket stoves really intrigued me as they require very little kindling to keep them going (the damper the log the more kindling you require).
Have a look at the original post here to see how they compared.
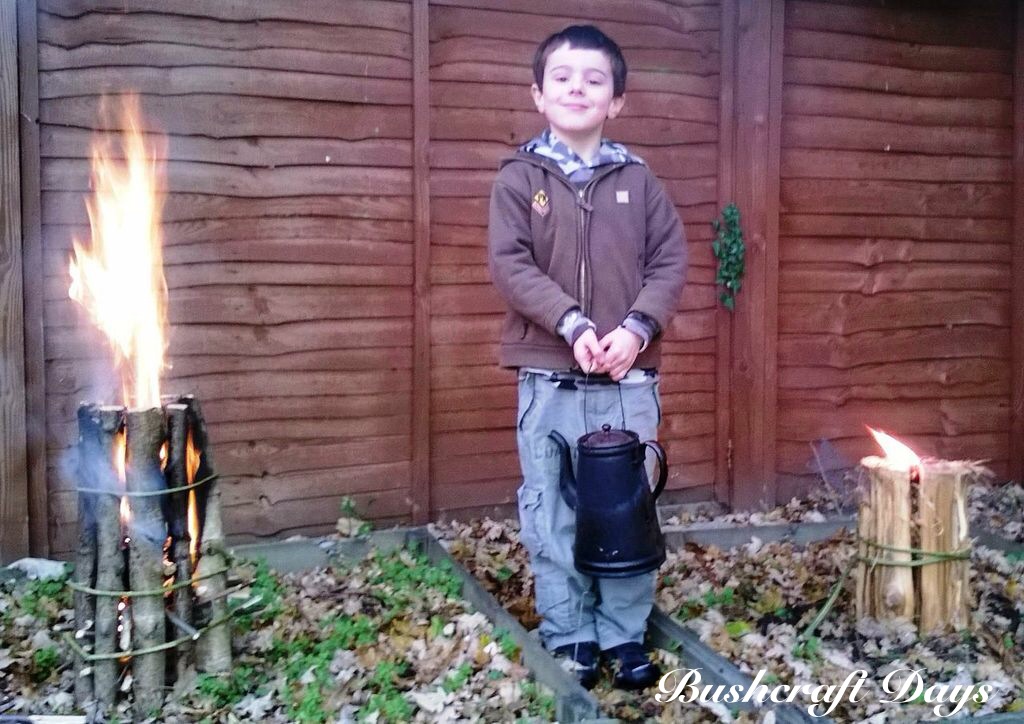
Now the kids love this stove – whenever you are having a barbie in the garden or if you are having a family camp make one or two of these up.
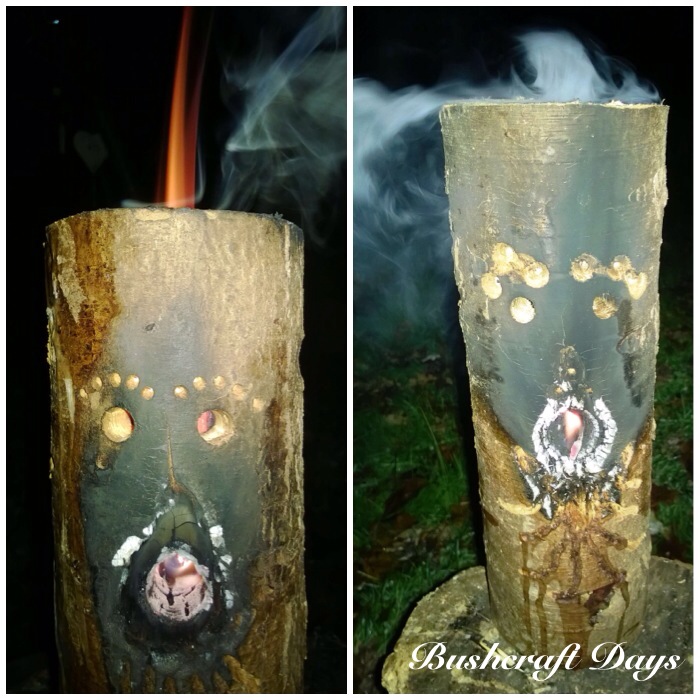
The principles are the same as the log rocket in the previous post except for the faces you can carve on them. Once they get going the faces really light up. They are perfectly able to be used as a normal log rocket stove for cooking or boiling but have the extra appeal factor of the face. A good video on this is the one made by Marcels Workshop.
Log rocket stoves have always appealed to me as a woodsman however when I am lightweight camping I do not fancy carrying around pre-prepared ones. Recently on Facebook Paul Hasling posted an article on making one with an axe and saw with no need for a drill. One of the other Scout leaders posted up a step by step guide on making one but it is in Spanish – the pictures though speak for themselves – Rocket Stove de Madeira.
I was instantly attracted to this method however when I was next out in the woods I could only find damp logs. To overcome this I split the log into six pieces and added Raappanan tuli cuts inside the chimney. This damp log rocket stove took slightly longer to get going as the internal wood slowly dried but once it was going there was no stopping it.
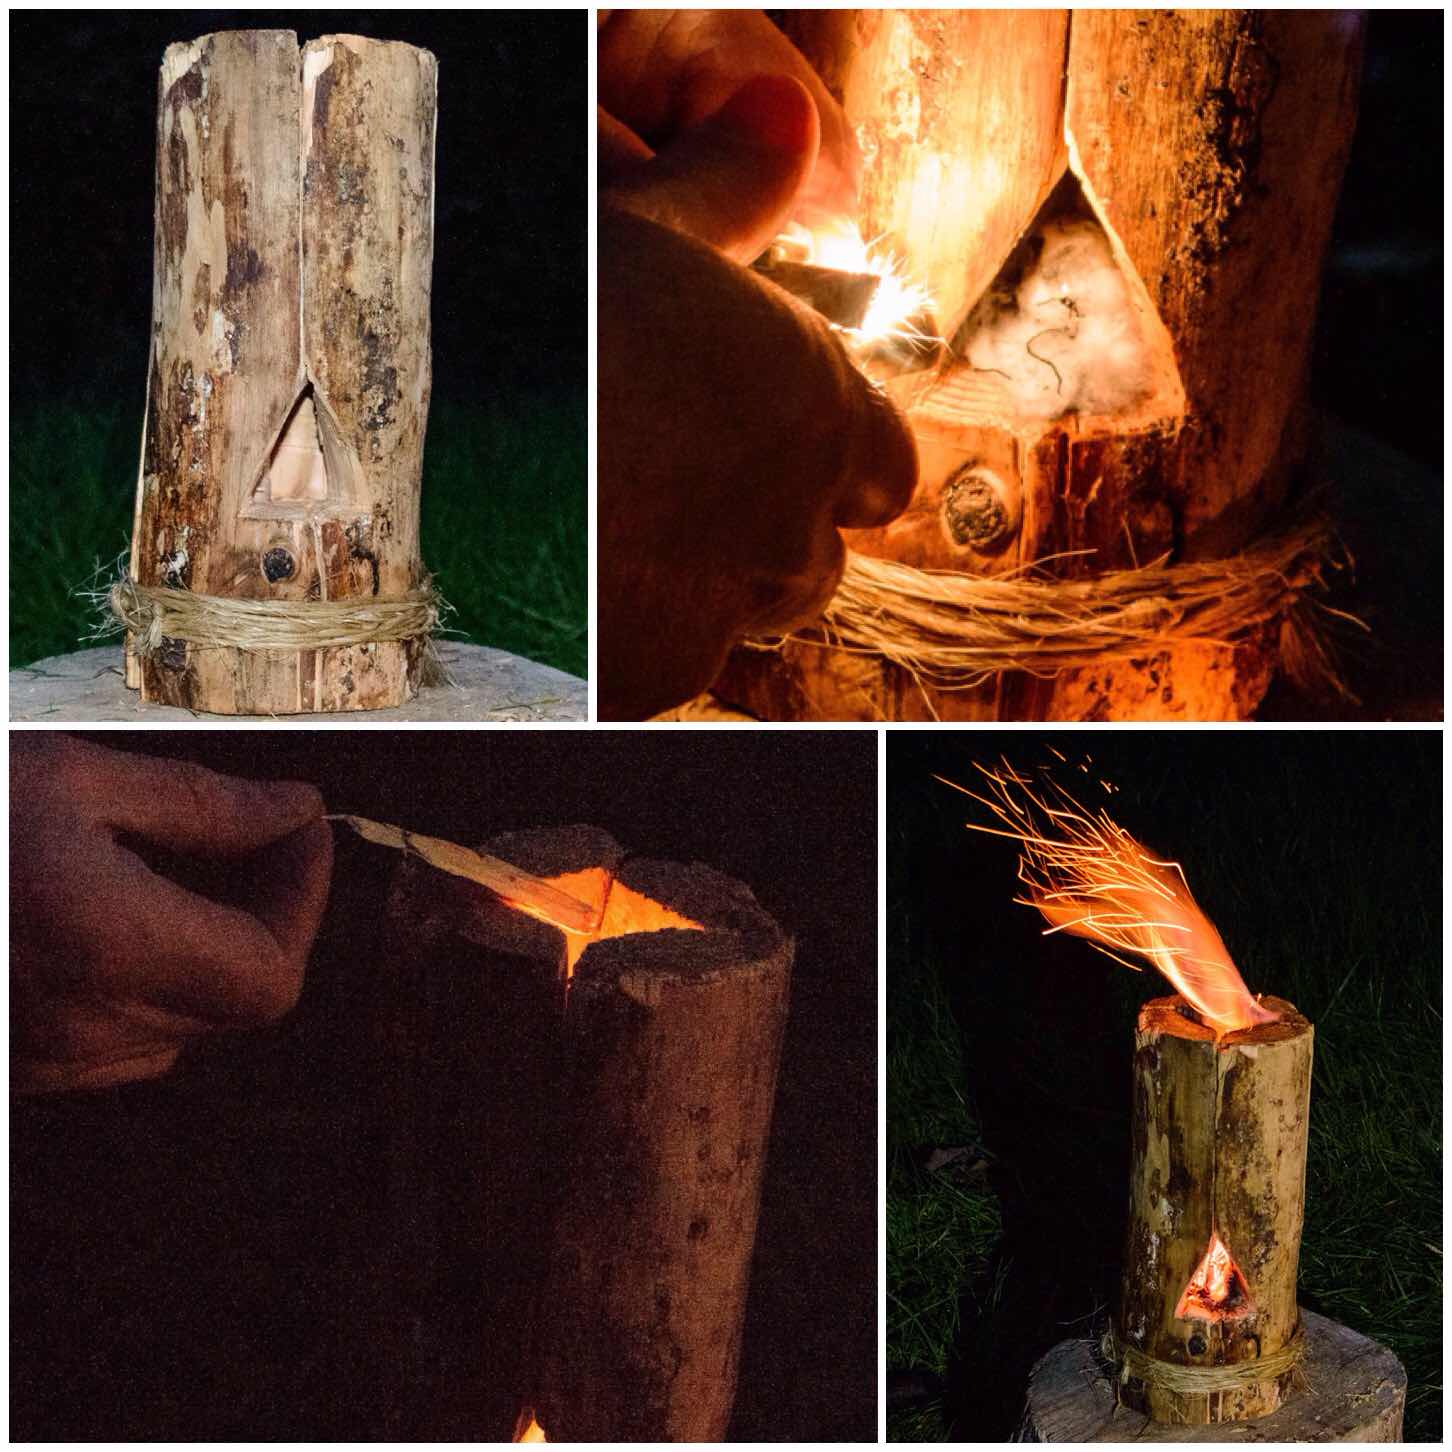
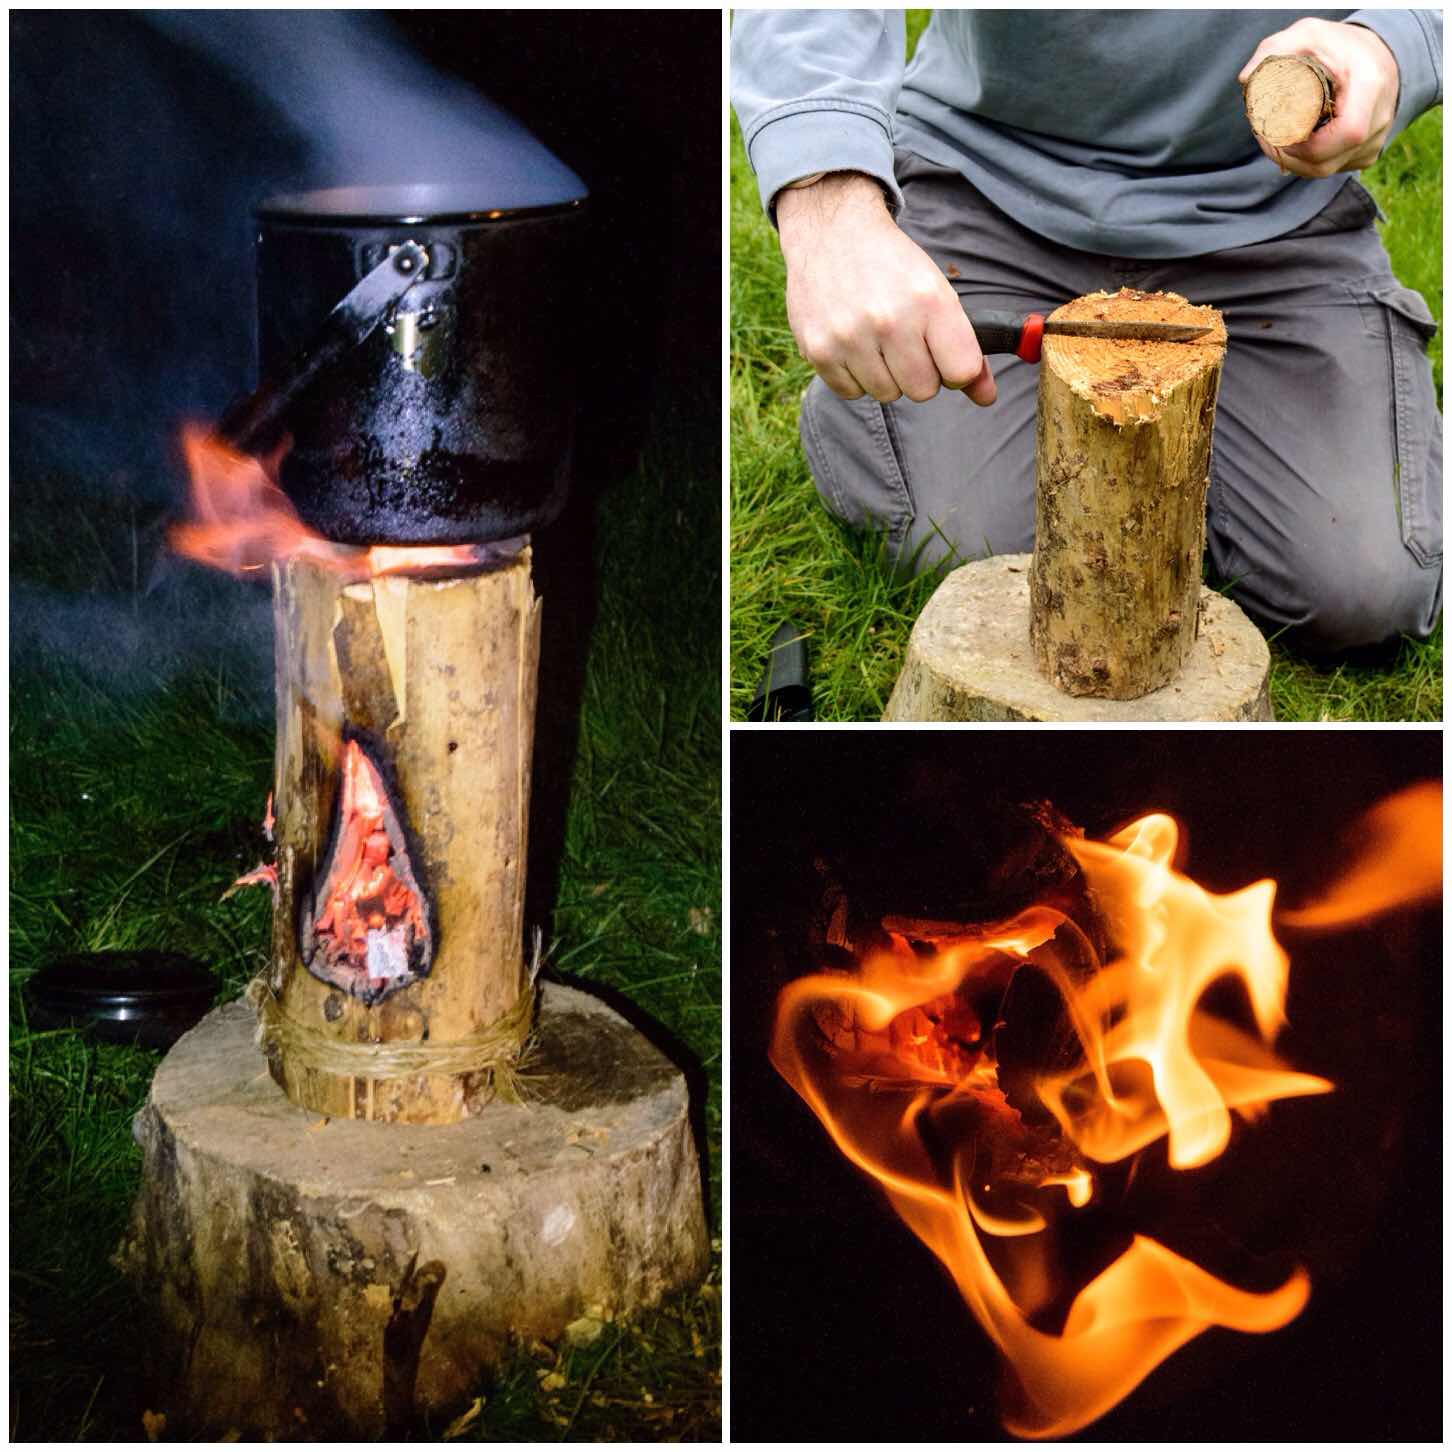
The final post in this series came to me one evening when I was wondering how I could operate in the woods without an axe. I figured it was worth a go trying to make a log rocket stove with just my Mora knife (I did use a small saw to trim the log).
With some battoning and the use of a wooden wedge I was able to split a decent sized log and fashion a perfectly good log rocket stove.
This exercise really is an excellent way to test out your knife skills.
Log Rocket using a Knife
Is the story over on candles, long fires and log rocket stoves? – I think not. I will continue to research this intriguing subject and if you have any ideas that I could try out to add to this library of knowledge I would really appreciate hearing from you.
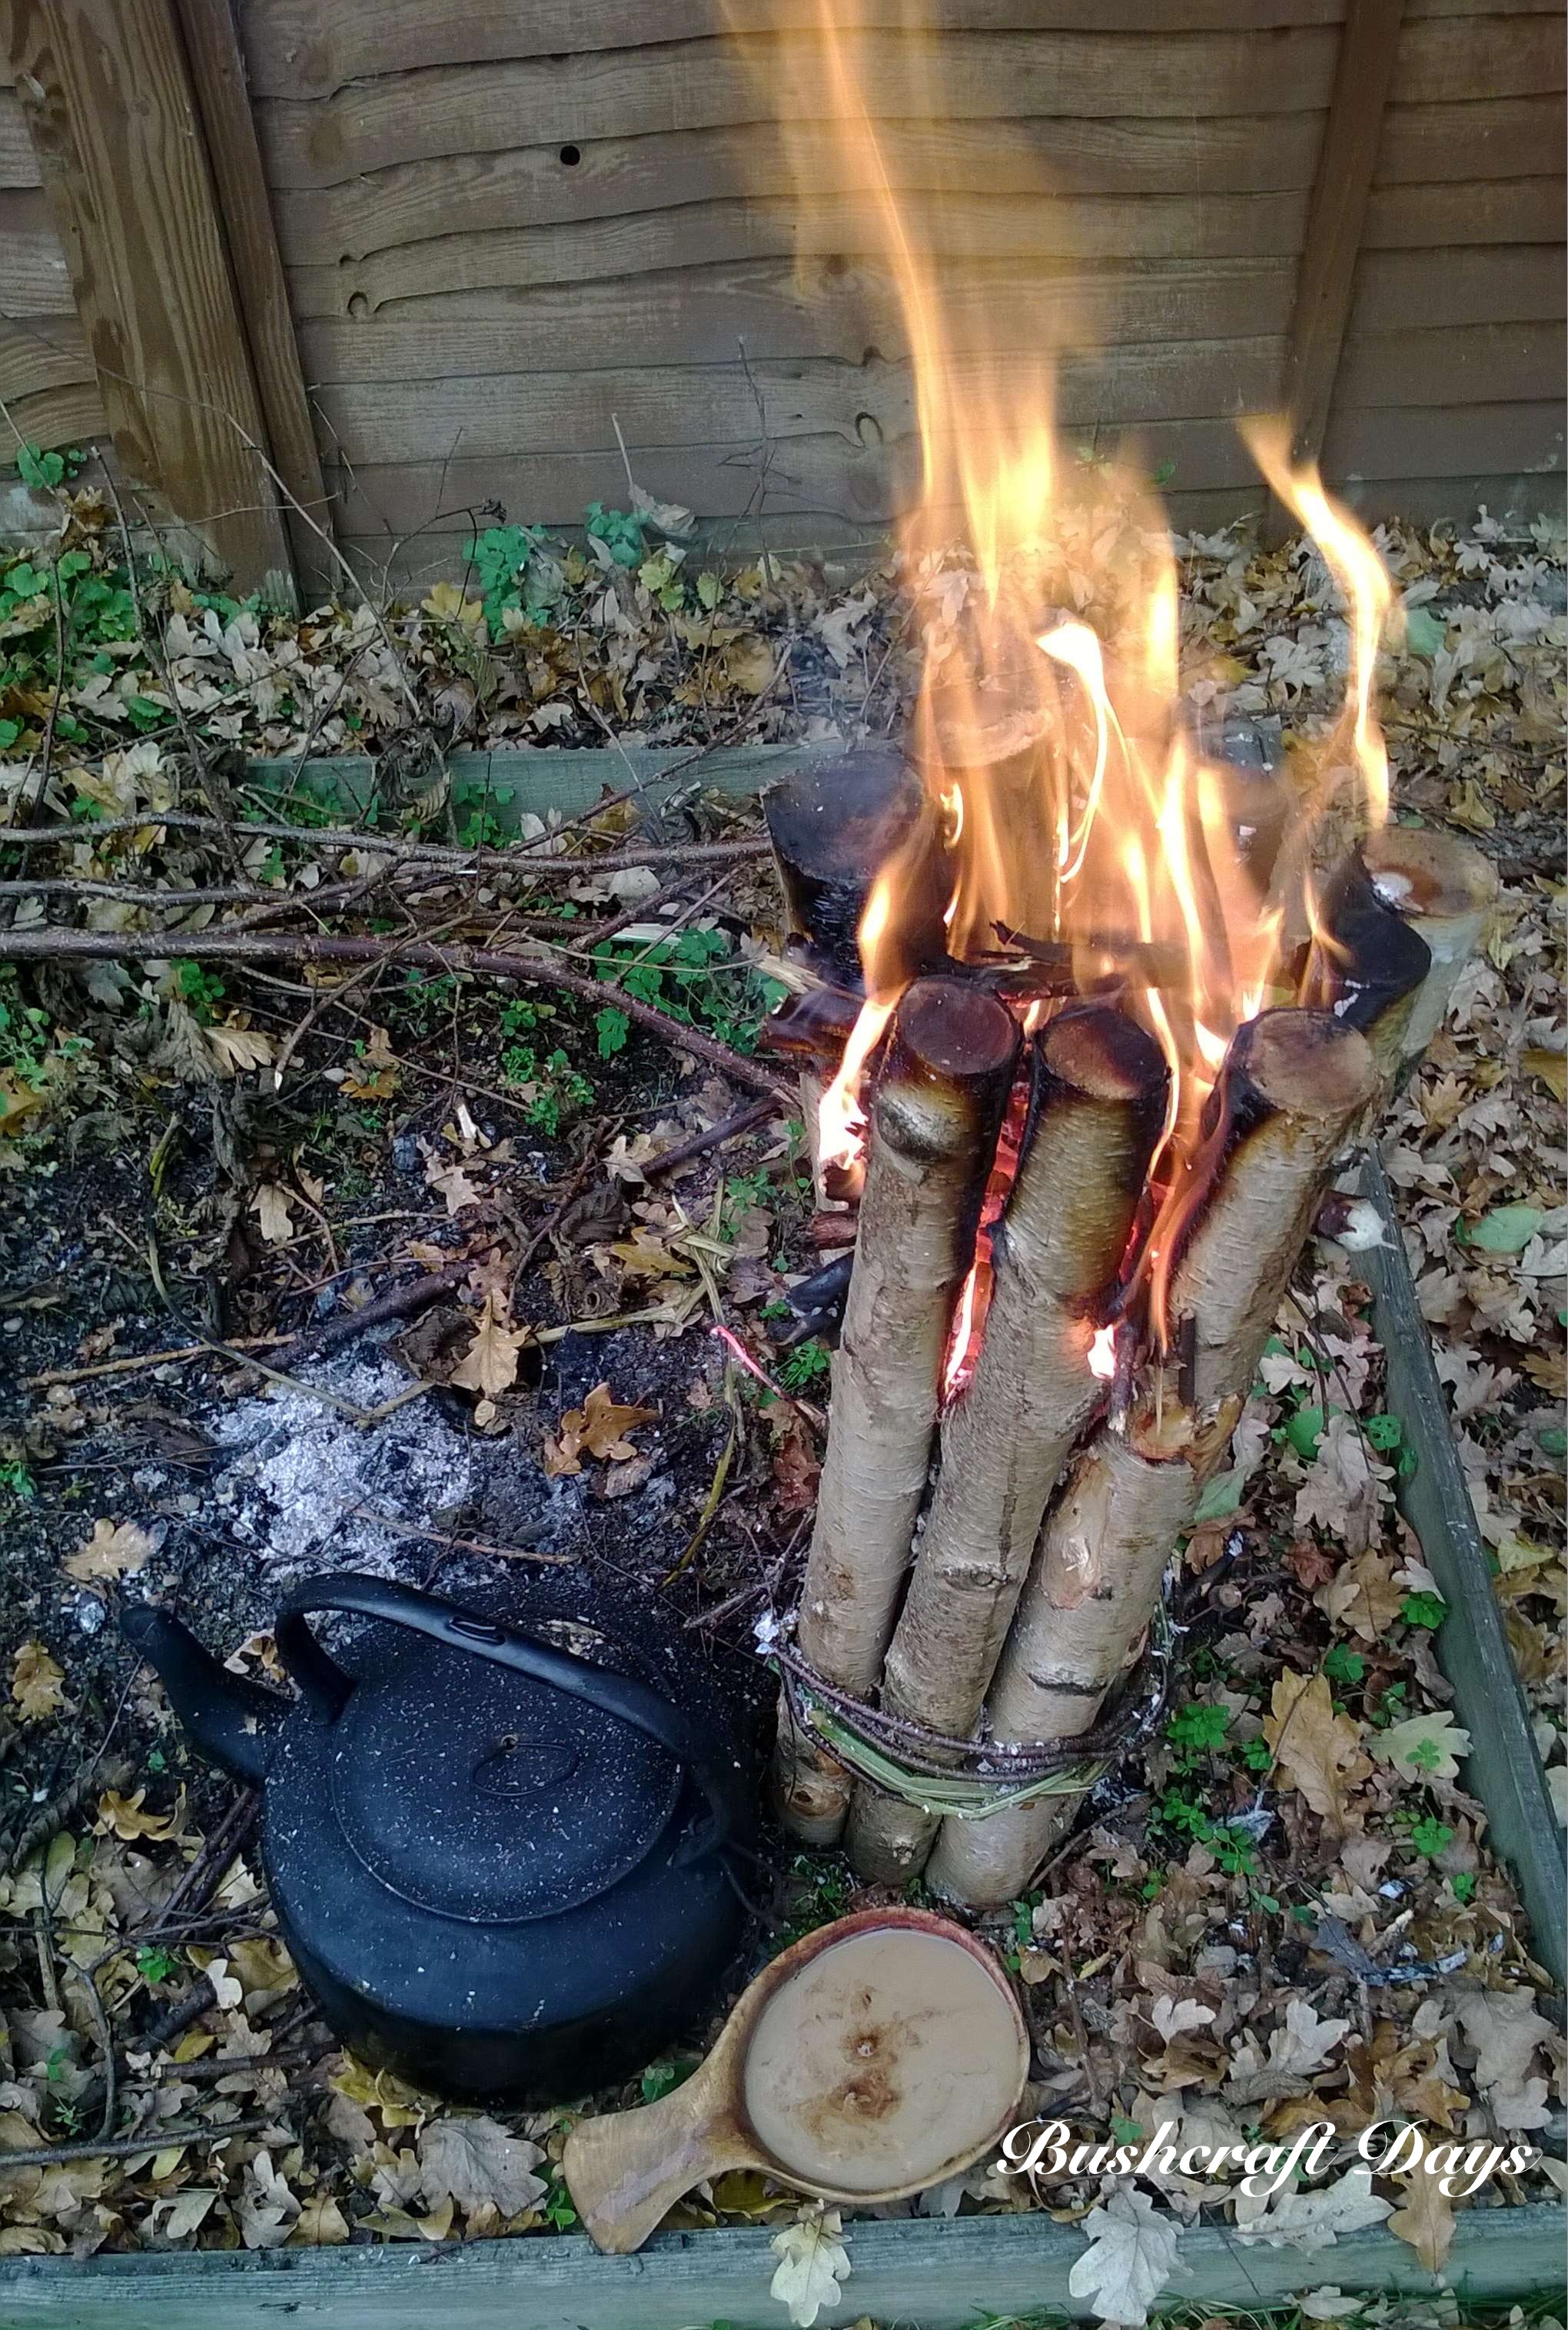
One night recently I just could not get to sleep and my thoughts wandered onto the subject of log rocket stoves. Having written on the subject a few times with the Damp Log Rocket and the Fire Face Candles it struck me that I always used large tools such as axes or drills to make them.
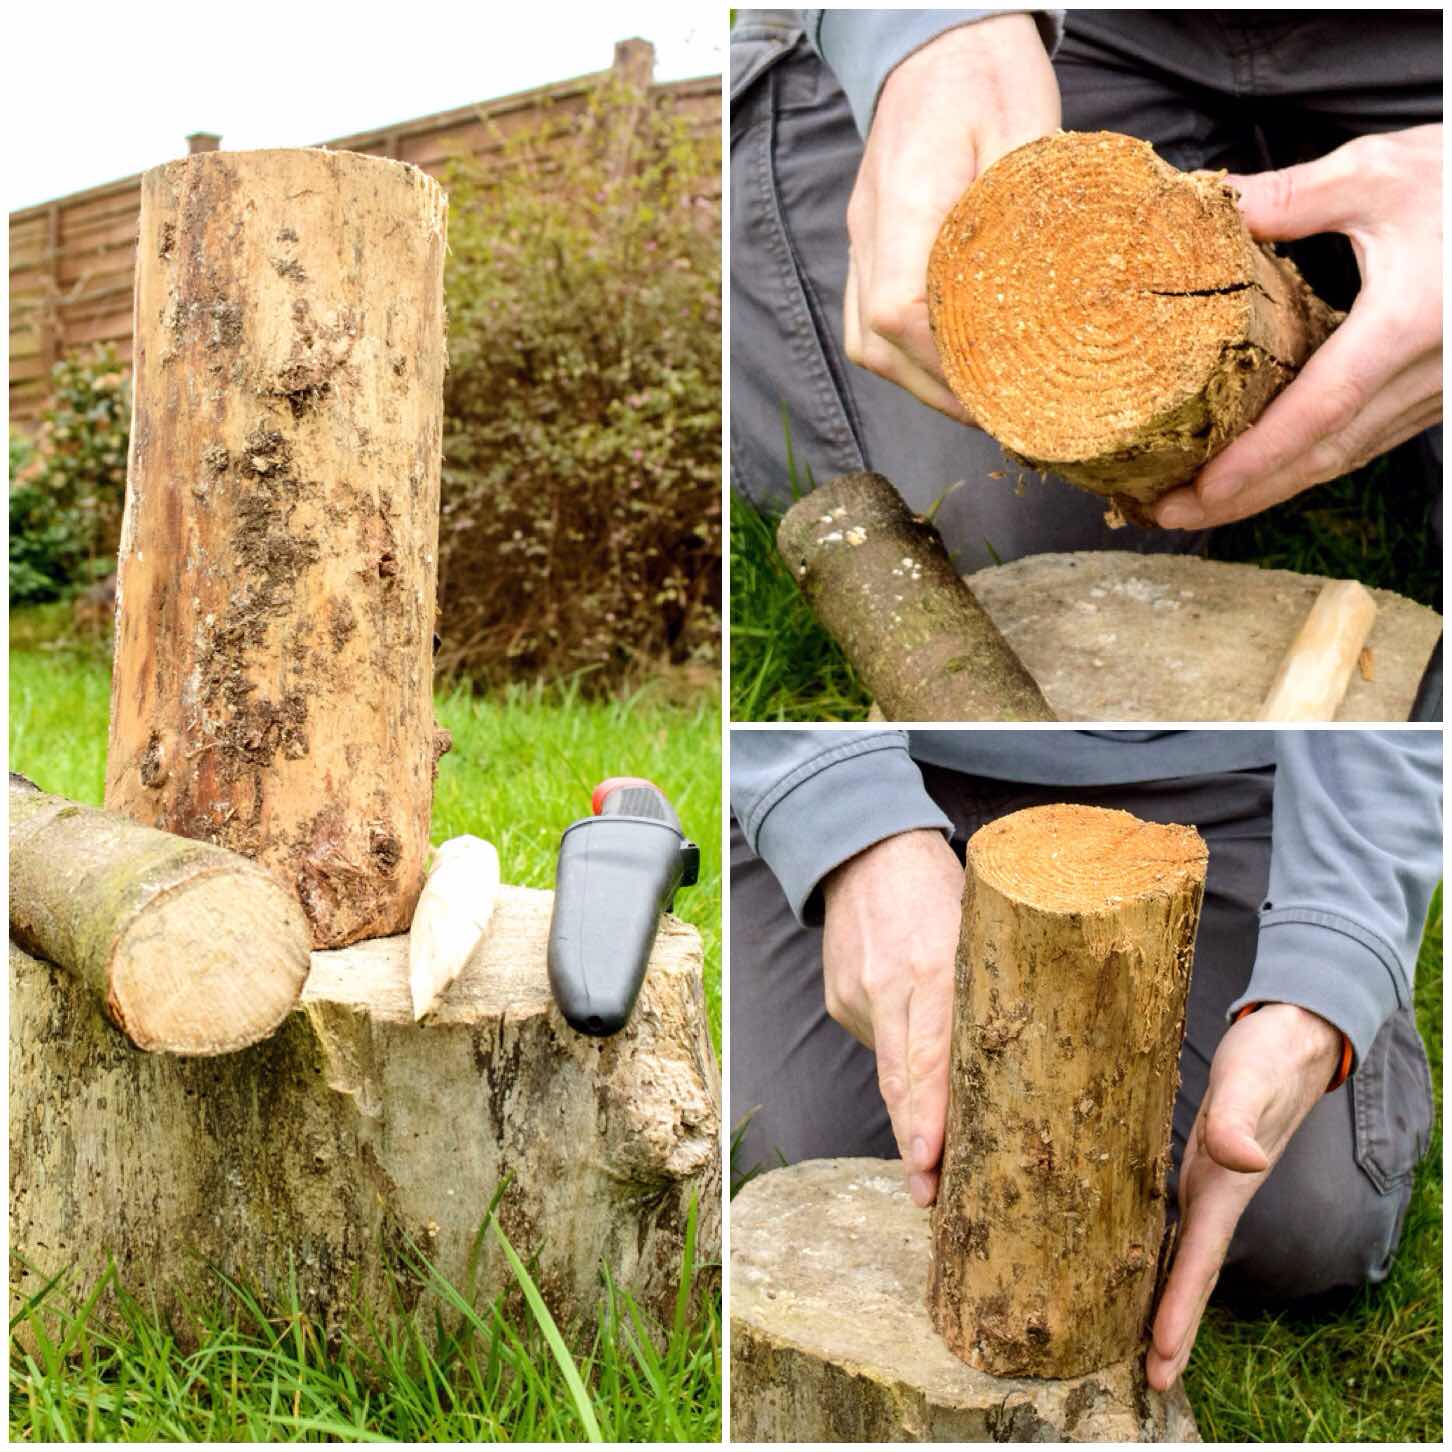
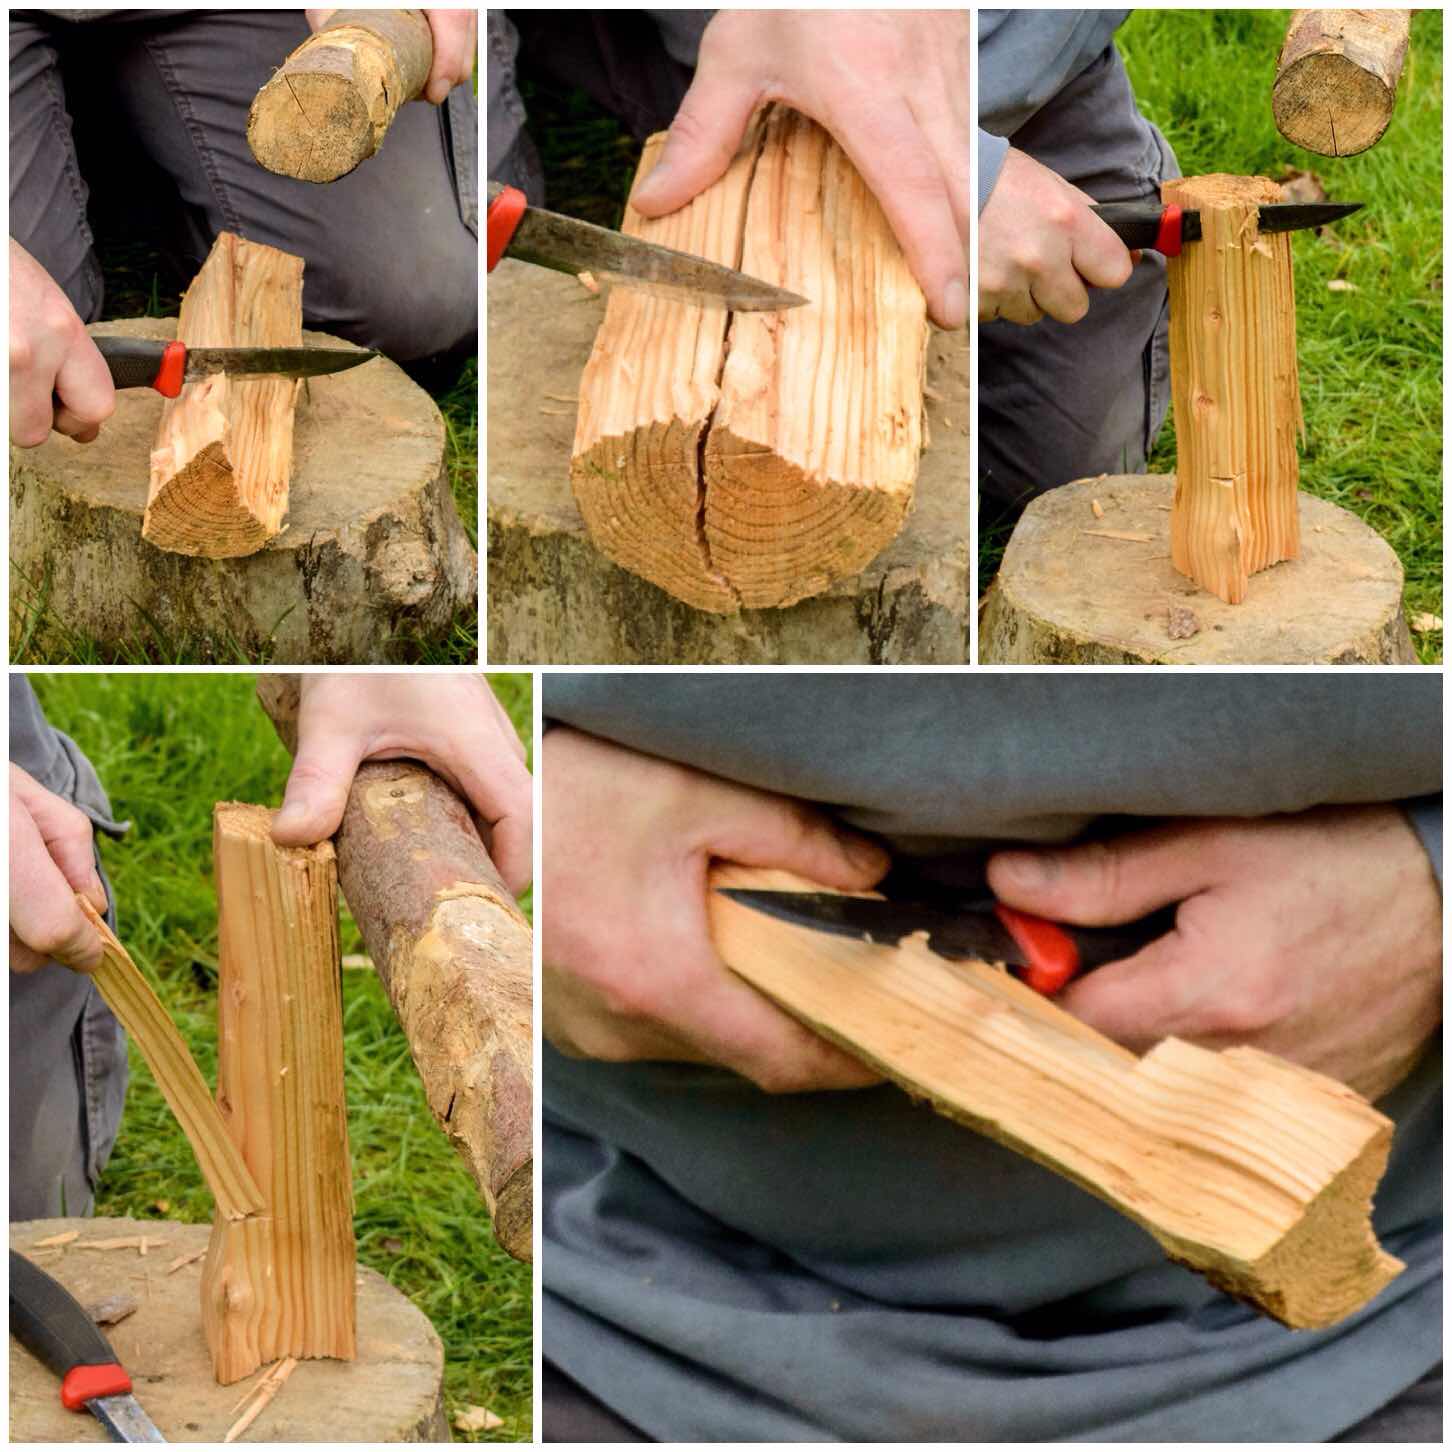
This post is about making a Log Rocket Stove with only my knife (a small pruning saw was used to trim the log). I wanted to see if I could easily produce a stove without having to rely on my axe.
Log Rocket Stove – Without an axe
I like log rocket stoves as they can be made quickly, work well on wet or snowy ground, produce their own kindling and come with a ready made platform for your pot. Once the stove has done its job the collapsing embers make a good start point for a bigger fire.
Set Up
I chose a seasoned piece of spruce wood from my log pile which had a diameter slightly larger than the blade on my Mora knife (do not be tempted to use a log much smaller than this as you will end up with a very small cooking surface) . I also used a larger round of wood as a work surface, carved myself a small wedge to help with splitting the wood and had a offcut of wood ready to batton with.
Spruce log and a stable work surface
Splitting
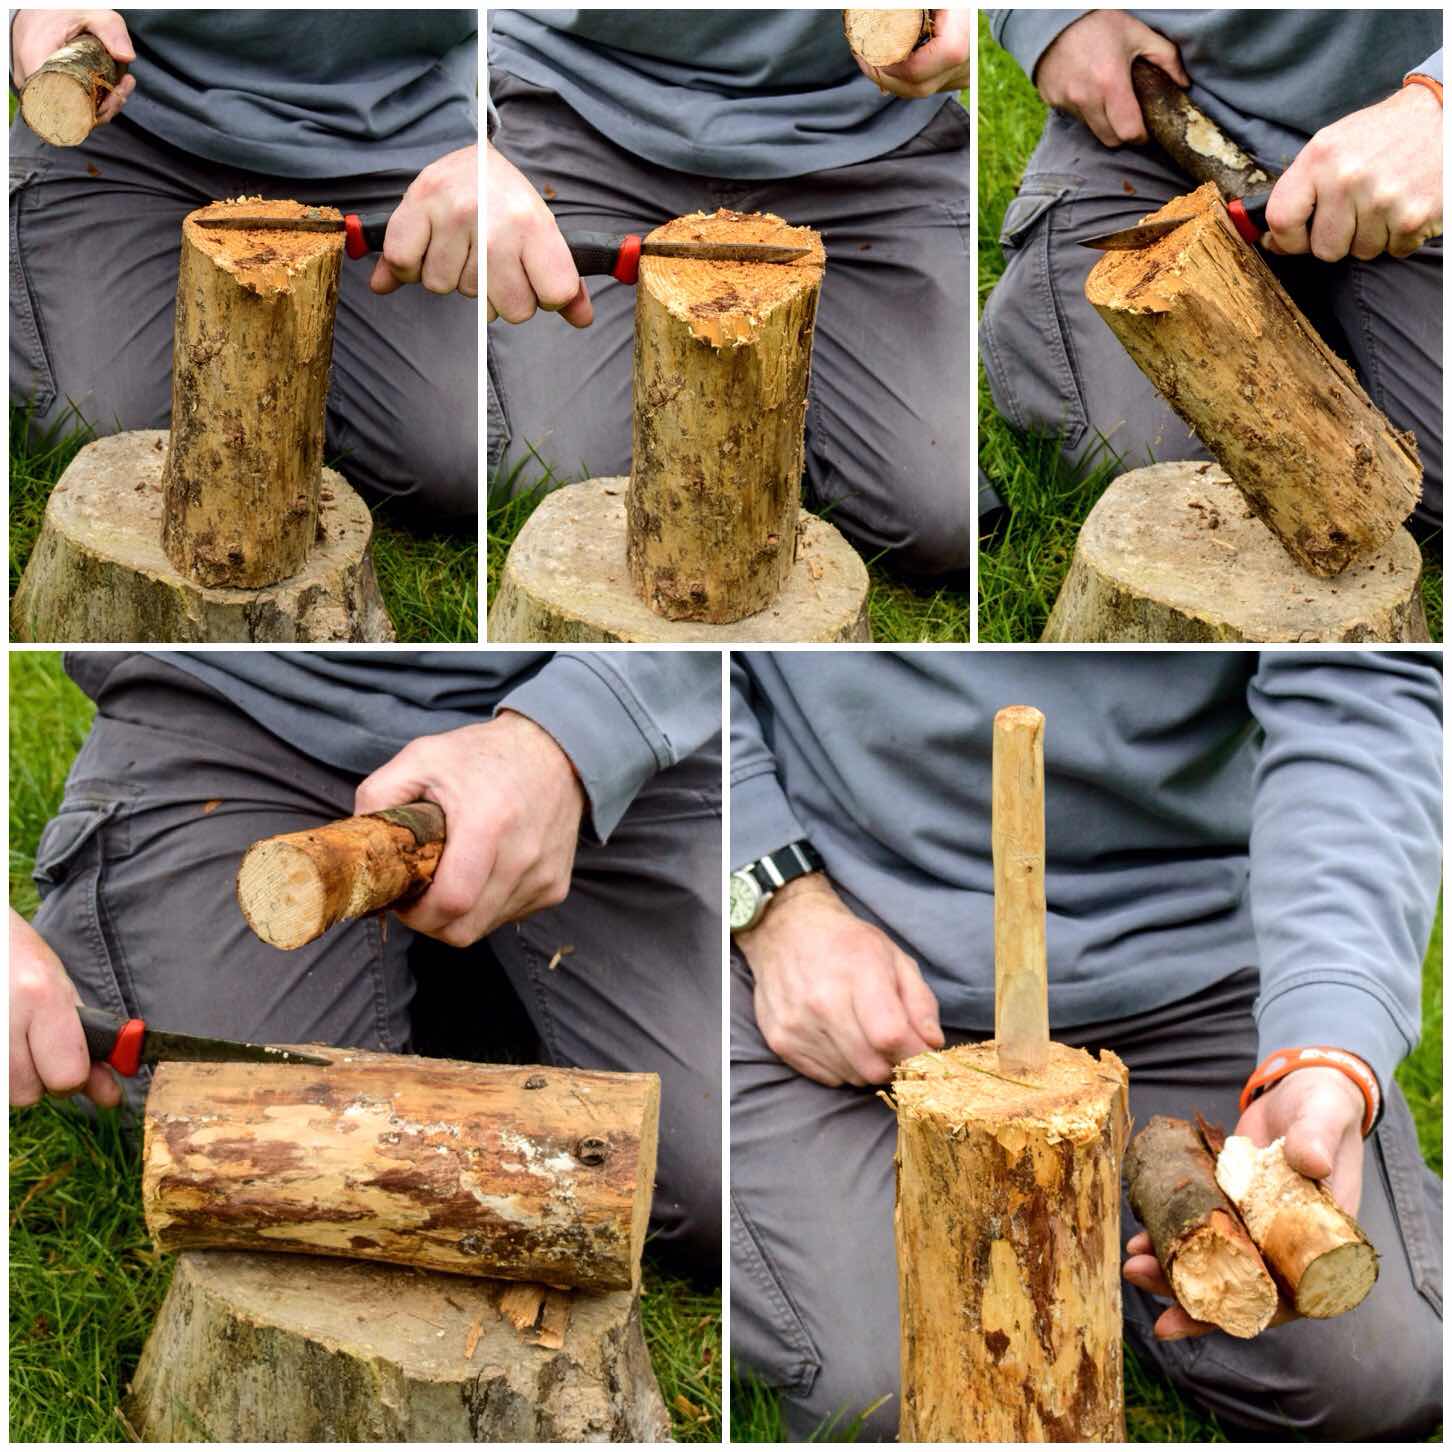
I started with my knife first and battoned it into the log (note that the knife blade is at 90 degrees to my body for safety). My aim at first was to create a split as deep as I could with the knife all around the middle of the log to create a weak point in it. The knife was smaller than the log so I could only batton it in a couple of centimetres.
Once I had my point of weakness battoned in all around the log I inserted the wedge into the split at the top and battoned that in as well to try and increase the split some more (upon reflection I think two wedges would have helped). It was at this point my batton decided to snap on me.
Batton out a split as much as you can with your knife
I went off and got a bigger piece of wood to act as a batton and soon had the log split right down the line off weakness. This line I created with my knife will help you to keep an even split on the log when you have twists and knots in your log as I had with this piece of spruce.
Use a wedge to split the log
I repeated the process on each split so I ended up with four roughly even sized pieces of wood.
Safety
One thing to be aware is that as you batton down on the wedge is that it will go slightly out of line at times. If this happens just tap the end of the wedge against the work surface until it lines up. This is much safer than trying to drag it back in line with your hands as it is very easy cut yourself on the knife tip.
As the split widens the knife blade will come loose. Let it drop away and only pull it out when it it is completely free. Do not be tempted to force it out as this is another time when injuries happen.
Quarter the log by battoning with your knife and using the wedge
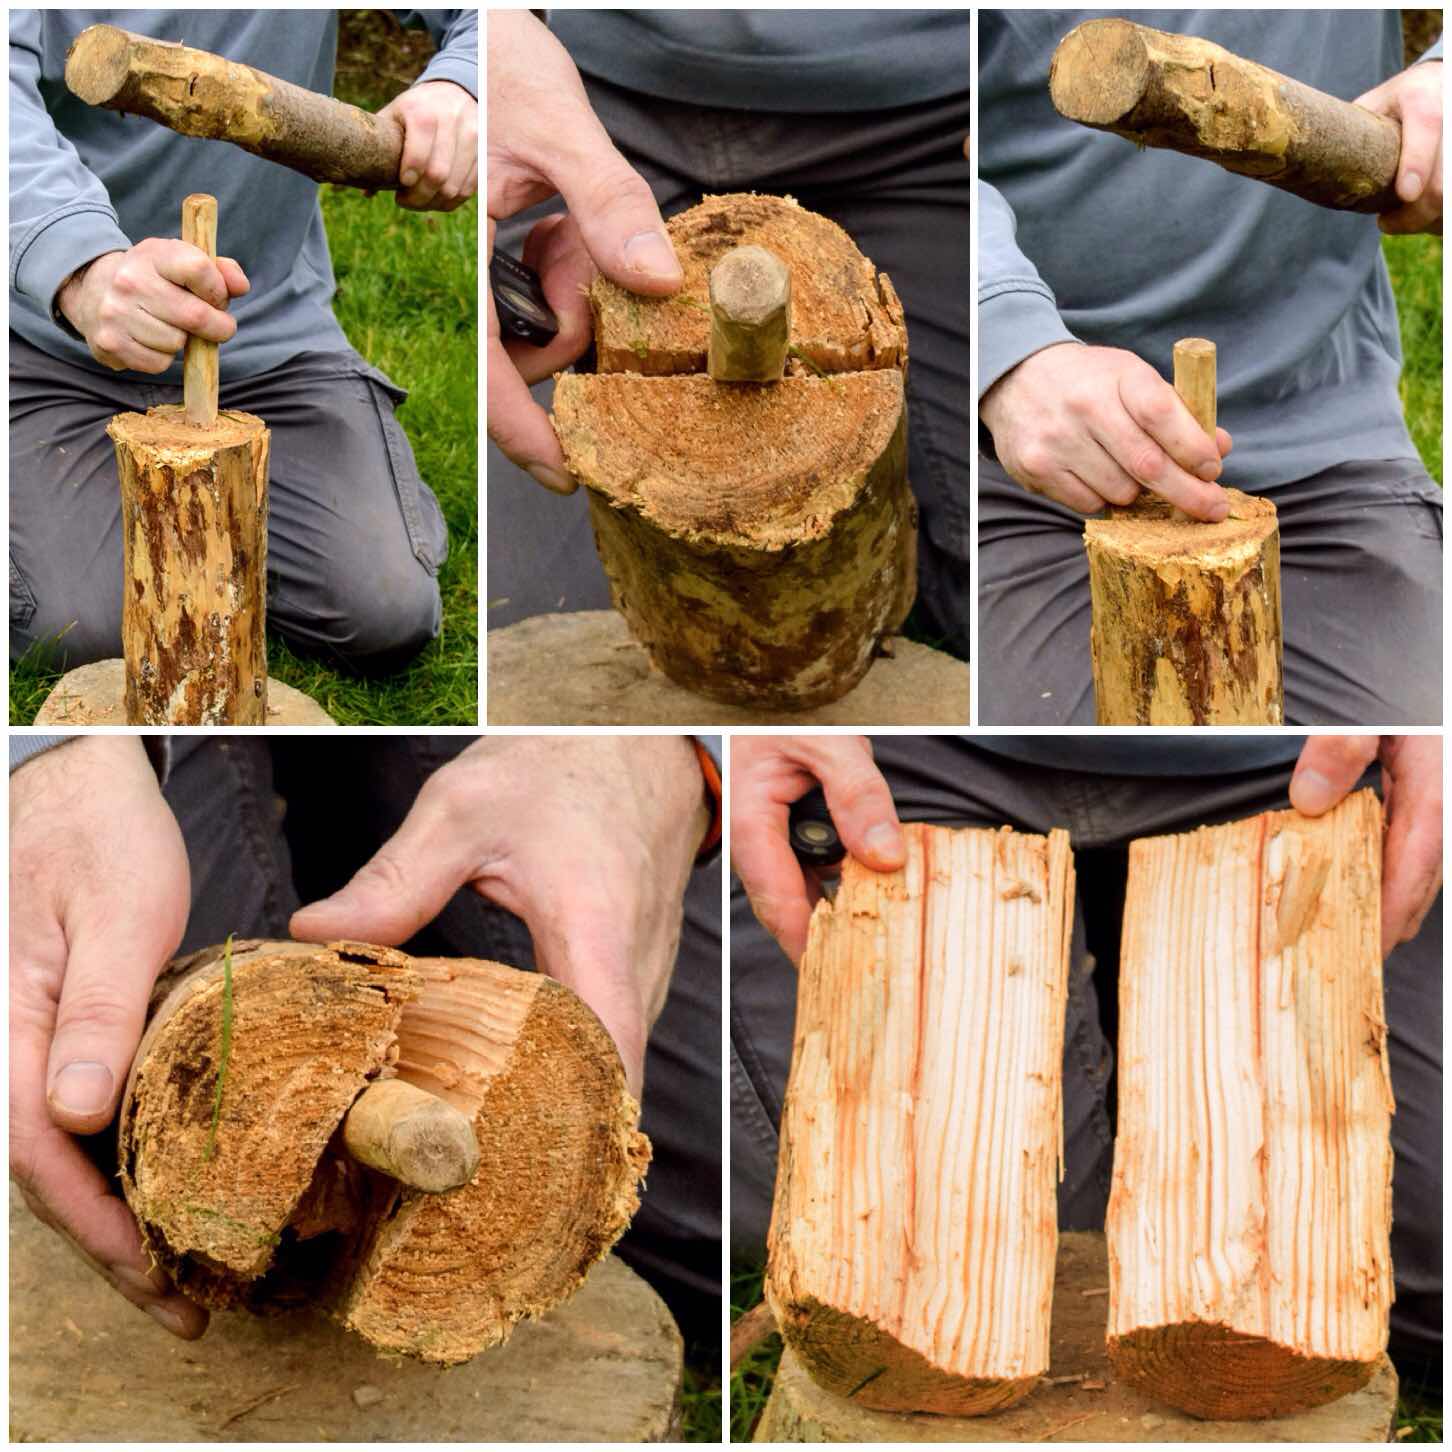
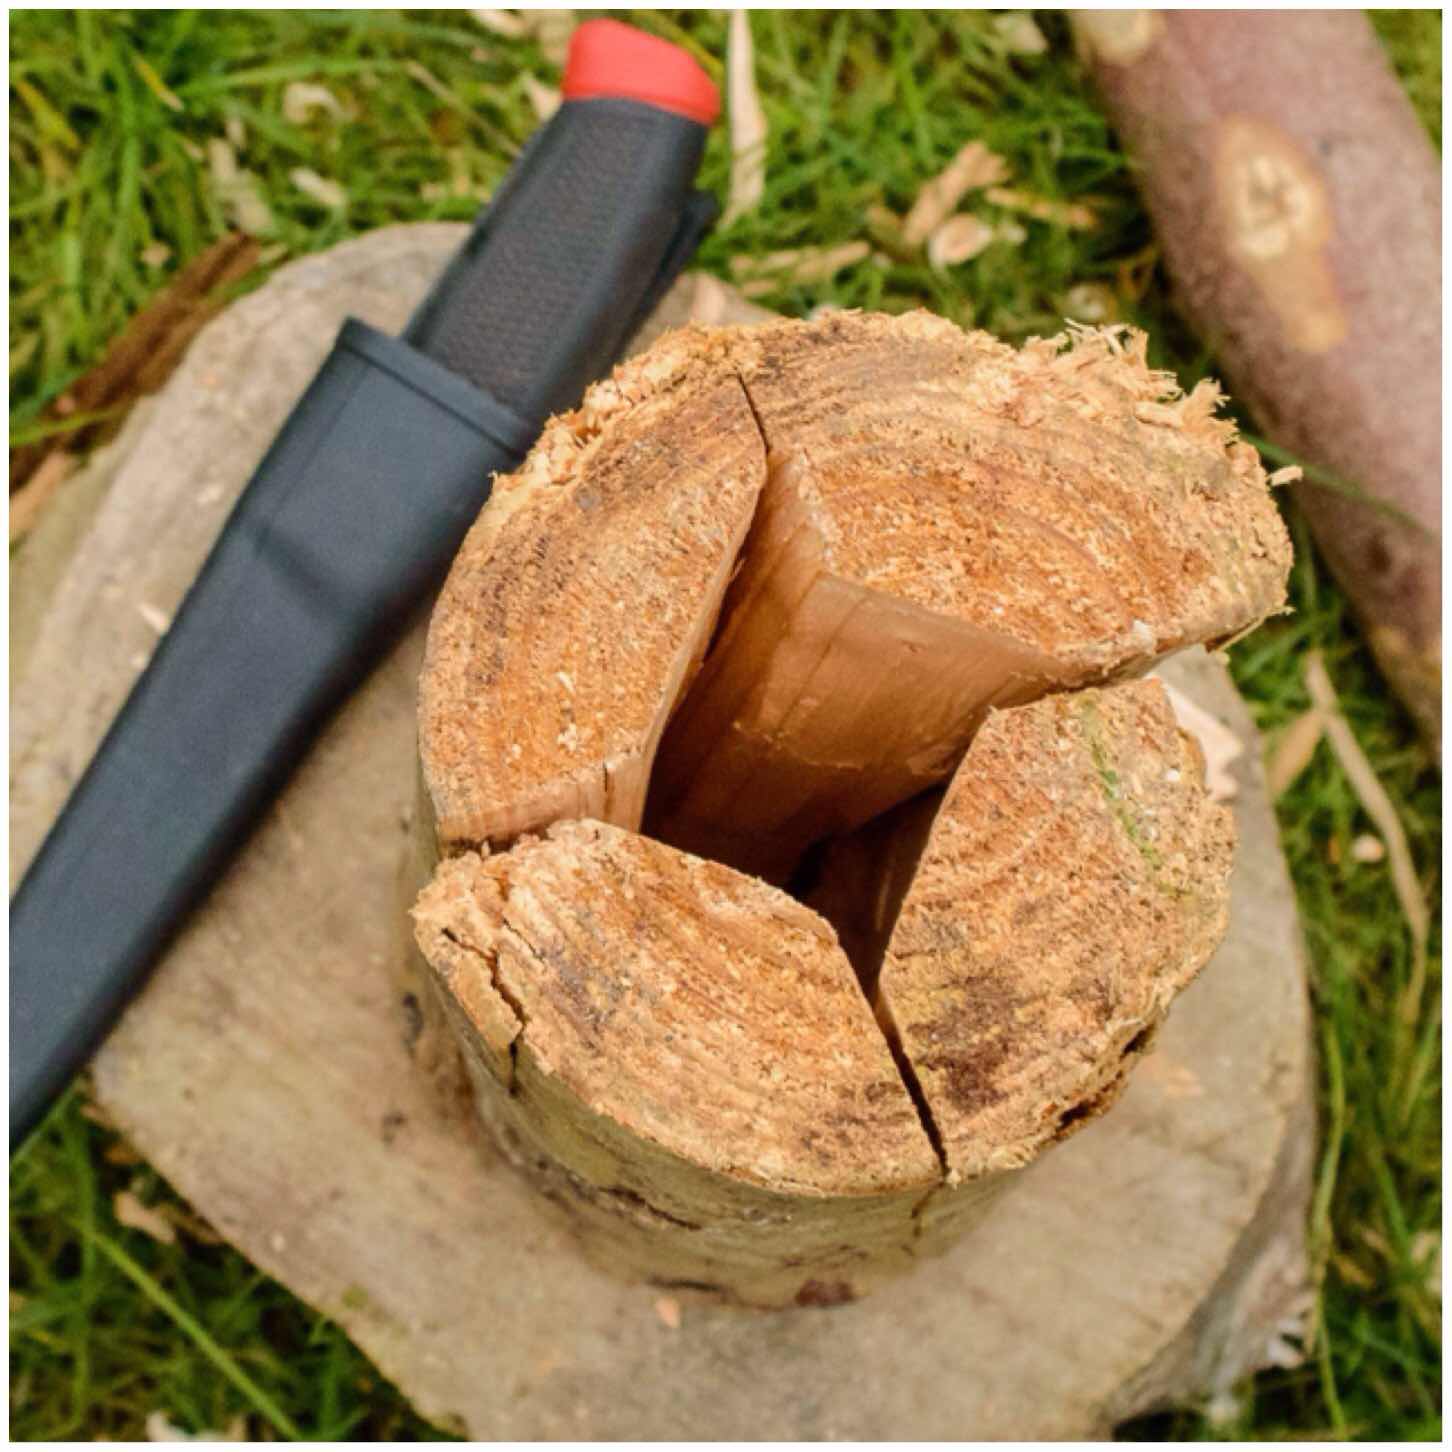
The Chimney
The stove requires a chimney and it is very easy to carve one out. About a third of the way from what will be the bottom of the stove I battoned my knife into centre ridge of one of the quarters of wood. I then used this a a marker to drive in stop cuts on all the other three pieces of wood.
Then from the what would become the top of the stove I battoned off the centre ridge of wood down to the stop cut. I then used my knife as normal to carve off some more excess wood so that part of the chimney looked fairly even. Once the first was completed I repeated the process on all the other pieces.
Keep all the offcuts and shavings as they will be needed to fire up the stove.
Batton out the core to form the chimney
From the top, looking down, your stove should look similar to the picture below. I have no idea how wide a chimney should be but I generally tend to take a couple of centimetres off each quarter.
The Chimney
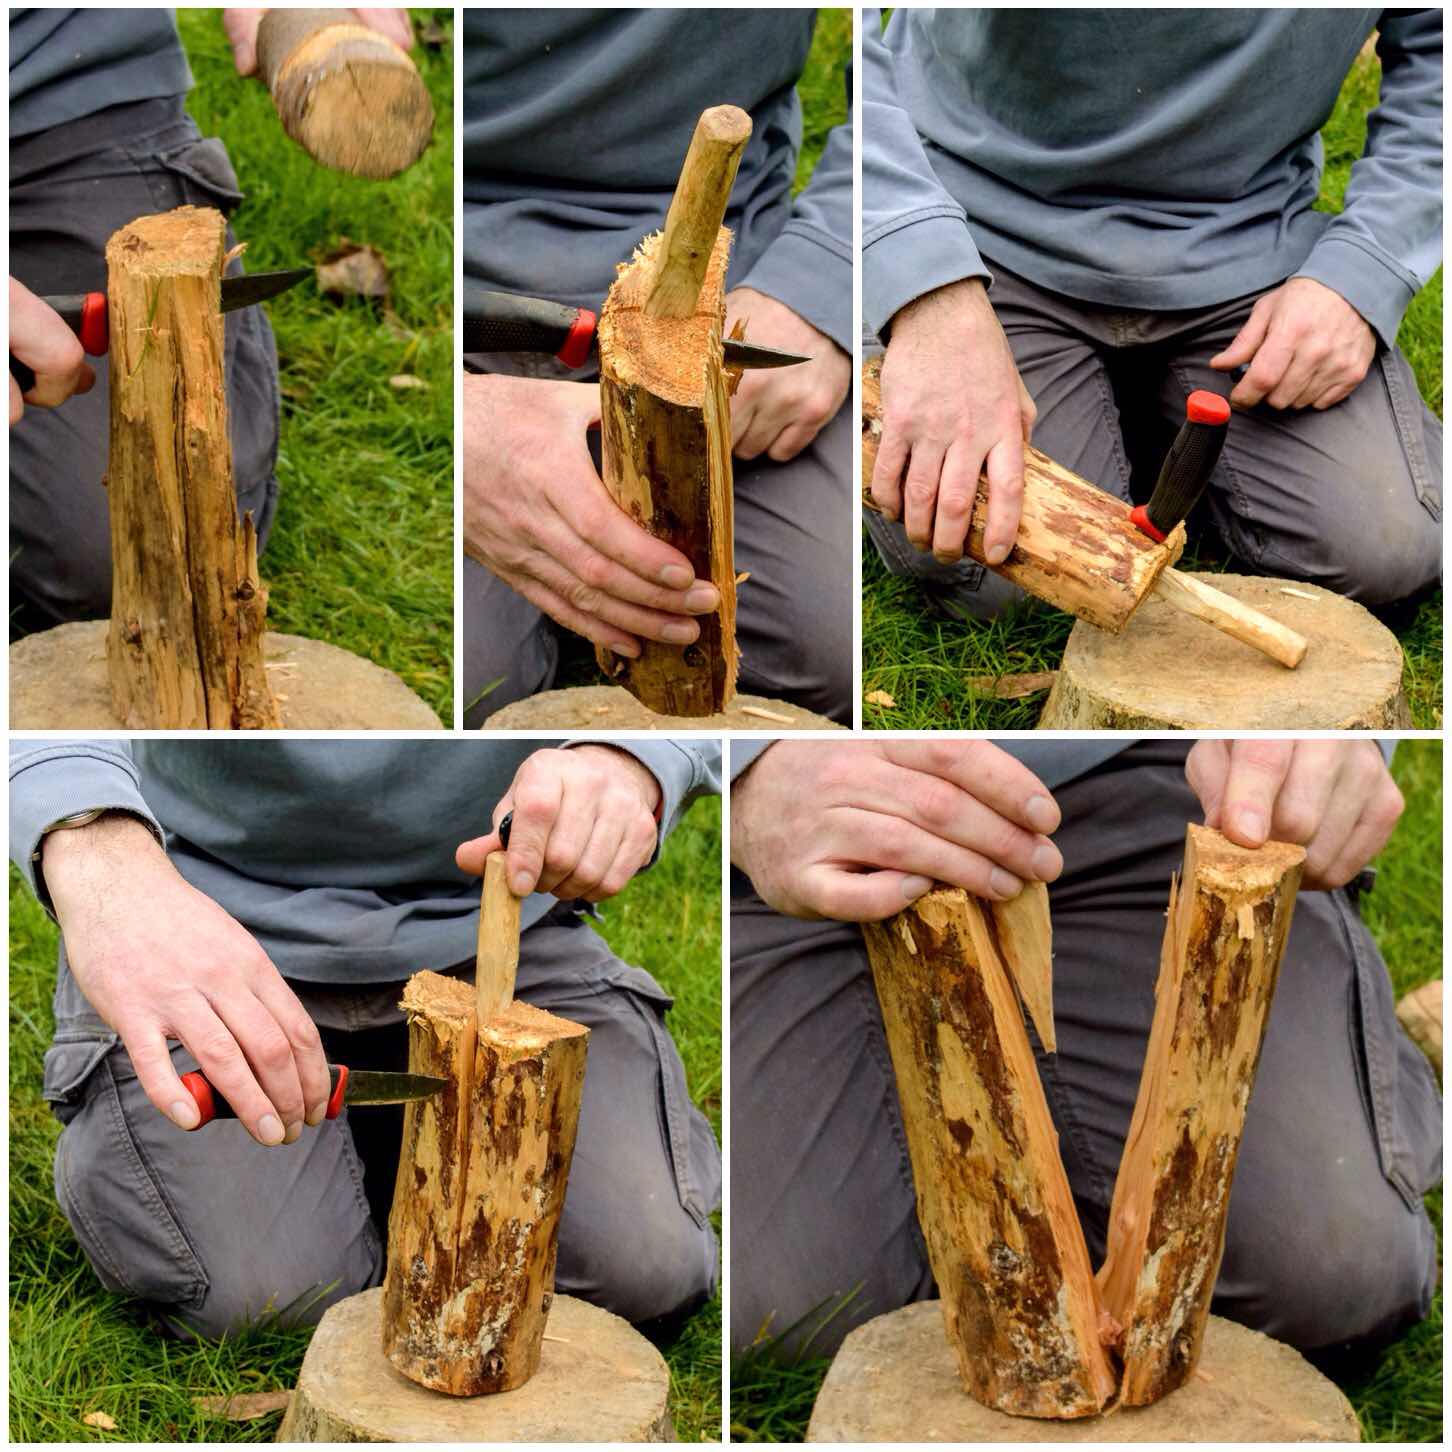
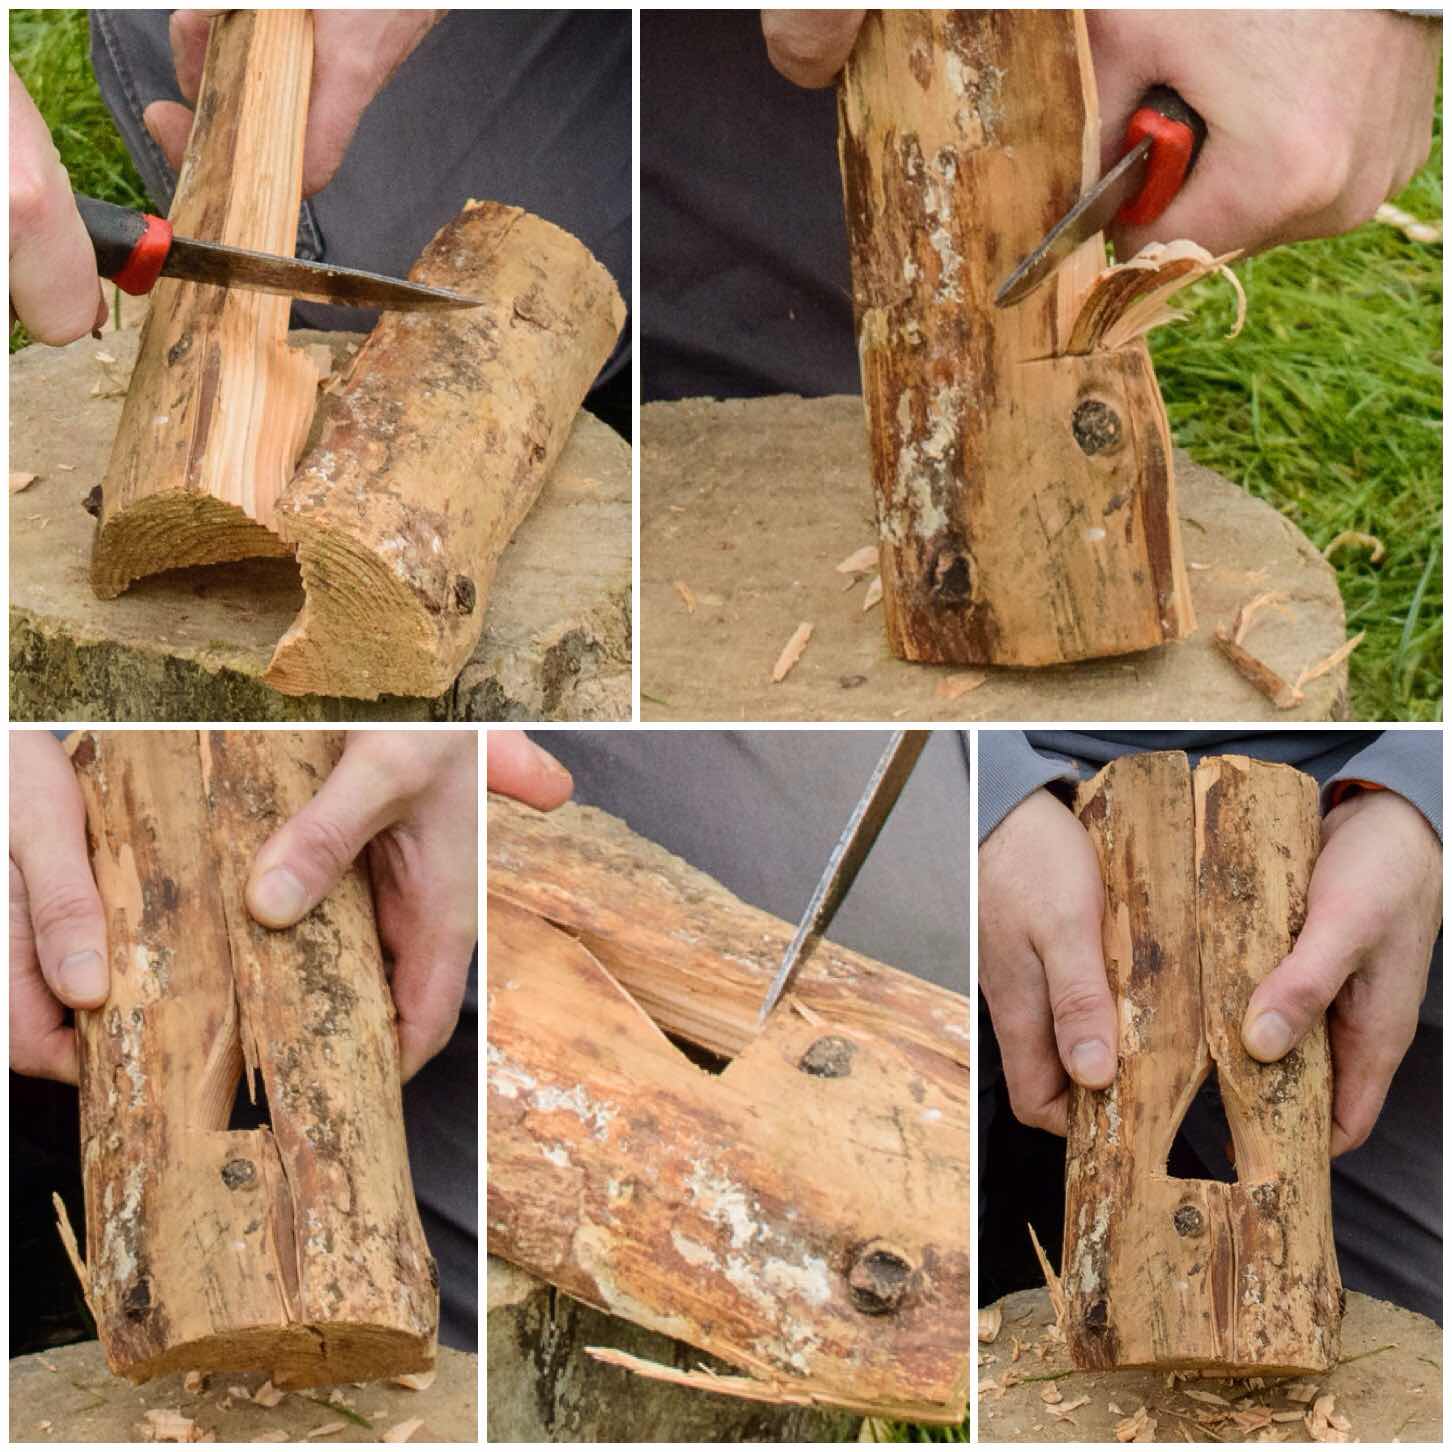
The Firebox
Once the chimney is finished select two of the quarters that fit together and just at the base of the chimney on each quarter carve out a half triangle on each quarter.
I put a stop cut in first and then carved off the excess wood down to the stop cut. The whole just needs to be big enough to let air in and allow you to add slivers of wood into the fire.
Make sure your cuts are opposite each other so that when you fit the two quarters together again you form a triangle.
I used to carve out a square shape with my saw and an axe in the past but a fellow bushcrafter called Takeshi Mizumoto showed me this method by just using a knife – so much easier.
Carve out a triangular fire box
Raappanan tuli cuts
I like to increase the surface area of the inside of my chimney so as to give the initial flame from my tinder something to grab onto.
This is a technique from Finland and you can read more about it here in my post on the Raappanan tuli candle. To make the cuts place each quarter on the work surface and gently batton in cuts to the inside of the chimney. Ensure that the cuts are made so that the small split you create is travelling towards the top of the stove.
Finally collect up all the wood shavings you have created and split the larger off cut pieces down to nice small kindling.
Creating extra surface area and kindling
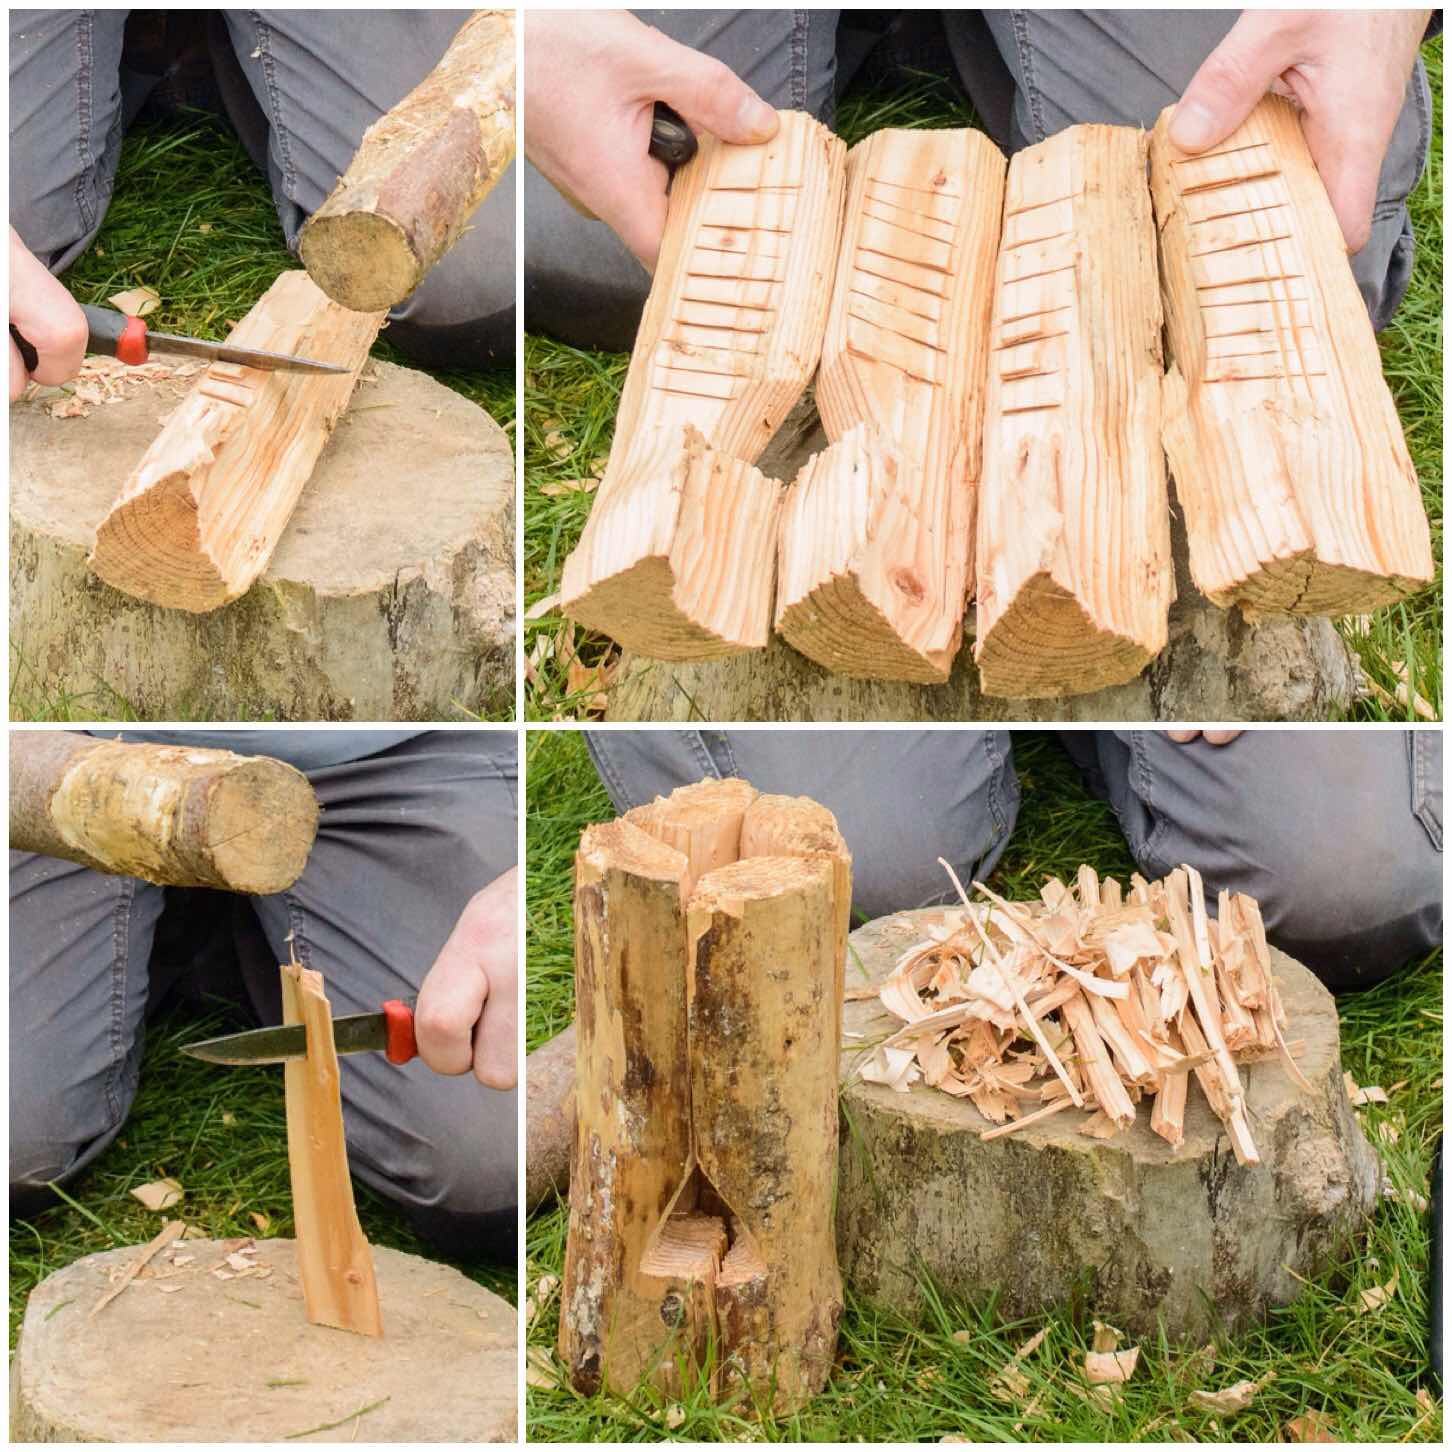
Firing the stove up
I found some old twine, thoroughly soaked it in water and then used it to tie the quarters together near the bottom.
To light the stove I used a firesteel to light some cotton wool smeared in vaseline. This gives me a burn time off about 5 minutes and as I always carry a supply in my rucksack am happy to use it. A more natural method that I like is to use birchbark and small lumps of spruce resin.
Once the cotton wool was well lit I added a few small pieces of wood in via the top of the chimney. At this stage it is important not to add too much kindling as this may block of the flow of air from the firebox to the top of the chimney. Also make sure your fingertips are not directly over the top of the chimney as you drop in the slivers of wood. Even at this early stage the heat is intense enough to cause injury.
Firing up
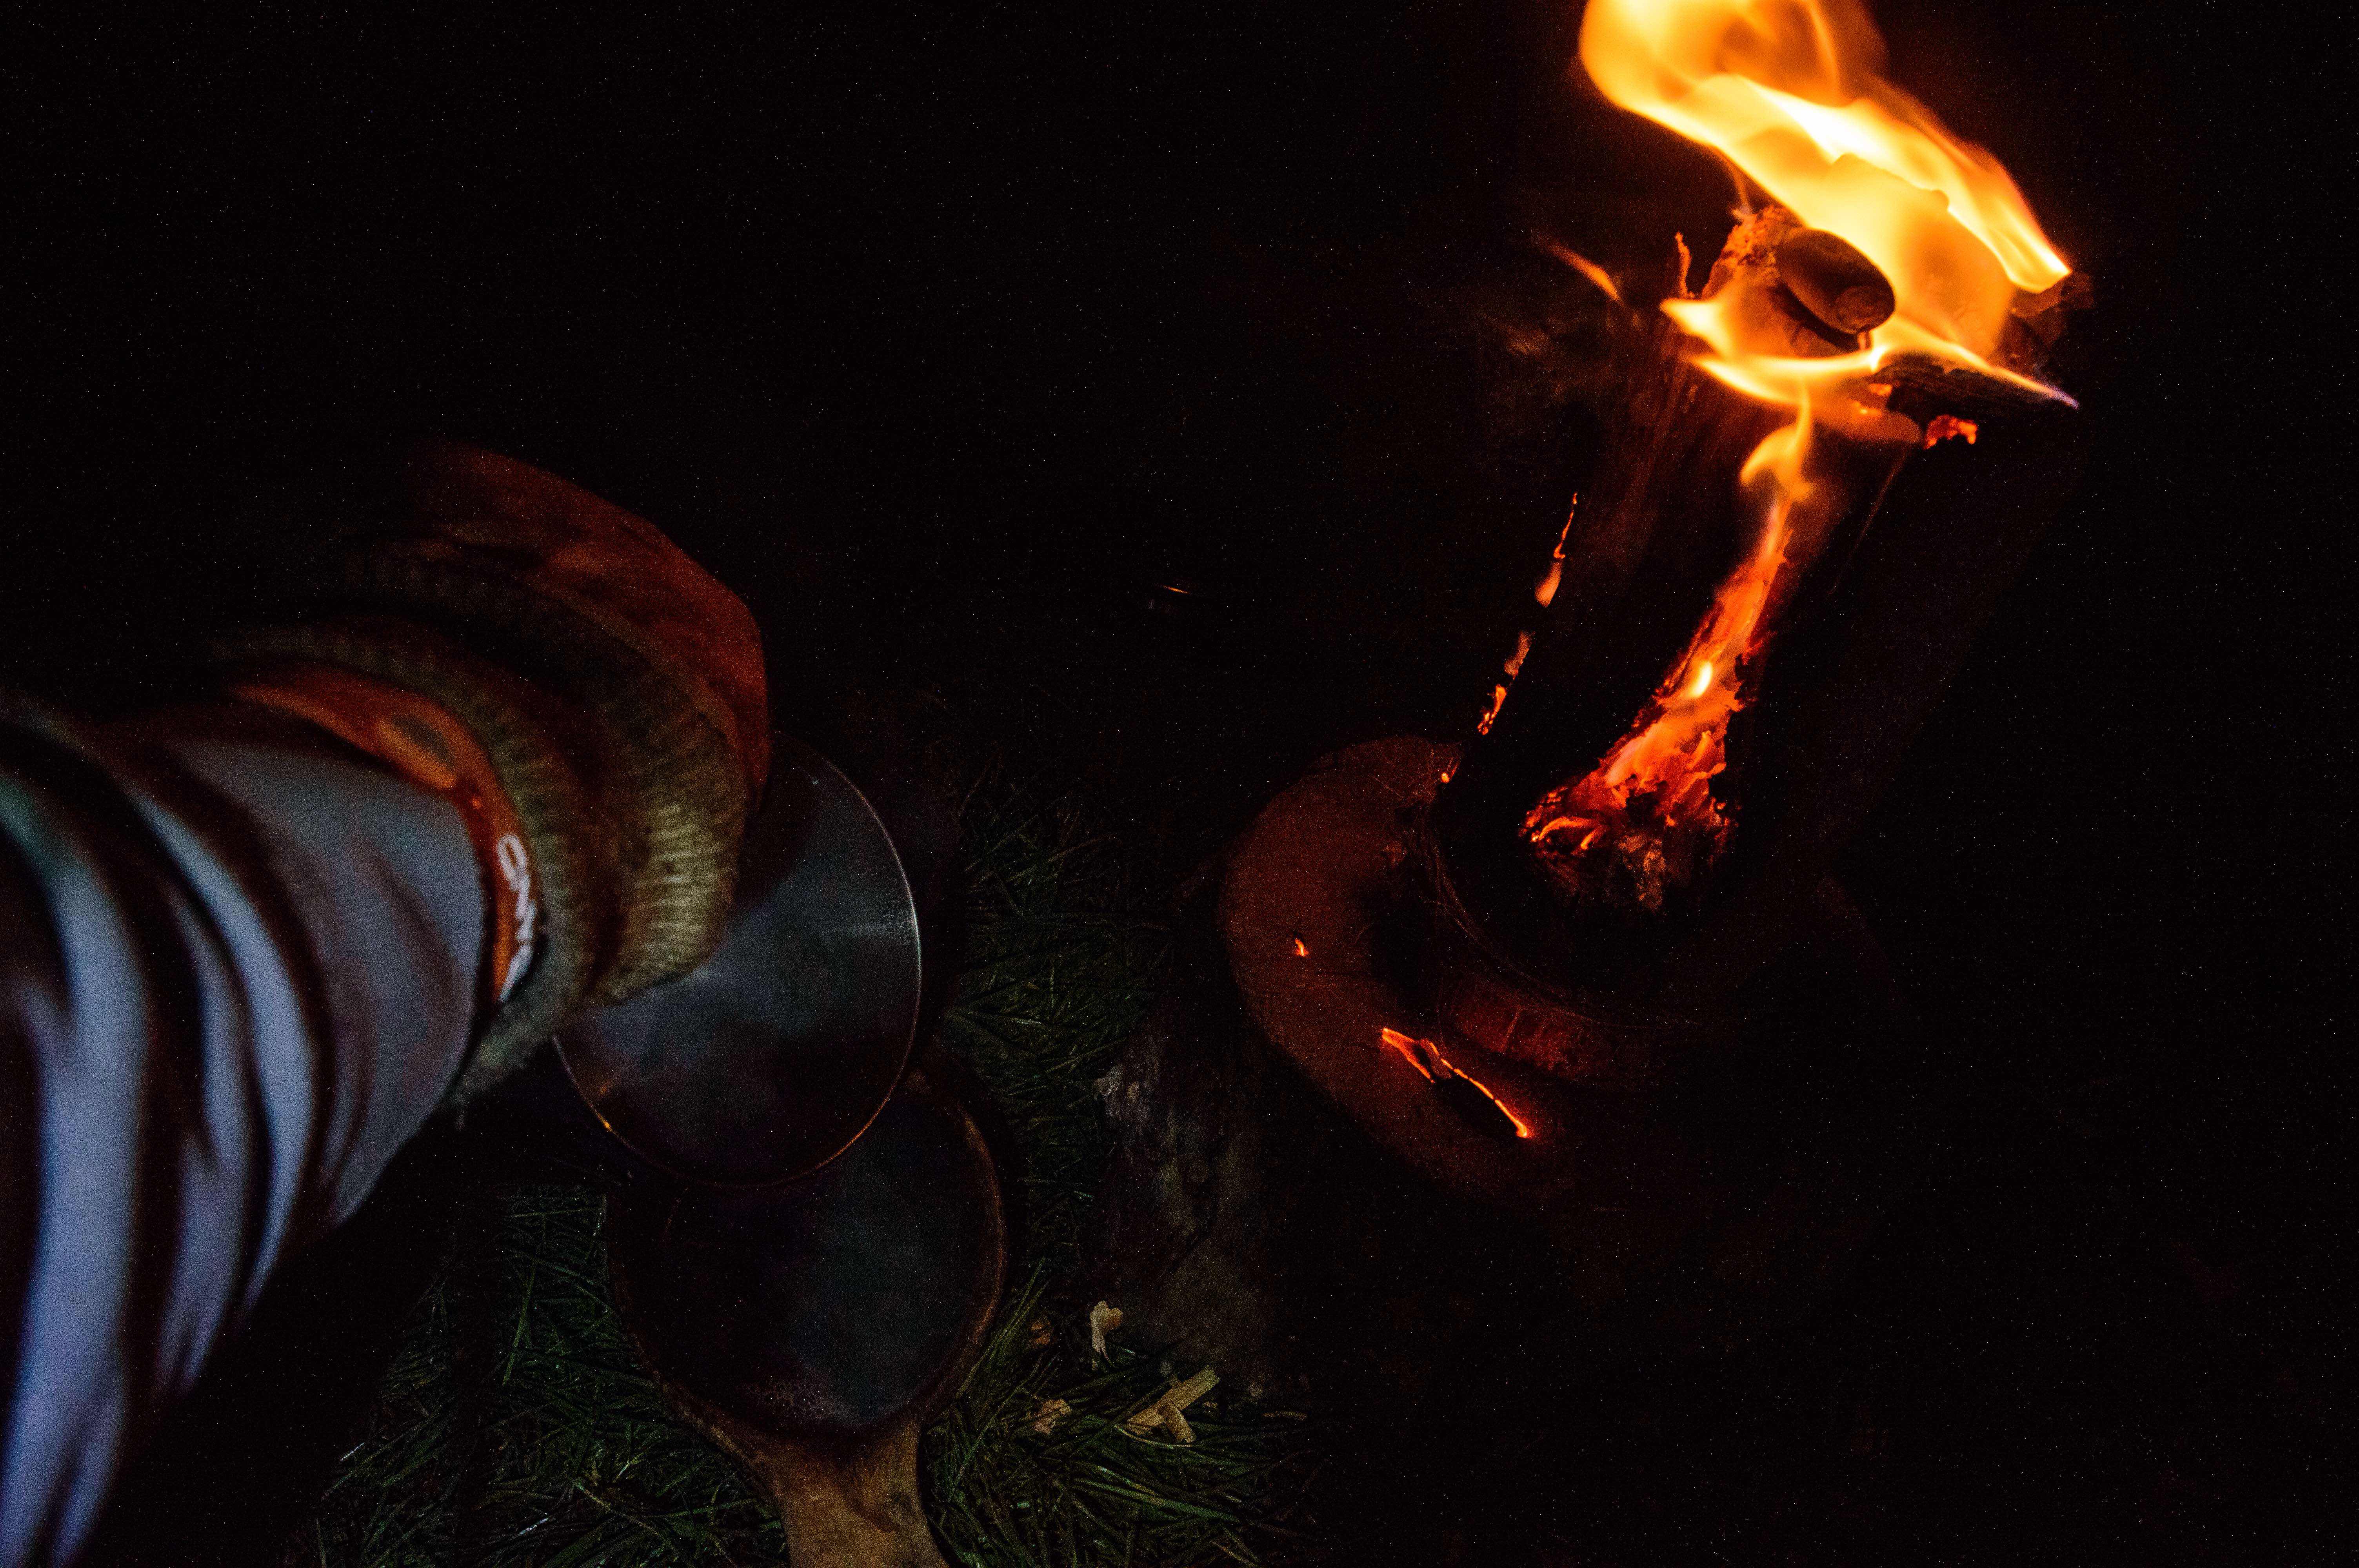
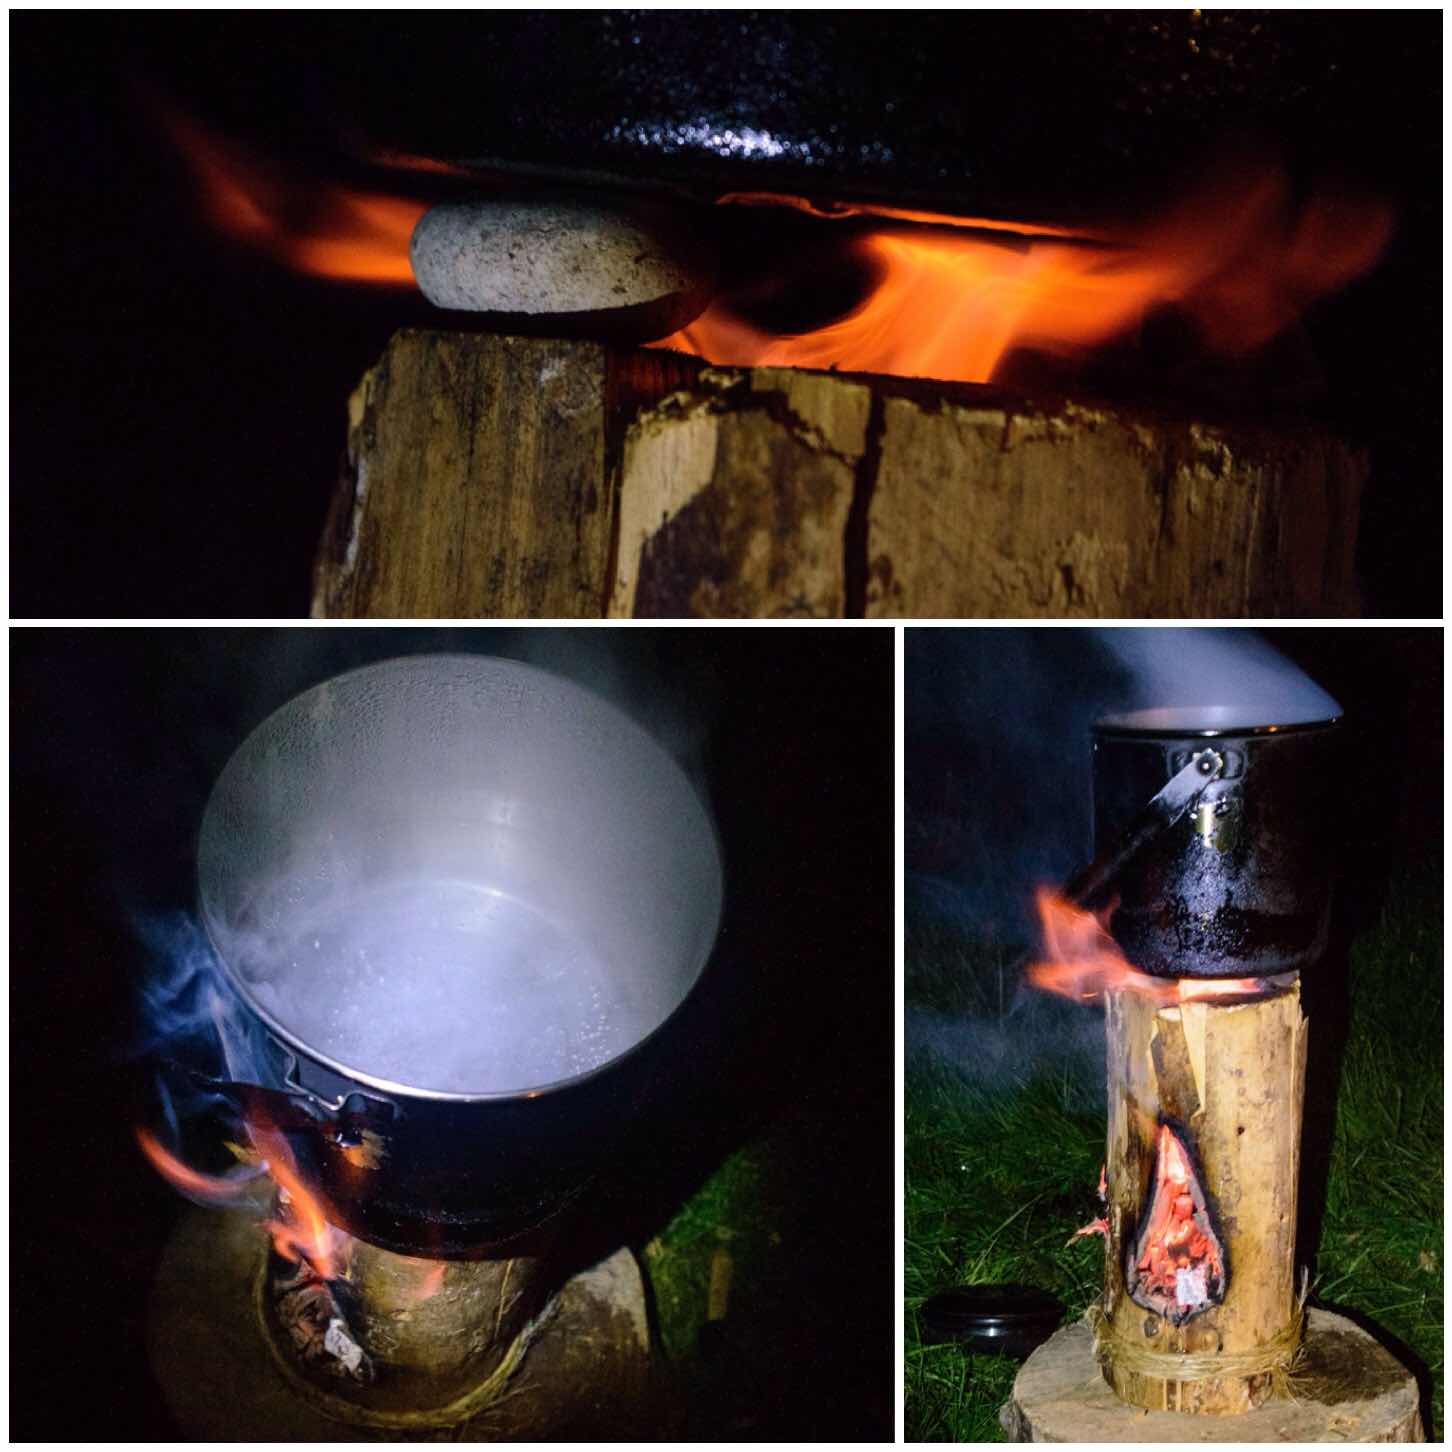
Three pebbles
I popped three flattish pebbles on the rim of the stove to act as a platform for my pot. As this is a small stove you need to keep a close eye on your pot as the water boils or the food cooks so that it does not accidentally fall over. I had this happen once before as I had left the handle of my pot up. The handle snapped back down eventually causing the pot to fall off the log.
All was well with this set up and after about 10 minutes of good heat my water was boiling. if you do not have pebbles to hand I find that 3 pieces of green wood work well instead.
Three stones and a pot
Afterwards as I was drinking my coffee the stove really came alive with some wonderful flames.
I really enjoyed making this small log rocket stove as it showed me that with a little ingenuity you can make do without an axe. It can be difficult but it is doable and a great way to test your personal skills.