How To…. Carve a Pretty Pear Platter

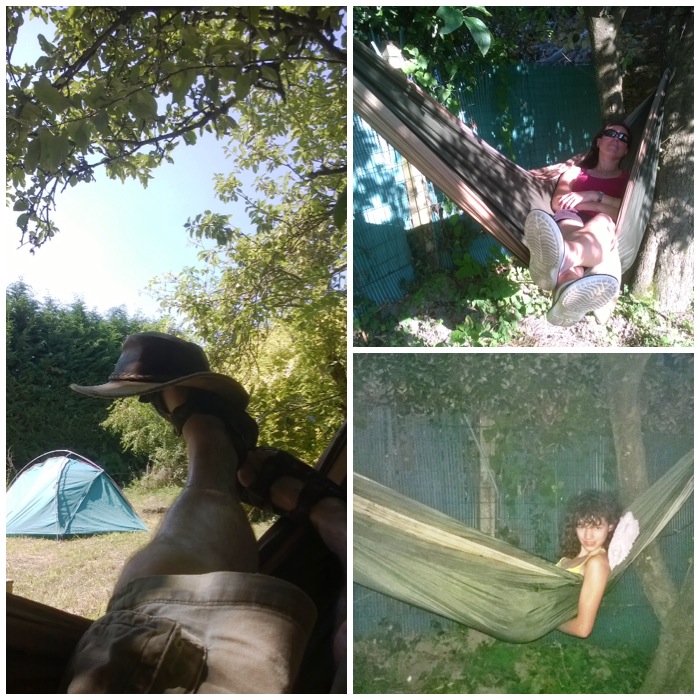
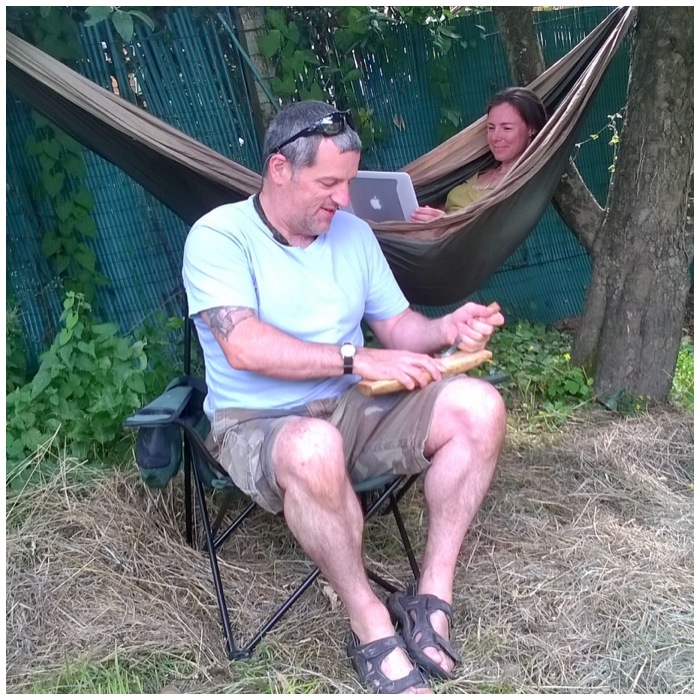
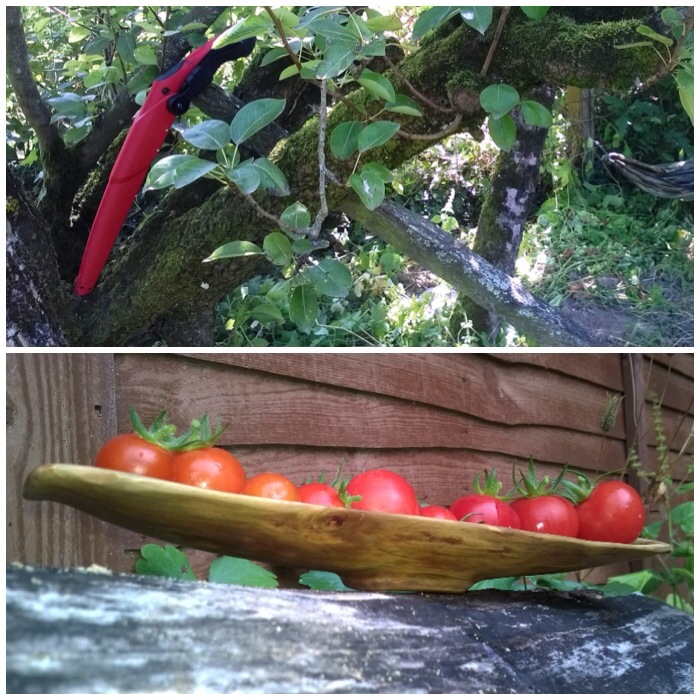
While we were on holiday in France at my friend Rick’s cottage he was telling me about some of the trees in his garden. He has an old, gnarly pear tree currently propped up by sticks as it was blown over in a storm a few years ago. It still bears fruit, but only on one side.

Rick agreed that I could trim a branch off the non-fruiting side as that would take some of the weight off the side that was being supported. I like to carve fruit woods when they are green as the wood is easy to remove.

IMG_2845-1.JPG
Before and after

I cut the limb off very close to the trunk so as to minimise the chance of infection damaging the tree. I made a single cut as the branch was easy to support as I cut it. Also the cut was made as close to the Collar as possible so as to give the tree the best chance to heal itself.

IMG_2846-0.JPG
De-limbing

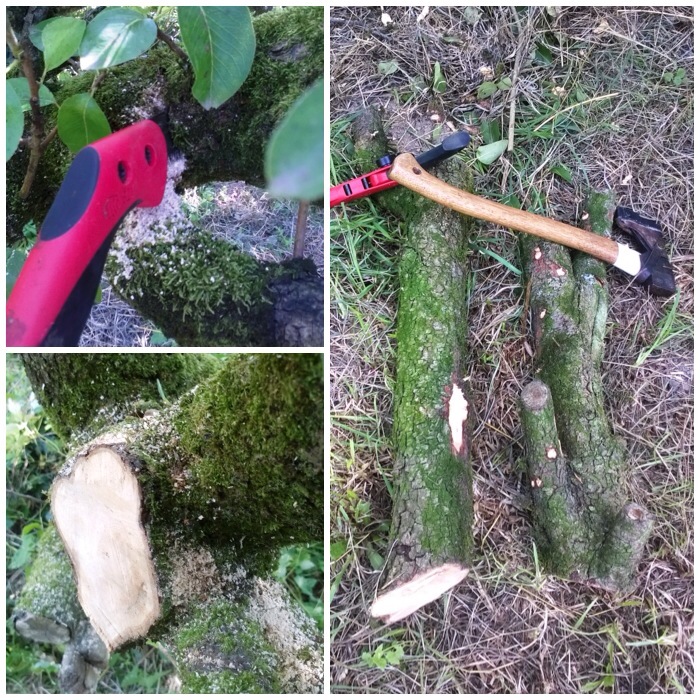
The bark was easy to strip off with my axe – being very careful where my fingers were at all times – and then I used my saw to cut it down further so I had a piece I was happy to carve.

IMG_2847-0.JPG
De-barking and trimming to size

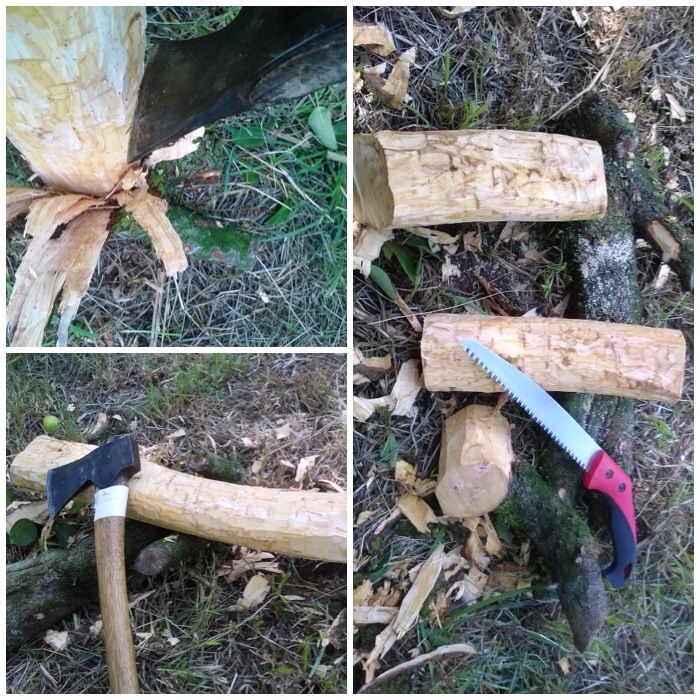
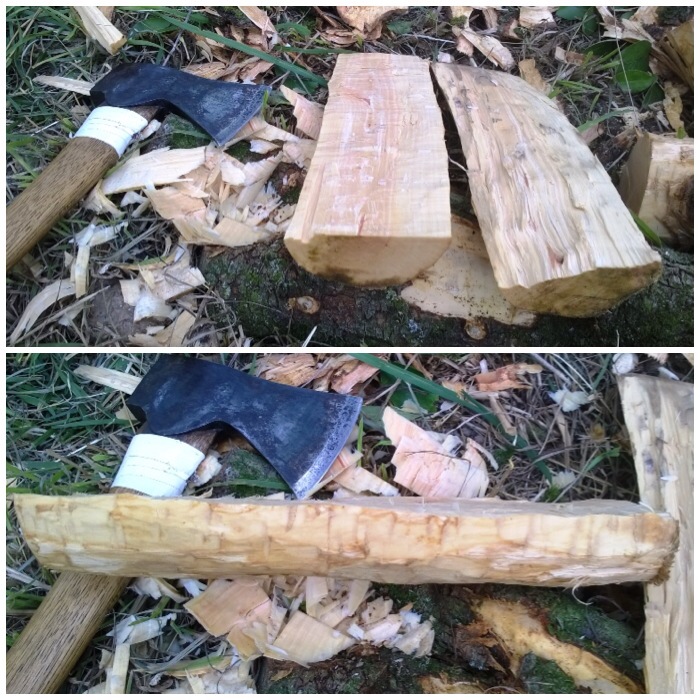
One piece of the branch made a perfect hammer for battoning my work piece in two. I make sure that the blade of the axe is 90 degrees to my body so that if it slips the edge of the axe swings away from me.

This piece did not split evenly as the wood was quite twisted with its age.

IMG_2848-0.JPG
Battoning

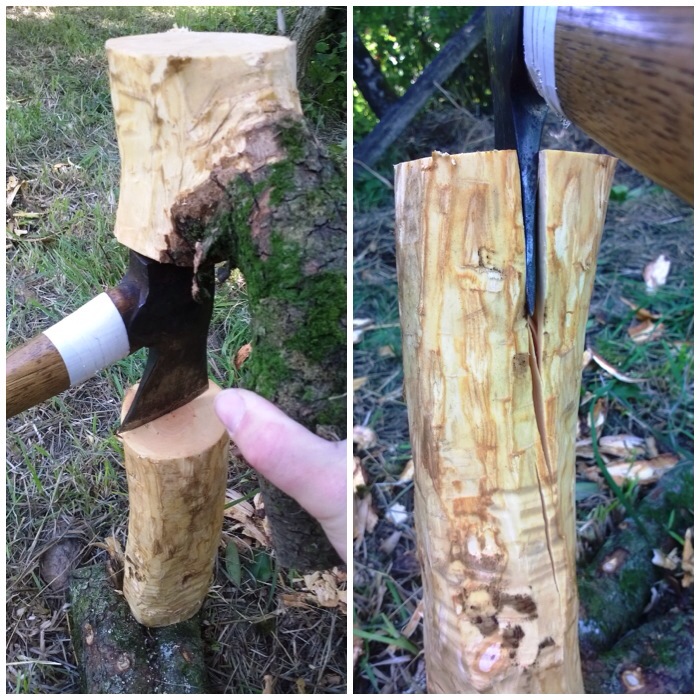
To make the split more even, I put the work piece on its side and split it further. A slower method but more controlled I think.

IMG_2849.JPG
Splitting out

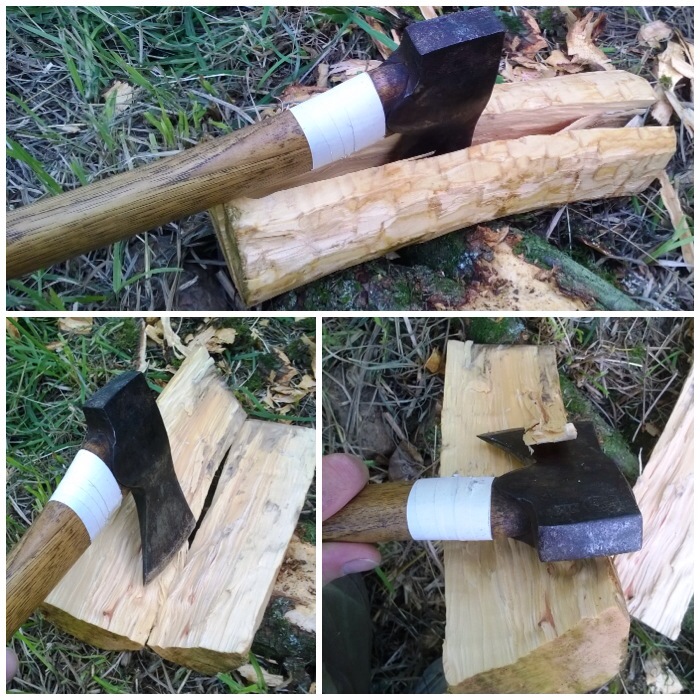
After splitting I cut out some wood from one of the halves to give it a flatter look.

IMG_2850.JPG
Flattening

I used my axe to take of some of the excess wood around what would be the bottom of the platter. As the shape was going to be a shallow curve I did not put any stop cuts in but just chipped away, starting from the ends and chasing the wood back to the centre.

IMG_2851.JPG
Axing out the back

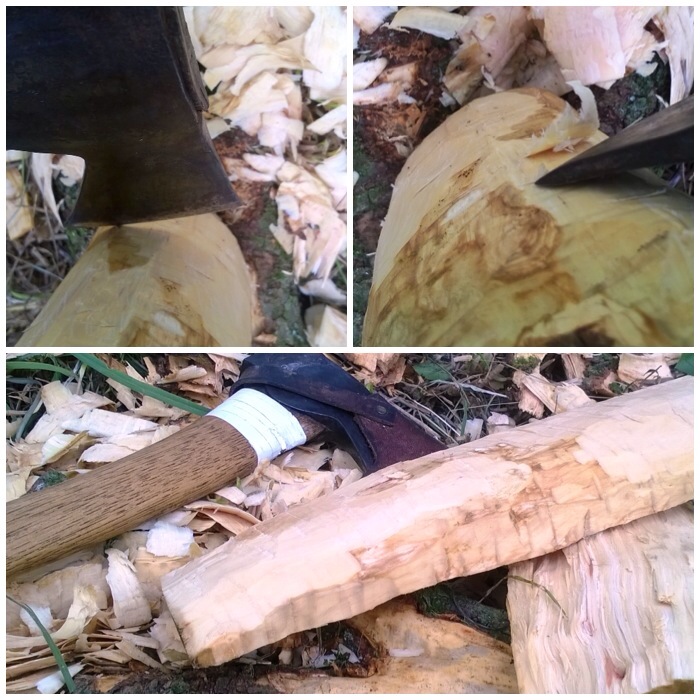
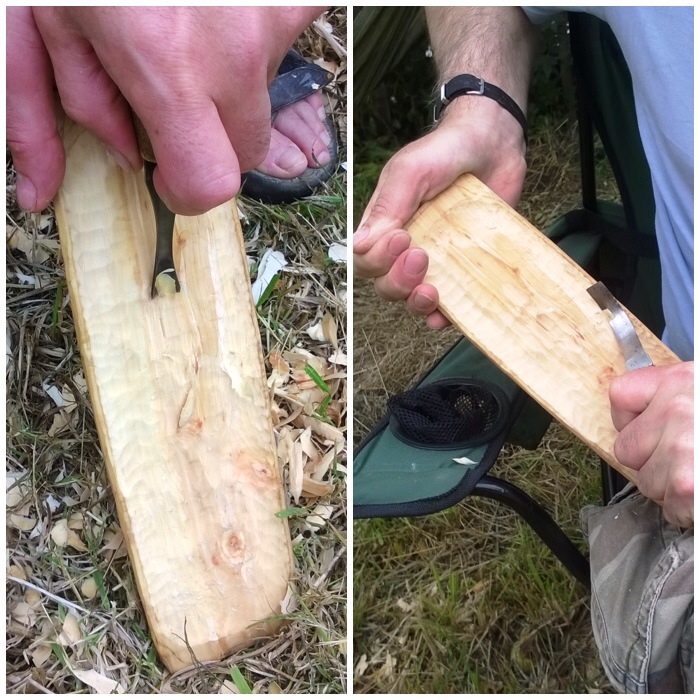
To finish the flattening of the top part of the platter I finished with the axe and moved onto my knife.

IMG_2852.JPG
Final flatten with the knife

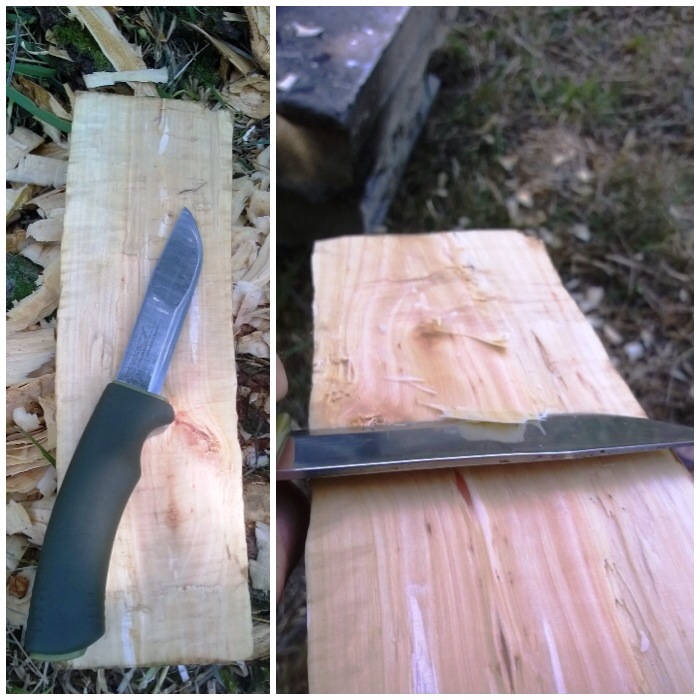
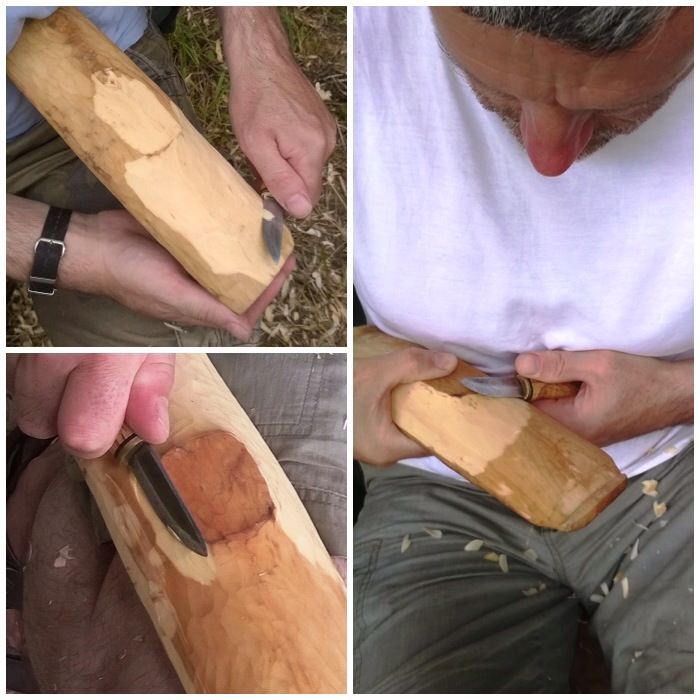
Once the work piece was as flat as I wanted I drew the shape of the bowl area and used my crook knife to start removing the wood from this area. As the wood was very green this excess was removed very easily.

IMG_2853.JPG
Using the crook knife

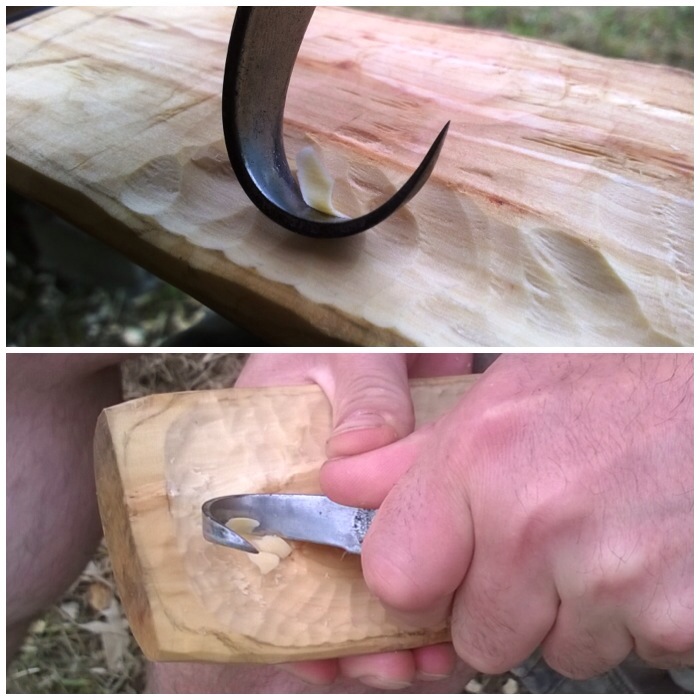
I also used my palm gauge and my bowl knife in this process. These are the only bowl-carving knives I have and I switch between them depending on what the wood is saying to me as I try and carve it out.

These tools make a real difference to carving the bowl area but are ones you really need to practise with a lot to be as safe and efficient as possible with when using them.

IMG_2854-0.JPG
Palm gauge and bowl knife

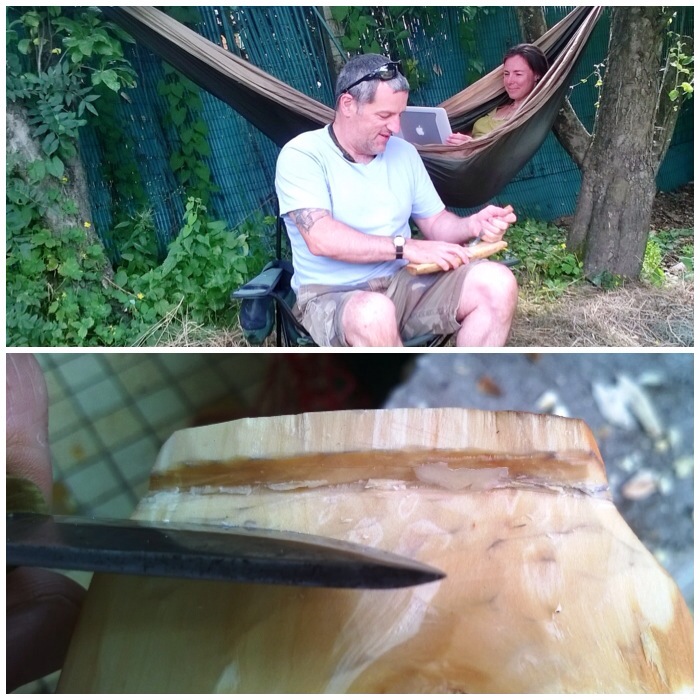
Once I was happy with the amount of wood removed from the bowl area, I moved onto the back. I like to take my time when working on this area as it is all too easy to cut out large chunks of wood and suddenly reveal a great big hole in the bowl. I use a variety of cuts: brake cuts towards me, small pressure cuts using my thumbs and powerful but small chest lever cuts to name just three. With all cuts, the main thing to remember is that you must always be aware where the blade will end up if the knife slips.

IMG_2855.JPG
Different knife cuts

I had a lovely time over a couple of evenings working on this carving – this is what I call relaxing.

IMG_2760.JPG
Relaxation and fine work

I had kept a lot of the chippings from the carving and when I had removed enough wood I put the platter and lots of the chippings into a plastic bag and kept it in my garage (a nice cool area) for a month to slowly dry out. I added some water to the chippings every few days for the first week to keep them and the platter slightly damp.

This slow drying process allows the whole of the platter to dry in a much more even manner. The platter would potentially crack if the outside dried at a much faster rate than the inside (caused by pressure differences).

IMG_2856.JPG
Roughed-out platter

After a month of drying I used different grades of sandpaper from rough to very smooth to get rid of most of the lumps and bumps.

IMG_2857.JPG
Sanding

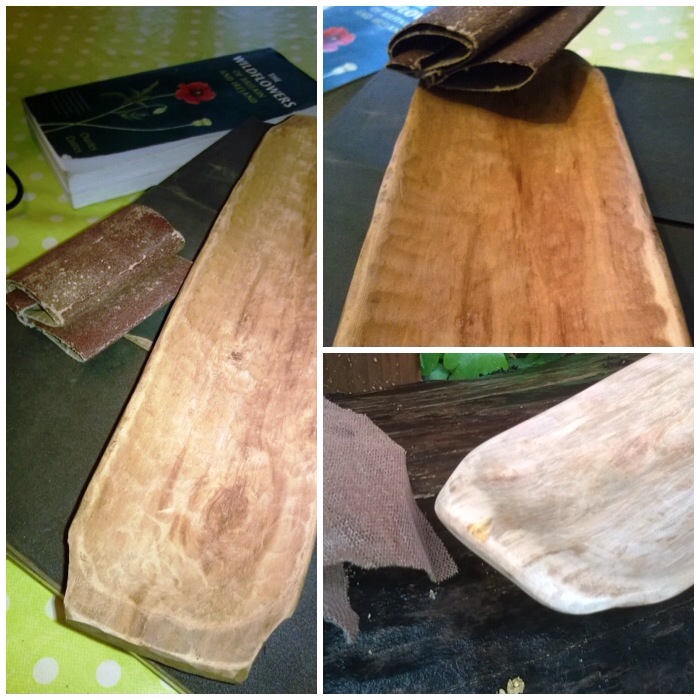
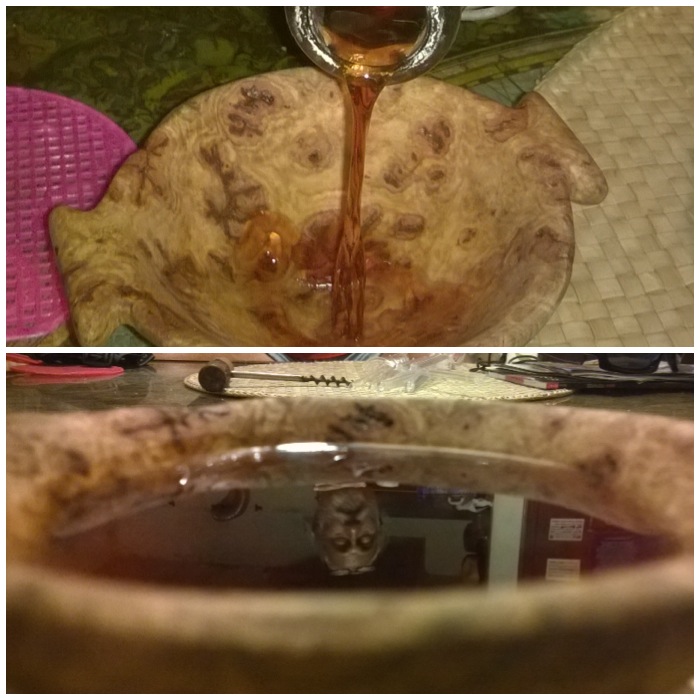
I coated the platter with 3 layers of olive oil (allowing each coat to dry fully before applying the next).

IMG_2858-1.JPG
Oiling

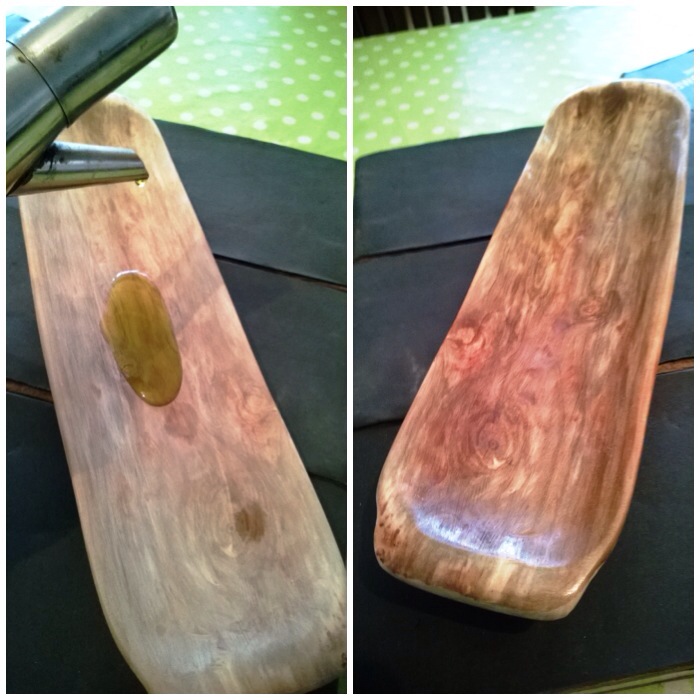
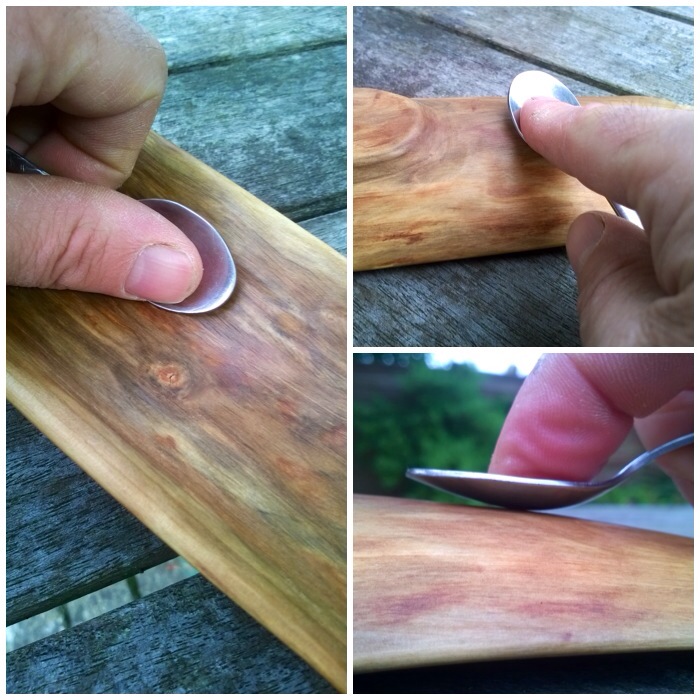
Then over a couple of nights I used the back of a spoon to rub the surface of the platter so that it became silky smooth (known as boning). Sometimes you get a very shiny surface doing this but I think that this wood may need to season for a bit longer as although it became beautifully smooth it stayed a bit dull.

The fibres of the wood may raise up again over the next few weeks but a light sanding and boning will soon have it smooth again.

IMG_2859-0.JPG
Boning

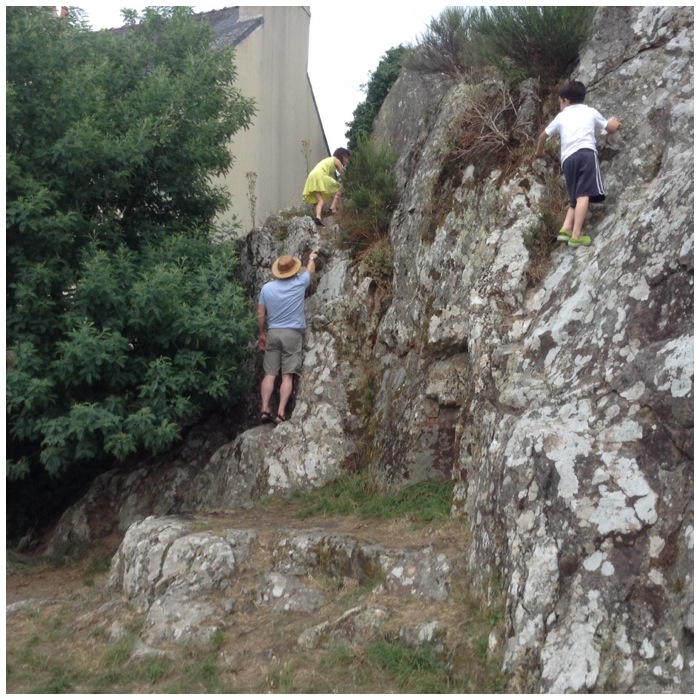
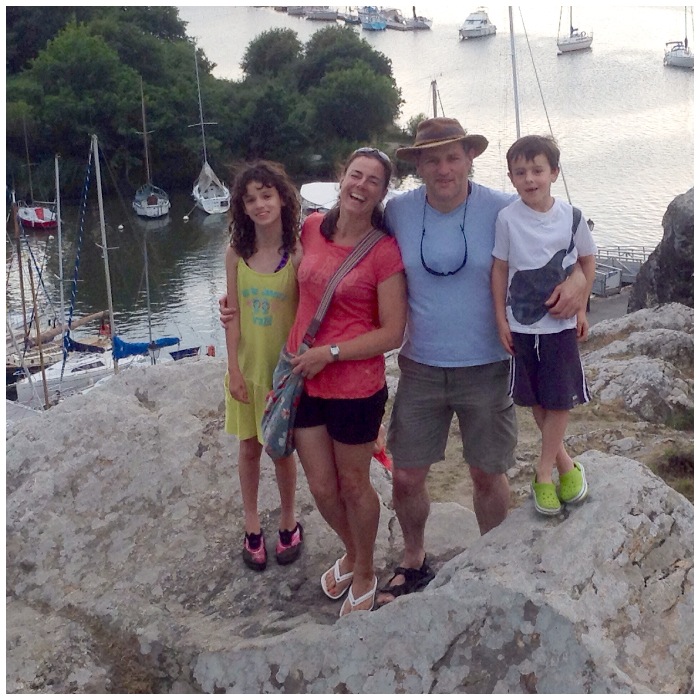
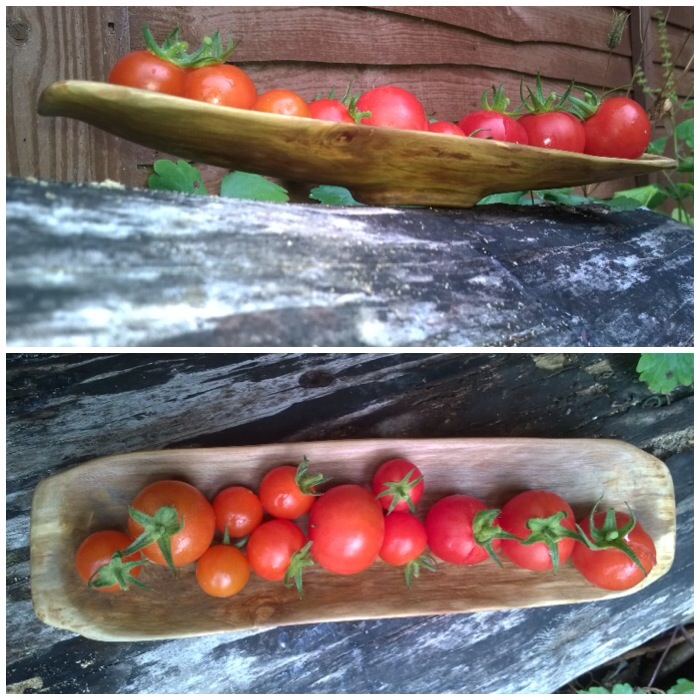
This is my 99th blog post and I am glad it was about something  I was very happy to carve. The platter is destined to go back to France as a present to Rick for letting us use his cottage for what was a very lovely holiday – Brittany Adventures.

IMG_2860.JPG
Finished platter

Cheers

George

Teine Eigin – Part 3 – Modern Bowdrill – My Way – A Video Post

Part 3 in this series on fire by friction looks at my style of using what I classify as a modern bowdrill set up.

I use the term modern as I am using starter cord on the bow to spin the drill piece. I like starter cord as it does not stretch too much when the drill piece is attached and it is also very hard wearing.

I have focussed primarily on the way I tend to teach the bowdrill to someone who wants to create fire on their own

I filmed this last July in France at early evening time. I appreciate there may be similarities with this post and my previous one on the Egyptian method but I want each of the videos to be stand alone.

So here is the video on Modern Bowdrill – My Way

My next videos on this will start to look at methods for using a bowdrill in a group scenario. I have already added an extra video to Part 2 in this series on the Egyptian method but showing the set up being used by two people – The Egyptian method doubled up

Cheers

George

Teine Eigin – Part 2 – An extra video on the Egyptian Method

I was at the BCUK Bushmoot in August and was asked by some friends if I could show them how the Egyptian method works.

Rather than me showing them I got the guys to double up and do it themselves to show them how easy it was.

They used two limpet shells as a bearing block (which they told me got eventually quite hot) and also watch out for the drill piece as they stop drilling. Notice how it does not spring away when it is released from the bearing block as the more modern single wrap method will do.

The other video on the Egyptian method going into it in more detail can be found here – Teine Eigin – Part 2 – Bowdrill – The Egyptian Method – A Video Post

Cheers

George

Brittany Adventures

The start of this year’s school holidays found our family in the beautiful Breton countryside. My good friend Rick offered us the use of his place over there for 10 days.

I tried to do a little bit of bushcraft as the holiday went on but it turned out to be a real mixed bag of outdoorsy adventures for the whole family.

Most days we would head into La Roche Bernard to find one of the cafes that had Wifi and chill/catch up on emails but every day my kids would want to climb the rocks beside the cafe. I tried to keep an eye on them but as you can see Finlay was usually off doing his own thing.

Photo 22-08-2014 14 44 31
You have your eye on one and the other…………….

My beautiful family Alison, Catherine and Finlay

Photo 22-08-2014 14 45 45
Family Fun at La Roche Bernard

We had a lovely day at a Breton Country Fayre at Nivillac where the focus was on early farm machinery. I looked at some of the tractors and could remember riding on these types when I was a boy.

Photo 22-08-2014 14 48 33
Traditional farming machinery

I liked the fact you could get up close to all the action. Catherine was enthralled with winnowing the seed heads but Finlay kept well back as he suffers from hayfever. I was particularly taken with the guys using the hand flails to thresh the wheat. They were so close to each other but not once did they have an accident.

Photo 22-08-2014 14 50 02
Even older techniques

I made a short video of the day

Back at the house, I managed to find a spot in the garden to put up a hammock for some quality chill time.

Photo 22-08-2014 14 52 31
Chill Zone

I managed to get a spot of carving in as there was a pear tree in the garden that needed a bit of a trimming. I have a roughed-out bowl drying out at the moment waiting for a sanding. It will end up back in Rick’s cottage as a thank you for letting us stay there.

Alison found the hammock great as an office. As a digital publisher she takes her laptop most places but prefers work in style wherever she goes.

Photo 22-08-2014 14 52 53
Modern and ancient pastimes

Evenings were a sociable time and my little whisky cup made for an excellent damson liqueur holder. I introduced this sharing cup to some of Rick’s Breton friends and they were very taken with this Celtic tradition – Brittany of course being one of the Celtic nations.

Photo 22-08-2014 15 09 02
Damson liqueur in the whisky cup

We went for a river cruise along the Vilaine River and while I was watching the world go by at a tranquil pace heard a buzzing sound. Have a look at this little video and tell me you would not want this toy – I know I do.

One morning I decided to explore the nearby woods and Finlay asked to come along. We found an area of woodland with a mixture of conifers and deciduous trees. The insect life was much richer than I would normally find back in the UK as it was not managed it seemed to any great extent.

We got up close to the spider’s web you can see at the top left and as the spider detected our movements he sped over to a fly he had wrapped up, protecting his dinner. I thought that the brown butterflies were particularly well camouflaged in amongst the leaf litter.

Photo 22-08-2014 15 10 42
Insect life

We found plenty of signs of deer (we spotted some out in the fields) such as scratching posts and found this butterfly trapped in a web. I would have left the butterfly if I had thought the spider could have eaten it but all that was happening was the butterfly was trashing the web with the poor spider staying well out of the way. Finlay helped release the butterfly and it flew off, leaving half a web for the spider.

Photo 22-08-2014 15 12 42
Investigations

A few other finds were lots of laying up points for the deer, some very strange gooey fungus and a pine cone that had only had one strip of its seeds eaten.

Photo 22-08-2014 15 14 36
Oddities

Back at the cottage I took down a tent that had been up in the garden and found this ants’ nest under it. In less than an hour every single egg had been removed to safety by the ants. The crickets were particularly tame and were quite happy to sit on your fingers.

Photo 22-08-2014 15 17 55
Super bugs

Under some slates covering the well I found this rather beautiful little lizard hiding from me. The damselflies were everywhere and very hard to get up close to to photograph.

Photo 22-08-2014 15 20 13
Up close and personal

I must admit to spending a couple of days on the beach and as you can see I was never properly dressed for this environment. I salvaged my bushcraft credentials with a good walk over the rocks at low tide looking at all the oysters, and I came across this little Breton lady foraging for buried seafood in the sand.

Photo 22-08-2014 16 33 47
Bushcrafters on the beach

Alison and the kids spotted some unusual holes across a path one day and I came over to have a look. There were no holes on either side of the track but there were little mounds of dirt. From what I could see that had happened was that a mole had dug his way across the path and as the ground was compacted there, when the earth was pushed aside the holes had remained visible.

Photo 22-08-2014 16 25 52
Moles and Marshes

As I have been photographing our UK wildflowers a lot over the last couple of years it was great to be in an environment where new ones were springing up all over.

Photo 22-08-2014 16 26 49
Stunning flowers

It was nice to see some old favourites too, such as bramble and mint.

Photo 22-08-2014 16 29 23
Time to relax

The highlight of the holiday had to be the climbing day. It took us a long time to find the place but it was well worth it. Alison had spotted in a flyer a centre called Escapades Verticales where we could take the kids climbing.

Photo 22-08-2014 15 21 51
Climbing high

I was very impressed with the set and we had a fantastic time climbing and zip wiring all afternoon.

Photo 22-08-2014 16 24 29
Zipping and traversing

I managed to put together a short video on it using my phone.

As far as holidays are concerned this one was one of the best and I will always remember it. I must say thanks to Rick for letting us stay at his cottage and also babysitting one night to let us get out for a lovely meal as a couple, a rare treat.

Cheers

George

Brecon in Bloom

‘for some reason the name Bob comes up time and again’

While helping with a Gold DofE Expedition this July in the Brecon Beacons in South Wales I got photographing as much of the plant life I could that was in flower.

I find that many people who walk these high hills (including many adventure leaders) pay scant regard to what is down by their feet but if you look closely enough you will see a riot of colour.

I have used two good reference guides for this article – these are:

1) The Wildflowers of Britain and Ireland – Charles Coates

2) The First Nature Guide to Wonderful Wildflowers of Wales – Volumes 1 to 4 – Pat O’Reilly and Sue Parker

All of the pictures were taken inside the Brecon Beacons National Park mostly on the hillsides.

On the left below is Bog Asphodel a beautiful yellow flower that is now in decline. Historically farmers associated this plant with ailments to sheep such as brittle bones or foot rot. It was not the plant that caused the problems but the poor soil the sheep lived on. As farming practices change so does the soil and so the plant is now in decline.

At the top right you see Tormentil and this little plant is always ovelooked but once you become aware of it you see it all over the hills. This is an astringent little plant that was used to treat gum disease and colic. Another common name is bloodroot for the red dye it produces.

At the bottom right you can see Perforate St John’s Wort. I normally spot this plant low down slopes but I found this one in a gully quite high up where it had found some shelter. Herbalists use this plant to treat depression to this day however due to its perforated leaves (hold one up to the sun to see them) it was previously thought to be good for treating wounds and stopping bleeding.

Bog Asphodel, Tormentil and St John's Wort
Bog Asphodel, Tormentil and St John’s Wort

I found Water Forget-Me-Not in a number of locations, sometimes on its own and sometimes in whole carpets but always around water in sheltered spots. Apart from being given to loved ones in the past so they would not feel forgotten this little plant was seen as cleanser of mucus so thought good for treating whooping cough and bronchitis.

A little point on naming plants is that when I am out and about especially with my younger students I do not always tell them the names of the plants. I get them to agree a random name for different plants and say out these names as they go along every time they spot one – for some reason the name Bob comes up time and again (must be a Blackadder thing). Once we are back at camp I then get them to ID Bob for its given name. This seems to make the plant names stick with them more. I got this idea many years ago from a fellow bushcrafter.

Photo 20-08-2014 16 06 40
Water Forget-Me-Not

Another couple of plants of wet areas are the Sundew (top) and the Butterwort (below). Both plants exude sticky fluids to catch insects and have been used to treat rough skin to make it smoother (Butterwort) and also to treat sunburn (Sundew).

Photo 20-08-2014 16 07 05
Sundew and Butterwort

I came across a bank made up of shaped stones to support a small railway and saw that it was completely covered in Wild Strawberries. I have never seen so many Wild Strawberries in one place. The bank was facing the South West over open water so that must have had quite an influence on its growth.

Photo 20-08-2014 16 07 49
Wild Strawberry

Back out on the moorland the land was dominated by the Soft Rushes. As recently as the second world war the soft piths of these plants were used as candles.

I found the Water Mint in a tiny stream in amongst the Rushes. I did not identify it easily at first as it was not in flower but its smell and square stem gave it away. A great medicinal plant and I like it in my tea.

Photo 20-08-2014 16 09 09
Soft Rush and Water Mint

The Brambles (top) I spotted in mid July were just starting to ripen their Blackberries. Is it me or are the blackberries very early this year?

I spotted these Bilberries (bottom) while walking with the cadets where the sheep could not get easy access to so we had a bit of a feast.

Both these fruits make excellent puddings and jams.

Photo 20-08-2014 16 10 50
Ripening Bramble and Bilberry

The beautiful Meadowsweet was in full bloom in July and was growing abundantly in the low lying areas around the hills where it had plenty of light and water.  This was one of the plants sacred to Druids and was a plant that Bayer used as one of the key ingredients when developing aspirin in the 19th century. It gives off a lovely aroma and was traditionally used in the home to cover up bad smells.

Photo 20-08-2014 16 11 53
Meadowsweet

On the left you can see the Common Spotted Orchid. I came across this beautiful flower in the hills but on the steep grassy slope by a river where the soil was not too acidic. A common ingredient in love potions all over the world I am told.

At the top right is the tiny Wild Thyme, a plant I got confused with Self Heal for a long time. As a medicinal plant it was used as a sedative and was good for hangovers.

The Red Clover in the bottom right is a little flower spotted all the time by most people but at this time you can see that it has opened up slightly. This little fella I can remember as a kid providing me with a shot of nectar. It is also loved by farmers as a nitrogen rich fertiliser or as a feed for animals

Photo 20-08-2014 16 17 27
Common Spotted Orchid, Wild Thyme and Red Clover

I did not see a great deal of the Bell Heather (top left) as it does not like the soil to be to acidic so it can be an indicator of drier ground. Traditionally this plant has been used in the making of ropes and baskets due to its long fibrous stems.

The Marsh Thistle (bottom left) as you can see by the insect feeding on it is a good source of food for many different types of insects. The young shoots are quite tasty too.

On the right is the majestic Foxglove. I did not spot too many high up in the hills but found a few in some of the more protected gulleys. A poisonous plant but one I remember playing finger puppets with as a child. As I know it is poisonous now as a father I do not let my kids go anywhere near it.

Photo 20-08-2014 16 18 50
Bell Heather, Marsh Thistle and Foxglove

The Meadow Crane’s Bill (top left) named after the fruiting body it grows that resembles a Cranes beak. This is another medicinal plant used historically for treating wounds and nowadays for treating diarrhoea and also as a gargle.
Bottom left is the tiny Self Heal. Another plant that is easily missed but was once seen as the woodmans friend and used to treat small cuts they got from their tools.
On the right is the tall and slender Great Burnet. I found this one in only one spot on my trip near a railway line and nearly walked past it. I like to nibble the young leaves. It’s other name is Burnip due to its ability to help treat burns.

Photo 20-08-2014 16 25 57
Meadow Crane’s Bill, Self Heal and Great Burnet

On the left is the well known medicinal plant Yarrow. This tough plant was growing all over the lower slopes. Up high you still saw the odd one but hugging the earth very closely. I remember being on a Bushcraft course, having a cold and being given Yarrow tea laced with honey. That cold did not hang around as it normally would do with me.

I think the yellow flower on the right is a Hawkbit. These little yellow flowers are difficult to identify correctly if you do not look closely at the leaves. I forgot to do this but I think it is a Hawkbit. The genus of this plant is Leontodon which translates to Lions Tooth – referring to the squared of but toothed tips of the flower.

Photo 20-08-2014 16 28 18
Yarrow and Hawkbit

My last picture I included as I came across a lot of logging in the lower slopes of the hills. It is Larch I think and I really liked the contrast between the young green growth, the growing cones and the sharpness of the stump left by the loggers.

Photo 20-08-2014 16 29 14
Larch

I really enjoyed spotting and photographing these plants (I had to climb down into some steep gullies) however please let me know if you think I have identified any of them incorrectly.

Cheers

George

Brecon Gold

Last July I found myself helping out with a Sea Cadet Gold Duke of Edinburgh (DofE) expedition in the Brecon Beacons of South Wales.

Photo 20-08-2014 11 26 46
Going for Gold

I was asked to attend in a safety role as a Mountain Leader but soon ended up doing safety and training as we had a shortage of instructors. The expedition was over five days and we had one team along for training and two other teams doing their assessed expeditions. All the participants were from the Sea and Royal Marine Cadets (including both cadets and younger staff in the teams). The participants were from London Area and Southern Area Sea Cadets.

I joined the expedition at the end of the first day at Dan yr Ogof campsite. The staff and cadets under training were camping there but the assessed teams camped elsewhere remotely. I soon had my hammock stand set up and turned around to see my neighbours were some pigs. At least they were better company than the midgies.

Photo 20-08-2014 10 25 56
My home for the trip

My first morning was a bit of a damp affair but the bacon sandwiches soon made up for that. I was joined by my friends Alan and Dave  Lewis, John Kelly, Chris Bonfield and met for the first time Paul Kelly. Paul also holds a Mountain Leader qualification which proved invaluable over the expedition.

Photo 20-08-2014 10 27 33
A wet start

I took a little bit of video after my first night in my recently modified hammock stand. I had a great sleep and it was nice to get away from the mossies.

I took out a team who were training for a future expedition. It was made up of Jess, Maisie, Rosie and Tara. Tara and Jess are also working towards their Level 2 Assisting Basic Leadership award with me so this trip proved great experience for them.

In the role of safety officer I normally like to get up very high in the hills to observe the assessed teams remotely. My team was dropped off at Tyle Gawr at the foot of Fan Nedd. The day was blustery but at this point the visibility was clear. We were soon slowly picking our way up the side of Fan Nedd, discussing all the factors of good route selection on a steep slope.

Photo 20-08-2014 10 43 40
Straight up

The spirits of this team were high and they did not let the wind or the rain get them down at any time (which makes my job far easier).

Photo 20-08-2014 10 45 08
The Training Team

After doing a fair bit of map work, where they had to continually identify where they were, we soon spotted the first of the assessed teams on the hills. Also while we were ascending Fan Nedd we were passed by many troops heavily laden down with heavy kit. They seemed to reach some point then turn around and run off down the hill. I said to the team that we would do the same and received an incredulous look from them – we did it anyway and it only took 15 minutes to descend half way down Fan Nedd to the minibuses.

Photo 20-08-2014 10 47 35
Observing and problem solving

Along the way we did a spot of foraging for bilberries and did a fair bit of wild flower spotting. I will do a separate post on all the wildflowers we came across later.

Photo 20-08-2014 10 48 57
Wanderings and Foraging

The weather soon closed in but we were still able to navigate easily over very rough ground (with limited use of maps or compasses) and keep an eye on the other teams remotely; thankfully though when we were lower down the visibility was much clearer.

Photo 20-08-2014 10 54 55
Beautiful views up high and down low

After ensuring that all the assessed teams had descended off the Beacons Way to Blaenglyn Farm campsite, I took my team to recce the steep slope at Craig Cerrig Gleisiad as this had been discussed as a possible point to ascend into the hills the next day. It soon became apparent that,thanks to the recent heavy rain, the steep grassy slopes would be too much of a challenge for the teams the next day. At least the team had a good time practising their route selection skills again as they descended this steep slope to the camp site.


Photo 20-08-2014 10 59 21
Steep Slopes

After the end of a long hard day all the tents, tarps and hammocks were soon up. Those on the expedition stayed at Blaenglyn Farm campsite while all the staff stayed at Grawen campsite.

Photo 20-08-2014 11 10 48
Accomodations

Day two started and finished with excellent weather. The teams were bussed to a new start point just at Twyn Garreg – wen. This day was to be much lower down but the ground was very treacherous with tufty grass before descending into the woods then climbing up onto Cadair Fawr and then to Grawen

Photo 20-08-2014 11 18 33
Sunshine

Dave and I spent the morning observing the teams and met them only a couple of times in the day. The training team also spent the day by themselves following the route. With so few landmarks on the open moorland the day was a good test of the teams navigation skills.

Photo 20-08-2014 11 20 16
Moorland navigation

Along the way I came across this group of ponies with a number of foals grazing on the hillside. The teams did not all get to the summit of Cadair Fawr (due to a few minor aches and sprains) but did spend the whole day navigating as much of the route as possible.

Photo 20-08-2014 11 21 26
Lovely encounters

The last day was spent navigating from Pont Sarn to Talybont dam. I found a spot halfway along the route to wait out the teams passing through at Buarth y Caerau. It was a long wait and I only saw two teams all day. The third team went slightly off track but got to the end on time anyway.

I spent my time watching wildlife (spooked a heron) and taking pictures of wild flowers.

Photo 20-08-2014 11 23 03
The waiting game

All the teams reached the dam safely and on time. There was a few aches and pains (including the staff) but an over-riding sense of achievement amongst everyone.

Photo 20-08-2014 11 23 57
Final team in

After a good clean up it was time for one more picture and the long trip home.

Photo 20-08-2014 10 21 45
Happy Expeditioners

I made a small video of the whole trip.

I hope that this is the start of many more Gold DofE expeditions in the Sea Cadet Corps and look forward to helping out on them in the future.

Cheers

George

Teine Eigin – Part 2 – Bowdrill – The Egyptian Method – A Video Post

Part 2 of this series is a short video on a type of bow drilling I came across a few years ago called the Egyptian method (Egyptian hieroglyphs have depicted this method).

I like this set up as it does not put the cordage under a great deal of strain (the cordage is wrapped a number of times around the drill) and it is good for learners as the drill piece does not ping out if the set up becomes loose.

Have a look at the video and try it out for yourself.

My next video in this series will be on my technique I use with a more modern bowdrill set up.

Note 24/08/14 – I have added an extra video on this method where the students are doubled up and can be found here – Teine Eigin – Part 2 – An extra video on the Egyptian Method

Cheers

George

Teine Eigin – Part 1 – The Handrill – A Video Post

I started researching this summer the recent history around Teine Eigin (Gaelic for ‘rubbing sticks together to make fire’) on the Western Isles of Scotland (where I grew up). Up until the early 19th century records have shown that in times of animal disease (such as cattle with Need Fire) and at particular times of the year, such as the Beltane festival, fires were lit on these Westerly Scottish Isles using fire by friction methods.

I documented some history and links in my article Bushcrafting at Lews Castle College on this Bushcrafting art.

Instead of writing full step-by-step articles on the different methods, I decided to experiment with video. I have read of many different set ups that were used for Teine Eigin so I will film some of the methods I use and explain the steps I follow to create fire.

Fire by Friction - The Handrill
Fire by Friction – The Handrill

This is the first video in the series and it covers how I use one of the simplest, yet sometimes seen as one of the hardest to master, methods of lighting a fire – the handrill.

Part 2 in the series will look at the bowdrill but focussing on the Egyptian method.

Cheers

George