The cadets knuckled down, worked hard, had great fun and made things comfy for themselves – that’s bushcrafting for you.
The end of October last year found me down at Crowborough Army camp in the Ashdown Forest. I set up a bushcraft area in the woods near for the camp to run a course to introduce some of our younger Sea Cadets to bushcraft.
Helping me on the weekend were Dave Lewis and Charlie Brookes (and at different times Christine Weston and Emma Deasy).
The weekend’s weather was pretty poor to say the least with a lot of rain and some quite high winds.
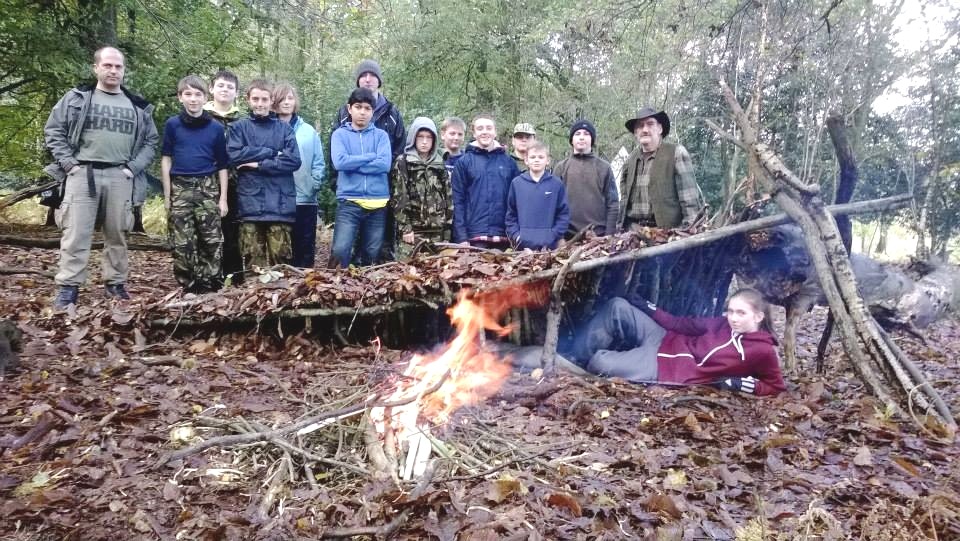
A team of hardened Sea Cadet Bushcrafters
The high winds were a concern for me so I told the cadets that sleeping in hammocks over the weekend was not an option. A few were upset but soon got on with things. The cadets ended up sleeping in their tents in the grounds of the main camp nowhere near any trees.
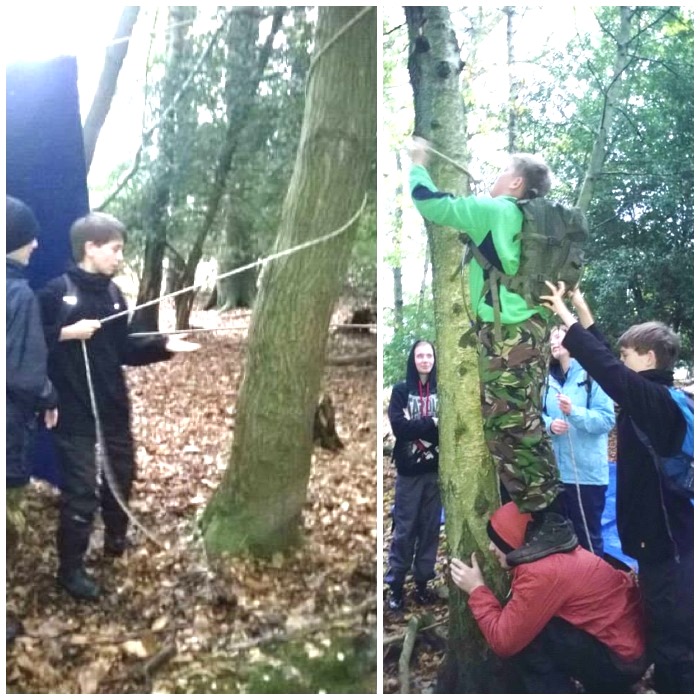
They had to set up the main tarps to work under, after a bit of instruction on knots they were left to their own devices and managed to get two big tarps up by themselves.
They had to set up their own campsite
Once the tarps were up the cadets had to collect dry wood from the surrounding area. As it had been raining heavily there was very little in the way of dry wood lying around so we taught them how to identify dead standing wood. Thankfully the woodland had been coppiced in the past and left untouched for many years so there were plenty of dead standing coppice poles in the area.
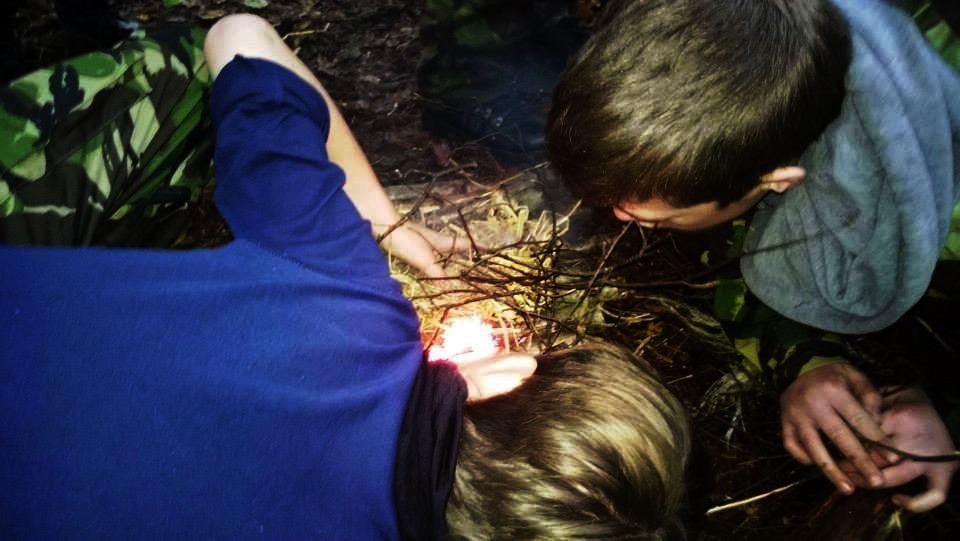
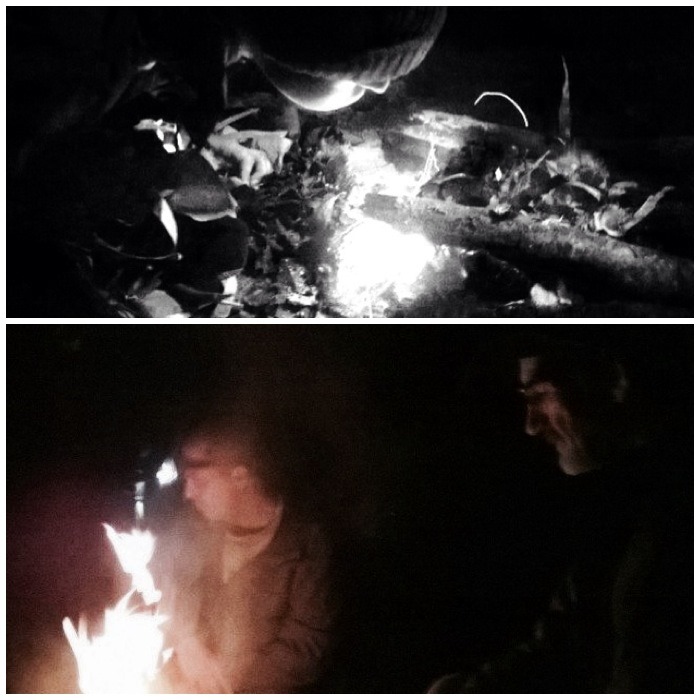
Once all the wood had been collected and graded it was time to play with some firesteels.
Learning how to use a fire steel
(NB The light levels in the woodland were poor and I only had my phone camera to hand so some of the pictures have been brightened slightly or have had the colours in them deepened slightly.)
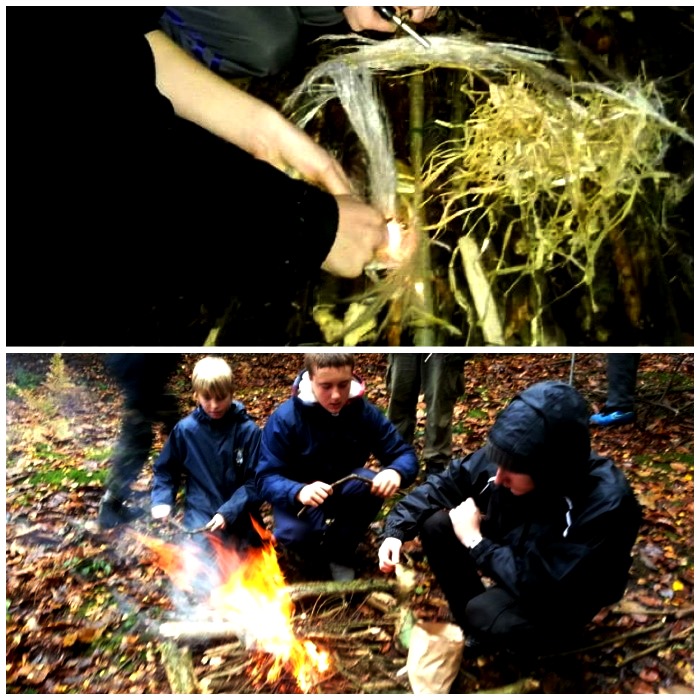
Once they got the hang of lighting char cloth the cadets experimented with other tinders such as pampas grass and birch bark.
Practising using different tinders
Everything was very damp but the cadets persevered and eventually had two good fires going to get a hot brew on. As we were running the course in the woodland within the grounds of the camp all the cadets were being fed from the main camp galley. This freed us up to concentrate on different bushcraft activities without having to worry about getting food cooked over the open fires.
They kept persevering through all the rain
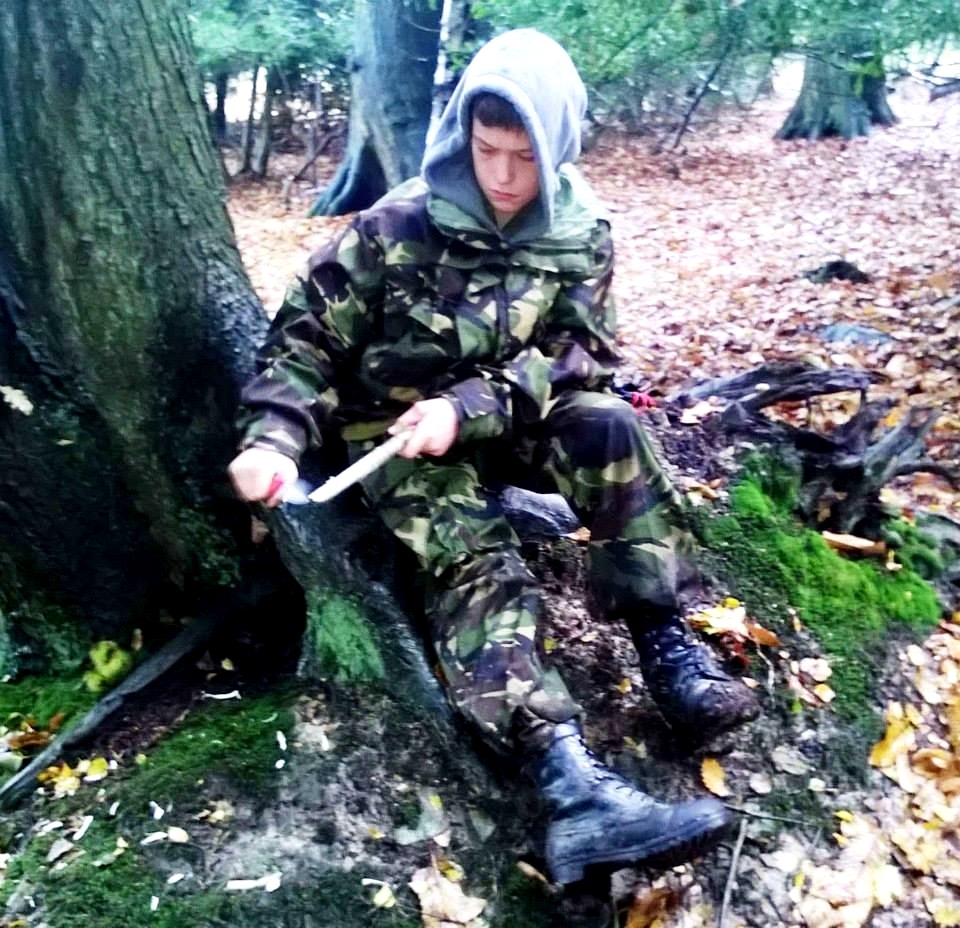
One of these activities was to introduce the cadets to a bit of safe knife use. After discussing safety issues and the legalities of using a knife, the cadets learnt how to carve themselves a small wedge. I like this simple activity as it involves using a variety of carving techniques.
Good knife safety was practised
The cadets practised cutting techniques safely, making cuts away from themselves and in front of them or off to the side. We spent a good hour trying out different cuts and everyone managed to finish their wedges.
Working well off to the side
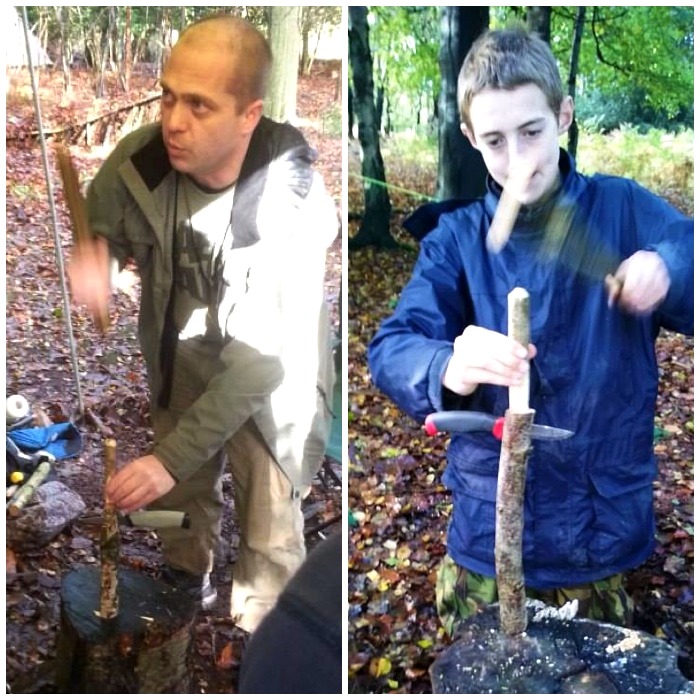
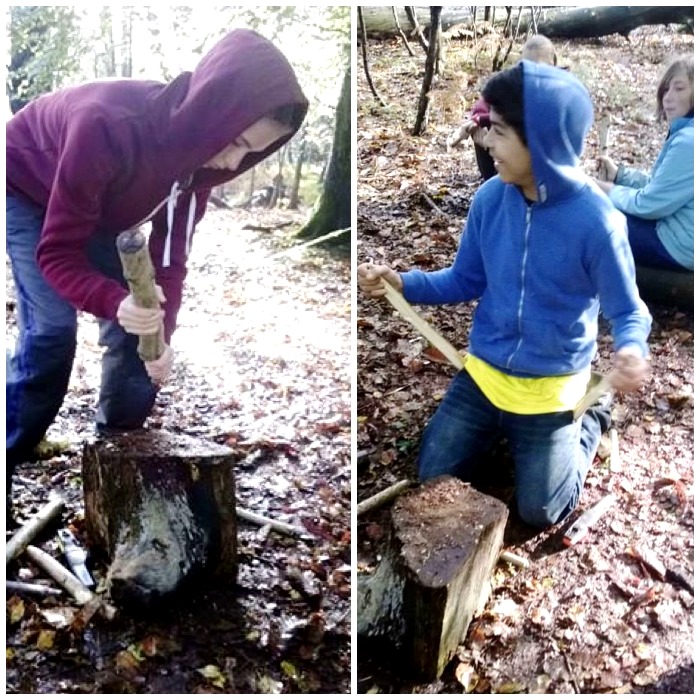
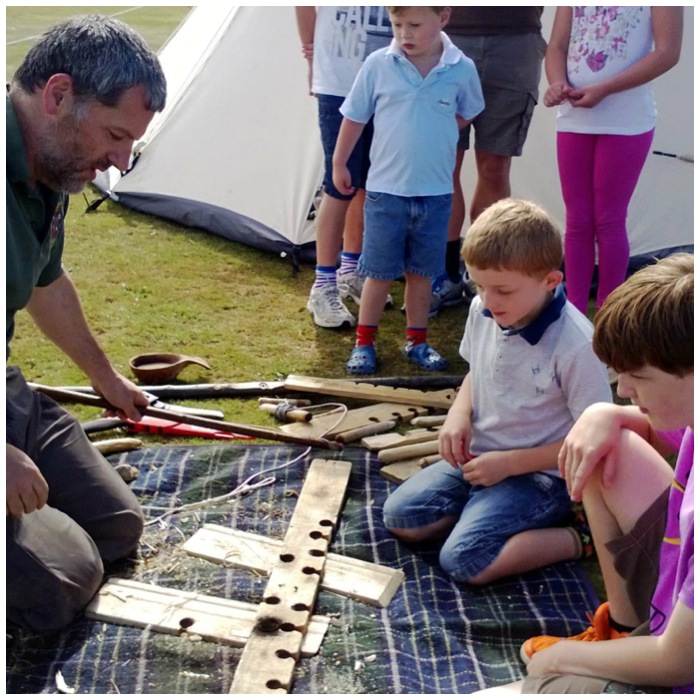
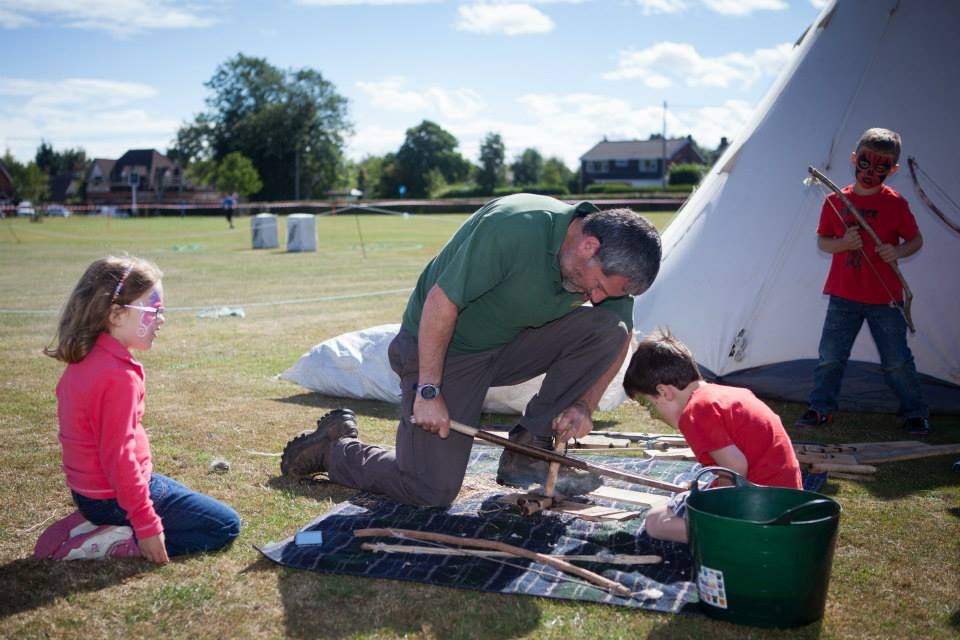
The wedges were needed because the next lesson was about battoning – where you use your knife more like an axe to split small logs. I did a demonstration to the class showing the whole process and then we split into two groups to let the cadets have a go themselves.
I find battoning is best done kneeling down and with the use of a stump on which to rest the piece of wood that needs to be split.
The knife is positioned on top of the piece of wood at 90 degrees to the body and the back of the blade is struck with the ‘hammer’ (a small but weighty stick) so that the edge of the blade is driven into the wood. I published an article on knife safety last year that covers battoning in more detail.
Later we introduced the cadets to the art of battoning
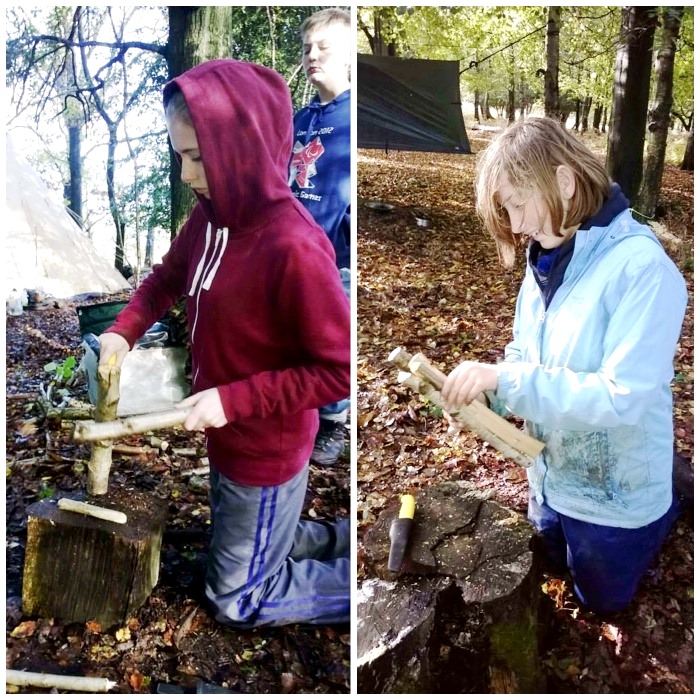
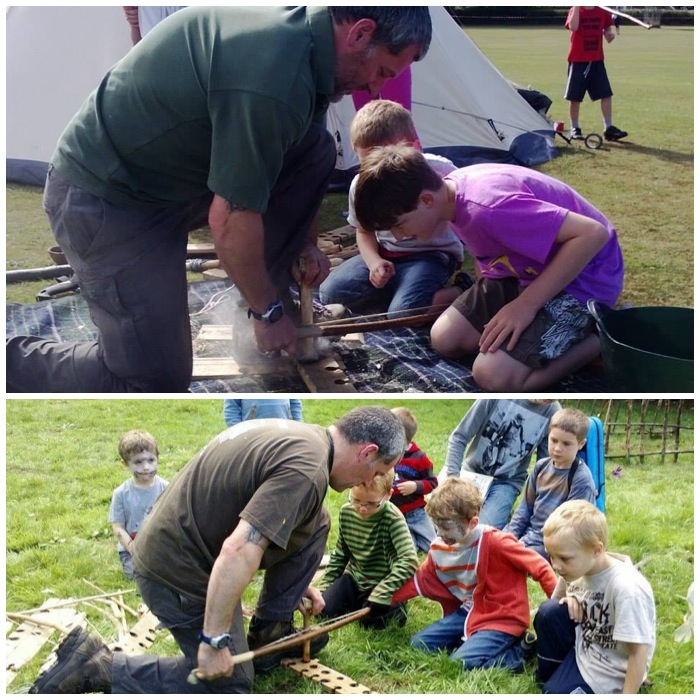
Here you can see that the knives have been driven well into the wood and the wedges are now being used to widen the split further.
Dave and Charlie led one class while I led the other
The cadets got the hang of it pretty quickly and were soon splitting the wood down.
Using the knife and then the wedge to batton
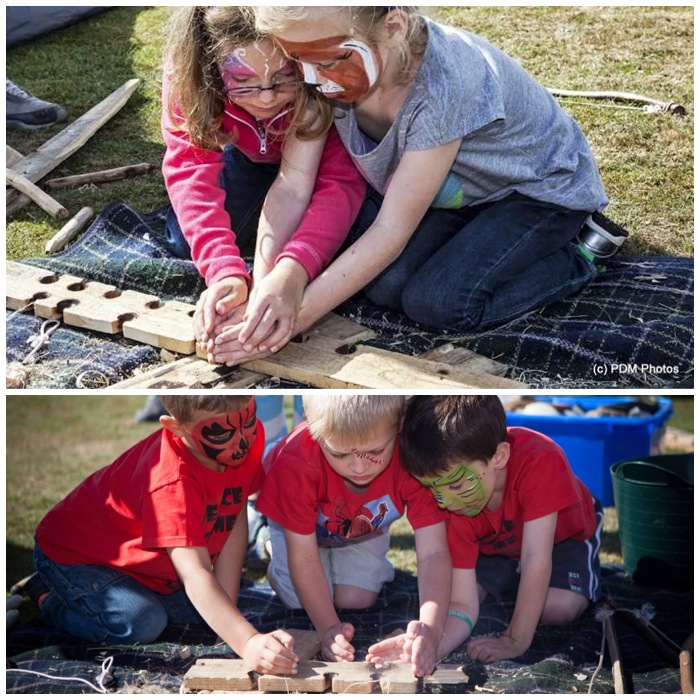
Here the knife has been removed and the cadets are using the stump to help drive the wedge into the wood to split it.
Hammering the wood and wedge into a stump to split the wood
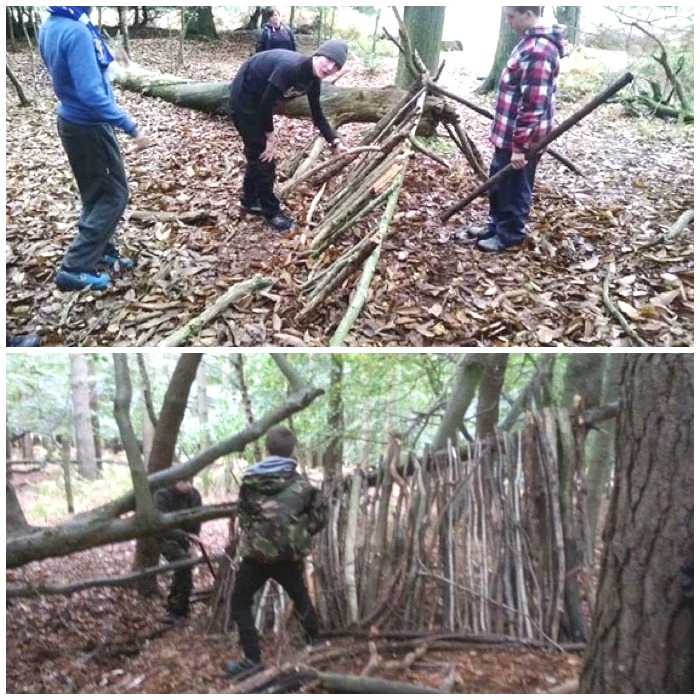
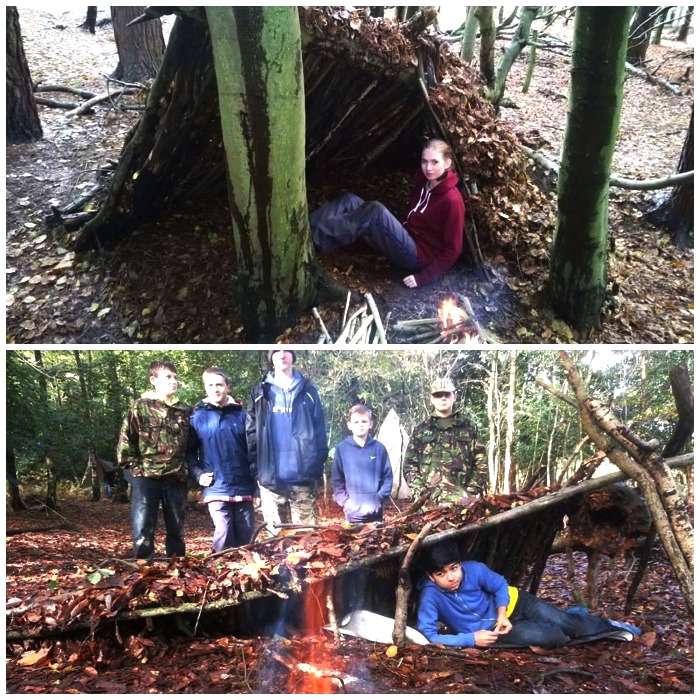
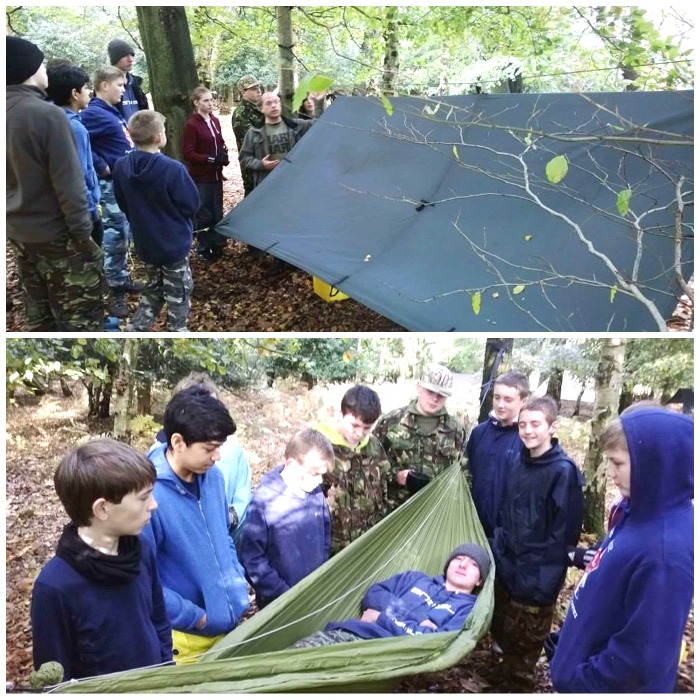
Later that afternoon we started on two shelters. Normally I would ask for volunteers to try and sleep out in them but due to the high winds I did not offer the cadets the option this time. The weather was quite cold, but this activity kept them moving and warm.
An early start to shelter building
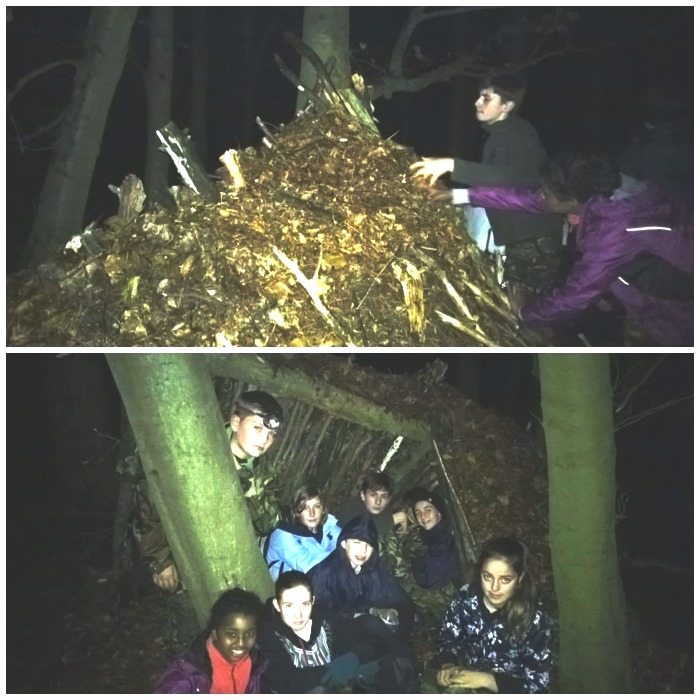
It was not until well after dark that I called a halt to the shelter building but they did a good job and worked well together.
They worked well into the evening
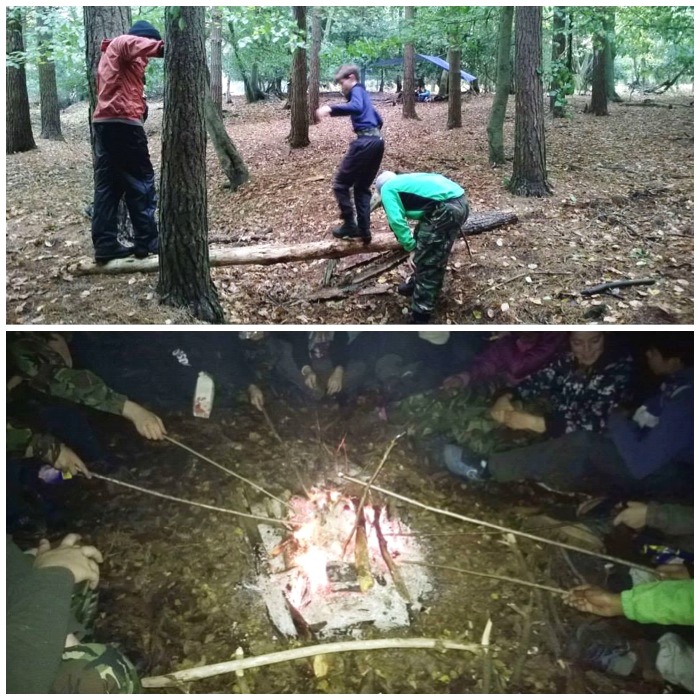
Even though the weather was not kind to them and we worked them hard there was still time to play and chill out around the fire with a marshmallow or two.
Plenty of time to just play and chill with a marshmallow
We stayed a couple of hours around the fire before sending the cadets back to the main camp and getting our own heads down. All the instructors stayed in the woods with our hammocks and it was a slightly ‘swaying’ night to say the least with lots of creaking from the trees above us.
An evening around the fire
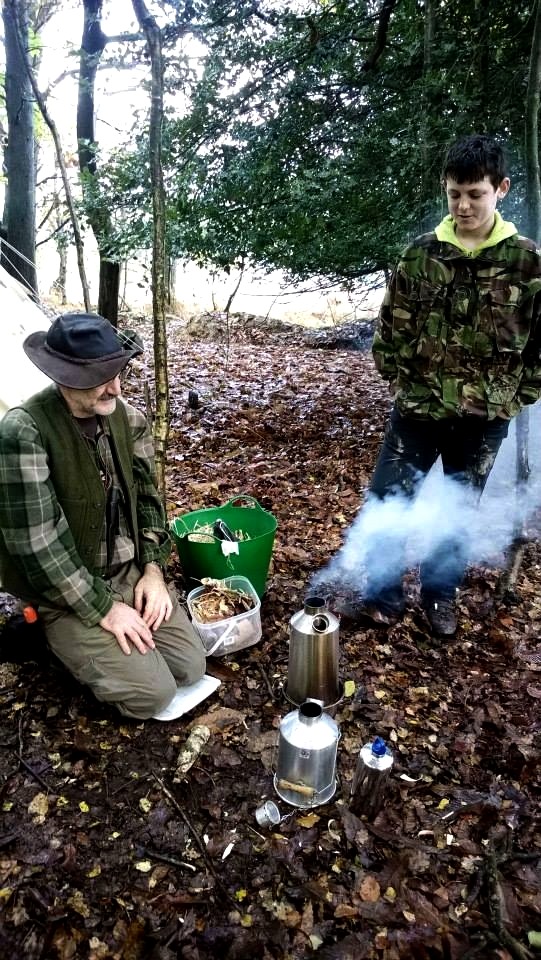
Charlie had a brew on first thing and also showed the cadets how to use the Kelly Kettles safely.
The day starts with a brew
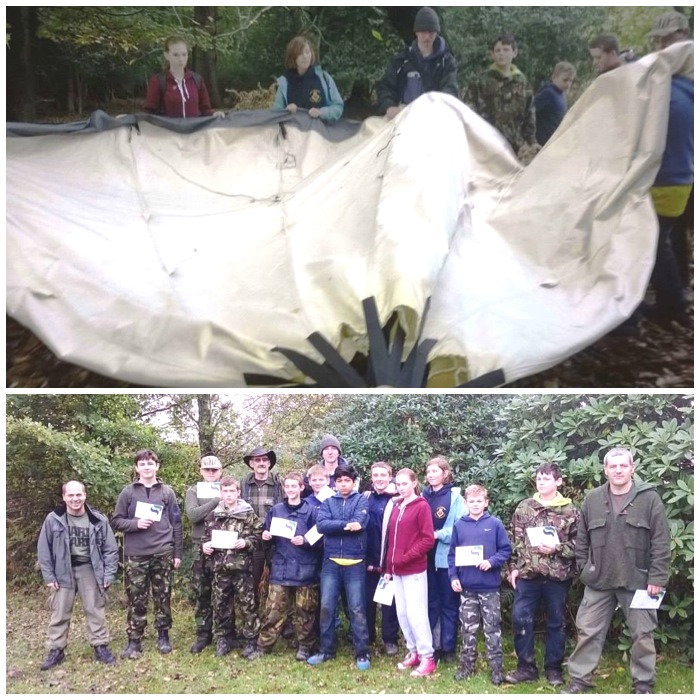
There was time for a couple of posed pictures in front of the shelters before the cadets dismantled them both and scattered the debris back around the site so as to leave no trace of them. Apart from becoming unstable if left up, shelters tend to attract rodents to the site (since it’s not just humans who seek shelter) – so down they came.
A few daylight shots of their shelters before dismantling them
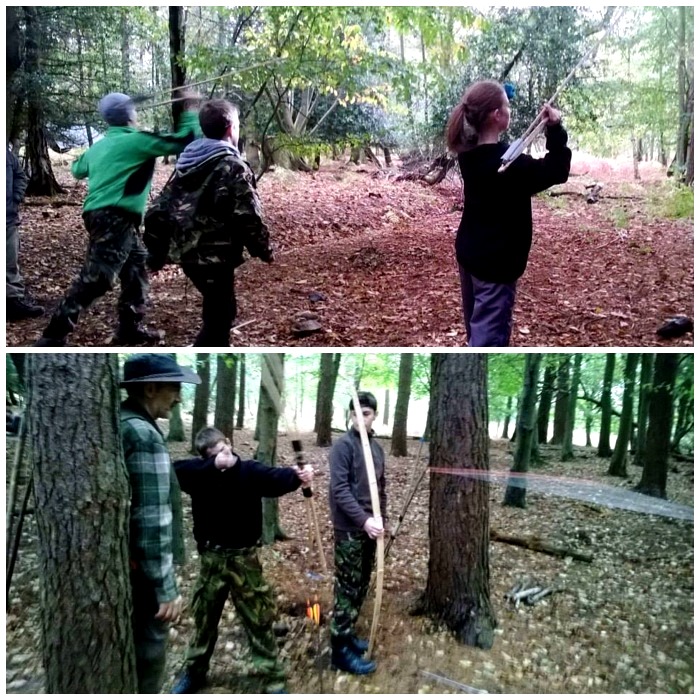
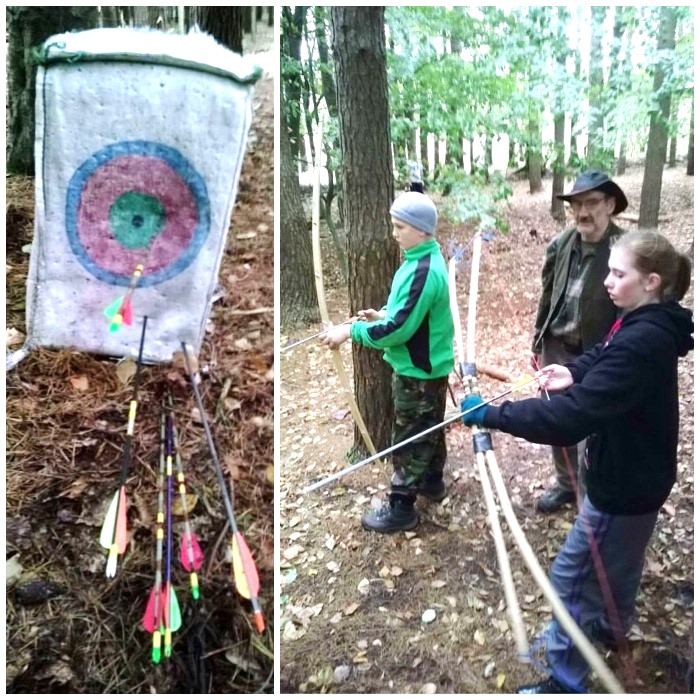
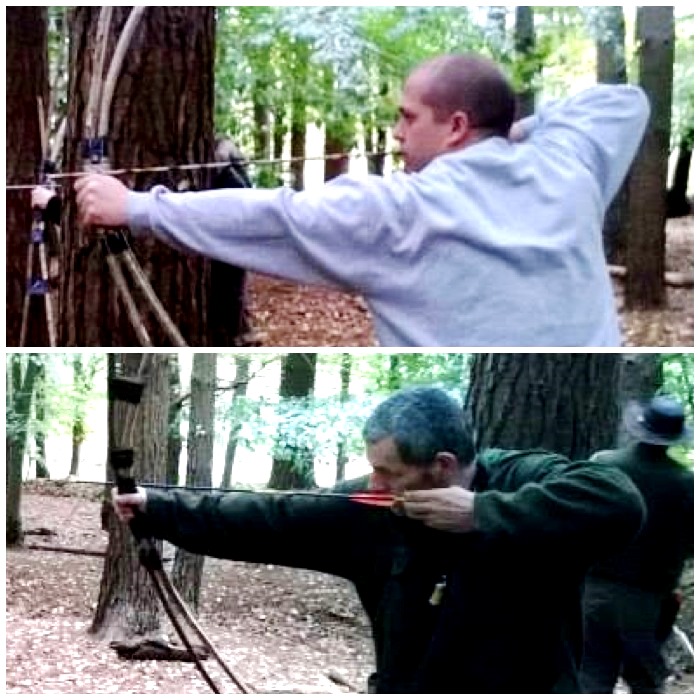
For the next couple of hours it was time for Atlatls, bows and stalking games.
A morning of games including Atlatls and Bows
Once the cadets got their eye in some had pretty good groupings.
Some good groupings
Even the staff managed to get a shoot in 🙂
Not that the staff were competitive 😉
Even though the cadets did not get to use the hammocks and tarps this time we did get some out for them to try.
Checking out tarps and hammocks
The final part of the weekend was to return the campsite to the condition we found it in, if not better. This was the easy part of the weekend as the teams were now working well together and everything was stripped down and packed away quickly.
Wrap up and home time
I hope to run one or two more bushcraft courses for the cadets this year and give them the chance to sleep out in a hammock.
Even though the weather was against us this time the cadets knuckled down, worked hard, had great fun and made things comfy for themselves – that’s bushcrafting for you.
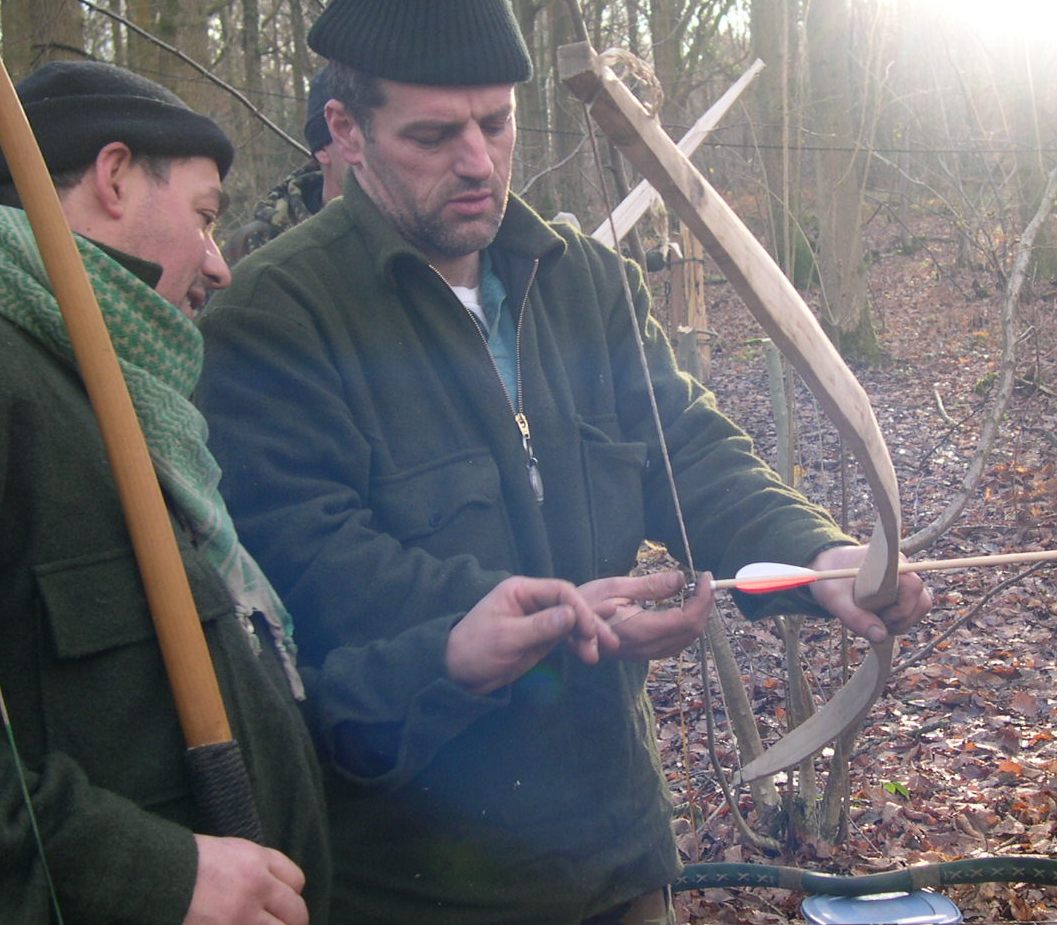
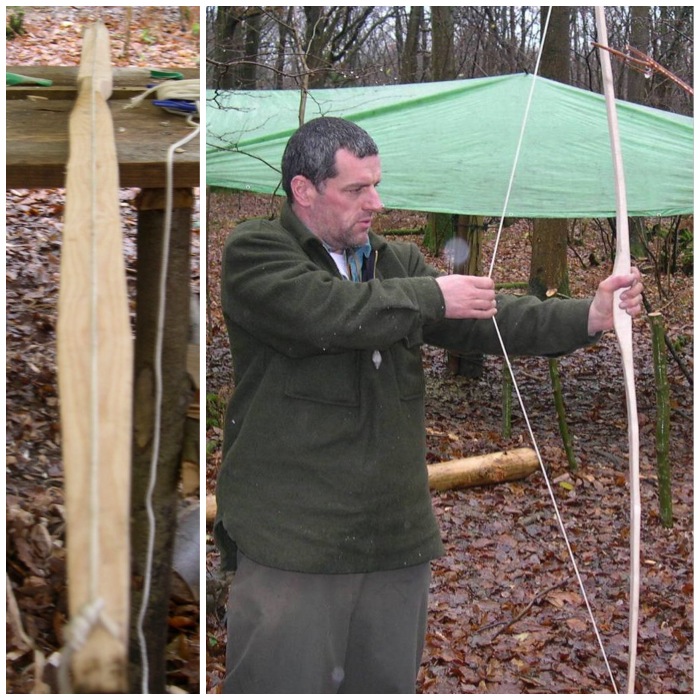
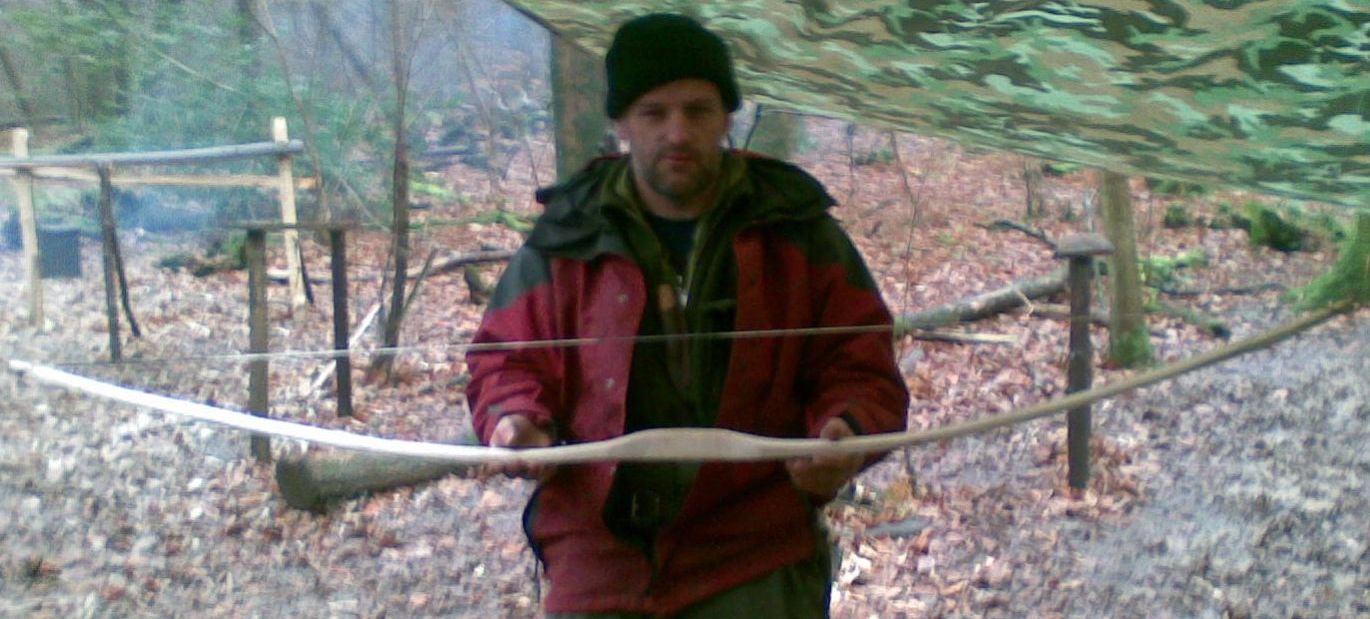
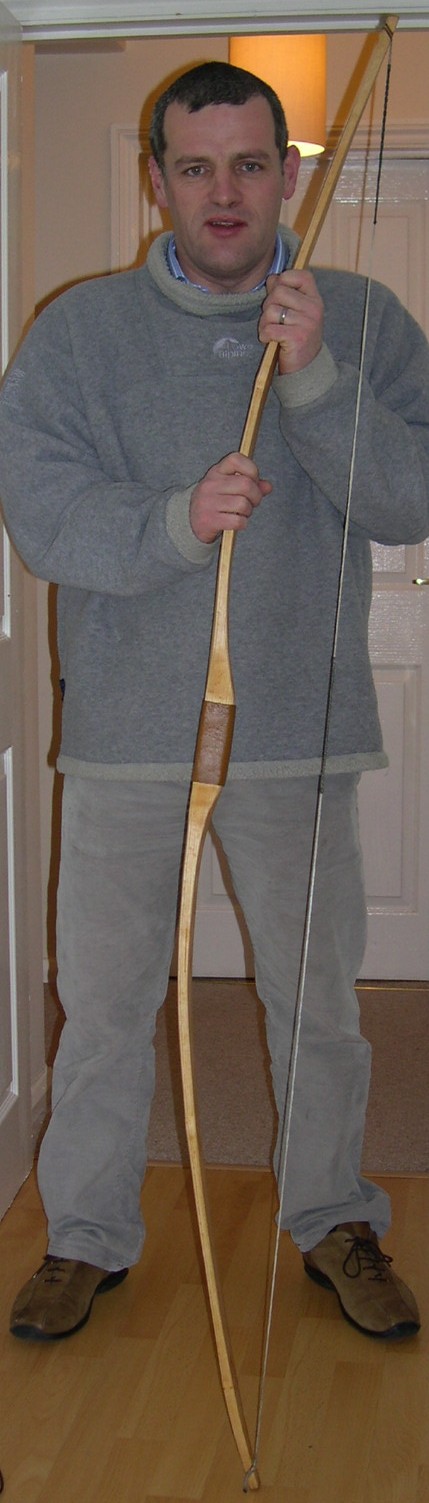
I carved this Ash Flatbow back in 2008 while I was on my Bushcraft Instructors course with Woodcraft Schooland has sincebeen used by scores of my Sea Cadets, and many of my friends and family. The two instructors who taught me to make this bow were John Rhyder (head instructor at Woodcraft School) and Nick McMillen (now of the Field Farm Project). Both of them as well as being professional outdoorsmen are top bowyers.
An Ash Flatbow about to have its first shoot
This How To…. is designed to lay out all the main steps I undertook to make this bow and if you have reasonable woodworking skills then it will aid you in building a bow for yourself. If you think your skills are a bit rusty then I advise that you attend a bow-making course. In addition to John and Nick who still offer courses I can recommend Wayne Jones of Forest Knights School, Paul Bradley from The Bushcraft Magazine (though I’m not sure if he runs courses anymore) and Will Lord as excellent bowyers to learn from.
I made some drawings on my initial write-up in 2008 and thought it easiest to take some screen grabs of this bow theory for this blog.
Bow theory, terminology and scale
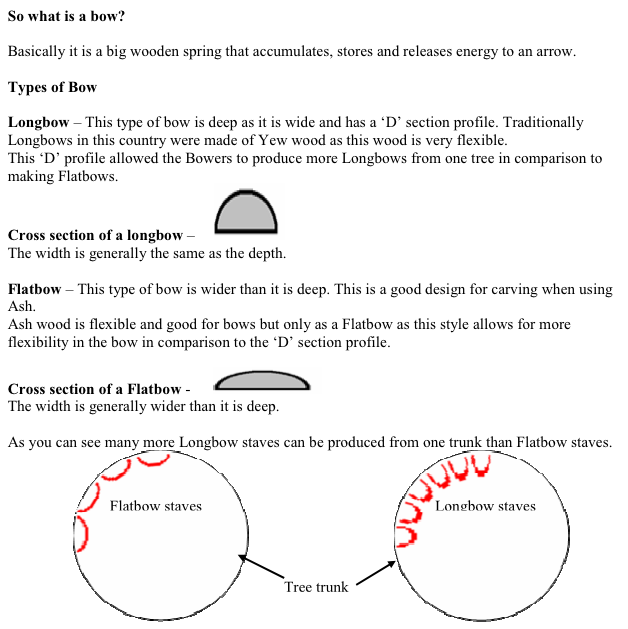
So the first question is – What is a bow?
So what is a bow
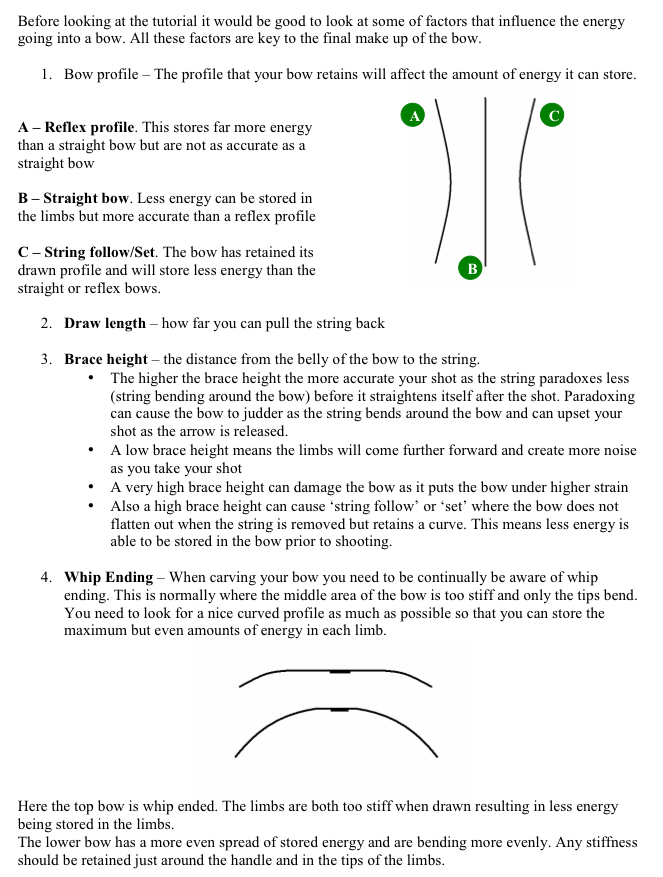
Some bow terminology for you to remember as I will be mentioning some of this in the post:
Some bow terminology
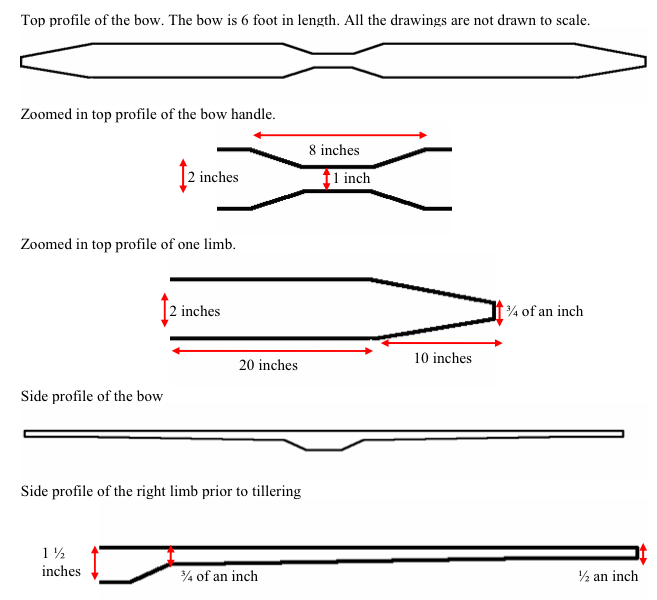
Not to scale, but these are the dimensions I mapped out for my bow:
My bows dimensions
Splitting out staves
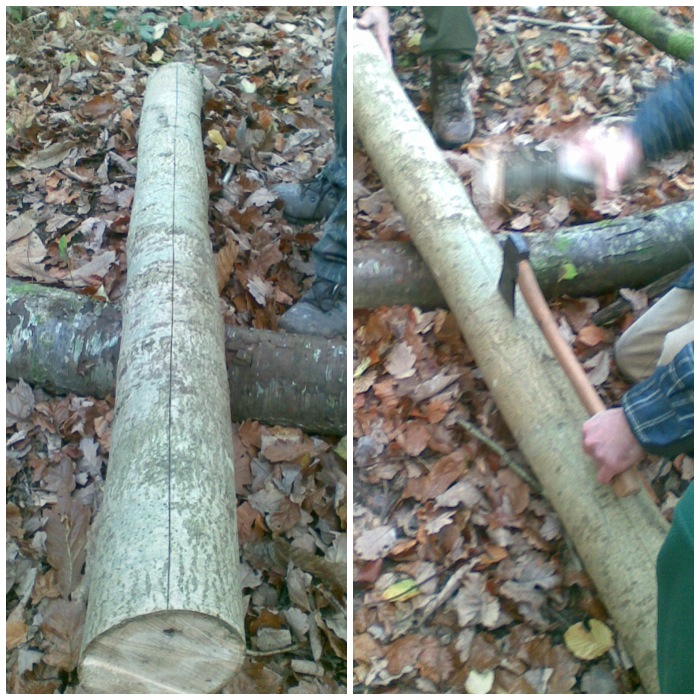
The ash tree was felled by the course instructor, John Ryder.
We scored a line down the length of the log, all the way through the bark and just into the sap wood, using an axe. This helps with guiding the split of the log.
We then drove an axe into the scored lined to start the split.
Note that the axe is at 90 degrees to the person hammering it in. This maintains a safe position for the worker.
Splitting out the staves – Step 1
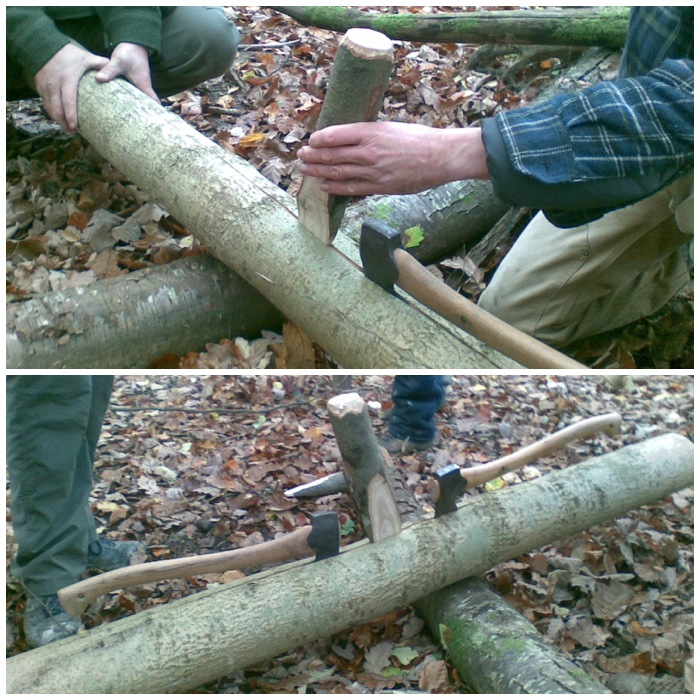
The first axe is followed by a wedge and another axe to widen the split.
The scored line helped greatly with controlling the split.
Splitting out the staves – Step 2
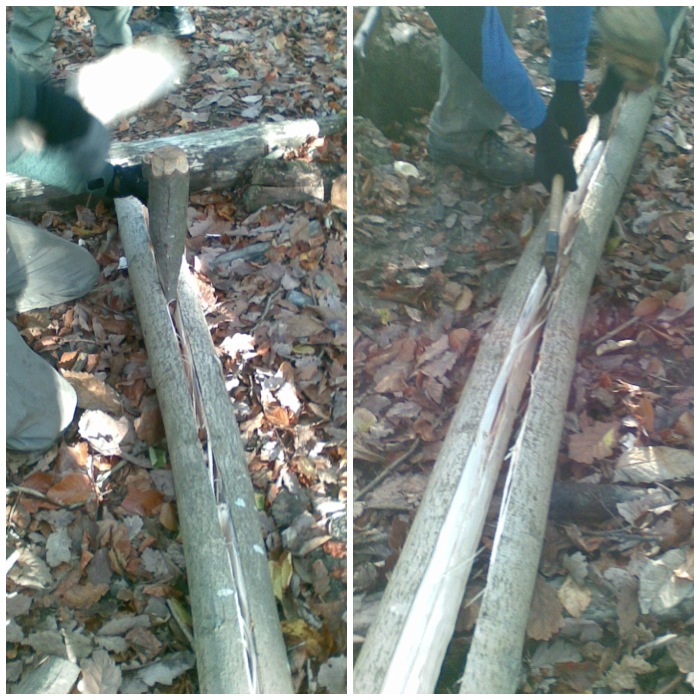
As other wedges are driven deeper into the split the previous ones can be removed to be used again.
An axe can also be used to cut the wood fibres not split by the wedges.
Splitting out the staves – Step 3
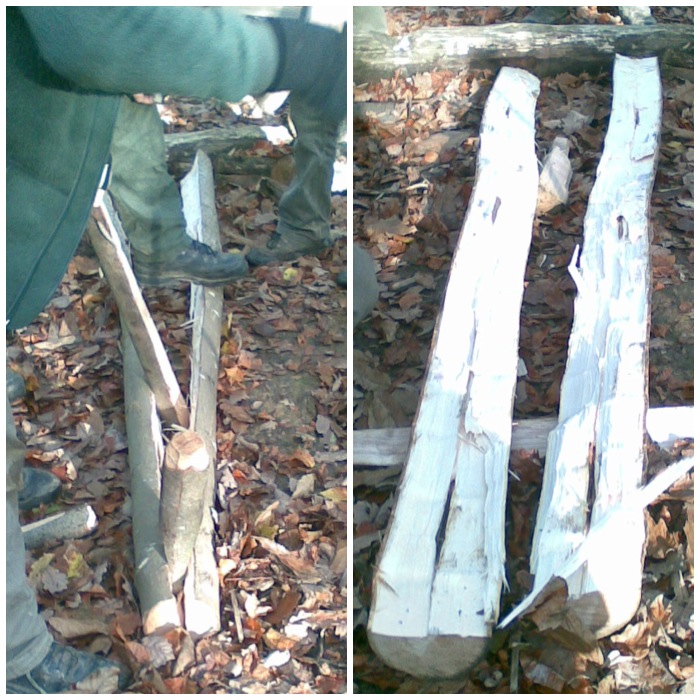
Once the log has been split the process is repeated again and again until you have the staves you require.
Splitting out the staves – Step 4
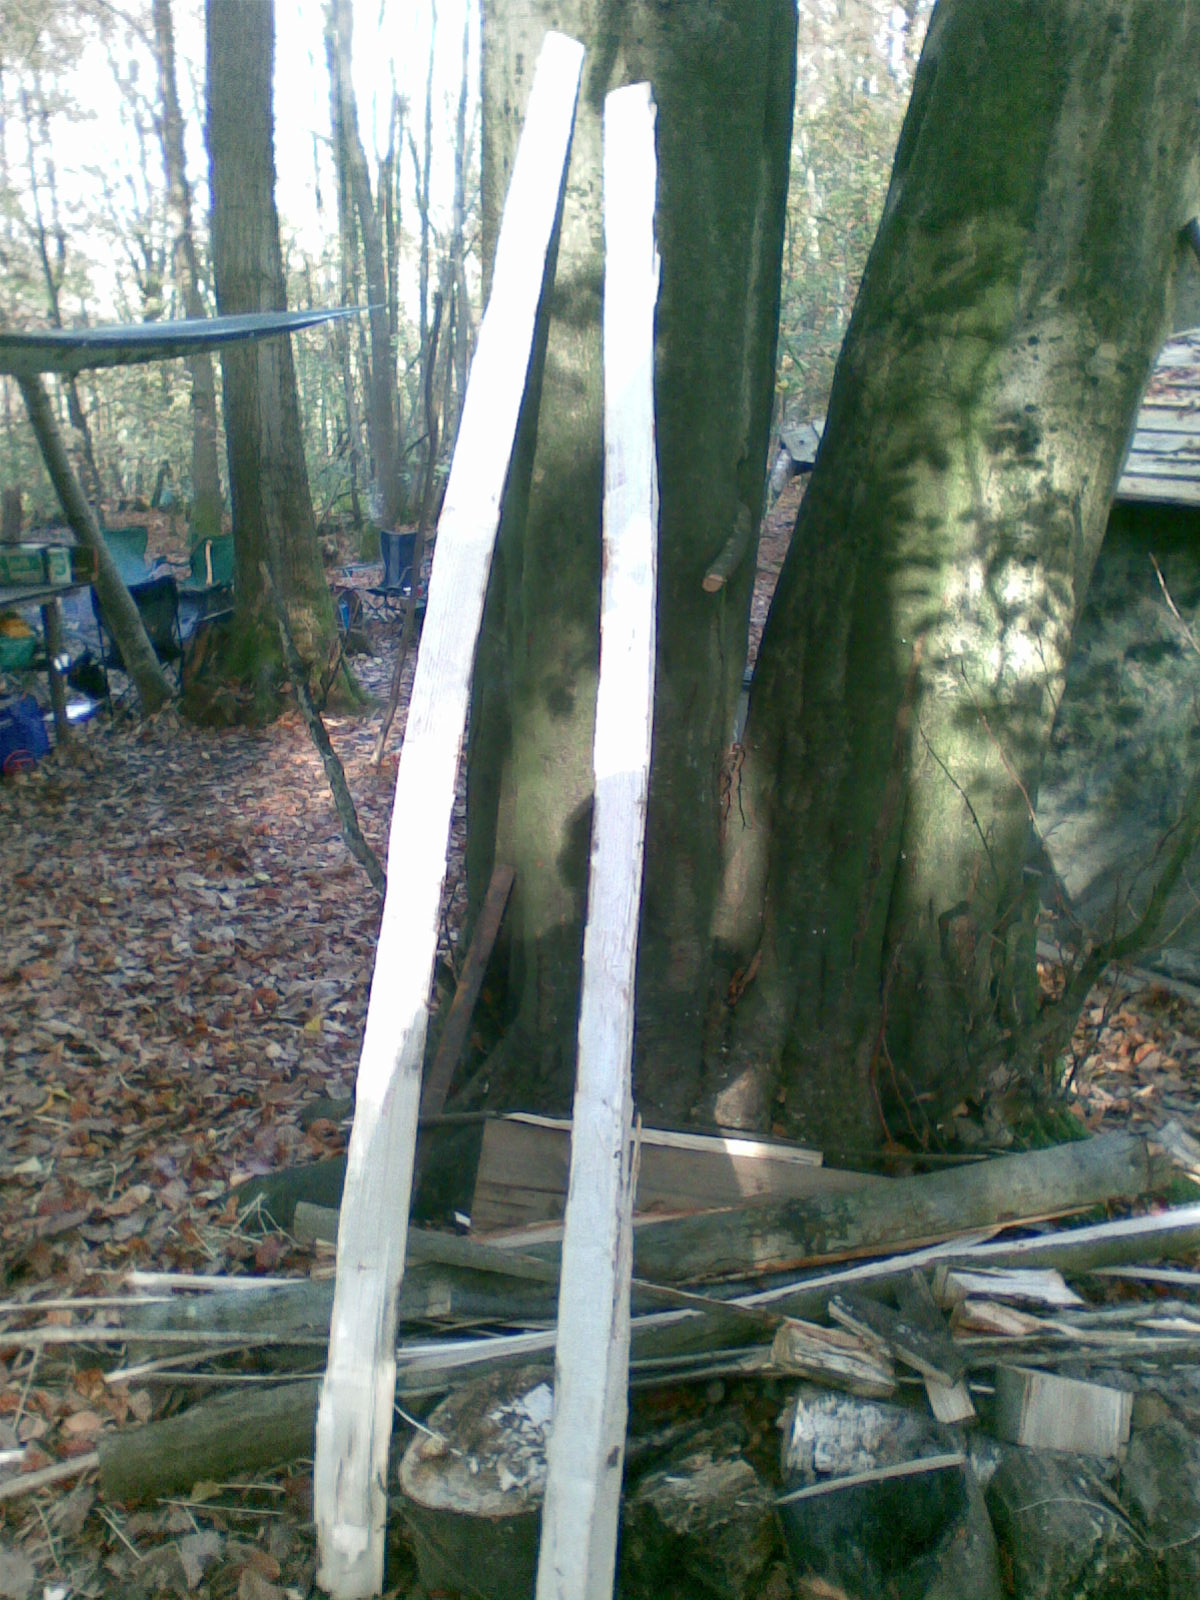
Here are two staves ready for shaping.
Split Staves
Shaping the bow
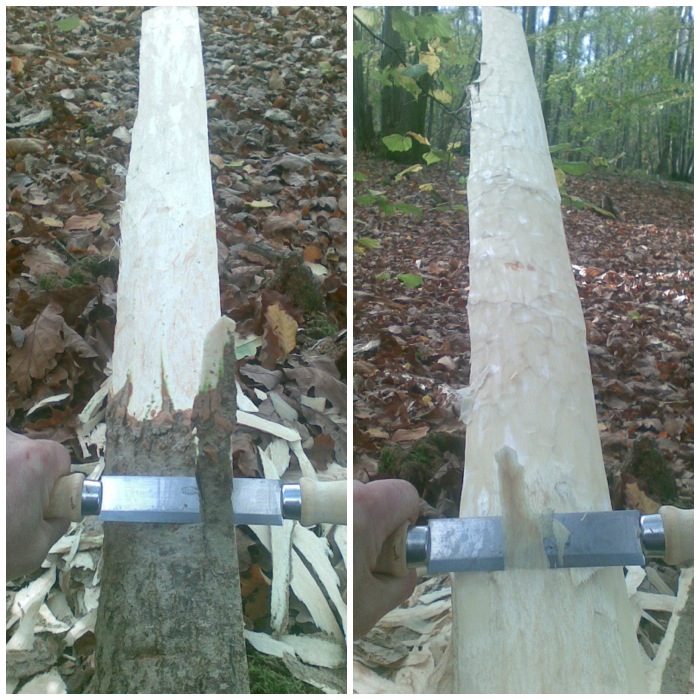
Using a draw knife I shaved off the bark of the stave. I was very careful only to remove the outer and inner bark and not touch any of the wood.
The sap wood found just under the bark is the most flexible and will form the Back of the bow. Apart from light sanding, this area of the bow is left untouched. All of the work on shaping the bow will be done on the sides and on the Belly (the part of the bow facing your belly when shooting).
Trimming off the bark
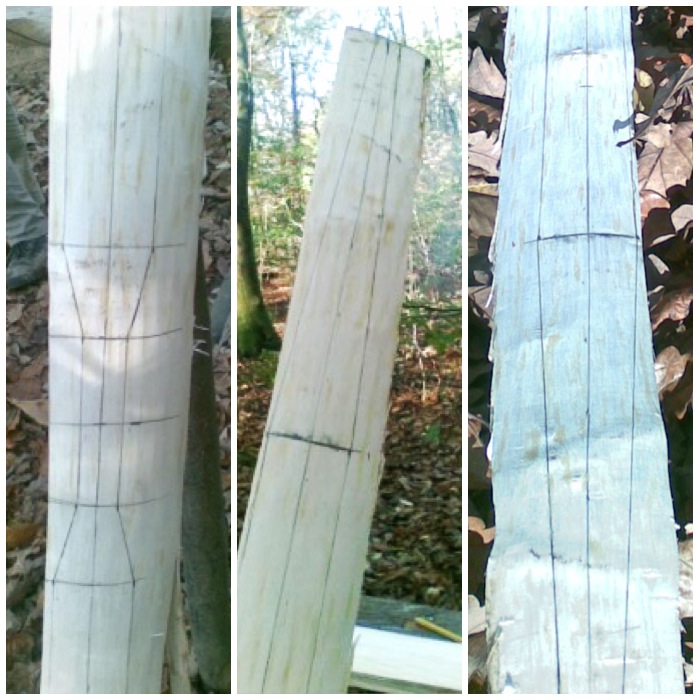
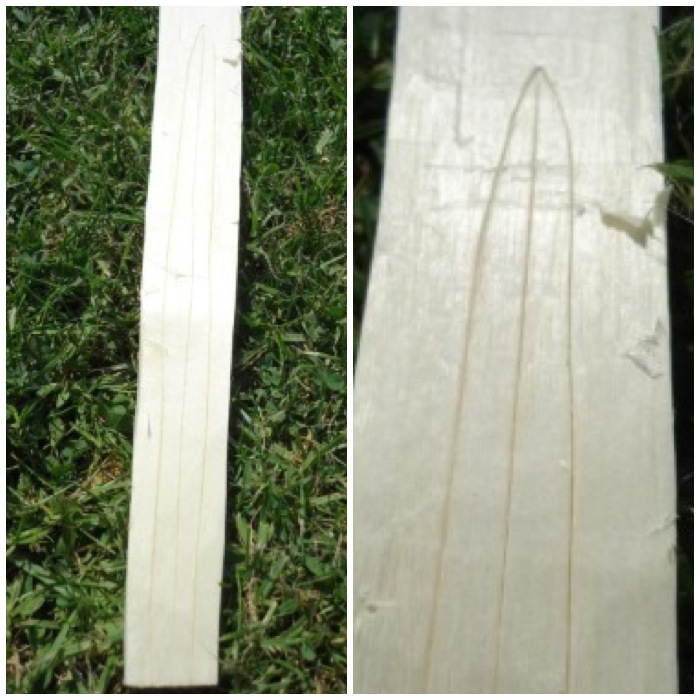
Using a string I marked out a centre line down the length of the stave.
I then drew onto the stave the shape of my bow (using the measurements shown at the beginning of this post).
The first picture is the handle area and the other two are of the limbs.
Marking out the bow
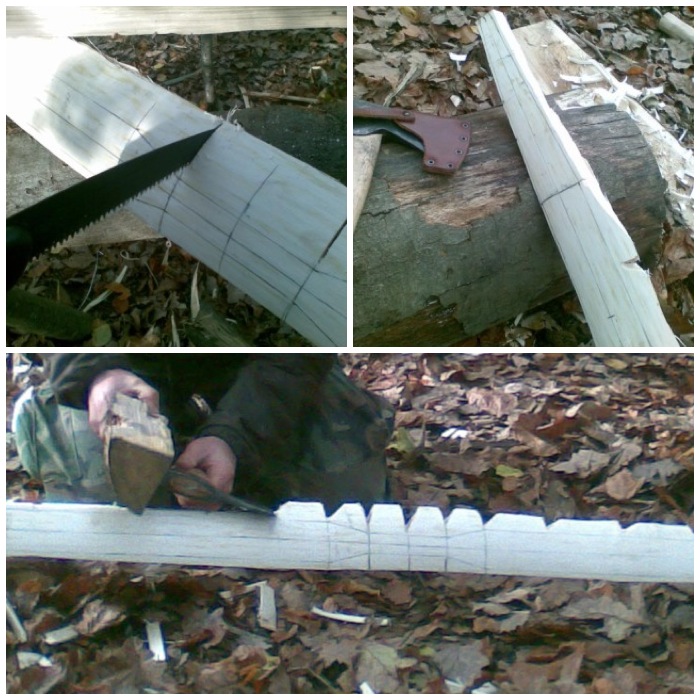
I then sawed stop cuts all along the stave: as a piece of wood is cut out with the axe the stop cuts stop a split running through the whole bow, meaning you only cut out the wood you want to remove.
Here you can see the stop cuts. Note too how the bow is wedged against a tree and resting on a stump and the axe is in front of me and at 90 degrees away from my body for safety.
Stop cuts and axing out
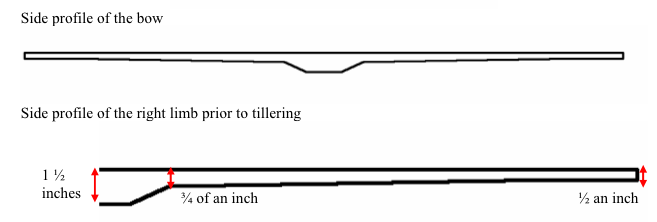
Once the top profile is cut out the side profile is next.
Using stop cuts again I roughed out the stave until I got the basic shape of the bow. The drawing below shows the shape of the side profile (I didn’t take a picture of this I am afraid).
Side profile
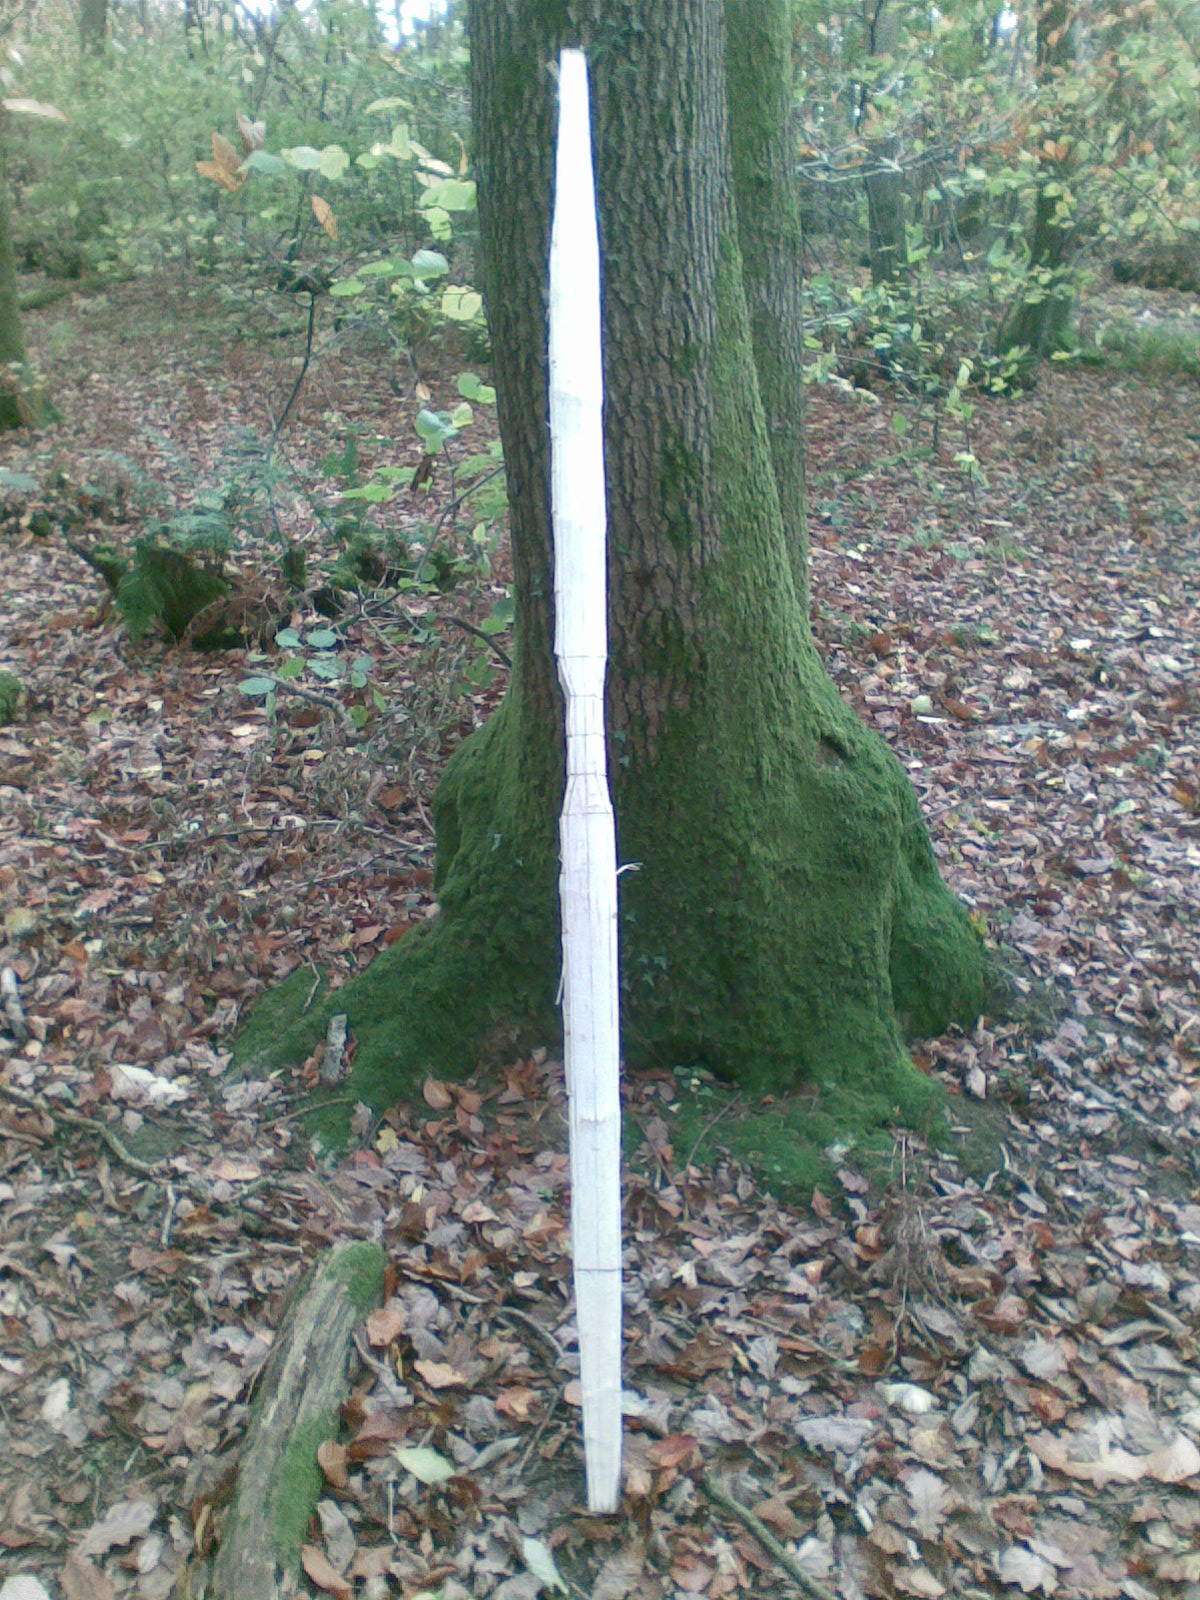
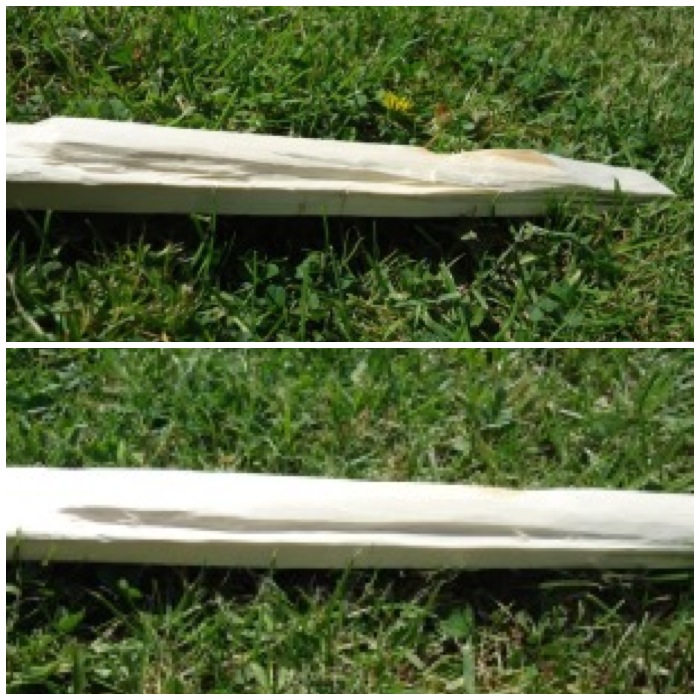
A finished blank stave ready to be seasoned for a while.
Blanked out bow ready to season a bit
At this point I left the bow to season for a month: one week in my garage and then three weeks in a cool spot in my house.
This allowed the wood to season enough to start the fine work.
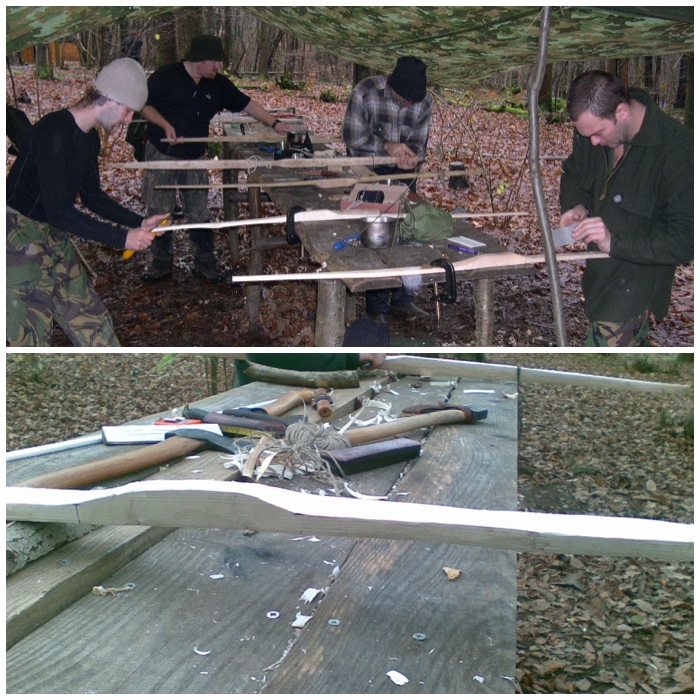
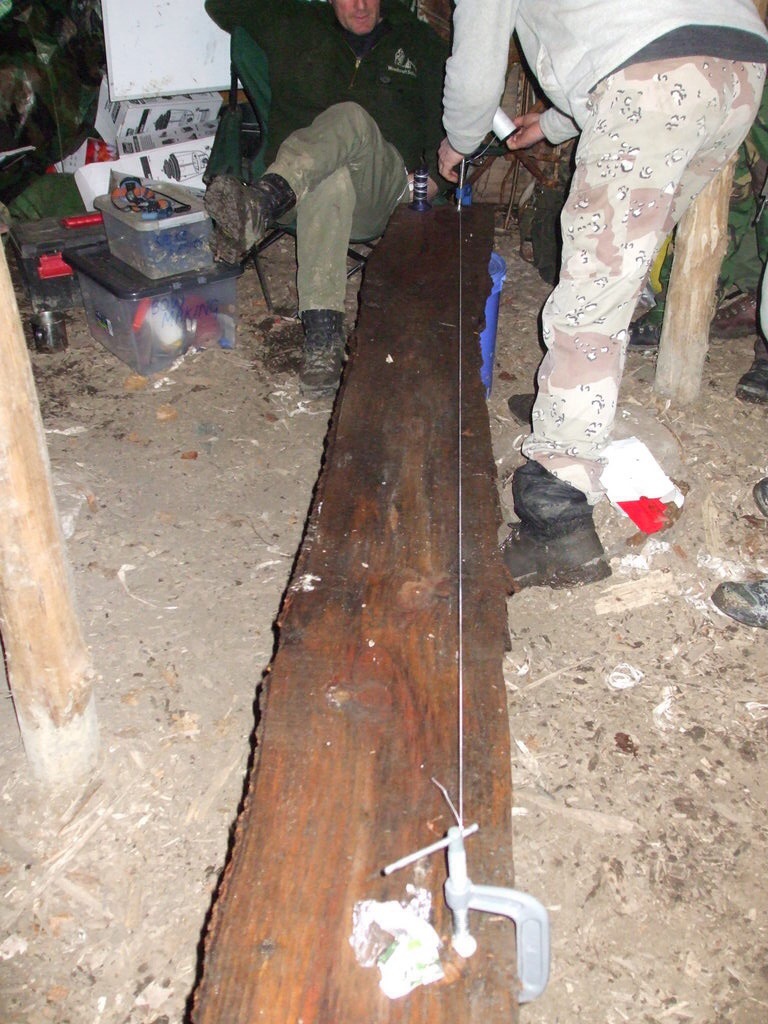
In the pictures below the bows are clamped down for the fine work.
A clear picture of the bow’s rough profile can be seen in the bottom picture.
Clamped out bows ready for fine work
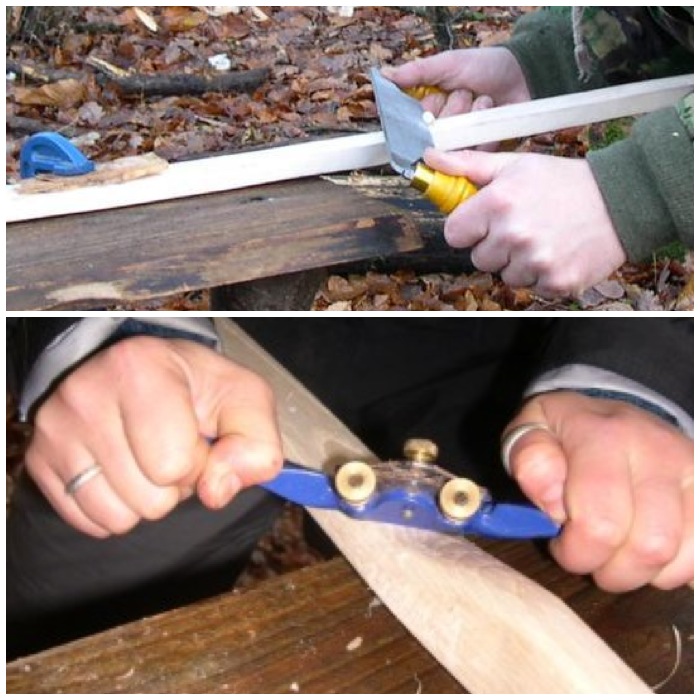
To begin with I used a draw knife and then moved onto a spoke shave.
Having the bow clamped allowed me to use these tools safely and with precision. I took the pictures so the hands you see aren’t mine: the top picture is Phil Brown of Badger Bushcraft using the draw knife and the bottom picture is Mollie Butters of the Field Farm Project using the spoke shave.
Draw Knife and Spoke Shave
For very fine shaving I used a cabinet scraper. With all of these tools I only worked on the belly and the sides of the bow working down to the tips of each limb. I was looking to get a neat taper effect from the handle to the tips as shown in the plan in the picture on the bows dimensions.
Cabinet scraper taking off minute amounts
Tillering
Throughout this fine work I tested the bow’s flexibility by floor tillering it.
This involves pushing down on each limb to test its flexibility (check out this thread on the Primitive Archer site on floor tillering).
I was looking for an even flexibility in each limb.
Hand Tillering to begin with
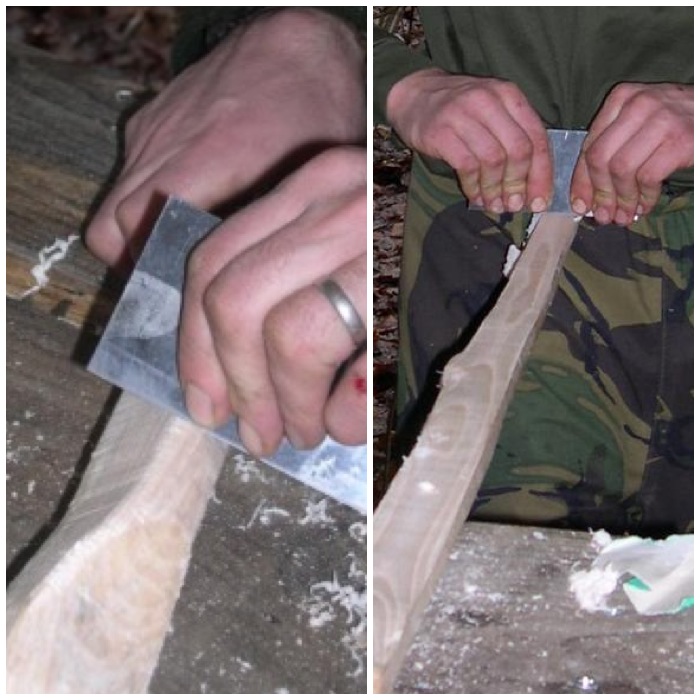
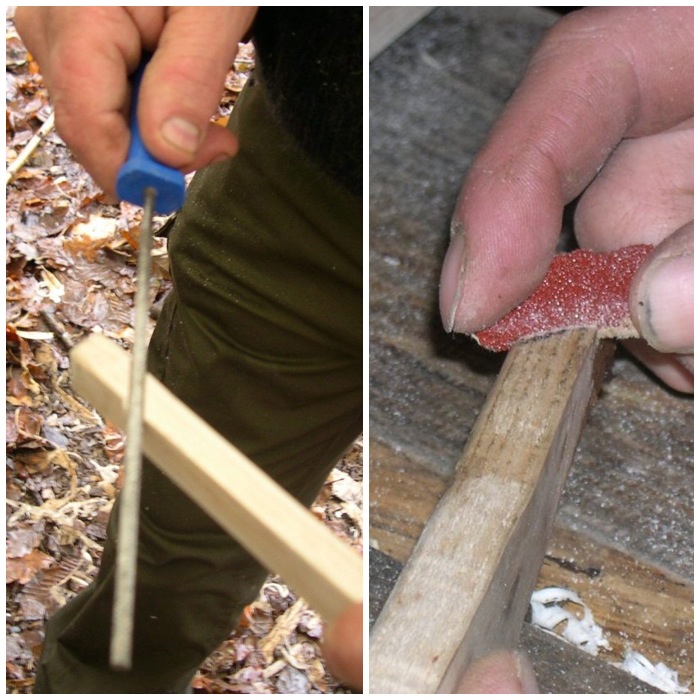
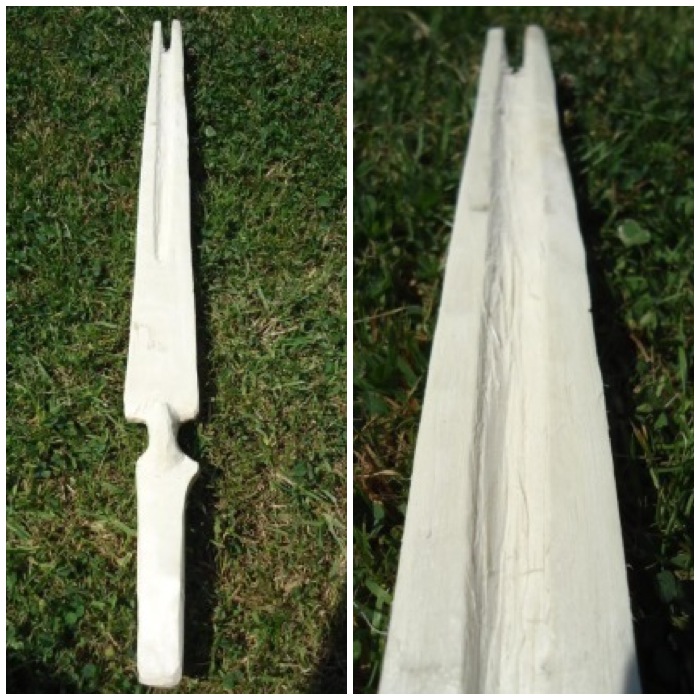
Once floor tillering couldn’t tell me any more I needed to move to the tiller stand, so I carved out the knocks on each limb to hold the string using a round wood file.
The knock needs to be at an angle of 45 degrees and deep enough so that the string doesn’t slip off.
Finally I sanded the knock so that the edges would not abrade the string.
At this stage the bow was not put under any tension by the string. This was so that I could train the bow to bend incrementally by using the upright tiller. Putting the bow under too much tension would lead quite quickly to it snapping or cracking.
Dick Baugh wrote a good article on tillering on the Primitive Ways website that is worth a read.
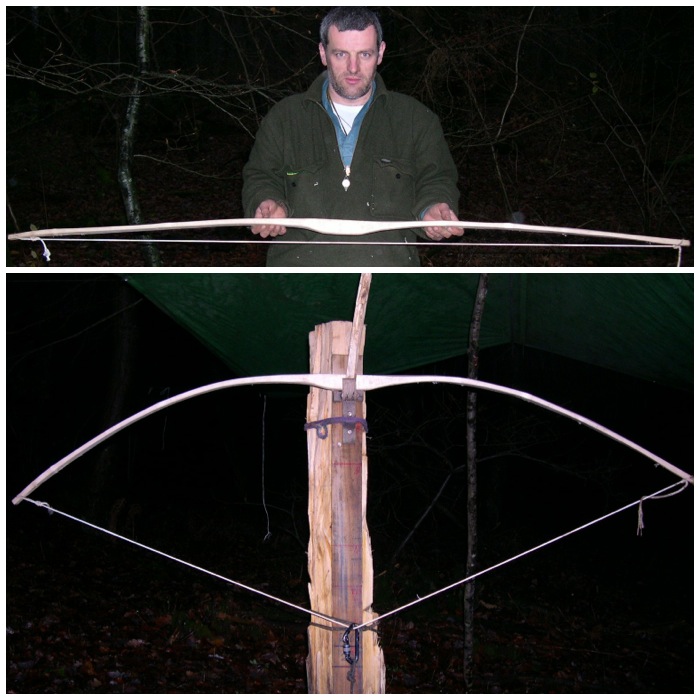
Ready for the Tiller Bar – No Brace Height
I then placed the bow on the tiller post and in increments slowly bent it, carefully watching the curve on each limb.
First Tiller
The following pictures are of the bow during the tillering process. After viewing it each time I would return to the workbench to scrape wood from areas of stiffness using the cabinet scraper or spoke shave. The close up pictures show in detail the top and bottom of the tiller when set up.
Further Tillers
The shape of the limbs can be viewed easily on the tiller: here I could see that the right hand limb was still stiff and needed working on.
Left limb is good – right limb a bit stiff
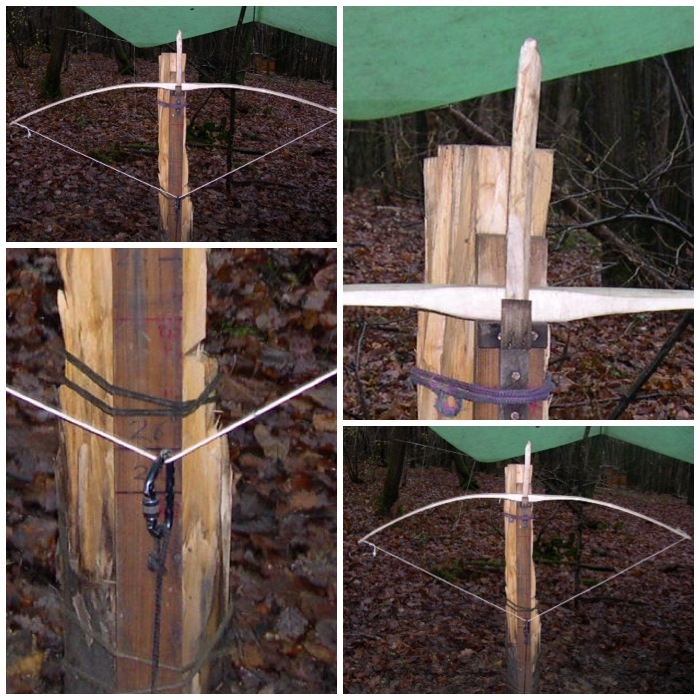
The next stage involves shortening the bow string so as to raise the brace height (the height of the string above the handle when the bow is strung up) then testing the bow on slowly increasing brace heights on the tiller. To do this you have to unstring the bow (at this stage that simply means sliding the loop off the knocks and loosening the Timber hitch) and adjust the Timber hitch to shorten the string.
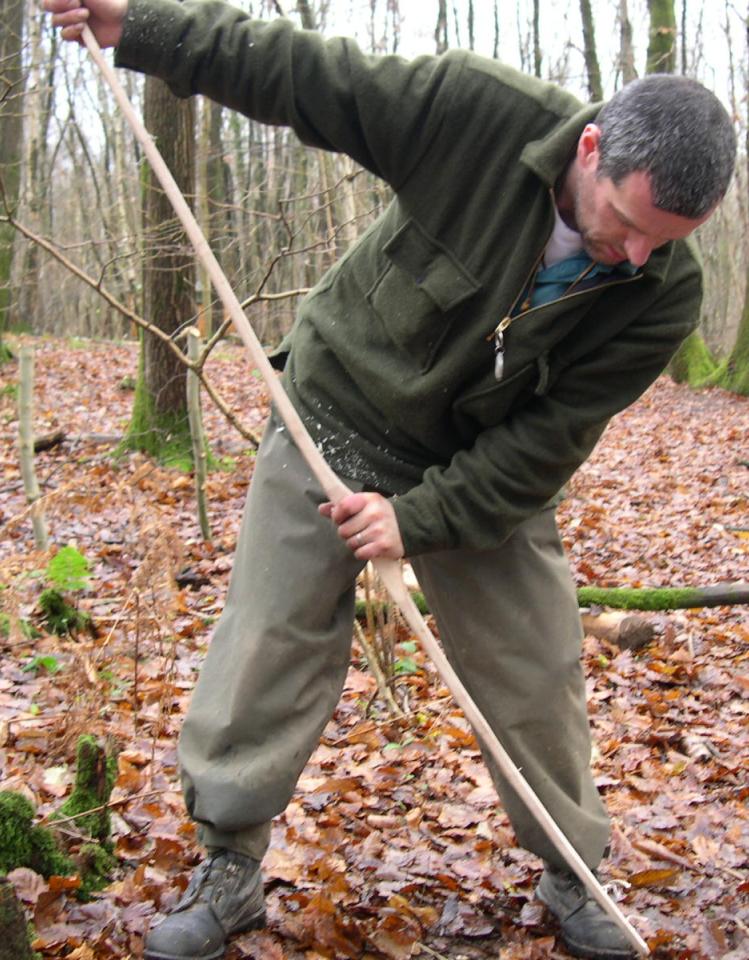
To re-string the bow after the Timber hitch has been adjusted and re tightened, hold the bow with the bottom limb (the one with the Timber hitch) trapped against your instep of your foot. Have the back of the bow facing you and with your left hand (if you are right handed) firmly hold the handle, then with your right hand slide the loop back up to the knock.
The first brace height I set the bow at was very low (the string touching the handle) as I only shortened the string by about an inch. A good site explaining how to string a bow can be found on the Archery Library website.
Bow Braced very slightly (string just tensioned)
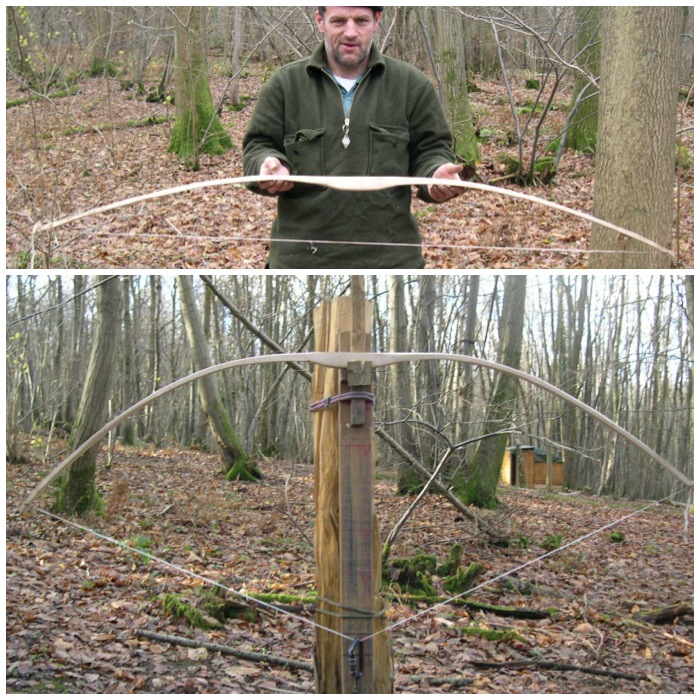
A two inch brace
A 2 inch brace
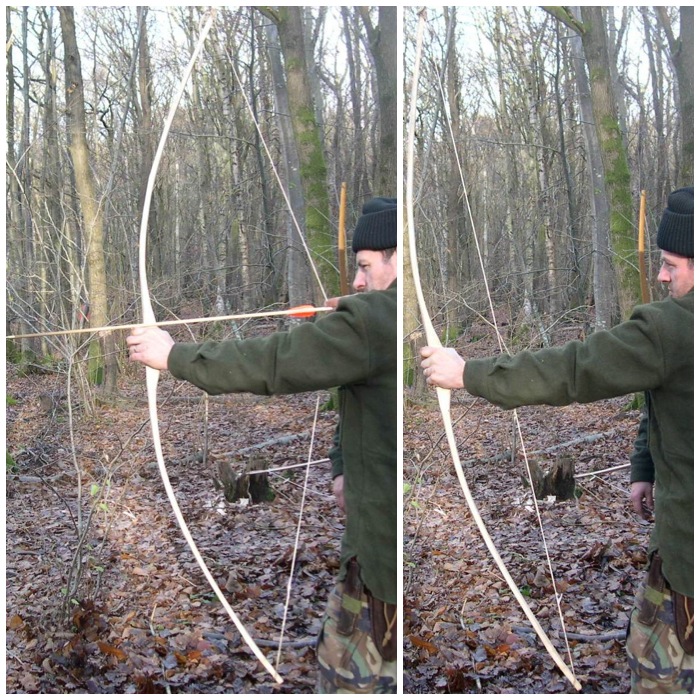
Tillering by hand with a two inch brace
Checking the feel of the bow as I went on – Still a 2 inch brace
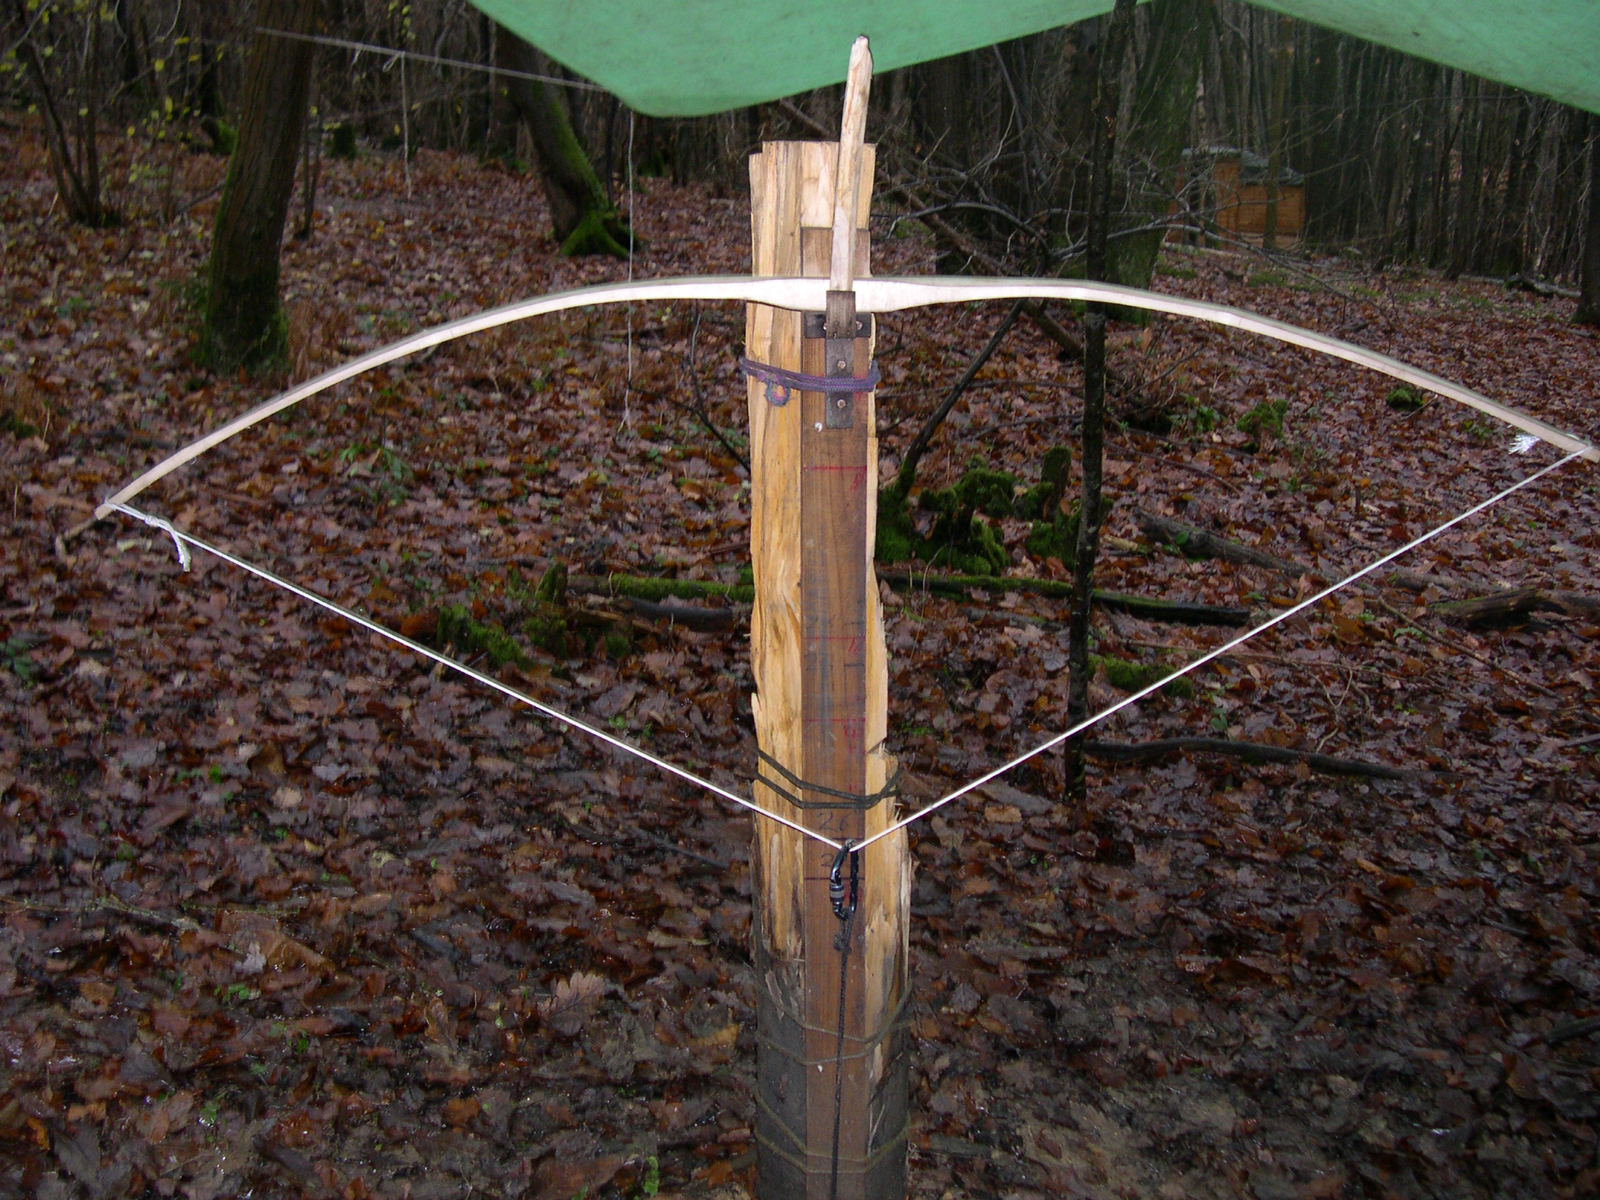
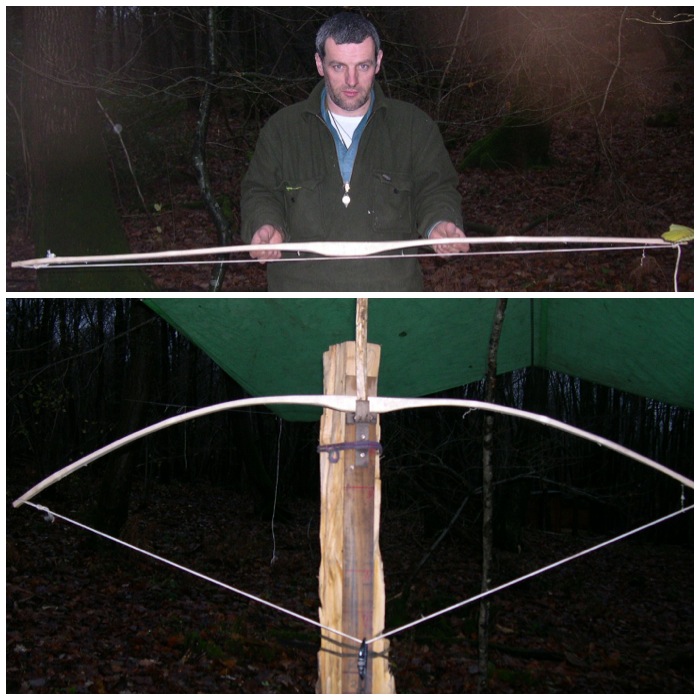
Final brace about six inches. Tillering now complete with evenly curved limbs
Six inch brace
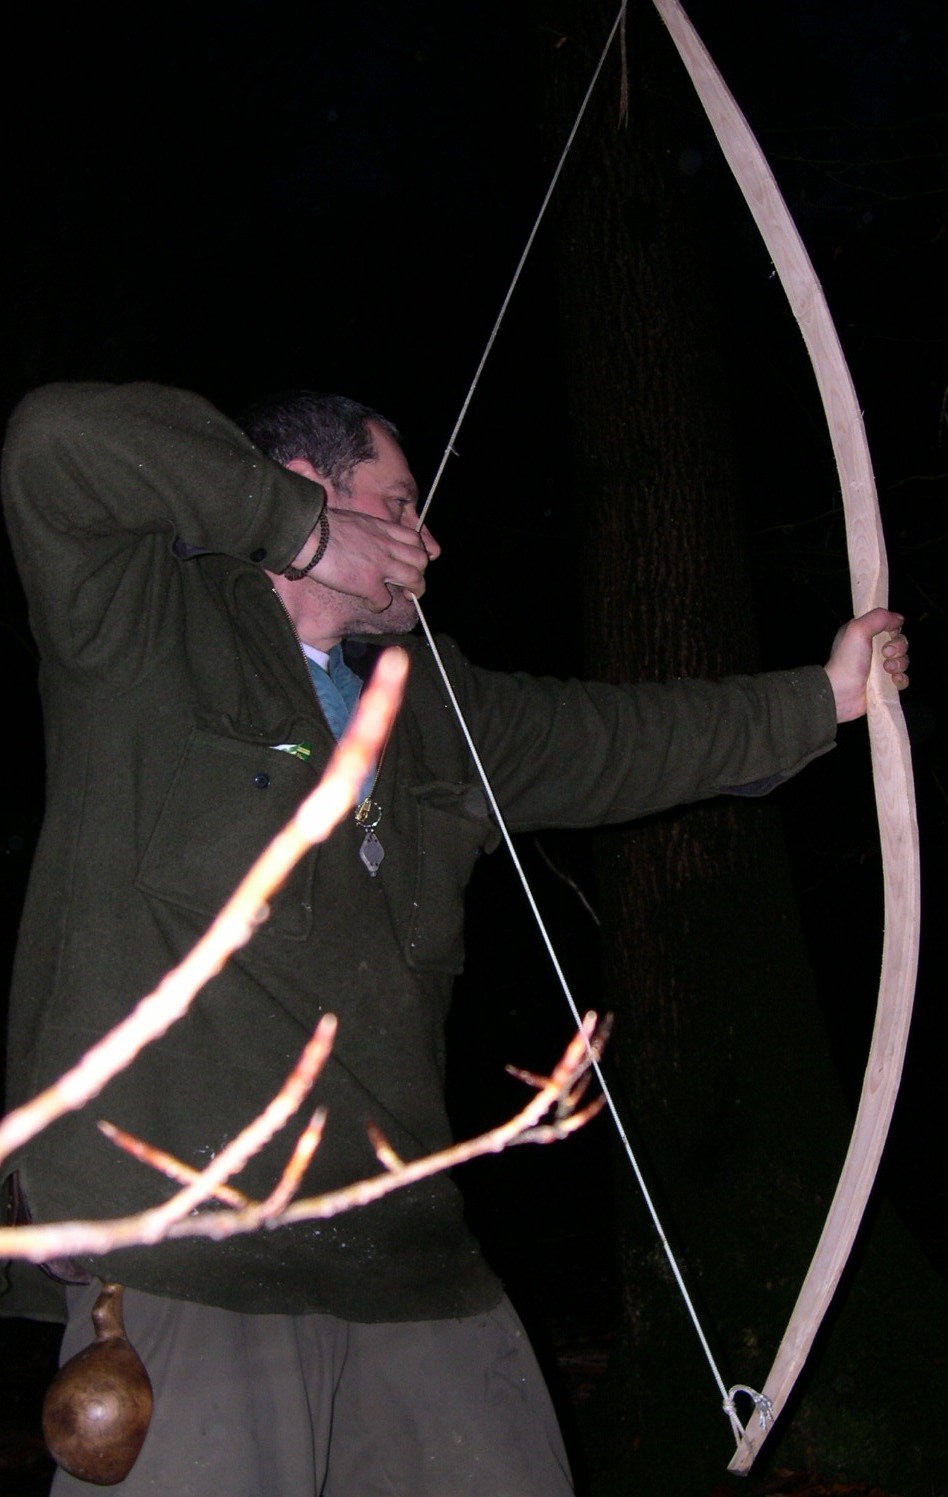
After a bit of tuition from Scott it was time to take my first shot and I even managed to hit the target.
Preparing for the first shot
I did not pull a full draw on the first shot in case the bow split.
Arrow away
In the picture below you can see one that did not make it: Charlie’s bow had developed a hingein one limb that gave under tension.
I think he took it in his stride.
One that did not make it – Charlie took it well
String making
The next stage is to make the string for your bow.
Traditionally natural materials such as sinew, rawhide, plant fibres (nettle) or linen were used but we used modern materials for our bows. As modern string such as Dacron B-50 (50lb) is non biodegradable there is less chance of the string breaking, which means less chance of your bow breaking.
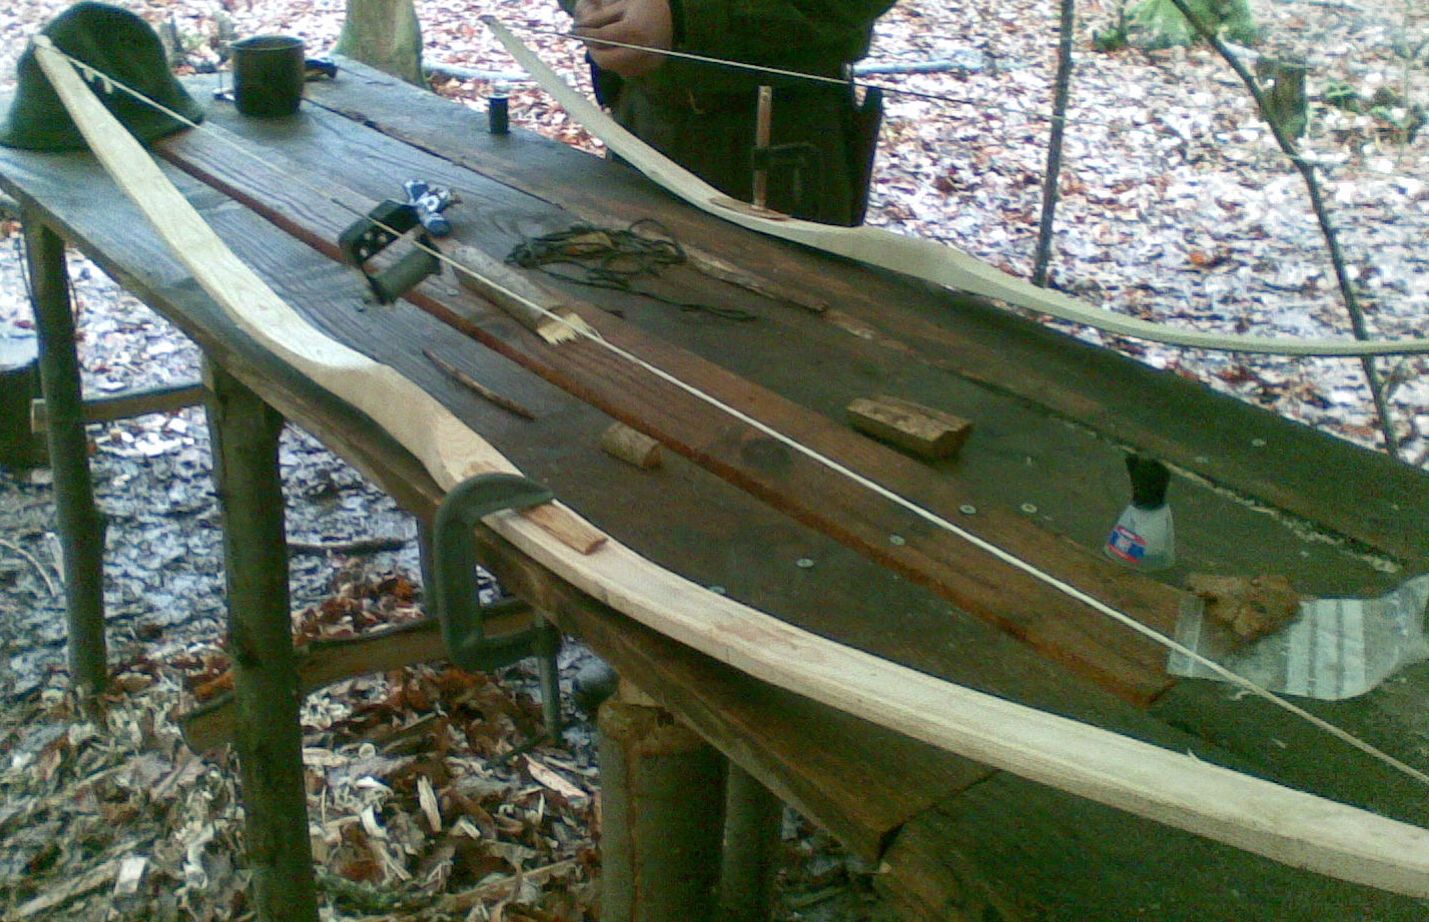
To make the string we used a plank with a clamp at either end, at a distance from each other of 18 inches longer than your bow length. Tie one end of the string to a clamp and run the string around the other clamp, then around the first one again. Keep doing this for five more cycles.
String making set up
Cut the string at each clamp and you should be left with two sets of five strings.
Then follow the steps in Sam Harper’s site Poor Folk Bowsto make a Flemish string. I did not document this step but he has a good tutorial on making the loop, twisting the string together and making the timber hitch at the other end.
Stringing up
The new string is attached by sliding the loop over one end down past the knocks and attached at the other end with a Timber hitch. You need to adjust the Timber hitch so that the string length is the correct length for the brace height you want. When you have the string set at the correct length, restring the bow and clamp it to a workbench.
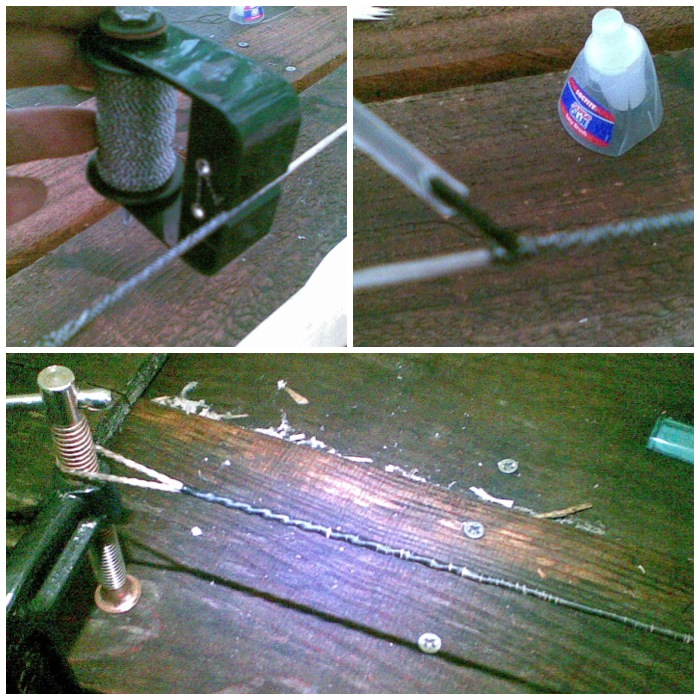
The string now needs to be ‘served’ in the centre of the bow where the arrow will be knocked. The Archery Talk forum has a good thread on serving a bow string. Have a look, as my pictures on this part of the process are not the best.
Bow clamped ready to serve the string
The serving of the string is basically a whipping to keep the individual pieces of string that are loosely wrapped around each other together and provide a firm area to knock into your arrow. I also served the top of the string near my loop to stop it unraveling. The little device you see in the pictures is known as a Serving Jig. After finishing serving the string I put some superglue at the end to keep it in place
Serving the string
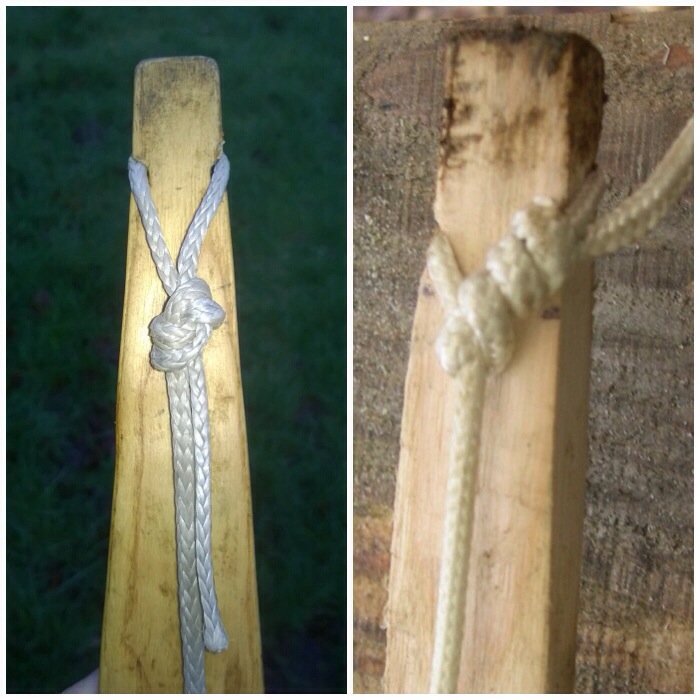
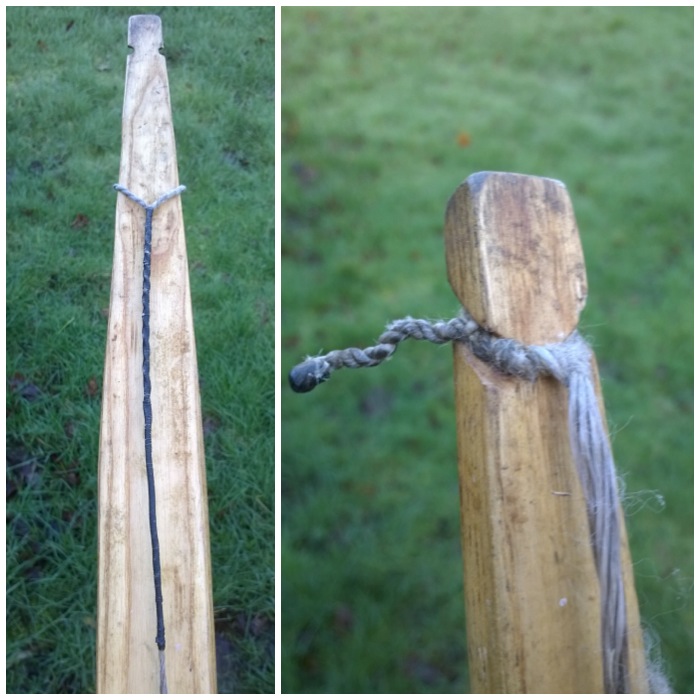
The finished loop needs to be wide enough to slip off the knocks but small enough to grip them when in place. In the picture on the left below you can see that it has been served for about 12 cms right up to the loop. The bottom limb just needs a timber hitch, though I did twist the end as if making cordage to keep it neat.
Finished bow string
Final touches
The bow was now ready for some final sanding and oiling.
Ready for the final touches
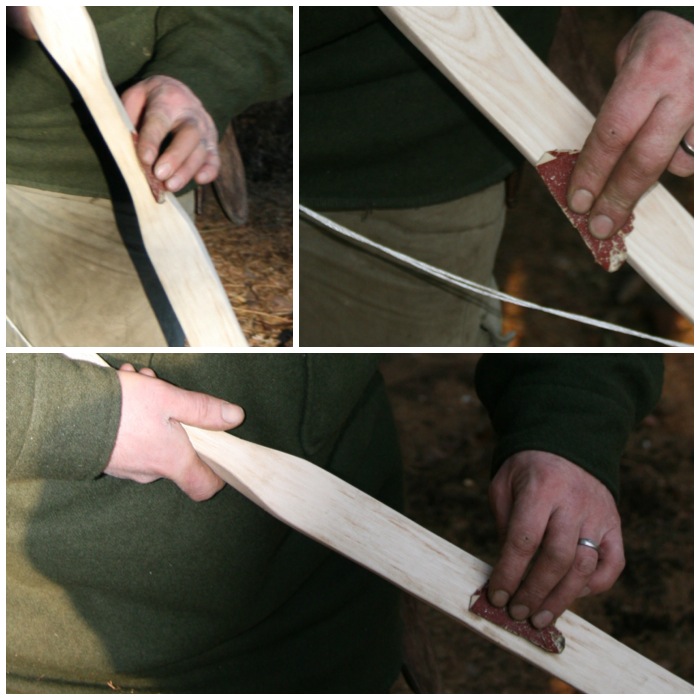
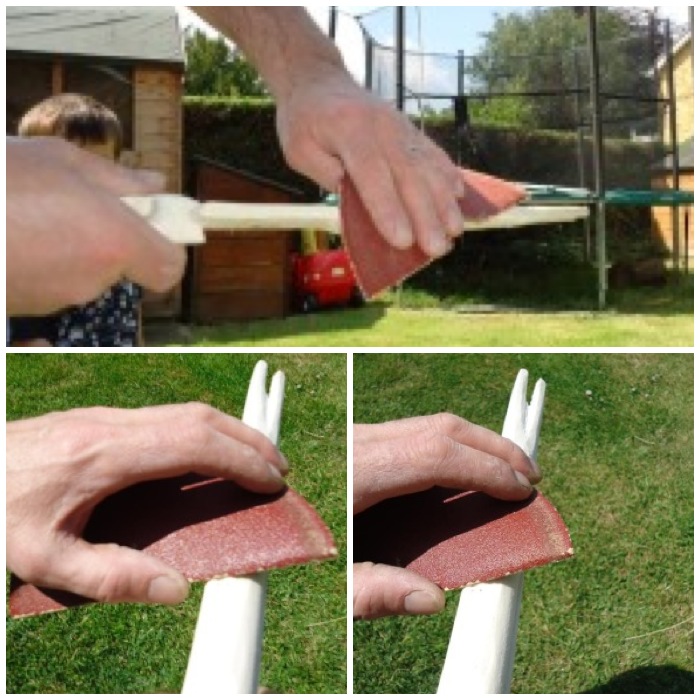
Using various grades of sandpaper, I sanded the bow down to get rid of any marks and sharp edges.
Lots of sanding
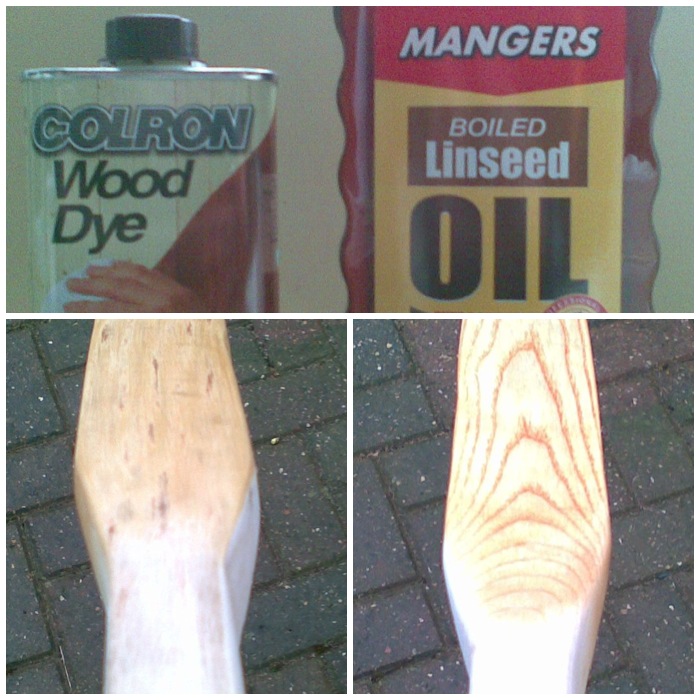
To protect the bow I stained the wood slightly then applied a mixture of boiled linseed oil and white spirits (50/50 at first). After this had dried I reapplied more oil, but with less white spirits each time until finally I just applied oil.
Oiling and staining
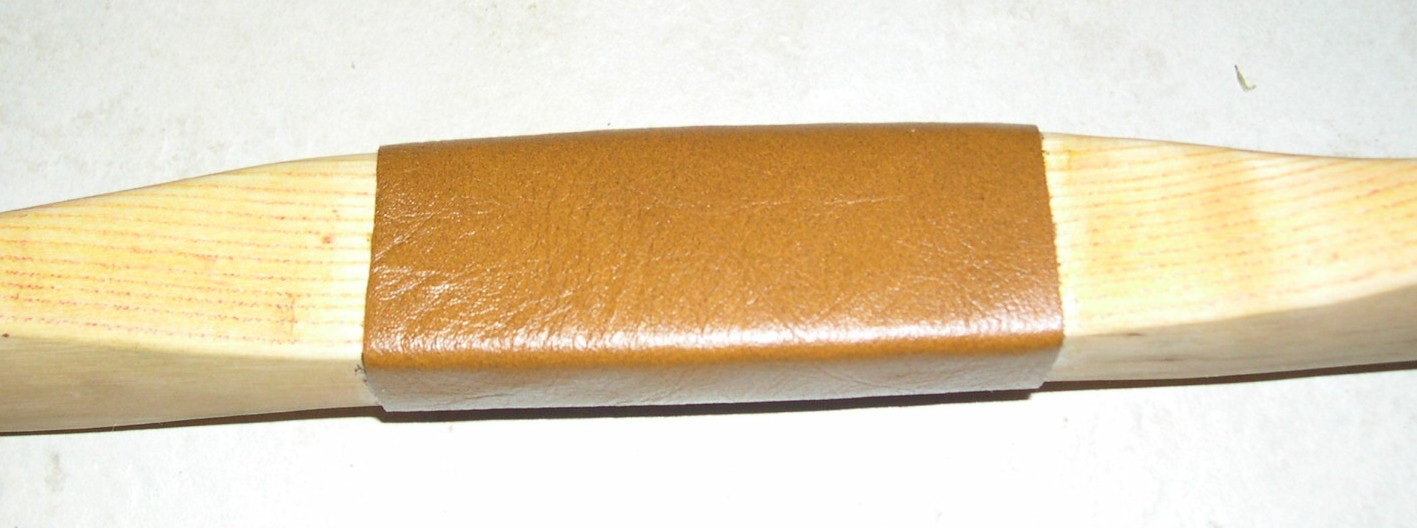
Lastly, I glued on a small leather handle. I thought about stitching one on but wanted to keep the clean line of the flat leather.
Simple leather handle glued on
The completed bow.
One Finished Ash Flatbow
This bow has been used by scores of my Sea Cadets over the last six years and still shoots as sweet as the day I finished her.
I enjoyed making this bow, it was my first but it was definitely not my last.
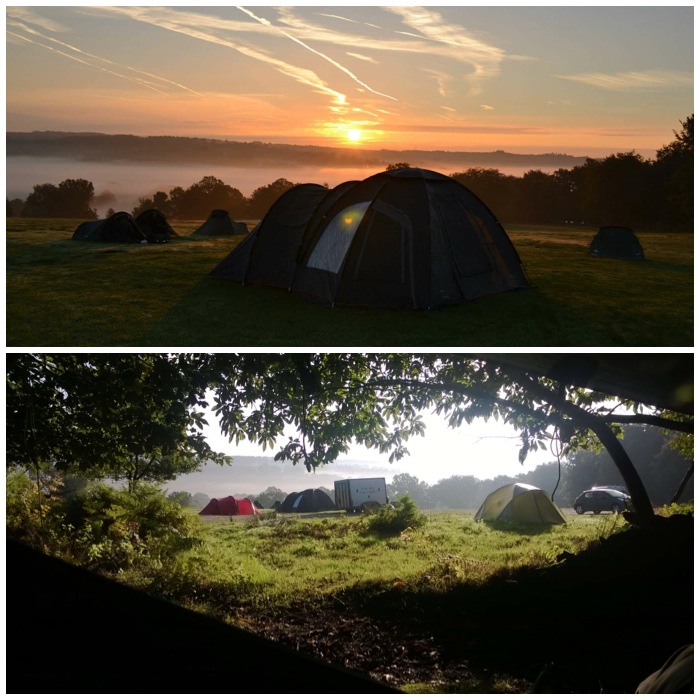
Early October brought me to the beautiful Pippingford Park in the Ashdown Forest. This is a military training area that is not open to the general public and so makes for an ideal place to run adventure training activities. This year London Area Sea Cadets decided to hold their annual Chosin Cup Adventure Training competition here.
The beautiful Pippingford Park in the Ashdown Forest Top picture courtesy of the Welsh Harp boat station. Bottom picture is the view from my hammock.
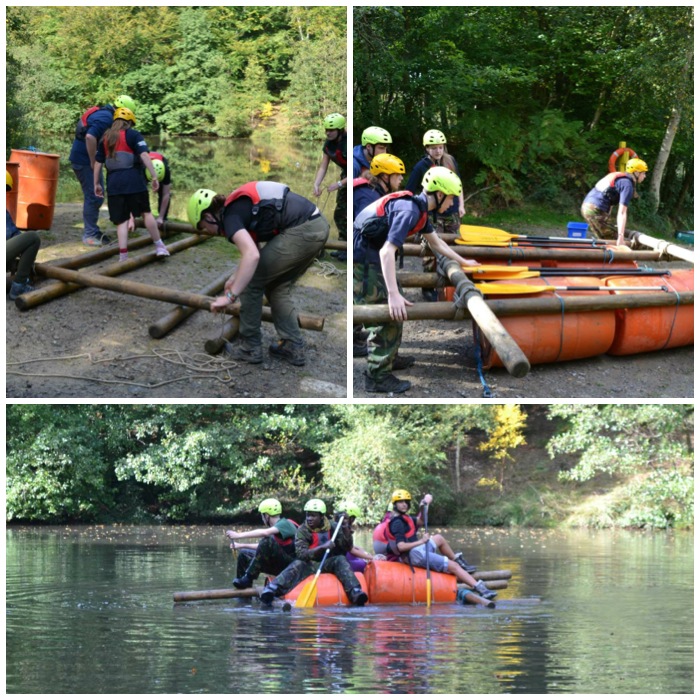
Nine teams took part this year (eight teams from London Area and one team from Southern Area). Each team has up to six cadets and the weekend consists of a navigational course with stances for the teams to complete. Points are awarded for technical skills, leadership, team work and overall enthusiasm. The stances are a mixture of seamanship and improvised skills. There are rigging type activities as well as other rope skills alongside tests of fitness and problem solving.
My Commanding Officer Paul Townsend explained the Chosin Cup nicely on the City of London web page :
A team of six Cadets competed in the annual London Area Adventure Training Competition. This is known as the Chosin Cup after the actions of the 1st US Marine Division, supported by 41 Commando Royal Marines, around the Chosin Reservoir in November 1950, during the Korean War. Vastly outnumbered by Chinese troops, and in mountainous terrain where the temperatures dropped to minus 37C, 1st Marines fought their way out of an encirclement.
Well, brilliant though the London Area Adventure Training Team are- they couldn’t manage minus 37C and the People’s Liberation Army failed to oblige, on this occasion. Nevertheless, the Cup consists of a gruelling, and very muddy, series of tests of brains, brawn and stamina. Raft building, orienteering, assault course, rope work and other challenges- some conducted in darkness. Our youngish team, including Gemma Knowles, aged 12, did brilliantly to come third out of the eight London Area teams.
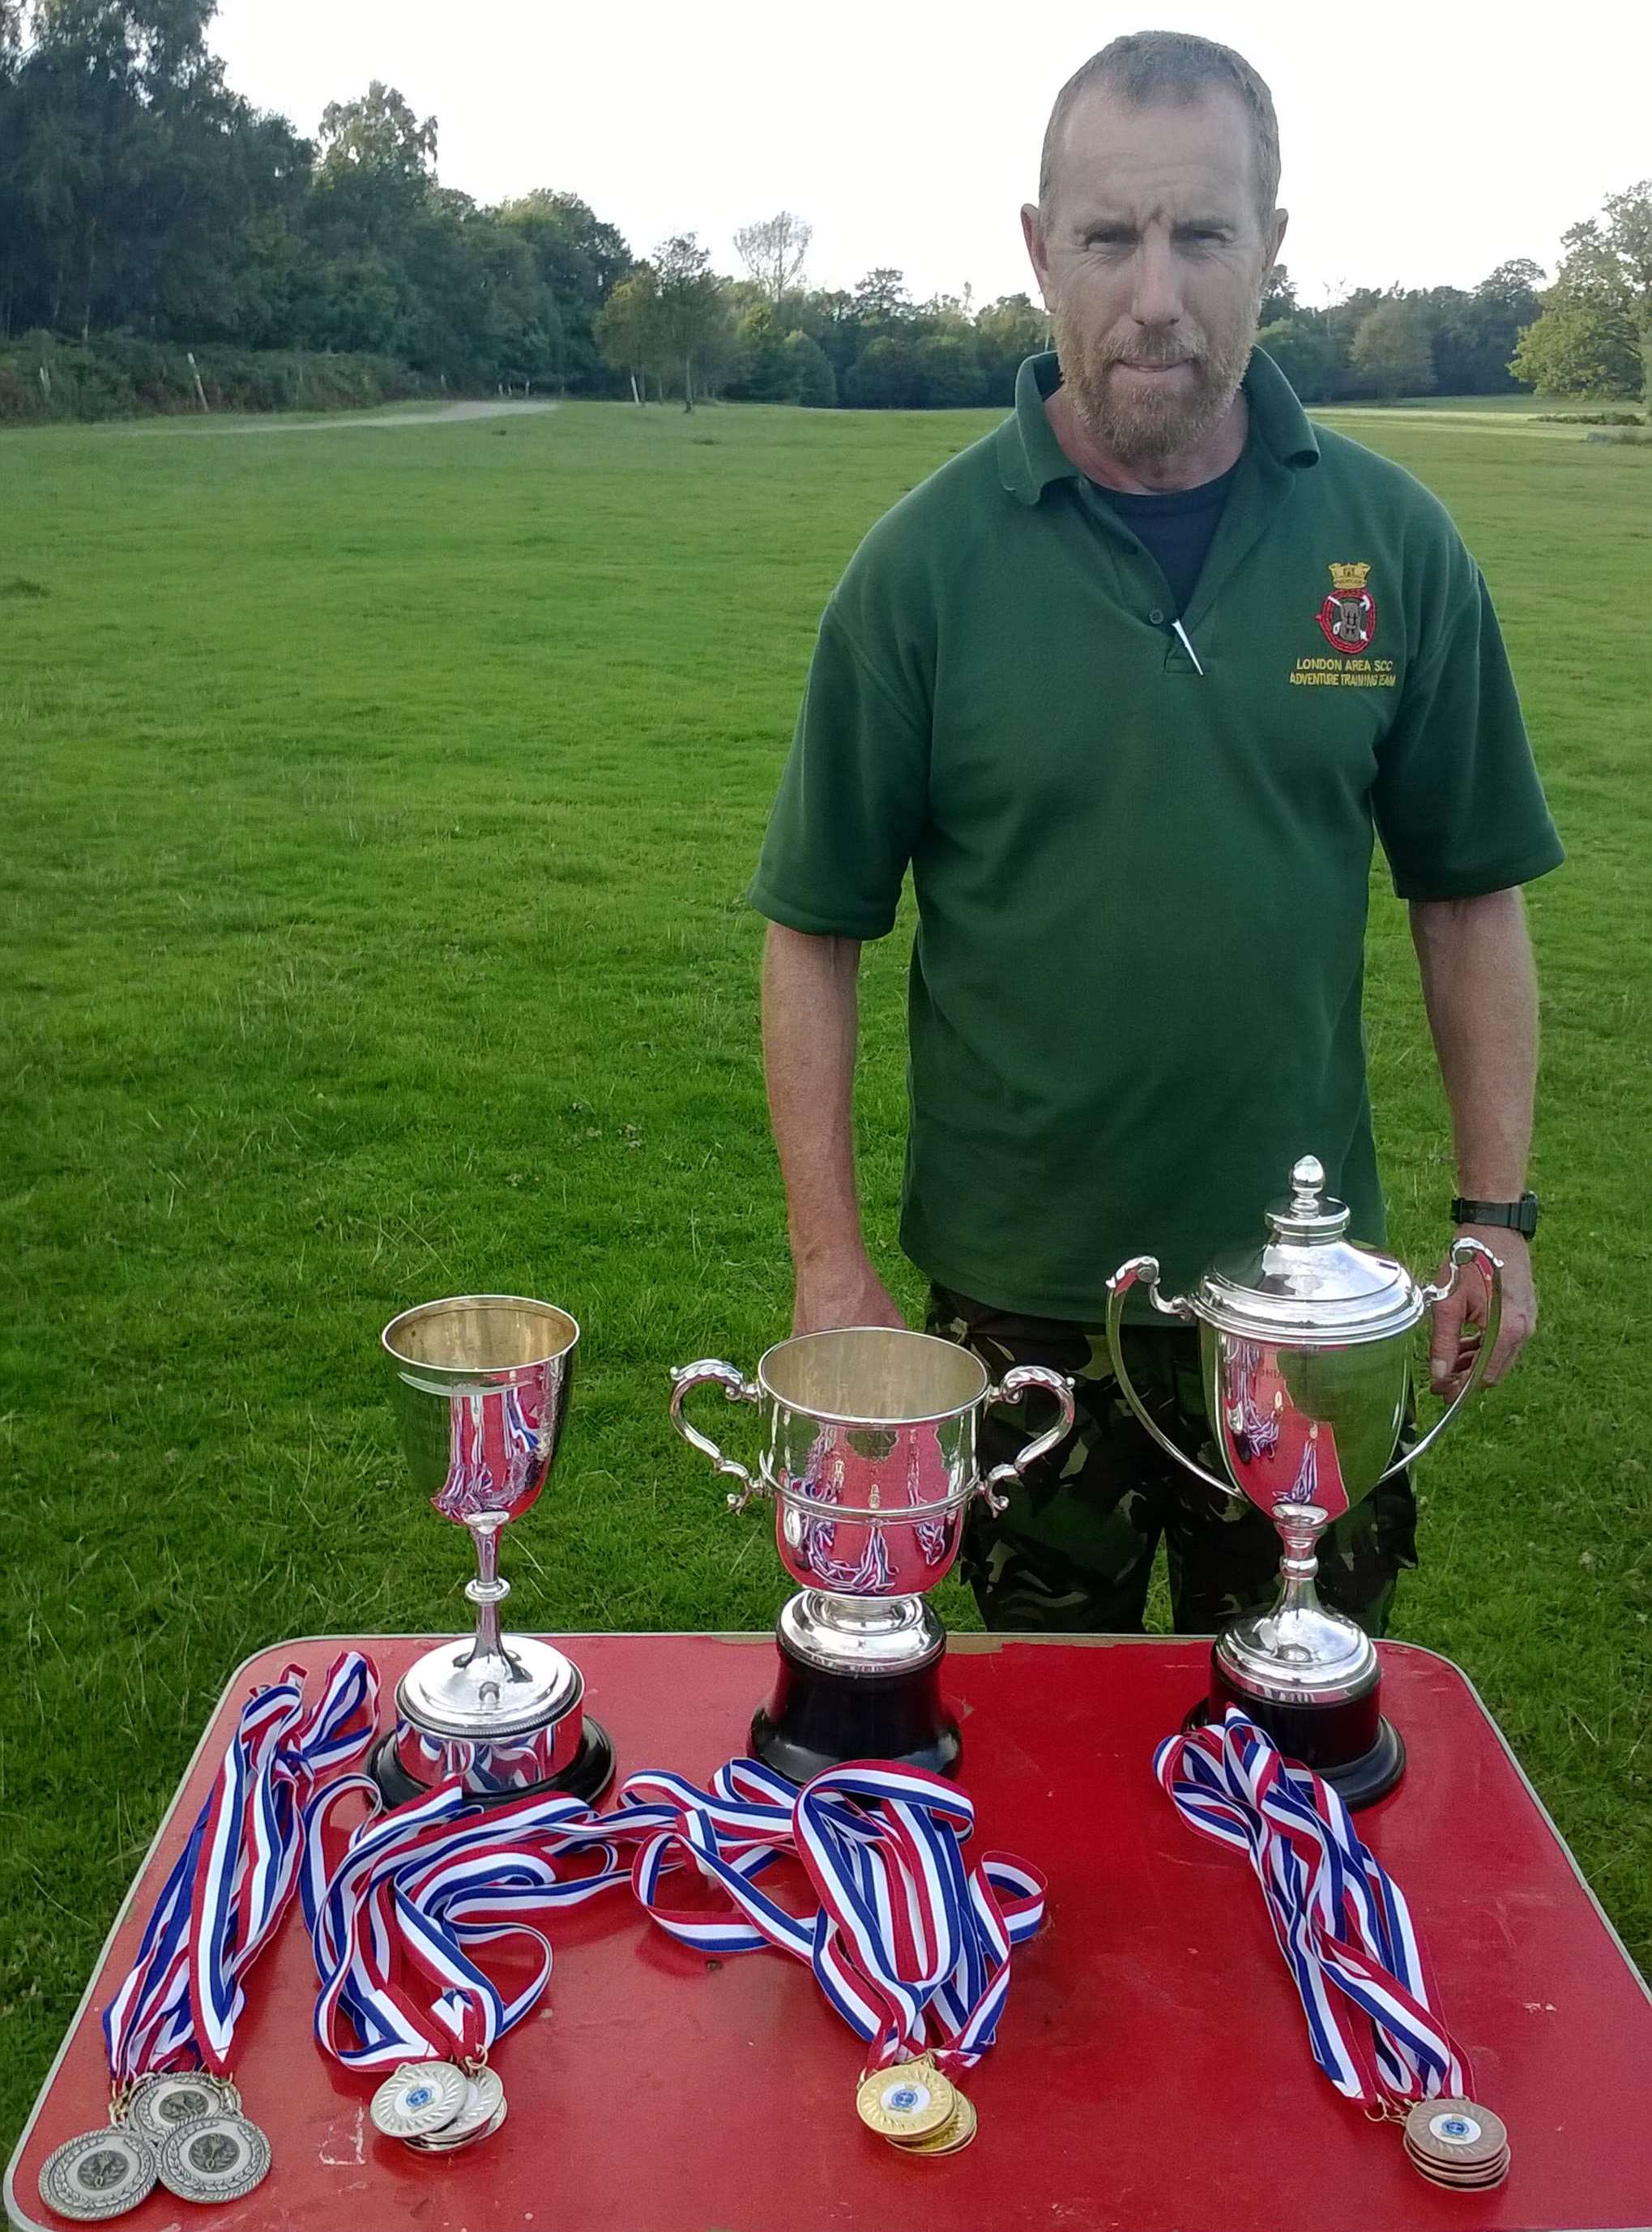
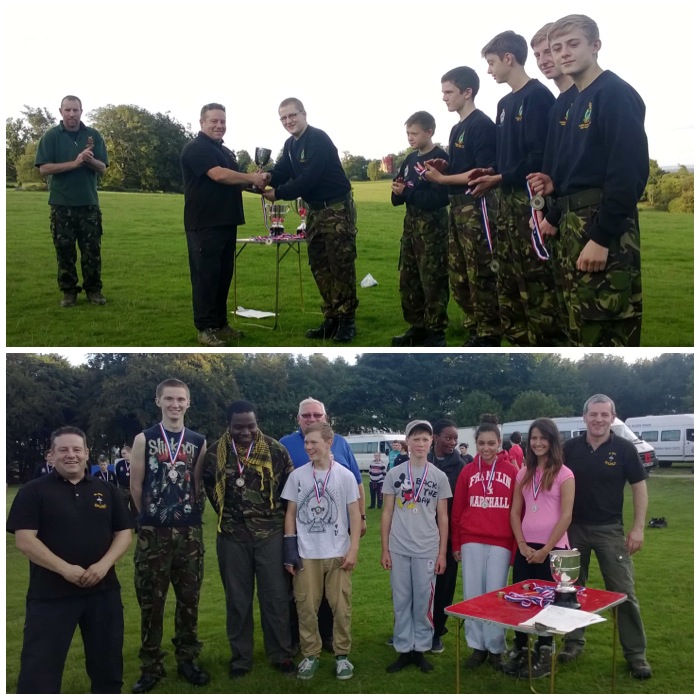
The Trophies
I arrived at lunch time with Graham Brockwell, Perry Symes, Charlie Brookes and John Kelly to help set up the event. The cadets arrived in the early evening. They were given a kit check and then some six figure grid references to plot on their maps and so find their bivvy site for the night.
While I was driving around the park on the Friday evening two stags shot out in front of me and proceeded to lock antlers furiously with each other. I tried to get a picture of this but my phone could not cope too well with the darkness – plus my hand was shaking a little 🙂
Night arrival
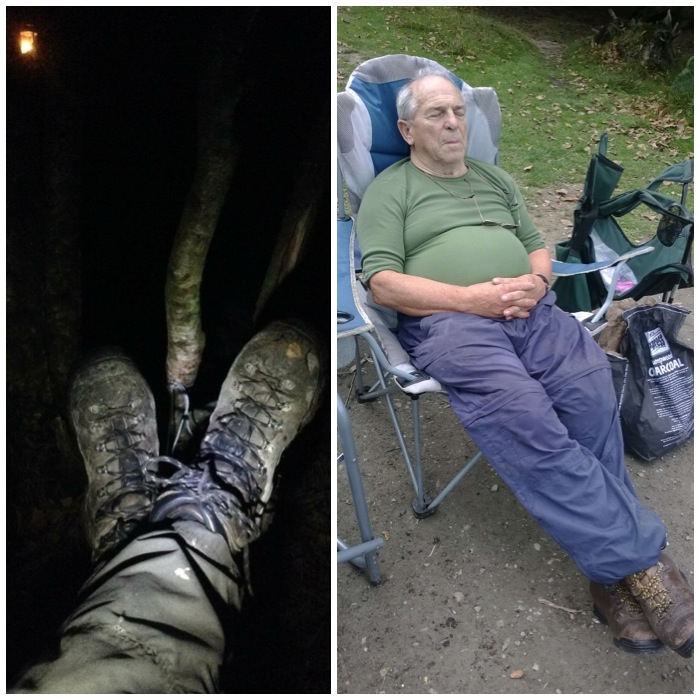
I ended up sitting out in my hammock chair for most of that evening in the woods to stop the cadets from wandering too far off course. On this course the staff have to do a lot of waiting around for teams to appear, then there is a burst of activity and then it is time to settle down again. As you can see our Alan Lewis has mastered the art.
A lot of waiting around
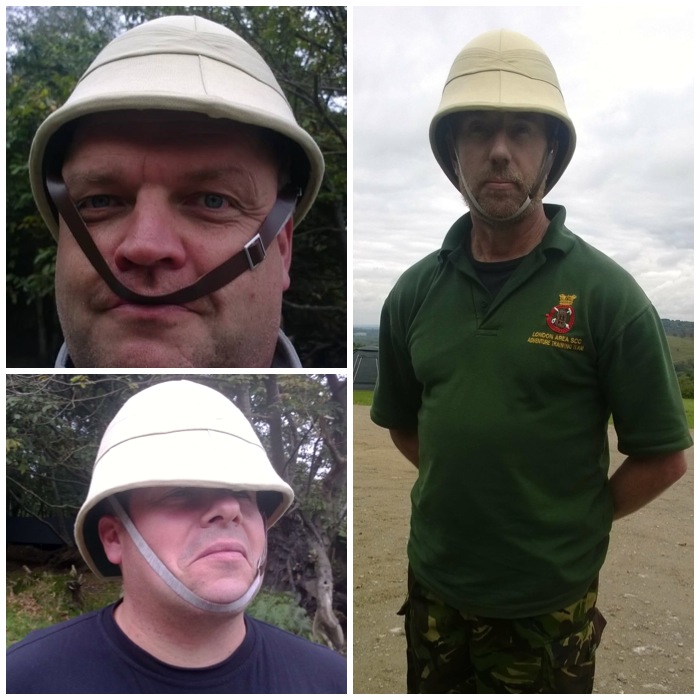
Meet a few of the team. Graham had been given a Pith helmet as a Father’s day present and in no time we all tried it on. I think the guys were all born in the wrong century and should have joined the army (though I am not too sure about Sarn’t Big Yin Kelly 😉
Meet my colleagues Top Left – Sarn’t John (Big Yin) Kelly Bottom Left – Sarn’t Major Perry (Smiler) Symes Far Right – The Honorable Gentleman Explorer Major General Graham (Ever So Mad) Brockwell
The Saturday starts out with some team planning and finalising of route cards before setting off. This year we kept the cadets within the military training area concentrating on micro navigation and lots of stances to test their team working and problem-solving skills.
Lots of team planning and quizzes
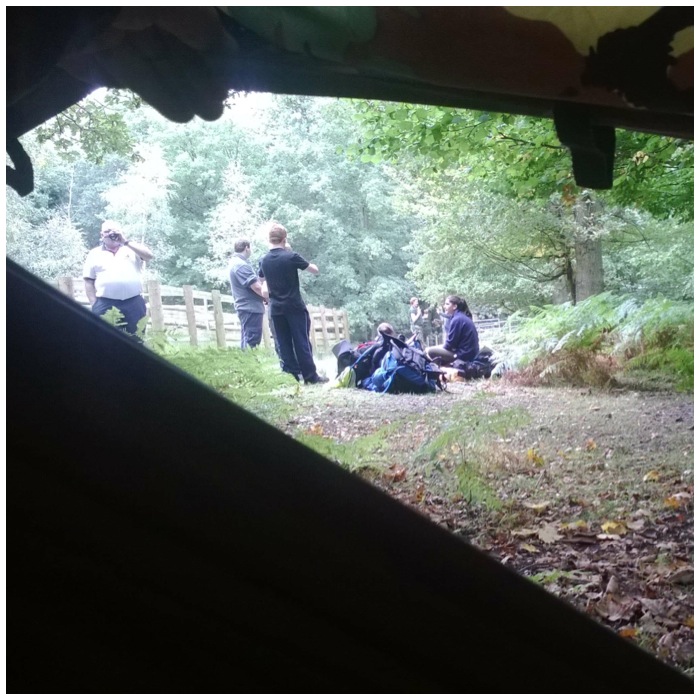
I managed to get out and about and had a great time spotting the many different fungi that can be found in the park. On my travels I stopped off at any stance I came across to see how things were going along. At one stance I found Dave Lewis and Paul Townsend and quickly spotted that Dave had his small hammock set up. As I said at the start there is a lot of waiting around so it was time for a quick lie down:-)
A view from Mr Dave Lewis’s day hammock – Cheers Dave
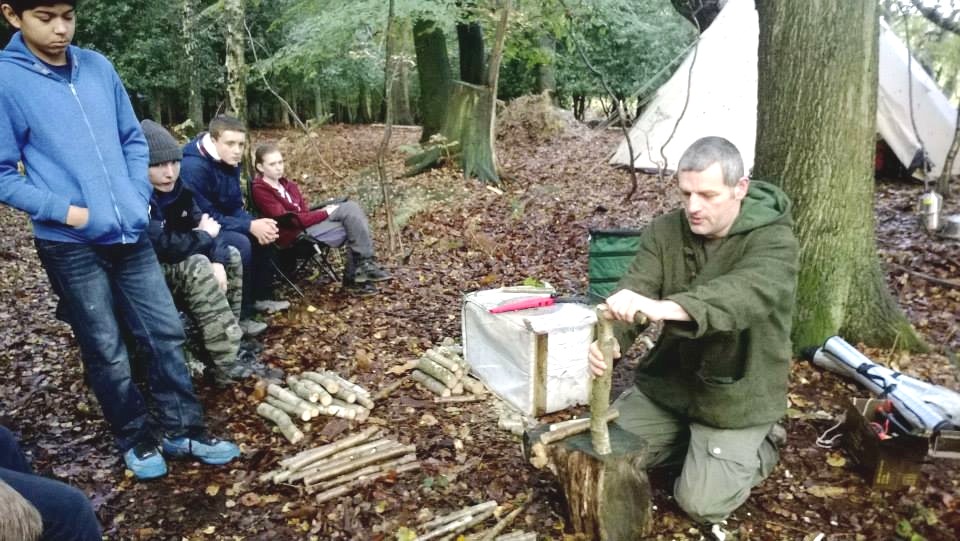
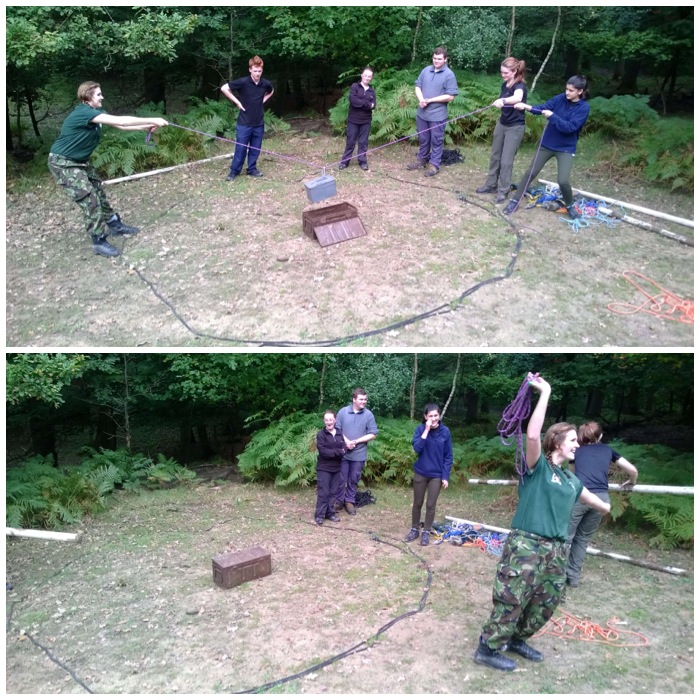
When the next team arrived it was time to get up and get some pictures. The cadets had to get the small blue box into the large brown box without entering the rope circle. They had been given lots of rope, poles, and various blocks and tackles to do the job. This team though elected to try out an alternative method using just rope and an open karabiner. Unusual, but it worked.
Stance – Sealing the radioactive waste
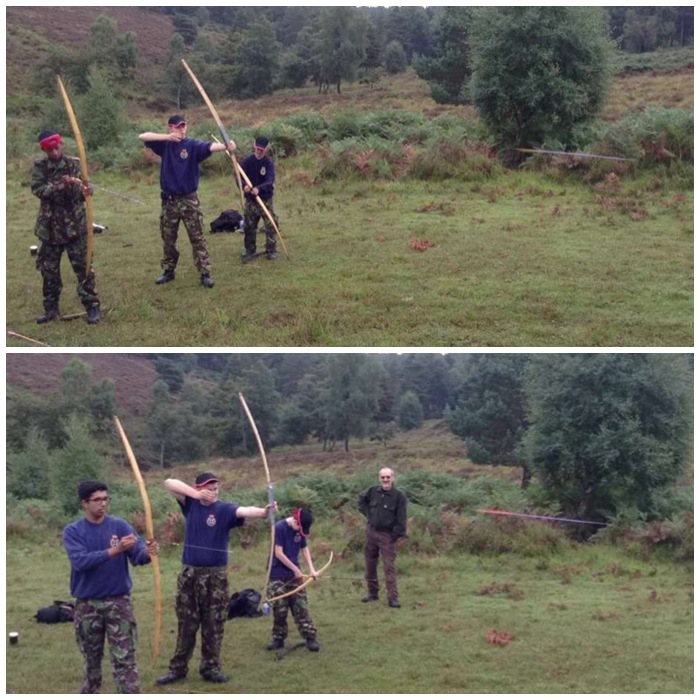
My friend and fellow bushcrafter Charlie Brookes ran the archery stance. The cadets were all given a little practice and training before shooting a marked round.
Archery
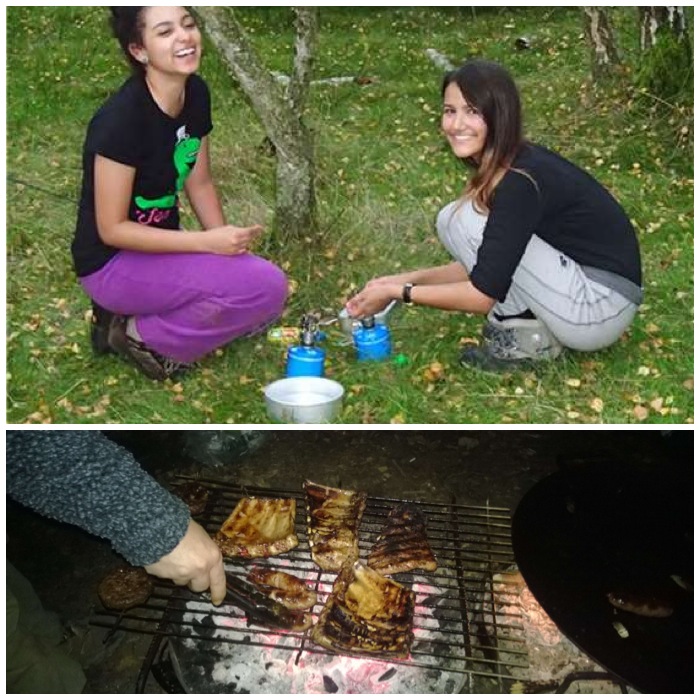
In between the stances the cadets would find time to heat up some food. As far as the staff went it was a case of grabbing some food on the go but Dave and Perry put together a midnight barbecue for all the staff when the cadets had gone to bed.
Making time for some food – Top picture courtesy of City of London Unit
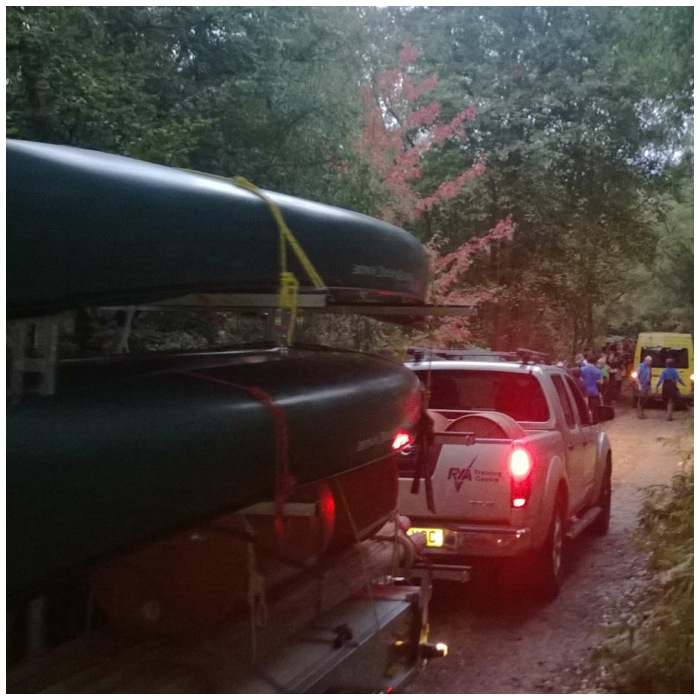
On the Saturday evening our colleagues from the Welsh Harp Boating Station arrived with lots of canoes and raft-building equipment. The cadets had to move camp after they had finished all the stances and then prepare for a night navigation exercise through the training area. This exercise involved a lot of night-time map work and crossing a lake in canoes in the dark. What they did not know was that they were not heading back to their tents when they finished.
I did not get any pictures of the canoe crossing but it all went very easily as the cadets are quite at home operating on water.
The Dockers arrive
Dave Lewis managed to get a bit of bushcraft in and got the evening fire going while we were out doing the night navigation.
Getting the evening fire going
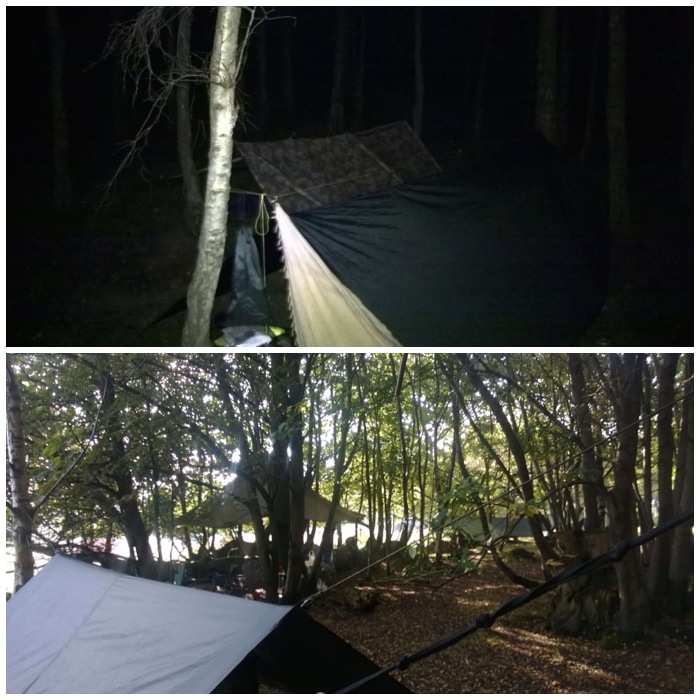
The cadets were told to head to a particular spot in the woods where they were handed a couple of tarps per team. They set the tarps up and eventually bedded down for the night. Thankfully I was able to retire back to the staff area where my nice comfy hammock was waiting for me.
Camp set up on the Saturday for cadets and staff
Sunday was another day of activities. All the teams had to build themselves a raft and row out to the centre of the lake and back again. Some made it, a few rafts did break up when they started rowing, but they all had a great time.
The Welsh Harp Station Dockers also put together an excellent video containing video and pictures of this event – Chosin Cup – Raft Building
Raft building – Pictures courtesy of the Welsh Harp Boat Station
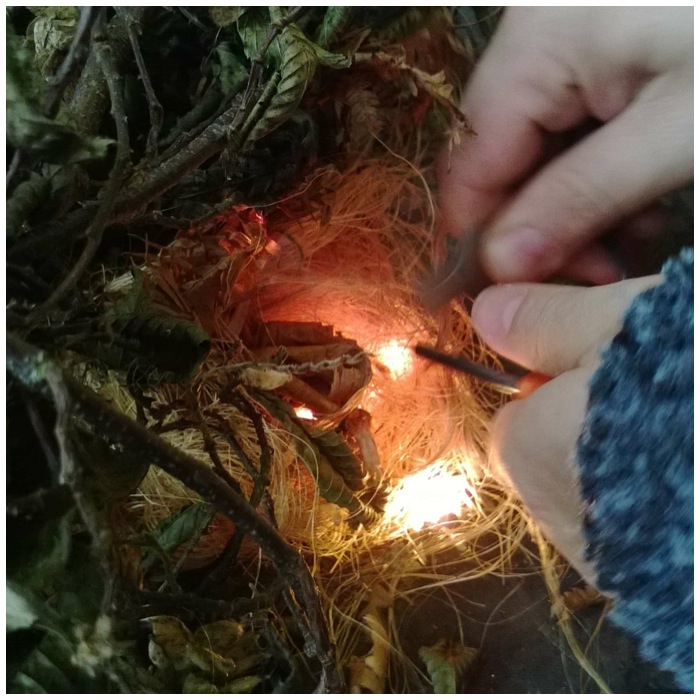
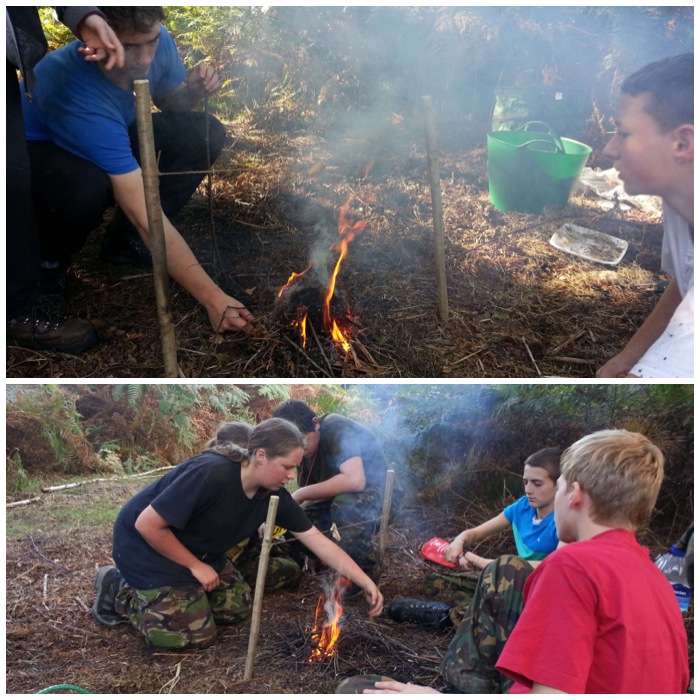
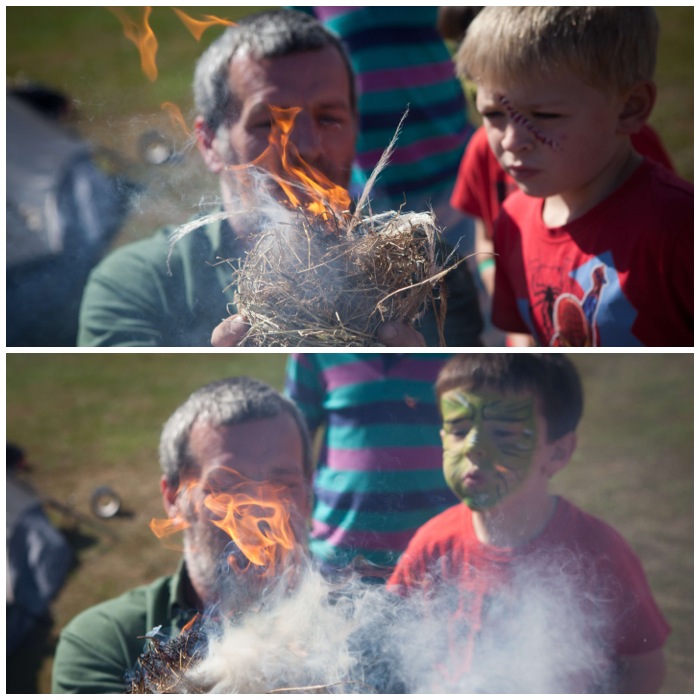
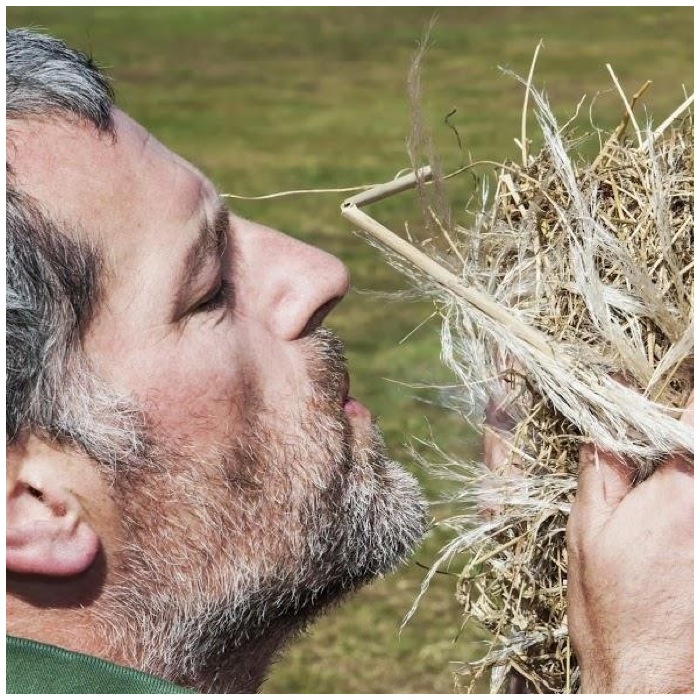
Charlie Brookes ran the fire-making stance where the cadets had to build a small fire after gathering all the materials to get it going. They gathered all the tinder and twigs to get the fire going (apart from some hay and char cloth to start it which we supplied). They used firesteels to light the charcloth which they then used to blow the hay into flame. They had to build a fire as quickly as possible so that the flames would burn through a piece of birch bark that was attached to the string you can see in the pictures below. Most teams burnt through the bark and string within a minute or two of starting their fires.
Fire making stance – Pictures courtesy of Charlie Brookes
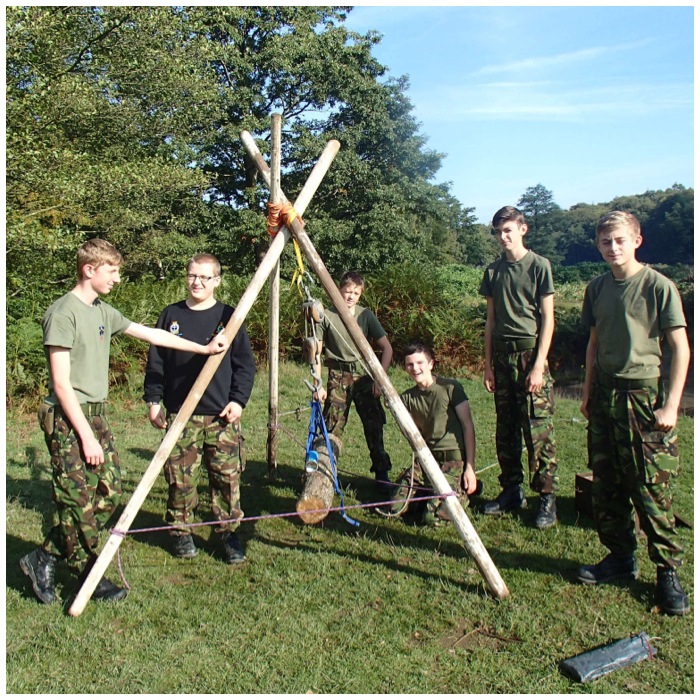
Paul ran the seamanship stance on the Sunday where the cadets had to build a tripod, known as a Gyn, to be able to lift a heavy log off the ground. This is a skill that the cadets learn in their units and works well when we are running these competitions to assess their team-working abilities.
Seamanship stance – The Gyn
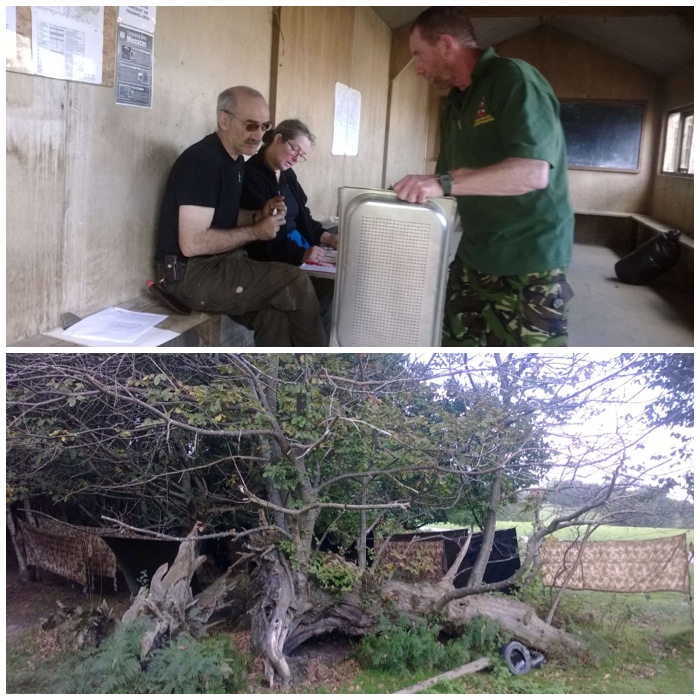
While all this was going on I spent most of my time back at the troop shelter we had set up as our HQ. In between dong admin I spent much of the morning drying out 20 or so tarps that the cadets had used the night before so I did not get to see much of what had been going on.
Work back at HQ – Admin and drying out more than 20 tarps
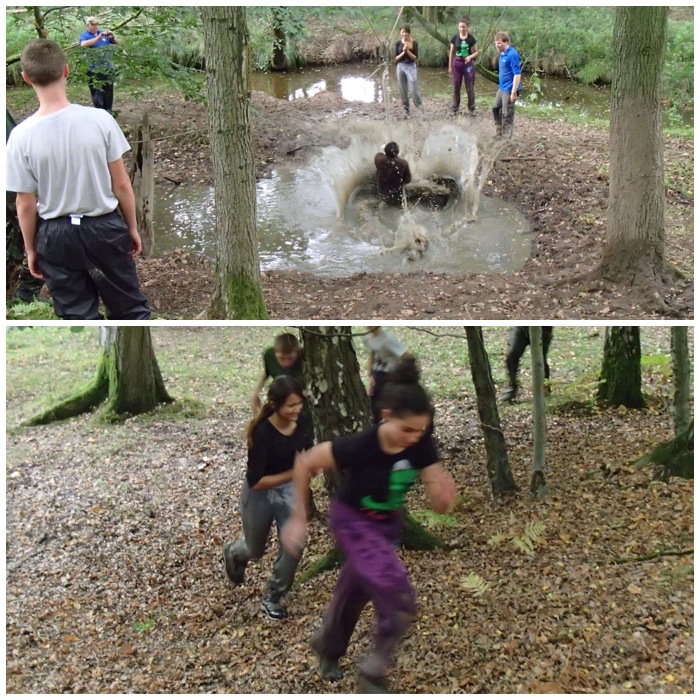
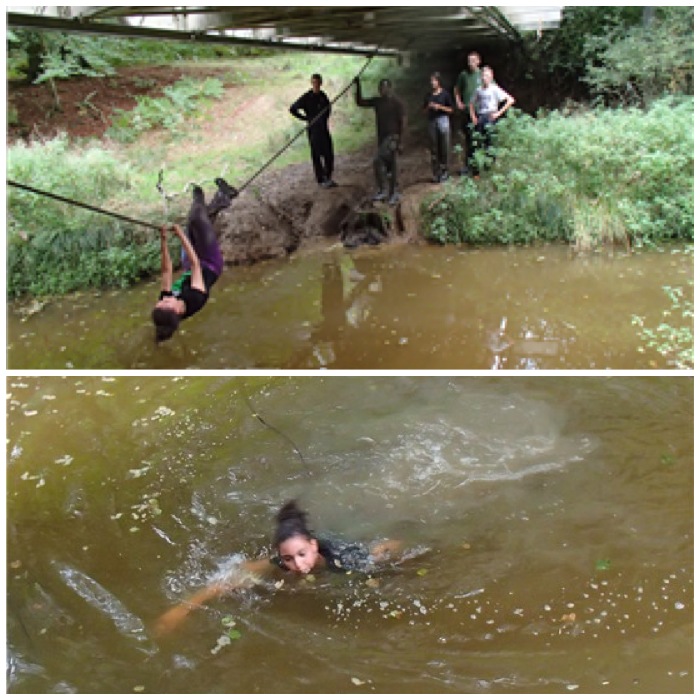
One of the Marine Cadet instructors, Kev Lomas, set up an excellent Endurance race. I only got to see the cadets as they came back from it but they all seemed to have a great time.
Endurance race – in with a splash – Pictures courtesy of City of London Unit
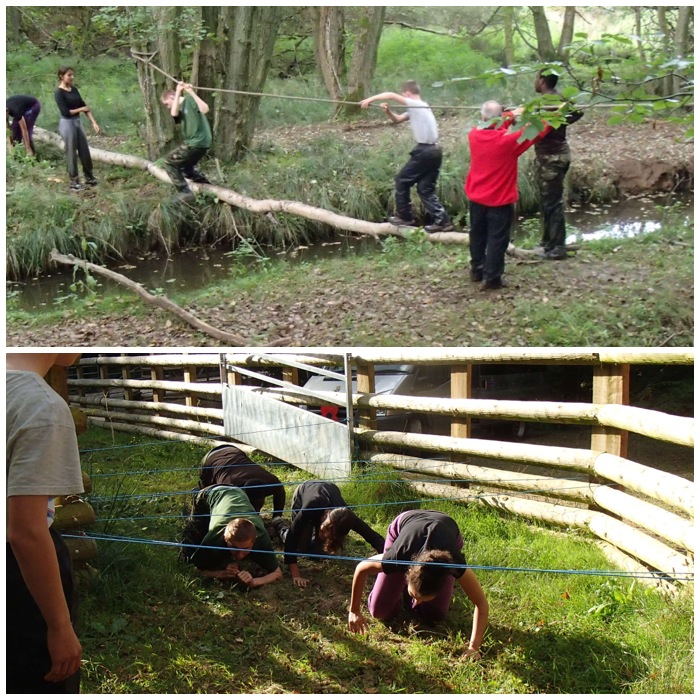
The route for the race was set up through the trees and over the local stream.
Endurance race- Over and under – Pictures courtesy of City of London Unit
As you can see not everyone got across dry. Jacob Leverett took a great video of cadets from Sunbury & Walton, Twickenham and Feltham Units running the course – Endurance race video.
Endurance race – Over and in – Pictures courtesy of City of London Unit
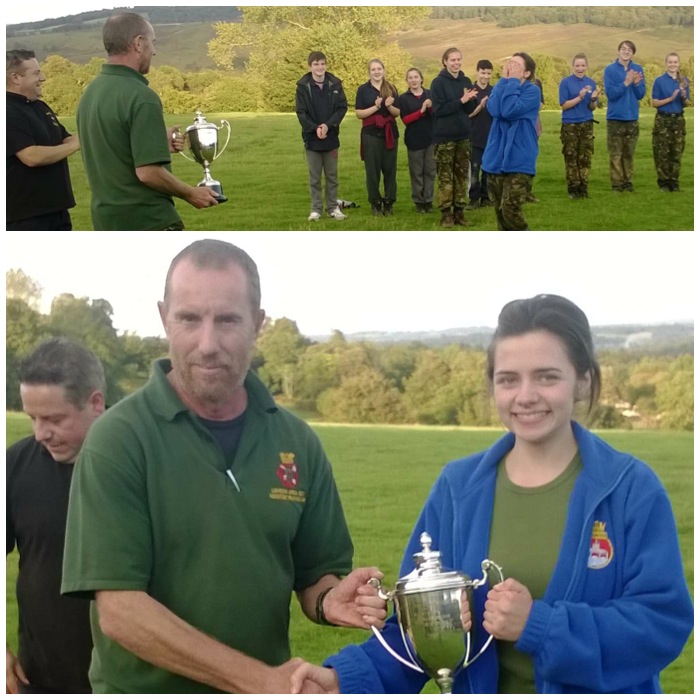
After everyone had gotten cleaned up and packed away it was time for the awards.
Leading Cadet Jess Edwards from Enfield Unit was the clear winner of the trophy for the best team leader of the weekend.
Team Leader Winner – LC Jess Edwards (Enfield Unit)
We had one team from outside of London Area on the competition, from Guildford RMCD Unit. As they are not in London Area they are not eligible to win the Chosin Cup but we do have a trophy for the winning visiting team. Even though they were the only team from outside London Area this year they did come third overall so well deserved the trophy.
As City of London Unit came fourth overall they were the third place London team so they collected their certificate and medals as well.
Guilford RMCD Unit from Zulu Company Royal Marine Cadets – Winning visiting team City of London Unit – Third place overall
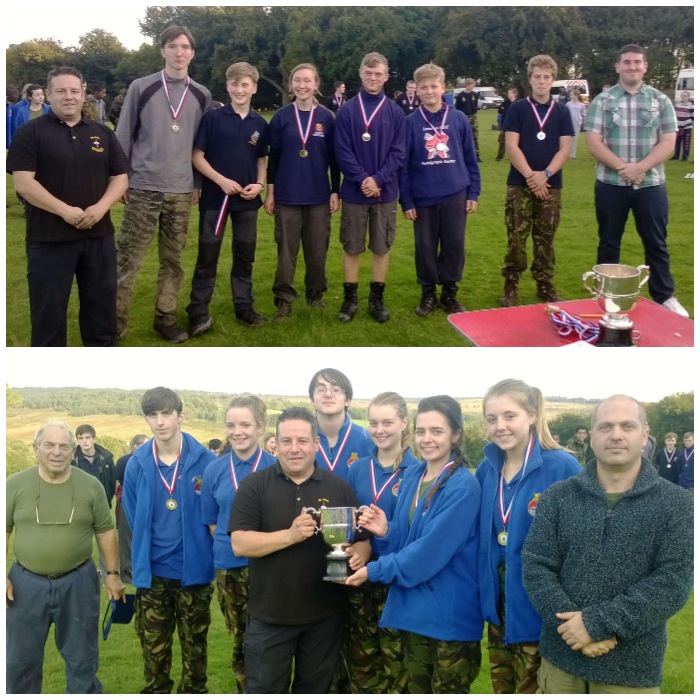
Second place went to Bexley unit and first place to Enfield Unit. City and Enfield are both in Northern District, to which I am attached, so I was very pleased with the high scoring of our teams in the competition.
Bexley Unit – Second place Enfield Unit – First place
So ended a fantastic weekend. It would not have been possible without the dedication of all the staff involved in its organization, the staff training the cadets up over the year and the cadets themselves who worked hard and, as you can see from the pictures, also played hard.
One of my favourite Atlatls is the Lovelock Cave Atlatl. I made this Atlatl a few years ago using modern tools including a Mora knife, a small carving knive, a flex gouge chisel and sandpaper.
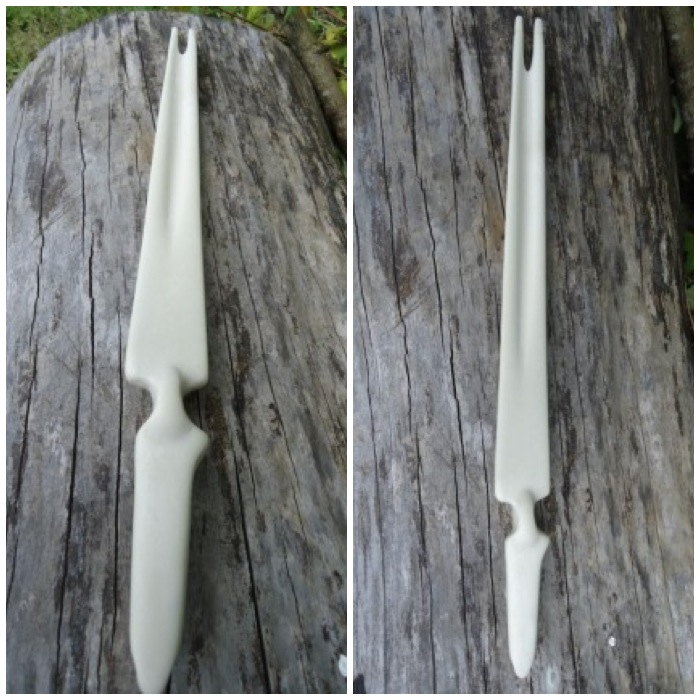
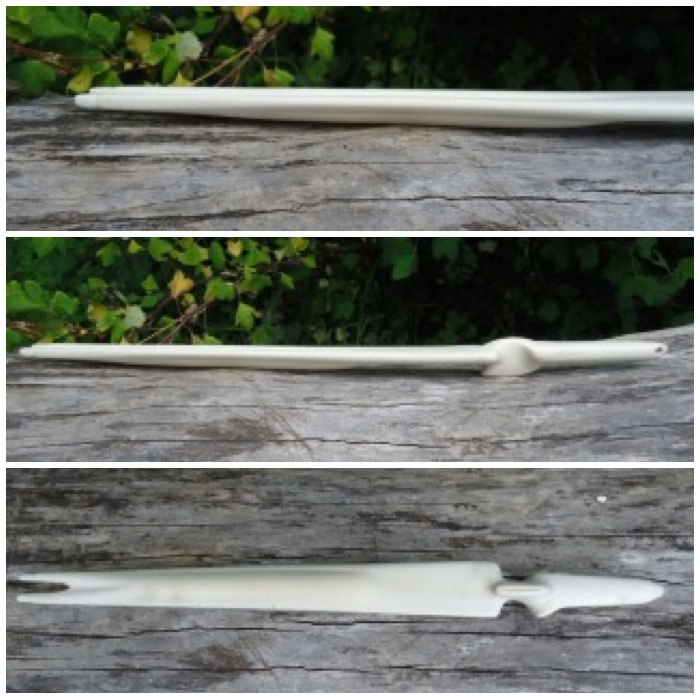
My reproduction Lovelock Cave Atlatl – Top ProfileMy reproduction Lovelock Cave Atlatl – Side Profile
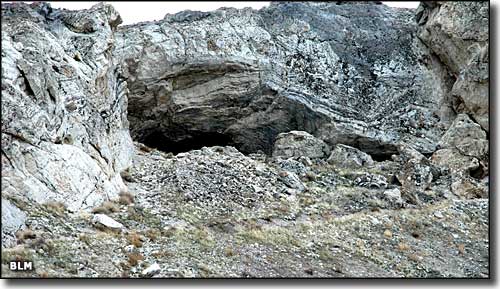
The original Atlatl was found in a cave over a century ago but was soon lost; thankfully, though, not before someone had made a detailed drawing of it. Lovelock Cave was previously known as the Sunset Guano Cave, the Horseshoe Cave and Loud Site 18. A good paper on the archaeological digs on the site was written by Phoebe. A. Hearst from the Museum of Anthropology (University of California Berkeley).
Lovelock Cave – Humboldt Sink USA
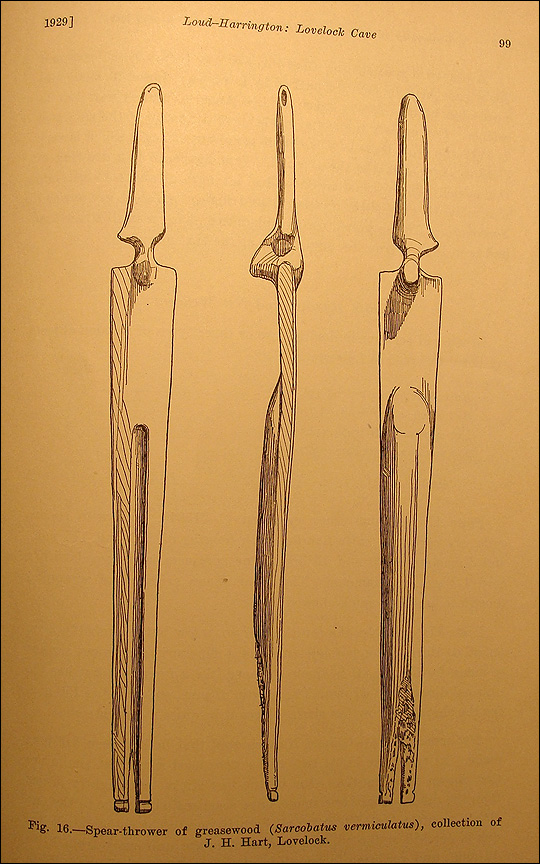
A copy of the drawing is shown below: I found this in a post by Mike Richardson on the Split Stick Atlatl, who also writes that the original was 17 inches long. I reproduced the Atlatl as closely to the drawing as I could.
It has a fork at the rear and the drawing shows a small groove around each prong. I have read that this was where a small piece of carved wood or bone known as a spur was attached as a point to hold the Atlatl. I decided though to see if the Atlatl would work with just some cordage wrapped around it. There is no historical evidence that this was done but it does work well. A good comparison of both attachment types on this Atlatl can be read in the PaleoPlanet forum here. A further project for me on this Atlatl is to make a spur for it.
Drawing 1
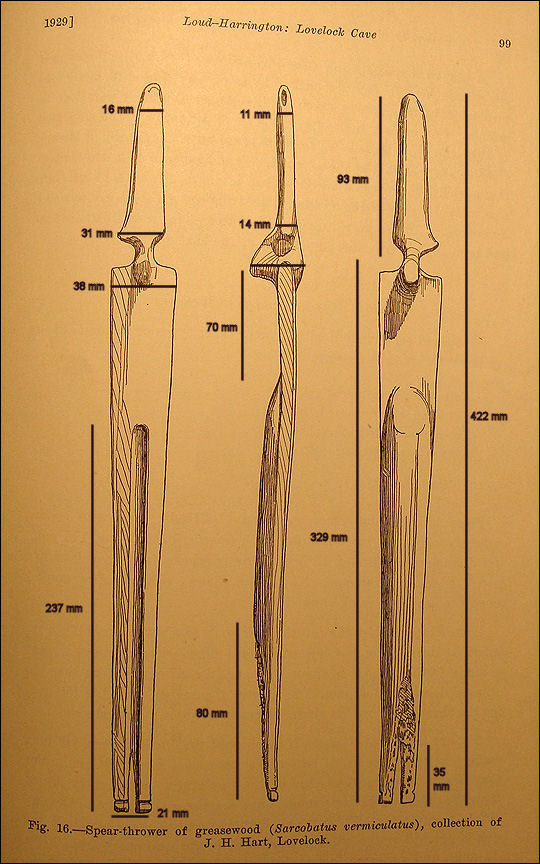
Knowing that the original was 17 inches long, I made a best guess at the other dimensions. The original Atlatl that was lost was made of Greasewood (Sarcobatus vermiculatus) but as this wood is not available in the UK I opted to use a piece of Siver Birch (Betulus pendula) as I had some available and it is easy to carve. The wood I had ready was only 16 1/2 inches long (422 mm to be exact) so using that as a starter and the drawing as a guide I scaled up all the other dimensions as shown below.
Dimensions of my reproduction
This was a beautiful Atlatl to carve as the finished lines are very smooth and pleasing to the eye. The top picture (below) is a close up of the handle of my reproduction. The final shape gives a surprisingly good grip even when smoothed down.
A beautiful slim design
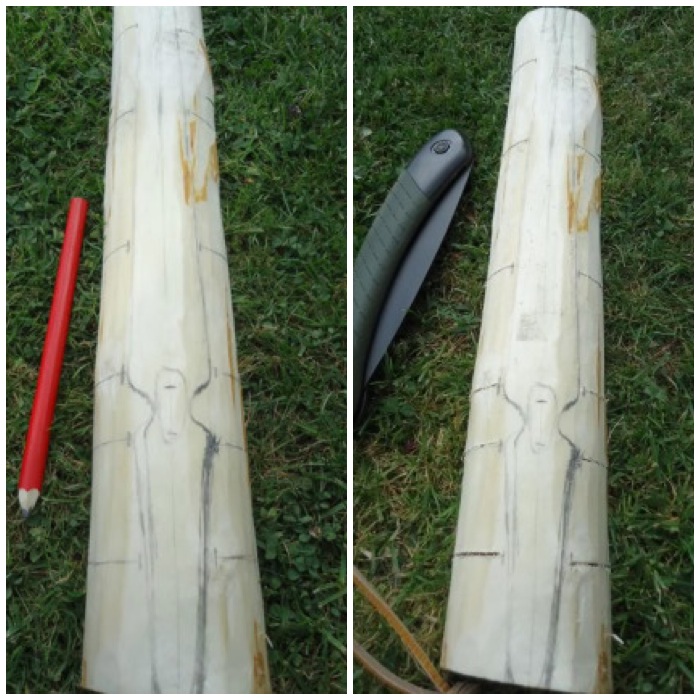
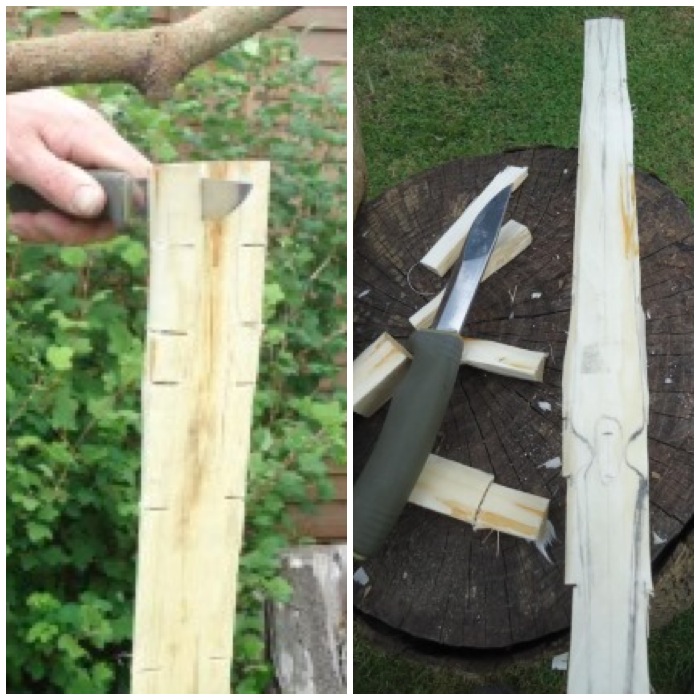
I split my log down to a rectangular shape and then using my dimensions drew out the shape of the Atlatl. After that I marked stop cuts along the whole length of the Atlatl and cut into them with my saw, finishing a couple of millimeters from the outline. These are useful to have in place to stop any splits from running off down the length of the Atlatl when you carve it.
Draw out the profile and place stop cuts
I battoned out the rough profile first using only my knife and a small branch as a hammer. I did the battoning with the work piece placed on a log in front of me. I kept the blade of the knife at 90 degrees to my body as I hit it so that if the knife slipped it would swing away from my body. See my post on Knife Safety Tips for more detail on this.
Batton off the excess
Then using my knife I trimmed the excess wood down to the line, keeping the work piece well in front of me to avoid any potential cuts from the knife if it slipped.
Tidy up the profile with a knife
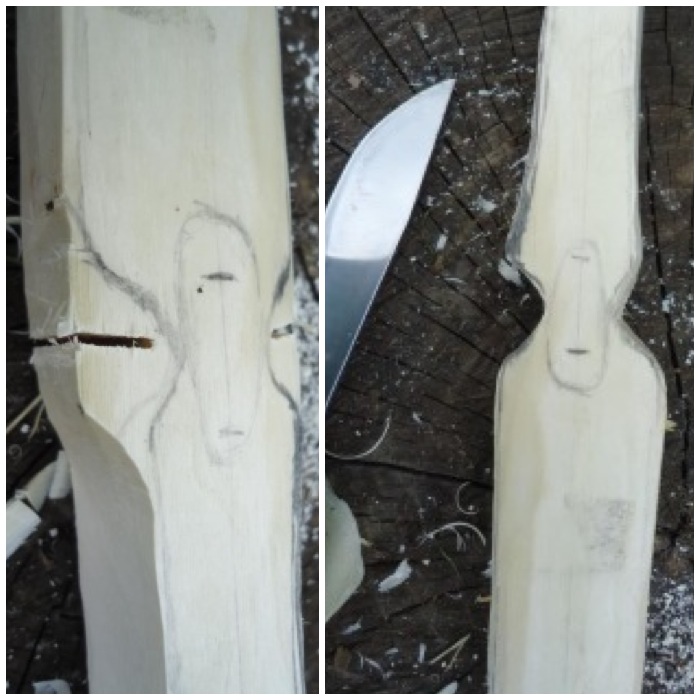
Using two more stop cuts I carved out the thumb and forefinger grip area.
Carve out the thumb and forefinger grip
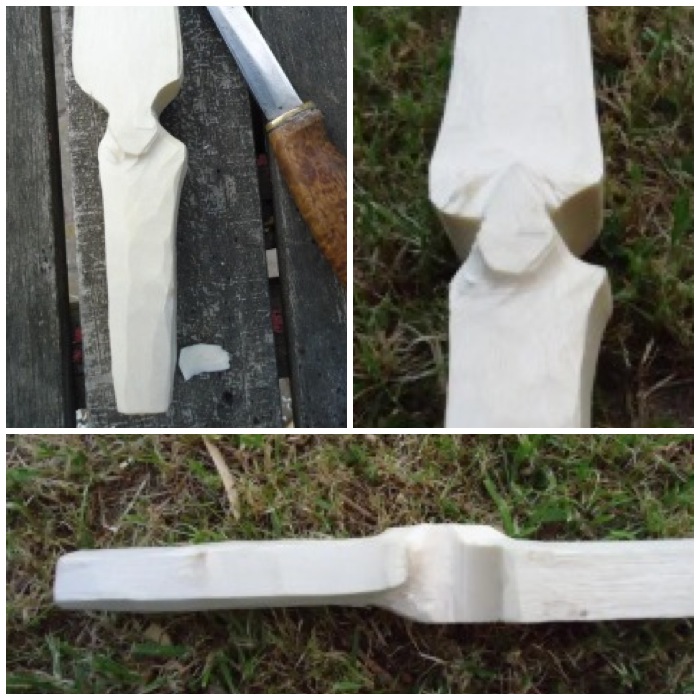
Then it was a case of roughly carving the handle area down to a size comfortable for my hand. I also started to carve out the protruding areas above and below the thumb and forefinger grip area.
Roughly carve out the handle shape
I worked on the bottom of the tail next, carving a flat area near the handle and then carving out an elongated bowl shape to the tail. No need to worry too much about perfection at this stage as the sanding will produce the final shape.
Roughly carve out the underside of the tail
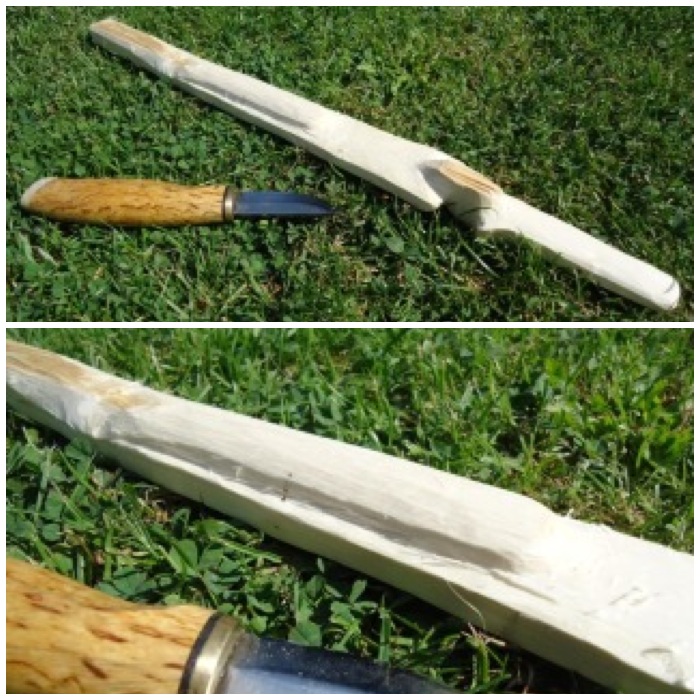
I tapered the tail area all the way to the end making a flat section of the final 8 cms (this will form the prong).
Taper the carving all the way to the end of the tail
On the top of the tail I marked out with my knife tip a 1 cm wide by 23 cm long spear shape that would form the bowl for the dart to rest in.
Mark out the top slot for the dart to rest in
I used a Flex Cut Gouge for carving the bowl area and my small carving knife for carving the prongs. This is the really tricky area of carving – you have to be particularly careful as it is very easy for the knife to slip.
Roughly carve out the slot for the dart to rest in and carve the fork out at the end
Once I’d carved the basic shape I used various sandpapers from about 40 grit to about 1000 grit to smooth everything.
Sand the whole Atlatl down using rough paper working up to very fine grades
Before I added the false sinew to the tail I oiled the Atlatl a couple of times and then boned it with a small pebble. Using a small pebble to rub the Atlatl wood down for a couple of hours smooths the wood fibres down and traps the oil in the wood. The whole process of boning really gives a smooth finish.
Add any oils (I used vegetable oil) and bone it smooth with a small pebble
The finished profiles of the Atlatl.
Tail, side and bottom profiles
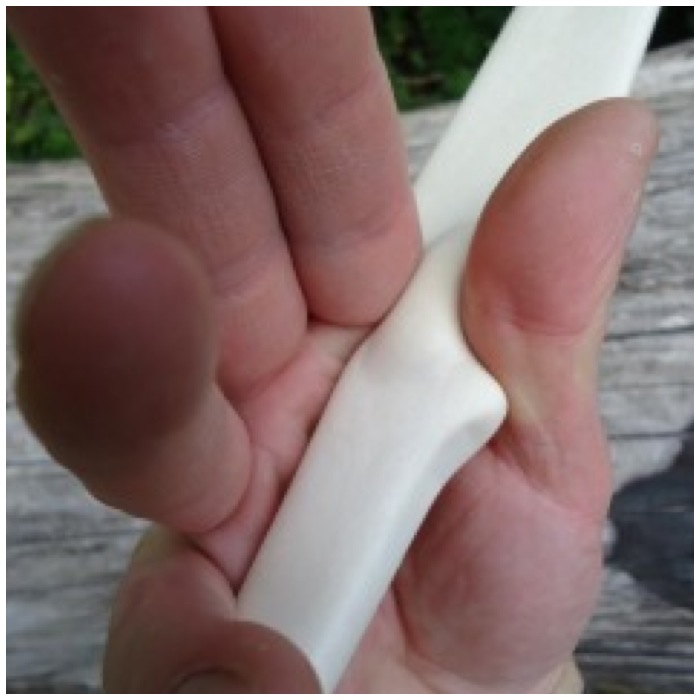
The handle has a very unusual shape but gives you a fantastic grip.
Handle profiles
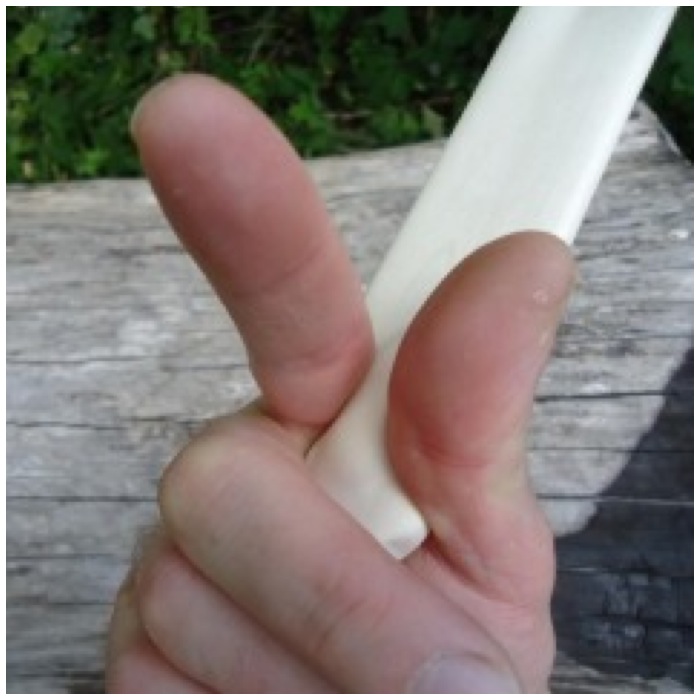
It is easy to flick with an open grip as the thumb and forefinger grooves keep the Atlatl fixed in the correct position in a throw.
Works with an open grip
As I carved the handle to fit my palm it makes for a very comfortable closed grip.
Works with a closed grip
After carving little notches around each prong I wrapped false sinew to the tail using a Constrictor knot. I kept it fairly tight but you may wish to experiment here. As I said earlier there is nothing in the archaeological record to prove this method was used but after experimenting with other Atlatls like the Split Stick method I see no reason why it could not have been used if a point was not available.
The problem with cordage however is that when you are in the act of throwing a dart, various forces are exerted on it. As you release the dart will flex/bend, and the cordage may cause the tail of the dart (fixed in place by the cordage) to go out of line with the point of the dart, thus decreasing accuracy. Having a point at the rear of the Atlatl holding the tail of the dart in place allows the tail to rotate with the point as it flexes during a throw, maintaining the dart’s accuracy. Chris from Paleoarts explains it well in a post on the Paleoplanet site. I will be experimenting with attaching a bone or wooden spur to the Atlatl in future.
False Sinew wrap at the tail to hold the dart
I am left handed and even though the shape of the handle is designed for a right hander (the slightly protruding piece of the handle to trap the thumb and the smoothed corner to fit in the palm) it is very comfortable still to shoot left handed.
Cordage wrap tail – No archaeological record of this
I enjoyed making this Atlatl and shooting it over the last few years. It would be great to see some more of this style being reproduced as there are so few to be found.
For a number of years I have been interested in bushcraft mat making. I like the thought of being able to go out into the woods and build my own shelter in a Robinson Crusoe sort of way, and in my blokey sort of way make my own fixtures and fittings. One of the key skills is having the knowledge to make your own mats to sit on, wrap around you, thatch with or just use as decoration.
This How To…. is designed to show you the main principles of making either a small or large loom using wooden poles. You will need to experiment to see what works for you but that is half the fun of it anyway. There are many other ways of creating looms, for example using live trees as props, or recycled materials.
The first loom we will look at is the Mini Loom.
Mini Loom
The second one will be the Mighty Loom.
Mighty Loom
The end result from the Mini Loom.
Mini Mats
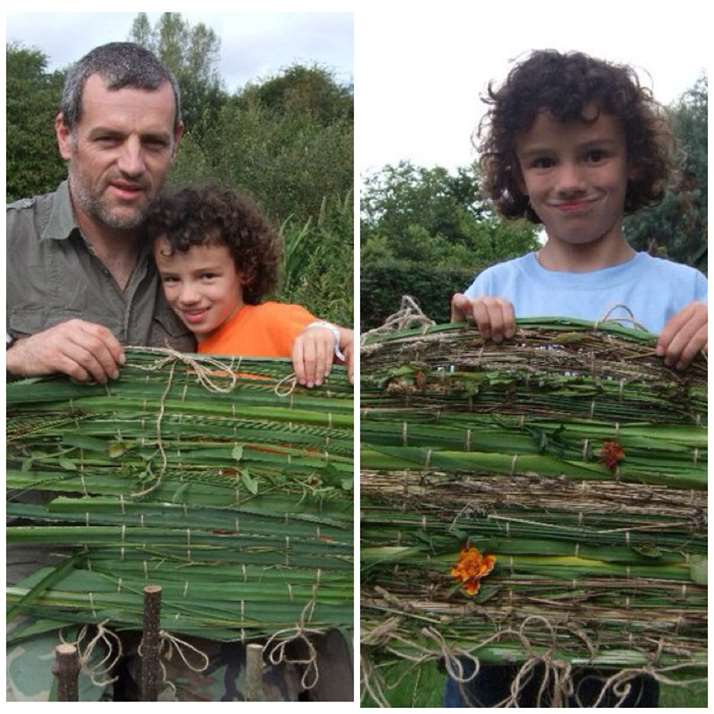
And the end result from a Mighty Loom.
Mighty Mat
Early Days
When I was growing up on the Isle of Lewis weaving was happening all around me. My sister was a weaver for many years on the Harris Tweed looms and though I never wove I did as a young lad have a job spinning the bobbins for the tweeds.
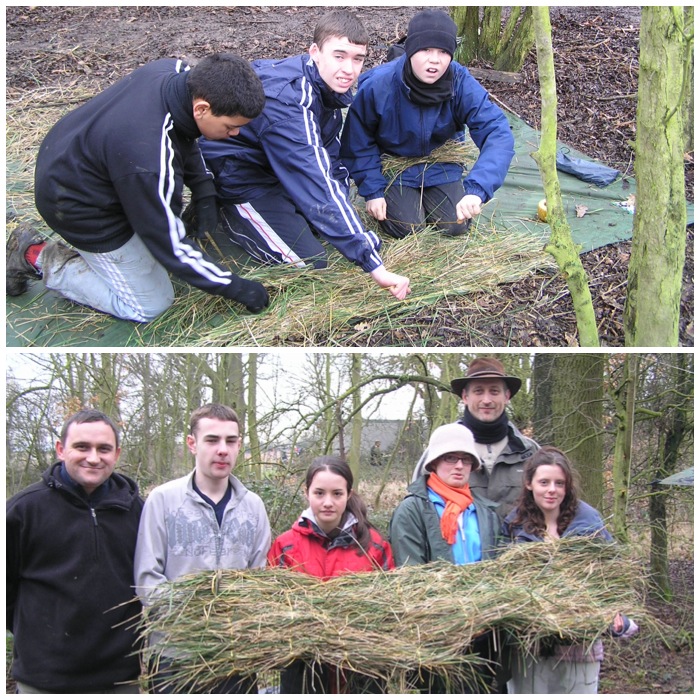
I was reading back in 2006 Ray Mears’s book ‘Outdoor Survival Handbook’ and came across a section on mat-making using only two stakes and lengths of string. I tested this out with my Sea Cadets on a Duke of Edinburgh bushcraft course where they made some very good mats.
A ground loom using only two stakes and string
Mini Loom
I came across the Mini Loom for the first time I think at the Wilderness Gathering a number of years ago. This loom has five individual stakes knocked into the ground on the left. On the right only two stakes are used and a crossbar tied off in between.
In this example five pieces of string have been used. The string is doubled over and tied off (at the bend) to the crossbar on the right. Then one strand is tied to one of the upright stakes on the left and the other strand to a horizontal rod that is used to move the string up and down. As you can see in this picture one of the strands is loose: I tightened it up after this.
Mini Loom – Staked into the ground & strung up
Line everything up as neatly as possible with no string crossing another. I use the Tarp Taut Hitch on all the tie-off points so when the mat is finished it is easy to disconnect from the frame.
Mini Loom – Top View
The horizontal bar needs to be tied off in the same way to the string and can then be lifted up and down as you insert material. This up-and-down movement ensures that the material gets trapped in the crossed-over string. After you insert some material and lift or drop the bar, remember to keep the mat tight by pulling the material towards the horizontal bar (on the right in this picture).
Mini Loom – The Weave
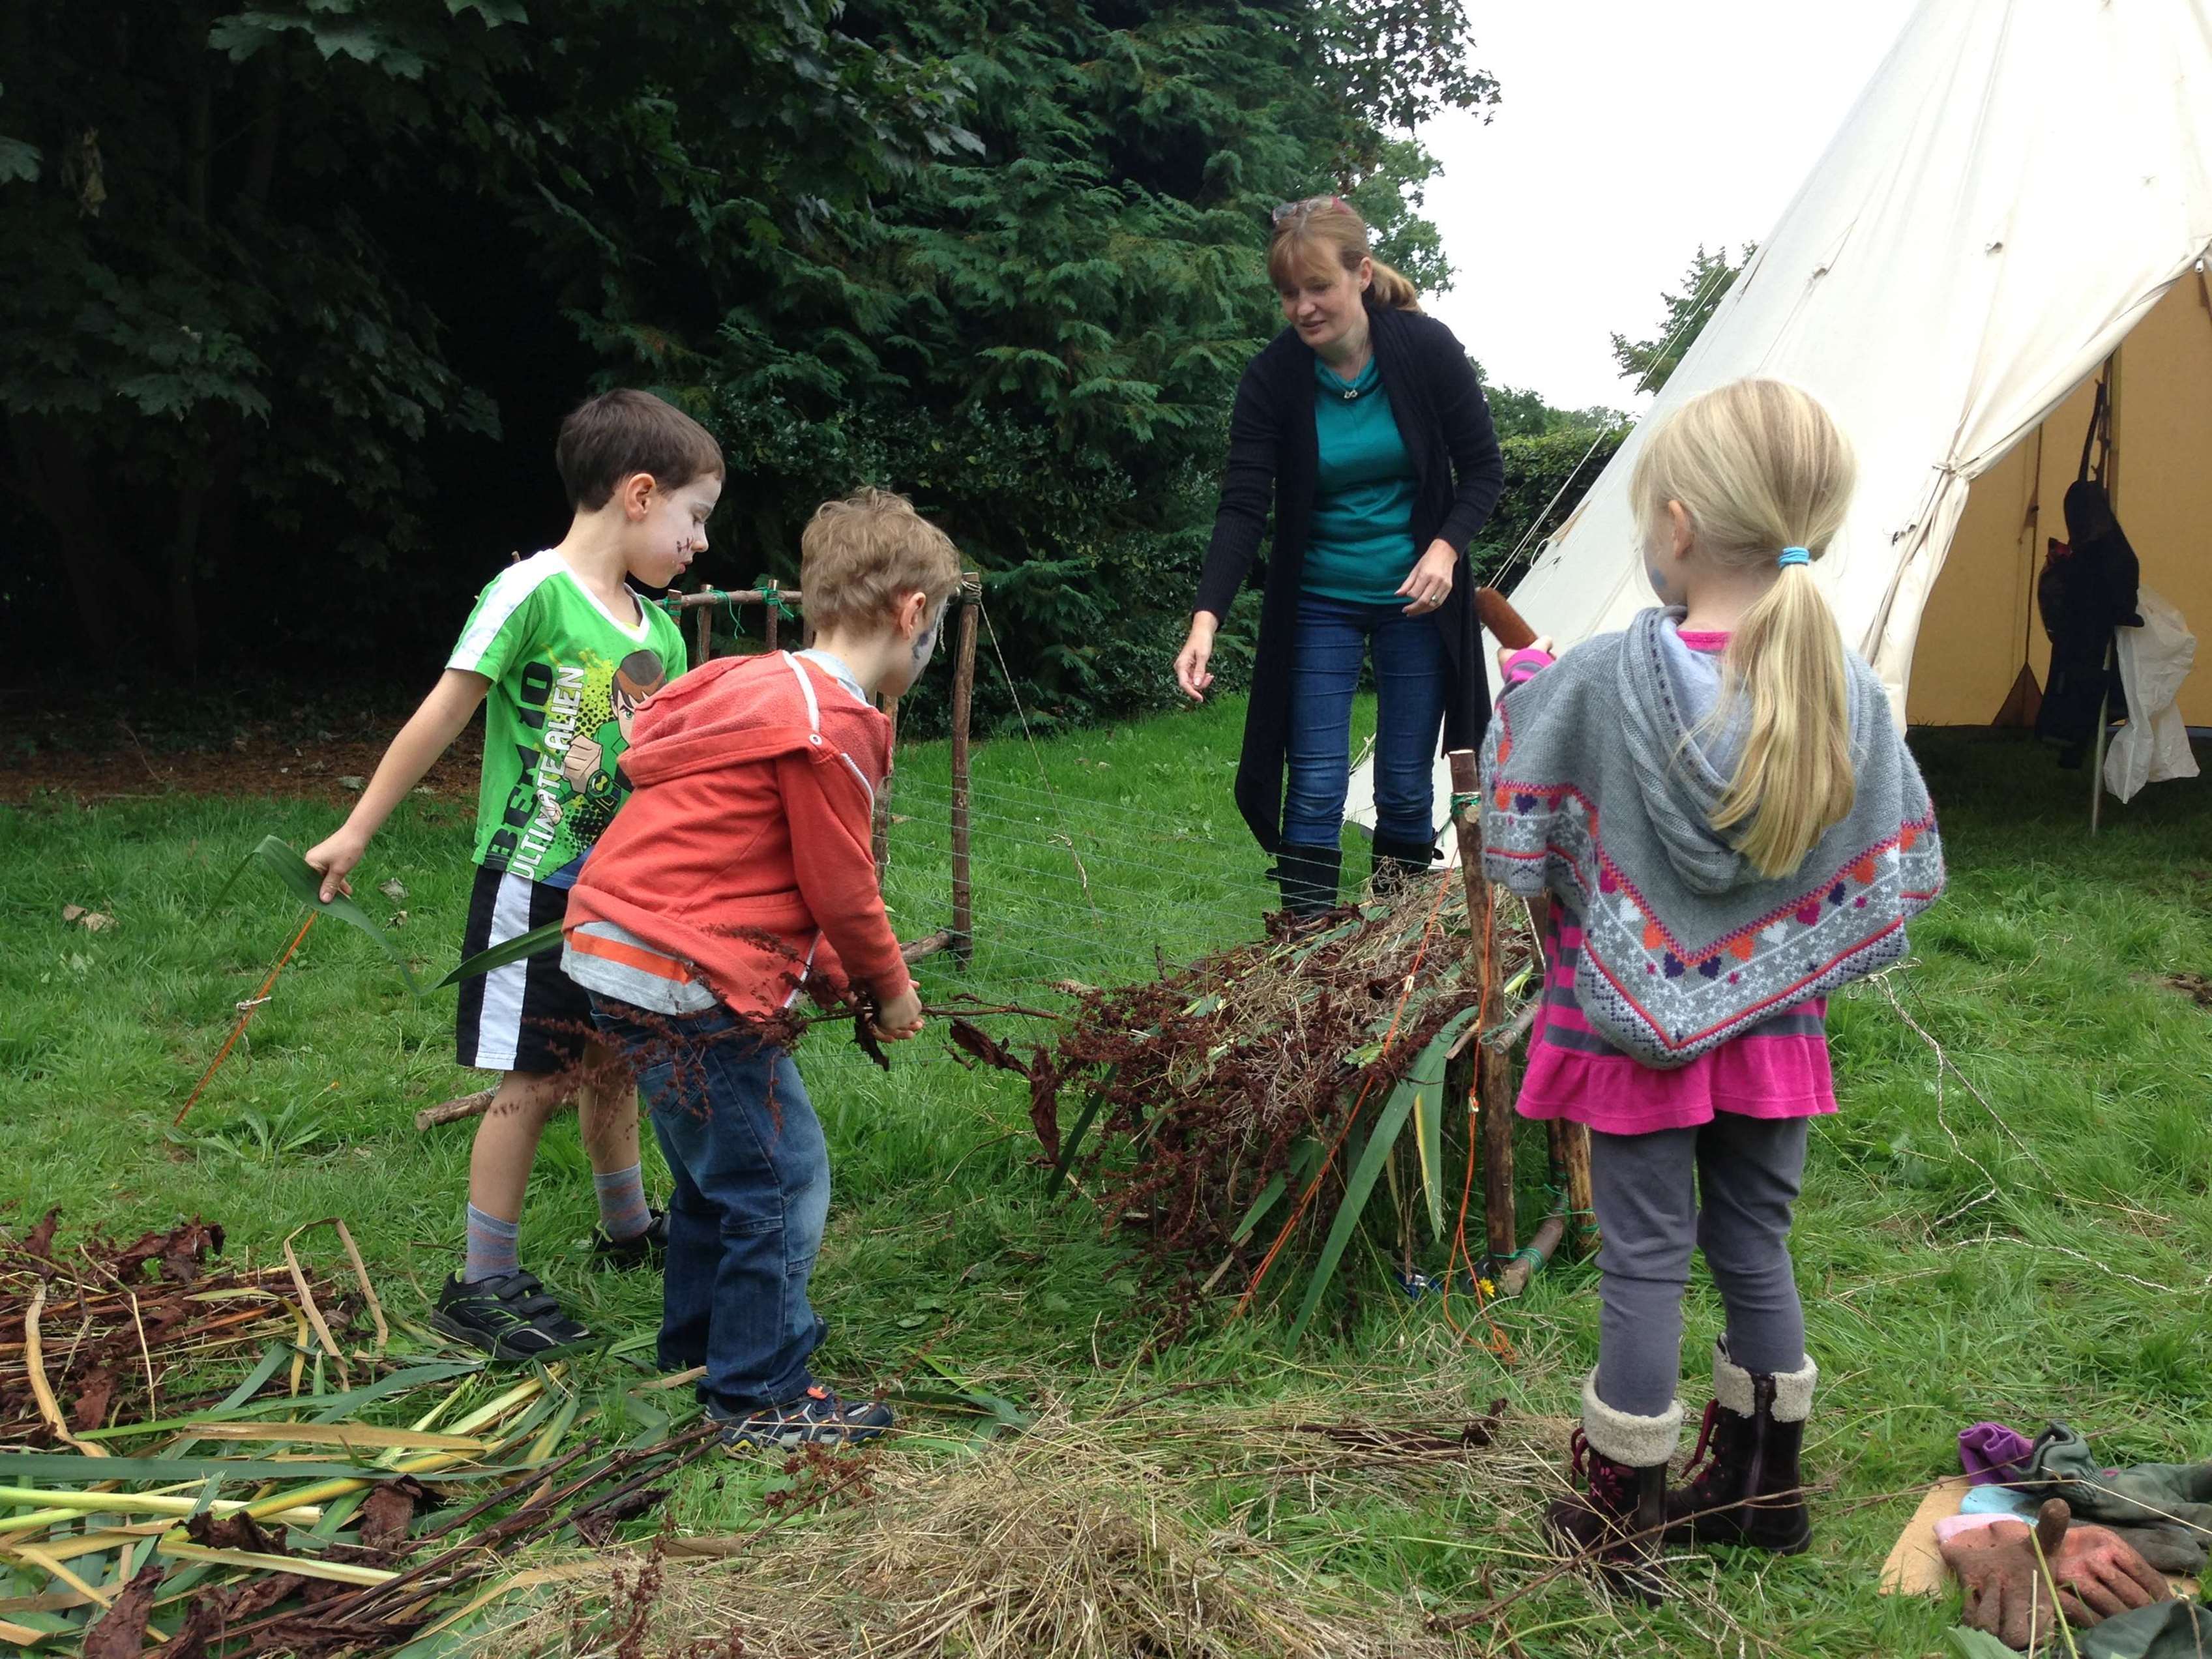
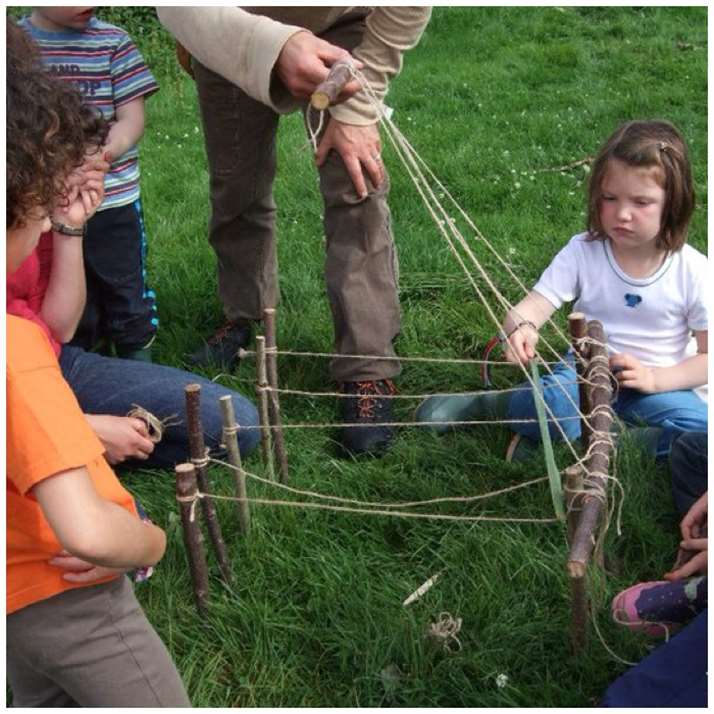
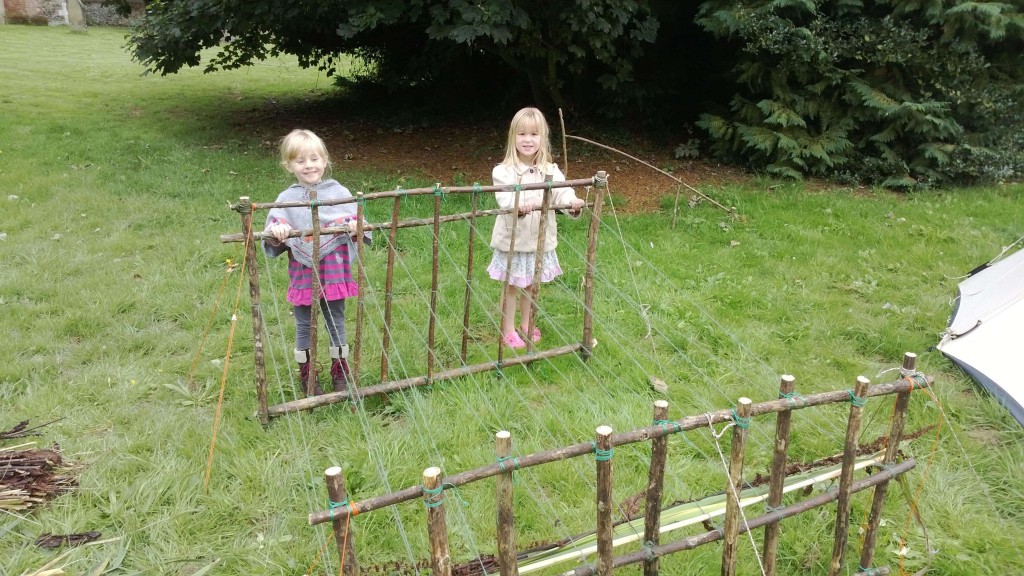
The Mighty Loom
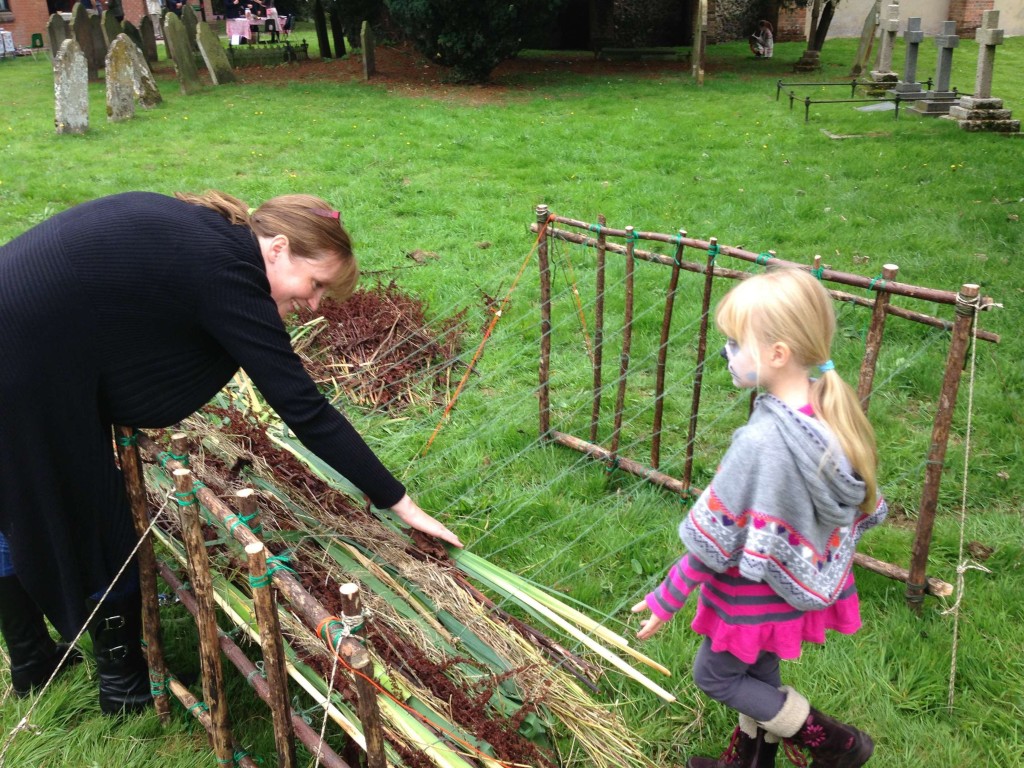
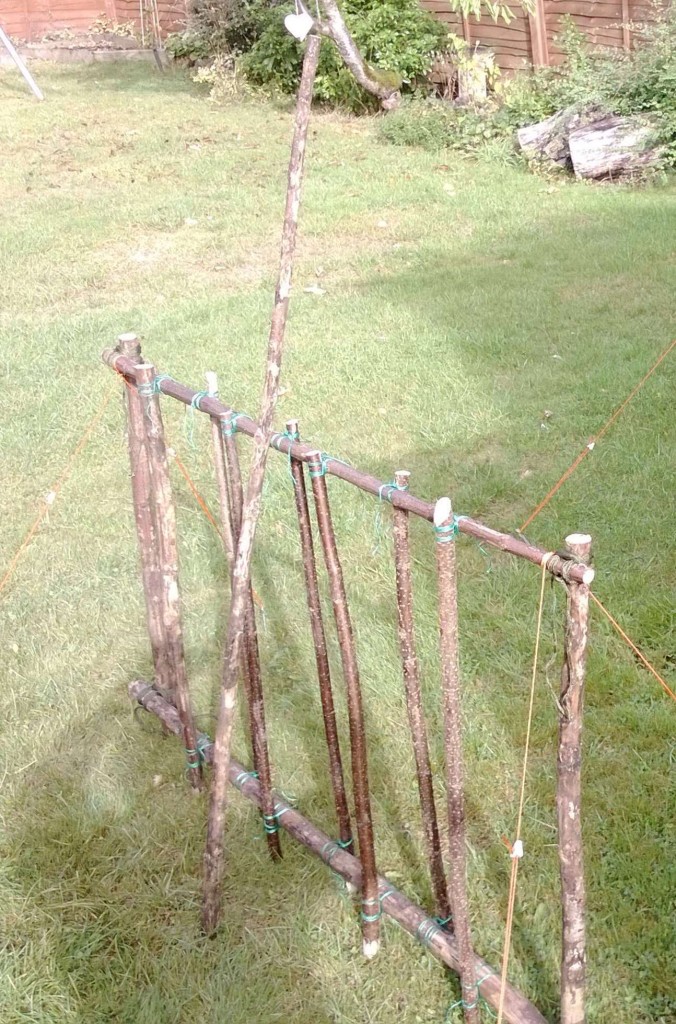
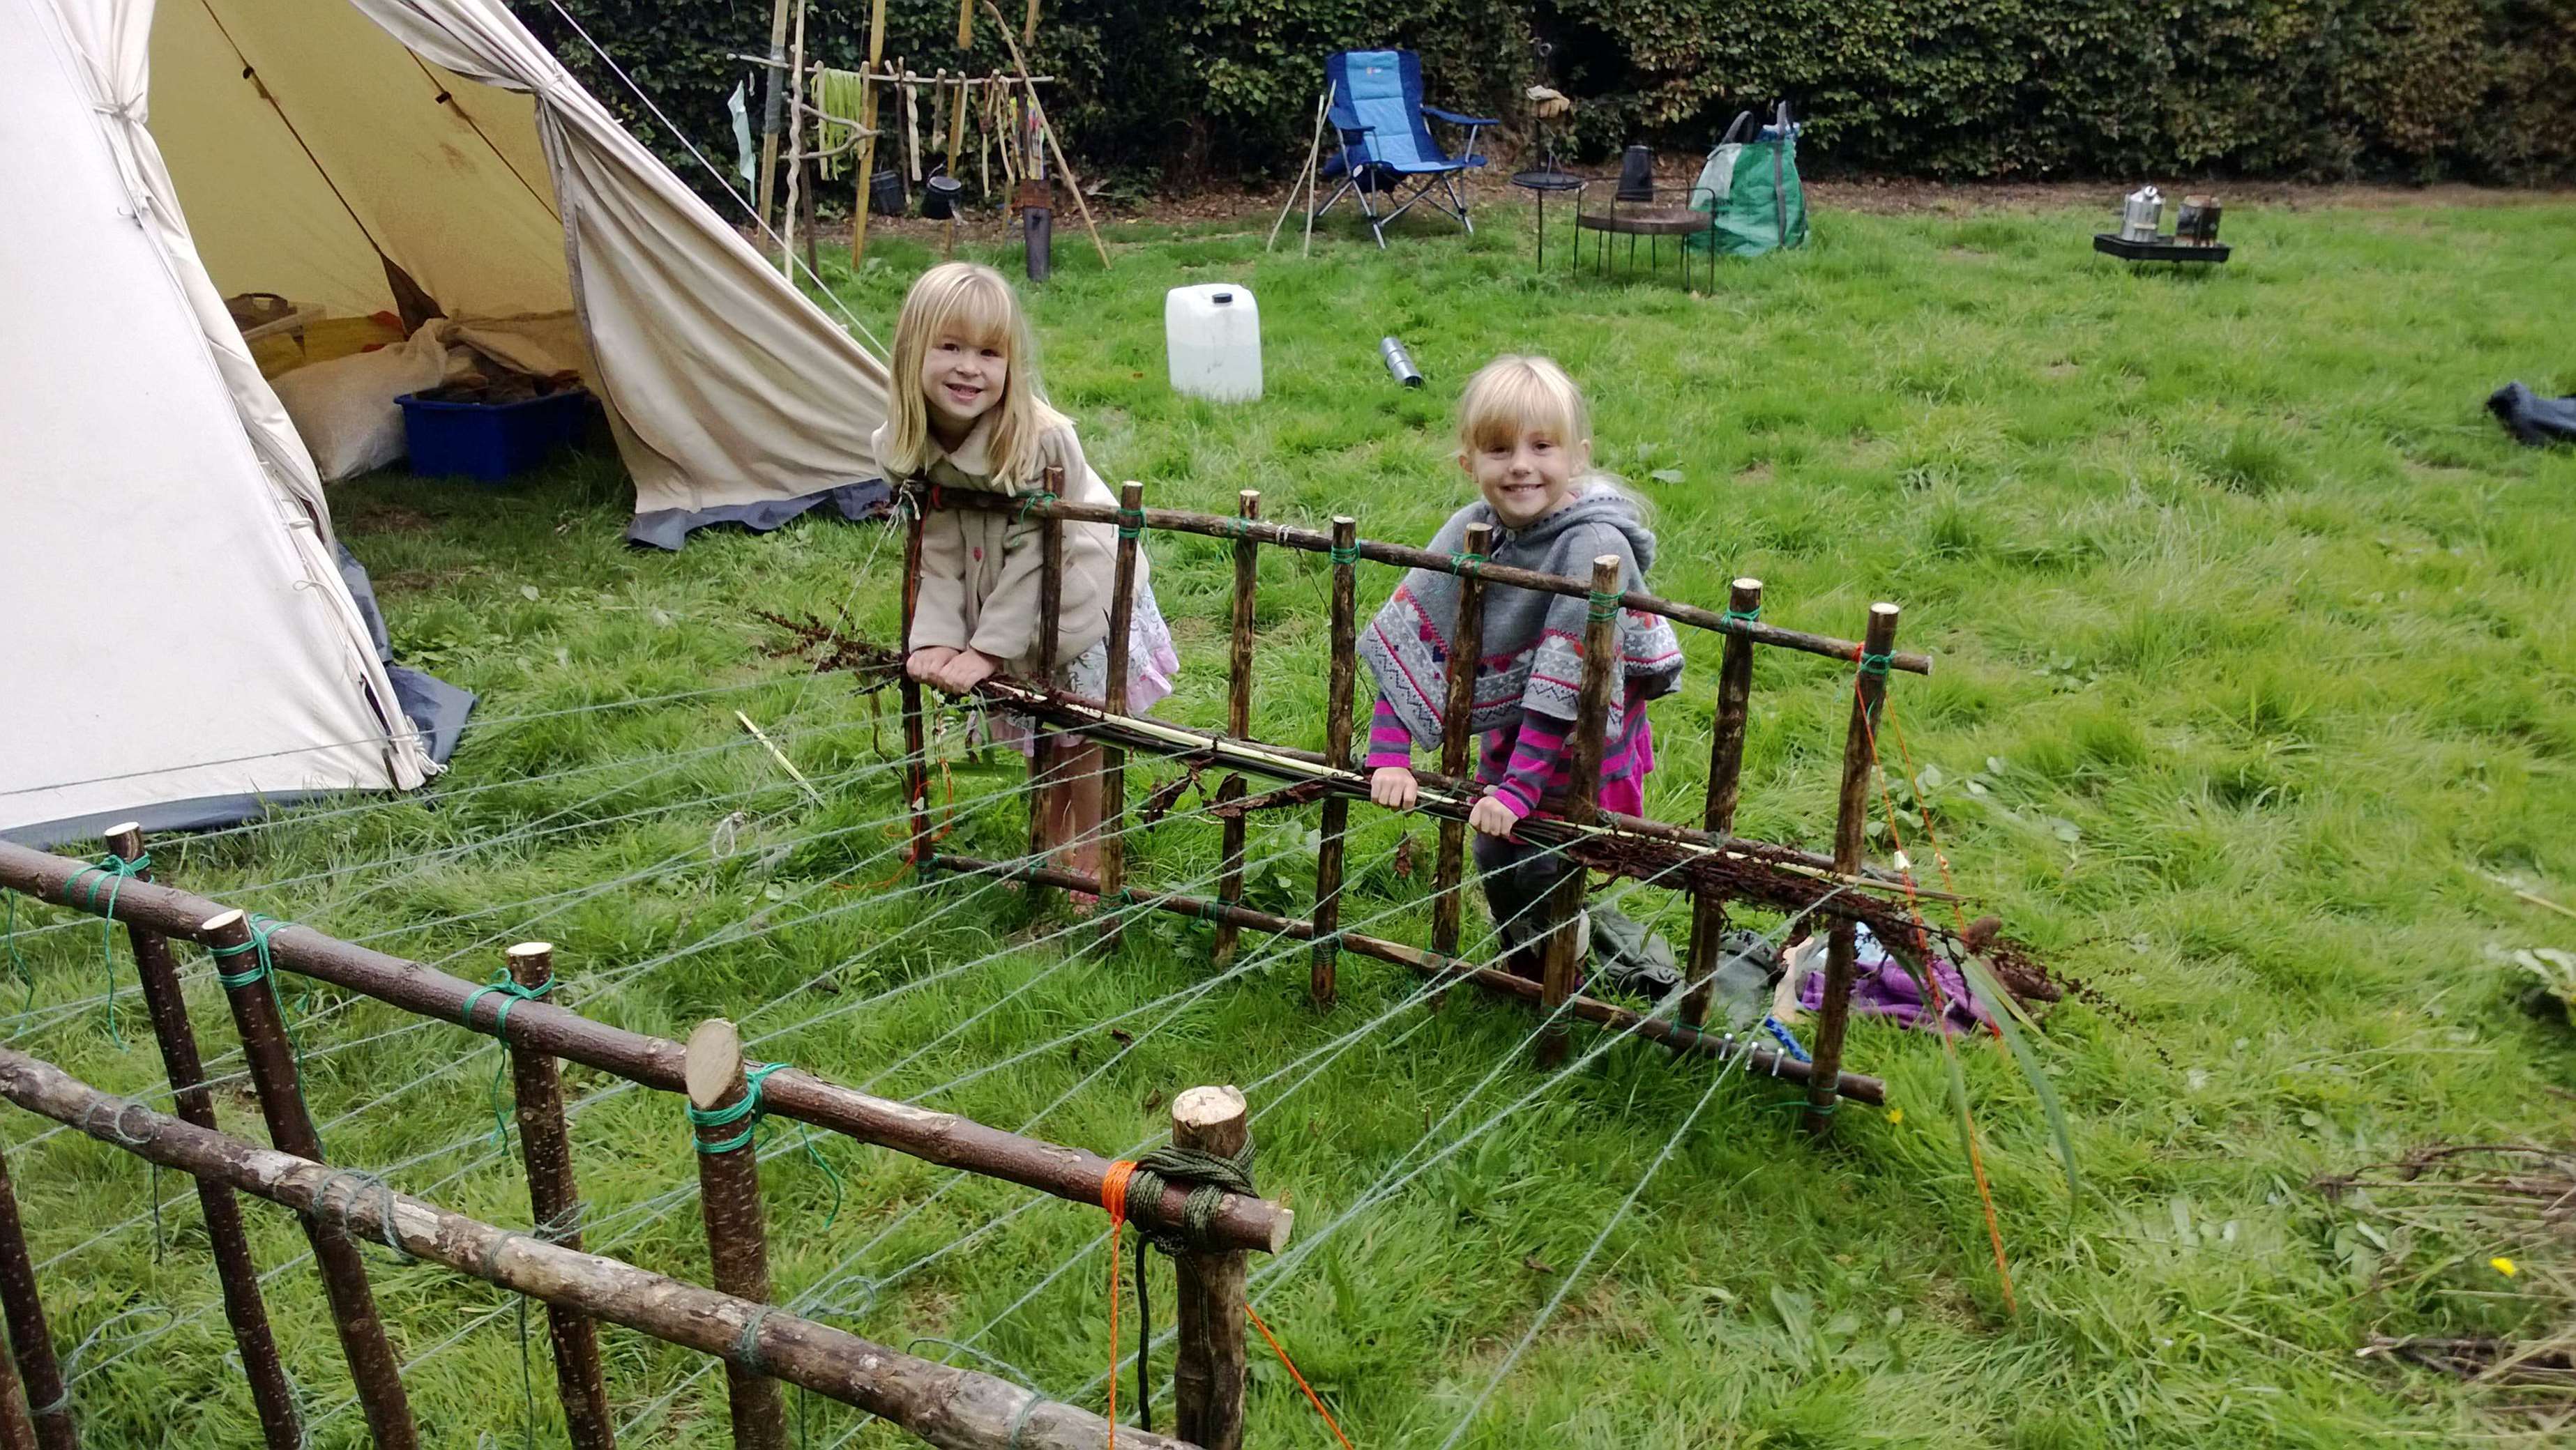
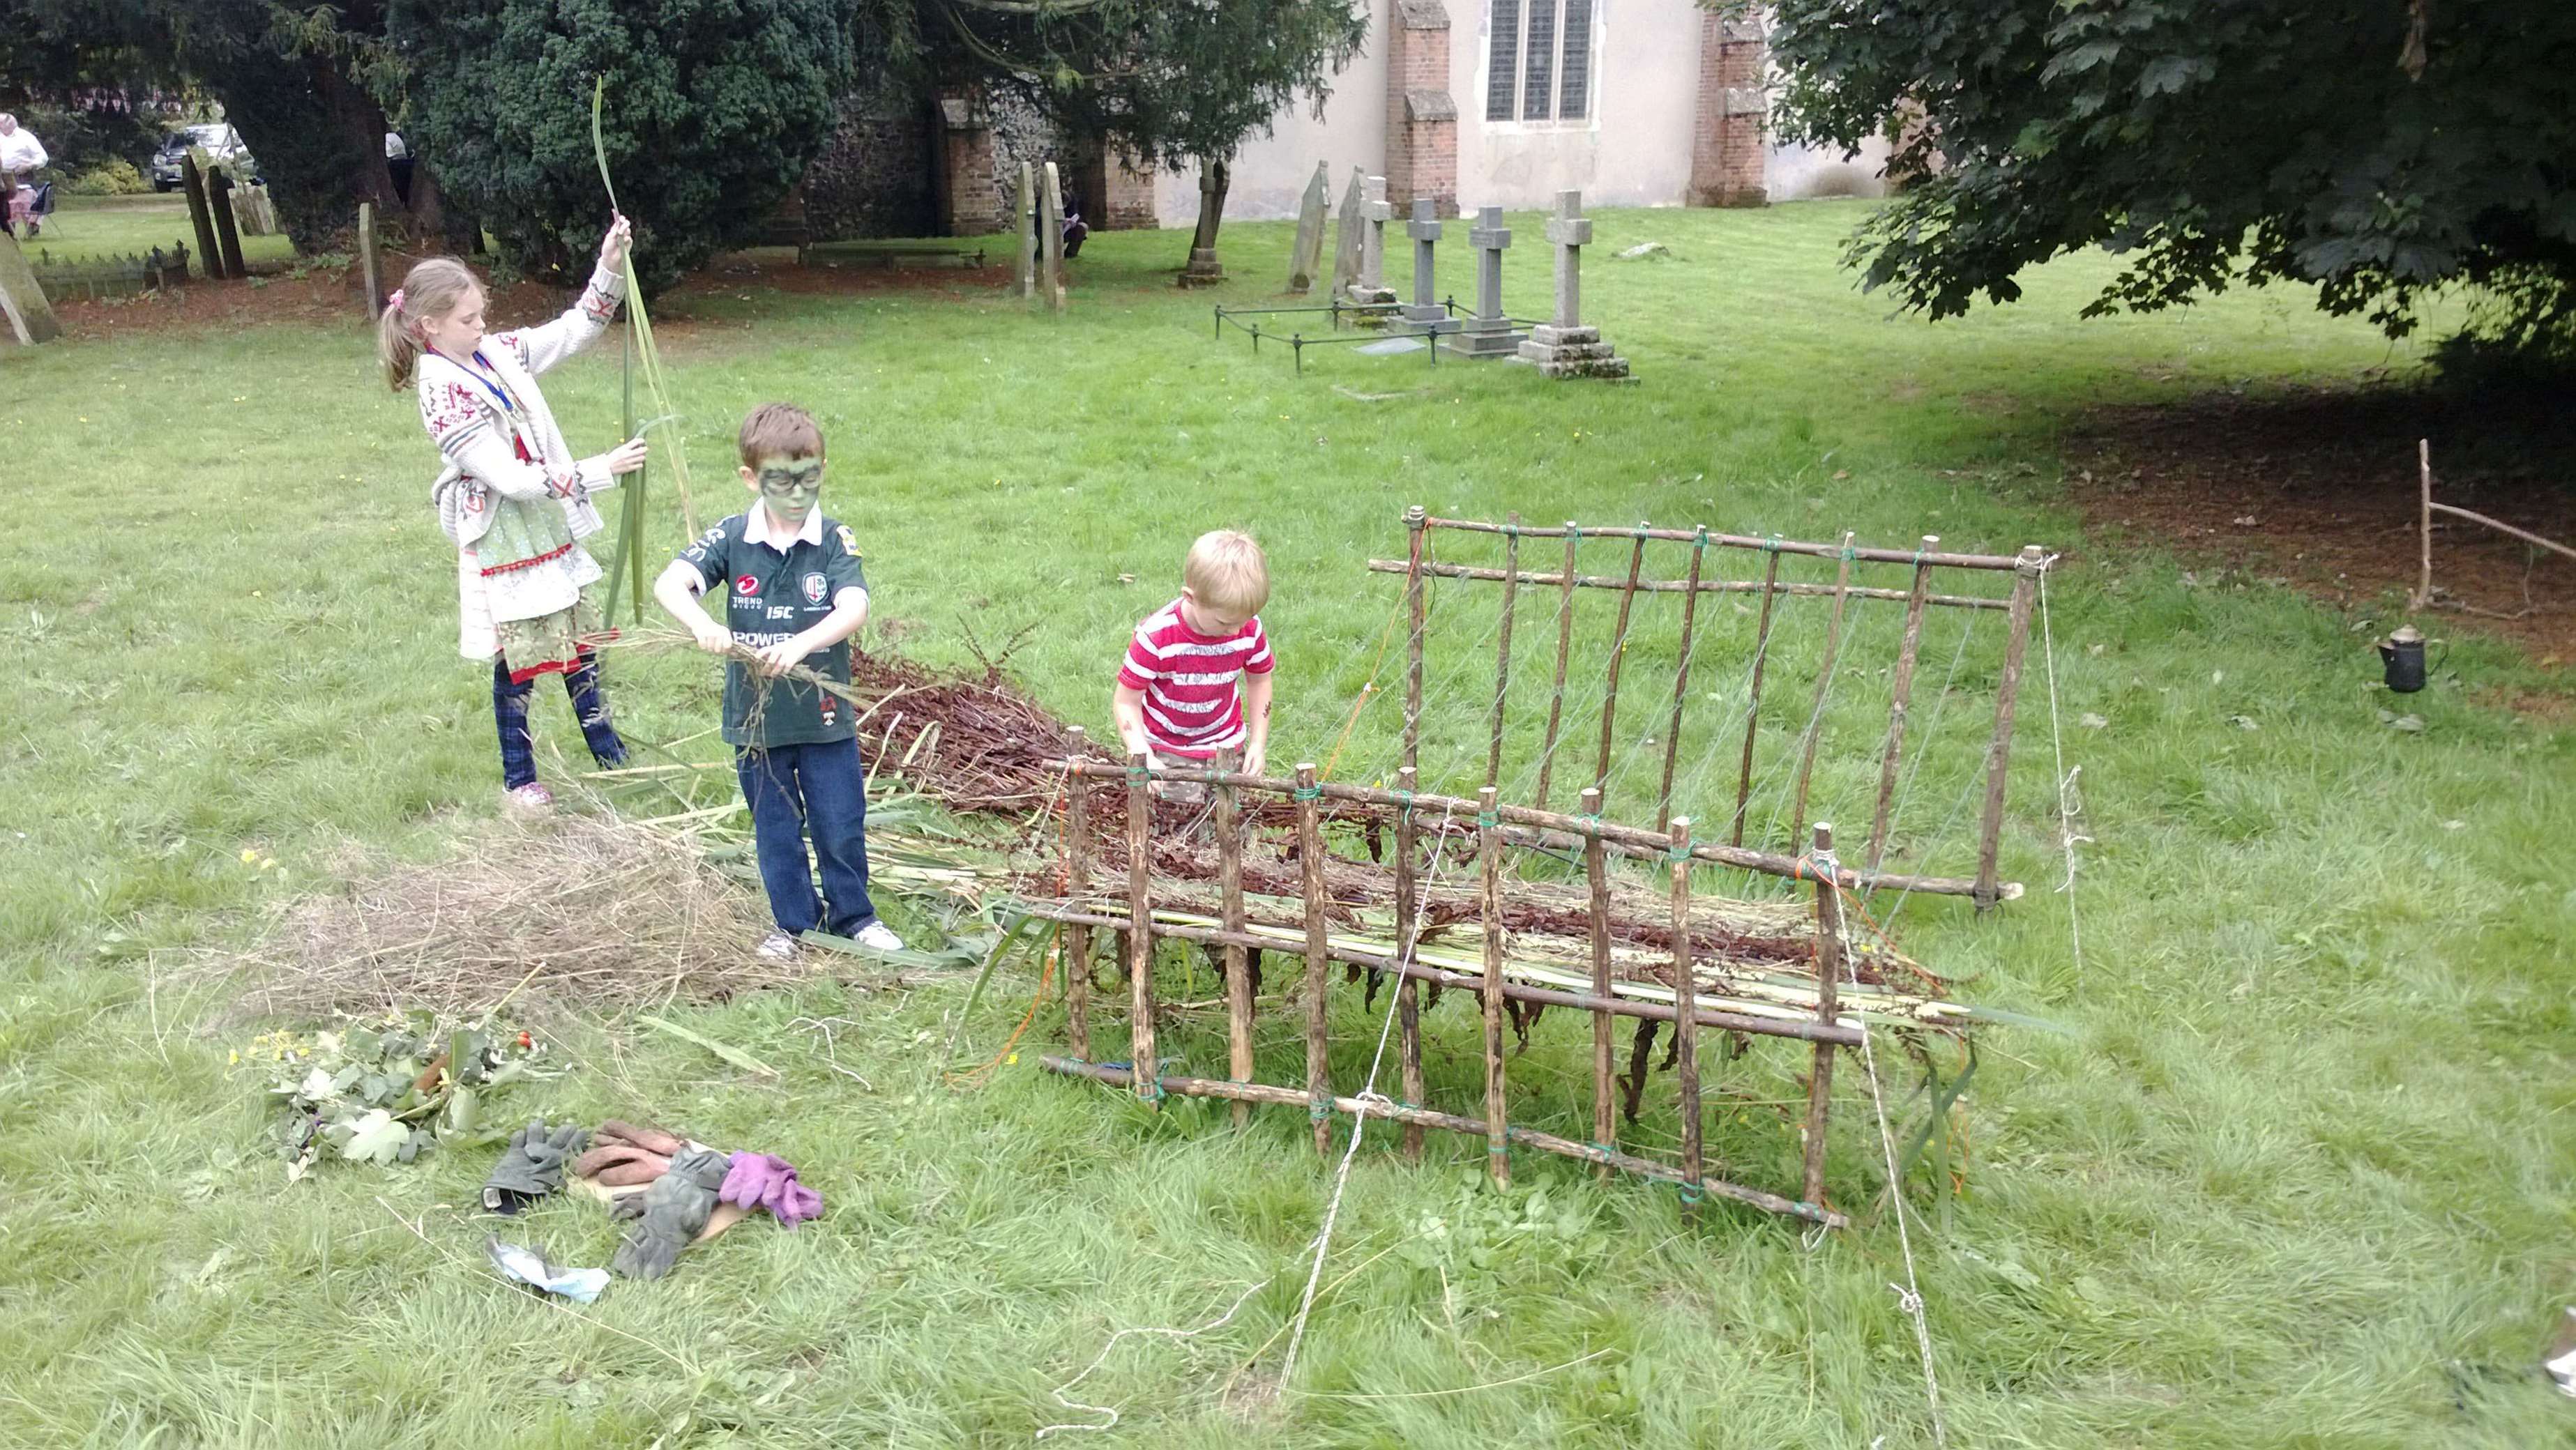
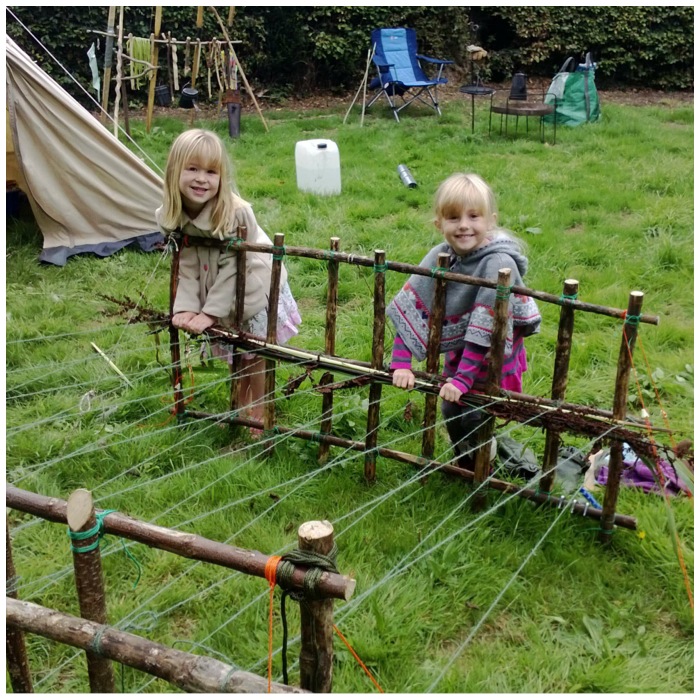
The Mighty Loom can be made in exactly the same way as the Mini Loom by driving stakes into the ground. I could not do that for this one as I was going to be teaching bushcraft in the grounds of a church. I needed to make something I could transport easily and set up easily with the minimum of fuss. I decided to make two seperate frames that could be set up using guy lines and when dismantled would leave no visible trace of having been there.
Mighty Loom – Initial set up
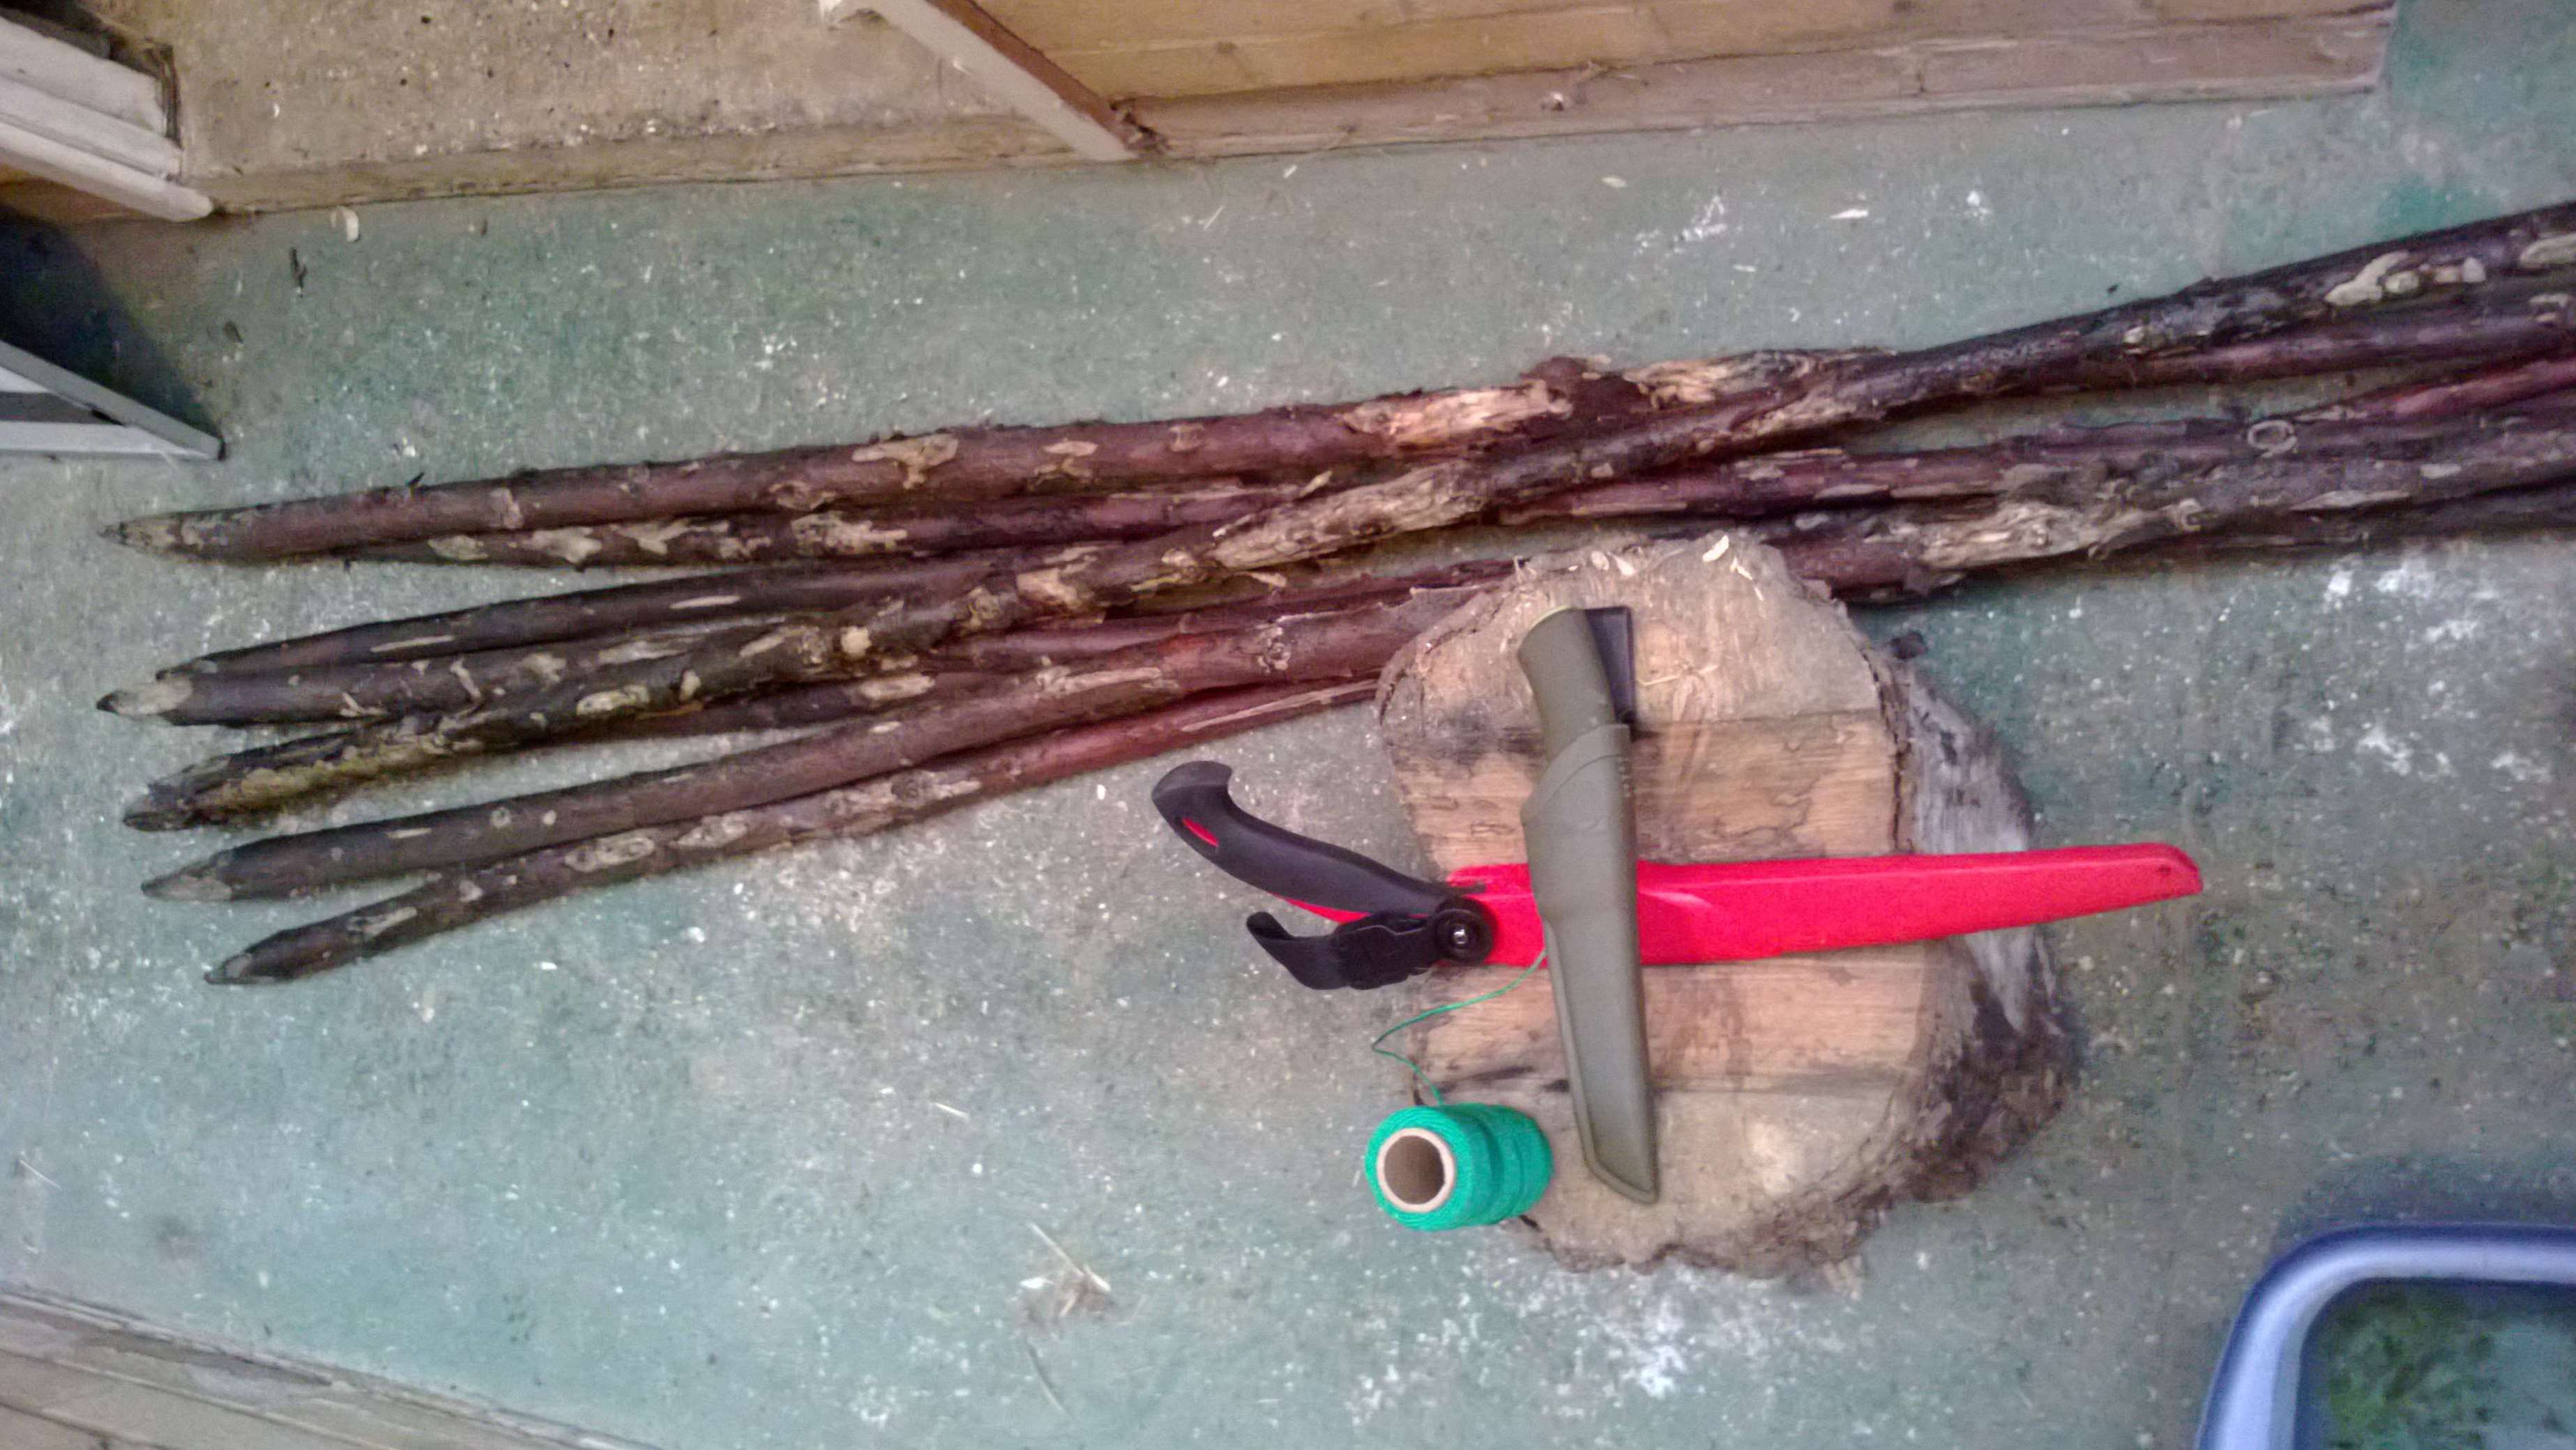
I had a load of sycamore rods (Acer pseudoplatanus) available for use. The plan was to make two frames. I planned to make one frame 75cms high and the other 92cms high (this height was based on the lengths of wood available) and both would be 145cms wide. I cut the rods to size (nine verticals and two horizontals for each frame) and made sure they were smoothed out so nobody would get a splinter.
Mighty Loom – Sycamore rods were used for the frame
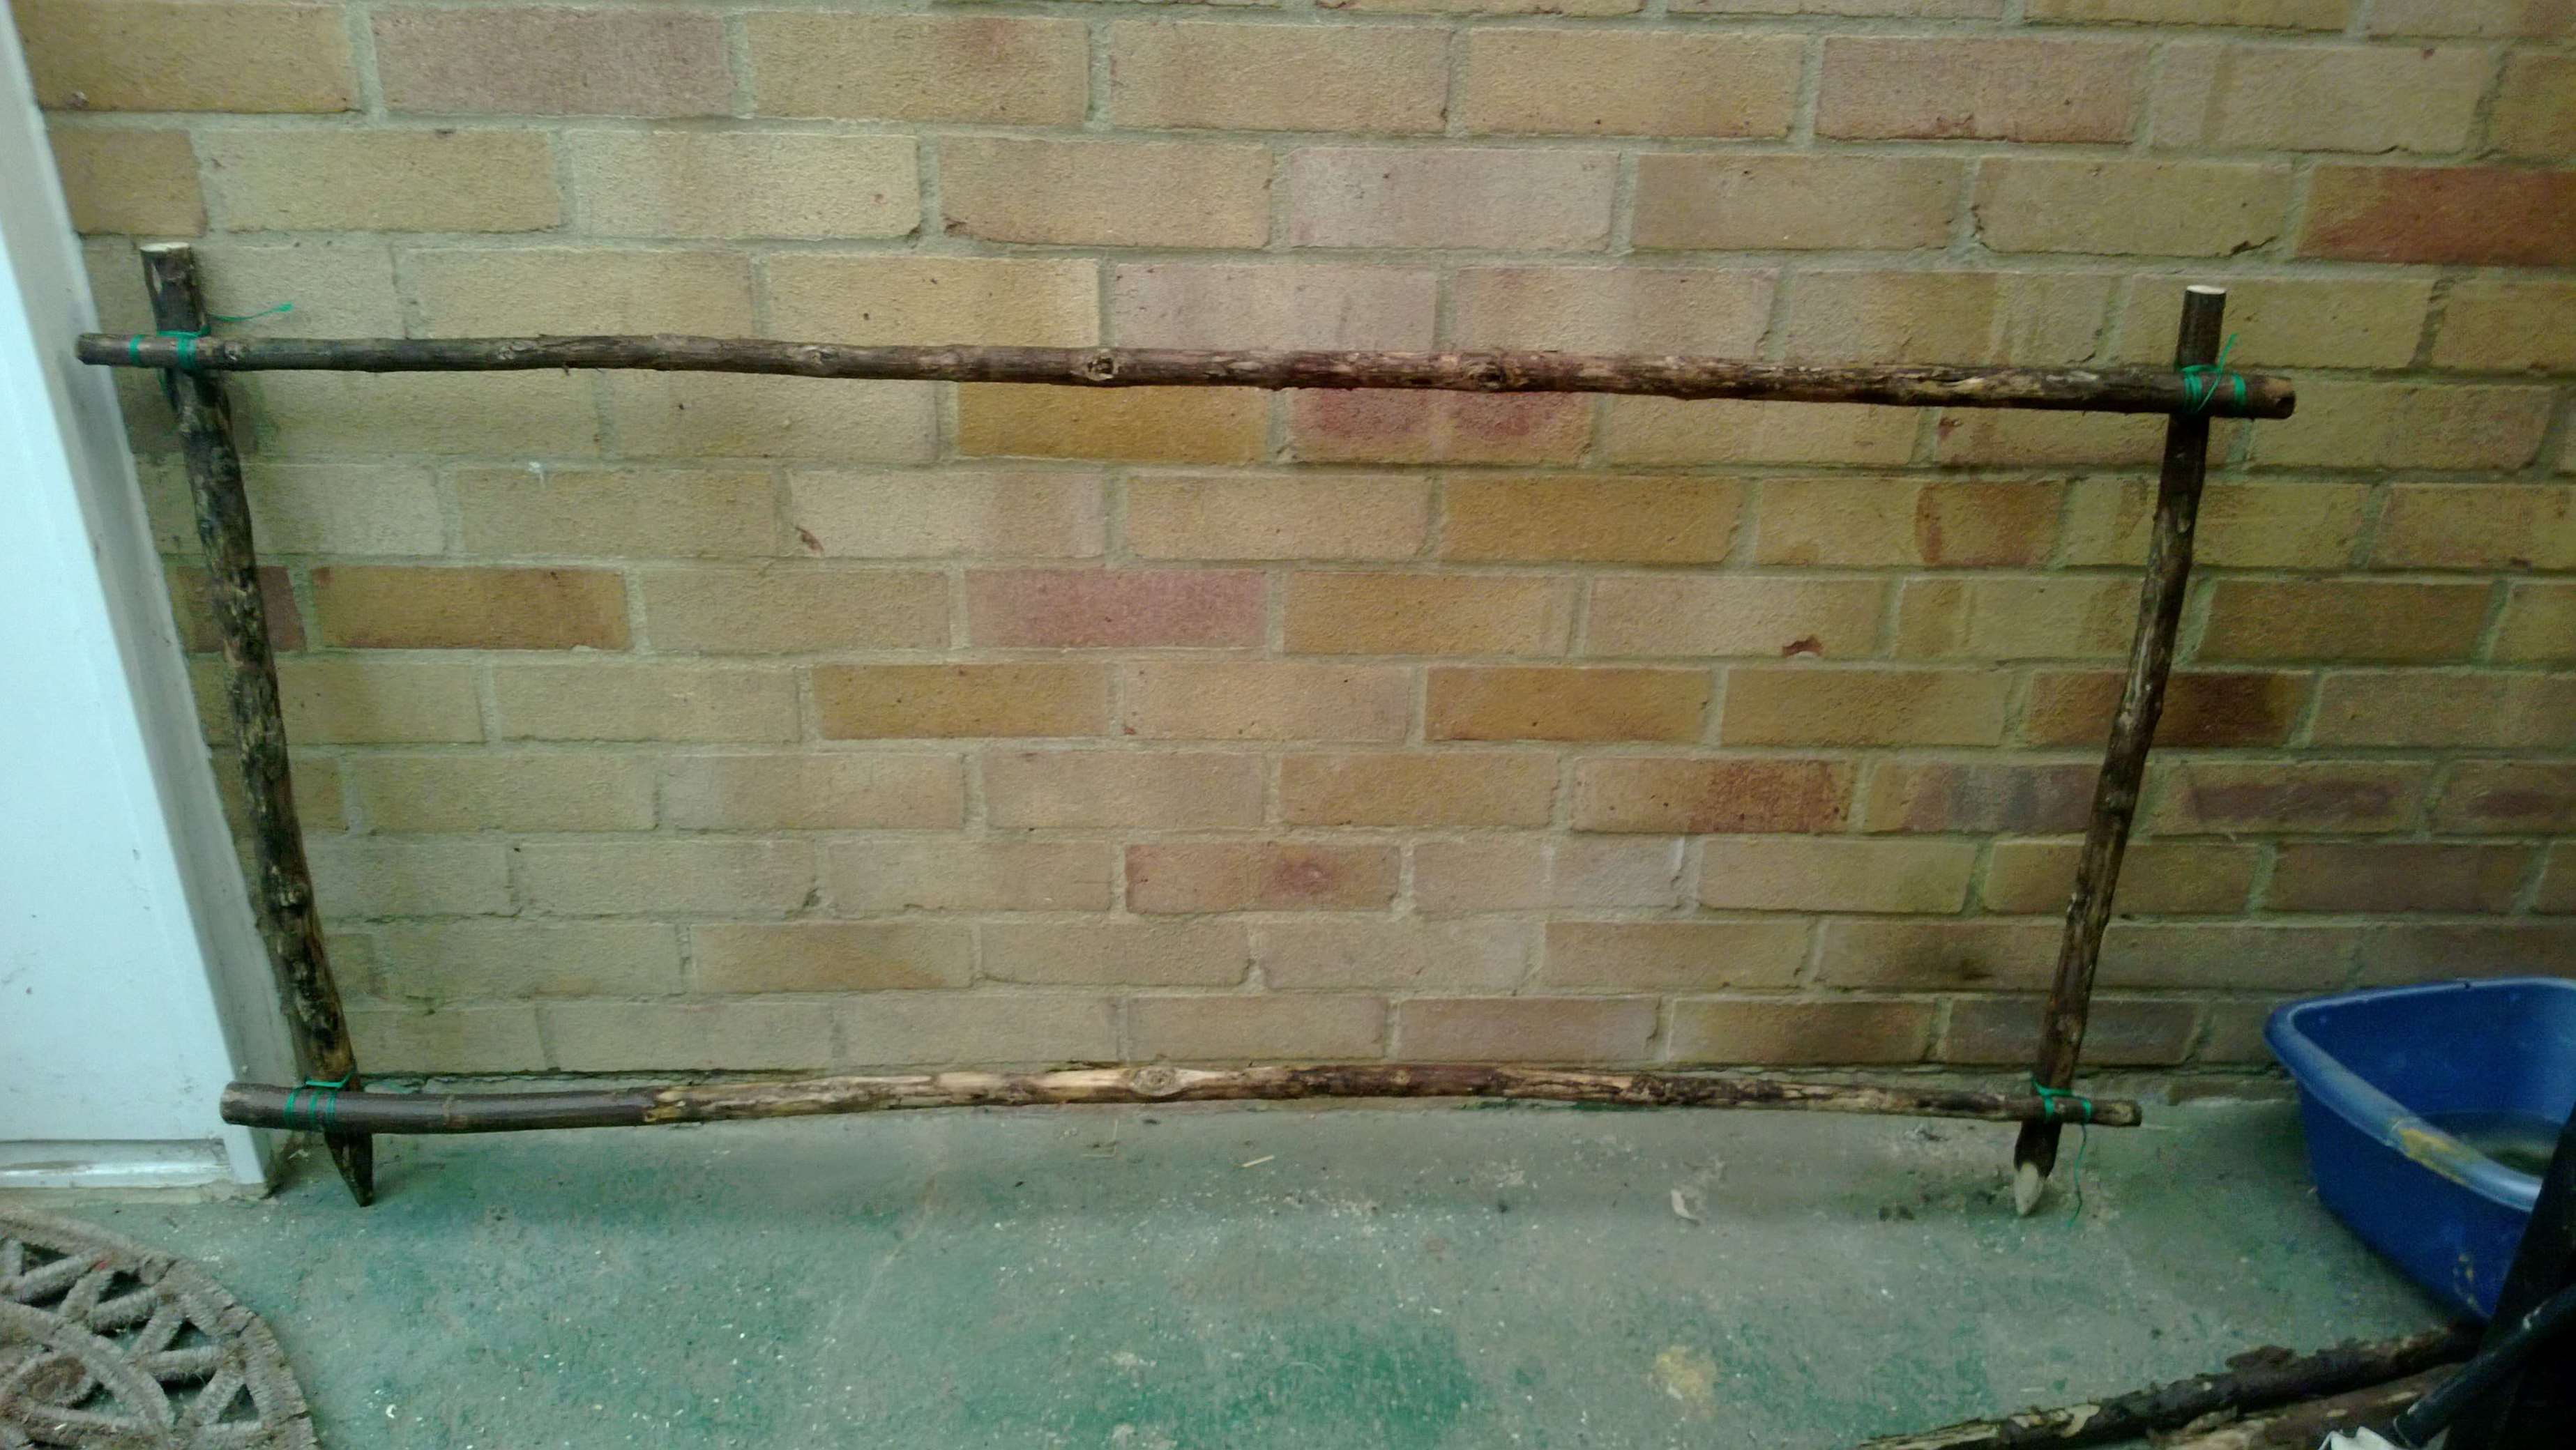
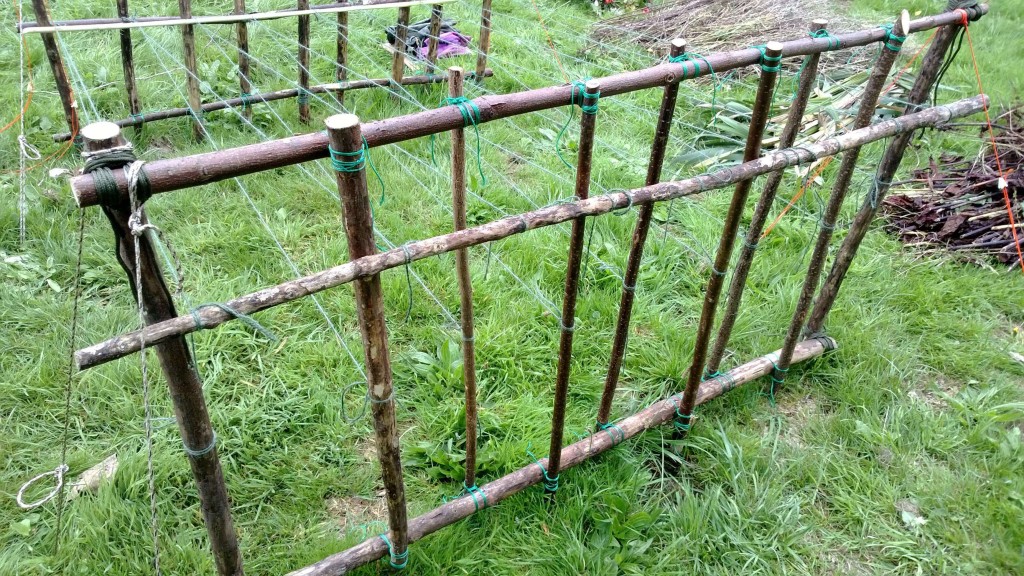
I started each frame by lashing together the two uprights to the two horizontal poles to form a rectangle.
Start of first frame
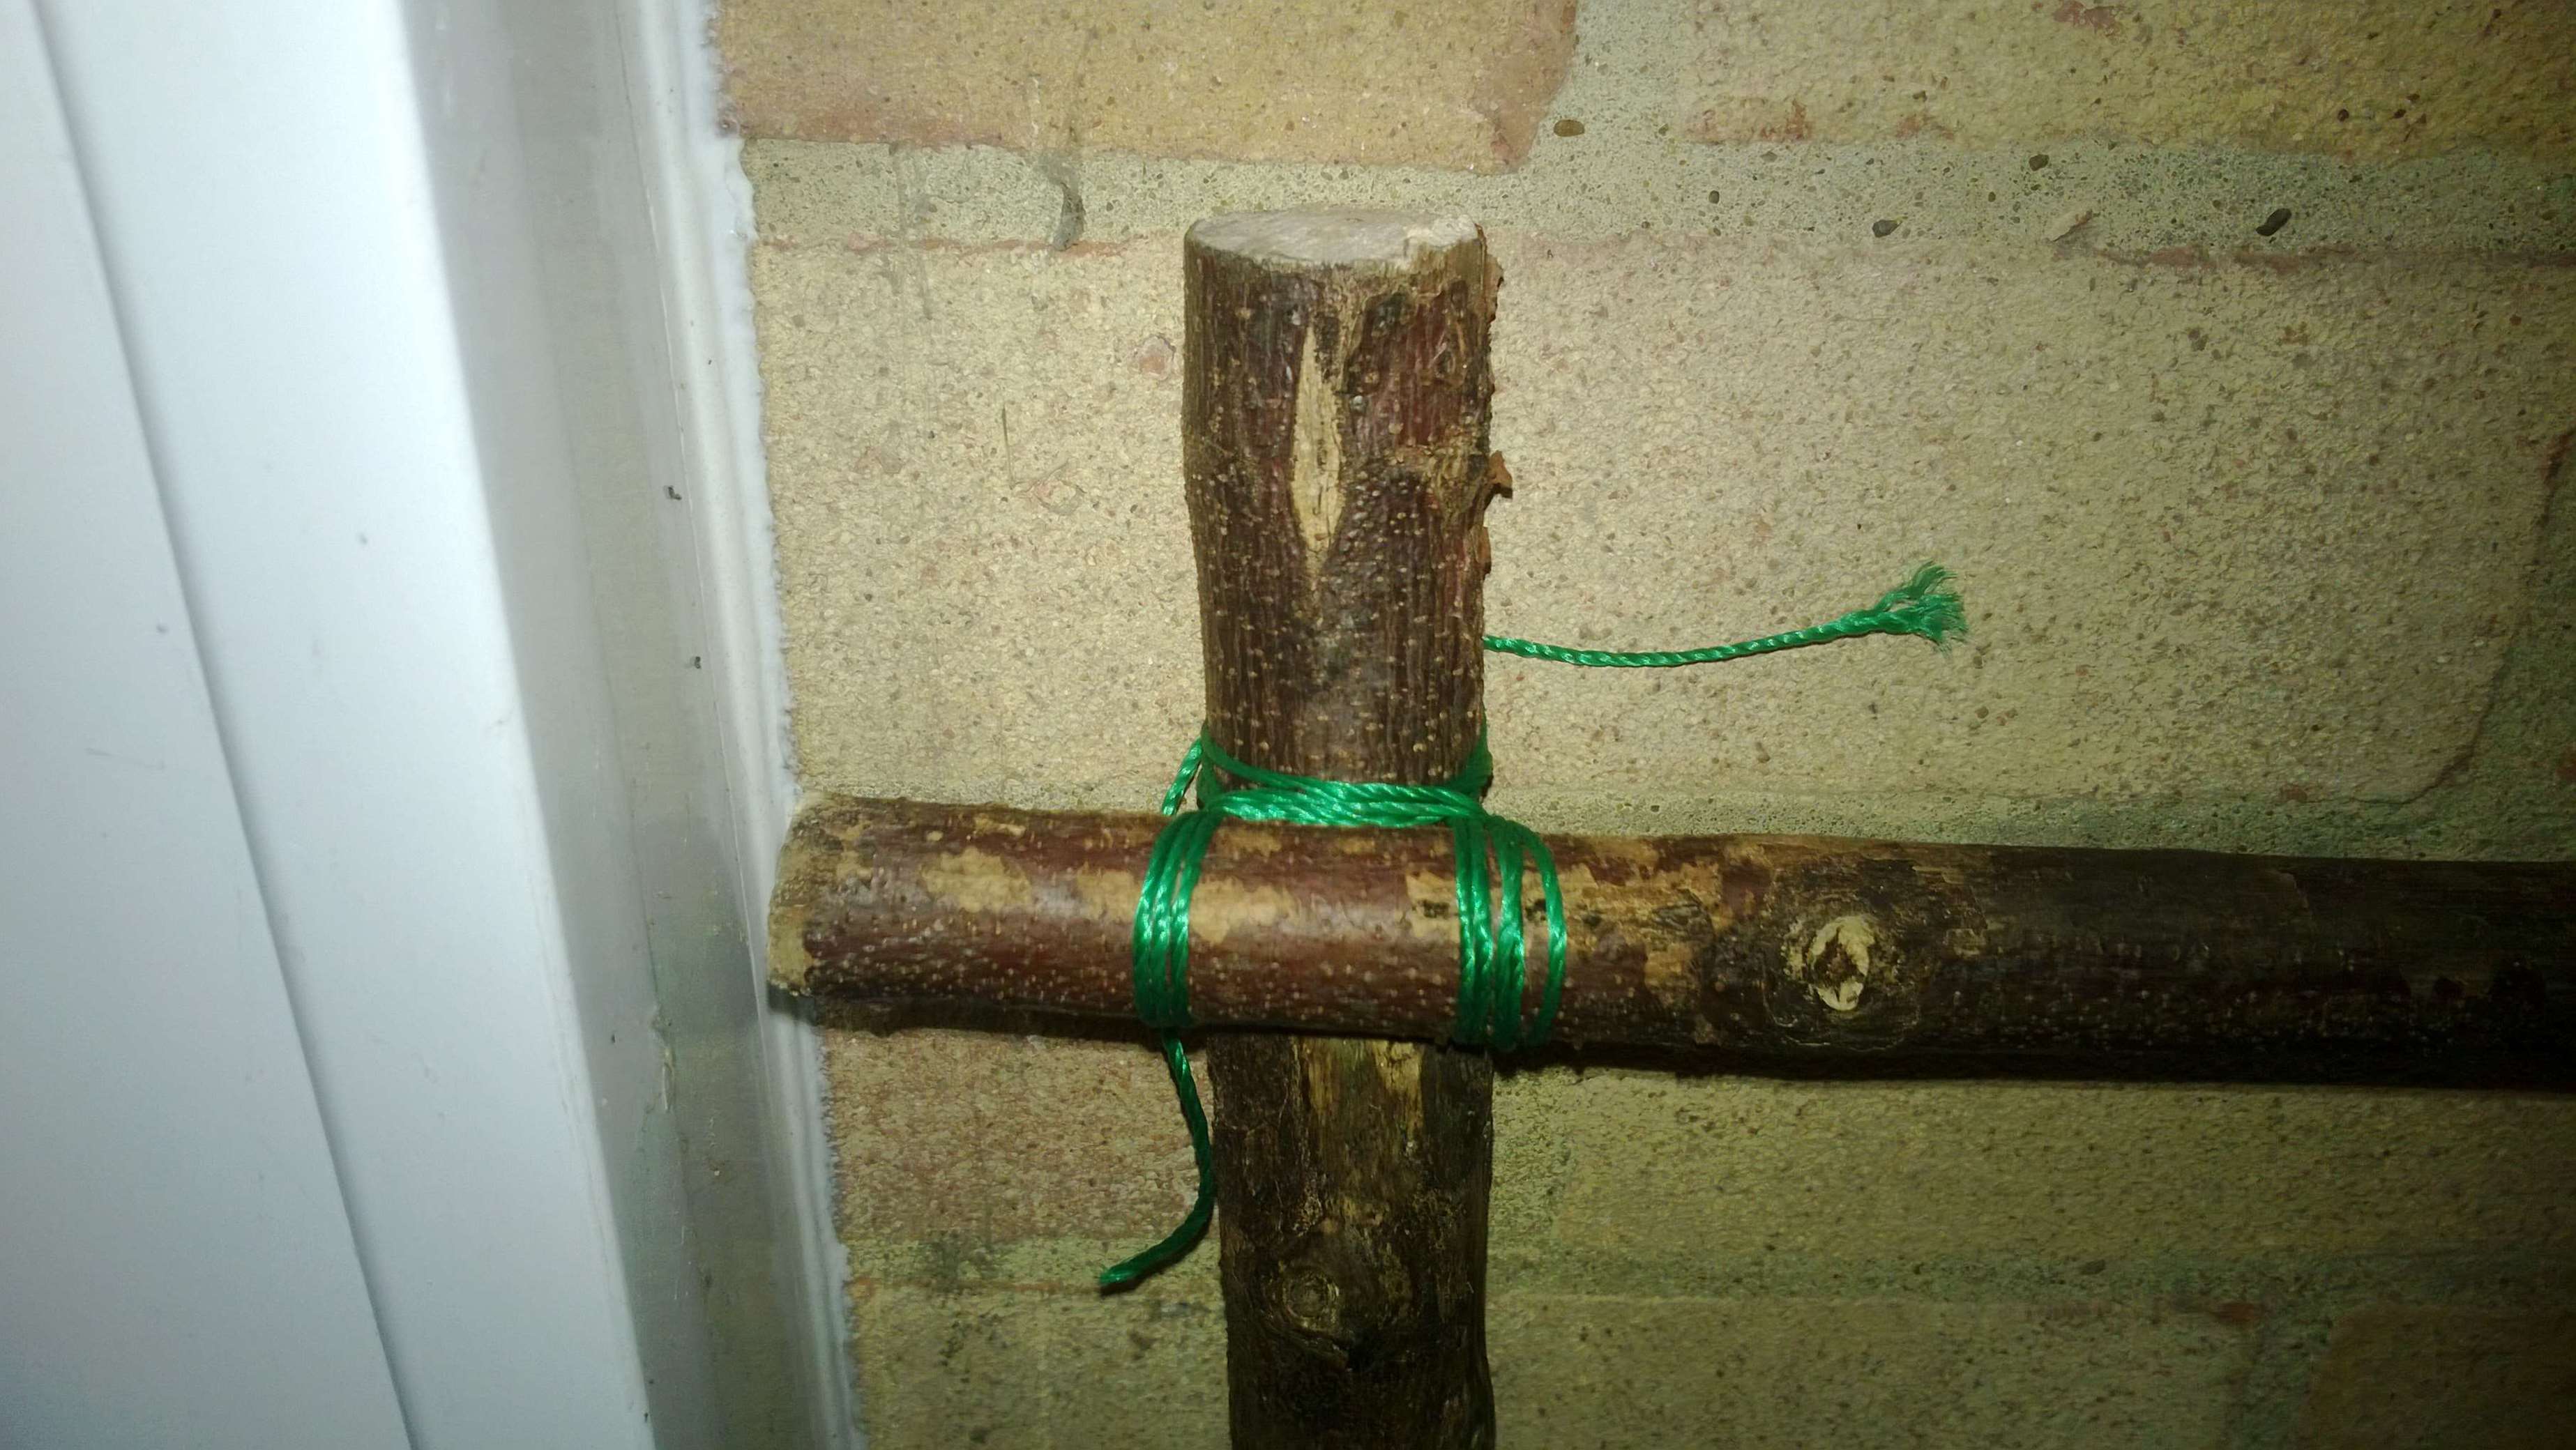
I used a square lashing on every tie-off point as you can really tighten this knot.
Square lashing used
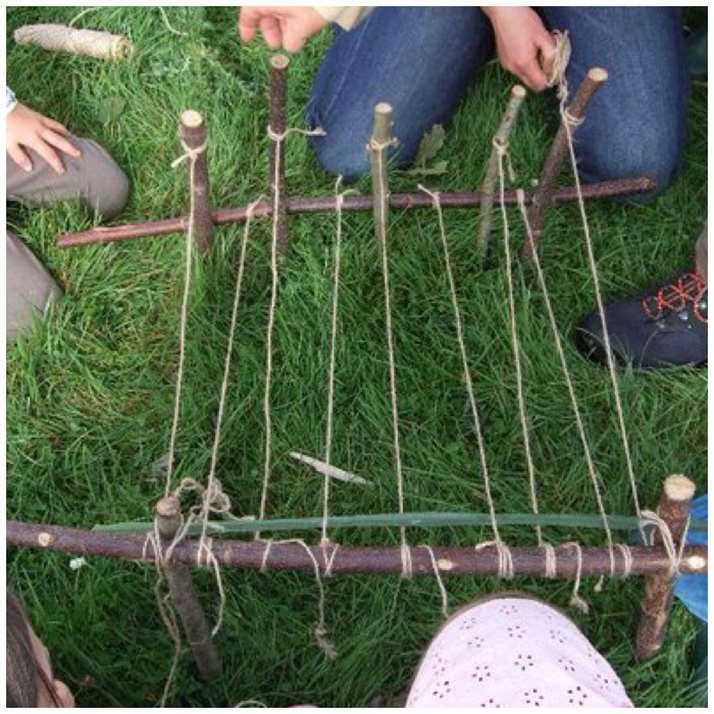
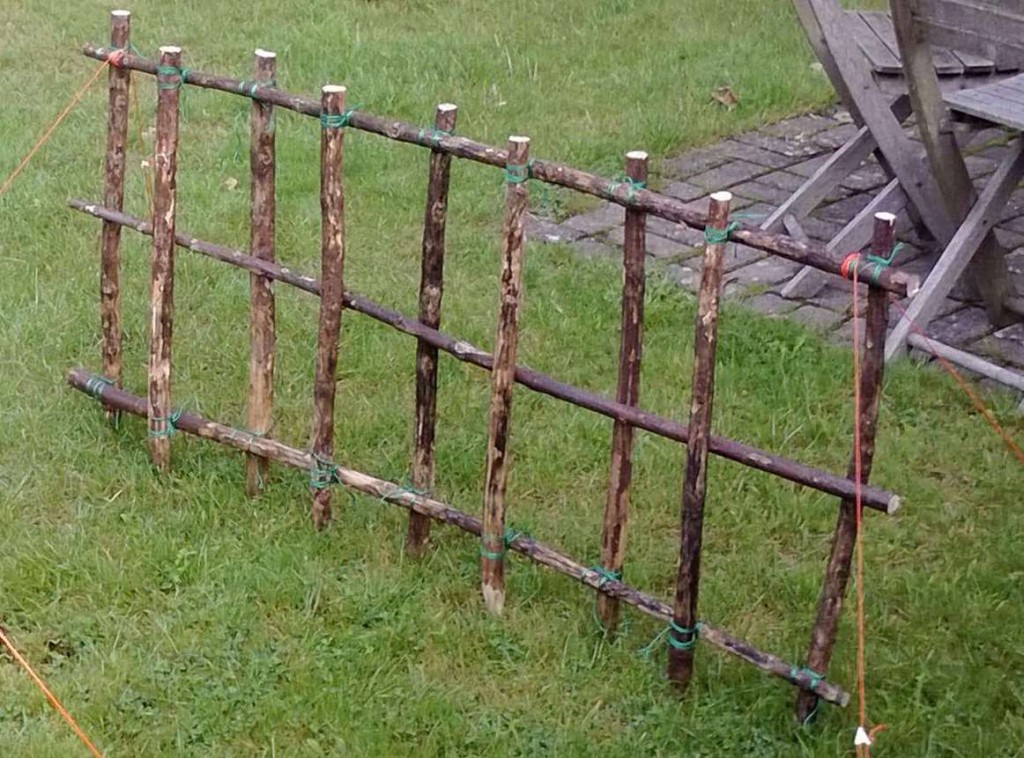
I tied off seven more vertical uprights to each frame using the square lashing, alternating them on either side of the frame to give it more stability when it was set up with the guy lines out. Here you can see the smaller frame set up with the guy lines out (I used some old tent guy lines).
I wove another horizontal pole through the frame to give it extra strength and also to act as an adjustable tie-off point for the string. This pole was not tied off but was held firmly in place by the vertical poles.
First frame – 9 vertical poles lashed with one horizontal pole for strength
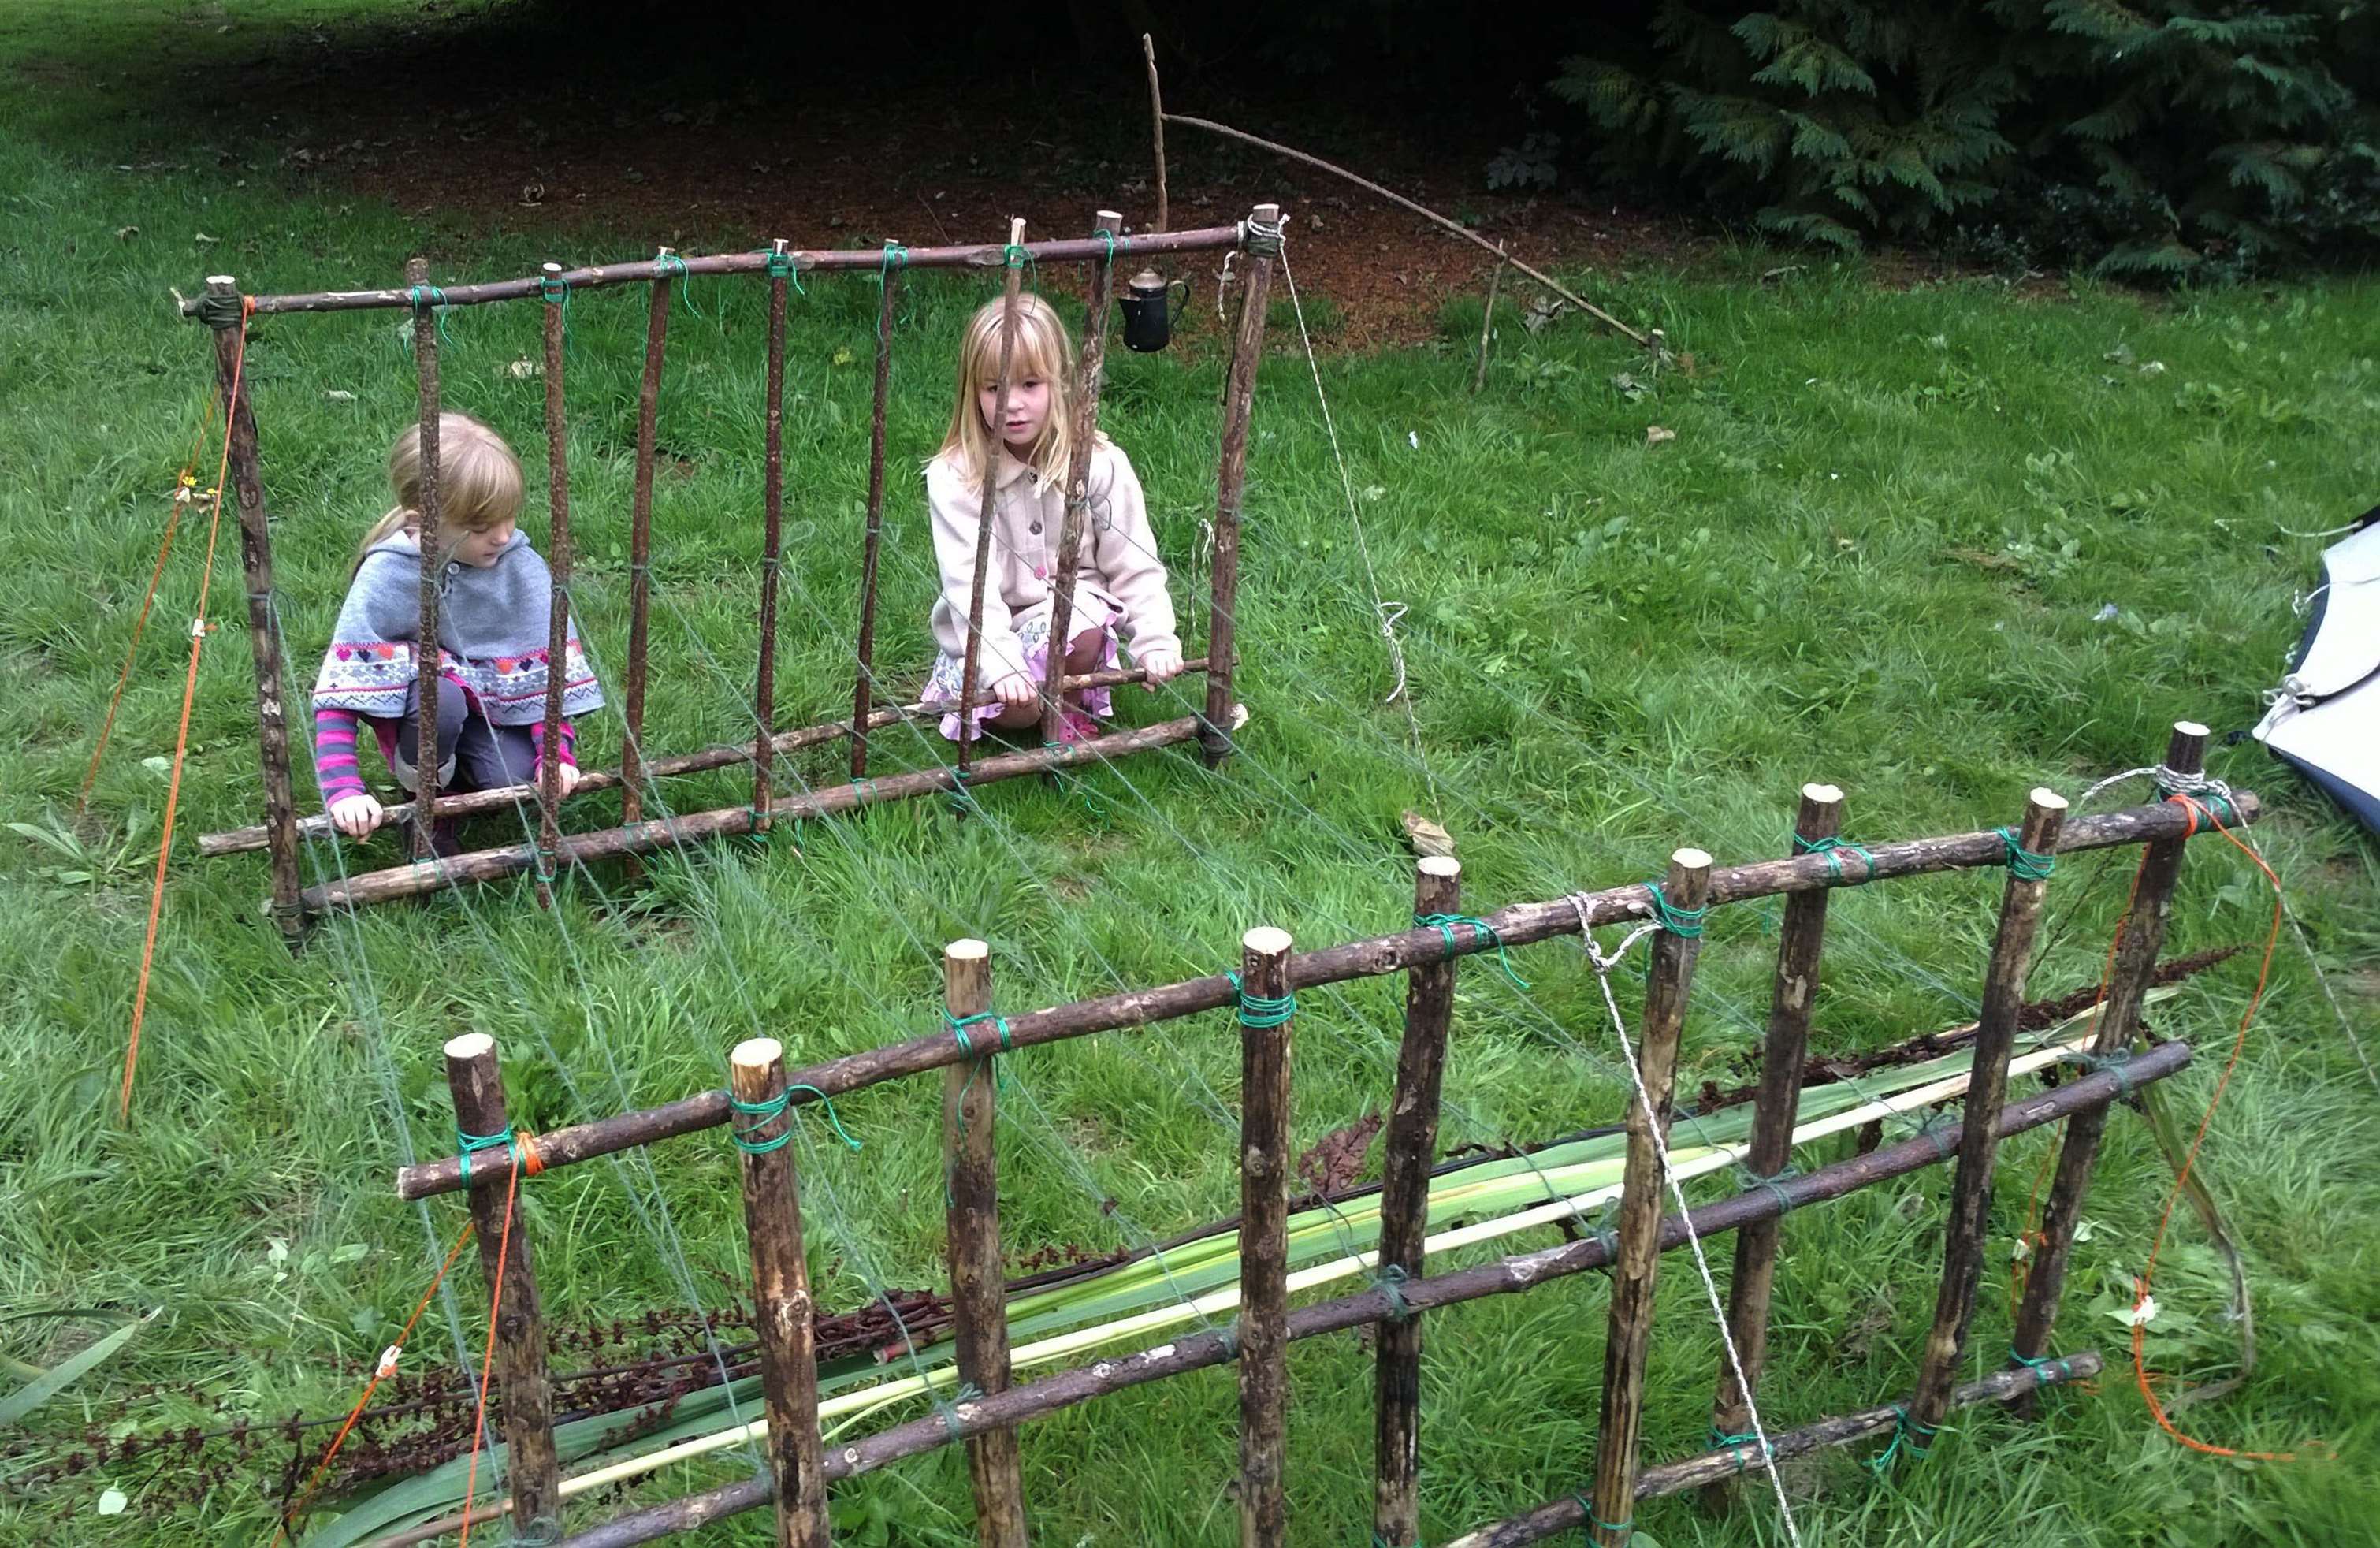
The bigger frame did not have this central horizontal pole as it would get in the way of the string moving up and down to create the weave (as per the Mini Loom). The pole propped up against the frame was used to move the string up and down.
Second frame built (bigger than first frame) with nine vertical poles
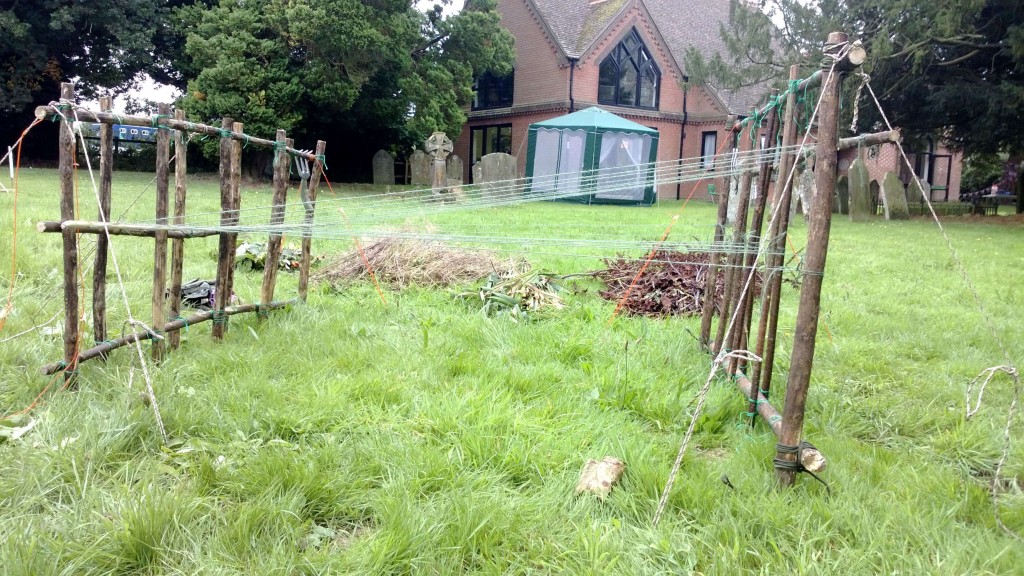
Setting the string up is the same as for the Mini Loom. Ensure you cut lengths of string long enough to be doubled up and tied off.
Initial set up – Roped up and staked out
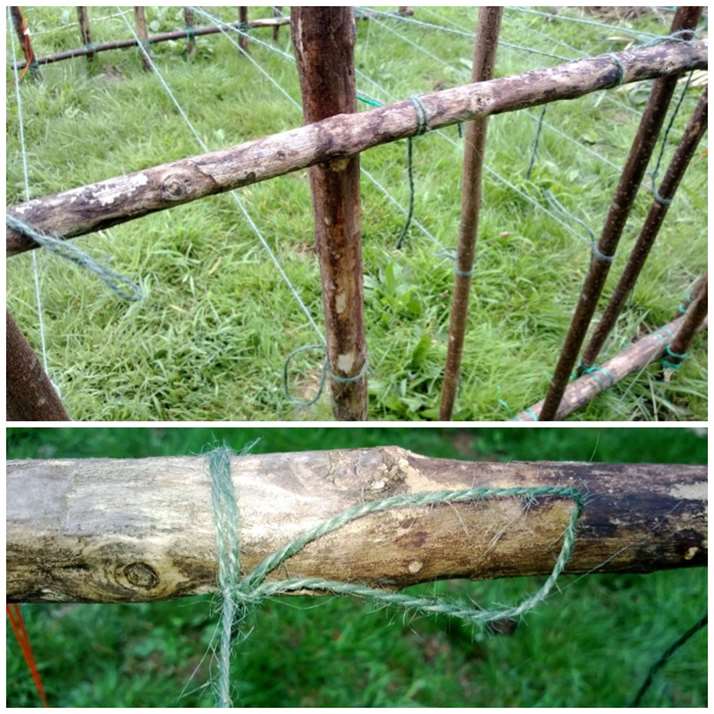
The Tarp Taut Hitch was used again on each bend of the string to attach it to the middle horizontal pole on the smaller frame.
First frame rope set up – Quick release knots used – 9 strings used
For each piece of doubled up string you have attached to the smaller frame you will have two individual strands to attach to the bigger frame. One strand should be attached to the middle of one of the vertical poles on the large frame and the other strand needs to be attached to the horizontal moving bar behind the larger frame.
Second frame set up – individual strands tied off, one to the vertical pole a one to the horizontal pole
This is the part that any weaver will tell you takes the longest. You have to take your time, do not let the strands become entangled and be prepared to do lots of adjustments. Nobody will appreciate quite what you will have gone through to set this up but they will appreciate the ease of being able to make a mat with the system.
All tied of and adjusted
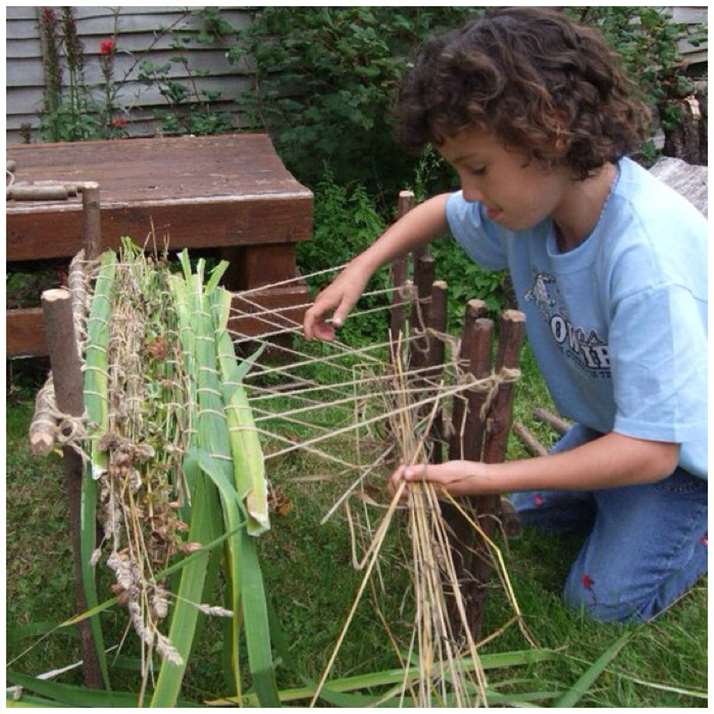
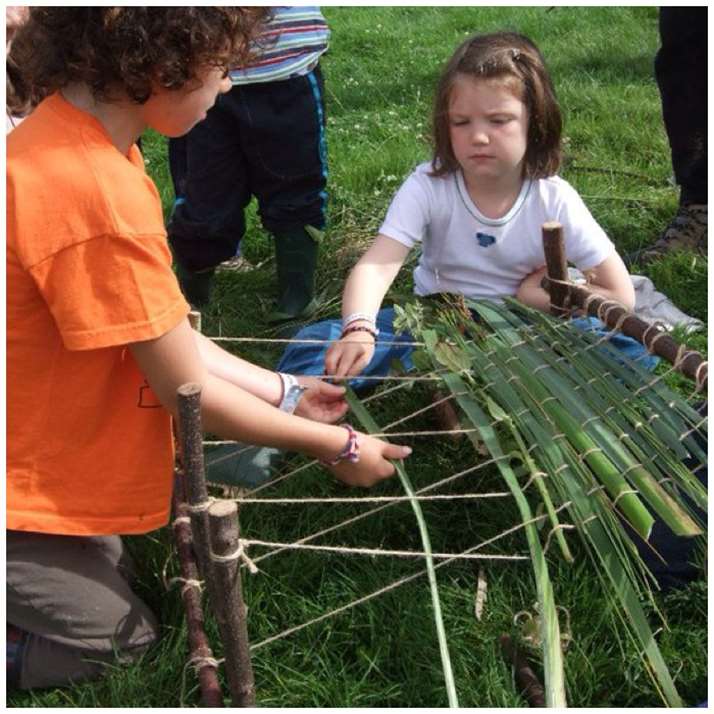
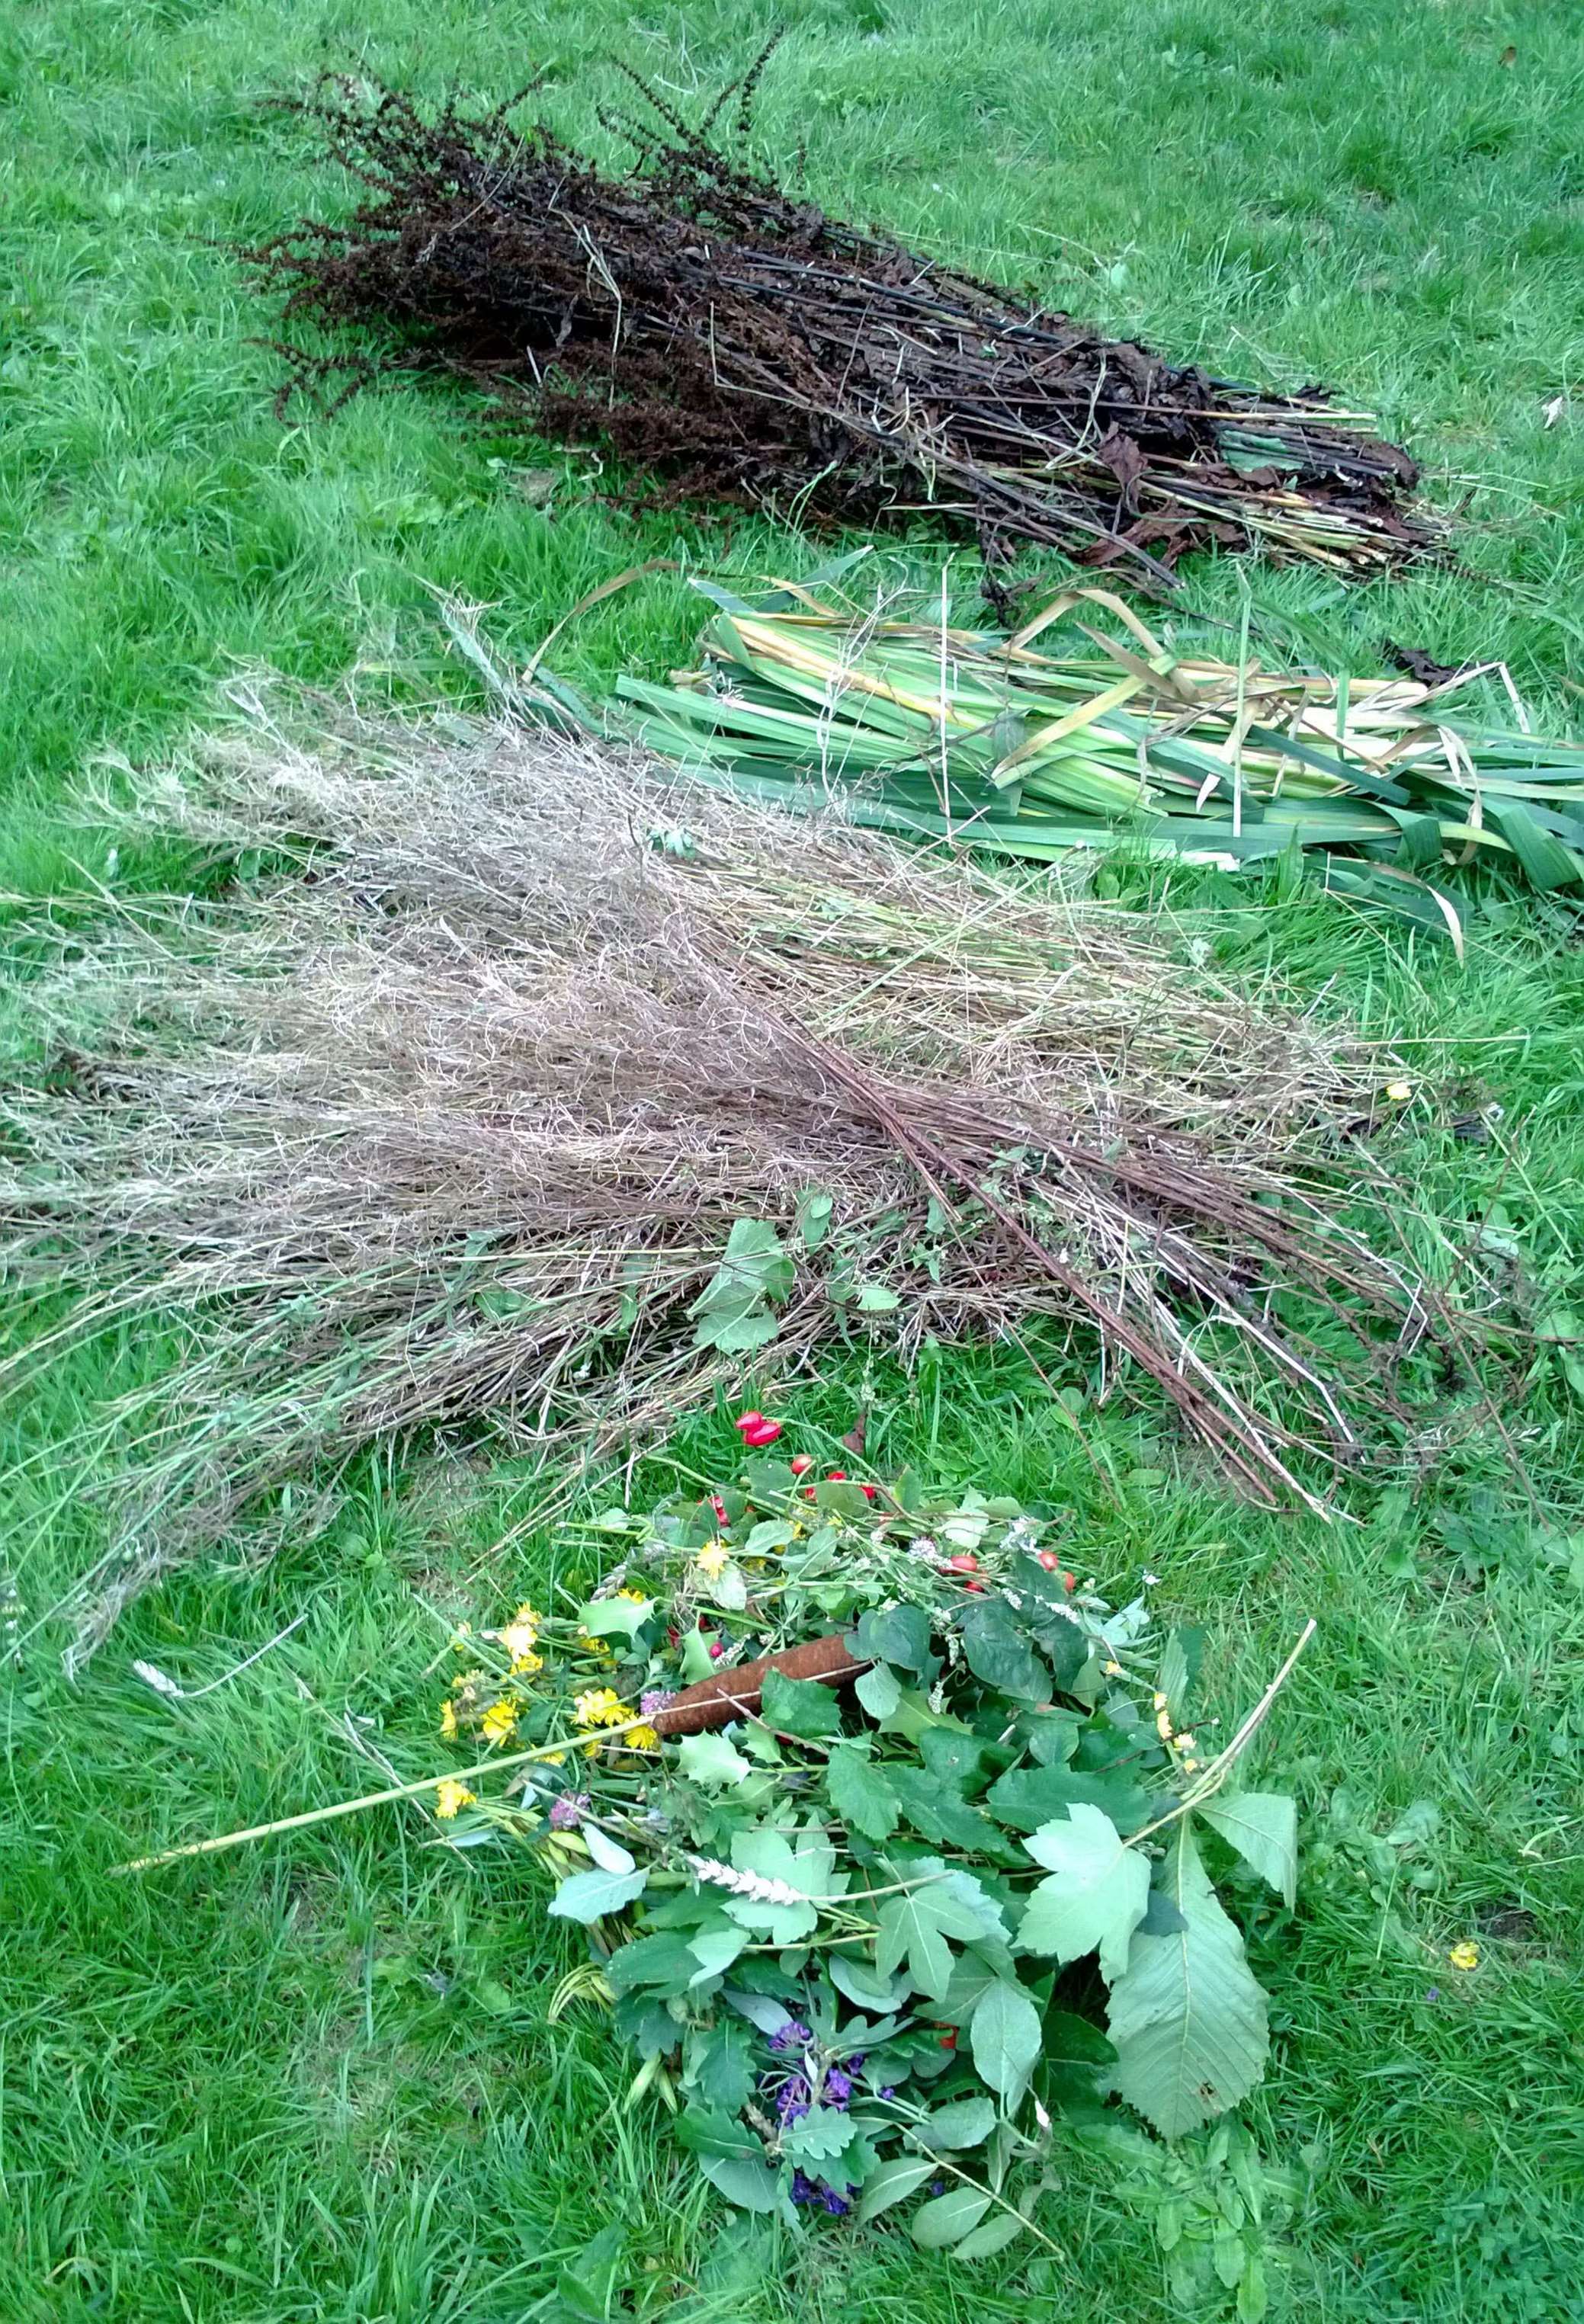
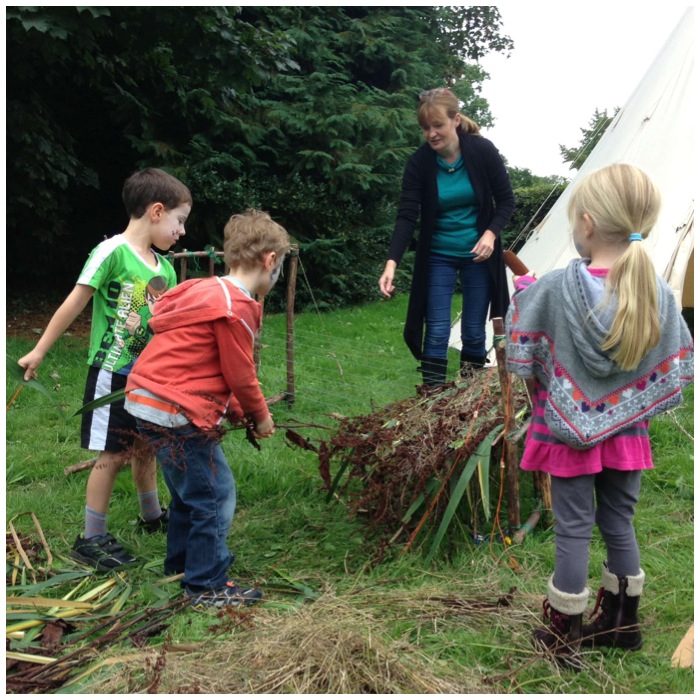
I sourced a mixture of different plants from the local area, mostly from abandoned allotments next to the church. This material would be used to form the mat.
A mixture of different weave material sourced locally
As with the Mini Loom, insert the material you want to start with. I prefer at the beginning and the end of the mat to insert fairly rigid material like the stems of Reedmace (Typha latifolia) but try different materials to see what works for you. Pull all the material (a good handful’s width) in tight then……………………
Insert some material between the strands
…drop the horizontal bar to cross the string over and trap the material.
Drop the horizontal bar
Then get ready to add a new layer of material to the loom.
Then get ready to insert more material and lift the bar to trap it
Keep repeating the process of lifting and dropping the handle and adding new material to build up the mat.
Keep repeating the whole process to build up your mat – vary the material as you like
The edges you can see here get very ragged. You can use a pair of sharp scissors (fairly big ones) or a very sharp knife to trim this down, but leave a good handwidth from your trimmed end and the first string so the material does not fall out.
It soon builds up and kids of all ages love this activity
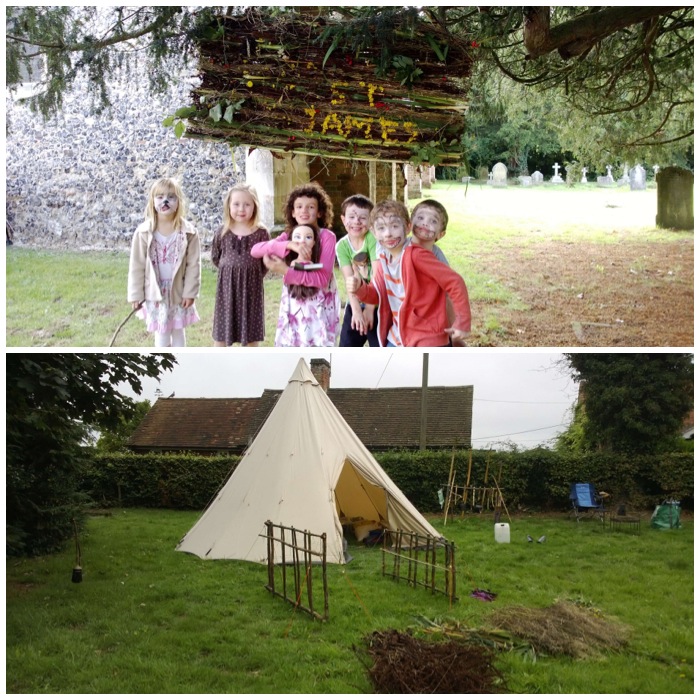
When you have finished, undo each slip knot and retie the string so that it holds all the material together. I attached some more string to this mat to hang it up and also decorated it with some small yellow flowers to form the name St James. Use your imagination and see what you can produce.
Release the slip knots, tie off, hang it up and enjoy your artwork
Mat making is not something I do at every bushcraft event I run but if I have limited opportunity to run Atlatl or archery stances, having a loom on standby will keep kids occupied for a long time.
They can be as easy or as complex to set up as you wish but the common thing about all of them is the great craft they can produce.
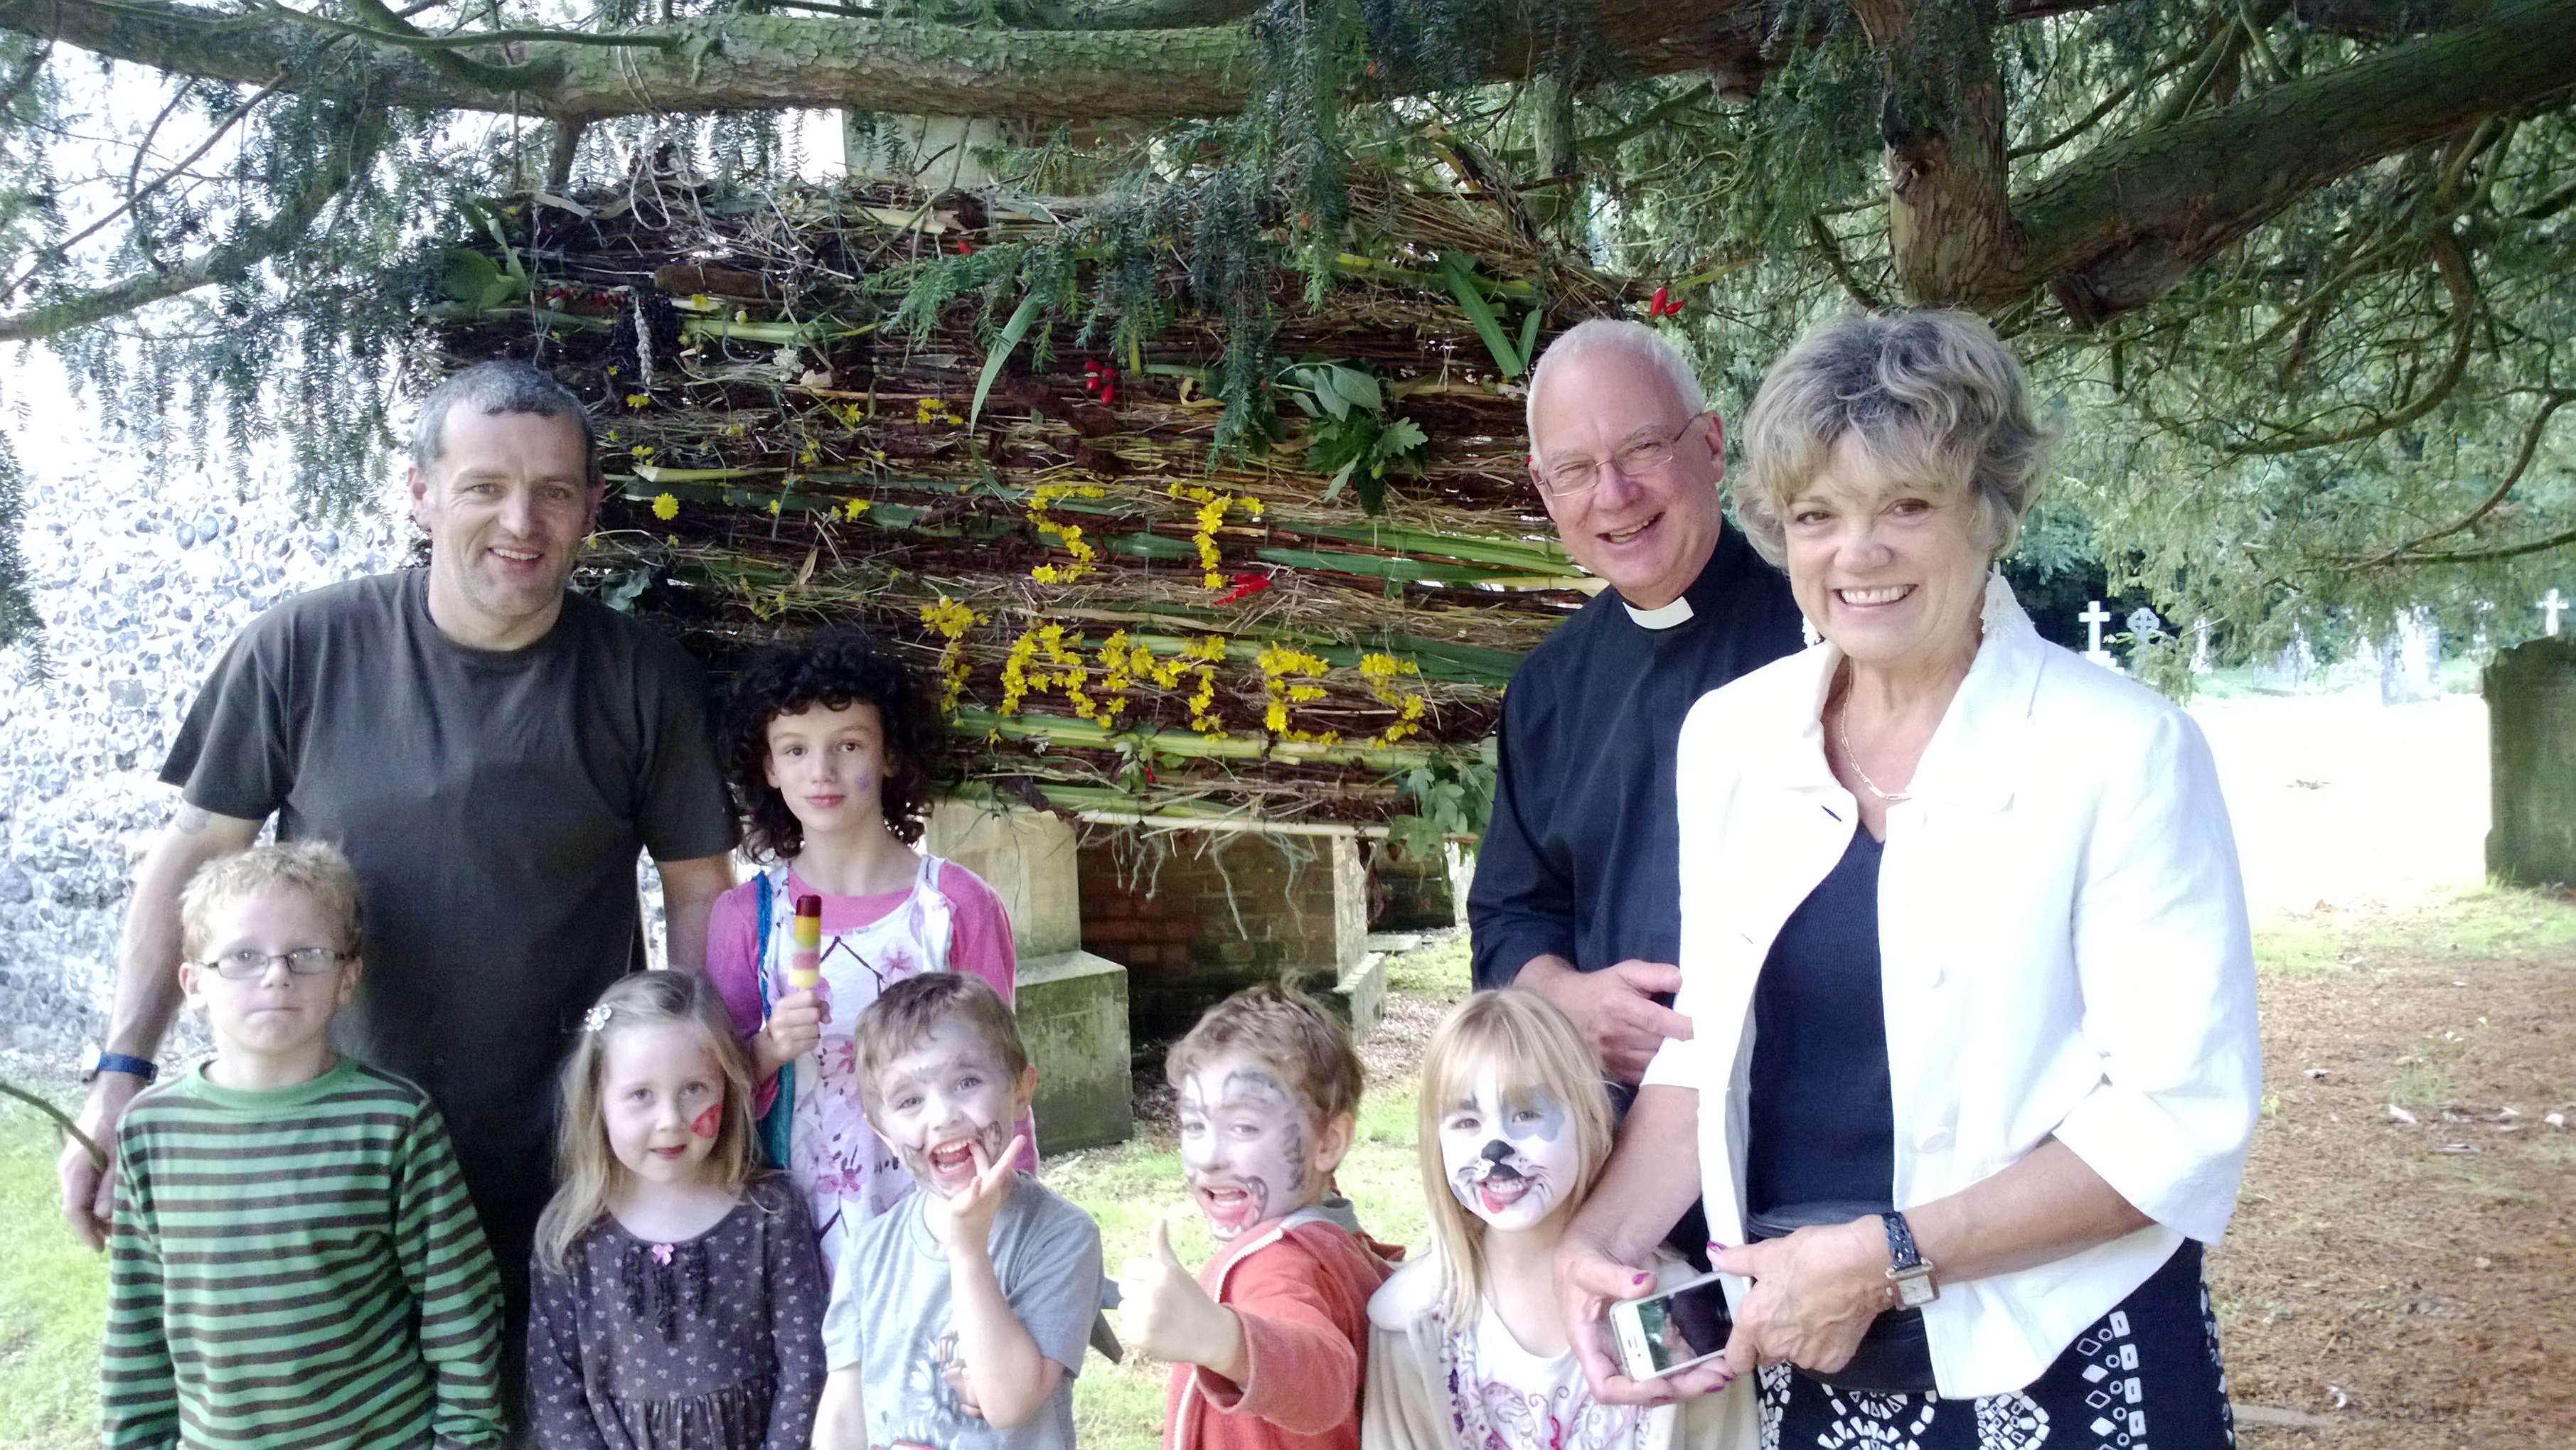
At the end of September last year I was asked to help out at our local church with their open day. This is the 50th post I put on the site and I am glad it it is one of such a good day to mark the occasion.
Our church is the beautiful St James in Bramley Hampshire. It dates back to the twelfth century and is a very family orientated church where my wife Alison is one of the Sunday School leaders.
The church has an annual open day and this year someone (me, more likely than not) had spilled the beans that I taught bushcraft to kids. I was particularly looking forward to this day as I had never taught bushcraft in the grounds of a church before. St James has a small but beautiful churchyard with an area kept aside for meadow flowers. It was in this area (very few flowers because of the time of year) I set up my stance.
A fun day and great location
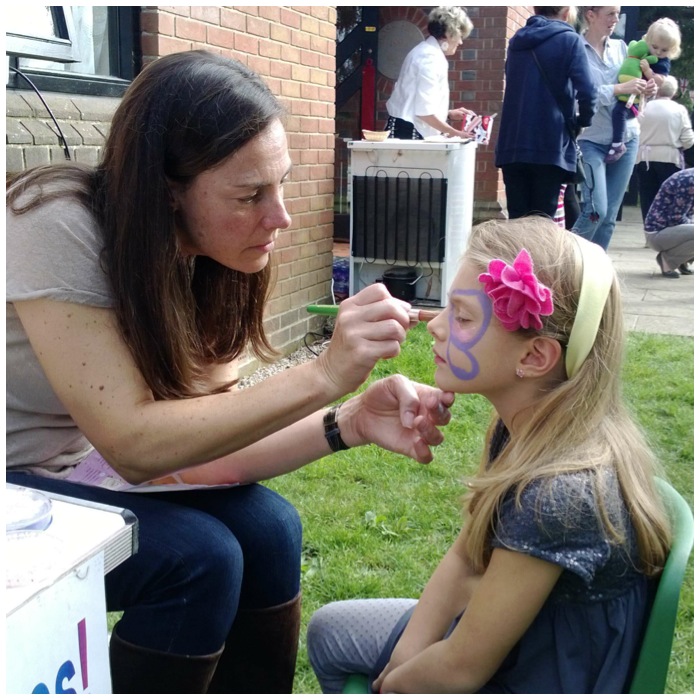
There were many other activities including face painting, bell ringing and craft stalls and the weather was perfect for the event.
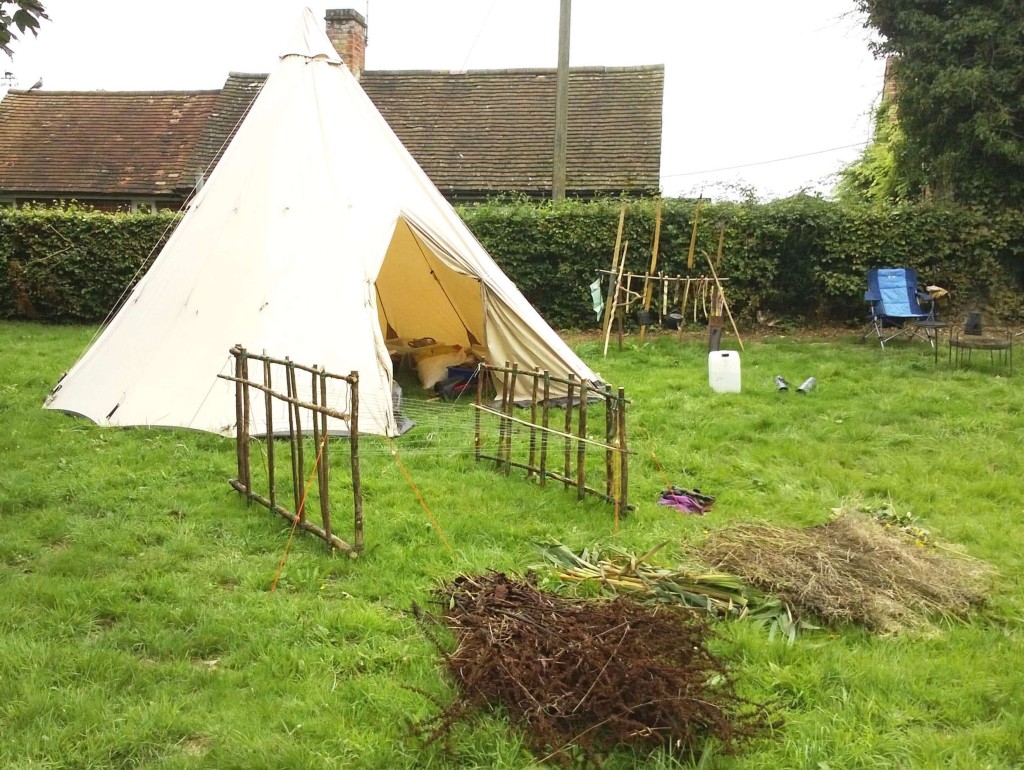
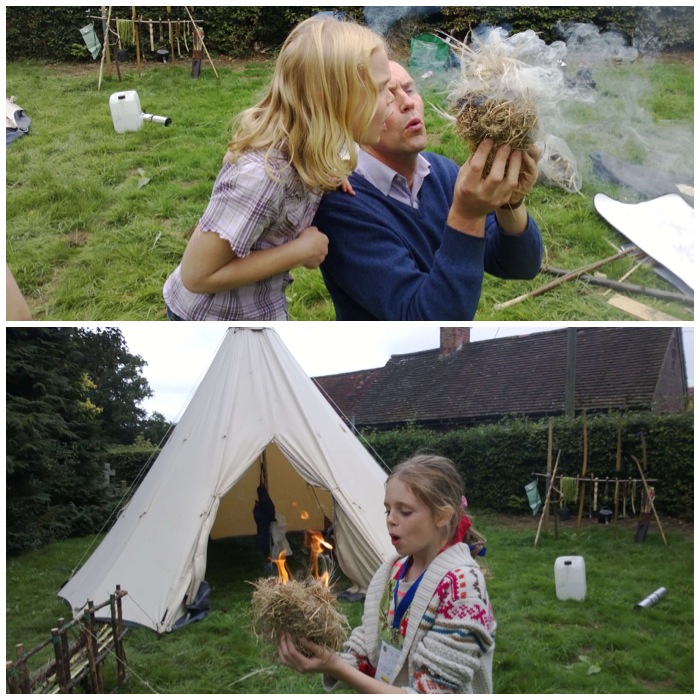
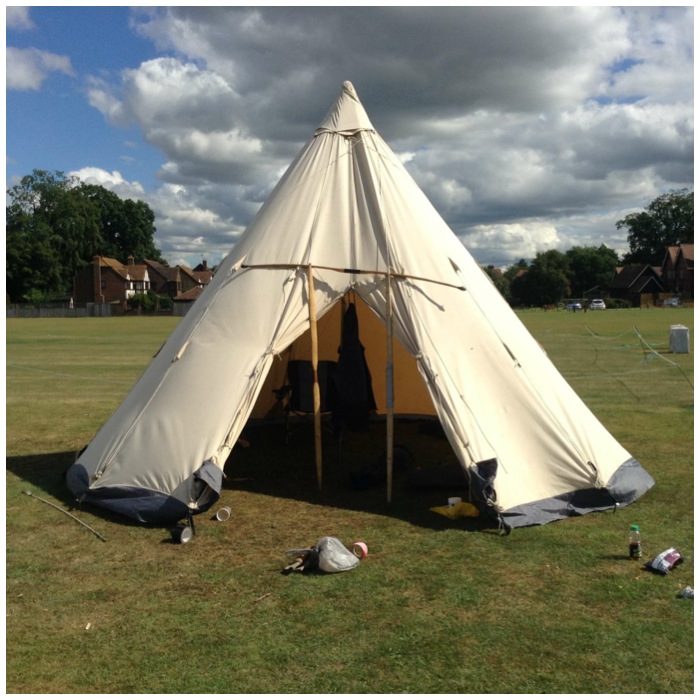
I set up my tipi with a bushcraft loom I had designed in front of it. My plan for the day was to get the kids (and adults) making mats, twisting cordage, bowdrilling and of course taking time out to have a marshmallow or two.
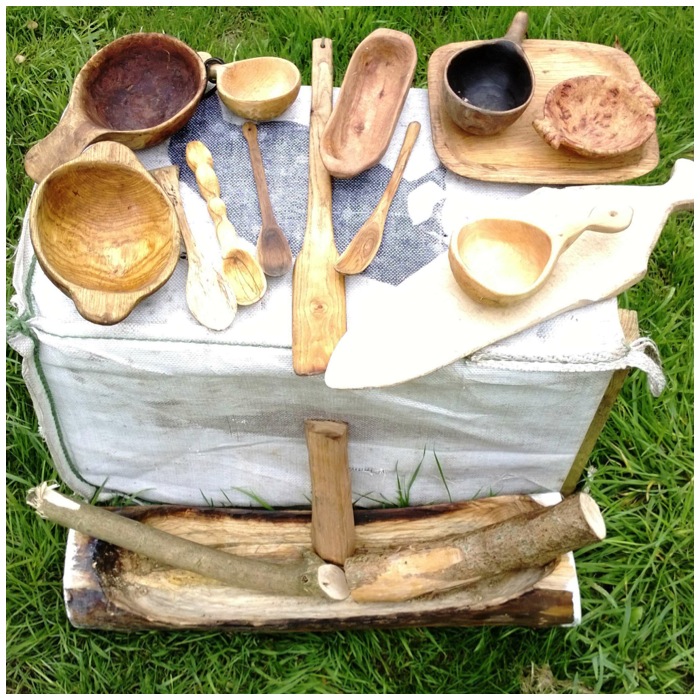
I also had on display some of my carvings (in various stages of completion) for folk to have a look at.
Craft display
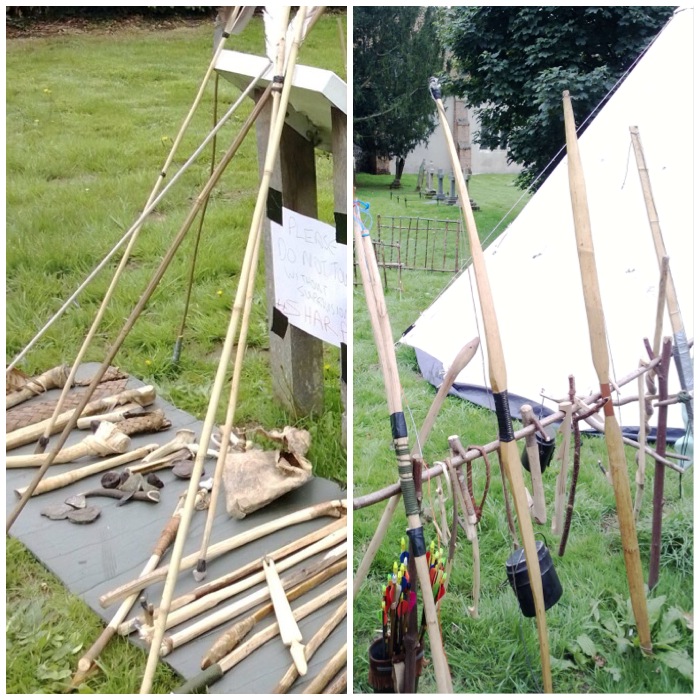
I did not have the room to set up an Atlatl or archery range so just had the tools on display.
Primitive tool display
While I was doing this Alison had her hands full all morning painting faces. You will see her handiwork as you go through the pictures.
Face Painting Fun
When I make a bushcraft loom I normally hammer the upright poles into the ground then string it up. In a churchyard, though, I thought that may not be the best course of action. I devised a loom out of some sycamore rods that I could set up just with a few guy lines. This proved an interesting experiment for me and I documented each step in its construction and its use so I will post a How To…. on making one soon.
The loom proved a great success, keeping kids and adults happily occupied while I got on with other classes. These looms can be time consuming to set up (ask my sister Tina – she used to be a Harris Tweed weaver) but will keep kids occupied for ages with minimal adult input.
Bushcraft mat-making set up
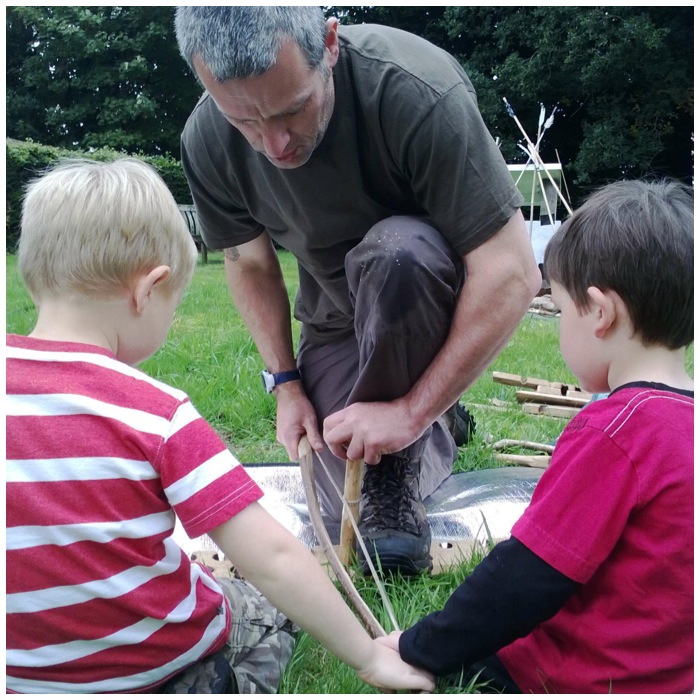
As per usual a queue quickly developed for bowdrilling. It may look like I am doing most of the work but I really do make the young ones work for that ember. I find the more effort they put into it, the bigger the smile when they get that flame.
Bowdrill sessions
You can really see them getting into it here.
Bowdrill was one of the day’s mainstays
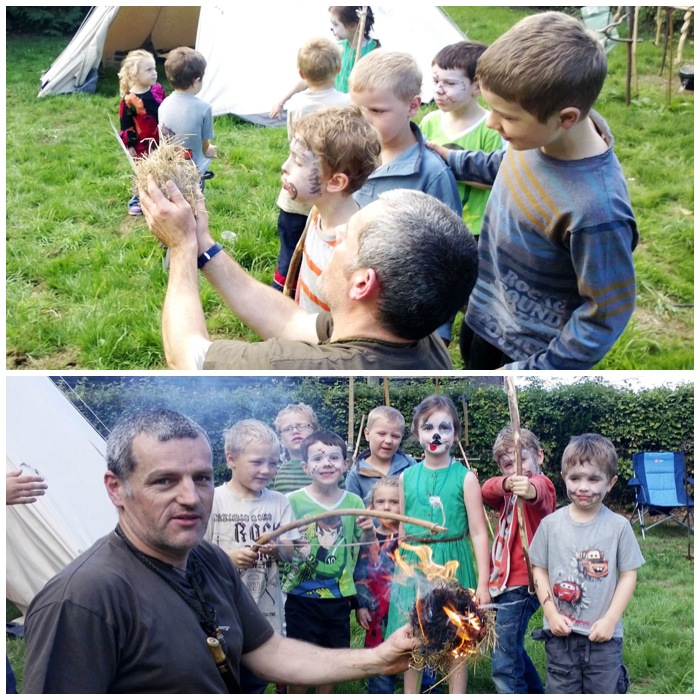
Once the ember is strong it is popped into a tinder bundle and the kids take turn blowing it into flame. I wish I had had the opportunity as a small child to do this – I had to wait until I was a big child instead 🙂
Group effort in fire making – Spot Daffy Duck?
After a bit of coaching some adults decided to give the bowdrill a go themselves or with the help of some of their family. This gave me a chance to get on with other things.
Single bowdrill lessons with the families helping out
Not all bowdrill but covered the hand drill for a little while as well.
Some Handrill lessons
With all the tinder bundles the kids put together we were able to keep a little fire going at the back of the graveyard where we got some marshmallows toasting – who can say they have had a toasted marshmallow in a graveyard before?
Time for marshmallows
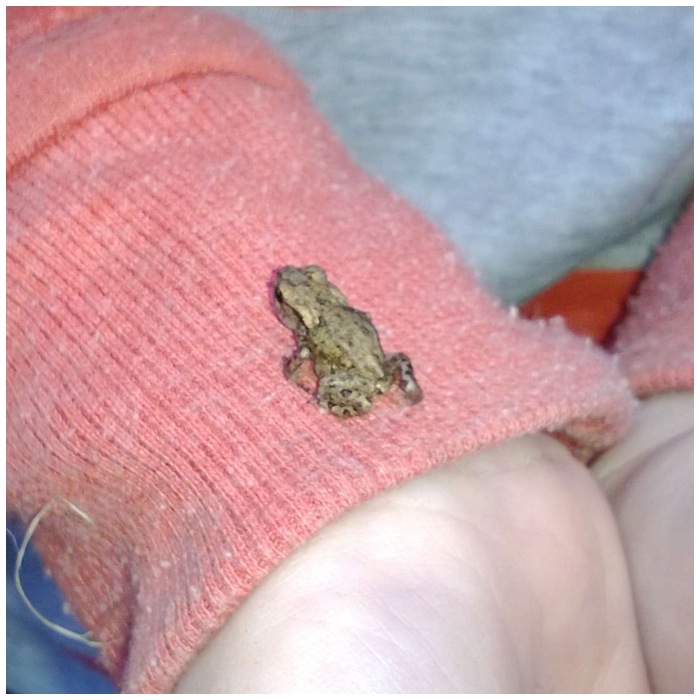
In amongst all this one of the young lads found himself a little frog in the long grass and proudly showed it to everyone. Afterwards he found a quiet spot to put him back in the long grass.
Found a little friend
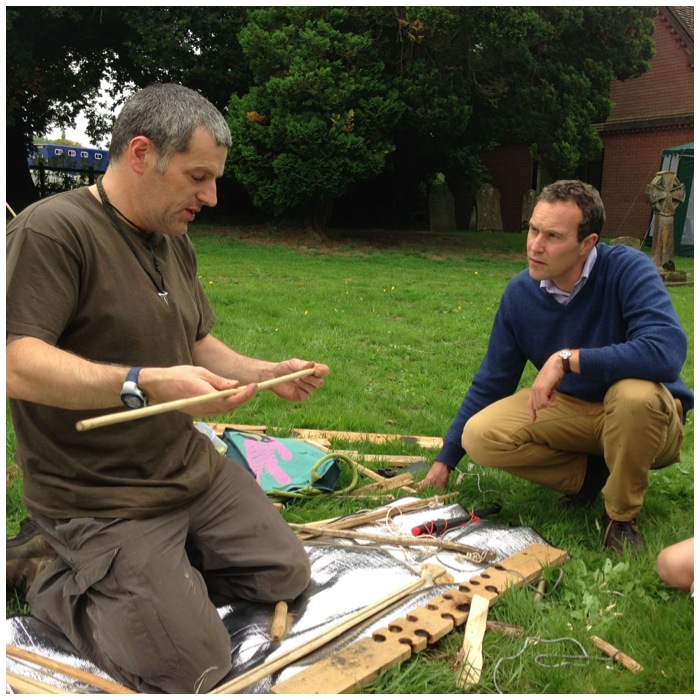
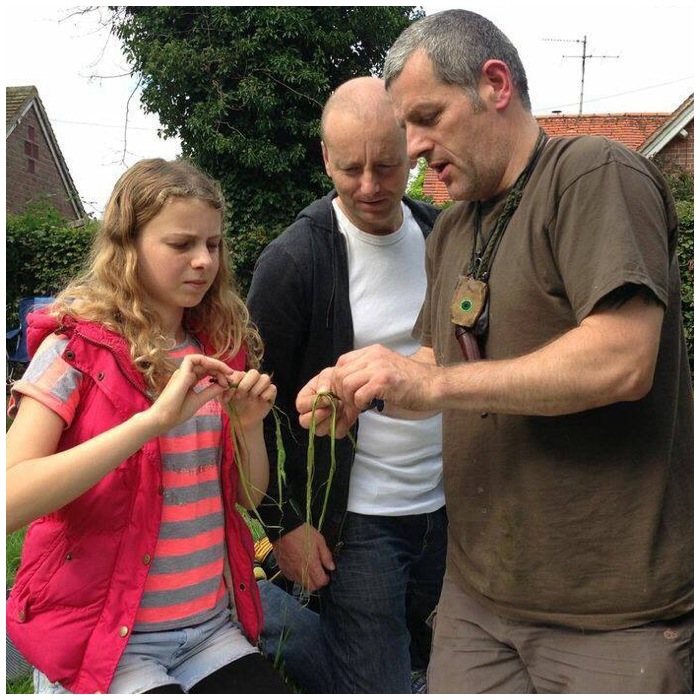
We just did a little bit of cordage-making using nettles to make some bracelets – not everyone is into bowdrilling (cannot think why!!)
Cordage making for bracelets
The mat-making carried on throughout the morning with kids and adults coming and going. Karen stepped up and organised this well with the kids to produce a lovely mat.
The mat-making class was always on the go
As we finished up I cut the mat from the loom and hung it from the branch of the yew tree. There it hung for a couple of months: the flowers faded, the grasses dried out but the whole mat stayed together in some pretty strong winds.
The end of a great day
I am looking forward to this year’s event and will be working on improving the loom set up.
Historically what would have been used to hang up your clothes and kit up if you lived in an environment where there were very few trees?
On the Isle of Lewis in the Outer Hebrides where I was brought up the stems of the Burdock (Arctium lappa) plant were used. Lewis is predominantly moorland so the locals had to use whatever resources came to hand. Burdock is a biennial (a life cycle of two years) plant and in its second year sends up a tall shoot in order to flower and reproduce. It is this stem (which is quite woody) that can be easily trimmed down and used as a hanger.
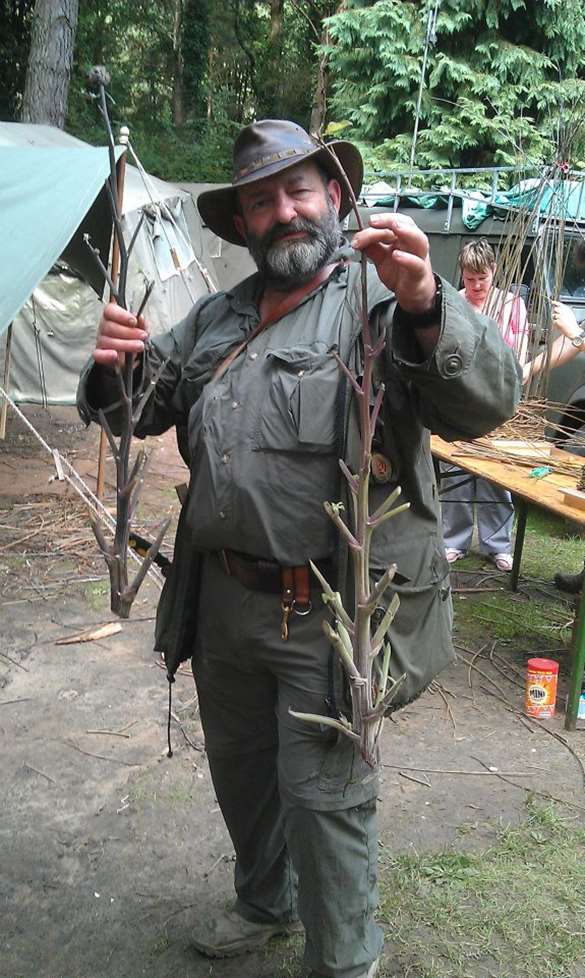
A keen convert to this was my friend John Fenna (from BCUK) as he does a lot primitive living re enactments (flint tools etc only allowed) and he thought it would be ideal for hanging stuff in his camp.
Our Mr Fenna is happy he has a Burdock hanger in the making
I came across a post on this in 2009 on my friend Kevin’s Natural Loresite (written by the guest blogger Freebornjem). The hanger had been spotted by Freebornjem in one of Blackhouses at the museum in Arnol village on the Isle of Lewis. I can remember seeing hangers like this as a small boy but it was not until I read the post on Kevin’s site did I start using one.
I now use a burdock hanger regularly when I am using my tipi or have a base camp set up. I try and find dead standing stems (autumn/early winter) as the hanger is ready for use instantly after trimming. If you use the stem from a live plant it will work for hanging kit but will not be as strong as a dead stem.
2nd Year Burdock growth (Arctium Lappa)
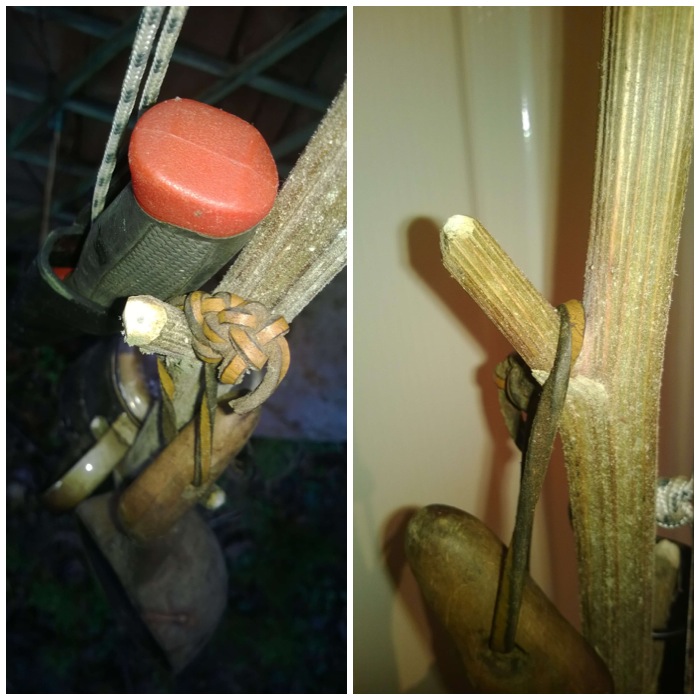
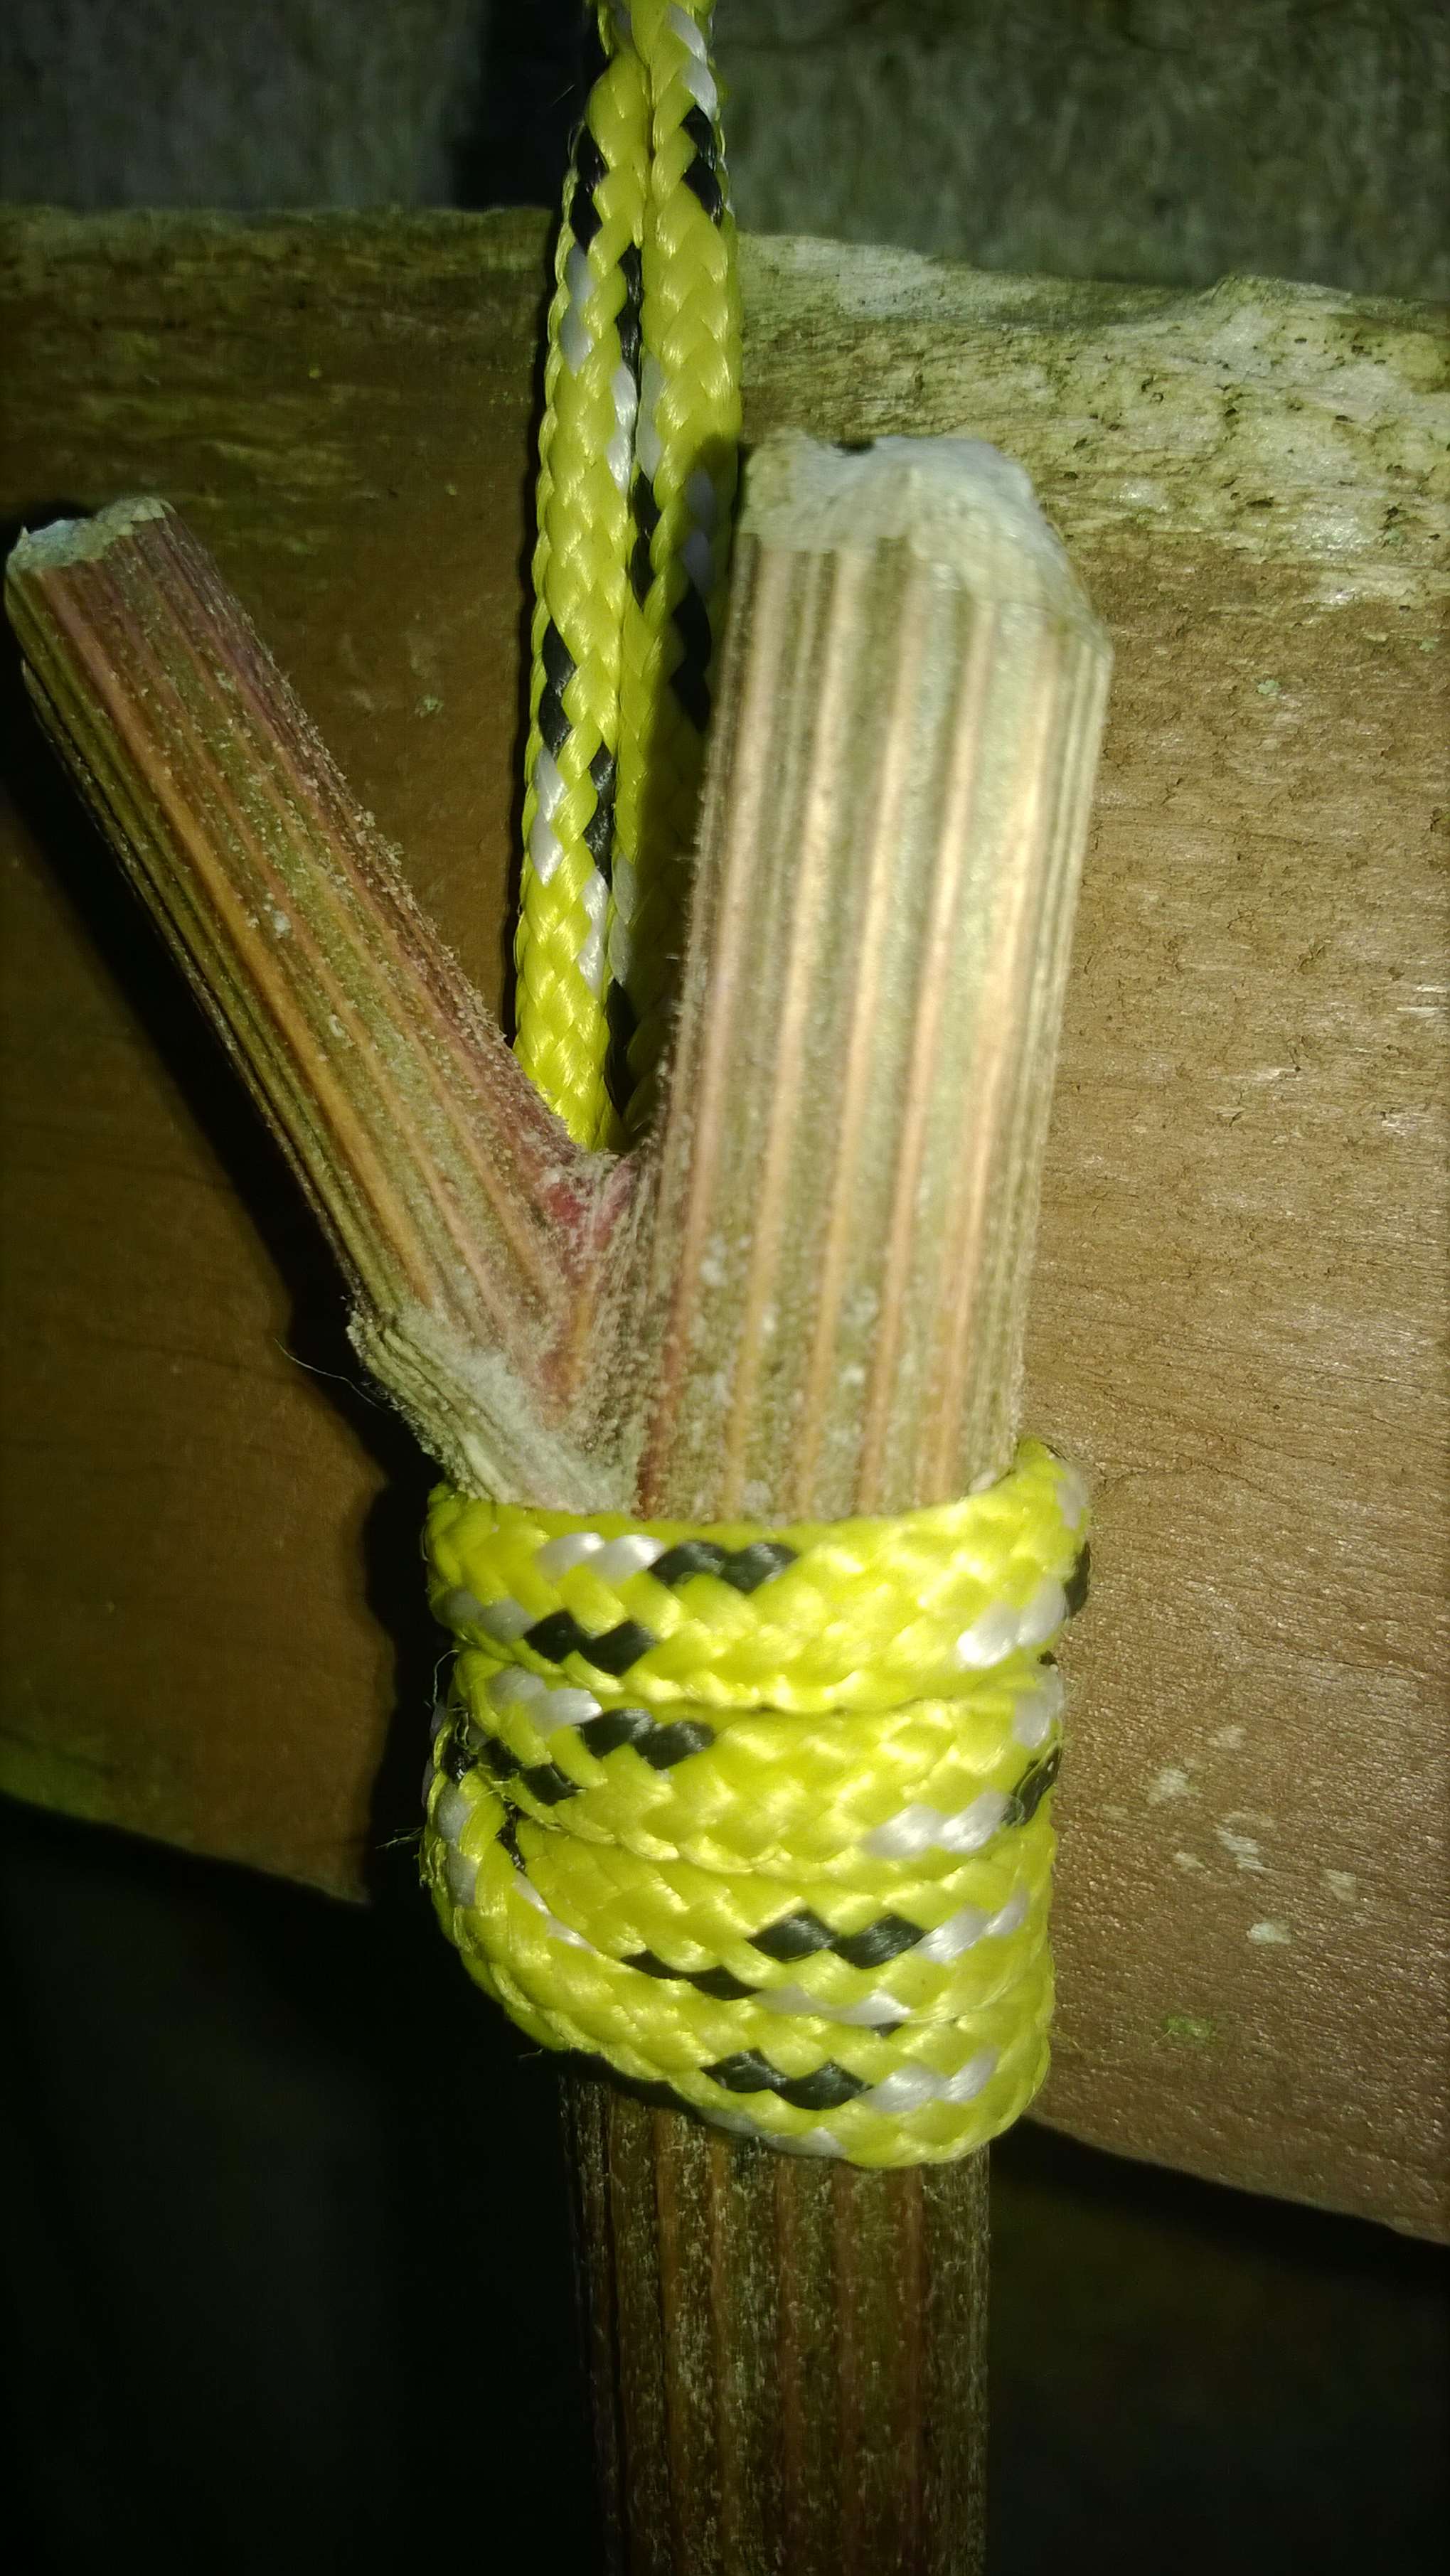
Once you have selected your stem, trimmed the leaves and burrs off cut the the branches back so that only about an inch is protruding from the main stem. Make sure you round each hook off as they can be very sharp if left after just a single cut.
Branches trimmed and rounded
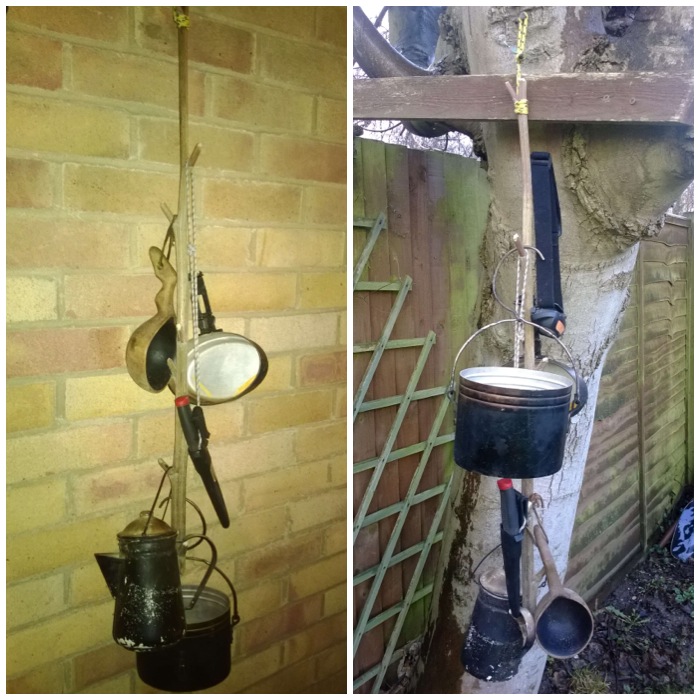
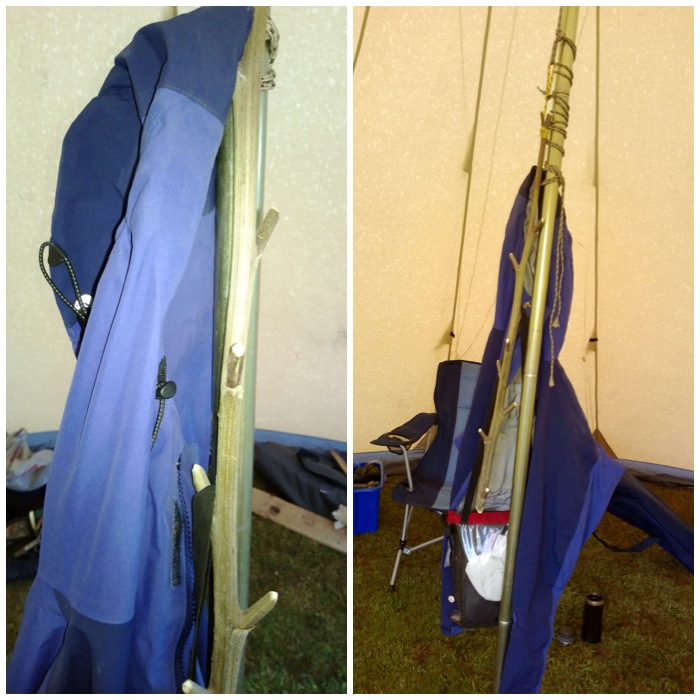
For this hanger I attached a modern connector (soft shackle prussick) but you can go natural by folding the thin top piece of the stem back and wrapping some cordage around it to form an eye. Kevin’s post covers this method. I use a modern connector now as it will take more weight. I use the hanger in my garage to hold any kit that I regularly use or it can be hung quite easily from a tree.
Great for indoors or outdoors
I particularly like this hanger in my tipi as it is easy to hang of the central pole and does not take up any room.
Hanging in my tipi
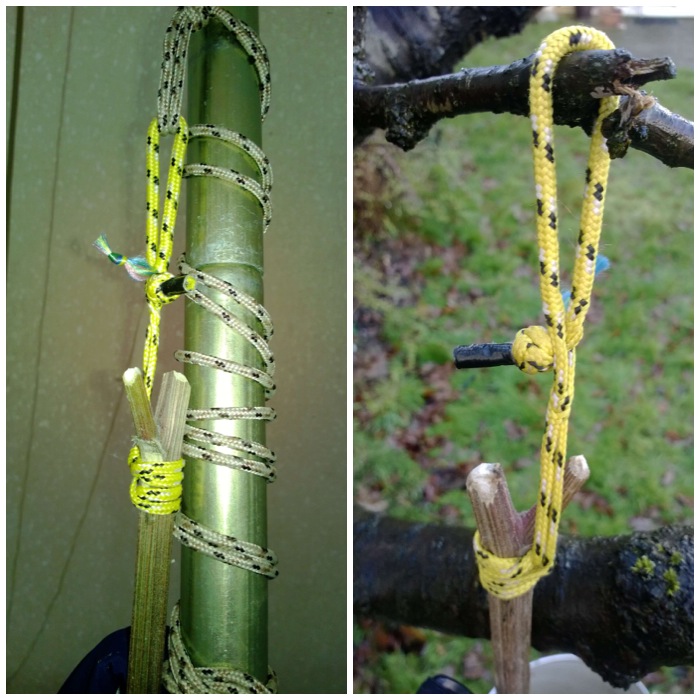
Experiment with how you want to attach the hanger to something. I like the soft shackle prussik as it grips very well and is easy to adjust.
Man made connector on this one
The top half of the shackle can be attached to a nail, branch or piece of rope very easily.
Soft Shackle Prussik
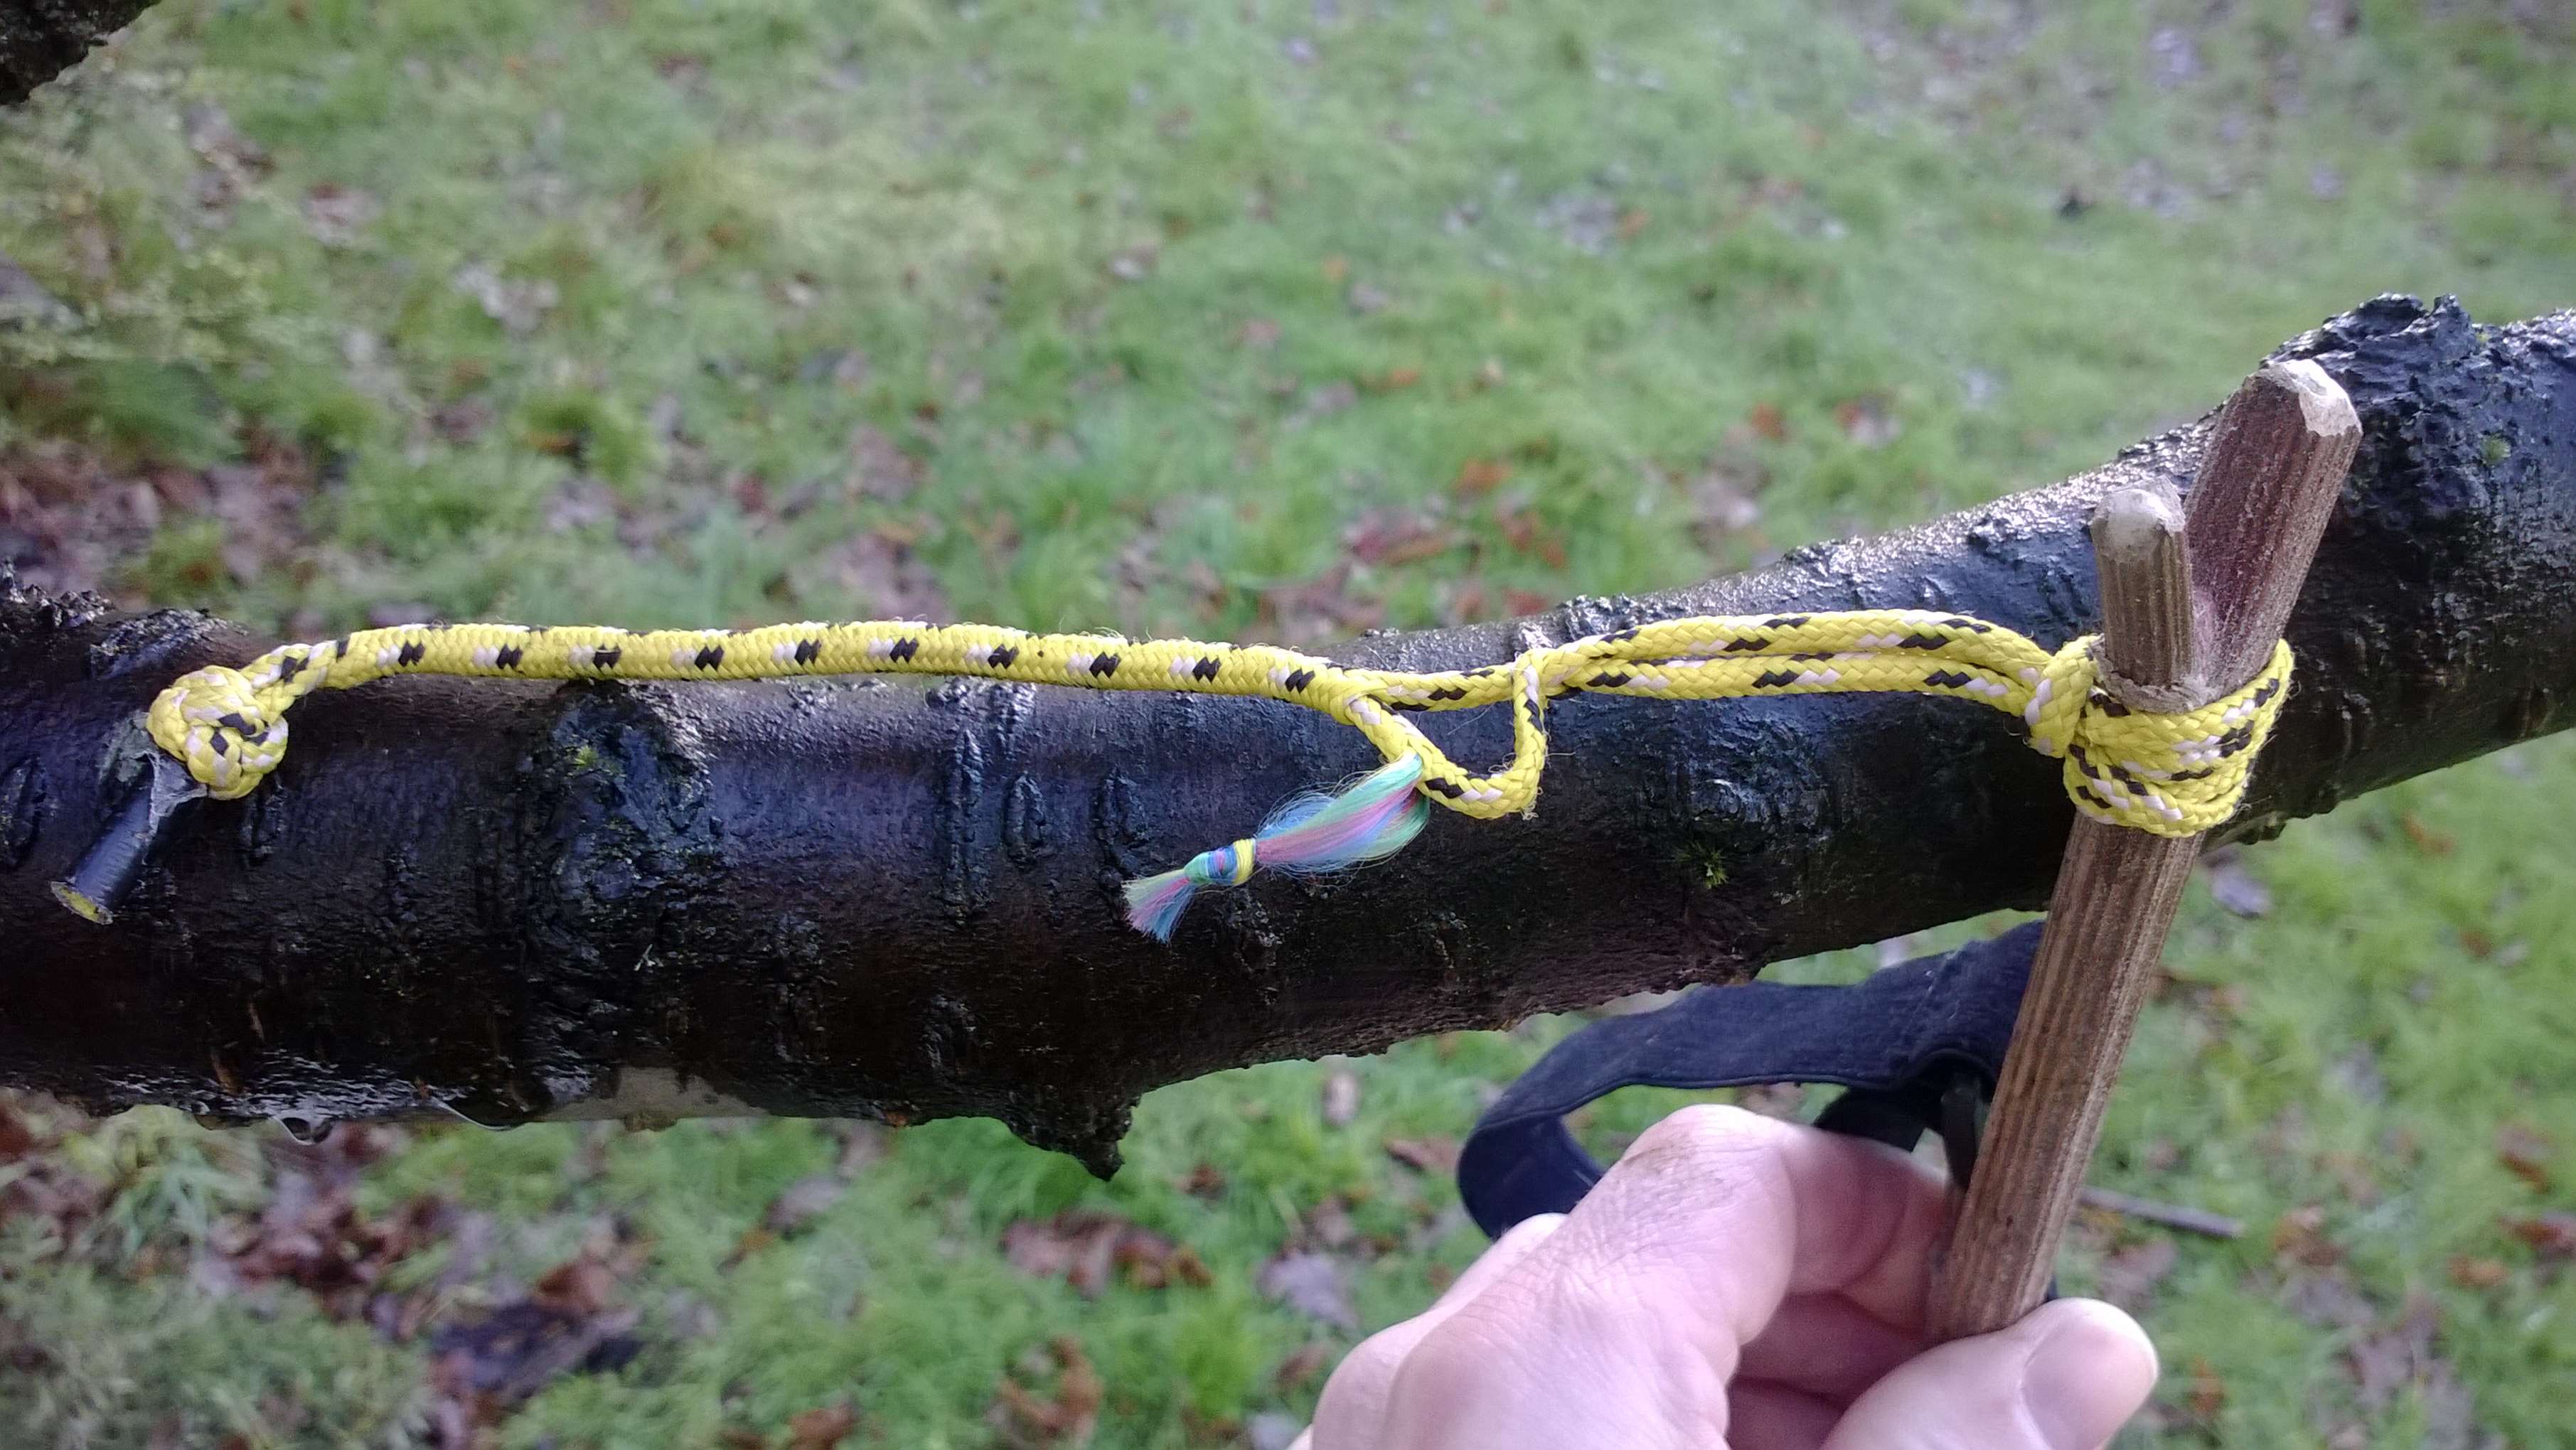
By pulling the little coloured tab you open the shackle up so making for an easy set up or take down. I will look to post an article in the future on making this type of shackle if anyone would be interested.
Soft Shackle Prussik opened up
Freebornjem mentions that the burrs when clumped into a fist sized bundle make a scouring pad. I have not tried that yet but may be worth a go next autumn.
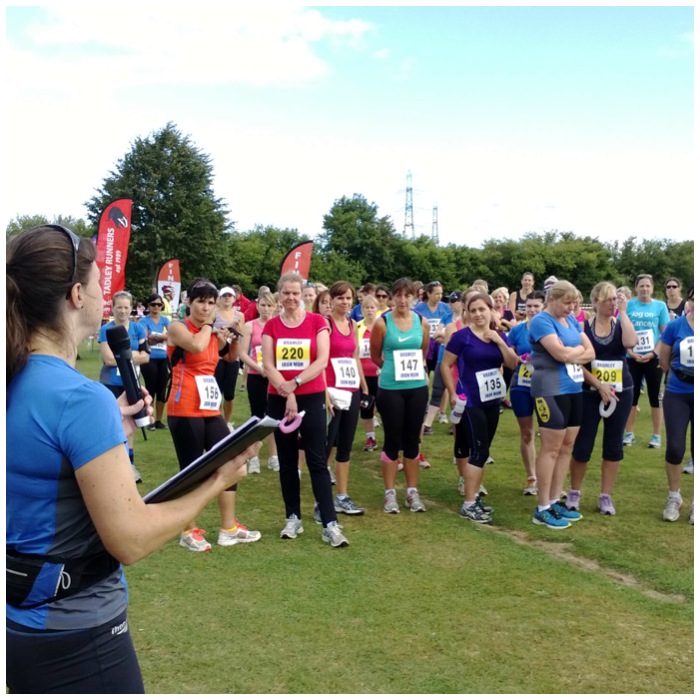
Every September for the last 5 years many of the ladies of Bramley, Hampshire have come together for a very special race. It’s called Iron Mumand these ladies train very hard throughout the months leading up to it. Many will have started for the first that year having not trained in any way for years (or never) and in a matter of a few short months are running, cycling and sprinting in this race. My wife Alison is one of the organisers and for the first few years she had me out on the route doing marshalling. Thankfully that came to an end two years ago when I was redeployed to the fun day, and now I get to play at bushcraft while the ladies are out running. Catch is though, I have to help about 20+ kids (and the occasional mum or dad as well) achieve an ember using a bowdrill. Luckily for me I enjoy the whole fire-making business.
The Iron Mums ready to race
The day for me starts early as I have to set up my bushcraft area and help with setting up the race. Normally I start about 6am setting up my tipi as a focal point for the bushcraft. I have the fire area set up near the tipi and an Atlatl range set up behind it.
Iron Dad HQ for the day
Inside my tipi hanging on a rope from the centre pole is a Burdock hanger for my jacket and bits and bobs. I will be posting a How To…. on these hangers shortly.
Burdock hanger
One of the main things I have to prepare are the drill pieces for the bowdrill. I will go through quite a few before the day is out.
Morning prep
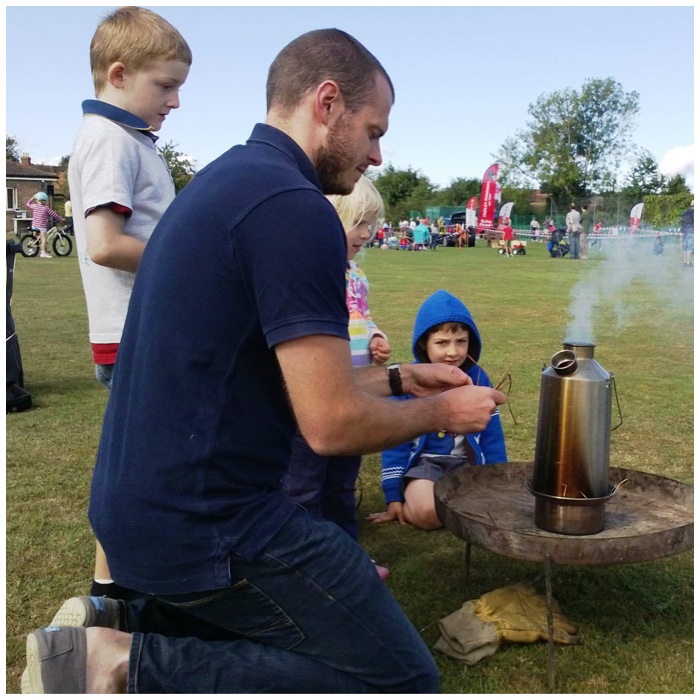
Once everything is set up it is good to get a brew on. I like to use the Kelly Kettle for this as the fire area is self contained. Also it is good for these kind of shows as people can learn some basic fire starting skills using one. In this picture though is Tom Gilbert (a fellow member of BCUK) who was perfectly capable of getting the Kelly going and a brew on.
Time for a brew
Last year I got my first customers even before the race started. I try and explain all the different parts but sometimes the queue is too big or the kids just have that look in their eye that says ‘Just get on with it!’.
Bowdrill basics
To give that feeling of teamwork (and maximise the number of kids having a shot) I try to get them to double up with me. The need to master the bowdrill solo only starts to take hold in the teenage years, so all the kids I work with are usually very happy to work as part of a team in firemaking.
Teamwork
My son Finlay though was very insistent on just the two of us having a go. Thankfully the day was warm, the wind was gentle and steady and I had plenty of dry timber, so we got lots of embers really quickly.
Bowdrilling with the ‘Red Ninjas’
The kids were pretty enthralled with seeing a glowing ember and were really protective of what they had just created. The wind was just strong enough to be helpful with the embryonic ember’s start in life but potentially strong enough to immediately blow it apart if it was not protected. Kind of a Catch 22 situation, but the kids managed to protect their embers until they were strong enough to pop into a tinder bundle.
Protecting that well-earned ember
Each ember produced a nice bundle of flame. With these tinder bundles I generally hold them unless the kids are really keen to do so. I then get all the kids to queue up behind my shoulder and take turns blowing it into flame.
Flames away 🙂 Spot the baby dragon
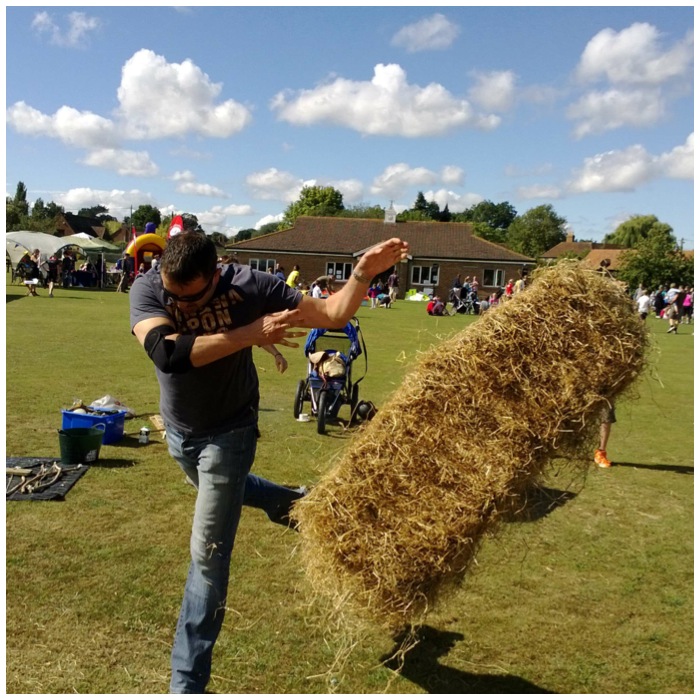
While all this was going on, the stance next to me was doing a bit of hay bale throwing. Never tried this before and only got it about half as far as the winner (must be a knack thing, obviously). The kids shied away from this one so my friend Michael and myself took turns throwing the bale with any of the kids who wanted a go. Turned out to be a hit after that. (Michael though had done his shoulder in earlier so when his good wife Helen found out what he had been up to there were a few choice words said) 😉
My neighbours were being a bit active
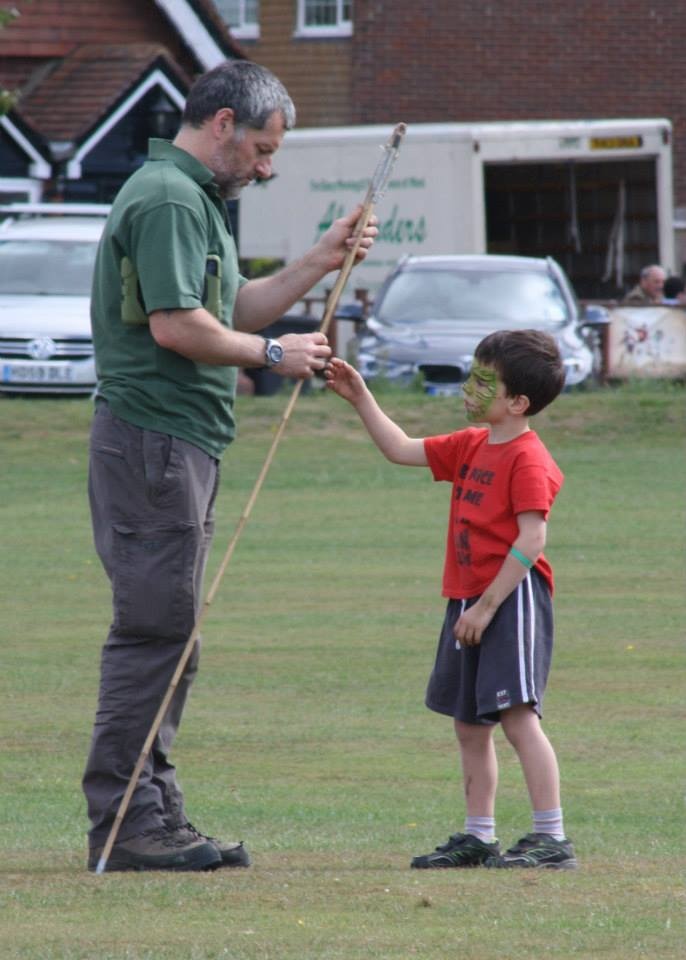
The other activity I offer is an Atlatl range. It is very small but it has a good turnover of kids. Michael is quite happy to run this stand for me (thanks mate). I have a range of different Atlatls for the kids to use so that even 3 year olds can use them. We give each of the kids a bit of tuition to begin with before letting them loose with what is basically a spear-chucking device.
Atlatl tuition with Finlay
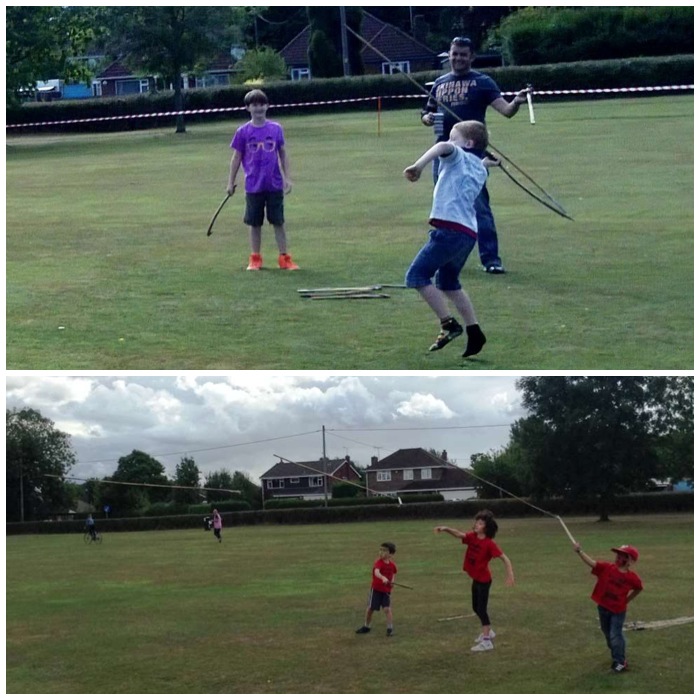
The range is strictly controlled with a clear target and launch area.
Airborne Atlatl darts
After a few tries most of the kids can get the dart into the roped off area. There is something fundamentally satisfying about throwing an Atlatl dart and I find whoever picks one up and uses it gets the same satisfaction. Must be something imprinted into our genetic makeup (like watching the flames in a campfire).
On target 12 o’clock high
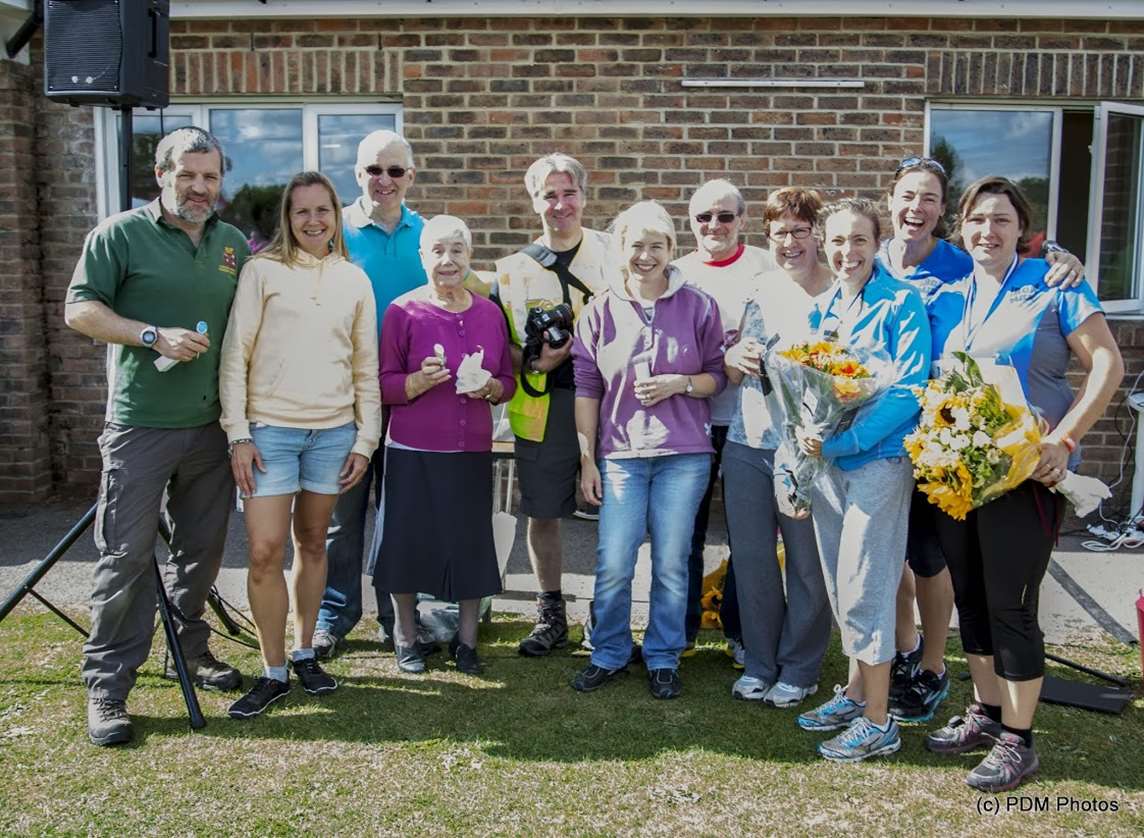
After the race (I saw nothing of it to tell the truth) those volunteers who had helped out at all 5 races received a lovely gift of an engraved metal wine stopper.
Long Service Medal Recipients for Ironmum
I thought I would finish on this picture: my wife Alison saw it and asked, ‘Where does your beard end?’ 😉
Recently I posted an article titled – Atlatls – What they are and why I love them where I said I would be publishing a couple of How To…. guides on making them. This is the first of these guides on making what I call the One Stick – Split Stick Atlatl.
The One Stick – Split Stick Atlatl
As explained in the previous article, an Atlatl is basically a spear-chucking device. Many different types have been made by different societies: there is nothing in the archaeological record (as far as I know) of this type of Atlatl, but then as it’s made completely of organic material there is no surprise there. I decided to investigate this type after researching the Lovelock Cave Atlatl. There is debate over how darts were launched by that Atlatl and whether a point was used or whether a strip of cordage was used.
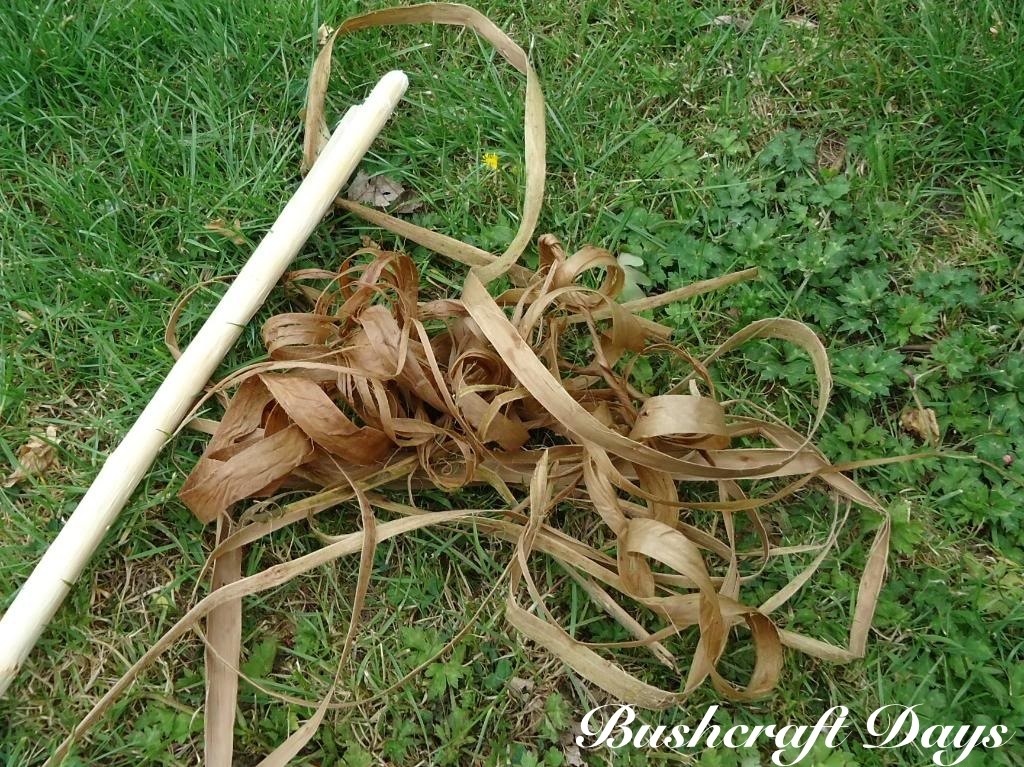
The One Stick -Split Stick Atlatl I made for this post was done using primitive tools only and a single shoot of goat willow (Salix caprea). I made the Atlatl just to prove to myself I could make one out of a single stick (shaft, wedge and cordage). All you would need to make one using modern tools would be a good sharp knife. The piece of willow I selected was about 1.5 metres long and about the thickness of my thumb. This was far longer than needed but I wanted it this length to get lots of cordage from the bark and to use part of the excess wood as a wedge (needed in making this type of Atlatl).
Goat Willow (Salix caprea)
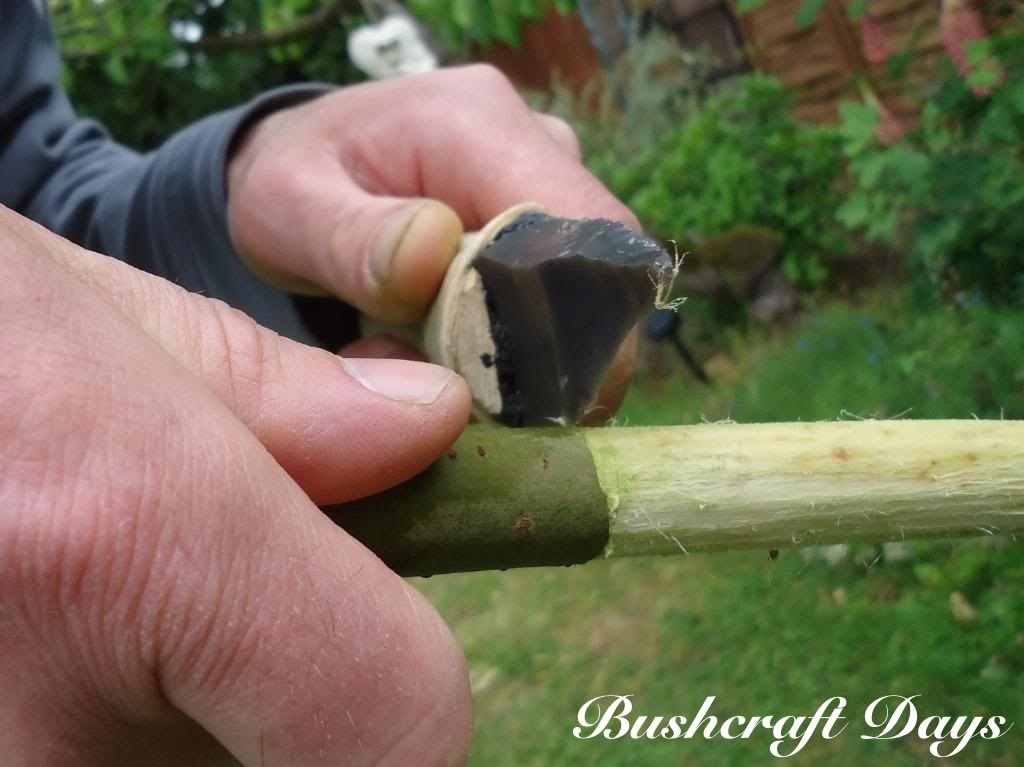
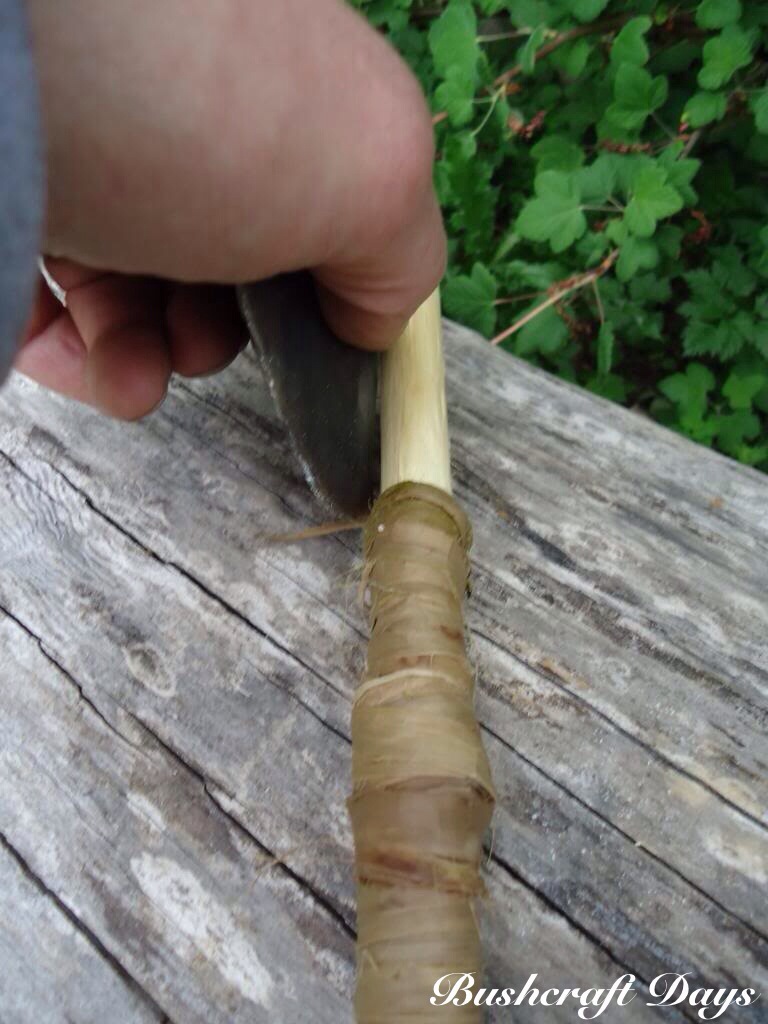
The first thing I did was to cut into the bark all the way around the stick about 12cms from the thickest end, leaving an area of bark slightly larger than my fist. This bark-covered end acts as a handle area.
Cut a line through the bark around the stick
I used an old deer rib bone to scrape the dark outer layer of the bark off rest of the stick, leaving the handle untouched. If you leave this on the bark, the cordage you make from it will not of the highest quality.
Scrape the outer bark off
After scraping off all the bark I re-cut around the stick just above the handle area to make sure all the inner bark was disconnected from the handle area.
Cut again through the inner bark all around the stick
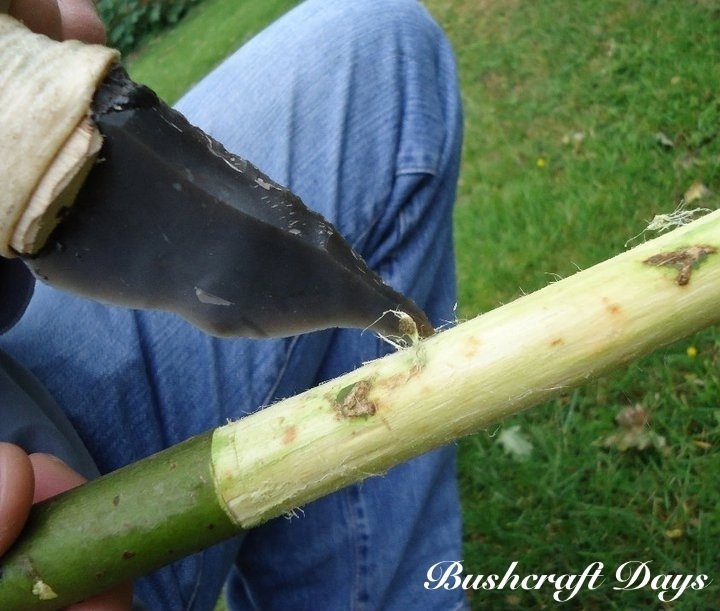
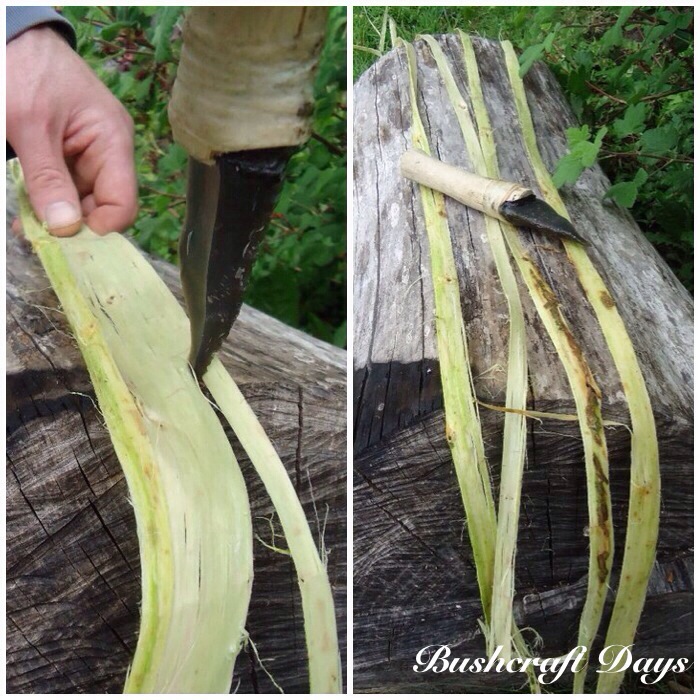
I then cut a line through the inner bark from the handle to the end of the stick to start to open the bark up.
Make a cut along the full length of the inner bark
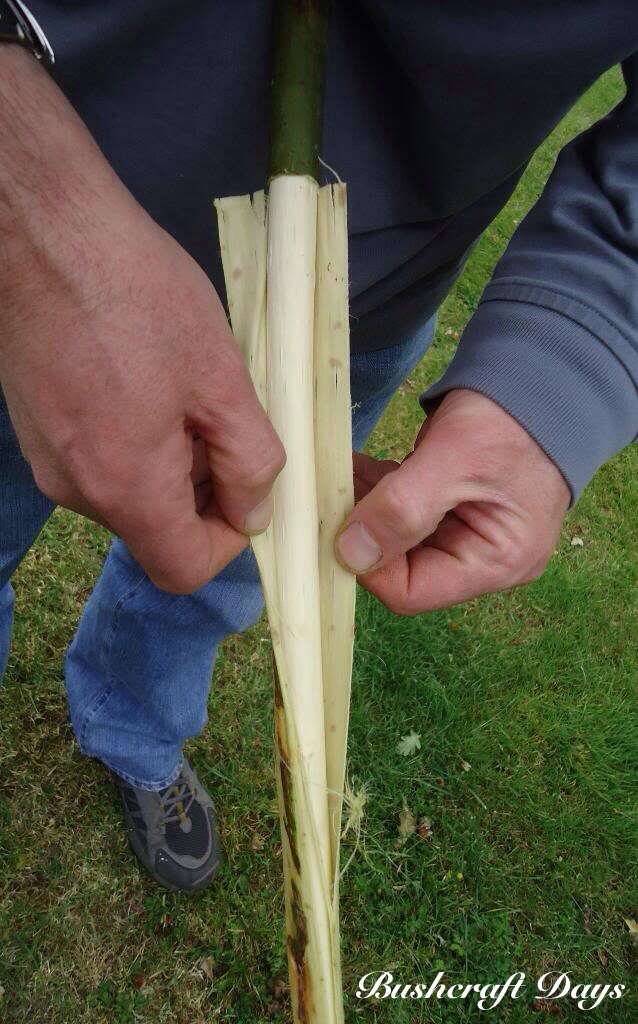
I used my thumbs to peel open the bark. Other tools that make this job easier are a small wooden wedge or the back of your knife blade. In late spring the bark comes off easily so my thumbs were all I needed.
Slowly peel the bark off – use a wooden wedge if the bark does not come off easily
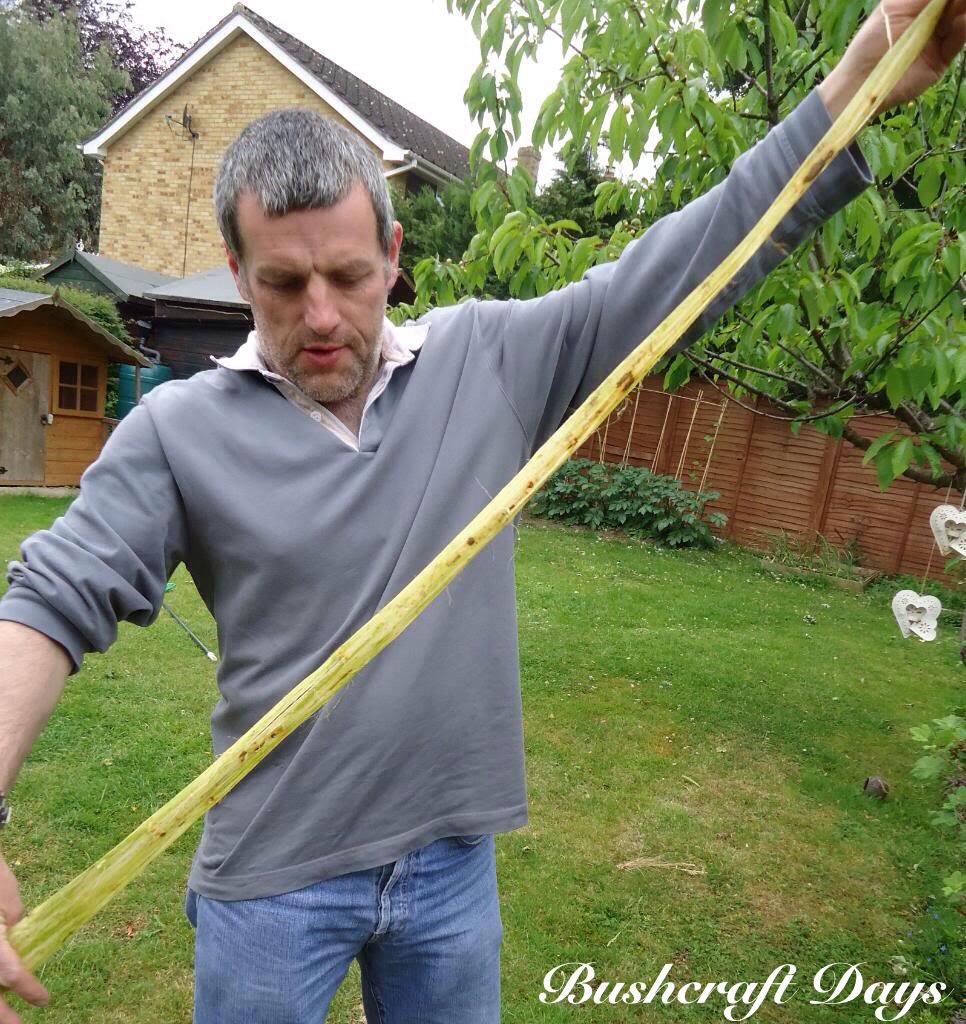
Wherever possible try and take the bark off in one piece so you can make long strands for easy cordage making. Do not worry if this does not happen, all it means is that your cordage may take slightly longer to make.
Try to get it off in one piece
I wedged the flint knife into a groove in the log and then sliced the bark into strips. I managed to get a good amount of strips out of this one piece of bark. I then left the strips to dry out in the sun. Cordage is best made from rewetted strips of bark as the bark shrinks considerably when it is dried out for the first time.
Split the bark into strands
I decided that I wanted my Atlatl to be about 64cms long (fingertip to armpit for me) so I used a piece of flint knapped as a discoidal (curved) knife to saw through the stick. This takes far longer than using a modern knife but I find far more satisfying.
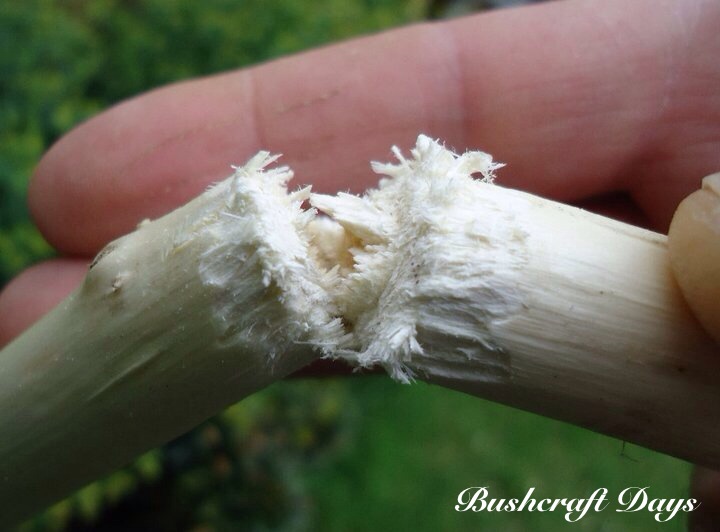
Saw/cut a piece of wood from the end of the stick
Keep sawing until you can feel you can snap the wood without splitting it down its length. Once snapped, trim the end of the Atlatl smooth.
Primitive cut
The spare piece of wood needs to be trimmed down and cut to size to make a wedge. This will be used to form the split stick part of the Atlatl.
Spare piece of wood to make a wedge
I used my flint adze at first to blank out the wedge, making it about 10cms long.
Create a wedge
Then I used my flint knife to trim the wedge to its final shape.
Trim the wedge
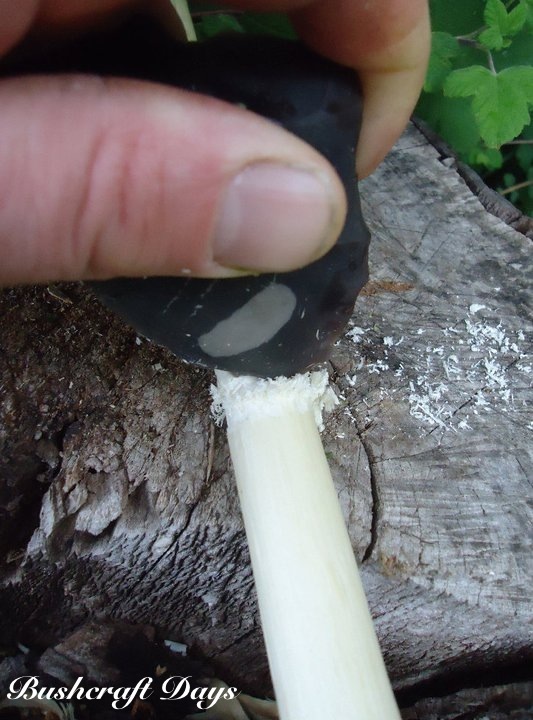
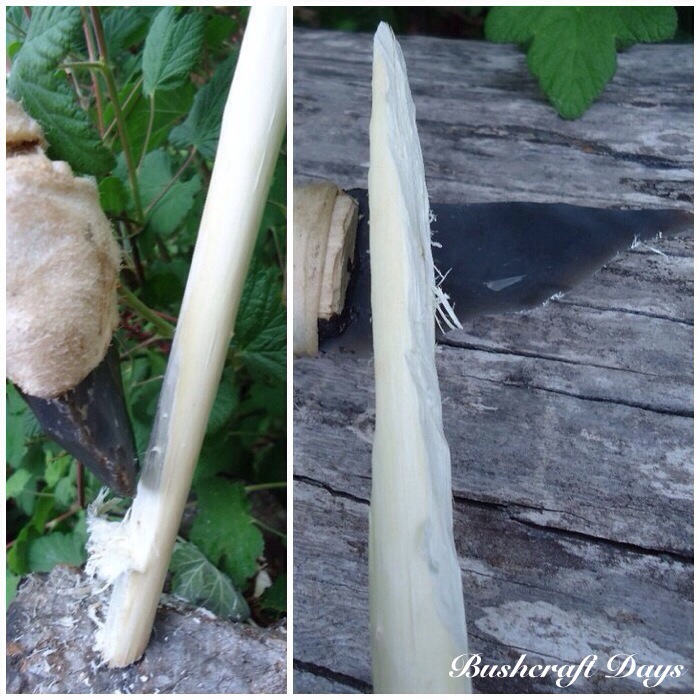
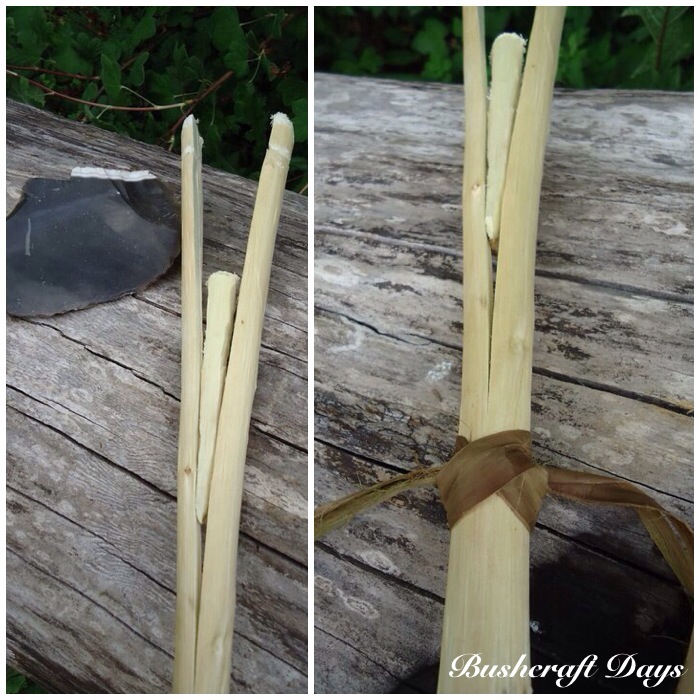
I used my flint knife to split the non-handle end of the Atlatl open. As the knife has a flat spine I just hit the back of the knife to start the split. Be careful to keep the split in the middle of the stick. A piece of cordage should really be tied off on the shaft where you want the split to stop. I forgot to do this but thankfully the split did not travel too far. I made my split 20cms long.
Split the end of the Atlatl
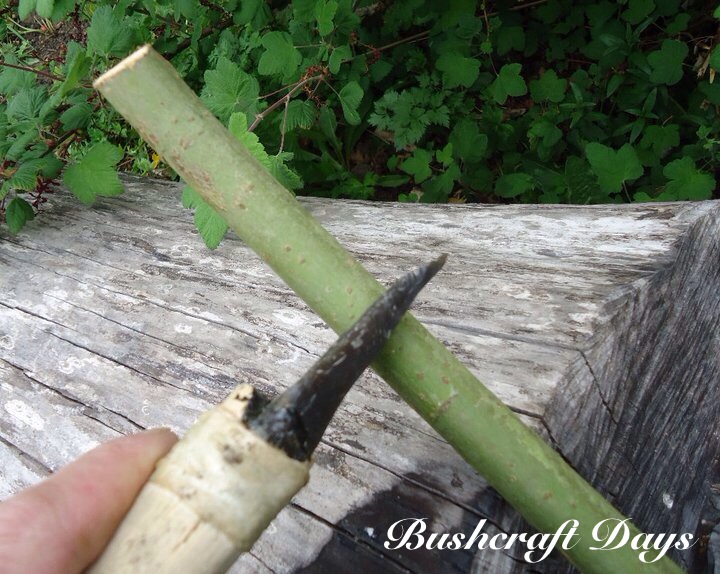
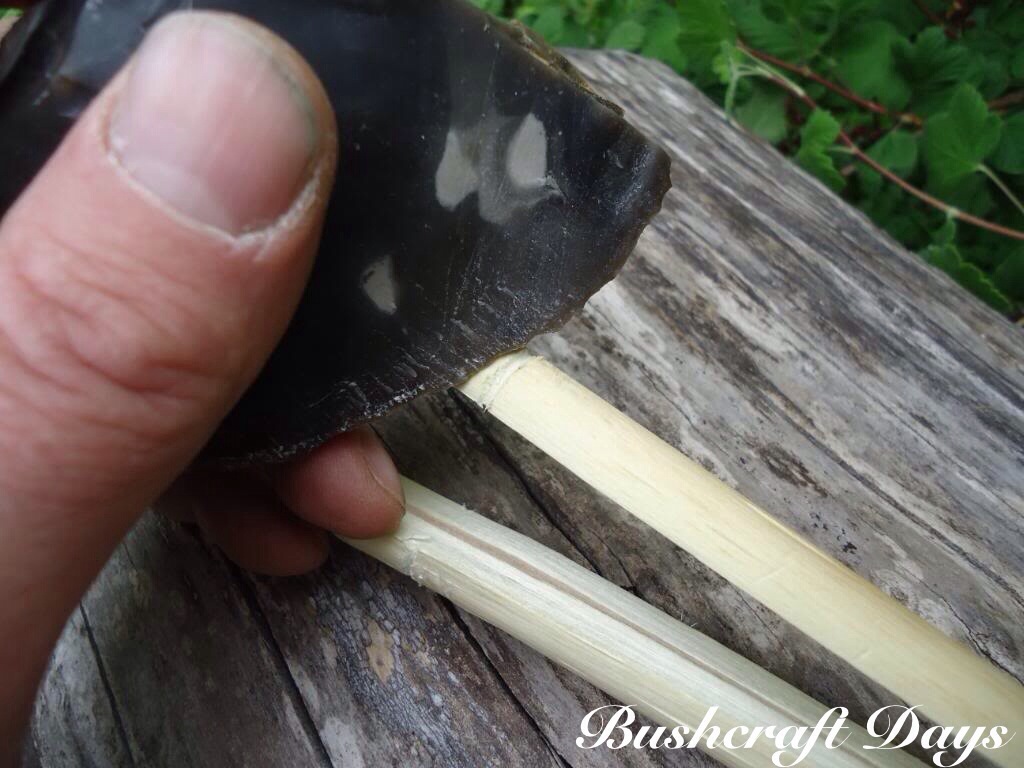
I used my discoidal knife to create a small groove around each split limb for the cordage to grip onto.
Create a notch on each split
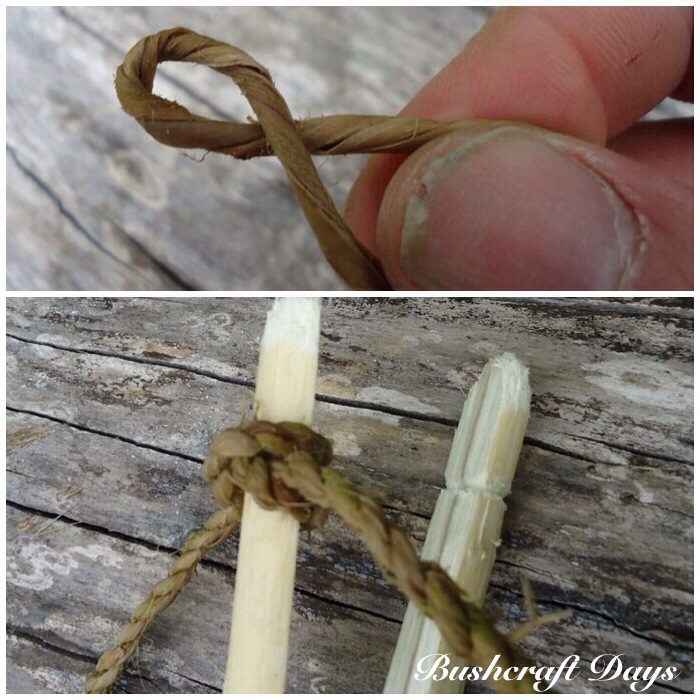
Before inserting the wedge I did tie off the split with some of the dried bark using a constrictor knot.
Insert the wedge but with the base of the split tied off.
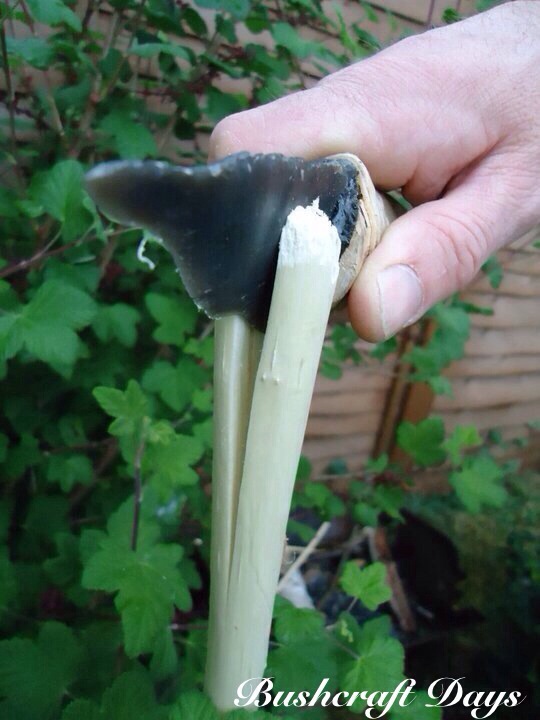
Afterwards I used more of the bark strips to secure the wedge by wrapping them around it to hold it secure.
Split secured
I had plenty of bark left over after this, which was good as I wanted to make some cordage to create a strap to hold the dart in place before launching.
Dried-out bark ready to make cordage
I completed a piece of cordage about 50cms long to give me plenty to tie onto the Atlatl. I used a constrictor knot on each split to hold the cord in place. Jonsbushcraft blog has an excellent tutorial on making cordage.
Create cordage to attach to the splits
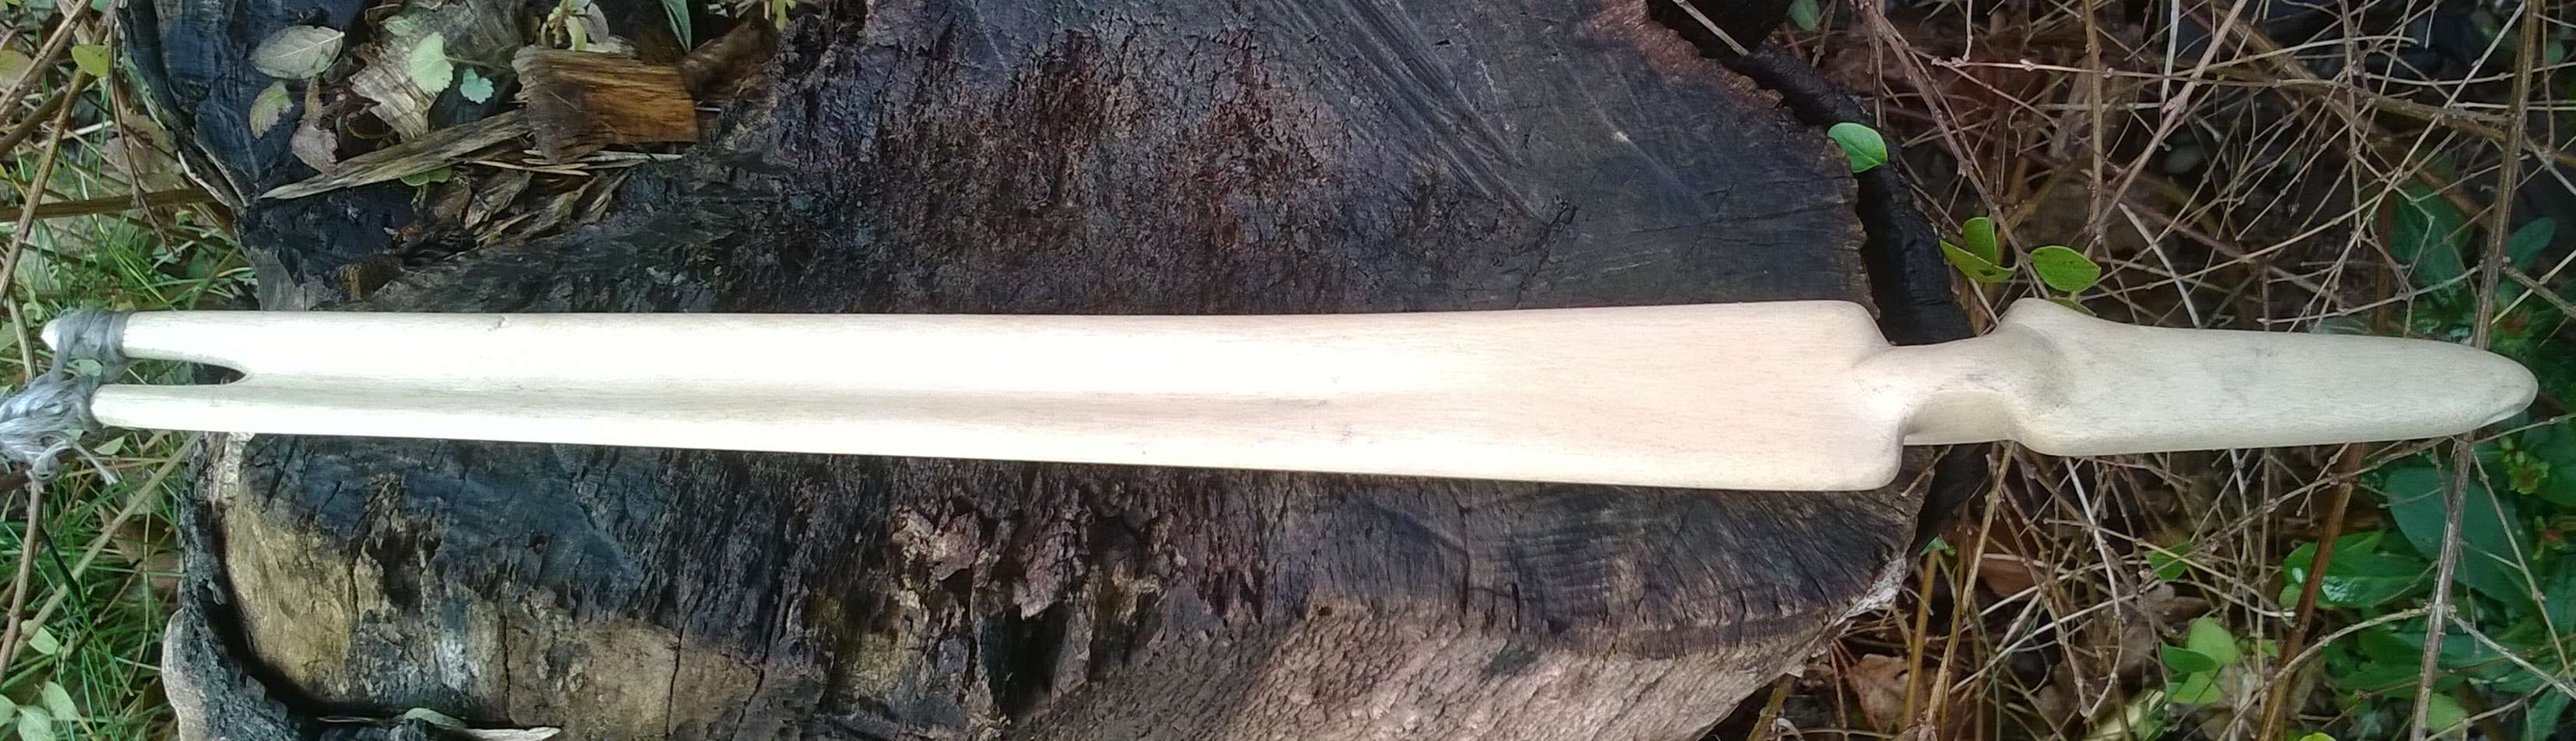
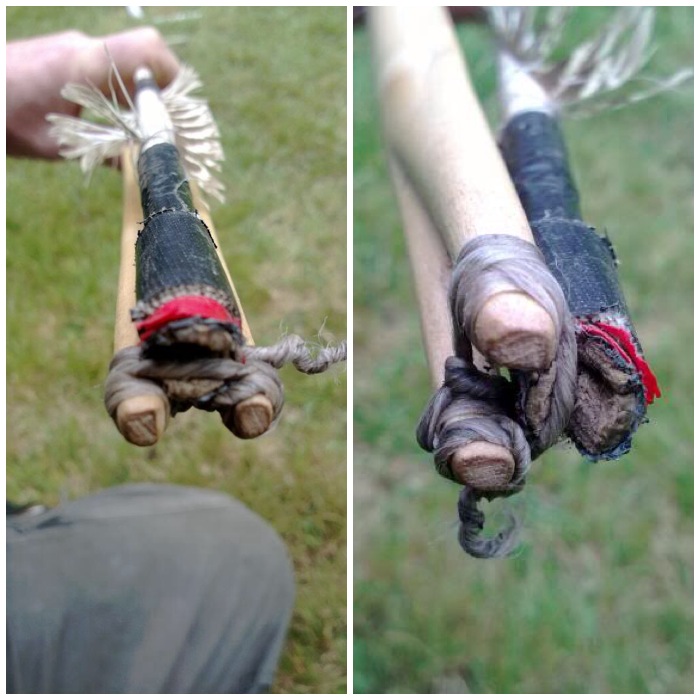
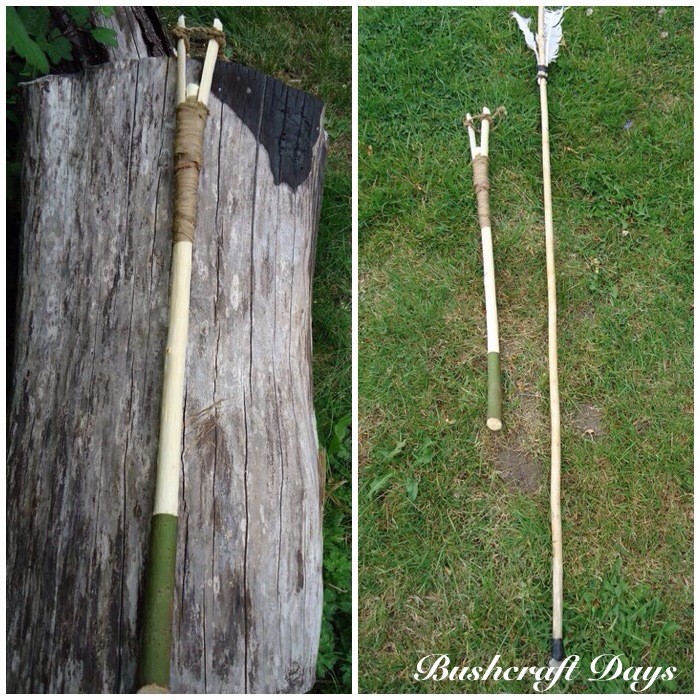
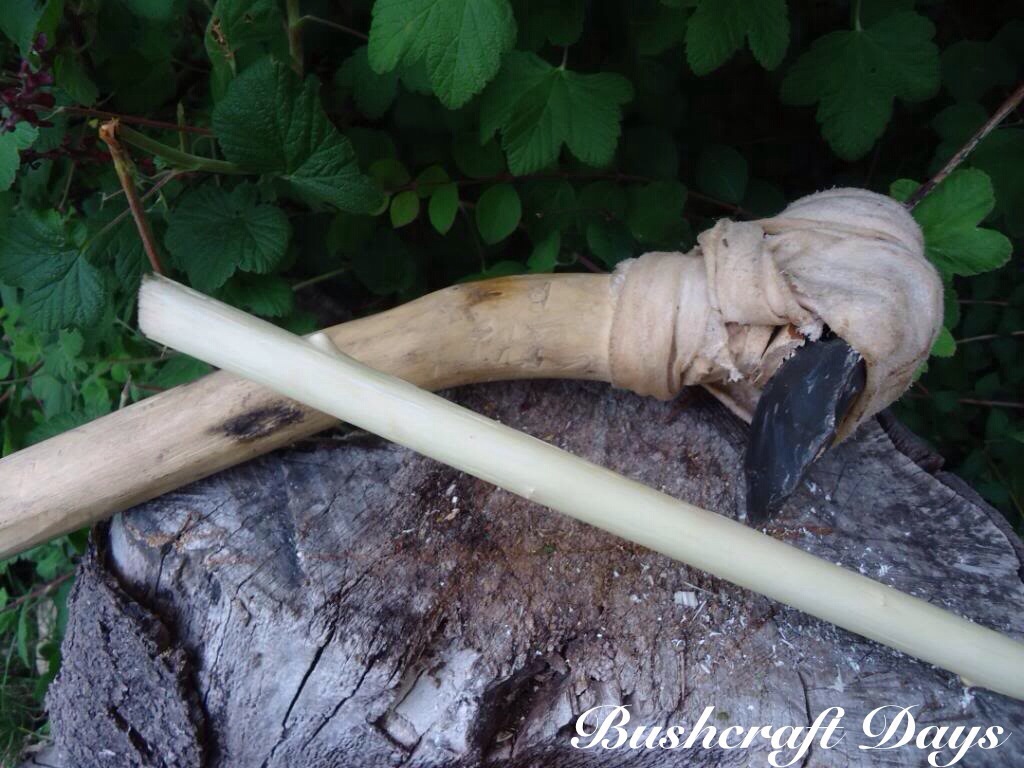
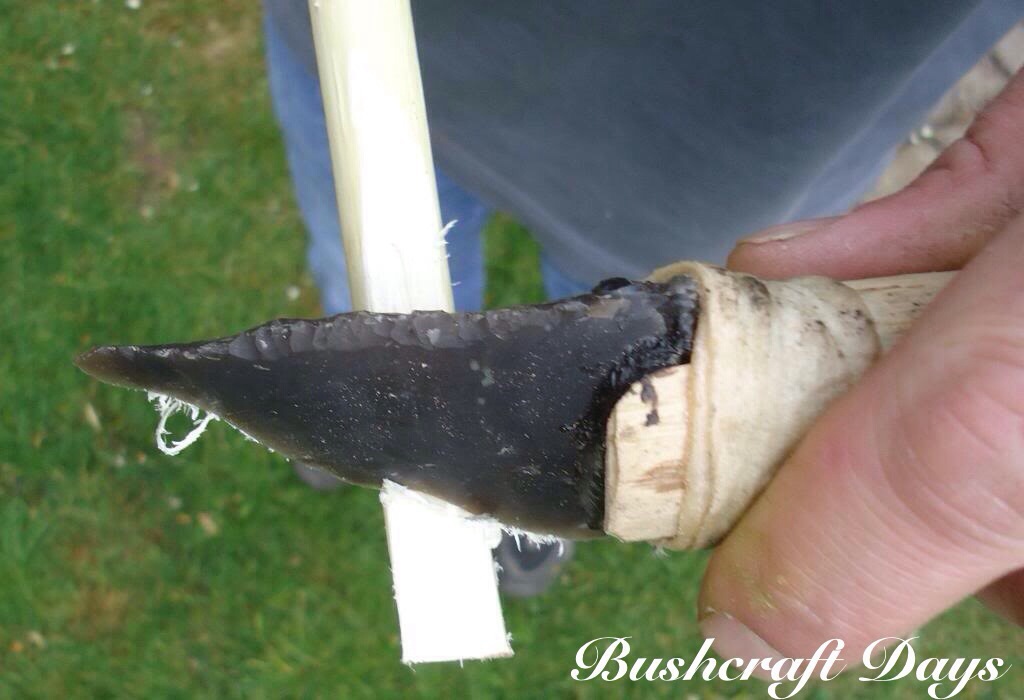
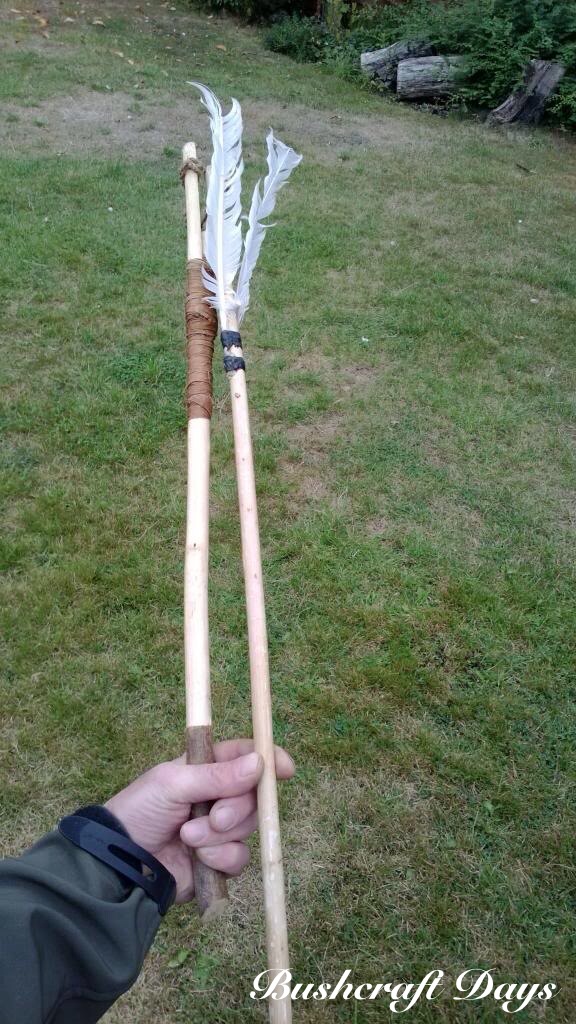
I was very happy with how this Atlatl turned out.
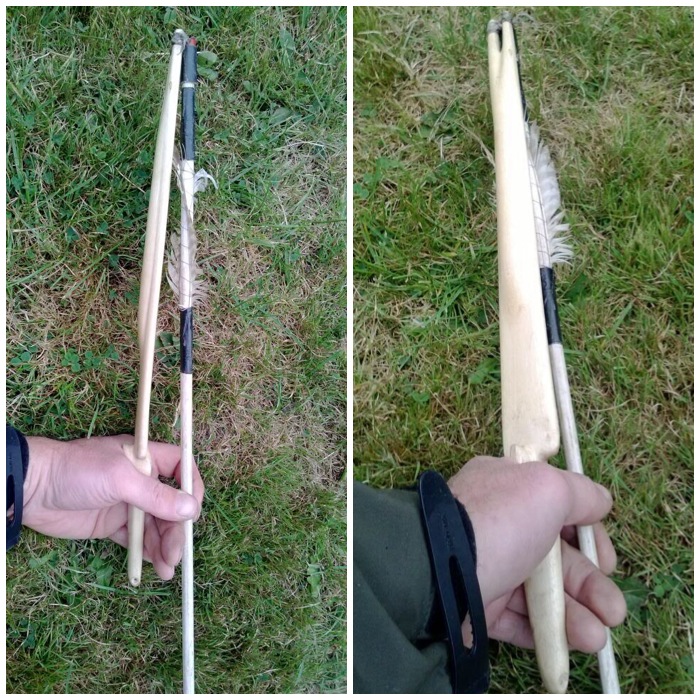
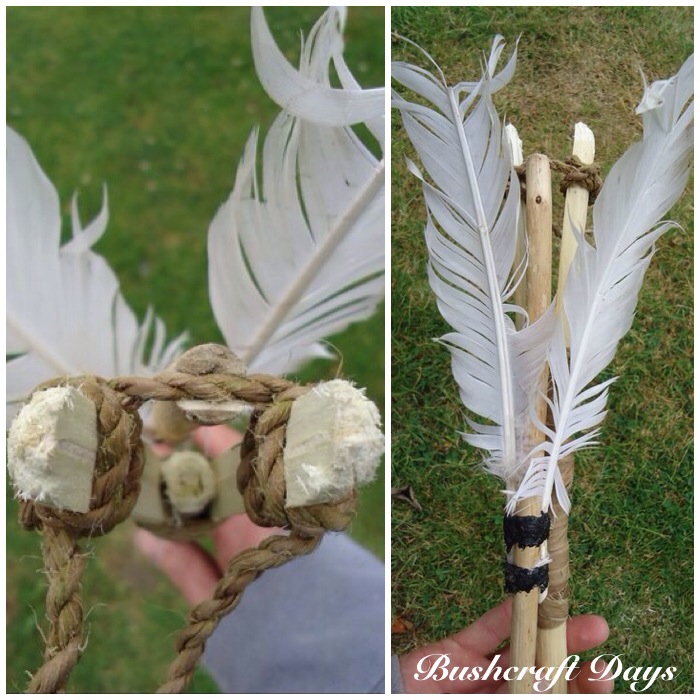
Completed One Stick – Split Stick Atlatl ready to go
You can see the dart has a groove instead of a hole at the end. This allows the cordage to hold the dart in place before launching.
Dart has a groove instead of a hole
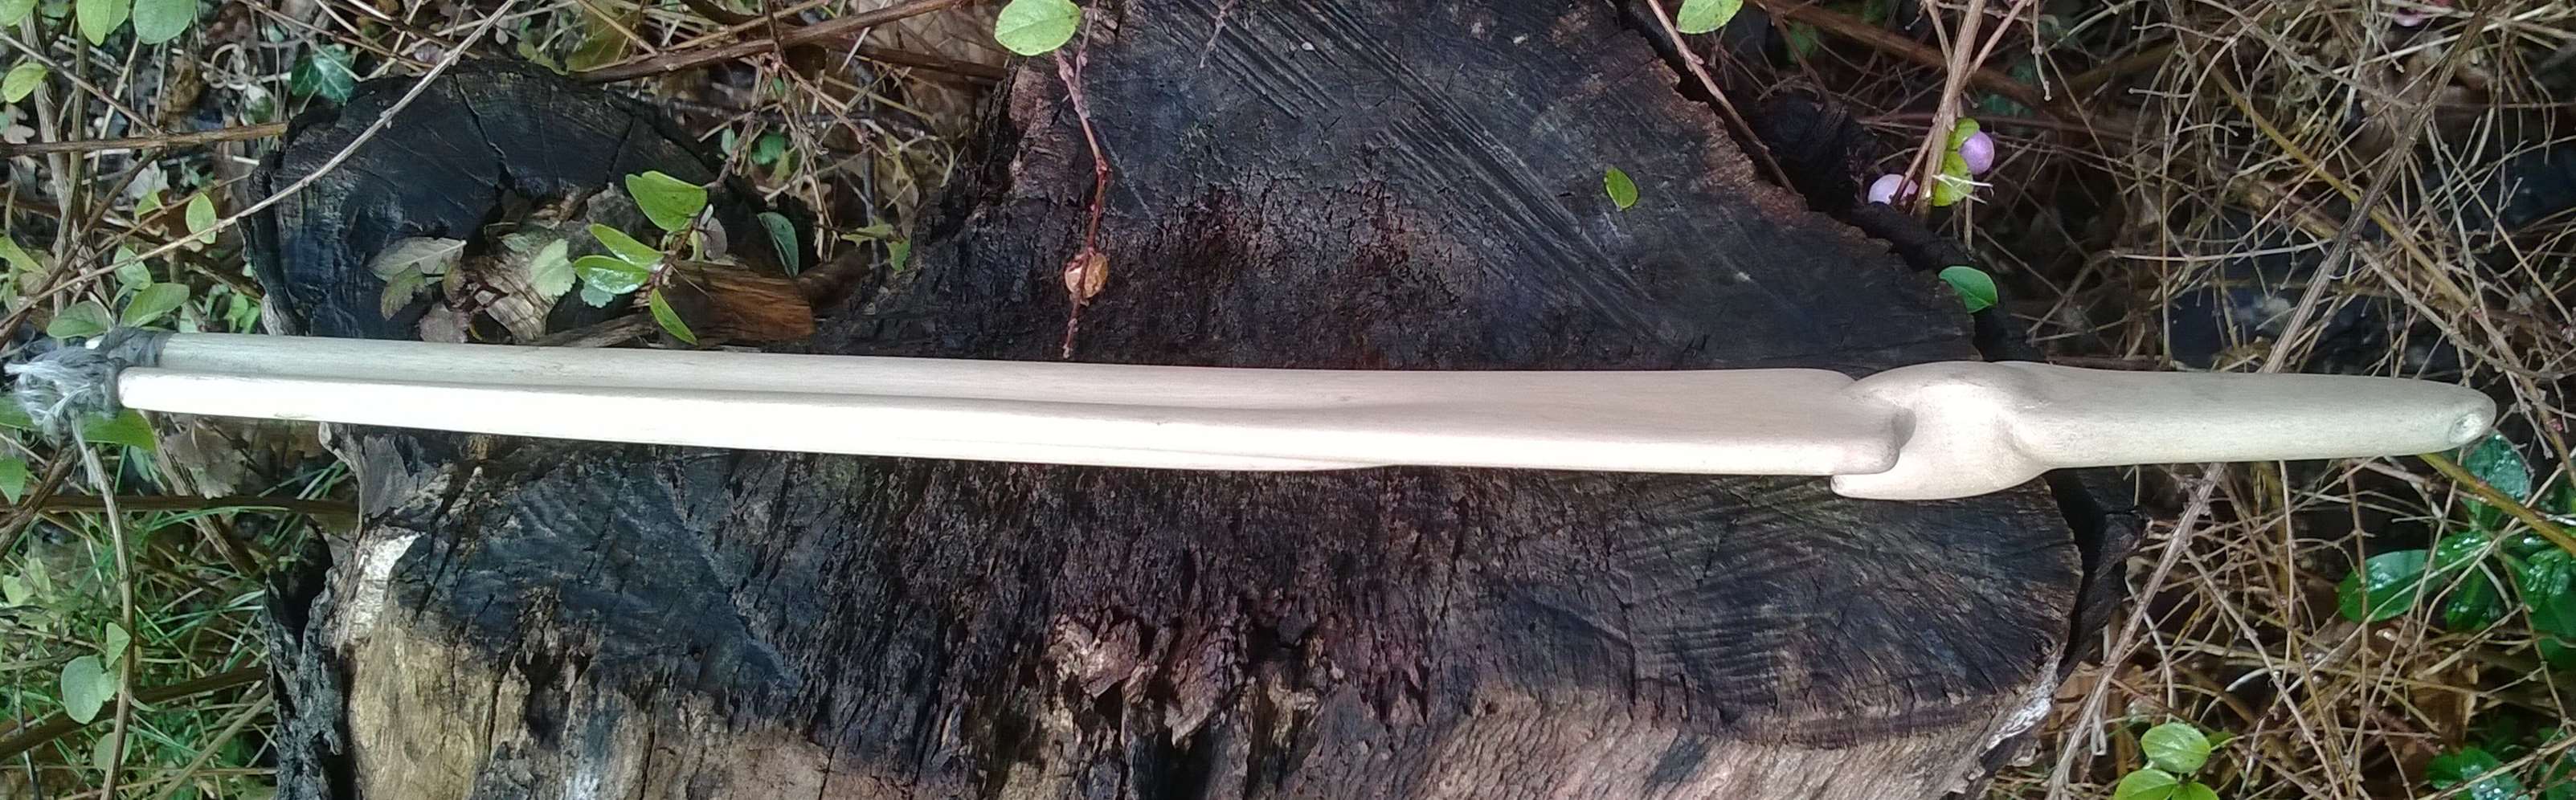
The finger pinch hold is just the same as a normal Atlatl with a point.
Simple finger pinch hold
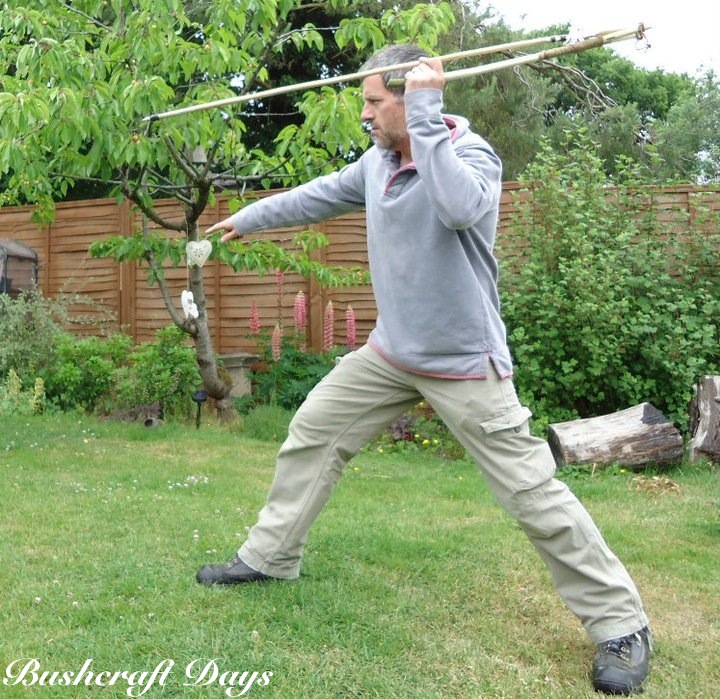
I think the launch with this type of Atlatl feels slightly different but once you get used to it I find the release is as smooth as it is with a normal pointed one.
Perfectly good Atlatl
I made this Atlatl purely for the joy of making one with primitive tools and to see if it was possible to produce a hunting tool out of just a single stick.
I have no idea whether hunters in pre-history used this type of Atlatl but I certainly now know they would have found it the easiest thing in the world for them to make.