Bows and Atlatls – My Set

It has been 8 or 9 years now since I started making my own bows and Atlatls. In that time I have enjoyed making a number of different types and have brought them all together in this post. I am no expert in making them however I do like to carve them.

If you want to know how to make any of these tools just click on the title for each section to see a detailed How To…. guide on making them. This post will concentrate on my thoughts on them through my own personal use and that of my students.

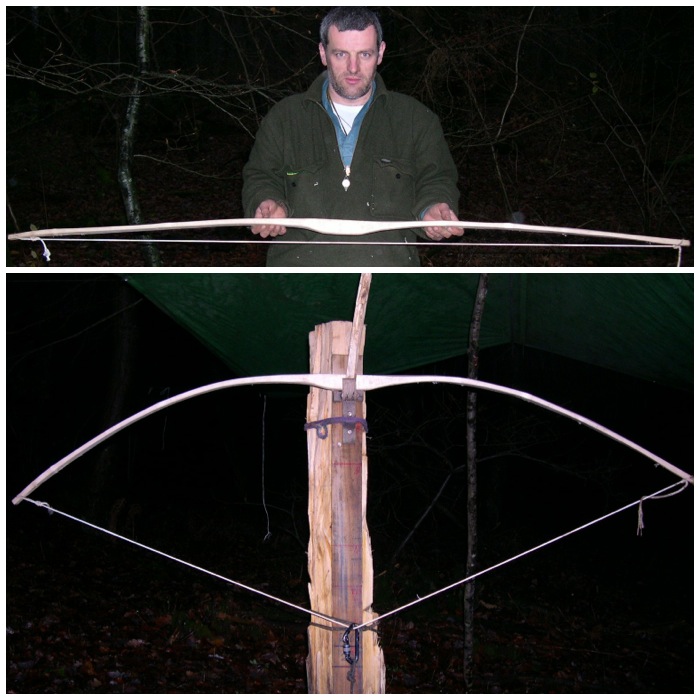
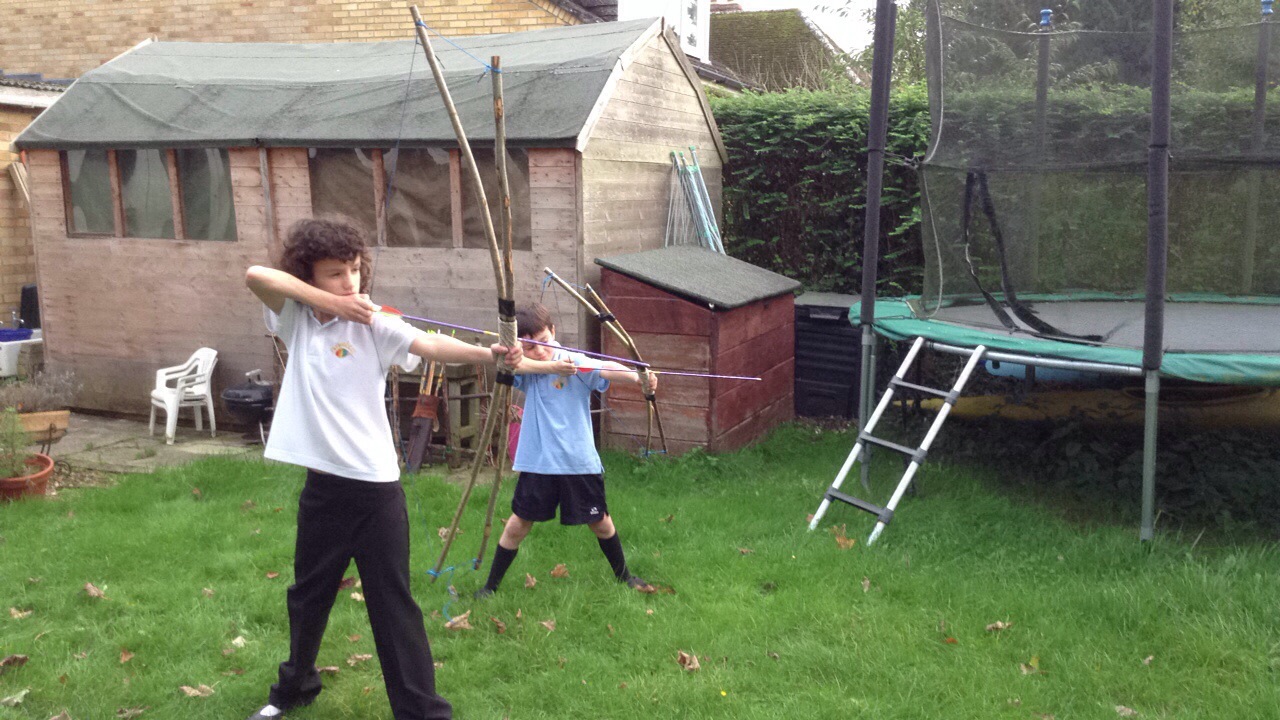
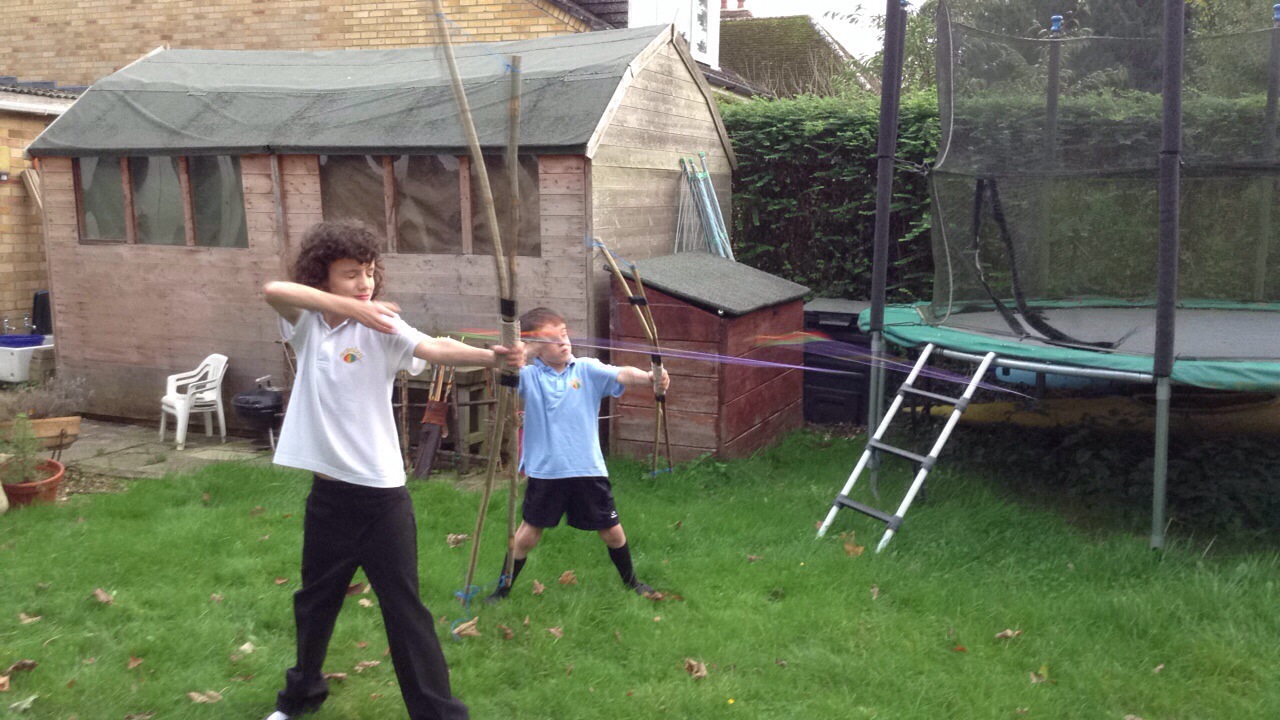
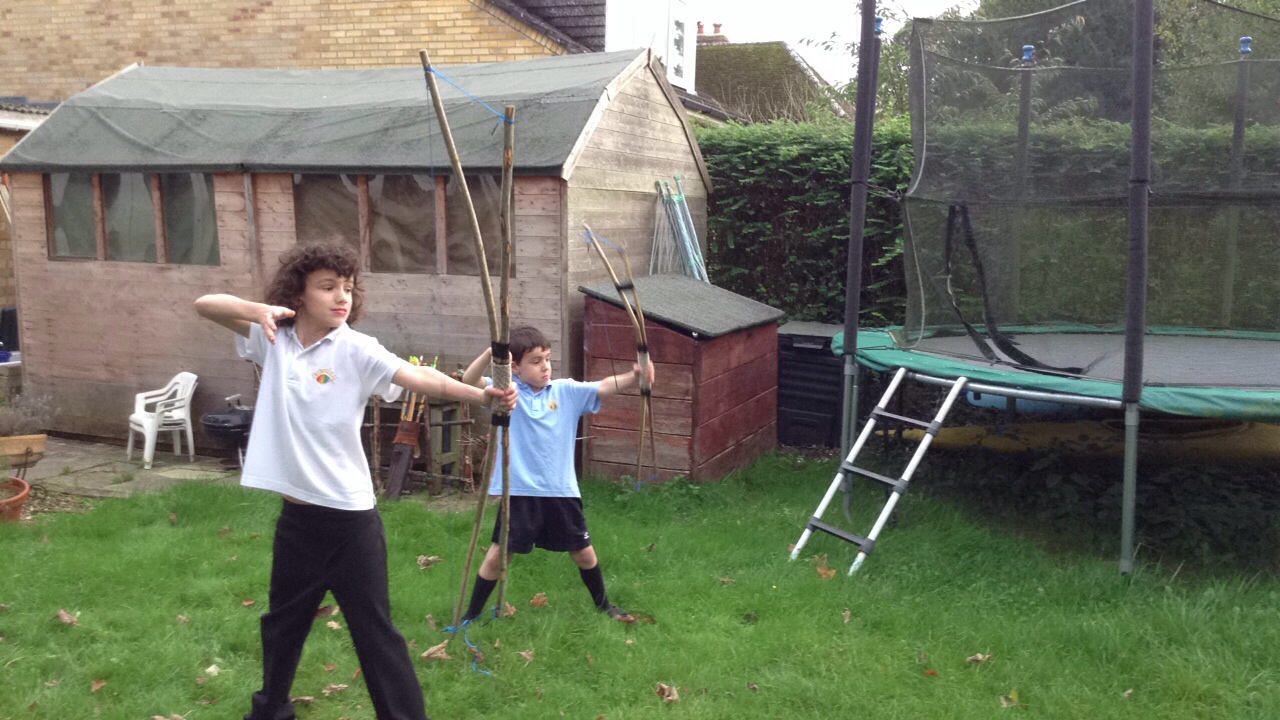
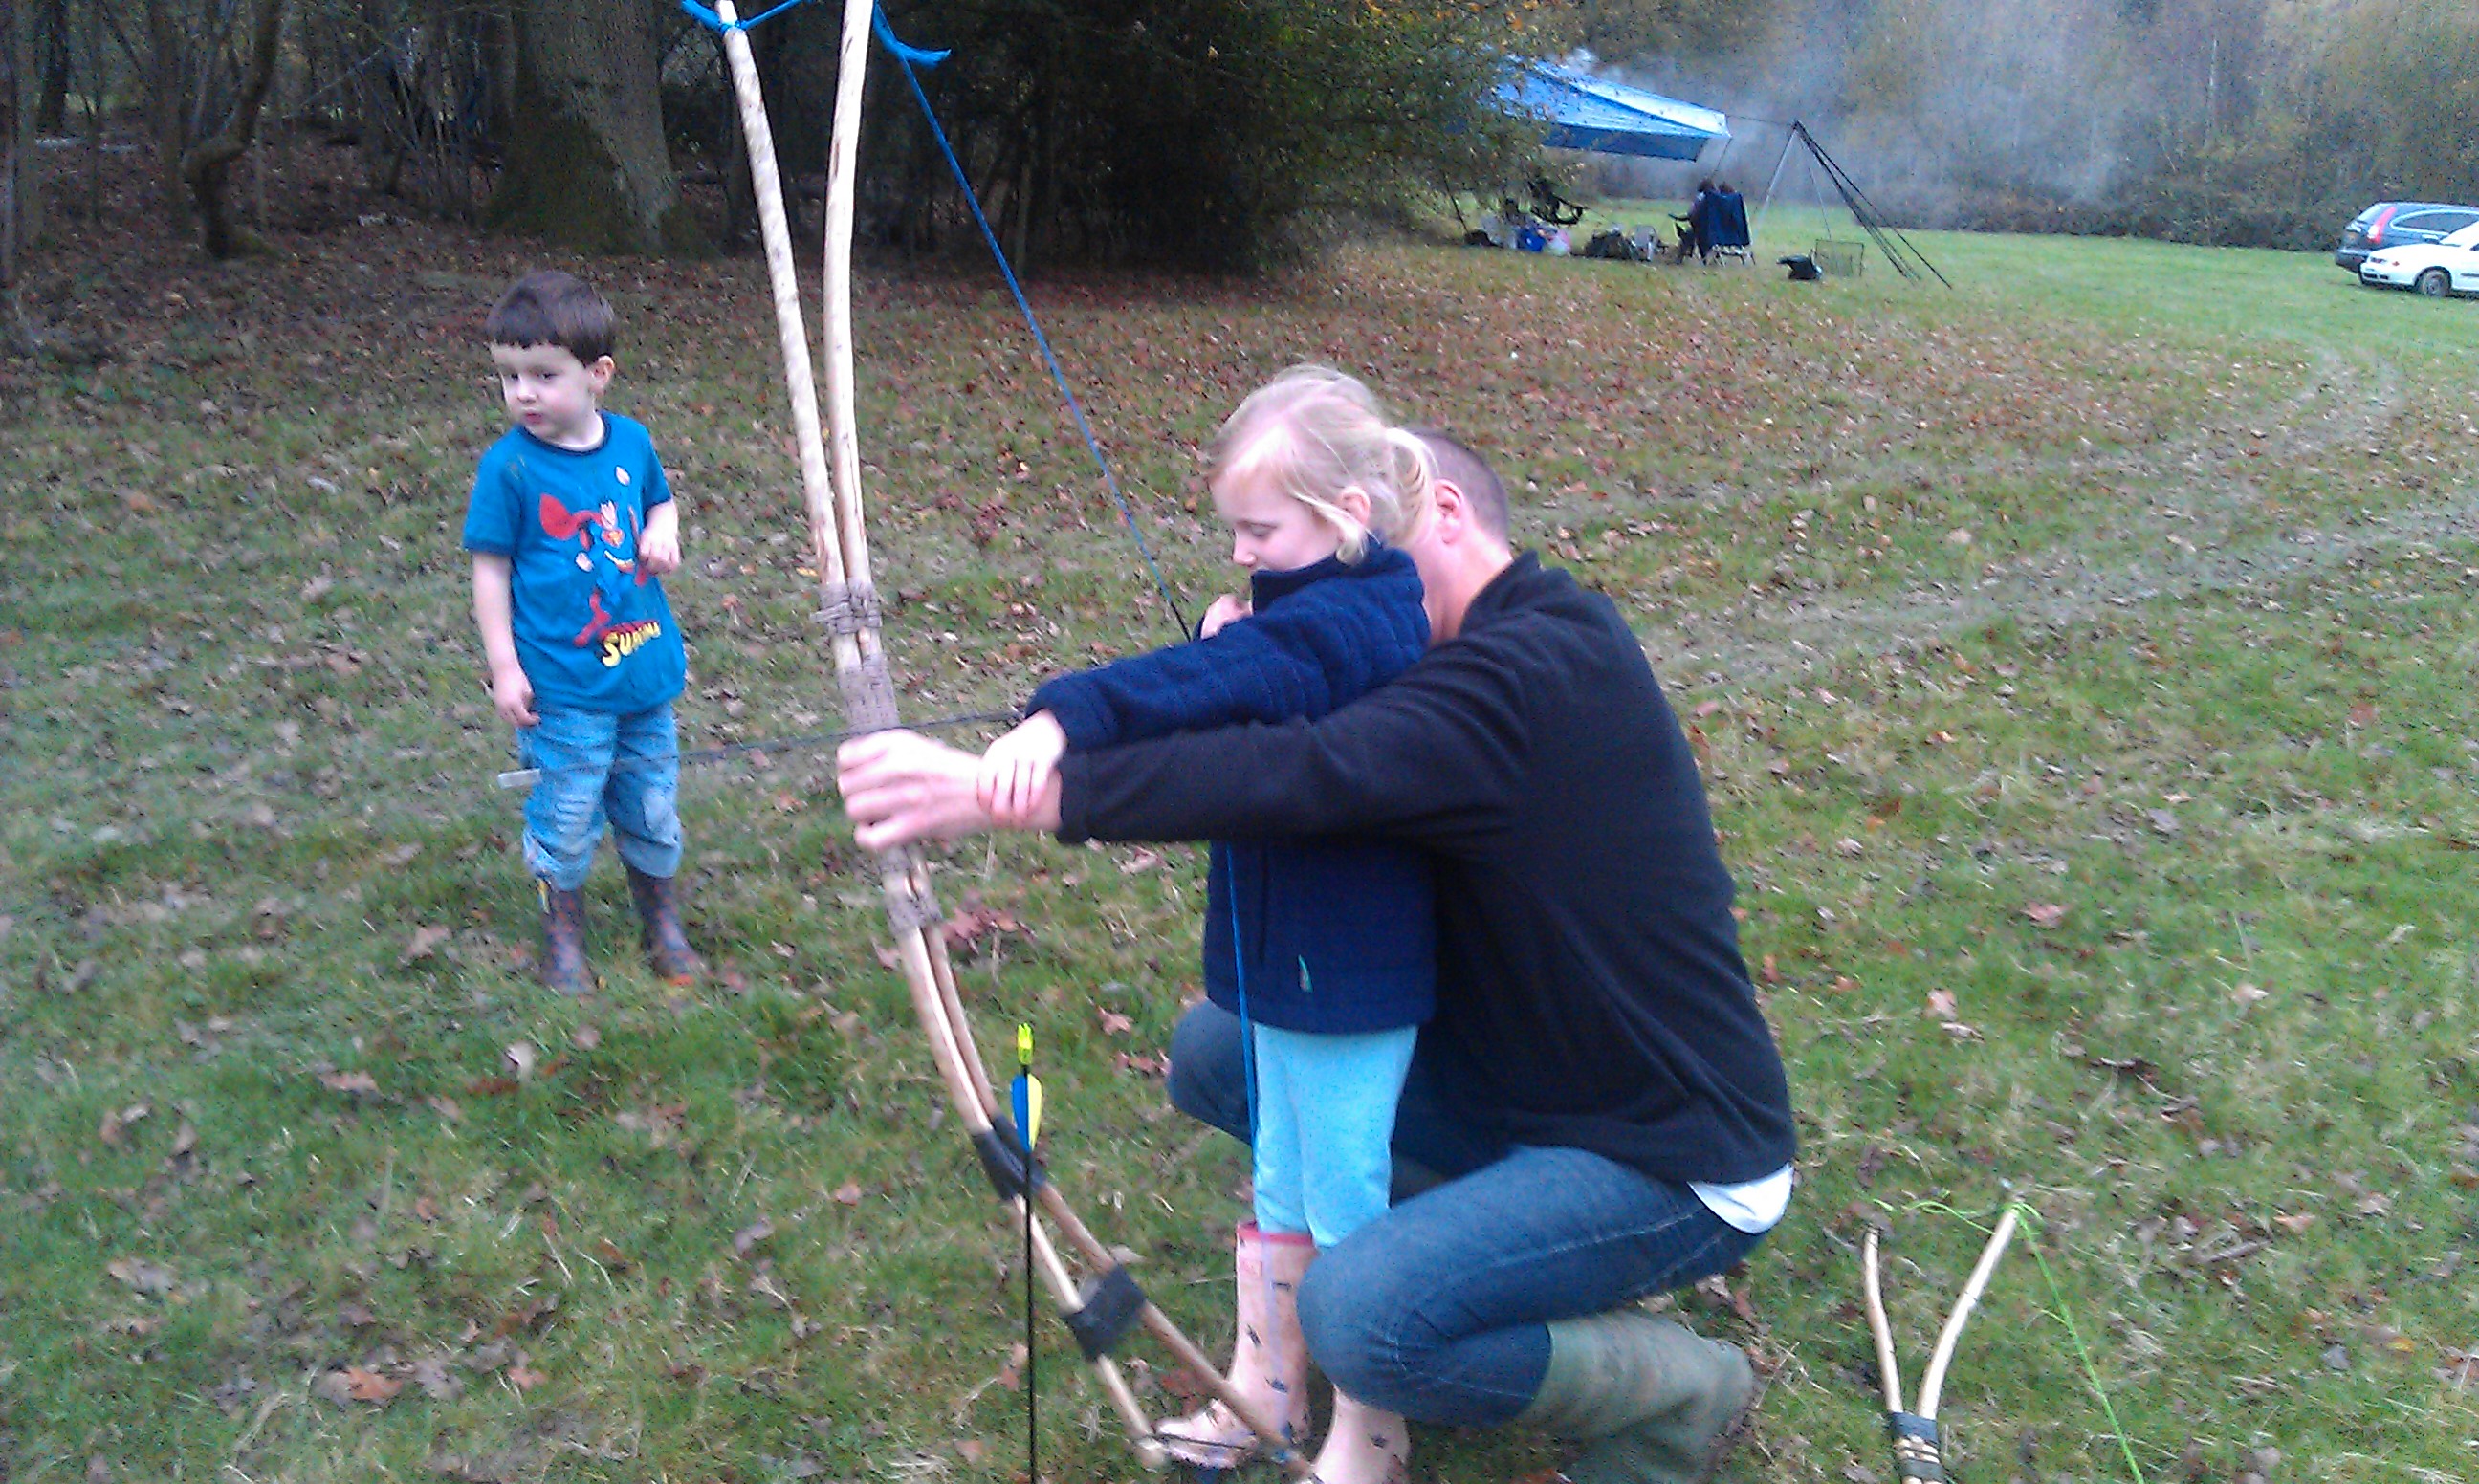
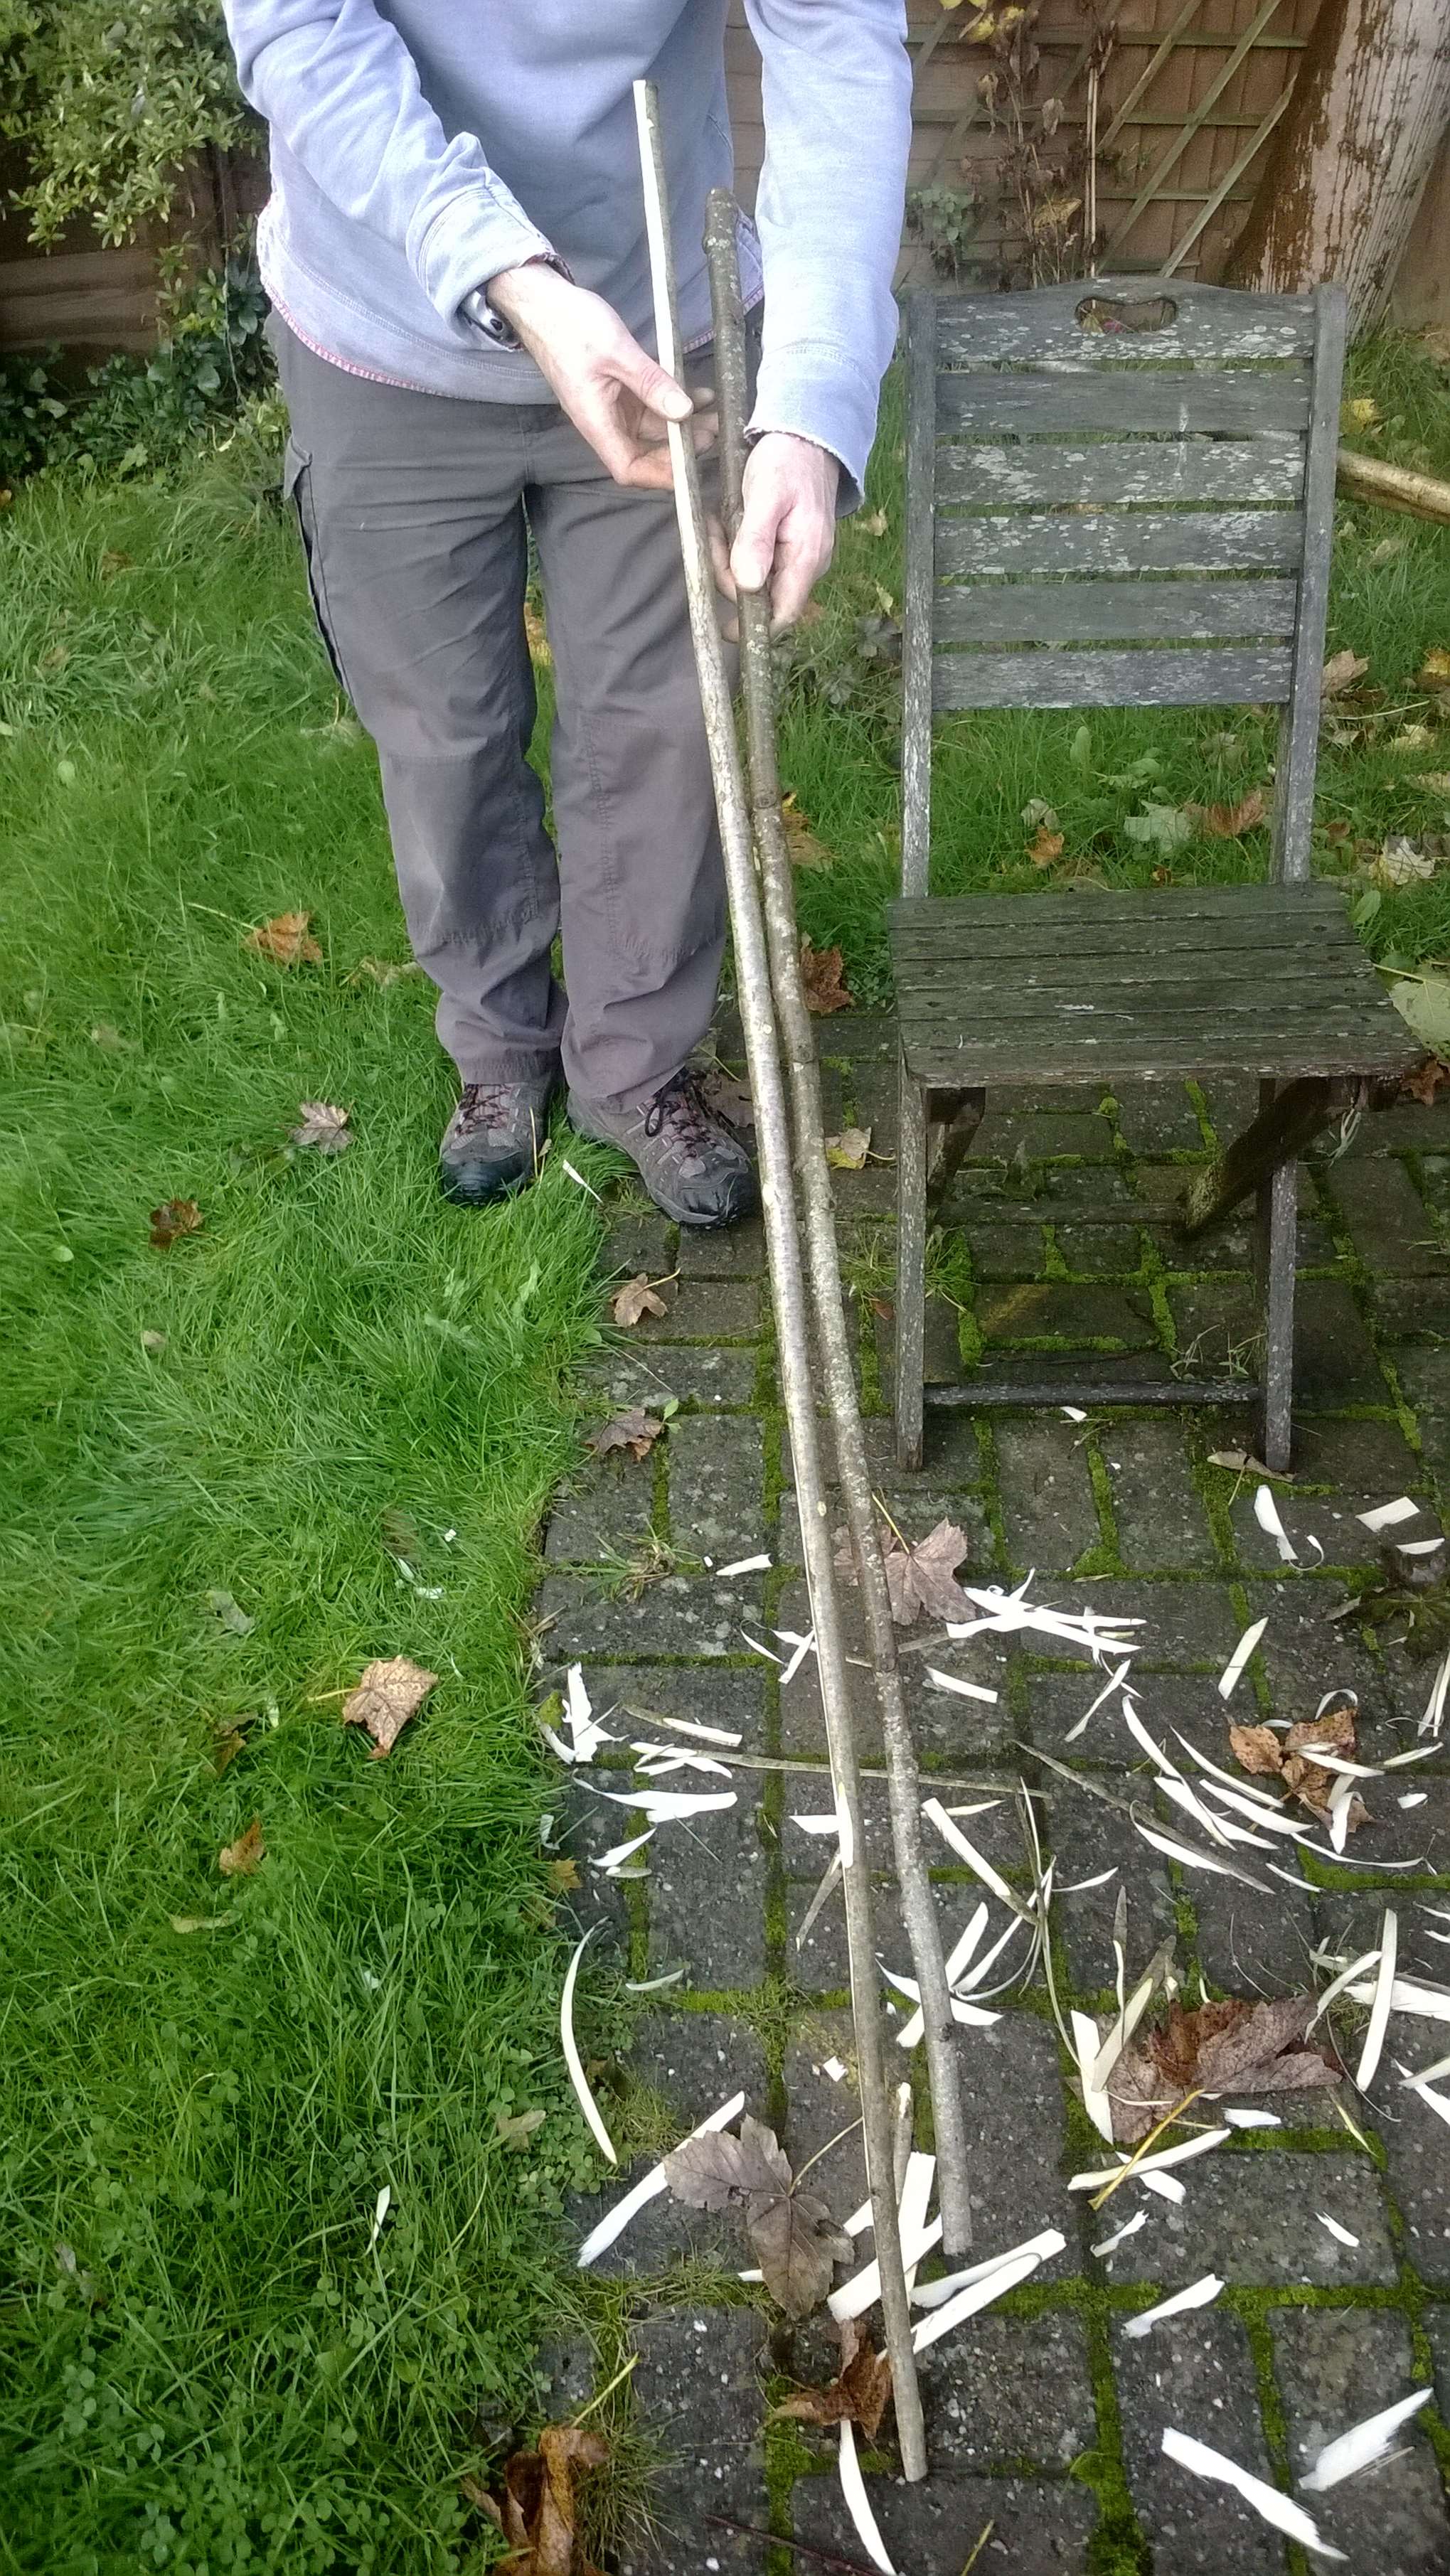
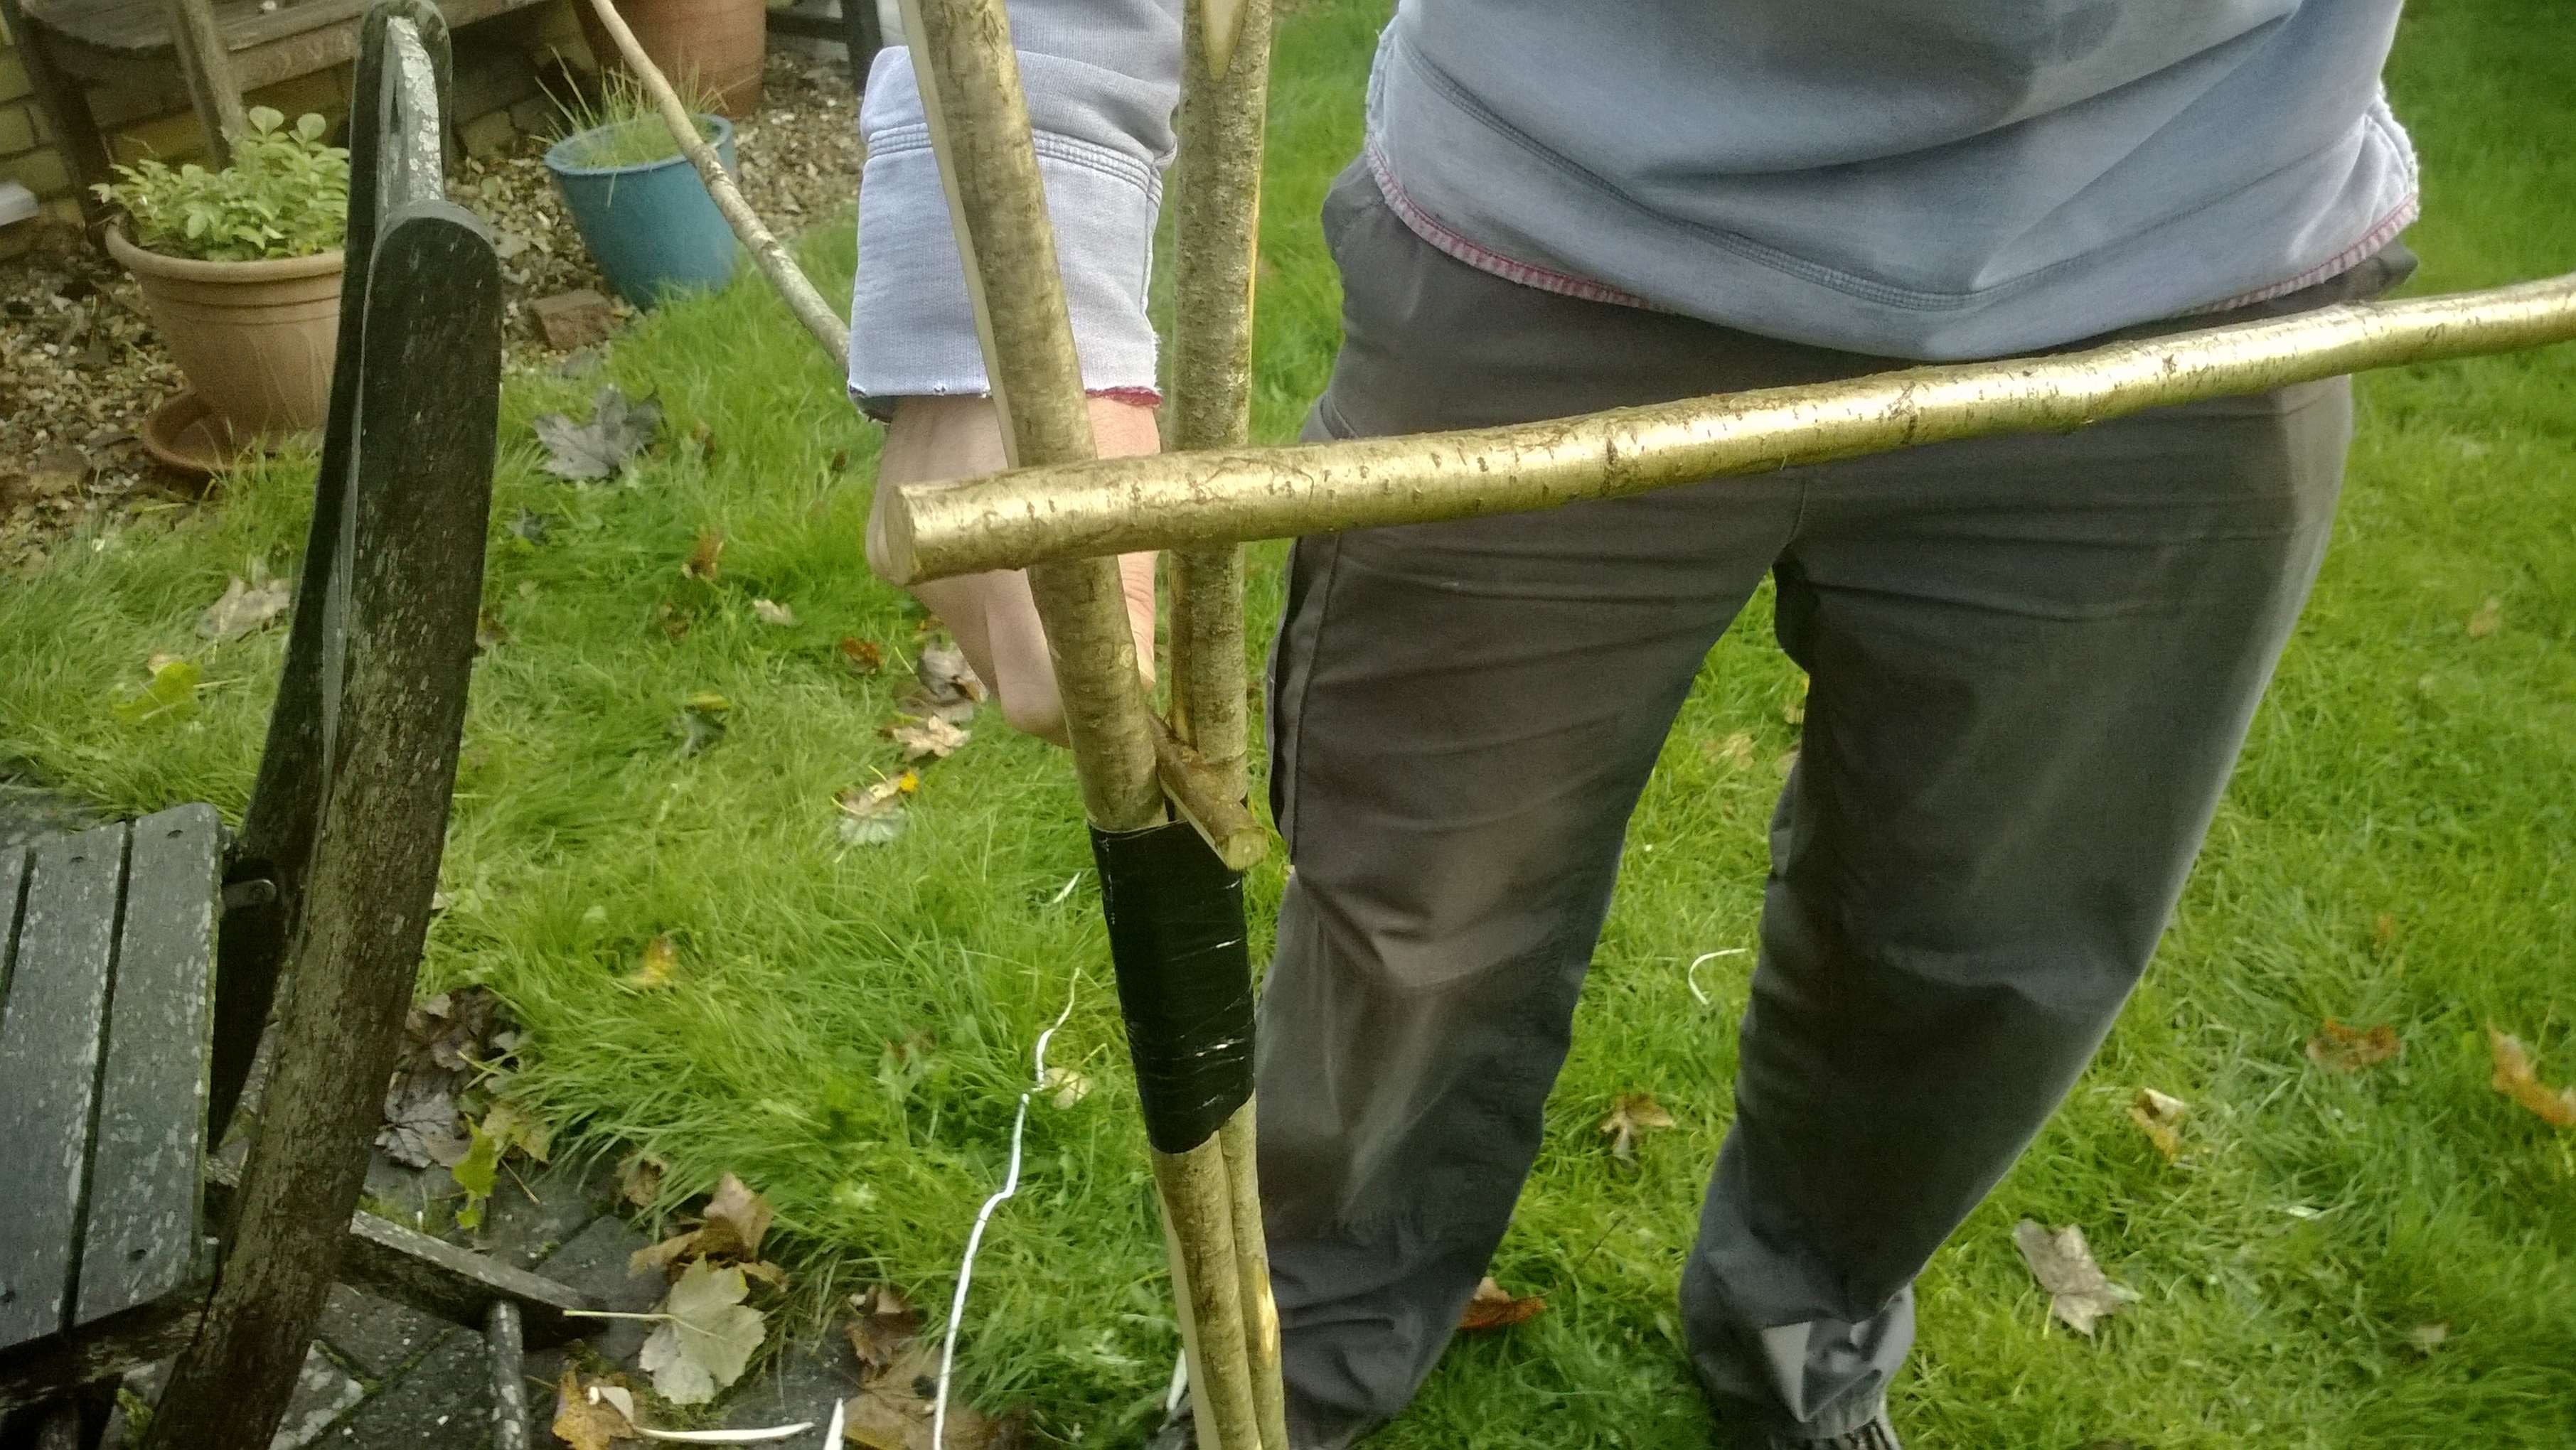
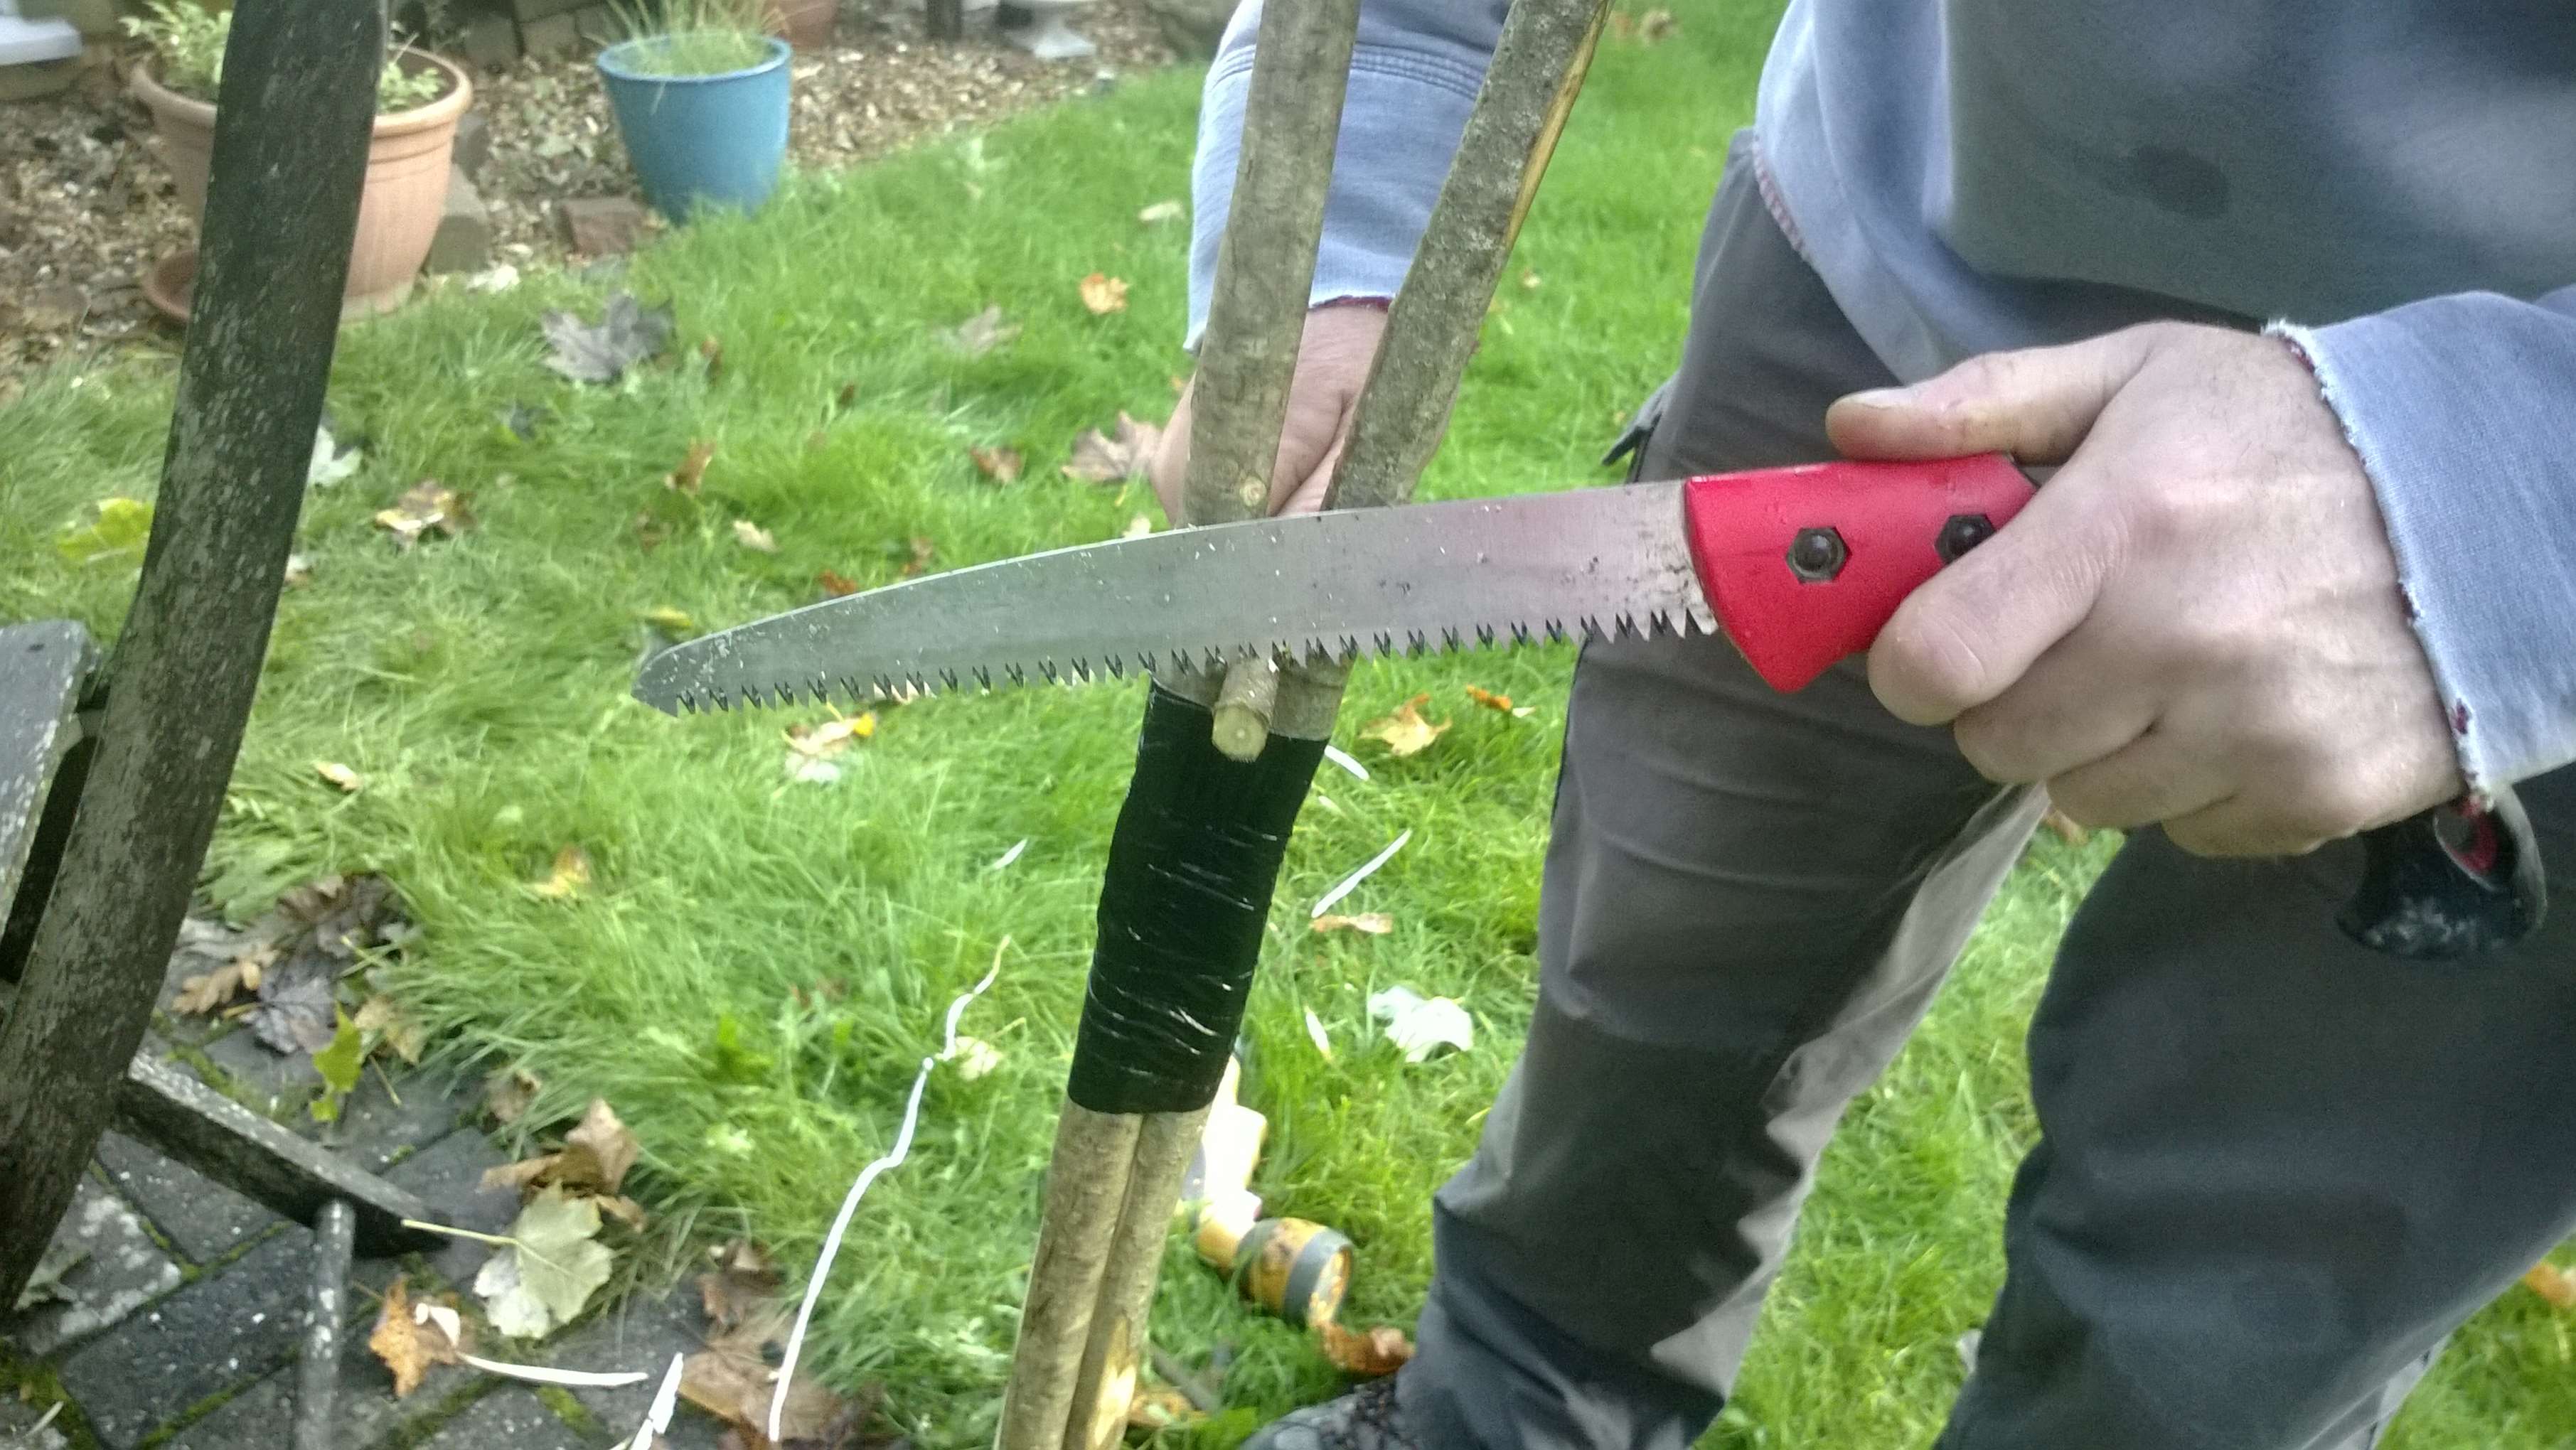
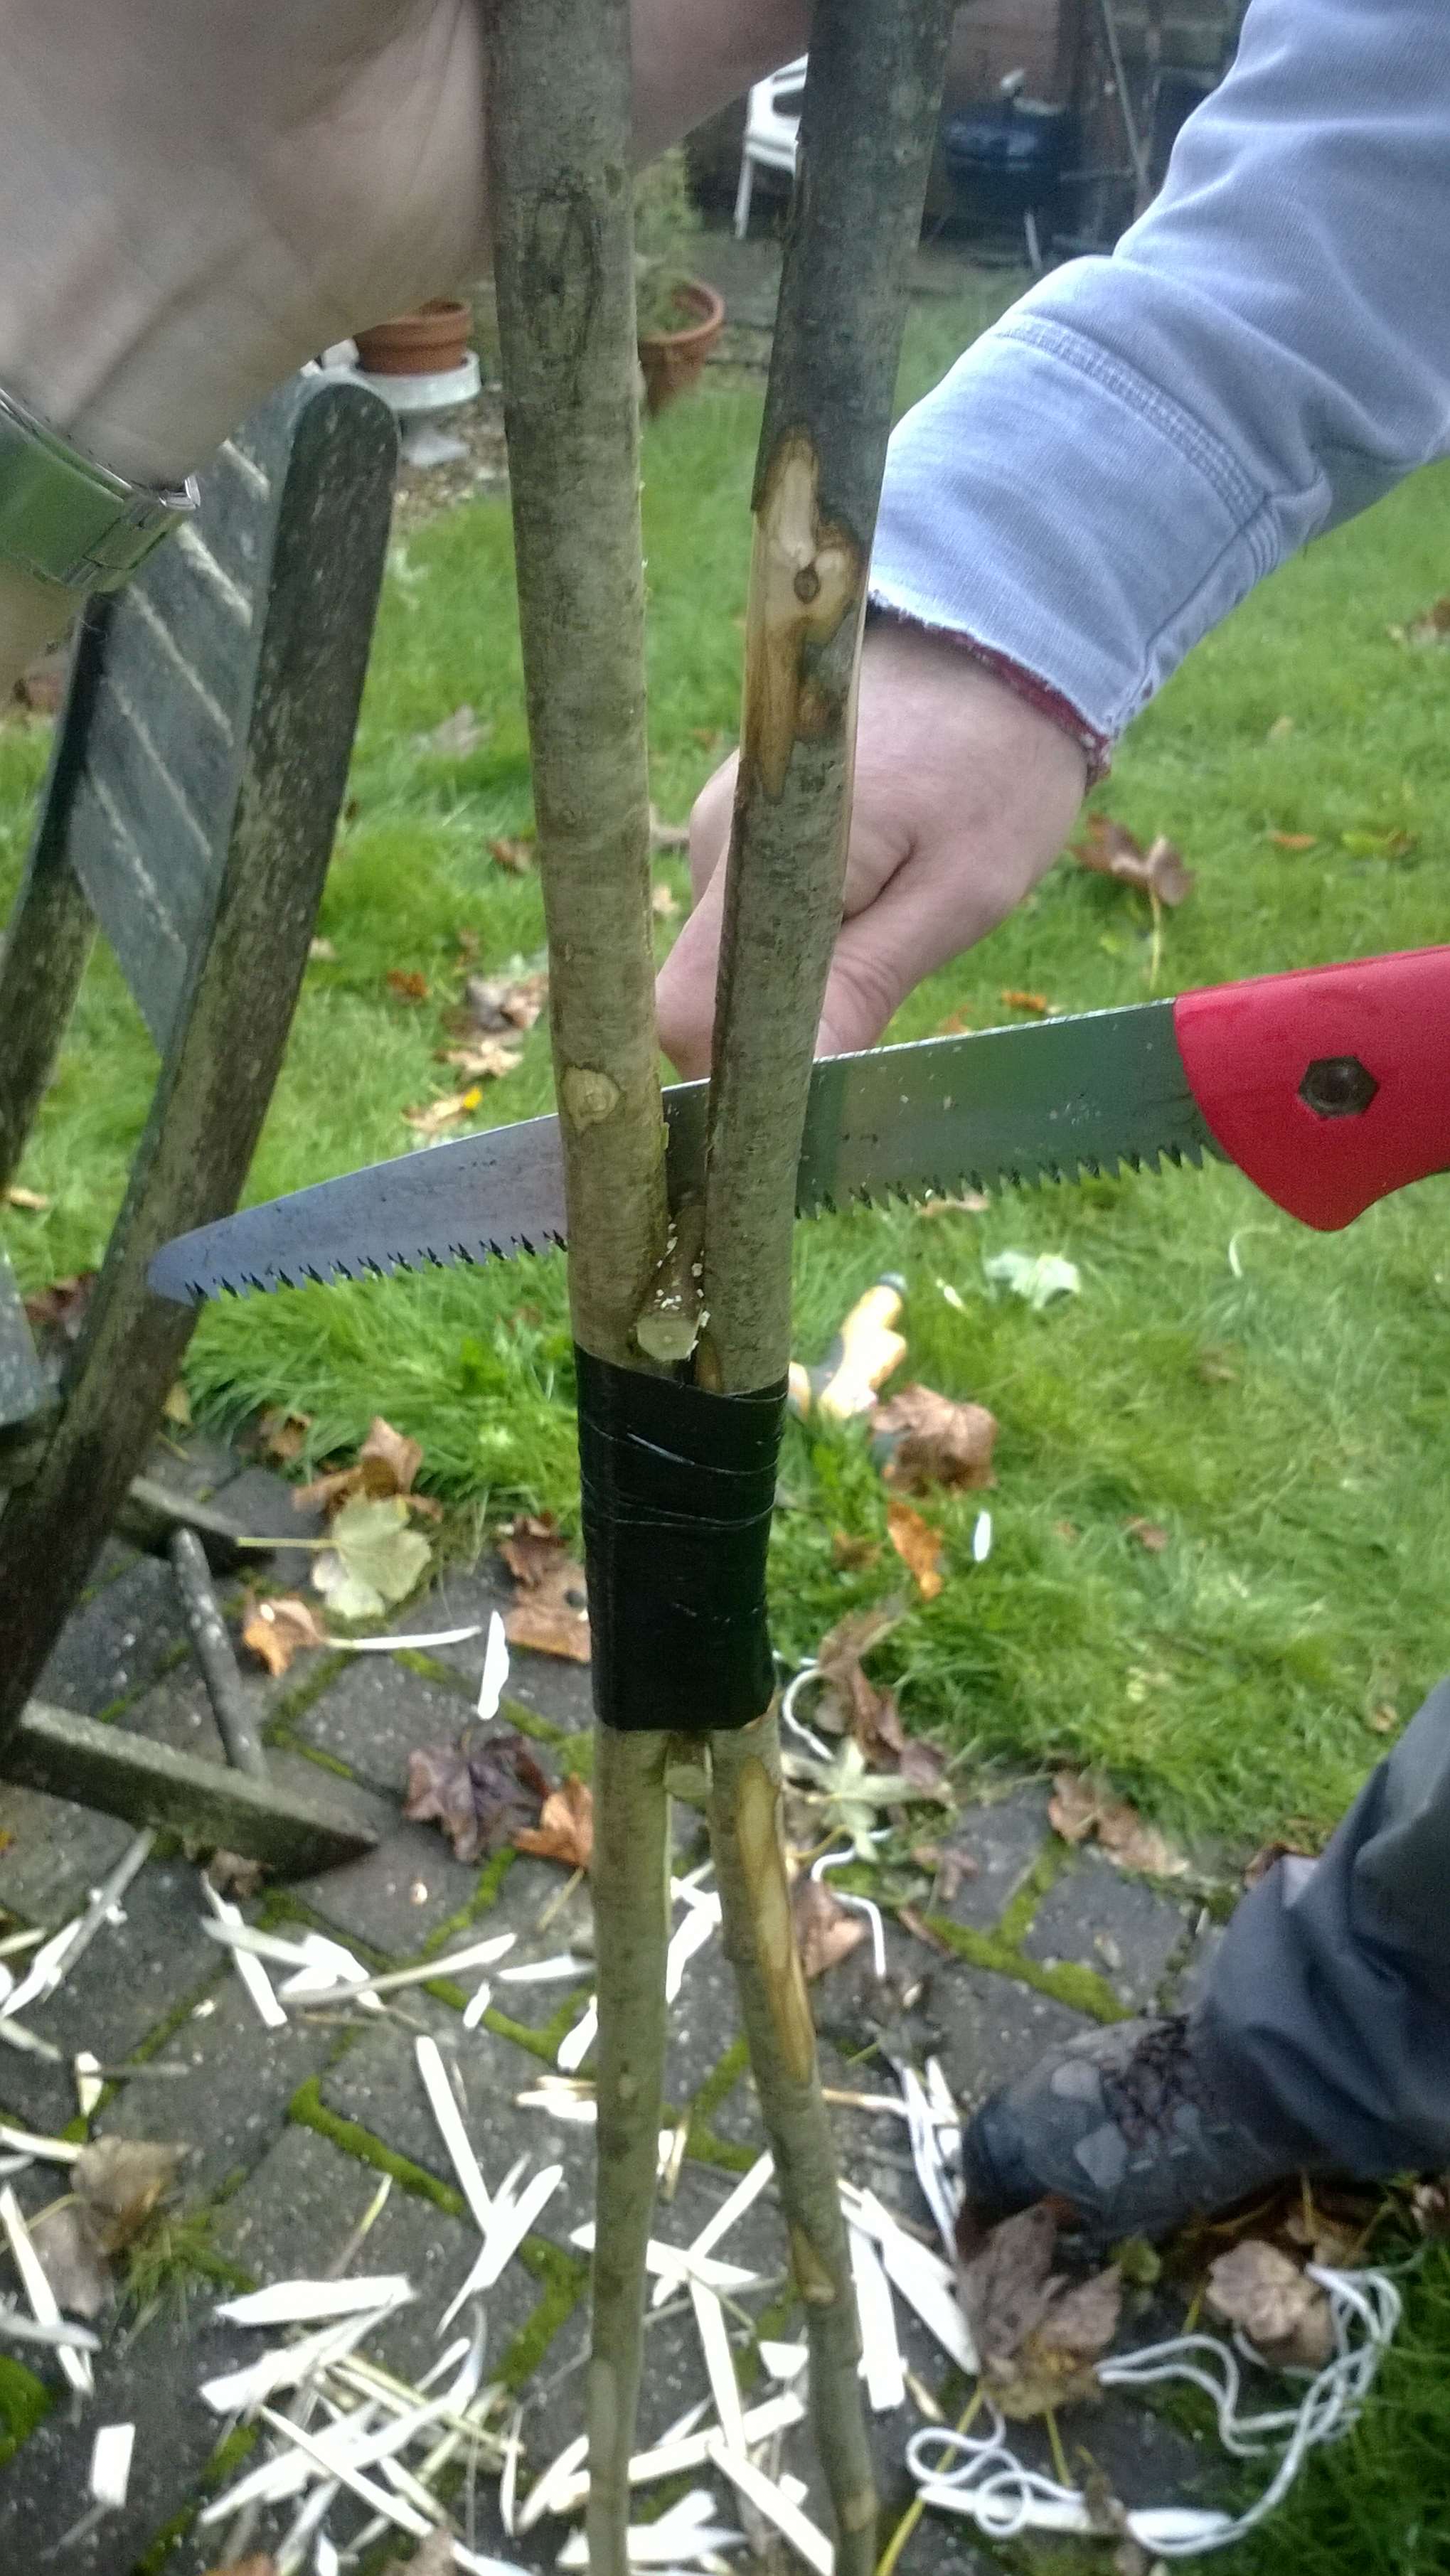
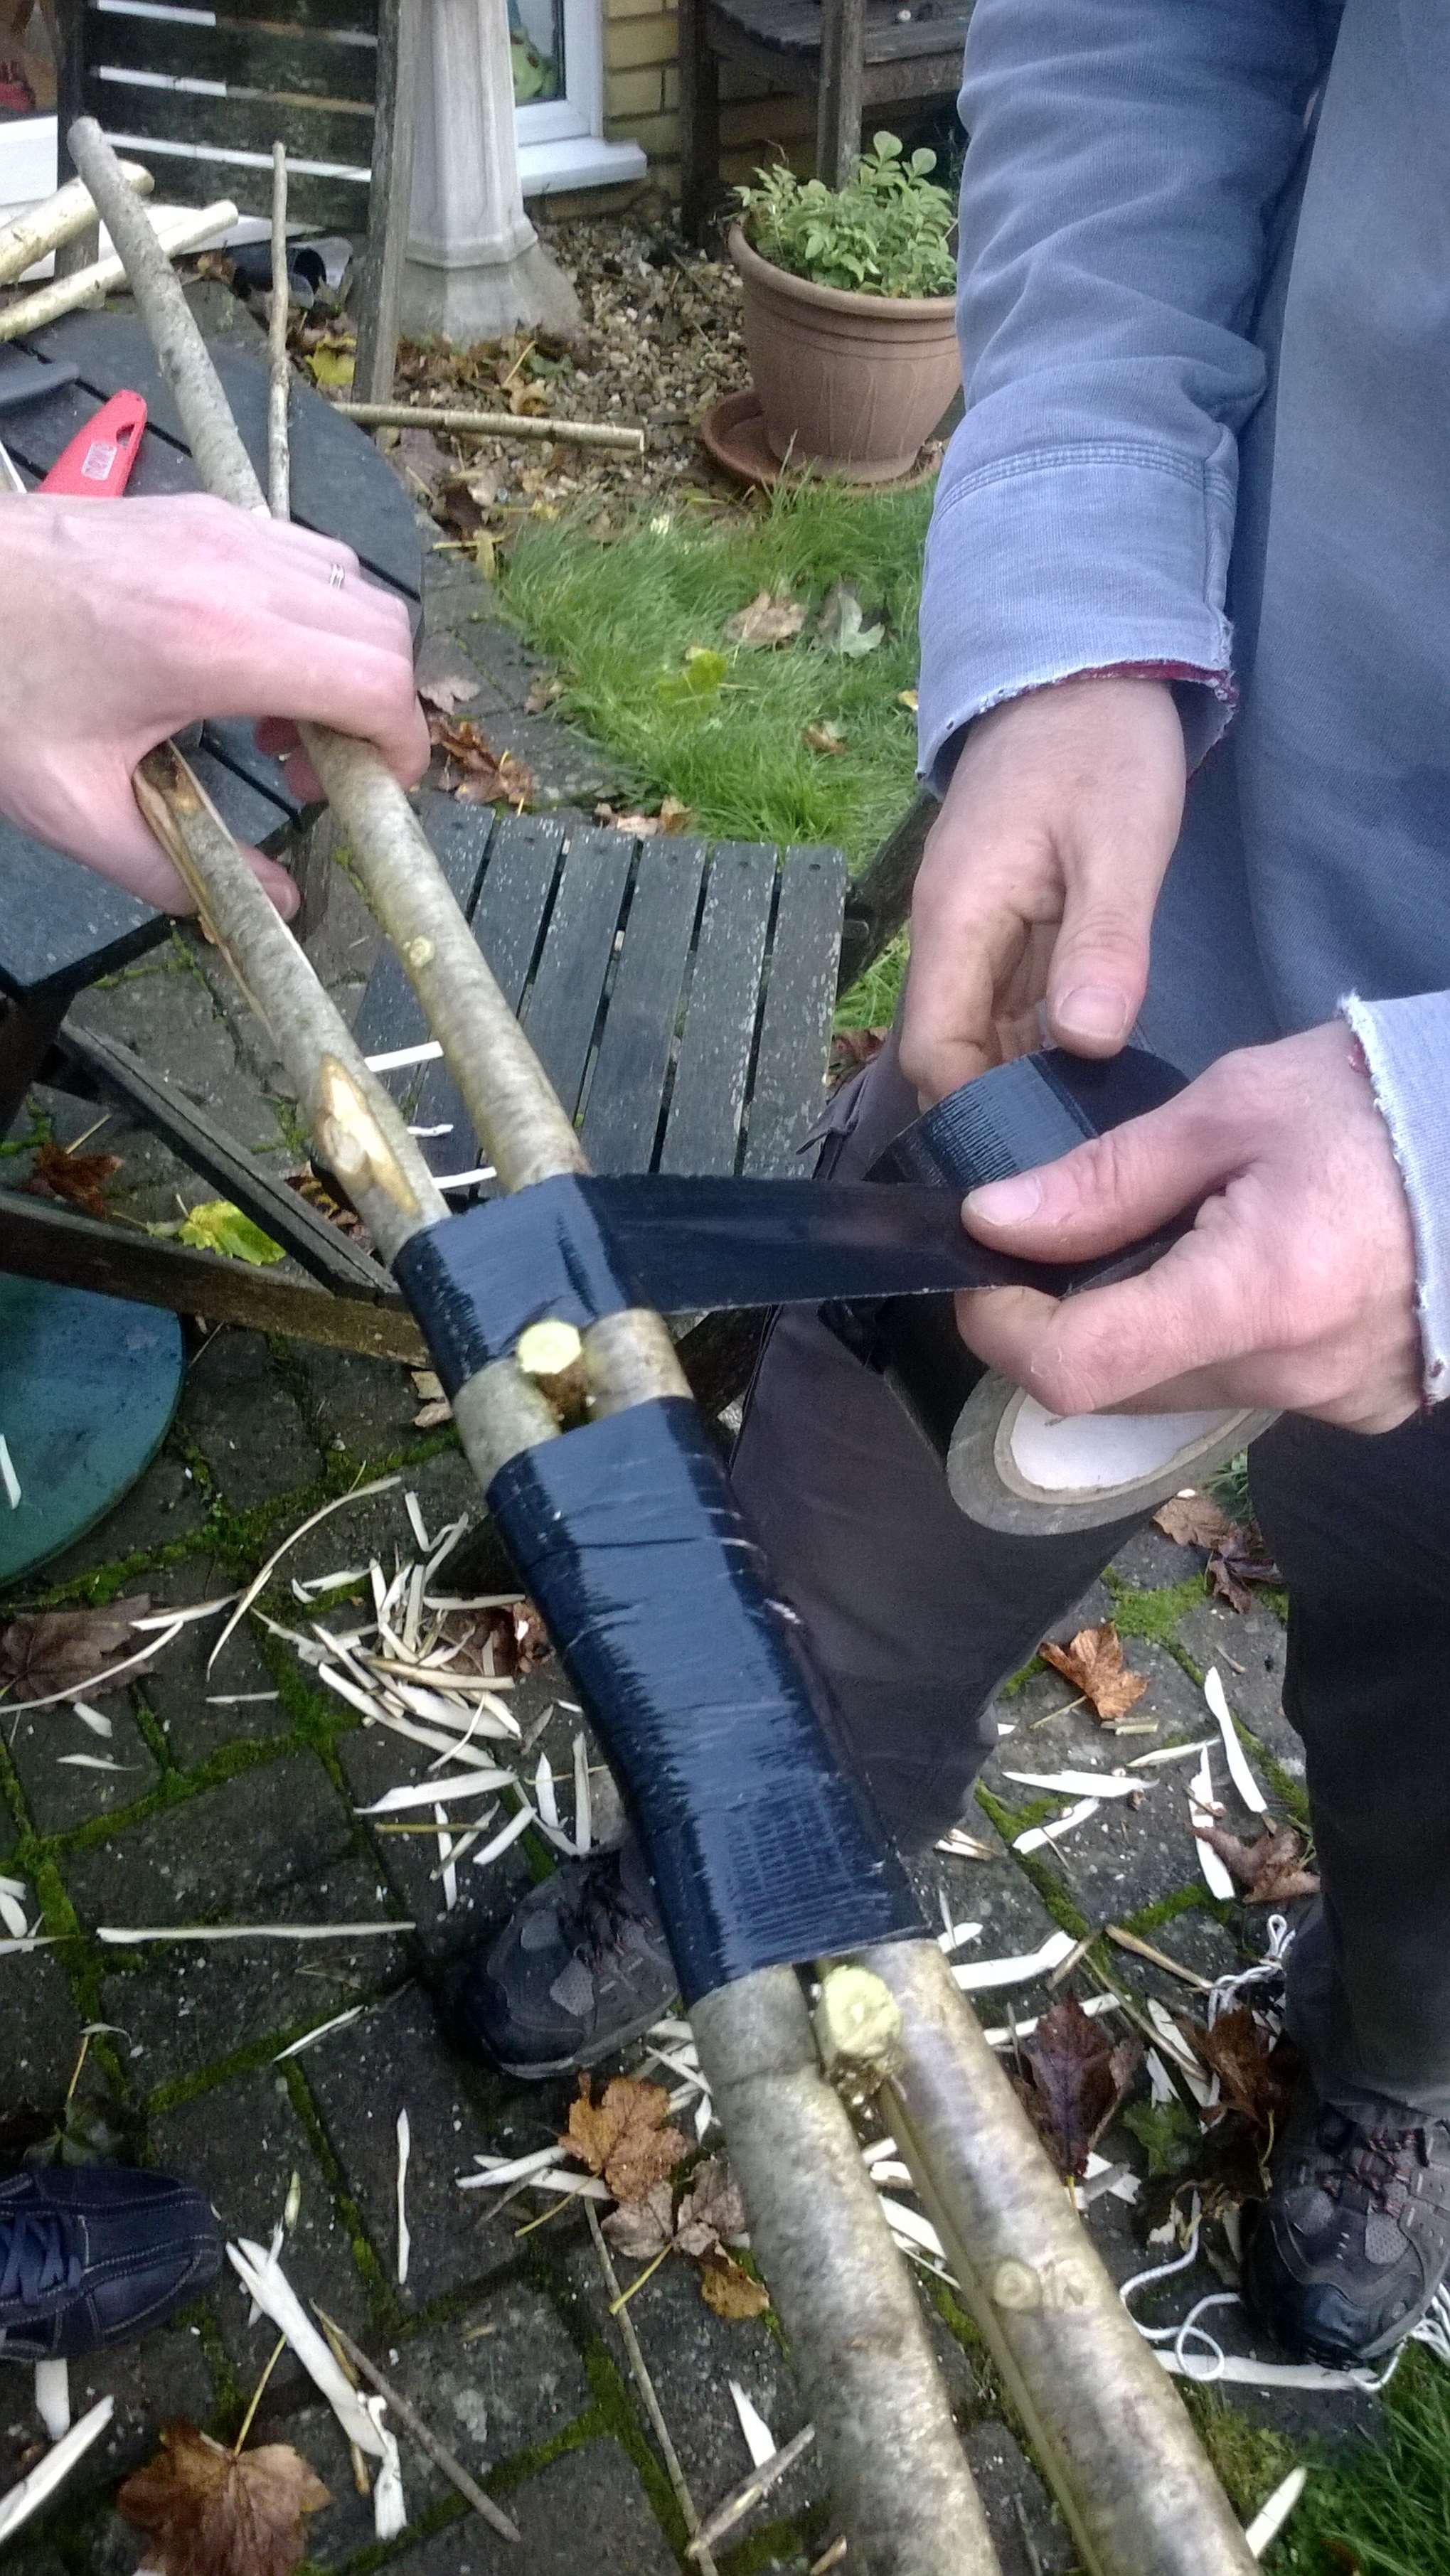
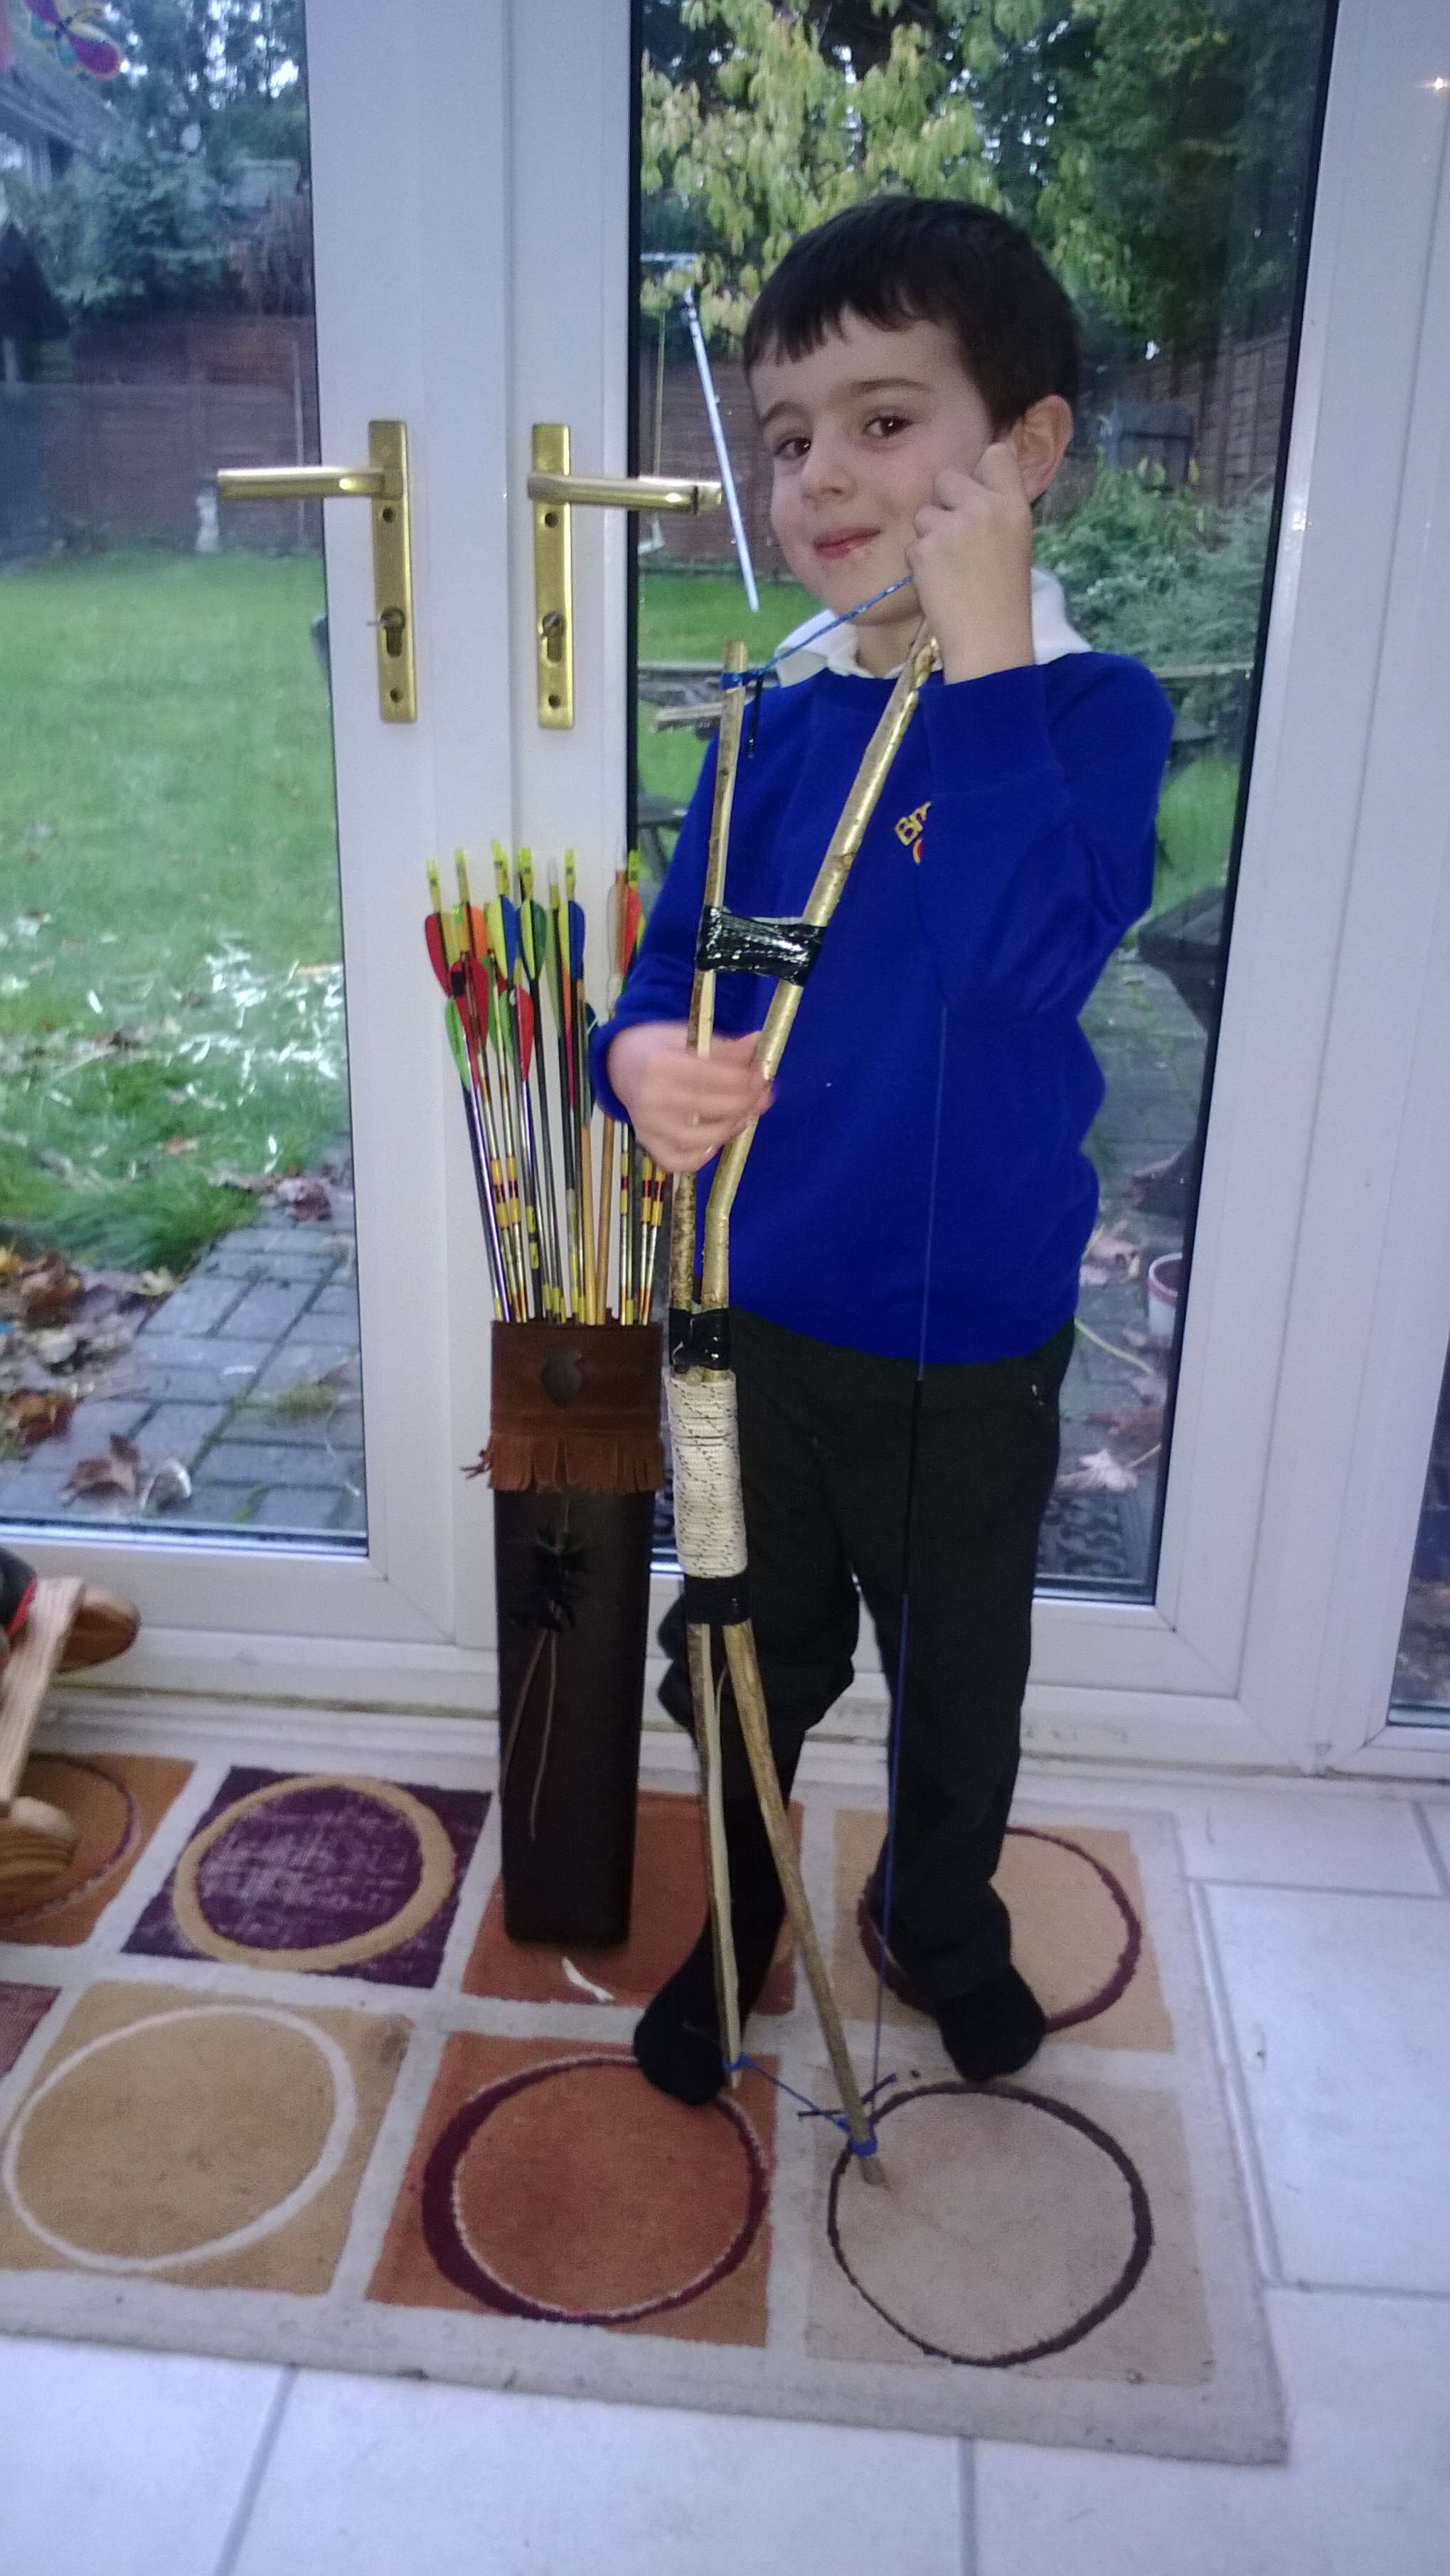
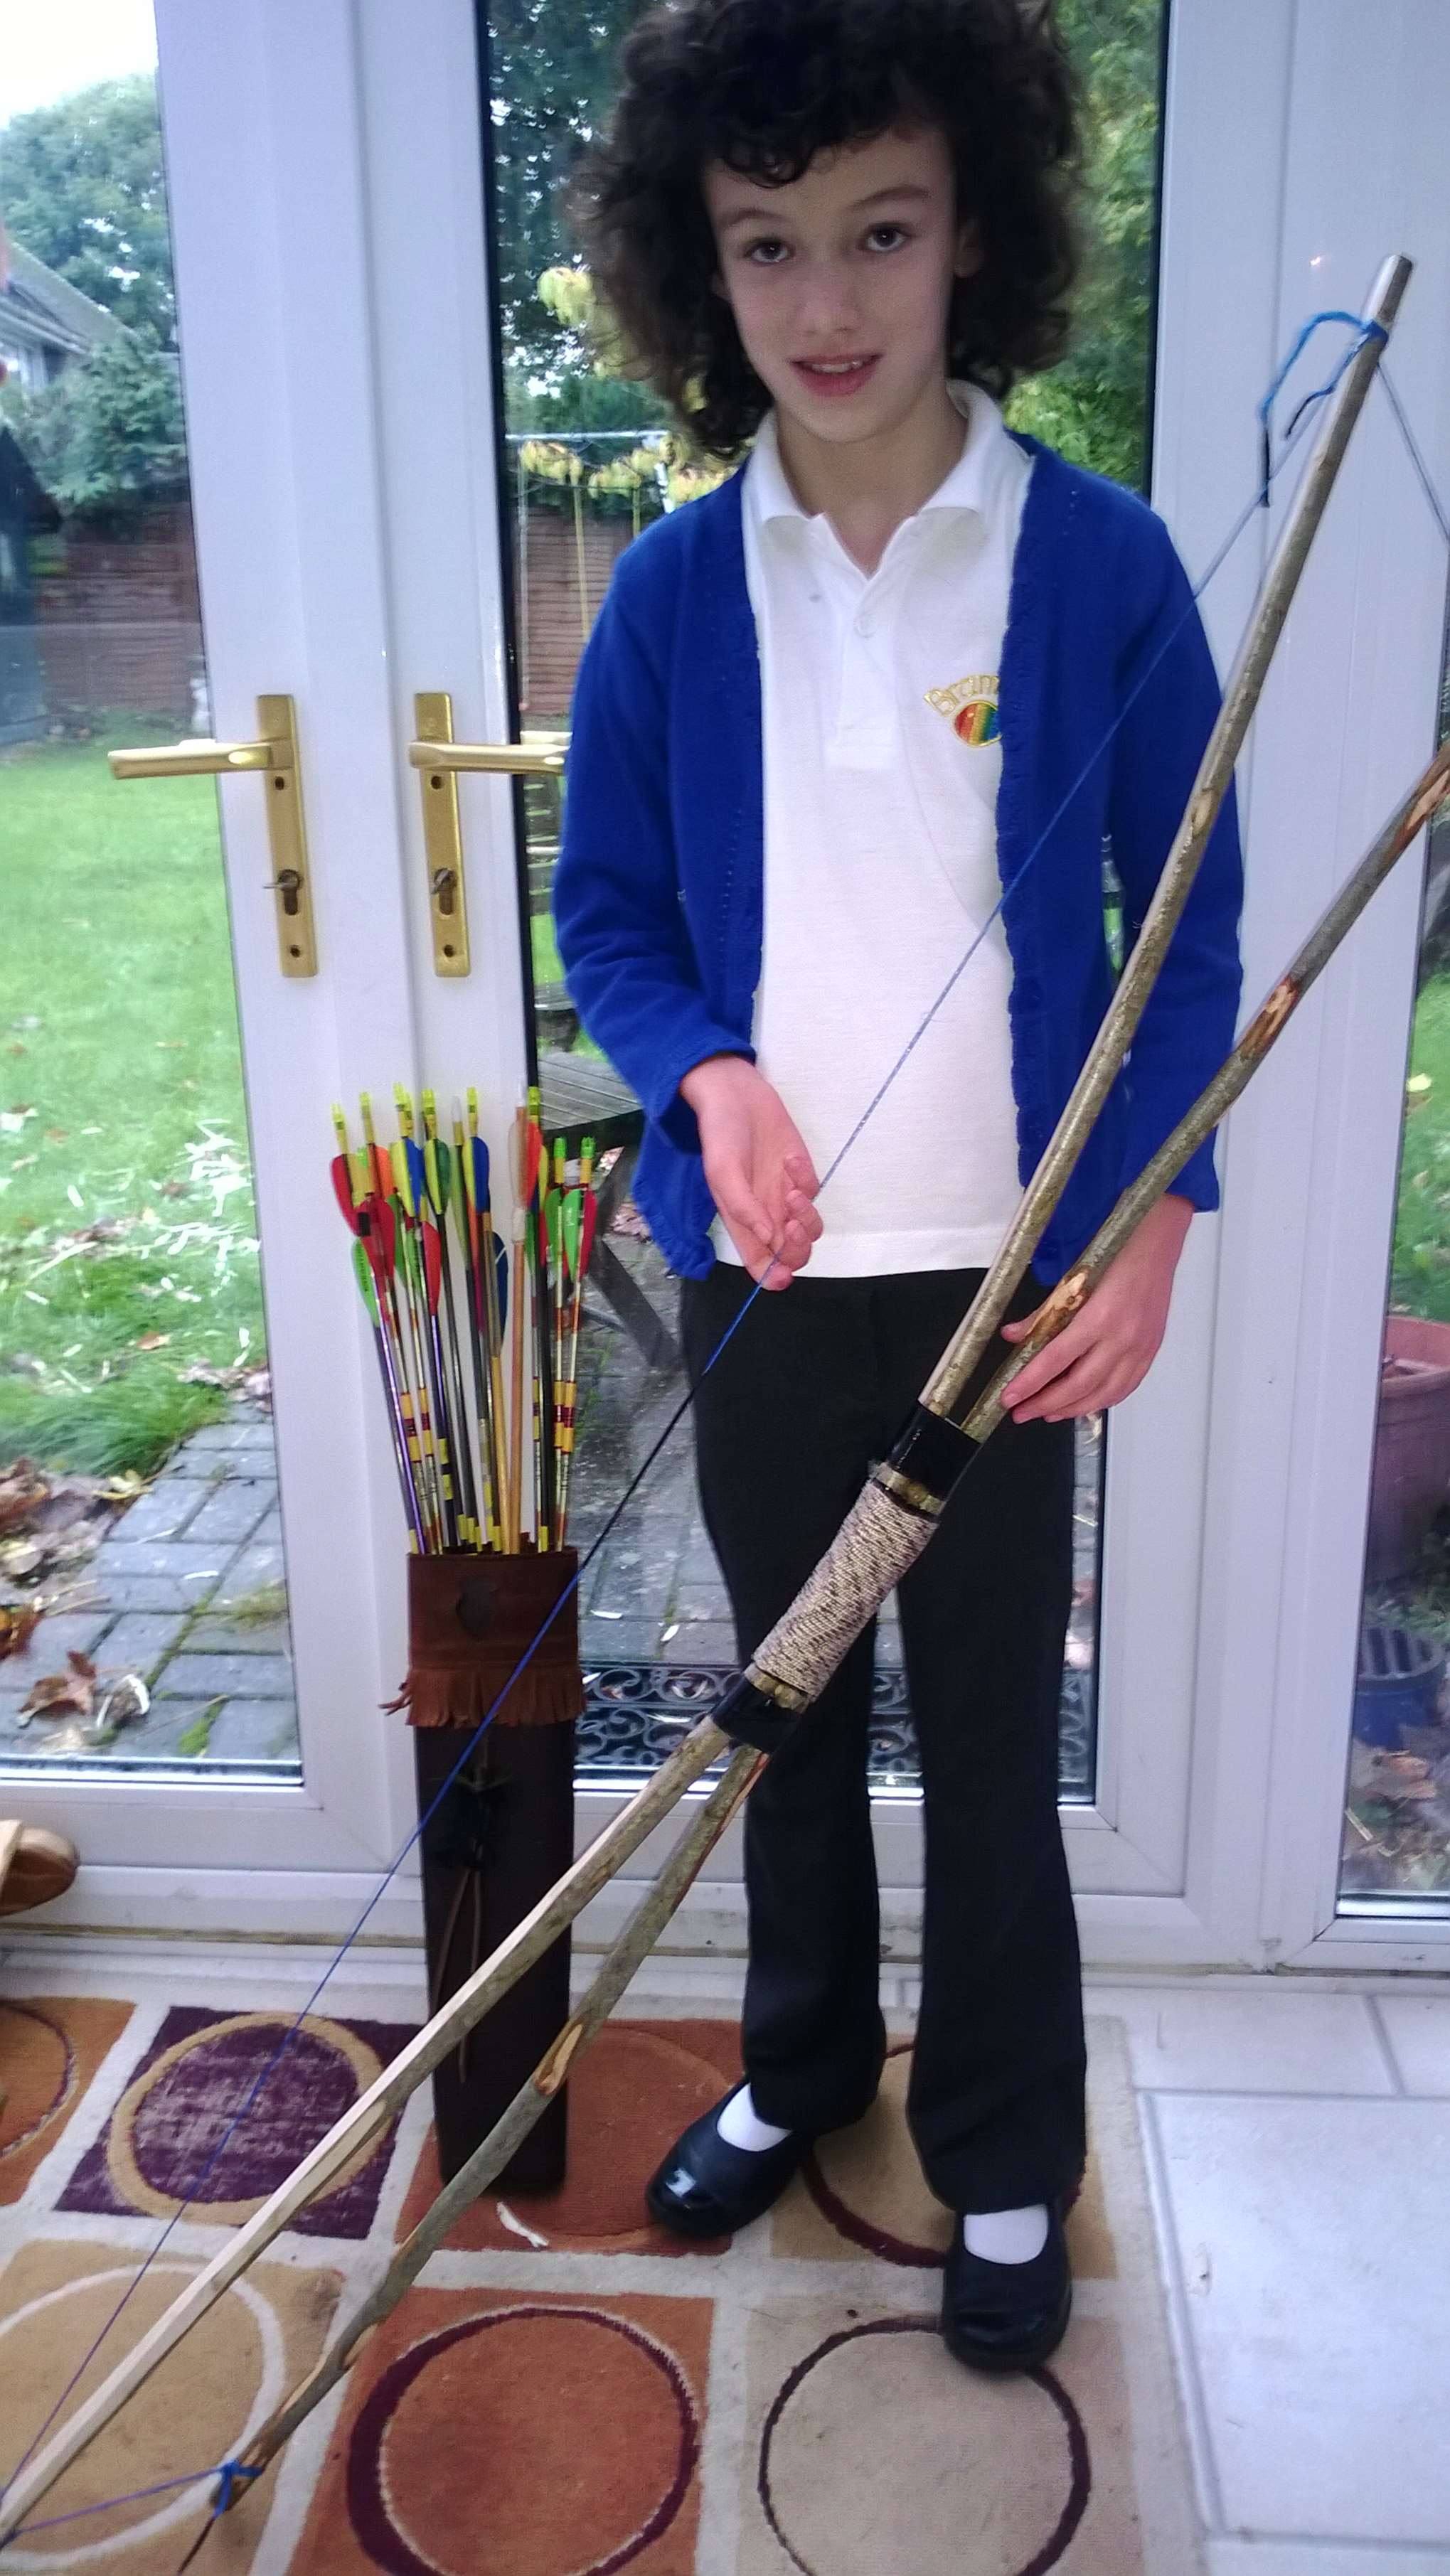
Father & Son Bow (Penobscot or Wabanaki bow)

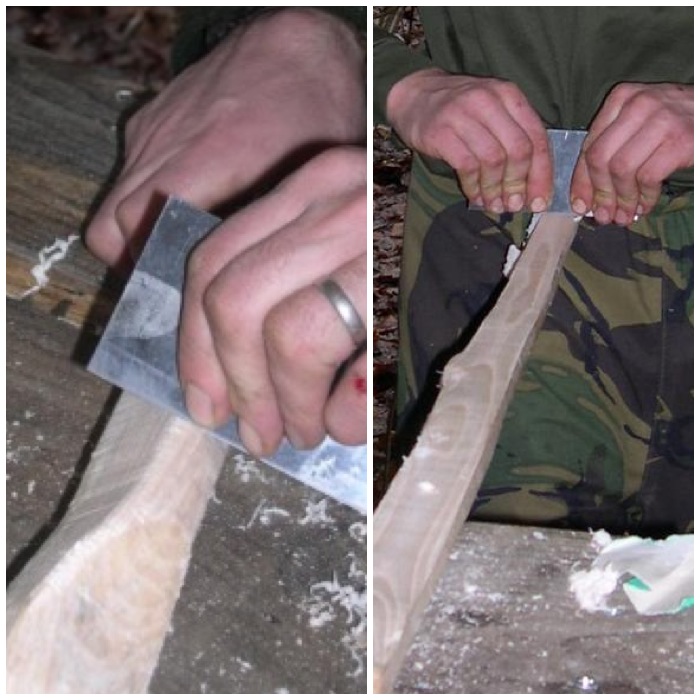
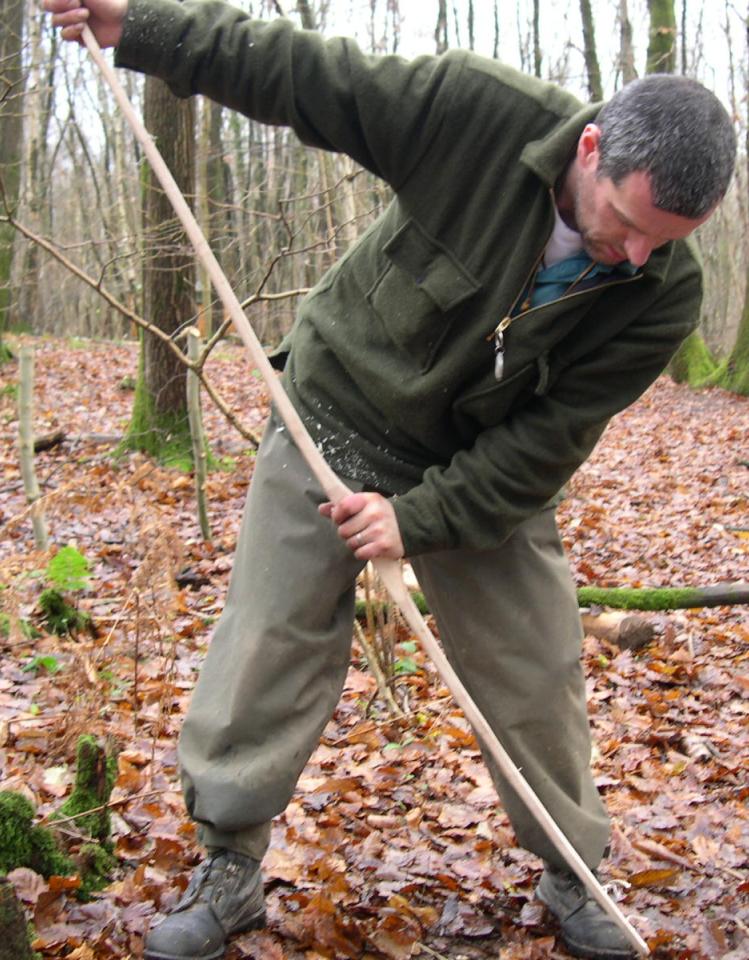
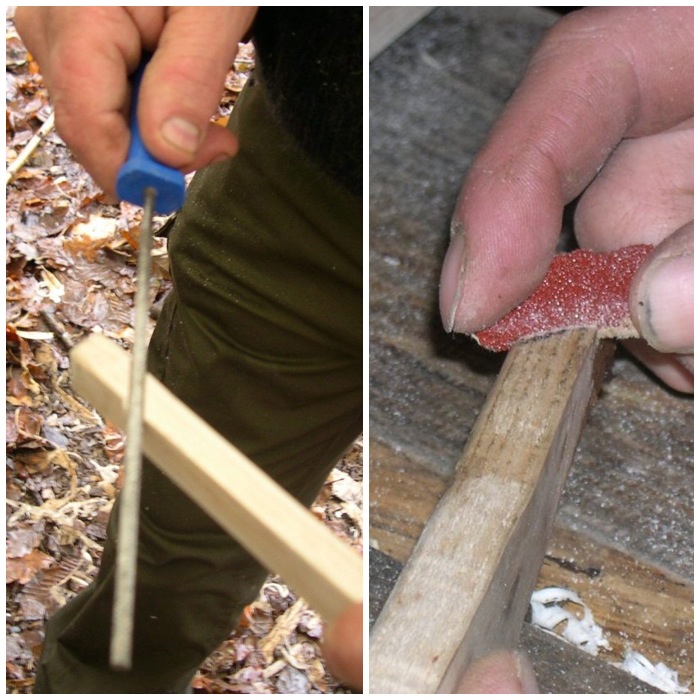
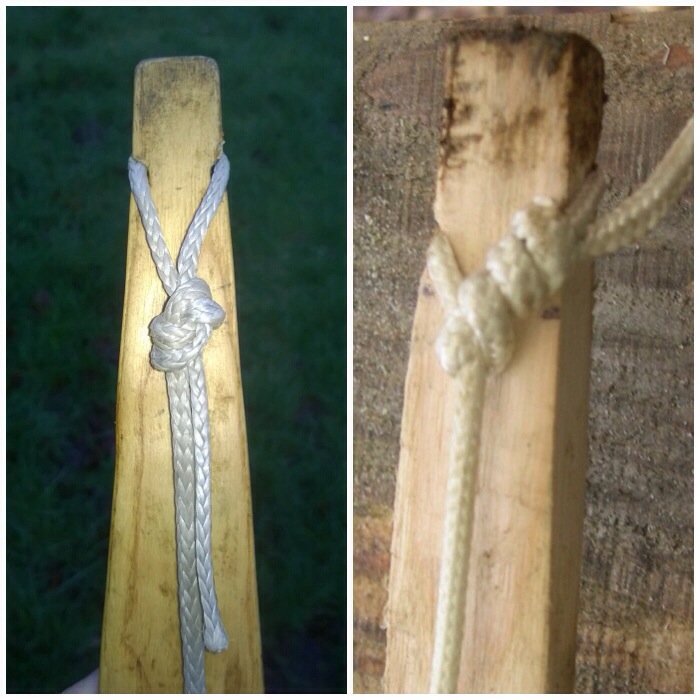
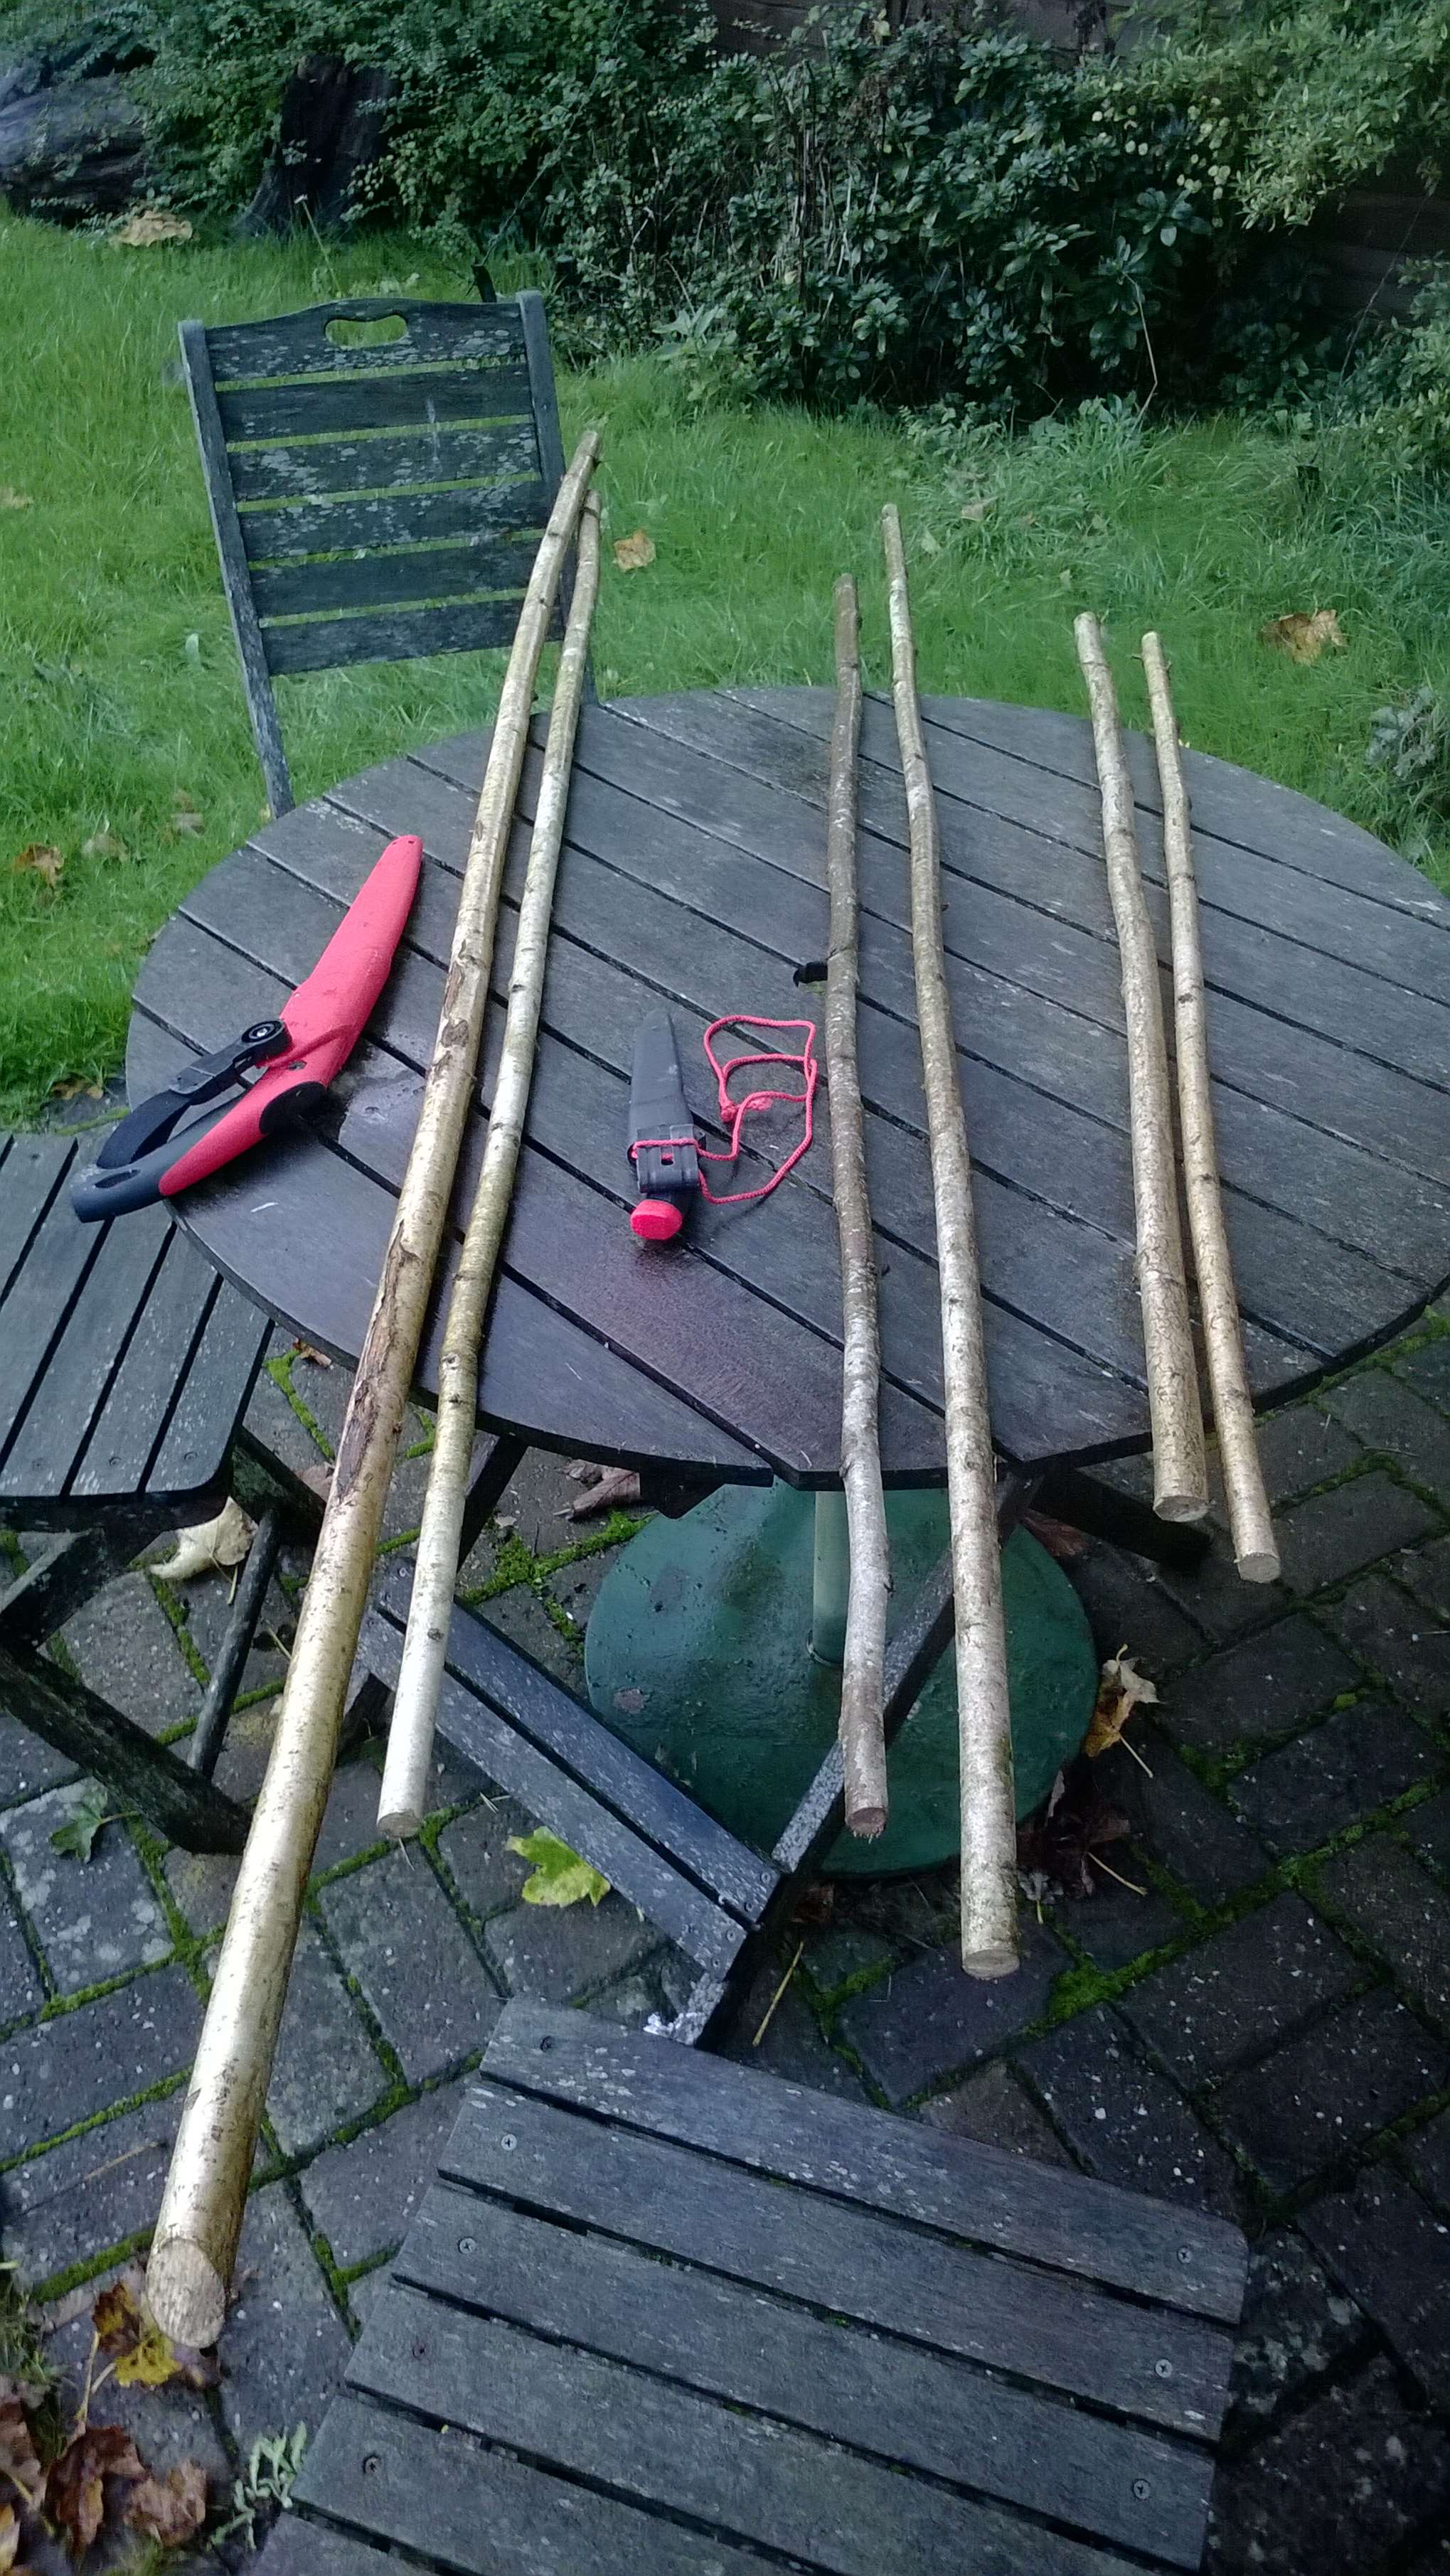
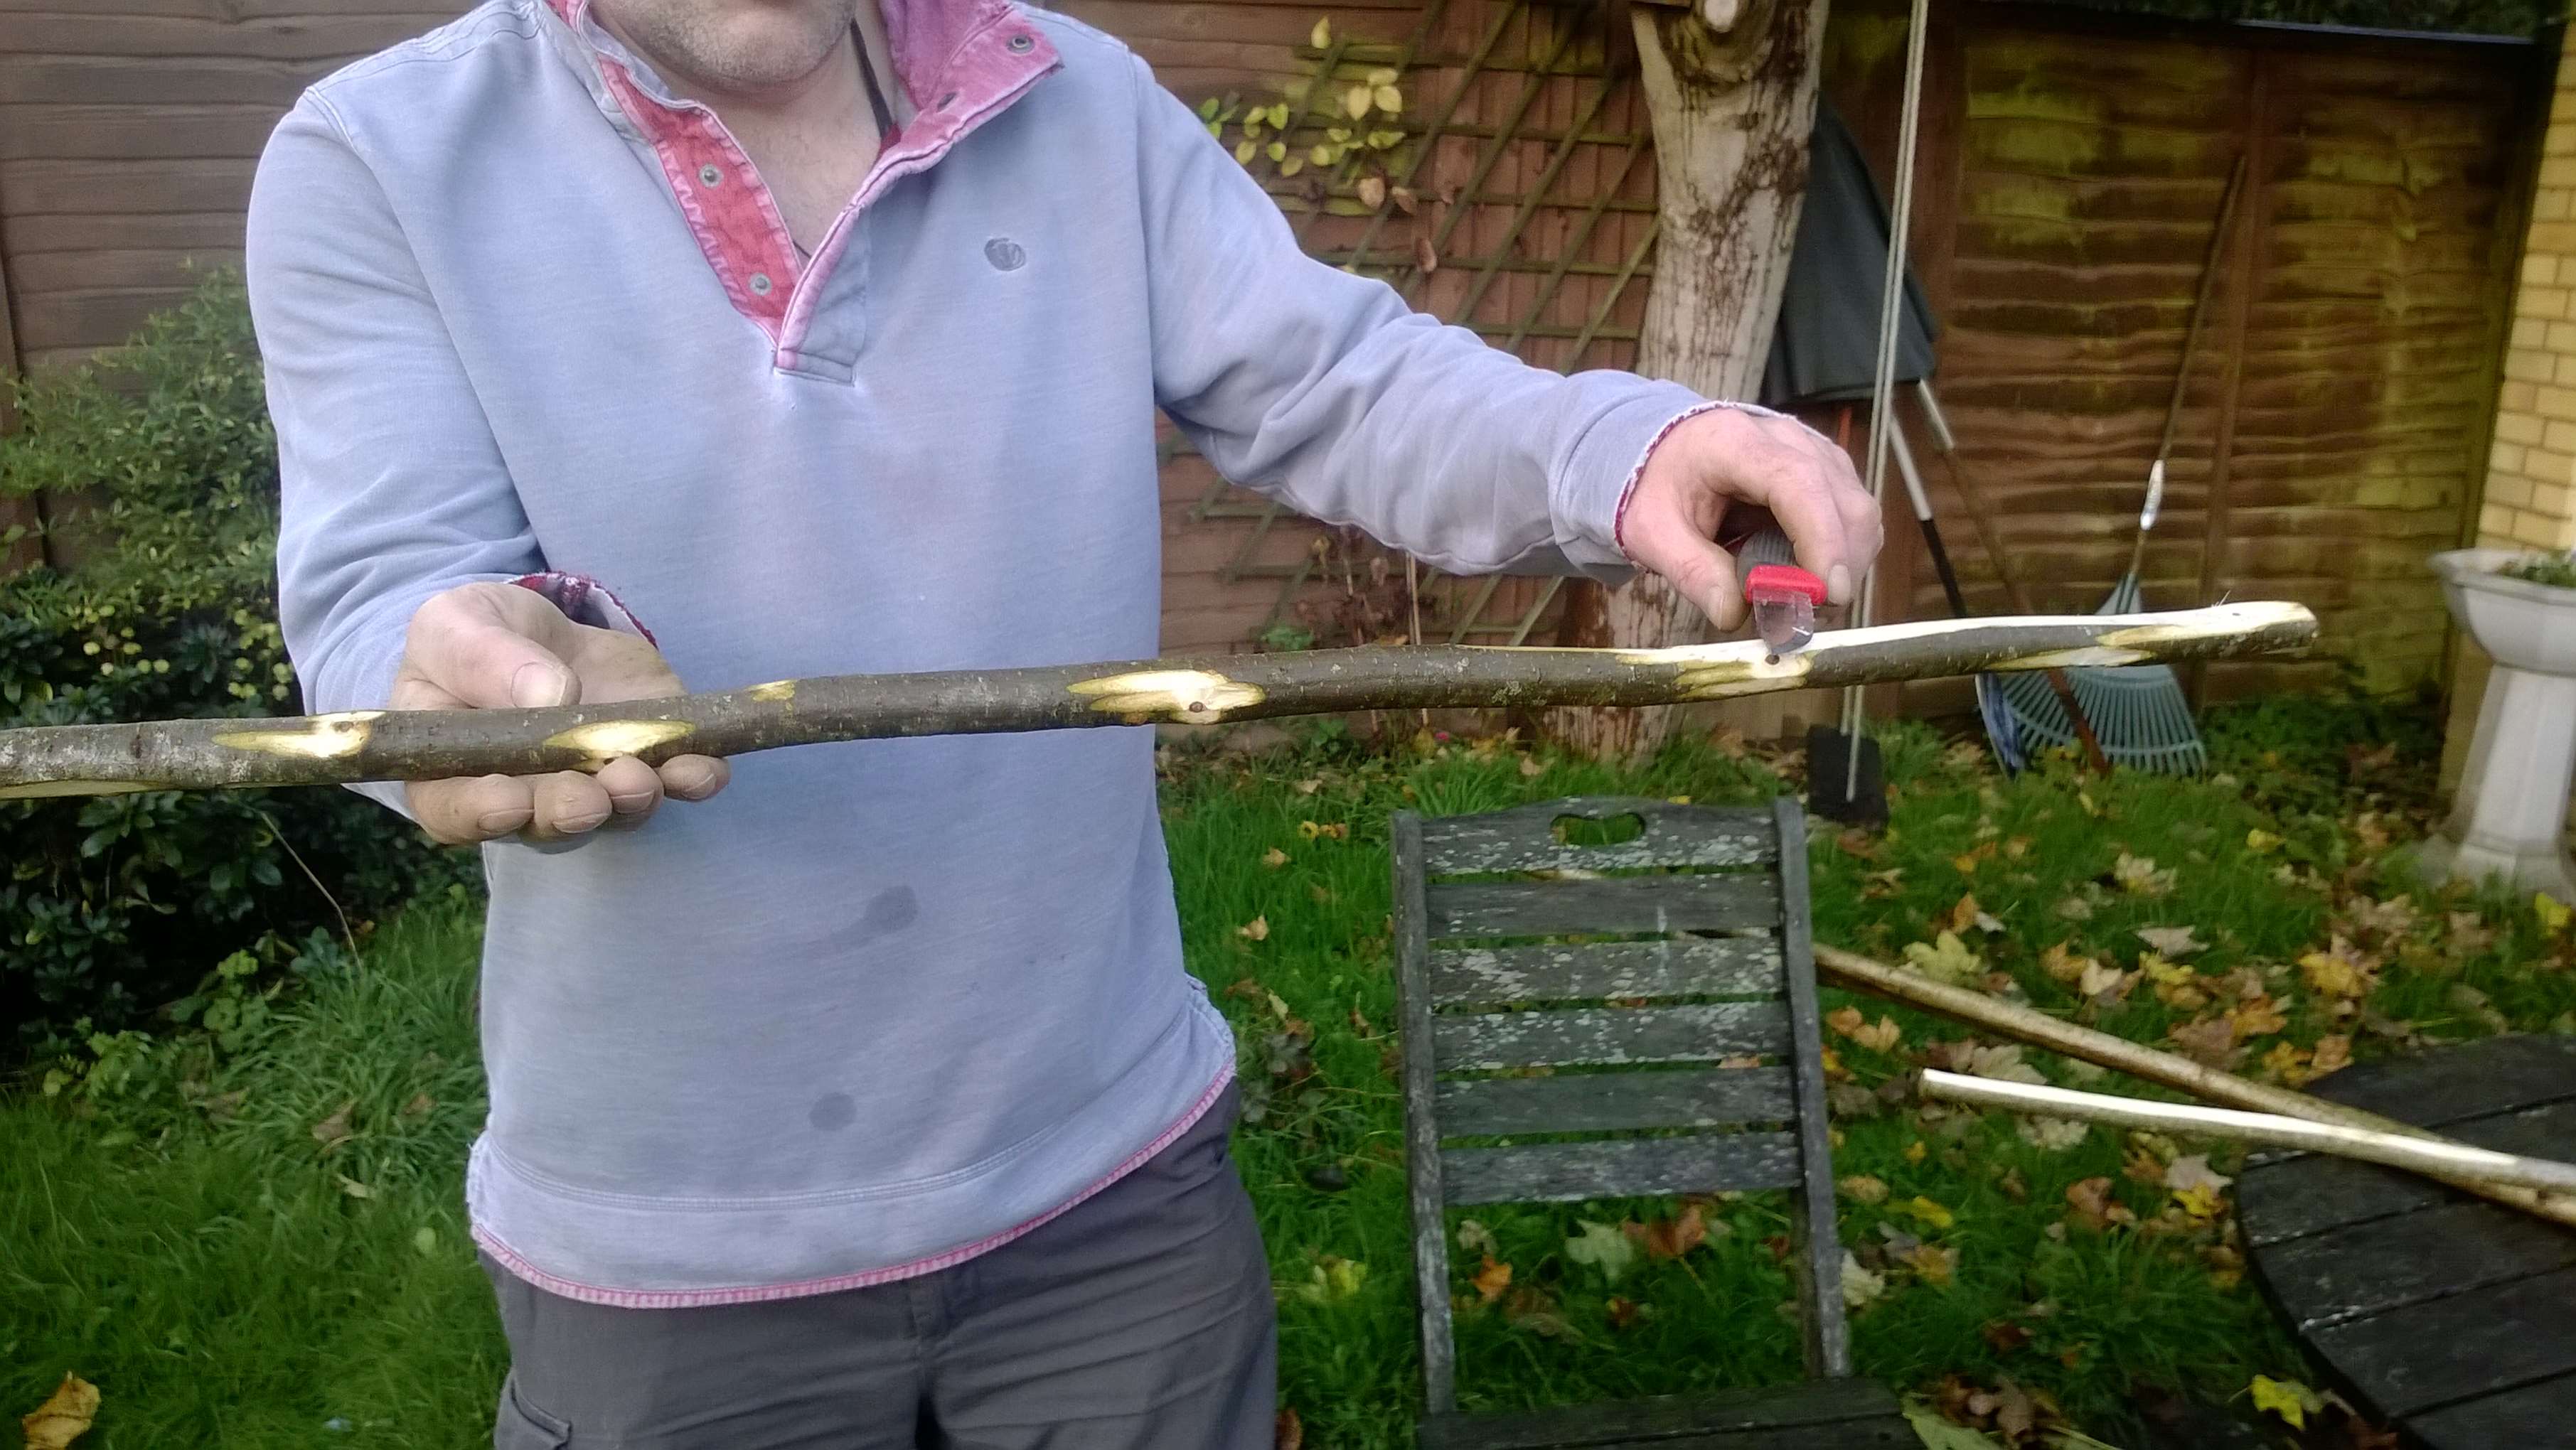
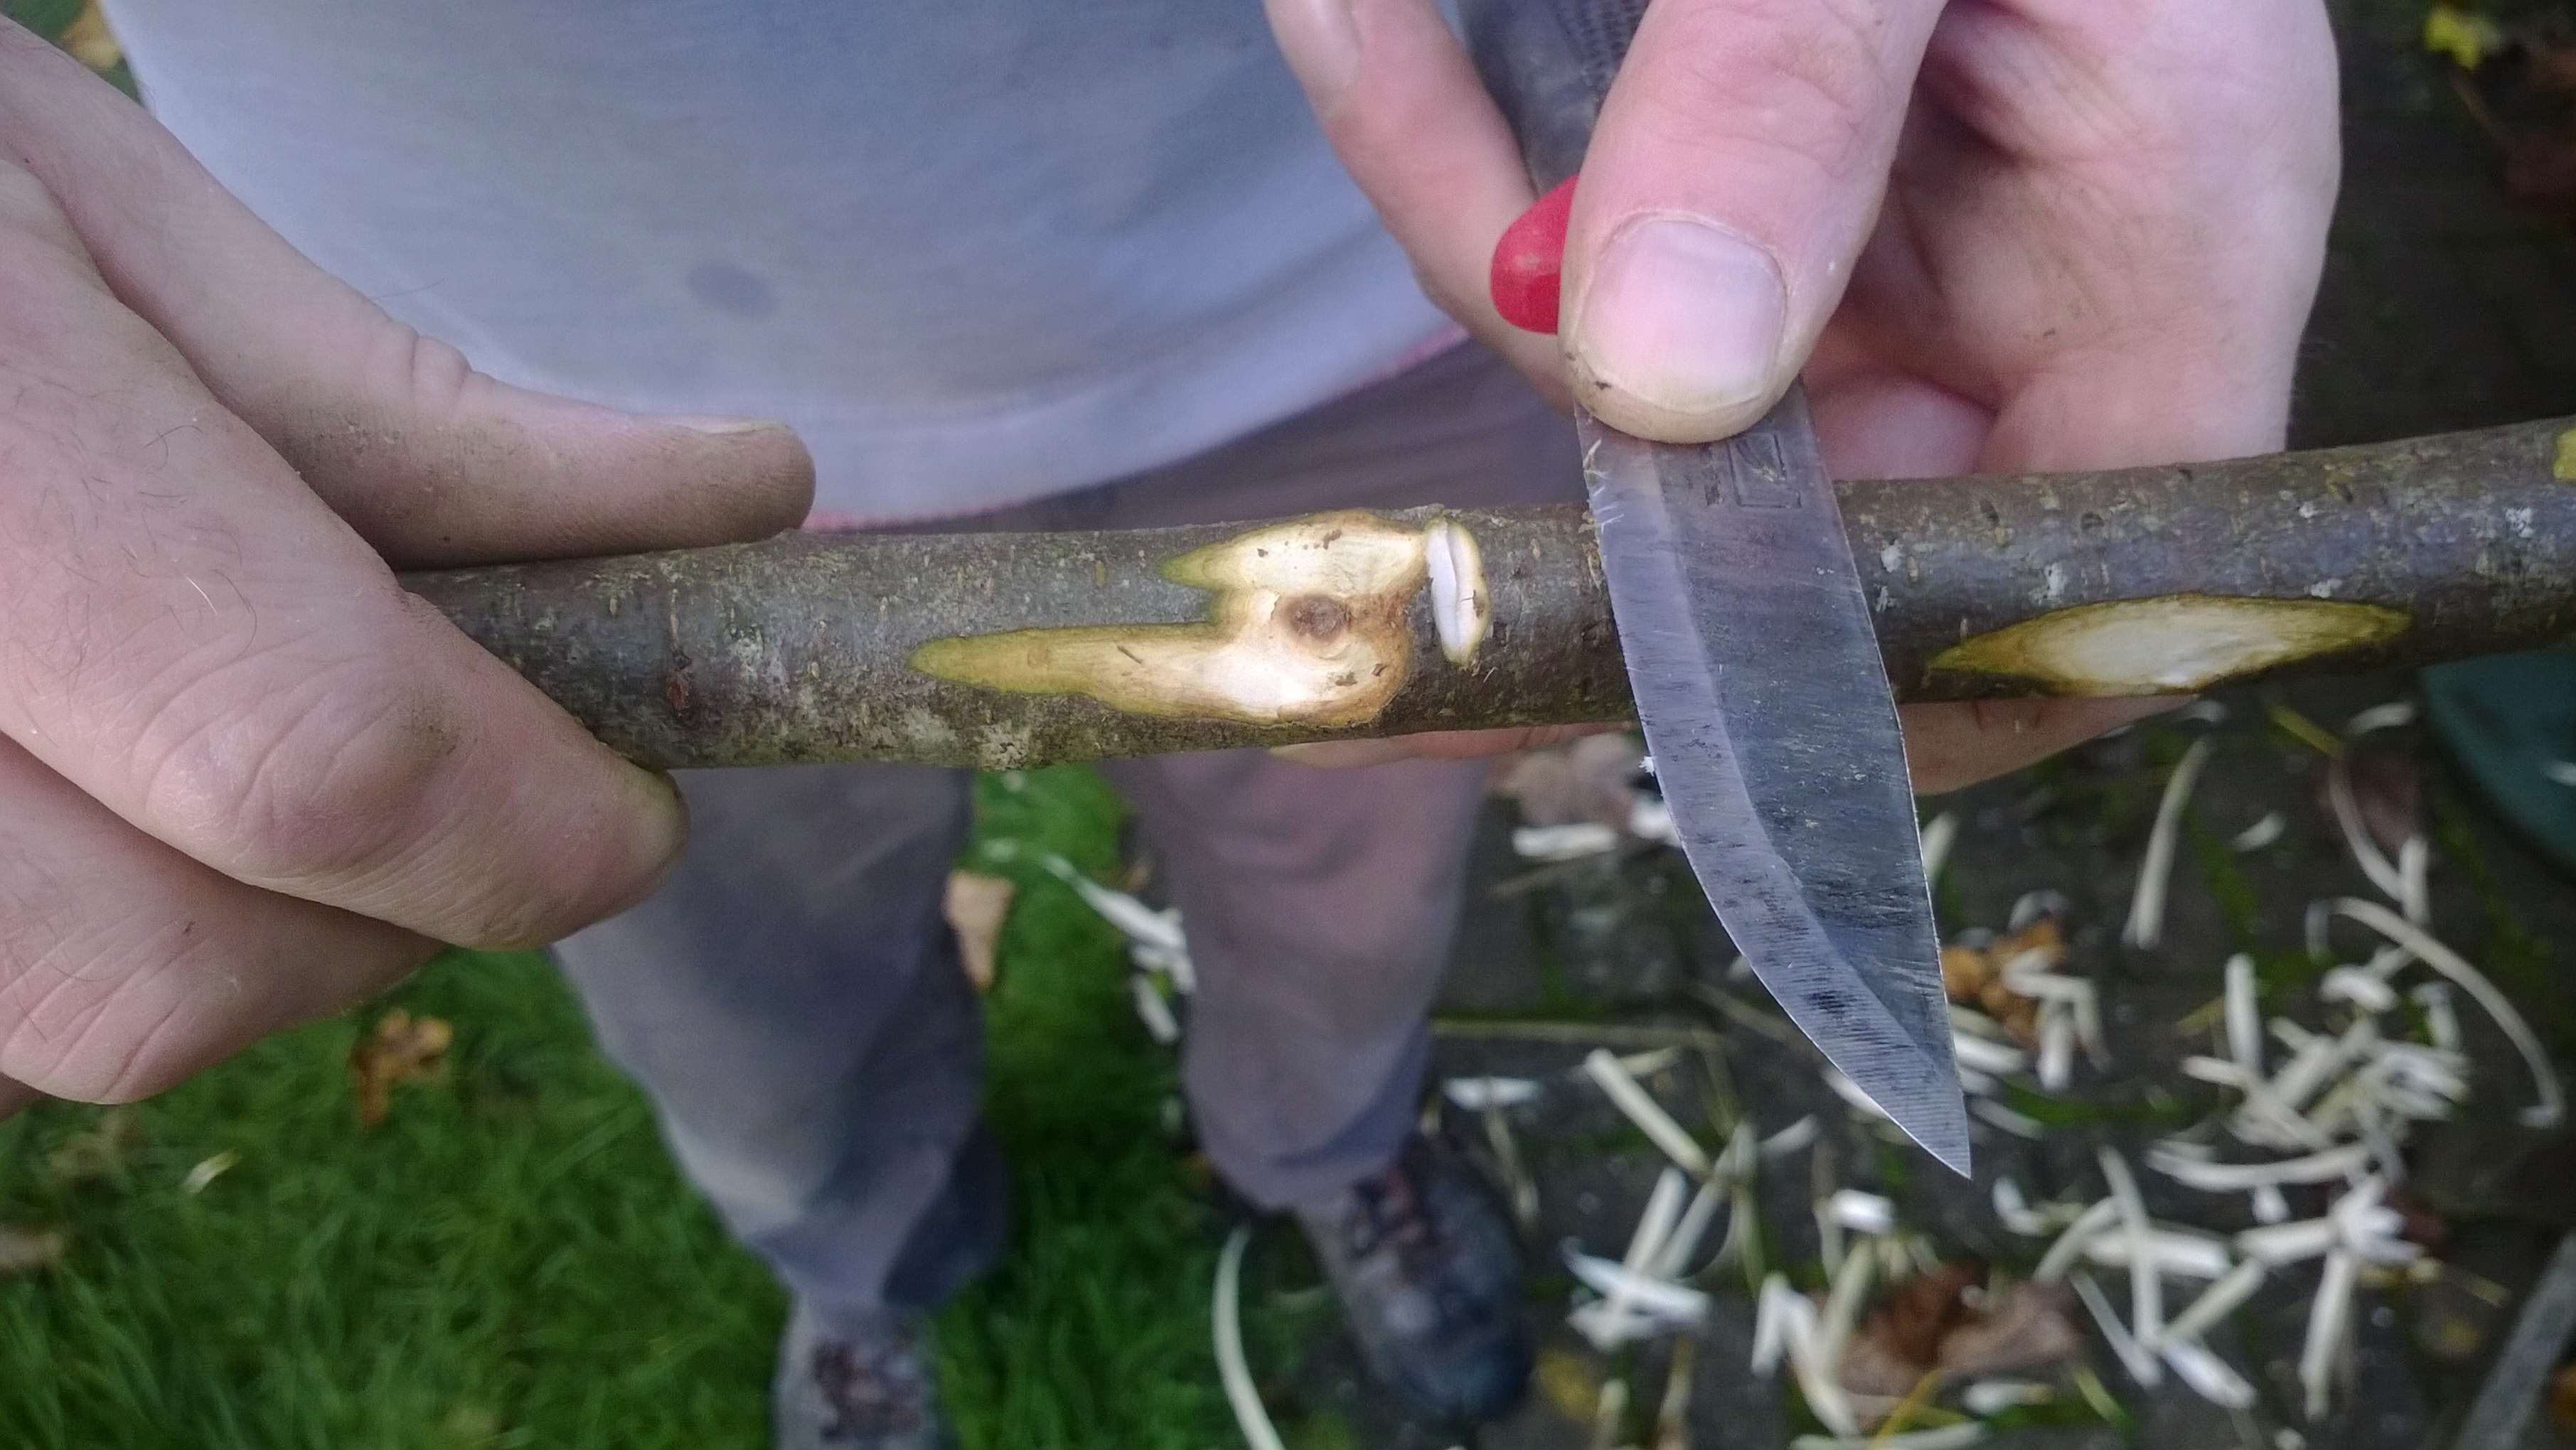
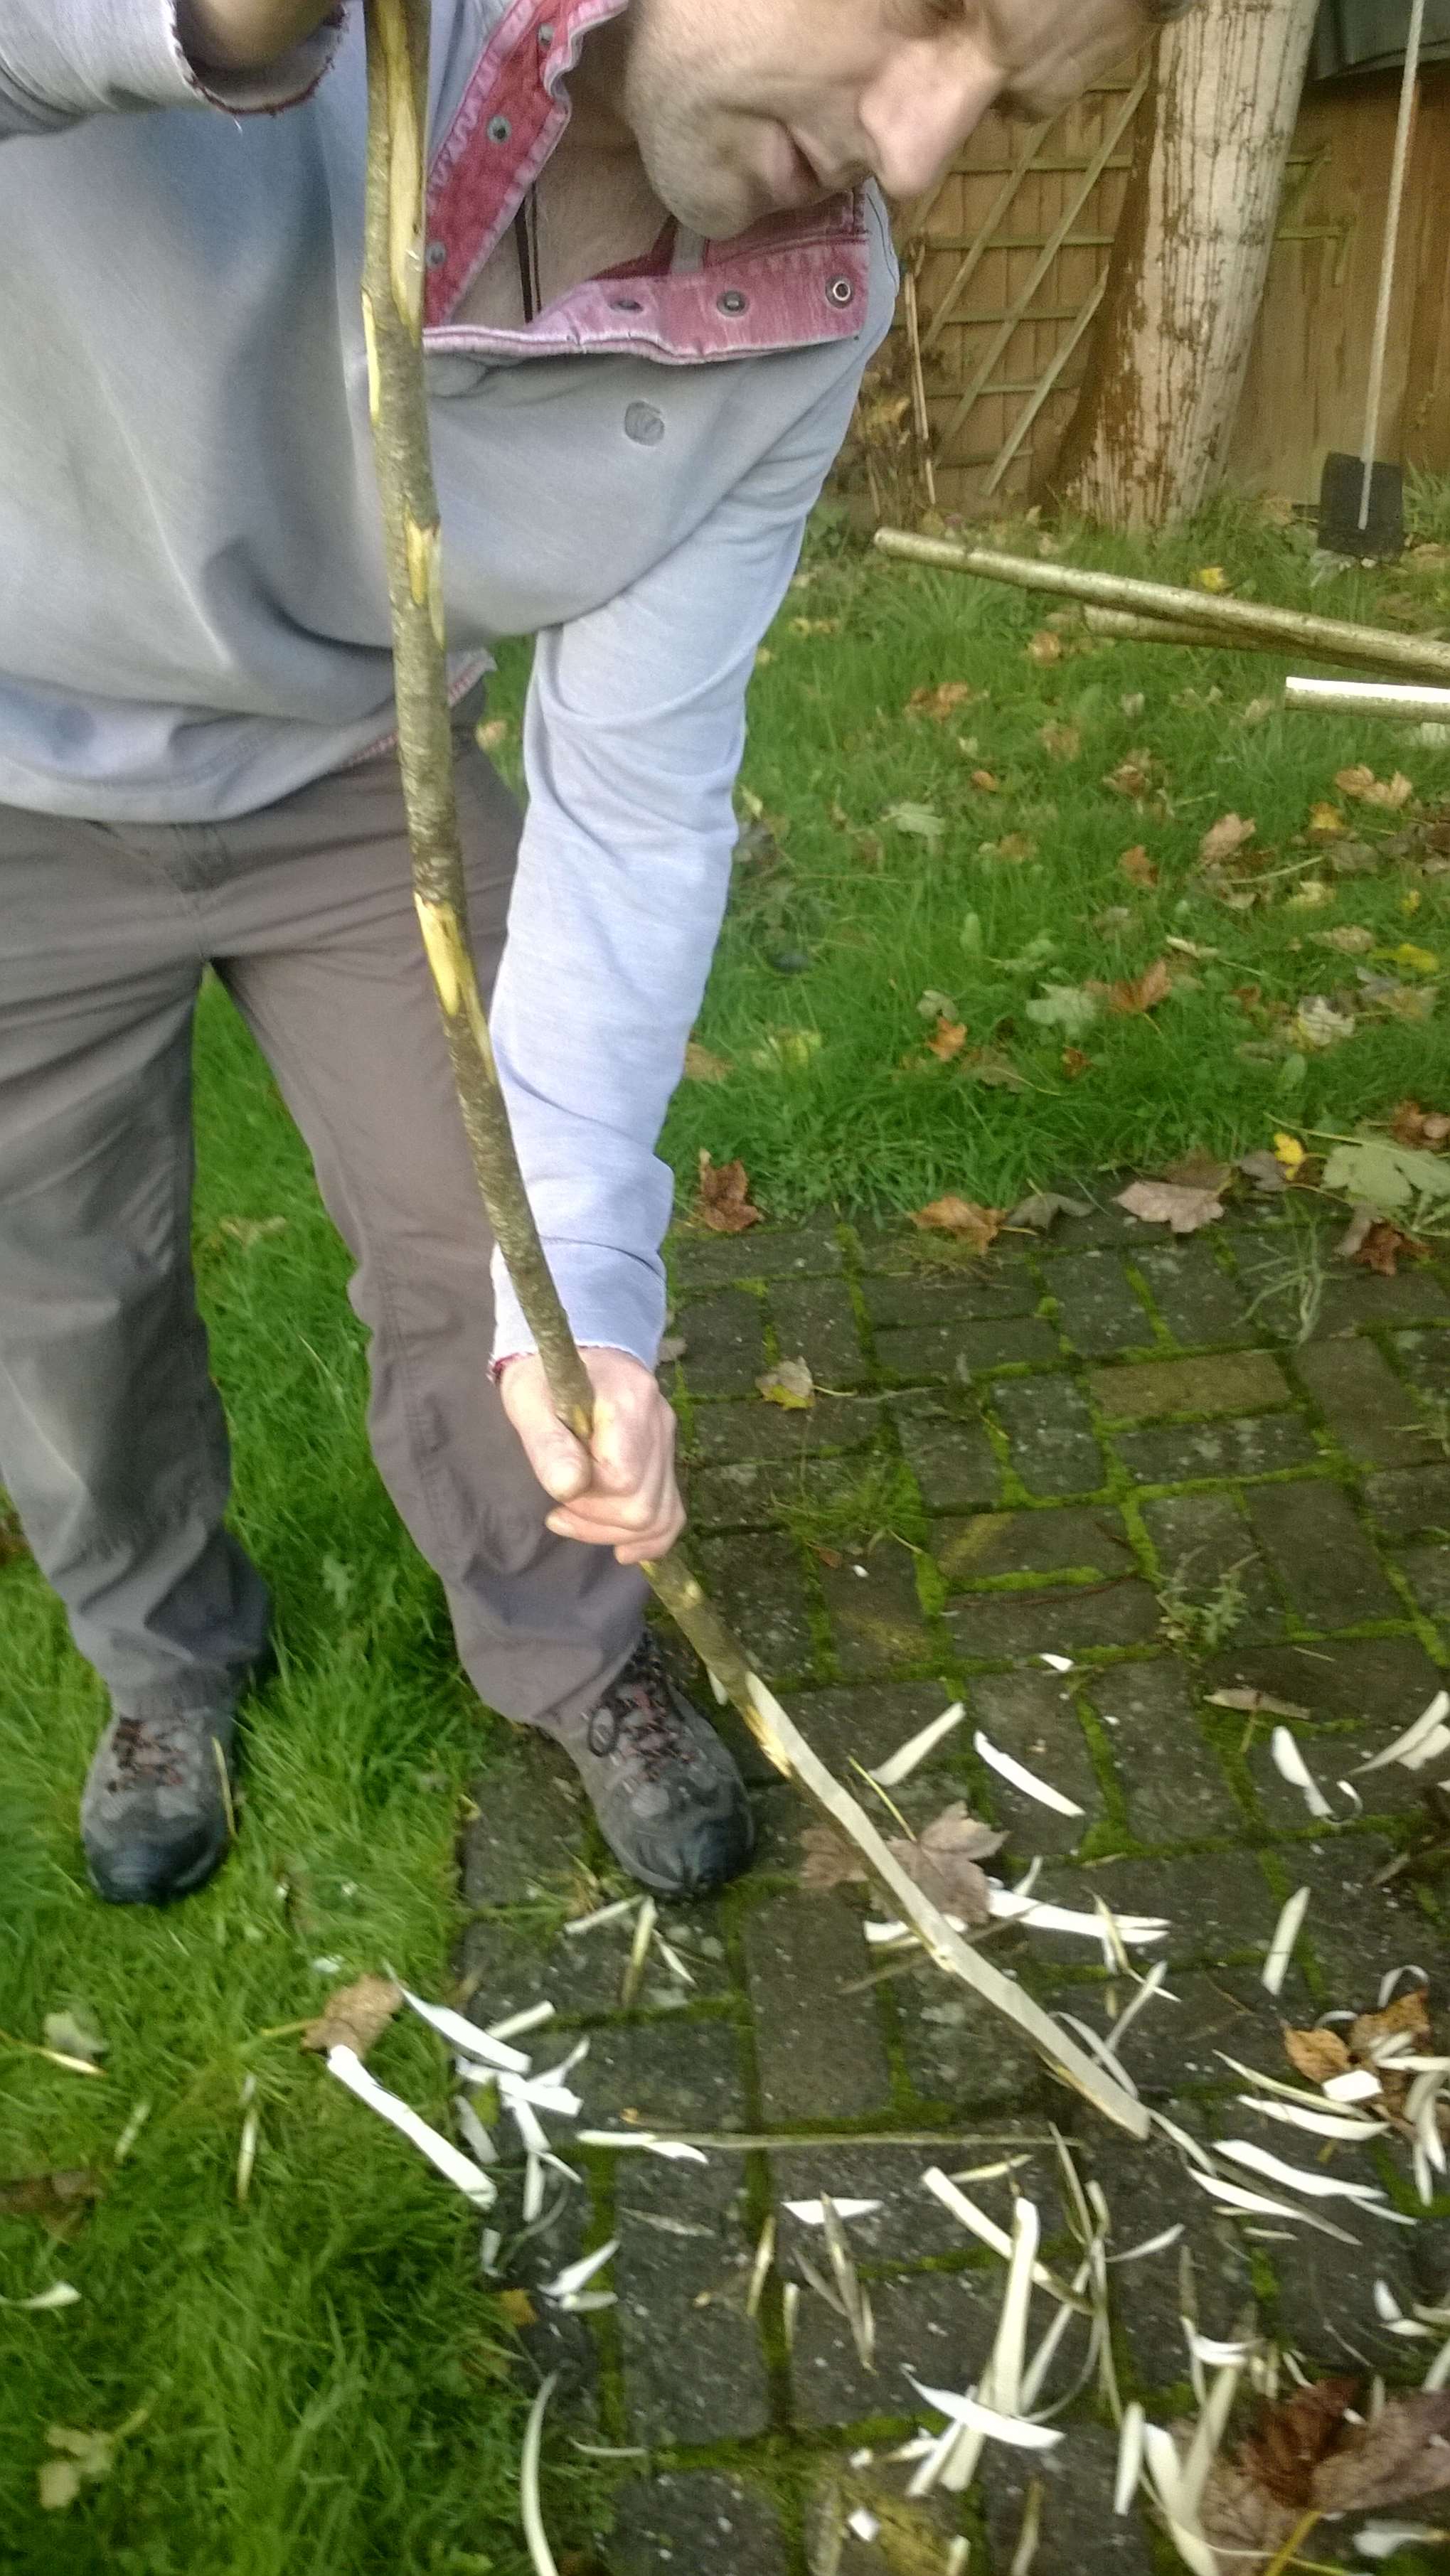
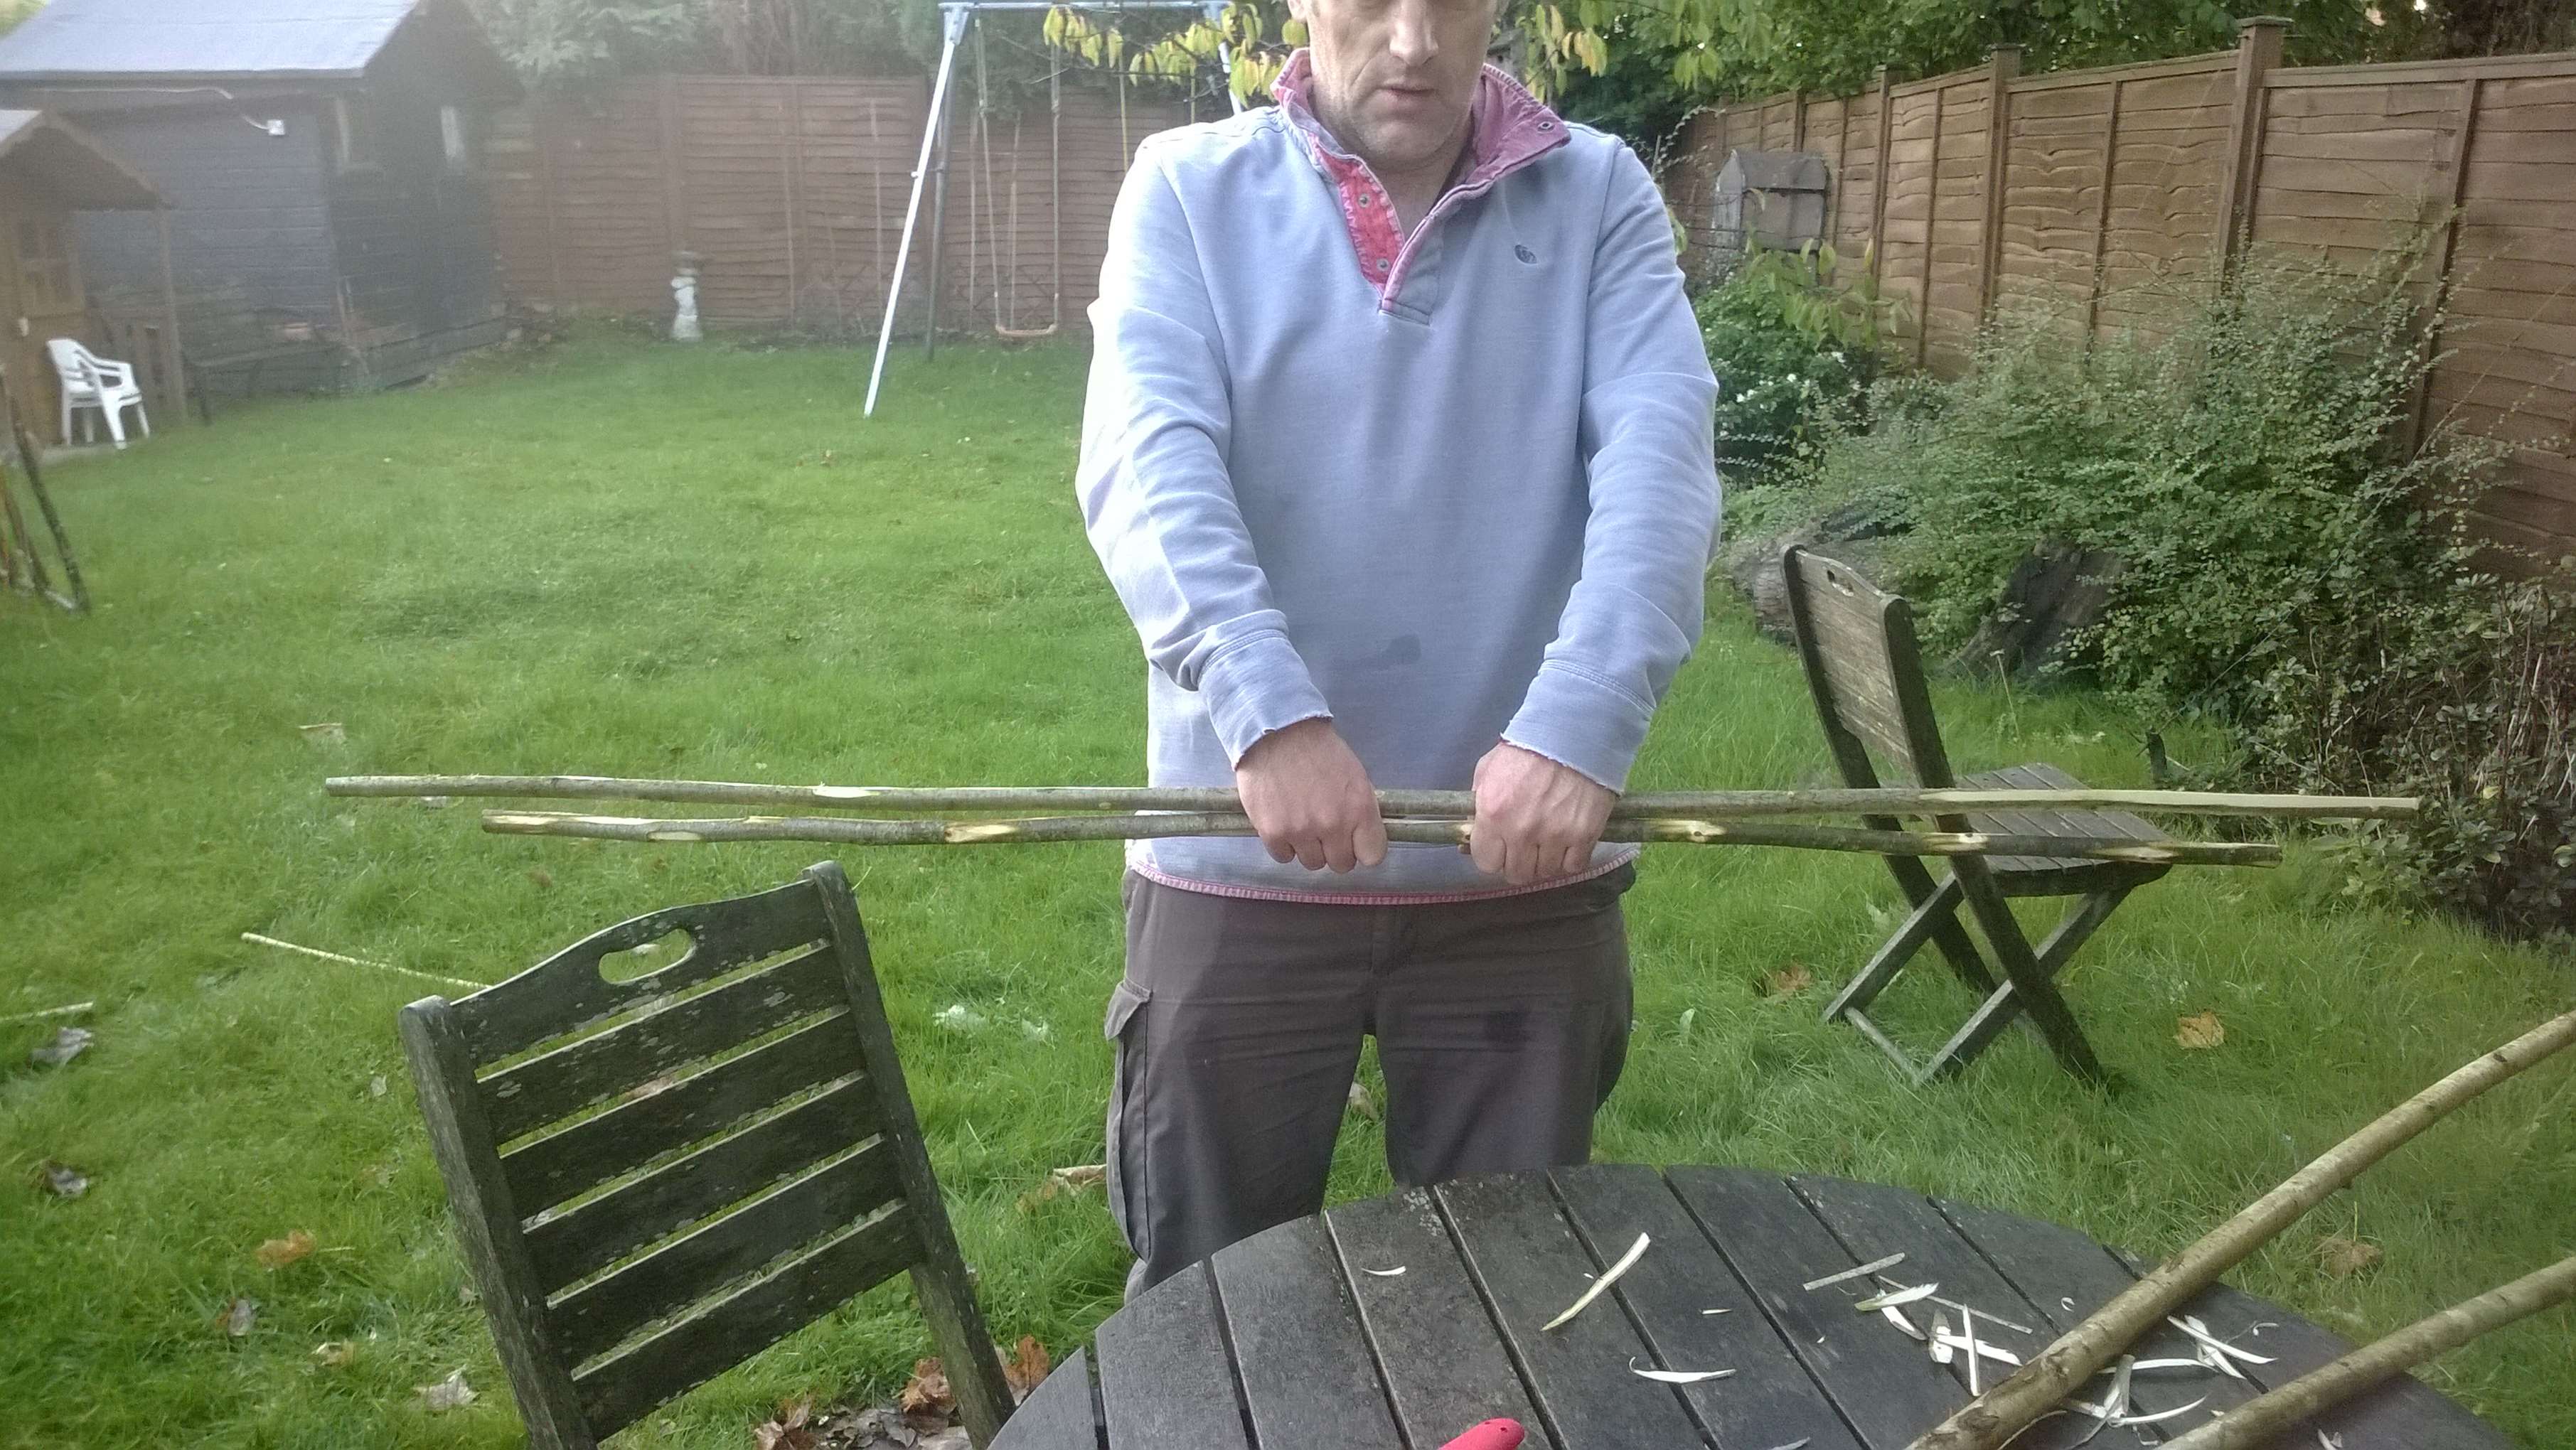
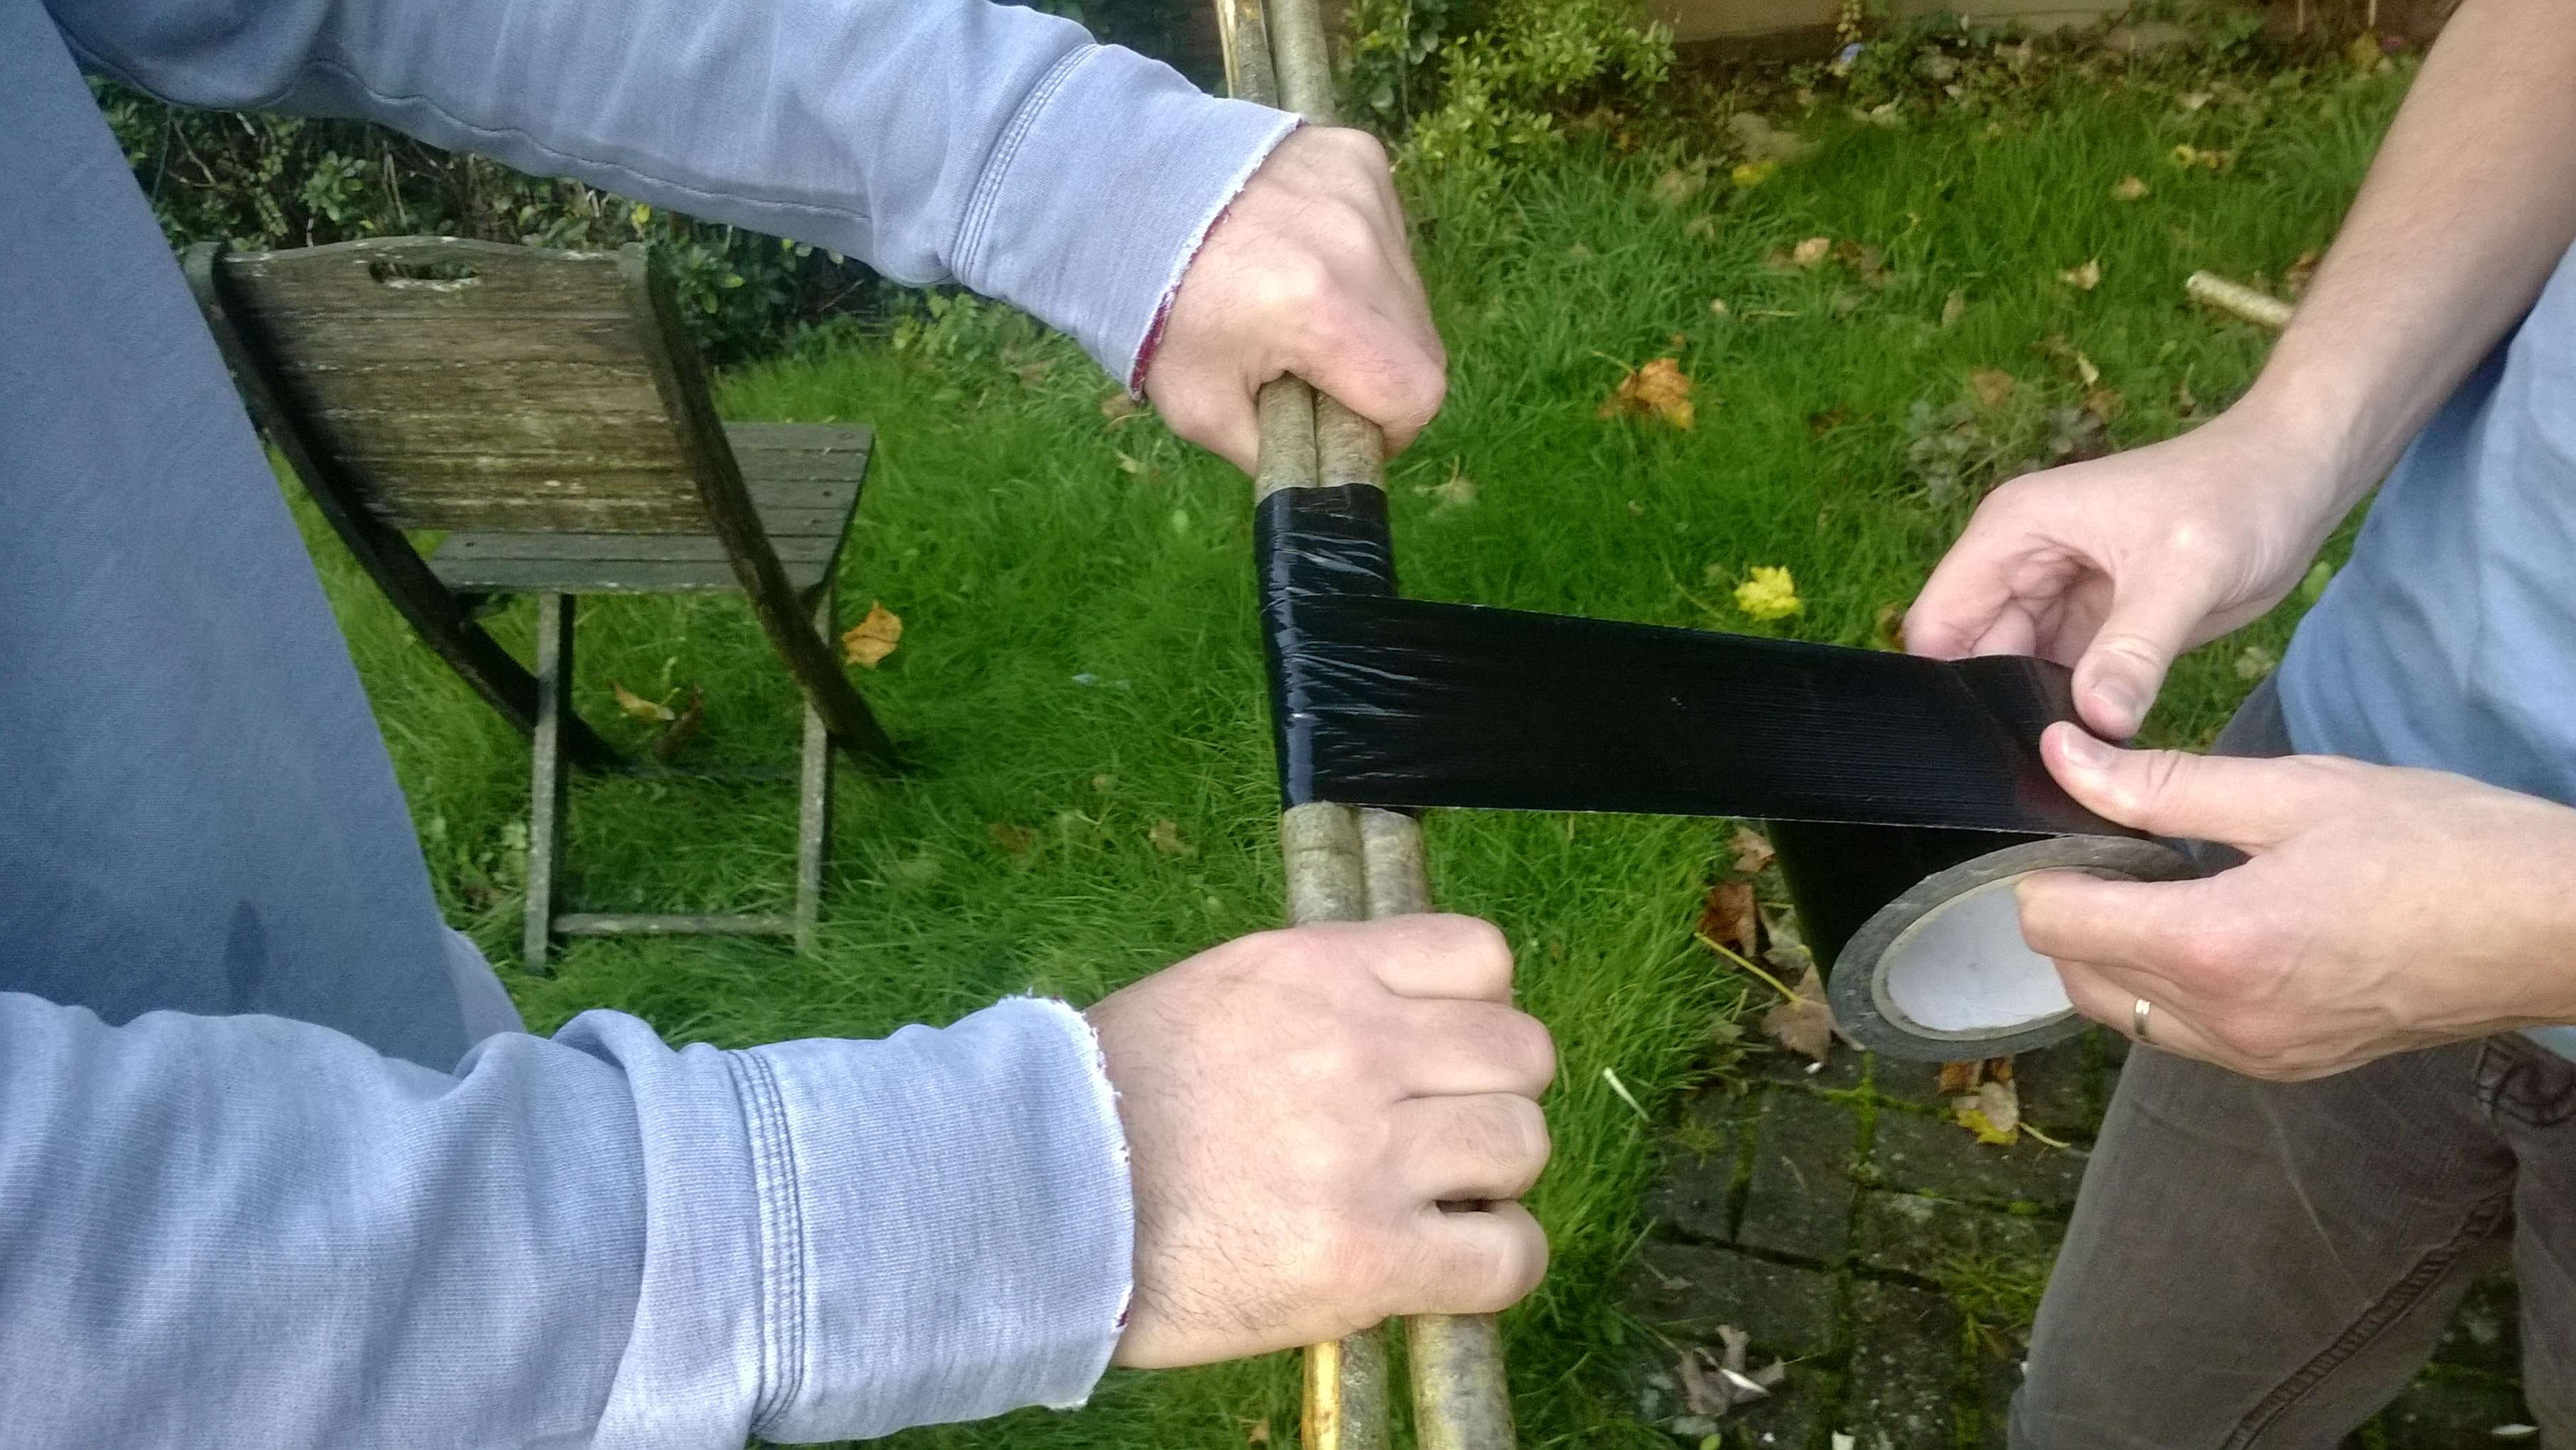
I have probably made at least a dozen of these quick bows and taught many students to make them since 2009. They take no more than a couple of hours to make and are quite powerful for green wood bows. I normally use two hazel or ash rods taped together to make them.

I learnt how to make them after watching a You Tube video by Mark Emery (Sussex Woodsman) who is an expert woodsman.

1
Father & Son Bow

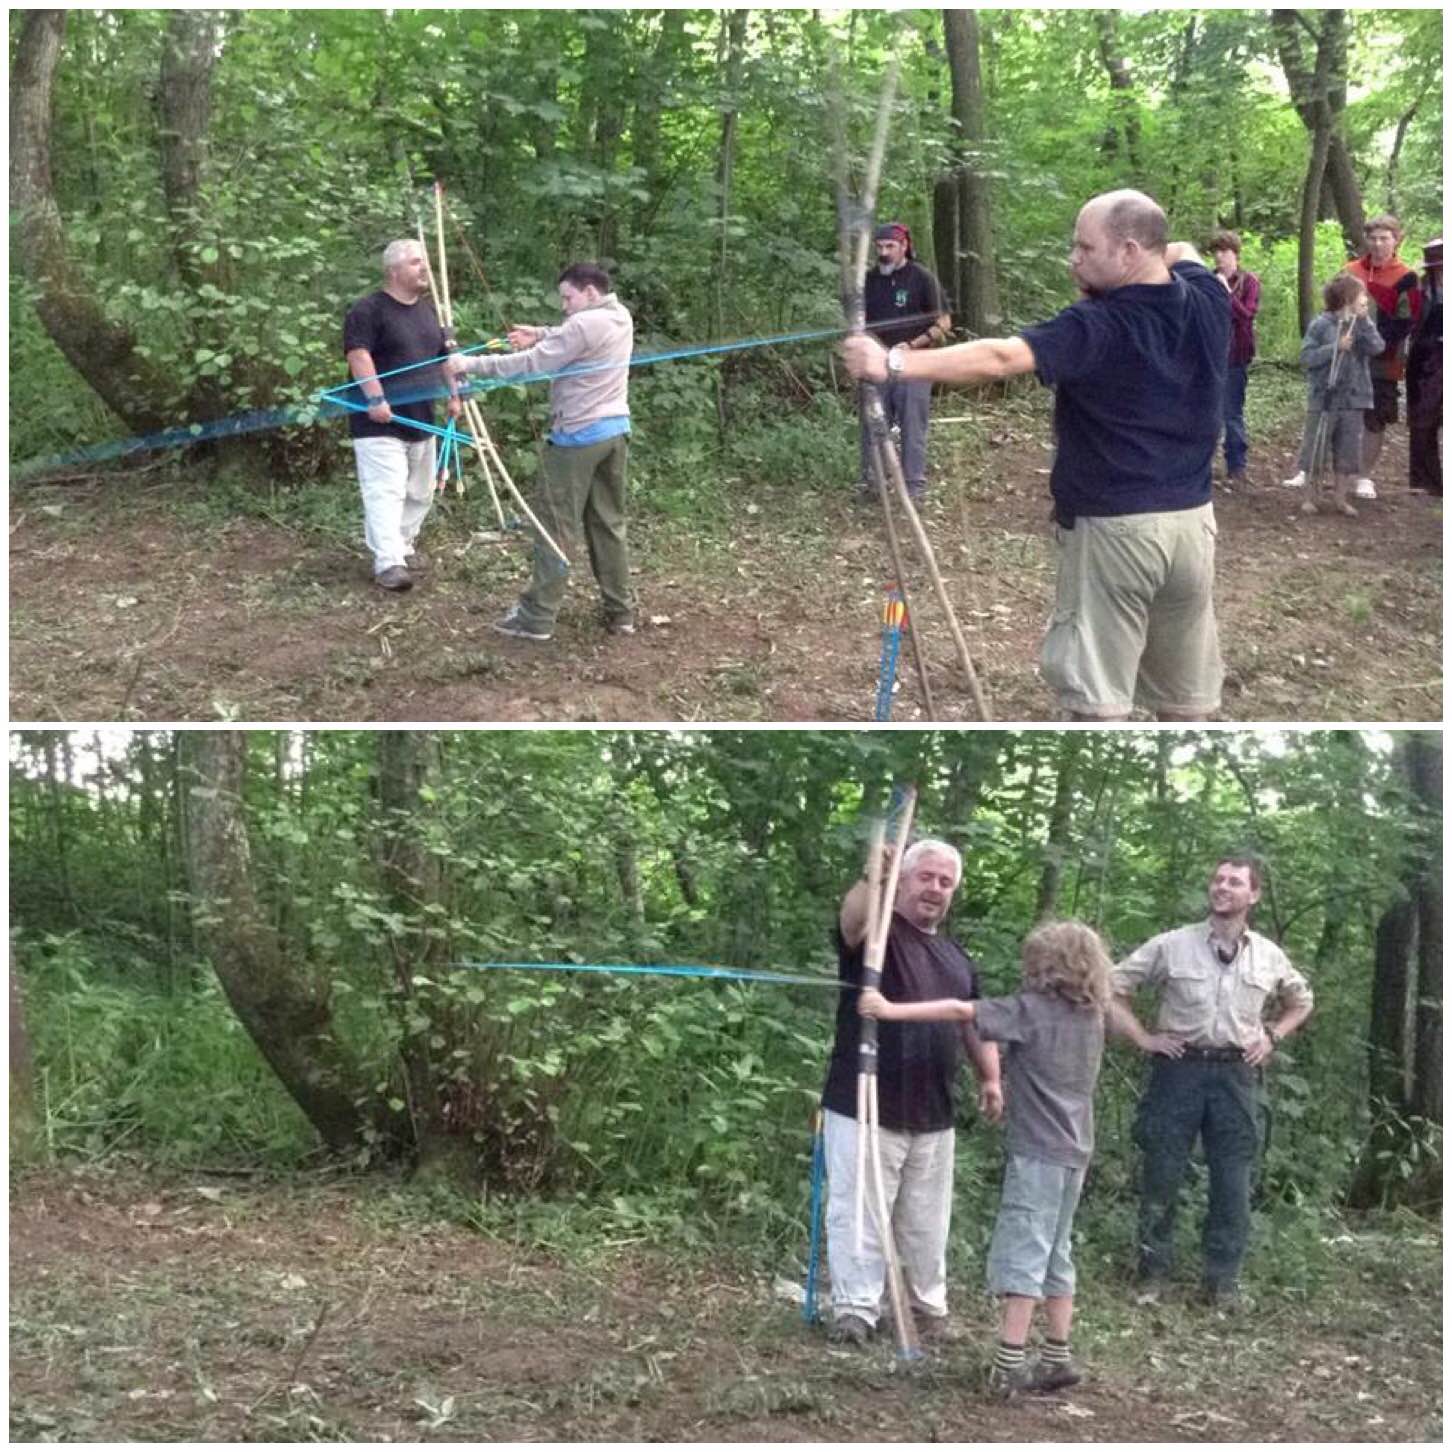
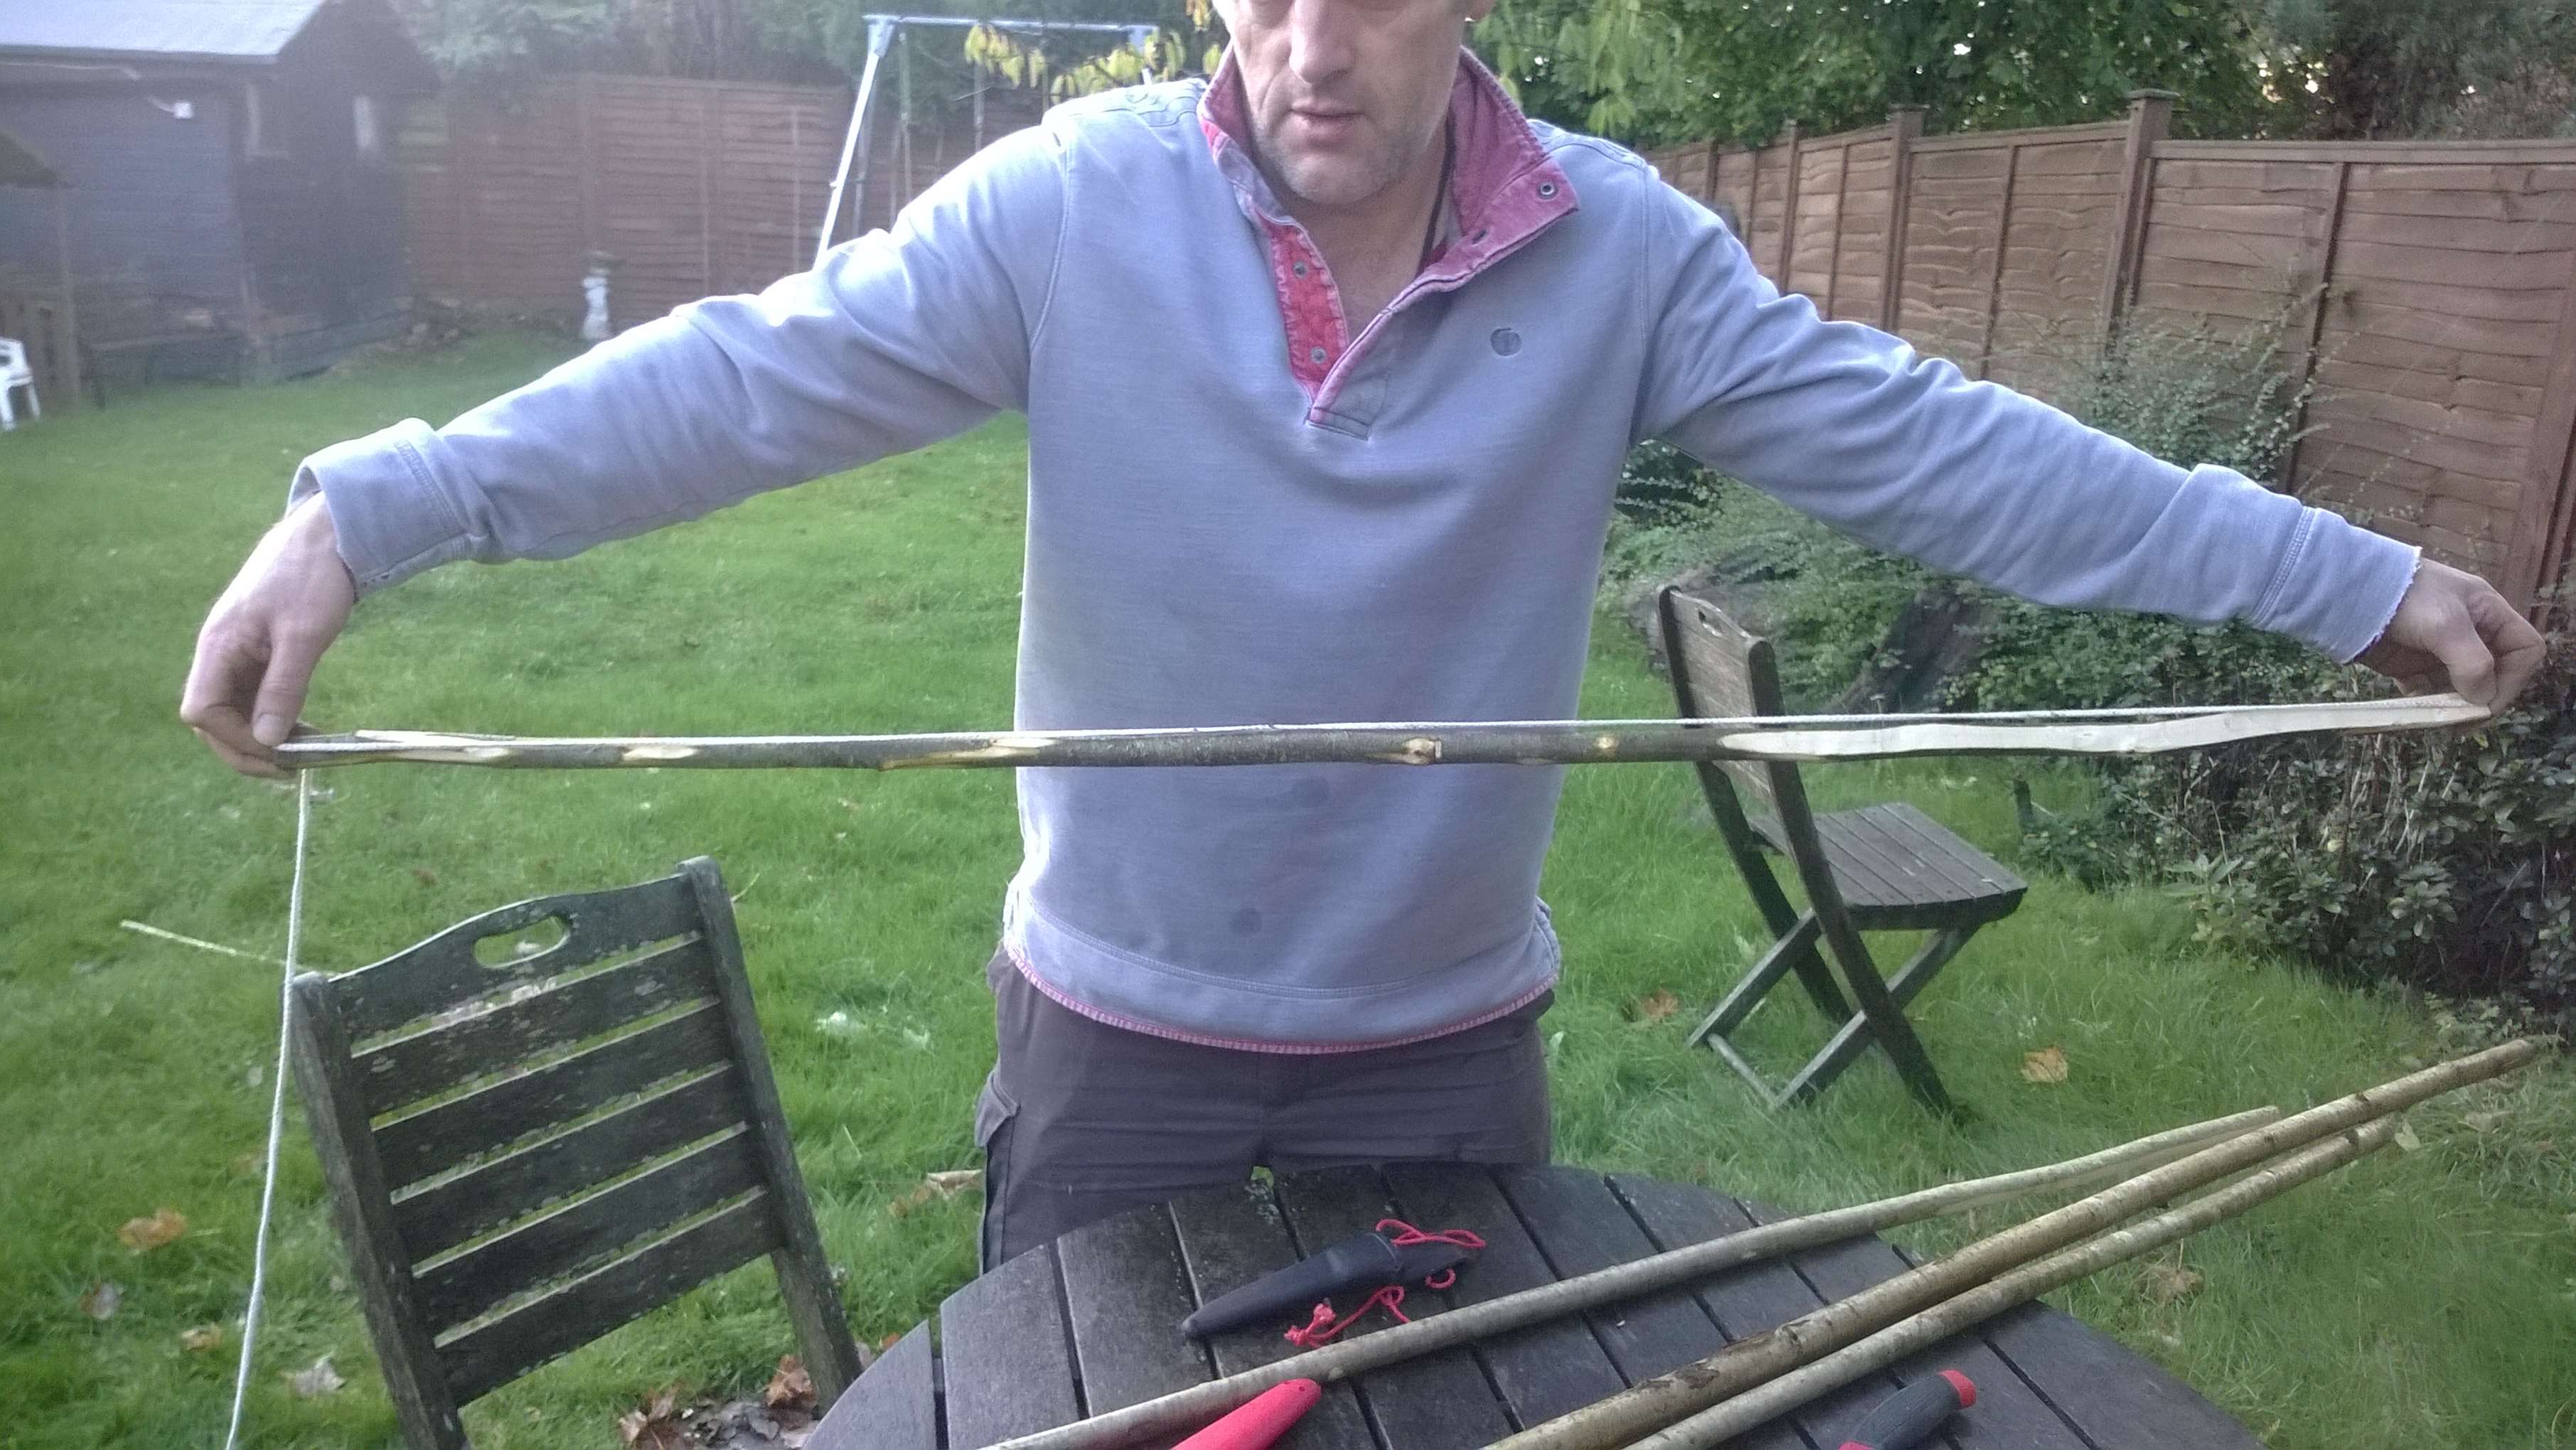
The bow themselves are very light in terms of poundage (20 to 30lbs in draw weight) but on a high arc I can generally get them to shoot an arrow 60 to 70 metres. I usually shoot them on short ranges of less than 20 metres in the woods.

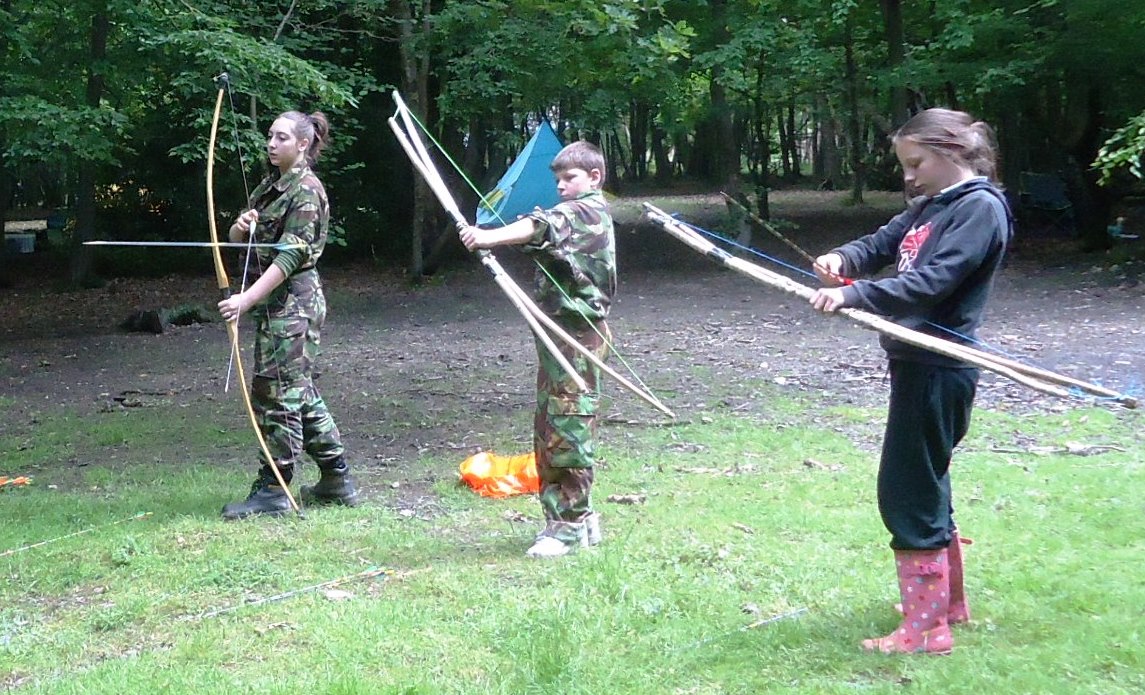
These have proven a massive hit at the Bushcraft UK Bushmoot and there has been a class run on them since 2009 with folks of all ages making them. I particularly like to see a family making one and then coming down to the range of an evening to shoot. I still have ones I made all these years ago and they still shoot well.

Ash Flatbow

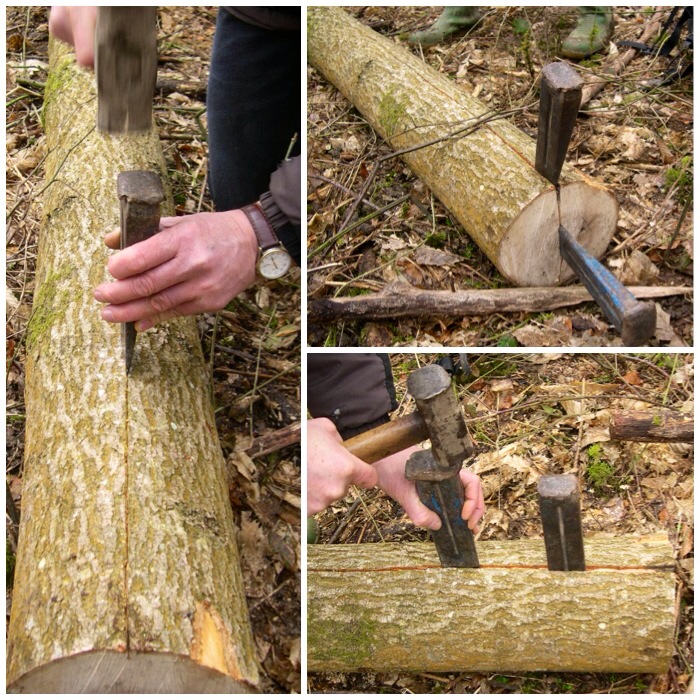
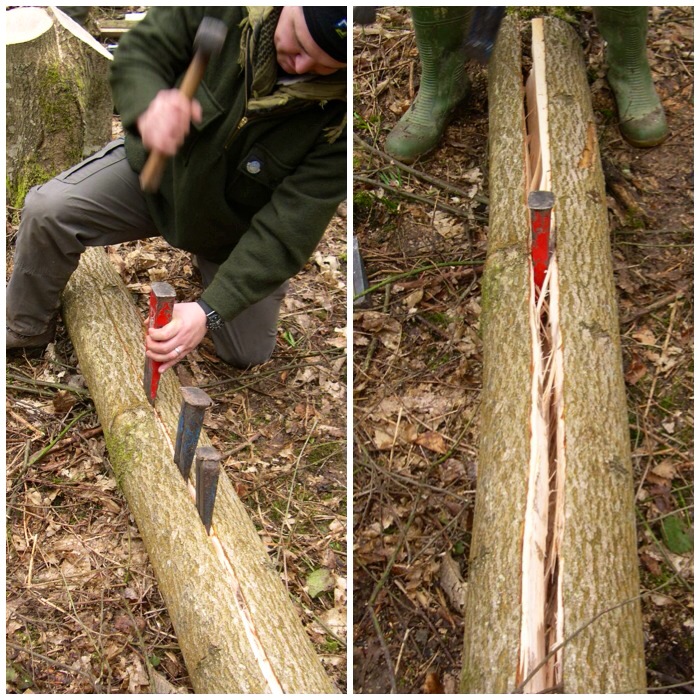
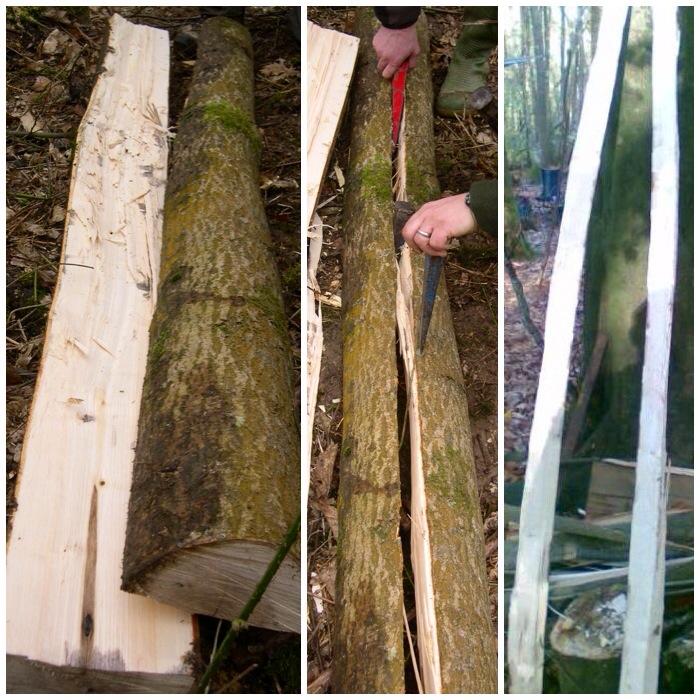
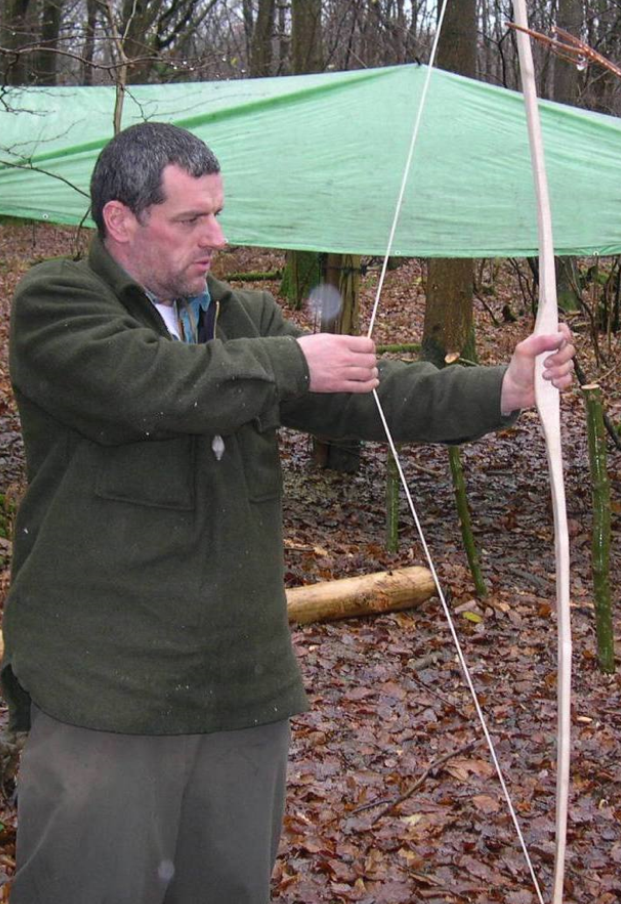
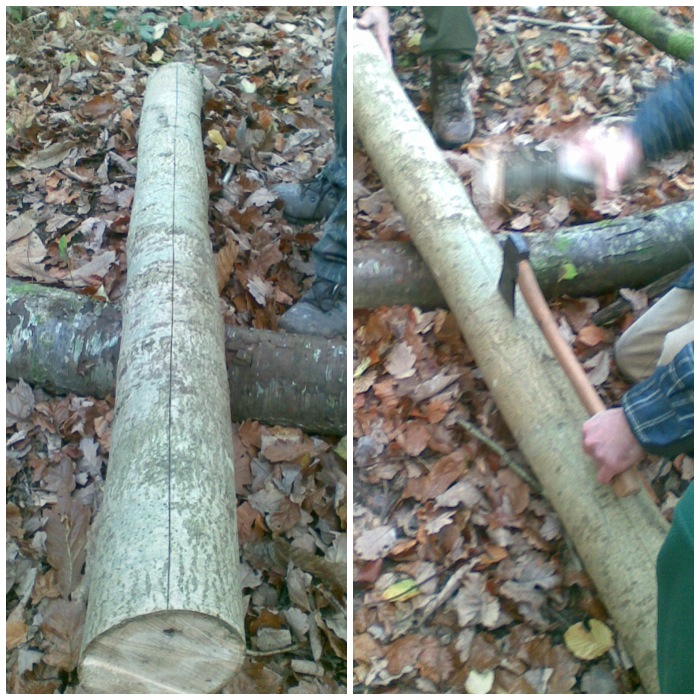
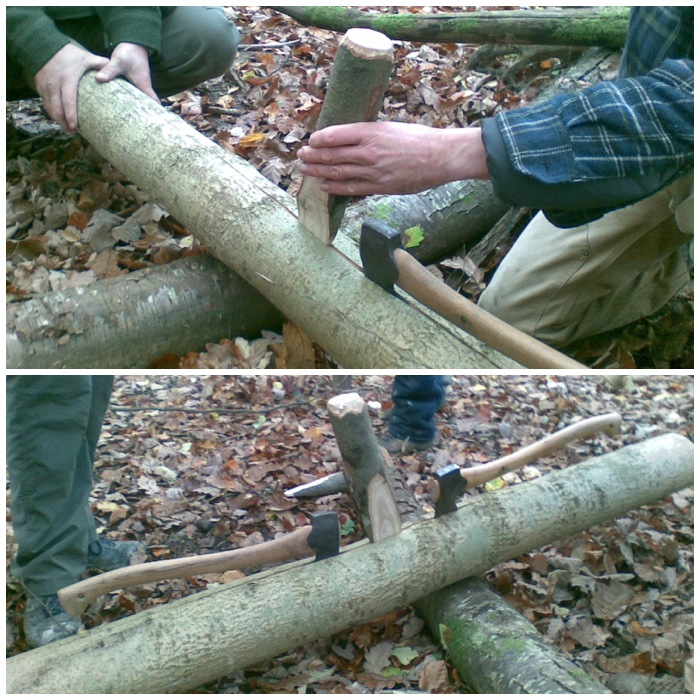
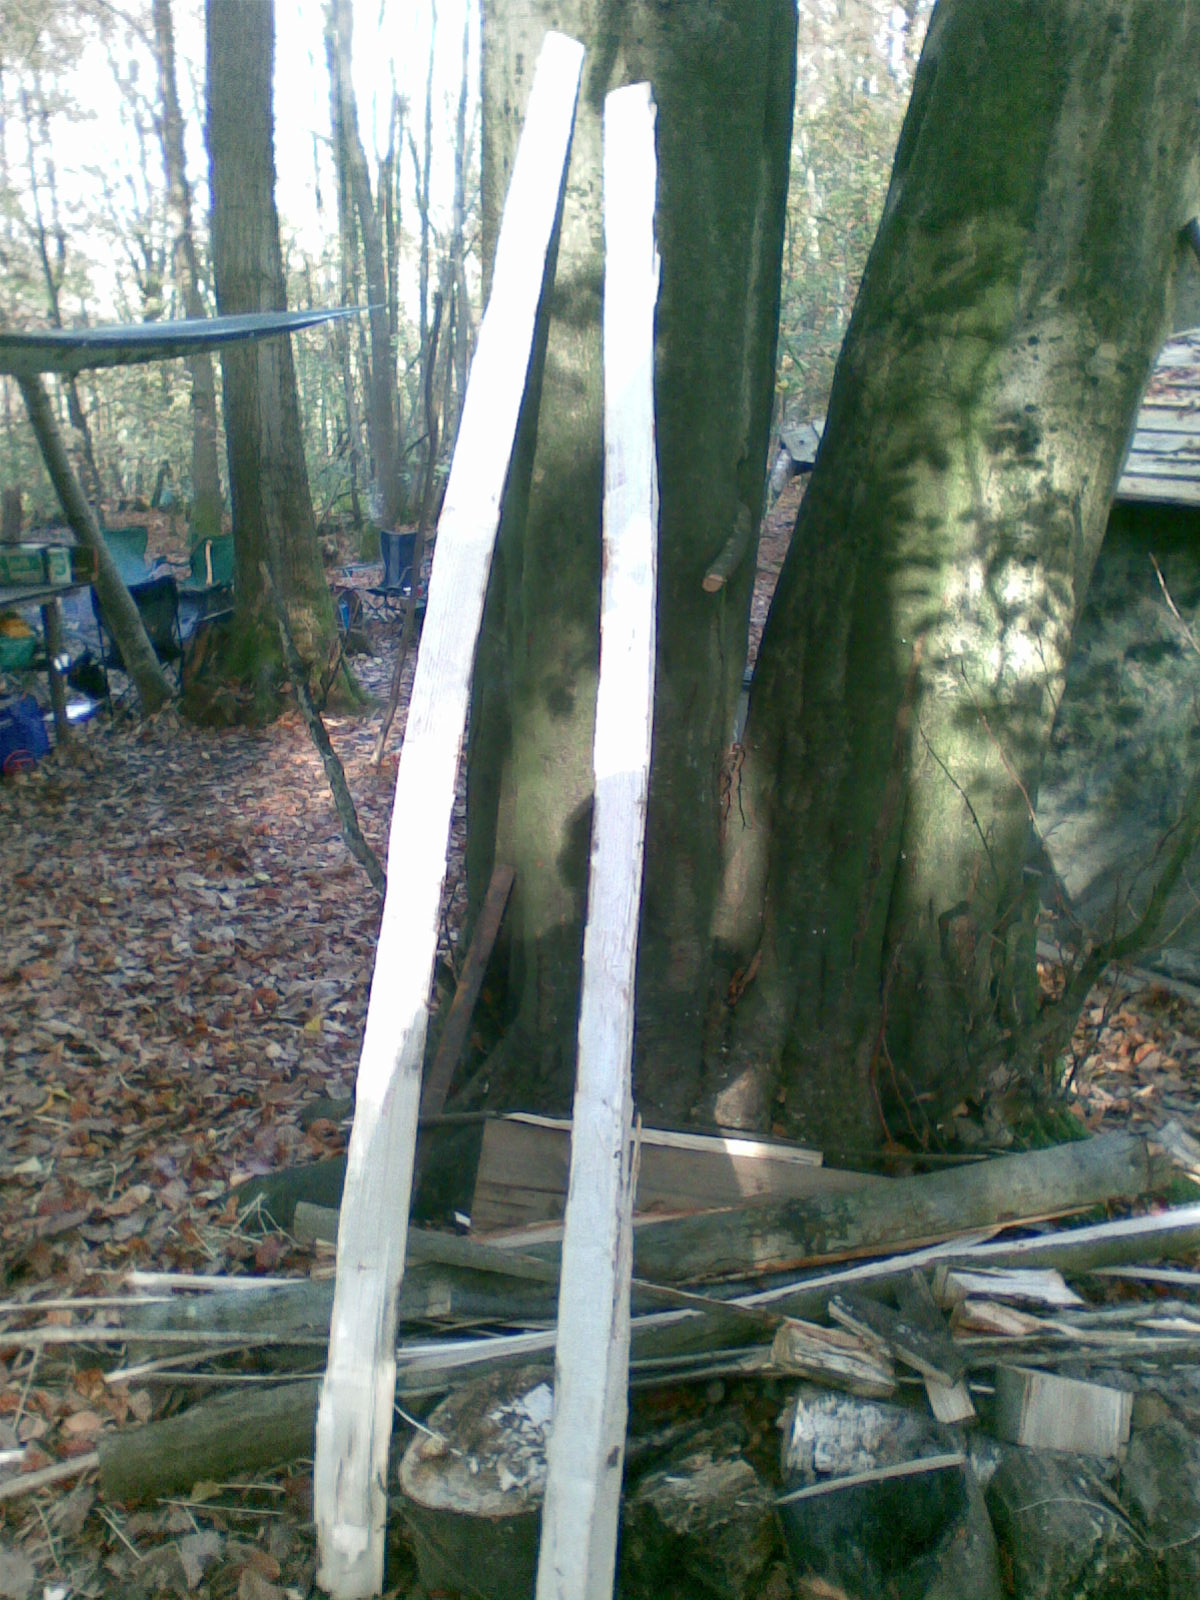
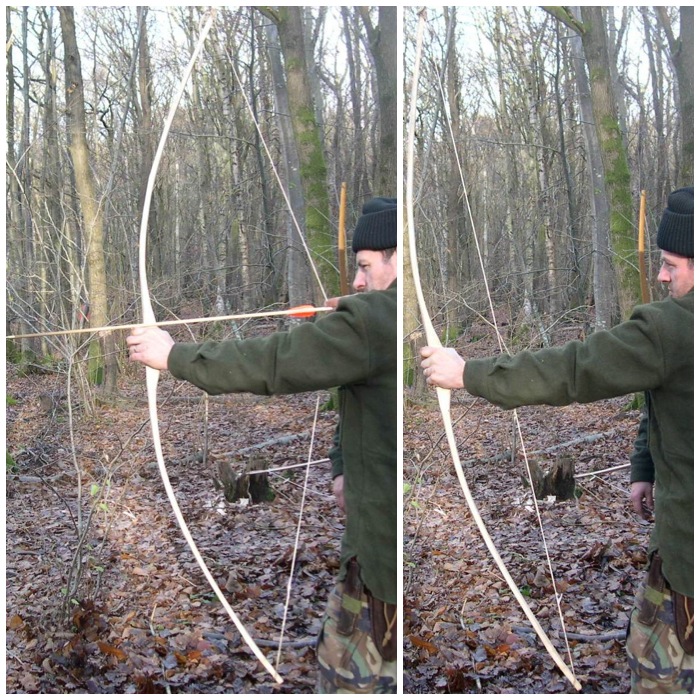
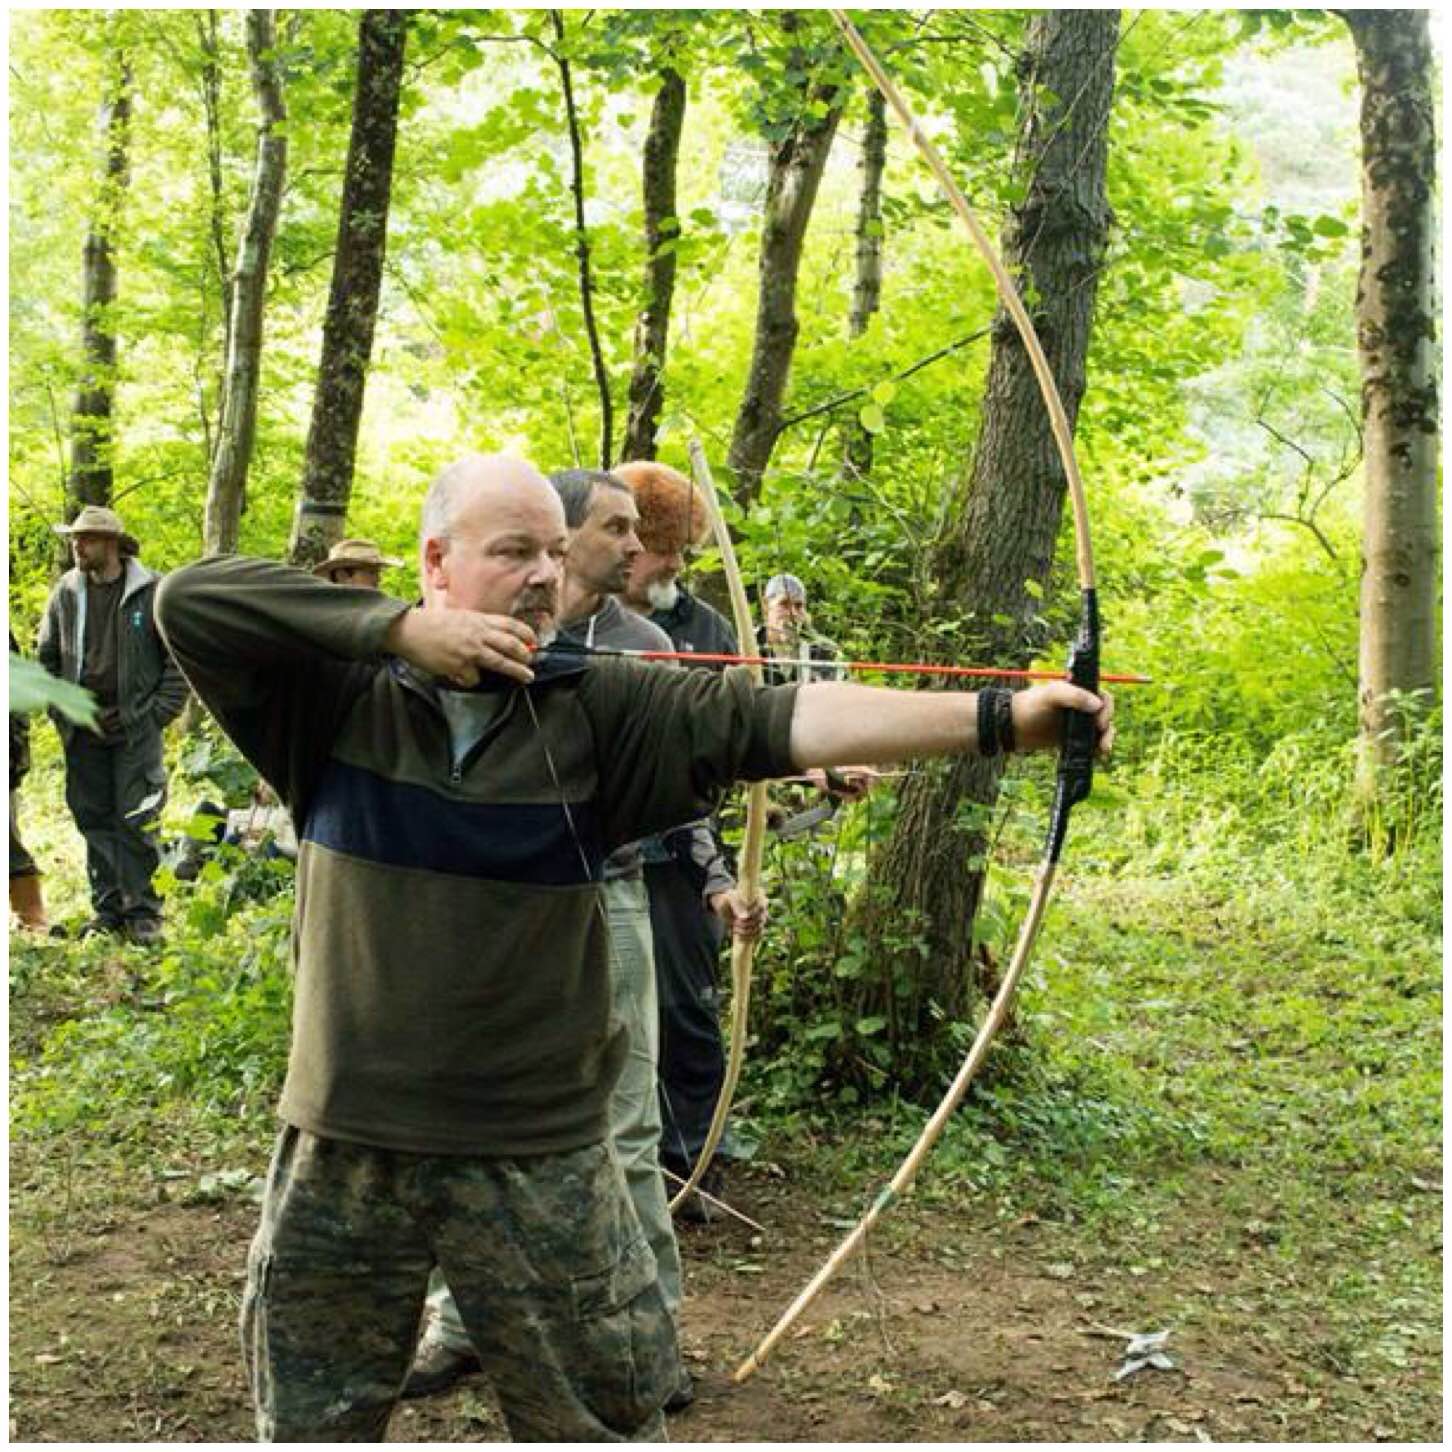
This was the very first bow I made back in 2008 on a Bushcraft Instructors course with John Rhyder of Woodcraft School.

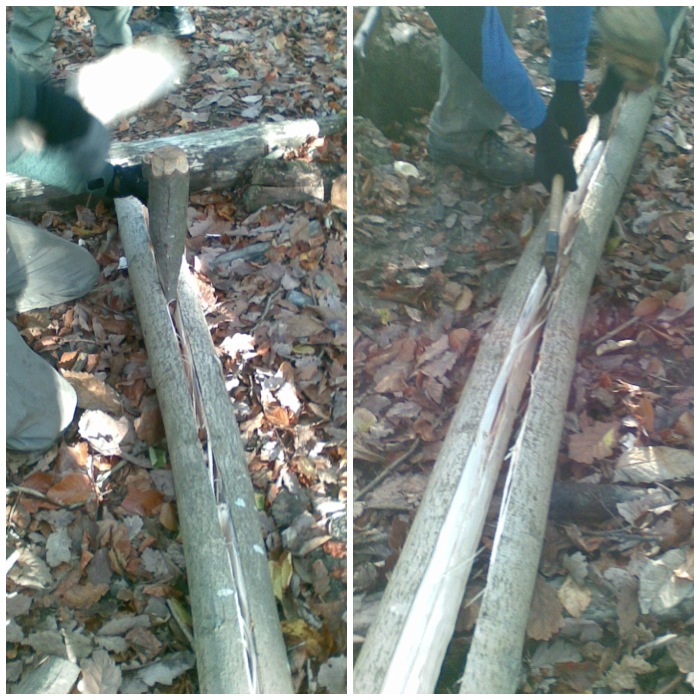
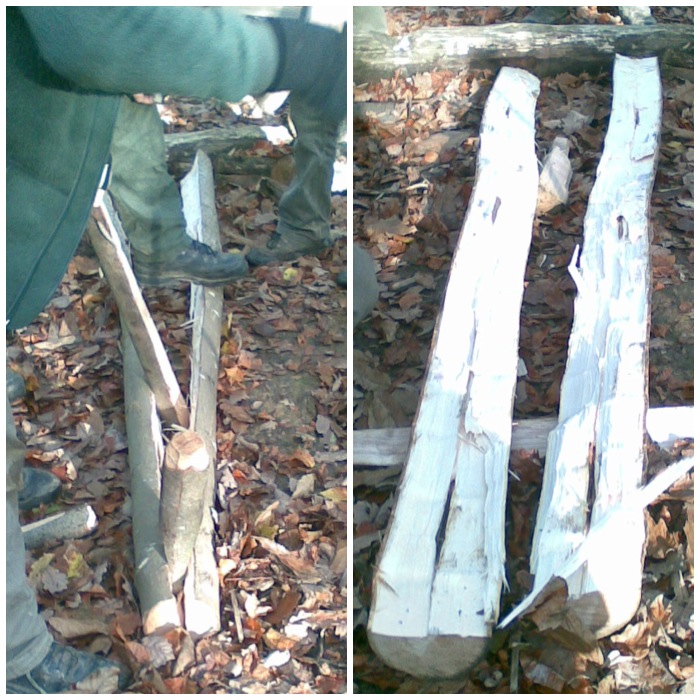
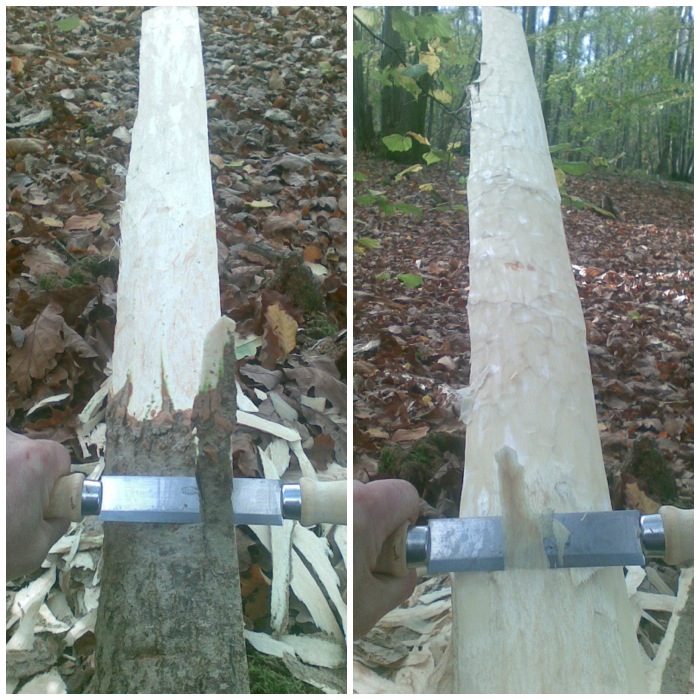
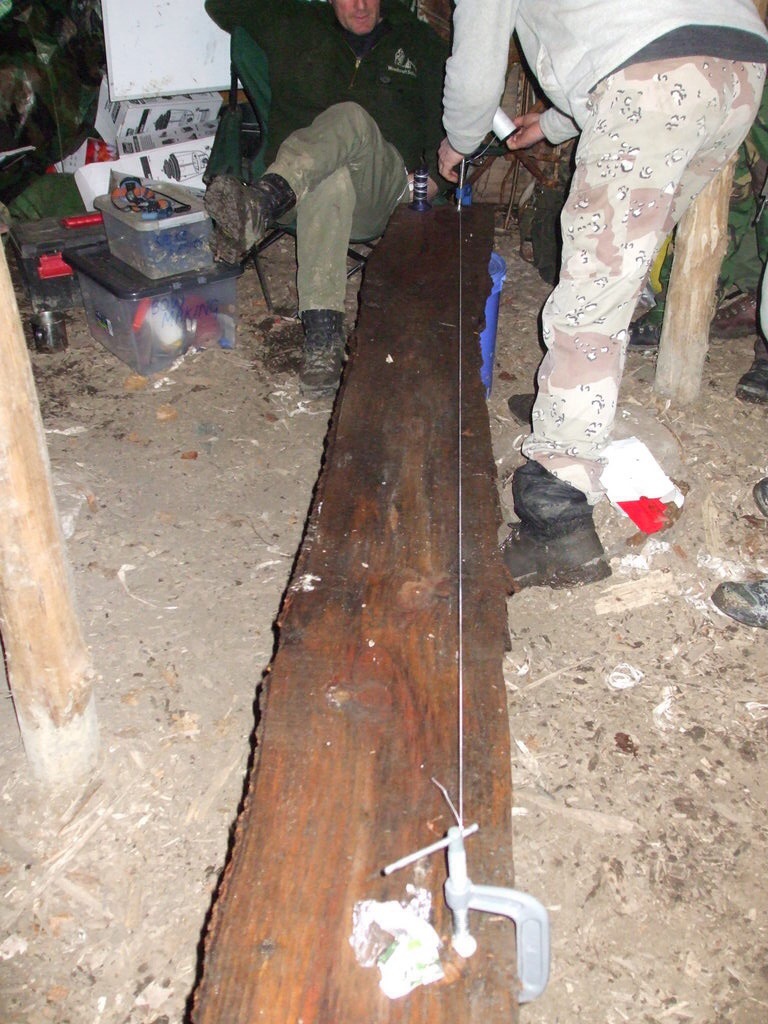
As a group we felled an ash tree , split it into staves and carved our own bows. We did this over two weekends with a month in-between so allowing the stave to season before the tillering process. The ash flatbow has to be made wider than it is deeper due to its deep rings however if it is tillered well it will still shoot fast.

2
Ash Flatbow

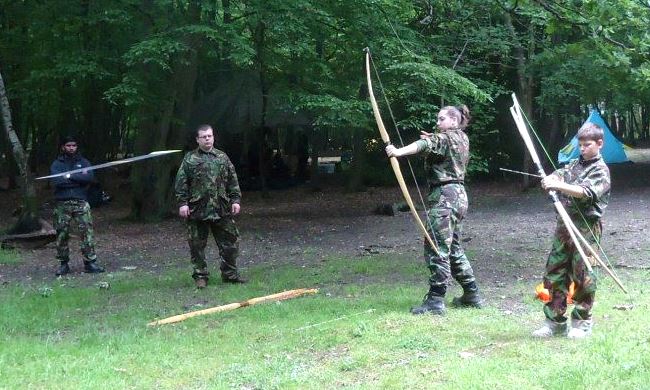
This bow comes in at about 40 lbs in draw weight and has a tendency to ‘twat’ the inside of your forearm so a arm guard is a must.

I give this bow mostly to adults to shoot because of its draw weight but with a good eye and a steady hand she can be very accurate. I started shooting right handed as that is how I was taught to shoot a rifle many years ago however my friend Charlie Brookes suggested one day to try left handed shooting and suddenly I started to hit the target. I am left handed and left eye dominant but the muscle memory from using a rifle made it difficult to shoot left handed at first – however with a lot of practice that has gone, so I am now happy to shoot with either hand.

The Bhutanese Bow

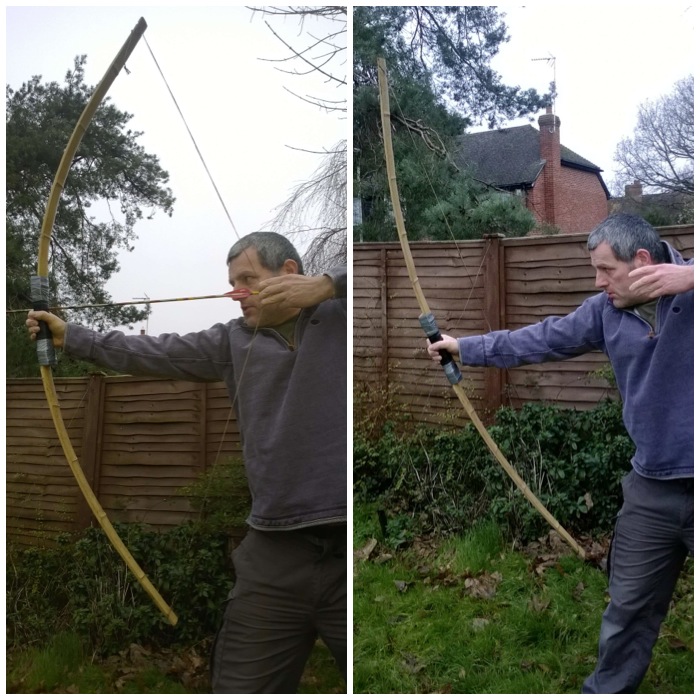
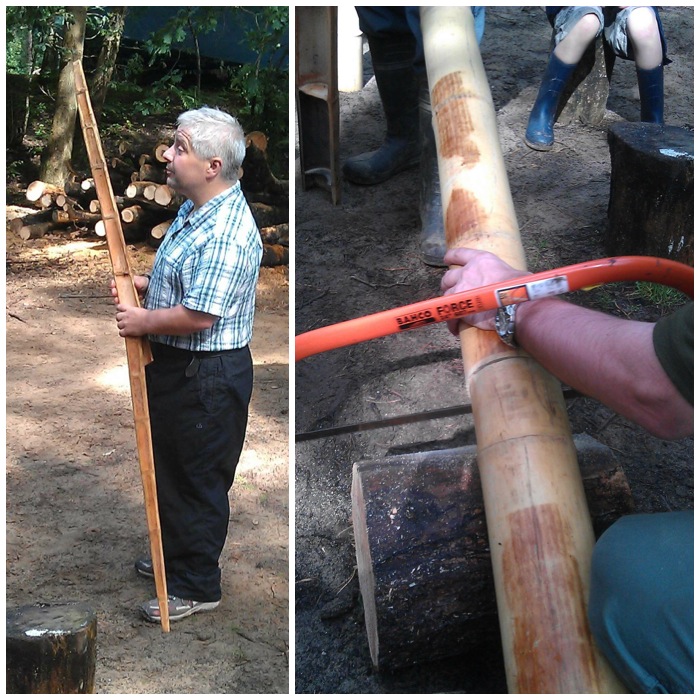
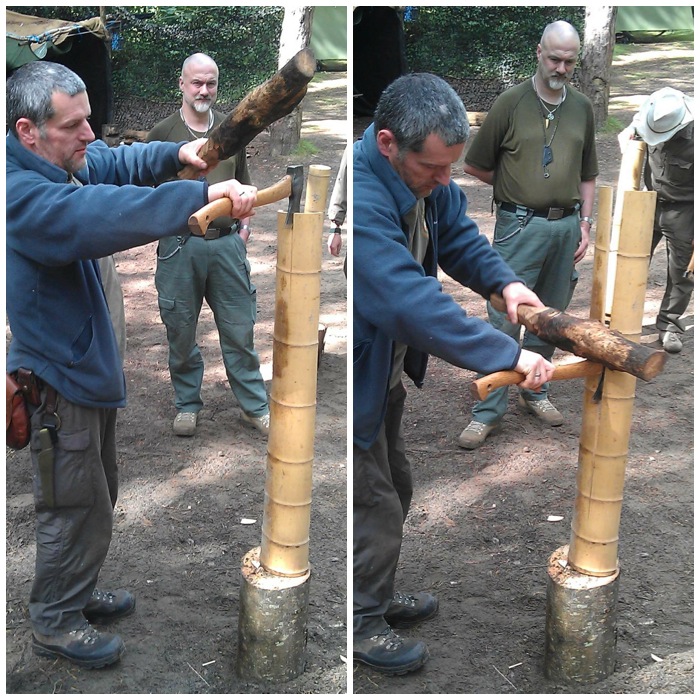
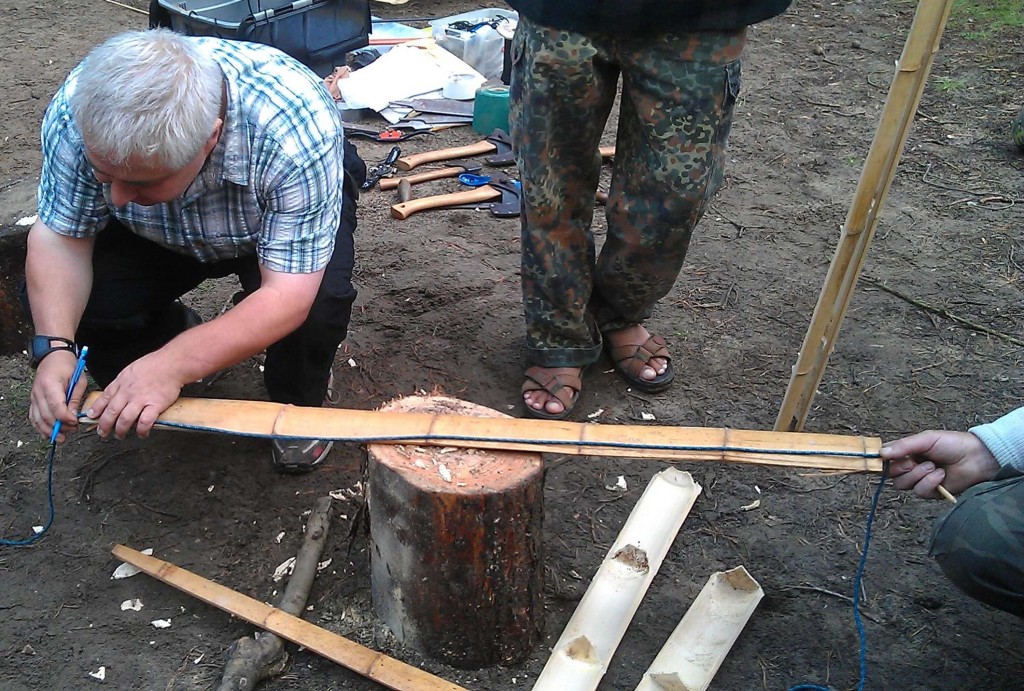
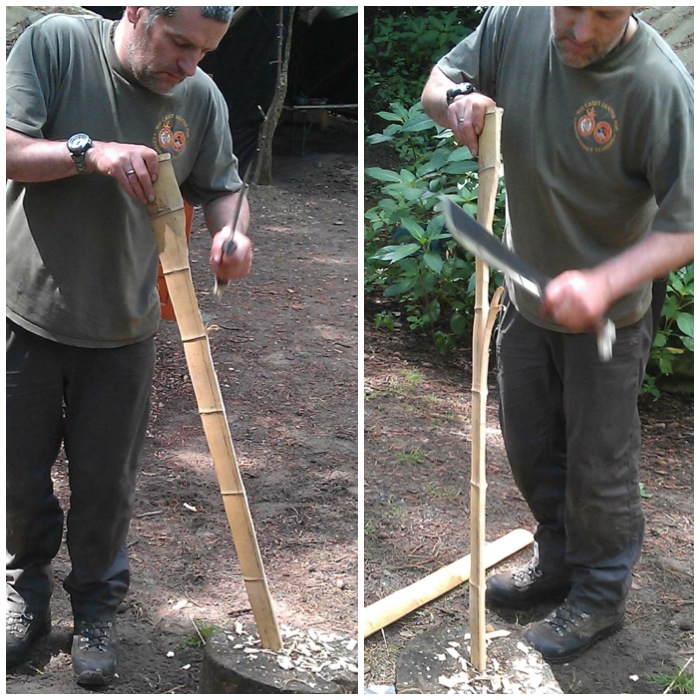
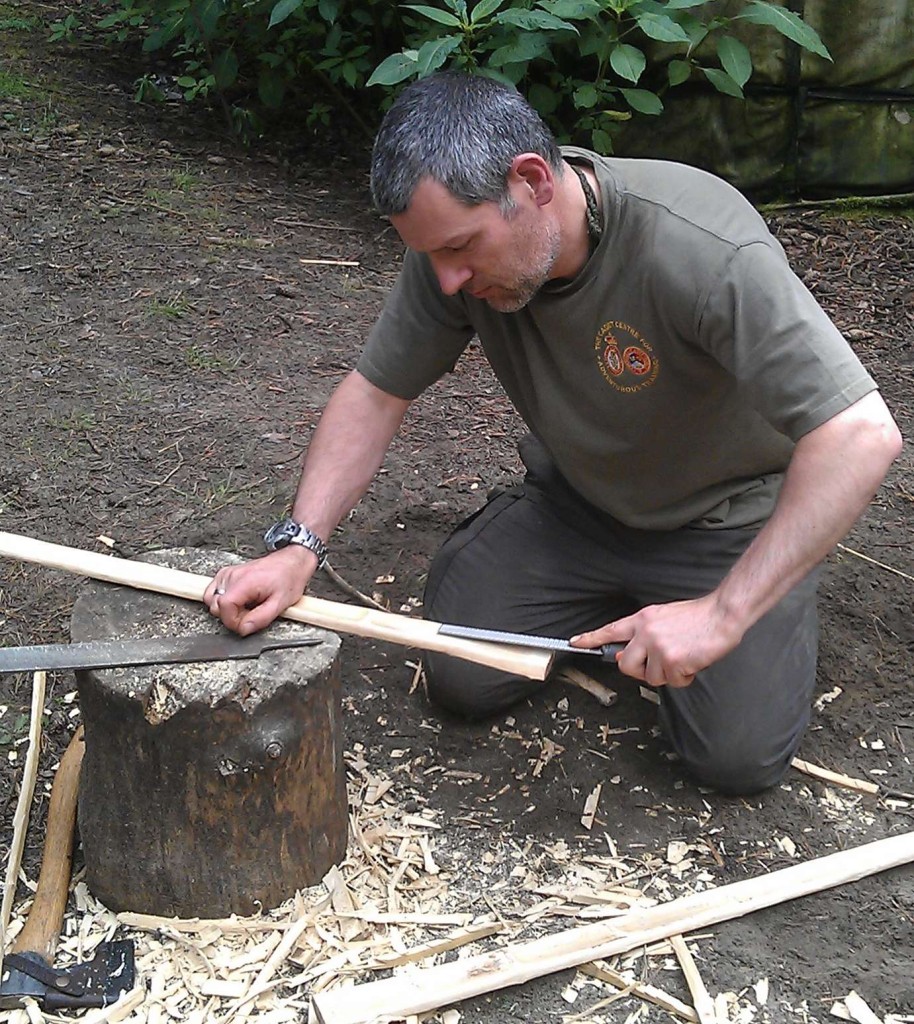
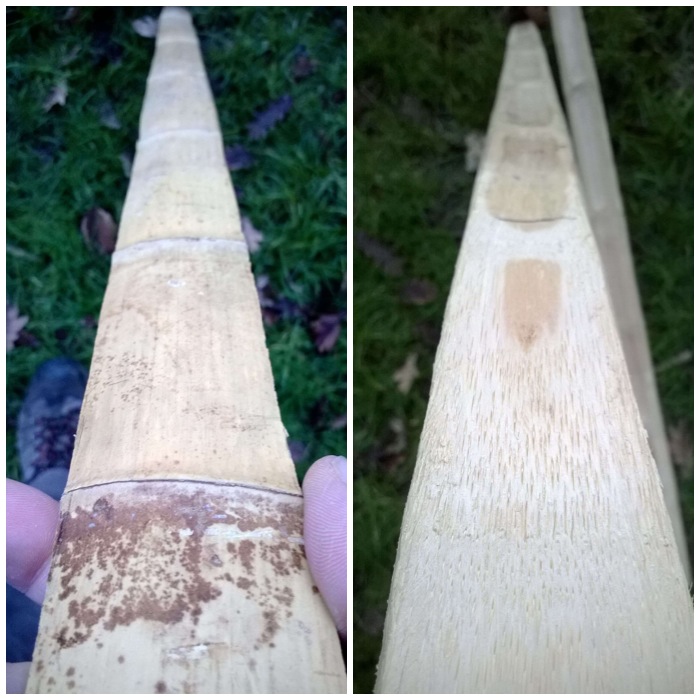
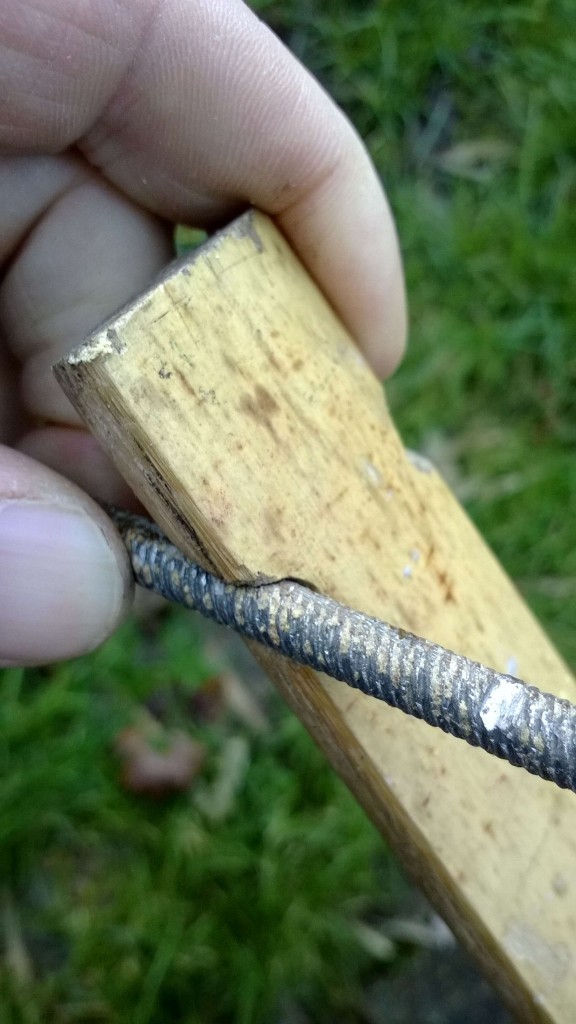
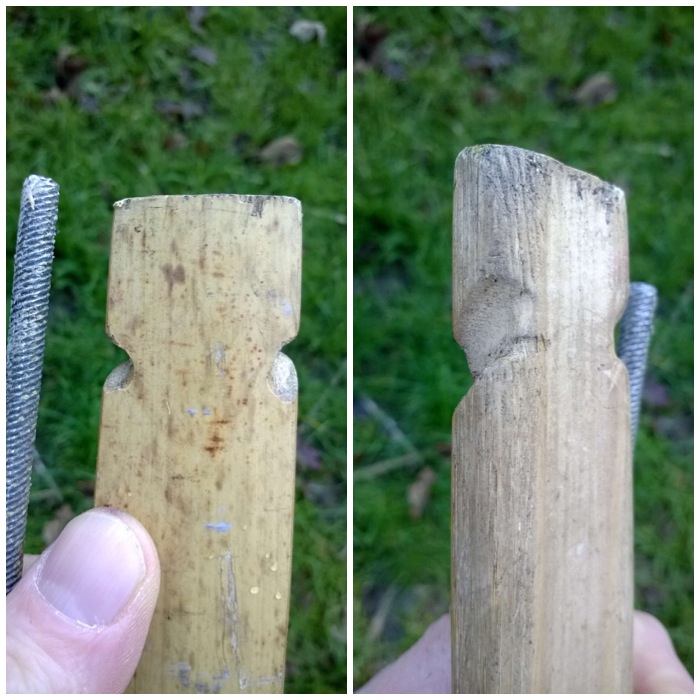
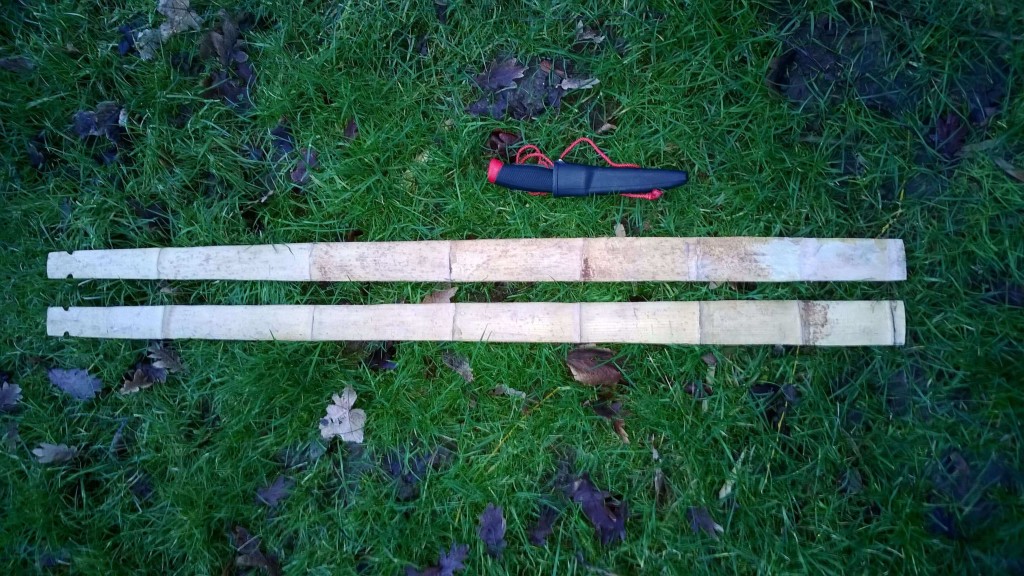
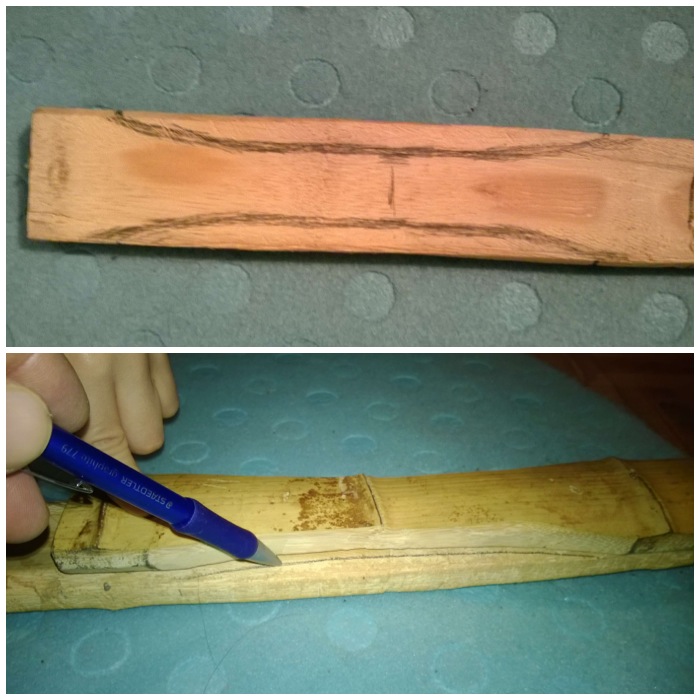
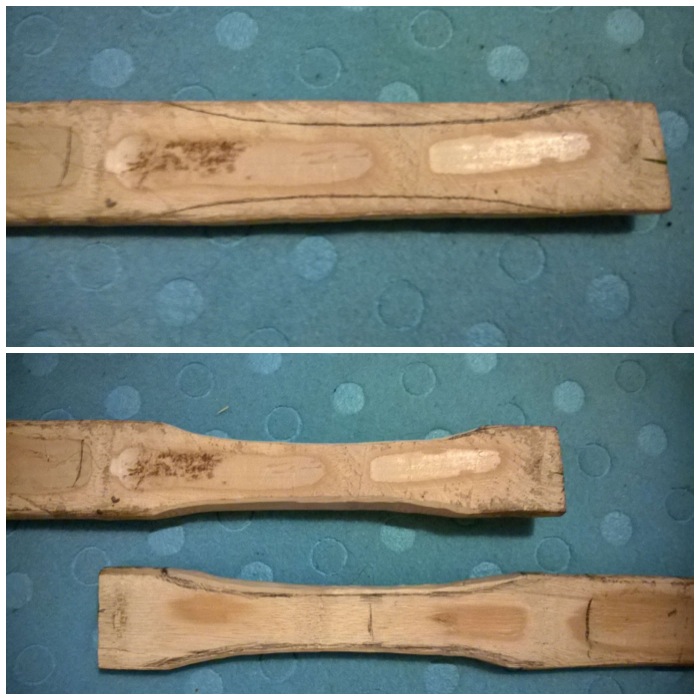
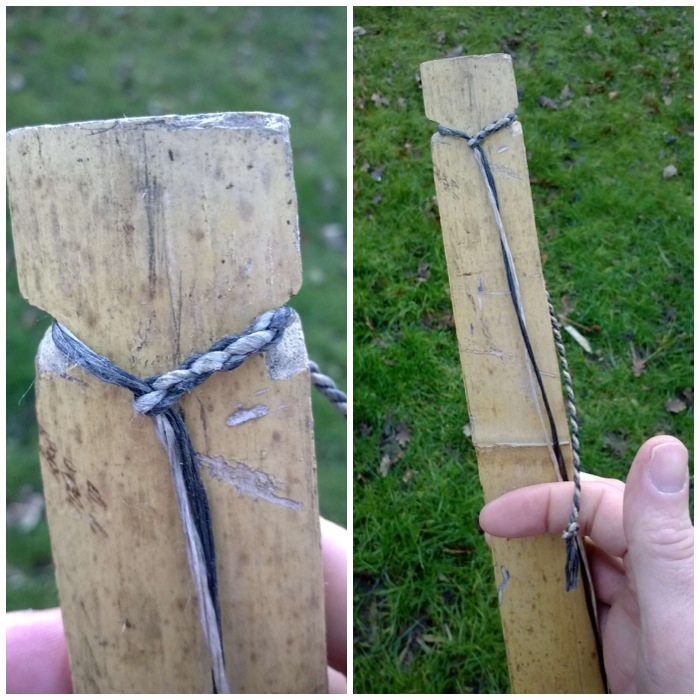
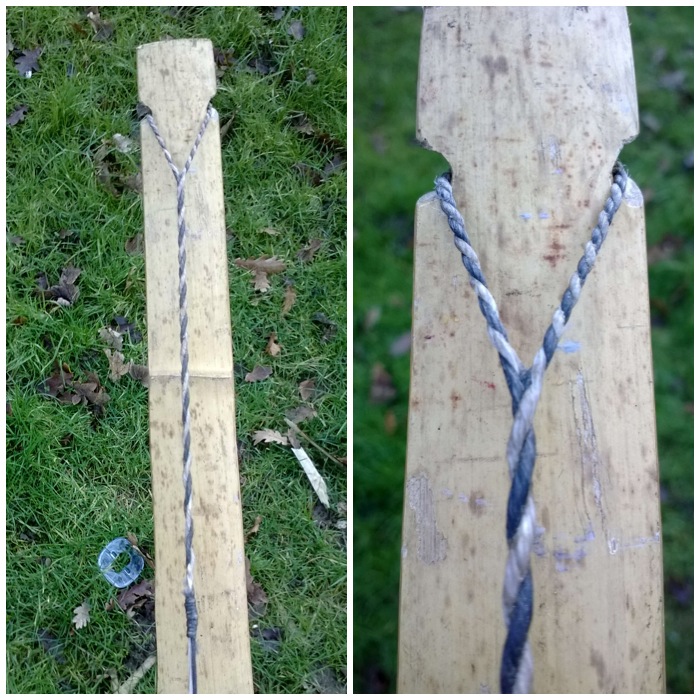
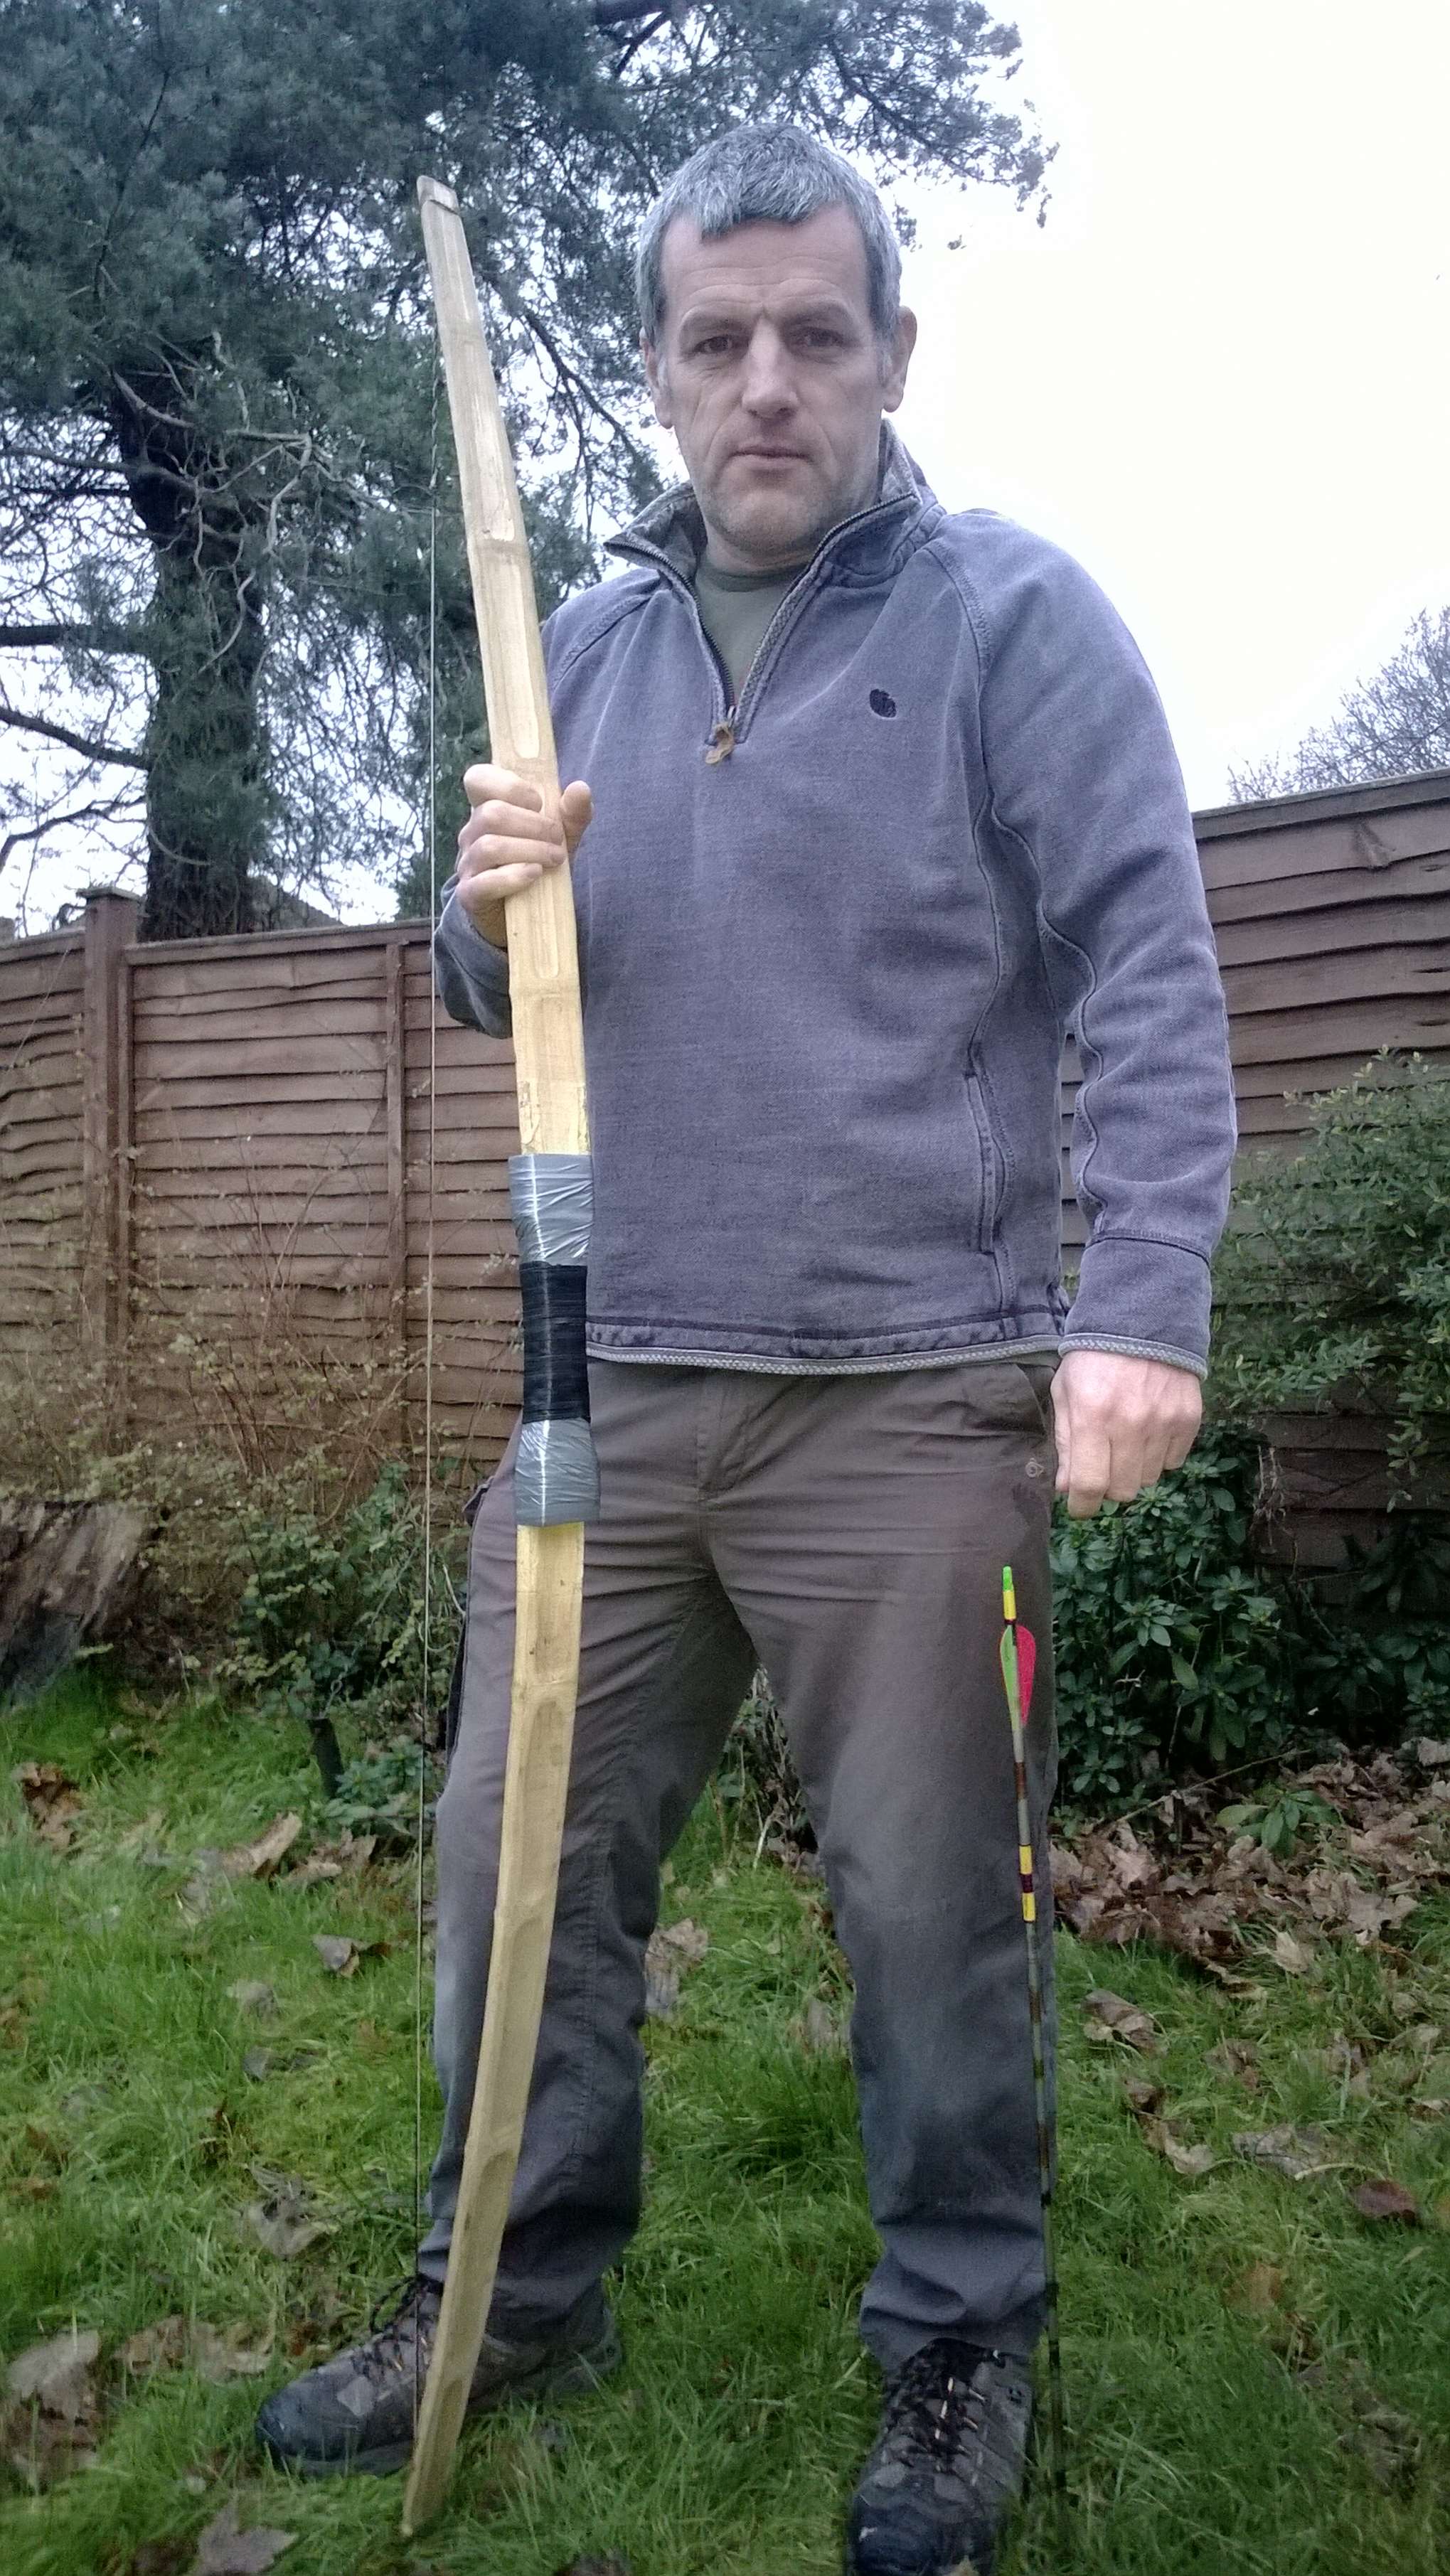
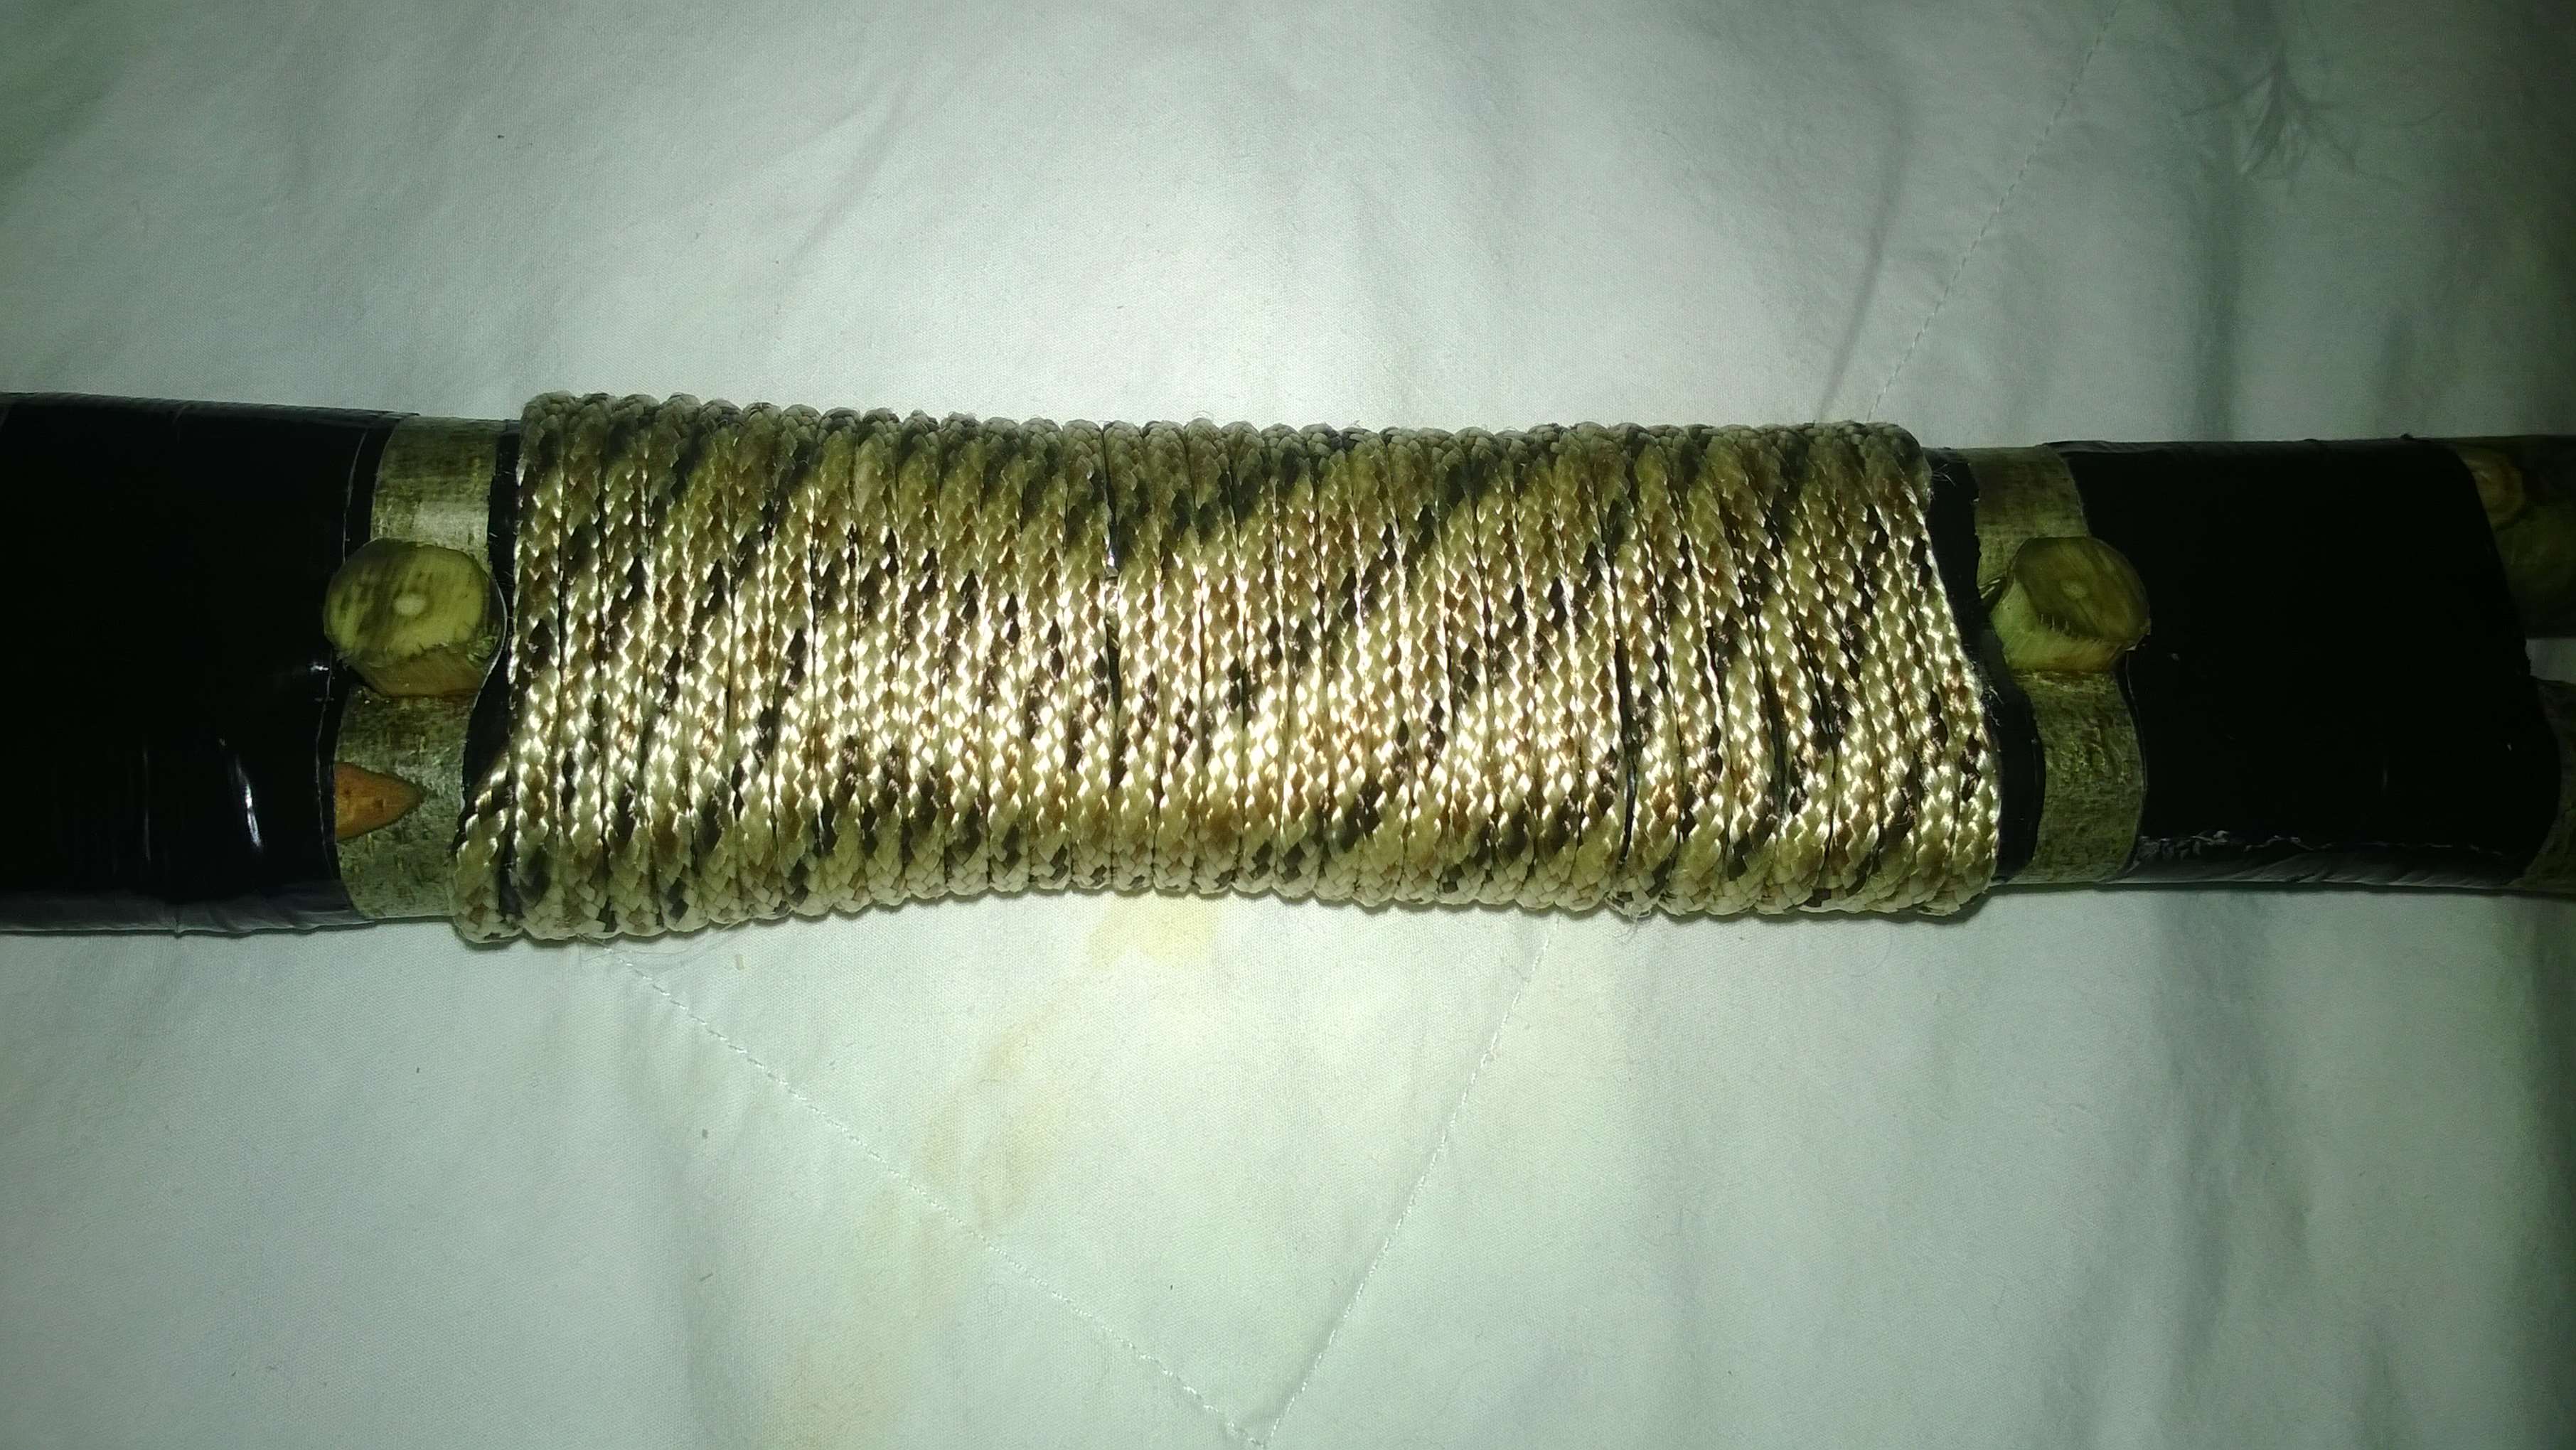
I made this bow about four years ago at the BCUK Bushmoot and was taught by Wayne Jones (Forest Knights). It is similar to the ash bow in that it is wider than it is deeper however it is made out of two pieces of bamboo (the HowTo…. goes into detail of why two pieces are used).

3
Bhutanese Bow

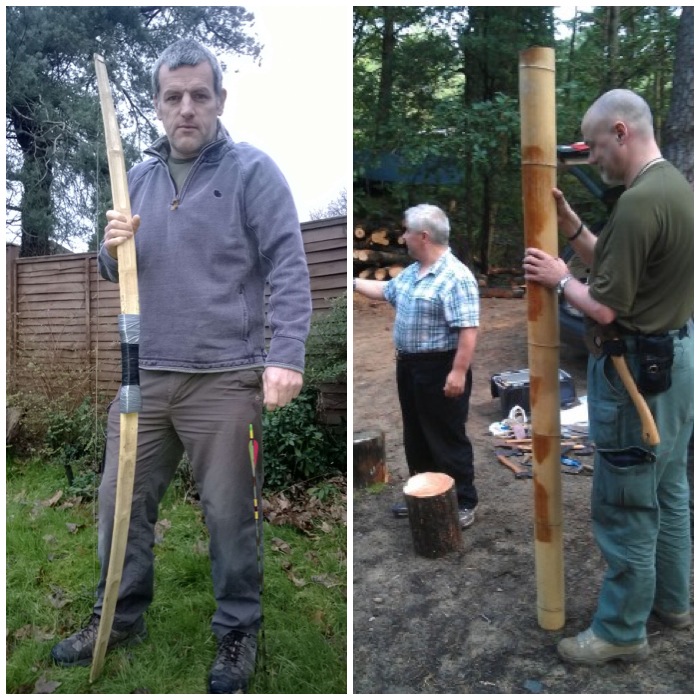
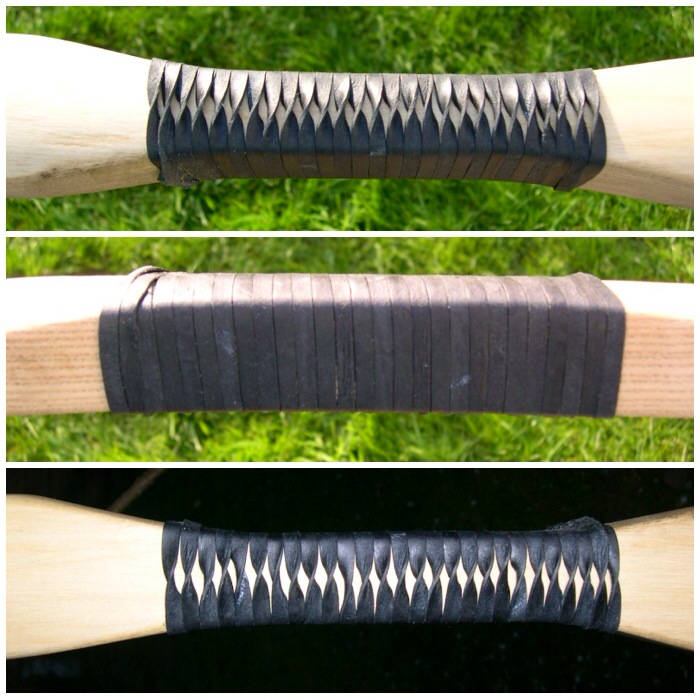
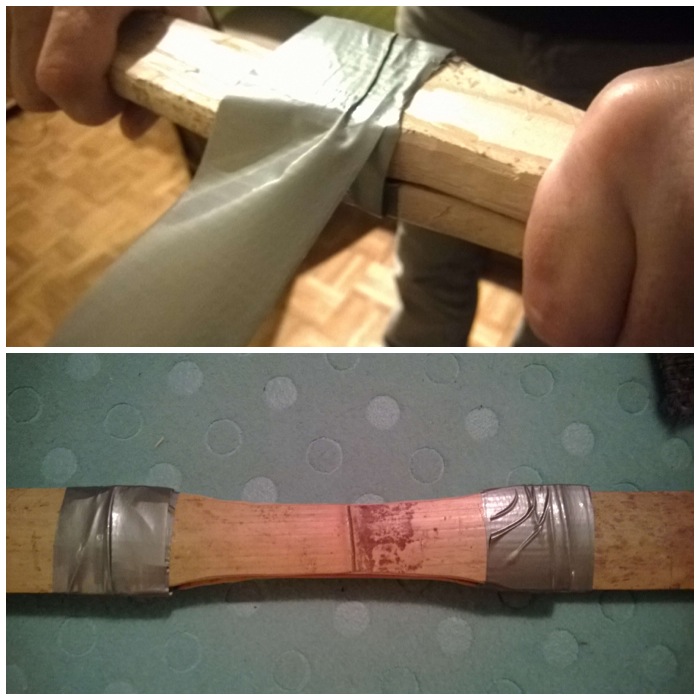
Traditionally the two pieces would be joined together with wooden pins and strapping but on the day all we had was tape. In the courses Wayne runs nowadays he uses the pins and strapping.

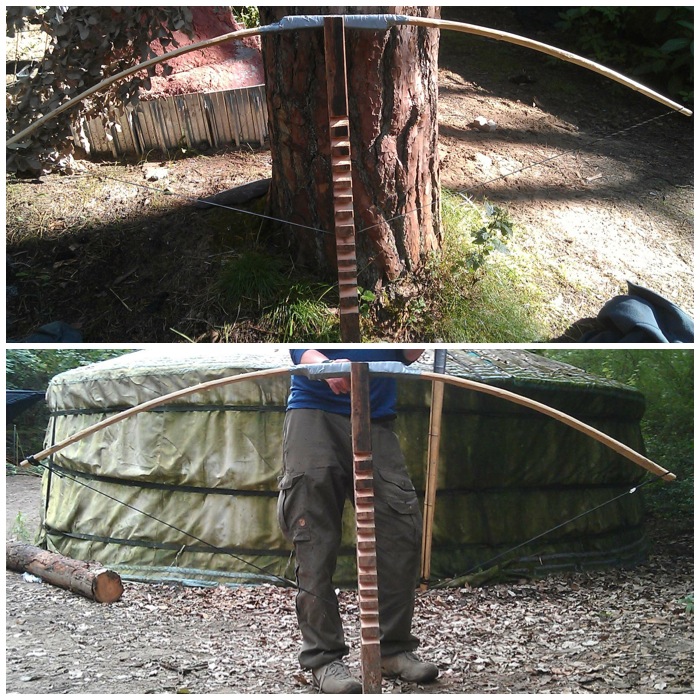
It is quite a light bow (about 30lbs in draw weight) however it has the advantage of being made very quickly (a couple of hours in competent hands).

4
Bhutanese Bow

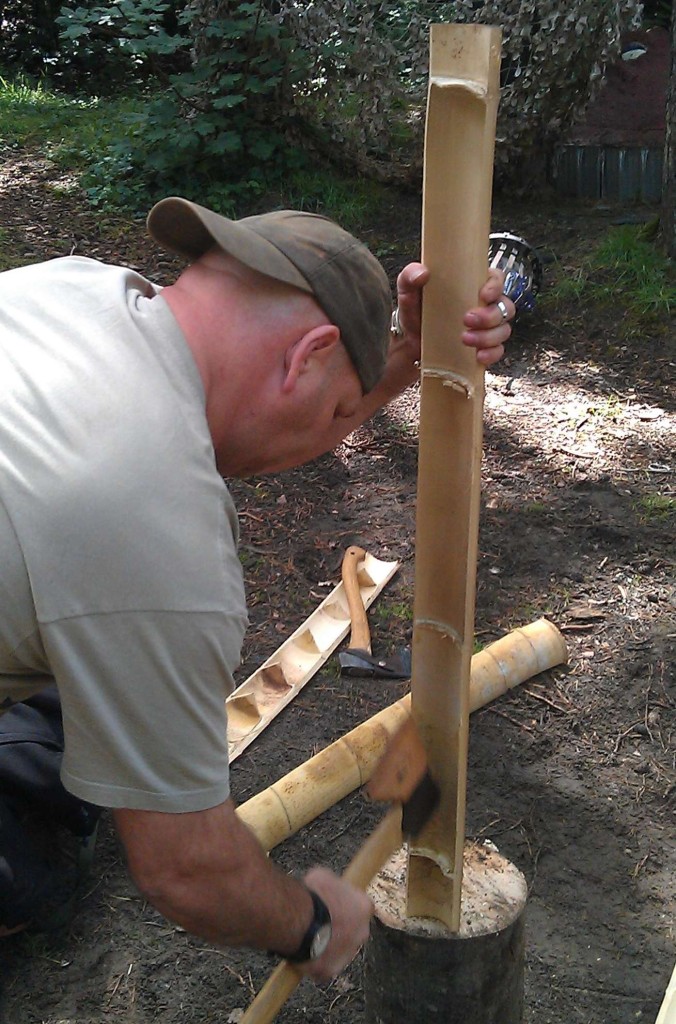
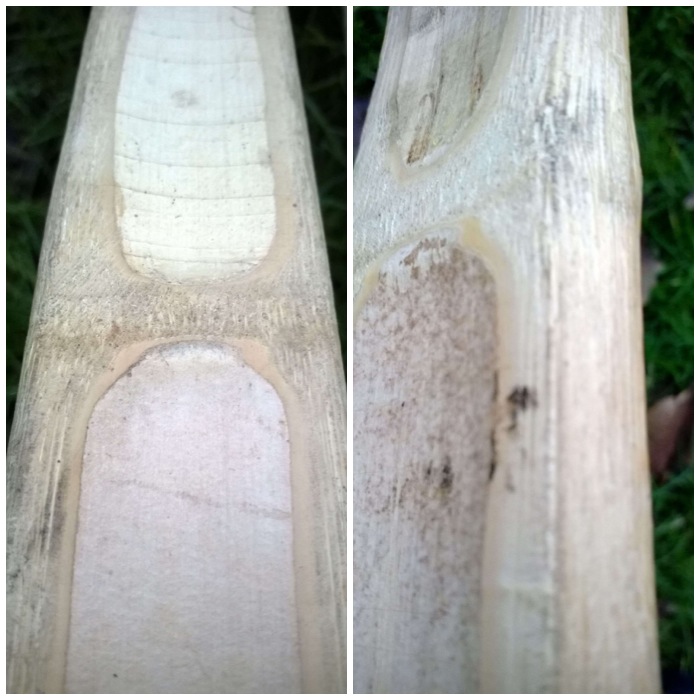
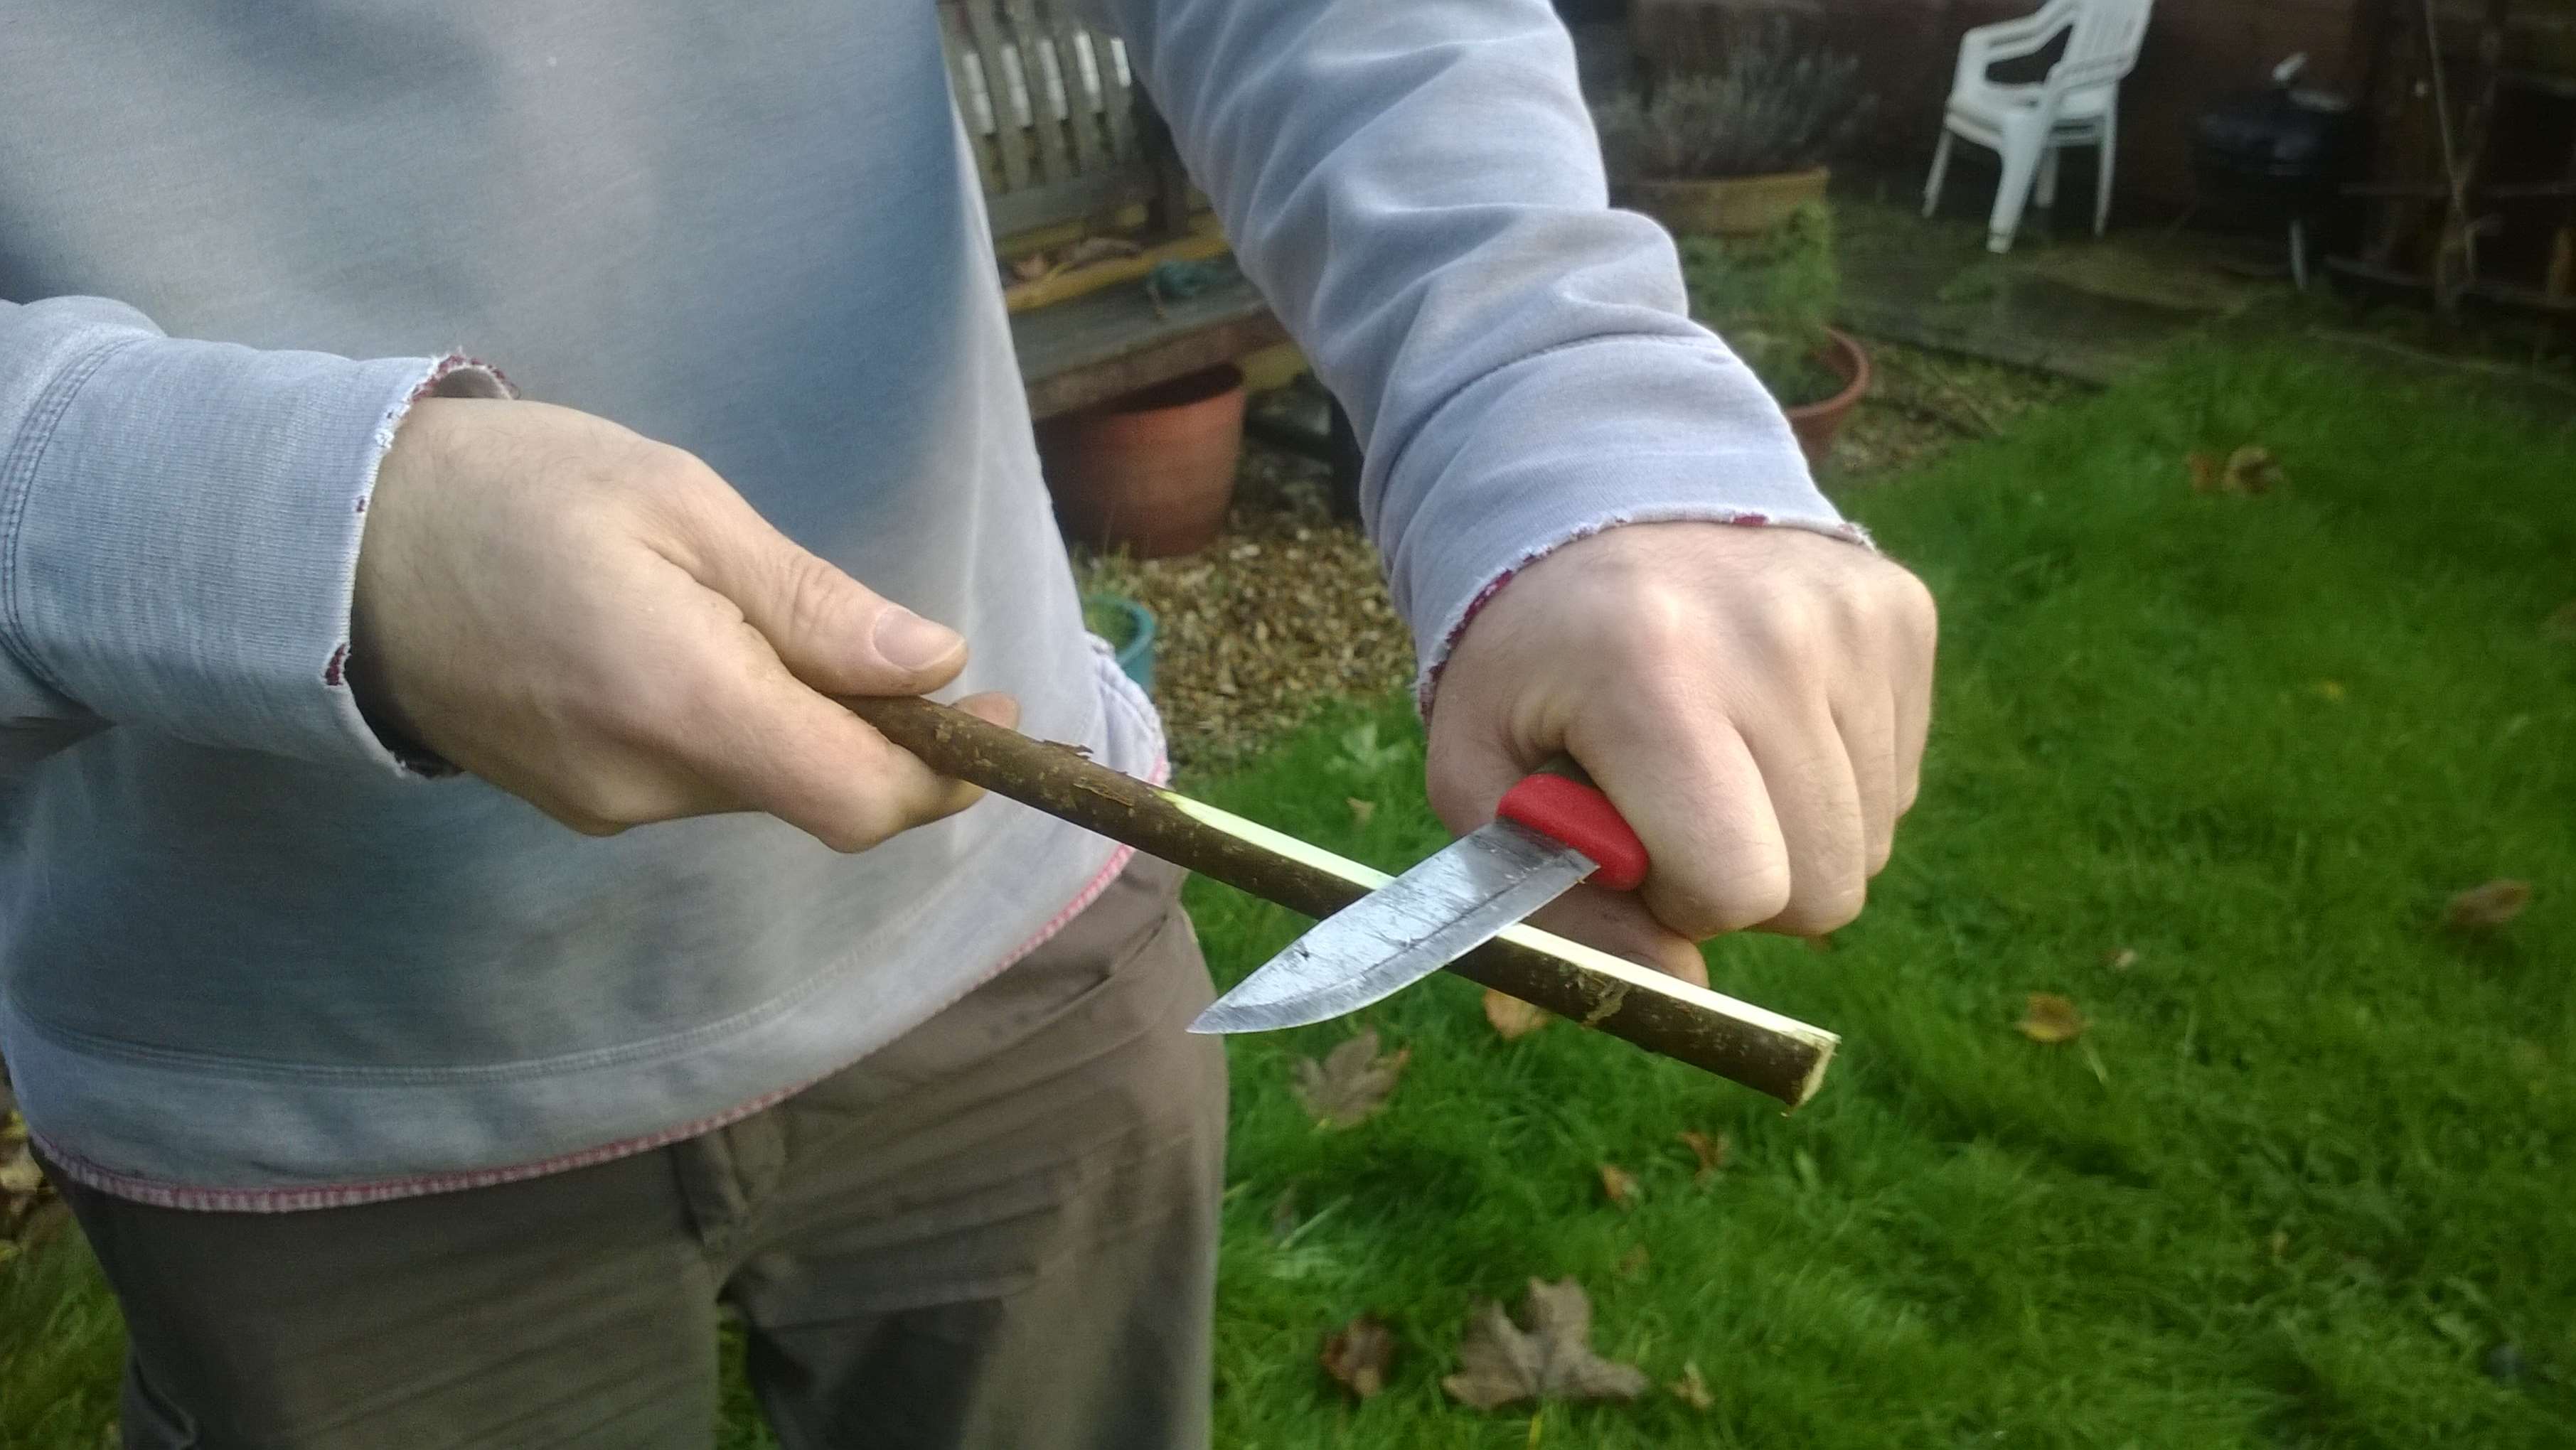
Another unusual feature of this bow is that the hard outer shell of the bamboo becomes the Belly (the part of the bow facing you when shooting) of the bow and the softer inner part of the bamboo becomes the Back of the bow (the part of the bow facing away from you when shooting). I am told that this is to do with the characteristics of the bamboo – because it is a grass technically and not wood.

The Holmegaard Bow

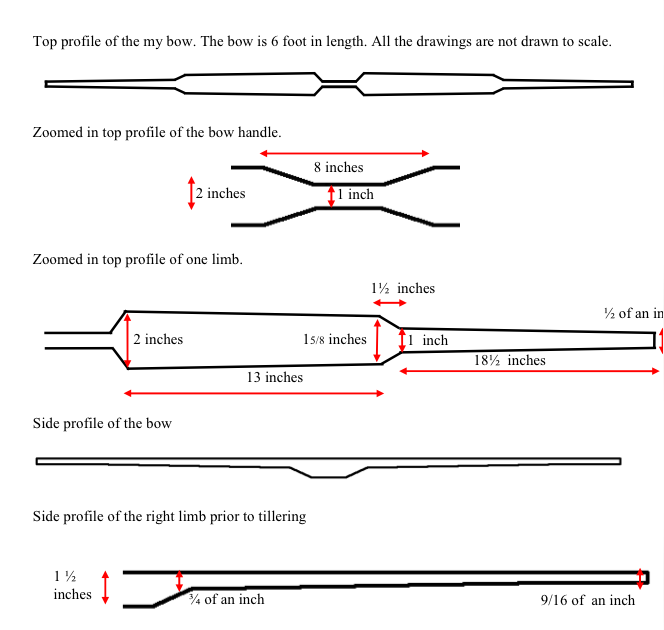
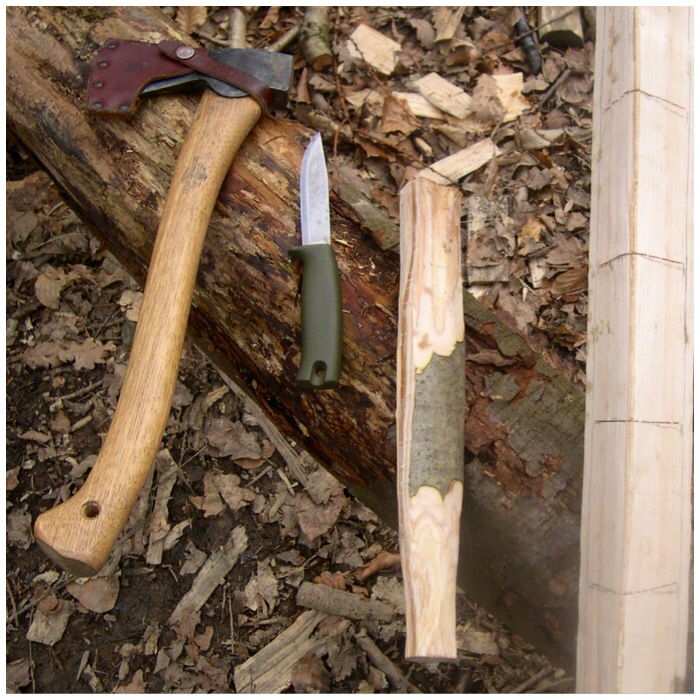
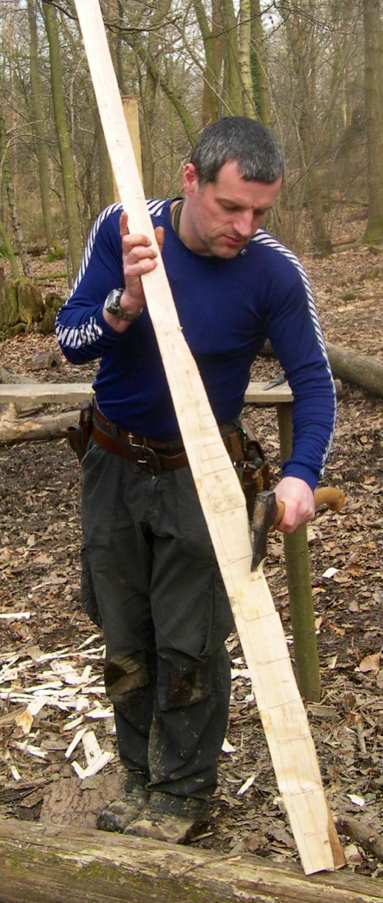
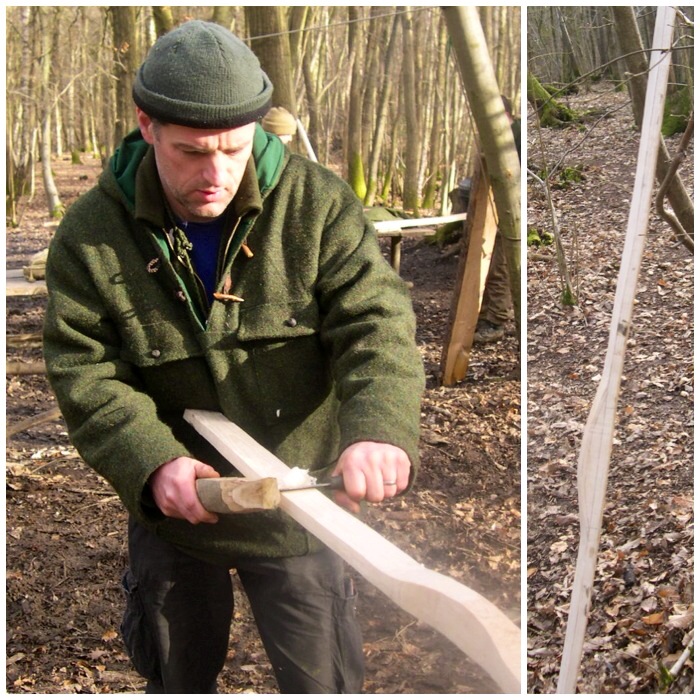
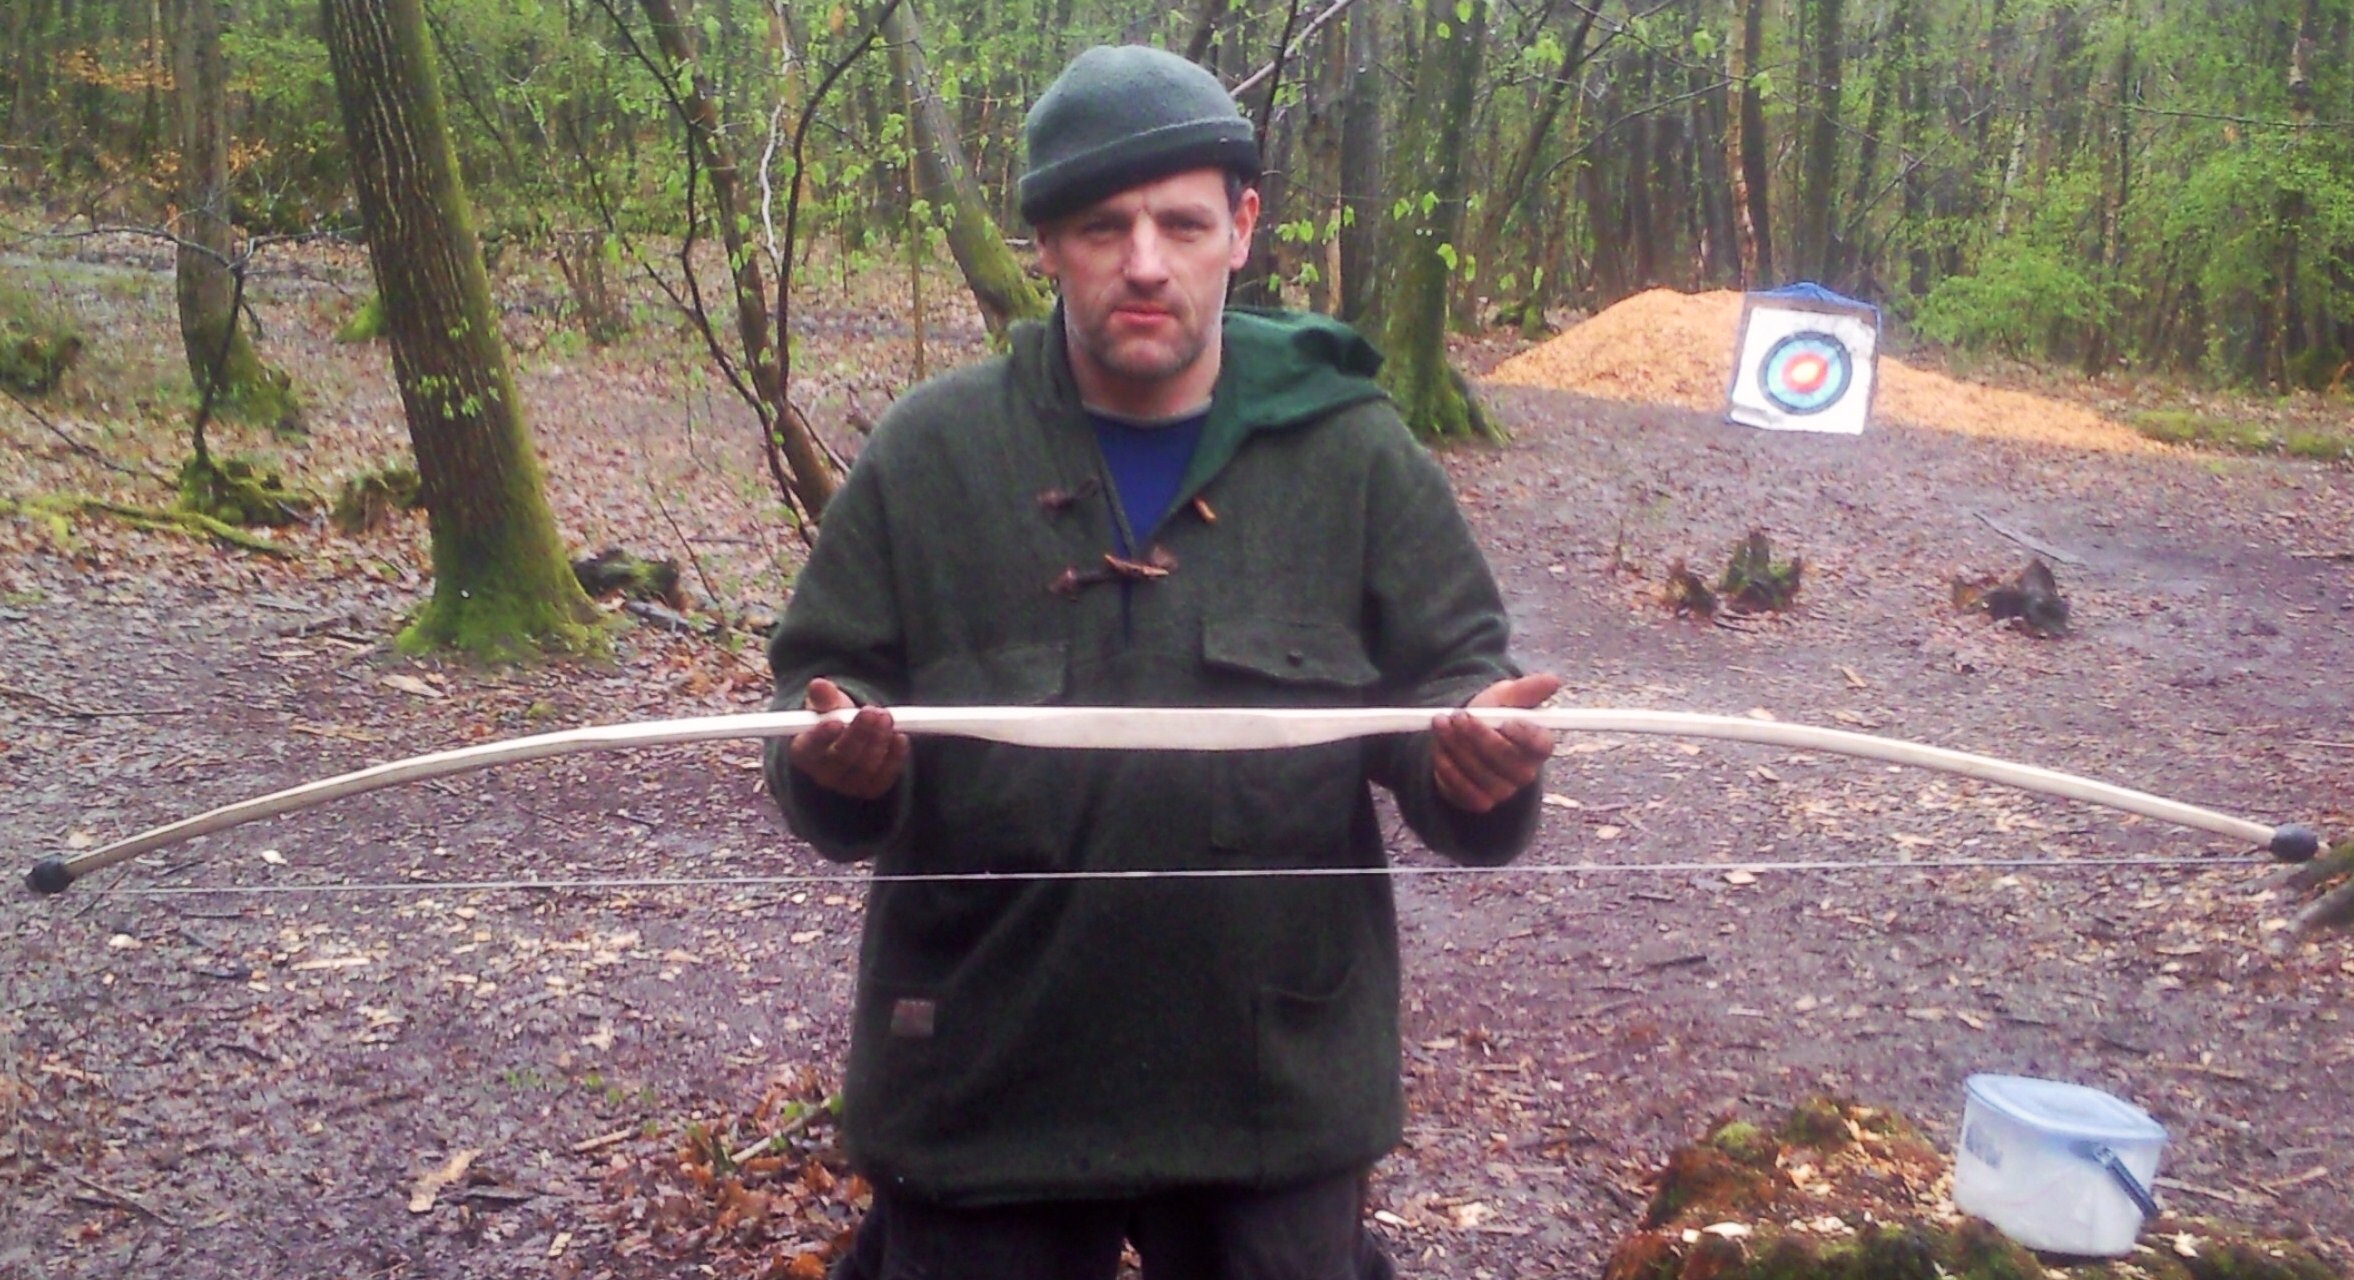
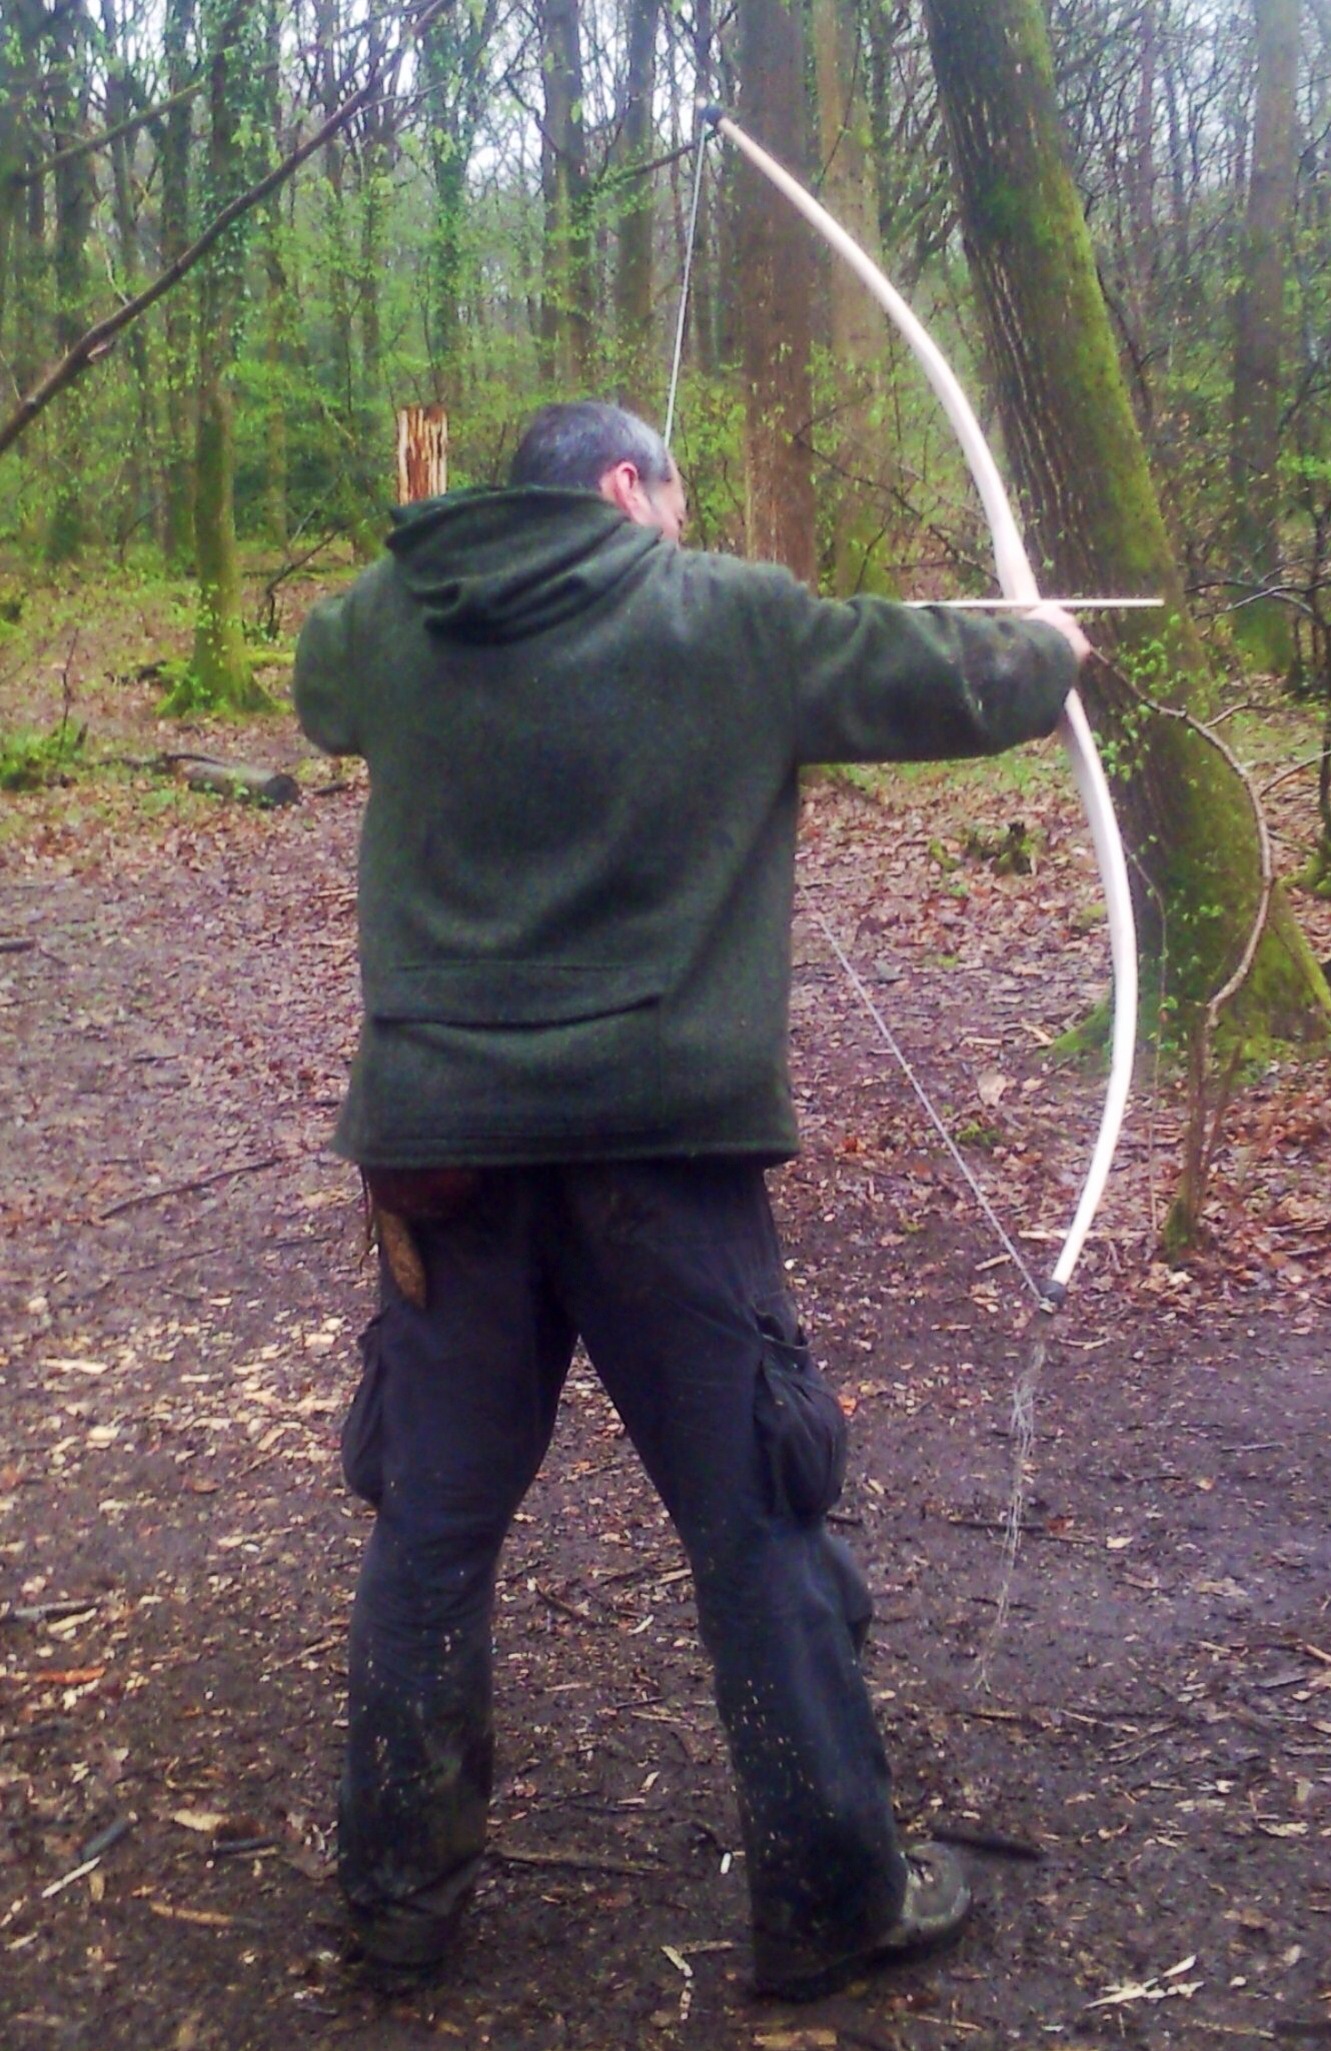
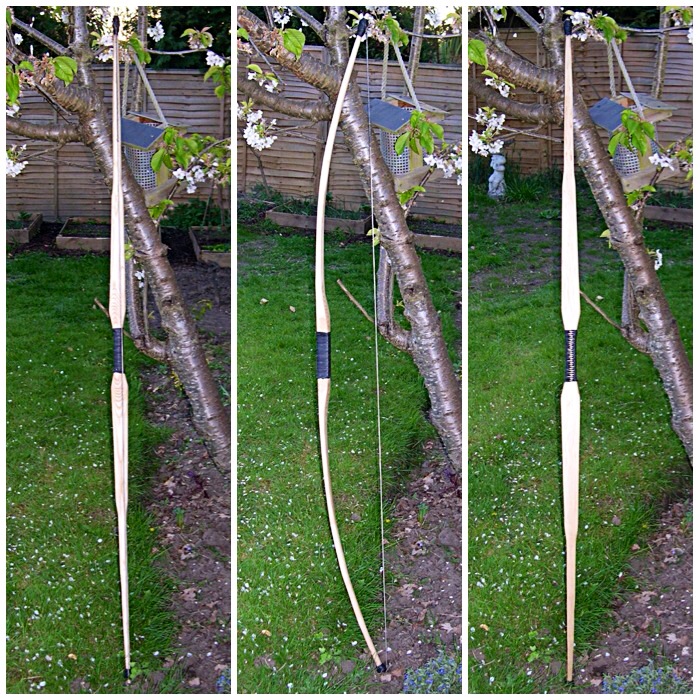
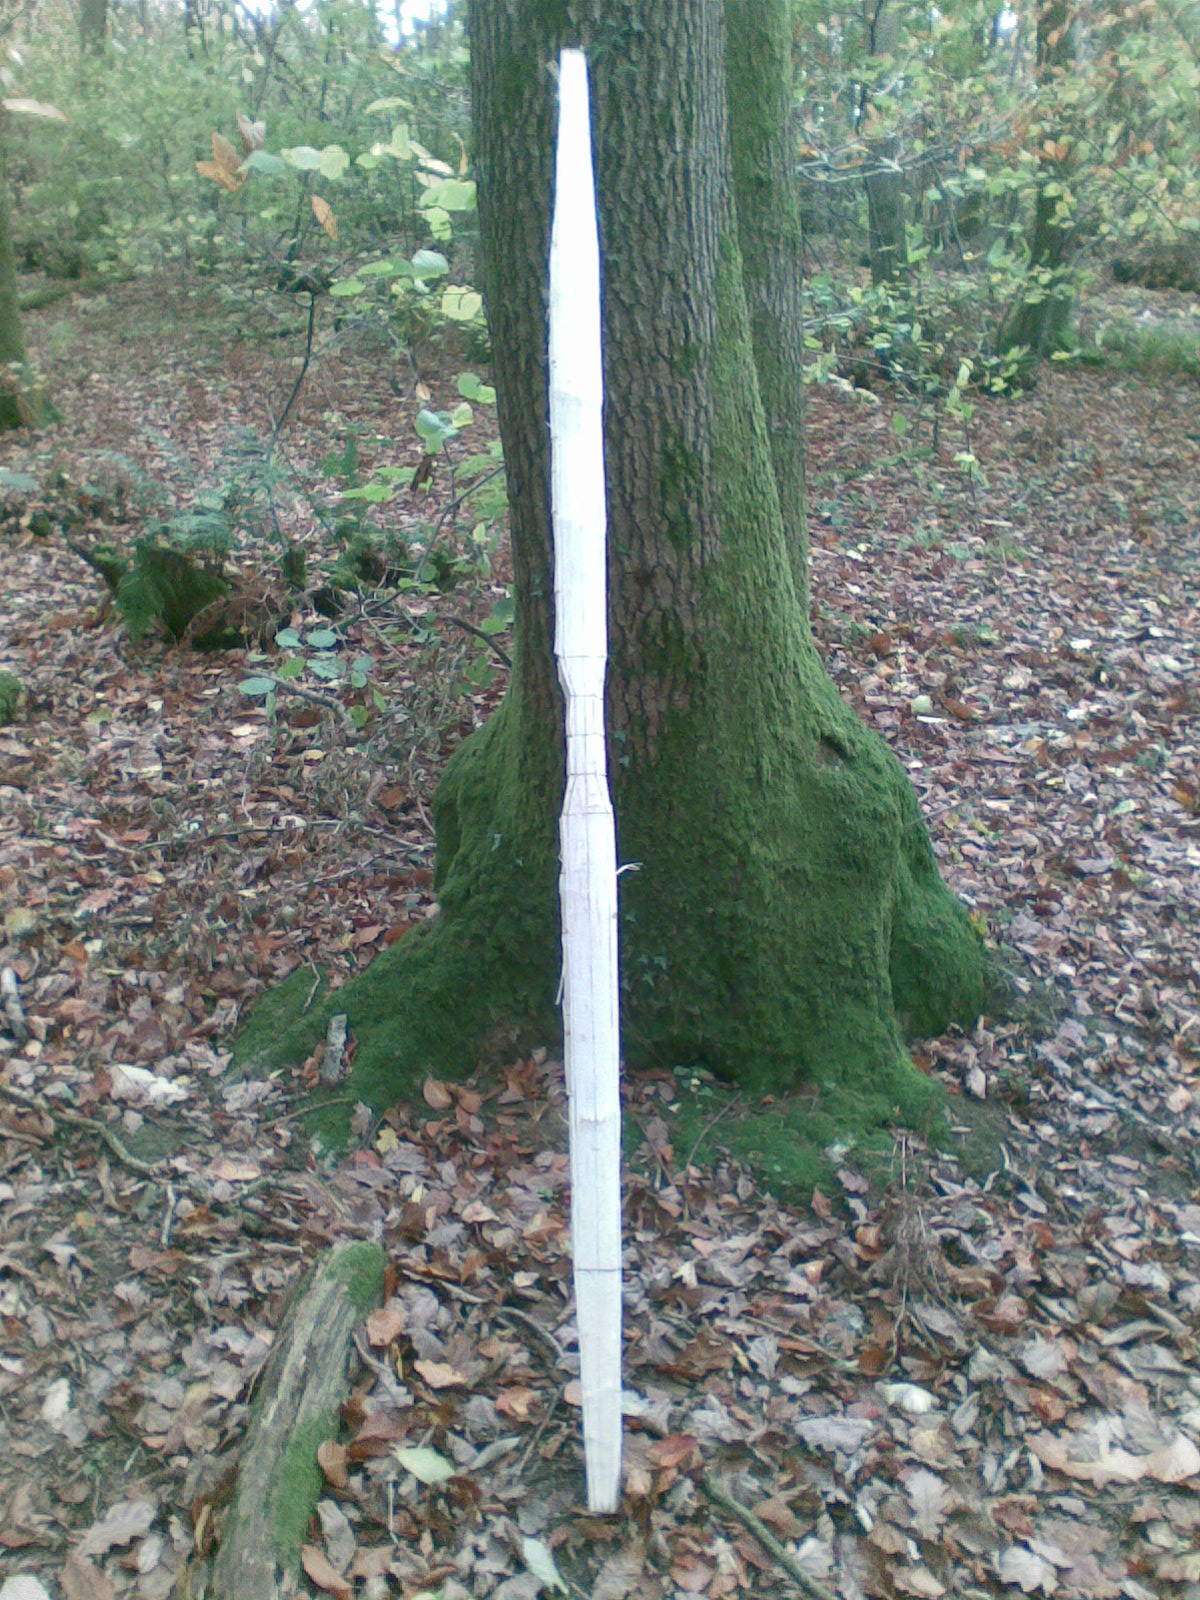
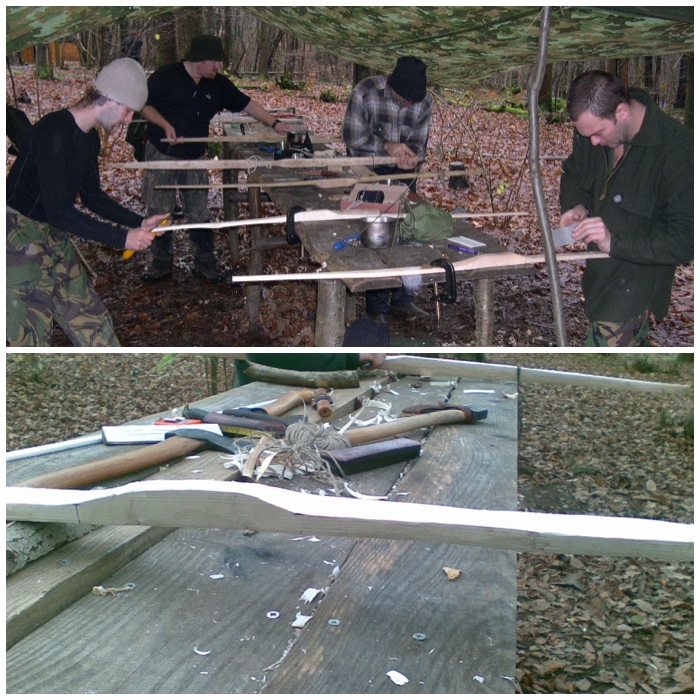
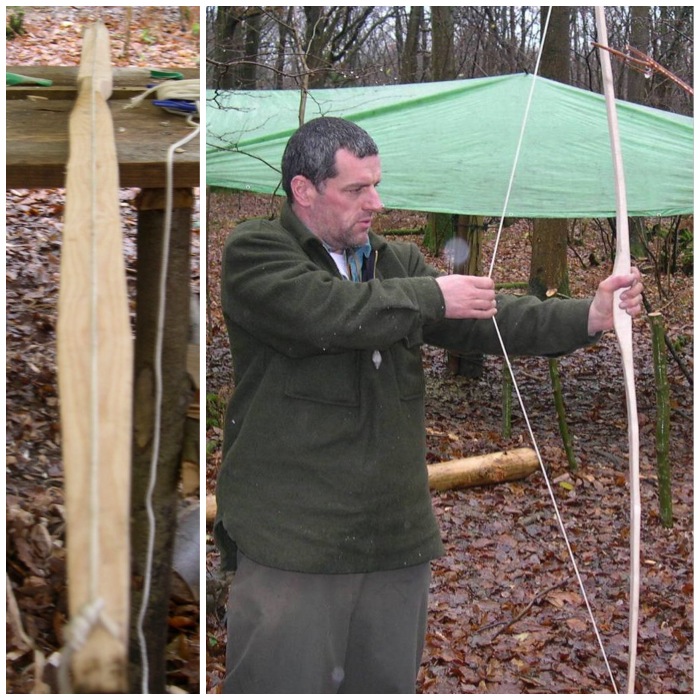
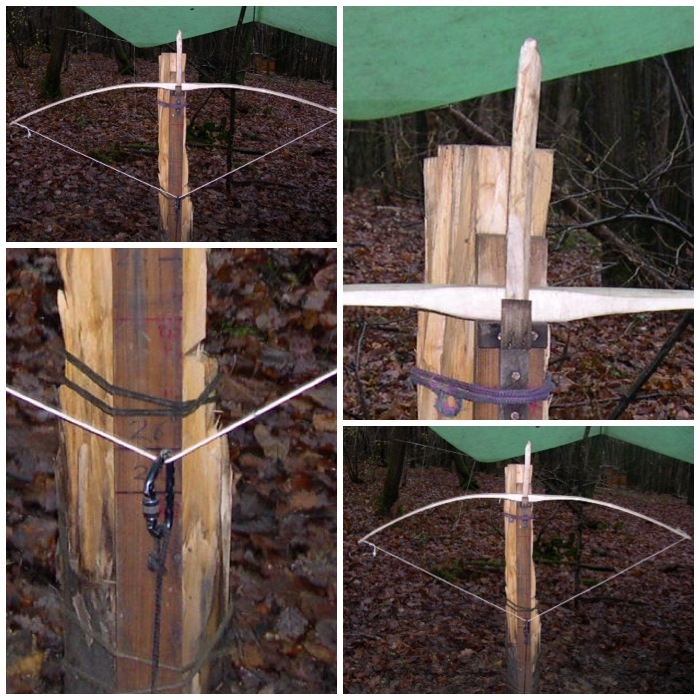
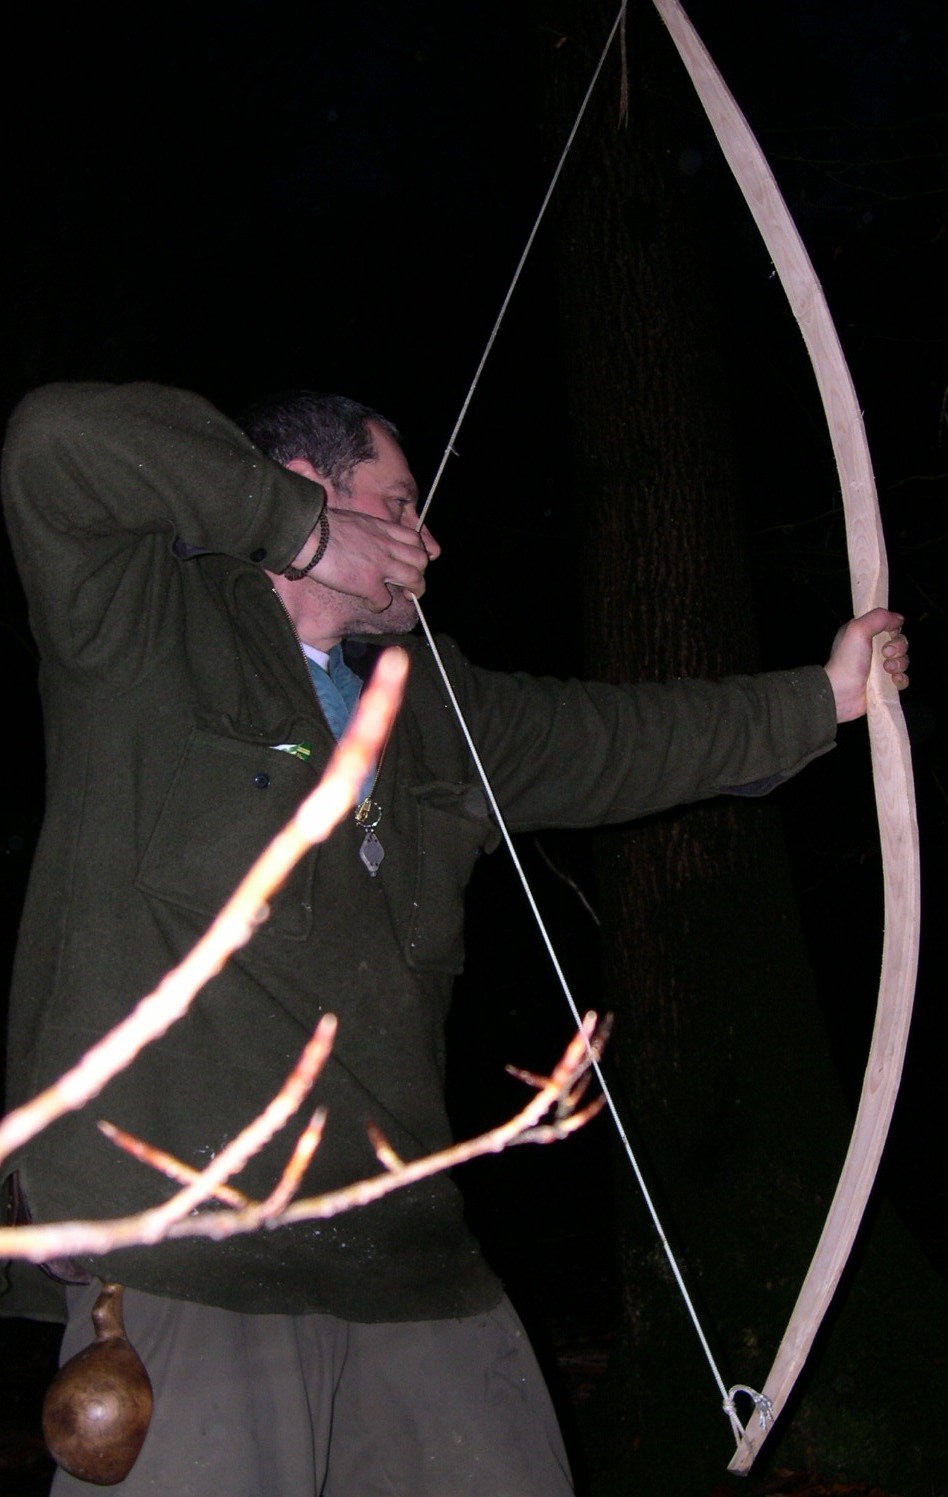
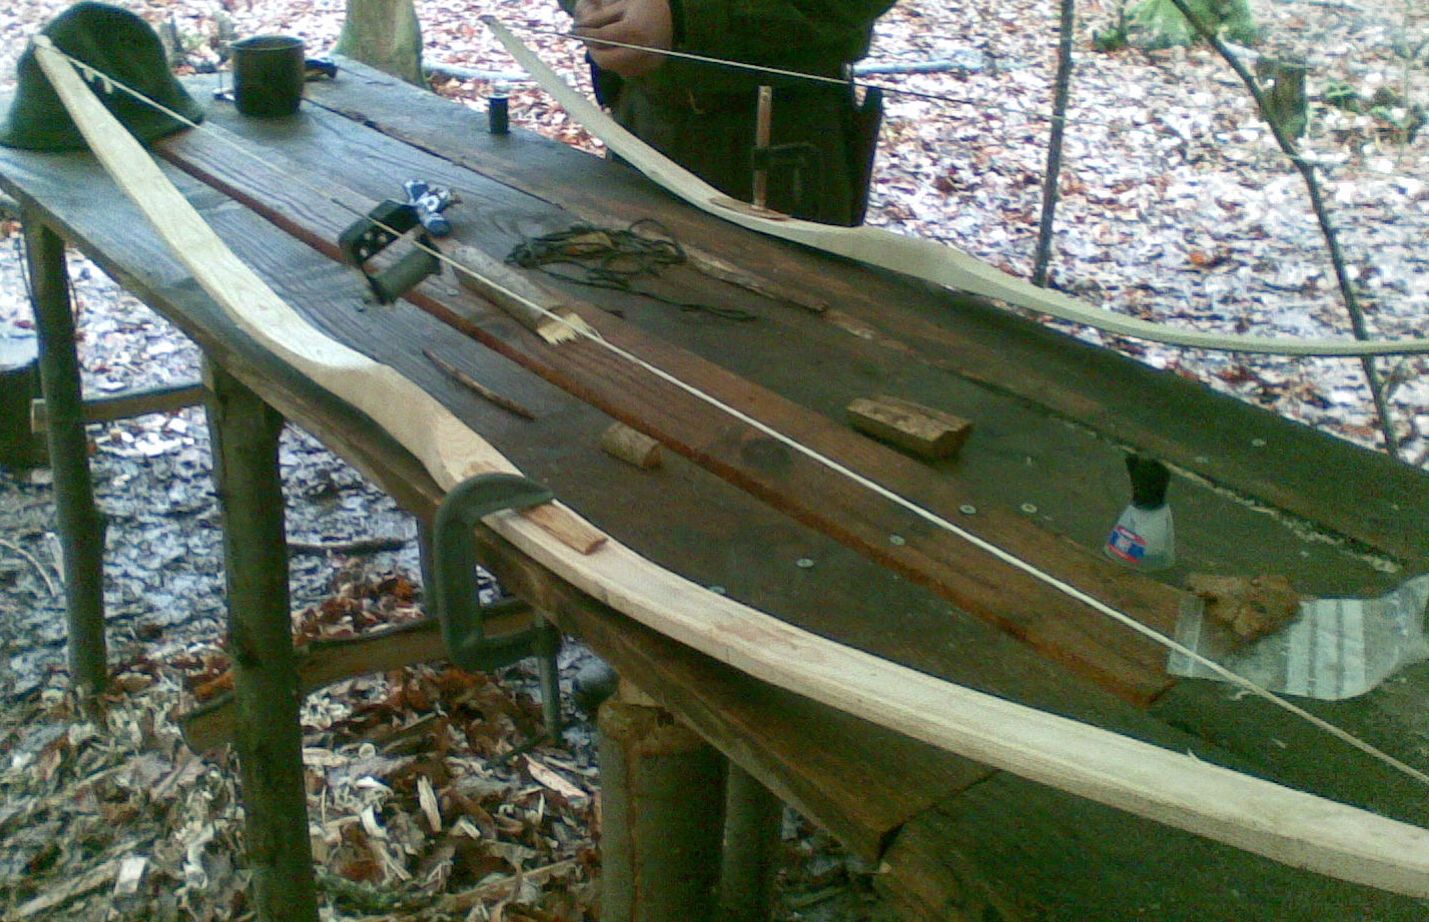
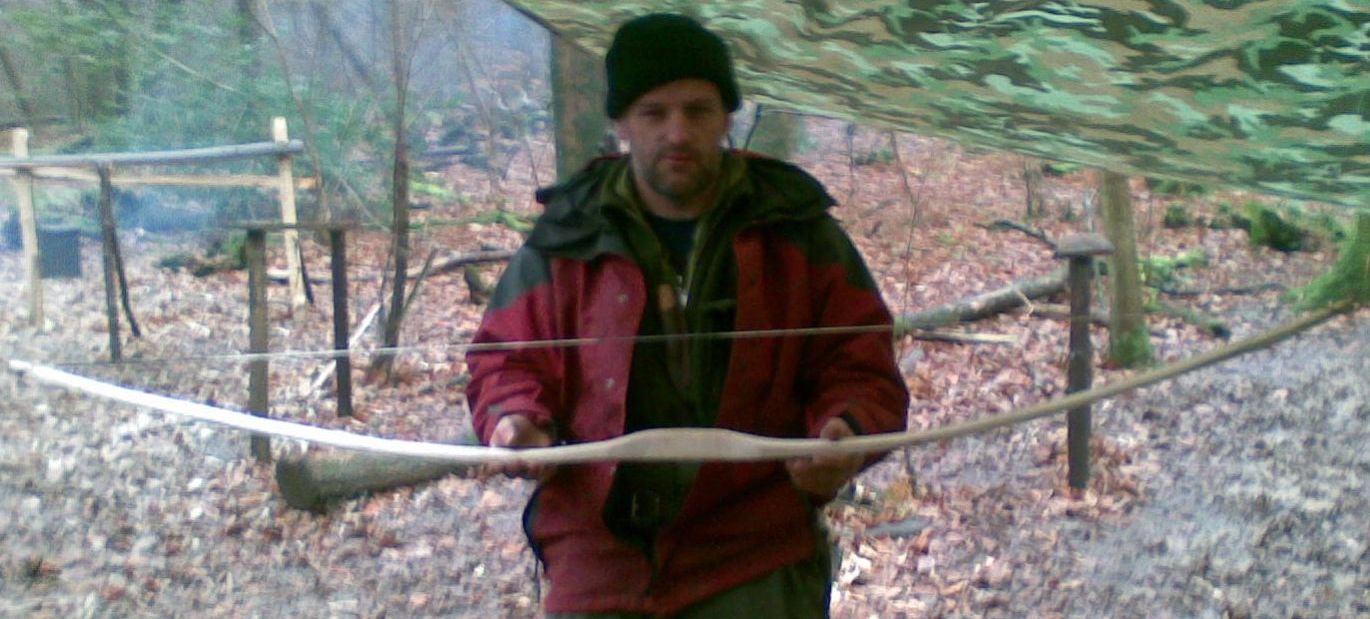
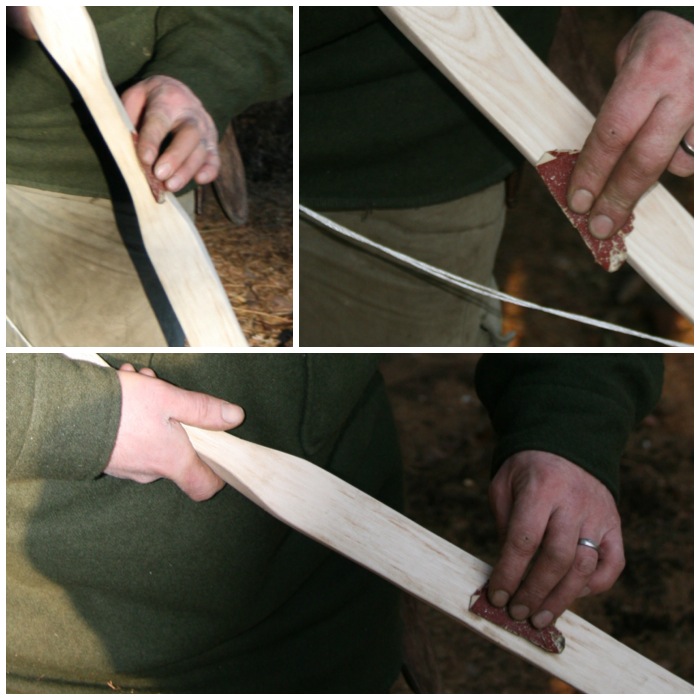
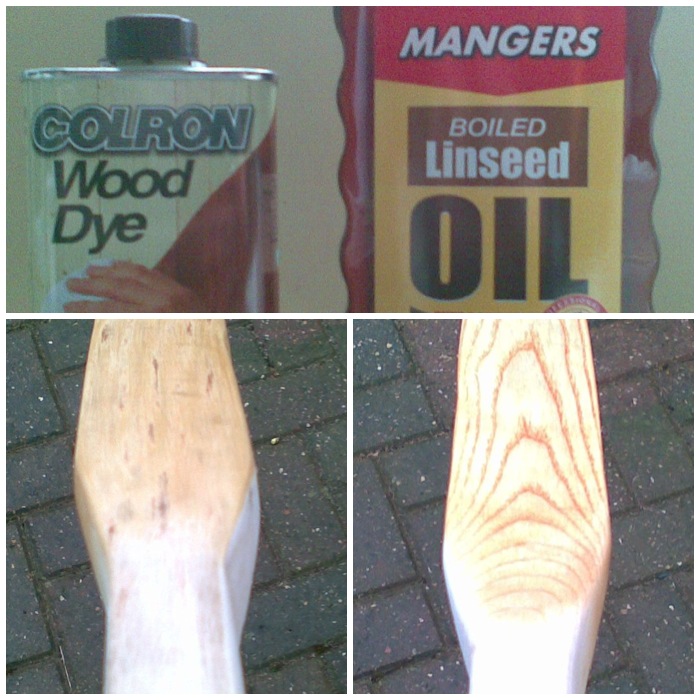
This is my favourite bow. I carved it while doing a Primitive Technology course at Woodcraft School.

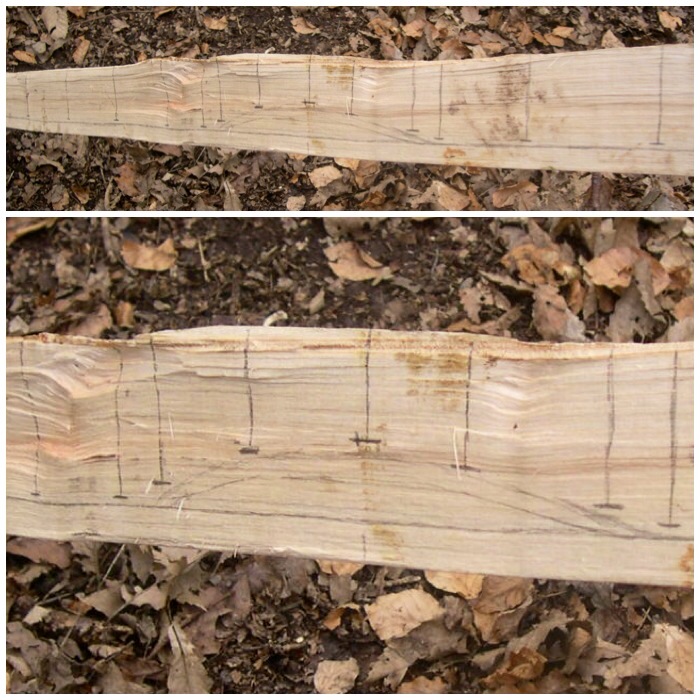
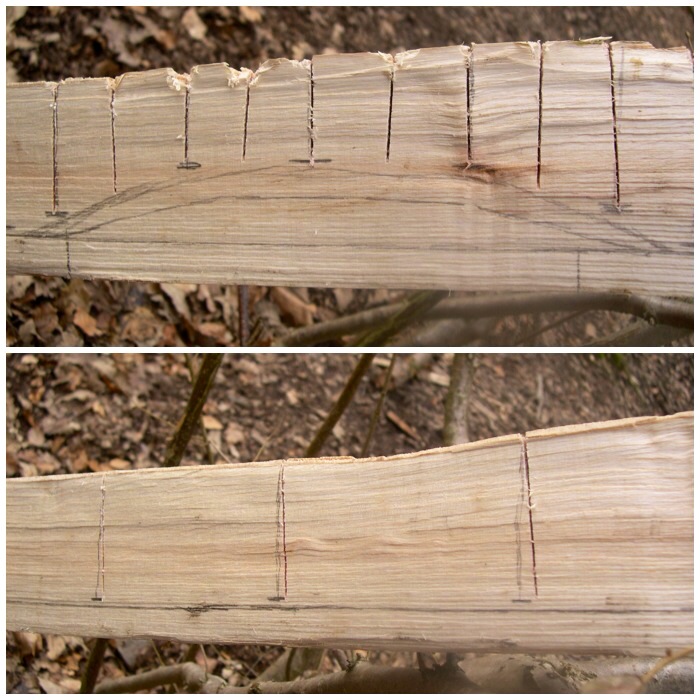
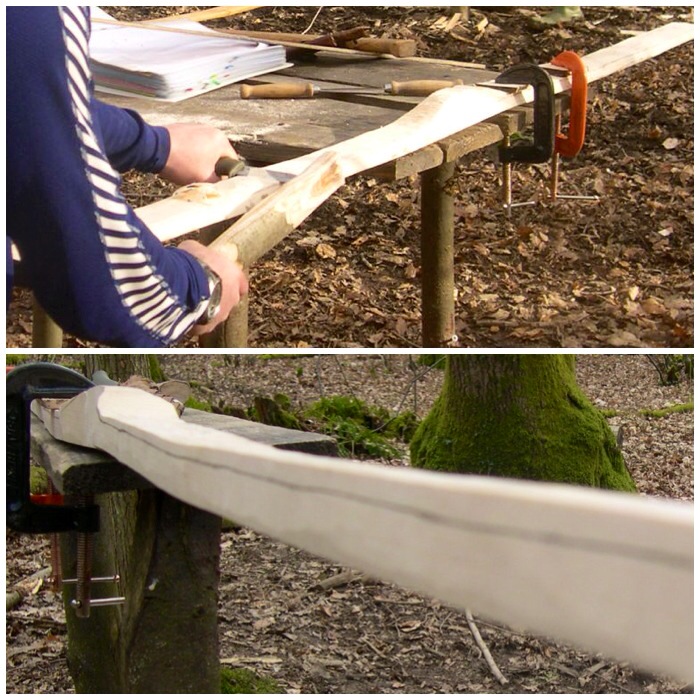
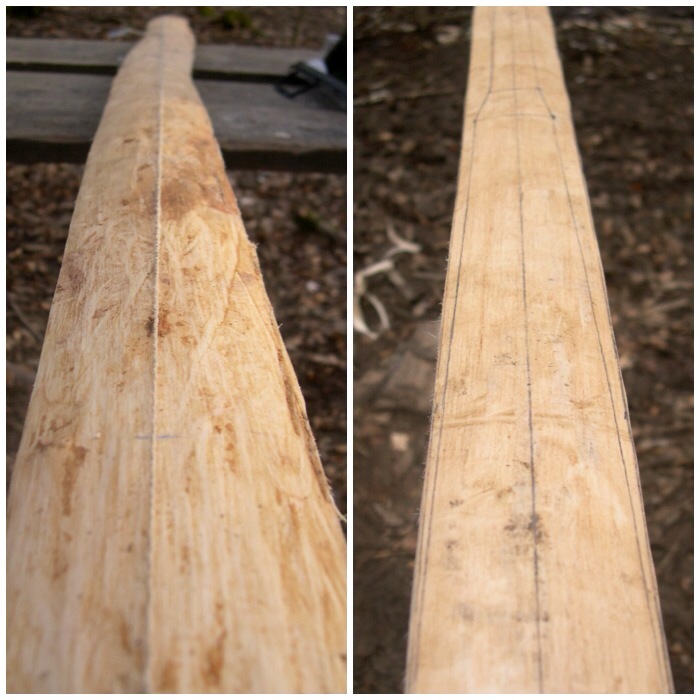
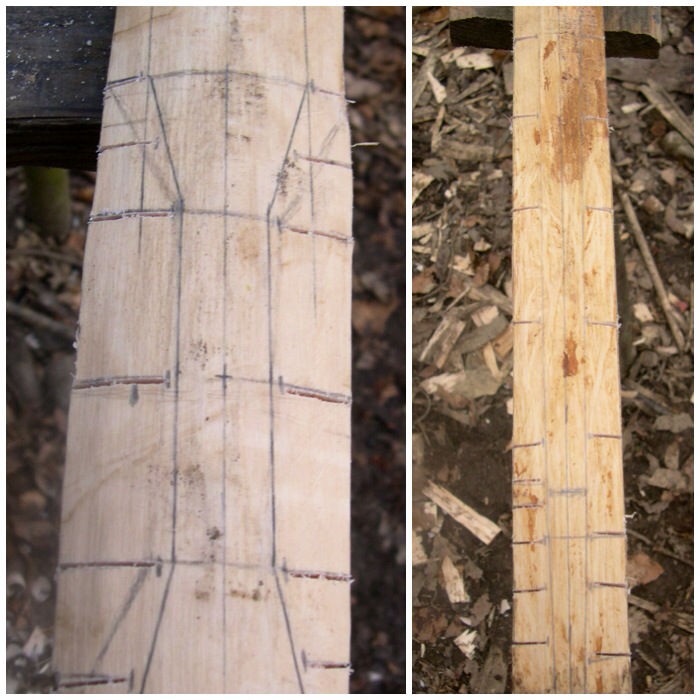
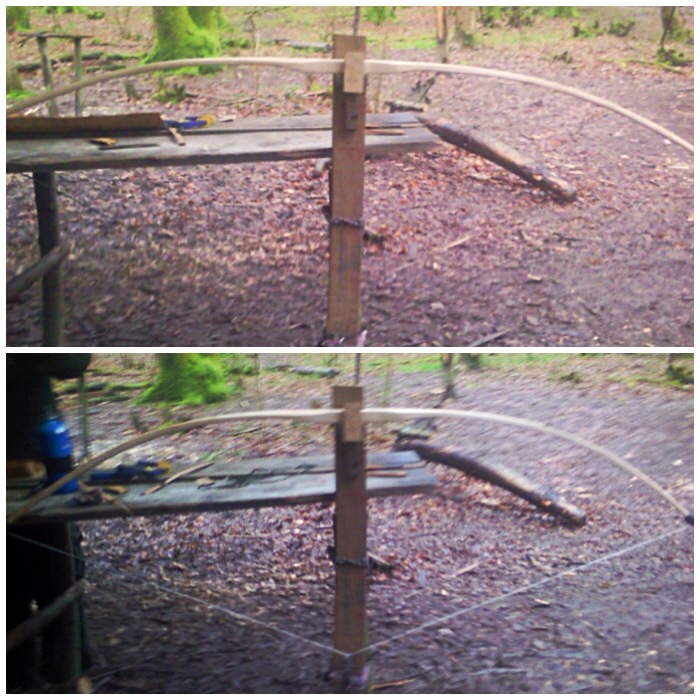
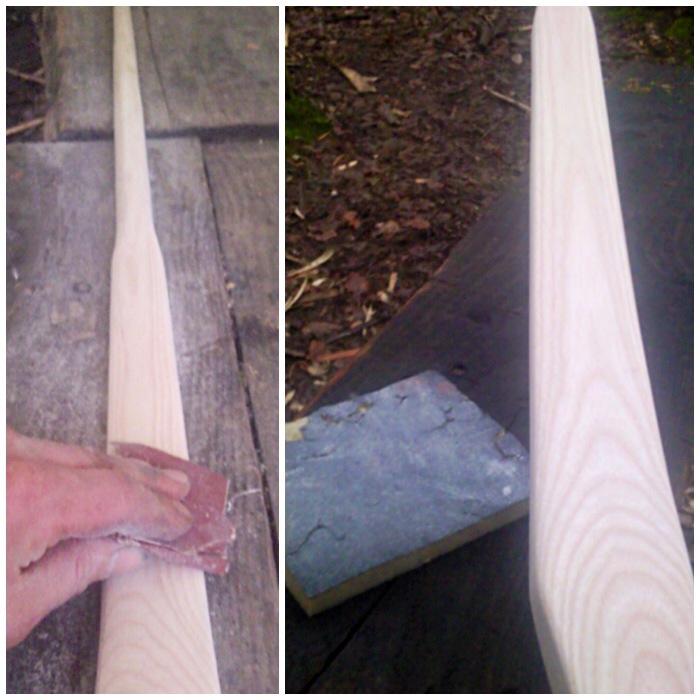
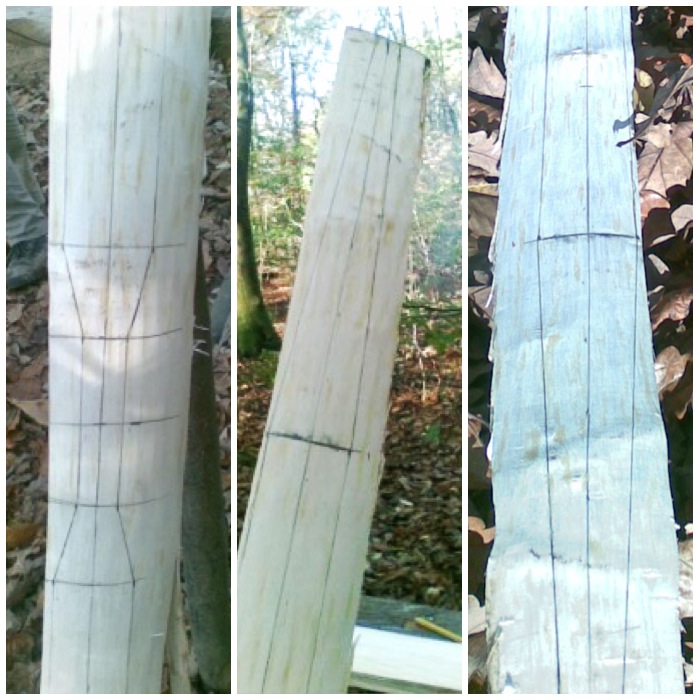
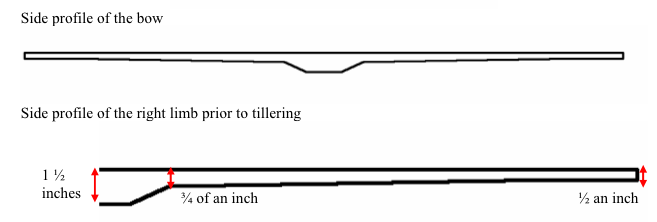
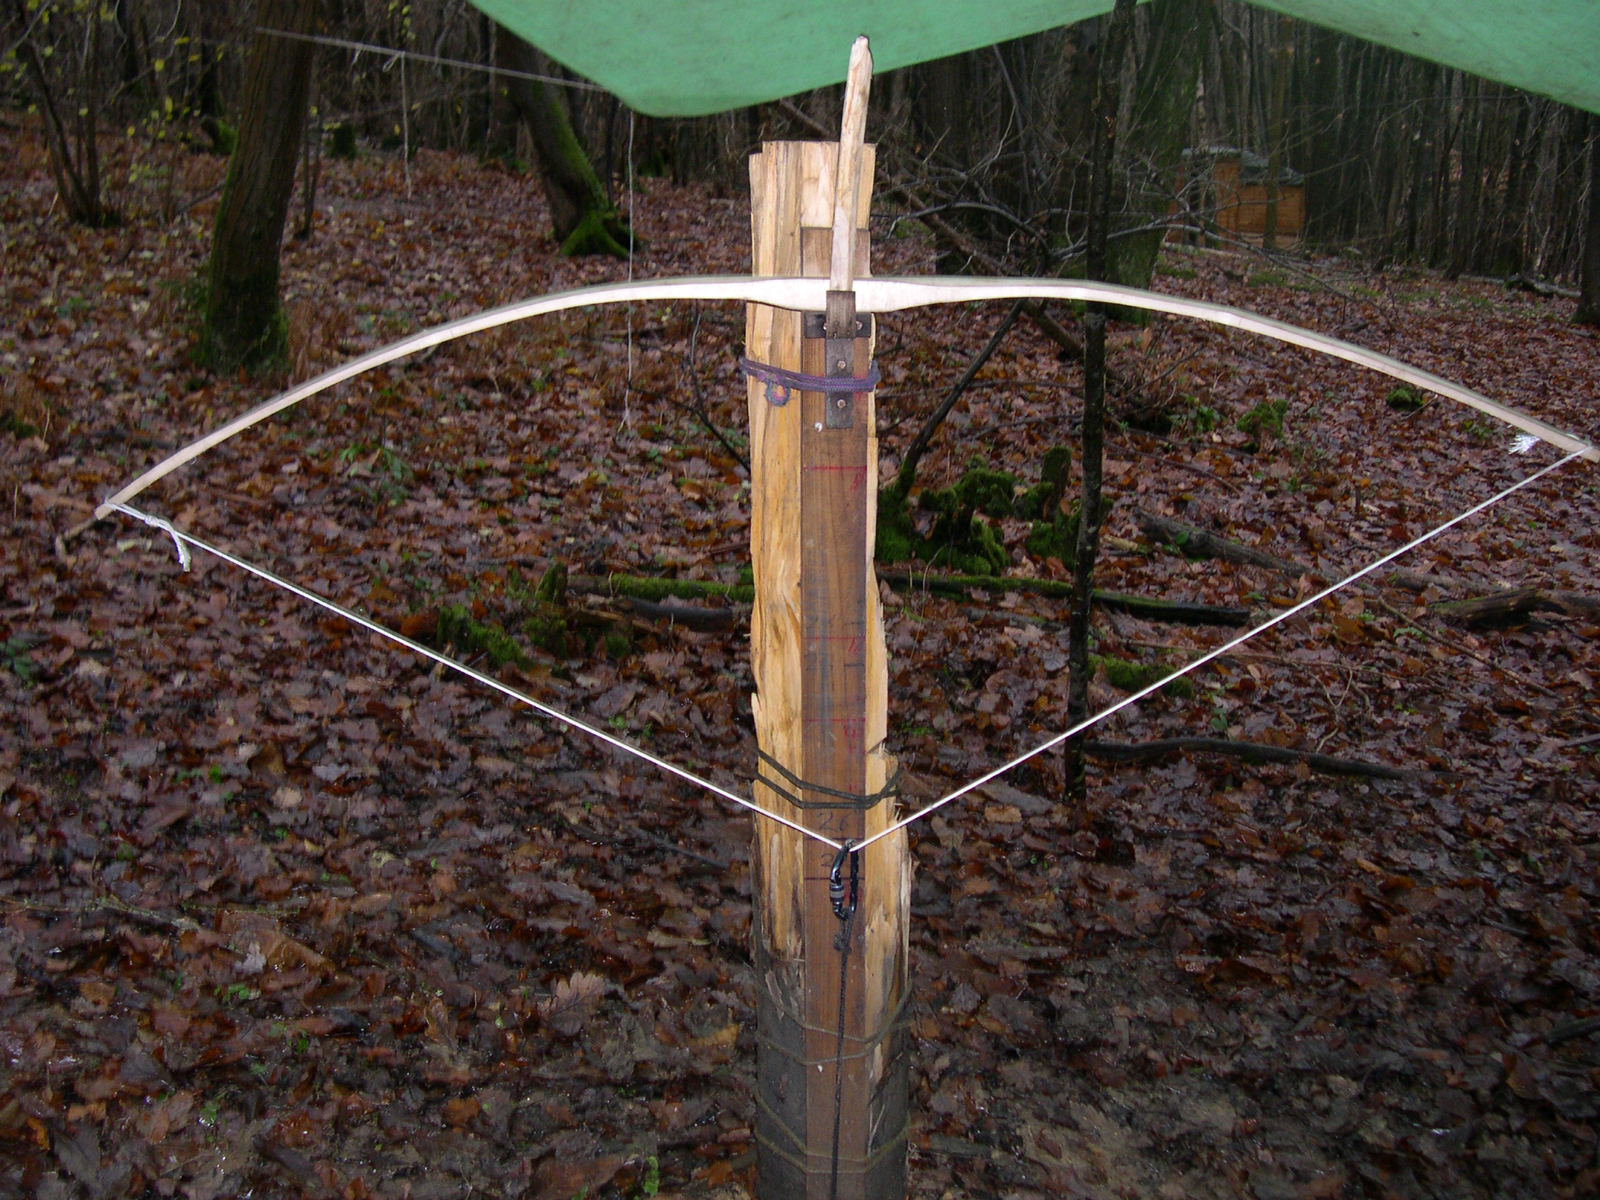
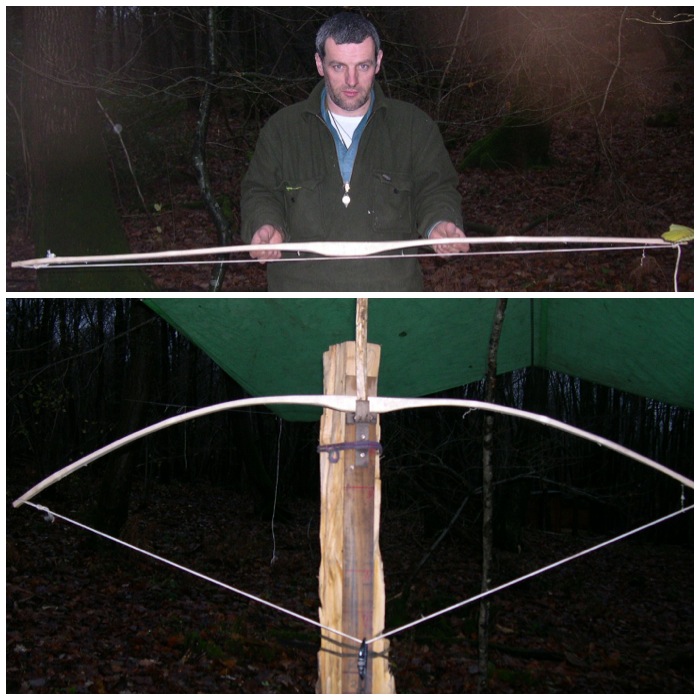
I carved the bow based on the dimensions of the ones found in the peat bogs at Holmegaard in Denmark. The bow has the lower parts of its limbs shaped wider than they are deeper much like the ash flatbow. The upper parts of the limbs are more ‘D’ shaped so making them stiffer but thinner than the lower parts of the limbs.

5
Holmegaard Bow

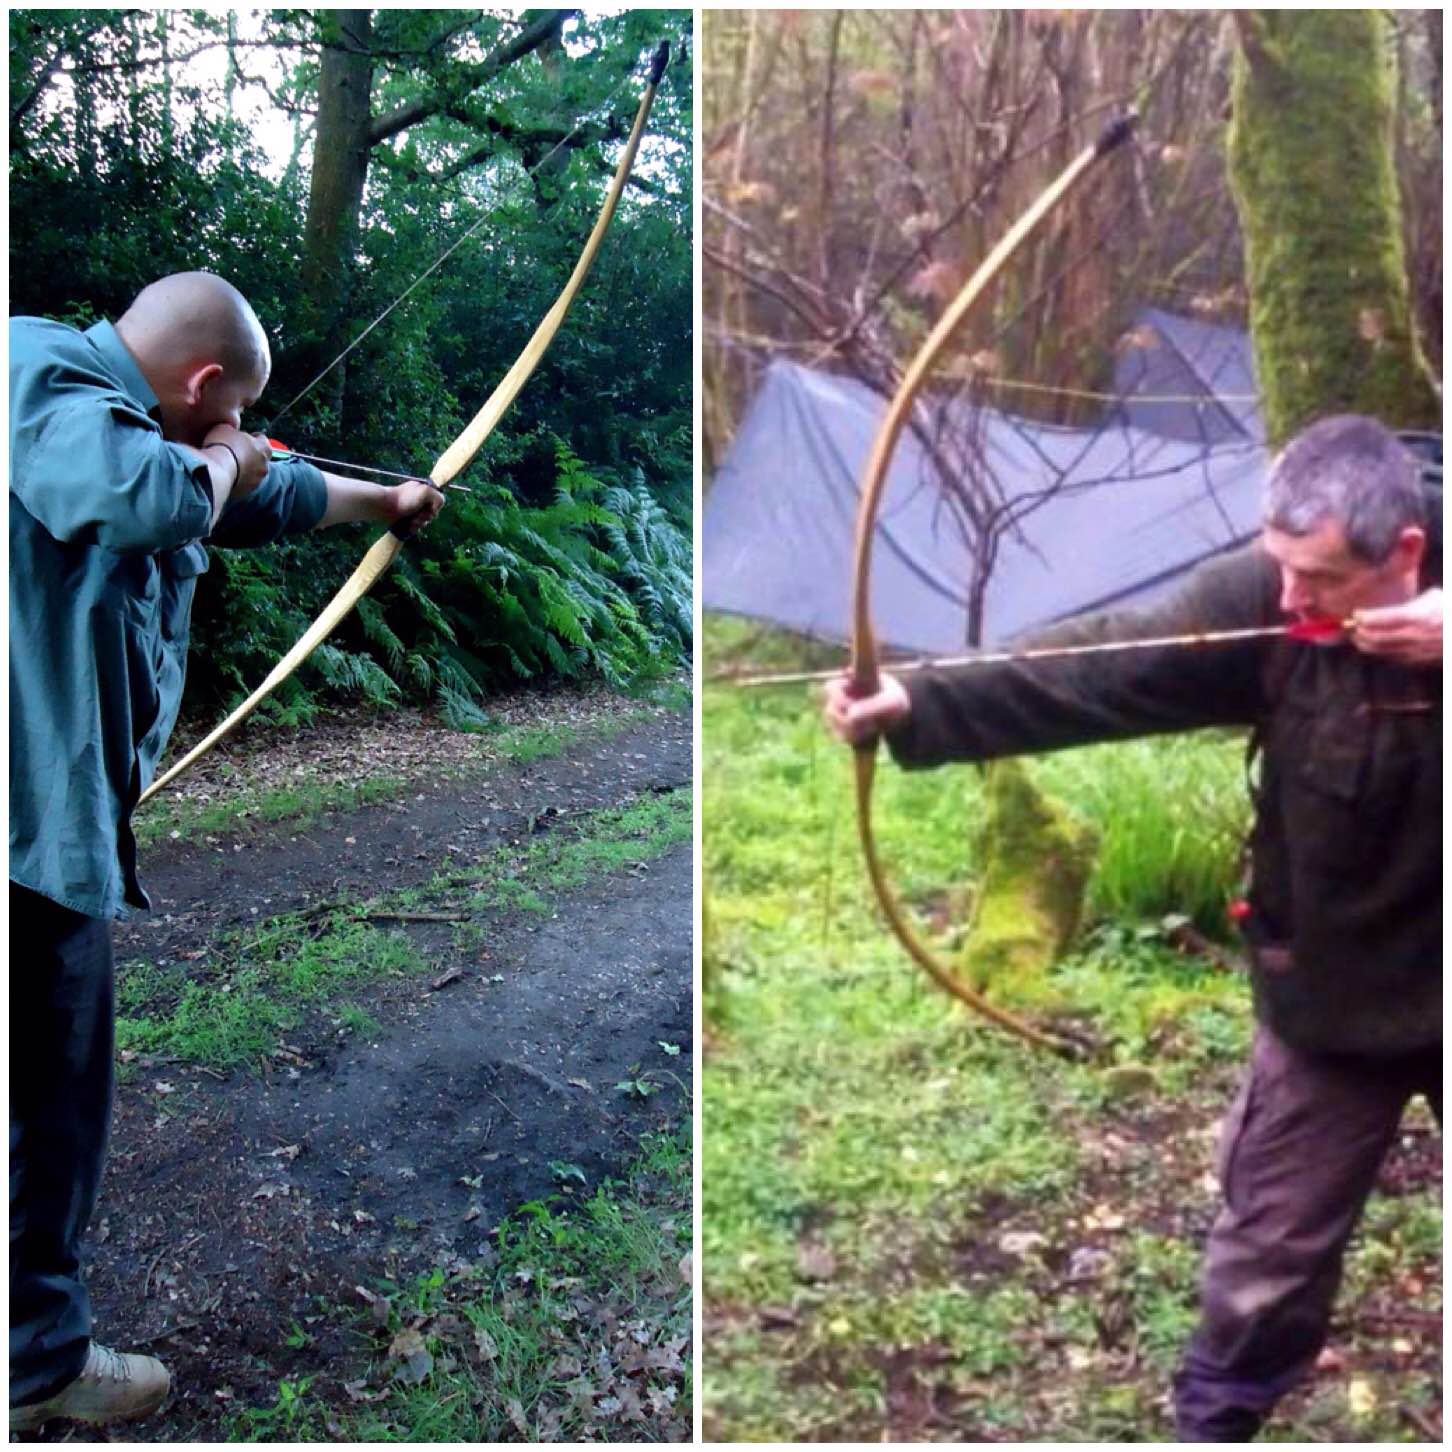
This unusual shape works well with ash as it is not a particularly strong wood for thin bows. The wide lower limbs give it strength while the thinner and stiffer ‘D’sectioned tips allow the limbs to shoot forward at a very fast speed so making it an excellent hunting bow where you get fairly close to your prey..

6
Holmegaard Bow

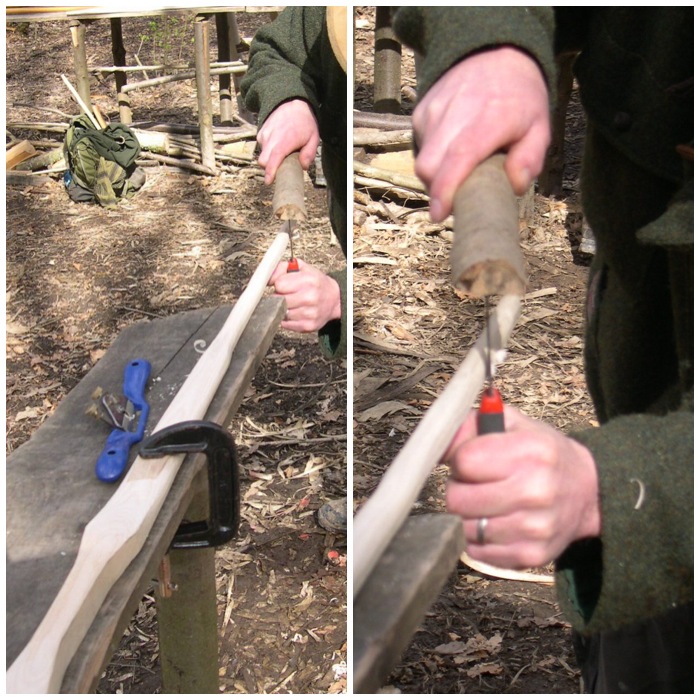
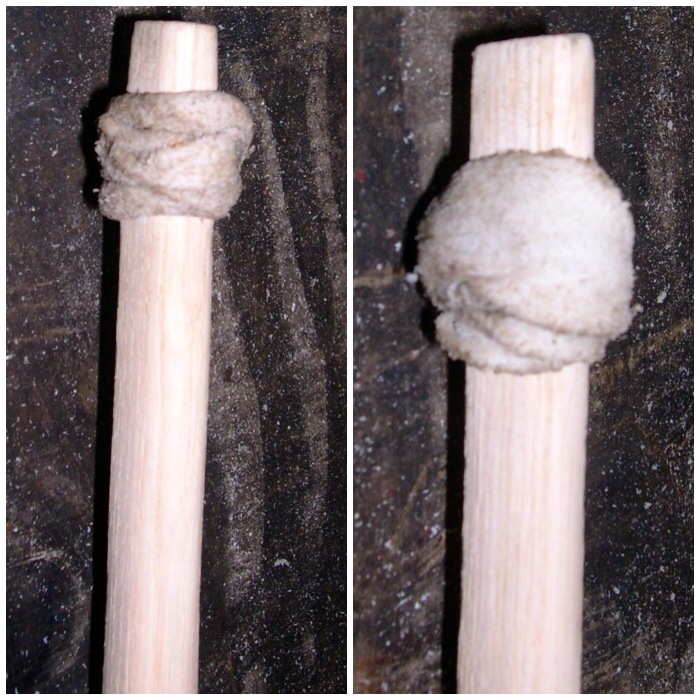
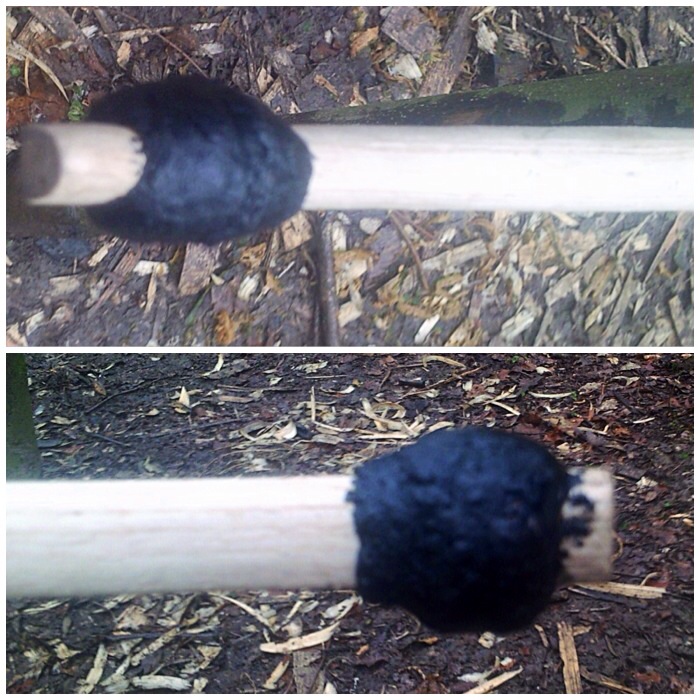
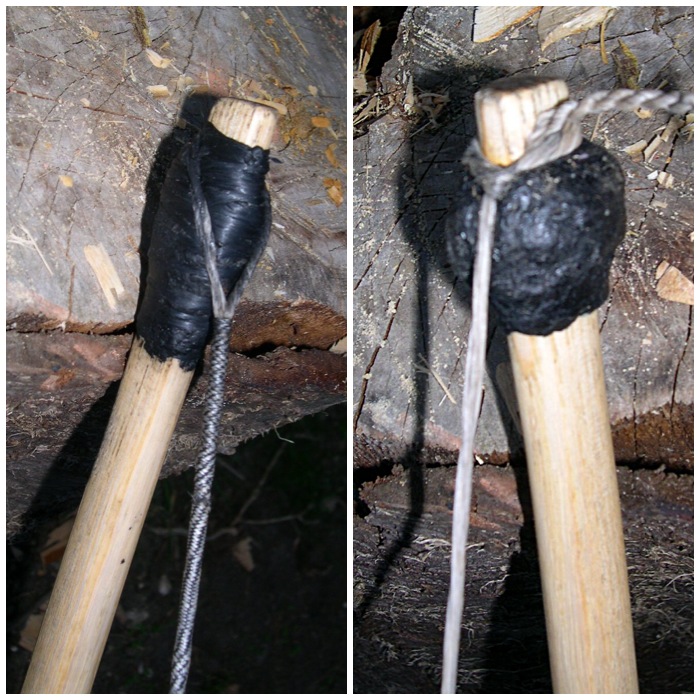
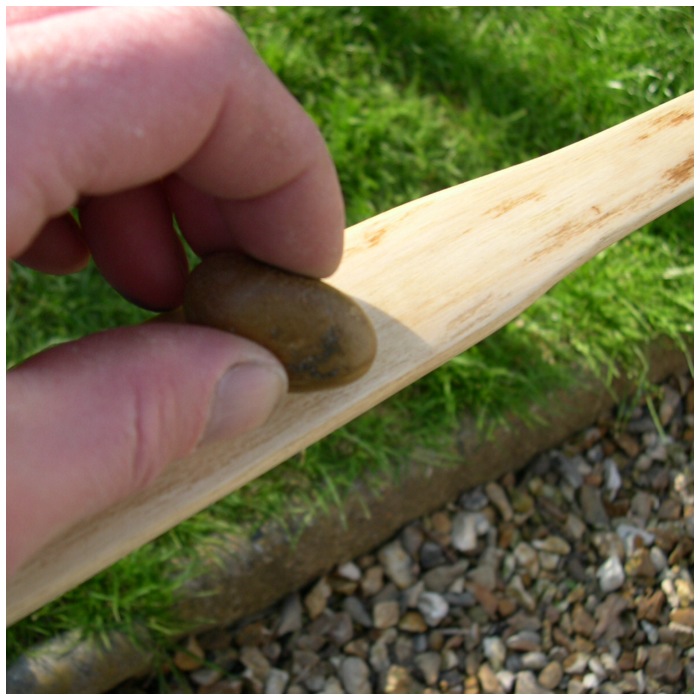
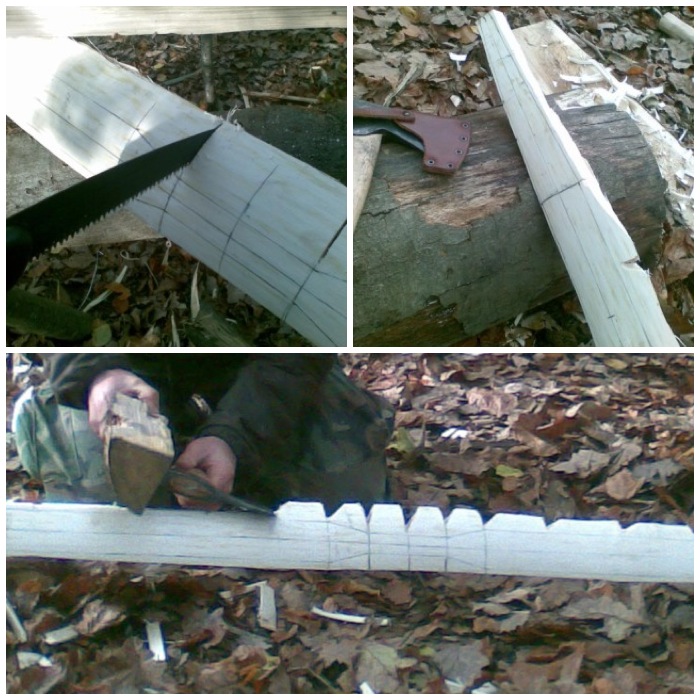
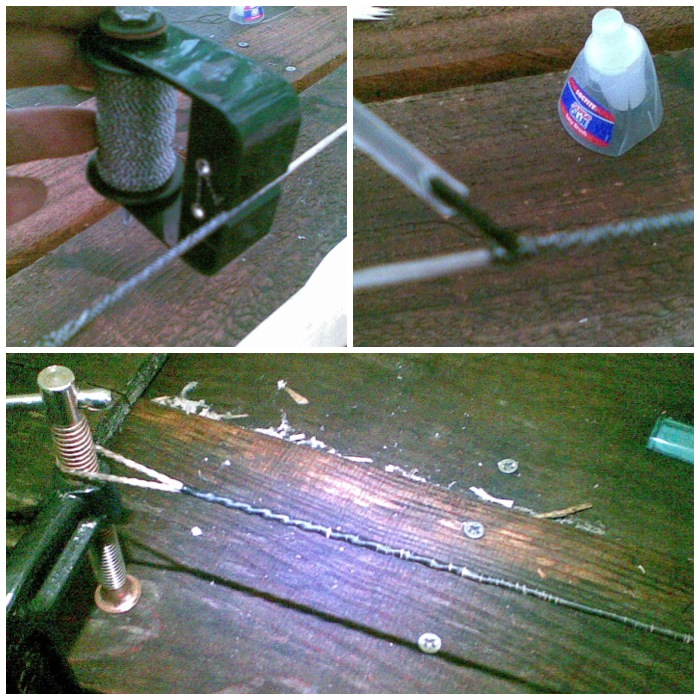
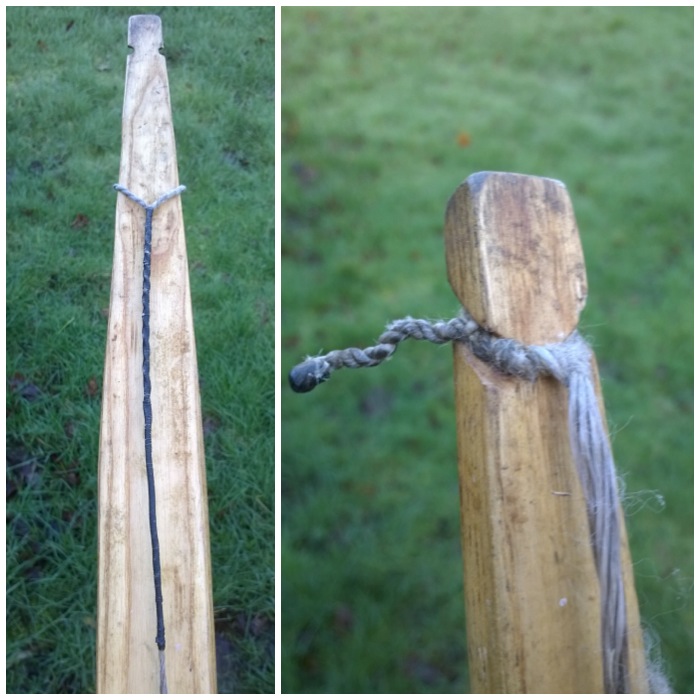
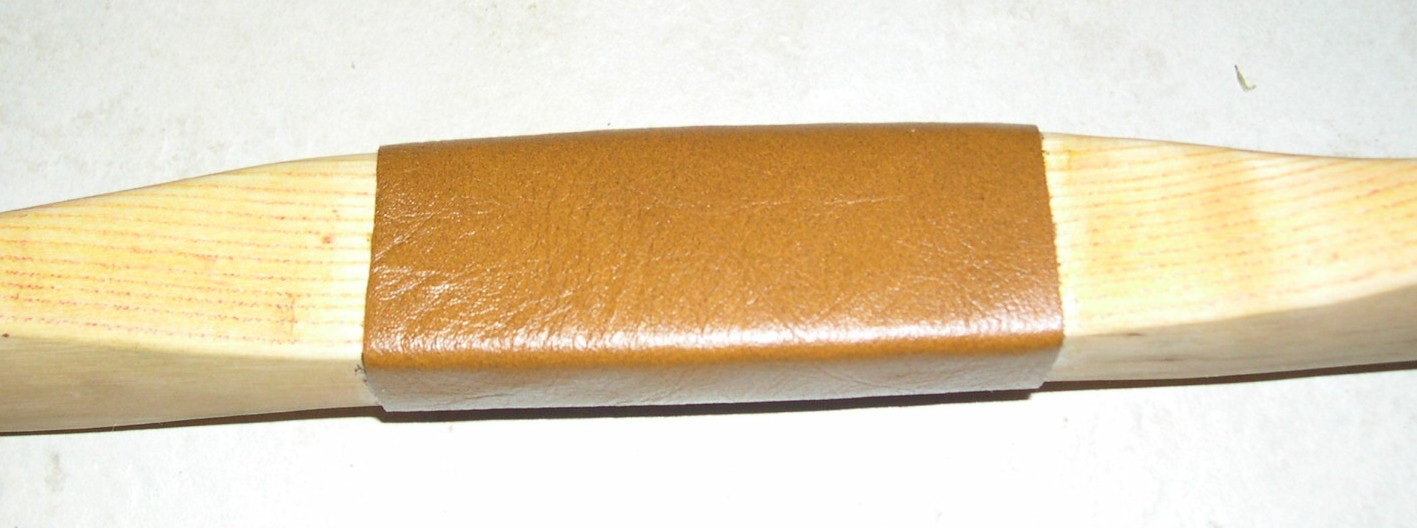
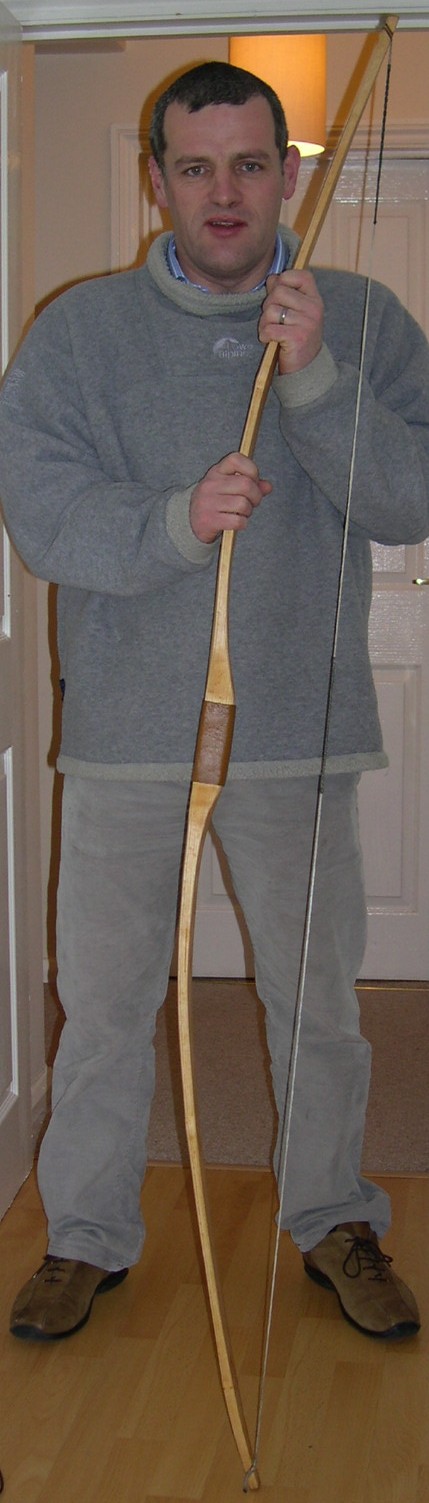
I also decided to make the nocks out of rawhide and spruce pitch rather than carving them in.  I did this as some Holmegaard bows have been found with no nocks carved into them. Whether they had bone nocks attached or rawhide as I experimented with will probably never be known but they work well.

This bow is a favourite amongst the children I teach as they can draw it easy. Personally I just love the shape of the bow and it shoots well for me,

Atlatls

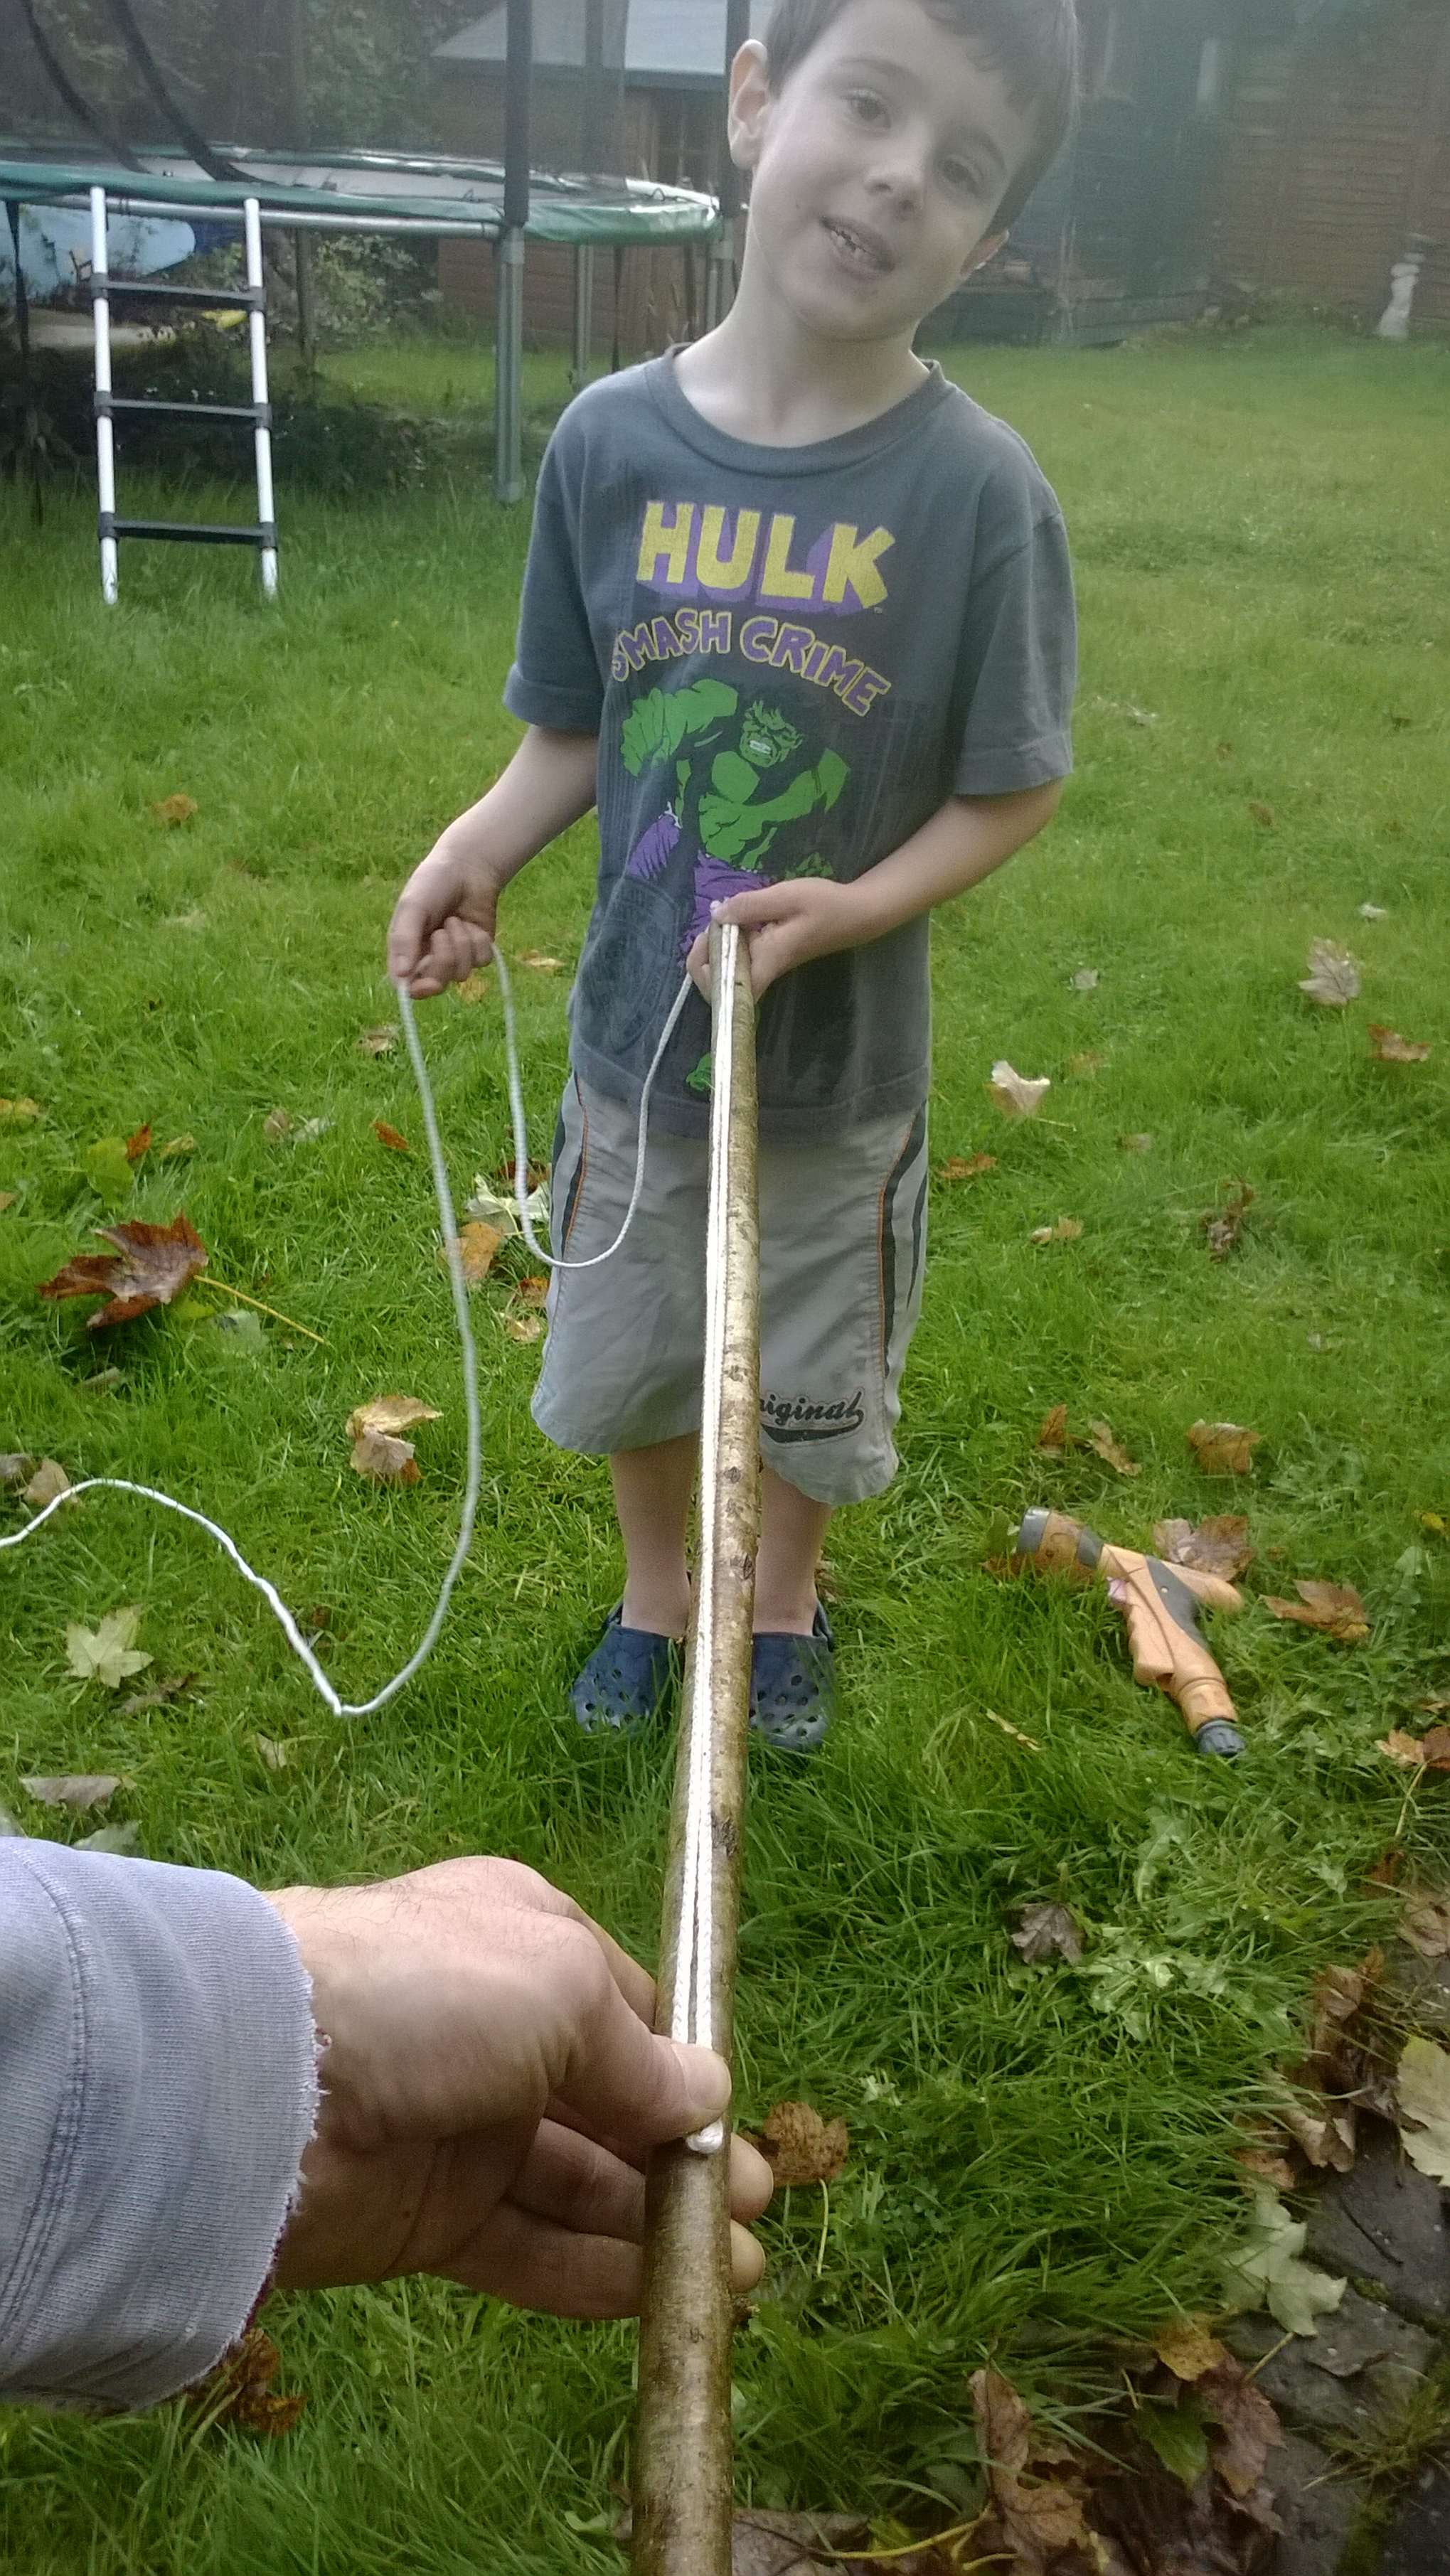
I have written a number of posts on these little devices. When asked about them by children I teach I liken them to these modern ball throwing devices dog walkers use nowadays. So if you imagine replacing the ball with a spear (technically called a dart) you will get the idea.

7
My Atlatl Set

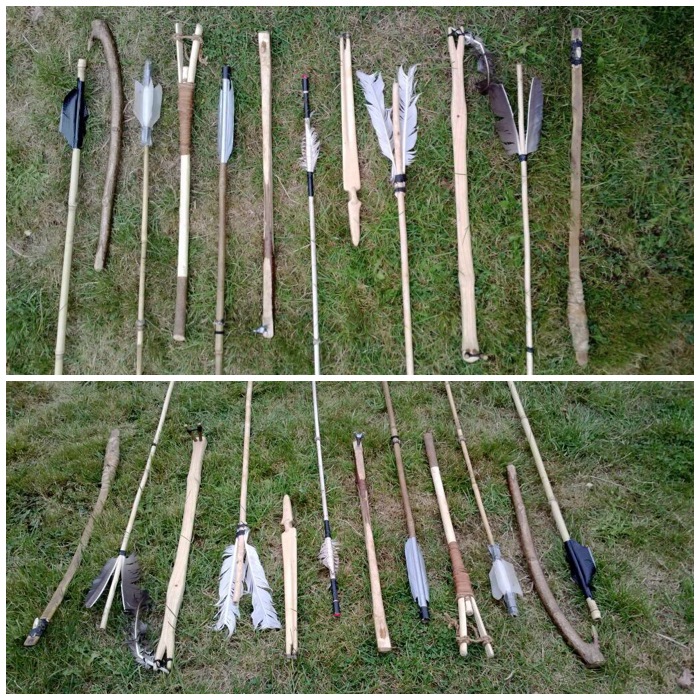
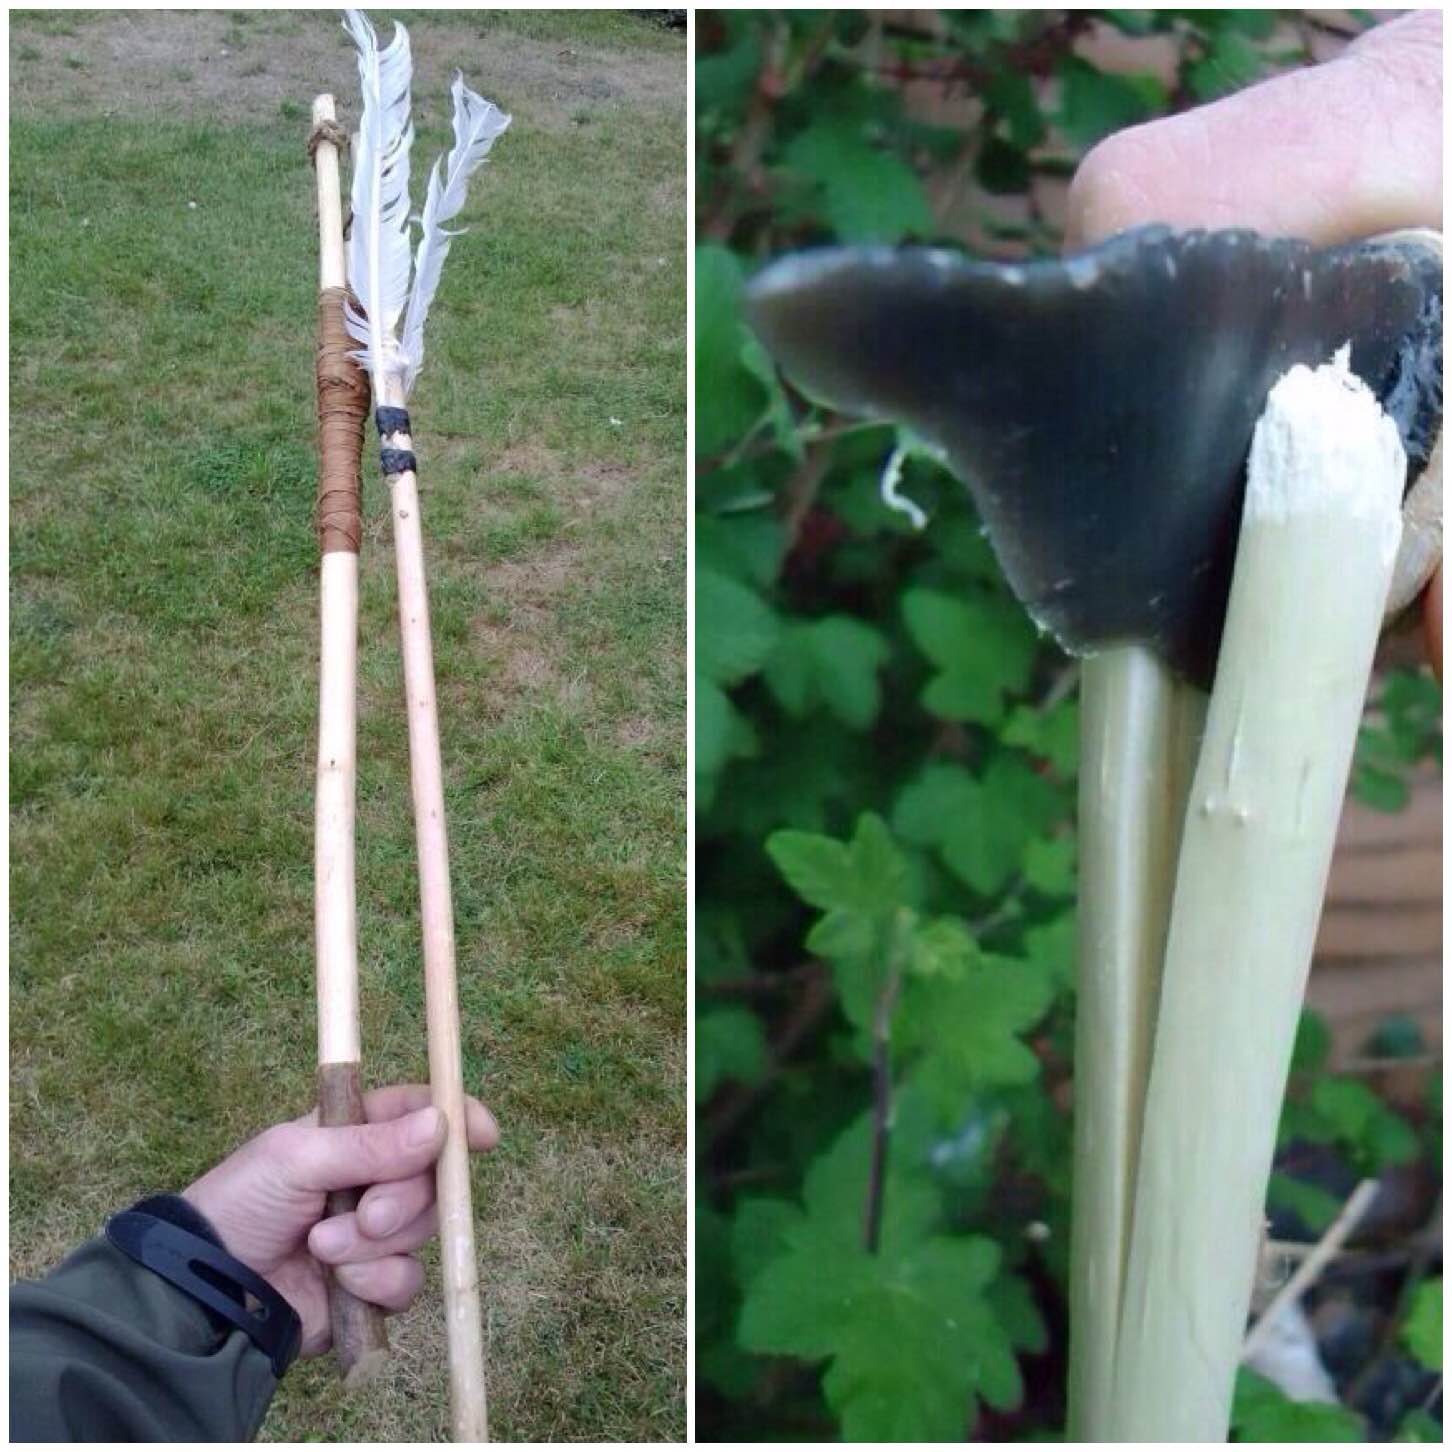
The set is made up of two parts – the Atlatl (the throwing device) as shown below and a dart (seen above). My post on the Atlatl goes into detail on the history of them and the different designs you can find.

The ones below are very simple ones. The left hand one has been carved from a hazel rod and the one on the right is from a piece of yew with an antler tip attached by sinew and spruce pitch.

image1
Basic Atlatls

Lovelock Cave Atlatl

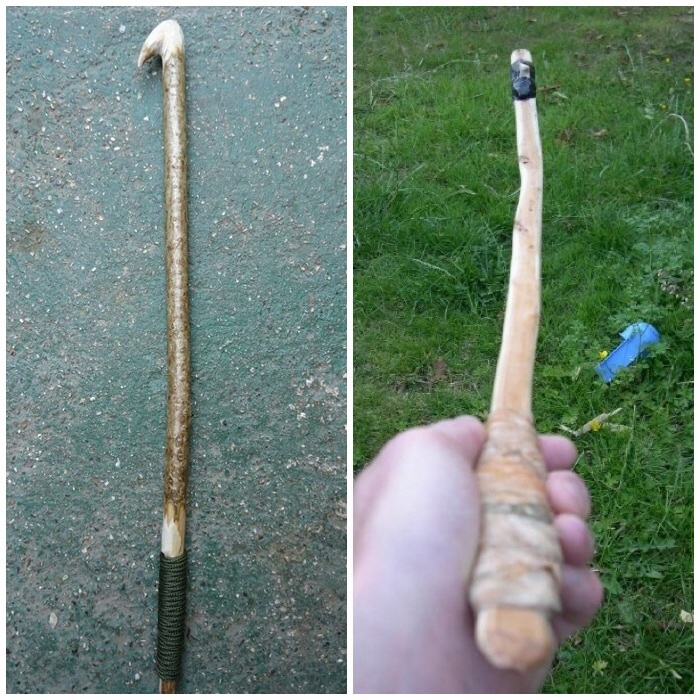
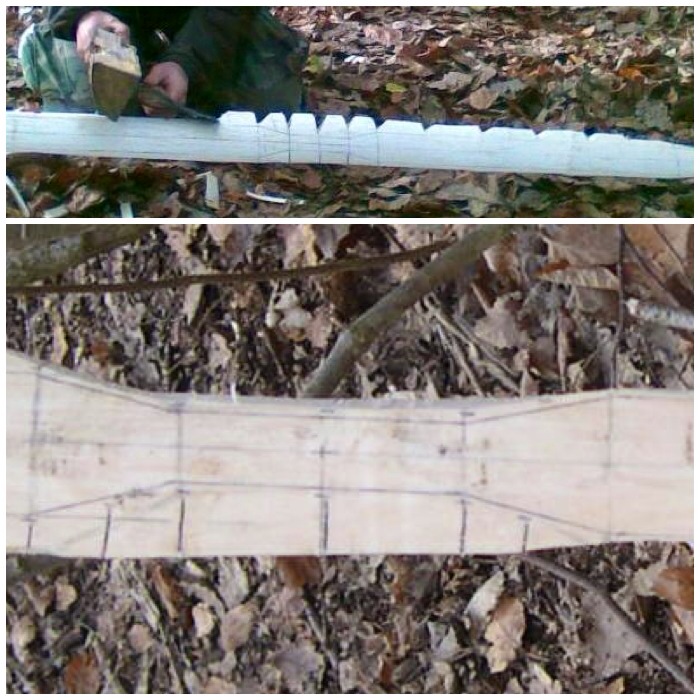
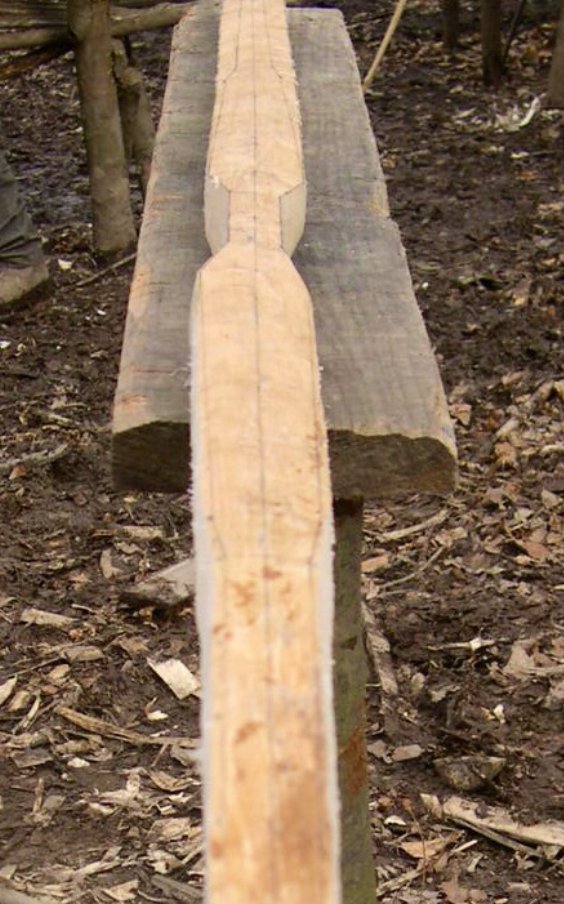
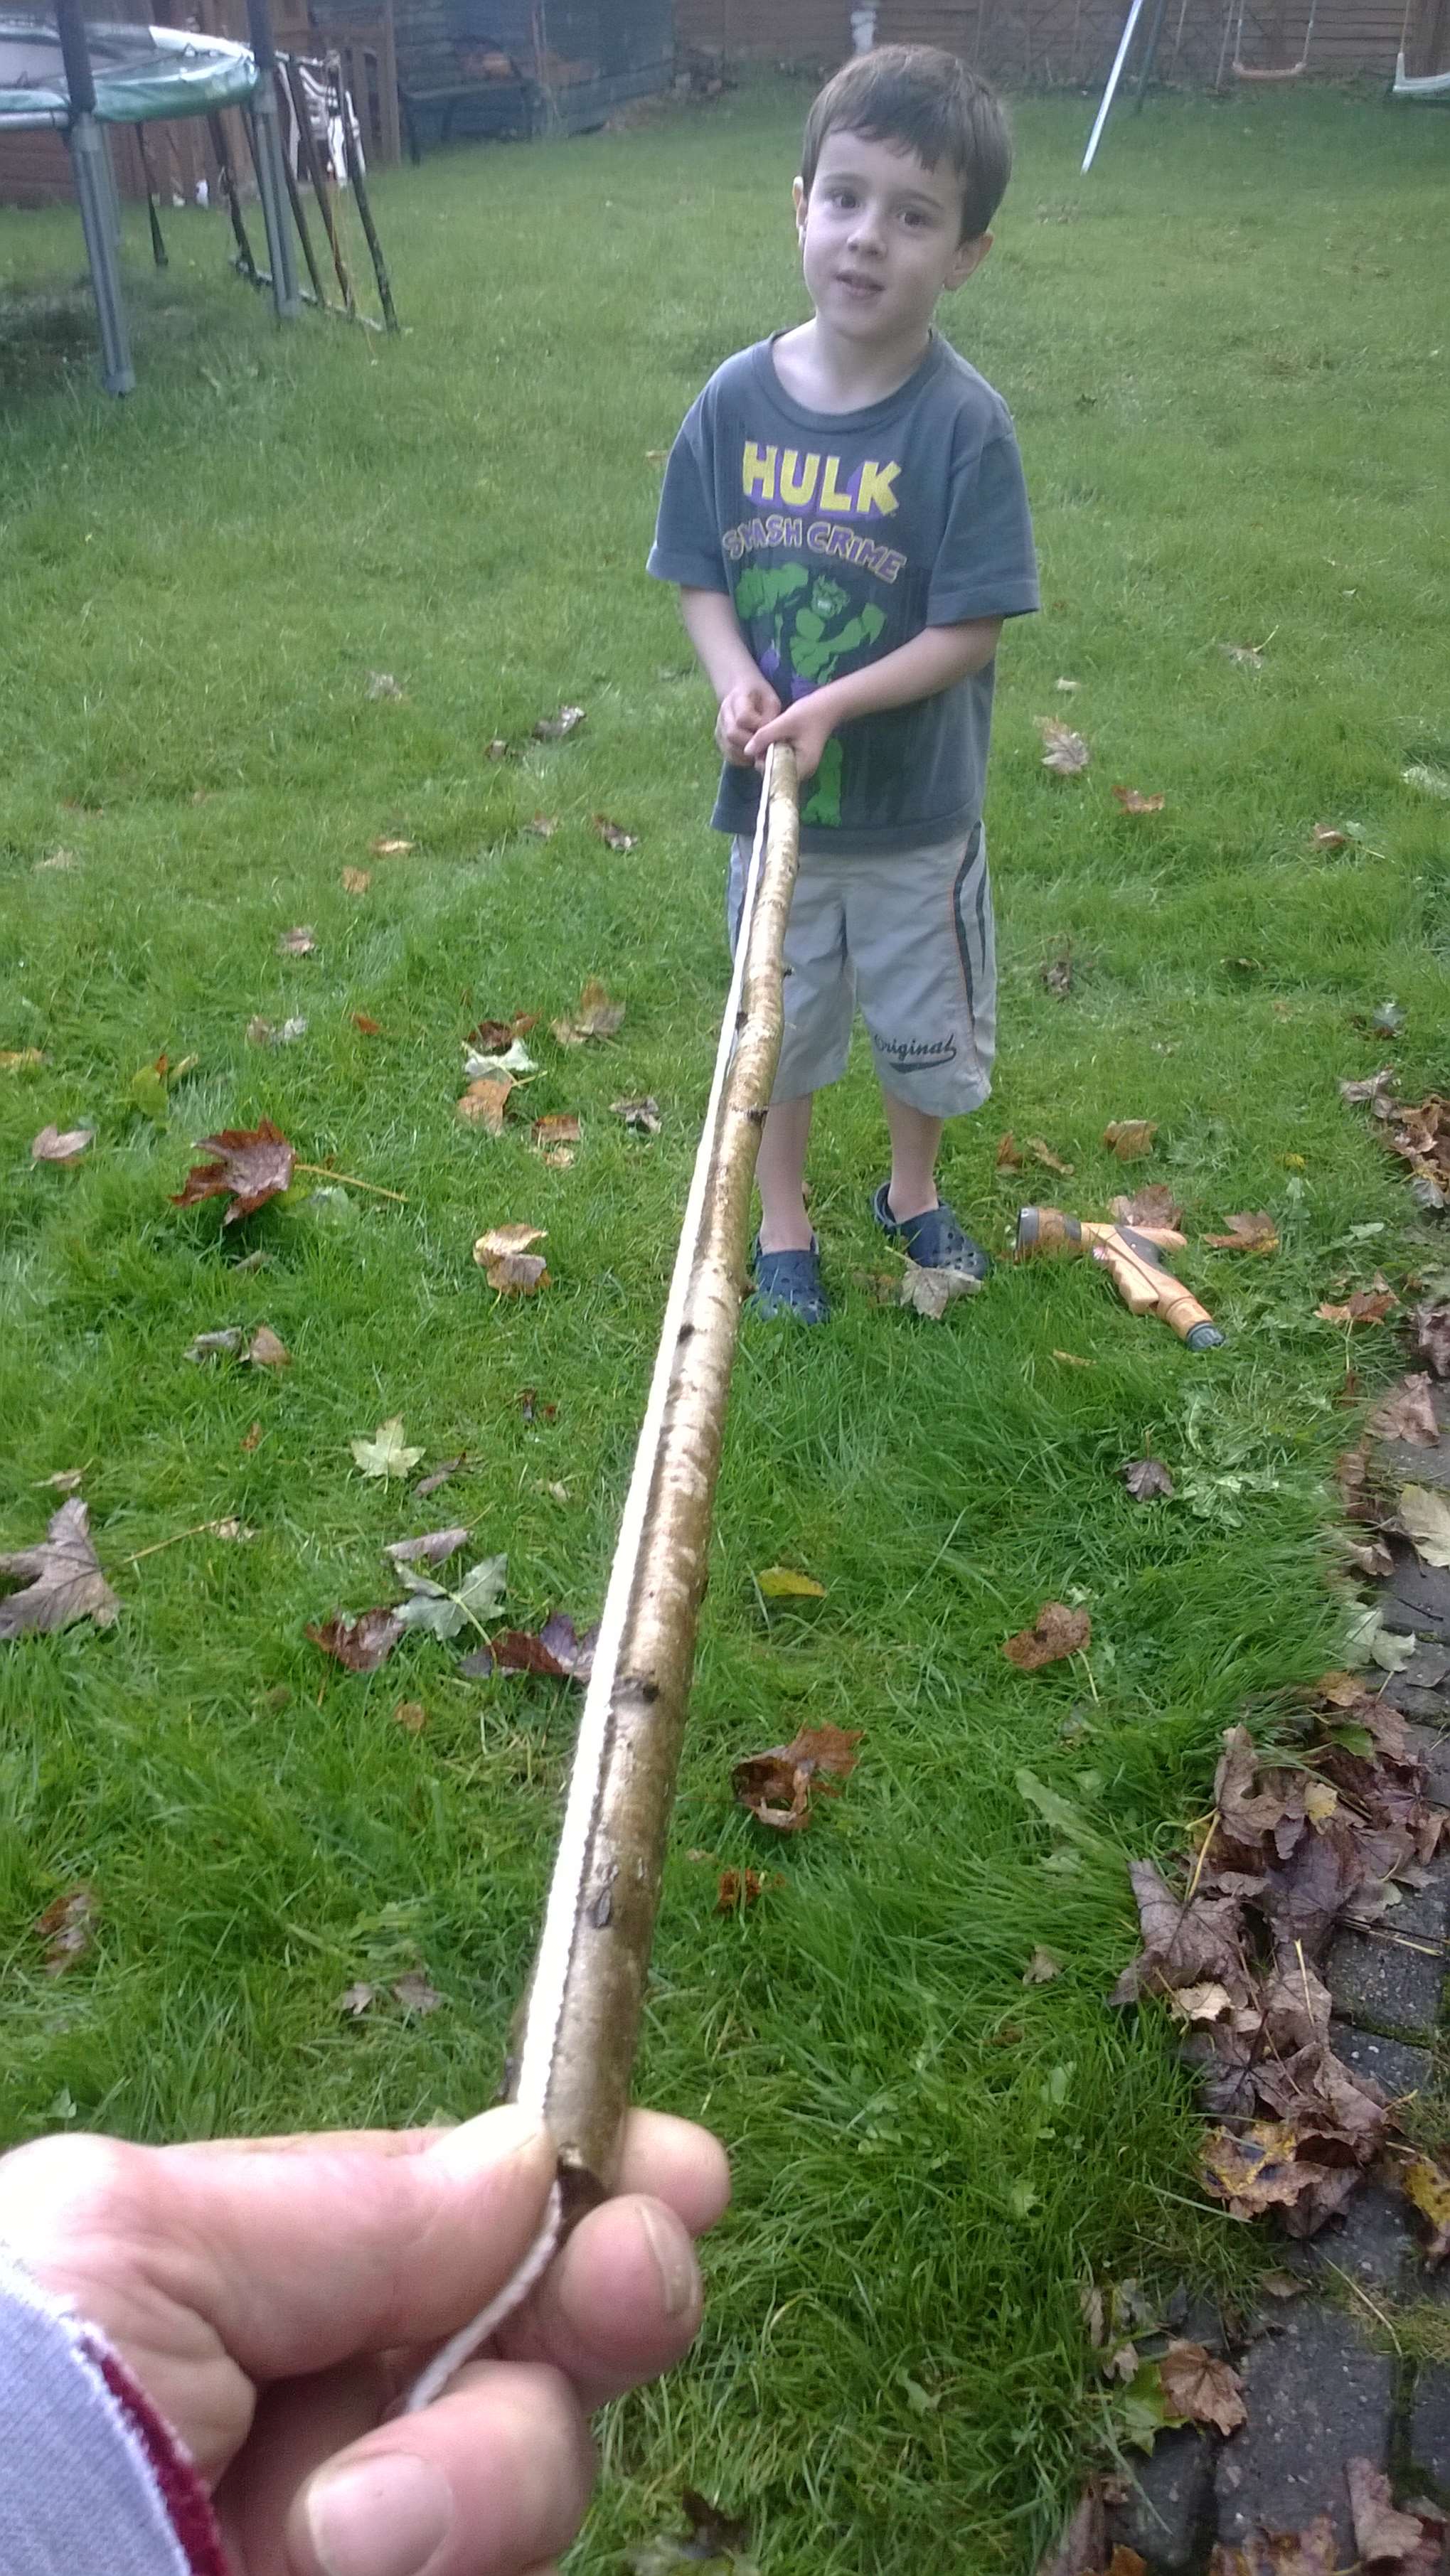
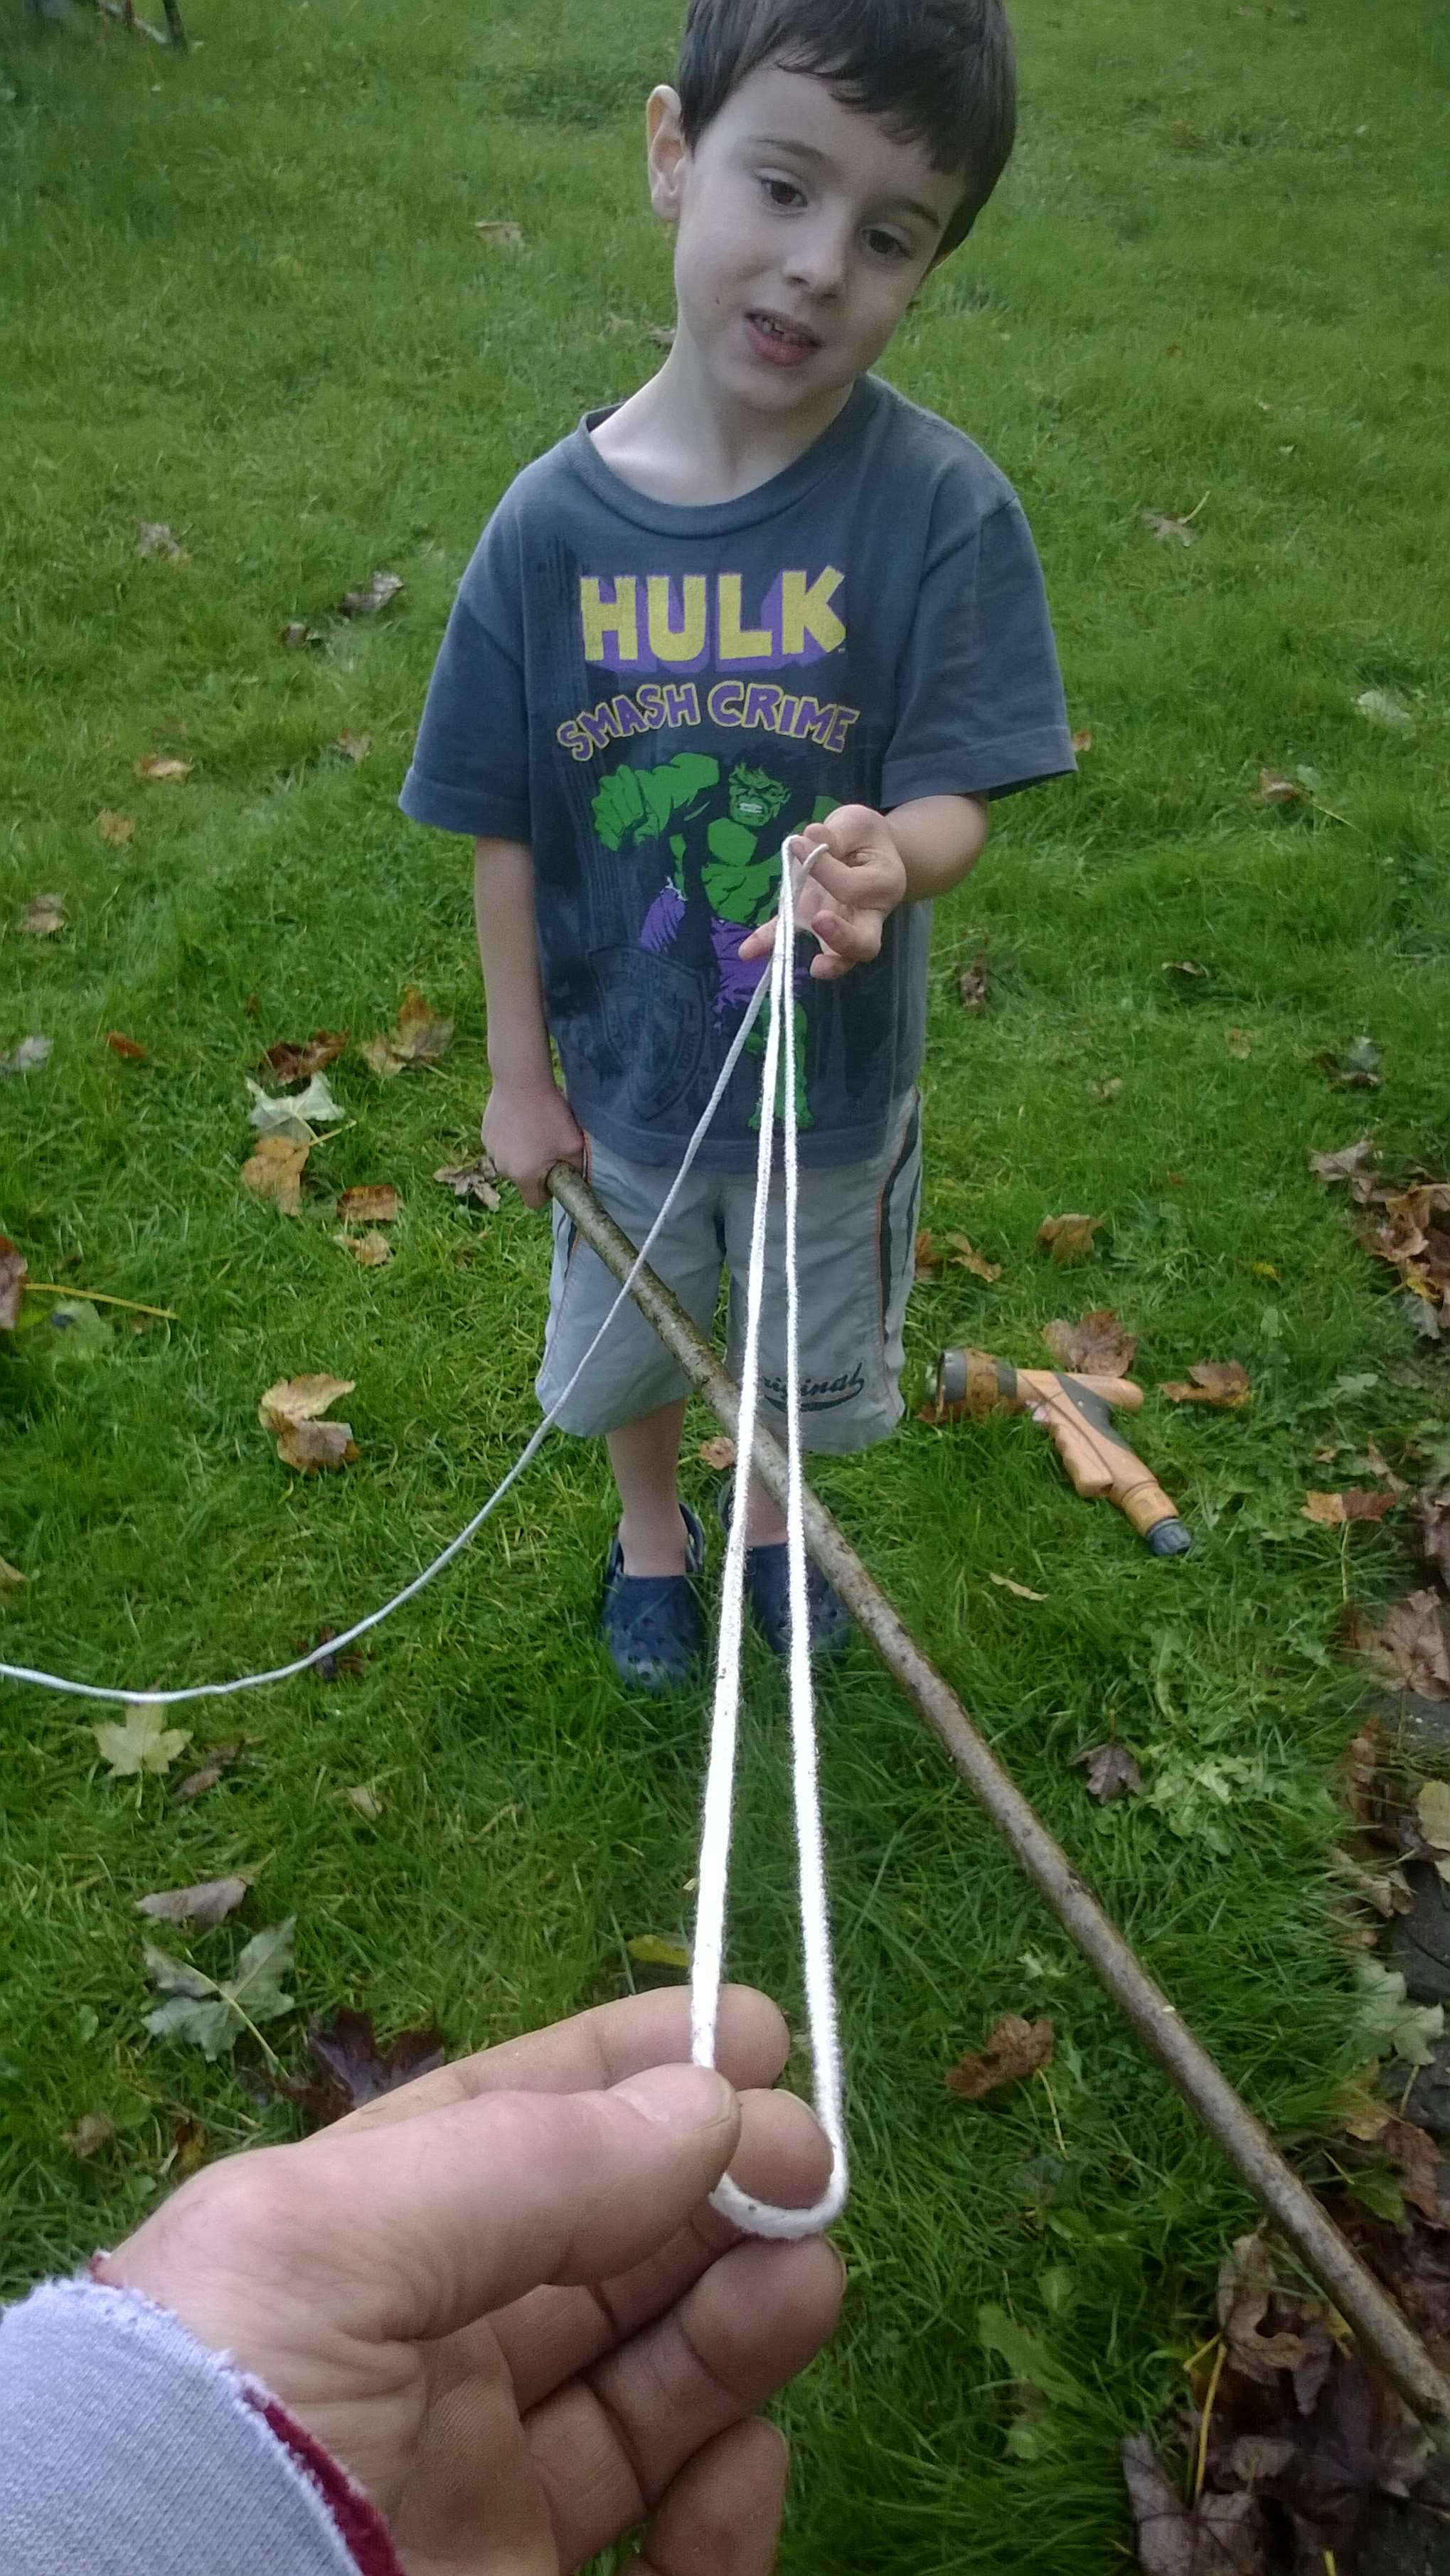
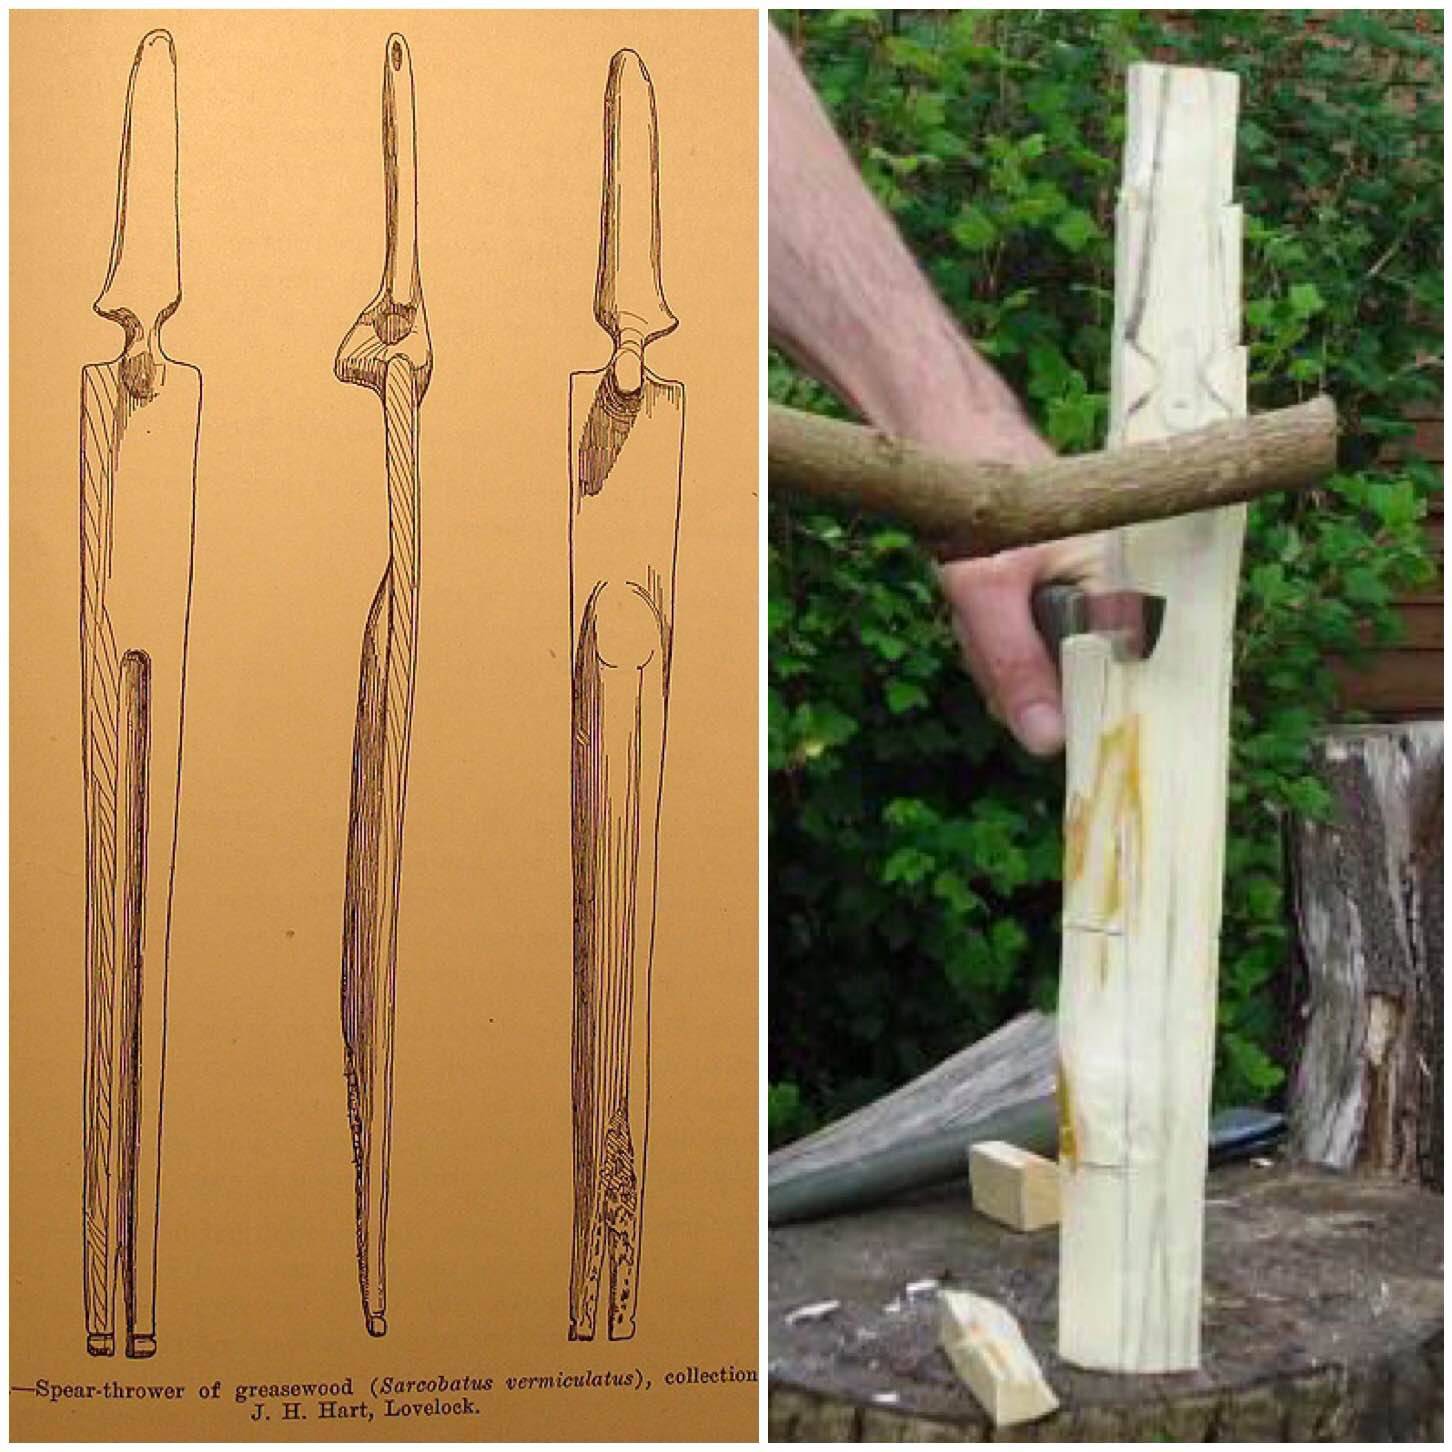
I have tried to make a number of different Atlatls over the years and a favourite of mine is called the Lovelock Cave Atlatl (named after where it was found in the USA). I came across some drawings of this Atlatl on the web and set about making one.

8
Lovelock Caver Atlatl

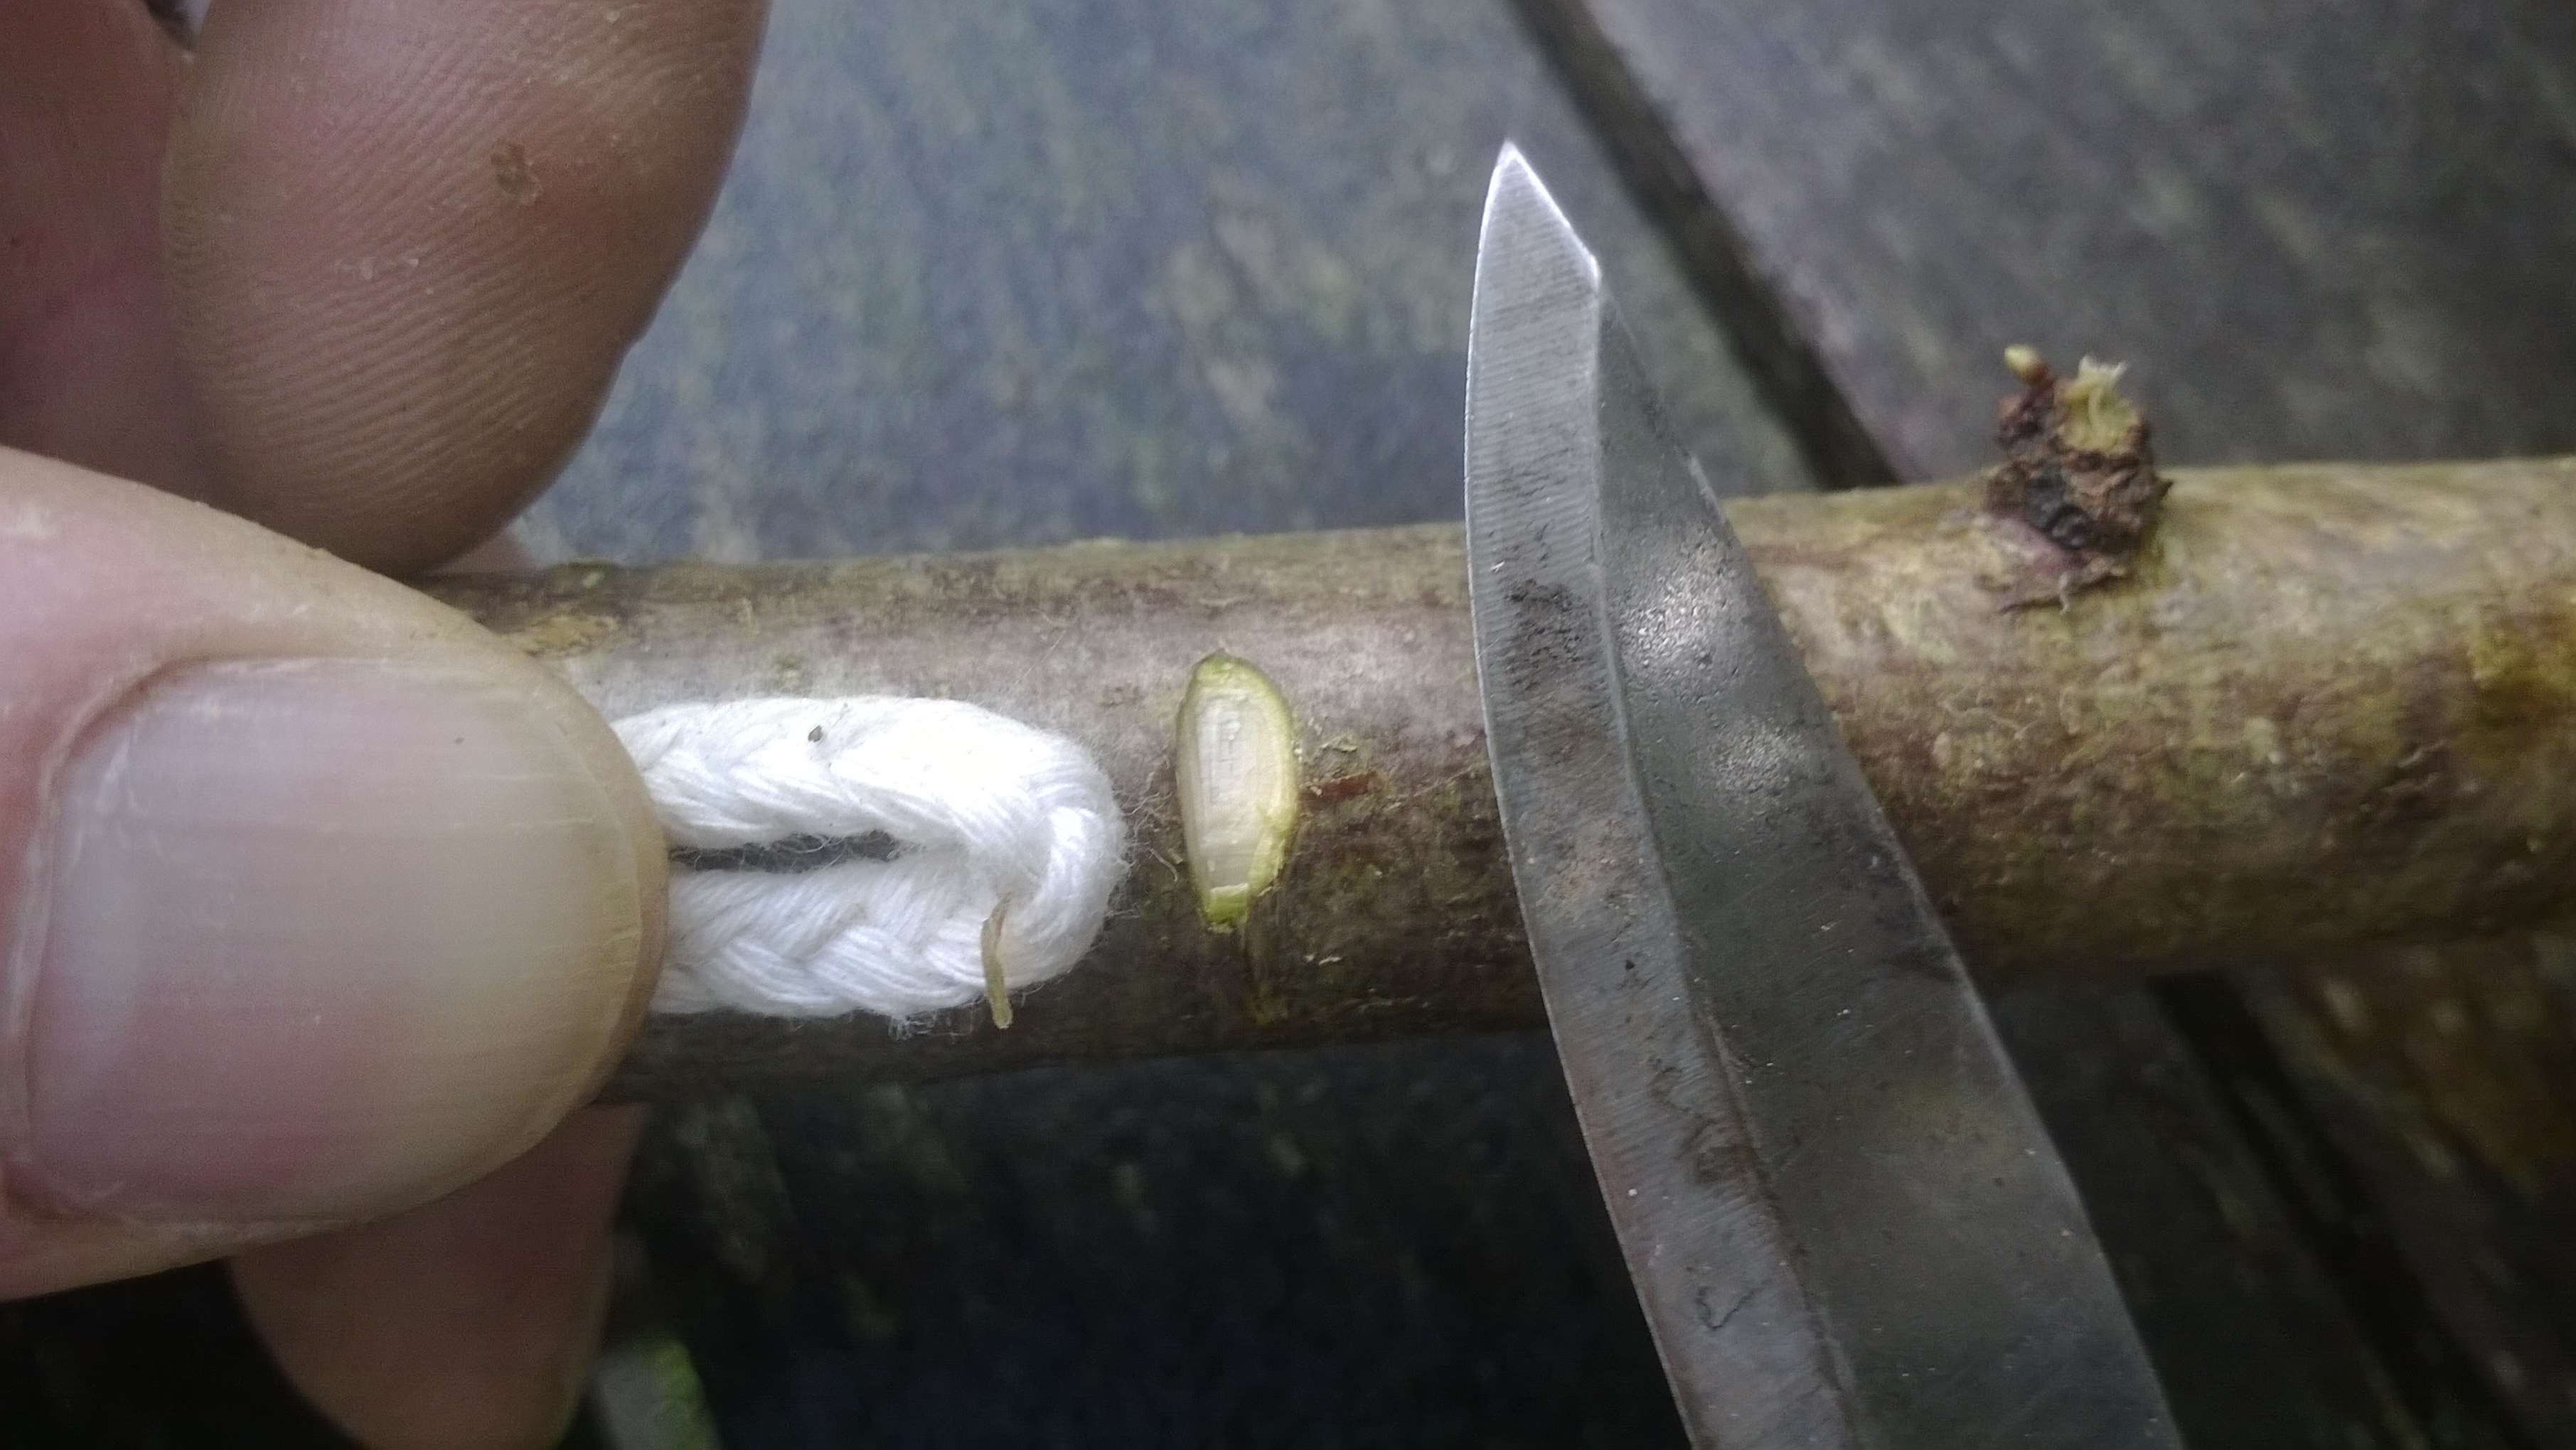
It was thought to have had a bone or wooden point at the end to attach the dart to it but I experimented with just cordage. This seems to work quite well however there is no archaeological records that this adaptation was ever used.

10
Lovelock Caver Atlatl

One Stick Atlatl

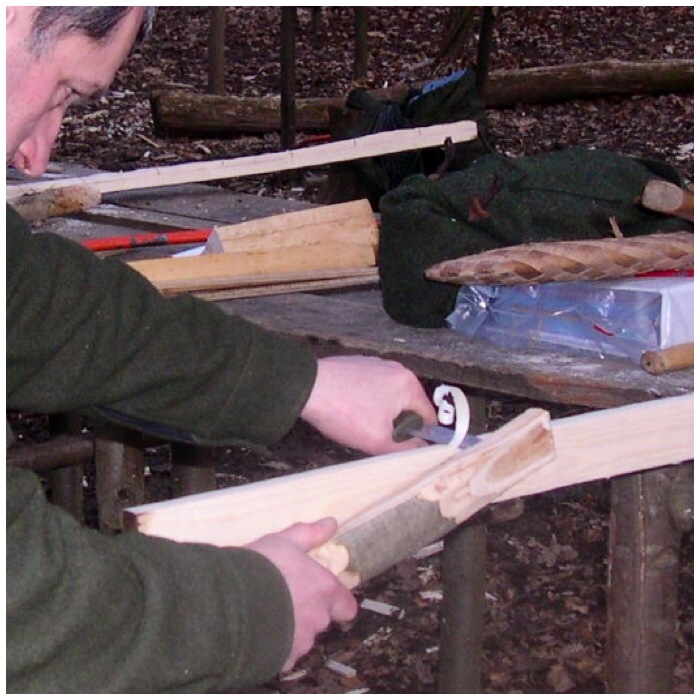
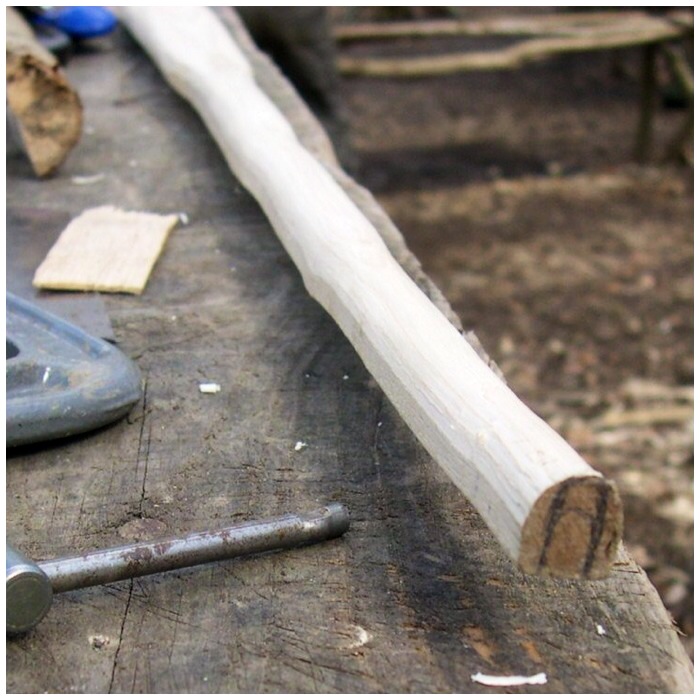
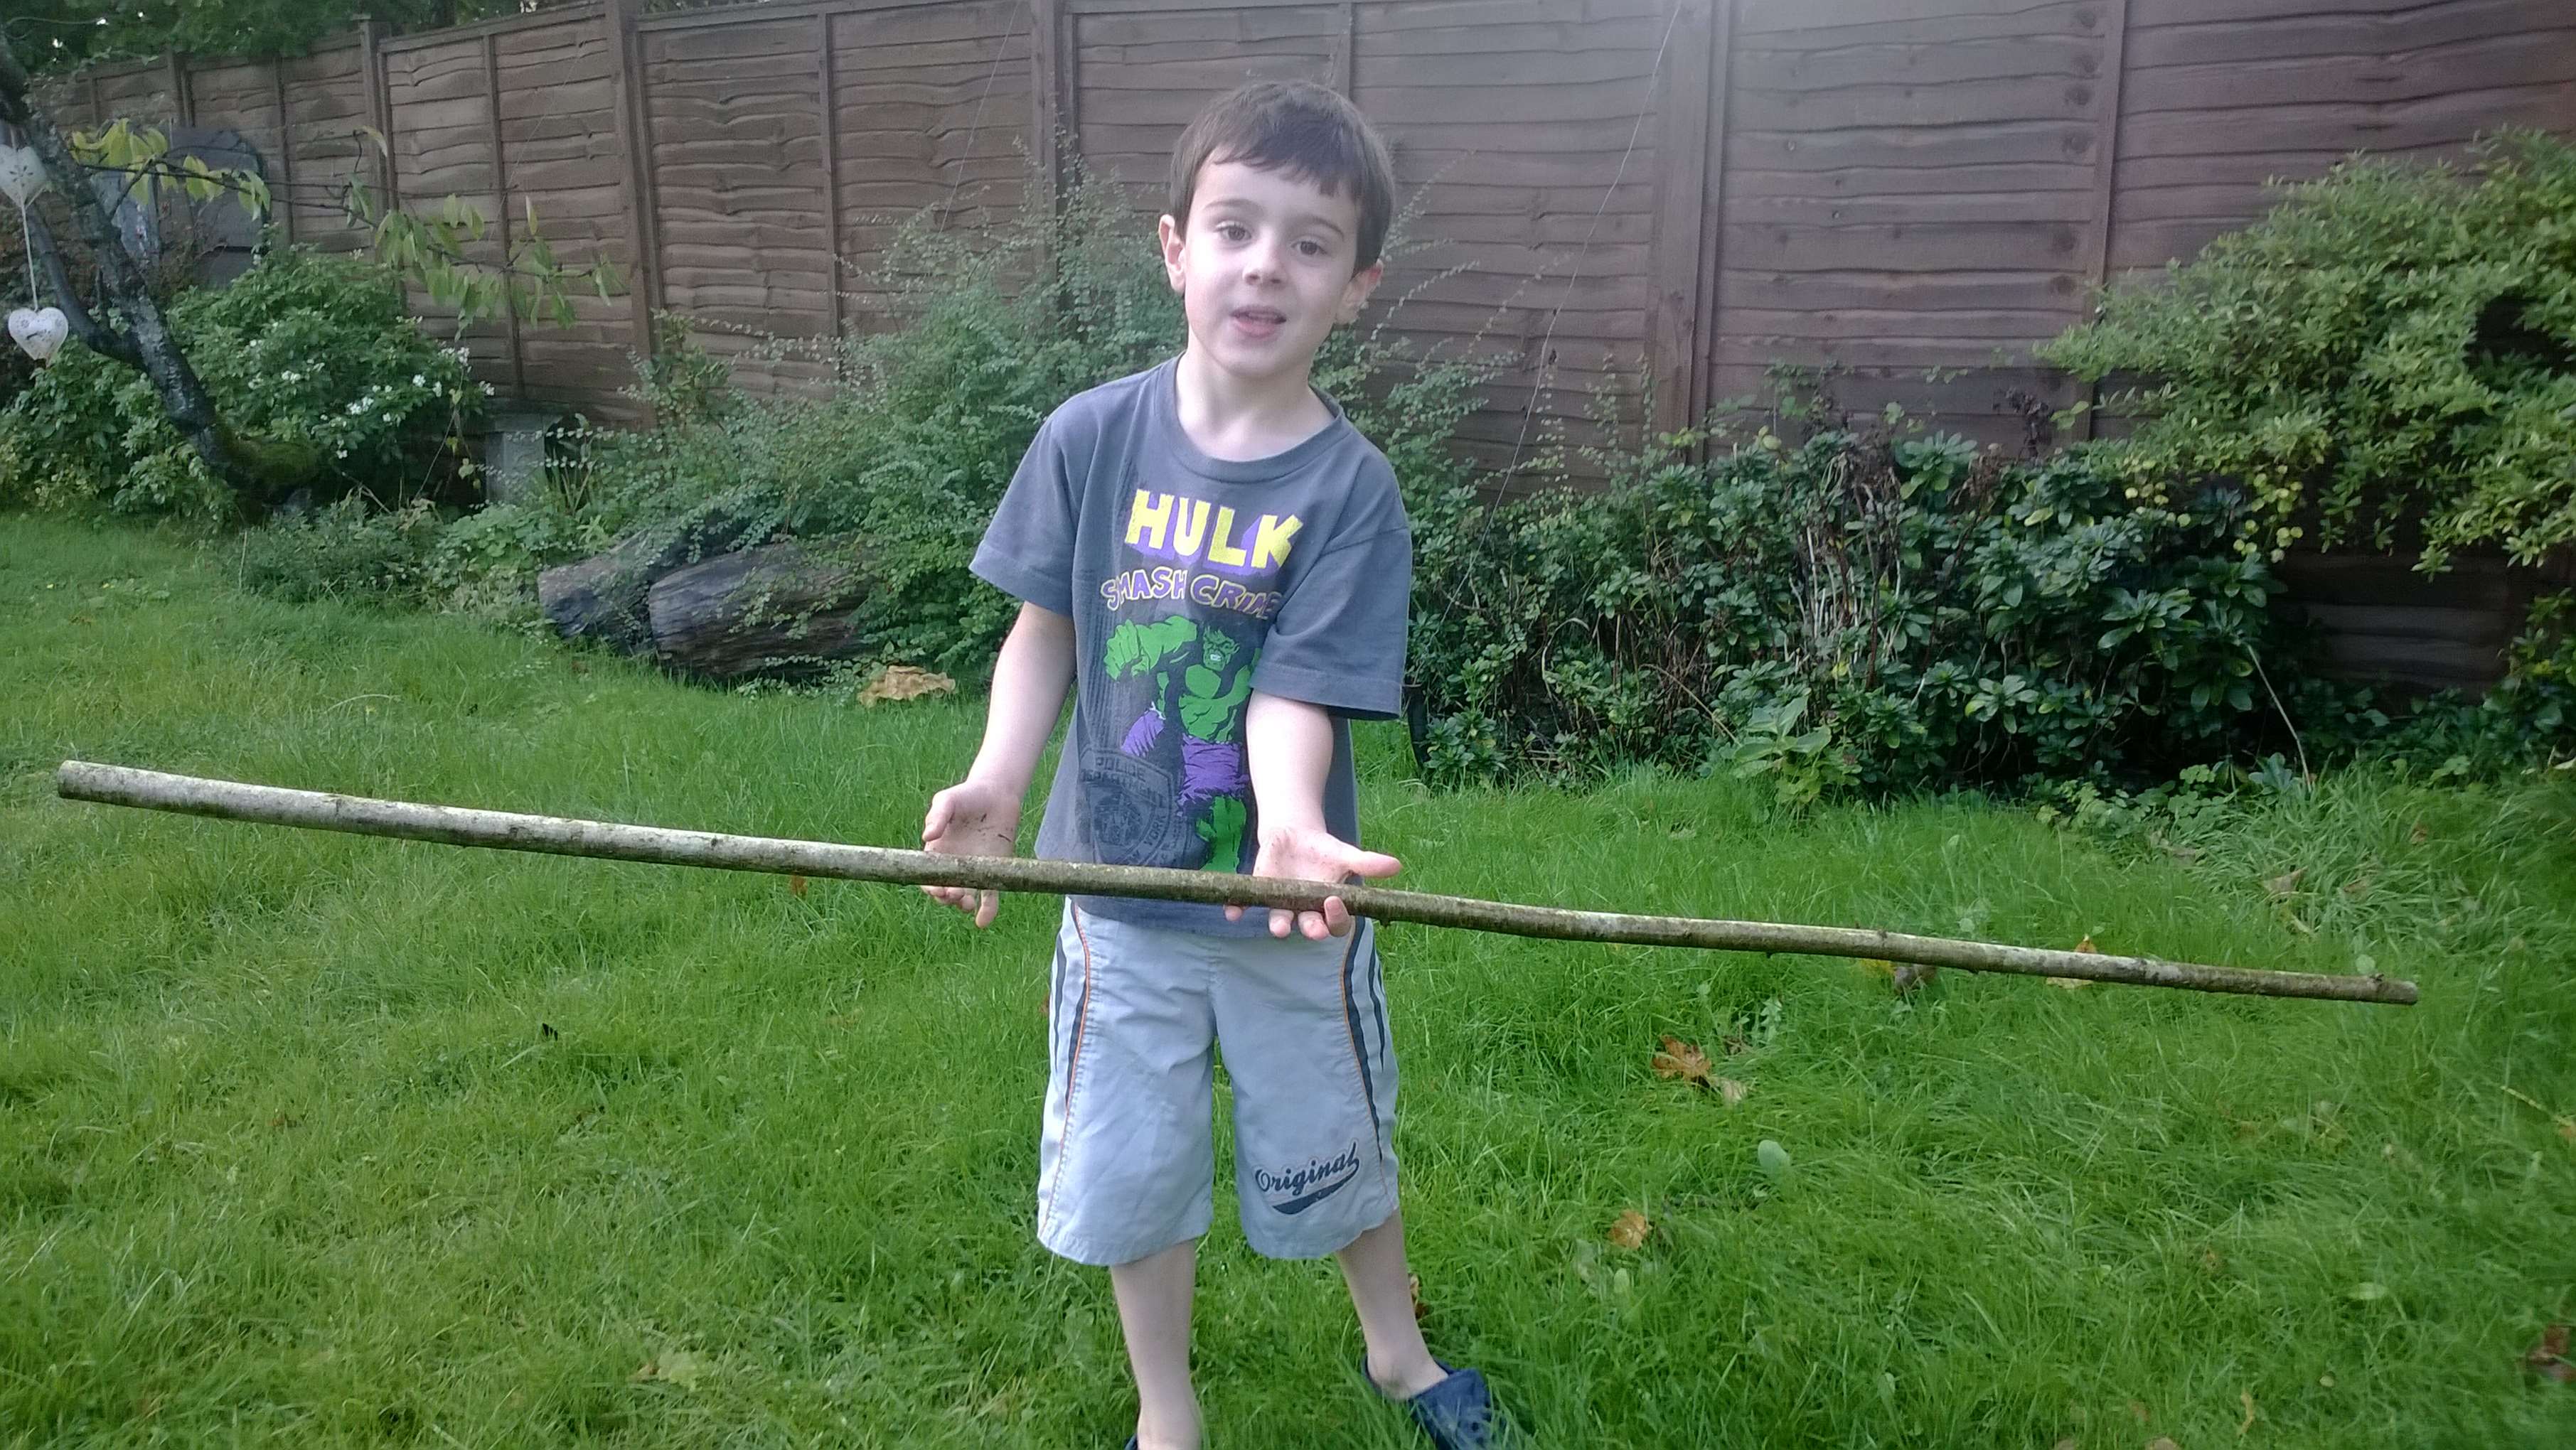
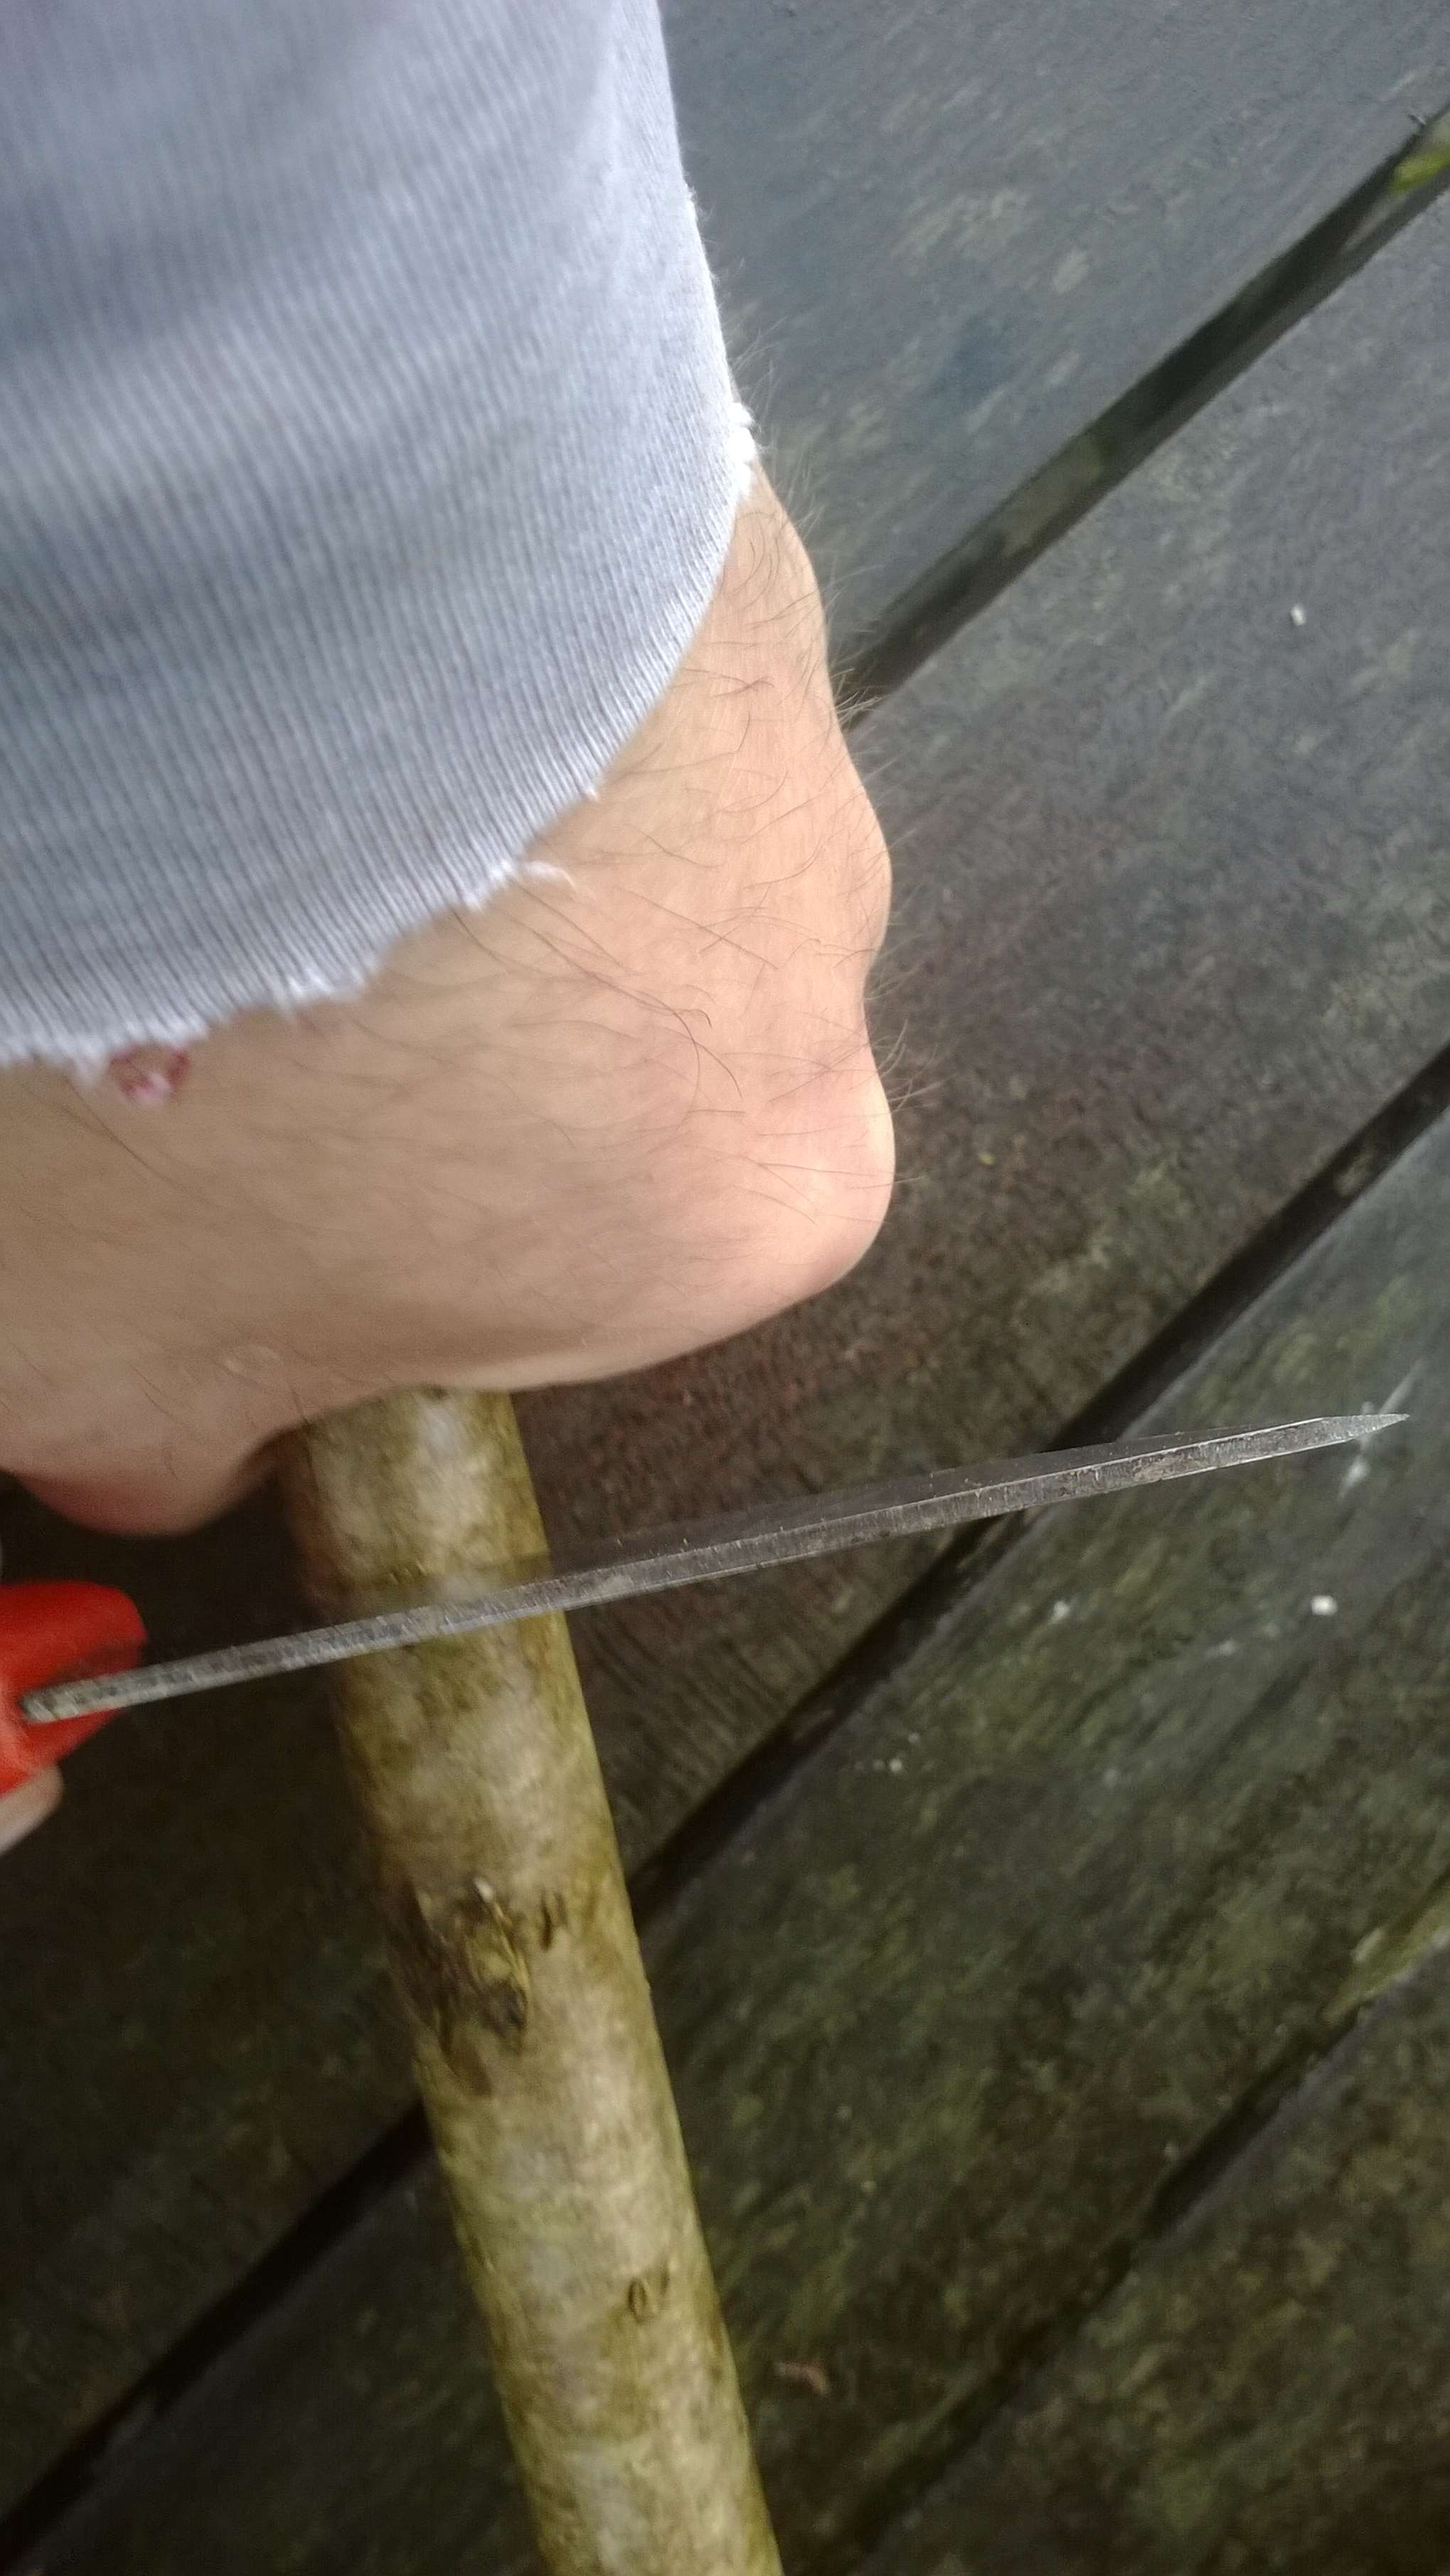
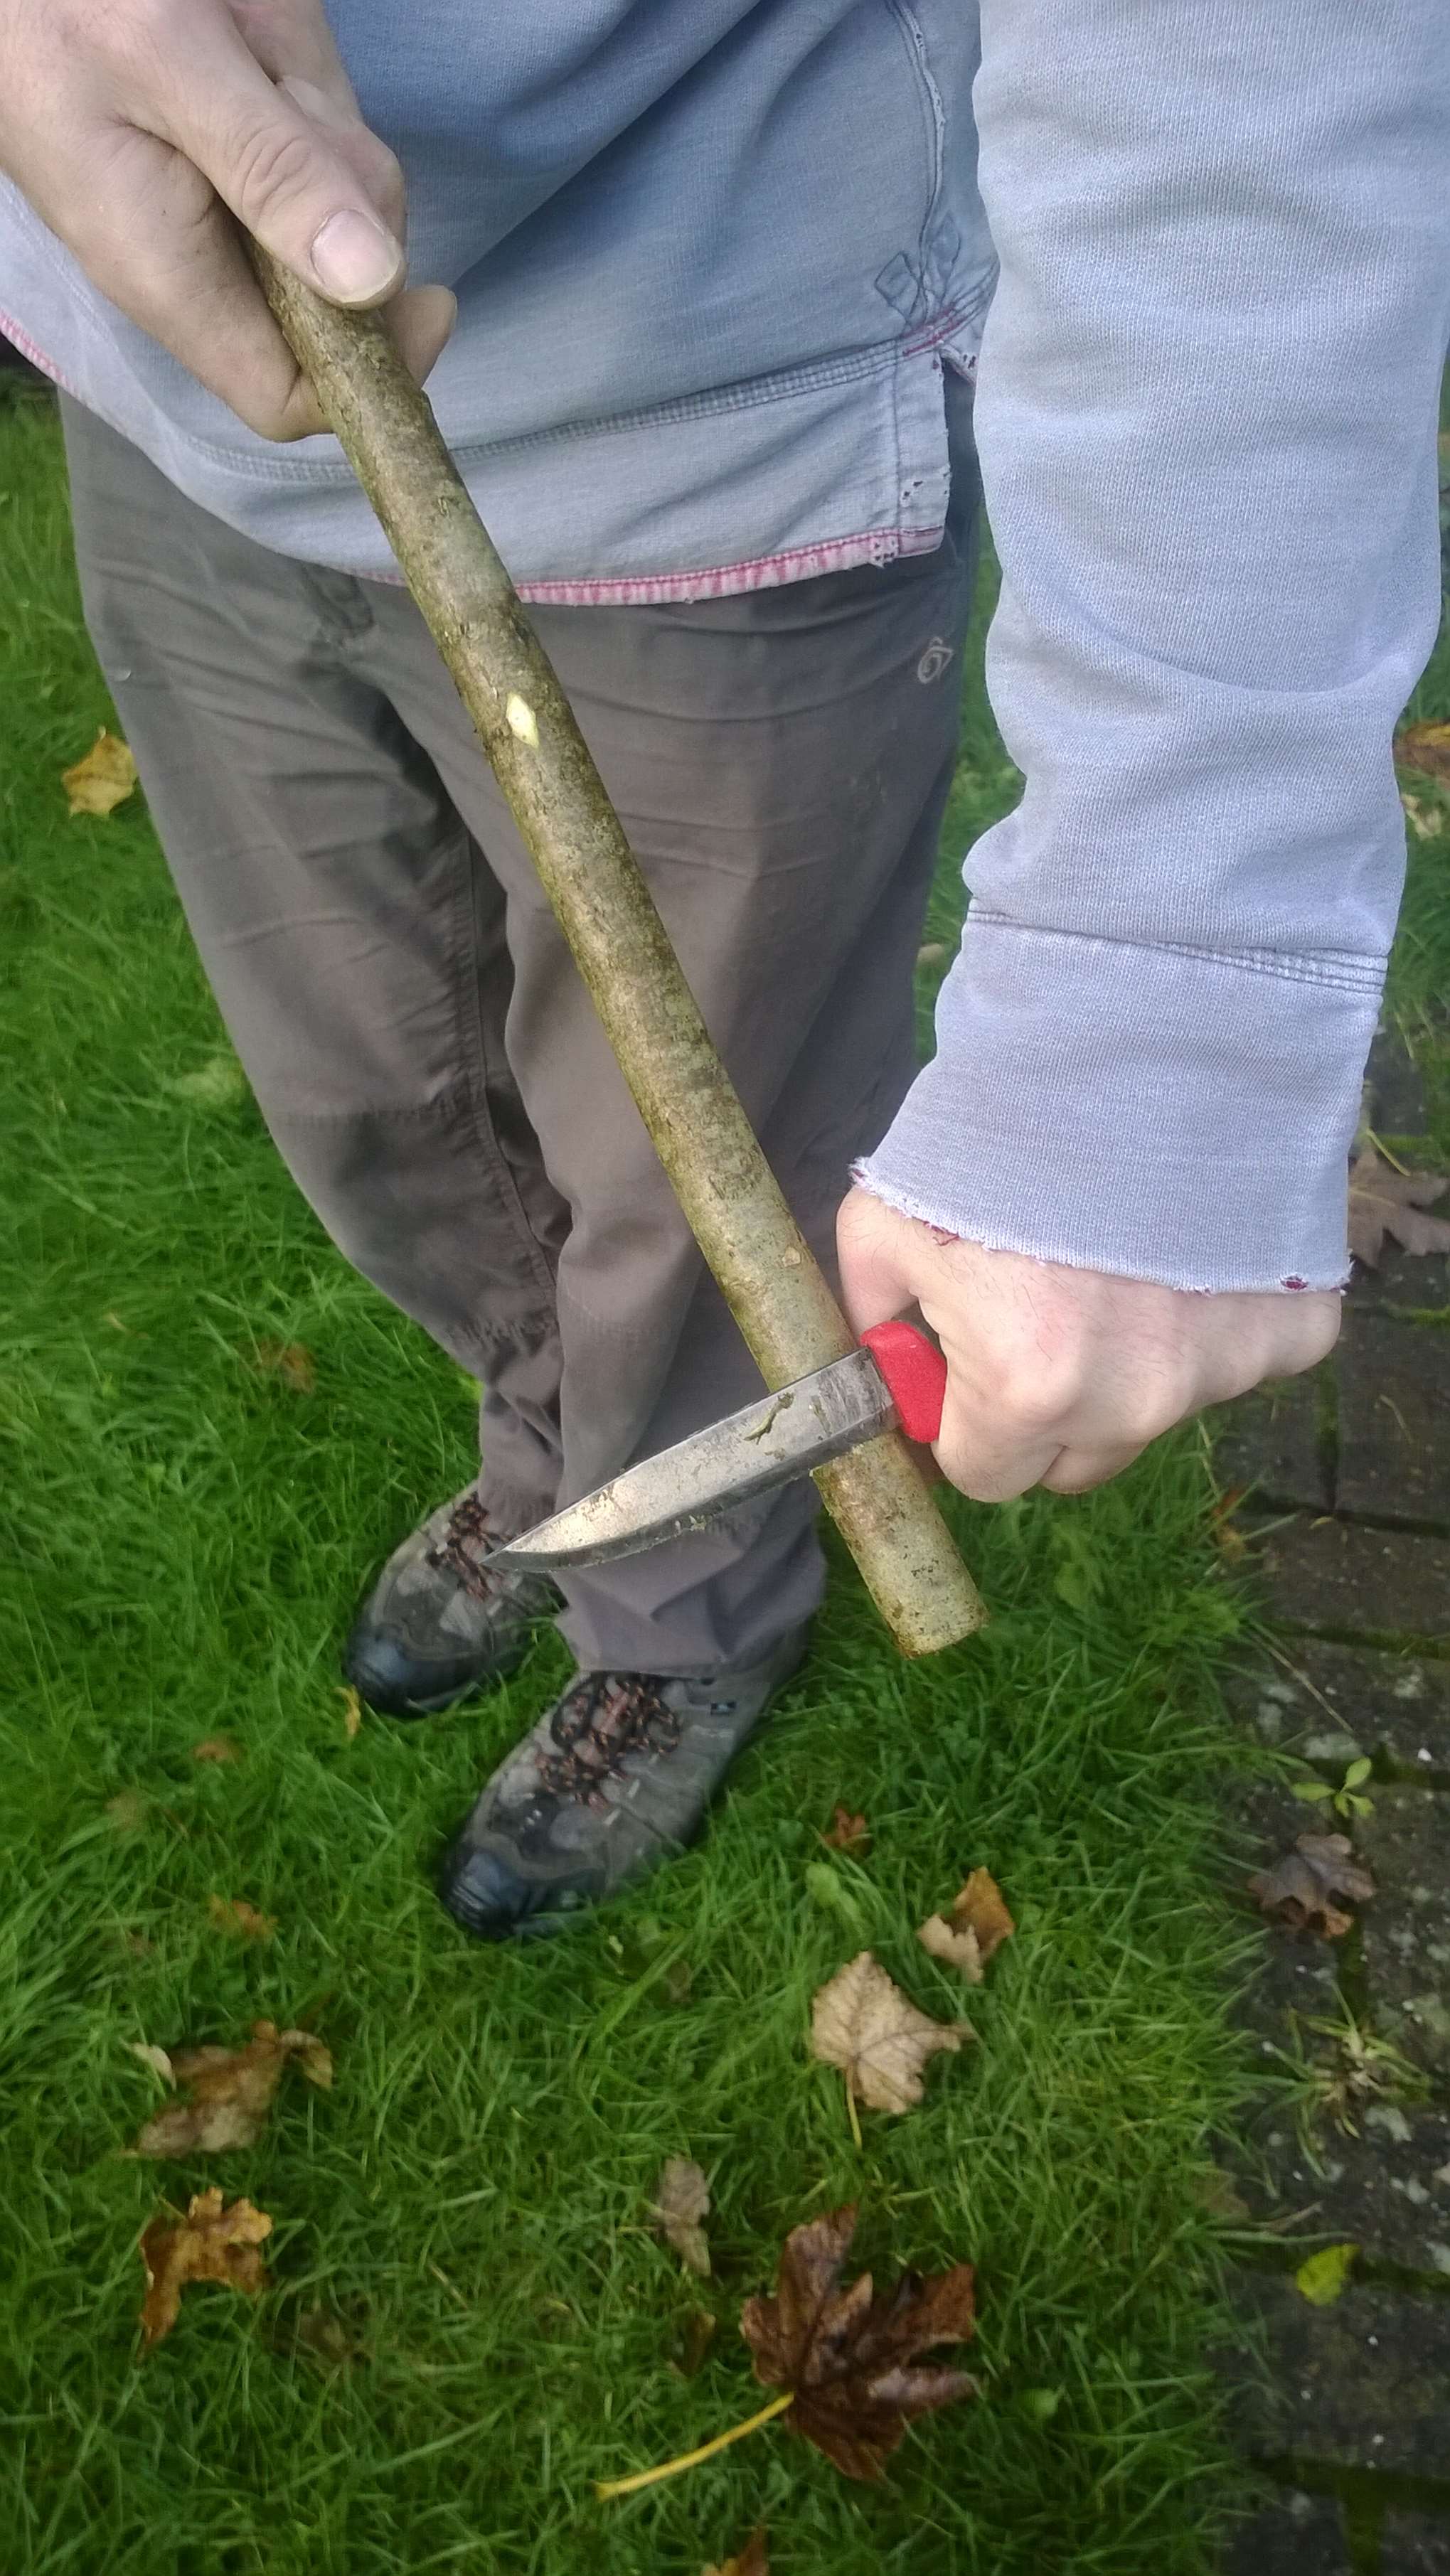
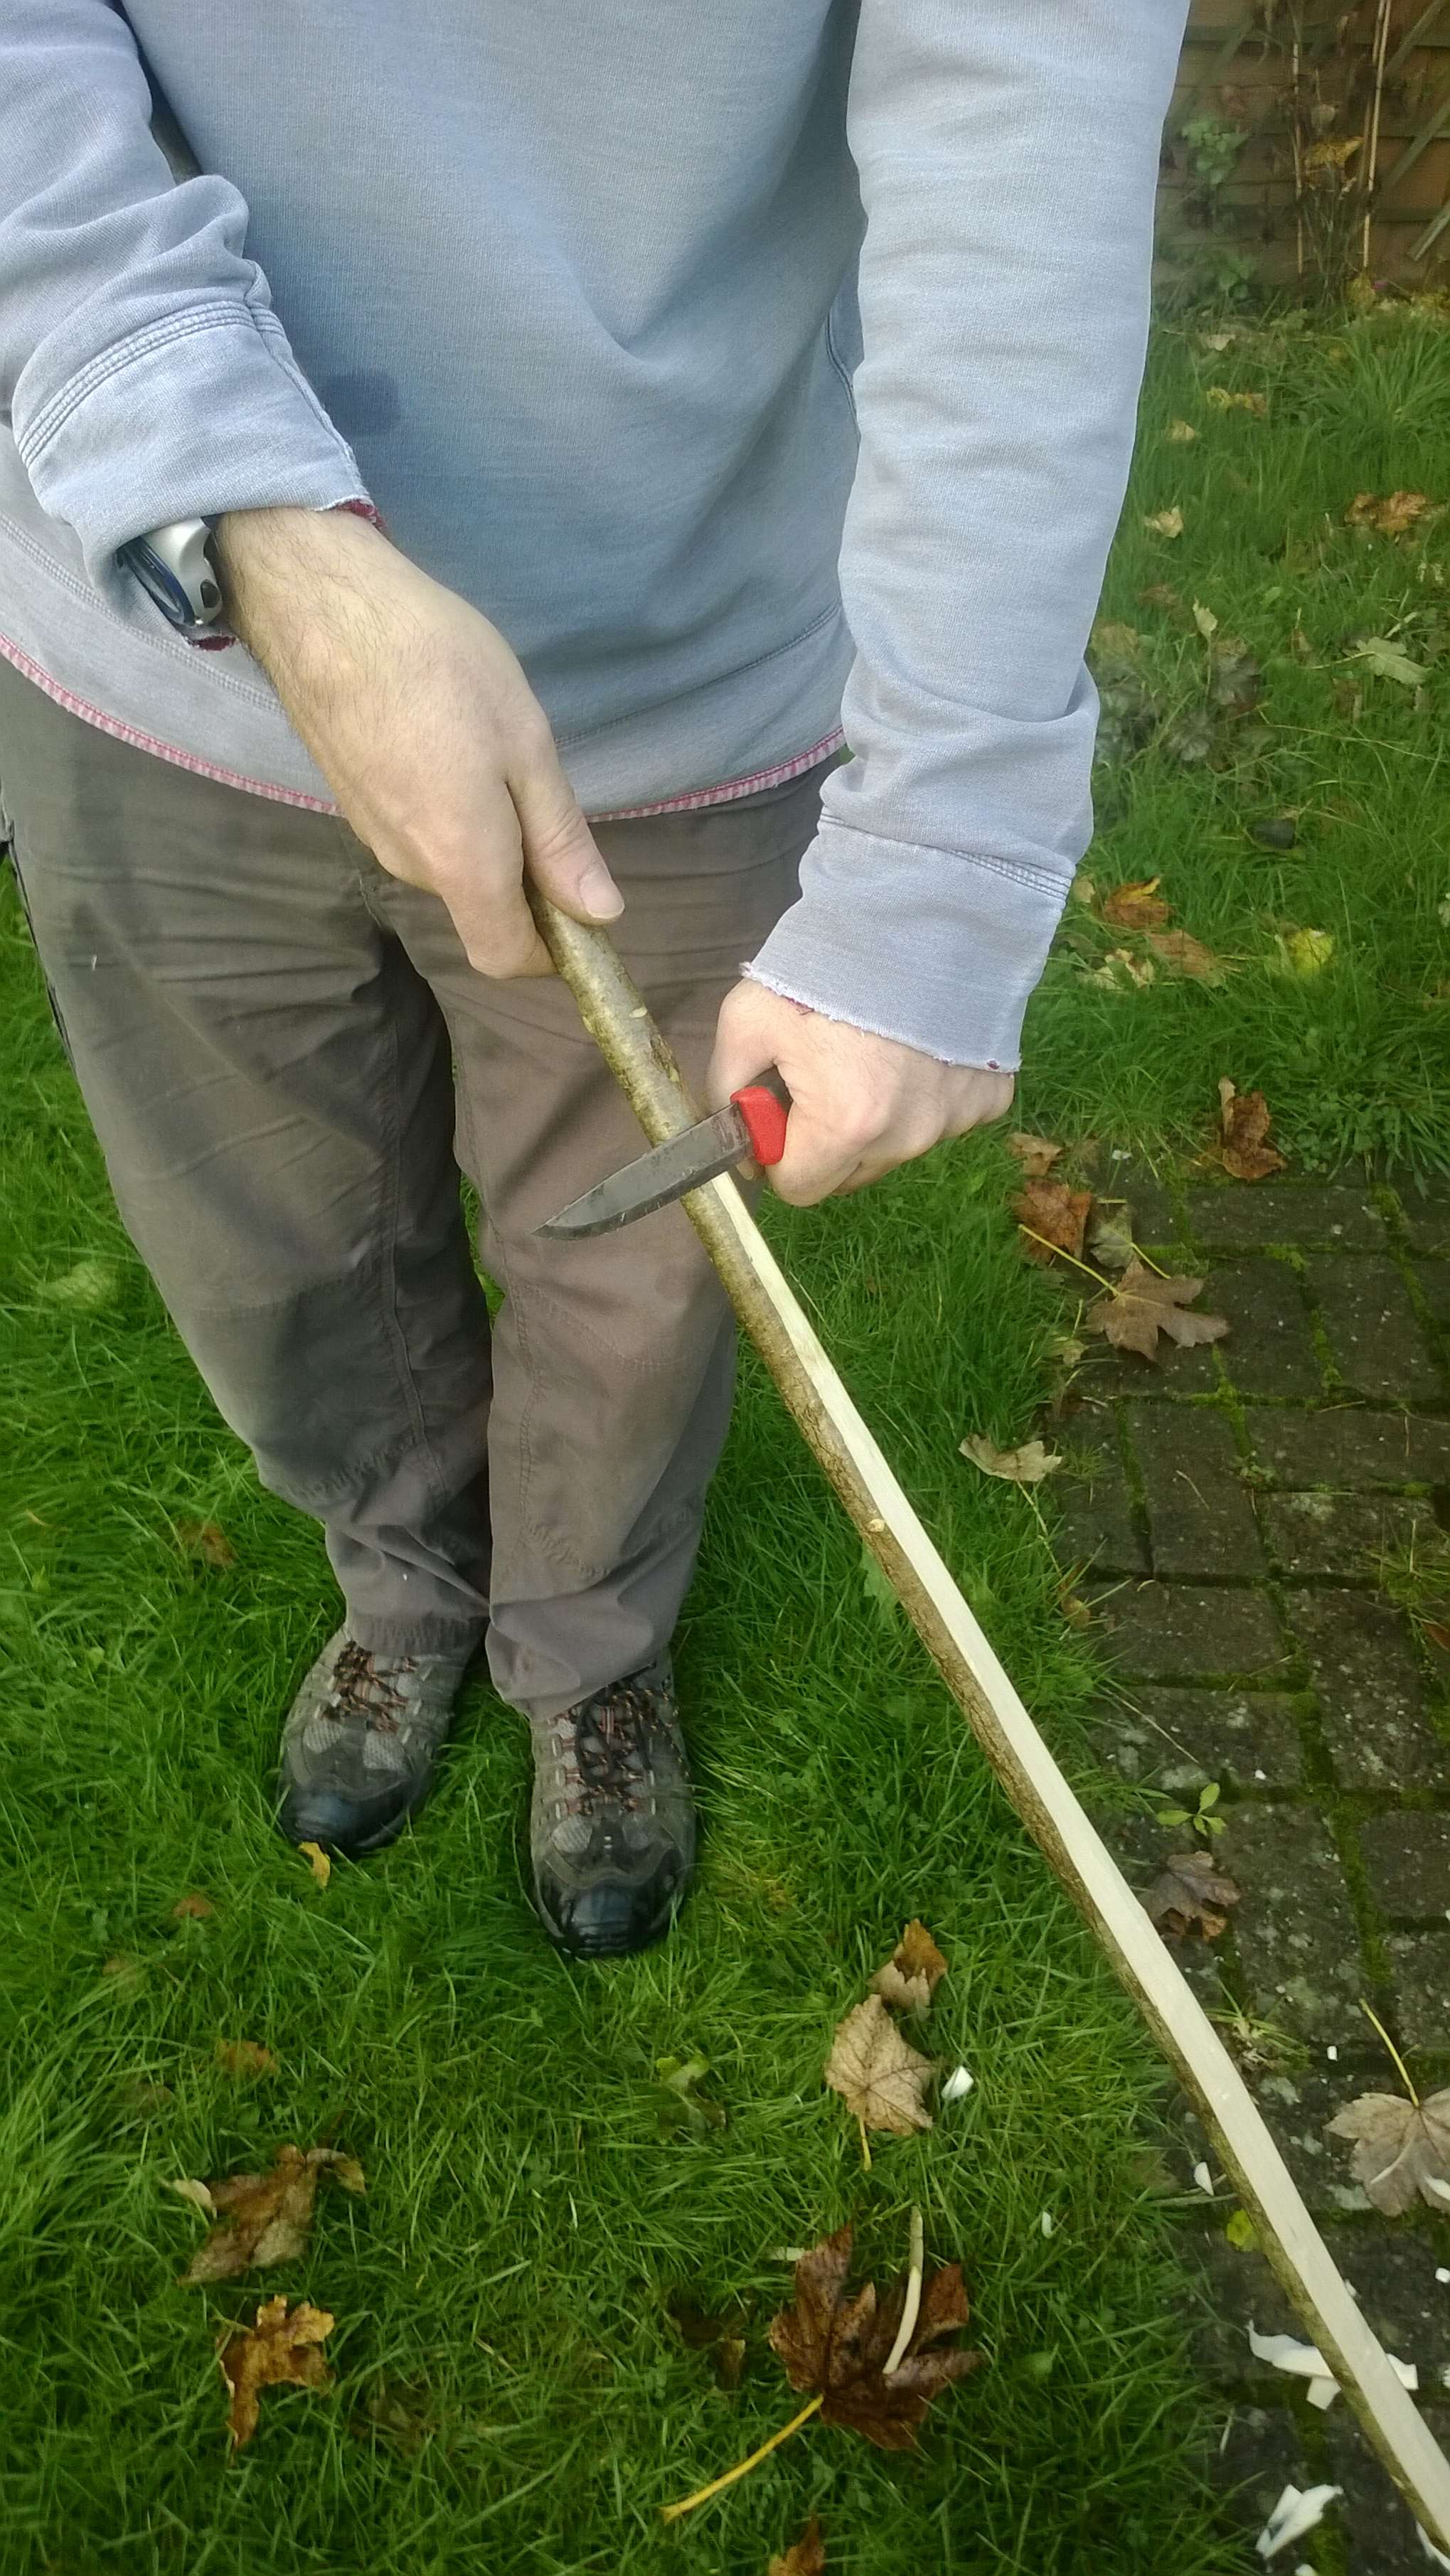
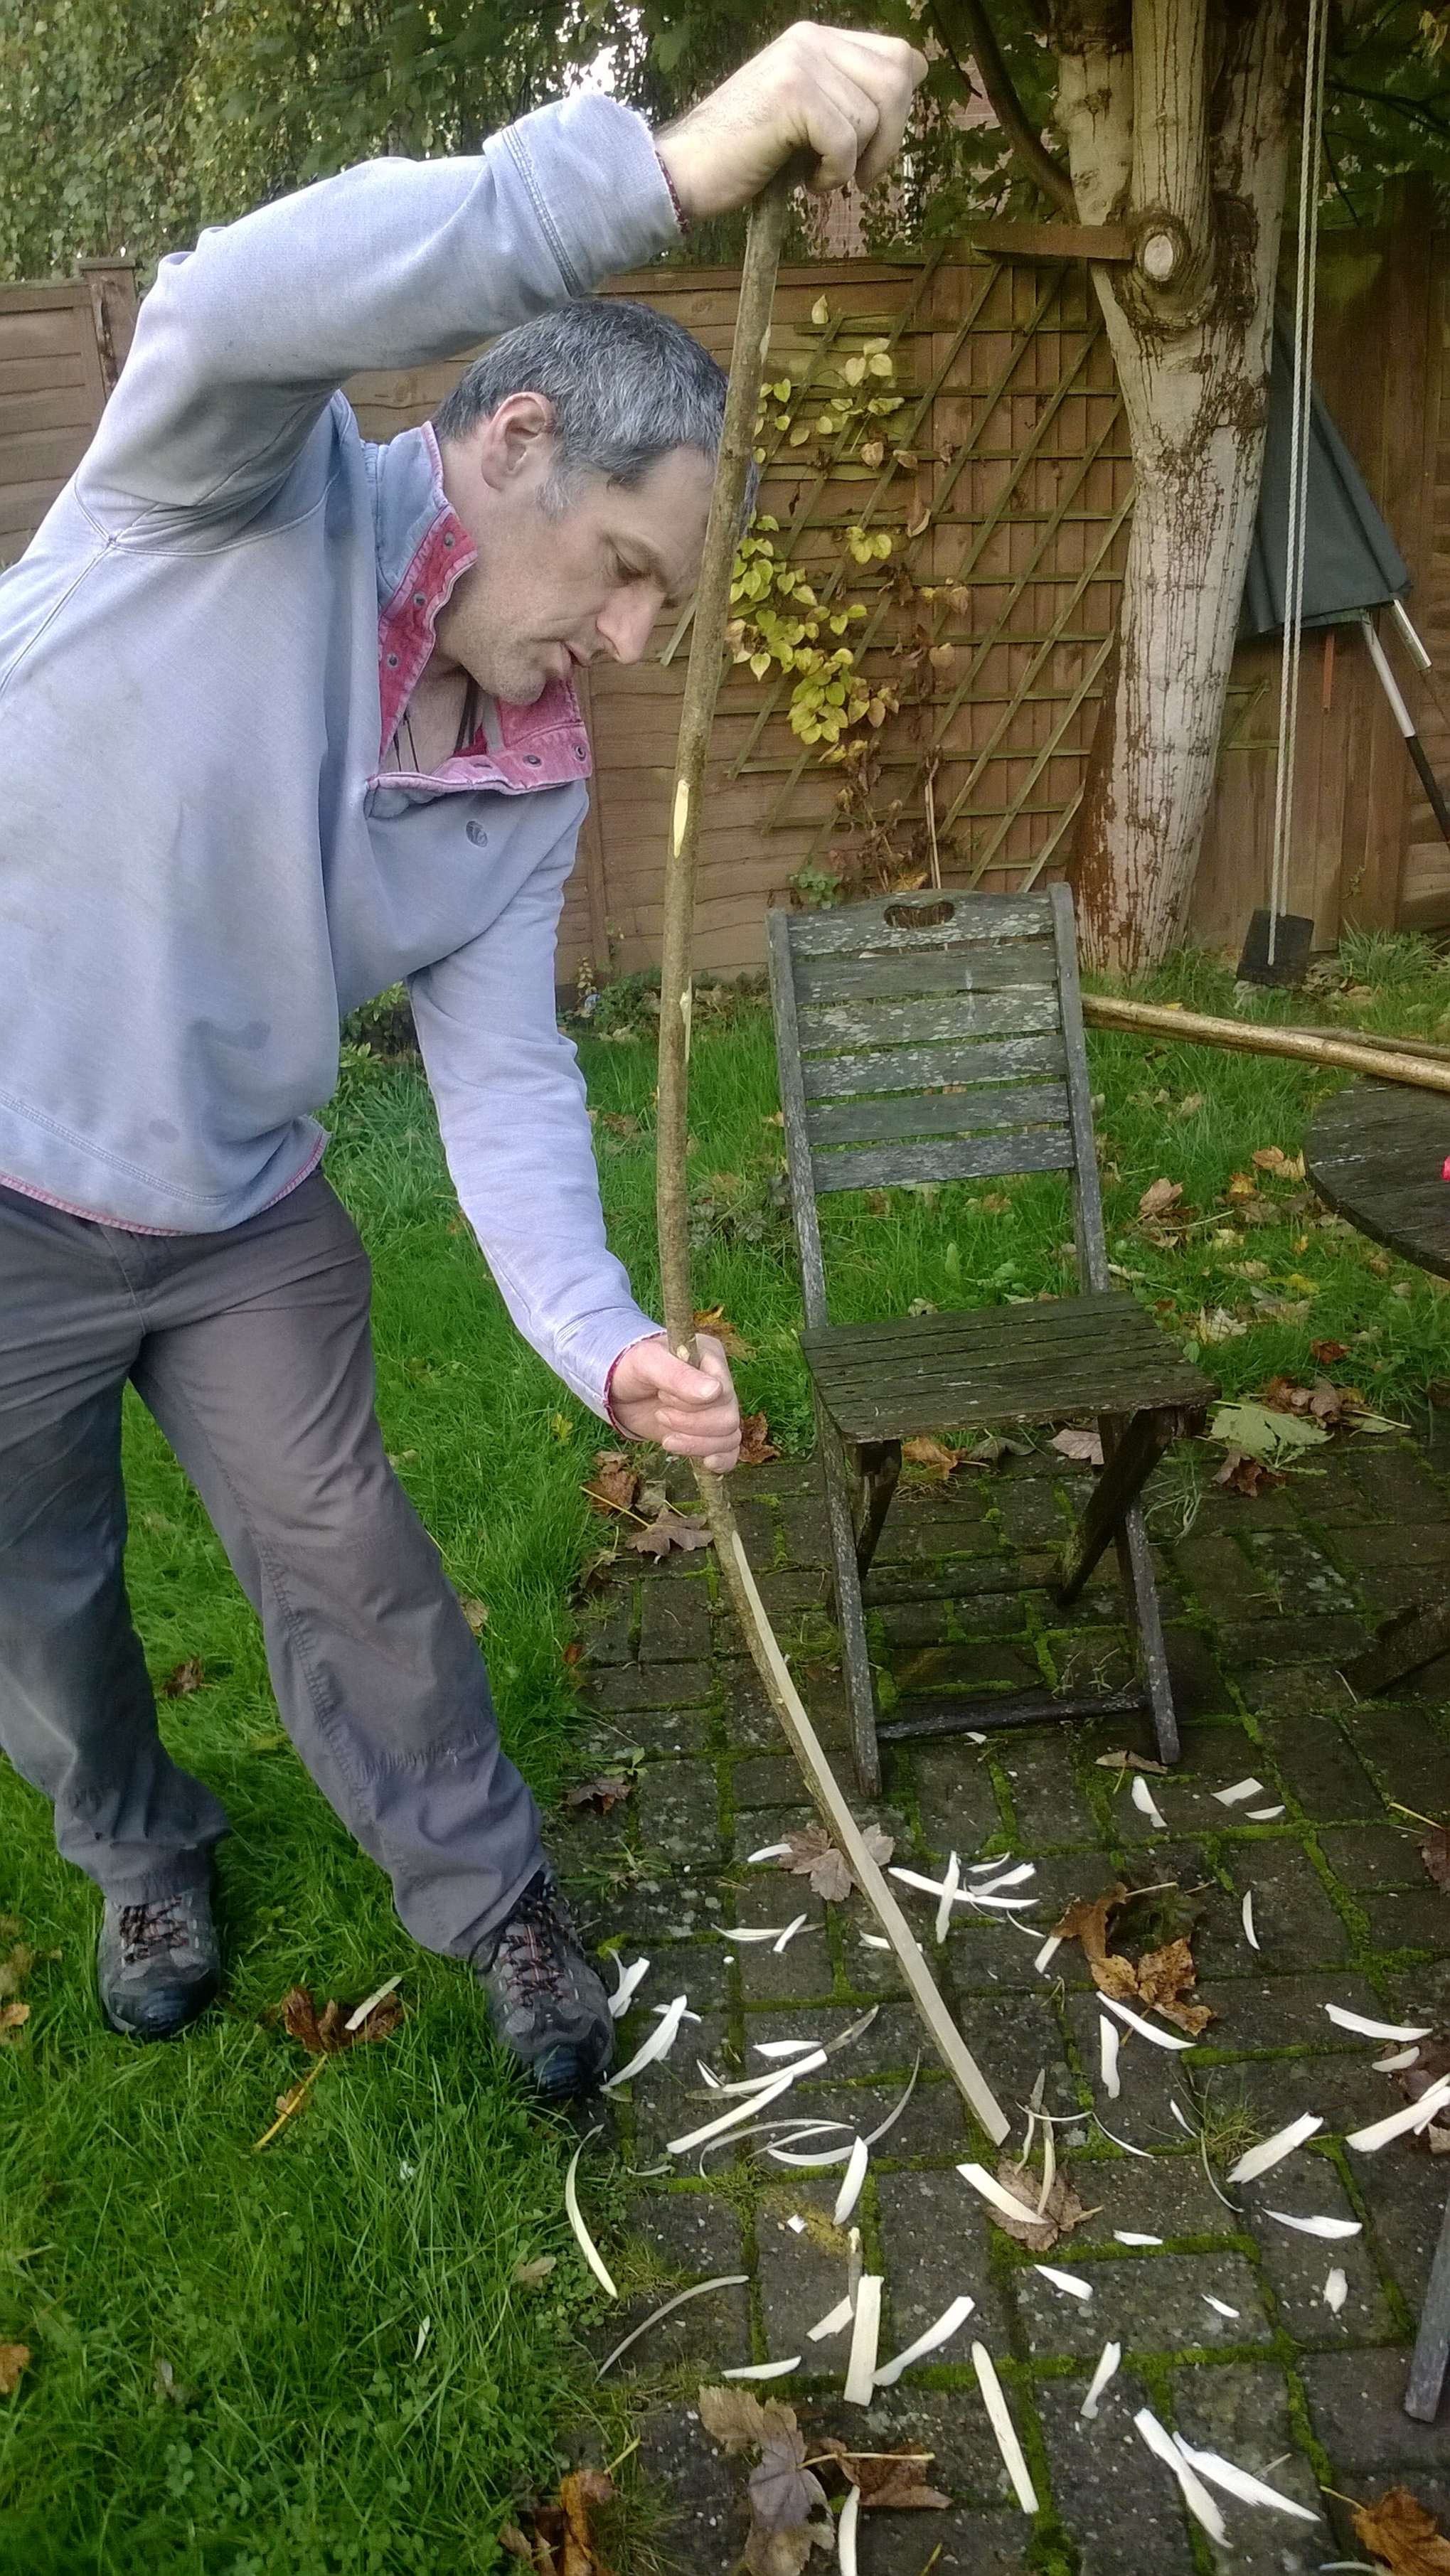
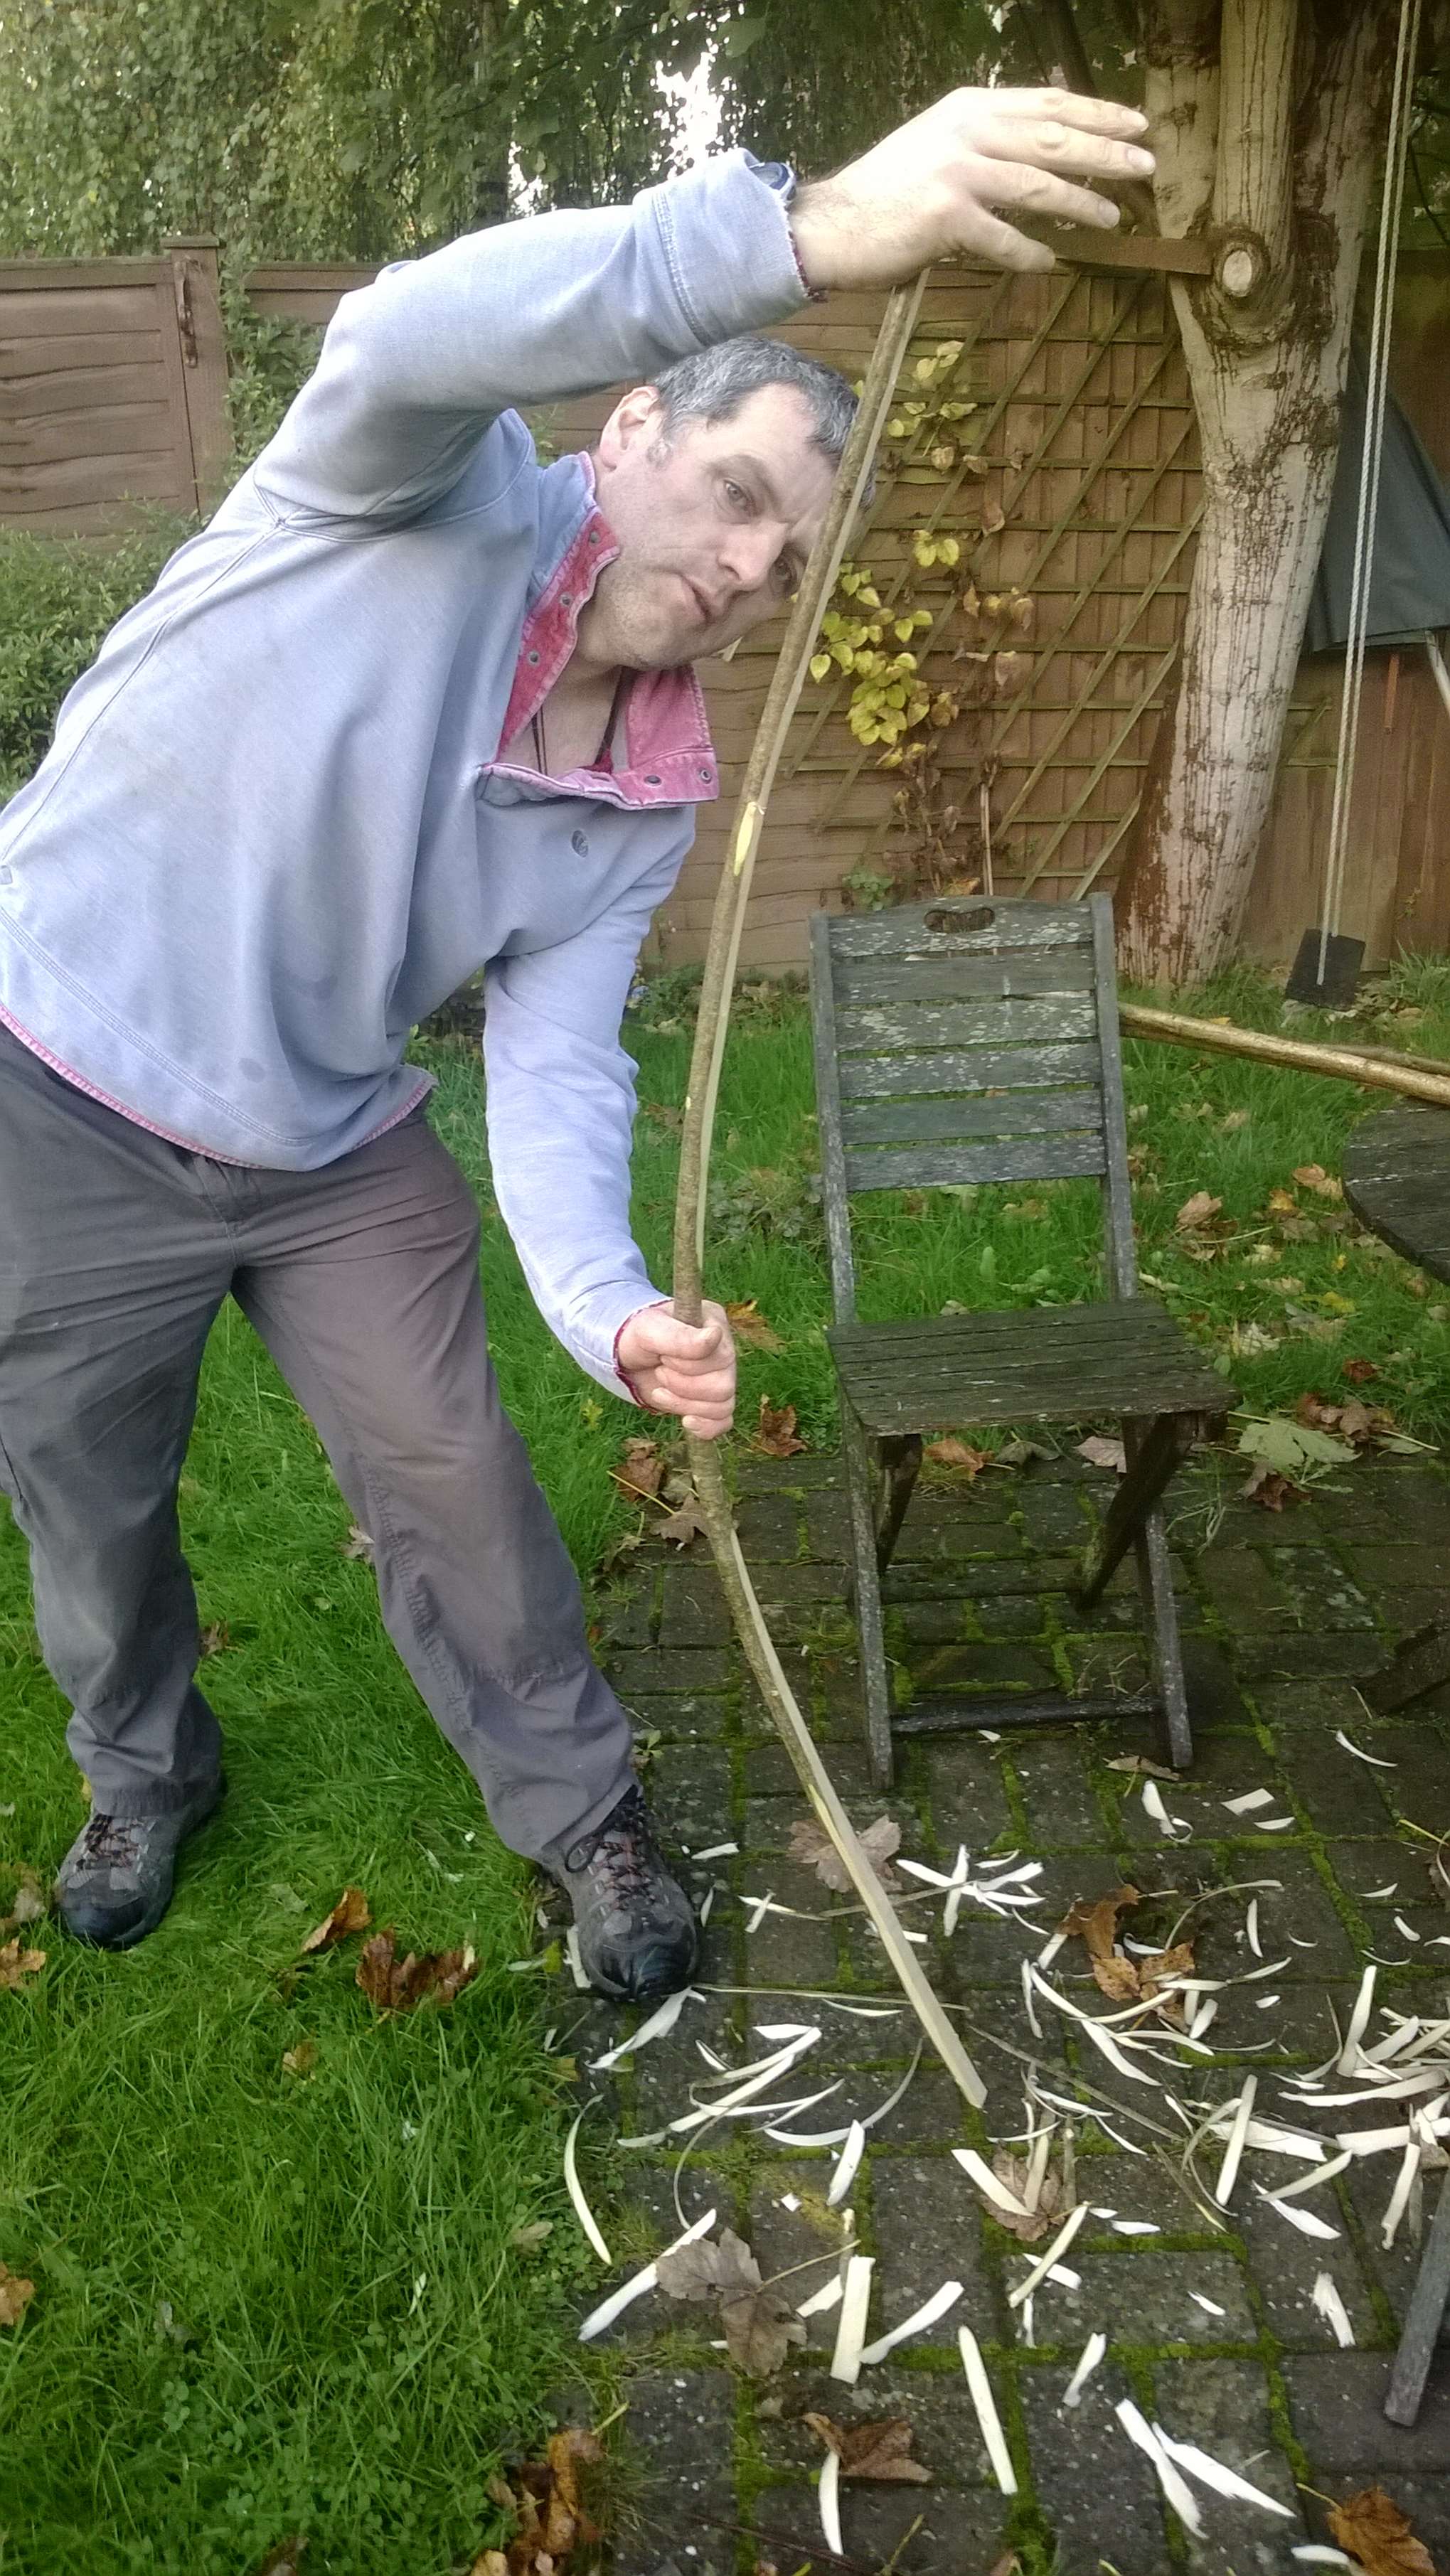
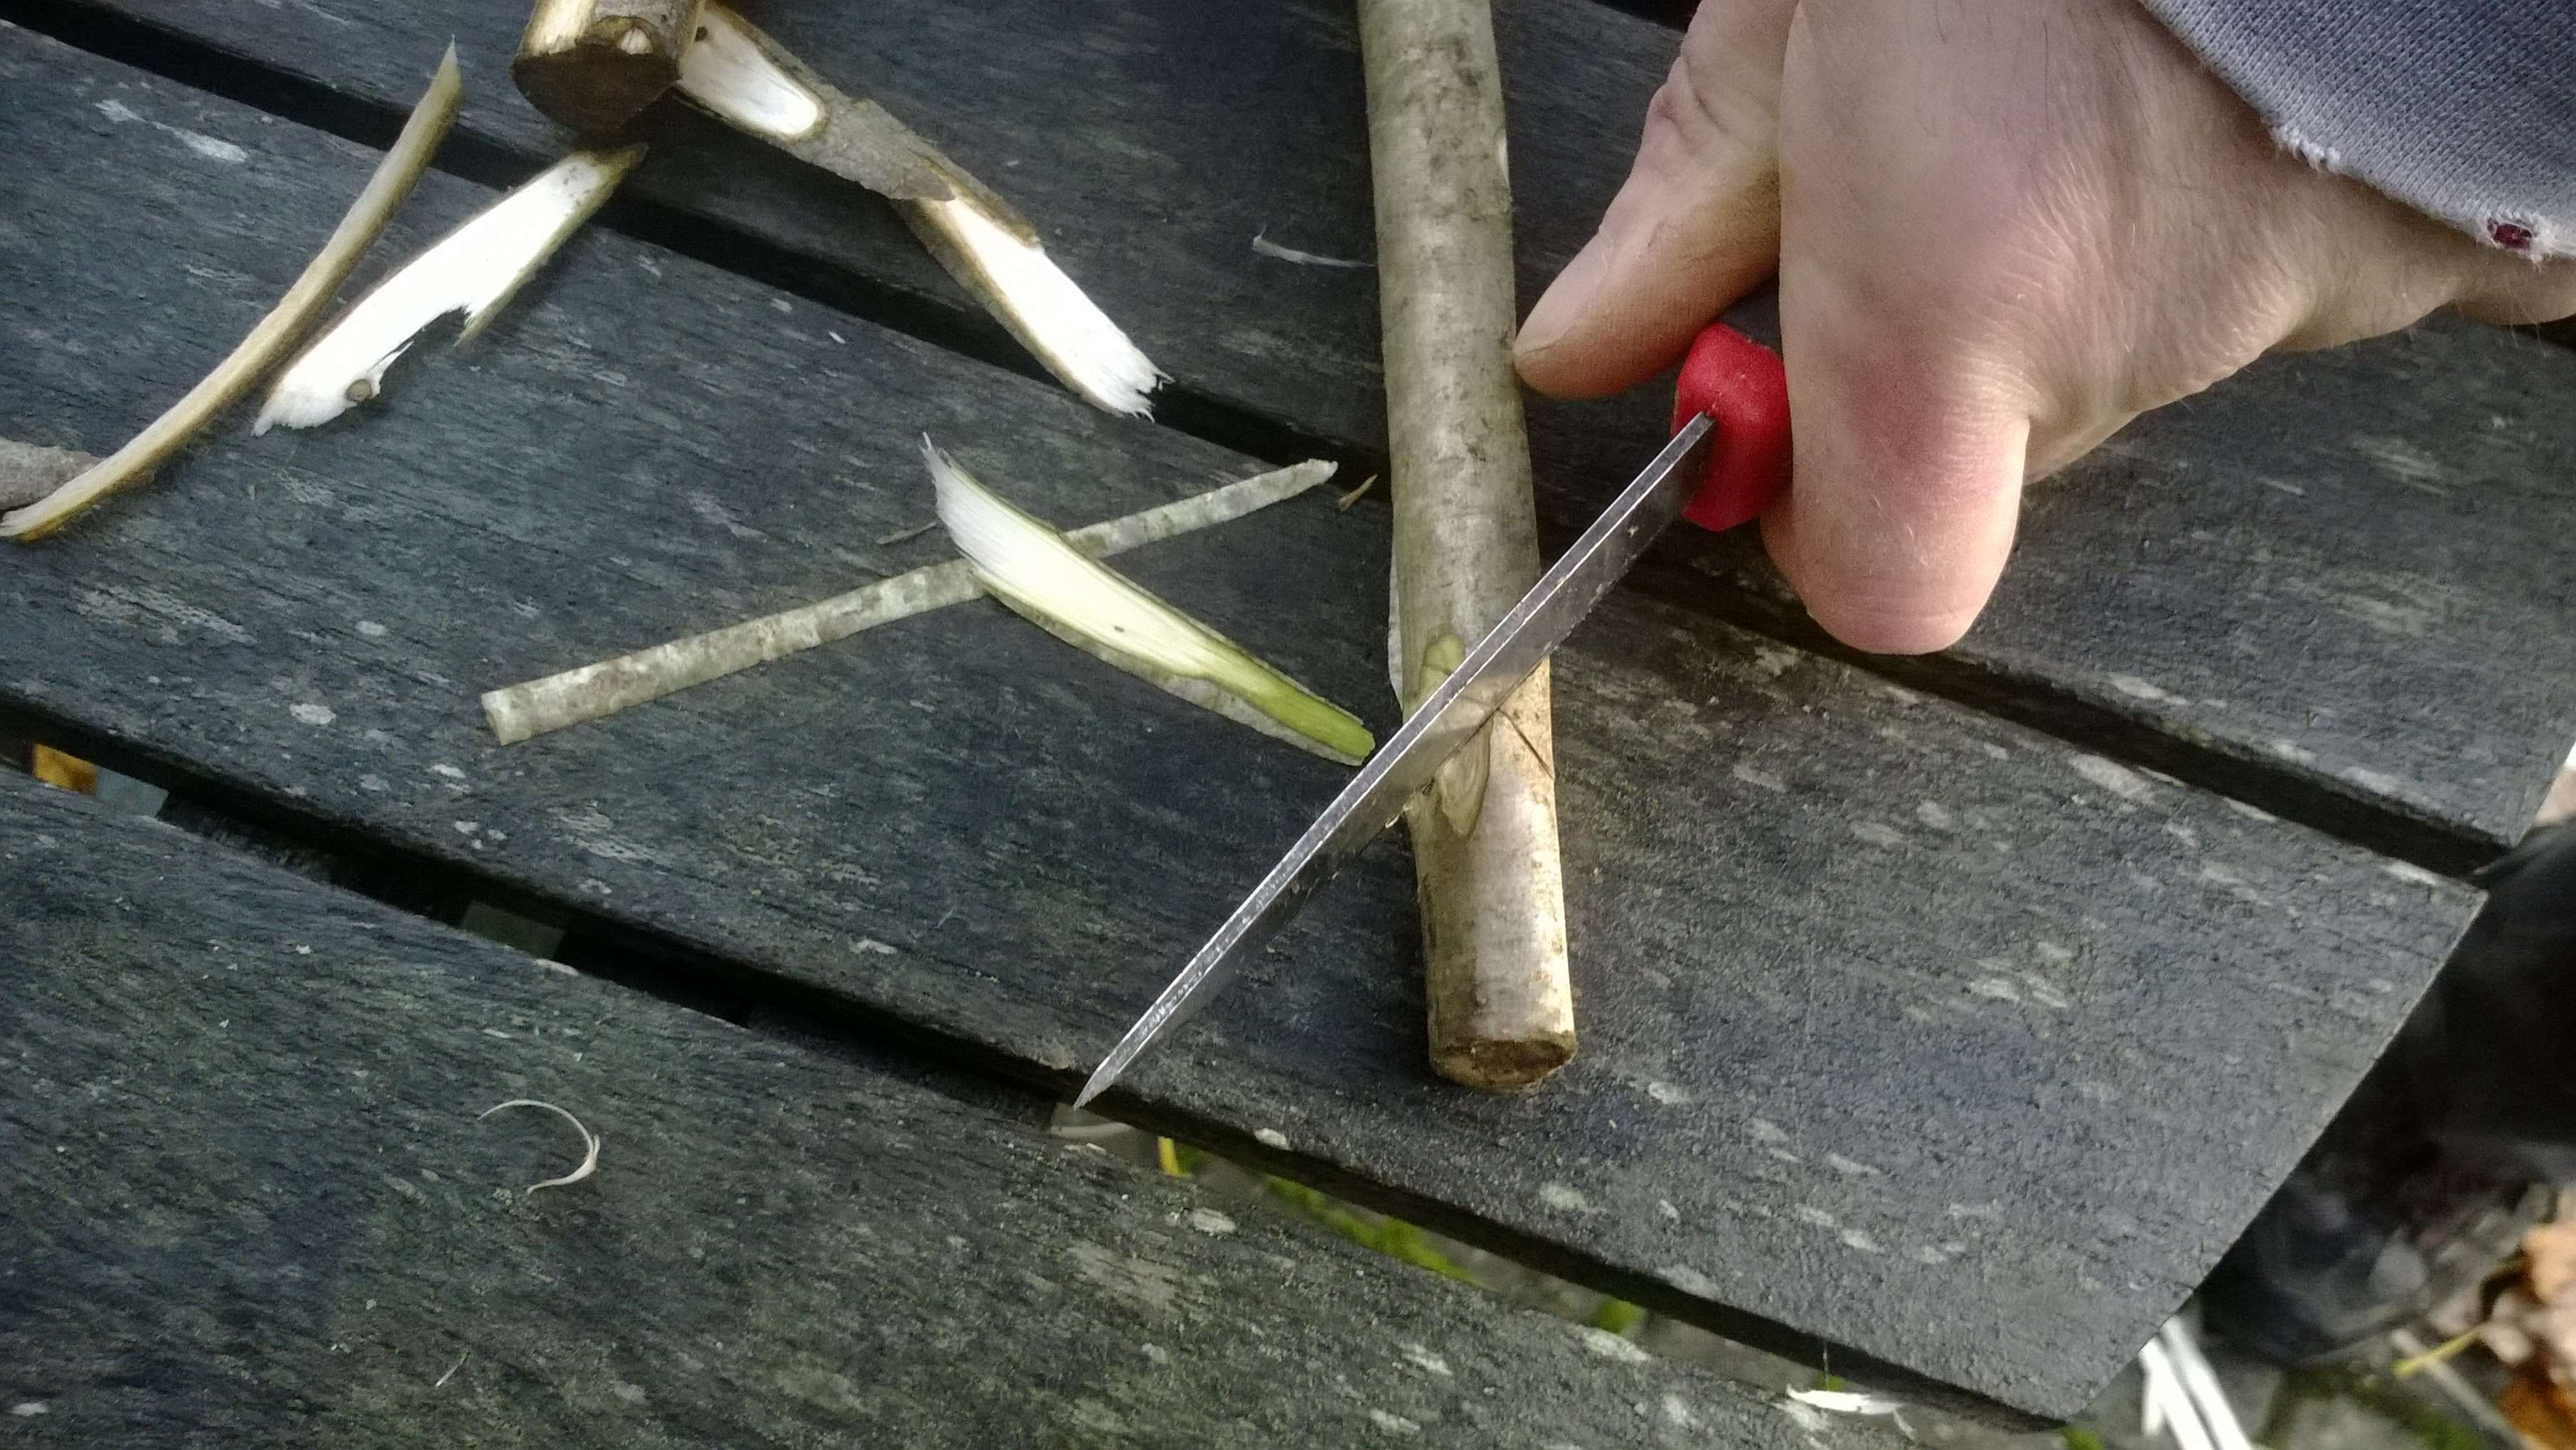
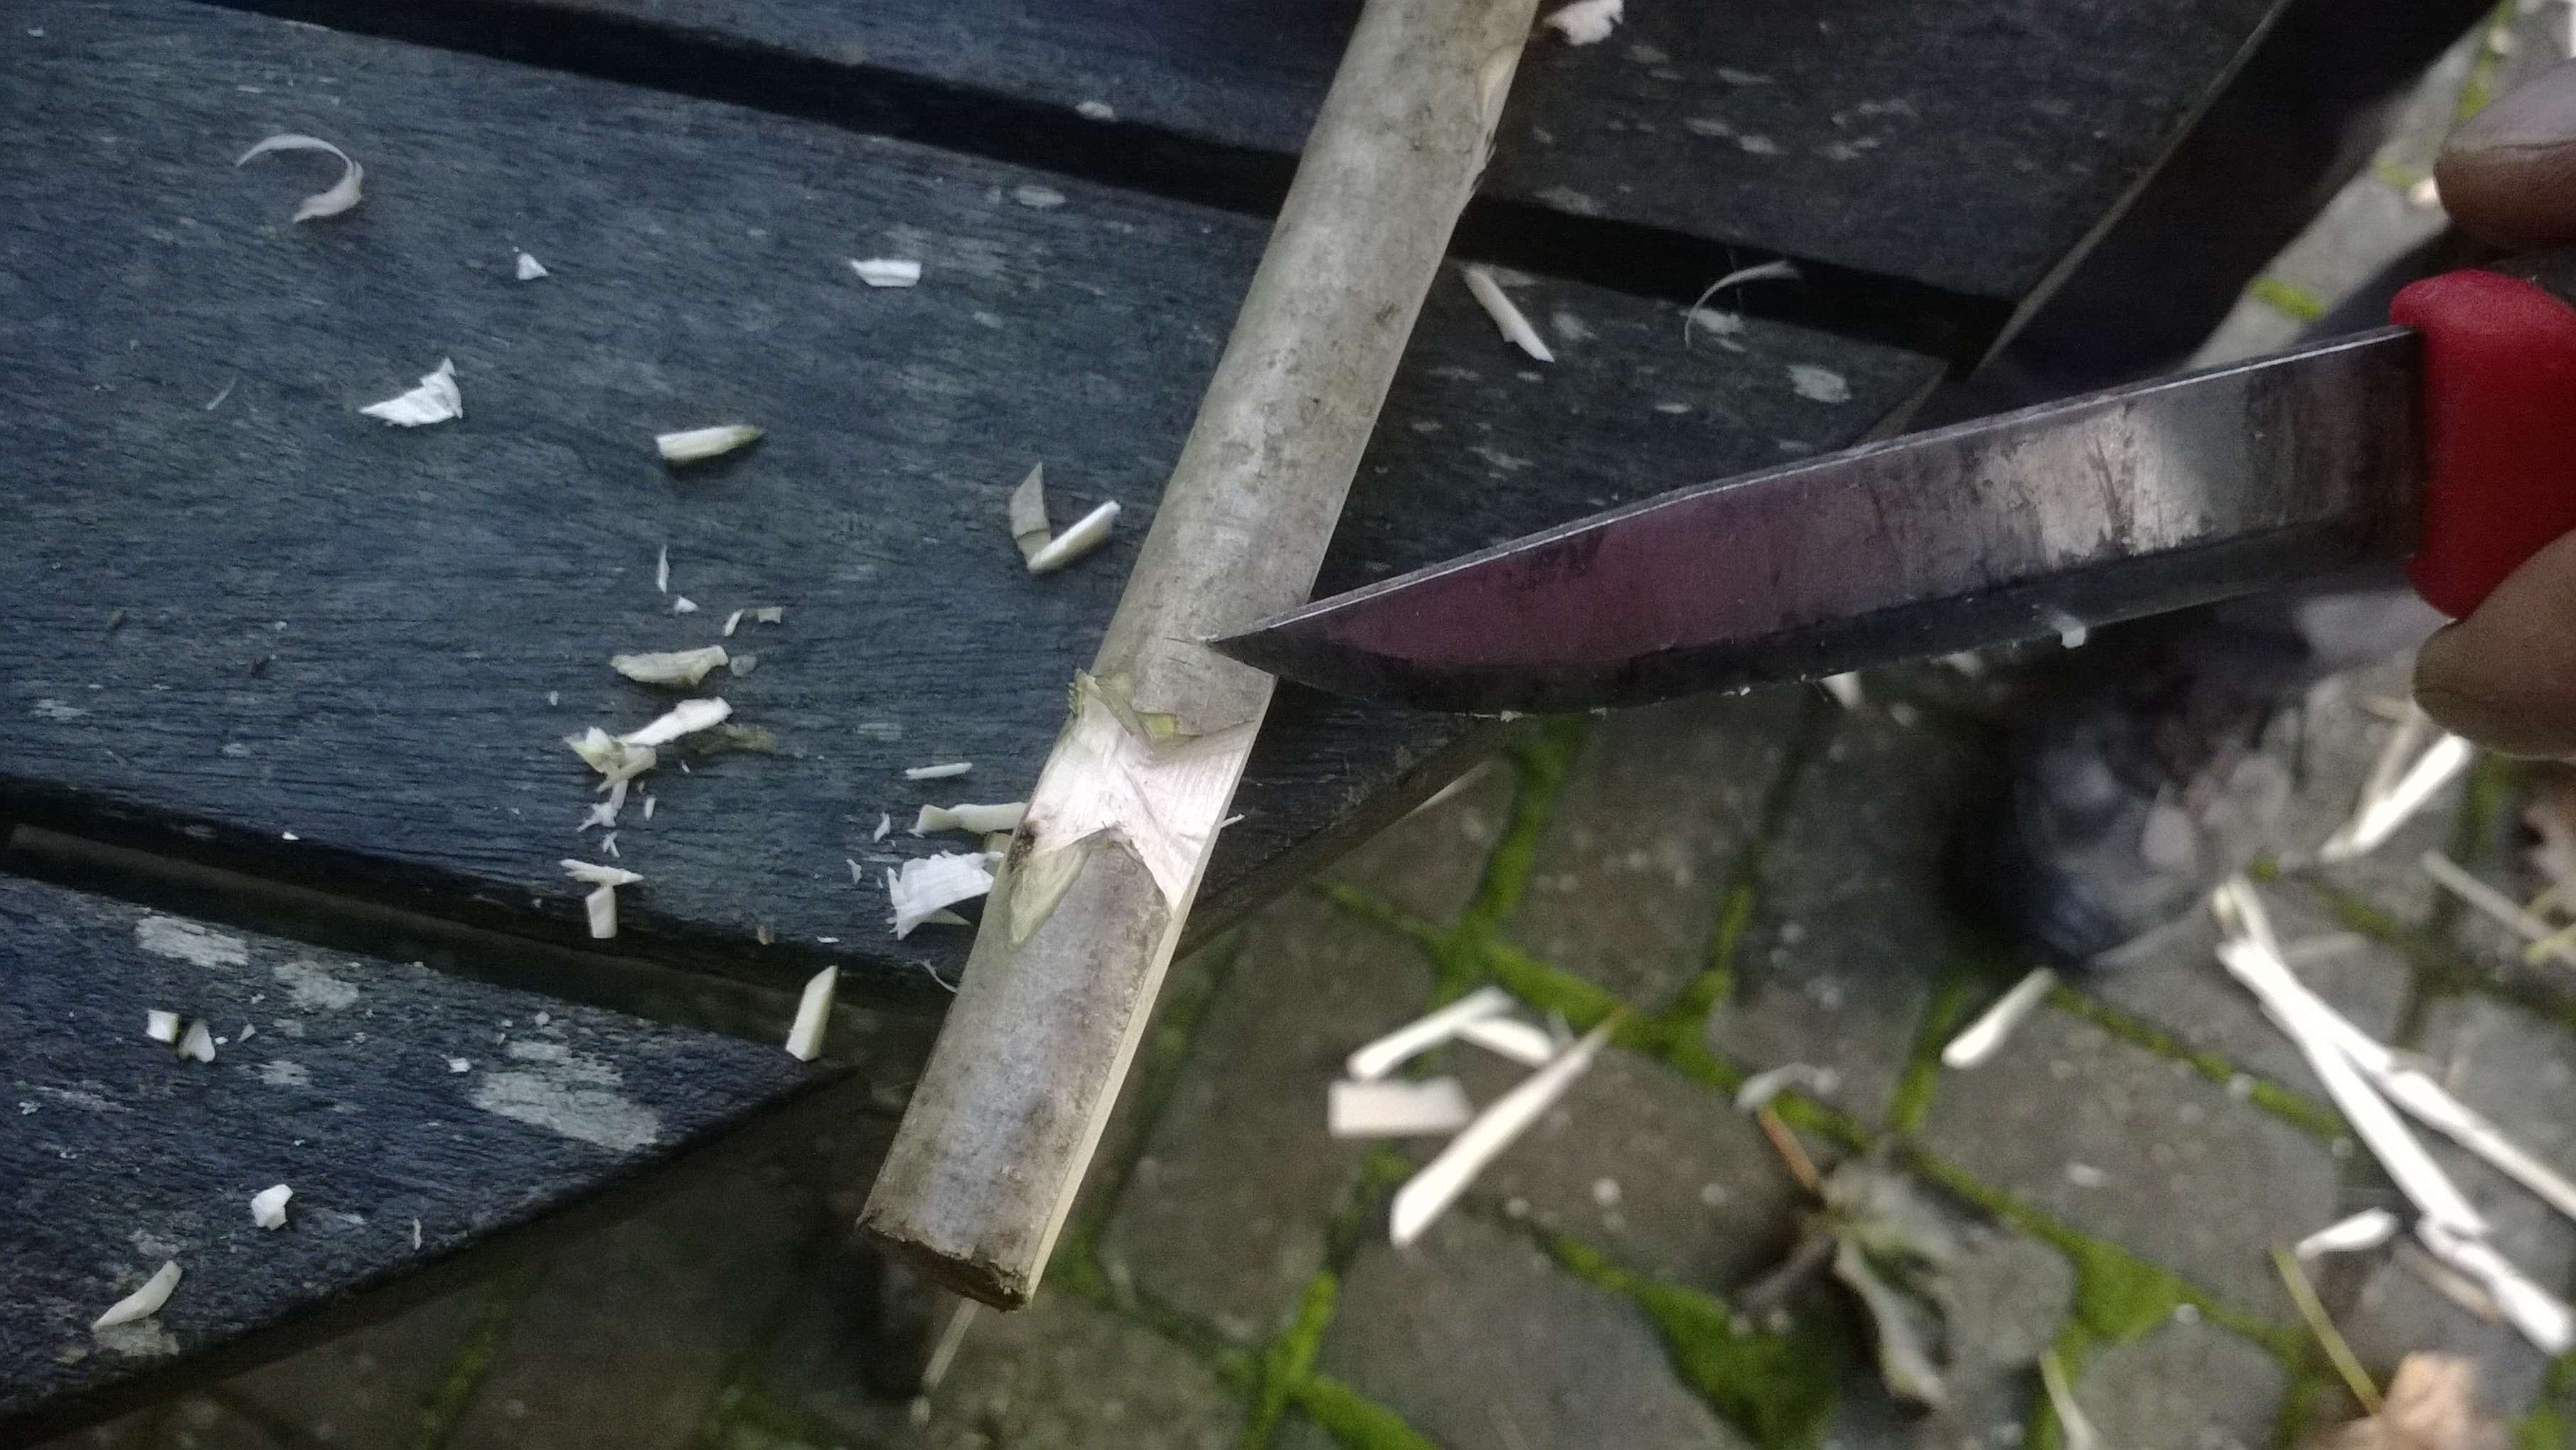
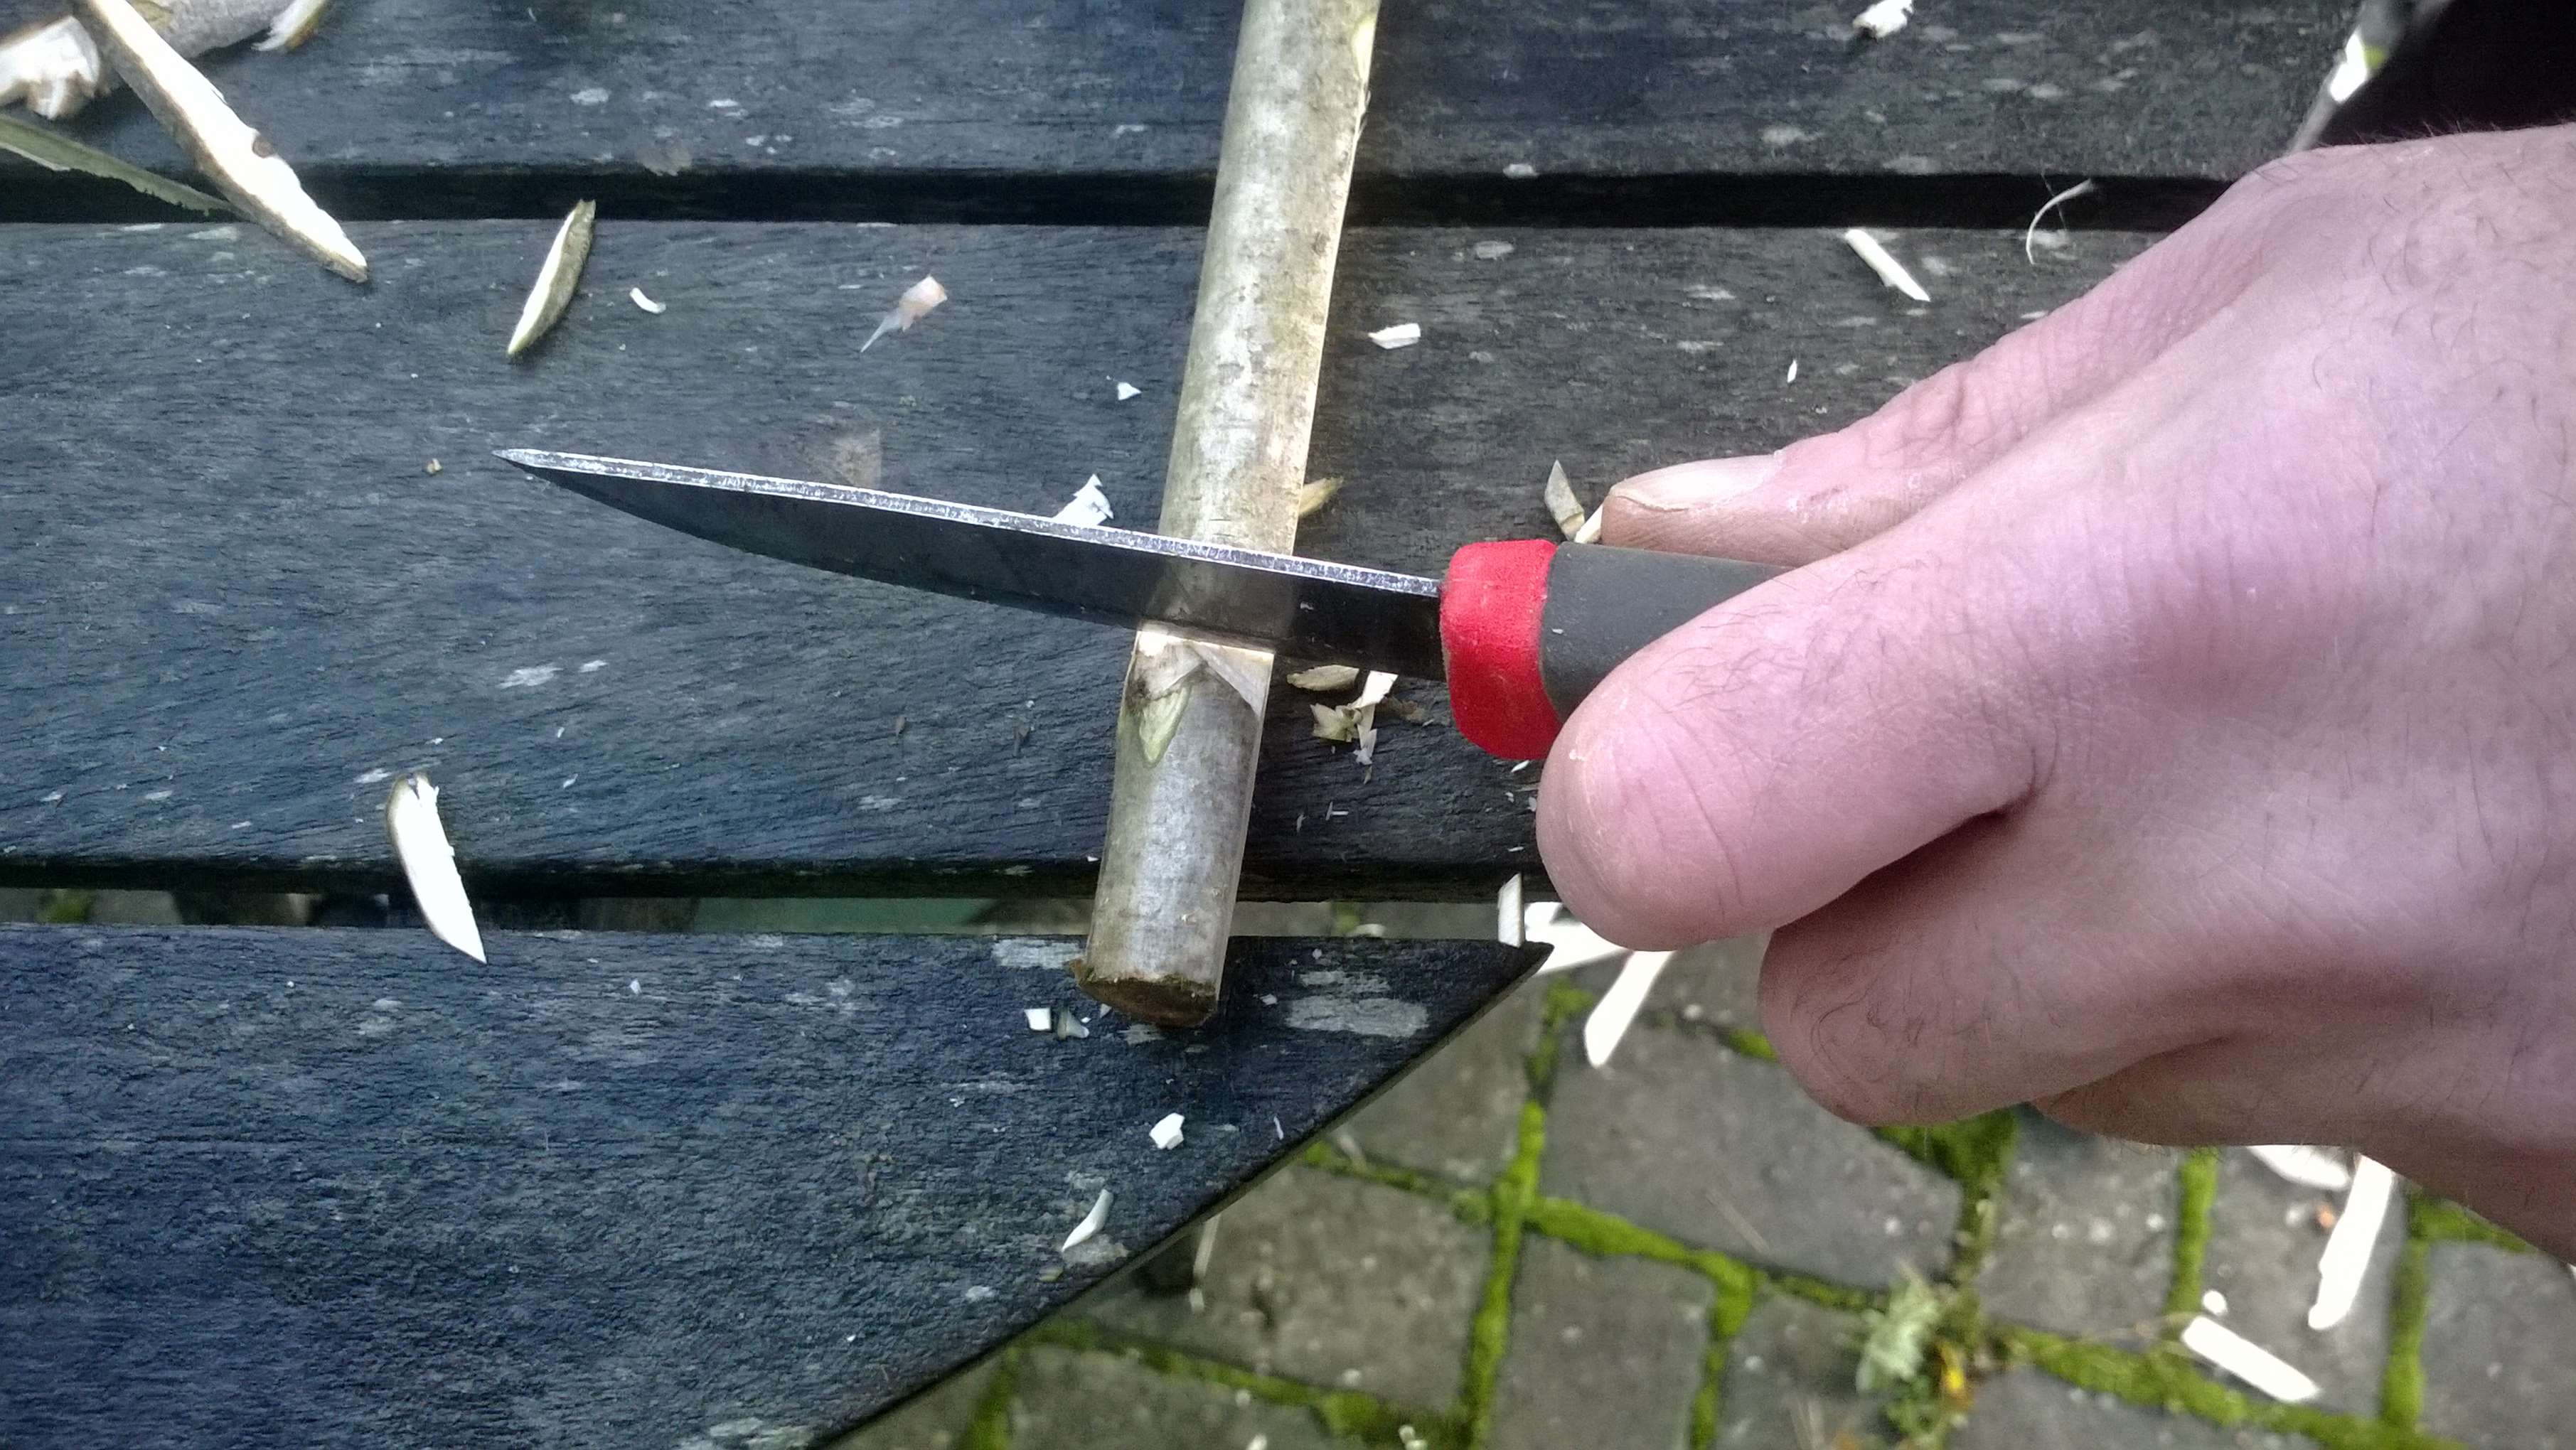
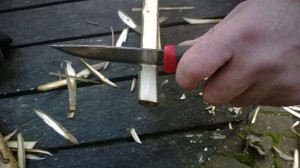
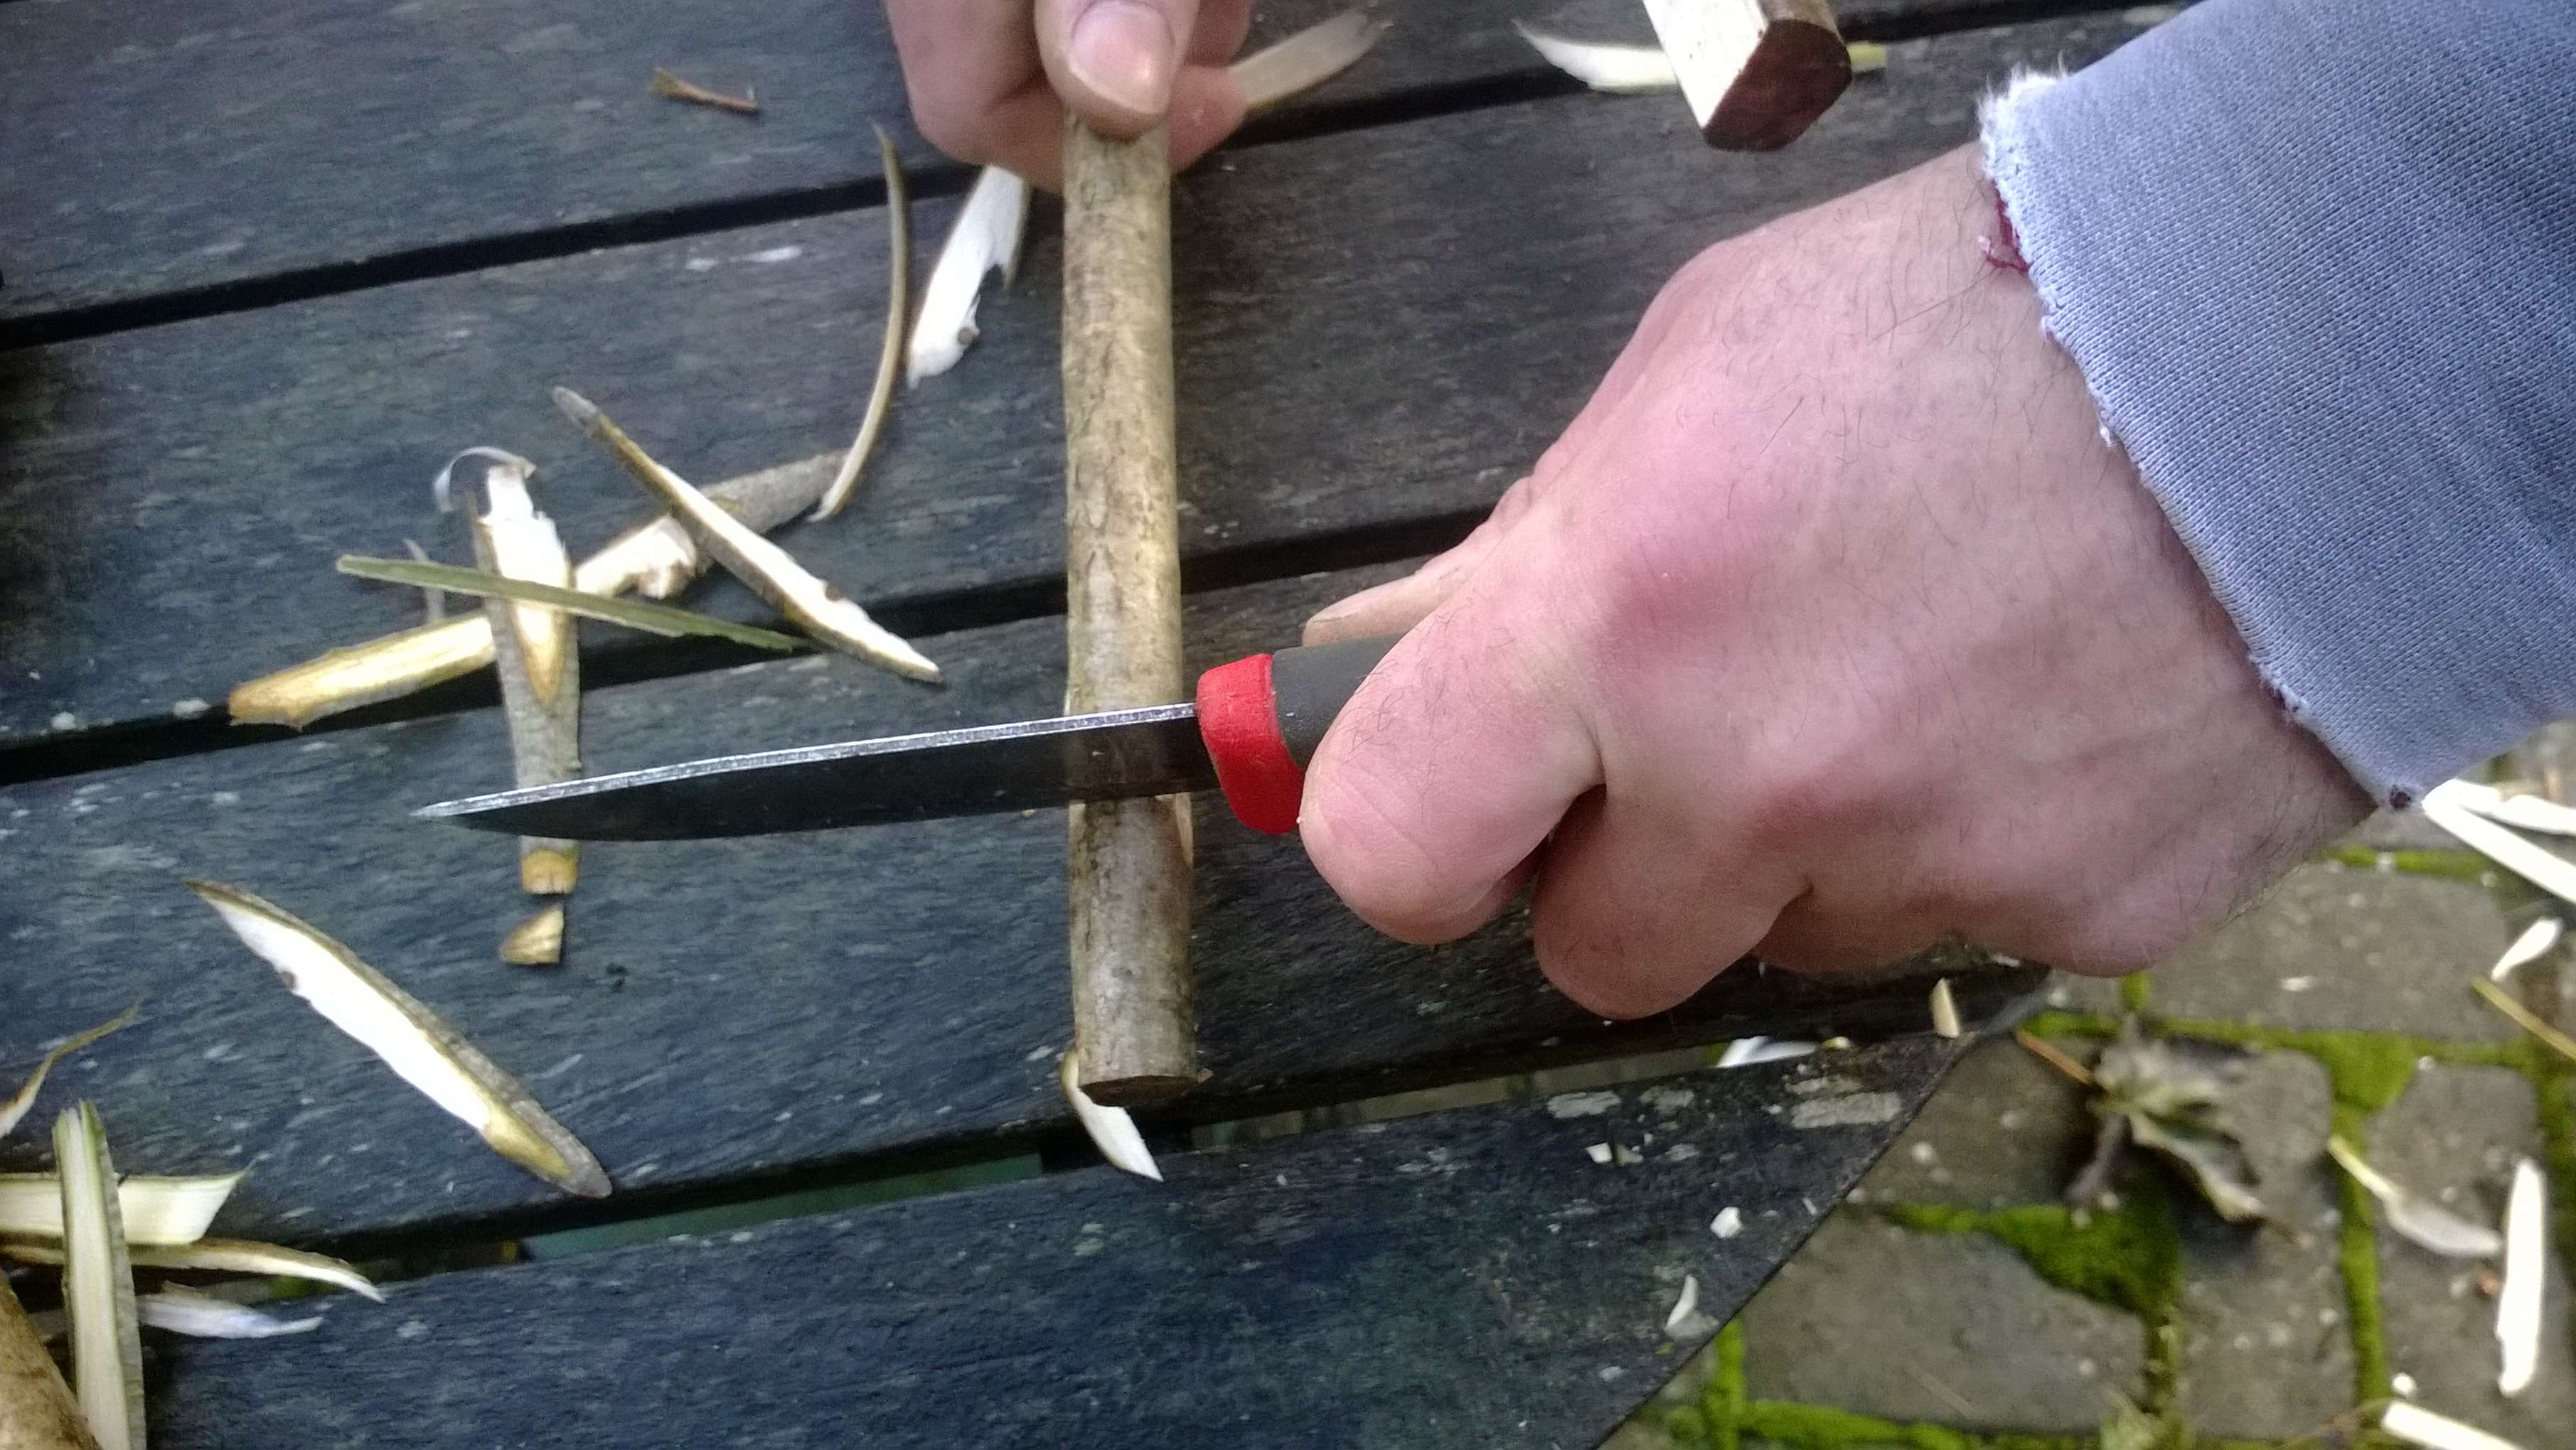
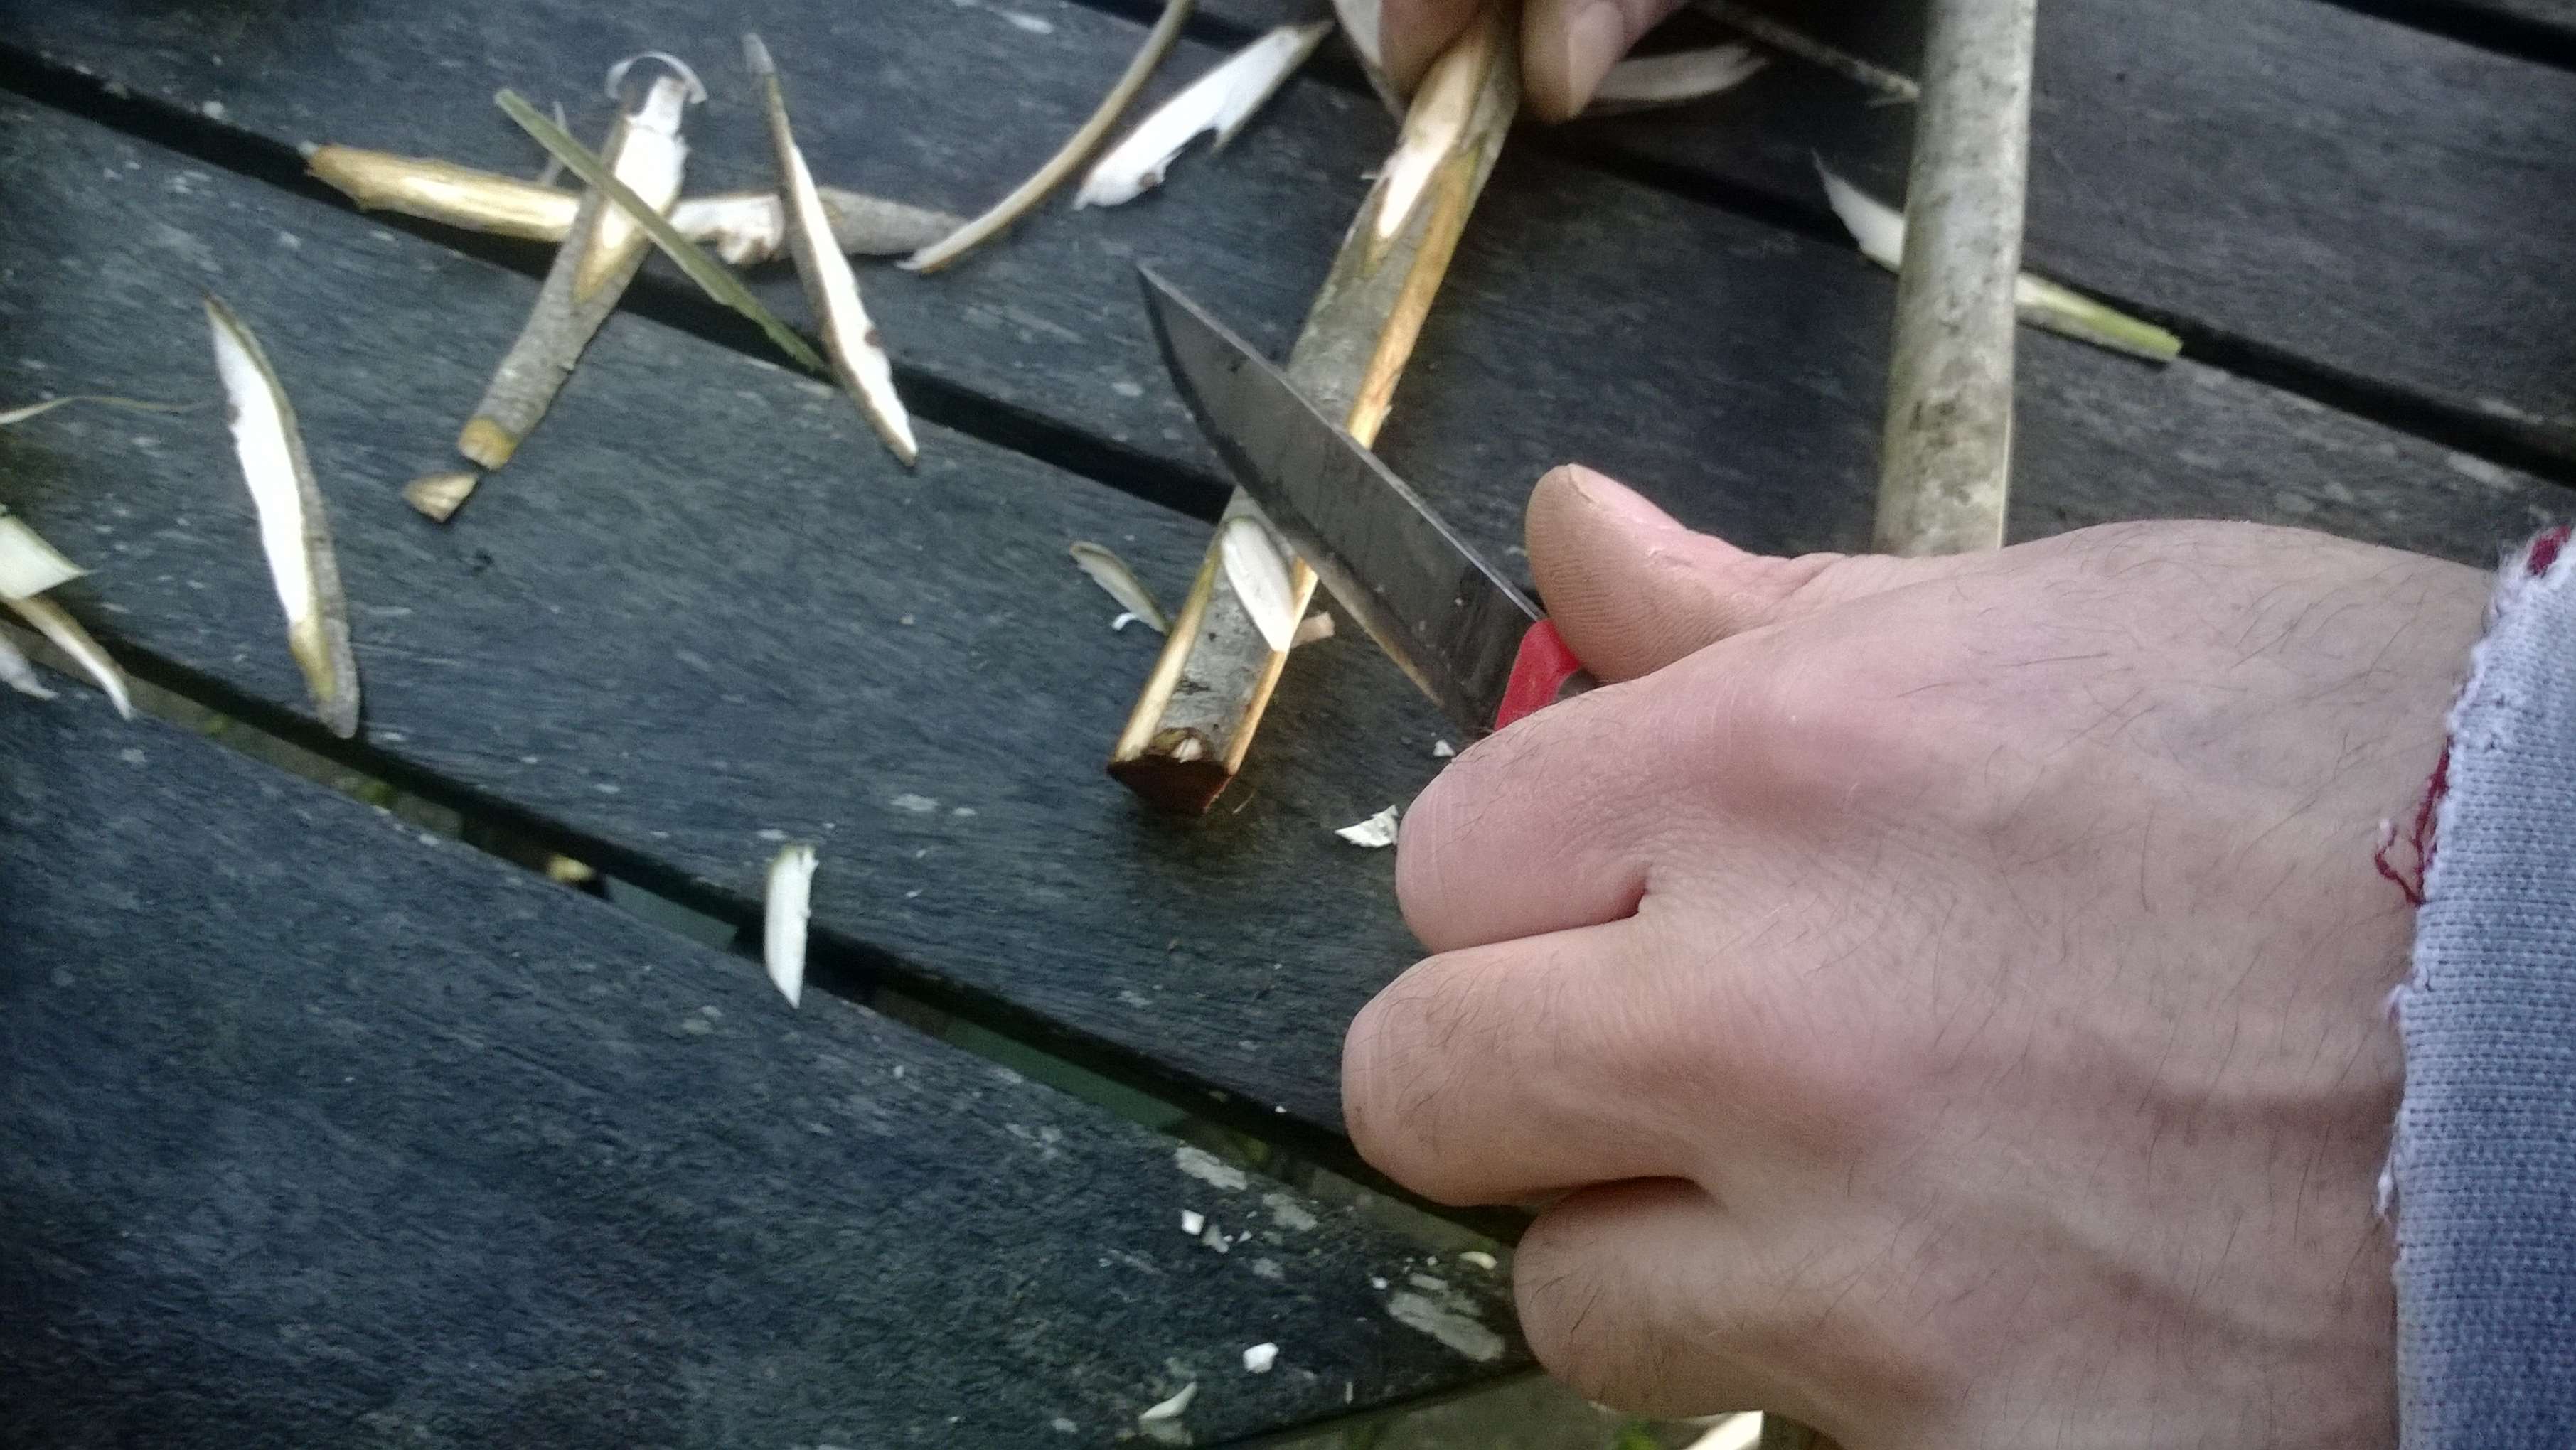
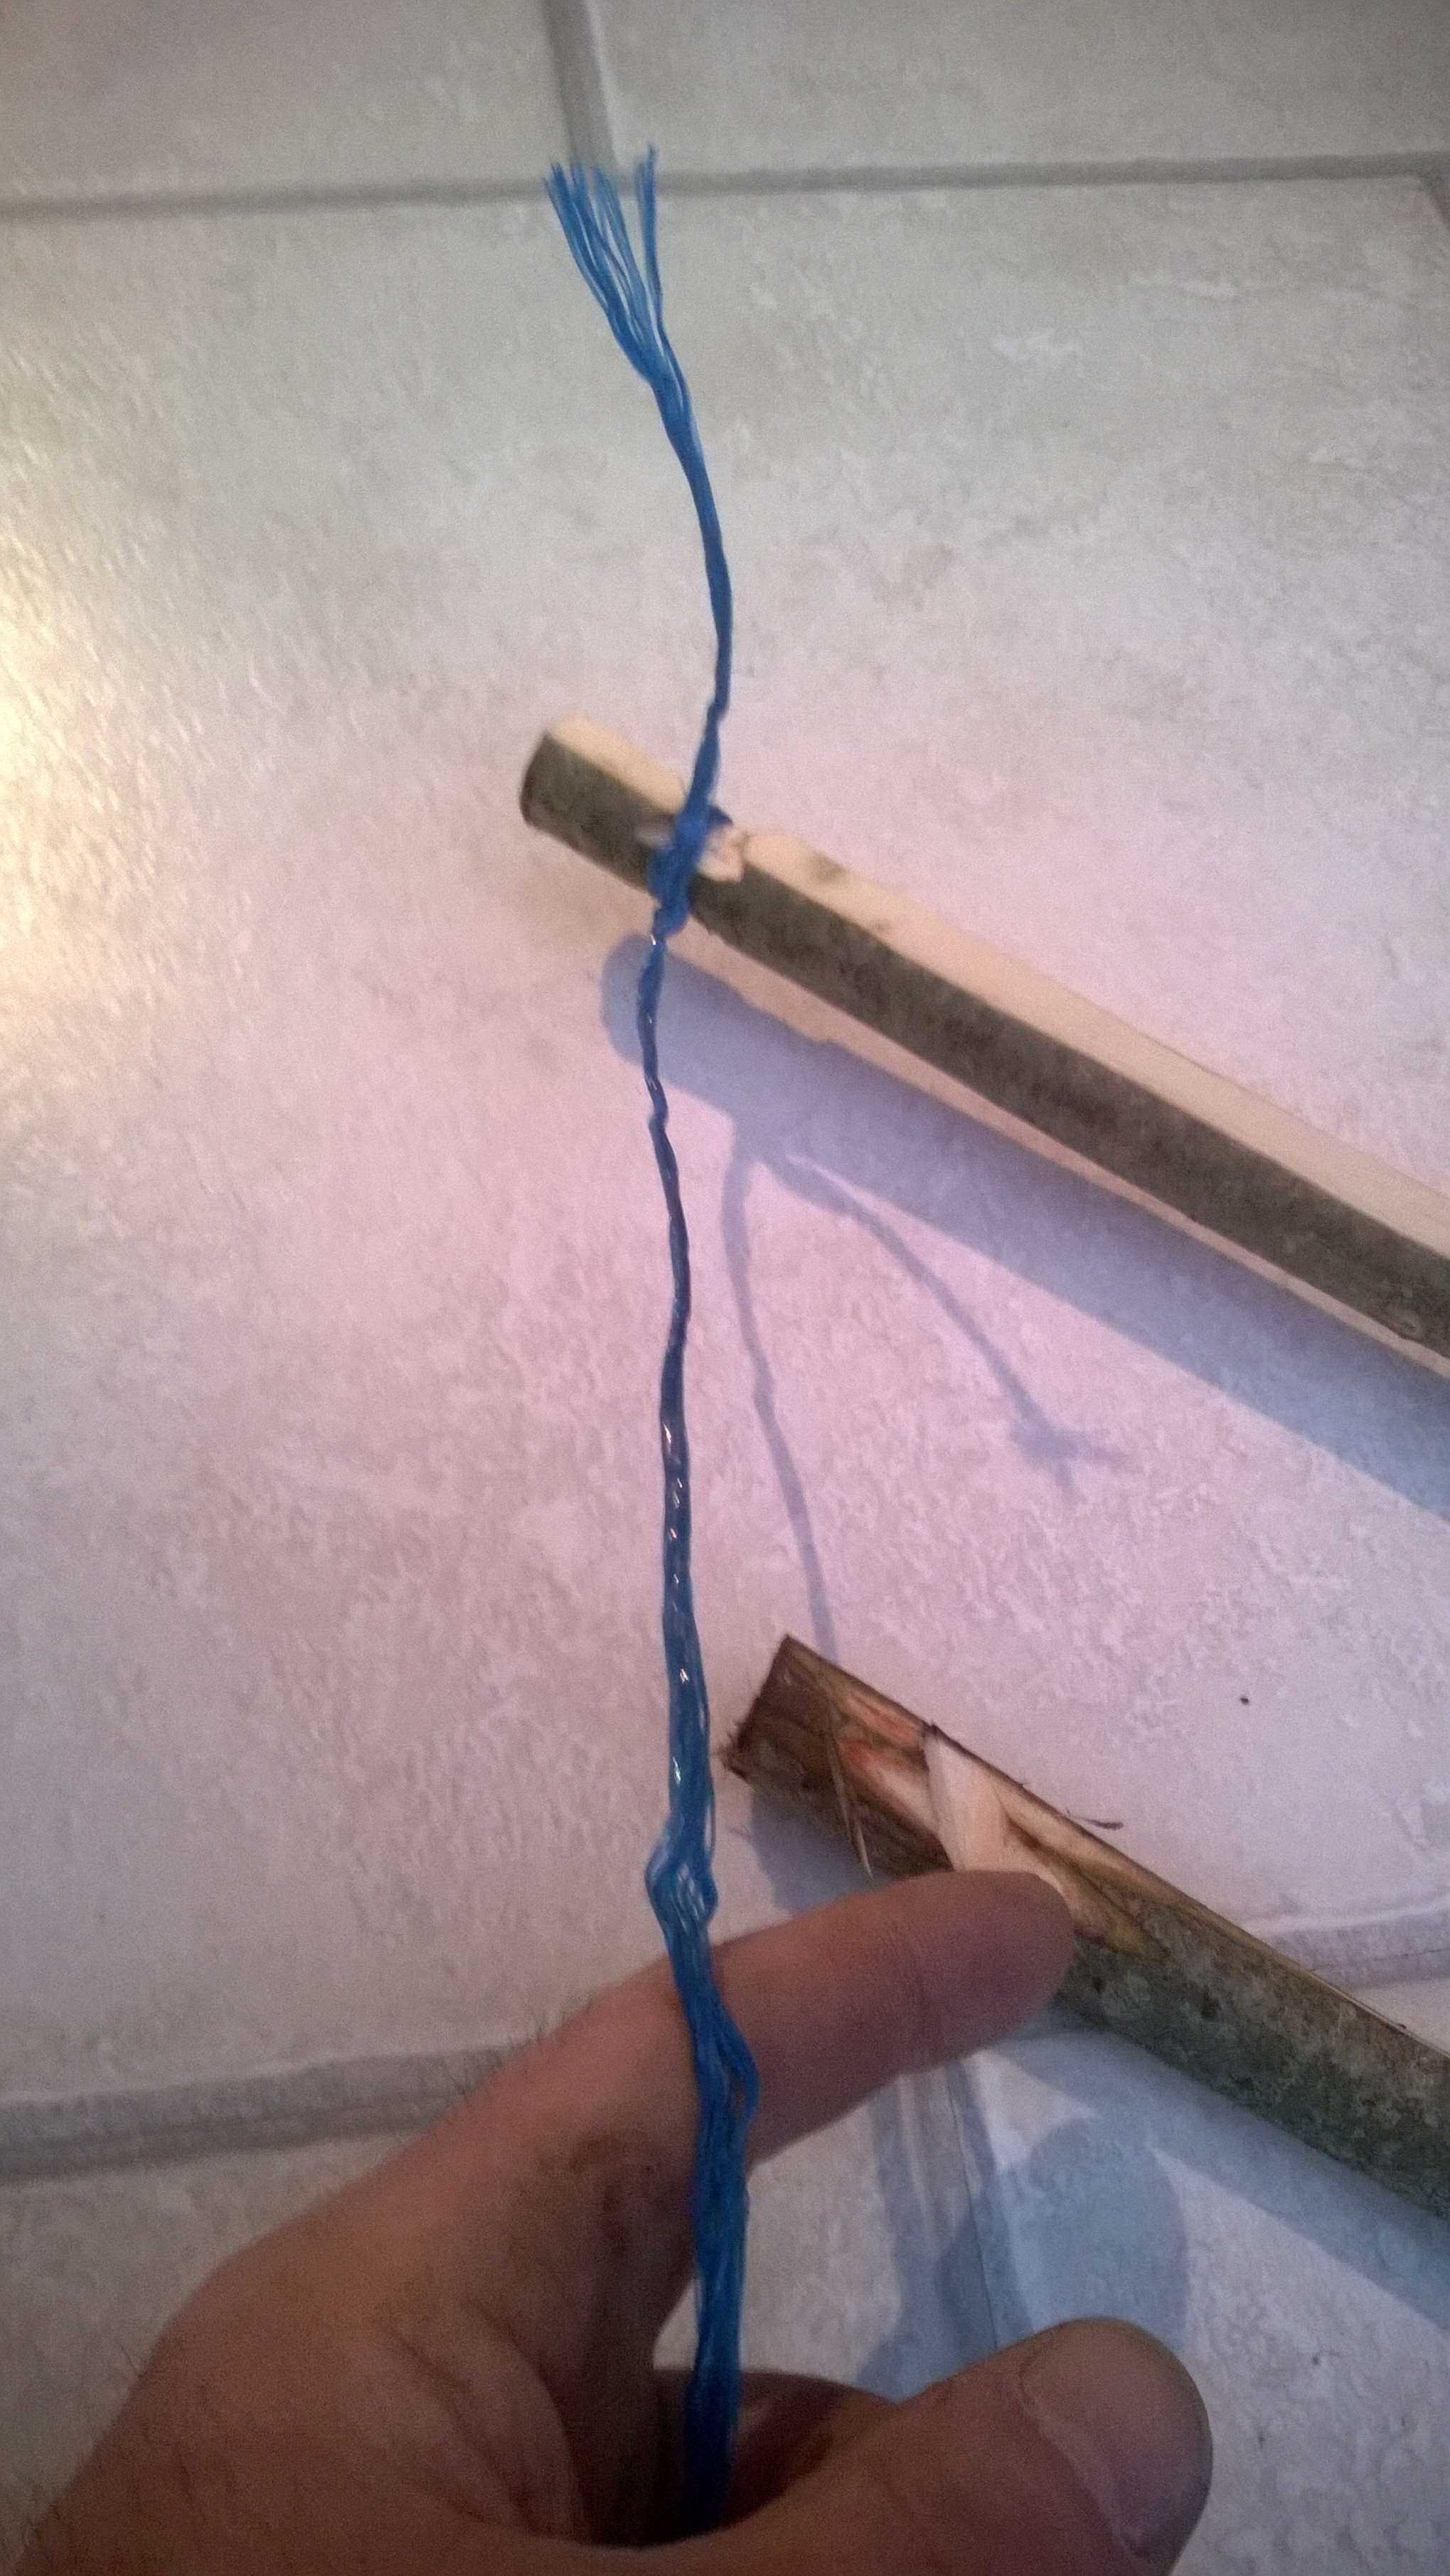
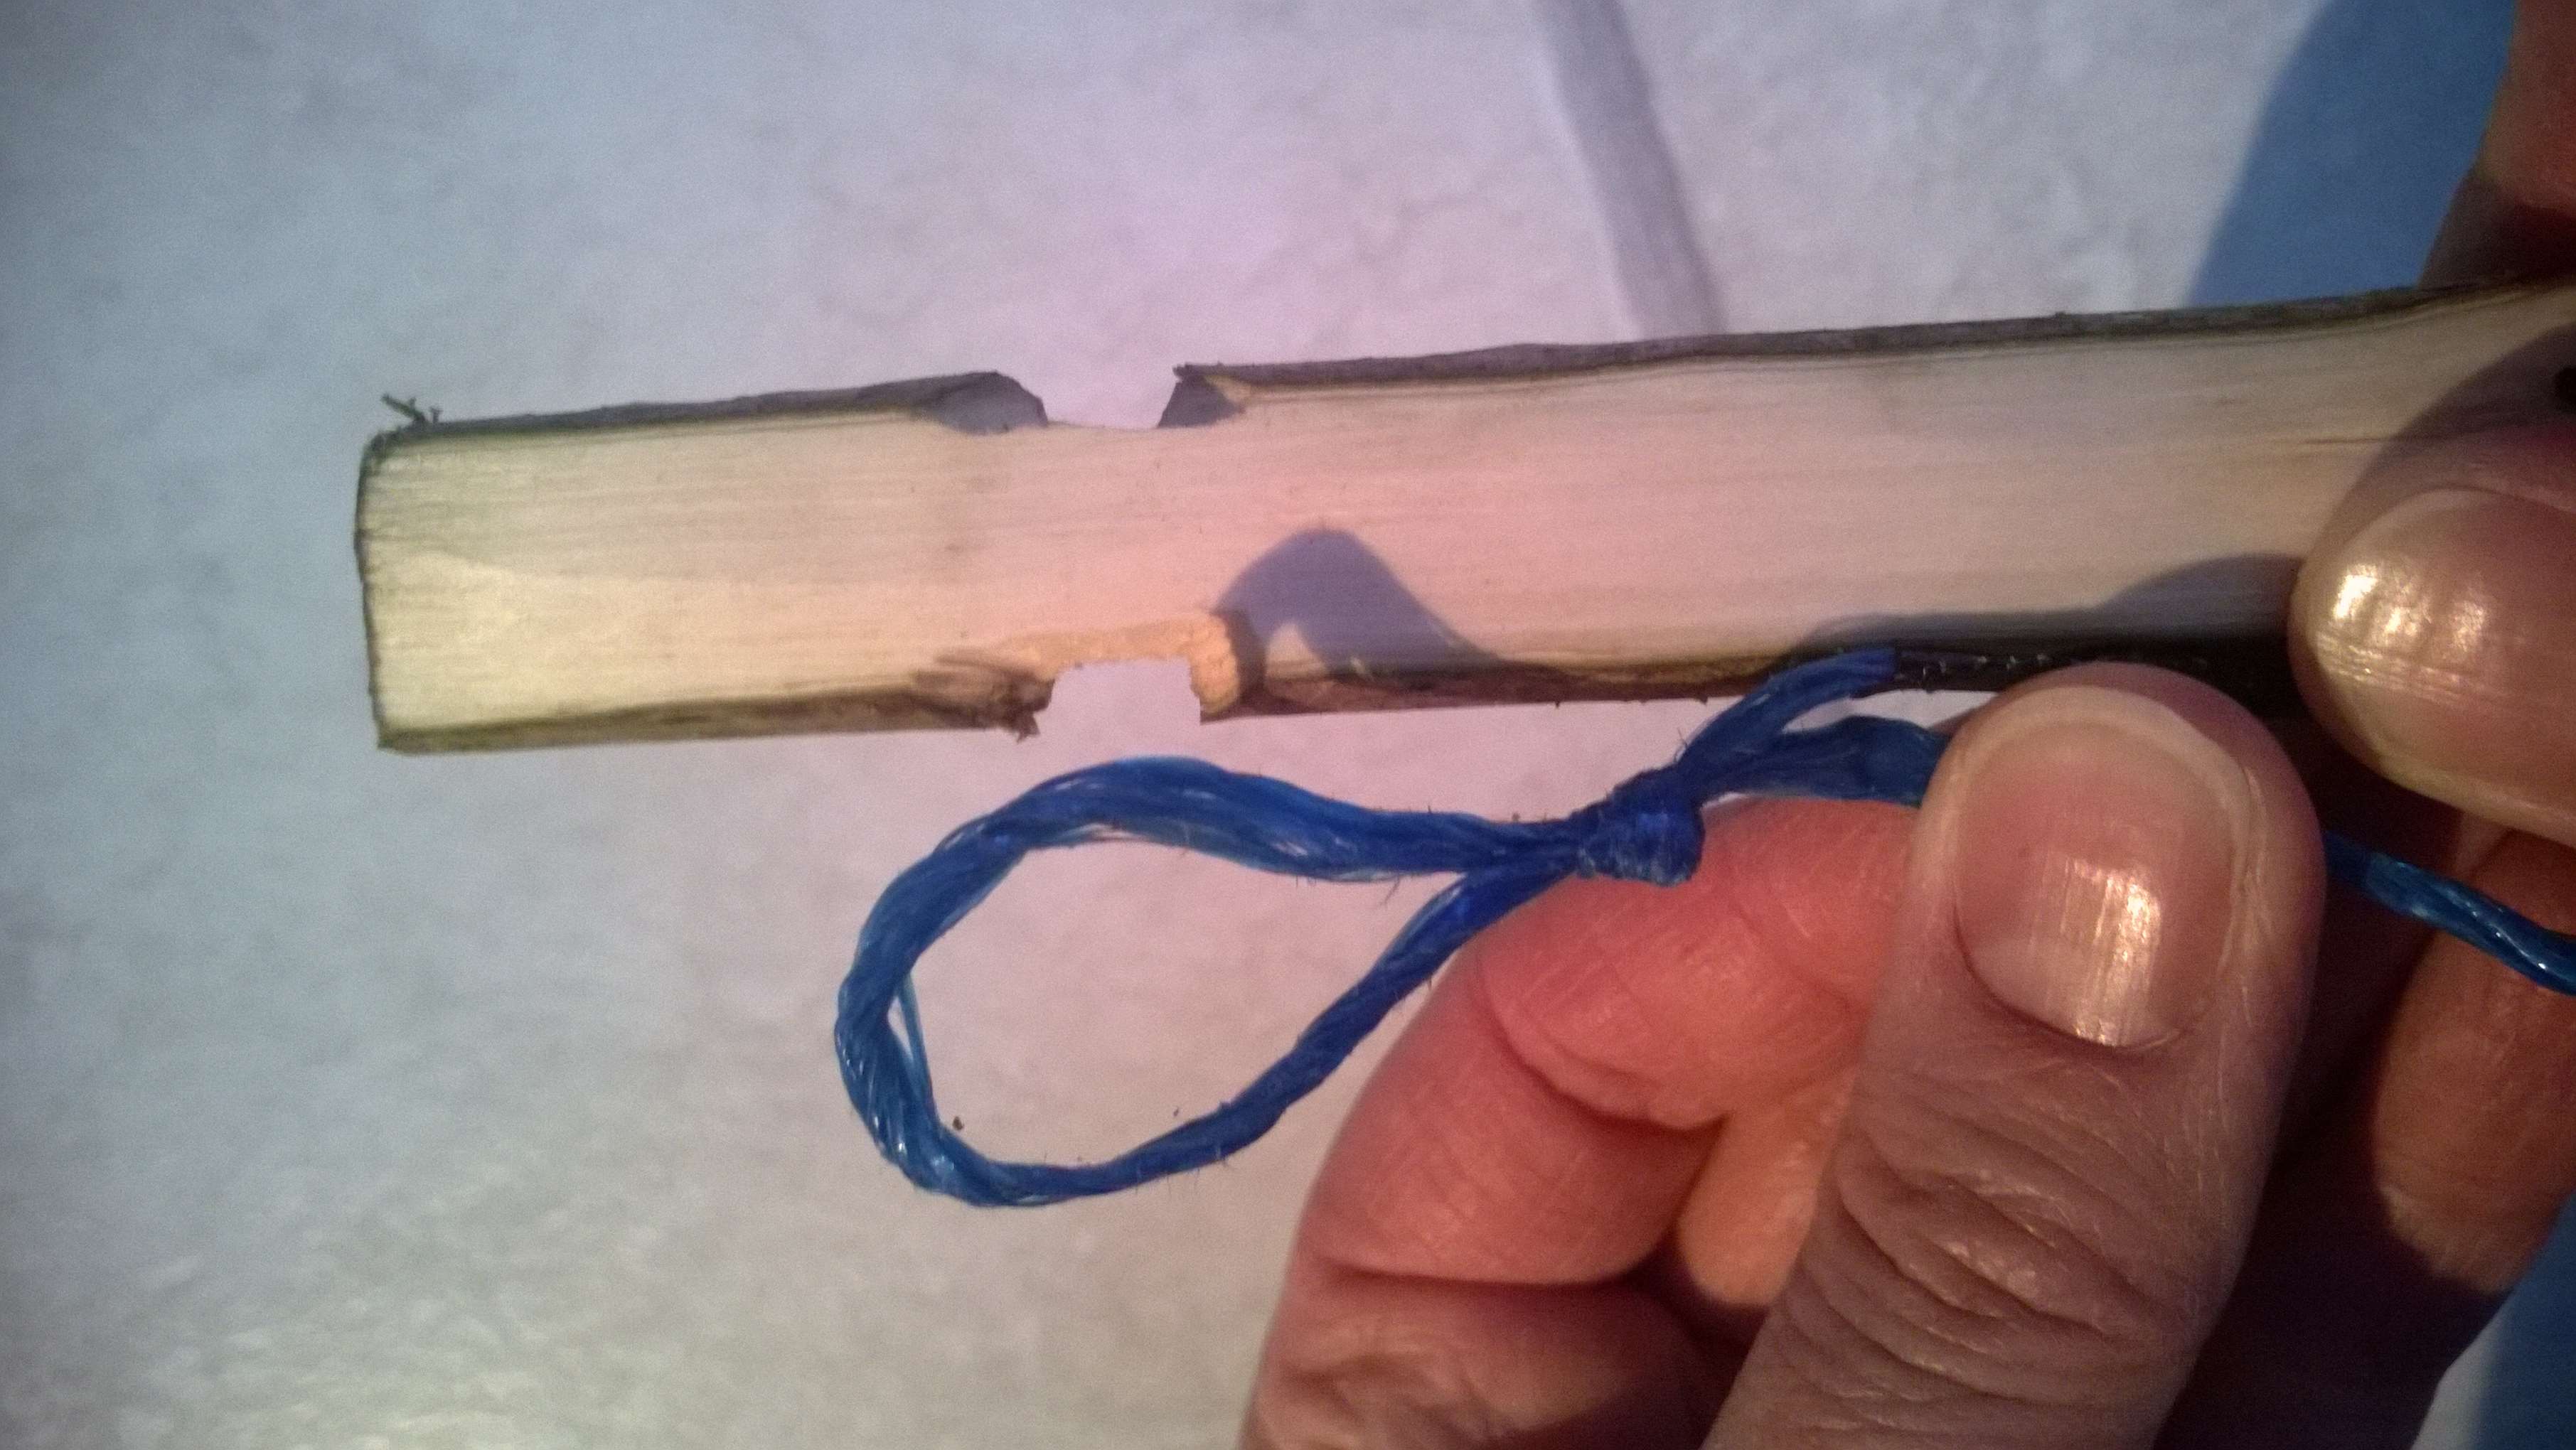
I set myself a challenge a while back to produce a split stick Atlatl from just one piece of willow and limited myself to just my primitive tools.

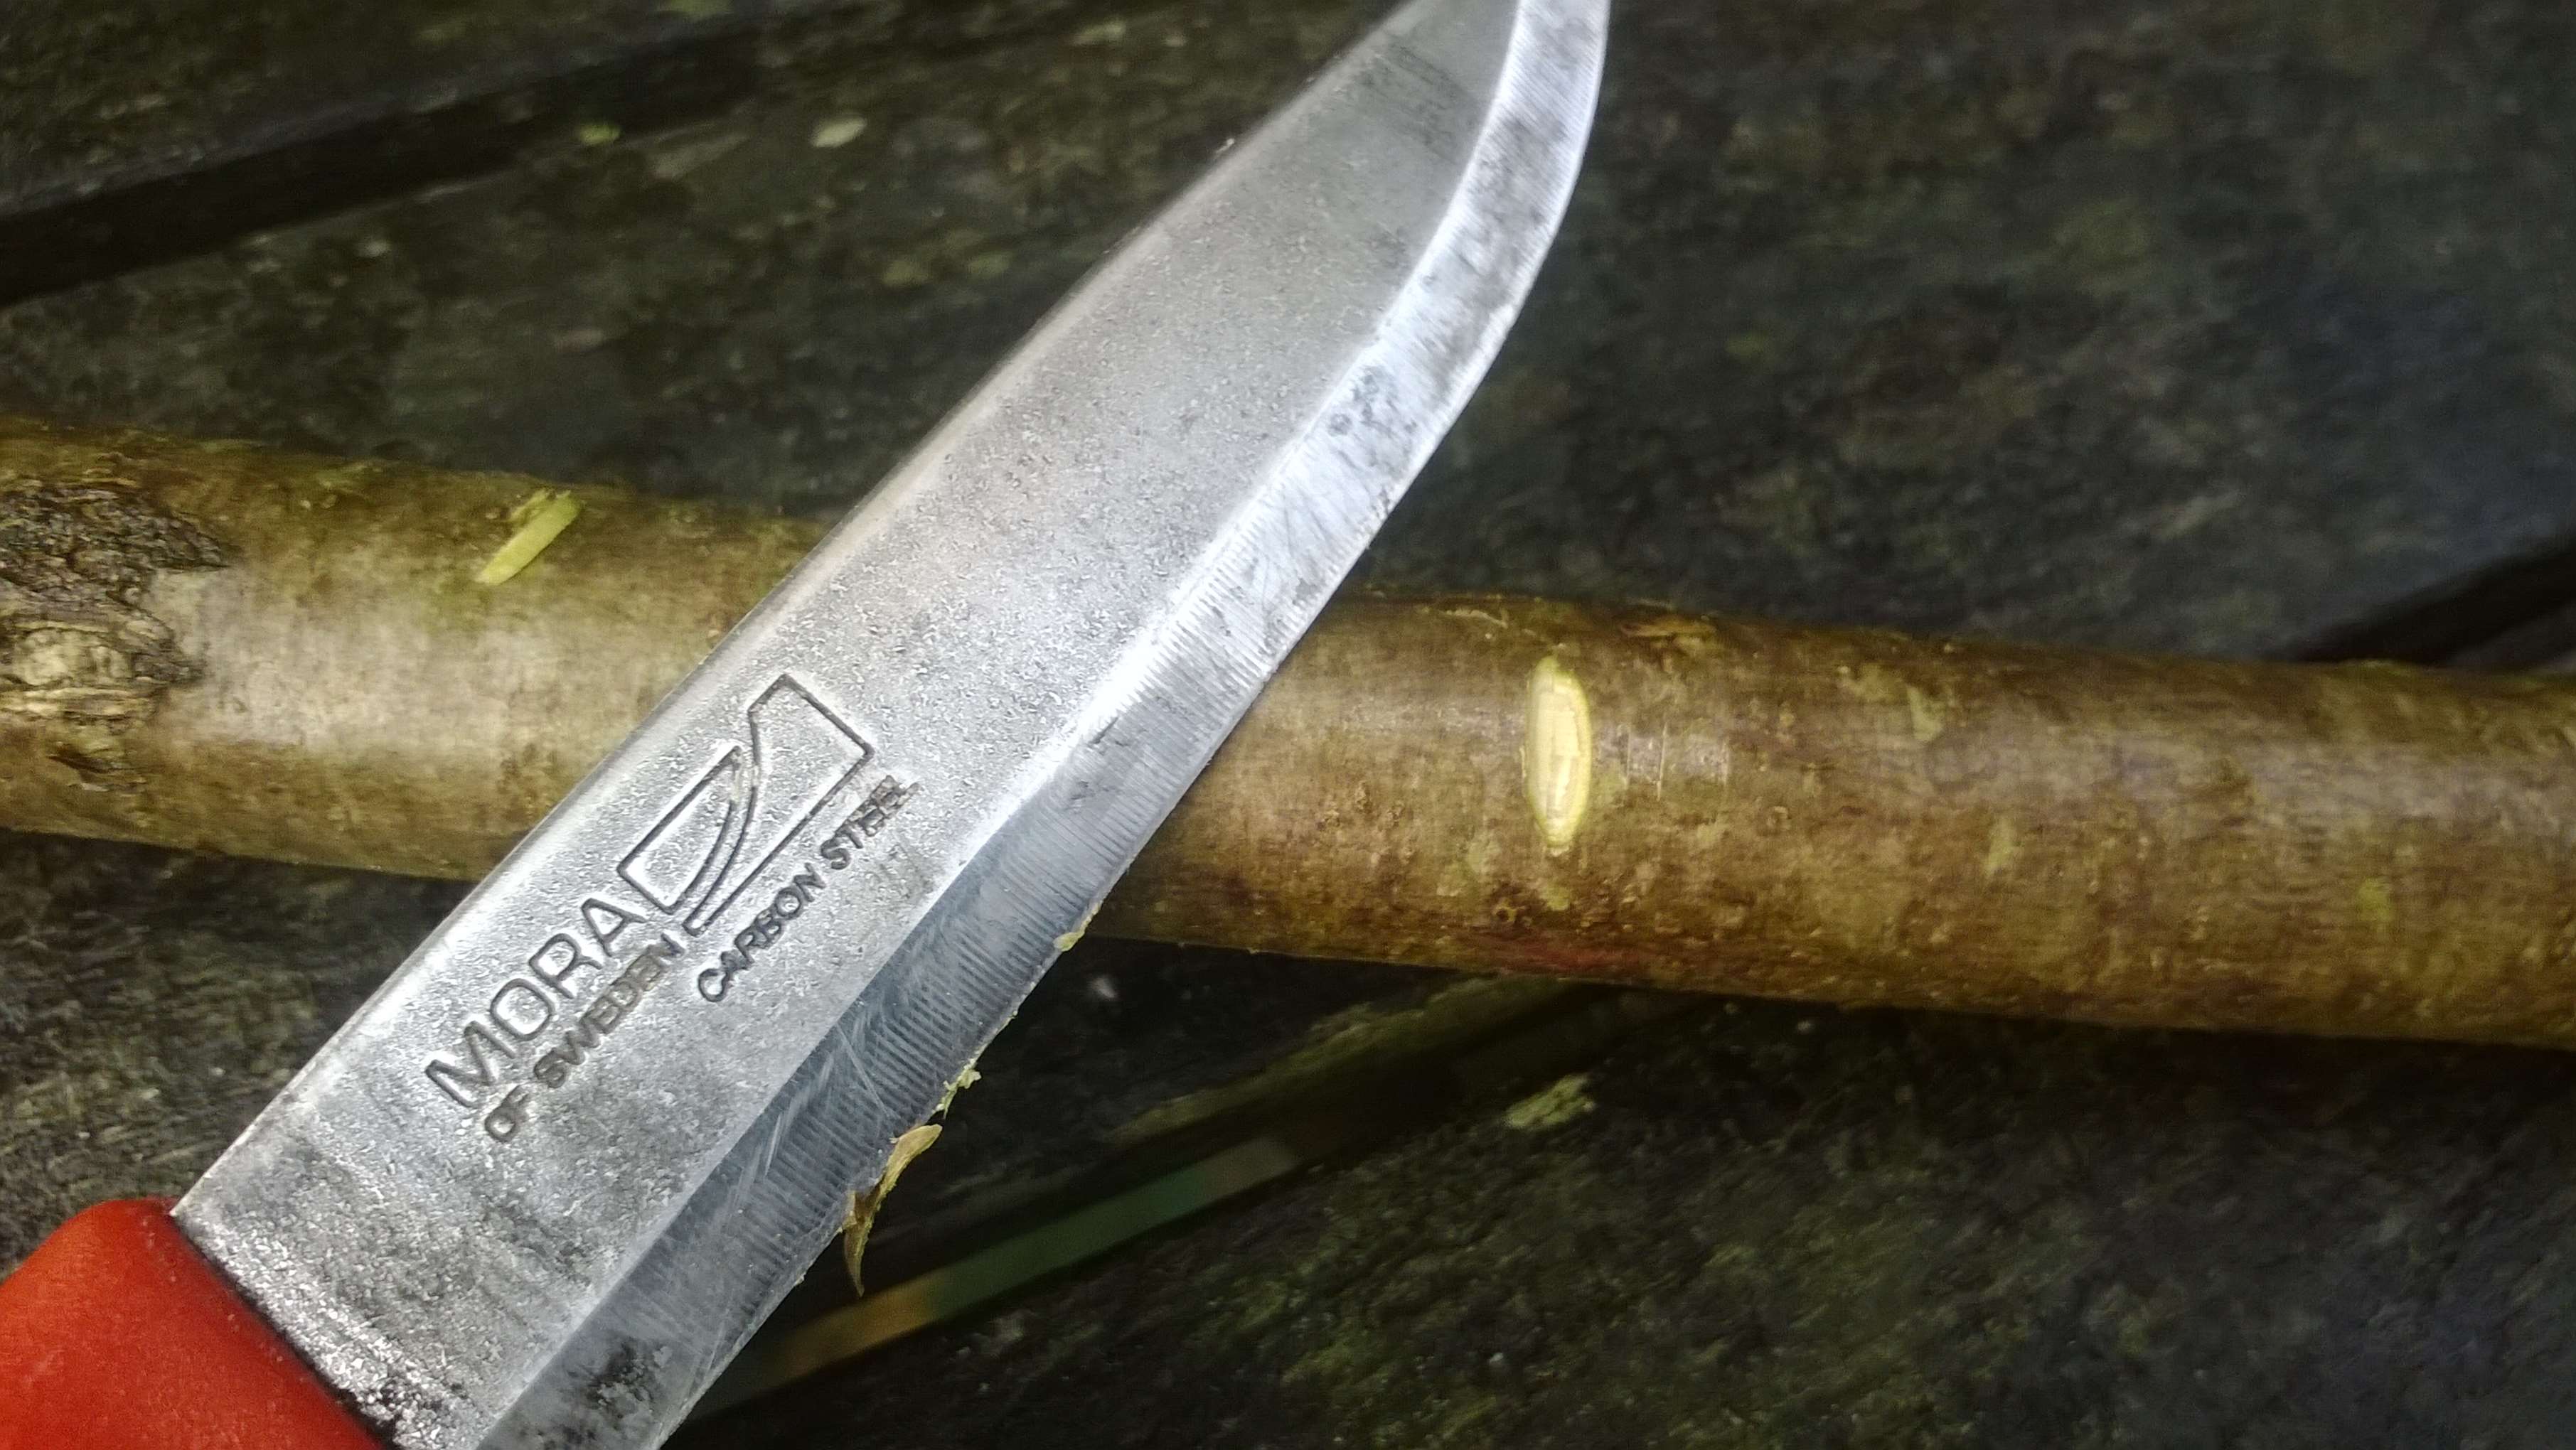
I scraped and carved the wood with my flint knife and used the bark as cordage. It turned out to be quite a nifty little Atlatl in the end.
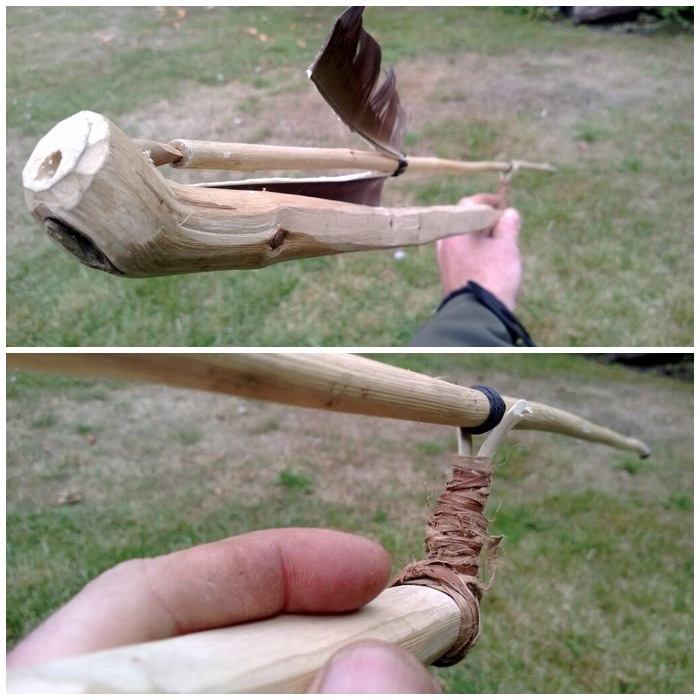
11
One Stick Atlatl

Atlatl with a Rest

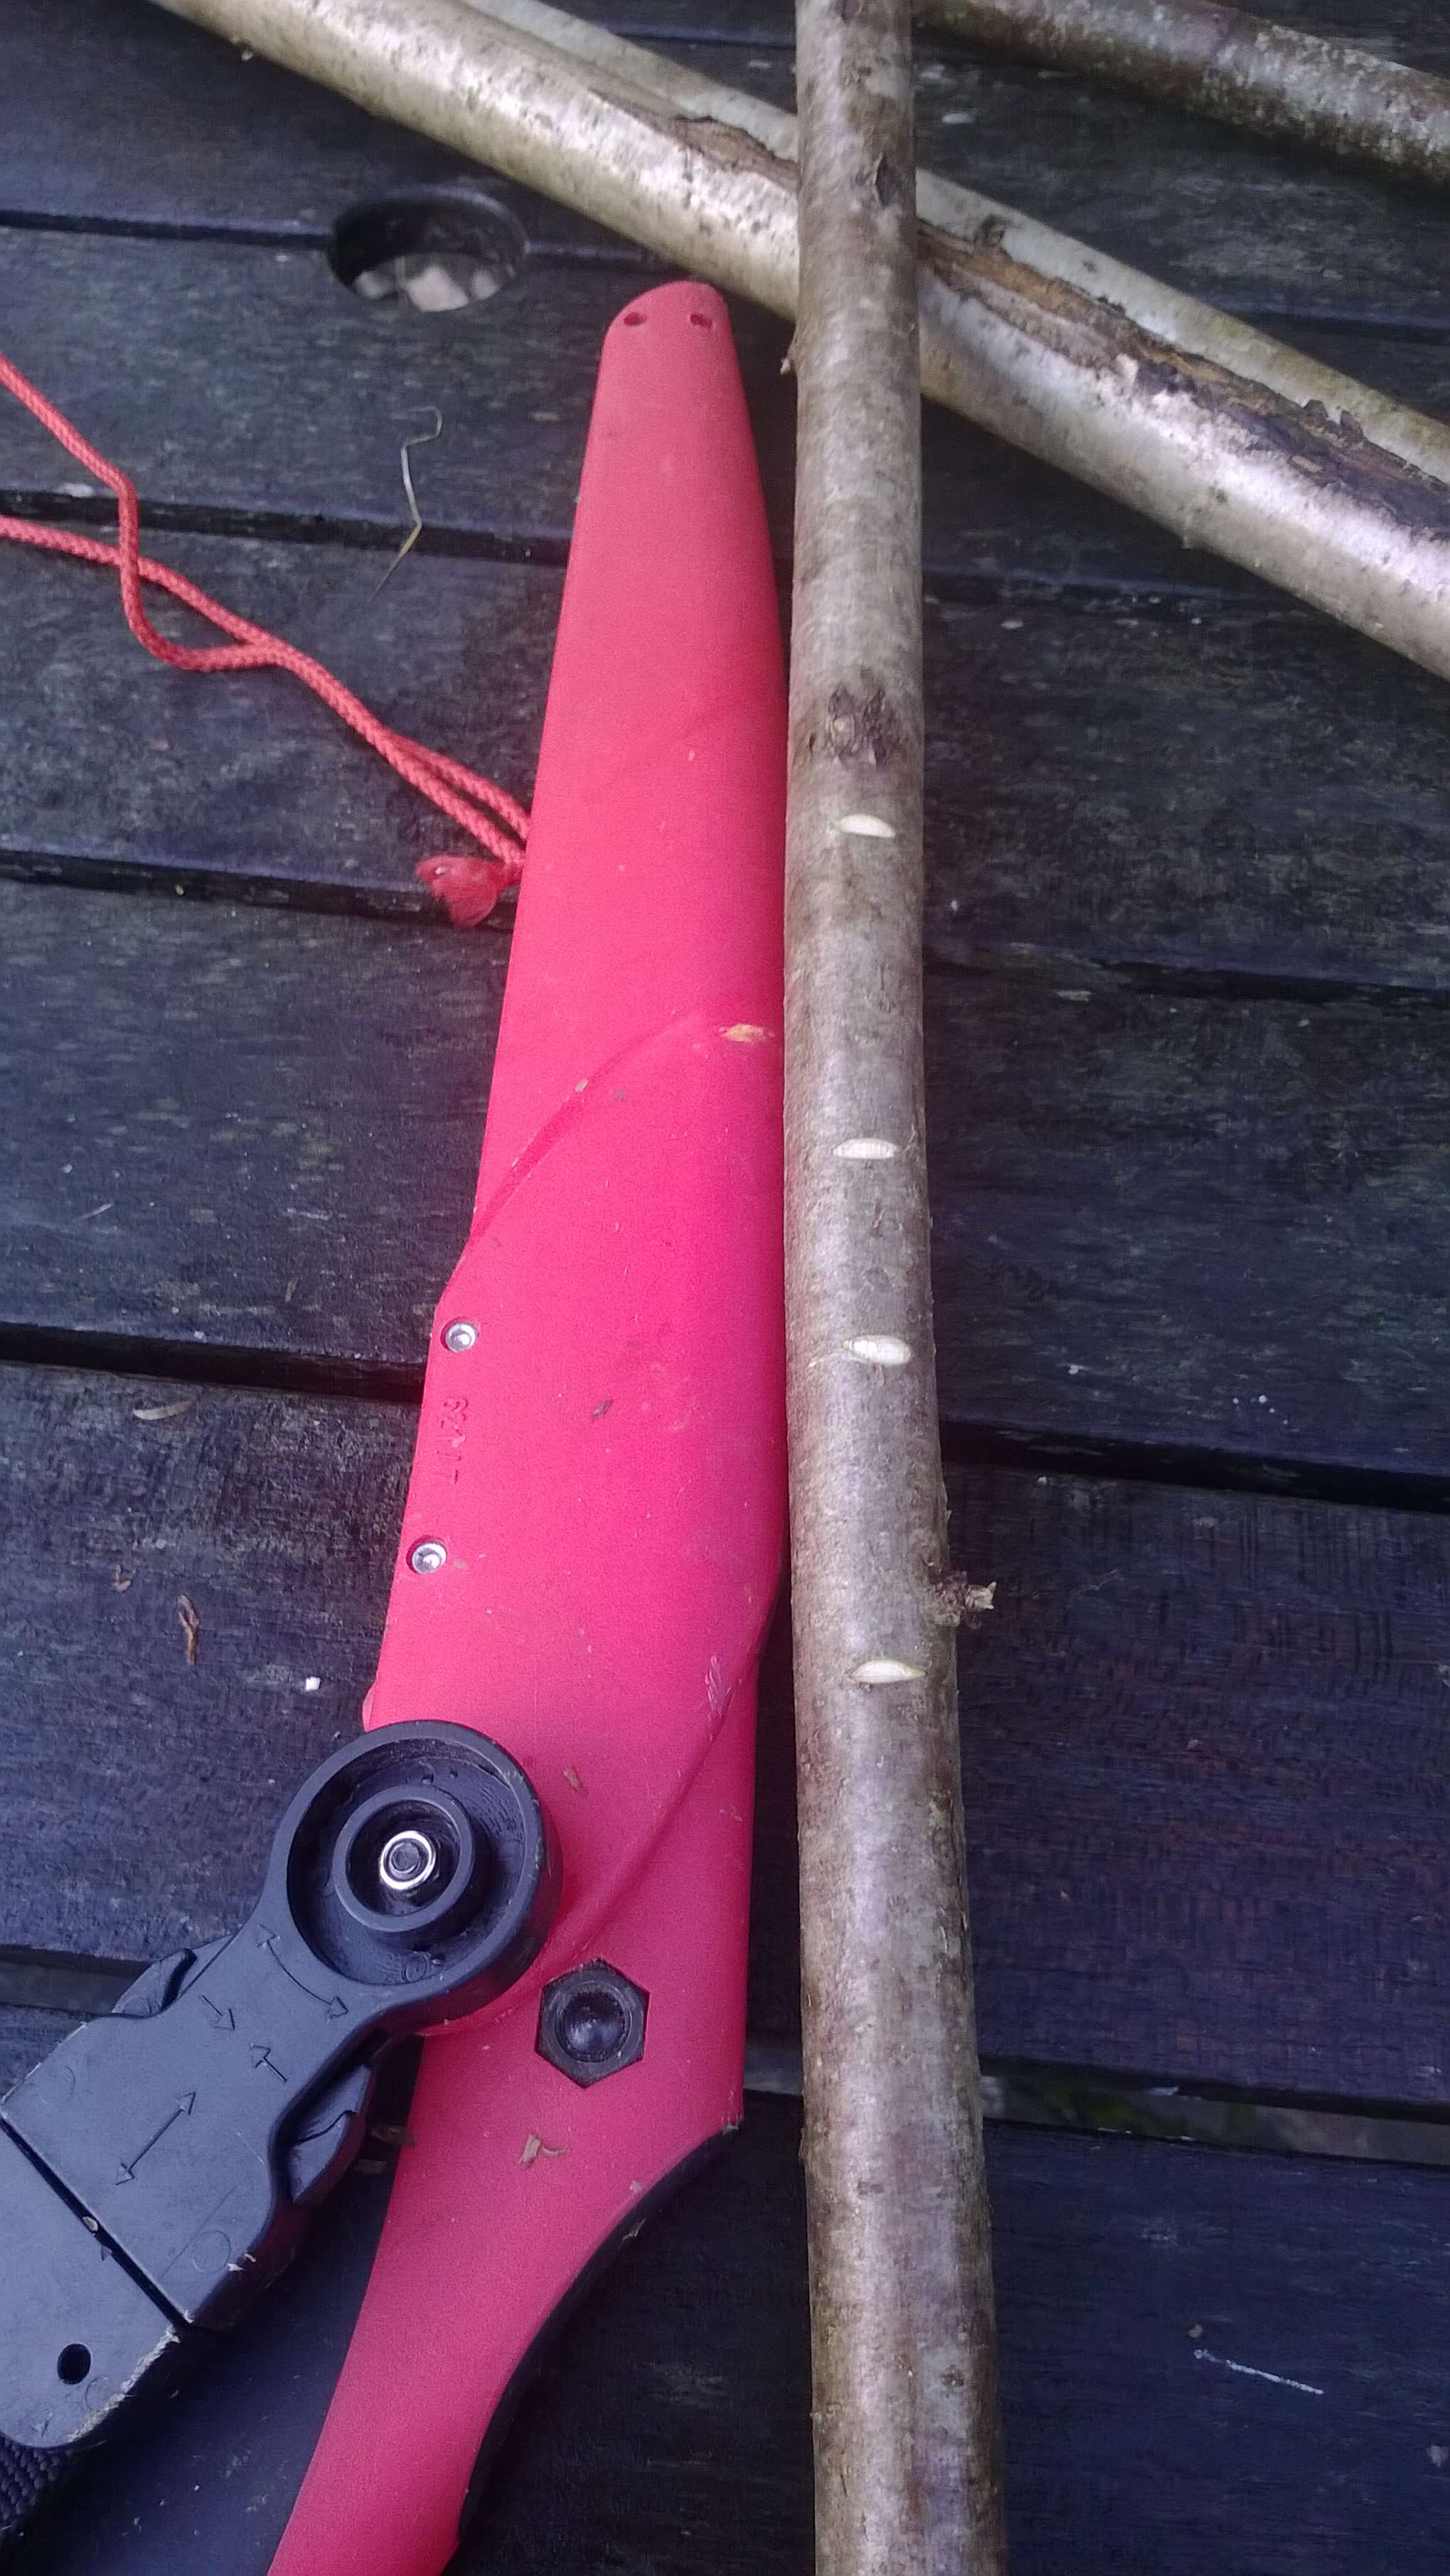
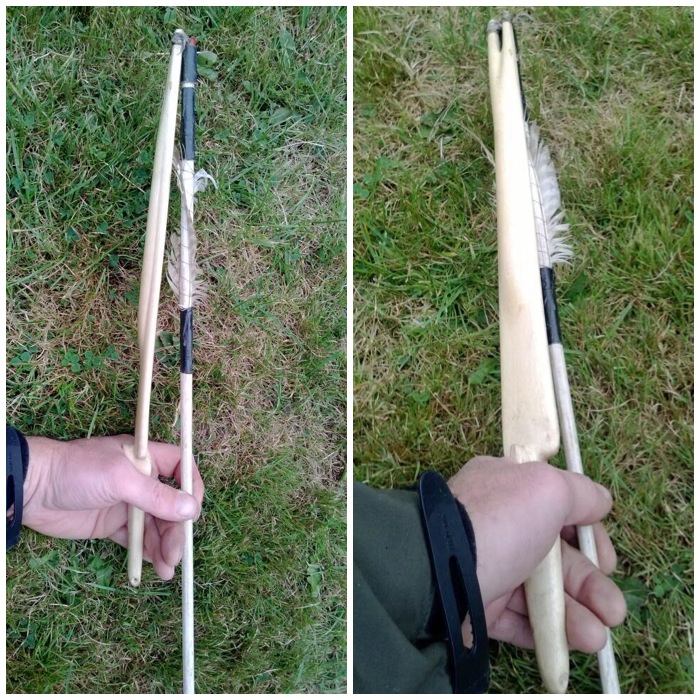
I carved this Atlatl after reading about hunters in Arctic environments using this type of Atlatl. The rest allows the hunter to wear a glove while waiting to shoot the dart. The dart has a piece of cordage wrapped tightly around it that is pushed up against the rest so fixing the dart in place. With a quick flick the dart is away with no ill effect on its flight.

Photo-22-01-2014-18-14-18
Atlatl with a Rest

Thats it for me on bows and Atlatls (unless I make some more).

Cheers

George

How To…. Carve a Holmegaard Bow

The second bow I ever carved was a Holmegaard-style bow made out of ash. The bow on which I based my replica was found in a peat bog in the Holmegaard area of Denmark in the 1940s and is thought to be over 9000 years old. I made this bow while studying at John Rhyder’s Woodcraft School doing a Primitive Technology course. The wood that was available to us at the time for bowmaking was ash but the original bow found in Holmegaard was made of elm. The bow is a mixture of styles with the limbs that have a flatbow shape for half their length and ‘D’ sectioned like a longbow on the limb tips.

The Holmegaard
The Holmegaard

I really like this bow as it is very light in terms of draw weight but fast and whippy when it shoots owing to its ‘D’ sectioned tips. I have included in my previous post on Carving an Ash Flatbow explanations on different bow terminology and the differences between flatbows and longbows. Below are the rough dimensions I made my bow to – I tried to replicate the dimensions of the original bow as much as possible.

Photo 03-03-2014 06 45 26
Holmegaard dimensions

An ash tree had recently been felled and a section of the trunk cut down to just over 6 foot. I scored a line in the bark with a wedge down to the wood to help with guiding the split of the log. Note that the wedge is positioned to one side of the person scoring the line. This maintains a safe position for the worker. I then drove a wedge into the scored line to start the split at one end of the log (upper wedge in the top right picture). A second wedge was driven in at the base of the log to further split the log (lower wedge). Putting in the second wedge loosened the first wedge so I pulled it out and drove it in further down the line to widen the split.

Photo 03-03-2014 06 49 11
Start of split

I just kept repeating this process of ‘leap frogging’ the wedges, and the scored line helped greatly with controlling the direction of the split.

Photo 03-03-2014 06 49 52
First complete split

Once the log had been split I kept repeating the process again and again until all the staves were split out.

Photo 03-03-2014 06 52 19
Finished staves

Using a wooden wedge I shaved off the bark of the stave. I was very careful to remove only the outer and inner bark and not to touch any of the wood. The wood found just under the bark is the most flexible part of the bow and will form the back of the bow. Apart from light sanding this area of the bow will not be touched.

Photo 03-03-2014 06 54 33
De-barking with a wedge

This is the side profile of the stave (top picture). The side profile has been roughly drawn out leaving plenty of room for error. A close up of the handle area can be seen in the bottom picture and the vertical lines are for the stop cuts.

Photo 03-03-2014 06 59 43
Side profile

These stop cuts help greatly when getting rid of the excess wood. As the excess wood is cut out, the stop cuts prevent splits from travelling down the length of the bow. The top picture shows the area around the handle ready to be cut out and the bottom picture shows one of the limbs ready for work.

Photo 03-03-2014 06 56 25
Stop cuts

Some of the tools that are used to take off the excess wood: the axe for the start of the process and a knife and batton to finish it off.

Photo 03-03-2014 07 04 24
Tools for initial shaping

Keeping the stave off to one side of me and resting on a log, I trimmed the excess wood off. As the stave was off to one side I was in a safe position to work with the axe. If the axe had slipped its follow-through path would have been to my side.

Photo 03-03-2014 19 12 43
Axing out

The tool on the left is a draw knife and can be used to finely trim the bow shape. If you do not have a draw knife you can embed the tip of a knife into a piece of wood to act as a second handle and use it as a draw knife. If you choose this method make sure that the piece of wood is on a secure flat surface before pushing the tip into it – never hold the piece of wood in your hand while you do this.

Photo 03-03-2014 07 04 44
Professional and impromptu draw knives

I clamped the bow securely to a workbench and then could easily start to use the draw knife. Here you can see the impromptu method in action; it works surprisingly well if your knife is sharp enough. It does not take long to work your way down to the line.

Photo 03-03-2014 07 03 44
Using the draw knife

A lot of the time I braced the tip of the bow against my stomach as I removed the excess wood. As I worked towards the tip I repositioned the bow on the workbench so that it was held securely without needing to brace it. You can see the side profile of the bow emerging on the picture of the stave propped up against the tree on the right.

Photo 03-03-2014 07 30 57
Side profile blanked out

The next stage was to mark out the top profile of the bow. I used a string to mark out a centre line down the length of the stave (picture on left). Then using my measurements (shown at the beginning) I marked out the shape of the bow (picture on right).

Photo 03-03-2014 07 08 05
Marking out the top profile

The picture on the left is the handle area I drew out and the one on the right is of one of the limbs. Both now have stop cuts sawn in to help with chopping out the bow shape.

Photo 03-03-2014 07 19 26
Stop cuts in place

I enlarged some of the stop cuts to make sure that no split would travel very far. I find that jamming one end of the bow against a tree helps with the axing-out process and that it can be done in a much more controlled, safe manner so that the axe blade can never swing into me. It’s important too to use the axe in a safe and controlled manner. In the bottom picture you can start to see the handle shape appearing.

Photo 03-03-2014 07 23 28
Axing out the top profile

As well as taking off a lot of wood quickly, the draw knife method is useful for taking off fine shavings as you get down close to the line.

Photo 03-03-2014 07 24 12
Draw knife on the top profile

The top profile slowly started to appear as I finely carved the excess wood down to the line.

Photo 03-03-2014 19 12 56
Top profile getting there

The draw knife was very easy to use as the angle of the limb changed from a Flatbow (near the handle) to a more ‘D’ shaped Longbow limb near the tips.

Photo 03-03-2014 07 27 03
The Holmegaard shape is appearing

The ‘D’ sectioned shape of the tips soon started to appear. It was at this stage I decided to let the wood season for a month before doing any more work.

Photo 03-03-2014 16 33 51
Limb tip needing trimming

I seasoned the wood for one week in my garage and for three weeks in a cool spot in my house. This allowed the wood to season enough to start the fine work. During this seasoning process I tied the bow into a frame to induce some reflex into it.

Seasoning
Tied back to keep the shape while drying

One month later it was time to finish the bow. I started work on the tips of the bow so that they would have more of a ‘D’ section shape to them. Making the tips smaller meant there would be less weight in them, allowing them to move forward faster when shooting an arrow. Using my knife as a draw knife I was able to finely carve the shape of the ‘D’ section on each limb. As the tip of the knife is firmly embedded into a piece of wood it is very safe to use and highly manoeuverable.

Photo 03-03-2014 16 31 01
Fine draw knife work

On each tip I came right down to the line but not past it with the draw knife.

Photo 03-03-2014 16 34 14
Limb tip finished

Up to this point I had tested the bow’s flexibility by floor-tillering it. This involves pushing down on the limb and checking to see if I was getting a nice curve or if there were areas of stiffness.

Photo 03-03-2014 06 27 54
Lots of hand tillering

To take off excess wood from areas of stiffness I used a metal cabinet scraper. The scraper only takes off minute pieces of wood and is ideal for this part of the process. I carried on this process of scraping and floor tillering until I got a fairly good curve on both limbs.

Photo 03-03-2014 16 41 35
Time for the cabinet scraper

Before using the tillering pole to finely check the curvature, I had to add knocks to the bow. Some Holmegaard bows have been found without knocks carved into them and it is thought that they may have had bone-tipped knocks added, or some sort of wrap on each limb as a knock. I decided as an experiment to make a knock from some material wrapped around the tips of the limbs. I first tried cordage made from western red cedar bark, but I found that this did not grip the wood firmly enough and kept slipping.

Photo 03-03-2014 16 31 44
Failed cordage knocks

Next I tried rawhide, soaking it in hot water and then wrapping strips onto each end. This took about one and a half days to harden but allowed me to string the bow.

Photo 03-03-2014 16 32 20
Successful sinew knocks

I coated the rawhide in pine pitch to waterproof it so it would not soften and slip if it got wet.

Photo 03-03-2014 16 38 27
Rawhide knocks covered in pine pitch

I just used some strong nylon string at first as a bowstring before starting the tillering process, tying on one end of the string with an overhand loop and the other end with a timber hitch. The string was just tied loosely, with no brace height. This picture is from when making my ash flatbow but the principle was exactly the same. Dick Baugh wrote a good article on tillering on the Primitive Ways website that is worth a read.

Photo 03-03-2014 19 13 31
Tillering string

I then placed the bow on the tiller and in increments slowly bent it to view the curve on each limb. The pictures are of the bow during the tillering process. After viewing it each time I would return to the workbench to scrape wood from areas of stiffness using the cabinet scraper or spoke shave. Also I would raise the brace height a little by shortening the bow string to see how the bow reacted under pressure when braced. This whole process ensures you get a good even curve on each limb and also trains the bow to bend properly.

Photo 03-03-2014 16 47 53
Tillering followed by scraping

This picture was taken at the end of the tillering process with a 4 inch brace height: I was happy to take my first shot now.

Photo 10-04-2009 13 52 43
Ready to shoot

Having seen a few bows in my time still fail (split) at this point, I only drew back on the string about two thirds of my normal draw length for this first shot.

Photo 10-04-2009 14 17 14
First shot

I then set about making my proper bowstring, which consisted of a Flemish twist on one end, a timber hitch on the other and serving the bowstring. Two good sites on this are Sam Harper’s site Poor Folk Bows for the string making and the Archery Talk forum for serving the string.

Photo 03-03-2014 17 13 15
Flemish twist and timber hitch

I used various grades of sandpaper to sand the bow down to get rid of any marks and sharp edges.

Photo 03-03-2014 16 56 14
Hours of sanding

To protect the bow I stained the wood slightly. Then I applied a mixture of boiled linseed oil and white spirits (50/50 at first). After this had dried I reapplied more oil, but with less white spirits each time until by the end I was applying just oil.

Photo 03-03-2014 17 09 24 (HDR)
Coats of linseed oil and white spirits

The next stage was to bone the wood by rubbing the whole bow with a small smooth pebble. This helps to close the fibres, making the bow very smooth, and also helps to lock in the oil. The whole process of boning can take a few hours but leaves a very smooth and shiny finish.

Photo 03-03-2014 17 10 45
Boning with a pebble

Lastly I wrapped on a small leather handle secured with a little glue. I thought about stitching one on but felt the seams might be too uncomfortable when holding it.

Photo 03-03-2014 17 16 02
Leather handle

The completed bow showing the belly, side profile and the back..

Photo 03-03-2014 17 17 42
One bow I am very proud of

I am so glad that the rawhide knocks worked so well on this bow as they were something of an experiment. I don’t know if the size of the knocks slows the limbs down when shooting, but she does shoot fast.

This bow is particularly liked by youngsters as it is so easy to draw but still shoots fast. I managed to capture this arrow just after it had been released by the Holmegaard bow.

Airborne arrow
Airborne arrow from the Holmegaard

Cheers

George

How To…. Carve an Ash Flatbow

Building a bow – from a log to a beautiful bow

I carved this Ash Flatbow back in 2008 while I was on my Bushcraft Instructors course with Woodcraft School and has since been used by scores of my Sea Cadets, and many of my friends and family. The two instructors who taught me to make this bow were John Rhyder (head instructor at Woodcraft School) and Nick McMillen (now of the Field Farm Project). Both of them as well as being professional outdoorsmen are top bowyers.

Photo 25-02-2014 17 25 00
An Ash Flatbow about to have its first shoot

This How To…. is designed to lay out all the main steps I undertook to make this bow and if you have reasonable woodworking skills then it will aid you in building a bow for yourself. If you think your skills are a bit rusty then I advise that you attend a bow-making course. In addition to John and Nick who still offer courses I can recommend Wayne Jones of Forest Knights School, Paul Bradley from The Bushcraft Magazine (though I’m not sure if he runs courses anymore) and Will Lord as excellent bowyers to learn from.

I made some drawings on my initial write-up in 2008 and thought it easiest to take some screen grabs of this bow theory for this blog.

Bow theory, terminology and scale

So the first question is – What is a bow?

Photo 19-02-2014 20 50 56
So what is a bow

Some bow terminology for you to remember as I will be mentioning some of this in the post:

Photo 19-02-2014 20 50 10
Some bow terminology

Not to scale, but these are the dimensions I mapped out for my bow:

Photo 19-02-2014 20 50 30
My bows dimensions

Splitting out staves

The ash tree was felled by the course instructor, John Ryder.

We scored a line down the length of the log, all the way through the bark and just into the sap wood, using an axe. This helps with guiding the split of the log.

We then drove an axe into the scored lined to start the split.

Note that the axe is at 90 degrees to the person hammering it in. This maintains a safe position for the worker.

Photo 25-02-2014 16 19 29
Splitting out the staves – Step 1

The first axe is followed by a wedge and another axe to widen the split.

The scored line helped greatly with controlling the split.

Photo 25-02-2014 16 21 21
Splitting out the staves – Step 2

As other wedges are driven deeper into the split the previous ones can be removed to be used again.

An axe can also be used to cut the wood fibres not split by the wedges.

Photo 24-02-2014 16 40 26
Splitting out the staves – Step 3

Once the log has been split the process is repeated again and again until you have the staves you require.

Photo 25-02-2014 16 25 11
Splitting out the staves – Step 4

Here are two staves ready for shaping.

Photo 25-02-2014 15 21 55
Split Staves

Shaping the bow

Using a draw knife I shaved off the bark of the stave. I was very careful only to remove the outer and inner bark and not touch any of the wood.

The sap wood found just under the bark is the most flexible and will form the Back of the bow. Apart from light sanding, this area of the bow is left untouched. All of the work on shaping the bow will be done on the sides and on the Belly (the part of the bow facing your belly when shooting).

Photo 25-02-2014 16 22 48
Trimming off the bark

Using a string I marked out a centre line down the length of the stave.

I then drew onto the stave the shape of my bow (using the measurements shown at the beginning of this post).

The first picture is the handle area and the other two are of the limbs.

Photo 24-02-2014 16 37 21
Marking out the bow

I then sawed stop cuts all along the stave: as a piece of wood is cut out with the axe the stop cuts stop a split running through the whole bow, meaning you only cut out the wood you want to remove.

Here you can see the stop cuts. Note too how the bow is wedged against a tree and resting on a stump and the axe is in front of me and at 90 degrees away from my body for safety.

Photo 24-02-2014 16 34 13
Stop cuts and axing out

Once the top profile is cut out the side profile is next.

Using stop cuts again I roughed out the stave until I got the basic shape of the bow. The drawing below shows the shape of the side profile (I didn’t take a picture of this I am afraid).

Side profile
Side profile

A finished blank stave ready to be seasoned for a while.

Photo 25-02-2014 15 25 35
Blanked out bow ready to season a bit

At this point I left the bow to season for a month: one week in my garage and then three weeks in a cool spot in my house.

This allowed the wood to season enough to start the fine work.

In the pictures below the bows are clamped down for the fine work.
A clear picture of the bow’s rough profile can be seen in the bottom picture.

Photo 25-02-2014 16 57 14
Clamped out bows ready for fine work

To begin with I used a draw knife and then moved onto a spoke shave.

Having the bow clamped allowed me to use these tools safely and with precision. I took the pictures so the hands you see aren’t mine: the top picture is Phil Brown of Badger Bushcraft using the draw knife and the bottom picture is Mollie Butters of the Field Farm Project using the spoke shave.

Photo 25-02-2014 16 57 48
Draw Knife and Spoke Shave

For very fine shaving I used a cabinet scraper. With all of these tools I only worked on the belly and the sides of the bow working down to the tips of each limb. I was looking to get a neat taper effect from the handle to the tips as shown in the plan in the picture on the bows dimensions.

Photo 25-02-2014 16 58 52
Cabinet scraper taking off minute amounts

Tillering

Throughout this fine work I tested the bow’s flexibility by floor tillering it.

This involves pushing down on each limb to test its flexibility (check out this thread on the Primitive Archer site on floor tillering).

I was looking for an even flexibility in each limb.

Photo 25-02-2014 16 48 36
Hand Tillering to begin with

Once floor tillering couldn’t tell me any more I needed to move to the tiller stand, so I carved out the knocks on each limb to hold the string using a round wood file.

The knock needs to be at an angle of 45 degrees and deep enough so that the string doesn’t slip off.

Finally I sanded the knock so that the edges would not abrade the string.

Photo 25-02-2014 17 00 39
Carve you Knocks

I just used some strong nylon string at first.

One end of the string is tied on with an Overhand loop and the other end with a Timber hitch.

20140226-140359.jpg
Tillering bow string

At this stage the bow was not put under any tension by the string. This was so that I could train the bow to bend incrementally by using the upright tiller. Putting the bow under too much tension would lead quite quickly to it snapping or cracking.

Dick Baugh wrote a good article on tillering on the Primitive Ways website that is worth a read.

Photo 25-02-2014 17 02 05
Ready for the Tiller Bar – No Brace Height

I then placed the bow on the tiller post and in increments slowly bent it, carefully watching the curve on each limb.

Photo 25-02-2014 17 16 33
First Tiller

The following pictures are of the bow during the tillering process. After viewing it each time I would return to the workbench to scrape wood from areas of stiffness using the cabinet scraper or spoke shave. The close up pictures show in detail the top and bottom of the tiller when set up.

Photo 25-02-2014 17 31 58
Further Tillers

The shape of the limbs can be viewed easily on the tiller: here I could see that the right hand limb was still stiff and needed working on.

Photo 25-02-2014 15 29 46
Left limb is good – right limb a bit stiff

The next stage involves shortening the bow string so as to raise the brace height (the height of the string above the handle when the bow is strung up) then testing the bow on slowly increasing brace heights on the tiller. To do this you have to unstring the bow (at this stage that simply means sliding the loop off the knocks and loosening the Timber hitch) and adjust the Timber hitch to shorten the string.

To re-string the bow after the Timber hitch has been adjusted and re tightened, hold the bow with the bottom limb (the one with the Timber hitch) trapped against your instep of your foot. Have the back of the bow facing you and with your left hand (if you are right handed) firmly hold the handle, then with your right hand slide the loop back up to the knock.

The first brace height I set the bow at was very low (the string touching the handle) as I only shortened the string by about an inch. A good site explaining how to string a bow can be found on the Archery Library website.

Photo 25-02-2014 17 32 42
Bow Braced very slightly (string just tensioned)

A two inch brace

Photo 25-02-2014 17 33 14
A 2 inch brace

Tillering by hand with a two inch brace

Photo 25-02-2014 17 24 26
Checking the feel of the bow as I went on – Still a 2 inch brace

Final brace about six inches. Tillering now complete with evenly curved limbs

Photo 25-02-2014 17 35 42
Six inch brace

After a bit of tuition from Scott it was time to take my first shot and I even managed to hit the target.

Photo 25-02-2014 17 25 00
Preparing for the first shot

I did not pull a full draw on the first shot in case the bow split.

Photo 25-02-2014 17 37 13
Arrow away

In the picture below you can see one that did not make it: Charlie’s bow had developed a hinge in one limb that gave under tension.

I think he took it in his stride.

Photo 25-02-2014 17 26 00
One that did not make it – Charlie took it well

String making

The next stage is to make the string for your bow.

Traditionally natural materials such as sinew, rawhide, plant fibres (nettle) or linen were used but we used modern materials for our bows. As modern string such as Dacron B-50 (50lb) is non biodegradable there is less chance of the string breaking, which means less chance of your bow breaking.

To make the string we used a plank with a clamp at either end, at a distance from each other of 18 inches longer than your bow length. Tie one end of the string to a clamp and run the string around the other clamp, then around the first one again. Keep doing this for five more cycles.

String making set up

Cut the string at each clamp and you should be left with two sets of five strings.
Then follow the steps in Sam Harper’s site Poor Folk Bows to make a Flemish string. I did not document this step but he has a good tutorial on making the loop, twisting the string together and making the timber hitch at the other end.

Stringing up
Stringing up

The new string is attached by sliding the loop over one end down past the knocks and attached at the other end with a Timber hitch. You need to adjust the Timber hitch so that the string length is the correct length for the brace height you want. When you have the string set at the correct length, restring the bow and clamp it to a workbench.

The string now needs to be ‘served’ in the centre of the bow where the arrow will be knocked. The Archery Talk forum has a good thread on serving a bow string. Have a look, as my pictures on this part of the process are not the best.

Photo 25-02-2014 17 46 57
Bow clamped ready to serve the string

The serving of the string is basically a whipping to keep the individual pieces of string that are loosely wrapped around each other together and provide a firm area to knock into your arrow. I also served the top of the string near my loop to stop it unraveling. The little device you see in the pictures is known as a Serving Jig. After finishing serving the string I put some superglue at the end to keep it in place

Photo 25-02-2014 17 51 38
Serving the string

The finished loop needs to be wide enough to slip off the knocks but small enough to grip them when in place. In the picture on the left below you can see that it has been served for about 12 cms right up to the loop. The bottom limb just needs a timber hitch, though I did twist the end as if making cordage to keep it neat.

Finished bow string
Finished bow string

Final touches

The bow was now ready for some final sanding and oiling.

Photo 25-02-2014 17 47 32
Ready for the final touches

Using various grades of sandpaper, I sanded the bow down to get rid of any marks and sharp edges.

Photo 25-02-2014 17 54 47
Lots of sanding

To protect the bow I stained the wood slightly then applied a mixture of boiled linseed oil and white spirits (50/50 at first). After this had dried I reapplied more oil, but with less white spirits each time until finally I just applied oil.

Photo 25-02-2014 18 01 11
Oiling and staining

Lastly, I glued on a small leather handle. I thought about stitching one on but wanted to keep the clean line of the flat leather.

Photo 25-02-2014 15 26 16
Simple leather handle glued on

The completed bow.

Photo 25-02-2014 17 59 23
One Finished Ash Flatbow

This bow has been used by scores of my Sea Cadets over the last six years and still shoots as sweet as the day I finished her.

I enjoyed making this bow, it was my first but it was definitely not my last.

Cheers

George

How To…. Build a Bhutanese Bow

Back in August of 2012 at the BCUK Bushmoot I learnt how to make a Bhutanese Bow with Wayne Jones of Forest Knights. As far as I know Wayne is the only instructor in the UK running classes in making this type of bow. I hope he runs another one at this year’s Moot.

Photo 24-01-2014 11 03 28
The Bamboo Bhutanese Bow

This is a quick bow to make when you have an instructor like Wayne to guide you. The bow is made up of two pieces of tapered bamboo joined together in the middle by some sort of cordage or tape around the handle area. I tried to take pictures of all the steps but must admit to missing a few as I got so wrapped up in the whole process. To make up for this I rehandled the bow at home and took some pictures of the missing steps.

I have done a bit of research about this type of bow. It seems that archery is a national sport in Bhutan with many villages in the country running archery competitions. Kids as young as three are taught how to use the bow. Due to the nature of bamboo the outer layer of the bamboo becomes the belly of the bow and the inner part becomes the back: as the outer layer is very hard it will not take the expansion forces exerted as you draw the bow (it will crack), but as it is a grass the inner area (which is fibrous) is more flexible.

Below on the left is a picture of the finished (reworked) bow and on the right Spikey is holding the tube of bamboo we used to make it.

Photo 24-01-2014 11 16 01
The finished article and how we started

Wayne Jones researched the bow for me as well and found this in the Bowyers Bible: ‘Unless the bamboo wall is unusually thick it’s best to overlap two billets at the grip secured by a couple of rivets made of nails or dowels, the grip is then wrapped with rawhide, sinew or even tape. Overlapping stiffens the midbow and increases poundage per bow length. Such bows can be made in minutes. Even though “quickie” bows, they are excellent in every regard.

This design is a good choice for kids’ bows: quick and easy to make, and fairly indestructible.’

Wayne brought a supply of large bamboo to the Moot for us to use. With this type of bow you need to use very large bamboo so that when you split it into quarters you get fairly flat limbs. I do not know the type of bamboo that was used or where Wayne sourced it but I am sure if you were to ask him he would help you.

In the first picture below Wayne is showing us two limbs made from one piece of bamboo he had carved earlier. As bamboo gets thinner as it grows higher you need to make both limbs from the same piece of the column to ensure both limbs are of the same width and thickness.

I cut out a section of tube that was 103 cms long to begin with so that when the two limbs were joined together the bow would be my height. NB I am not 2m 6cms tall, but as the limbs overlap at the handle these measurements produced a bow of my height. You will need to experiment for yourself.

Photo 20-01-2014 16 40 51
Finished limbs and start of the bow

I used an axe to batton out the bamboo into quarters and selected the best two pieces to work with. I made sure when I was battoning that I kept the blade of the axe at 90 degrees to my body. This would ensure that if the axe slipped out of the split it would swing away from me.

Photo 20-01-2014 16 39 33
Battoning out the limbs

Here you can see many of the battoned-out pieces of bamboo ready to be shaped into limbs. You can clearly see the node plates on the inside of each limb, which keep the structure rigid. These need to be knocked off and eventually filed flat.

Photo 20-01-2014 15 12 54

In this picture you can see Mark using the back of his axe to knock off each piece of the node plates.

Photo 20-01-2014 16 31 23
Breaking the node plates

To make full use of each limb it is best to use string to mark out its shape. Allow an extra half centimetre or so so you can finely trim the limb after you have axed the shape out. I made the handle area (thicker end) about 5 cms wide and the tip of the limb (thinner end) about 3 cms wide. Once you have blanked out the first limb you can use this one to mark out the second limb so it is the same shape.

Photo 20-01-2014 16 31 32
Using string to draw the limb shape

Keeping the limb to one side of my body, I experimented first with using an axe to cut the excess off but soon swapped it for a large chopping knife loaned to me by my friend Sargey (Andy Sergeant). This was so sharp with such a good weight behind it that I soon had the first limb blanked out. I then used a smaller knife to trim the limb down to the line I had marked with the string. I used this finished limb to mark out my second limb and repeated the whole process until I had two roughed-out limbs.

Photo 20-01-2014 16 41 39
Shaping the limbs

I used various tools such as my Japanese rasp, a cabinet scraper, a small knife and wood files to smooth out what was left of the node plates and to curve all the edges of the limbs. If you do not smooth off all the edges, you don’t just risk a splinter, there’s a good chance your finished bow will develop a split when you draw it.

Photo 20-01-2014 16 32 35
Smoothing the plates

Take your time smoothing the plates and edges down.

Photo 24-01-2014 10 07 40
Smoothed plates and sides

The outer layer of the bamboo is left untouched and this will become the belly of the bow. The smoothed inner side will become its back.

Photo 24-01-2014 11 08 17
The belly (left) is left untouched – The back (right) is smoothed

I used a rounded file to produce the nocks to hold the bow string. Make sure you get them the right way round.

Photo 23-01-2014 15 48 07
Nocks produced with a round file

Make sure the edges of the nocks are sanded down so there are no sharp edges. A sharp edge will potentially cut your bow string and could cause a split to occur.

Photo 24-01-2014 10 09 02
Lined up neatly and the edges rounded off

When I first built this bow I left the handle area as you see it in the picture below. After shooting the bow I found the handle area just too wide for a comfortable grip.

Photo 23-01-2014 16 37 27
Ready to work the handle area

I marked out one handle so I would lose 1 cm on each side, making the actual handle 3 cms wide. Then with a sharp knife I carved out the excess.

Photo 24-01-2014 10 11 27
Mark your handle area on one limb, trim off the excess and then use the first limb to mark out the second limb

I then used the first carved handle to mark out the second handle and carved that one as well.

Photo 24-01-2014 10 11 48
Trim off the excess from the second limb and you are ready to join them together

To take this picture I got my son Finlay to hold the tape taut and my wife Alison rolled the bow to tape the limbs together.

Photo 23-01-2014 18 00 54
I used help to bind the handle. Keep the tape taut and roll the limbs

This method ensures the limbs stay in the correct position and the tape is put on as firmly as possible. Once I had the limbs secured I taped up the middle of the handle by myself.

Photo 24-01-2014 10 13 57
Secure both ends

I find that the tape does not offer a good grip so I put on a leather handle using a common whipping technique.

Photo 24-01-2014 10 14 49
Finish taping the handle and add any leather for a comfortable handle

Tillering is the process of testing the bow to see if it forms a balanced curve on each limb. Initially we had just a piece of paracord attached to the bow to do this. The tillering stick in the picture allows you to see if the limbs are balanced. If they are not balanced you need to remove a small amount of the inner side of the bamboo using a light rasp or cabinet scraper wherever the limb looks stiffest. This is one part of the process that is very hard to show without taking a whole string of pictures and probably where going on a course and getting one-to-one tuition on it pays dividends. Dick Baugh wrote a good article on tillering on the Primitive Ways website that is worth a read.

Photo 20-01-2014 16 42 58
Tillering

Wayne supplied some Dacron for our bow strings. I twisted one end as you would do to make cordage and used that to make a timber hitch for one end of the bow.

Photo 24-01-2014 10 09 40
Timber hitch

For the other end I created a loop using the Flemish twist method. Sam Harper in his blog Poor Folk Bows has an excellent article including a video on making the Flemish twist and the timber hitch.

Photo 24-01-2014 10 10 26
Flemish twist

The finished bow. This was taken after I had reshaped the handle. I plan to wrap the exposed tape in strips of rawhide to cover them up.

Photo 24-01-2014 08 23 08
Ready to shoot

I like this bow much better now that I have rehandled it as it is far more comfortable to hold. I think some more of the cadets will also want to use it now because of the reduced handle size.

Photo 24-01-2014 11 03 28
Shoots well

A nice shot of the bow in action with an arrow in flight.

Photo 20-01-2014 15 34 03
In action with the cadets – Spot the arrow.

If I could ever source some of this bamboo I would definitely make one or two more. In comparison to my Ash Flatbow and Holmegaard this bow shoots just as well but took only a fraction of the time to make.

If you have further information or links on this type of bow I would love to hear from you.

Cheers

George

How To…. Build a Father & Son Bow

A very quickly made bow – It should take anyone competent with a knife and saw about 1 hour to make. The bow is made up of two poles – The larger is the Father and the smaller is the Son. I still have the first Father & Son bow I made about 5 years ago and it still shoots well. I use these bows typically on ranges of less than 20 metres but on a high arc they will shoot an arrow between 60 and 70 metres. Not bad for something made in an hour but only about 20 to 30lbs in draw.

DSC07778
Two Father & Son Bows (Centre & Right) up against my Holmegaard (left)

I was introduced to this sort of bow from Mark of Kepis Bushcraft when he posted a You Tube video where he made one for his son (I have put a link to the video at the bottom of the article). I realised instantly that this would be an excellent tool to use with my Sea Cadets. Funding is always tight so the thought that I could make bows quickly and that they could shoot well got me going.

I was originally told that there was no historical record for this type of bow apart from being created by some locals in the States during the 1930’s to fool some Anthropologists but since have come across these types of bows being called the Penobscot or Wabanaki bow (I have included a link at the end of the article to the Primitive Archer website to give more detail on the history). So far from my reading this type of bow dates back at least 1500 years and comes in a number of different types.

My cadets like to refer to the bow as the X Wing Fighter Bow. I can kind of see why.

IMAG0616
The X Wing


This step by step is to guide you through how I make one of these bows. I have tried to make the steps as clear as possible but please leave a comment if you are unsure about any stage.

I do not make them in a primitive way as my aim is to have a useful tool in limited time that my cadets or my own children can use quickly. After researching this bow more though I will be interested in making one in a primitive way.


WP_20131020_050
Finlay’s choice
WP_20131020_048
Catherine’s choice


The Limbs

I typically use coppiced shoots of Hazel but I will use young Ash if it is available. I have tried Sycamore before but I found that this wood tended to snap easily.


WP_20131020_049
Cut at the base


I cut poles about thumb thickness in diameter (but use what you can find). I always make my cut at the base of the coppice so to stimulate regrowth.


WP_20131020_067
Three Father & Son Bows ready for making


I like the Father pole to be as straight as possible but the Son can either be straight or curved. When making one for myself I cut the Father to the height of my chin. With younger children I normally make the bow just bigger than them. I have found if you make the bow too short they can snap quickly. For the Son I normally cut another pole about two thirds of the length of the Father.


WP_20131020_068
Finding the Belly


I work the Father first. I let the pole roll in my hand to determine the Belly and the Back of the Bow. To keep things simple the side of the pole facing the ground will be the Belly, the side facing the sky will be the Back. If you want to play about with recurve shapes feel free to switch things around.


WP_20131020_070
Mark the Belly


I then mark the Belly side with my knife.


WP_20131020_071
Using a string to measure the length of the bow


I use string to measure the length of the pole


WP_20131020_073
Fold the string


Fold the string in half.


WP_20131020_075
Find the centre


 Lay the doubled up string back on (the Belly) the pole).


WP_20131020_078
Mark the centre


Make another cut on the Belly side to mark the centre of the bow.


WP_20131020_079
Mark out the handle


 Holding the pole in the middle with the Belly facing me I then make a mark on either side my fist to show where the handle area will be.


WP_20131020_081
Marked out


 The marks I have made also help me to see clearly which part of the pole is the Belly at this stage. I want that as I am leaving the bark on this bow and I have found I can lose sight of pen or pencil marks on bark. If you take the bark off then pencil or pen marks will work well.


Getting that Curve

WP_20131020_082
Start at the tip
WP_20131020_085
Work your way to the handle


The next stage is to see if you can make both ends of the pole curve evenly. I usually find that the thicker end of your pole needs to be shaved down. I work from the end of the pole backwards to the handle area shaving off small pieces at a time. I will take off more wood from the tip of the pole than I will from the handle area. You want to have a tapered shape on each limb.


WP_20131020_088
Keep testing the curve


Keep testing the pole until you get a consistent curve on both limbs.


WP_20131020_089
Trim the sides if needed


I do not like to go past the Pith of the wood as this will cause the limb to form a hinge and snap. If you are getting near the Pith then take some wood of the side of the limb.


WP_20131020_091
Keep checking the curve


Trim back the wood on both sides if needs be. If you can get a good curve then stop but it does not need to be perfect (you are not making a Longbow).


WP_20131020_092
Cut the Son to about two thirds of the Father


Cut the Son pole to about two thirds the size of the Father. I have seen though where the Son is very curved that it can be half the size of the Father.


WP_20131020_093
Belly of the Son


I find the Belly of the Son as I did with the Father and mark it. Any trimming of the limbs this time is done on the Back of the bow and not the Belly. This is because the Back of the Son will be attached to the Back of the Father.


Mark the centre of the Son with string.

WP_20131020_096
Measure again using the string
WP_20131020_094
Mark the centre


WP_20131020_095
Checking the curve


Trim the limbs (on the back) and test for a good curve.


Producing the X Wing

WP_20131020_100
Setting up the join


It is far easier to join the limbs if you have some help (thanks Roddy). I sometimes join the poles with a common whipping and sometimes just use strong tape. For this bow I am going to use tape and then at the end make a handle with a bit of whipping.


WP_20131020_106
Joining the poles


With one person holding the two poles (make sure the Backs of each poles are touching) the other person can attach tape. I find it best if you roll the poles rather than wrapping the tape. Tape the whole handle area.


WP_20131020_107
Prepping the spacer


If the Son has a very pronounced curve you do not need to do the next step. Most of the bows I make have poles that are not very curved so I put spacers in near the handle. Take one small branch and trim if necessary.


WP_20131020_109
Battoning in the spacer


Then using a baton hammer the spacer down to the handle.


WP_20131020_110
Trim the spacer


Trim the spacer. Be very careful to keep your hands clear of the blade here. Out in the woods I don’t always have a handy makeshift table to work on.

WP_20131020_115
Last trim


Repeat on the other side and you will find that the Son pole goes into a more pronounced curve.

WP_20131020_116
Secure the spacers


Tape around each of the spacers to secure them (or whip them).


The Nocks

WP_20131020_122
Mark the X


I then lay the bow on its side to work on the nocks. The nocks on the Father pole need for this type of bow to be in the shape of an X. This is to accommodate the string to the Son and for the main bow string. I firstly make an X cut.


WP_20131020_123
Carve the X nock


Then cut the knock out until I get this shape. Make the edges of the nock that are closest to the handle as flat as possible so as to catch the bow string when it is strung.


To make the nock on the opposite side of the pole roll the knife around the pole from the middle of your completed nock and repeat the cuts. Repeat the whole process on the other limb so you have four nocks.


WP_20131020_127
Line up at the middle of the completed nock
WP_20131020_128
Roll the pole


WP_20131020_129
Make the other X nock on the opposite side of the pole


WP_20131020_124
Cut the Son nock


The nock on the Son should be pointing towards the nock on the Father. An X nock is not needed but just a single nock on each side. Remember to repeat the nock on the end of the Son.


WP_20131020_126
Lined up nocks


Here you can see the nocks lined up. On some primitive Father & Son bows the Son limbs are tied of to the Father limbs about half way down the Father limb. I do not do that with these quick bows as I find the poles are not wide enough to incorporate a separate set of nocks half way down the limb. Experiment if you can though and let me know if it works for you.


Stringing up

Keeping things as cheap as possible I like to use Bailer twine for the string (thanks Phil). Either tie the ends off or use tape to seal the ends to stop it fraying. I like to use tape.  Bailer twine has the benefit that it does not stretch under tension. Use whatever string that comes to hand but try to find something that does not stretch. In a primitive bow the string could have been made up of sinew broken down into fine strands and woven into cordage.

WP_20131020_130
Tie off the bottom Father & Son limbs


I decide firstly which part of the bow will be the top and which will be the bottom. On the bottom I attach the Son to the Father with string. Use knots that you can easily untie. Also the string needs to be taught but not overly tight.


WP_20131020_131
Make a loop


To make the main bow string cut a length about one and a half times the length of the bow and make a loop at one end. To make this loop I just made an overhand knot on the bight. The loop needs to be small enough to catch the nock when you string the bow but big enough to be slid down the upper Father limb when unstringing the bow. Try to keep the knot loose until you get the loop the right size.

WP_20131020_132
Tying off the bow string


Get someone to help you measure how long you need to make the bow string (thank you Kate). With the loop attached to the upper Father limb hold it in place about one hand width down from the nock and tie a knot to the bottom nock on the Father pole. This will allow about a brace height of one fist.


Again your knot should be able to hold under strain but easy enough to untie to make adjustments. I like to wrap the string around the nock then back on itself (shown in the enlarged example around the tree) then I wrap the remaining string a few times around the nock before finishing with overhand wraps or similar. This makes it easy to untie to make adjustments.

WP_20131020_143
Knot the bottom nock
IMG_1767_zps5dc8d59b
Enlarged example before tying off


After warming the wood up by bending it from the middle slide the bow string loop up into the top knock. To do this I trap the bottom of the Father bow on my instep, hold the handle in one hand and with the other hand both bend the upper Father limb and slide the loop into place.

Ideally the brace height (handle to the bow string) should be a fist and thumb in height. You may need to adjust the string length to get this.
Then attach a piece of string to the end of the other Son limb and tie it off over the bow string loop on the father limb in a knot that will come undone easily. Try and get the distance of these limbs to match the distance on the other end. This way you can always brace the bow fully.

When unstringing the bow all you need to do then is untie the knot on the top Father limb (the string to the Son) and then slide the loop on the Father limb down towards the handle.

WP_20131020_147
Bow is strung ready to have the final knot done
WP_20131020_148
Finally strung up with taped off ends


As Bailer twine can be hard on the fingers I roll tape onto the nocking area of the bow string (you may not need to do this if your string does not cut into your fingers).

WP_20131020_149
Strip of tape ready to be rolled
WP_20131020_150
Rolled tape. Do not make it to thick


The Handle

It is not a requirement but I like to make the handle more comfortable with some Common Whipping.

WP_20131020_152
Common Whipping start
WP_20131020_154
Common Whipping end


WP_20131020_155
Finished handle

The Finished Bows

 Two happy children looking forward to trying out their new bows. Finlay’s bow developed a hinge so I added some extra tape to support it. It still shoots well.

WP_20131021_002
Finlay
WP_20131021_004
Catherine


Bows in action.

DSC07778
Airborne arrow
IMAG0616
Good for all ages


This is just one way of making this type of bow but it has been tried and tested by hundreds of Sea and Marine Cadets over the years.
Good luck and it would be great to hear of anyone making one of these bows.

George

Links 

Kepis Bushcraft video on a quick Father& Son bow

http://www.youtube.com/watch?v=AQIaZCuMzCM

Barry Minditch video on a primitive Father & Son bow

http://www.youtube.com/watch?v=NgIlr5xgC4E

Some history on the Father & Son bow

http://www.primitivearcher.com/smf/index.php?topic=10369.0