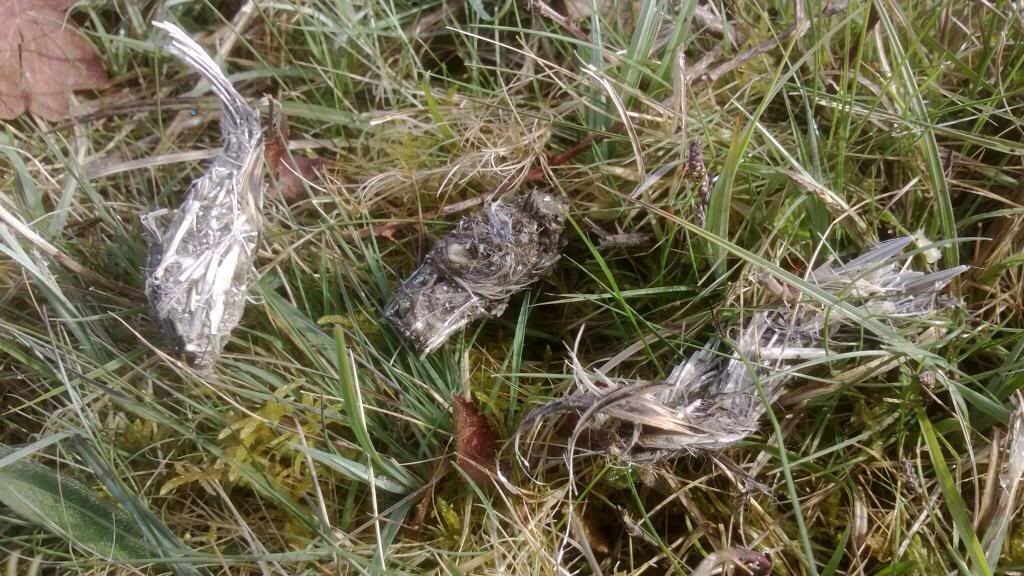
Currently I am on holiday in the North West of England. I was reflecting on the fact that the 2020 Bushcraft UK Bushmoot had to be cancelled due to Covid when I suddenly realised that I had never got round to writing a blog on the 2020 Wintermoot that took place last February – pre-Covid, of course. I had published plenty of videos from the event but not actually written it up – probably due to the fact I was still digesting the enormous amount of food I had eaten in that week 🙂
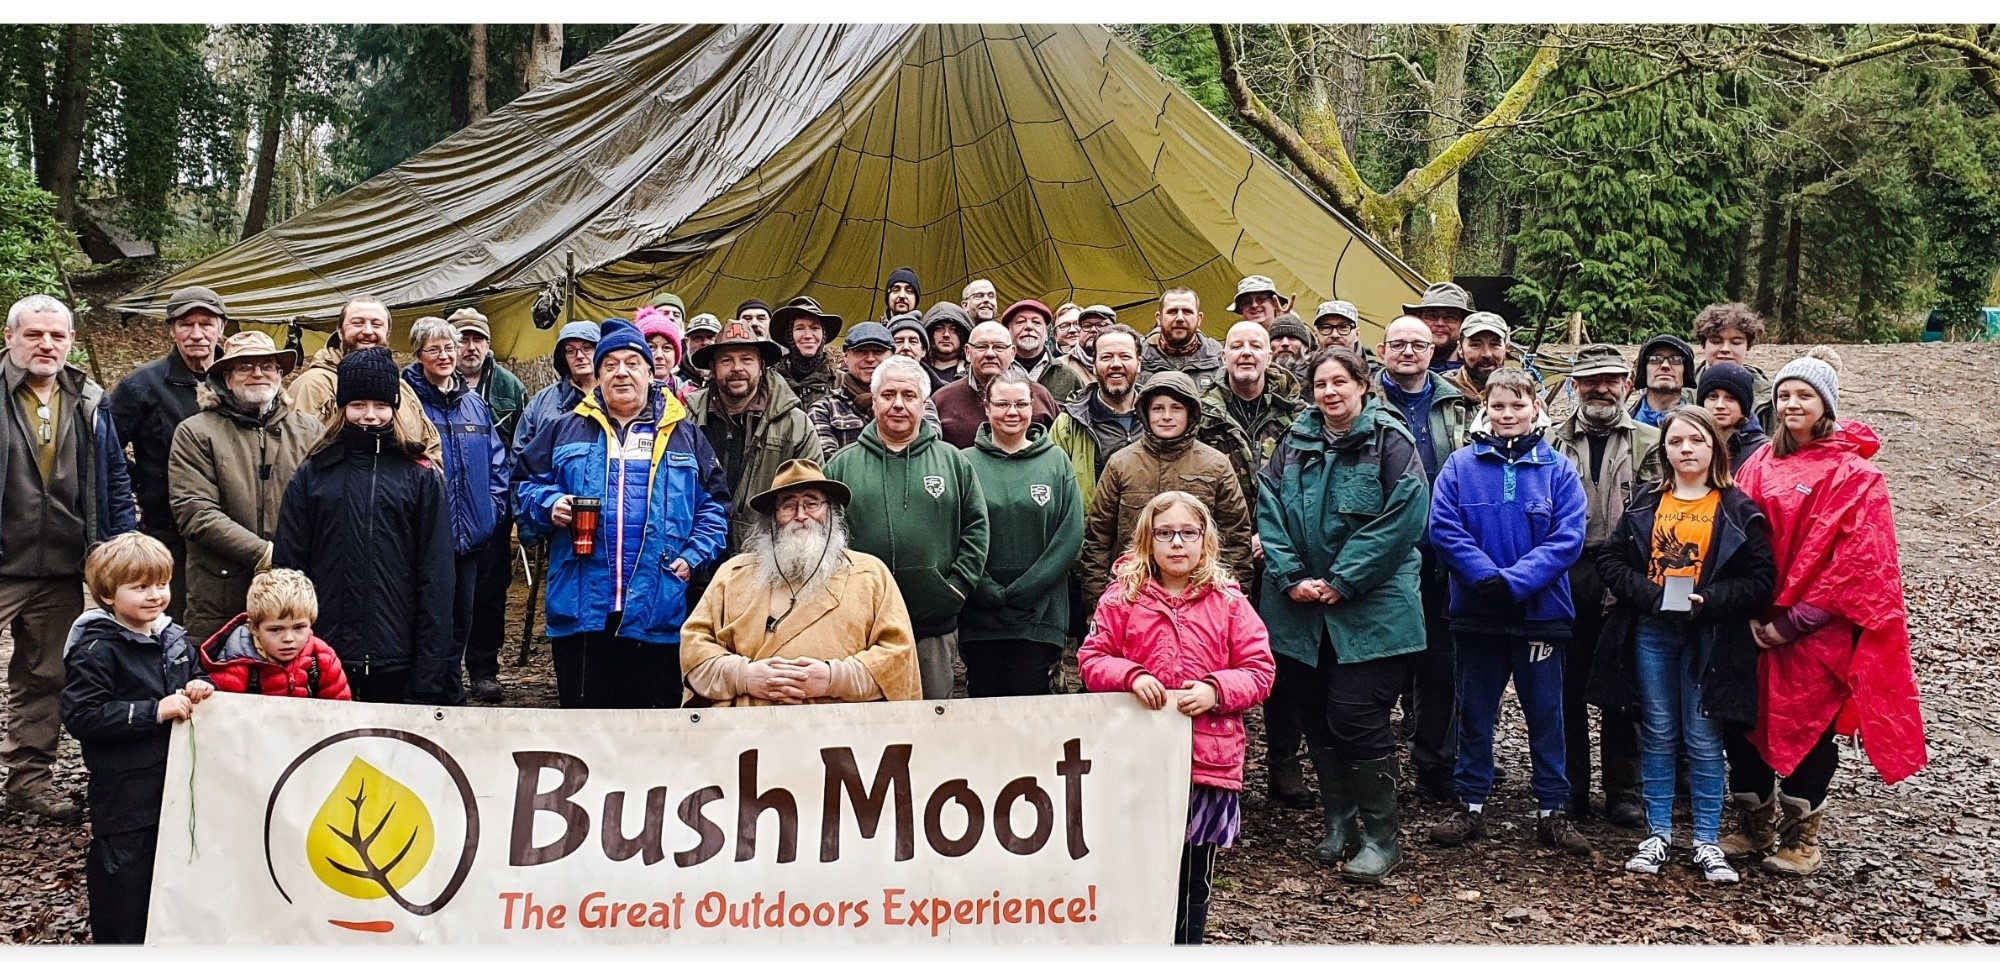
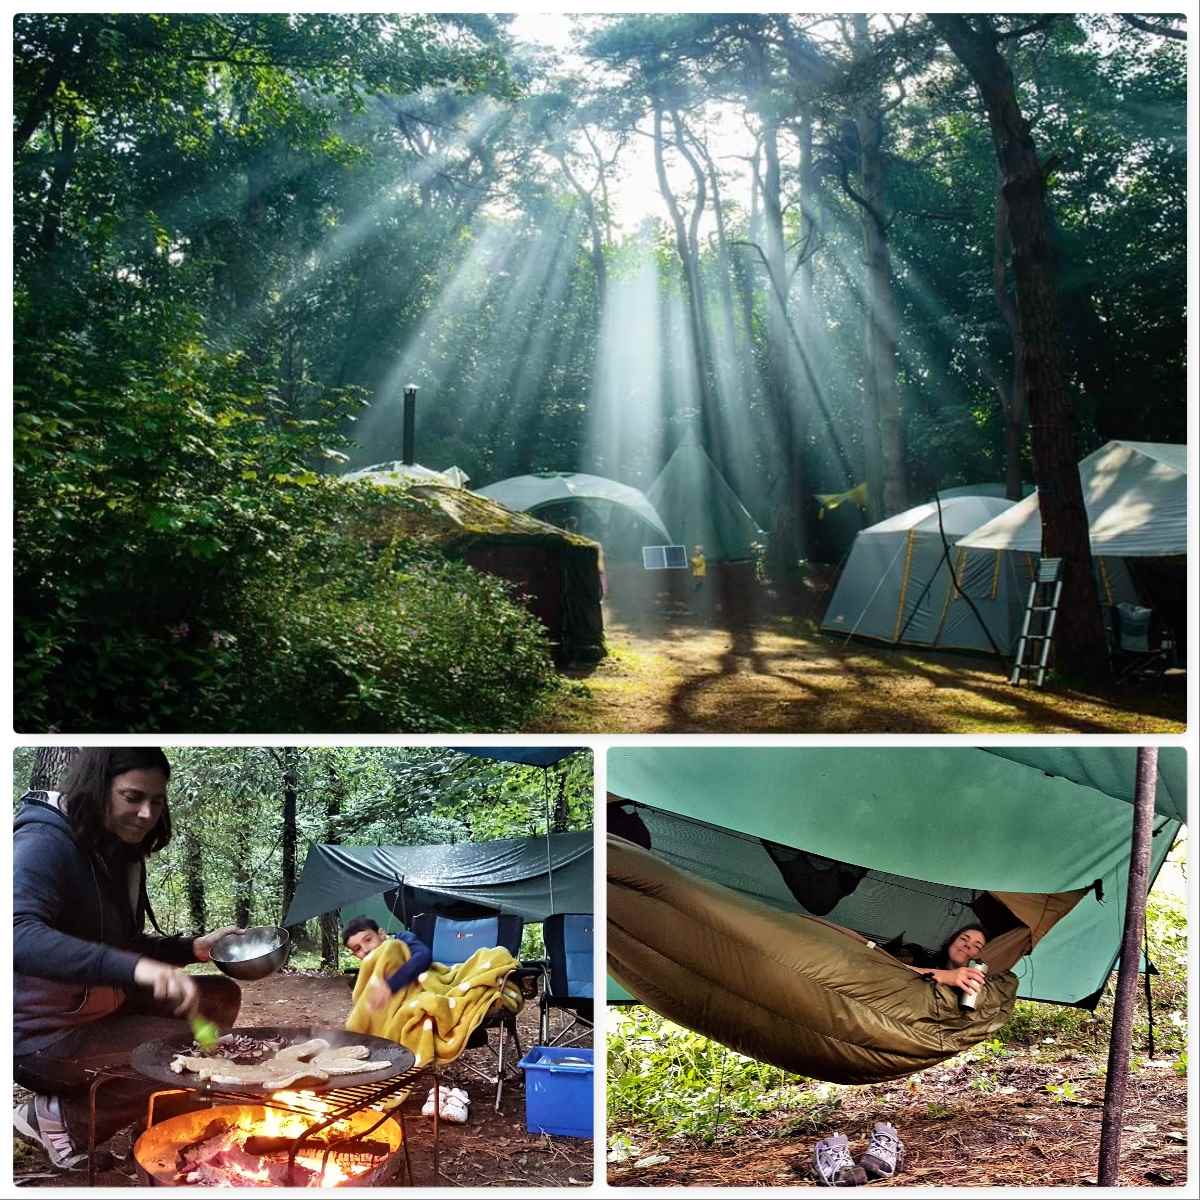
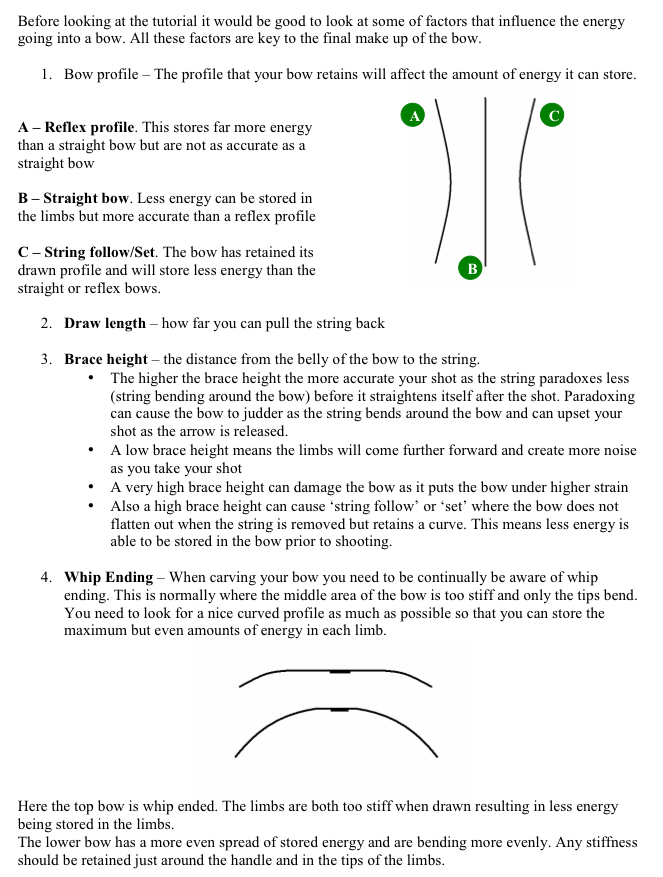
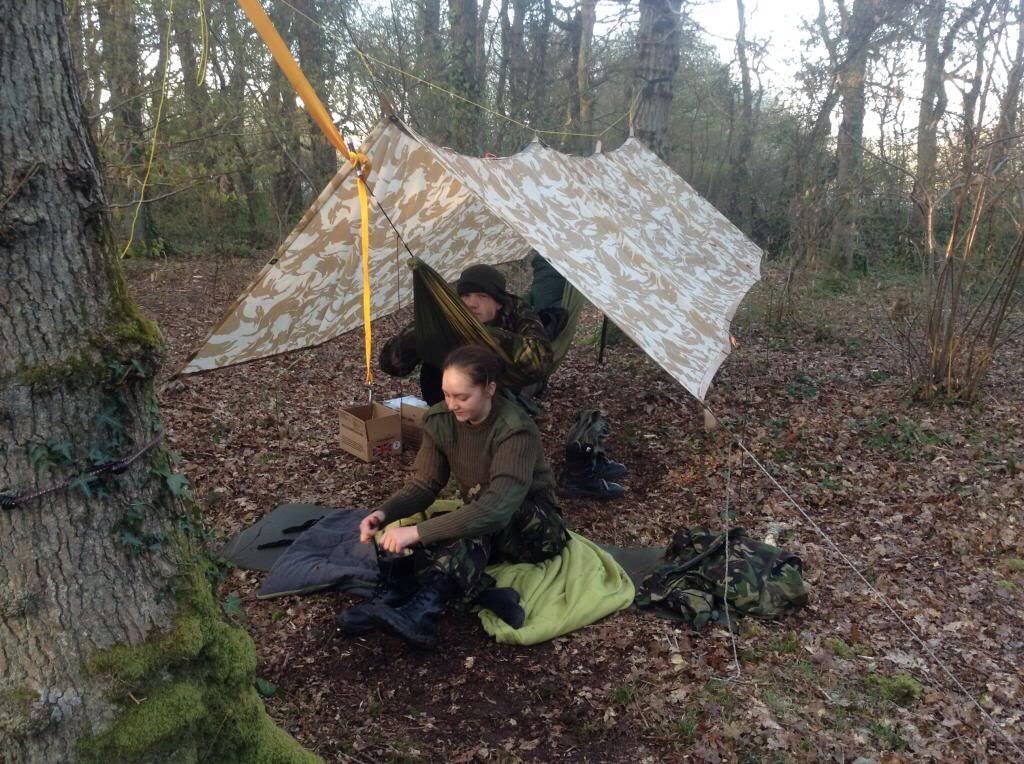
The Wintermoot is held at the same place as the summer Bushmoot, at Merthyr Mawr in South Wales, and as it is a smaller affair (around 45 folk in comparison to the 200-300 at the summer event) it feels very homely. I soon had my camp set up (seemed strange with no leaf cover over me and no family with me) and the kettle on.
Home Sweet Home
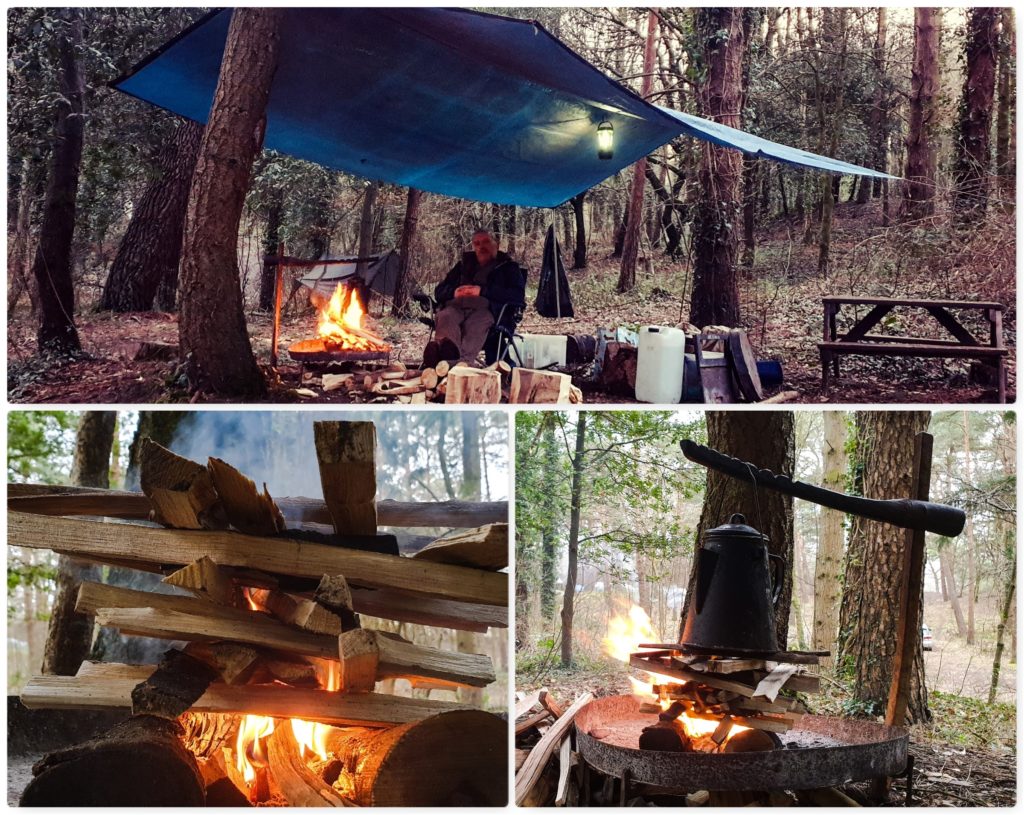
Set Up
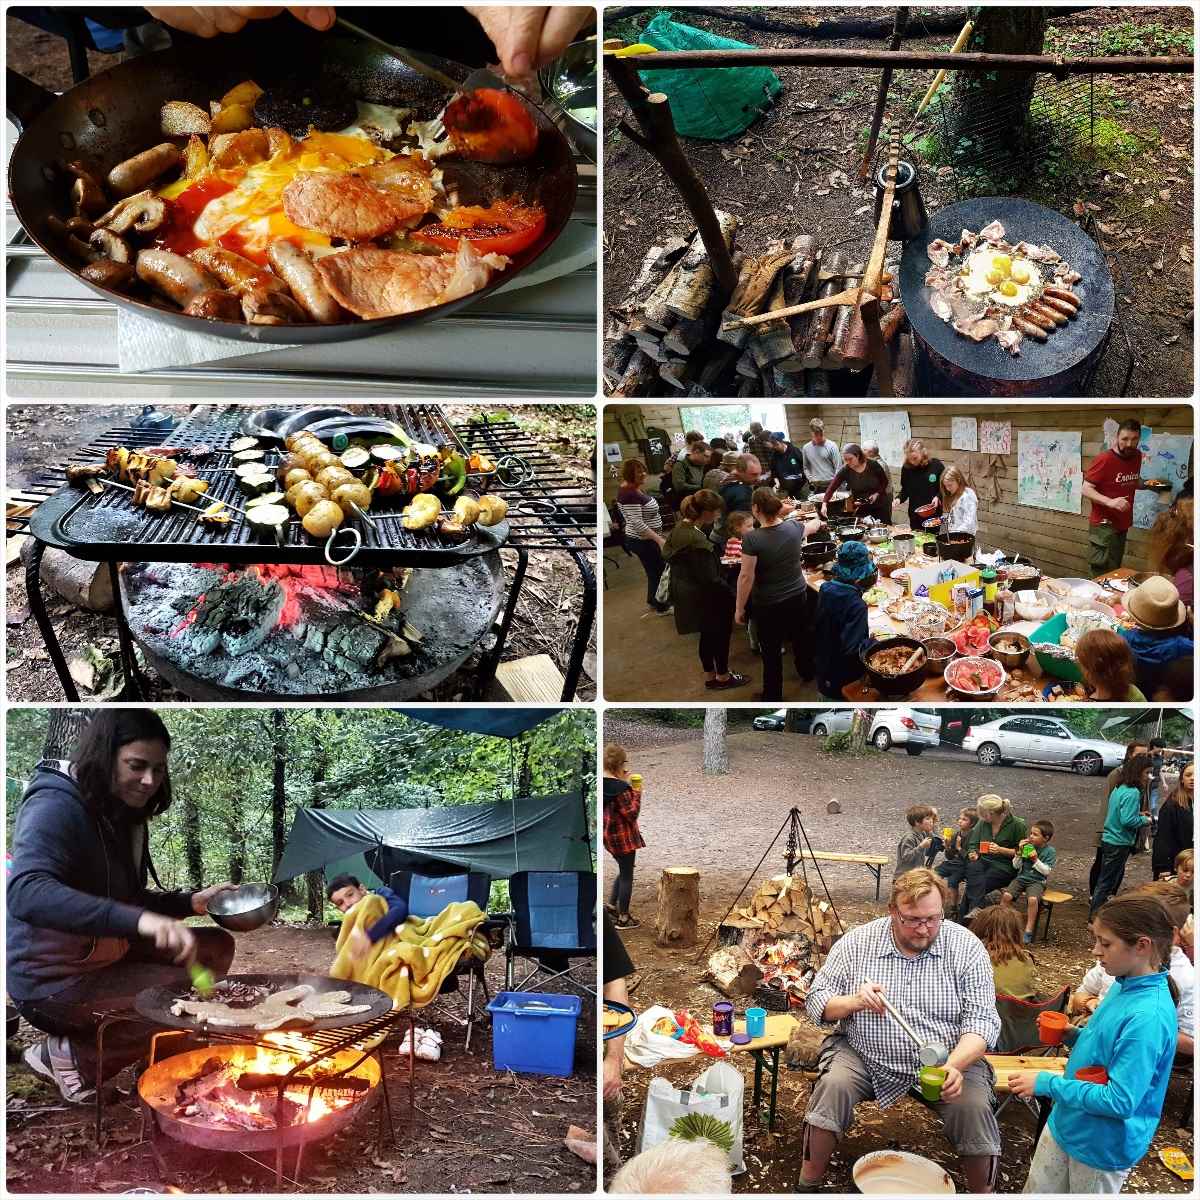
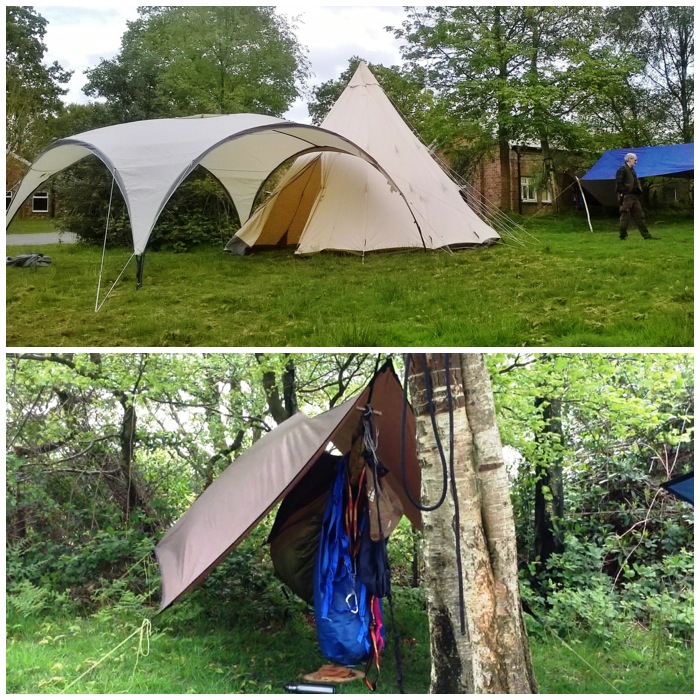
Tony – the boss – settled on two main areas for cooking and food preparation and after a bit of strange rope work (in terms of the kitchen tent on the right) we were soon set up and the fire lit. Folk arrived over the first two days and prepared to get on with the cooking – well not me personally (I just do not have that artistic sort of mind) – my focus was on photography, video work and building campfire cooking constructions.
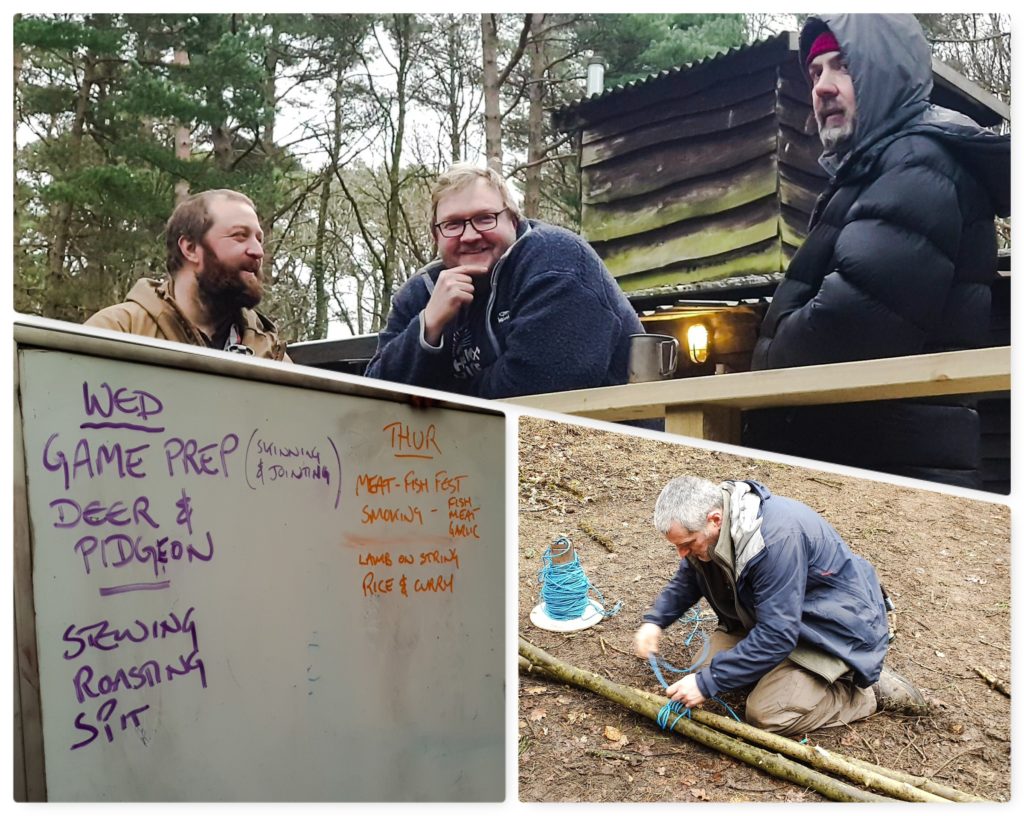
ArrivalPreparation , Planning & Pausing 🙂
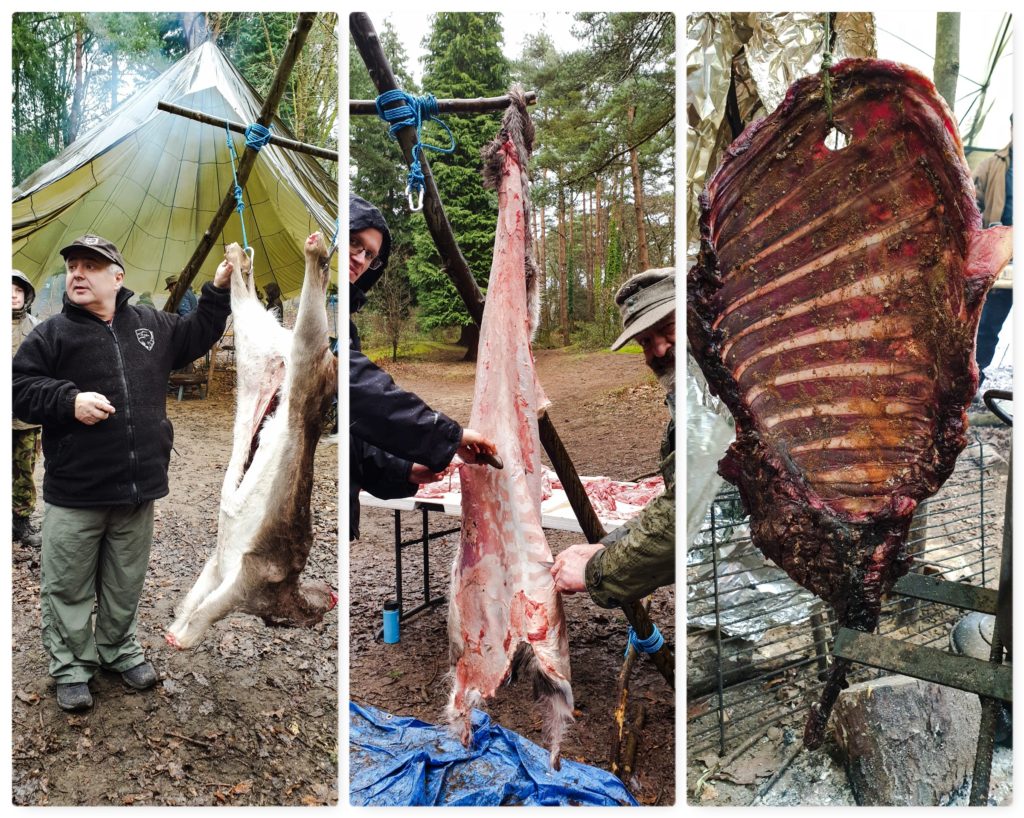
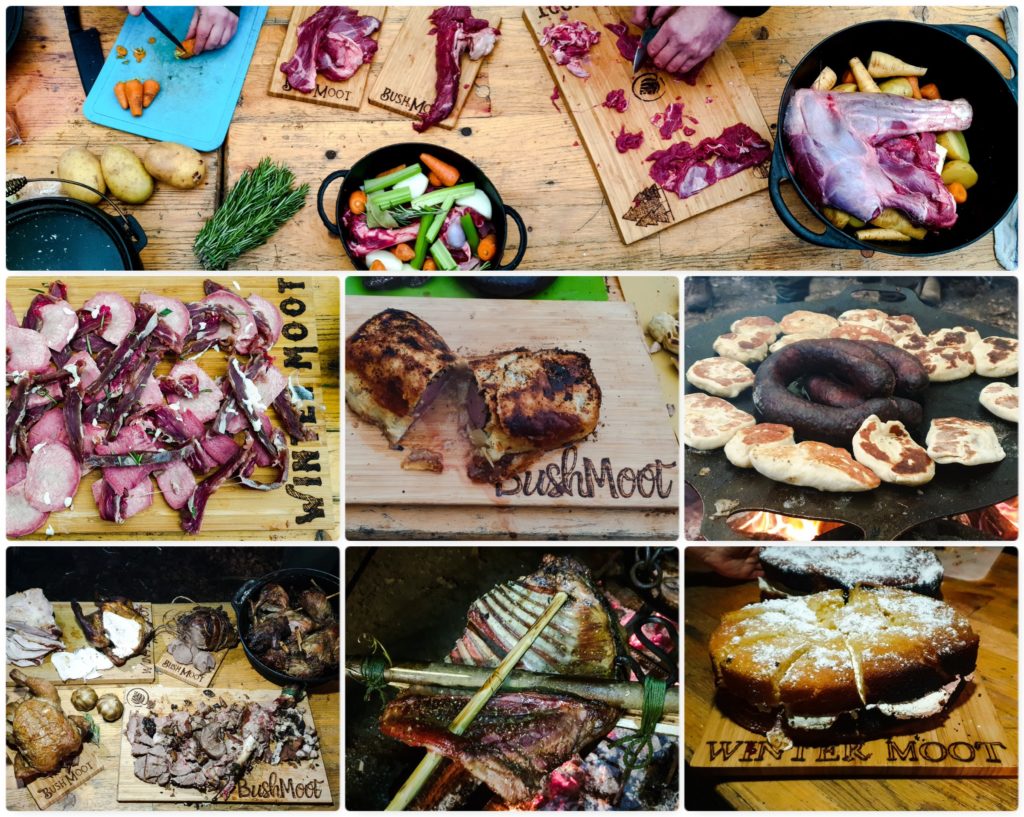
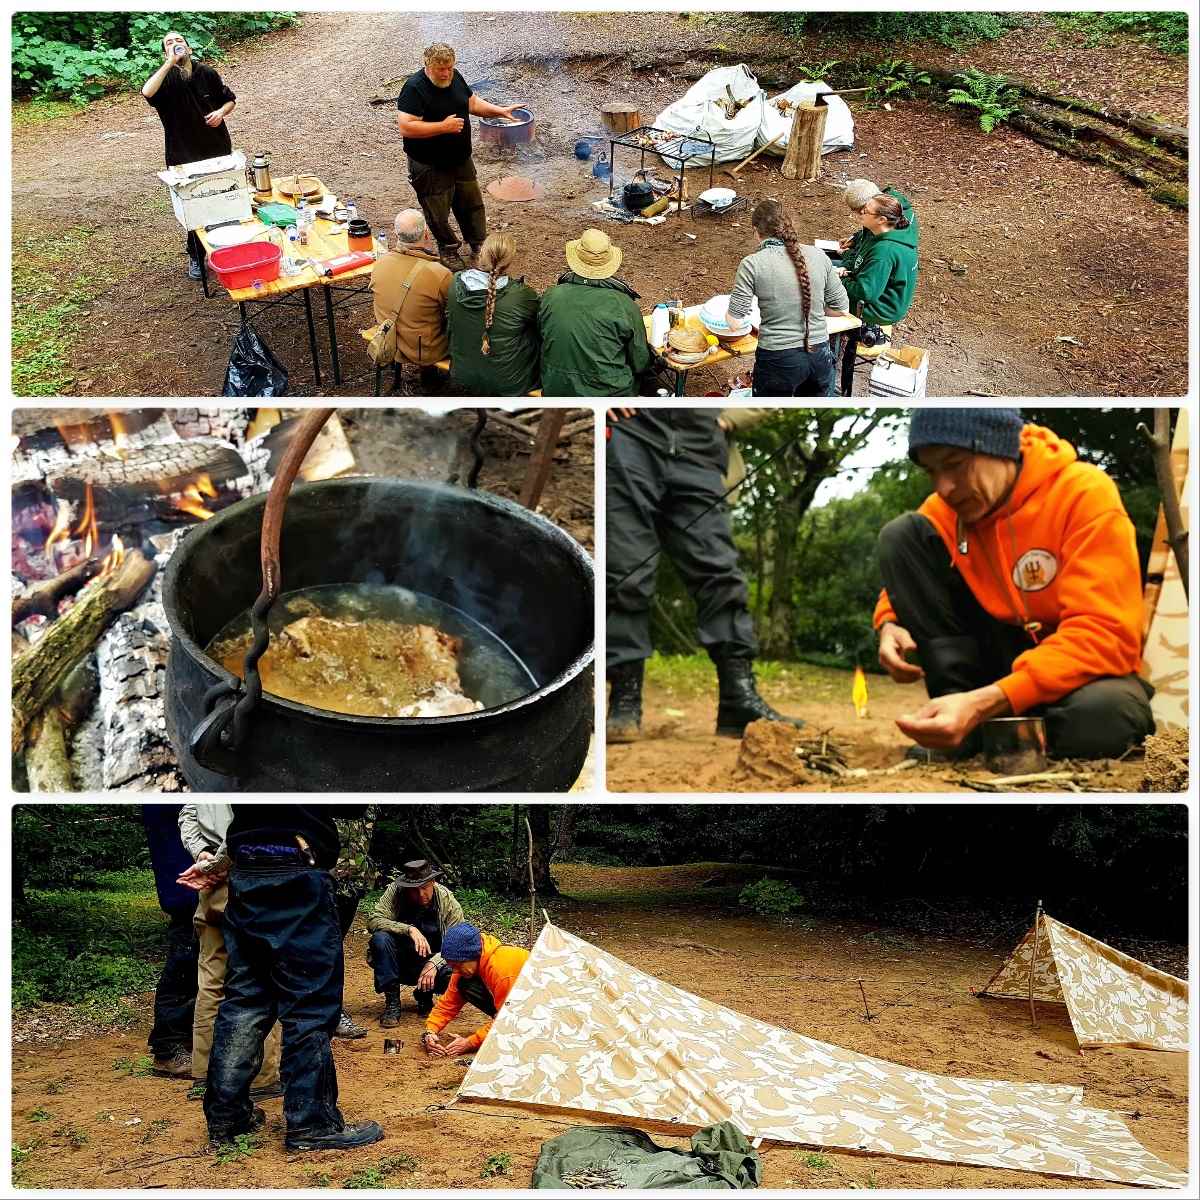
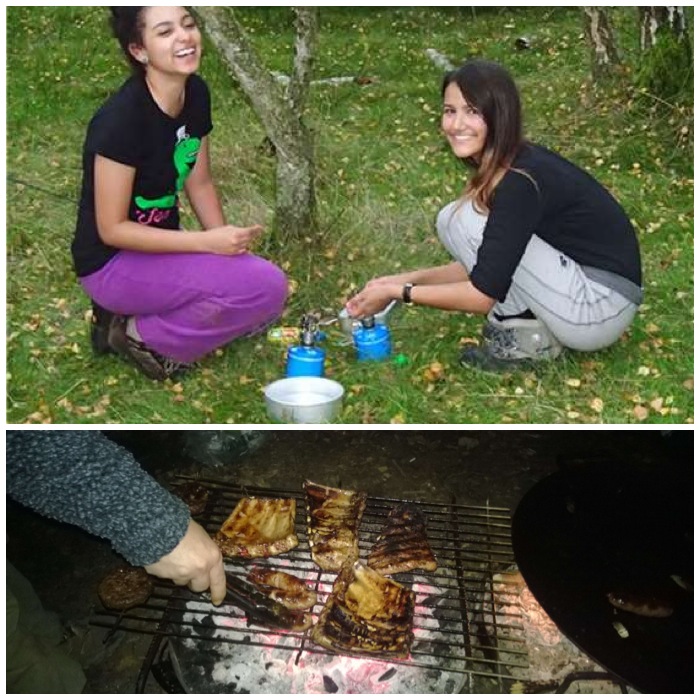
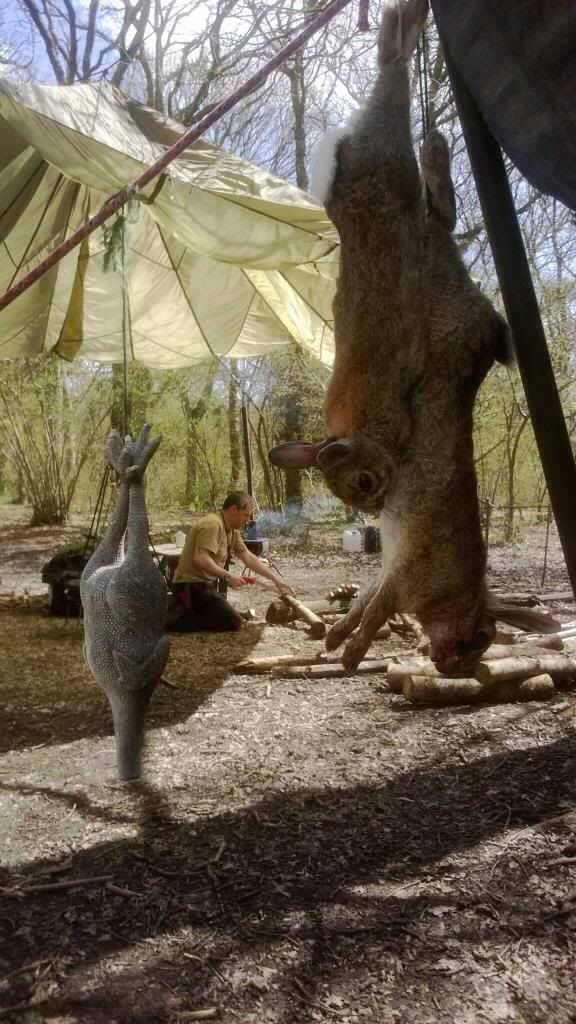
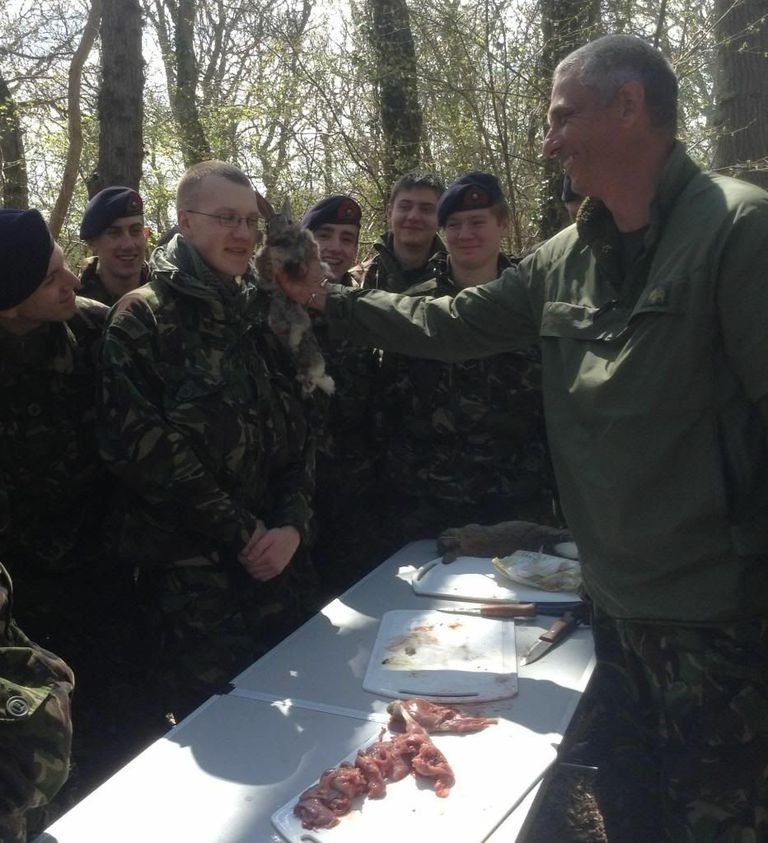
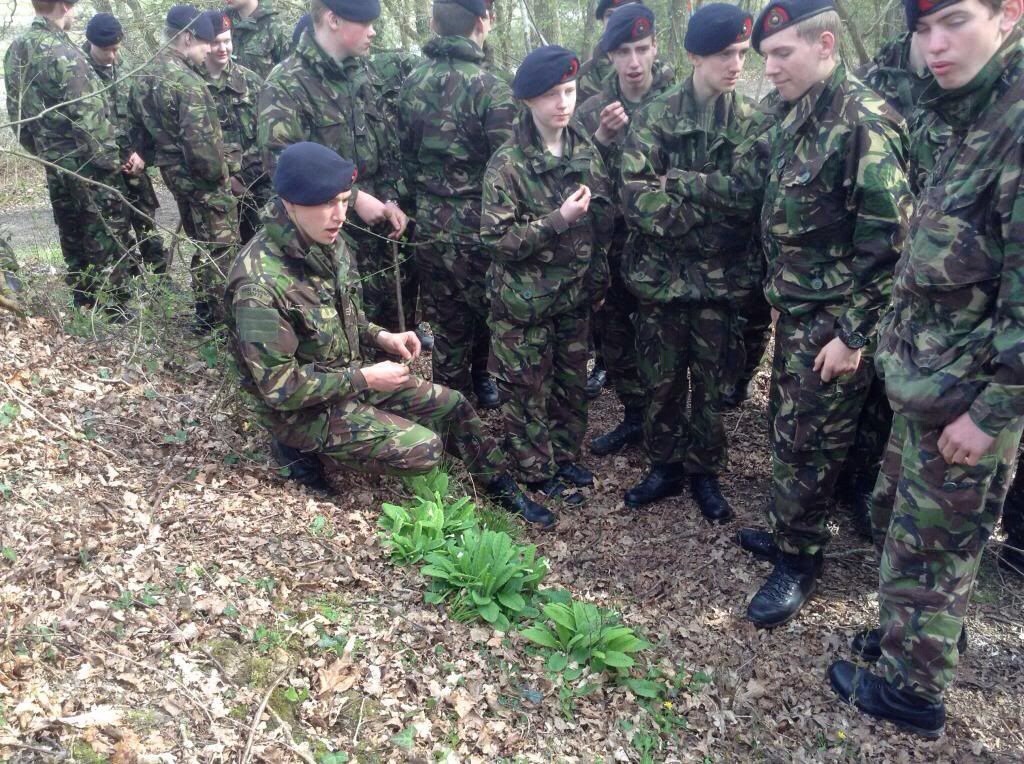
The Deer
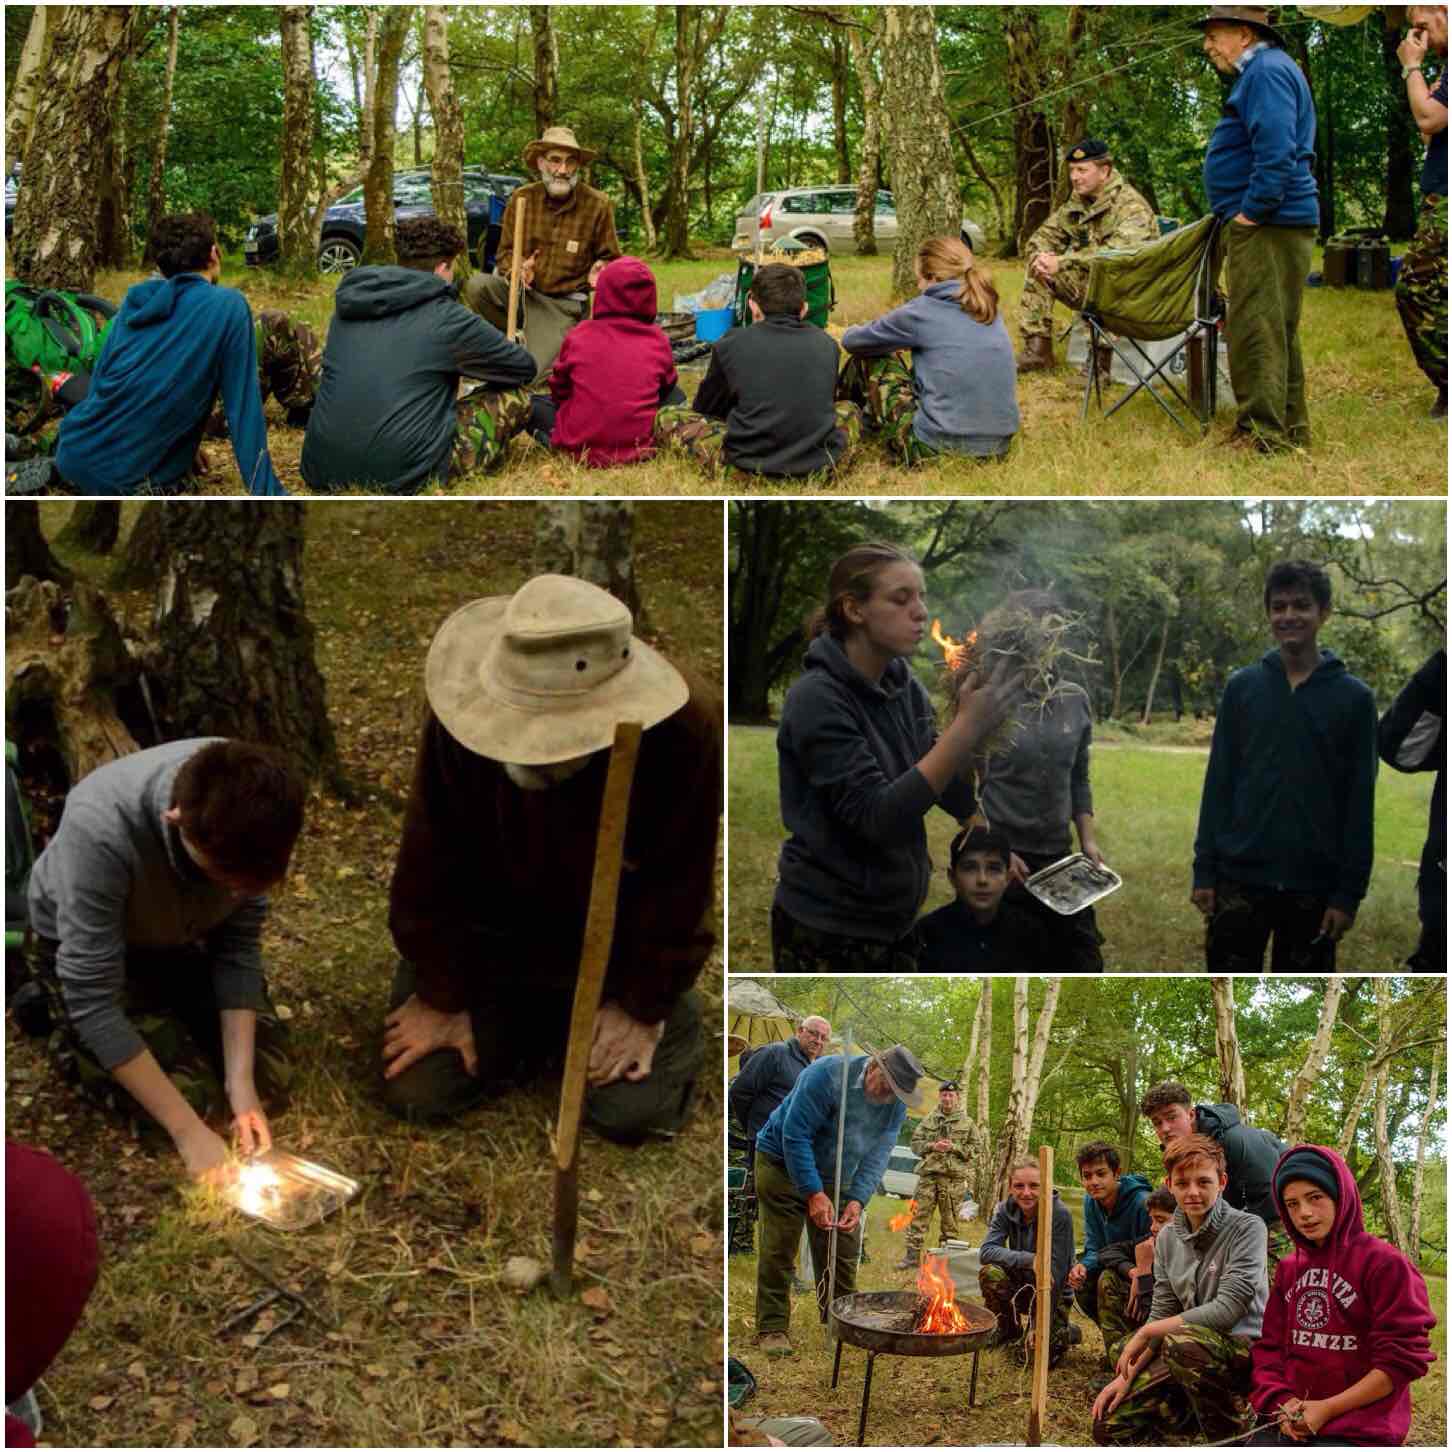
Not sure who obtained the deer for us but after setting up the tripod it turned into a butchery class (led by Wayne) and then a shorter class on preparing the hide for tanning. Before long the ribs were slowly roasting over the fire on the rotisserie.
It was great to see everyone getting involved and trying out new skills.
Deer Prep
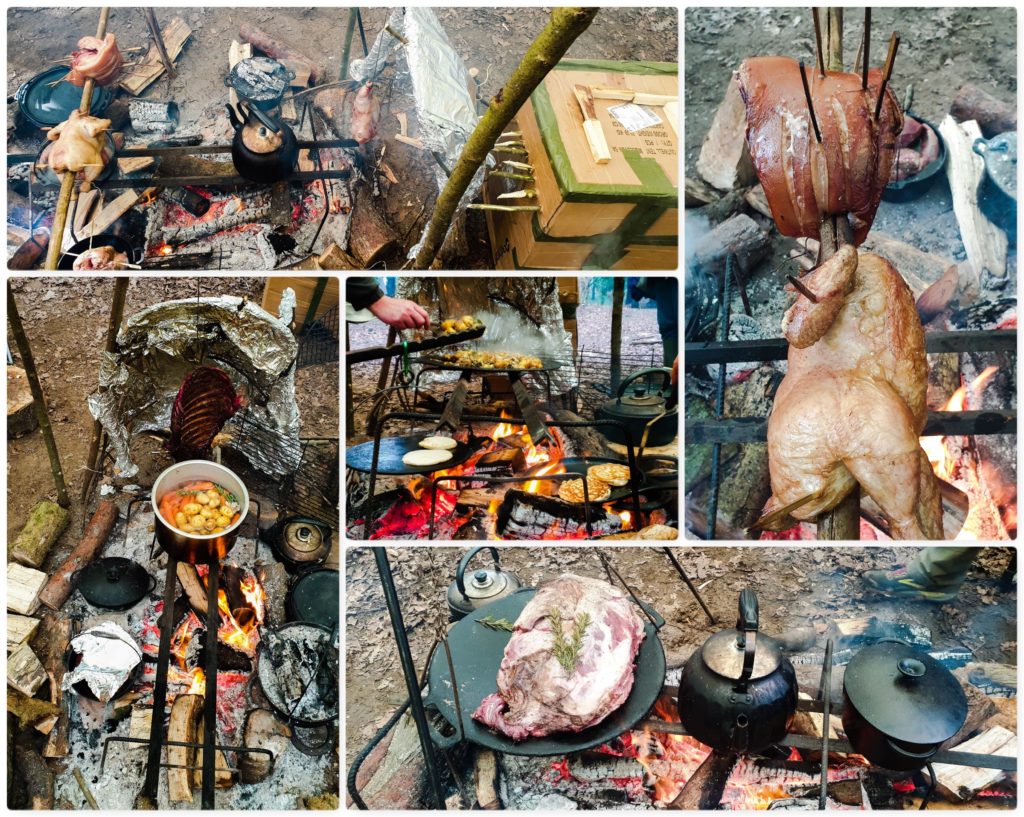
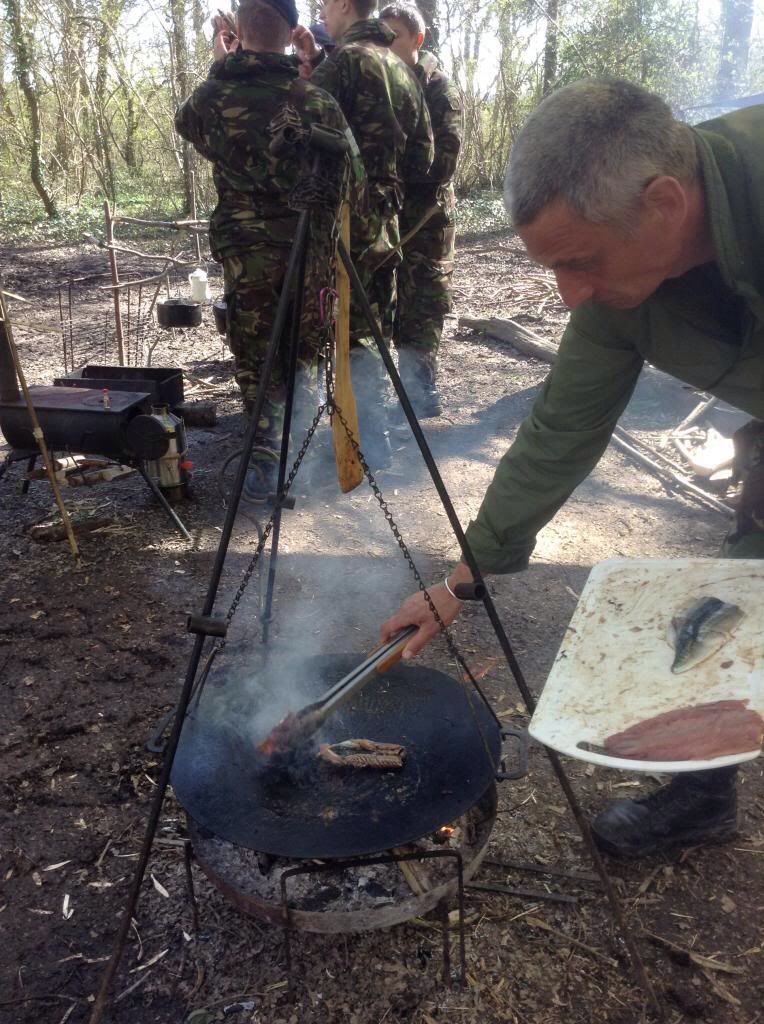
Cooking Contraptions
Throughout the week I had fun alongside a few others coming up with different set ups for cooking.
These included:
A Rotisserie with reflector
A Hot Smoker
A Spit
A Campfire Crane
An Asado
All these alongside the usual cooking with Dutch ovens, skillets, frying pans and in foil.
Great Cooking Constructions
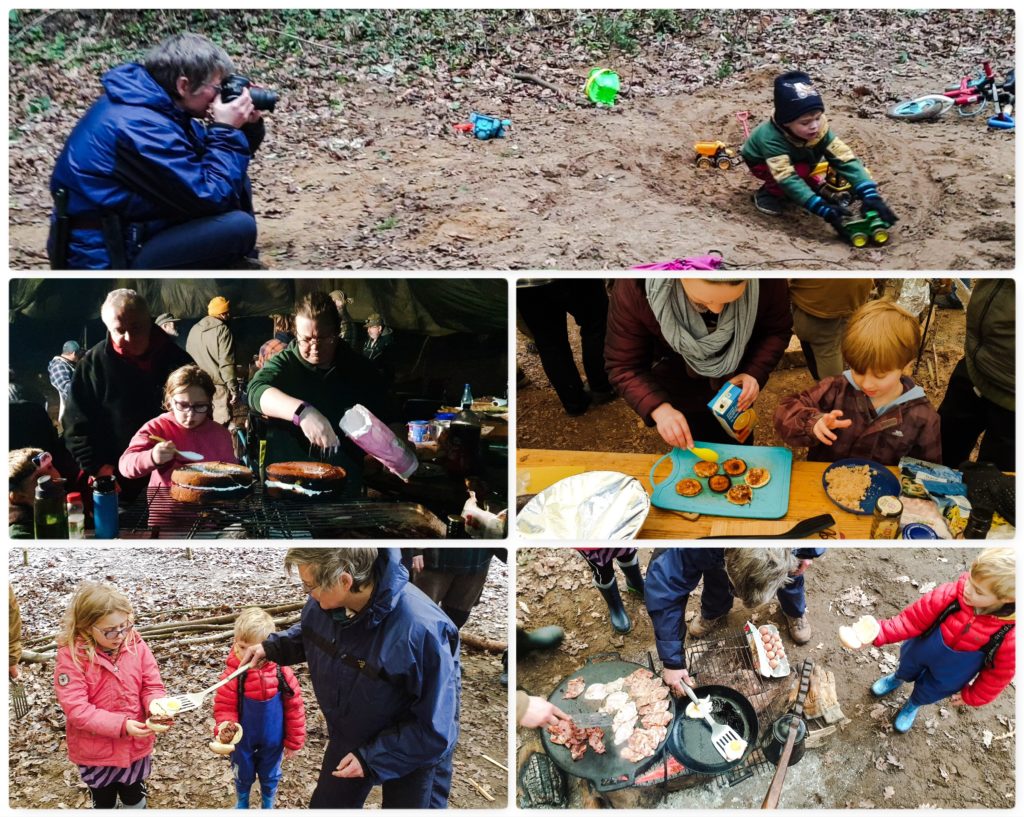
Family Time
The Wintermoot, like the full Bushmoot, is family orientated with lots of chances for the kids to get involved if they wish. Even without any snow the February temperatures were low but everyone was kept warm with the great food on offer.
Fun with the kids
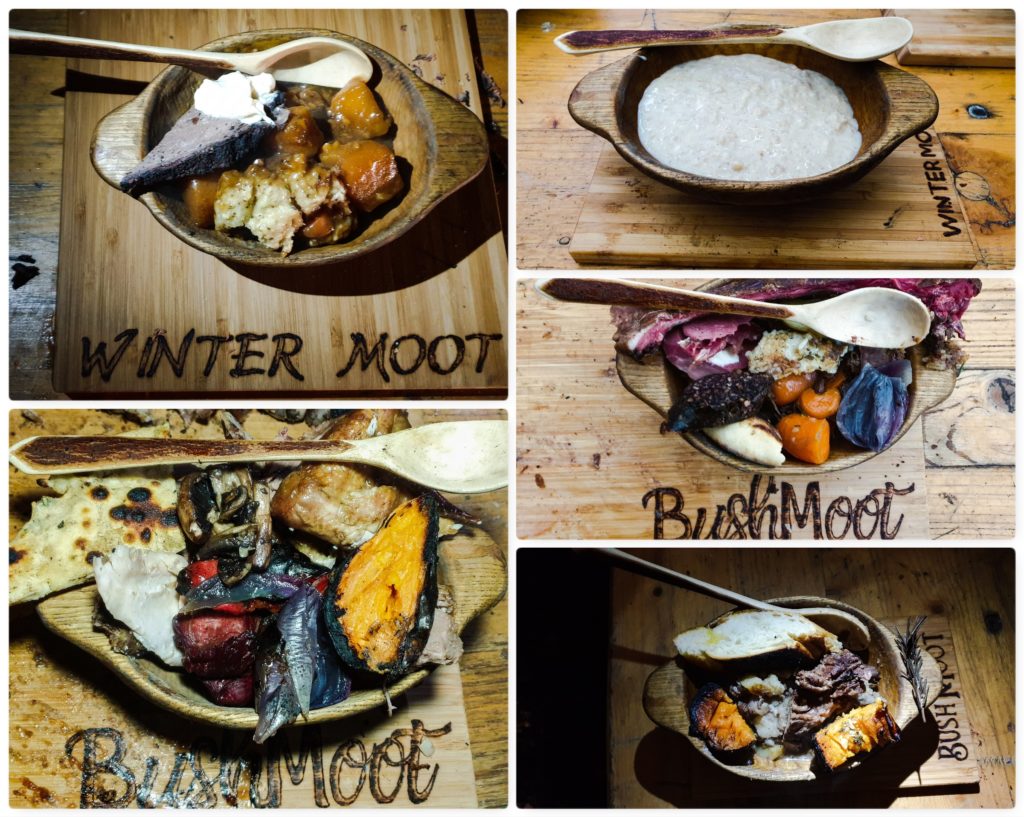
Great Dishes
As I am no chef I struggle to describe these different meals – I can but try with my photography skills – as an experienced eater I can say they were brilliant 🙂 – Lots of people helped out with the cooking but special mention must go to Beth Shepheard, Andy Illsley and Wayne Jones – as well as cooking continuously they demonstrated butchery, baking and food preservation.
Great Dishes
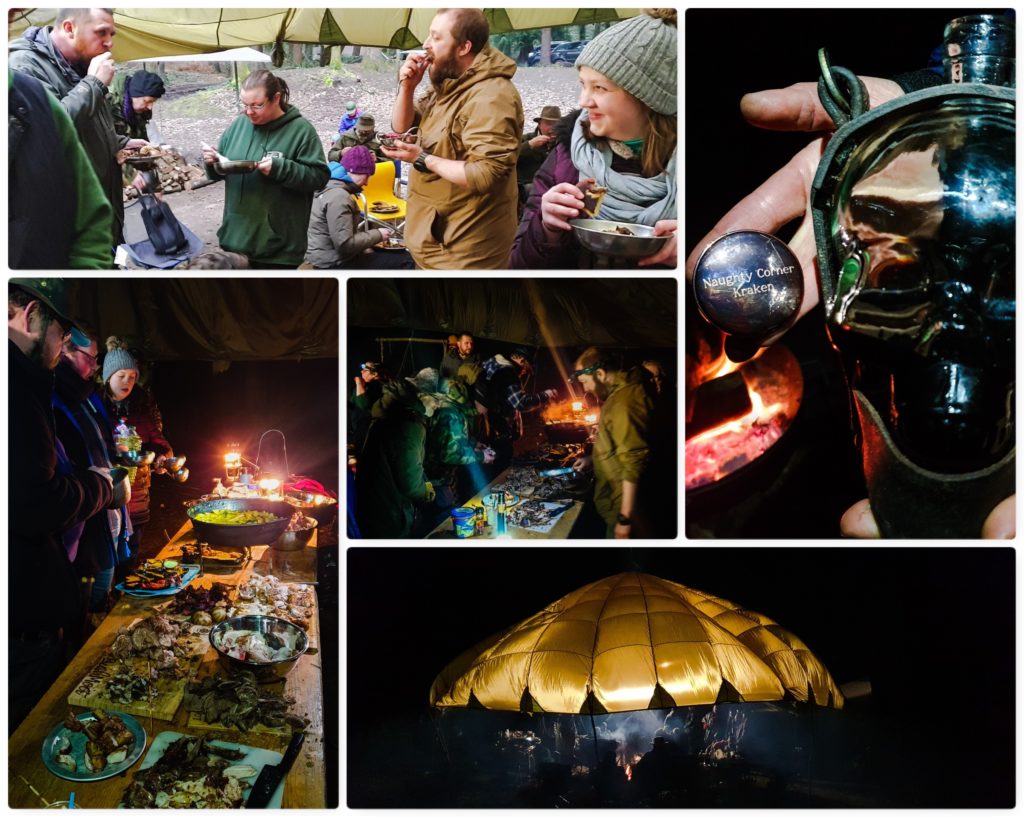
Fun EveningsFull Plates
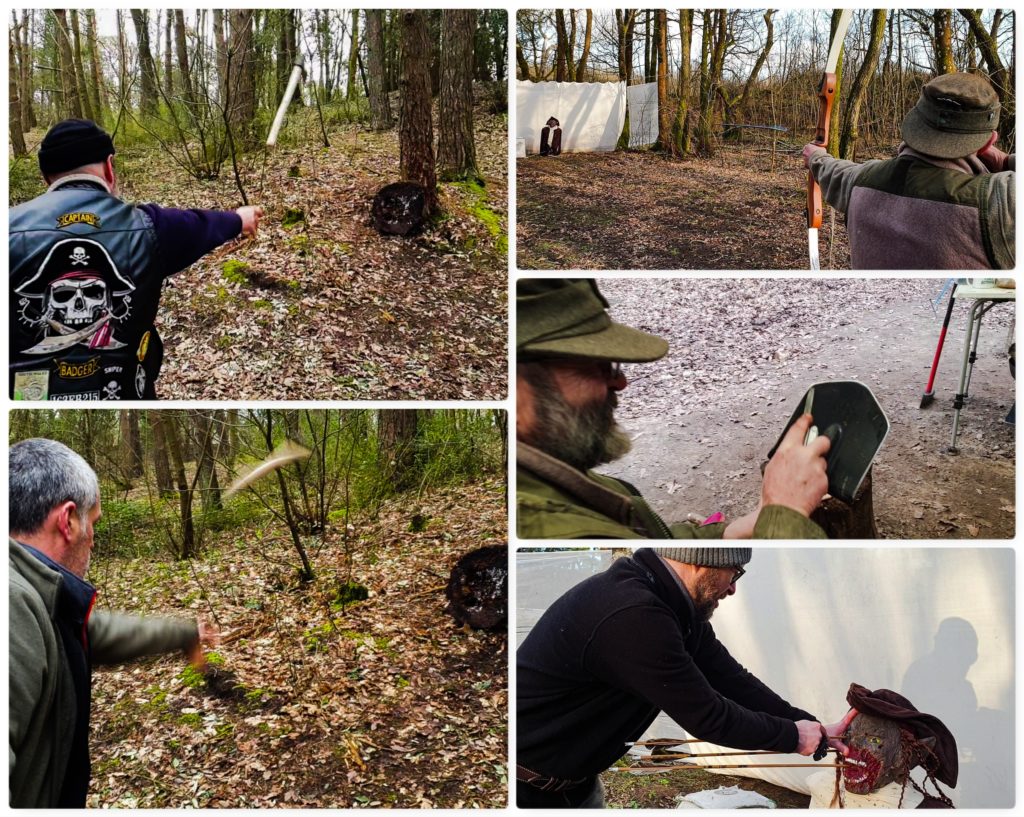
Other Fun
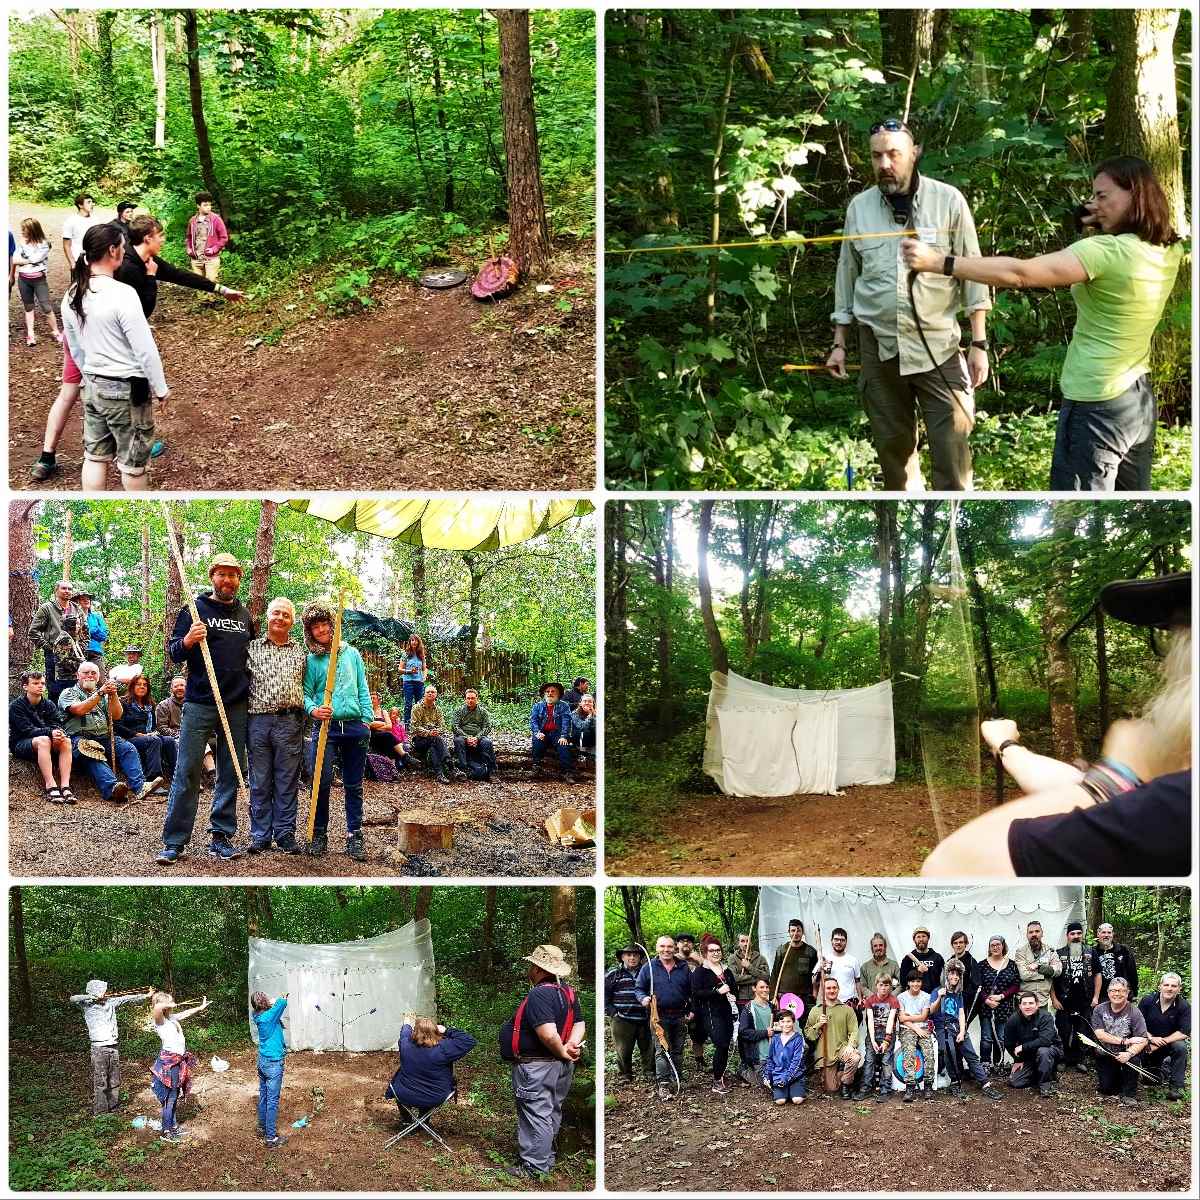
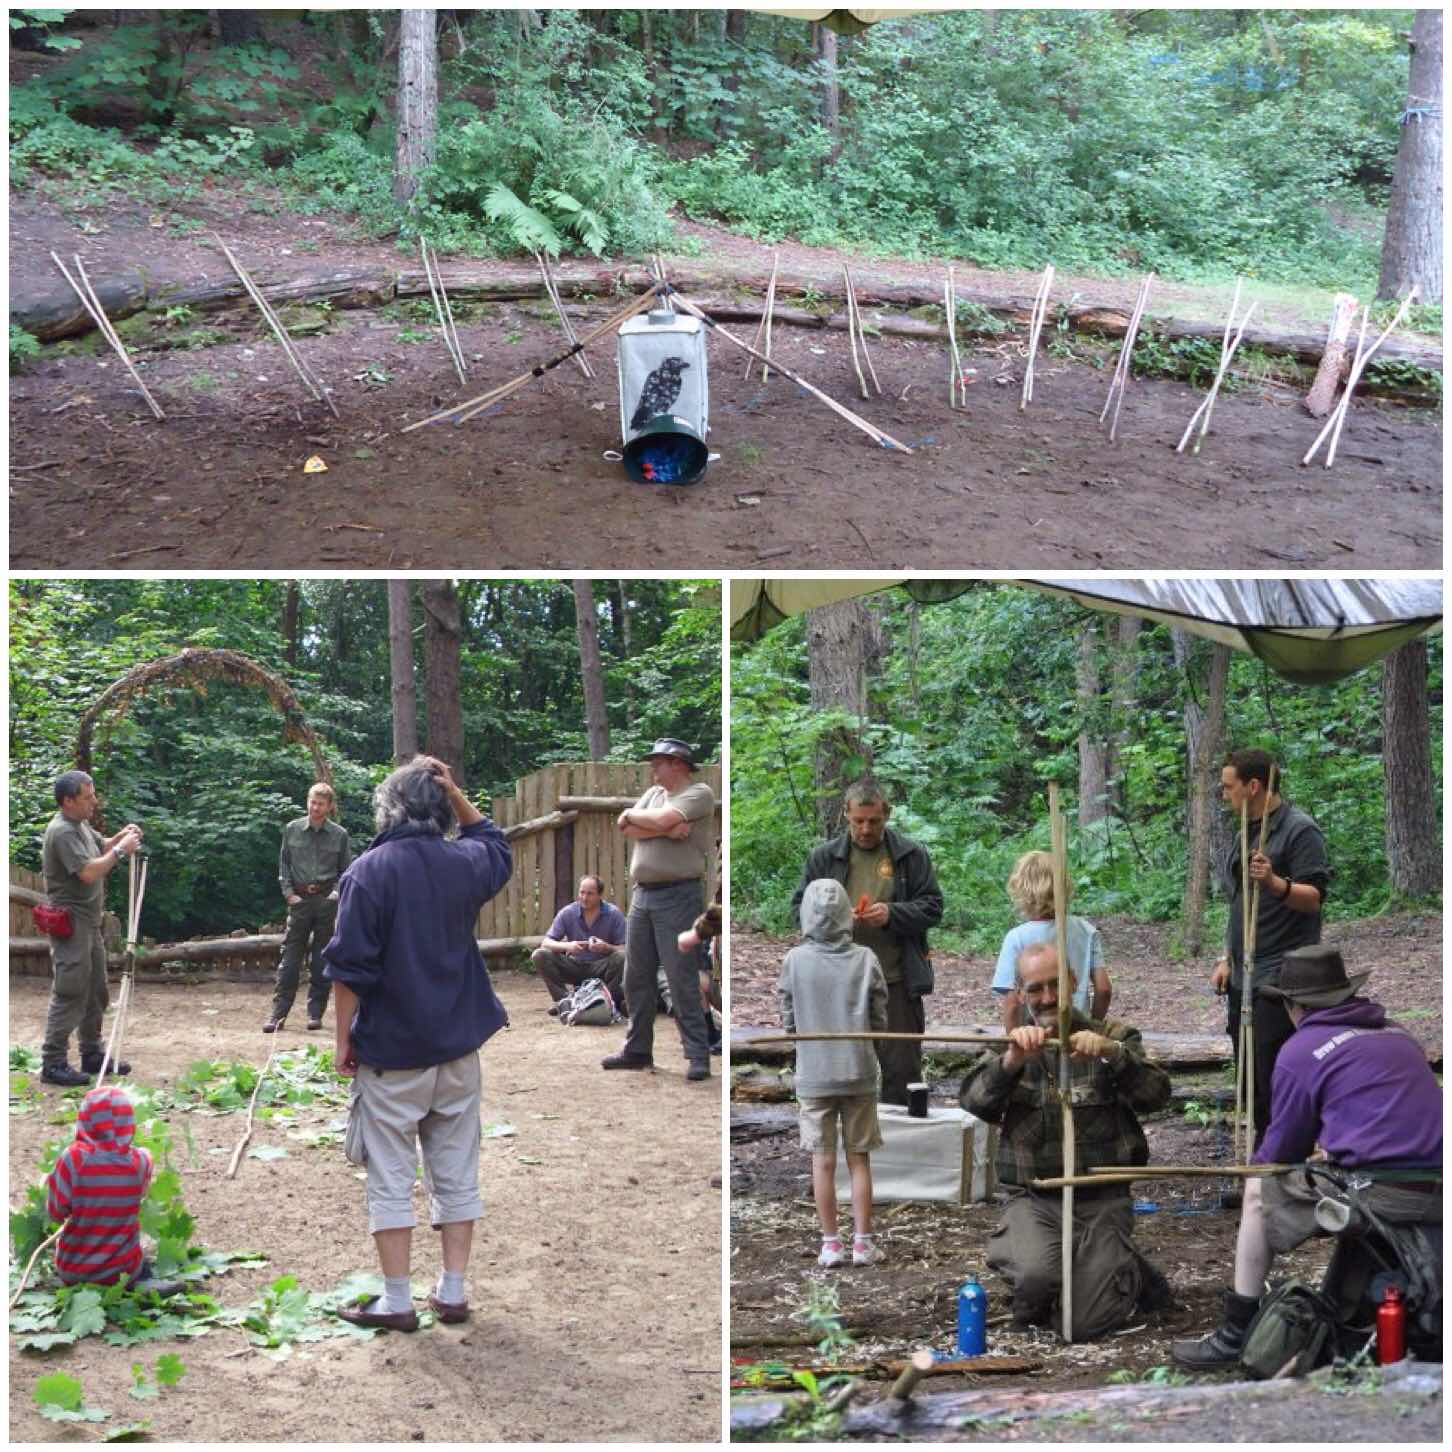
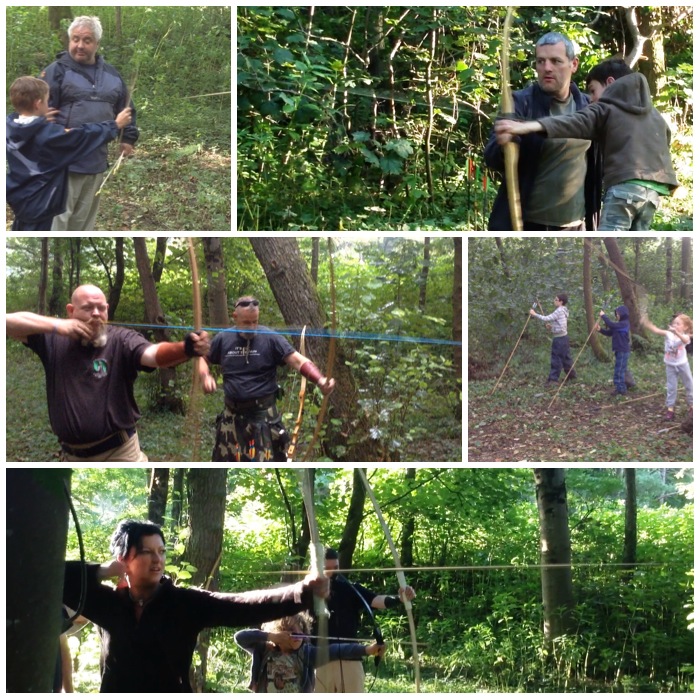
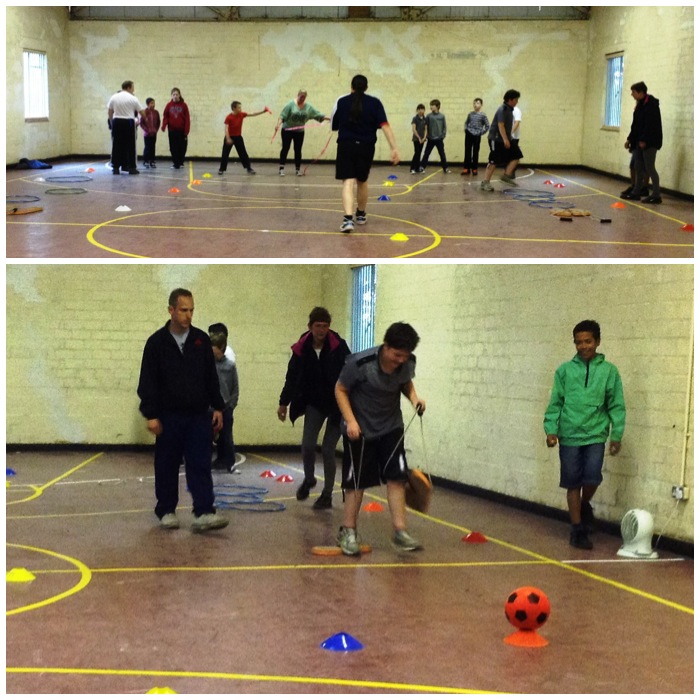
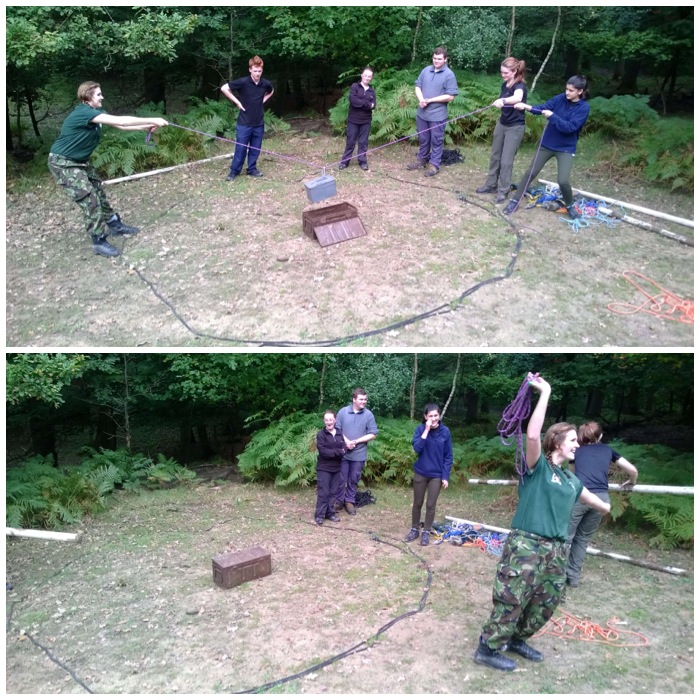
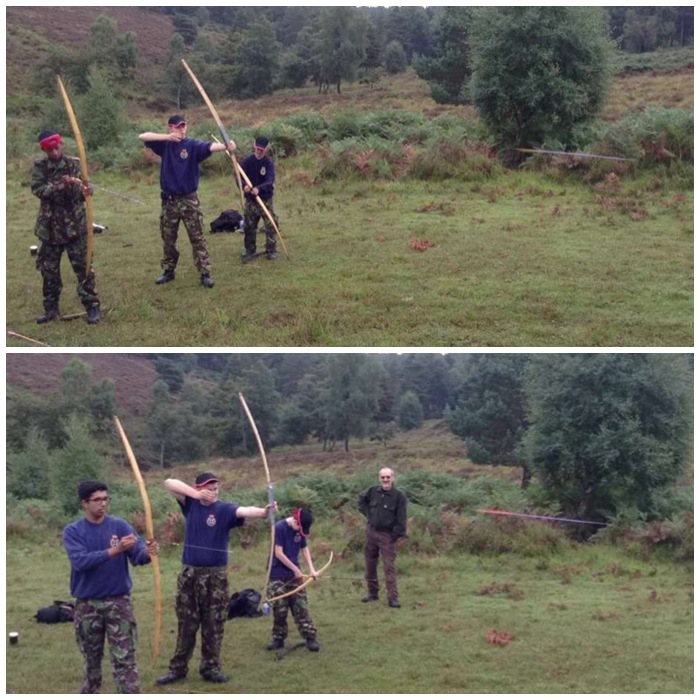
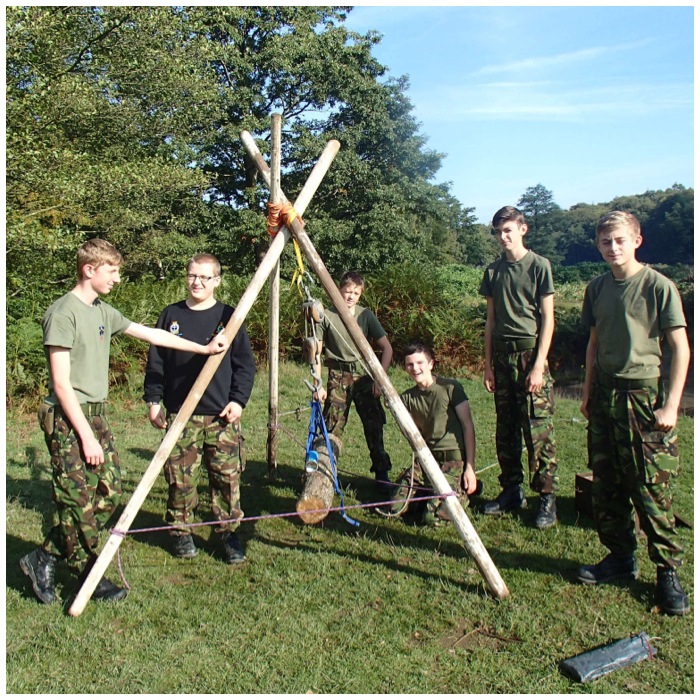
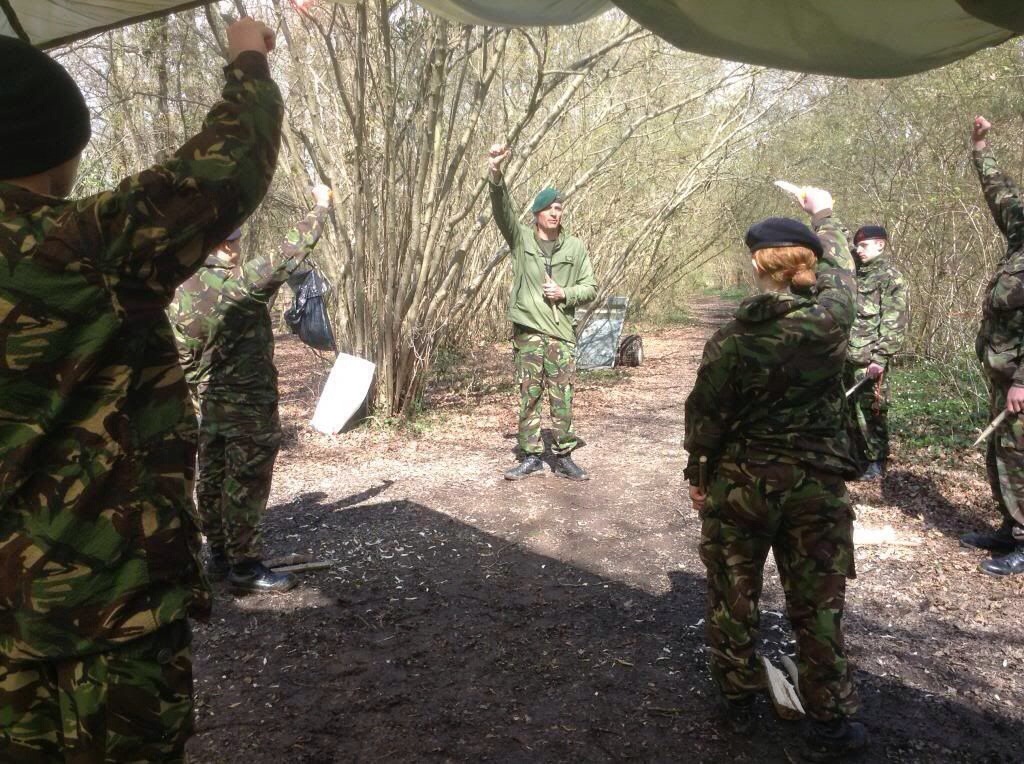
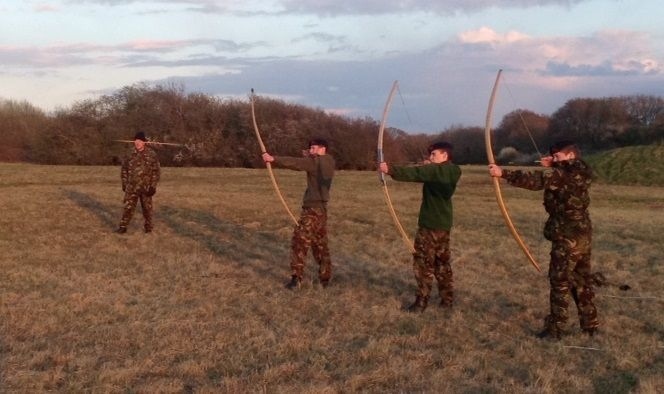
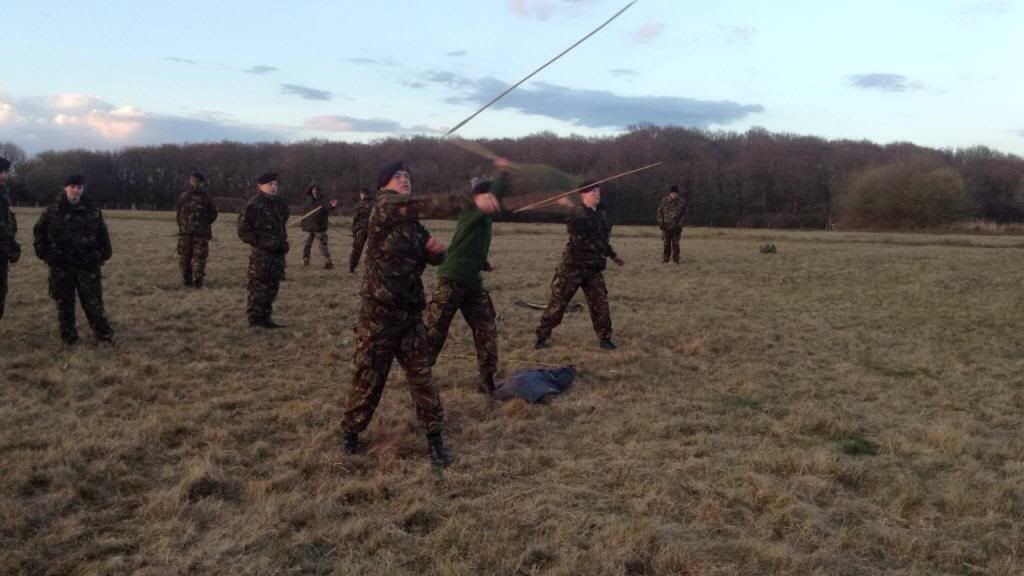
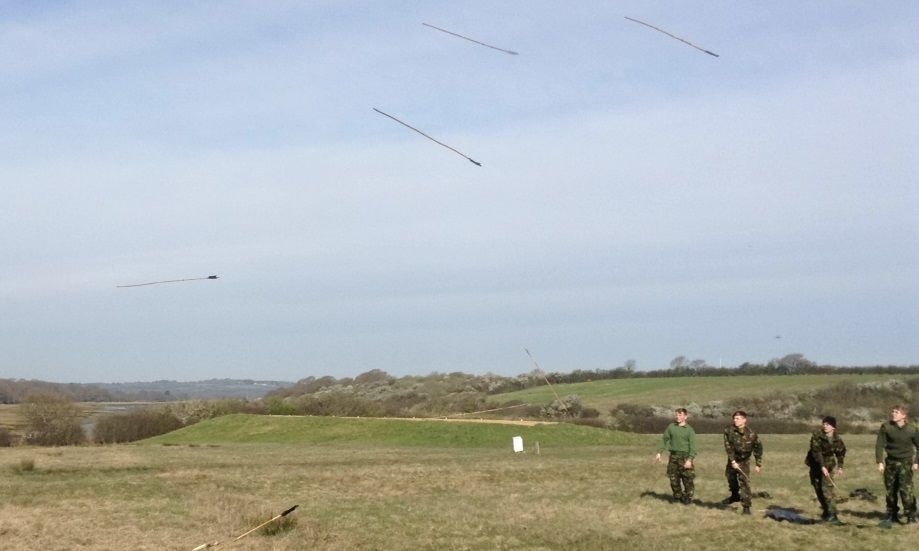
In amongst all this cooking and eating we managed a few other activities including fun on the range, constructing a Windlass and a bit of Jedi training.
As it is a long time until next year’s Bushmoot I do hope we can have another Wintermoot next February.
Stay safe and hopefully see some of you next year.
Things have been settling in here at the Bushcraft UK Bushmoot here in Merthyr Mawr.
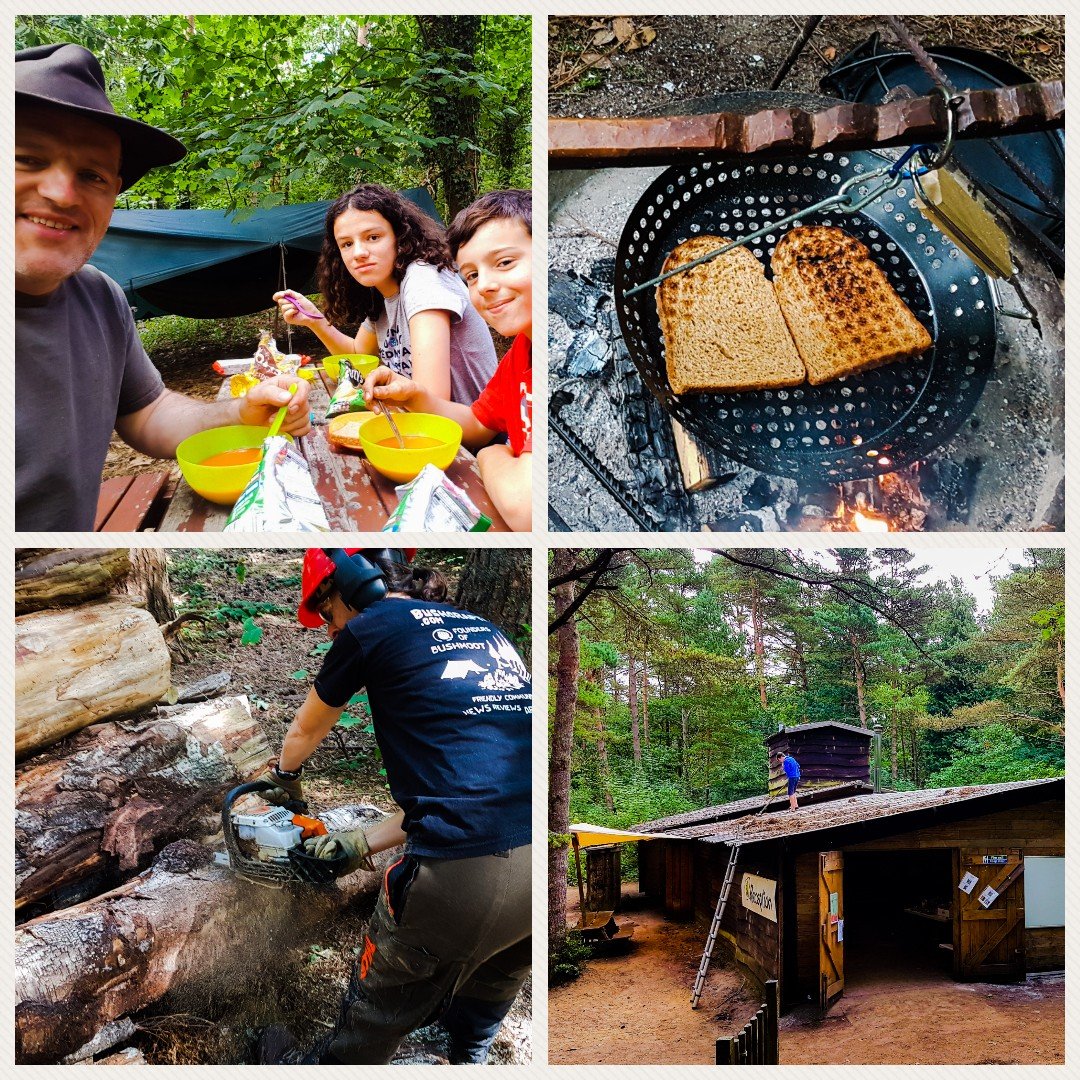
Took time out to test out my new barbeque pan – well tested it out as a toast rack really – works a treat so everyone is happy 🙂
There was much to do in terms of getting the site ready for all the visiting Bushcrafters so we were all soon getting stuck into the prep.
Getting Started
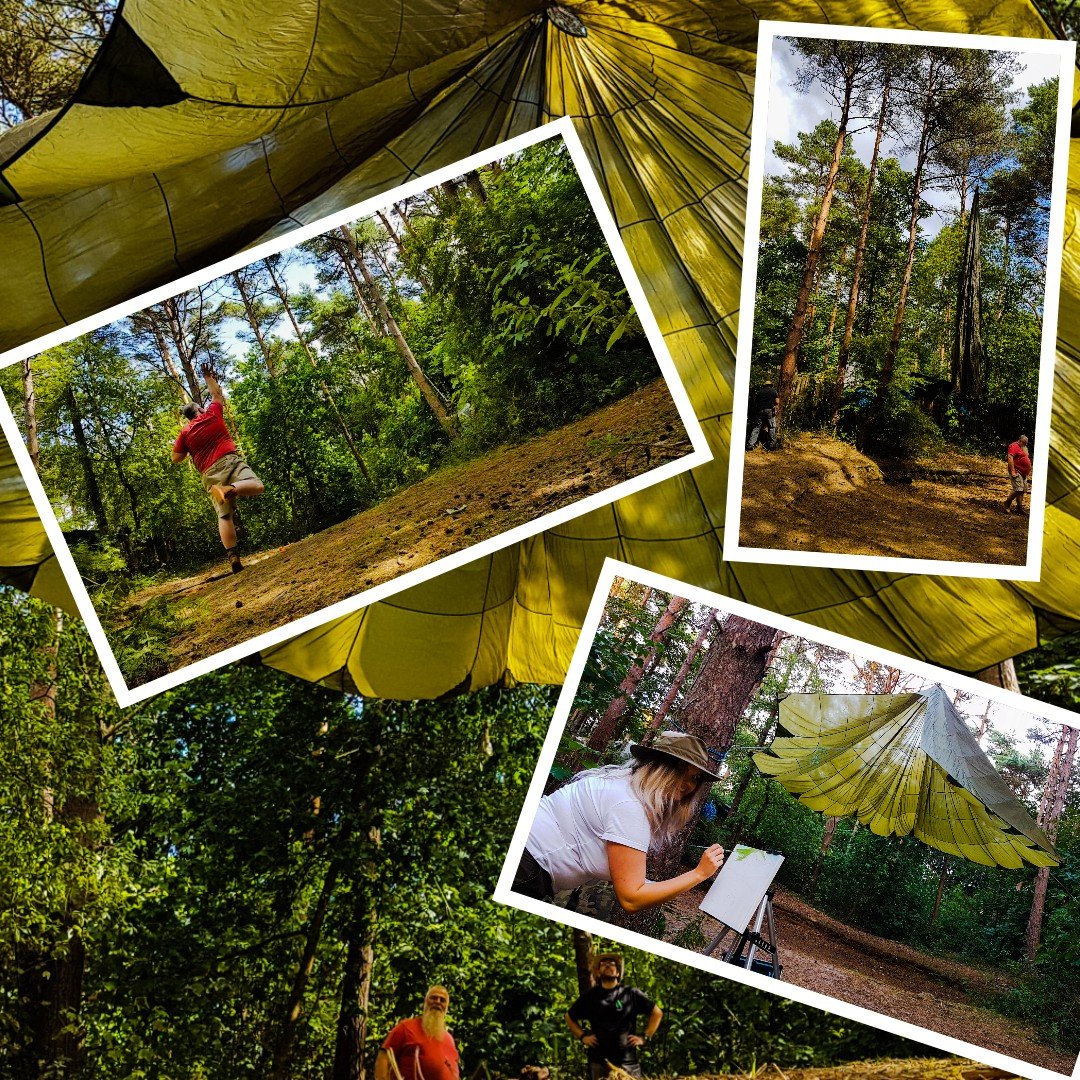
A favourite of mine is helping out getting all the chutes up. Our secret weapon ‘Pete’ is a dab hand at shooting a line high into the trees.
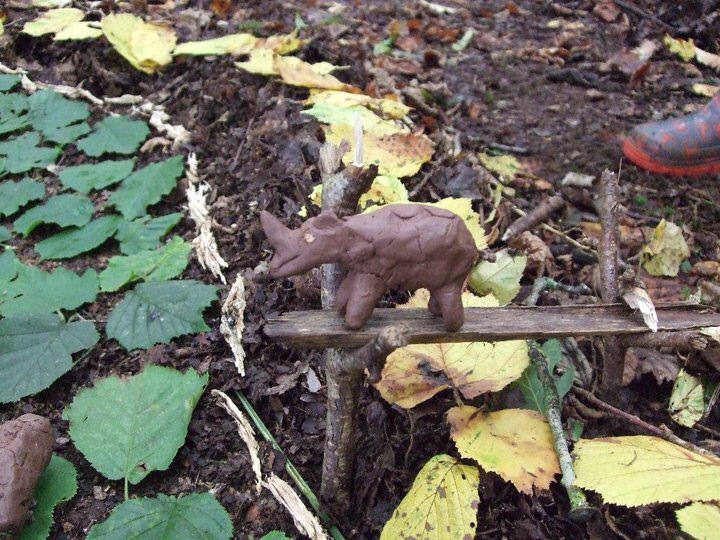
Later that day I spotted that our handiwork was receiving some attention in terms of some art work.
Parachutes and more parachutes
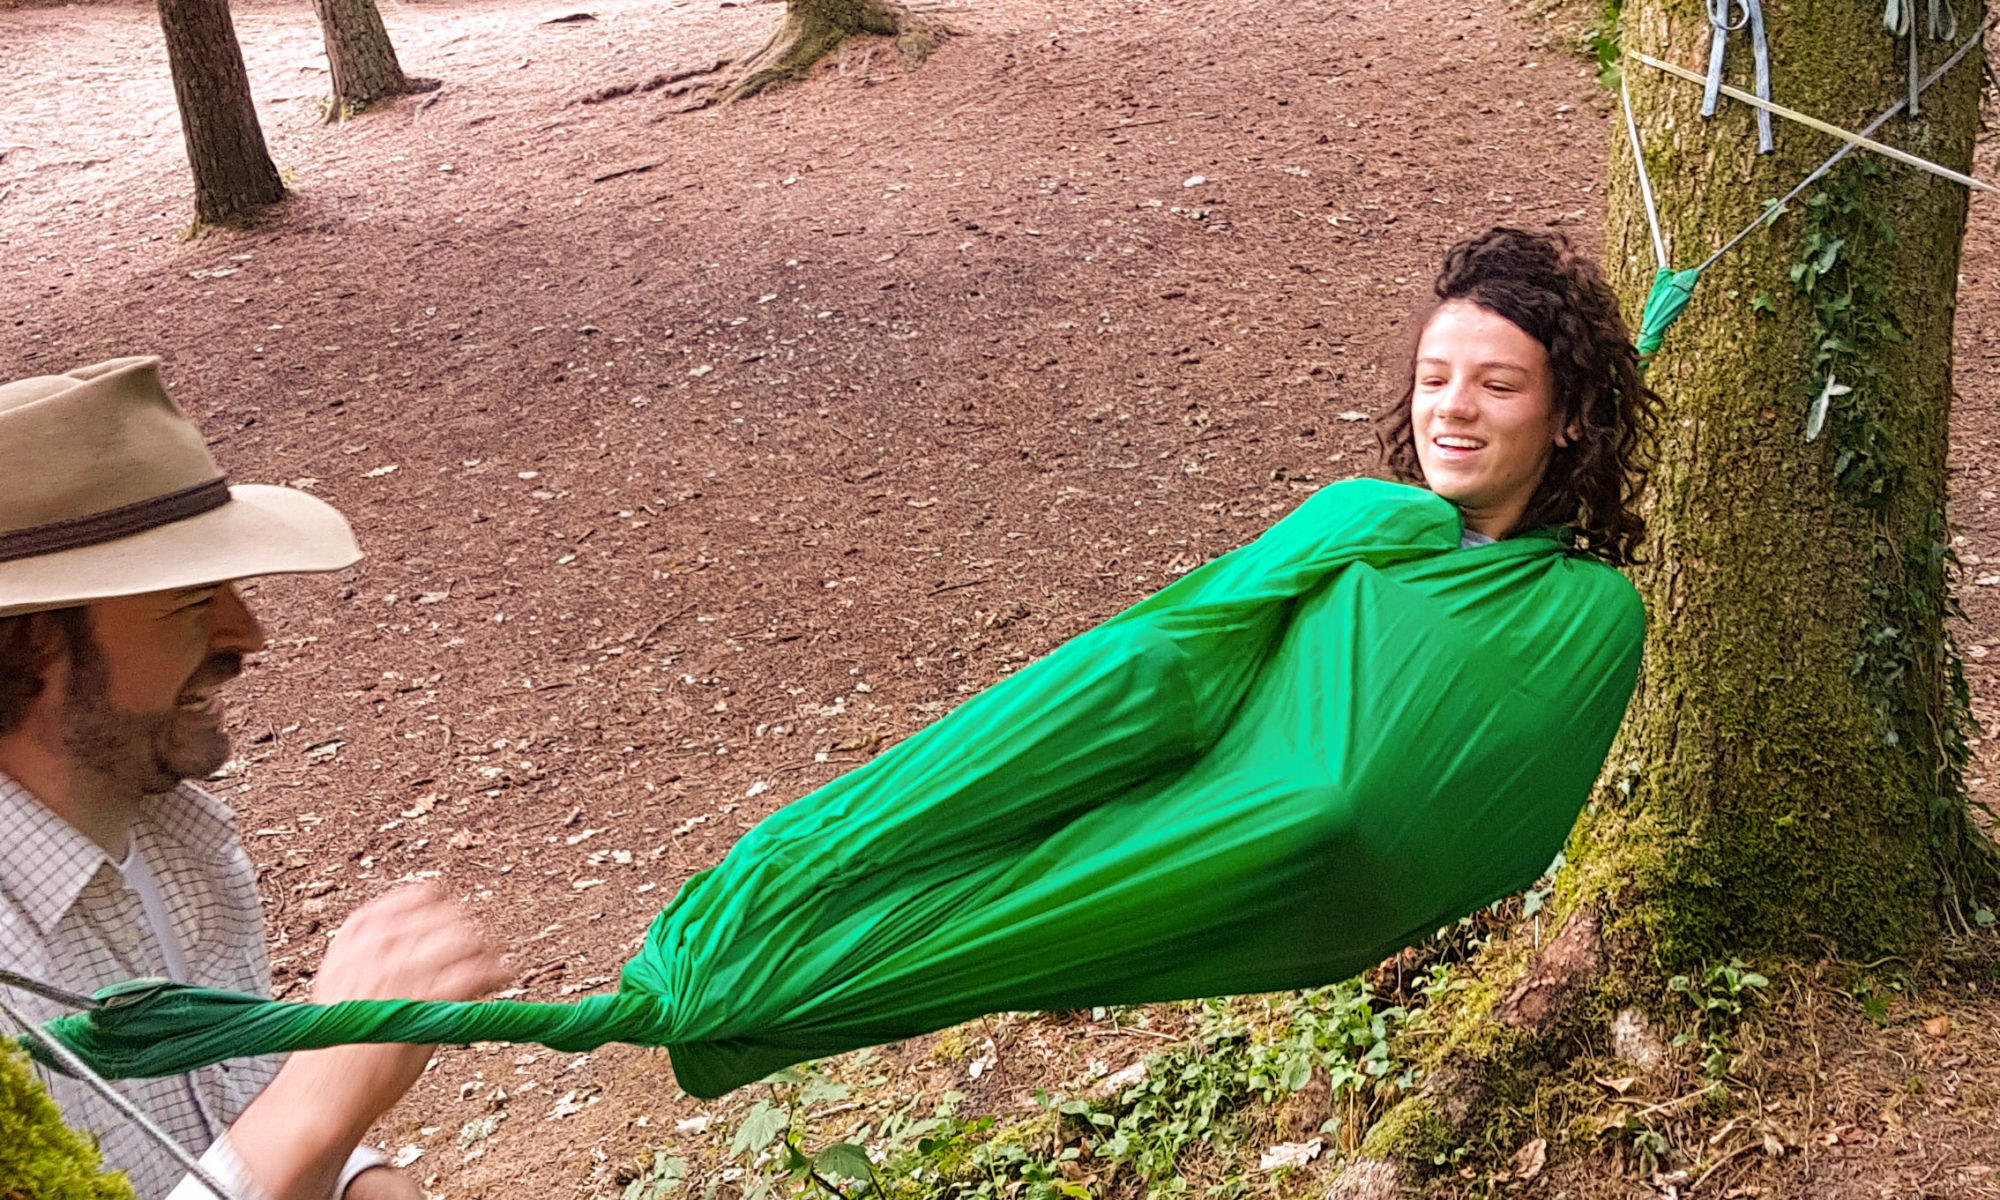
My kids did help out a little however they are on holiday and soon got into the swing of things. They have been out playing every day getting dirty, crafting and generally having a great time.
Kid time
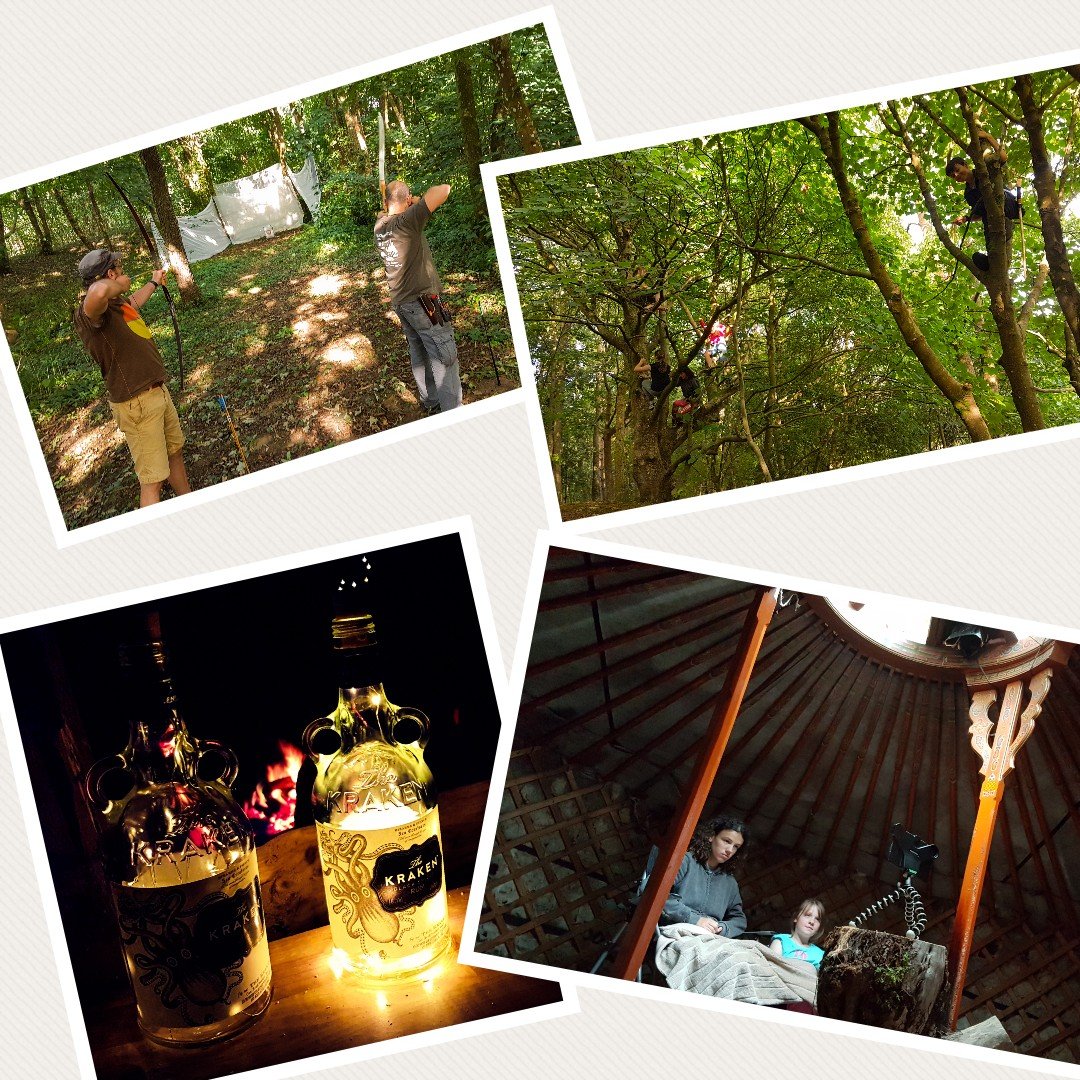
We got the range set up and it was soon on use. We will use it every day and have our annual competition next week.
Later in the evening I let the kids watch a movie and I spend a little time up at the Naughty Corner.
Evening time
Things are well set up now and we have everybody arriving – more on that in my next post.
A ‘Brilliant Moot’ is how I would summarise this year’s Bushcraft UK Bushmoot. It was action packed from start to finish for me as I juggled my time between looking after my kids, running workshops and doing a lot of filming.
I will let the pictures and video do most of the talking so will keep the text to a minimum.
Bushmoot 2017
The first few days for us ‘Mods’ (forum moderators) were all about setting up the Bushmoot so that everything was in place for everyone arriving later in the week. We did not rush things as it was a holiday for us as well but over a few days the Bushmoot was soon set up.
Set up
There are some great places to camp at the Bushmoot which makes for stunning photography. The Mods’ corner is great to photograph on a sunny morning.
I have used the same camping spot for a number of years now and even though a year passes between each visit it feels as if I have never been away when I return.
Camp life
Early Workshops
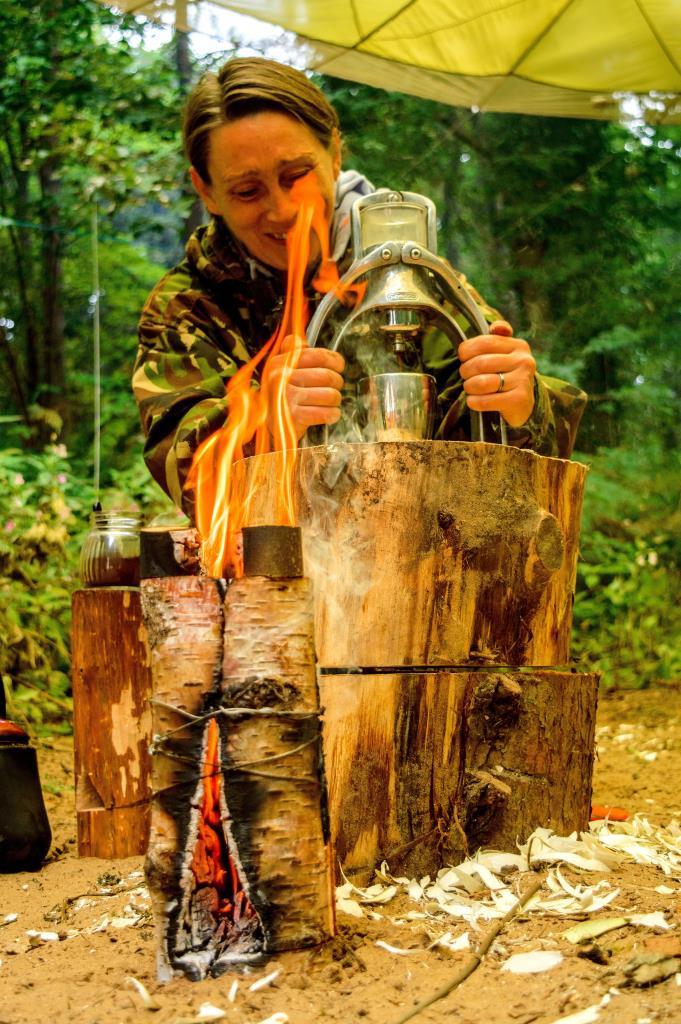
There were a couple of early workshops this year – Open Fire Cooking with Neil and a 48hr Survival Course with Fraser from Coastal Survival. Both courses covered a lot of different areas so my photos are just a snapshot of their content – needless to say on both courses all the students eat well.
Early workshops
Videos
I put a short video together of this early part of the Bushmoot – including a scenario where my son pretends to chop my head off with an Ivy sword 🙂
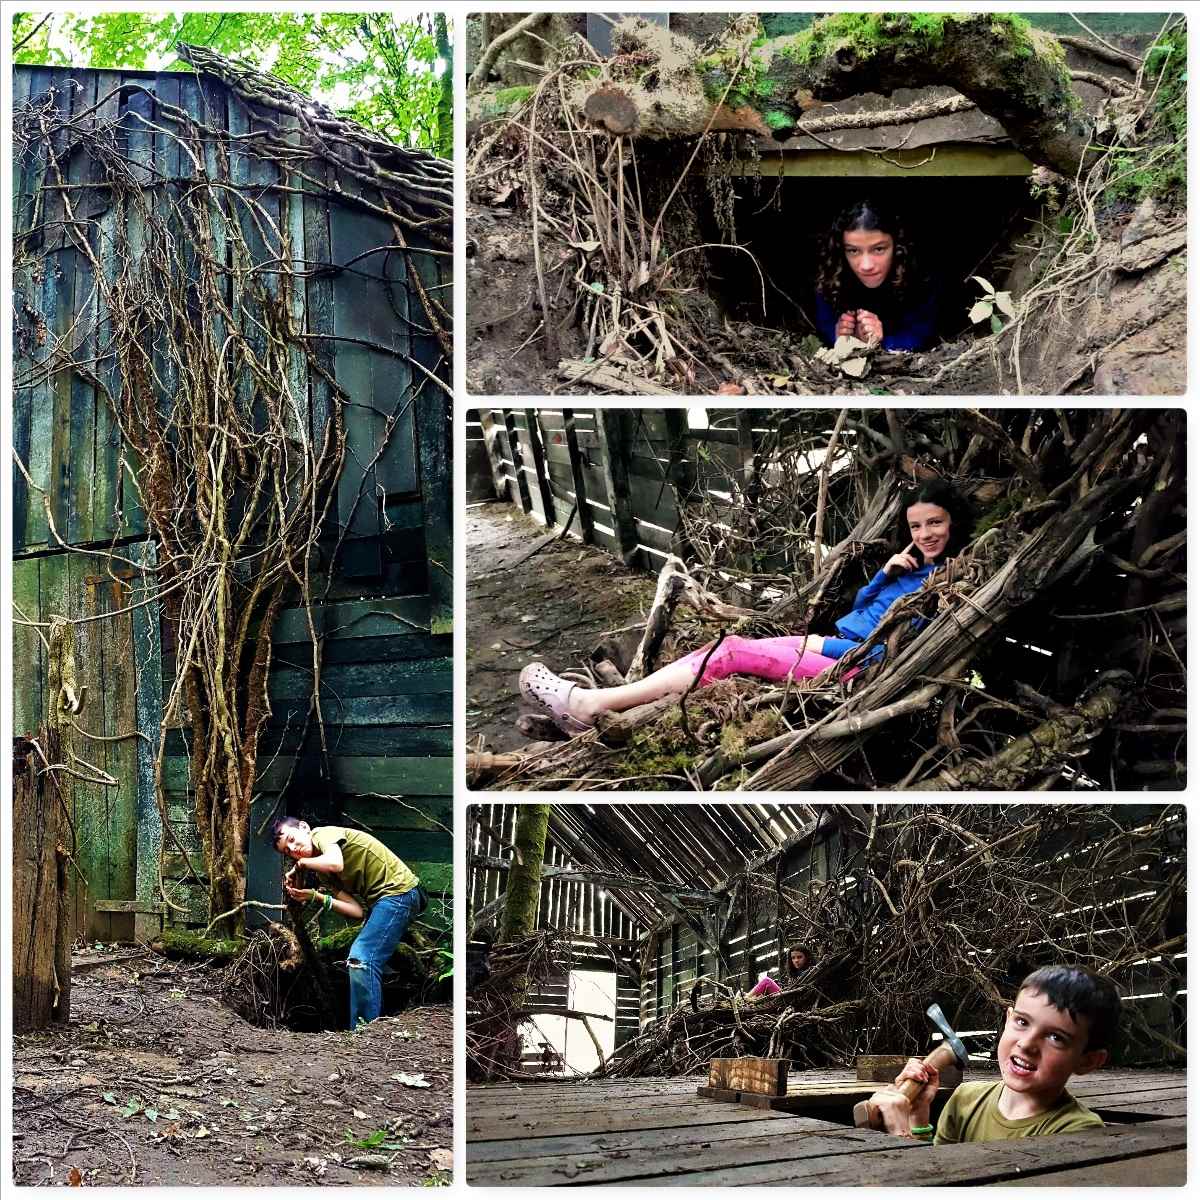
In amongst all these workshops and general setting up my kids took themselves off exploring. I went with them on one jaunt and they took me to the ‘House of Doom’ (as they referred to it). I think film companies use the site and they had left this massive Gothic barn – quite beautiful but eerie at the same time (the axe was for posing with only by the way).
Exploring
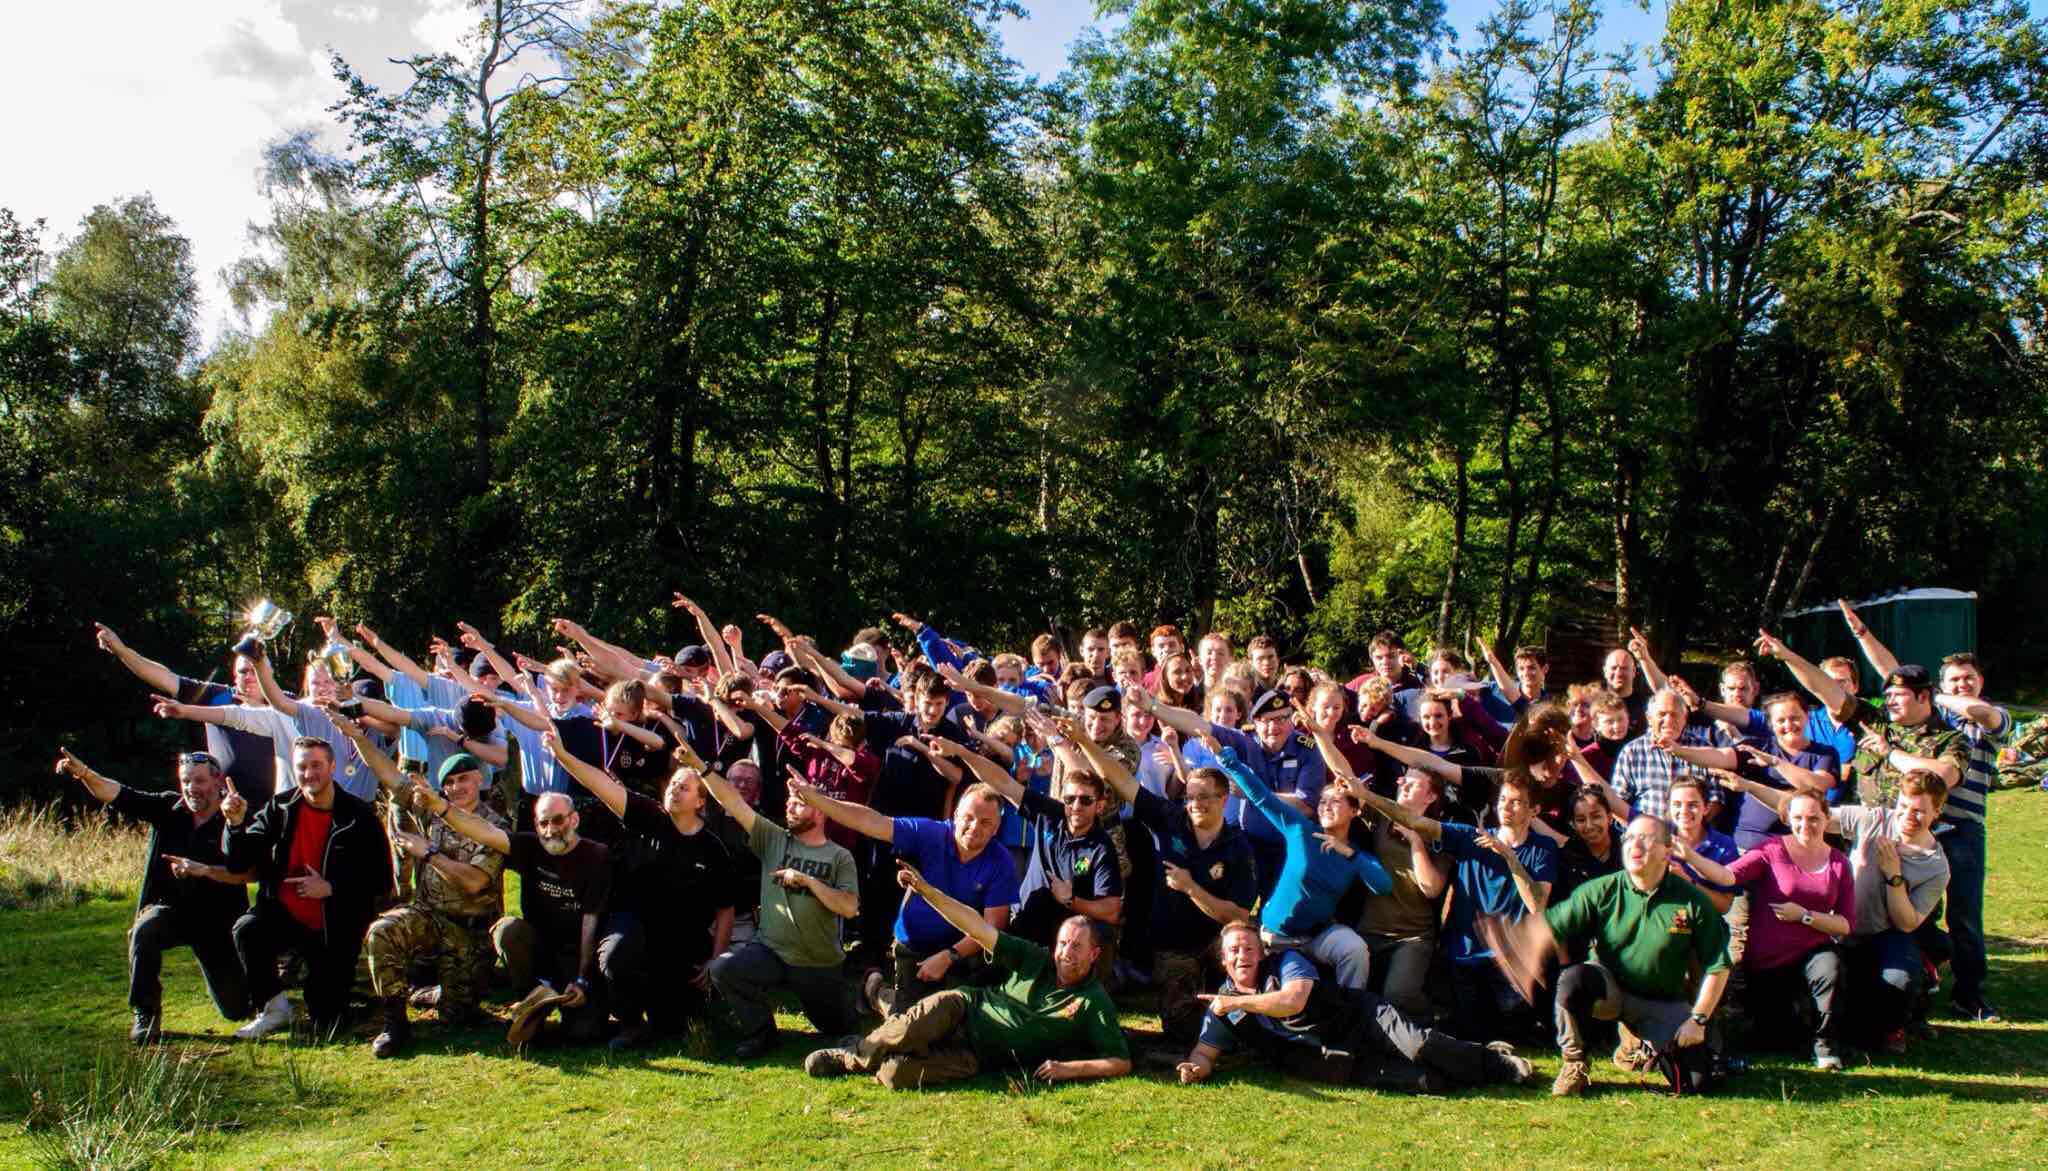
The Bushmoot is all about ‘Family’ as far as I am concerned – this family extends out to all my Bushmoot friends I see time and time again as I return each year.
Friends
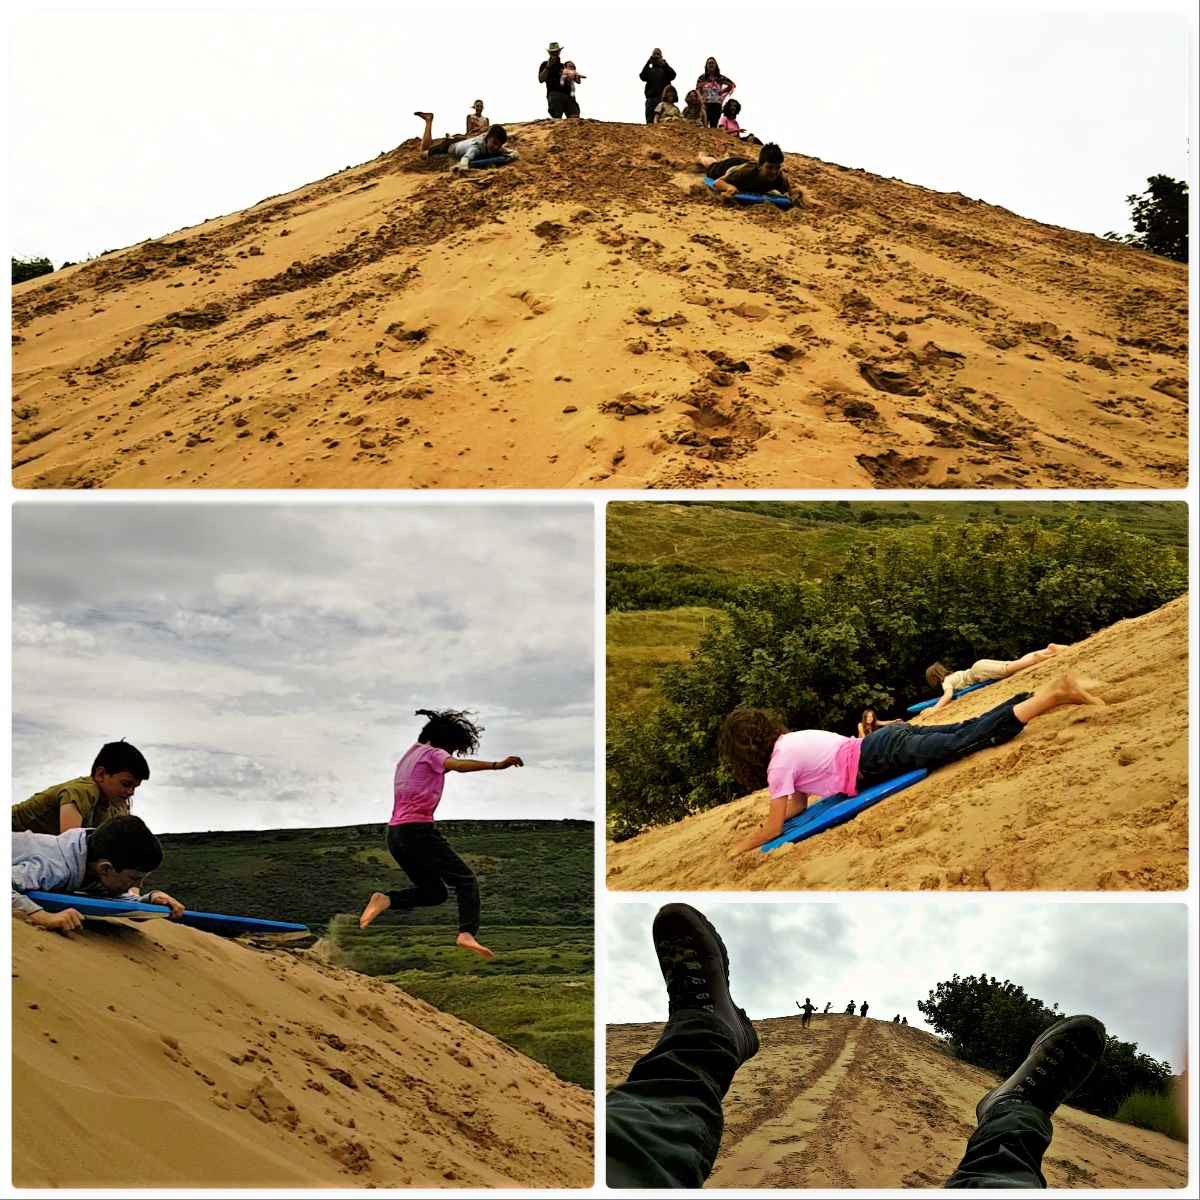
Getting out of the woods one day with my friends Ian, Catherine and Liz (and assorted kids) we went Dune Diving. Merthyr Mawr sand dunes are the second highest dunes in Europe, apparently, and there is one dune in particular that the kids love.
Needless to say I joined the kids as they threw themselves down the dune – great fun even for a 50-year-old kid like me.
Dune riding
Core Day Workshops
I have no idea how many different workshops we ran this year and I only photographed or filmed a small number of them. We always start with a tool safety presentation (normally three different groups) before starting the main workshops.
Core days – part 1
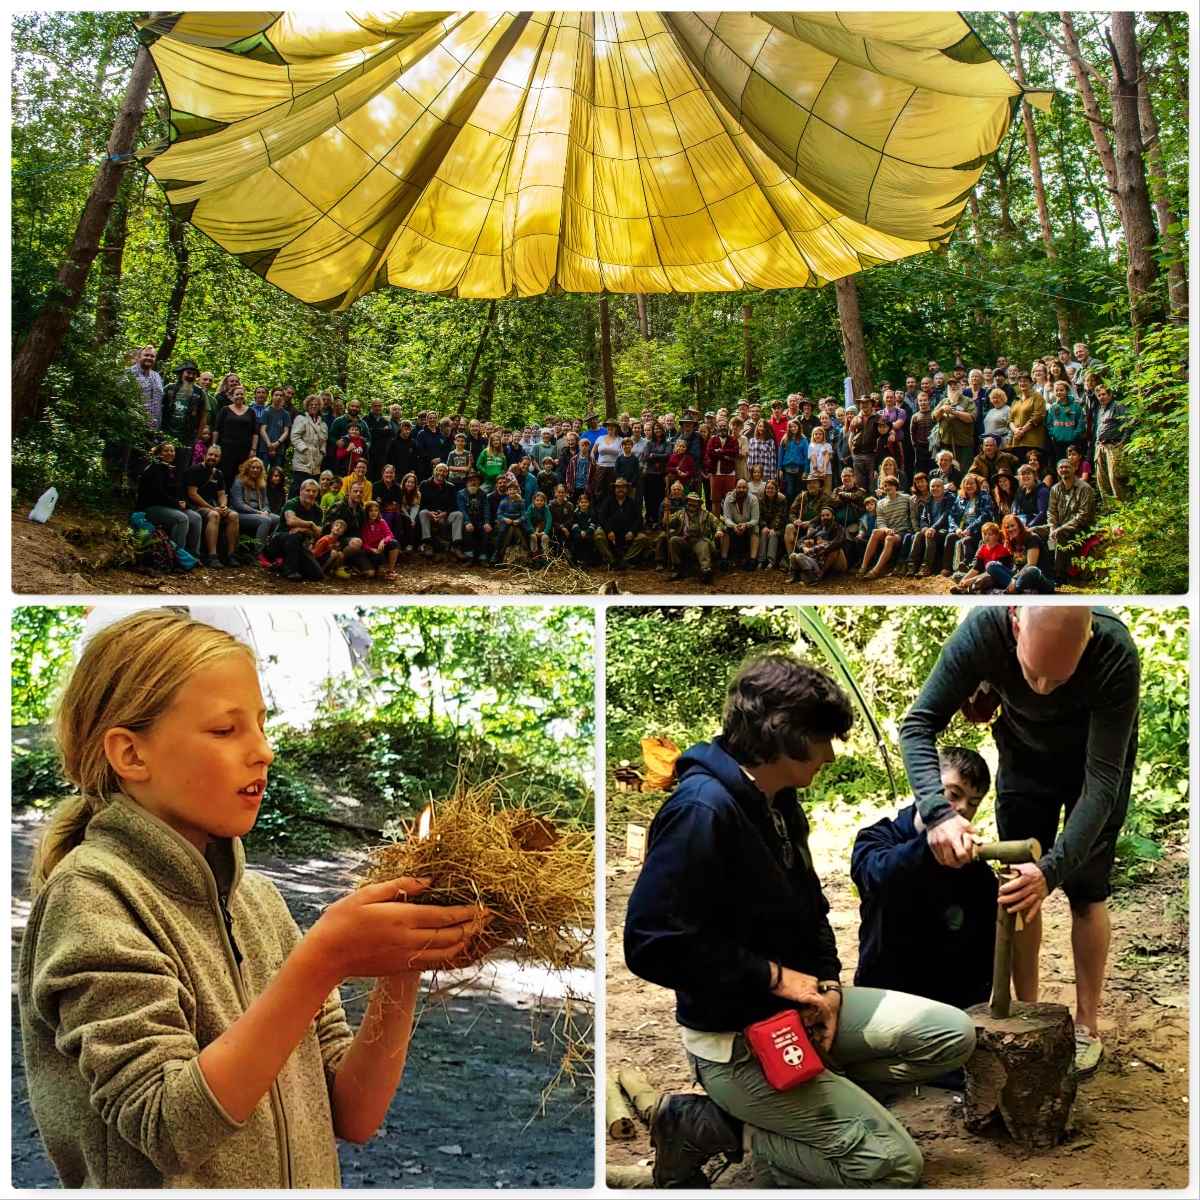
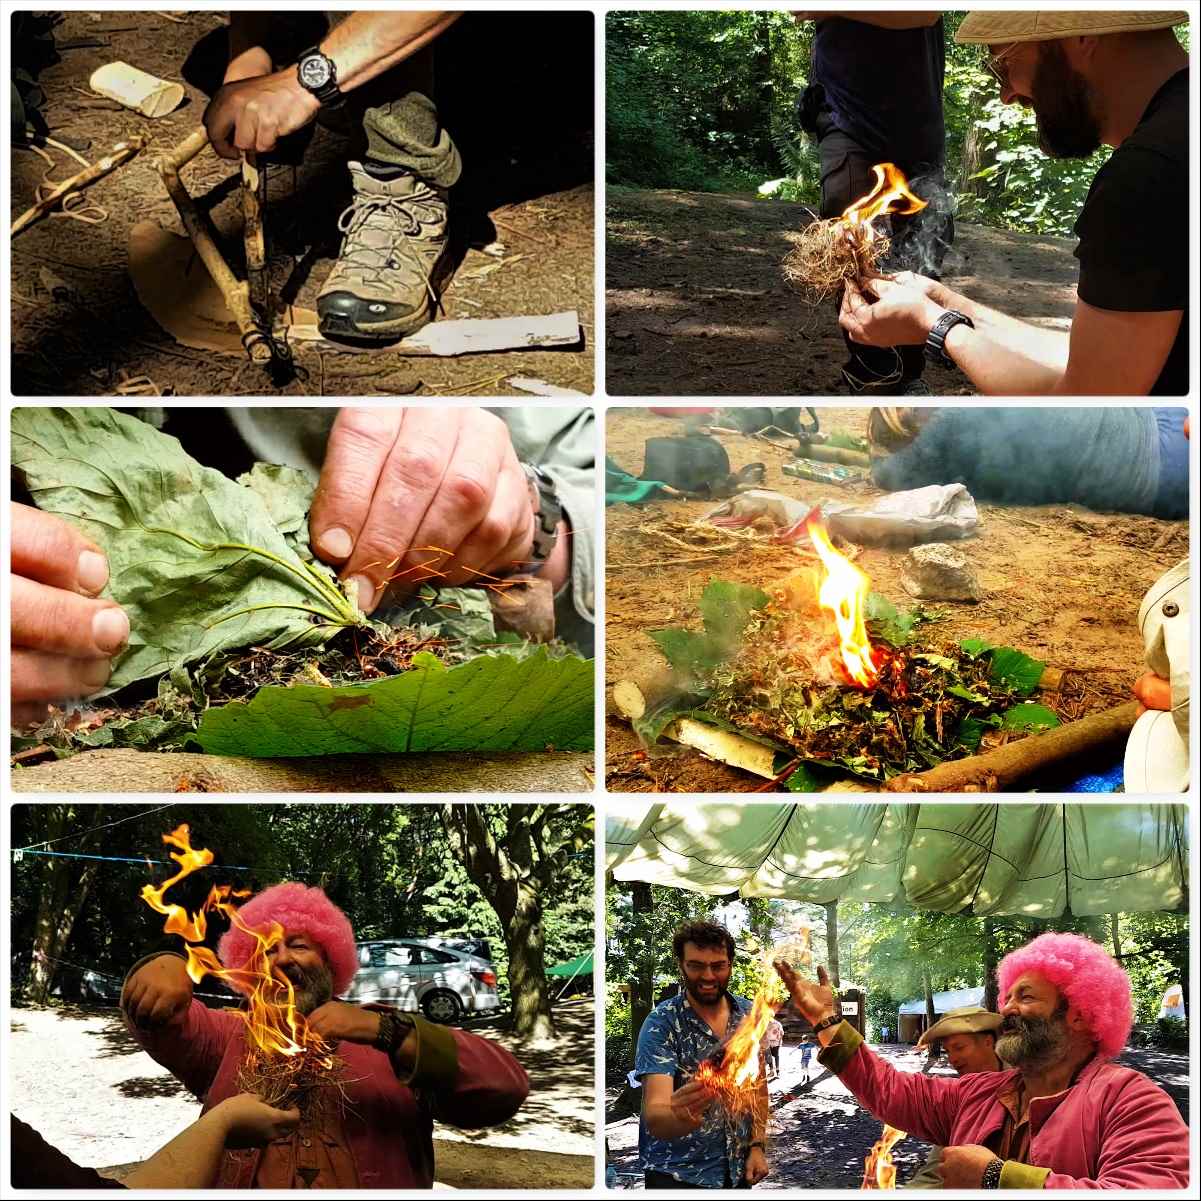
Fire lighting in its many different forms is a staple of the Bushmoot and this year was no different – below are pictures from the bowdrill, the damp tinder and the flint and steel workshops.
Core days – part 2
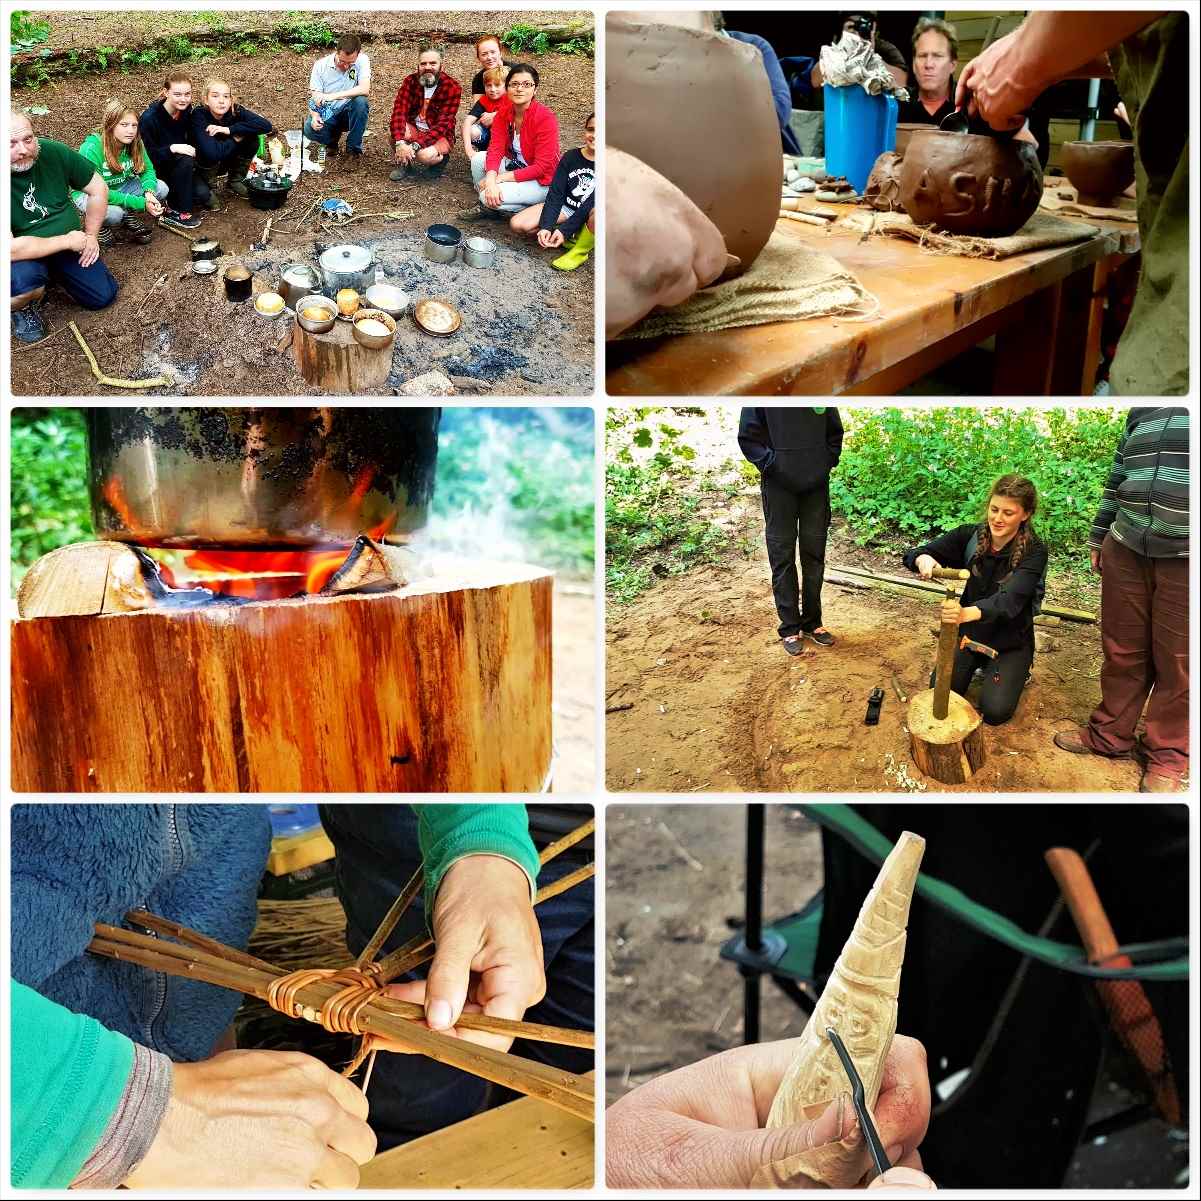
Other workshops included Baking, Pottery, Rocket Stoves, the Starter Course, Basketry and Wood Spirits (to name just a few).
Core days – part 3
Watch the video to get a feel of the subjects we cover at the Bushmoot.
Bushmoot Life
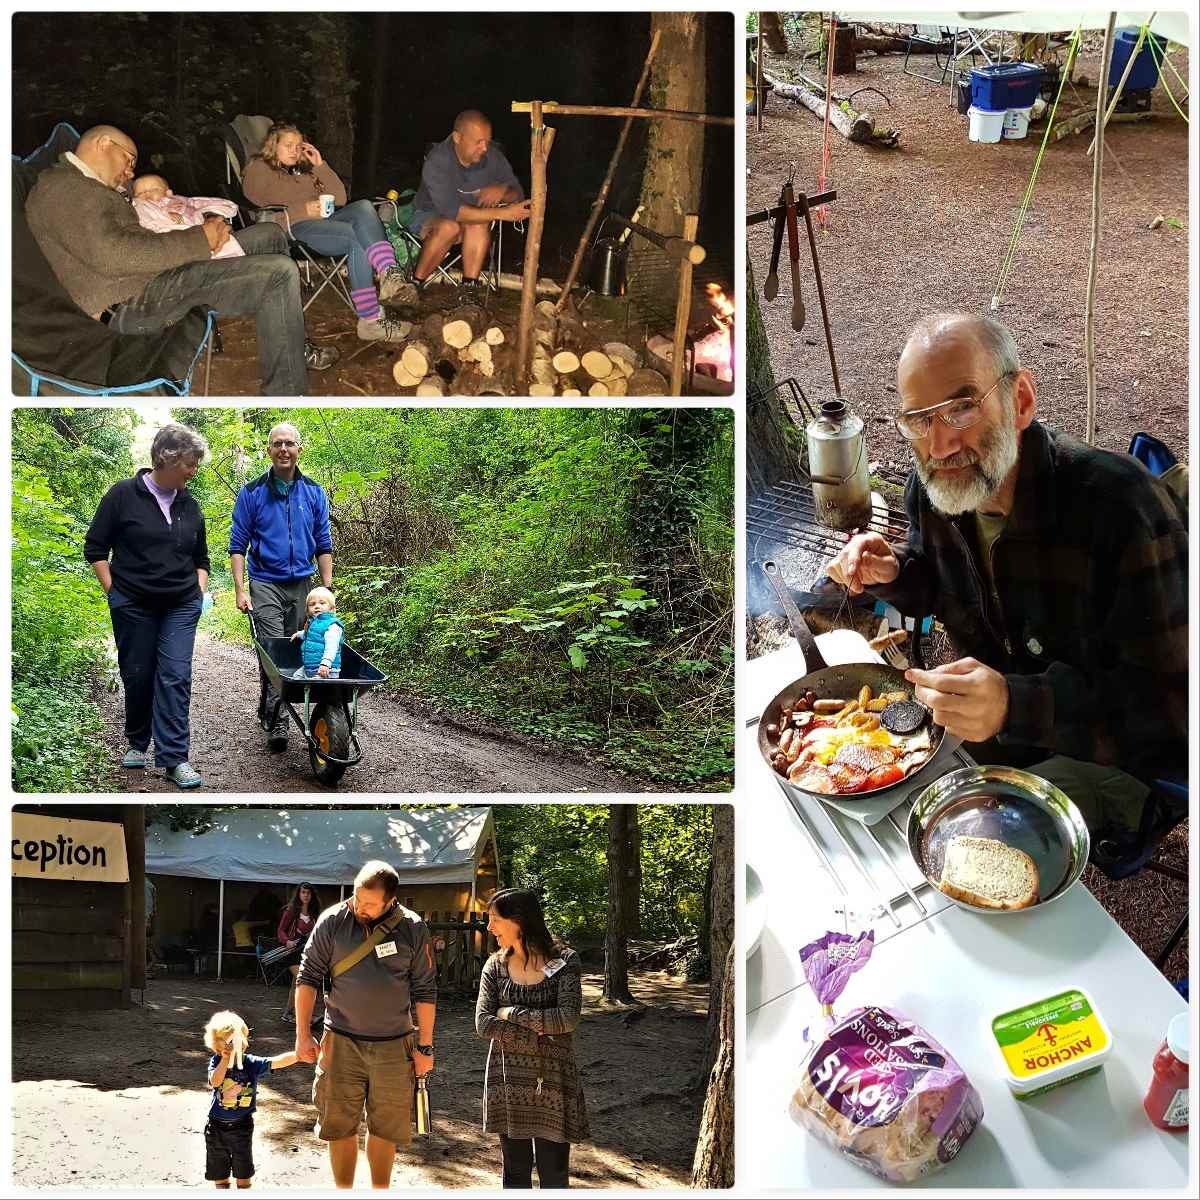
Outside of all these workshops and background work life goes on at the Bushmoot – food I can tell you forms a big part of that life 🙂
I am no great chef (tend to prefer building Campfire Cooking Constructions) but can when needed put something together – thankfully though there are plenty of people around like my wife Alison willing to put together a good spread for the kids and myself. Highlights of the Bushmoot are the Group Meal and the Hot Chocolate evening.
All things food
A favourite of mine has always been the archery range. We had another great competition this year. The winners from last year (Marek and Louey) were also presented their made-to-measure bows from Wayne Jones of Forest Knights.
This year we also had a catapult competition run by Steve (Mesquite) Harral and a workshop from David Colter on the Pellet Bow. Around the site we had various smaller ranges for axe, spade and pin throwing.
Down on the range
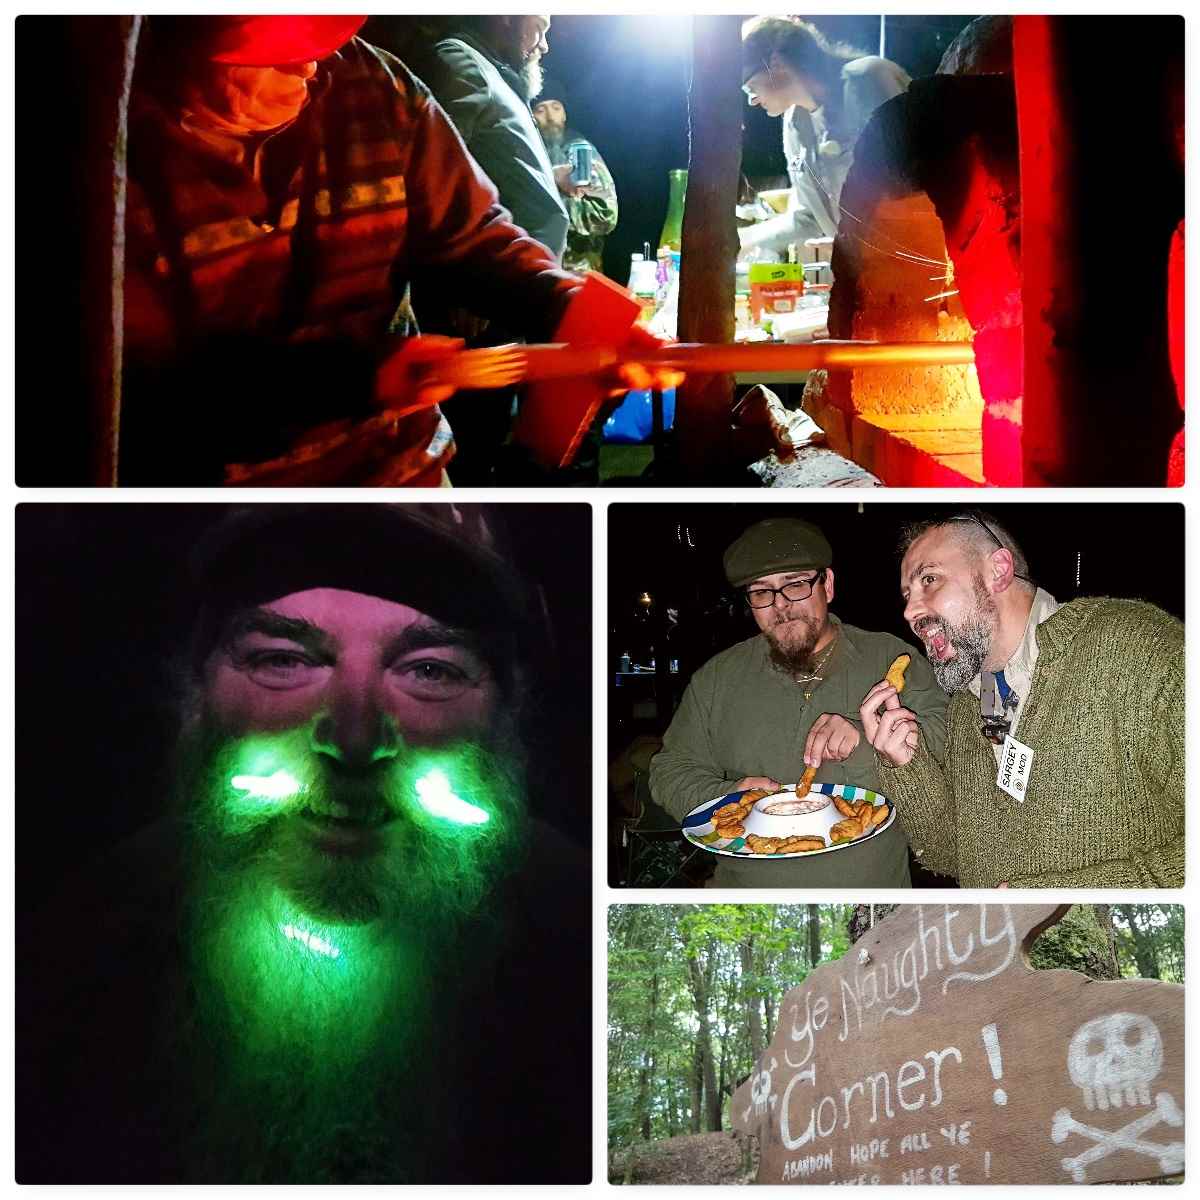
The Naughty Corner
No Bushmoot would be complete without the Naughty Corner and I try to get up to it for an hour or two each evening. This year my friend from the Sea Cadets Alan Lewis joined me at the Bushmoot for the first time and as he is a chef found himself drawn to the pizza oven.
Phil and Magda as usual kept us well fed each evening and Cap’n Badger made sure we were all not too naughty 😉
The Naughty Corner
The Sand Pit
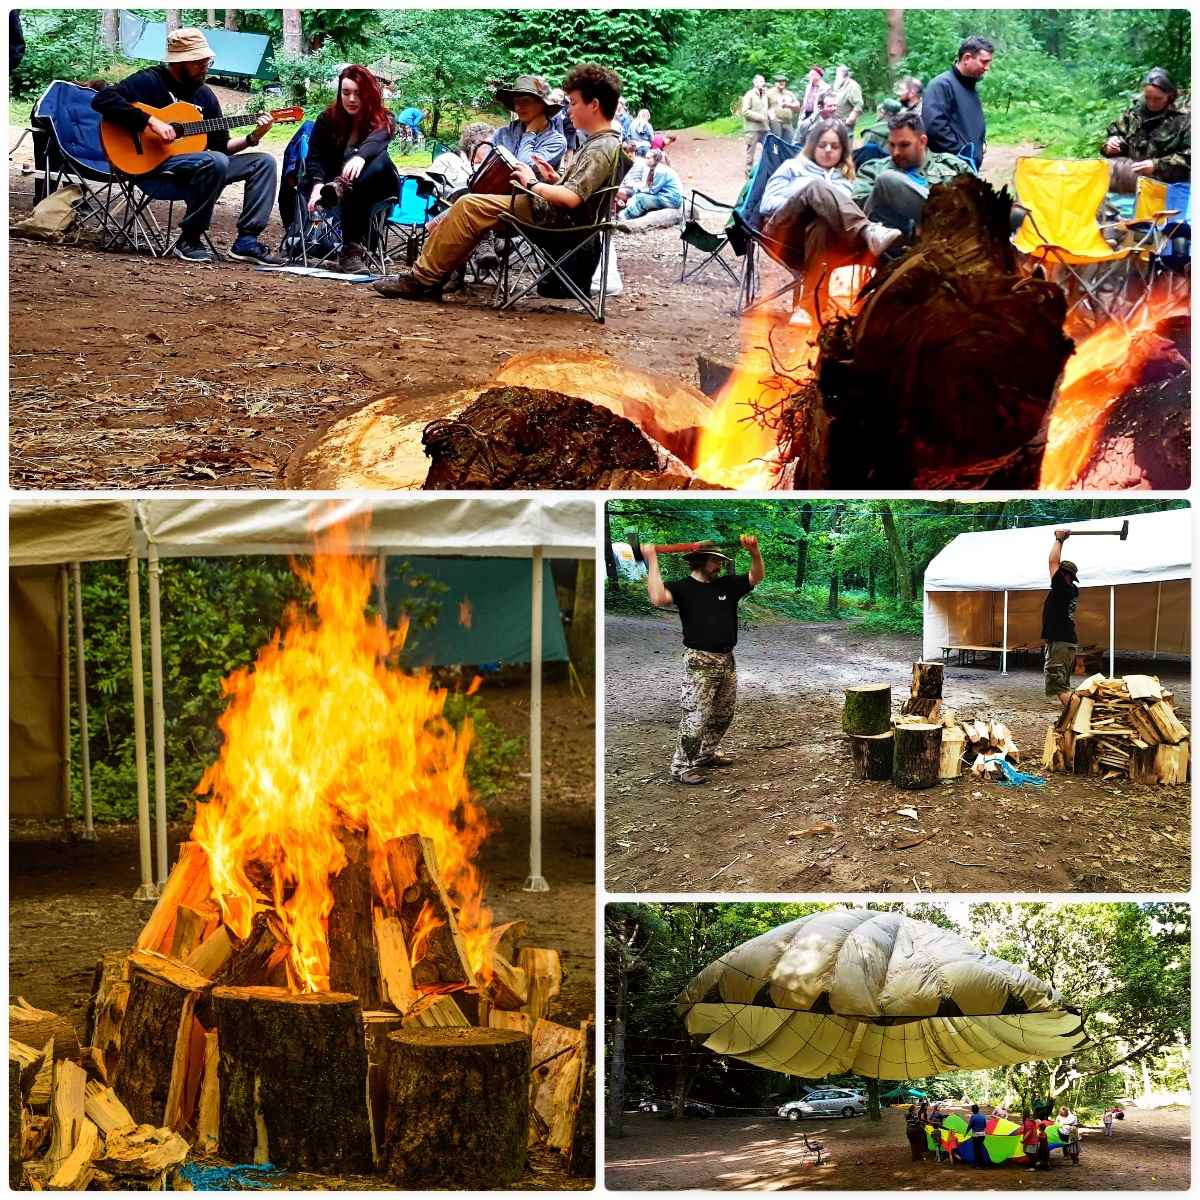
The evening socialising is not restricted to the Naughty Corner – usually for a couple of evenings lots of folk congregate under the big chute by the kids sandpit for a bit of a shindig.
We were supposed to have a band along one evening but for some reason they failed to show up – thankfully Marek and Gemma with some others started their own musical session that lasted well into the evening.
Sandpit evenings
The Main Chute
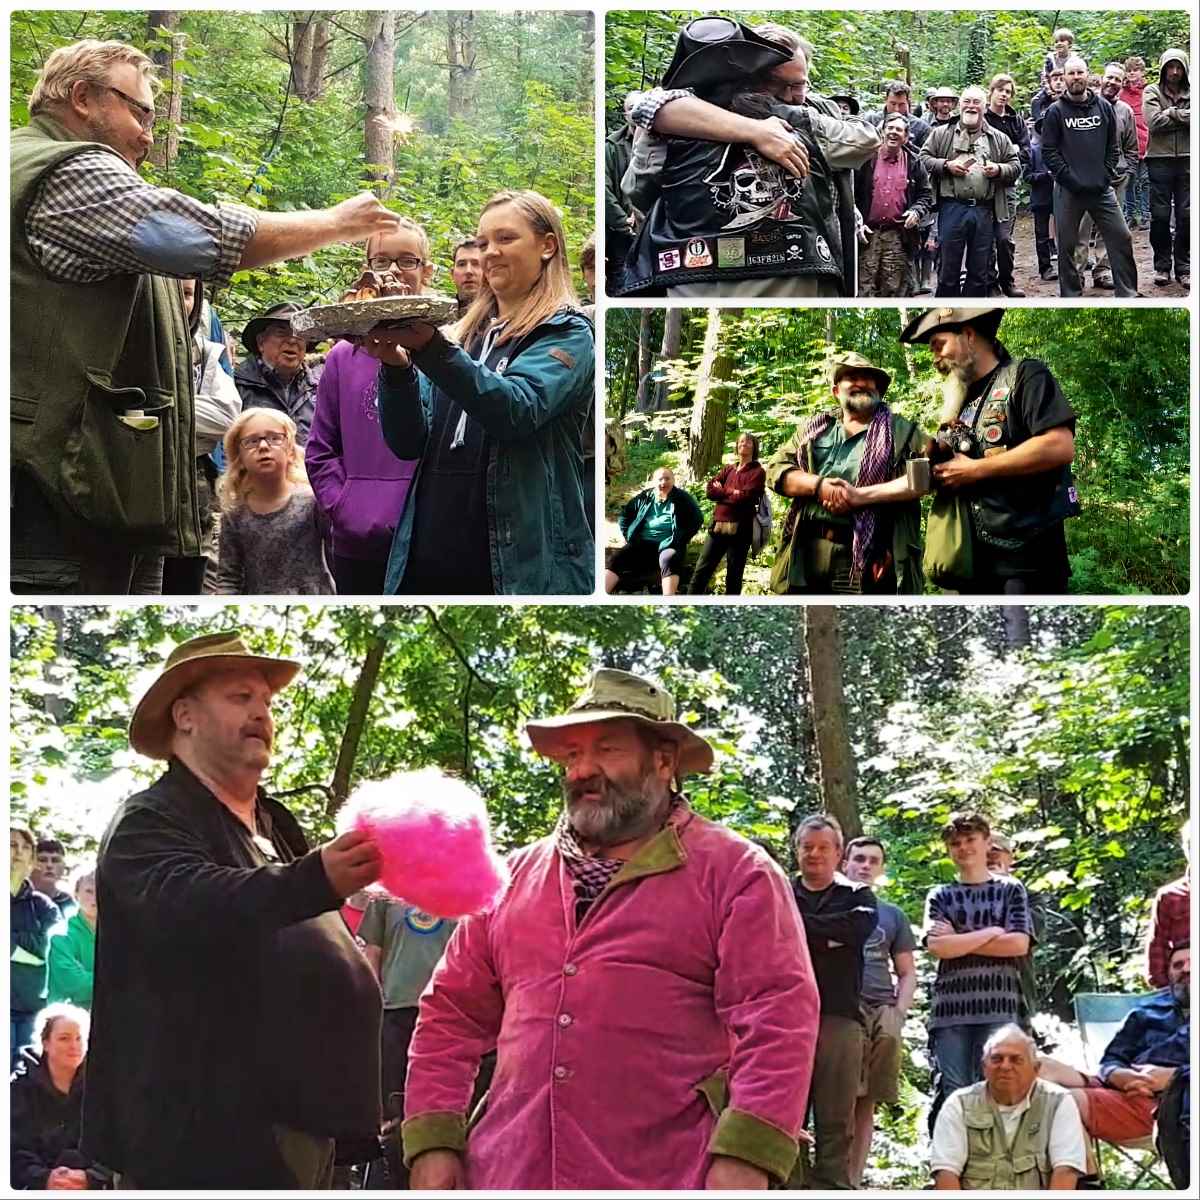
This is where we meet each day, talk about what will be happening, answer questions and celebrate people.
The Bushmoot is run by Tony and Shelly Bristow (along with us volunteer Mods) and as often happens the Bushmoot coincided with Tony’s birthday. We also remembered our dear friend Drew who passed away so tragically at a young age in 2013. We do this by giving each year an engraved Swiss Army Knife to the person we feel has contributed most to the Moot.
Our good friends John Fenna and Steve Harral raise money each year for Cancer charities. Steve gets John to dress up in a different pink outfit each year and we make lots of donations in various ways. Also John has an award he gives out called the John Fenna Award (a Teddy Bear with lots of bushcraft kit) and this year it went to Cap’n Badger for dedicated service to running the Naughty Corner – or undetected crime as I hear 😉
Life under the main chute
Kids’ Fun
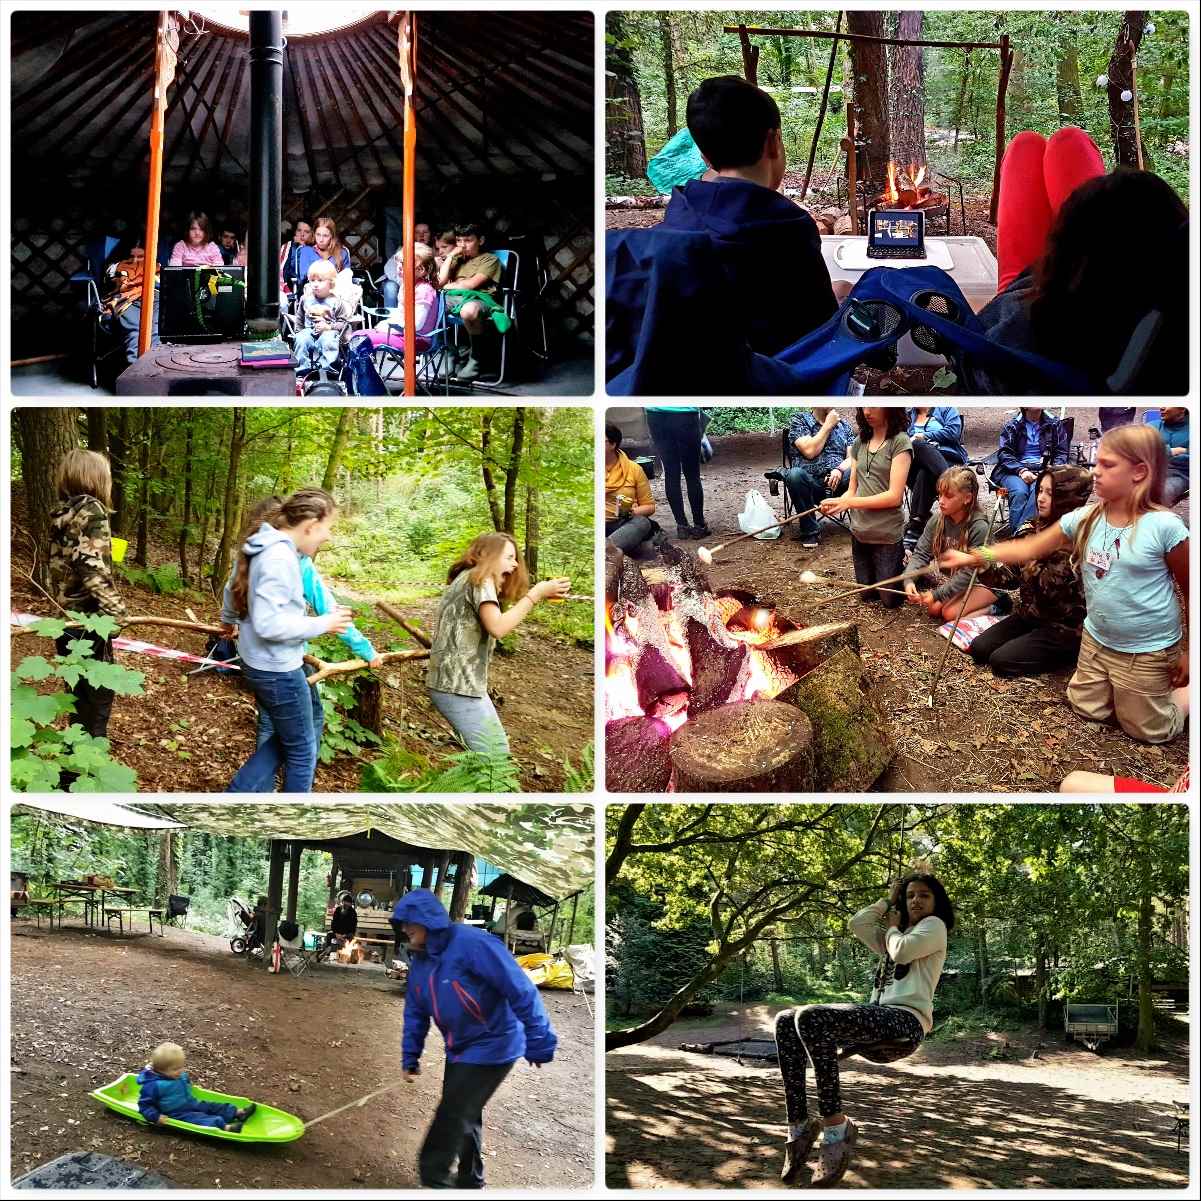
All this talk of fun would not be complete without mention to what we organise for the kids (I mean the young ones here). We are not against technology and I am happy to let my kids watch a movie in the evening by the fire (gives me a breathing space to get on with camp chores).
The Bushmoot is a family friendly place and there are always workshops and games planned in for the kids. When there are no planned activities the whole estate is their playground and it’s great to see my kids roam free as I once did as a kid growing up in the Western Isles.
Kids – old fun and modern fun
My last video on the Bushmoot looks at this ‘Bushmoot Life’.
A Celebration
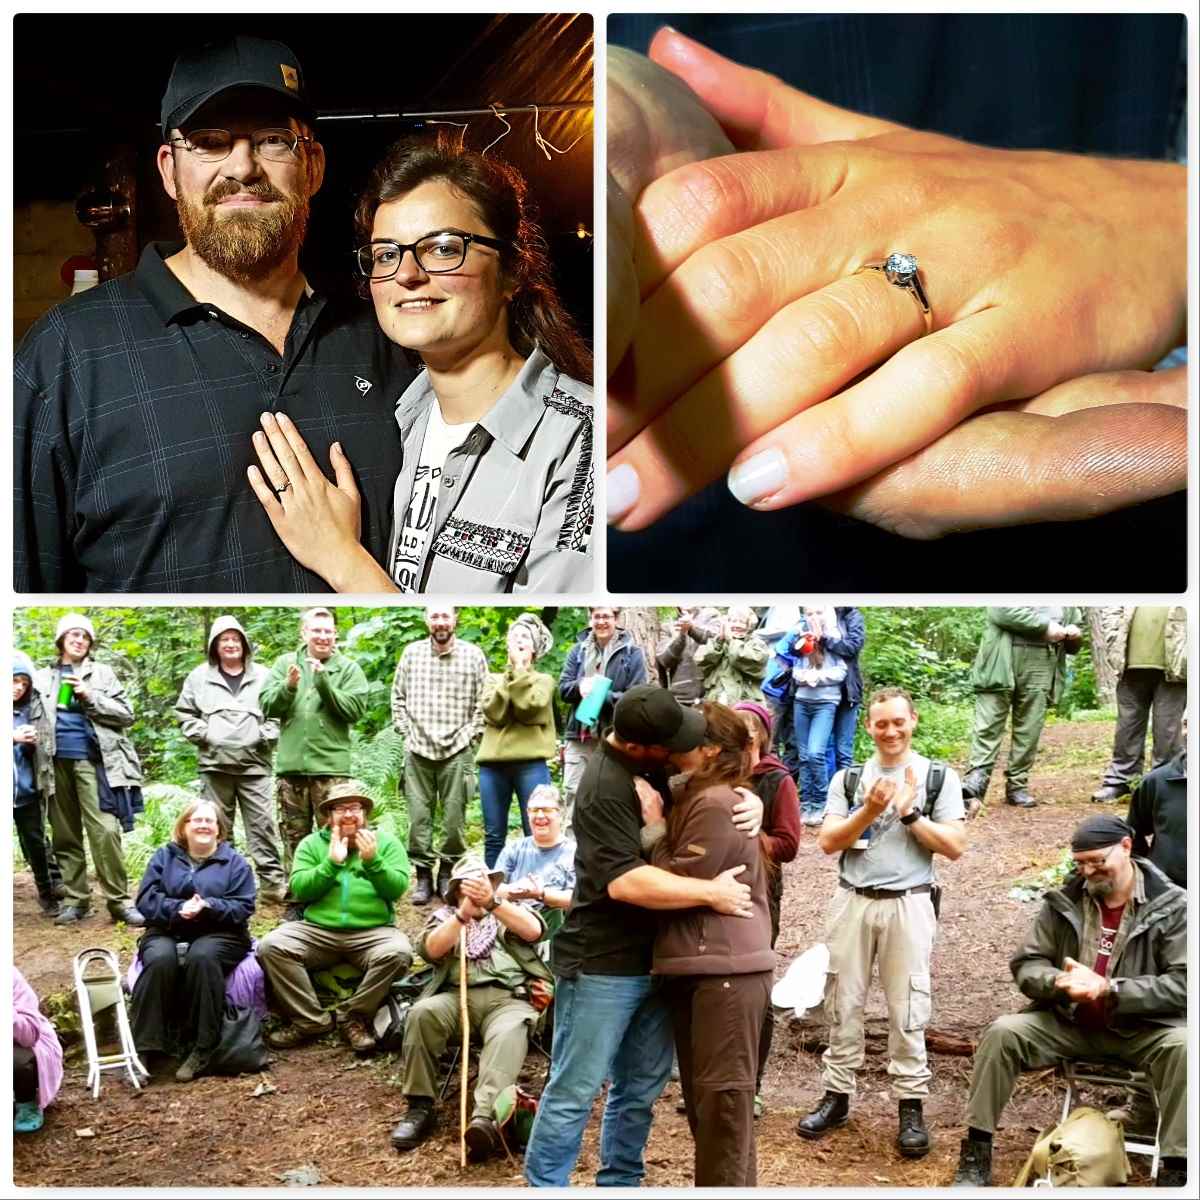
When I popped up to the Naughty Corner one night I got chatting to our chefs Phil and Magda and found out that they had just got engaged – Phil had popped the question to Magda that day down on the beach and she had said yes.
The next day we got Phil and Magda to announce the engagement to everyone under the Main Chute – congratulations guys.
Congratulations
Me
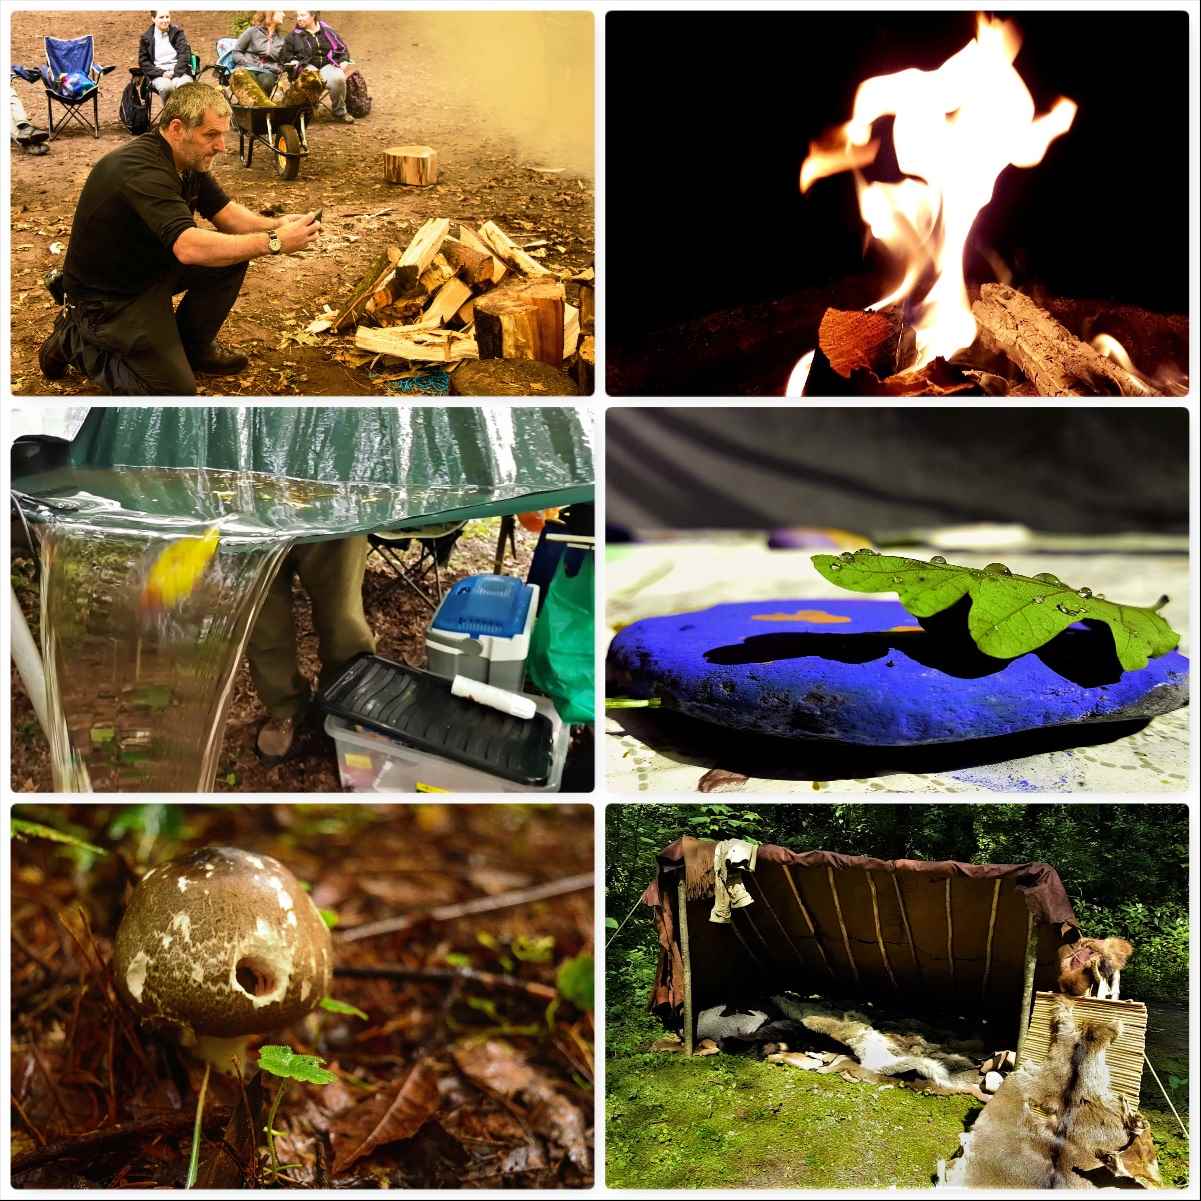
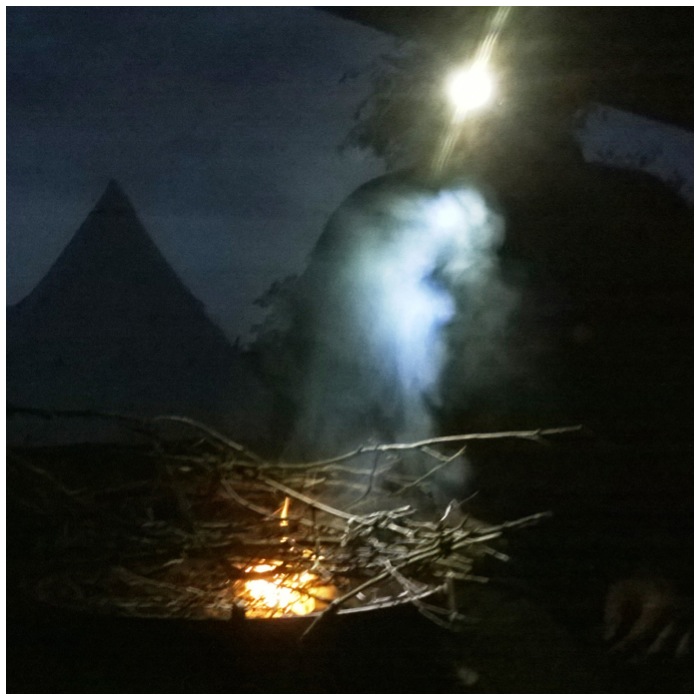
I am mostly to be found behind the camera lens so you do not see many pictures of my silver mop at the Bushmoot. Over the last 10 years I have really embraced photography and am always on the look out for something unusual to snap.
Fire Faces are a favourite of mine – spotted the BFG in one snap I took this year – but there is always something interesting to photograph at the Bushmoot.
Just me
A bit of Magic
This year at the Naughty Corner it was hard to miss the fact that the fire was making a good impression of a Rainbow. It turns out that Cap’n Badger had acquired some Mystical Fire and popped it into the fire. I took a few snaps of the flames and caught a lovely shot that I call ‘The Dancer’.
My kids loved the stuff and so we popped a couple of sachets on our campfire one evening while they watched a movie.
Rainbow flames
Alison
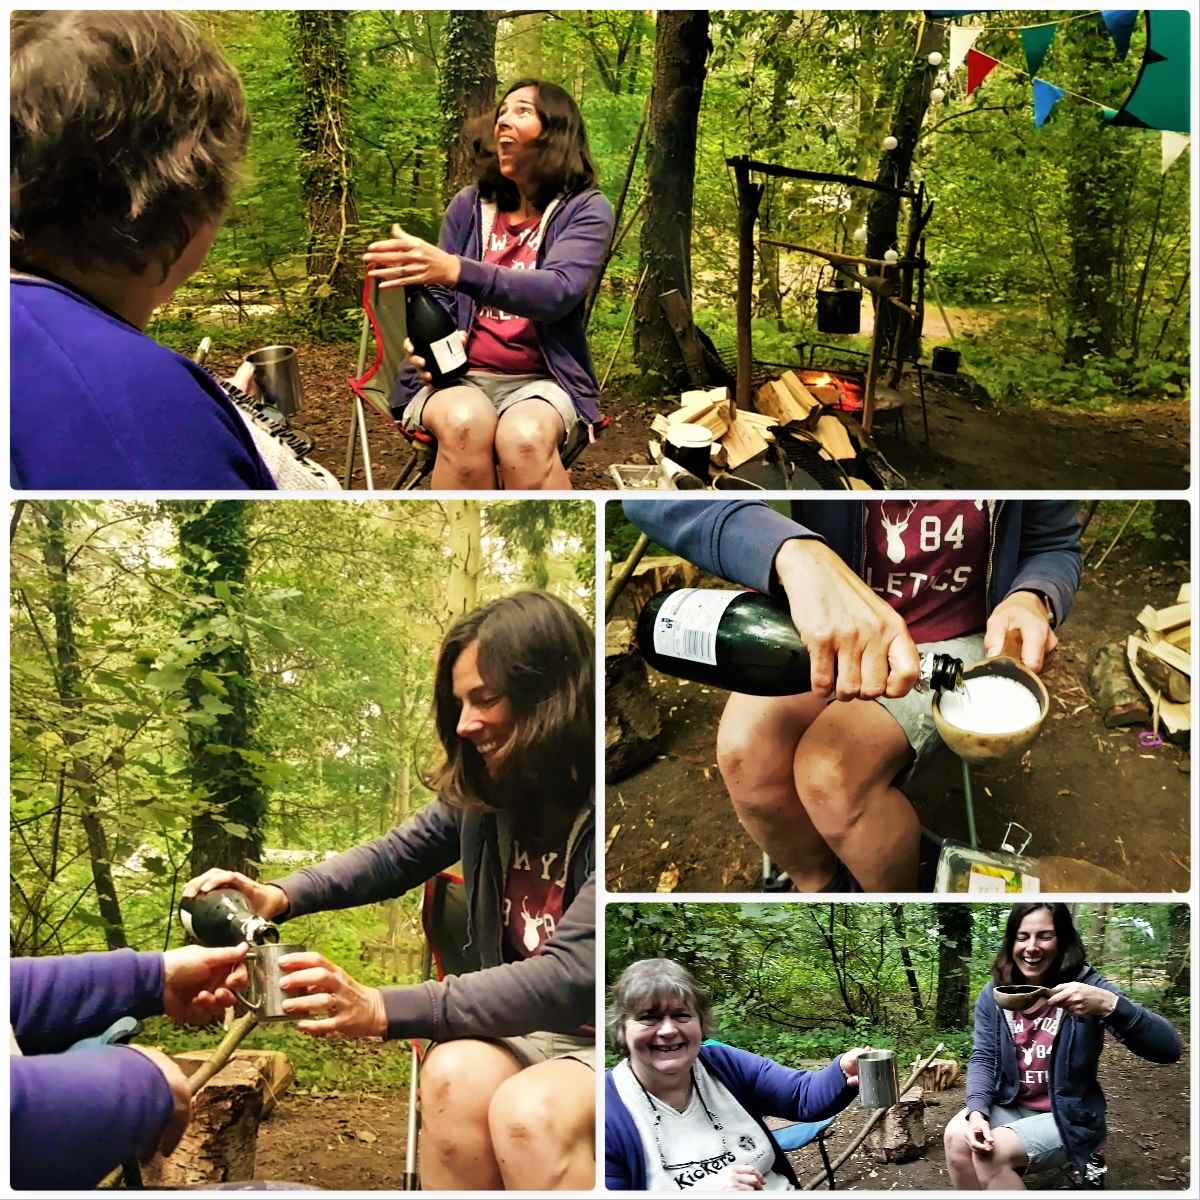
My wife Alison did not attend the whole of the Bushmoot (she pops back and forth from home over the fortnight) as she runs her own publishing company and this year was focused on finishing the first draft of her own book while we were at the Bushmoot.
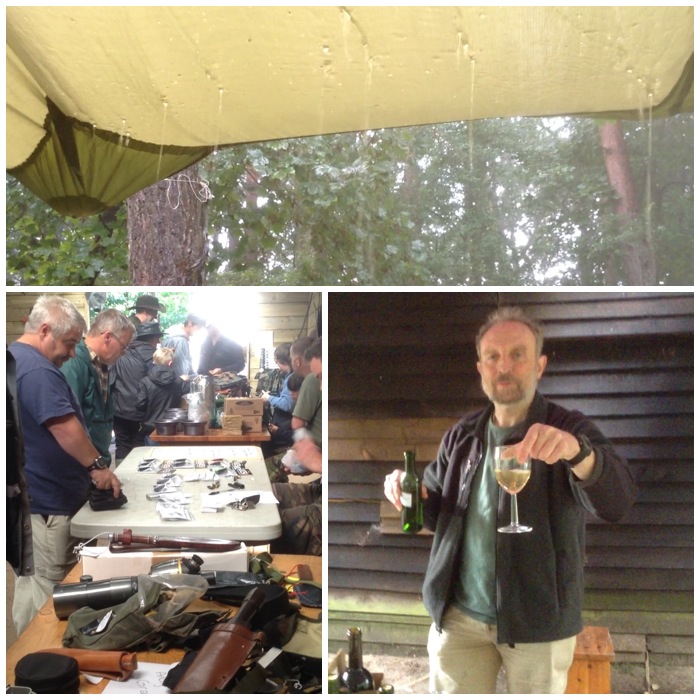
Needless to say when Alison returned at the end of the Bushmoot she did so with a bottle of bubbly to celebrate the fact that she had finished her first draft – well done darling 🙂
Congratulations Alison
That is it from me on the subject of the 2017 Bushmoot. Thank you to Tony, Shelly, all the Mods and all the other helpers who organised everything and helped make it such a magical two weeks.
Over the last few years as I have made videos of the BCUK Bushmoot I have noticed I tend to video the workshops. Looking at the footage I shot this year I saw that I had captured so much more.
This is the 3rd and final video in my Bushmoot 17 trilogy focusing on ‘Bushmoot Life’ outside of the workshops and is dedicated to my wife Alison as she completed the first draft of her latest book during the Bushmoot – Congratulations Alison and look forward to reading it.
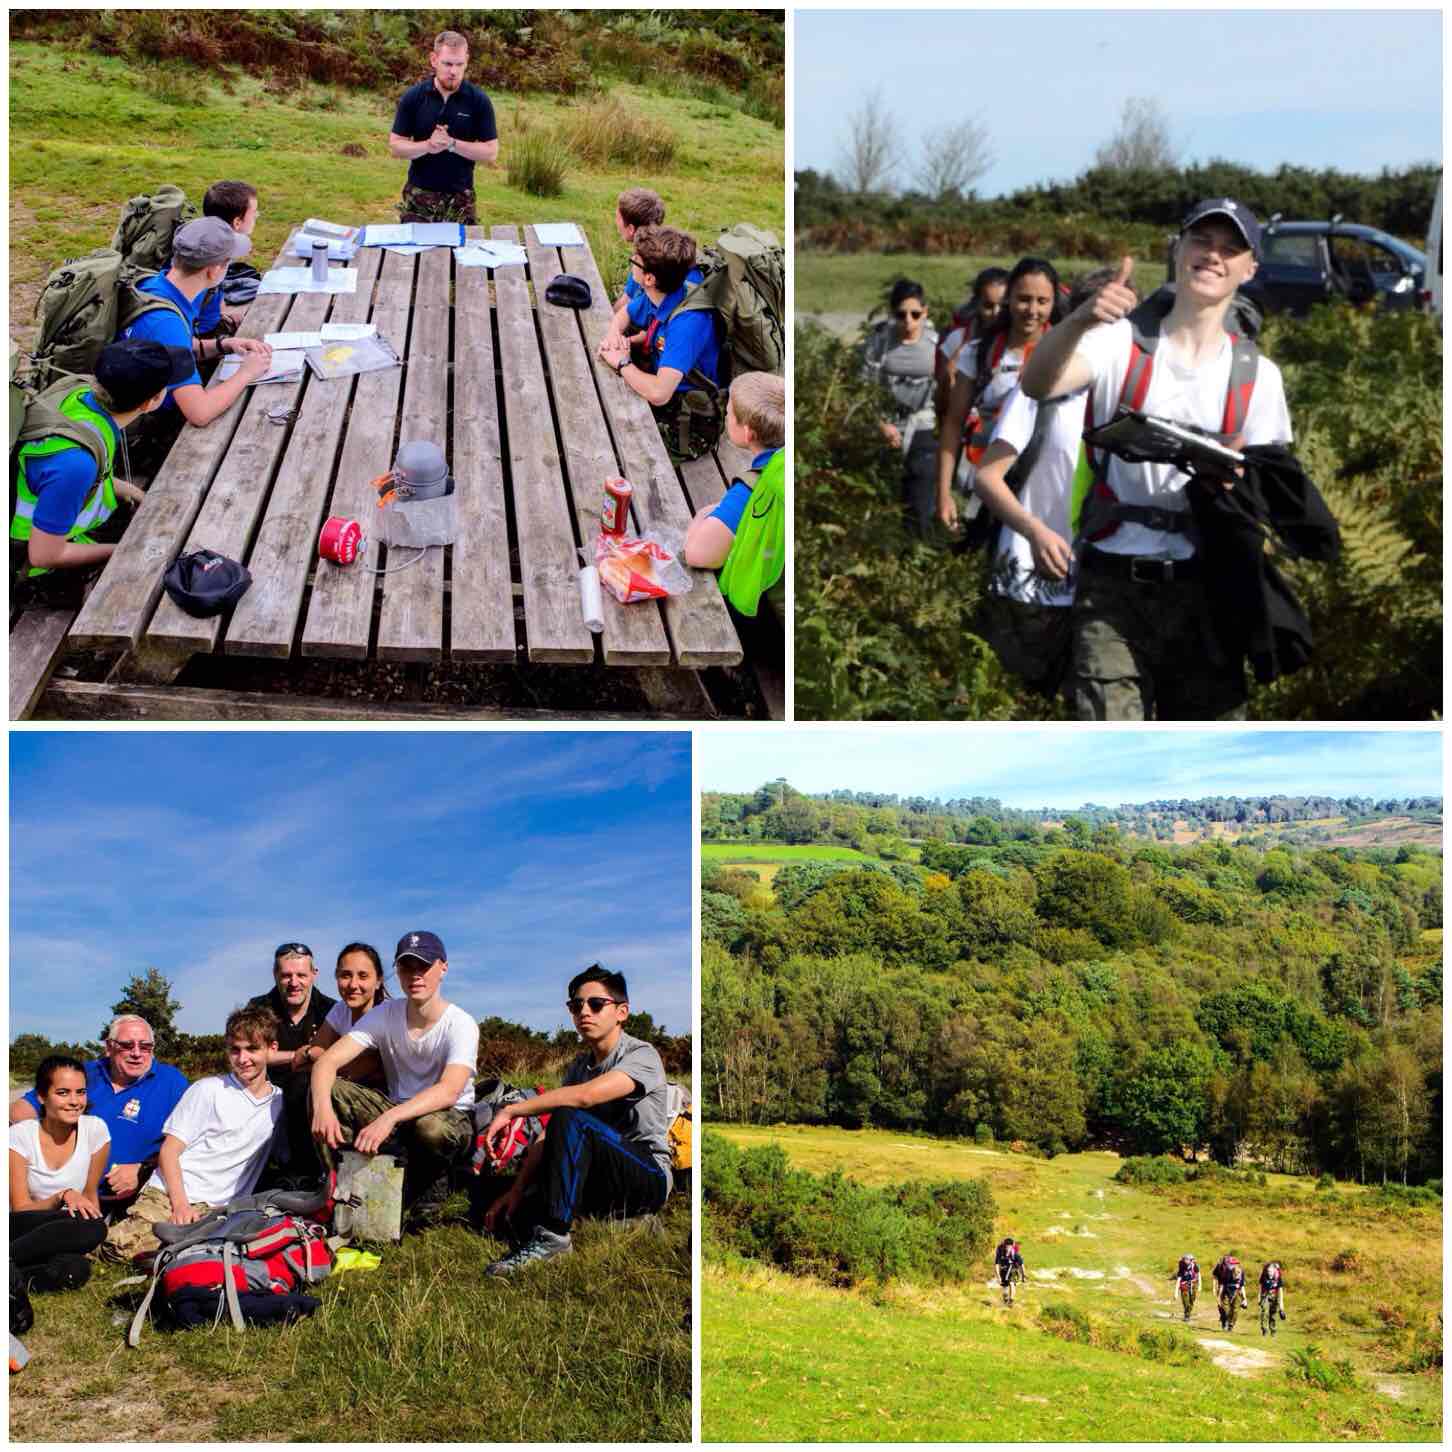
The London Area Sea Cadets annual Chosin Cup competition is one event I look forward to every year. Since 1999 I have been attending this event and this year may not have been the hardest in terms of the weather but it sure was hard due to the sheer number of different tests the cadets had to undertake.
Friday
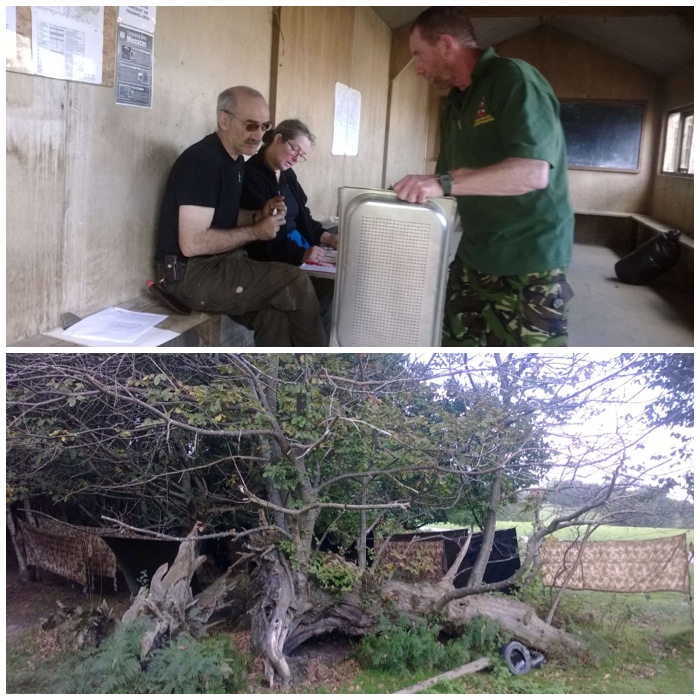
Kick off is on the Friday night (late September) with the cadets marching in to their bivvie sites and working on their route cards. The staff though were up into the early hours prepping everything for the weekend.
Saturday
First thing on Saturday morning they were briefed in their teams and then they were off. They needed to navigate a route inside and outside Pippingford Park military training area (located in the beautiful Ashdown Forest in the UK).
Out and about
This year the Chosin Cup was run by our ‘soon to be‘ new Area Staff Officer Ben MacDonald. Ben is keen to really test the cadets and brought in some new activities for them to try out.
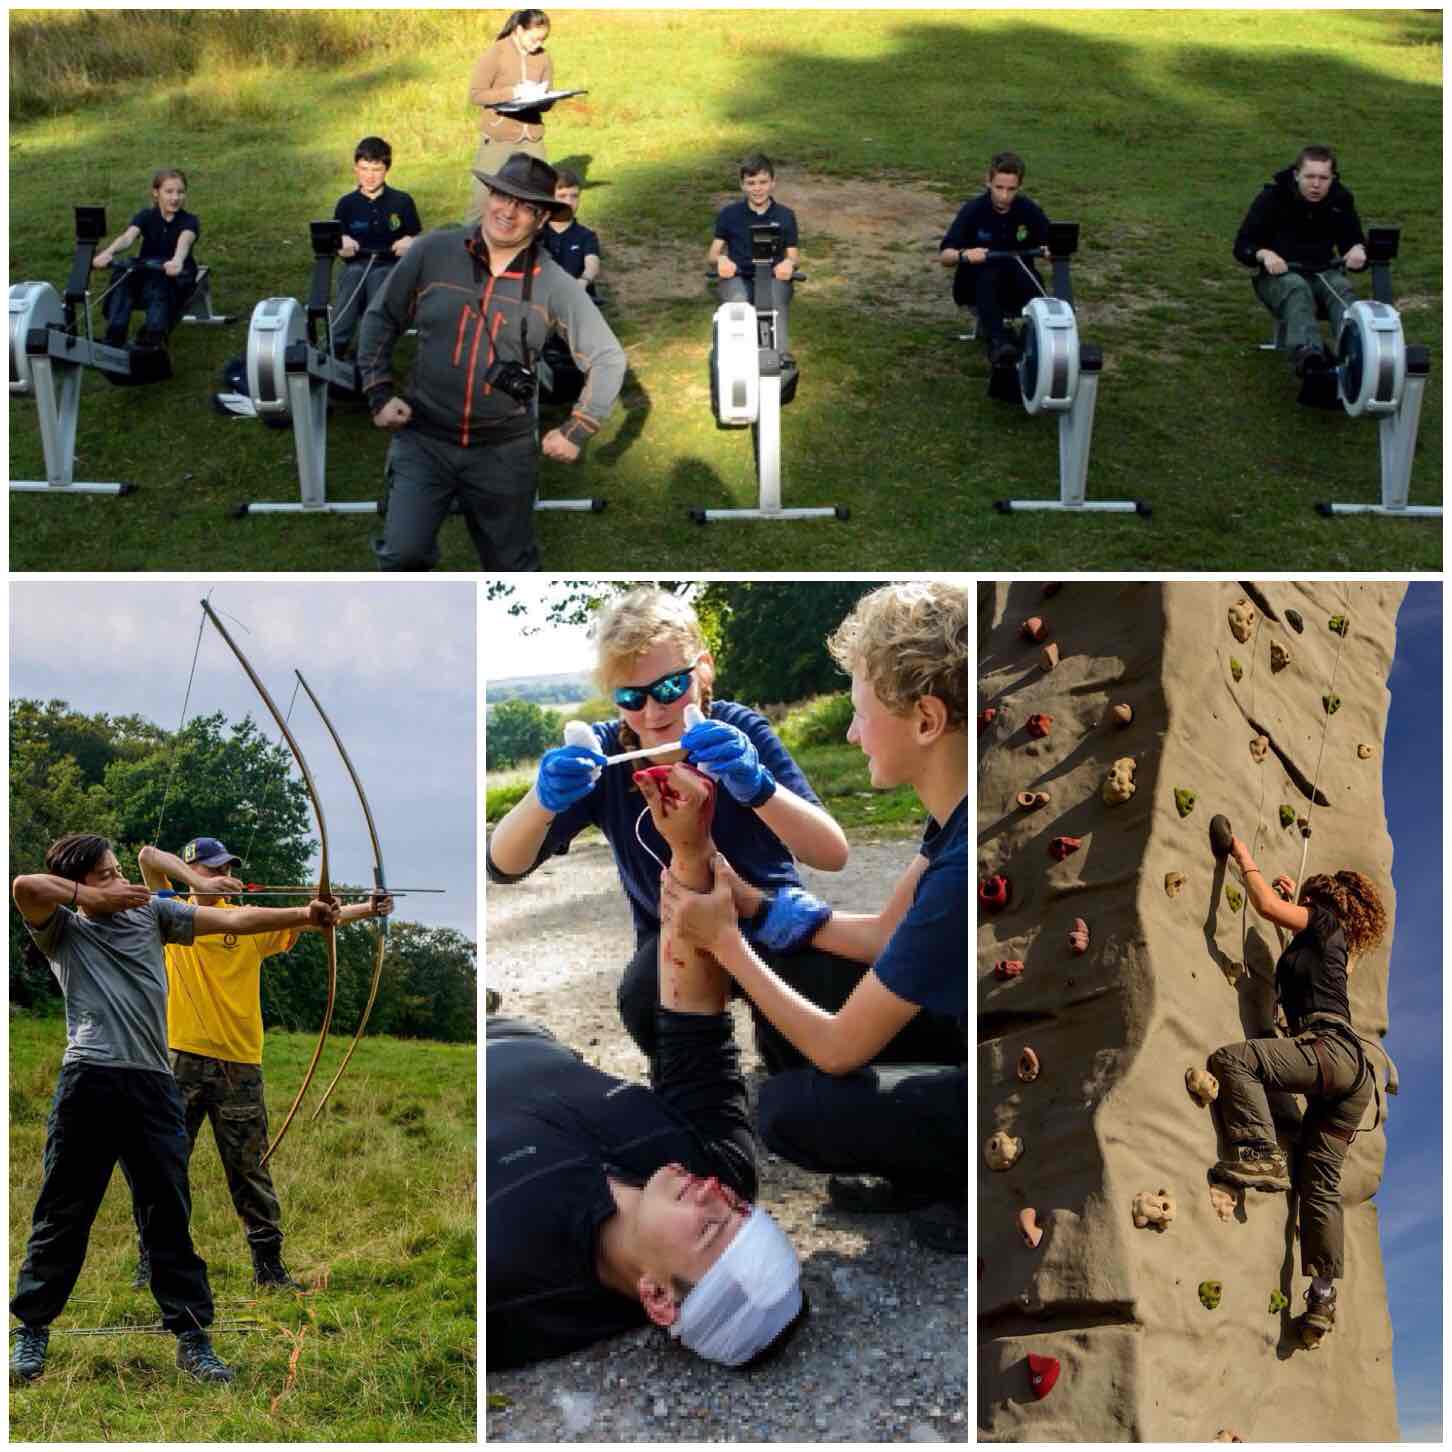
Cliff Lewis was in his element running the timed rowing race, there was plenty of archery to test the keen eyed ones, loads of fakeblood for the hardy at heart to stem and a fantastic climbingtower to let the cadets scurry up.
Multi activities
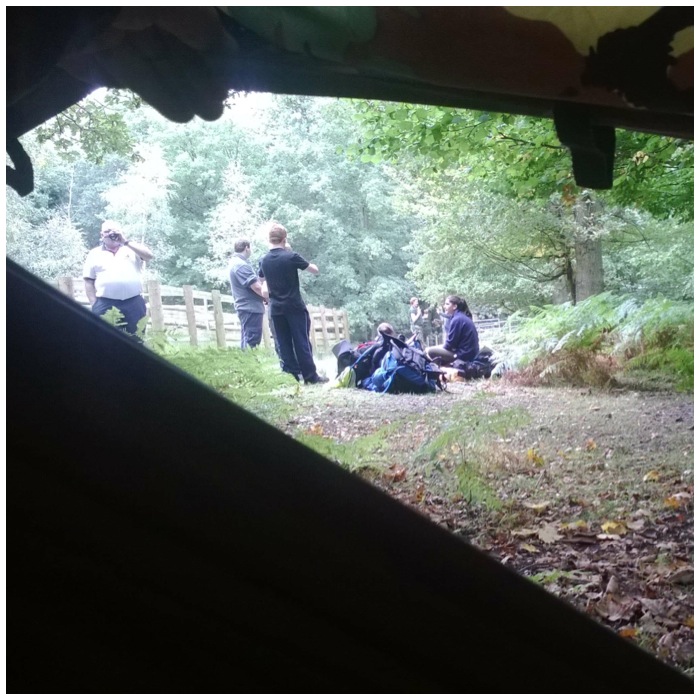
In between each stance the cadets had to keep navigating and pushing themselves to get to each one as quickly as possible.
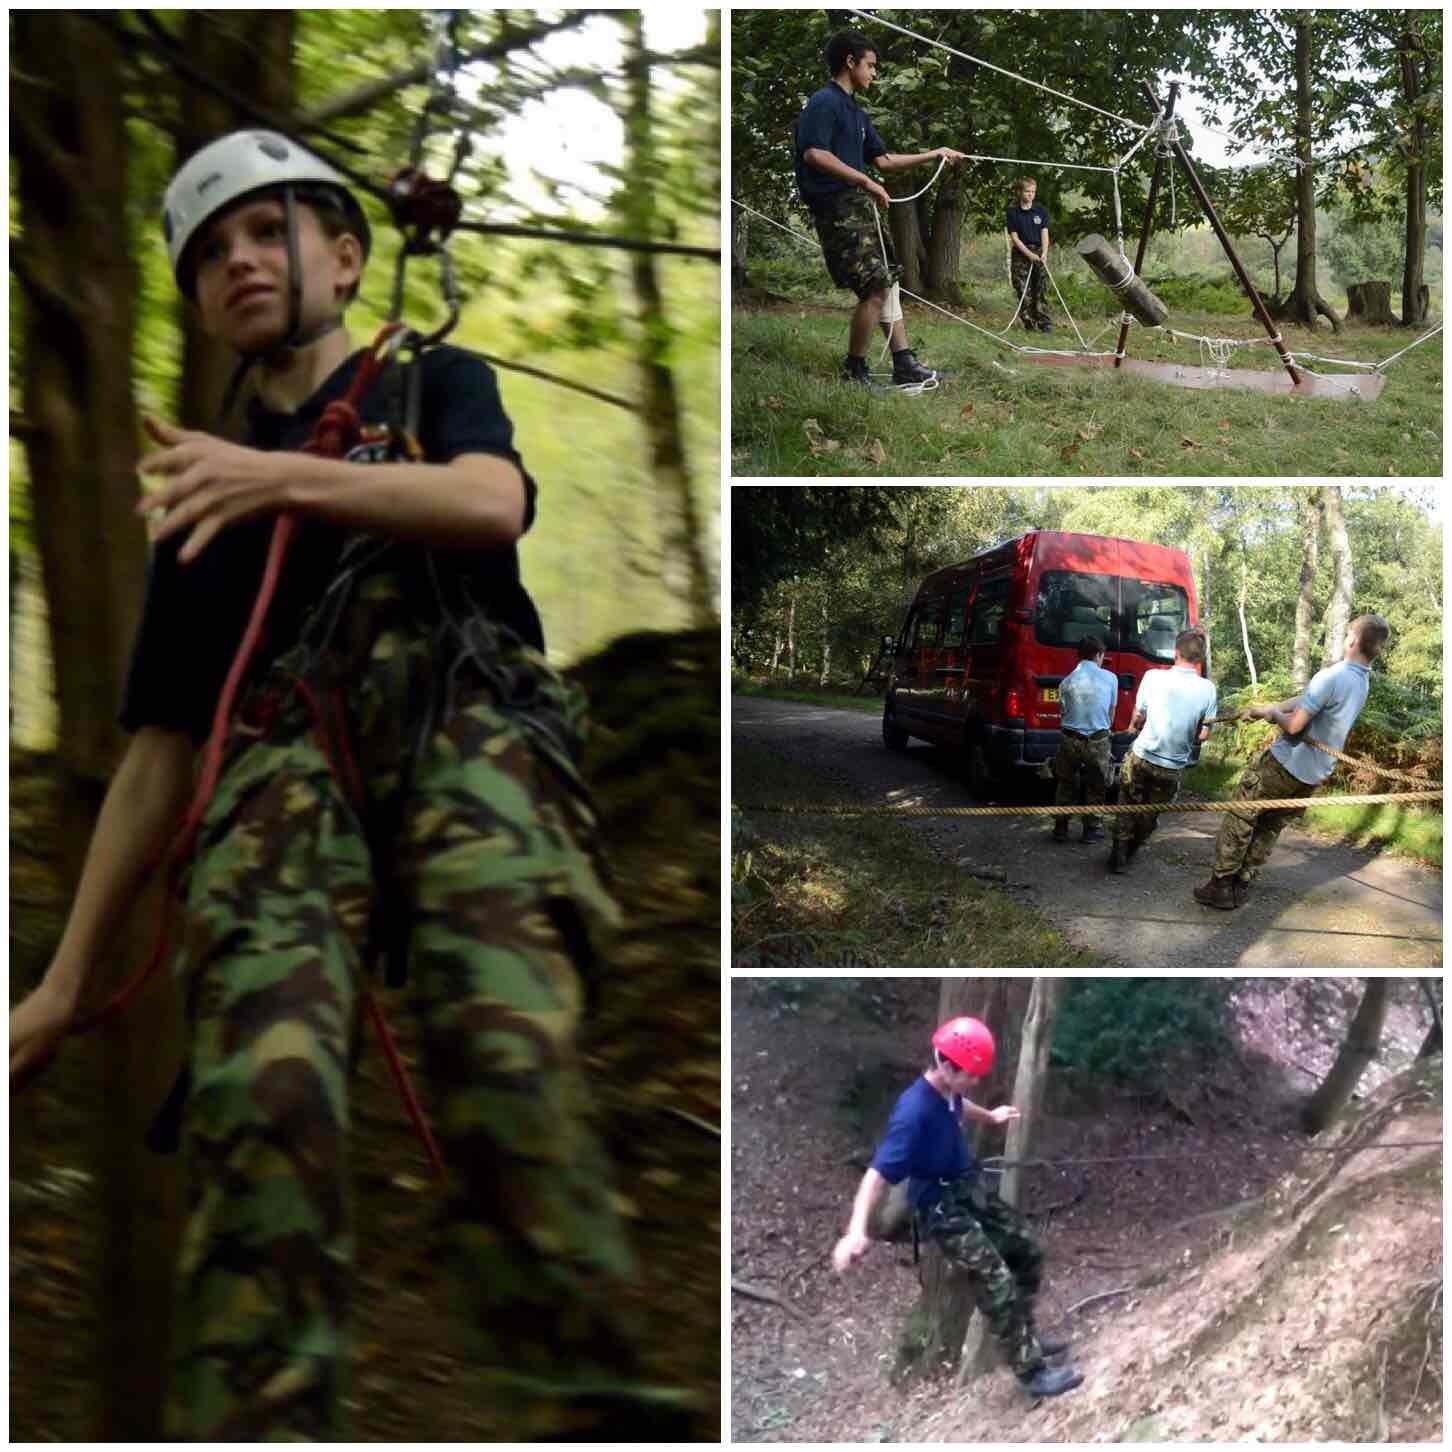
The TyroleanTraverse and the Minibuspull tested the cadets teamwork and strength while the Seamanship stance worked on their core Sea Cadet skills
Skills and Stamina
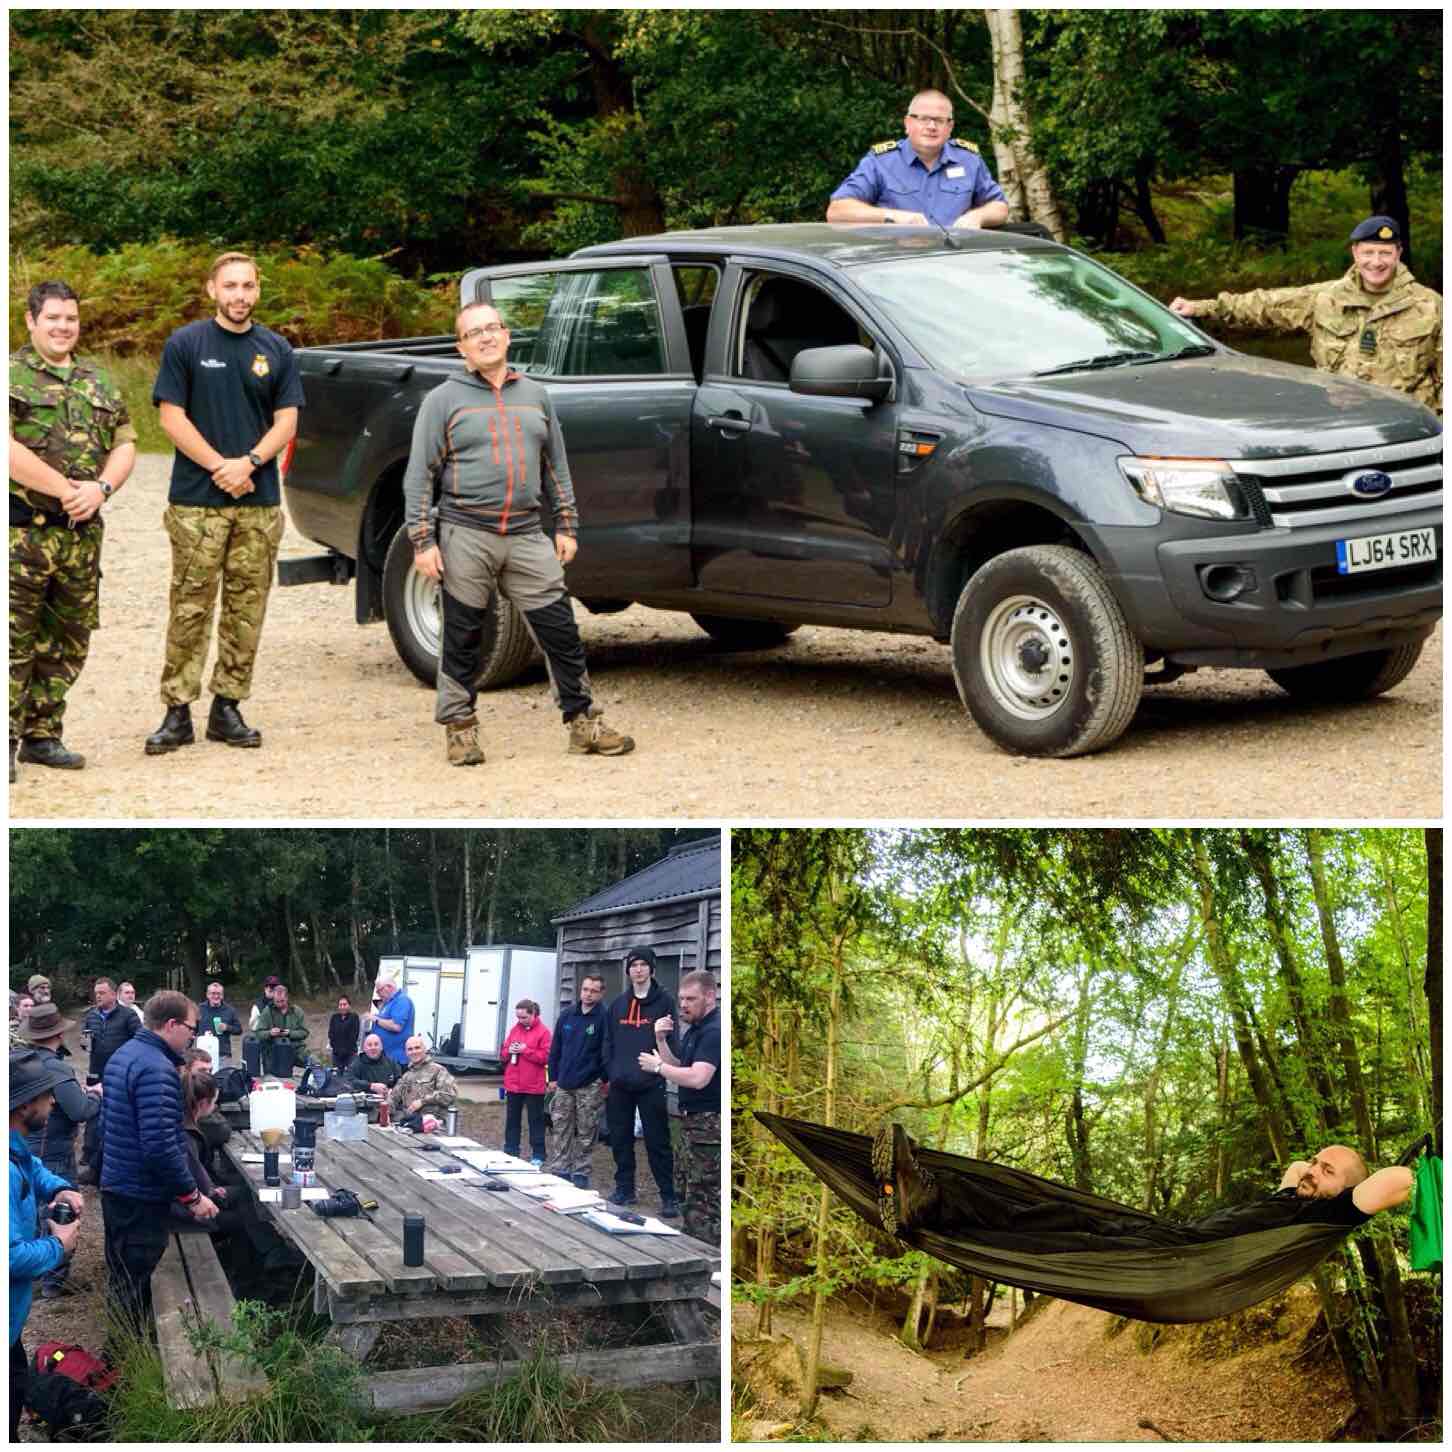
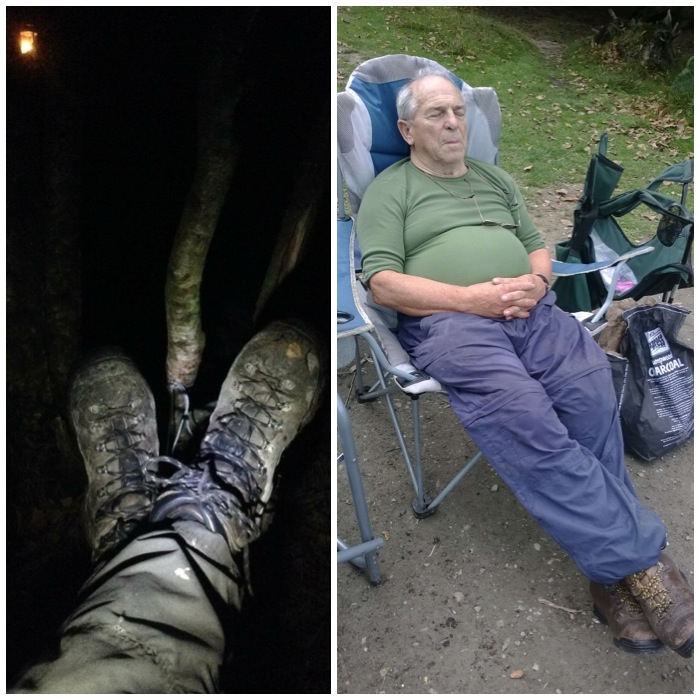
In between all this tooing and frowing of cadets the staff were busy running the stances (well some got a bit of R&R in between) and we had a visit on the Sunday from the Senior London Area officers (that kept us on our toes).
Busy Staff
As for myself I was in the enviable position of being the roving safety officer/official photographer (my car ended up totally covered in dust from all the dirt tracks).
I put together a couple of short videos of the weekend and below is the first one with snippets of the Saturdays activities.
The Saturday night was not a quiet affair, as soon as it was dark, they were off again. This time on a night navigation excercise working from point to point using compasses and maps – they all made it and were soon safely back at camp.
Sunday
All the activities on the Sunday morning were located within the confines of Pippingford Park (no hardship there as it is a beautiful site) and so after a good breakfast it was time to get started again.
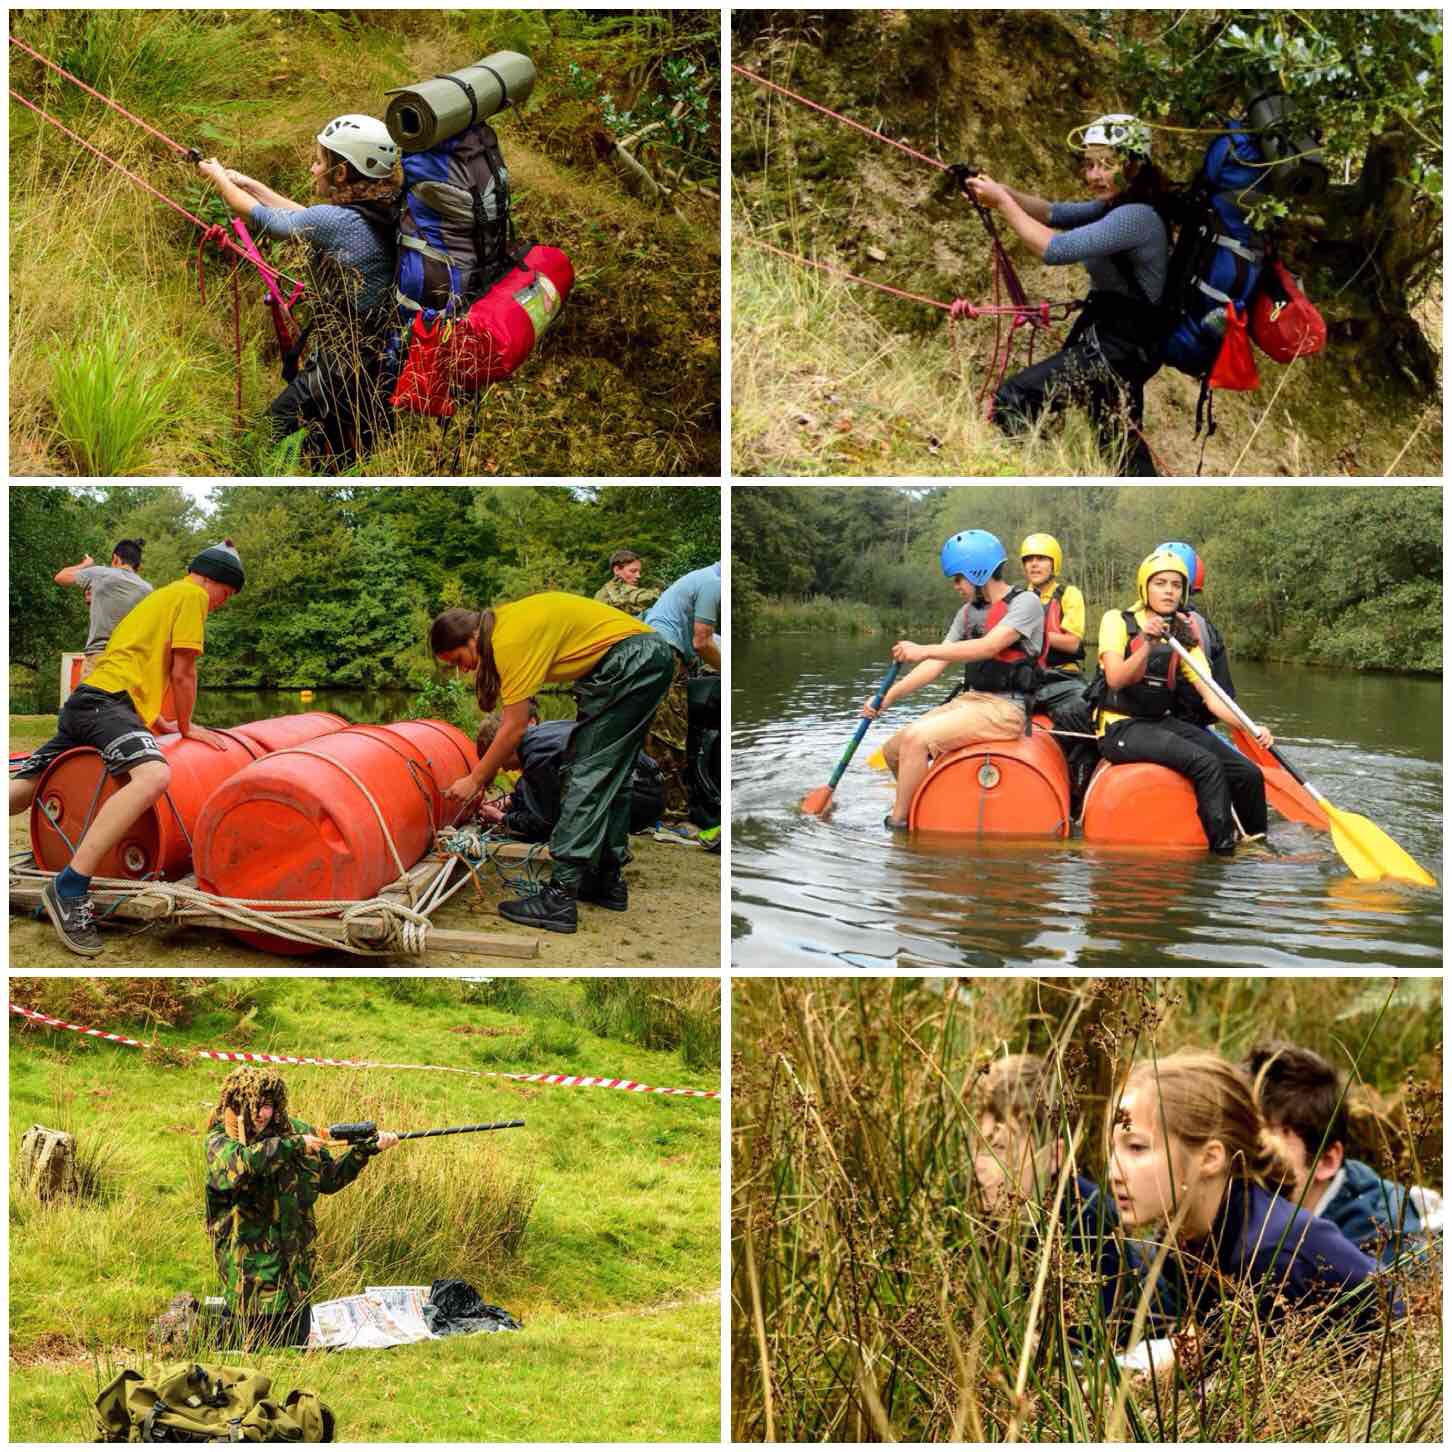
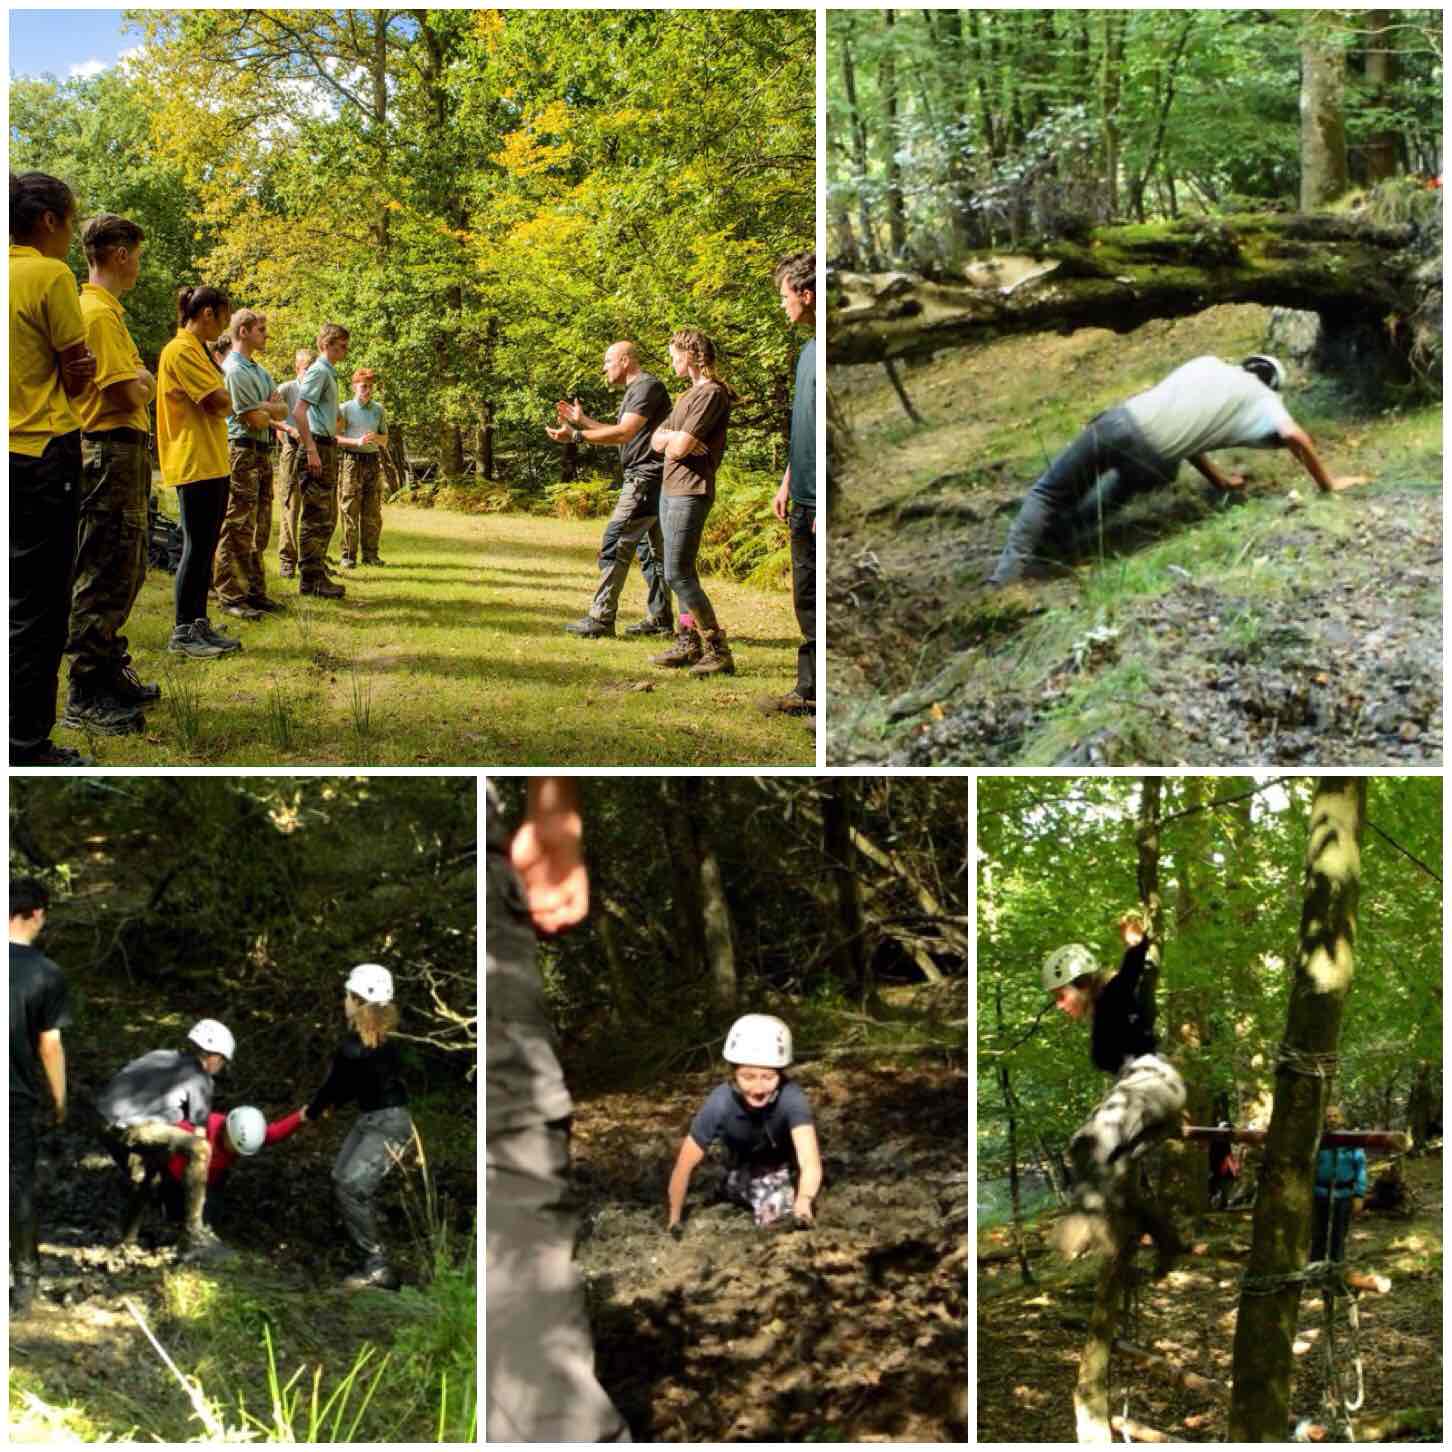
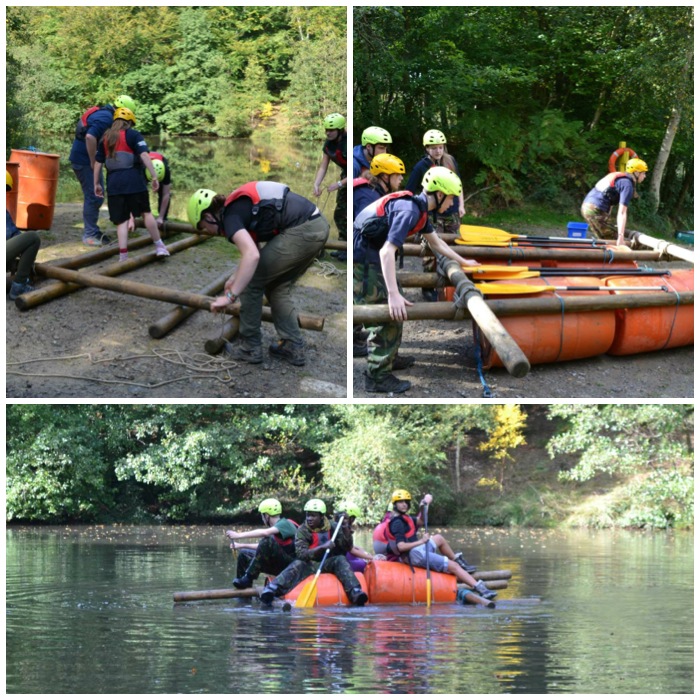
The cadets were kept busy hauling themselves and all their kit up steep inclines, building rafts (a few did come apart) and stalking the enemy 🙂
Sunday morning activities
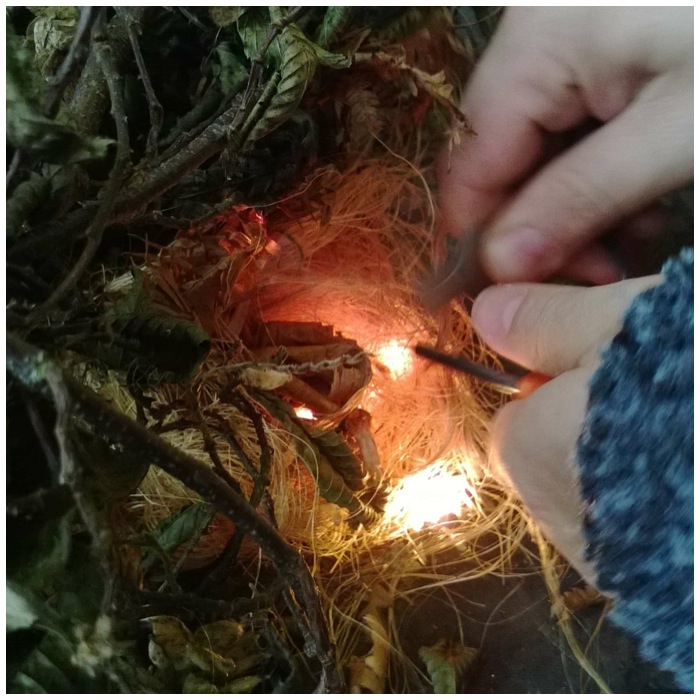
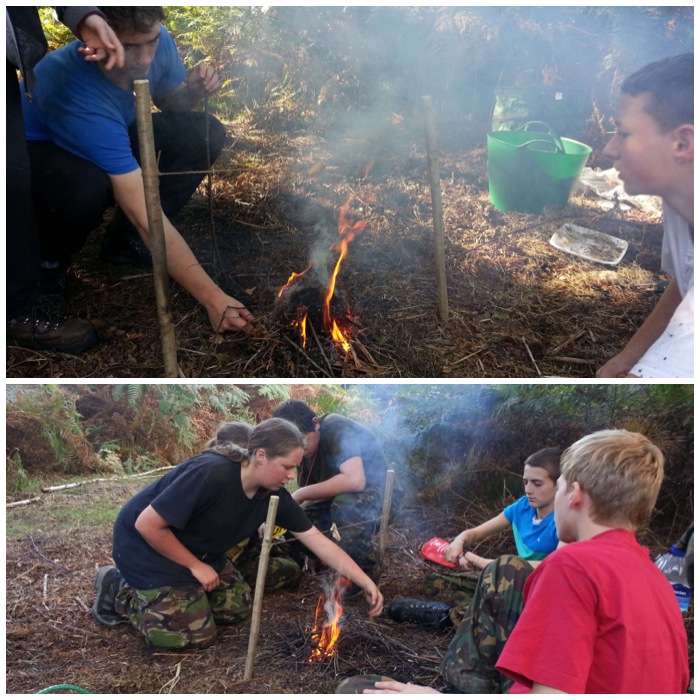
My friend Charlie Brookes ran the Fire Race. This involves collecting different tinders and twigs then lighting them (using a firesteel) and getting the flames high enough to burn through a suspended horizontal rope – not as easy as you might think.
Fire Race
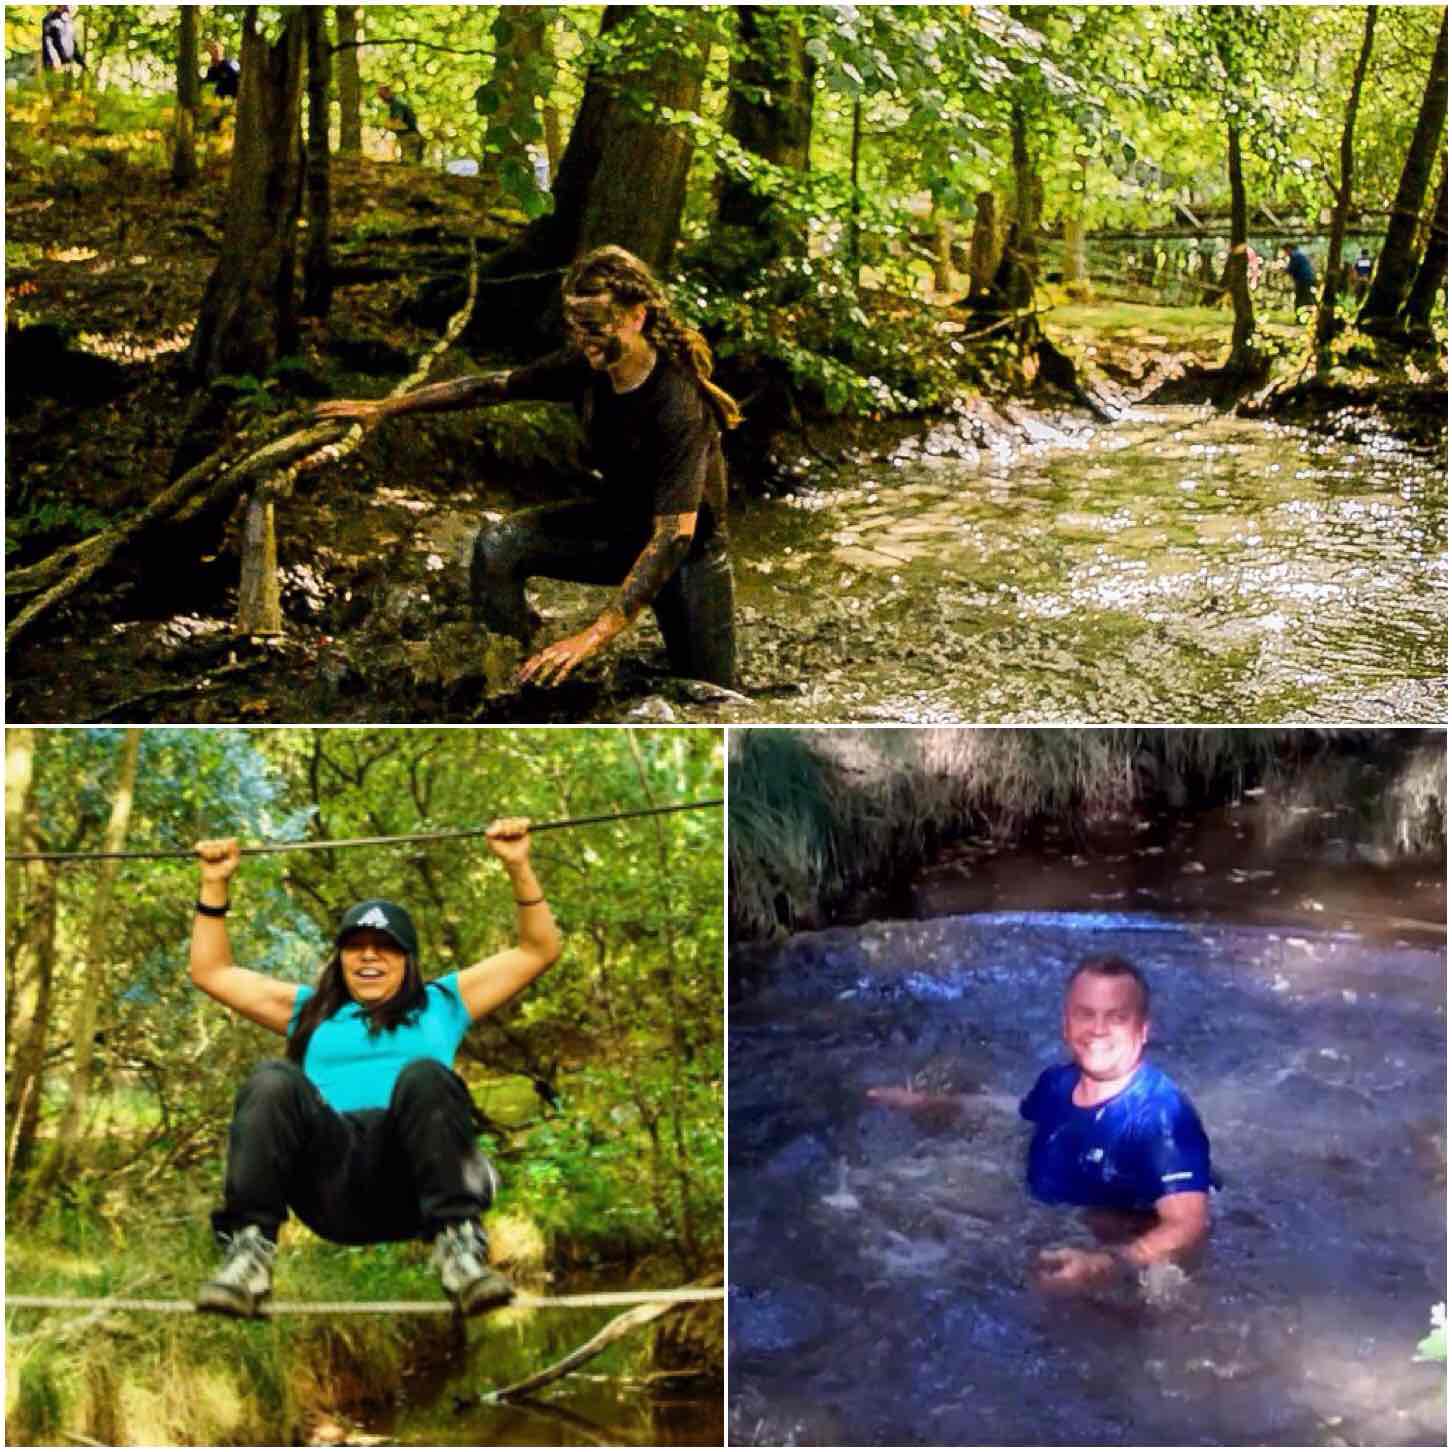
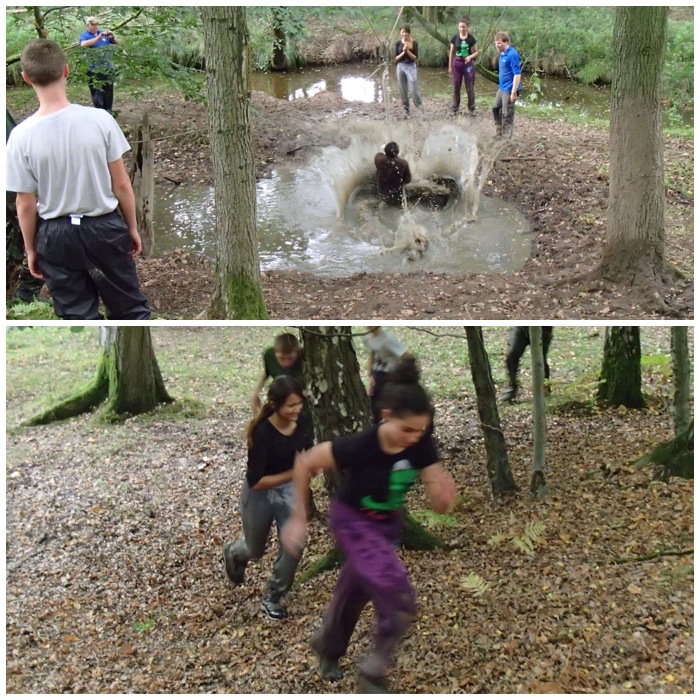
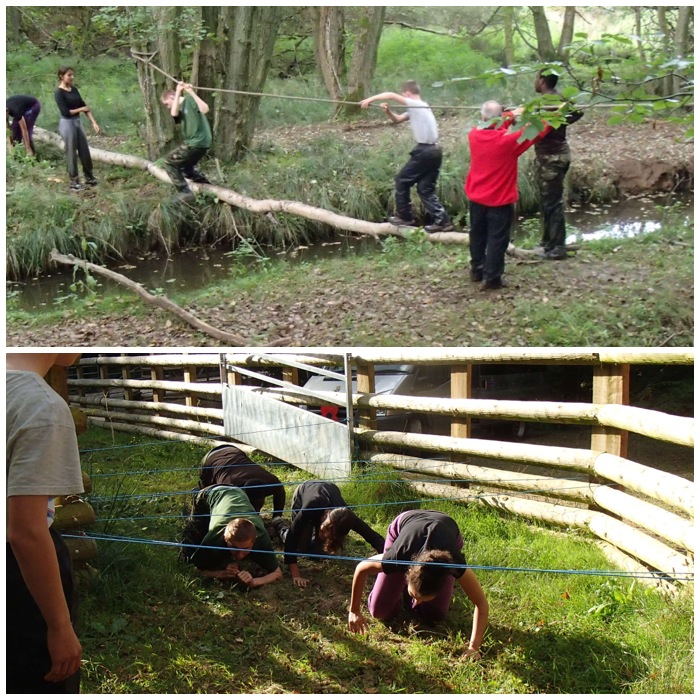
The event culminated in each team having to run the EnduranceRace. This was set up by our friend Kev Lomas from Southern Area Royal Marines Cadets and he knows how to set a tough race (he knows his stuff as he runs a company called Muscle Acre).
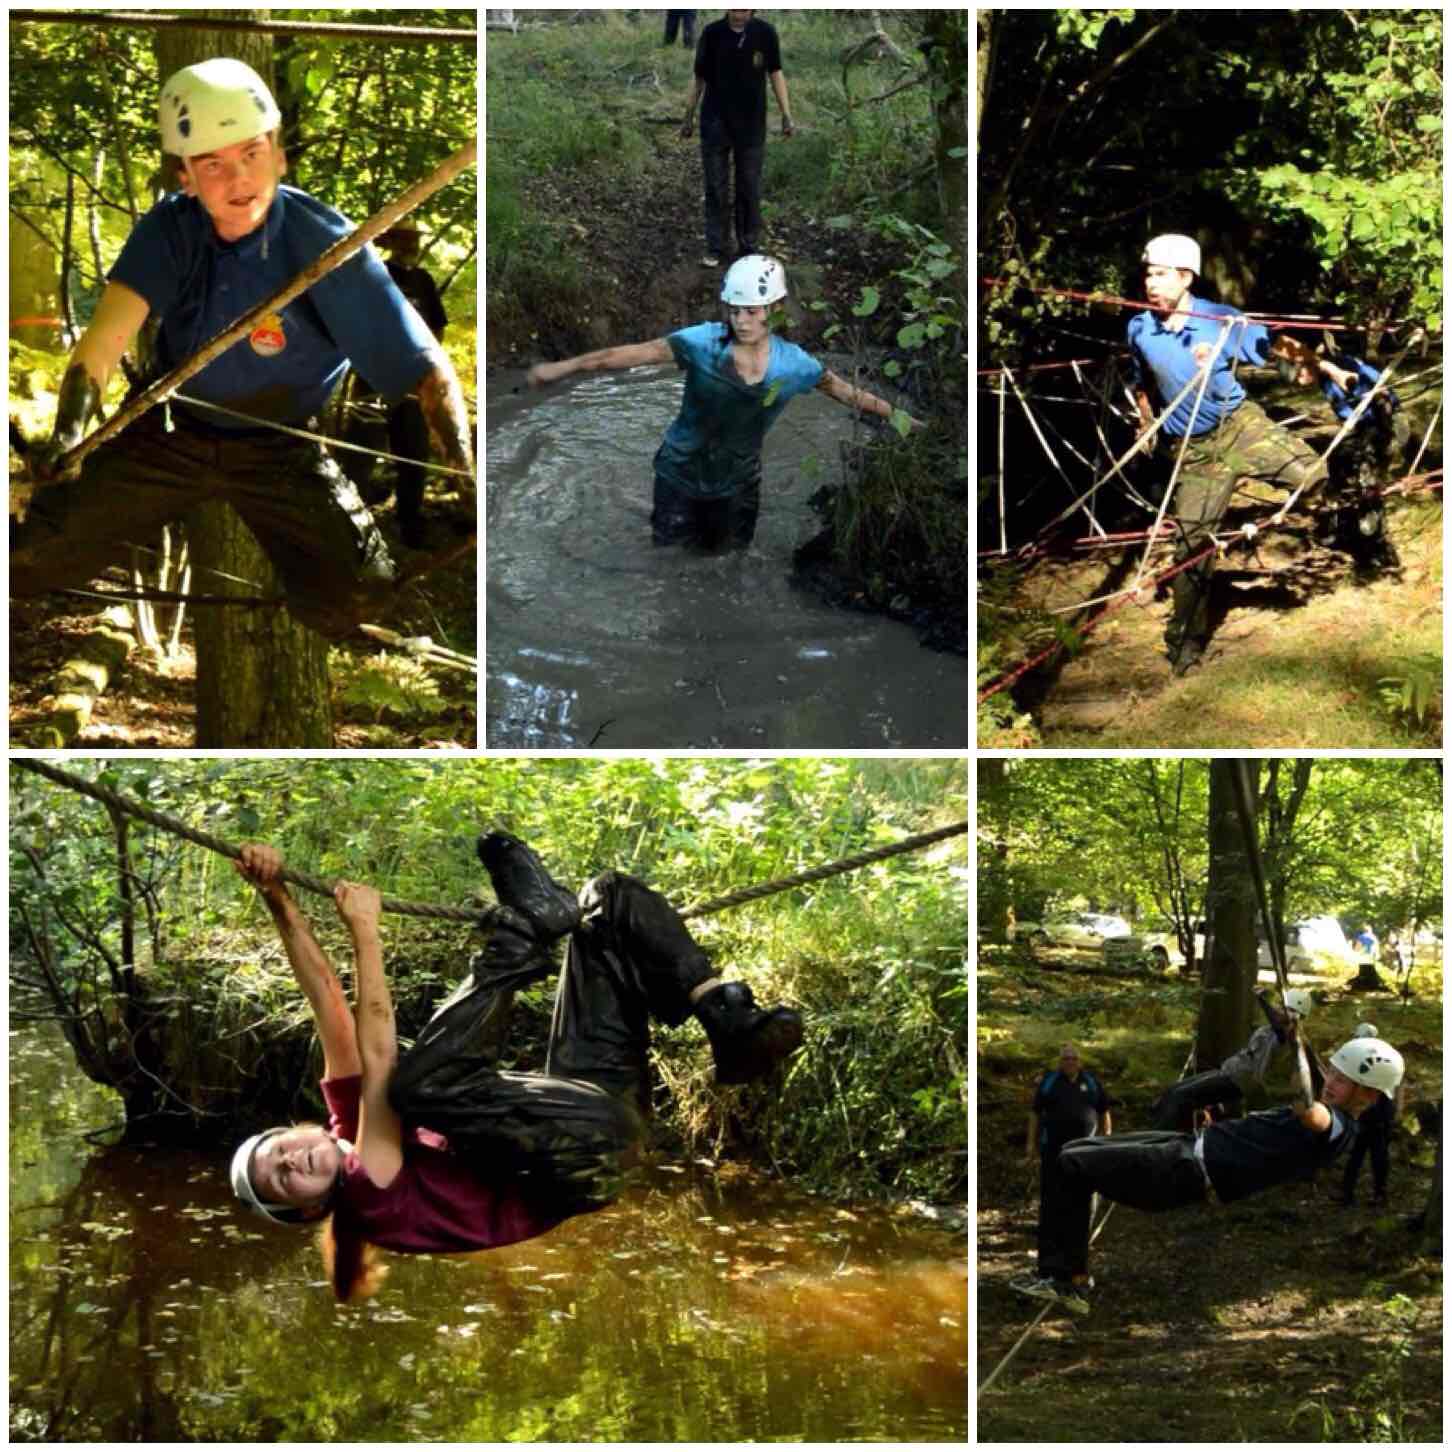
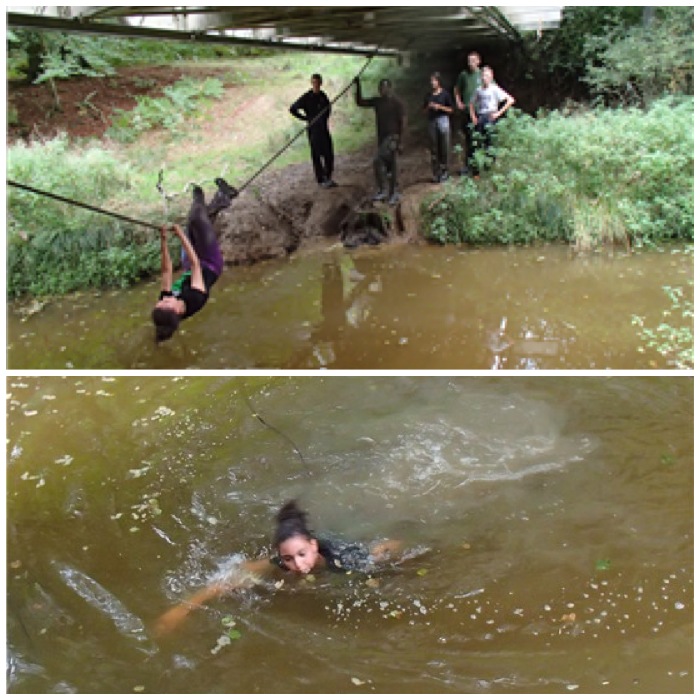
After a briefing they were off – each team took about 15 minutes to complete the race. It was a mixture of natural and man-made obstacles but the general theme was mud, ropes and water.
Start of the Endurance Race
It was great to watch the cadets pushing themselves over the race and really come together as individual teams. There were staff located all around the site to encourage the cadets and ensure they were always safe. It was hard for them but the looks on their faces when they finished showed that they really enjoyed themselves.
Pushing On
For many years I have run with the teams around these races however this year it was time to let others have a go and as the official photographer I encouraged/poked/prodded some of the other staff to have a go so I could film them (you have to have some sort of R&R when you reach 50!!)
The staff having a go
Below is the second of my videos showing the Sunday activities including the Endurance Race.
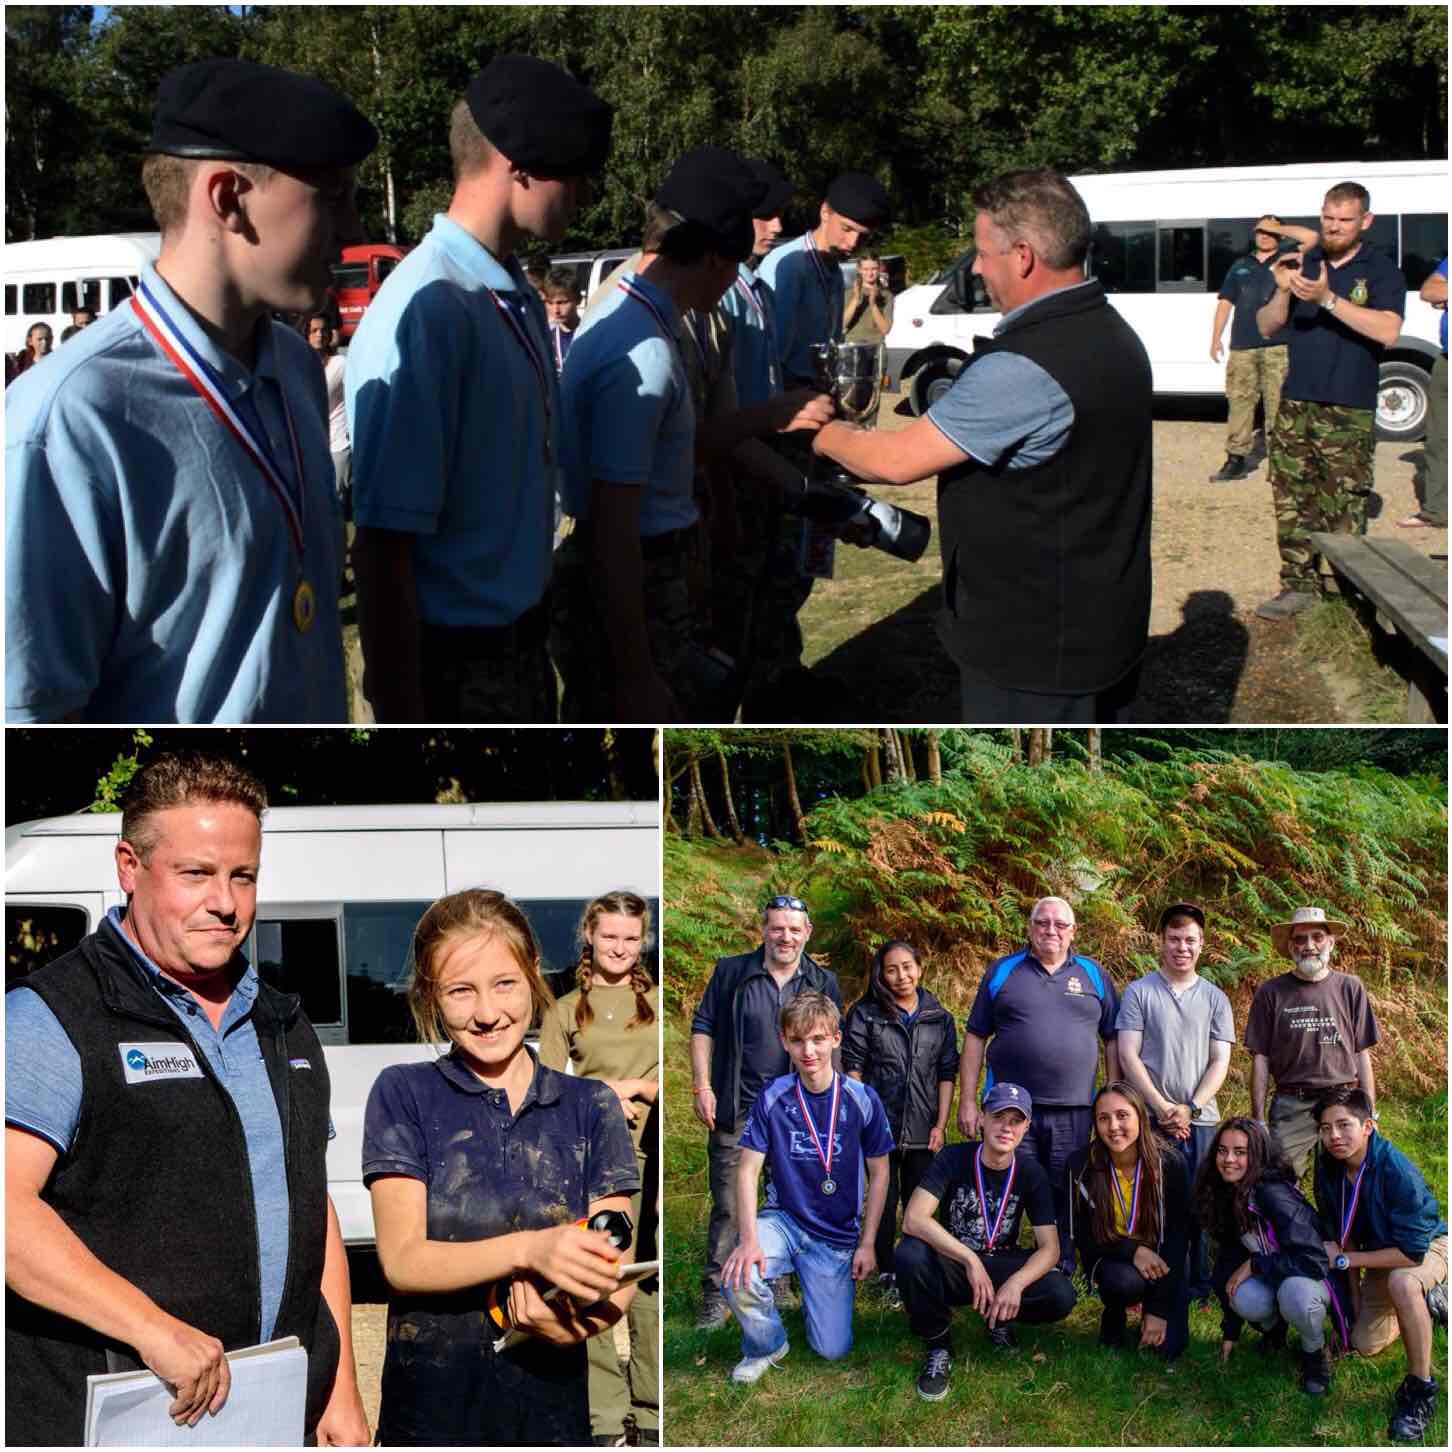
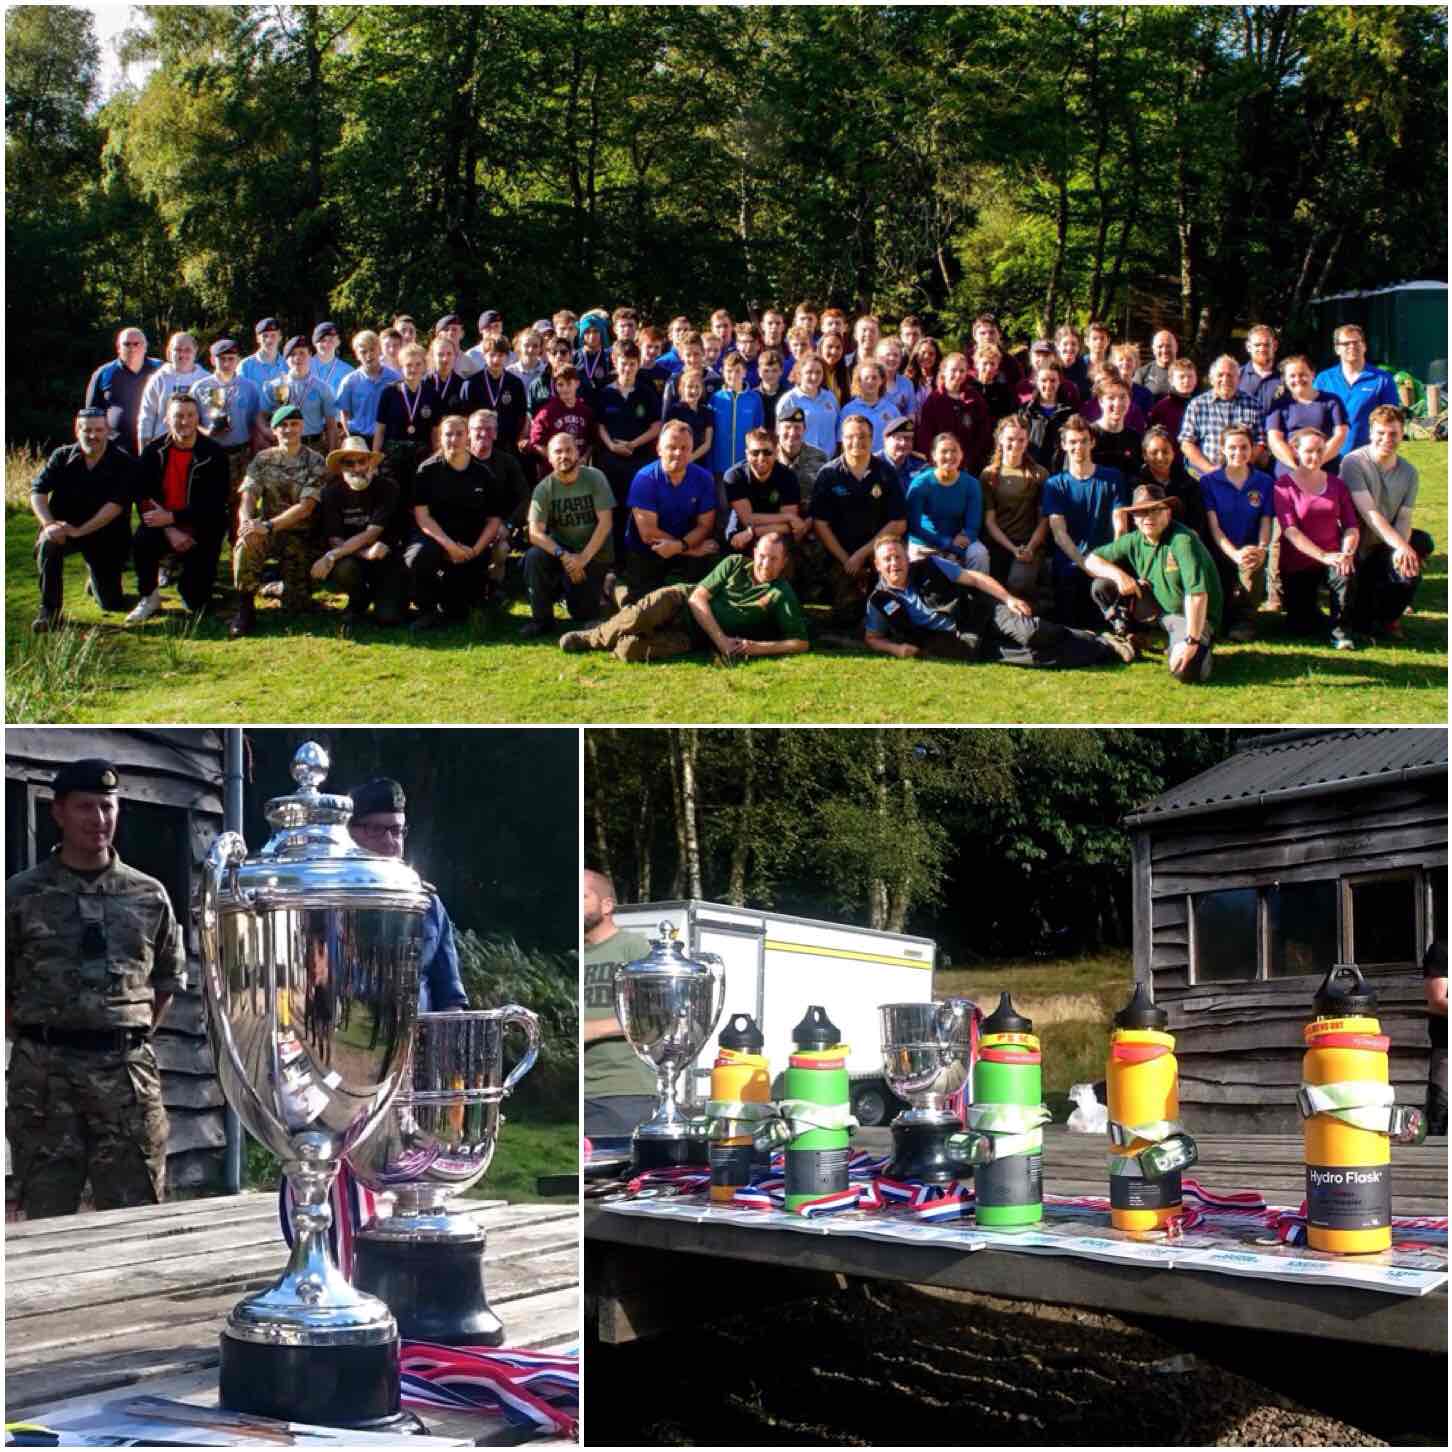
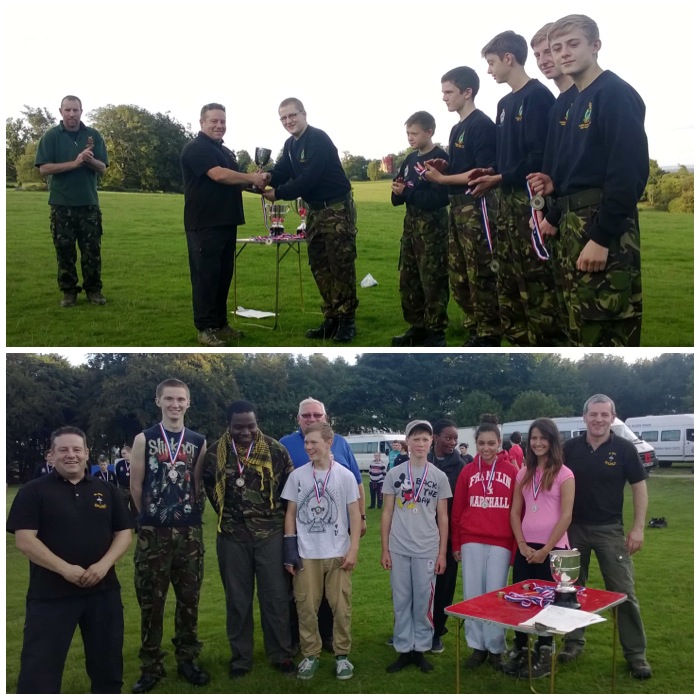
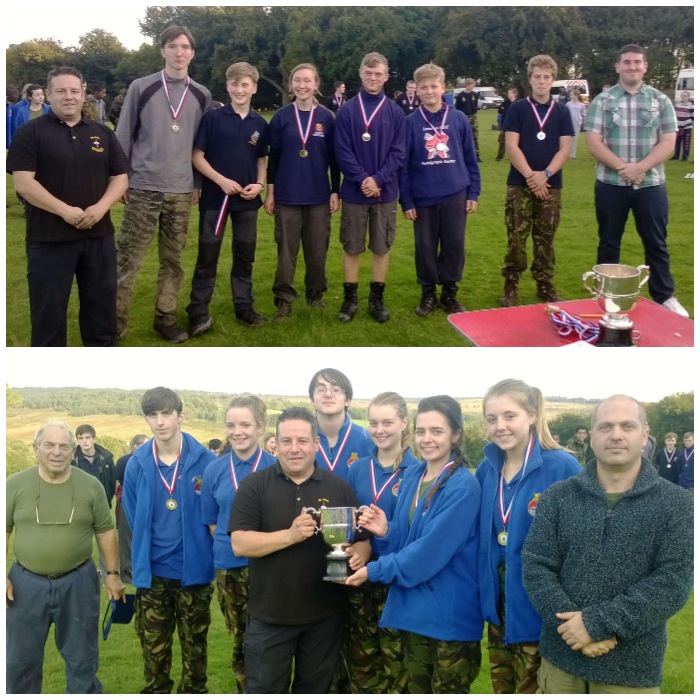
After a quick wash up it was time for the awards. There were 9 teams entered in the event this year and a close run thing it was too.
Merton Unit came 3rd, City of London came 2nd and the winners were Maldon Unit – BZ guys.
The Awards
For many years the Chosin Cup has been overseen by our two Area Staff Officers Perry Symes and Graham Brockwell. They are standing down now to make way for some younger members of staff such as Ben MacDonald to take over and test themselves. This post then, I am dedicating, (like my videos) to these two stalwarts of the Adventure Training world in the Sea Cadets – Perry and Graham.
Chosin Cup
The weekend could not have been run without all the staff that volunteered to come along and run it so thank you to each and every one of you.
Thanks to all the cadets that came along and really tested themselves in what I regard as the toughest competition the Sea Cadets and the Royal Marines Cadets run.
Finally thanks must go to Ben MacDonald for putting it all together and making it a fine one for Perry and Graham to bow out on.
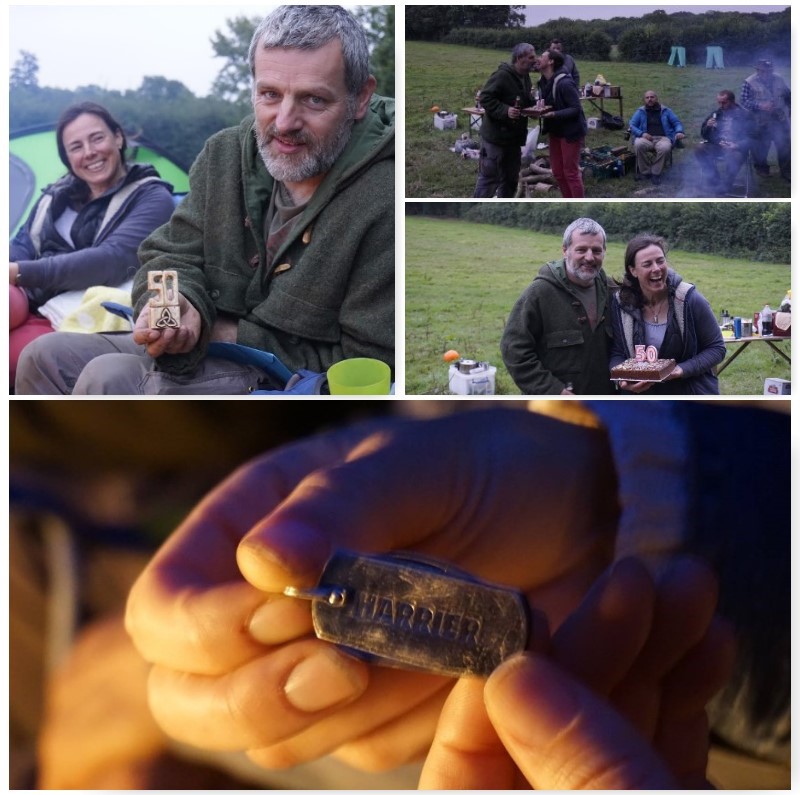
There has been a lot of skullduggery going on in the Aitchison-Jones household recently and it all came to a head in September 🙂
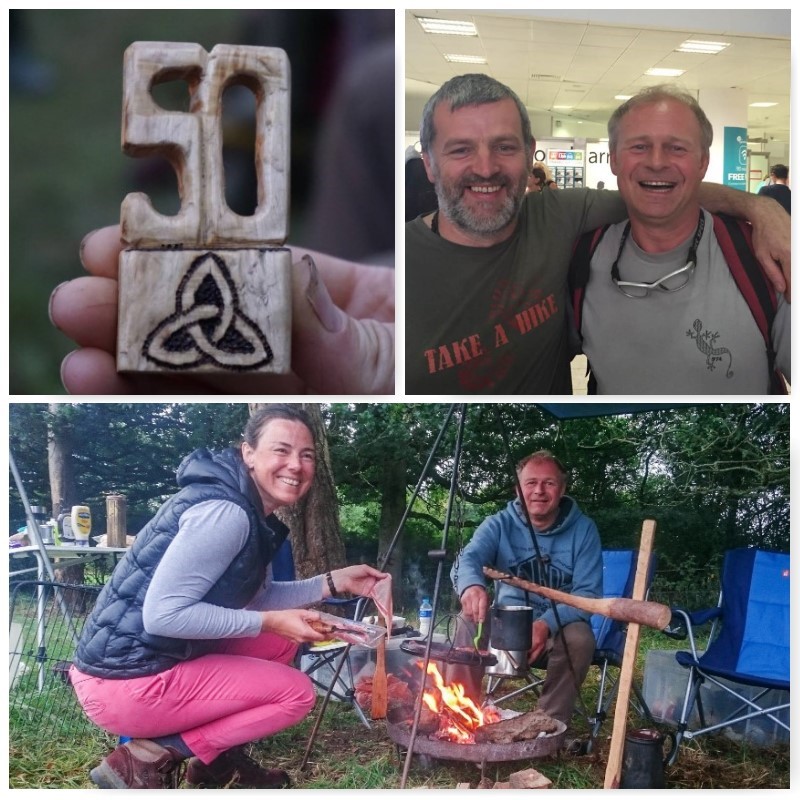
My wife Alison made sure that a certain weekend in September was kept well clear in my diary. I was told to pack for a family camp to celebrate my 50th birthday (location unknown) – hard to believe I have reached such a lofty age, I know 😉
So after packing we set off on a magical mystery tour that stopped off at the Arrivals lounge at Gatwick Airport. Passing through the gates was ‘Darling Barney’ all the way from Southern France to celebrate my birthday with us.
The pictures in this blog are a mixture from Tony Bristow, Ian Woodham, Alison Jones and myself.
The Bushcraft Birthday Bash
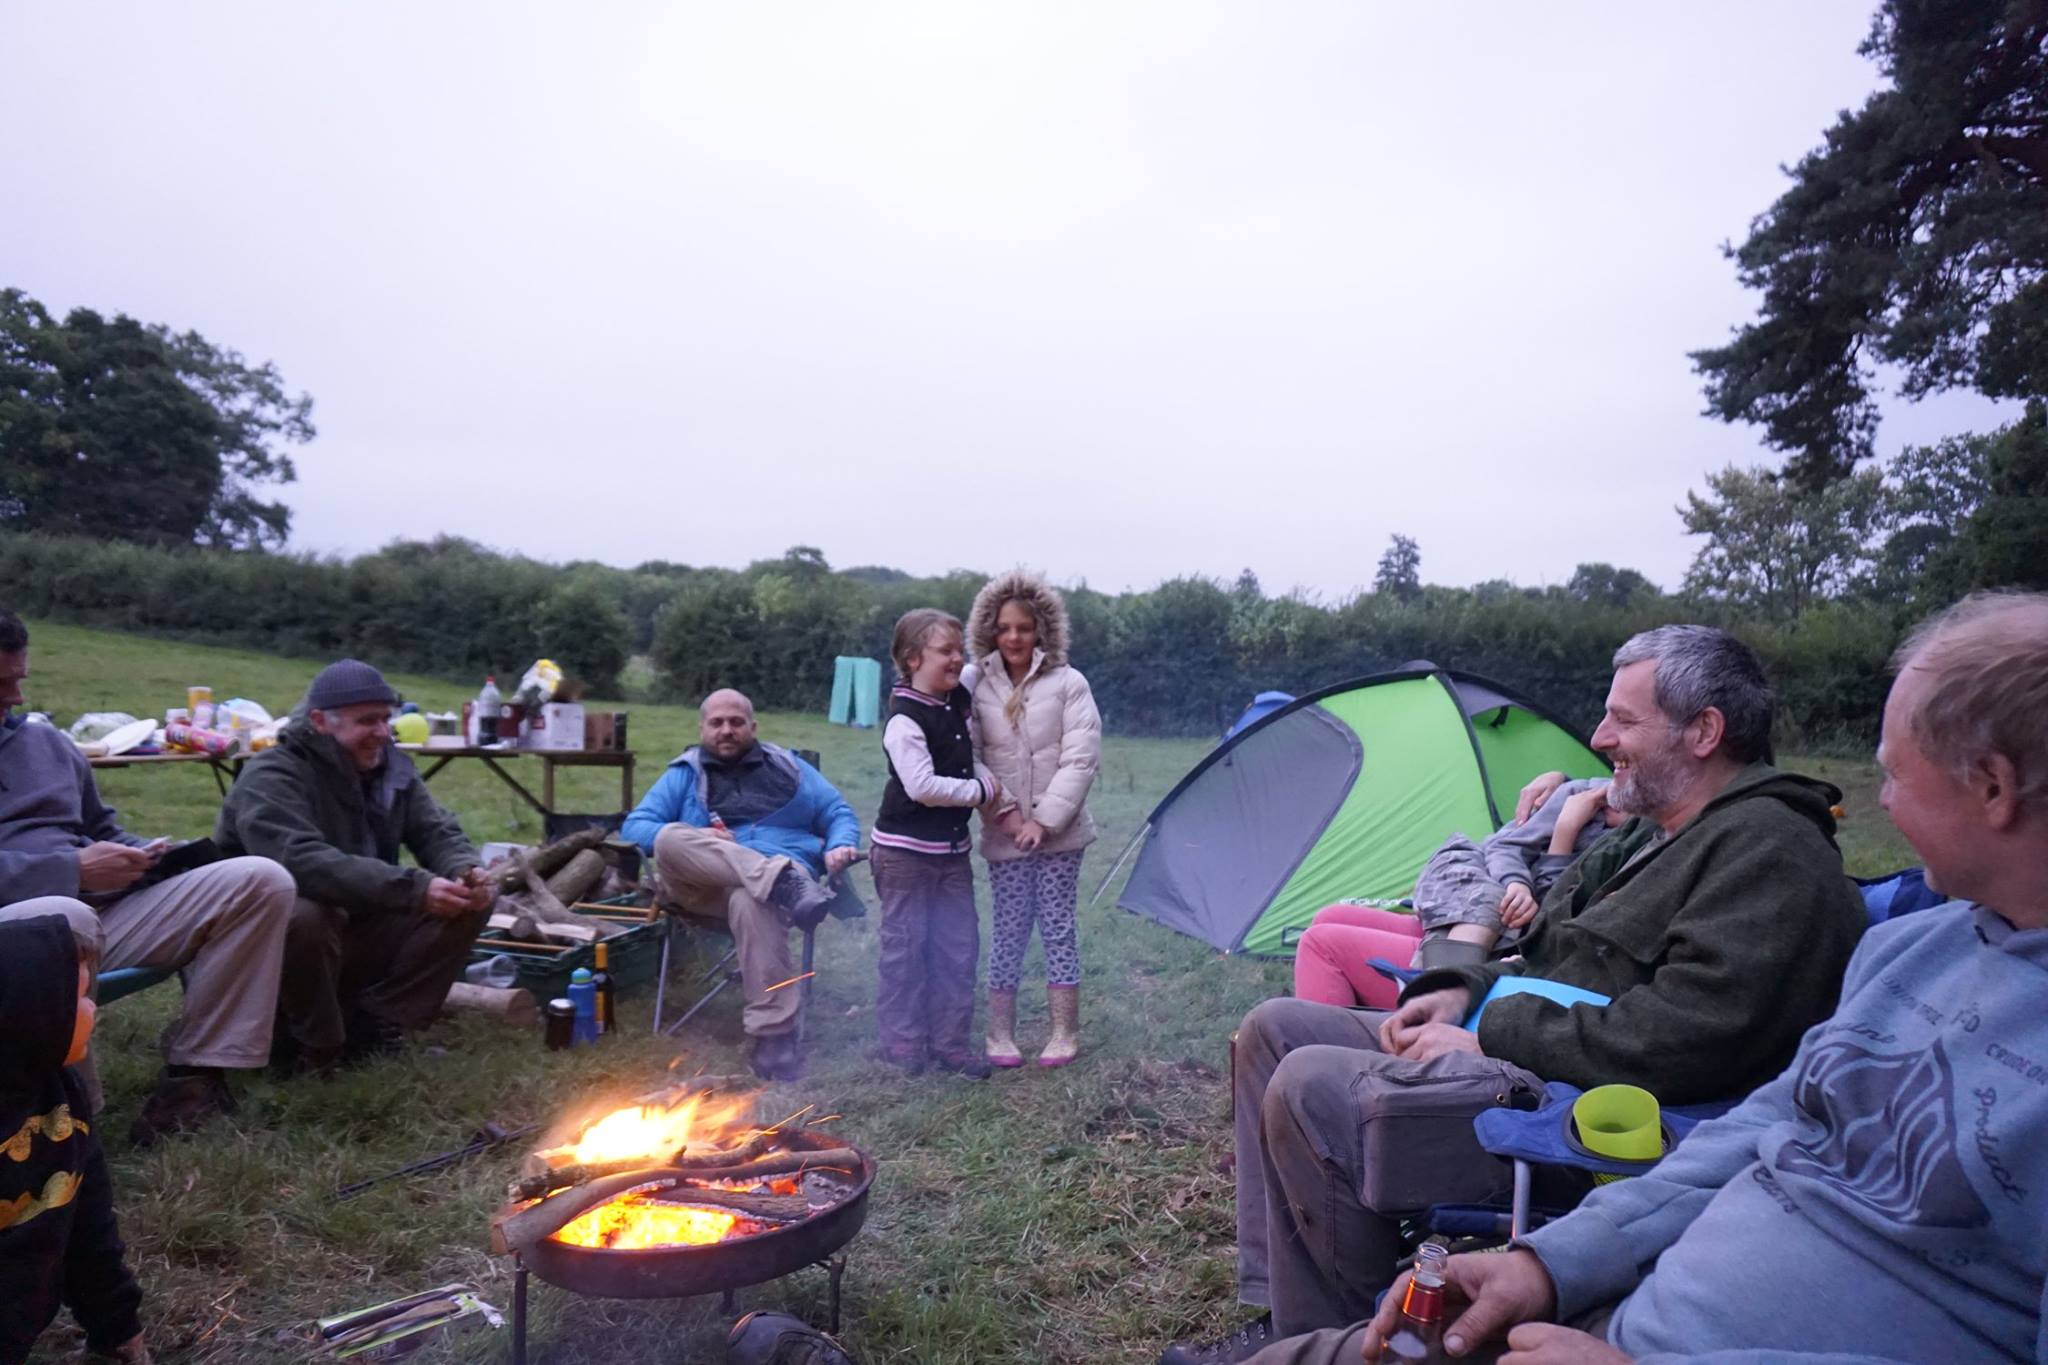
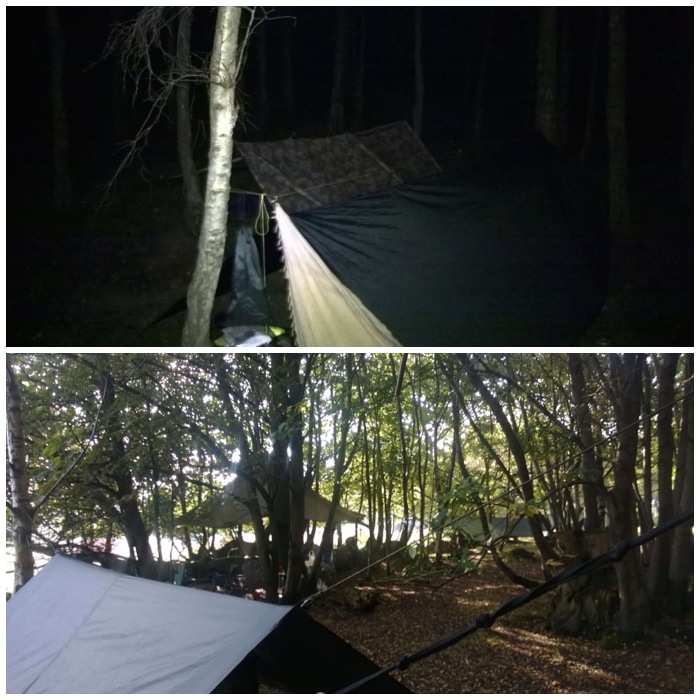
The magical mystery tour continued to our friends Philippa and Phil’s farm just outside Dorking in Surrey. I was directed to a field to set up camp and we soon had our hammocks up and fire on. That night Phil came down to join us around the fire, there was a Harvest Moon and real ale and I was happy as Larry.
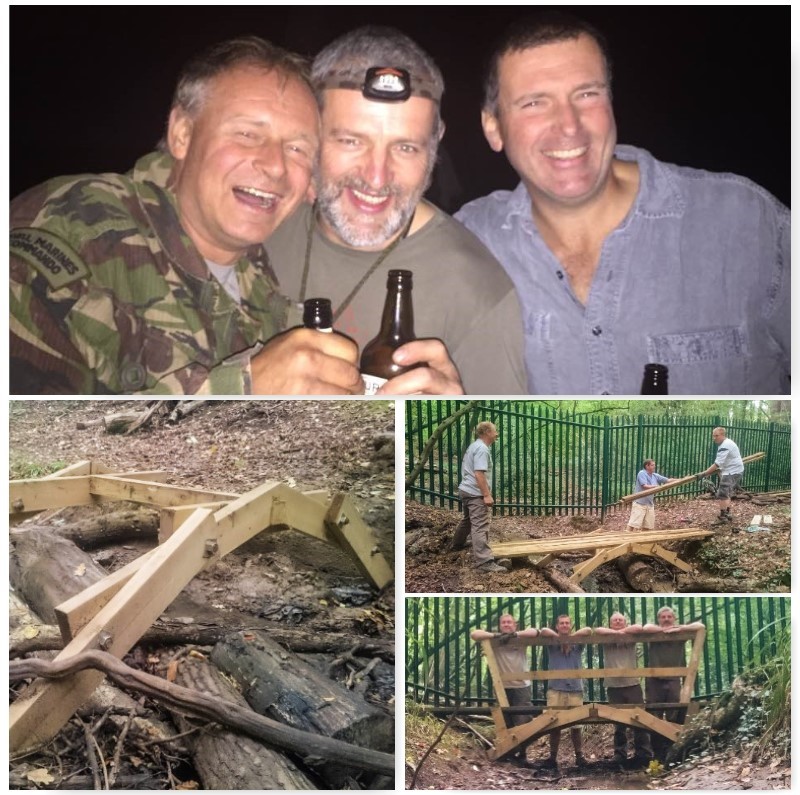
Phil asked Barney and myself if we could help him and a couple of friends complete a bridge at his girls school the next morning. I thought nothing of this as I normally help out Phil’s farm when I camp there and Barney is a carpenter/cabinetmaker anyway so his skills were needed.
Friday Night – Saturday Morning
It was a good morning mucking about in the mud building the bridge and we even stopped off for a couple of pints on the way back.
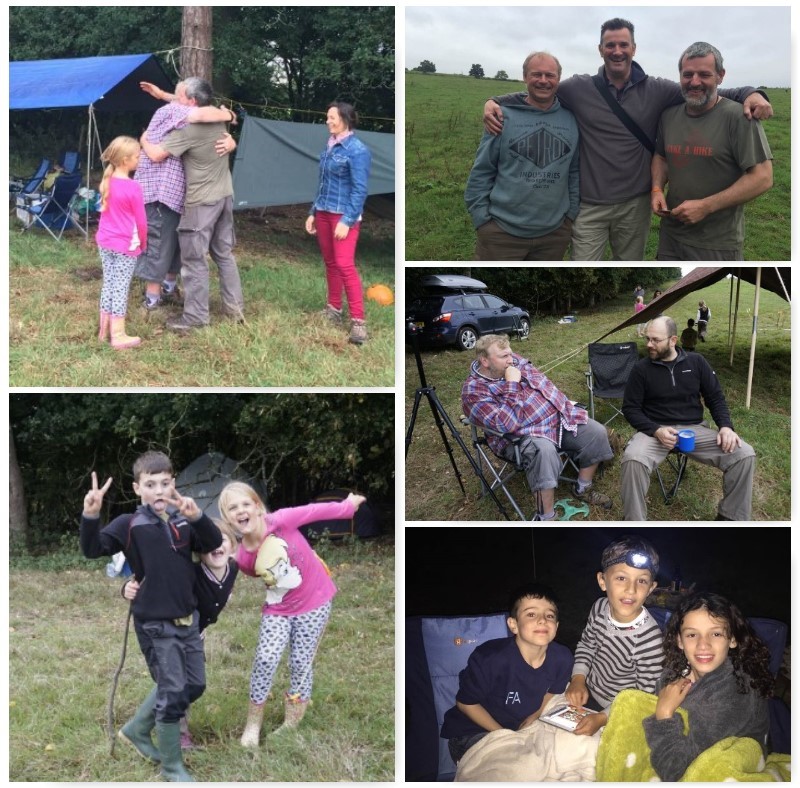
Unbeknownst to me Alison had set up a secret Facebook page and invited lots of my friends to the bash. While I was away folks started to arrive and needless to say that when I was in the car coming back down the field to the camp I was feeling slightly bemused.
There followed a lot of hugging and generally turning around with a startled look on my face as more and more folk popped out of the wood. These Saturday morning arrivals were friends from various parts of my life. Barney and Steve from Raleigh International, Liz, Rick, Stu and Gordon from Crisis, Alan and Dave from the Sea Cadets, Tony, Shelly, Robin, Jenna, David, Ian and Archie from Bushcraft UK
More Surprises
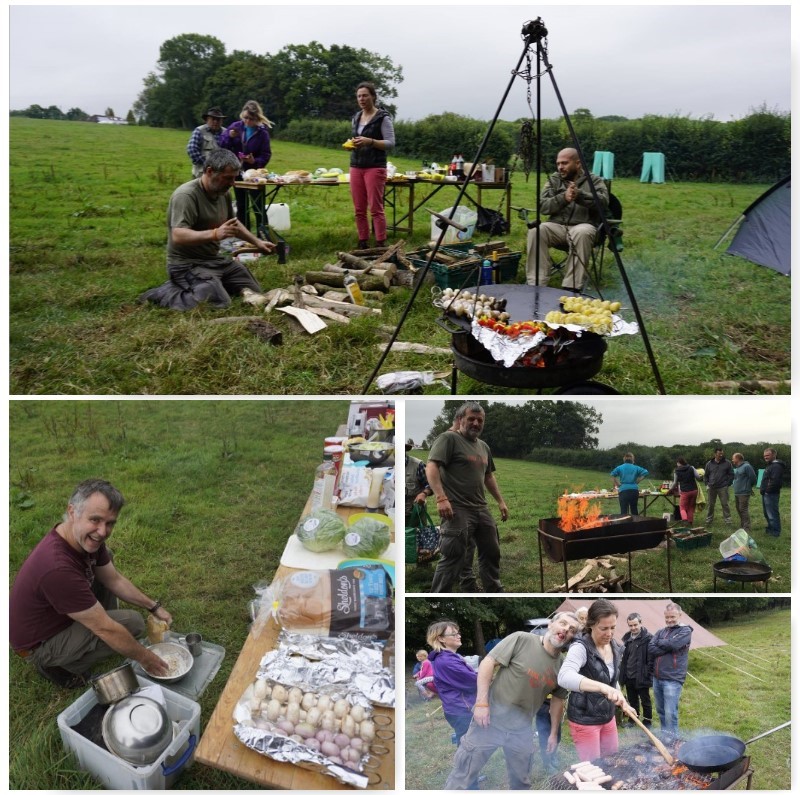
Alison had arranged for a delivery of groceries to be dropped off at the farm and a feast was quickly prepared. David Willis (Bushcraft With David Willis) used his bushcraft baking skills to make bread and our resident Sea Cadet chef Alan Lewis got on with prepping the skewers for the barbie.
I had gone from quite chilled out (must have been the two pints in the pub) to frantically running around getting the fires going, maintaining them and trying to chat with everyone who arrived. Those of you who know me personally know that multi tasking is not my strong point.
Added to all this confusion my friend Graham was spotted coming down the hill carrying a massive present all wrapped up. He told me I could not open it until later that evening around the fire.
The Feast
After a few more beers (I kept opening one, putting it down, chatting, losing it, opening another……and so on, repeating the process) the food was ready and a lovely birthday cake produced.
Thanks to everyone who brought a present along – every one was appreciated and I am still working my way through all the single malts you brought along Rick, Gordon, Stu, Dave and Alan.
The wooden ’50’, Cliff, sits with my medals and other personal bits and bobs. It is a lovely piece of carving buddy.
Still not used the old military canteen, Barney, in case I damage it – it too will live on my bits and bobs shelf.
As for the Harrier knife carving, that log Graham that may take a while. (The massive present Graham brought me turned out to be a rare Harrier stamped knife together with a log from which to carve my own twelve-piece dinner service).
Thanks Phil and Philippa for the lovely honey you had just jarred 20 minutes before. As fresh as you can get I would imagine.
Thanks for all the Go Outdoor vouchers – I spent a happy couple of hours in there getting some extra kit.
Lastly to Alison for getting me that rather nice laptop I was really looking for (cheers for organising that Dave). It works a dream and I can process pictures so much quicker now.
Partying
The rest of the evening was spent chatting and from time to time Alison managed to extract some stories from folks about myself – many had the ending of me being hit in some way 🙂
A real highlight of the evening was listening to Robin and Jenna singing Happy Birthday to me in Welsh – I am not normally an emotional person but that moment will stay with me for the rest of my life.
A surprise evening arrival to the party were my good friends John and Caron of Woodcraft School (apologies I did not get a picture of you at the party). They just sort of appeared out of the dark while I was chatting away (just when I was sure there were no more surprises I was proved wrong).
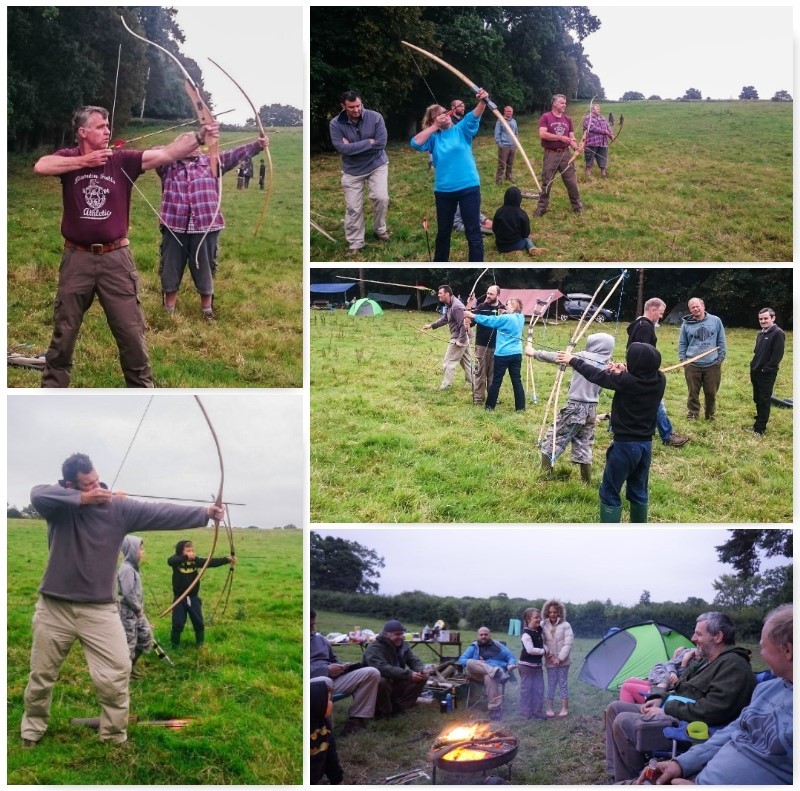
Activities
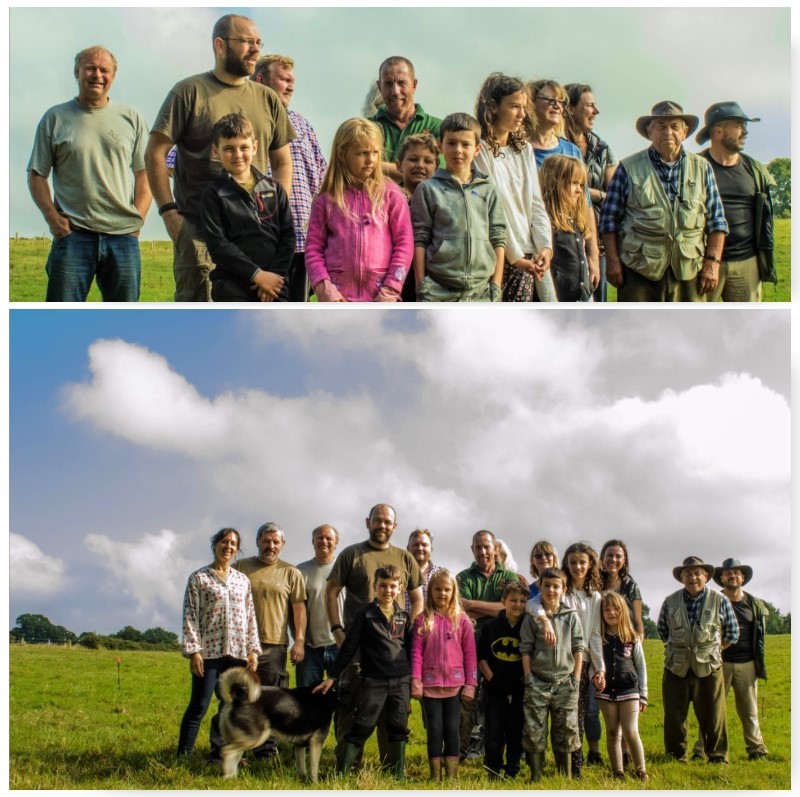
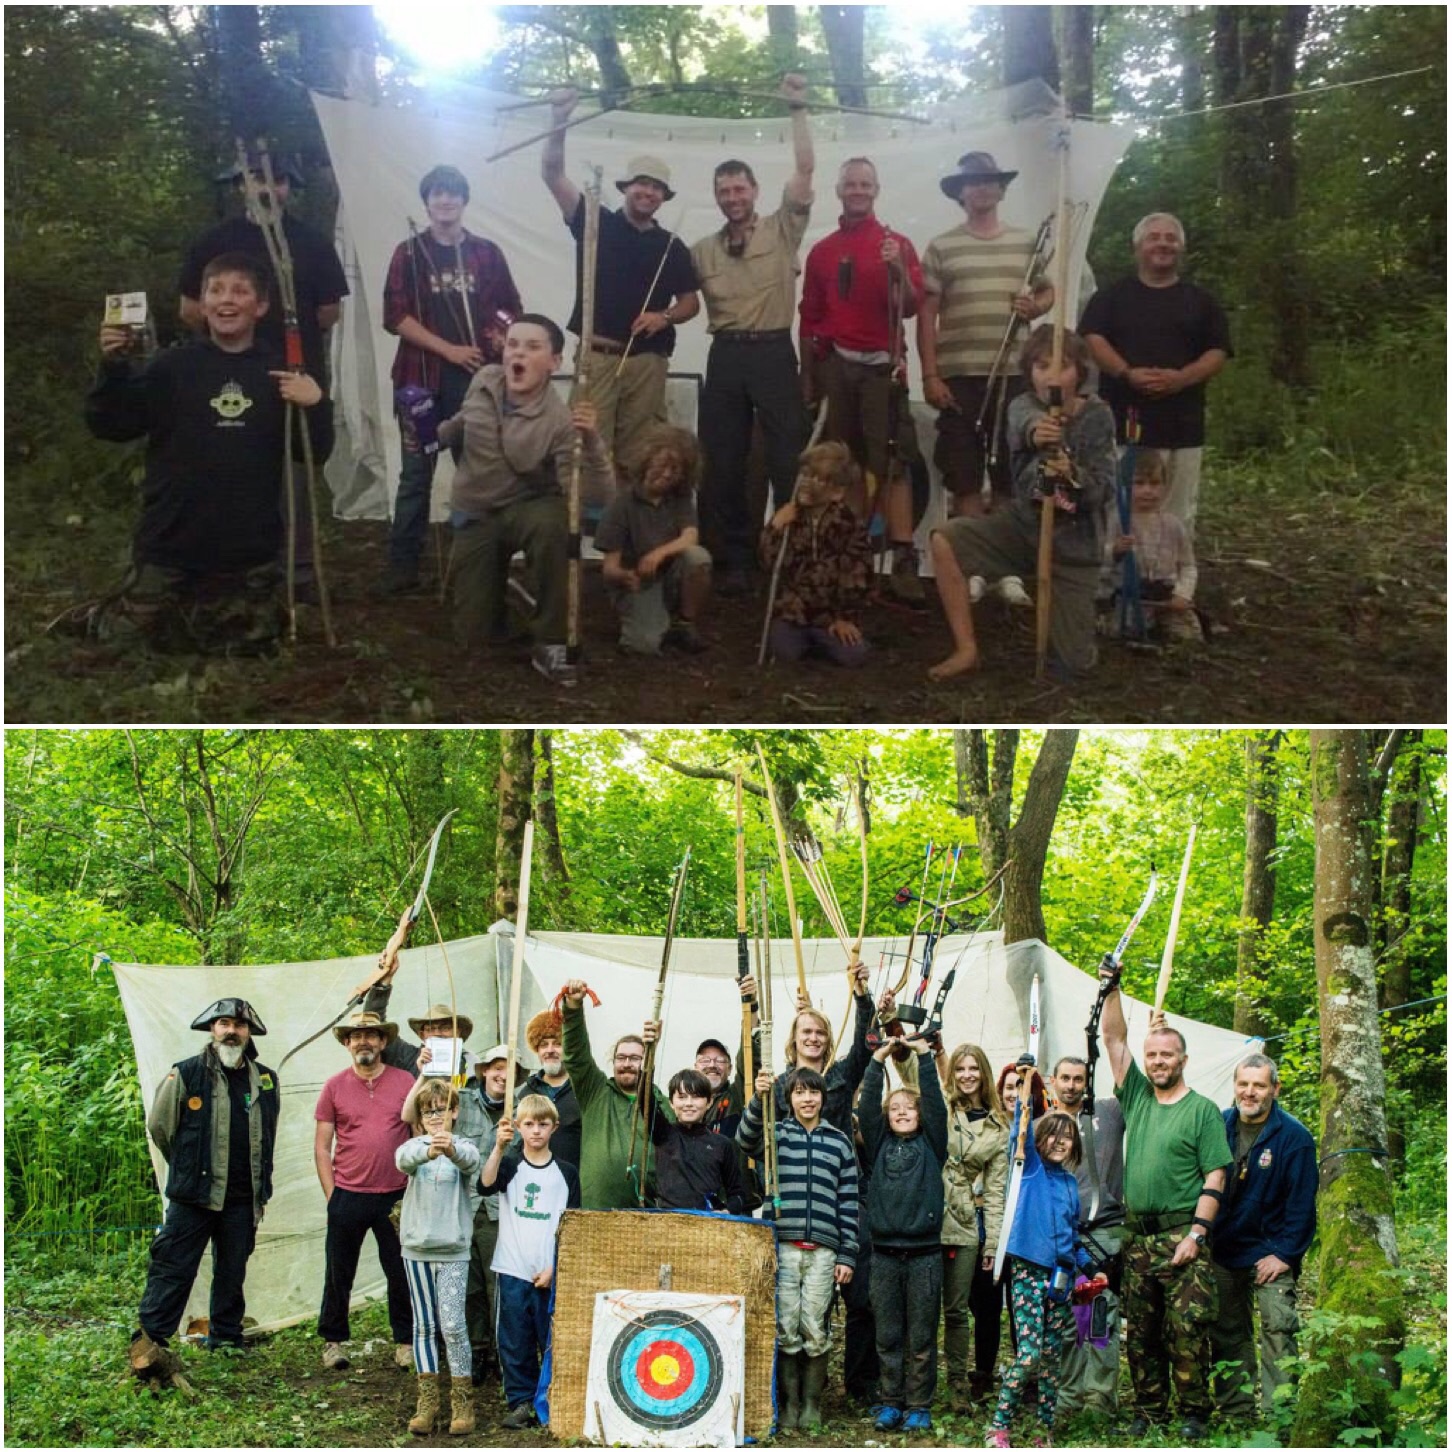
Sunday morning soon came and those that had decided to stay for the night rose to a breakfast of bacon rolls and sausages before cracking on with some archery and Atlatls and posing for a Survivors’ picture.
Packing up was a sad business as everyone prepared to travel back home but I was still reeling slightly in a happy way from the whole surprise party.
Survivors Photo
I am still amazed at the distances people travelled to come to the party – France, west Wales, Leeds and more. Some came for the day and others stayed overnight. Thank you to all those who could not make the weekend but sent me there heartfelt wishes instead.
Thank you everyone who came and a special thanks to Alison and Philippa for all your organisational skulduggery 🙂
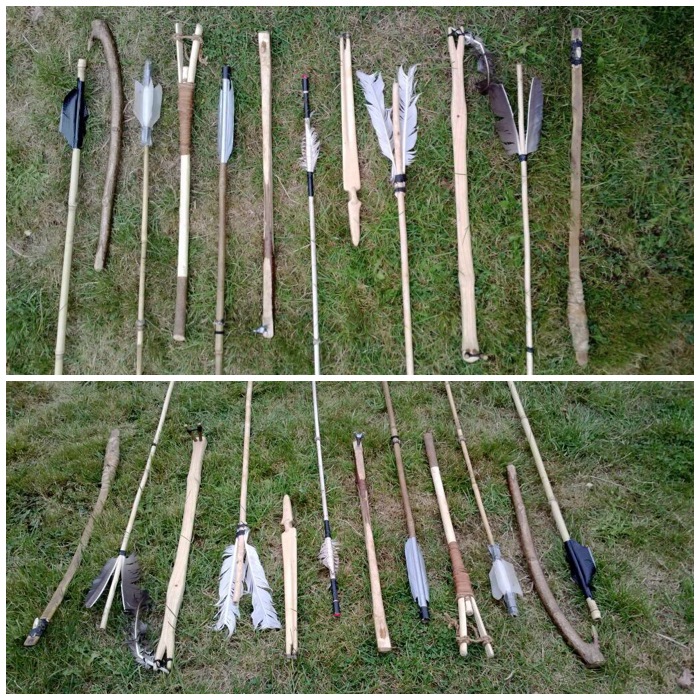
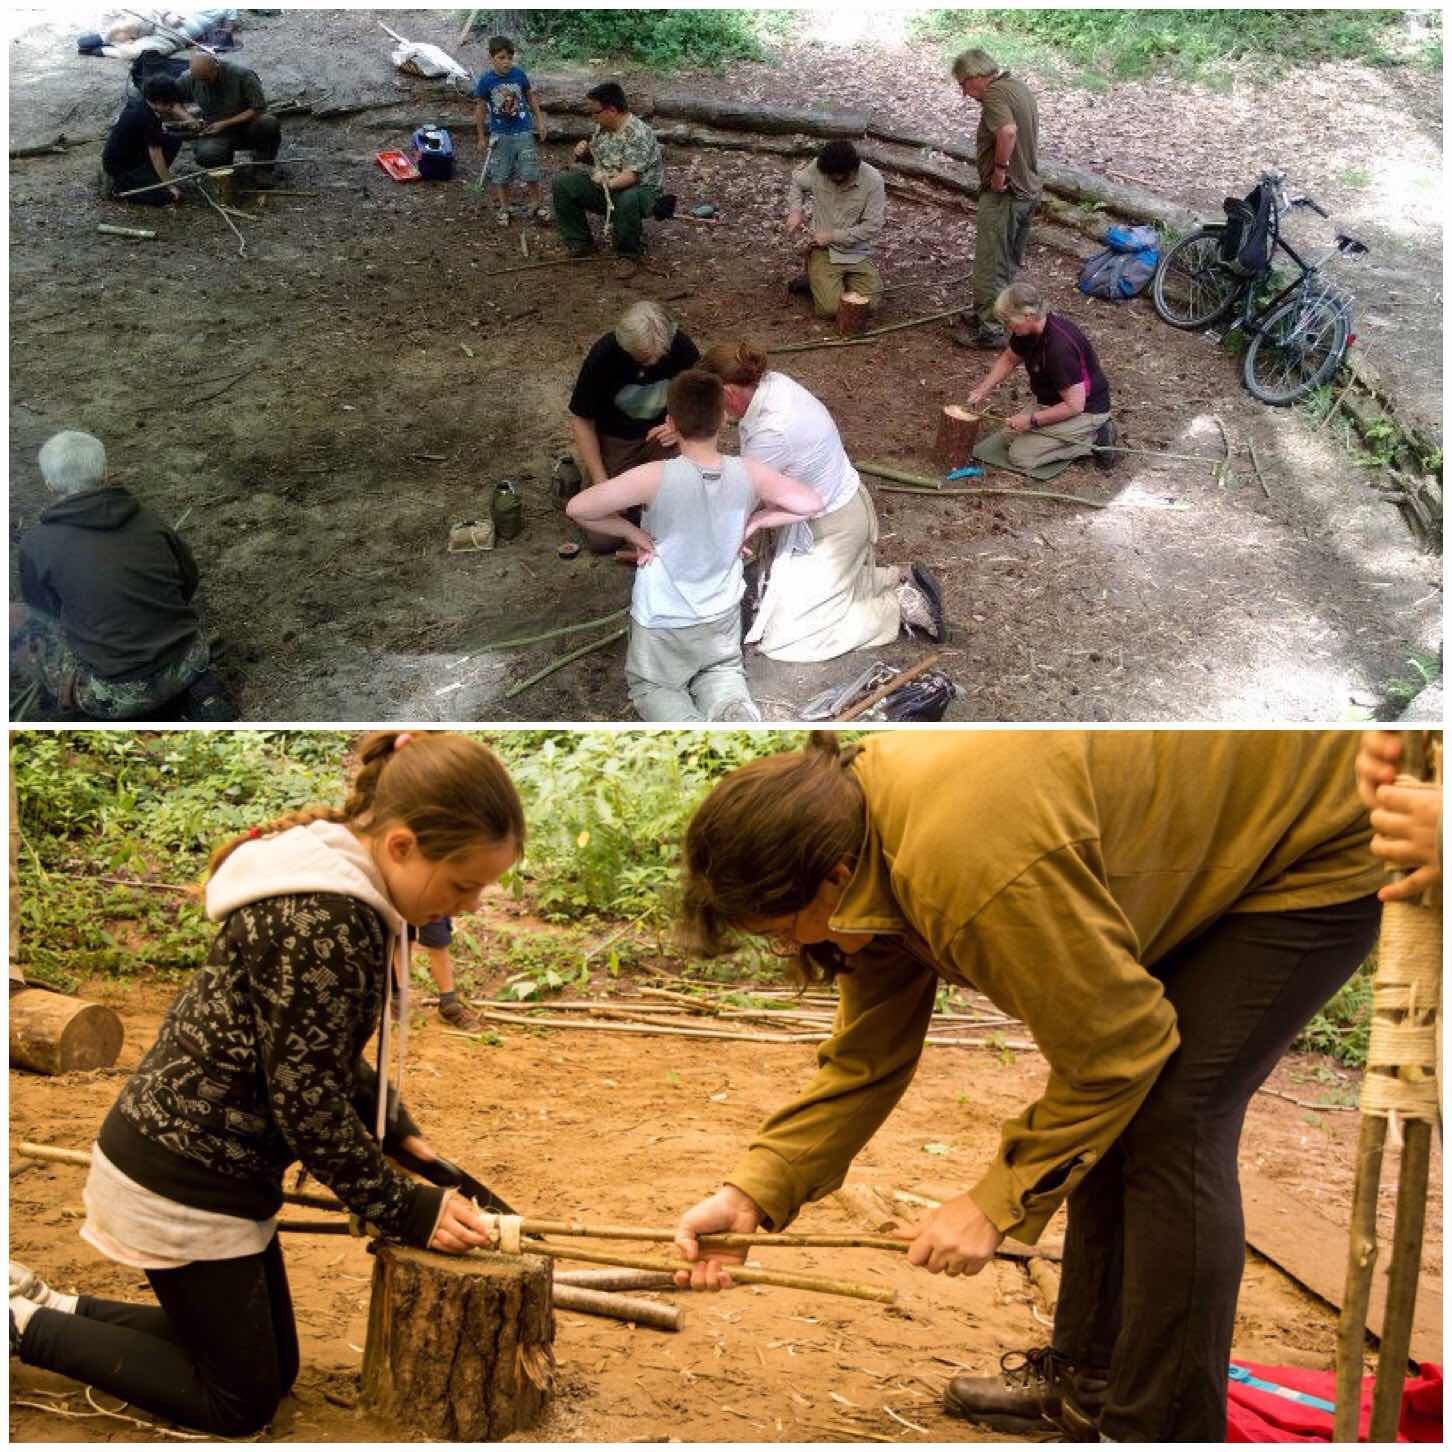
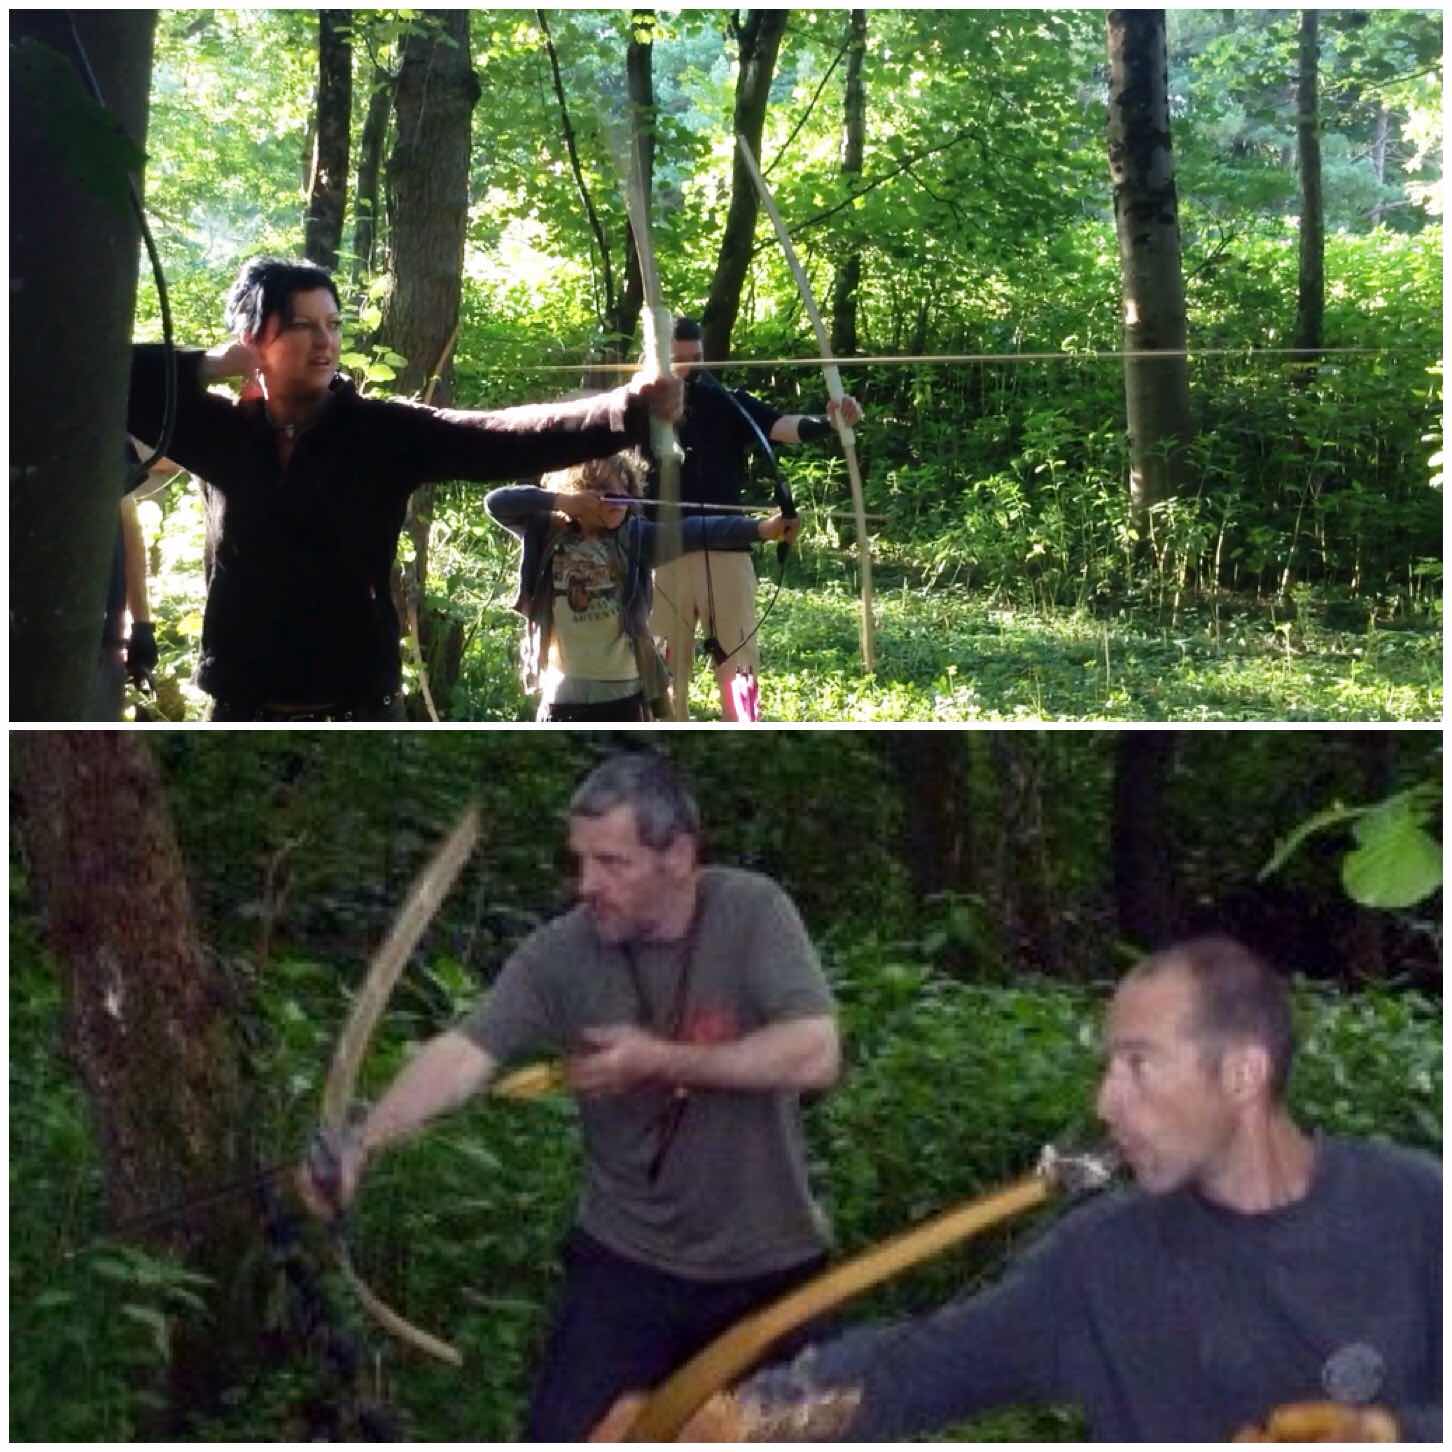
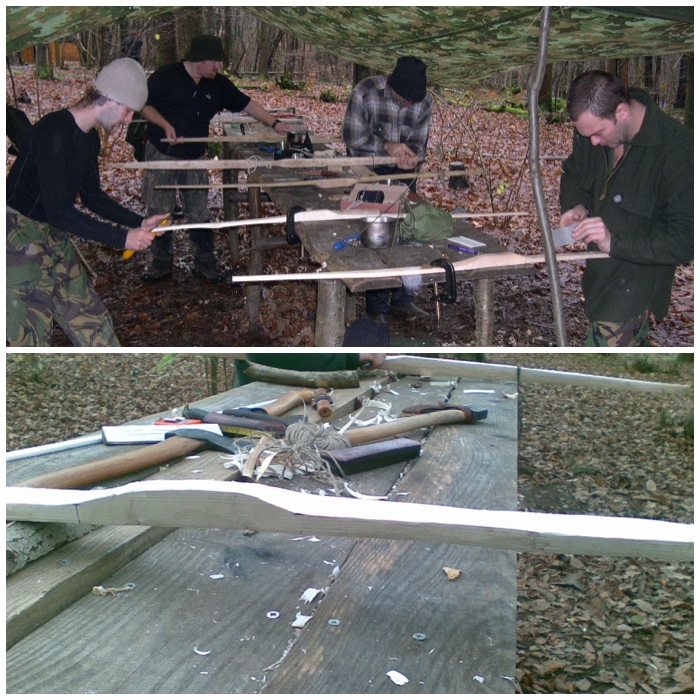
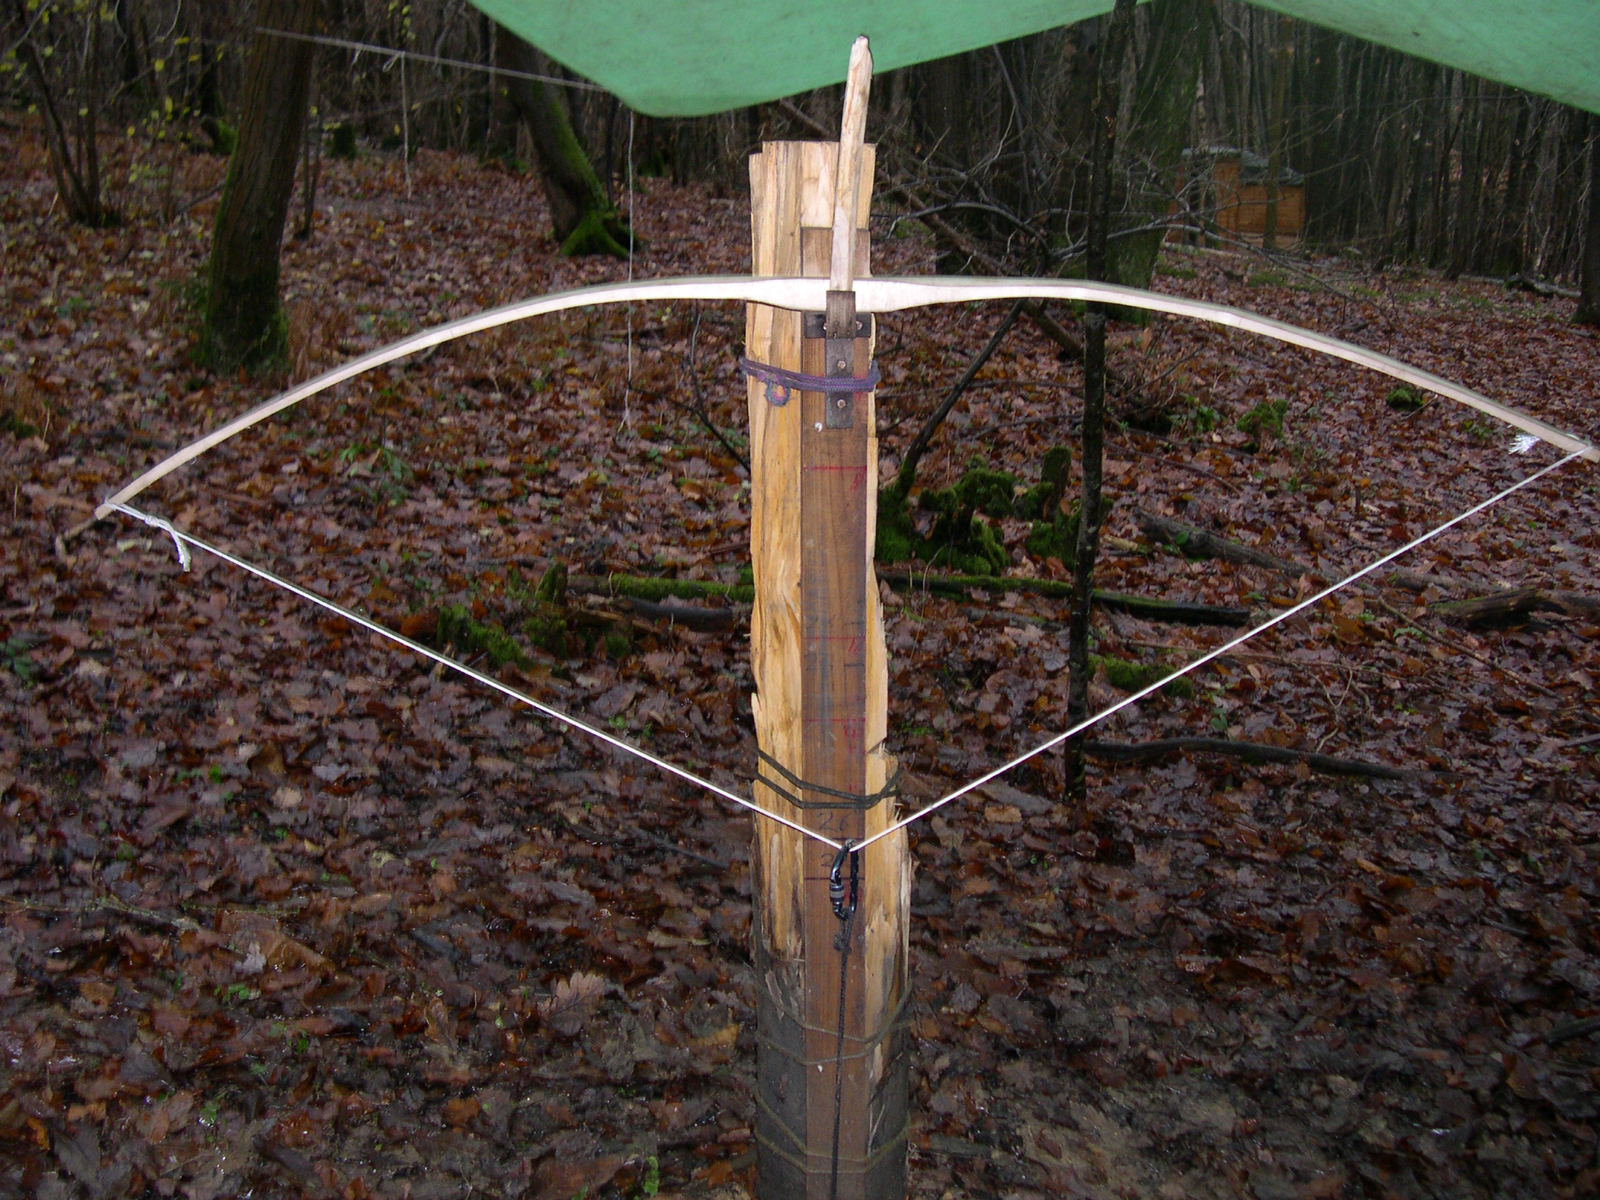
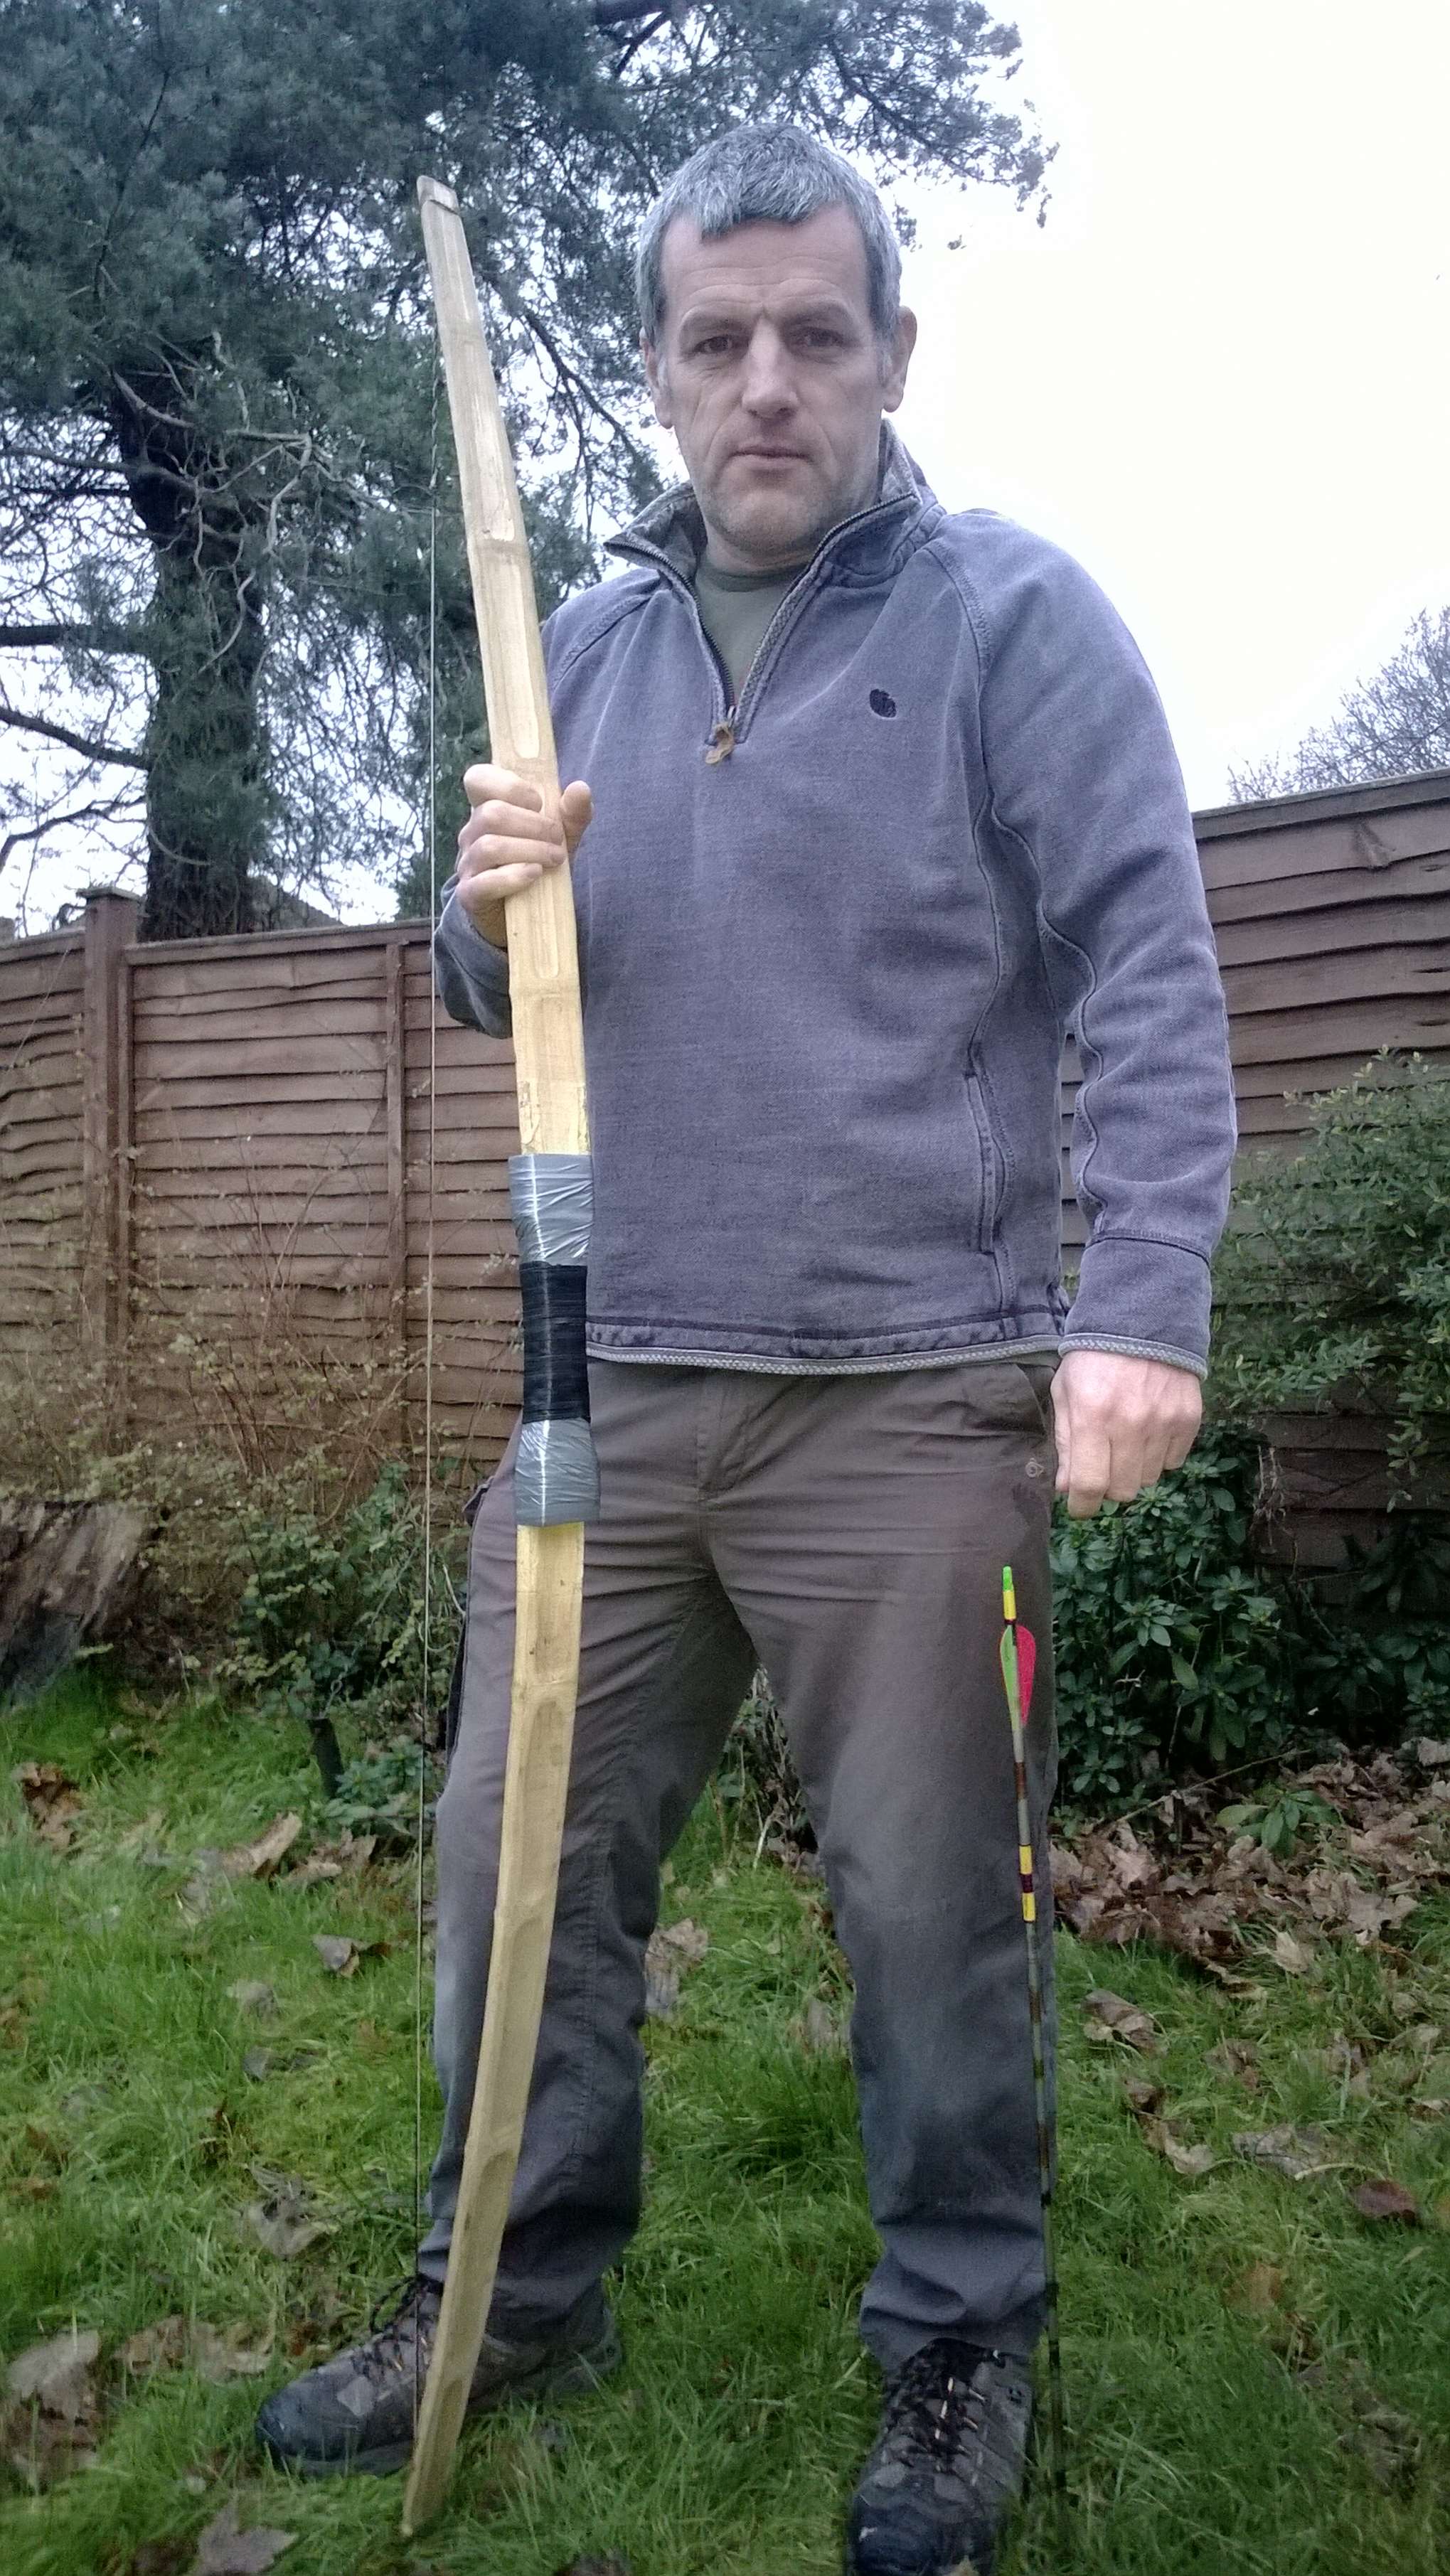
It has been 8 or 9 years now since I started making my own bows and Atlatls. In that time I have enjoyed making a number of different types and have brought them all together in this post. I am no expert in making them however I do like to carve them.
If you want to know how to make any of these tools just click on the title for each section to see a detailed How To…. guide on making them. This post will concentrate on my thoughts on them through my own personal use and that of my students.
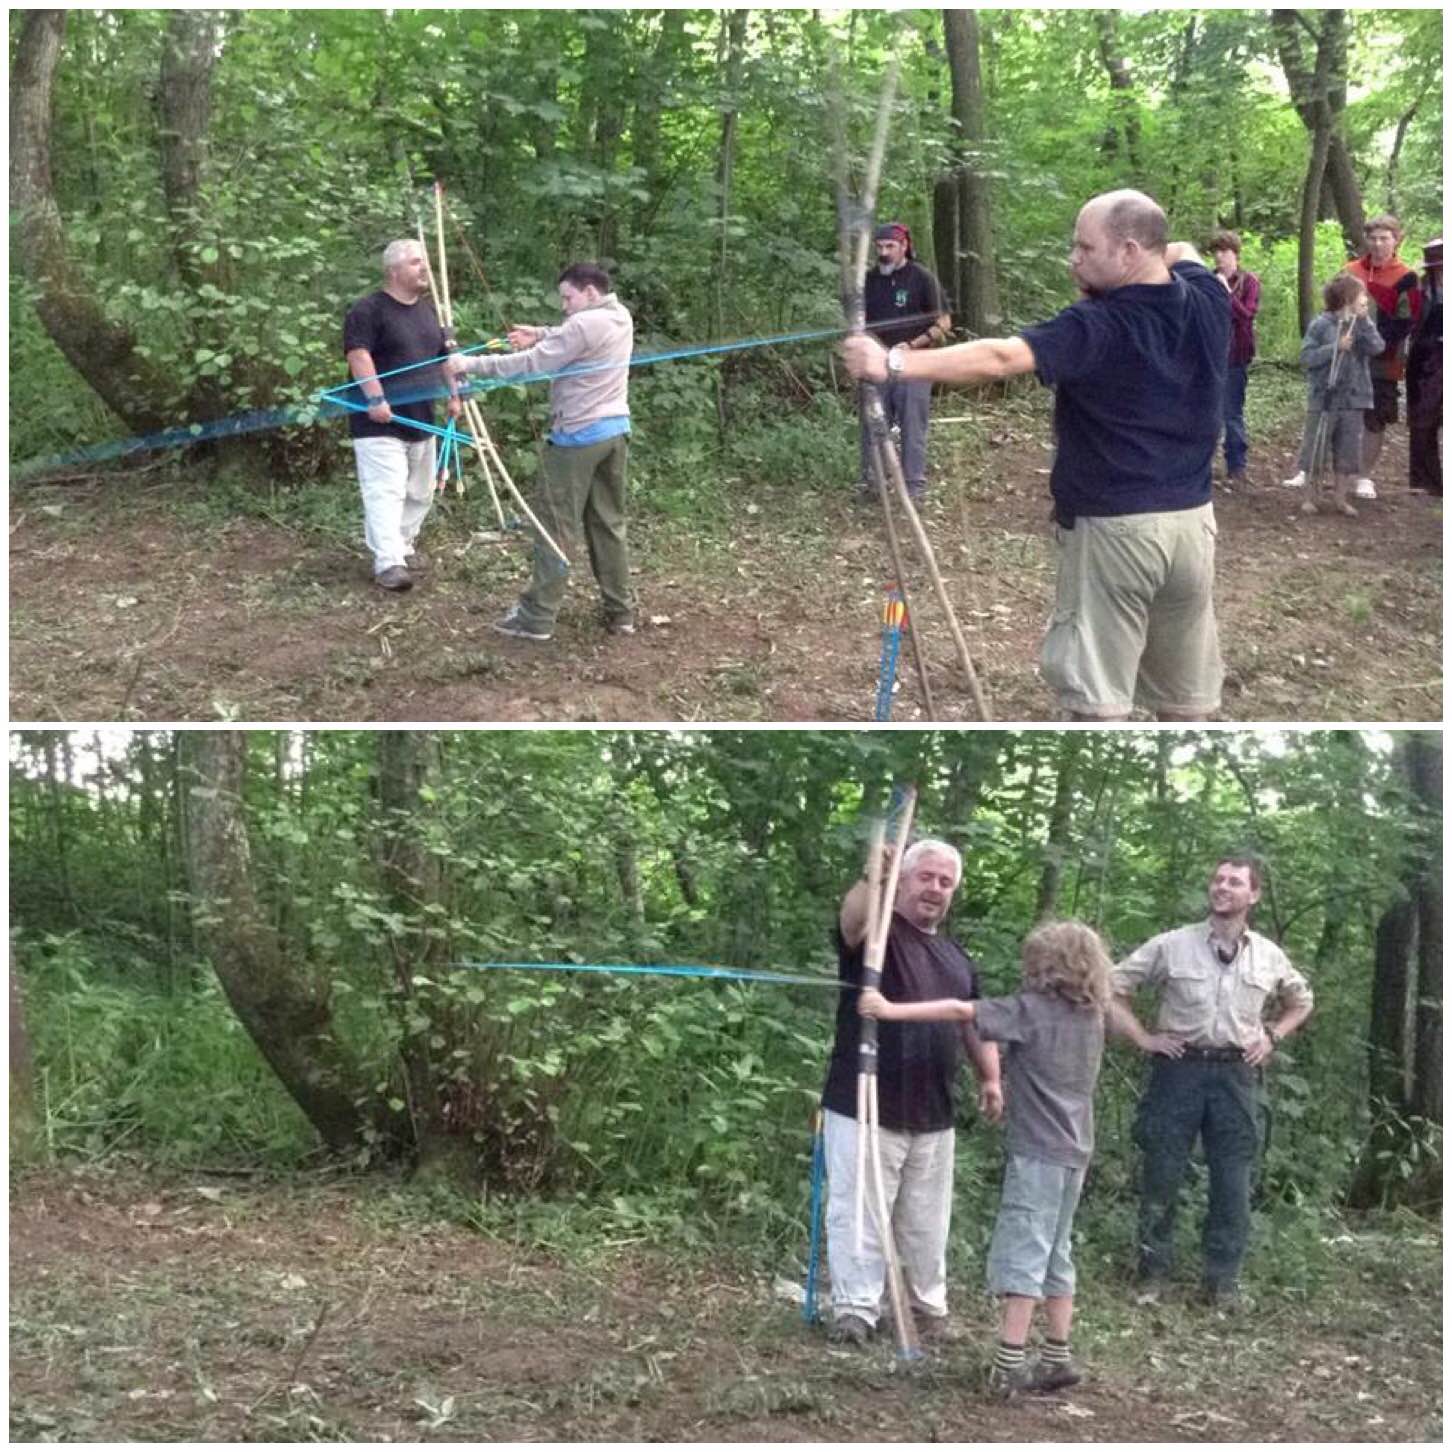
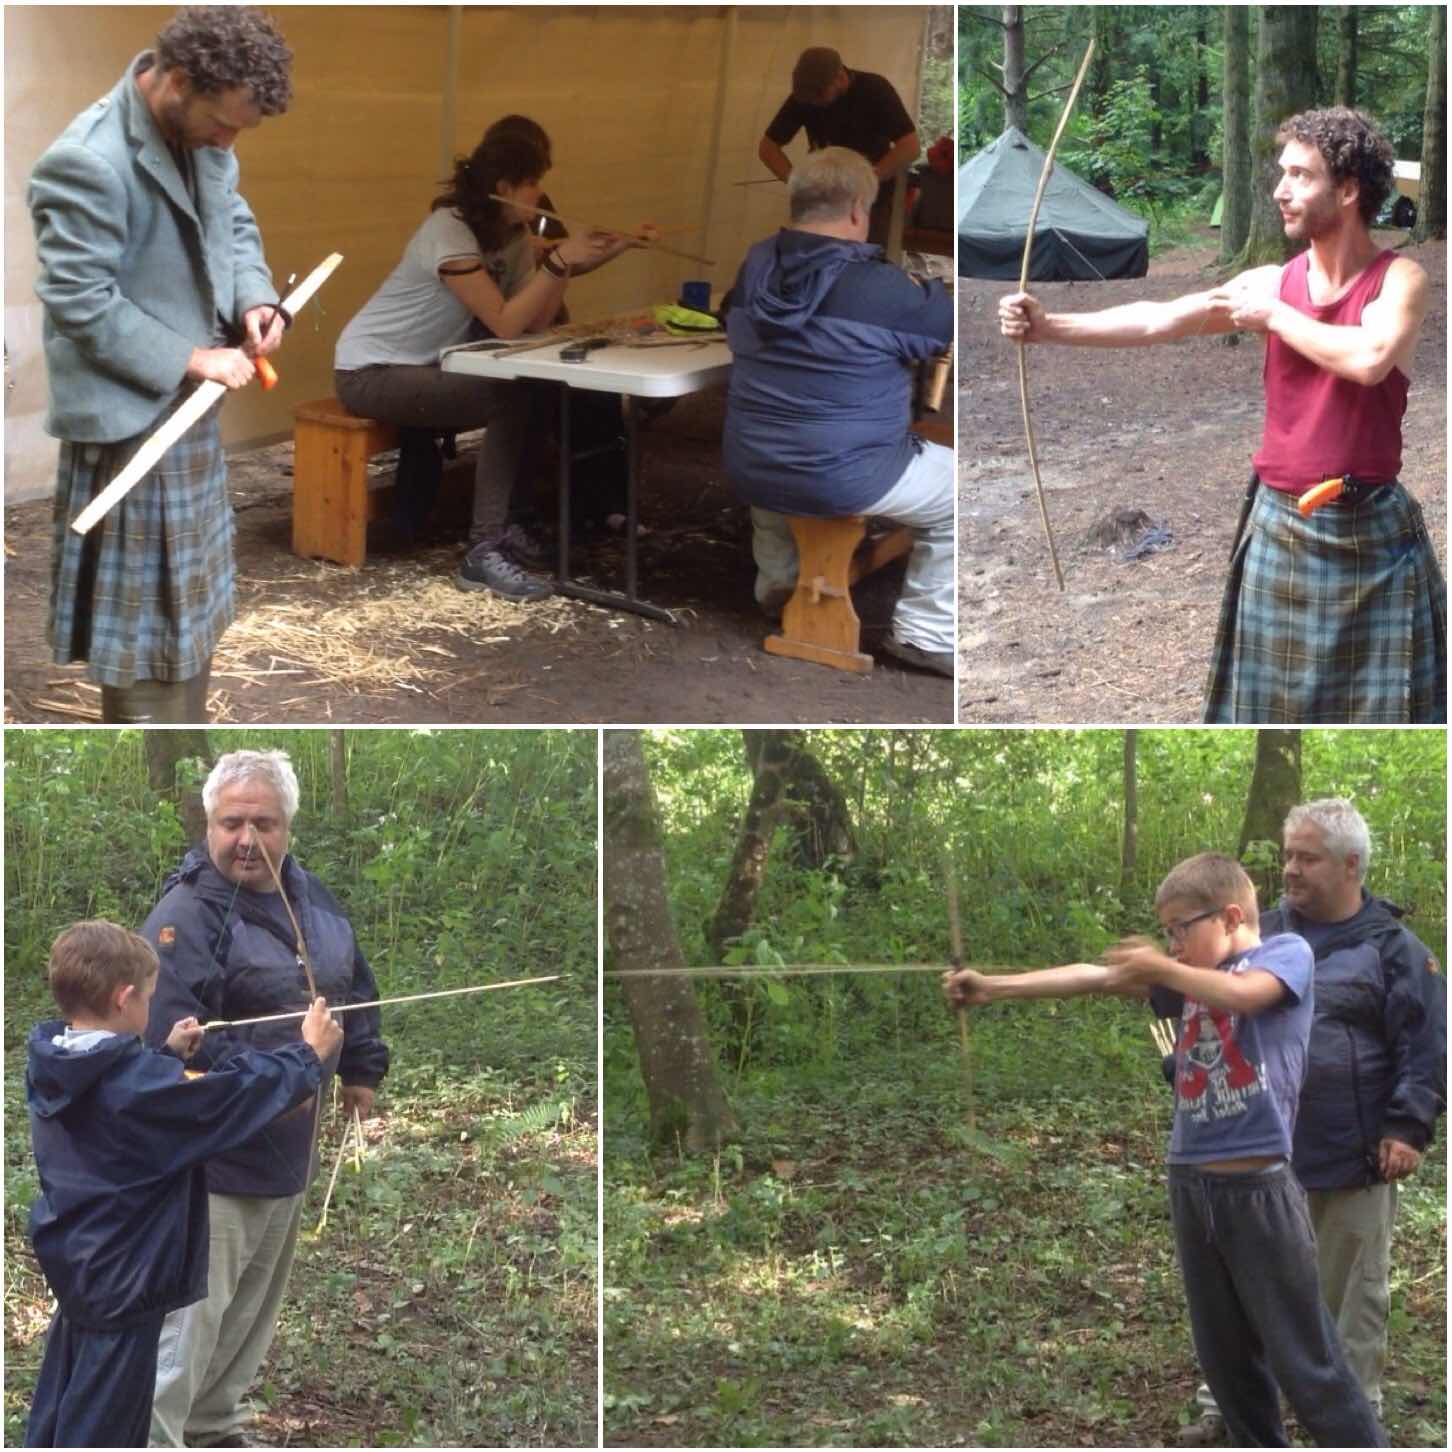
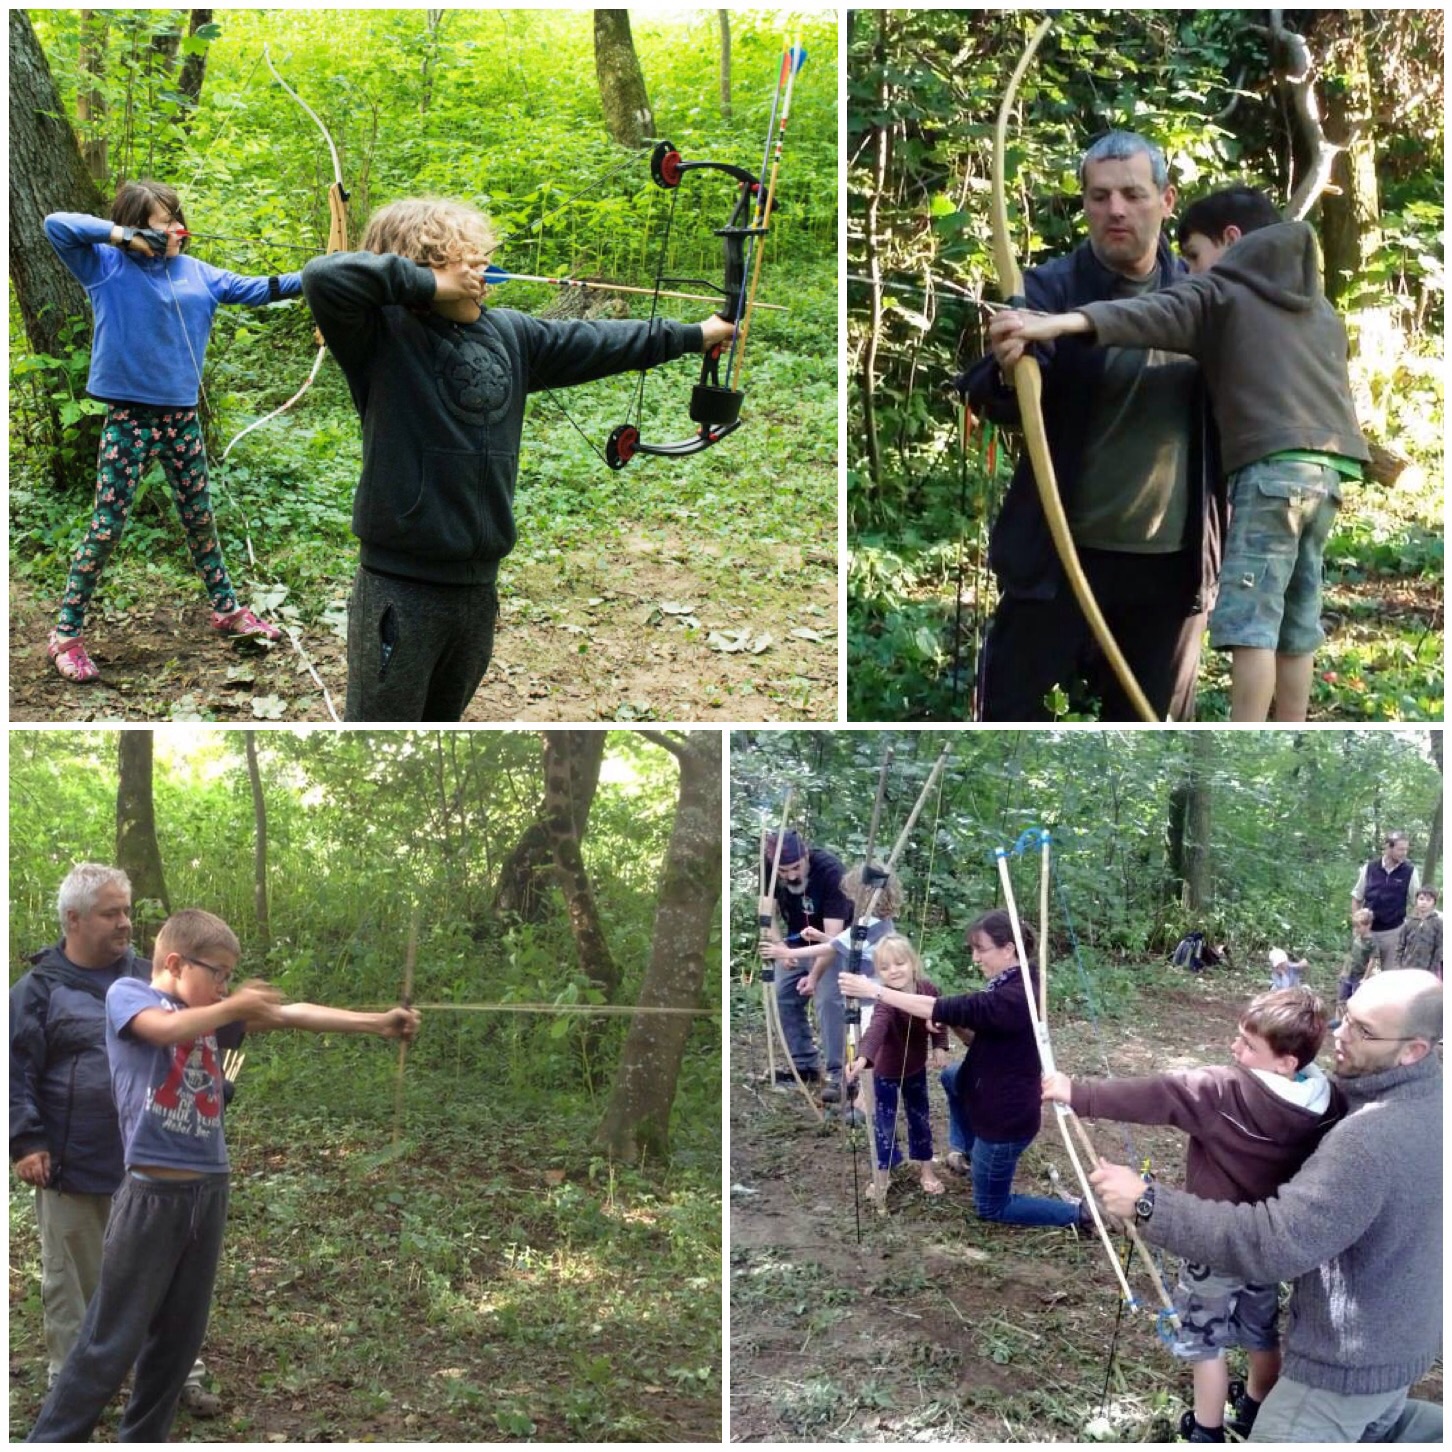
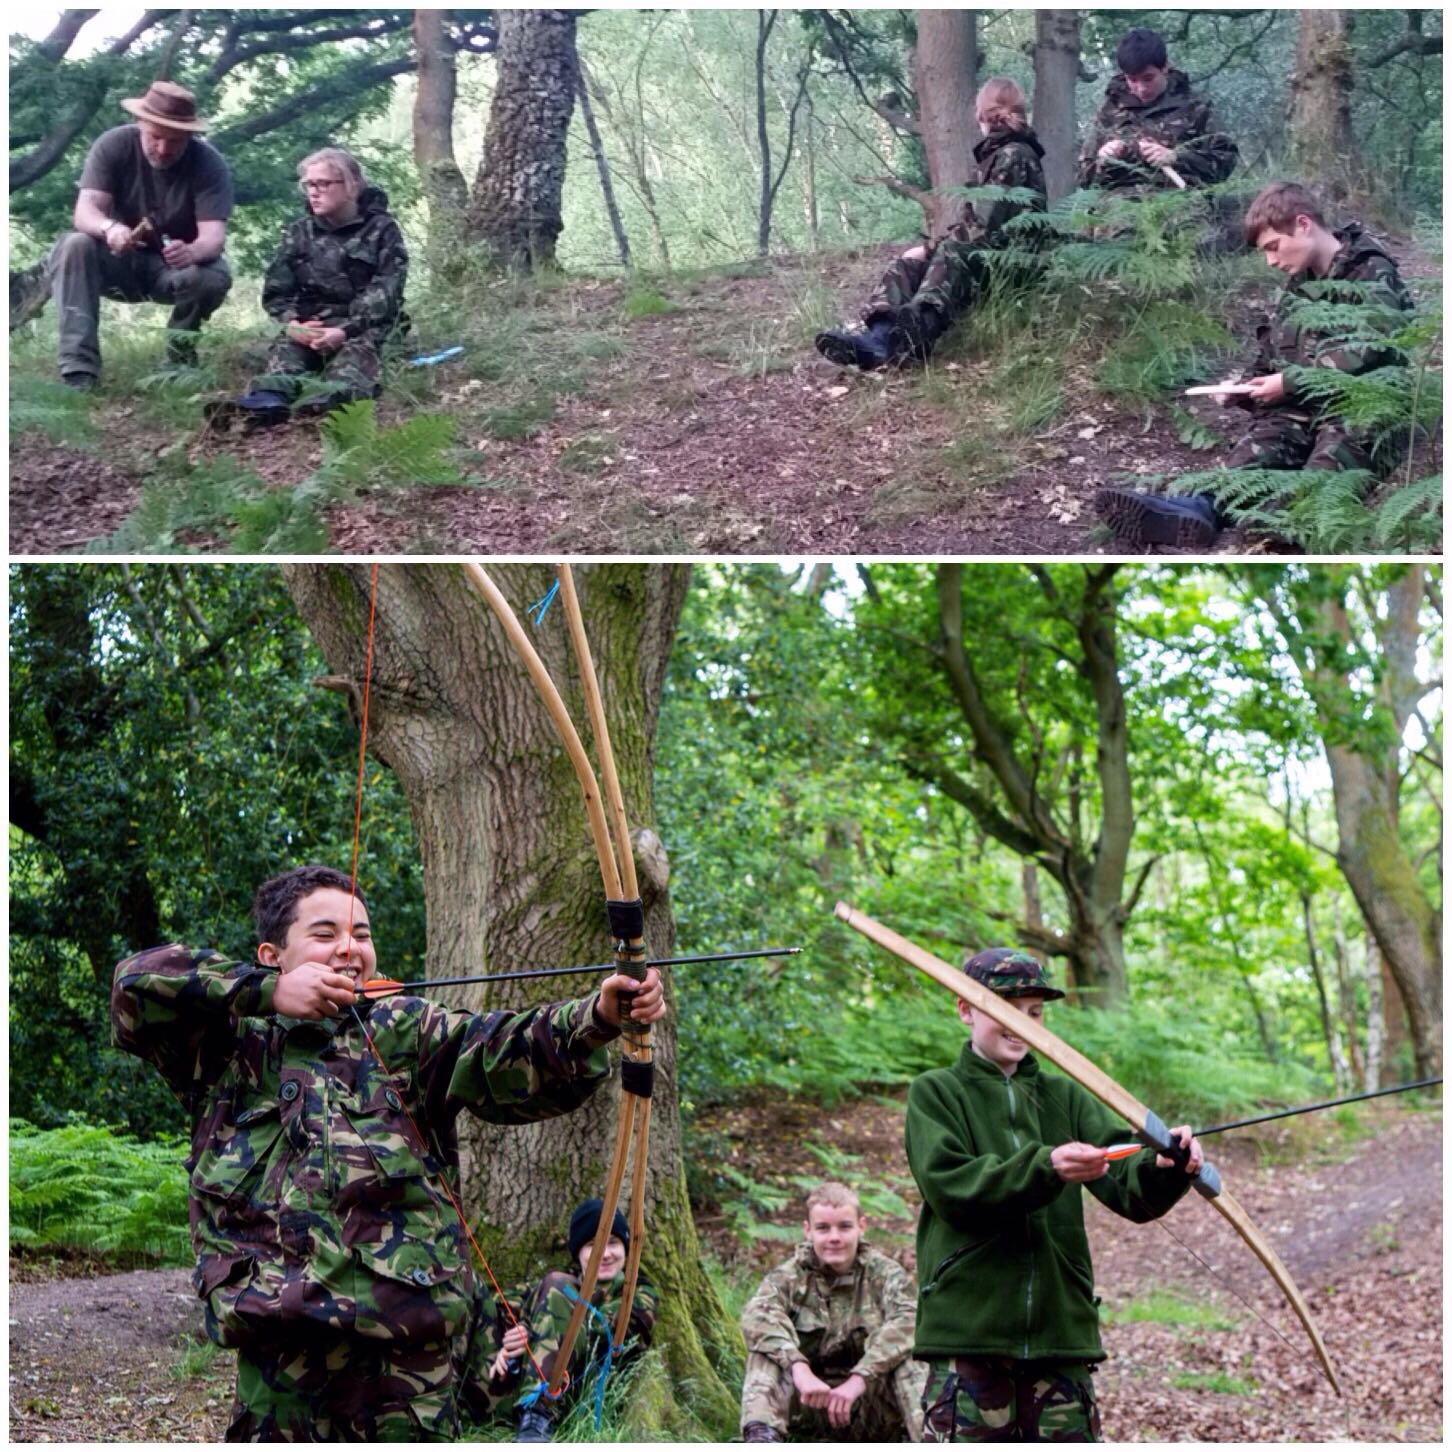
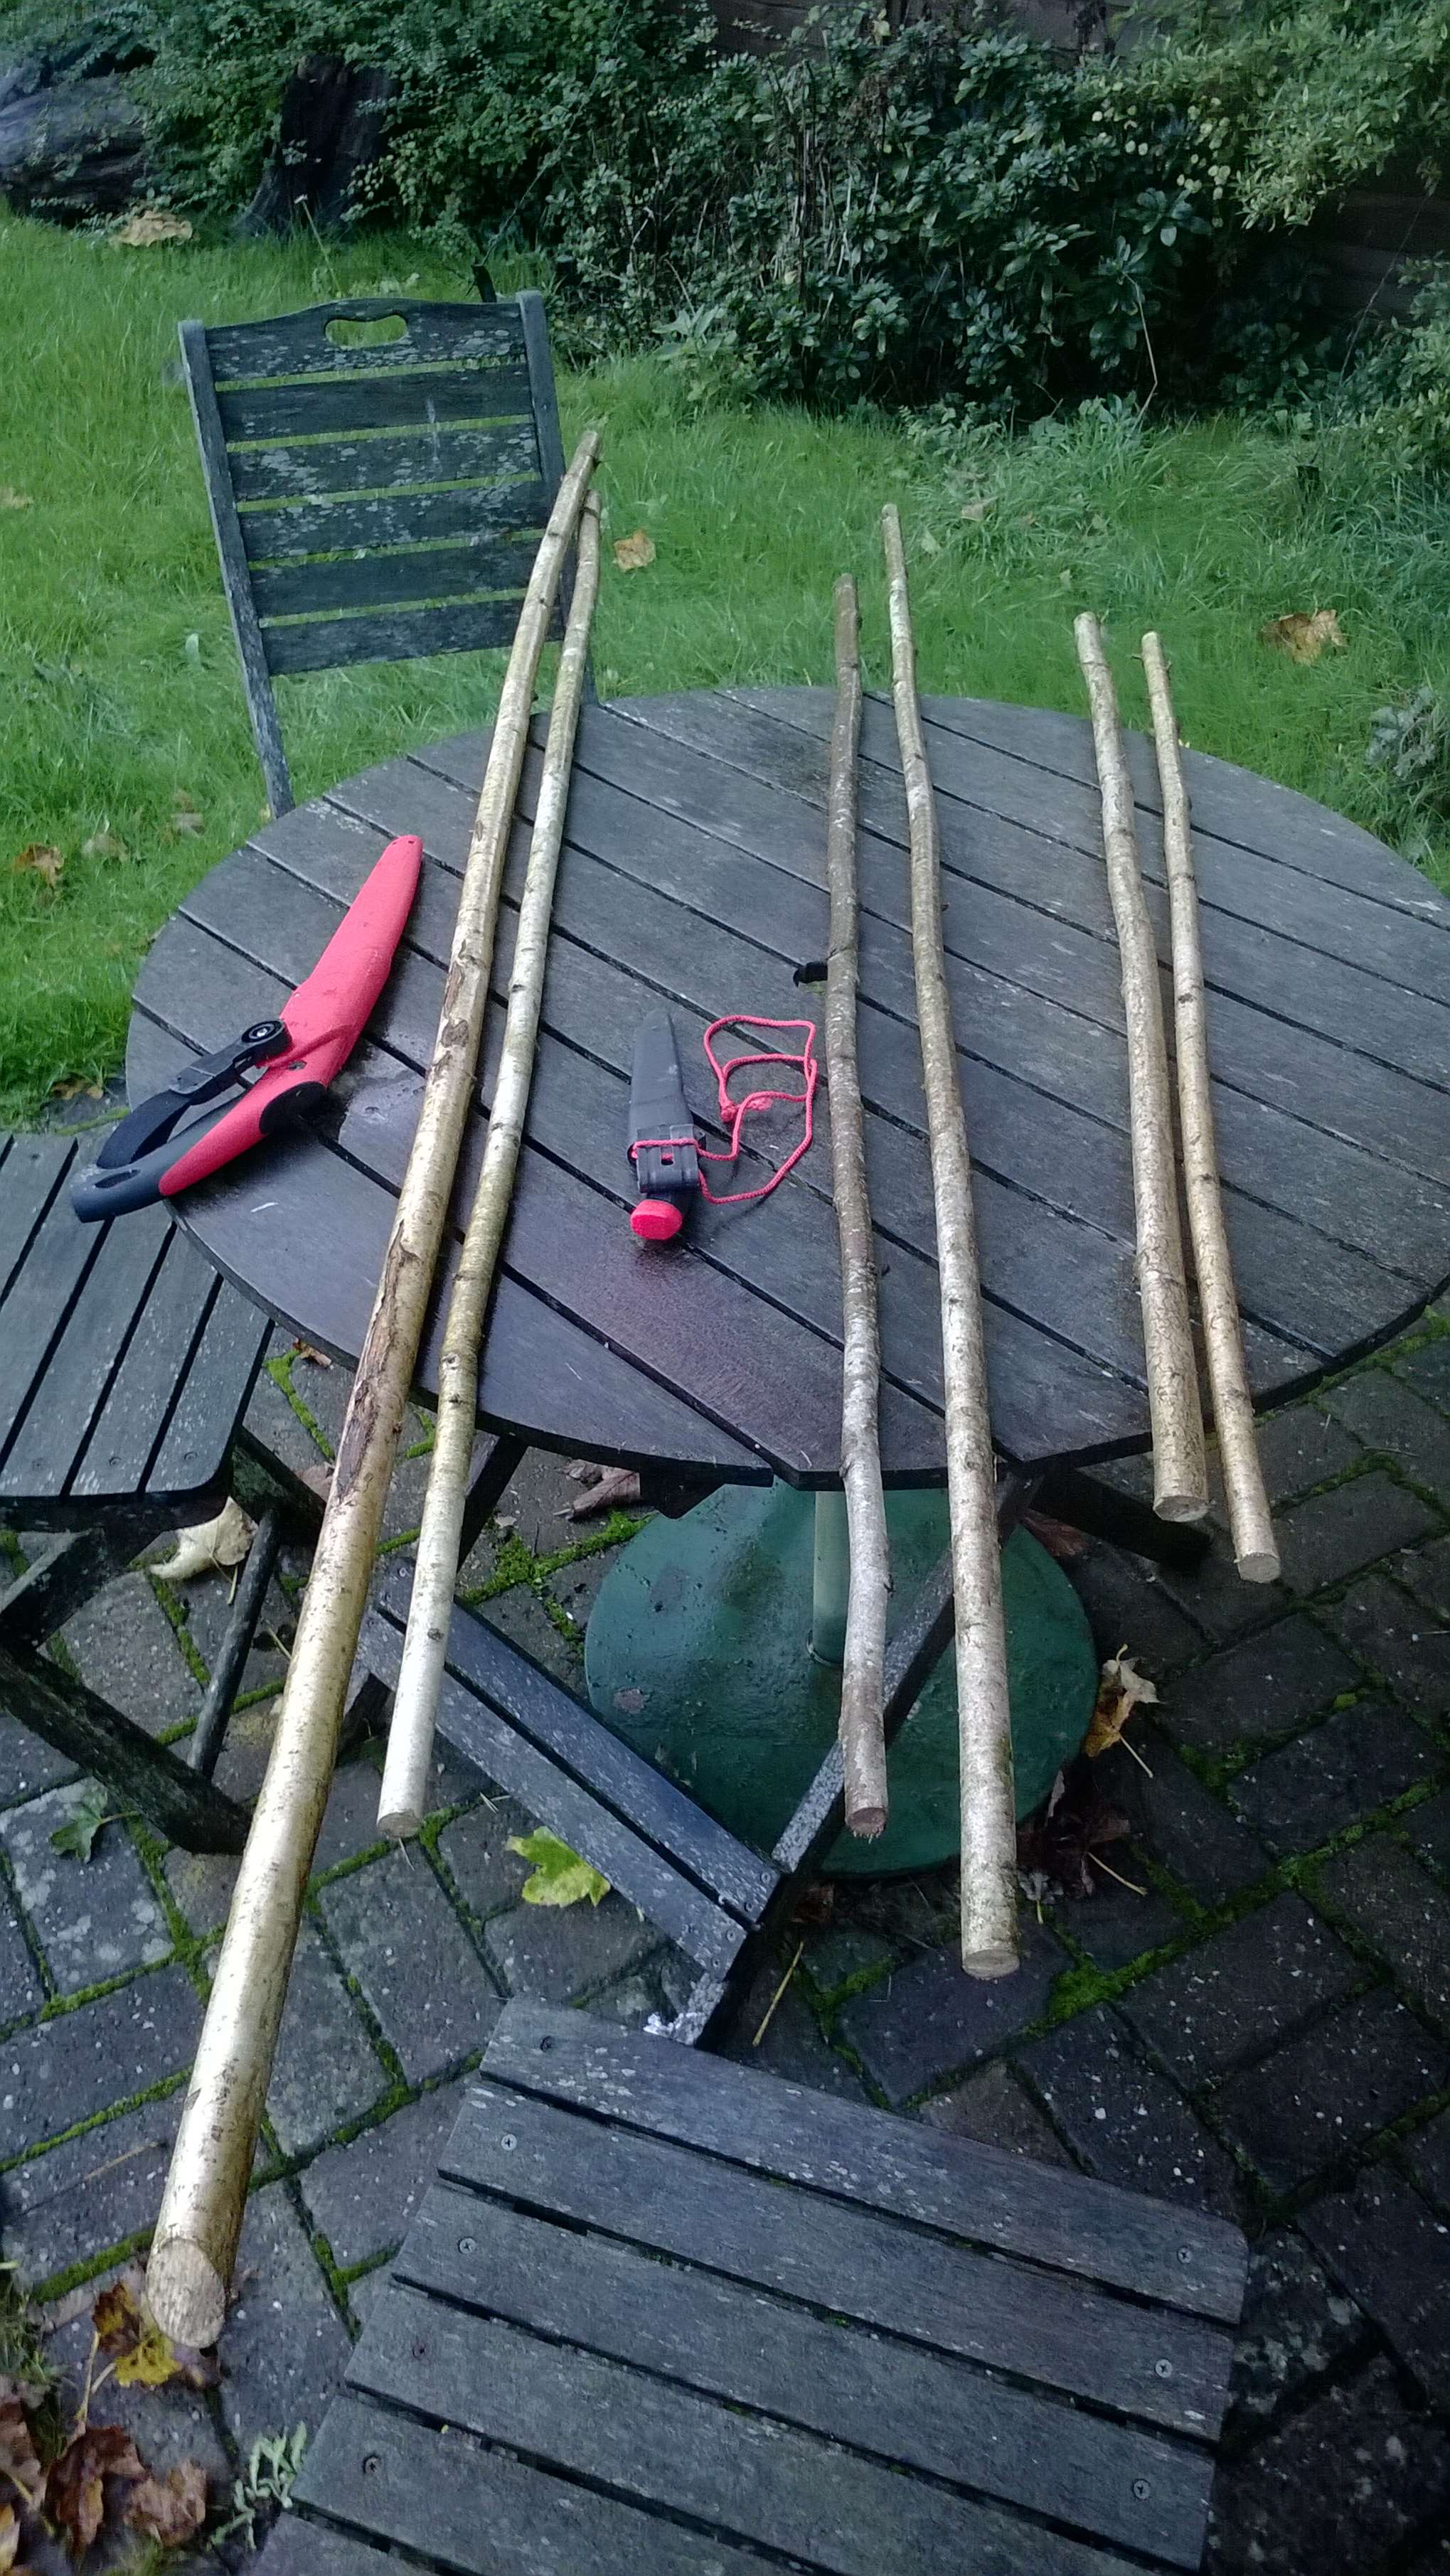
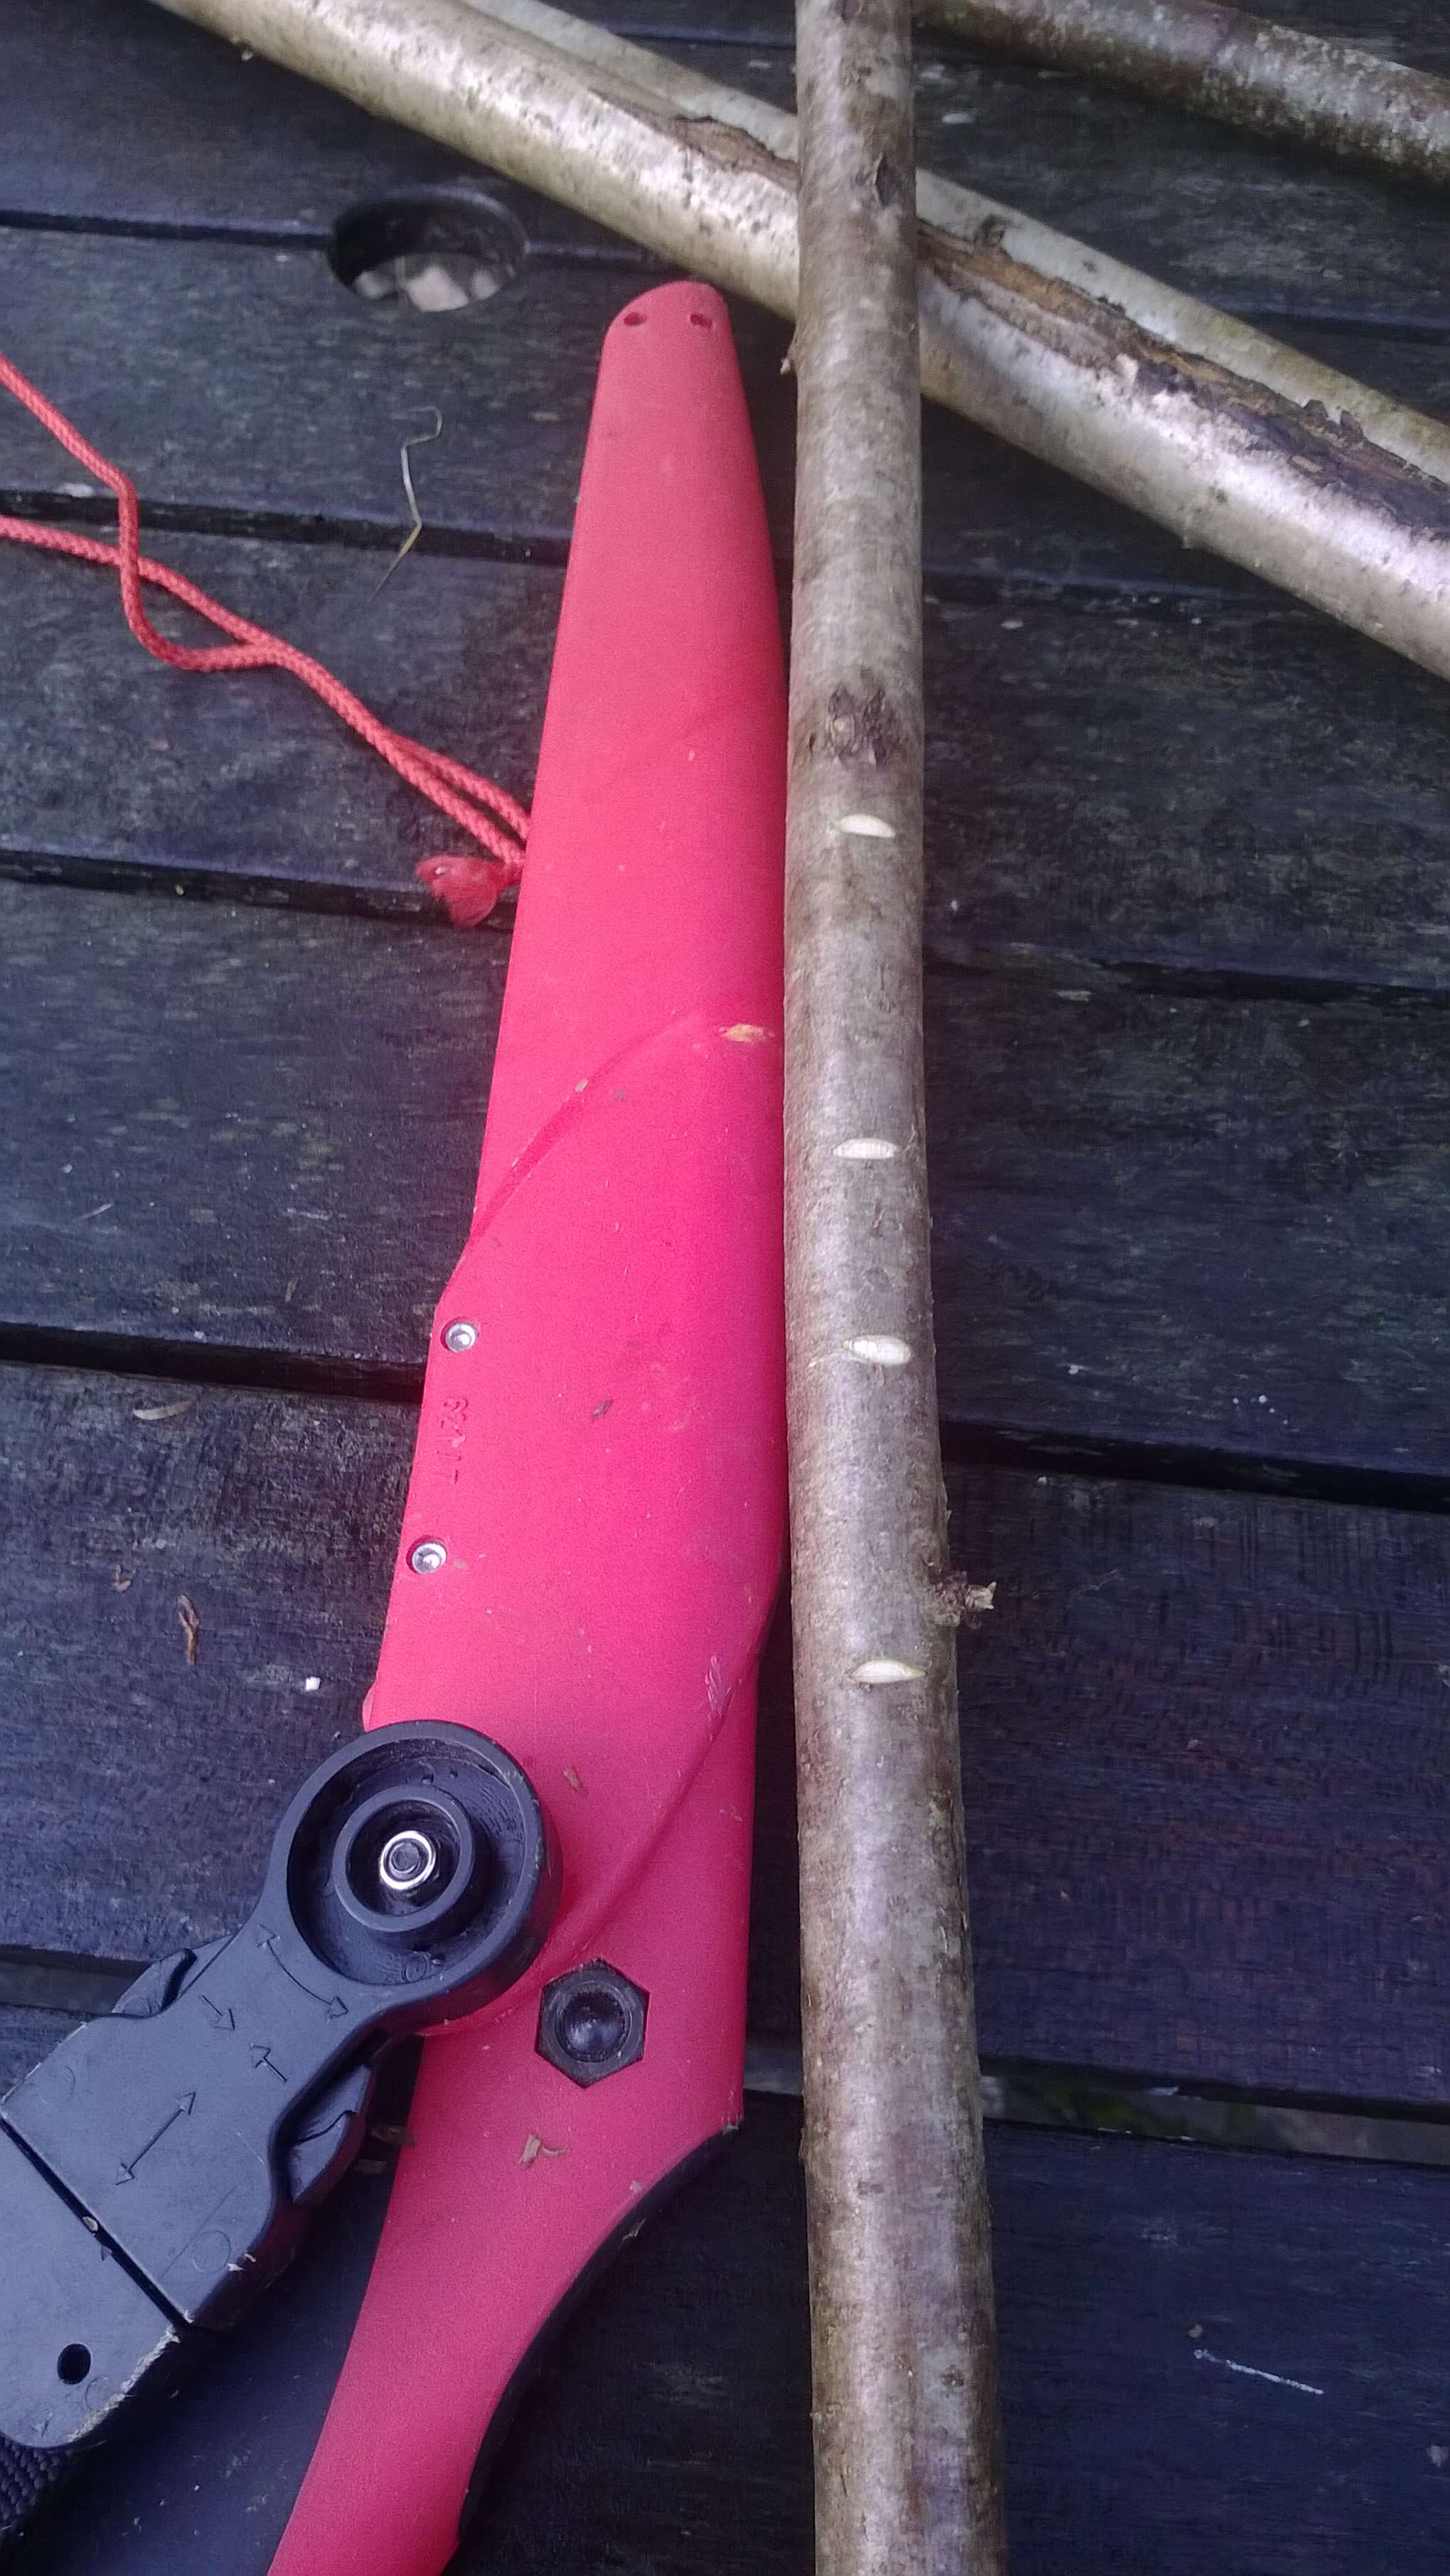
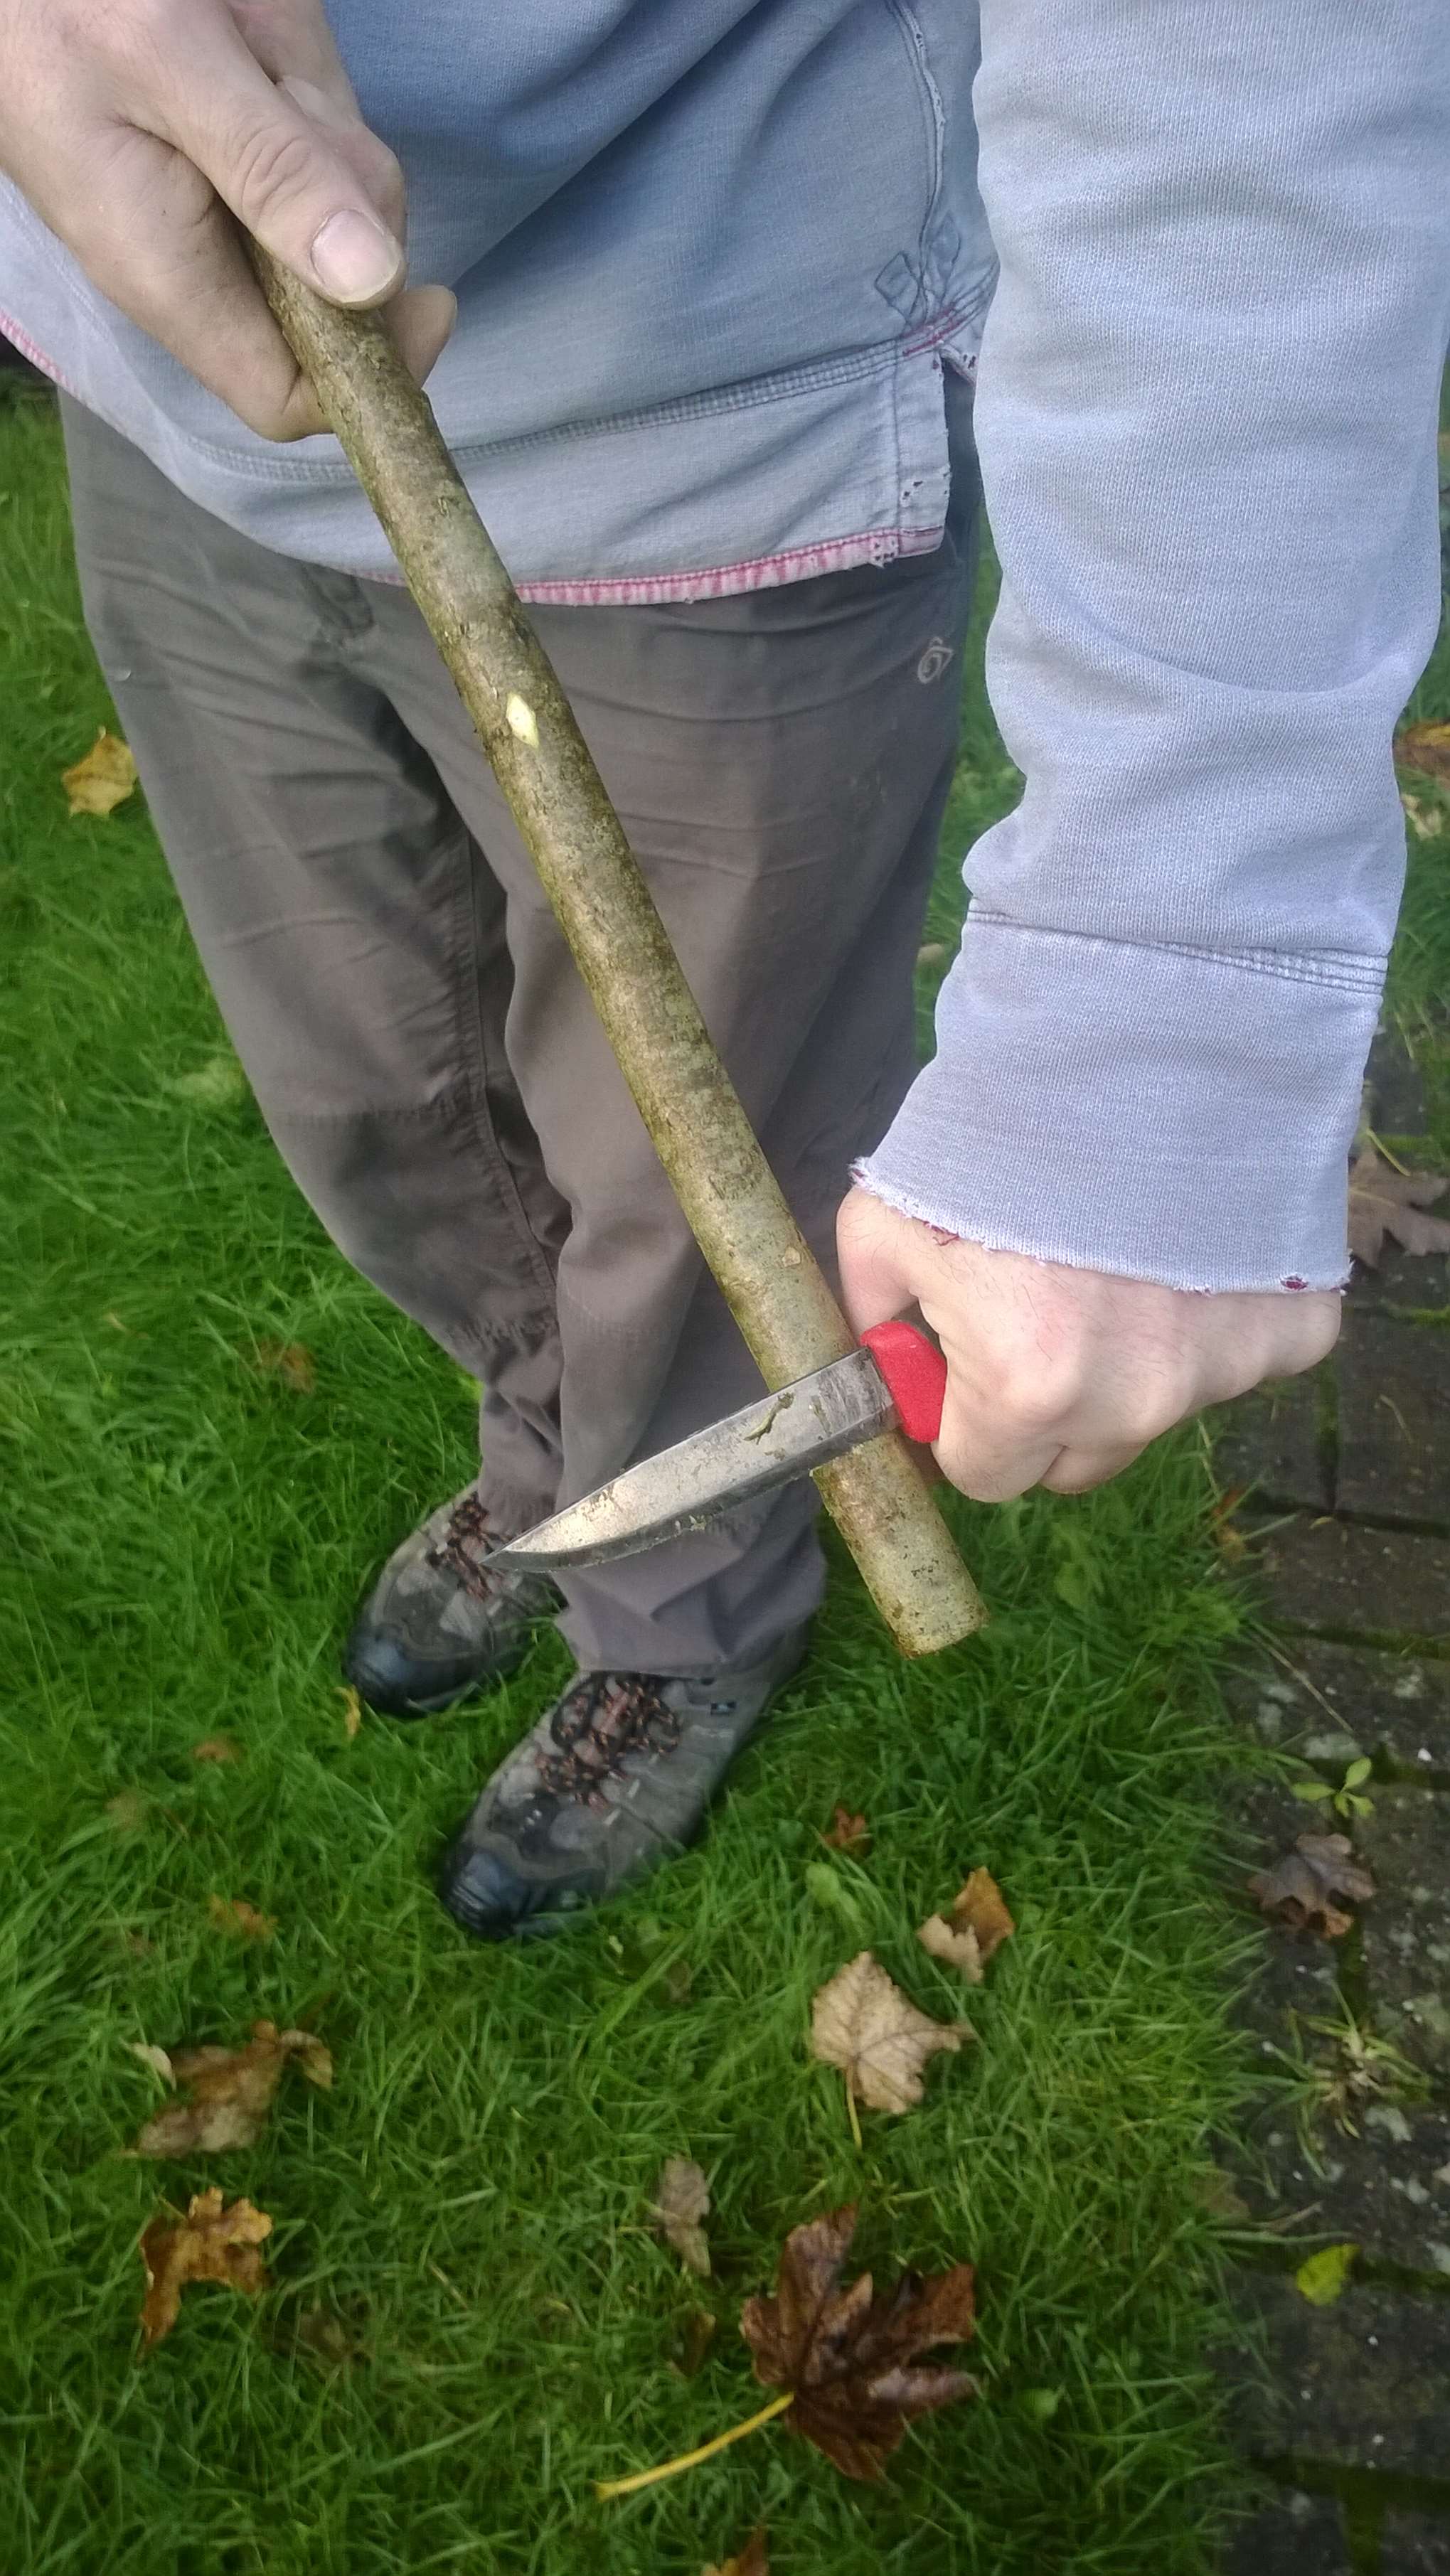
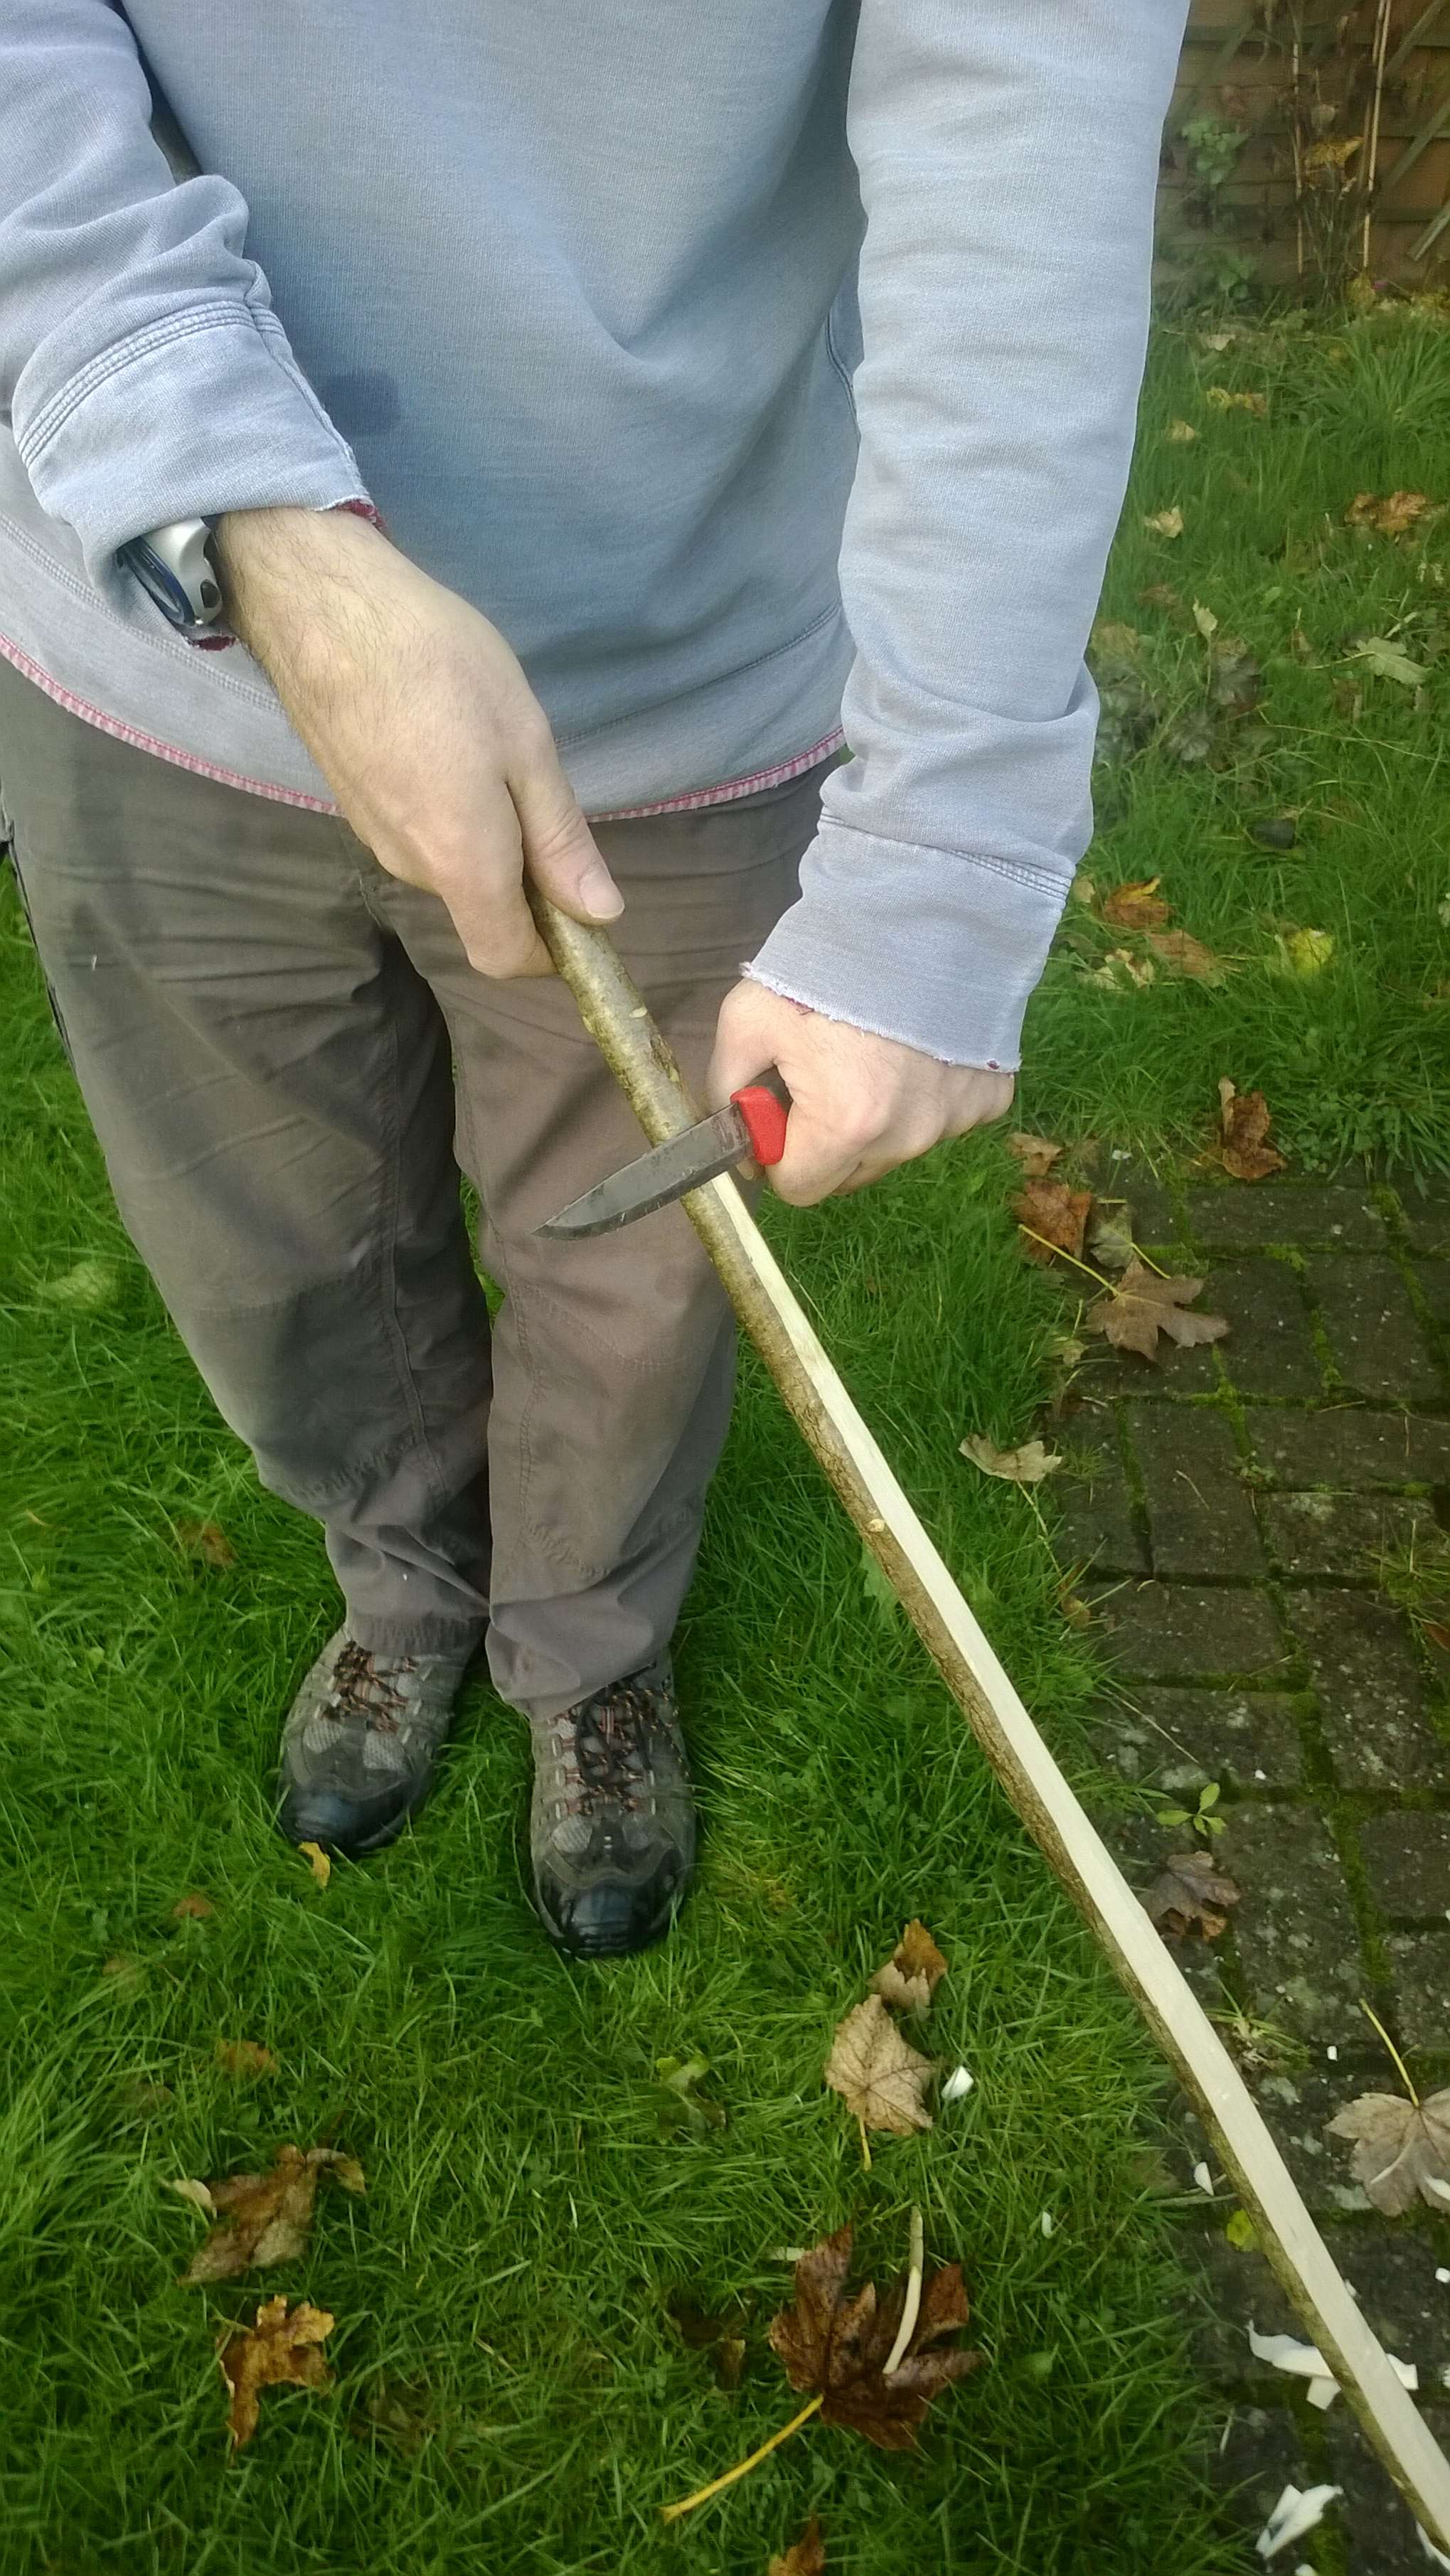
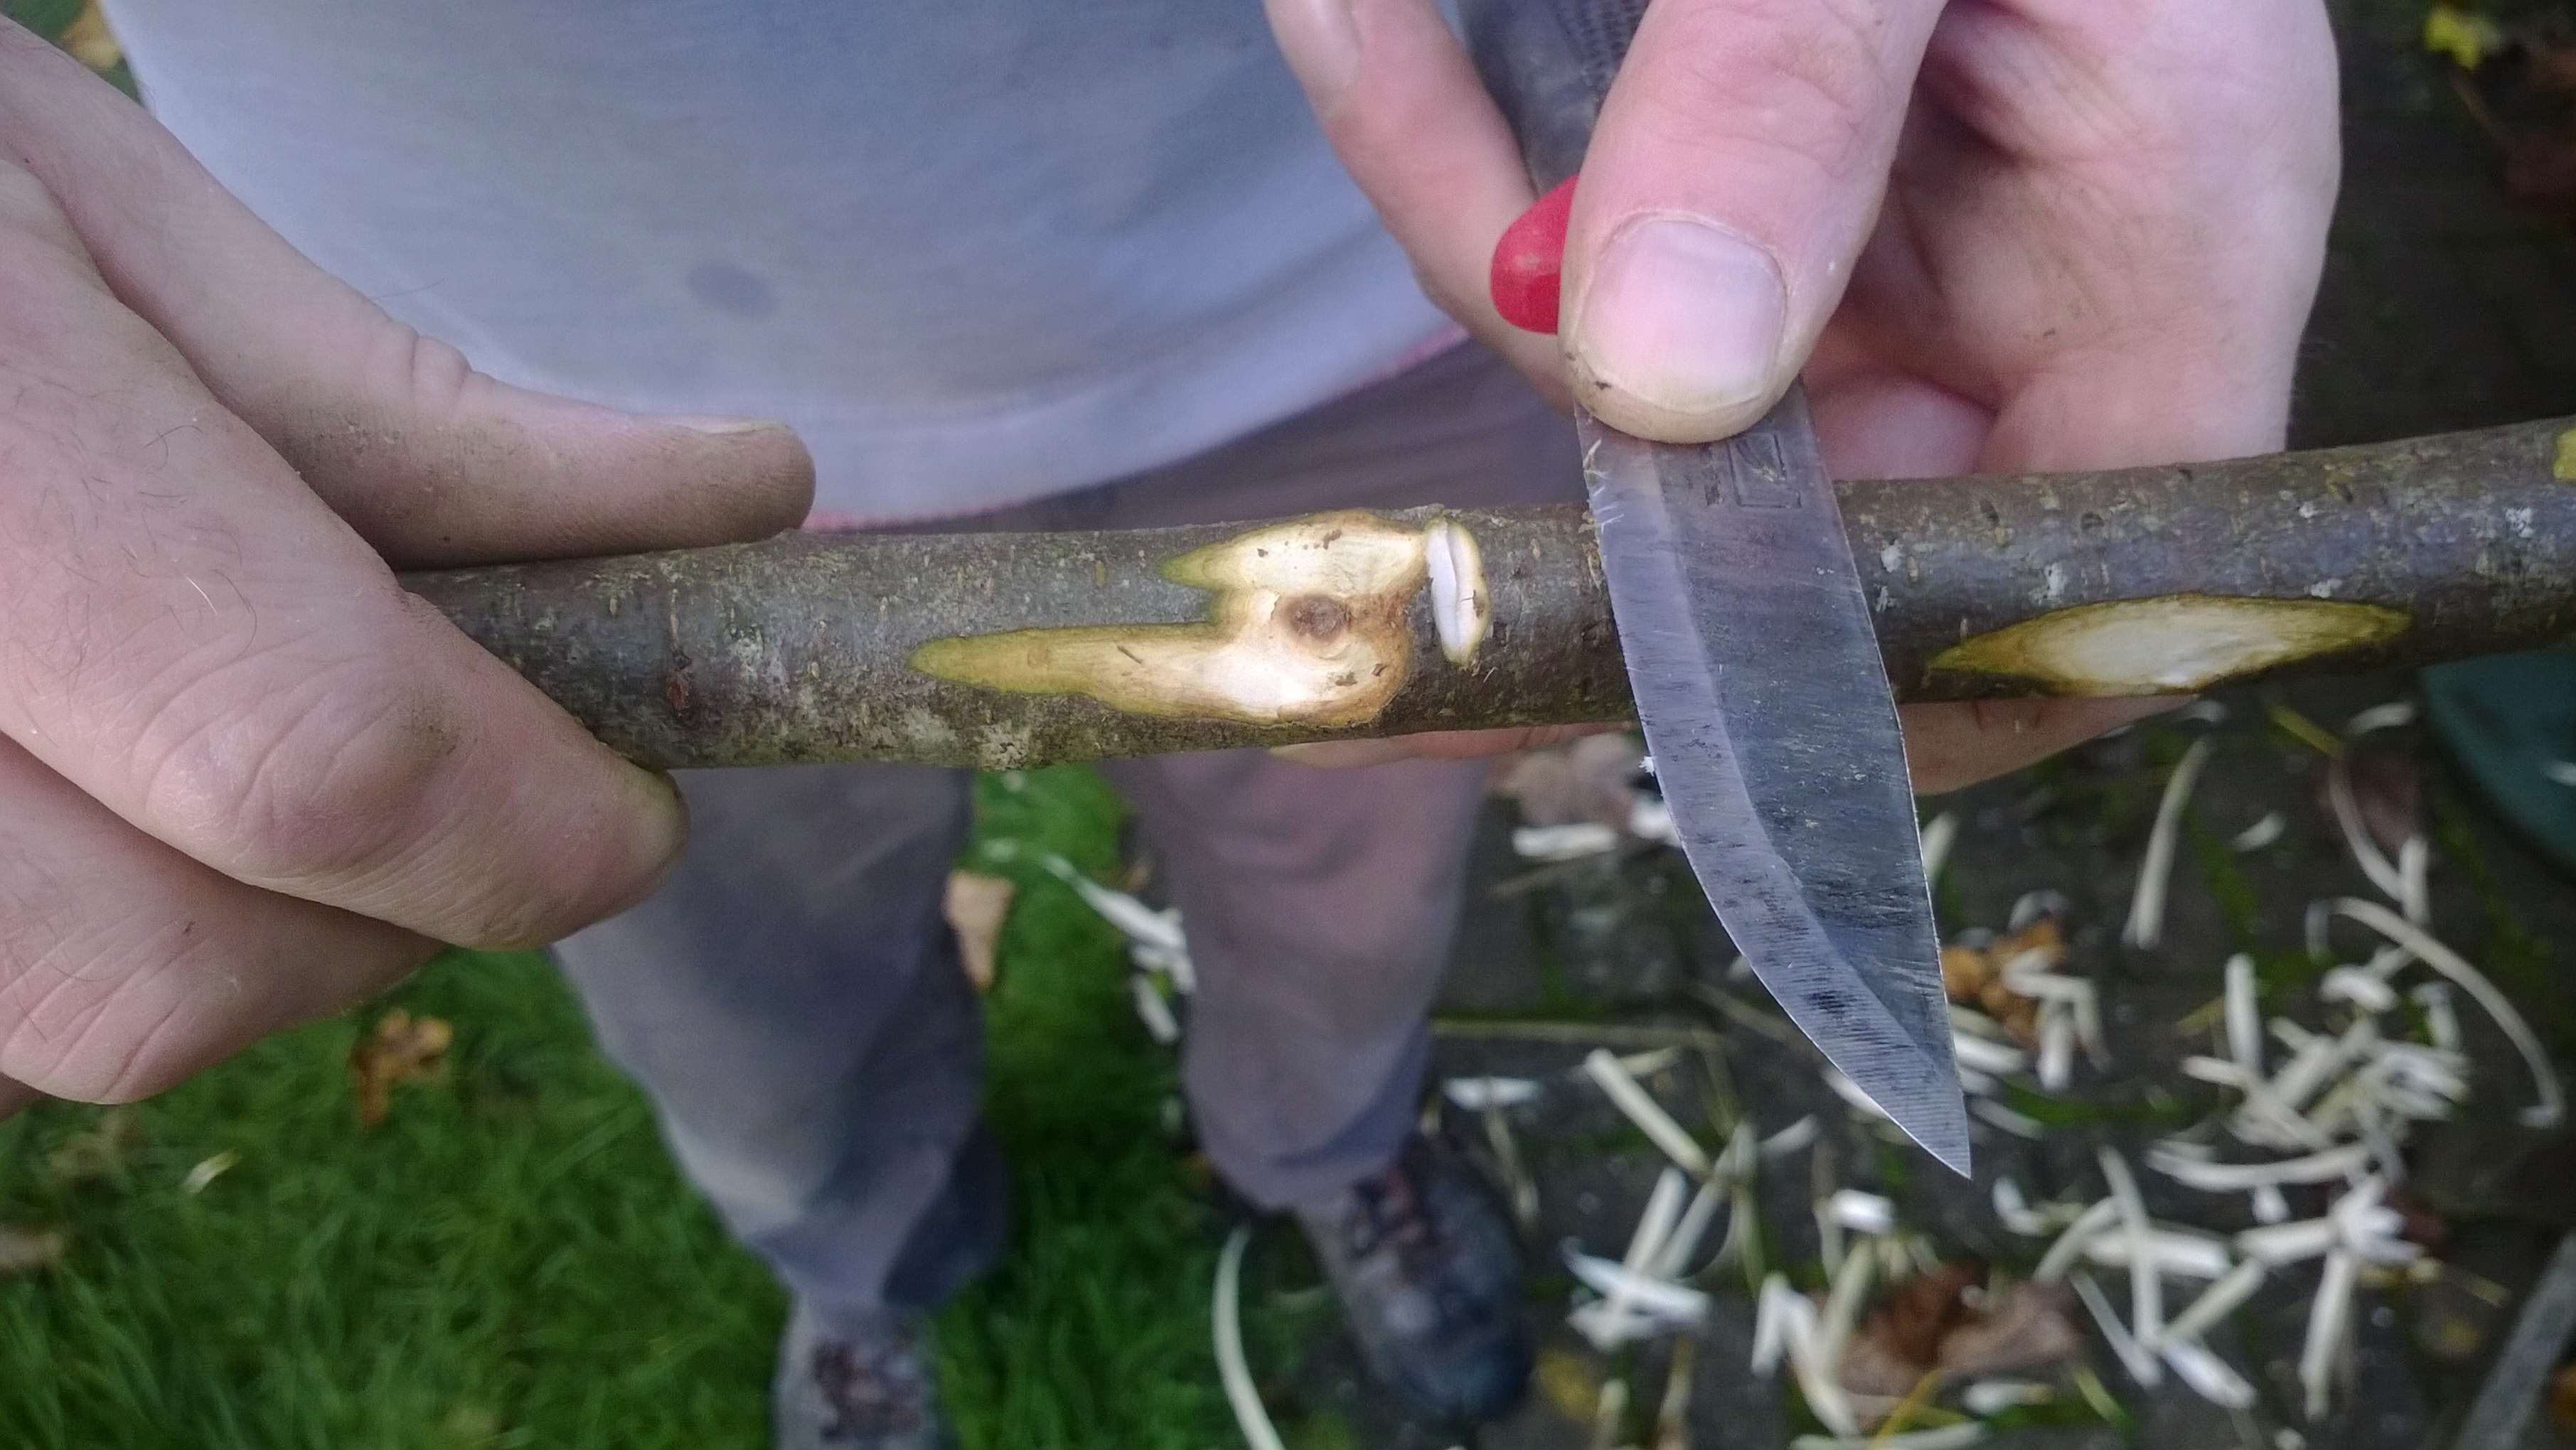
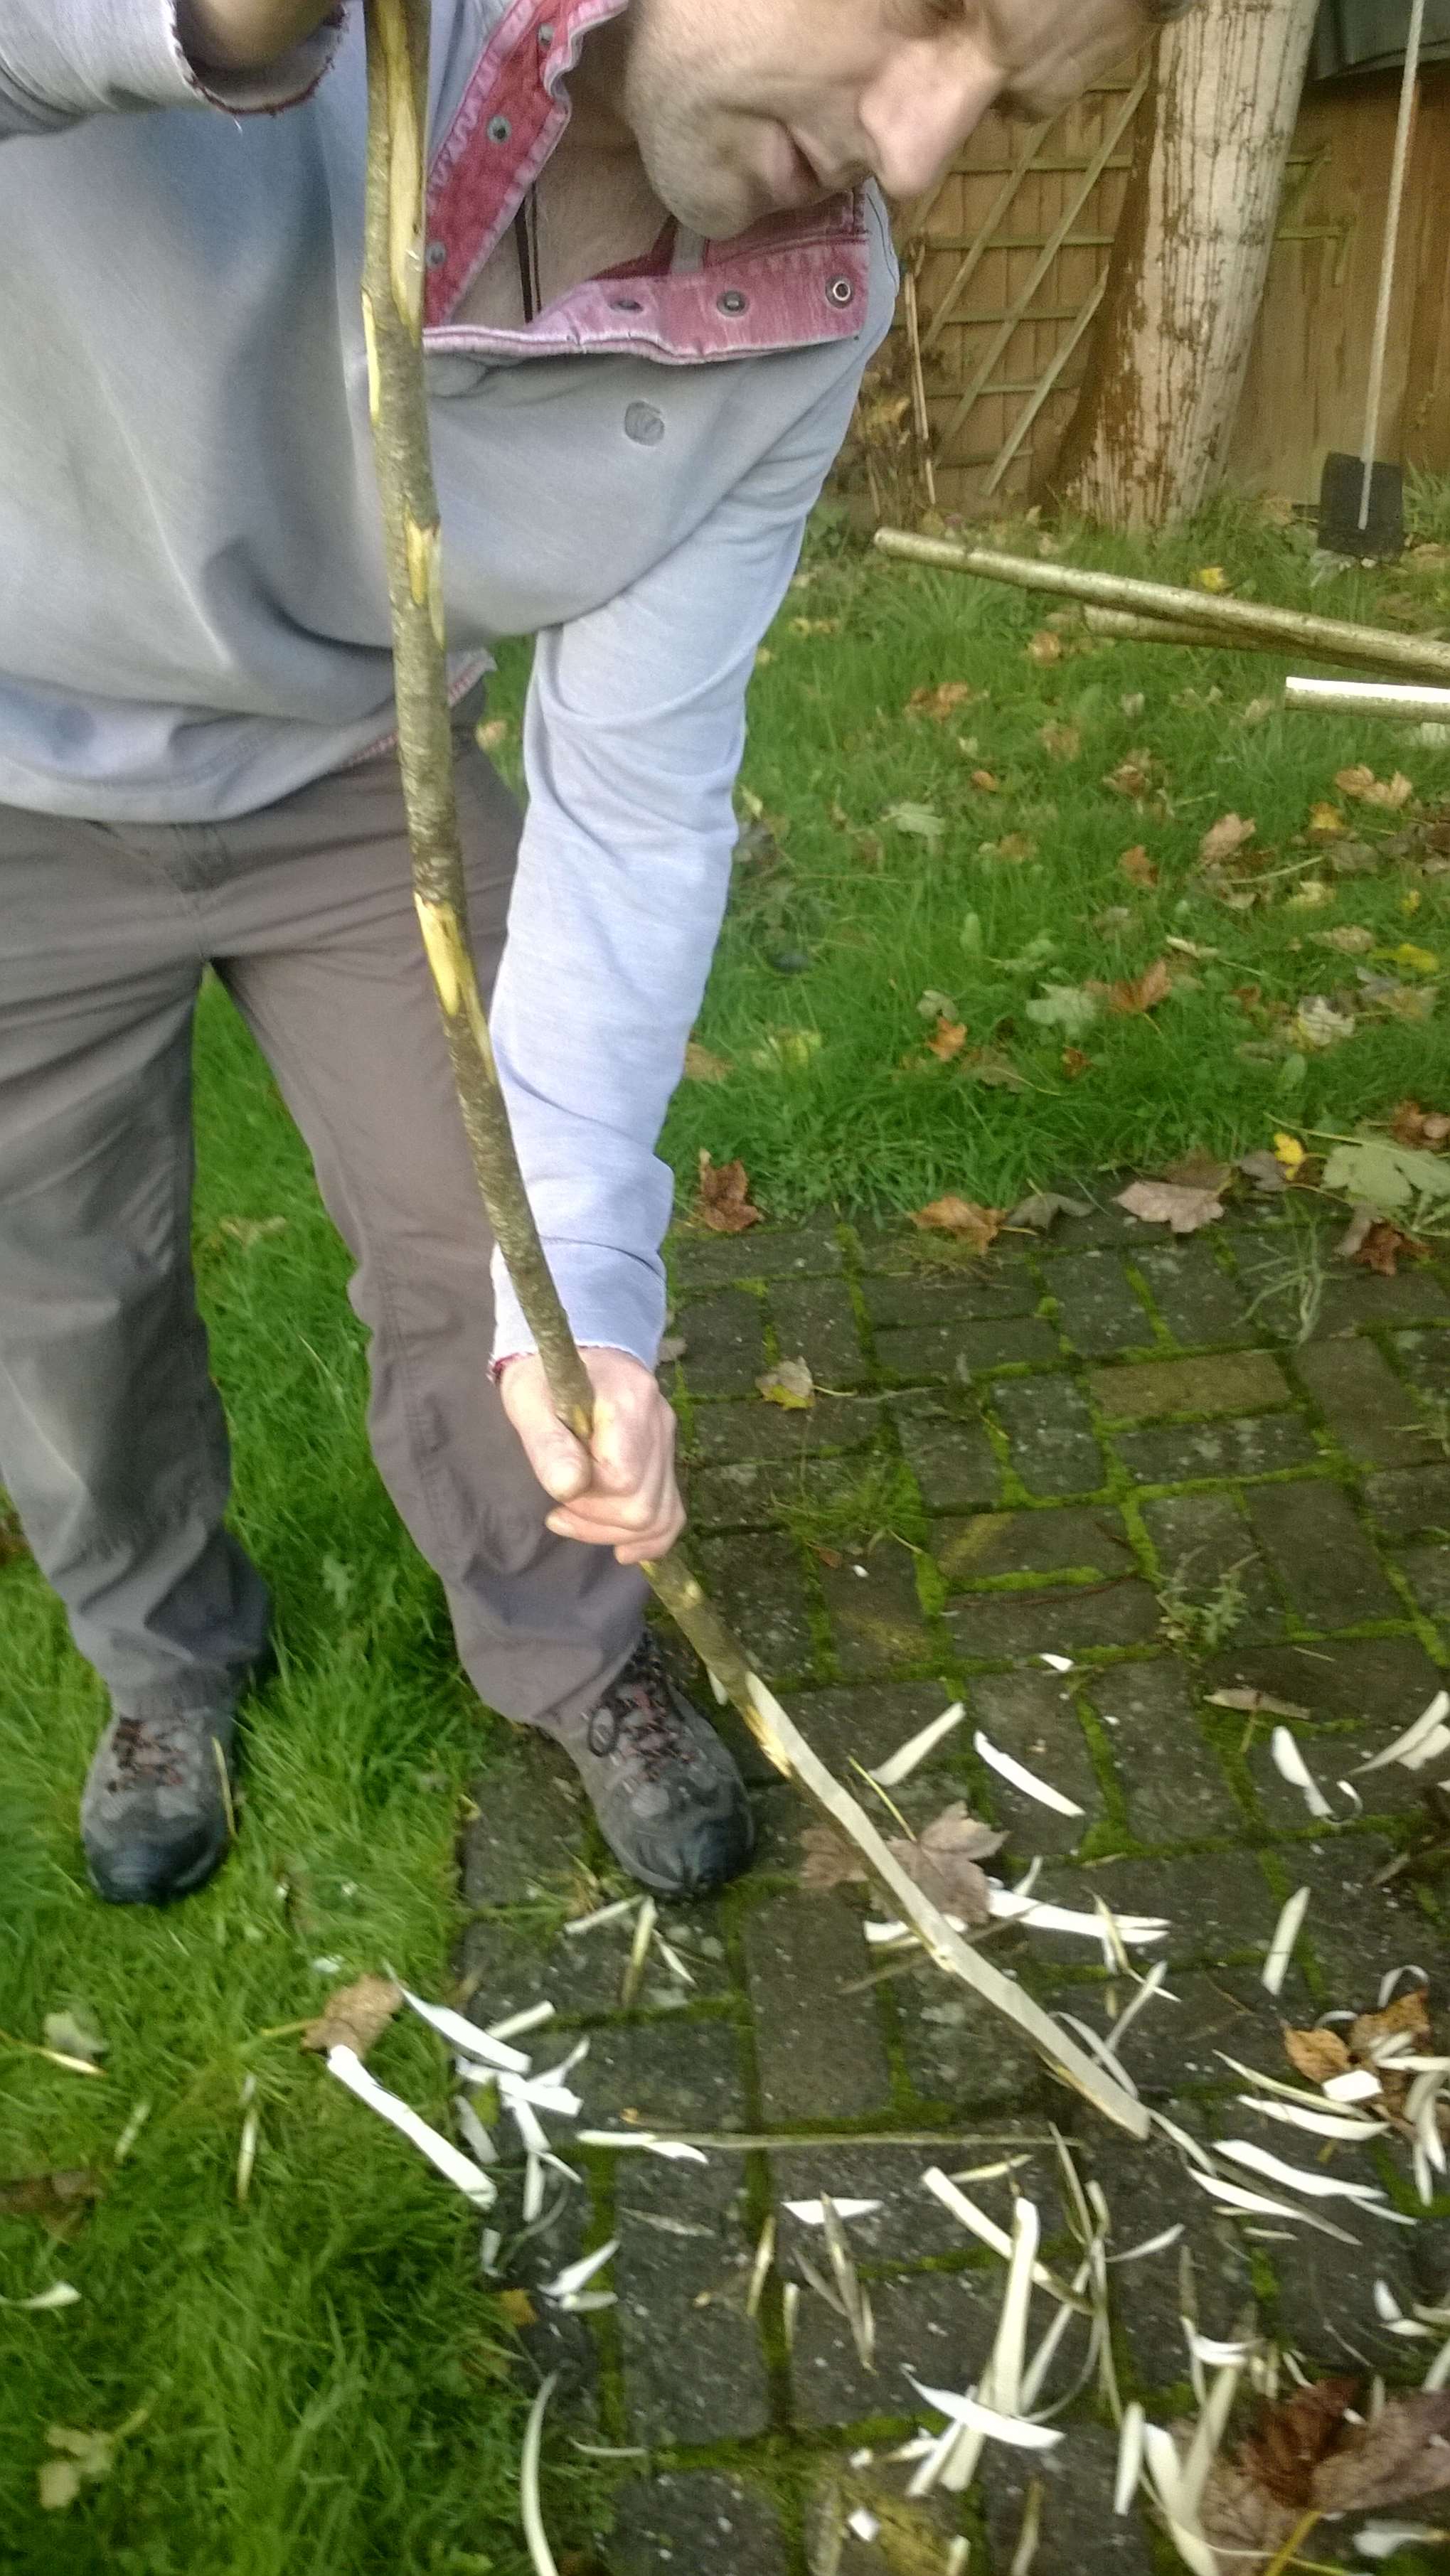
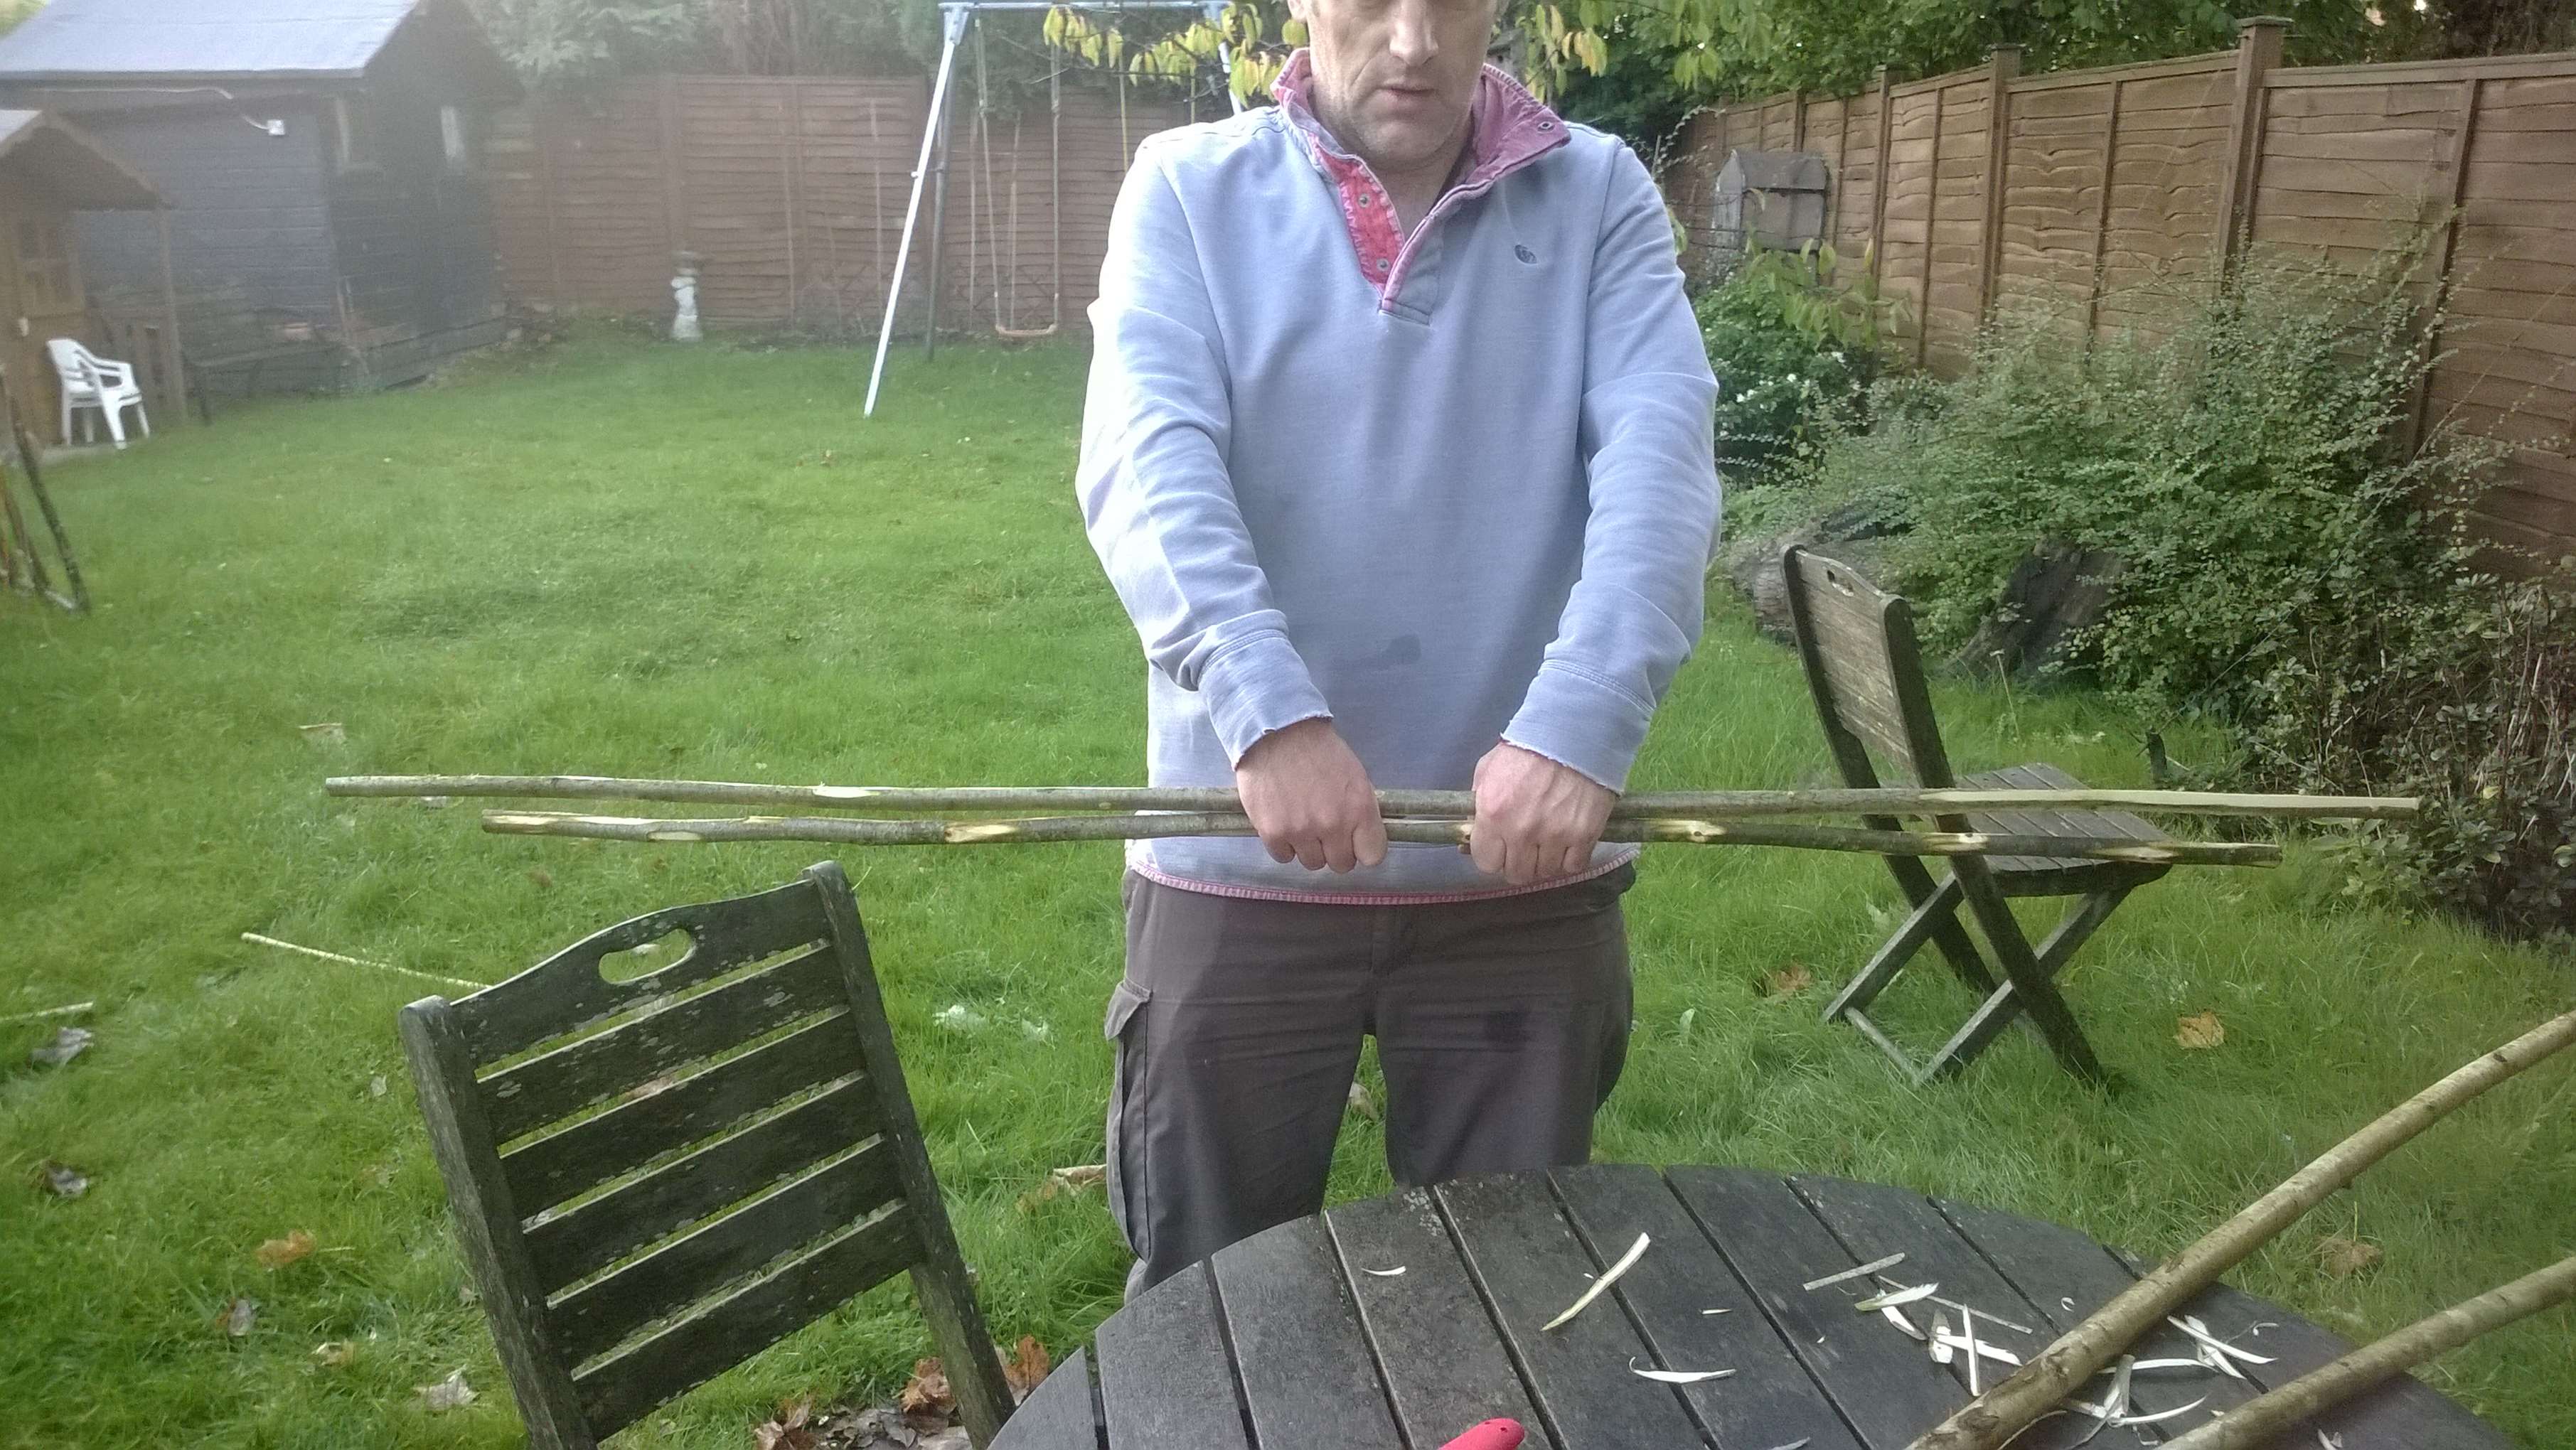
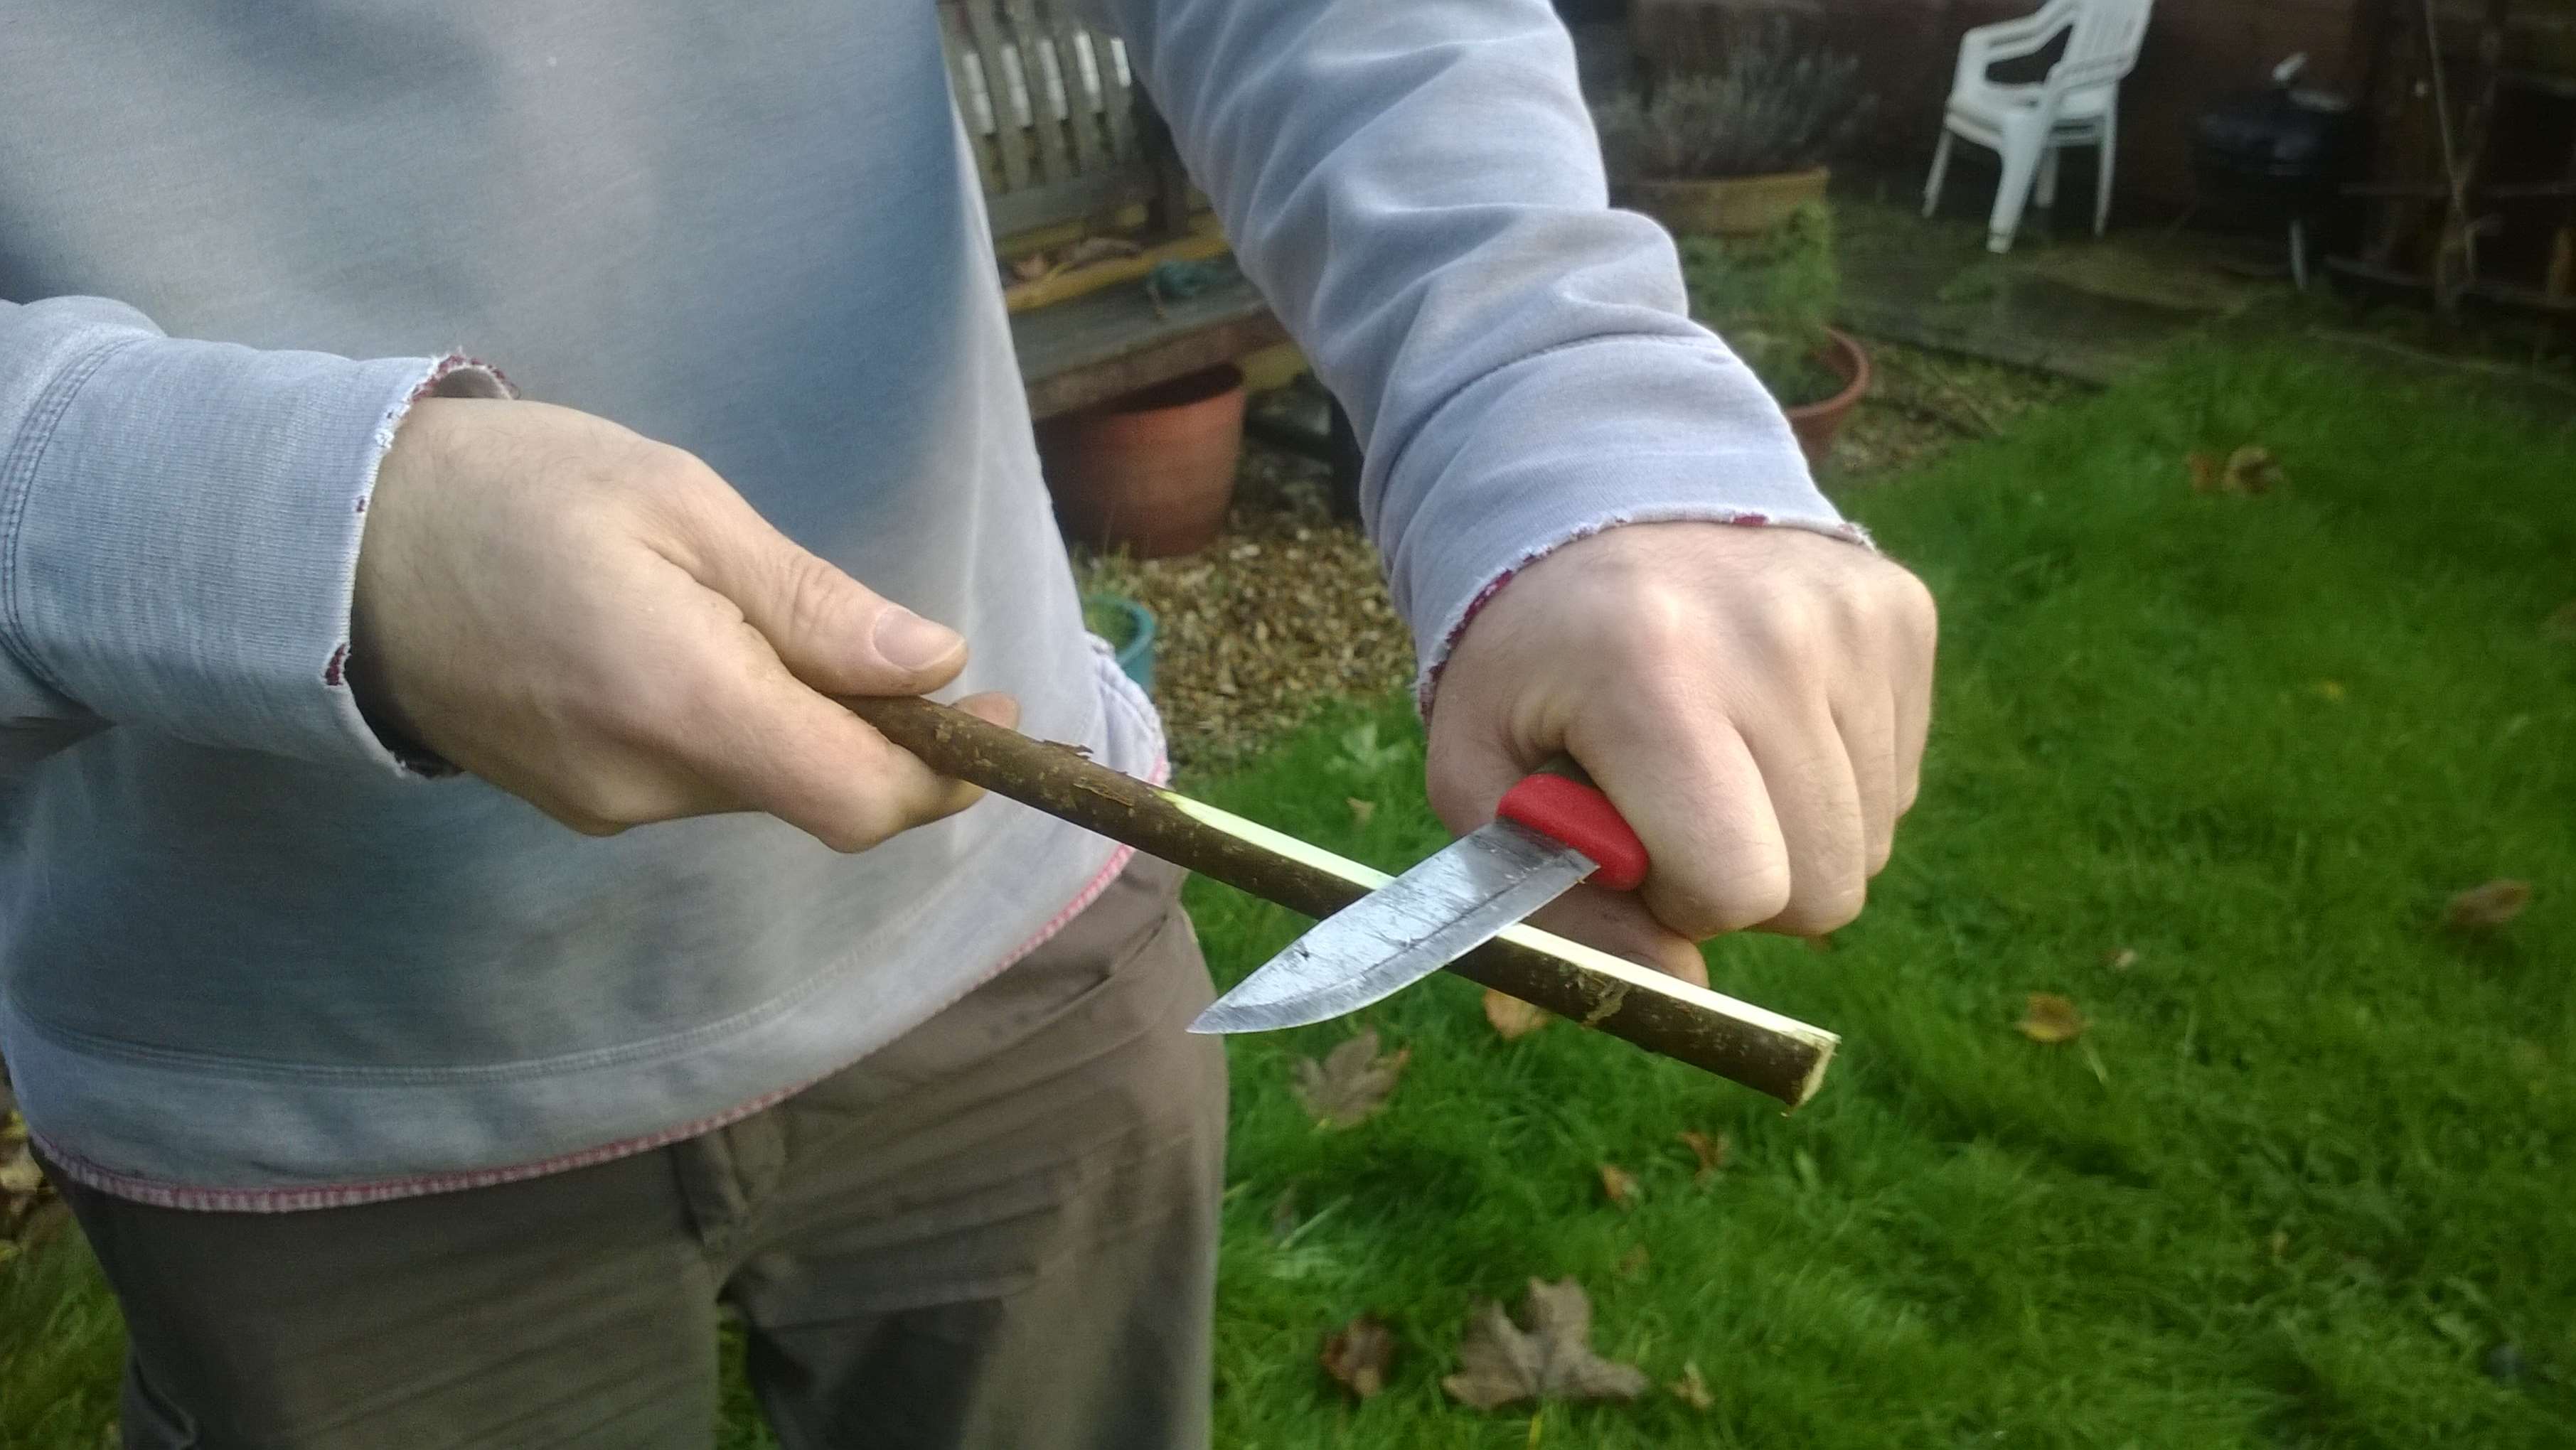
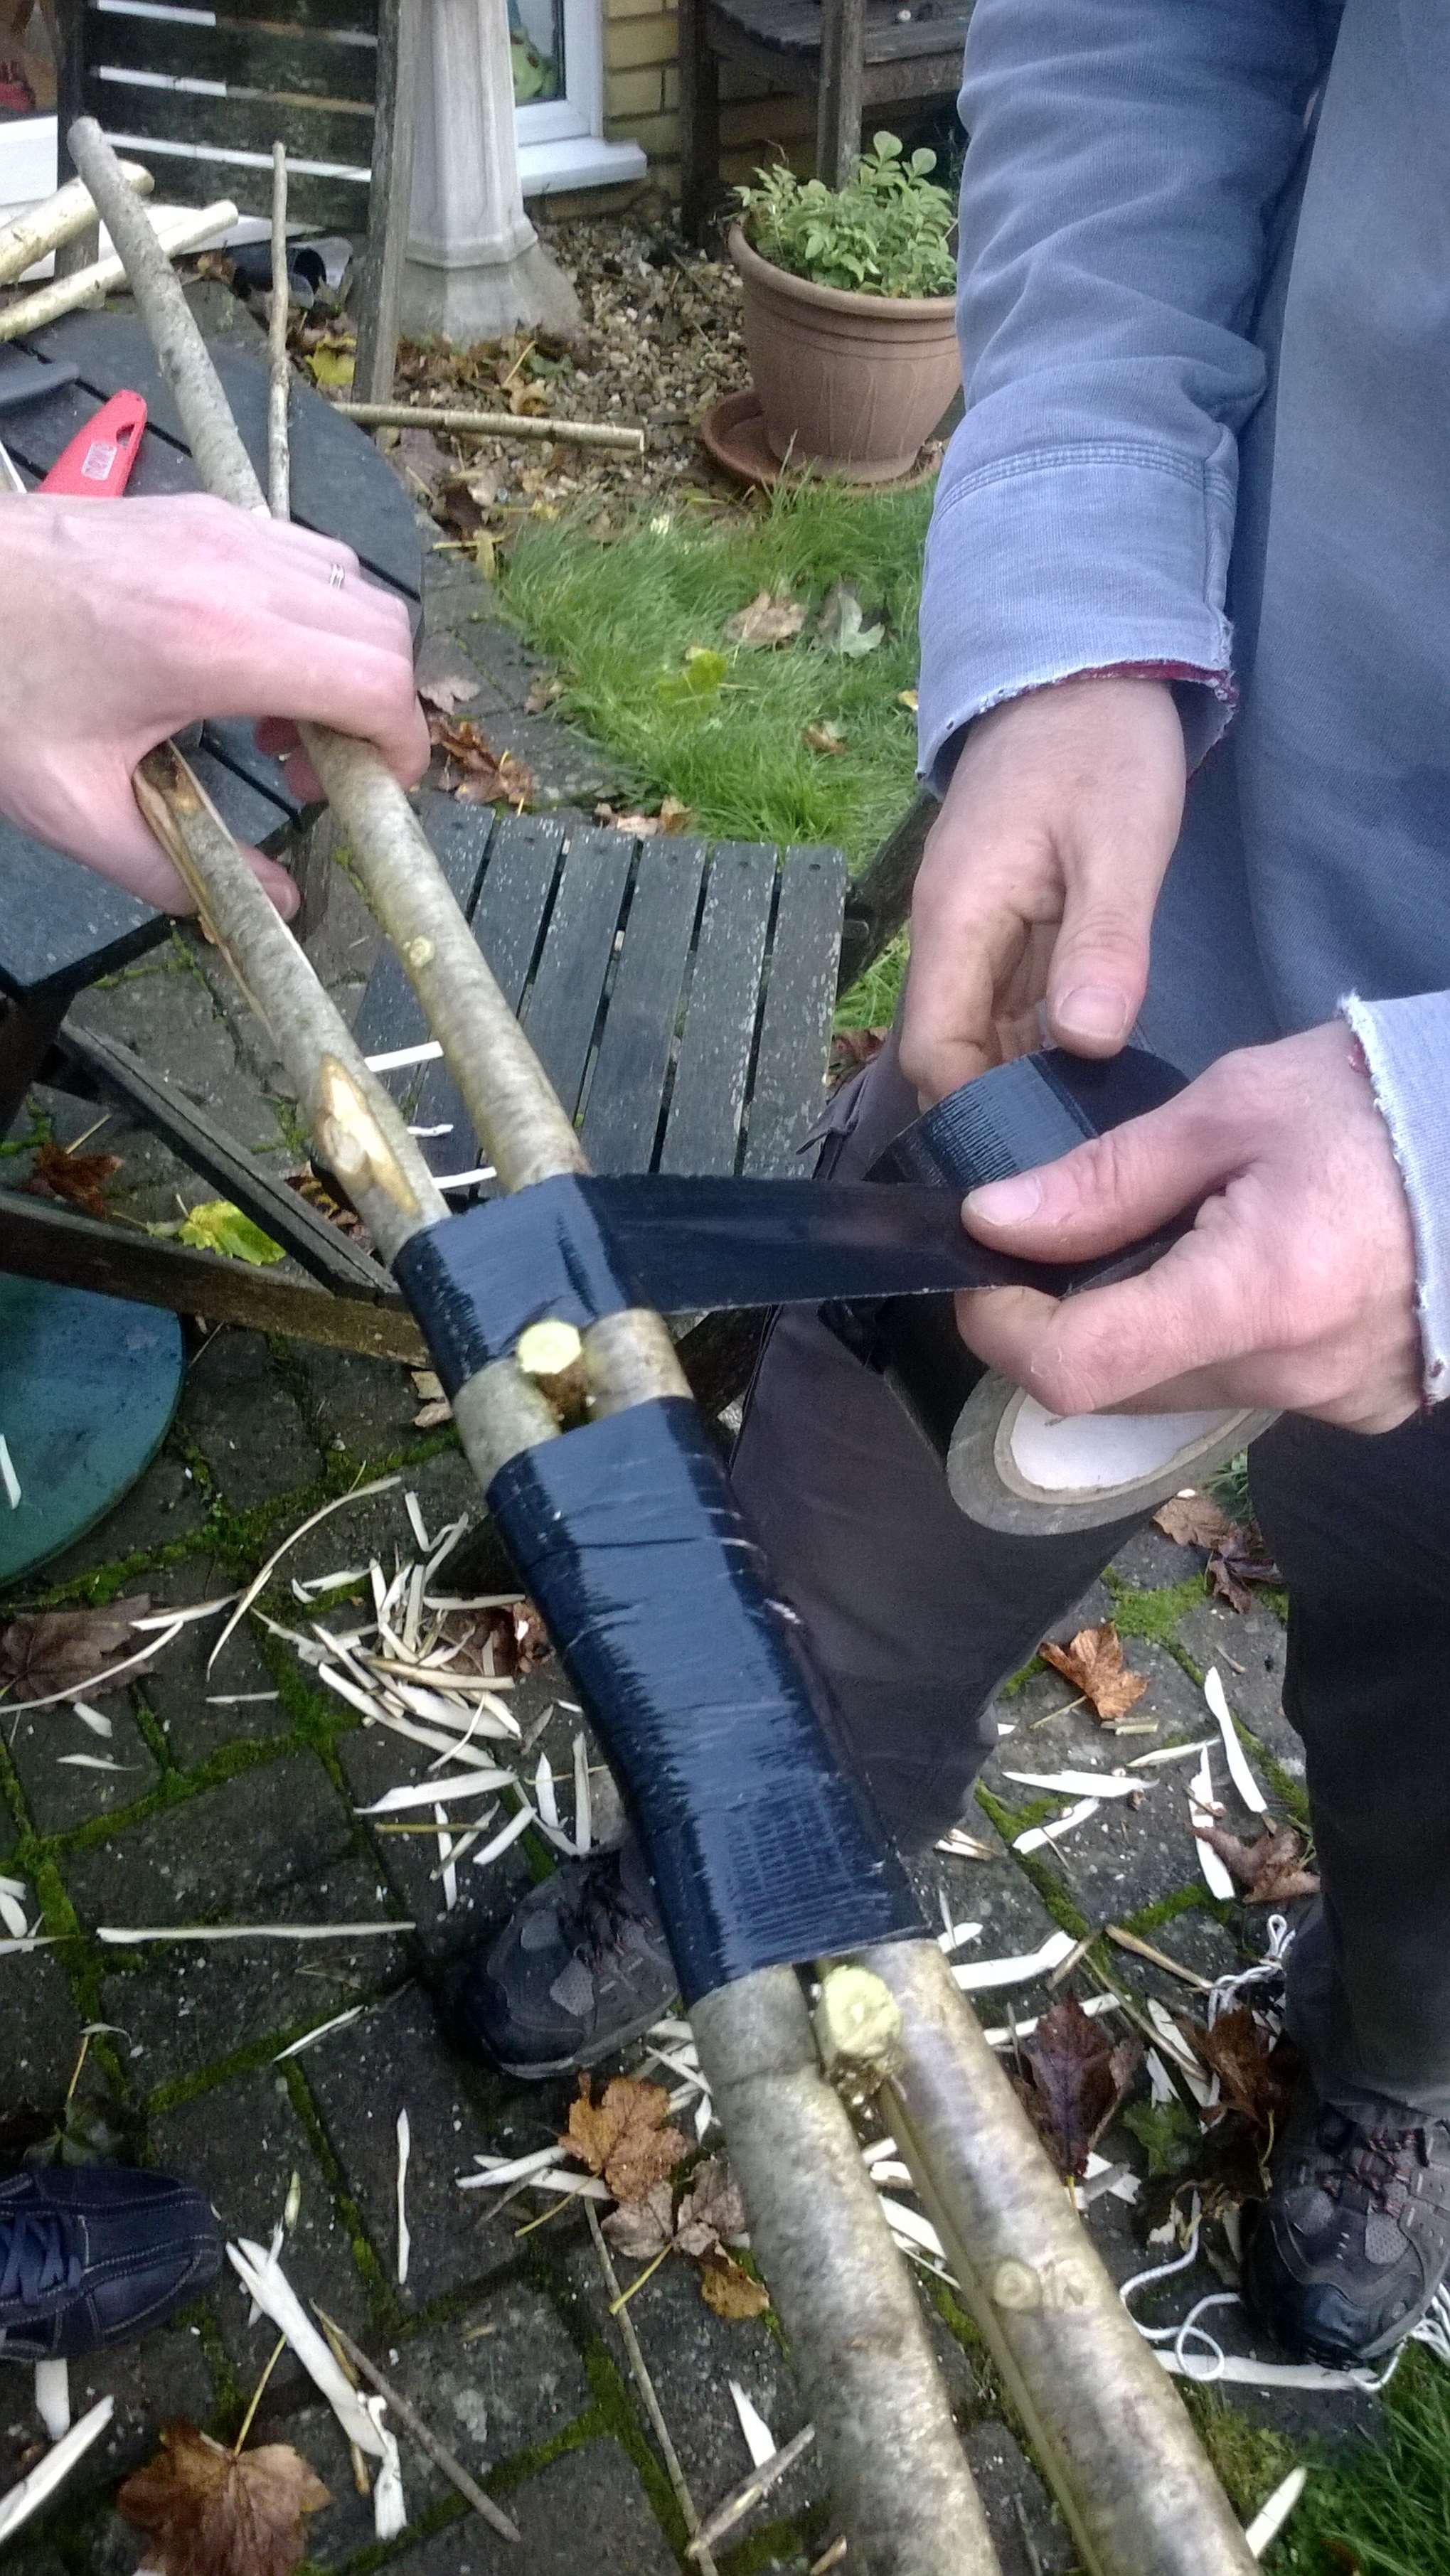
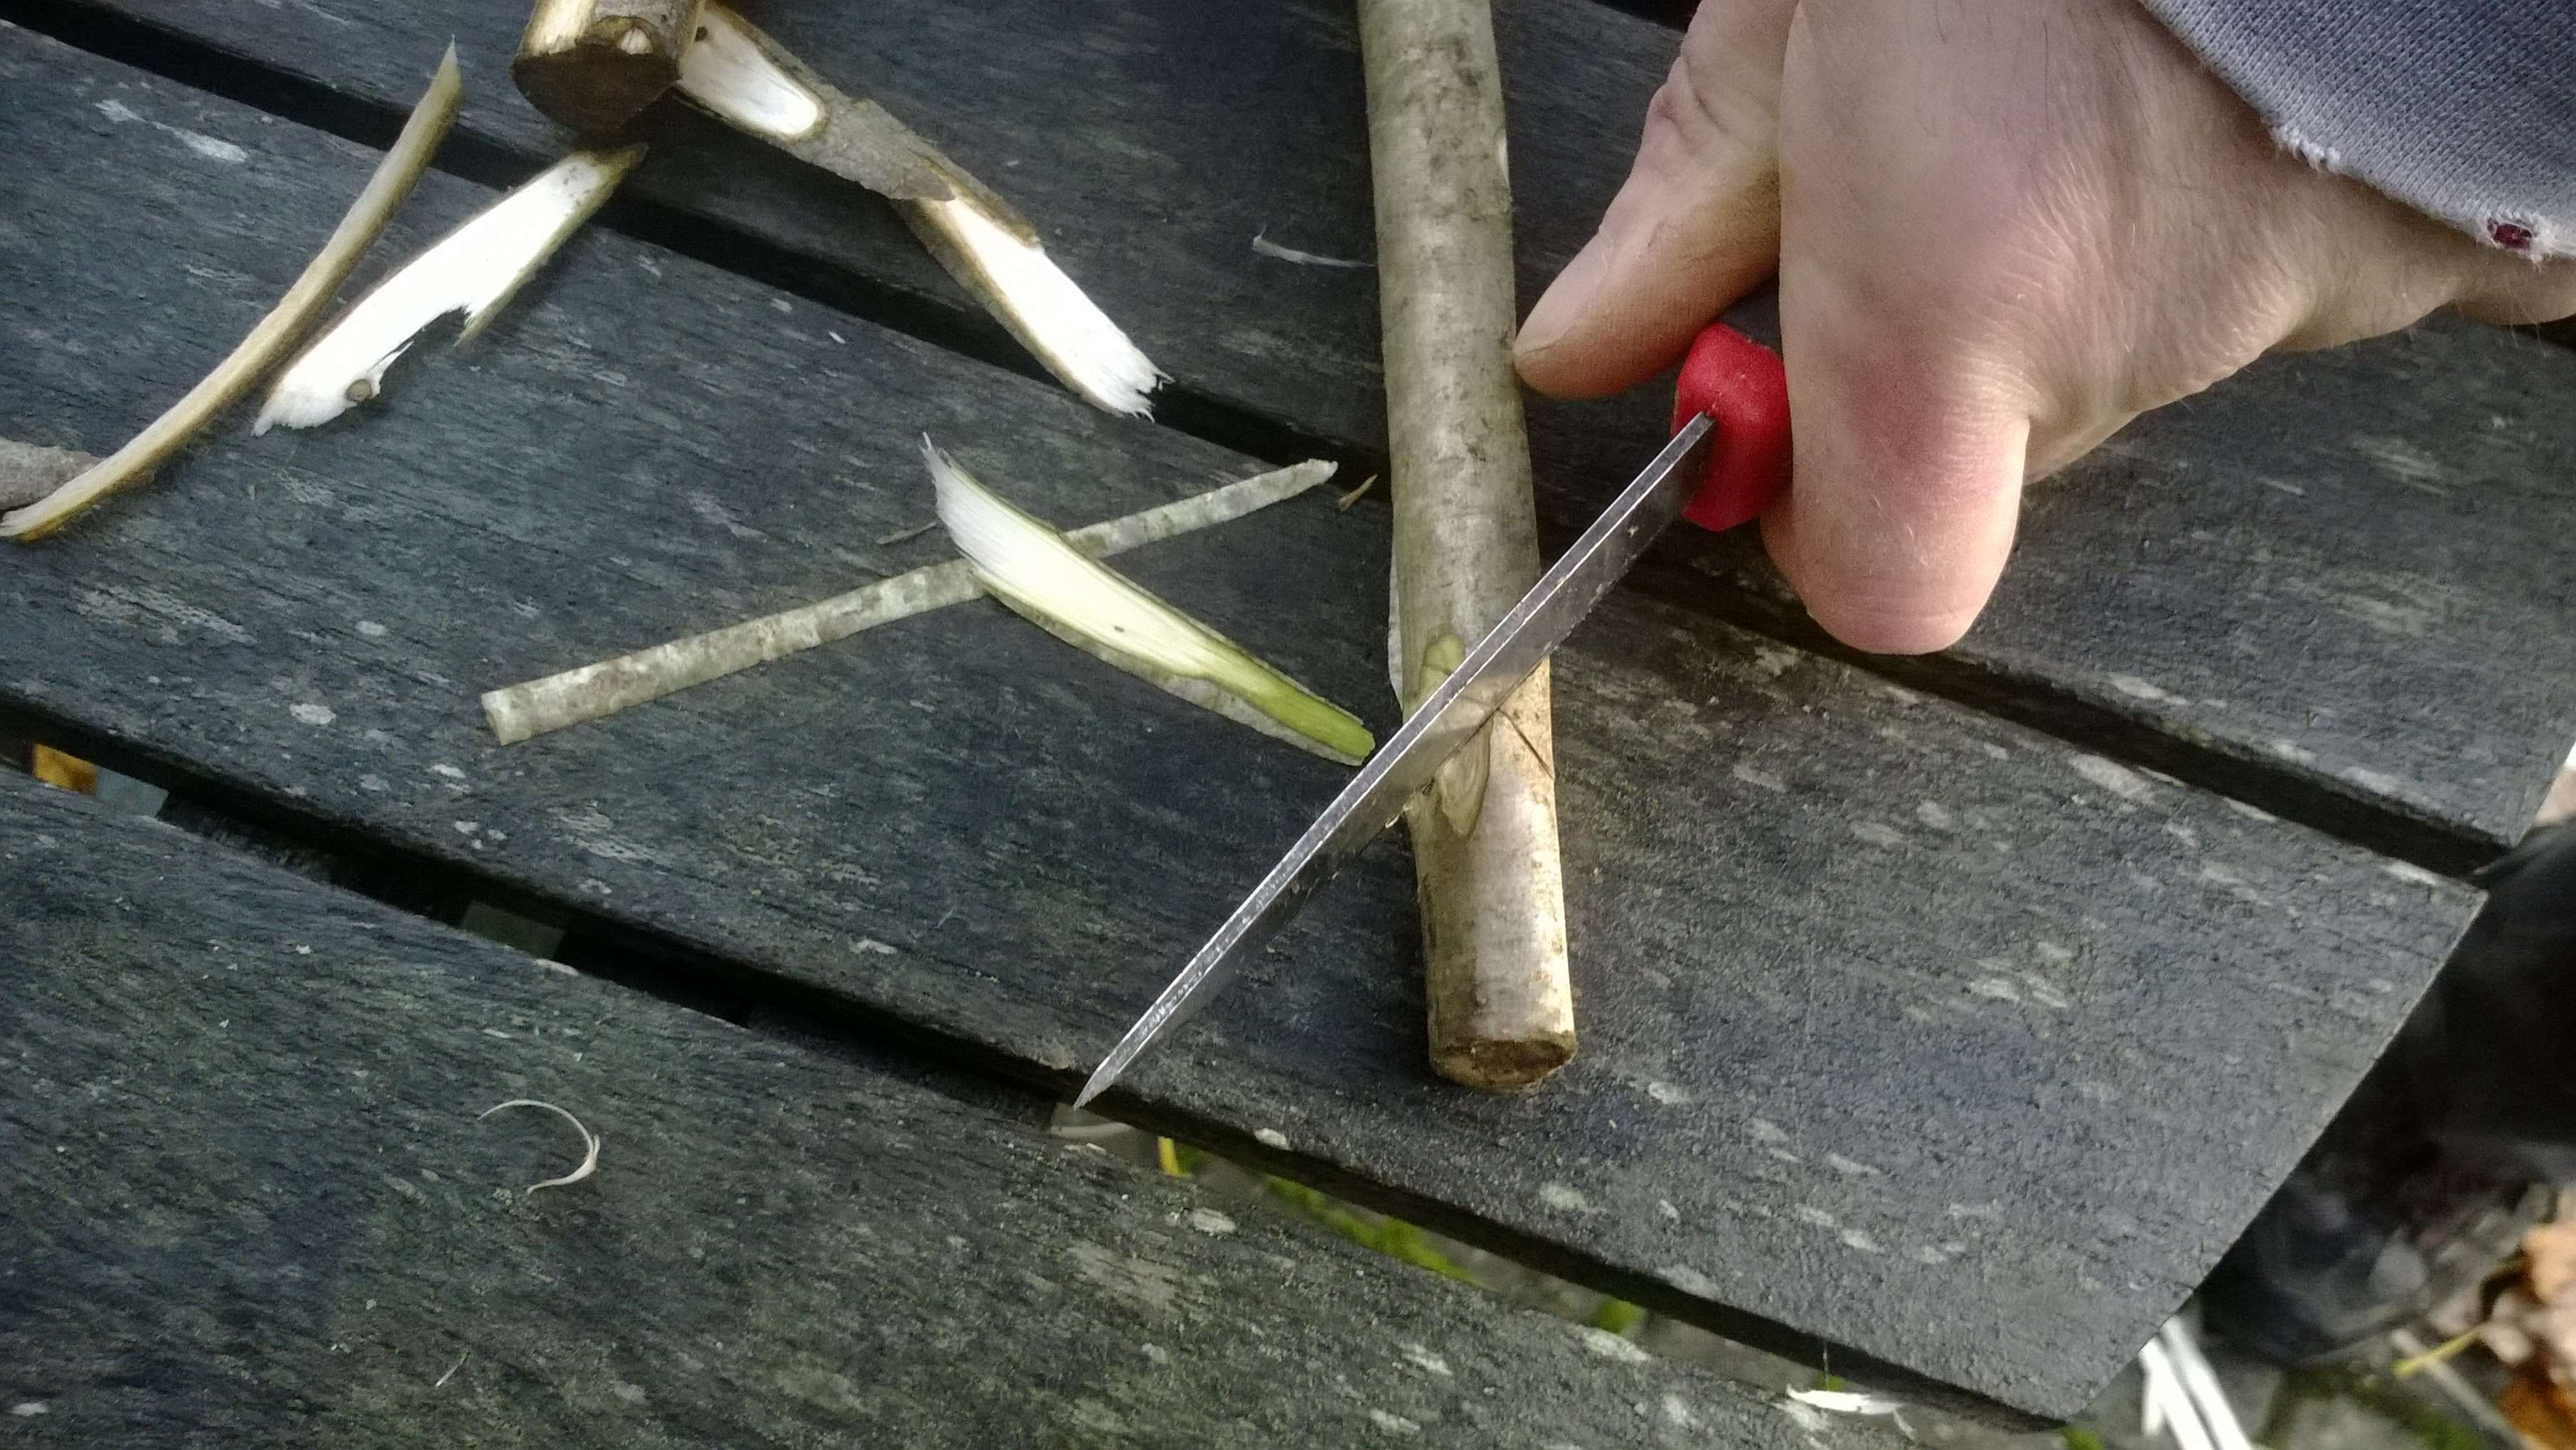
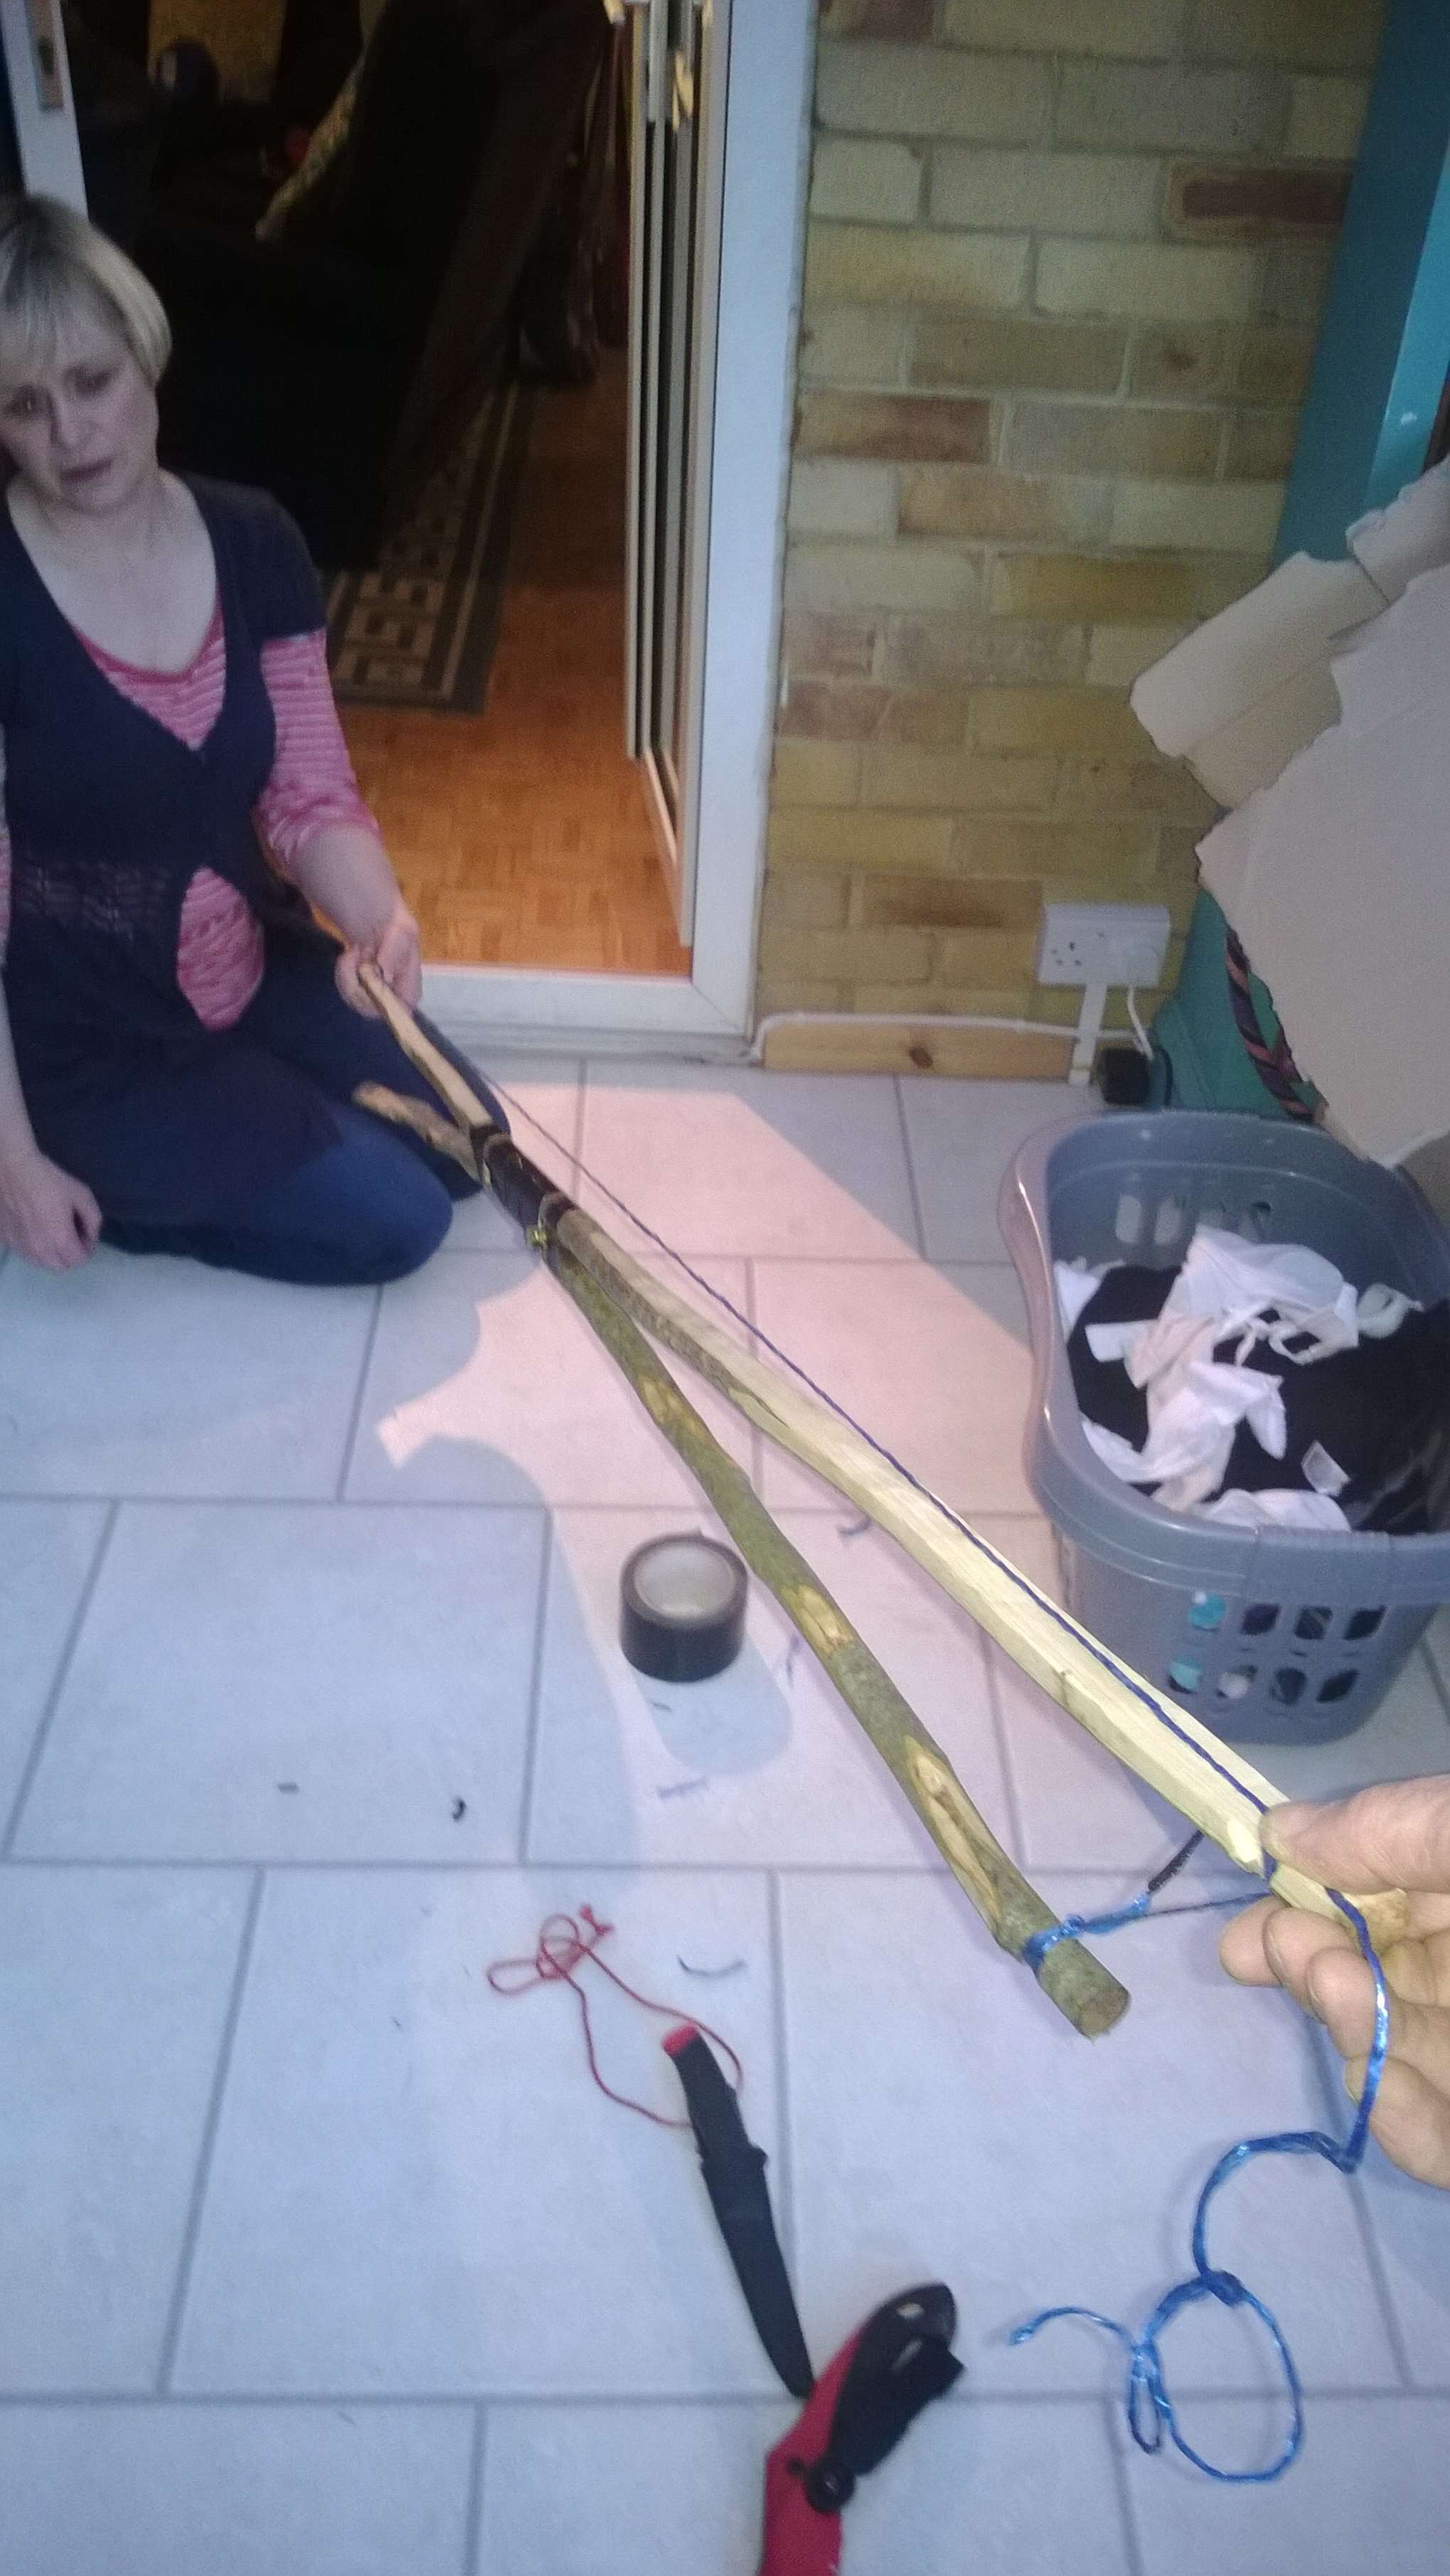
I have probably made at least a dozen of these quick bows and taught many students to make them since 2009. They take no more than a couple of hours to make and are quite powerful for green wood bows. I normally use two hazel or ash rods taped together to make them.
I learnt how to make them after watching a You Tube video by Mark Emery (Sussex Woodsman) who is an expert woodsman.
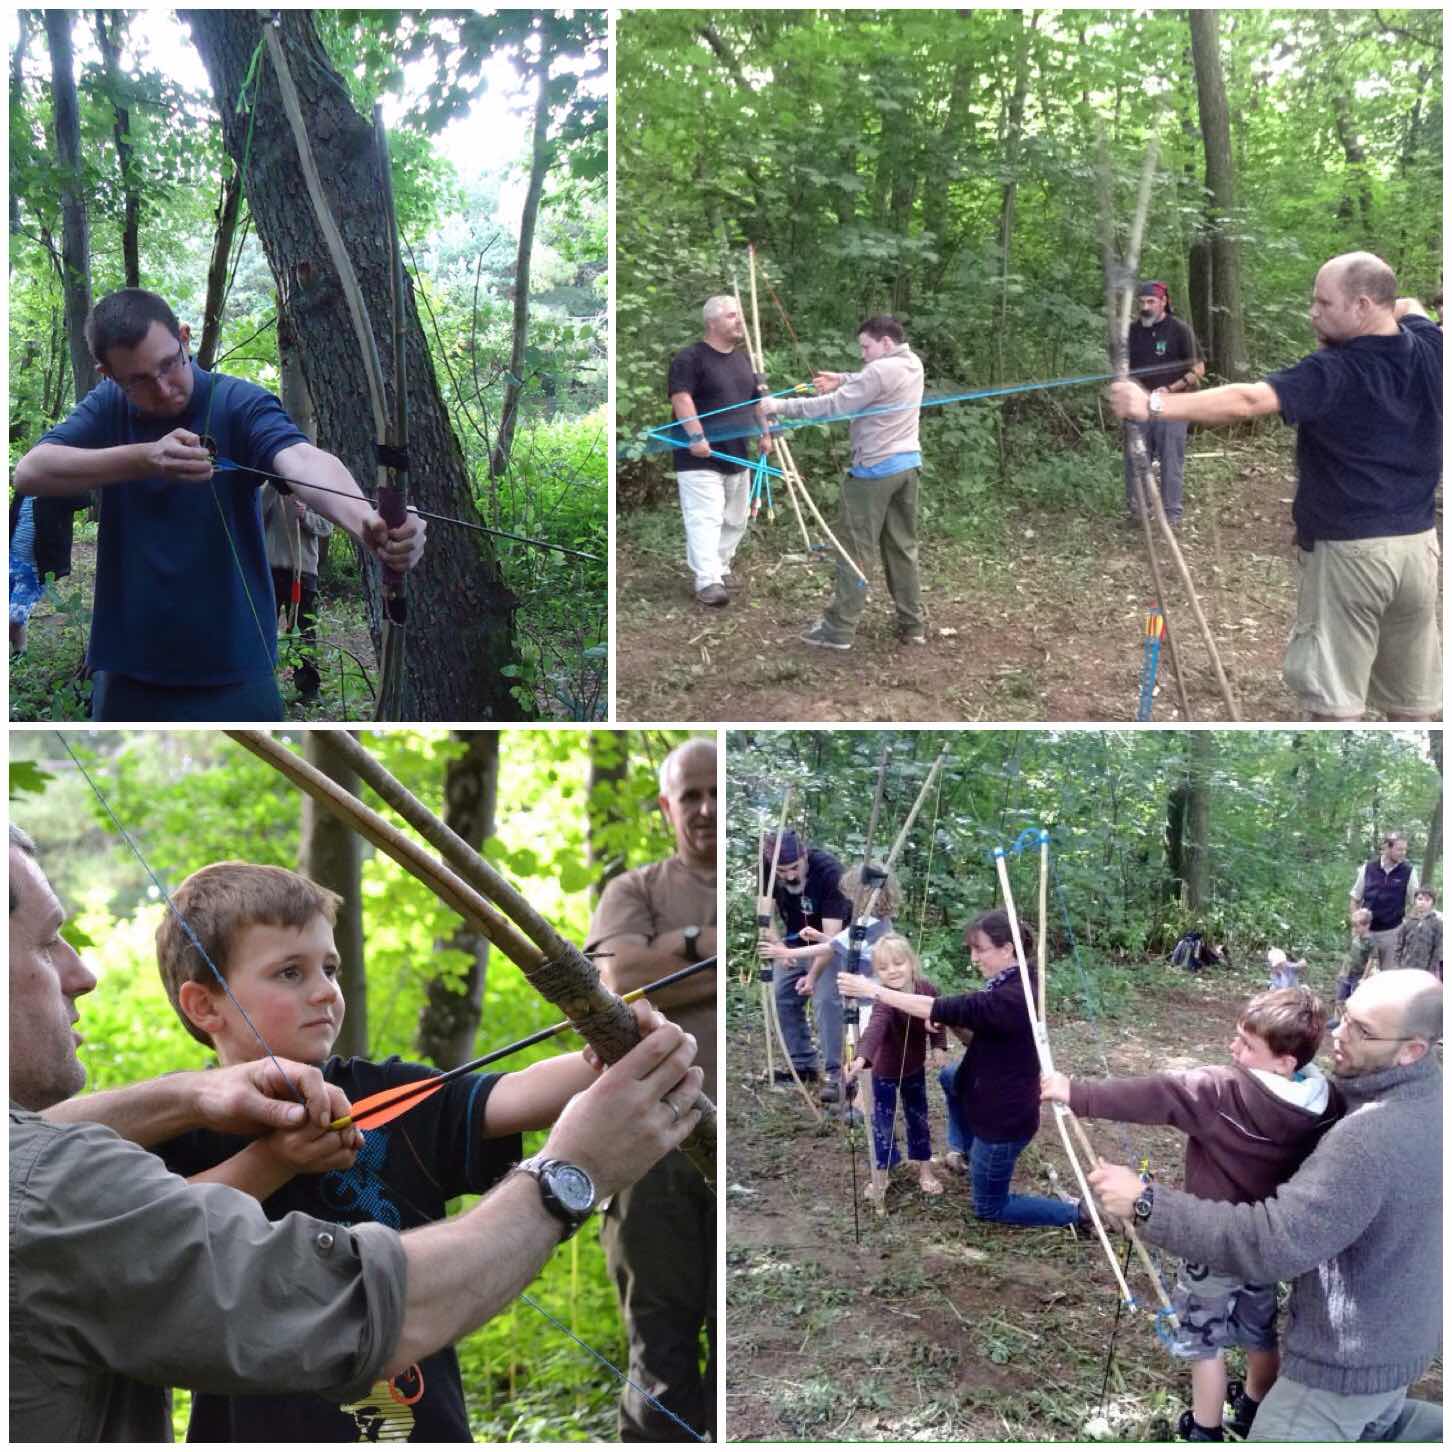
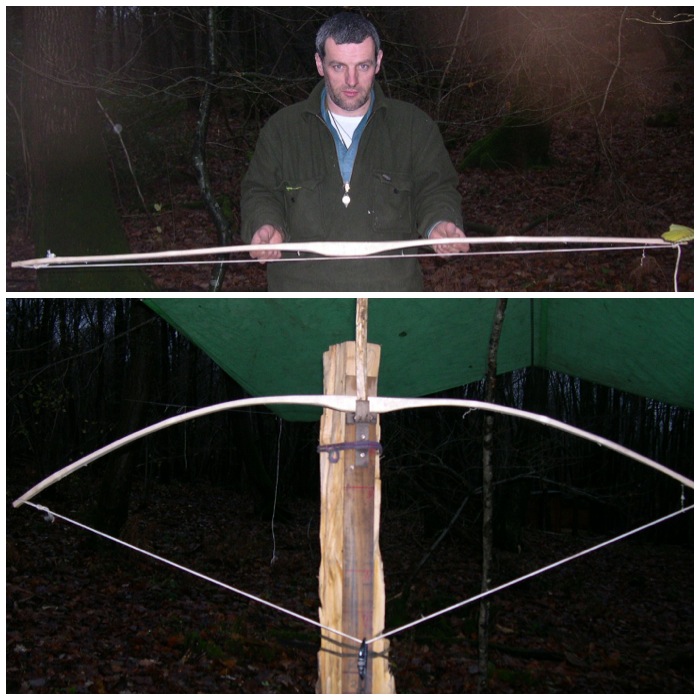
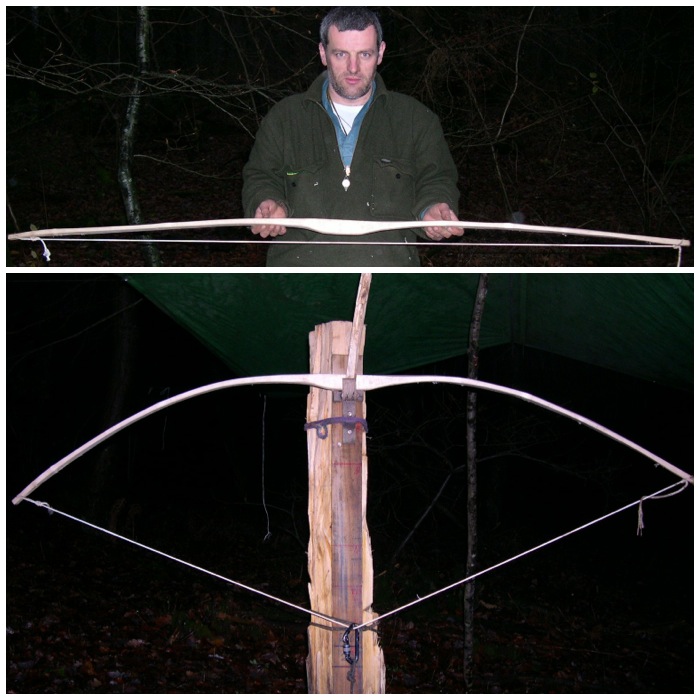
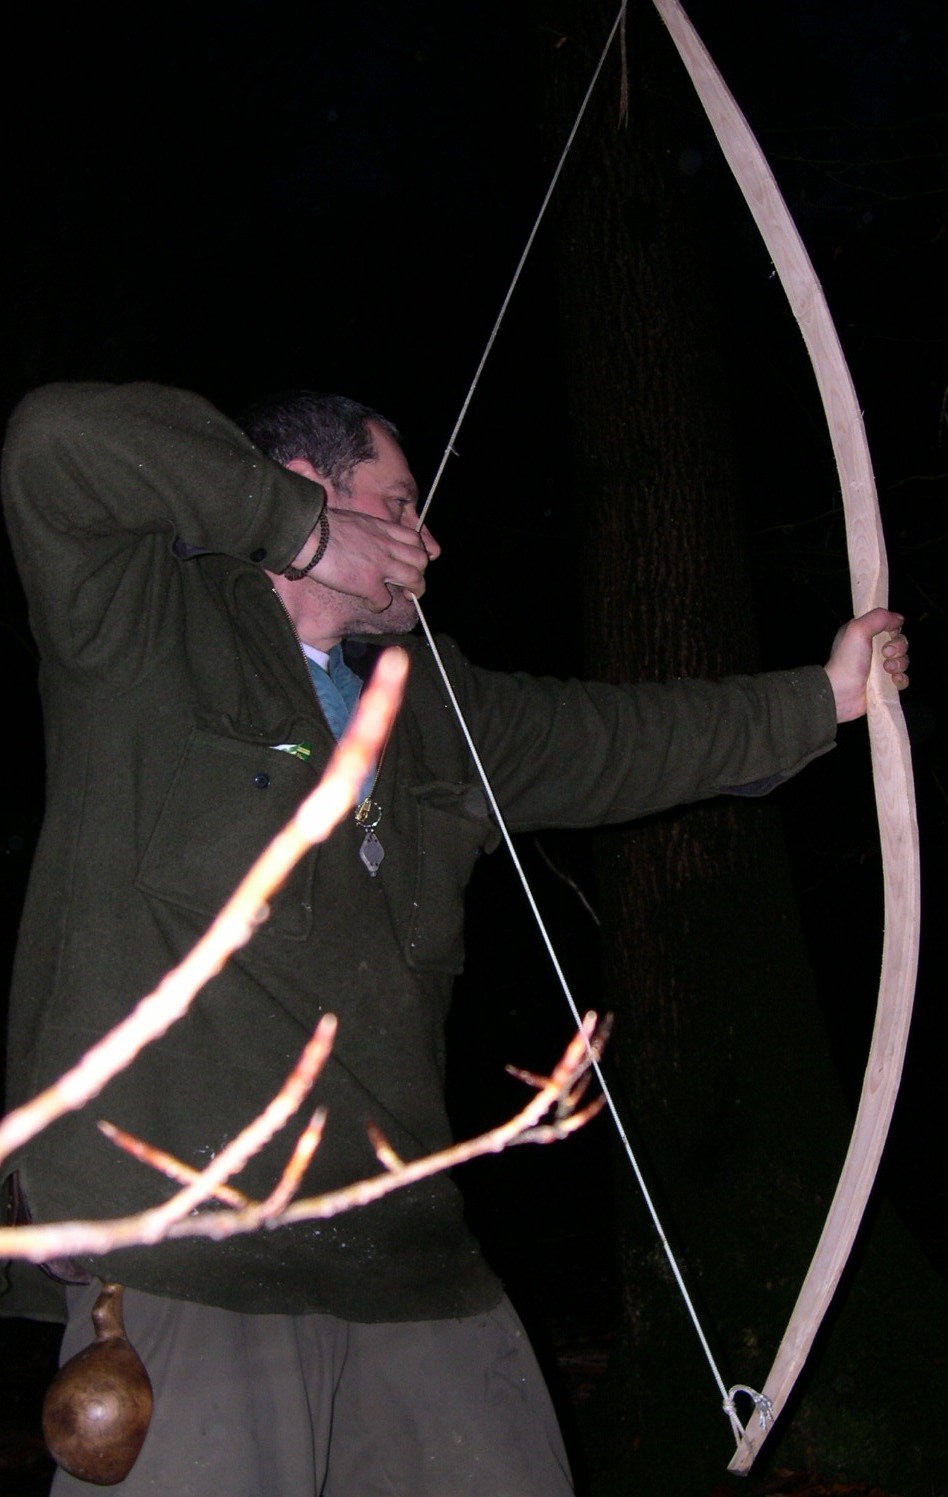
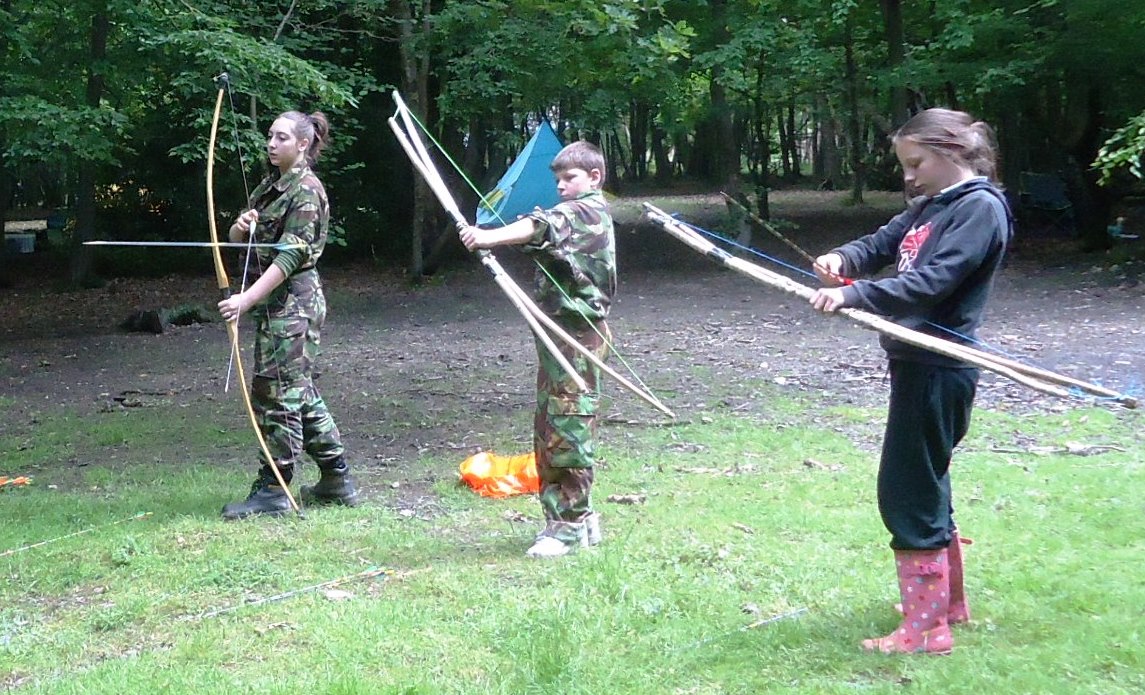
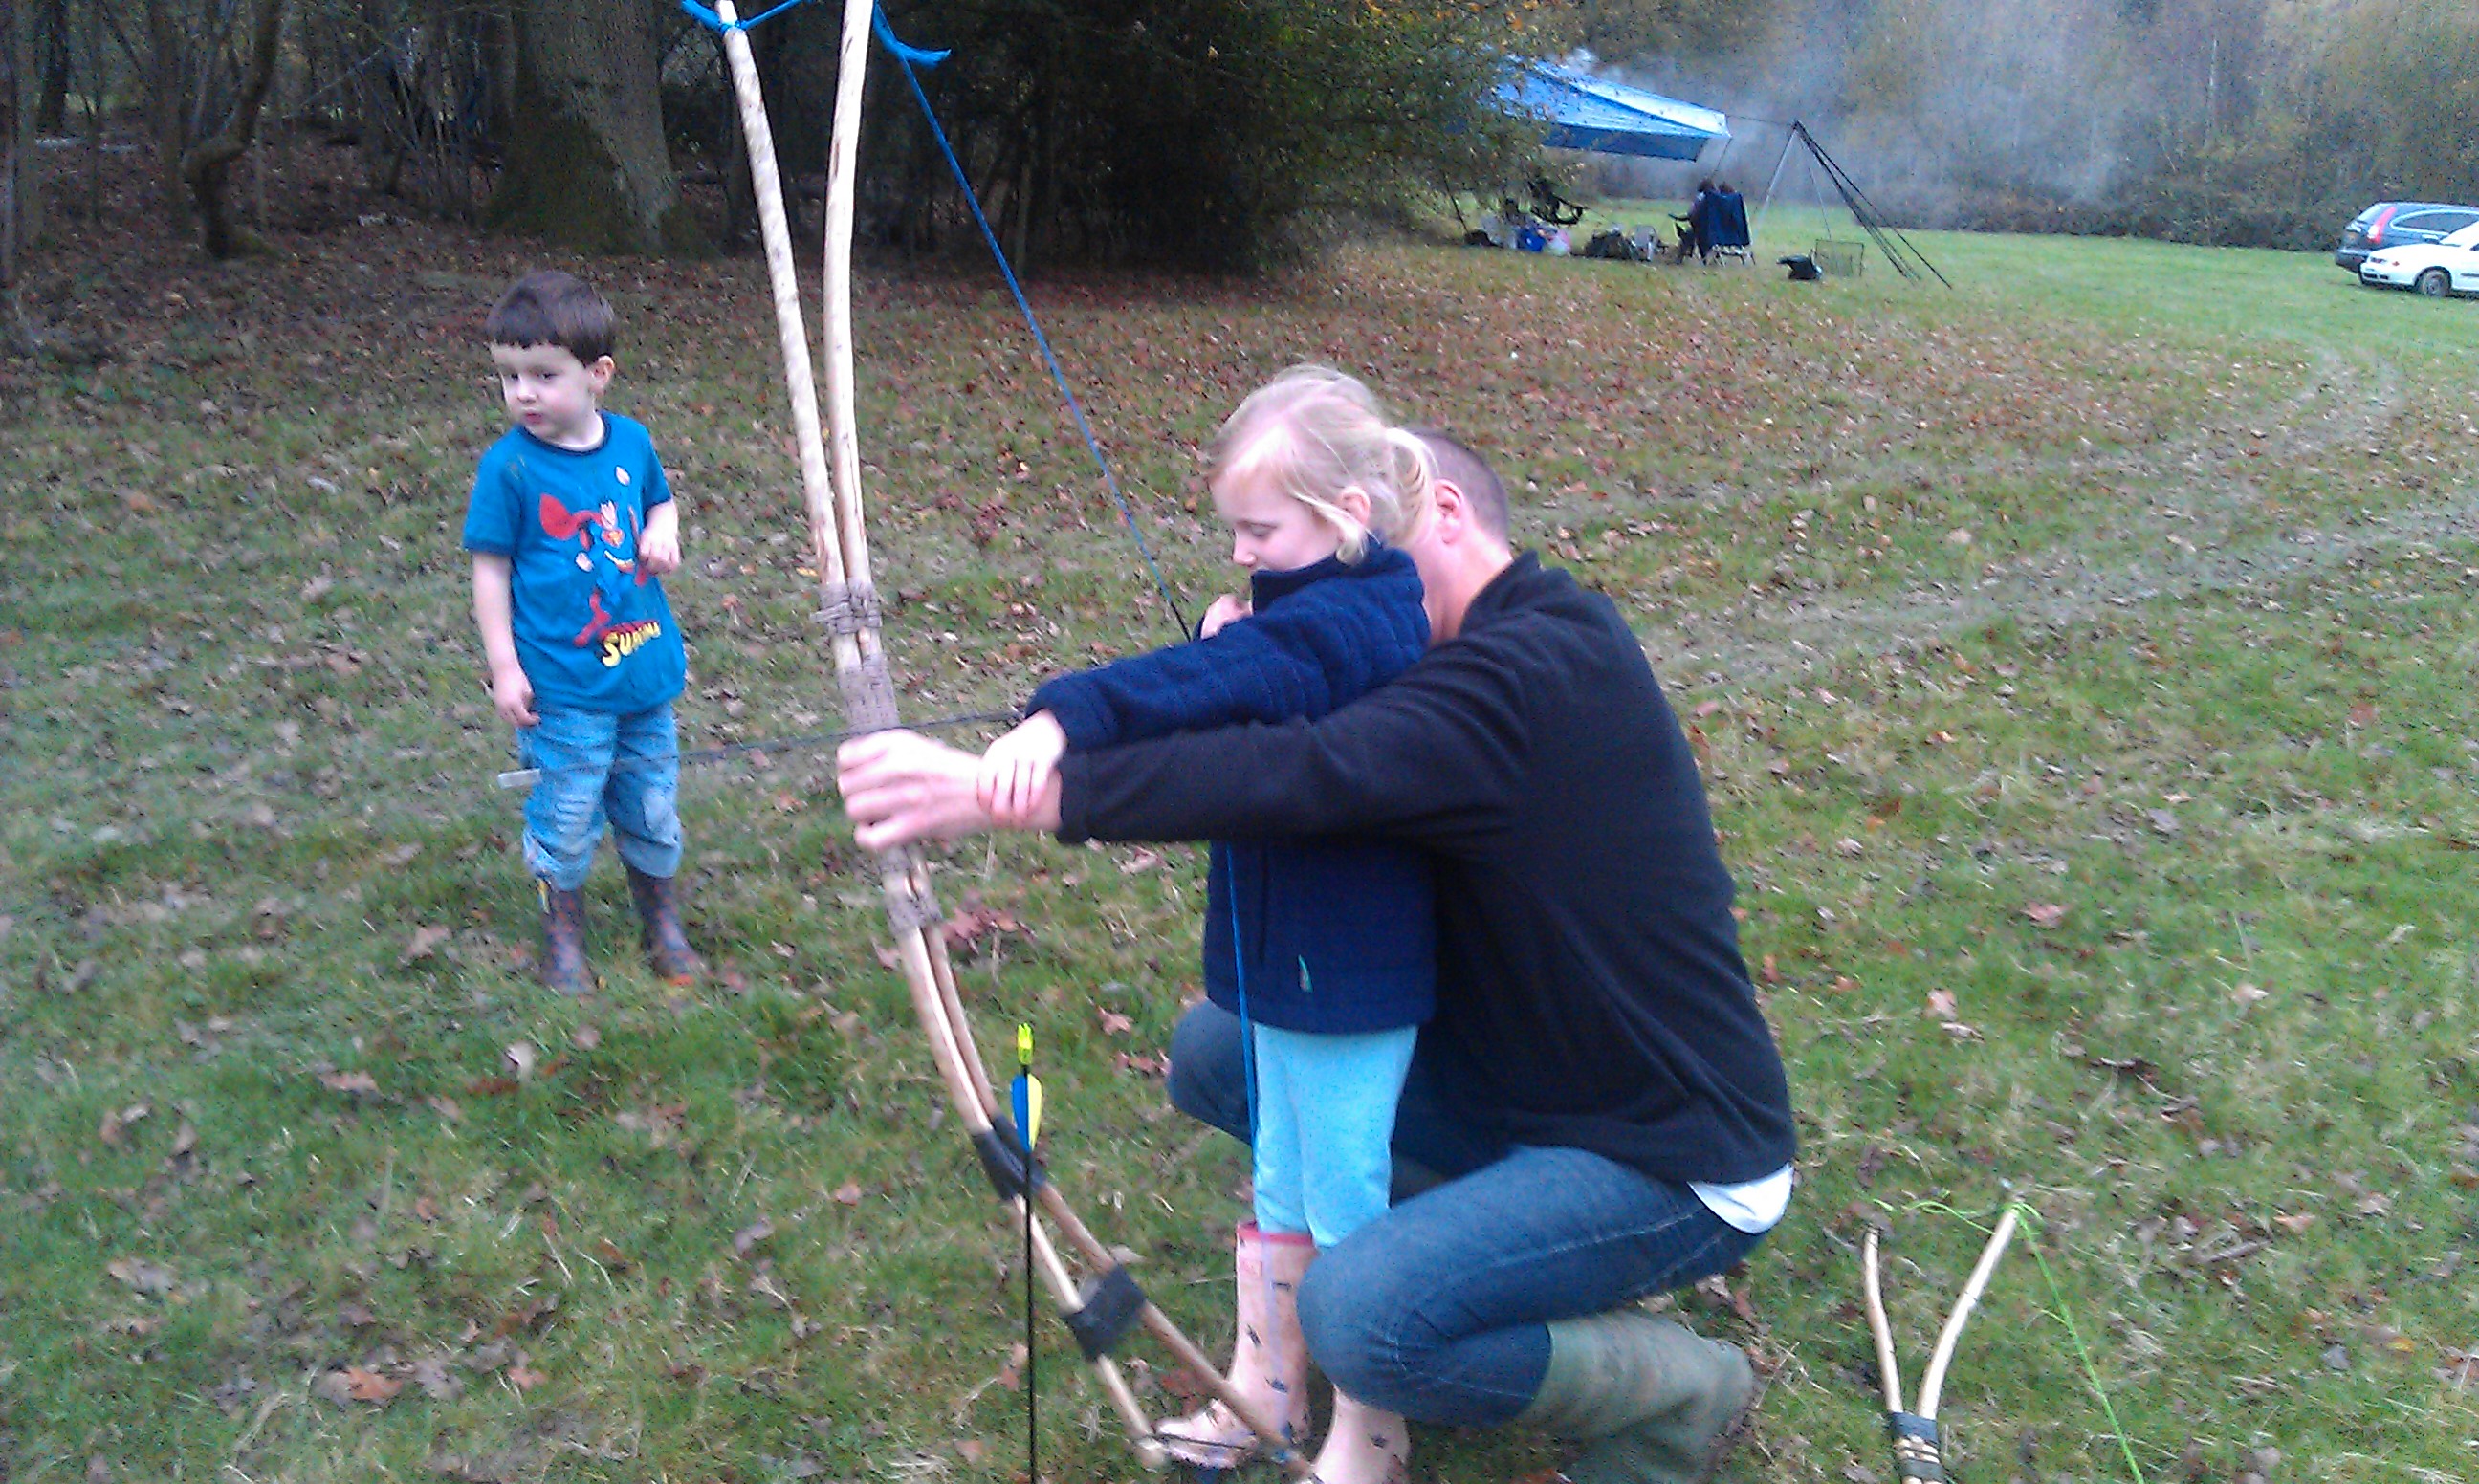
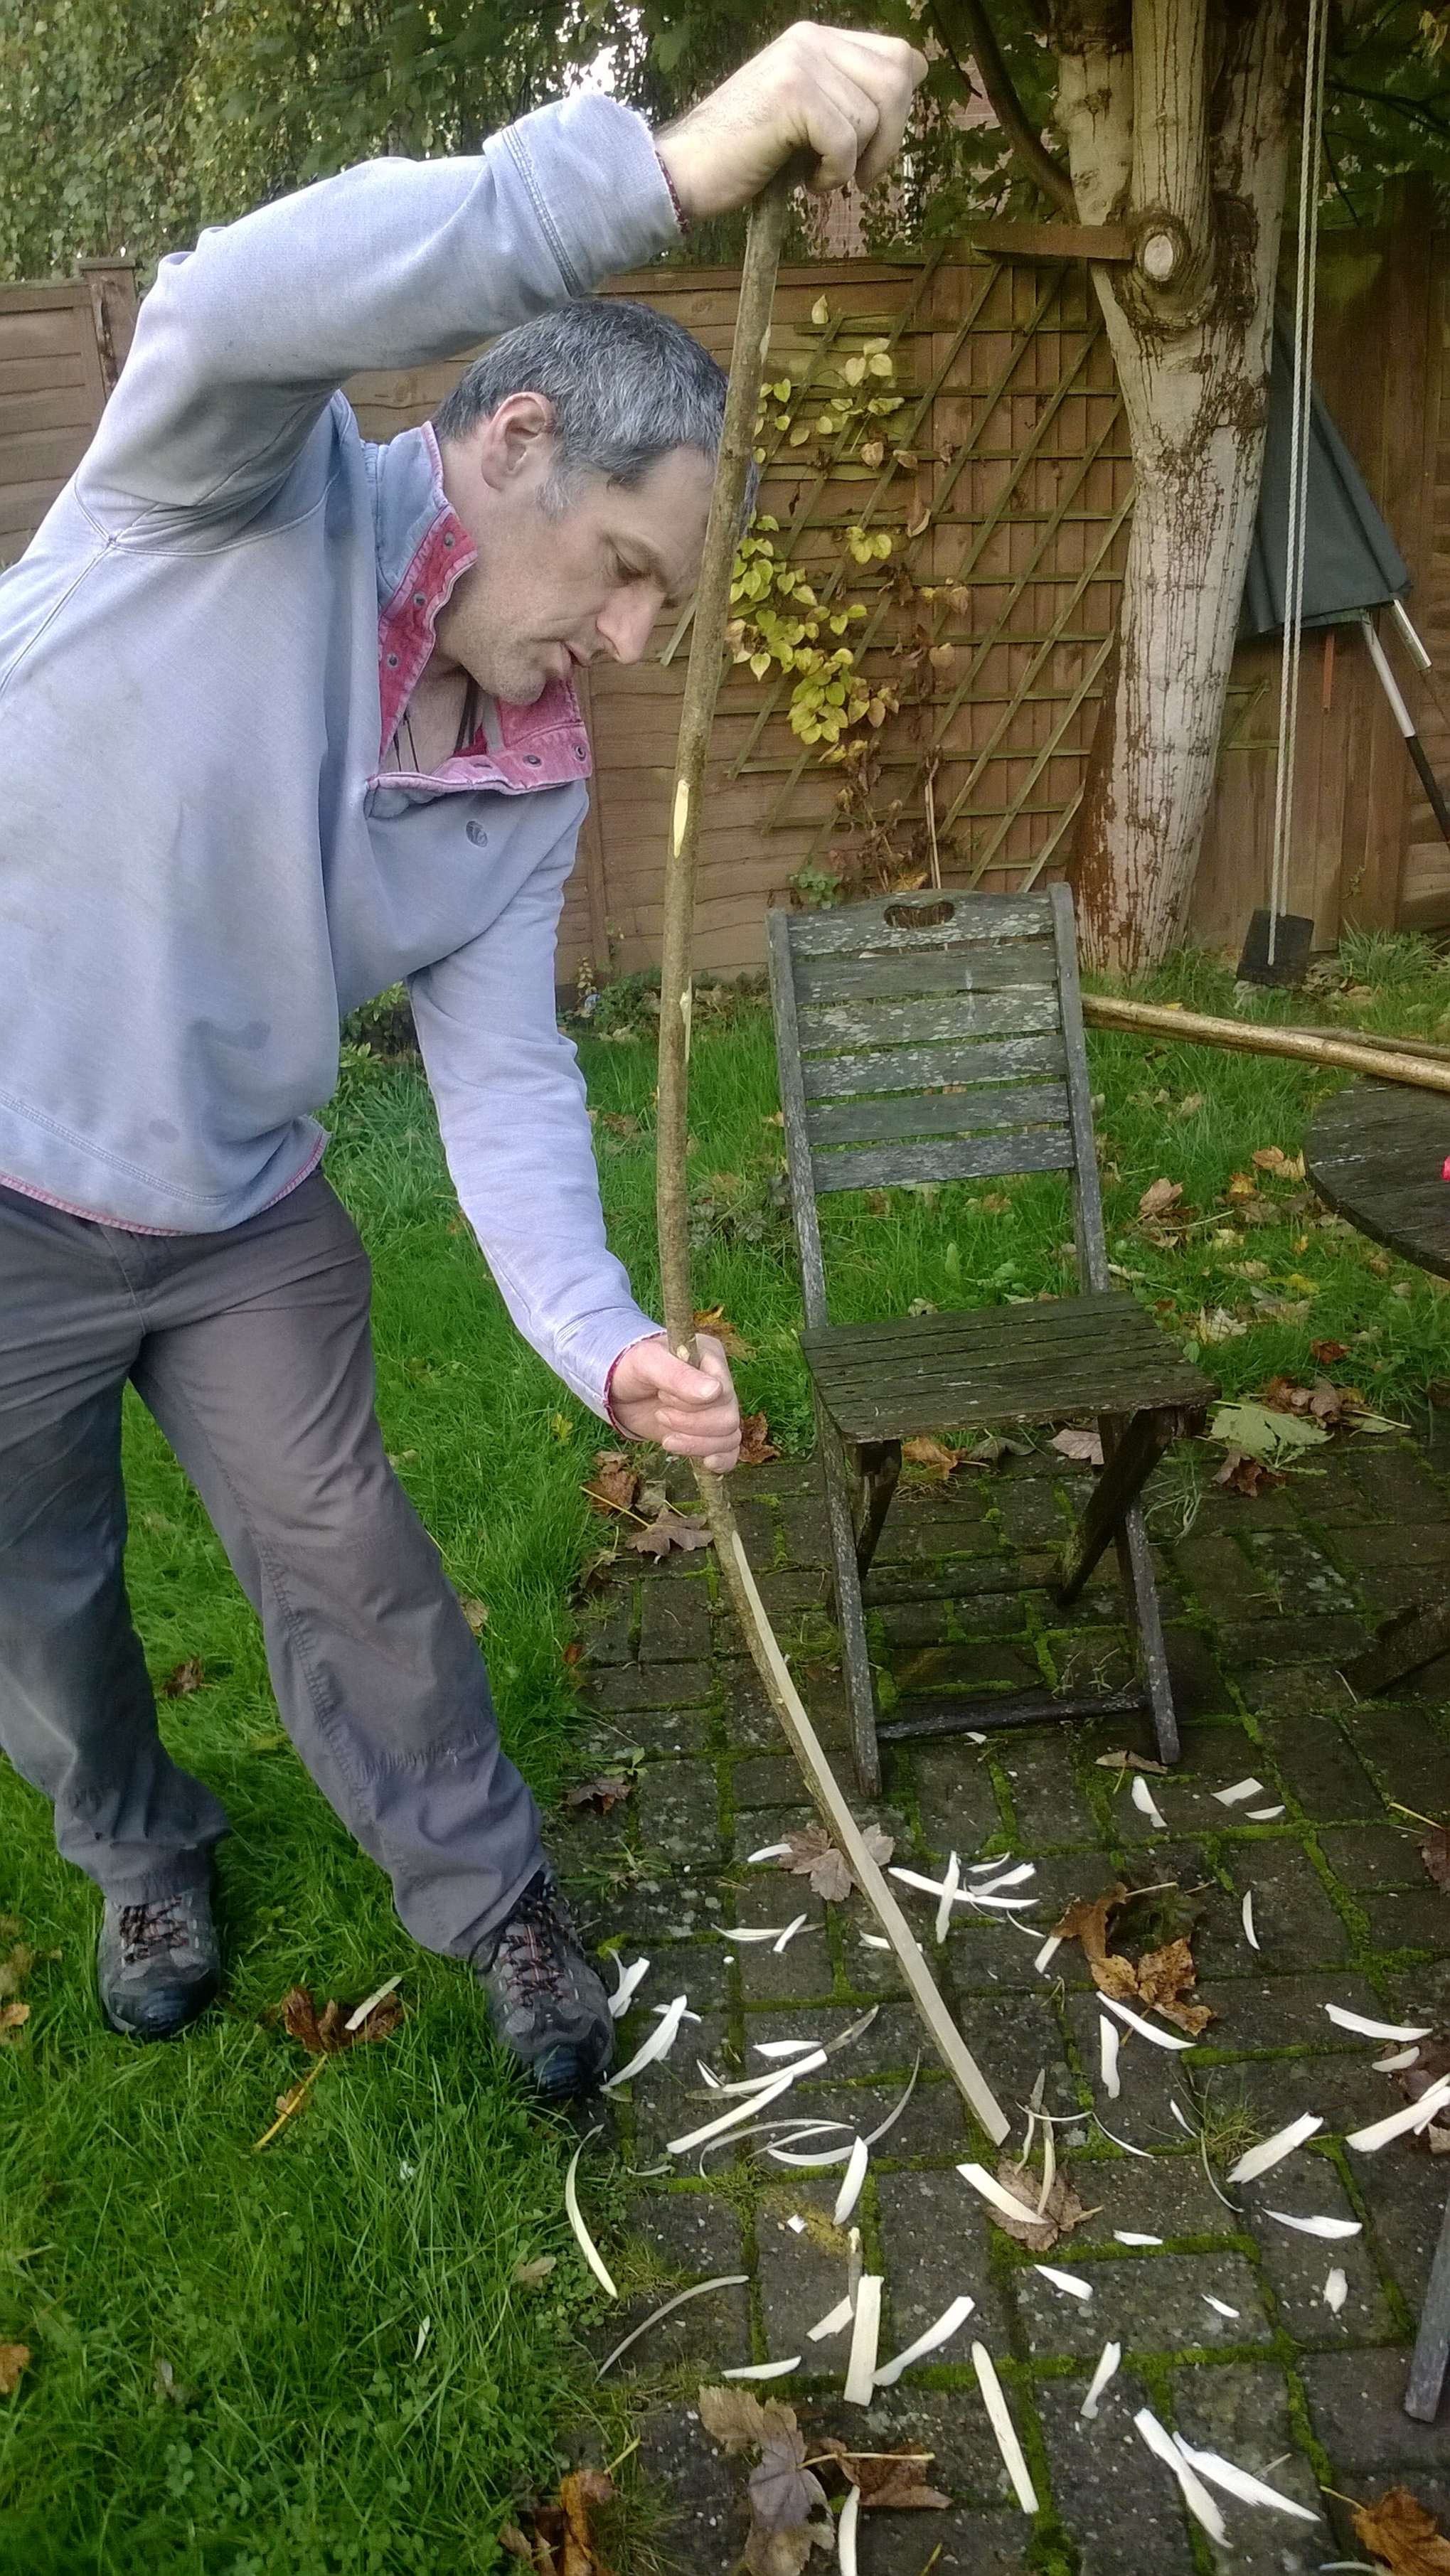
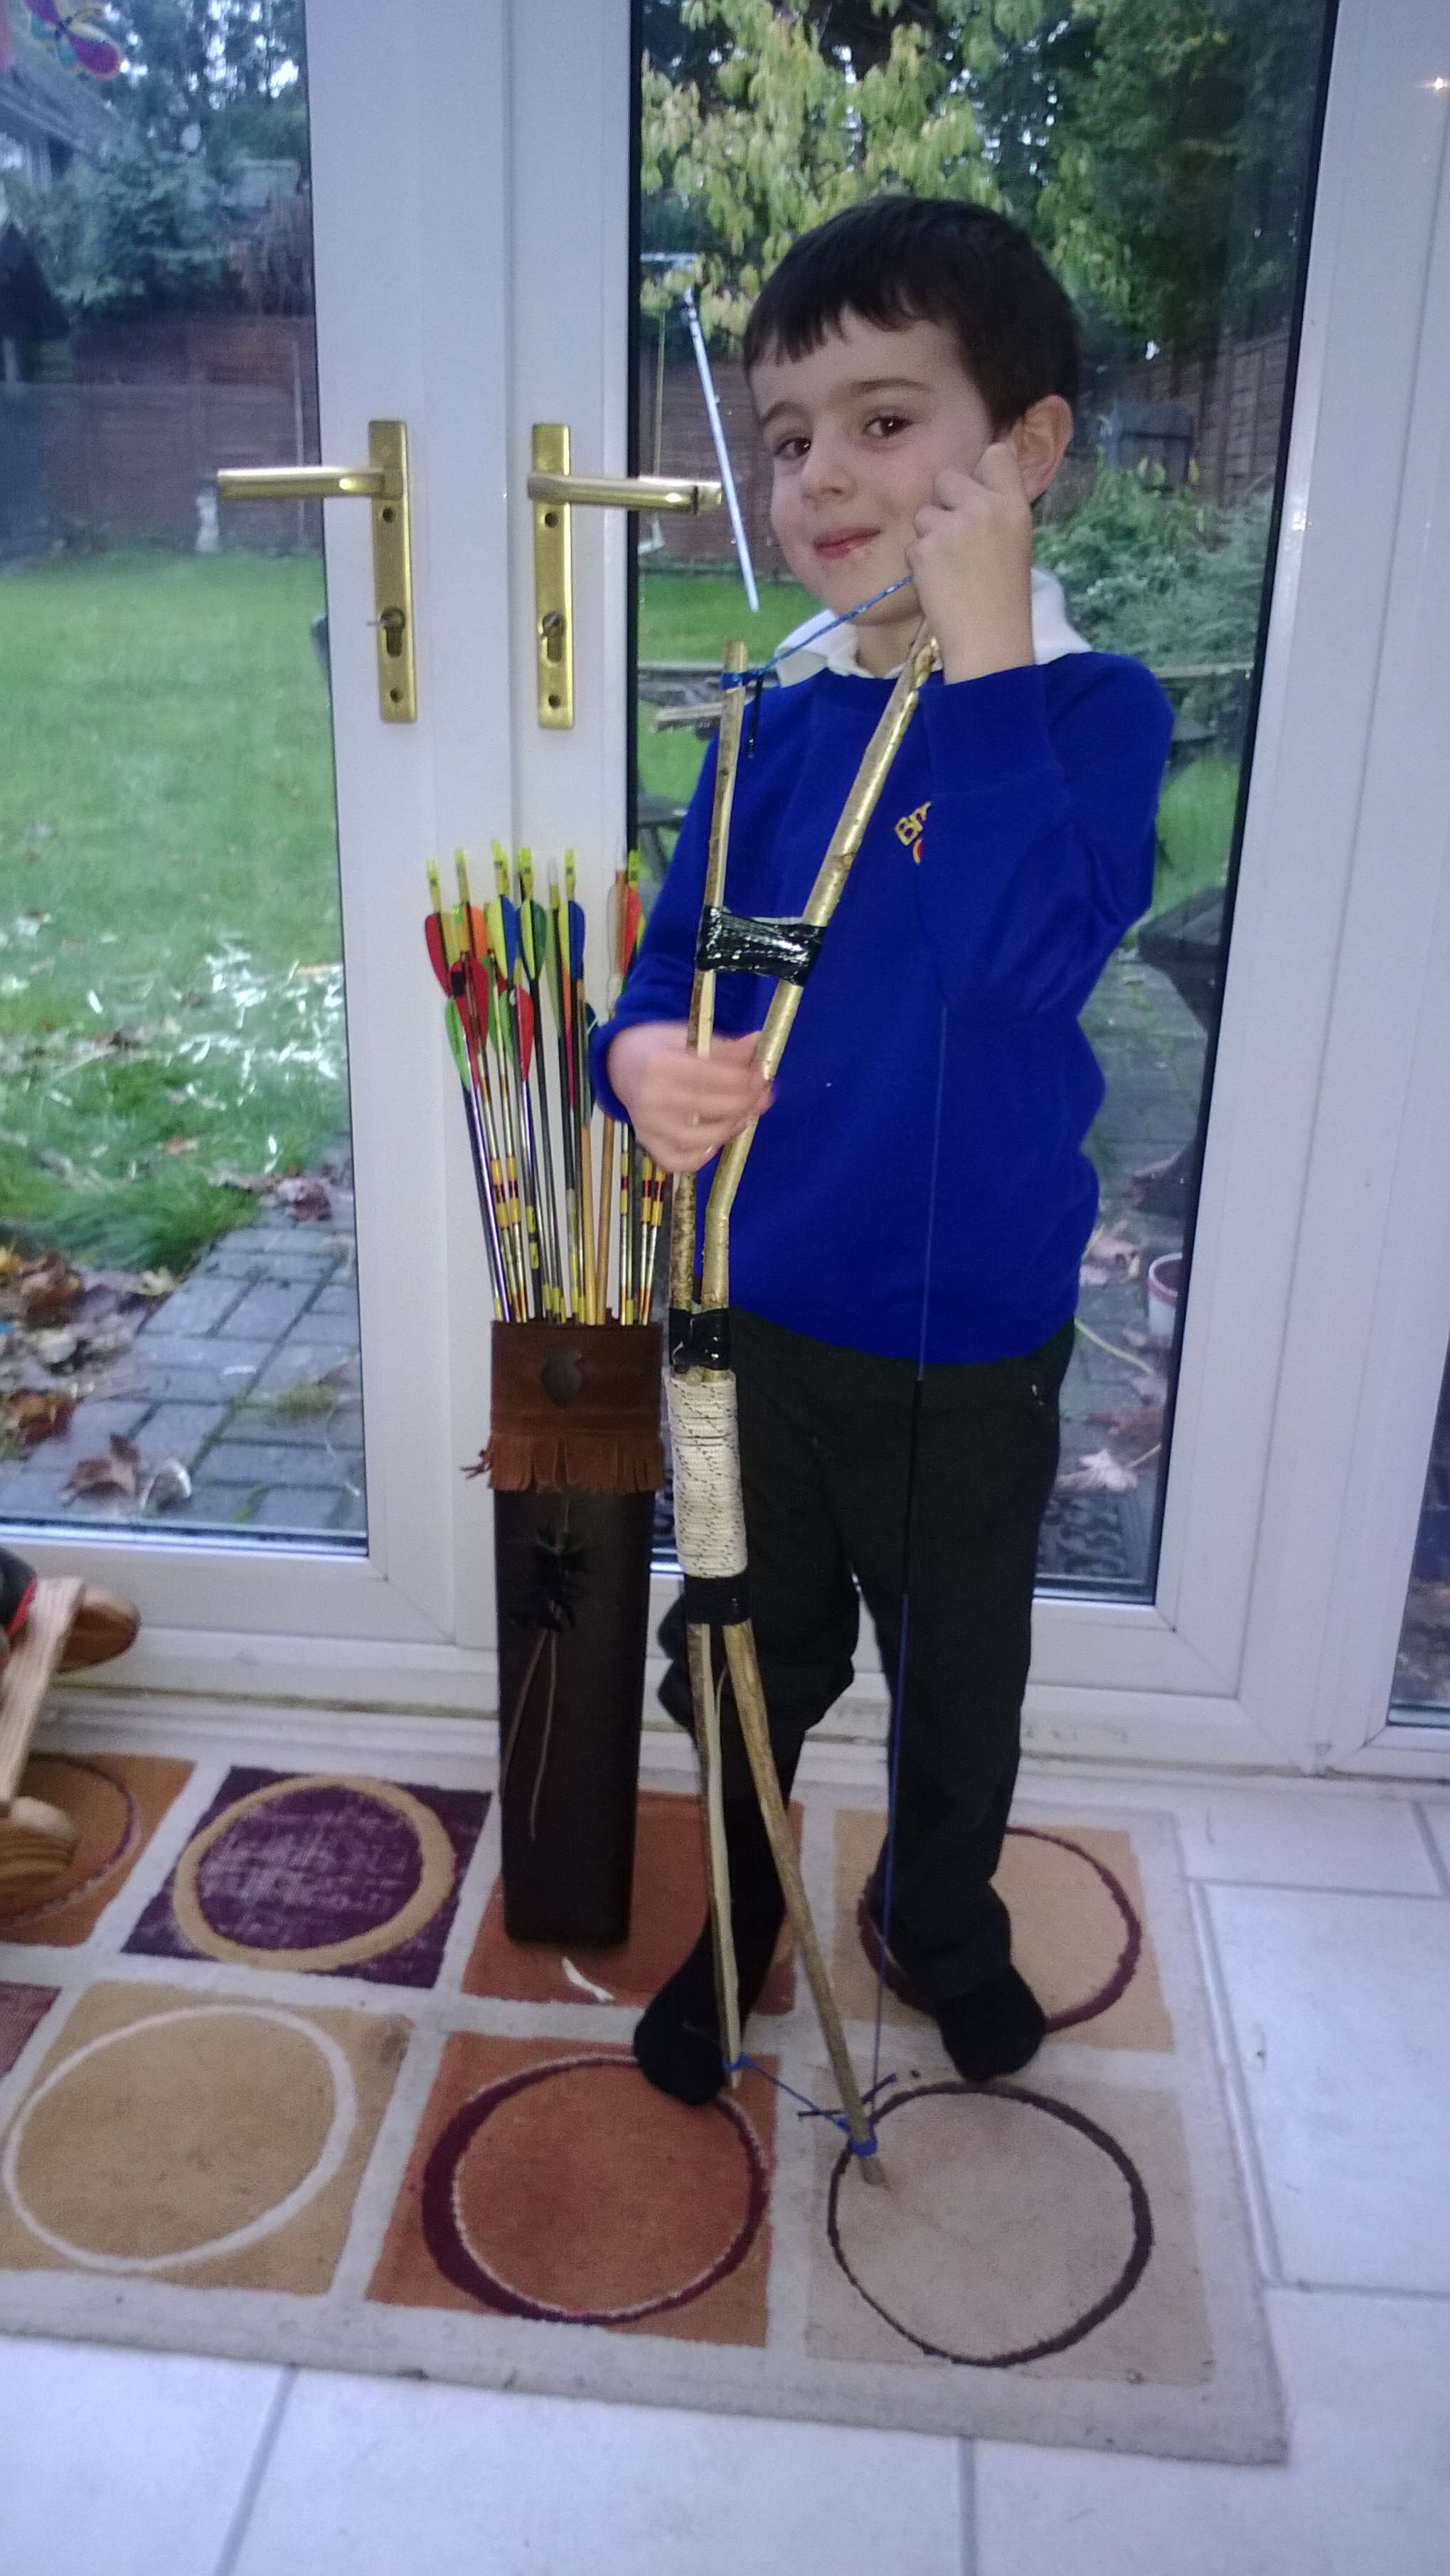
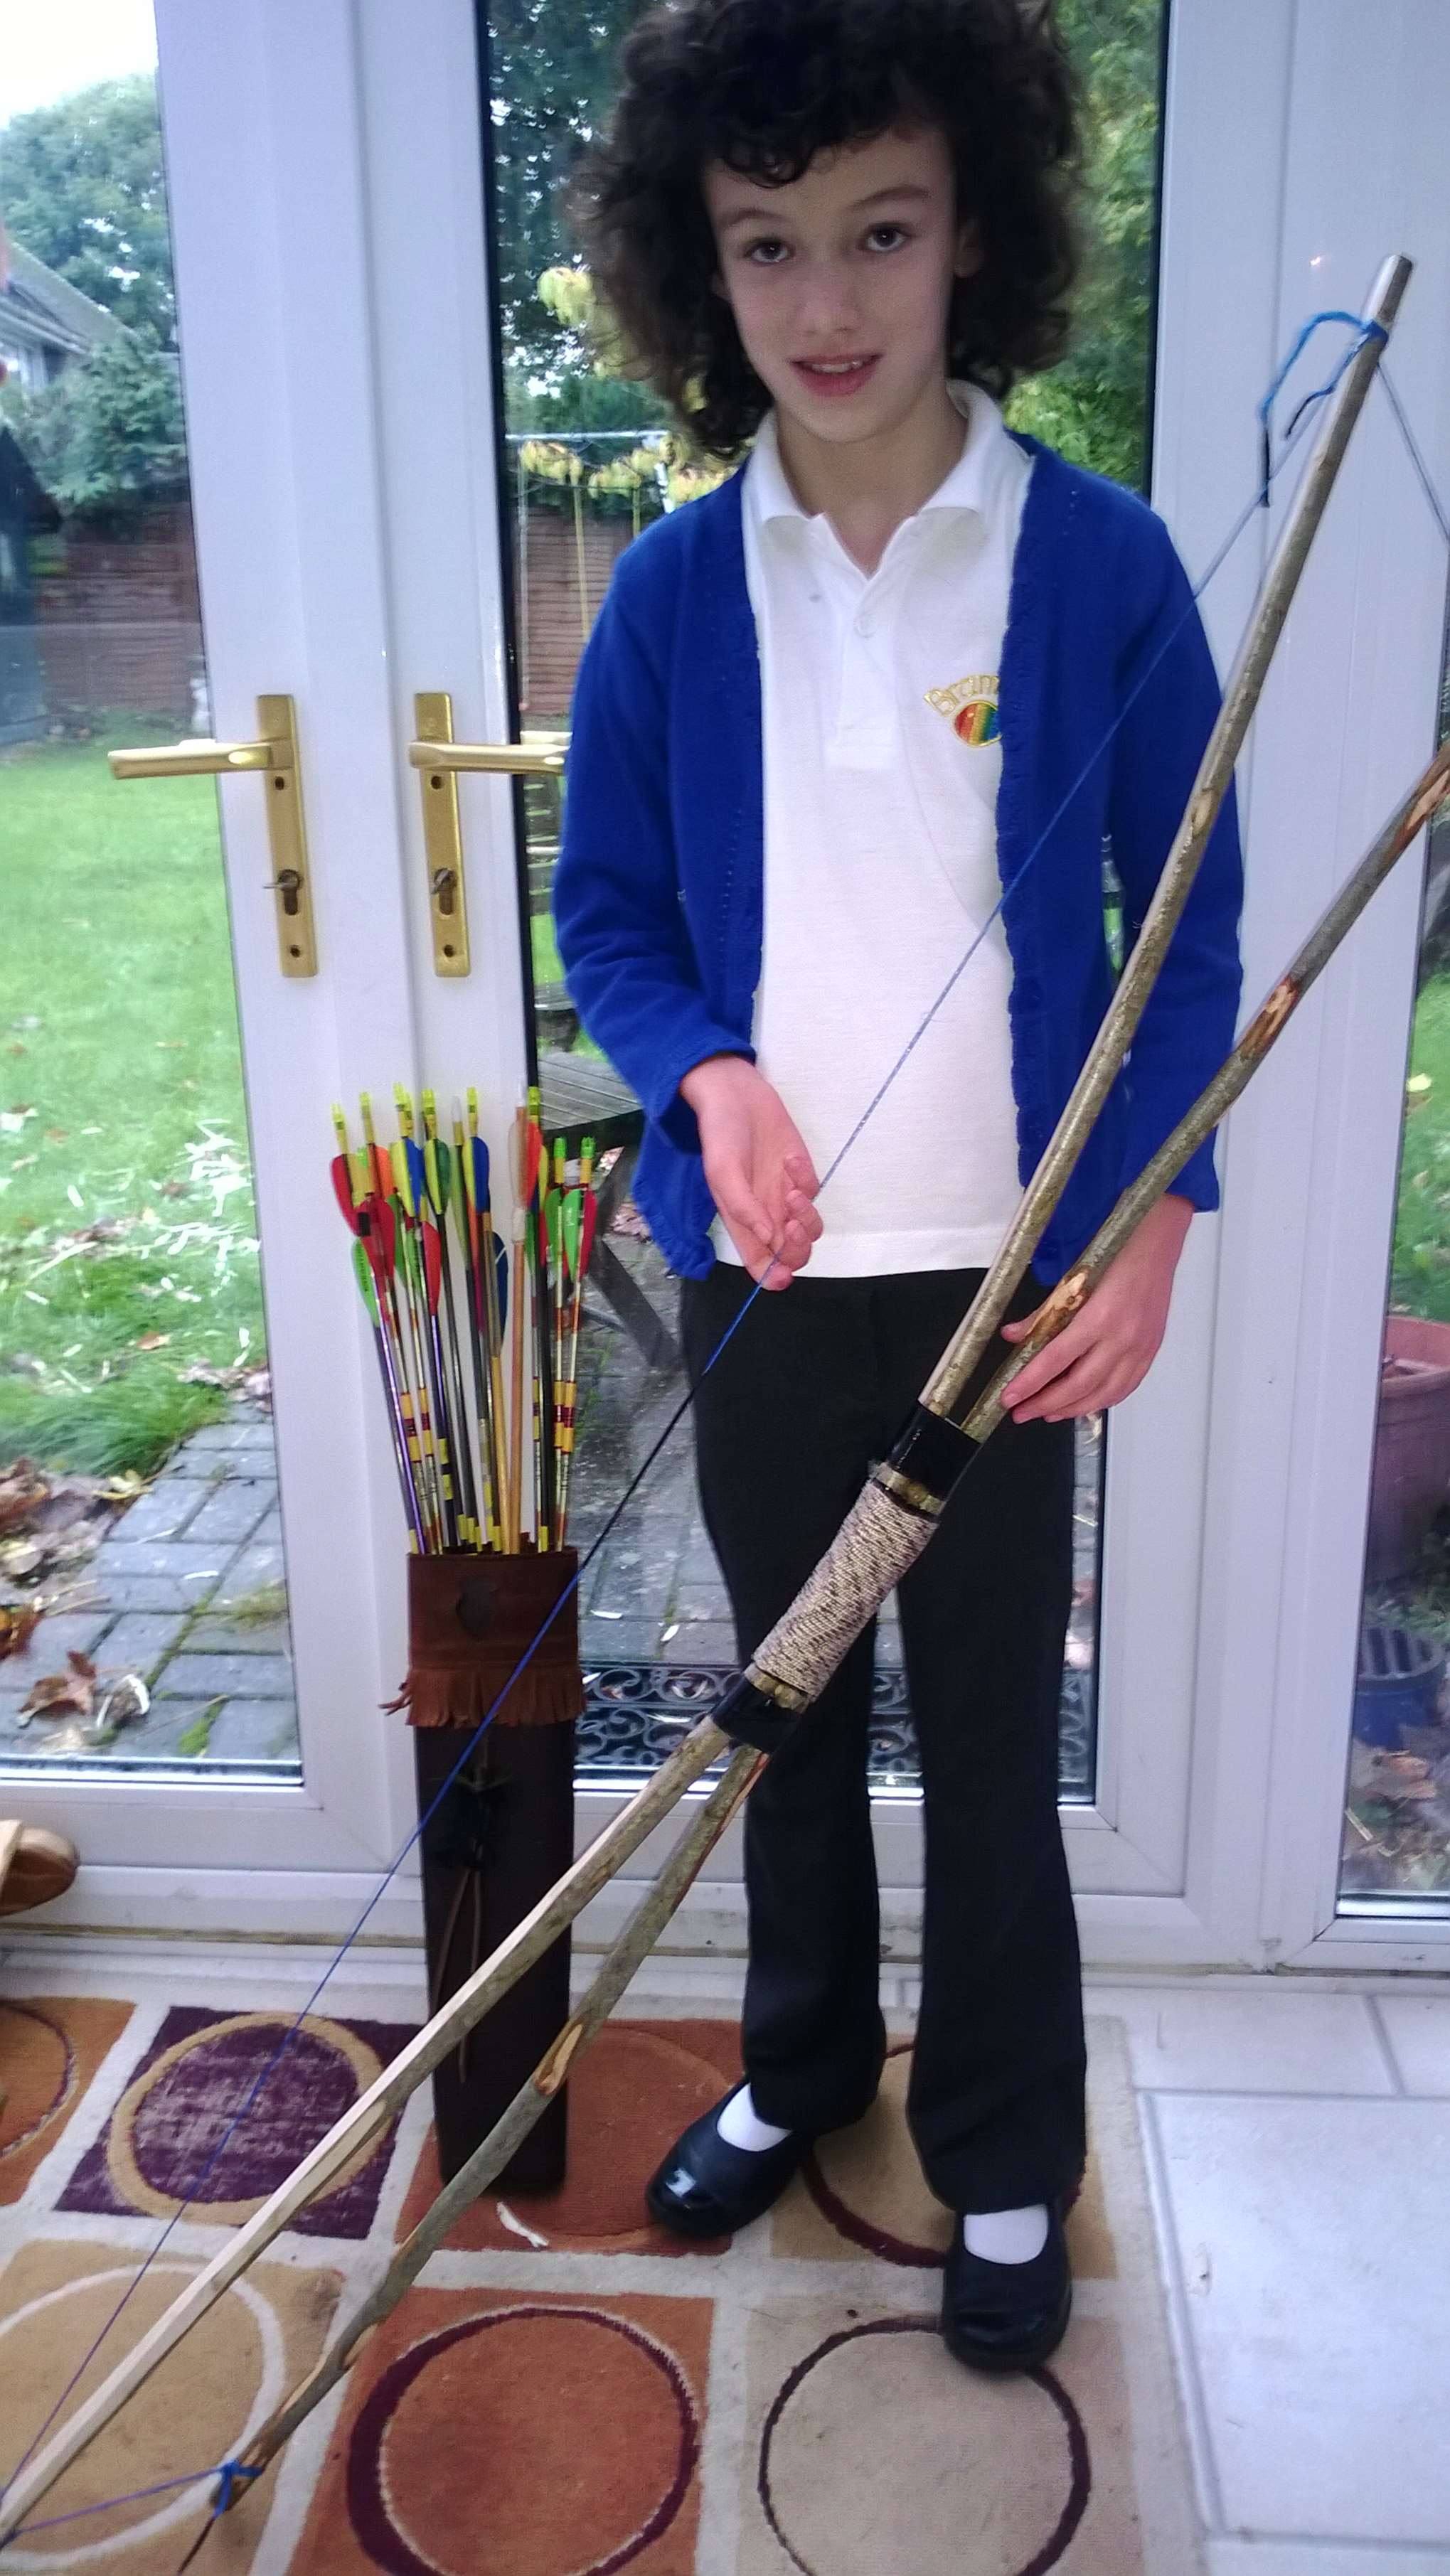
Father & Son Bow
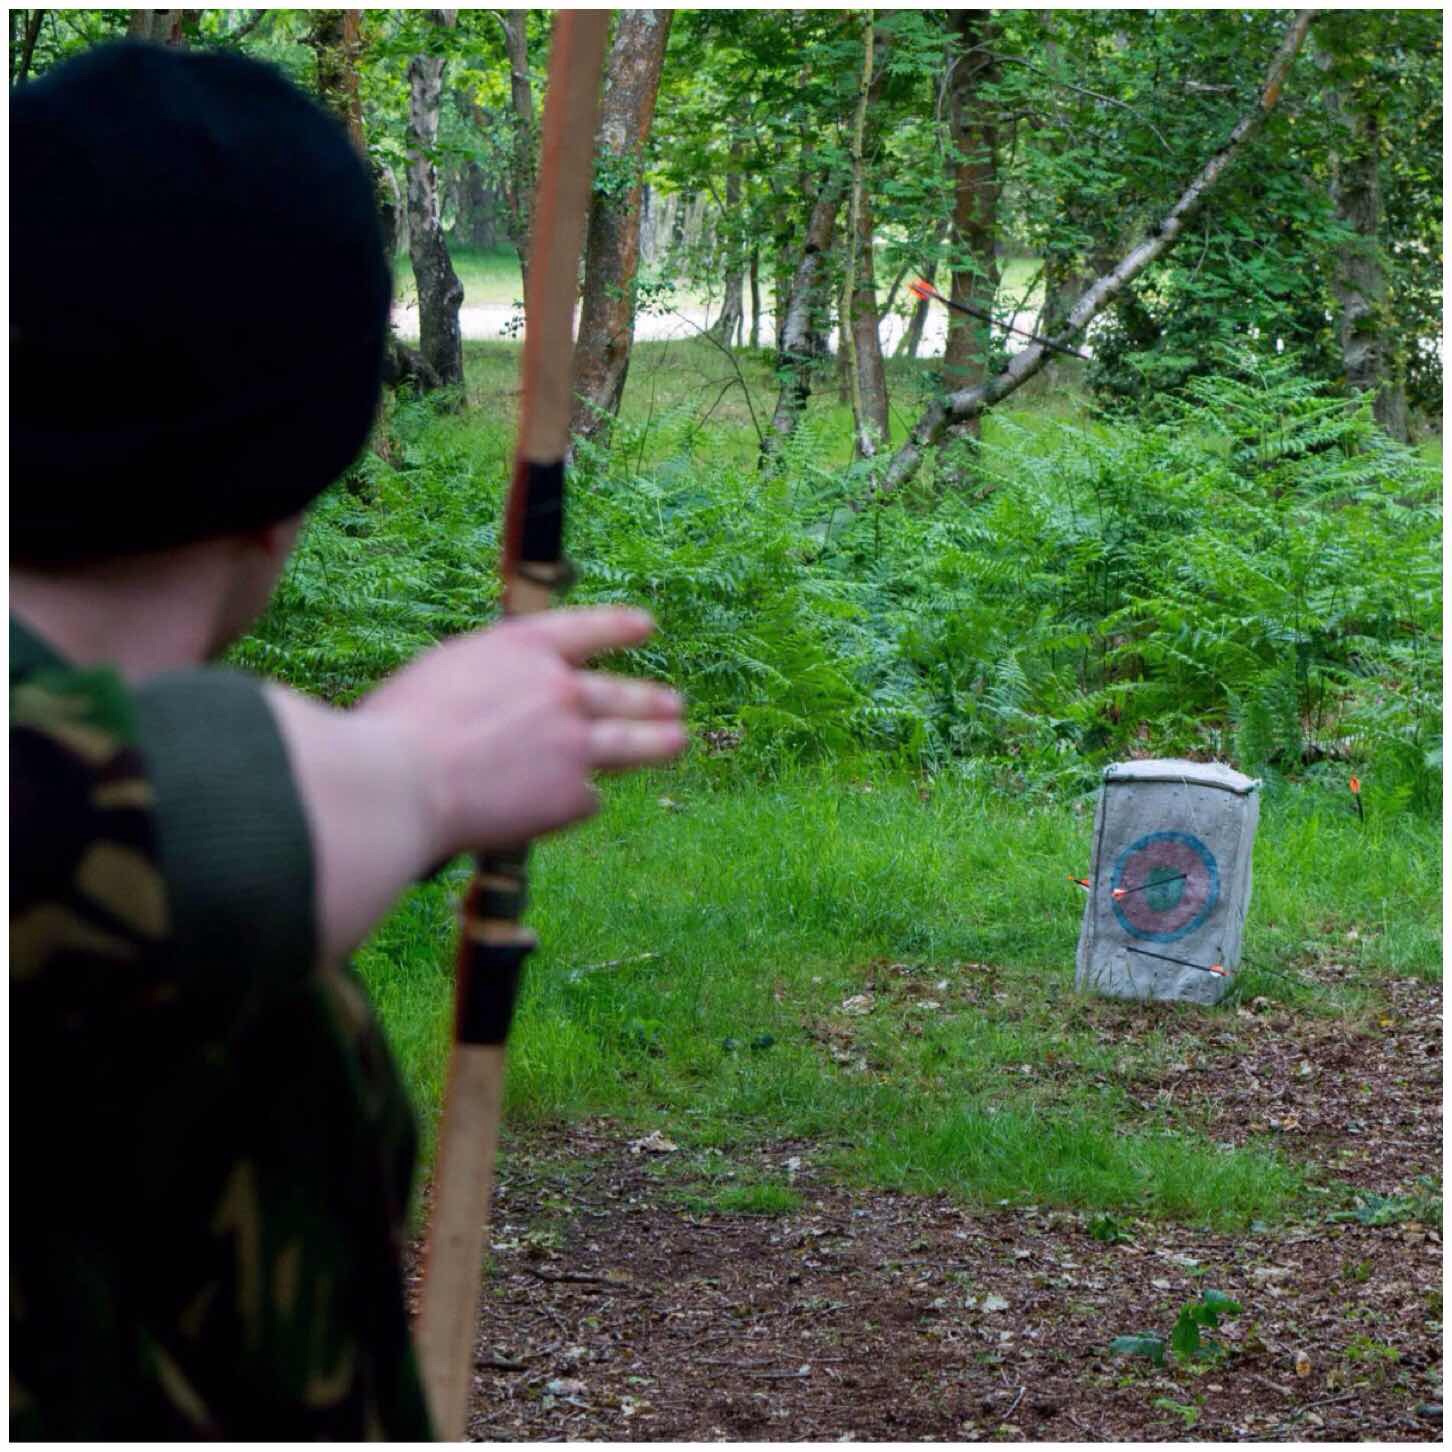
The bow themselves are very light in terms of poundage (20 to 30lbs in draw weight) but on a high arc I can generally get them to shoot an arrow 60 to 70 metres. I usually shoot them on short ranges of less than 20 metres in the woods.
These have proven a massive hit at the Bushcraft UK Bushmoot and there has been a class run on them since 2009 with folks of all ages making them. I particularly like to see a family making one and then coming down to the range of an evening to shoot. I still have ones I made all these years ago and they still shoot well.
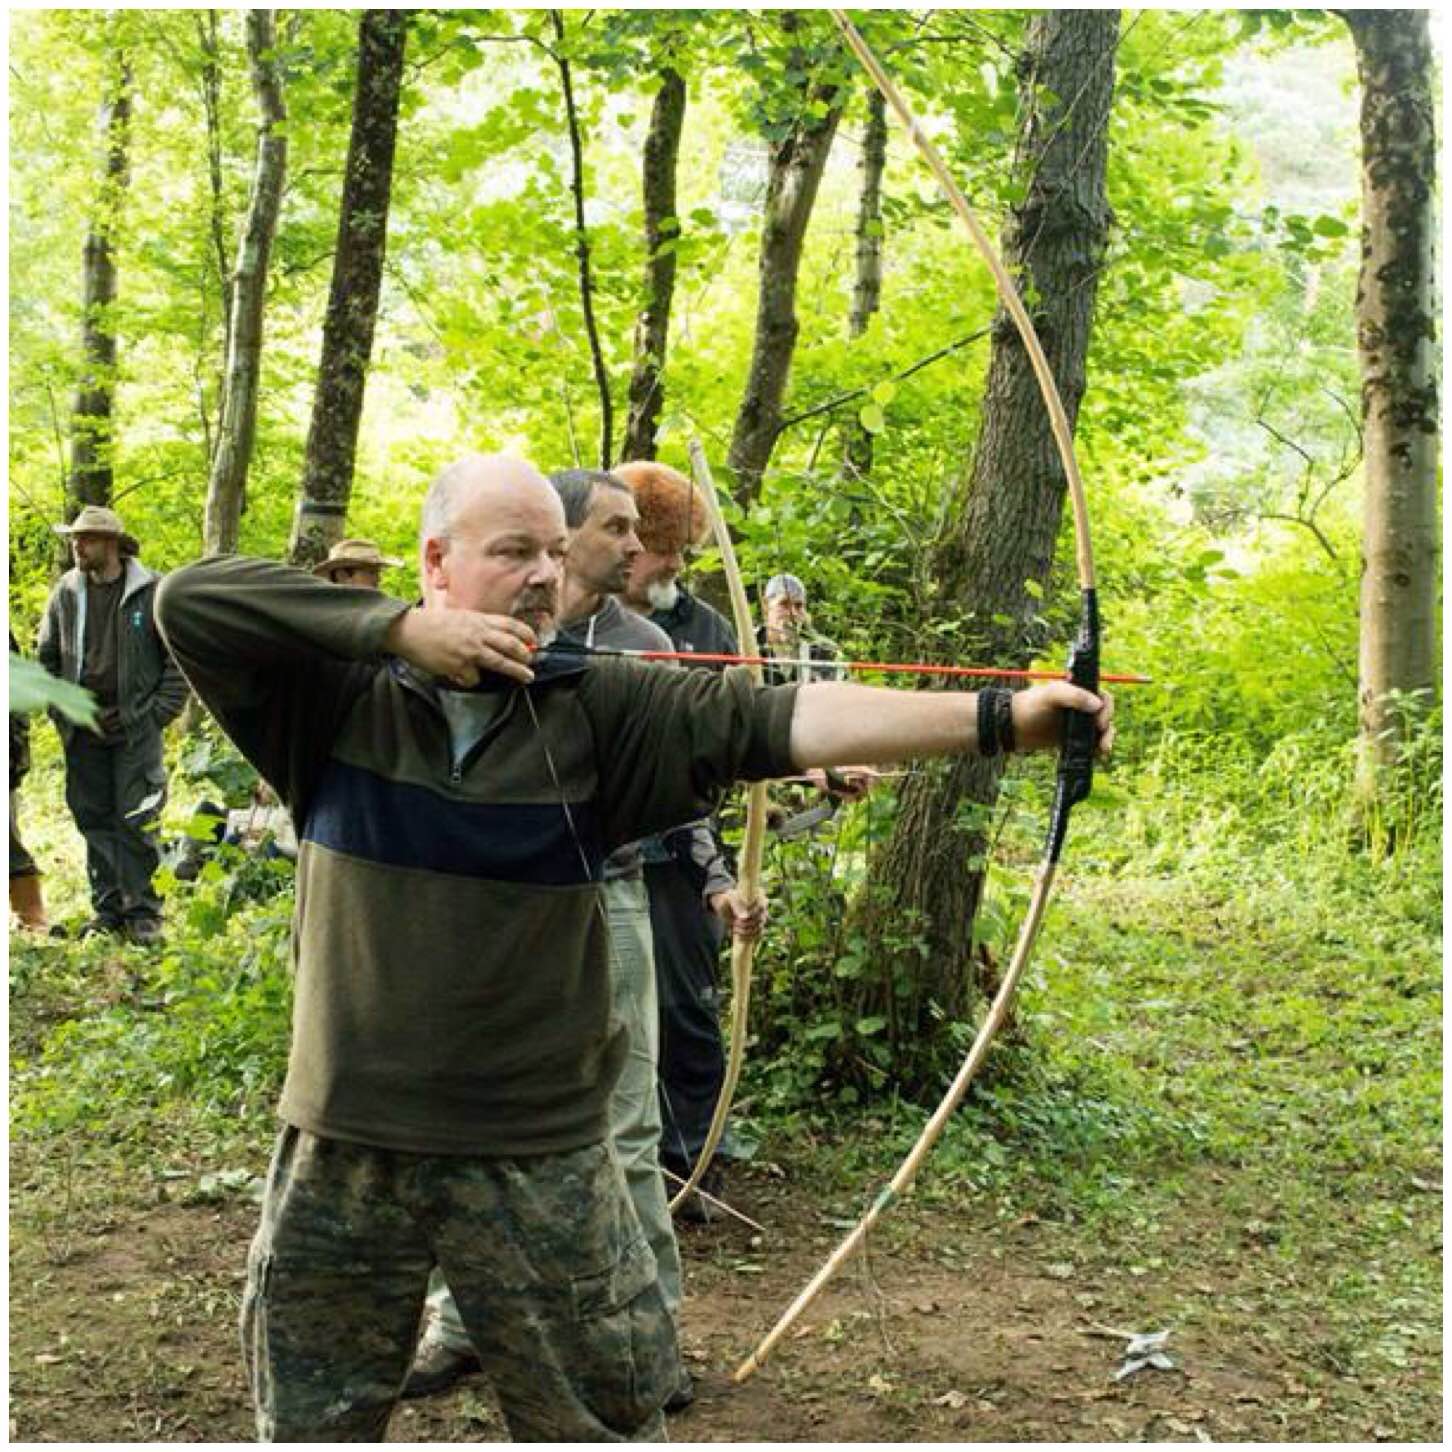
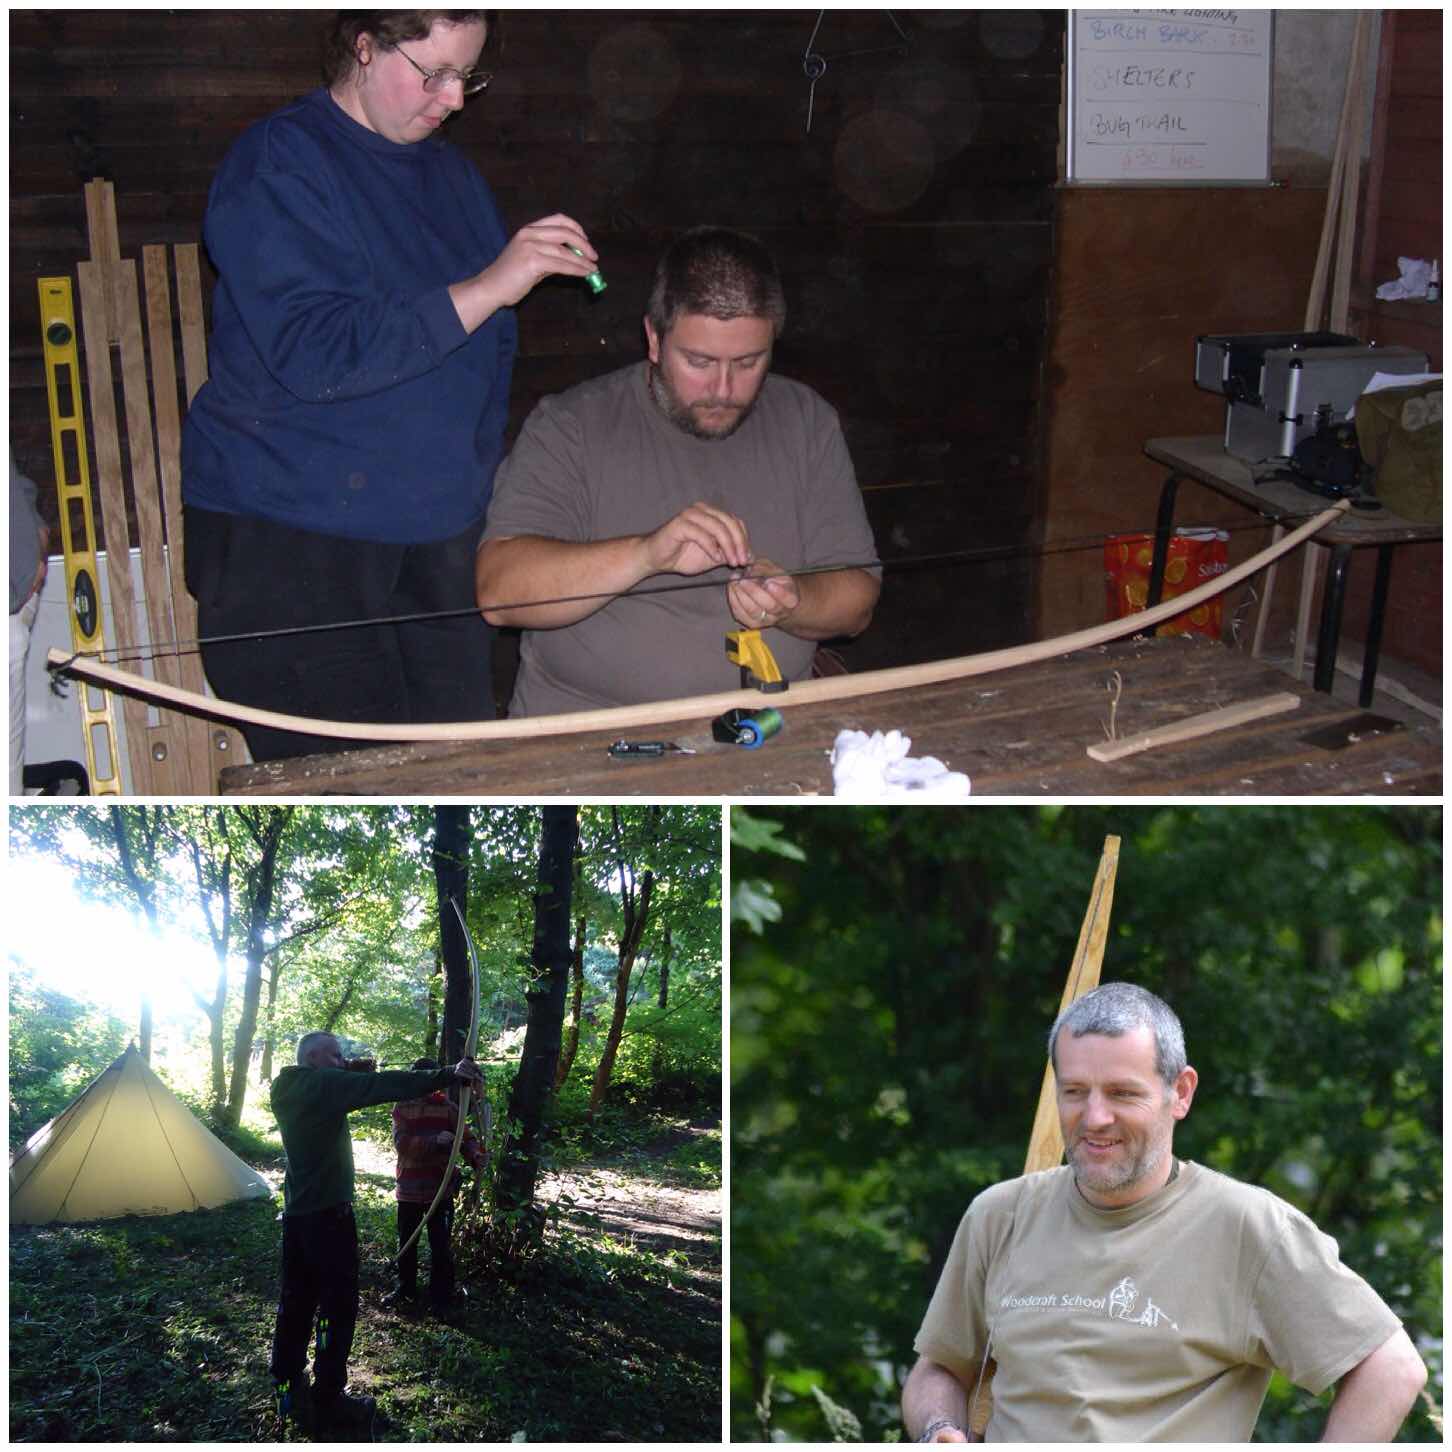
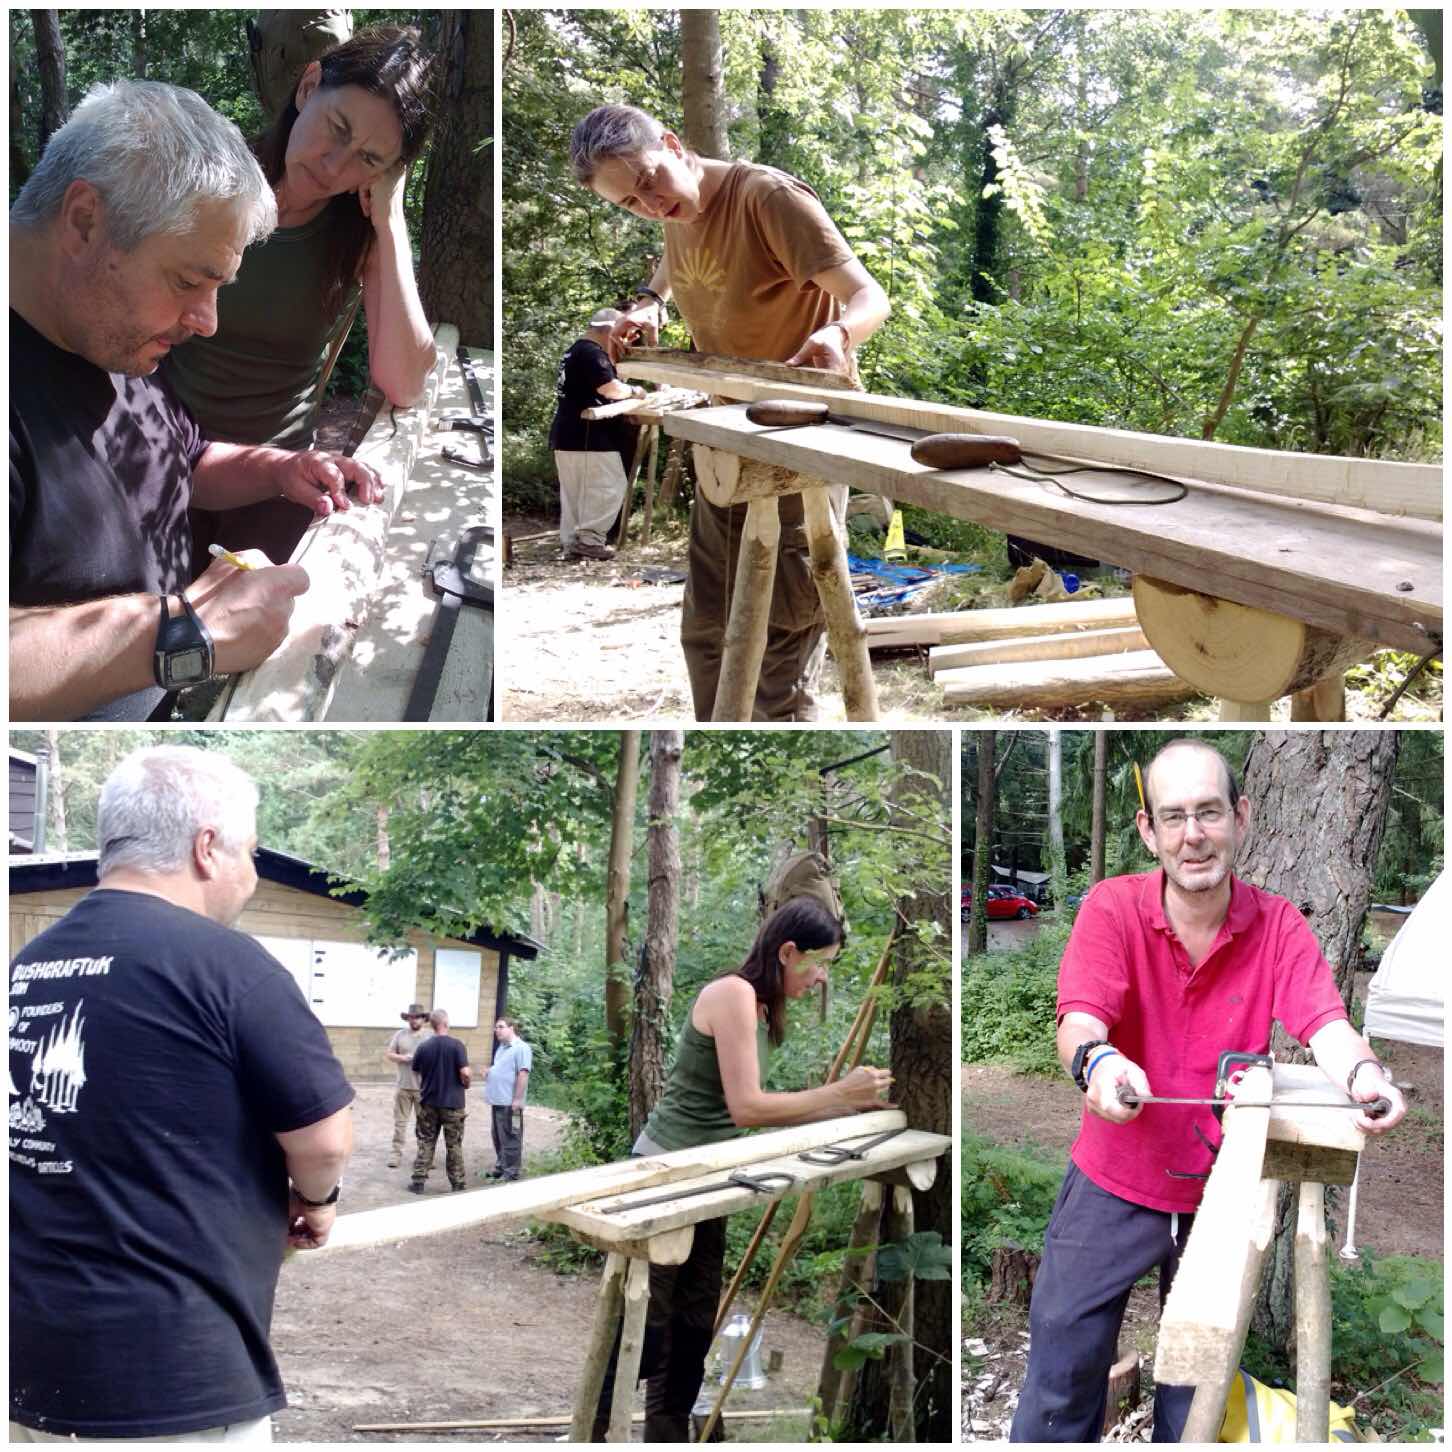
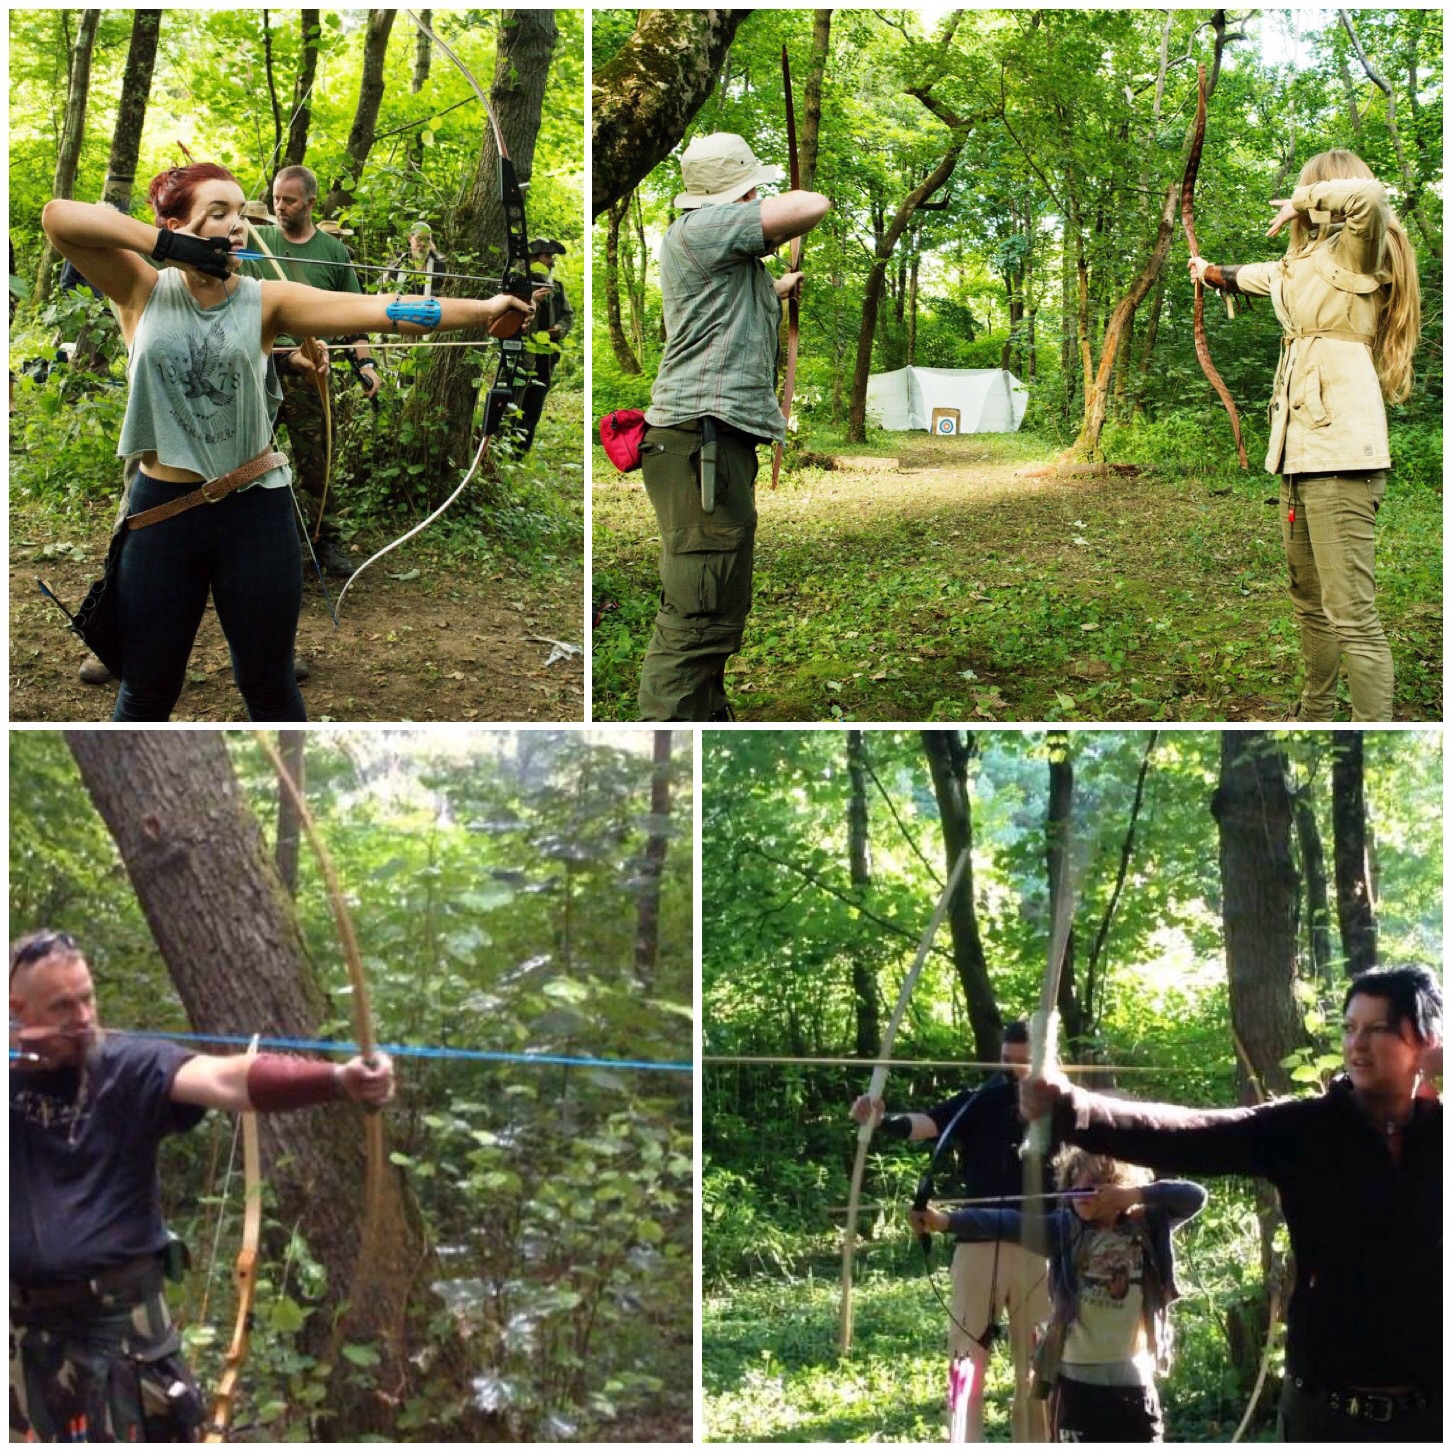
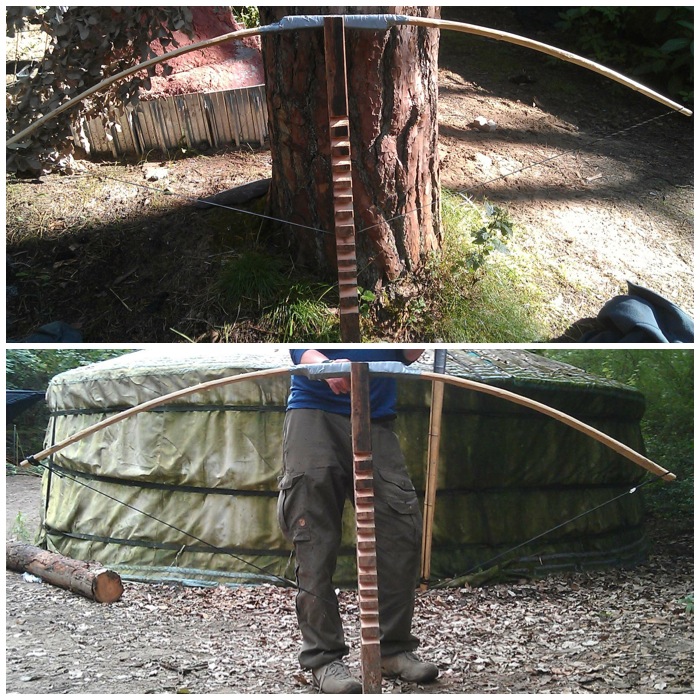
This was the very first bow I made back in 2008 on a Bushcraft Instructors course with John Rhyder of Woodcraft School.
As a group we felled an ash tree , split it into staves and carved our own bows. We did this over two weekends with a month in-between so allowing the stave to season before the tillering process. The ash flatbow has to be made wider than it is deeper due to its deep rings however if it is tillered well it will still shoot fast.
Ash Flatbow
This bow comes in at about 40 lbs in draw weight and has a tendency to ‘twat’ the inside of your forearm so a arm guard is a must.
I give this bow mostly to adults to shoot because of its draw weight but with a good eye and a steady hand she can be very accurate. I started shooting right handed as that is how I was taught to shoot a rifle many years ago however my friend Charlie Brookes suggested one day to try left handed shooting and suddenly I started to hit the target. I am left handed and left eye dominant but the muscle memory from using a rifle made it difficult to shoot left handed at first – however with a lot of practice that has gone, so I am now happy to shoot with either hand.
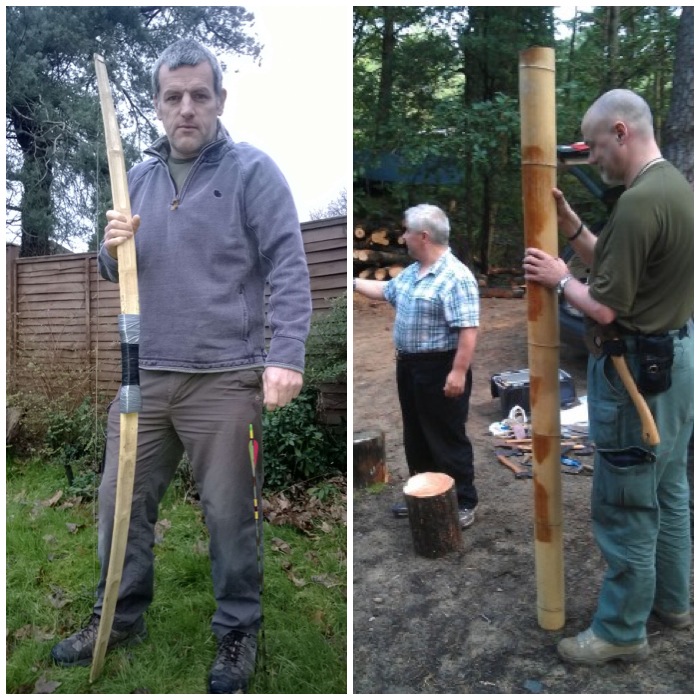
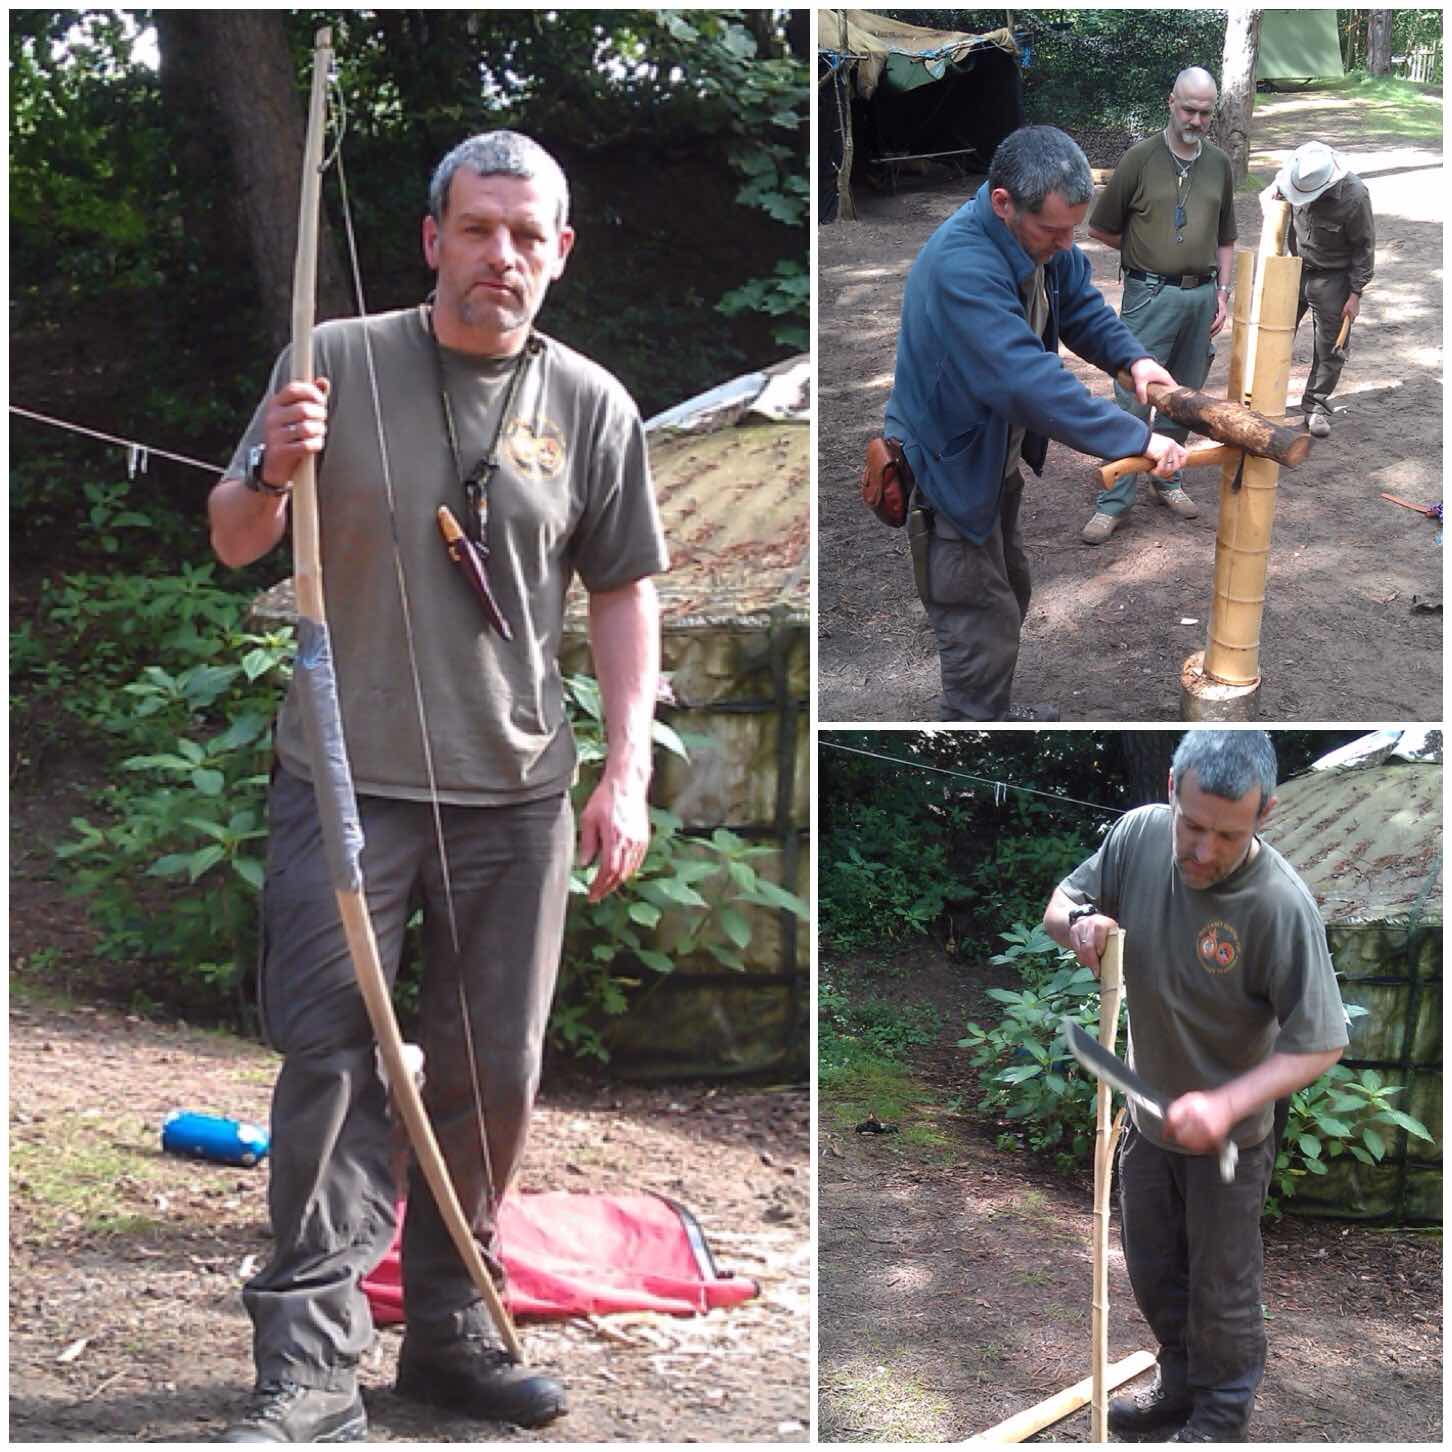
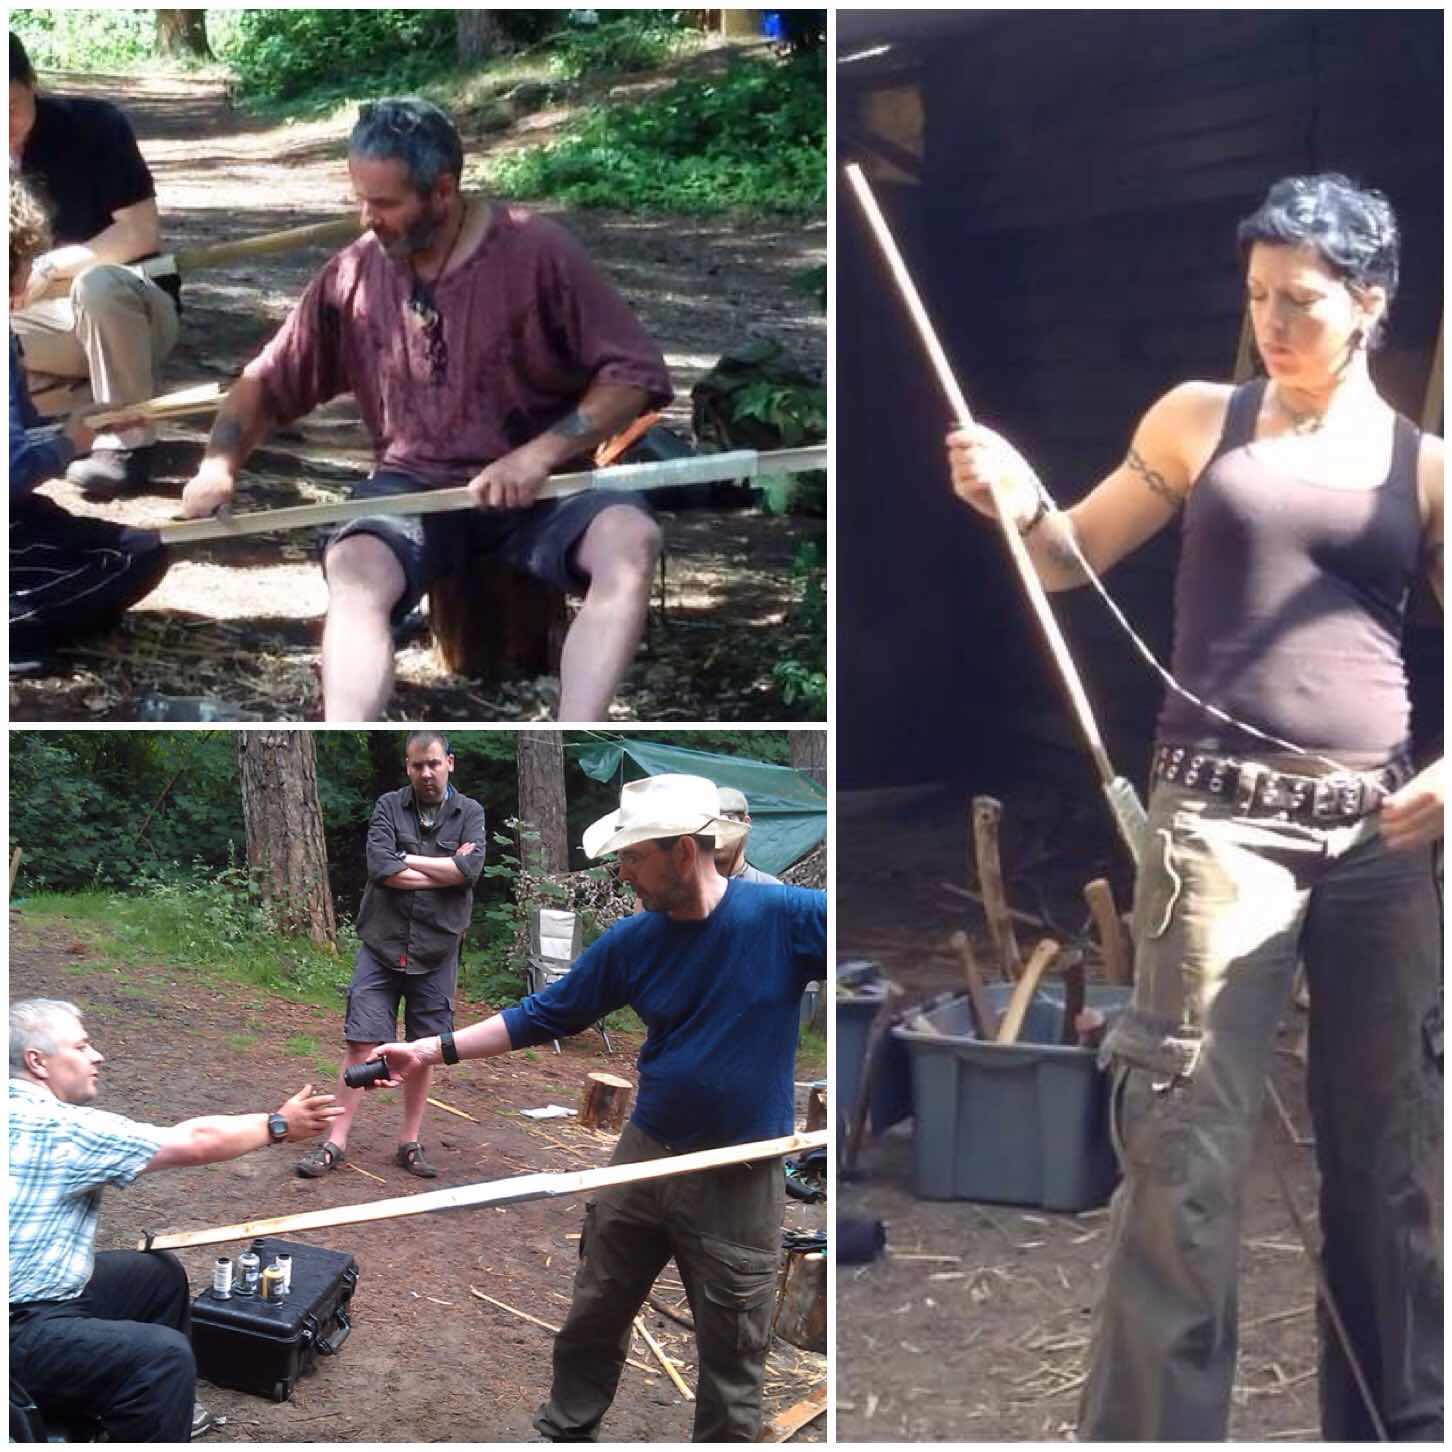
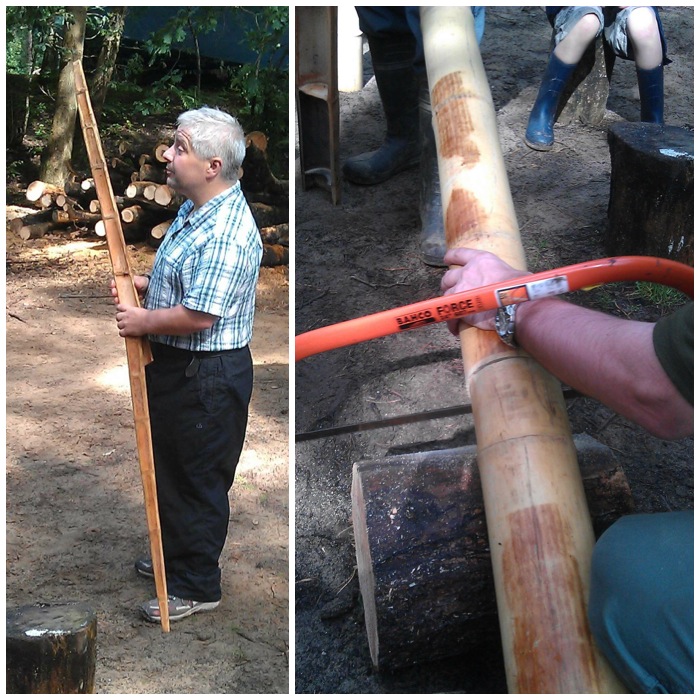
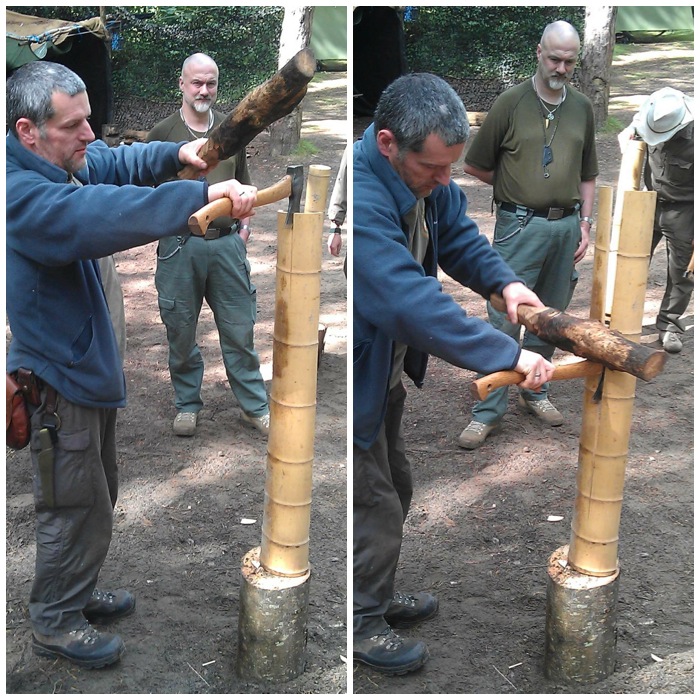
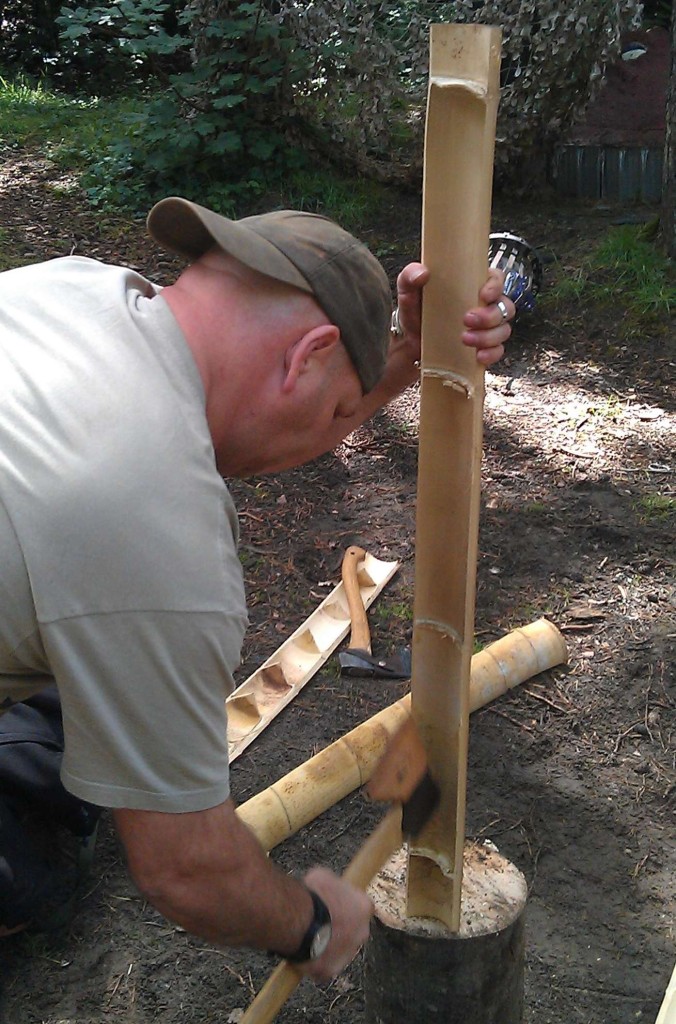
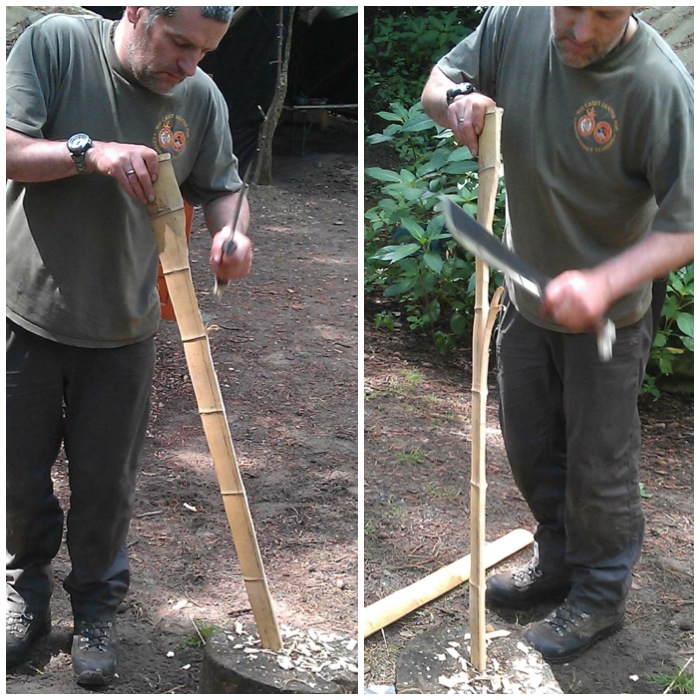
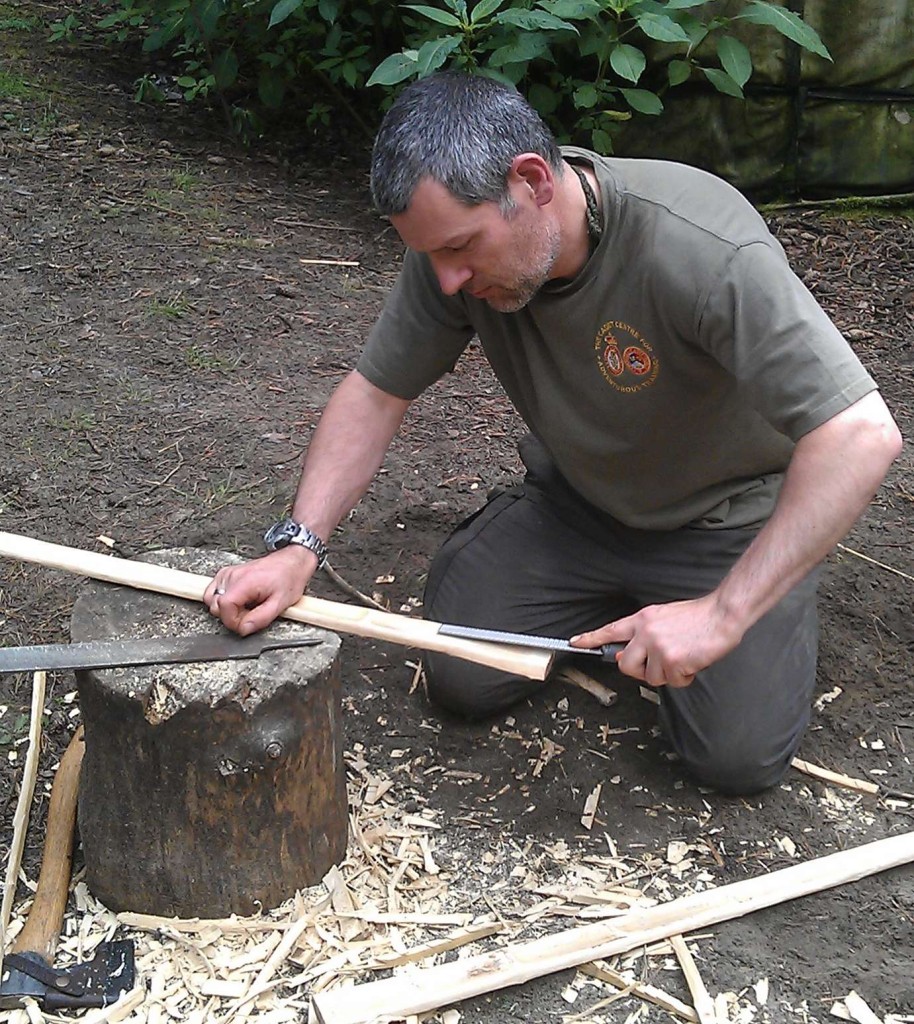
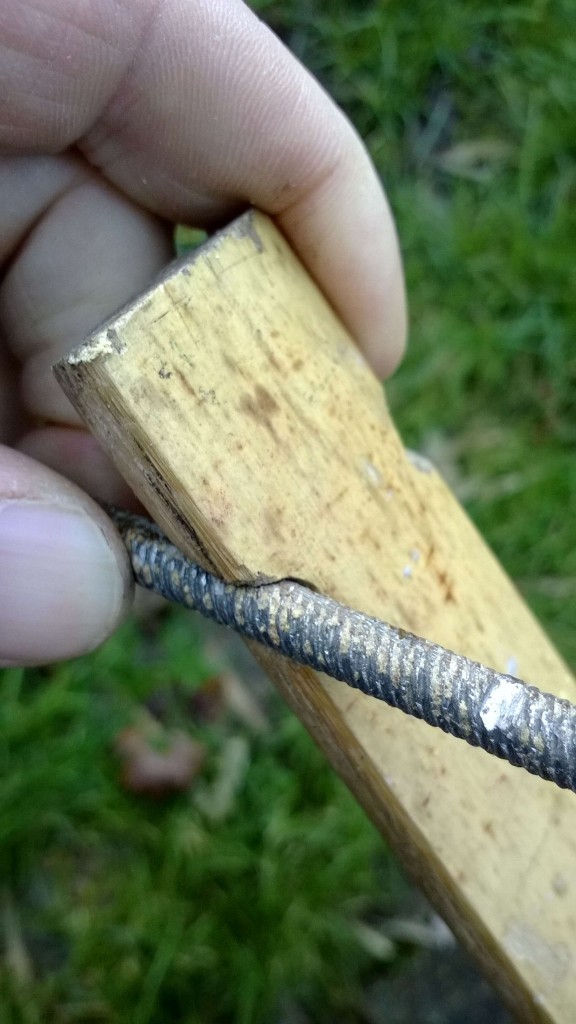
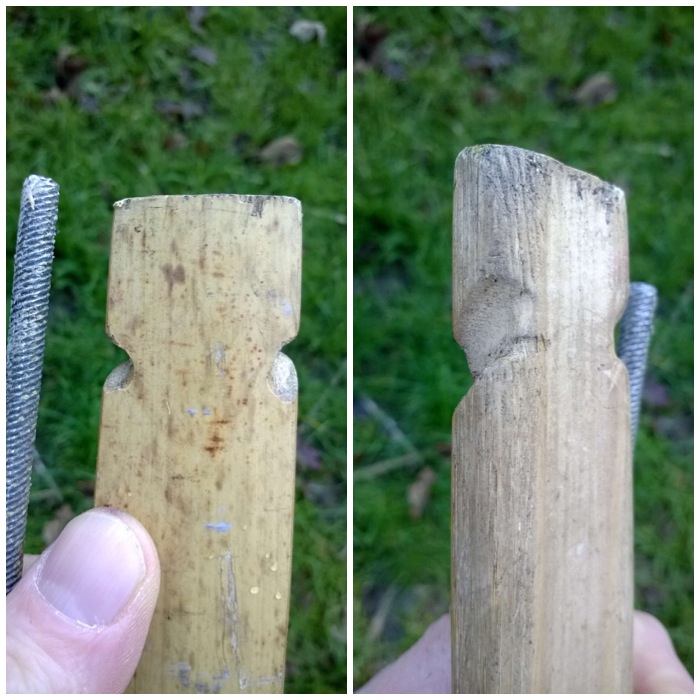
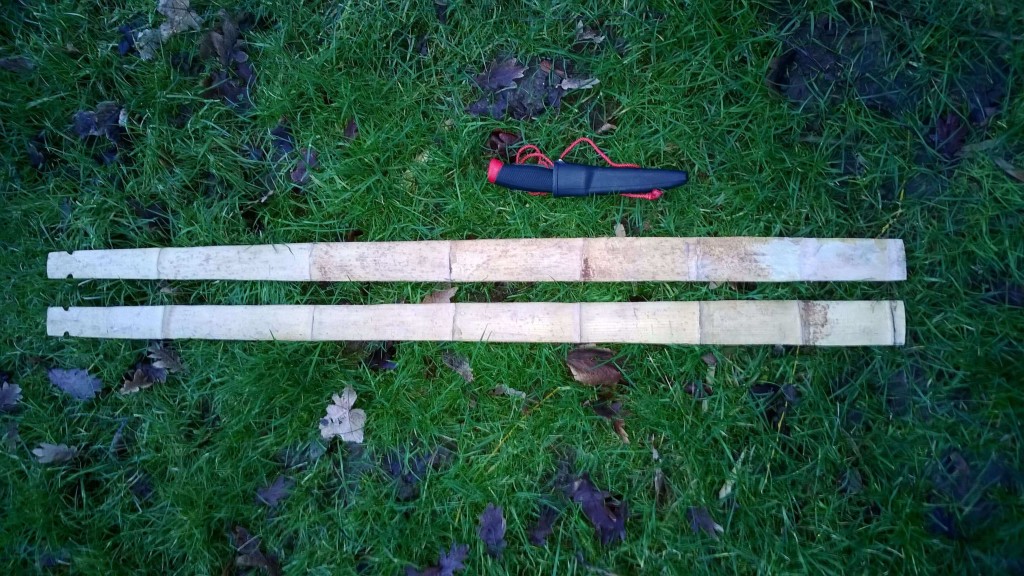
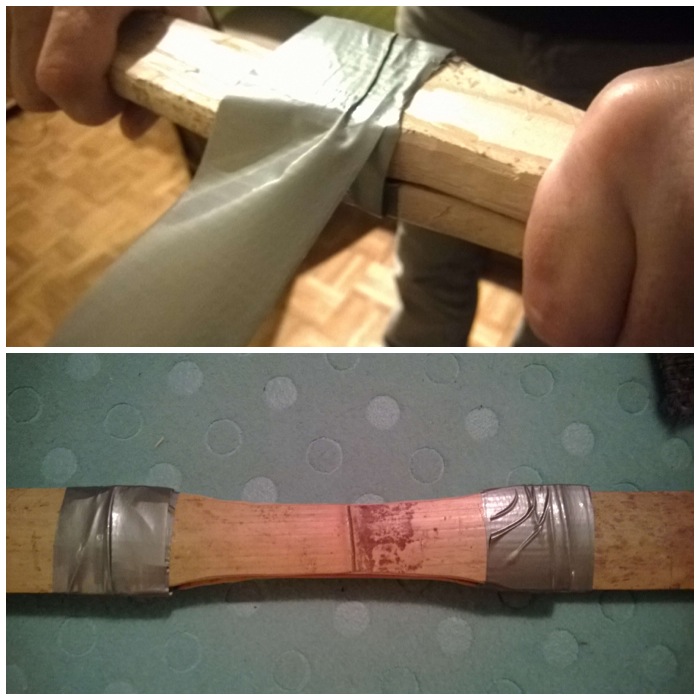
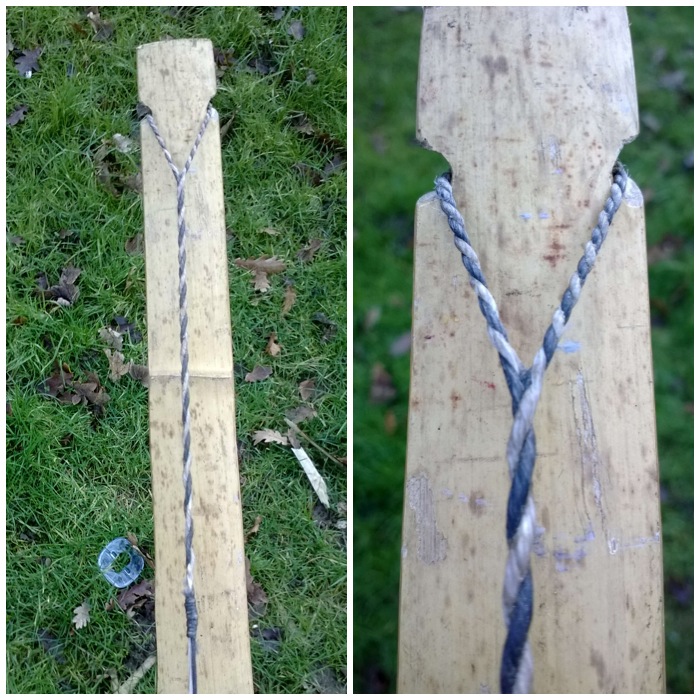
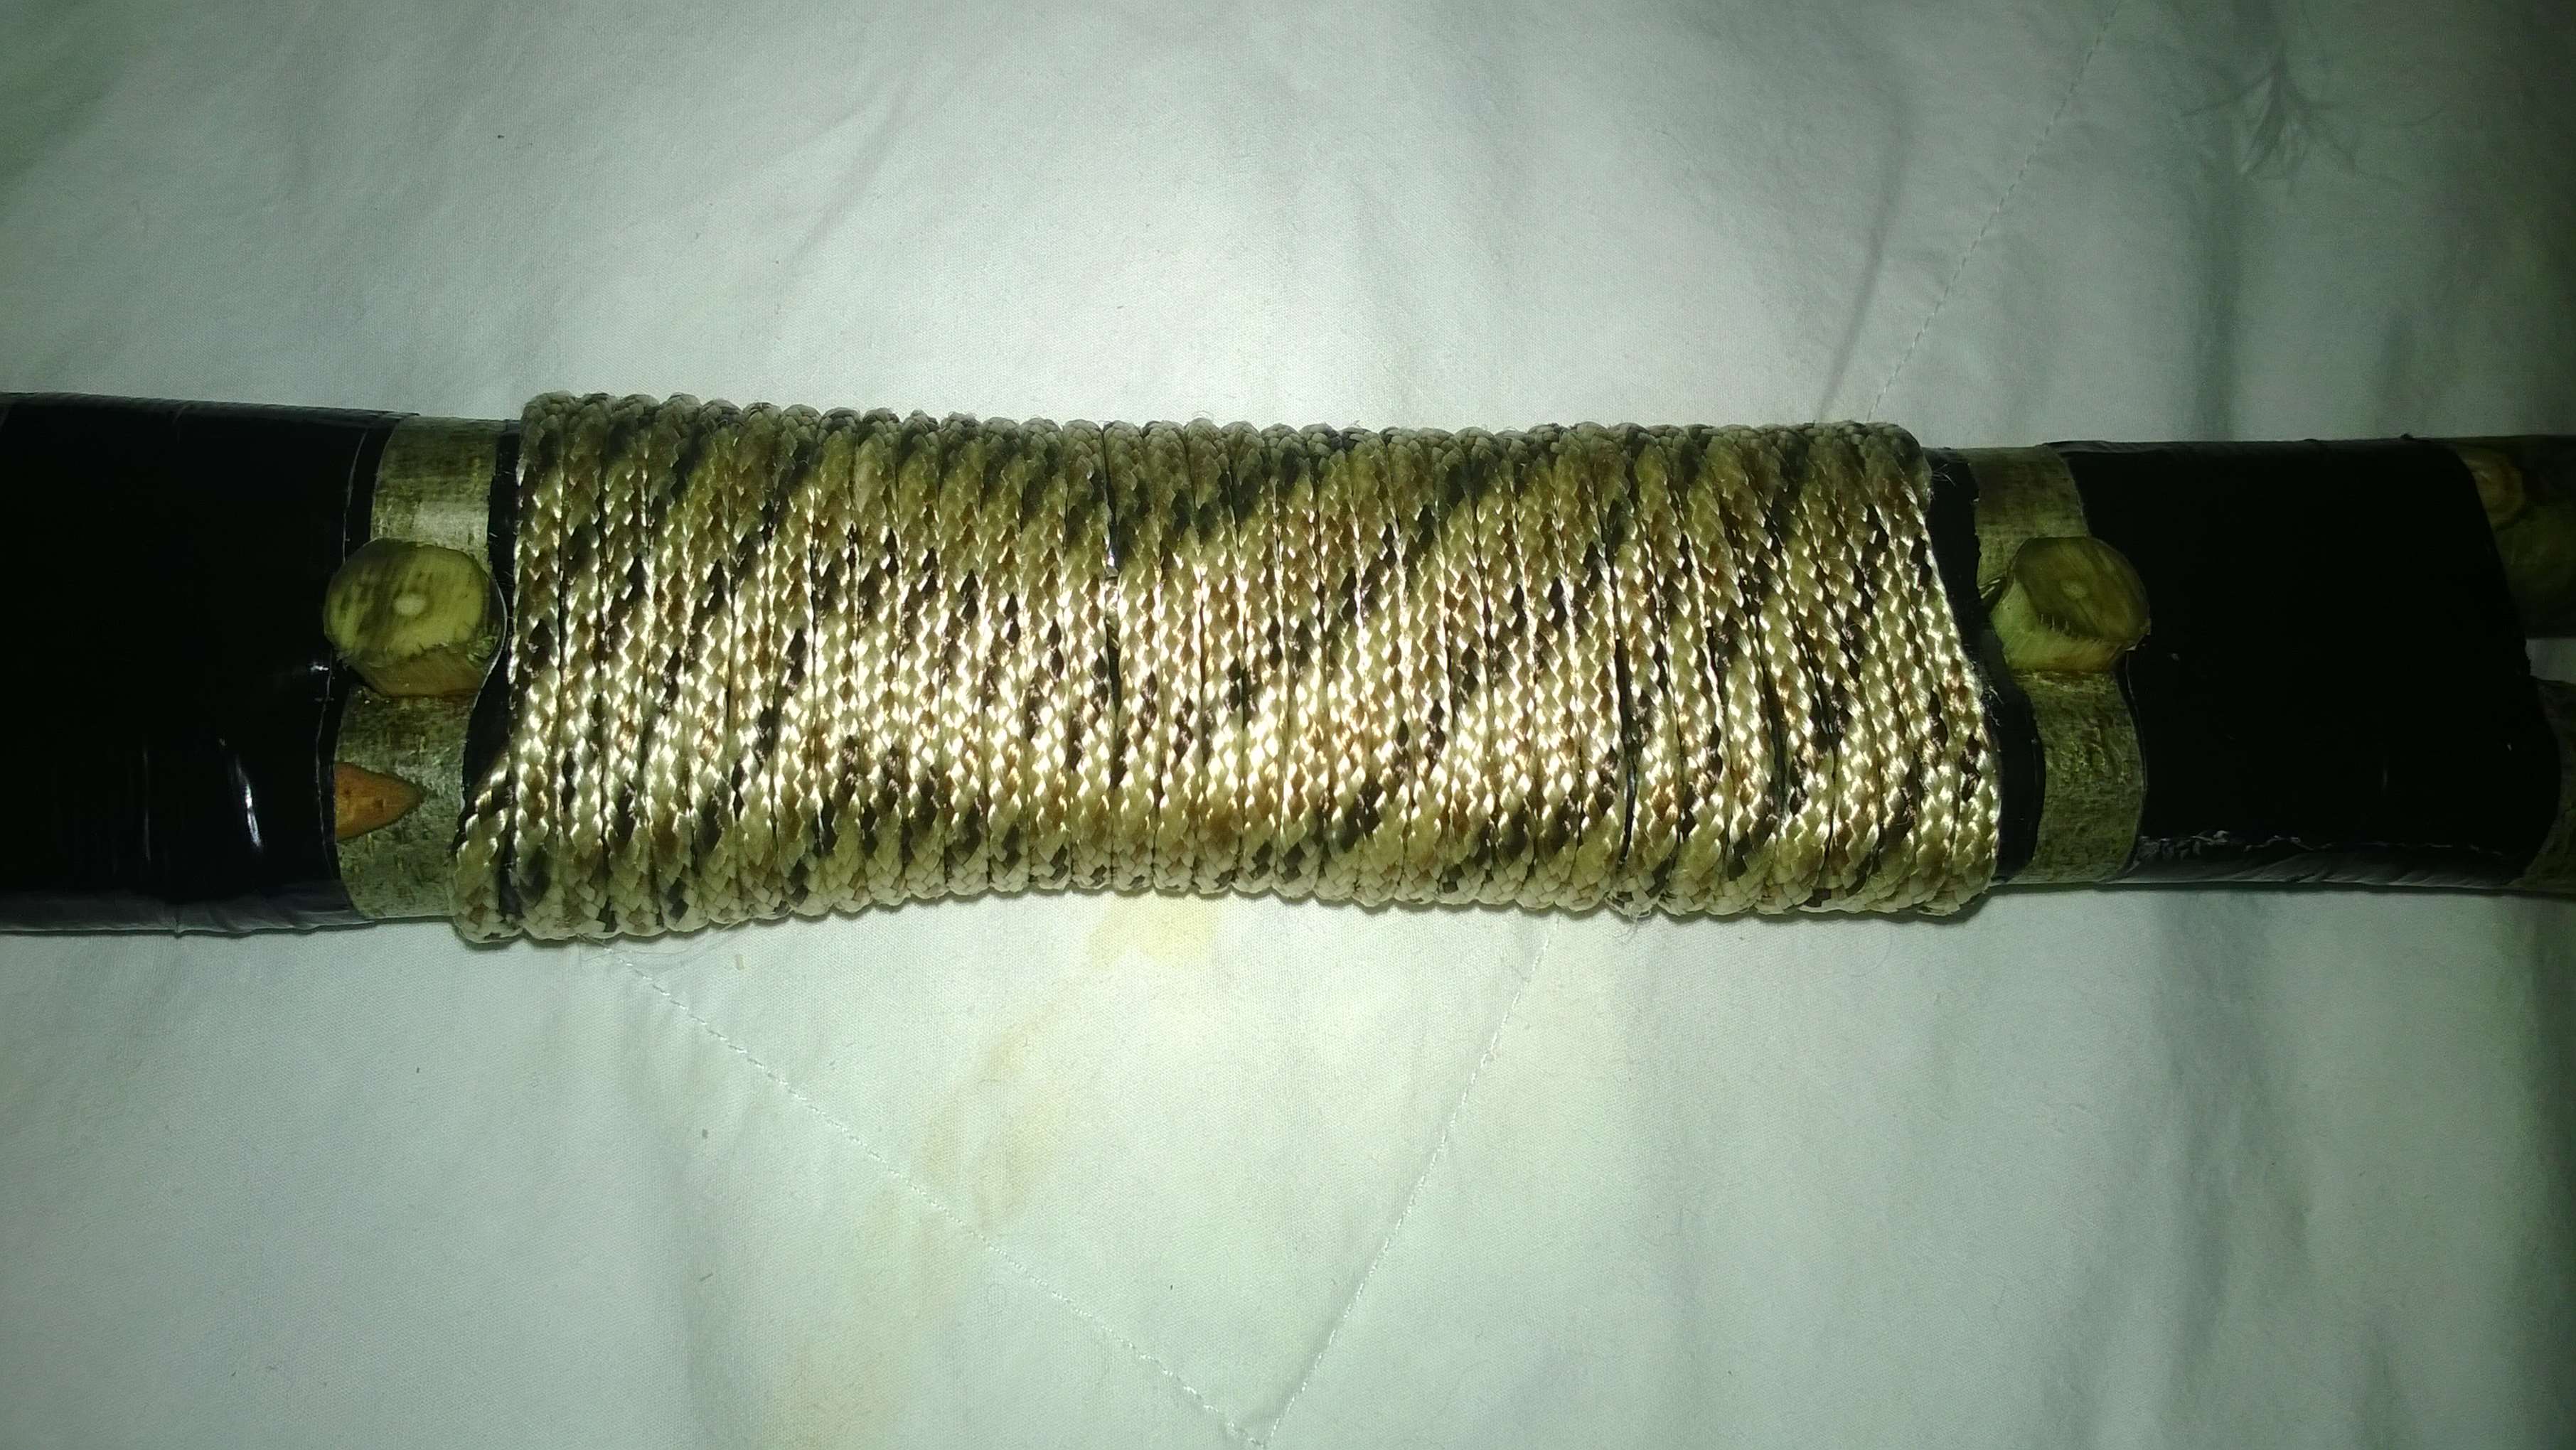
I made this bow about four years ago at the BCUK Bushmoot and was taught by Wayne Jones (Forest Knights). It is similar to the ash bow in that it is wider than it is deeper however it is made out of two pieces of bamboo (the HowTo…. goes into detail of why two pieces are used).
Bhutanese Bow
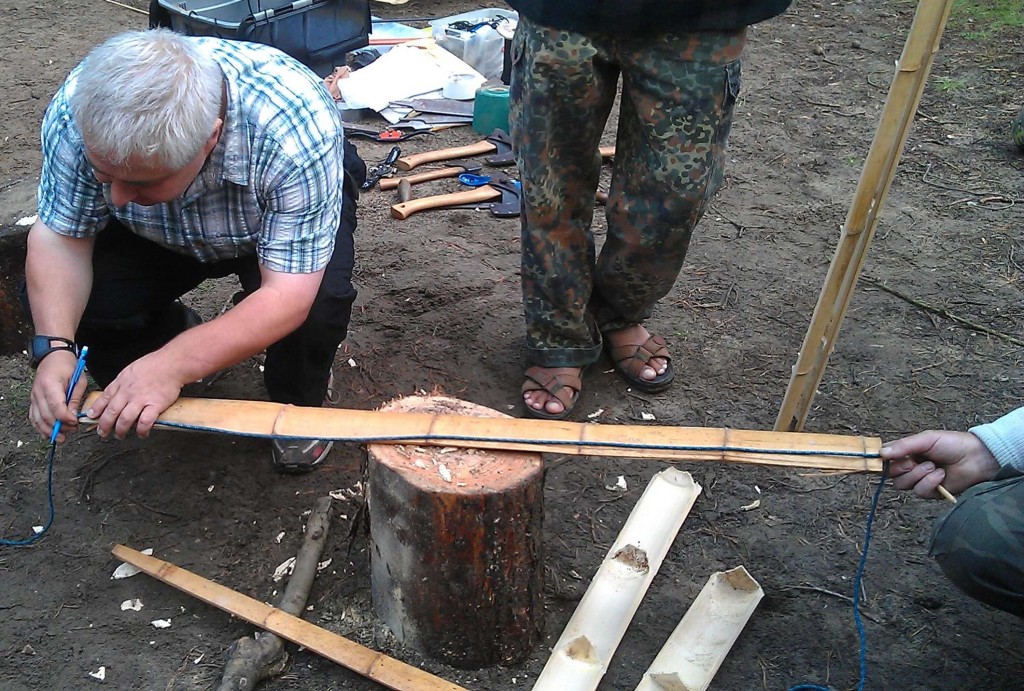
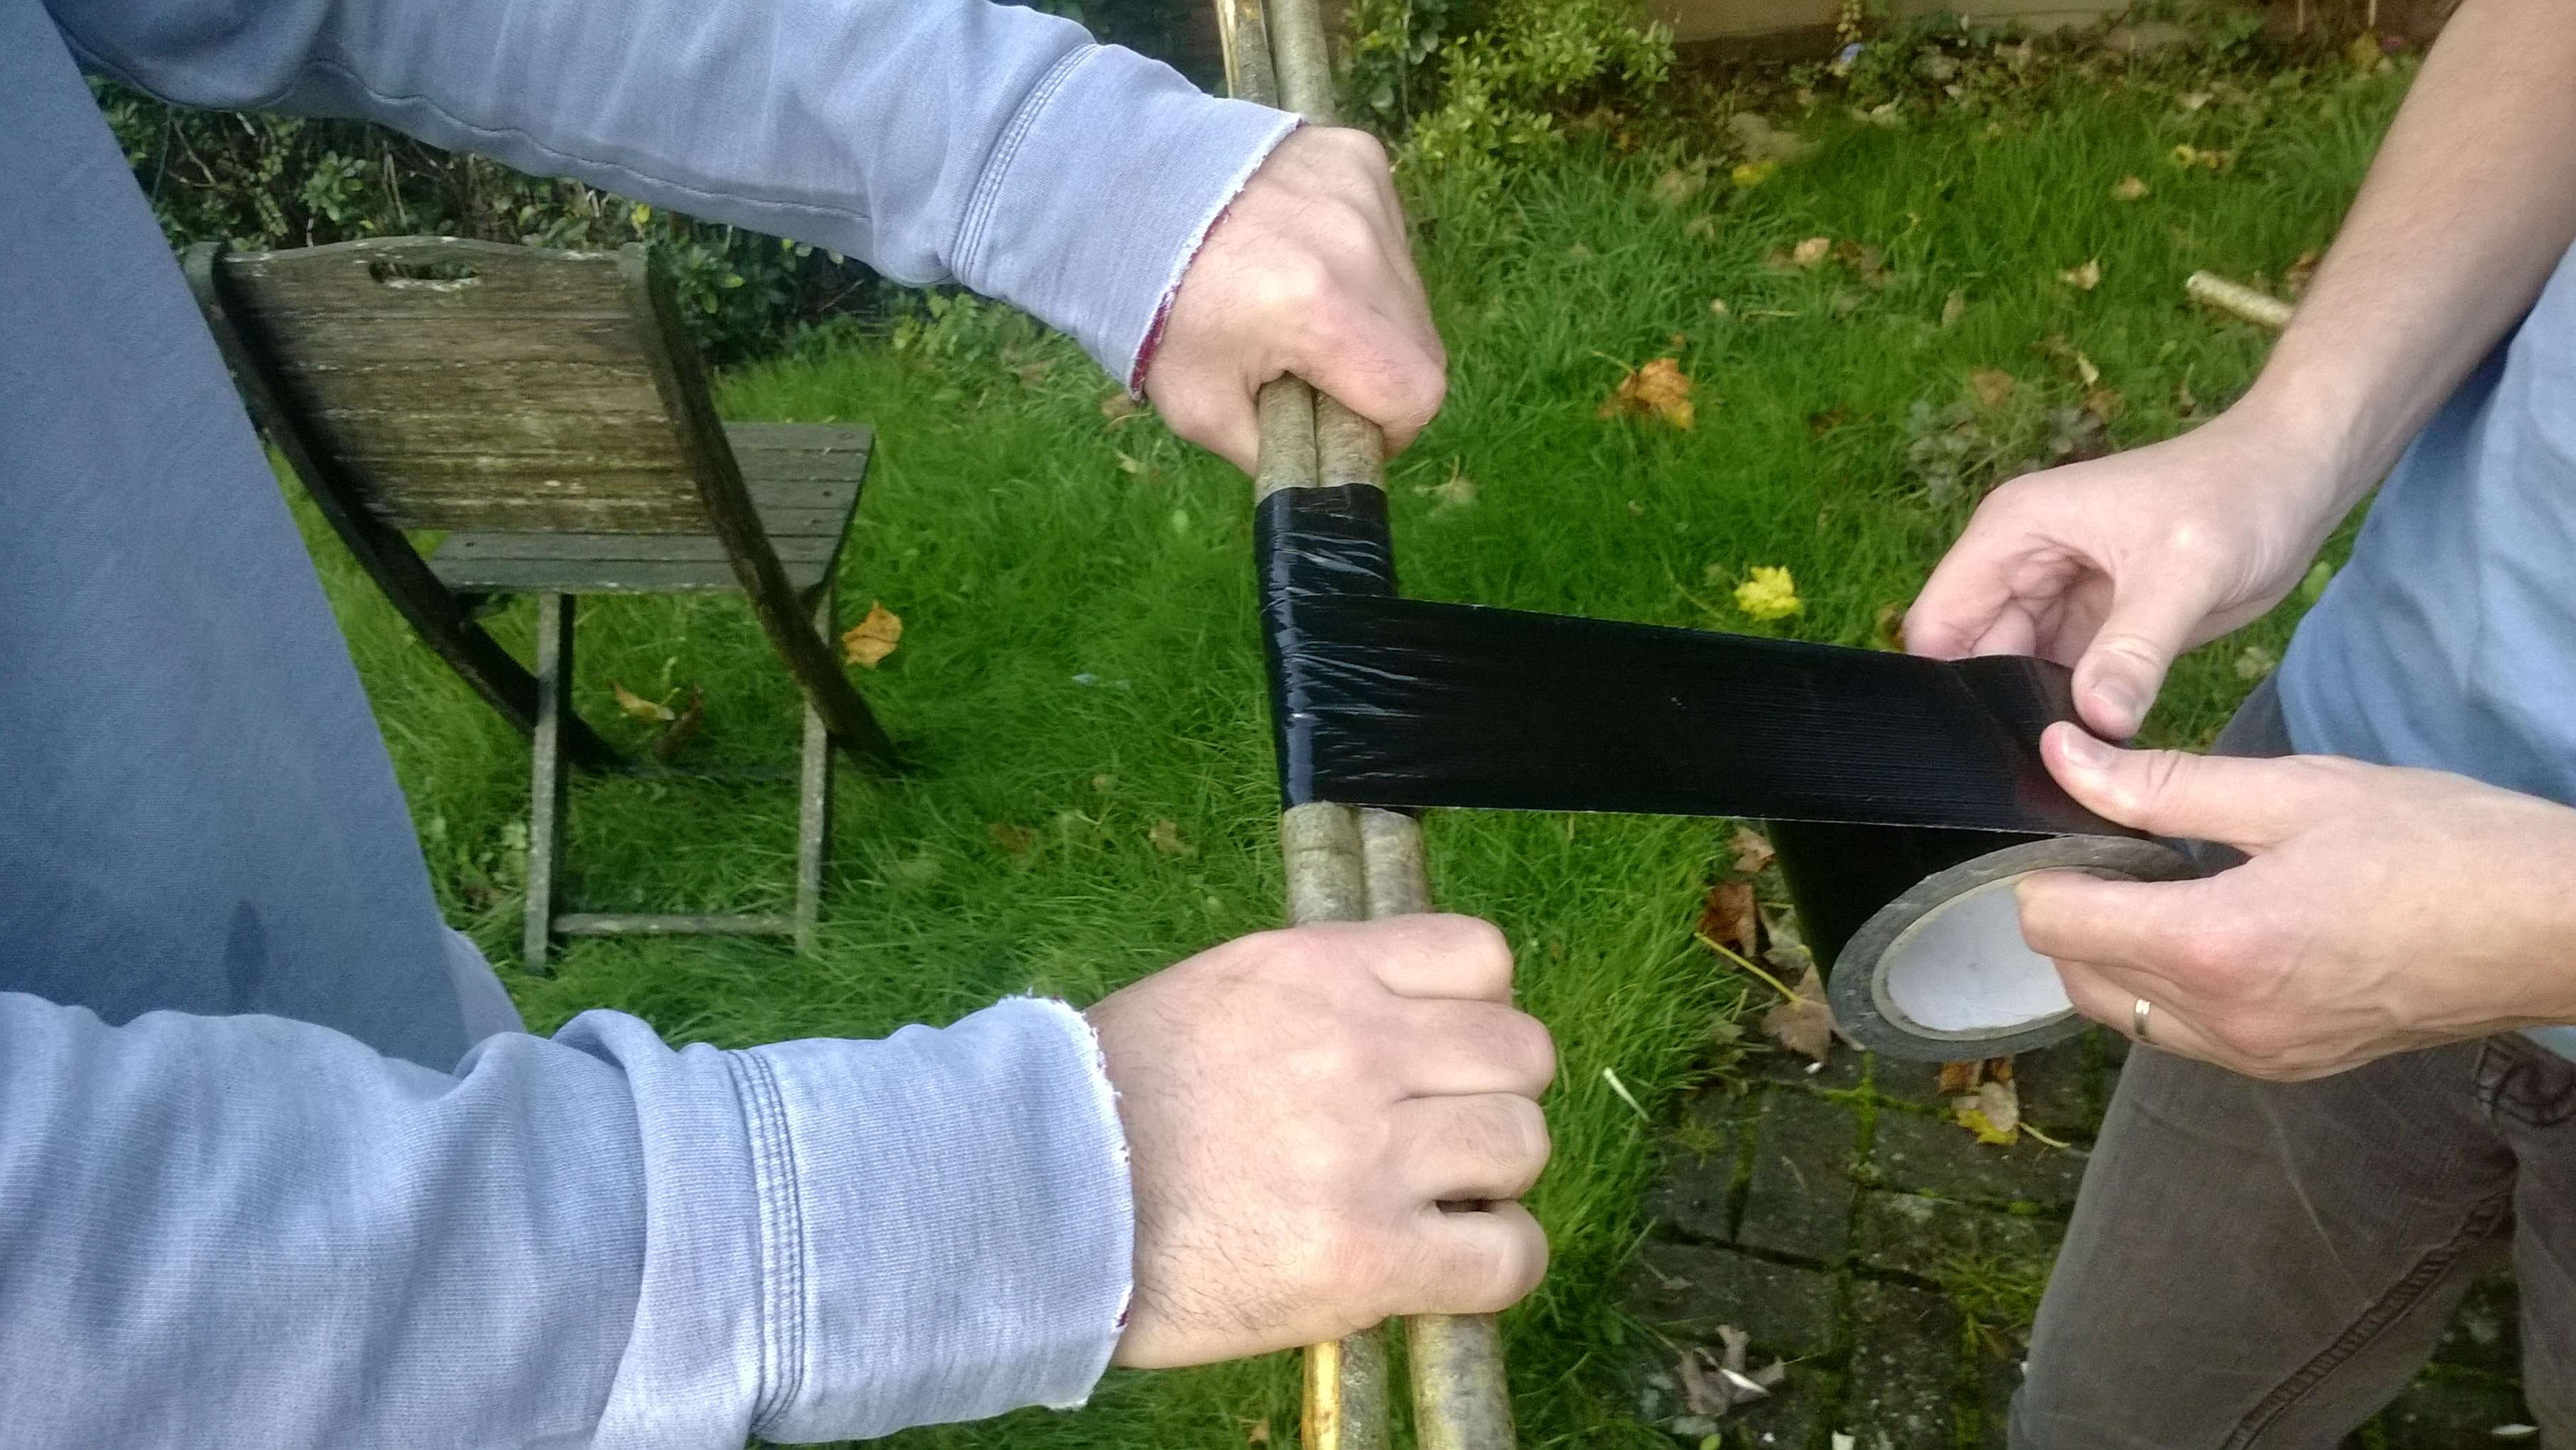
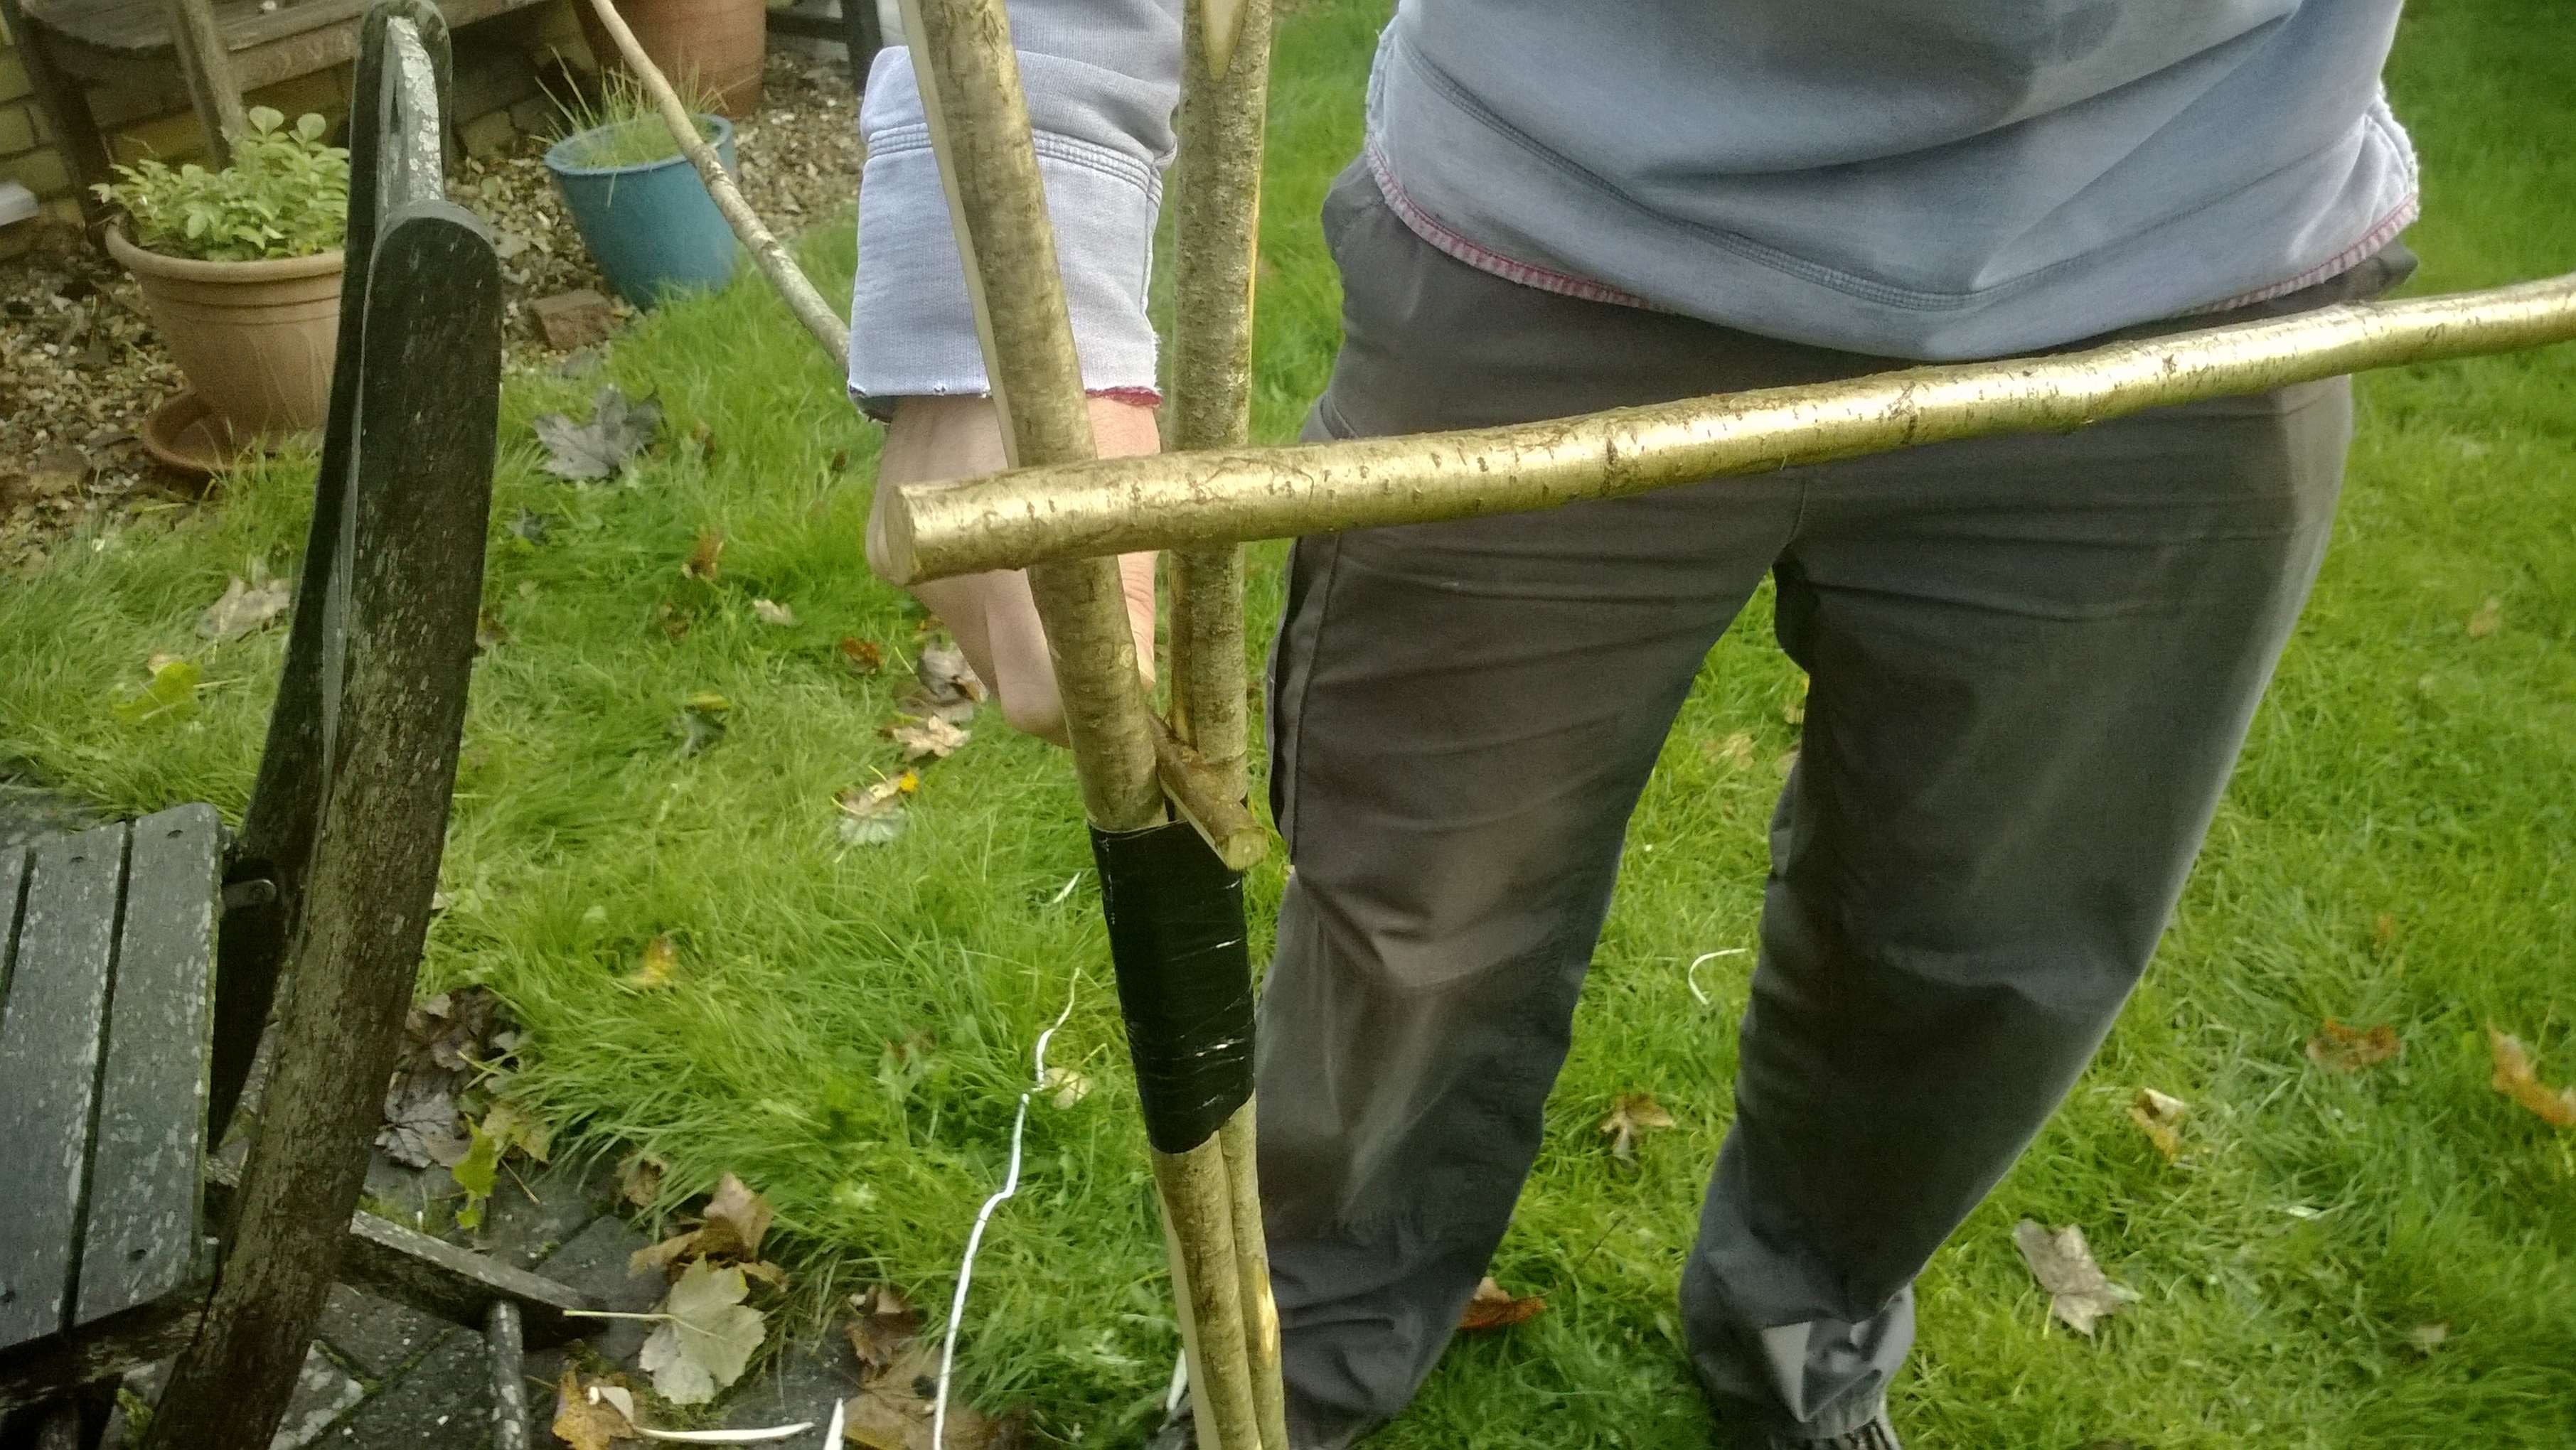
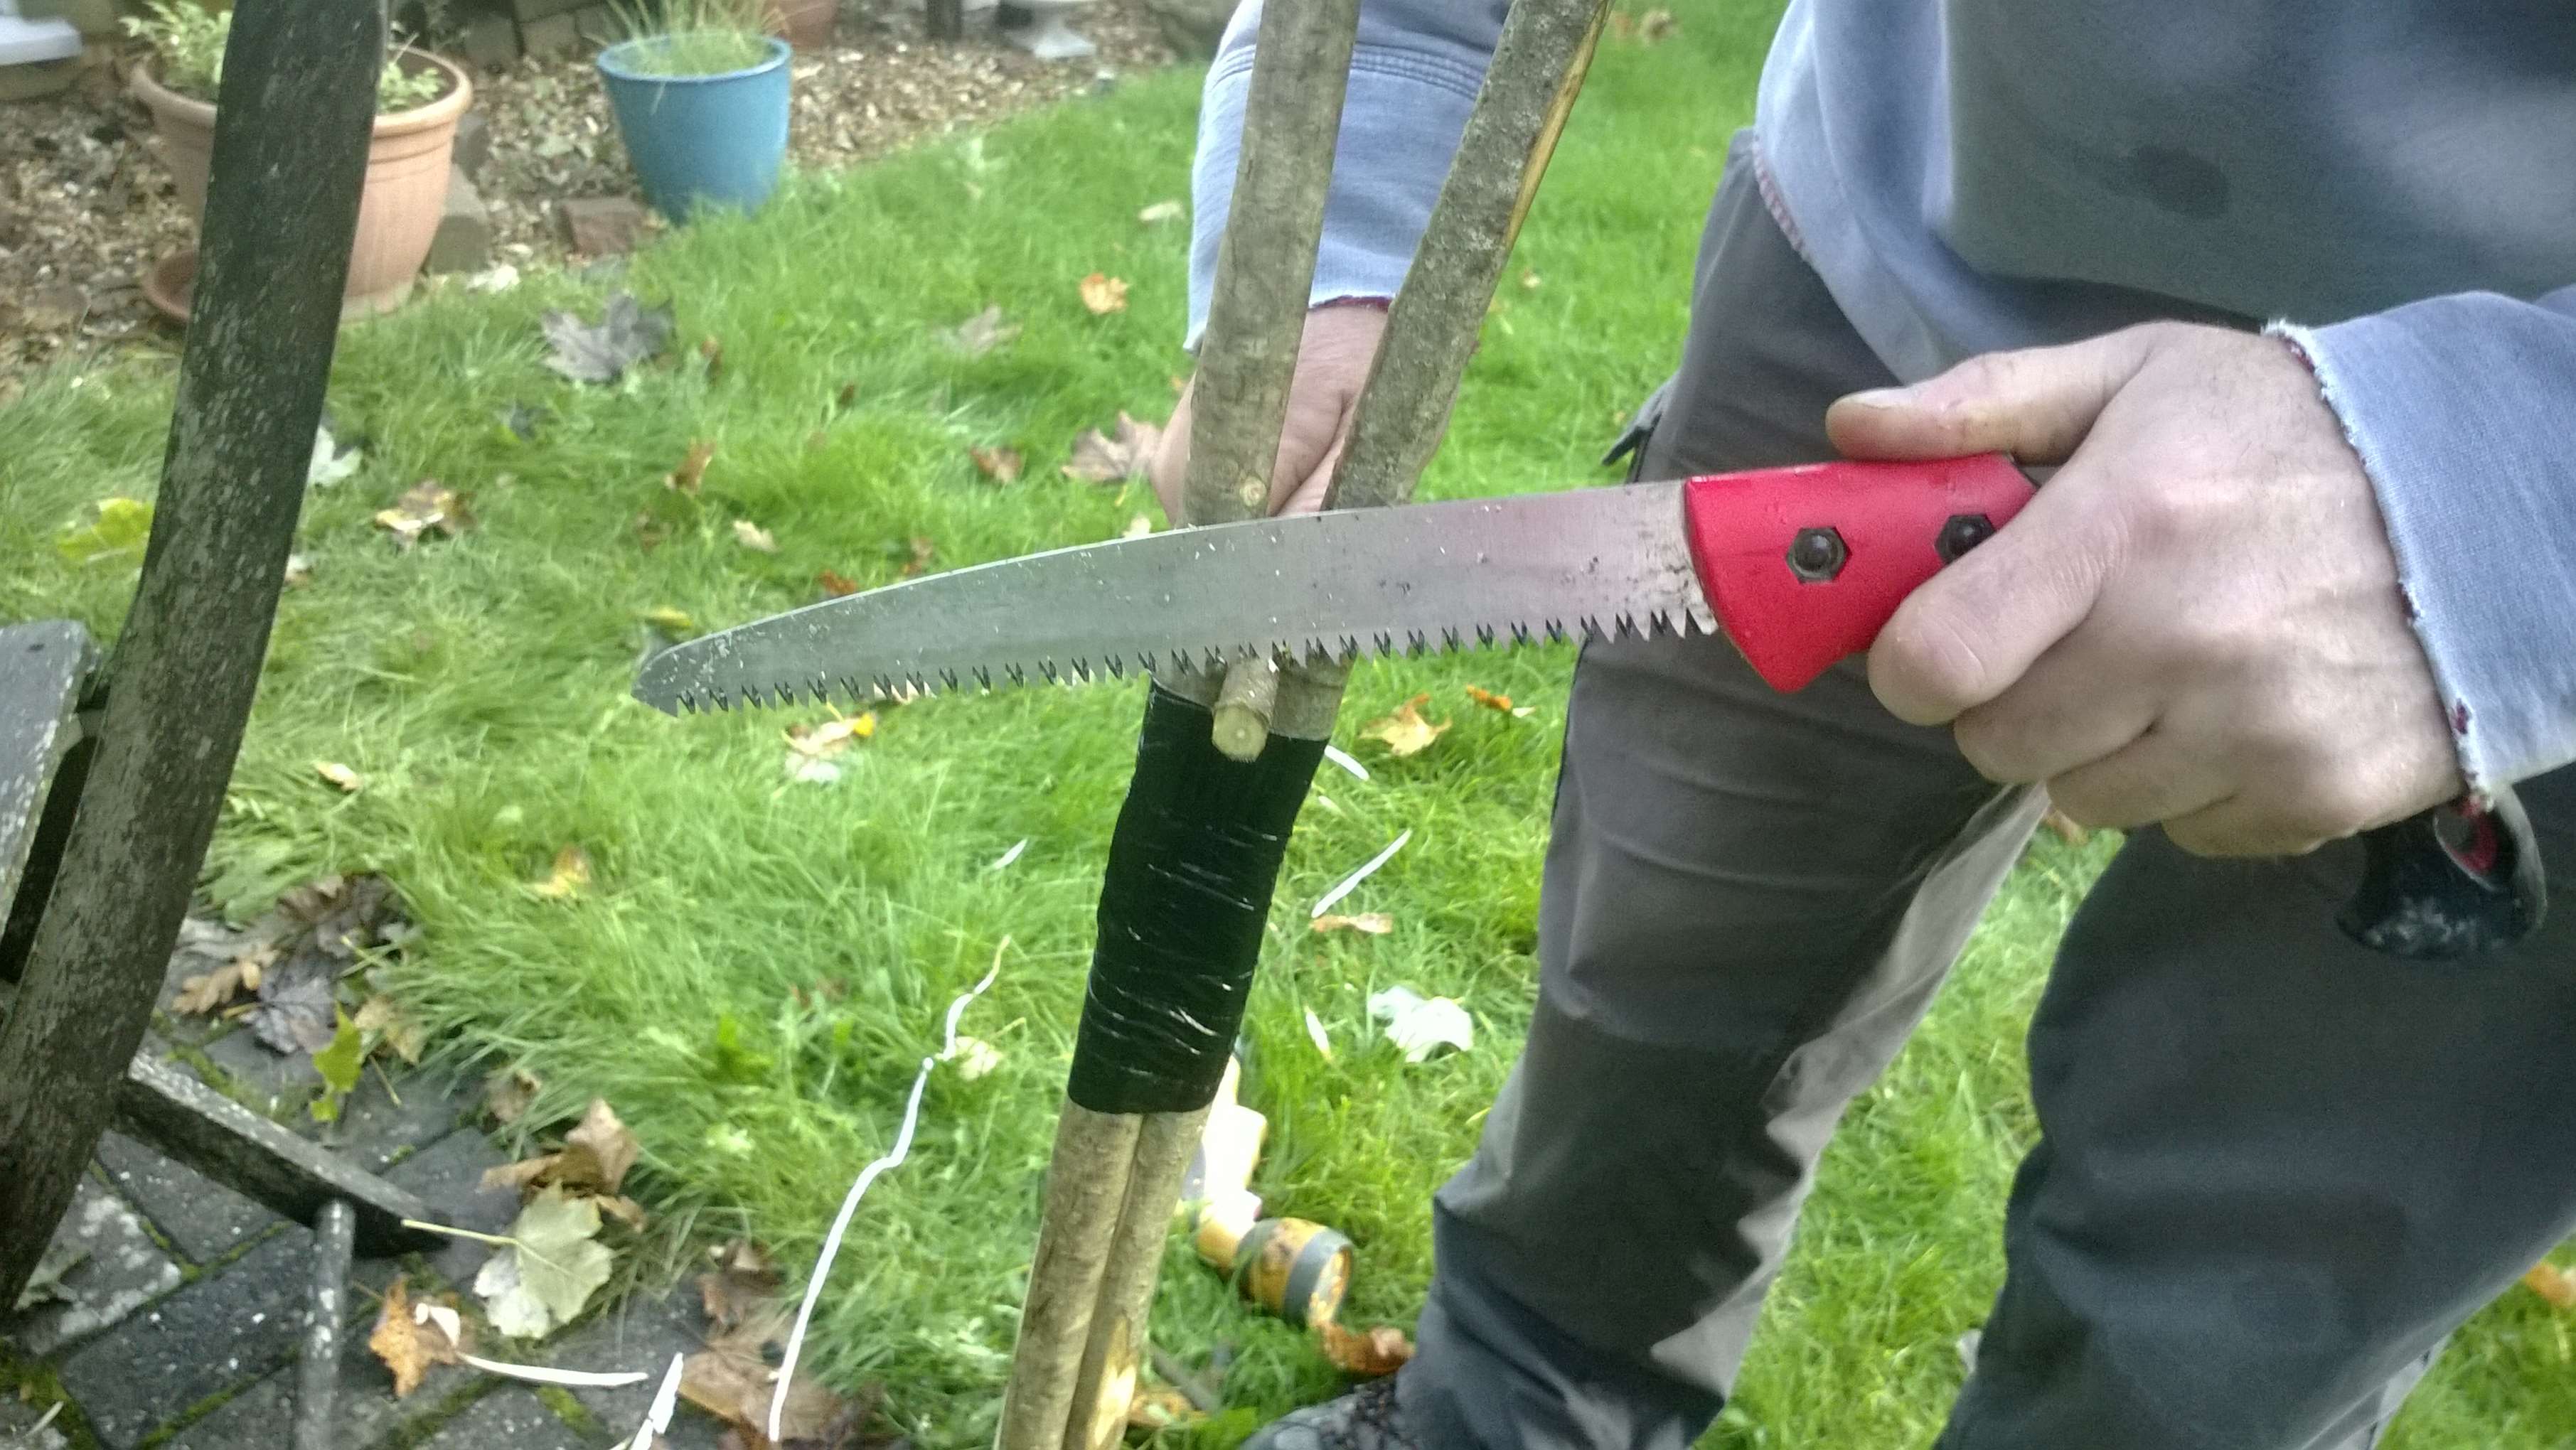
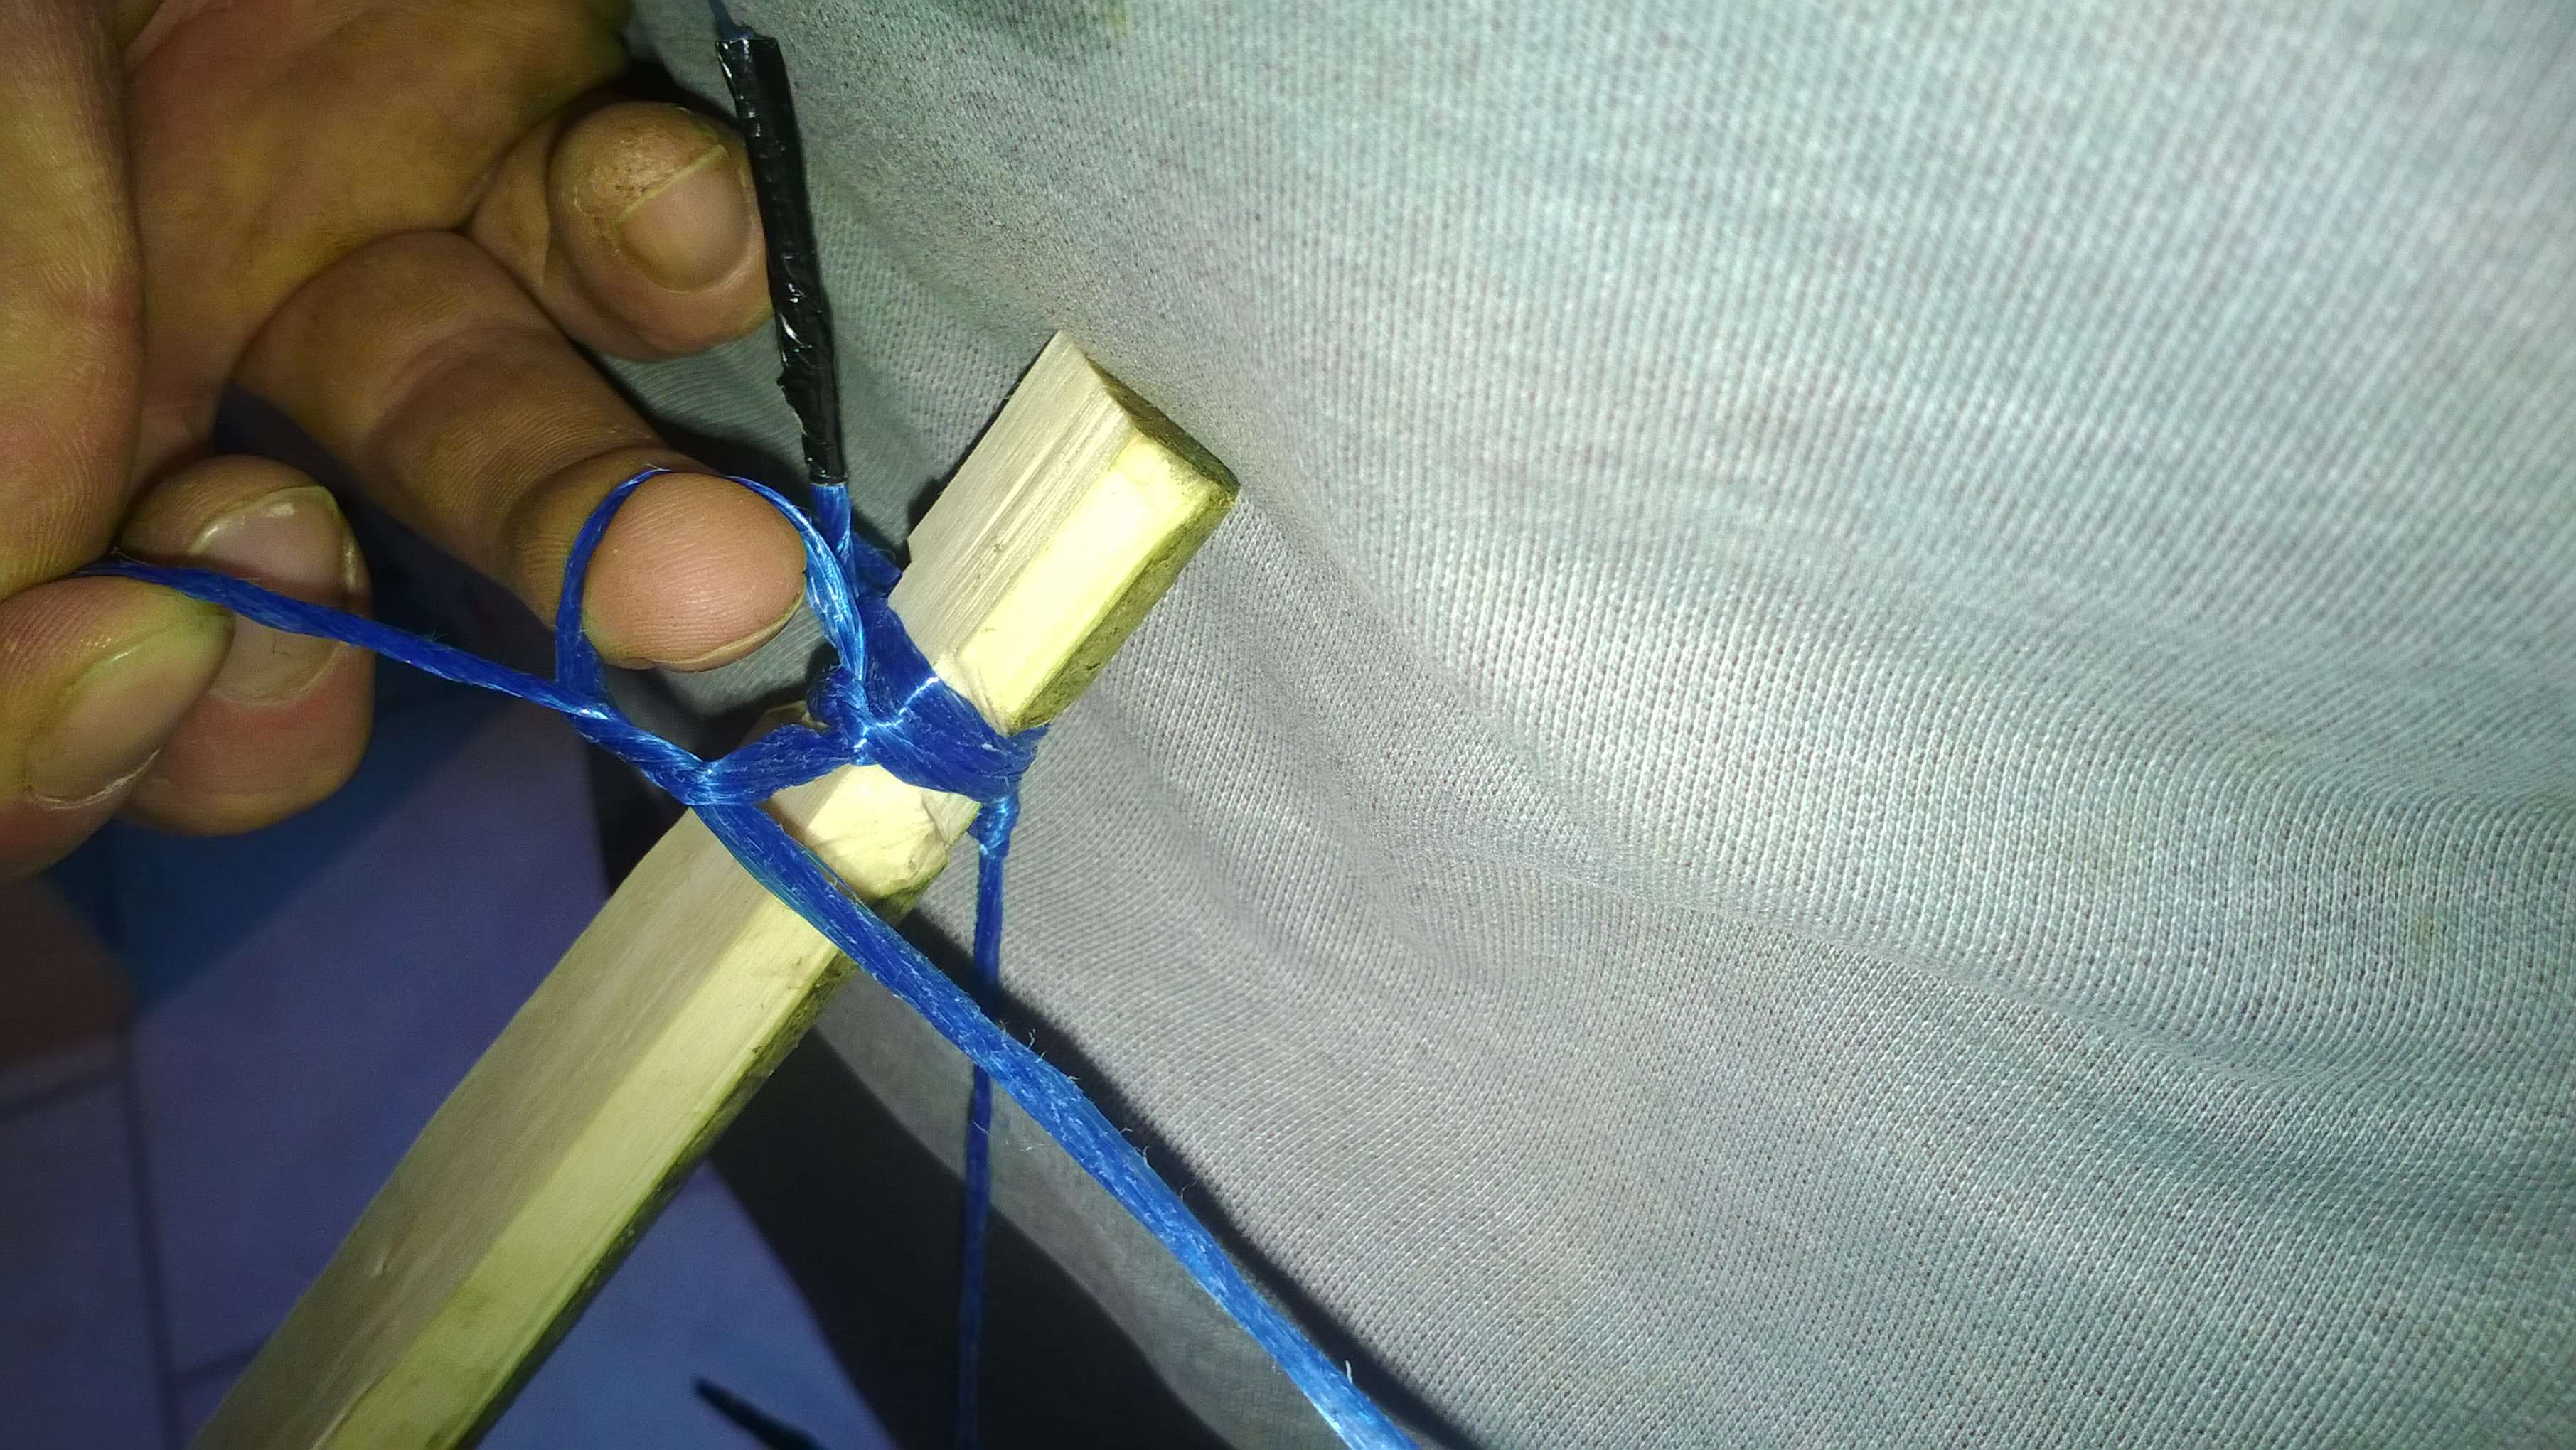
Traditionally the two pieces would be joined together with wooden pins and strapping but on the day all we had was tape. In the courses Wayne runs nowadays he uses the pins and strapping.
It is quite a light bow (about 30lbs in draw weight) however it has the advantage of being made very quickly (a couple of hours in competent hands).
Bhutanese Bow
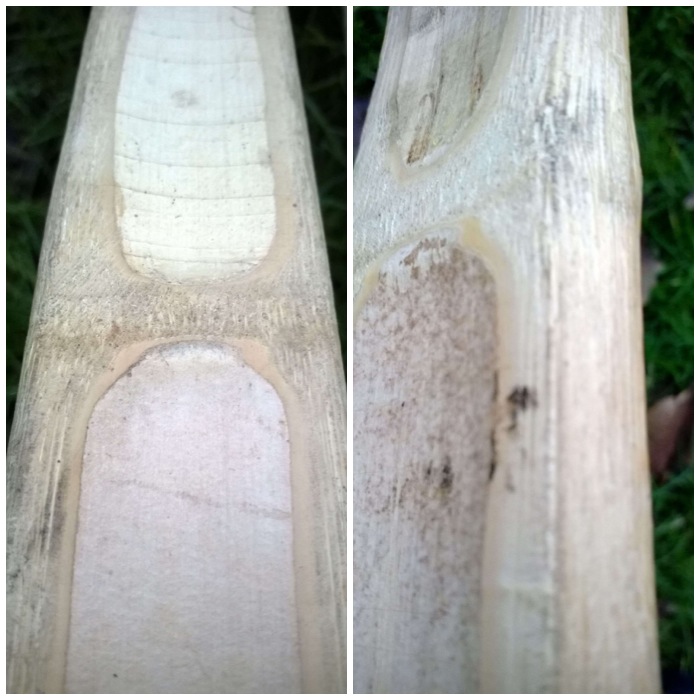
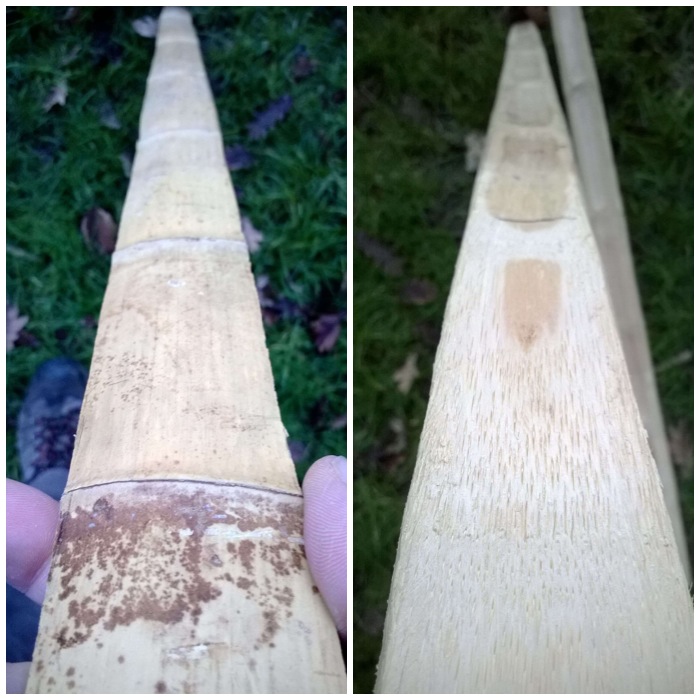
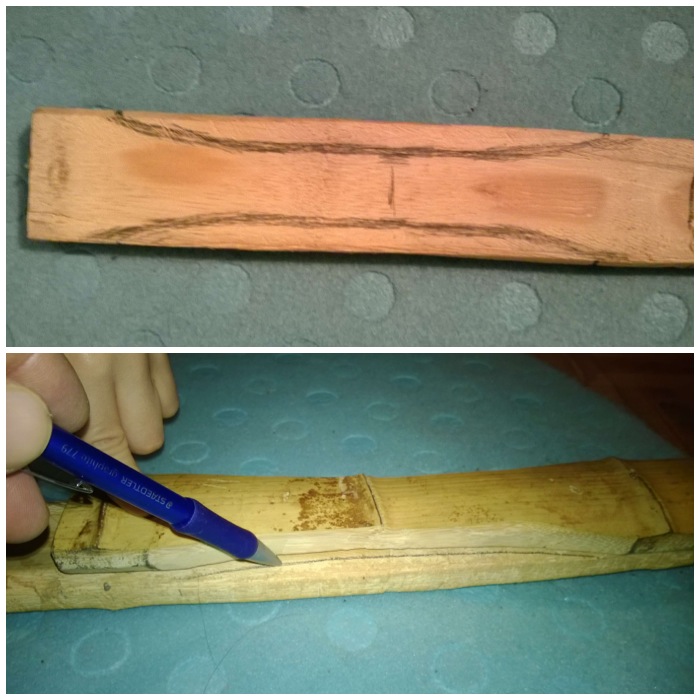
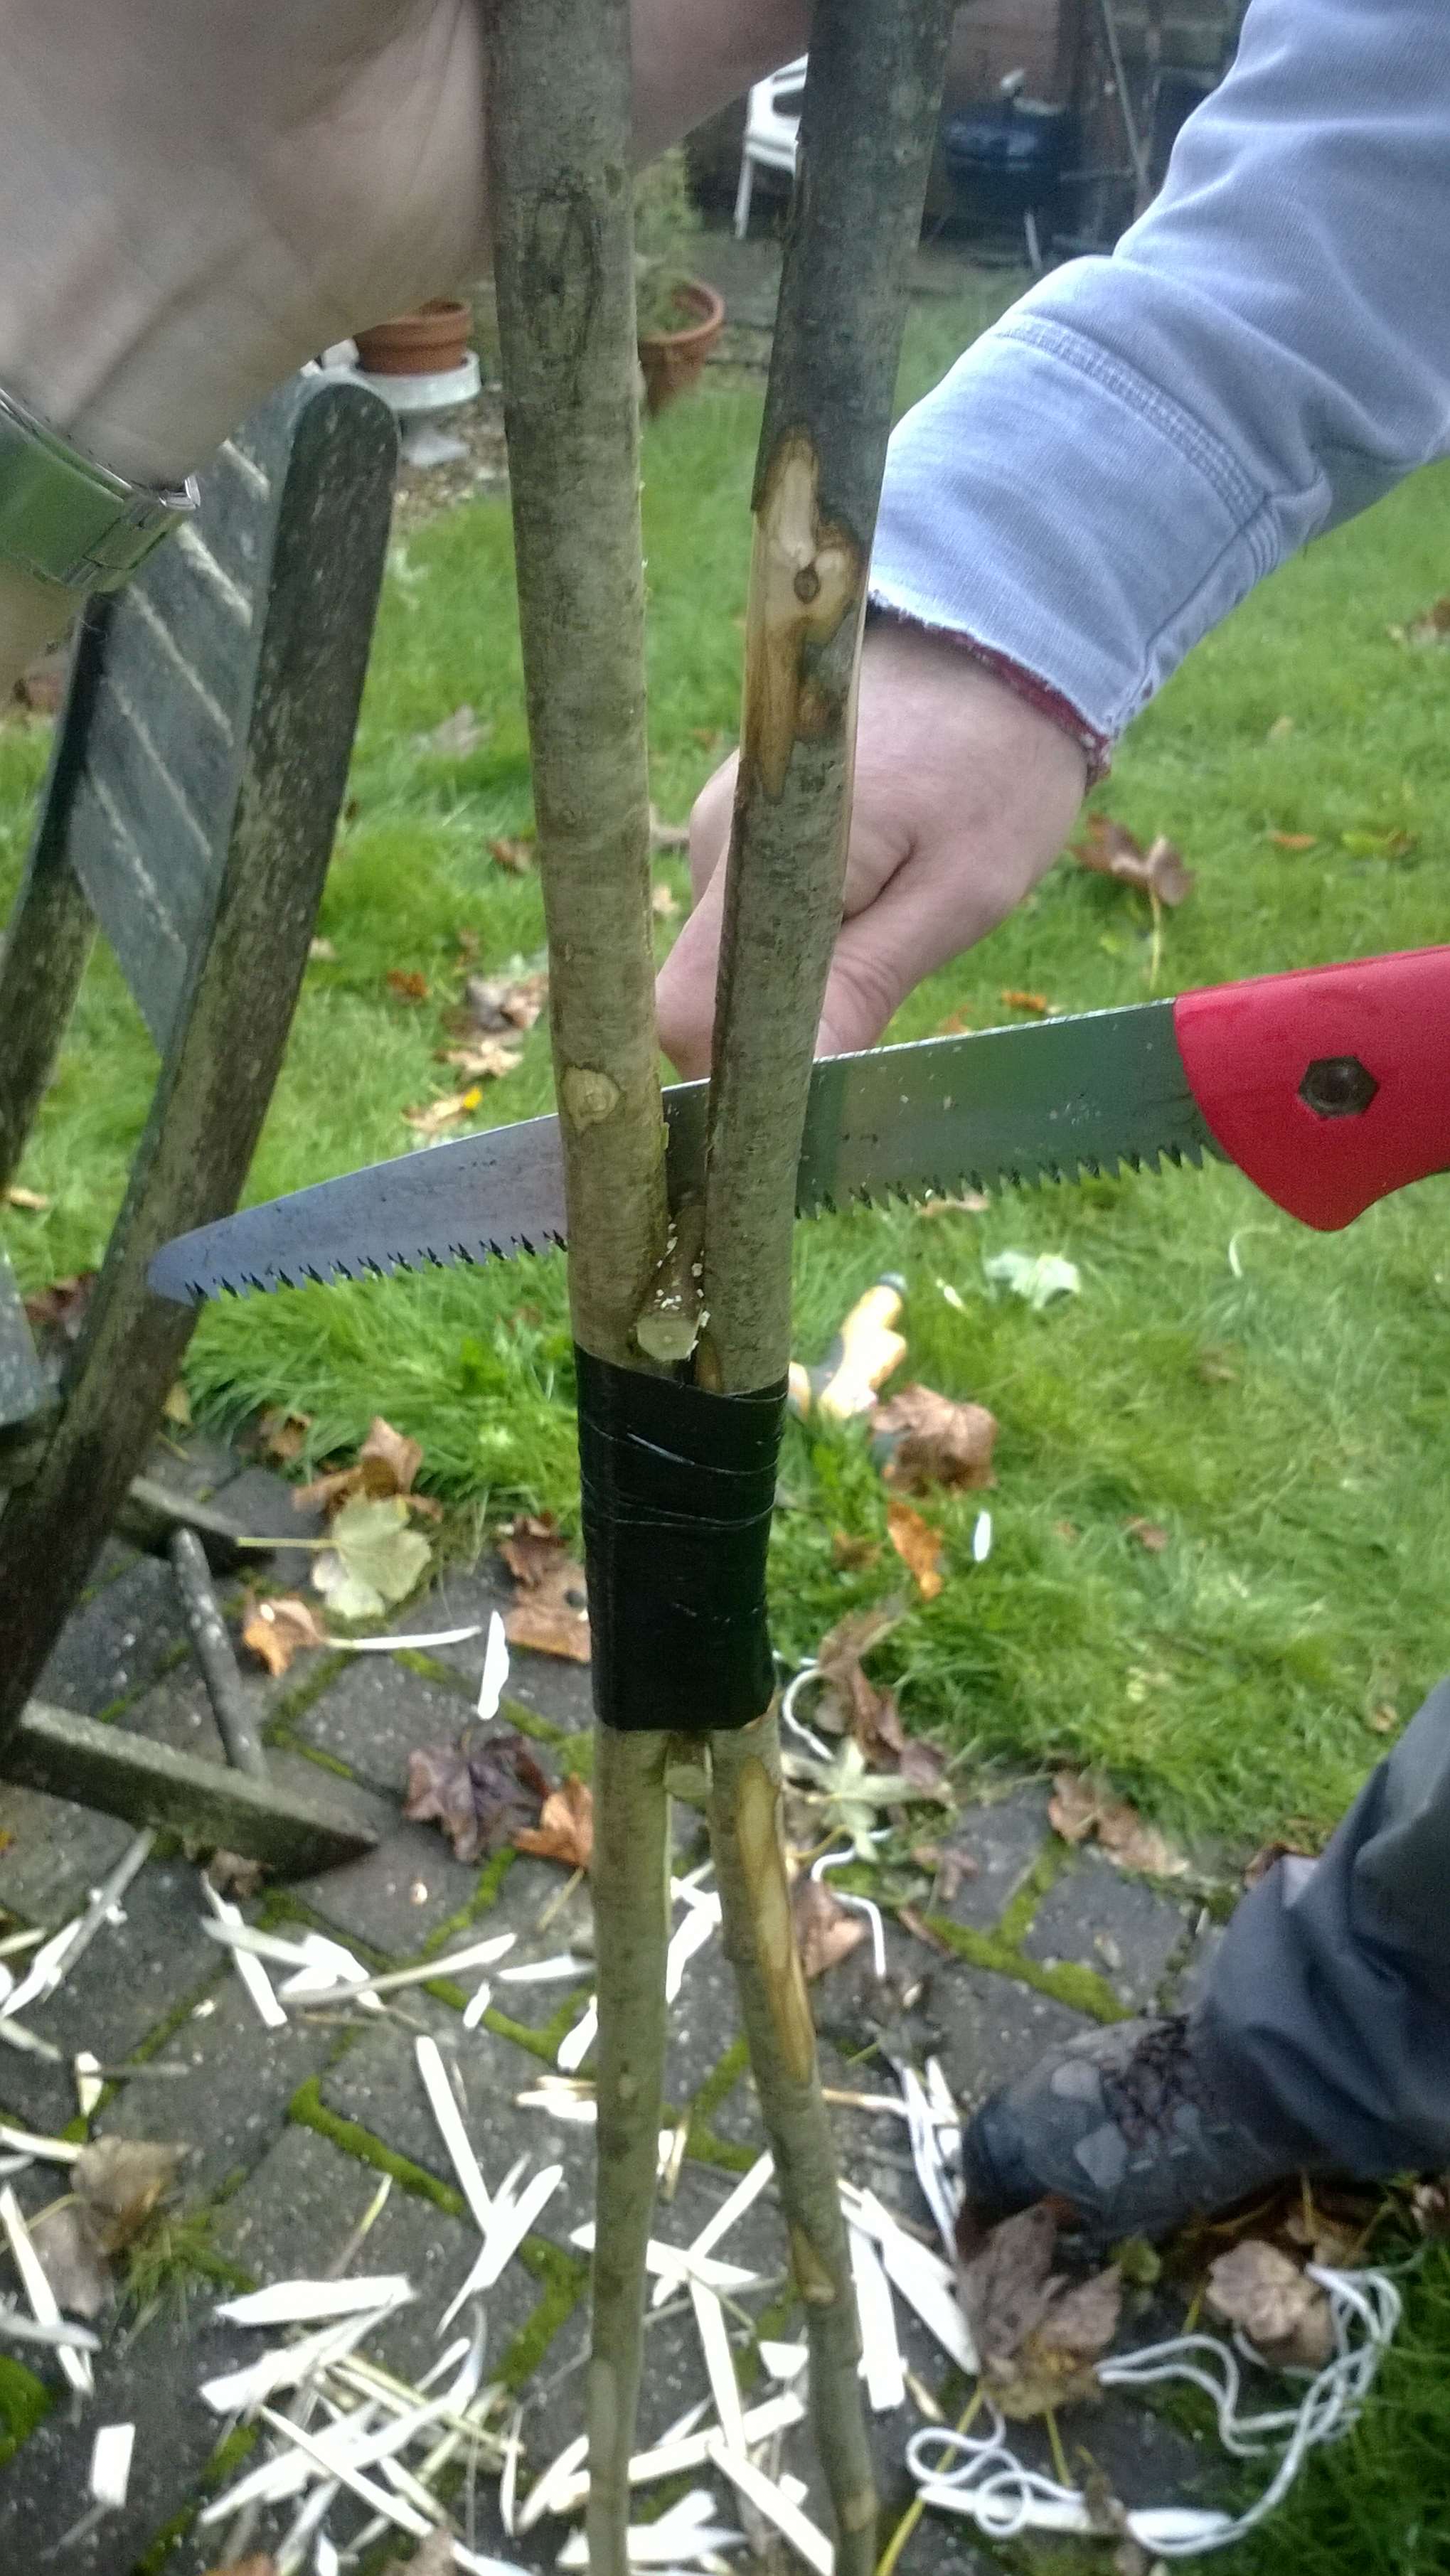
Another unusual feature of this bow is that the hard outer shell of the bamboo becomes the Belly (the part of the bow facing you when shooting) of the bow and the softer inner part of the bamboo becomes the Back of the bow (the part of the bow facing away from you when shooting). I am told that this is to do with the characteristics of the bamboo – because it is a grass technically and not wood.
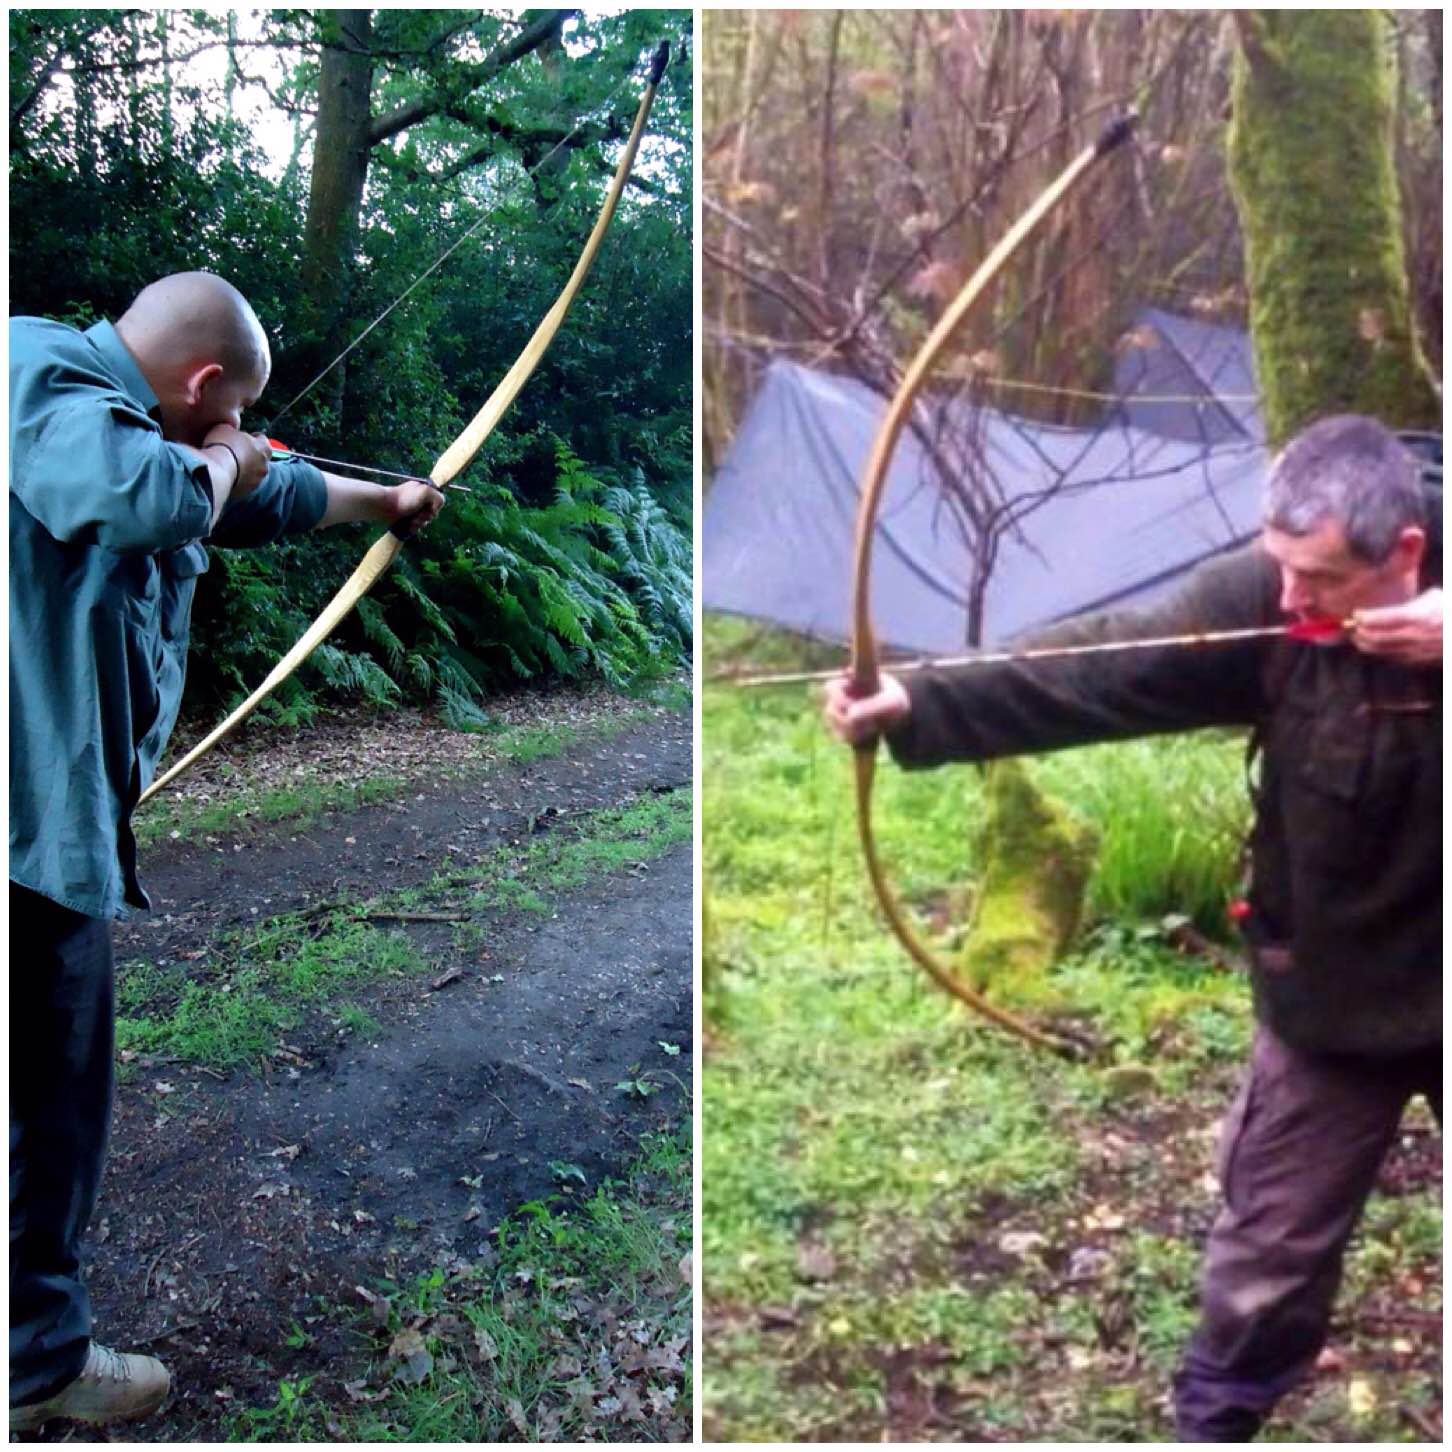
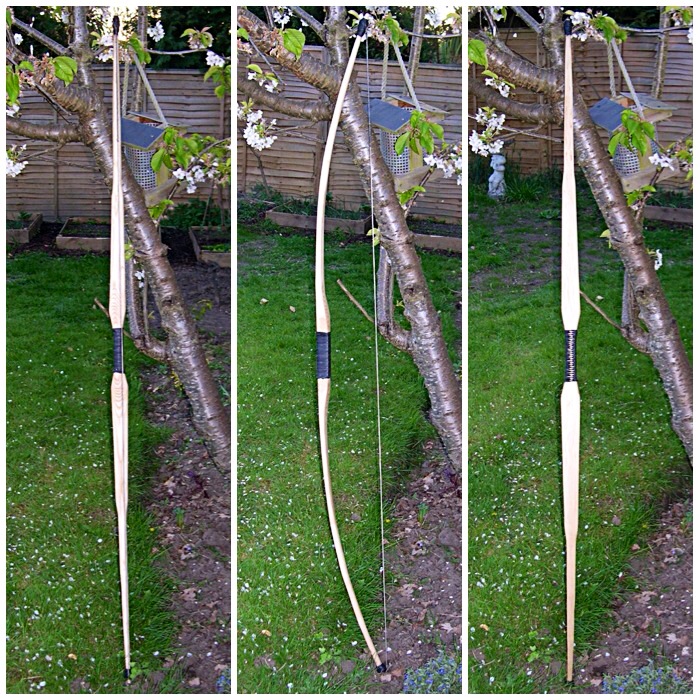
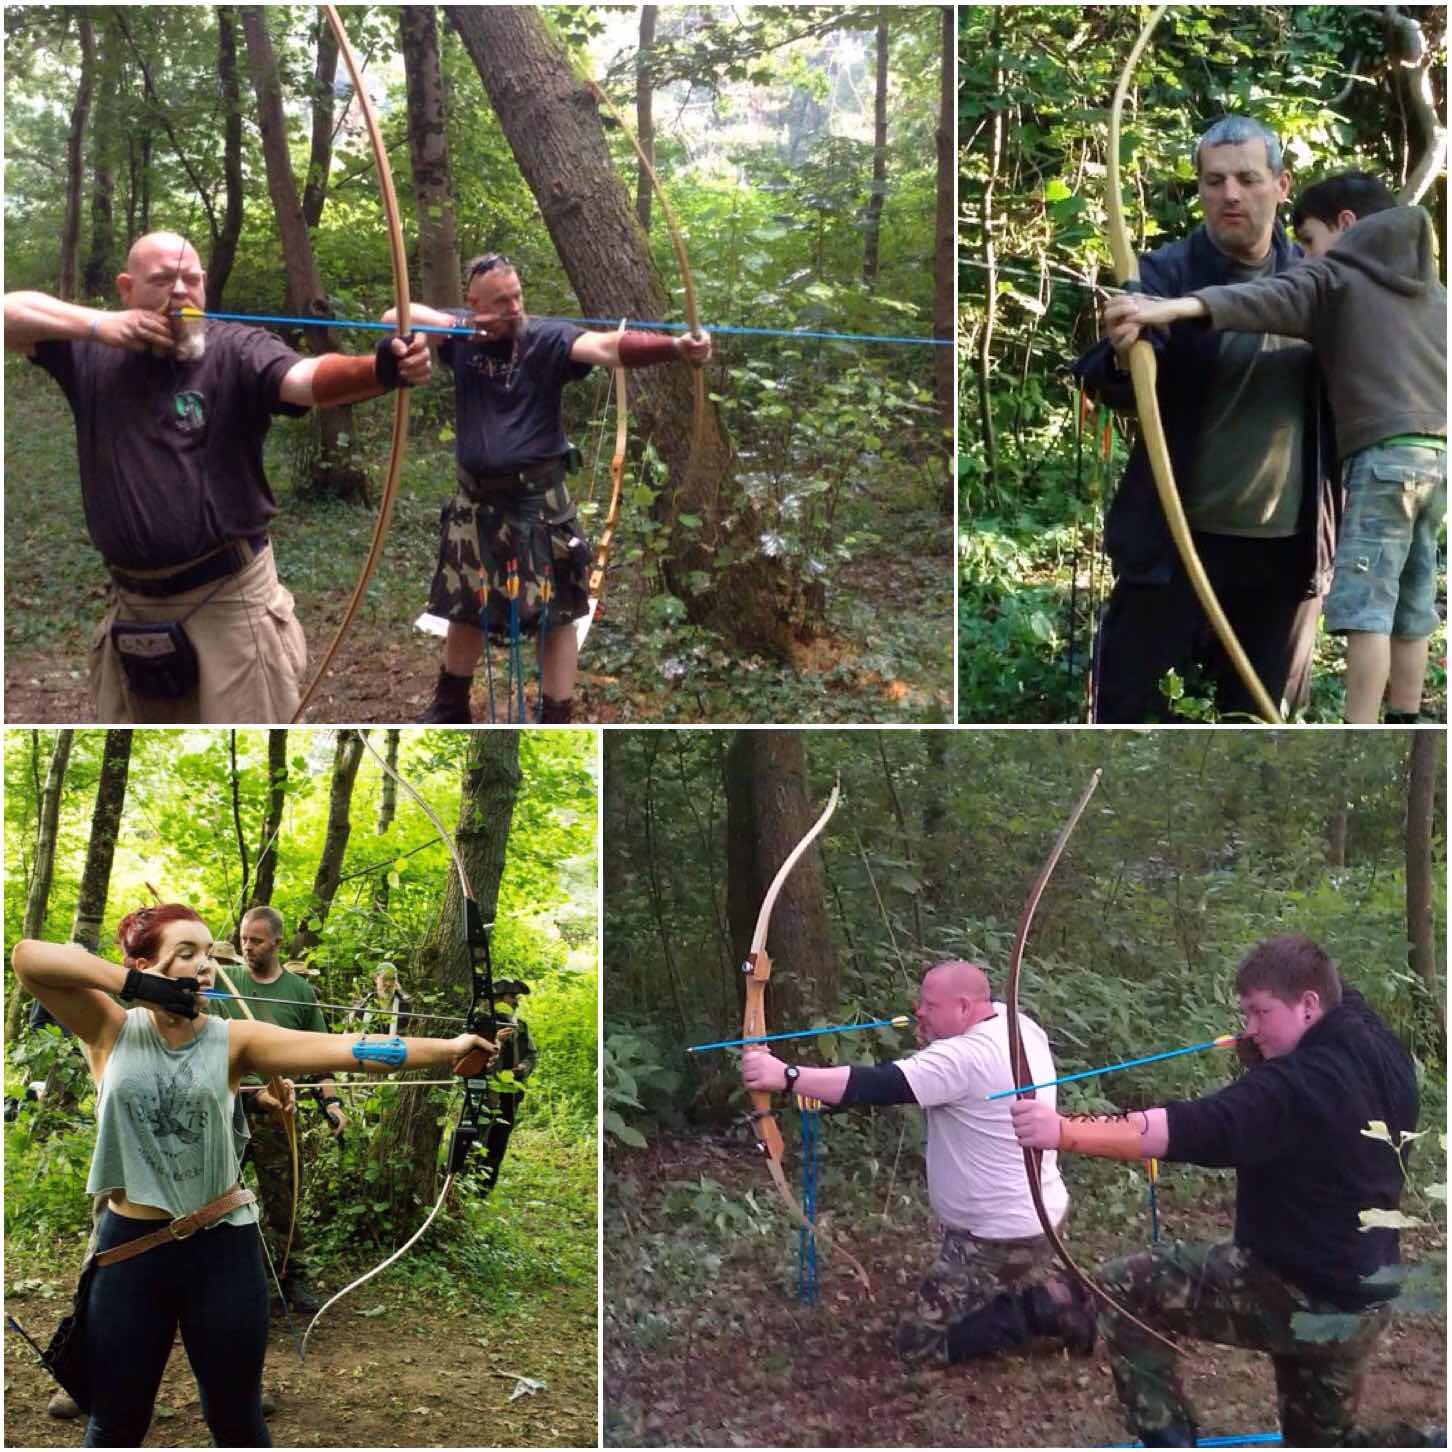
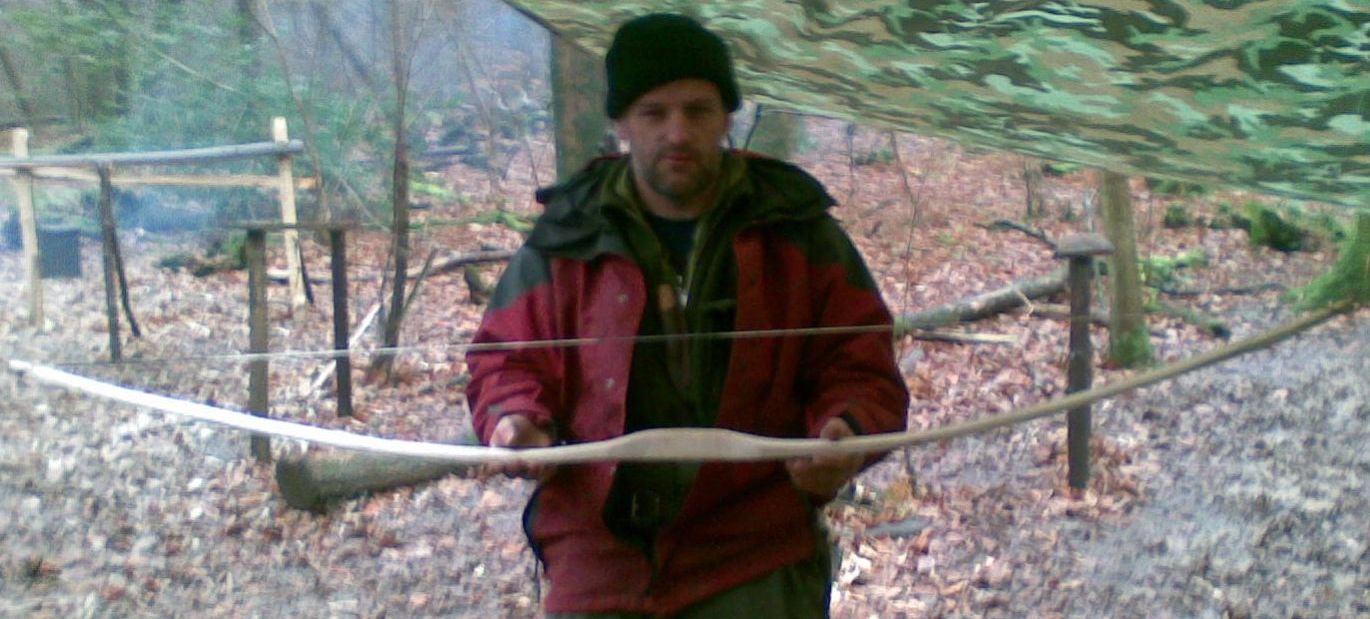
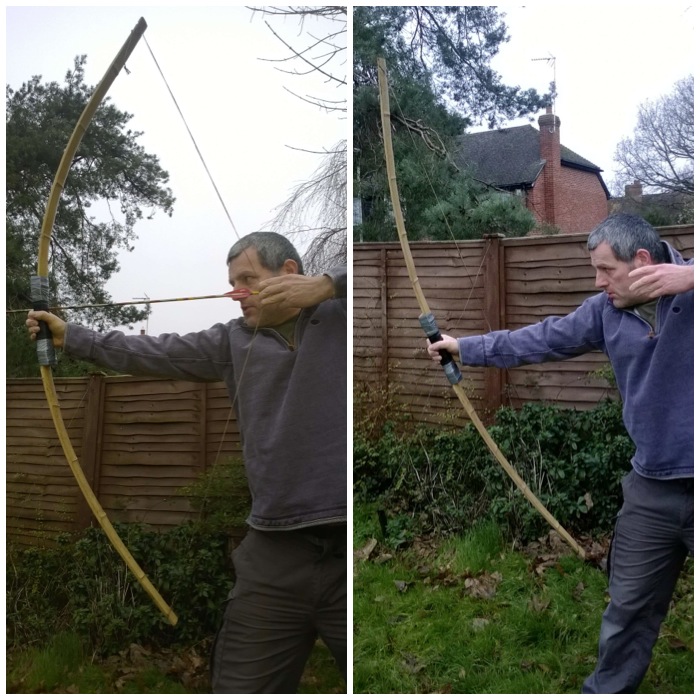
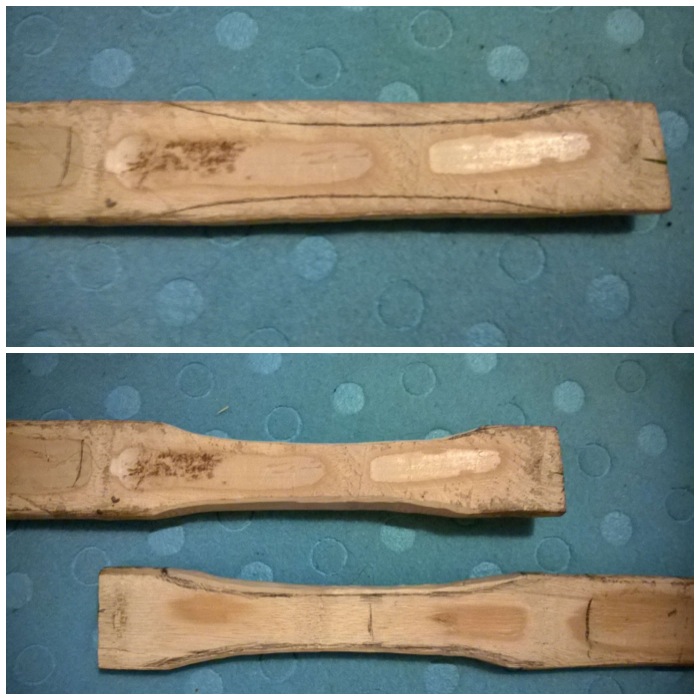
This is my favourite bow. I carved it while doing a Primitive Technology course at Woodcraft School.
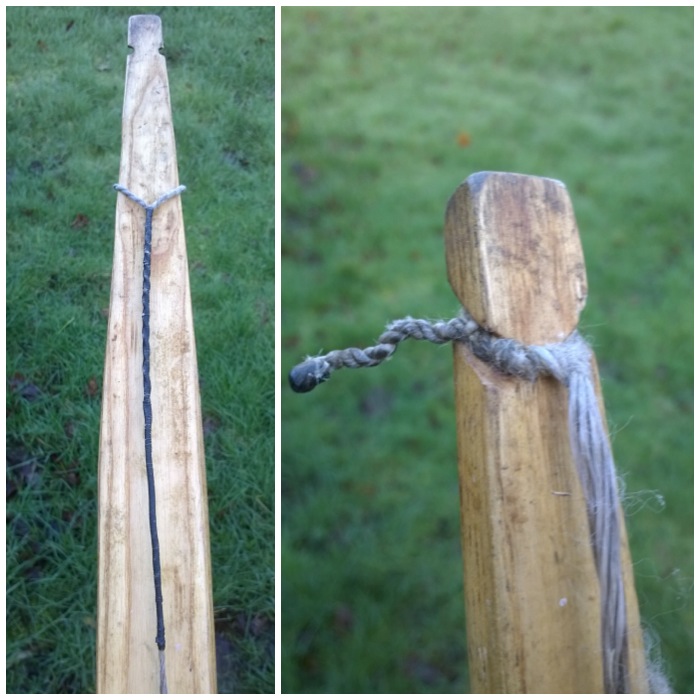
I carved the bow based on the dimensions of the ones found in the peat bogs at Holmegaard in Denmark. The bow has the lower parts of its limbs shaped wider than they are deeper much like the ash flatbow. The upper parts of the limbs are more ‘D’ shaped so making them stiffer but thinner than the lower parts of the limbs.
Holmegaard Bow
This unusual shape works well with ash as it is not a particularly strong wood for thin bows. The wide lower limbs give it strength while the thinner and stiffer ‘D’sectioned tips allow the limbs to shoot forward at a very fast speed so making it an excellent hunting bow where you get fairly close to your prey..
Holmegaard Bow
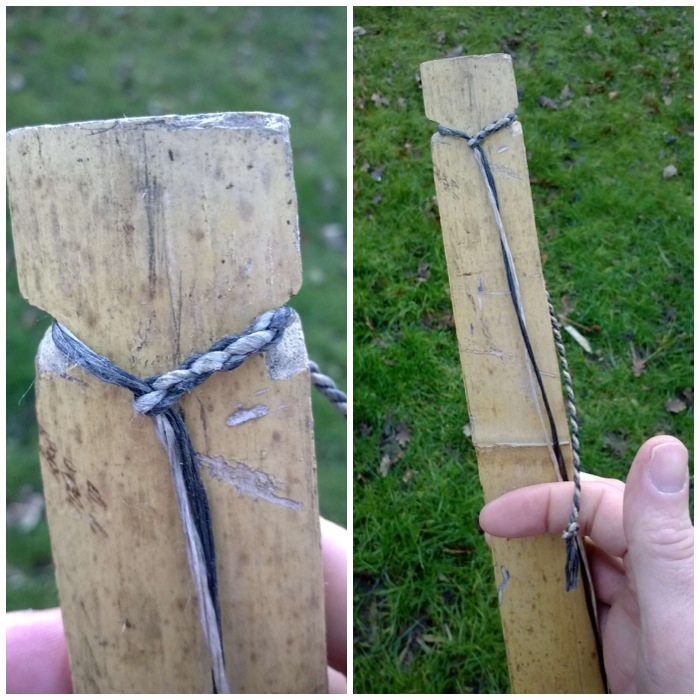
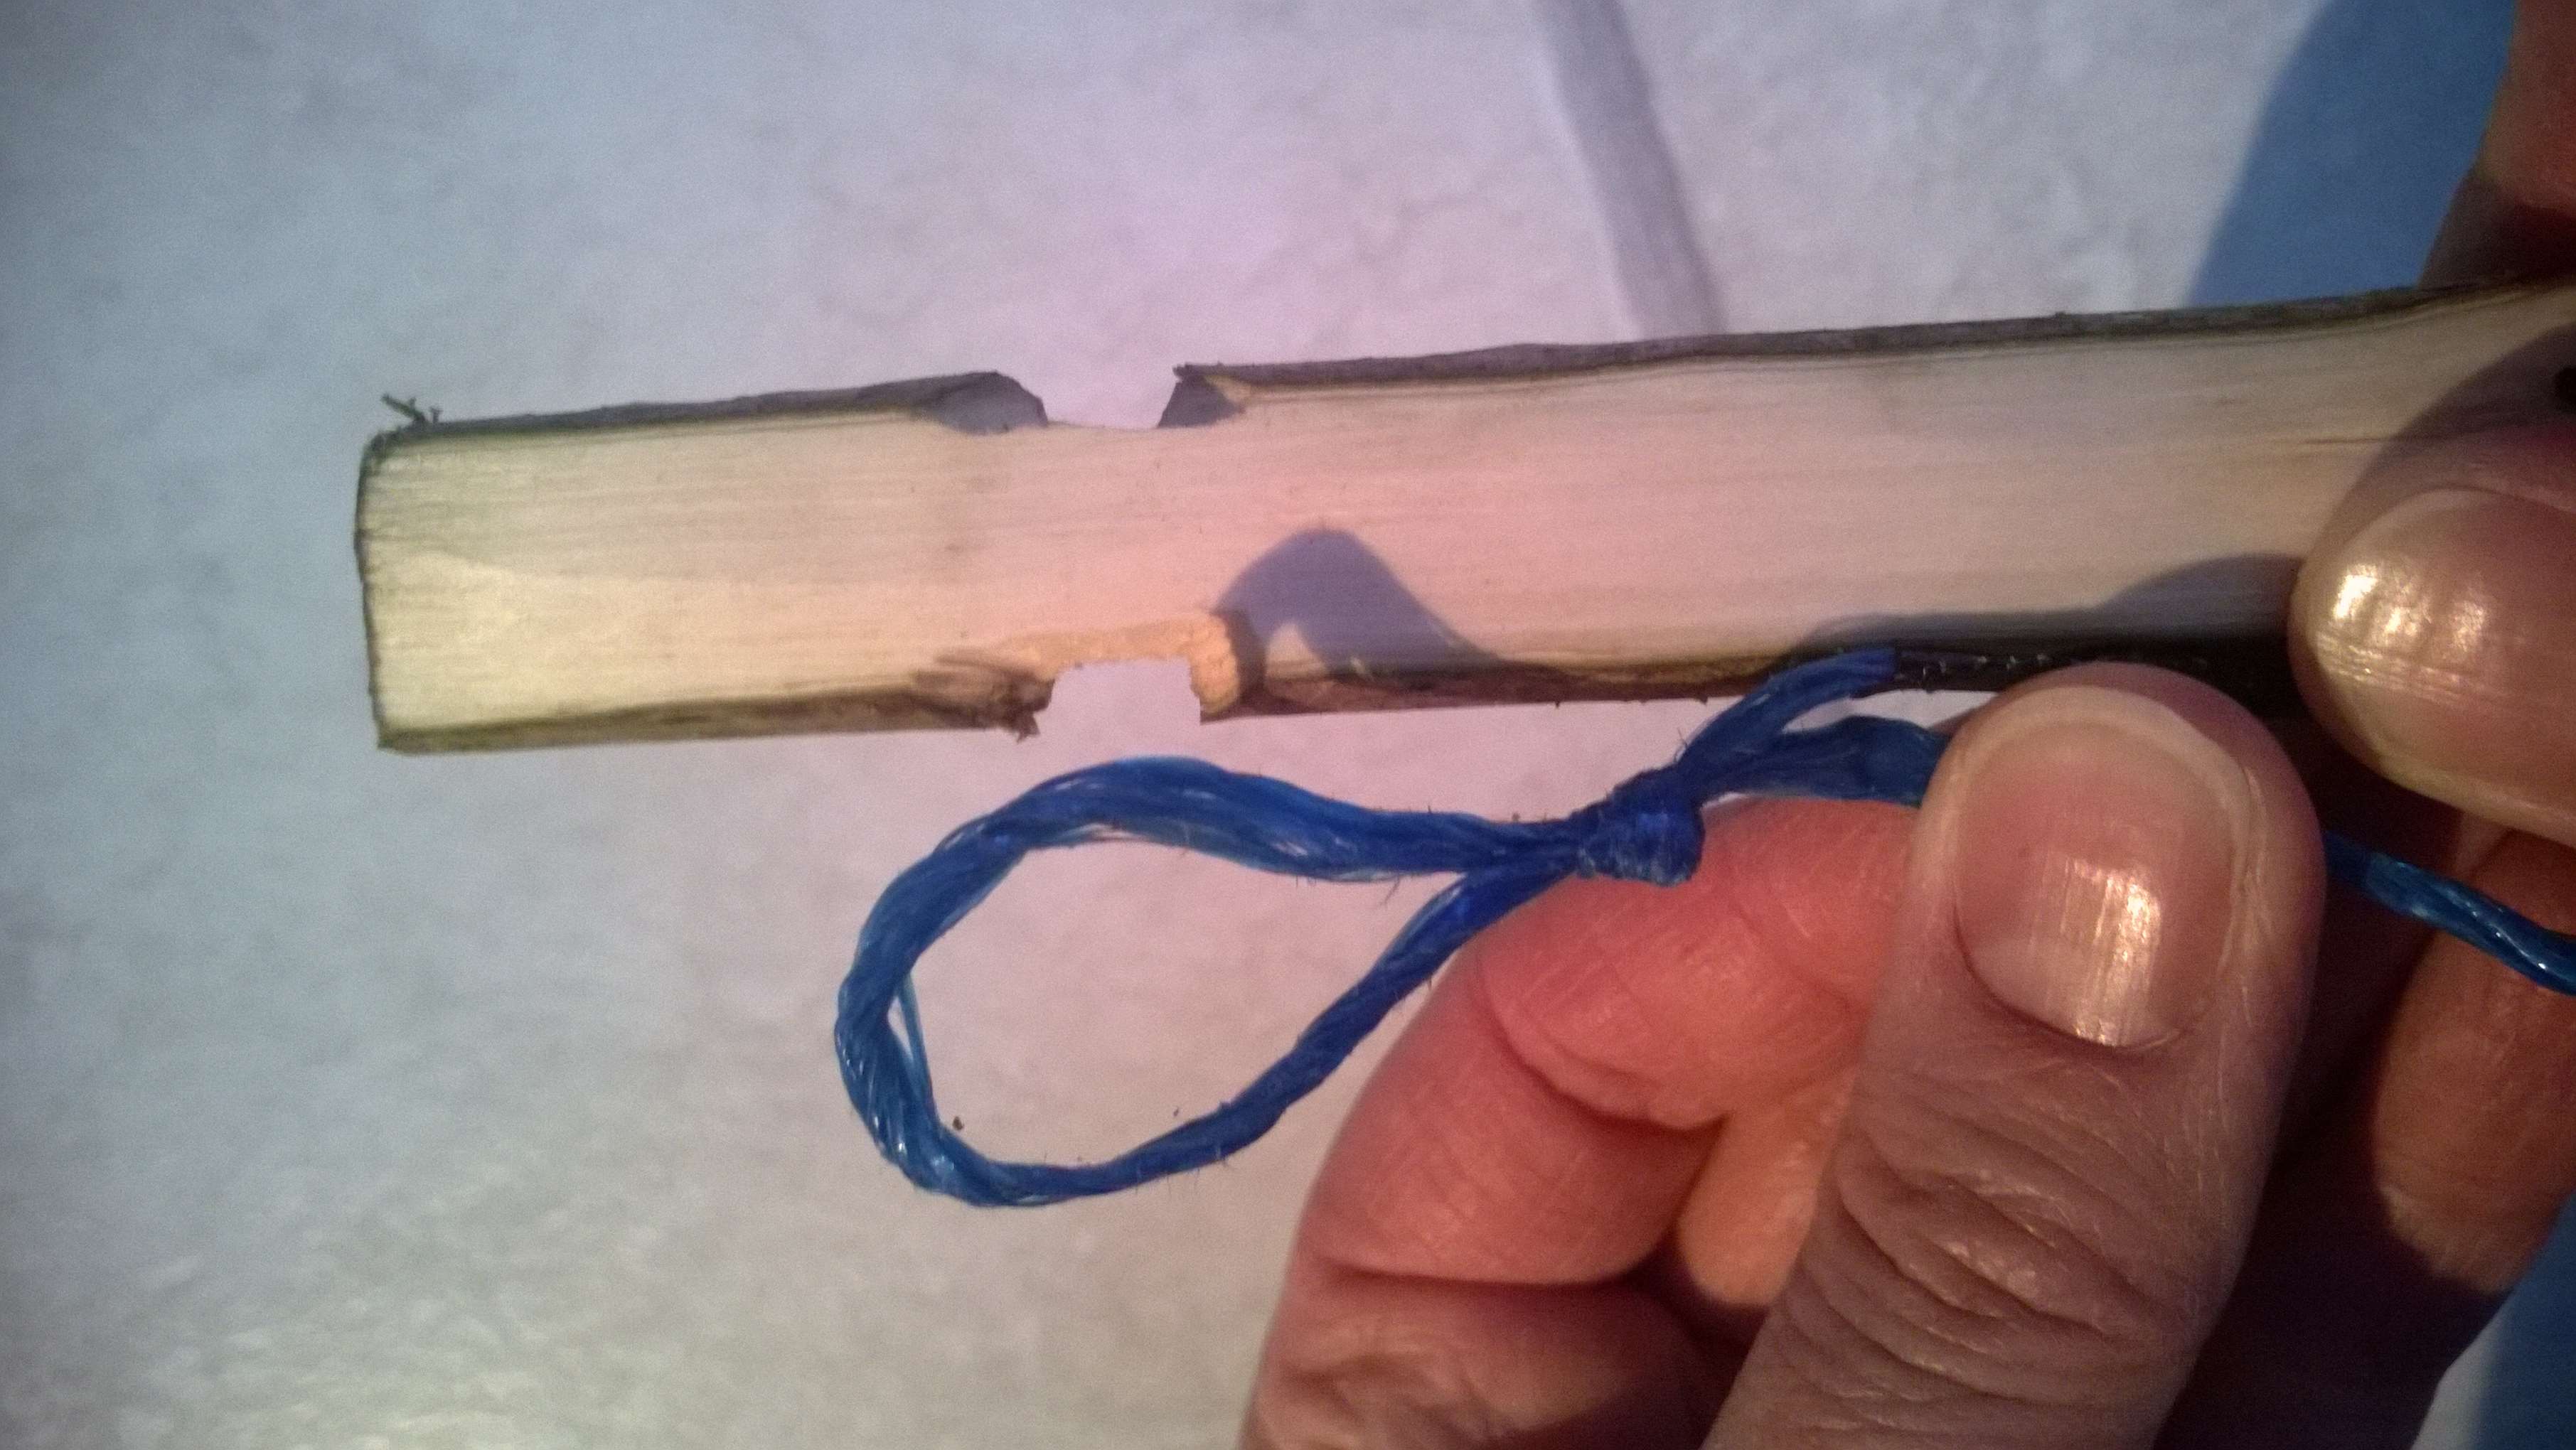
I also decided to make the nocks out of rawhide and spruce pitch rather than carving them in. I did this as some Holmegaard bows have been found with no nocks carved into them. Whether they had bone nocks attached or rawhide as I experimented with will probably never be known but they work well.
This bow is a favourite amongst the children I teach as they can draw it easy. Personally I just love the shape of the bow and it shoots well for me,
I have written a number of posts on these little devices. When asked about them by children I teach I liken them to these modern ball throwing devices dog walkers use nowadays. So if you imagine replacing the ball with a spear (technically called a dart) you will get the idea.
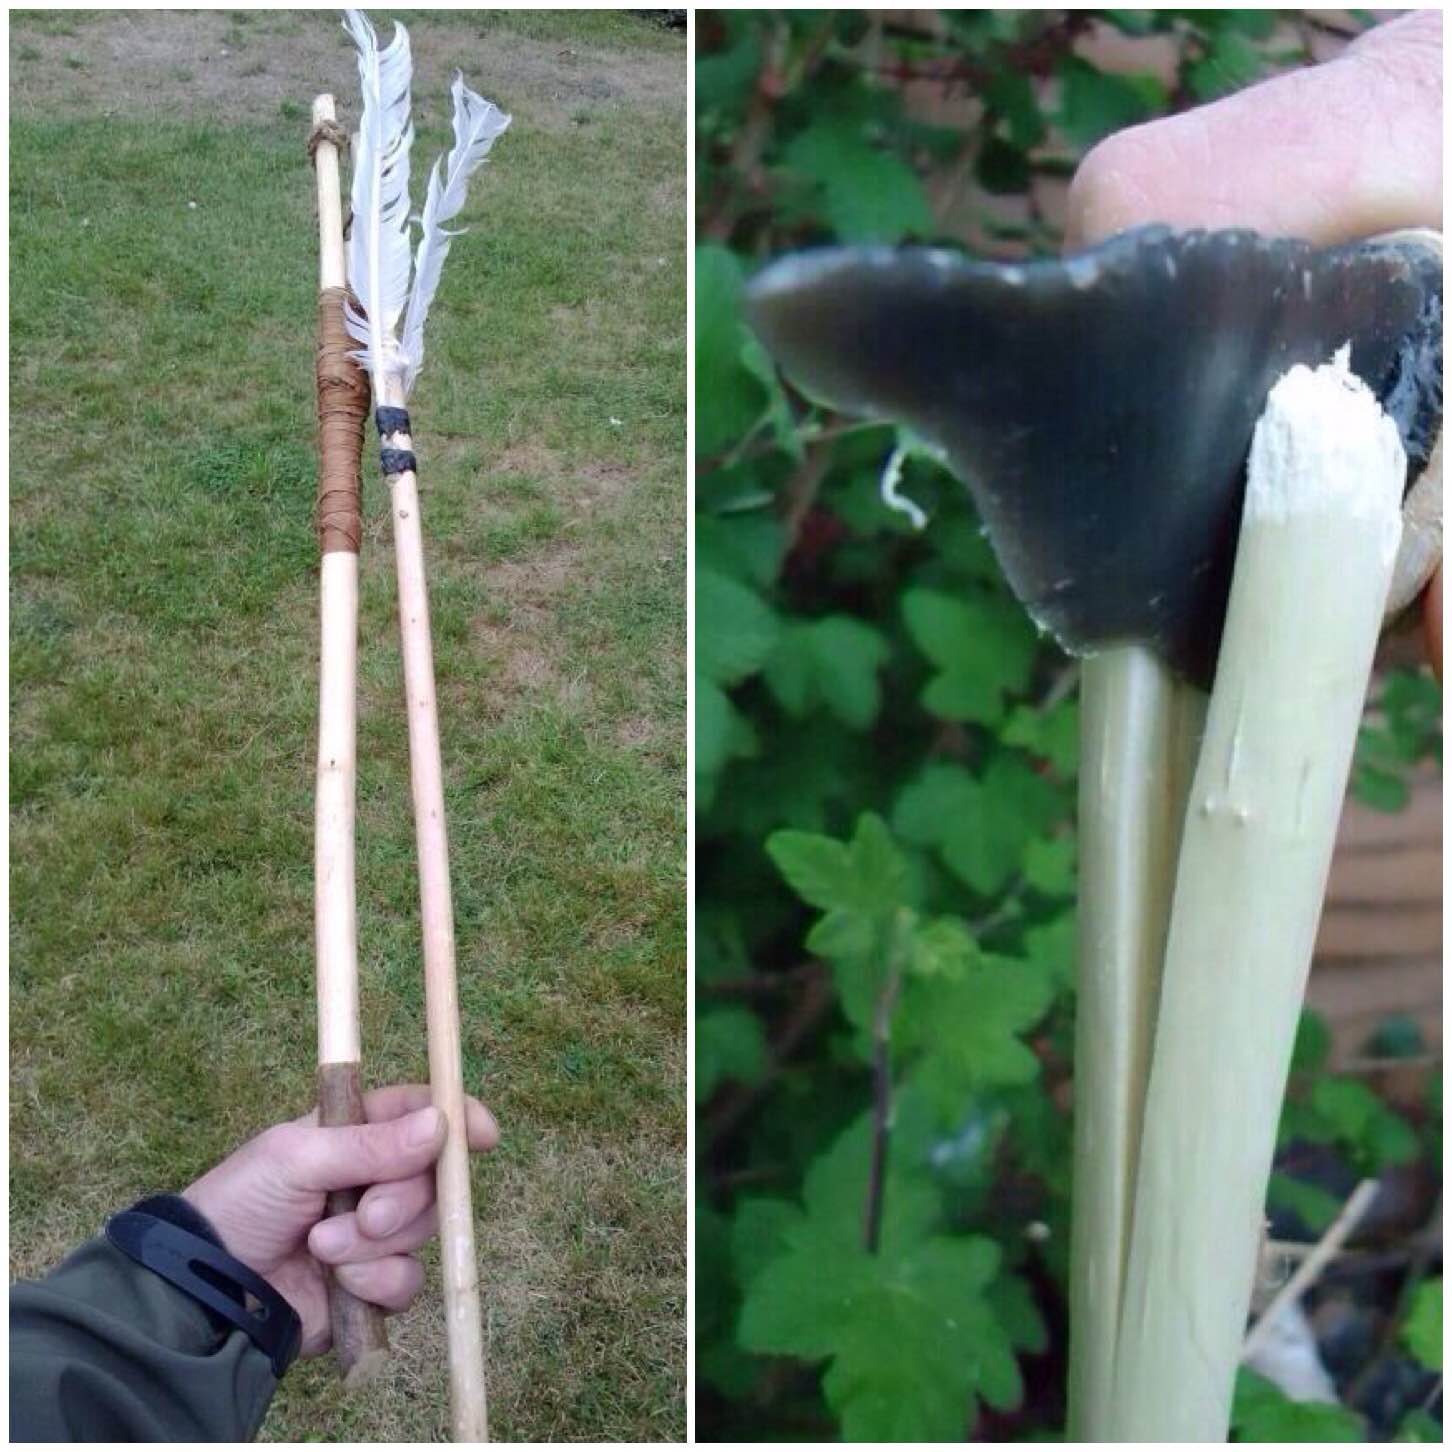
My Atlatl Set
The set is made up of two parts – the Atlatl (the throwing device) as shown below and a dart (seen above). My post on the Atlatl goes into detail on the history of them and the different designs you can find.
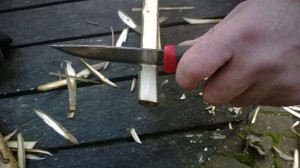
The ones below are very simple ones. The left hand one has been carved from a hazel rod and the one on the right is from a piece of yew with an antler tip attached by sinew and spruce pitch.
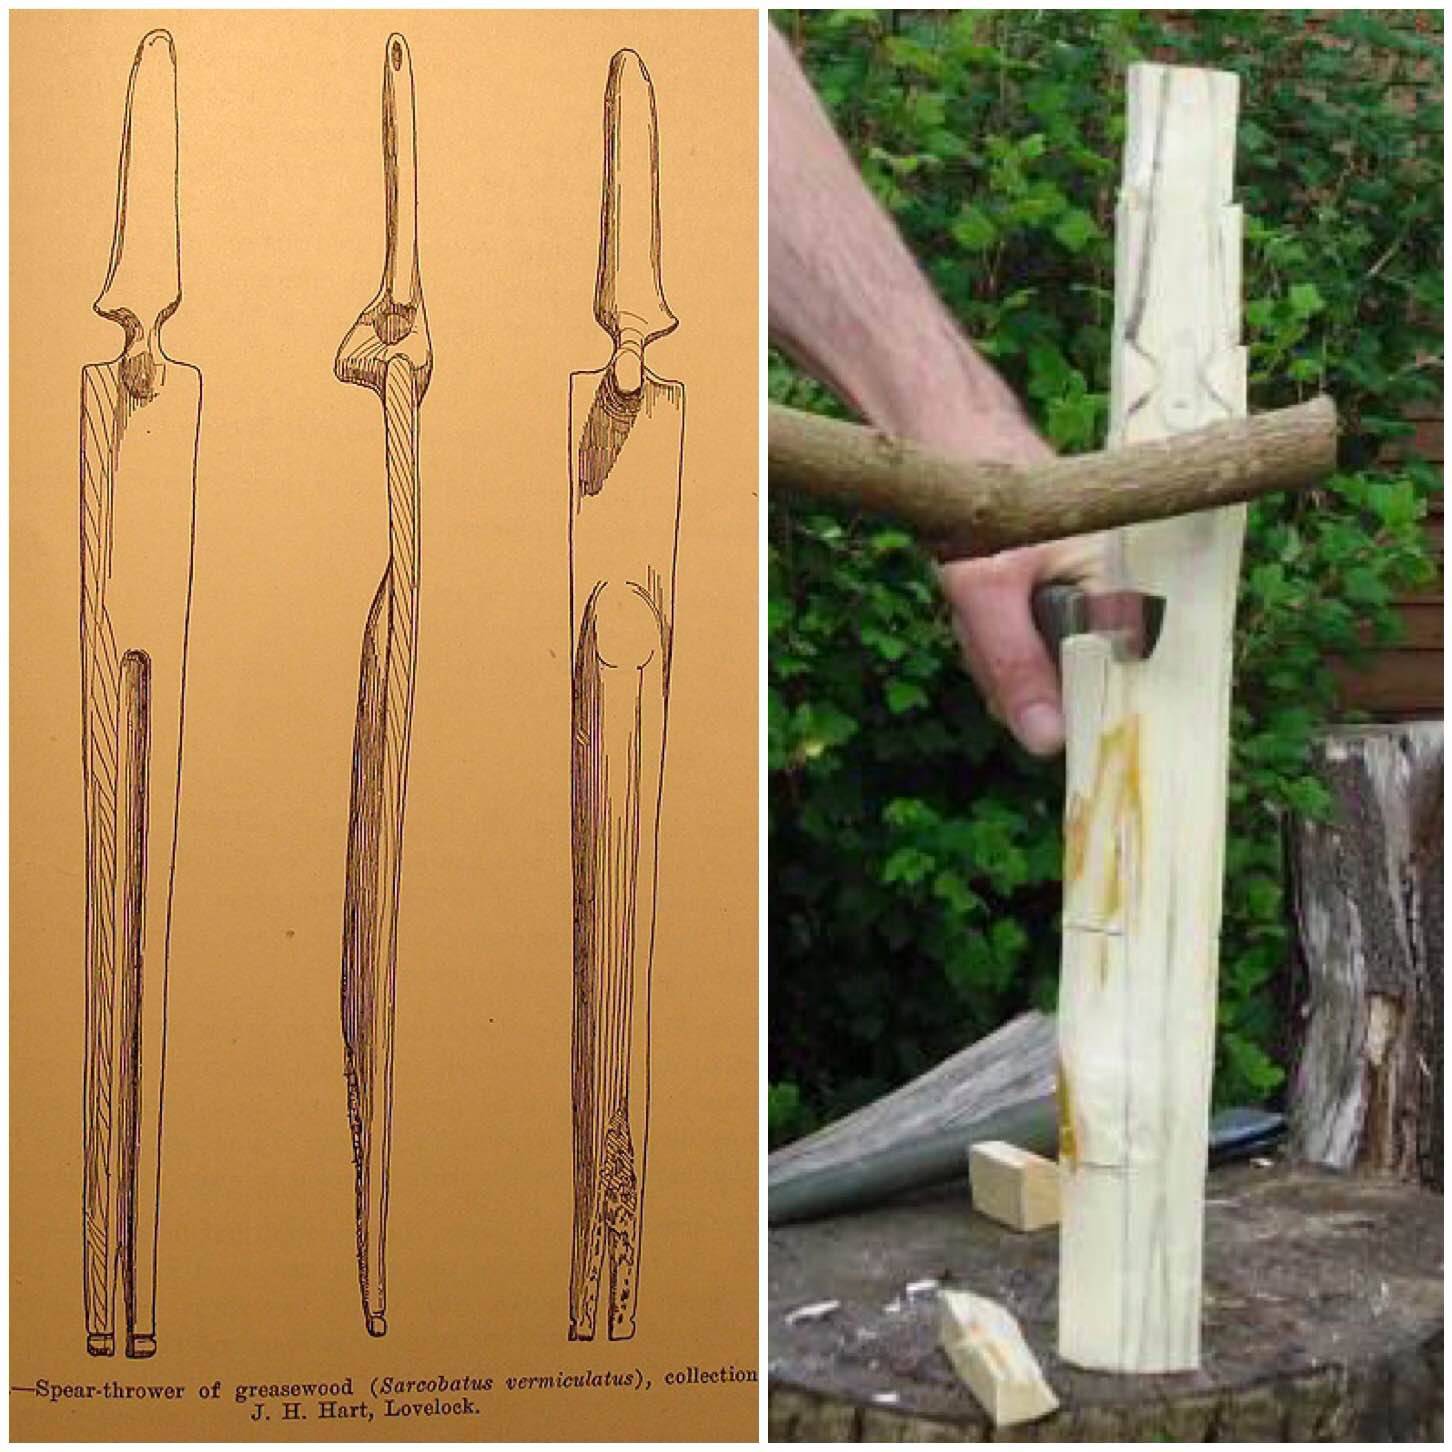
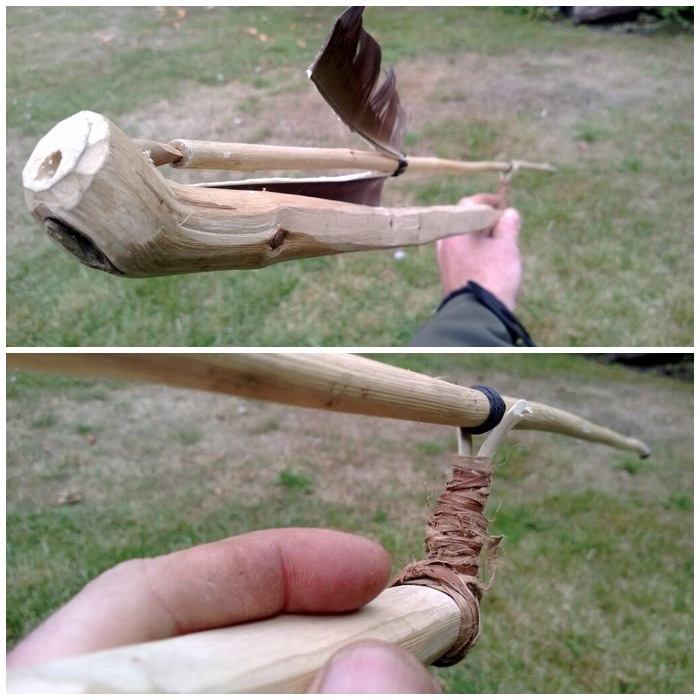
I have tried to make a number of different Atlatls over the years and a favourite of mine is called the Lovelock Cave Atlatl (named after where it was found in the USA). I came across some drawings of this Atlatl on the web and set about making one.
Lovelock Caver Atlatl
It was thought to have had a bone or wooden point at the end to attach the dart to it but I experimented with just cordage. This seems to work quite well however there is no archaeological records that this adaptation was ever used.
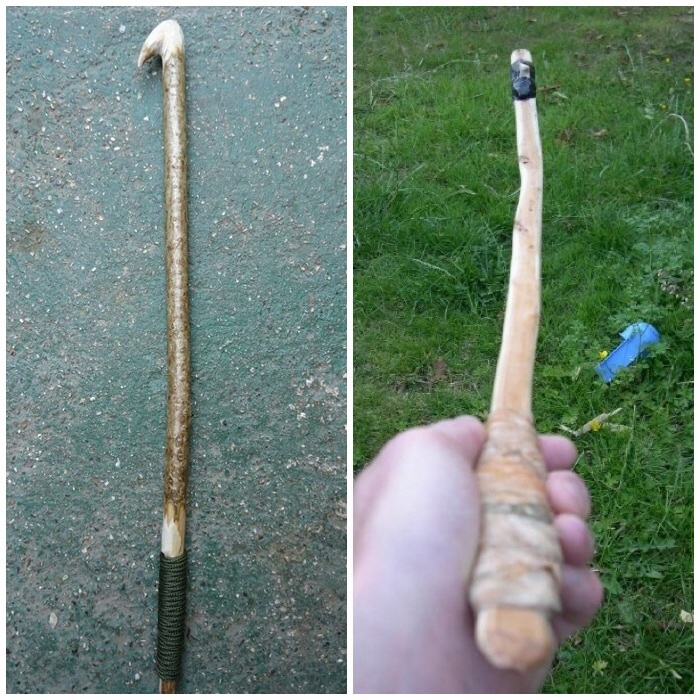
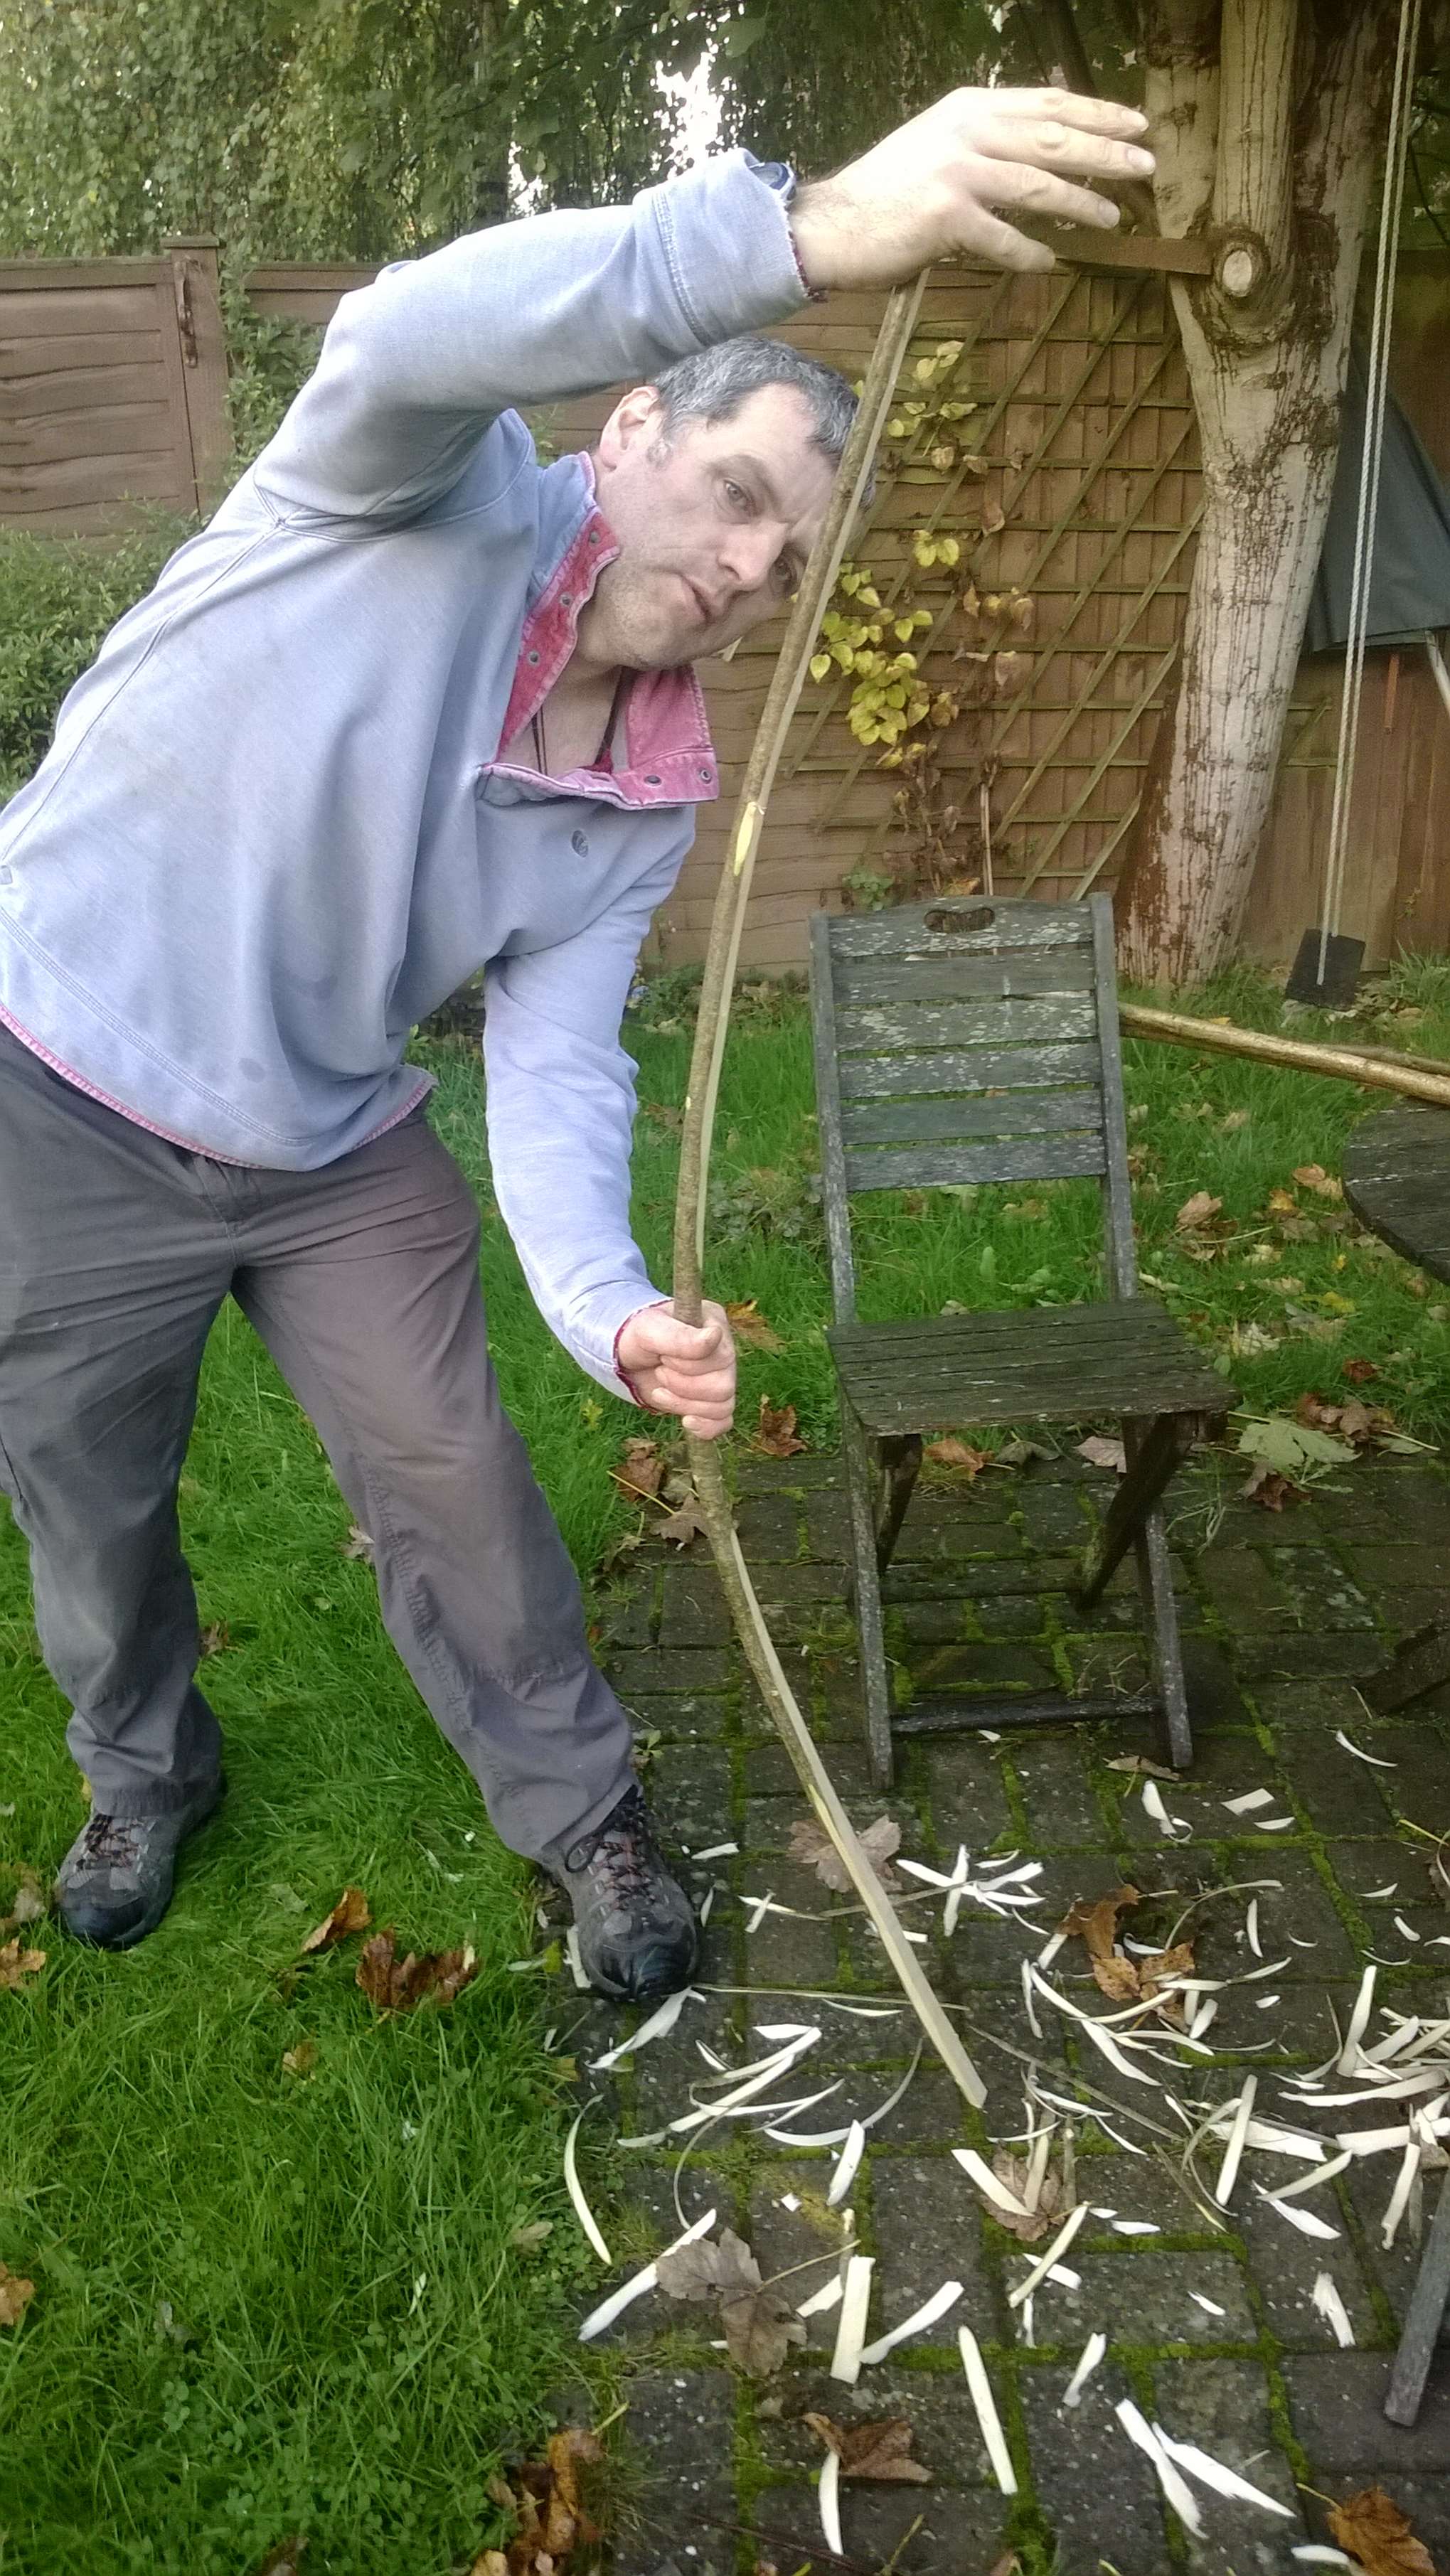
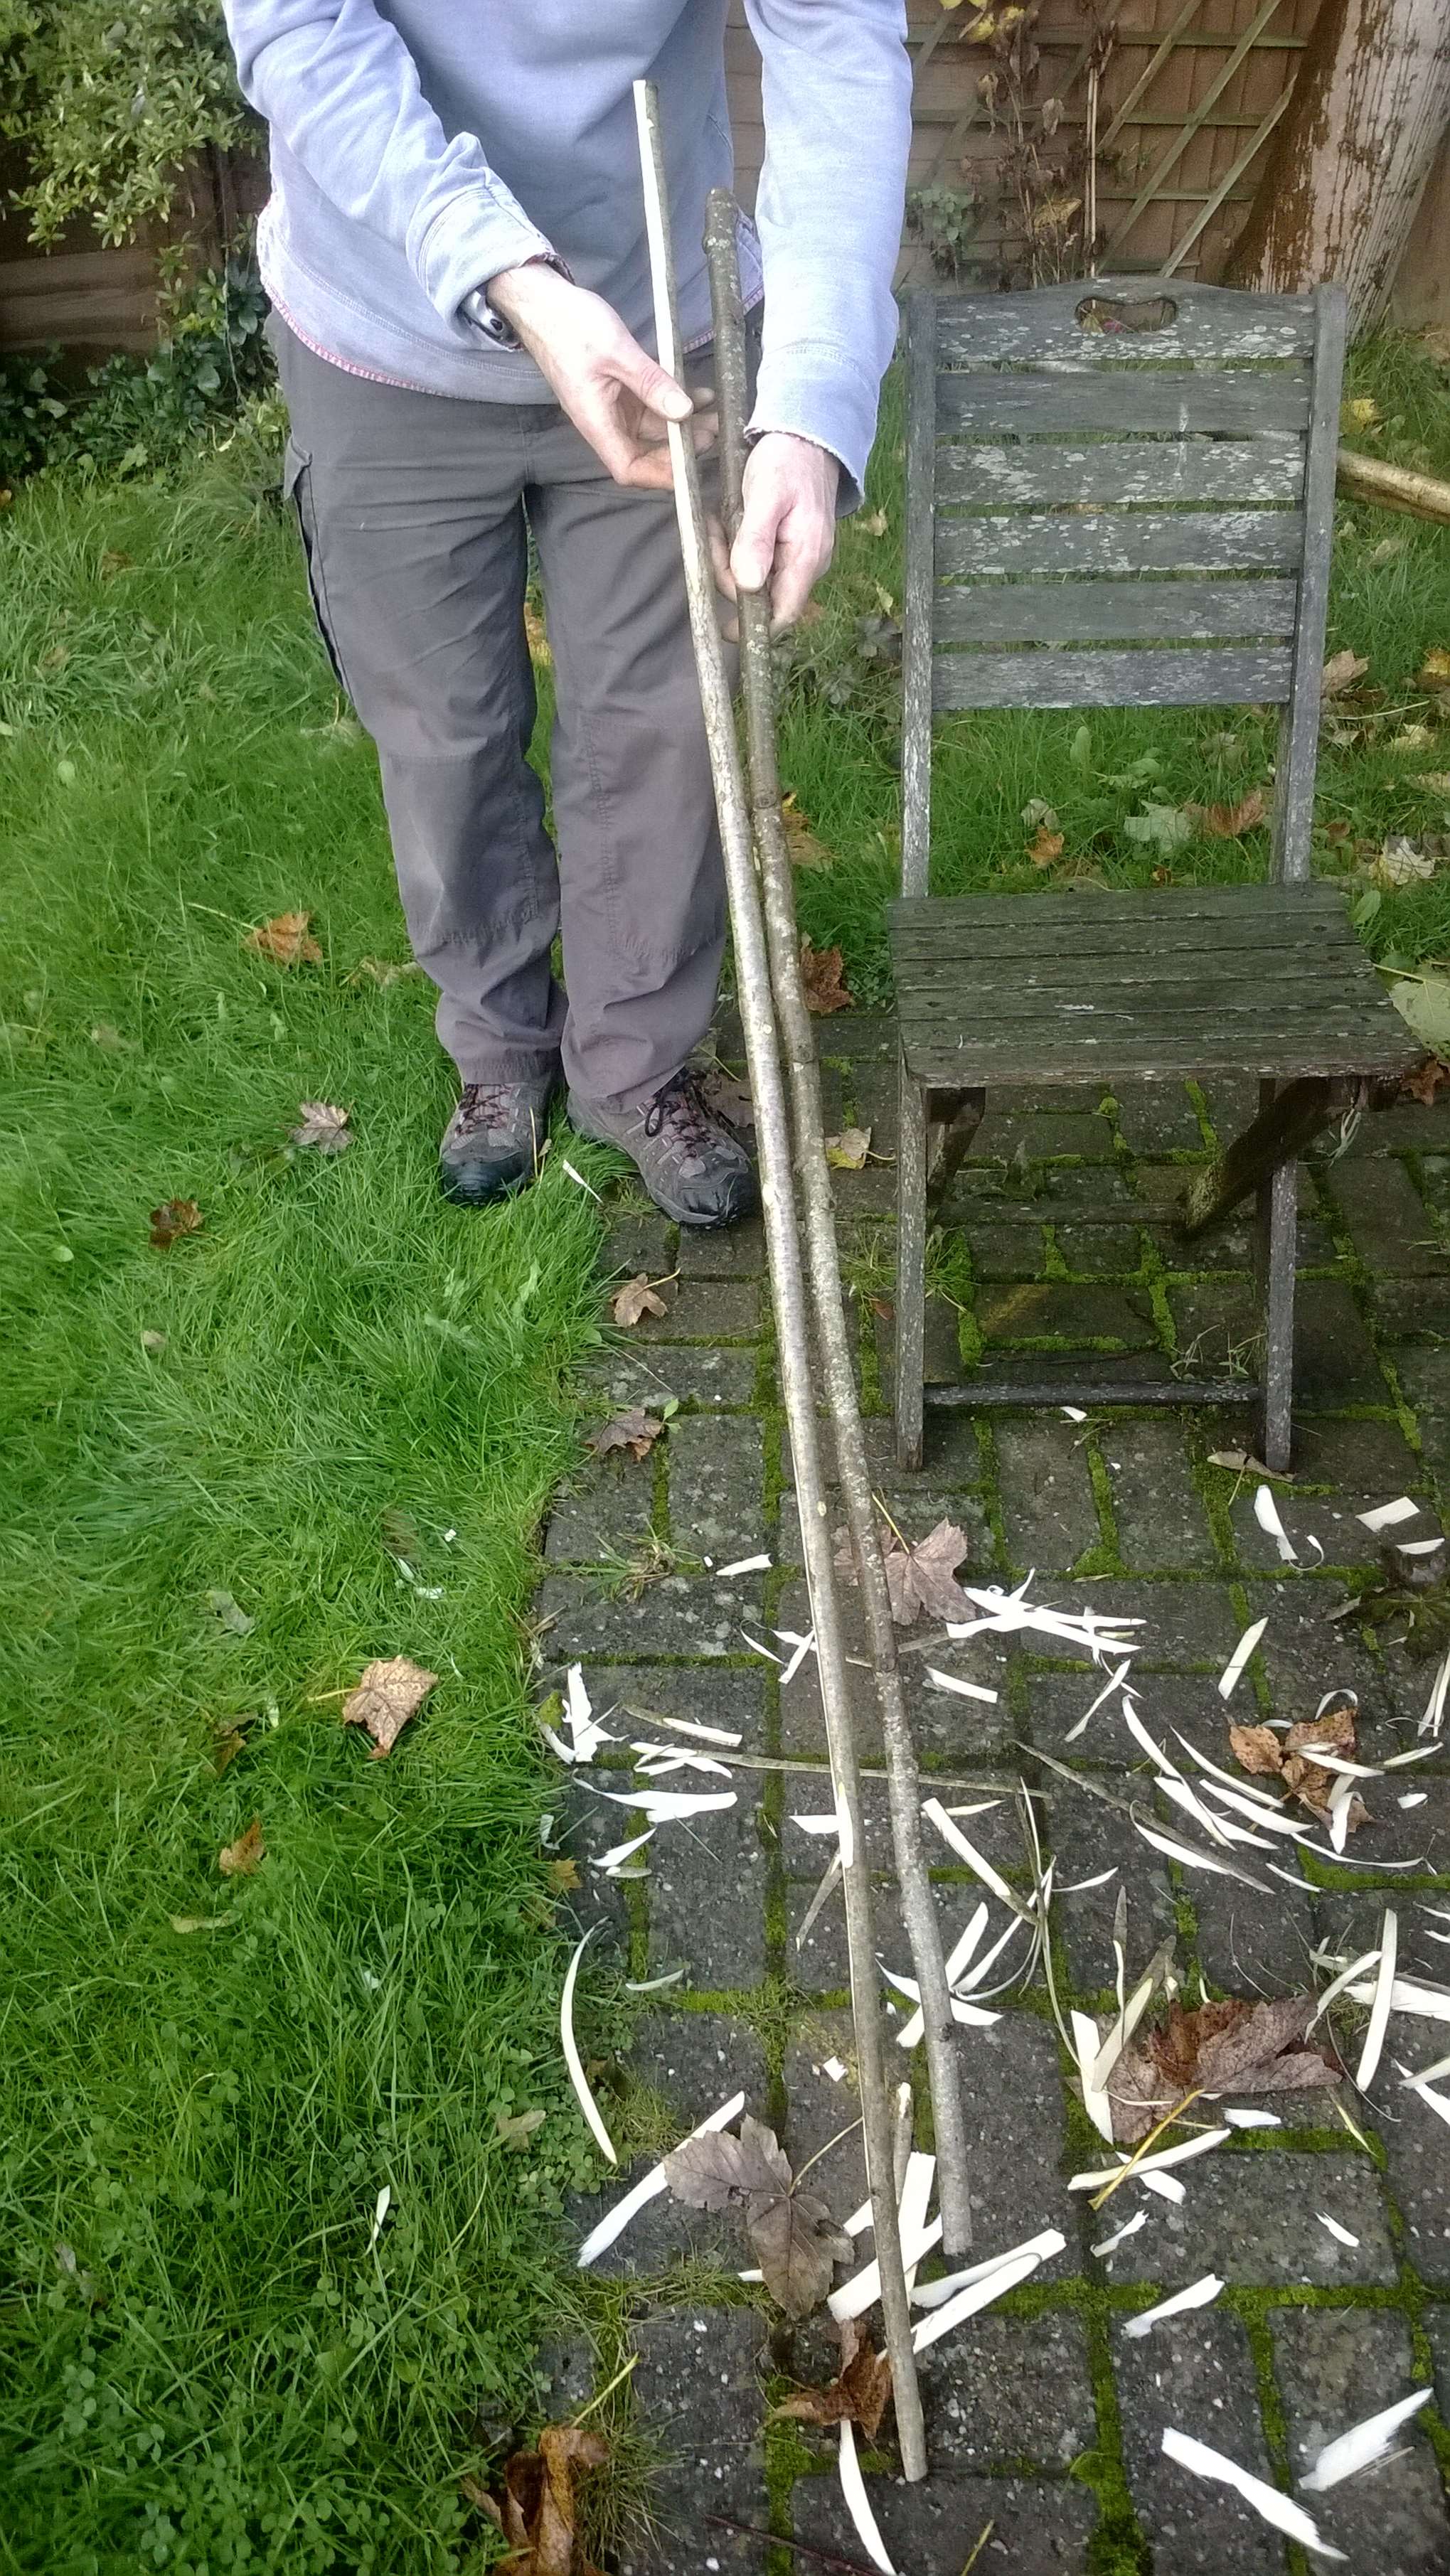
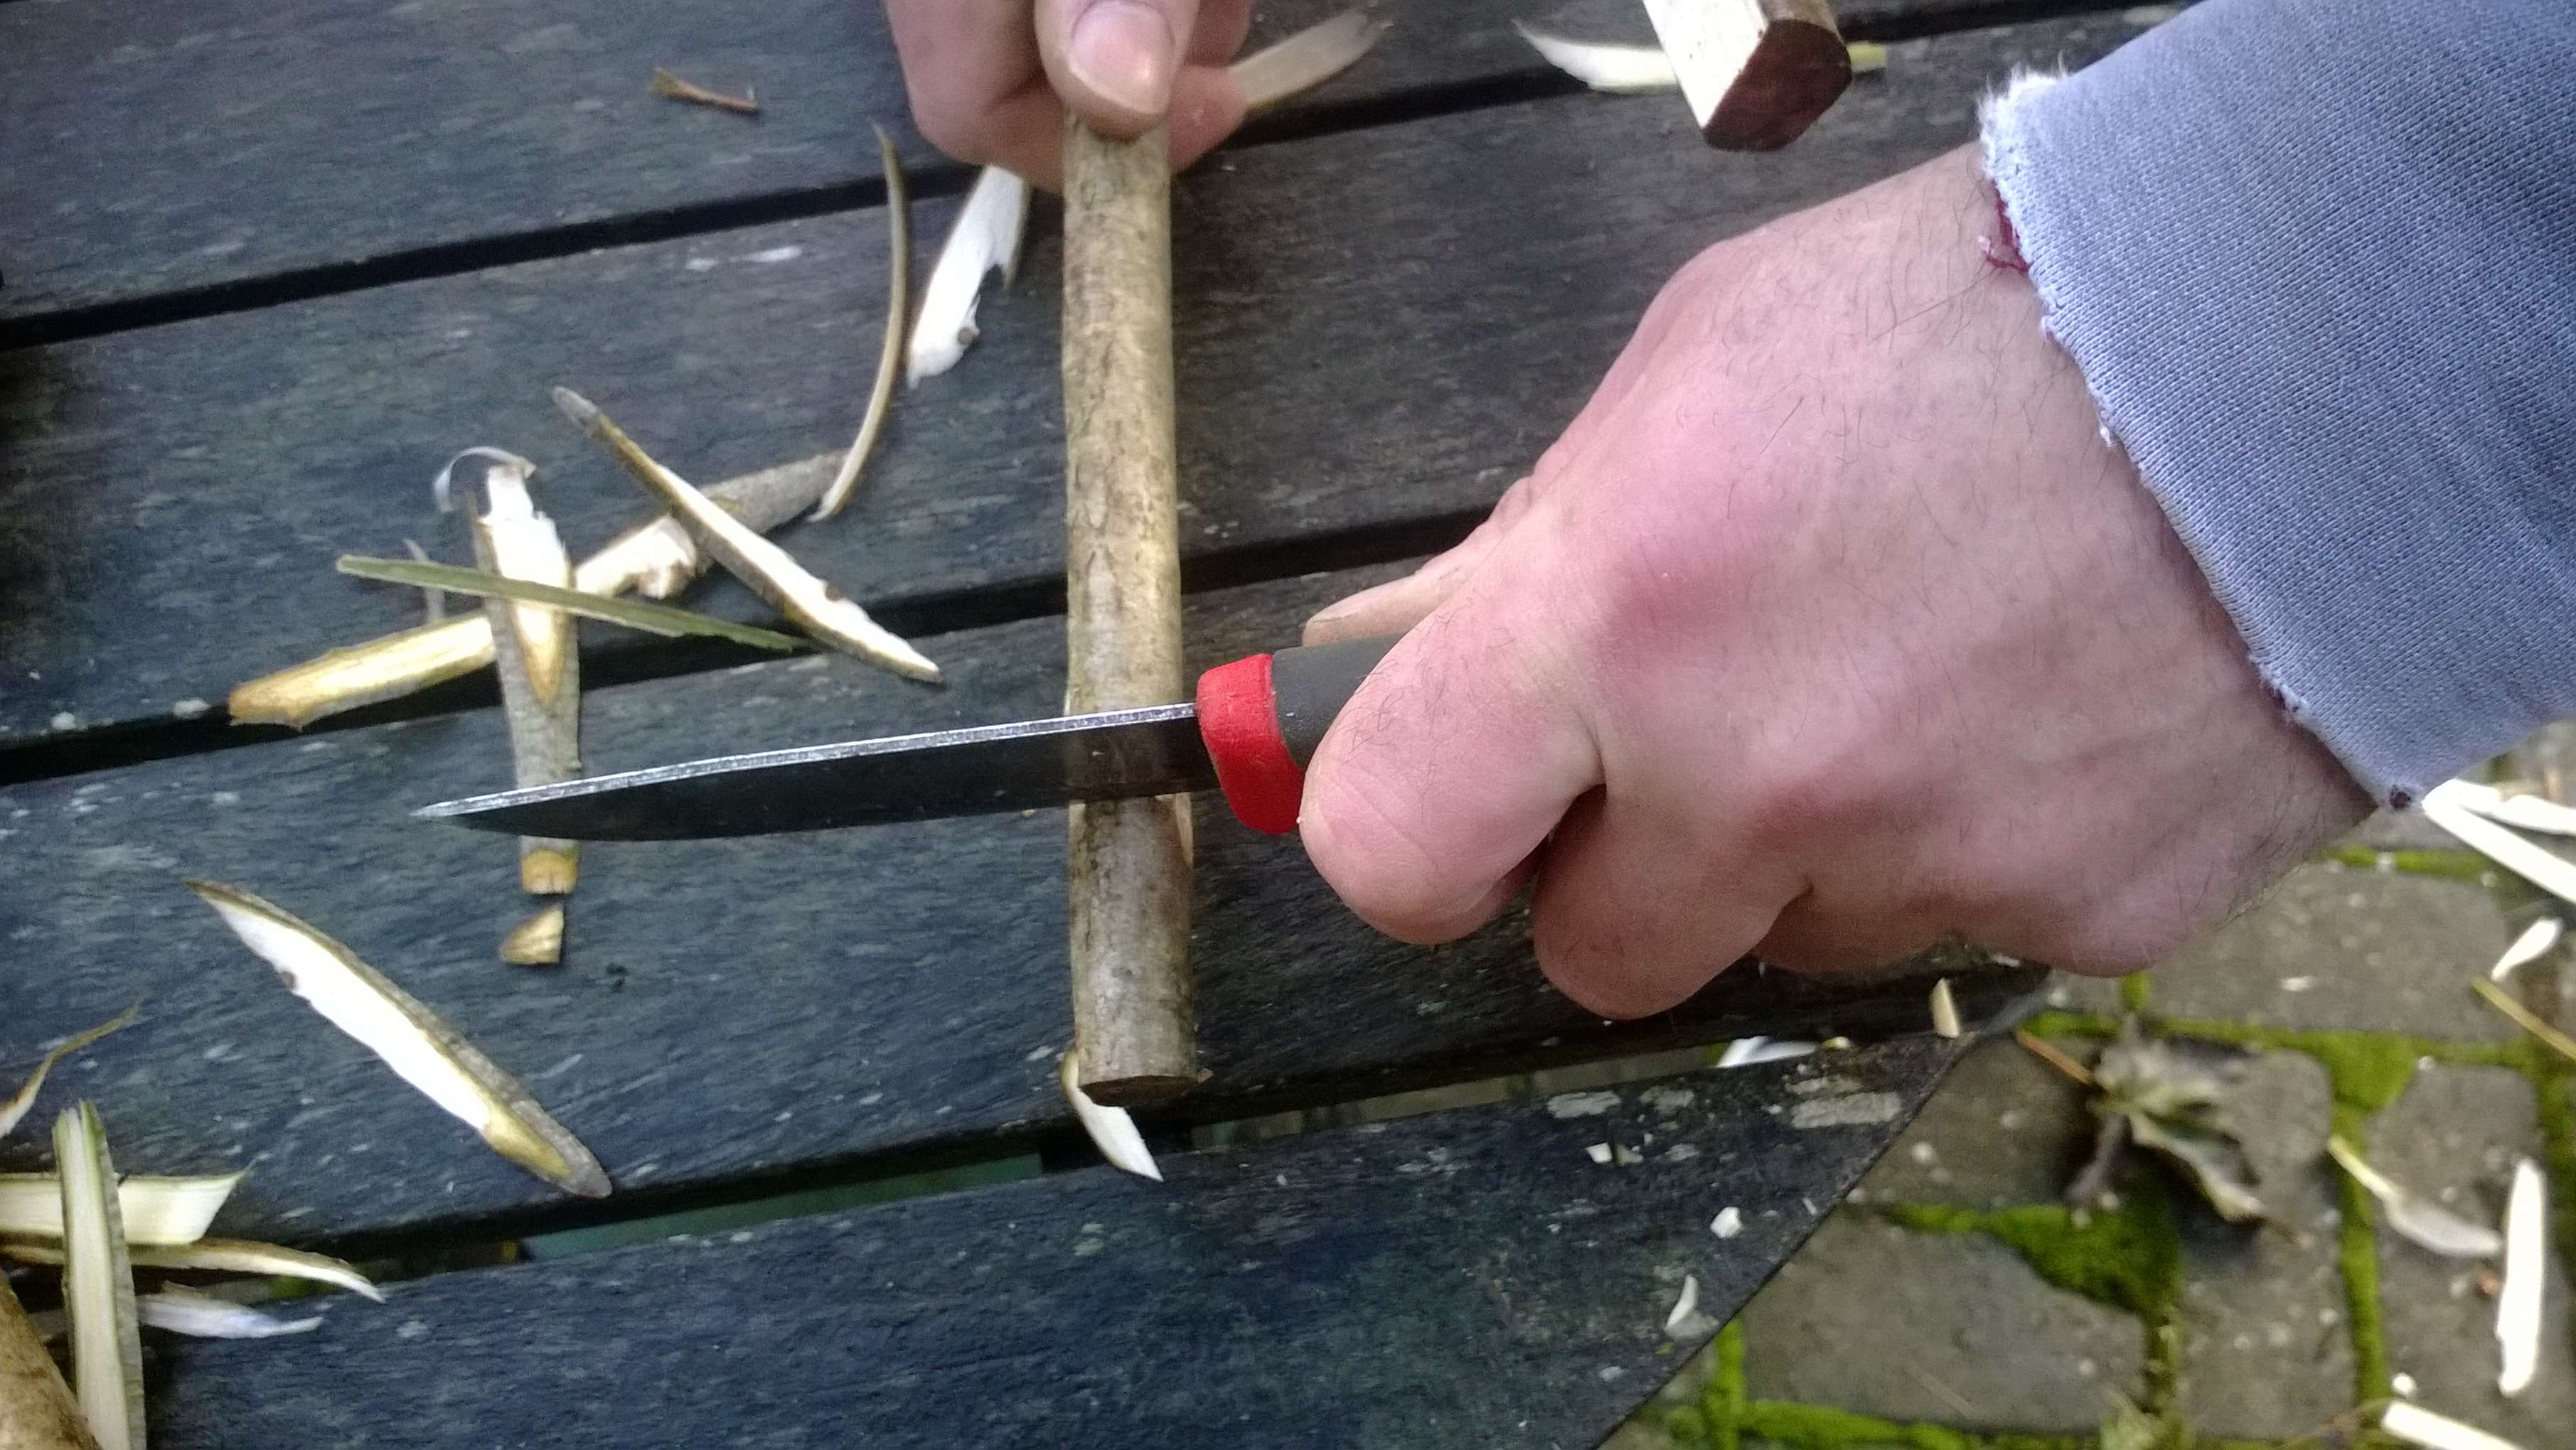
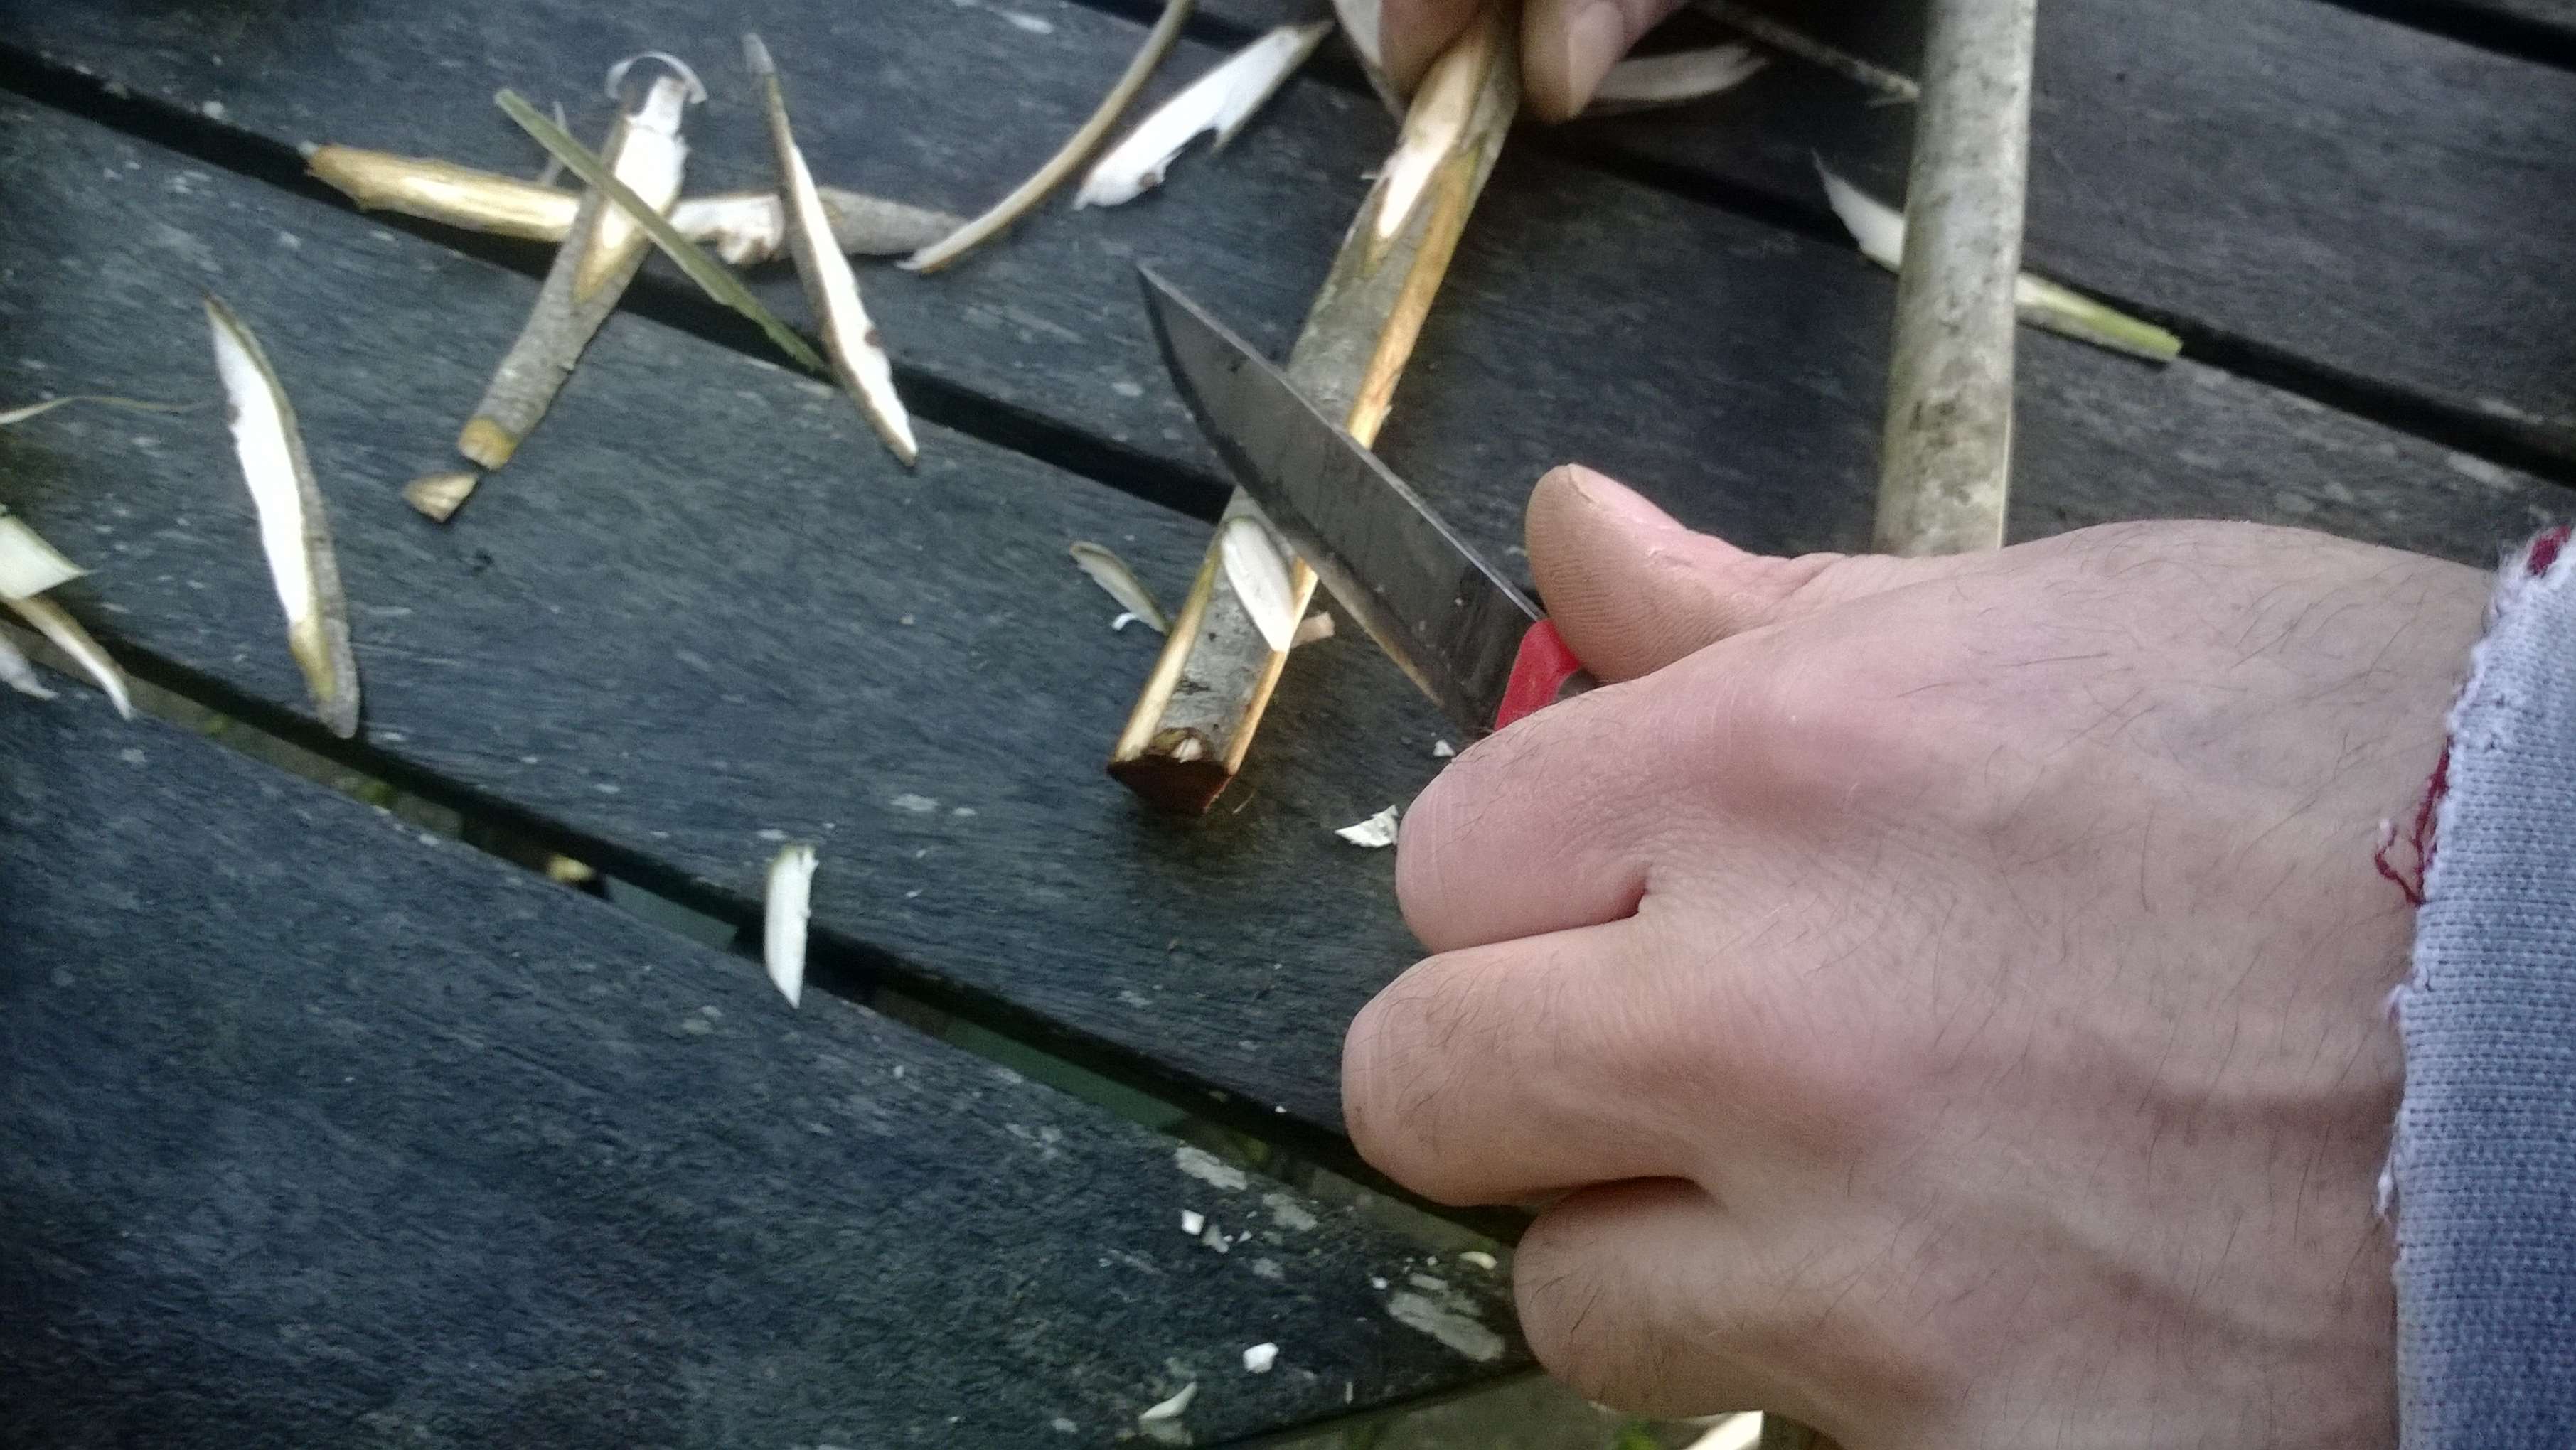
I set myself a challenge a while back to produce a split stick Atlatl from just one piece of willow and limited myself to just my primitive tools.
I scraped and carved the wood with my flint knife and used the bark as cordage. It turned out to be quite a nifty little Atlatl in the end.
One Stick Atlatl
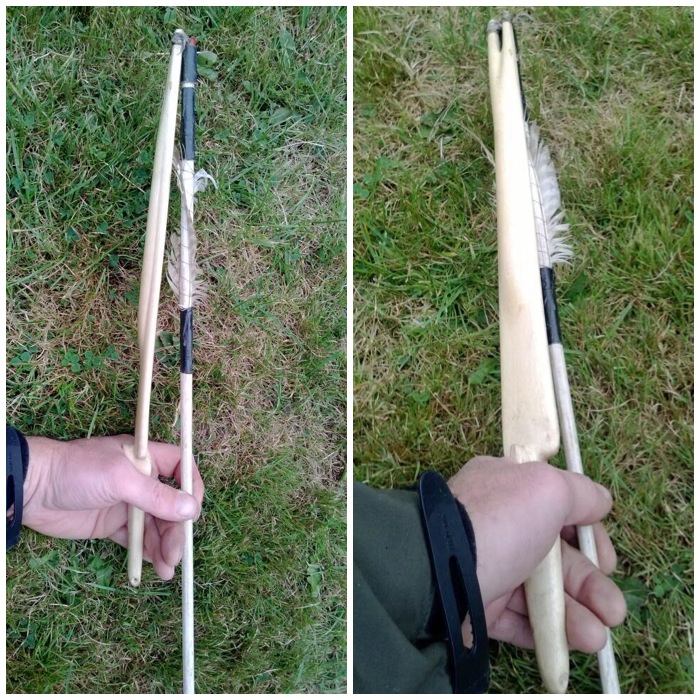
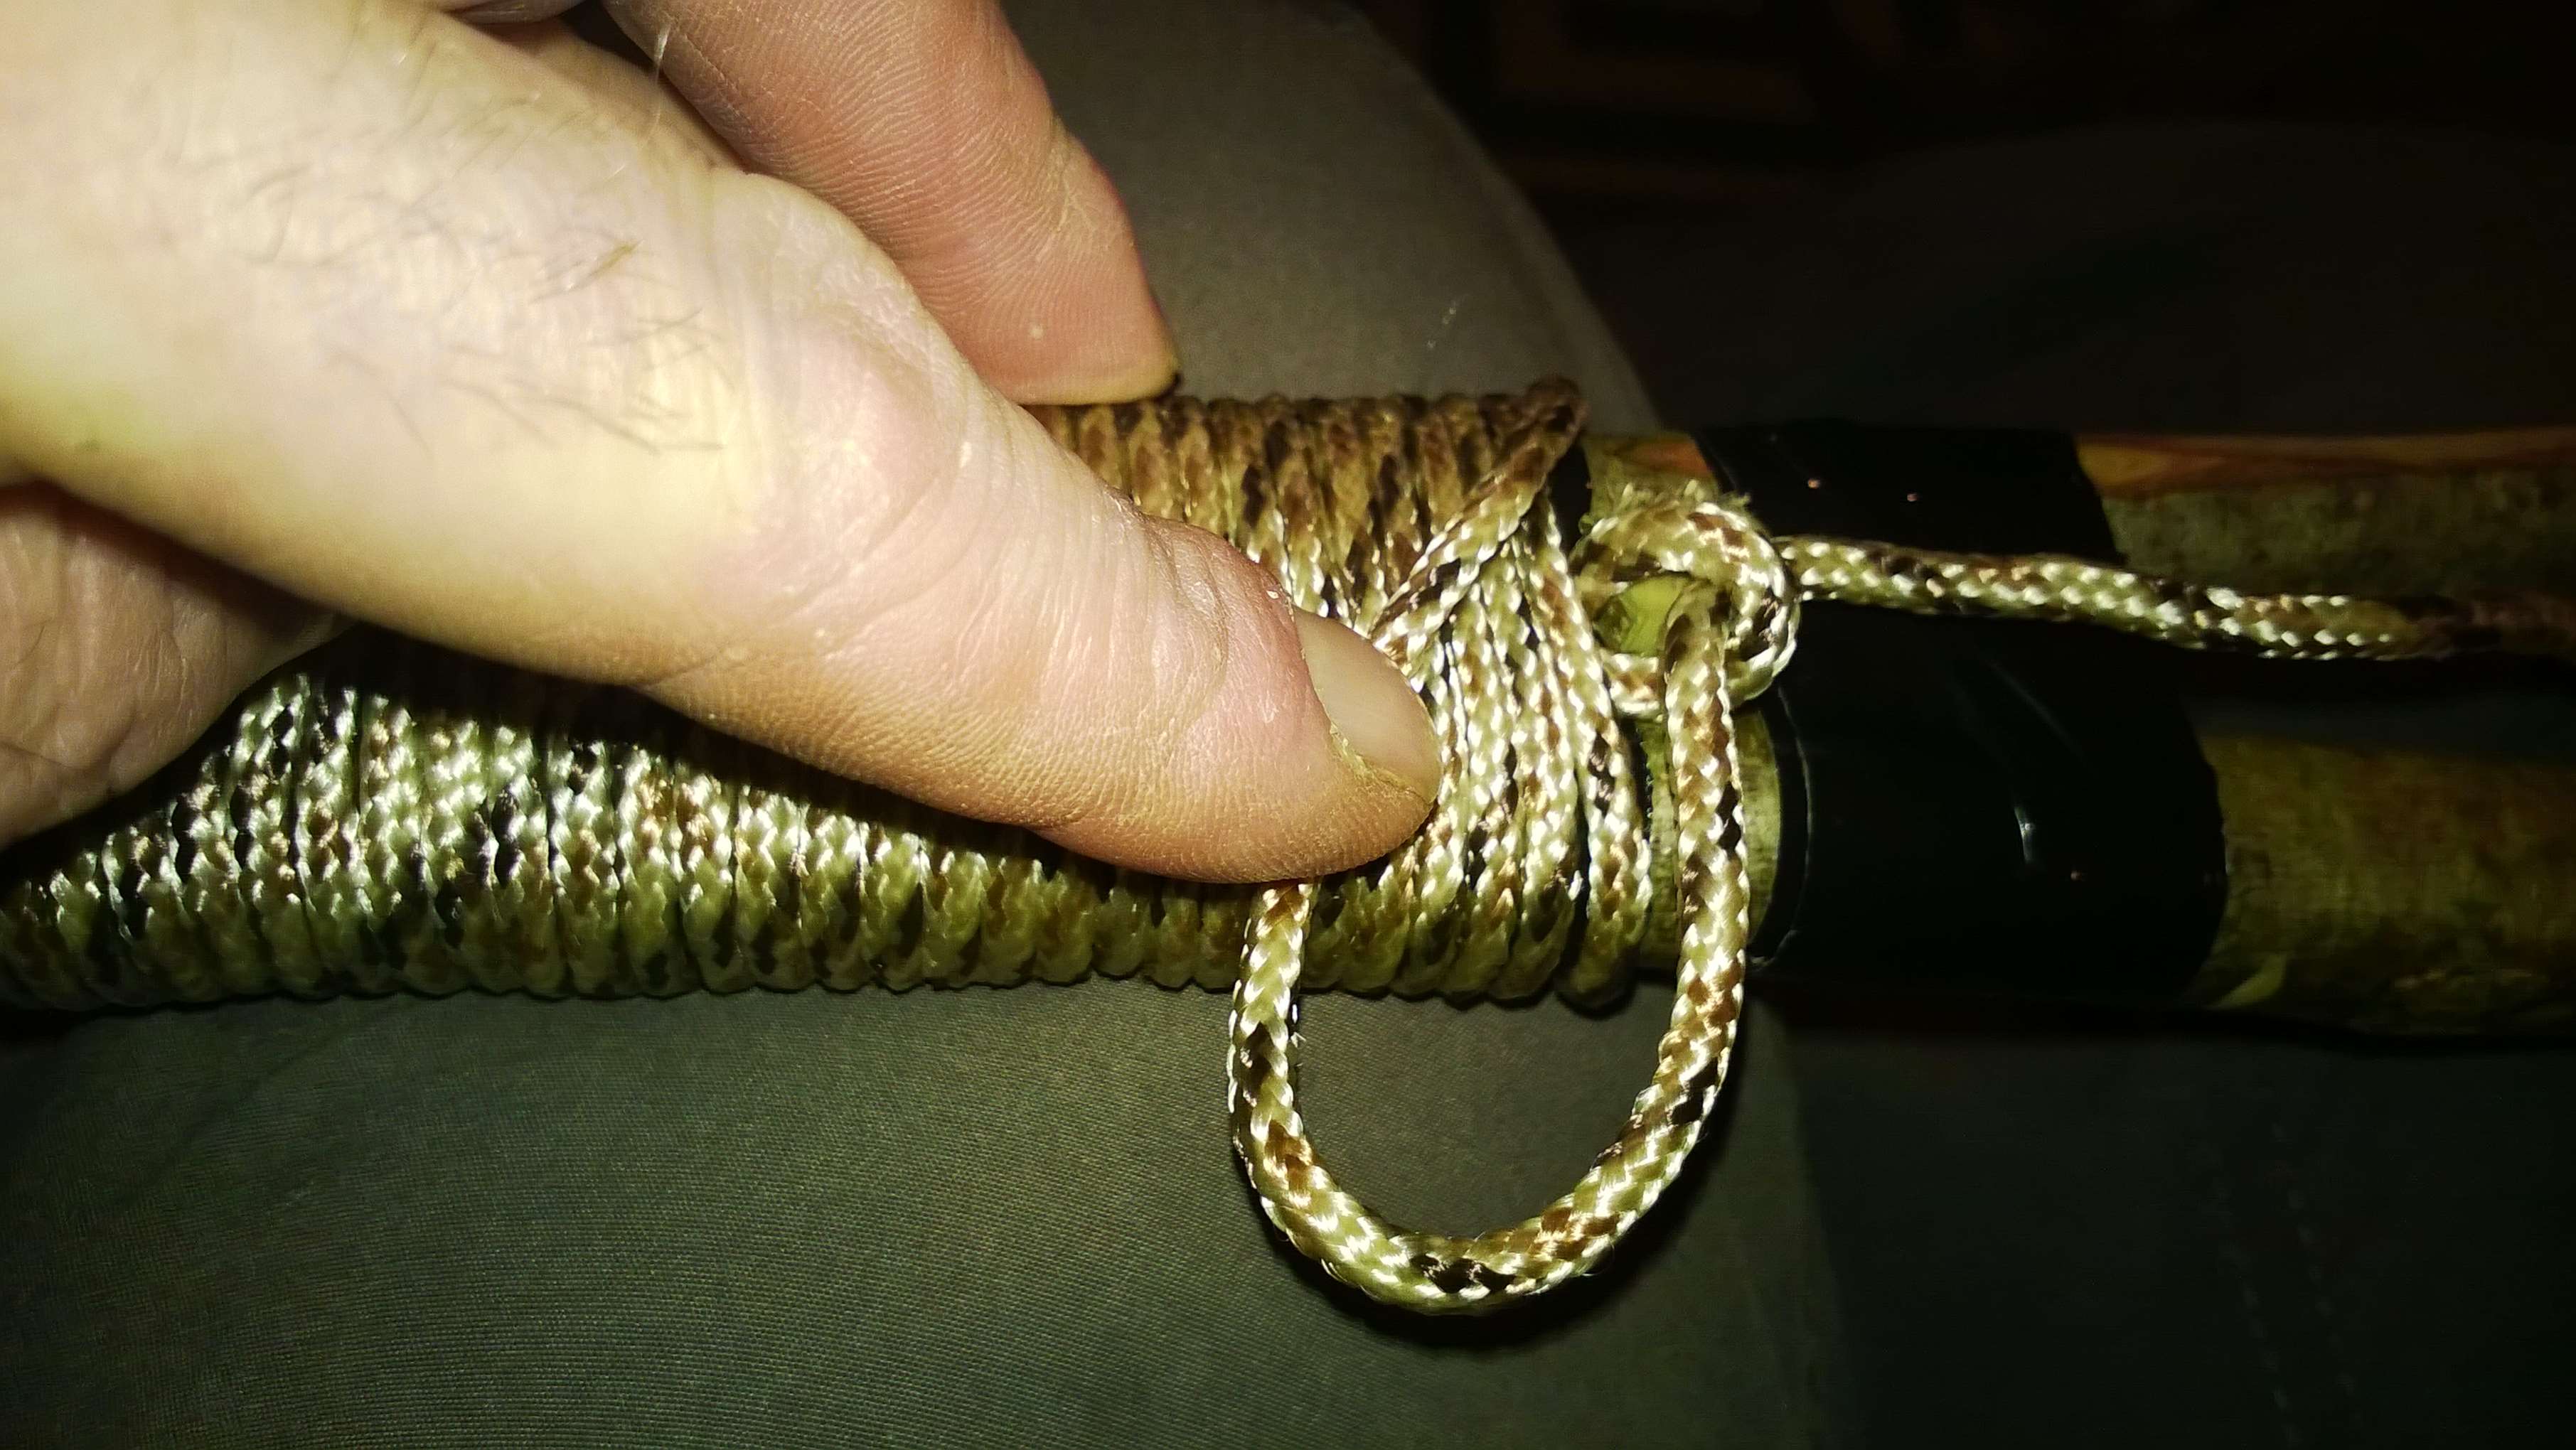
Atlatl with a Rest
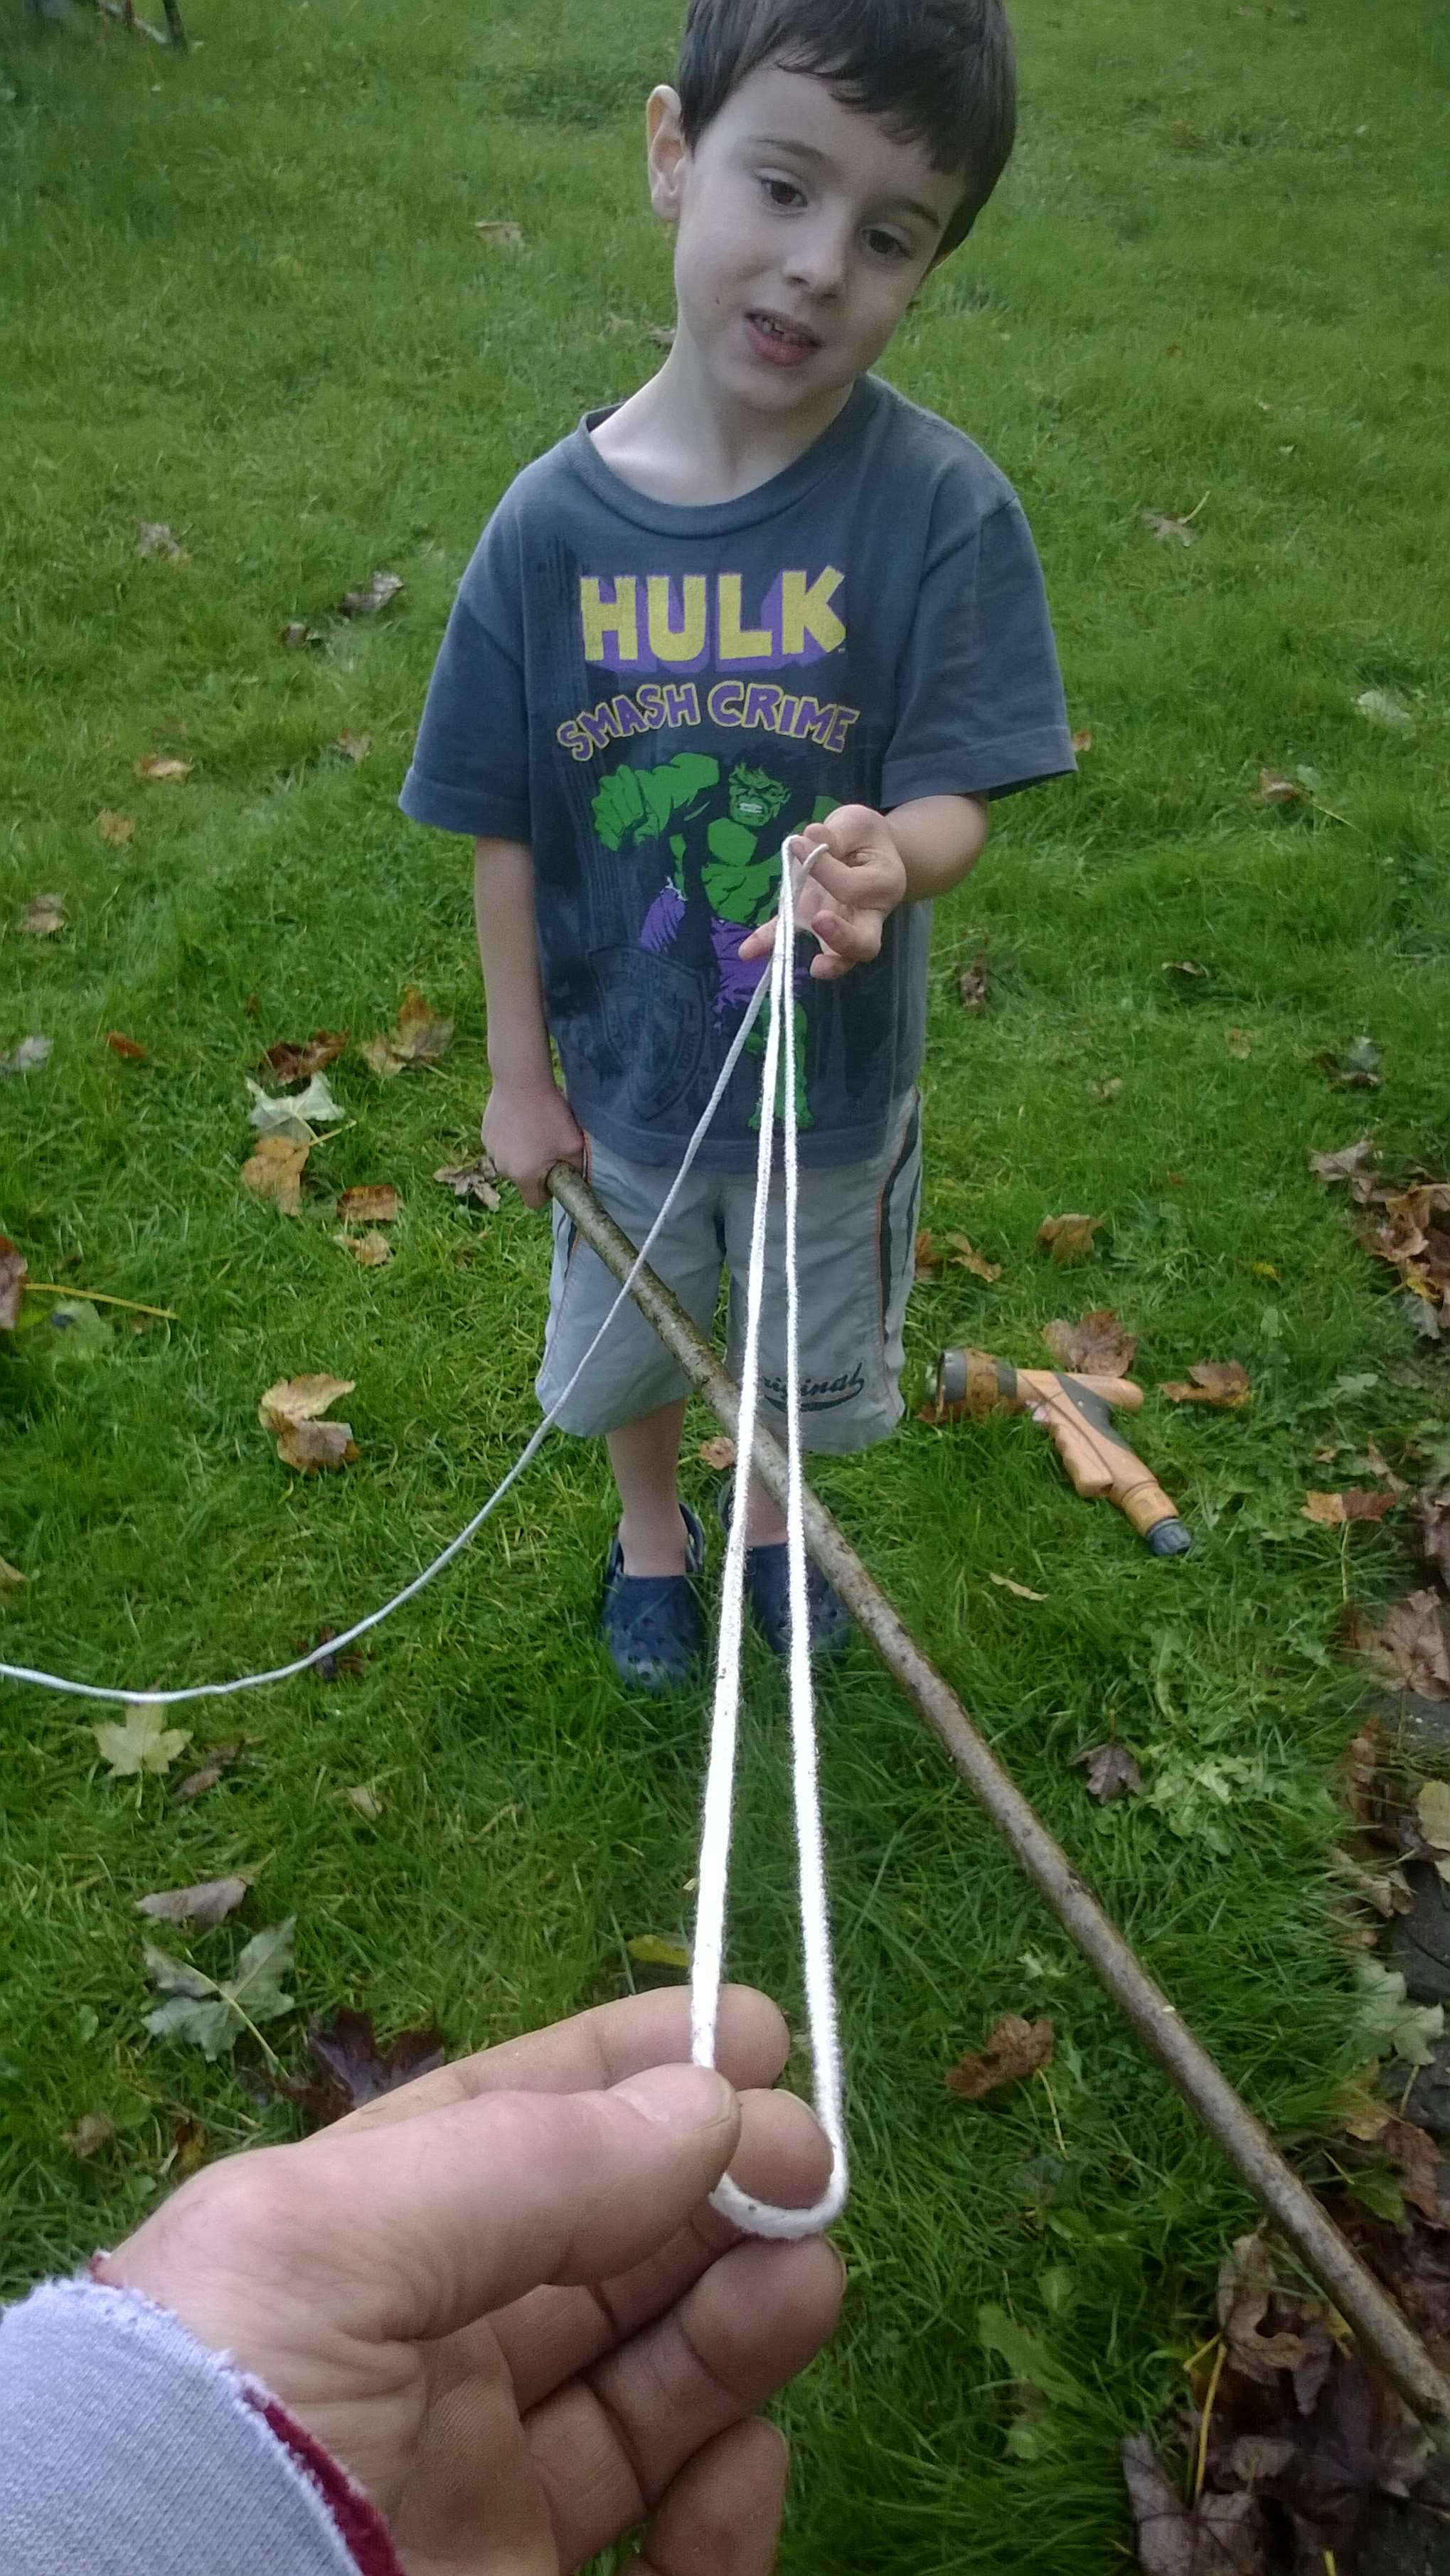
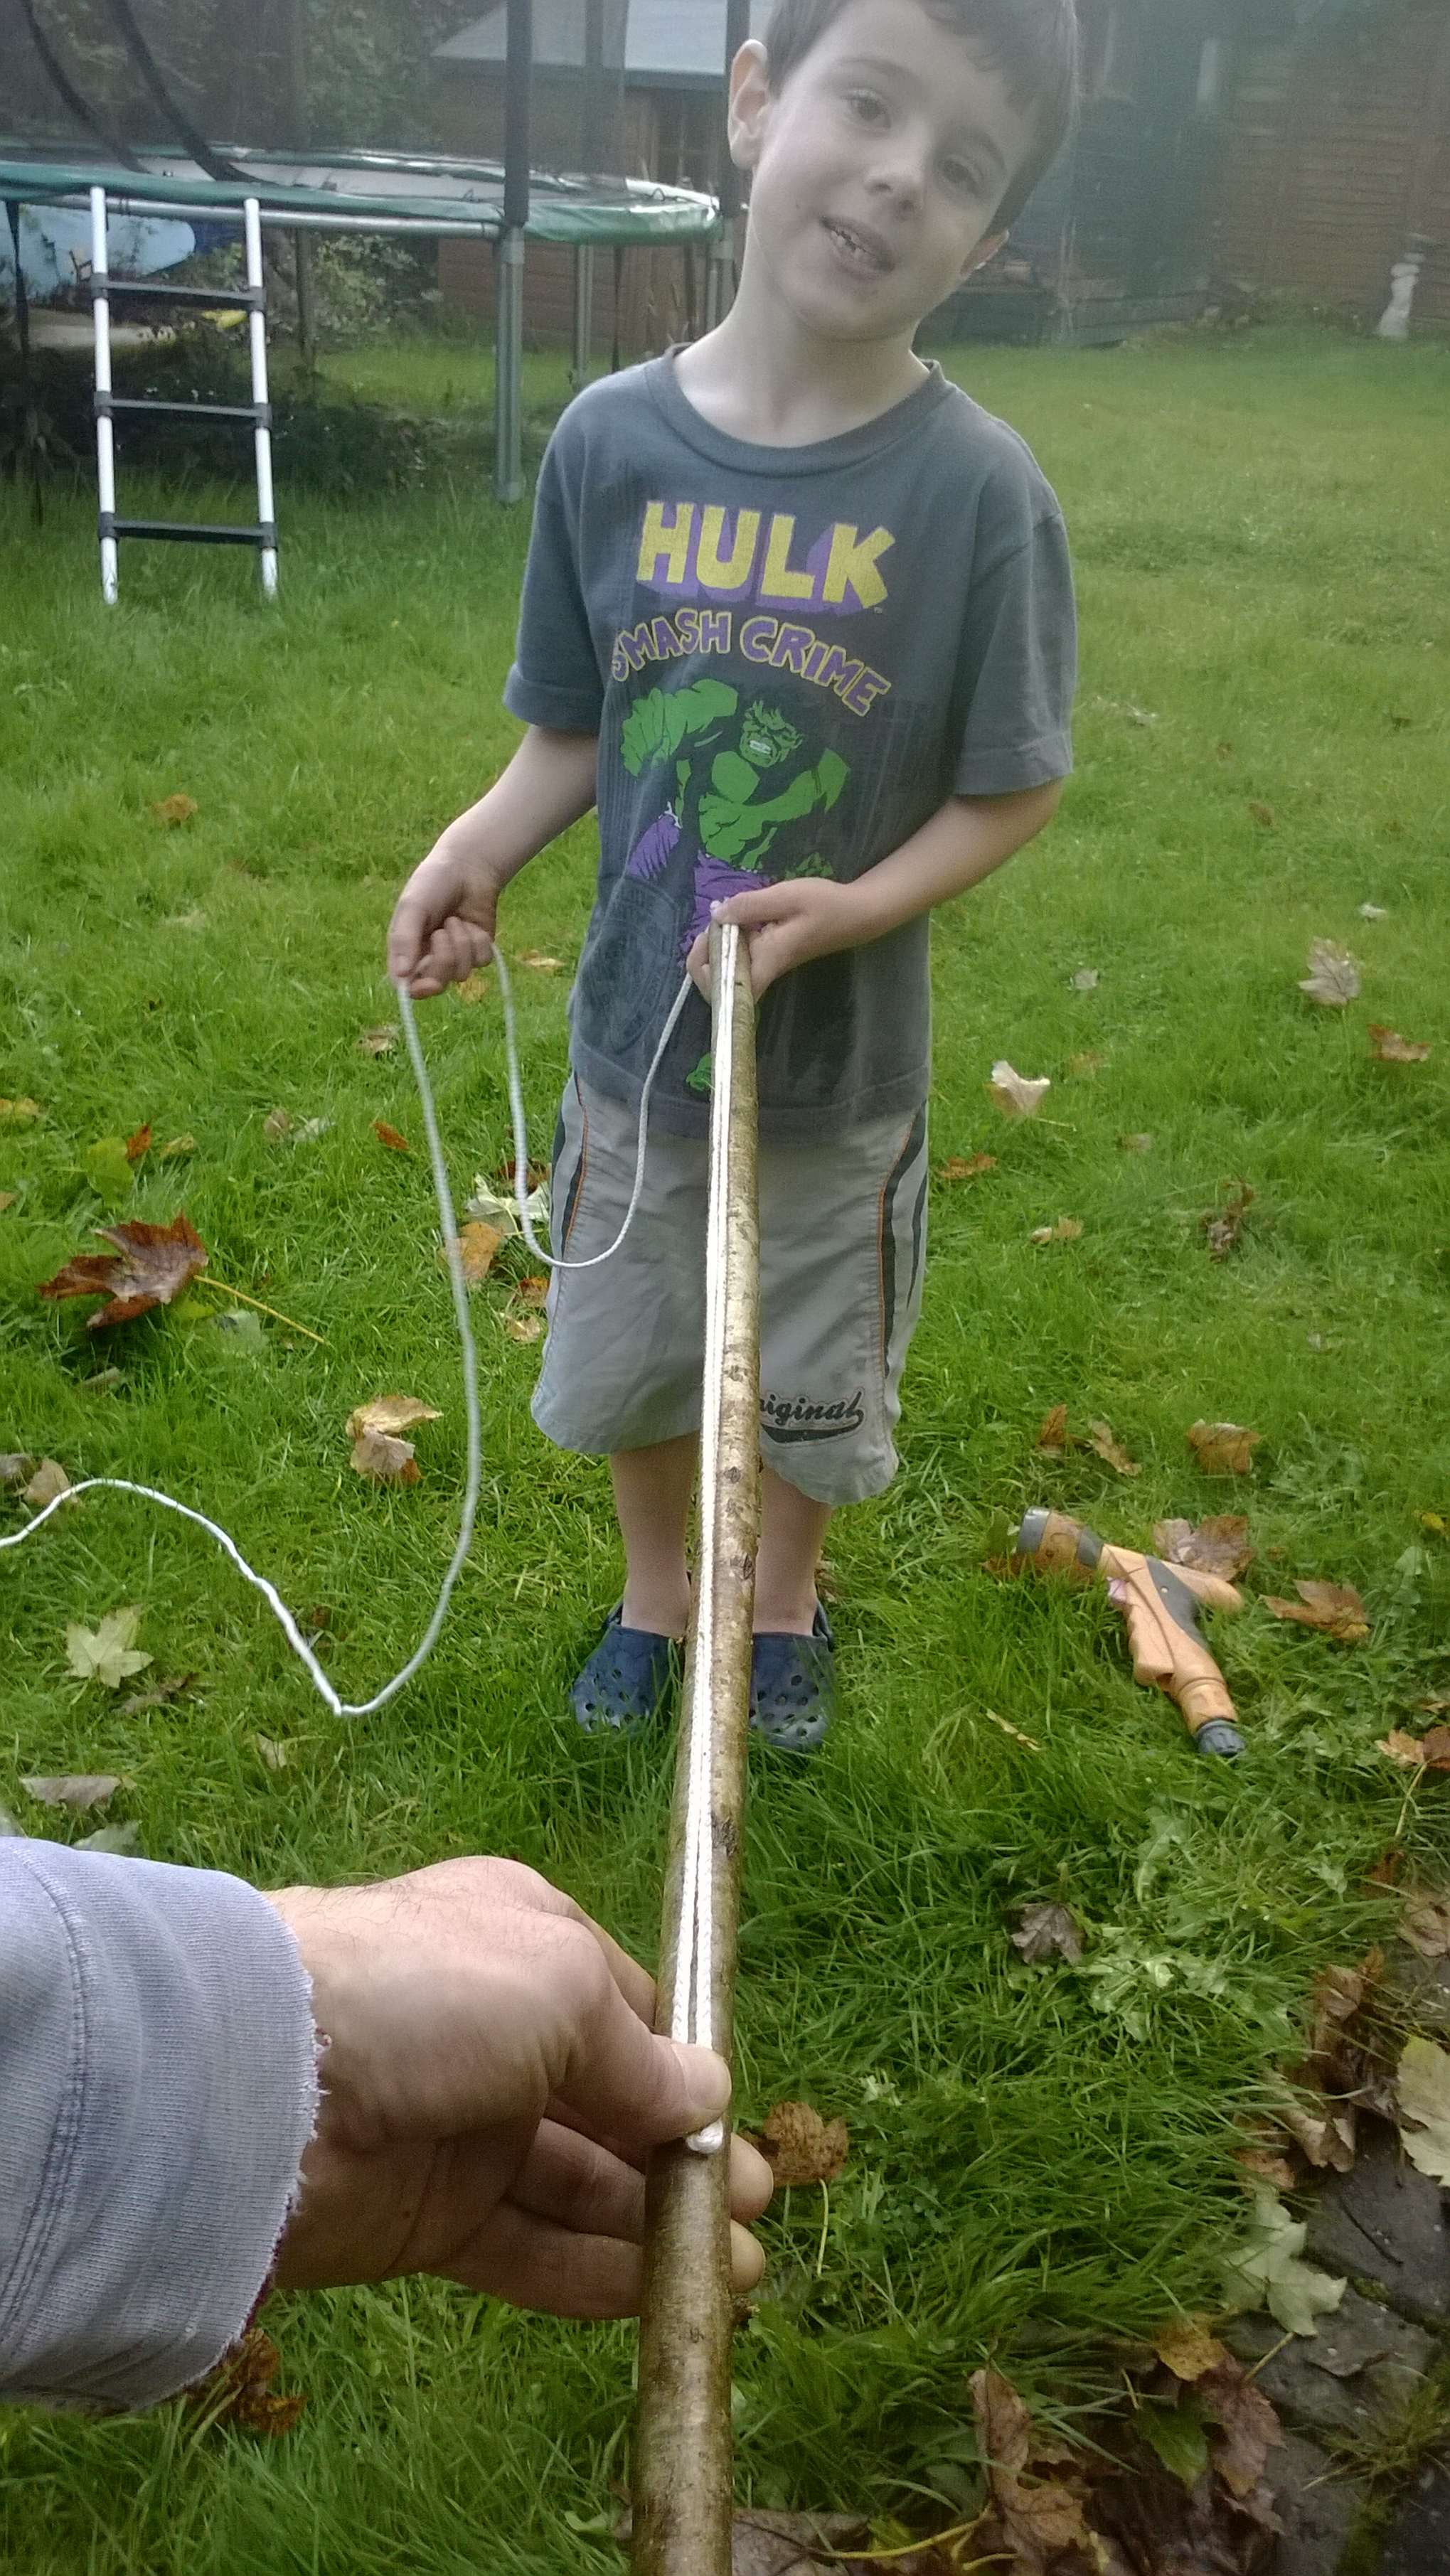
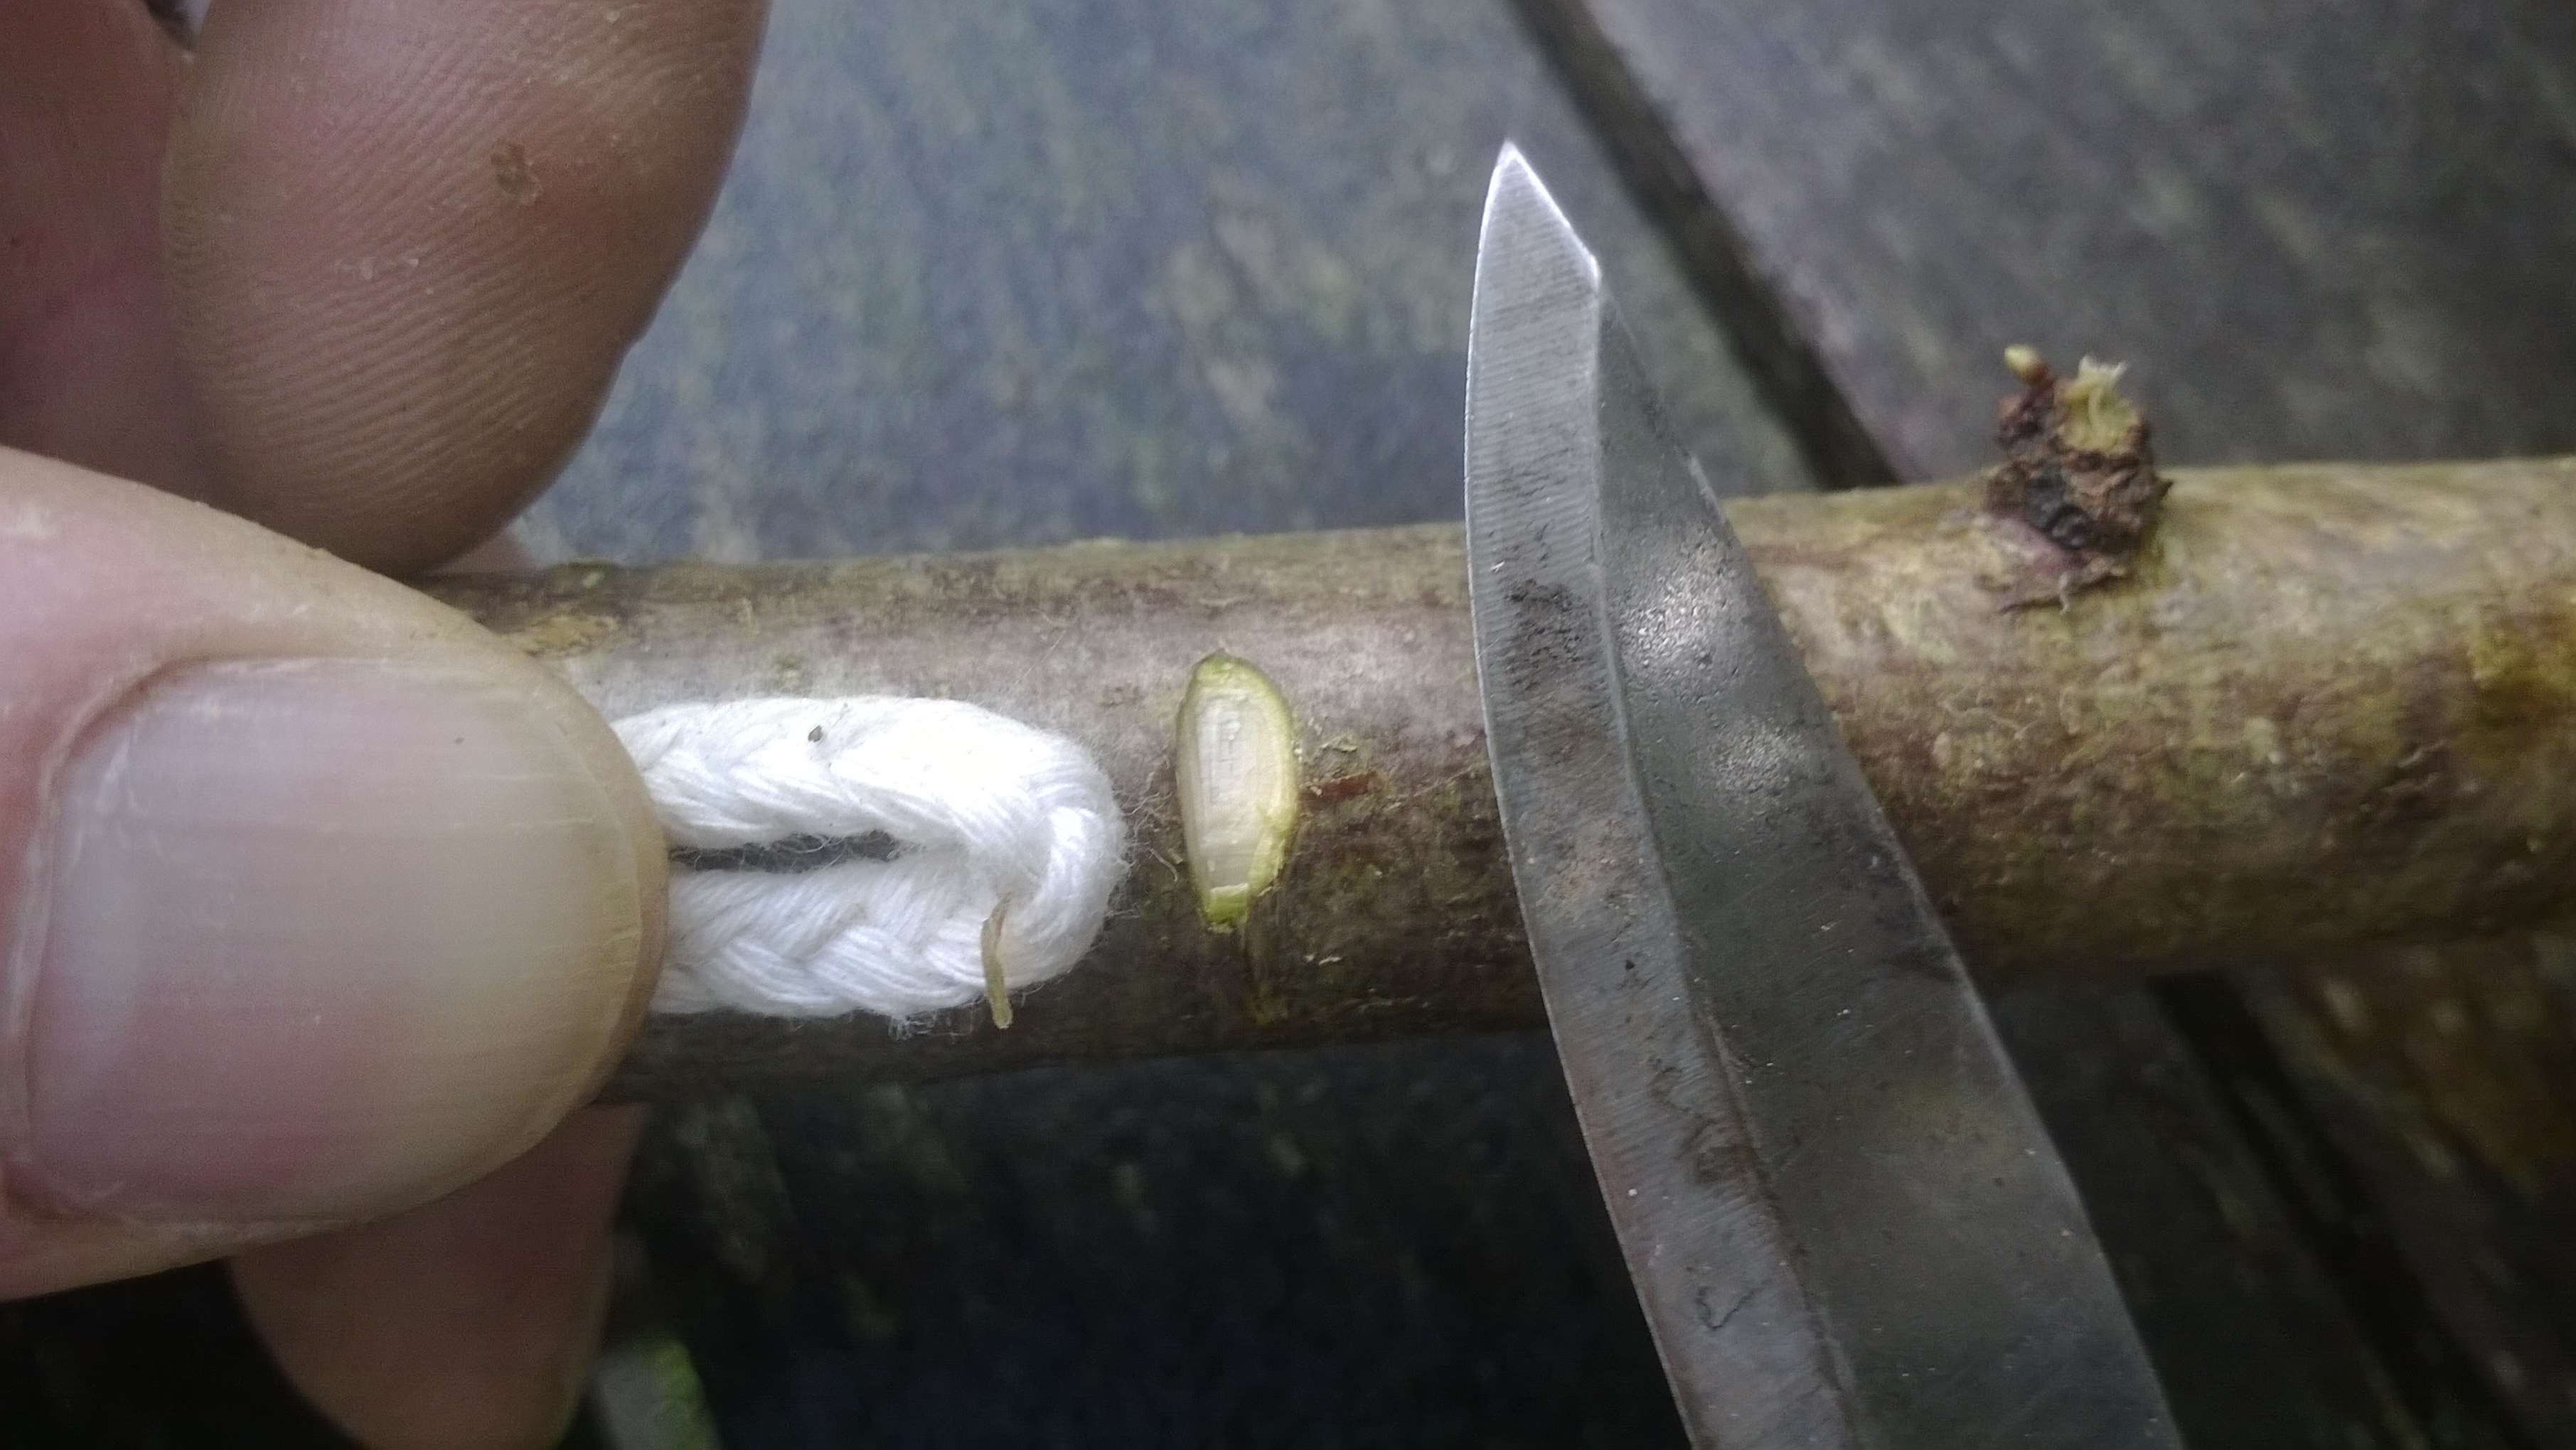
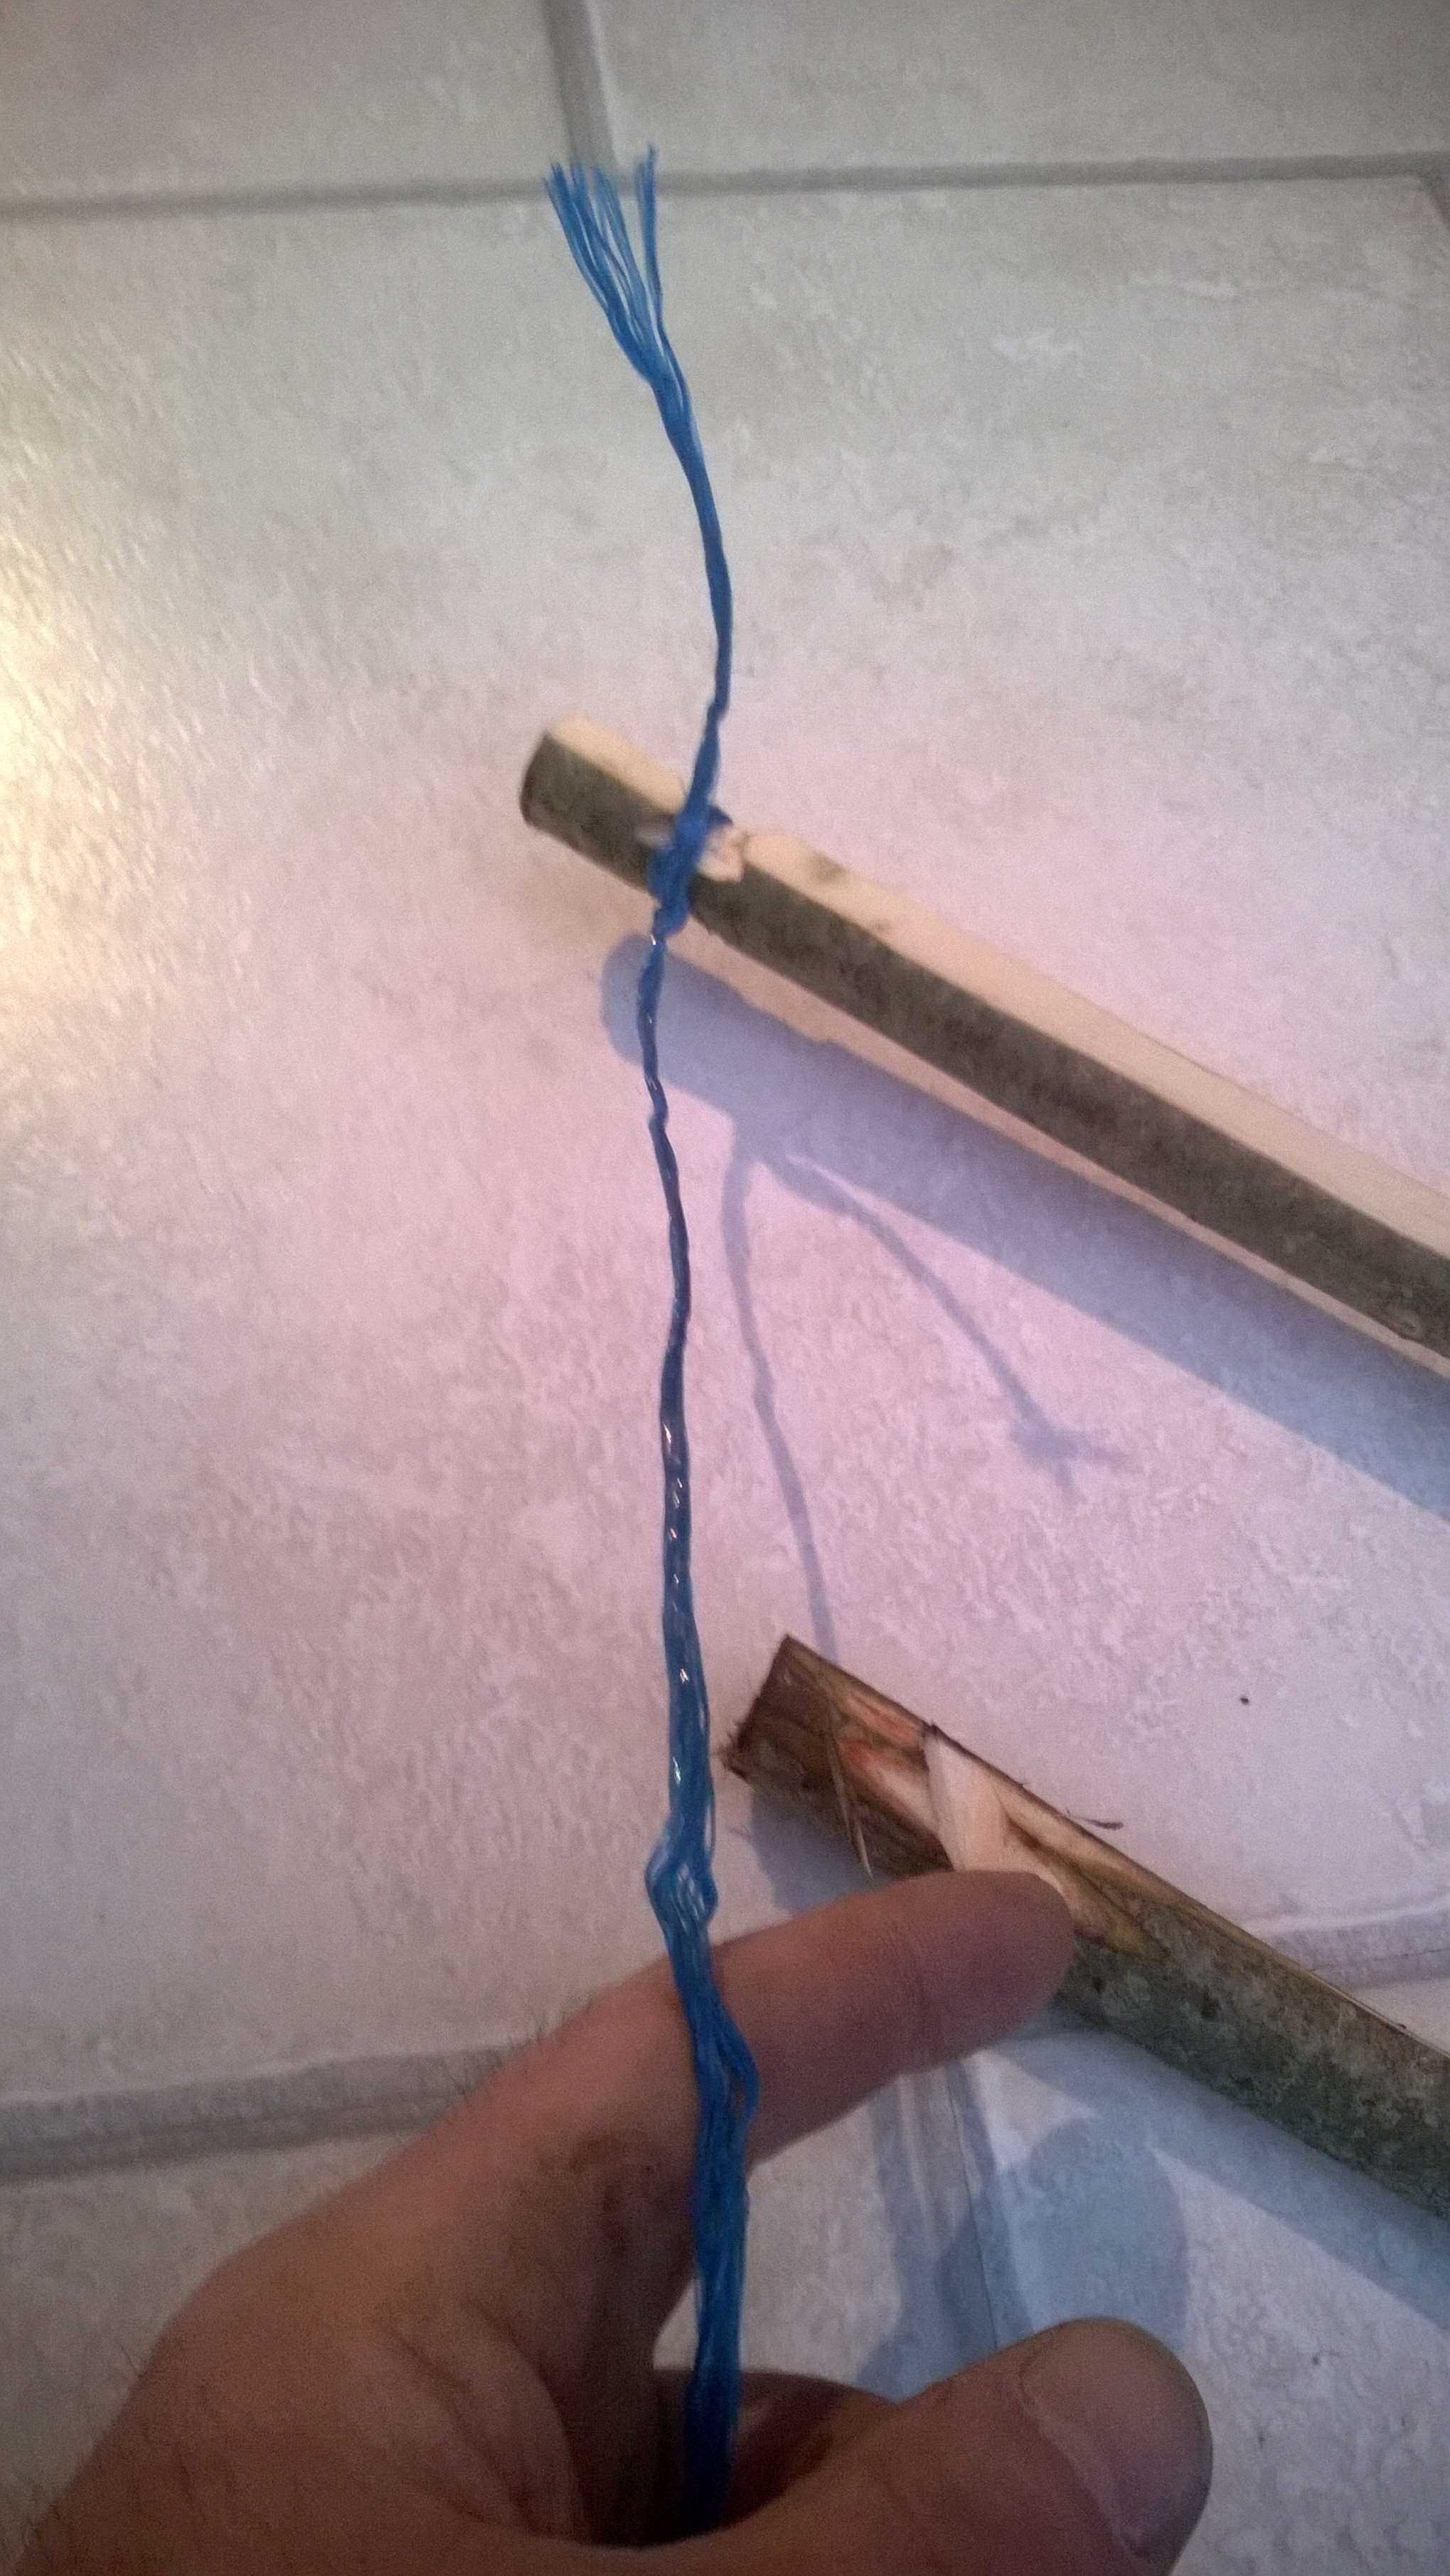
I carved this Atlatl after reading about hunters in Arctic environments using this type of Atlatl. The rest allows the hunter to wear a glove while waiting to shoot the dart. The dart has a piece of cordage wrapped tightly around it that is pushed up against the rest so fixing the dart in place. With a quick flick the dart is away with no ill effect on its flight.
Atlatl with a Rest
Thats it for me on bows and Atlatls (unless I make some more).
My annual holiday to the BCUK Bushmoot would not be complete without a bit of bow making and some time down on the range.
About ten years ago I was introduced to bowmaking by my friend Bardster (Paul Bradley). Bardster used to run workshops at the Moot which were always well attended. I then studied under John Rhyder of Woodcraft School and made a number of different bows from Ash Flatbows, Holmegaards and the Father & Son bow.
Bushmoot Archery
The Father & Son Bow
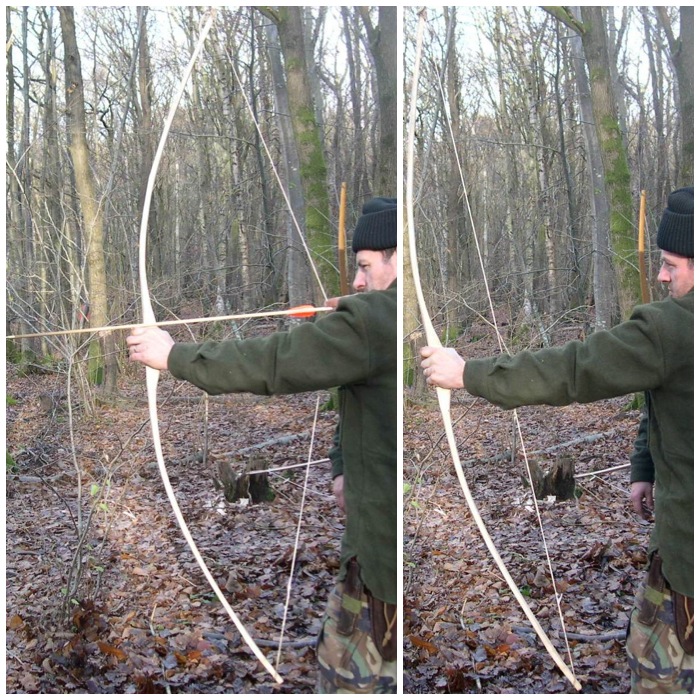
I introduced to the Moot a number of years ago the Father and Son bow (I had learnt this of my friend Mark Emery of Kepis Bushcraft) This is a ‘quickie’ bow to make and comprises two rods (usually hazel) strapped together. The bows take only an hour or two to make if you know what you are doing although they may take up to a day to make if you are new to it all.
I have run quite a few classes over the years at the Moot on the Father & Son bow. As you can see in the pictures below they were large classes.
The Father & Son bow
Nowadays Chris Pryke runs this class and it is well attended each year. The bows if made properly can last you years. I still have and use my first one which is over 6 years old now.
In new hands
I have had hours and hours of fun making and using these bows over the years. They are cheap to make, very accurate with practice (normally I shoot them between 10 and 20 metres) and will shoot on a high arc about 60 to 70 metres.
Father & Son Bow in action
The Bhutanese Bow
One of our long-term members is Wayne Jones of Forest Knights bushcraft school. Wayne is an expert bowyer and taught me a few years ago to make a Bhutanese bow. This type of bow is made of a large piece of bamboo and relatively quick to make (about half a day I think it took me)
The Bhutanese Bow
The bow is constructed of two separate pieces of bamboo joined in the centre. The join can be with, tape, cord or with pins.
Building the Bhutanese bow
Most folk who start one of these bows can be found down on the range in the evening.
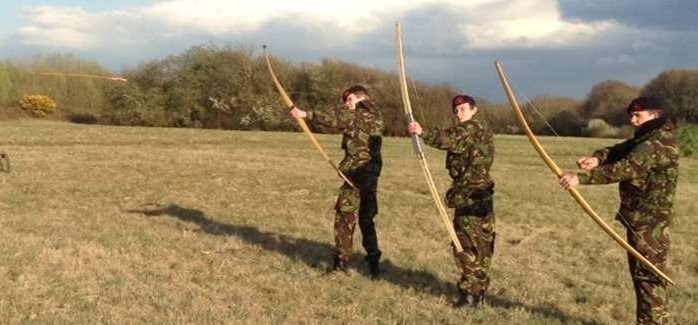
We started the range at the Moot about six years ago. it is well away from all the camping areas surrounded by wooded sand dunes. There are two Bhutanese bows in the top picture below in action and I am holding one in the bottom picture below.
Bhutanese bows in action
Traditional Bows
Wayne sometimes runs workshops similar to the ones Bardster did in the past making more traditional style flatbows. I hope to one day make time to study under Wayne as it has been a few years since I have made an Ash Flatbow.
Classic bows
The Mini Bow
The final type of bow that is produced at the Moot is the Mini bow. Wayne uses the large pieces of bamboo he brings along for the Bhutanese bows to also make these very small Mini bows. The kids absolutely (and a few adults) love them.
They do not take long to make and are small enough to be made as one piece.
The Mini bow
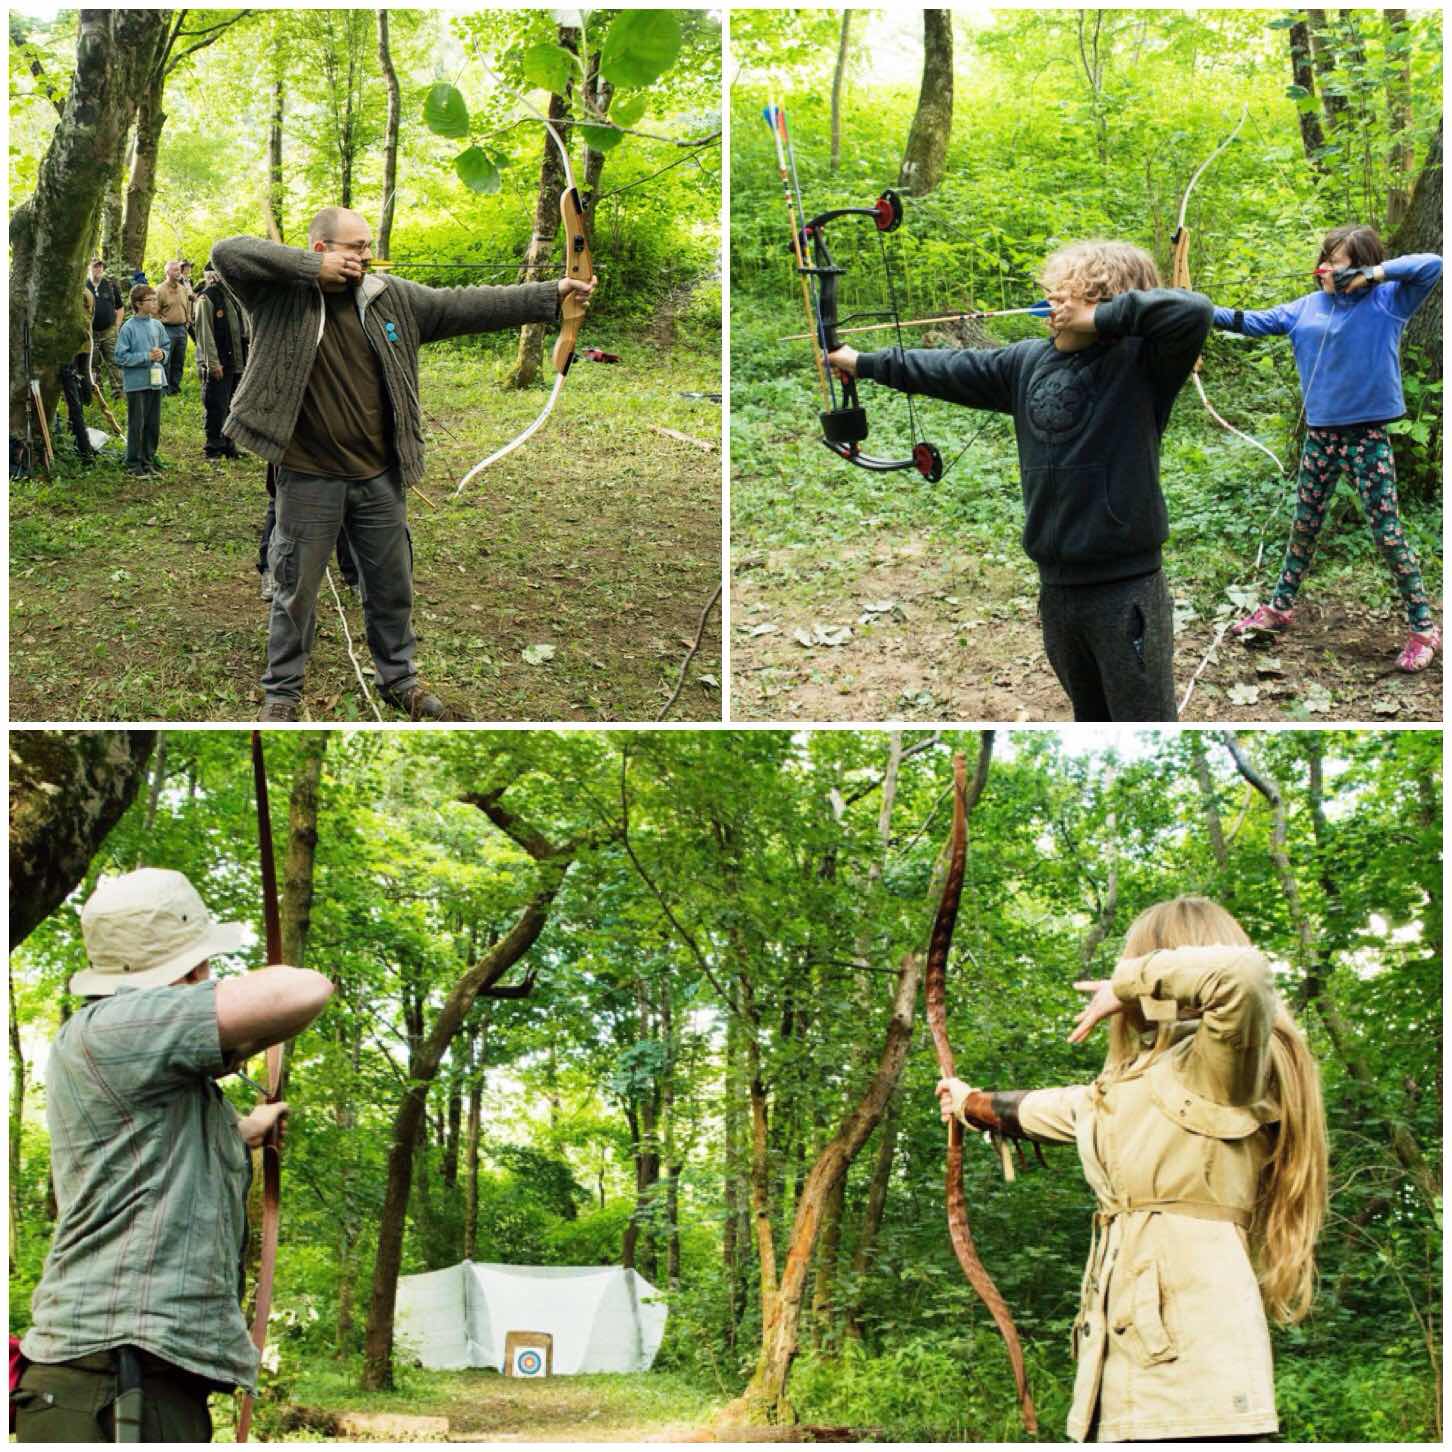
Different Bows
On the range you will see a wide variety of bows in action from the traditional (top two have my Ash Flatbow and my Holmegaard in use.
Below them are some of the modern bows people bring along to the Moot. Some are very powerful and come with all manner of attachments. When it comes to the competition we hold we do not mind what type of bow you use as long as it does not have extras such as stabilisers, sights or gears attached.
Old and new
I am always intrigued with the different bows that appear and was particularly interested in the Mongol style bow Lisa had brought along as I had never seen one before (bottom right).
Bows in all sizes
Each evening during the Moot (and sometimes during the day) a few of us troop down to the range for a shoot. Running the range is usually Cap’n Badger, Paul Pomfrey, Ian Woodham and myself.
We try and balance the time between teaching novices and letting the ‘Old and Bold’ have time to keep their eye in. After a full days teaching bushcraft having to do this can initially feel like a chore to me however once I have shot in a few arrows it can be quite relaxing, especially after a very busy day.
Hard contests
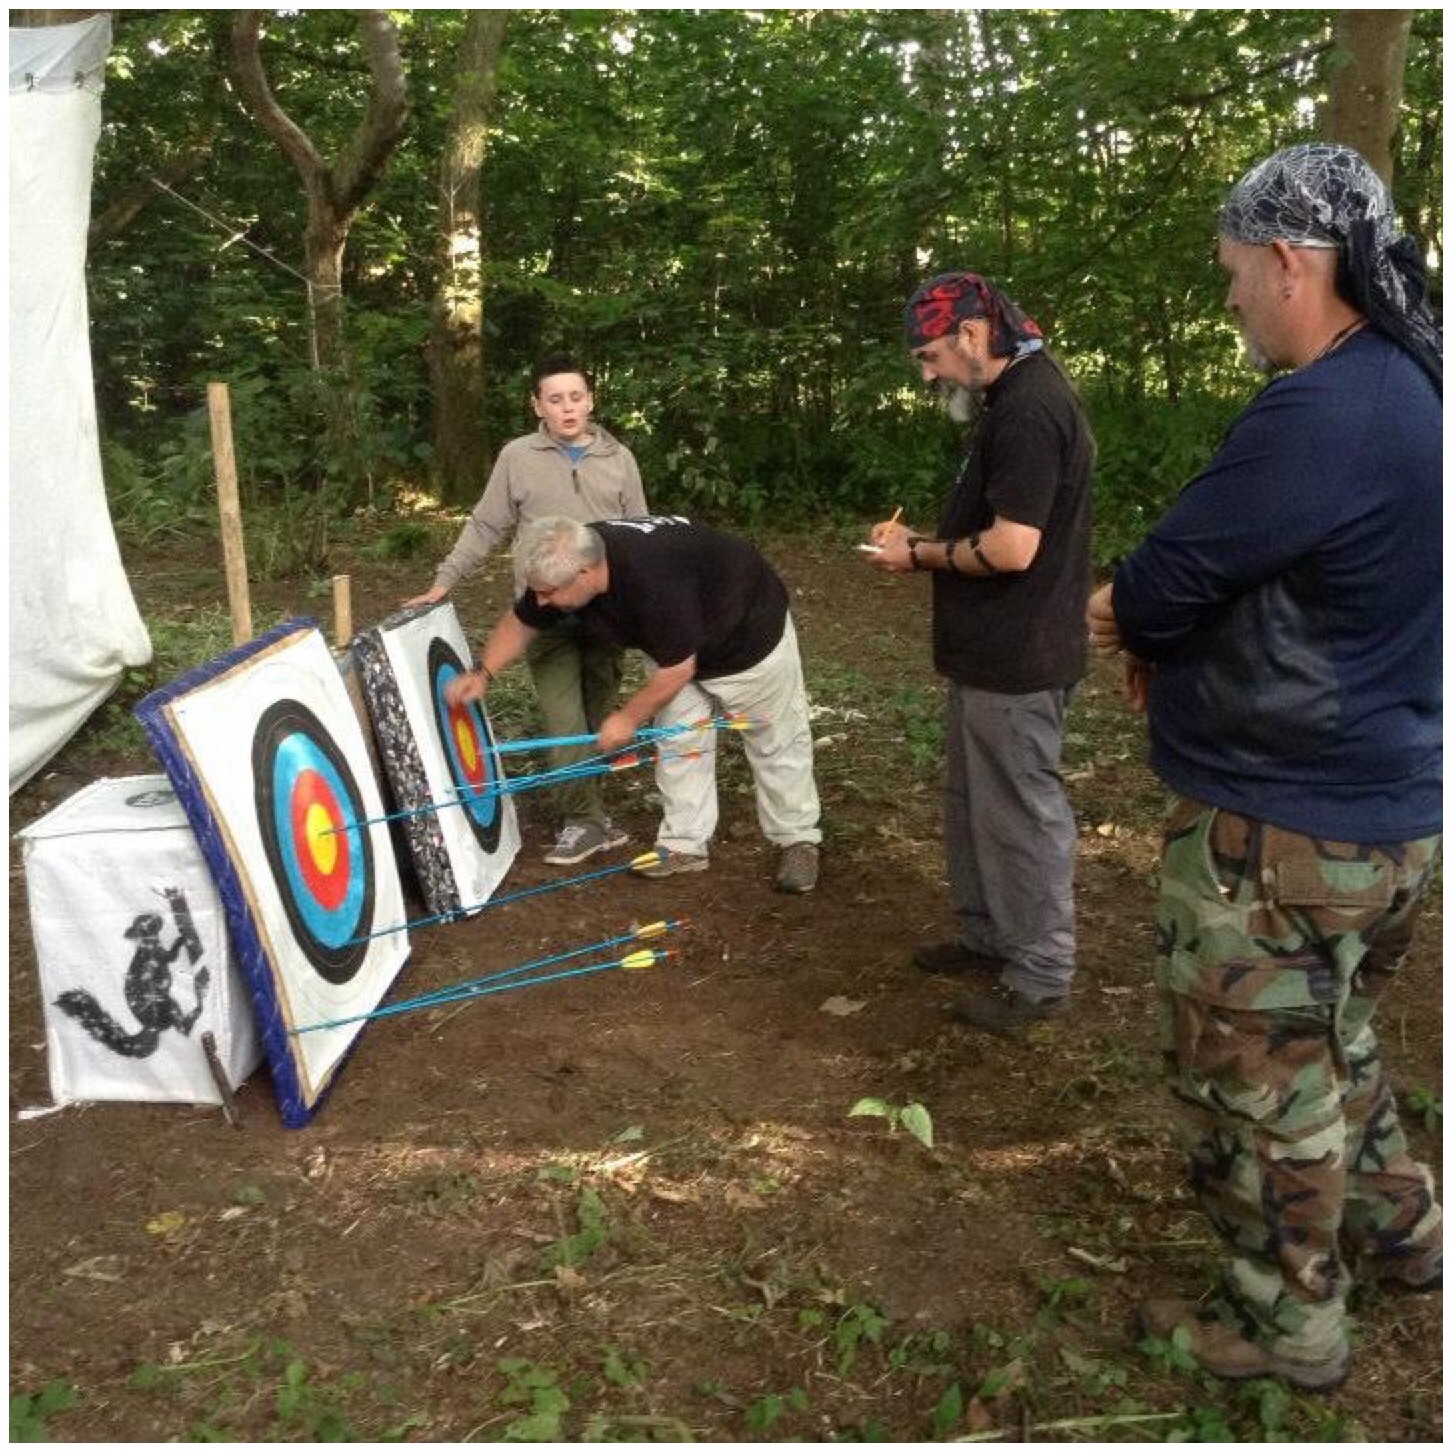
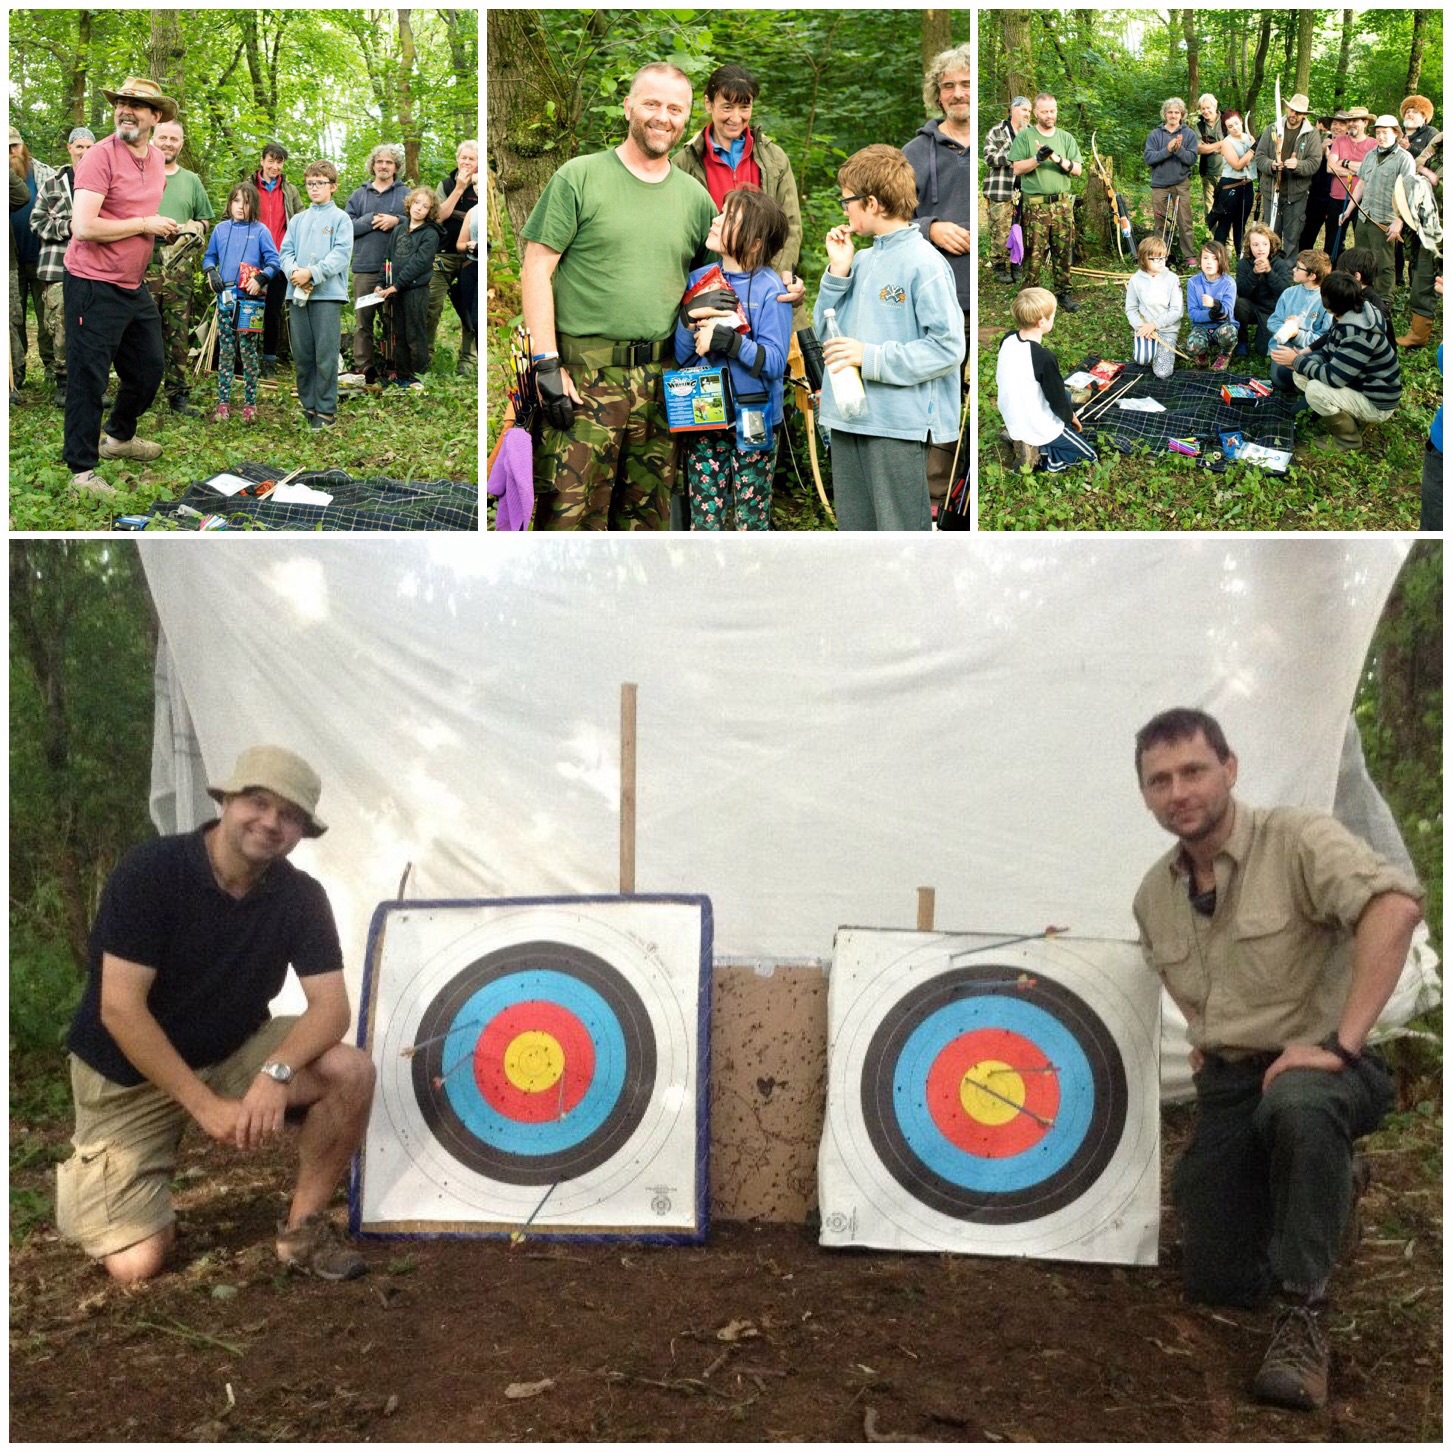
Competition day happens usually in the second week of the Moot and it gets very competitive. We normally run two competitions, one for the kids and one for the adults. They have to shoot at different ranges and are closely marked by the referees as there are usually some very good prizes up for grabs.
Over the years
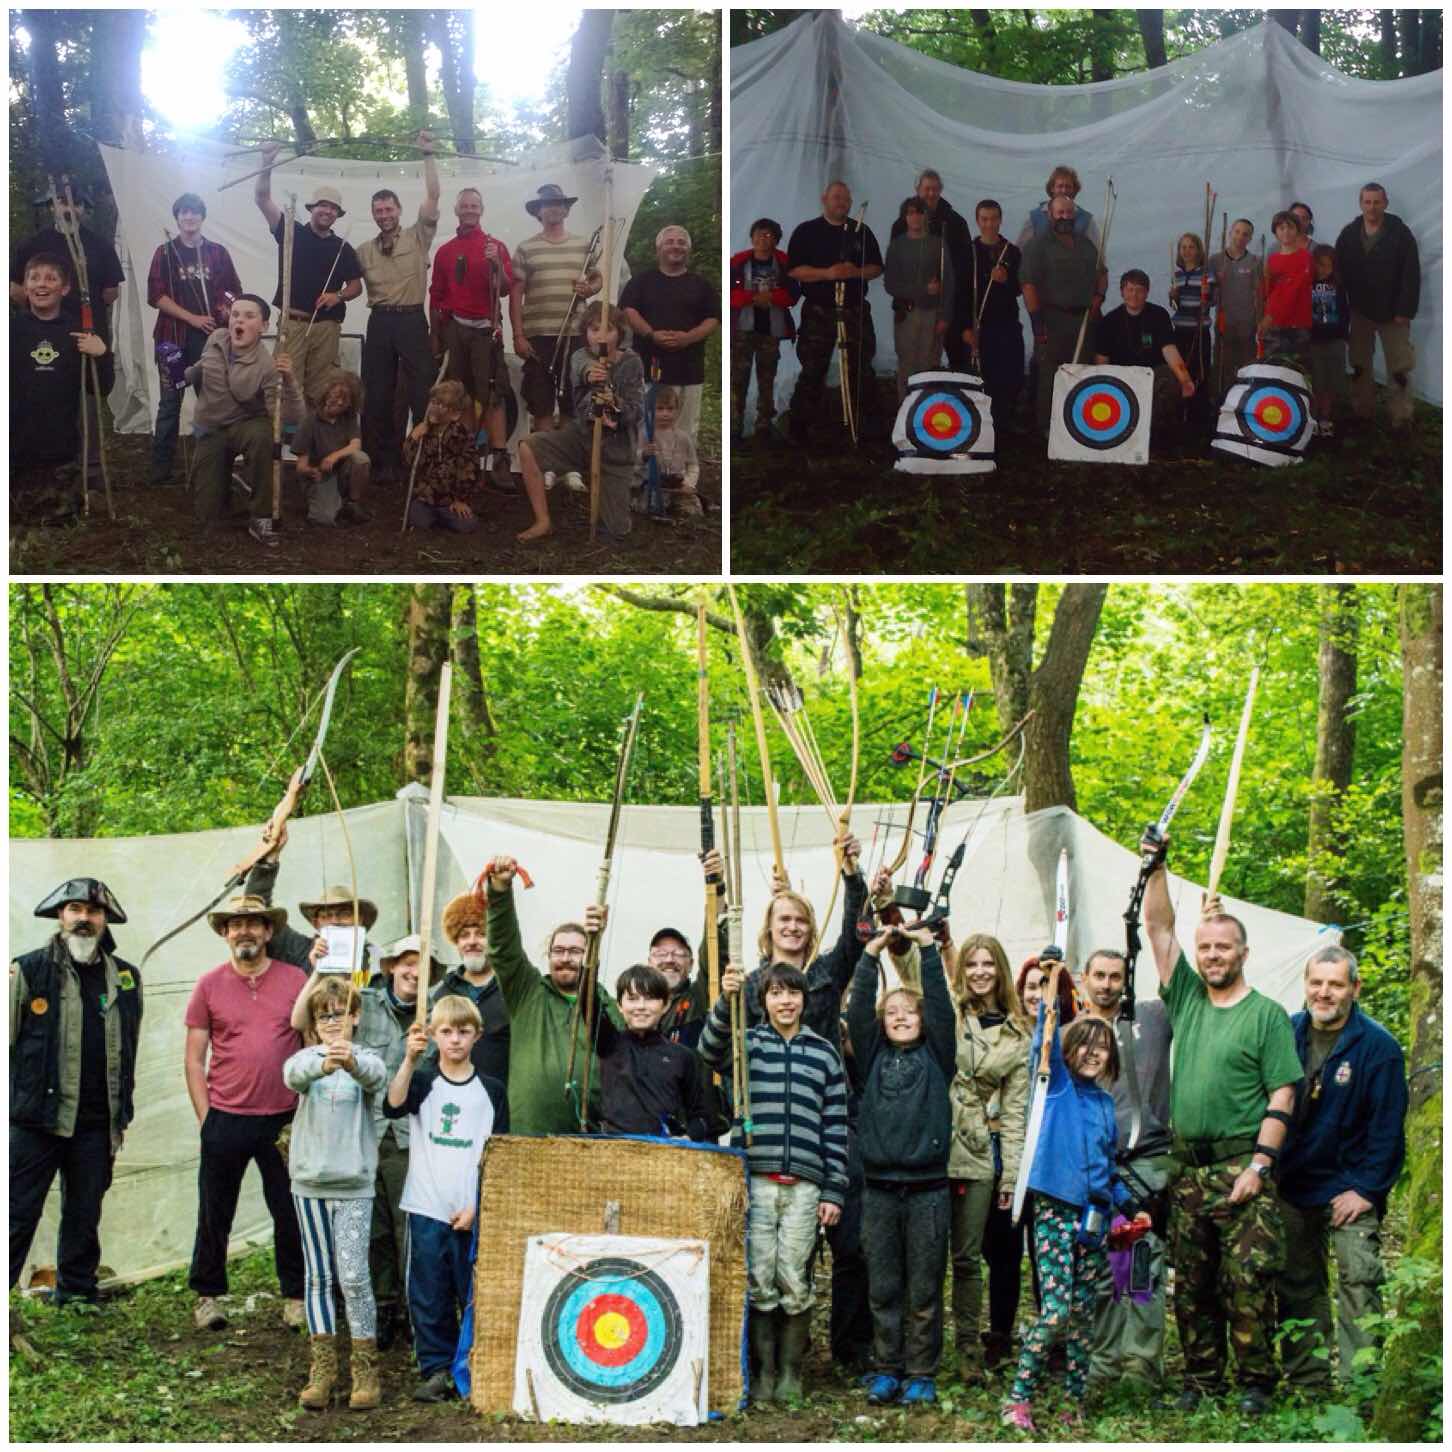
Afterwards when all the scores have been tallied up the thing I really like about this time down on the range is how good natured everyone is.
The winners get first dibs at the prizes (everyone brings a prize for the pot with a few extras donated) however everybody walks away with a prize at the end.
Having fun
I have been to many different types of bushcraft shows, courses and meetings over the years but it is only at the BCUK Bushmoot that I see such a wide range of archery on display.
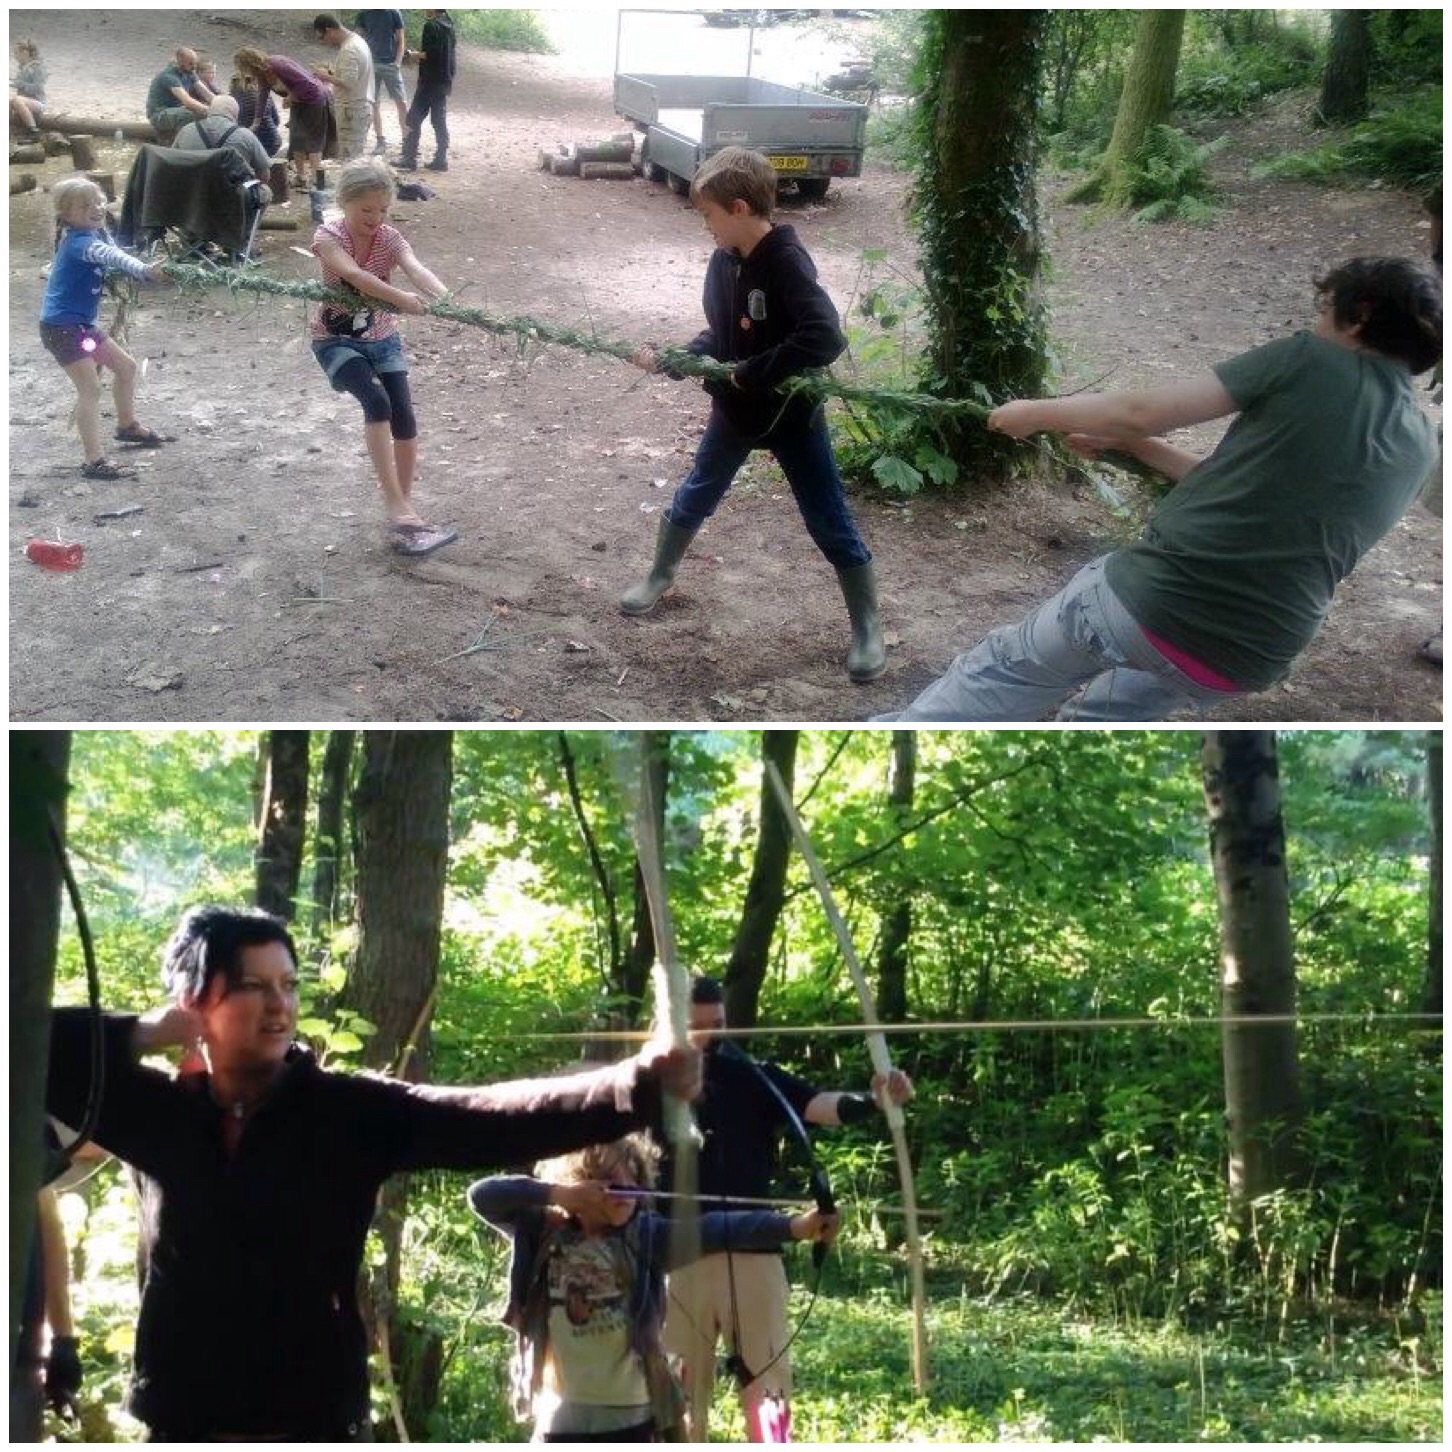
The BCUK Bushmoot is about sharing knowledge however one thing it does bring out in me is my competitive spirit. That may be through making a tug of war rope out of grass through to the serious competitiveness of the archery range.
Competition time
This sharing of knowledge may come about in many ways such as workshops, one to one sessions, presentations and competitions. This post is focussed on the many competitive activities we undertake over the two weeks of the Bushmoot.
The first picture I shared was of the grass tug of war we undertook under the watchful eye of Perry McGee from the National Tracking School. Perry showed us how to quickly gather grass, twist it, create rope and most importantly how to have fun with what we created.
Catapult
One of the activities that attracted participants from all age ranges was the catapult. The catapult is a tool for all ages I think – sometimes we were aiming for accuracy and sometimes aiming just for the fun of it 🙂
Cattie time
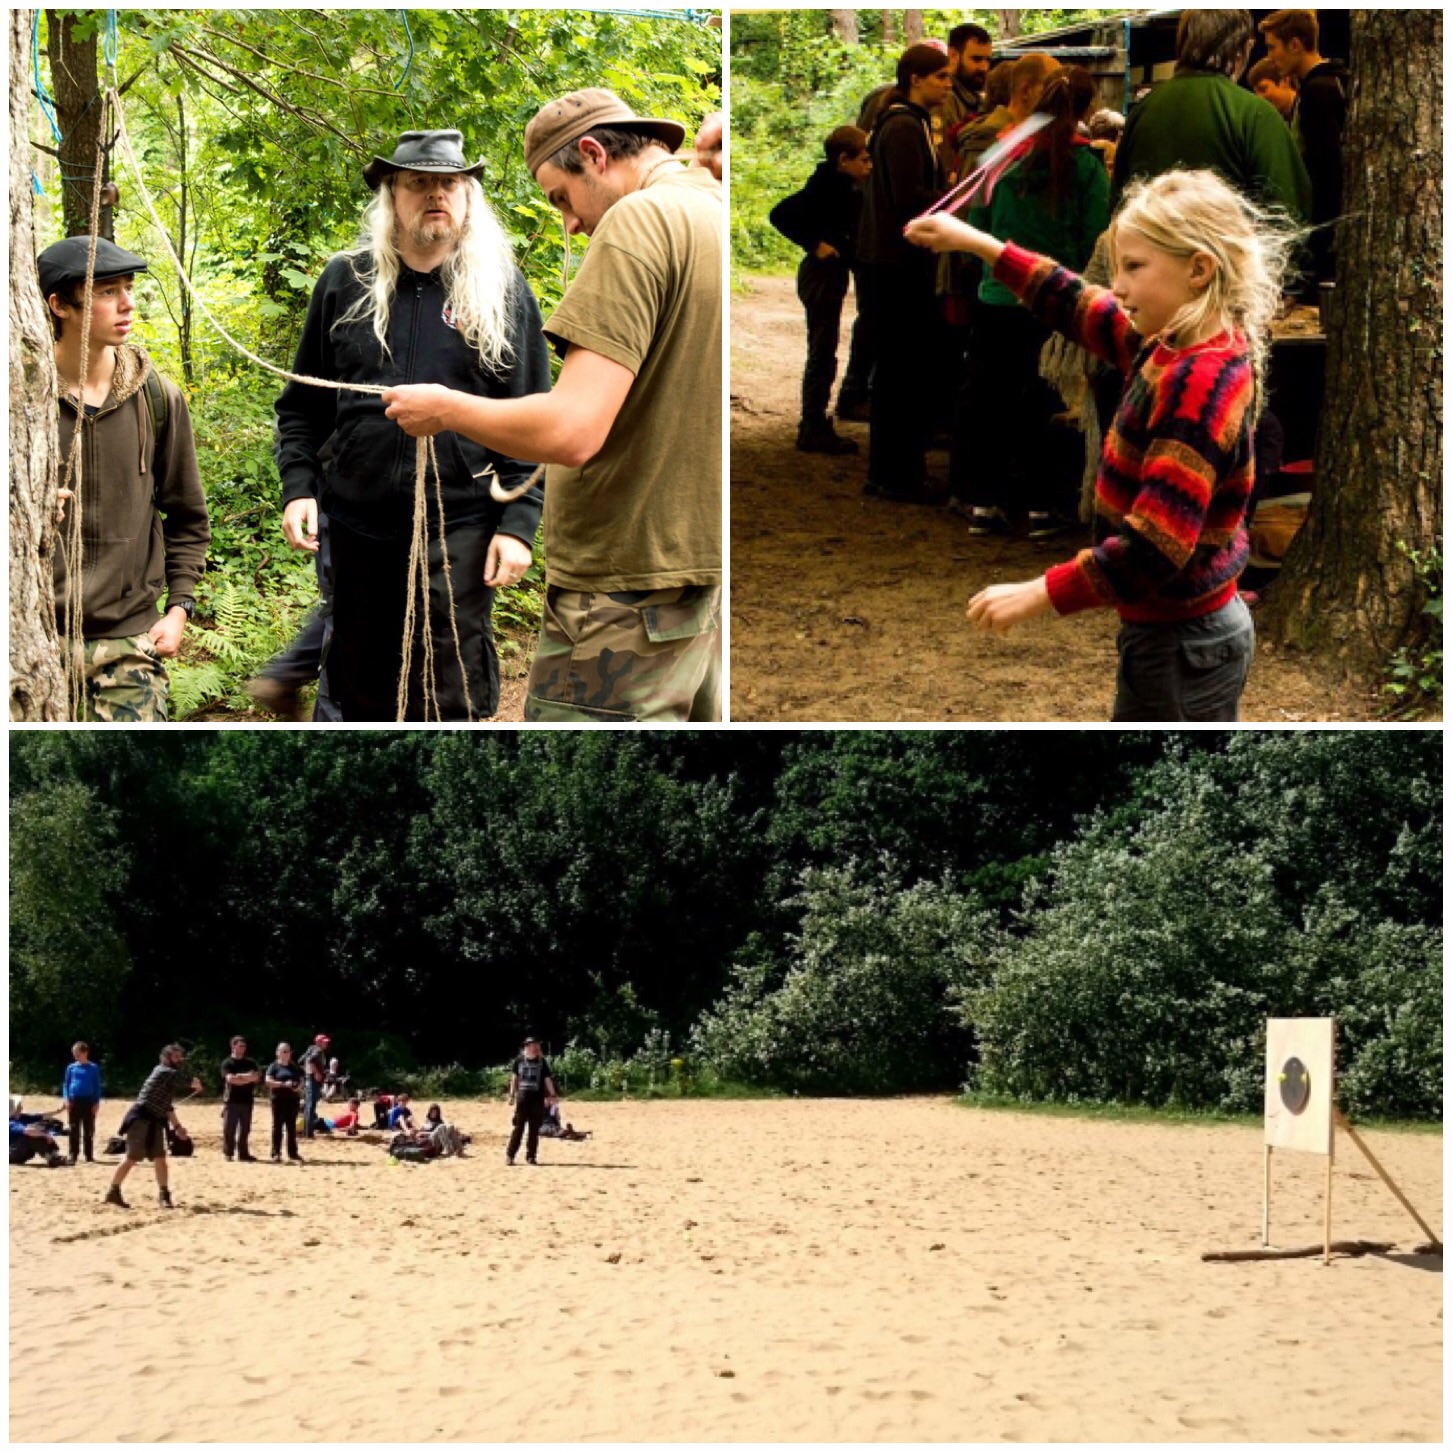
The Sling
My friend David Colter has introduced the sling and in particular the Balearic style of sling. The throwers all made their own slings from string and leather and it attracted participants of all age groups.
David has run classes on this for a number of years and he had a great time running a competition on the sand dunes this year. The sling throws the projectile at very high speed so I think they used tennis balls for safety’s sake.
Next year David is making this official by running the Balearic slinging world championship event at the Bushmoot.
The Slingshot
Atlatl
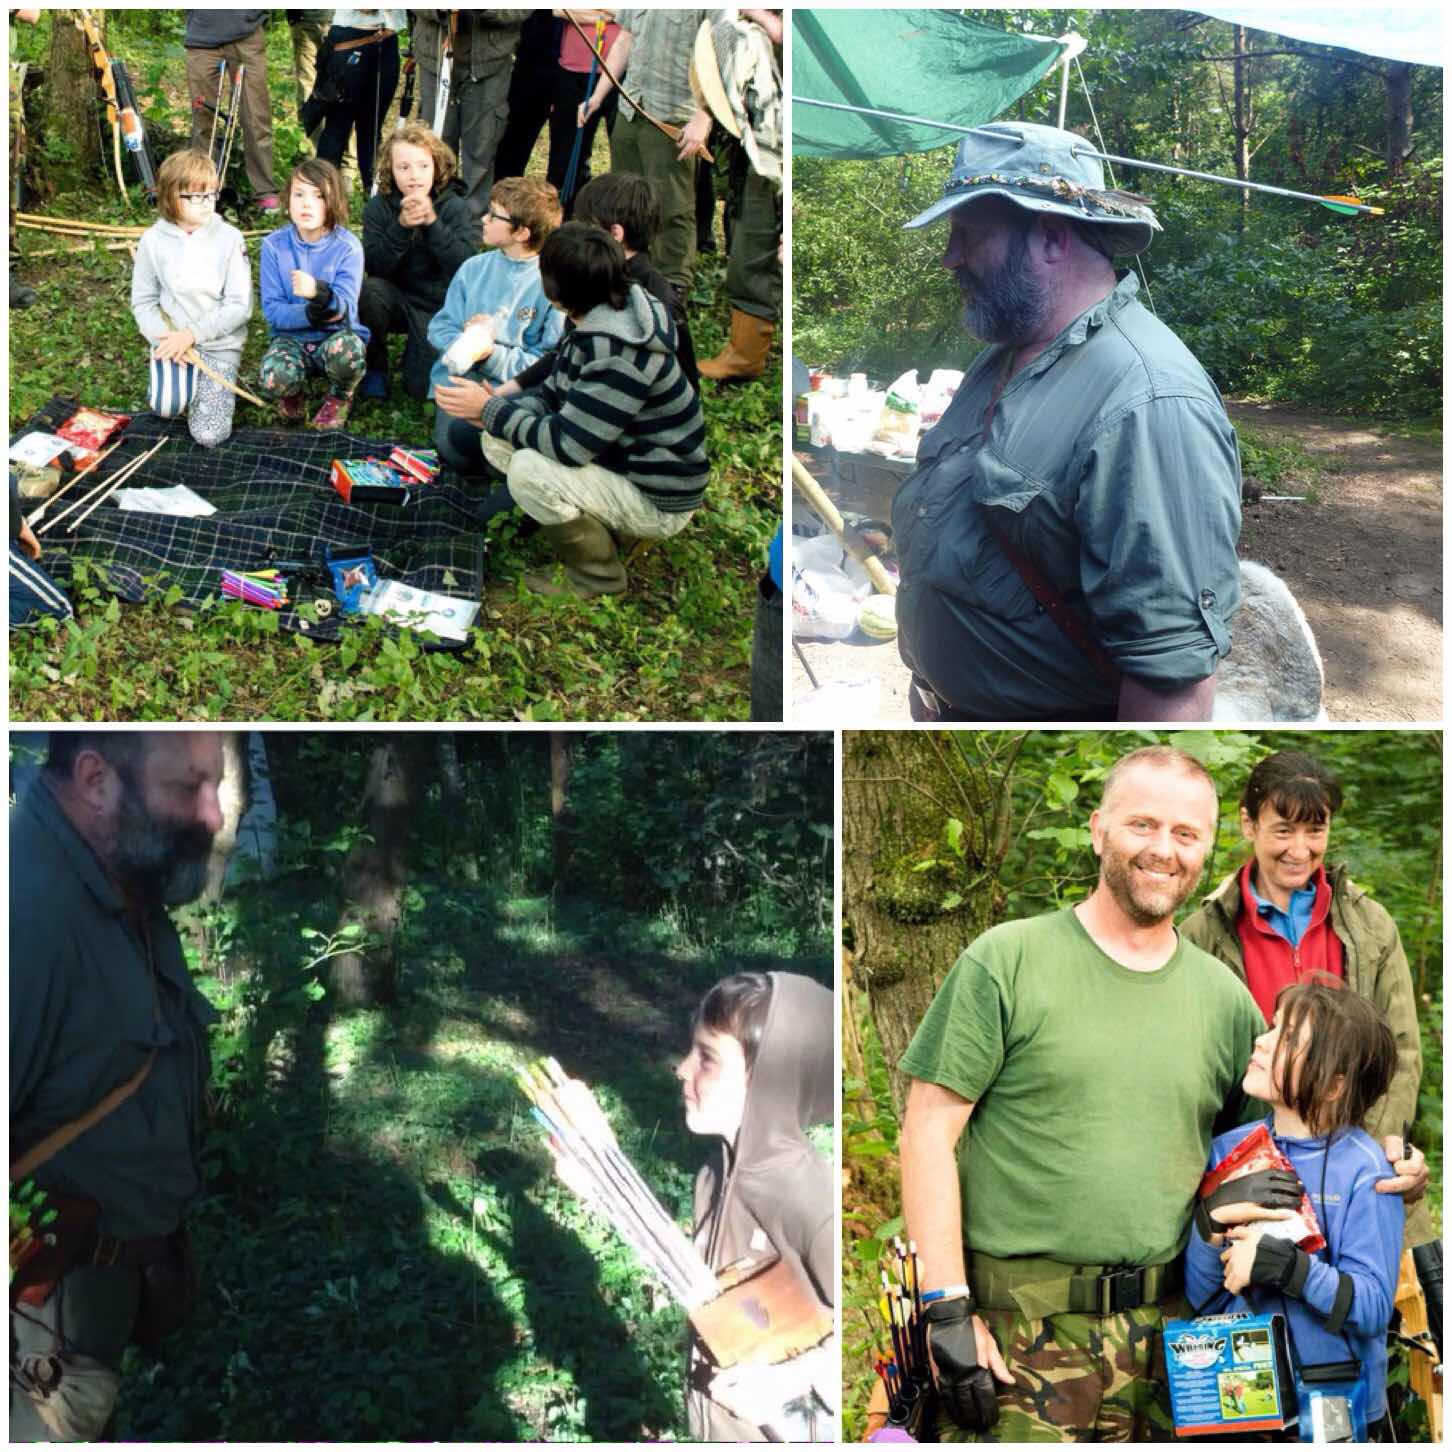
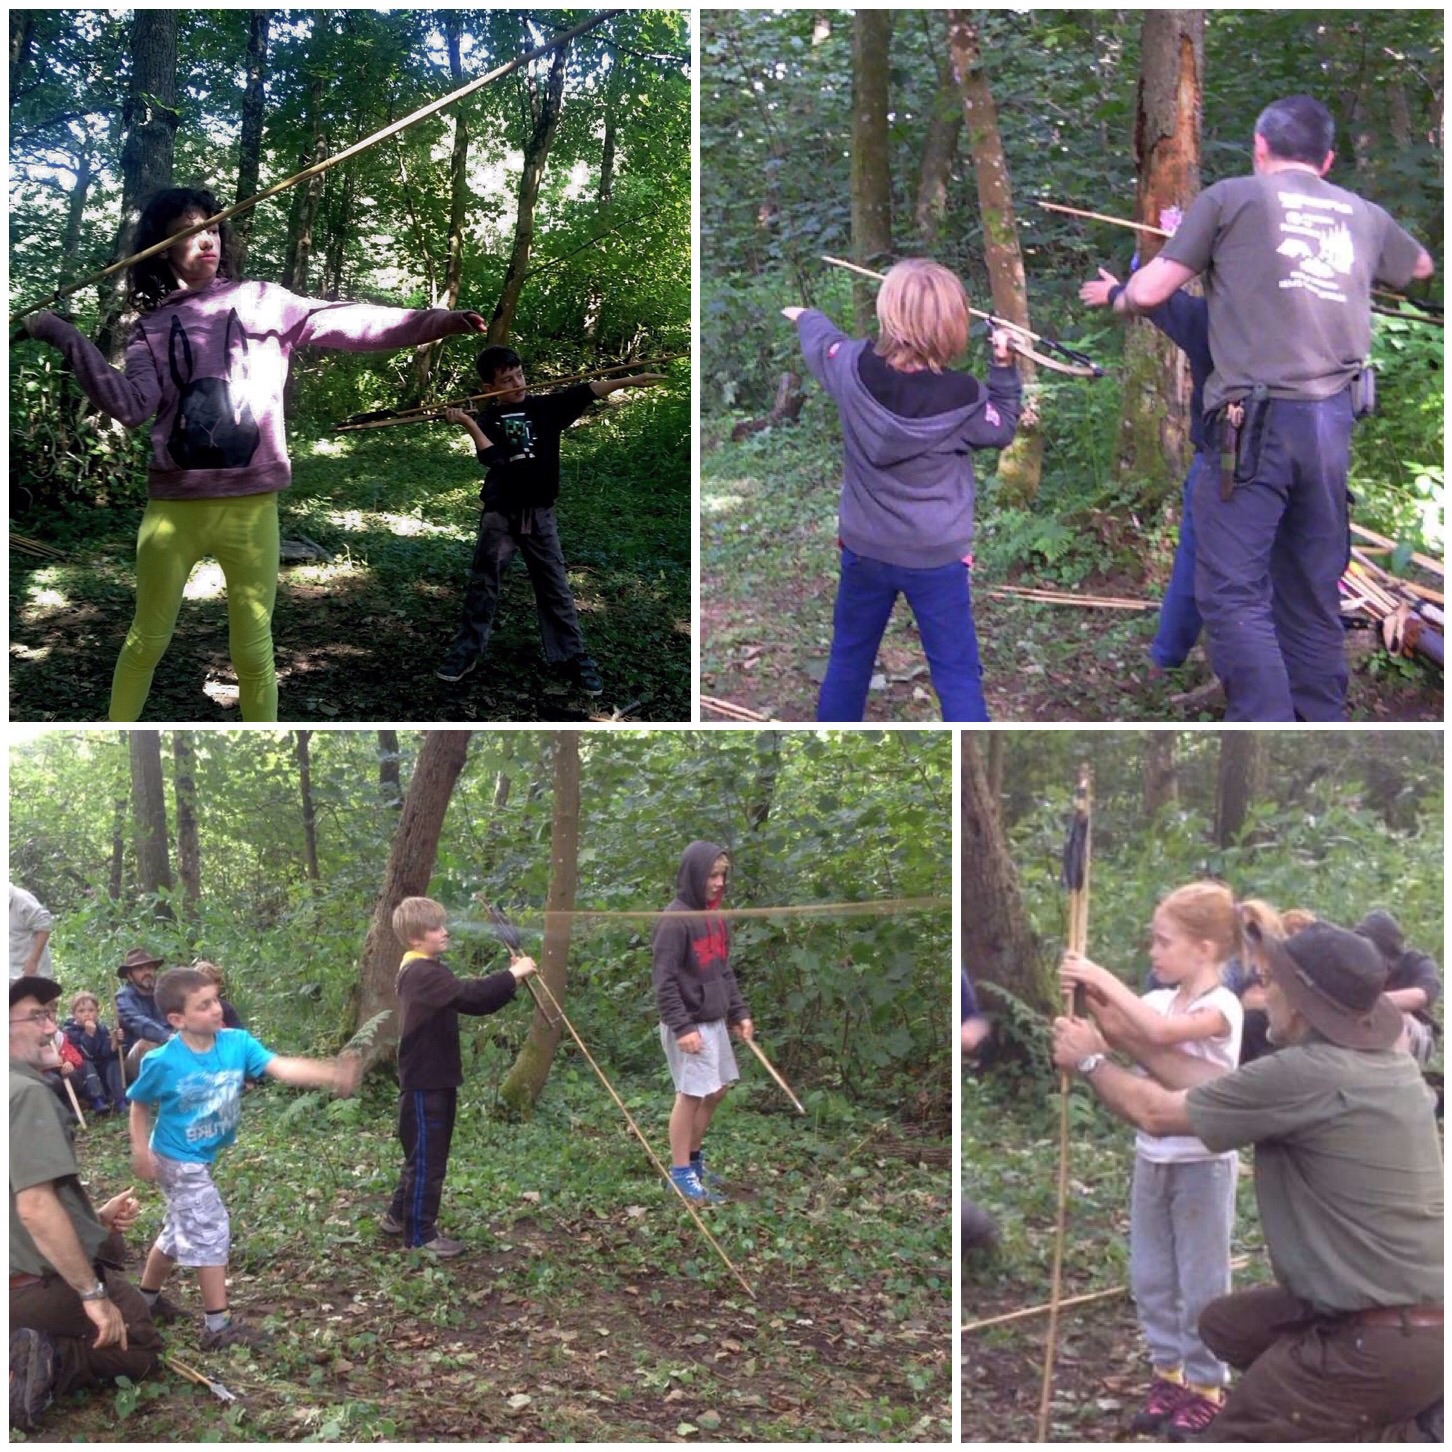
One of my favourite events is the Atlatl. This again is a very ancient art and was (and still is in certain parts of the world) used as a hunting tool.
I have lots of different types of Atlatl throwers and darts however I use unsharpened bamboo canes for training. I use Atlatl throwers with rest attachments for the kids to use (they can be difficult to hold) and spend many an hour with my friend Charlie Brookes on the range teaching them to throw.
This is a particularly popular activity for kids of all ages (most adults at the Bushmoot come under this category as well) as the appeal of throwing Atlatl darts down range can be quite addictive.
The Atlatl
Axe/Spade throwing
We run an axe and spade throwing range as well ( more difficult than it looks) and it provokes stiff competition. I have not done this to any great degree (though I hope to throw more next year) but it does make for great viewing and photography.
I noticed the guys were throwing next to Cap’n Badger’s white tarp and positioned myself to try and capture the axes and spades in flight. Needles to say I had my lens well zoomed in and the shutter speed really fast.
Axe/Spade throwing
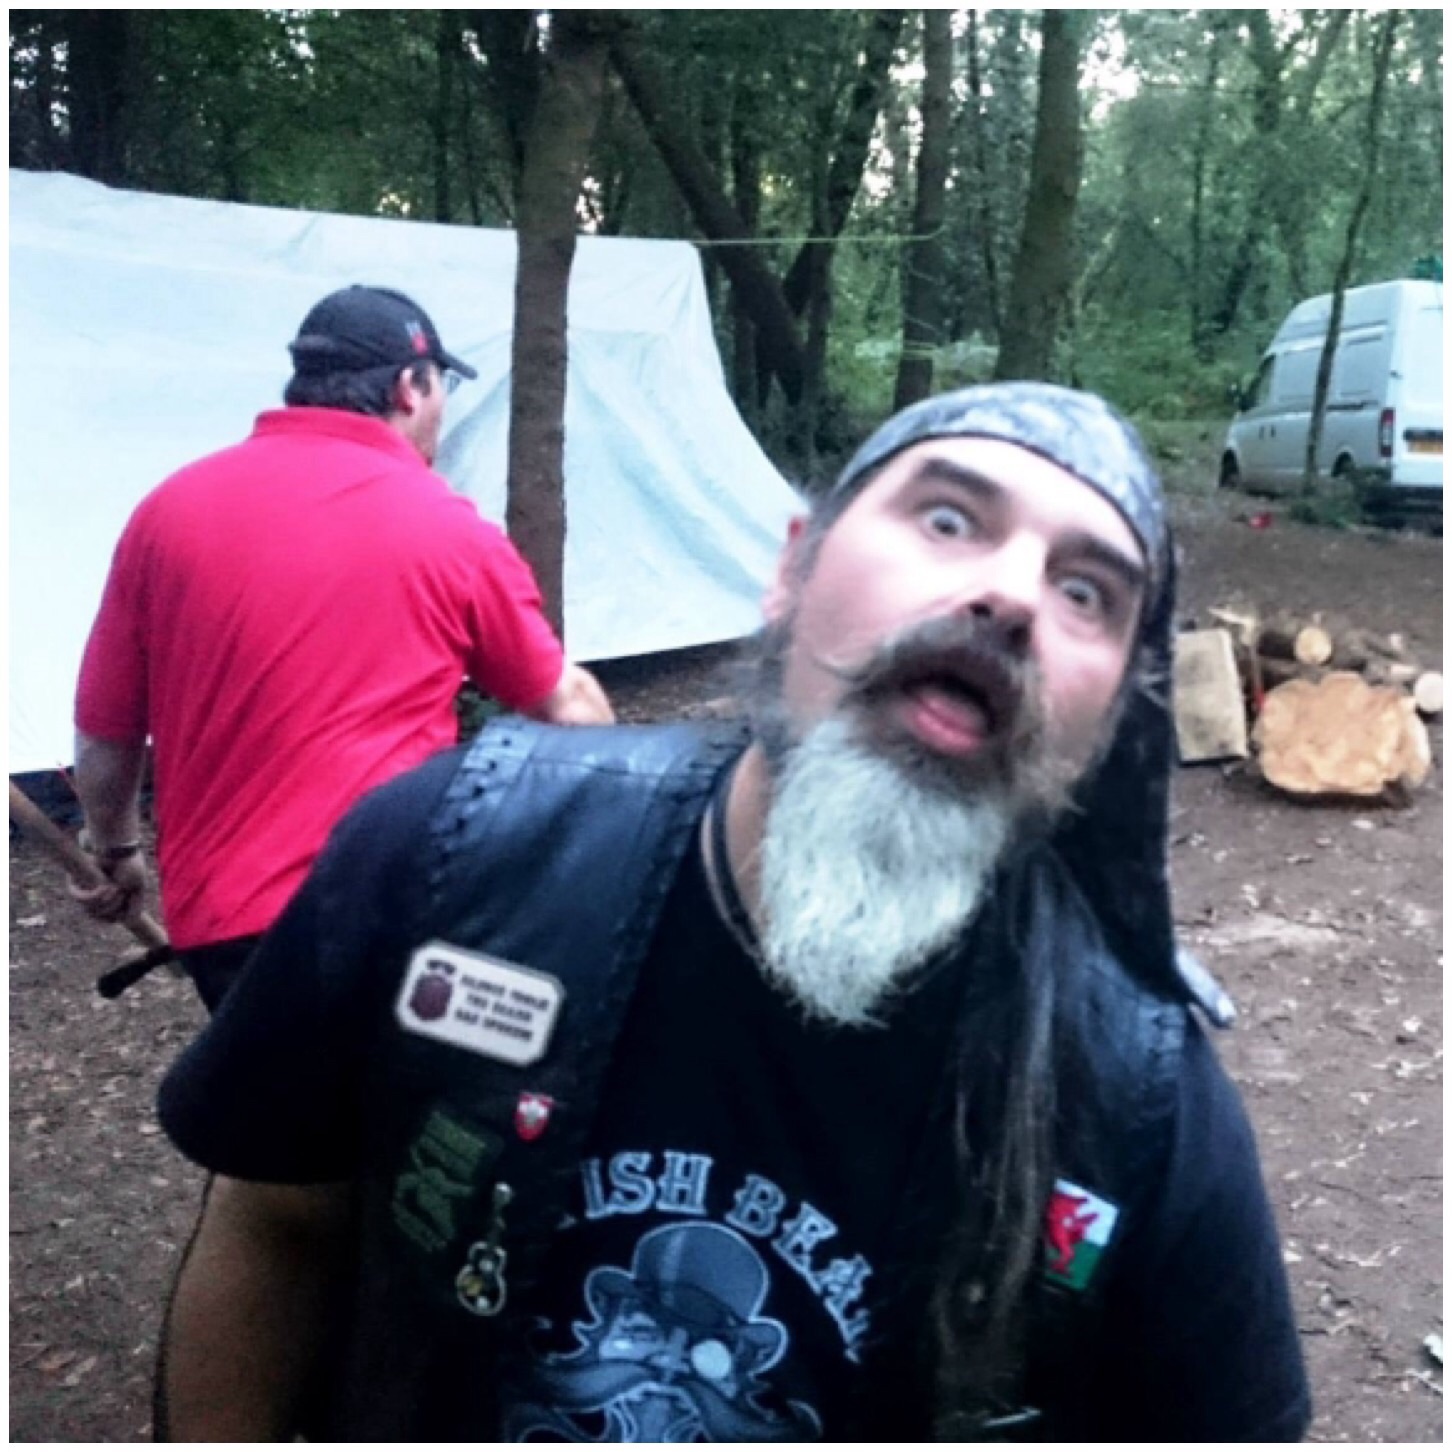
I think Cap’n Badger was trying to tell me here what he thought of Phil’s throwing technique 😉
Cap’n Badger
Archery
Each year we (that is usually Cap’n Badger, Paul Pomfrey and myself) run the archery range for an hour or two in the evening. This allows anyone who wants time to get in a bit of practice.
We run lots of classes for the kids offering tuition or time for parents to teach their own kids. For many who come to the Bushmoot this is the first time they have ever shot a bow.
Many of the bows are made on site including the Bhutenese bows (with Wayne Jones) and the Father and Son bows by Chris Pryke (I used to make these at the Bushmoot as well).
Little ones archery
The archery range is situated well away from the main camping area in the centre of a beautiful copse. The range is managed well by a core team and there is plenty of time to practise before the competition.
We have a competition for the kids and one for the adults. Everyone who enters brings a present along and we also have prizes donated by others so the so the spirit of competitiveness can be quite fierce.
Big ones archery
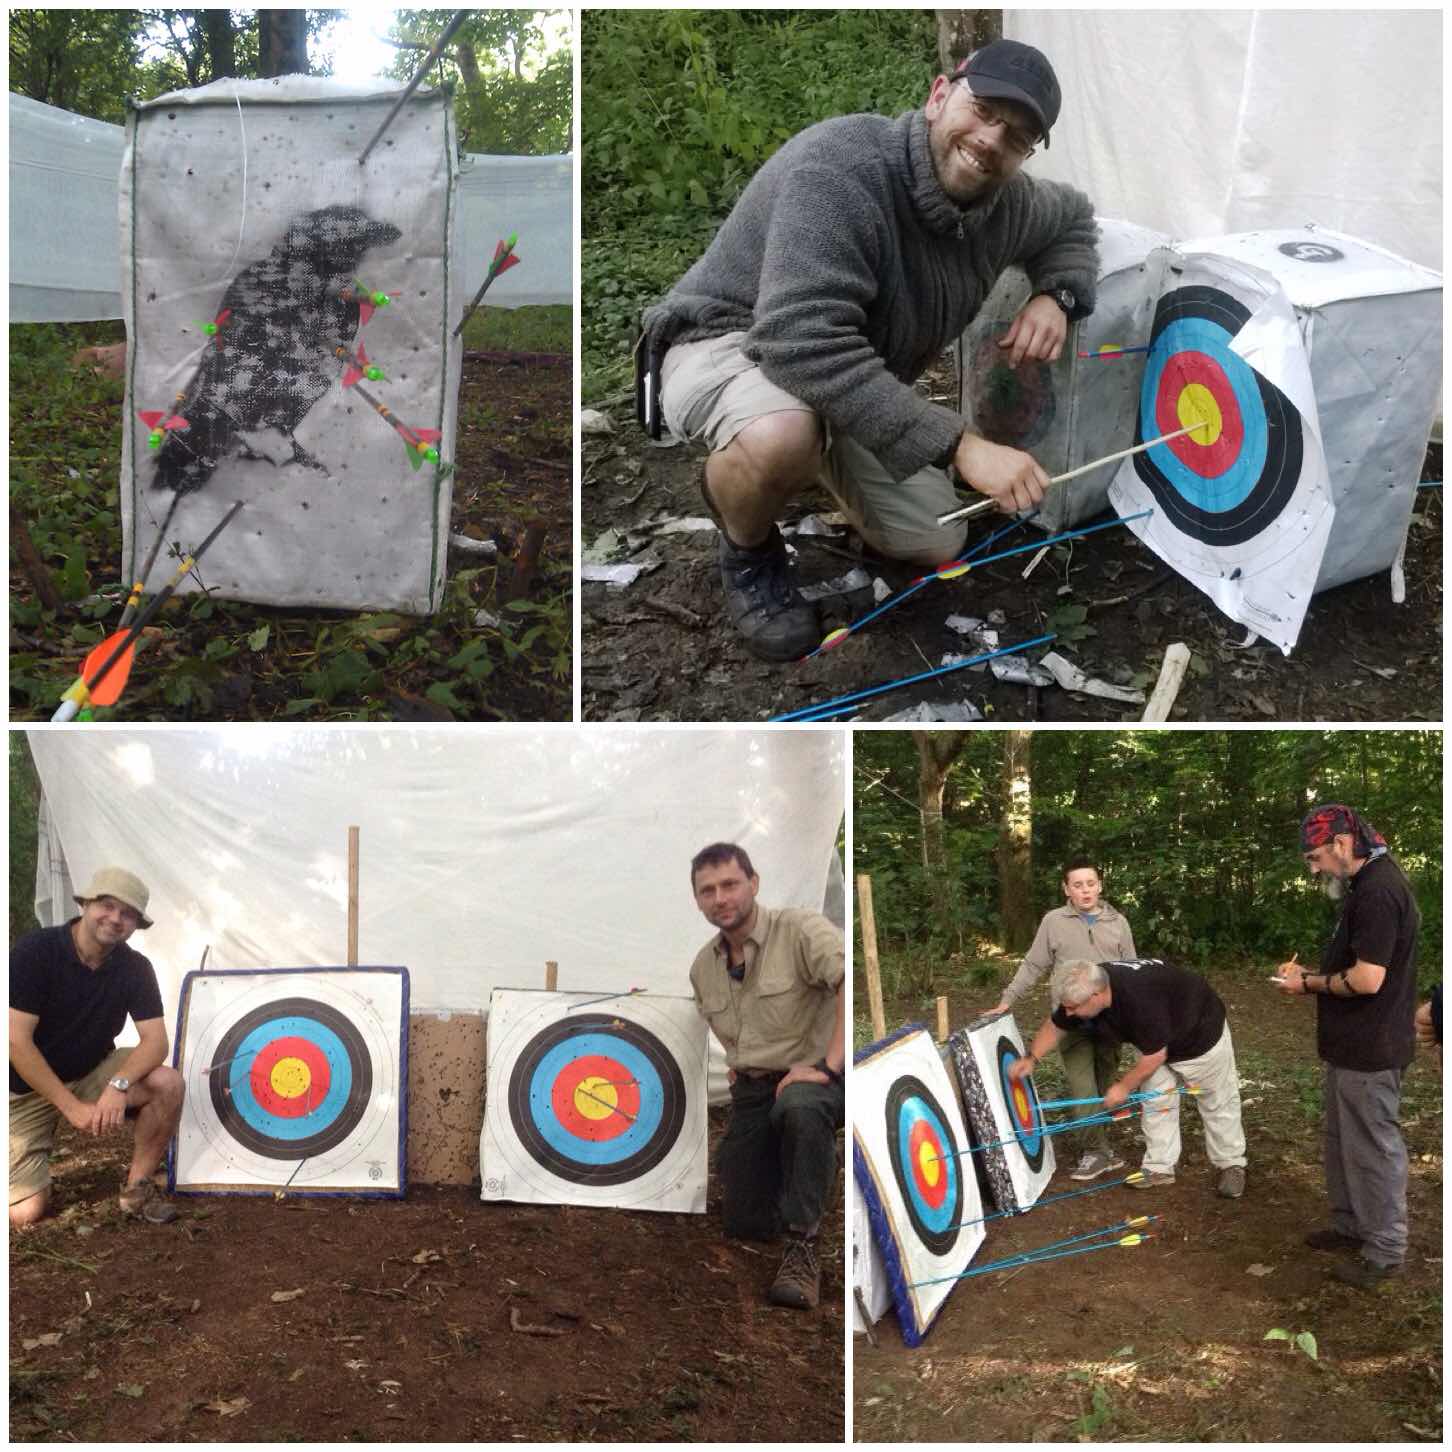
Usually we have three rounds of shots at different distances and the judges make sure everything is tallied up correctly.
Keeping an eye on things
The award ceremony is always great fun (especially as the scores are read out) and everyone walks away with at least one prize.
As the years have gone by and the competition has become a normal part of the Bushmoot many people look forward to this event so that they can walk away as champion.
Prizes
The Bushmoot is a great place to learn however it is also a great place to come and test yourself against others, be that making grass rope the quickest through to being crowned archery champ for 2016 – who knows it could be you 🙂
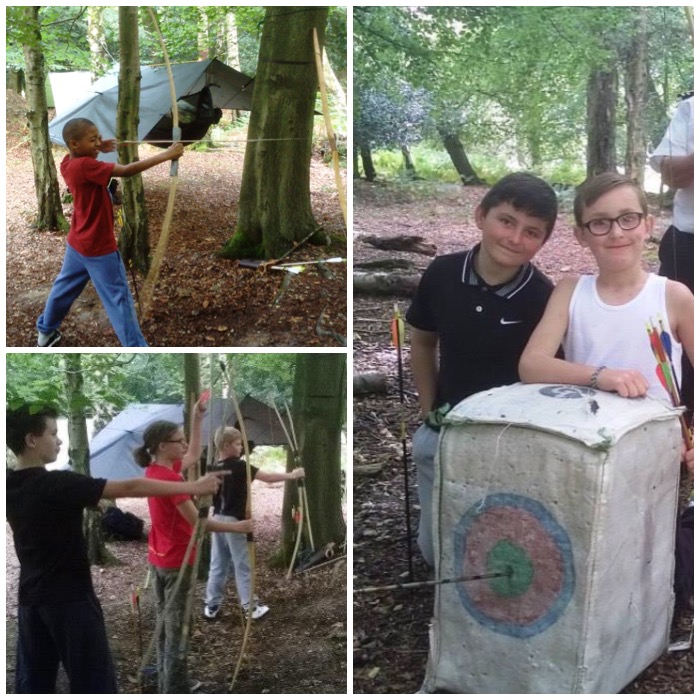
Catch up time again – I ran a bushcraft course with my colleagues Charlie, Dave, Cliff and Alan for the Southern Area Royal Marines Cadets last June in the military training area around Aldershot here in the UK.
This is an excellent area with lots of woodland to roam around and learn about the art of bushcraft.
A great bushie weekend
I wrote three short articles about this weekend back in June for the Wildlife Trusts 30 day Challenge I undertook however this is the full report on the weekend now.
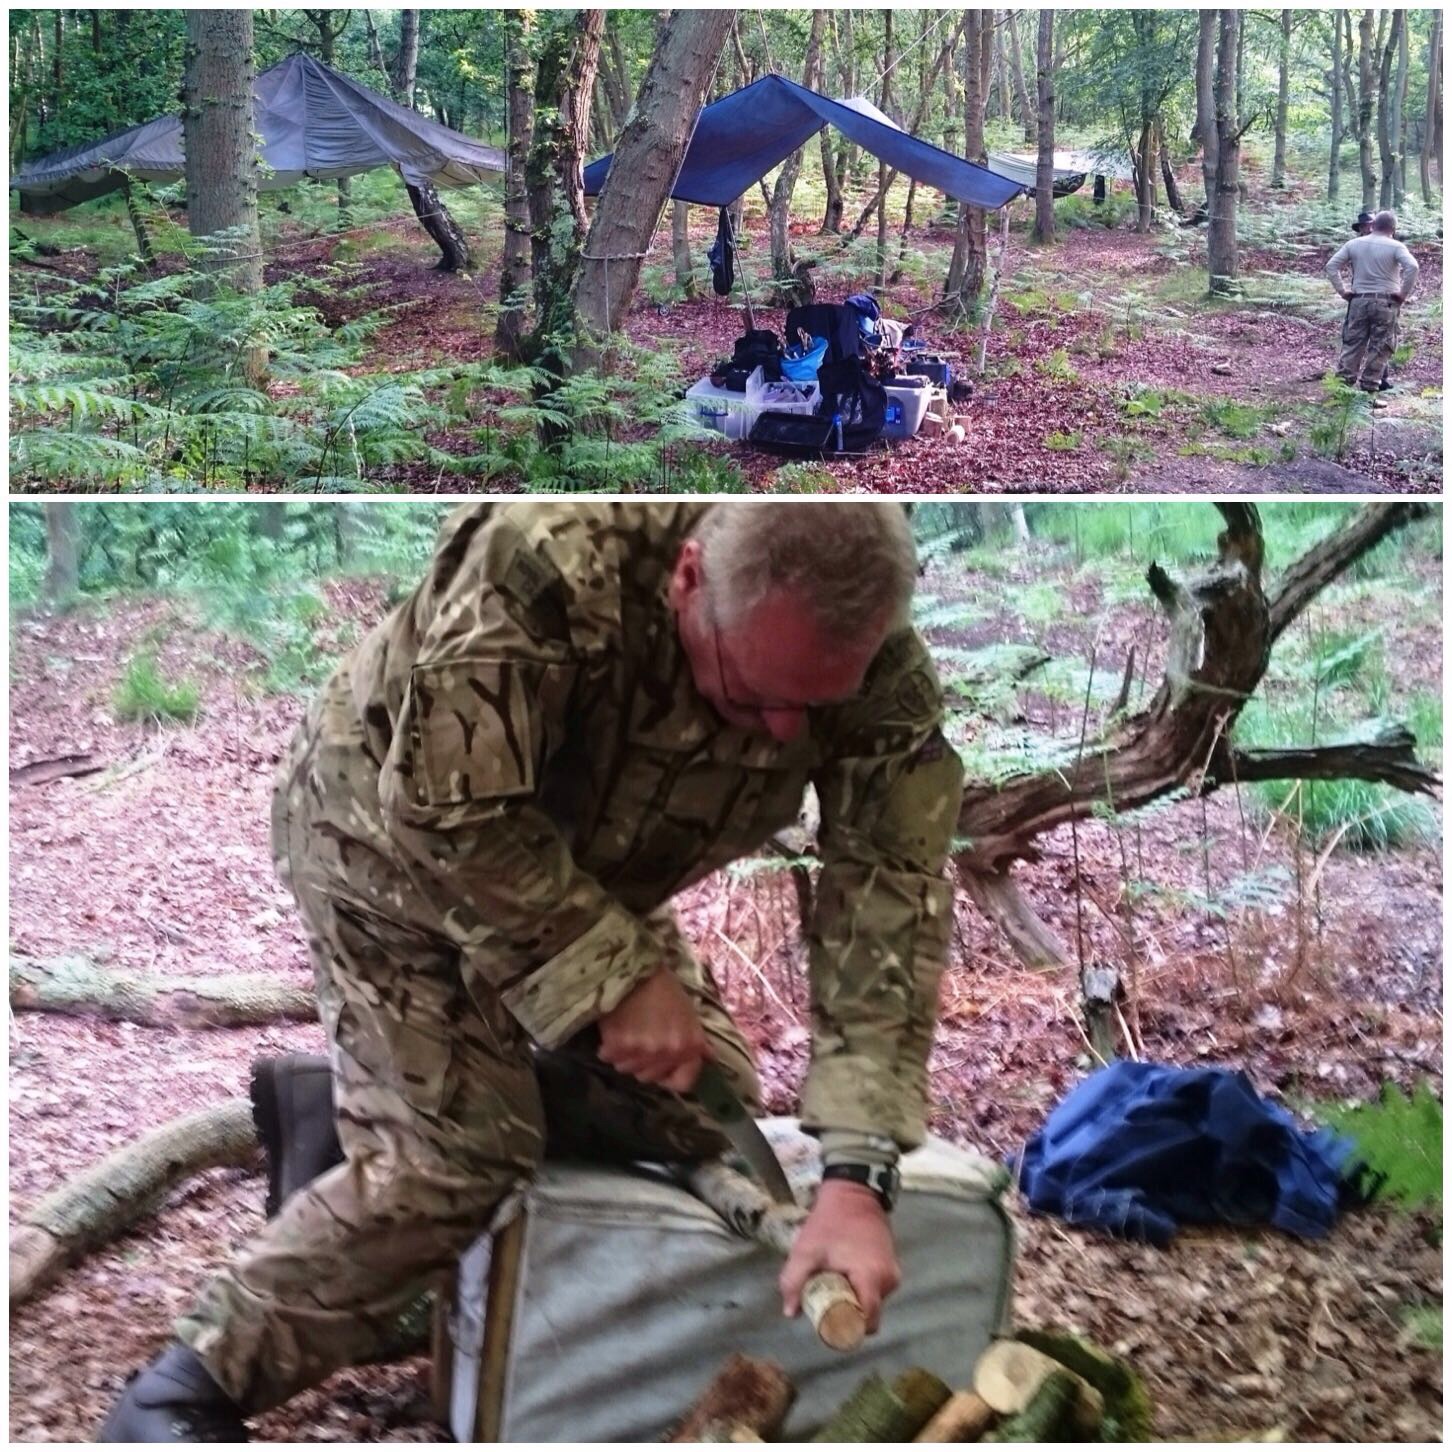
Set up took most of the Friday and we were joined by a number of the Royal Marines staff so it did not take too long.
Setting up the HQ
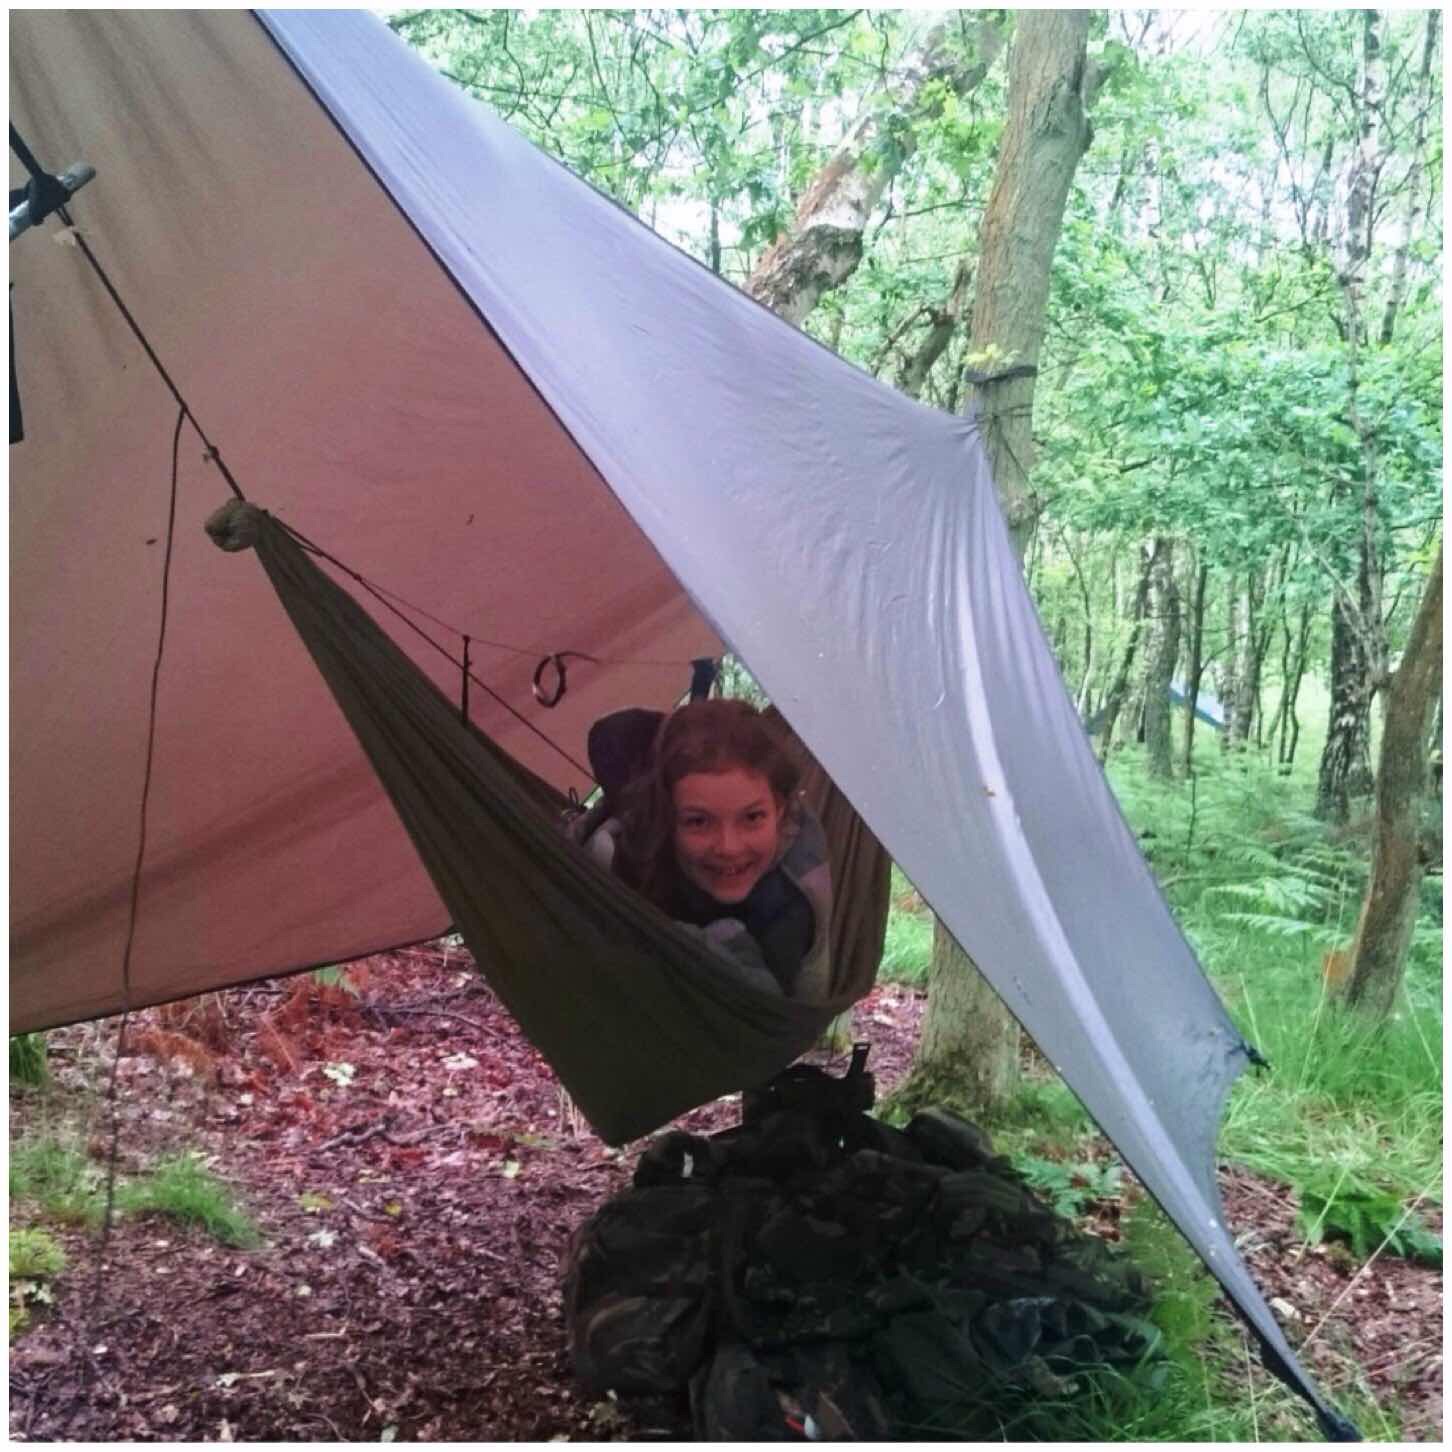
I wanted the cadets to experience sleeping in hammocks so brought a dozen or so along. They took a while to set up but it was worth it in the end.
A dozen tarps and hammocks to put up
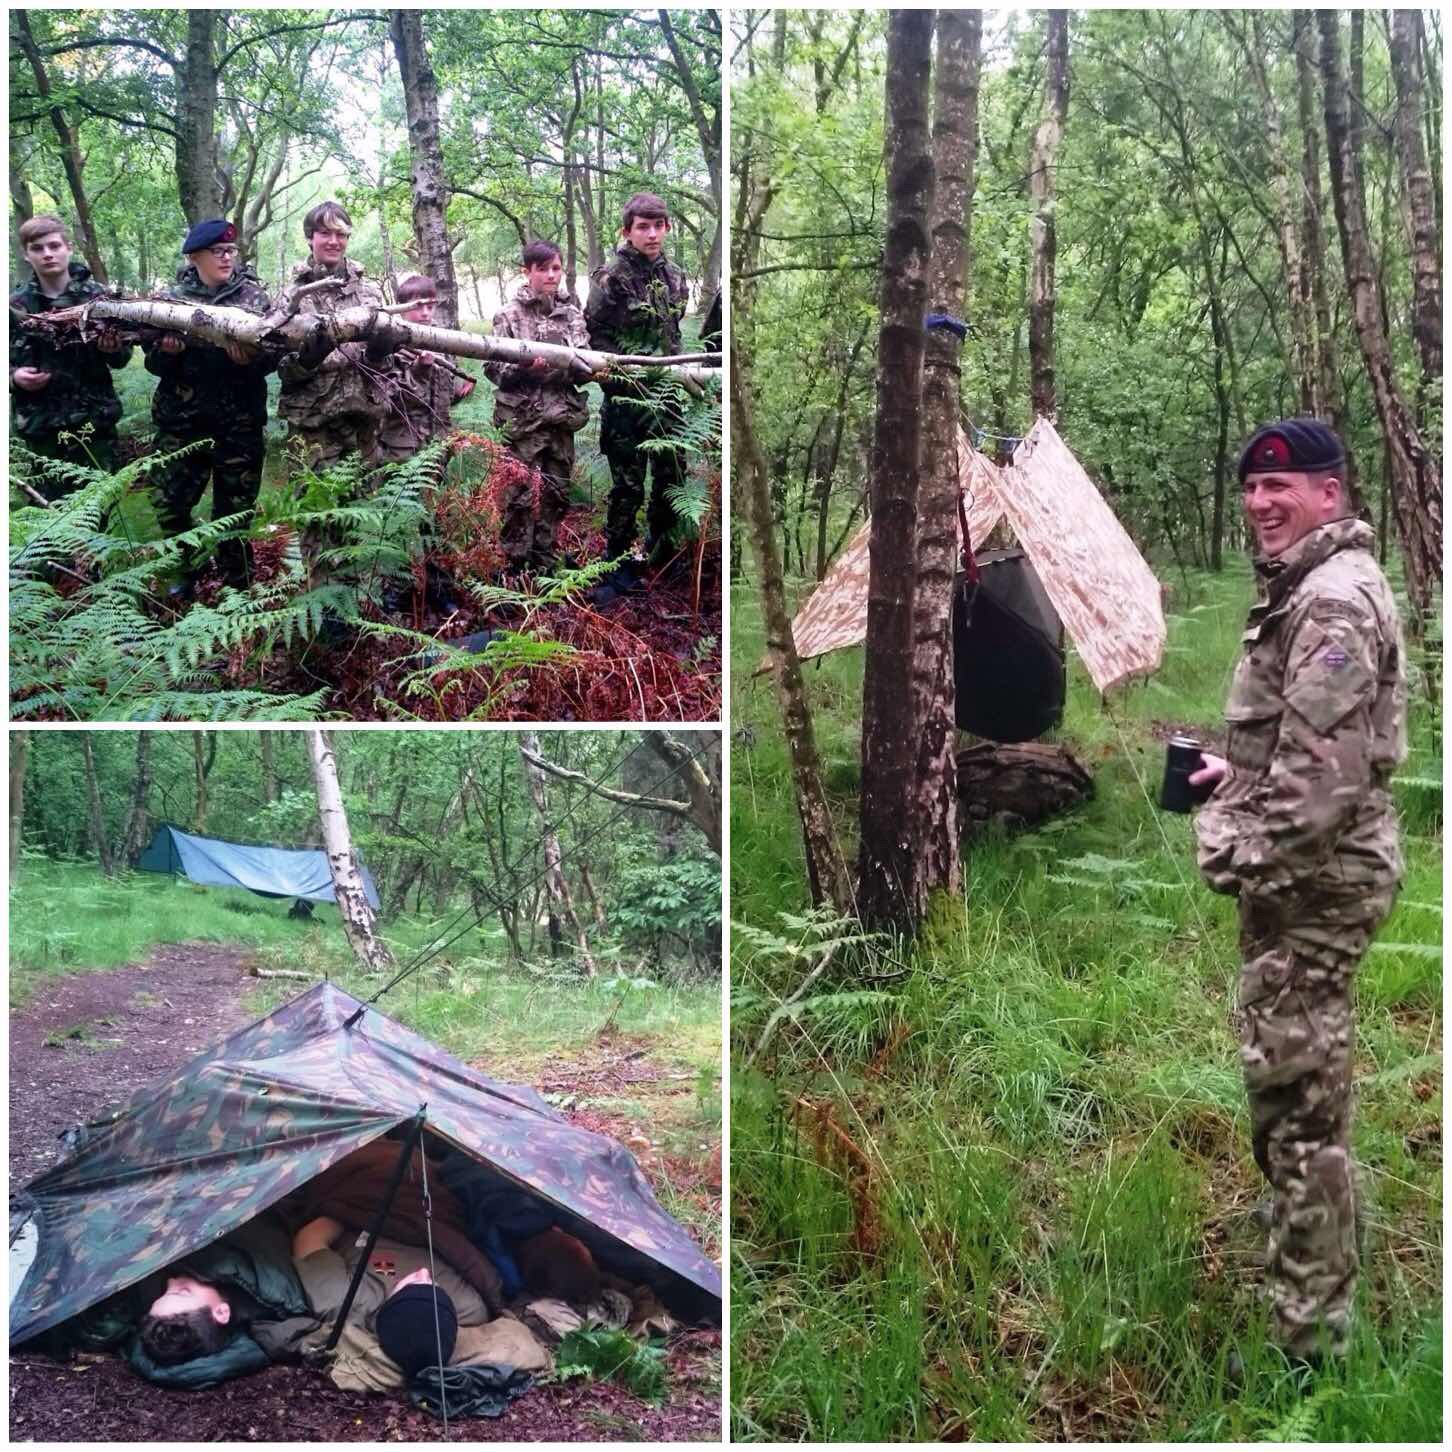
The cadets arrived in the evening and after a safety briefing, some supper and a stroll it was time to bed down for the night.
Some cadets were in the hammocks and some under their tarps on the ground. It was a wet night however everybody was mostly dry in the morning.
Bedding down
We ran a number of classes starting with building different types of shelters, and looking at how the tarps and hammocks were set up.
Shelter building
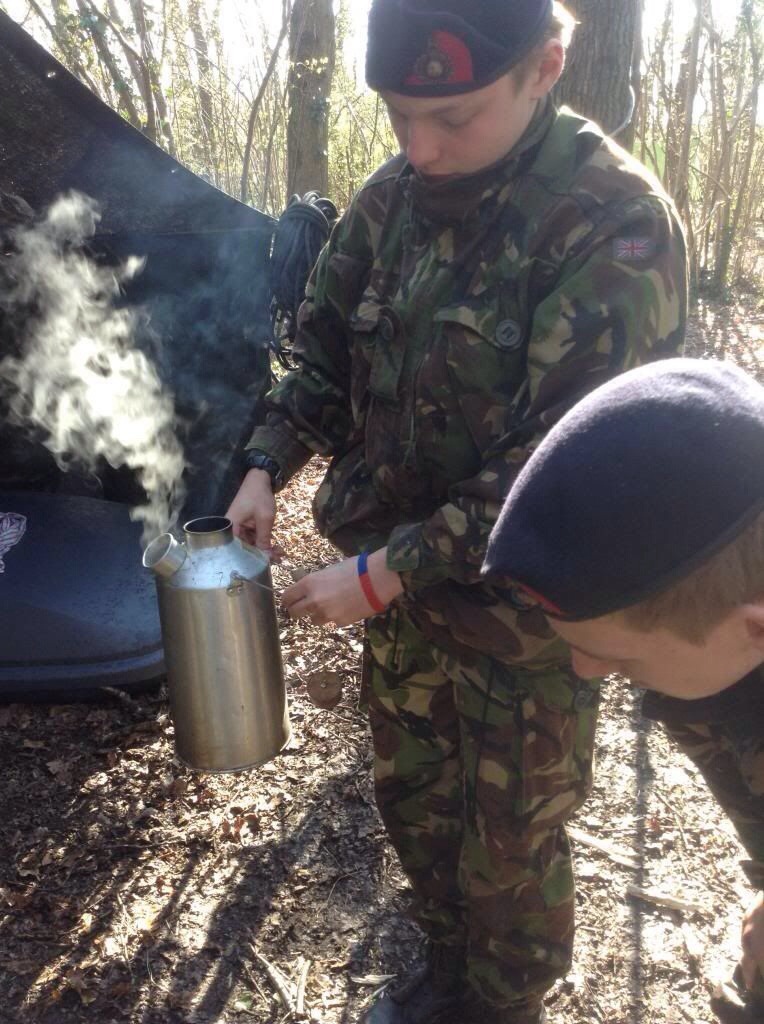
The camp chores such as gathering wood and getting fires going were soon under way. At this stage we taught the cadets how to use firesteels to light their fires.
I had also brought a number of cooking rigs for them to try out. The one in the bottom picture is the Double French Windlass rig and is one of my favourites.
Setting up the cookhouse
I wanted the cadets to feel comfortable so we spent quite a lot of time setting up different apparatus for cooking such as this Broiling rig or just taking time to chill out (bottom left).
One rule I had made at the very beginning was that unless there was an emergency there was to be no running. Quite hard for Marine Cadets to do I know however the feel of the weekend was to be one of a relaxed atmosphere.
Learning the art of Broiling and doing nothing
So relaxed that magically some cup cakes appeared in Dave’s lap.
Charlie had a good time ponnasing some trout around the fire and it tasted equally as good as it looked cooking.
Taste comes in many forms
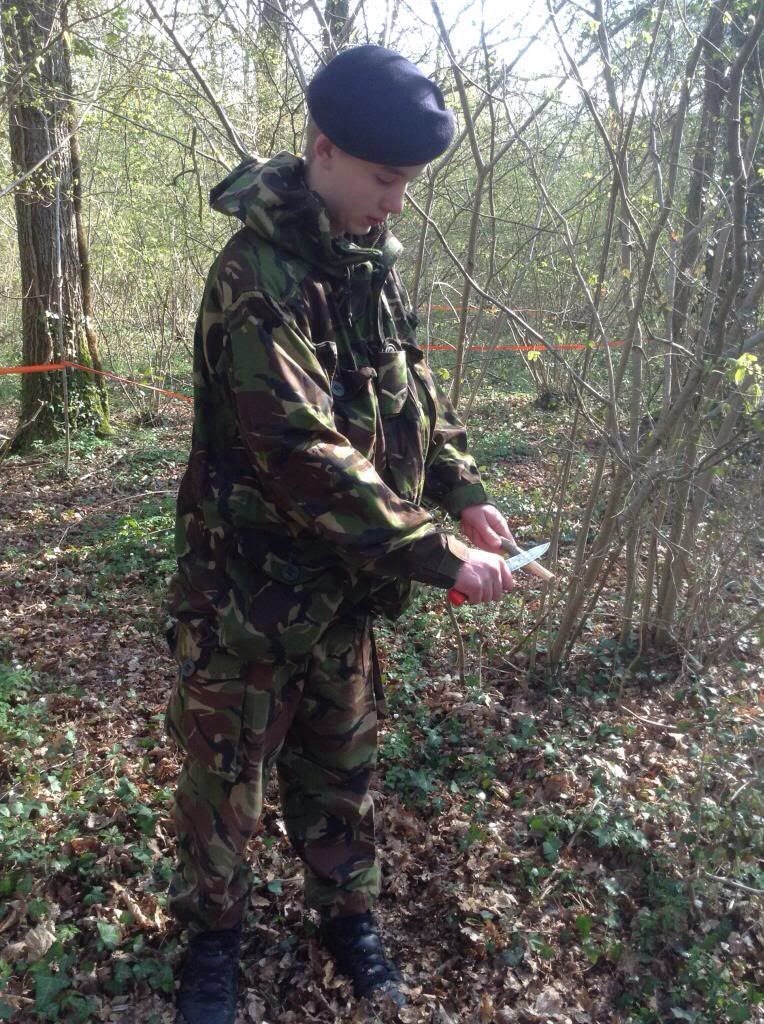
We spent quite a while learning about knife safety, battoning and carving. Then later in the evening Dave and Cliff ran a stalking game and Atlatl range.
Knife work, stalking and Atlatl
Once the cadets were bedded down the staff relaxed around the woodland TV to plan the next day out (and have a cupcake or two).
Some Woodland TV
I think you can tell by the happy smile on this cadets face that the hammocks were a success.
Morning all
Our resident master chef Alan soon had breakfast organised with plenty of sausages and bread on the go.
Brekkie time
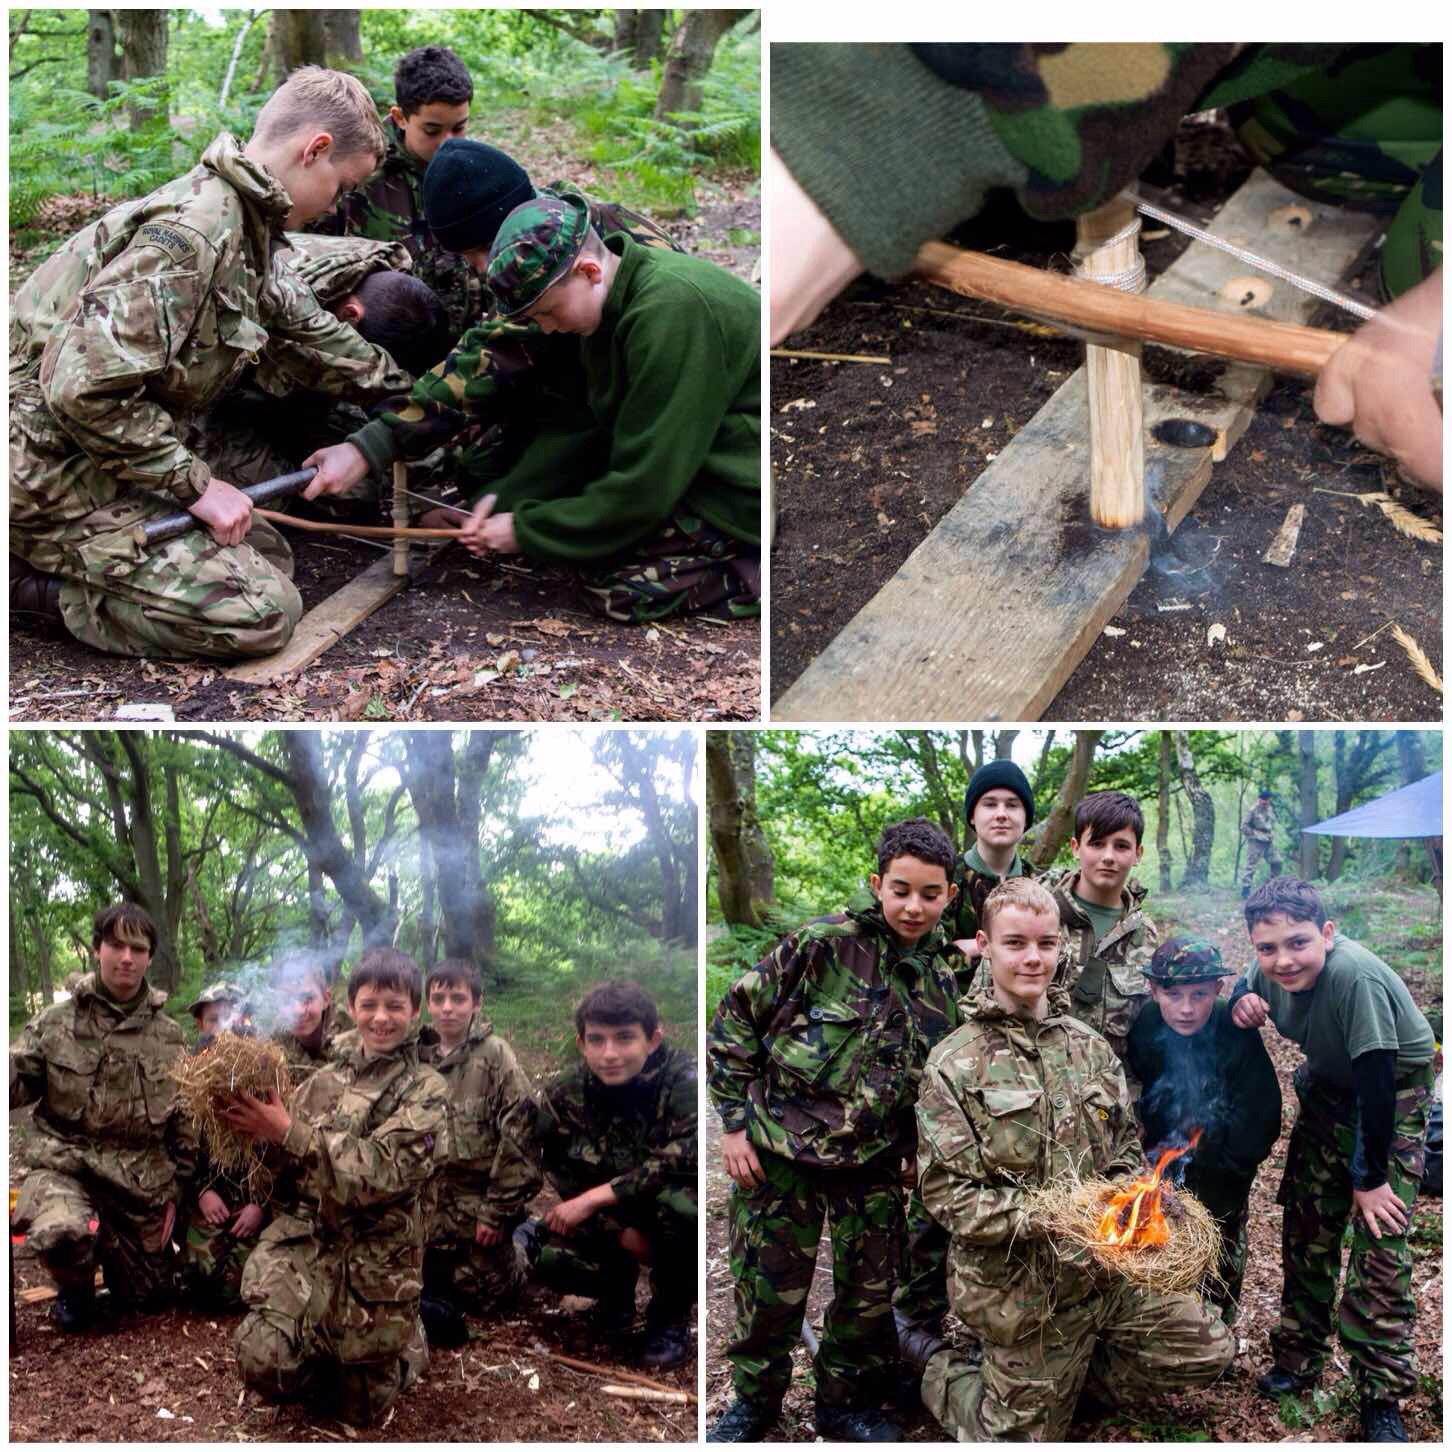
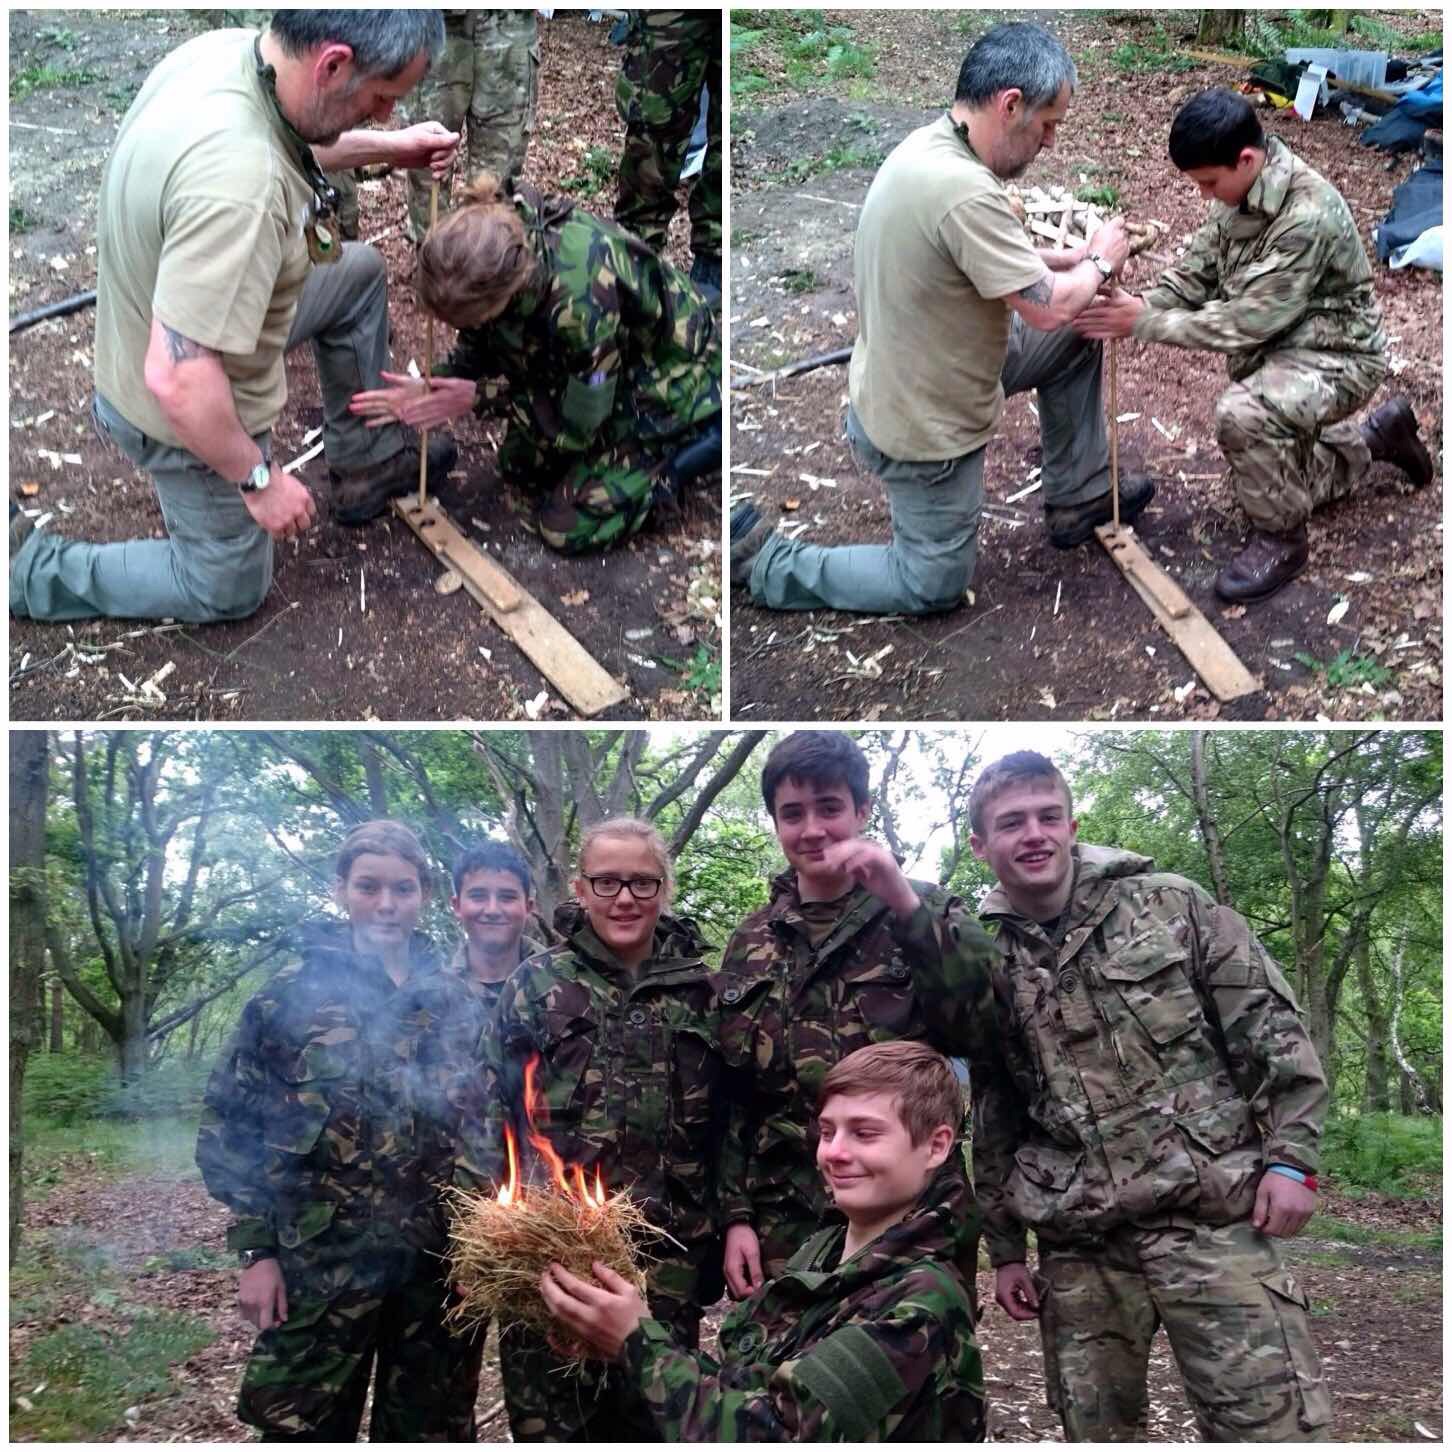
Classes began again soon after and I ran the group bowdrill sessions. Every team that did this got an ember and successfully blew it to flame. No mean feat considering how damp everything was.
Group Bowdrill
We tried out the handrill however without success. The cadets and myself gave it our best shot but the conditions were not with us for this one so we went back to using the bowdrill.
Having a go at Handrill
Some groups also carried on with carving their butter knives. Some ended up as pointy sticks (teenagers tend to do this for some reason) however we did get a number of very nicely shaped and functioning wooden knives carved in the end.
More knife work and archery
Cliff ran another stalking game involving water pistols however they all failed to work so improvised with squeezy bottles instead (worked a treat so I will be using them in the future).
I had also brought along a number of Father and Son survival bows for the cadets to use on a short range and they were soon happily pinging the arrows down range.
Stalking and archery to finish
We had to pack up on the Sunday lunchtime so it was over before we knew it however it was a great weekend.
My aim was to show the cadets how to make themselves comfortable in the outdoors and to have fun so that when they went back out again to practice their field craft skills they would have a wider and better understanding of the nature around them.
Day 12 of the 30 Day Challenge was one of rush, rush and rush from morning till night.
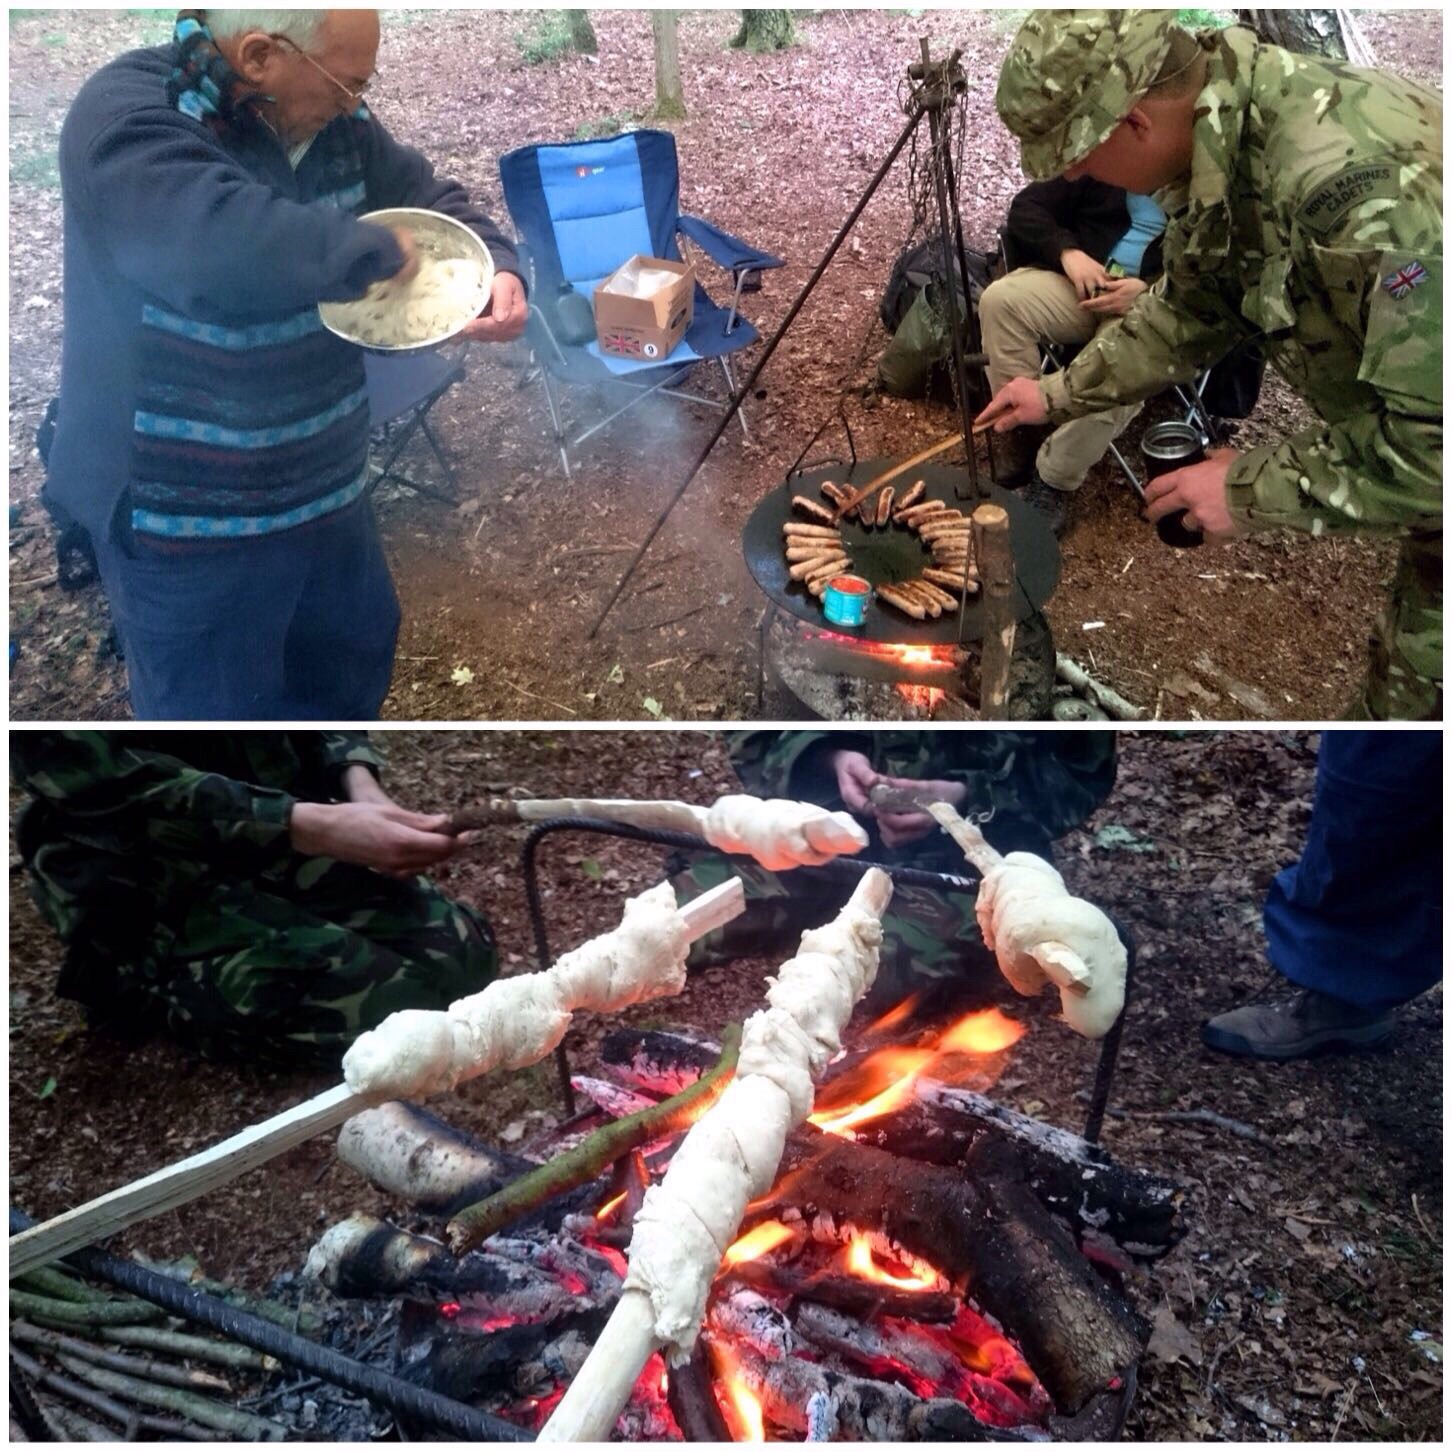
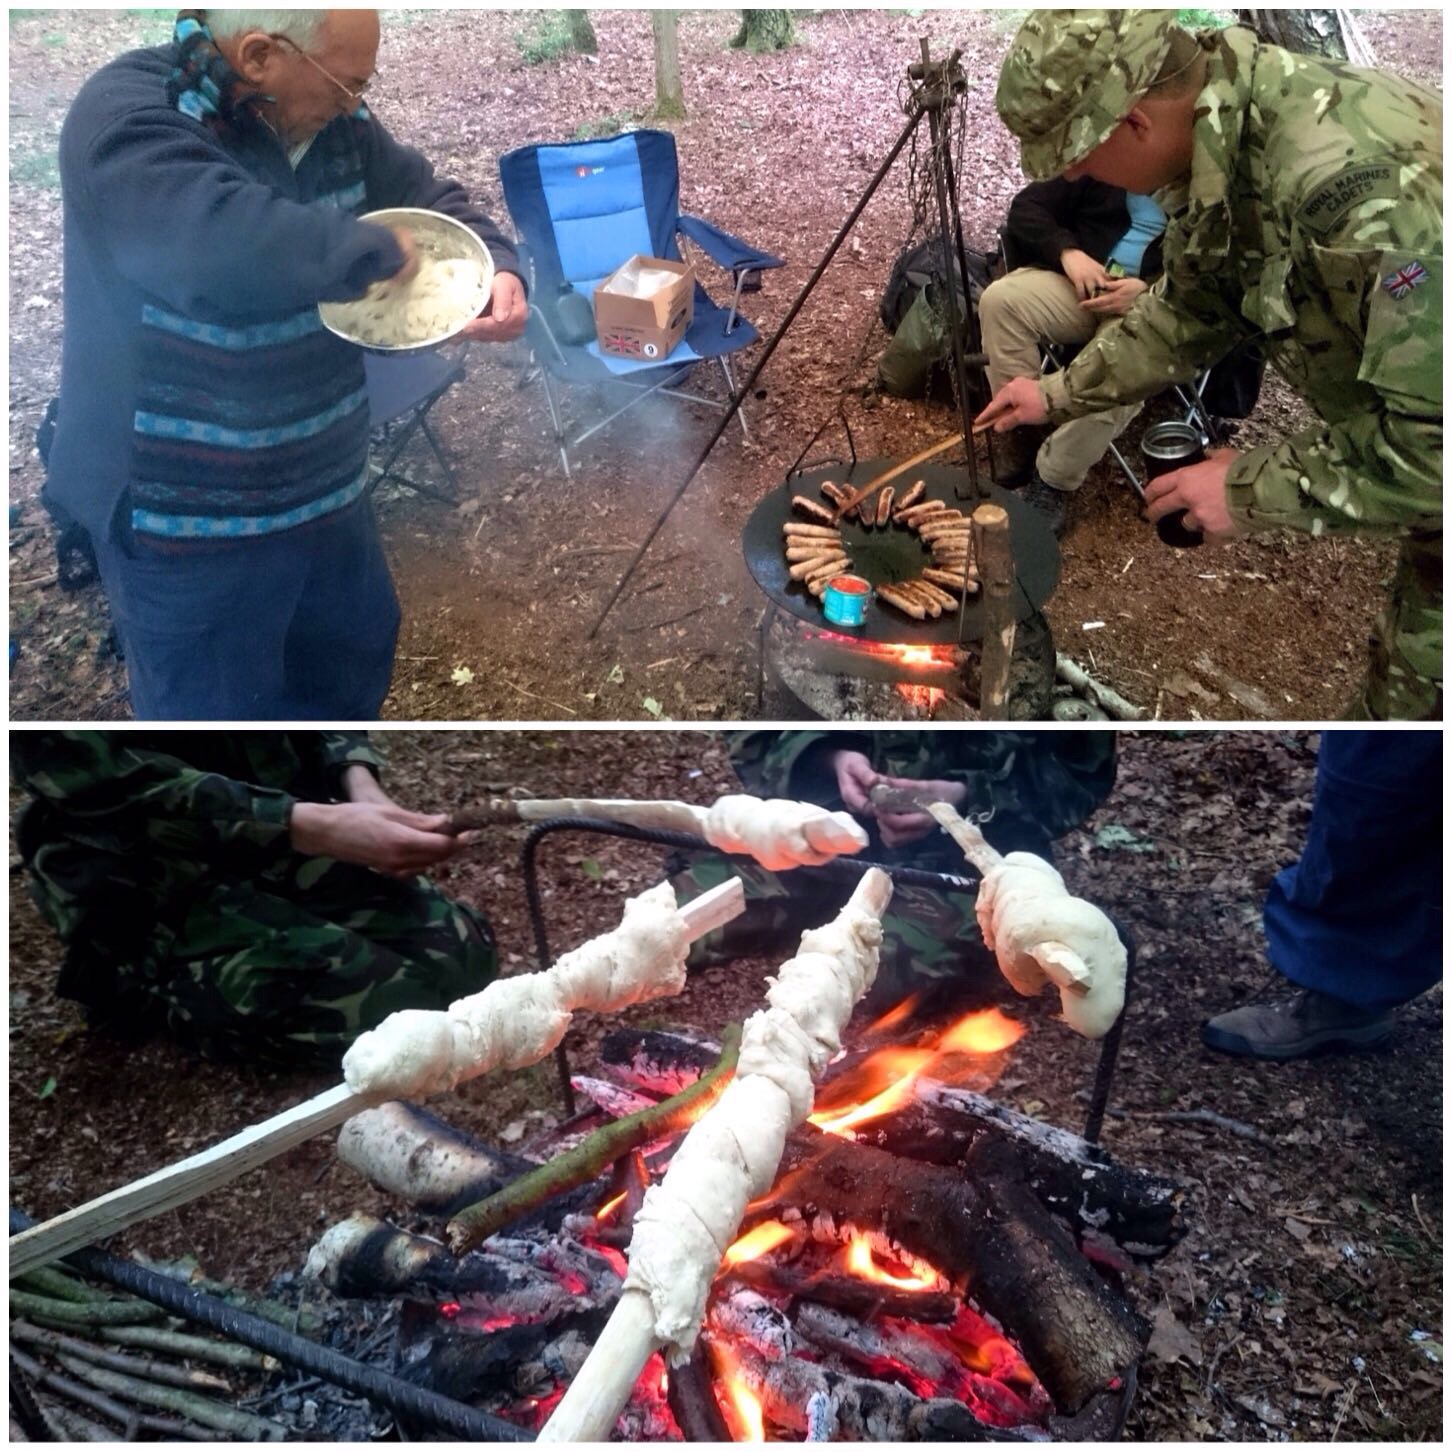
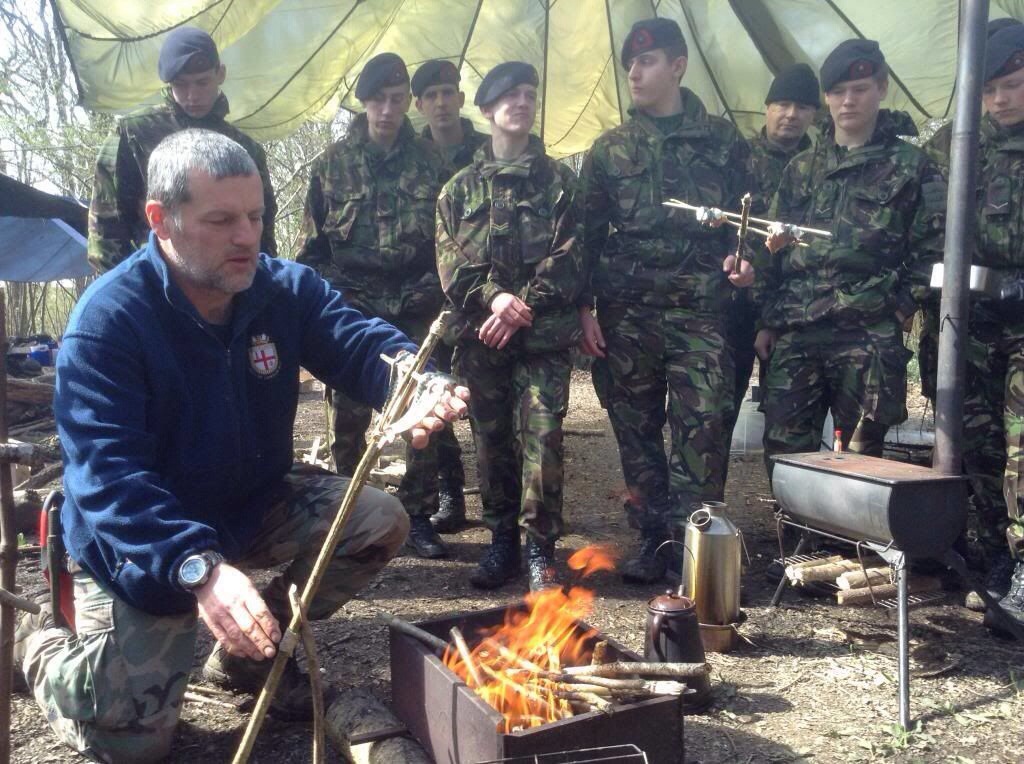
The Royal Marines Cadets we were training had the task of lighting the fires to cook the breakfast but thankfully we had our very own chef Alan Lewis to oversee all the cooking.
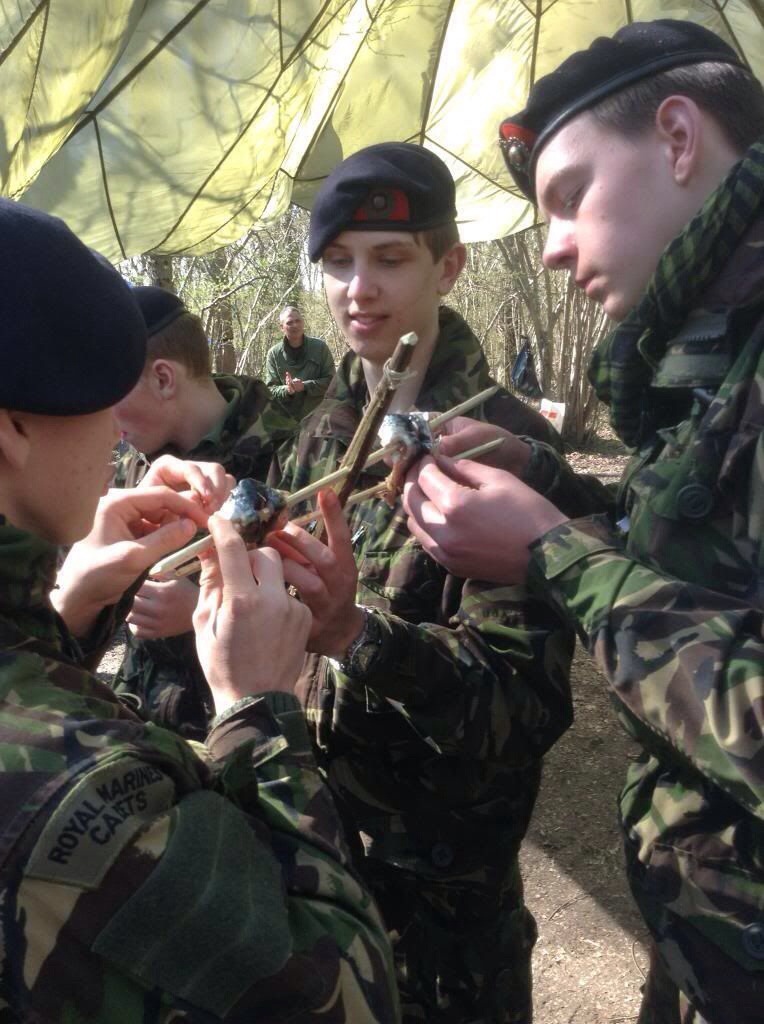
I tried to spend as much time as possible baking twizzle stick bread to get out of doing the many chores that were needed doing on this last morning of the camp (not very successfully may I add).
Busy Breakfast
We ran various classes that day including bread making, archery, stalking games and group bowdrill. London Area Sea Cadets have a brilliant Bushcraft team and this weekend showed that clearly – thanks to Dave Lewis, Charlie Brookes, Cliff Lewis and Alan Lewis for being that team.
Sunday Stances
Wrap up was a fast affair with everyone helping out. So fast I was home at 2pm – just in time to start on all my home chores 🙂
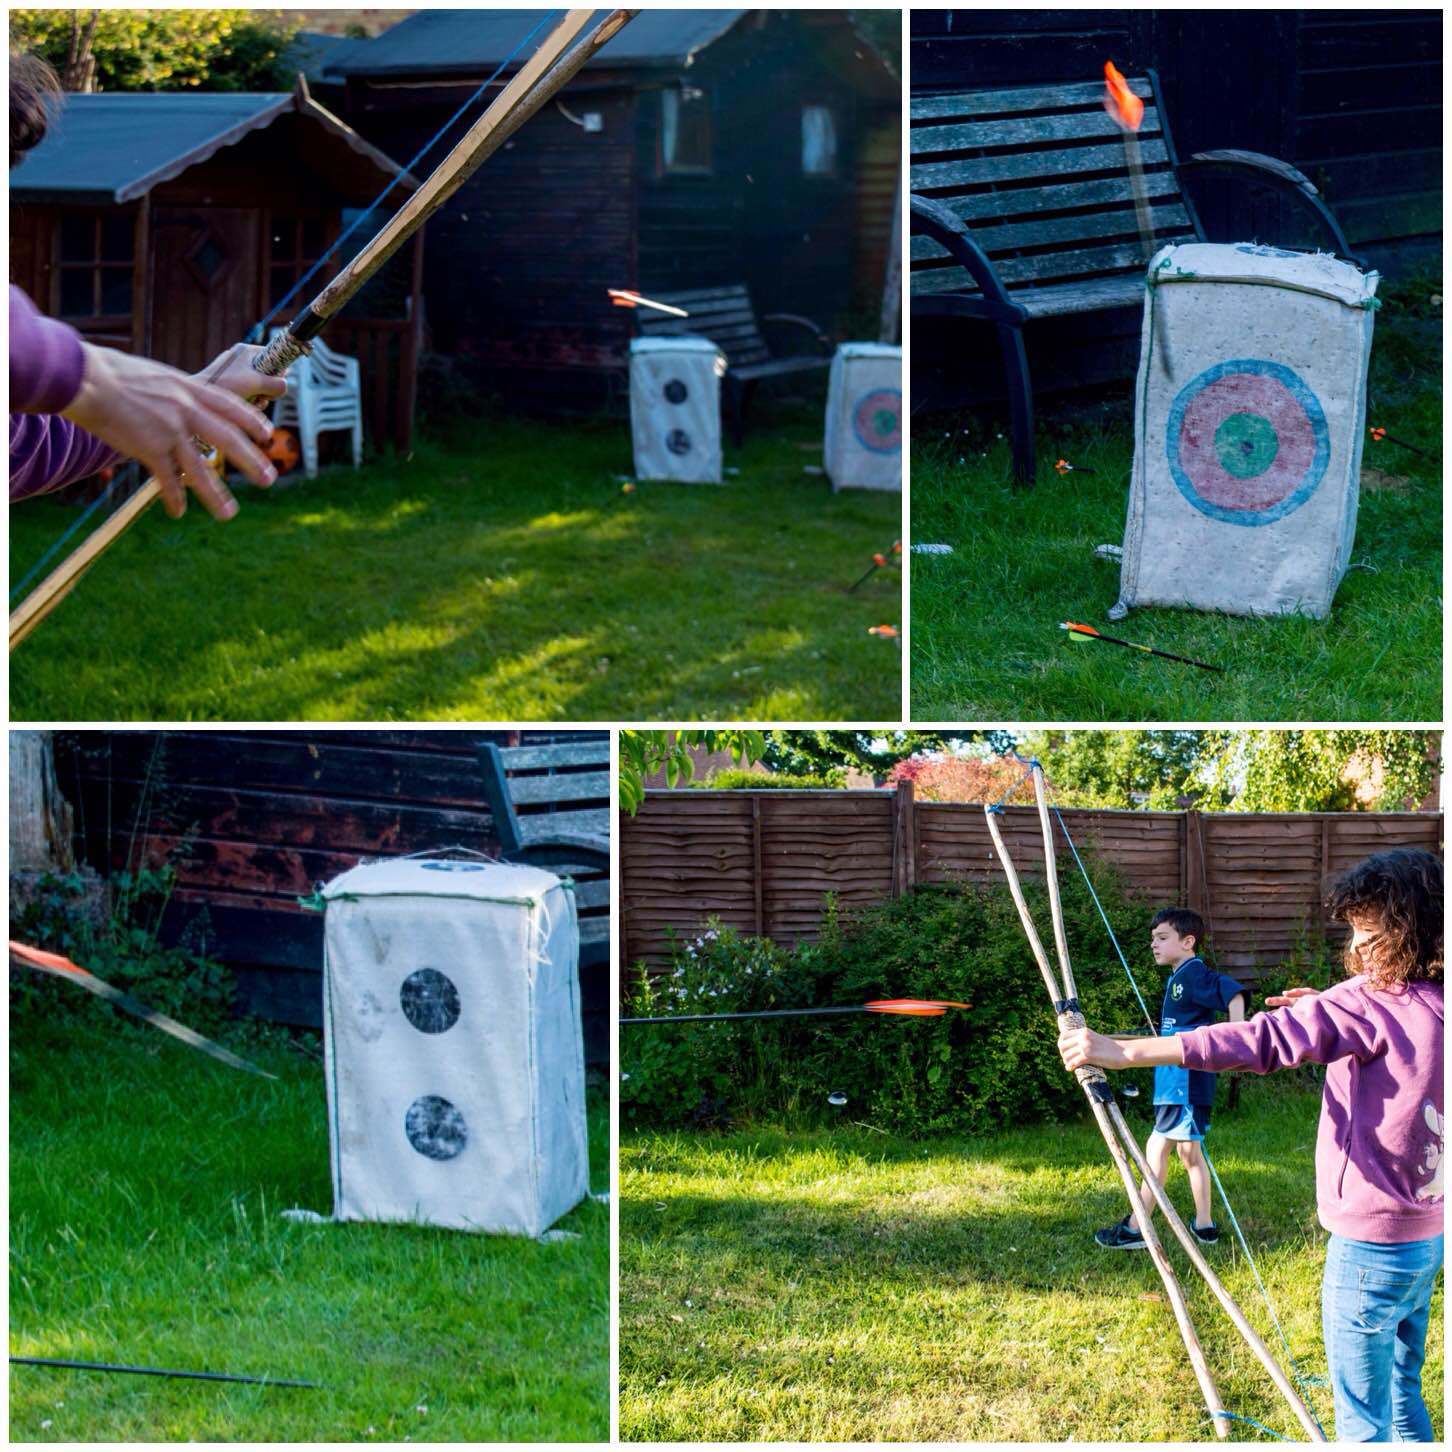
It has been a busy day today with all the chores of most Sundays so the wildest we got today was the back garden to do the 30 day challenge.
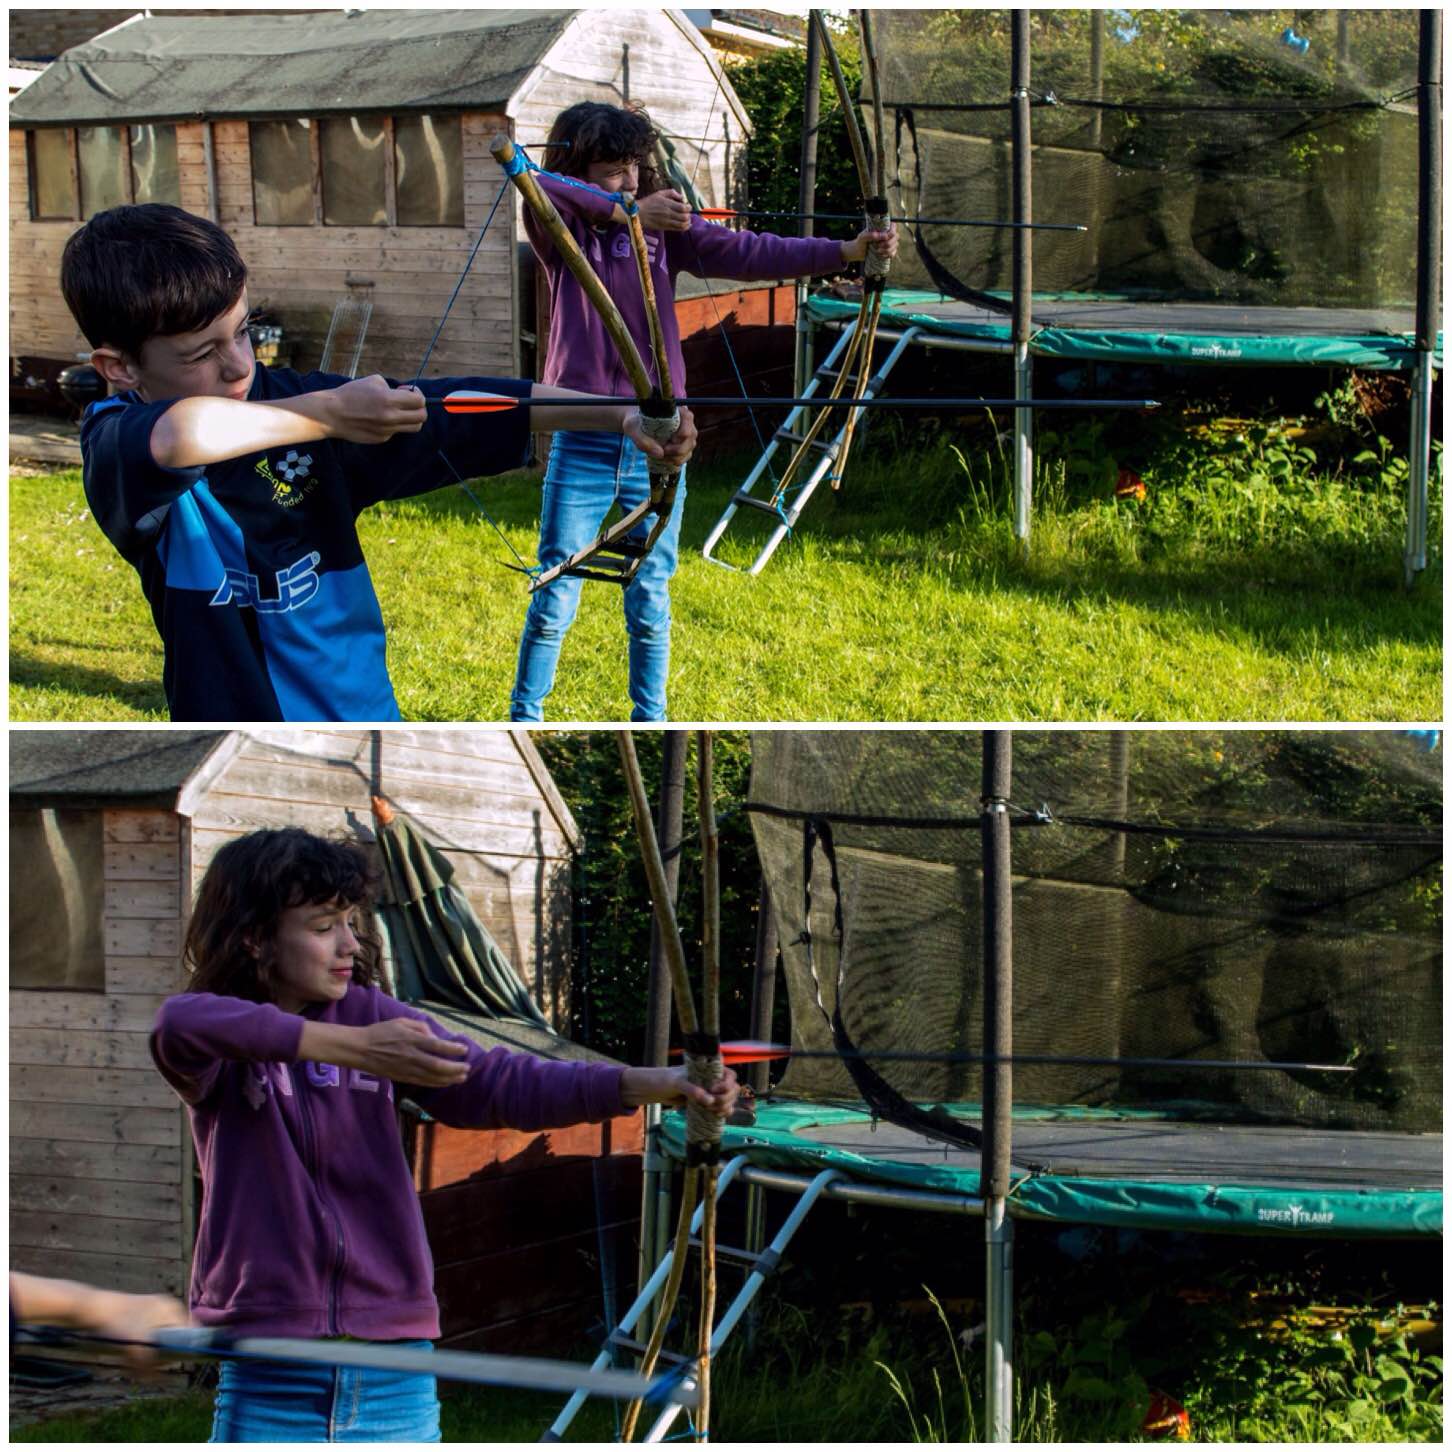
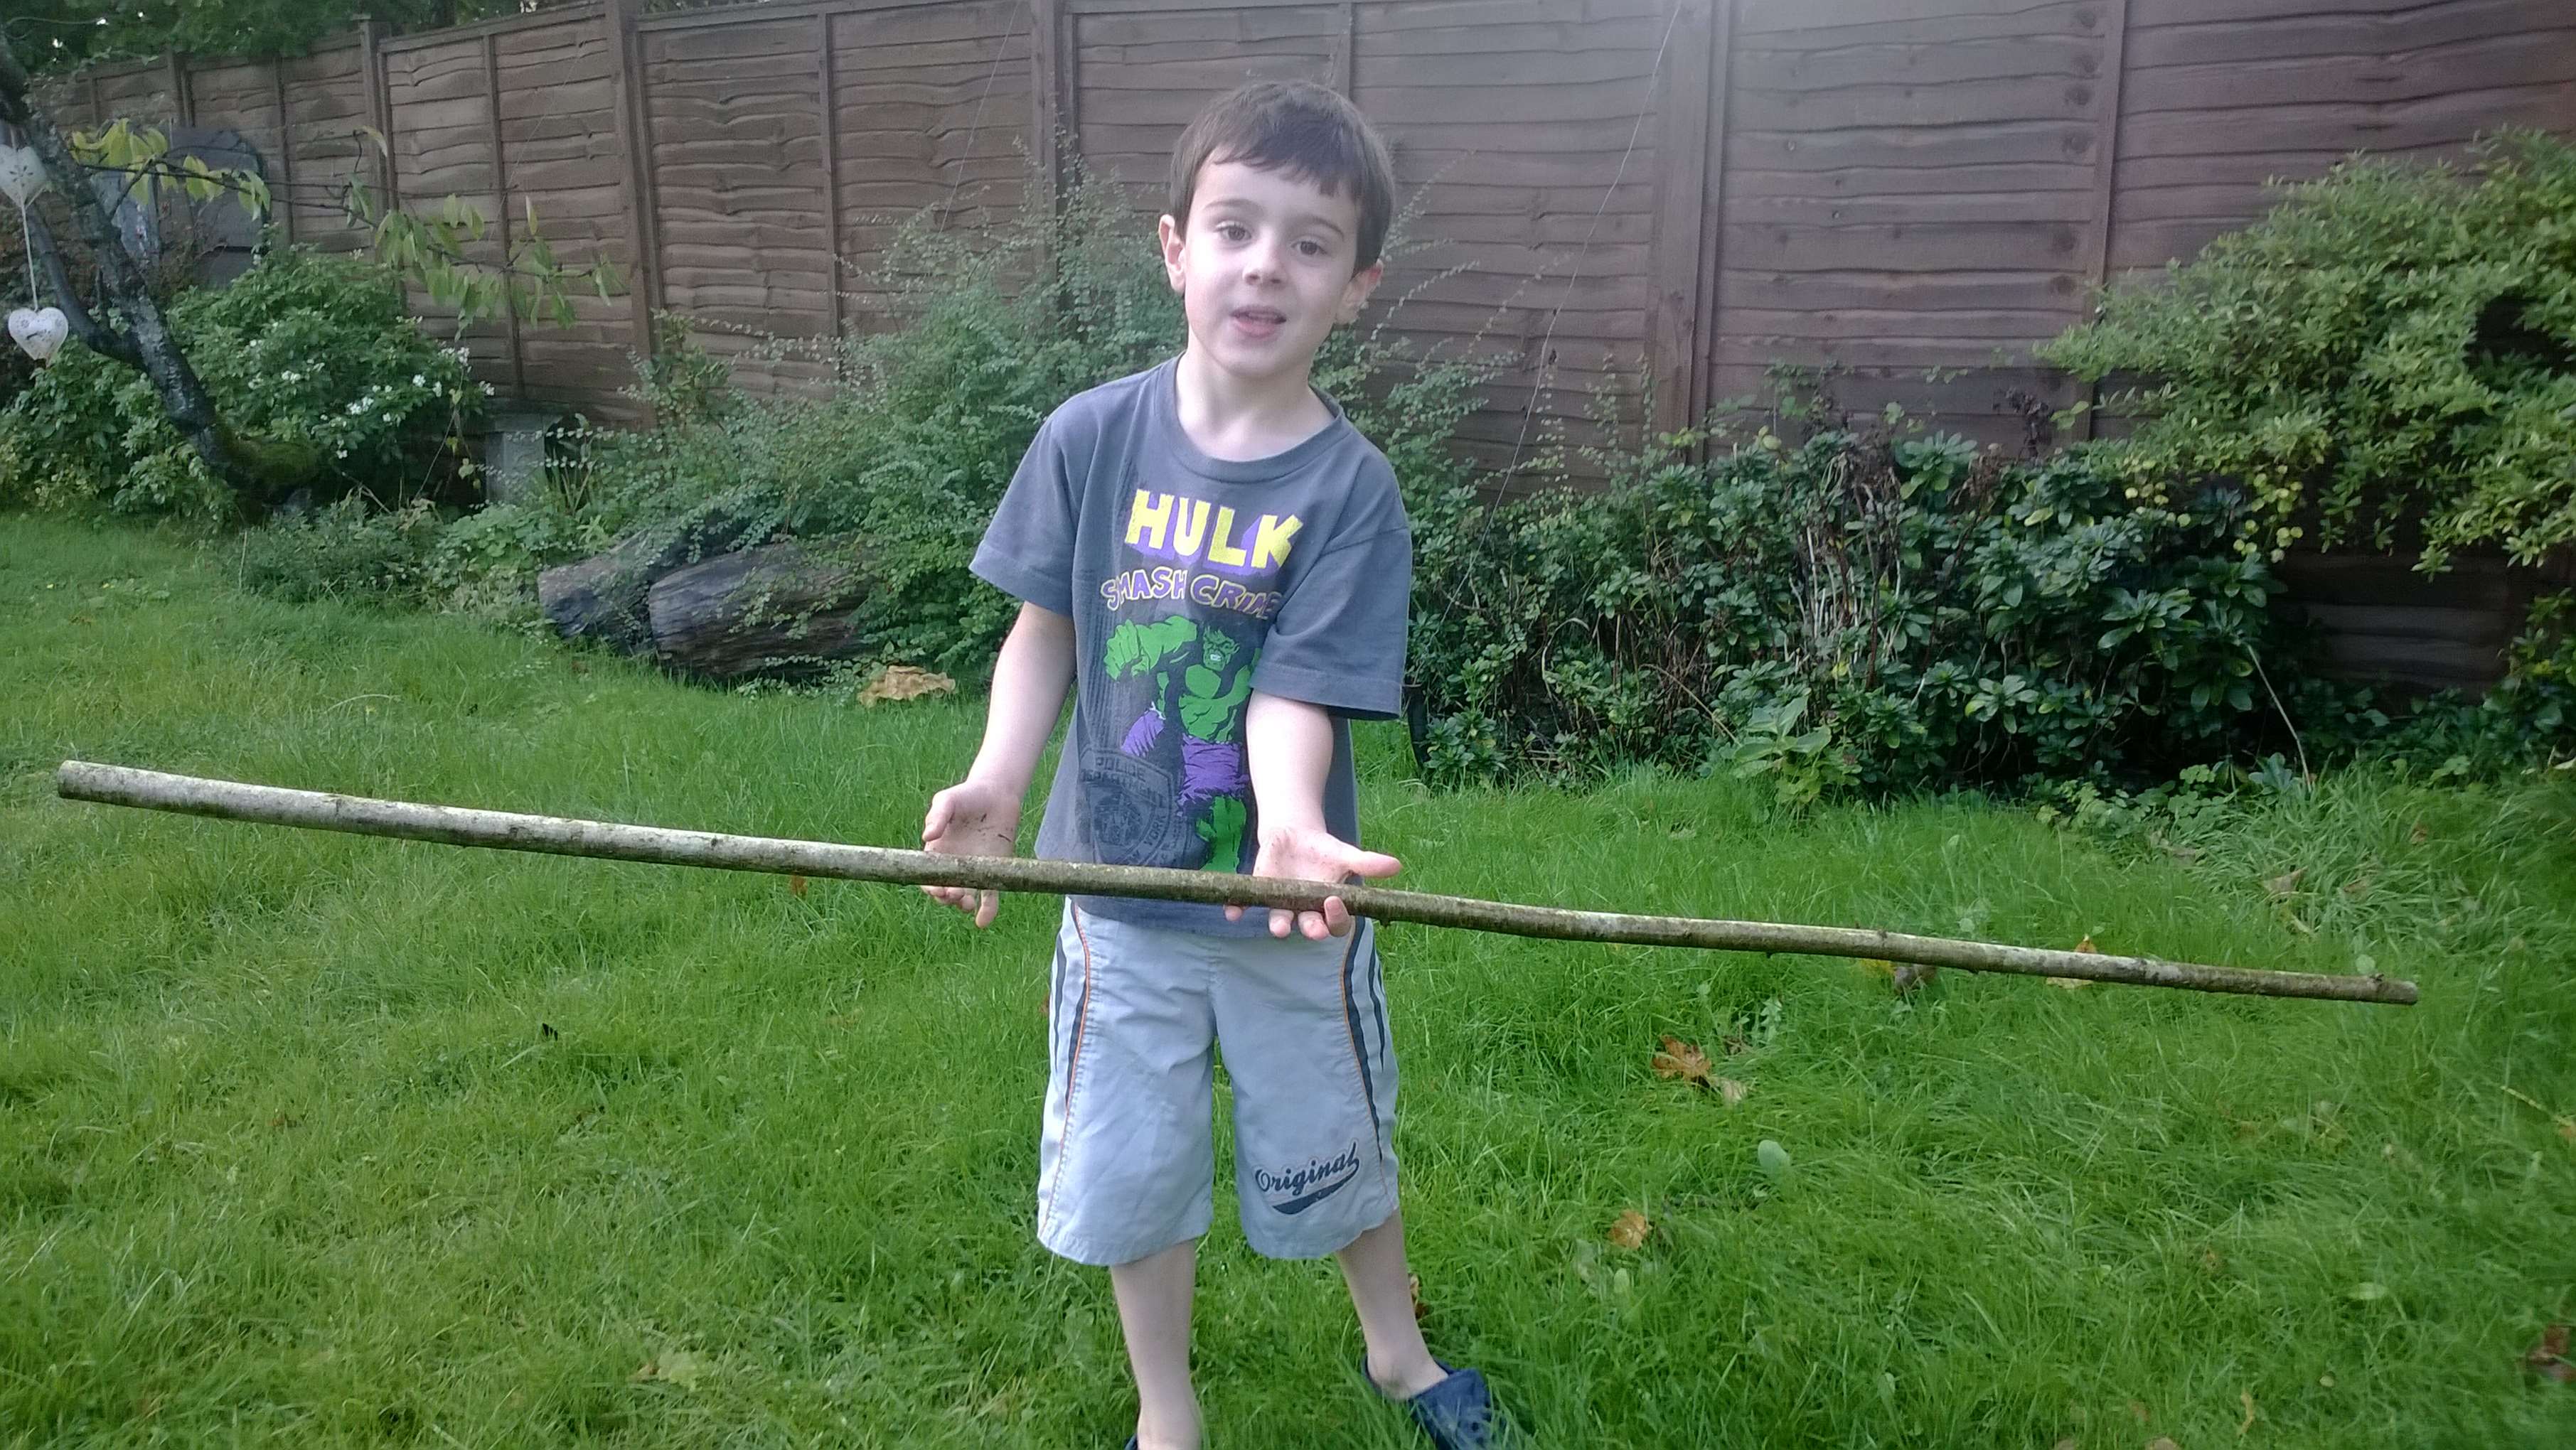
A couple of years ago the kids each helped me build their father and son bows. These quick bows are made from Hazel and shoot just as well as the day they were made.
Father and Son Bows
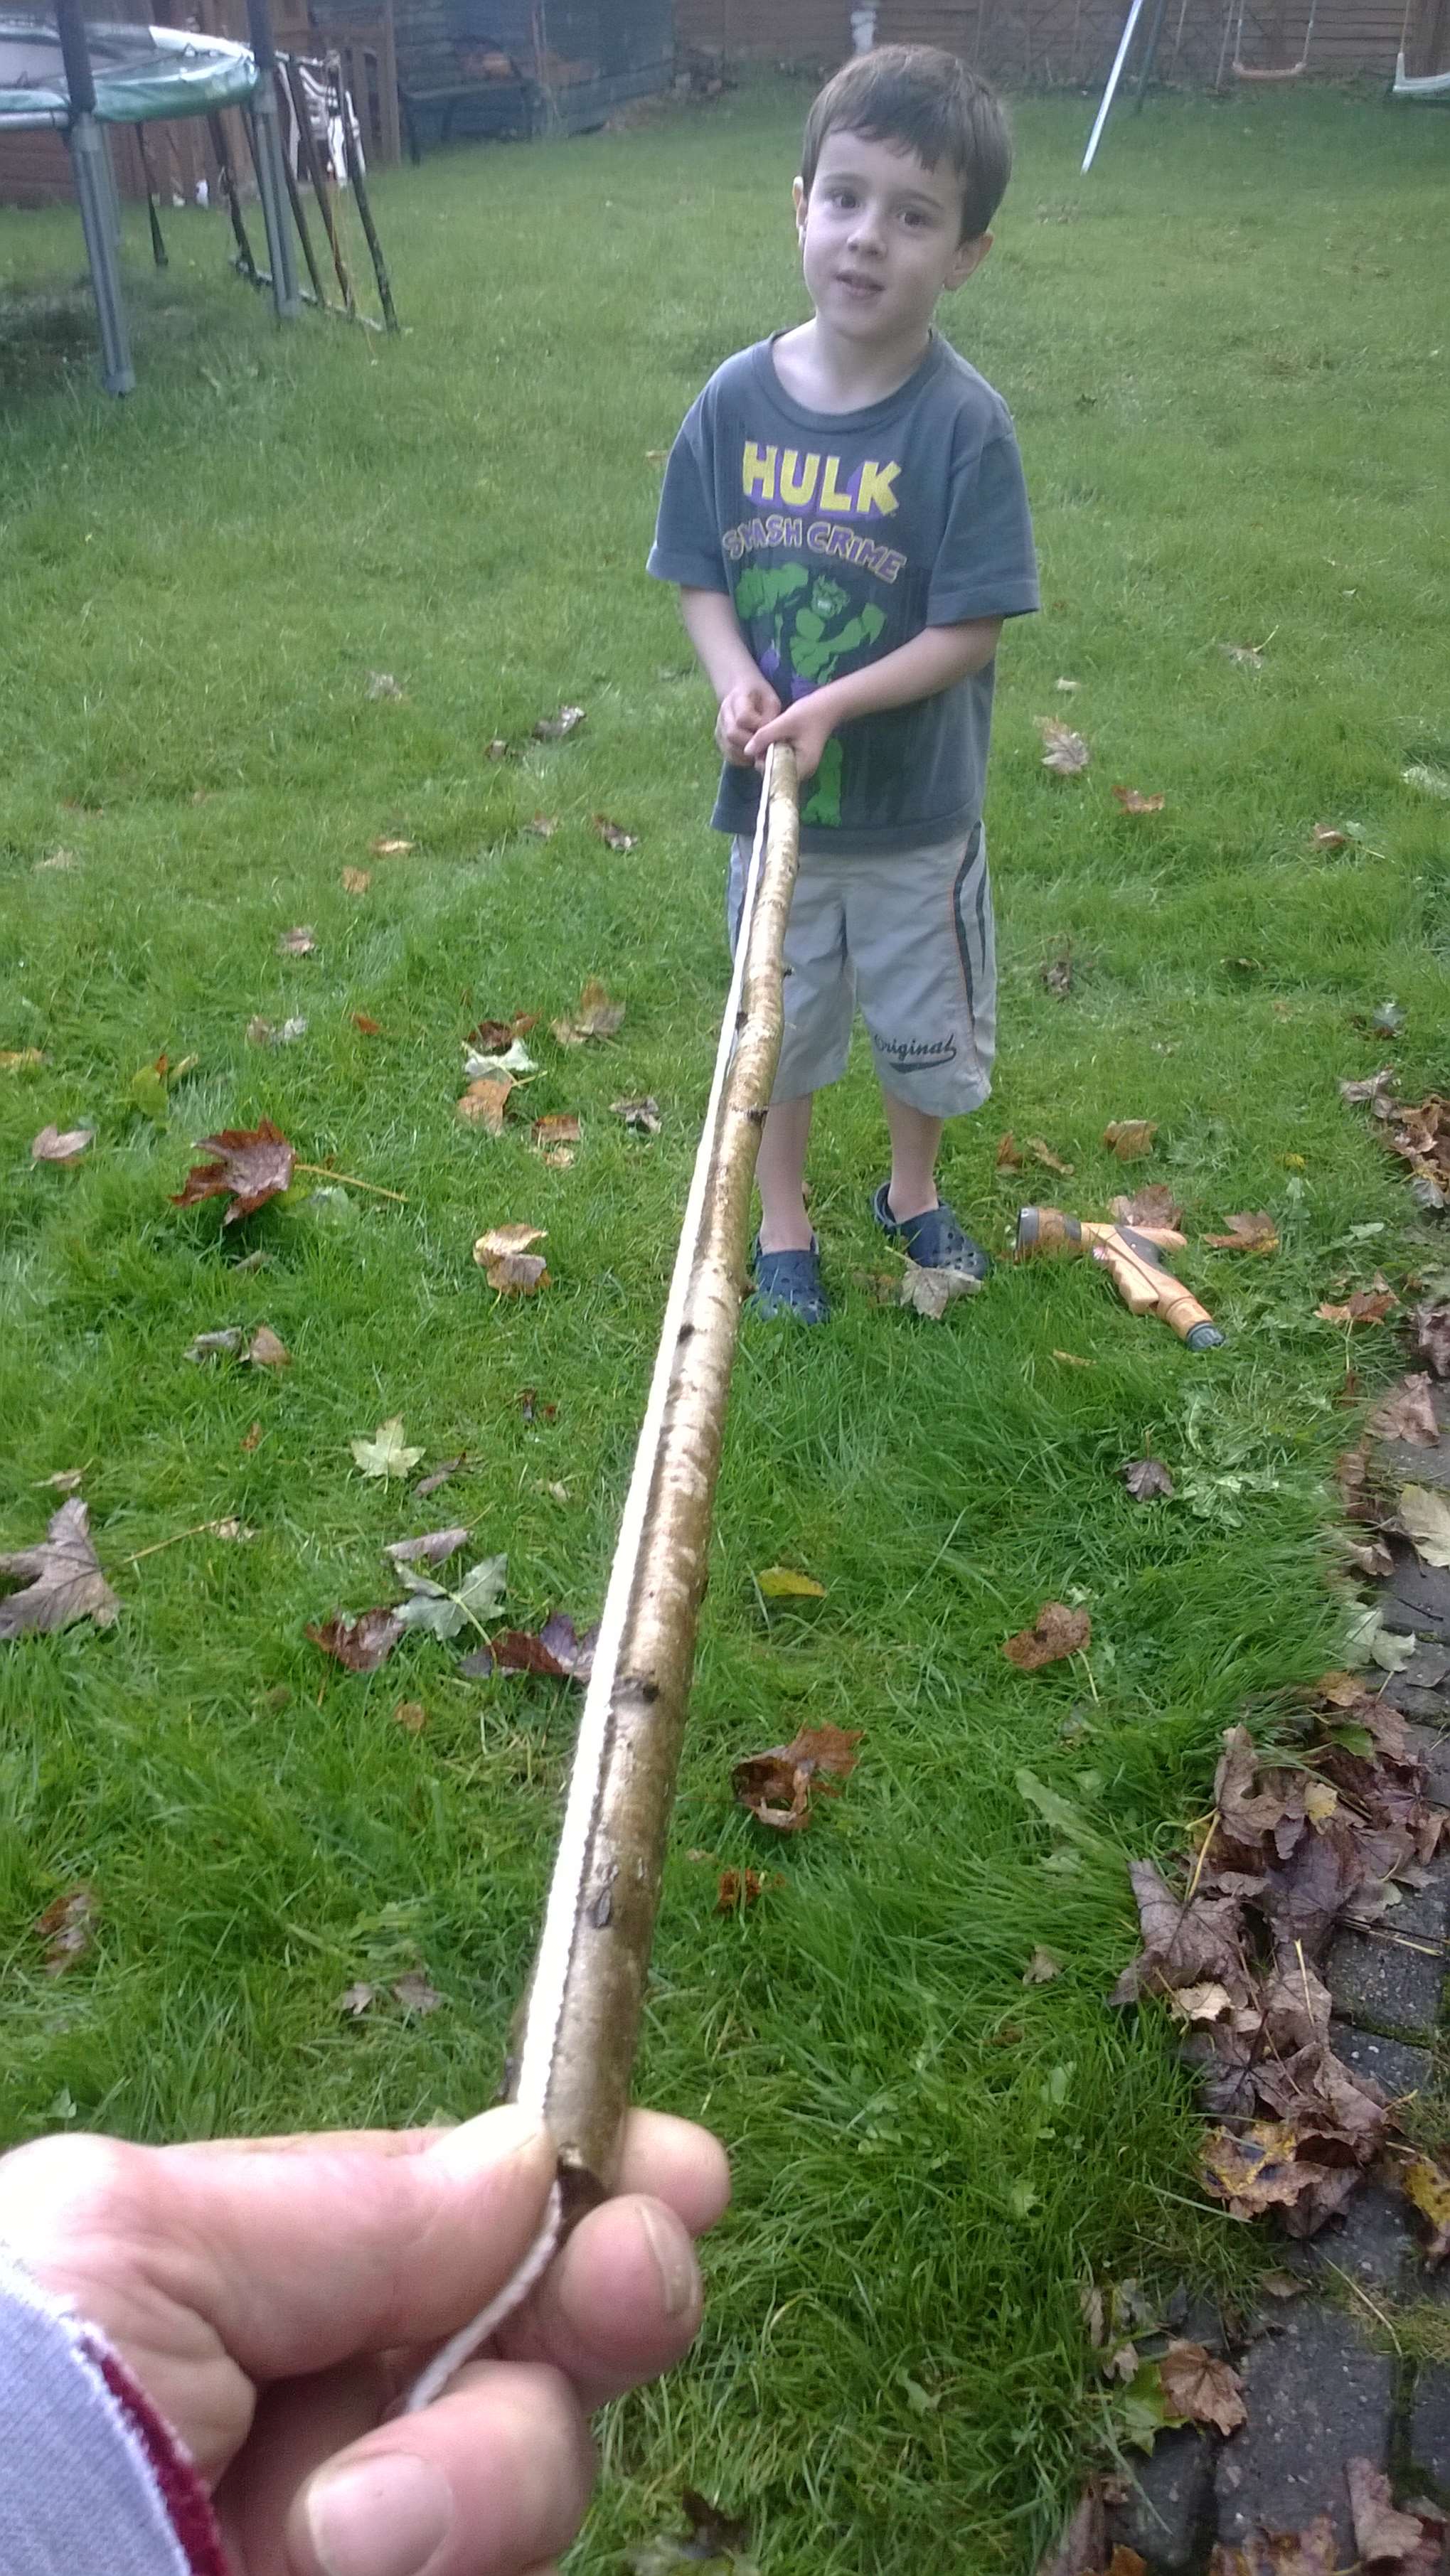
We have not had the bows out this year so after going through the basics again we had quite a few rounds shooting down the garden.
As the kids do not draw them back too far at the moment I was happy to have them shoot in the garden. Once they got their eye in they started to hit the targets.
Arrows Away
Not to be outdone I had a little shoot myself and thoroughly enjoyed spending my evening with the kids.
A Lovely Evening
I am off to Cardiff tomorrow for a couple of nights so there will be a couple of posts on what I can find in the city.
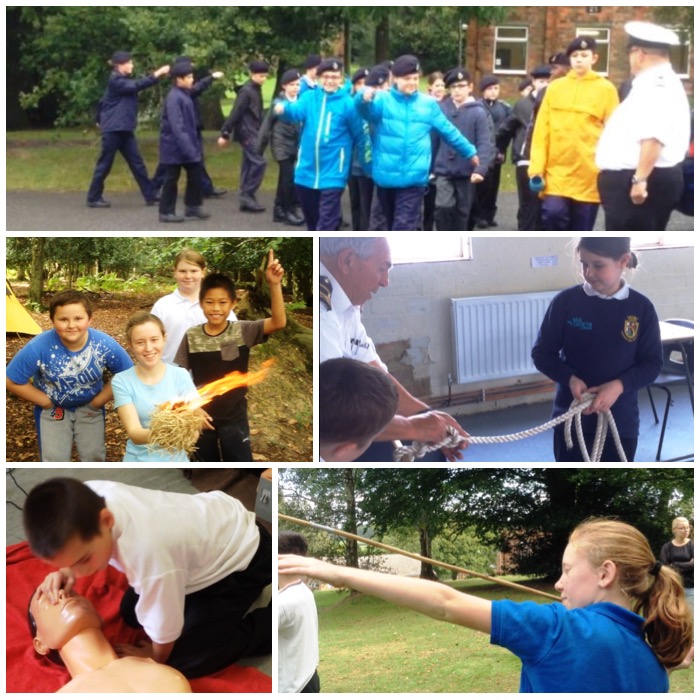
Meet our Junior Sea Cadets from London Area – Cadets who love to learn by having fun.
A year or so ago my friend Lt Cdr (SCC) Mark Weston invited me along to help out on one of the weekends he organises for our Junior Sea Cadets. Mark believes that it is sometimes good to bring these youngsters (10 and 11 year olds) away on training weekends where they can learn in a fun manner but not have the prospect of an assessment hanging over them at the end of the weekend.
I was hooked on these weekends from the start as the Juniors undertake a number of different activities to learn new skills and I get the chance to play at bushcraft with them.
Meet London Area Juniors
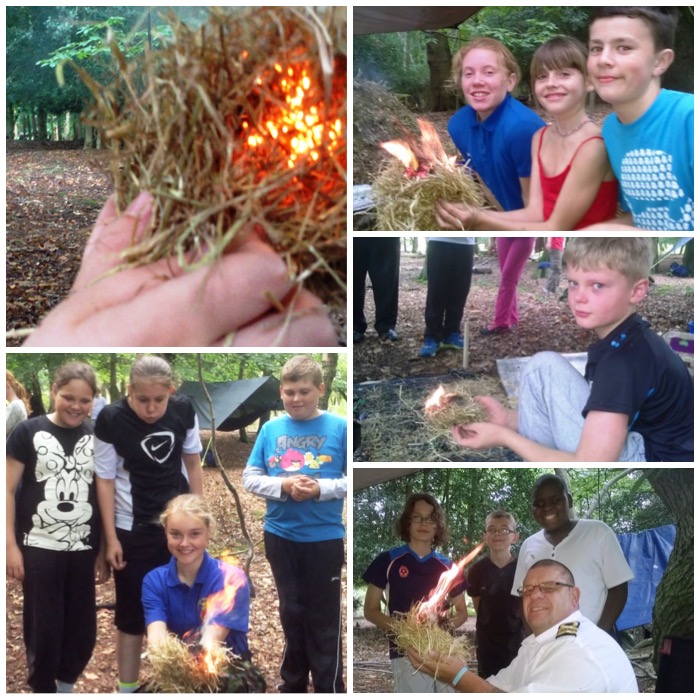
I was joined on the weekend by my friend Dave Lewis to deliver the bushcraft class in the woods. The training was conducted at Crowborough Army Camp but thankfully this time we got access to the ajoining woodland where we are allowed to light fires.
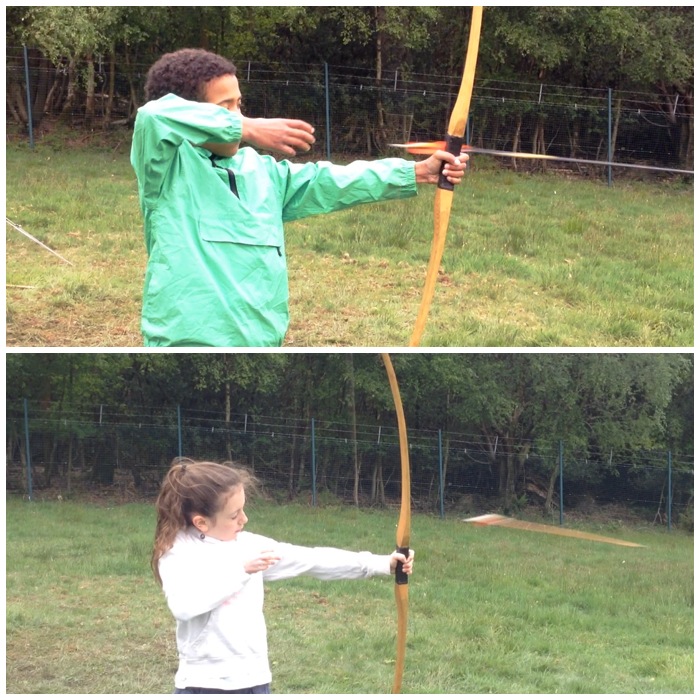
Many of the Juniors had never shot an arrow before but after some tuition they were pinging them down range as quick as they could. One little lad was so chuffed as he got the tiny bull’s eye on one of the targets.
Bulls-eye archery
Dave and I took it in turns to deliver different classes as we got a group of about 6 Juniors at a time for about an hour and a half each time. So while I was doing archery Dave was teaching half of the group how to use a firesteel properly and then how to build a proper fire.
Firesteel fun
I collect Fire Faces from images I see in the flames but the best faces are always found on the owners of the flame. Even Mark helped out with the fire lighting and I think his face says it all.
Happy Fire Faces
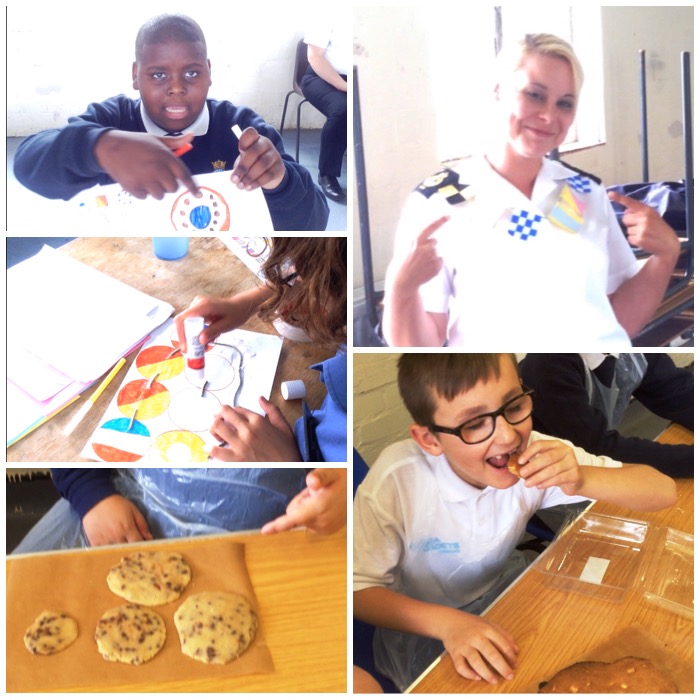
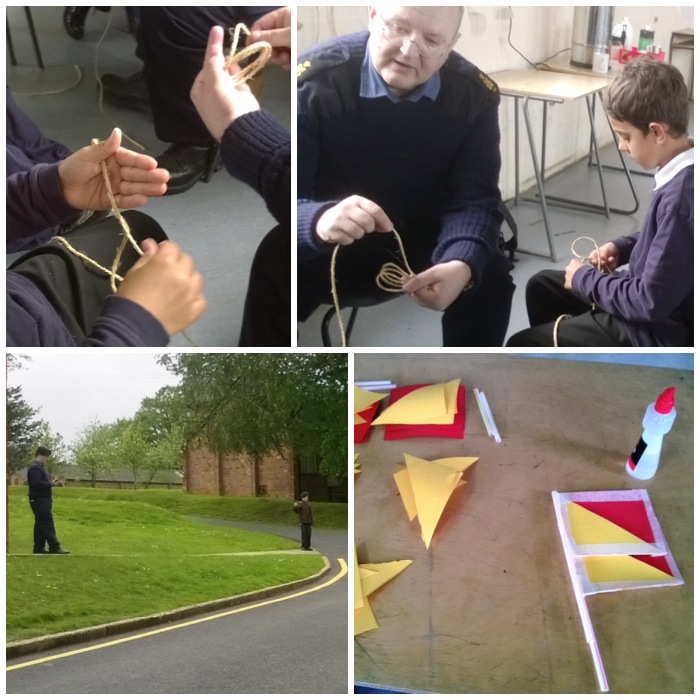
While we were having fun in the woods, other instructors were running courses back in the main camp. Here you can see Kay modelling some of the signalling flags the Juniors had designed in her class.
Also Sam and Lorraine ran a very busy and successful cookery class where the Juniors made some rather delicious biscuits (I know – I tried a few out).
Comms and Cooking
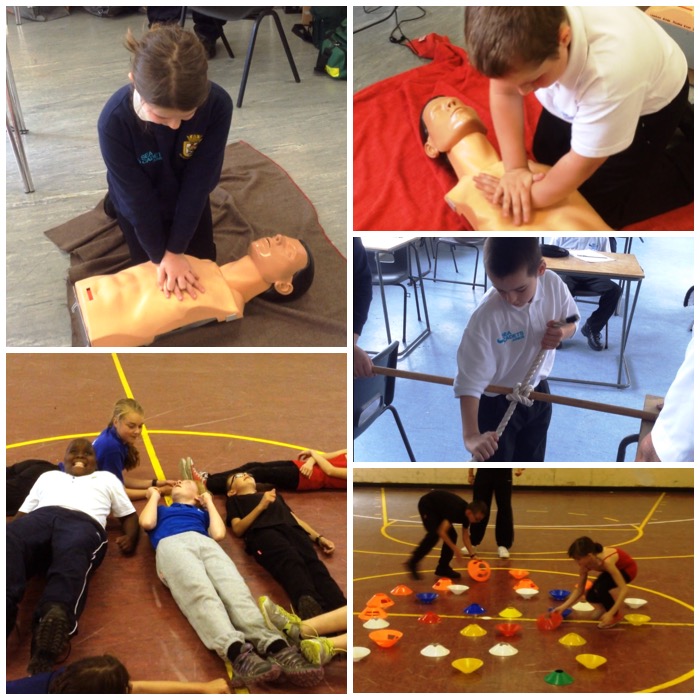
Every Junior took part in the First Aid class with Keith and learnt about CPR and got themselves a signed certificate to confirm this.
A Sea Cadet course would not be complete without a seamanship class so Alan and Nigel were kept busy teaching all the Juniors about bends and hitches.
Up in the gym Darren our PTI kept the Juniors running around all day with fun classes to use up all their excess energy.
First Aid and Fitness
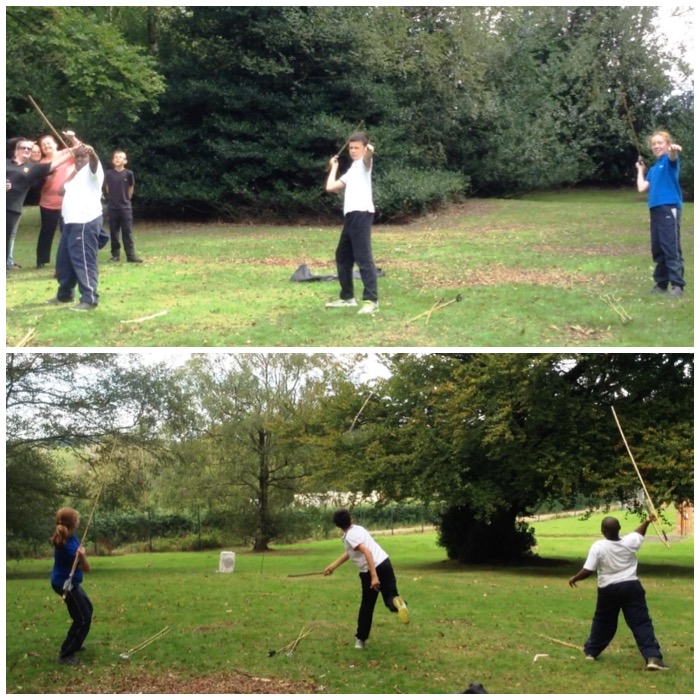
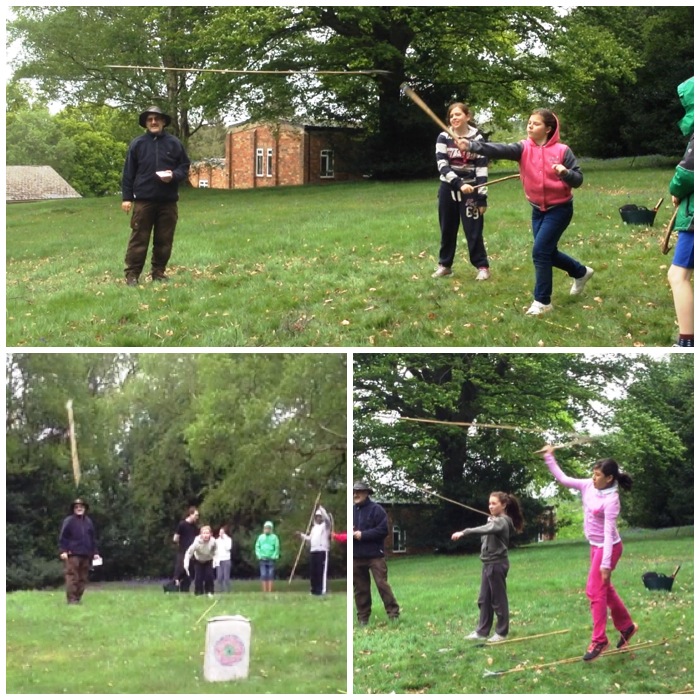
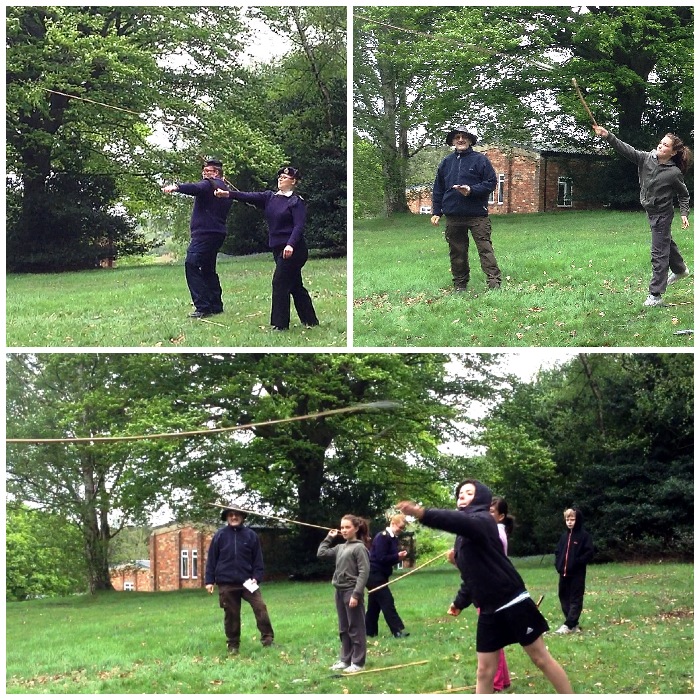
On the Sunday all the classes were up in the camp and included the ever popular Atlatl class. This skill has become a popular one to learn as the older cadets are now marked on this in the Chosin Cup competition held annually by London Area Sea Cadets.
Steady – Aim – Shoot
Dave ran this class leaving me free for some time to concentrate on getting these pictures and capturing some video of the weekend.
As some Juniors were doing the Atlatl others were in the gym with Darren competing against each other doing lots of games.
On target
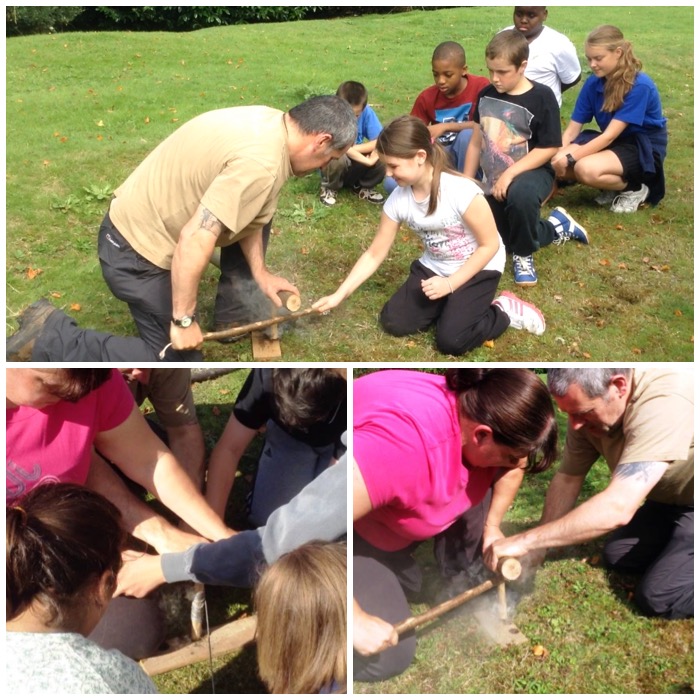
I got some of the Juniors and staff together that morning to do some relay bowdrill. I didn’t have time to run this with all the cadets but those that did had a great time.
Group Bowdrill
I put together two videos of the weekend. The first one shows all of the activities the Juniors undertook and was partly filmed by Deputy Area Officer (London) Lt Cdr (SCC) Cliff Lewis while I was teaching.
The other video shows the relay bowdrill I did with the Juniors. This was an experiment and as it was successful I will be using this technique with them again. Thanks to Chrissie Weston for filming much of this.
This was a great weekend and Mark has gotten a winning formula with the variety of classes the Juniors get to try out – I am looking forward to the next one in late spring next year.
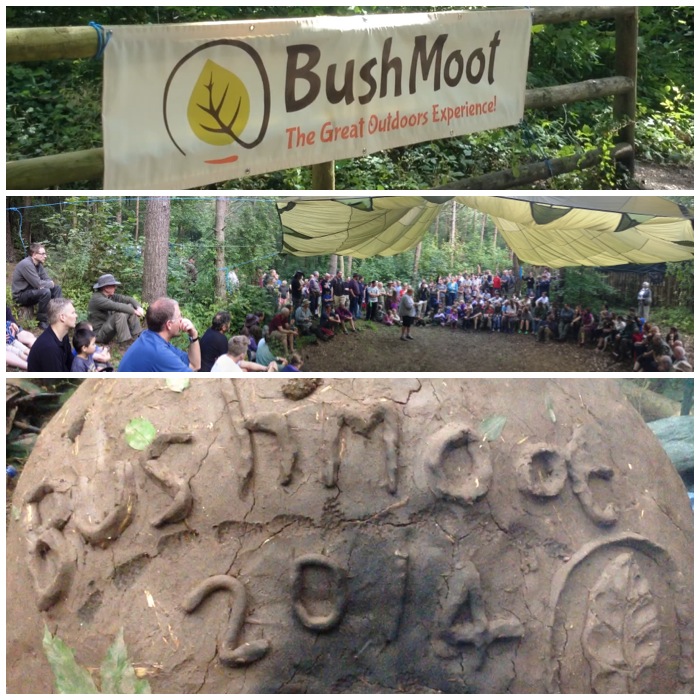
My 100th post – it seems like only yesterday that I was tentatively writing my first post way back at the end of last September.
For this 100th post the subject couldn’t be anything other than this year’s Bushcraft UK Bushmoot.
BCUK Bushmoot 2014
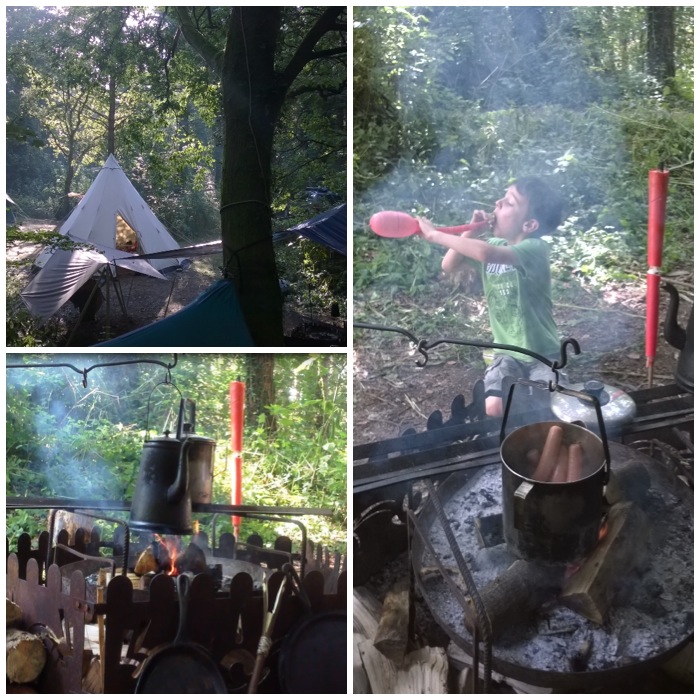
I came back from holiday in France on Saturday the 2nd of August, unpacked then re-packed and headed out with my two kids Catherine and Finlay to Merthyr Mawr in South Wales on Sunday the 3rd of August. Unluckily I had been beaten to my usual camping spot at the Moot by another family but managed to set up nearby with my tipi, kitchen tarp and my hammock stand.
I found a fire guard lying in the sand and after digging it out used it around my fire. It was quite a well engineered piece and I could not understand why anyone would have discarded it.
My camp
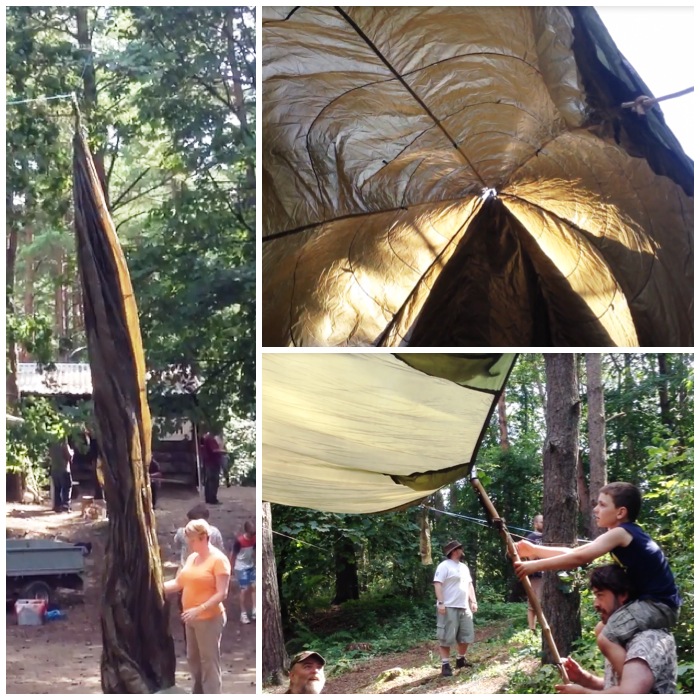
The first few days were mostly spent chilling out with the kids before eventually getting around to putting up the workshop tarps and parachutes. This was the first year I had taken my children to the Moot and they took to it like ducks to water.
Set up
For the first few evenings we had dinner with Fraser from Coastal Survival over in the sand dune area so preparing the evening meal was never an issue for me, thankfully.
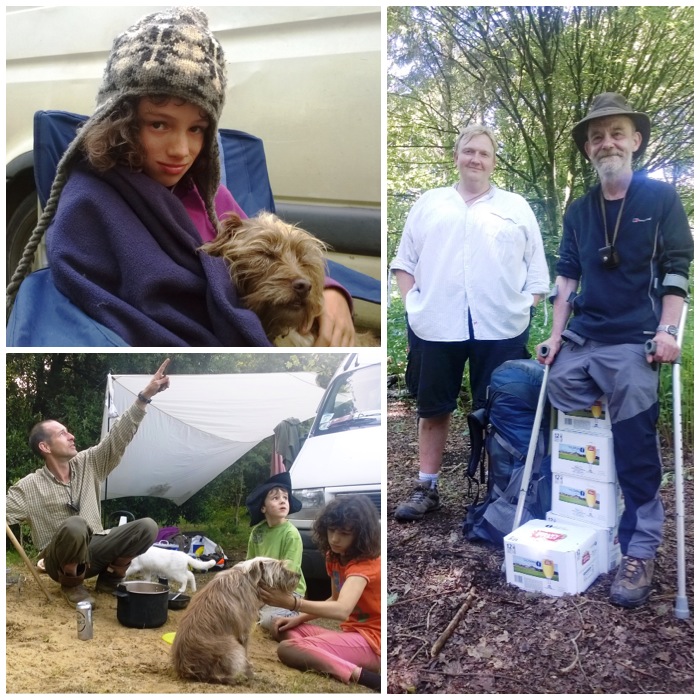
I could not resist taking this shot of Stu when he arrived in a taxi and we unloaded his supplies for the Naughty Corner.
It was at this time that my daughter started feeling unwell with a high temperature and feeling very faint. For the next few days she would sleep a lot in her hammock and eat very little. I thought it was just one of those 24 hour bugs but it turned out to be quite a nasty virus and really laid her out.
Settling in and arrivals
This is the first of five videos I took while at the Moot and shows the set up and some of the first courses that were held.
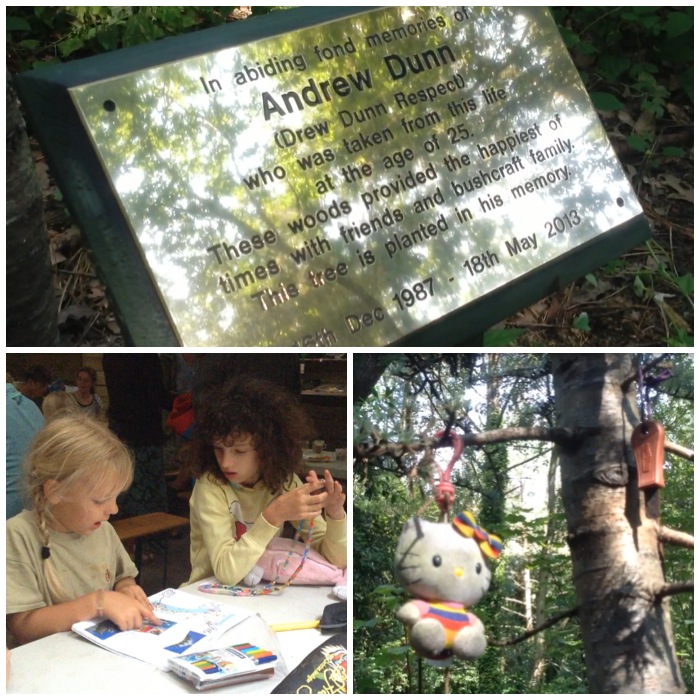
It was good to see all the new growth on Drew’s tree that had been planted last year. People have been leaving little tributes on the tree over the year which I thought made it look very special. While Catherine was feeling a little better she would come out and play with the other kids while she could. She never met Drew but I am sure that they would have gotten on with him like a house on fire. Drew loved to run role-playing games with the kids at the Moot and Catherine and Finlay love these types of games.
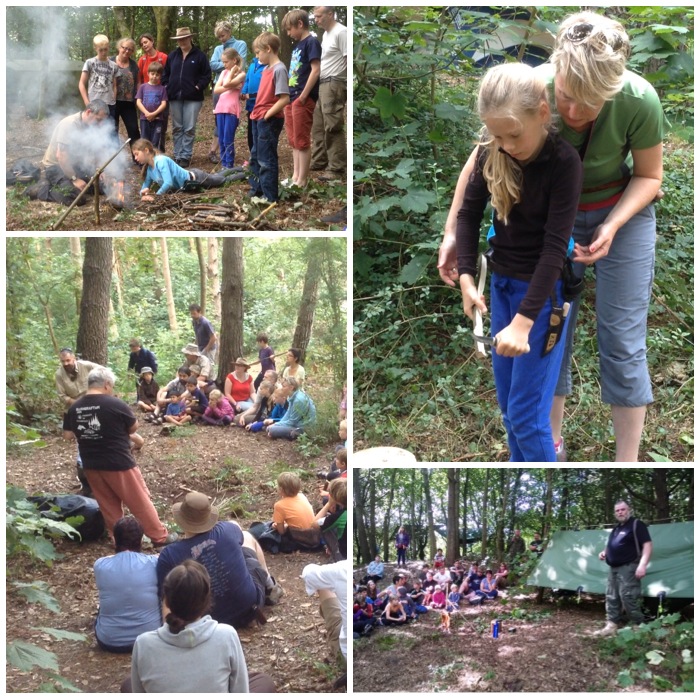
The first course I was involved in was the Starter Course. I have written a separate post on this course on the BCUK forum and you can read about it here – Bushmoot Starter Course. This is the second year we have run the course and it is starting to prove very popular now.
Starters Course
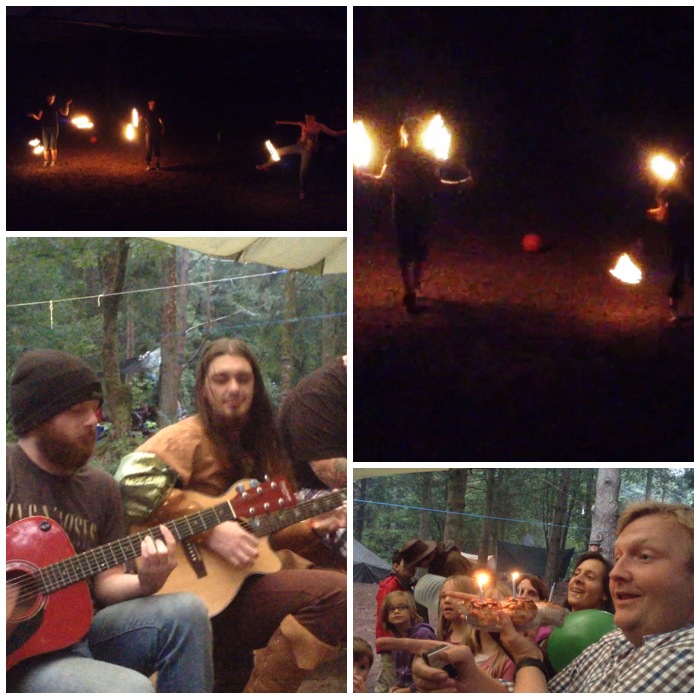
Over three of the nights I was at the Moot there was some great entertainment. On one night some of the lads from the Naughty Corner came down to the main sandpit area and had a great jamming session. Apart from filming them I recorded a couple of their tracks and then used them as backing music for my second video. Tony, the organizer of the Moot, even got himself some birthday cake on the night.
The other two nights we were treated to an amazing fire display by Emily, Liesl and Naomi Cook. These three young ladies are very talented and brave.
Evening Entertainment
Here is the video of Emily, Liesl and Naomi doing their fire show on both nights.
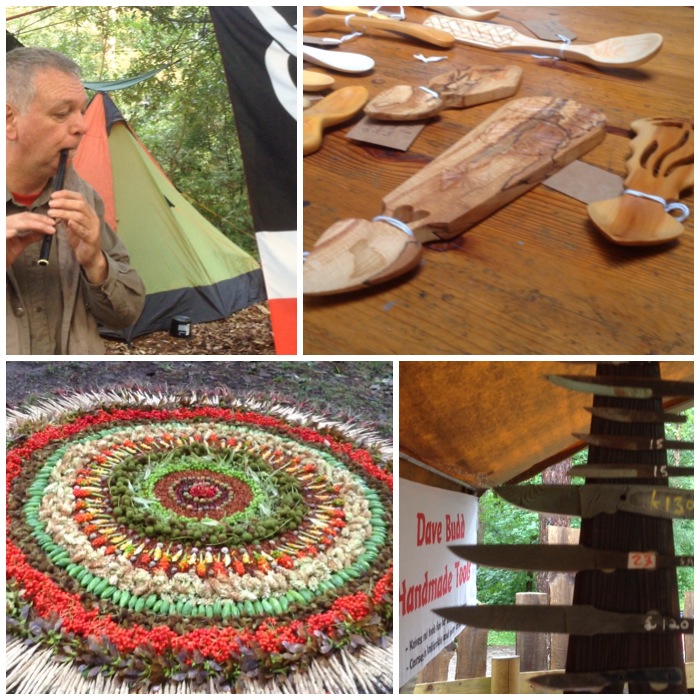
One of the things that has struck me about the Moot is all the different art that you can experience there. Art in the form of music from Stephen Crump (recorded for my third video), Welsh love spoons from Dean Allen, Woodland Plant Art from Keith Beaney and art in the form of iron from Dave Budd.
Bushcraft Art
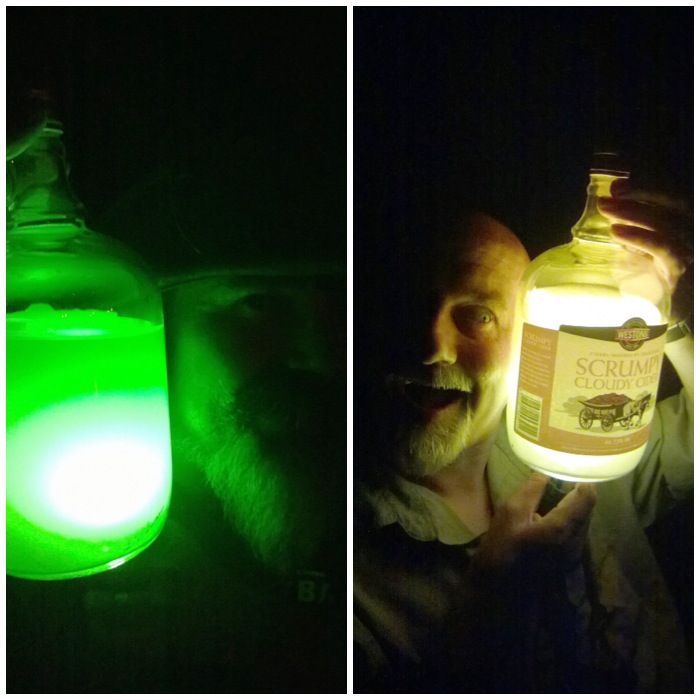
Needless to say Spikey and Badger managed their own version of art up in the Naughty Corner with the use of torches and some evening spirit.
Ye Old Naughty Corner
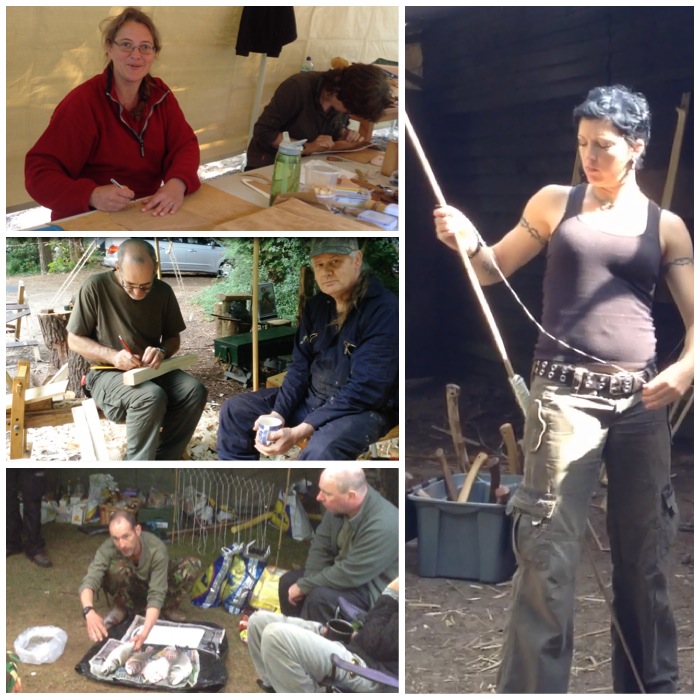
The main Moot kicked off with lots and lots of courses. I have posted pictures from just a small selection of what was on offer: making the pizza oven with Tim, mini bows with Wayne, water purifying with Richard, net needle making with Steve and spoon carving with Dean. There were lots more courses going on but I did not get to see them as I was on the Starter course all day. My wife Alison arrived on the first day of the main Moot and took a lot of the pictures of the day.
It was at this stage that we decided that Catherine was best off at home, so instead of staying, Alison took her back that day with Finlay.
Workshops – 1
The next video is of many of the first day’s workshops, with backing music from the Naughty Corner band.
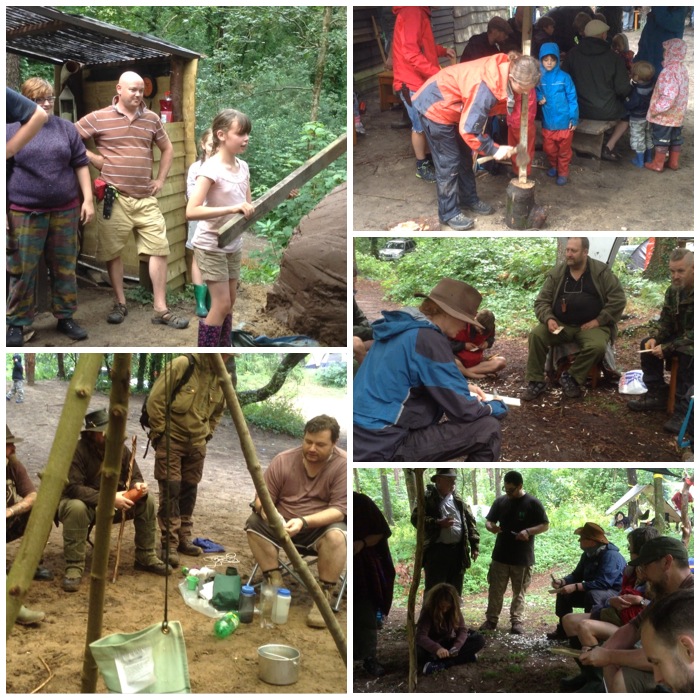
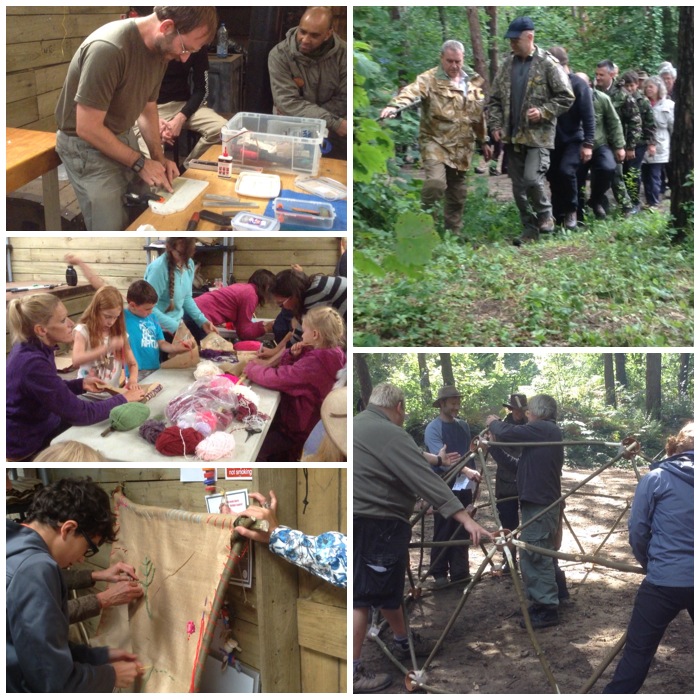
The Sunday was another day of workshops and I tried to get around to as many as possible. These included knife sharpening with Chris, making tapestries with Shelly, tracking with Perry McGee of the National Tracking School and making a geodesic dome with Tony. There were plenty of other courses going on such as plant walks with Robin Harford and willow basket trap making with Fraser from Coastal Survival.
Workshops – 2
My video of the day has as its soundtrack Stephen Crump playing a tin whistle on a wet afternoon.
Needless to say I spent a lot of my time down on the archery range shooting arrows or atlatl darts. With all the bows Wayne had been helping people to make we were kept very busy.
Down on the Range
I made a short but very funny video of Mad Dave and Cap’n Badger helping me to clear the range of a hung up tree.
At this stage I had not run any bowdrill classes but I had done a couple of one-to-one sessions. My neighbour Matt Baillie went off after one of the sessions and persevered until he got the bowdrill cracked – well done mate.
A Little Fire Fix
I also did a quick session on the Egyptian bowdrill method and made a short film of it.
The Monday was a bit of a damp affair but the Traders’ Day went well and I managed to try some more of Richard’s excellent elderberry wine.
Traders’ Day and a Private Wine Tasting
I managed to get a little bit of food at the group meal before it was devoured. This is becoming a bit of a tradition now since we stopped doing the hangis, and it is amazing to see all the different dishes that can be cooked over an open fire in a Dutch Oven.
Group Meal
My last video of the Moot is of the Traders’ Day and the group meal.
I spoke with Alison that evening and decided to head home in the morning as Catherine was still very poorly. I got home by lunchtime on Tuesday and thankfully over the next few days Catherine started to recover and was soon back to her usual self.
I really enjoyed the half of the Moot I attended this year and my kids are desperate to come back again next year. There were another couple of days of workshops that I missed but I think this post will give you a feel for how the Bushmoot works.
I hopefully will see you all again next year and meet a few new faces as well.
No pressure, no assessments, no worries – just fun, fun and more fun – these were the requirements for the recent London Area Sea Cadet Juniors training weekend at Crowborough Army camp.
I was joined by my good friend Charlie Brookes for the weekend teaching some bushcraft skills to the cadets. Also helping us were one our new Adventure Training instructors Emma Deasy and Leading Cadet Jessica Edwards (Jessica is under training to become an Adventure Leader).
We set up our classroom and prepared for all our activities on the Friday afternoon. At this stage it was just Charlie and myself but as he is a top bushcrafter everything got set up in record time.
Our classroom and my billet
As the cadets arrived on the Friday evening Charlie and myself relaxed around a nice fire and discussed how best to run the weekend. We did not have to look after the cadets in the evenings as there were enough ‘Duty Staff’ around to do this.
A relaxing evening
There were lots of activities planned for the cadets. The plan was for us to be given six cadets for an hour or so and then they would be moved onto other activities. On the saturday we had 3 teams in the morning and 3 in the afternoon.
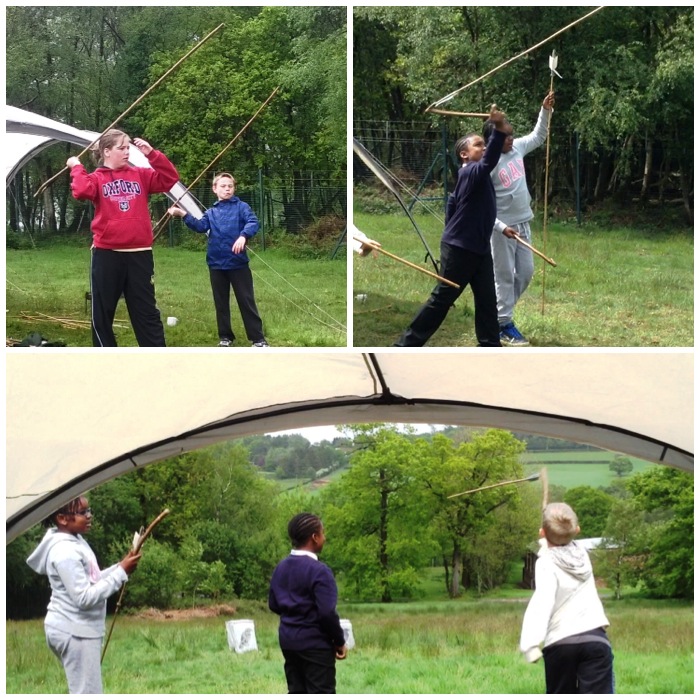
We ran various activities in each slot including the Atlatl, archery, fire lighting and stalking games.
The Atlatl (a spear chucking device) has become a regular event at many of our courses. Just looking at these cadets you can see that they really enjoy this activity. I set up a short range of about 15 meters as I was more focused on accuracy rather than distance.
Atlatls in action
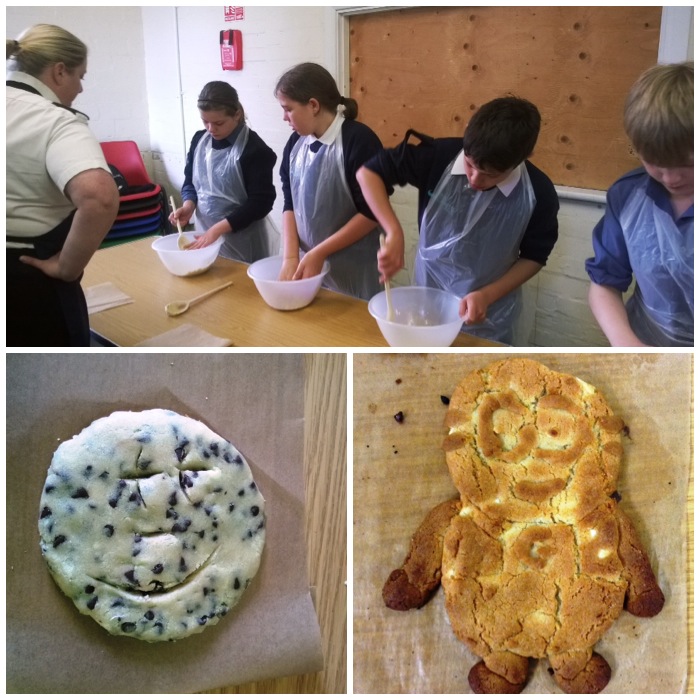
One of the other activities the cadets undertook was a cookery class (Cook Stewards course in the Sea Cadets). I was supplied on a number of occasions with some excellent cookies that were baked in this class and every time I went into the main building I was assaulted by a fantastic smell of baking biscuits.
Cookery class
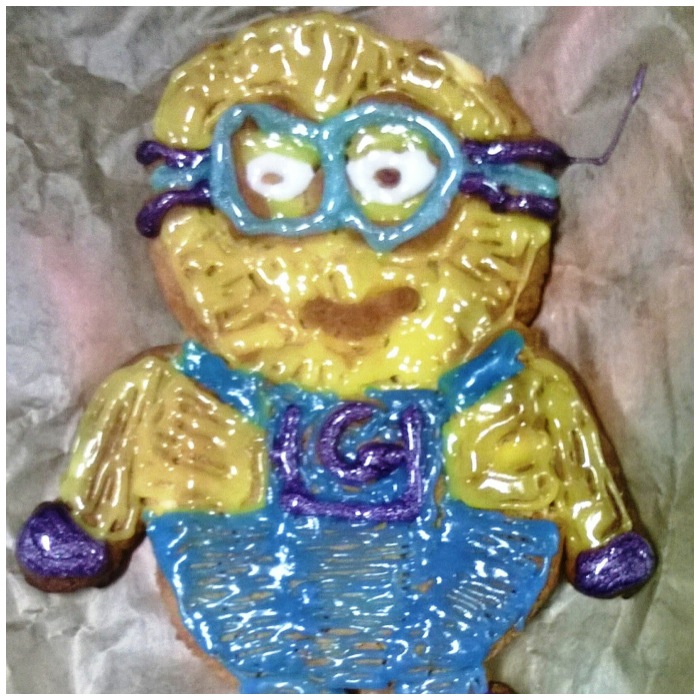
As you can see that the little fella in the picture just above on the right turned out to be a proper little Minion. This was baked by one of the other instructors Emma.
Emma’s Minion
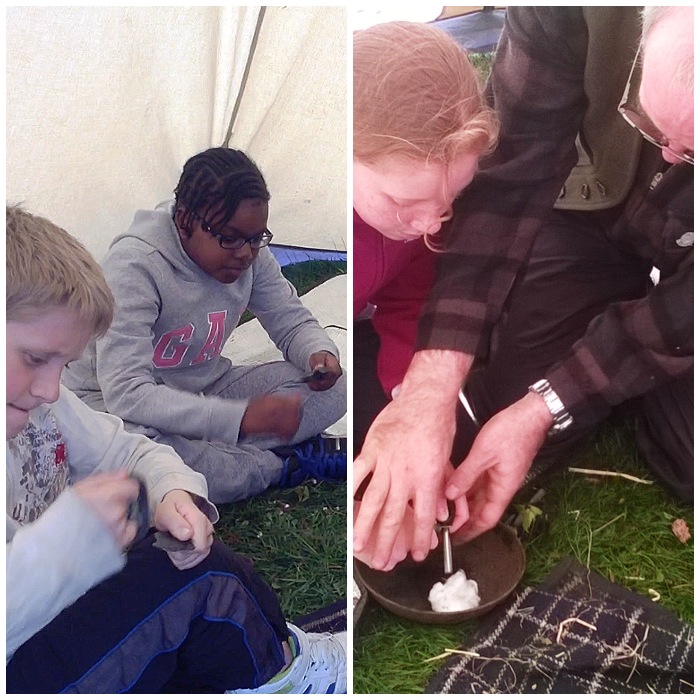
Charlie spent a great deal of the day teaching the cadets how to light a fire in many different ways and also about the responsibilities they need to think about when lighting a fire. In these pictures the cadets are using traditional flint and steels on the left and more modern firesteels on the right.
Some take to this straight away and others require a little bit of a helping hand.
Flint & Steel and Firesteels
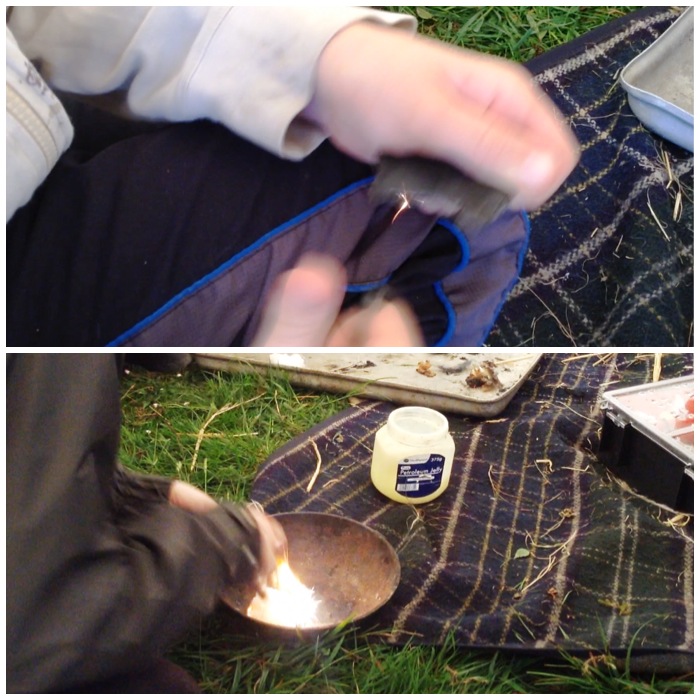
In no time the cadets were creating good sparks from traditional flint and steels and lighting up cotton wool balls smeared in Vaseline with modern firesteels.
Sparks and flames
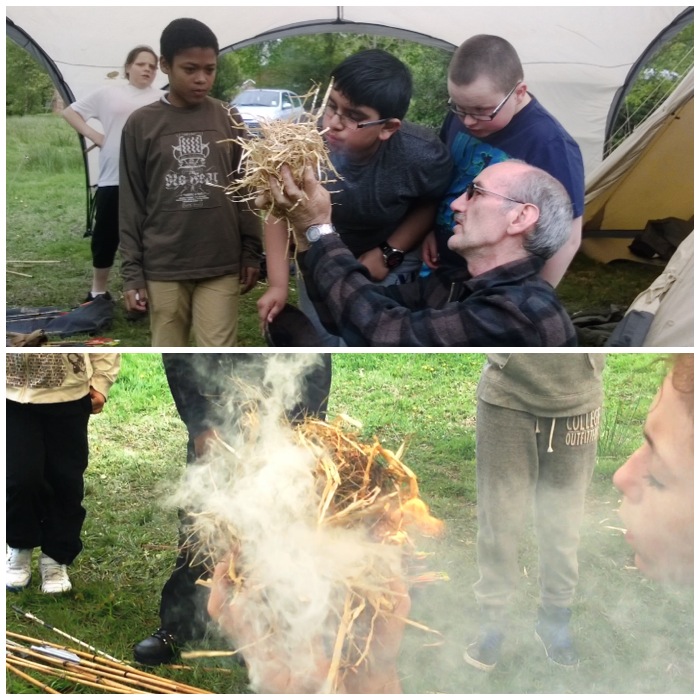
The cadets also lit lots of charcloth and soon had good tinder bundles going.
Flamage
I put together a short video showing all these activities.
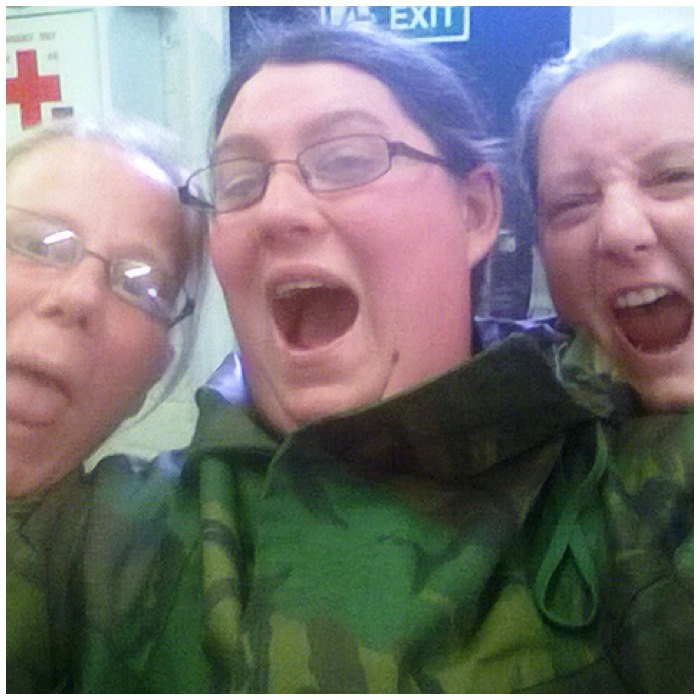
I asked Emma at some time on the Saturday to go around the other classes and get one or two pictures of each one. Emma did get some good pictures but I also found this on my camera – scary stuff 😉
The ladies taking a selfie
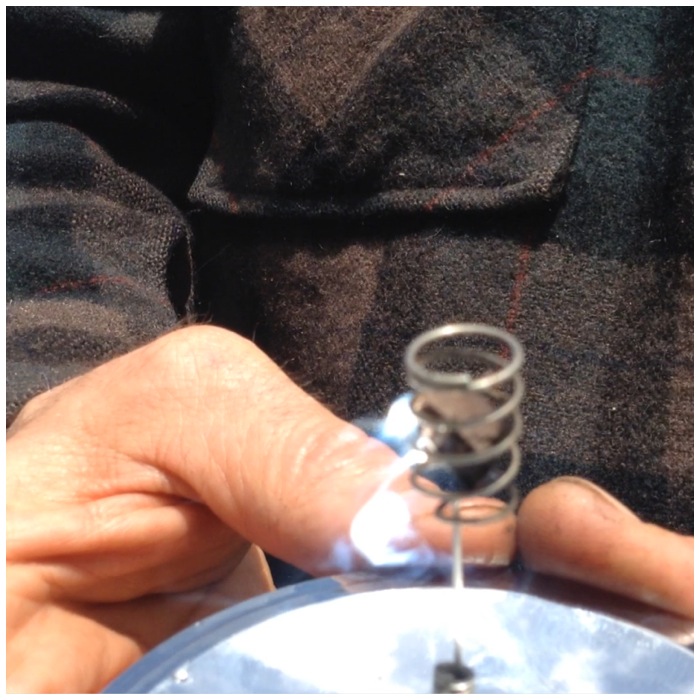
A little toy that really caught the attention of the cadets was the parabolic mirror. This is a concave mirror that you can use to light a small piece of material just using the suns rays.
Parabolic mirror
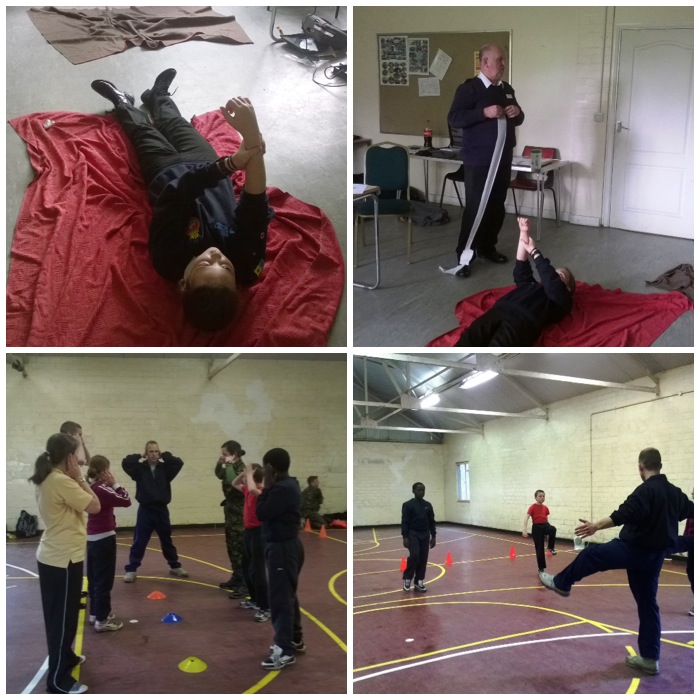
Other classes the cadets undertook included First Aid and Physical Training.
First Aid and PT
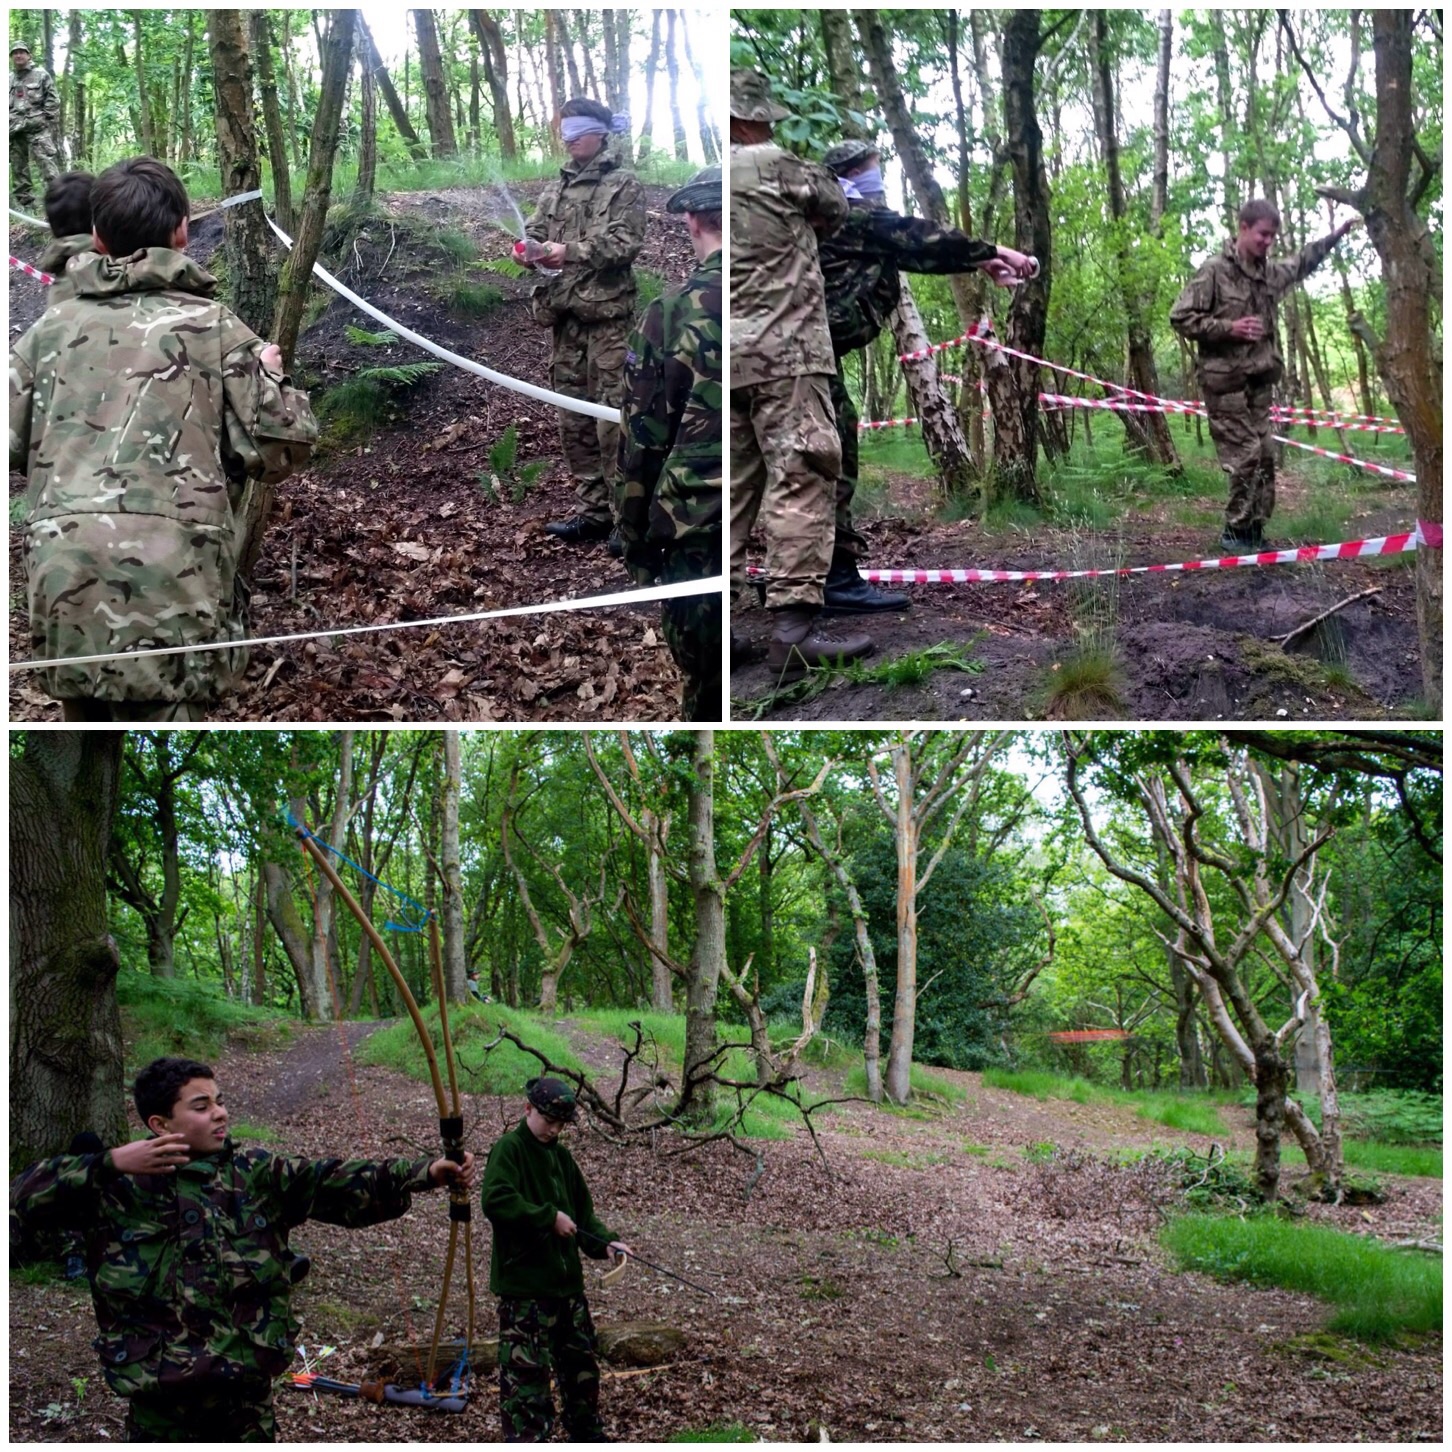
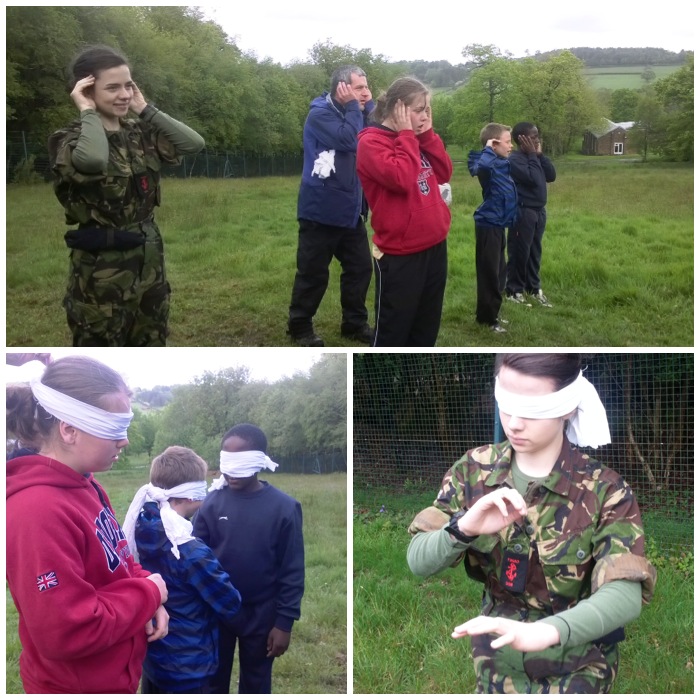
One of the activities I like to teach the cadets is about listening correctly while out and about. They all come from London so for many they do not truly listen to the countryside when out and about. to begin with I get them to focus their listening by cupping their hands to their ears. This really increases the sound volume from the direction they are facing and as they turn around they can clearly hear everything coming from quite a distance.
After they get used to this we blindfold them so that they can appreciate how much sound can help us with spotting animals in the woods.
Learning to listen properly
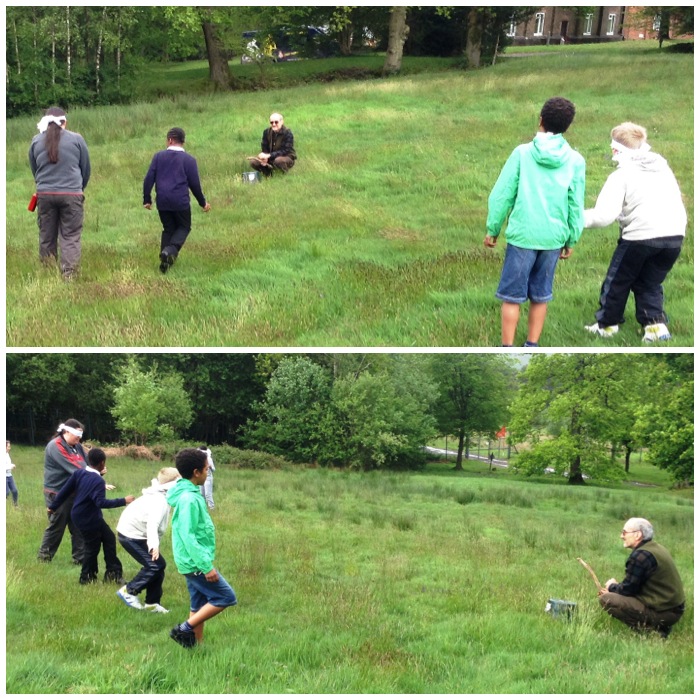
The drum stalk is a game where the participants are blindfolded and have to walk from an unknown spot (to them) and touch the head of the drummer. The drummer gently taps the drum (a bucket in this case) to give the participants a focus to walk to. Each participant has a guide walking by them to make sure they do not fall into any holes or trip over anything.
Drum stalk
Being Sea Cadets a training weekend would not be complete without a class on Seamanship and on Comms skills. In Seamanship the cadets learnt how to make a monkeys fist – this is a type of knot that creates a weight using the rope and is used for throwing a heaving line from a boat to the shore in order to tie it up.
In the comms class the cadets learnt all about how to use radios properly by getting out and about using hand held radios and they also made their own semaphore flags.
Seamanship and communication skills
After each Atlatl session I also got the cadets to shoot some arrows down the range. I managed to get some cracking shots this time of the arrows being released.
Archery action
On the Sunday morning a competition was held and we set up an Atlatl range so that the cadets could try out all the skills they had learnt the previous day.
Atlatl competition 1
The cadets were definitely better than the staff with both accuracy and enthusiasm.
Atlatl competition 2
The PT staff also set up an indoor sports competition for the cadets. I walked into the hall and the noise of all the cadets egging their pals on was amazing.
Sports competition
A staff team was put together and thankfully as I was seen to be too busy filming was left alone. In all the madness and fun that was being had I have no idea who won.
Even the staff took part
In amongst all this fun we did find time to do some other stuff. Charlie tested out a Wood Gas stove and I managed to do a little pot hook carving (a How To on this to follow).
Testing and carving
A great weekend with great Sea Cadets both young and old.
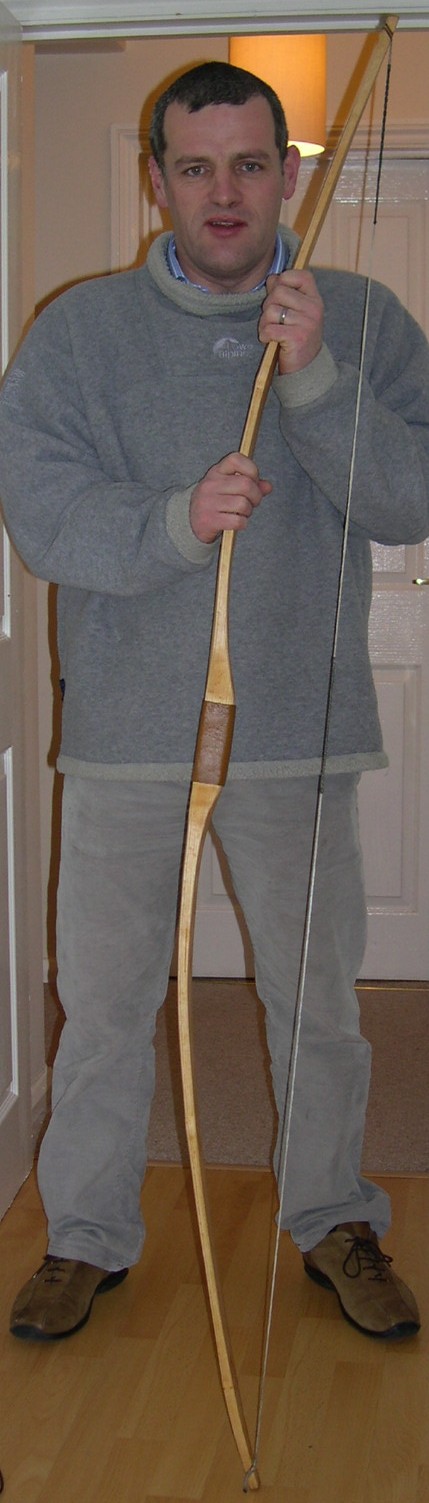
I carved this Ash Flatbow back in 2008 while I was on my Bushcraft Instructors course with Woodcraft Schooland has sincebeen used by scores of my Sea Cadets, and many of my friends and family. The two instructors who taught me to make this bow were John Rhyder (head instructor at Woodcraft School) and Nick McMillen (now of the Field Farm Project). Both of them as well as being professional outdoorsmen are top bowyers.
An Ash Flatbow about to have its first shoot
This How To…. is designed to lay out all the main steps I undertook to make this bow and if you have reasonable woodworking skills then it will aid you in building a bow for yourself. If you think your skills are a bit rusty then I advise that you attend a bow-making course. In addition to John and Nick who still offer courses I can recommend Wayne Jones of Forest Knights School, Paul Bradley from The Bushcraft Magazine (though I’m not sure if he runs courses anymore) and Will Lord as excellent bowyers to learn from.
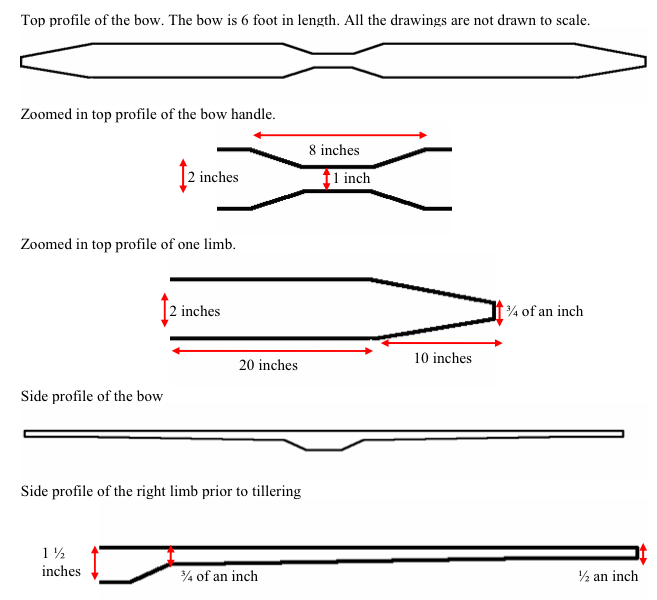
I made some drawings on my initial write-up in 2008 and thought it easiest to take some screen grabs of this bow theory for this blog.
Bow theory, terminology and scale
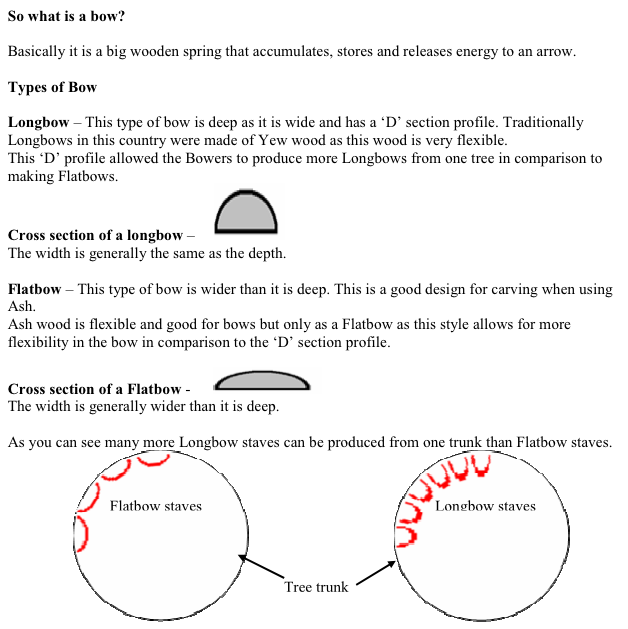
So the first question is – What is a bow?
So what is a bow
Some bow terminology for you to remember as I will be mentioning some of this in the post:
Some bow terminology
Not to scale, but these are the dimensions I mapped out for my bow:
My bows dimensions
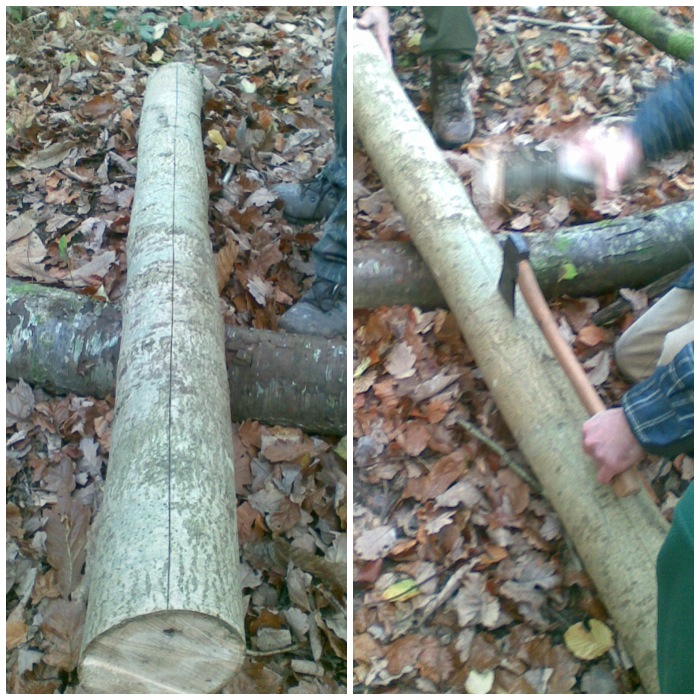
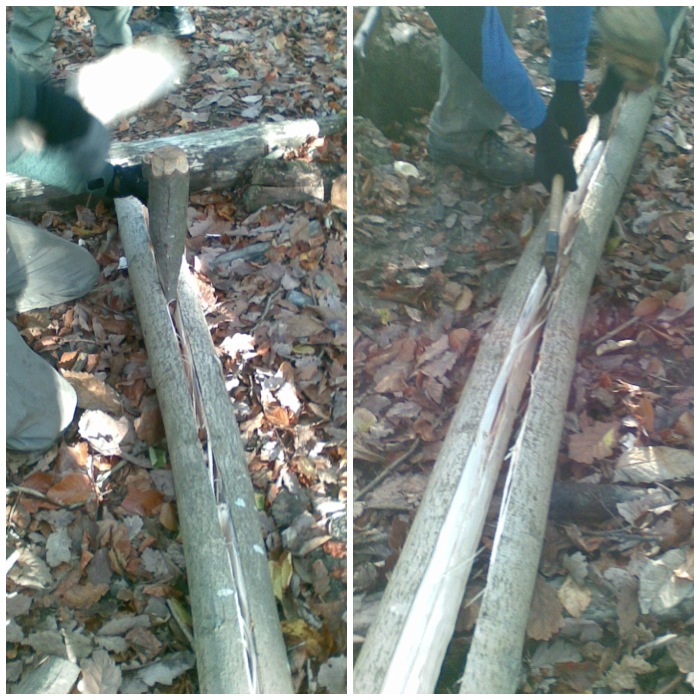
Splitting out staves
The ash tree was felled by the course instructor, John Ryder.
We scored a line down the length of the log, all the way through the bark and just into the sap wood, using an axe. This helps with guiding the split of the log.
We then drove an axe into the scored lined to start the split.
Note that the axe is at 90 degrees to the person hammering it in. This maintains a safe position for the worker.
Splitting out the staves – Step 1
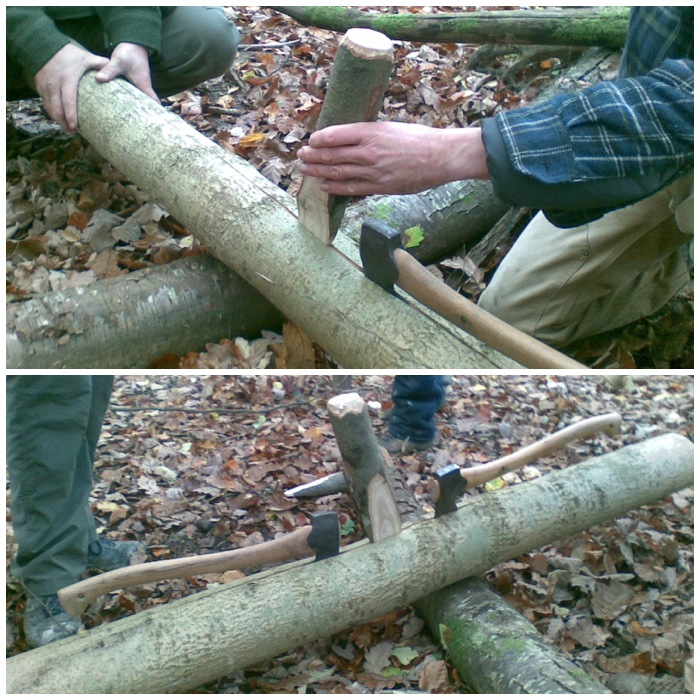
The first axe is followed by a wedge and another axe to widen the split.
The scored line helped greatly with controlling the split.
Splitting out the staves – Step 2
As other wedges are driven deeper into the split the previous ones can be removed to be used again.
An axe can also be used to cut the wood fibres not split by the wedges.
Splitting out the staves – Step 3
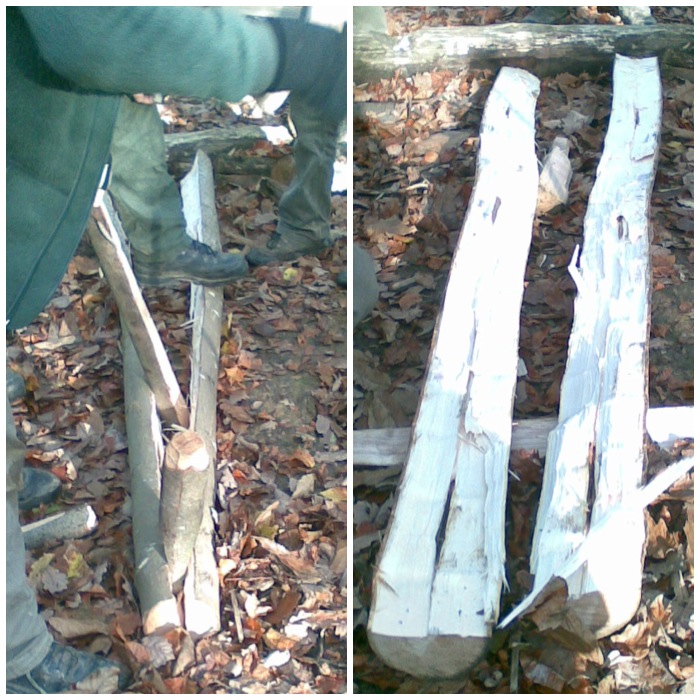
Once the log has been split the process is repeated again and again until you have the staves you require.
Splitting out the staves – Step 4
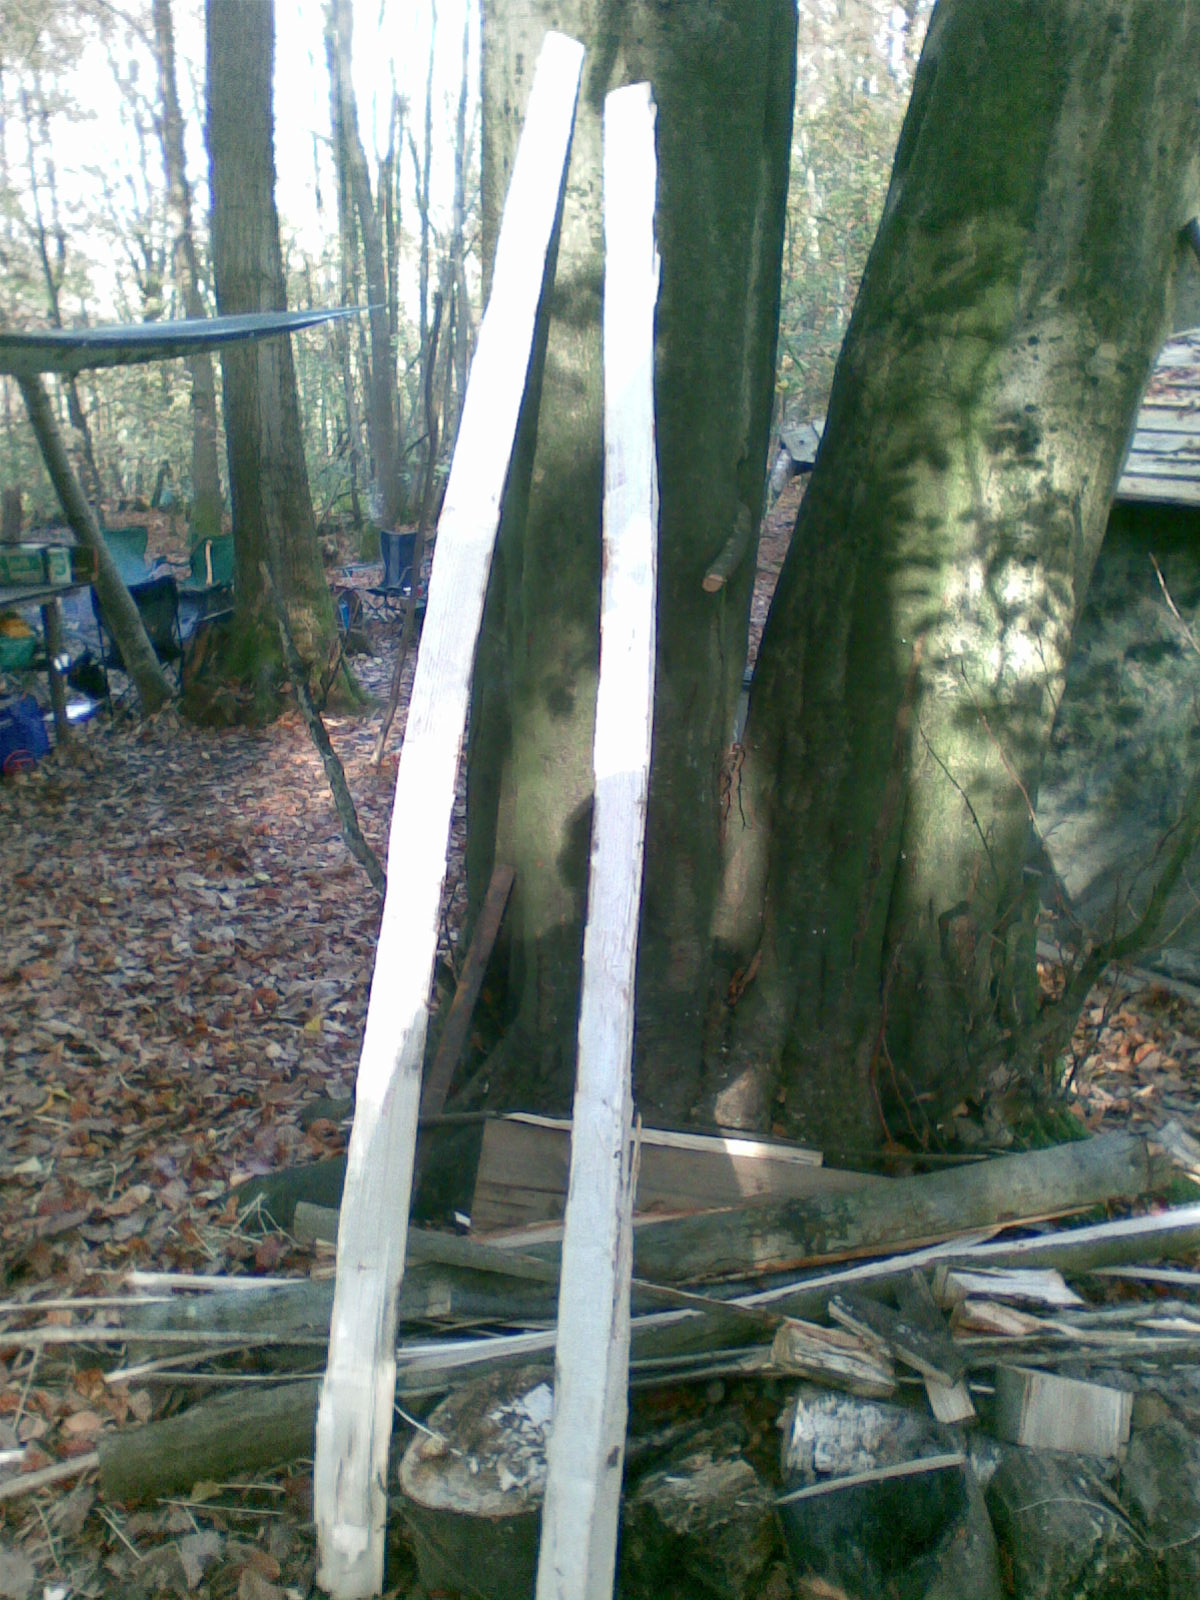
Here are two staves ready for shaping.
Split Staves
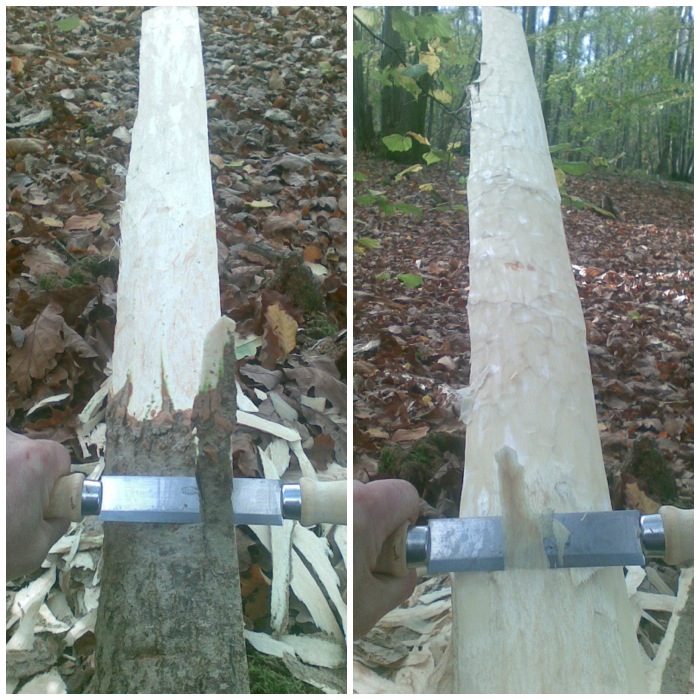
Shaping the bow
Using a draw knife I shaved off the bark of the stave. I was very careful only to remove the outer and inner bark and not touch any of the wood.
The sap wood found just under the bark is the most flexible and will form the Back of the bow. Apart from light sanding, this area of the bow is left untouched. All of the work on shaping the bow will be done on the sides and on the Belly (the part of the bow facing your belly when shooting).
Trimming off the bark
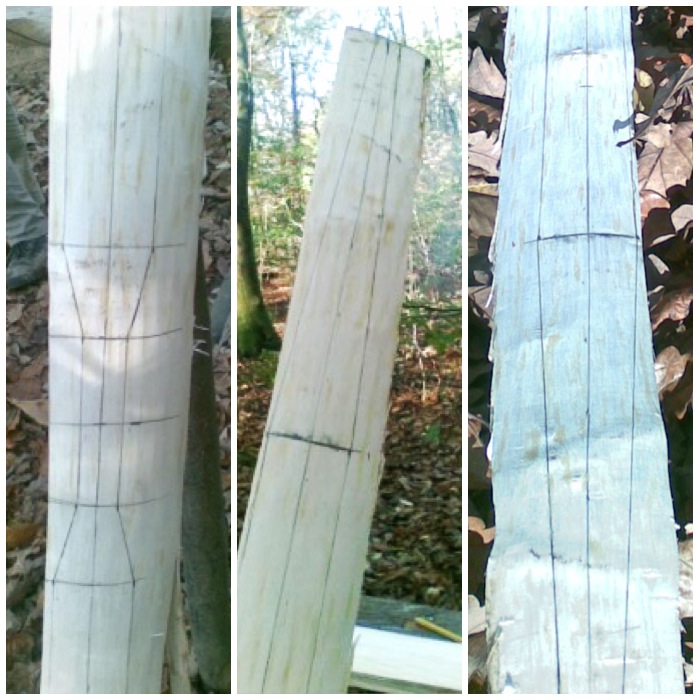
Using a string I marked out a centre line down the length of the stave.
I then drew onto the stave the shape of my bow (using the measurements shown at the beginning of this post).
The first picture is the handle area and the other two are of the limbs.
Marking out the bow
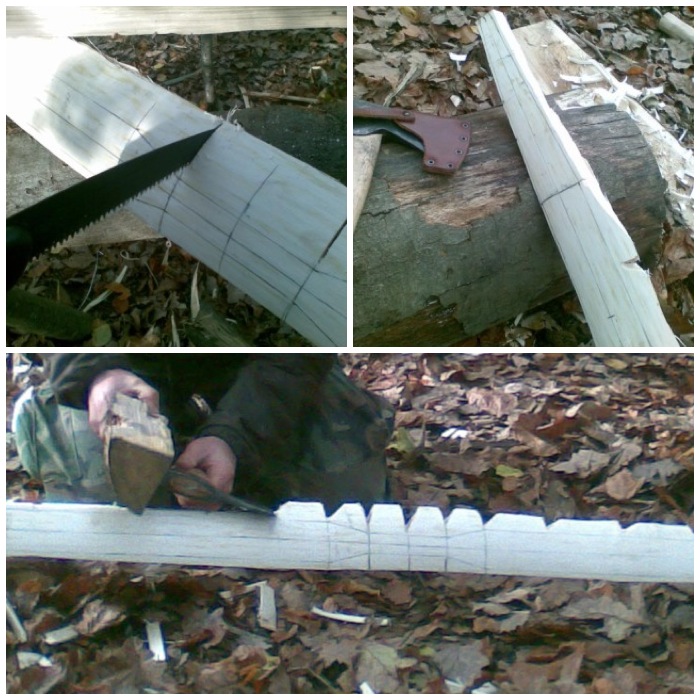
I then sawed stop cuts all along the stave: as a piece of wood is cut out with the axe the stop cuts stop a split running through the whole bow, meaning you only cut out the wood you want to remove.
Here you can see the stop cuts. Note too how the bow is wedged against a tree and resting on a stump and the axe is in front of me and at 90 degrees away from my body for safety.
Stop cuts and axing out
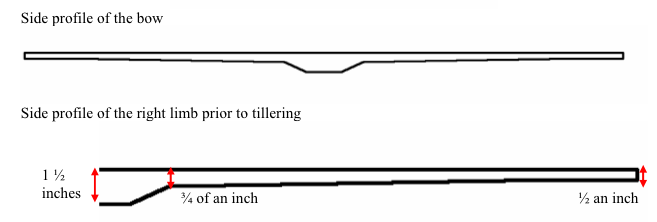
Once the top profile is cut out the side profile is next.
Using stop cuts again I roughed out the stave until I got the basic shape of the bow. The drawing below shows the shape of the side profile (I didn’t take a picture of this I am afraid).
Side profile
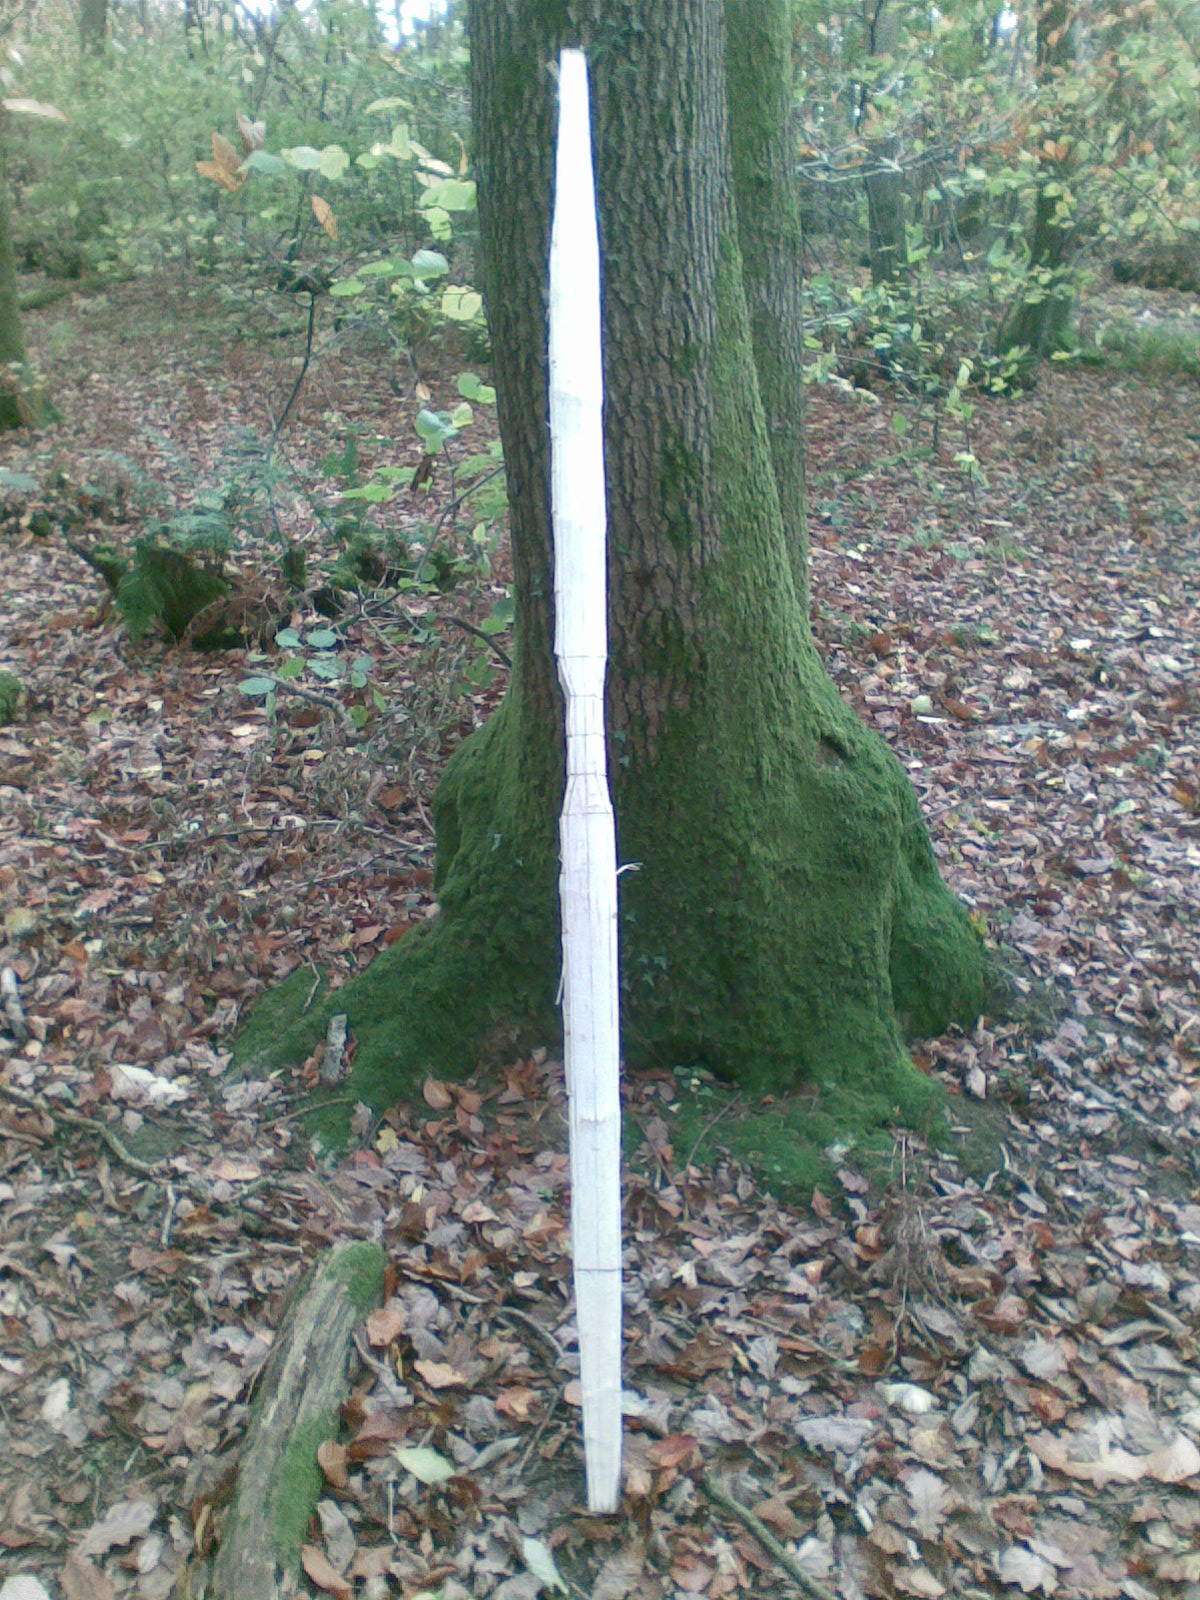
A finished blank stave ready to be seasoned for a while.
Blanked out bow ready to season a bit
At this point I left the bow to season for a month: one week in my garage and then three weeks in a cool spot in my house.
This allowed the wood to season enough to start the fine work.
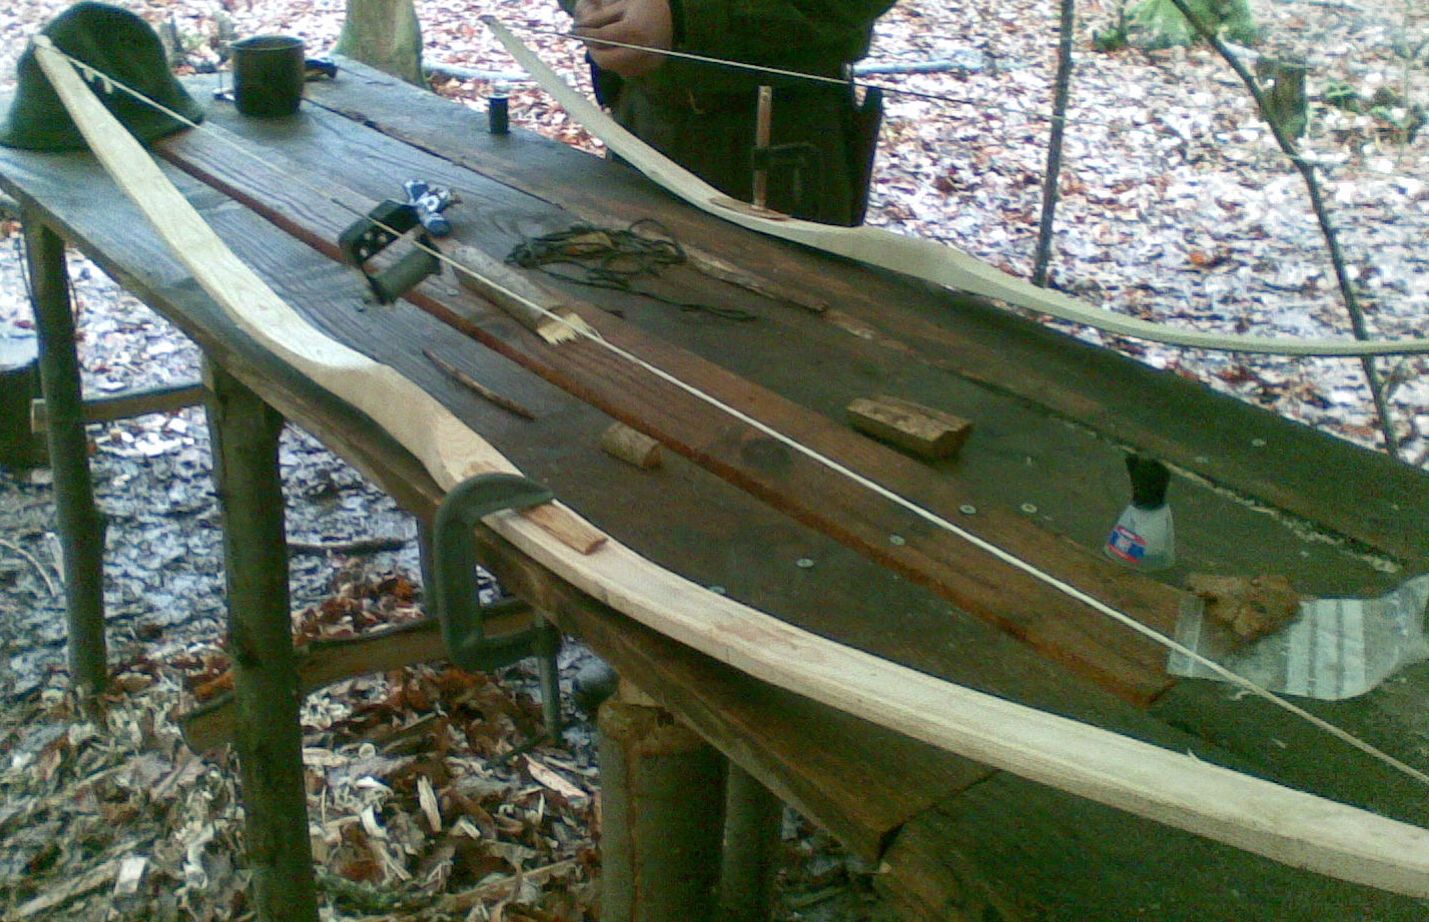
In the pictures below the bows are clamped down for the fine work.
A clear picture of the bow’s rough profile can be seen in the bottom picture.
Clamped out bows ready for fine work
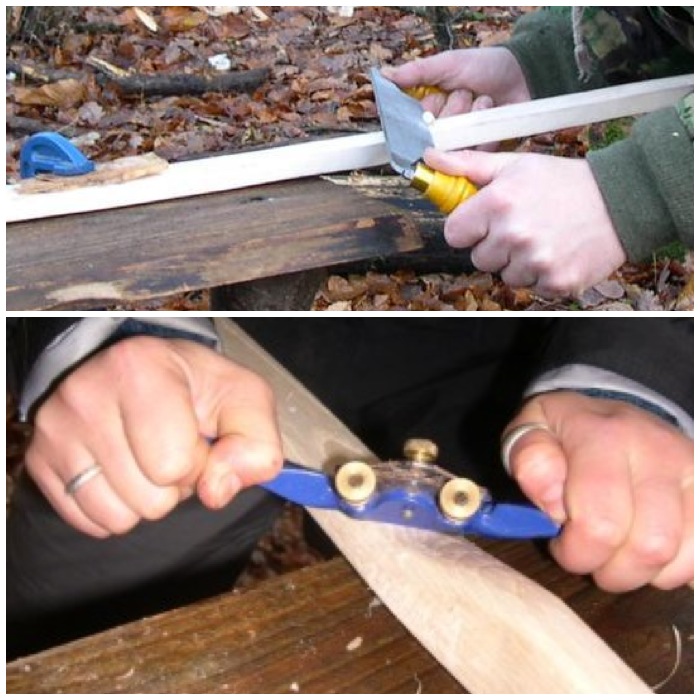
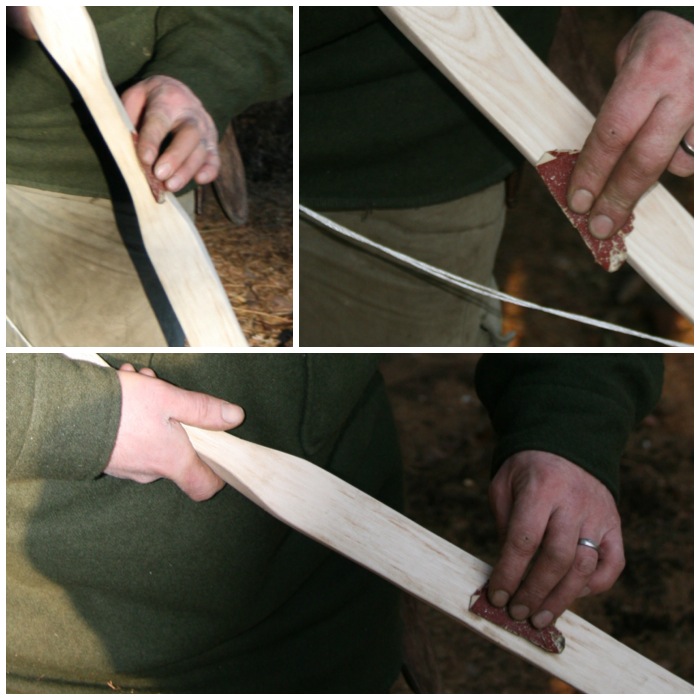
To begin with I used a draw knife and then moved onto a spoke shave.
Having the bow clamped allowed me to use these tools safely and with precision. I took the pictures so the hands you see aren’t mine: the top picture is Phil Brown of Badger Bushcraft using the draw knife and the bottom picture is Mollie Butters of the Field Farm Project using the spoke shave.
Draw Knife and Spoke Shave
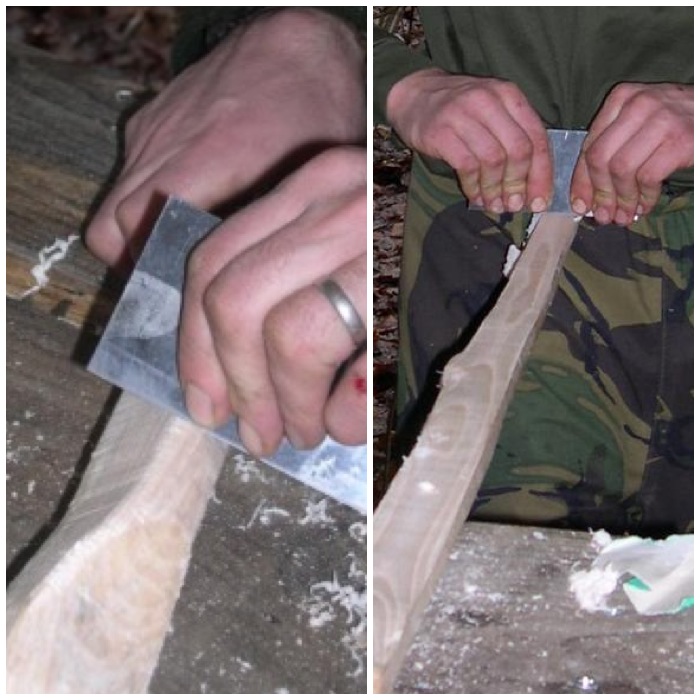
For very fine shaving I used a cabinet scraper. With all of these tools I only worked on the belly and the sides of the bow working down to the tips of each limb. I was looking to get a neat taper effect from the handle to the tips as shown in the plan in the picture on the bows dimensions.
Cabinet scraper taking off minute amounts
Tillering
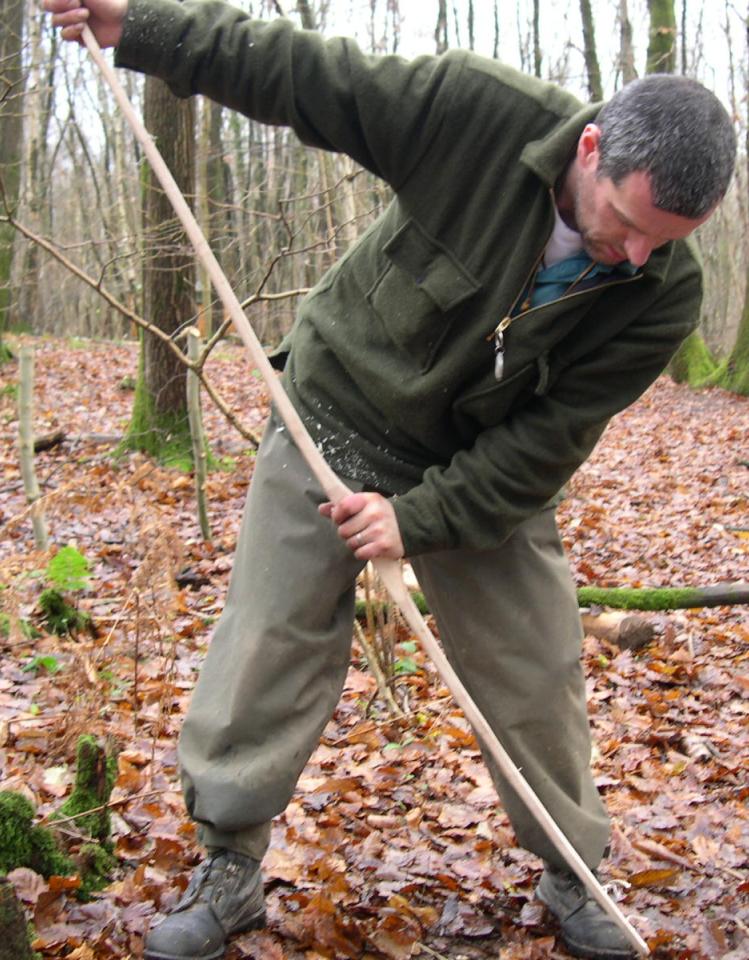
Throughout this fine work I tested the bow’s flexibility by floor tillering it.
This involves pushing down on each limb to test its flexibility (check out this thread on the Primitive Archer site on floor tillering).
I was looking for an even flexibility in each limb.
Hand Tillering to begin with
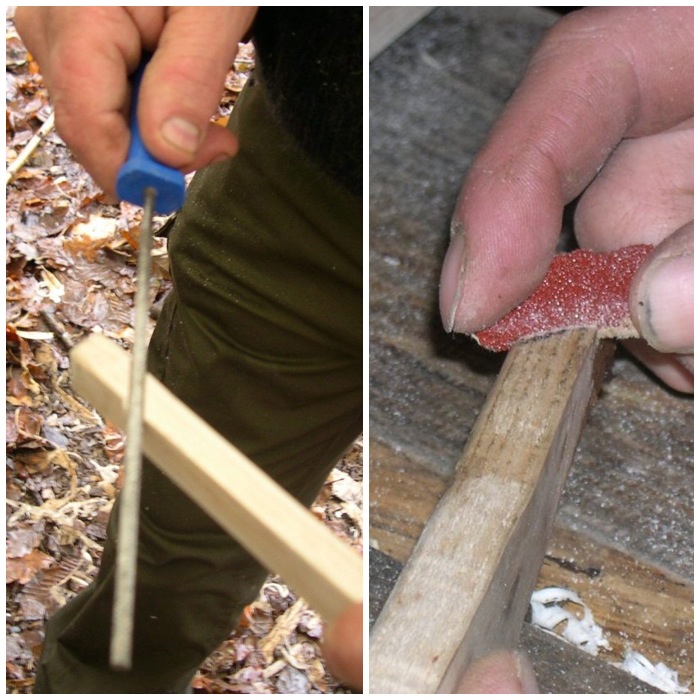
Once floor tillering couldn’t tell me any more I needed to move to the tiller stand, so I carved out the knocks on each limb to hold the string using a round wood file.
The knock needs to be at an angle of 45 degrees and deep enough so that the string doesn’t slip off.
Finally I sanded the knock so that the edges would not abrade the string.
At this stage the bow was not put under any tension by the string. This was so that I could train the bow to bend incrementally by using the upright tiller. Putting the bow under too much tension would lead quite quickly to it snapping or cracking.
Dick Baugh wrote a good article on tillering on the Primitive Ways website that is worth a read.
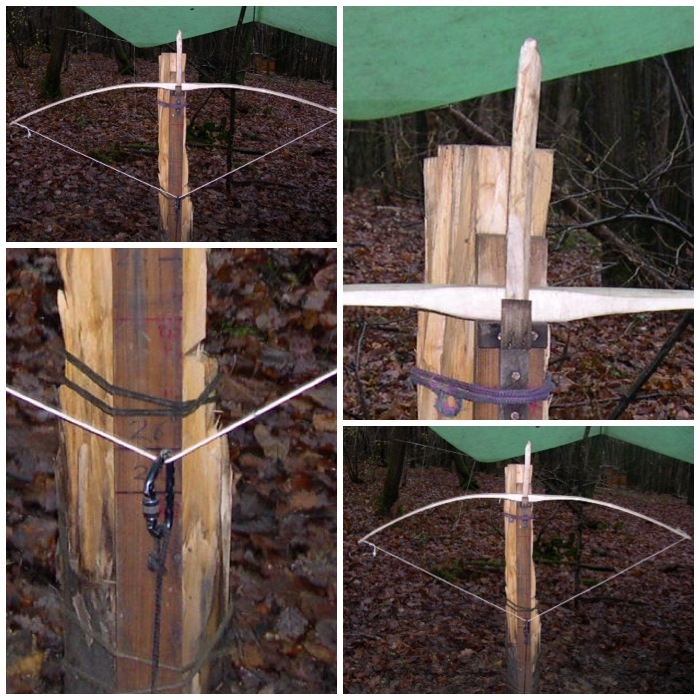
Ready for the Tiller Bar – No Brace Height
I then placed the bow on the tiller post and in increments slowly bent it, carefully watching the curve on each limb.
First Tiller
The following pictures are of the bow during the tillering process. After viewing it each time I would return to the workbench to scrape wood from areas of stiffness using the cabinet scraper or spoke shave. The close up pictures show in detail the top and bottom of the tiller when set up.
Further Tillers
The shape of the limbs can be viewed easily on the tiller: here I could see that the right hand limb was still stiff and needed working on.
Left limb is good – right limb a bit stiff
The next stage involves shortening the bow string so as to raise the brace height (the height of the string above the handle when the bow is strung up) then testing the bow on slowly increasing brace heights on the tiller. To do this you have to unstring the bow (at this stage that simply means sliding the loop off the knocks and loosening the Timber hitch) and adjust the Timber hitch to shorten the string.
To re-string the bow after the Timber hitch has been adjusted and re tightened, hold the bow with the bottom limb (the one with the Timber hitch) trapped against your instep of your foot. Have the back of the bow facing you and with your left hand (if you are right handed) firmly hold the handle, then with your right hand slide the loop back up to the knock.
The first brace height I set the bow at was very low (the string touching the handle) as I only shortened the string by about an inch. A good site explaining how to string a bow can be found on the Archery Library website.
Bow Braced very slightly (string just tensioned)
A two inch brace
A 2 inch brace
Tillering by hand with a two inch brace
Checking the feel of the bow as I went on – Still a 2 inch brace
Final brace about six inches. Tillering now complete with evenly curved limbs
Six inch brace
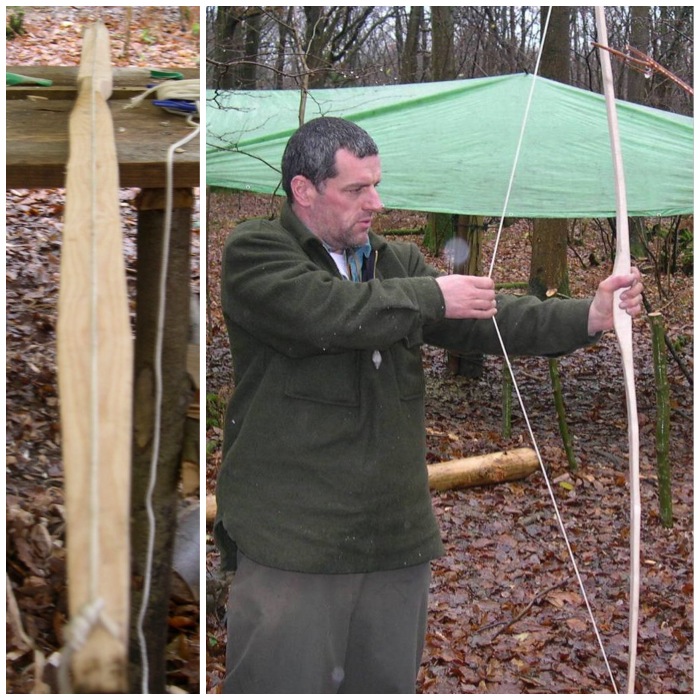
After a bit of tuition from Scott it was time to take my first shot and I even managed to hit the target.
Preparing for the first shot
I did not pull a full draw on the first shot in case the bow split.
Arrow away
In the picture below you can see one that did not make it: Charlie’s bow had developed a hingein one limb that gave under tension.
I think he took it in his stride.
One that did not make it – Charlie took it well
String making
The next stage is to make the string for your bow.
Traditionally natural materials such as sinew, rawhide, plant fibres (nettle) or linen were used but we used modern materials for our bows. As modern string such as Dacron B-50 (50lb) is non biodegradable there is less chance of the string breaking, which means less chance of your bow breaking.
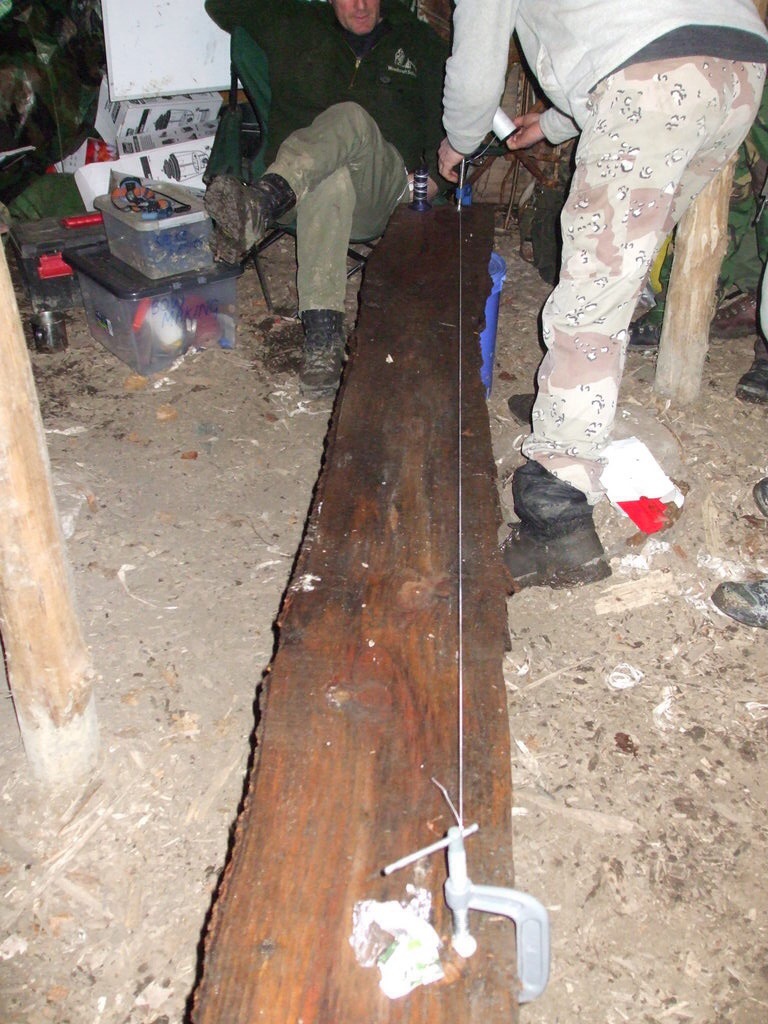
To make the string we used a plank with a clamp at either end, at a distance from each other of 18 inches longer than your bow length. Tie one end of the string to a clamp and run the string around the other clamp, then around the first one again. Keep doing this for five more cycles.
String making set up
Cut the string at each clamp and you should be left with two sets of five strings.
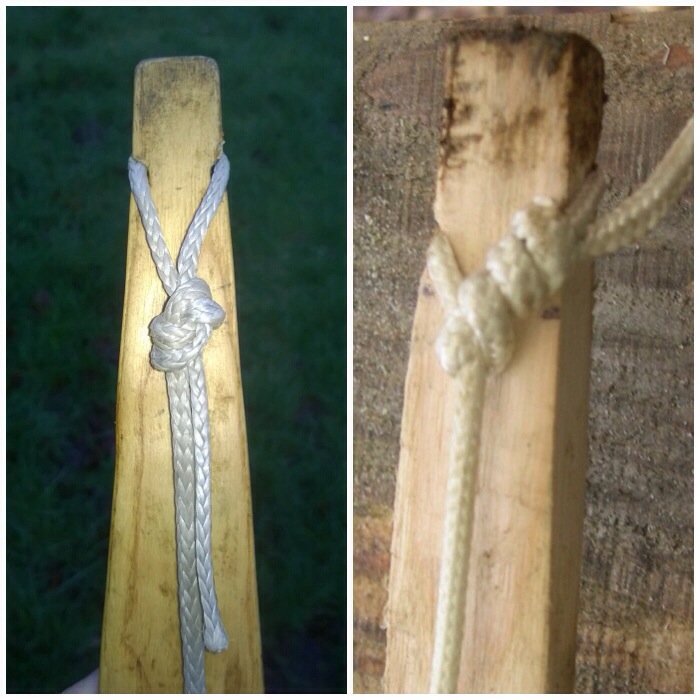
Then follow the steps in Sam Harper’s site Poor Folk Bowsto make a Flemish string. I did not document this step but he has a good tutorial on making the loop, twisting the string together and making the timber hitch at the other end.
Stringing up
The new string is attached by sliding the loop over one end down past the knocks and attached at the other end with a Timber hitch. You need to adjust the Timber hitch so that the string length is the correct length for the brace height you want. When you have the string set at the correct length, restring the bow and clamp it to a workbench.
The string now needs to be ‘served’ in the centre of the bow where the arrow will be knocked. The Archery Talk forum has a good thread on serving a bow string. Have a look, as my pictures on this part of the process are not the best.
Bow clamped ready to serve the string
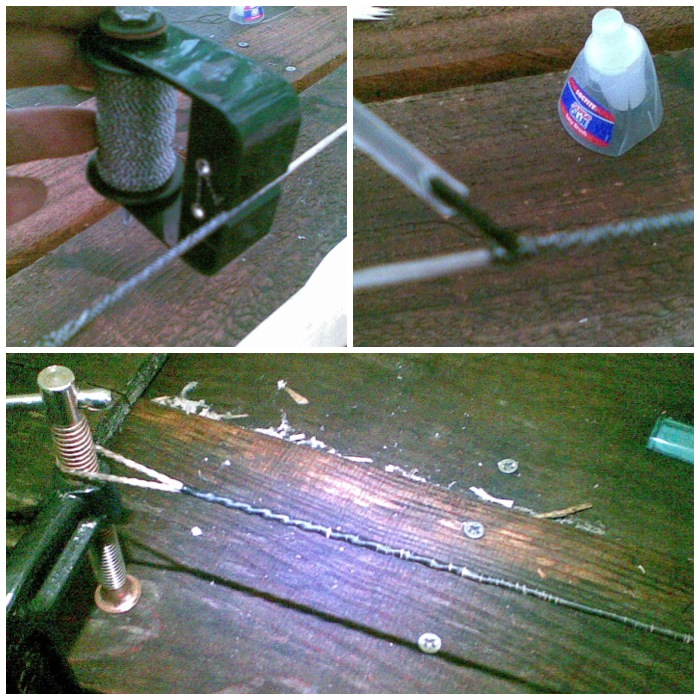
The serving of the string is basically a whipping to keep the individual pieces of string that are loosely wrapped around each other together and provide a firm area to knock into your arrow. I also served the top of the string near my loop to stop it unraveling. The little device you see in the pictures is known as a Serving Jig. After finishing serving the string I put some superglue at the end to keep it in place
Serving the string
The finished loop needs to be wide enough to slip off the knocks but small enough to grip them when in place. In the picture on the left below you can see that it has been served for about 12 cms right up to the loop. The bottom limb just needs a timber hitch, though I did twist the end as if making cordage to keep it neat.
Finished bow string
Final touches
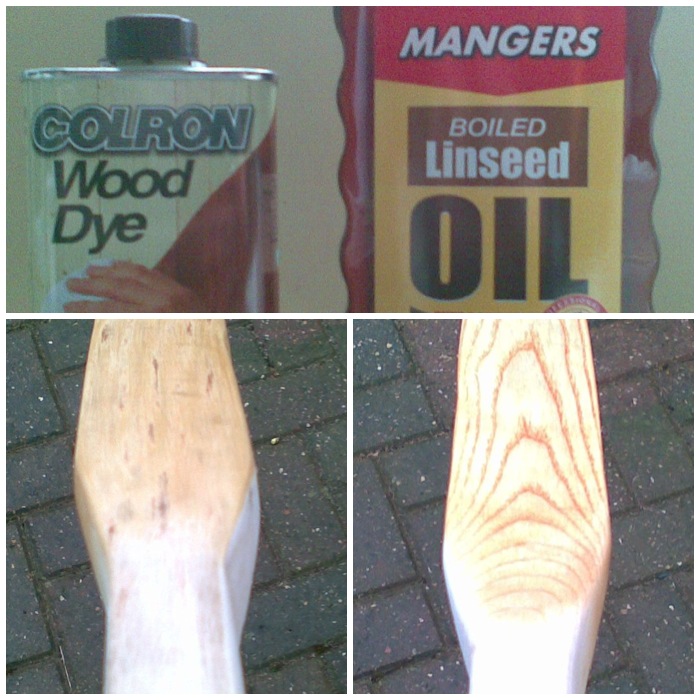
The bow was now ready for some final sanding and oiling.
Ready for the final touches
Using various grades of sandpaper, I sanded the bow down to get rid of any marks and sharp edges.
Lots of sanding
To protect the bow I stained the wood slightly then applied a mixture of boiled linseed oil and white spirits (50/50 at first). After this had dried I reapplied more oil, but with less white spirits each time until finally I just applied oil.
Oiling and staining
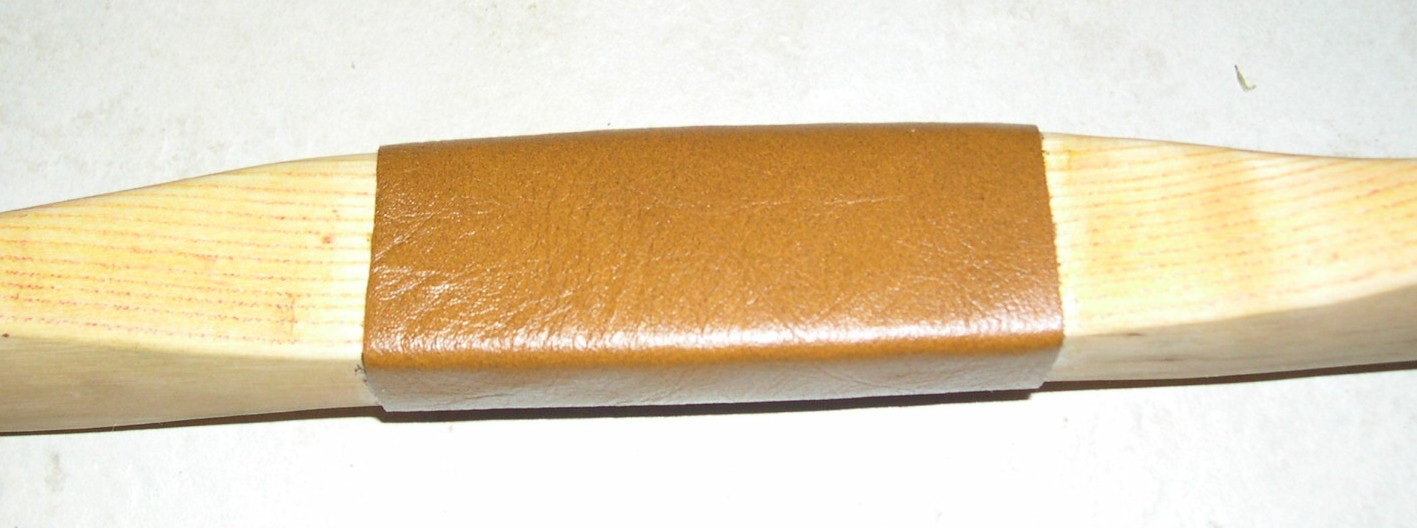
Lastly, I glued on a small leather handle. I thought about stitching one on but wanted to keep the clean line of the flat leather.
Simple leather handle glued on
The completed bow.
One Finished Ash Flatbow
This bow has been used by scores of my Sea Cadets over the last six years and still shoots as sweet as the day I finished her.
I enjoyed making this bow, it was my first but it was definitely not my last.
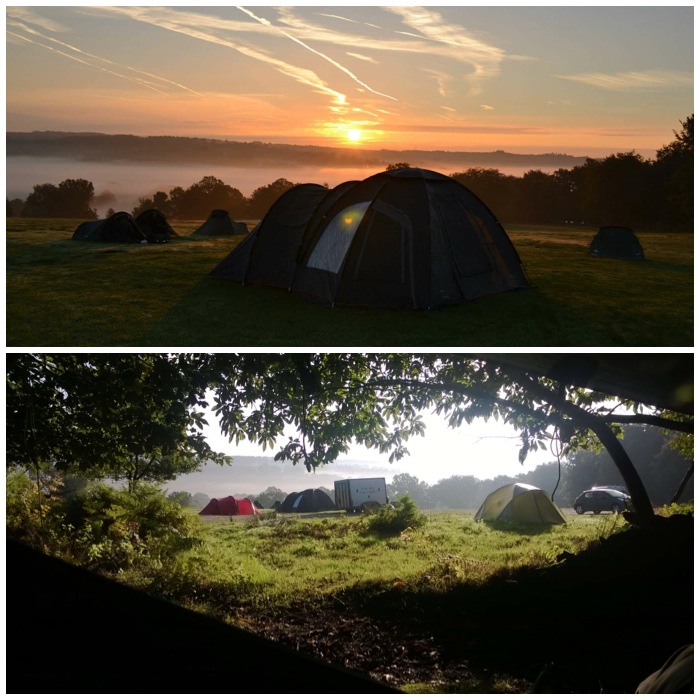
Early October brought me to the beautiful Pippingford Park in the Ashdown Forest. This is a military training area that is not open to the general public and so makes for an ideal place to run adventure training activities. This year London Area Sea Cadets decided to hold their annual Chosin Cup Adventure Training competition here.
The beautiful Pippingford Park in the Ashdown Forest Top picture courtesy of the Welsh Harp boat station. Bottom picture is the view from my hammock.
Nine teams took part this year (eight teams from London Area and one team from Southern Area). Each team has up to six cadets and the weekend consists of a navigational course with stances for the teams to complete. Points are awarded for technical skills, leadership, team work and overall enthusiasm. The stances are a mixture of seamanship and improvised skills. There are rigging type activities as well as other rope skills alongside tests of fitness and problem solving.
My Commanding Officer Paul Townsend explained the Chosin Cup nicely on the City of London web page :
A team of six Cadets competed in the annual London Area Adventure Training Competition. This is known as the Chosin Cup after the actions of the 1st US Marine Division, supported by 41 Commando Royal Marines, around the Chosin Reservoir in November 1950, during the Korean War. Vastly outnumbered by Chinese troops, and in mountainous terrain where the temperatures dropped to minus 37C, 1st Marines fought their way out of an encirclement.
Well, brilliant though the London Area Adventure Training Team are- they couldn’t manage minus 37C and the People’s Liberation Army failed to oblige, on this occasion. Nevertheless, the Cup consists of a gruelling, and very muddy, series of tests of brains, brawn and stamina. Raft building, orienteering, assault course, rope work and other challenges- some conducted in darkness. Our youngish team, including Gemma Knowles, aged 12, did brilliantly to come third out of the eight London Area teams.
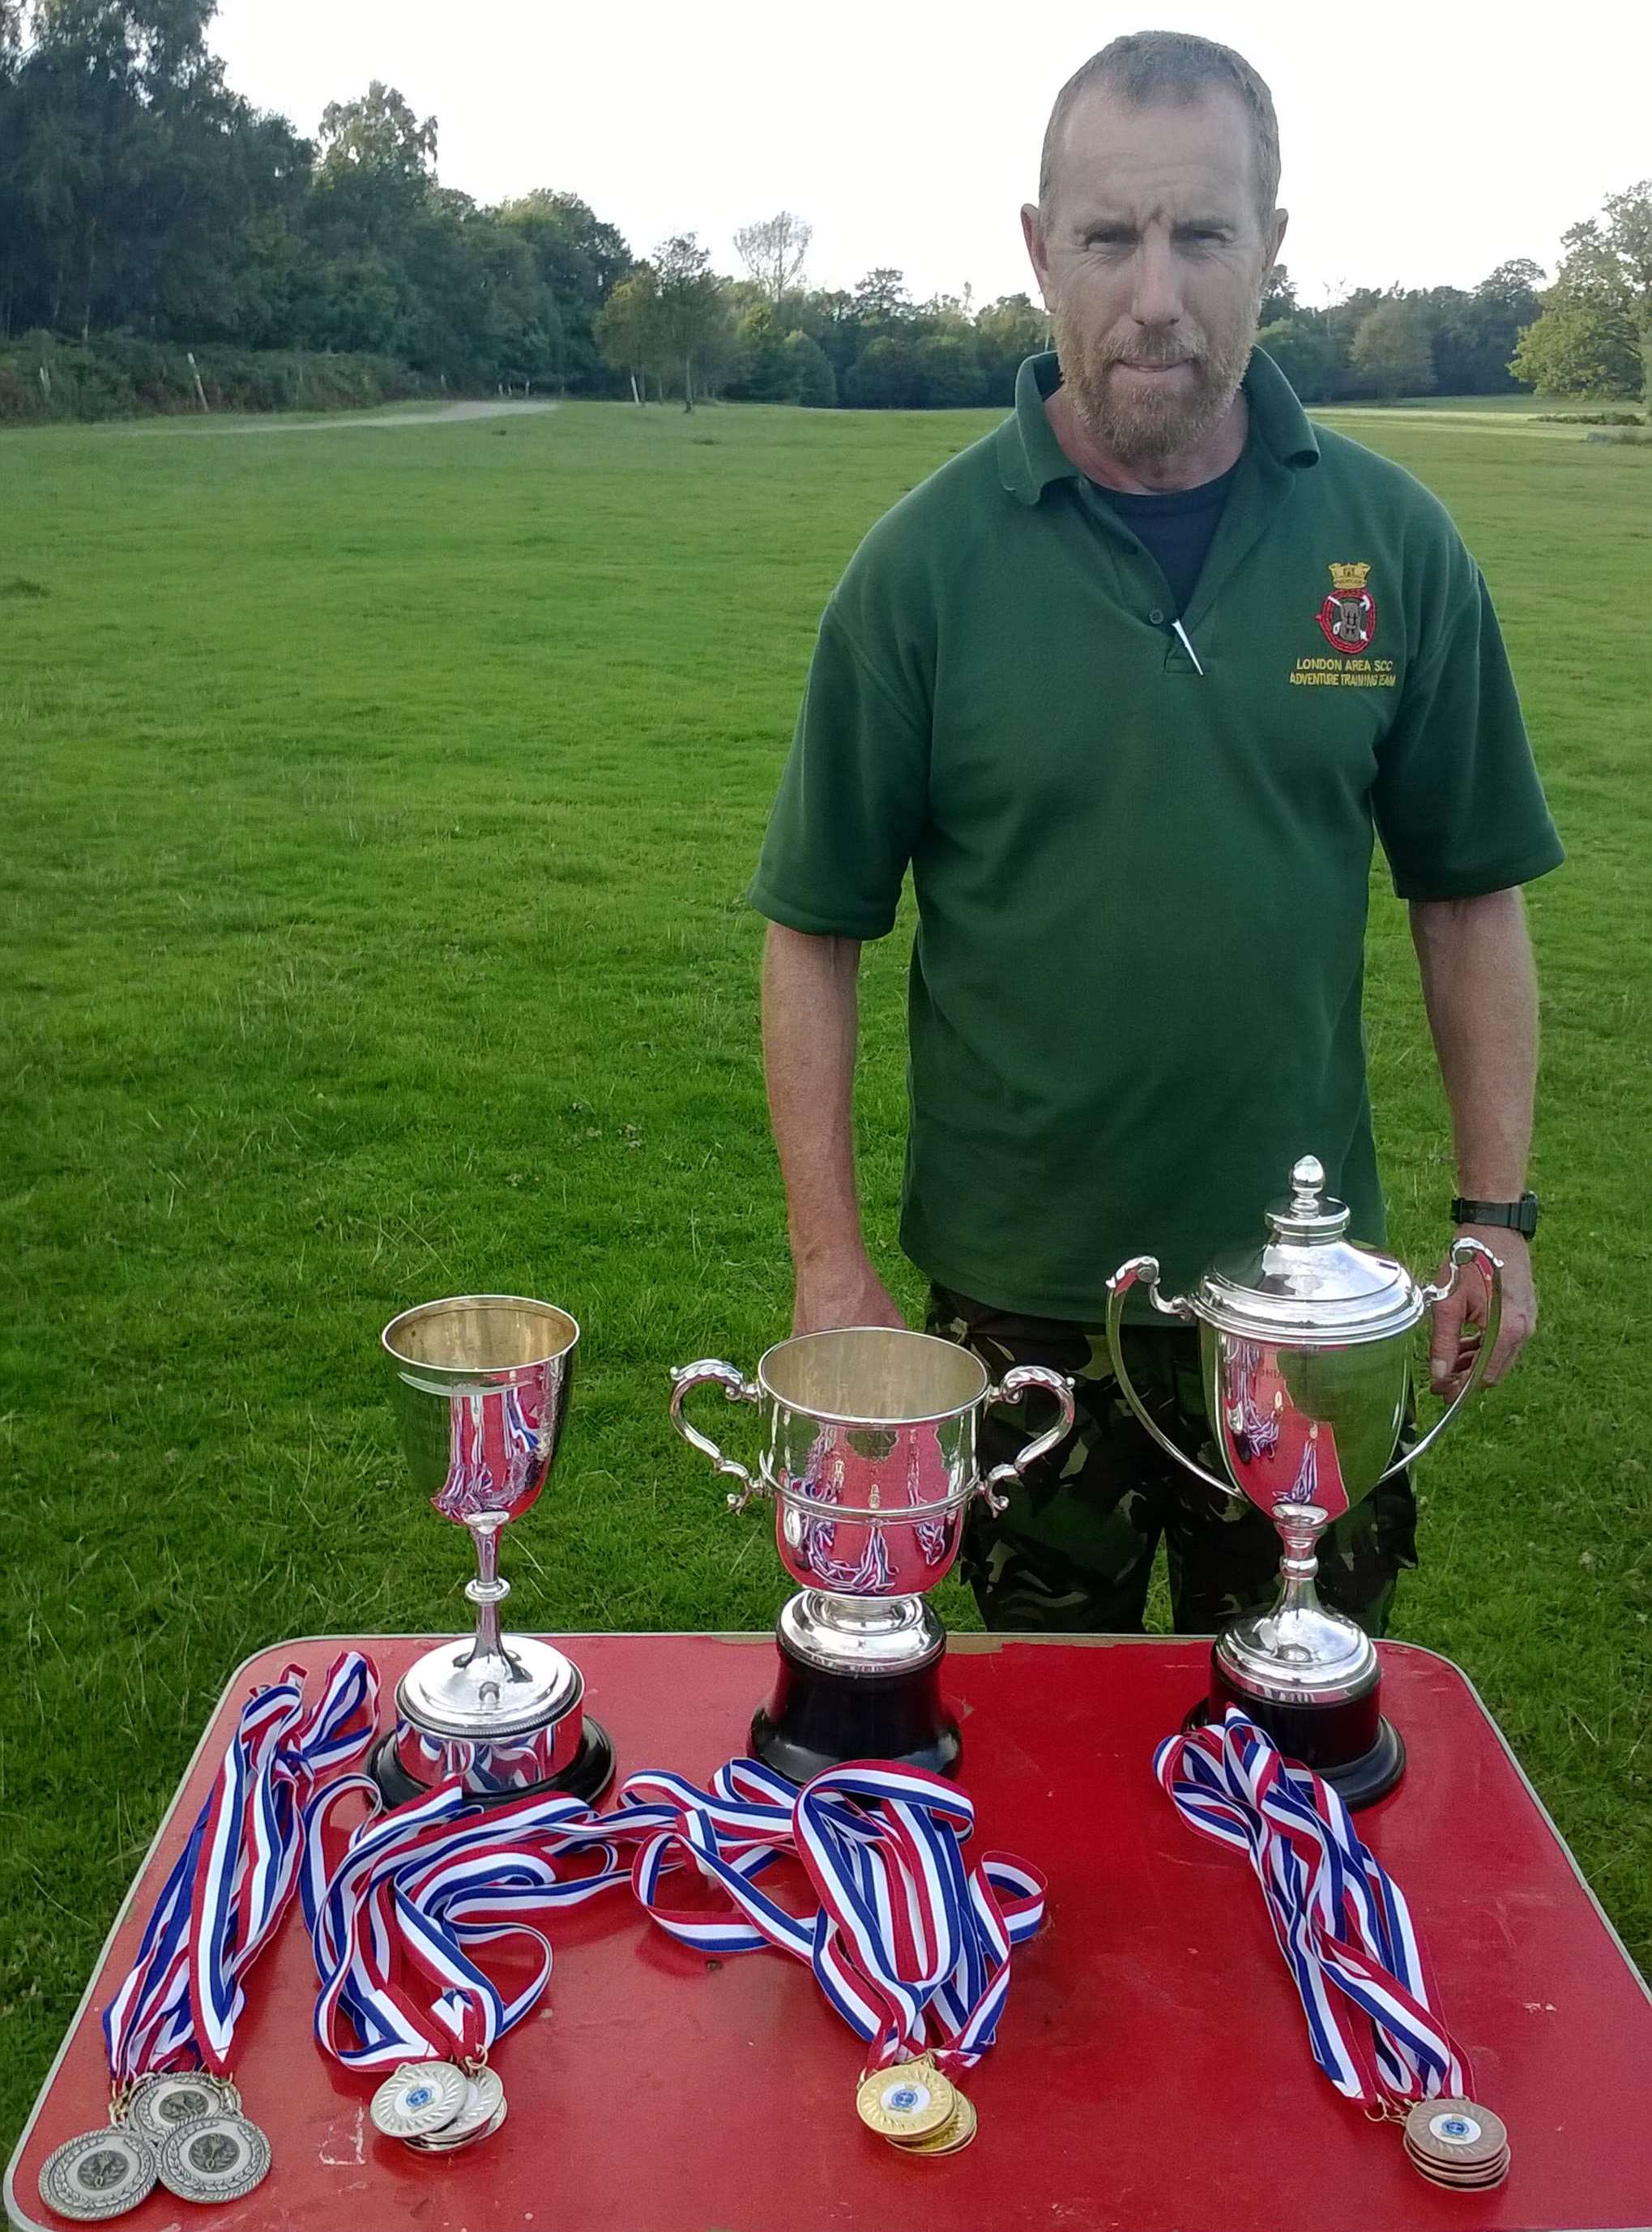
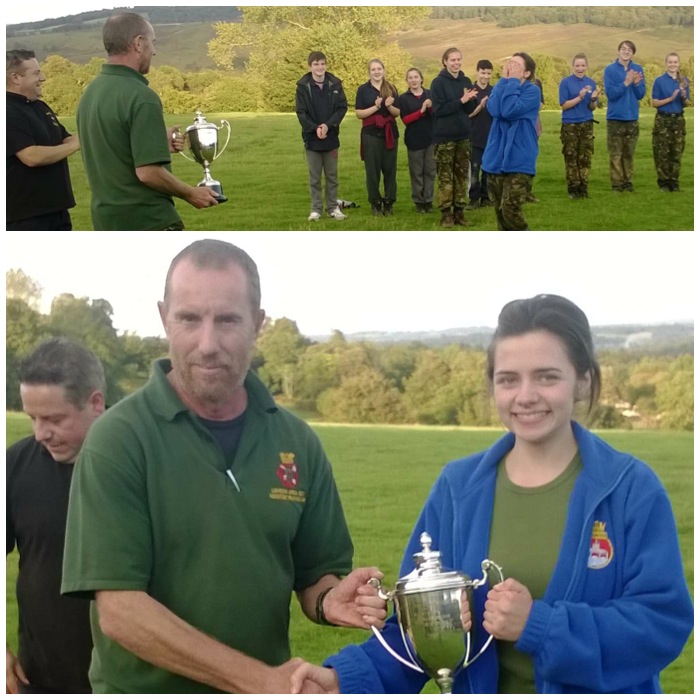
The Trophies
I arrived at lunch time with Graham Brockwell, Perry Symes, Charlie Brookes and John Kelly to help set up the event. The cadets arrived in the early evening. They were given a kit check and then some six figure grid references to plot on their maps and so find their bivvy site for the night.
While I was driving around the park on the Friday evening two stags shot out in front of me and proceeded to lock antlers furiously with each other. I tried to get a picture of this but my phone could not cope too well with the darkness – plus my hand was shaking a little 🙂
Night arrival
I ended up sitting out in my hammock chair for most of that evening in the woods to stop the cadets from wandering too far off course. On this course the staff have to do a lot of waiting around for teams to appear, then there is a burst of activity and then it is time to settle down again. As you can see our Alan Lewis has mastered the art.
A lot of waiting around
Meet a few of the team. Graham had been given a Pith helmet as a Father’s day present and in no time we all tried it on. I think the guys were all born in the wrong century and should have joined the army (though I am not too sure about Sarn’t Big Yin Kelly 😉
Meet my colleagues Top Left – Sarn’t John (Big Yin) Kelly Bottom Left – Sarn’t Major Perry (Smiler) Symes Far Right – The Honorable Gentleman Explorer Major General Graham (Ever So Mad) Brockwell
The Saturday starts out with some team planning and finalising of route cards before setting off. This year we kept the cadets within the military training area concentrating on micro navigation and lots of stances to test their team working and problem-solving skills.
Lots of team planning and quizzes
I managed to get out and about and had a great time spotting the many different fungi that can be found in the park. On my travels I stopped off at any stance I came across to see how things were going along. At one stance I found Dave Lewis and Paul Townsend and quickly spotted that Dave had his small hammock set up. As I said at the start there is a lot of waiting around so it was time for a quick lie down:-)
A view from Mr Dave Lewis’s day hammock – Cheers Dave
When the next team arrived it was time to get up and get some pictures. The cadets had to get the small blue box into the large brown box without entering the rope circle. They had been given lots of rope, poles, and various blocks and tackles to do the job. This team though elected to try out an alternative method using just rope and an open karabiner. Unusual, but it worked.
Stance – Sealing the radioactive waste
My friend and fellow bushcrafter Charlie Brookes ran the archery stance. The cadets were all given a little practice and training before shooting a marked round.
Archery
In between the stances the cadets would find time to heat up some food. As far as the staff went it was a case of grabbing some food on the go but Dave and Perry put together a midnight barbecue for all the staff when the cadets had gone to bed.
Making time for some food – Top picture courtesy of City of London Unit
On the Saturday evening our colleagues from the Welsh Harp Boating Station arrived with lots of canoes and raft-building equipment. The cadets had to move camp after they had finished all the stances and then prepare for a night navigation exercise through the training area. This exercise involved a lot of night-time map work and crossing a lake in canoes in the dark. What they did not know was that they were not heading back to their tents when they finished.
I did not get any pictures of the canoe crossing but it all went very easily as the cadets are quite at home operating on water.
The Dockers arrive
Dave Lewis managed to get a bit of bushcraft in and got the evening fire going while we were out doing the night navigation.
Getting the evening fire going
The cadets were told to head to a particular spot in the woods where they were handed a couple of tarps per team. They set the tarps up and eventually bedded down for the night. Thankfully I was able to retire back to the staff area where my nice comfy hammock was waiting for me.
Camp set up on the Saturday for cadets and staff
Sunday was another day of activities. All the teams had to build themselves a raft and row out to the centre of the lake and back again. Some made it, a few rafts did break up when they started rowing, but they all had a great time.
The Welsh Harp Station Dockers also put together an excellent video containing video and pictures of this event – Chosin Cup – Raft Building
Raft building – Pictures courtesy of the Welsh Harp Boat Station
Charlie Brookes ran the fire-making stance where the cadets had to build a small fire after gathering all the materials to get it going. They gathered all the tinder and twigs to get the fire going (apart from some hay and char cloth to start it which we supplied). They used firesteels to light the charcloth which they then used to blow the hay into flame. They had to build a fire as quickly as possible so that the flames would burn through a piece of birch bark that was attached to the string you can see in the pictures below. Most teams burnt through the bark and string within a minute or two of starting their fires.
Fire making stance – Pictures courtesy of Charlie Brookes
Paul ran the seamanship stance on the Sunday where the cadets had to build a tripod, known as a Gyn, to be able to lift a heavy log off the ground. This is a skill that the cadets learn in their units and works well when we are running these competitions to assess their team-working abilities.
Seamanship stance – The Gyn
While all this was going on I spent most of my time back at the troop shelter we had set up as our HQ. In between dong admin I spent much of the morning drying out 20 or so tarps that the cadets had used the night before so I did not get to see much of what had been going on.
Work back at HQ – Admin and drying out more than 20 tarps
One of the Marine Cadet instructors, Kev Lomas, set up an excellent Endurance race. I only got to see the cadets as they came back from it but they all seemed to have a great time.
Endurance race – in with a splash – Pictures courtesy of City of London Unit
The route for the race was set up through the trees and over the local stream.
Endurance race- Over and under – Pictures courtesy of City of London Unit
As you can see not everyone got across dry. Jacob Leverett took a great video of cadets from Sunbury & Walton, Twickenham and Feltham Units running the course – Endurance race video.
Endurance race – Over and in – Pictures courtesy of City of London Unit
After everyone had gotten cleaned up and packed away it was time for the awards.
Leading Cadet Jess Edwards from Enfield Unit was the clear winner of the trophy for the best team leader of the weekend.
Team Leader Winner – LC Jess Edwards (Enfield Unit)
We had one team from outside of London Area on the competition, from Guildford RMCD Unit. As they are not in London Area they are not eligible to win the Chosin Cup but we do have a trophy for the winning visiting team. Even though they were the only team from outside London Area this year they did come third overall so well deserved the trophy.
As City of London Unit came fourth overall they were the third place London team so they collected their certificate and medals as well.
Guilford RMCD Unit from Zulu Company Royal Marine Cadets – Winning visiting team City of London Unit – Third place overall
Second place went to Bexley unit and first place to Enfield Unit. City and Enfield are both in Northern District, to which I am attached, so I was very pleased with the high scoring of our teams in the competition.
Bexley Unit – Second place Enfield Unit – First place
So ended a fantastic weekend. It would not have been possible without the dedication of all the staff involved in its organization, the staff training the cadets up over the year and the cadets themselves who worked hard and, as you can see from the pictures, also played hard.
Back in August of 2012 at the BCUK Bushmoot I learnt how to make a Bhutanese Bow with Wayne Jones of Forest Knights. As far as I know Wayne is the only instructor in the UK running classes in making this type of bow. I hope he runs another one at this year’s Moot.
The Bamboo Bhutanese Bow
This is a quick bow to make when you have an instructor like Wayne to guide you. The bow is made up of two pieces of tapered bamboo joined together in the middle by some sort of cordage or tape around the handle area. I tried to take pictures of all the steps but must admit to missing a few as I got so wrapped up in the whole process. To make up for this I rehandled the bow at home and took some pictures of the missing steps.
I have done a bit of research about this type of bow. It seems that archery is a national sport in Bhutan with many villages in the country running archery competitions. Kids as young as three are taught how to use the bow. Due to the nature of bamboo the outer layer of the bamboo becomes the belly of the bow and the inner part becomes the back: as the outer layer is very hard it will not take the expansion forces exerted as you draw the bow (it will crack), but as it is a grass the inner area (which is fibrous) is more flexible.
Below on the left is a picture of the finished (reworked) bow and on the right Spikey is holding the tube of bamboo we used to make it.
The finished article and how we started
Wayne Jones researched the bow for me as well and found this in the Bowyers Bible: ‘Unless the bamboo wall is unusually thick it’s best to overlap two billets at the grip secured by a couple of rivets made of nails or dowels, the grip is then wrapped with rawhide, sinew or even tape. Overlapping stiffens the midbow and increases poundage per bow length. Such bows can be made in minutes. Even though “quickie” bows, they are excellent in every regard.
This design is a good choice for kids’ bows: quick and easy to make, and fairly indestructible.’
Wayne brought a supply of large bamboo to the Moot for us to use. With this type of bow you need to use very large bamboo so that when you split it into quarters you get fairly flat limbs. I do not know the type of bamboo that was used or where Wayne sourced it but I am sure if you were to ask him he would help you.
In the first picture below Wayne is showing us two limbs made from one piece of bamboo he had carved earlier. As bamboo gets thinner as it grows higher you need to make both limbs from the same piece of the column to ensure both limbs are of the same width and thickness.
I cut out a section of tube that was 103 cms long to begin with so that when the two limbs were joined together the bow would be my height. NB I am not 2m 6cms tall, but as the limbs overlap at the handle these measurements produced a bow of my height. You will need to experiment for yourself.
Finished limbs and start of the bow
I used an axe to batton out the bamboo into quarters and selected the best two pieces to work with. I made sure when I was battoning that I kept the blade of the axe at 90 degrees to my body. This would ensure that if the axe slipped out of the split it would swing away from me.
Battoning out the limbs
Here you can see many of the battoned-out pieces of bamboo ready to be shaped into limbs. You can clearly see the node plates on the inside of each limb, which keep the structure rigid. These need to be knocked off and eventually filed flat.
In this picture you can see Mark using the back of his axe to knock off each piece of the node plates.
Breaking the node plates
To make full use of each limb it is best to use string to mark out its shape. Allow an extra half centimetre or so so you can finely trim the limb after you have axed the shape out. I made the handle area (thicker end) about 5 cms wide and the tip of the limb (thinner end) about 3 cms wide. Once you have blanked out the first limb you can use this one to mark out the second limb so it is the same shape.
Using string to draw the limb shape
Keeping the limb to one side of my body, I experimented first with using an axe to cut the excess off but soon swapped it for a large chopping knife loaned to me by my friend Sargey (Andy Sergeant). This was so sharp with such a good weight behind it that I soon had the first limb blanked out. I then used a smaller knife to trim the limb down to the line I had marked with the string. I used this finished limb to mark out my second limb and repeated the whole process until I had two roughed-out limbs.
Shaping the limbs
I used various tools such as my Japanese rasp, a cabinet scraper, a small knife and wood files to smooth out what was left of the node plates and to curve all the edges of the limbs. If you do not smooth off all the edges, you don’t just risk a splinter, there’s a good chance your finished bow will develop a split when you draw it.
Smoothing the plates
Take your time smoothing the plates and edges down.
Smoothed plates and sides
The outer layer of the bamboo is left untouched and this will become the belly of the bow. The smoothed inner side will become its back.
The belly (left) is left untouched – The back (right) is smoothed
I used a rounded file to produce the nocks to hold the bow string. Make sure you get them the right way round.
Nocks produced with a round file
Make sure the edges of the nocks are sanded down so there are no sharp edges. A sharp edge will potentially cut your bow string and could cause a split to occur.
Lined up neatly and the edges rounded off
When I first built this bow I left the handle area as you see it in the picture below. After shooting the bow I found the handle area just too wide for a comfortable grip.
Ready to work the handle area
I marked out one handle so I would lose 1 cm on each side, making the actual handle 3 cms wide. Then with a sharp knife I carved out the excess.
Mark your handle area on one limb, trim off the excess and then use the first limb to mark out the second limb
I then used the first carved handle to mark out the second handle and carved that one as well.
Trim off the excess from the second limb and you are ready to join them together
To take this picture I got my son Finlay to hold the tape taut and my wife Alison rolled the bow to tape the limbs together.
I used help to bind the handle. Keep the tape taut and roll the limbs
This method ensures the limbs stay in the correct position and the tape is put on as firmly as possible. Once I had the limbs secured I taped up the middle of the handle by myself.
Secure both ends
I find that the tape does not offer a good grip so I put on a leather handle using a common whipping technique.
Finish taping the handle and add any leather for a comfortable handle
Tillering is the process of testing the bow to see if it forms a balanced curve on each limb. Initially we had just a piece of paracord attached to the bow to do this. The tillering stick in the picture allows you to see if the limbs are balanced. If they are not balanced you need to remove a small amount of the inner side of the bamboo using a light rasp or cabinet scraper wherever the limb looks stiffest. This is one part of the process that is very hard to show without taking a whole string of pictures and probably where going on a course and getting one-to-one tuition on it pays dividends. Dick Baugh wrote a good article on tillering on the Primitive Ways website that is worth a read.
Tillering
Wayne supplied some Dacron for our bow strings. I twisted one end as you would do to make cordage and used that to make a timber hitch for one end of the bow.
Timber hitch
For the other end I created a loop using the Flemish twist method. Sam Harper in his blog Poor Folk Bows has an excellent article including a video on making the Flemish twist and the timber hitch.
Flemish twist
The finished bow. This was taken after I had reshaped the handle. I plan to wrap the exposed tape in strips of rawhide to cover them up.
Ready to shoot
I like this bow much better now that I have rehandled it as it is far more comfortable to hold. I think some more of the cadets will also want to use it now because of the reduced handle size.
Shoots well
A nice shot of the bow in action with an arrow in flight.
In action with the cadets – Spot the arrow.
If I could ever source some of this bamboo I would definitely make one or two more. In comparison to my Ash Flatbow and Holmegaard this bow shoots just as well but took only a fraction of the time to make.
If you have further information or links on this type of bow I would love to hear from you.
Around a fire some time last year my friend Kev Lomas asked me about helping out the Royal Marine Cadets (RMC) in his area (Southern Area Sea Cadets) with some Bushcraft. As Kev had helped us in London Area a lot over the years I was keen to help out.
Another reason was that the course would be on the Isle of Wight and there is nothing better than walking through dappled woodland in the Spring on a sunny day on the island (there are no deer on the island to eat all the flowers).
The course was at the end of April this year and the weather was fine and warm. I had a smooth trip over the Solent with with just a little fog to begin with but it soon cleared up.
Beautiful ferry crossing
I went down on the Thursday to set up camp and I am glad I did as it took us all Thursday afternoon and Friday to set everything up. The camp we stayed at was deserted and the woodlands were beautiful – though I did manage to get my heavily laden van well and truly stuck in the mud trying to set up. Luckily once emptied she leapt out of the mud to save my embarrassment.
There was to be about 25 cadets on the course with about 5 instructors. One of the instructors called Sgt Tony Moore had attended the same instructor course with Woodcraft School that I had completed so it was good to swap stories. (The chicken below, by the way, is a plastic one we found in the woods.)
Prepping the camp
When the cadets arrived they were briefed on the activities. I think some were a bit disappointed to find out I was a Blue Jacket (a Sea Cadet instructor) rather than a RMC instructor but when I began describing all the skills they would cover and how these could cross over into their field skills they started to come around (I think also that it helped when Kev mentioned I was ex-Airborne).
Briefing time
We had the Padre around for the weekend and he was keen to be involved. As well as trying out a normal hammock he was very taken with my UK Hammocks EDC chair.
The Padre was around all weekend and keen to take part (in a relaxed sort of way)
A tradition in the RMC is to introduce the cadets to the Coca Cola tree. Many of the older ones had seen this before and sniggered at the back watching younger ones’ confusion as Kev pulled the ‘tree’ out of the ground all the while explaining how rare it was 🙂
The rare Coca Cola tree
Many of the cadets brought their own knives along so we had a good chat about the pros and cons of the various different types. I then issued some fixed-blade bushcrafting knives for them to practise with.
Knife class
They all managed to make wedges and learn the art of battoning wood, making the kindling they’d later use for their fires.
Knife skills
They used firesteels to get their fires lit and then we boiled water in our Kelly Kettles for a brew. I love using the term ‘brew’ to Marines as you can see the grimace appear on their faces. To them the correct term is a ‘wet’ and they are very proud of the difference (no idea why).
Make a Fire – Make a Brew (sorry I should say a Wet)
We bought in some mackerel and the cadets prepared them and made up some Ponassing rigs.
Ponassing class
A bit of a scrum to be fed but they all enjoyed it.
Enjoying the fruits of their labour
During the day we went out for a wander looking at tracks and signs. We found some owl pellets, scavenged birds’ eggs and also some early orchids.
Owl pellets
In the woods there were clear Badger trails which were easy to follow. We came across this nice print near their latrine.
Badger print
On the Saturday afternoon we dug up some worms so they could be cleaned out overnight. The next day a quite passable omelette was made with a bit of worm as protein.
Digging up worms for an omelette
Tony had fun showing the cadets how to prep rabbit.
Rabbit prep
As we had quite a lot of fish that was not Ponassed we fried it off in the Muurrika.
Frying up the remaining fish the cadets had prepped
In the evening the staff helped the cadets set up 10 hammocks. This took quite a while but was worth it as some were very keen to try them out. One cadet was about 6 foot 5 inches and was determined to have a go. His head could not fit in the hammock so it was quite a challenge to make him comfortable. He survived the night however, and said it was a relaxing sleep.
We set up 10 hammocks
Again on the Sunday we went for a wander to see was out there in terms of foraging. The cadets were introduced to hawthorn, birch and beech leaves (all tasty in the spring). The small plants we looked at were nettles, wood sorrel, burdock, plantain, reedmace and primrose to name just a few.
Foraging – Primroses
The ranges were an ideal spot to get the bows out.
Arrow away
We also introduced the cadets to the Atlatl.
Airborne Atlatls
You do not often see so many being launched simultaneously like this.
Broadside
I had a fantastic weekend and so did the cadets, based on the feedback I received. I am looking forward to doing something similar with the RMC in London and also with the Southern Area RMC again next year.
A very quickly made bow – It should take anyone competent with a knife and saw about 1 hour to make. The bow is made up of two poles – The larger is the Father and the smaller is the Son. I still have the first Father & Son bow I made about 5 years ago and it still shoots well. I use these bows typically on ranges of less than 20 metres but on a high arc they will shoot an arrow between 60 and 70 metres. Not bad for something made in an hour but only about 20 to 30lbs in draw.
Two Father & Son Bows (Centre & Right) up against my Holmegaard (left)
I was introduced to this sort of bow from Mark of Kepis Bushcraft when he posted a You Tube video where he made one for his son (I have put a link to the video at the bottom of the article). I realised instantly that this would be an excellent tool to use with my Sea Cadets. Funding is always tight so the thought that I could make bows quickly and that they could shoot well got me going.
I was originally told that there was no historical record for this type of bow apart from being created by some locals in the States during the 1930’s to fool some Anthropologists but since have come across these types of bows being called the Penobscot or Wabanaki bow (I have included a link at the end of the article to the Primitive Archer website to give more detail on the history). So far from my reading this type of bow dates back at least 1500 years and comes in a number of different types.
My cadets like to refer to the bow as the X Wing Fighter Bow. I can kind of see why.
The X Wing
This step by step is to guide you through how I make one of these bows. I have tried to make the steps as clear as possible but please leave a comment if you are unsure about any stage.
I do not make them in a primitive way as my aim is to have a useful tool in limited time that my cadets or my own children can use quickly. After researching this bow more though I will be interested in making one in a primitive way.
Finlay’s choice
Catherine’s choice
The Limbs
I typically use coppiced shoots of Hazel but I will use young Ash if it is available. I have tried Sycamore before but I found that this wood tended to snap easily.
Cut at the base
I cut poles about thumb thickness in diameter (but use what you can find). I always make my cut at the base of the coppice so to stimulate regrowth.
Three Father & Son Bows ready for making
I like the Father pole to be as straight as possible but the Son can either be straight or curved. When making one for myself I cut the Father to the height of my chin. With younger children I normally make the bow just bigger than them. I have found if you make the bow too short they can snap quickly. For the Son I normally cut another pole about two thirds of the length of the Father.
Finding the Belly
I work the Father first. I let the pole roll in my hand to determine the Belly and the Back of the Bow. To keep things simple the side of the pole facing the ground will be the Belly, the side facing the sky will be the Back. If you want to play about with recurve shapes feel free to switch things around.
Mark the Belly
I then mark the Belly side with my knife.
Using a string to measure the length of the bow
I use string to measure the length of the pole
Fold the string
Fold the string in half.
Find the centre
Lay the doubled up string back on (the Belly) the pole).
Mark the centre
Make another cut on the Belly side to mark the centre of the bow.
Mark out the handle
Holding the pole in the middle with the Belly facing me I then make a mark on either side my fist to show where the handle area will be.
Marked out
The marks I have made also help me to see clearly which part of the pole is the Belly at this stage. I want that as I am leaving the bark on this bow and I have found I can lose sight of pen or pencil marks on bark. If you take the bark off then pencil or pen marks will work well.
Getting that Curve
Start at the tip
Work your way to the handle
The next stage is to see if you can make both ends of the pole curve evenly. I usually find that the thicker end of your pole needs to be shaved down. I work from the end of the pole backwards to the handle area shaving off small pieces at a time. I will take off more wood from the tip of the pole than I will from the handle area. You want to have a tapered shape on each limb.
Keep testing the curve
Keep testing the pole until you get a consistent curve on both limbs.
Trim the sides if needed
I do not like to go past the Pith of the wood as this will cause the limb to form a hinge and snap. If you are getting near the Pith then take some wood of the side of the limb.
Keep checking the curve
Trim back the wood on both sides if needs be. If you can get a good curve then stop but it does not need to be perfect (you are not making a Longbow).
Cut the Son to about two thirds of the Father
Cut the Son pole to about two thirds the size of the Father. I have seen though where the Son is very curved that it can be half the size of the Father.
Belly of the Son
I find the Belly of the Son as I did with the Father and mark it. Any trimming of the limbs this time is done on the Back of the bow and not the Belly. This is because the Back of the Son will be attached to the Back of the Father.
Mark the centre of the Son with string.
Measure again using the string
Mark the centre
Checking the curve
Trim the limbs (on the back) and test for a good curve.
Producing the X Wing
Setting up the join
It is far easier to join the limbs if you have some help (thanks Roddy). I sometimes join the poles with a common whipping and sometimes just use strong tape. For this bow I am going to use tape and then at the end make a handle with a bit of whipping.
Joining the poles
With one person holding the two poles (make sure the Backs of each poles are touching) the other person can attach tape. I find it best if you roll the poles rather than wrapping the tape. Tape the whole handle area.
Prepping the spacer
If the Son has a very pronounced curve you do not need to do the next step. Most of the bows I make have poles that are not very curved so I put spacers in near the handle. Take one small branch and trim if necessary.
Battoning in the spacer
Then using a baton hammer the spacer down to the handle.
Trim the spacer
Trim the spacer. Be very careful to keep your hands clear of the blade here. Out in the woods I don’t always have a handy makeshift table to work on.
Last trim
Repeat on the other side and you will find that the Son pole goes into a more pronounced curve.
Secure the spacers
Tape around each of the spacers to secure them (or whip them).
The Nocks
Mark the X
I then lay the bow on its side to work on the nocks. The nocks on the Father pole need for this type of bow to be in the shape of an X. This is to accommodate the string to the Son and for the main bow string. I firstly make an X cut.
Carve the X nock
Then cut the knock out until I get this shape. Make the edges of the nock that are closest to the handle as flat as possible so as to catch the bow string when it is strung.
To make the nock on the opposite side of the pole roll the knife around the pole from the middle of your completed nock and repeat the cuts. Repeat the whole process on the other limb so you have four nocks.
Line up at the middle of the completed nock
Roll the pole
Make the other X nock on the opposite side of the pole
Cut the Son nock
The nock on the Son should be pointing towards the nock on the Father. An X nock is not needed but just a single nock on each side. Remember to repeat the nock on the end of the Son.
Lined up nocks
Here you can see the nocks lined up. On some primitive Father & Son bows the Son limbs are tied of to the Father limbs about half way down the Father limb. I do not do that with these quick bows as I find the poles are not wide enough to incorporate a separate set of nocks half way down the limb. Experiment if you can though and let me know if it works for you.
Stringing up
Keeping things as cheap as possible I like to use Bailer twine for the string (thanks Phil). Either tie the ends off or use tape to seal the ends to stop it fraying. I like to use tape. Bailer twine has the benefit that it does not stretch under tension. Use whatever string that comes to hand but try to find something that does not stretch. In a primitive bow the string could have been made up of sinew broken down into fine strands and woven into cordage.
Tie off the bottom Father & Son limbs
I decide firstly which part of the bow will be the top and which will be the bottom. On the bottom I attach the Son to the Father with string. Use knots that you can easily untie. Also the string needs to be taught but not overly tight.
Make a loop
To make the main bow string cut a length about one and a half times the length of the bow and make a loop at one end. To make this loop I just made an overhand knot on the bight. The loop needs to be small enough to catch the nock when you string the bow but big enough to be slid down the upper Father limb when unstringing the bow. Try to keep the knot loose until you get the loop the right size.
Tying off the bow string
Get someone to help you measure how long you need to make the bow string (thank you Kate). With the loop attached to the upper Father limb hold it in place about one hand width down from the nock and tie a knot to the bottom nock on the Father pole. This will allow about a brace height of one fist.
Again your knot should be able to hold under strain but easy enough to untie to make adjustments. I like to wrap the string around the nock then back on itself (shown in the enlarged example around the tree) then I wrap the remaining string a few times around the nock before finishing with overhand wraps or similar. This makes it easy to untie to make adjustments.
Knot the bottom nock
Enlarged example before tying off
After warming the wood up by bending it from the middle slide the bow string loop up into the top knock. To do this I trap the bottom of the Father bow on my instep, hold the handle in one hand and with the other hand both bend the upper Father limb and slide the loop into place.
Ideally the brace height (handle to the bow string) should be a fist and thumb in height. You may need to adjust the string length to get this.
Then attach a piece of string to the end of the other Son limb and tie it off over the bow string loop on the father limb in a knot that will come undone easily. Try and get the distance of these limbs to match the distance on the other end. This way you can always brace the bow fully.
When unstringing the bow all you need to do then is untie the knot on the top Father limb (the string to the Son) and then slide the loop on the Father limb down towards the handle.
Bow is strung ready to have the final knot done
Finally strung up with taped off ends
As Bailer twine can be hard on the fingers I roll tape onto the nocking area of the bow string (you may not need to do this if your string does not cut into your fingers).
Strip of tape ready to be rolled
Rolled tape. Do not make it to thick
The Handle
It is not a requirement but I like to make the handle more comfortable with some Common Whipping.
Common Whipping start
Common Whipping end
Finished handle
The Finished Bows
Two happy children looking forward to trying out their new bows. Finlay’s bow developed a hinge so I added some extra tape to support it. It still shoots well.
Finlay
Catherine
Bows in action.
Airborne arrow
Good for all ages
This is just one way of making this type of bow but it has been tried and tested by hundreds of Sea and Marine Cadets over the years.
Good luck and it would be great to hear of anyone making one of these bows.