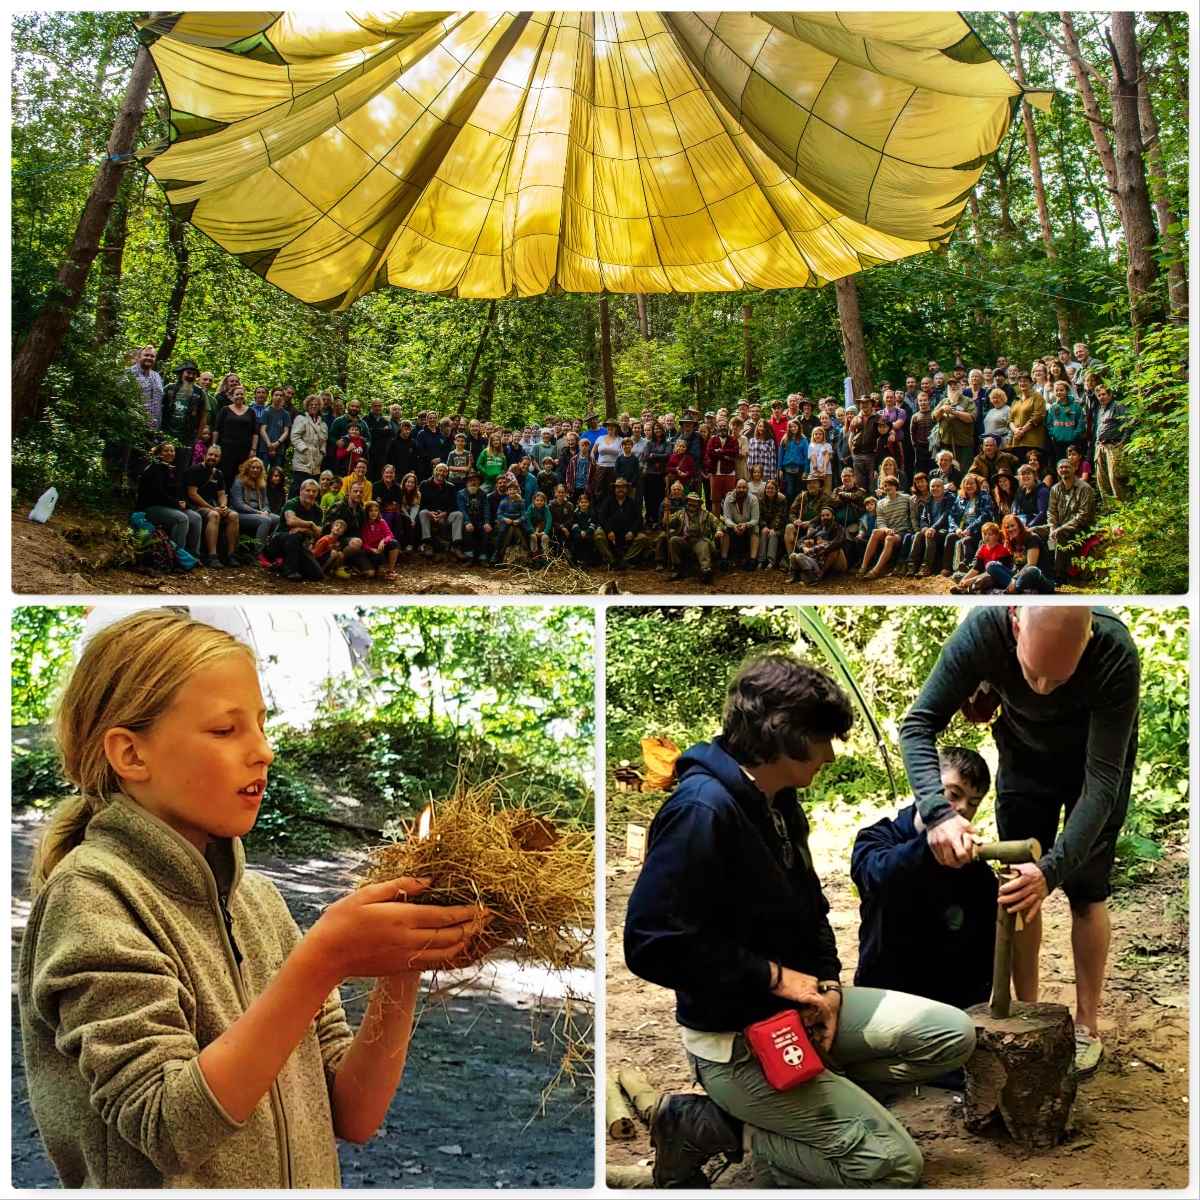
The Bushcraft UK (BCUK) Bushmoot was supposed to be held this August however like many other big events had to be cancelled due to worries around Covid.
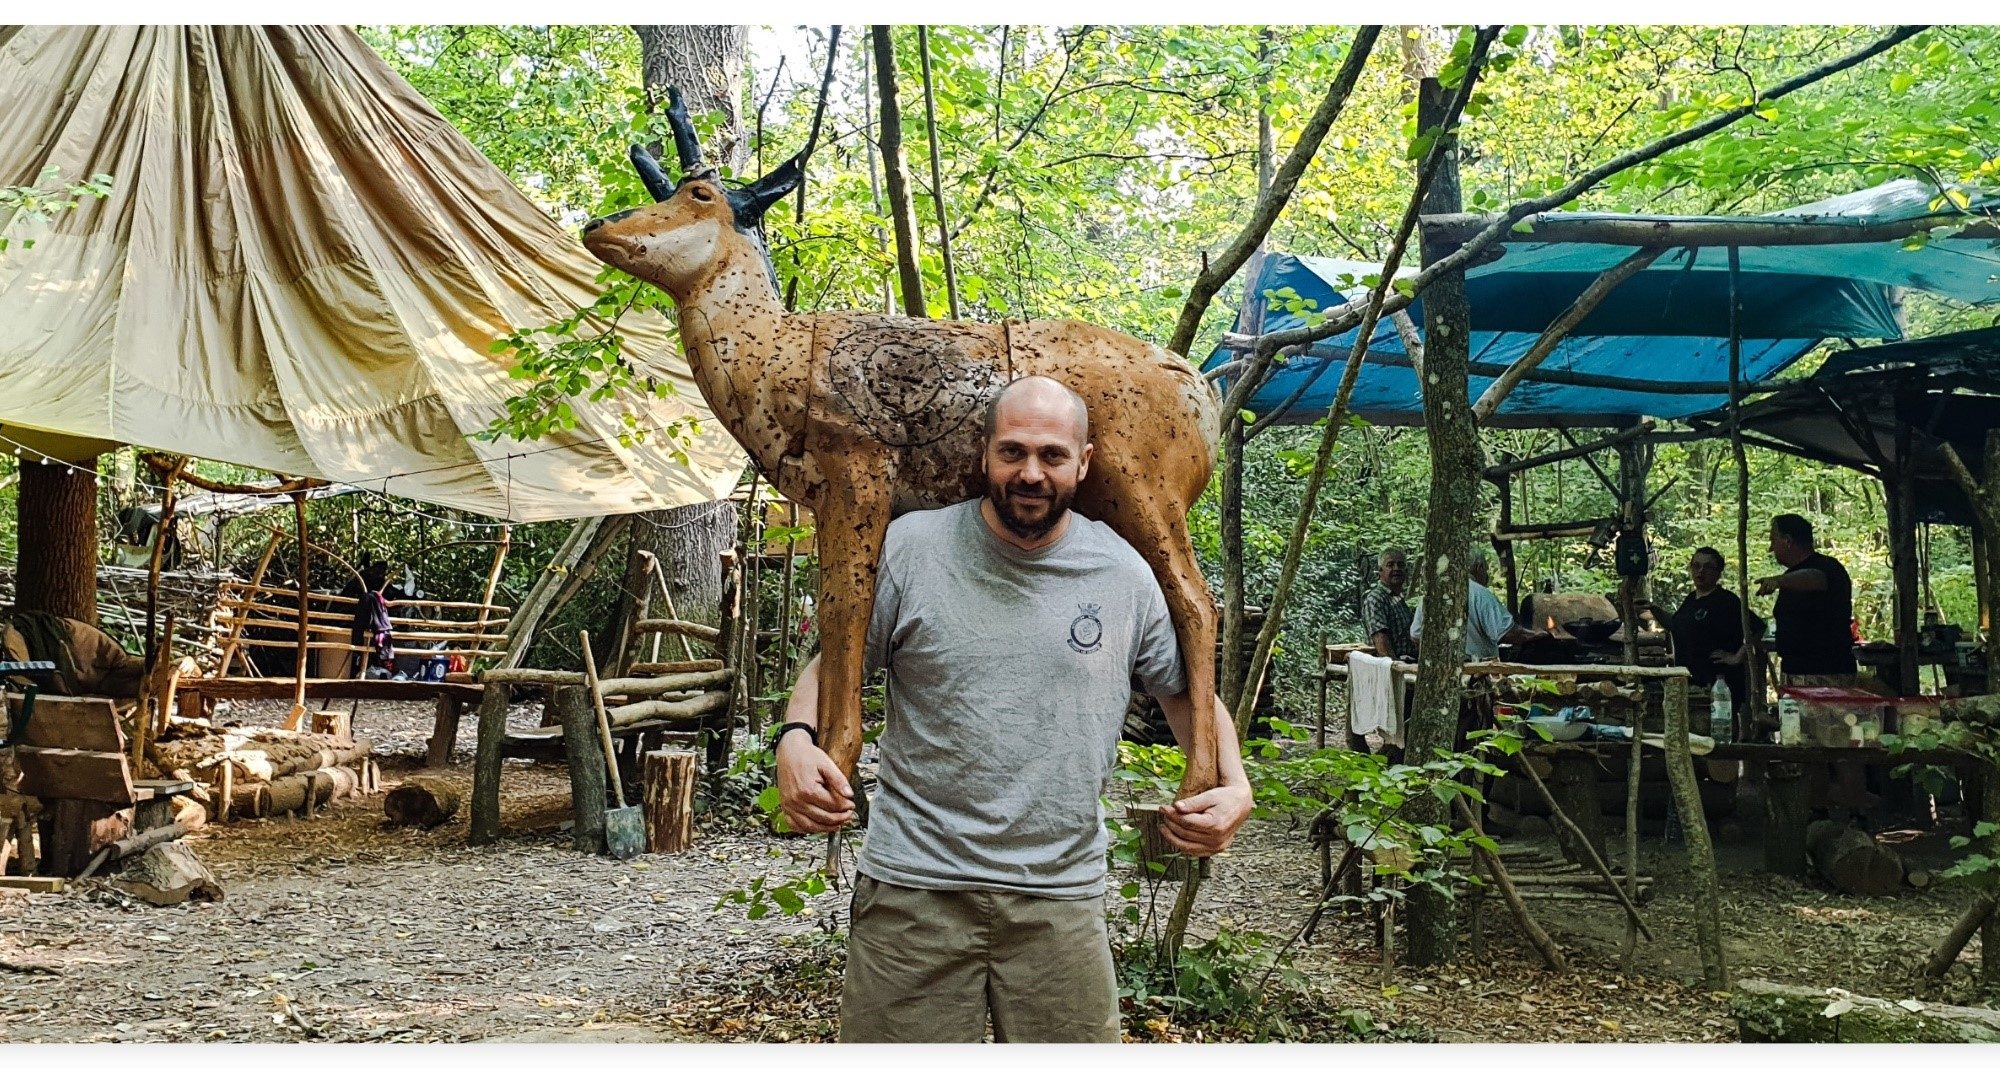
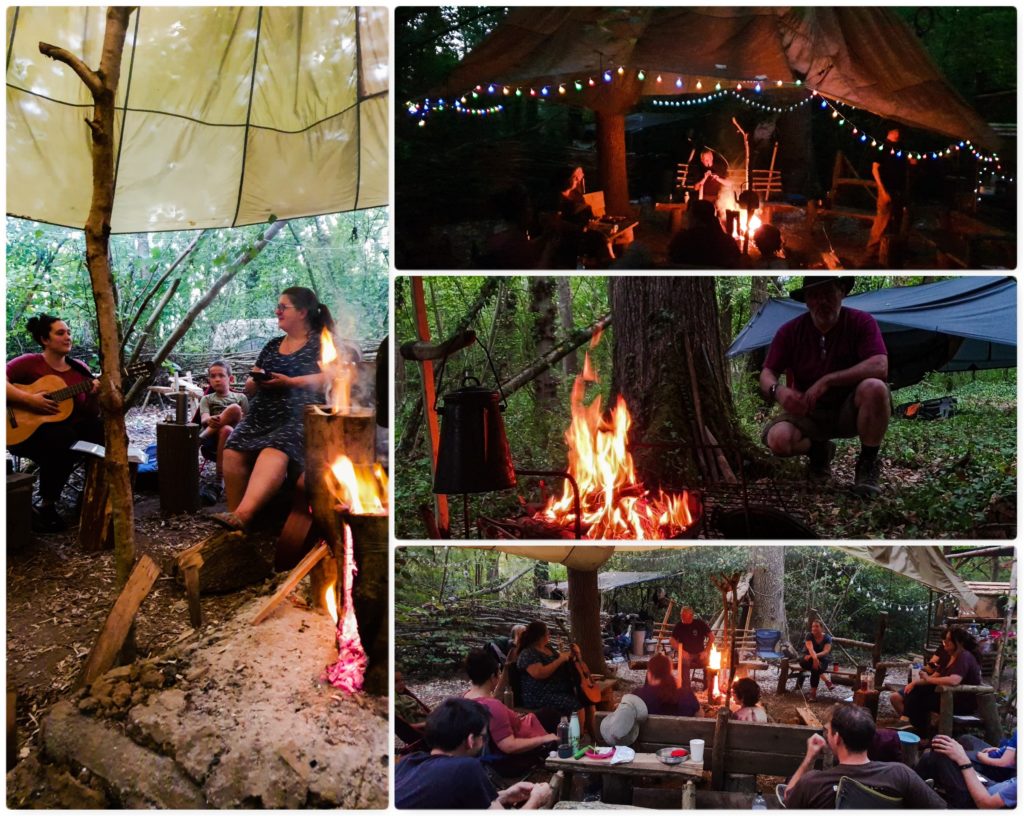
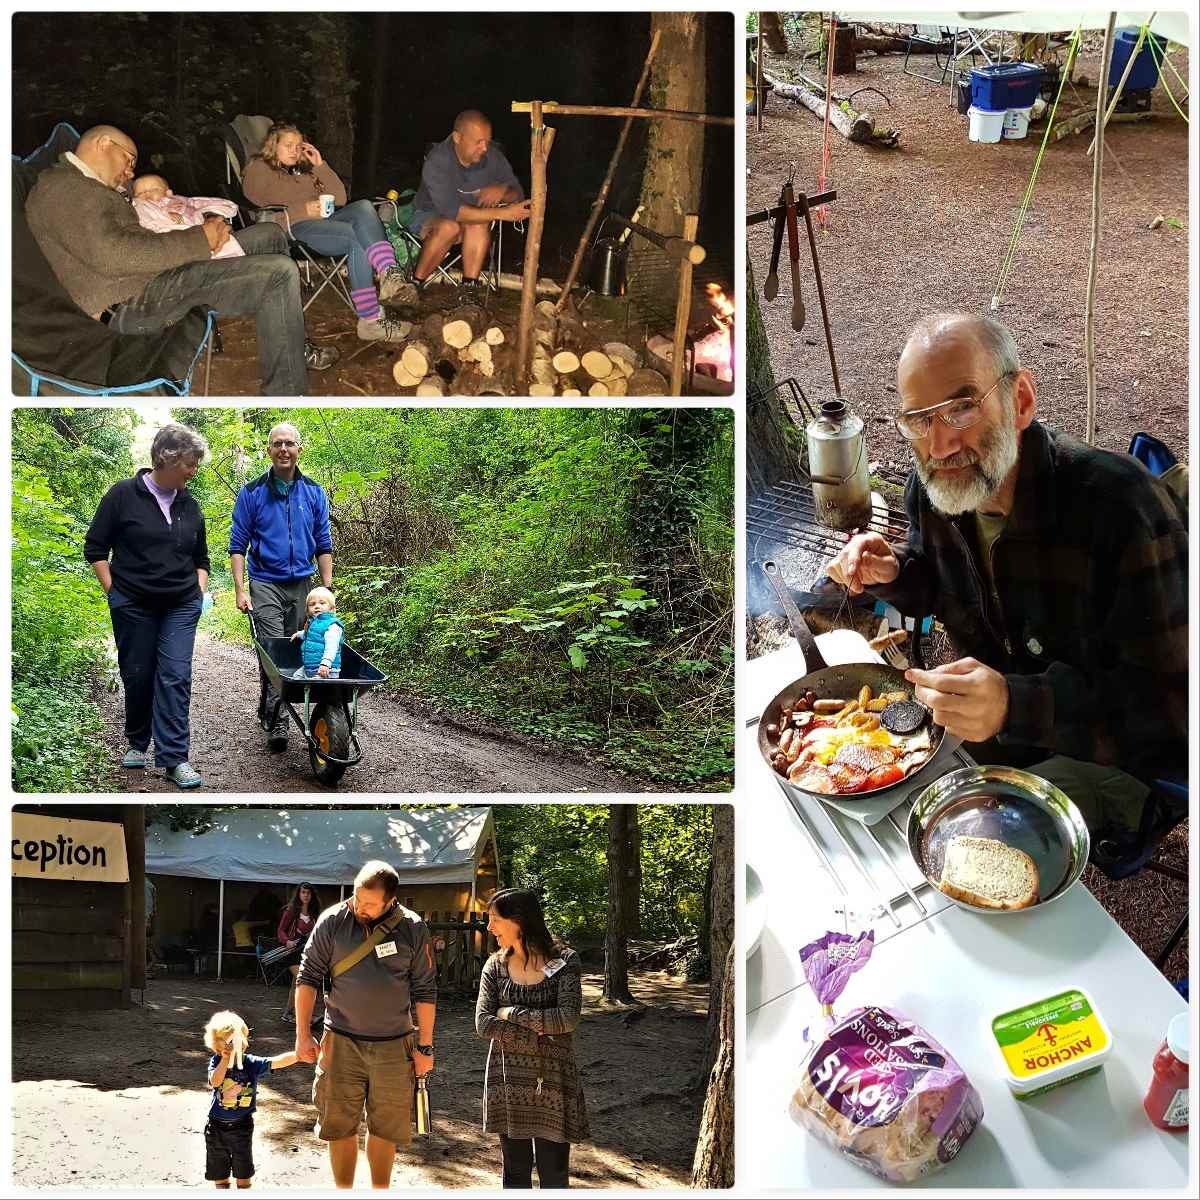
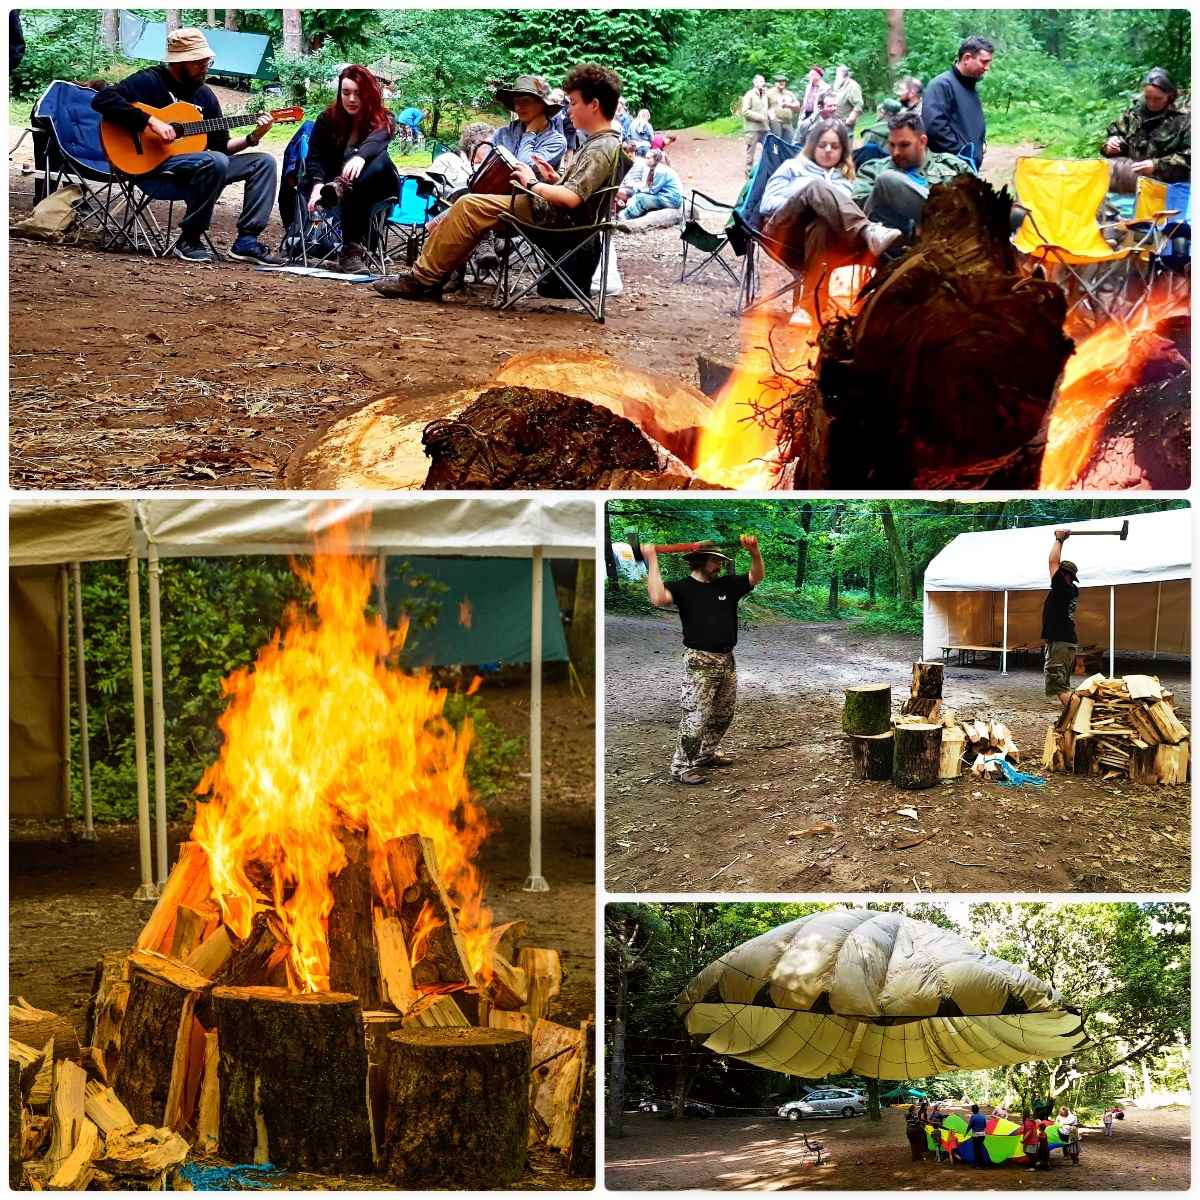
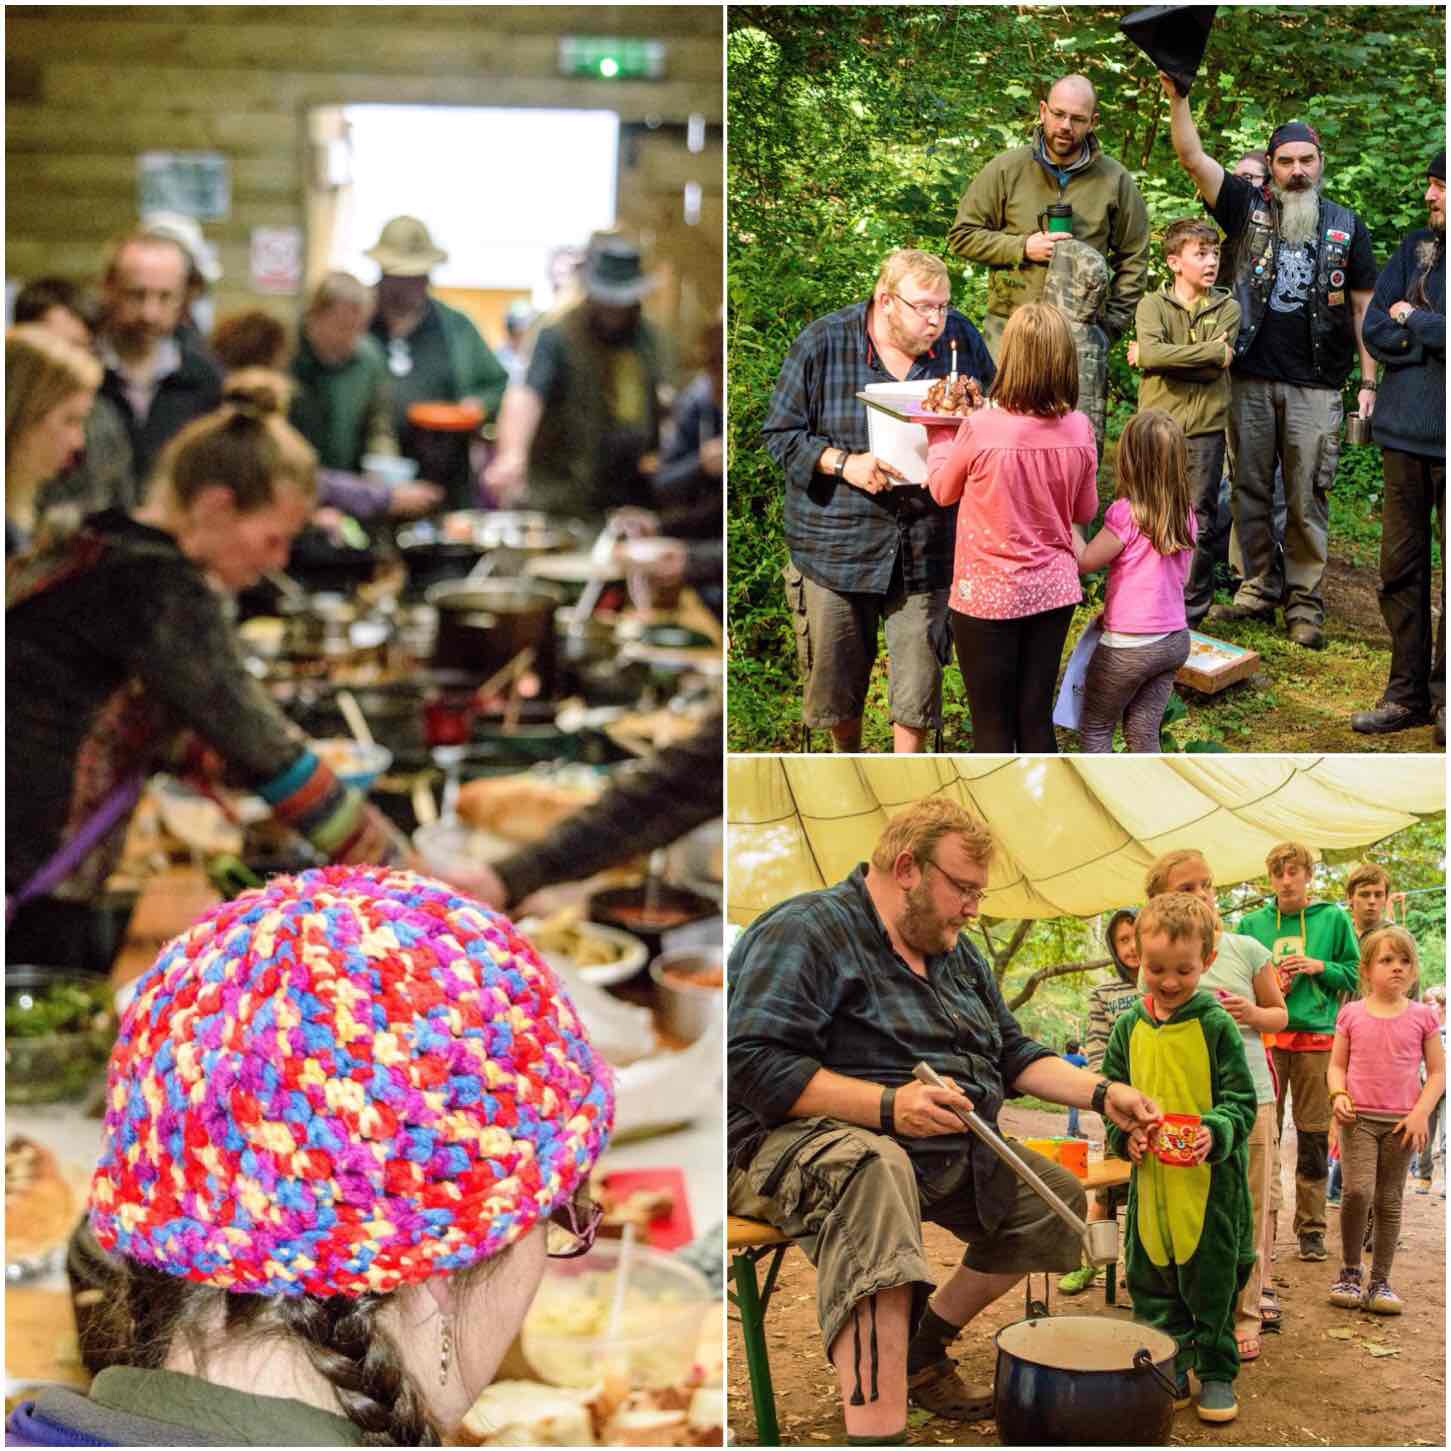
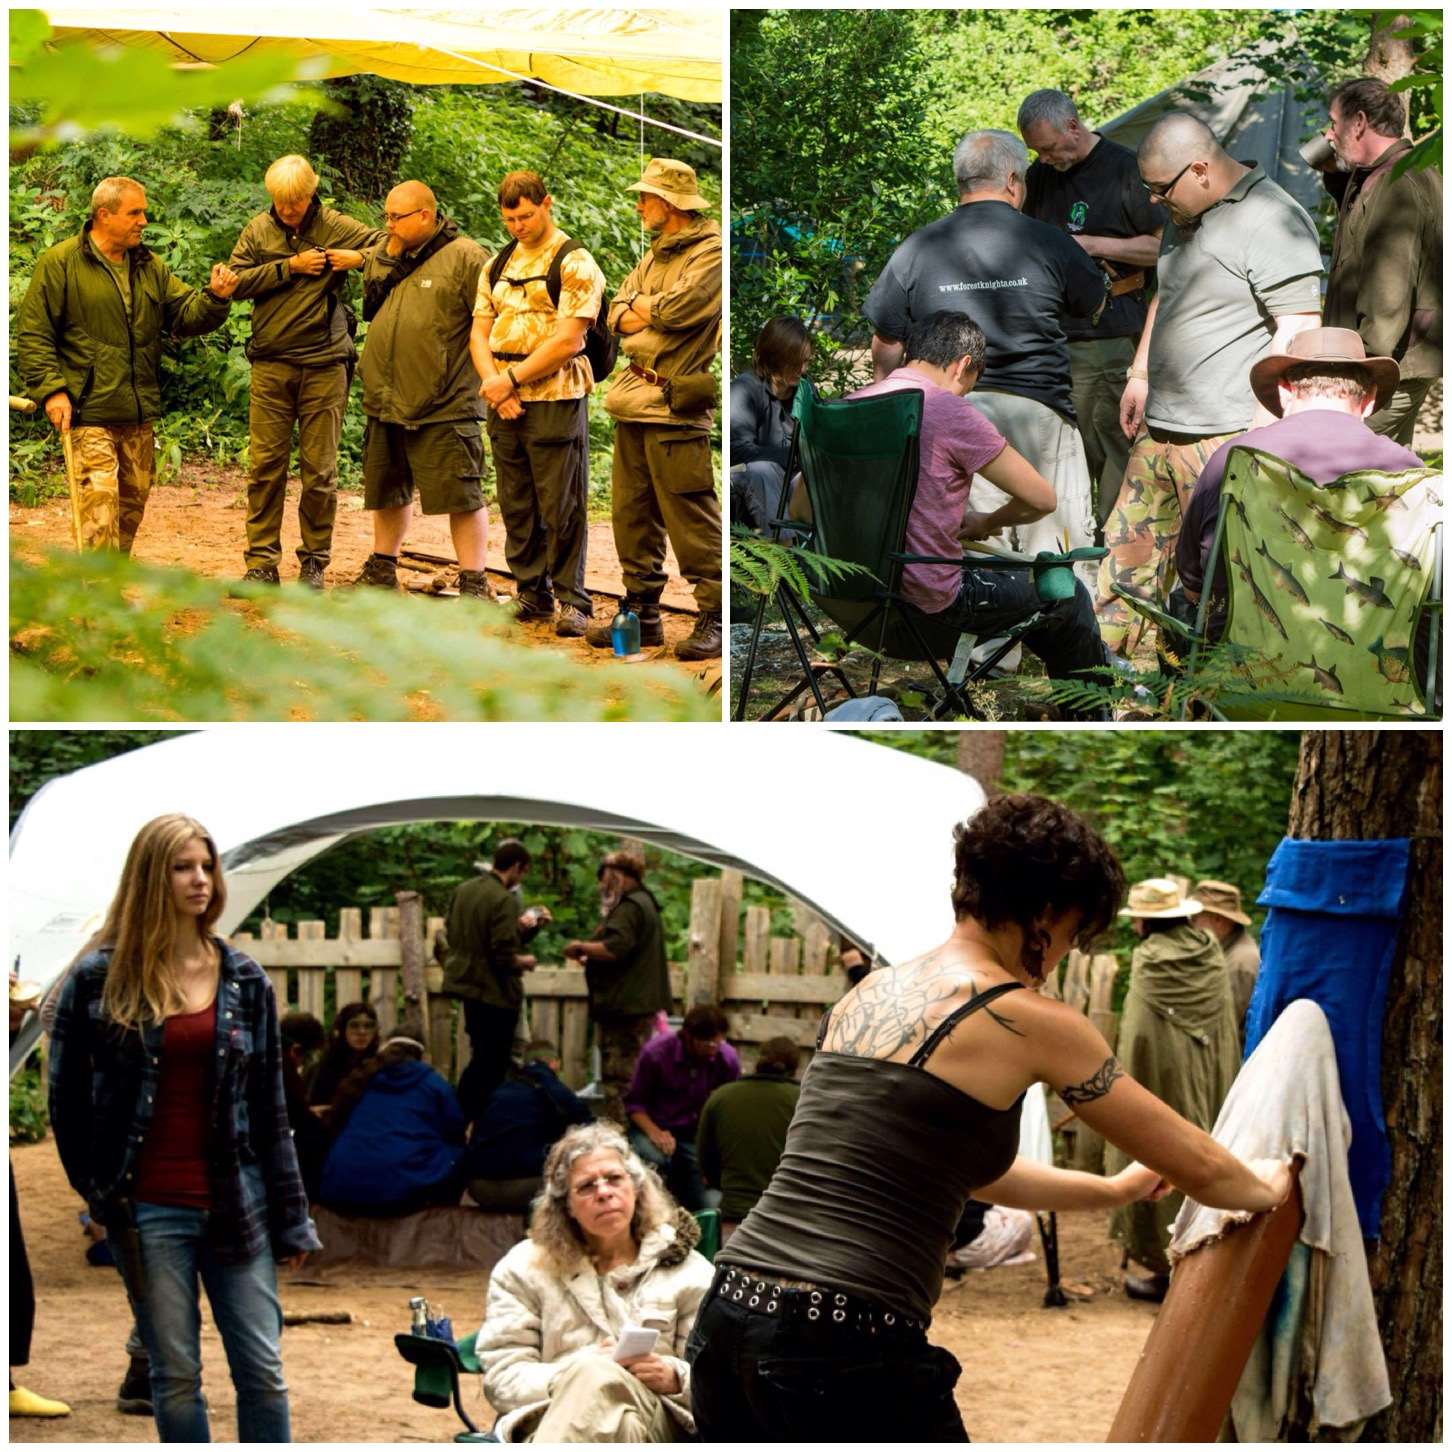
Wayne Jones from Forestknights Bushcraft (a fellow BCUK Moderator) along with his co-worker Beth Shepheard offered to run a small (for 20 to 30 people) Minimoot at his woods near Arundel for anyone who felt they could make it.
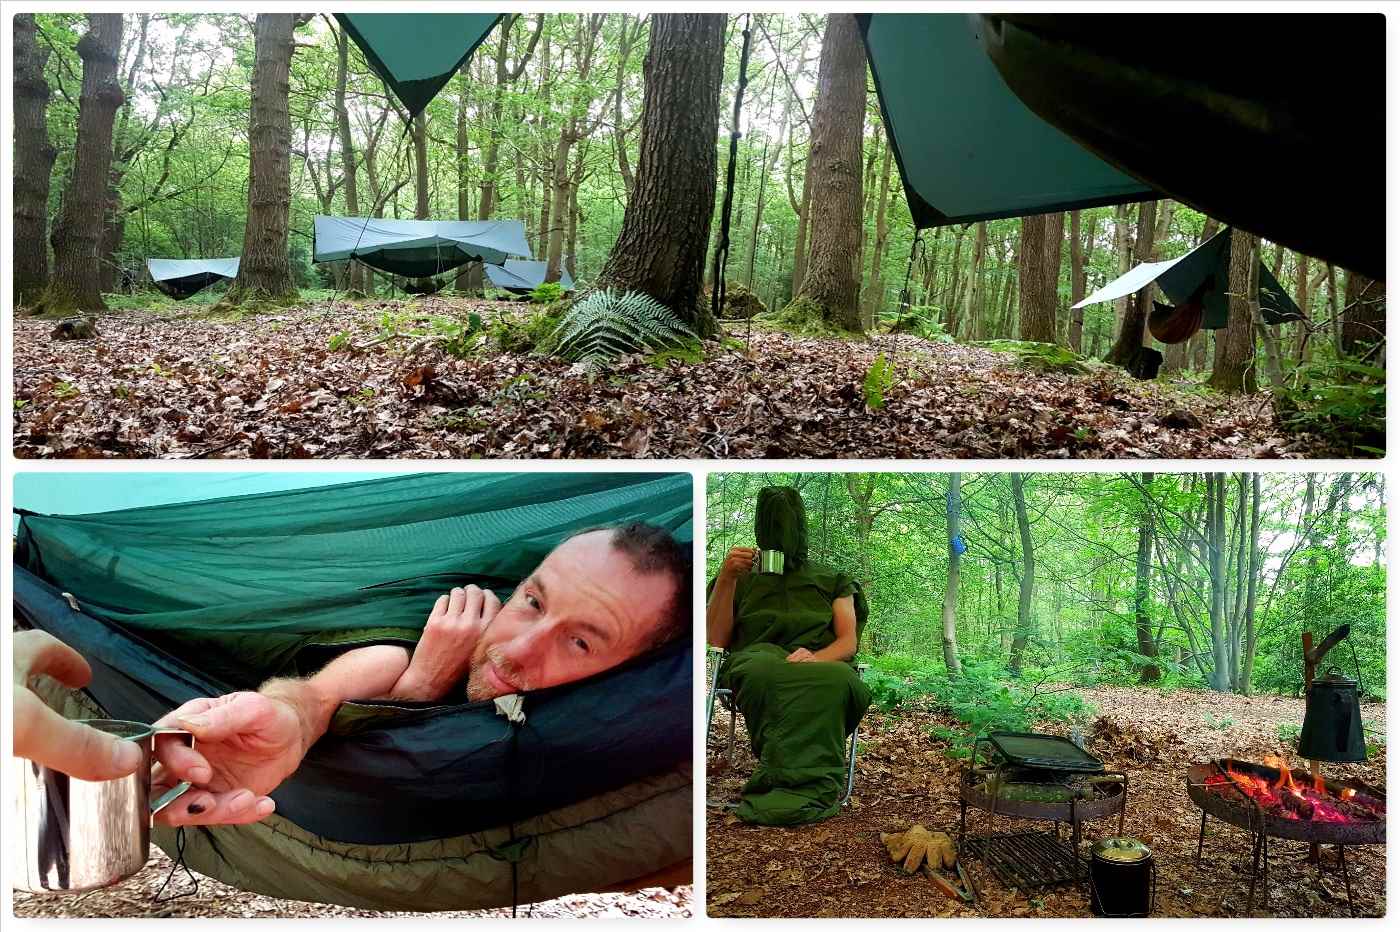
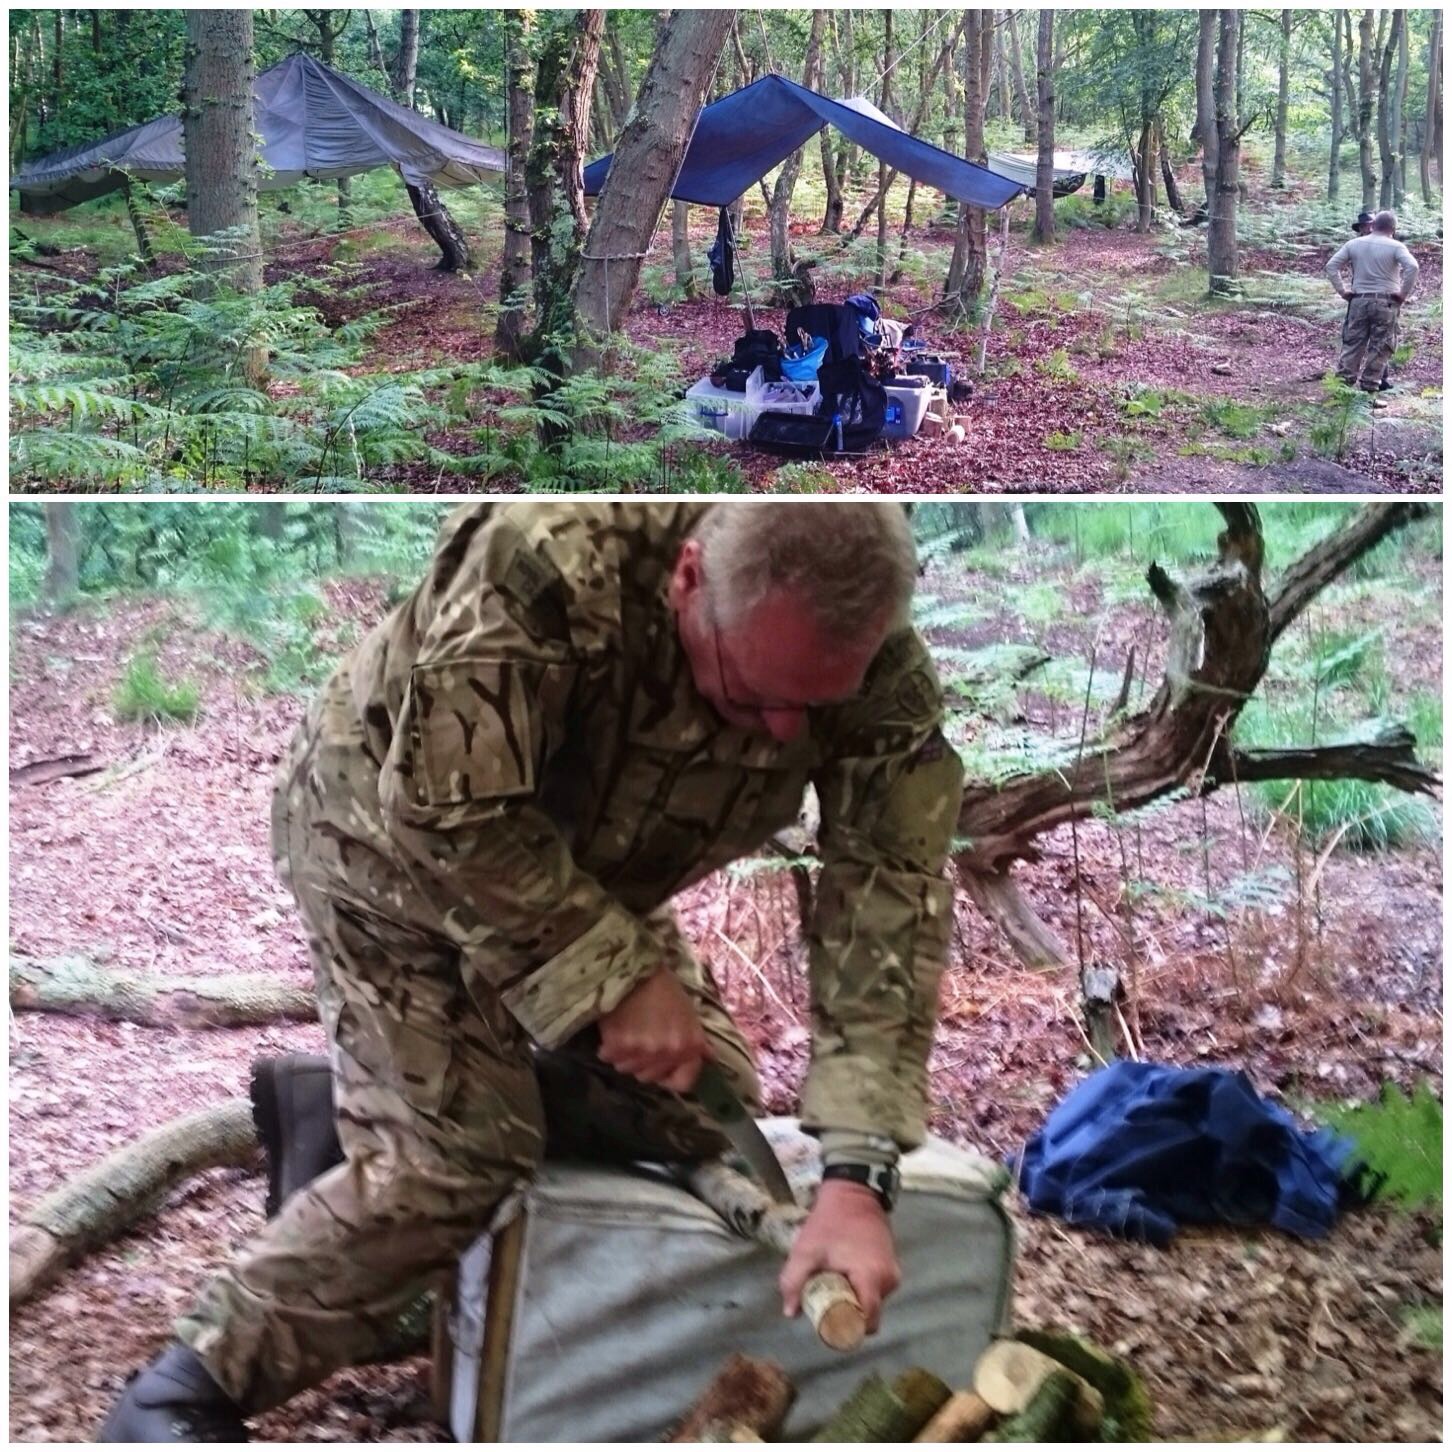
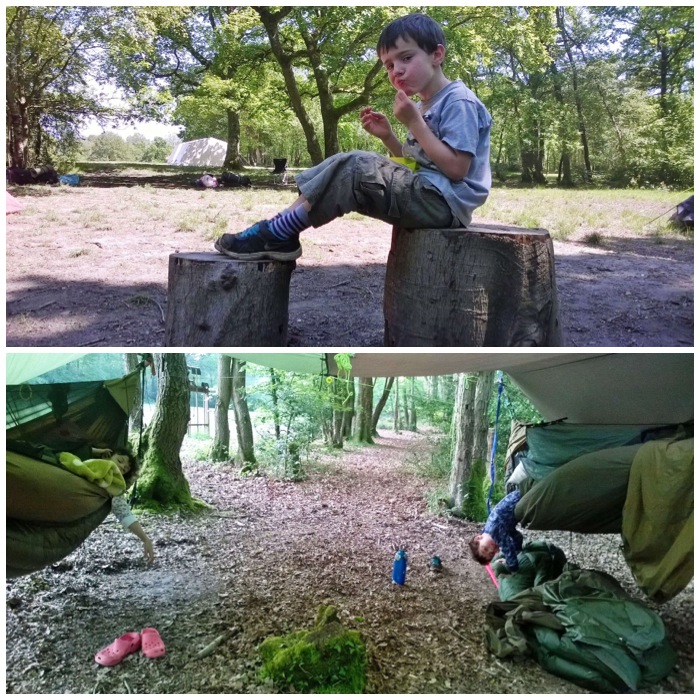
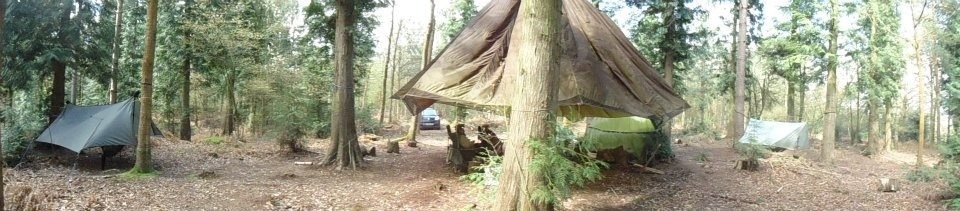
Home in the woods
This was proper camping (no cars anywhere in the woods) and after a few trips back and forth with the trolley we soon had our hammocks up. I was joined by my son Finlay and our friends Dave and Alan.
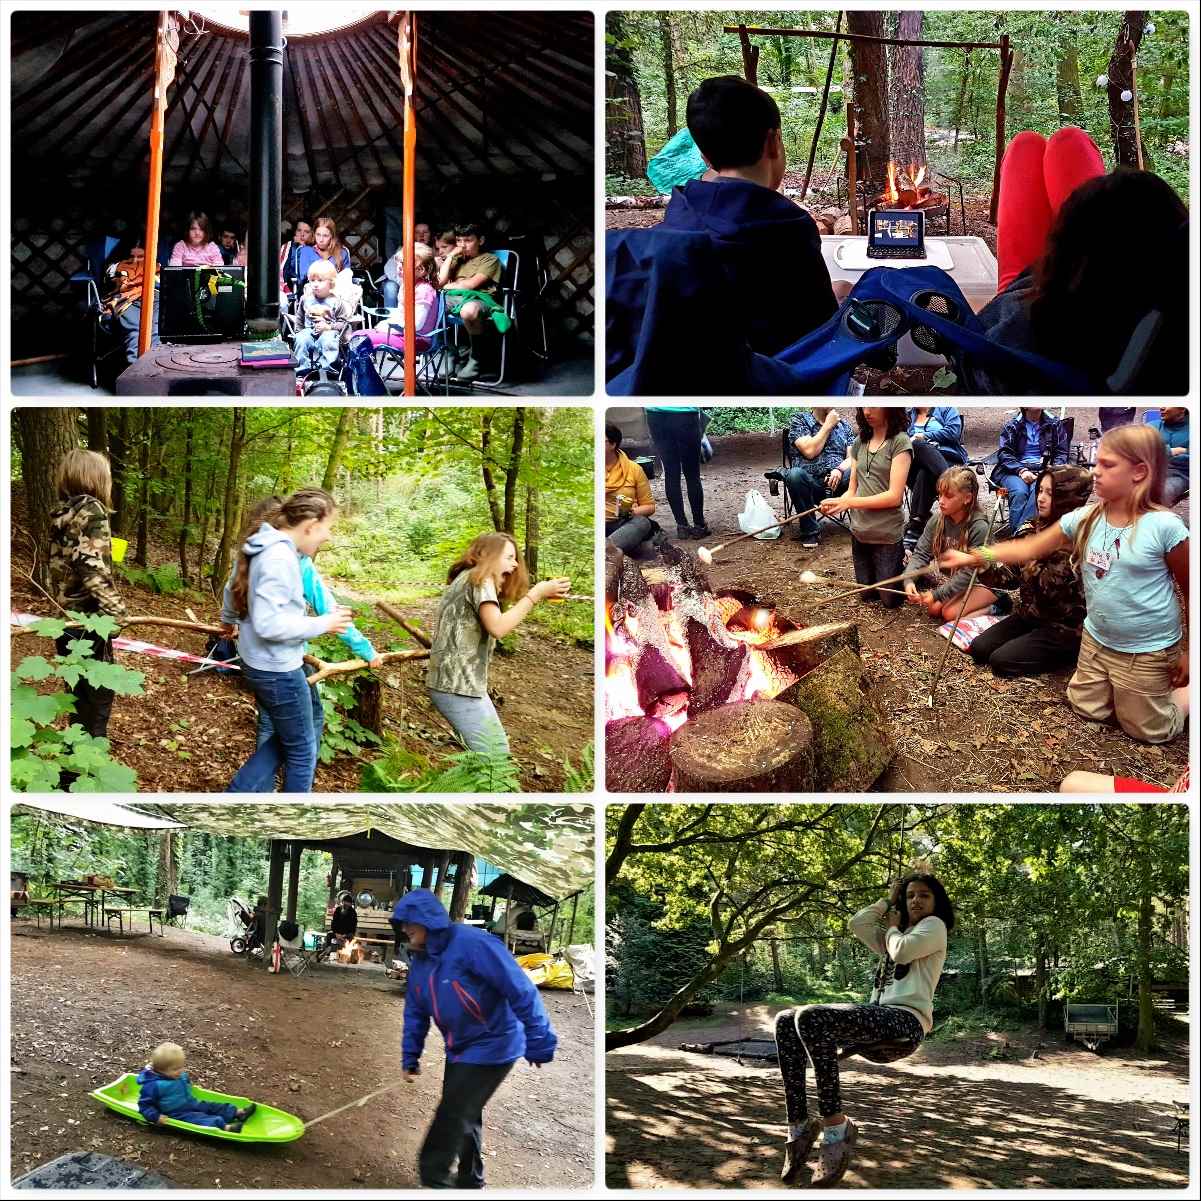
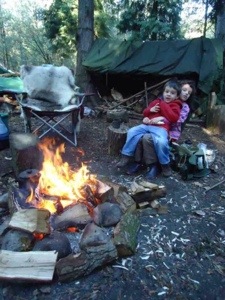
We had a communal cooking area and Fin managed to sneak a movie in each evening around the fire (got to make allowances for this day and age).
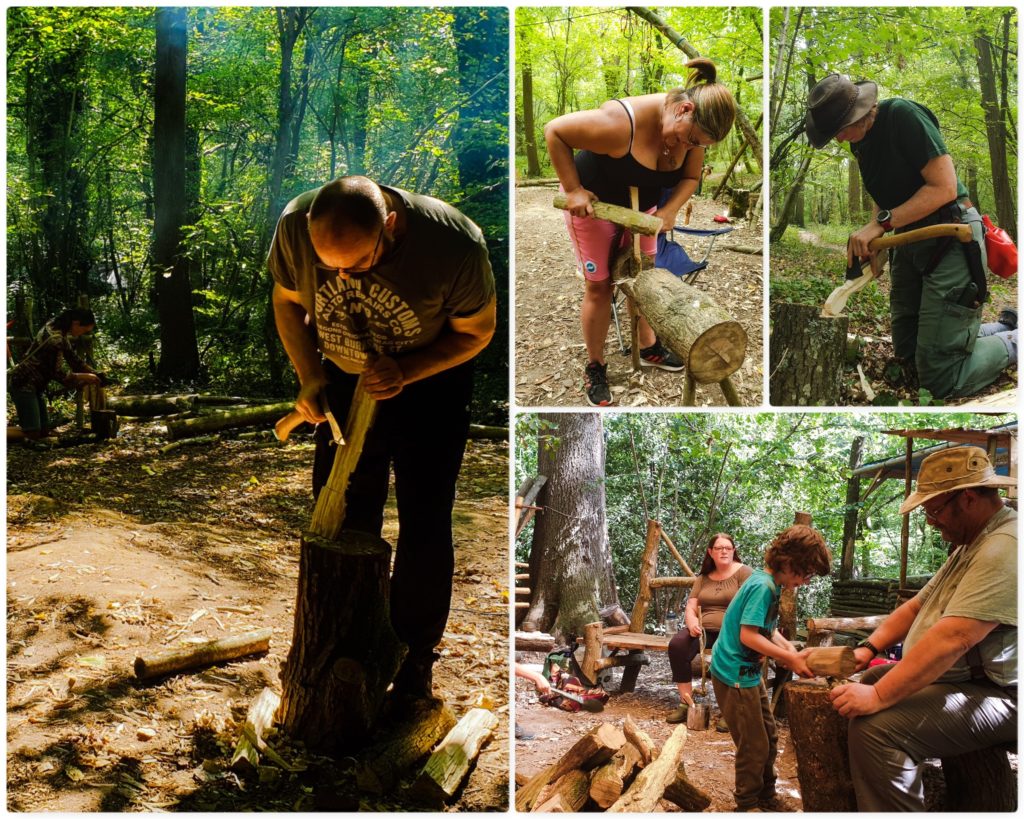
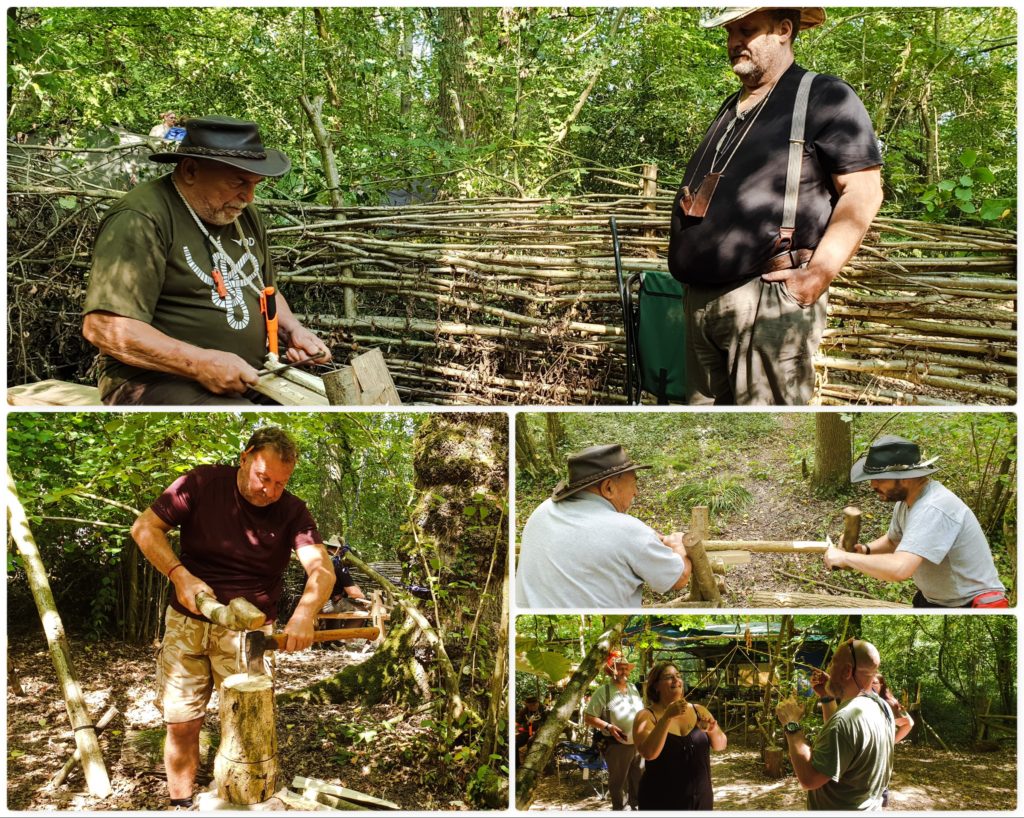
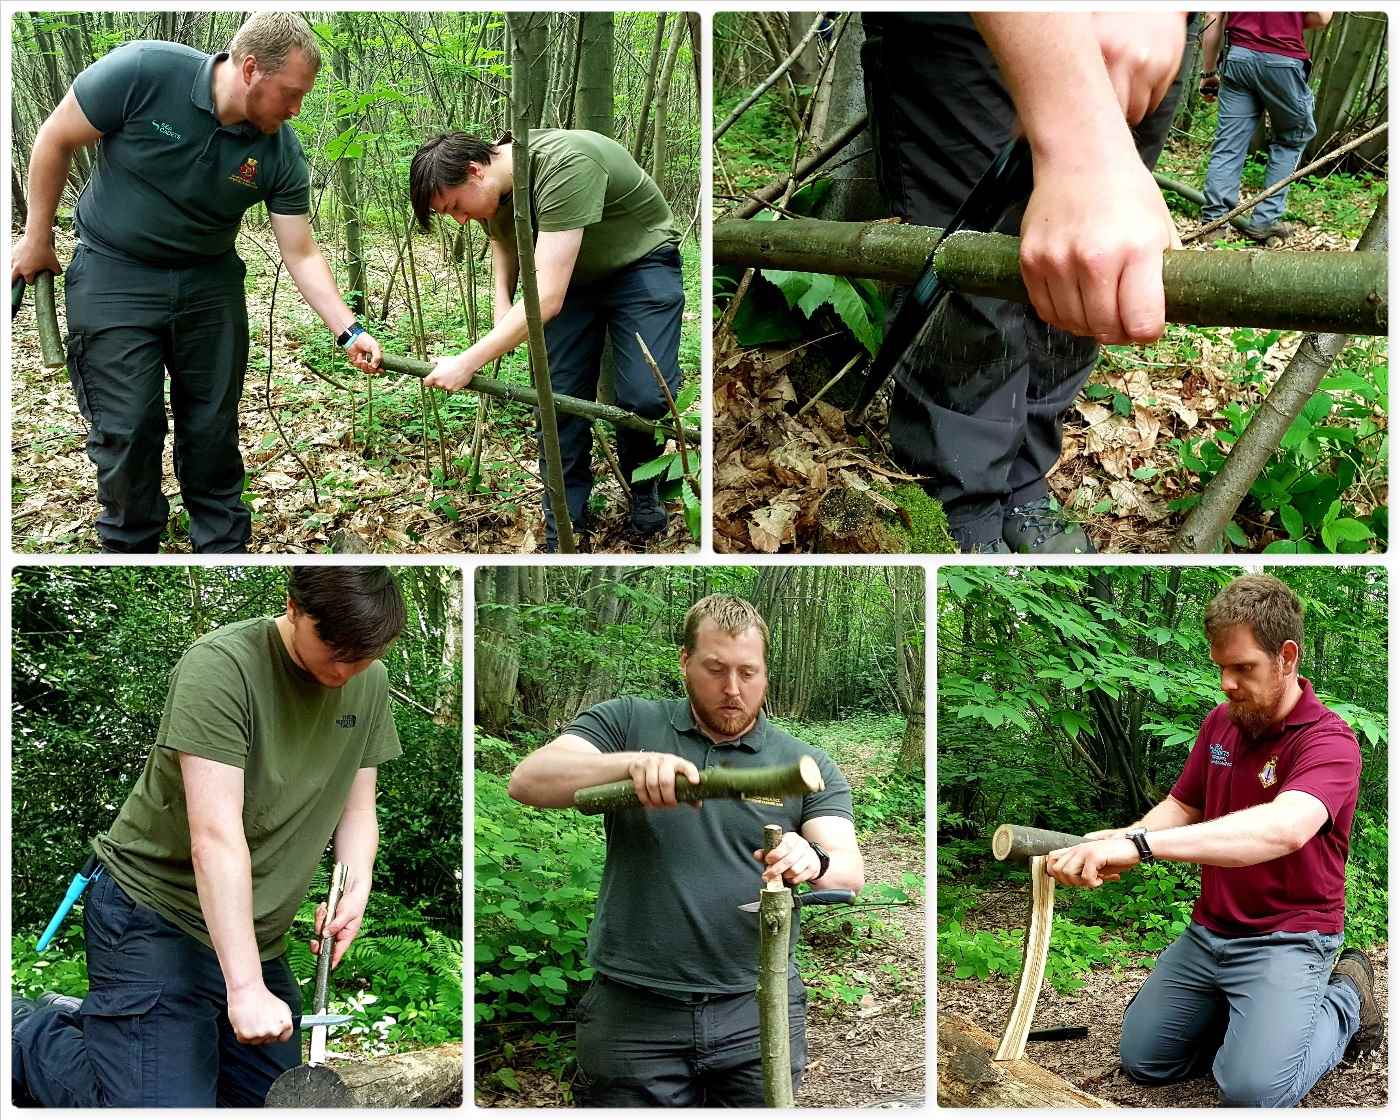
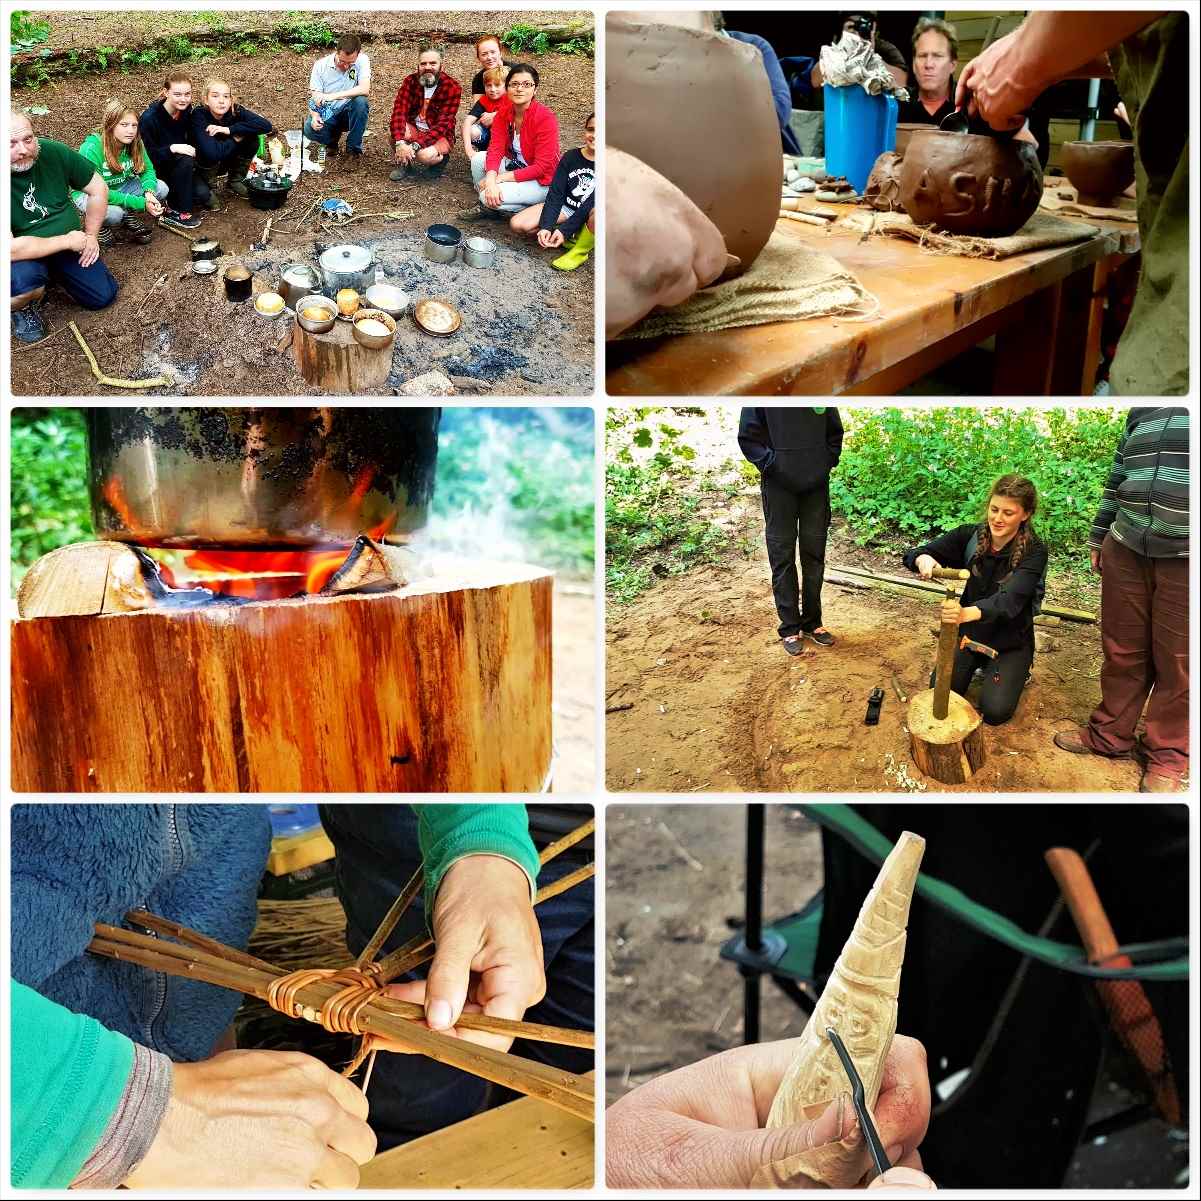
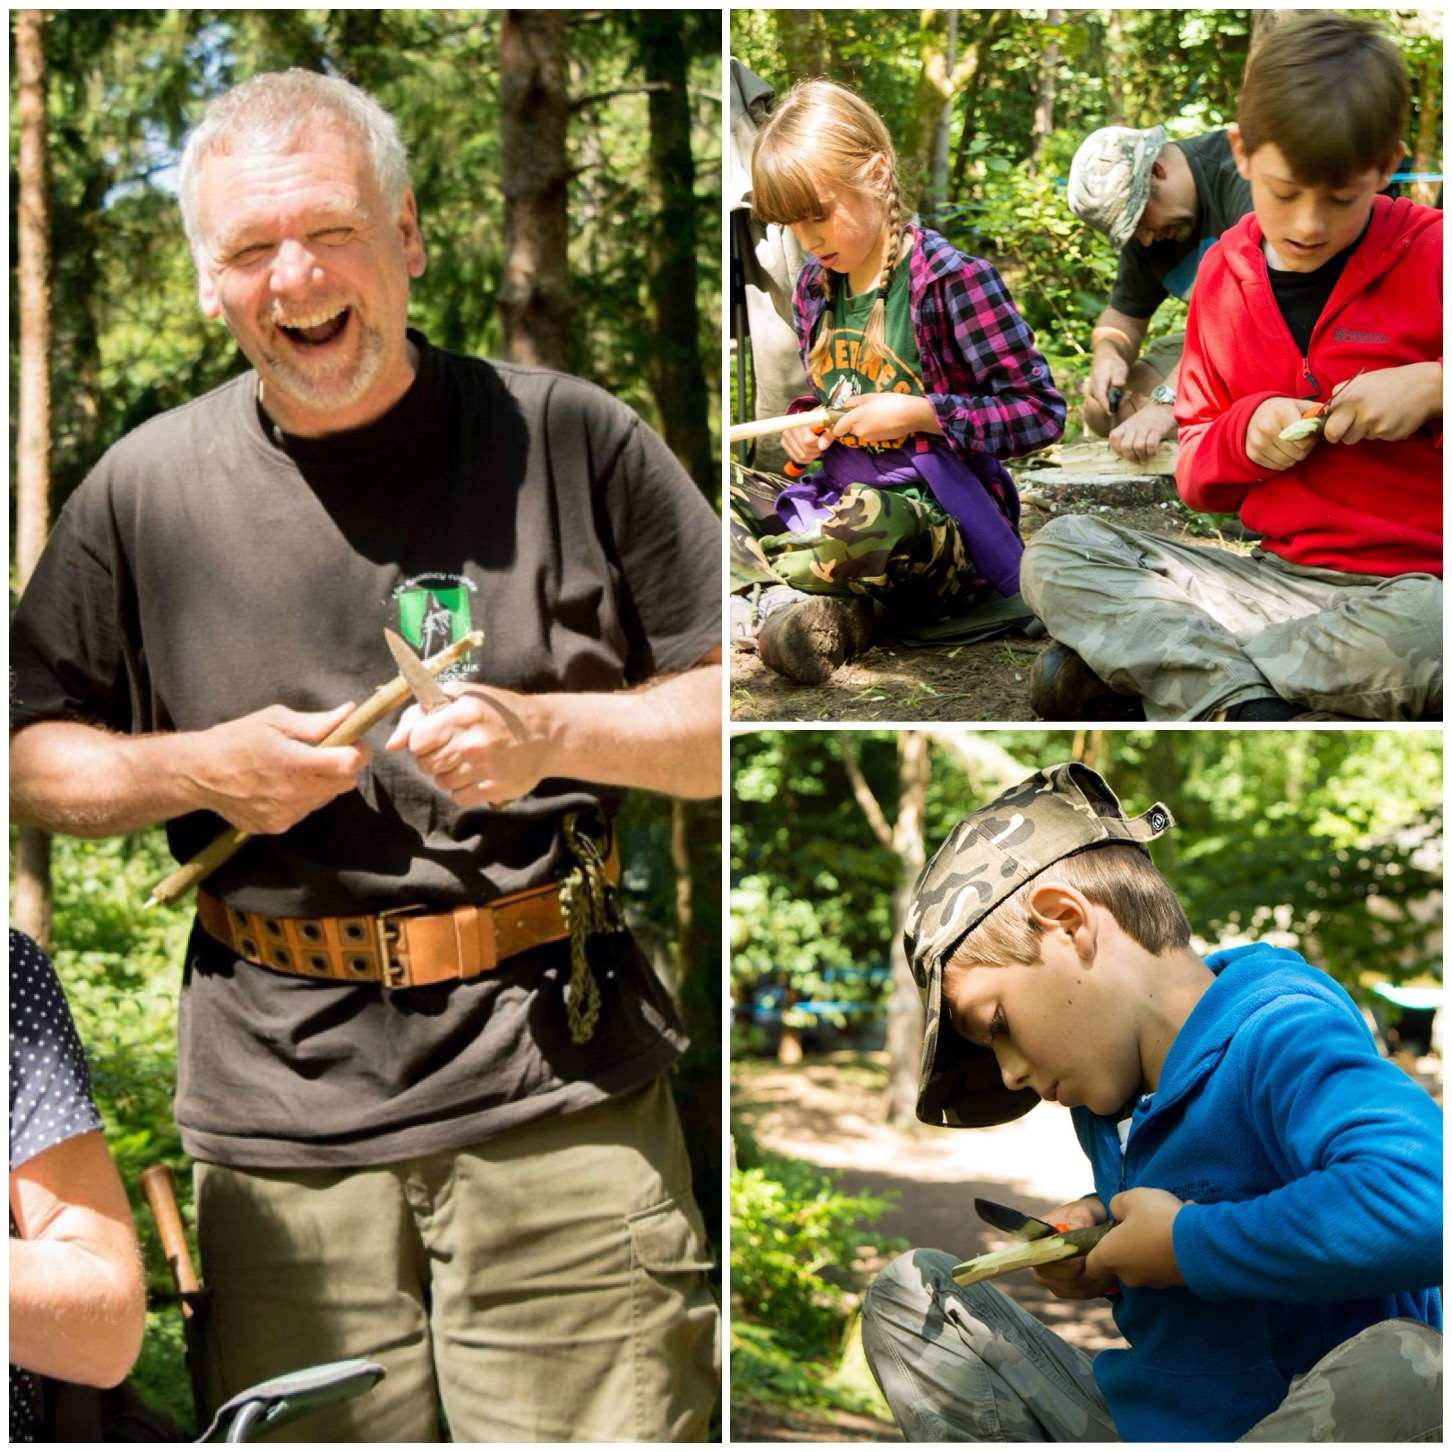
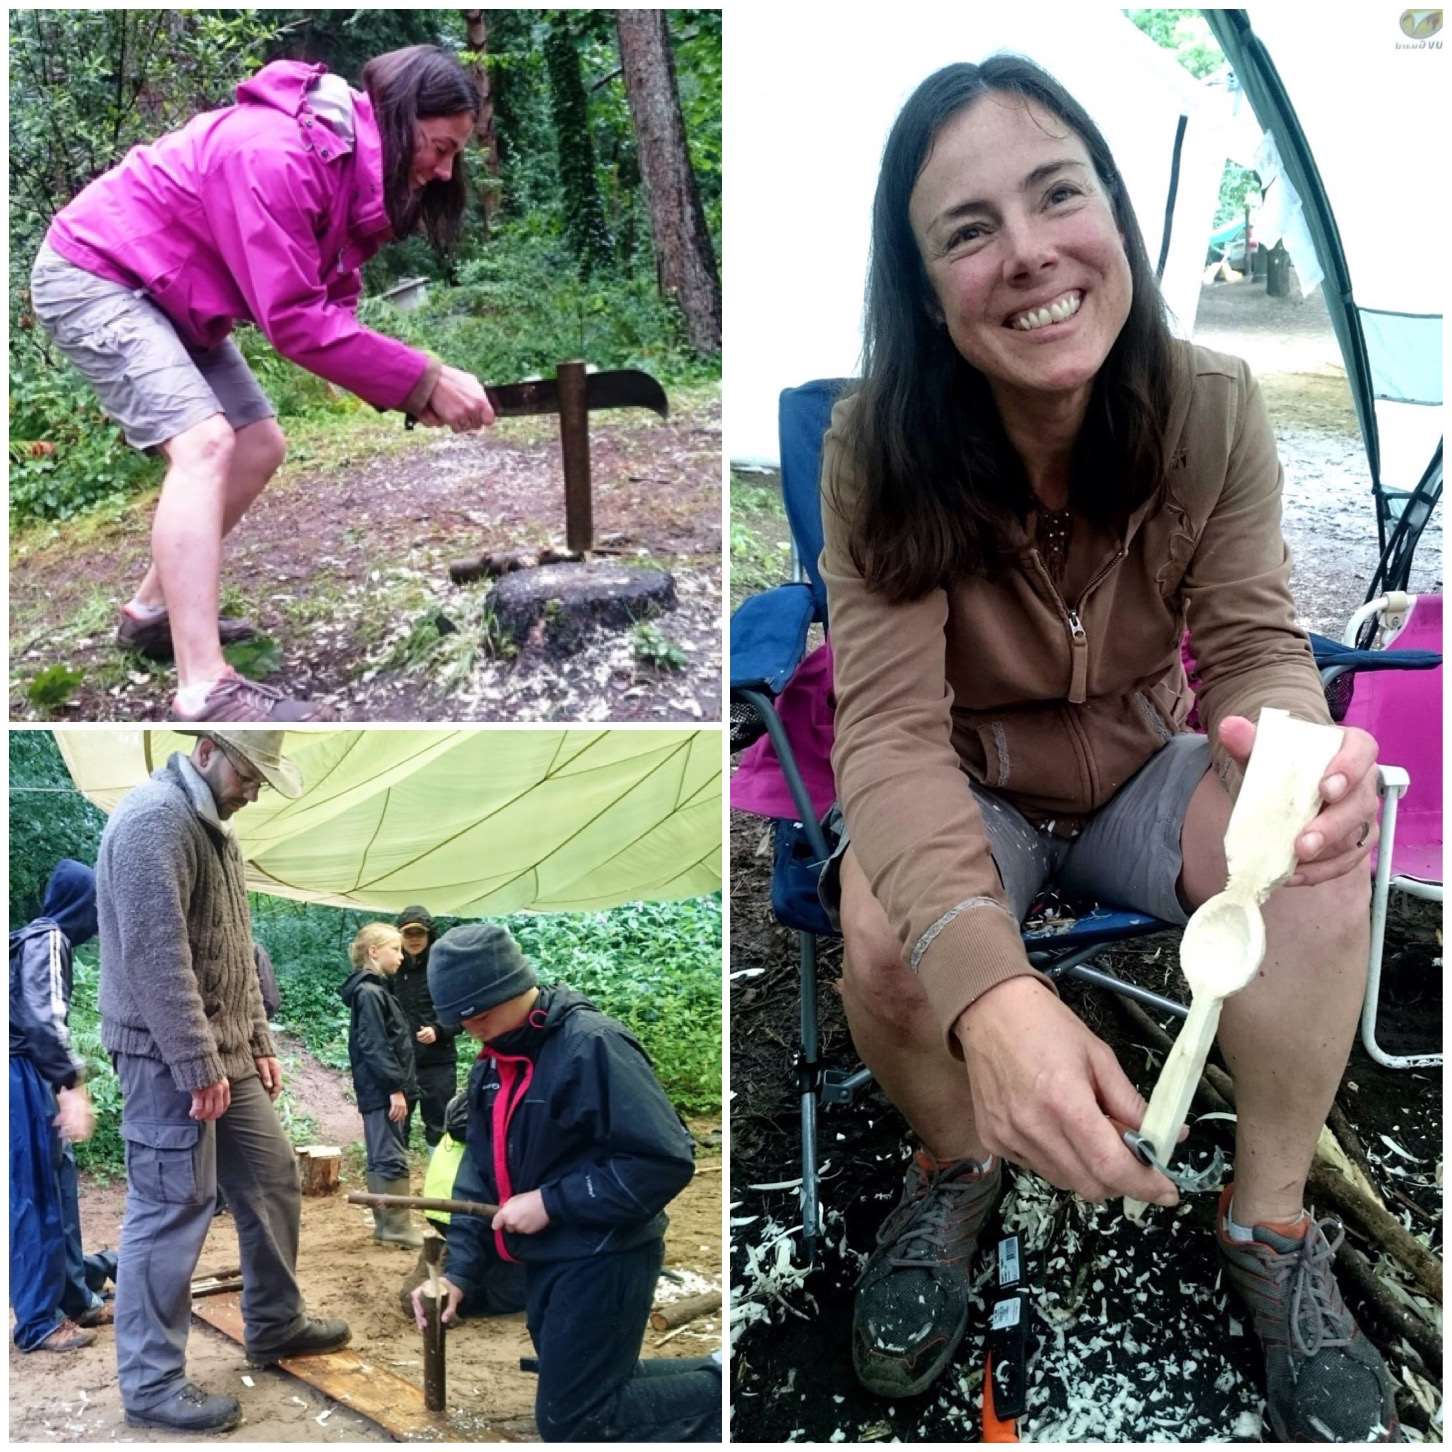
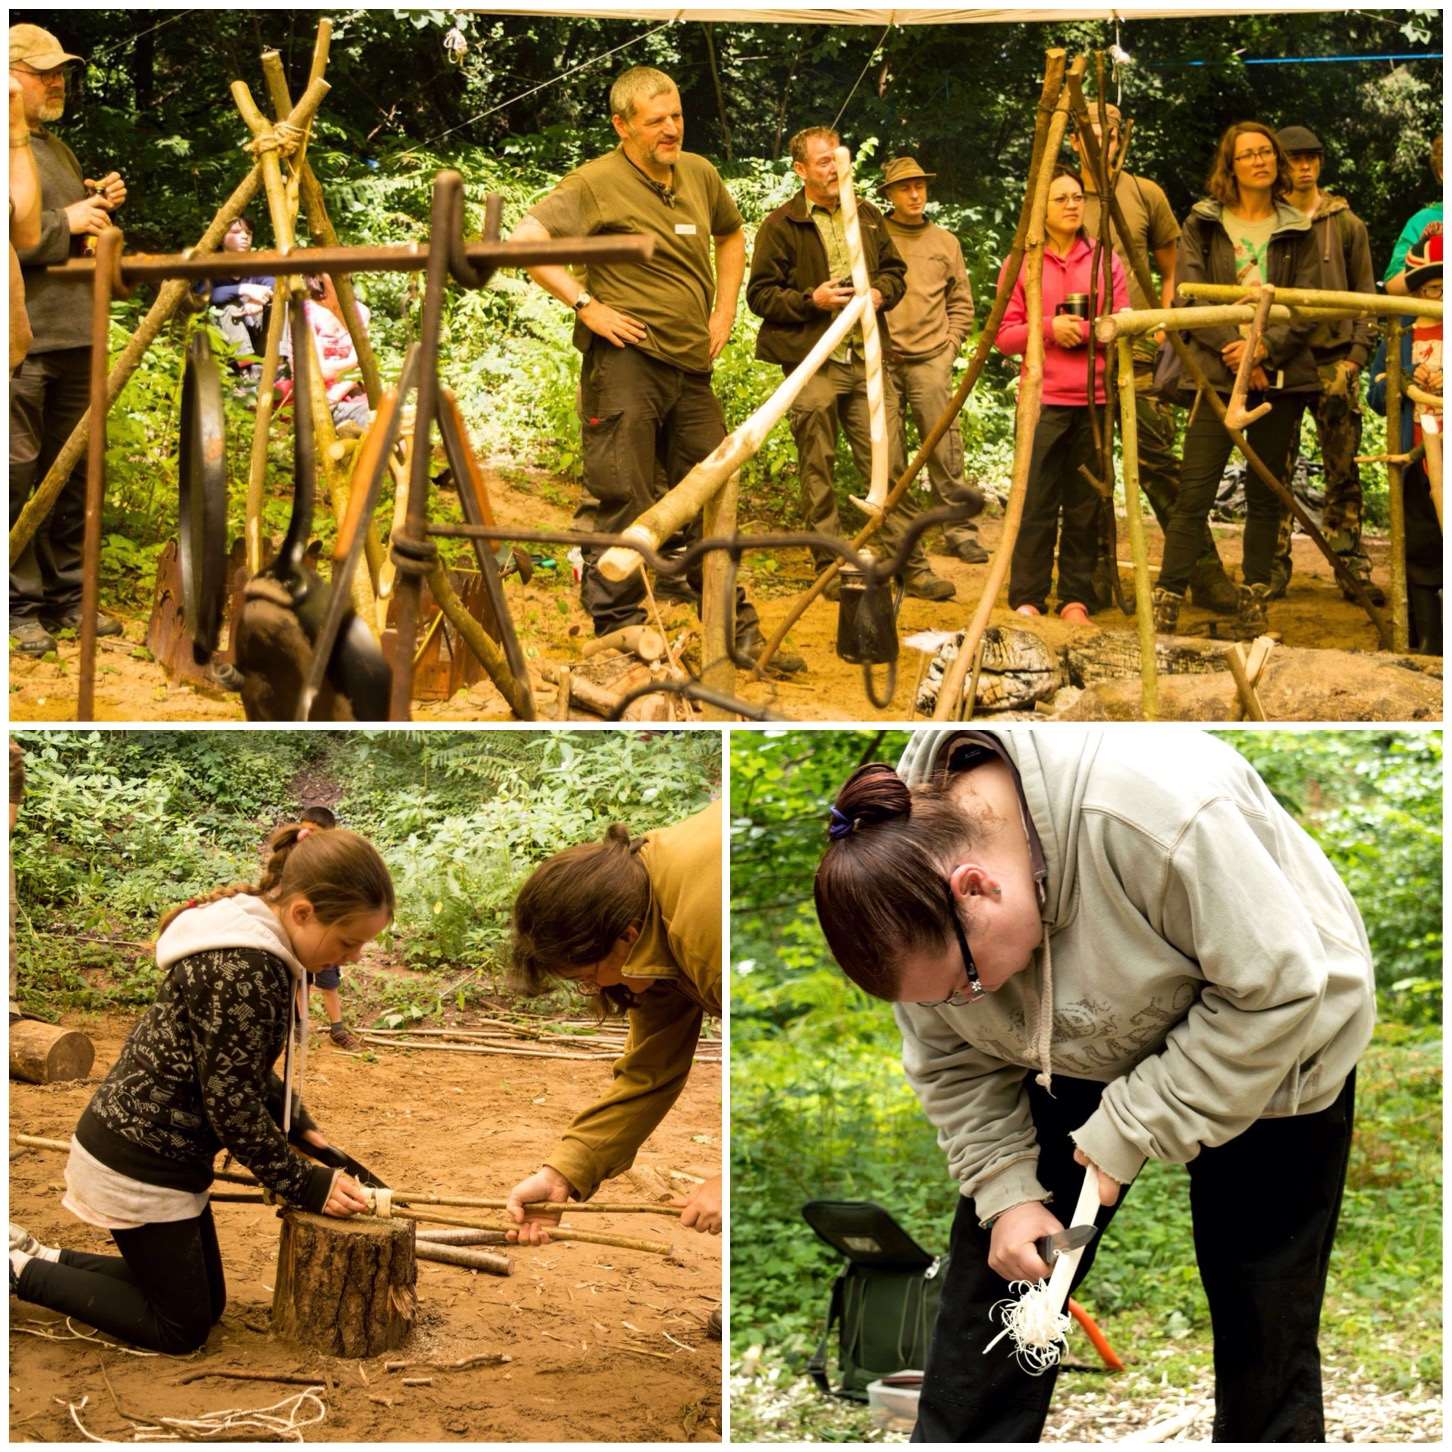
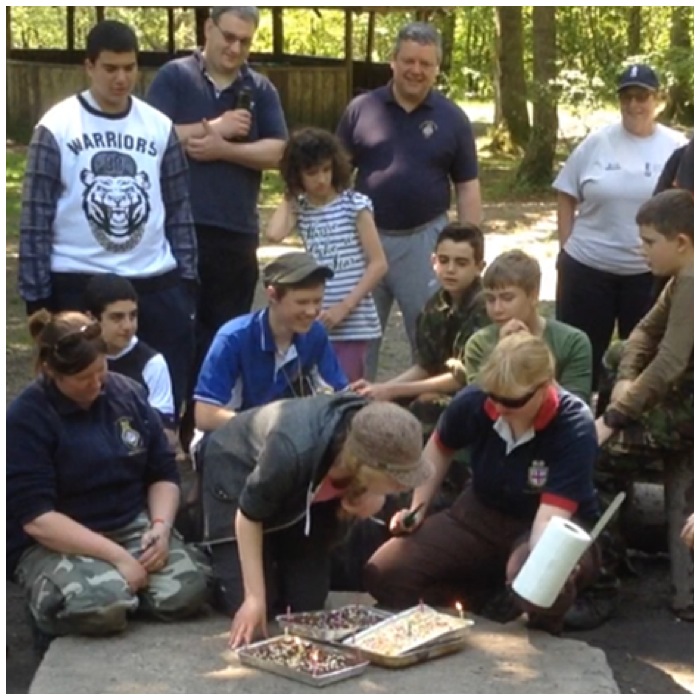
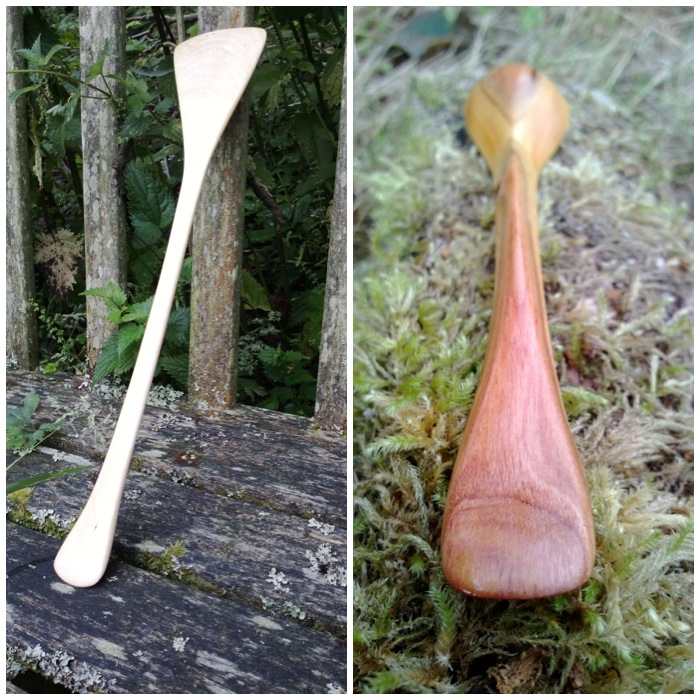
A little bit of whittling
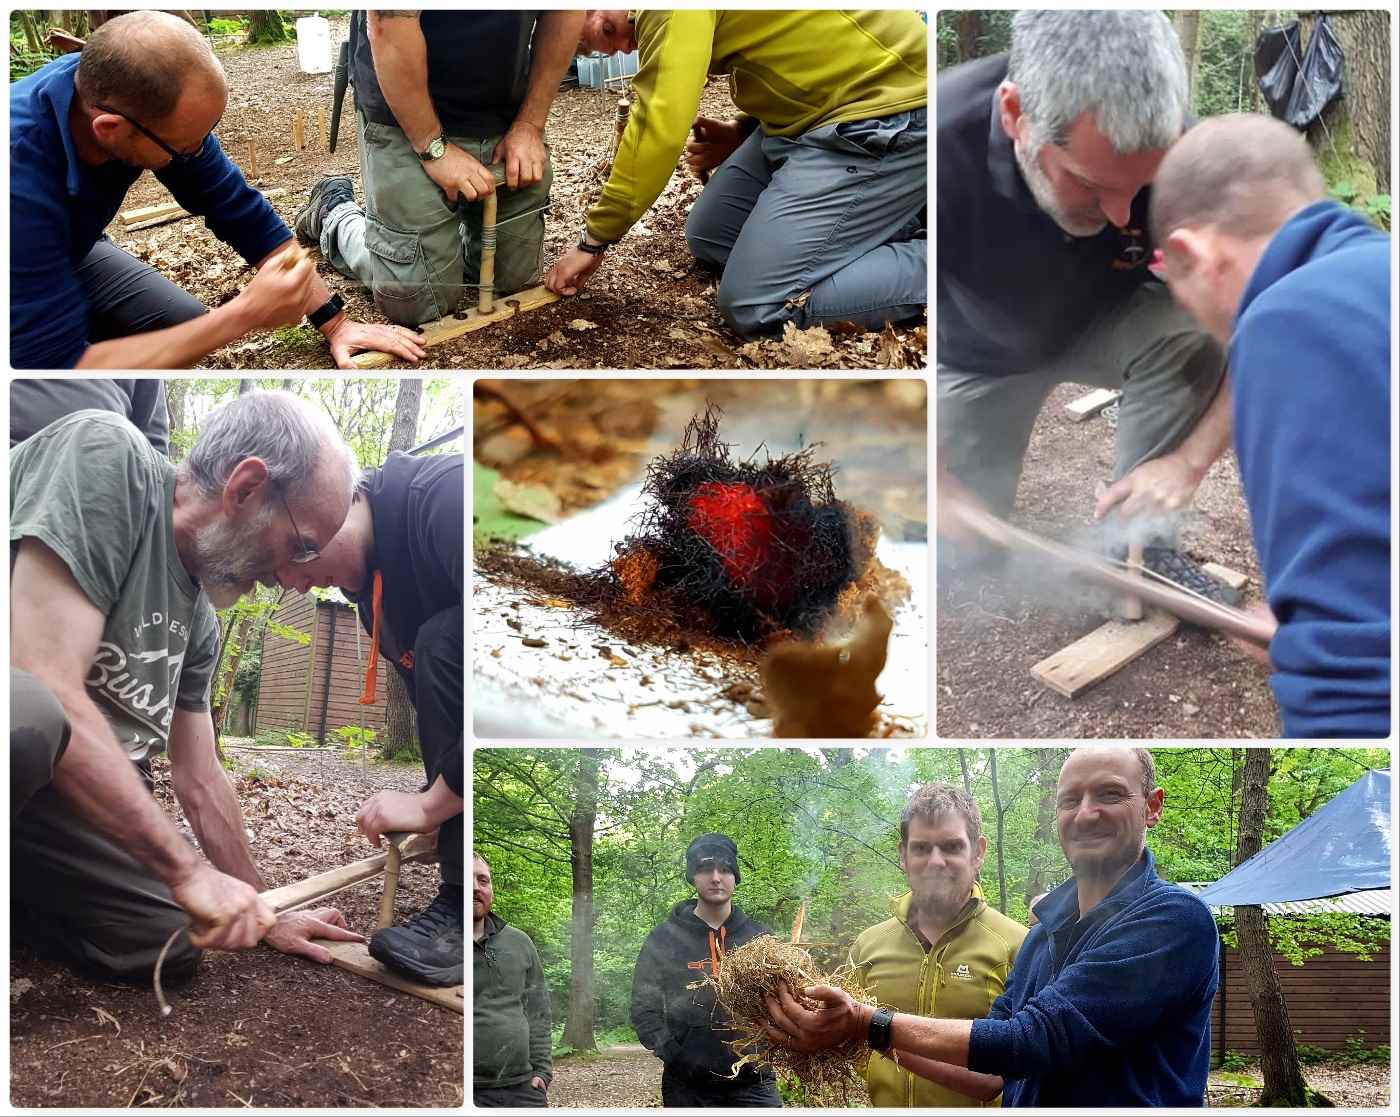
The Minimoot, like the Bushmoot, was a relaxed affair however there were a few classes. One of the first that many asked for was spoon carving – this one went to Wayne to organise with all ages involved – it was great to see all that knowledge being shared.
Multi activities
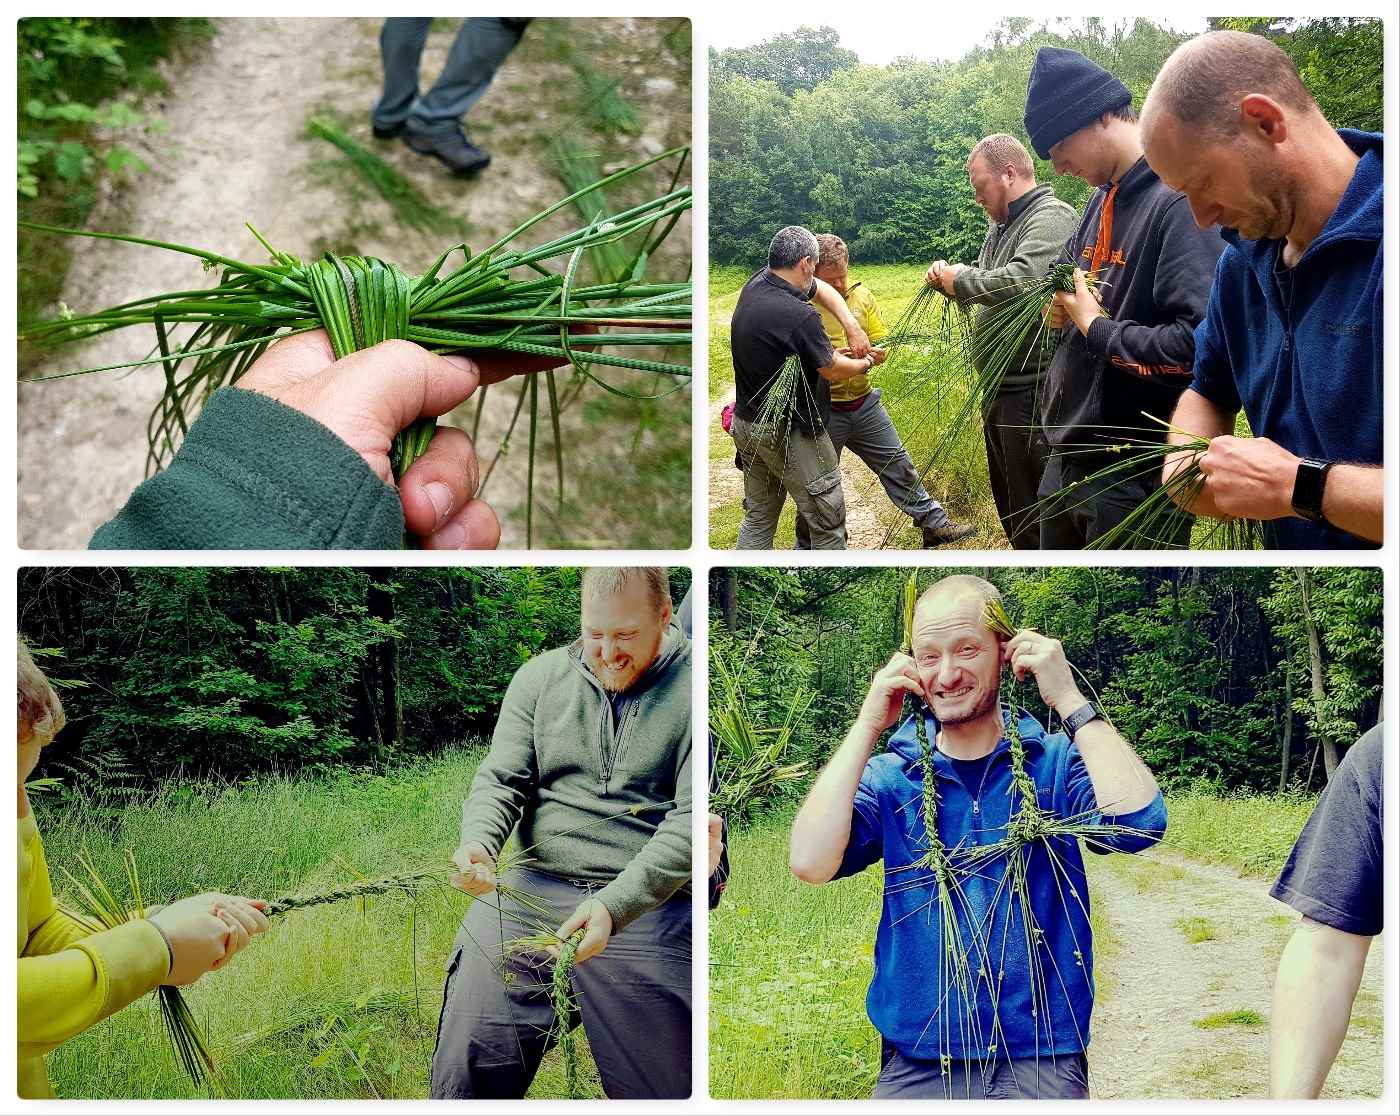
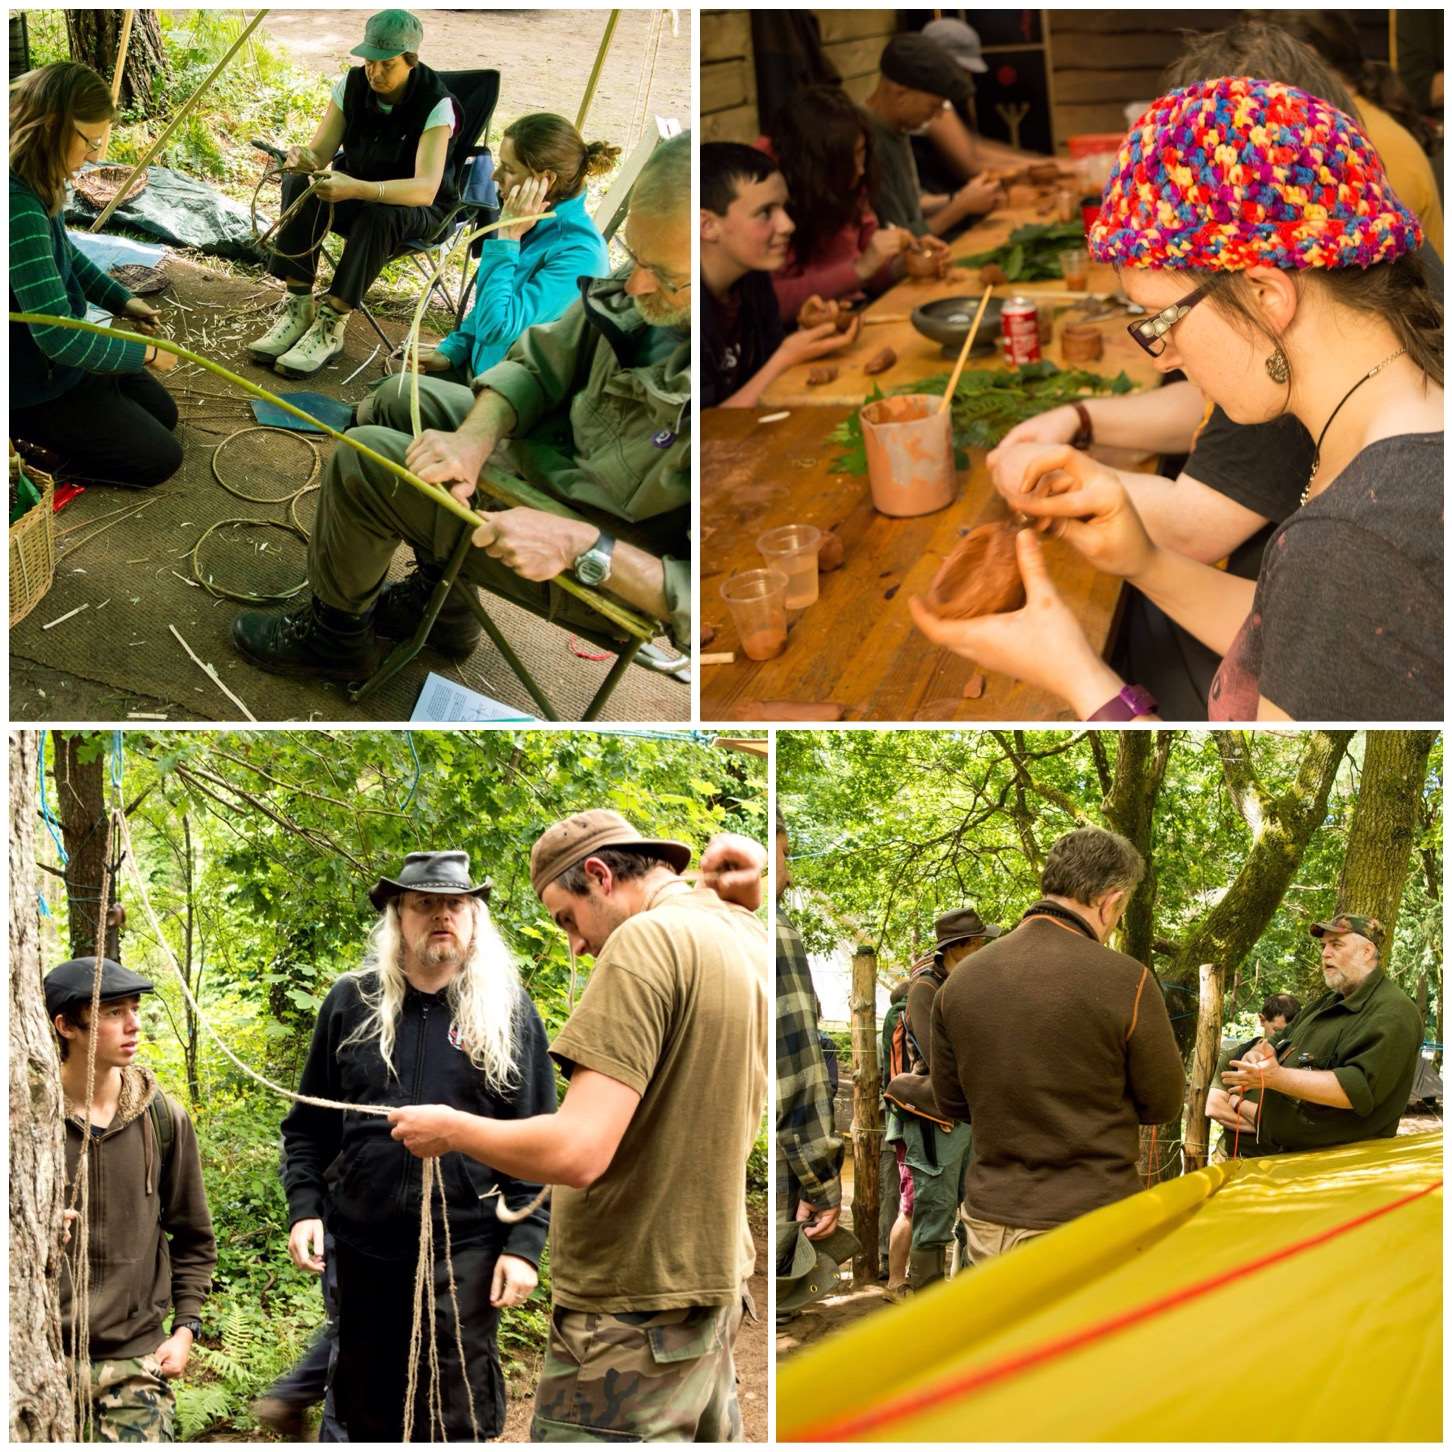
If spoon-whittling didn’t appeal, we had a lot more going on over the weekend including;
Net needle carving
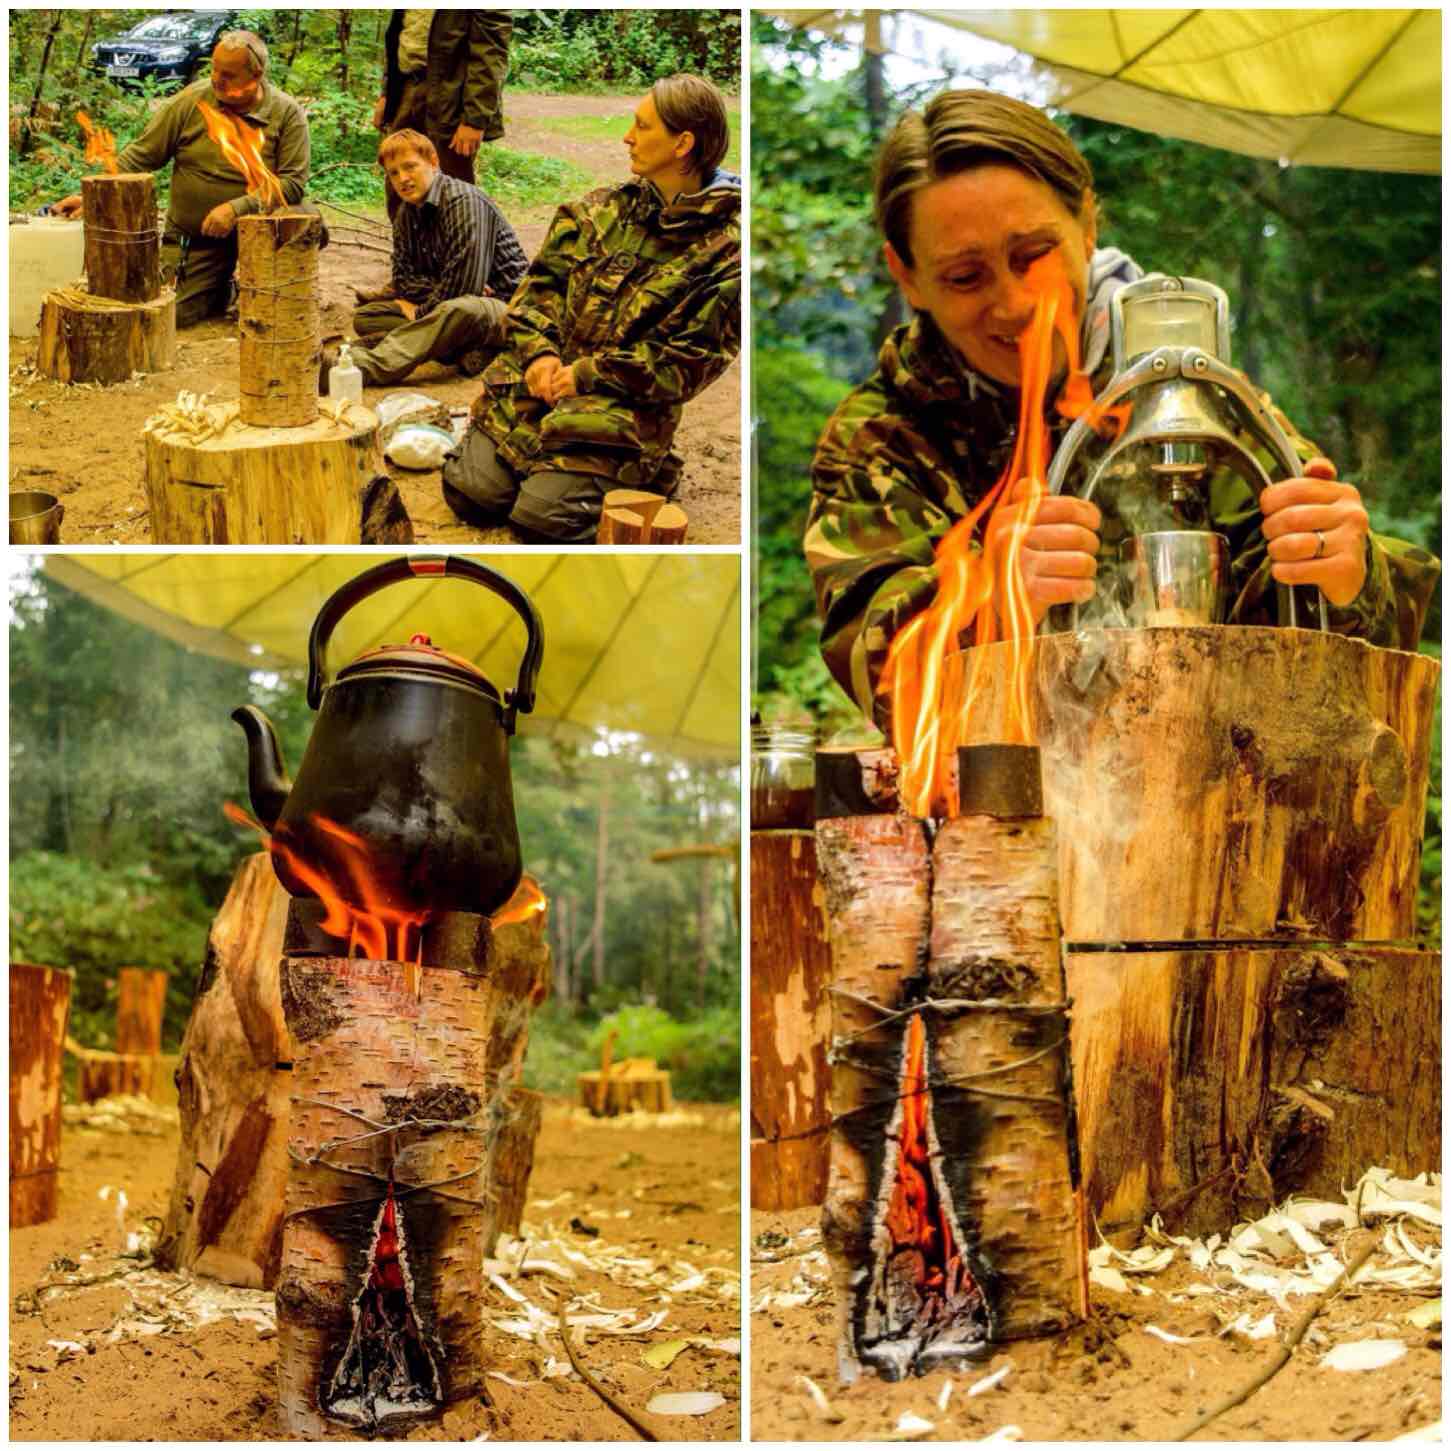
Log rockets
Nordic braiding
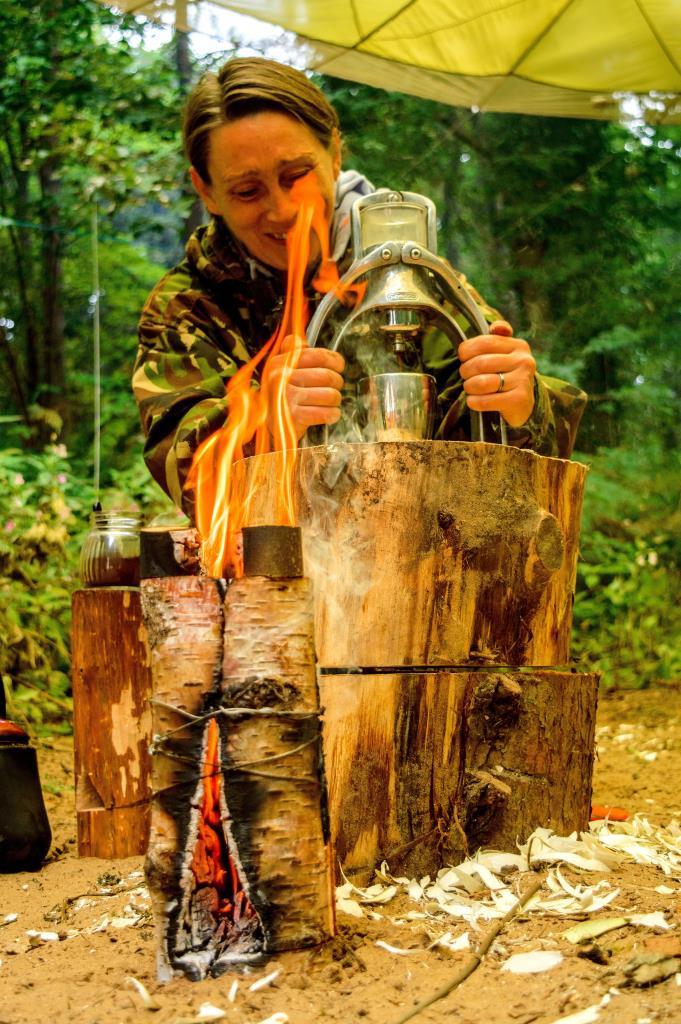
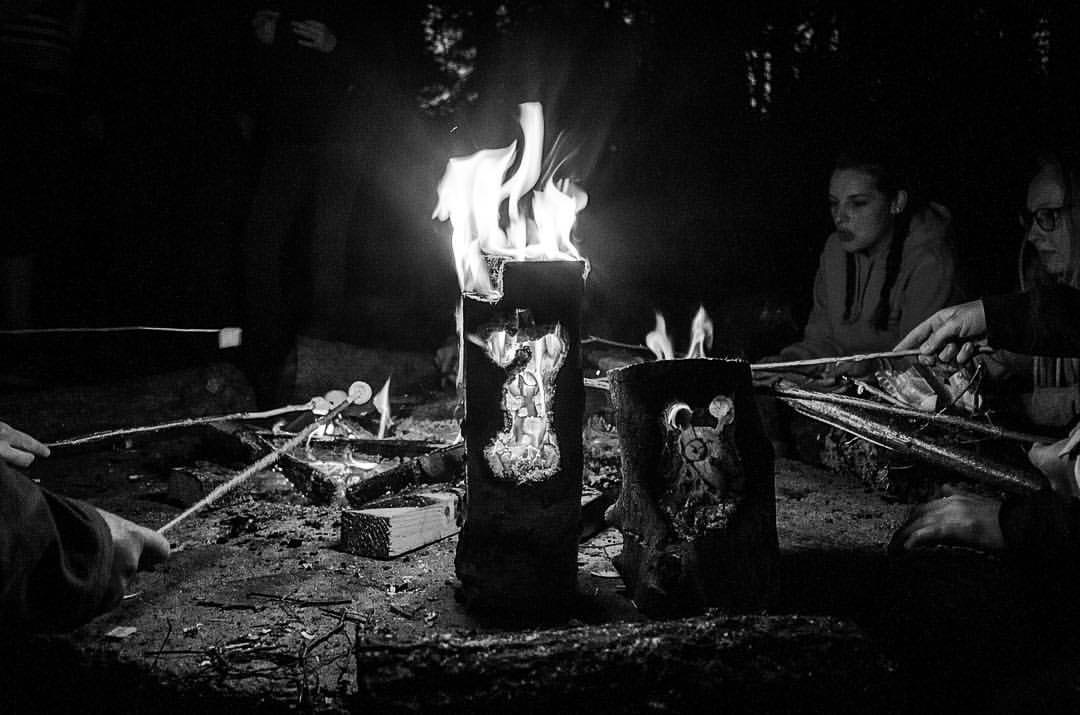
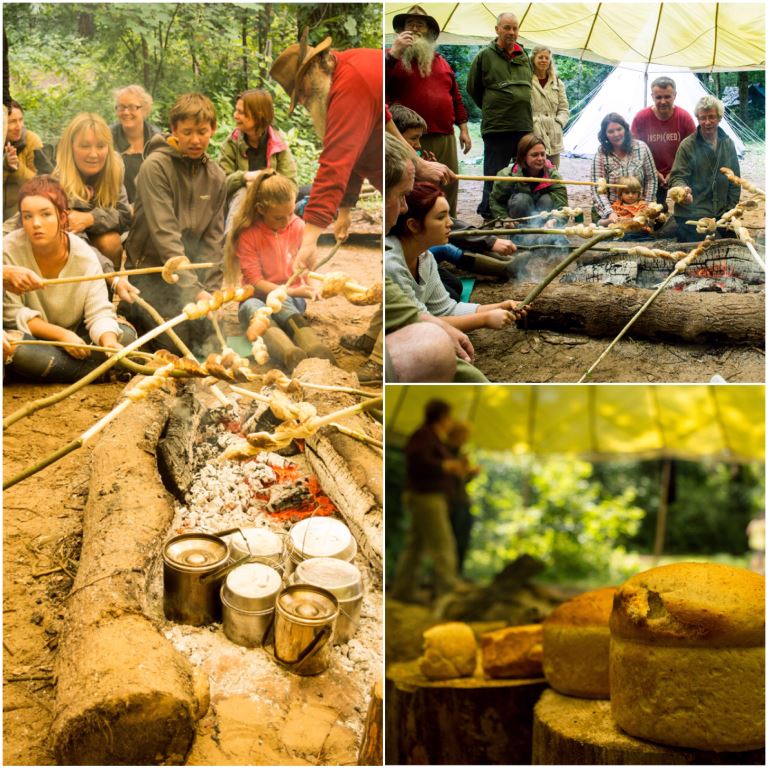
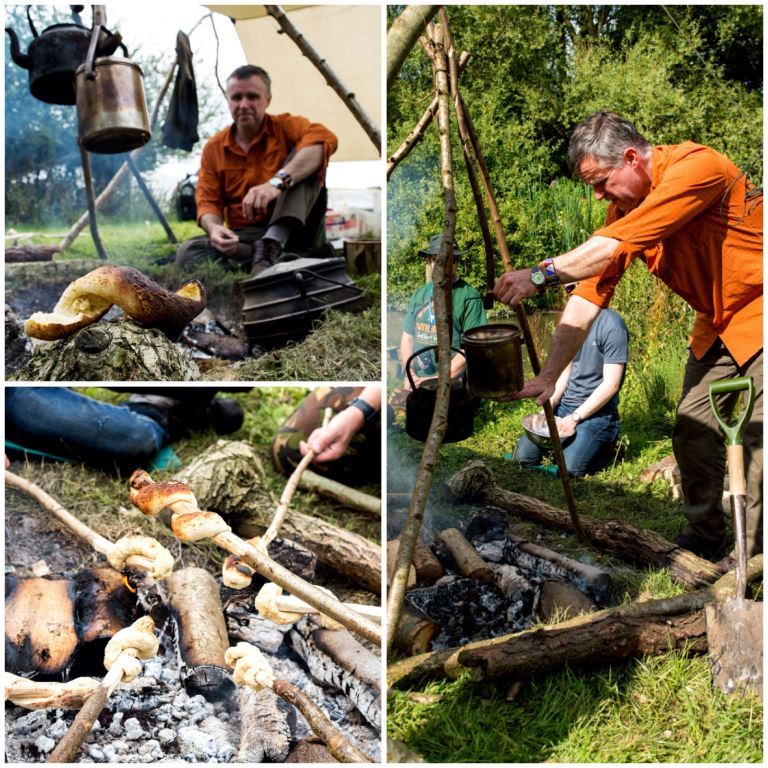
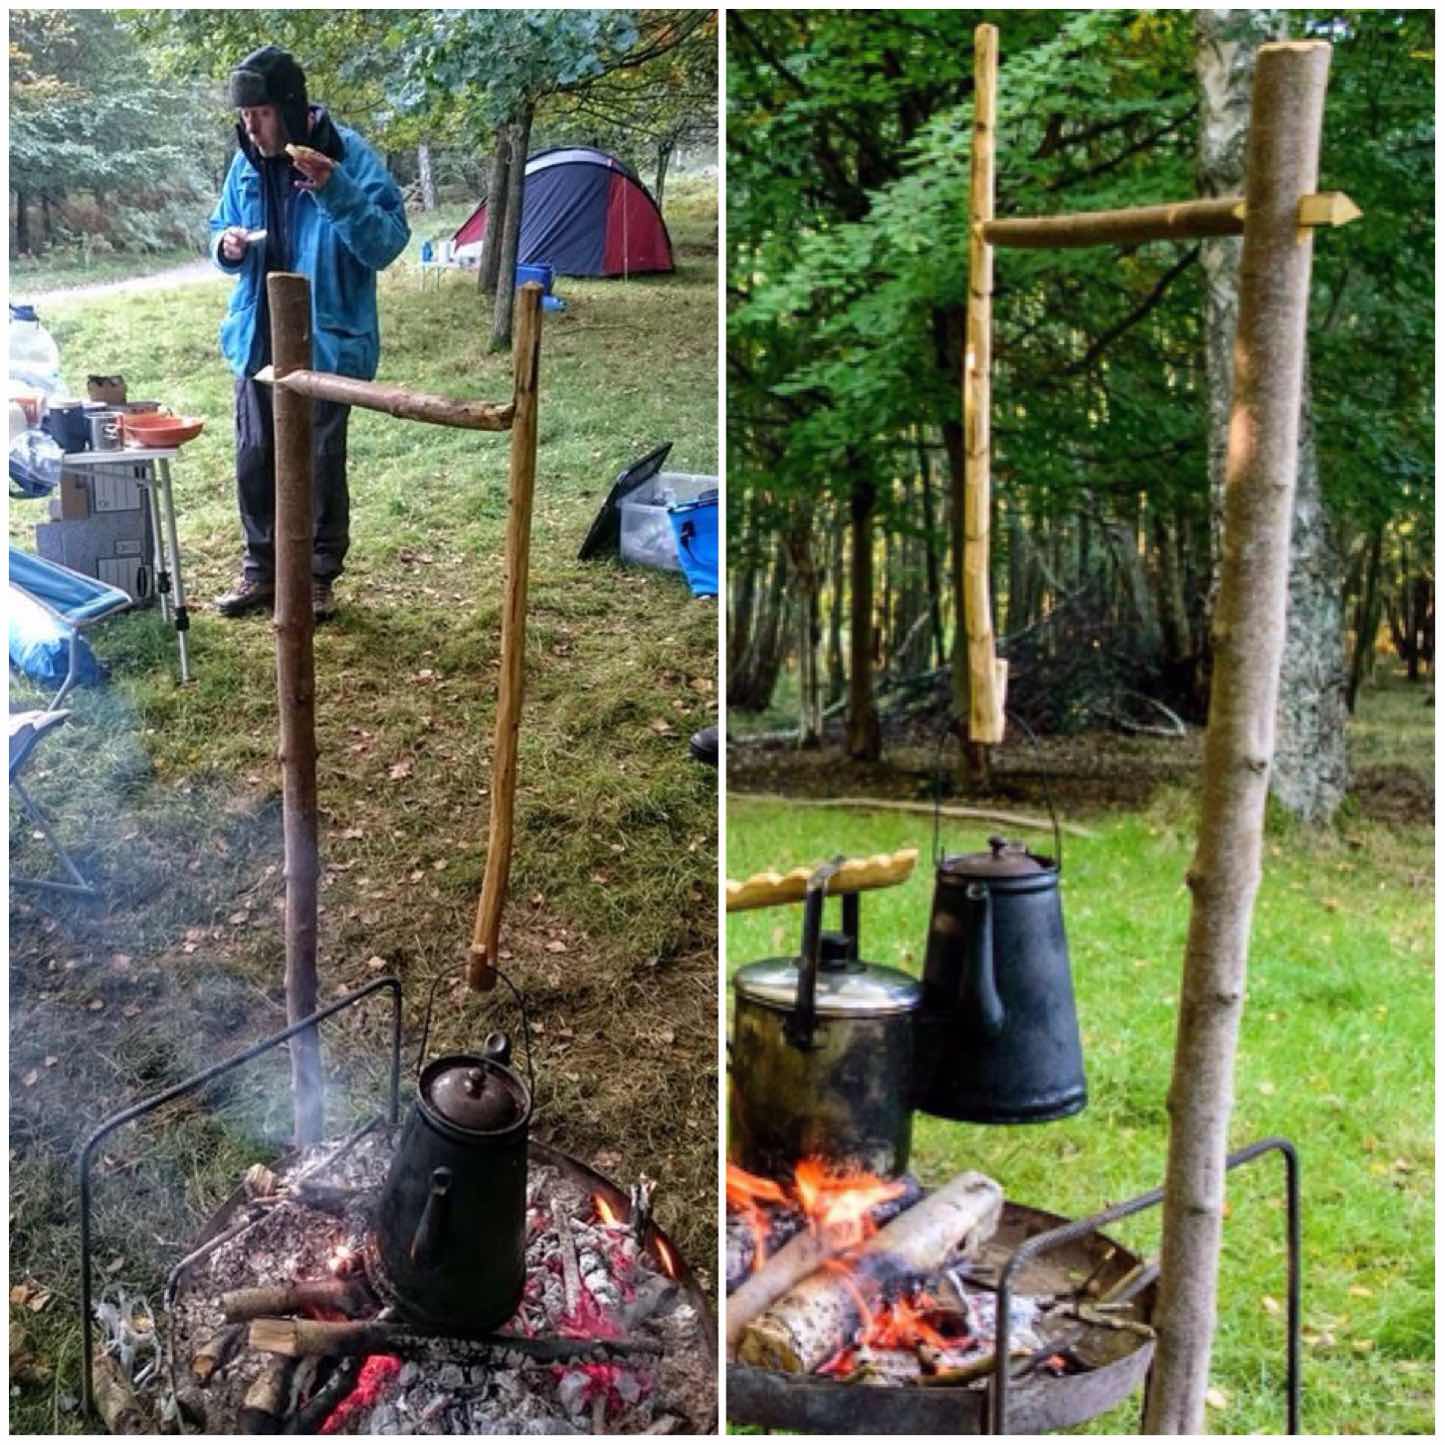
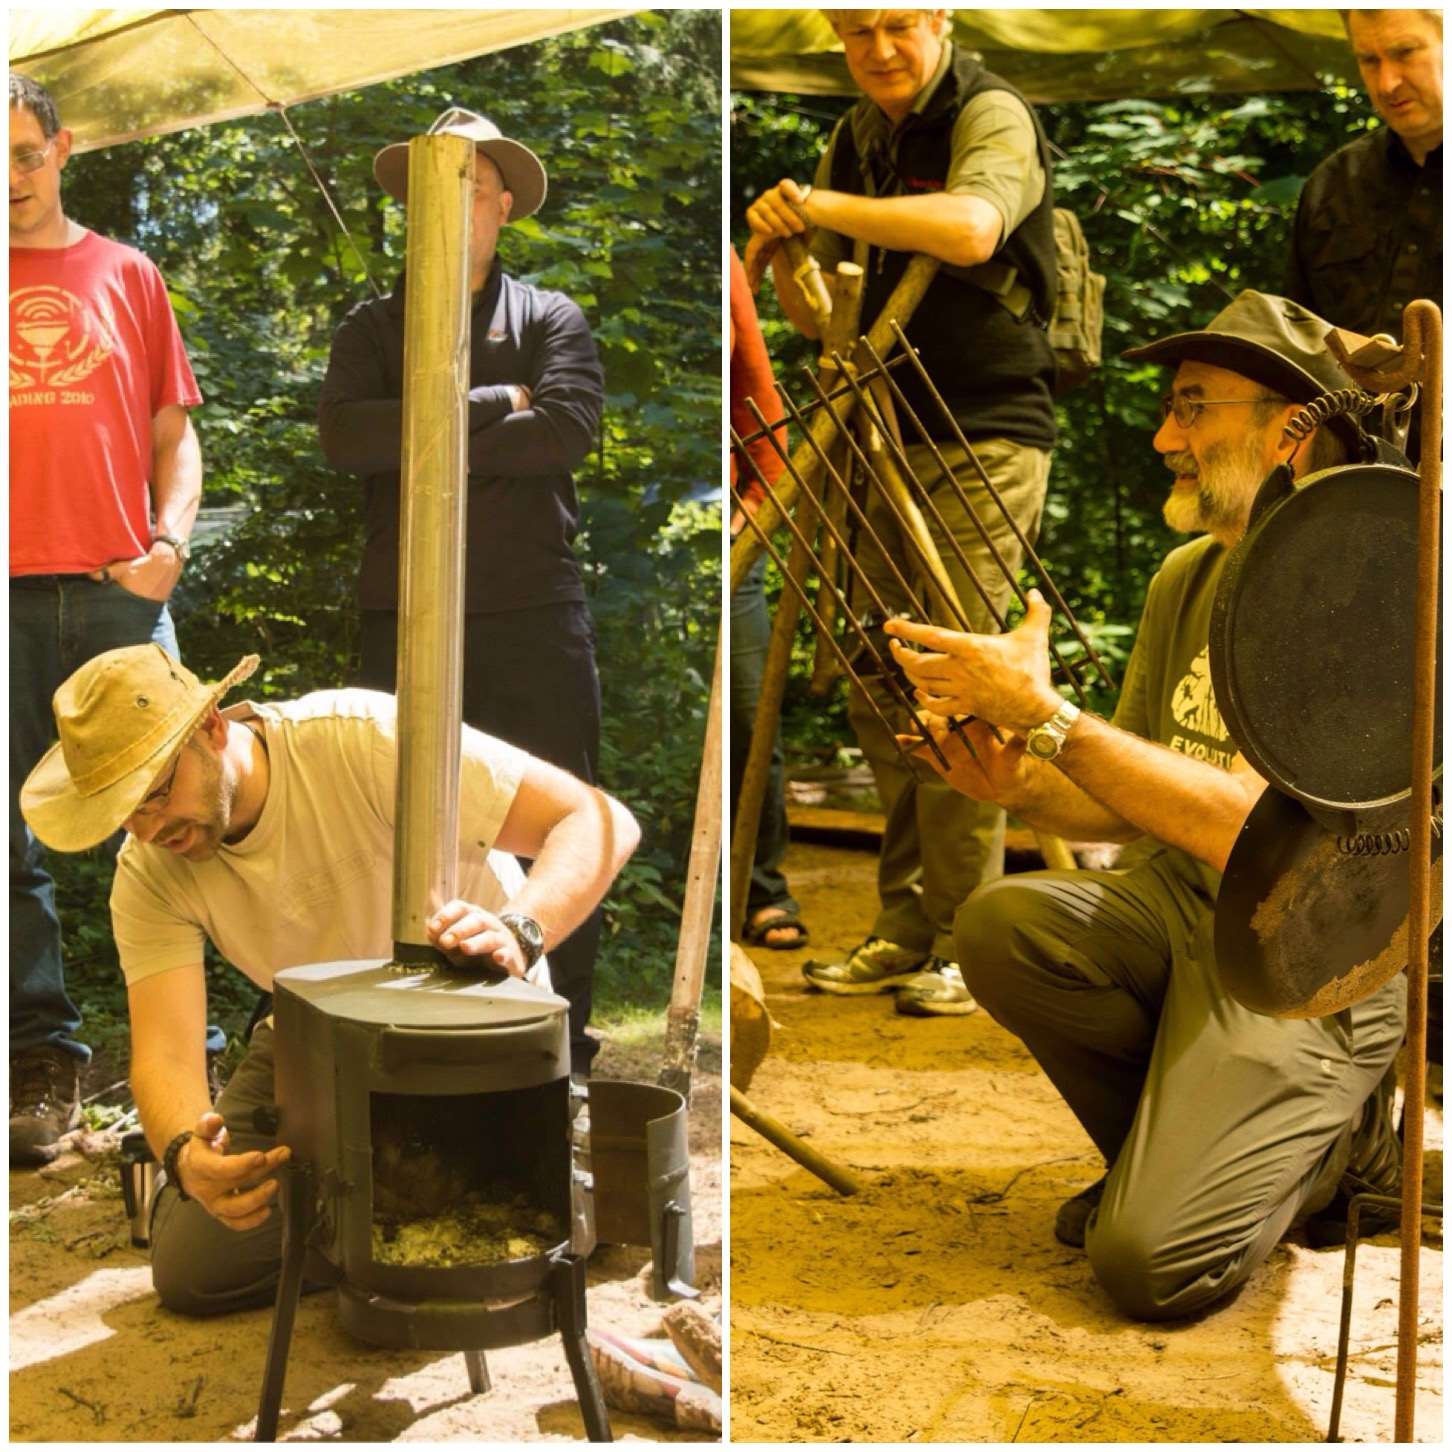
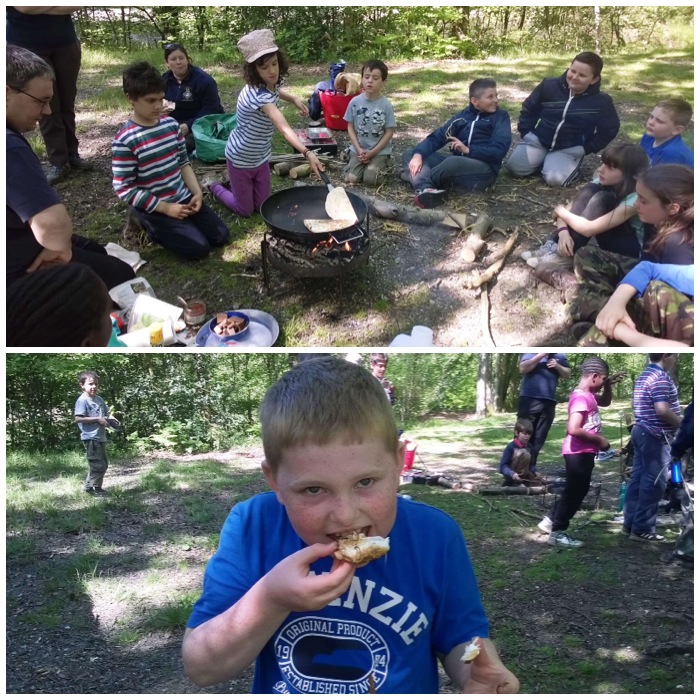
Campfire cooking constructions
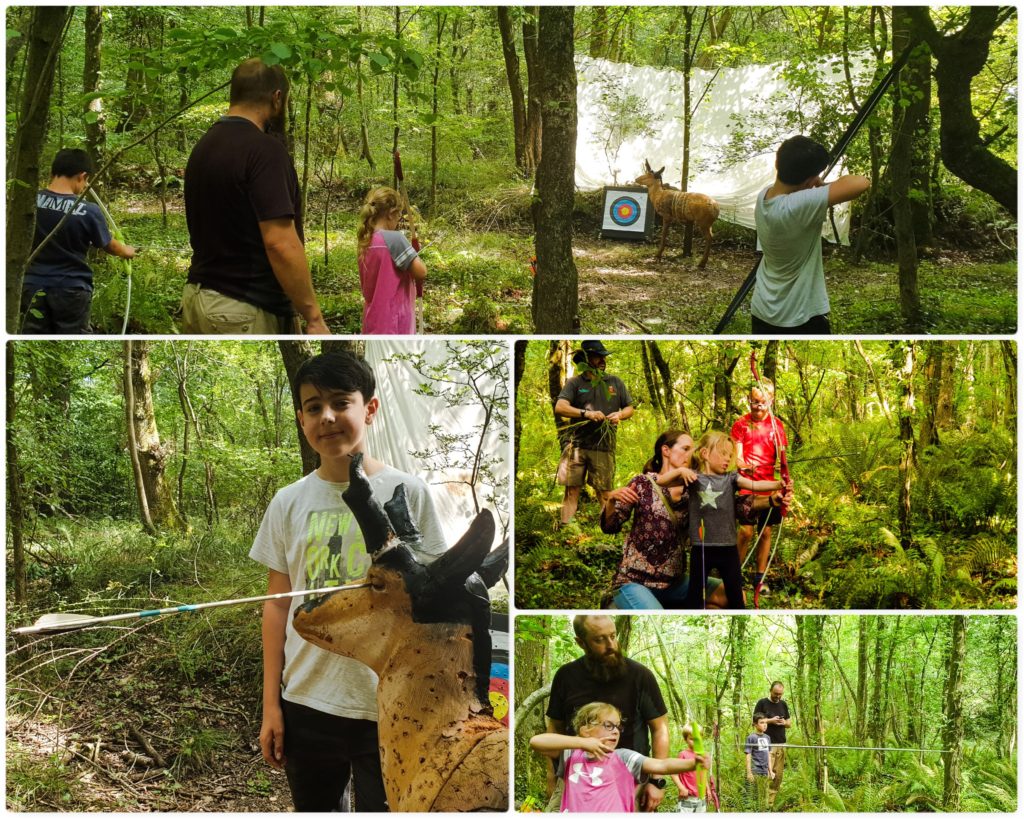
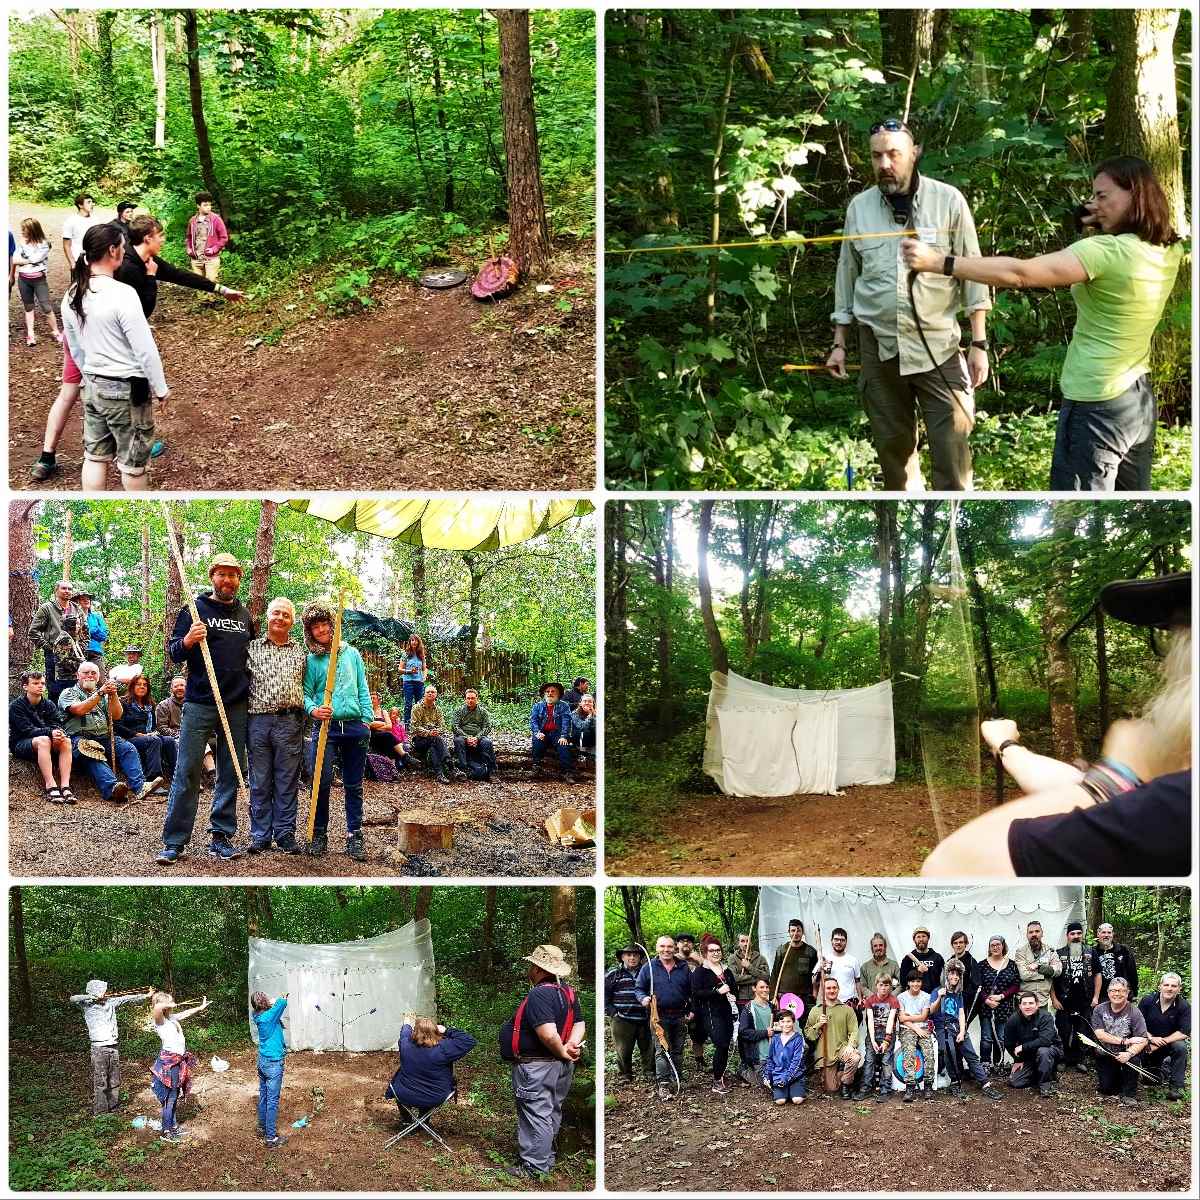
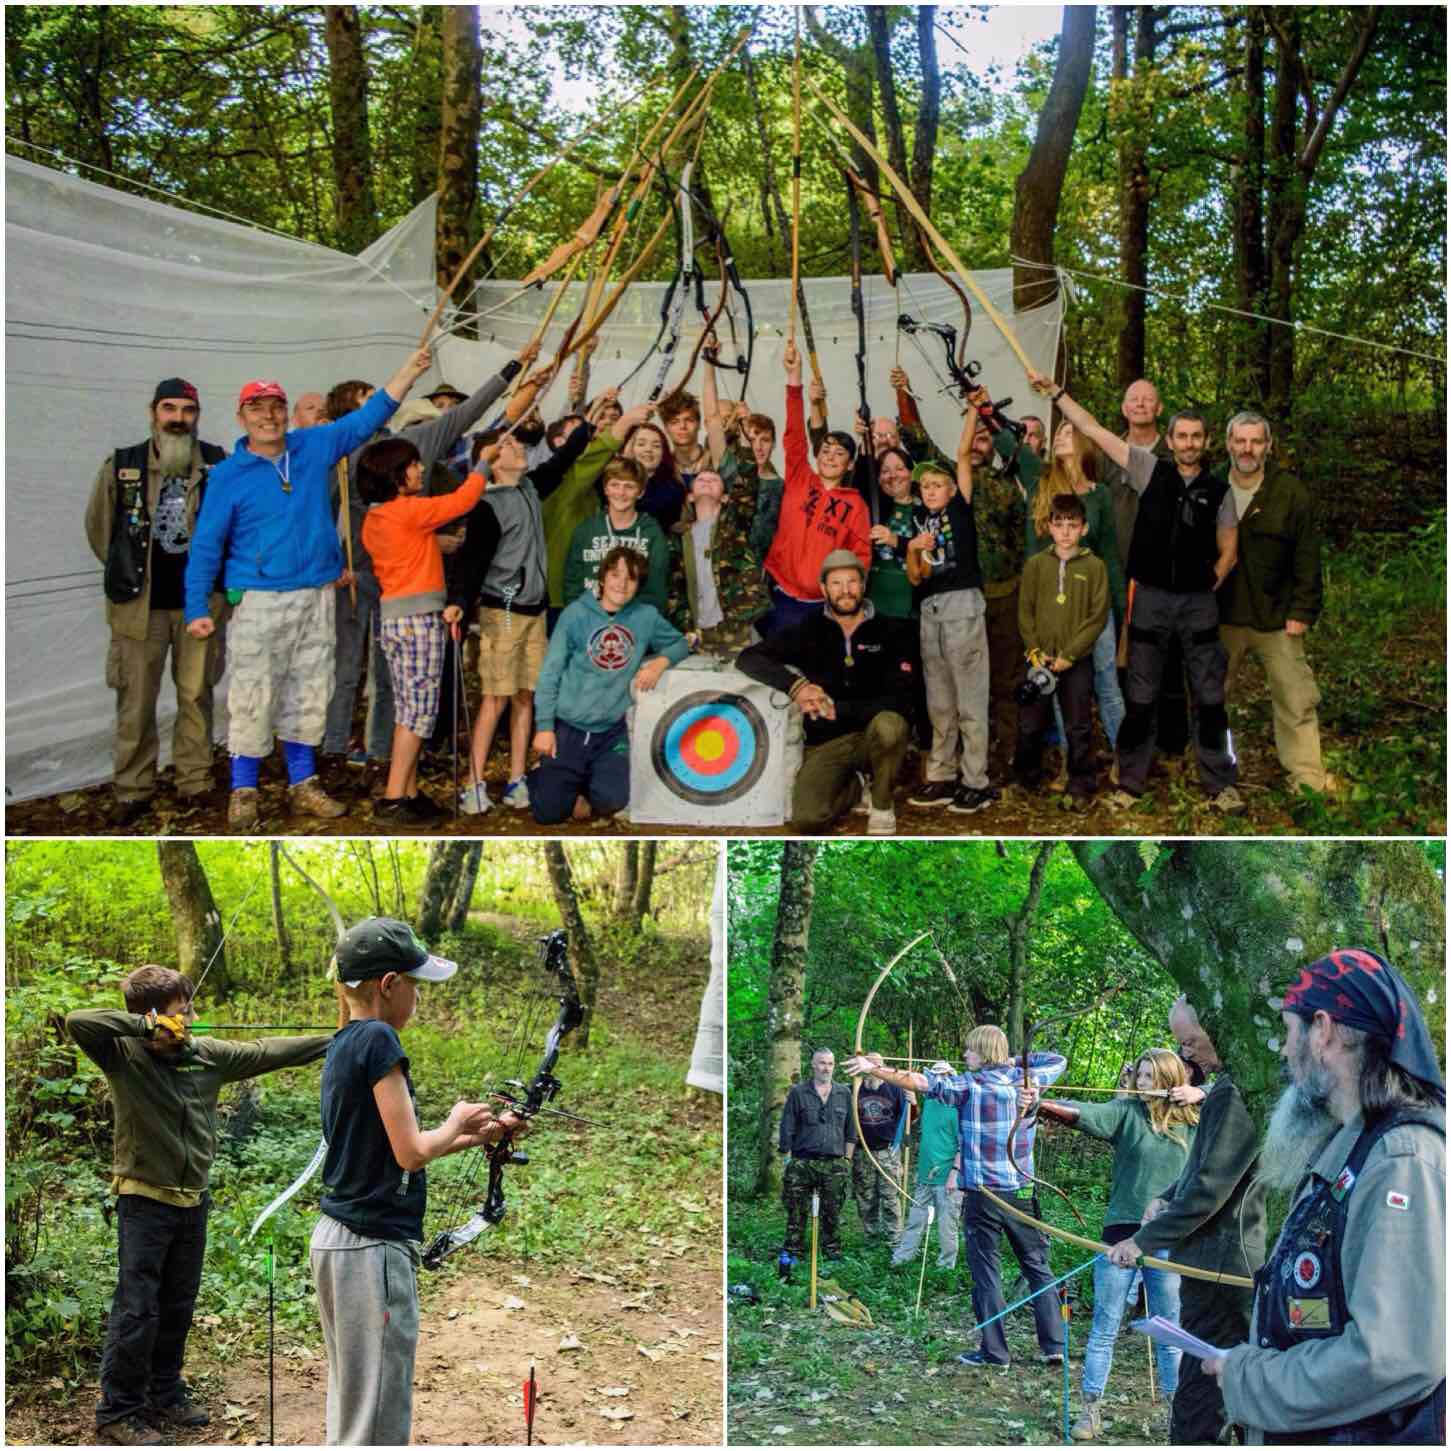
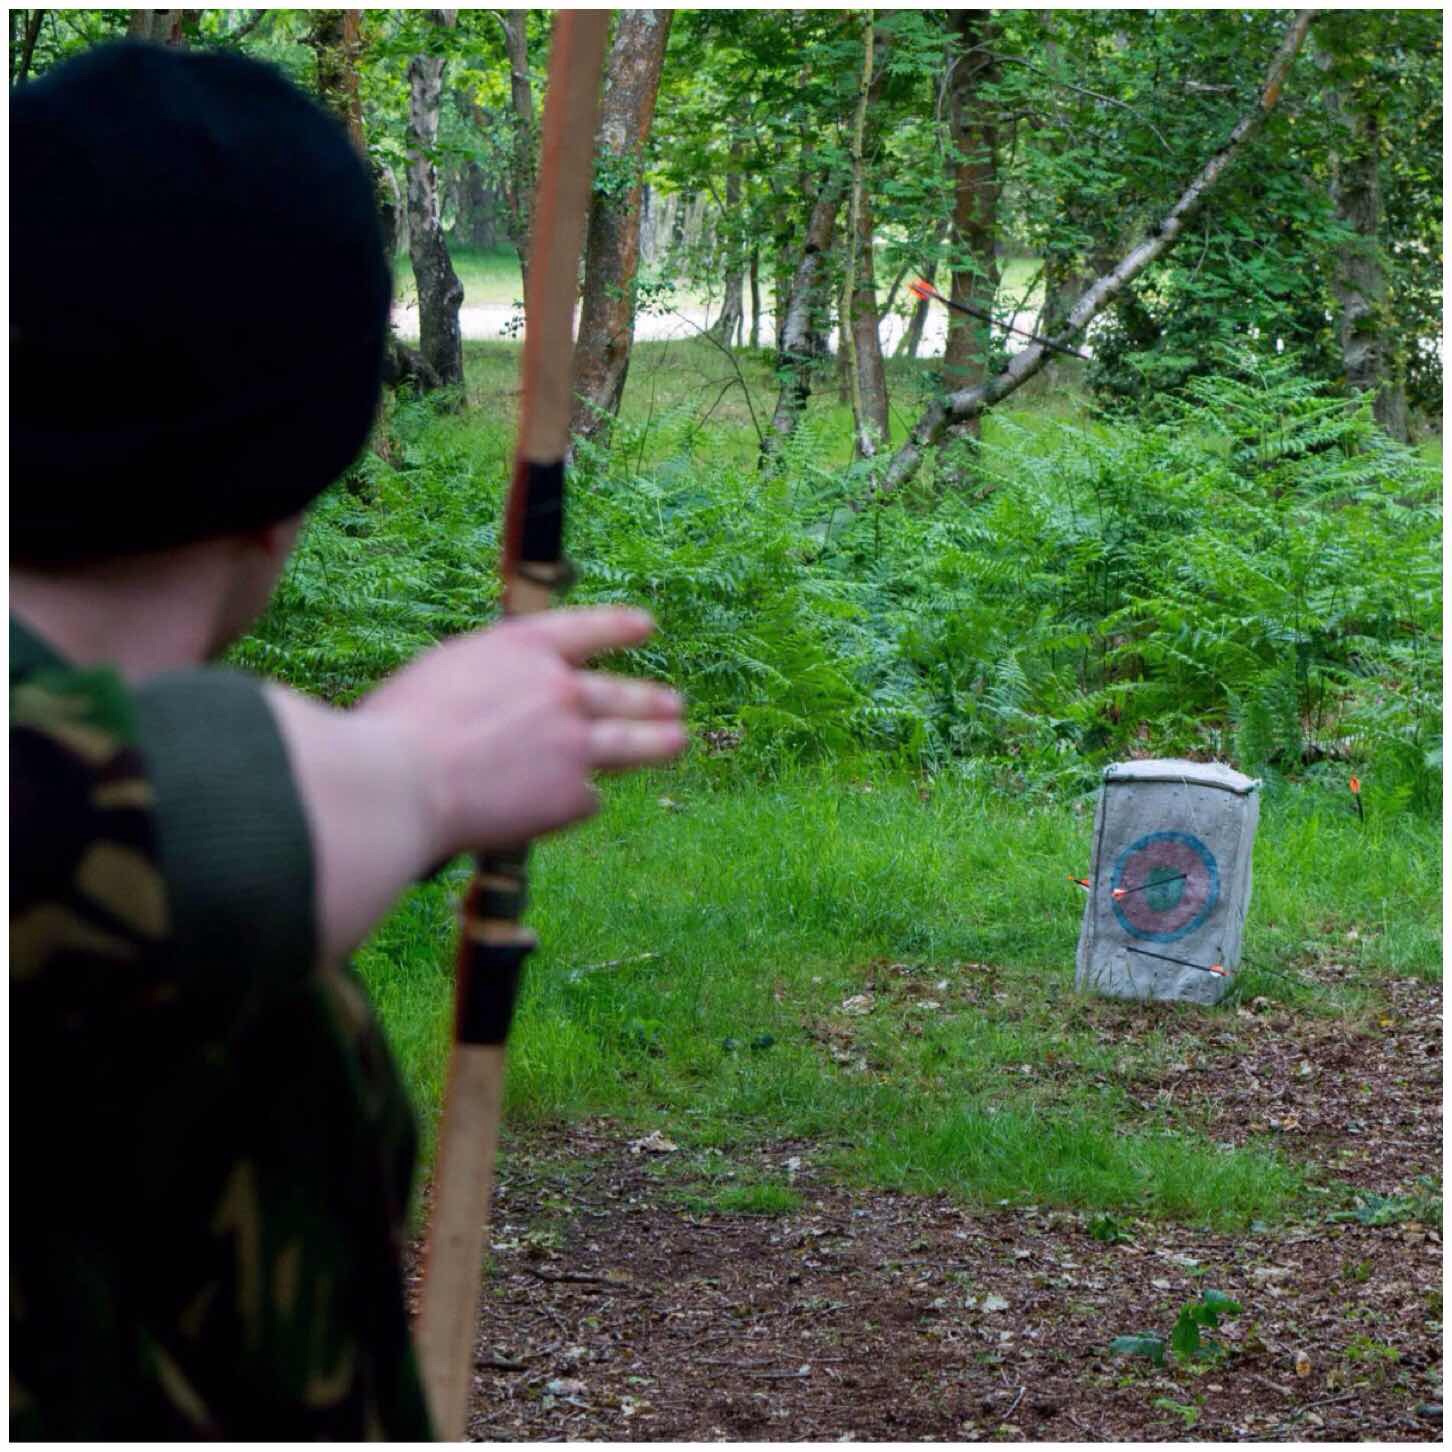
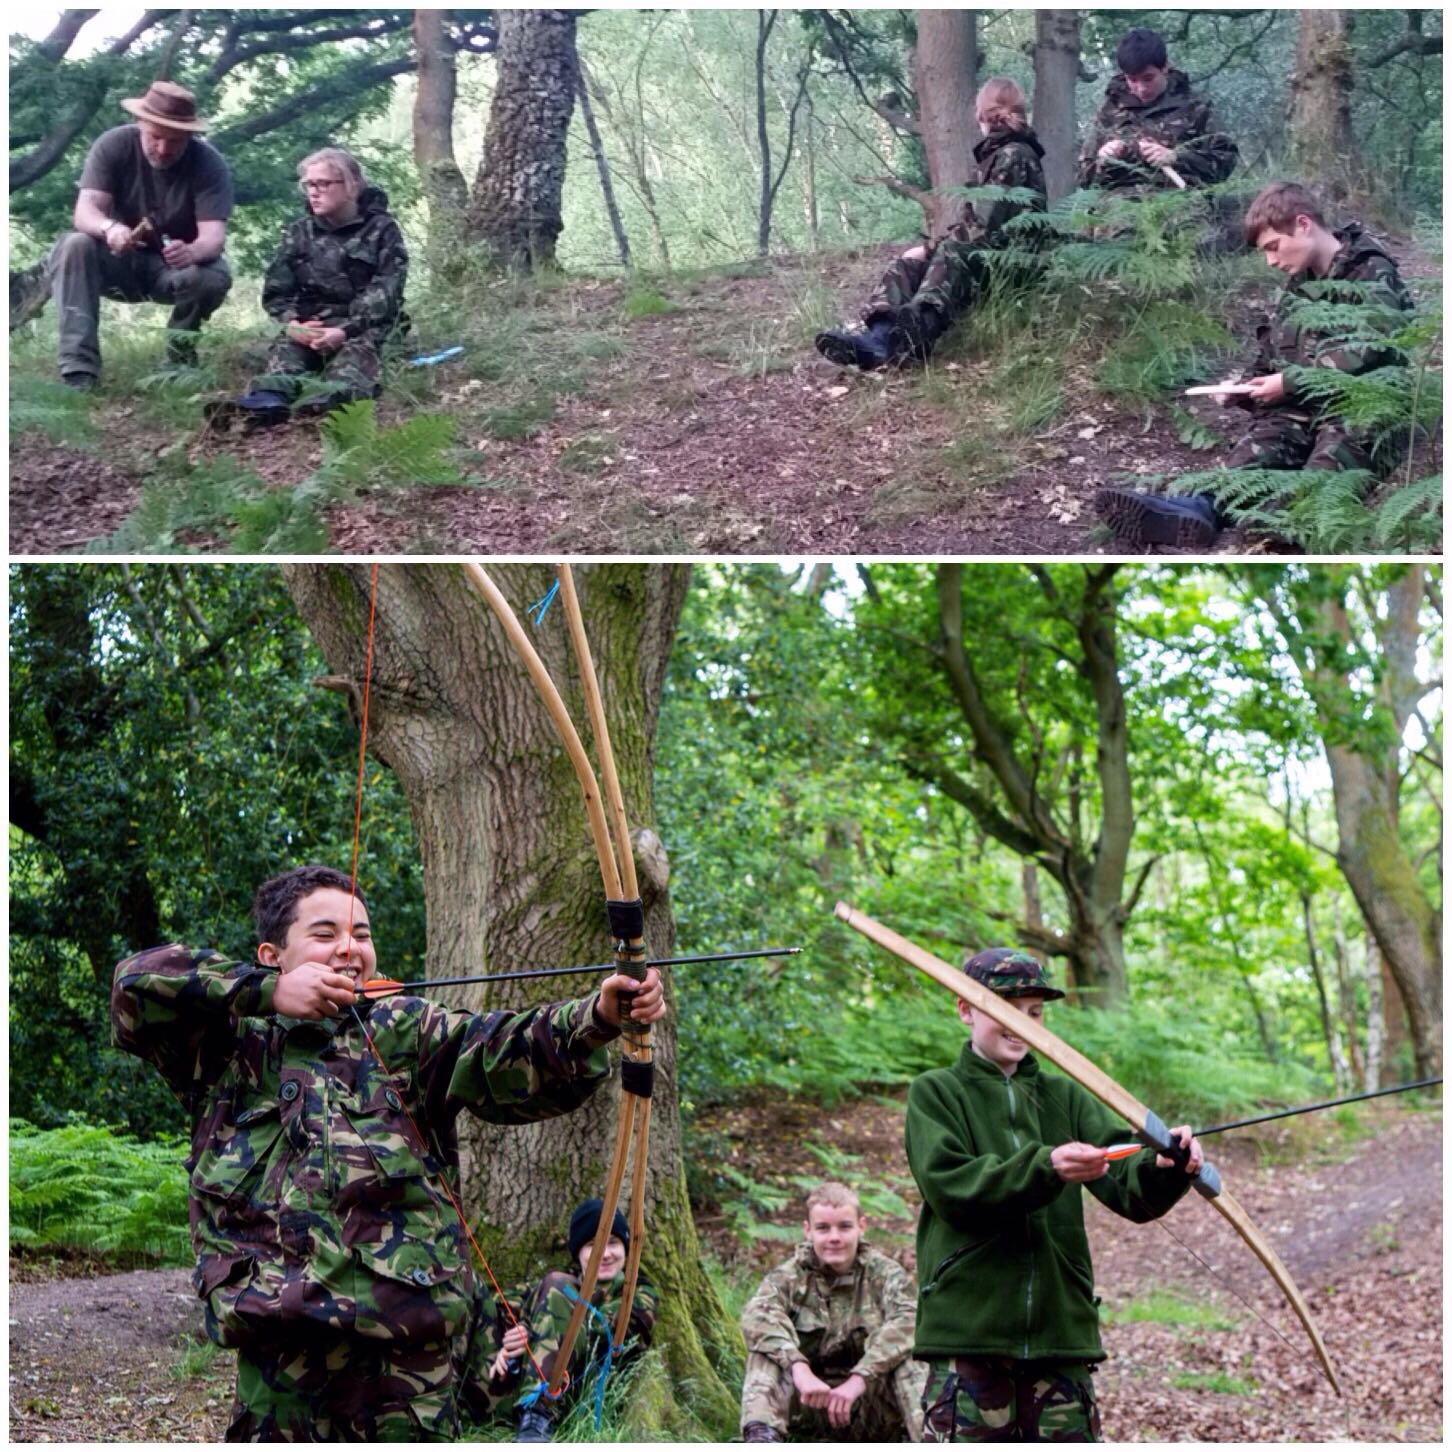
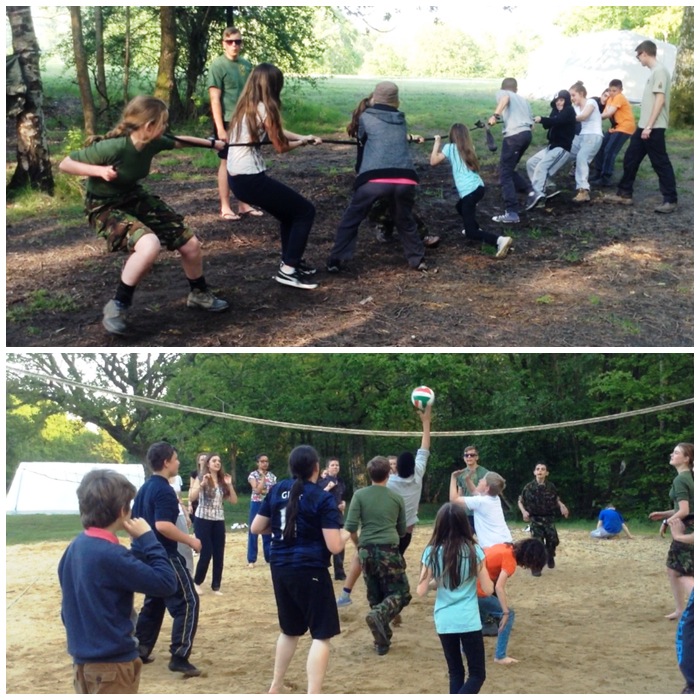
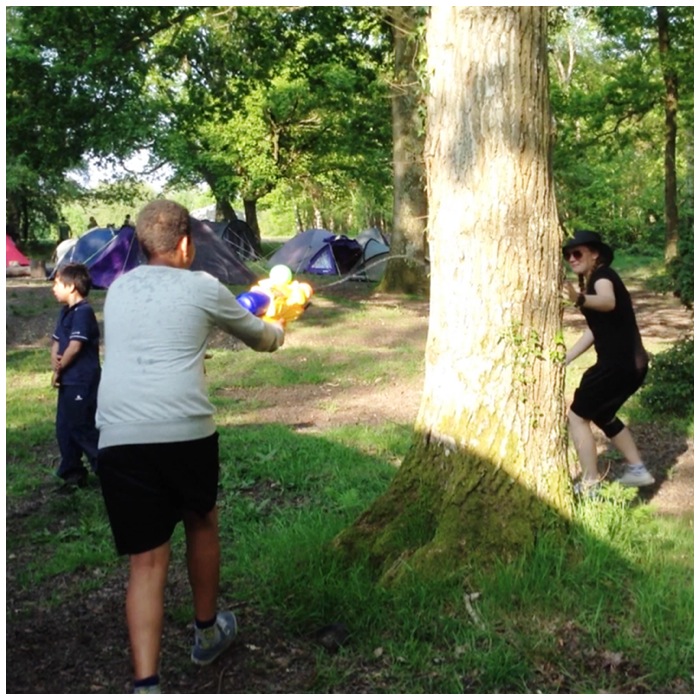
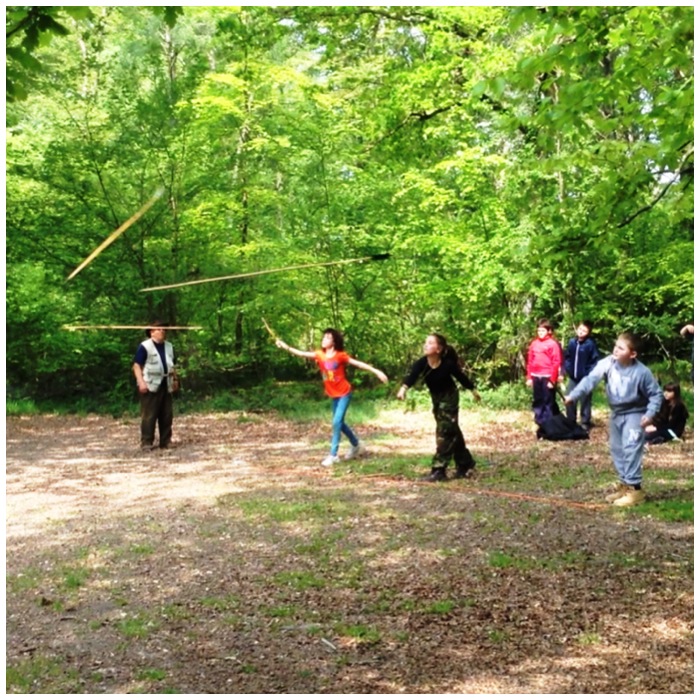
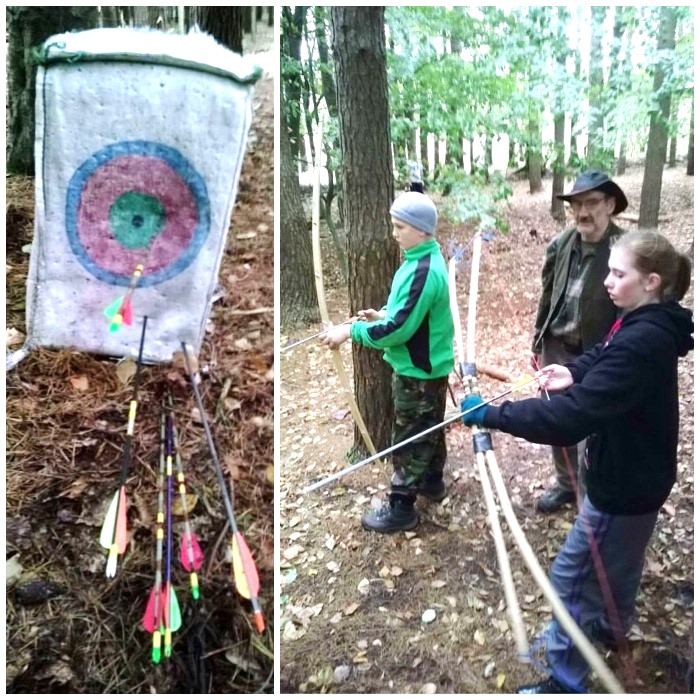
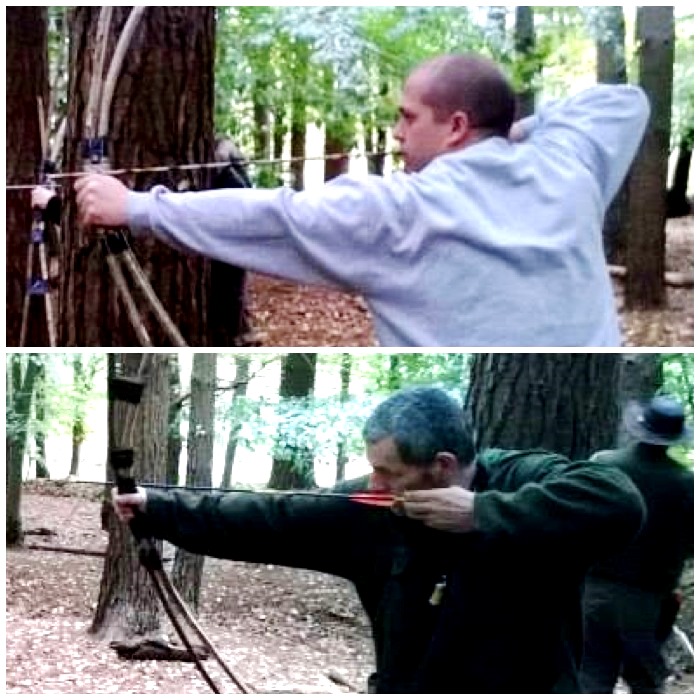
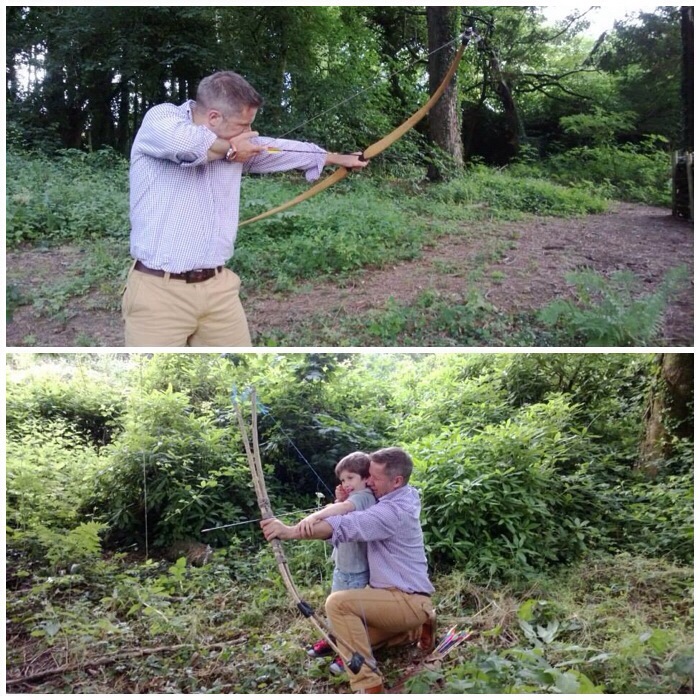
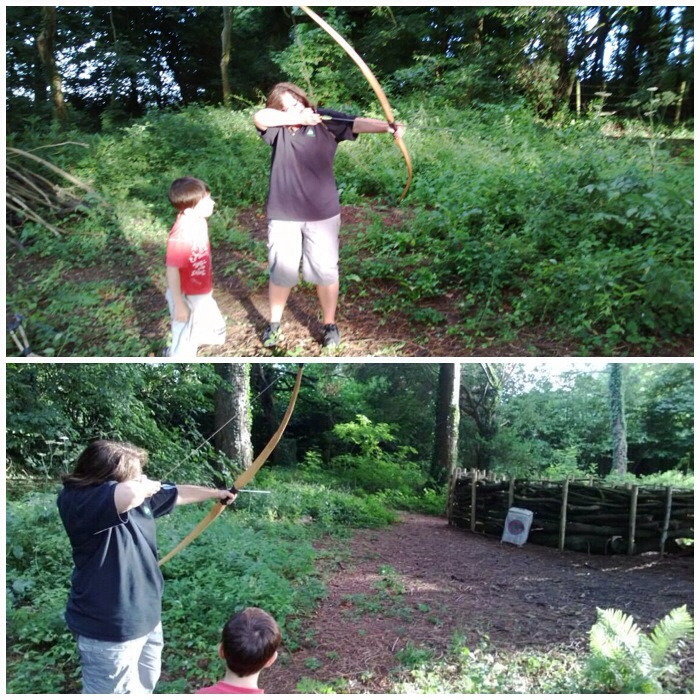
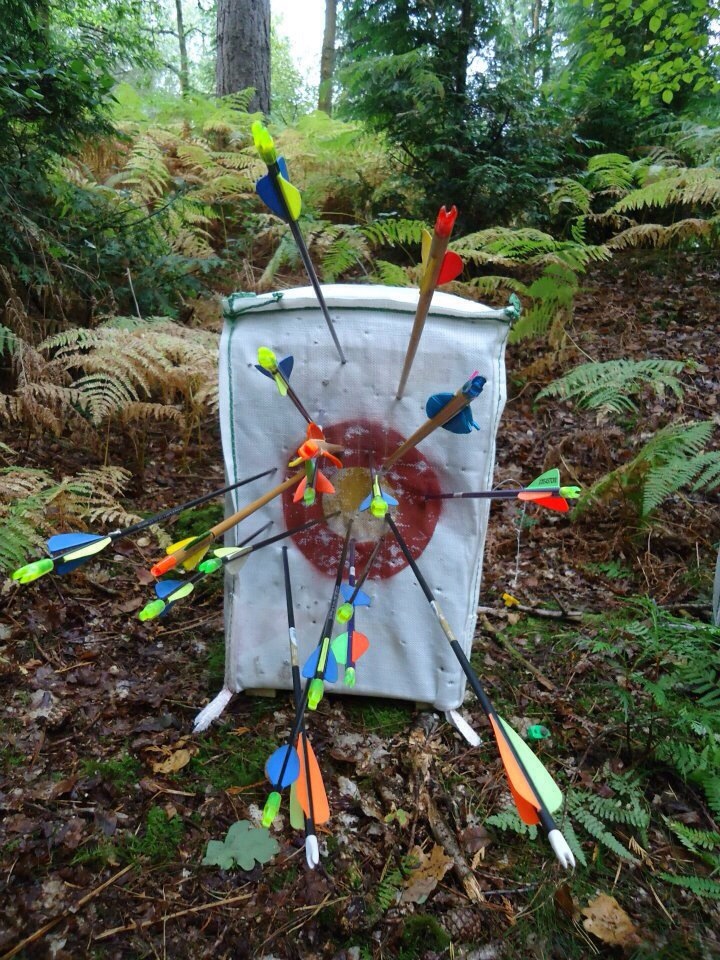
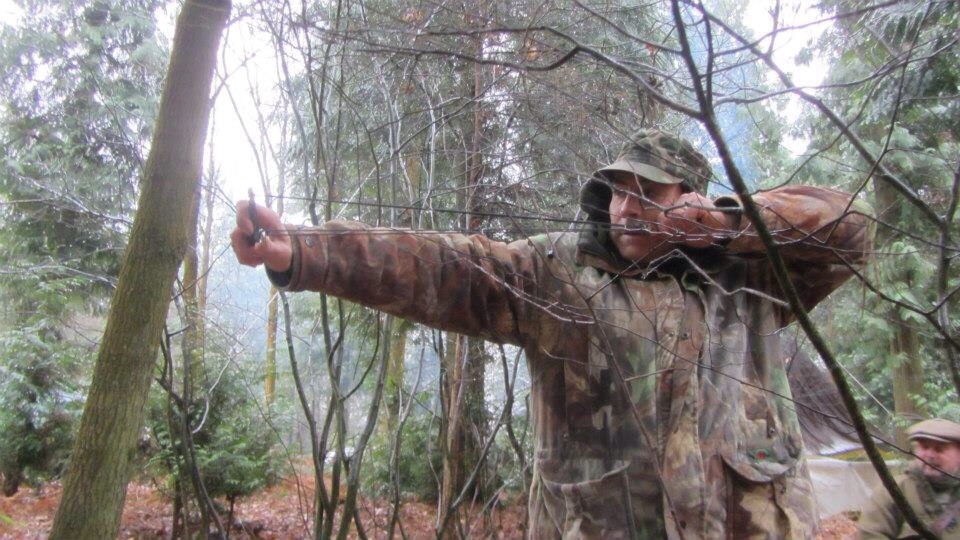
Down on the Range
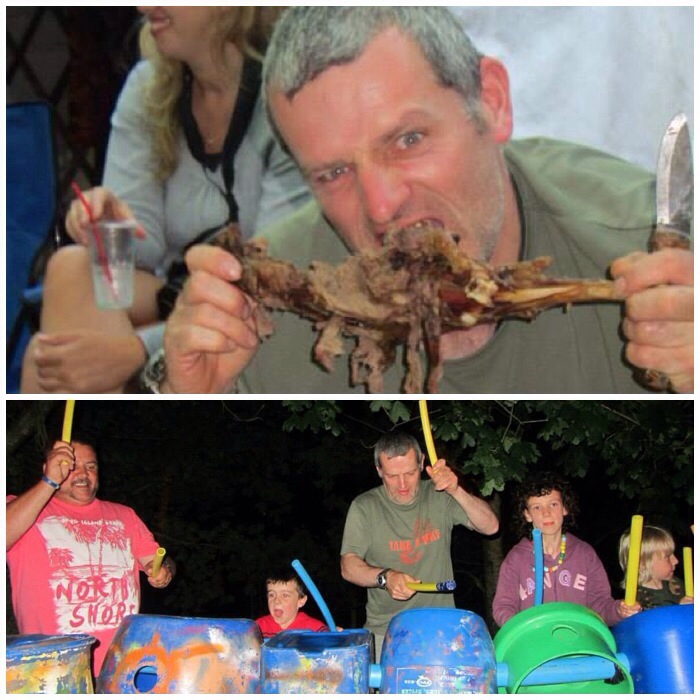
Usually in the afternoon we had the range up and running – we had all sorts of bows to choose from and Finlay was happy to be shooting some Mint Imperials down the range from his catapult.
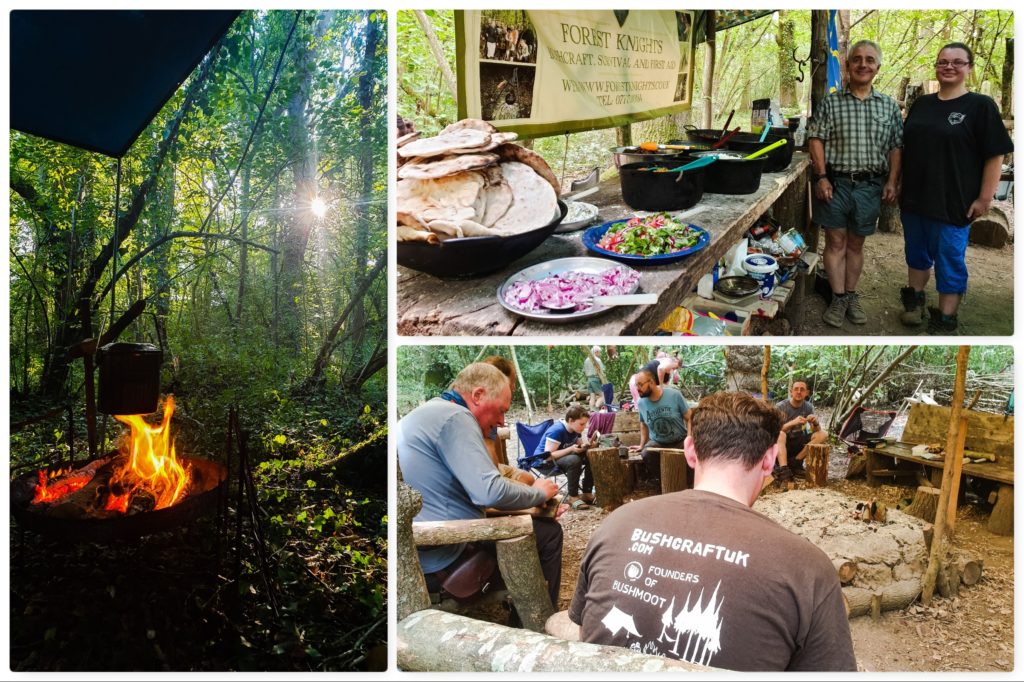
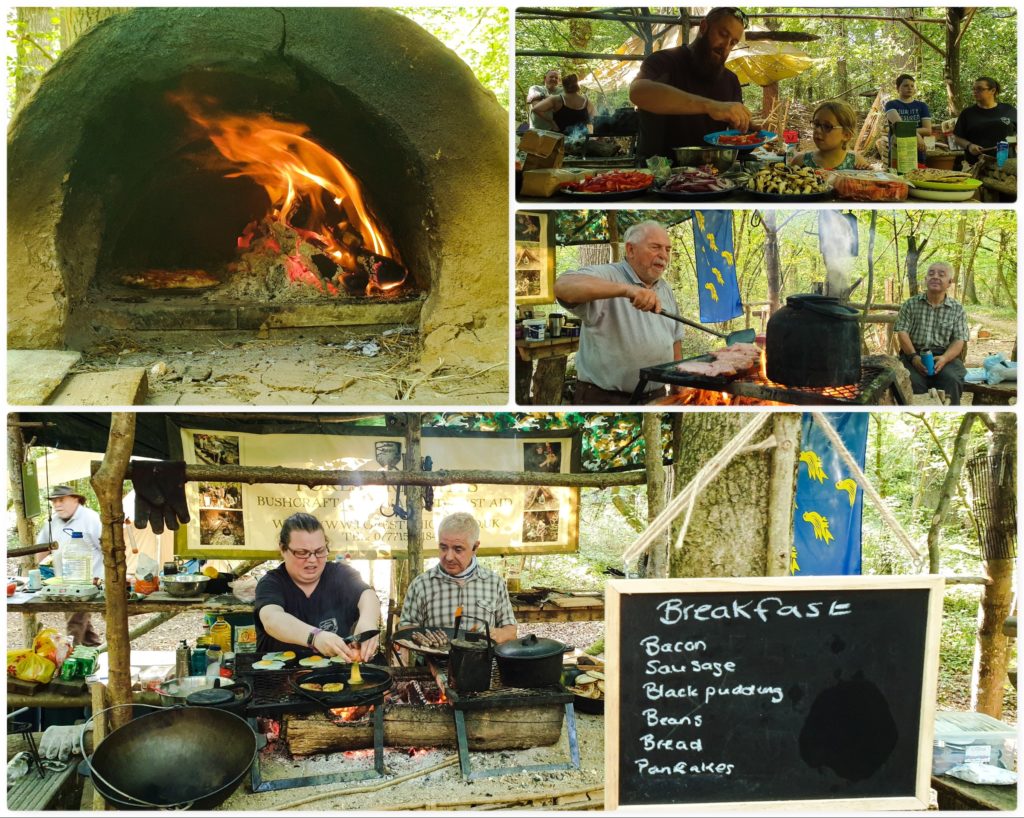
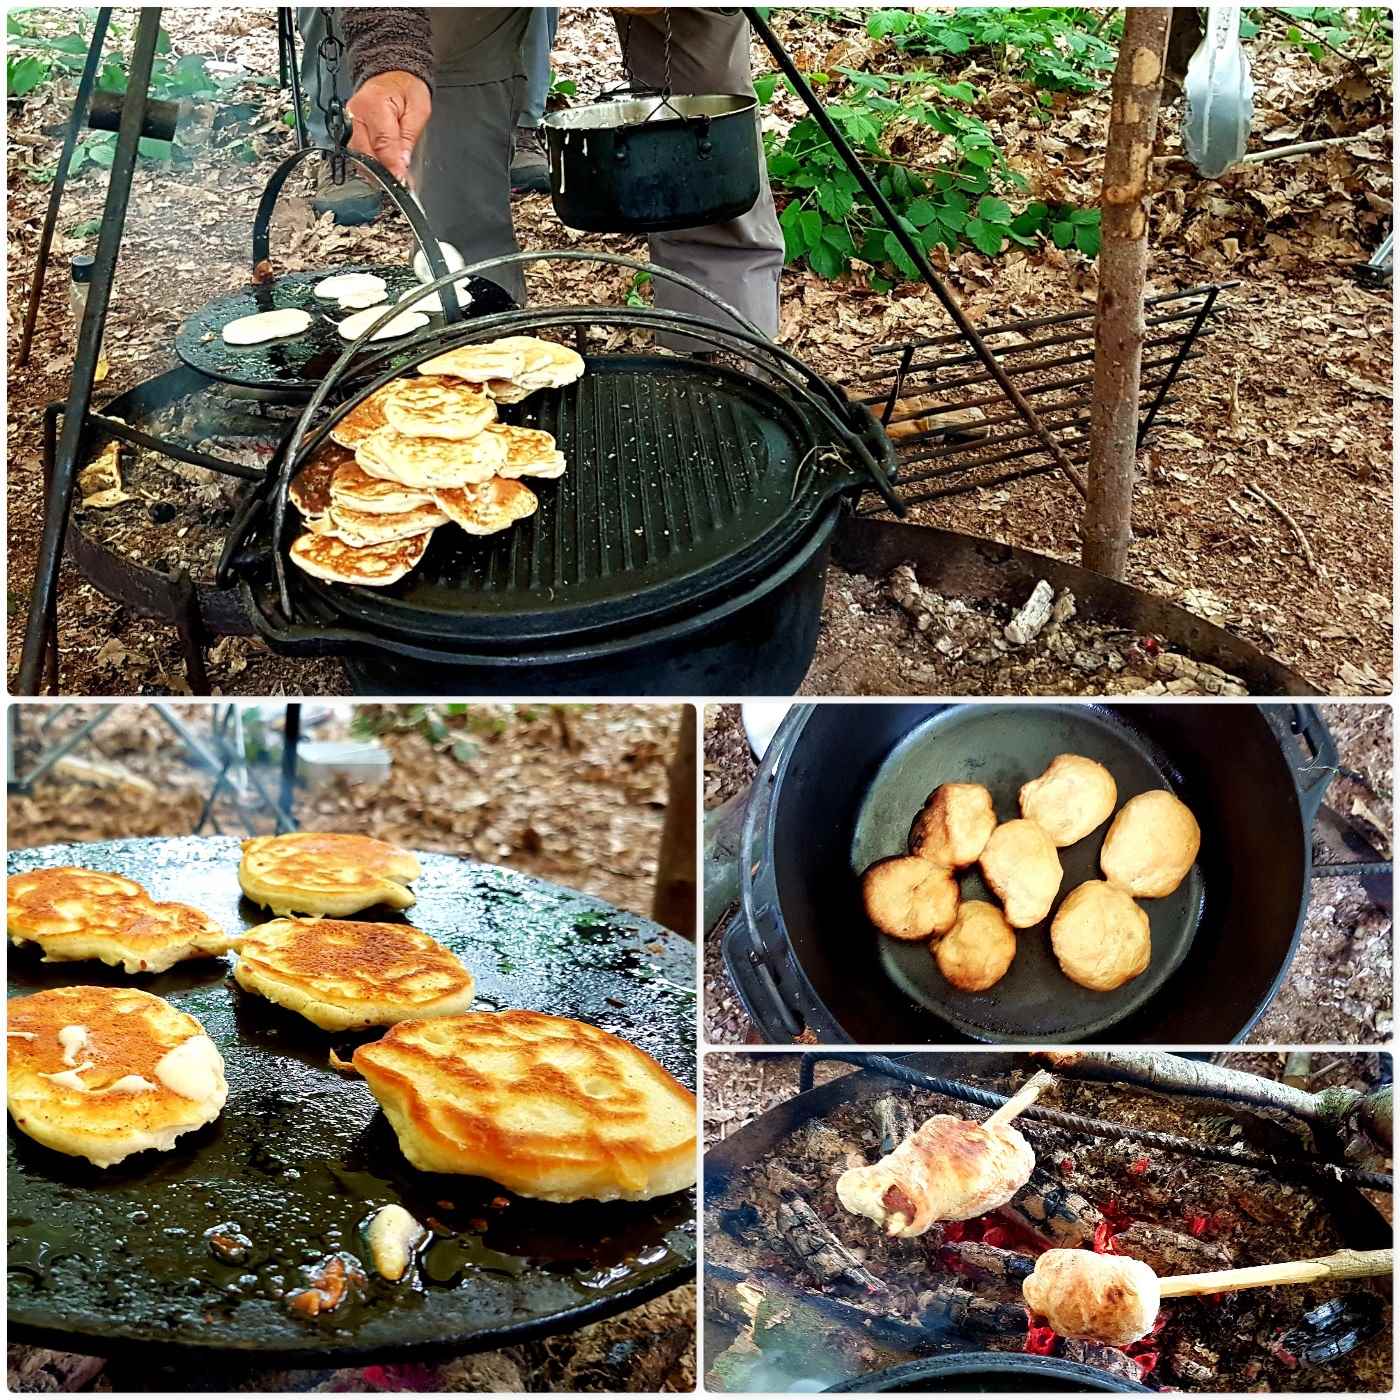
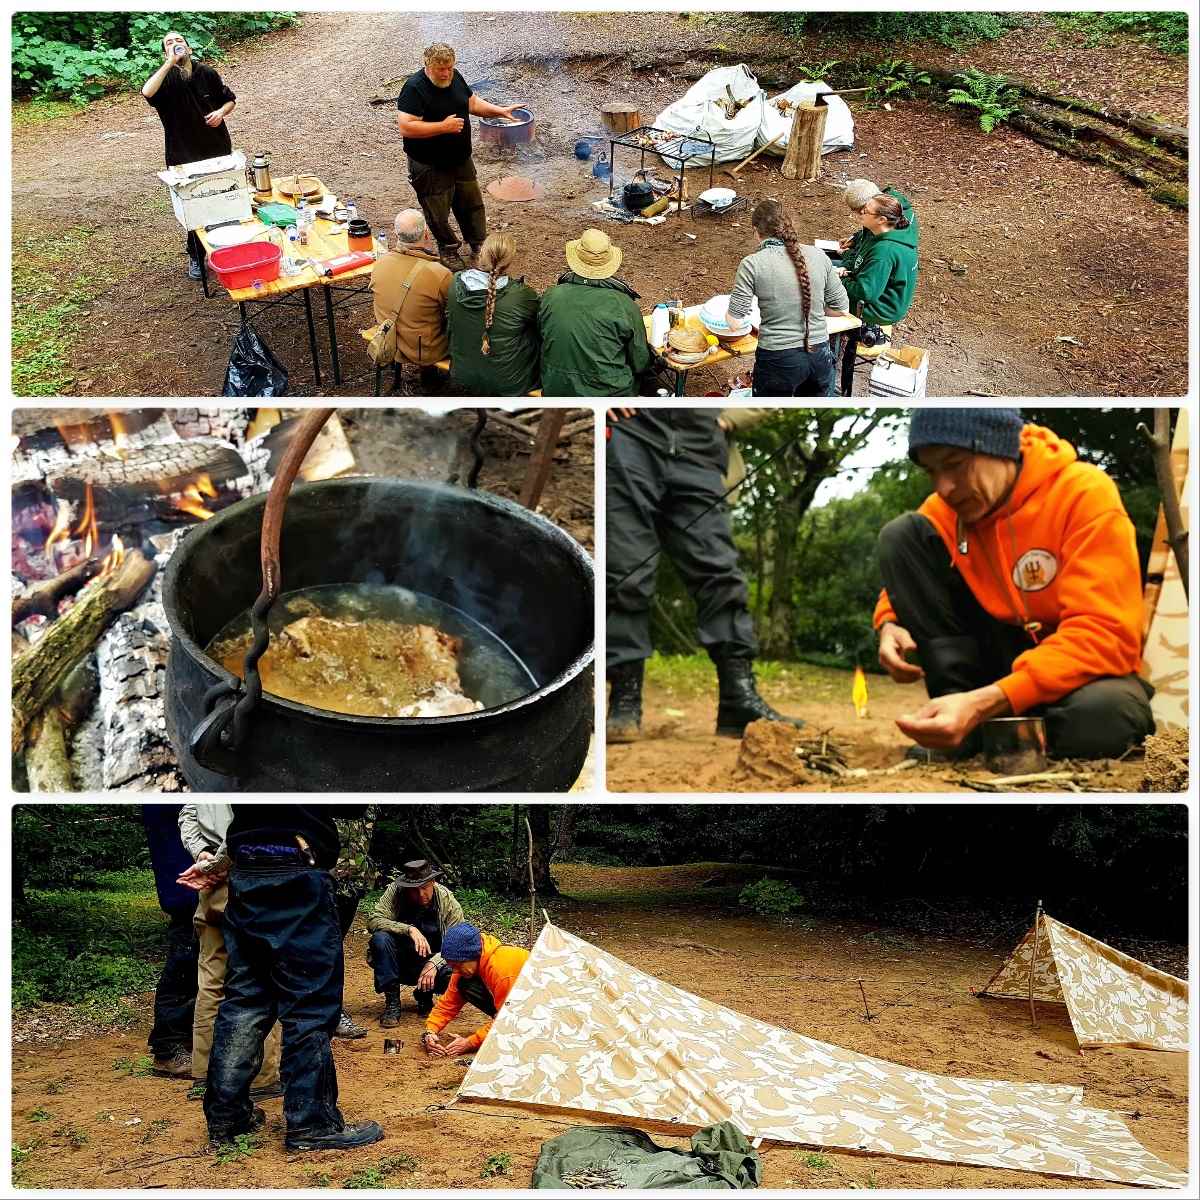
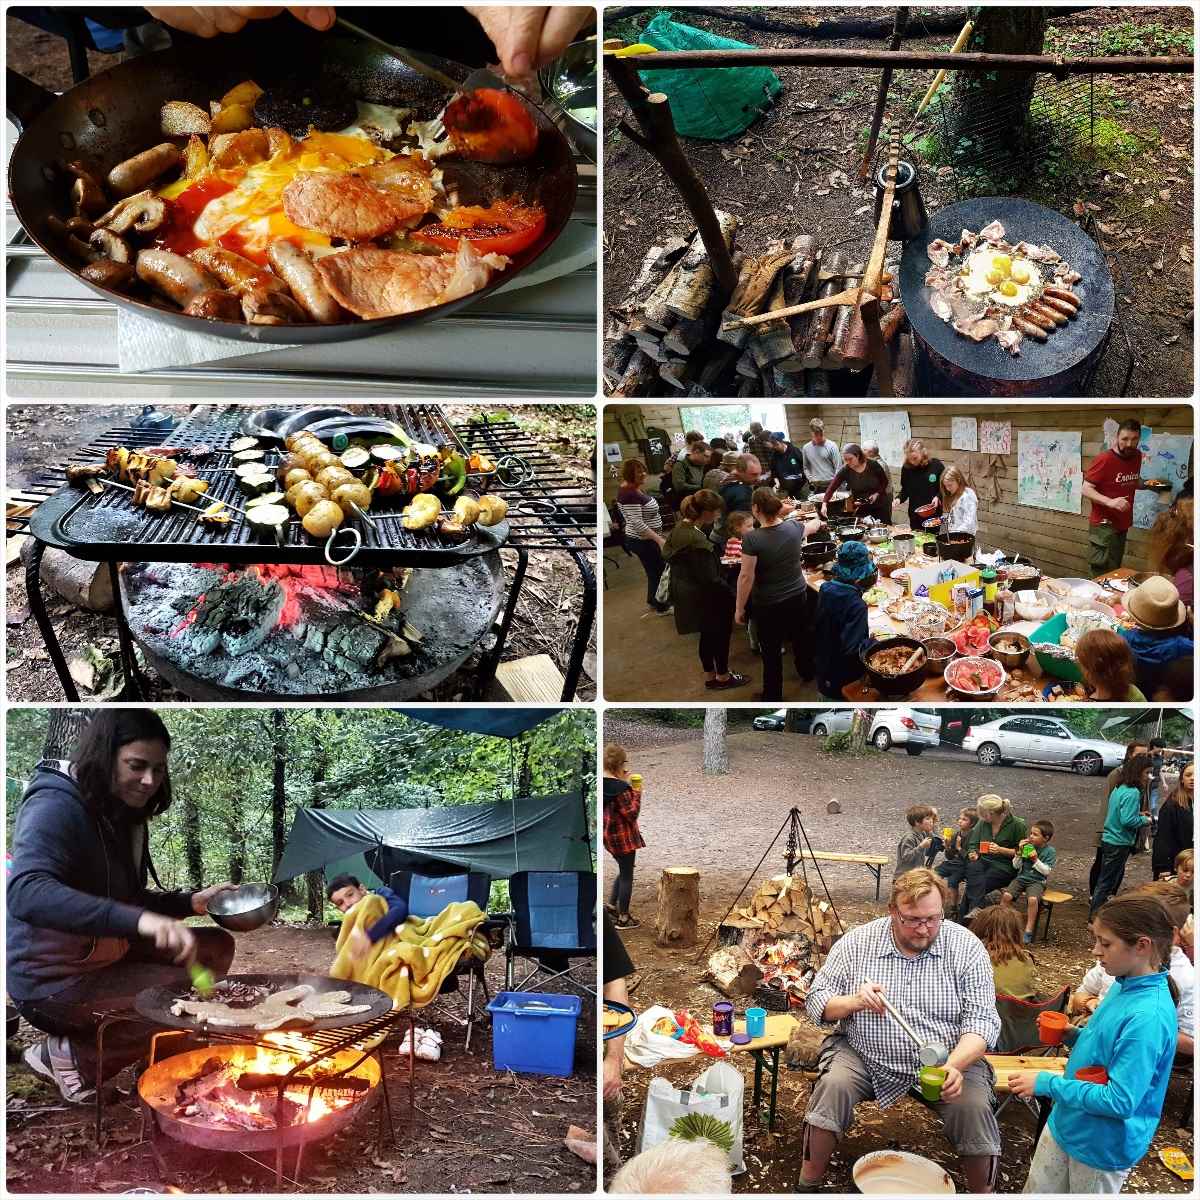
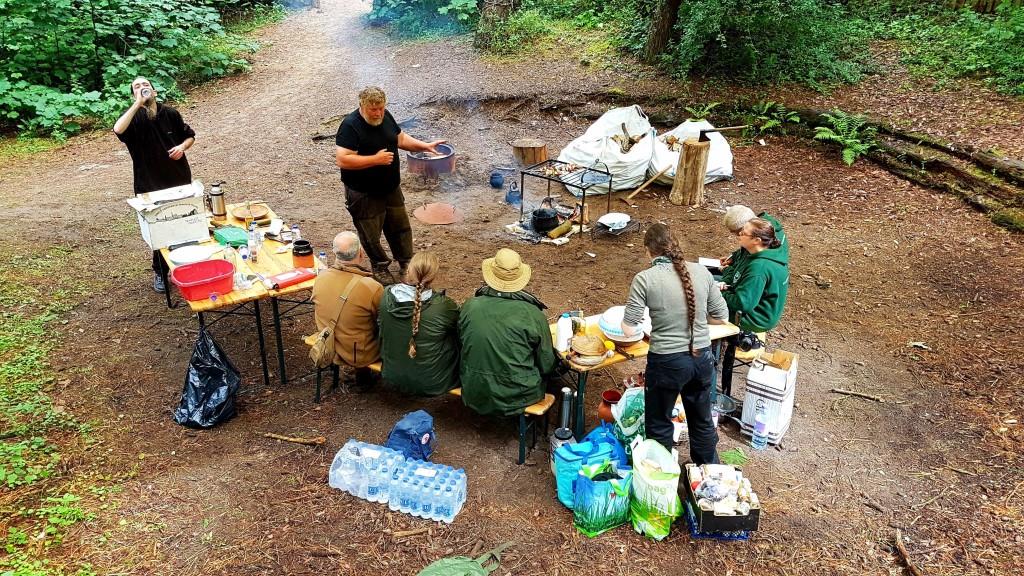
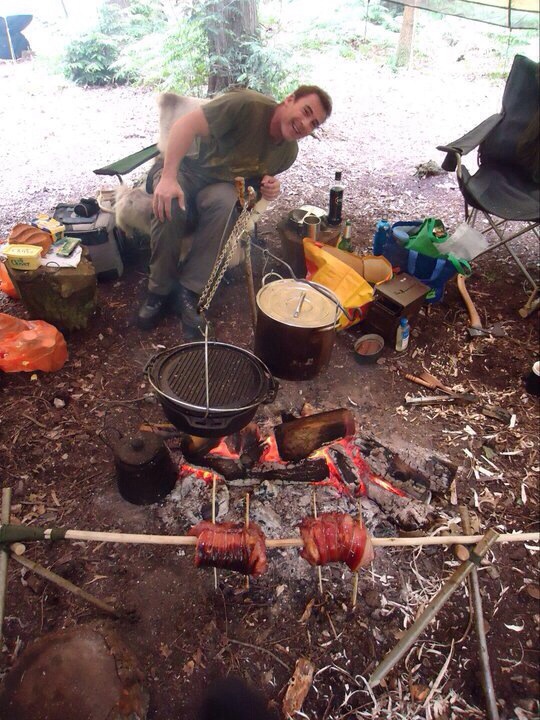
Food – Glorious – Food
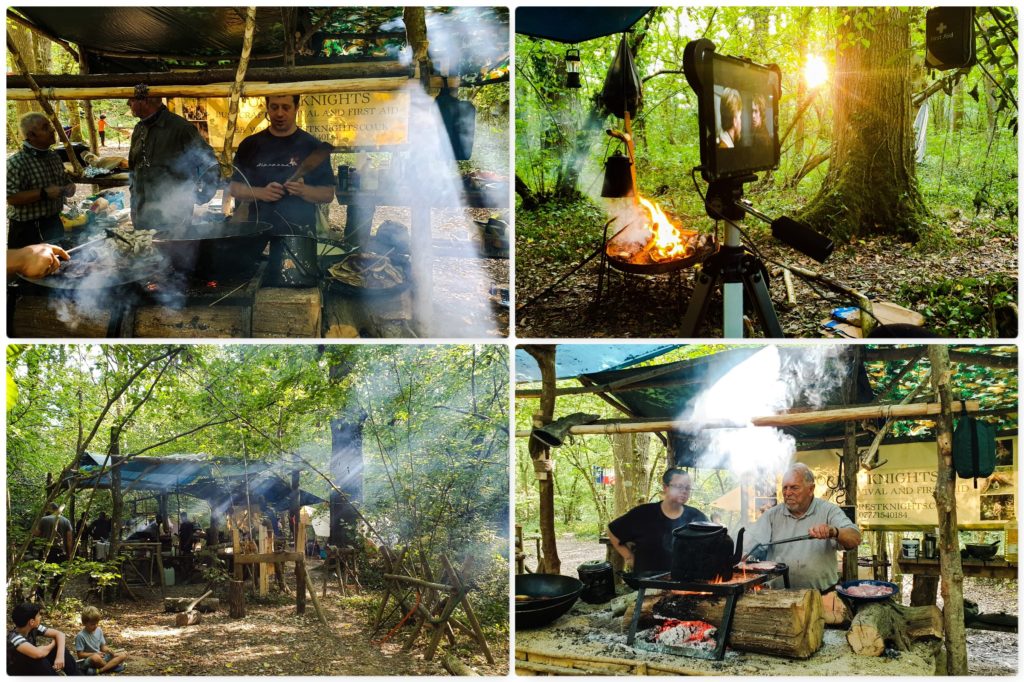
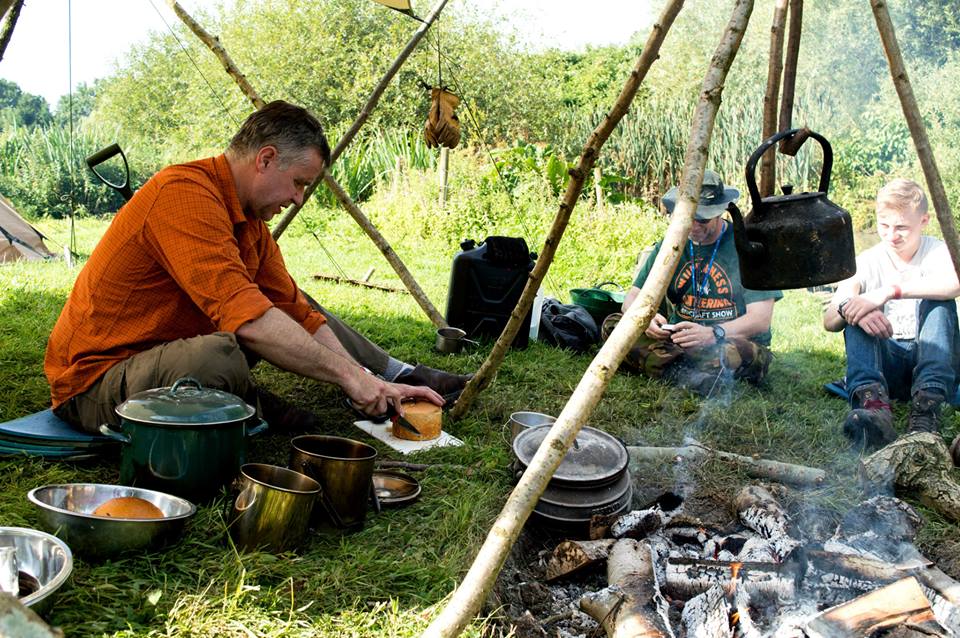
One thing that did not happen on this weekend was going hungry – Beth and Wayne (I will put them in order of priority here) are renowned for their cooking skills around a campfire. They cooked a mega breakfast every morning, a curry on the Saturday night and had the pizza oven fired up on a number of occasions.
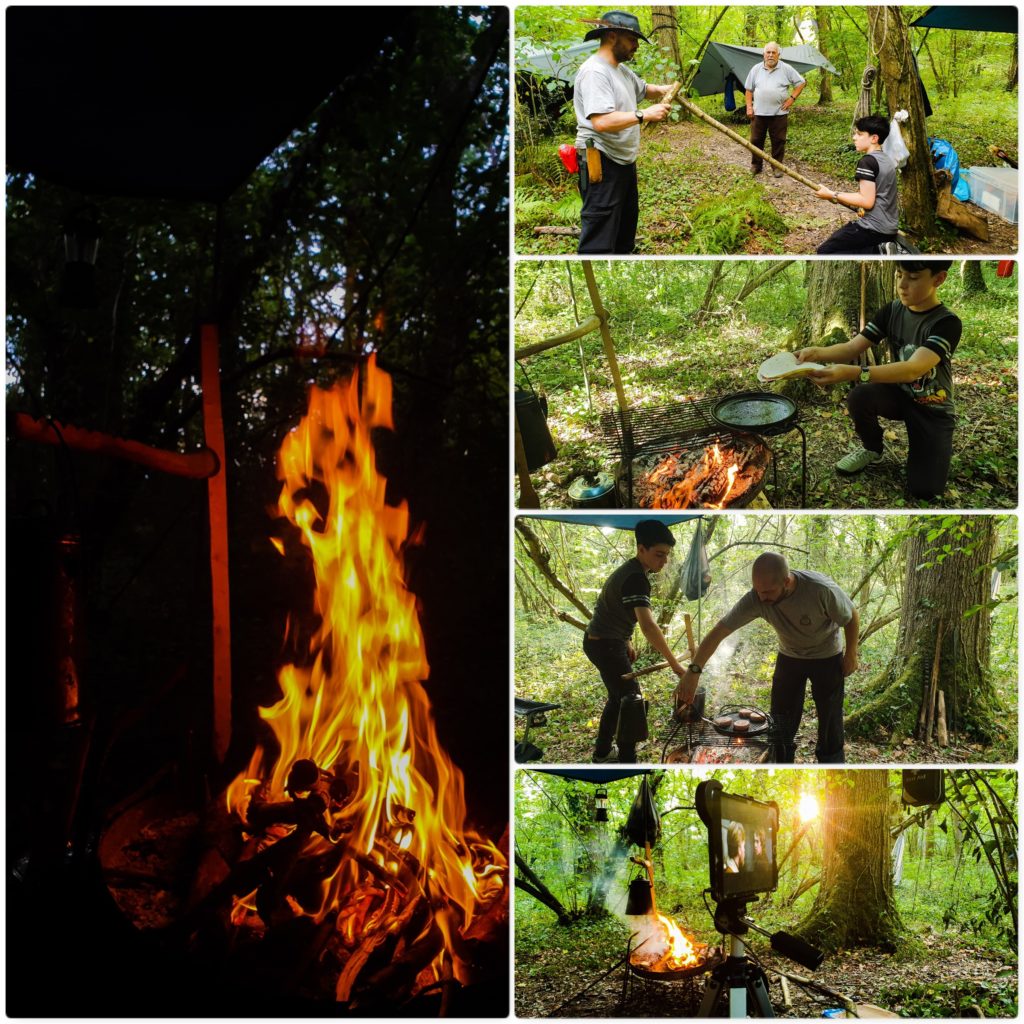
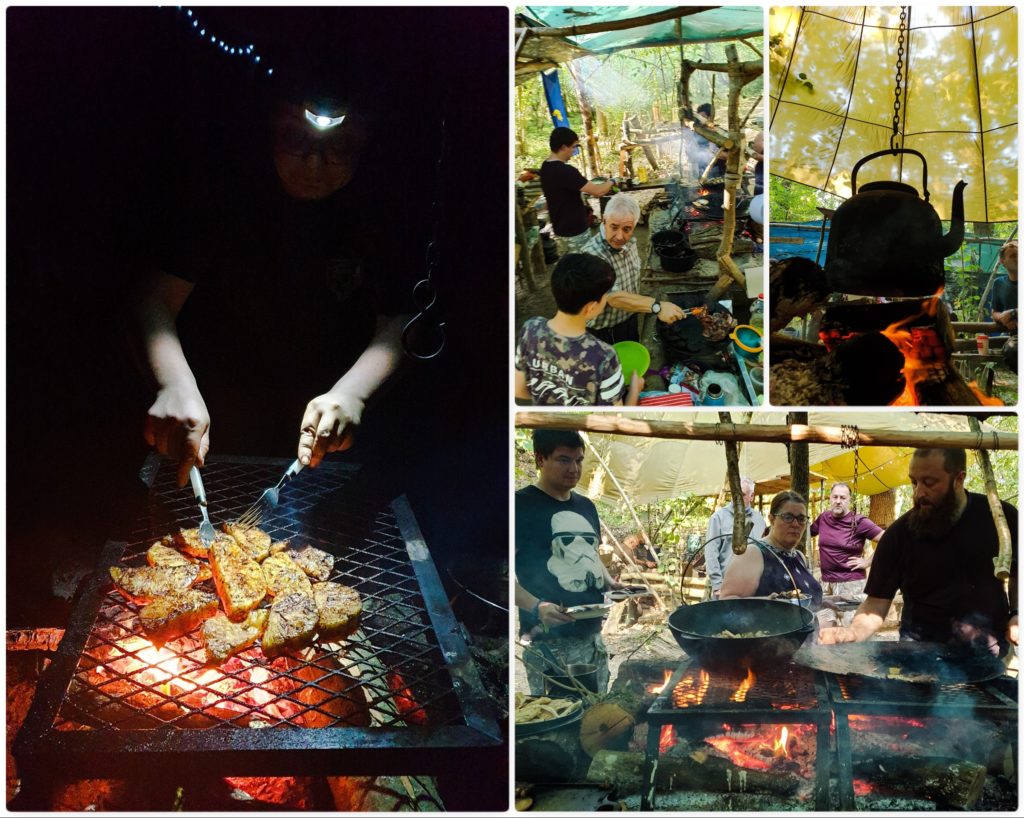
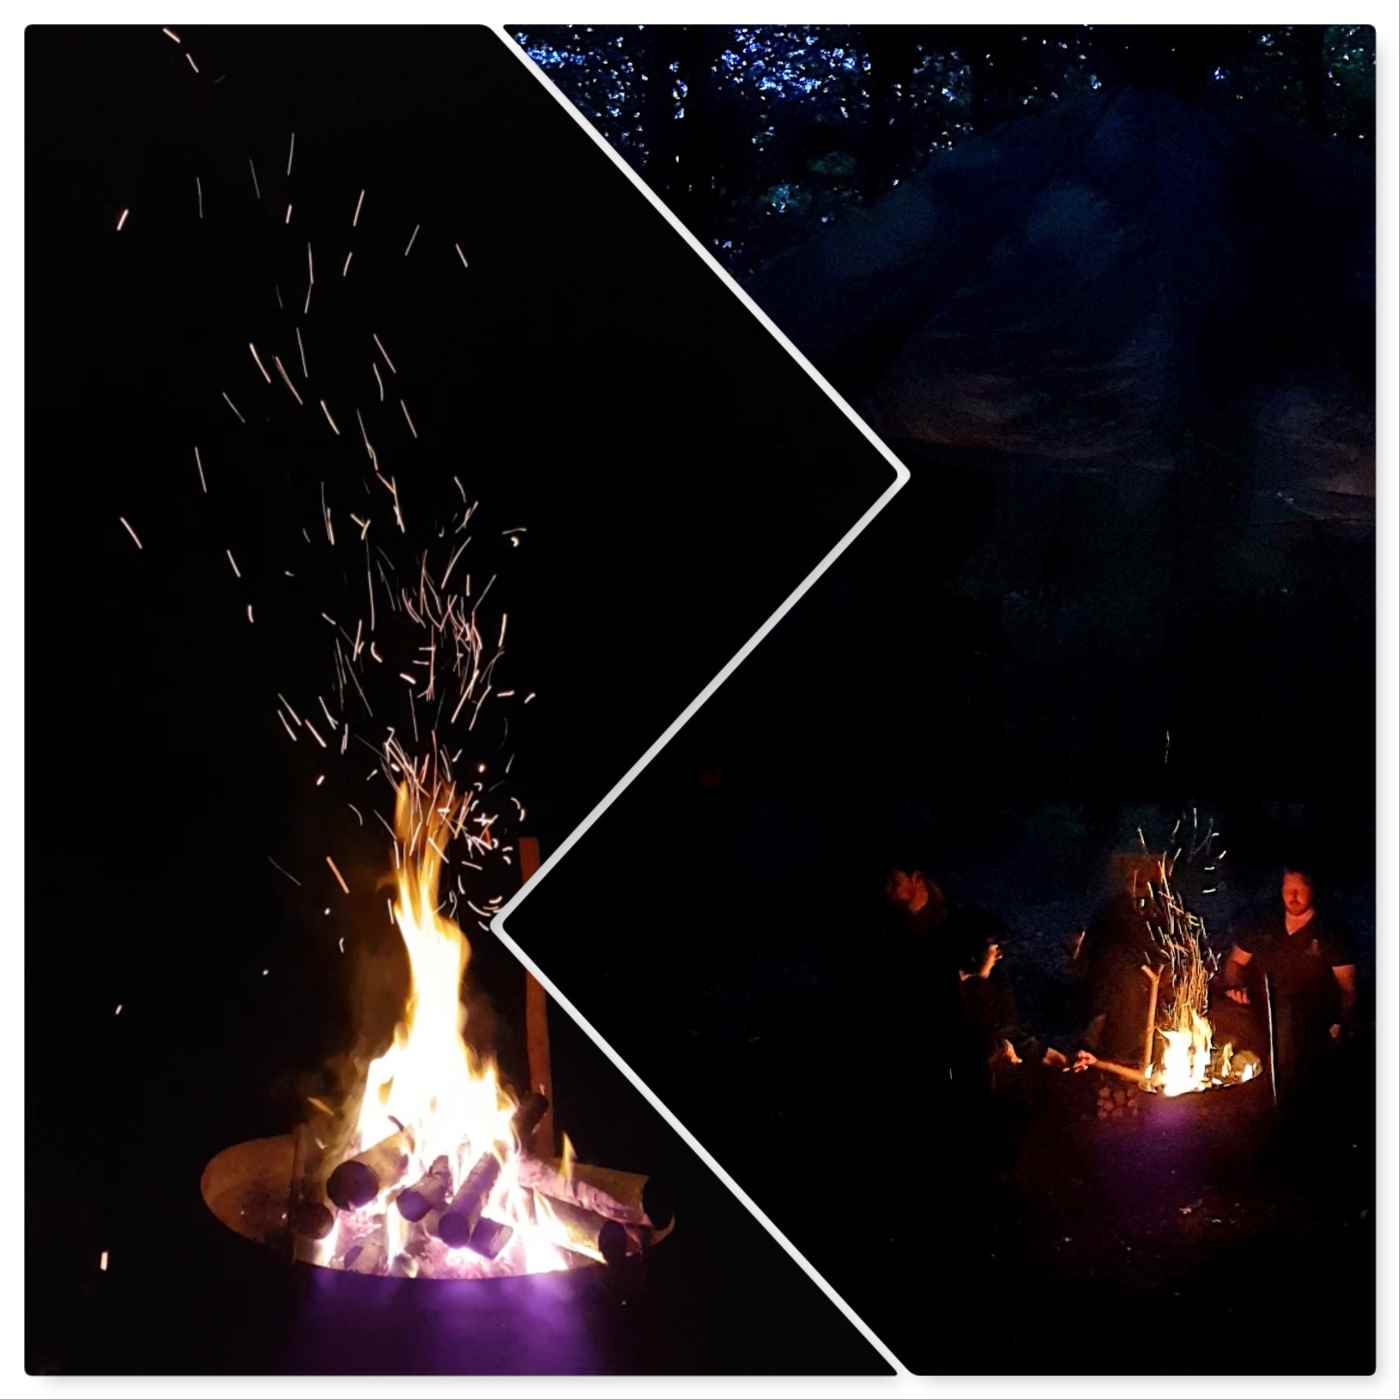
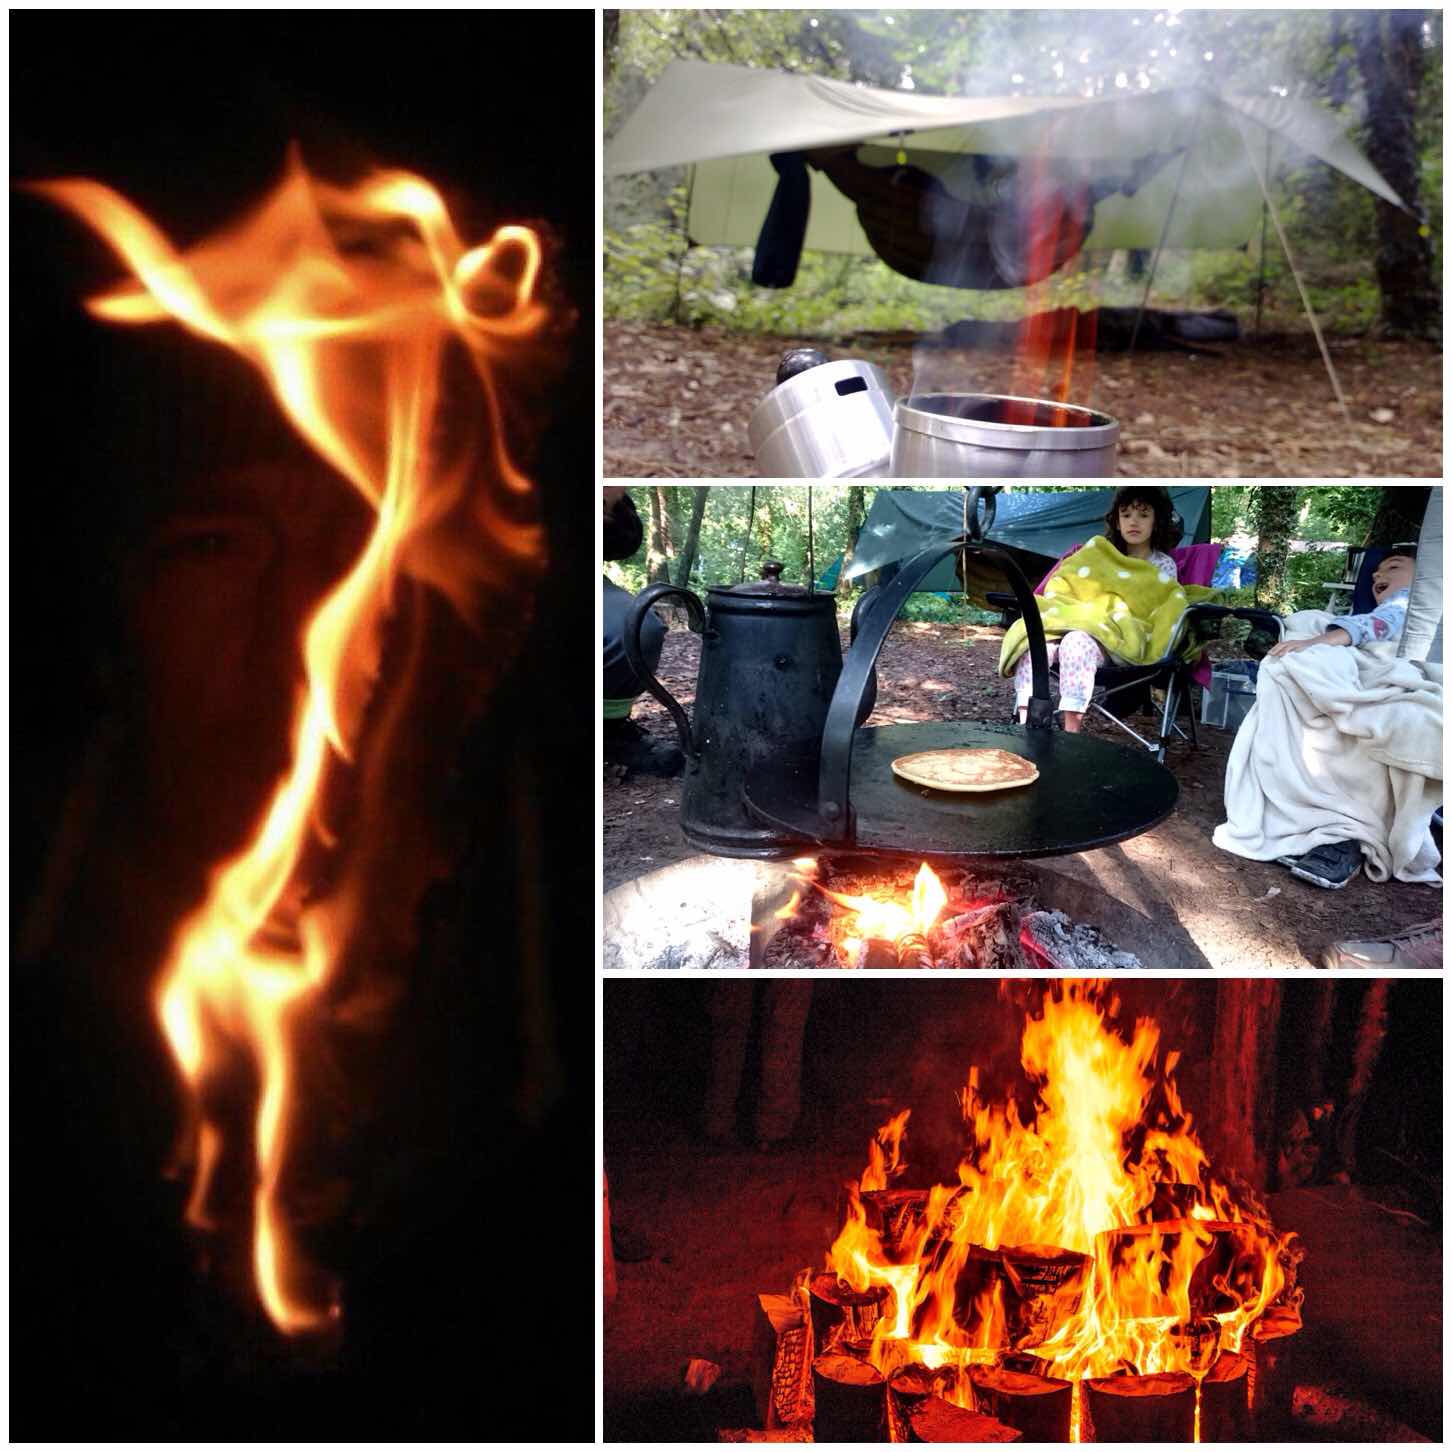
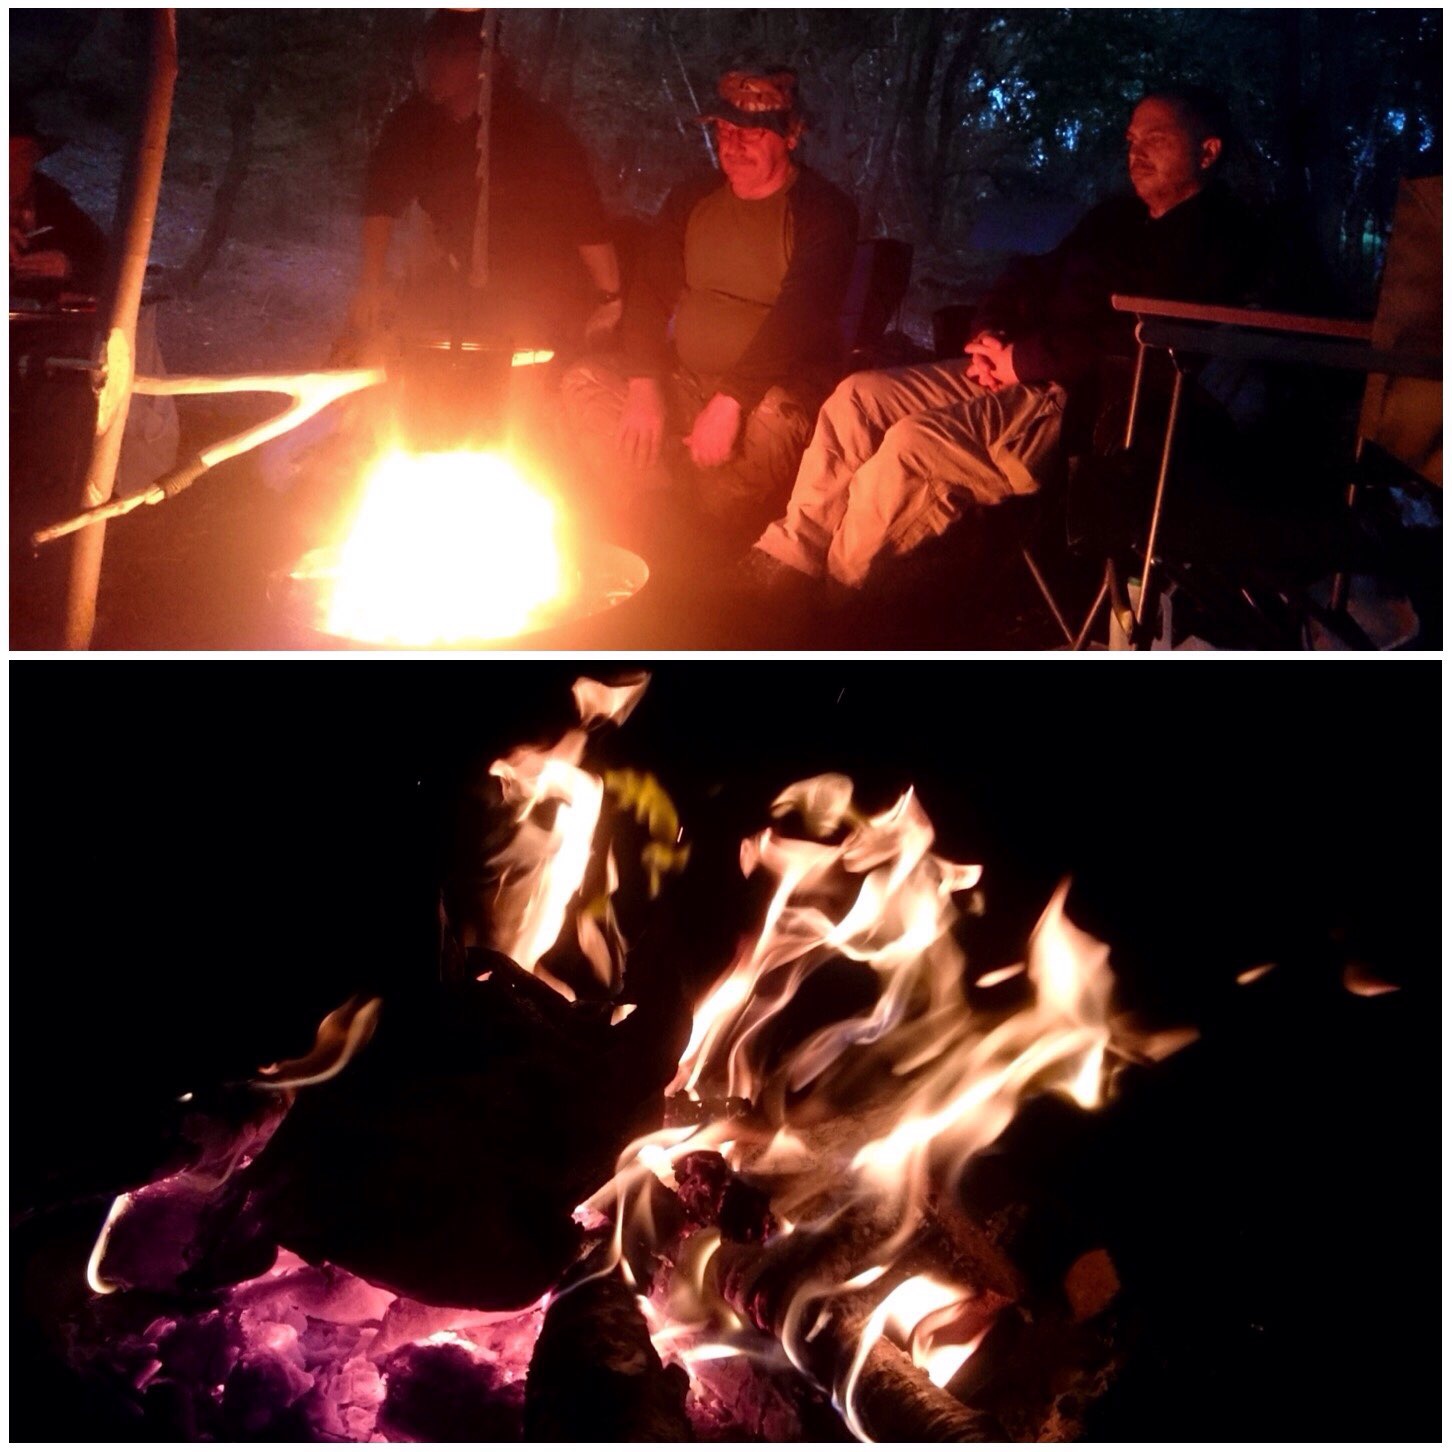
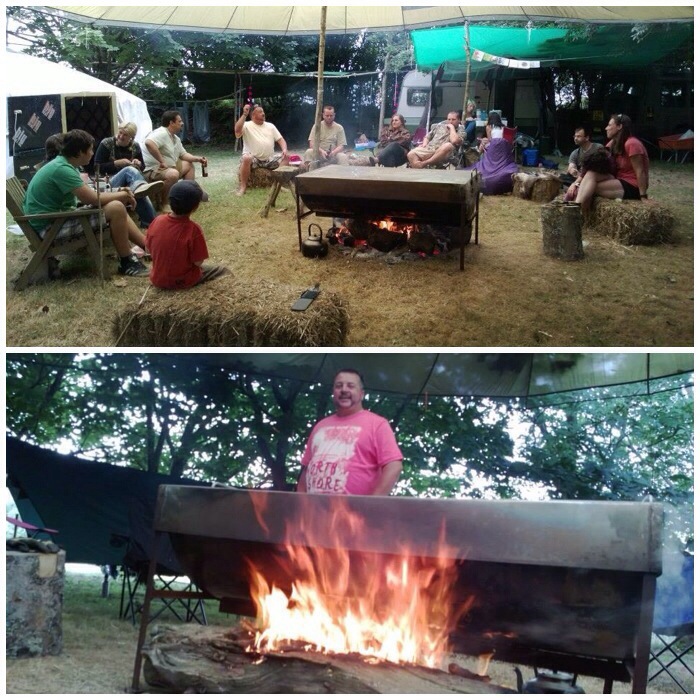
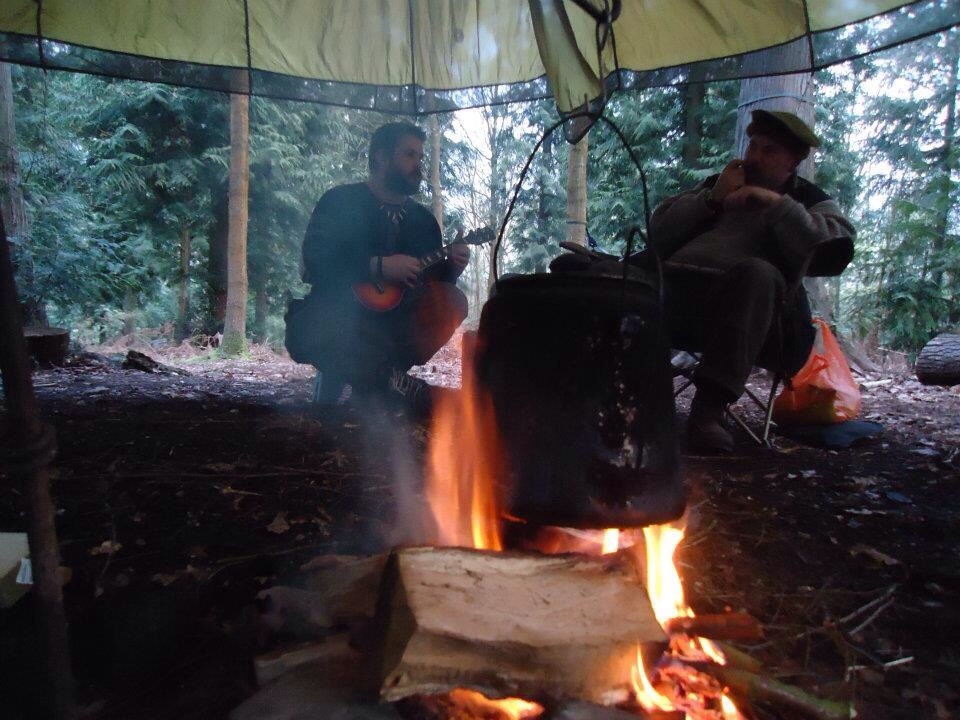
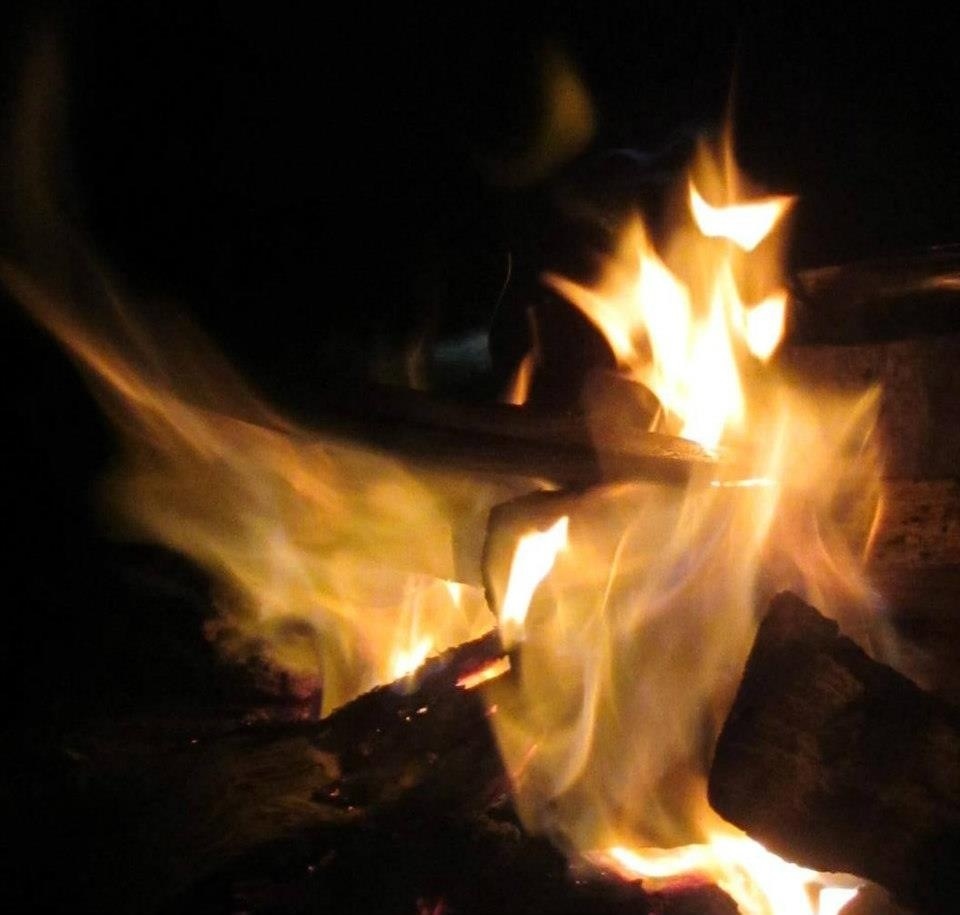
Life around the fire
It was not just Beth and Wayne around the fire – eveyone got stuck in. My son Finlay loved making pizzas and Alan (being a cheffy-type person) loved the raised firepit – I was happy to stick the kettle on every now and then 🙂
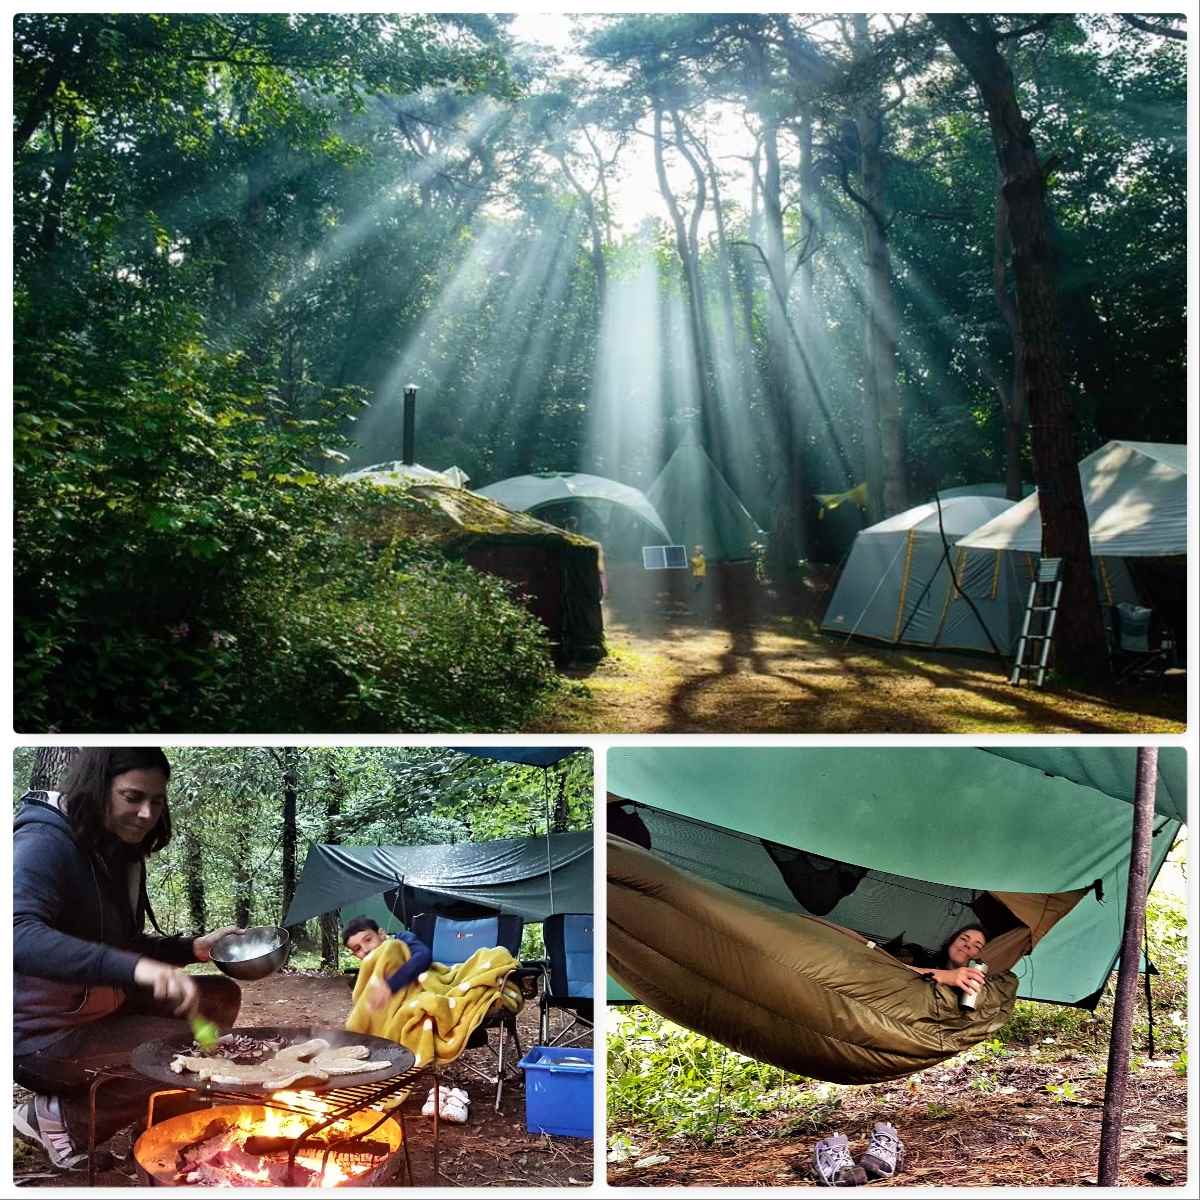
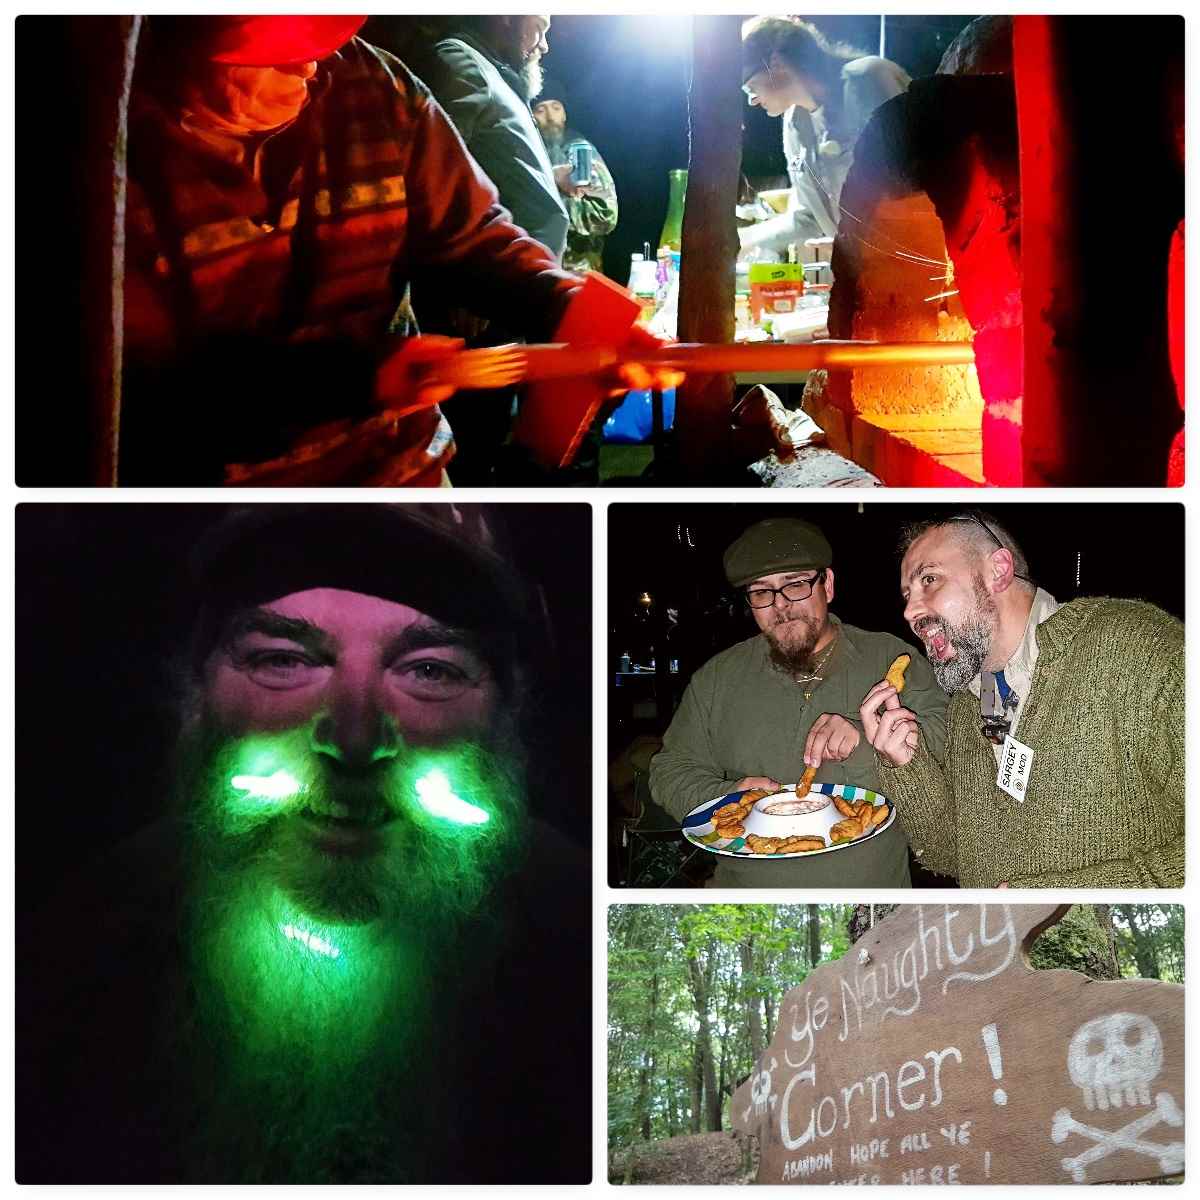
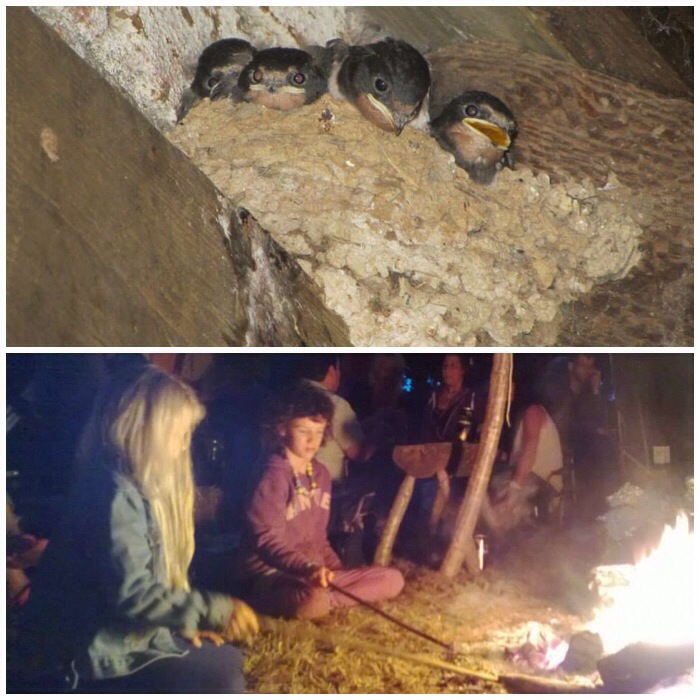
Evening Relaxation
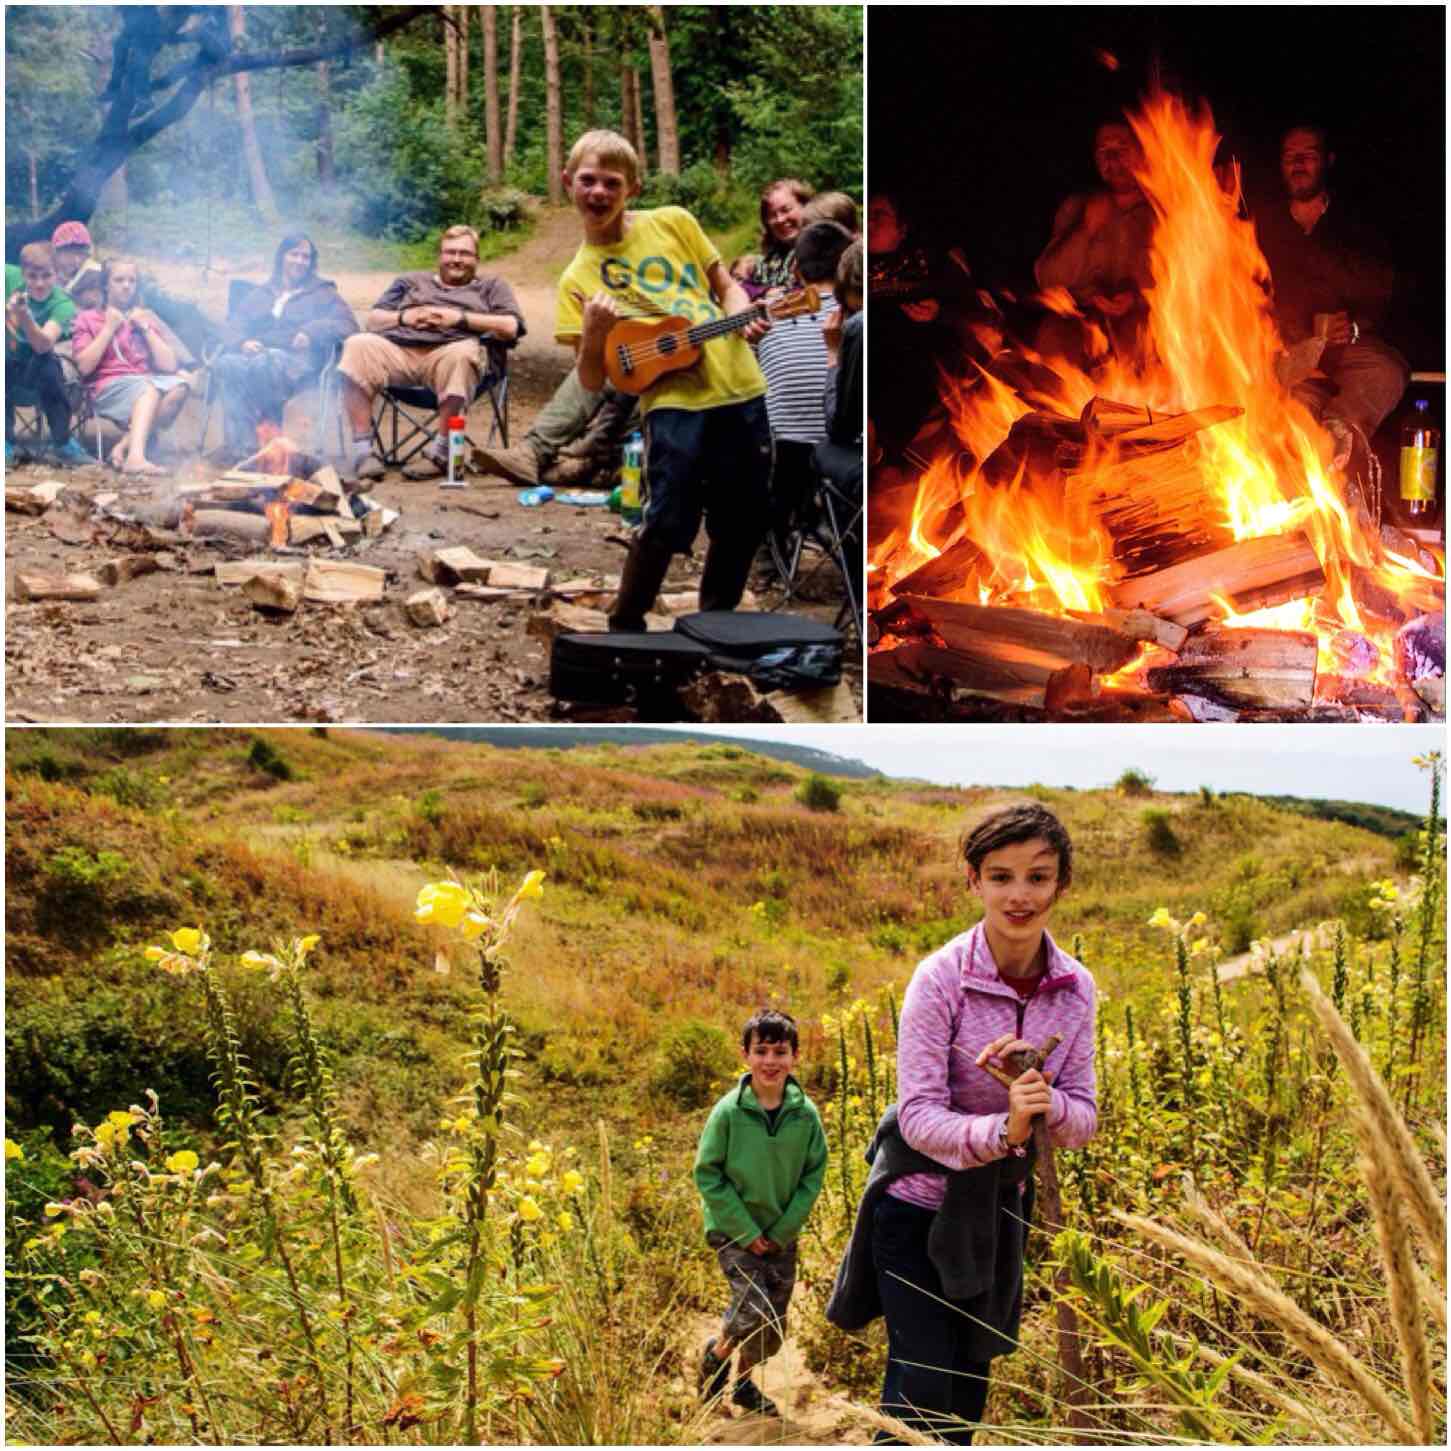
It was not all hard work (though that heat really made doing simple chores twice as hard as they actually were) and in the evening we would sit around our campfire before joining a socially distanced group fire when it was fully dark.
Most evenings you could hear the penny whistle from the likes of Stephen Crump and on the Saturday we had great singing (and guitar work) from Ruth and Mel.
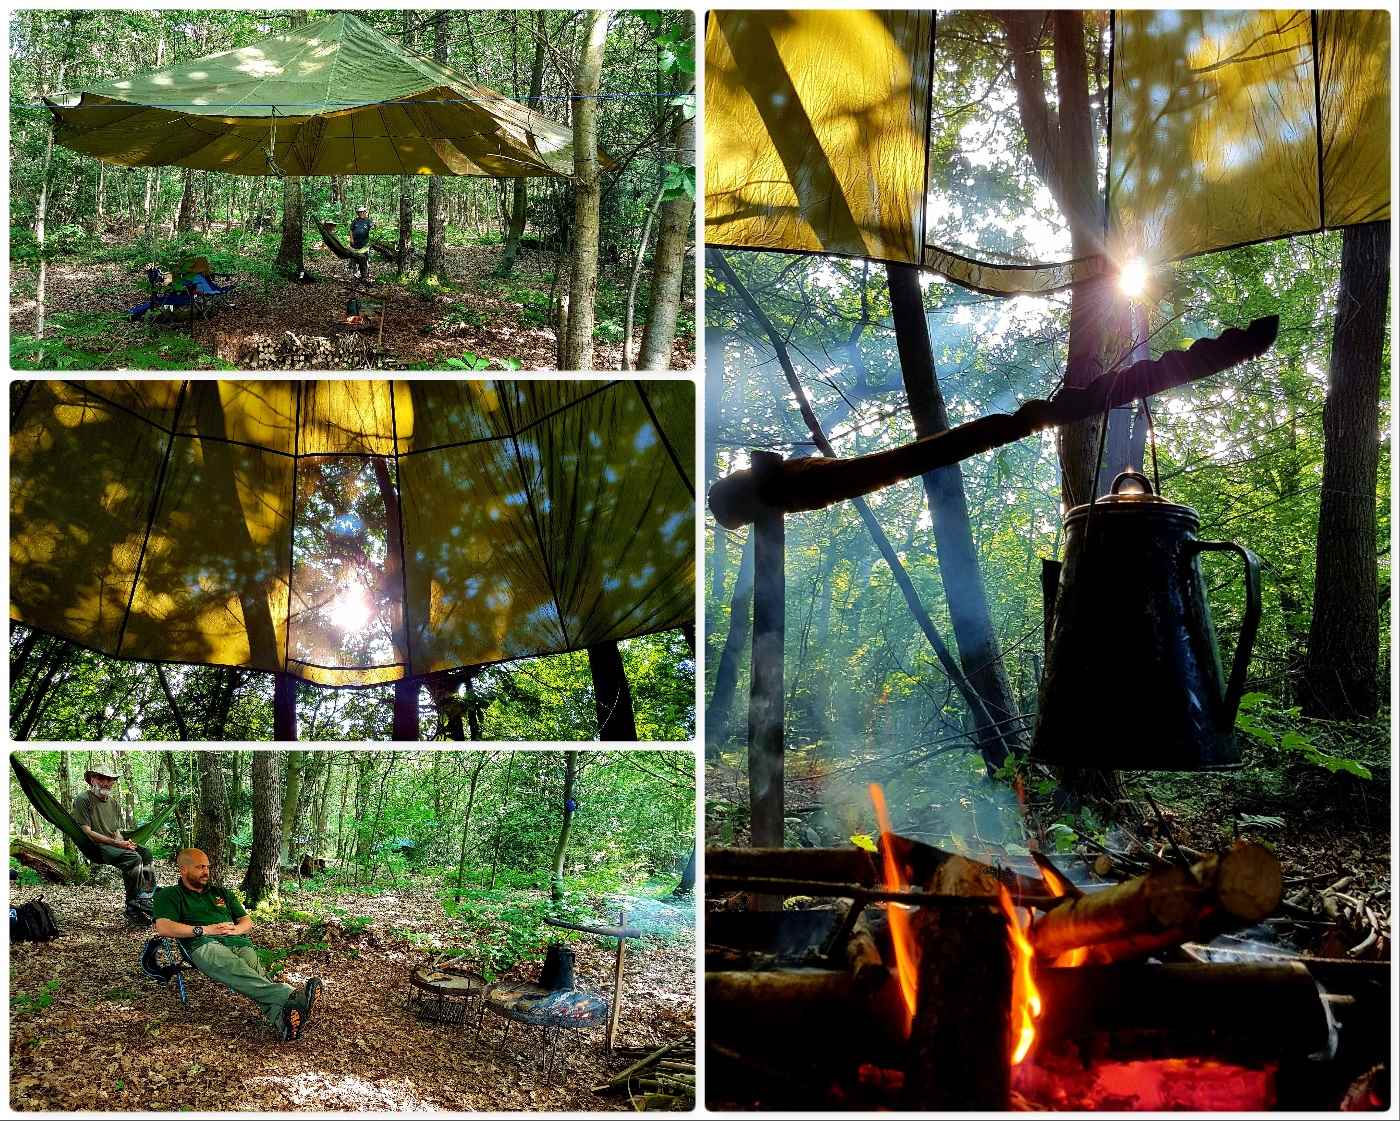
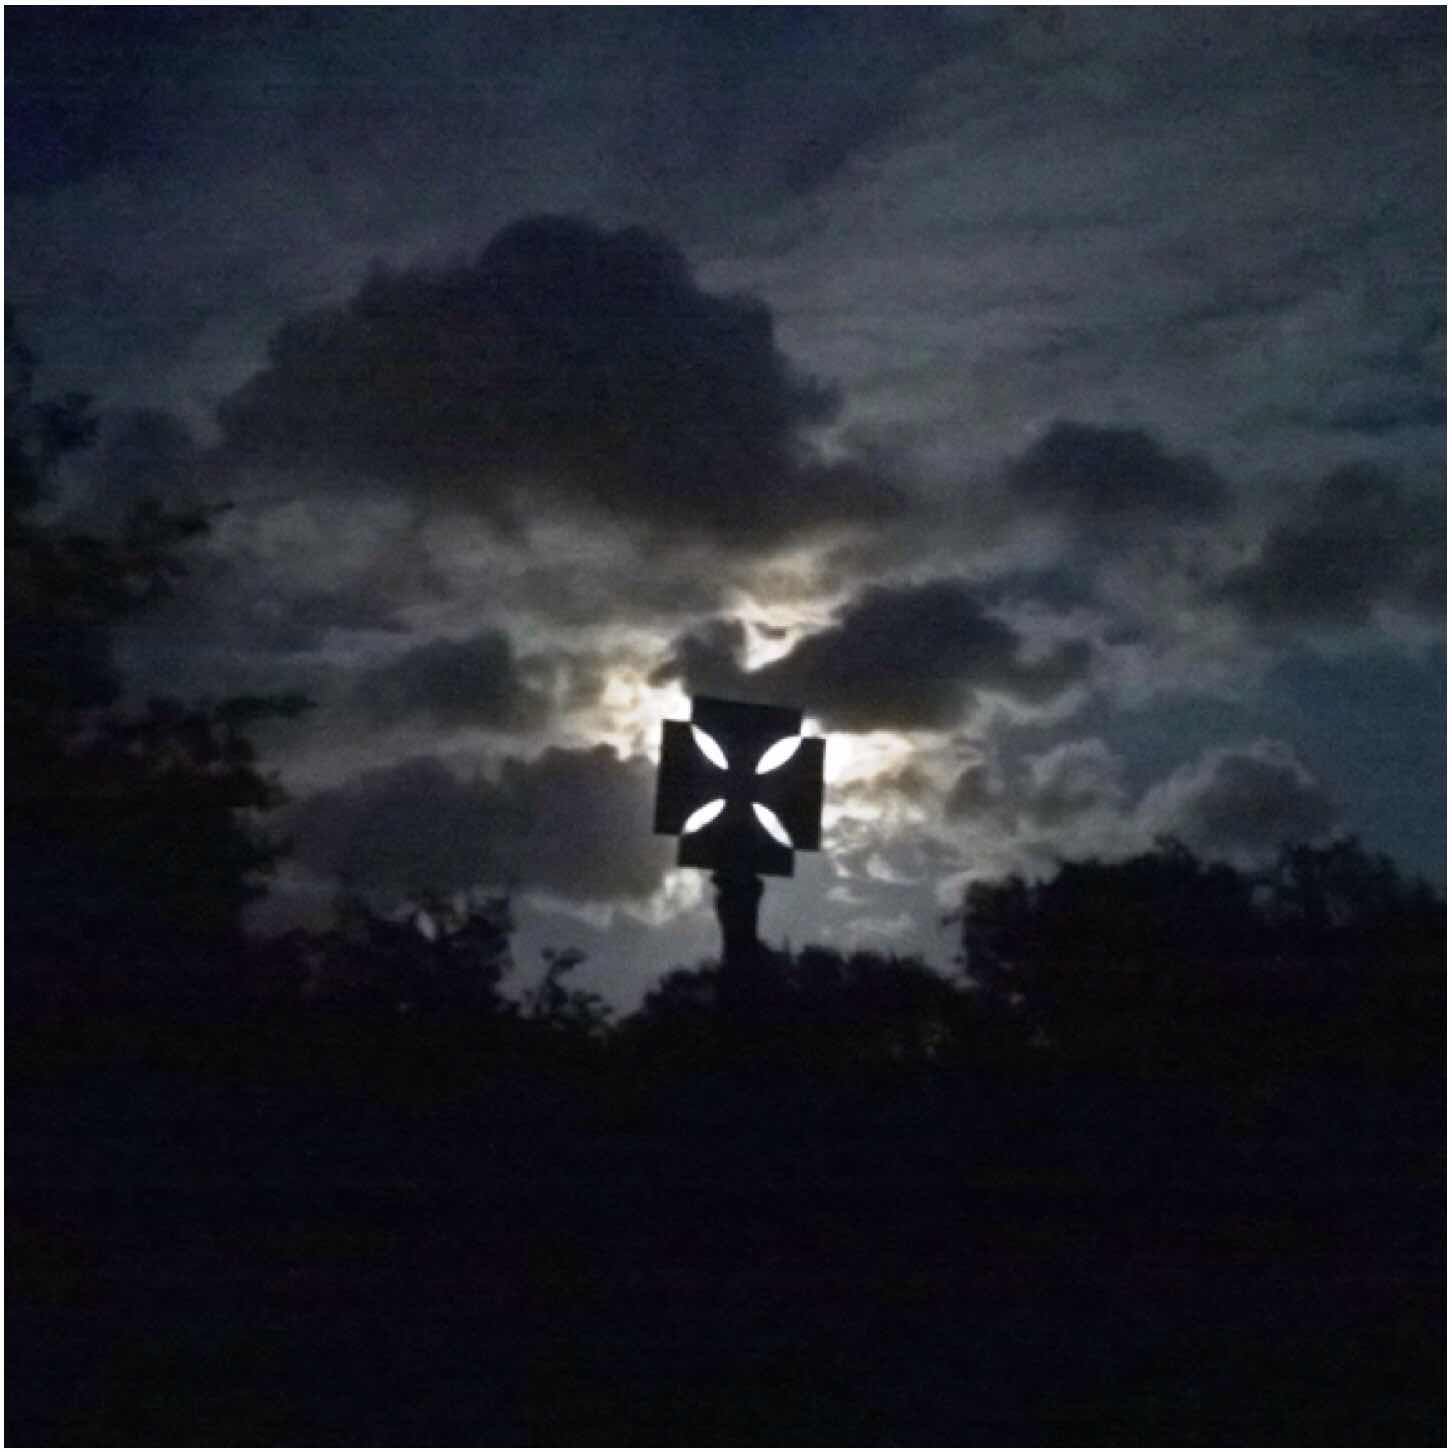
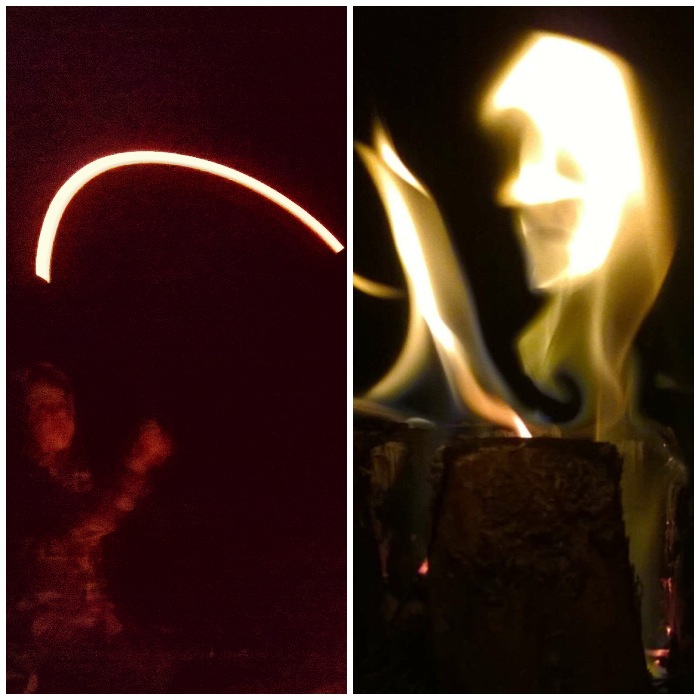
Glorious light
As a photographer I usually struggle to get good shots in the woods with my phone camera and have to rely on the big old DSLR. But on this weekend the light was fantastic, so my DSLR never left my rucksack. Loved seeing all these rays through the canopy with the smoke from the cooking fires.
Thanks again to Wayne and Beth for hosting the Minimoot – the first camp I had attended since lockdown. It was great to see some friends again in a relaxed and socially responsible way – there was plenty of room in these woods.
Cheers (and look forward to future Minimoots alongside the main Bushmoot), George
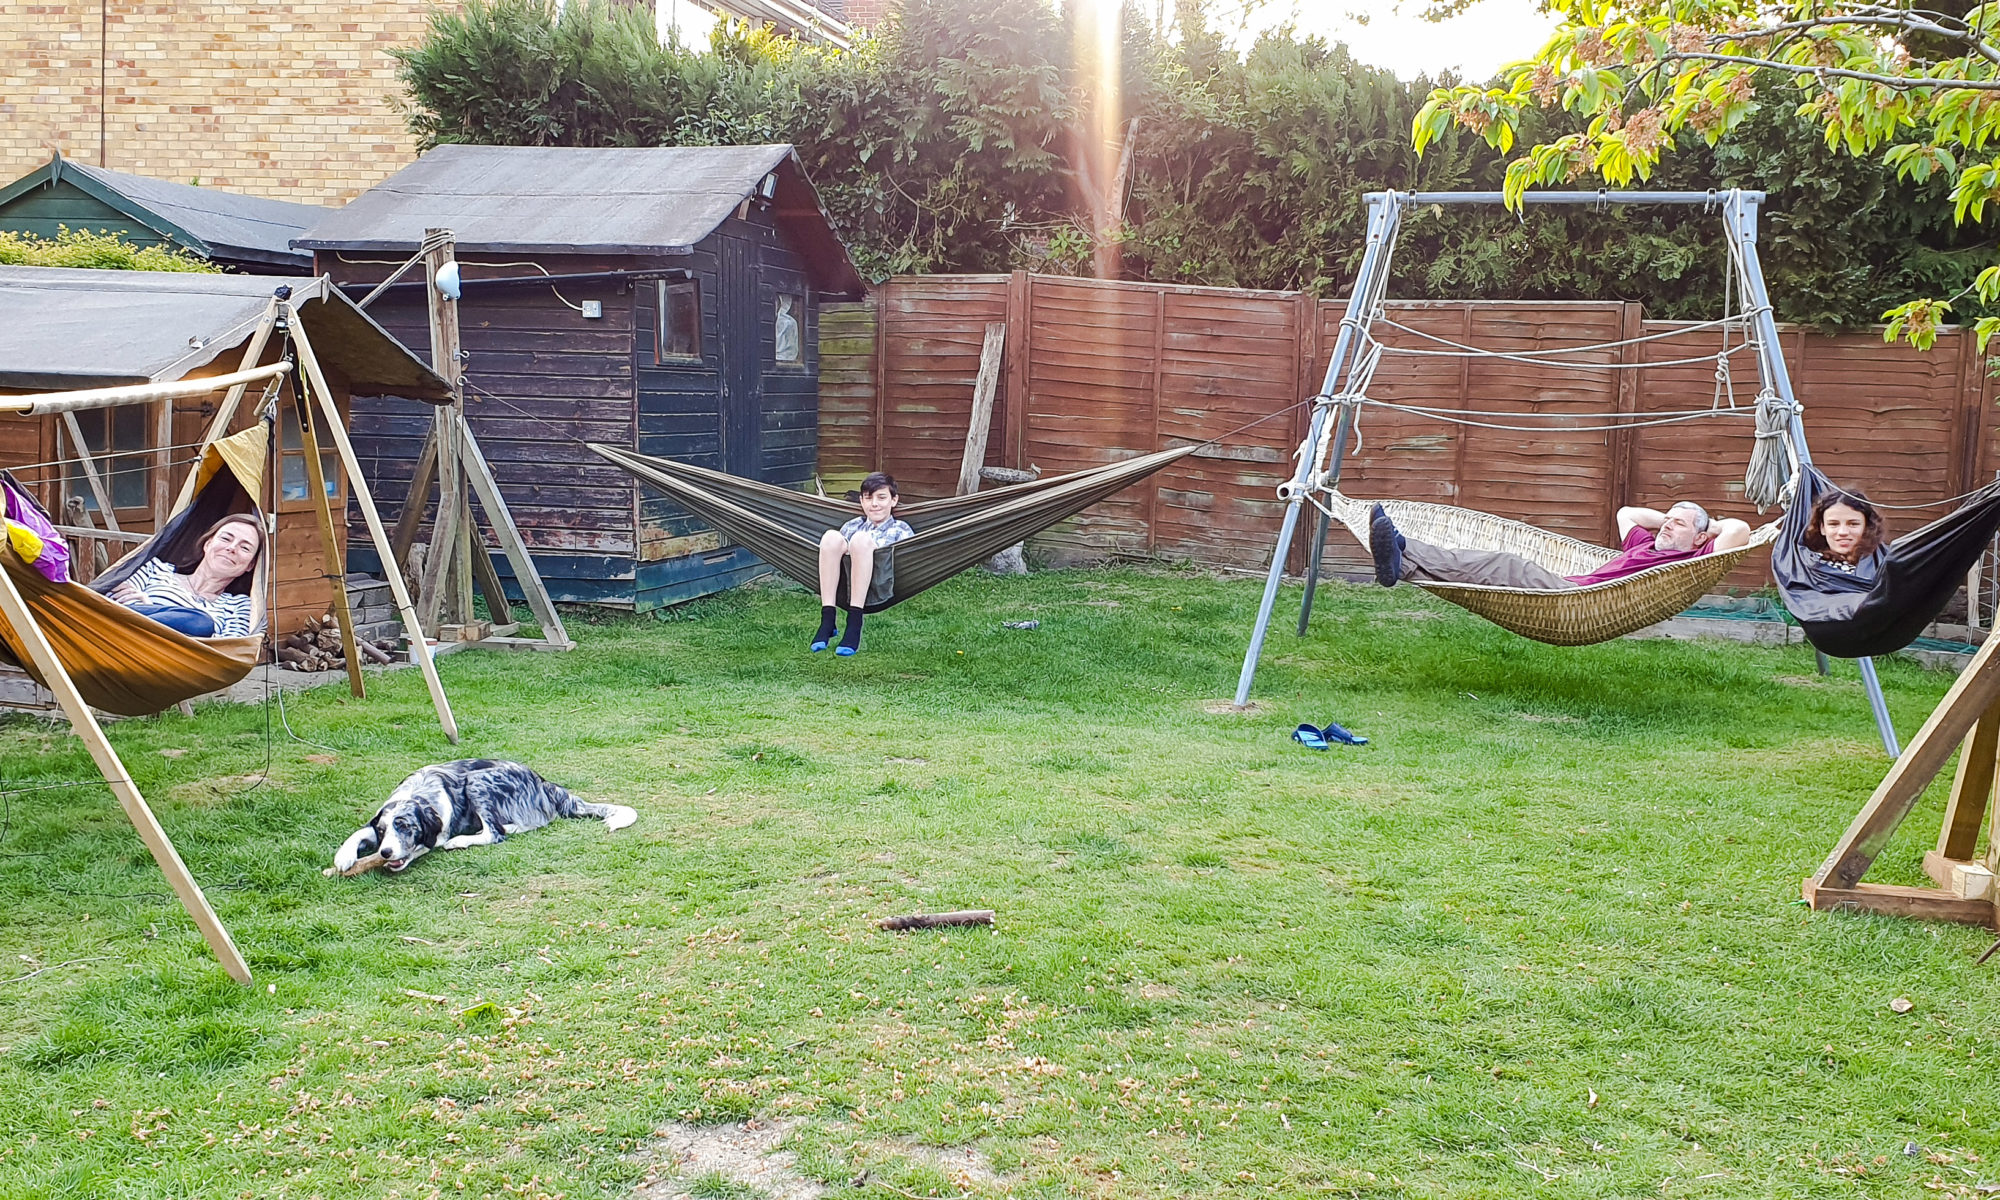
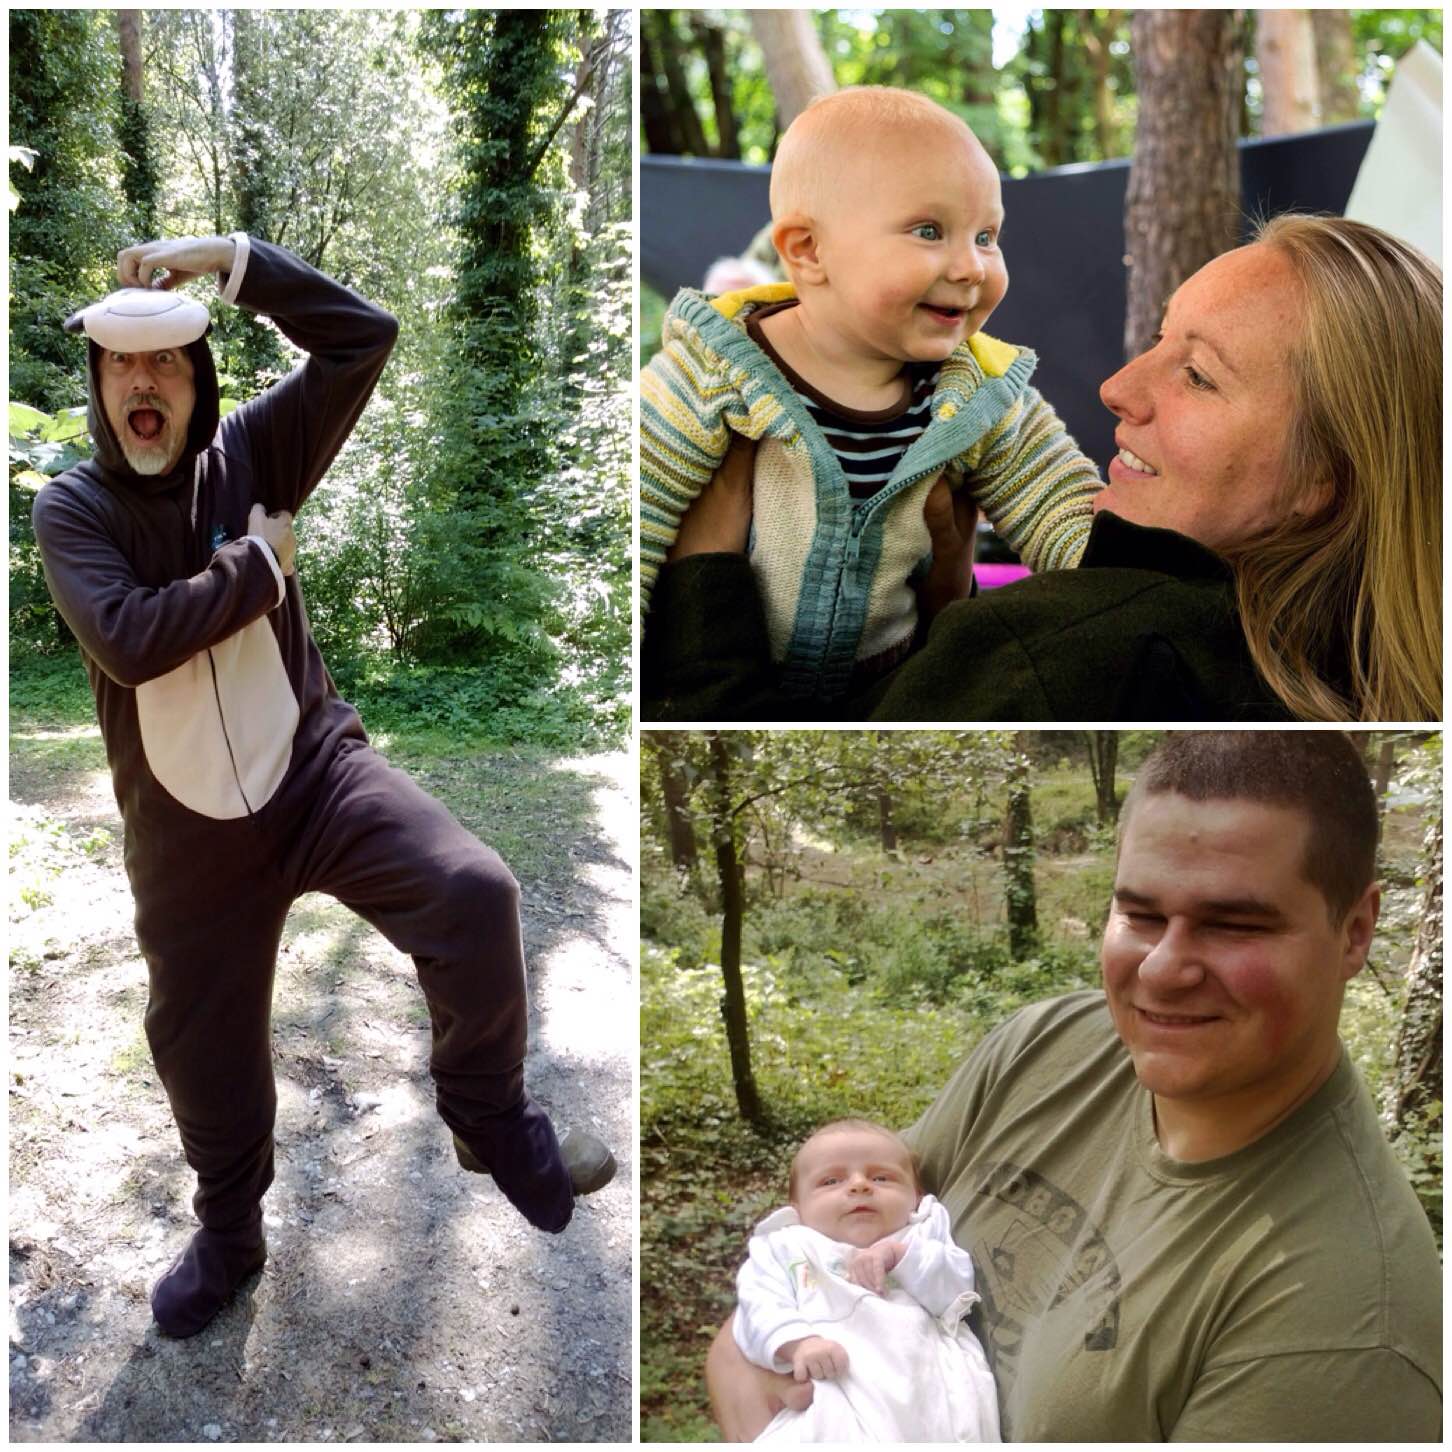
Over the years building hammock stands have really intrigued me.
My Freestanding Hammock Stand is great for popping up in the garden or putting in the back of the car to take to events – however I have only one and with this current Covid crisis found I have been spending more time in the garden – so more hammock stands were needed. I did not have all the wood I needed for another Freestanding Hammock Stand however I found I had a lot of old fence posts that could be turned into something.
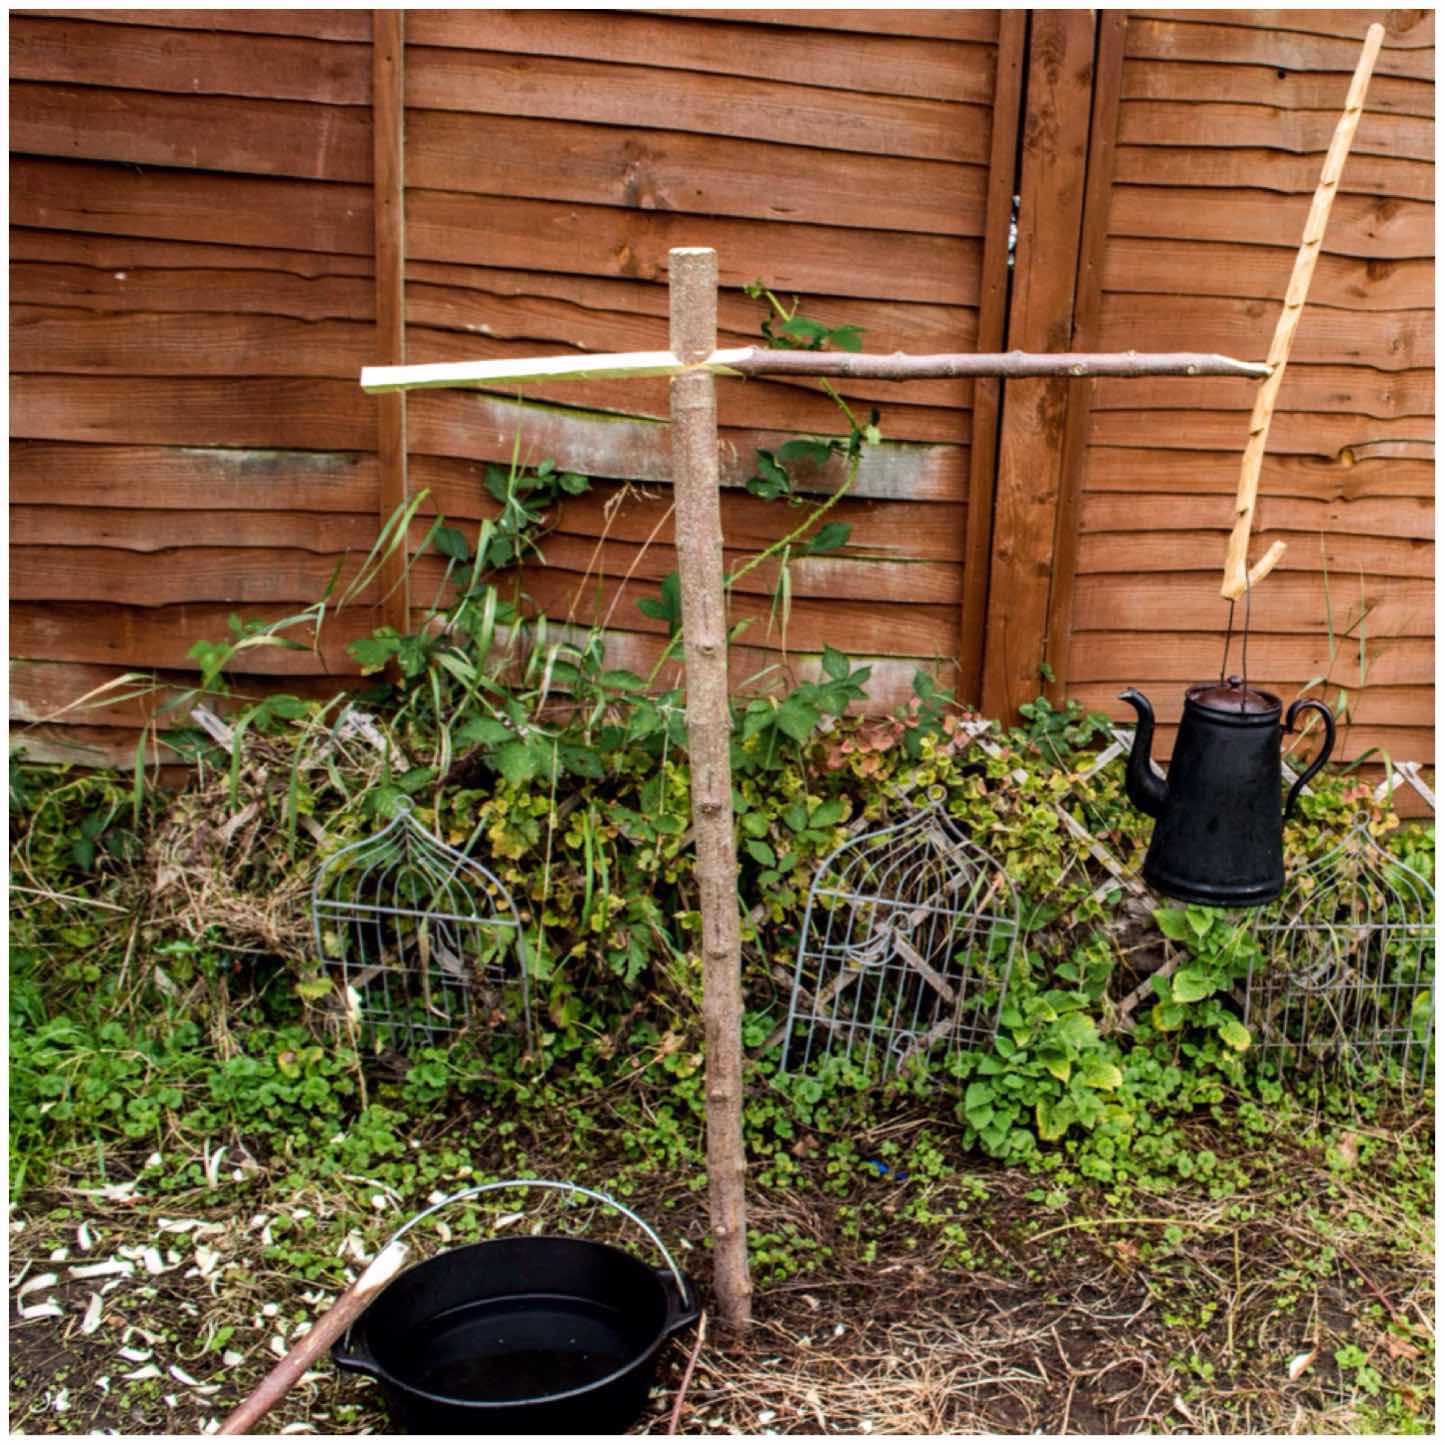
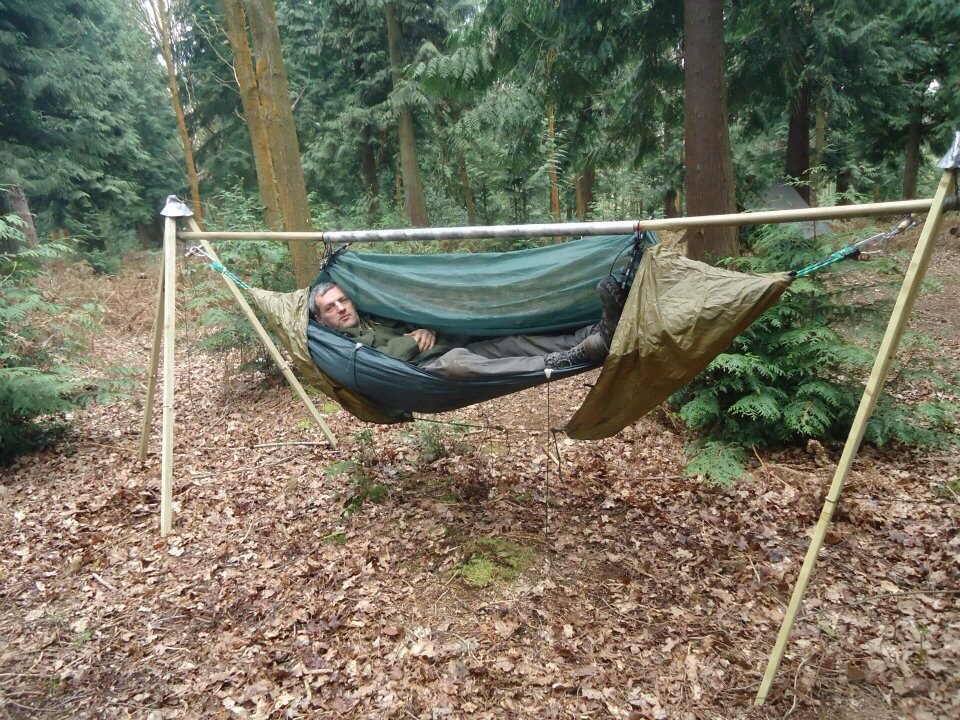
I have only one decent tree in my back garden and an old swing frame (they are too far apart to use together) that I can hang a hammock off so I needed some kind of ‘Hammock Upright’ that did not need to be dug into the ground.
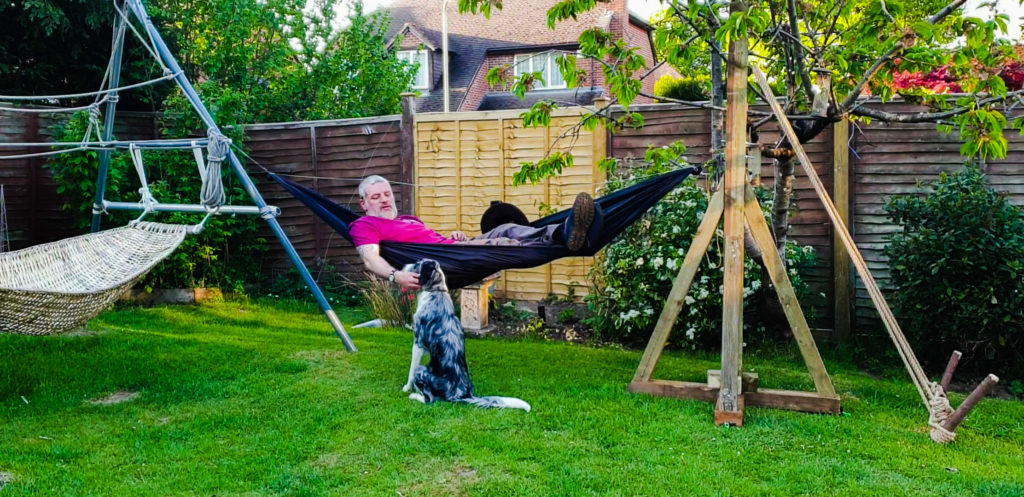
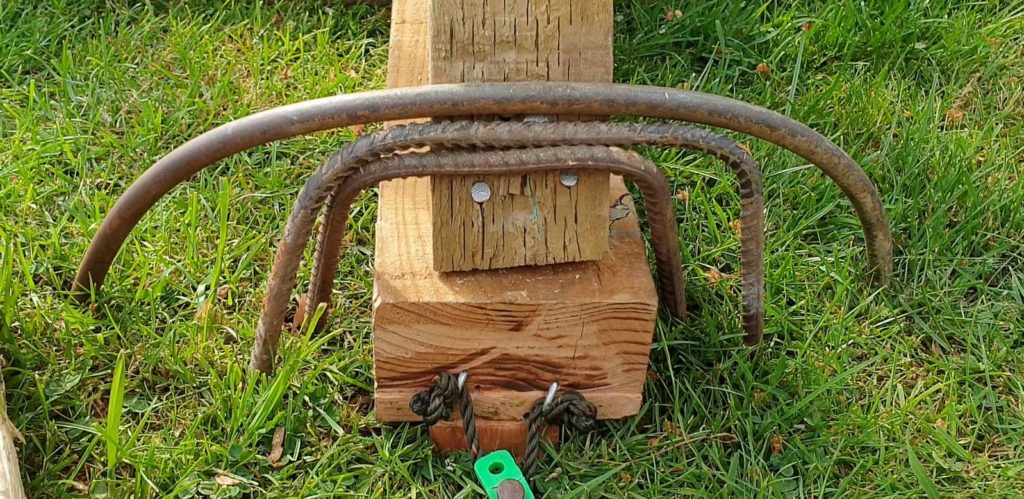
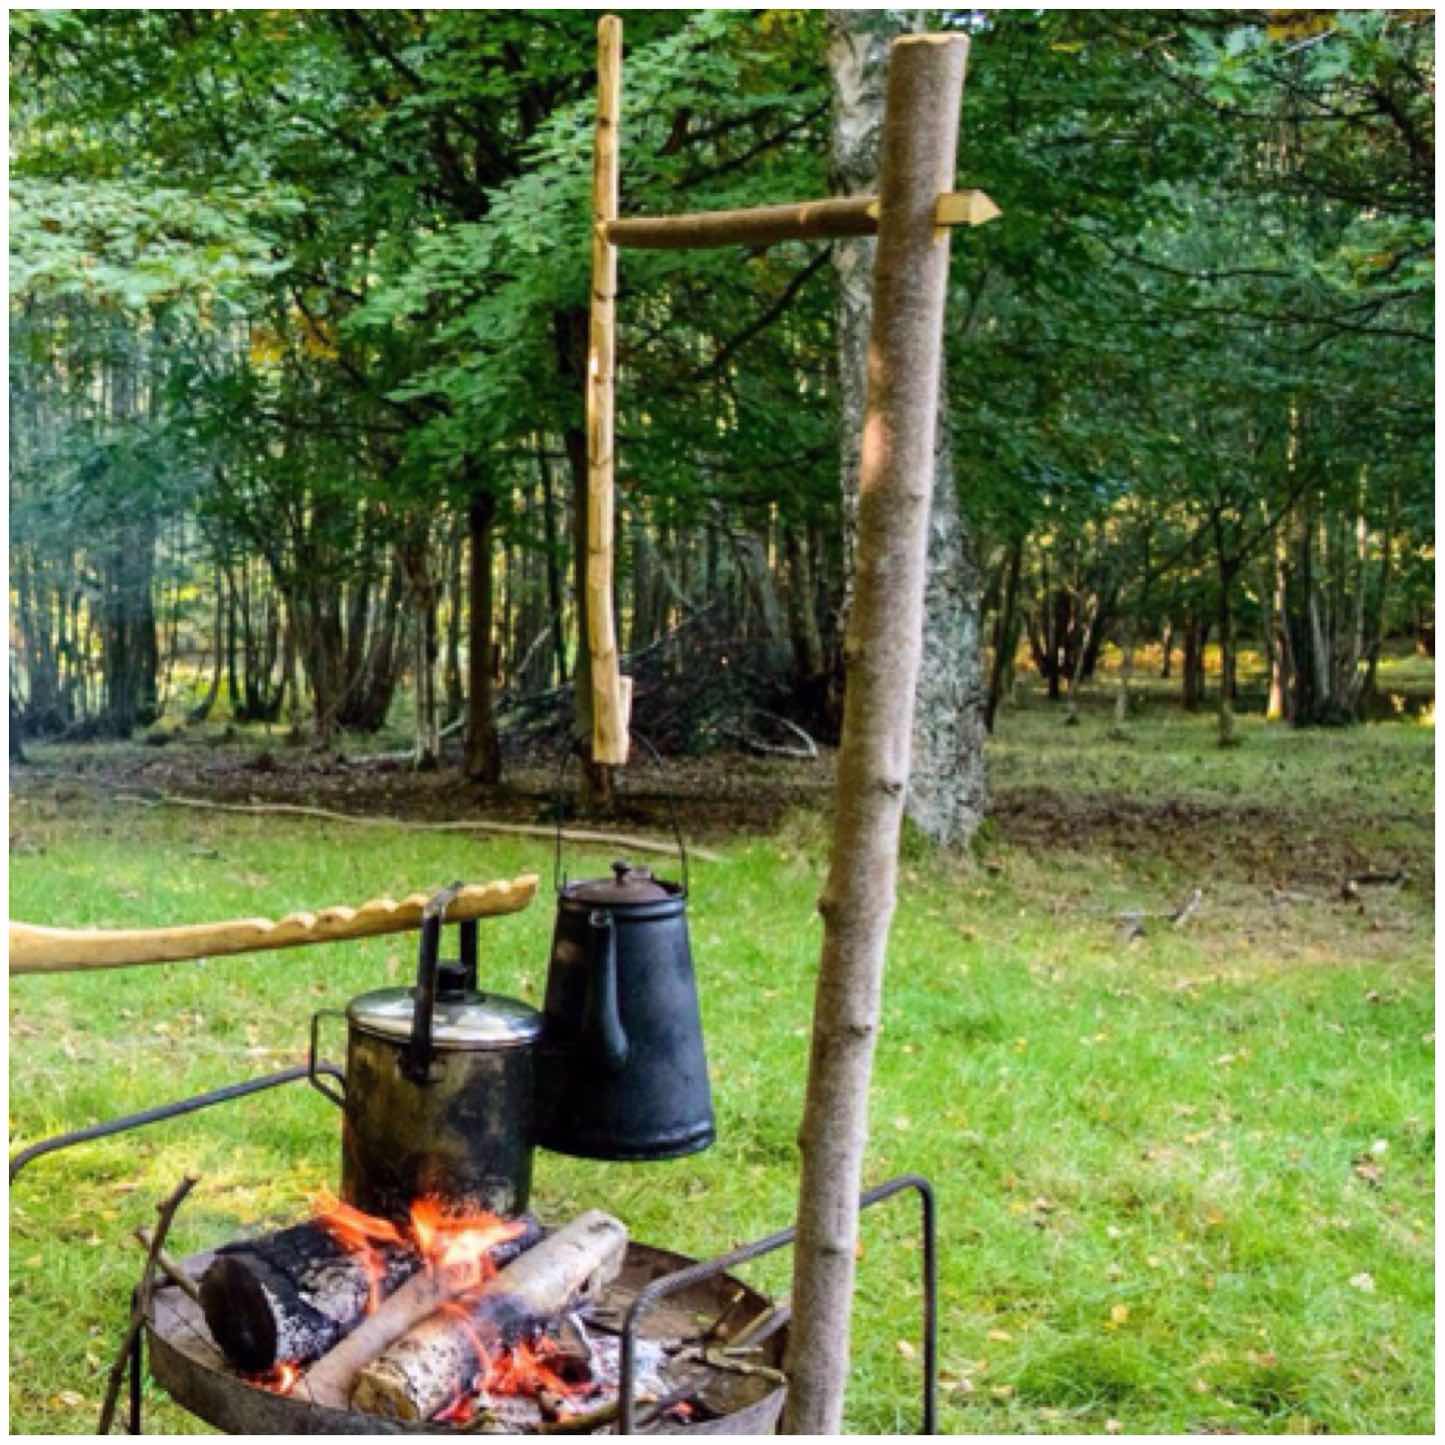
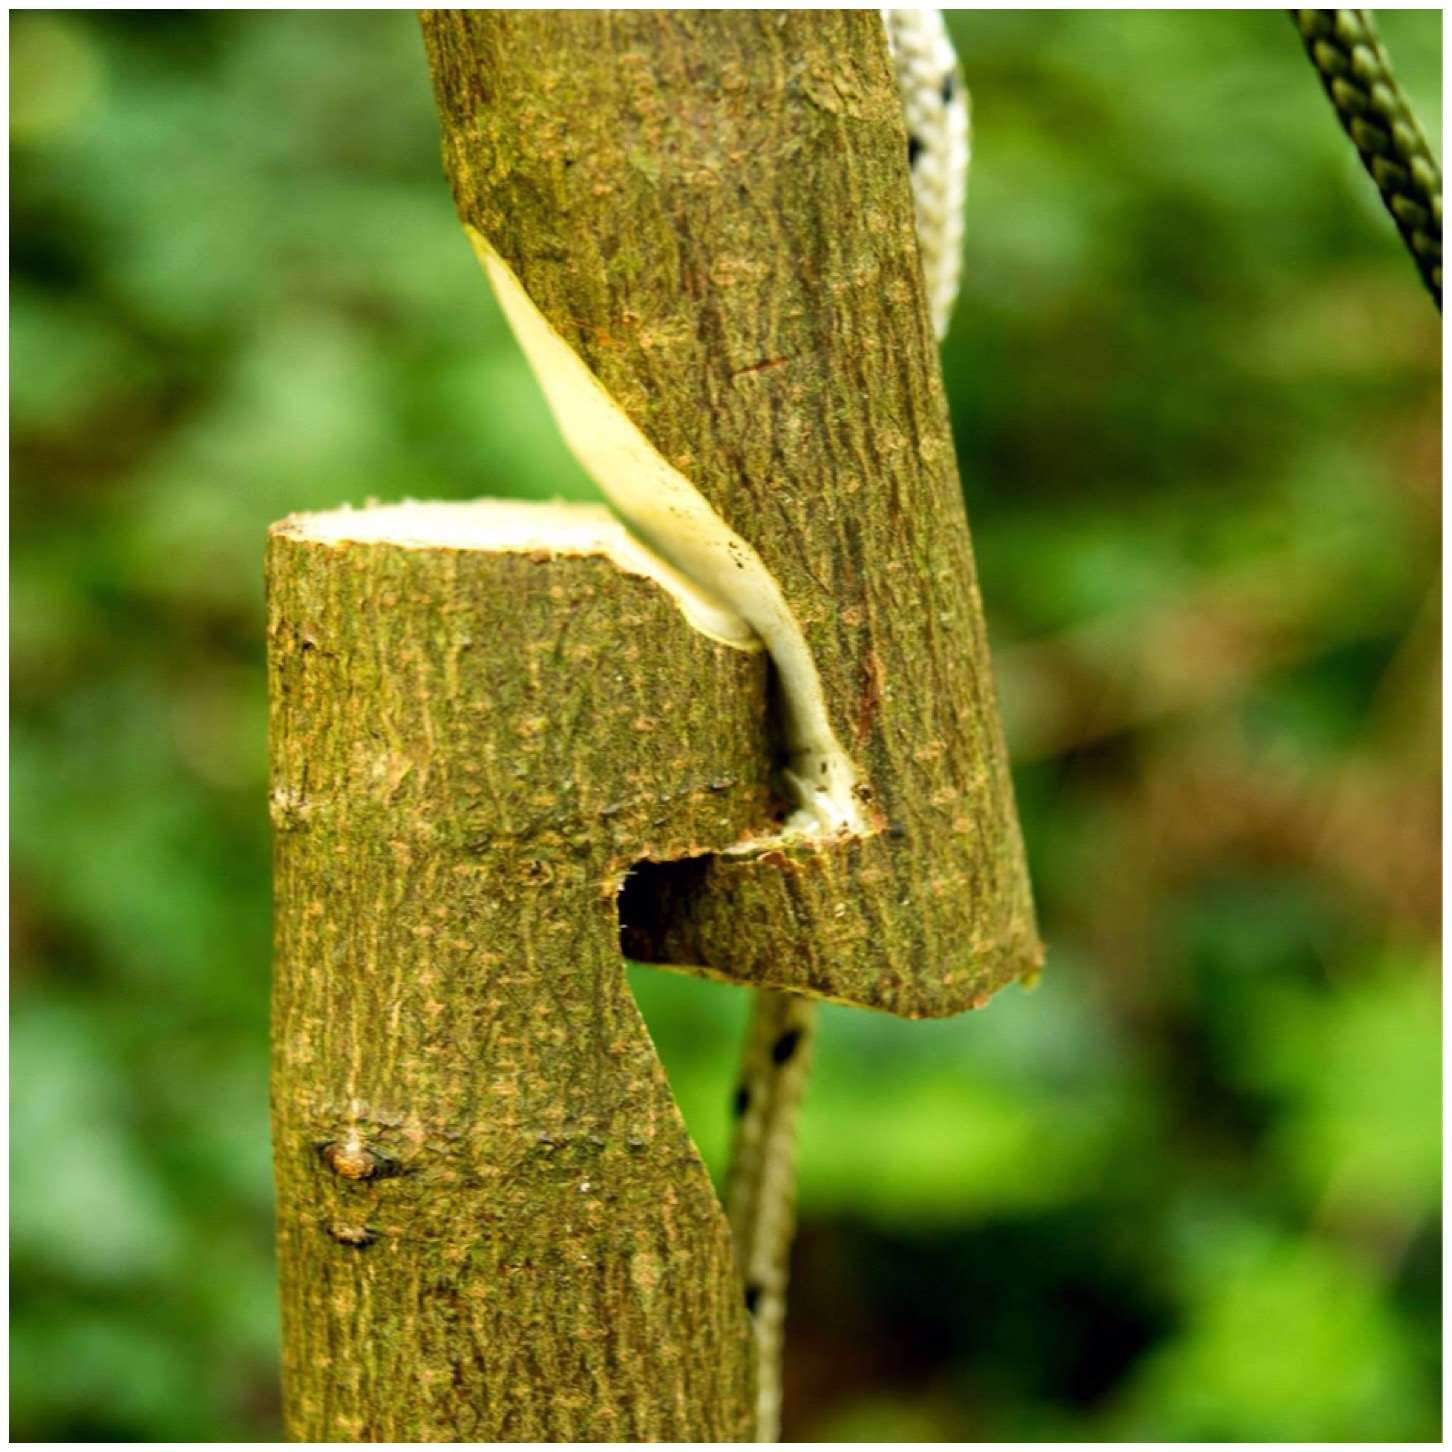
The ‘Hammock Upright’ you can see below is the one I built and it shows it being secured by land anchors. It is not portable (well I can move it around the garden easily) but it is robust. I know that there are ways to make them lighter however I wanted to use the wood I had on hand.
Land Anchor Secured
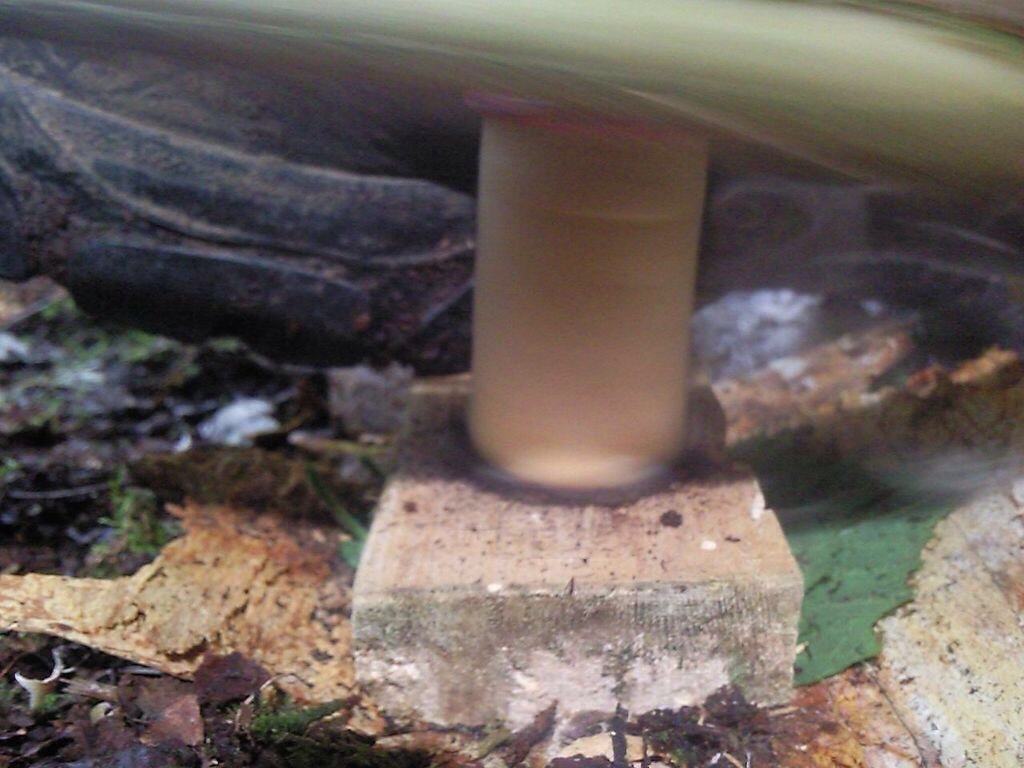
While making a video on the upright it struck me that iron pins would do the same job as the land anchors.
Iron Pins
So to see how it is all built have a look at my video below.
Cheers, George
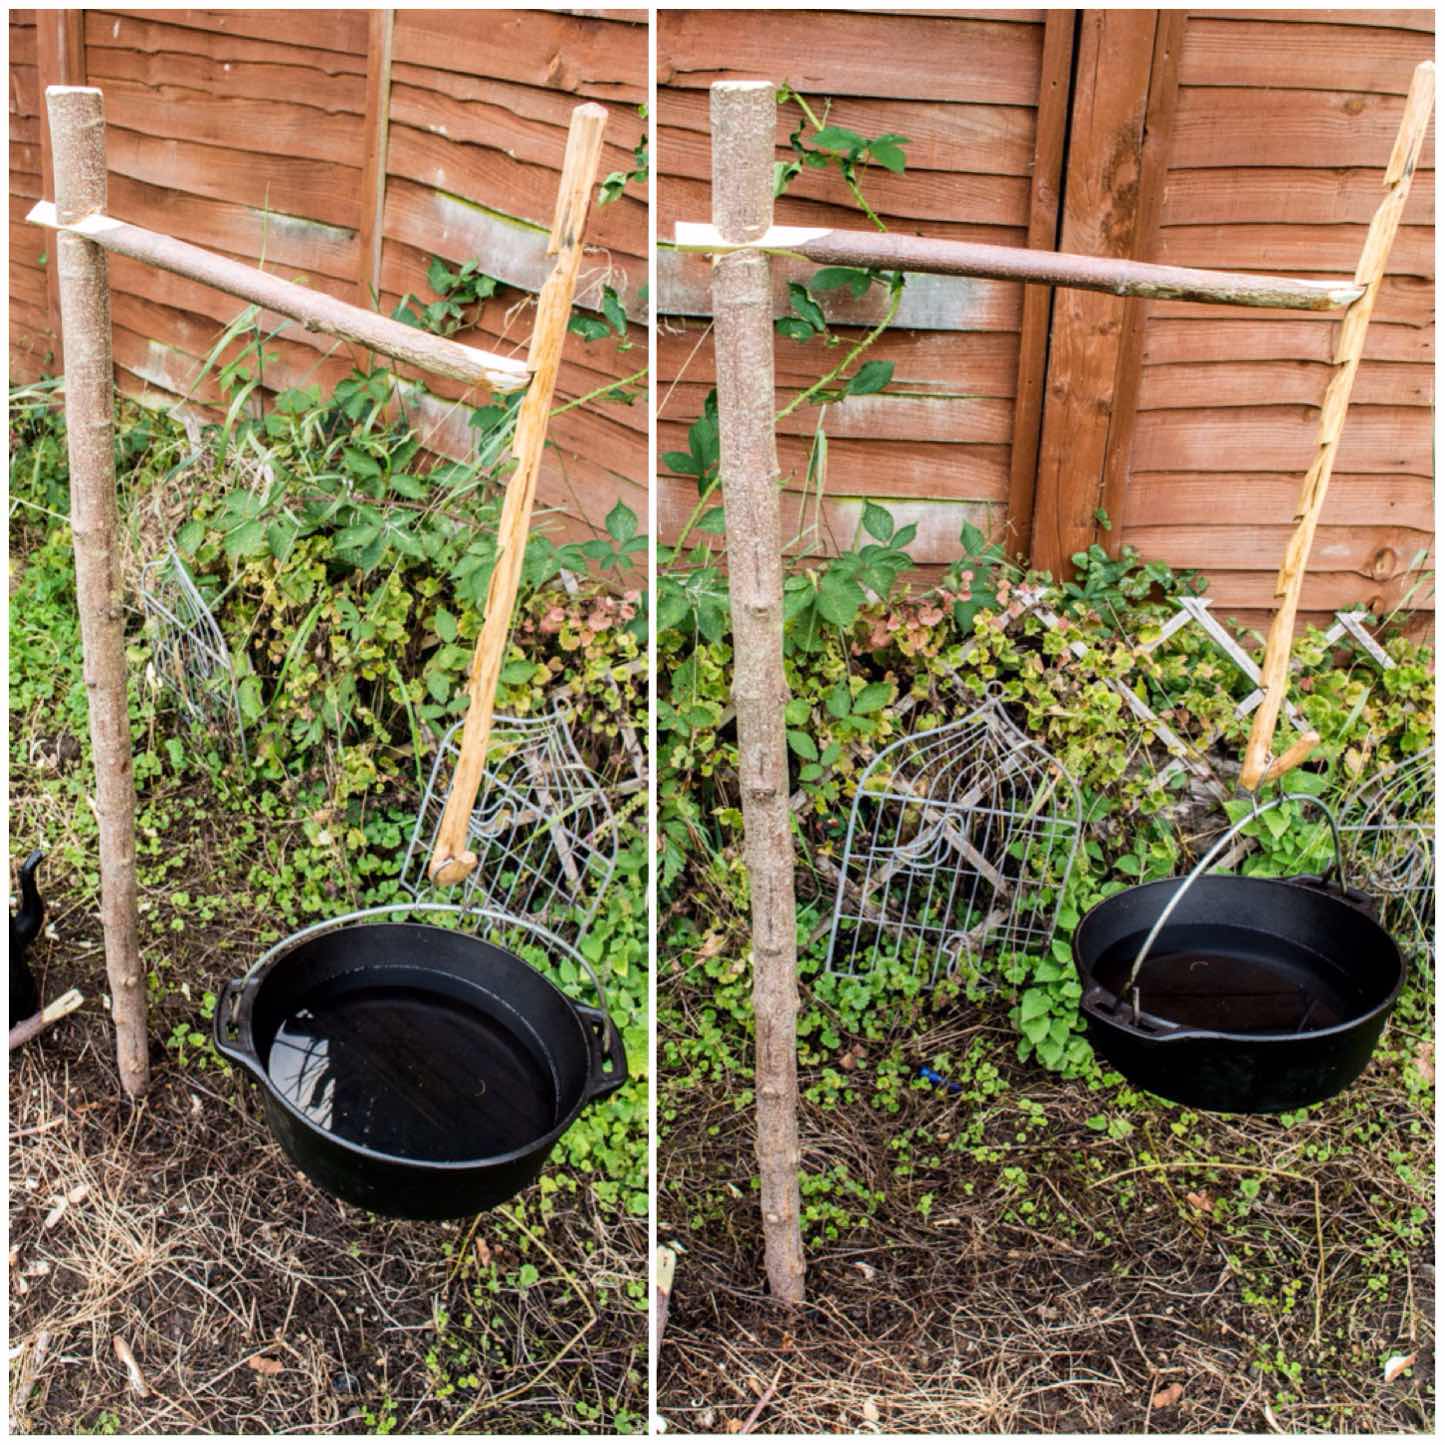
Update (02/05/2020) – Brought the two uprights together and used pins on both.
Having not posted for a while and not being able to travel due to the Corona pandemic I have been looking back at some my older pictures and videos to bring a smile to my face and it worked – plan is to make this a regular thing until we get the go-ahead to get out and about again.
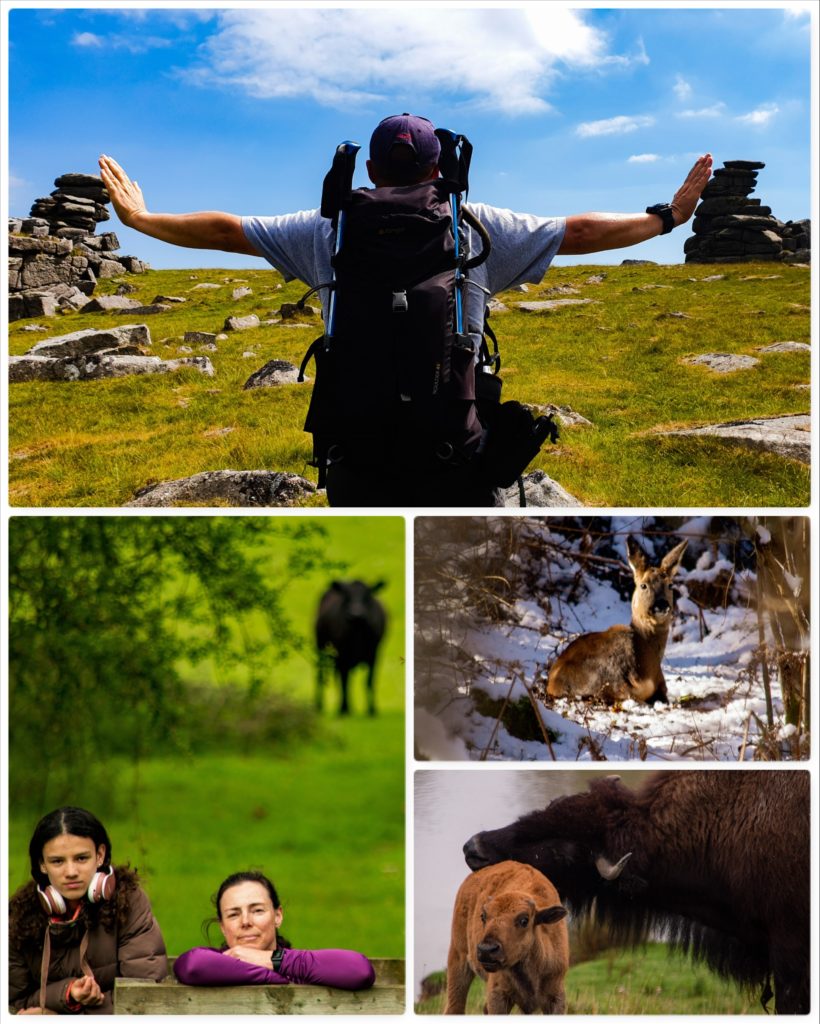
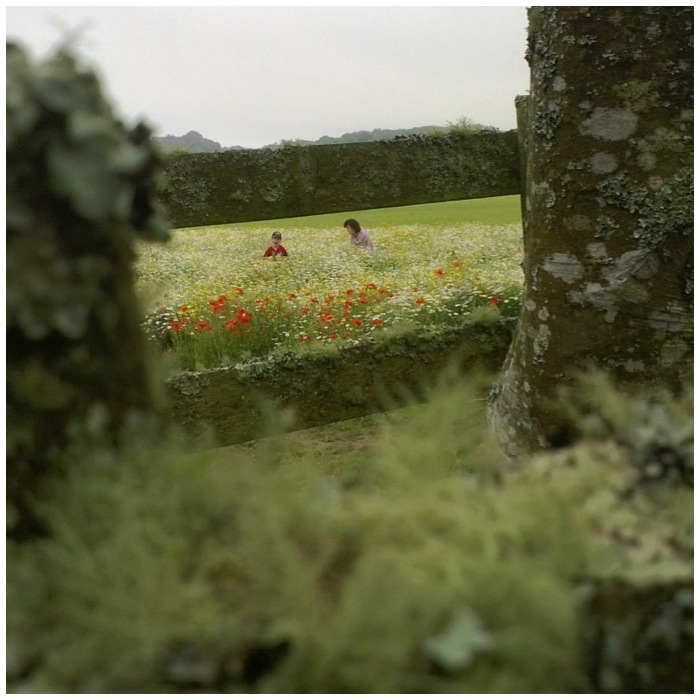
So here goes – It was a great trip on Dartmoor with the Sea Cadets/DofE last year where we had a little fun along the way (Dave you have to put up a lot with me I know). Alison and Catherine had no idea they were being watched while I photographed them at The Vyne (National Trust).
I spent a bit of time stalking (with a camera) a herd of Deer in the snow (very crunchy snow) and I had a laugh watching the mother Bison scratching her cheek on her calf’s bottom.
Finally looking at my Youtube channel this short video from the Bushmoot always brings a smile to my face – great people in a great location – here is to hoping we can meet up this year.
Travelling back from Manchester tonight I decided to re-instate my ‘Memorable Moments’ posts again. It has been a fantastic summer of photography for me – so here are just a few moments from July 18.
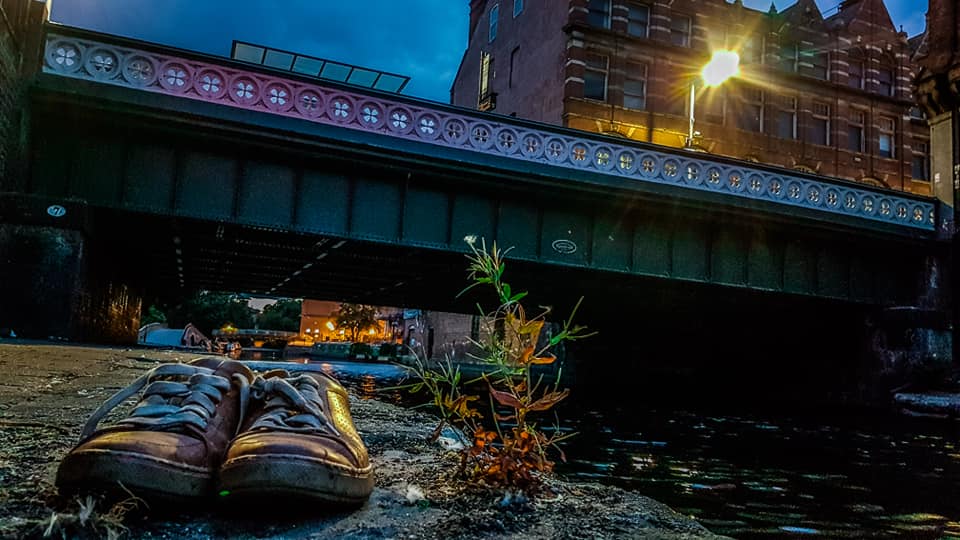
Nottingham Nights
On a work trip to Nottingham I happened across this little scene by the side of the canal – I wonder what the story was here?
Wonder what the story was here?
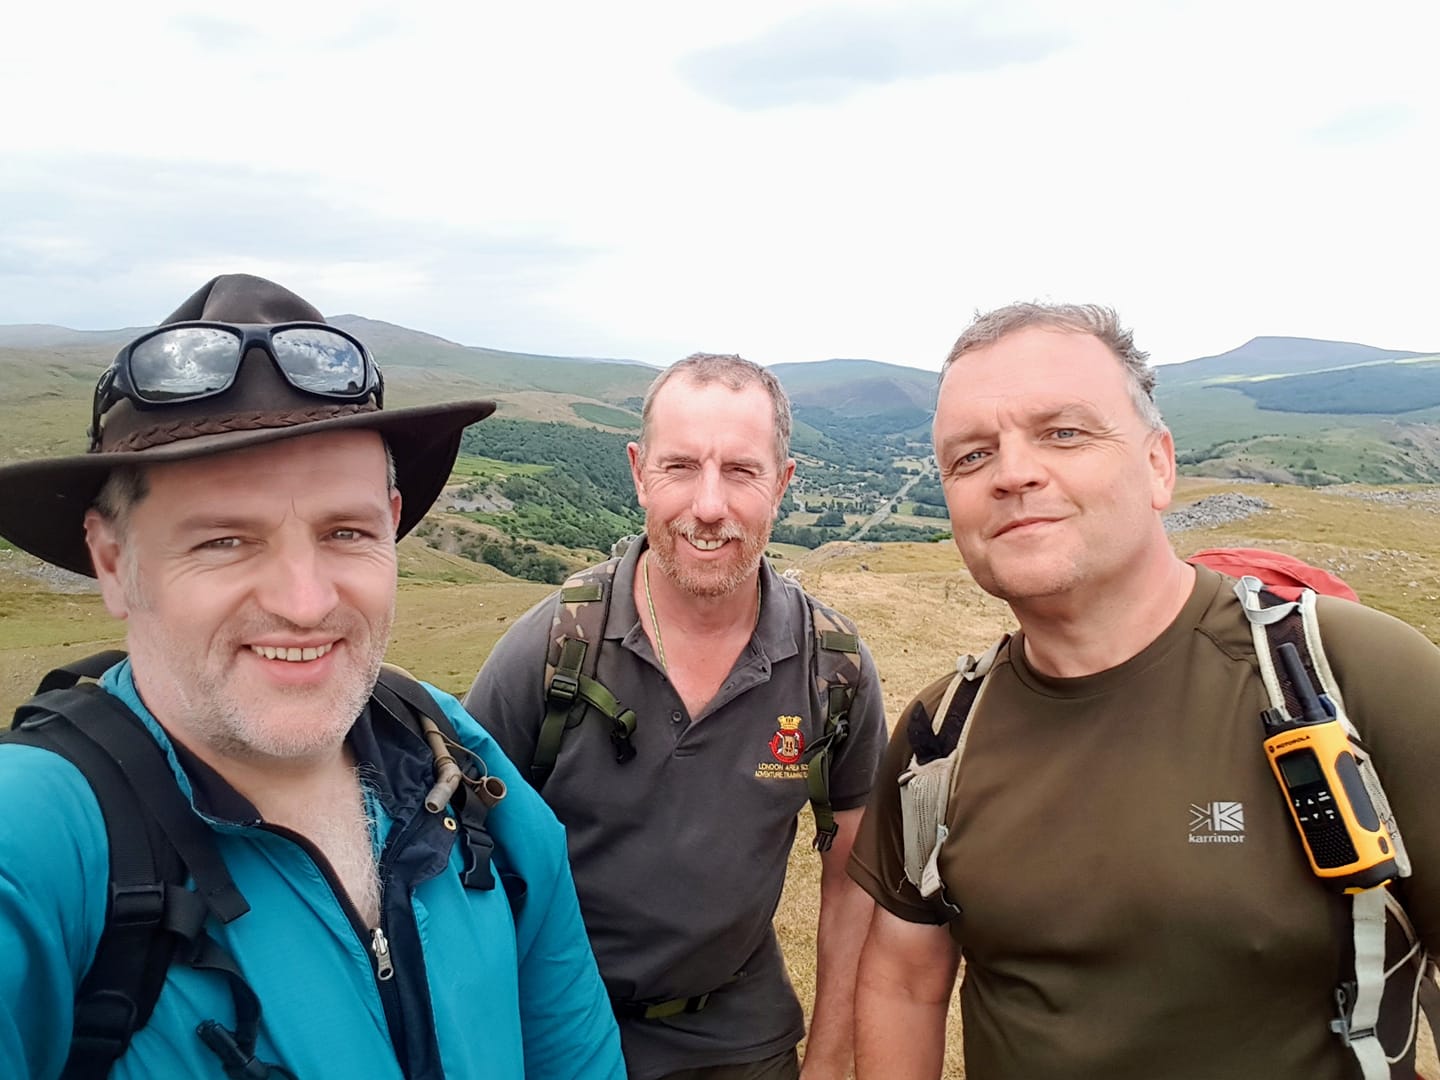
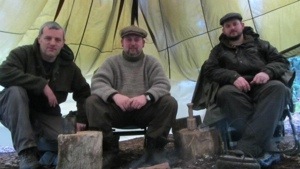
Foggy, Cyril, Cleggy and Compo
Meet three of the Sea Cadet ‘Last of the Summer Wine Troup’ – Graham, John and myself. We missed our final member Dave Lewis this year on our Brecon DofE trip – Hopefully you will be with us on our Peaks trip in October Dave?
Last of the Summer Wine minus one – Dave
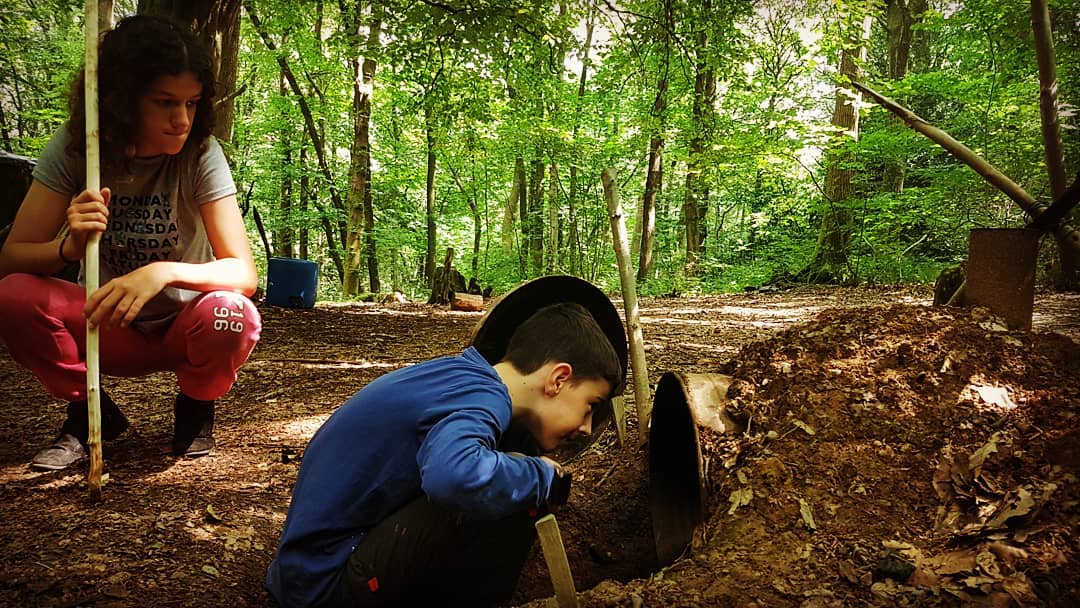
Woodcraft School
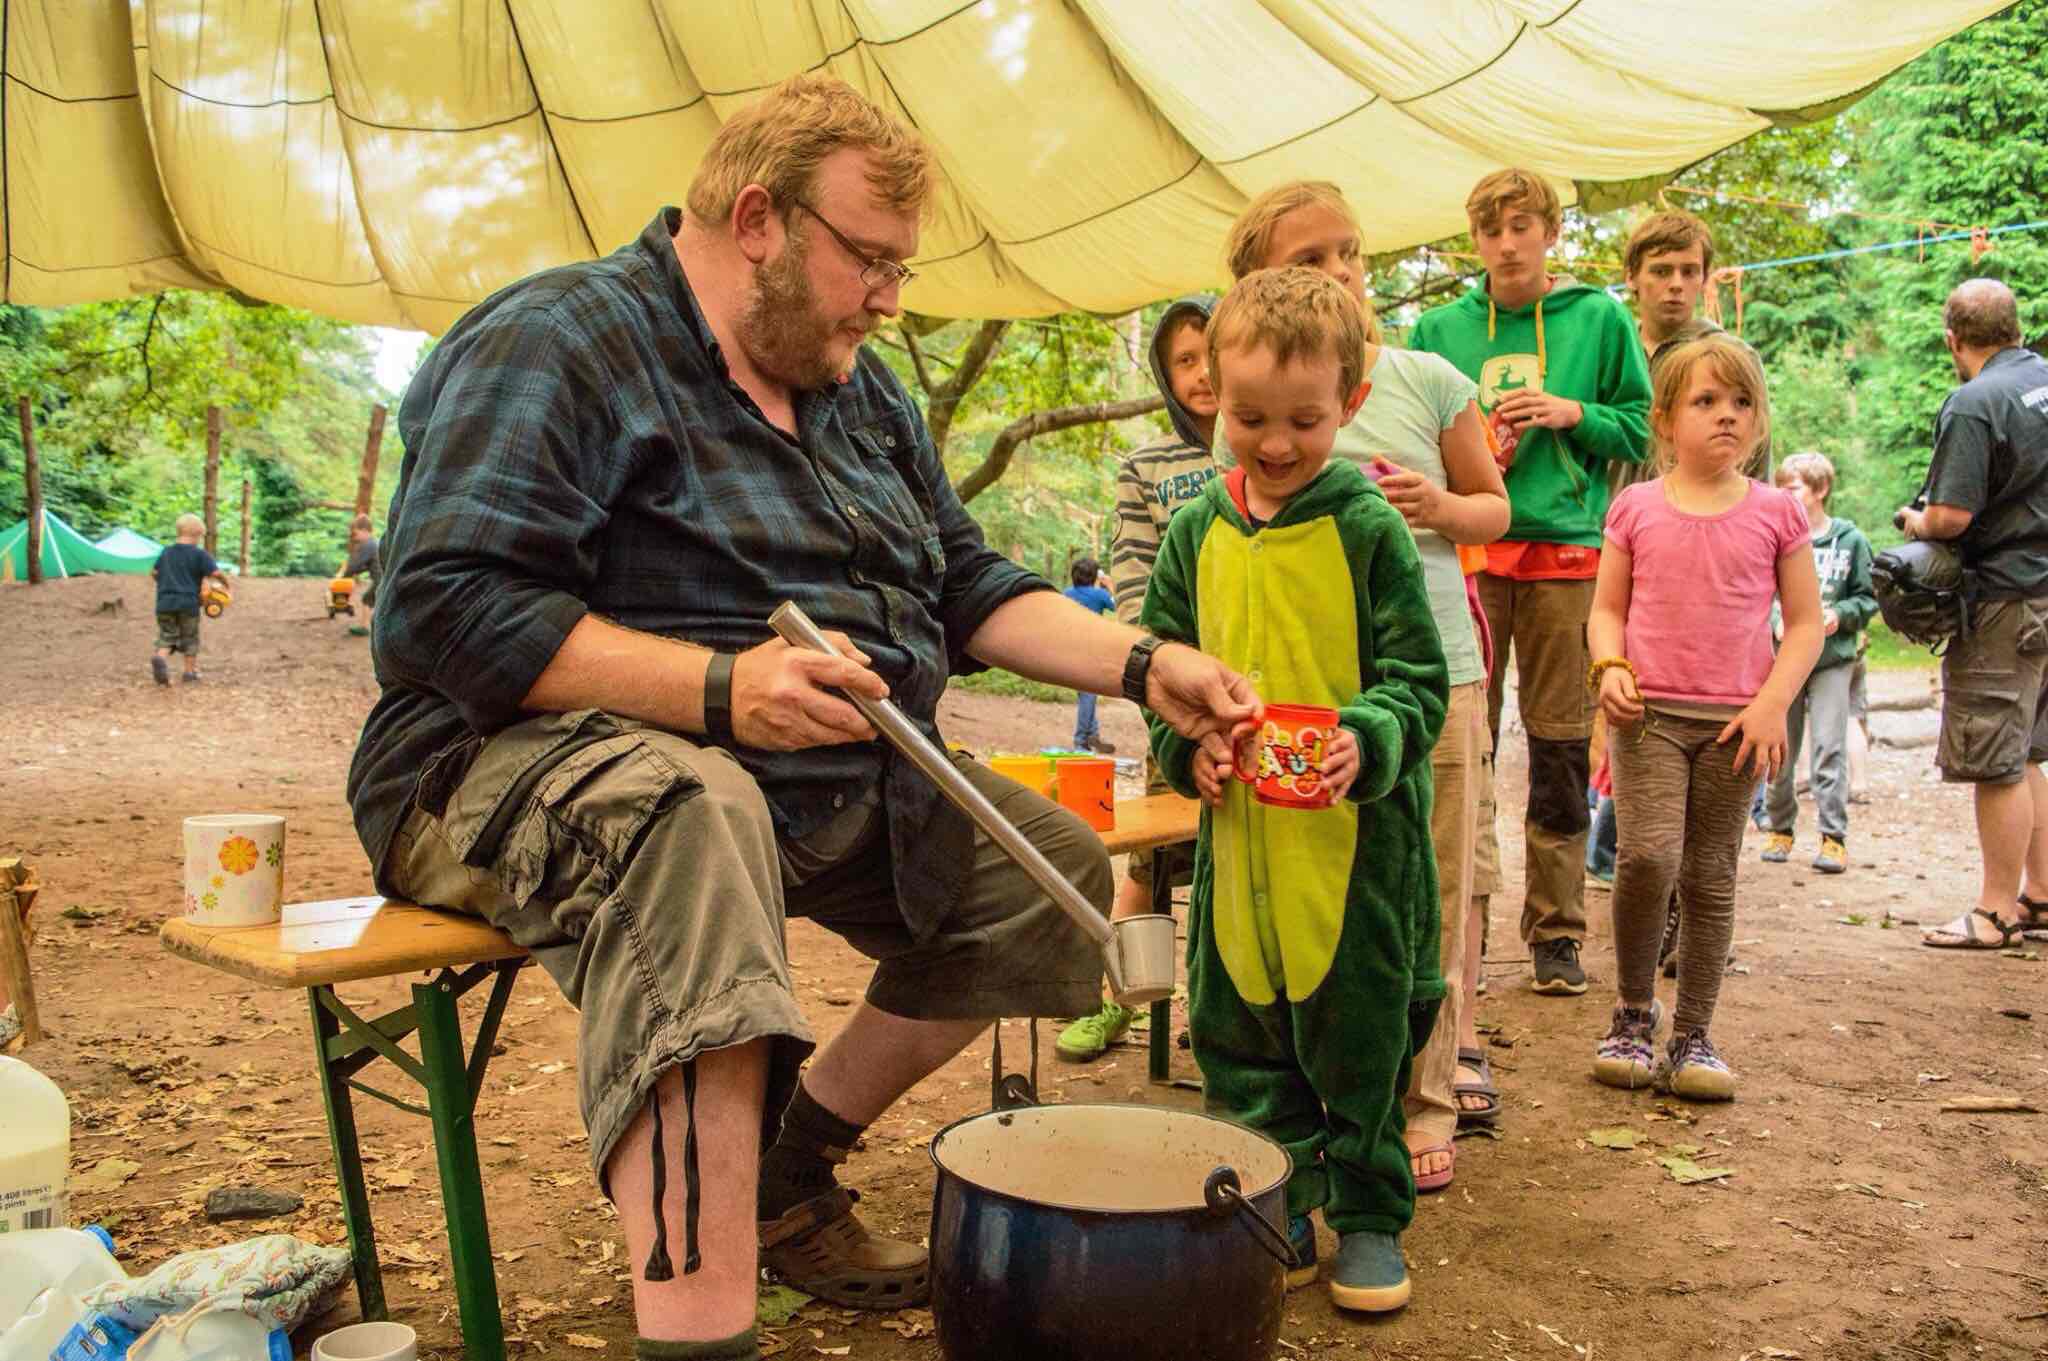
We attended John Rhyder’s book launch (Woodcraft – A practical celebration of the tree) at his woods. It was great to see the book being launched and catching up with old friends – the kids though had a ball investigating all John’s camp gadgets.
The Camp Stove
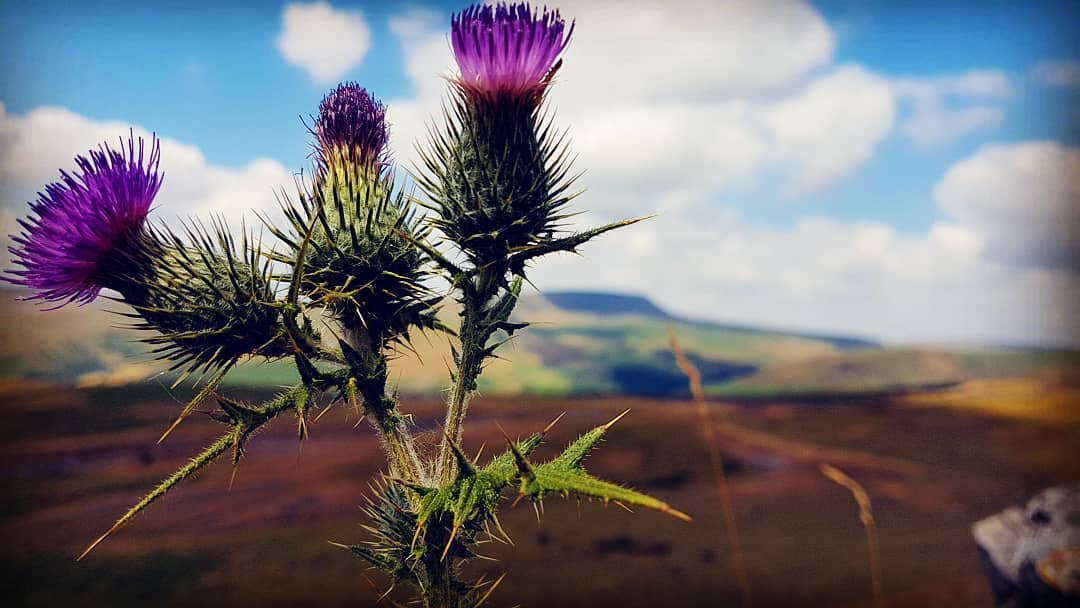
A Scottish view from a Welsh hill
I happened across this view on the side of a hill in the Brecon Beacons. I posted it on my Facebook account for all my Scottish friends. I did enhance the purple a little for artistic effect 🙂
A Scottish view – A Wesh hill
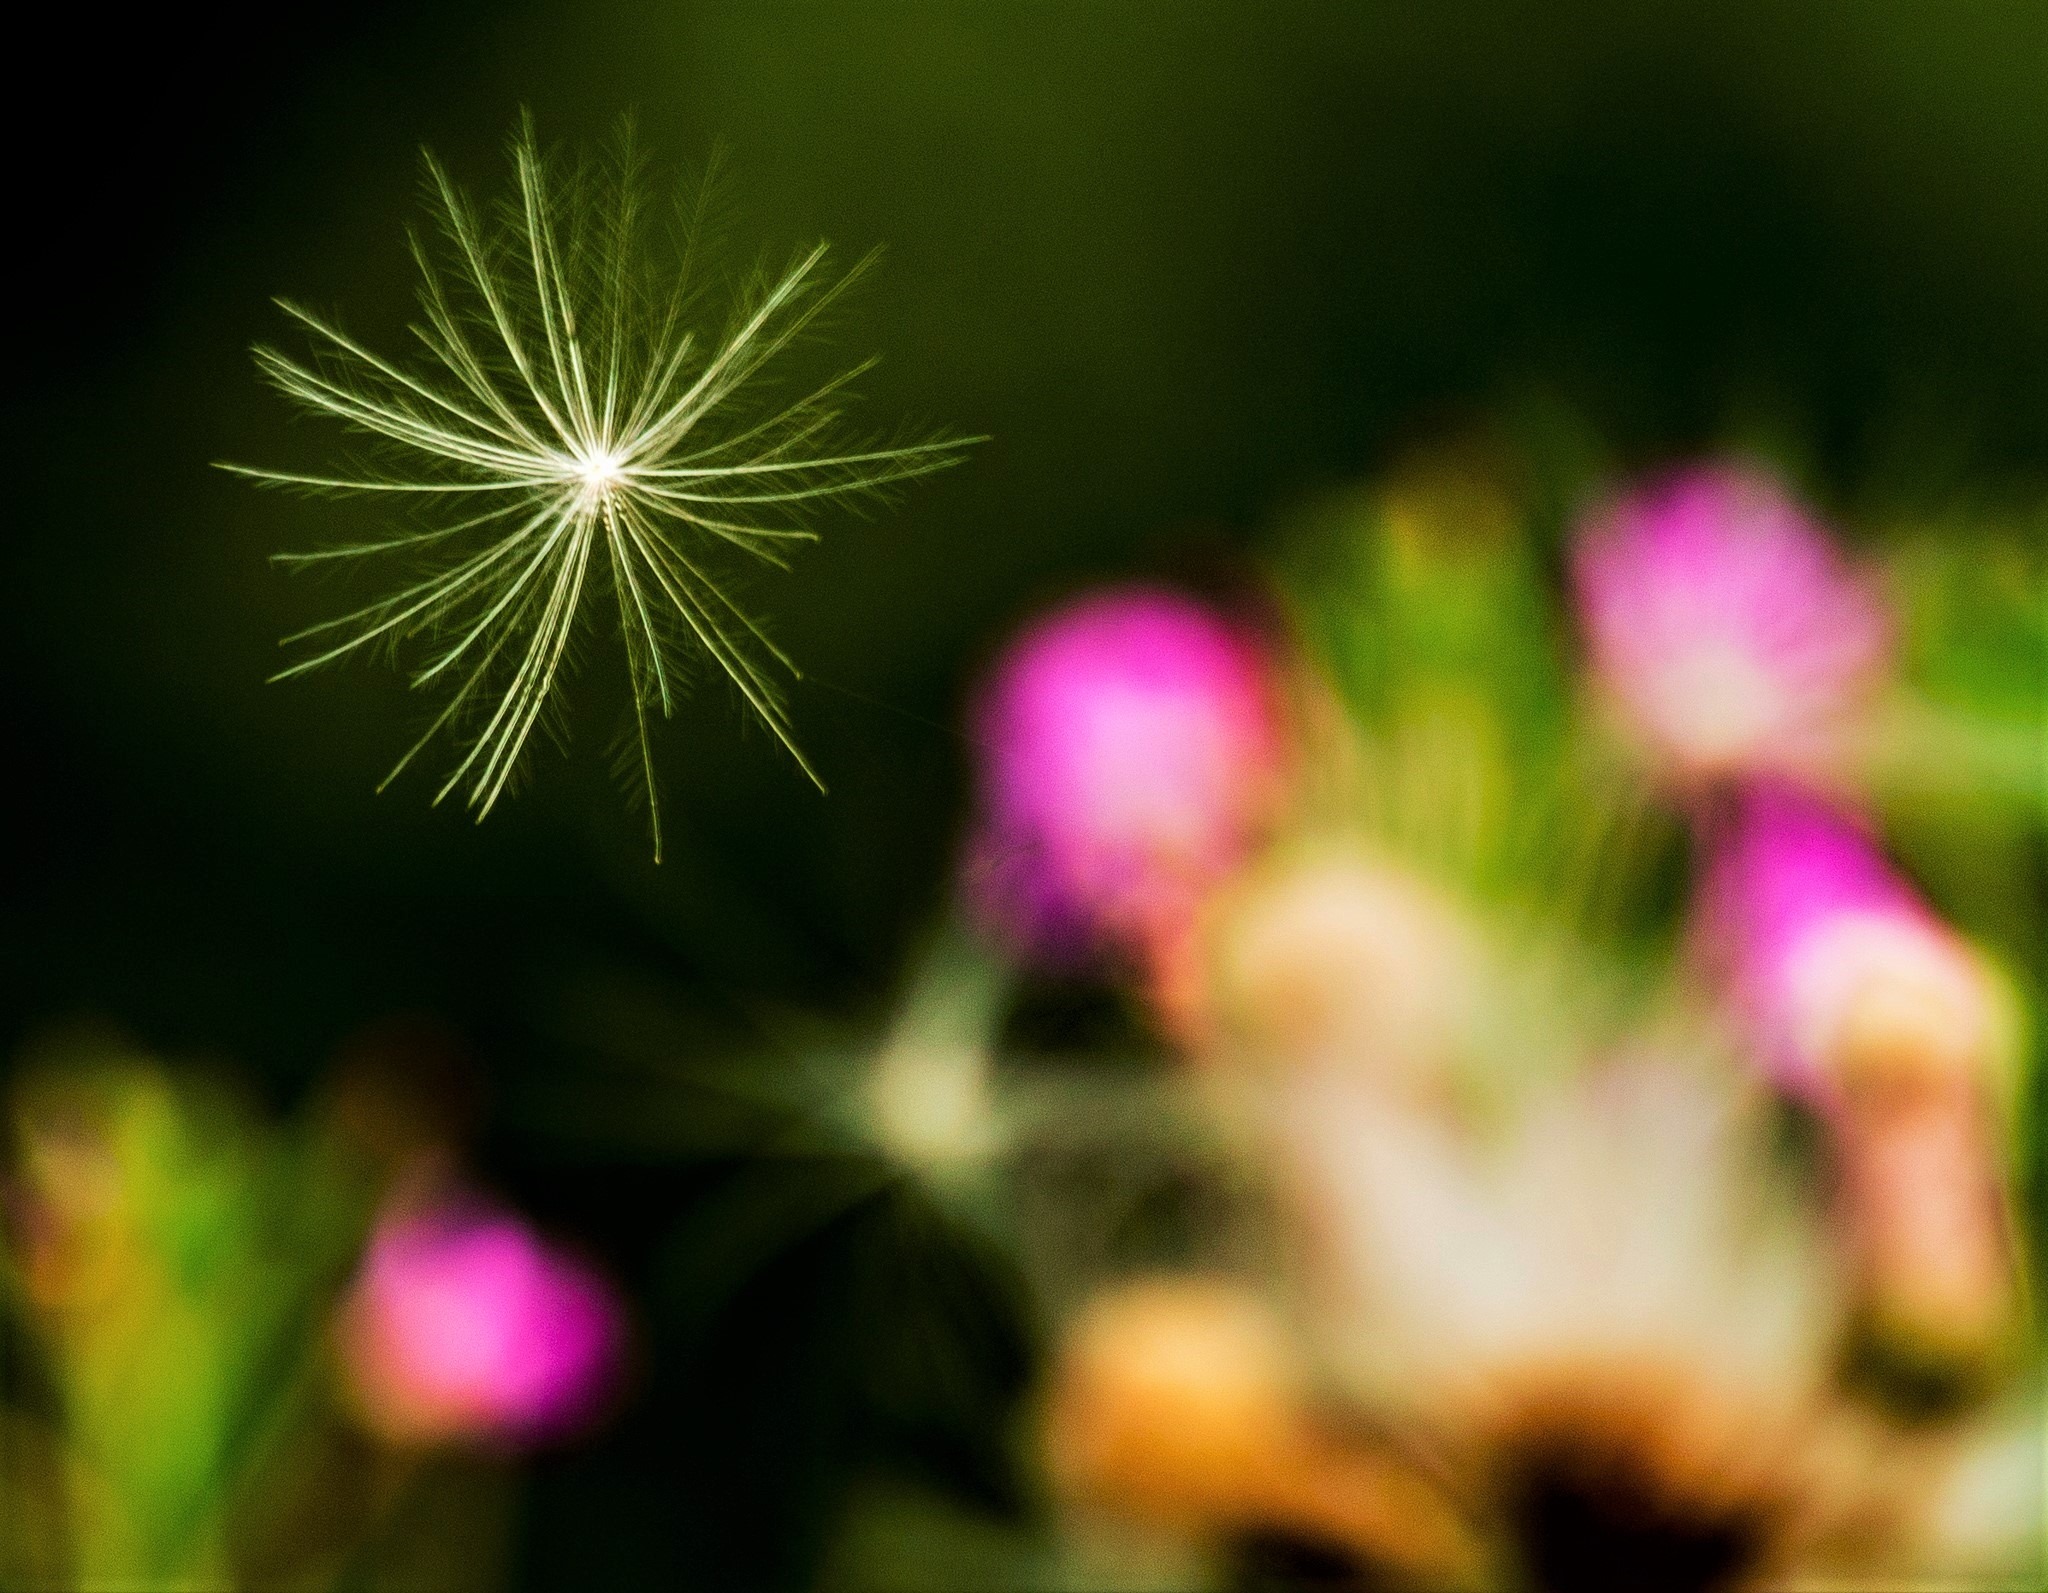
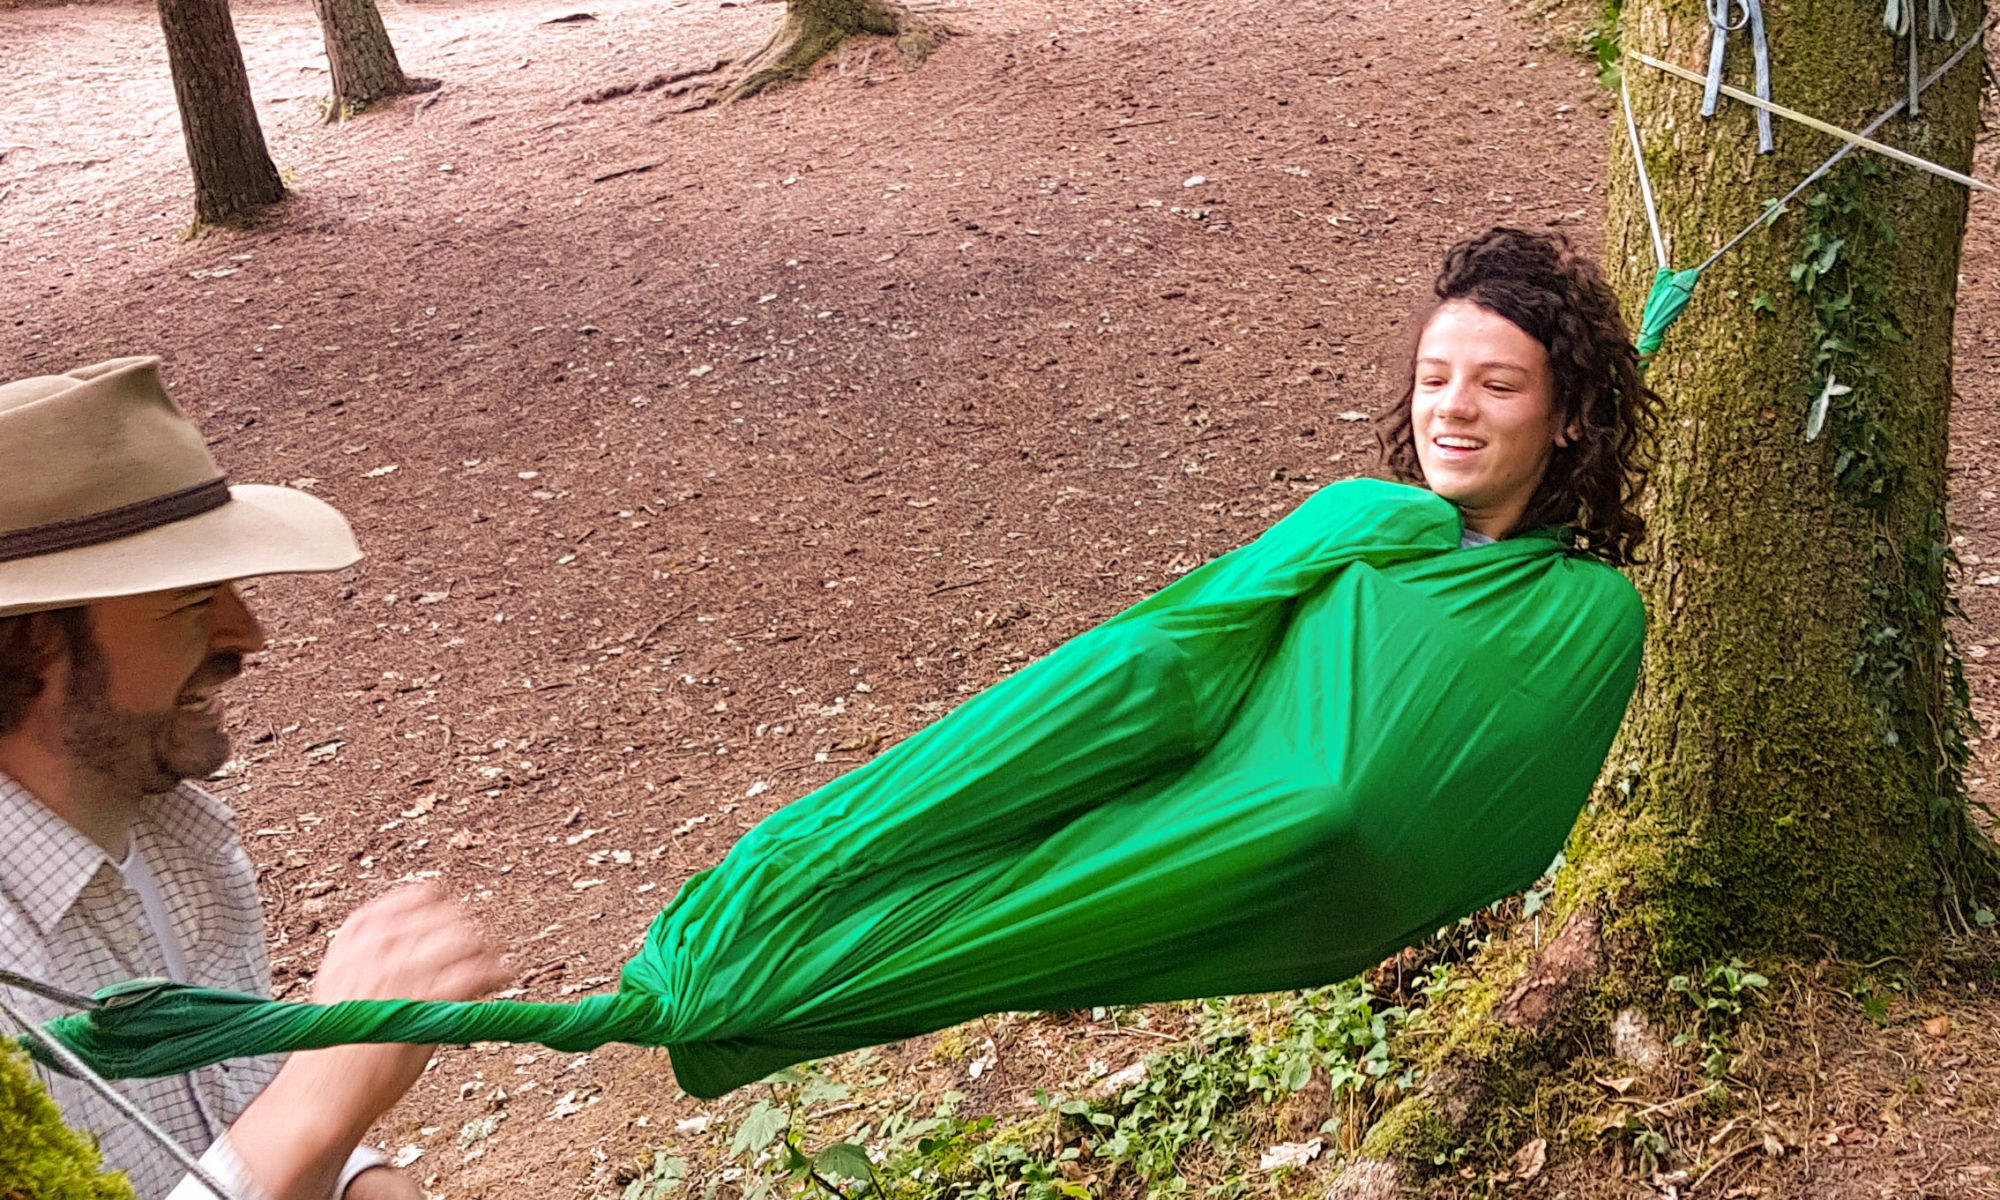
Hanging About
My local National Trust property is ‘The Vyne‘. I do spend a bit of time there when I can with the family however on my last trip I went alone. I would never have gotten this shot of the Thistle Down seedhead if the kids had been pulling on my shirt tails.
Just Hanging
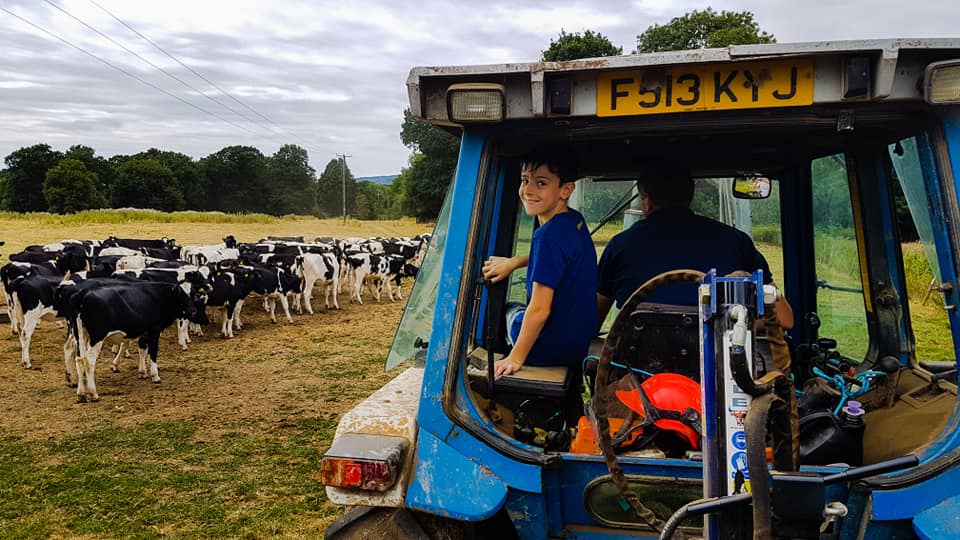
Boys and Toys
What can I say – boys and toys 🙂 Finlay and myself had a ball working at our friends Phil and Philippa’s farm – there is just something I love about driving tractors.
Boys and Toys
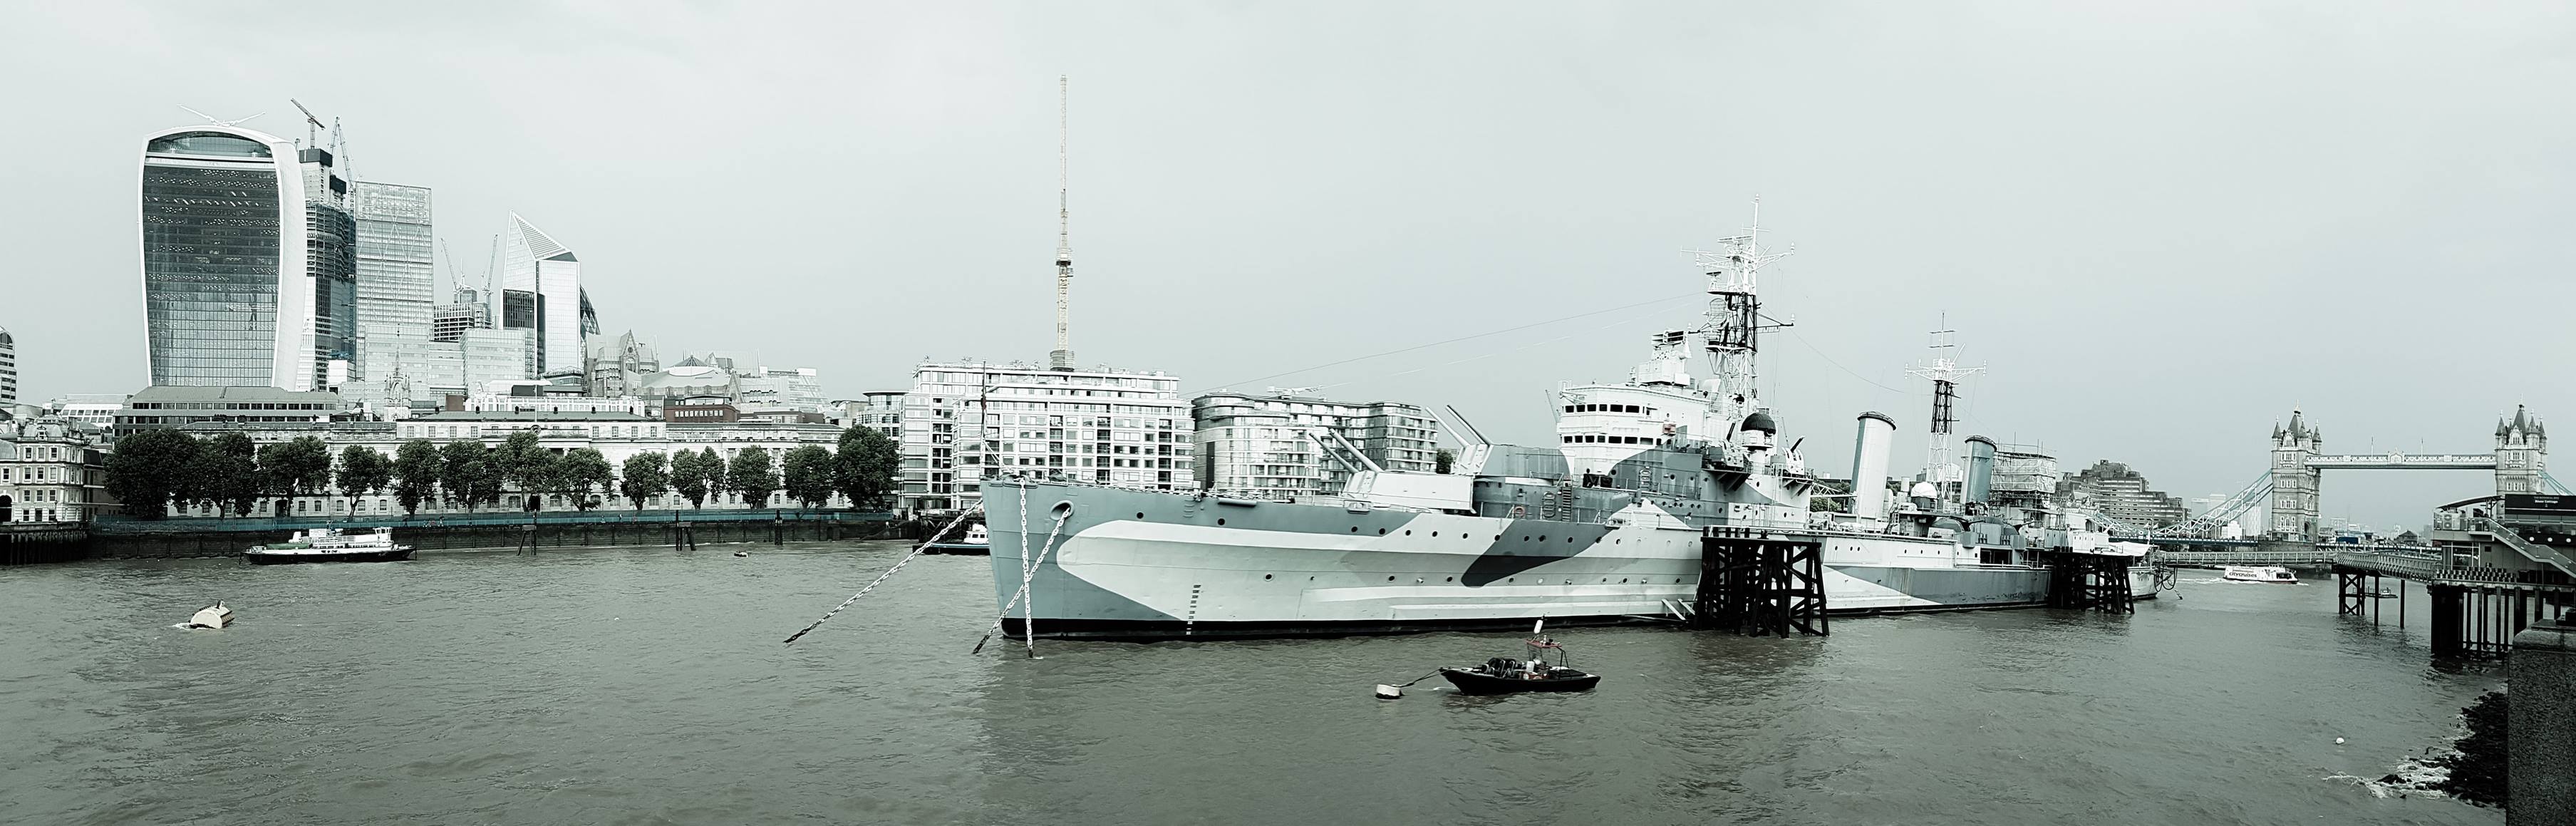
Farewell to a Friend
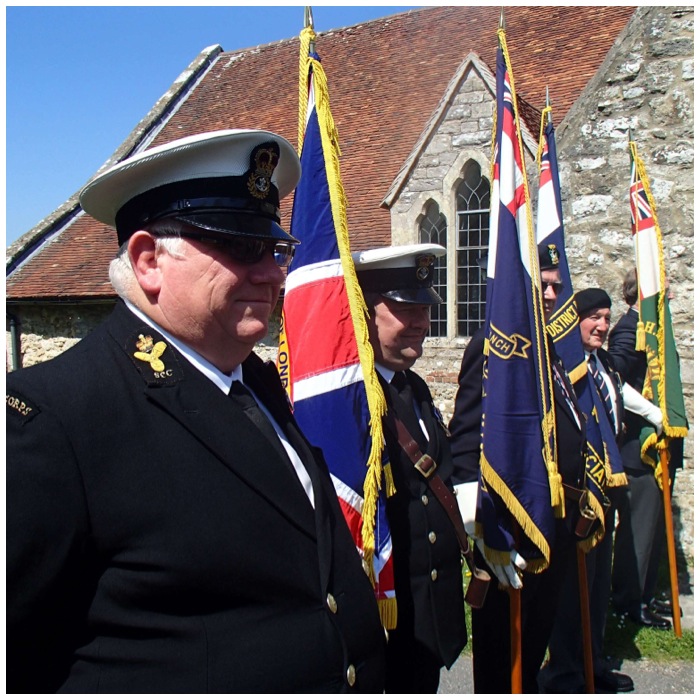
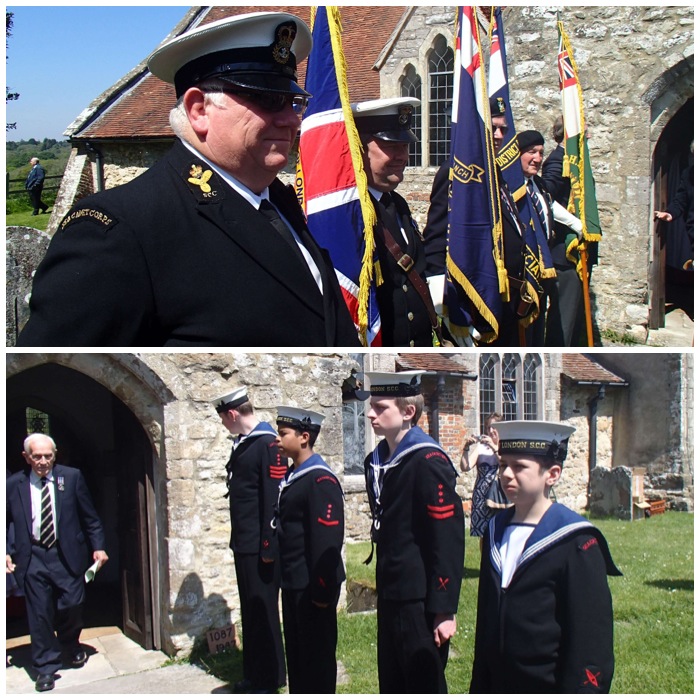
HMS Belfast – home to my Sea Cadet unit – City of London. I dont get down for a visit very often as I do not live in London these days. The visit was a sad one as it was for the funeral of our old shipmate Bernie – we did though give him a good send off at the Cathedral and the wake afterwards – Bernie was a WWII vet and a member of the Coastal Forces Association.
A rare visist
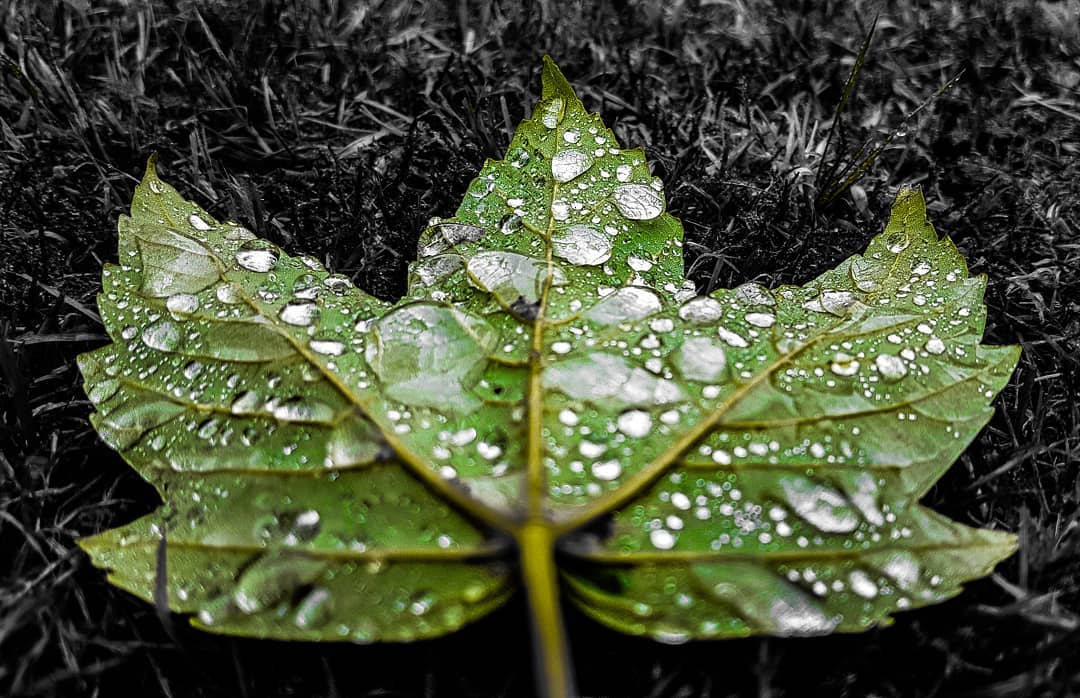
Parched Times
My final moment was found at the back of our church – St James. With all the hot weather over the summer I think we only had rain once or twice in July. I saw this wind blown Sycamore leaf lying on some very parched yellow grass and had to grab a shot of it. I used Lightroom to manipulate the colours so as to try and make the raindrops stand out a bit.
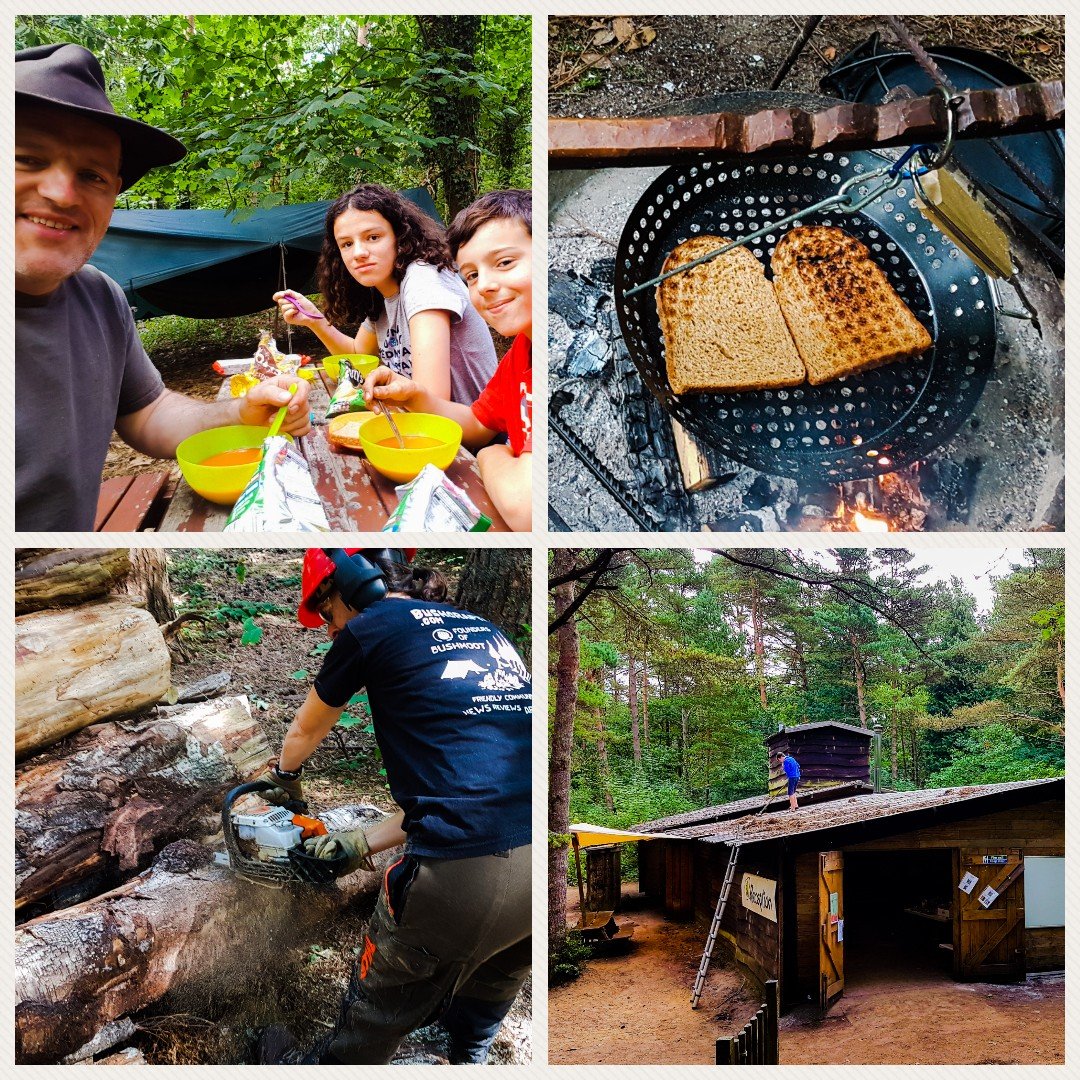
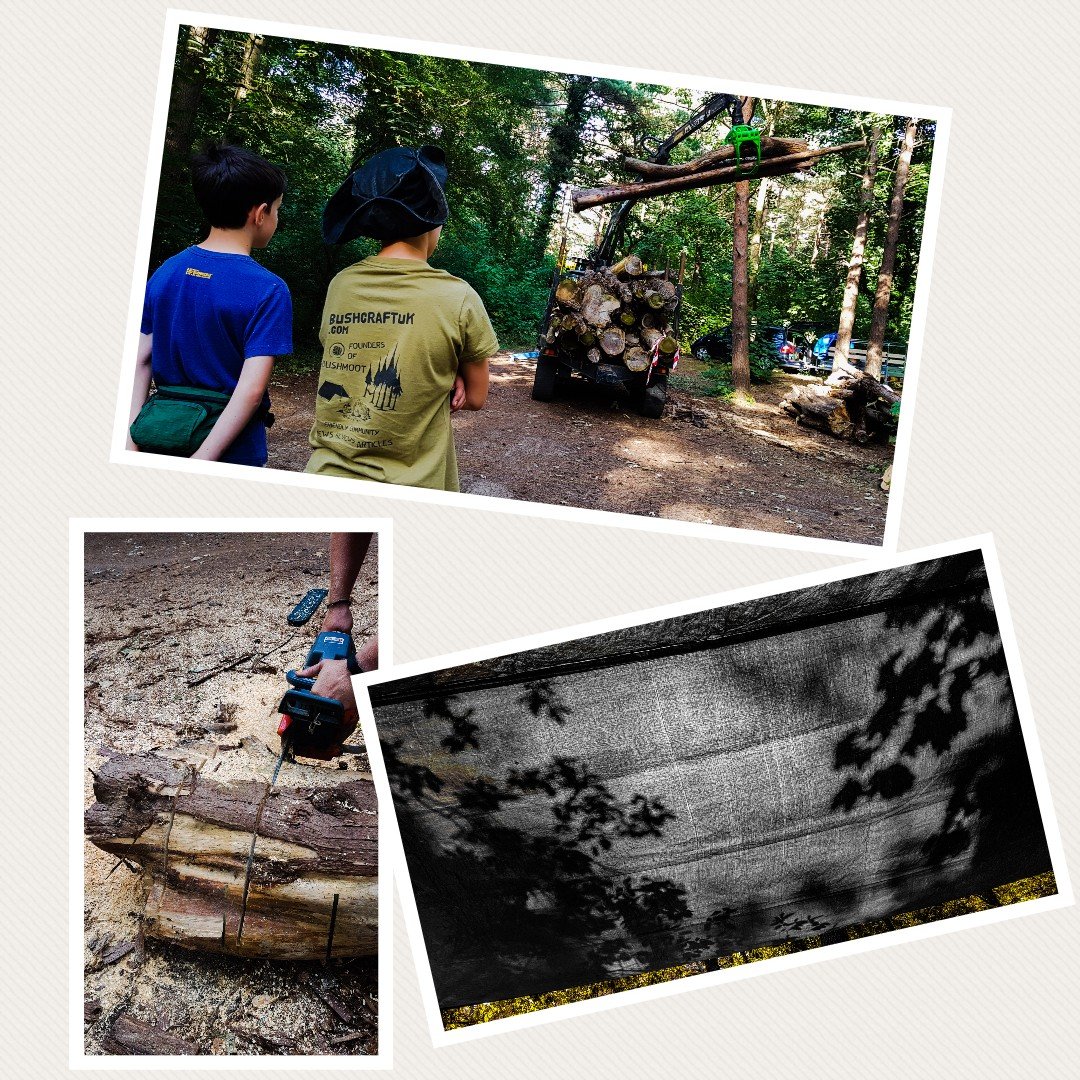
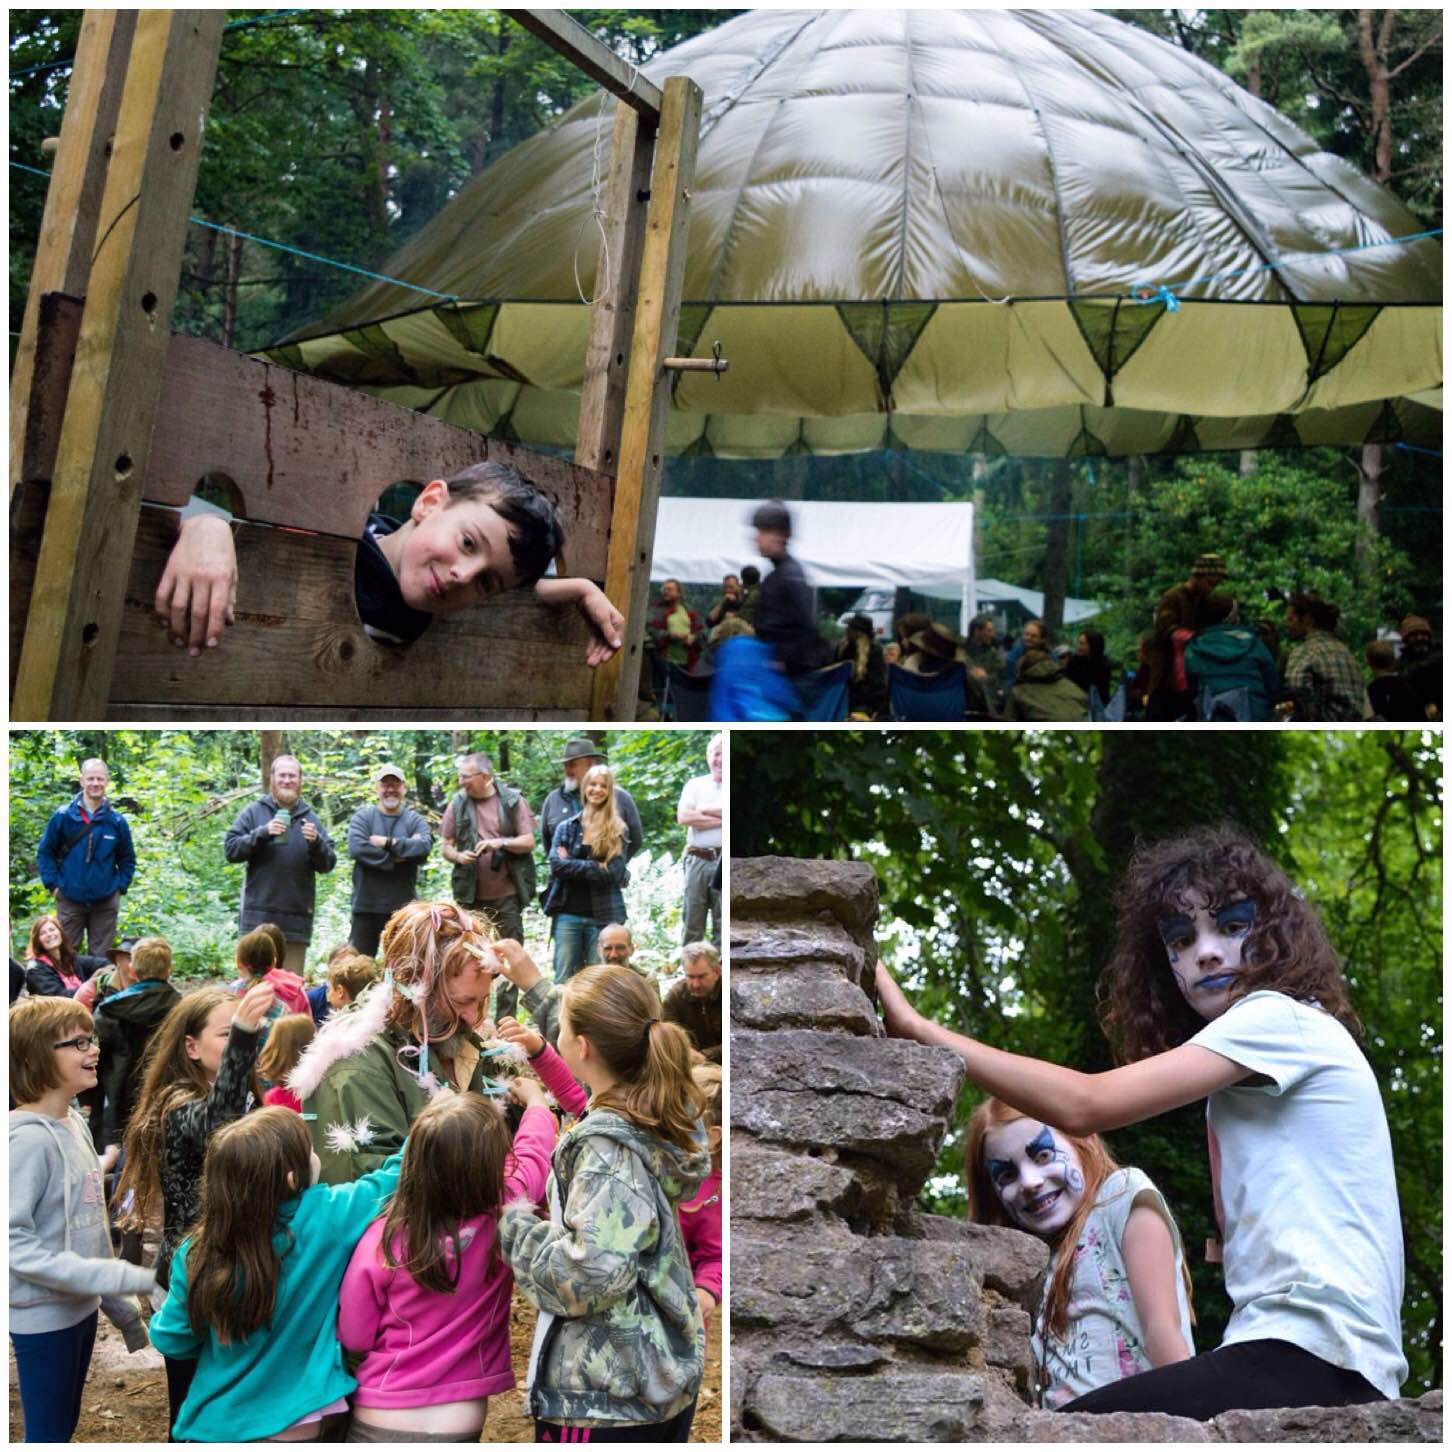
Things have been settling in here at the Bushcraft UK Bushmoot here in Merthyr Mawr.
Took time out to test out my new barbeque pan – well tested it out as a toast rack really – works a treat so everyone is happy 🙂
There was much to do in terms of getting the site ready for all the visiting Bushcrafters so we were all soon getting stuck into the prep.
Getting Started
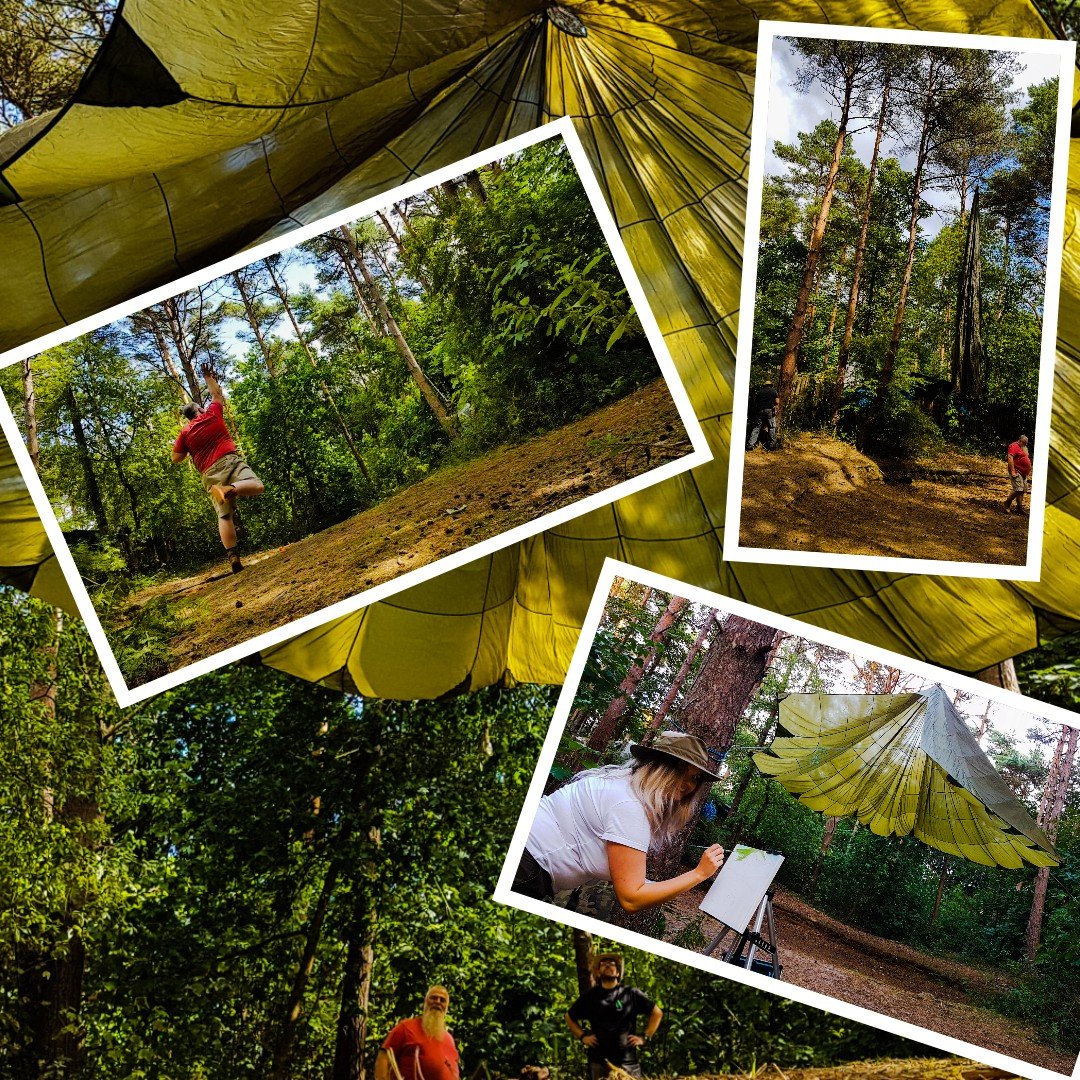
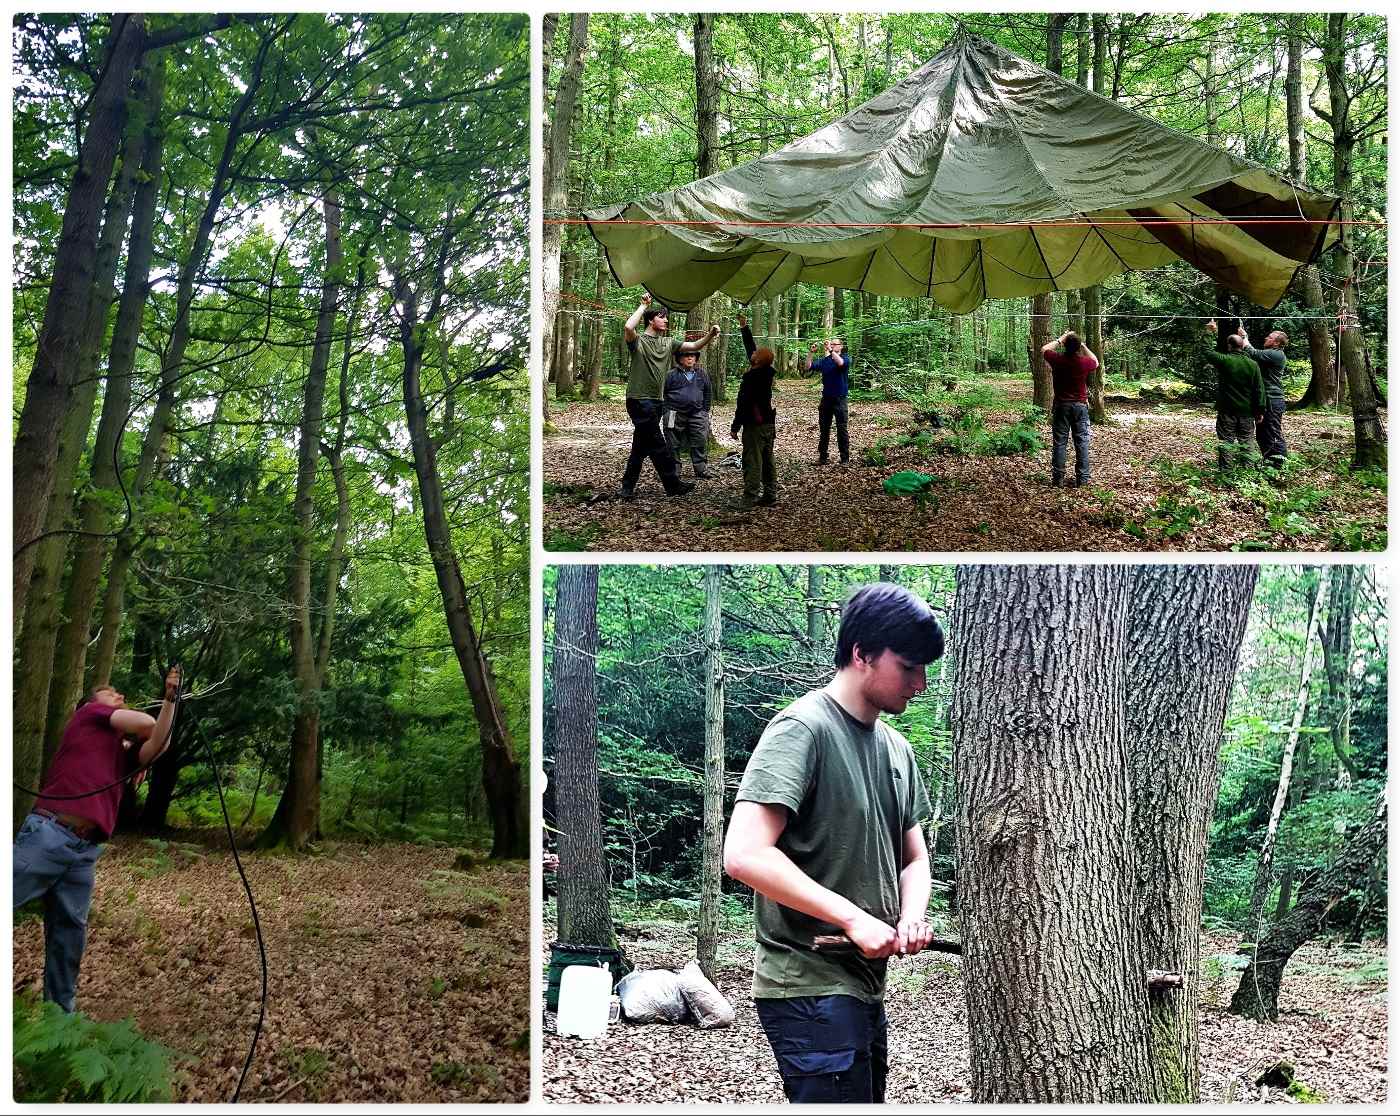
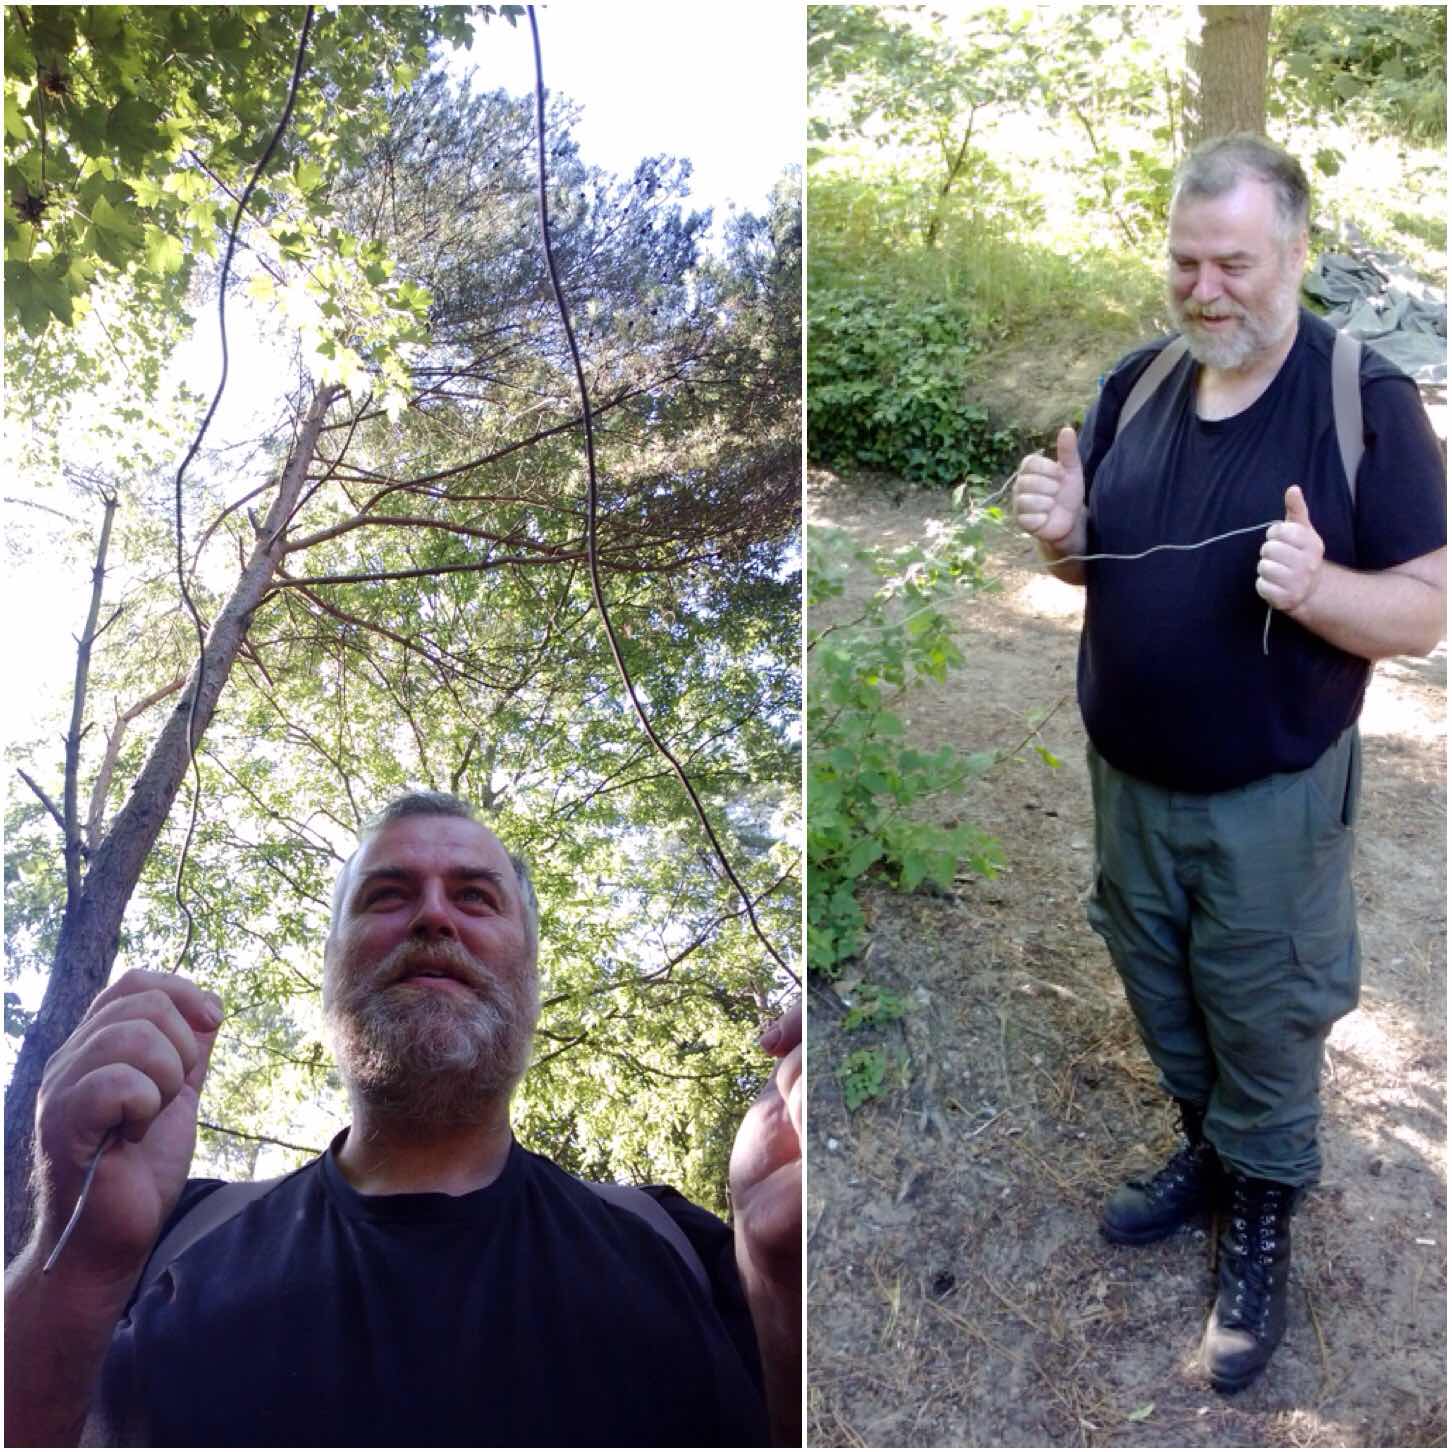
A favourite of mine is helping out getting all the chutes up. Our secret weapon ‘Pete’ is a dab hand at shooting a line high into the trees.
Later that day I spotted that our handiwork was receiving some attention in terms of some art work.
Parachutes and more parachutes
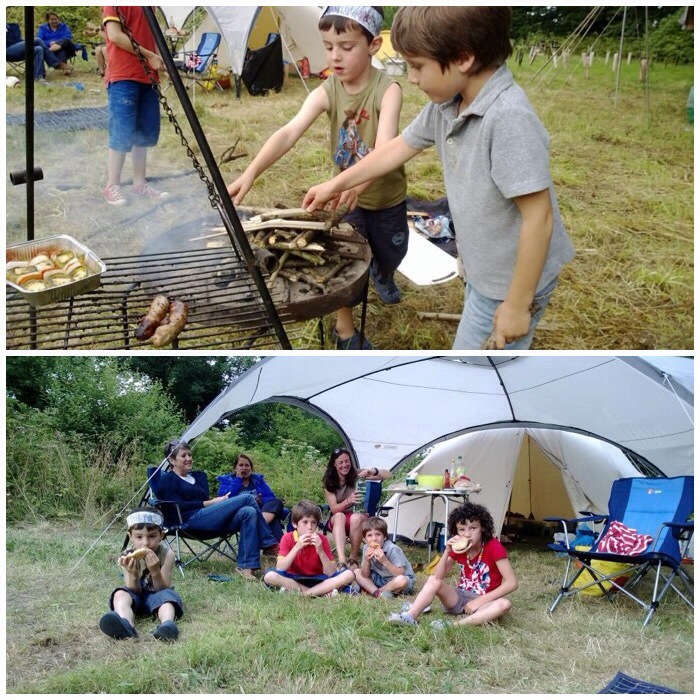
My kids did help out a little however they are on holiday and soon got into the swing of things. They have been out playing every day getting dirty, crafting and generally having a great time.
Kid time
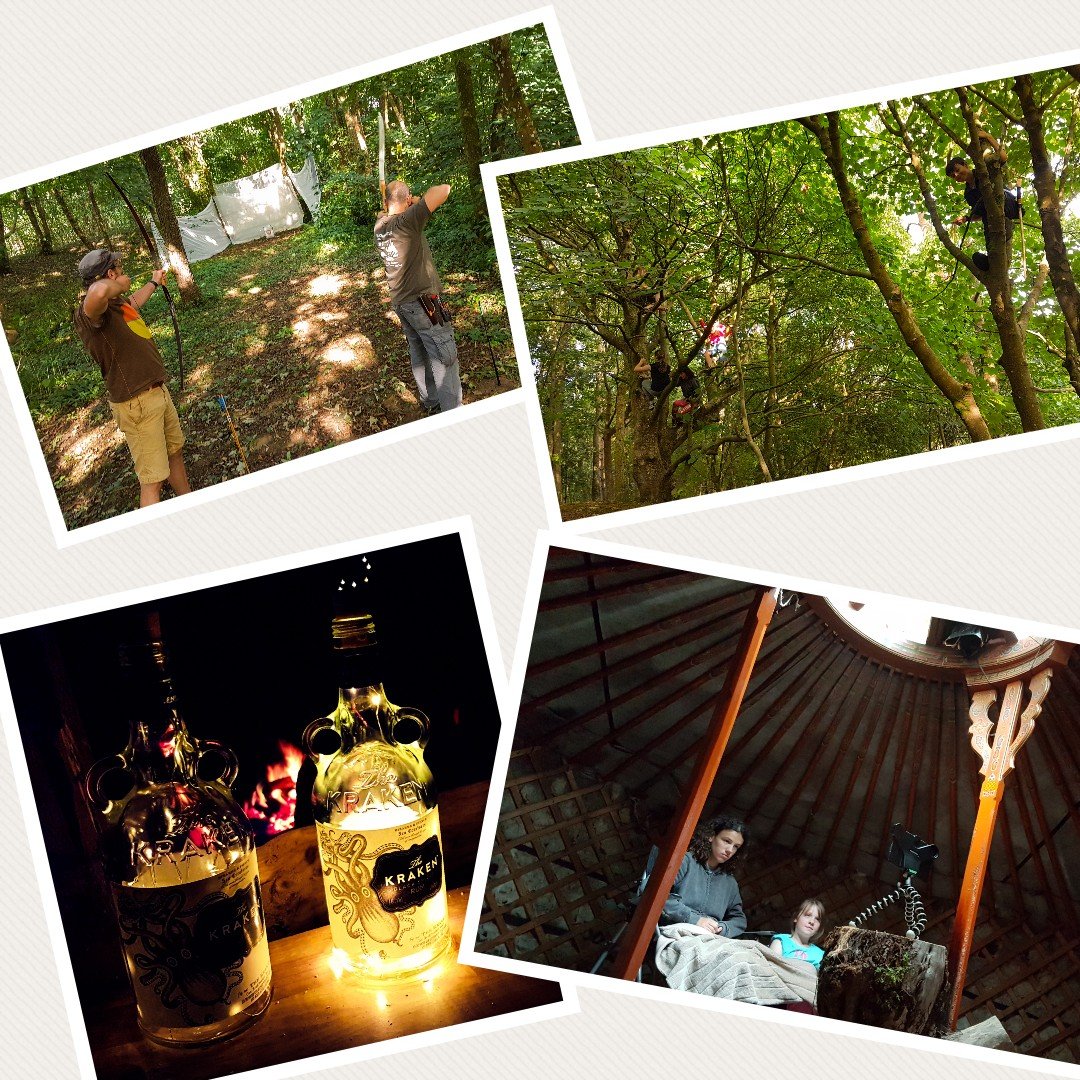
We got the range set up and it was soon on use. We will use it every day and have our annual competition next week.
Later in the evening I let the kids watch a movie and I spend a little time up at the Naughty Corner.
Evening time
Things are well set up now and we have everybody arriving – more on that in my next post.
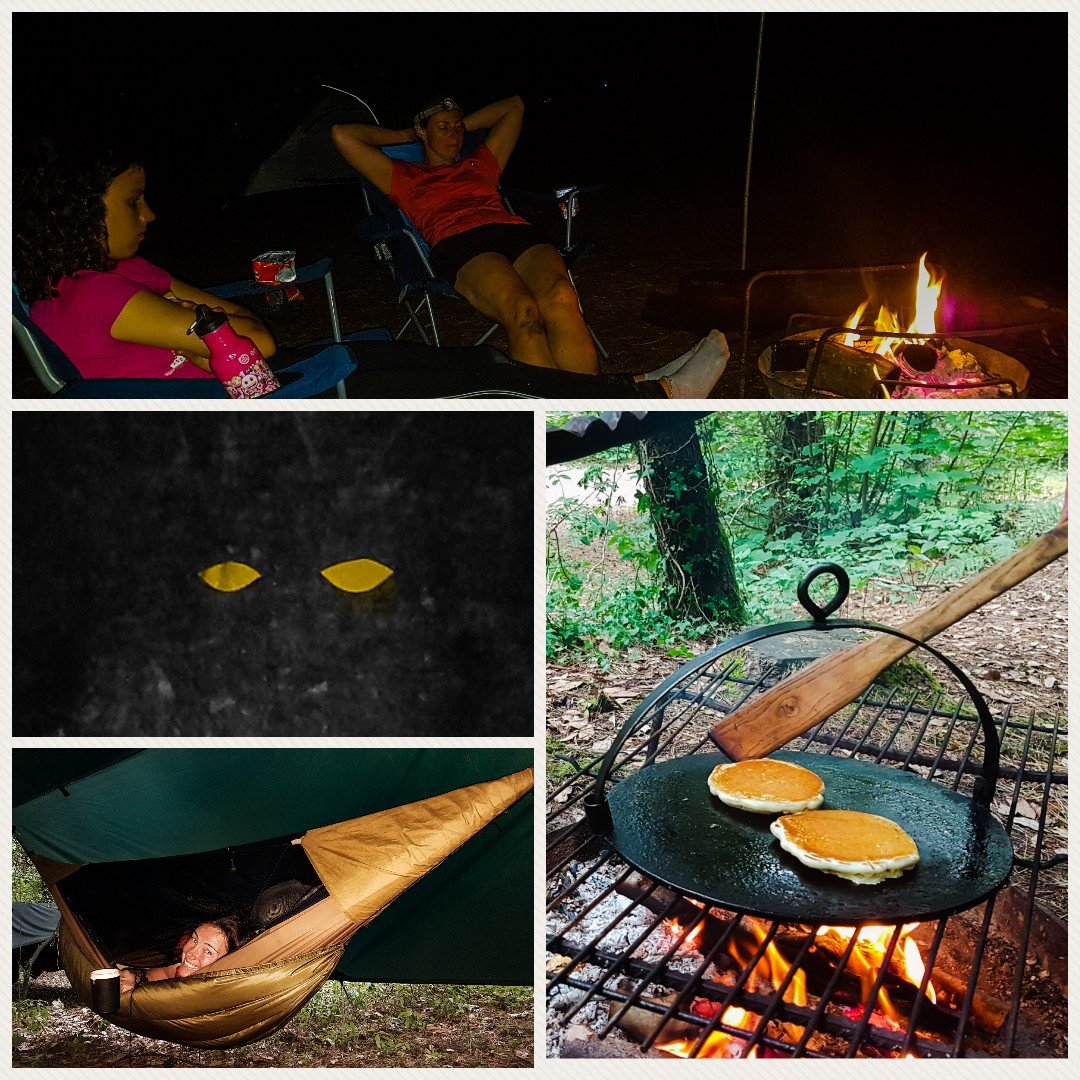
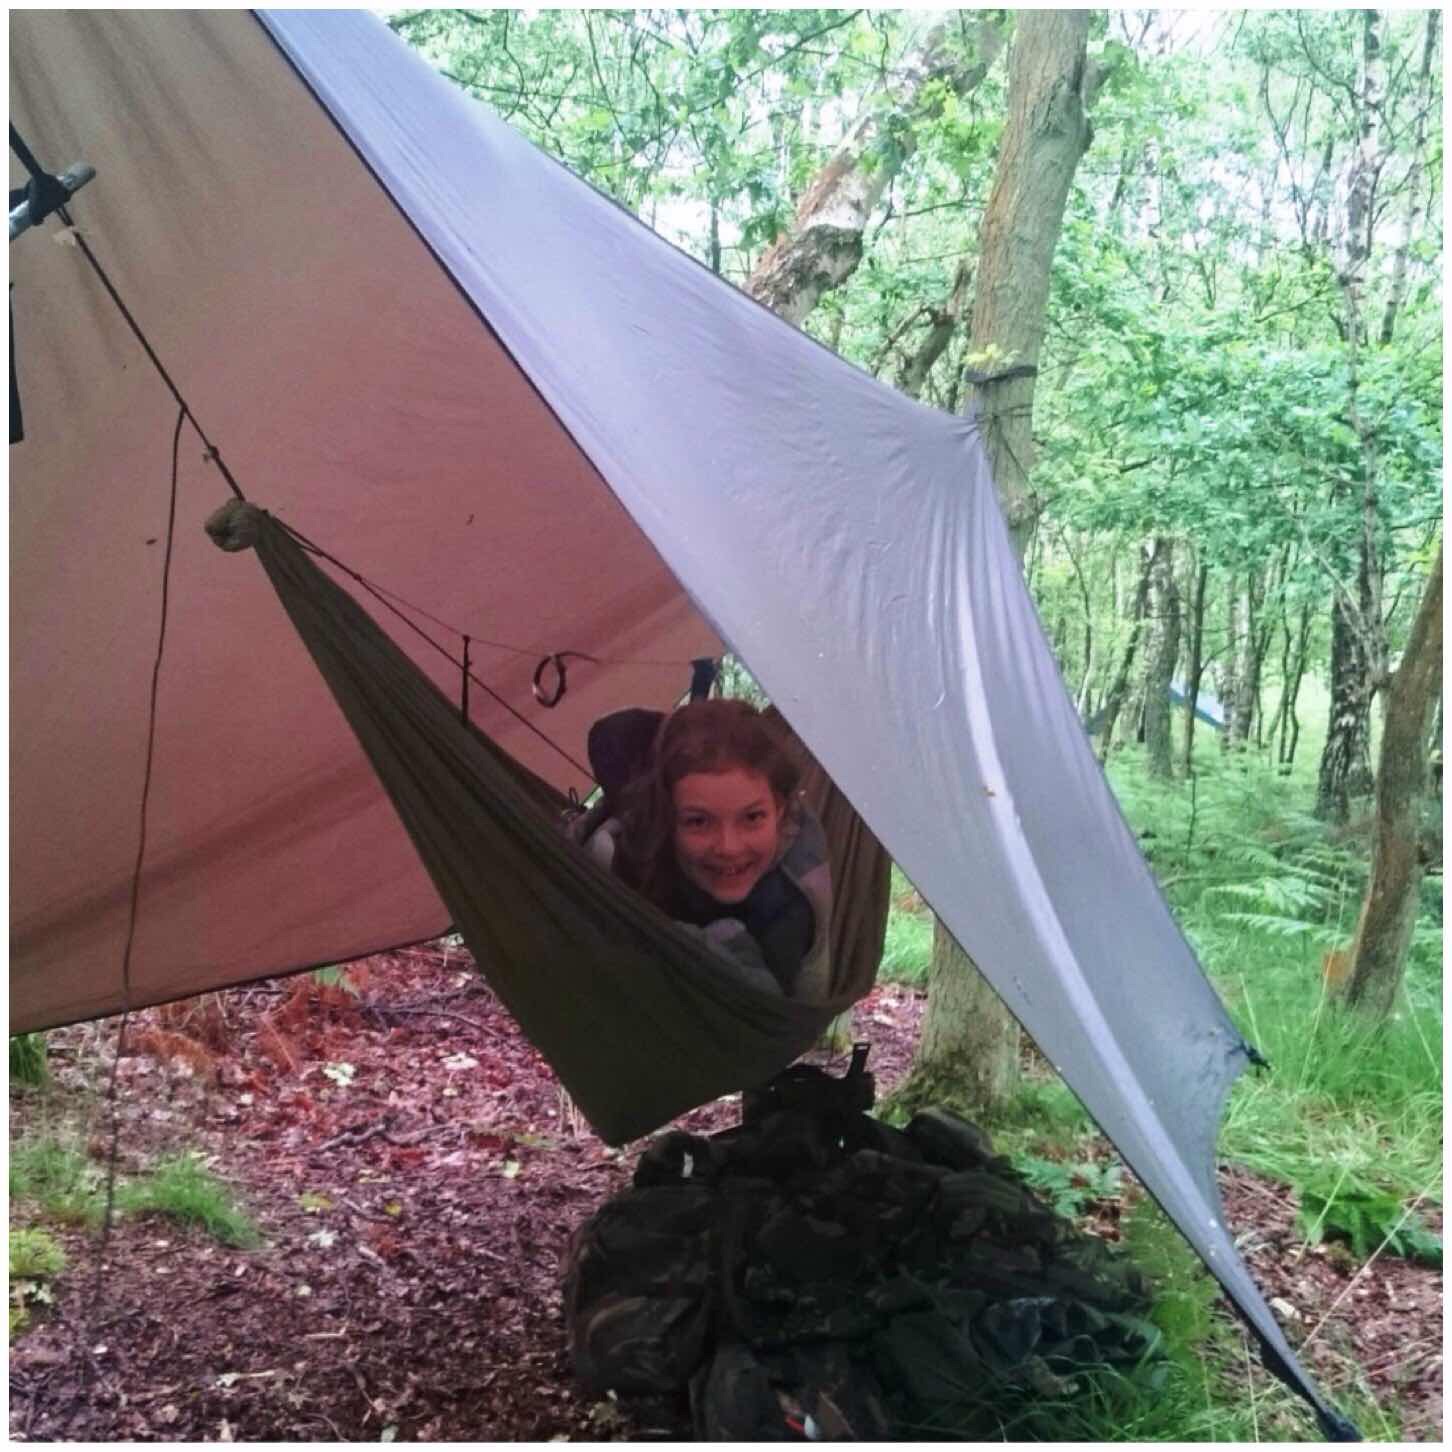
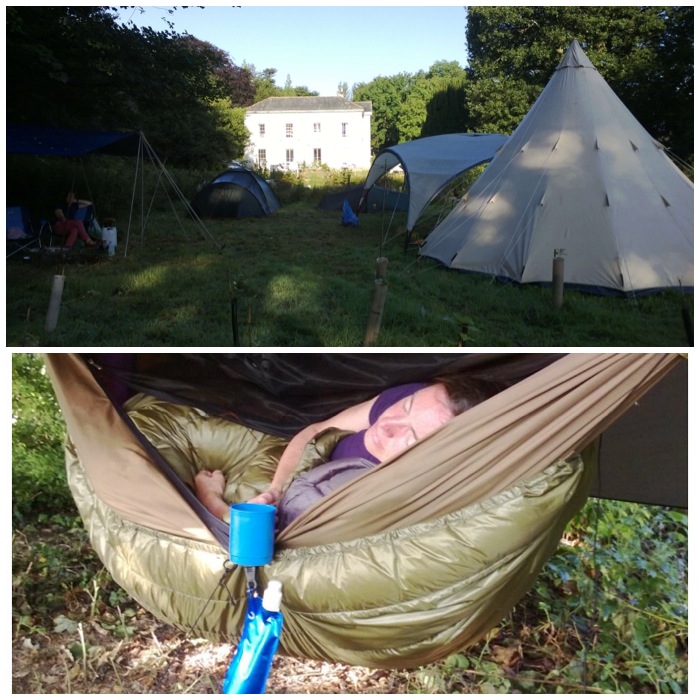
We arrived at the Bushcraft Uk Bushmoot (Merthyr Mawr in South Wales) on Sunday evening. I am here for the next week and a half working with the Mootley Crew on what is what I call – My Busmans Holiday.
Sunday night was a busy one with all the set up of the family campsite – 3 hammocks, one tipi for kit, one tent for daughter and the main tarp for the kitchen/fire area.
Late evening/Early morning
Needless to say we relaxed when it got dark and had an early night (Not before spotting all the Ooglie eyes on the trees).
Alison got her customary coffee in her hammock and we all got out customary pancakes – fair trade I think.
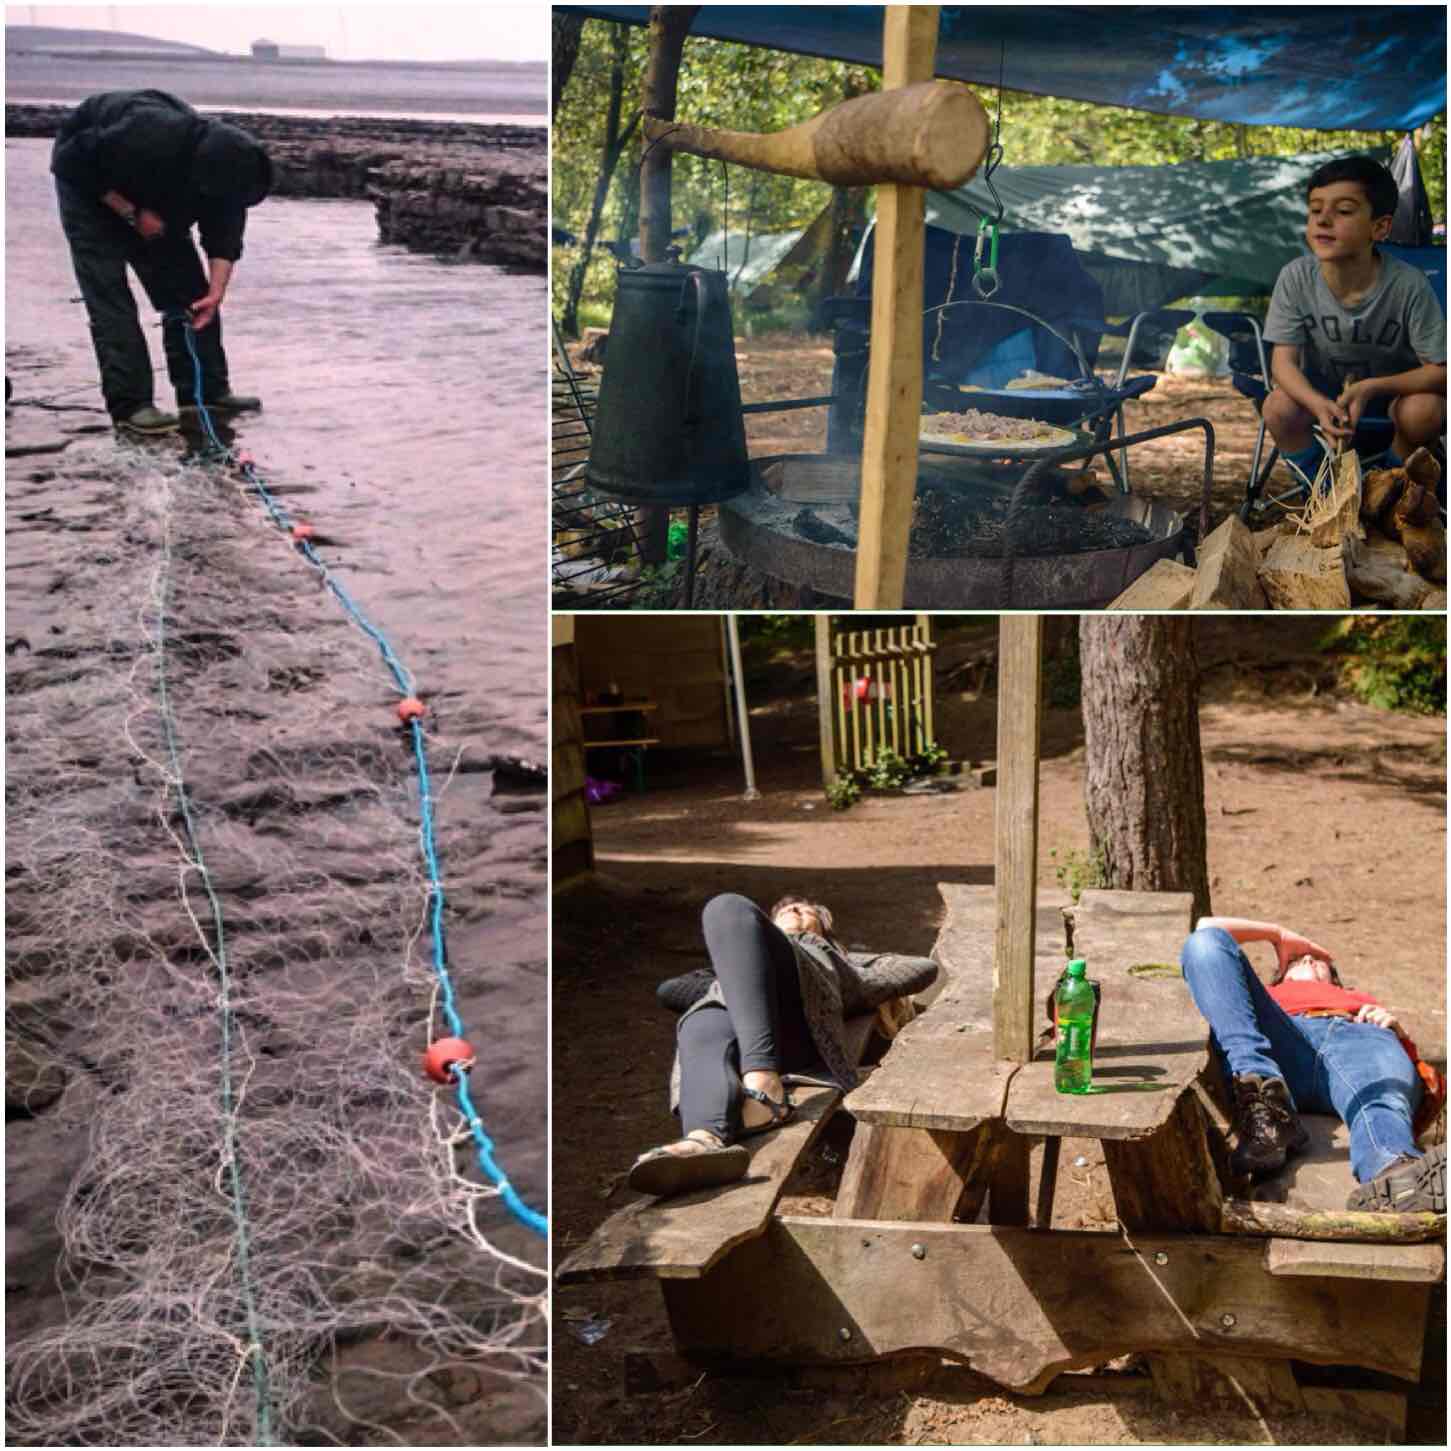
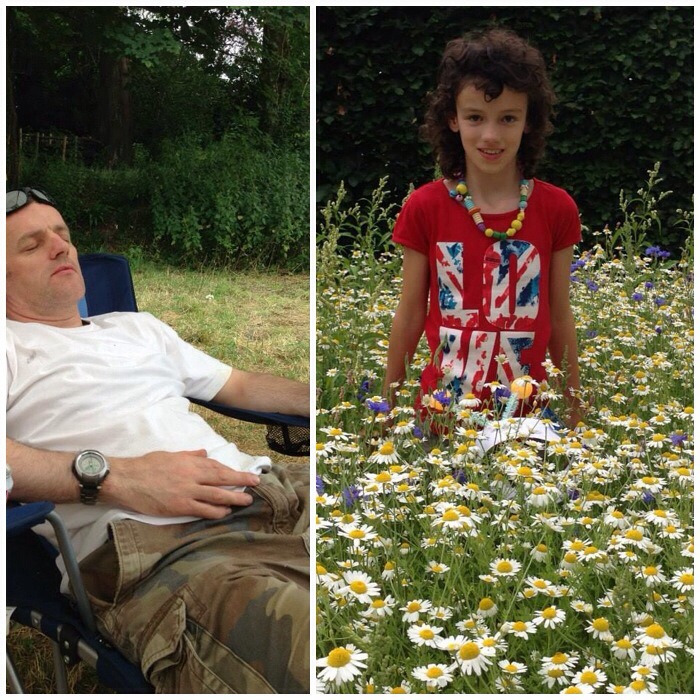
It was good to catch up with everyone as they started to arrive on the Monday. I did get a bit of relaxation time and spent it snoozing under the main tarp – woke up to some lovely shadows dancing above me.
Busy Monday
Alison headed off on Monday evening but thankfully she will be back later in the week.
It is all busy now setting the Moot up so I will finish here and catch up with you all later.
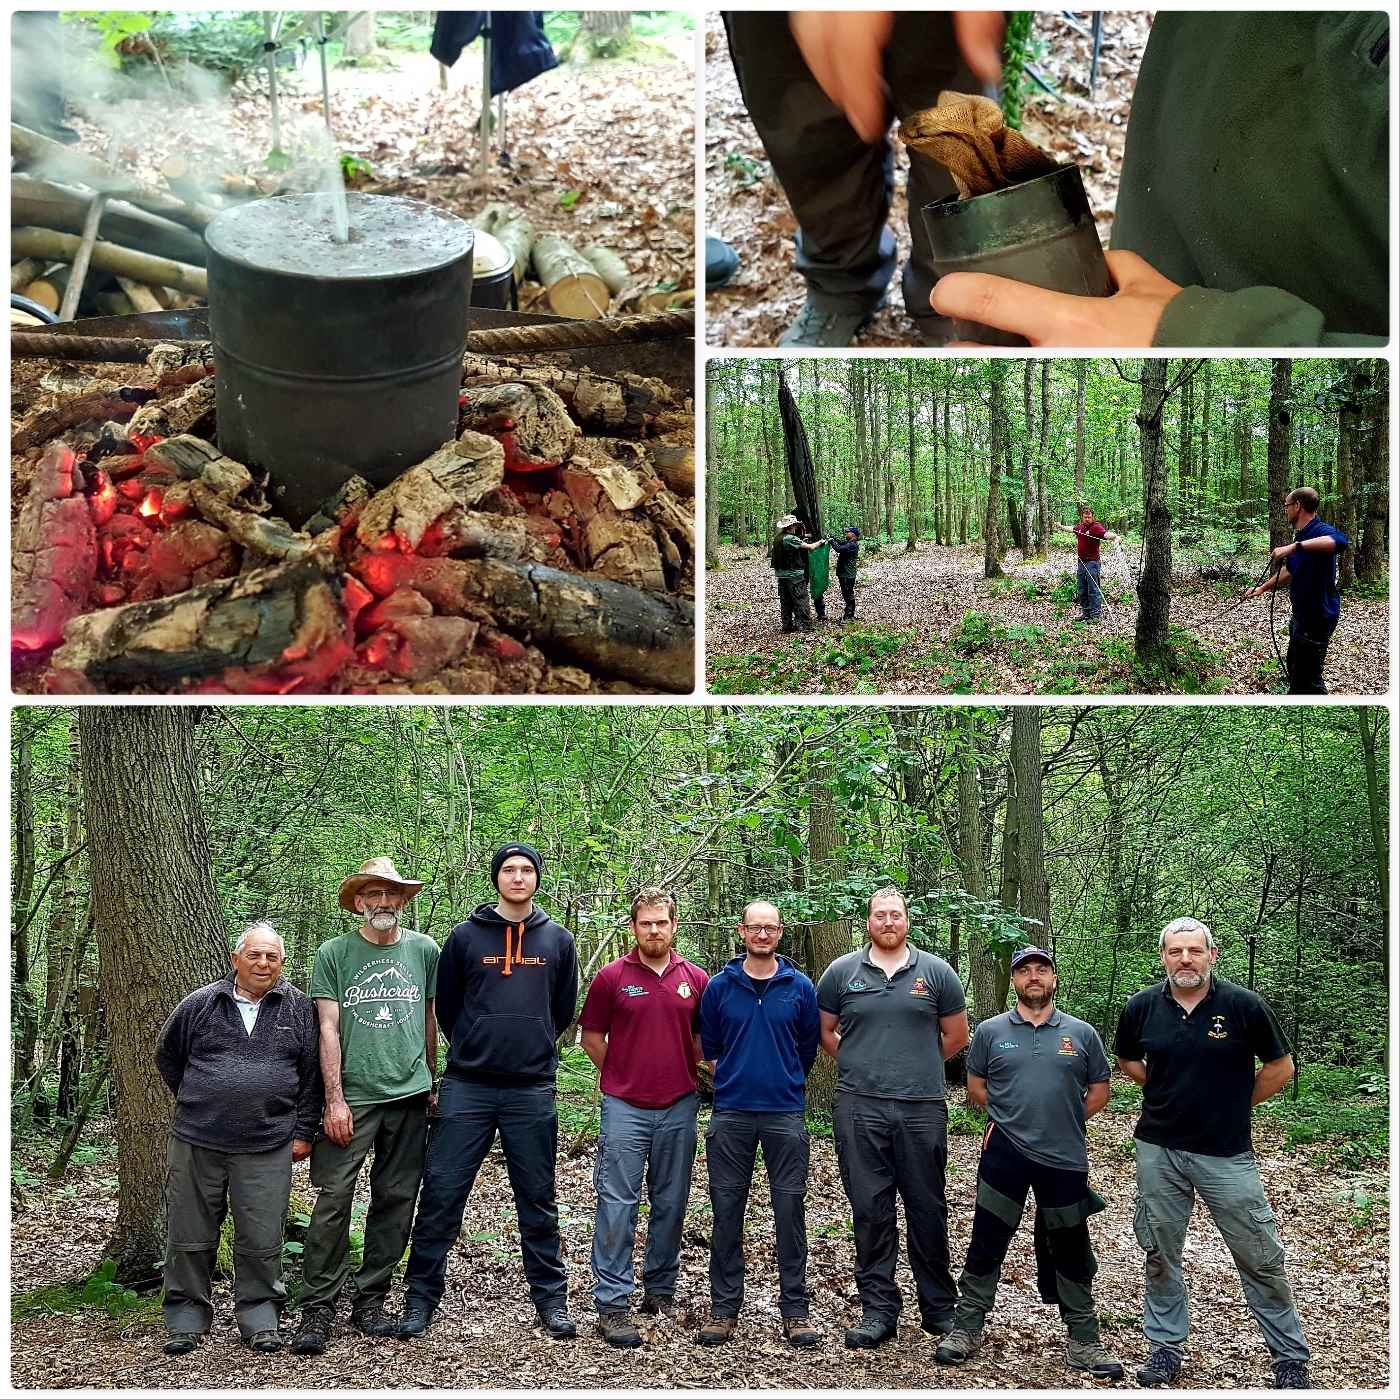
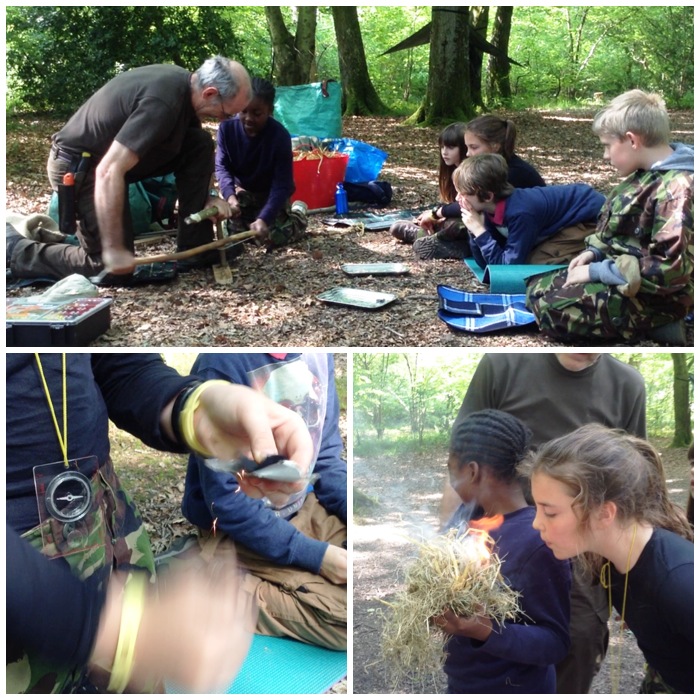
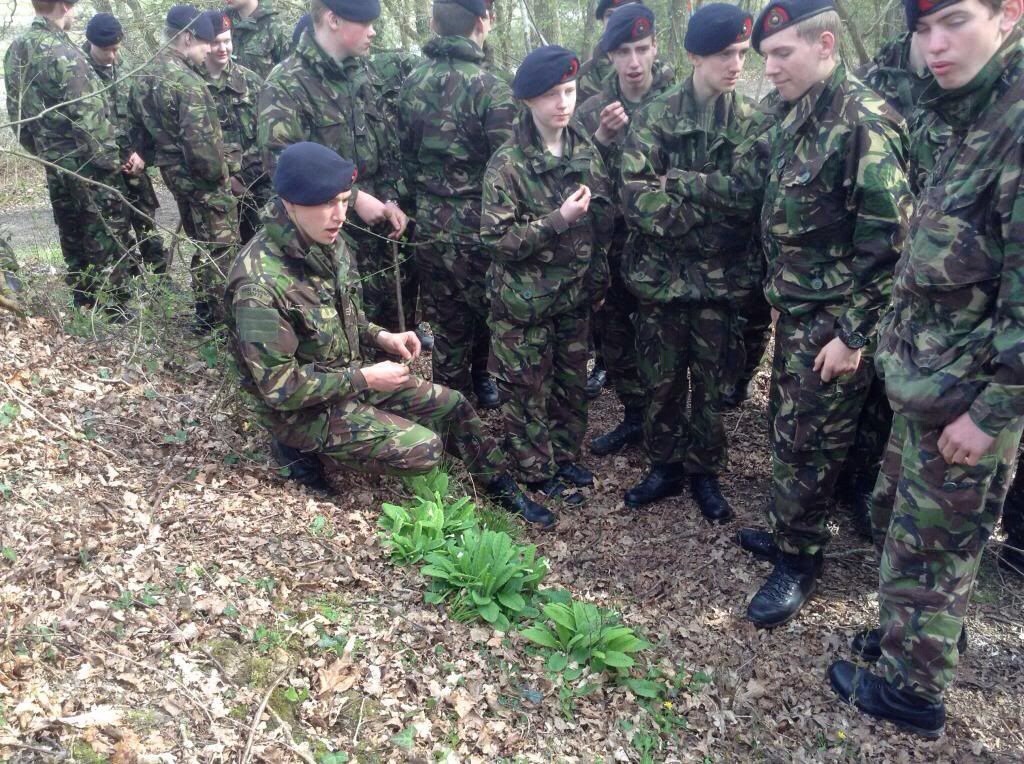
Over the last year or so I have found that my Bushcrafting has been taking a bit of a backseat to my other Adventure Training responsibilities so it was great to get back to some Bushcraft with fellow instructors from London Area Sea Cadets at one of our regular Multi Activity Staff Training (MAST) weekends.
It was a bit of CPD weekend for some and a bit of a new adventure for others. We took our time setting up camp on the Friday in the Mereworth Woods training area we had been given access to as the students were not due to join us until the Saturday morning – a kind of calm before the storm you could say.
Back to Bushcraft
Saturday
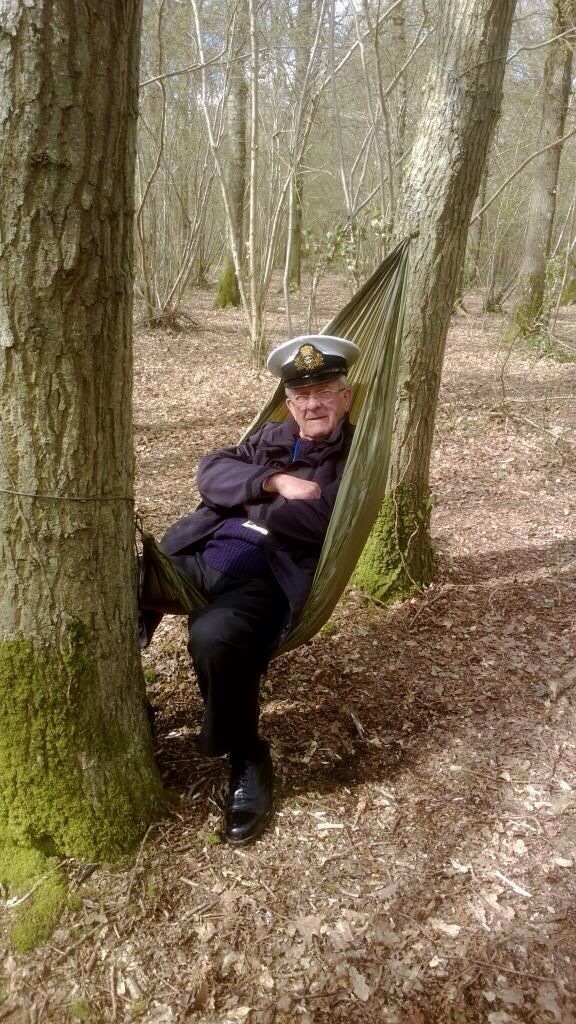
The weather was on the whole kind to us with no major showers but the tarps were up just in case. Graham got his cuppa in bed that morning (being an officer and all that) and then modeled his Buffalo sleeping bag for us by the fire – I have no idea why the thing has a full face zip – weird 🙂
Morning Sir
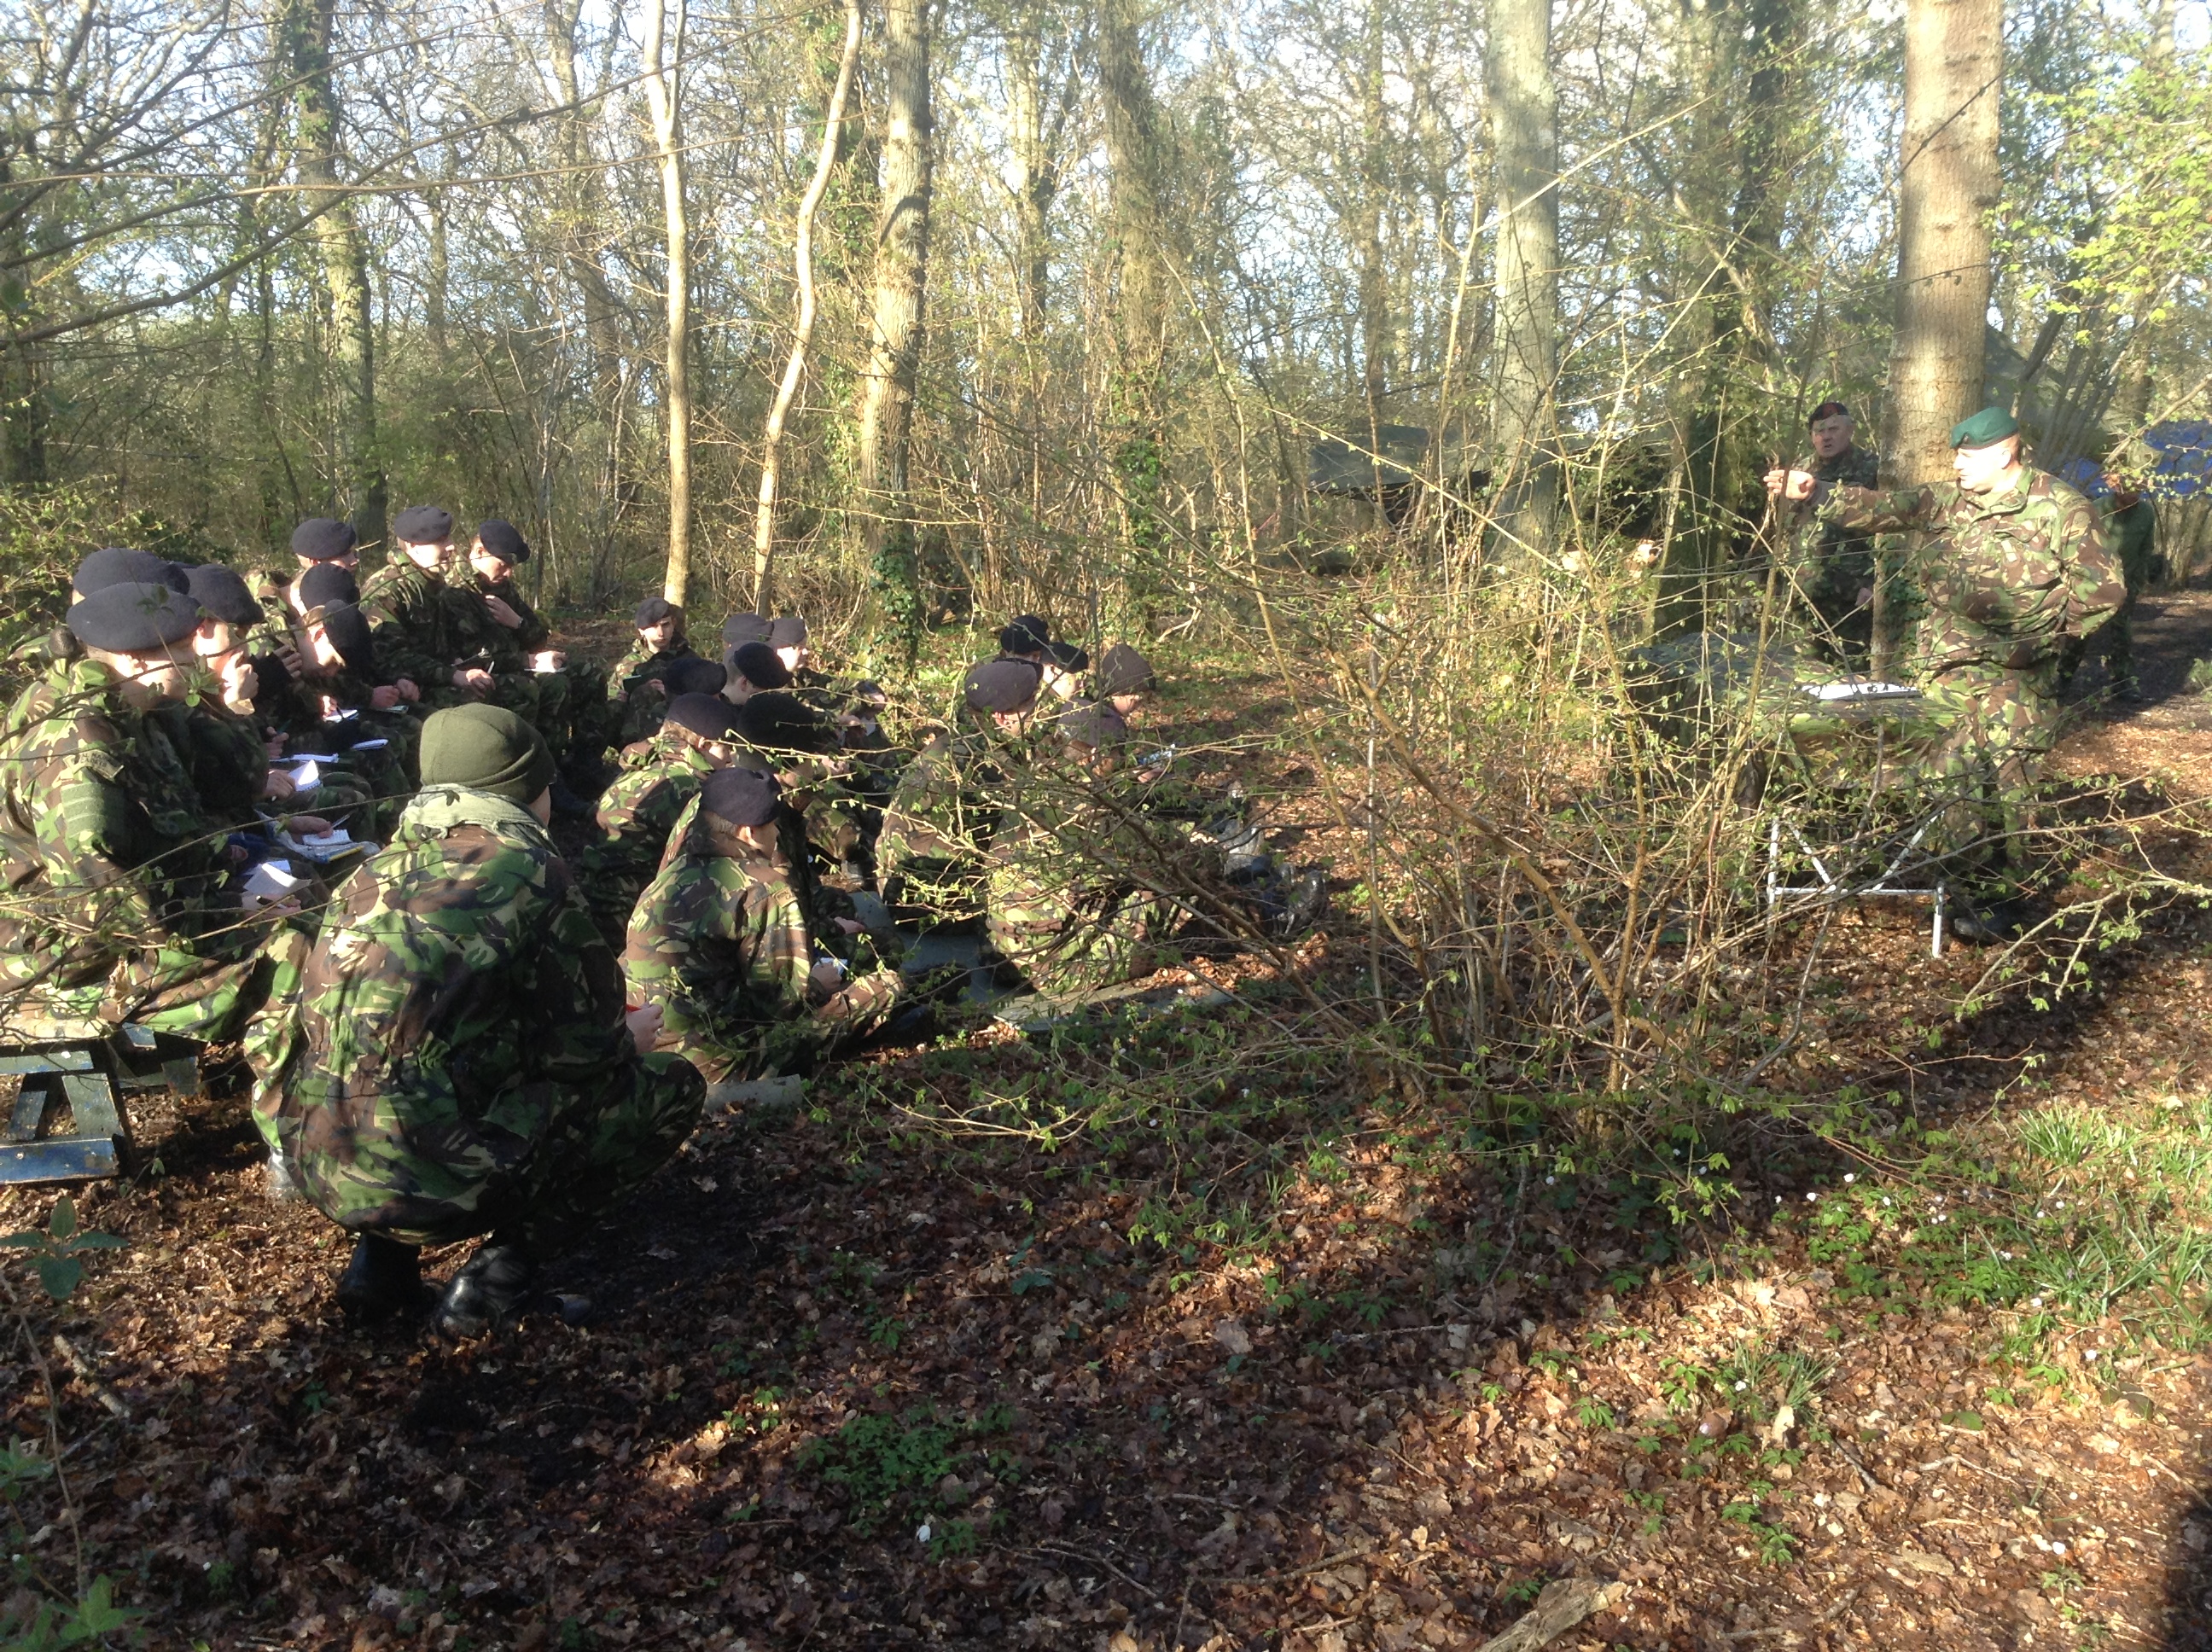
Along to help out and do some CPD were Dave, Alan, Charlie and Graham. The instructors from the Adventure Training team looking to learn the basics of Bushcraft were Ben, Lee, Sam and Gary. We like to run these Bushcraft courses from time to time to expand out Expedition Leaders skill set so that they can pass the knowledge onto their cadets.
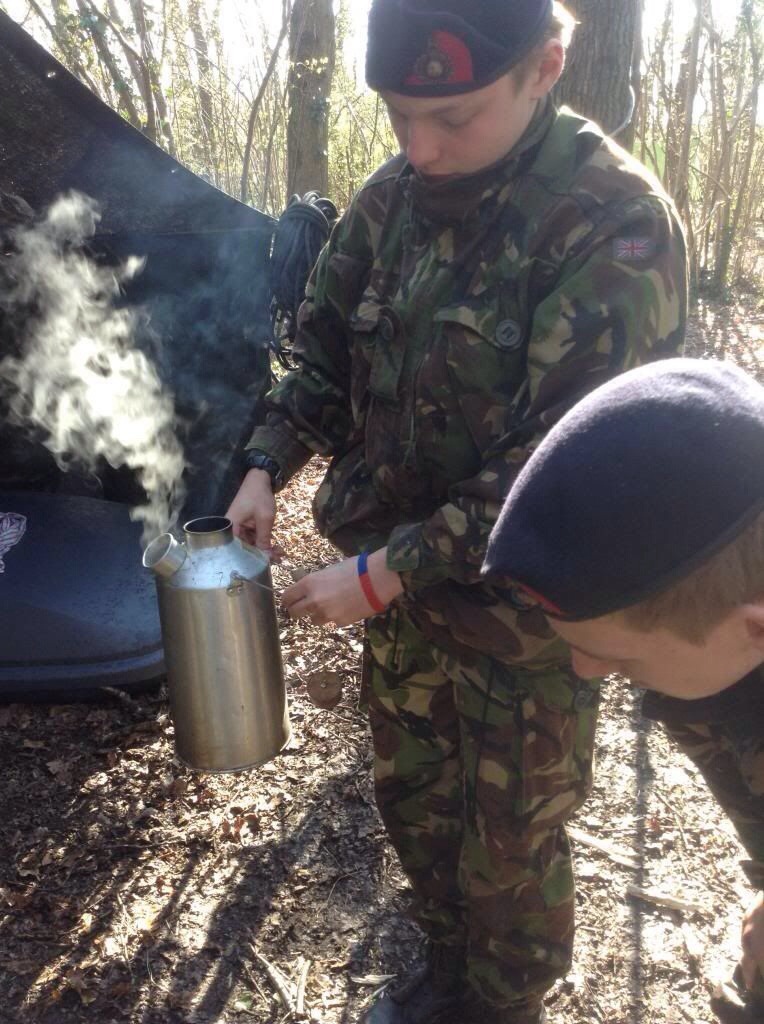
Time for Tea
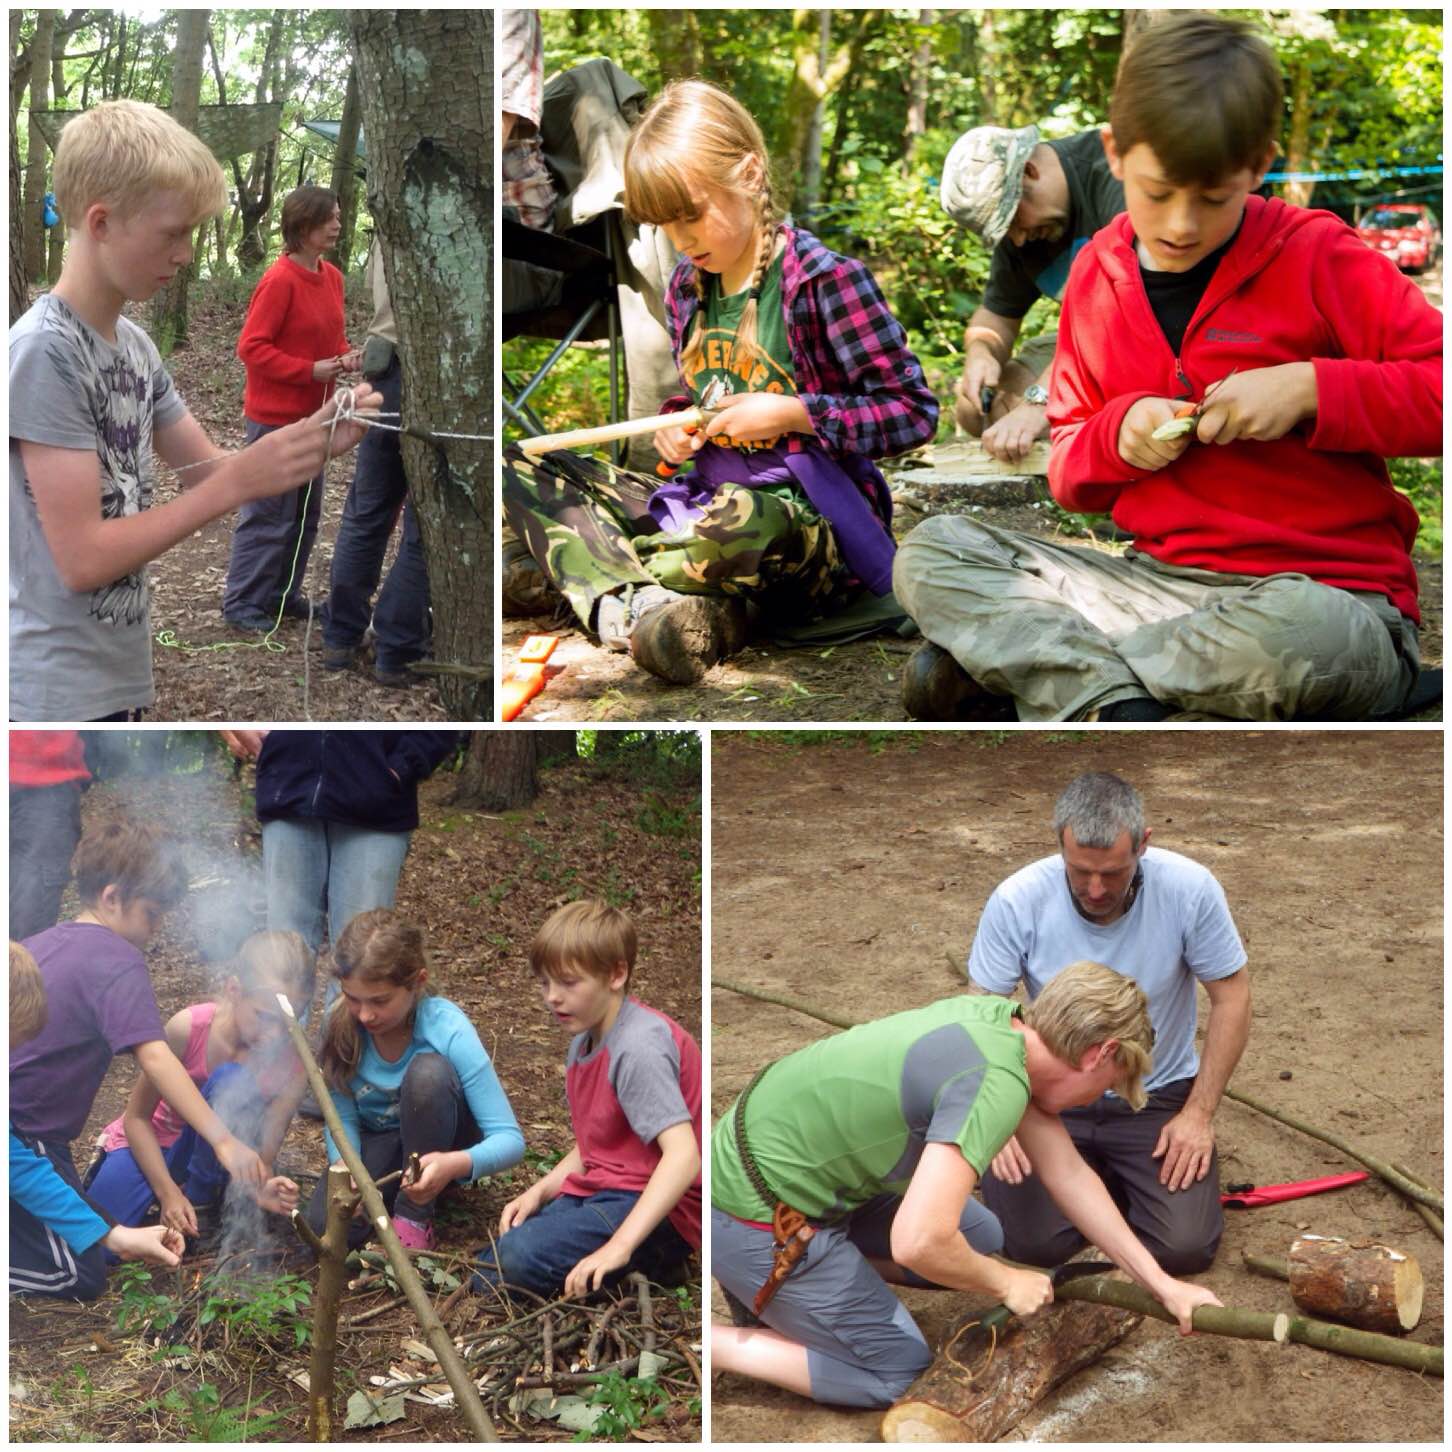
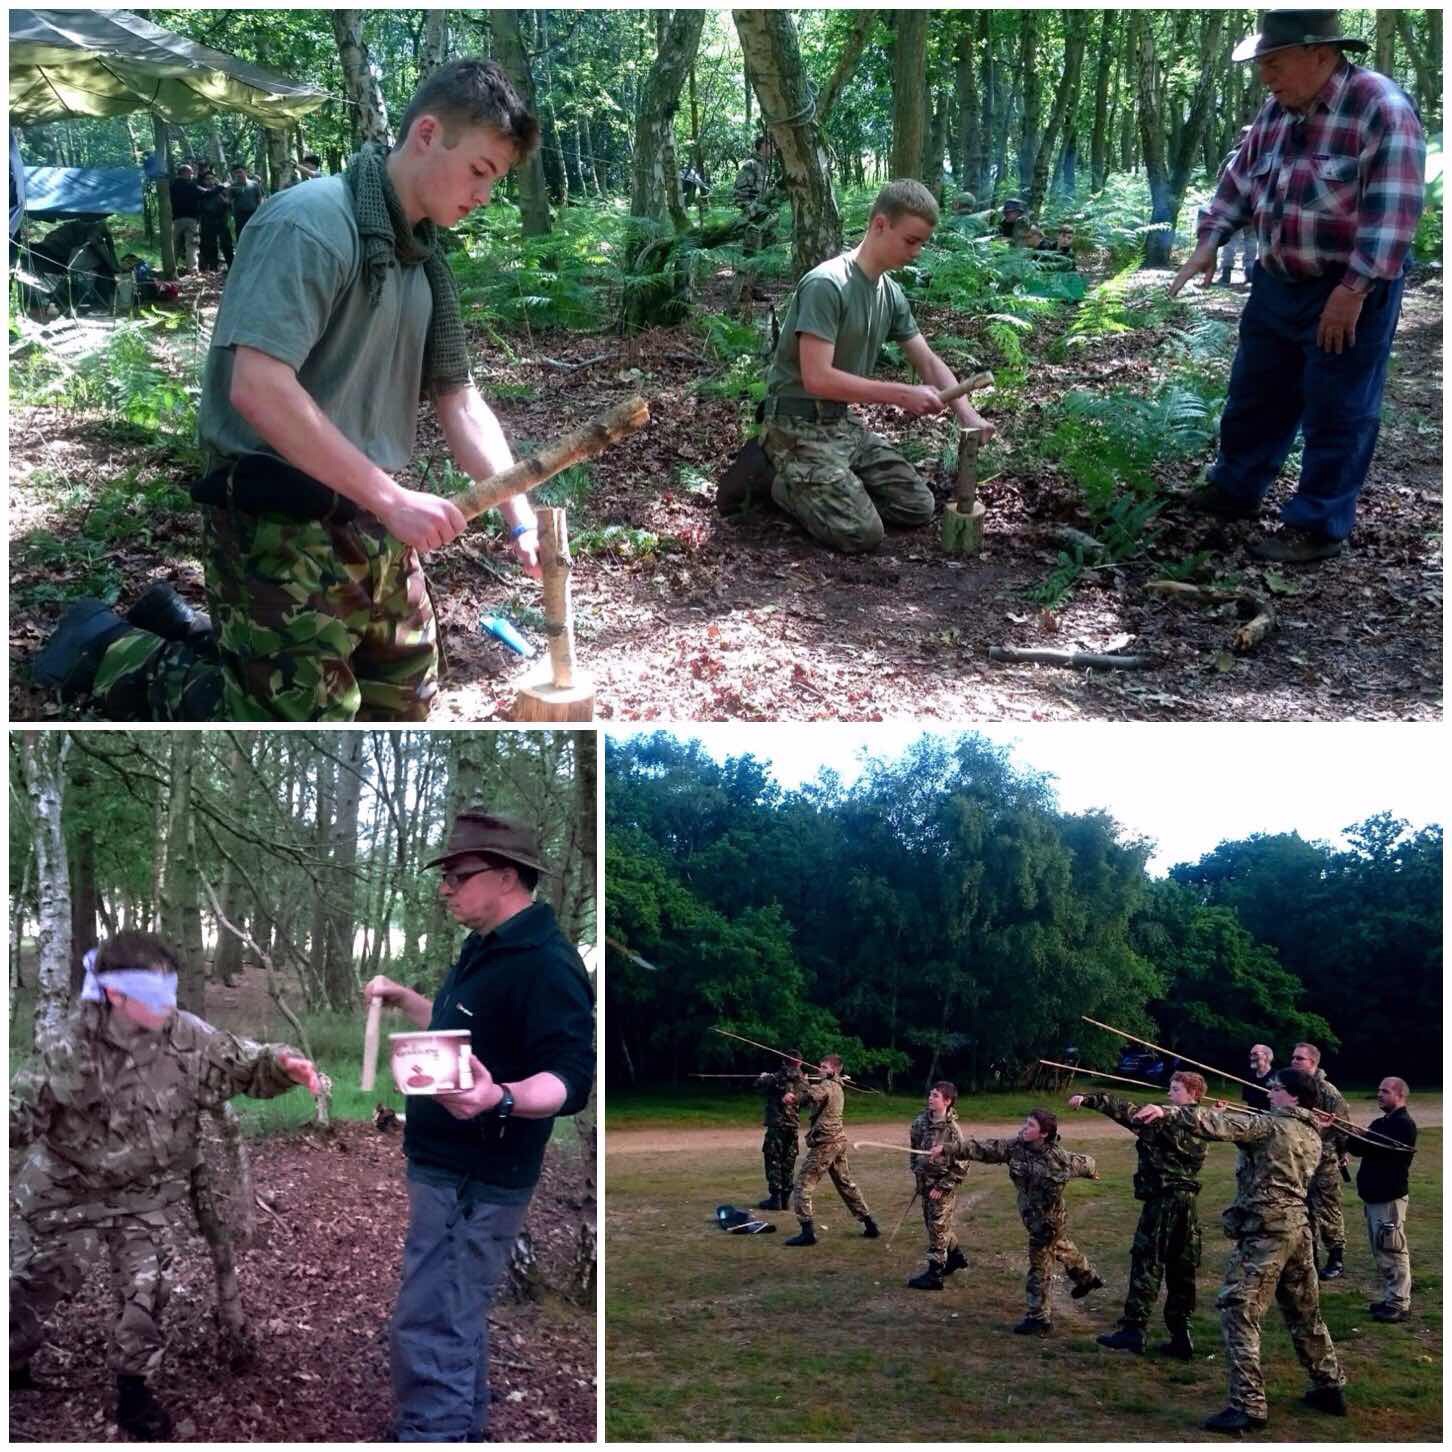
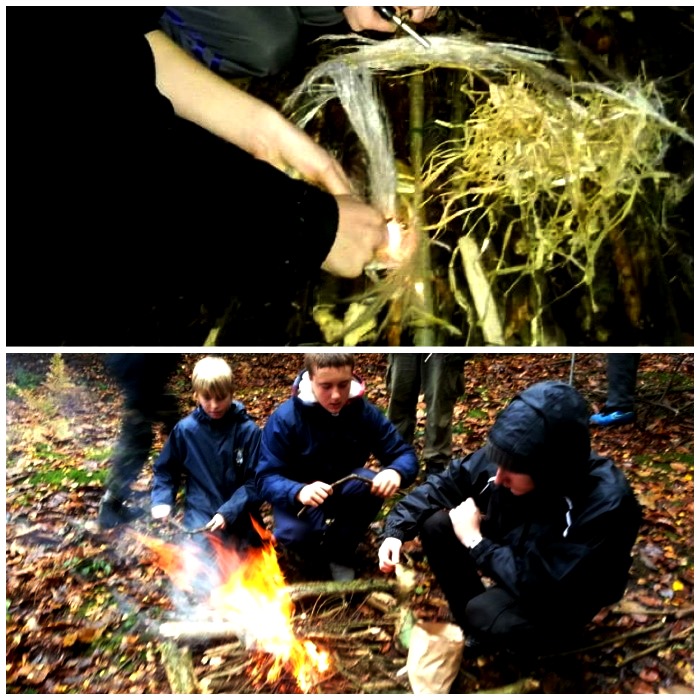
Before they were allowed to have a cuppa on the Saturday morning the students had to learn about lighting a fire. Off they went to learn about gathering dead standing wood, processing and grading it before learning to use firesteels – needless to say the tea and coffee was soon brewing.
Brew Time
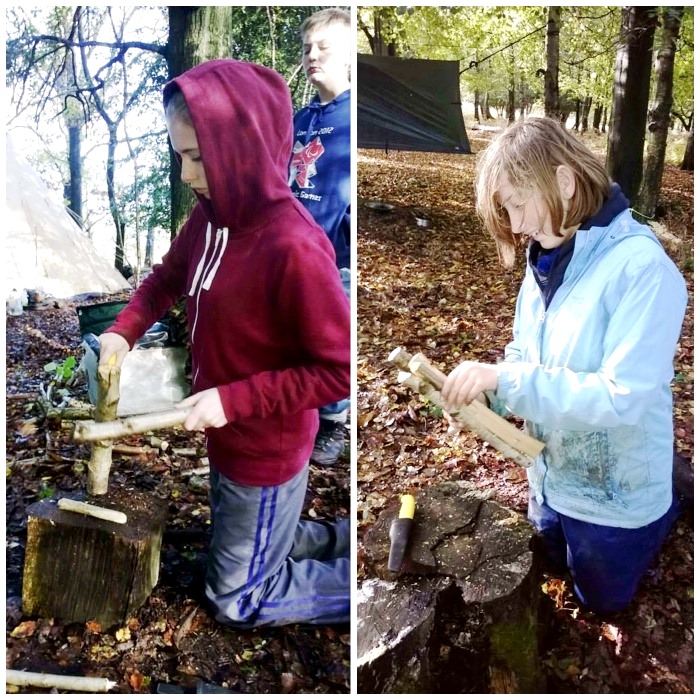
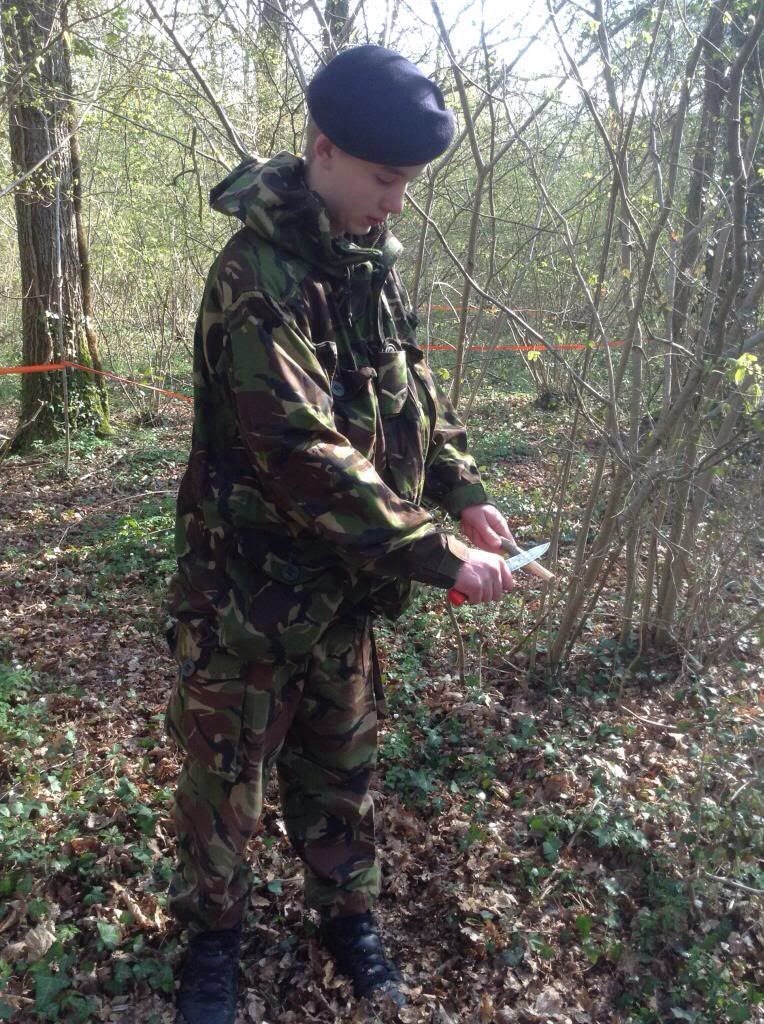
Saw and Knife use
After their brew it was time to learn how to use saws and knives safely. Once the wood was gathered they learnt about safe knife cuts and battoning. I like teaching in this way as there is no need to get axes out (and we did not have time to cover them anyway). The students produced some strong tent pegs and looked at the techniques for making feather sticks for fire lighting.
Saws and Knives
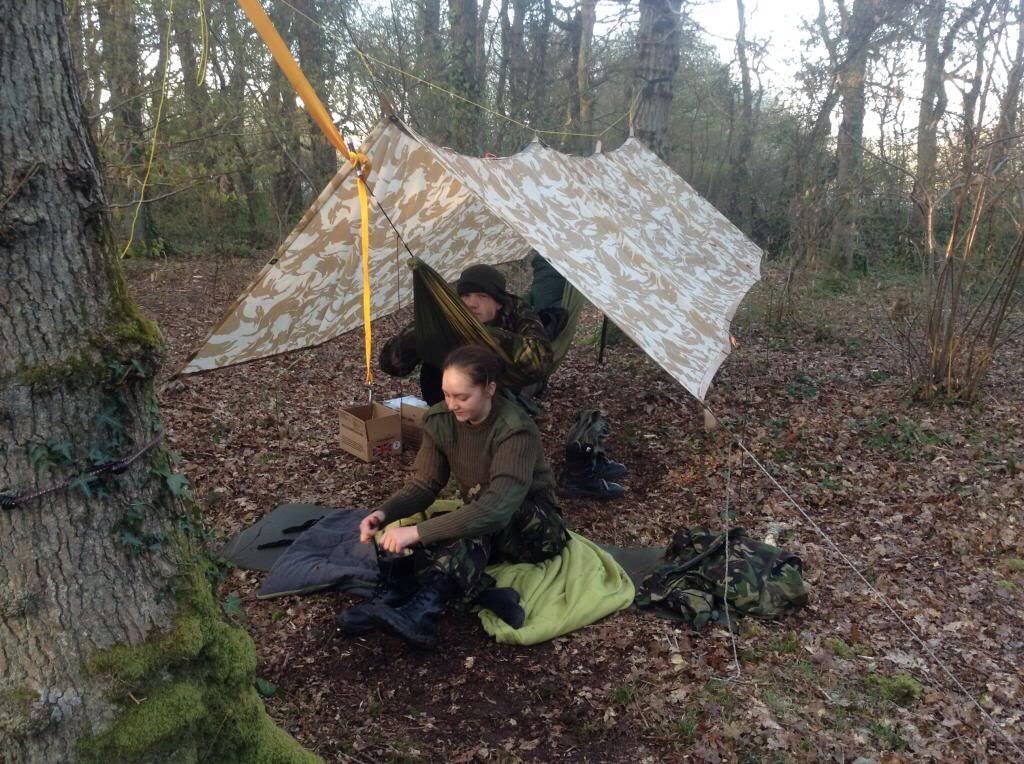
Camp Set Up
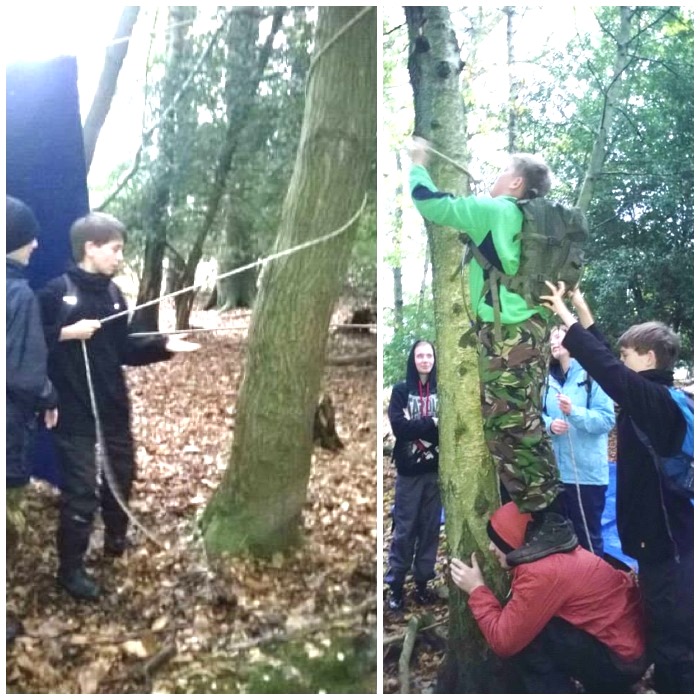
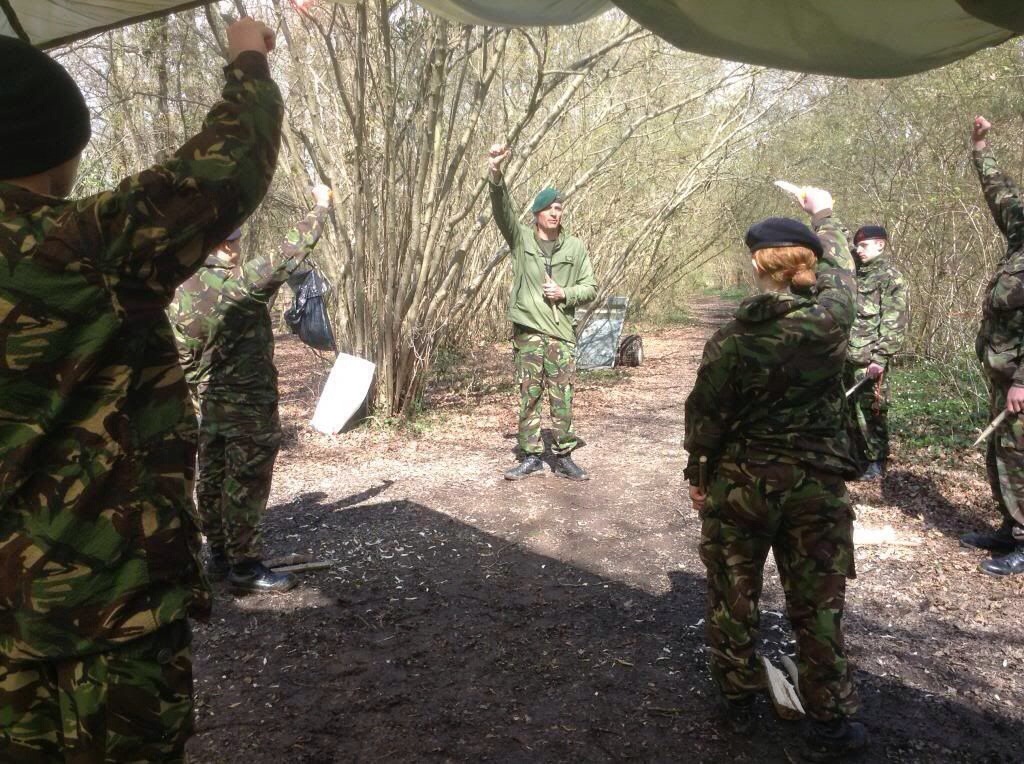
One of the things I wanted the students to do over the weekend was to set up their own camp. They learnt some of the basic Bushcraft knots with Charlie and how to throw a line through the trees. Soon they had their parachute up and firewood collected. Once that was all done they spent time with Dave and Graham learning how to put hammocks and tarps up (no ground dwelling on this weekend).
Camp Set Up
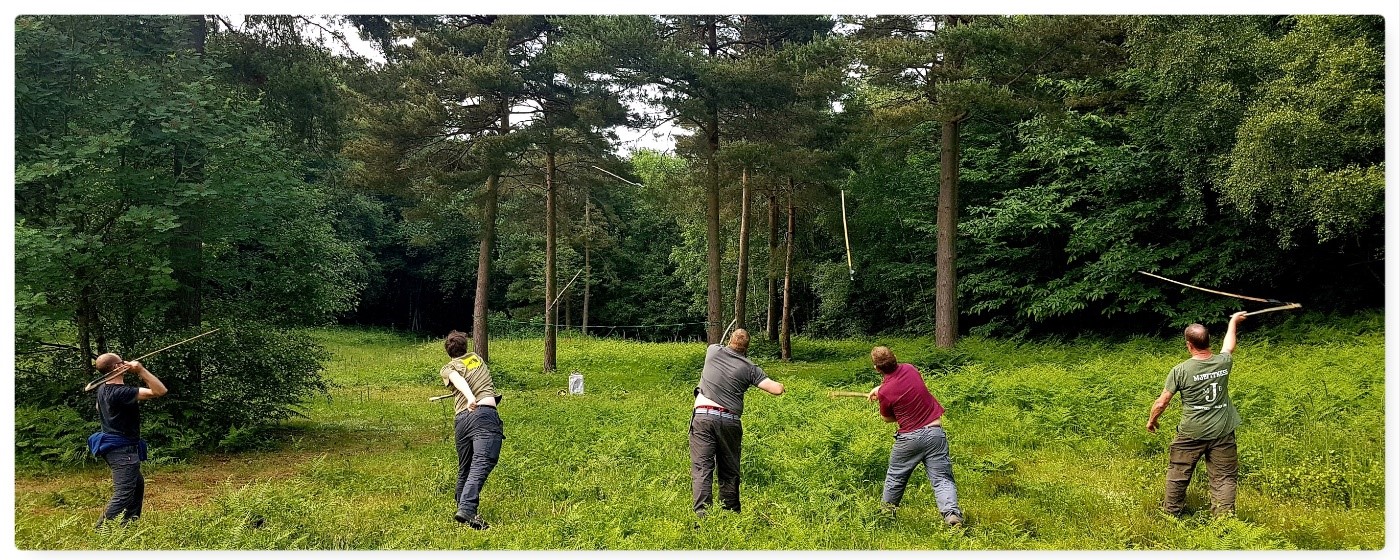
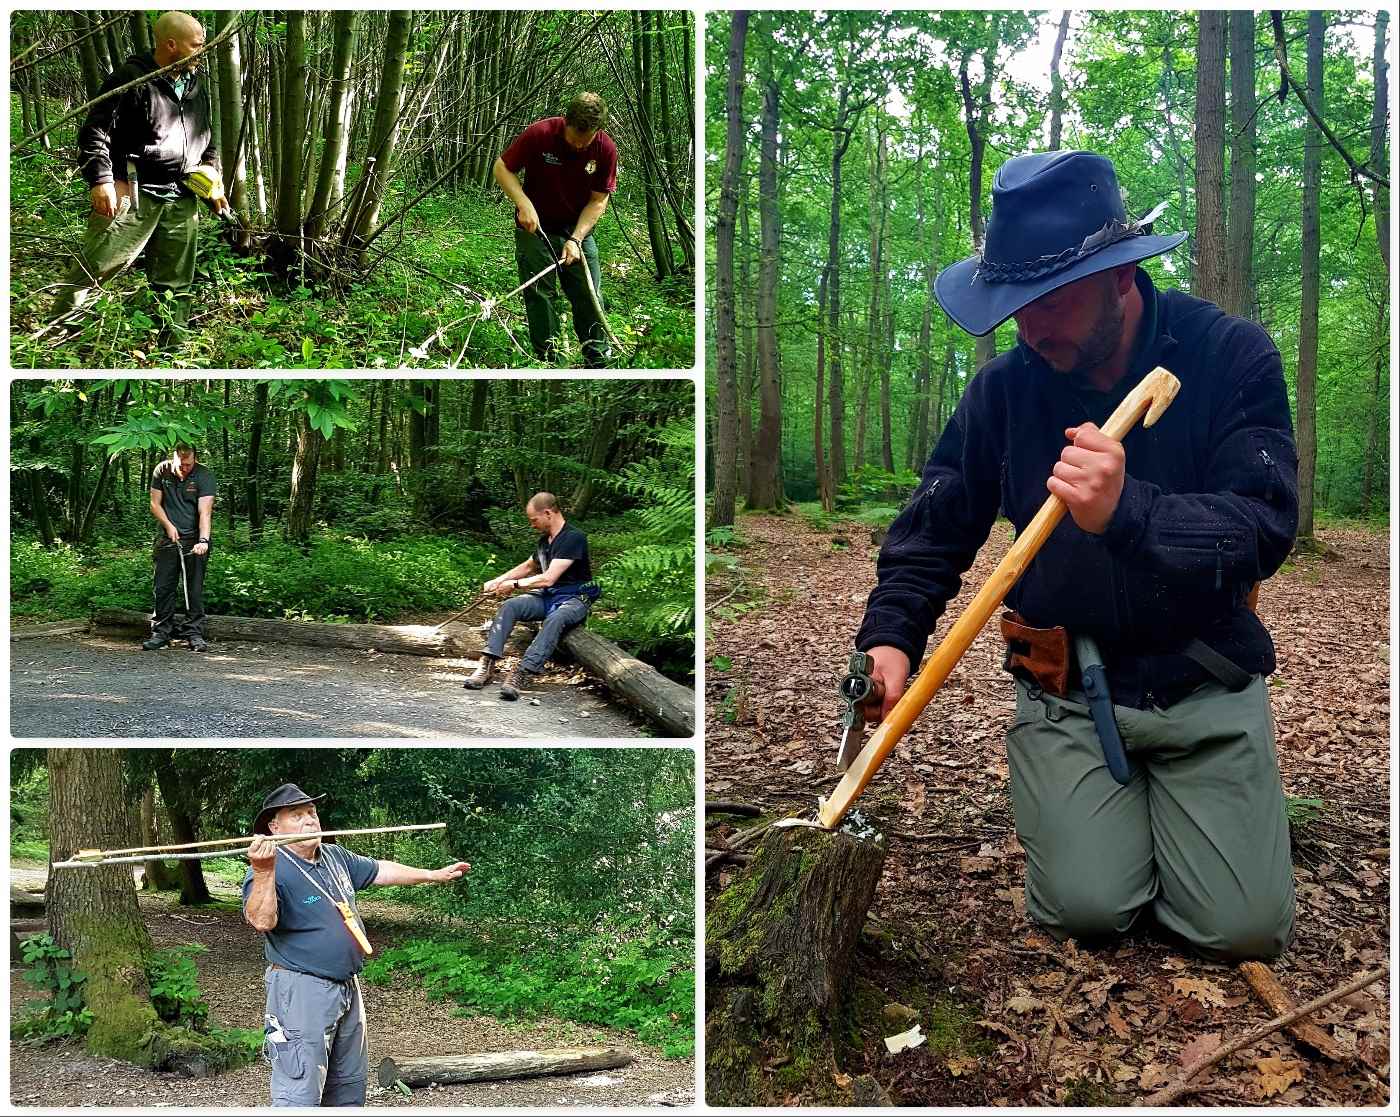
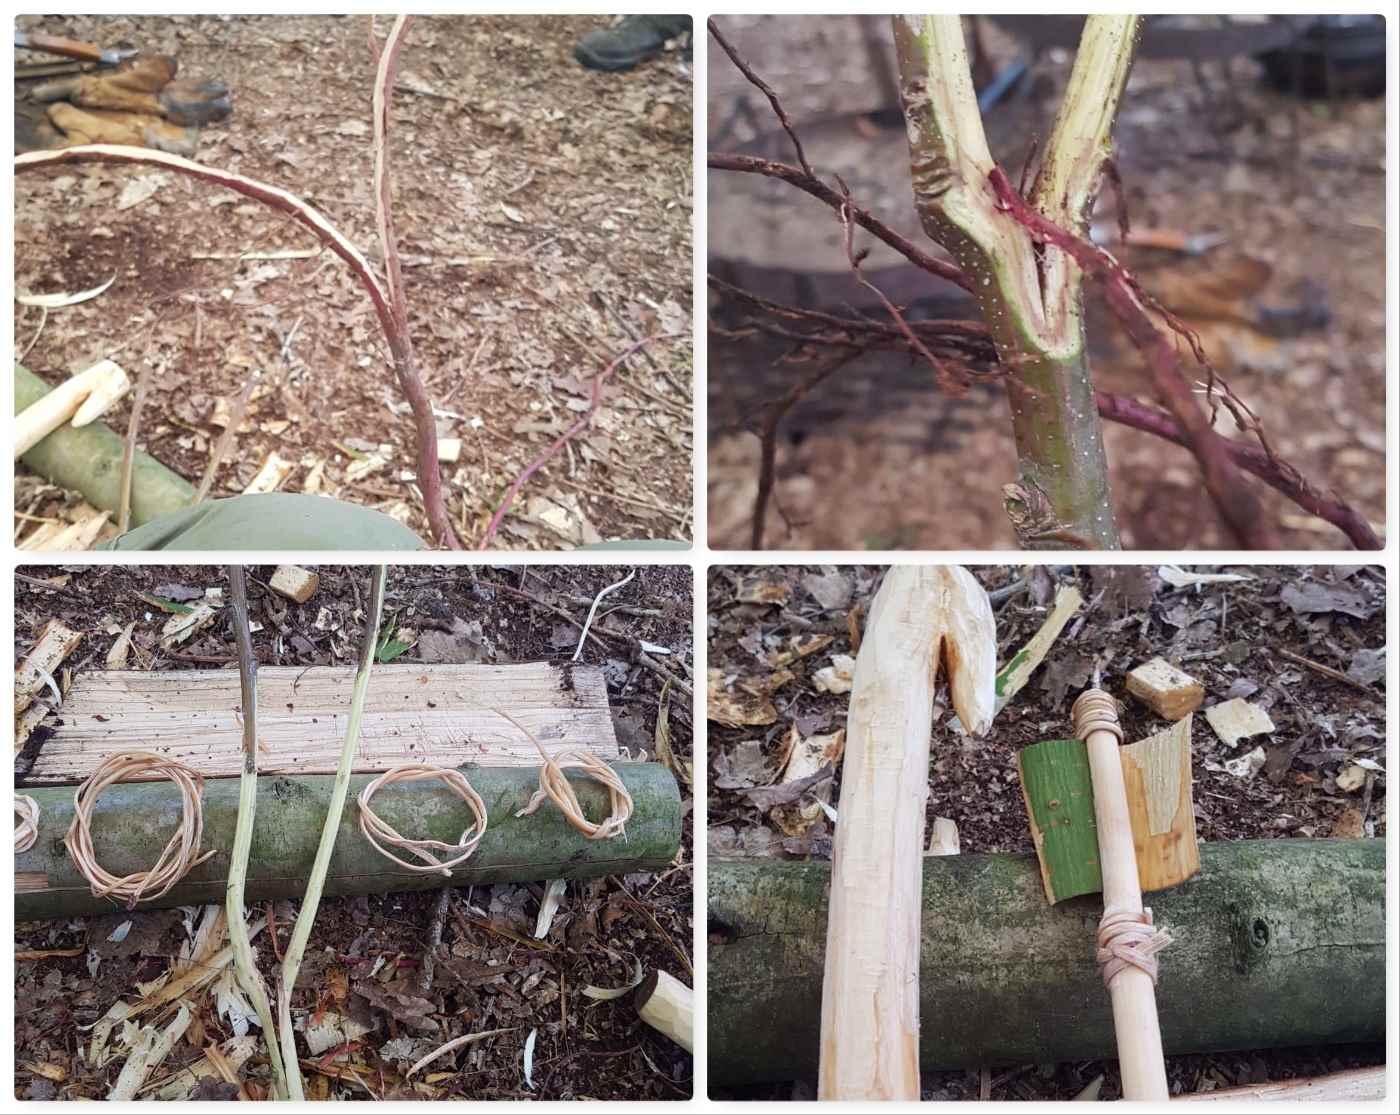
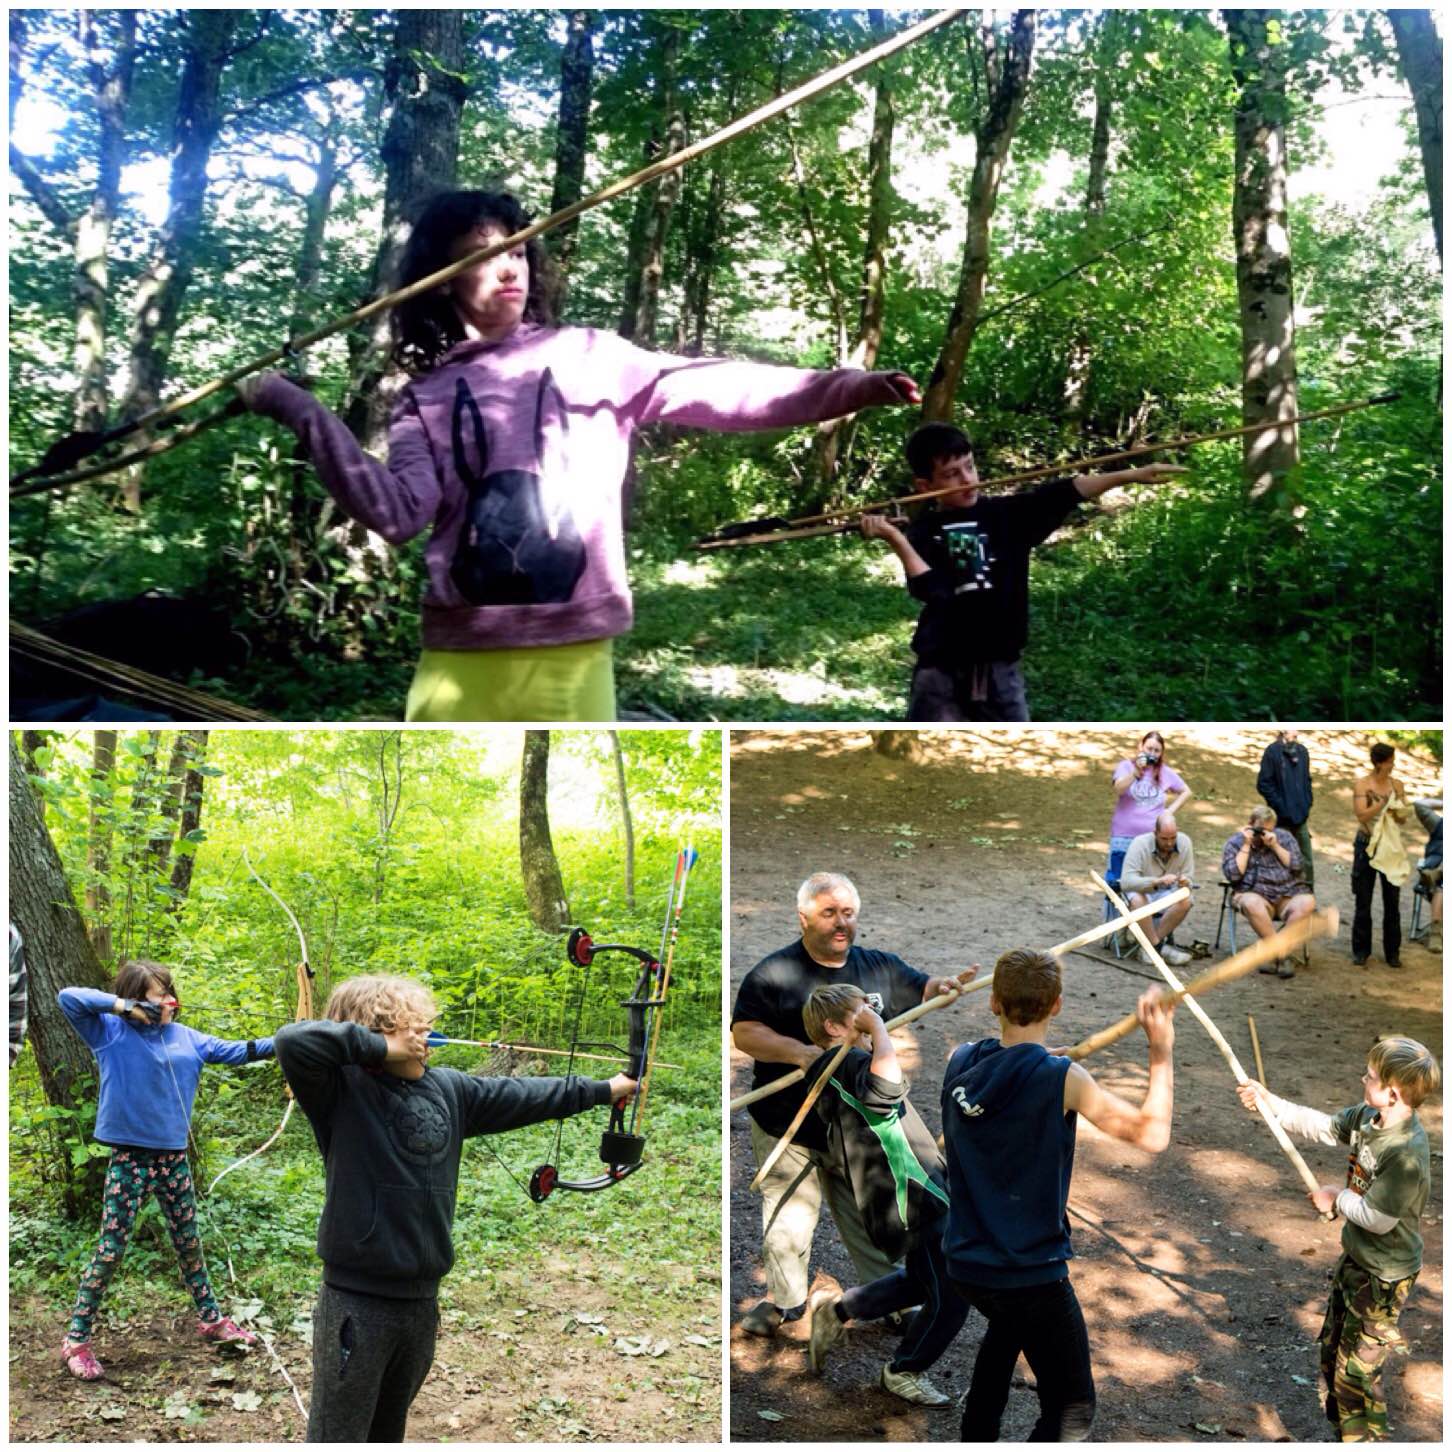
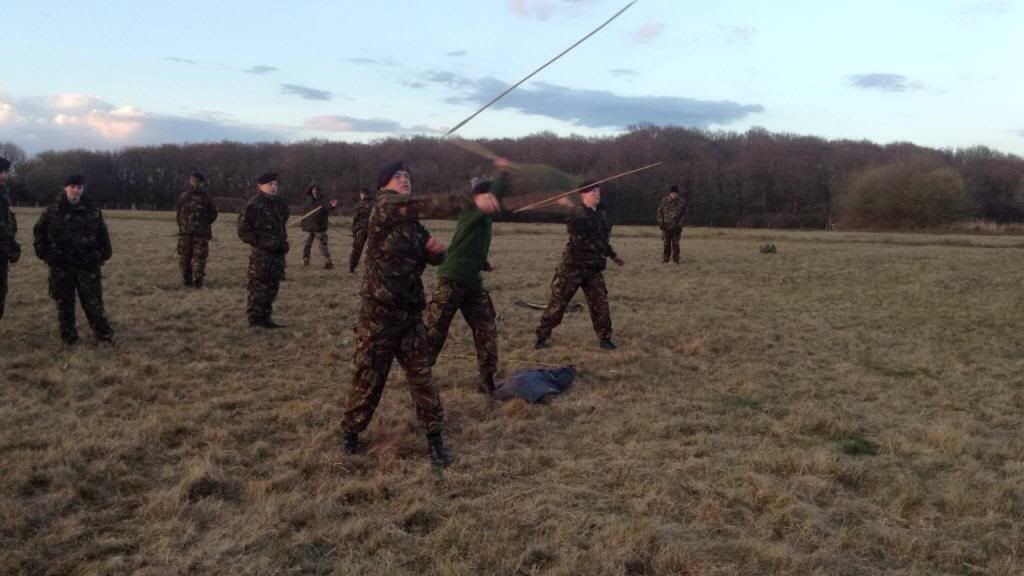
Atlatl Carving
A popular activity at cadet camps is Atlatl dart throwing so Dave and Alan spent a couple of hours with the students getting them to carve their own Atlatl throwers. All the skills that they had learnt in the morning with the saws and knives were used here with some finer knife cutting technique thrown in to get the points done.
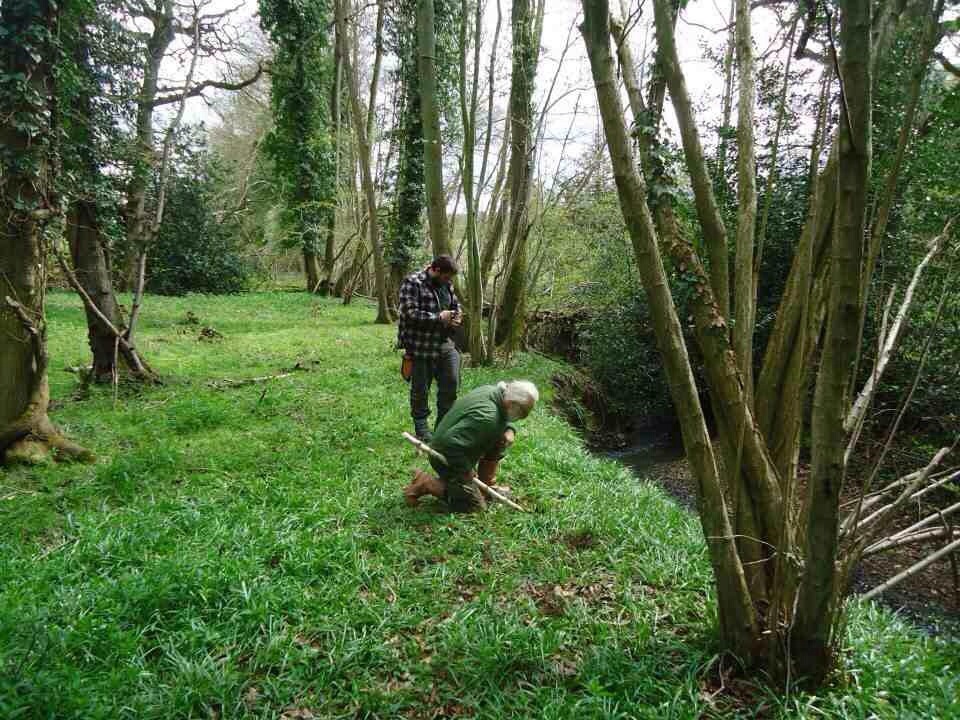
Atlatl Carving
As this was CPD time for the experienced instructors Dave went off earlier on the Saturday and experimented with Spruce roots as cordage. After digging up a little he split them down and removed the bark (with the forked stick) before using it to bind his demonstration Atlatl dart for his class. He also used Sweet Chestnut bark as a flight for his dart – worked perfectly well.
Natural Cordage -pictures courtesy of Dave
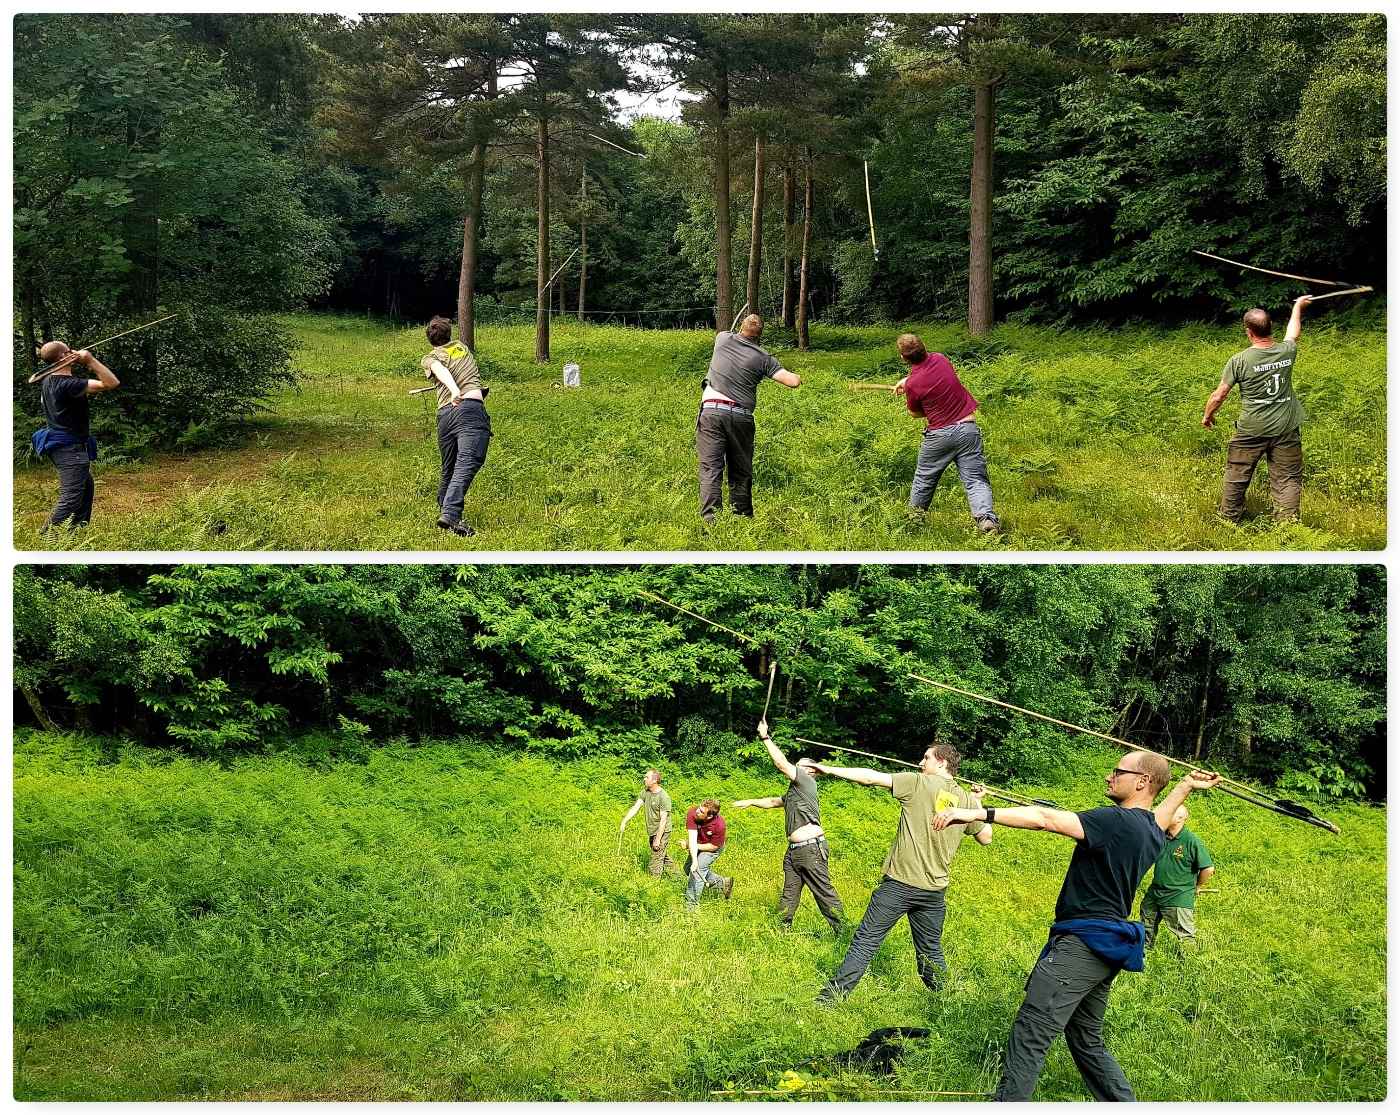
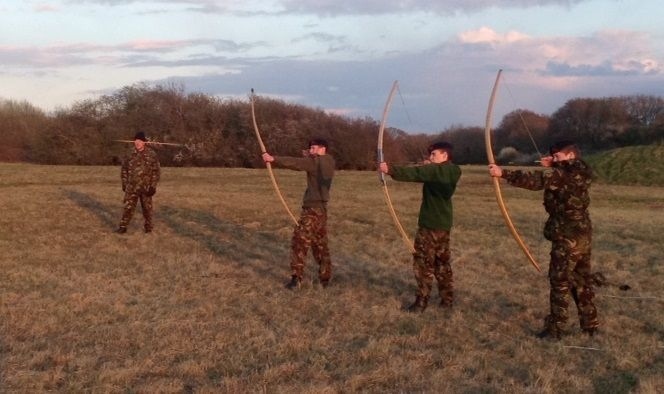
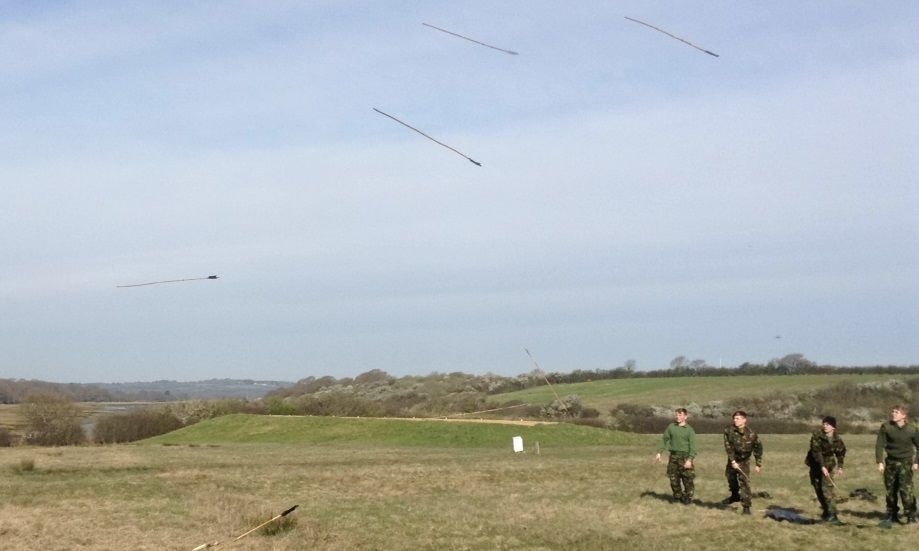
We had a nearby glade that was soon set up as arrange and the darts were soon pinging away. I have used Atlatls for years and shown hundreds of people how to use them – they never fail to intrigue people and offer hours of fun either in their construction or use.
Time on the Range
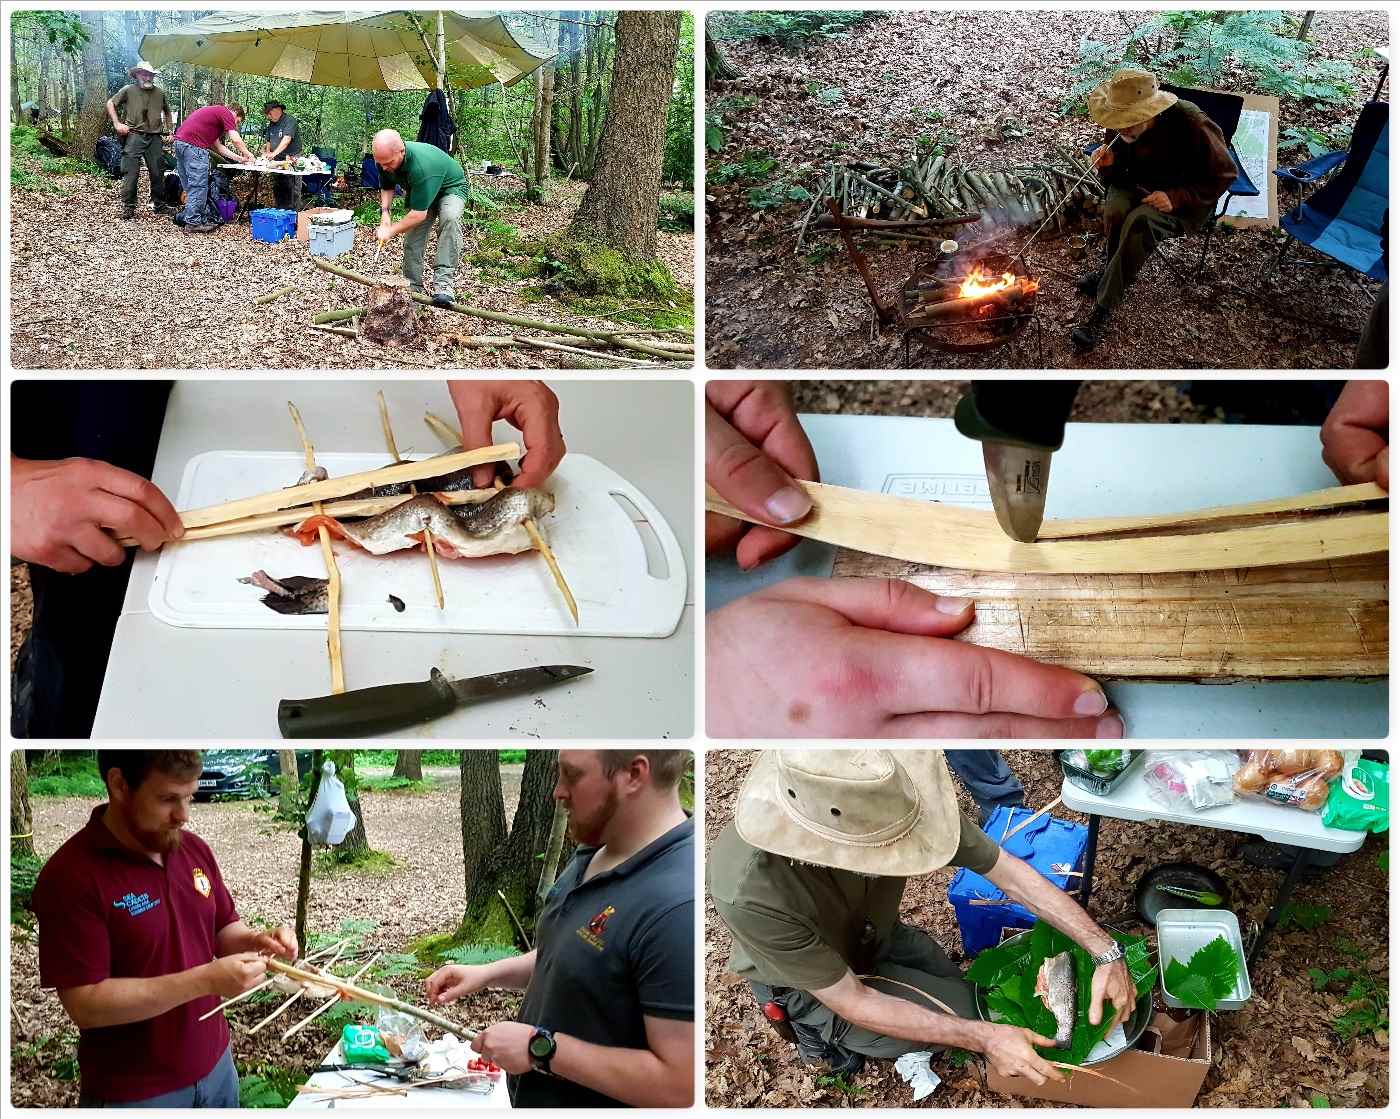
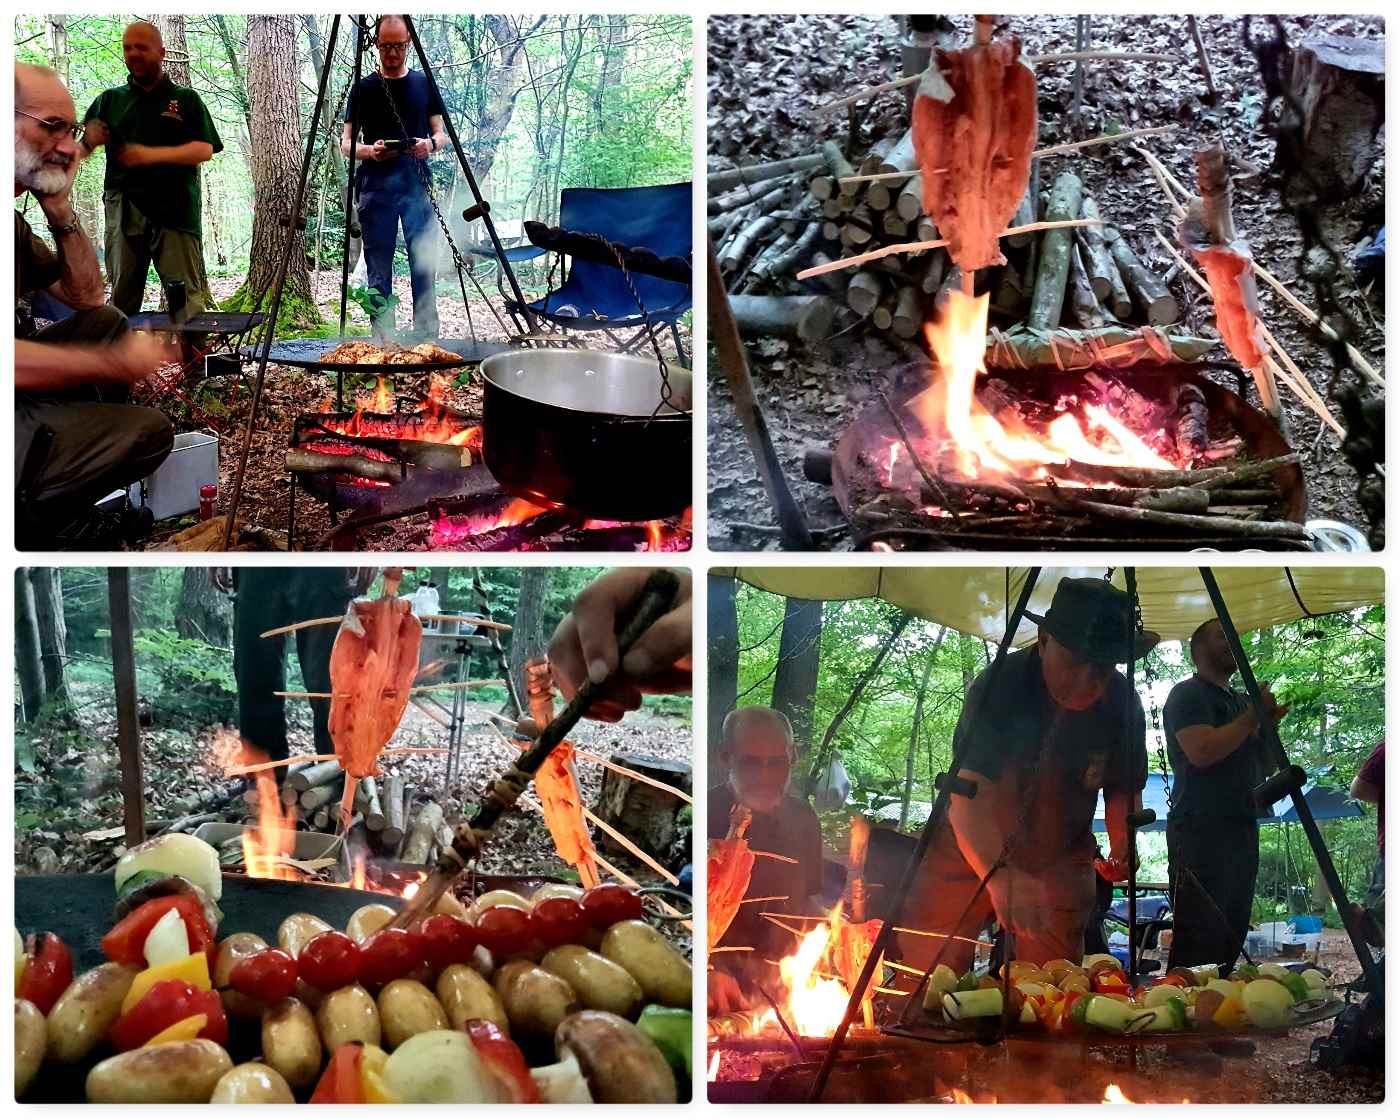
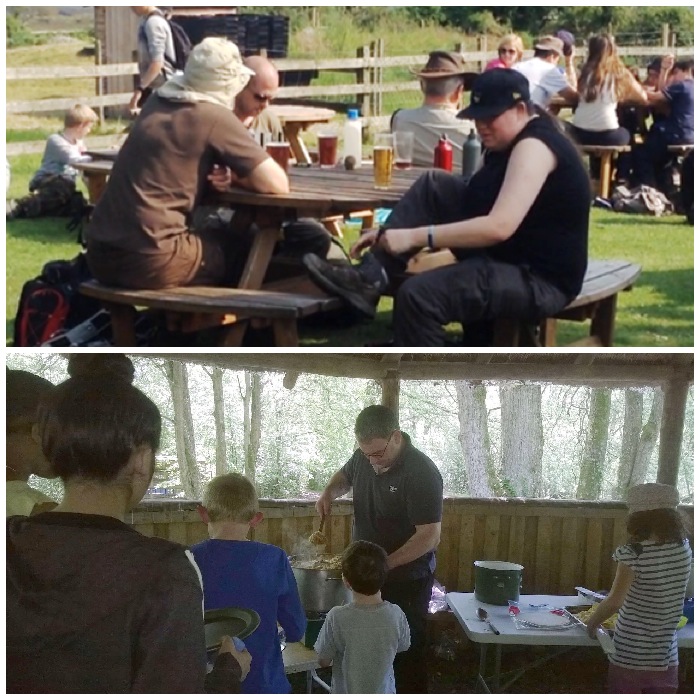
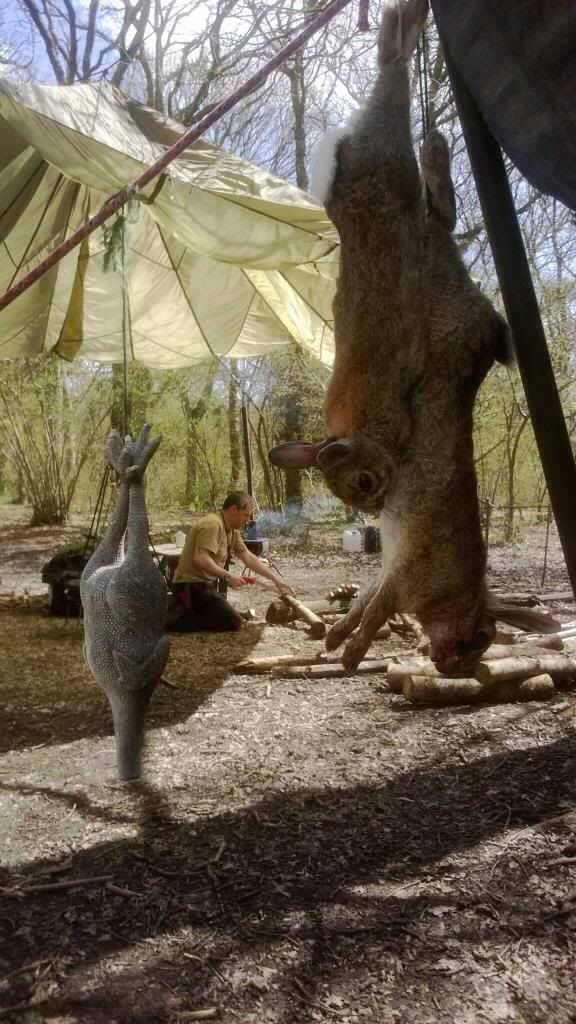
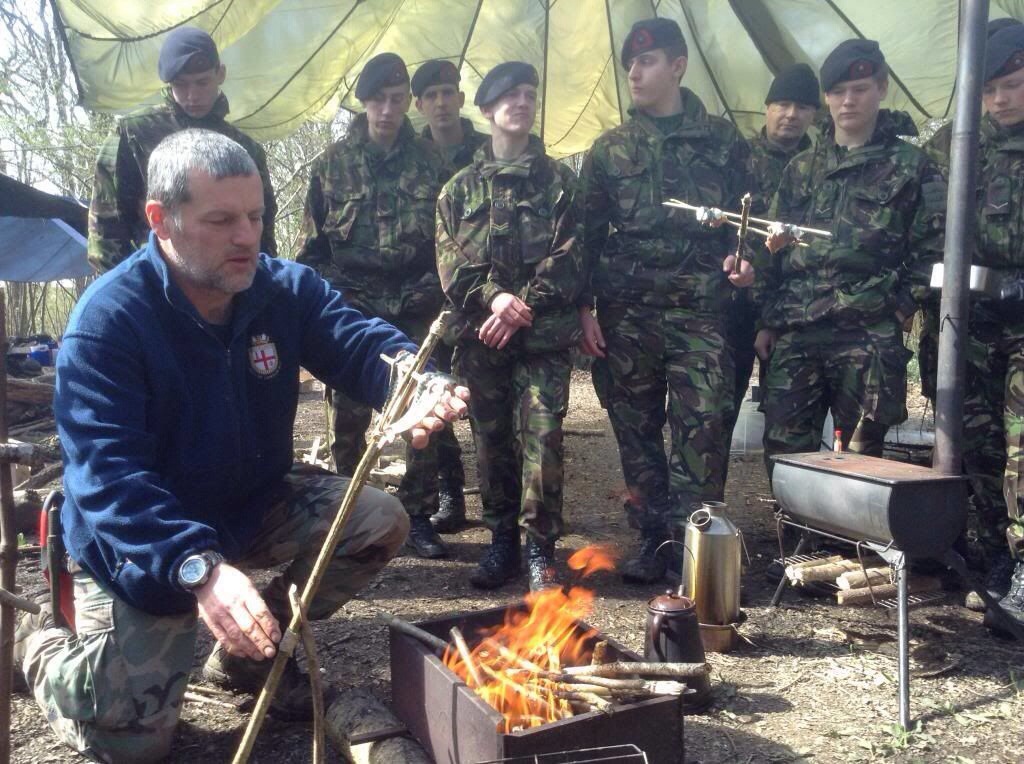
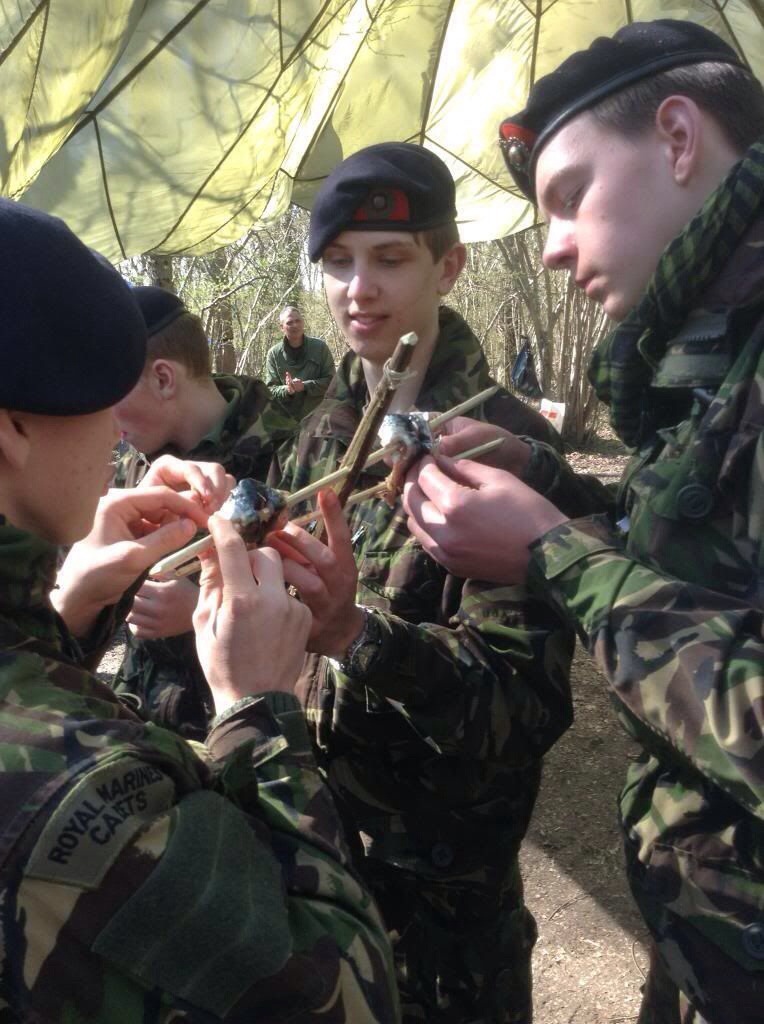
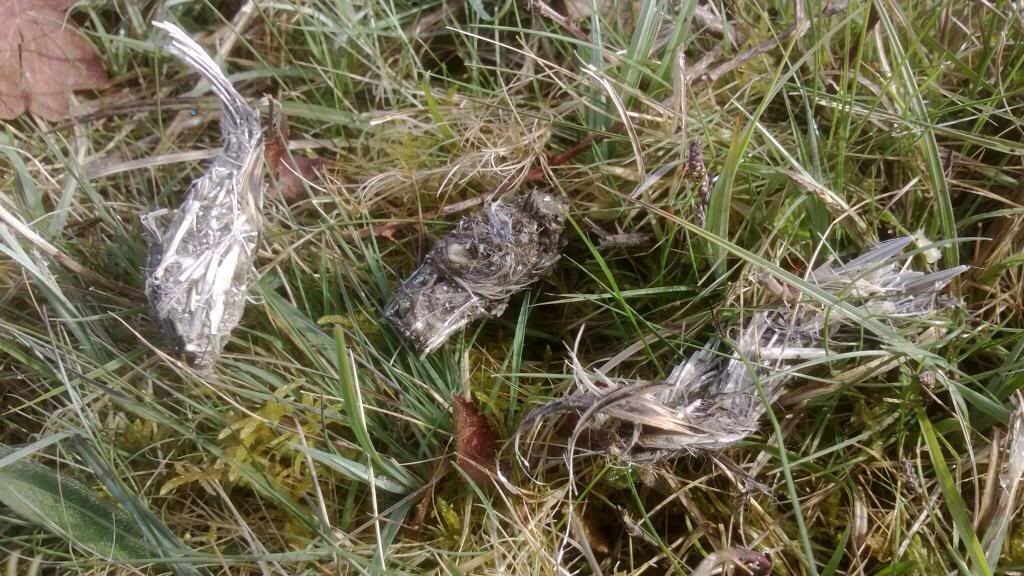
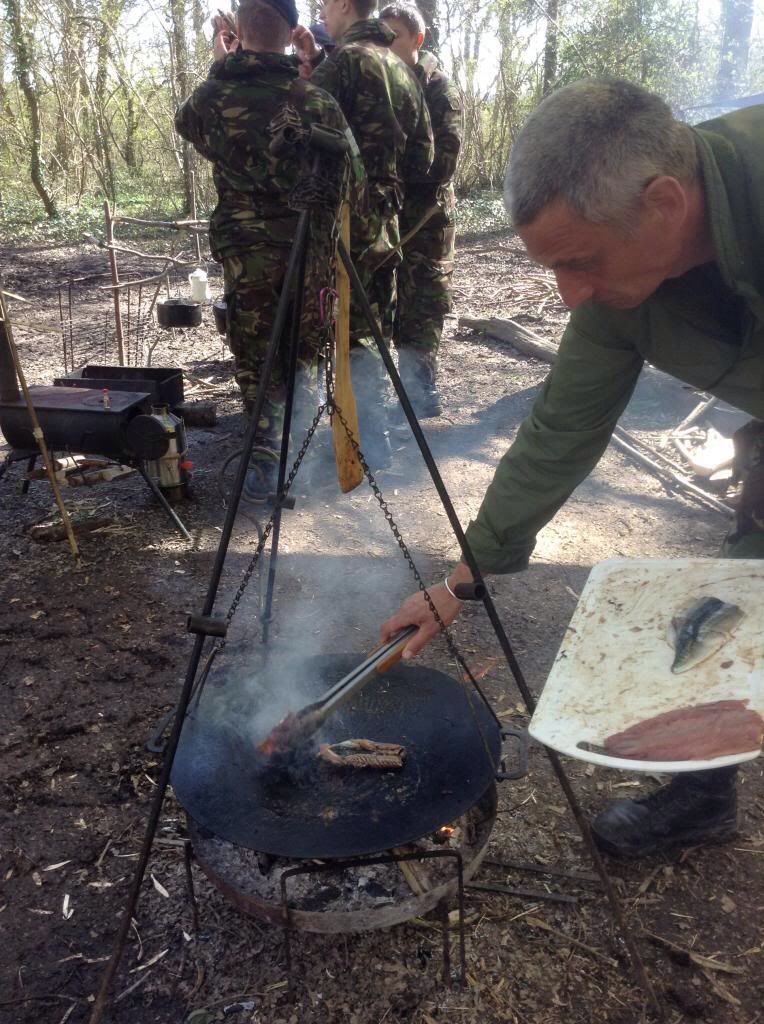
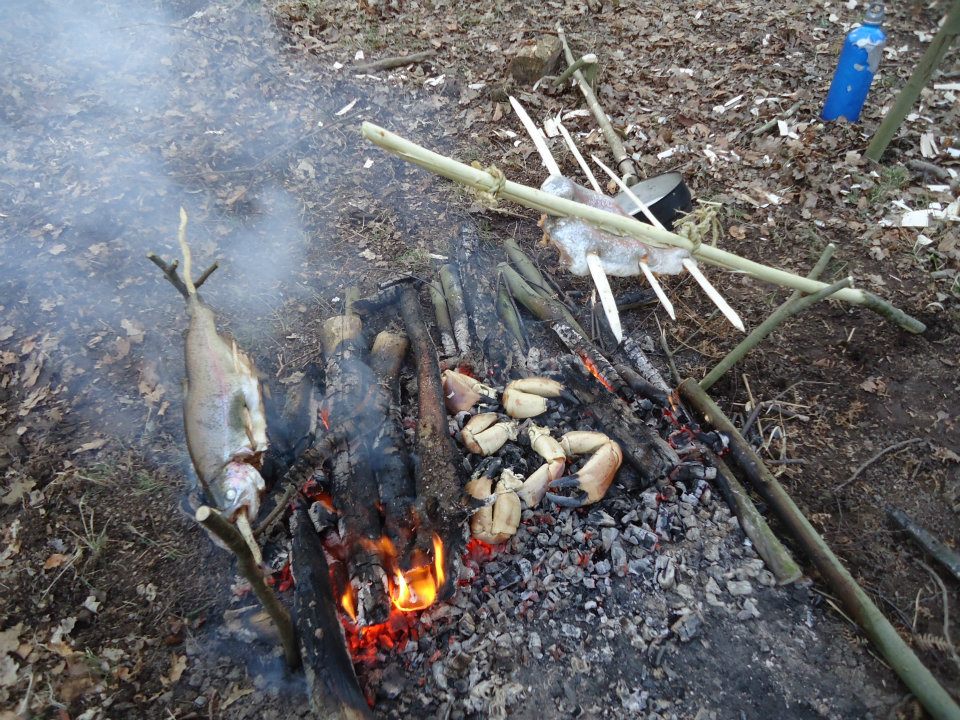
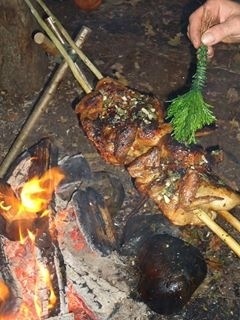
While Dave and Graham ran the range I went back with Charlie and Alan to help gather the material for ponassing some fish. Dinner was to be Trout, Chicken and Vegetable Kebabs. As well as ponassing we wrapped and bound one Trout in Sweet Chestnut leaves (these were the biggest we could find) and its inner bark. The fish was then cooked over the open fire when the coals were nice and ready.
Dinner Prep
Alan ran our little galley and had the students helping him out on all the stages. It was not long before everything was cooked and even less time until everything was eaten.
A Busy Galley
We retired to the students parachute for the evening to watch the fireworks display – Sweet Chestnut wood sparks fantastically. Luckily we did not get one of the many thunderstorms we could hear nearby pass over us, so we remained dry while we watched the fireworks.
Kick Back Time
Sunday
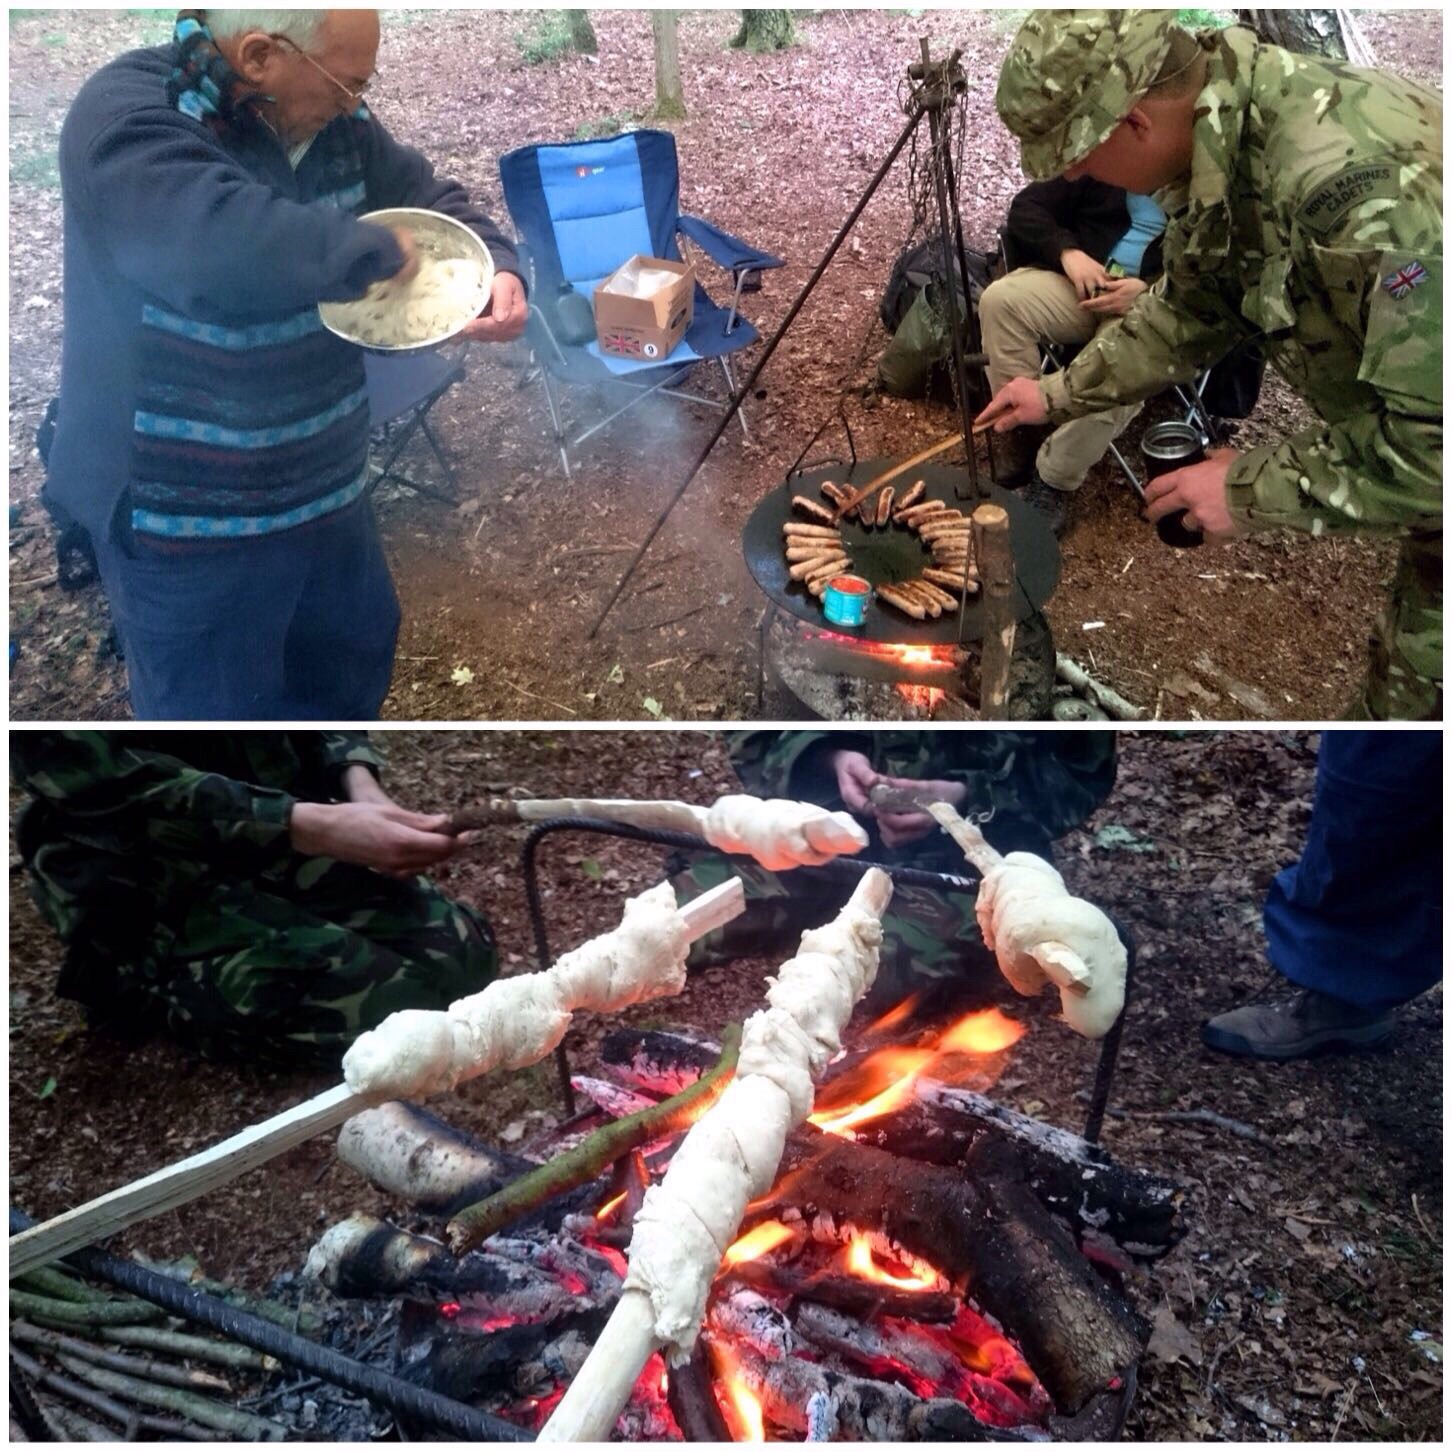
After a good nights sleep it was time for the breakfast feast. My wife Alison had made me up a pancake mix and Alan soon had the skillet working hard cooking pancakes (with a few rolls baking away on the side in the Dutch Oven). As well as pancakes we had the students cooking fresh sausage rolls over the fire (another great cadet pastime.
Breakfast Delights
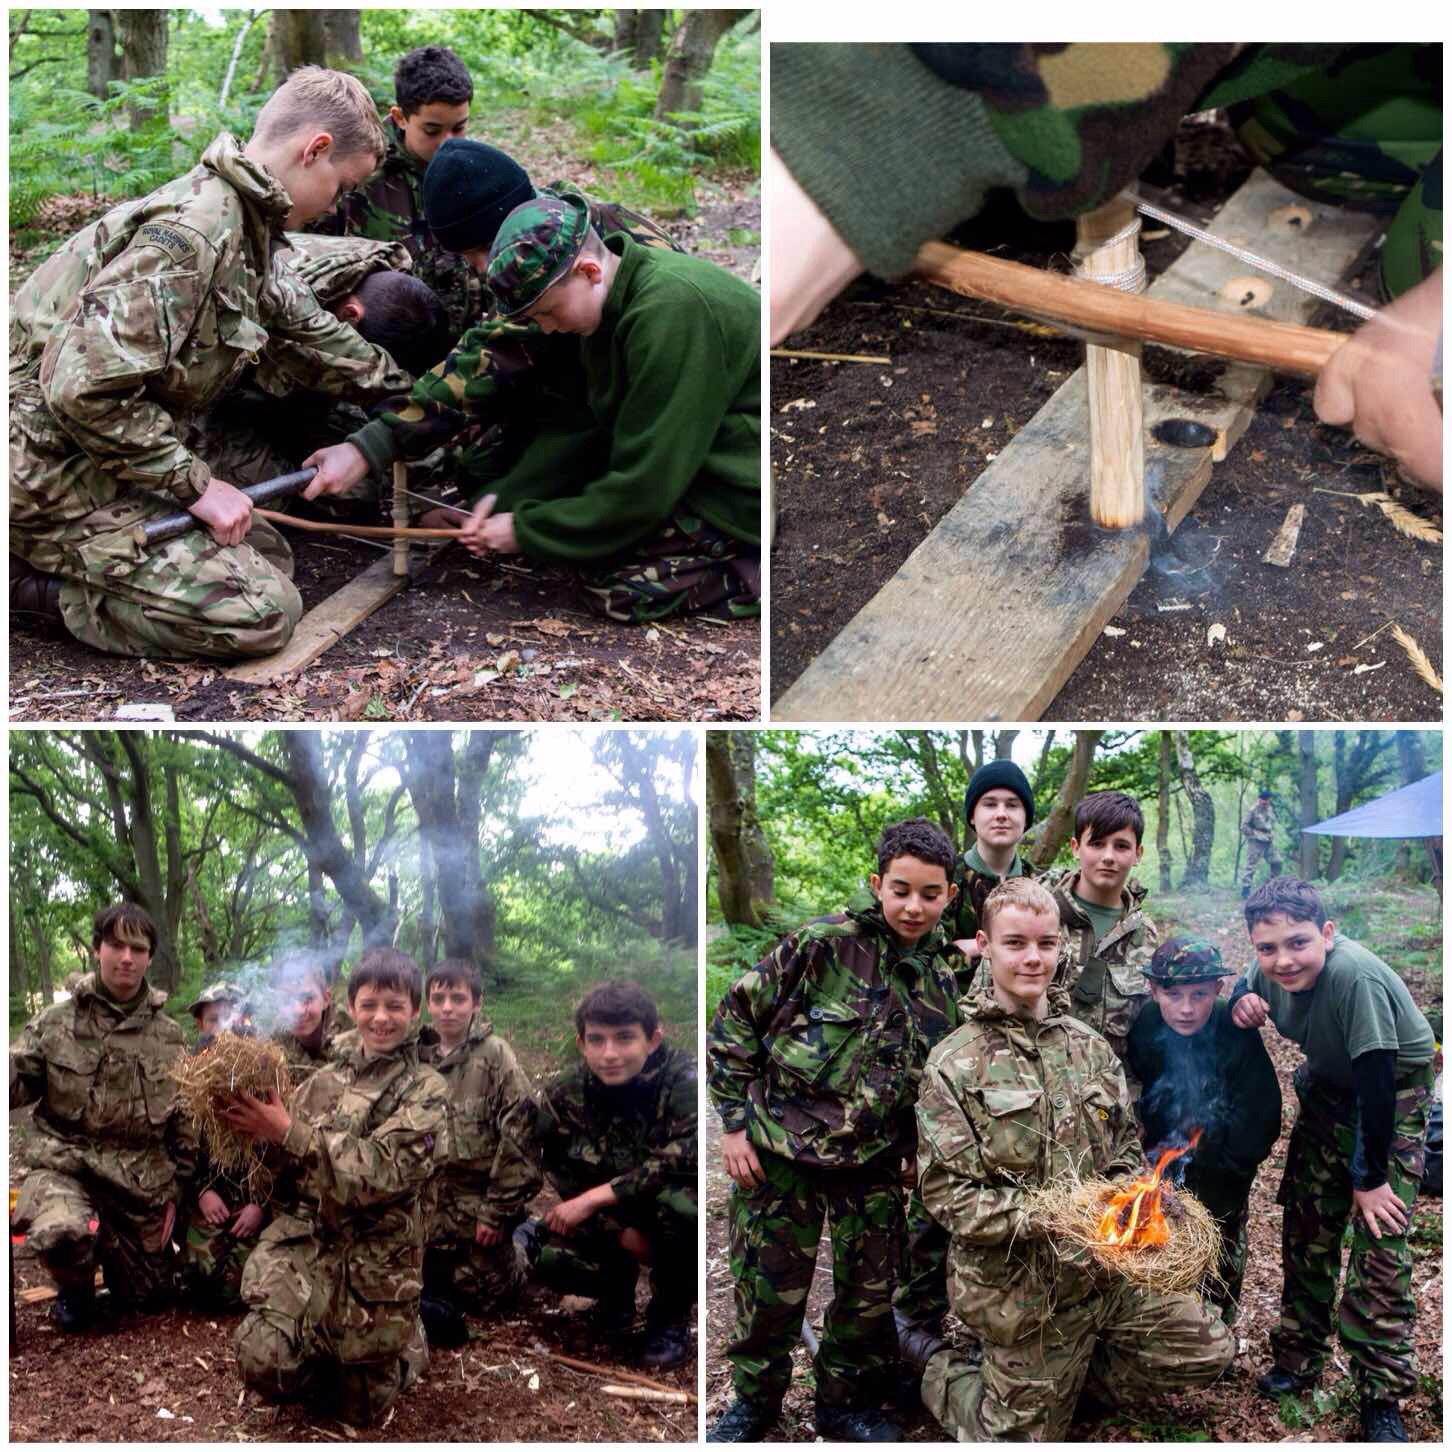
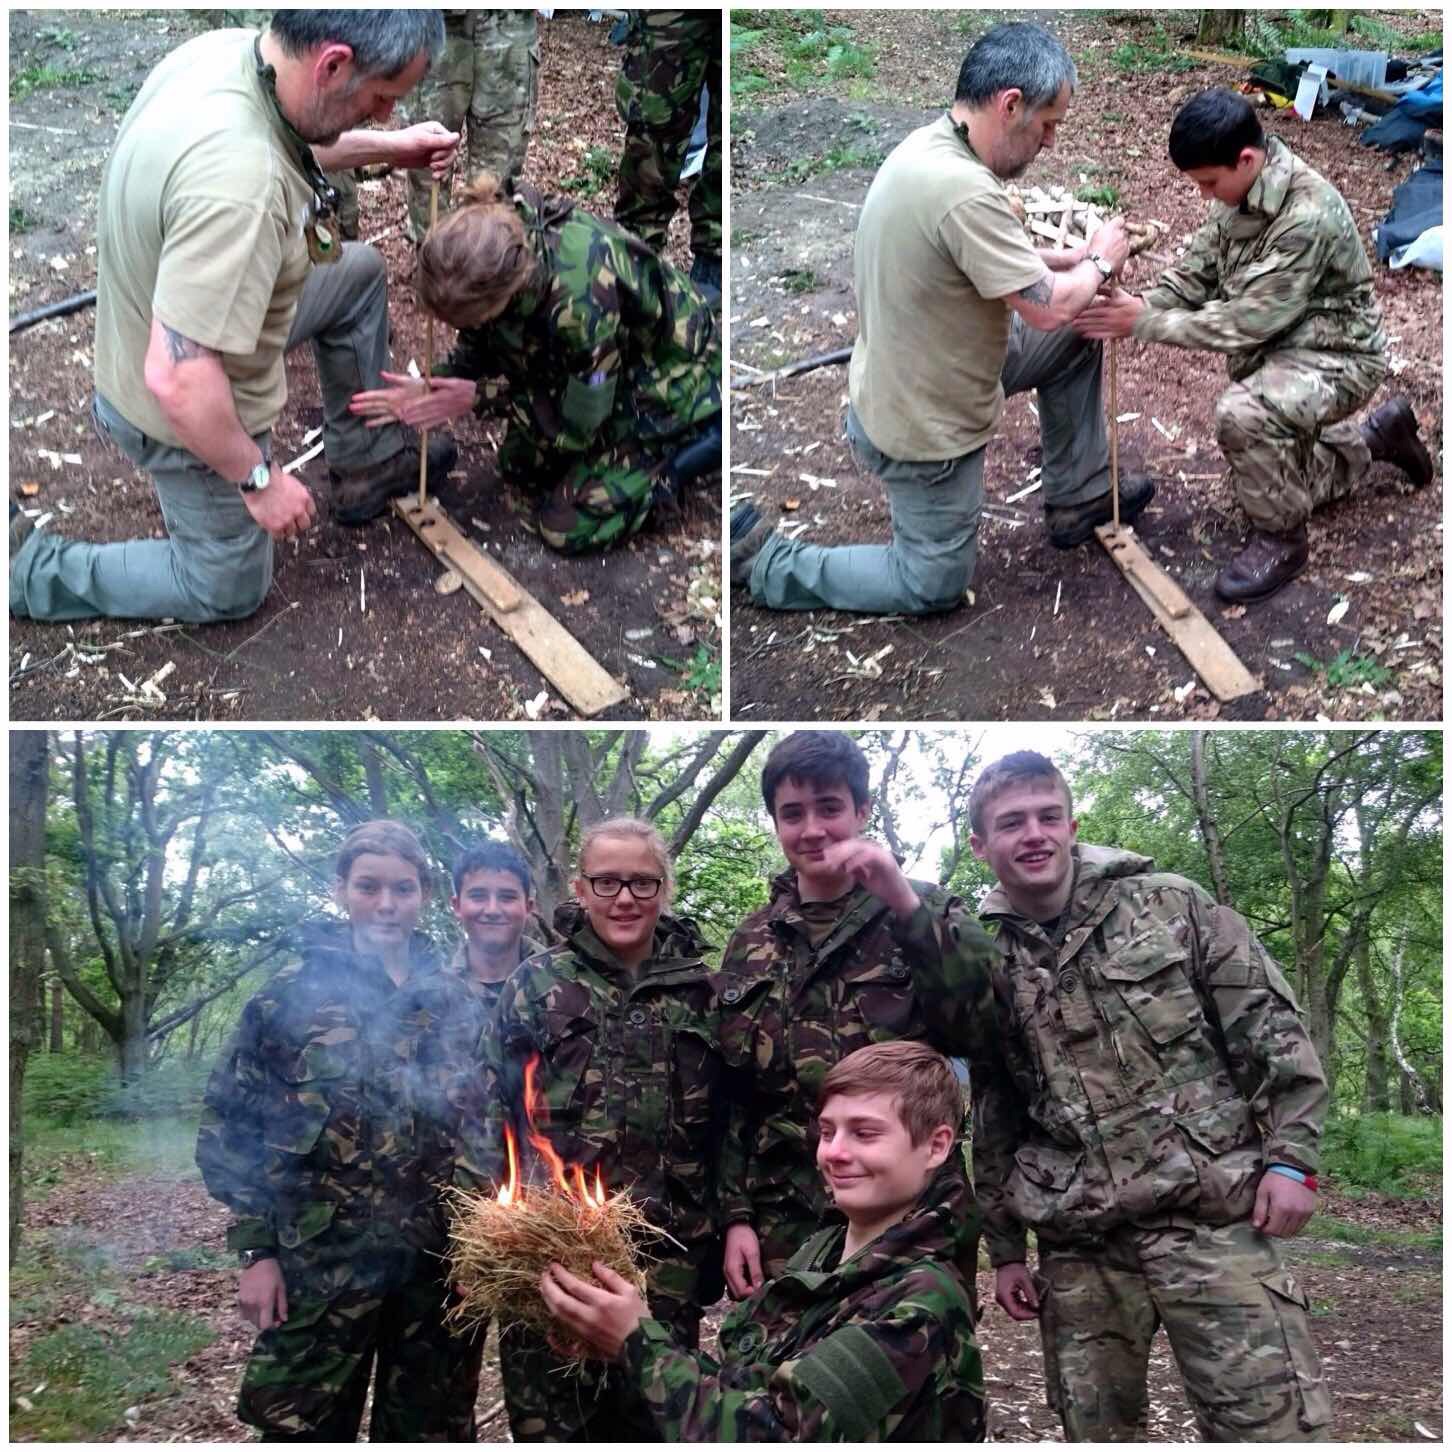
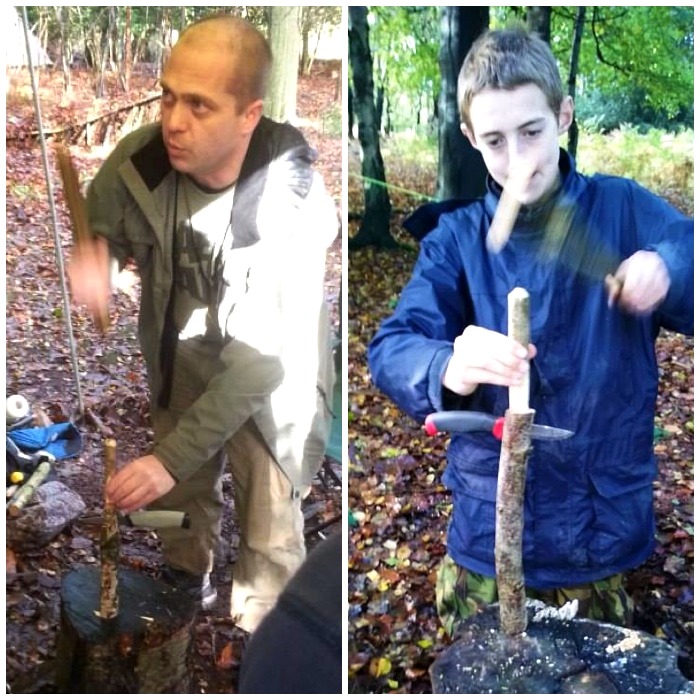
Bowdrill
Straight after breakfast – out came my bow drill kit. This was not a full on bowdrill workshop but a taster to show how ‘assisted bowdrill‘ works. When we do this activity with cadets we always do it with the assistance of an instructor (or as a group of four or five) due to a lack of time usually. We used a couple of different methods and got good embers every time.
Bowdrill Techniques – pictures courtesy of Dave and Ben
Grass Rope Making
In the Sea Cadets we work with ropes a lot (seamanship and all that) so I showed the guys how to make rope using grass. This is a fast rope making technique and we can create enough (with the right material) to make enough rope to do a seamanship class if needed (or just make earrings).
Rush Rope
Char Cloth
To finish Dave showed the students how to make some char cloth in a tin – we did not have time to finish it all off but they got the principles.
It was soon time to pack everything up and head home. Normally it is just the instructors that do most of this work so it was great to see all the students getting stuck in to put everything away in the correct manner so that it can be deployed quickly the next time we run a course.
A bit of Charcloth and Wrap Up
It was great to be back out doing Bushcraft again and sharing knowledge on the subject. I hope some of the guys are with us in a few years helping to deliver this course as having a good understanding of Bushcraft really enhances their skill set for teaching cadets. I hope to be back running another course at MAST next year.
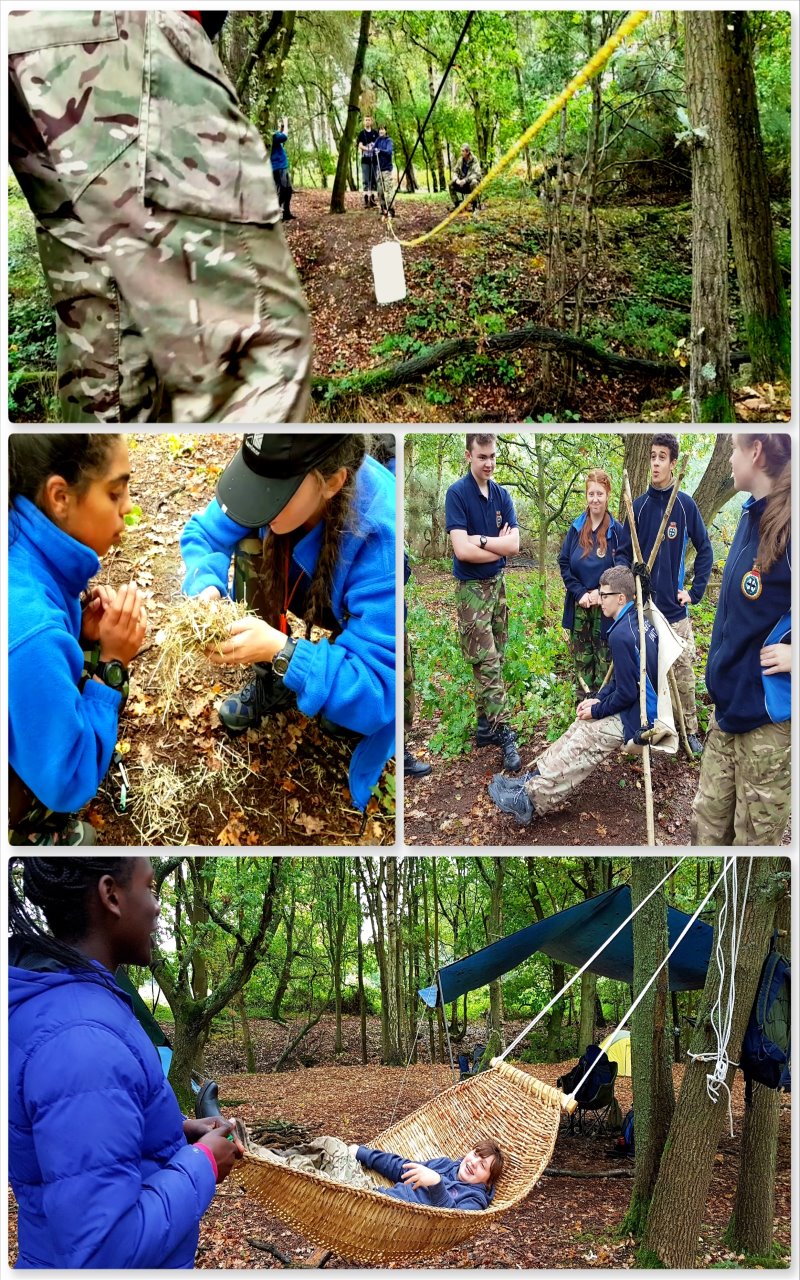
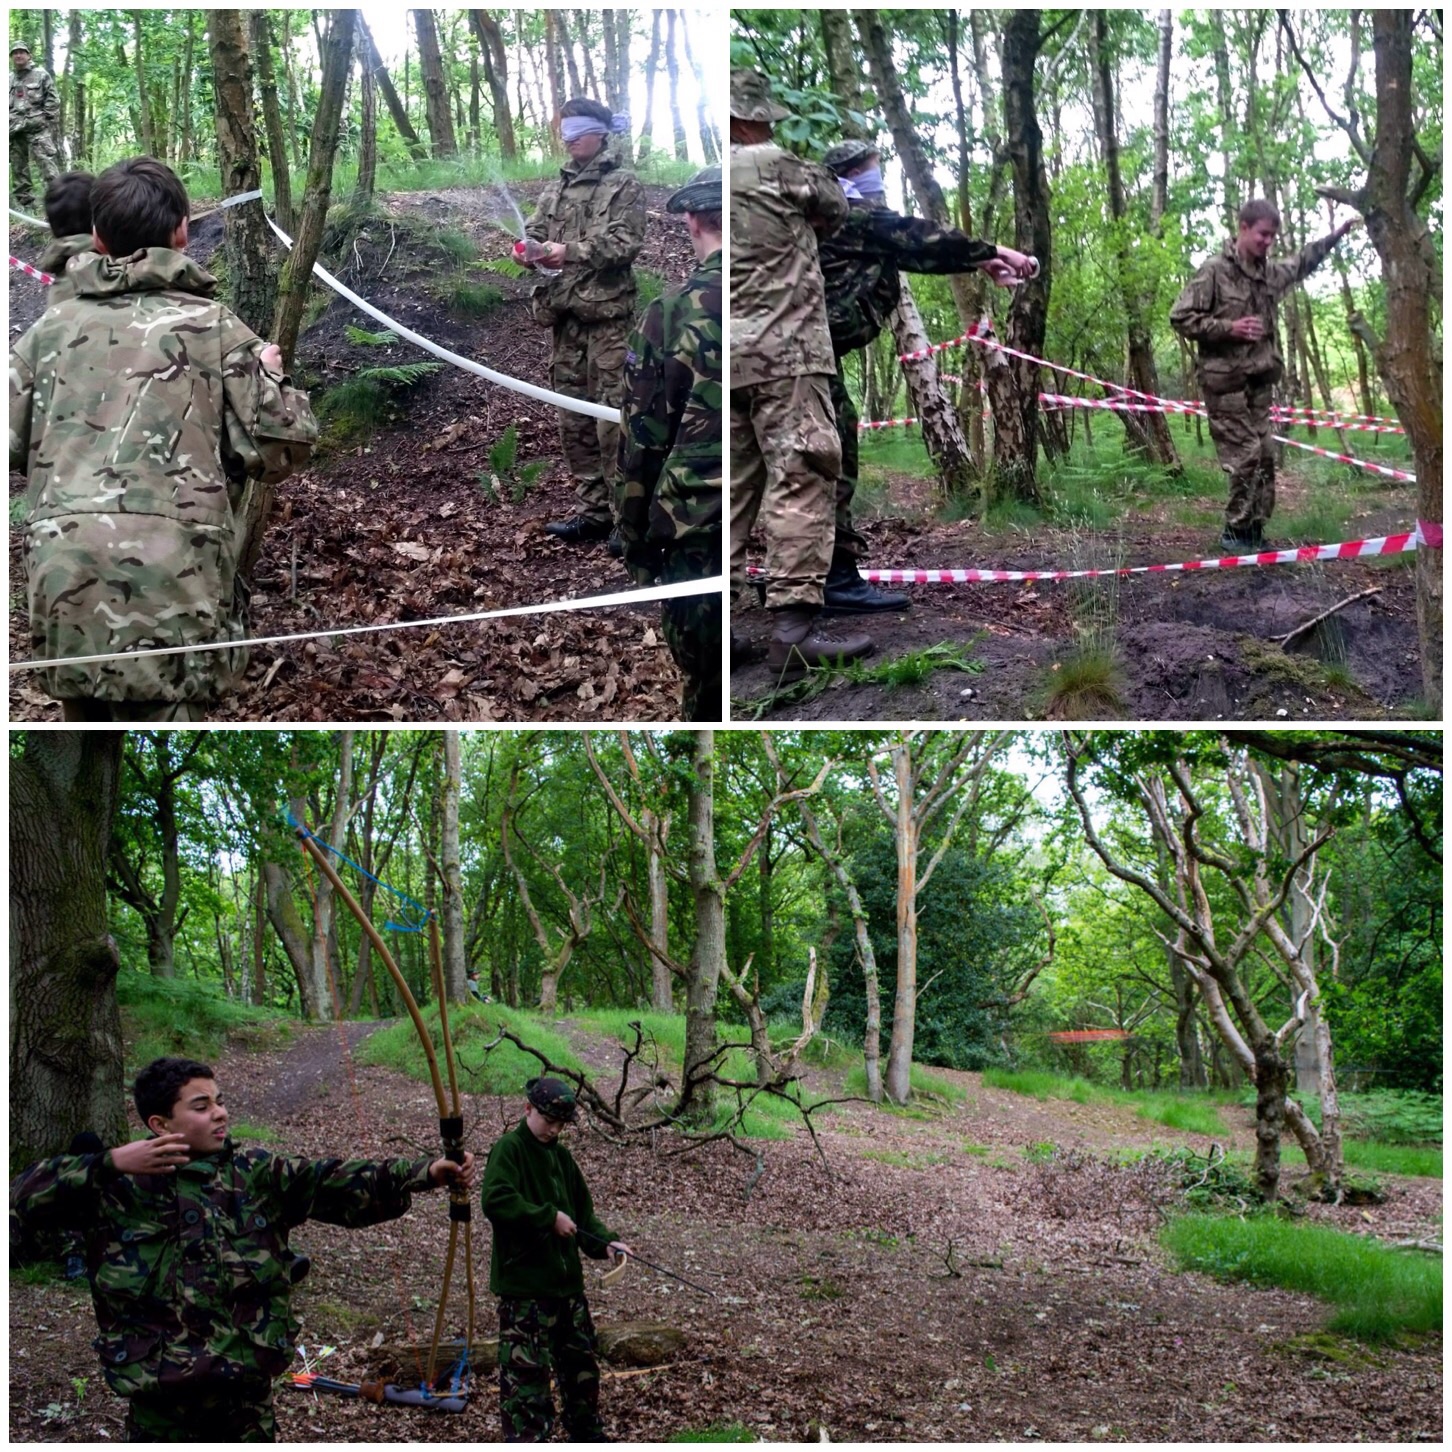
Unlike the Saturday where navigation skills were the focus the Sunday at Chosin Cup is all about testing the cadets skills such as teamwork, ropework, first aid and archery – to name just a few (there will be a further post on the Endurance Race).
After a short briefing the cadets were sent out in their teams to various stances set out in and around the woods earlier that morning.
Being Sea Cadets a weekend without testing their Seamanship skills in some way would not be proper so they soon found themselves having to construct a pulley system to transport water across a ‘raging river!!‘.
Bushcraft is a key part of their training now so their firelighting and pioneering skills were also tested however there was always time to take a few minutes’out‘ on the hammock.
Seamanship and Bushcraft Skills
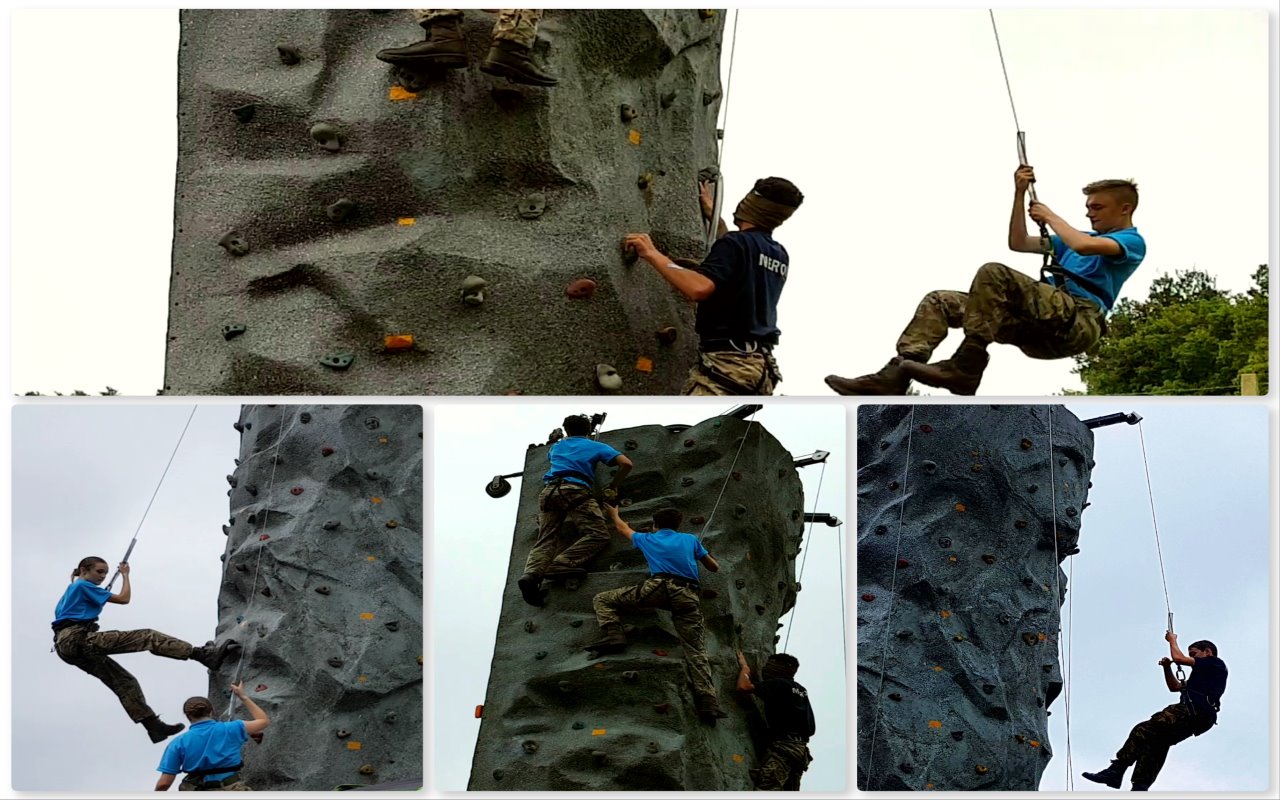
Our adventure training boss Ben McDonald had organised for a mobile climbing wall to turn up that morning. I have no idea how they scored this event however the cadets were up and down it like yoyo’s.
A couple of challenges they faced involved climbing in pairs carrying a ball between them and making the climb blindfolded – both more difficult than you would think.
The Wall
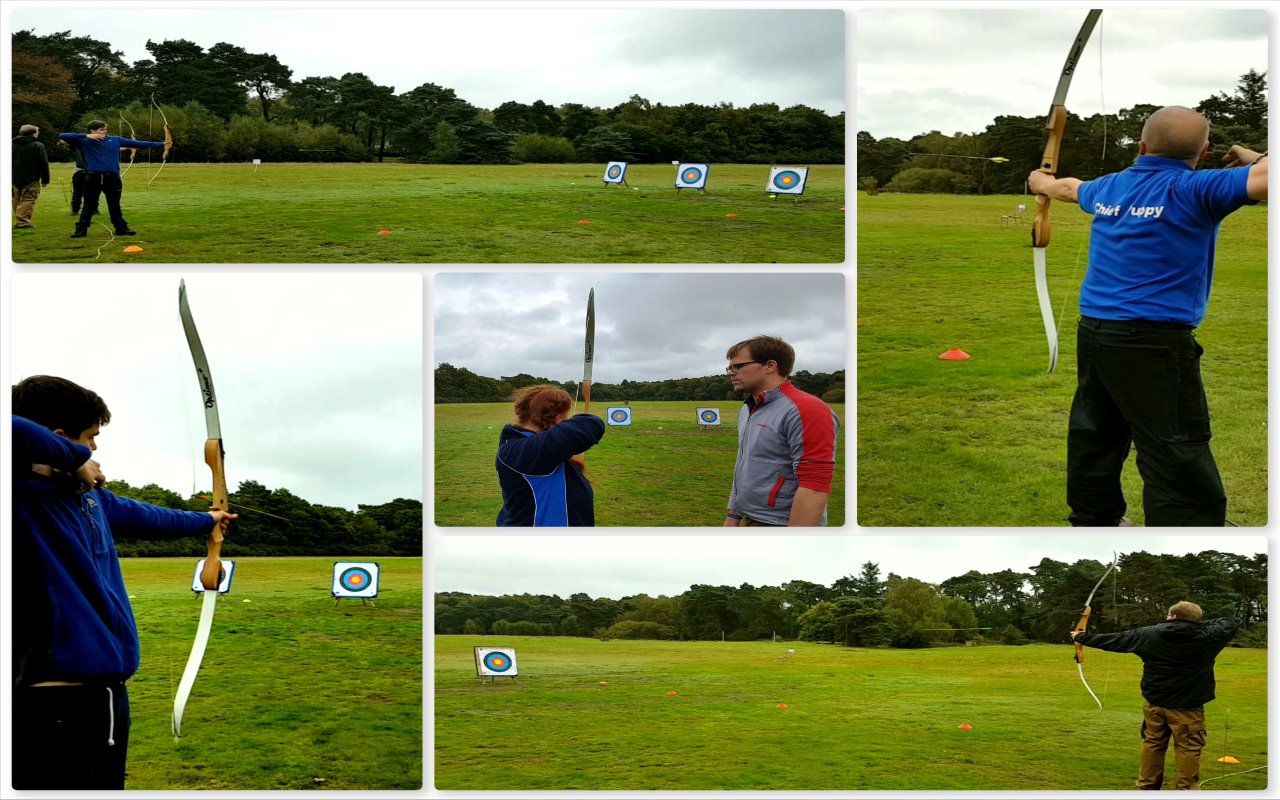
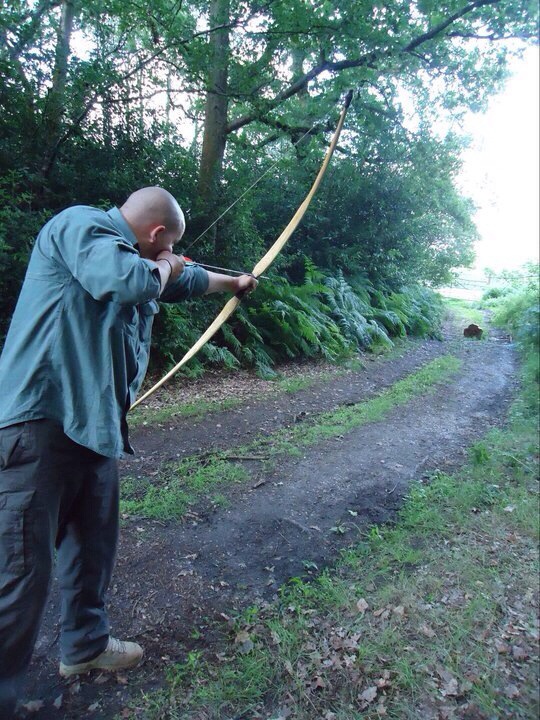
A favourite of mine is archery. This year our archery instructor Jacob brought along his Area kit so my poor bows could have a year off (I broke one a year ago so glad we have new kit). It proved a ‘hit‘ with both the cadets and staff and even the visiting VIP’s had a bash.
The Range
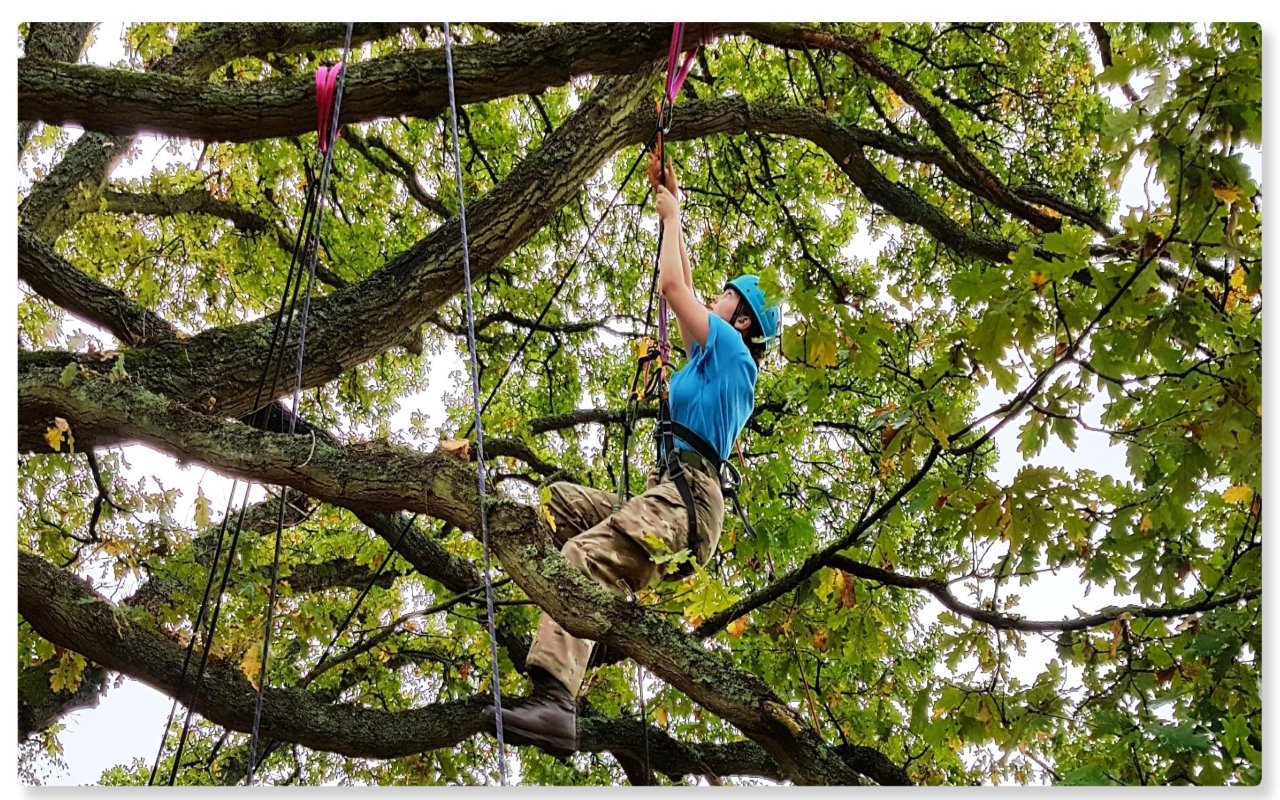
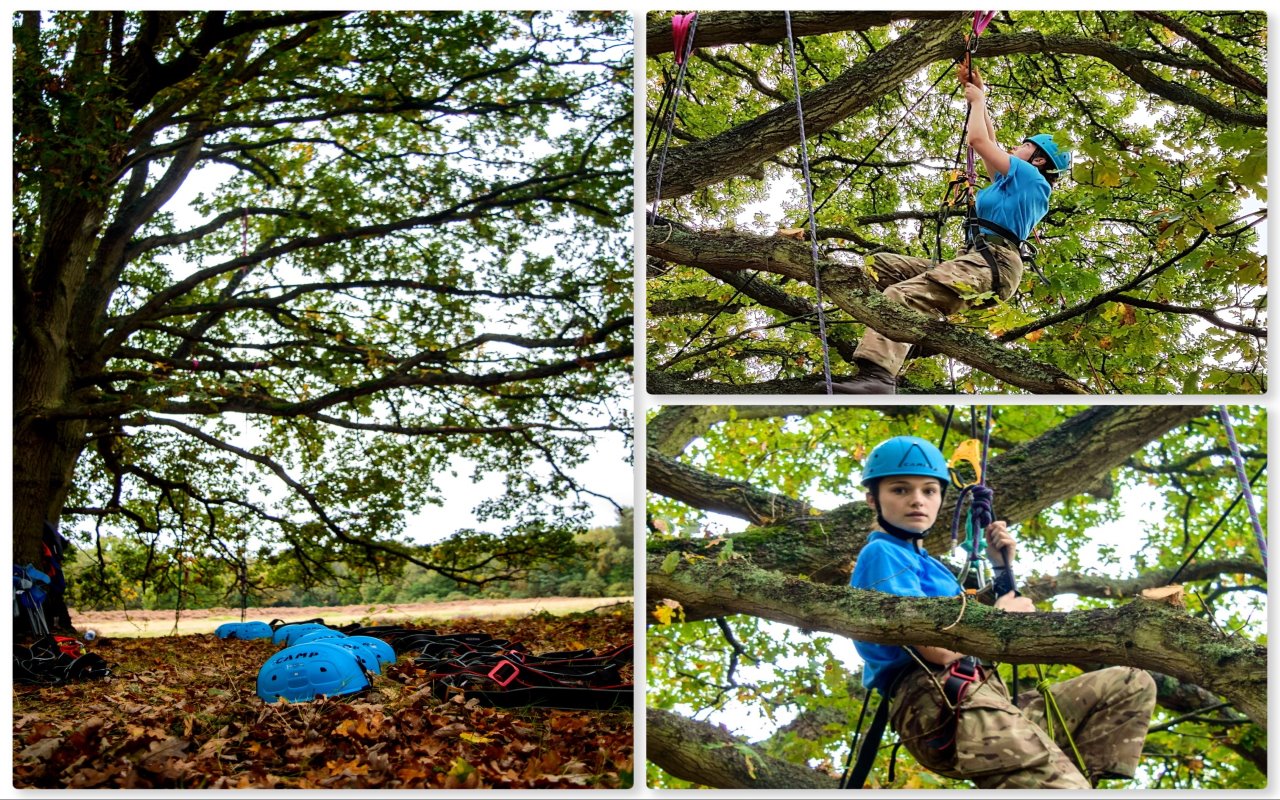
Perry and Deano spent the morning running the tree climbing stance. The cadets had to use ascending devices to climb up into the big old oak tree. This was done to varying degrees of success as it can be difficult if you do not get the knack right.
Ascending
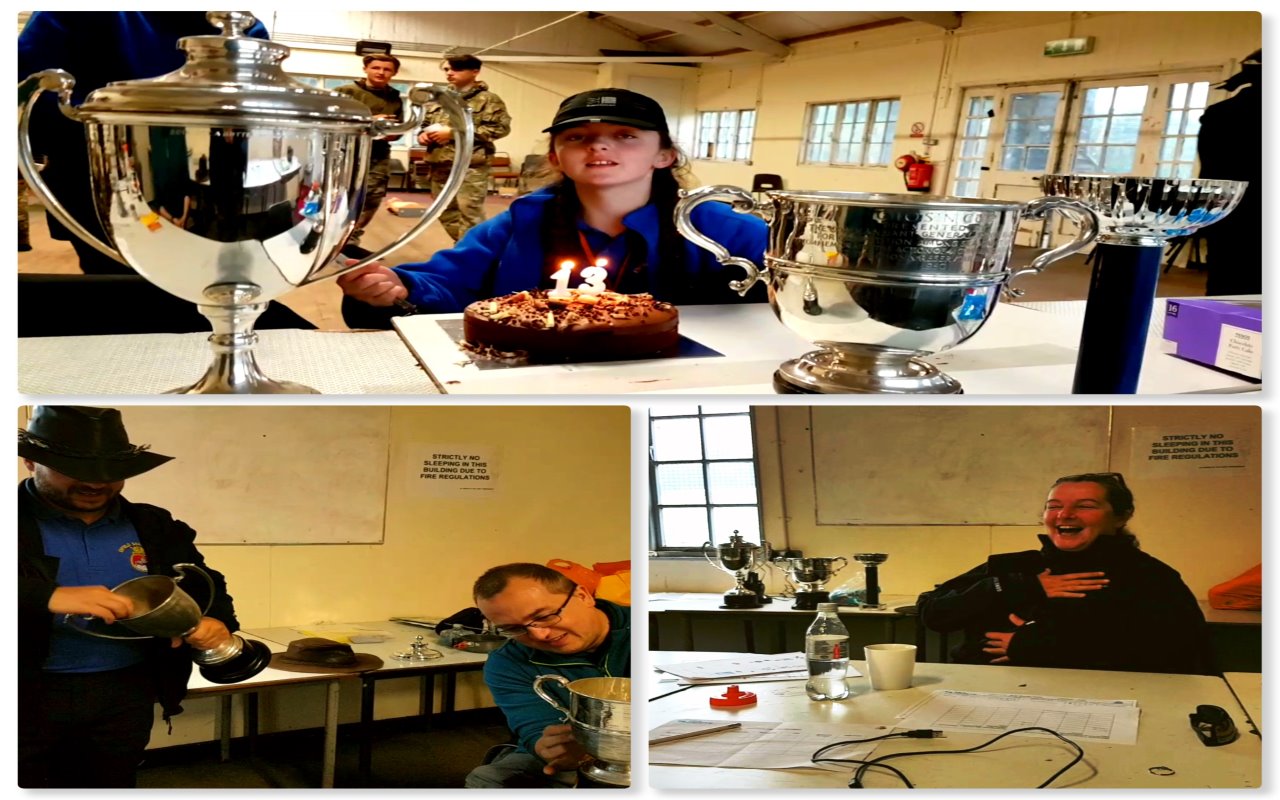
We had a birthday that weekend – Frankie Mae Edwards turned 13 on the weekend and the cadets had brought her along a cake to celebrate. Needless to say the staff did not get to see much of the cake – thankfully I missed out on all that polishing – well done Cliff and Dave – vary shiny job.
Busy times in the office
Normally all our classes are located outdoors but this year for some reason the First Aid and the Navigation quiz was hosted indoors – no idea why and hopefully will not be repeated next year 🙂
First Aid and Navigation
The one activity missing from this post is the Endurance Race – that deserves a post all of its own which will follow after this.
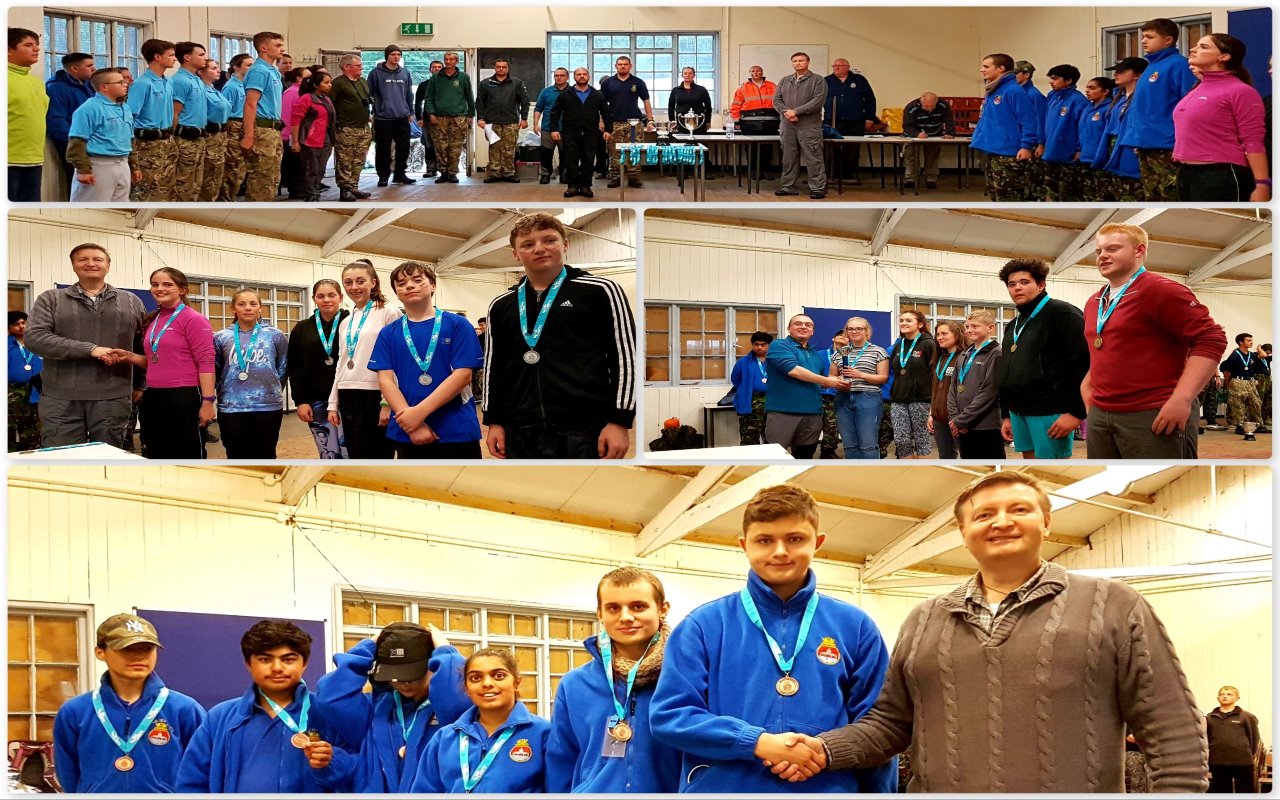
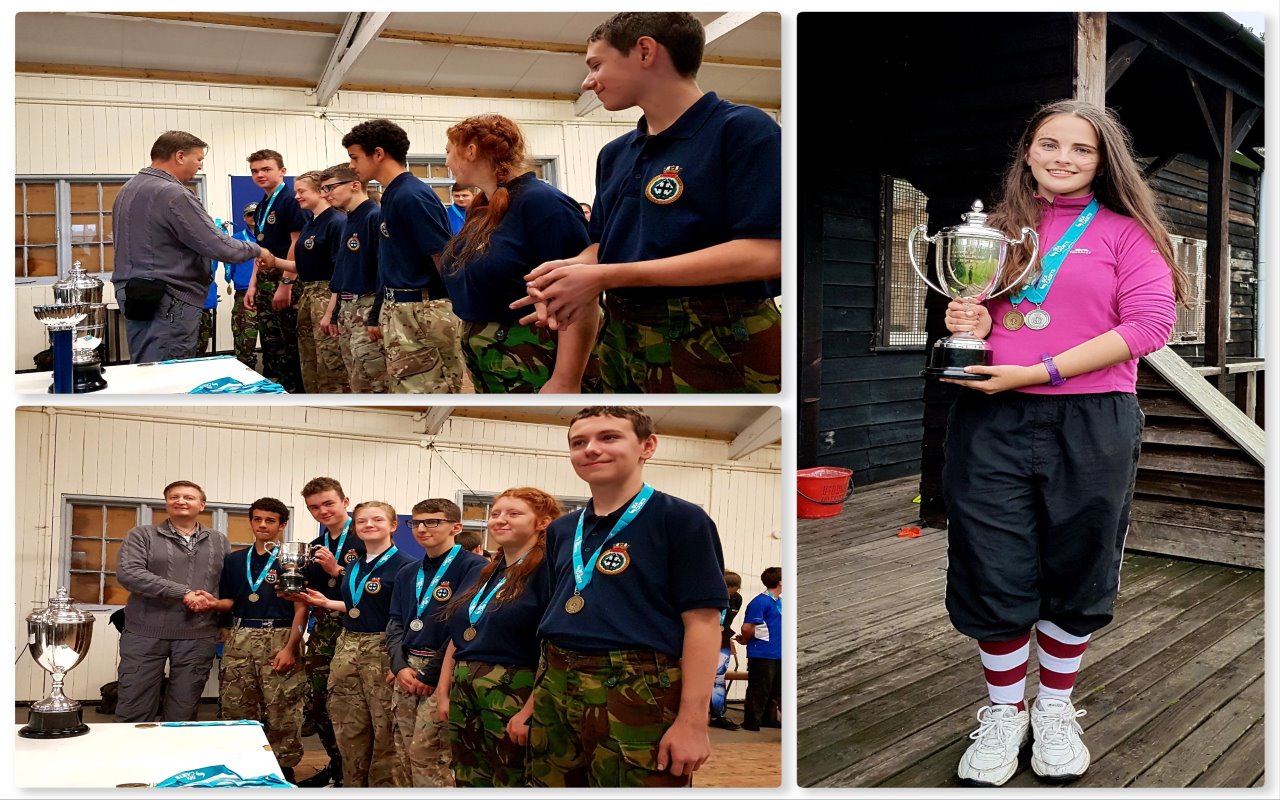
Soon it was time for the awards and we all paraded in the massive troop shelter on the training area. Enfield unit came 3rd, Sunbury & Walton unit came second and Poole unit won the visitors trophy.
Runners Up
First place went to Merton unit and the Team leader trophy went to Niamh Kelly. Well done to everyone – cadets and staff for taking part in what was a great weekend.
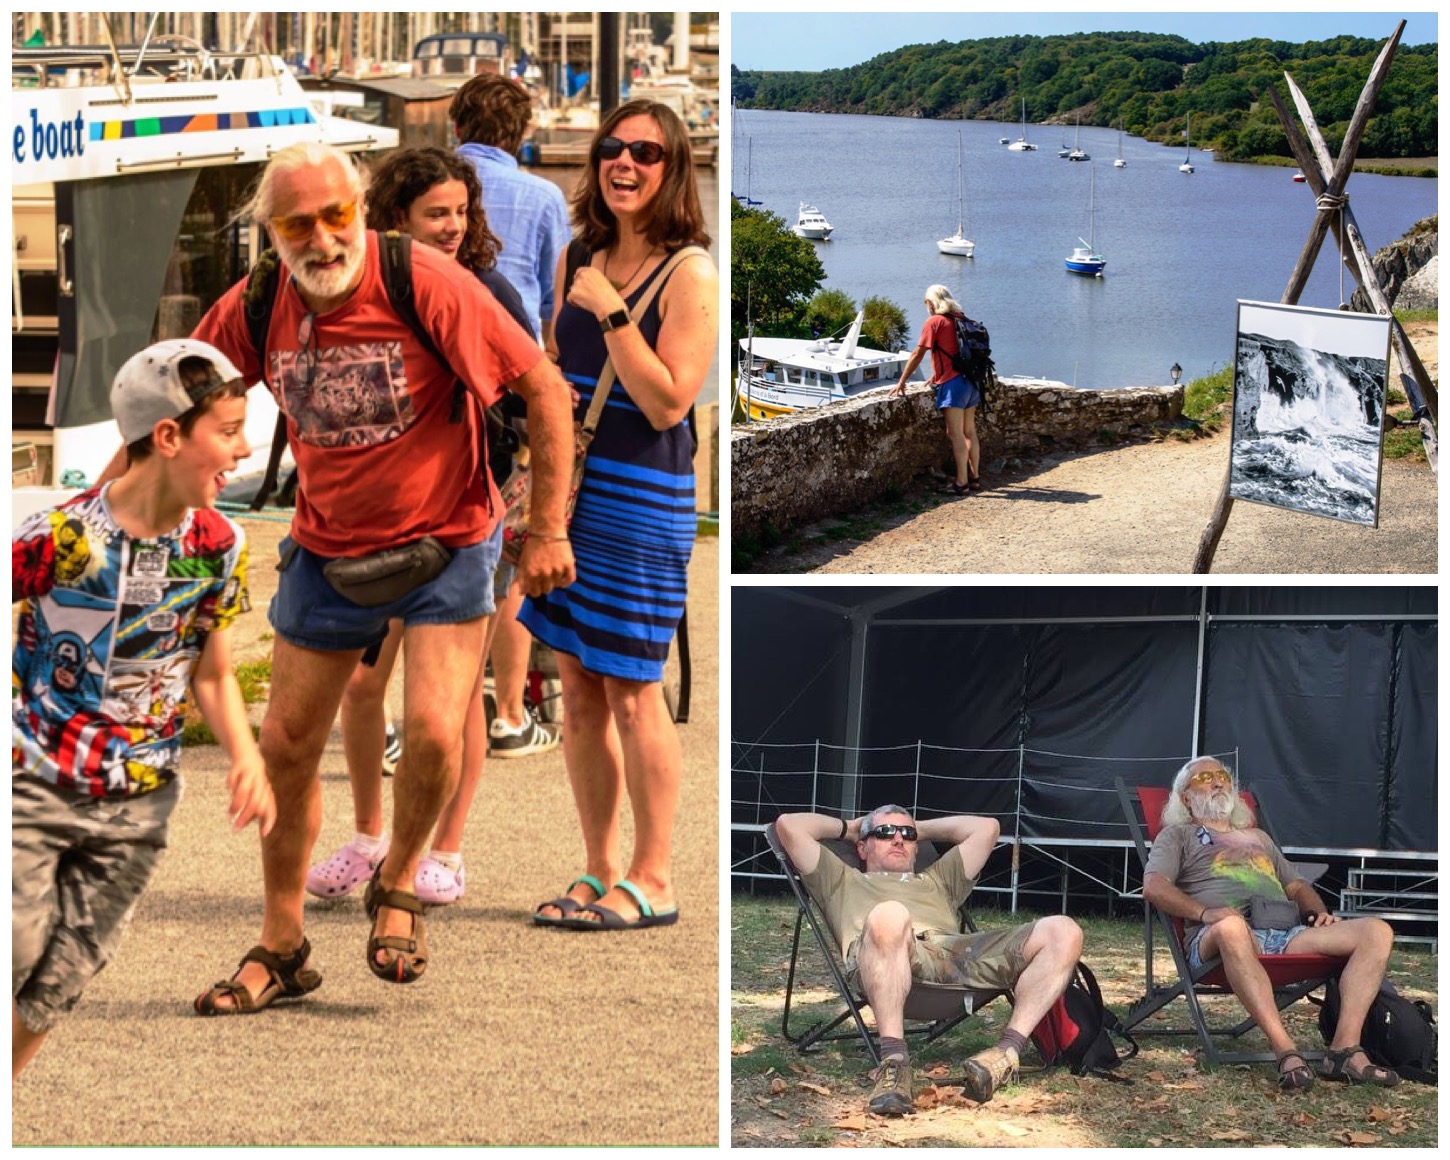
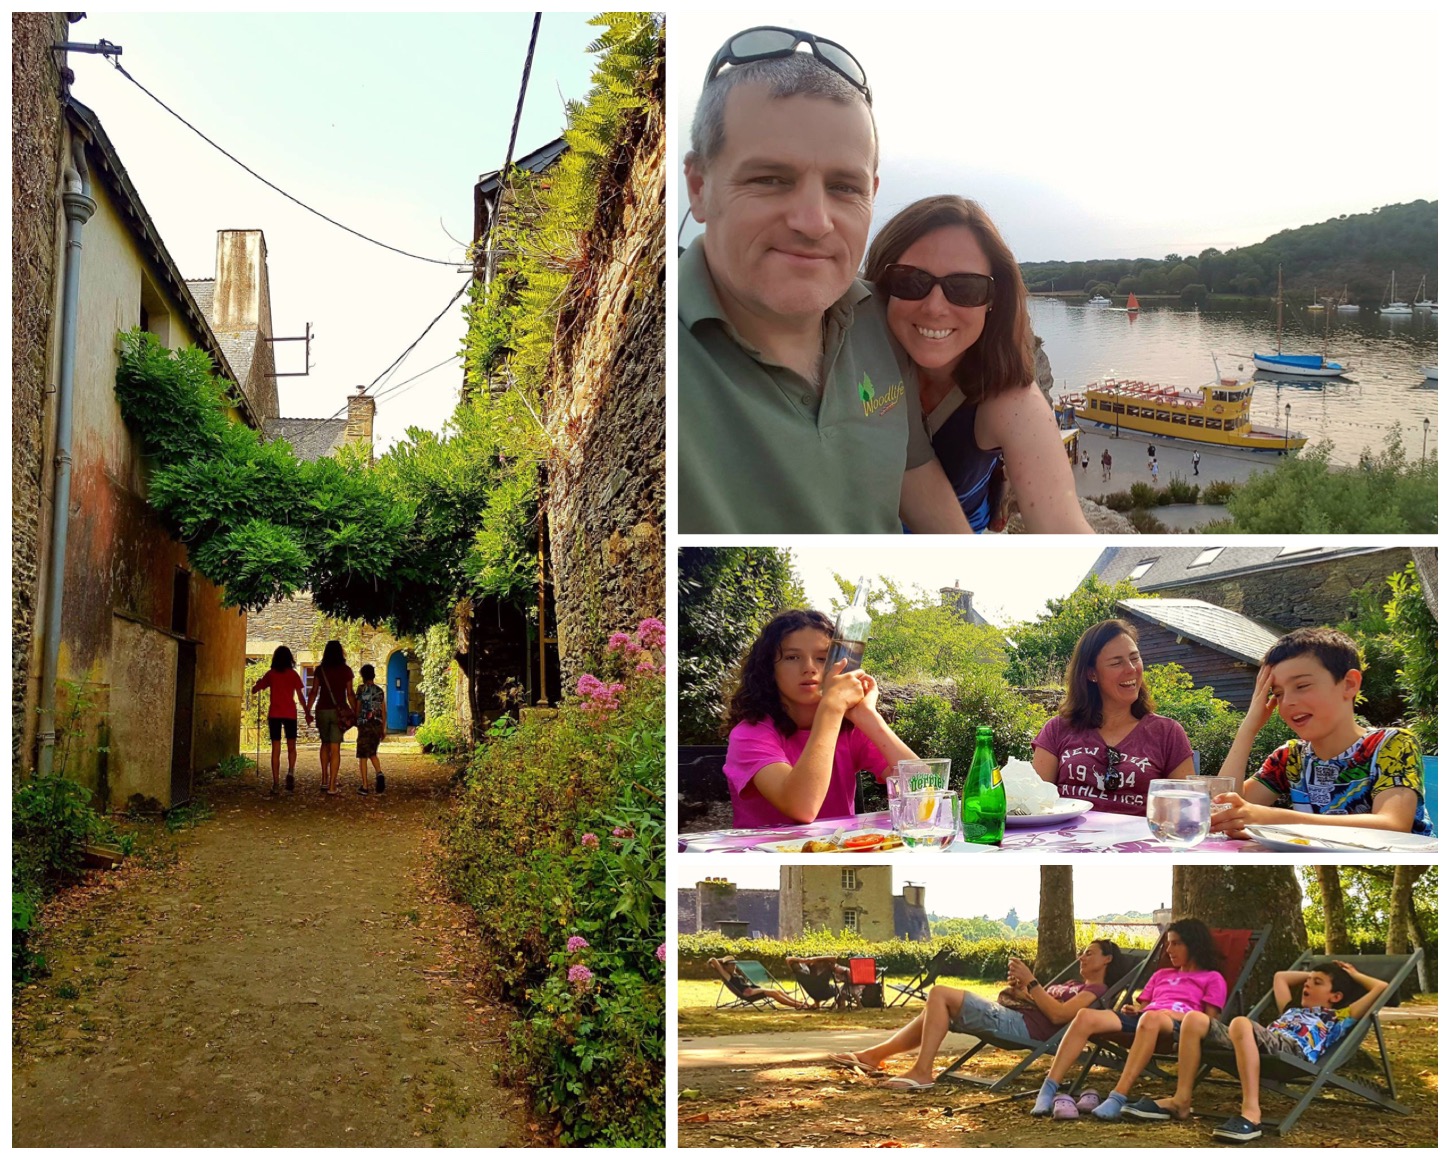
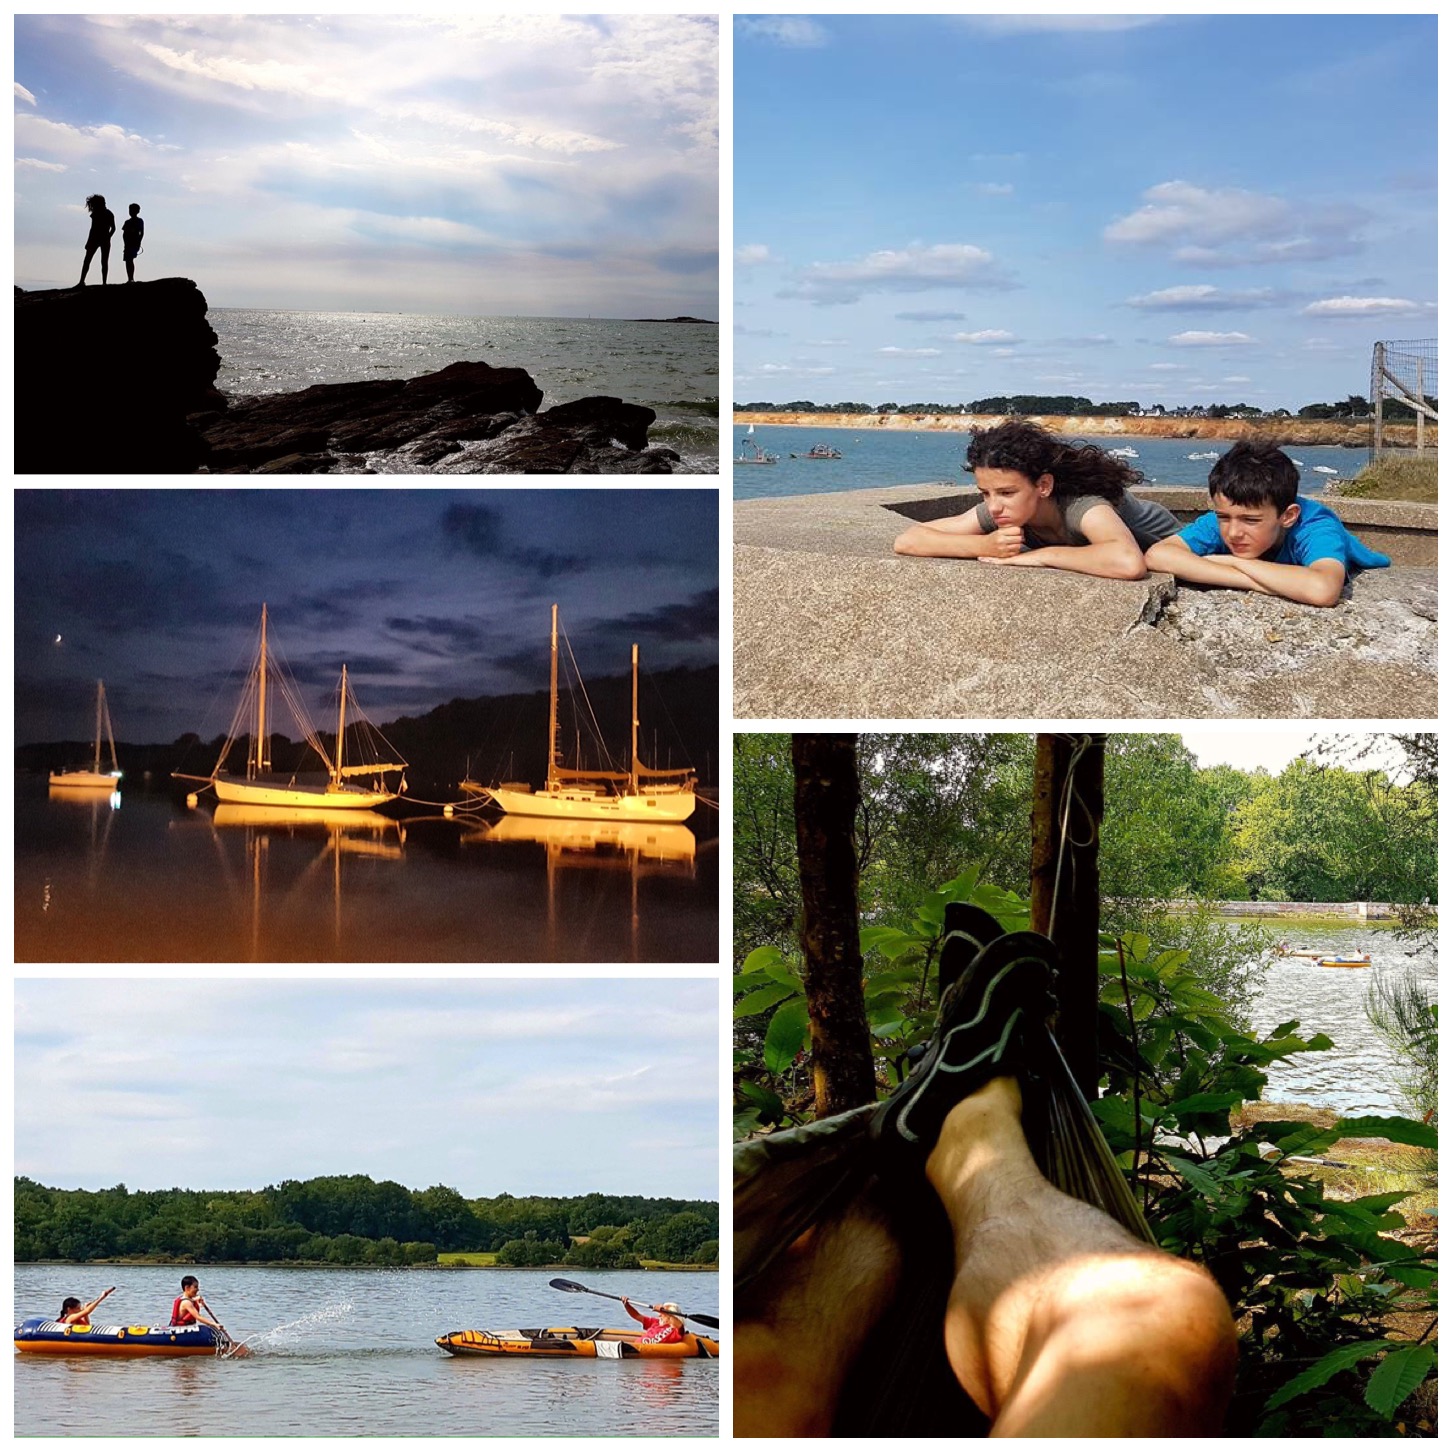
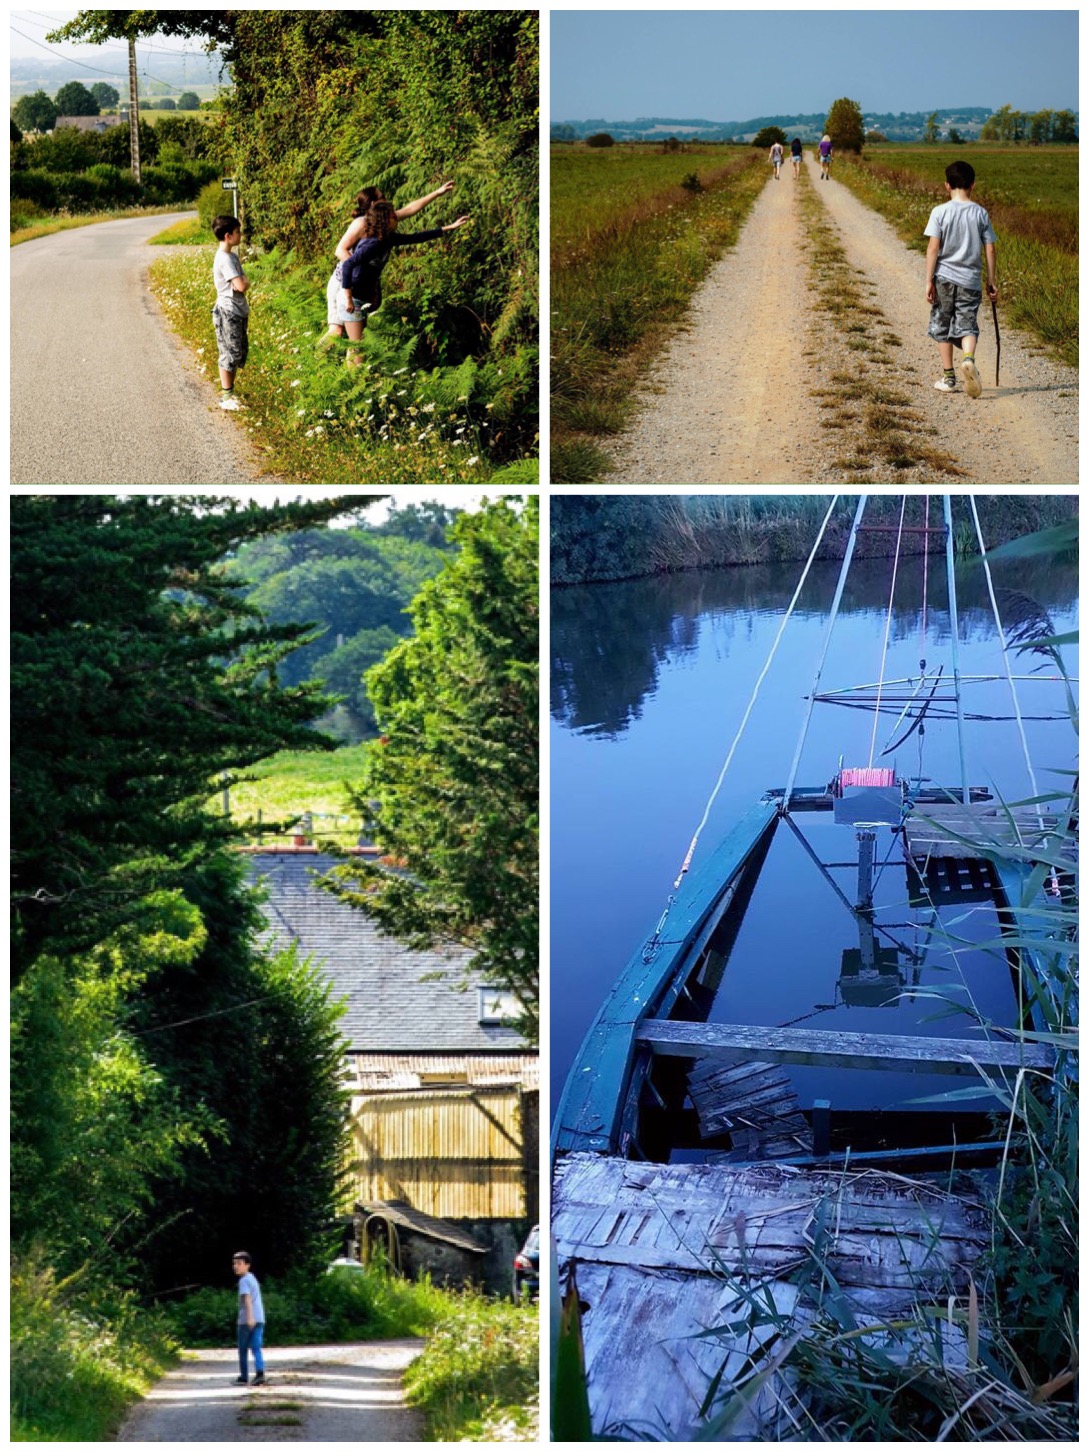
Over the last few years along with my family I have had some fantastic trips to France. Last August found us in Brittany once again spending some quality time with our friend Rick.
On the ferry out I caught my first glimpse of the new aircraft carrier HMS Queen Elizabeth – no planes as yet but a sight to behold none the less.
Departure Time
I have known Rick for over 20 years now and he is always happy for us to visit him in this lovely part of France – I think the kids treat him kind of like a Grandad as he spoils them, then hands them back to us to calm them down 🙂
Rick Time
We have a few holidays throughout the year but not often are we all away together as a family. As there is so much to do in Brittany it is the ideal location for us to spend a lovely two weeks.
Family Time
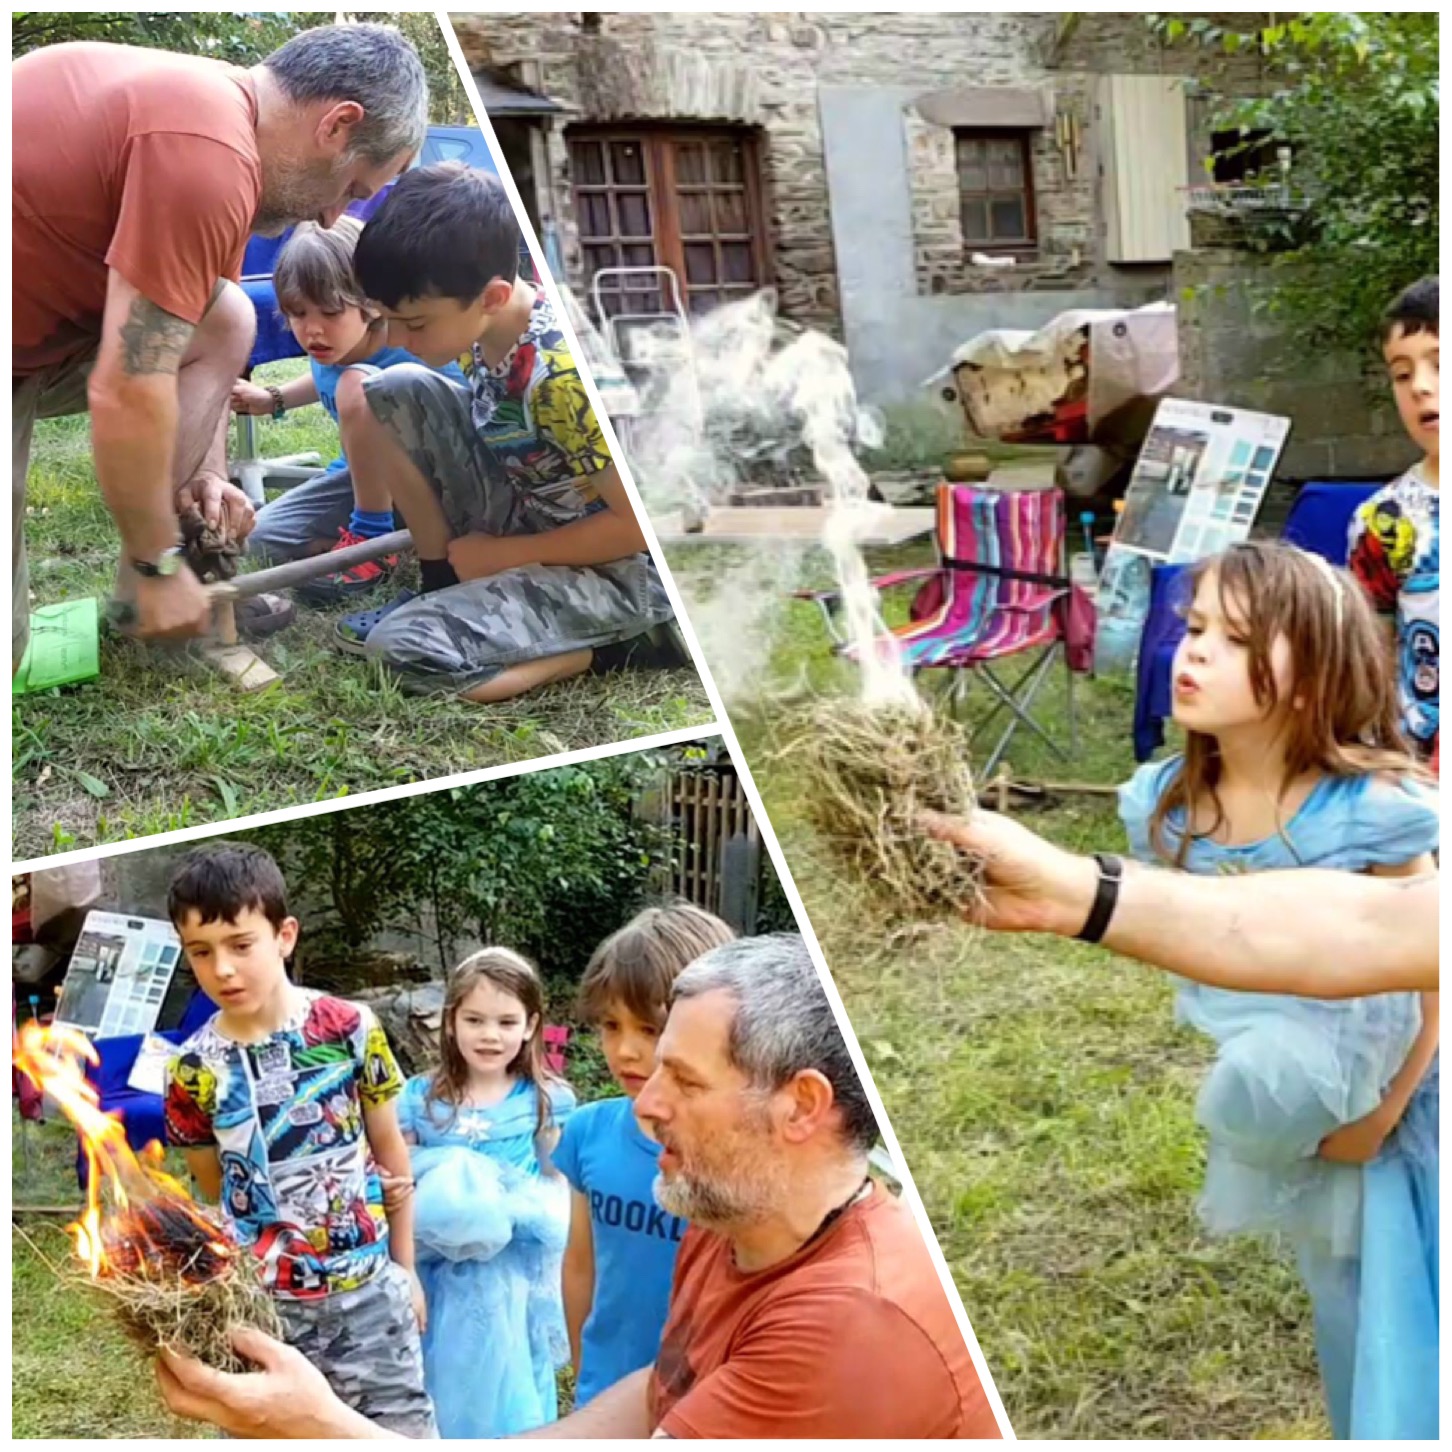
I kicked the holiday off with a bit of Bushcraft. We had a barbeque on the first night and Rick invited the neighbours round. The kids heard that I teach Bushcraft so we soon had the bowdrill out and in action.
I must say that this was the first time that a Princess assisted me with this particular skill 🙂
Bushcraft Time
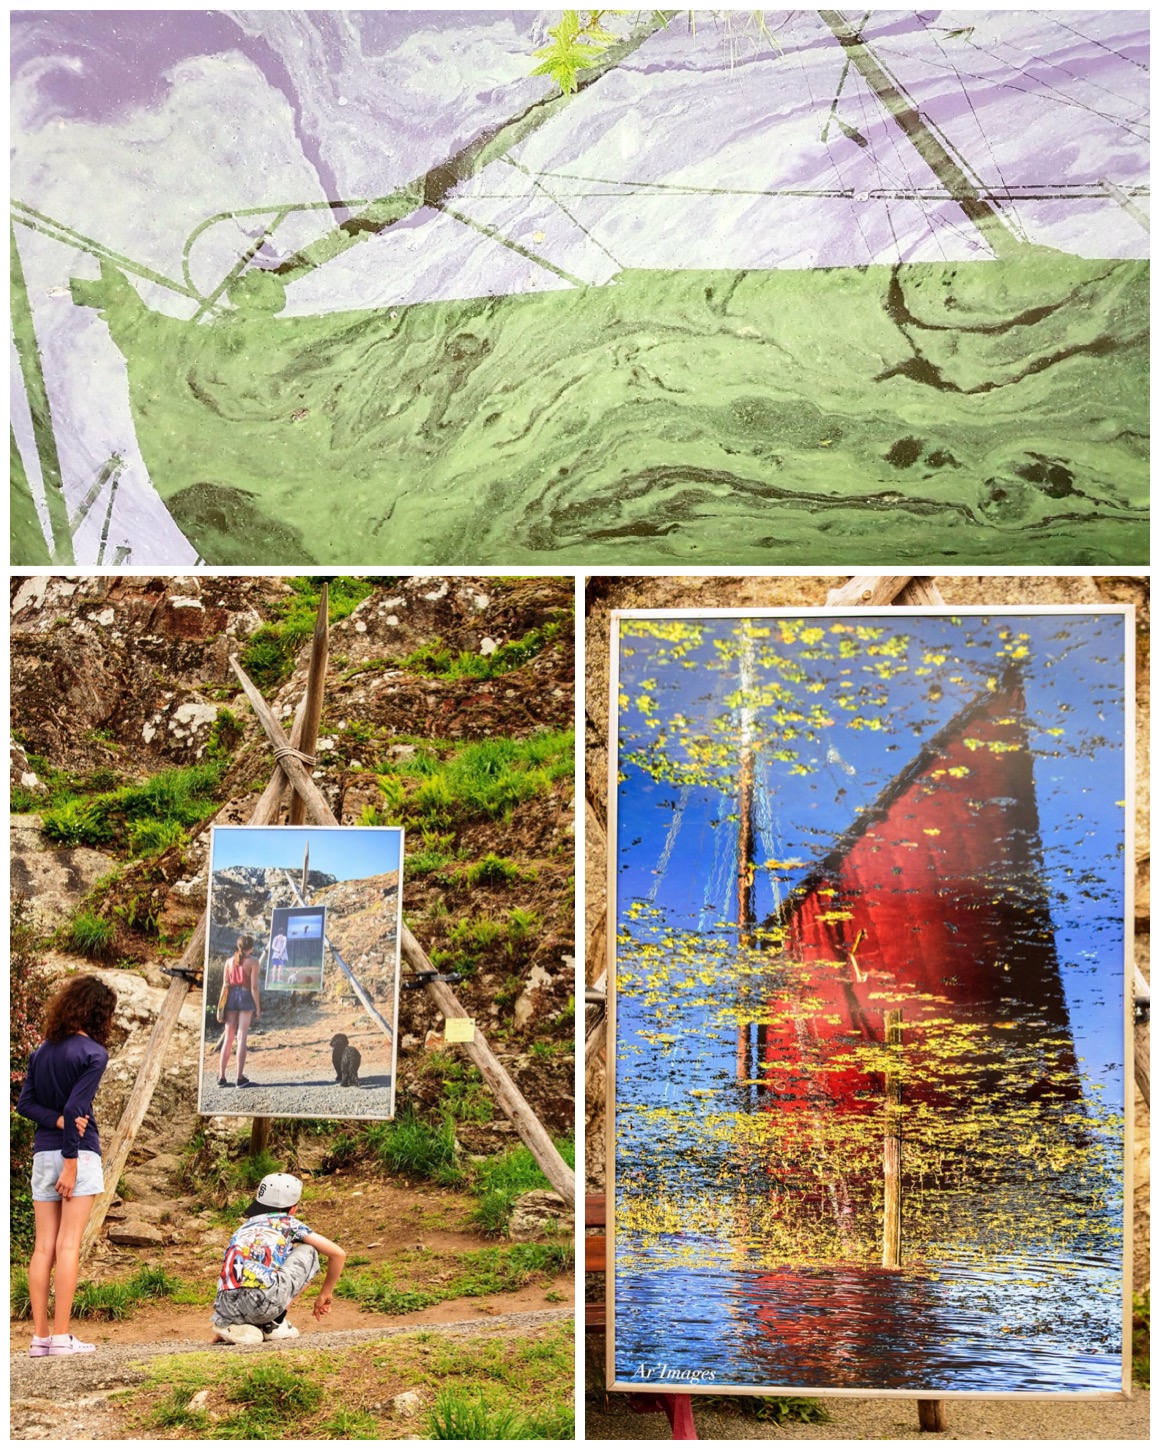
Up to now I have been creating videos and hosting them on YouTube – Alison introduced me to Vimeo. I find that this is an excellent platform for these family type videos.
The nearest town to us was La Roche Bernard and there is a profusion of artwork on display around the town. I even managed my own piece in the top picture below. It is the shadow of a yacht with a background of oily water – kinda cool I thought.
Art Time
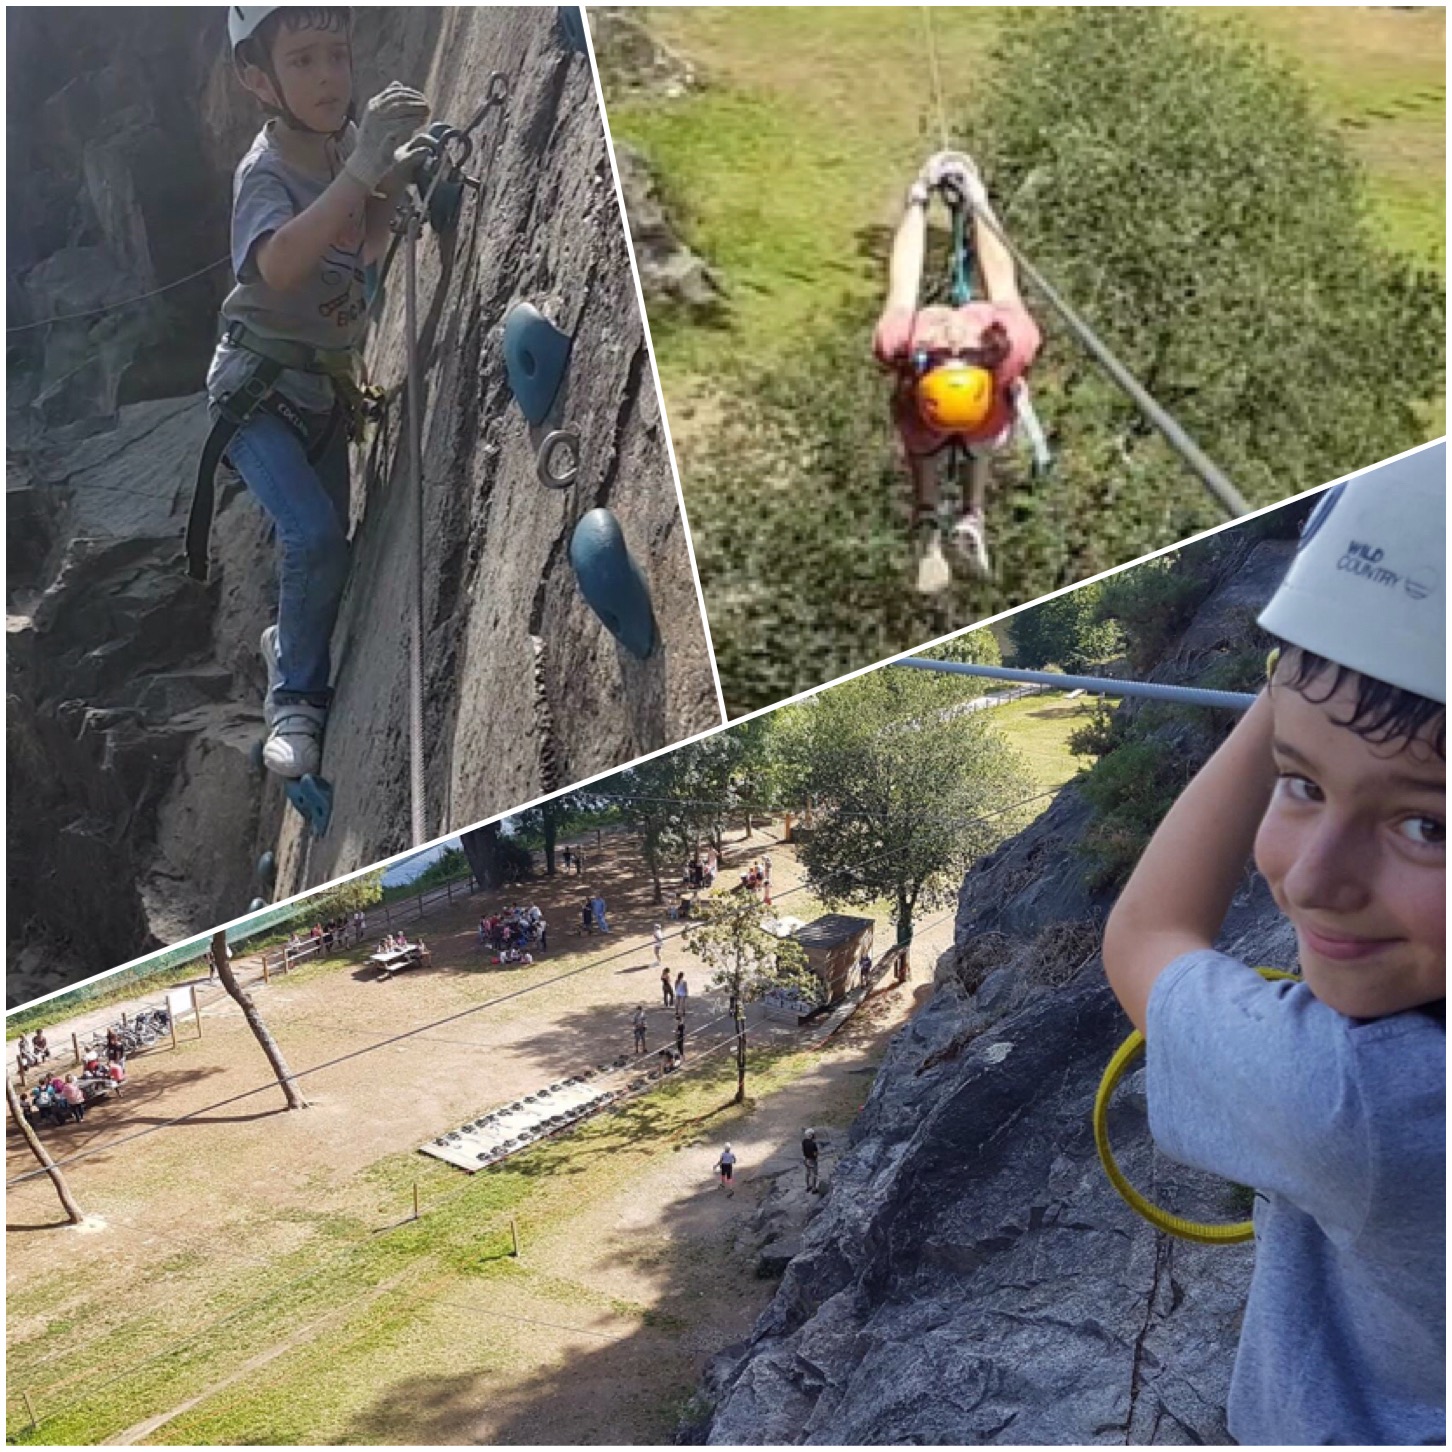
No trip to Brittany is complete until you visit Escapades Verticales. When we first went Finlay could not do all the routes due to his age and height – this year there was no stopping him.
Cliff Time
Alison and Catherine were also in action on the routes and I tentatively filmed some of the action with my phone (paranoid I would drop it) – I now have a Go Pro but alas, not at the time we were there.
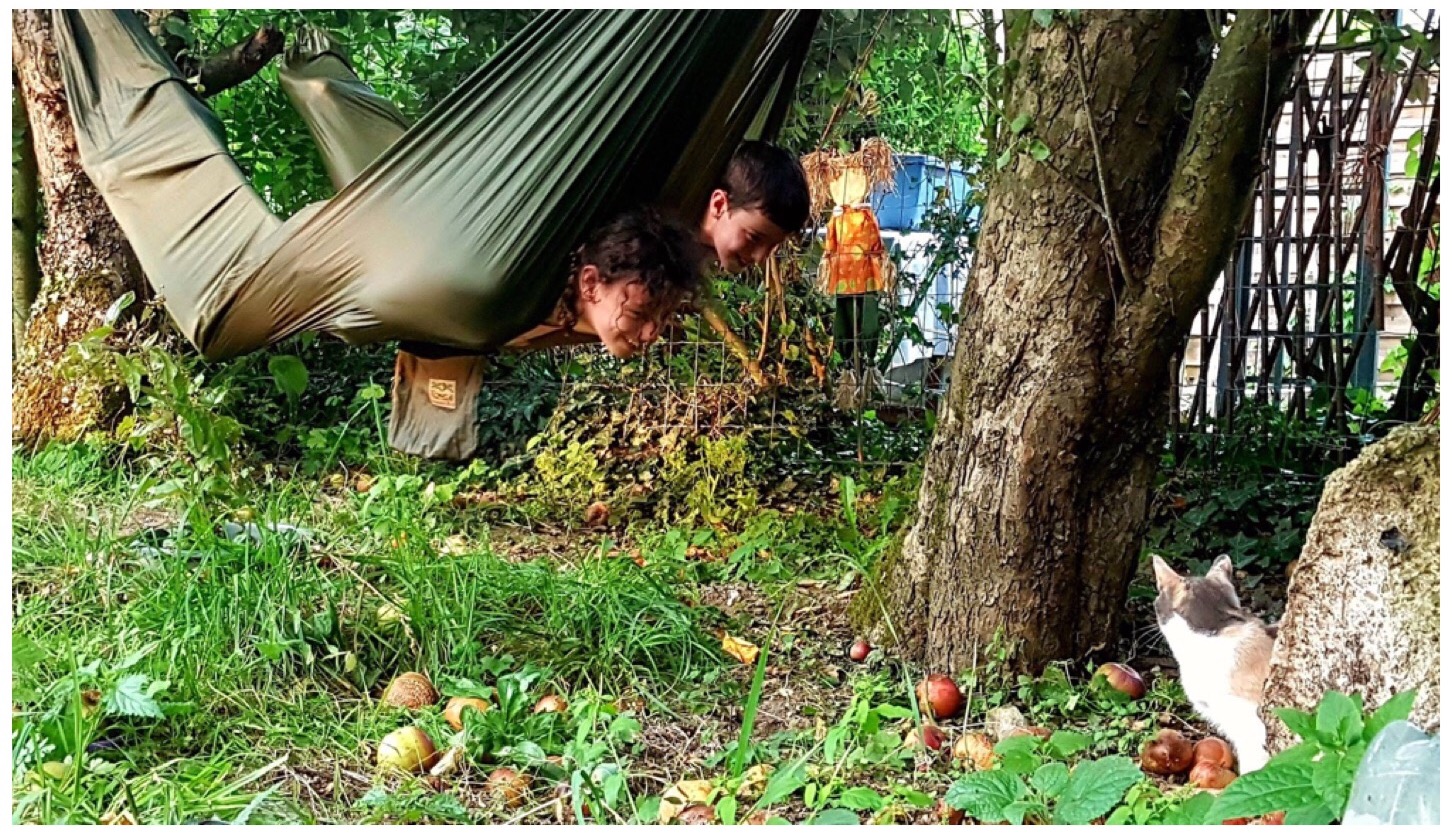
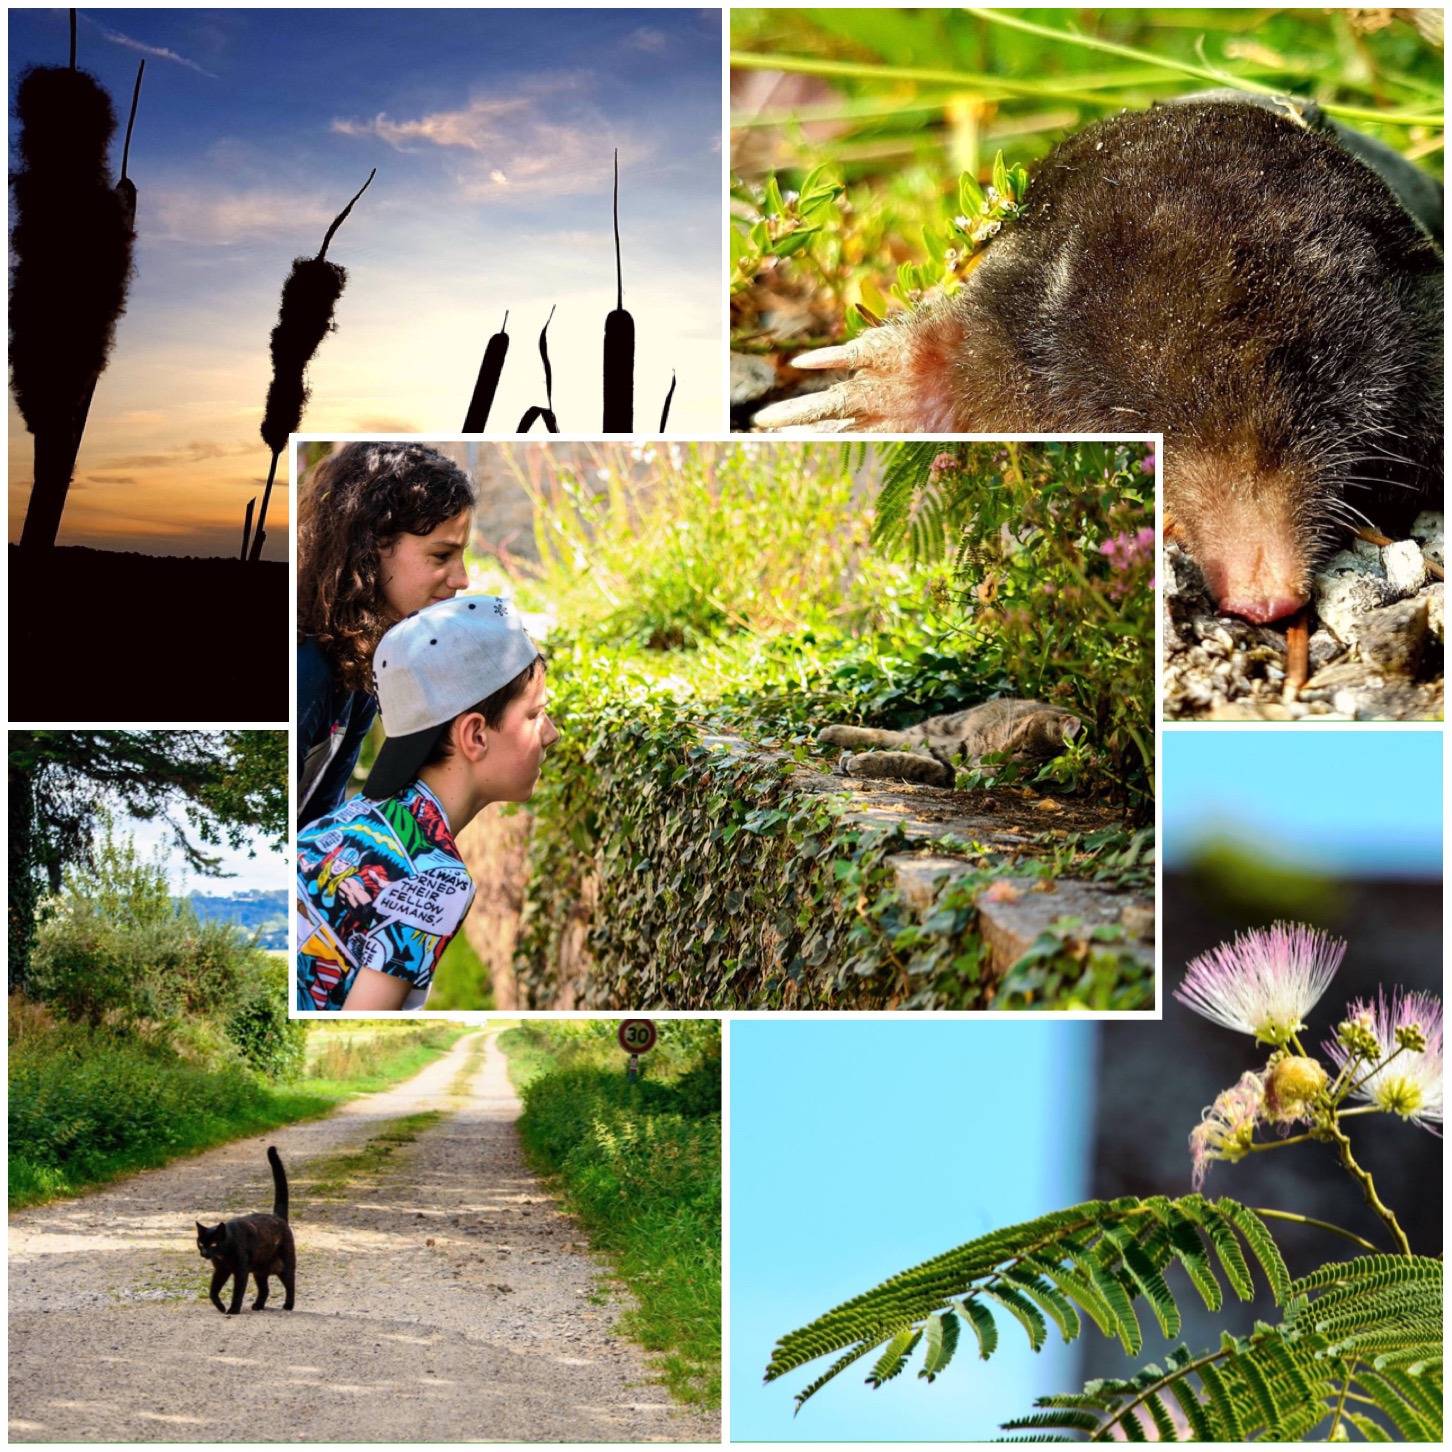
Some evenings we would stroll off down to the river and some days around the town. If you kept your eyes open, though, there was always something interesting to see from Mother Nature – I think the mole passed away from heat exhaustion as the cats were too lazy to do much.
Nature Time
Beaches are not usually my thing but I do make an exception on the Brittany coastline. I can usually find a cliff to scramble or a couple of convenient trees to put up my hammock.
Water Time
The heat may well have gotten to me on this trip (raising my grumpiness levels above their norm) but I really enjoyed my time in Brittany last year. This year we are off up to Scotland to visit the family so Brittany will have to wait till next year for another visit.
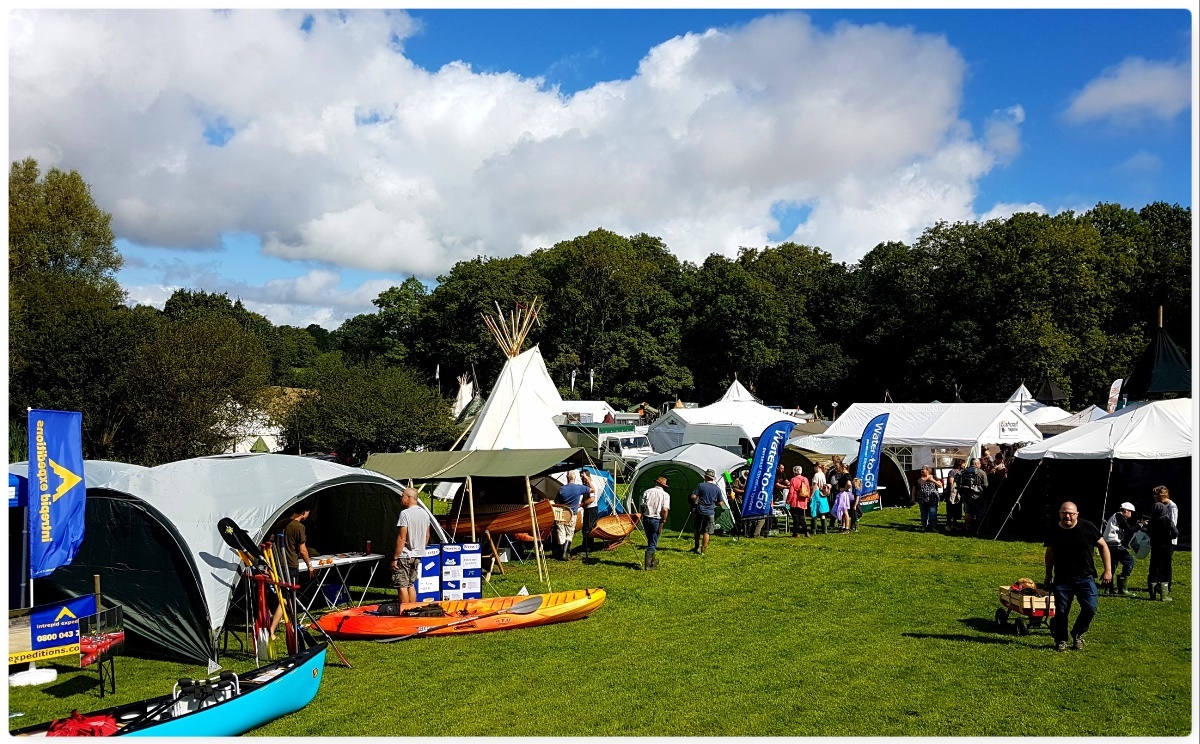
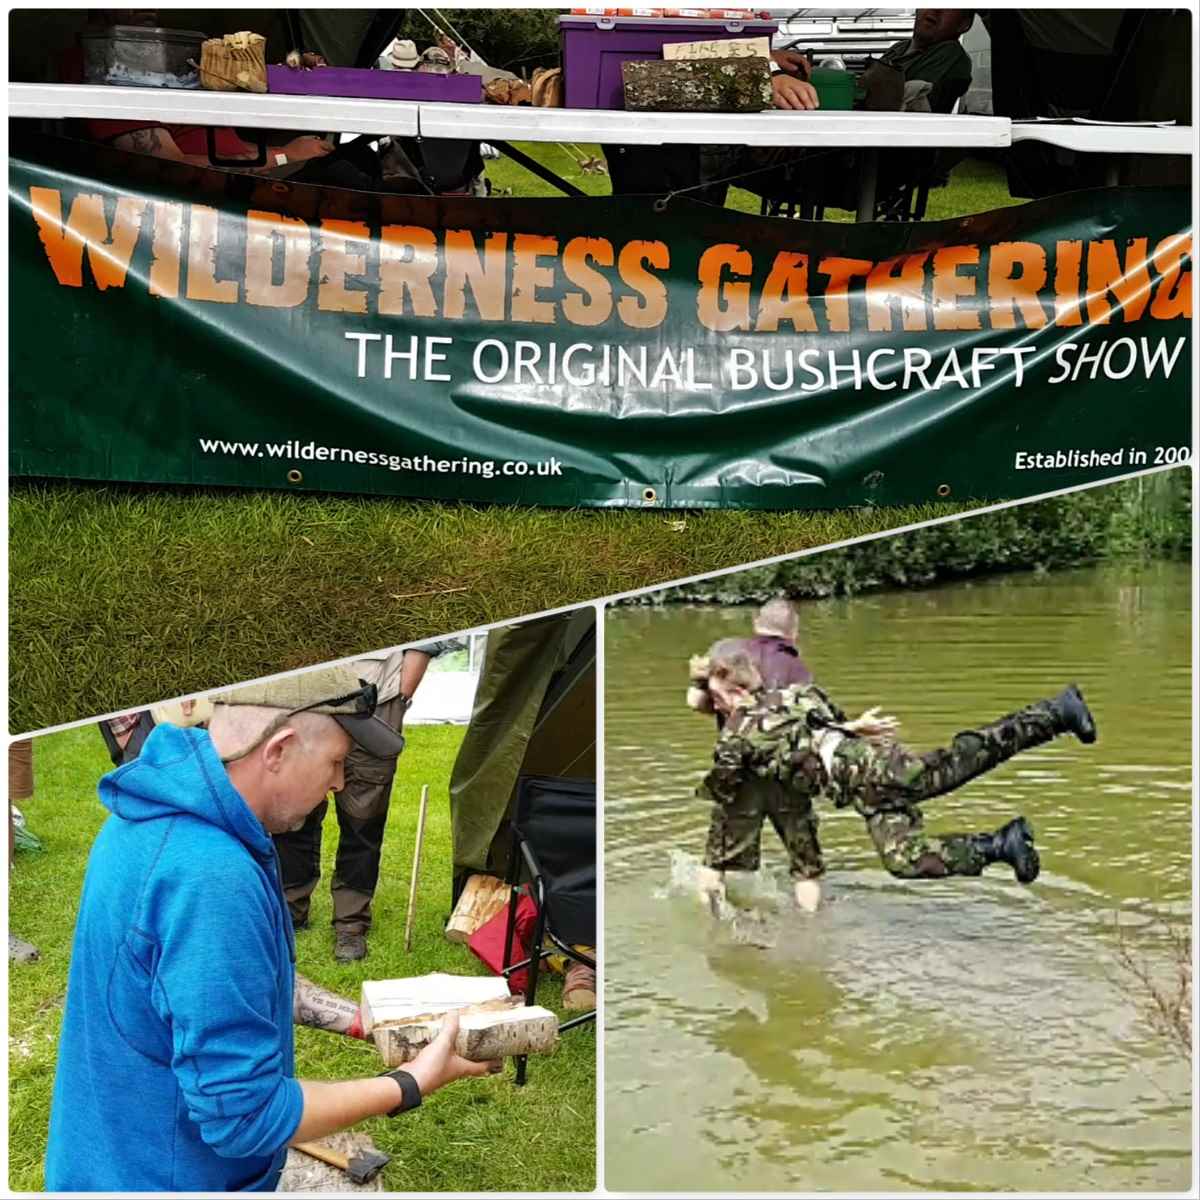
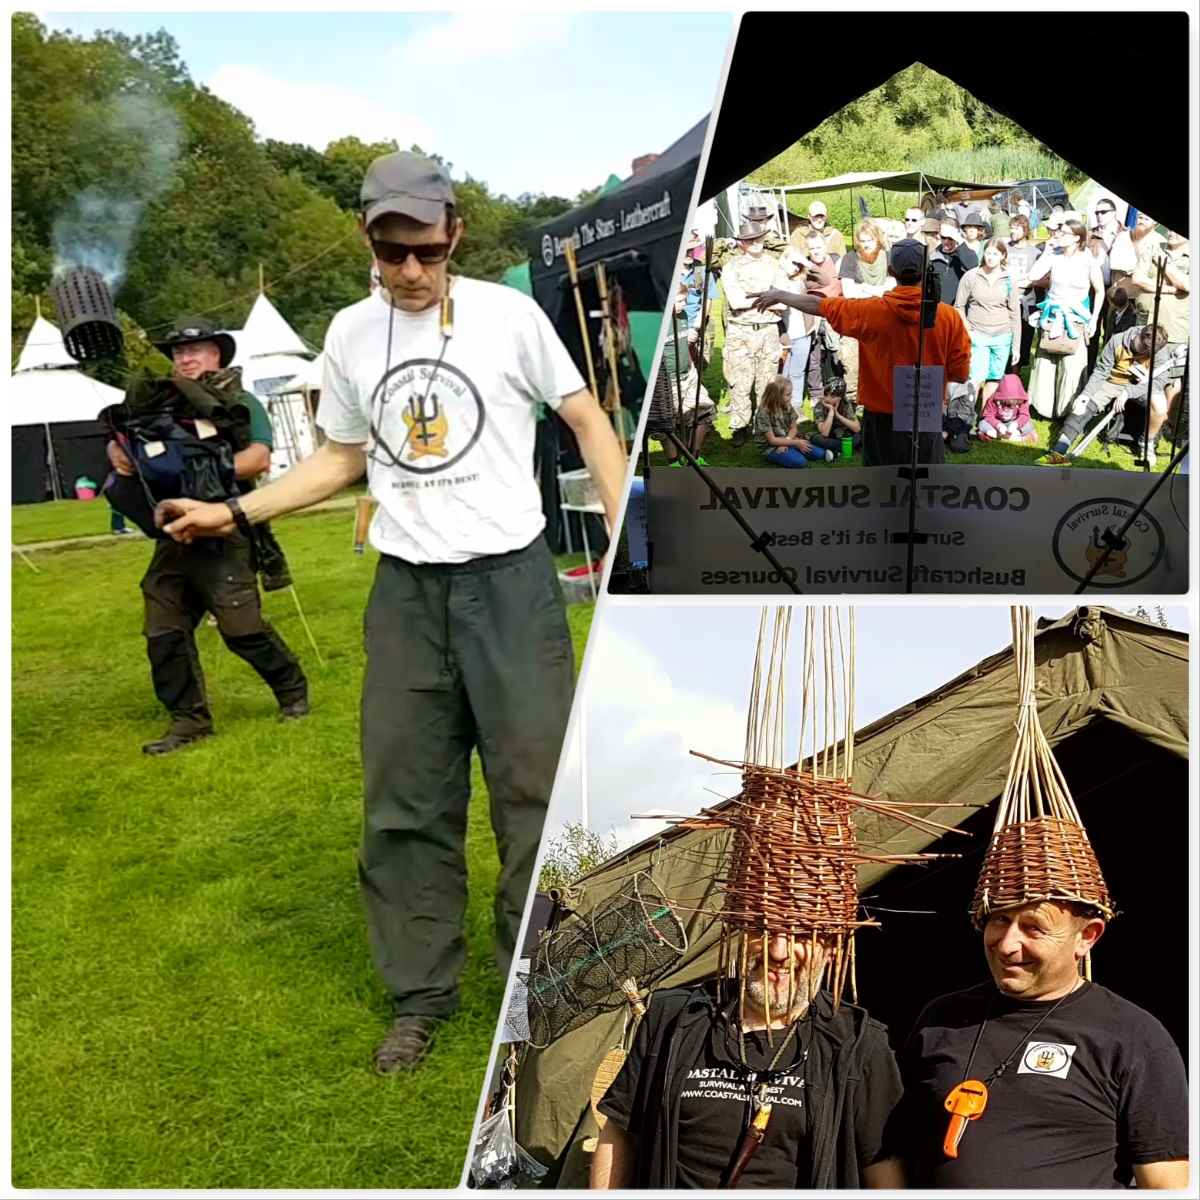
This August I went to the Wilderness Gathering to help out my friend Fraser Christian of Coastal Survival with the running of his stand. It was a busy stand however from time to time I ventured out around the show and spotted some real gems.
Wilderness Gathering 2017
Starting at the end of the Wilderness Gathering I got tipped off that JP from Woodlife Trails was going to get ambushed by the Coyote Kids – Needless to say the tip off was spot on 🙂
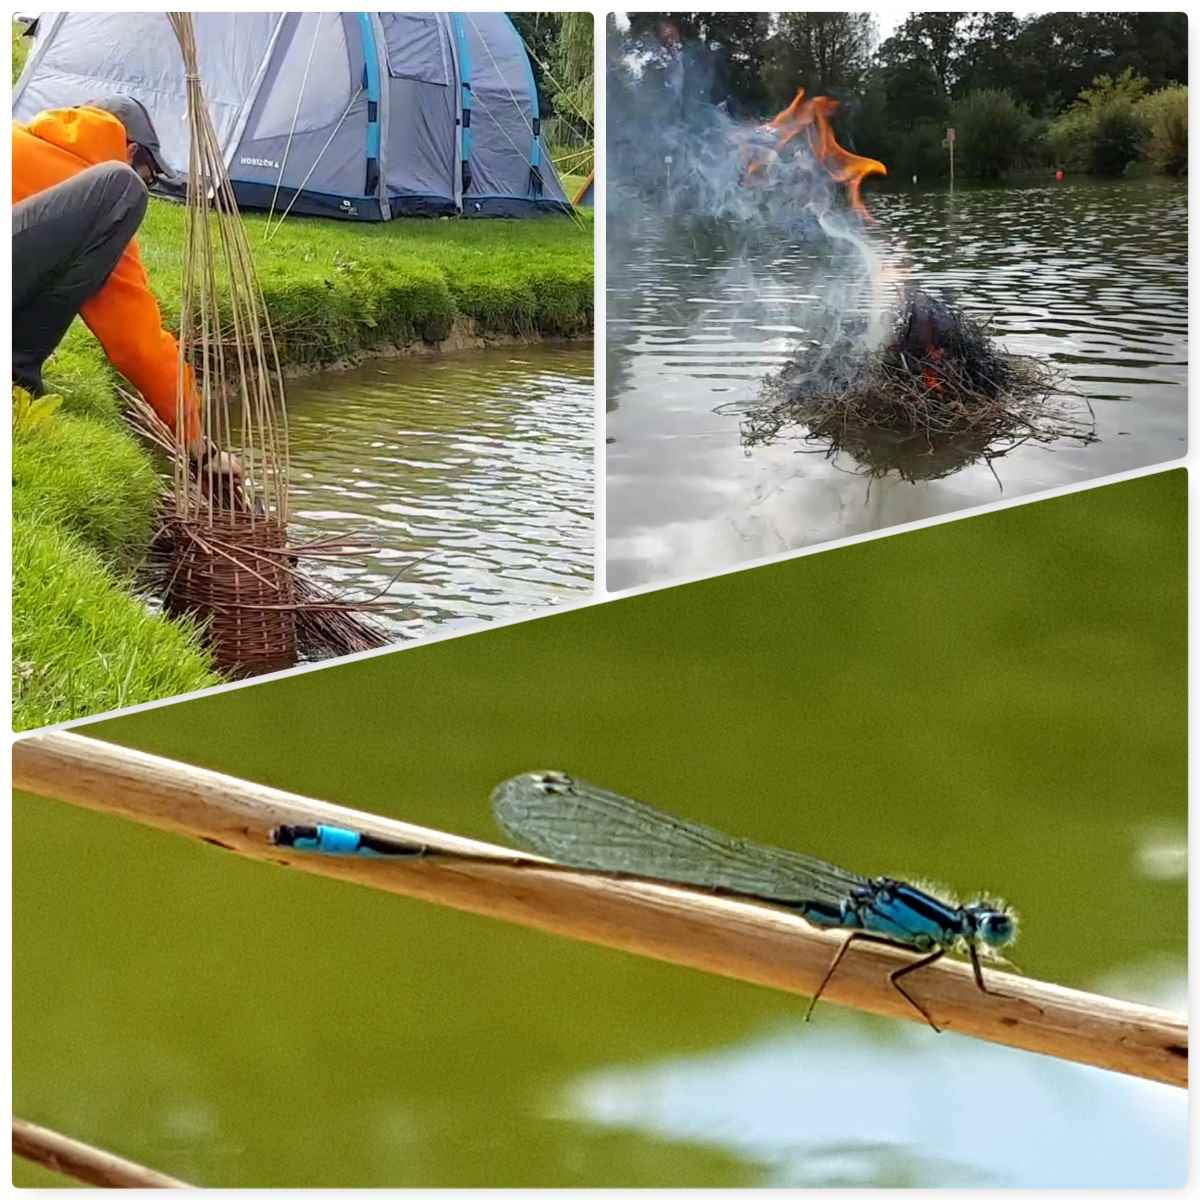
Just off to the main area of the Wilderness Gathering is the pond. In here the canoeists have fun, we soak our willow for our fishtraps and I like to sit here watching nature go by. This year my friend Jason Sears decided to use it as a platform to light his tinder bundles – more of this in the last video in this post.
Life on the pond
The Coastal Survival stand was busier than any time I can remember. The crowds gathered outside the stand when Fraser was demonstrating food prep and his hot smoker were fantastic.
Obviously Danny and myself were very professional and serious at all times:-)
Time with Coastal Survival
I shot quite a bit of video this year and made a video of some of the activities we at Coastal Survival got up too – including the ancient and near forgotten art of Basketeering!!!!
One thing I love to look out for at the Wilderness Gathering is all the art – I use the term art here to describe the beautiful work that is always on display.
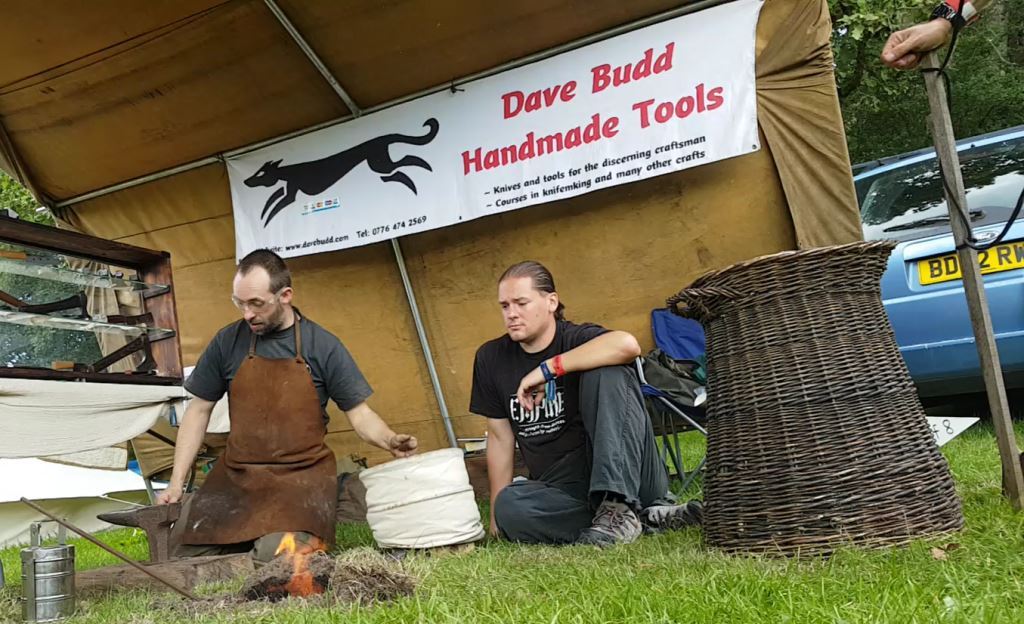
Below are the stunningly sculpted Kuksas from Jon Mac, the intricately carved spoons by Giles Newman and the finely twisted bottle opener by Dave Budd.
Beauty in many forms
The bottle opener I spotted being made by Dave Budd as I strolled by. Dave was making one as part of a one2one training session and it did not take him long to craft it.
The bottle opener now lives in France with a friend of mine.
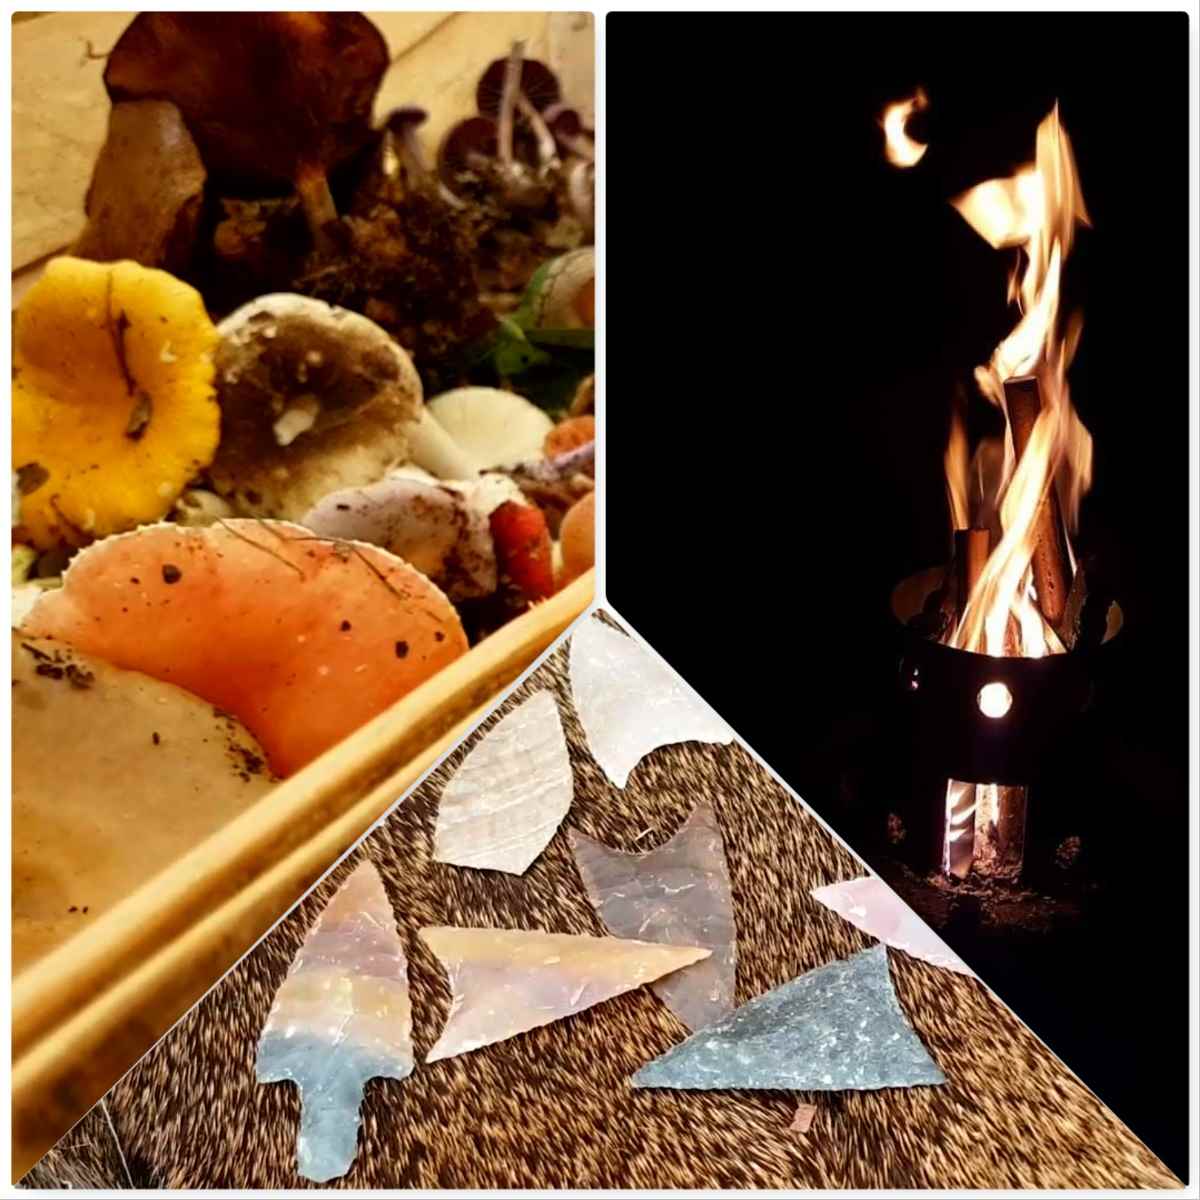
Still on the lookout for art I was taken by these three scenes. The first was a basket of beautifully coloured mushrooms on the Bushcraft Magazines stand. The second was spotting this Roman Centurions profile in the flames of our fire (it is something I do looking for fire faces). The last one was all the colours in the flint arrow heads I spotted on the Bushcraft Journal stand.
Art in many forms
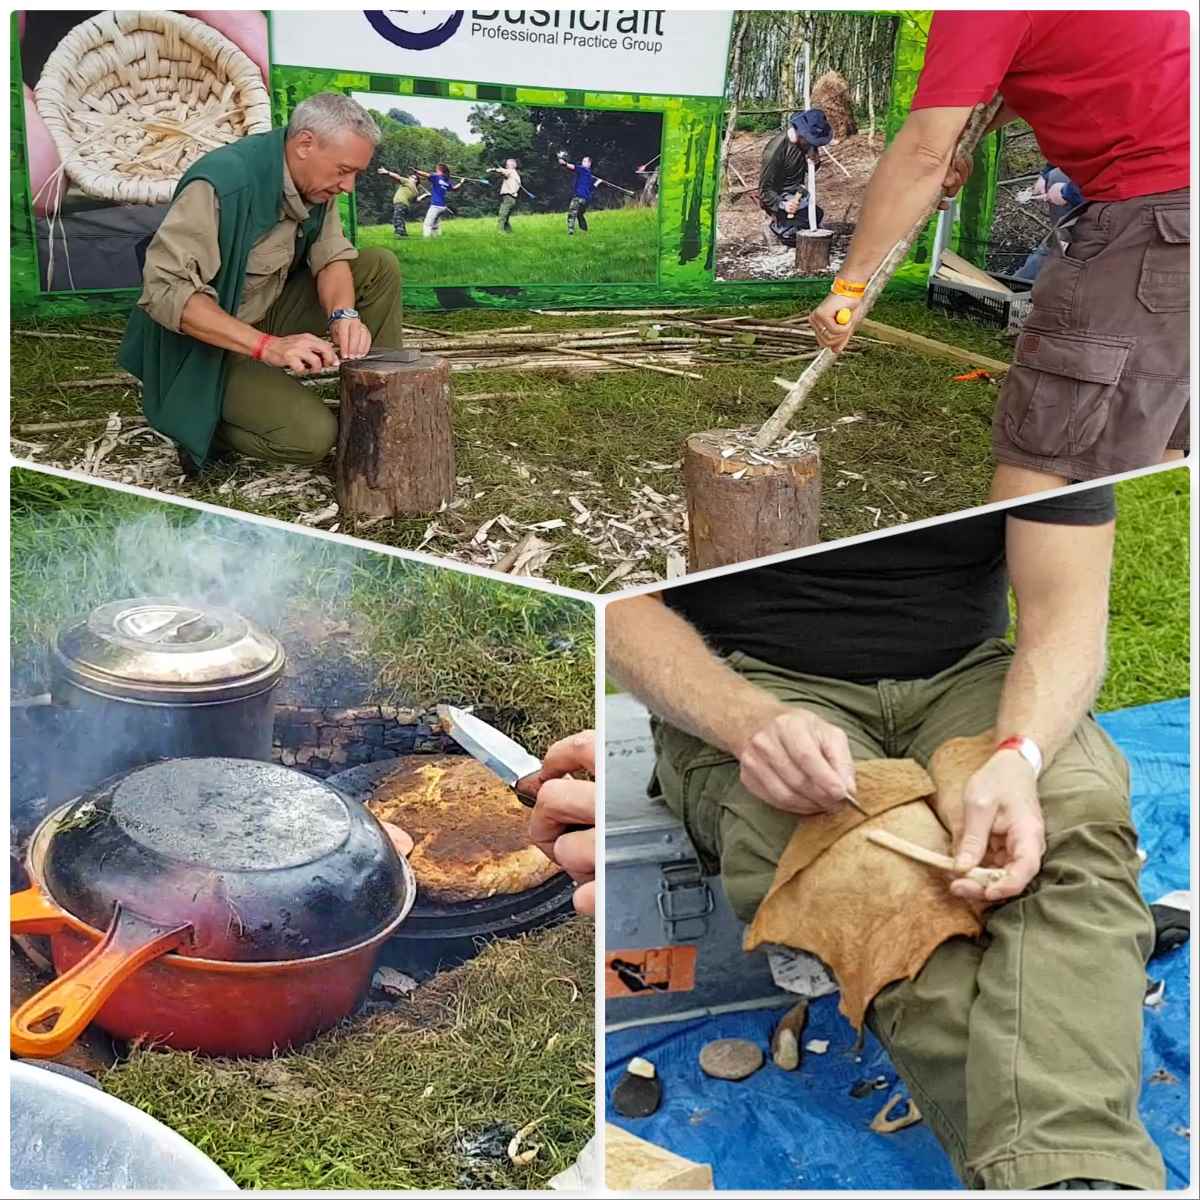
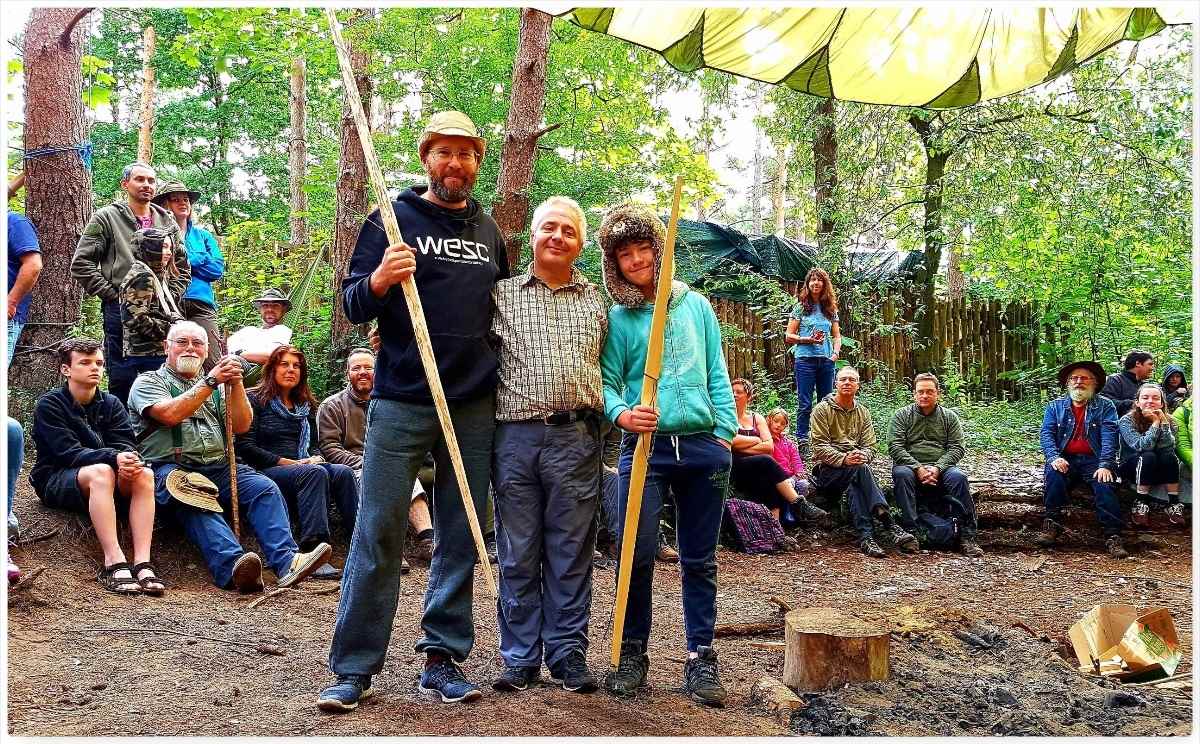
Further on on my strolls I came across loads of other sites where learning was going on. This was in the form of demonstrations, one2one’s or class work. I could only spend only a short time away from the stand but my time strolling always threw up little gems of learning.
Loads of Learning
A particular favourite subject of mine is building Log Rocket Stoves and my friend Des Cattys shares this passion. I spotted him one day starting a demonstration and decided to hang around to see how the class went (always looking for new ways of building these stoves)
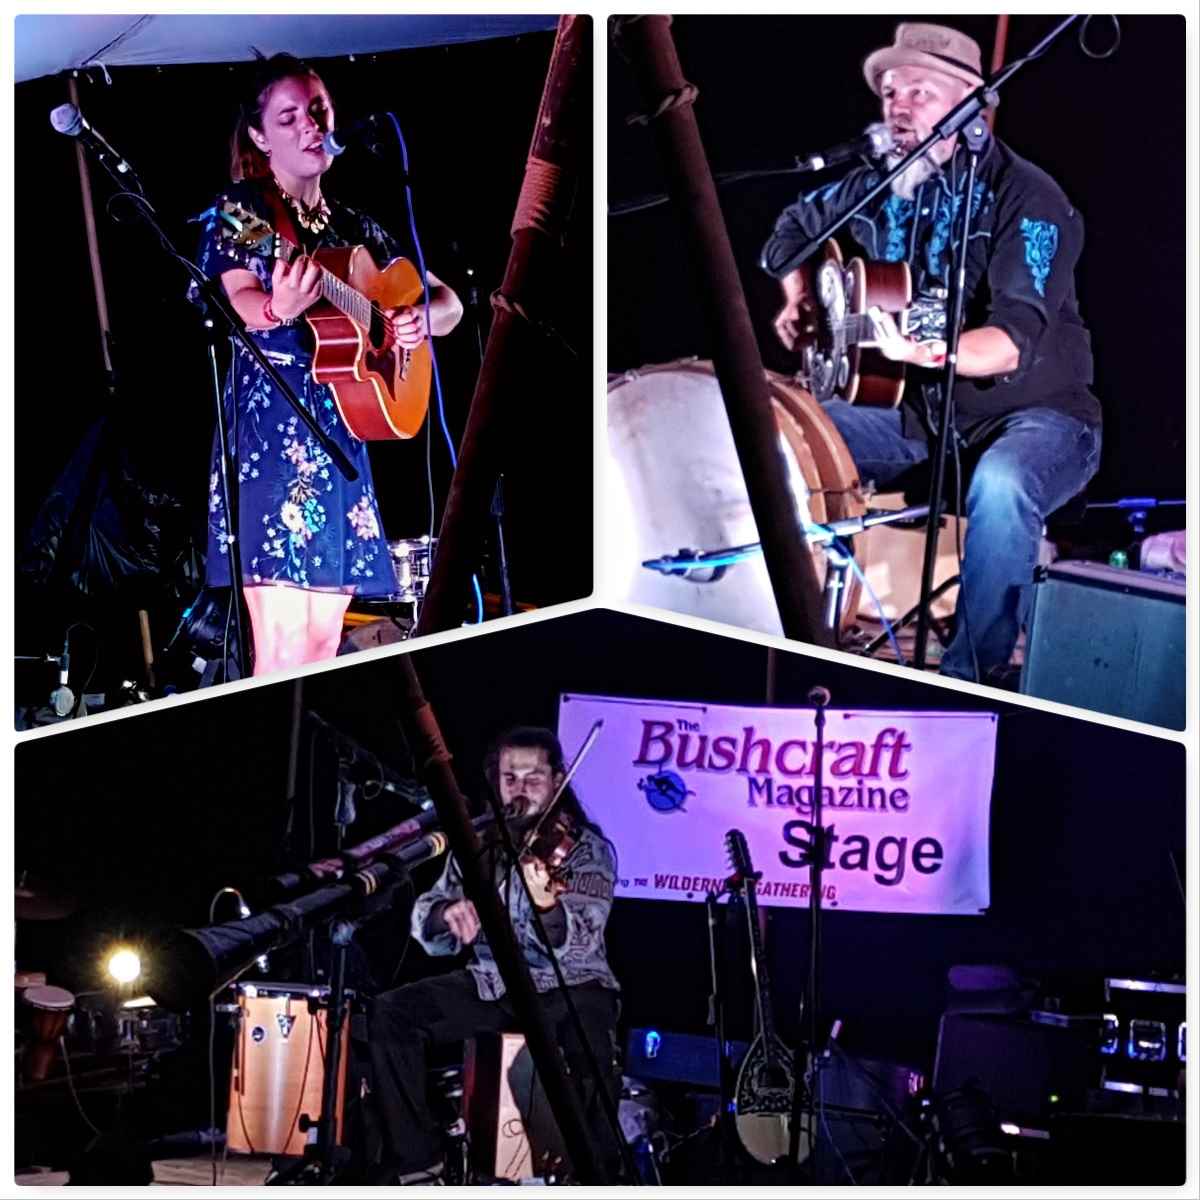
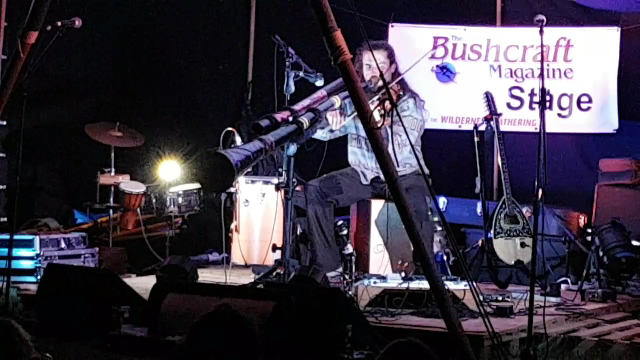
In the evenings the music got better and better each night. There was a wide variety of artists and a particular favourite of mine was Vojta. Bushcrafters are not normally known for their dancing abilities but the front of the Bushcraft Magazine stand was buzzing each night with revellers.
Night Time Music
After listening to a couple of Vojta’s songs I decided to record his last one of the night and I am glad I went with that gut feeling – a great session.
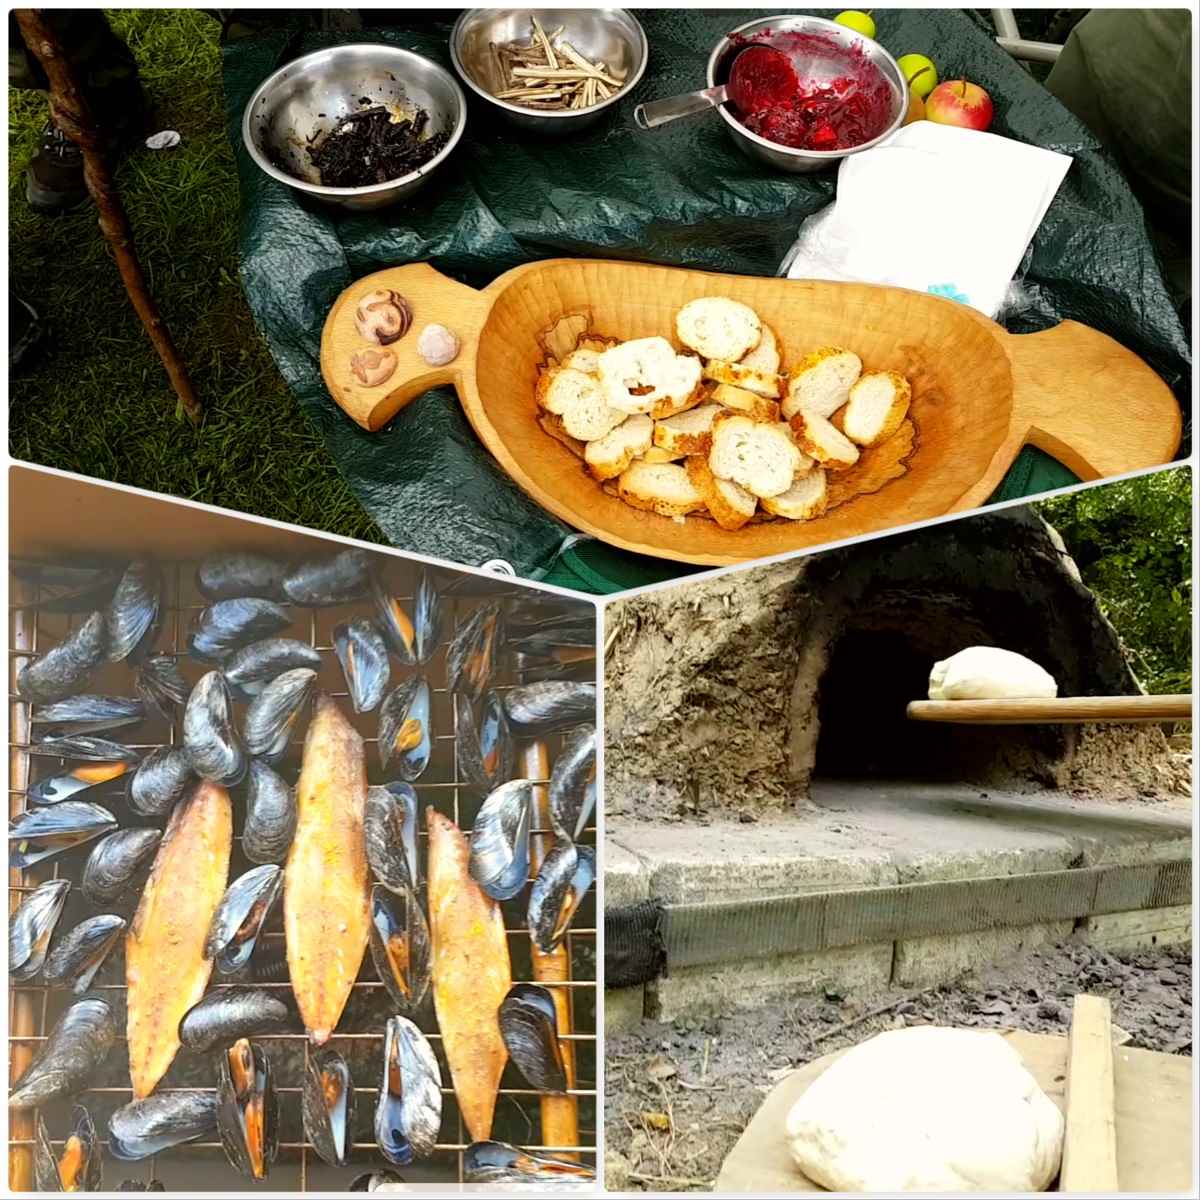
If you are patient while out and about at the Wilderness Gathering you can usually get a treat or two. The wild food tasting at the Bushcraft Magazine stand kept me hanging around for ages, Fraser’s great smoked sea foods were as usual highly sought after and I got to observe Roli Jones in action baking large loaves in his oven.
Wonderful food
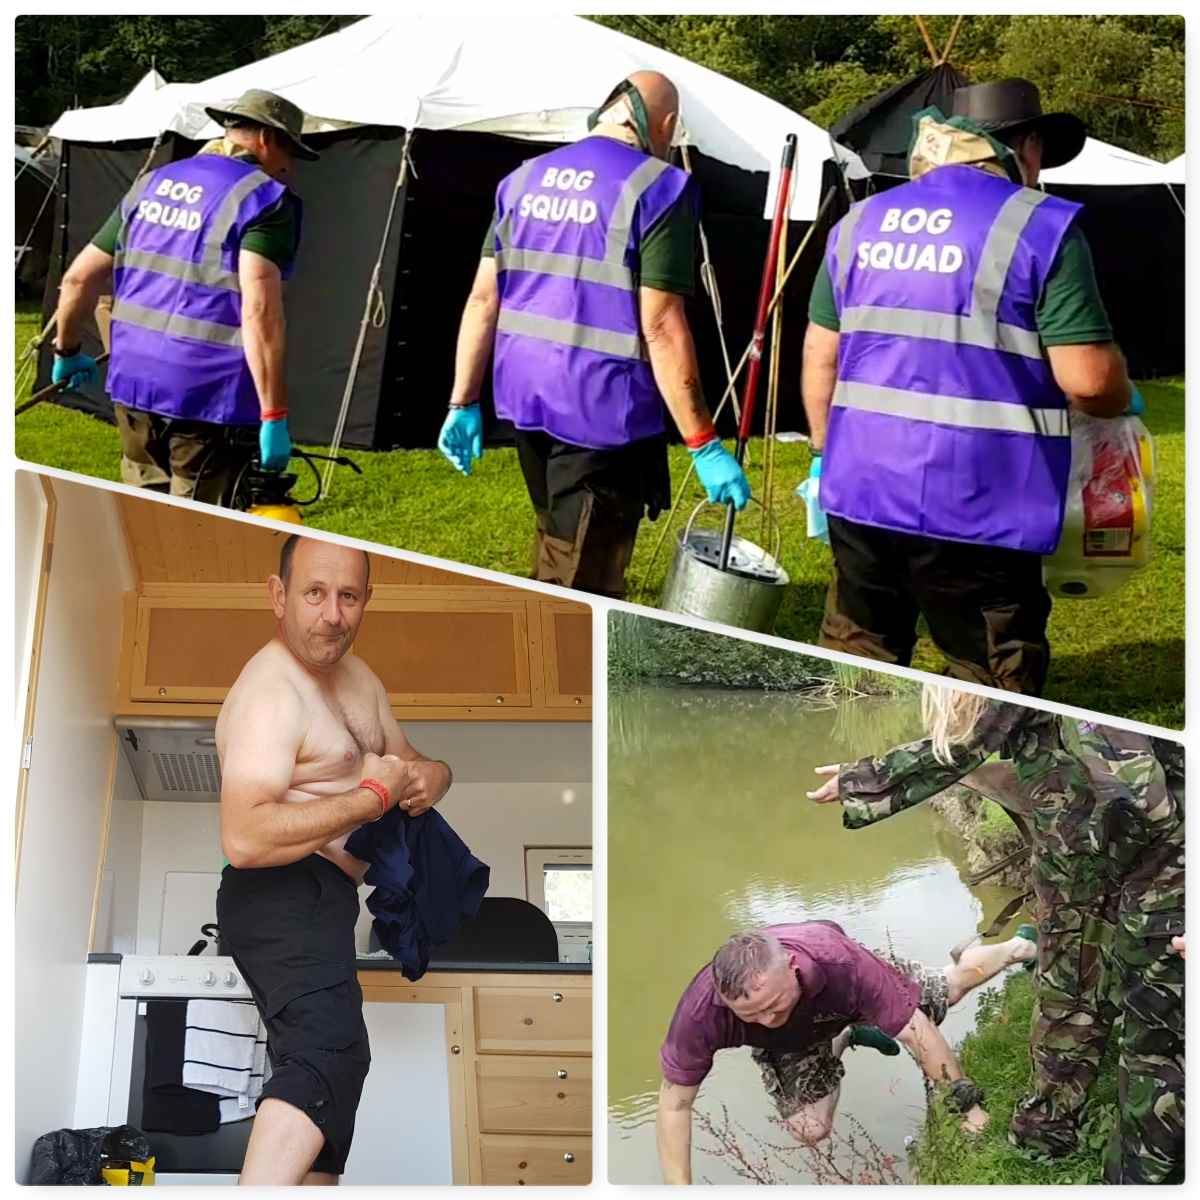
In amongst all this learning and art you will come across the odd and the unexpected. The Scout instructors were the ‘Bog Squad’ and worked hard to keep our loos in clean and working order – I take my hat of to you guys. As they walked by in formation I had to get this shot.
My friend Danny got a soaking while canoeing one day and decided to show off his fine ‘manly’ form to us all – I will leave it to you to judge this 🙂
The final unexpected moment relates back to my first video of JP being ambushed – I captured the moment he was turfed into the pond by the Coyote Kids and is one of my favourite pictures of the whole event.
The Unexpected
My final video was put together to try and capture the essence of the Wilderness Gathering.
A ‘Brilliant Moot’ is how I would summarise this year’s Bushcraft UK Bushmoot. It was action packed from start to finish for me as I juggled my time between looking after my kids, running workshops and doing a lot of filming.
I will let the pictures and video do most of the talking so will keep the text to a minimum.
Bushmoot 2017
The first few days for us ‘Mods’ (forum moderators) were all about setting up the Bushmoot so that everything was in place for everyone arriving later in the week. We did not rush things as it was a holiday for us as well but over a few days the Bushmoot was soon set up.
Set up
There are some great places to camp at the Bushmoot which makes for stunning photography. The Mods’ corner is great to photograph on a sunny morning.
I have used the same camping spot for a number of years now and even though a year passes between each visit it feels as if I have never been away when I return.
Camp life
Early Workshops
There were a couple of early workshops this year – Open Fire Cooking with Neil and a 48hr Survival Course with Fraser from Coastal Survival. Both courses covered a lot of different areas so my photos are just a snapshot of their content – needless to say on both courses all the students eat well.
Early workshops
Videos
I put a short video together of this early part of the Bushmoot – including a scenario where my son pretends to chop my head off with an Ivy sword 🙂
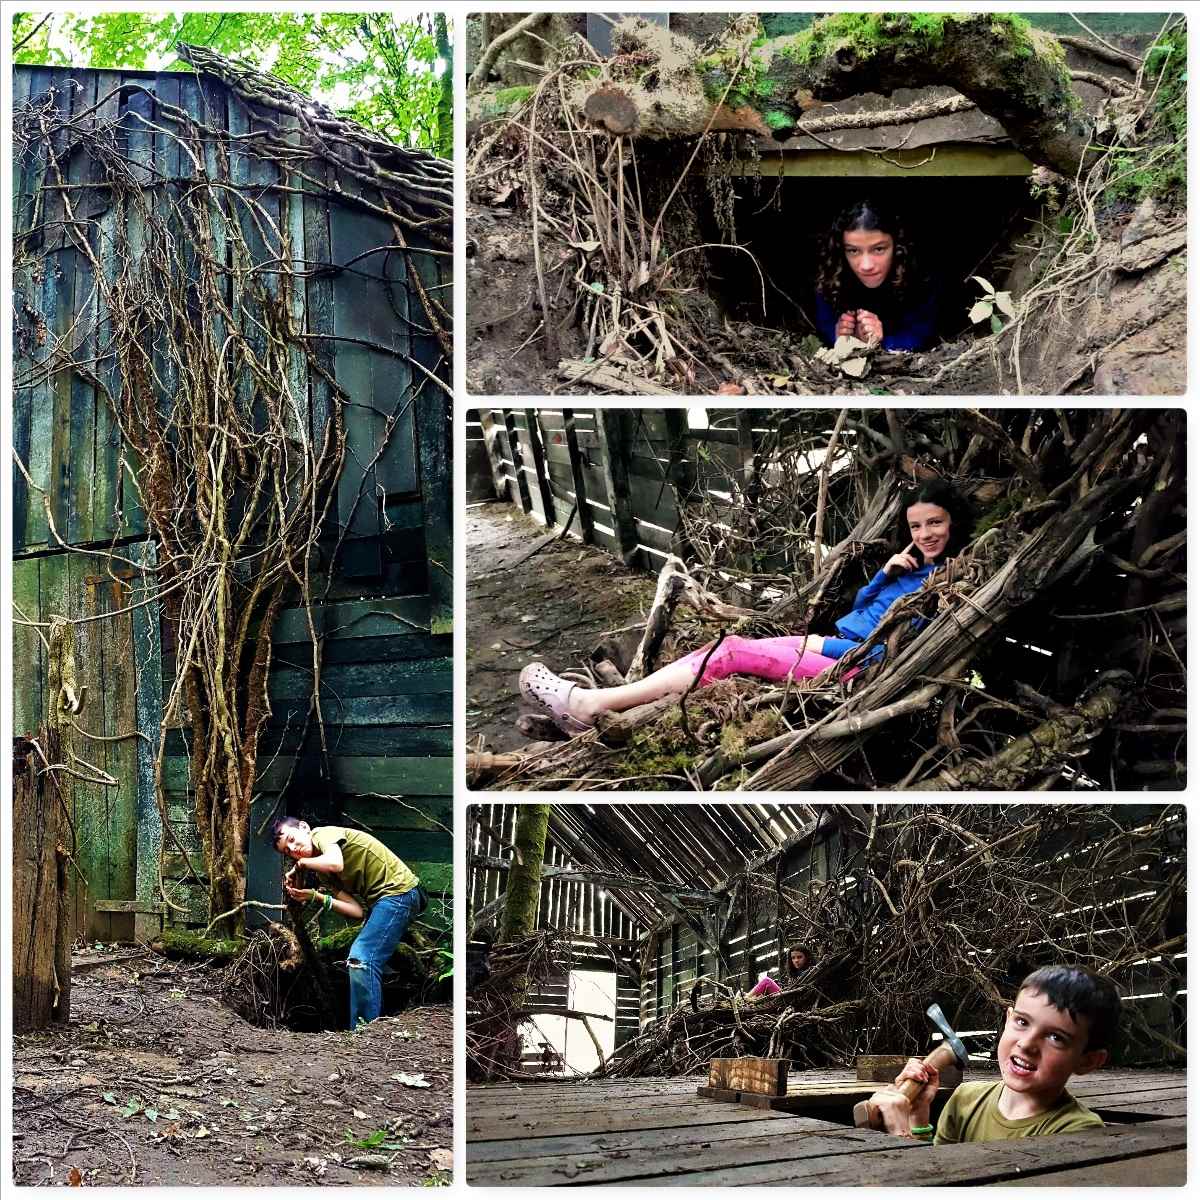
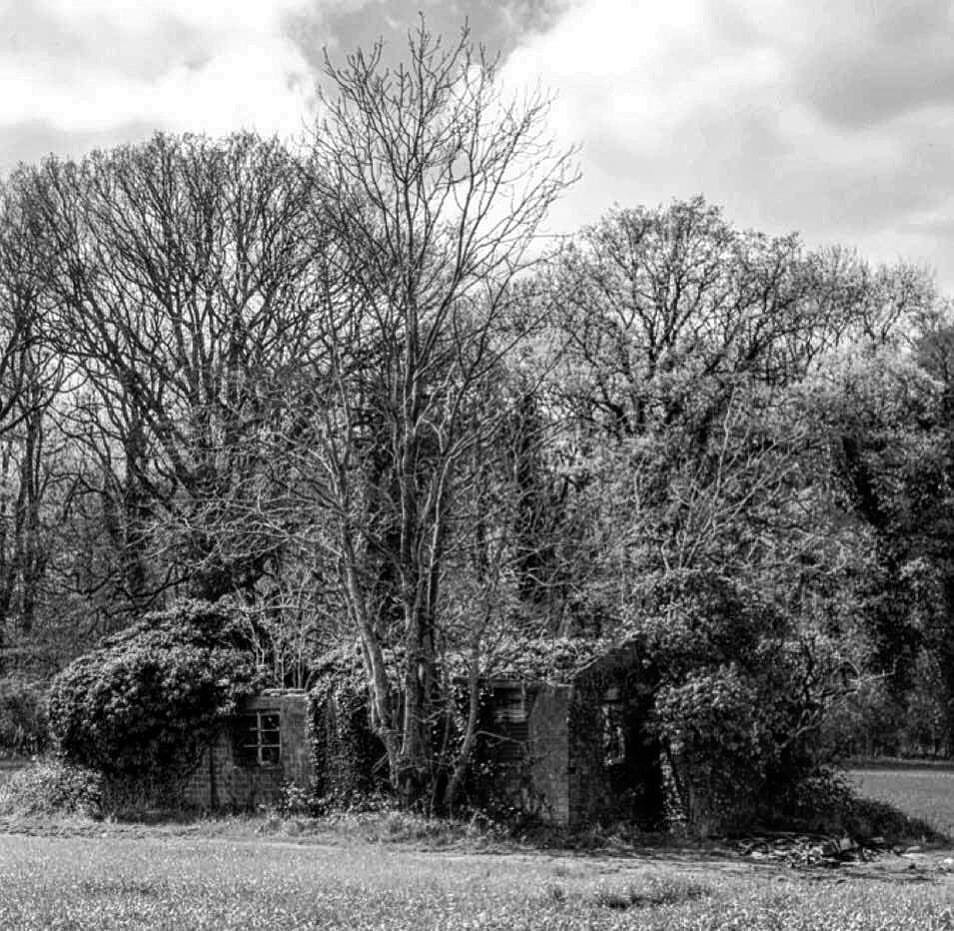
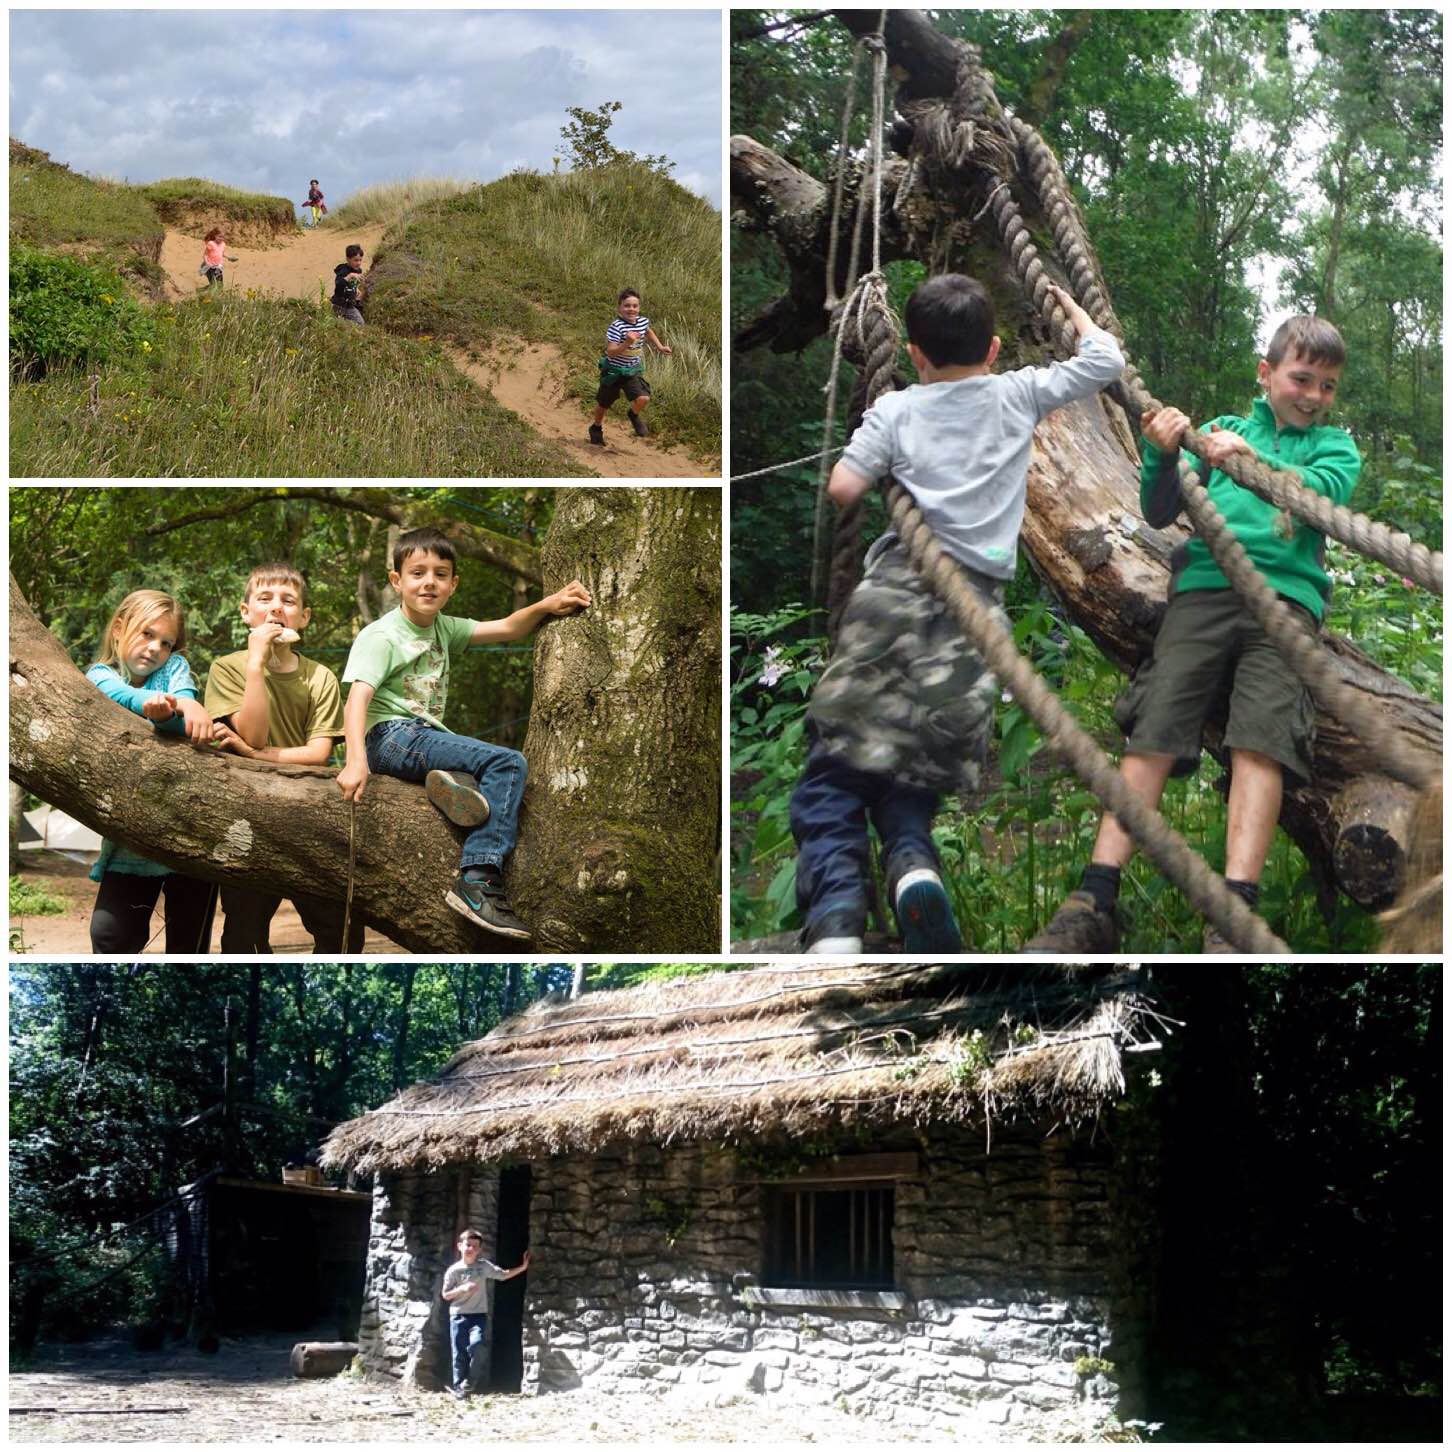
In amongst all these workshops and general setting up my kids took themselves off exploring. I went with them on one jaunt and they took me to the ‘House of Doom’ (as they referred to it). I think film companies use the site and they had left this massive Gothic barn – quite beautiful but eerie at the same time (the axe was for posing with only by the way).
Exploring
The Bushmoot is all about ‘Family’ as far as I am concerned – this family extends out to all my Bushmoot friends I see time and time again as I return each year.
Friends
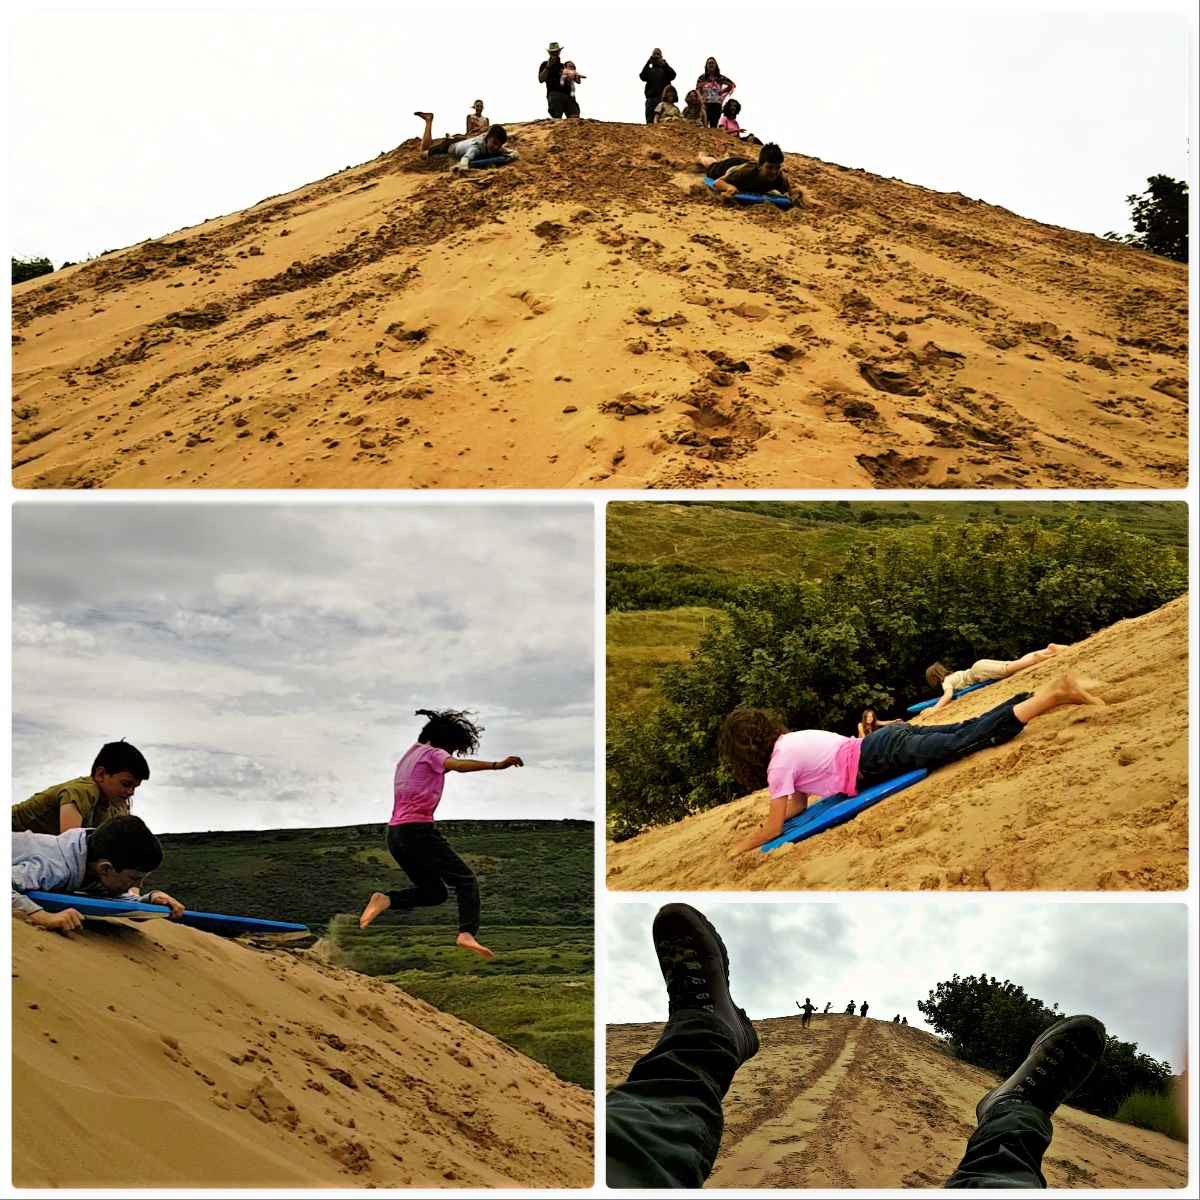
Getting out of the woods one day with my friends Ian, Catherine and Liz (and assorted kids) we went Dune Diving. Merthyr Mawr sand dunes are the second highest dunes in Europe, apparently, and there is one dune in particular that the kids love.
Needless to say I joined the kids as they threw themselves down the dune – great fun even for a 50-year-old kid like me.
Dune riding
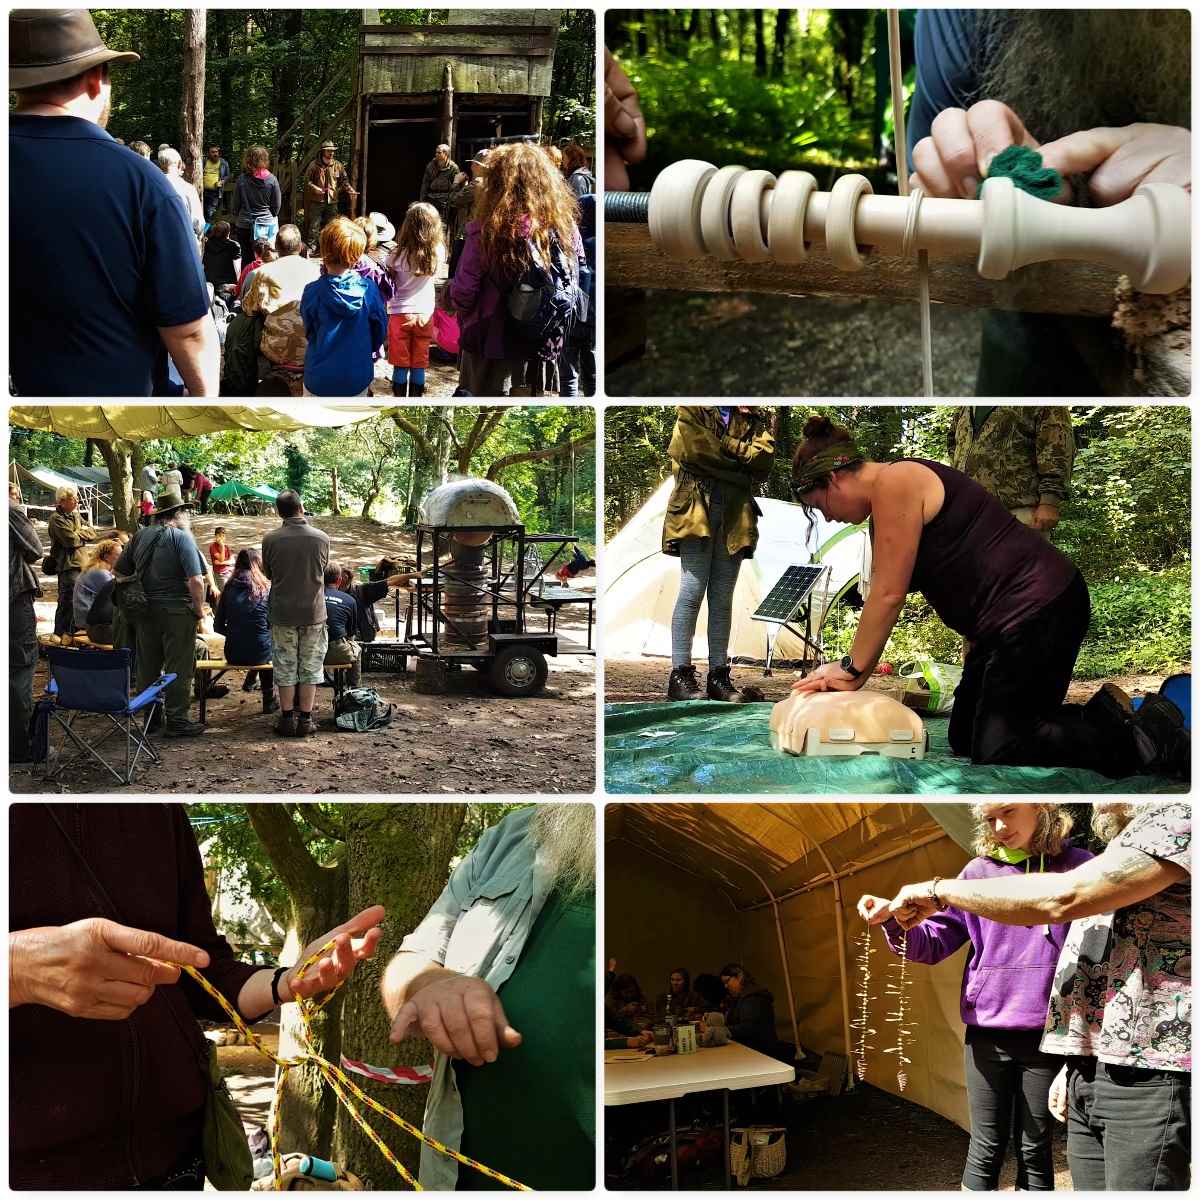
Core Day Workshops
I have no idea how many different workshops we ran this year and I only photographed or filmed a small number of them. We always start with a tool safety presentation (normally three different groups) before starting the main workshops.
Core days – part 1
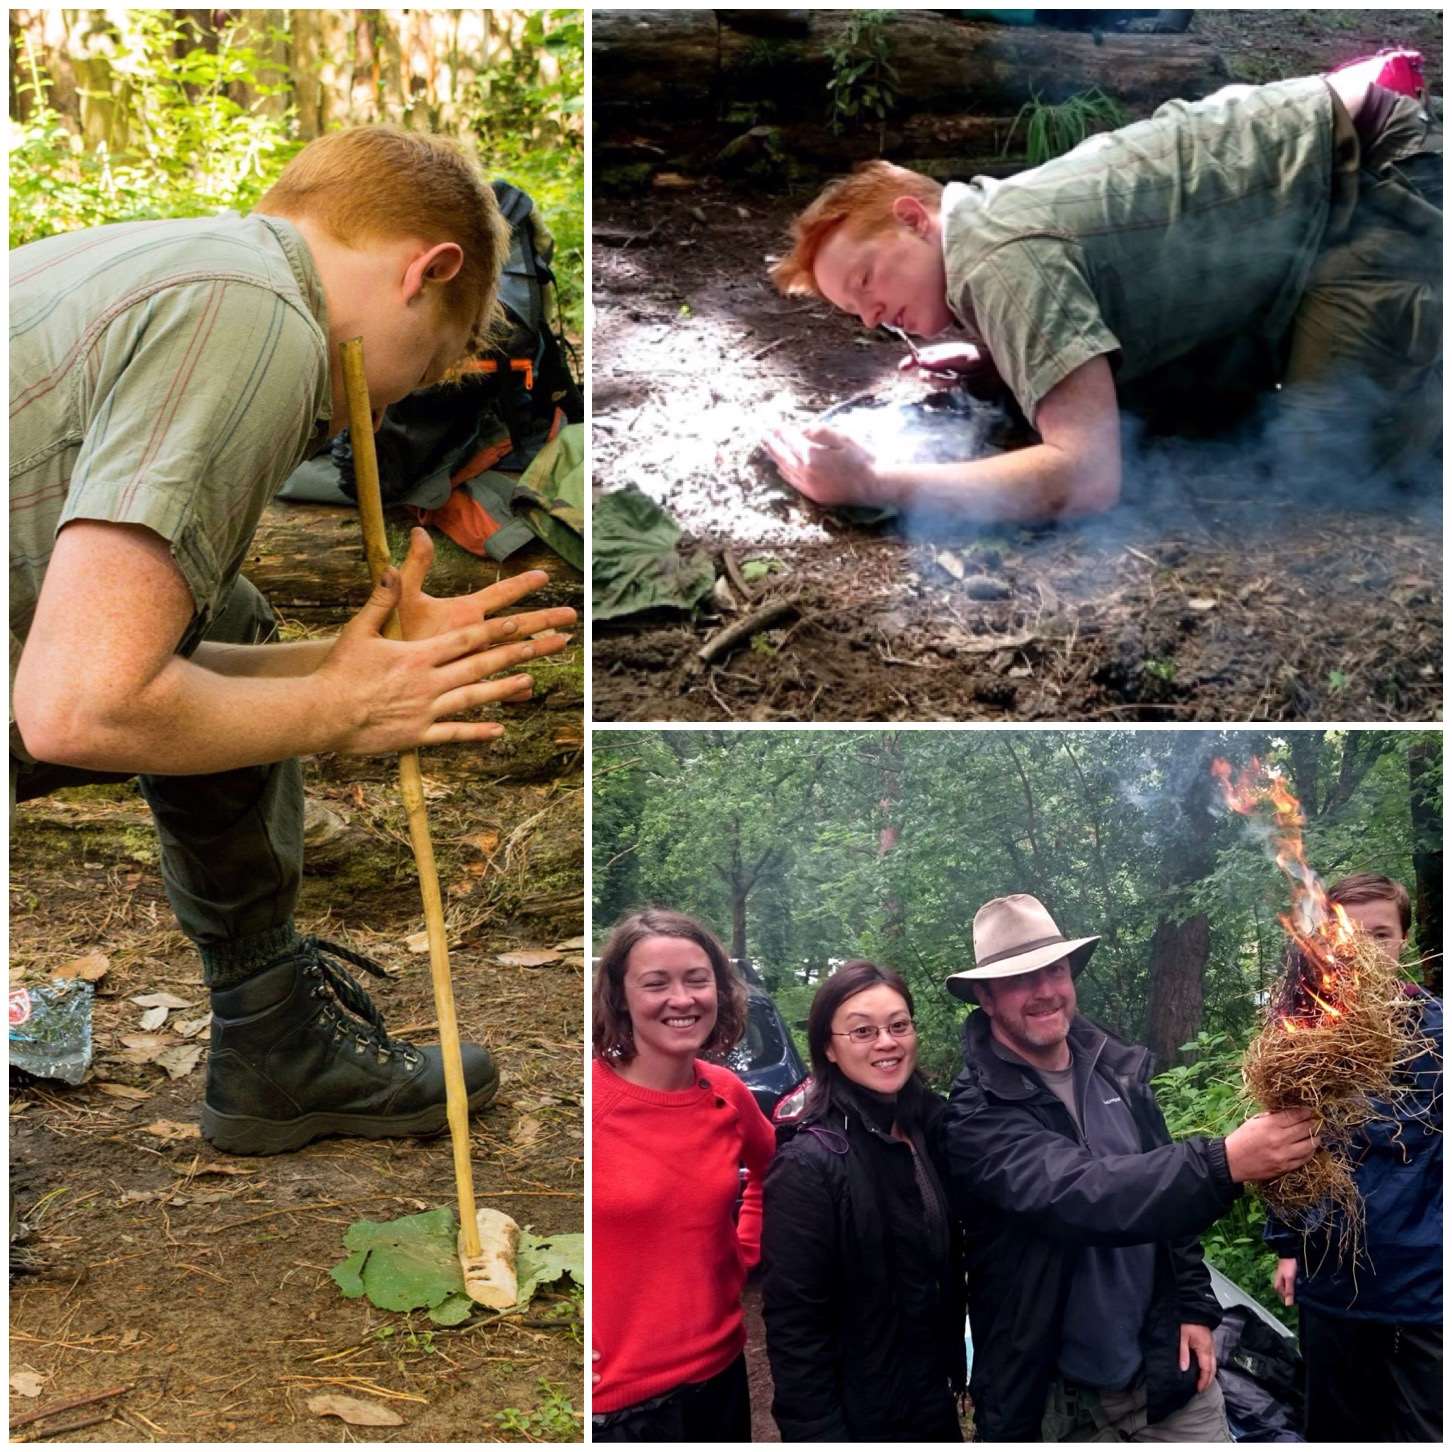
Fire lighting in its many different forms is a staple of the Bushmoot and this year was no different – below are pictures from the bowdrill, the damp tinder and the flint and steel workshops.
Core days – part 2
Other workshops included Baking, Pottery, Rocket Stoves, the Starter Course, Basketry and Wood Spirits (to name just a few).
Core days – part 3
Watch the video to get a feel of the subjects we cover at the Bushmoot.
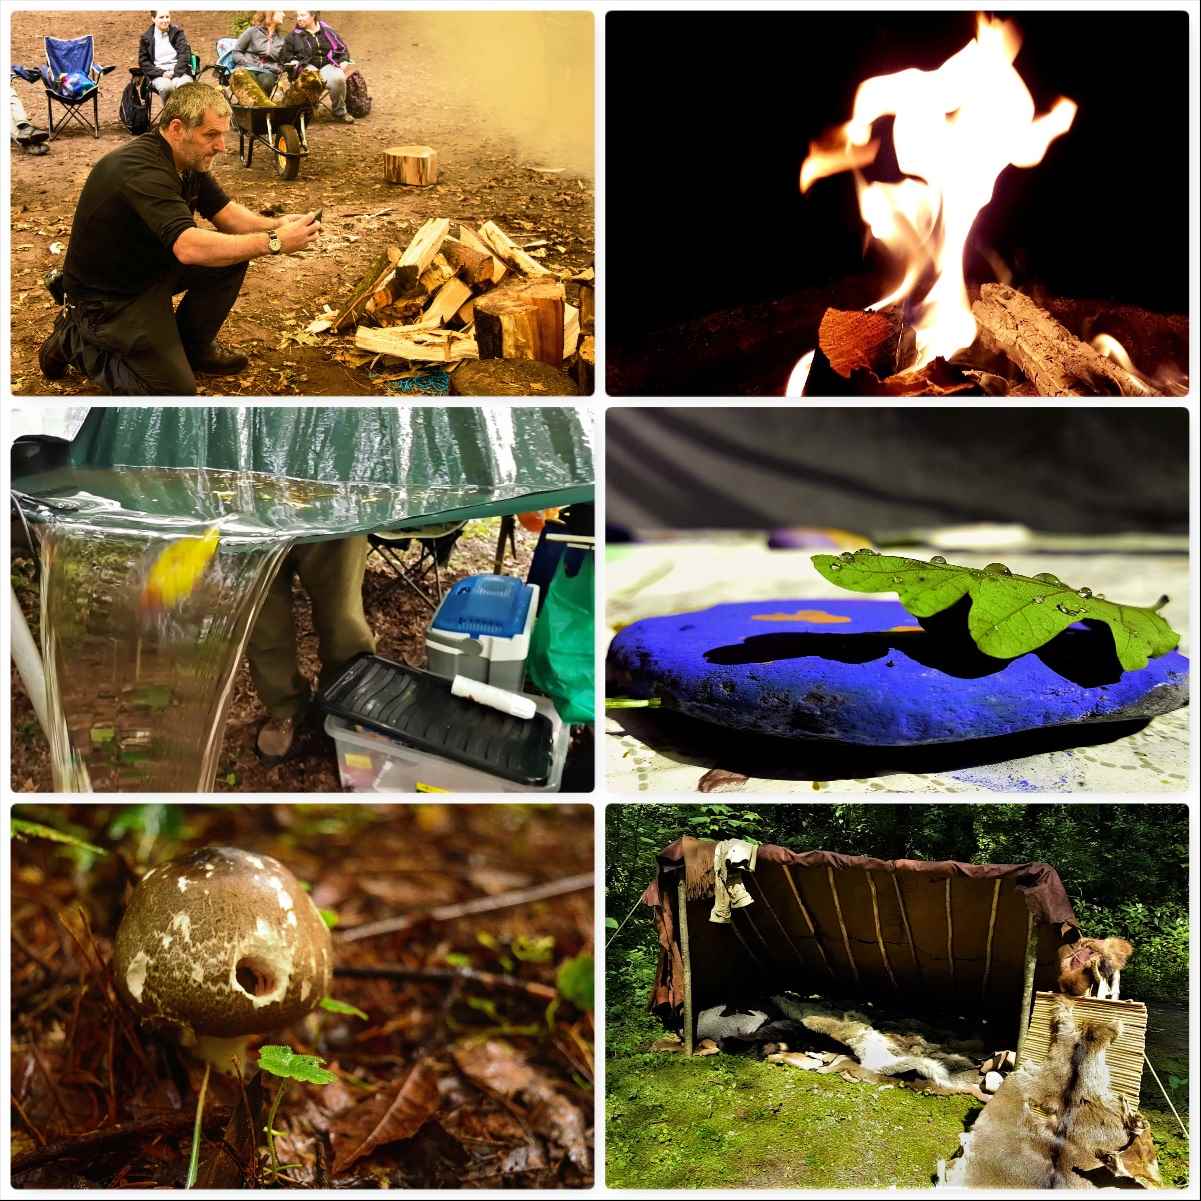
Bushmoot Life
Outside of all these workshops and background work life goes on at the Bushmoot – food I can tell you forms a big part of that life 🙂
I am no great chef (tend to prefer building Campfire Cooking Constructions) but can when needed put something together – thankfully though there are plenty of people around like my wife Alison willing to put together a good spread for the kids and myself. Highlights of the Bushmoot are the Group Meal and the Hot Chocolate evening.
All things food
A favourite of mine has always been the archery range. We had another great competition this year. The winners from last year (Marek and Louey) were also presented their made-to-measure bows from Wayne Jones of Forest Knights.
This year we also had a catapult competition run by Steve (Mesquite) Harral and a workshop from David Colter on the Pellet Bow. Around the site we had various smaller ranges for axe, spade and pin throwing.
Down on the range
The Naughty Corner
No Bushmoot would be complete without the Naughty Corner and I try to get up to it for an hour or two each evening. This year my friend from the Sea Cadets Alan Lewis joined me at the Bushmoot for the first time and as he is a chef found himself drawn to the pizza oven.
Phil and Magda as usual kept us well fed each evening and Cap’n Badger made sure we were all not too naughty 😉
The Naughty Corner
The Sand Pit
The evening socialising is not restricted to the Naughty Corner – usually for a couple of evenings lots of folk congregate under the big chute by the kids sandpit for a bit of a shindig.
We were supposed to have a band along one evening but for some reason they failed to show up – thankfully Marek and Gemma with some others started their own musical session that lasted well into the evening.
Sandpit evenings
The Main Chute
This is where we meet each day, talk about what will be happening, answer questions and celebrate people.
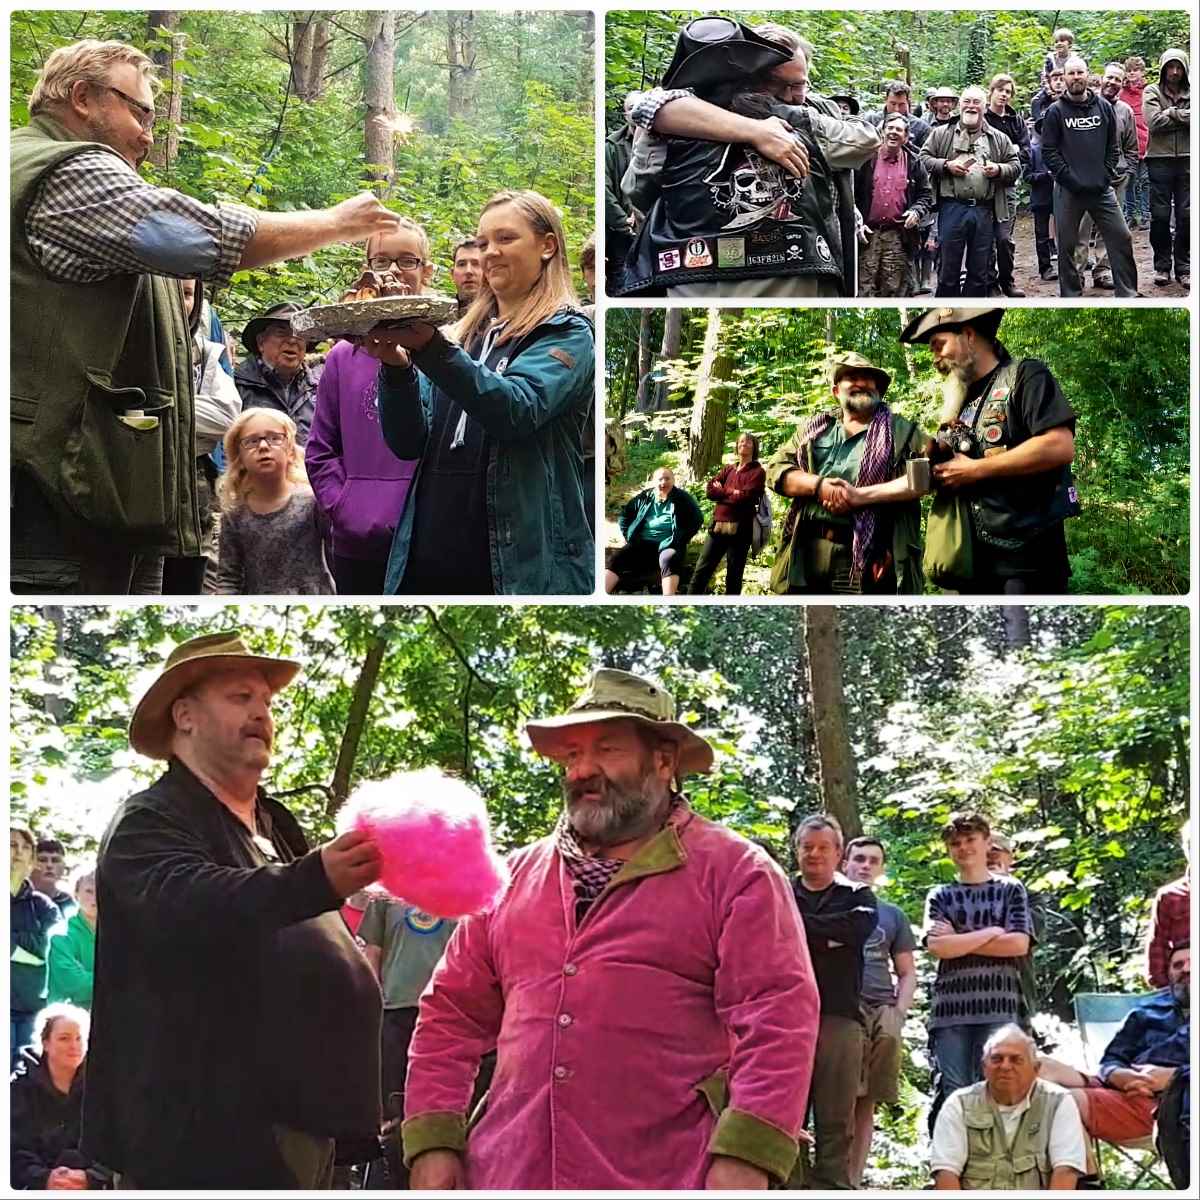
The Bushmoot is run by Tony and Shelly Bristow (along with us volunteer Mods) and as often happens the Bushmoot coincided with Tony’s birthday. We also remembered our dear friend Drew who passed away so tragically at a young age in 2013. We do this by giving each year an engraved Swiss Army Knife to the person we feel has contributed most to the Moot.
Our good friends John Fenna and Steve Harral raise money each year for Cancer charities. Steve gets John to dress up in a different pink outfit each year and we make lots of donations in various ways. Also John has an award he gives out called the John Fenna Award (a Teddy Bear with lots of bushcraft kit) and this year it went to Cap’n Badger for dedicated service to running the Naughty Corner – or undetected crime as I hear 😉
Life under the main chute
Kids’ Fun
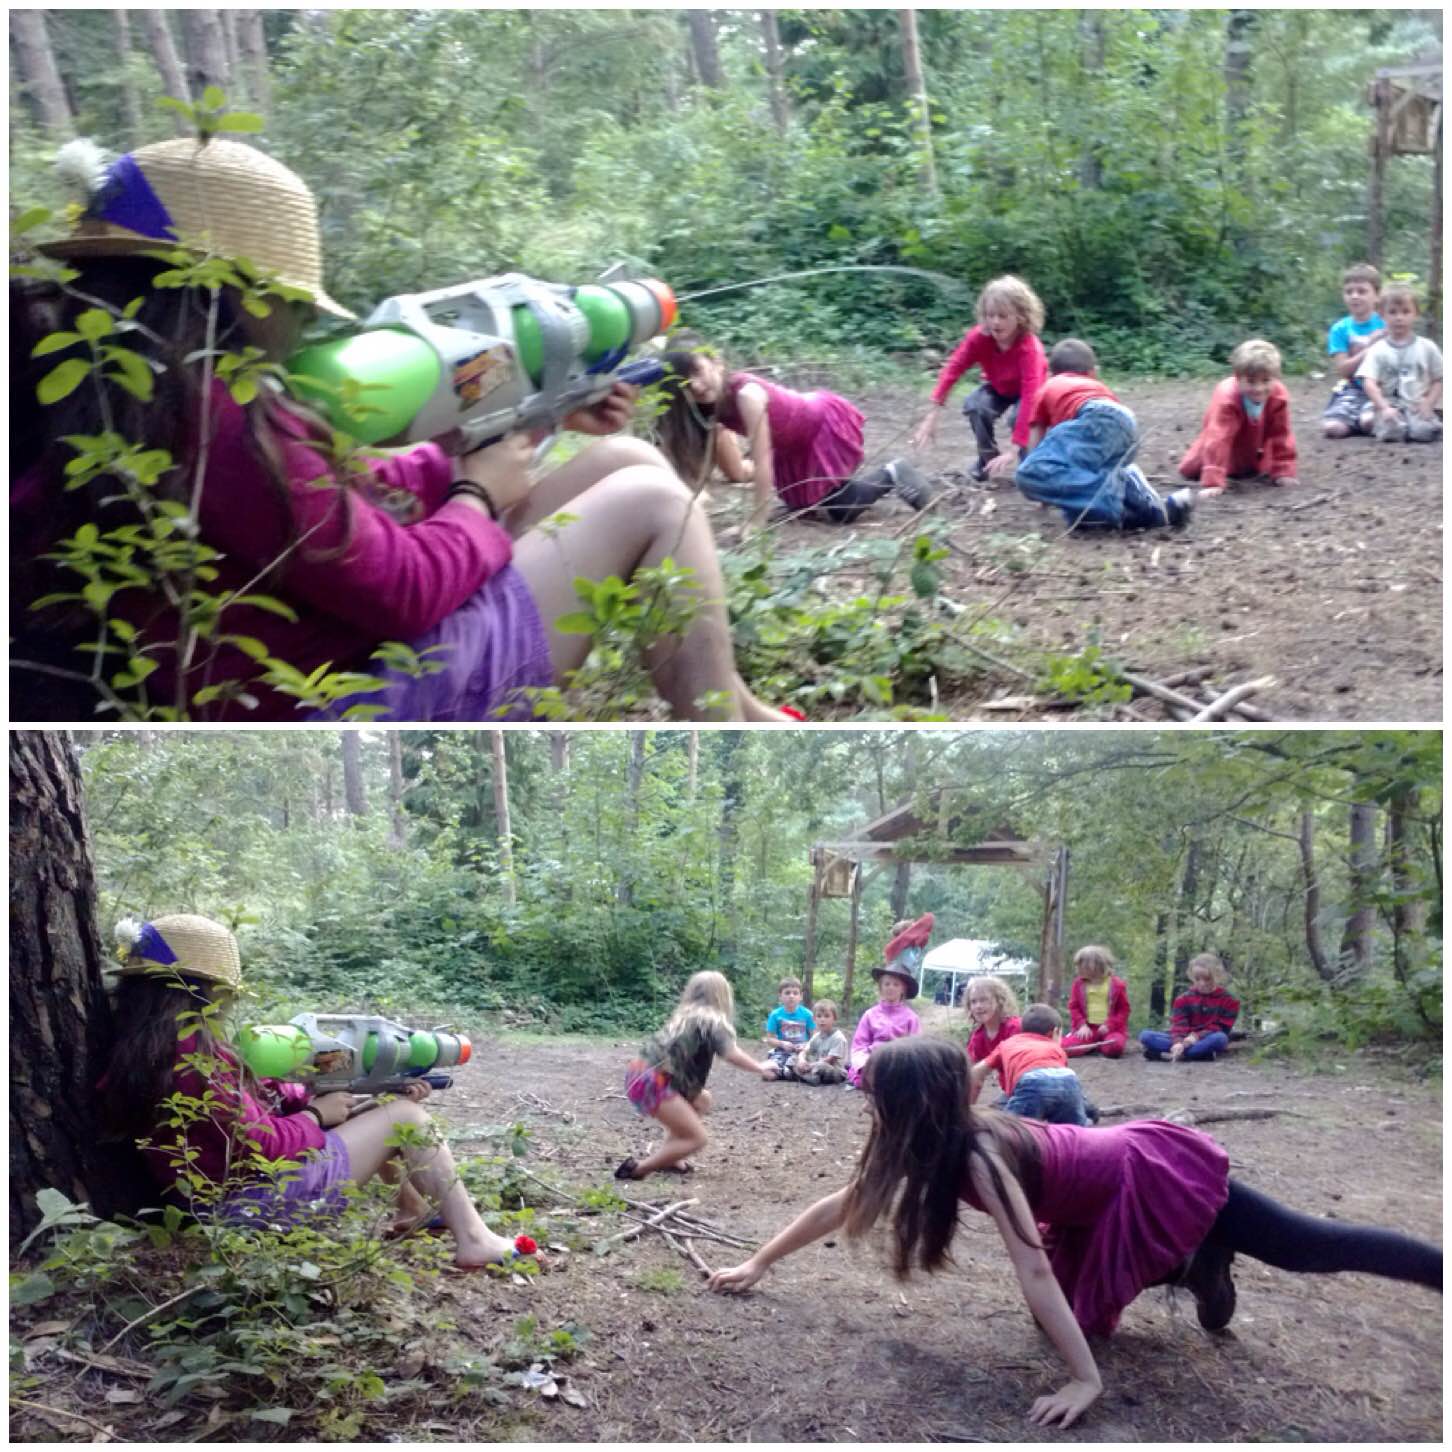
All this talk of fun would not be complete without mention to what we organise for the kids (I mean the young ones here). We are not against technology and I am happy to let my kids watch a movie in the evening by the fire (gives me a breathing space to get on with camp chores).
The Bushmoot is a family friendly place and there are always workshops and games planned in for the kids. When there are no planned activities the whole estate is their playground and it’s great to see my kids roam free as I once did as a kid growing up in the Western Isles.
Kids – old fun and modern fun
My last video on the Bushmoot looks at this ‘Bushmoot Life’.
A Celebration
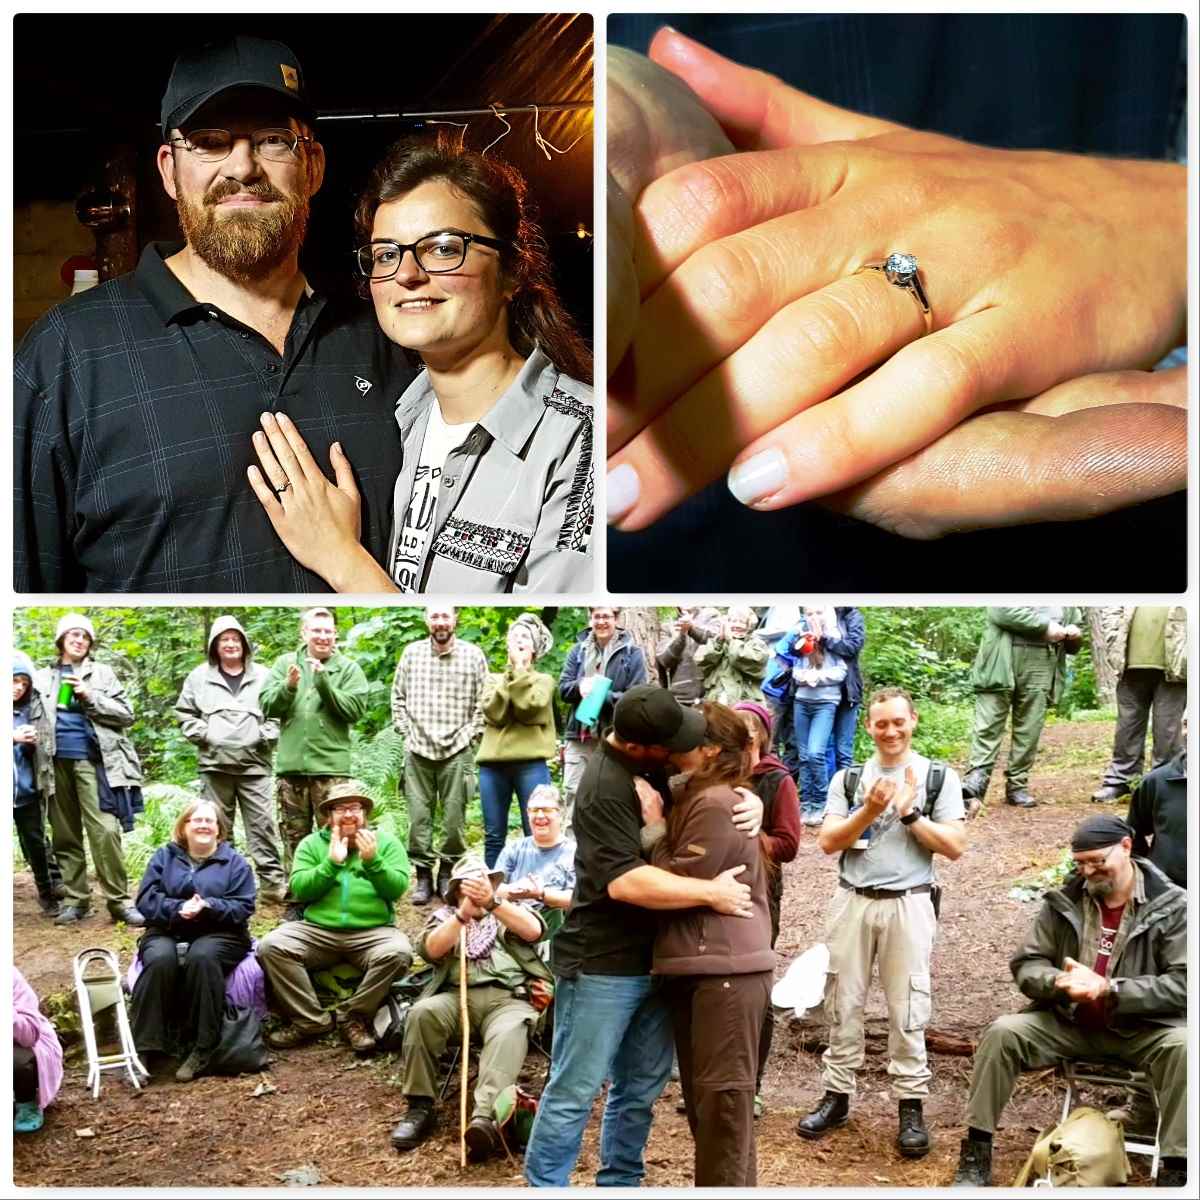
When I popped up to the Naughty Corner one night I got chatting to our chefs Phil and Magda and found out that they had just got engaged – Phil had popped the question to Magda that day down on the beach and she had said yes.
The next day we got Phil and Magda to announce the engagement to everyone under the Main Chute – congratulations guys.
Congratulations
Me
I am mostly to be found behind the camera lens so you do not see many pictures of my silver mop at the Bushmoot. Over the last 10 years I have really embraced photography and am always on the look out for something unusual to snap.
Fire Faces are a favourite of mine – spotted the BFG in one snap I took this year – but there is always something interesting to photograph at the Bushmoot.
Just me
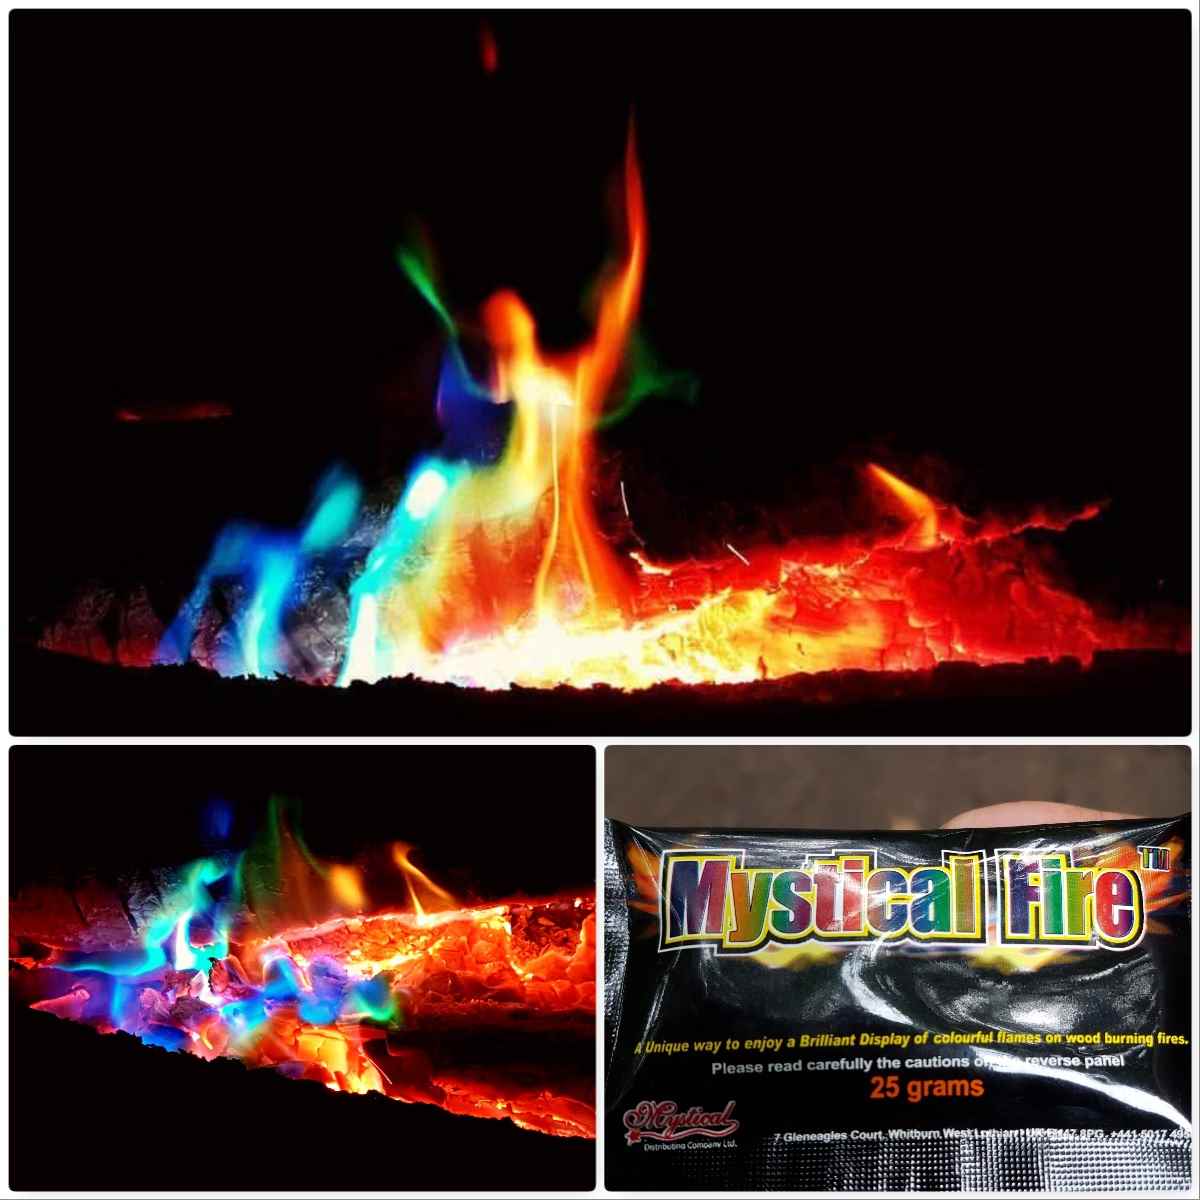
A bit of Magic
This year at the Naughty Corner it was hard to miss the fact that the fire was making a good impression of a Rainbow. It turns out that Cap’n Badger had acquired some Mystical Fire and popped it into the fire. I took a few snaps of the flames and caught a lovely shot that I call ‘The Dancer’.
My kids loved the stuff and so we popped a couple of sachets on our campfire one evening while they watched a movie.
Rainbow flames
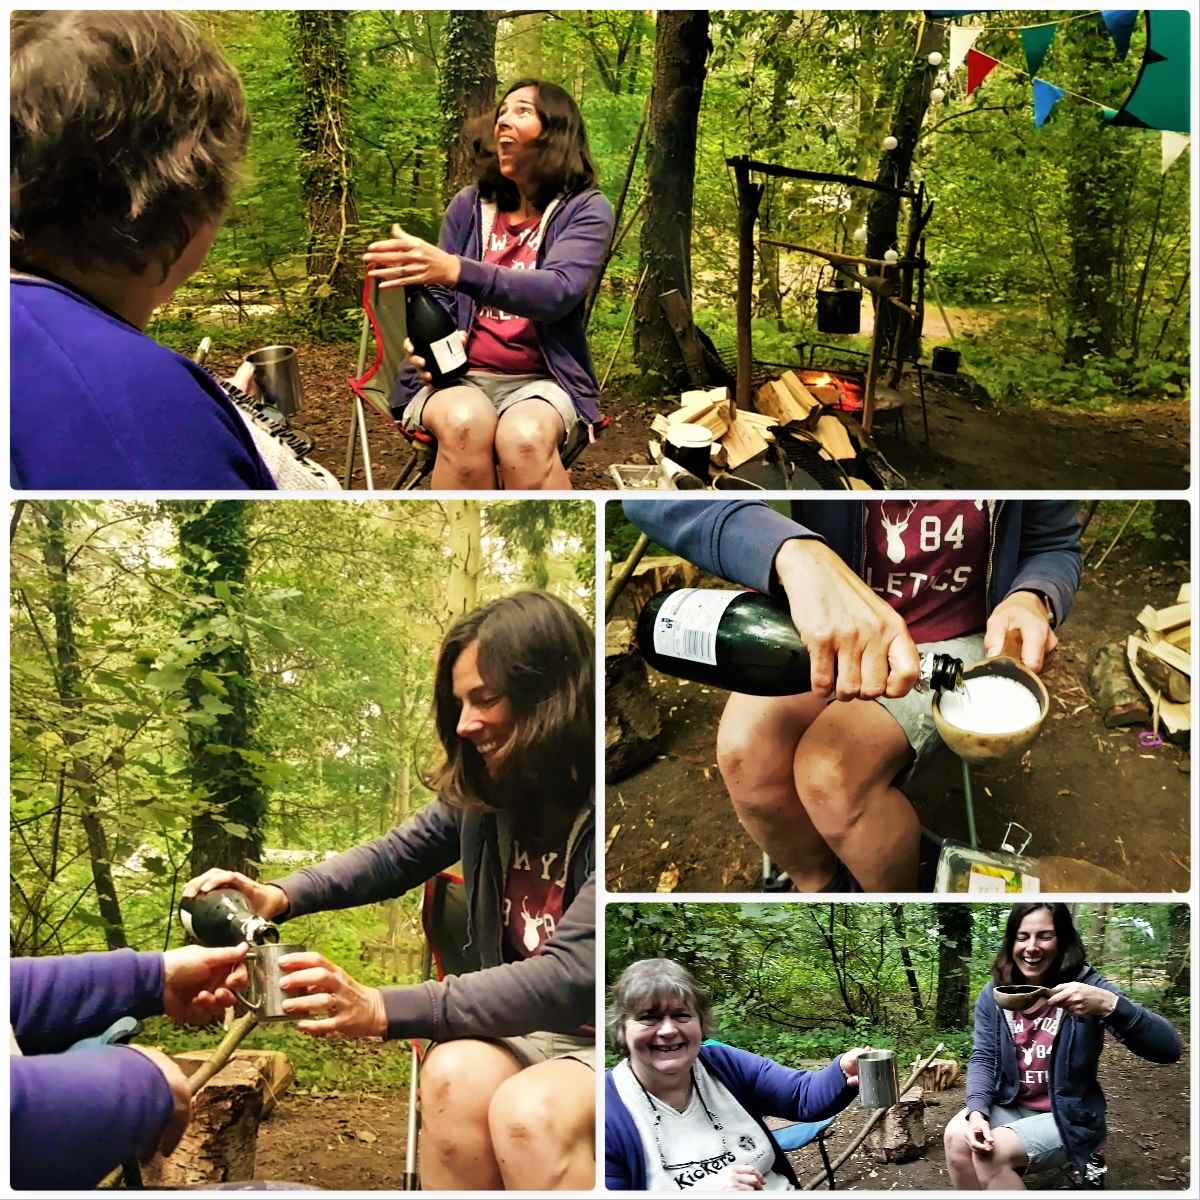
Alison
My wife Alison did not attend the whole of the Bushmoot (she pops back and forth from home over the fortnight) as she runs her own publishing company and this year was focused on finishing the first draft of her own book while we were at the Bushmoot.
Needless to say when Alison returned at the end of the Bushmoot she did so with a bottle of bubbly to celebrate the fact that she had finished her first draft – well done darling 🙂
Congratulations Alison
That is it from me on the subject of the 2017 Bushmoot. Thank you to Tony, Shelly, all the Mods and all the other helpers who organised everything and helped make it such a magical two weeks.
Over the last few years as I have made videos of the BCUK Bushmoot I have noticed I tend to video the workshops. Looking at the footage I shot this year I saw that I had captured so much more.
This is the 3rd and final video in my Bushmoot 17 trilogy focusing on ‘Bushmoot Life’ outside of the workshops and is dedicated to my wife Alison as she completed the first draft of her latest book during the Bushmoot – Congratulations Alison and look forward to reading it.
Over the last few years one of the changes I have seen at the Wilderness Gathering is the quality of the music in the evenings – this year it was particularly great.
Roger Harrington of Bison Bushcraft and Dom Harvey (they run the Wilderness Gathering) had great music playing each night however I was particularly struck by one young musician – Vojta. He is a violinist at heart but somehow brings in many other instruments to his sessions.
Here is the last number he played at this years Wilderness Gathering.
It only seems a short time ago I was havering about making videos – I plucked up the courage eventually to load a video onto YouTube and now here I am on my 100th YouTube video 🙂
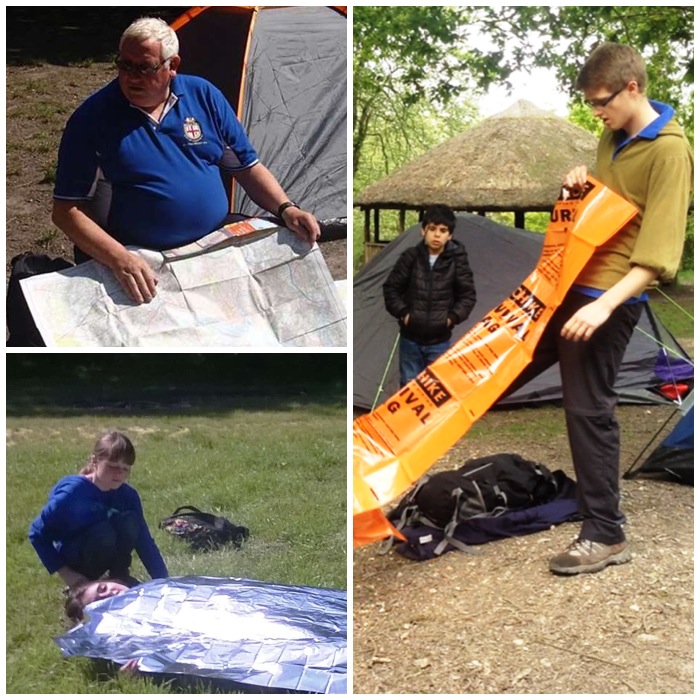
Life is all hustle and bustle at times – so when it is you need some time out. A great place for this time out can be found at the Field Farm Project.
Our friends Mollie and Nick run this project and I feel as if I have entered a different world when I pop into visit. They certainly live up to their business tagline: Grow – Study – Make.
A Field Farm Day
I met Mollie on a Bushcraft instructor course at Woodcraft School and part of the course was to undertake the Basic Expedition Leadership (BEL) award. I did not do this part of the course as I was already a qualified Mountain Leader however as I run this BEL course myself now Mollie wanted to do a bit of a refresher on her navigation as she runs lots of outdoor classes.
Along for the day’s training as well was my wife Alison, daughter Catherine, Mollie’s friend Debbie and her young son. It was a lovely sunny day but with the northerly wind it was bitterly cold at times. Before setting off we were fortified by some hot home-made celeriac/parsnip soup with a side of freshly baked breadsticks.
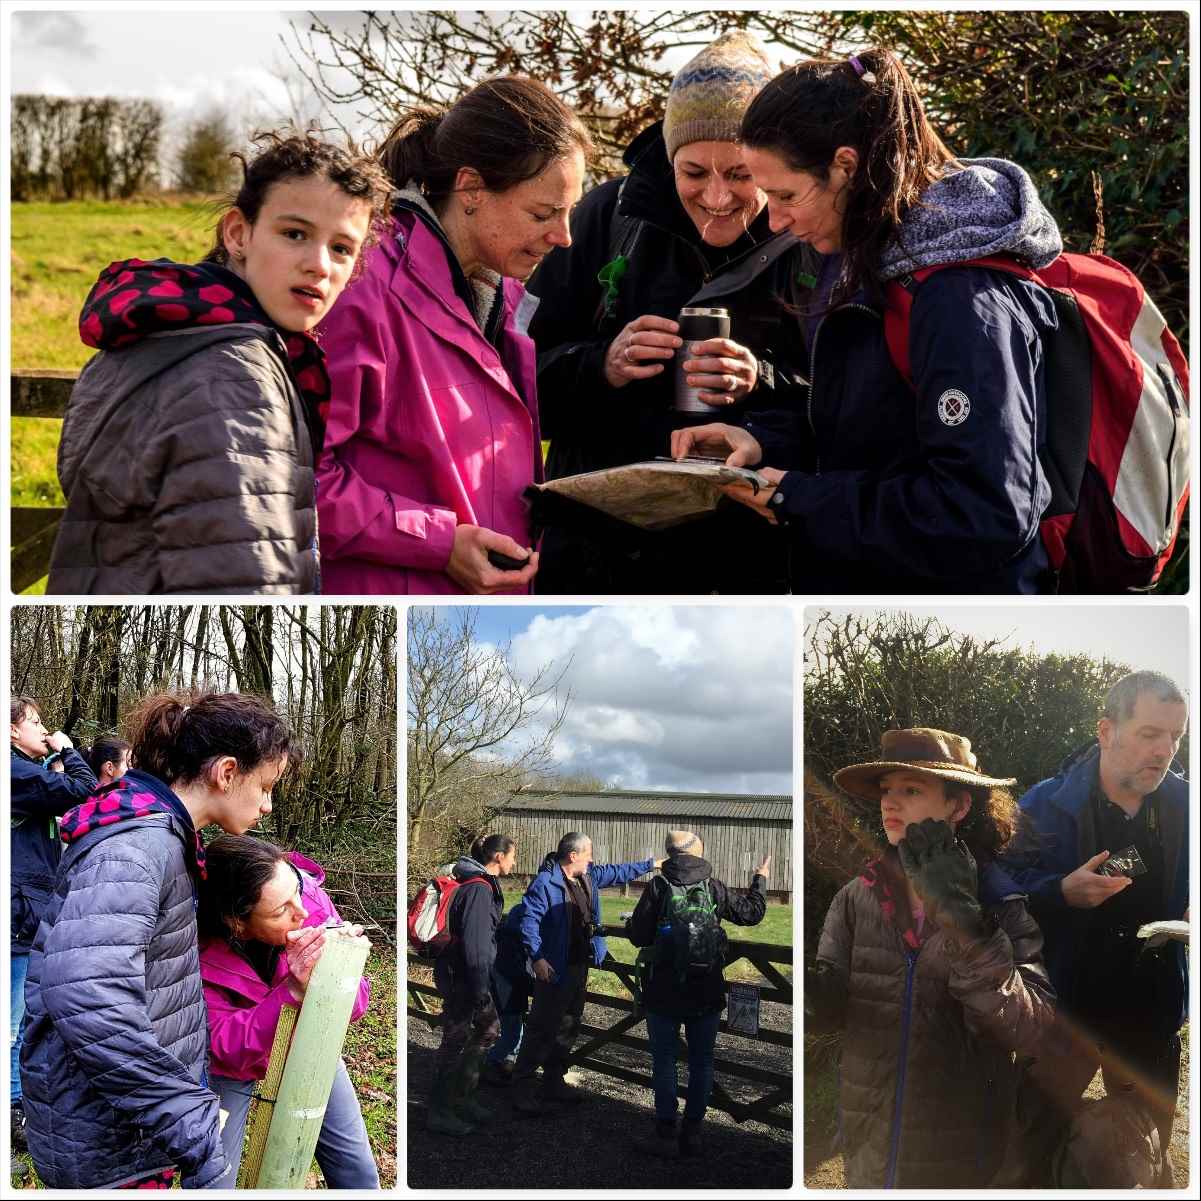
Lots of Nav
It was not all map and compass work (though there was a fair bit of it), we had lots of fun along the way.
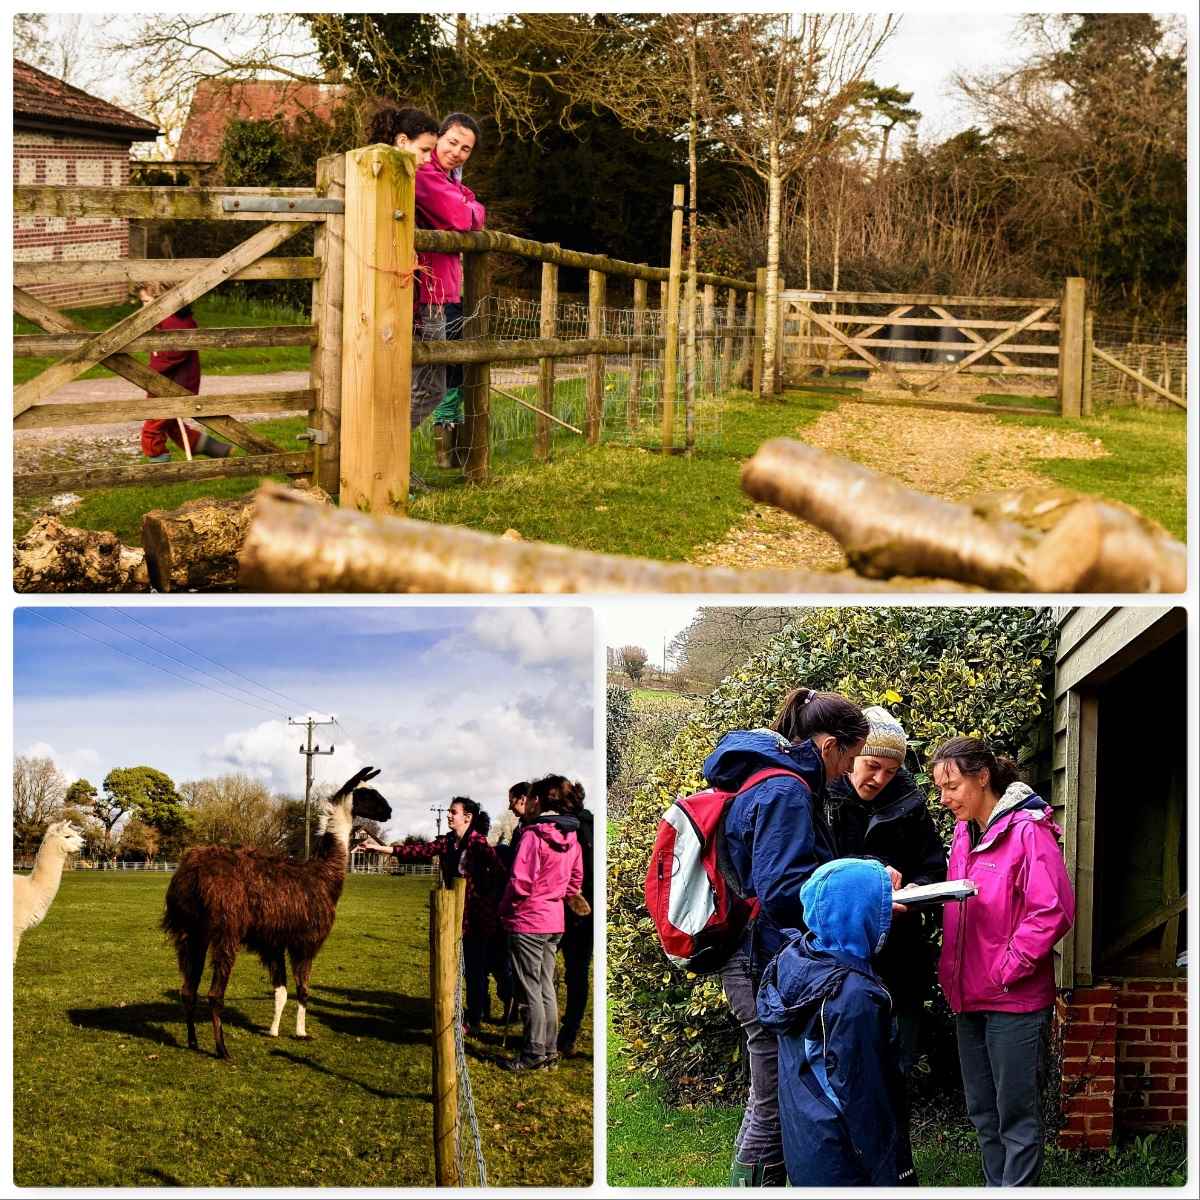
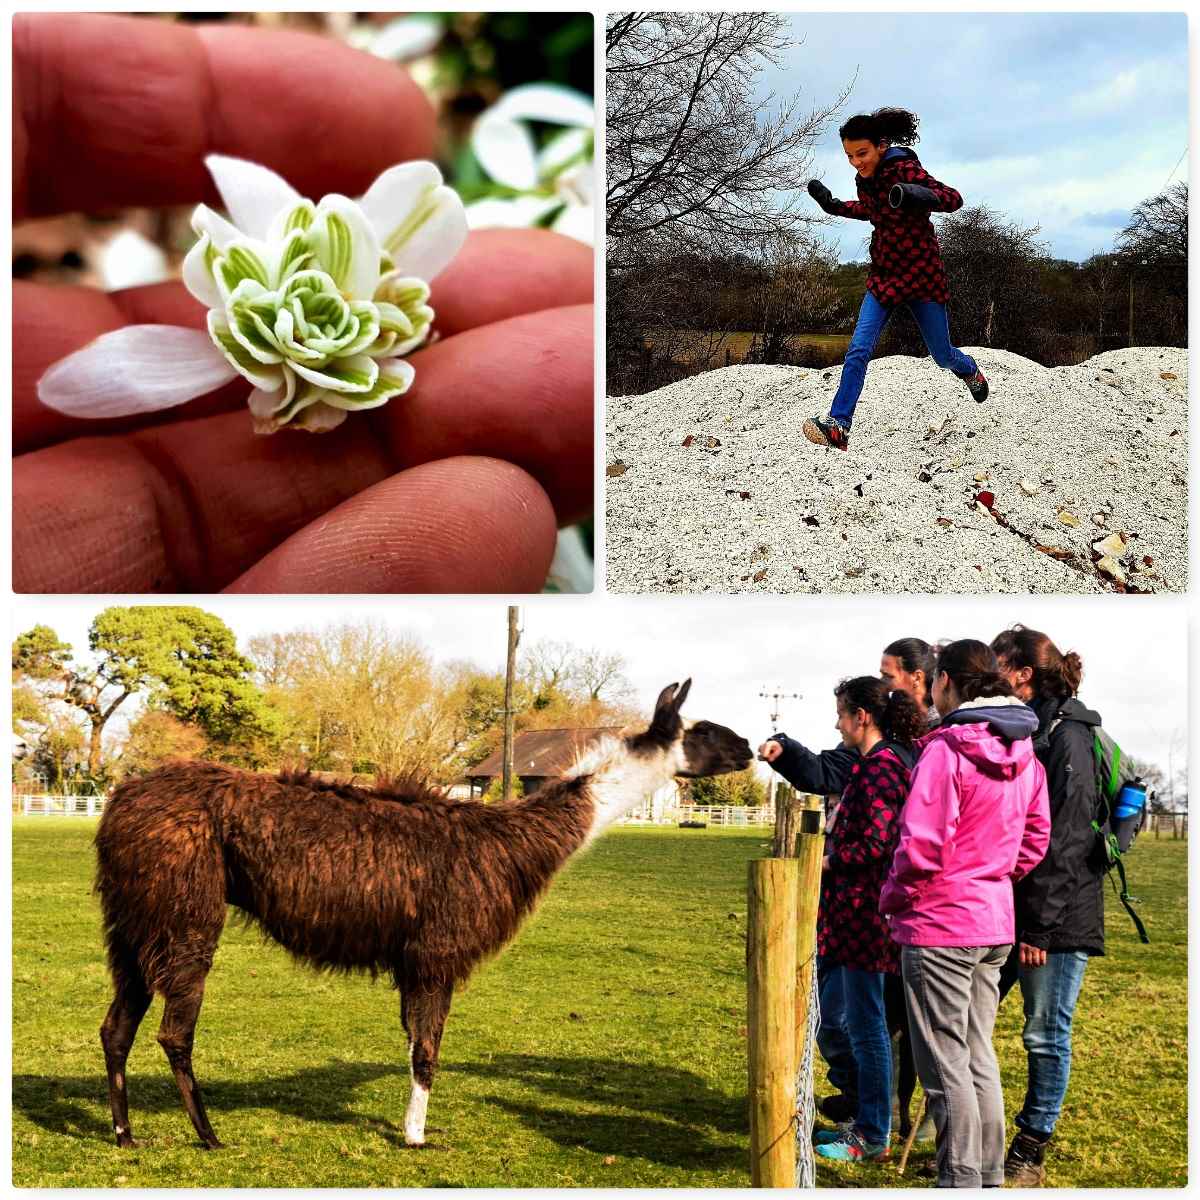
The snowdrops were still in full bloom and we investigated the colourful world that is their underside, had a stomp around a flint/chalk pile and petted the odd Llama and Alpaca.
Explorations
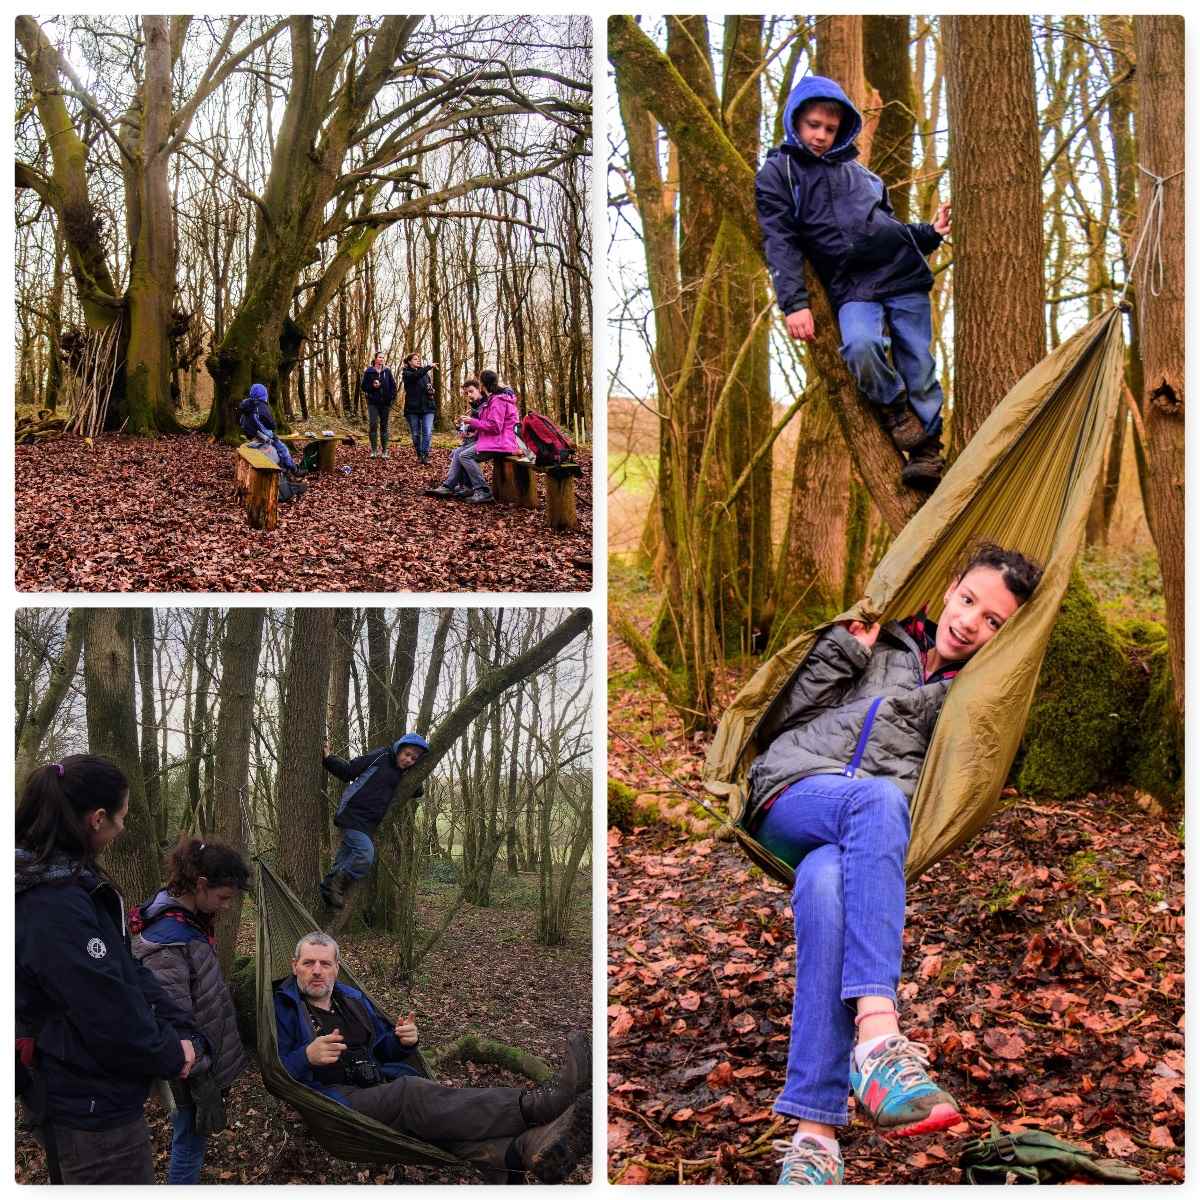
Eventually we wound our way through the footpaths and country lanes to one of Mollie’s outdoor training areas. The central Beech tree was festooned with woodland art that Mollie’s classes had made, there was a small shelter and plenty of benches.
Personally I prefer to use my hammock seat however my daughter Catherine soon had me out of that 🙂
A bit of bushcraft
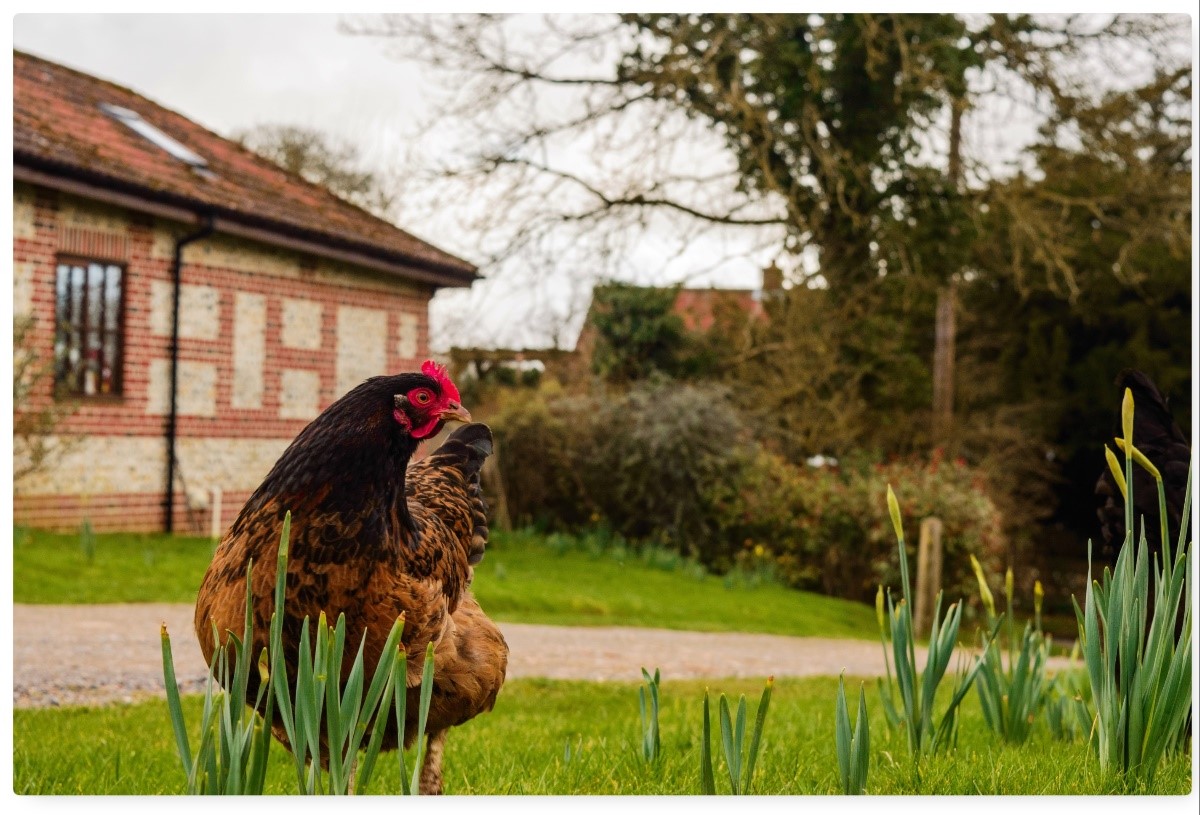
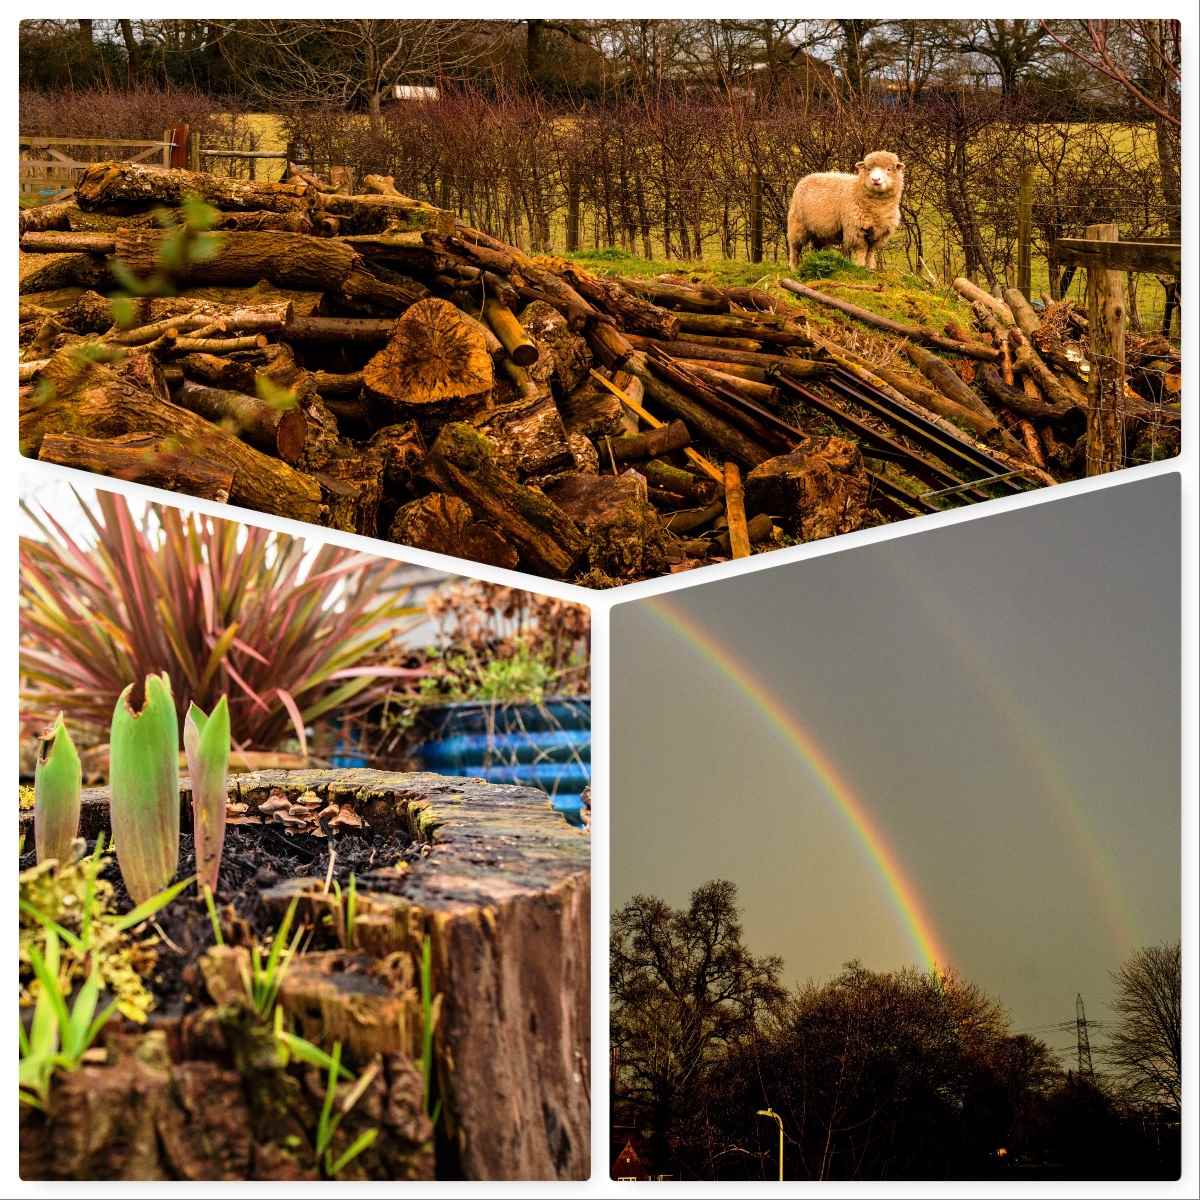
The weather changed in the latter part of the walk with some heavy showers but that did not dampen our spirits. We were soon back at the farm where I took a little time out just to photograph the animals.
As we arrived home we were treated to a fantastic double rainbow over our house – a fitting end to a great day.
Back on the Farm
So if you are looking for somewhere to get away from the hustle and bustle of life then I thoroughly recommend spending some time with Mollie and Nick at the Field Farm Project.
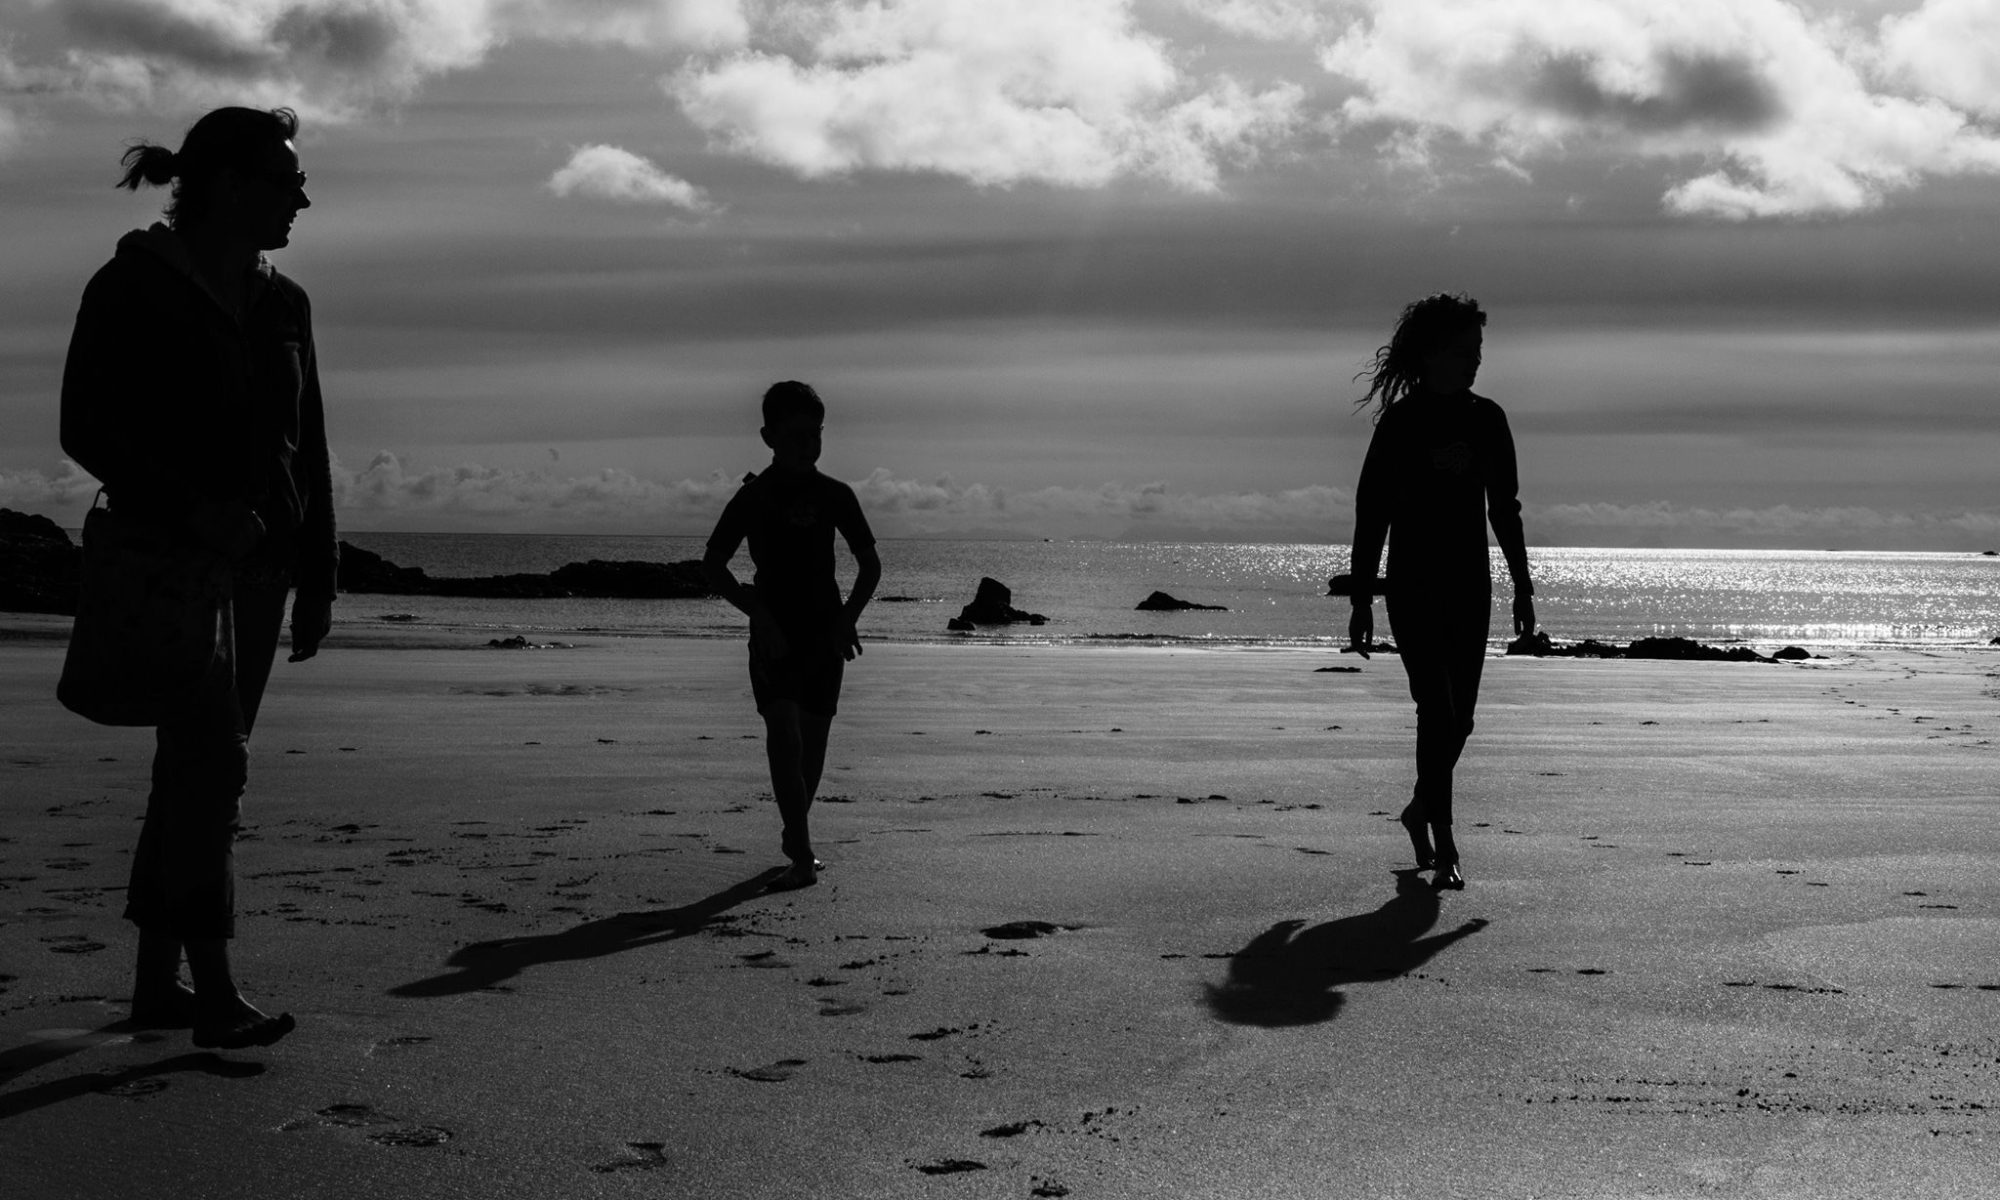
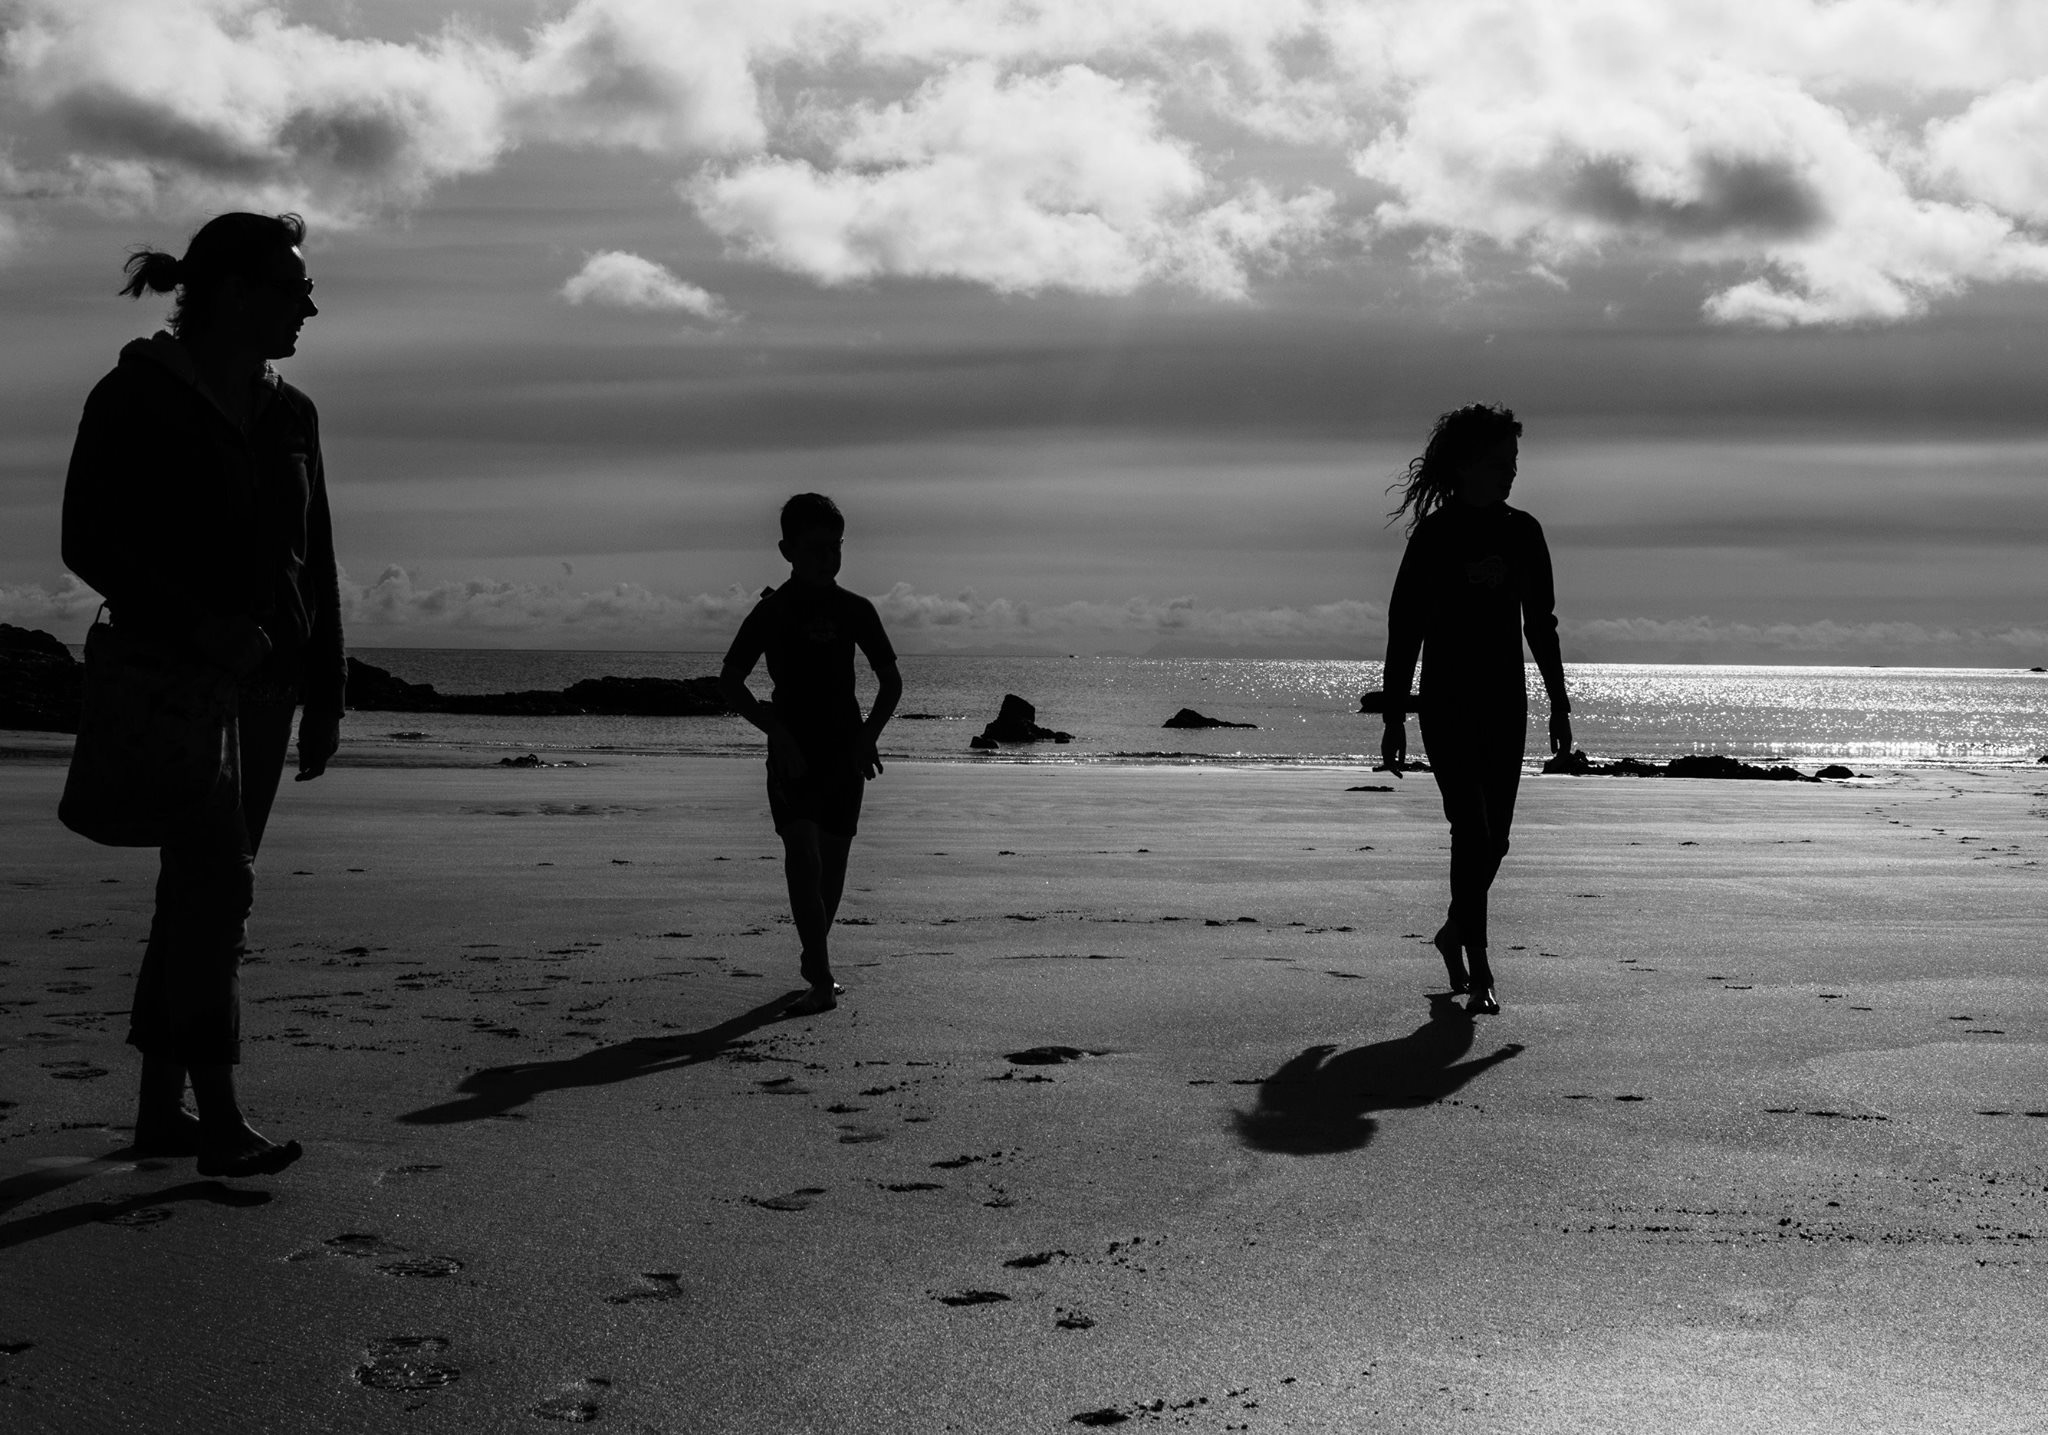
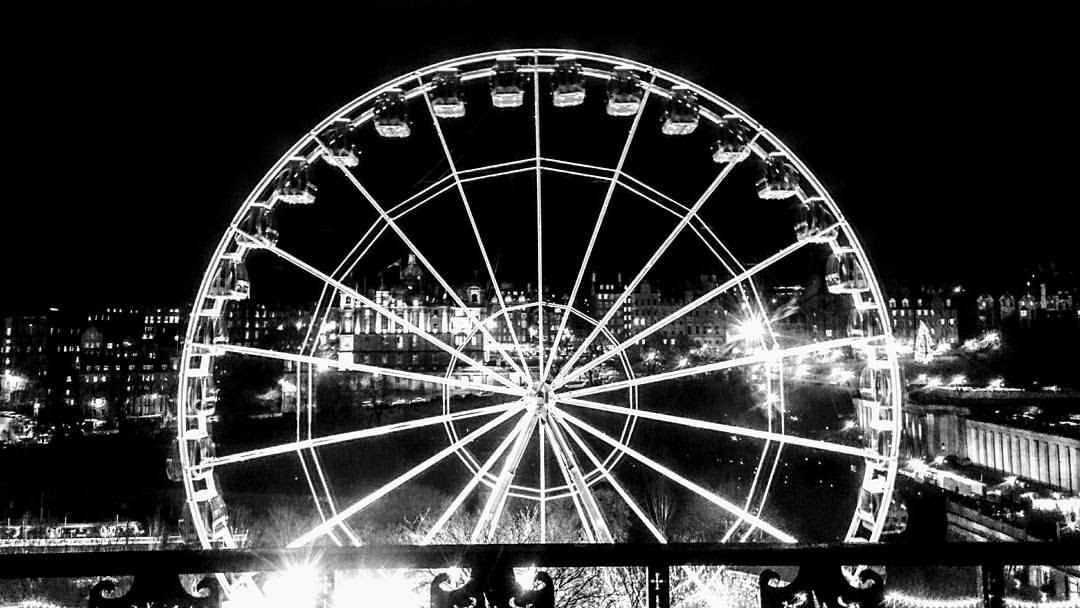
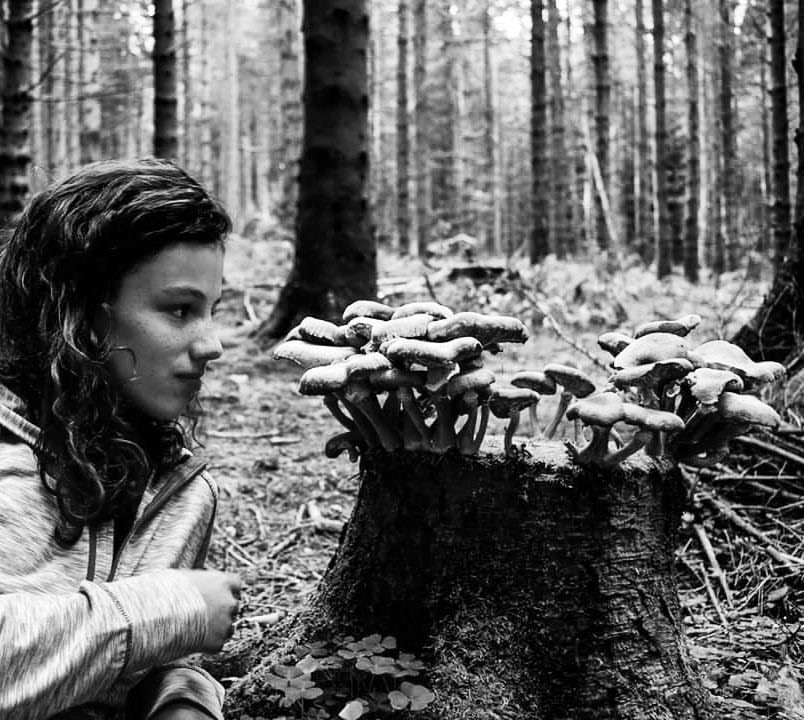
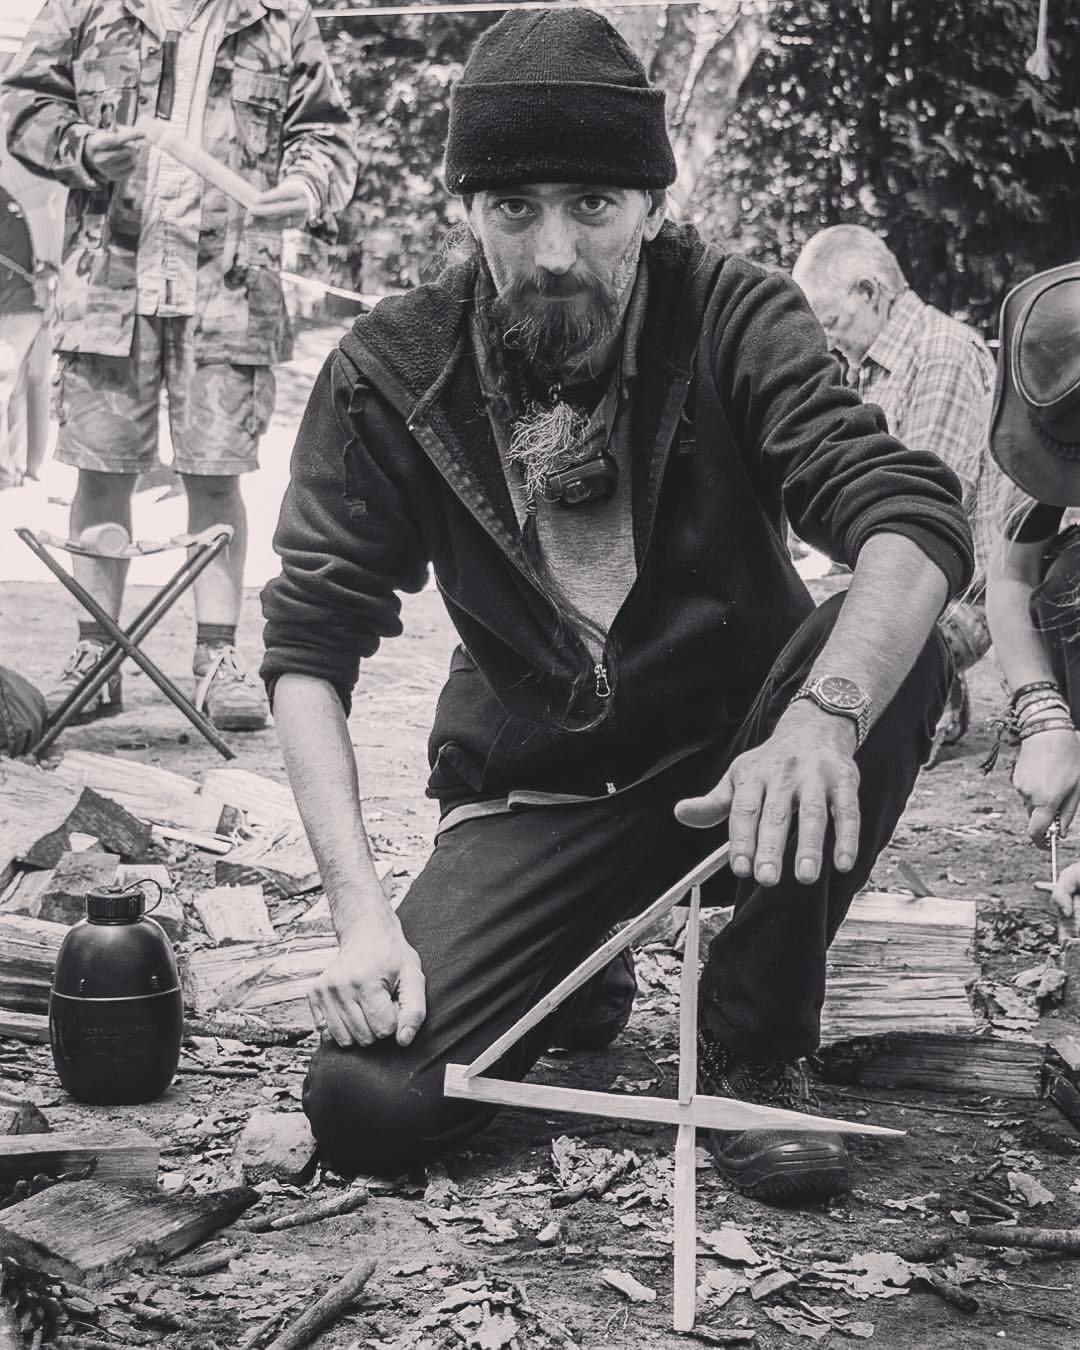
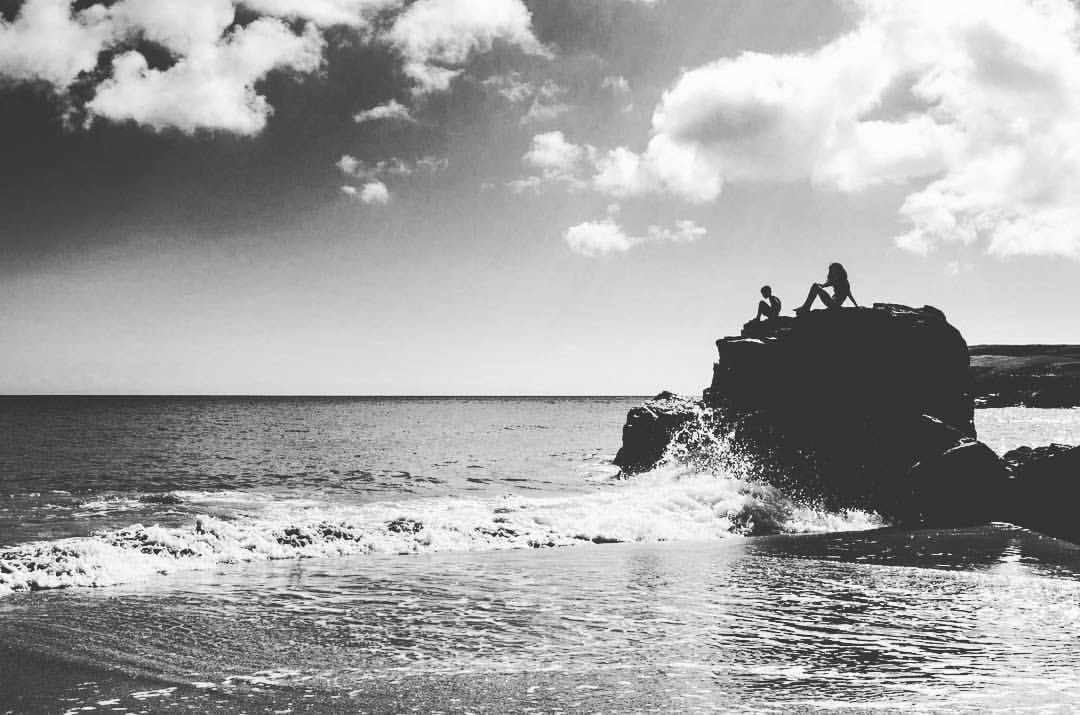
Over the last year I have dabbled with some of my pictures to see how they they fared in Black and White. I did look for pictures that gave me good shadows and high levels of contrast. I have no idea if that is the best way of going about it but I had fun along the way.
I hope you enjoy the pictures and wish you all a Happy New Year.
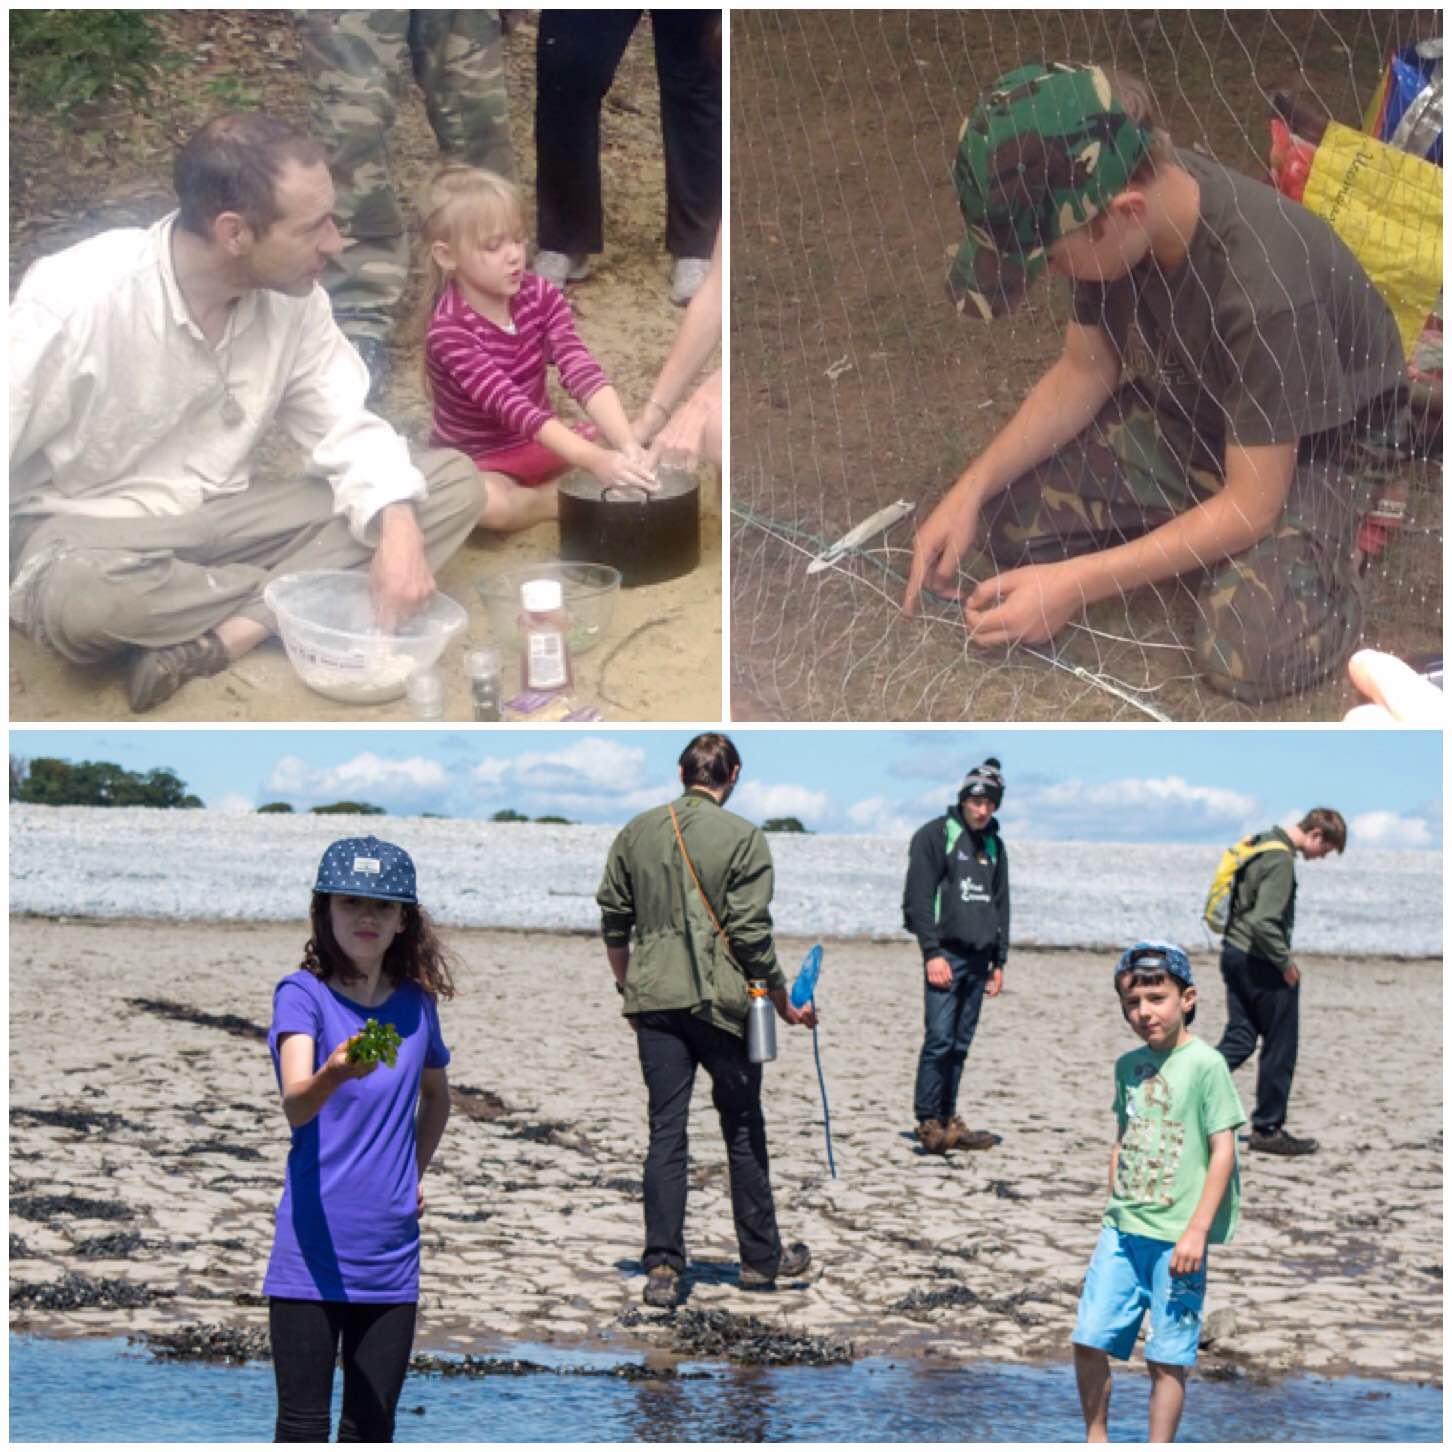
As family holidays go the BCUK Bushmoot is hard to beat. It has it all, with activities for all ages, a stunning location and people who are happy to share their knowledge with you.
The week started with three days of wet weather however that did not stop us getting out and about. I spent one day with my friend Fraser Christian (Coastal Survival) setting nets and lobster pots out on the coast for a class he was running.
Beginnings
My family spent two weeks at the Bushmoot in early August and the kids cannot wait until next years return trip. The Bushmoot is held on the Ogmore Estate by the beautiful Merthyr Mawr sand dunes in South Wales here in the UK.
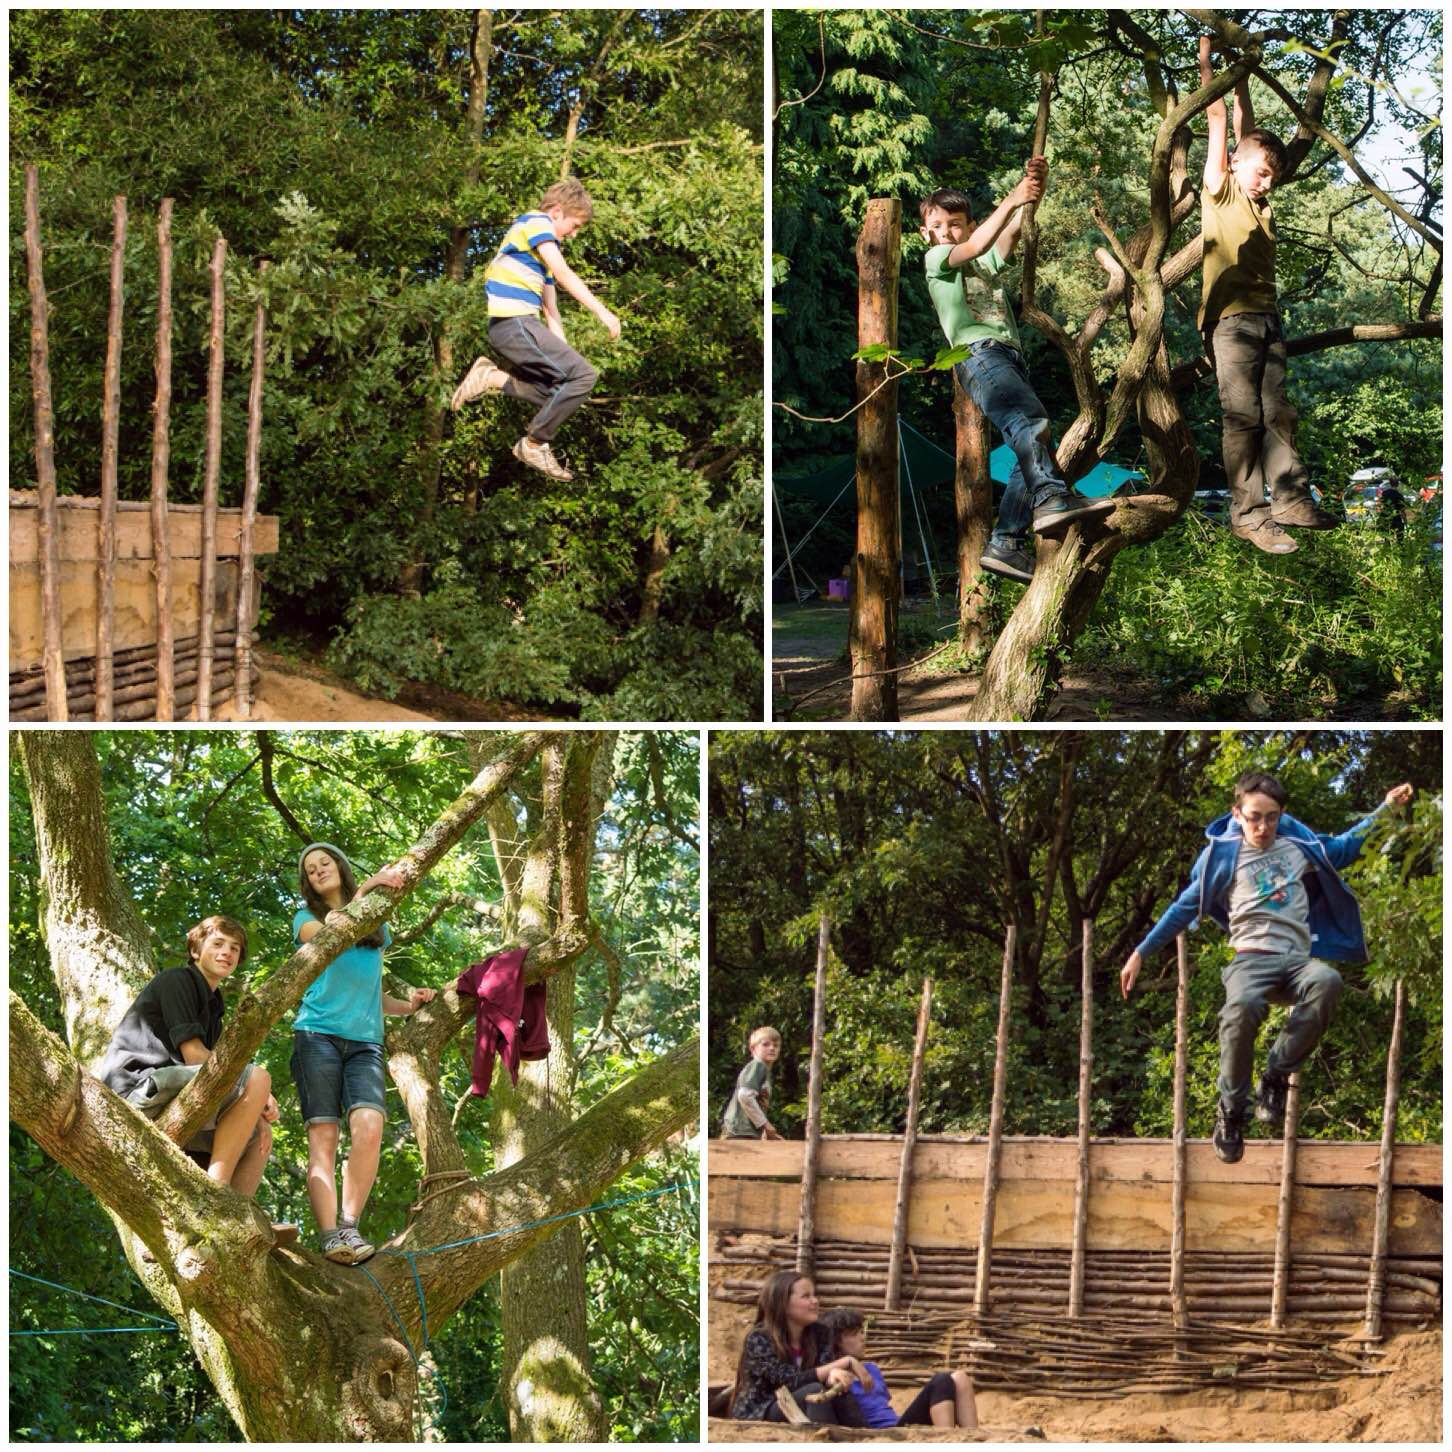
While the kids were off playing I was busy with running or attending classes. Once again this year we ran a Starter Course for anyone new to Bushcraft. Alison decided though to crack on with some more spoon carving this year with our daughter Catherine under Deans watchful eye while Finlay got on with climbing everything he could find..
Play for some – Work for others
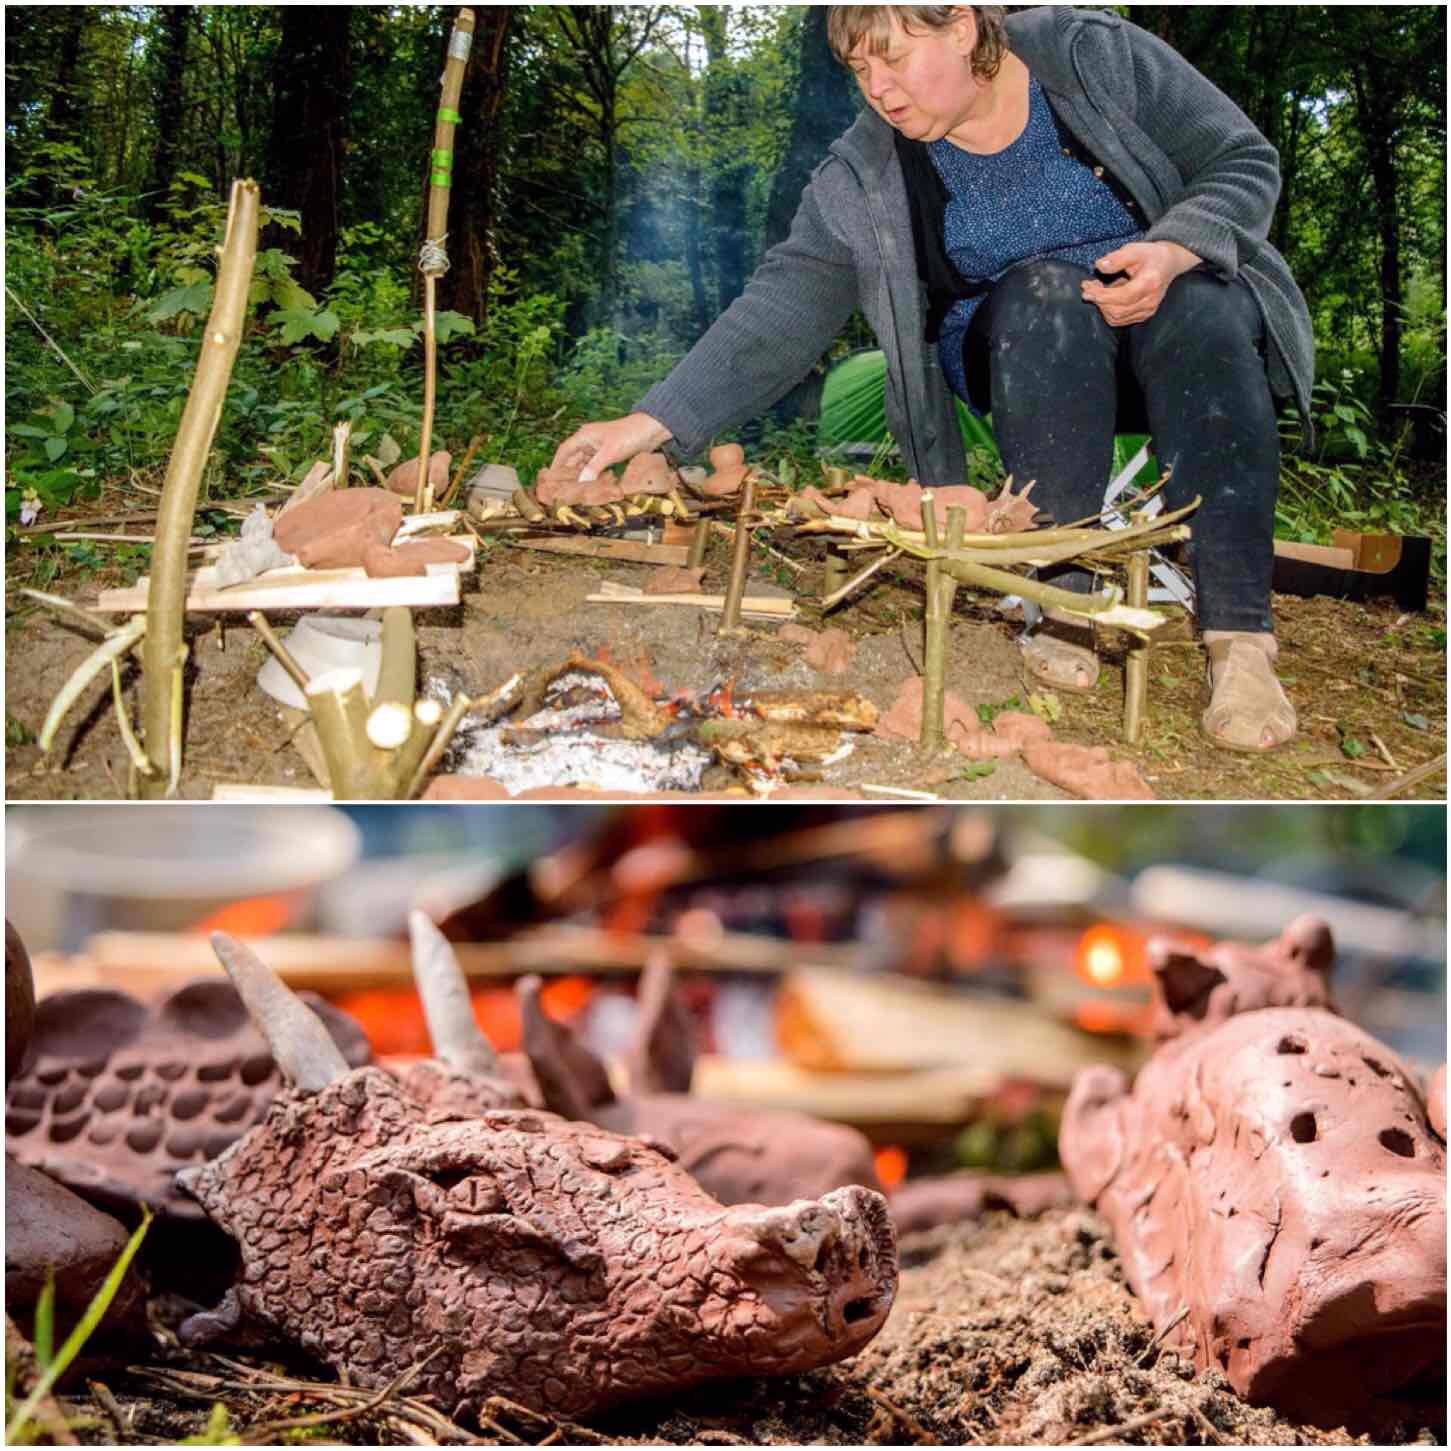
This year I spent some time with Anita (our resident potter) discussing how to make a primitive pot for extracting birch bark oil. Anita came up with a design for me which I am hoping to try out in the winter. Anita ran a number of sessions and a particularly popular one was making clay whistles.
The picture of the clay dragon whistle shown below won the August heat of the BCUK Bushmoot competition – It was a cracking bit of craft
Pottery Art
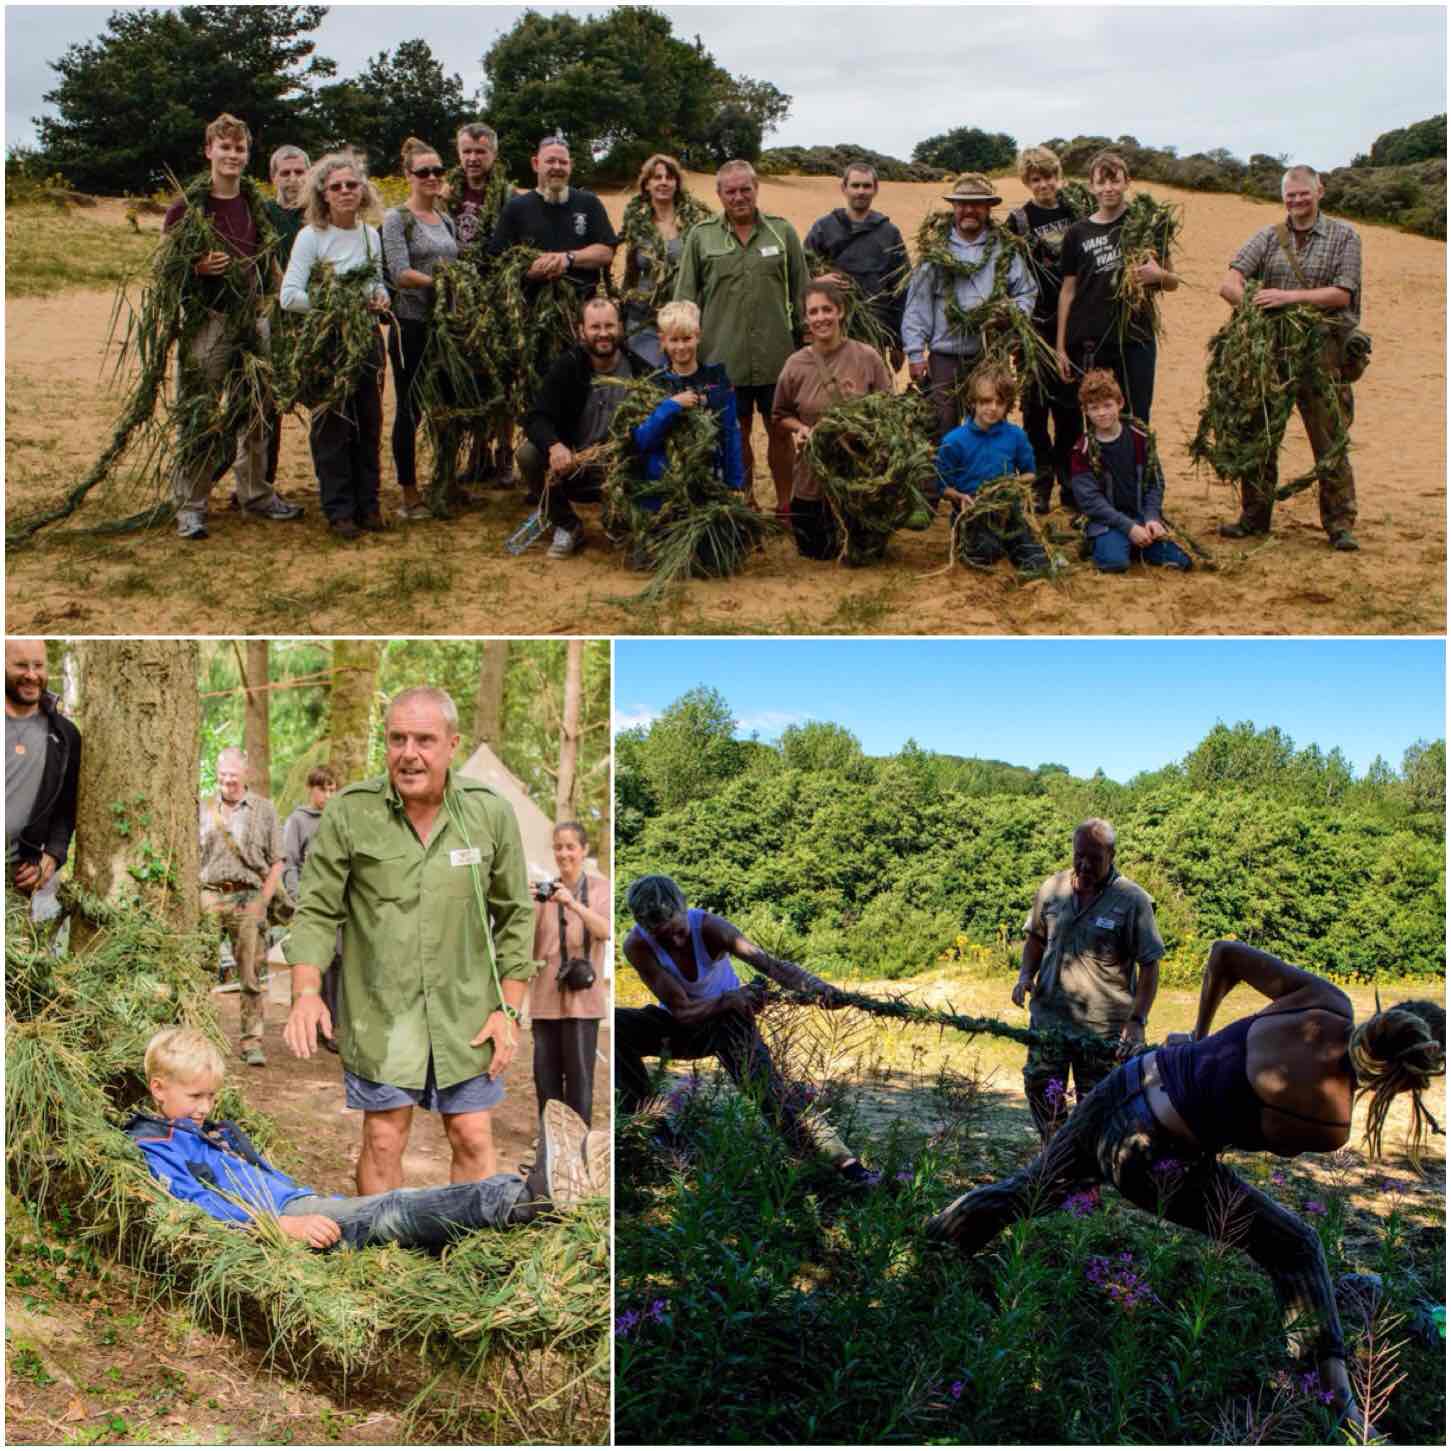
A course I thoroughly enjoyed this year was Perry McGee’s (National Tracking School) grass rope making (I had attended last years one as well). I really like Perry’s style of teaching – it is relaxed in one way however he really does make you work :-).
The whole group made enough rope from grass to make a hammock that took the weight of anyone in the group, This is a skill I have been looking into more after seeing rope that was made out of heather recently up on the Isle of Lewis.
Grass – comfy and tough
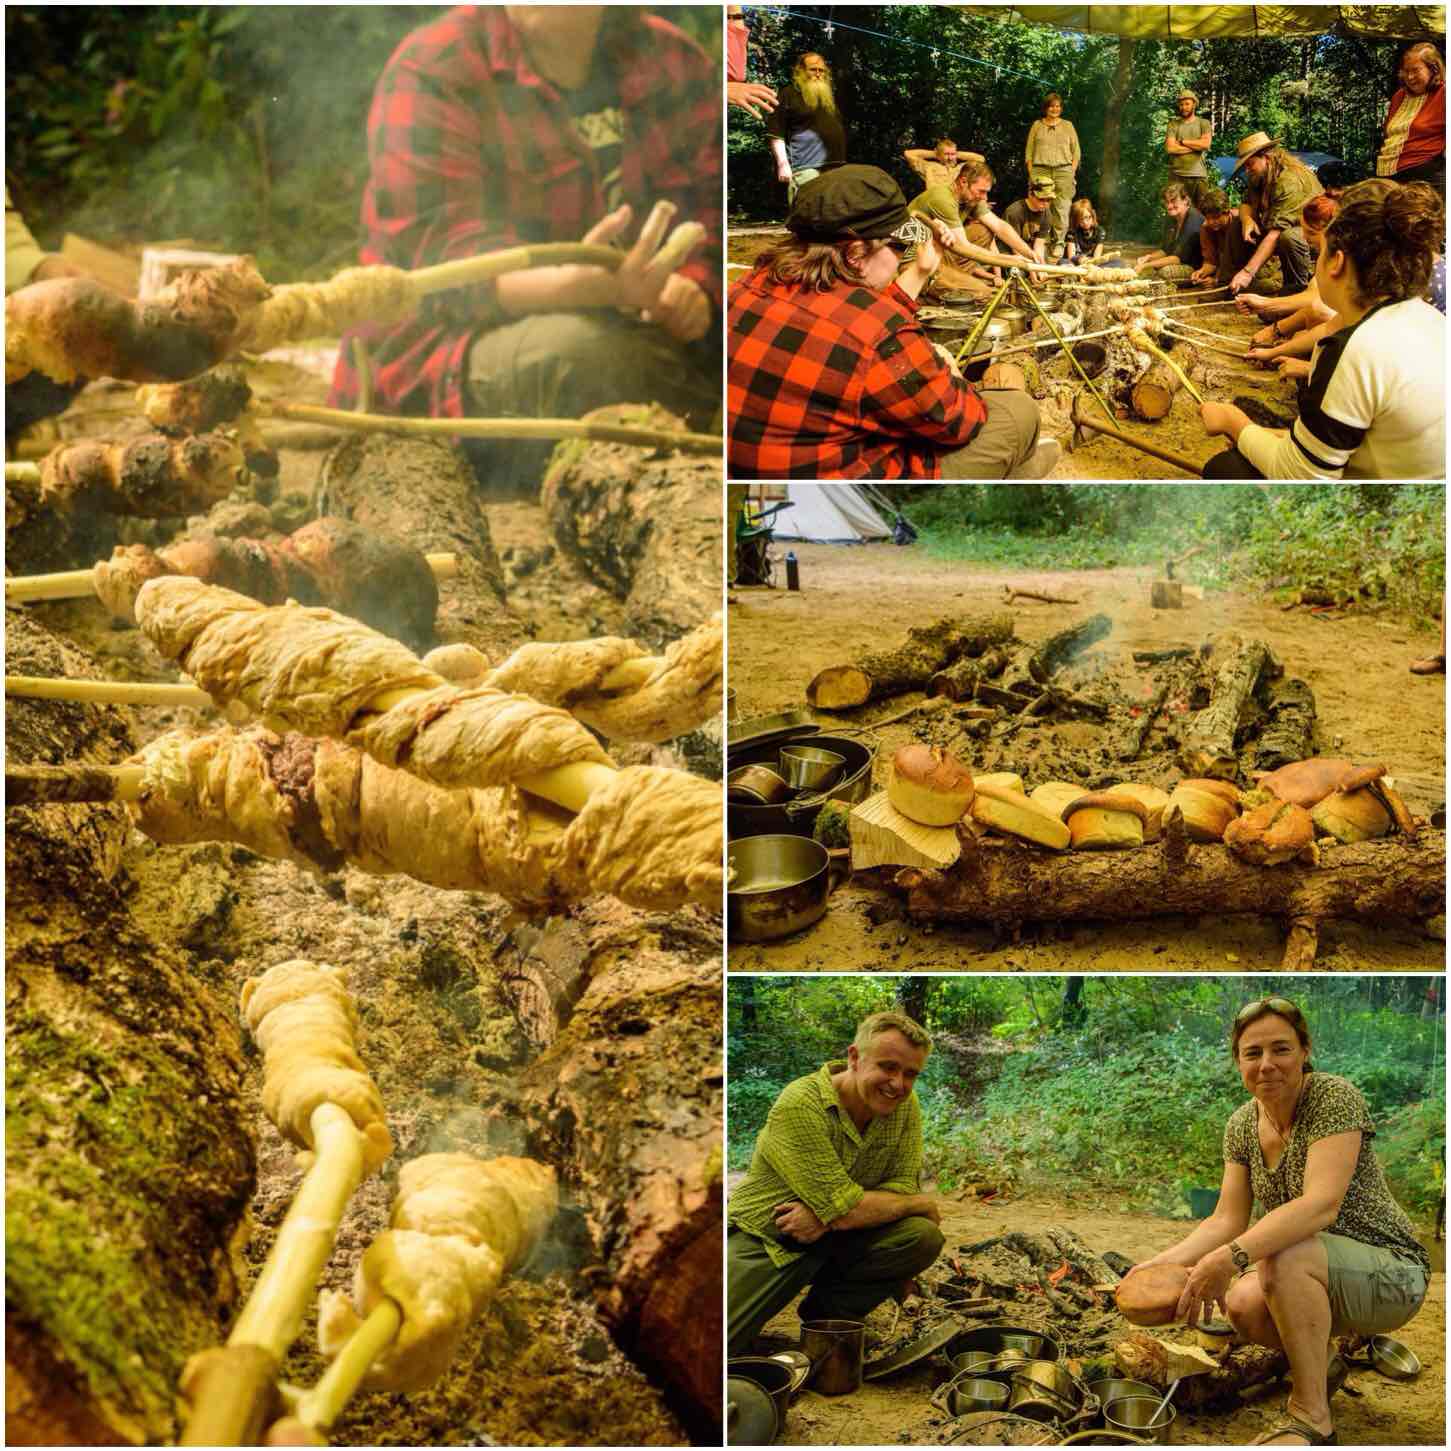
David Willis (Bushcraft with David Willis) attended once again this year and his class was packed. The smell of fresh baking bread could be detected from afar and I made sure I swung by the class a few times.
Alison attended the class and we were well set up for bread for the next couple of days.
Beautiful Bread
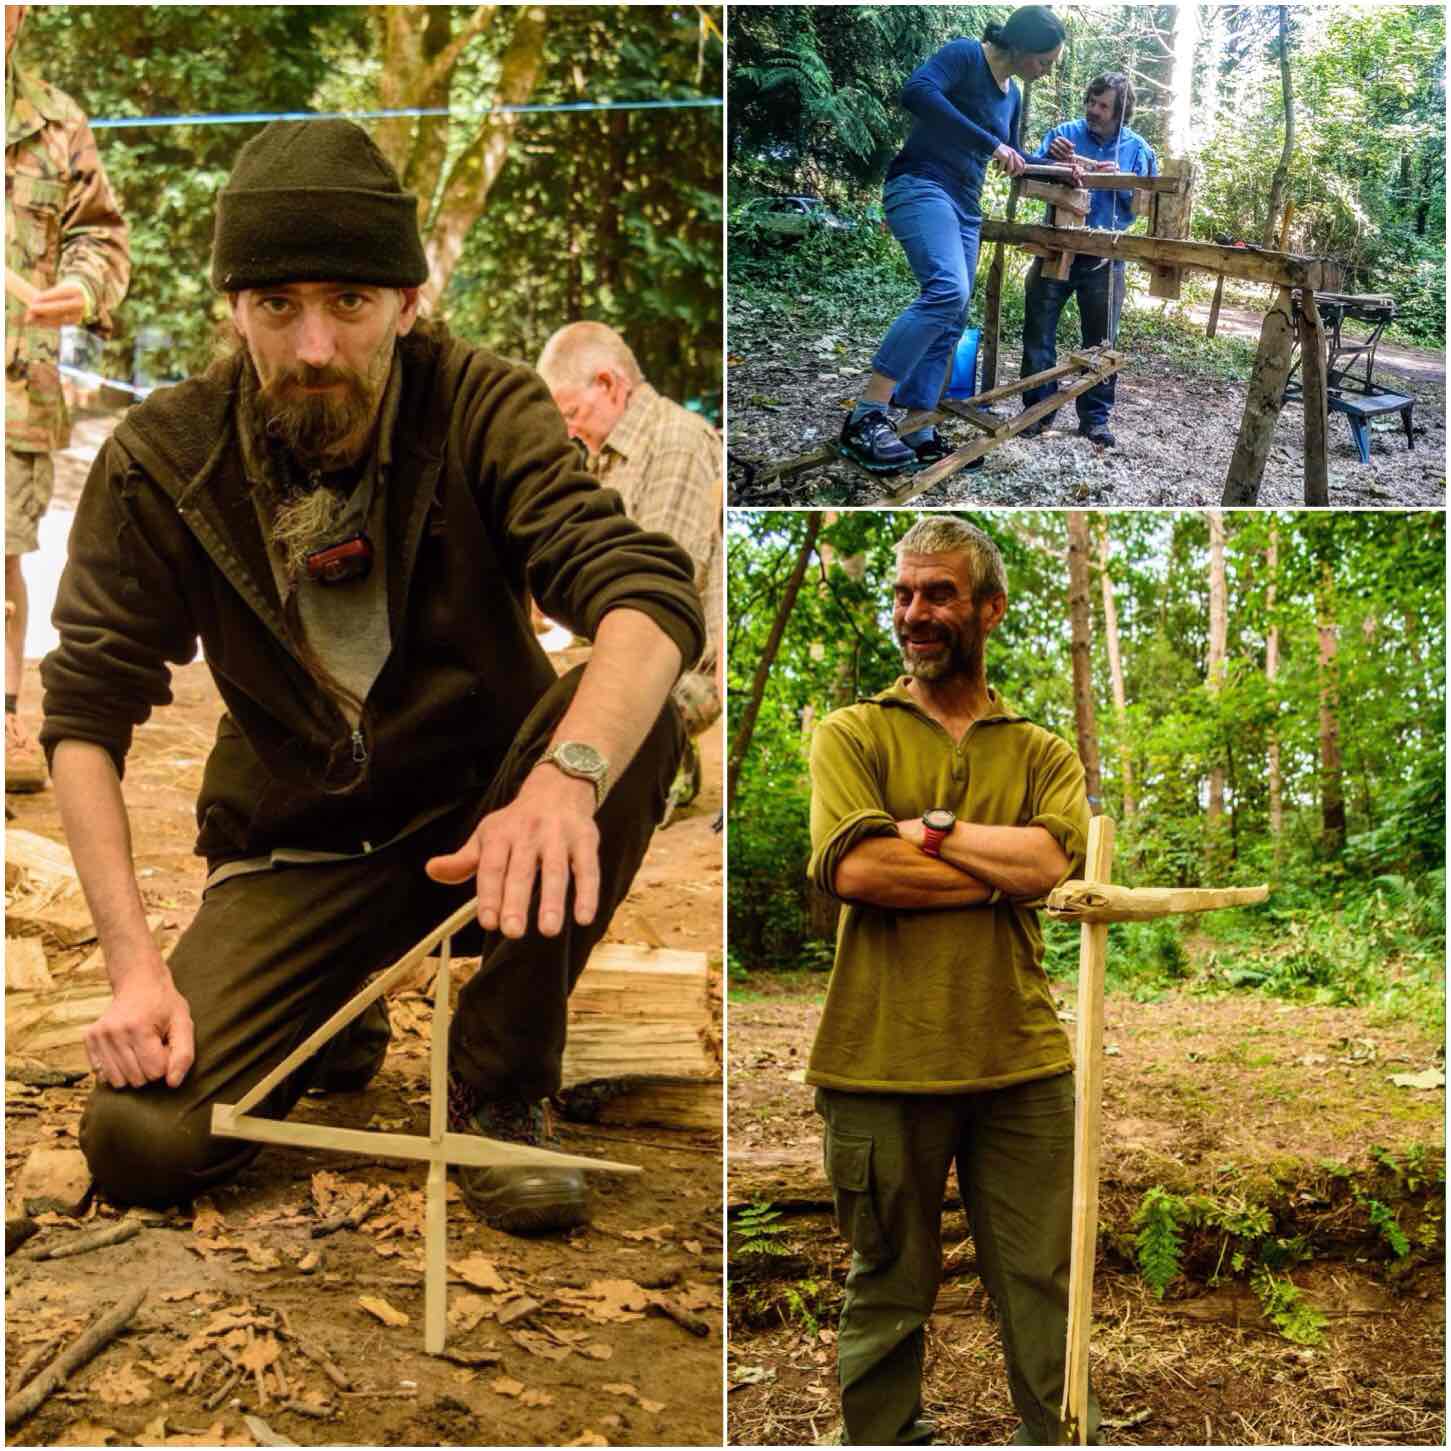
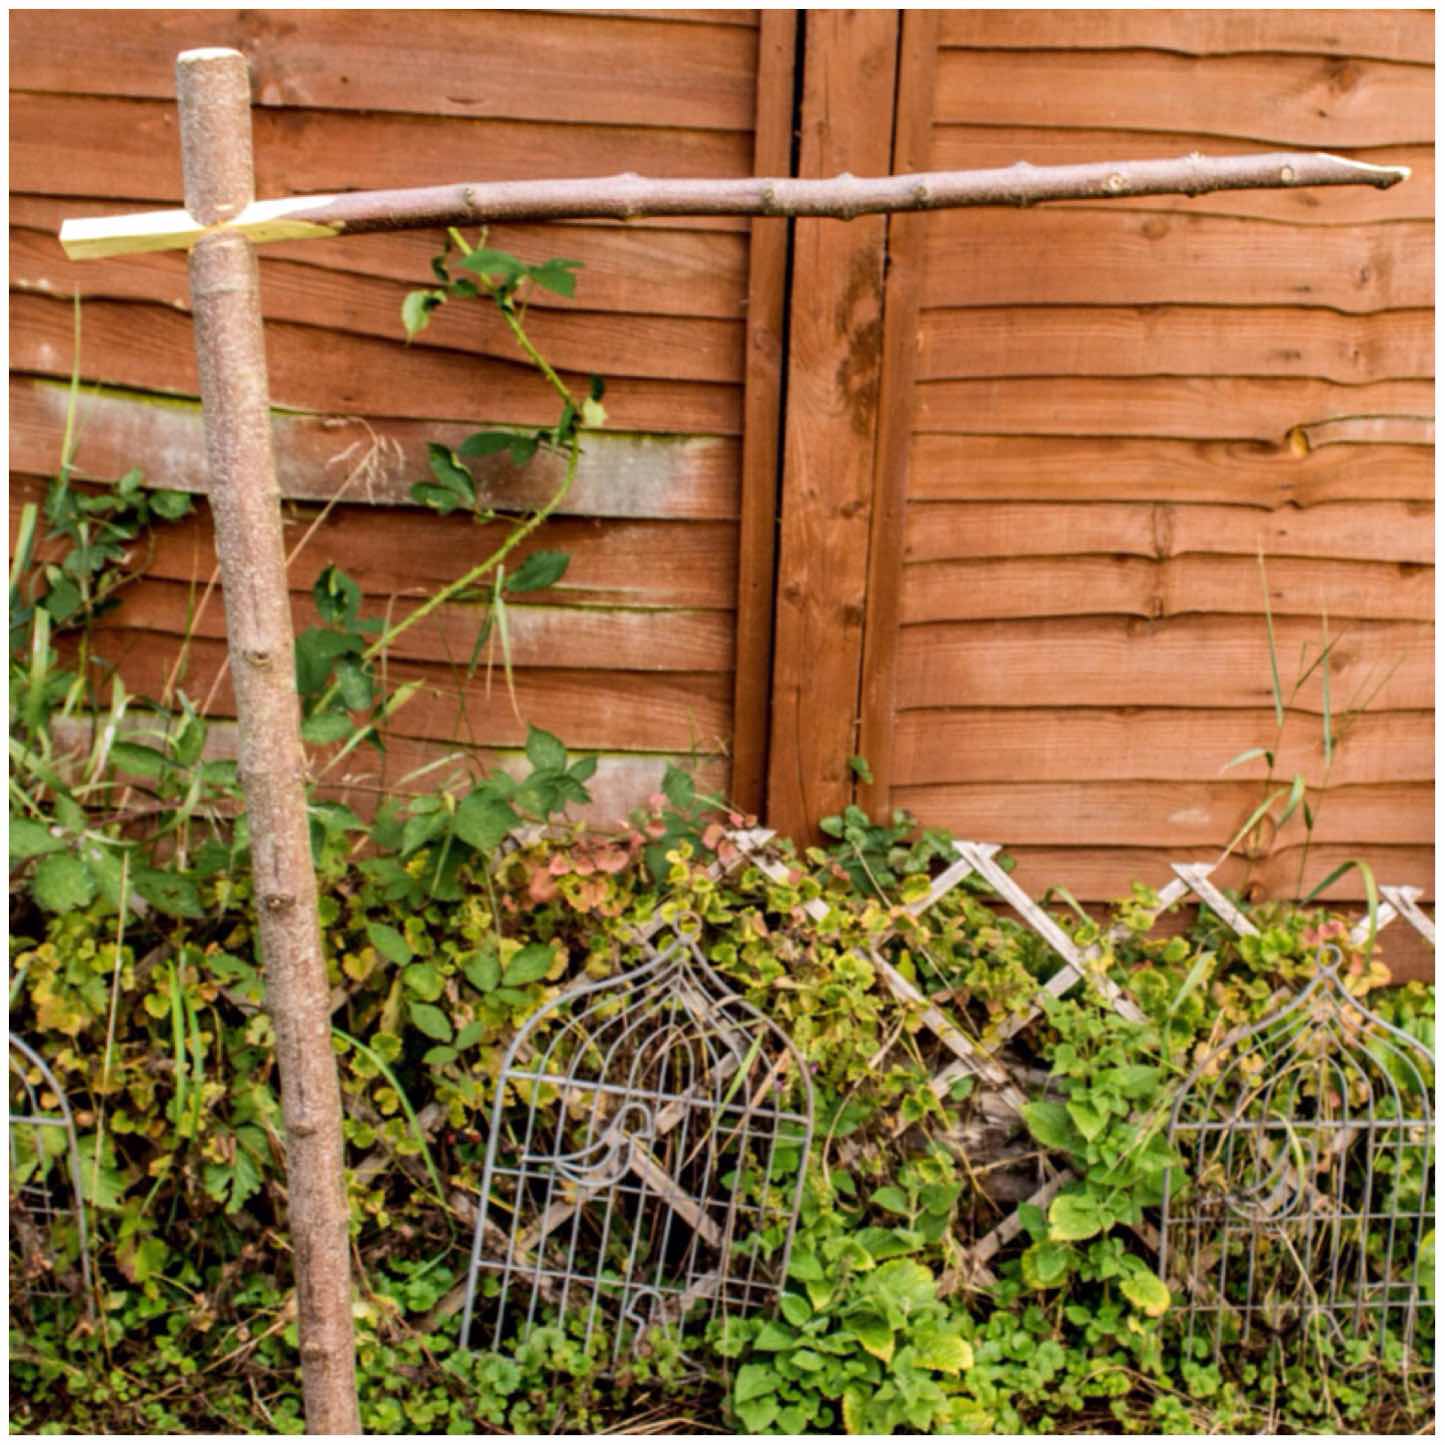
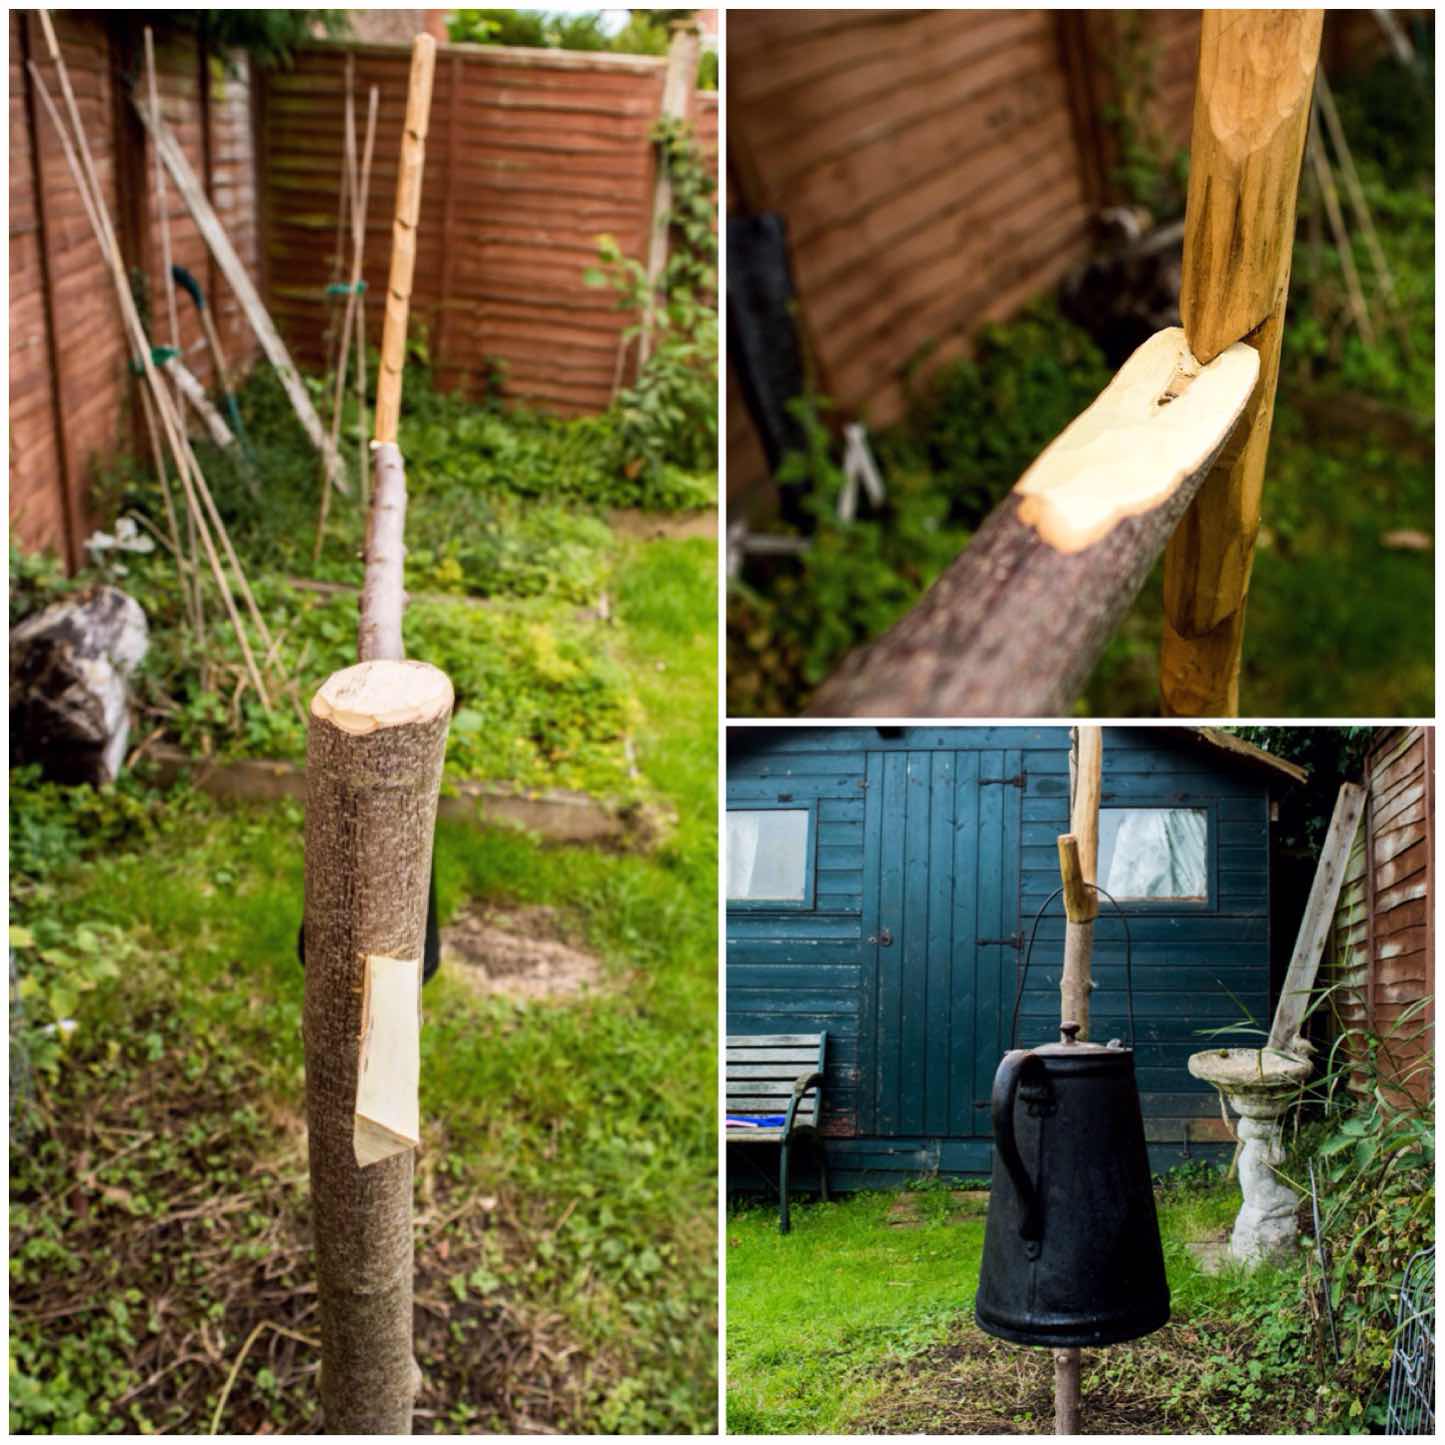
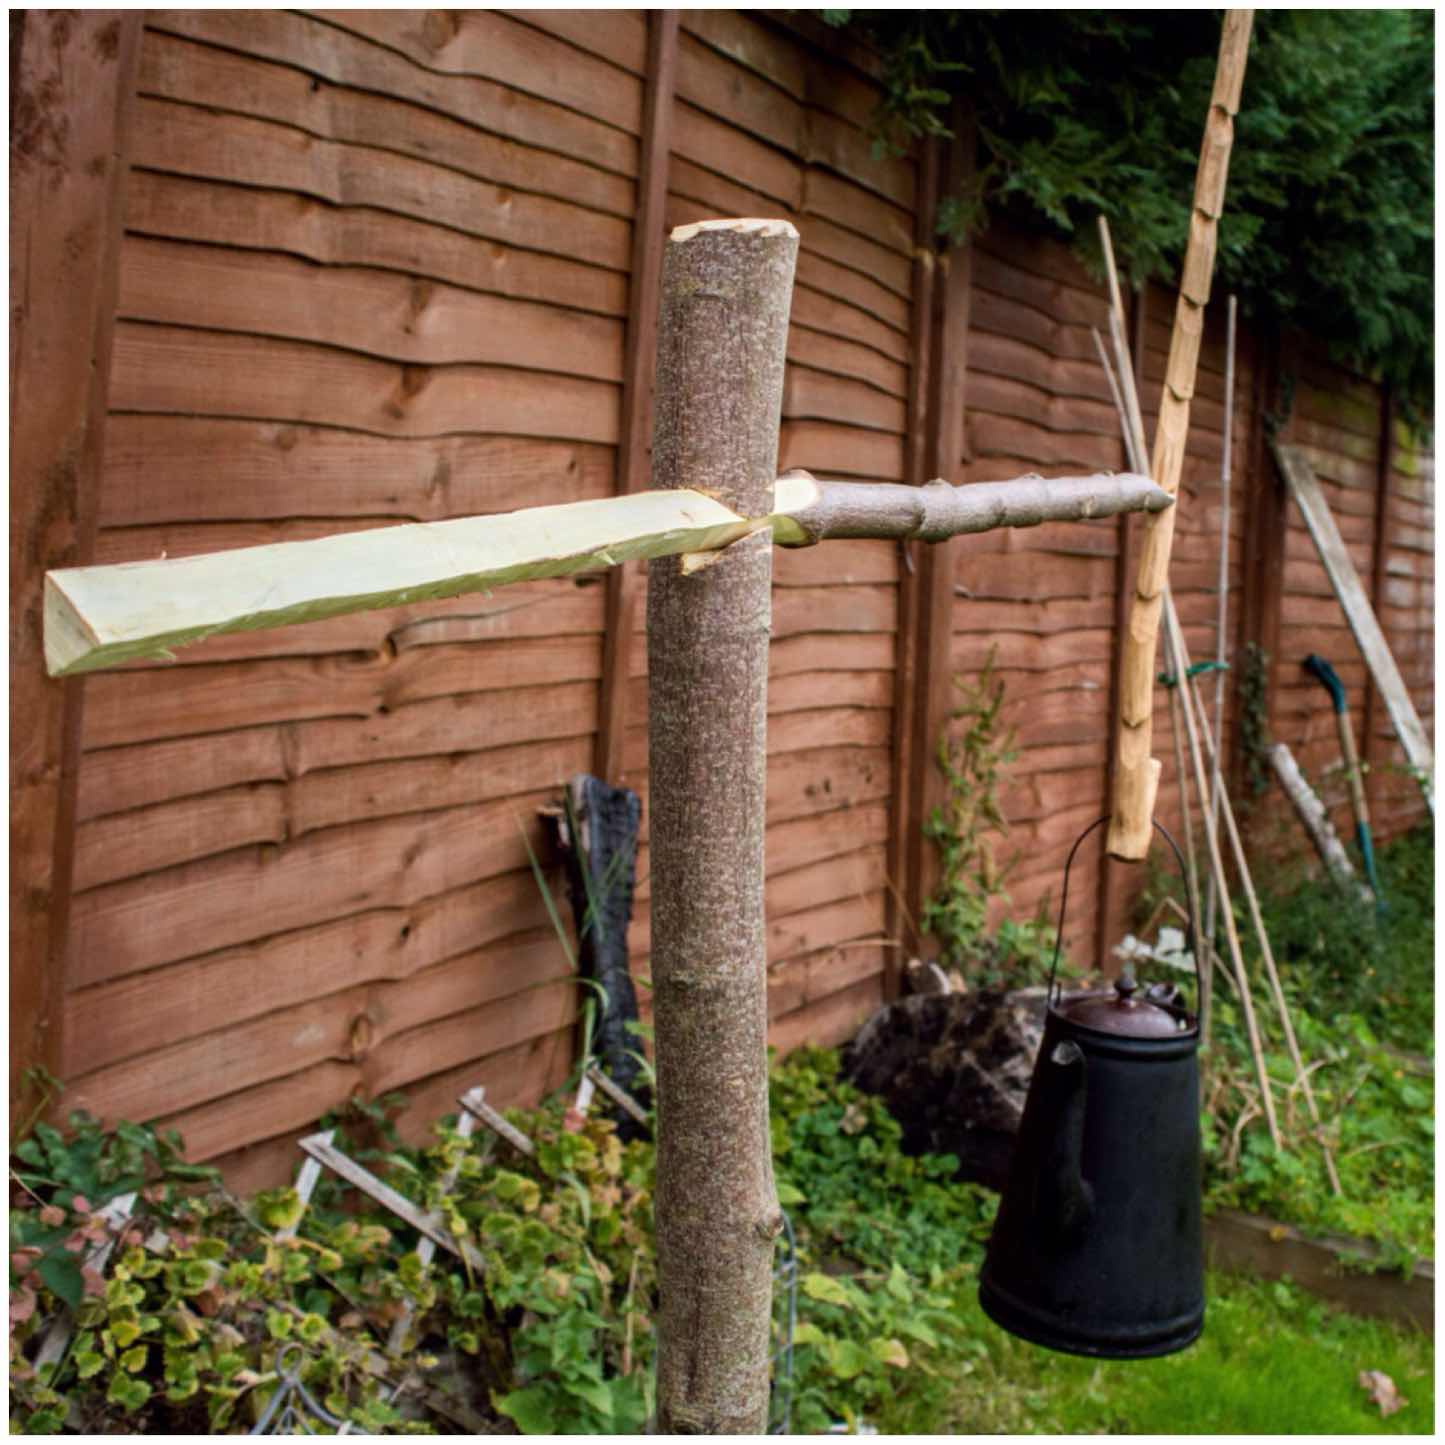
There was plenty of wood working going on as usual this year. Ed Livesy ran a busy class on carving a Figure Four Deadfall mechanism, Roy Budd was running the pole lathe continuously every day (where he got the energy I do not know) and I ran for the first time the Dovetail Campfire Crane class.
This class on the crane I will run again next year as a lot of people have never heard of it and became very interested in it after seeing what my students created. It is basically an adjustable crane made out of one pole.
Wood Skills
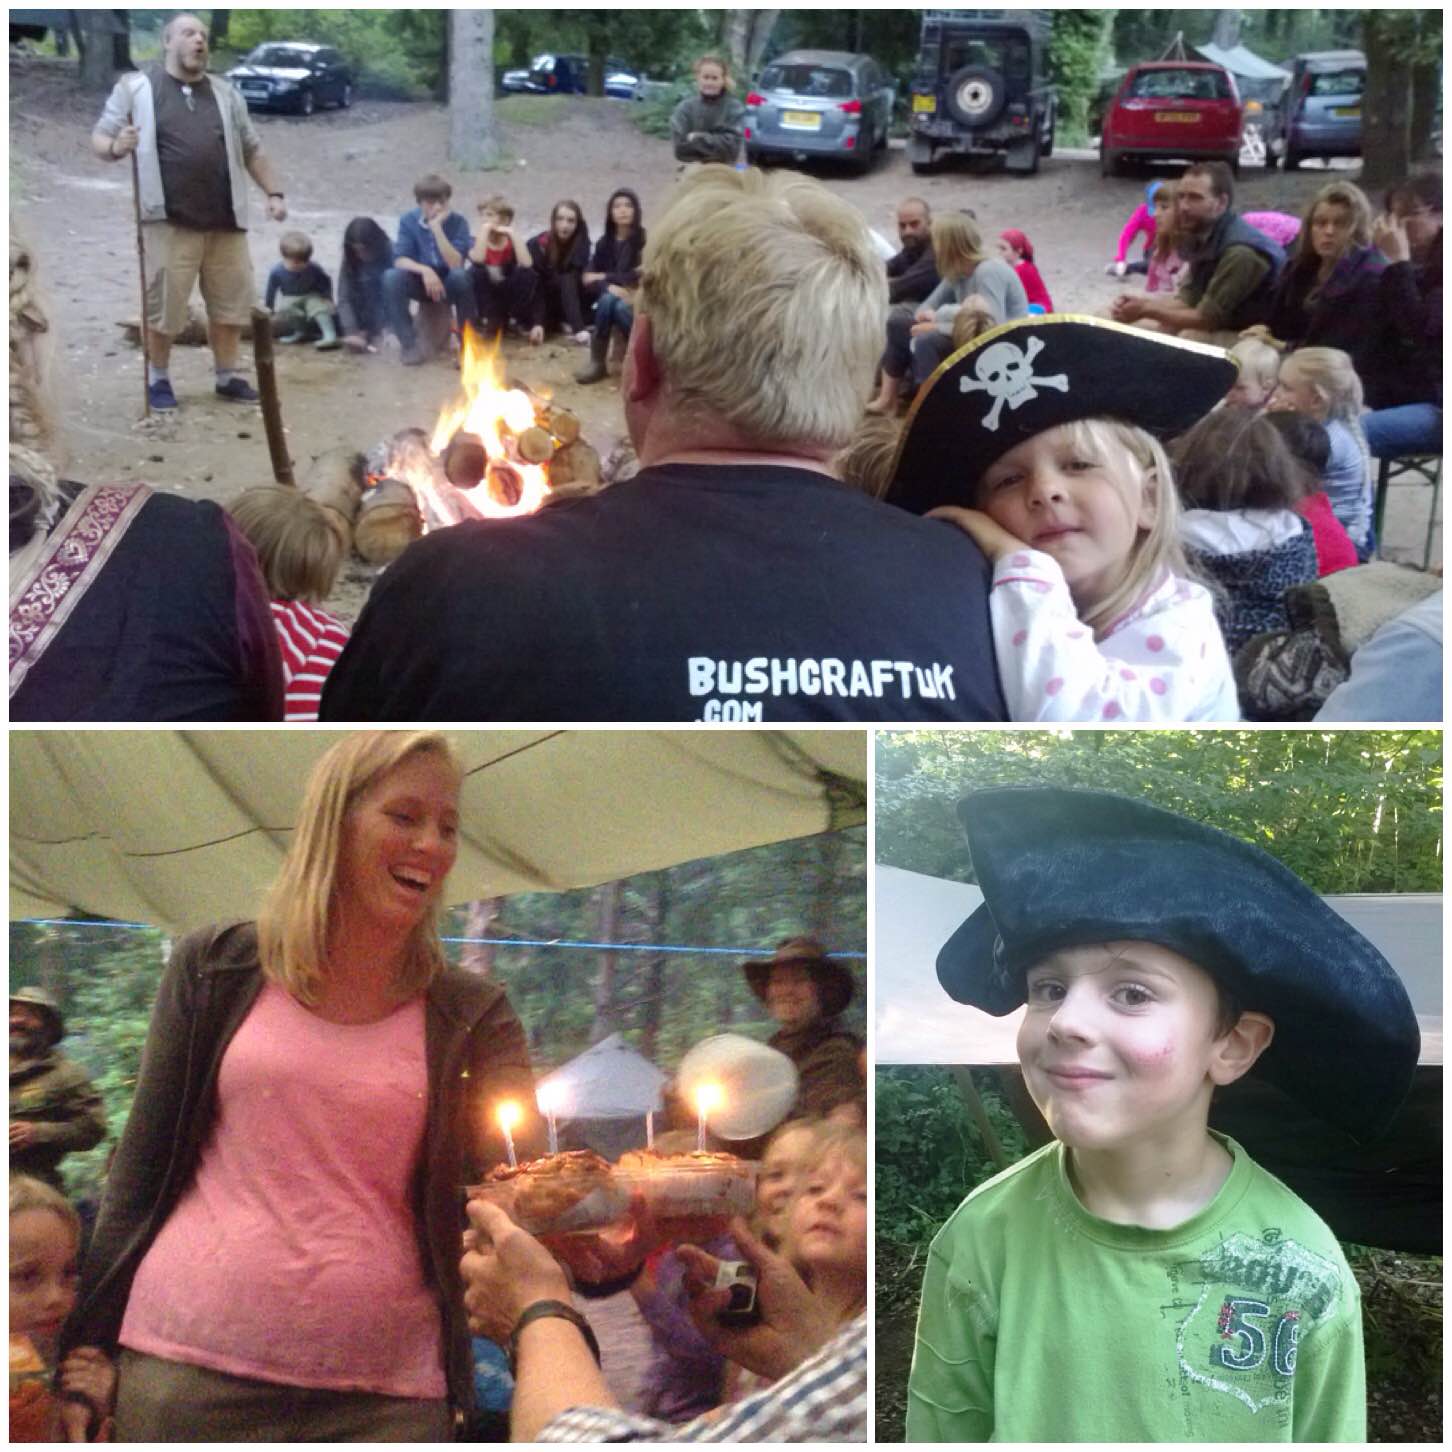
Food as usual plays a big part in the life of the Bushmoot. The communal meal was a great success again, Tony got himself a lovely birthday cake and the kids enjoyed a few evenings supping hot chocolate around the fire.
Top Scoff
It must be getting on 6 or 7 years we have run the archery range with the competition later in the Moot.
We have sessions run most evenings and the competition is broken into two parts (kids and adults). I received many great presents to give away as prizes so thanks to all who donated. The winners are each to receive a handmade bow from Wayne Jones (Forest Knights).
On a down side my Holmegaard bow snapped this year at the Moot. It has been a trusty bow since I made it 8 years ago and it has been used by hundreds of people on my courses. I did though get an Elm stave from Chris Claycomb – so that is a project for the winter.
Down on the Range
Another first for me was running the Damp Wood Log Rocket stove class. The rain we had earlier meant that all the logs were damp (the spray was hitting us in the face when we split them) so it was great to see after all their hard work all the students managed to get their log rockets fired up.
The coffee I can tell you was brilliant 🙂
Proper coffee from Damp Log Rockets
As you can see I did take a few pictures at the Bushmoot however there were a few special ones to me. Below are three that I really was glad they turned out so well.
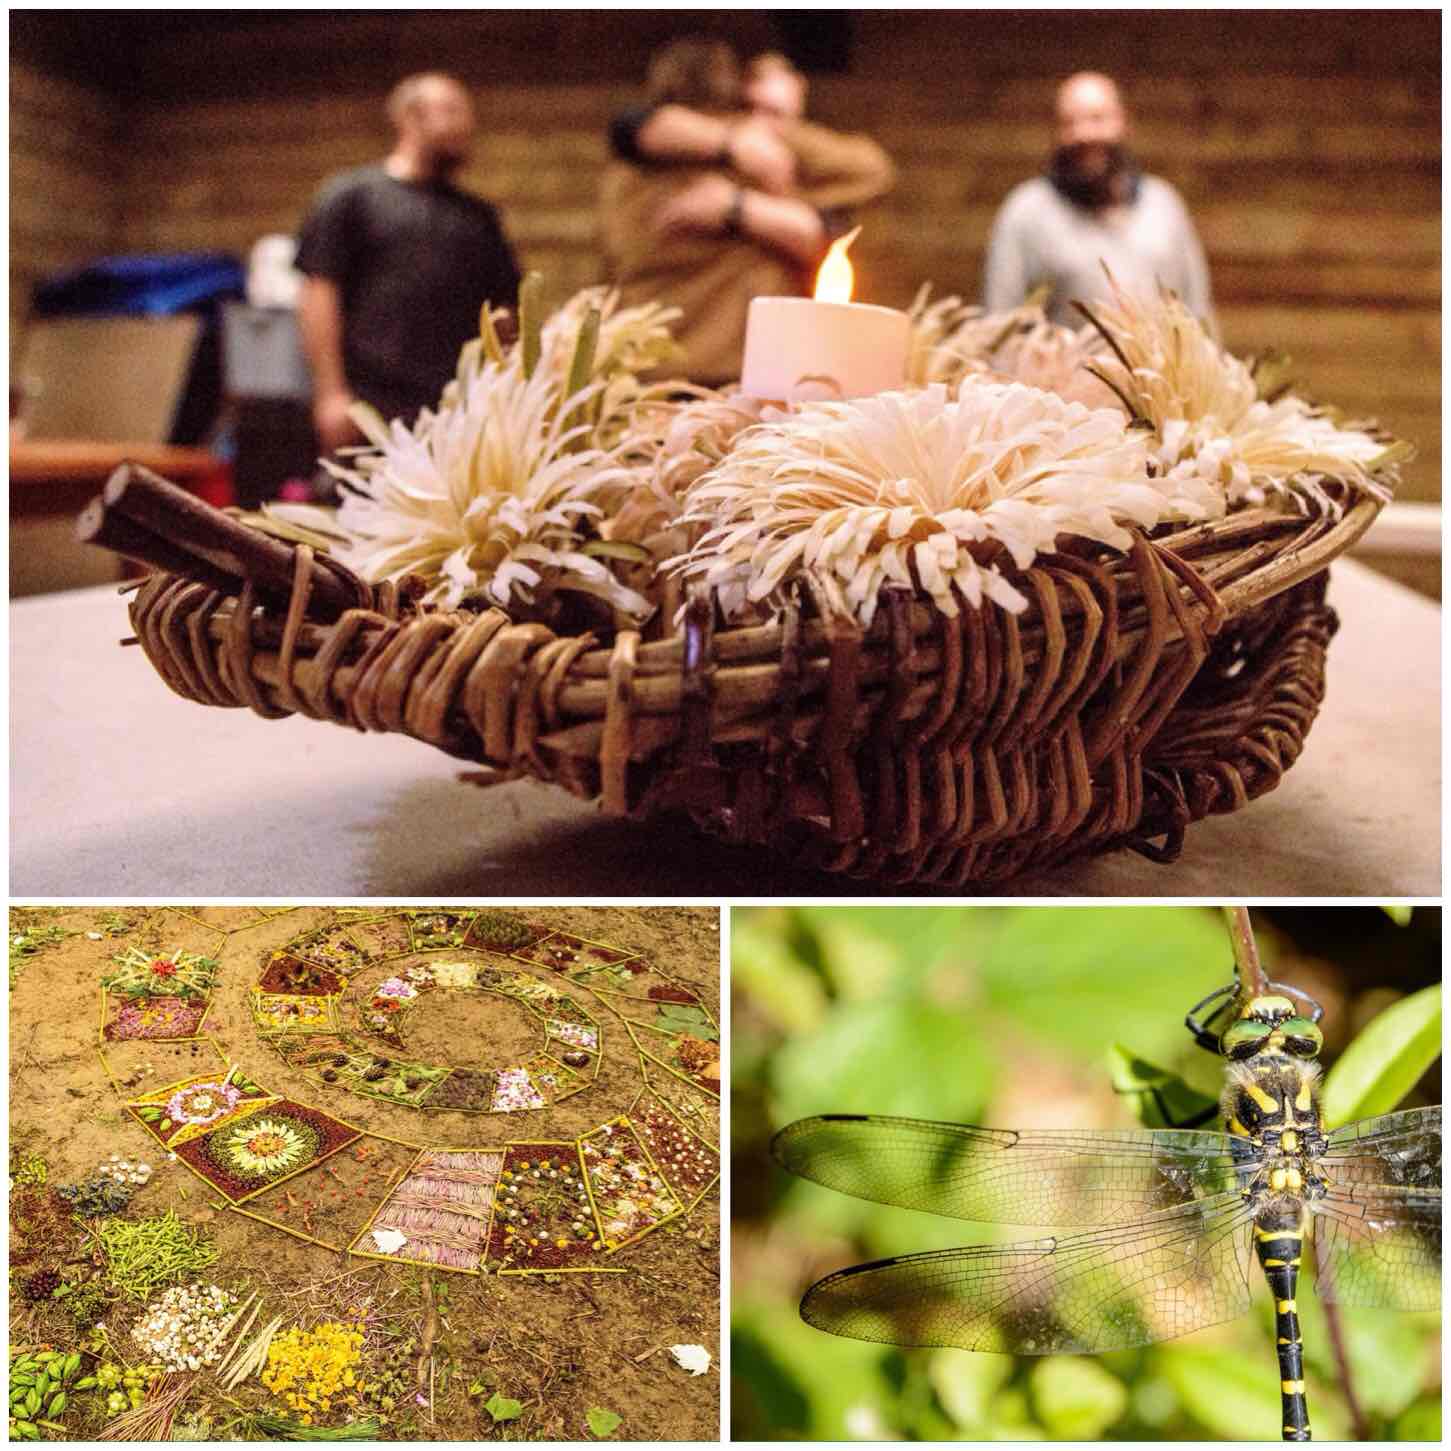
The first one was a moment I captured when taking a picture of the battery candle sitting in basket of carved flowers. Mark was just saying goodbye to Tony with a manly hug when I pressed the shutter.
Next was sitting beside the beautiful artwork created by Keith Beaney. Every year Keith comes along and patiently creates these works of art for us all to enjoy.
And finally one day someone pointed out to me a dragonfly sunning itself next to the shower block. This little fella was not moving for anyone and really let me get up close and personal to photograph him.
Special Moments
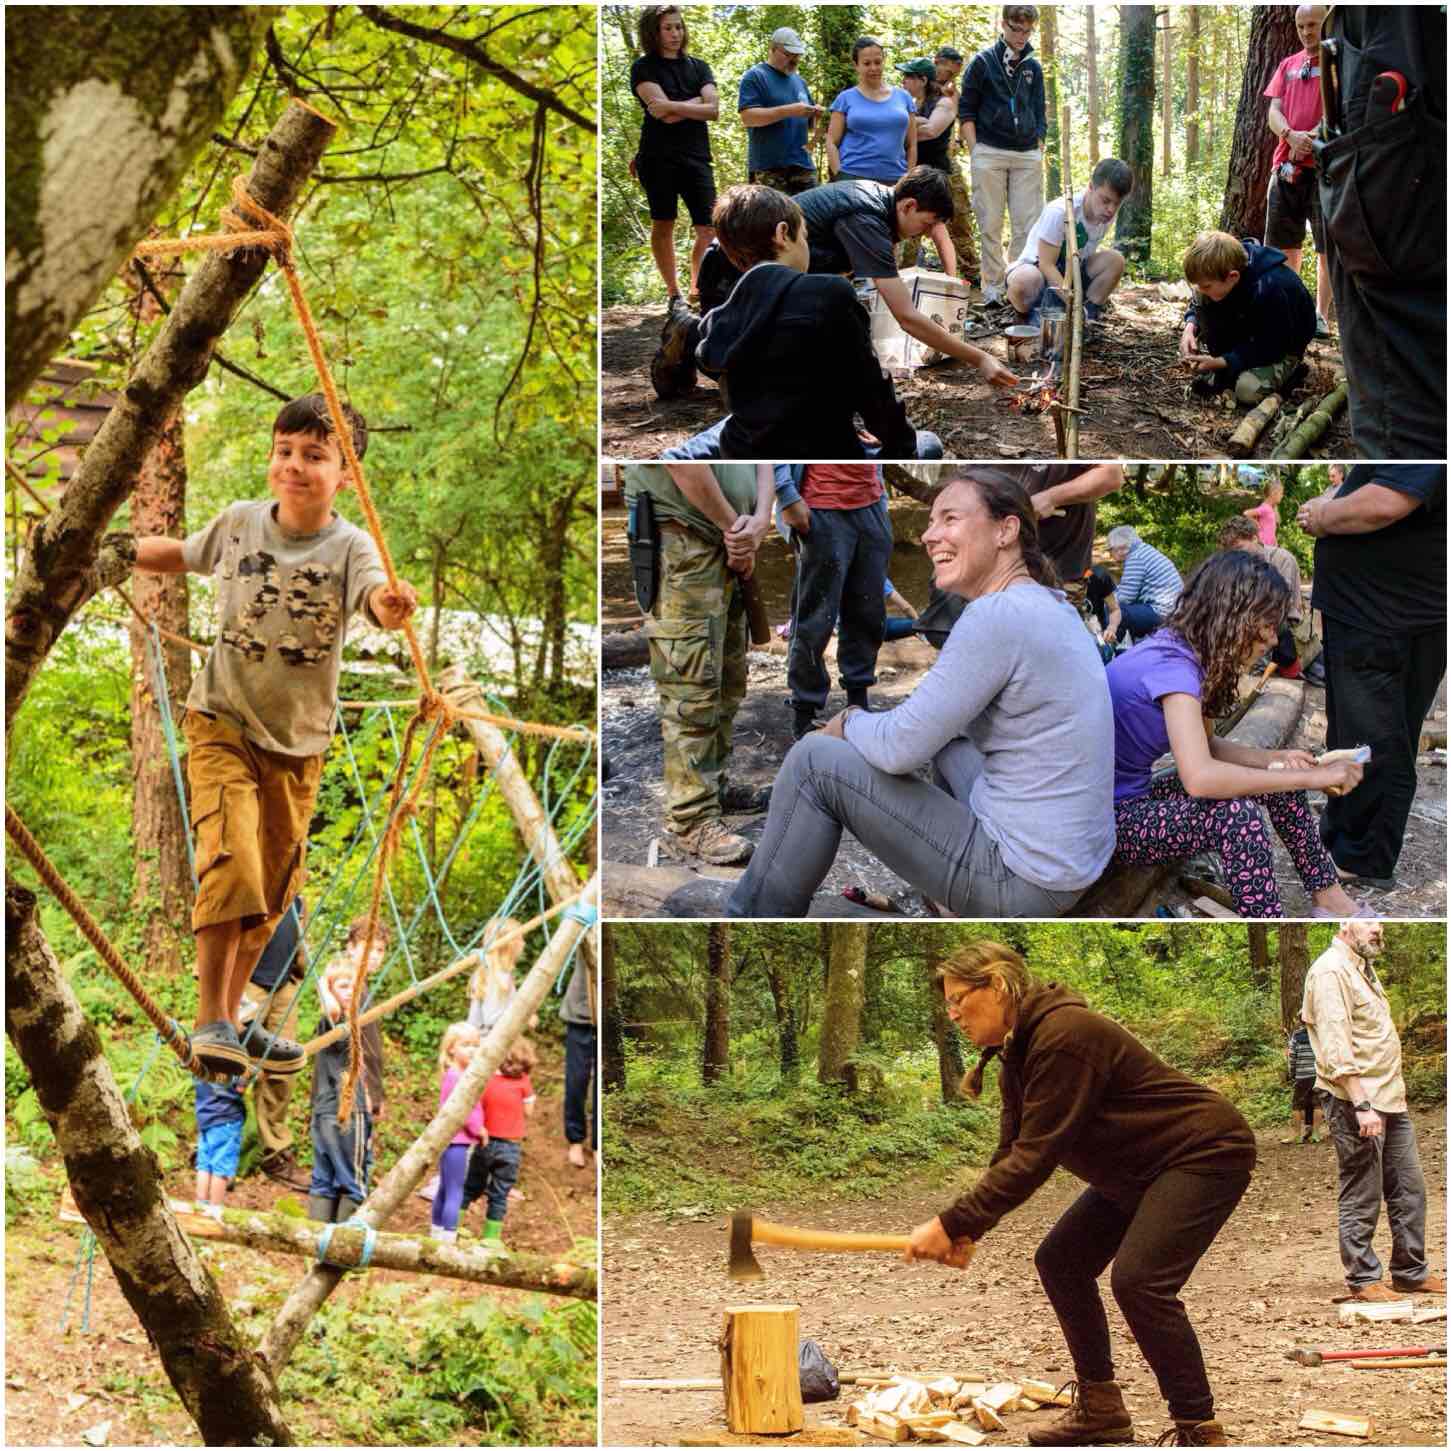
There were too many workshops run to be able to attend them all (approx. 110 were run over the core days) however keeping my trusty Nikon with me I managed to capture a few moments from just some of them.
Wayne was busy teaching knife throwing, Theresa ran a very busy workshop on flint knapping and Stuart spent two days splitting the most twisted trunk in the world without using metal wedges. There were many, many more workshops run by different instructors, I saw some, photographed some but missed many – that is the nature of the Bushmoot for you.
Passing On By
After the core days were over we spent time dismantling lots of the classrooms, mooching by the fire and taking long relaxing walks down to the beach,
Winding Up
During the Moot I finished off doing my 22 Day 22 Push up challenge and videoed it each day. In the video below you will see in the second half of it lots of Bushmoot locations, finishing up with pushups in the swash zone in the sea at Merthyr Mawr,
So if you are into activity holidays that do not cost the earth then head on down to the Bushmoot next year.
Recently I came across a video on You Tube from my friend David Willis who runs his own company called Bushcraft with David Willis. David teaches outdoor living skills, natural history and woodland crafts. I thoroughly enjoyed the video so decided to write this blog post, share the video and tell you a little about this excellent fellow bushcrafter.
David Willis
I have known David for a number of years now and met him at a re-union of student who studied under John Rhyder of Woodcraft School fame.
Last year at the BCUK Bushmoot David ran a number of classes for us and the Backwoods Baker class proved to be a hit. I was photographing lots of classes that morning but kept on coming back to David’s class just to take in the smell of the baking and get the odd morsel or two.
The BCUK Bushmoot
A week later at the Wilderness Gathering I met David once again and he asked if I could take a few pics of him running a class on Backwoods Baking – needless to say I readily agreed, got some great pictures and some lovely bread.
The Wilderness Gathering
Keep an eye out on David’s website for his free Family Friendly Guided Woodland Walks. They are becoming increasingly popular and David will guide you through the beauty of the Chiltern Hills.
I am hoping that I’ll see David back once again at the Bushmoot and the Wilderness Gathering but in the meantime here is the video on one of his Backwoods Baker courses to enjoy.
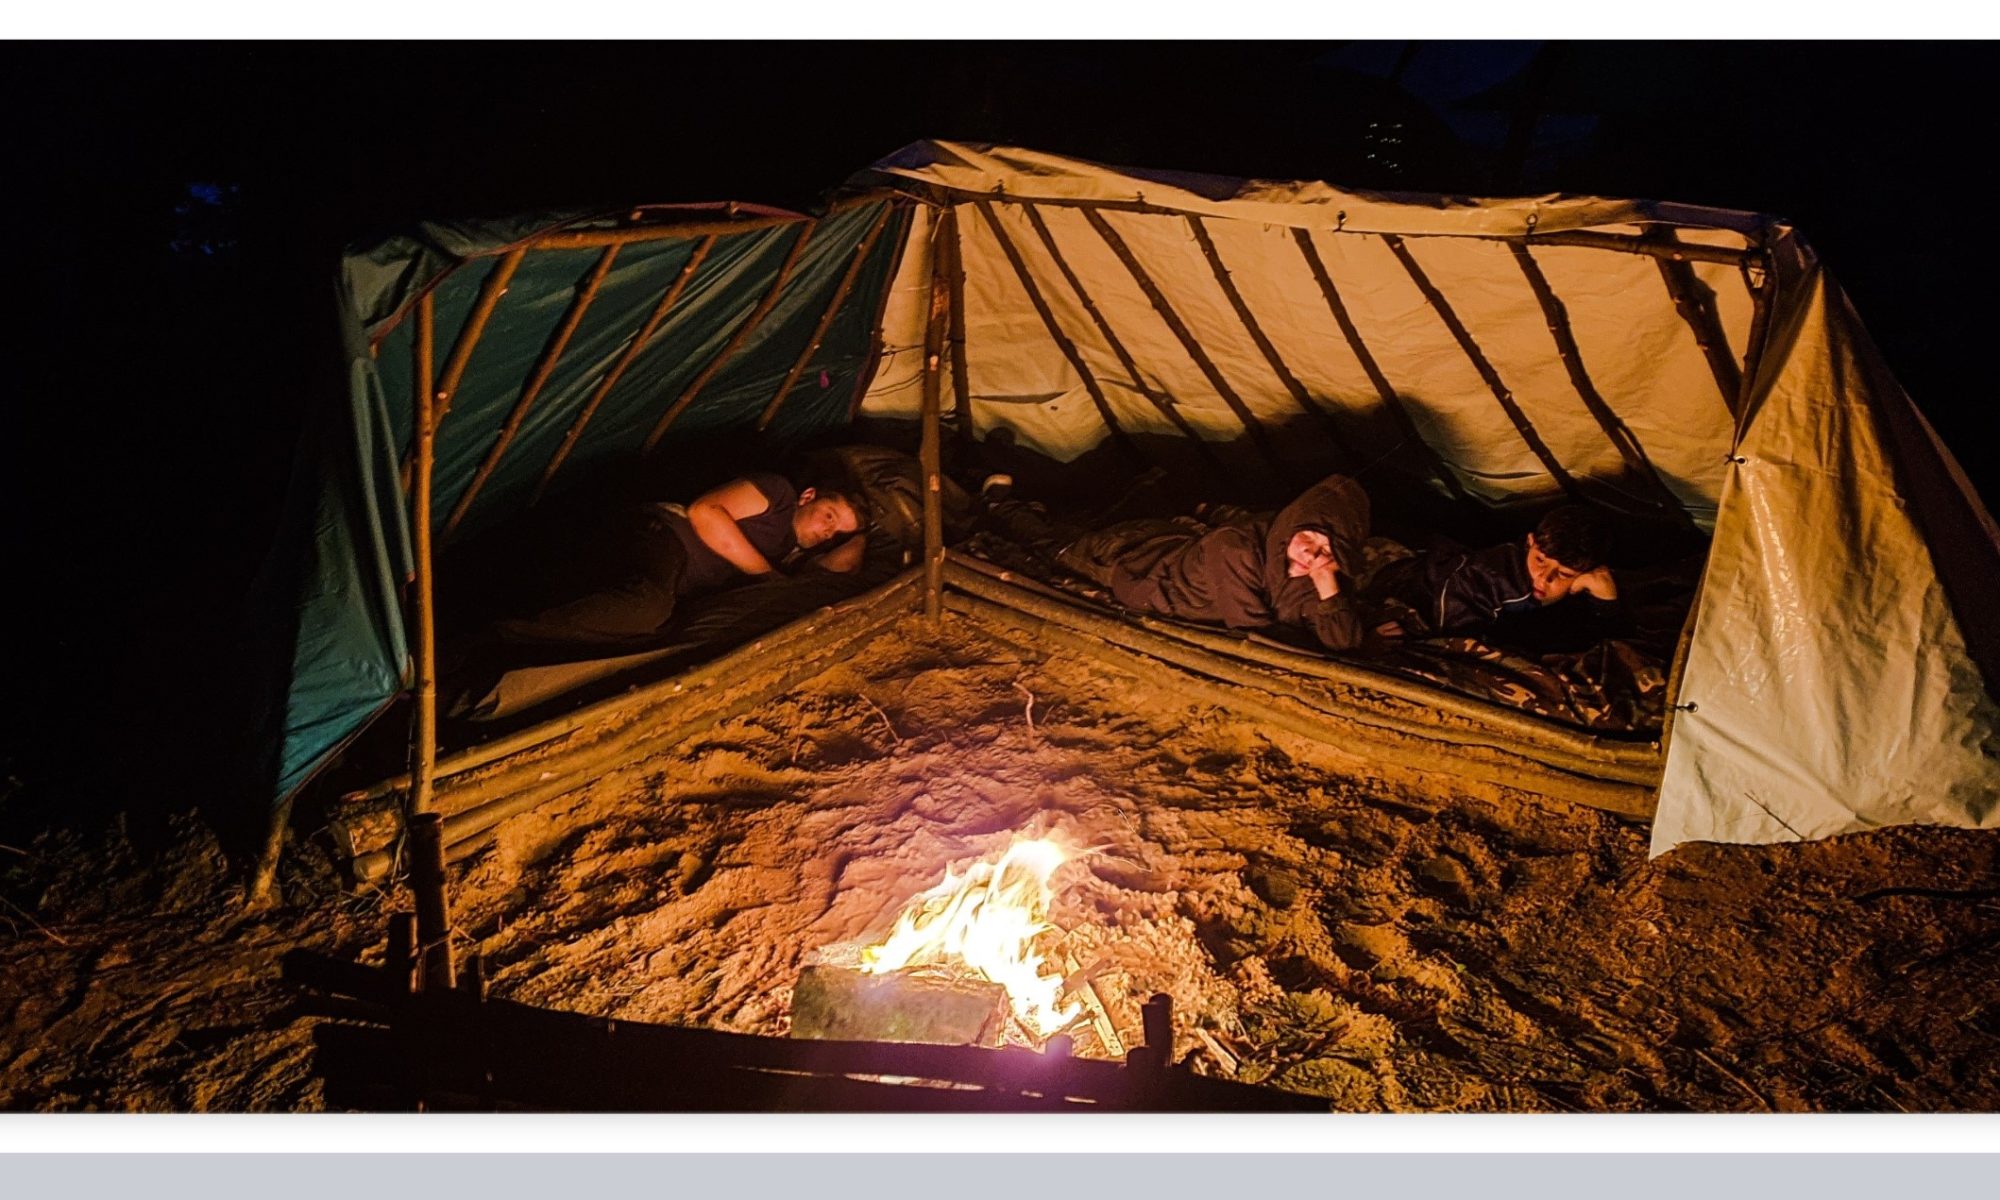
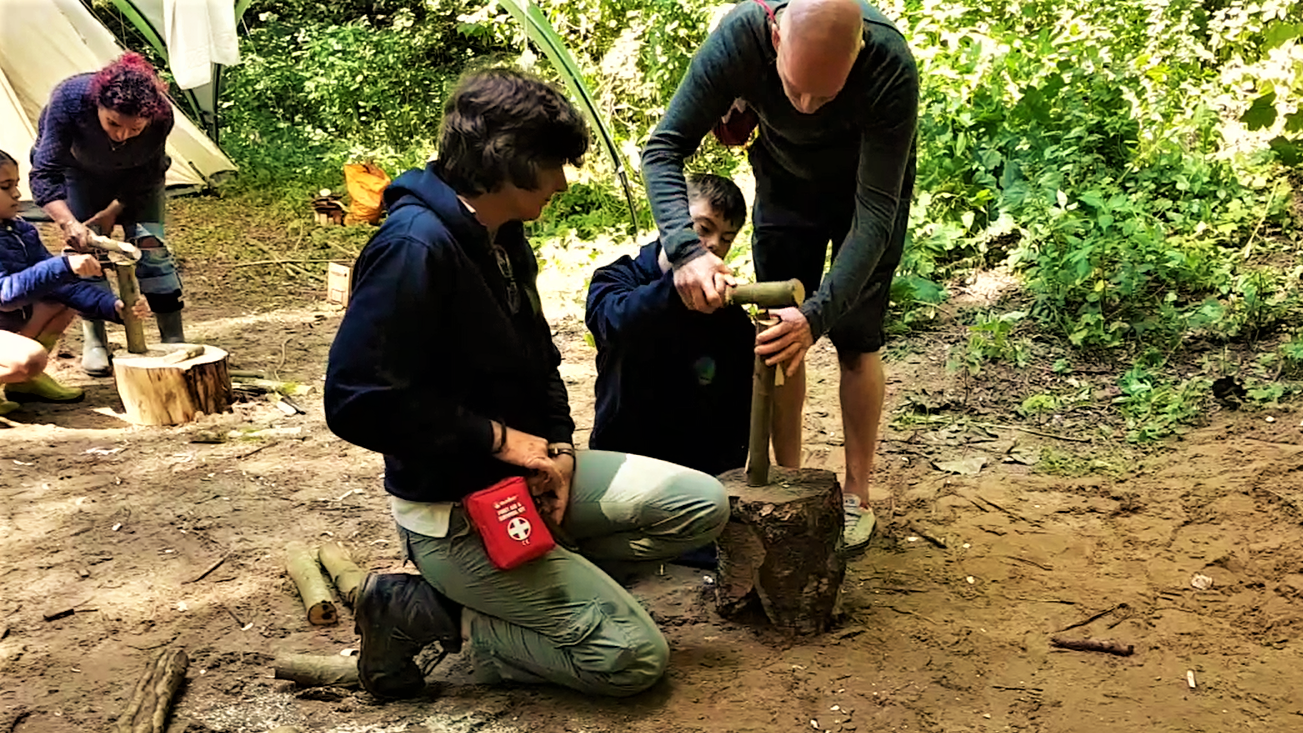
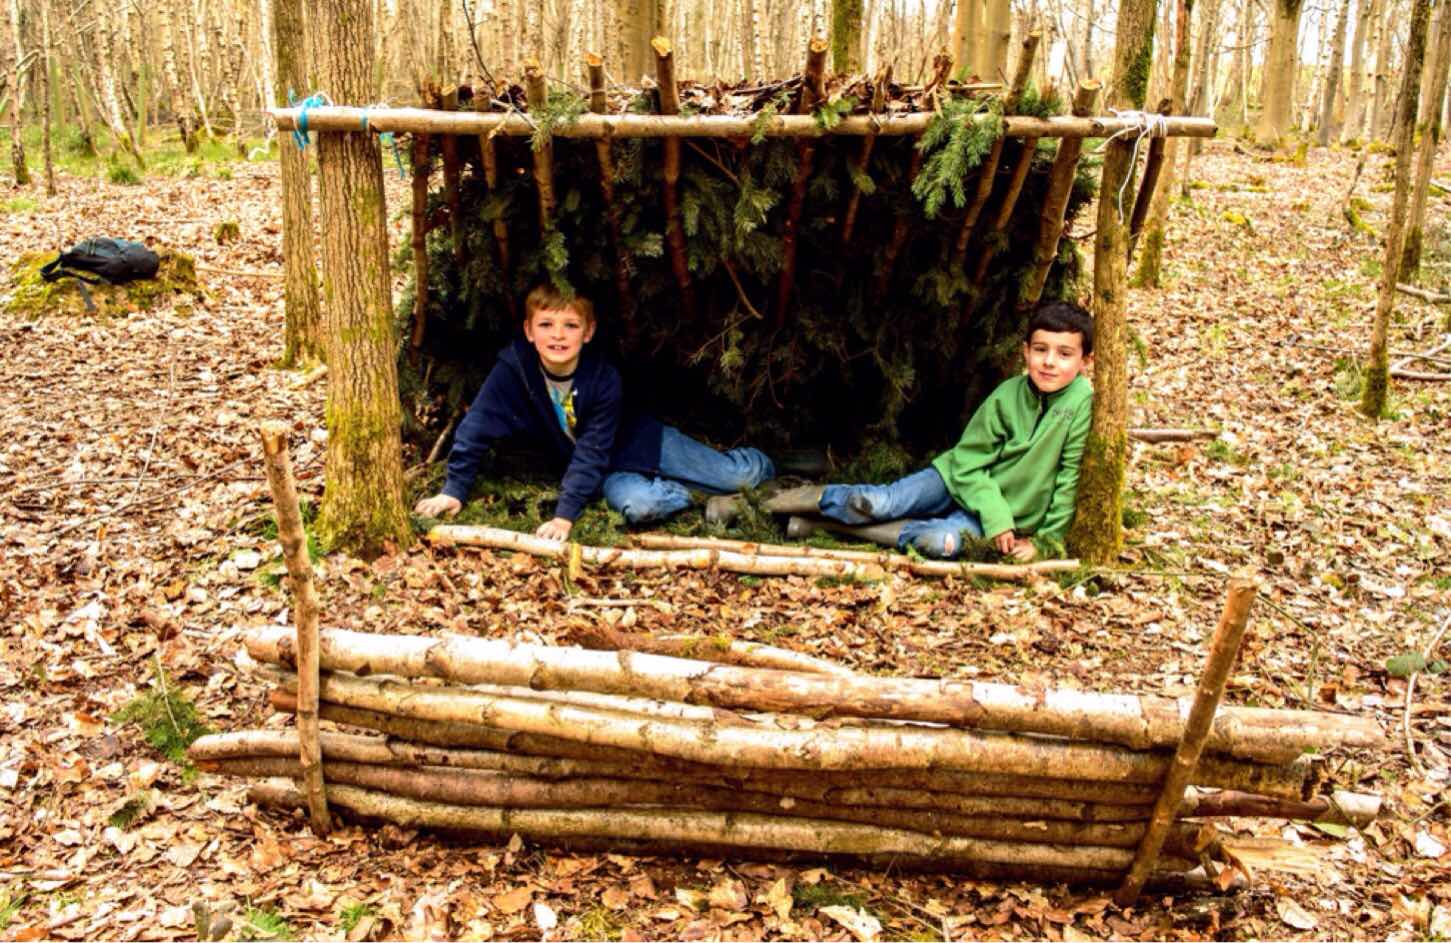
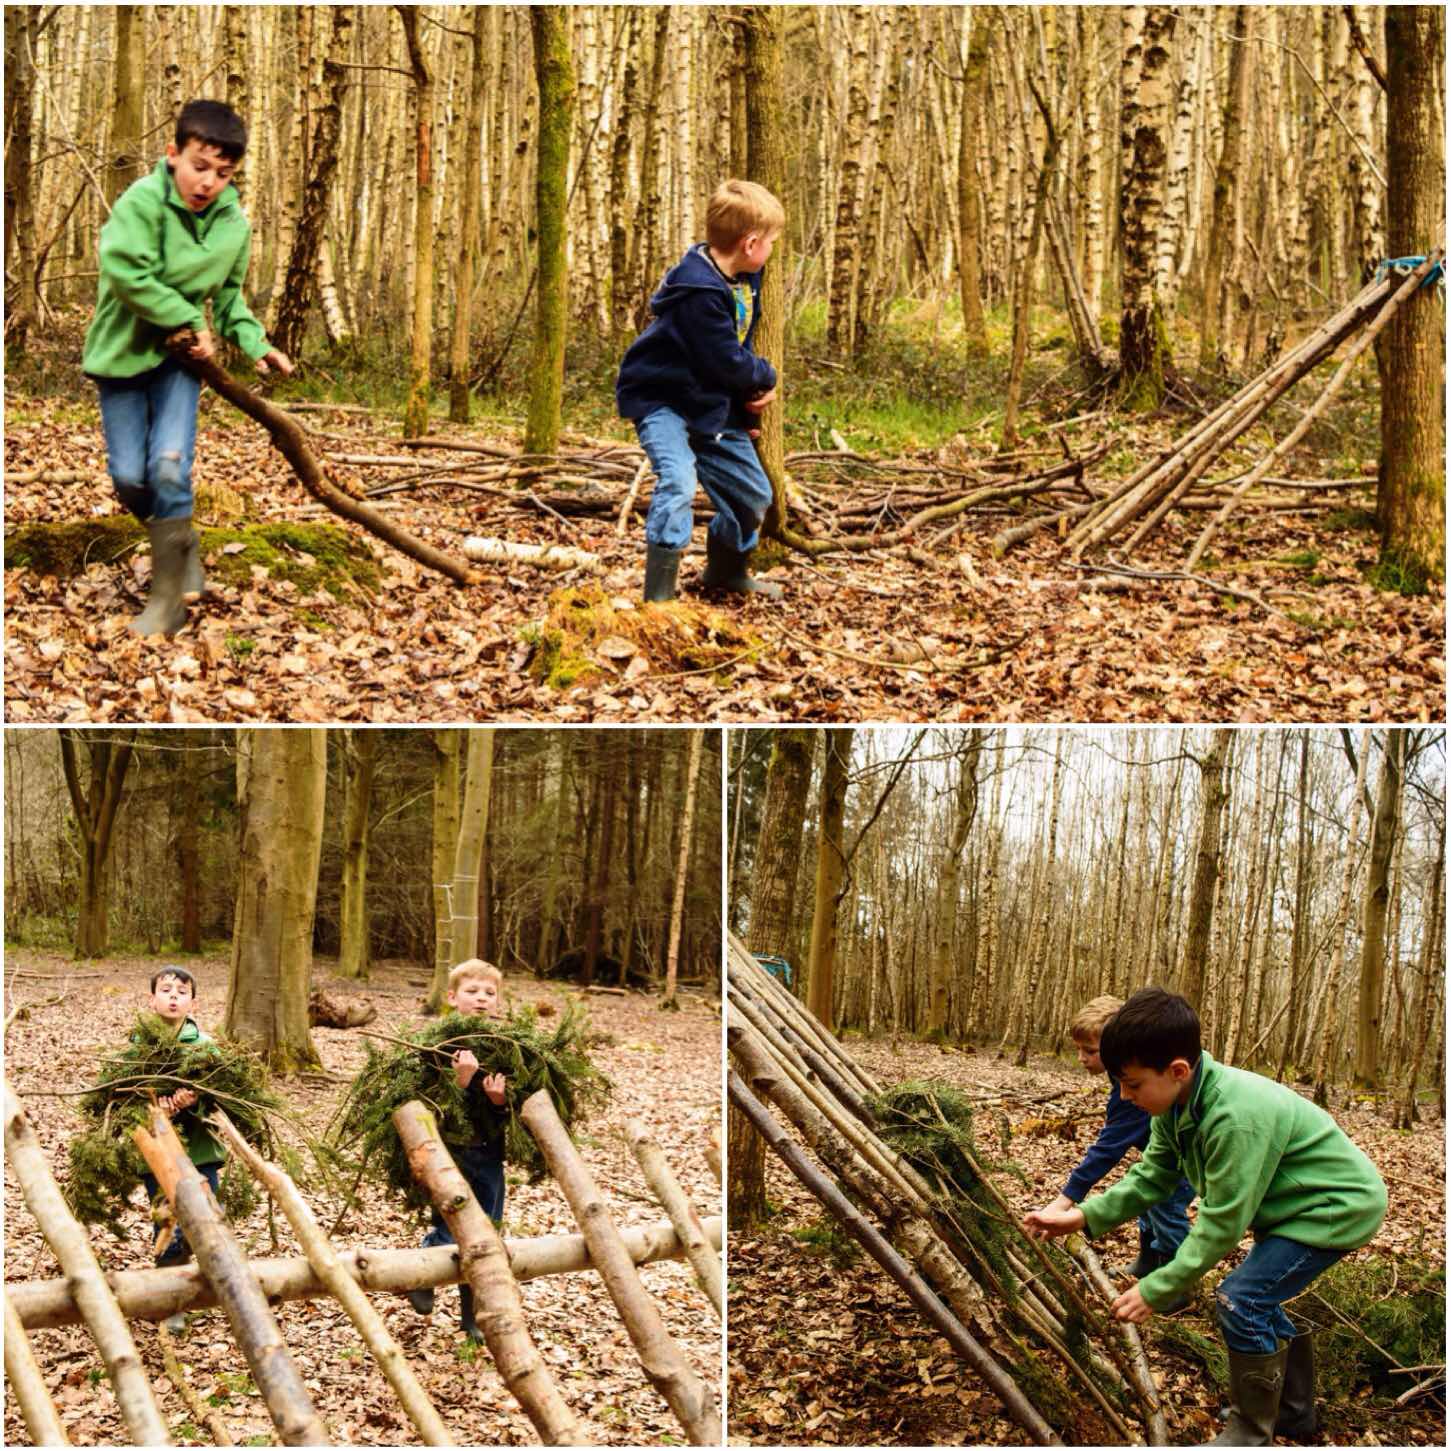
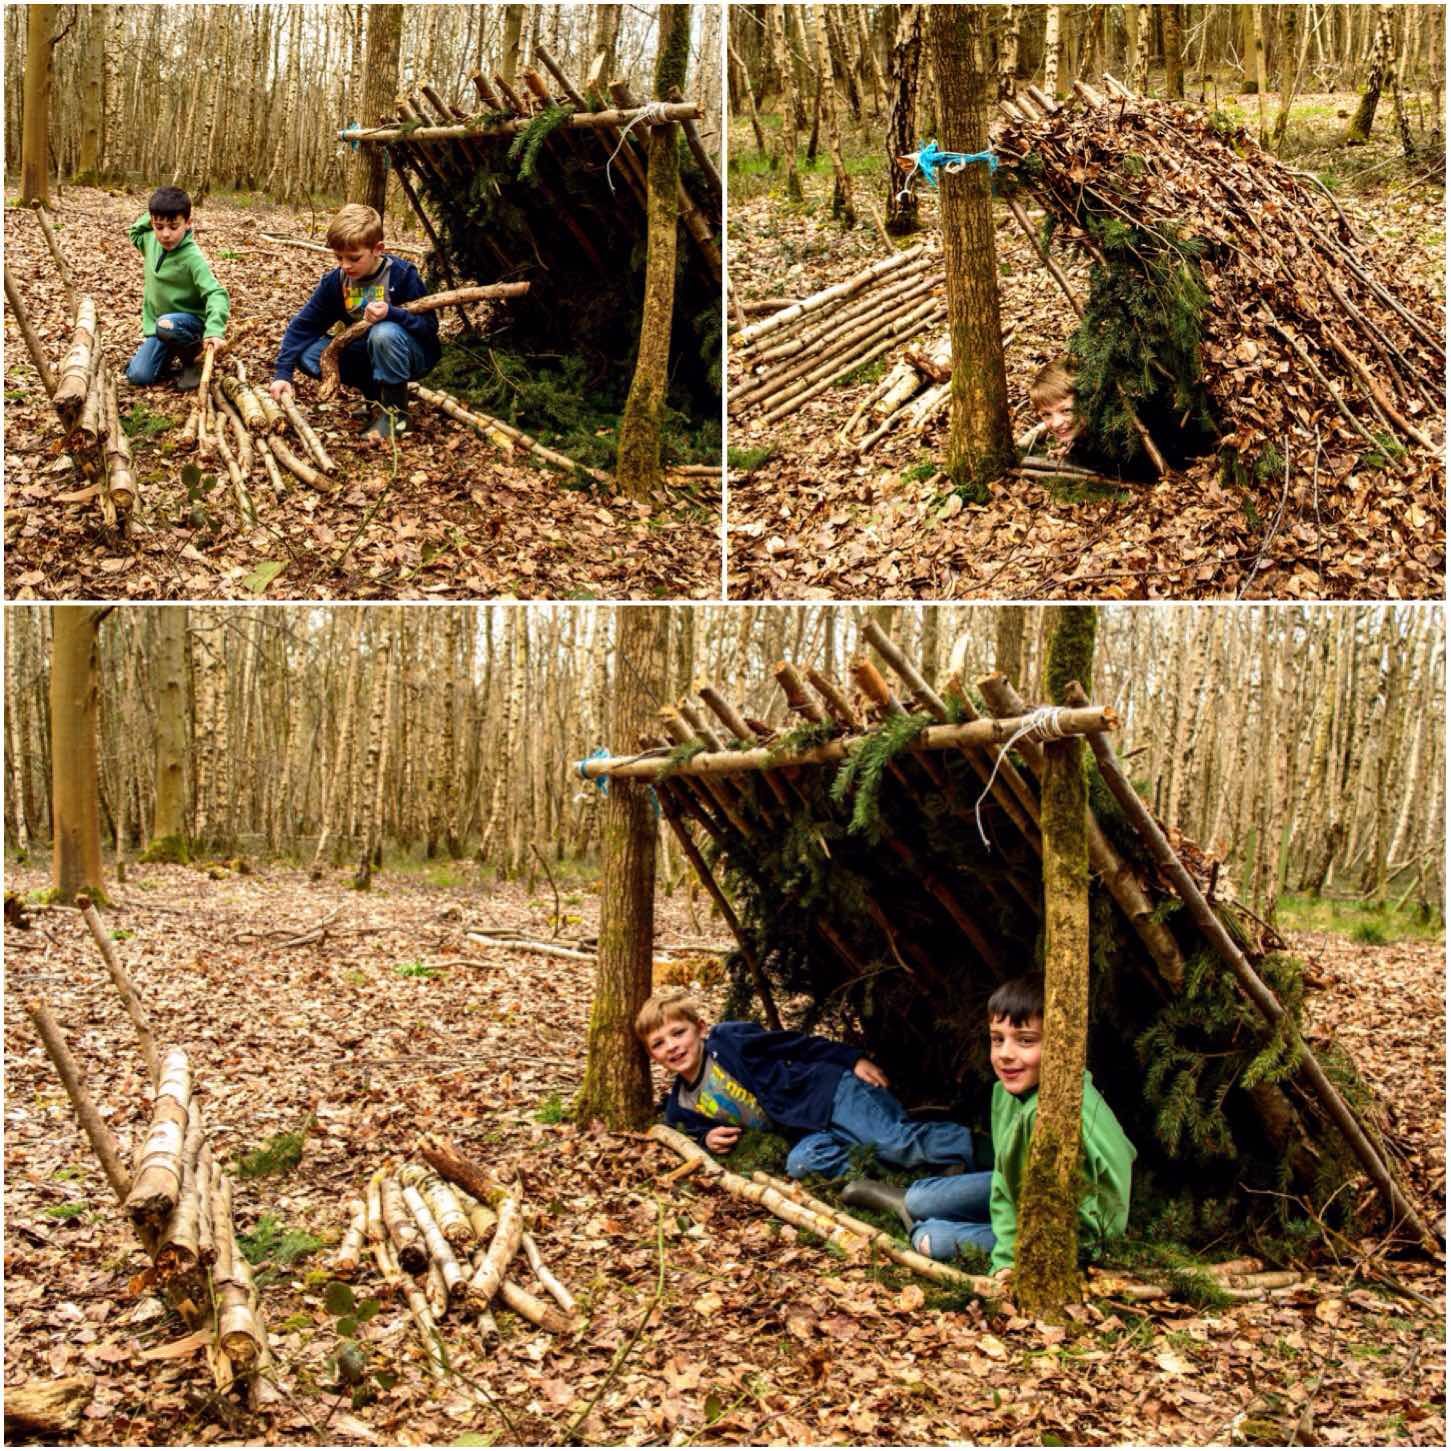
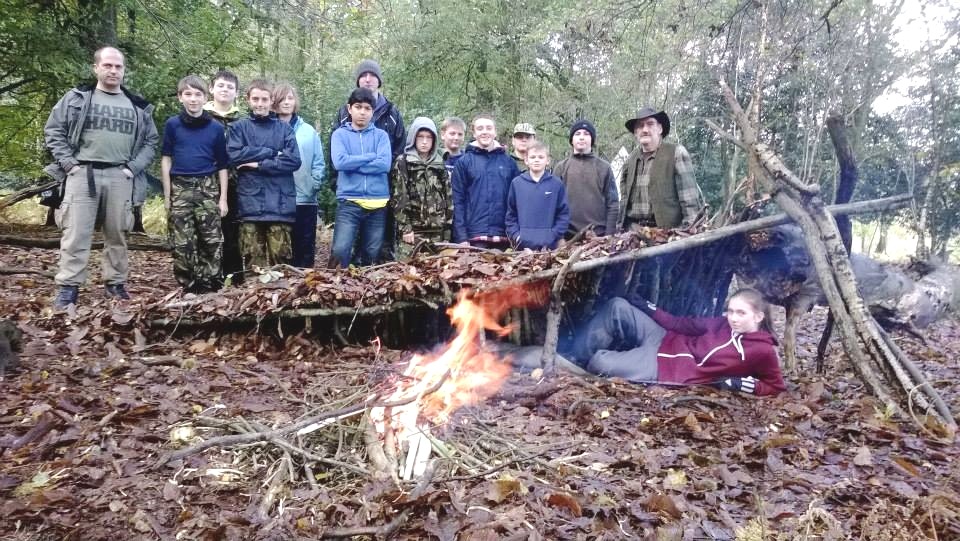
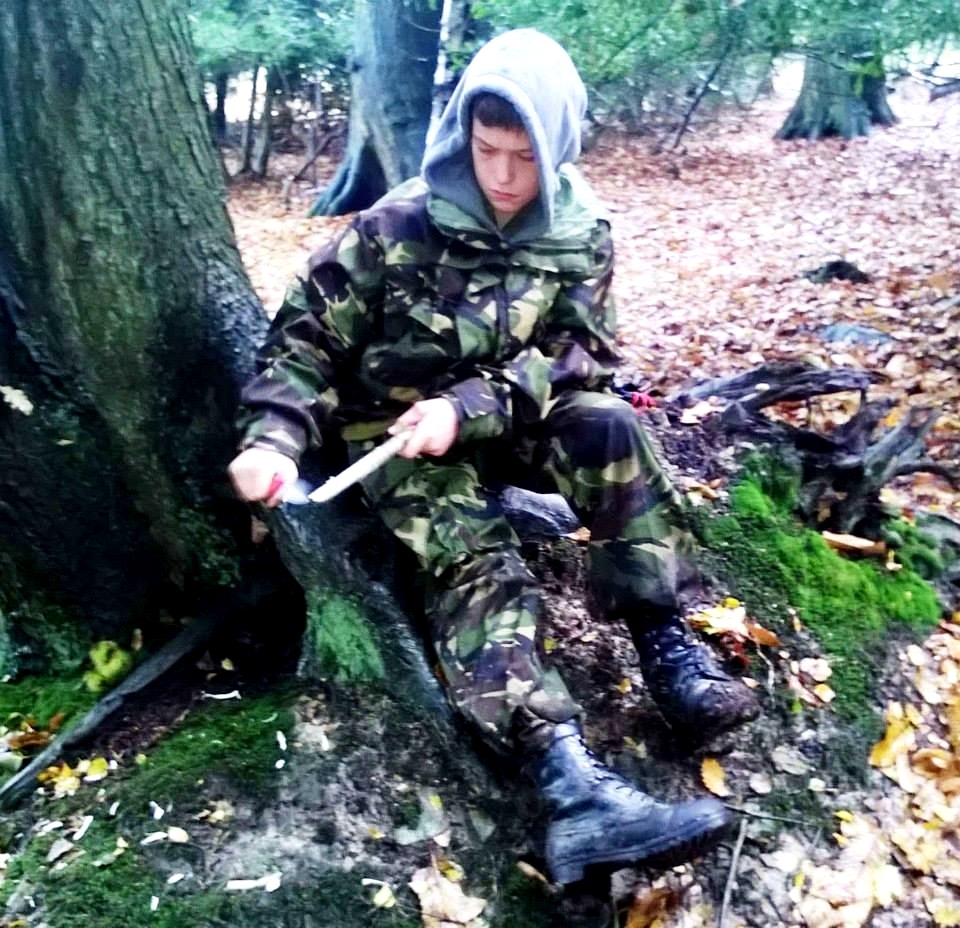
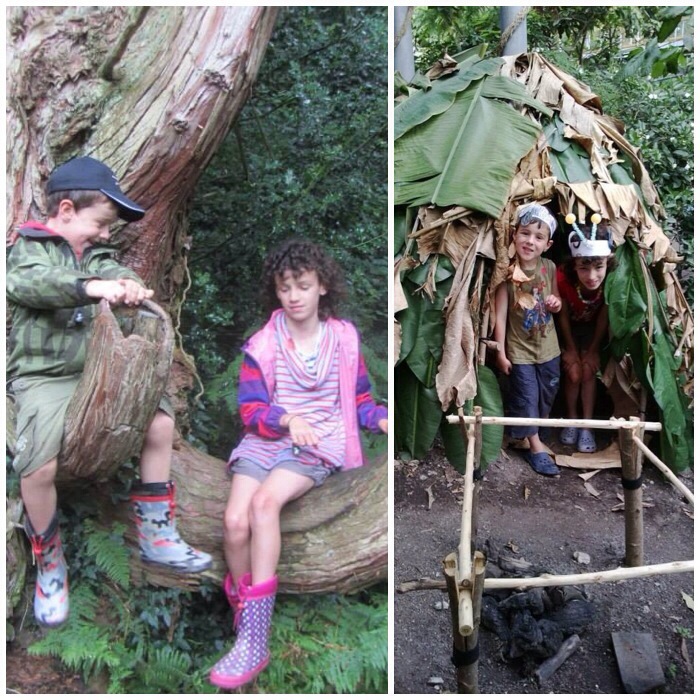
Last weekend I went for a walk in the woods with my lad Finlay and his friend William. I was planning a bit of a hike however I spotted a glade in our local woods where an area has been set aside for kids to build dens.
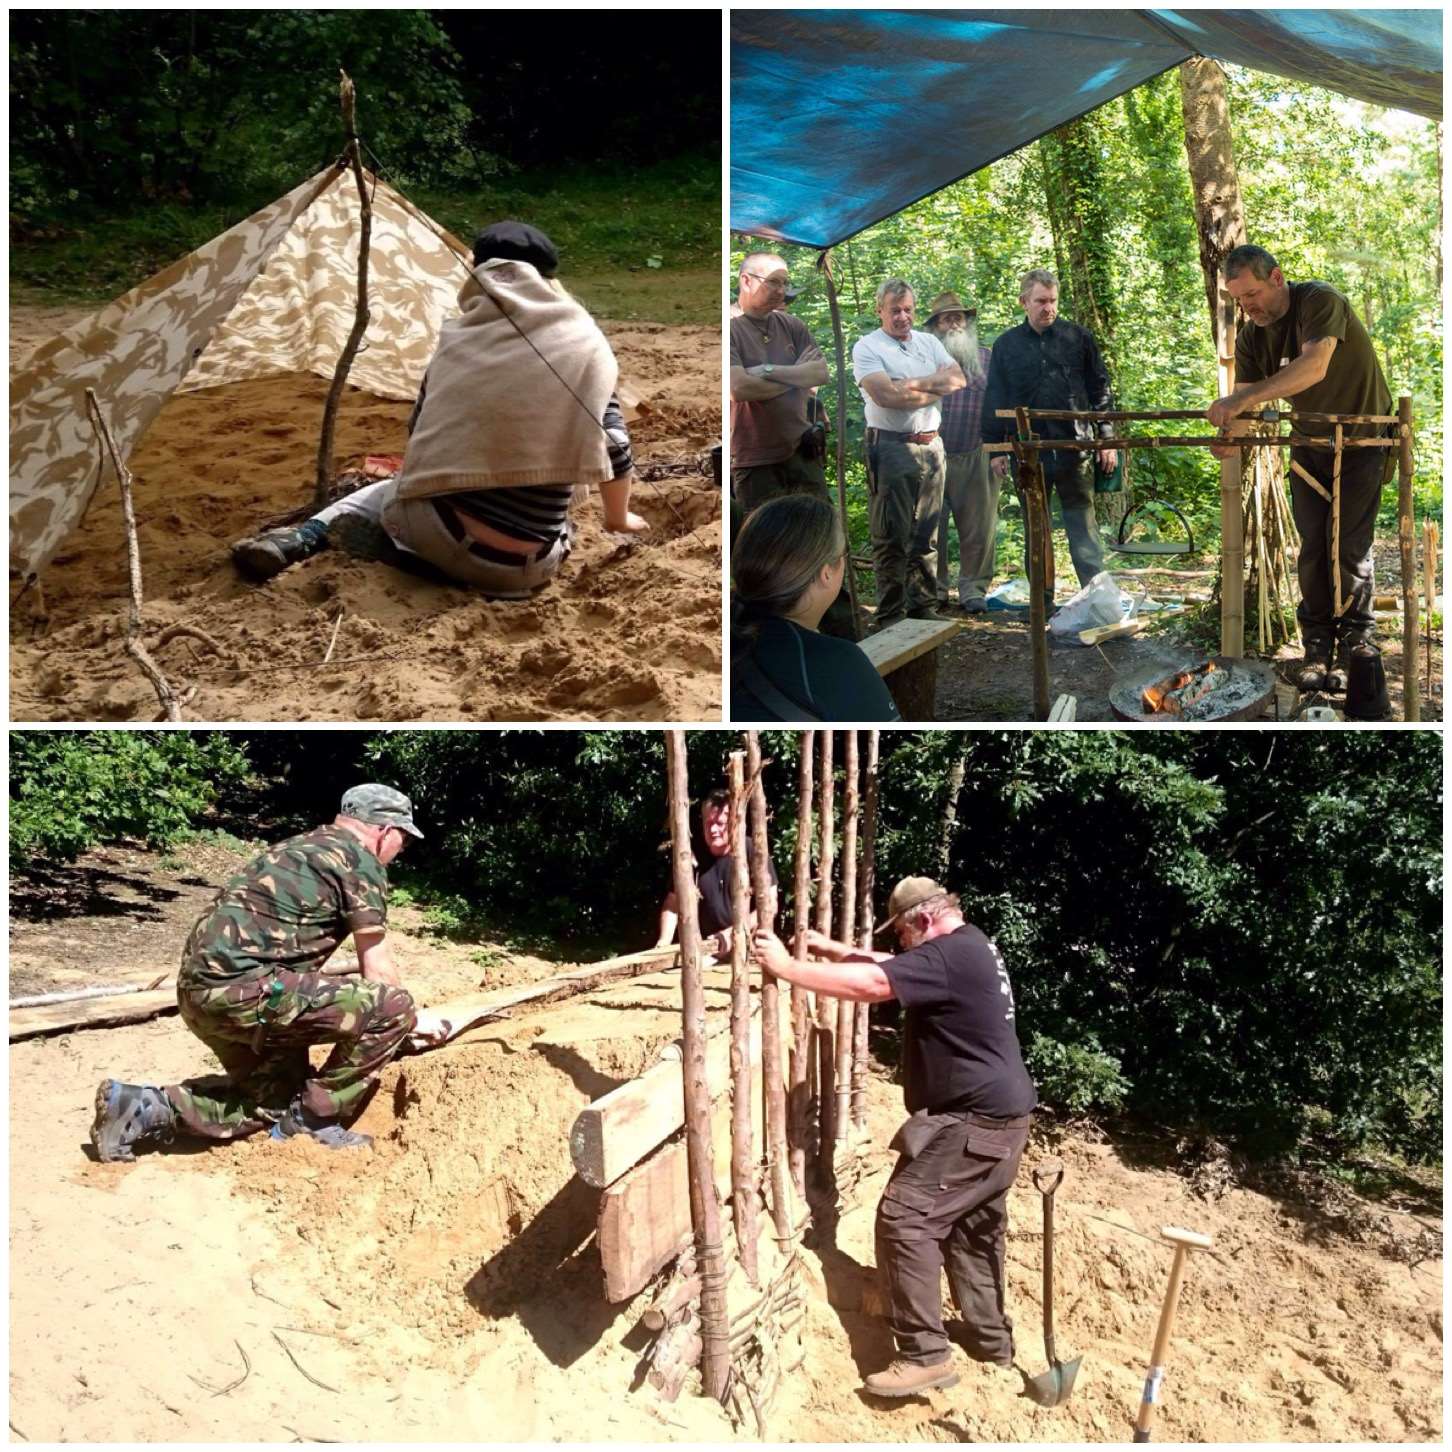
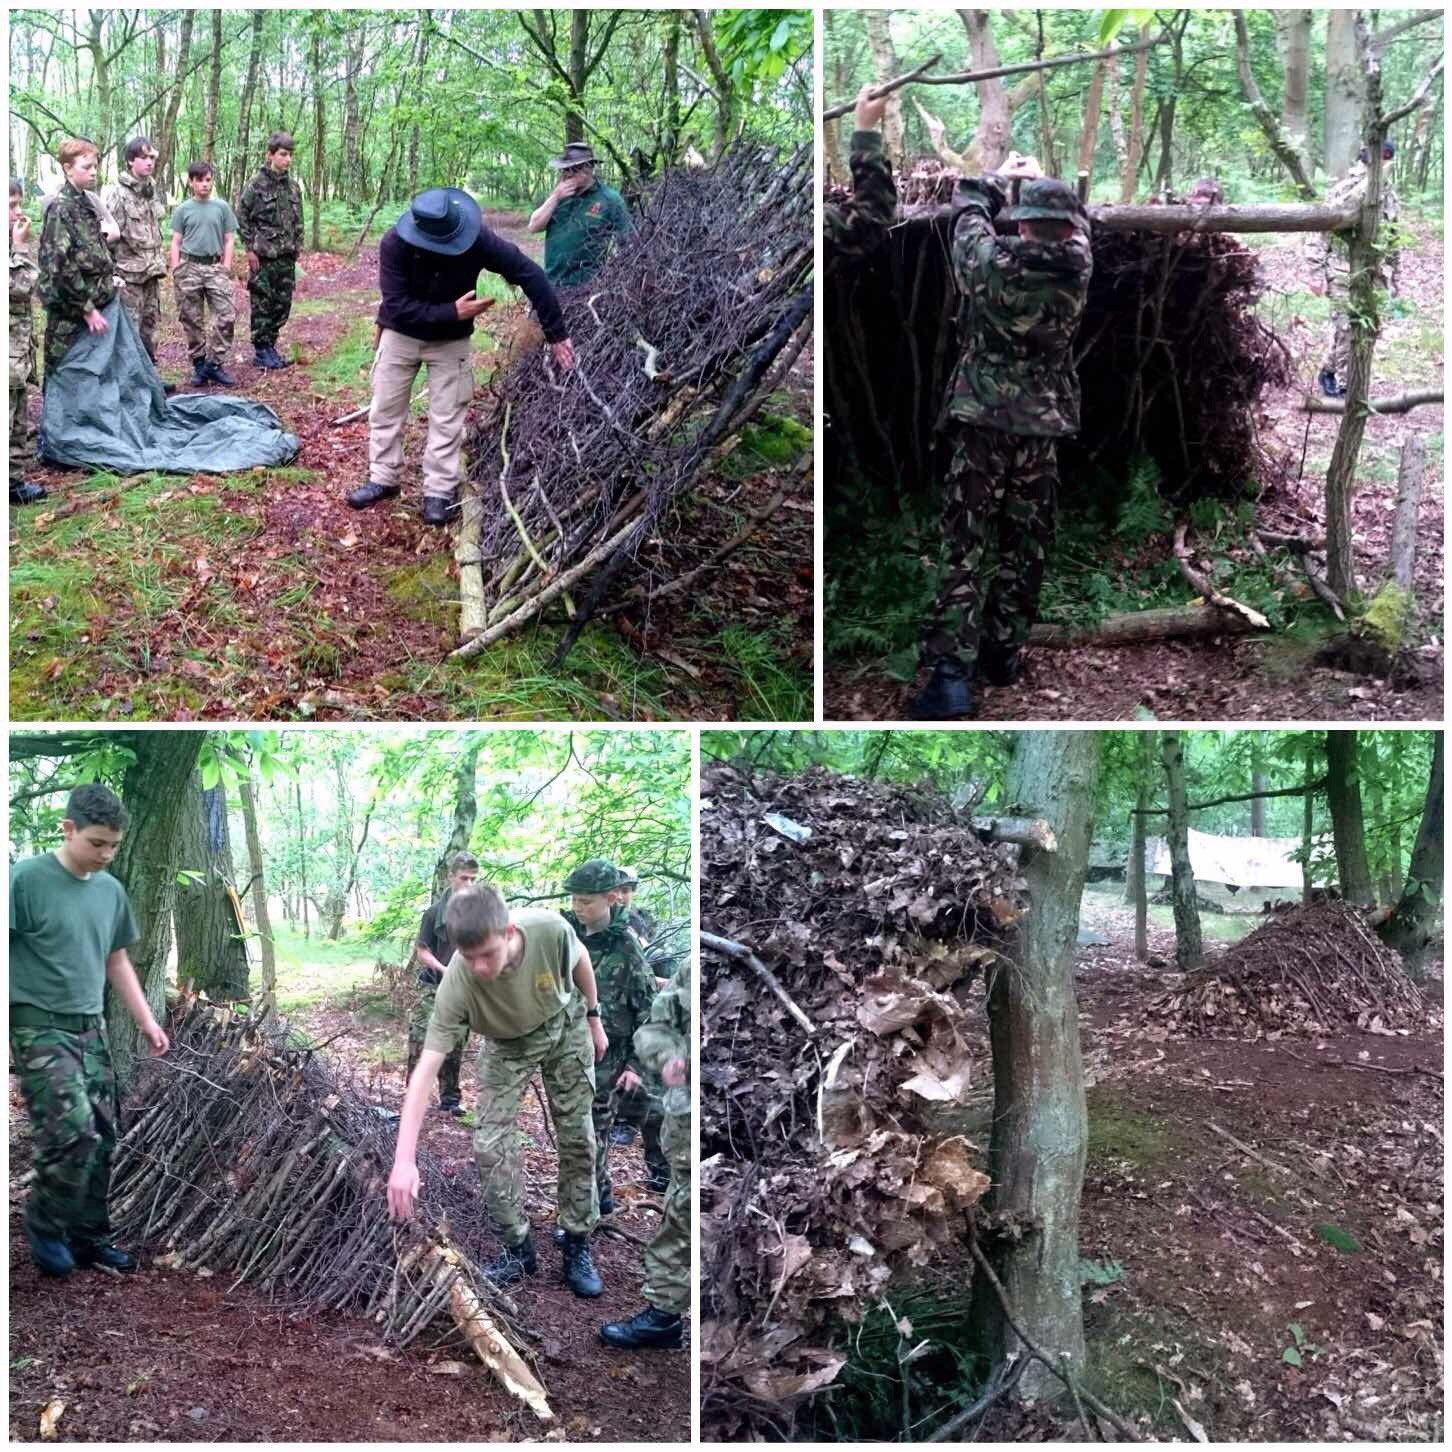
This post follows the steps I talked the lads through the principles of shelter building. This is not a full on How To…. guide to shelter building but more of an introduction to the principles of it all.
The principles of shelter building
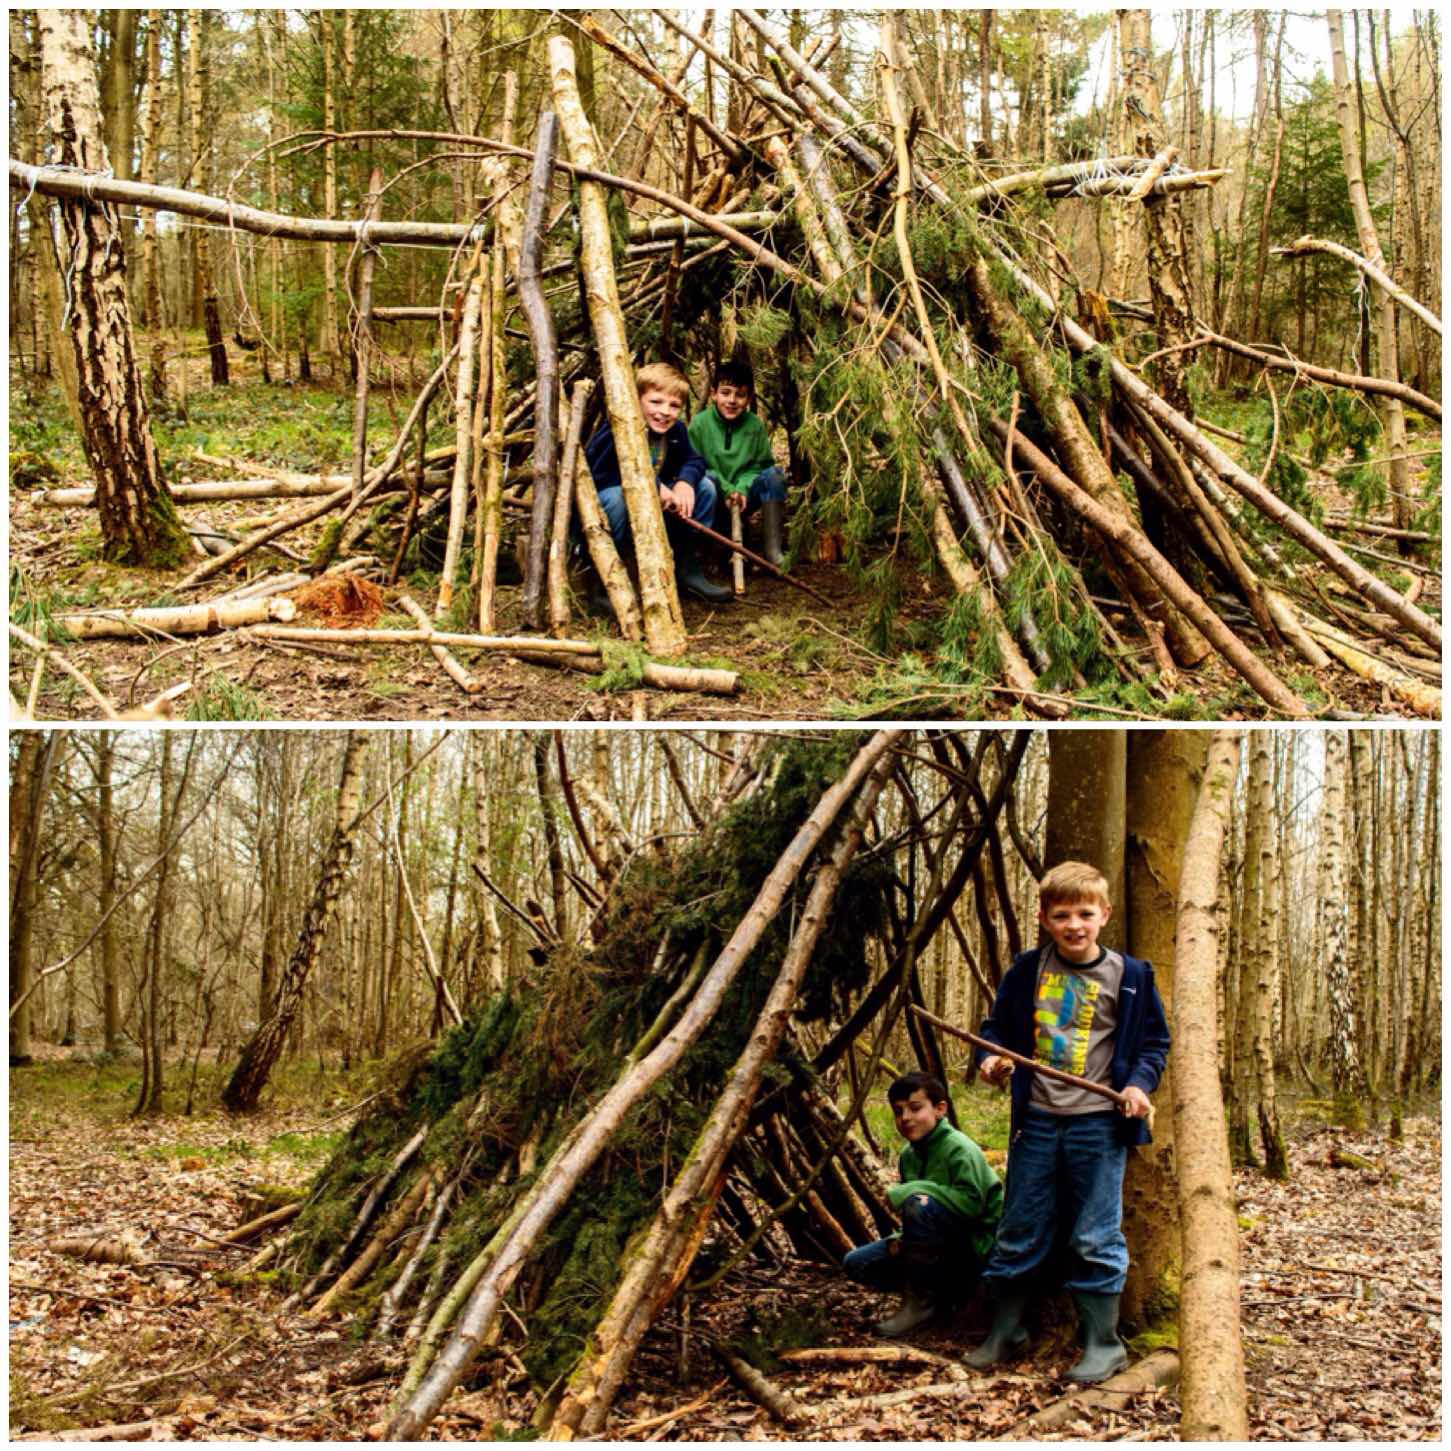
We had a wander around some of the shelters that had been left up by other groups and talked about the positive elements of each shelter. I find that this focuses the mind on what has worked well and how these elements can be incorporated into any other shelter.
We looked at how high a shelter needed to be, how many walls were really needed, how much thatch was needed and what was needed to keep them warm dependent on different weather conditions.
The positives
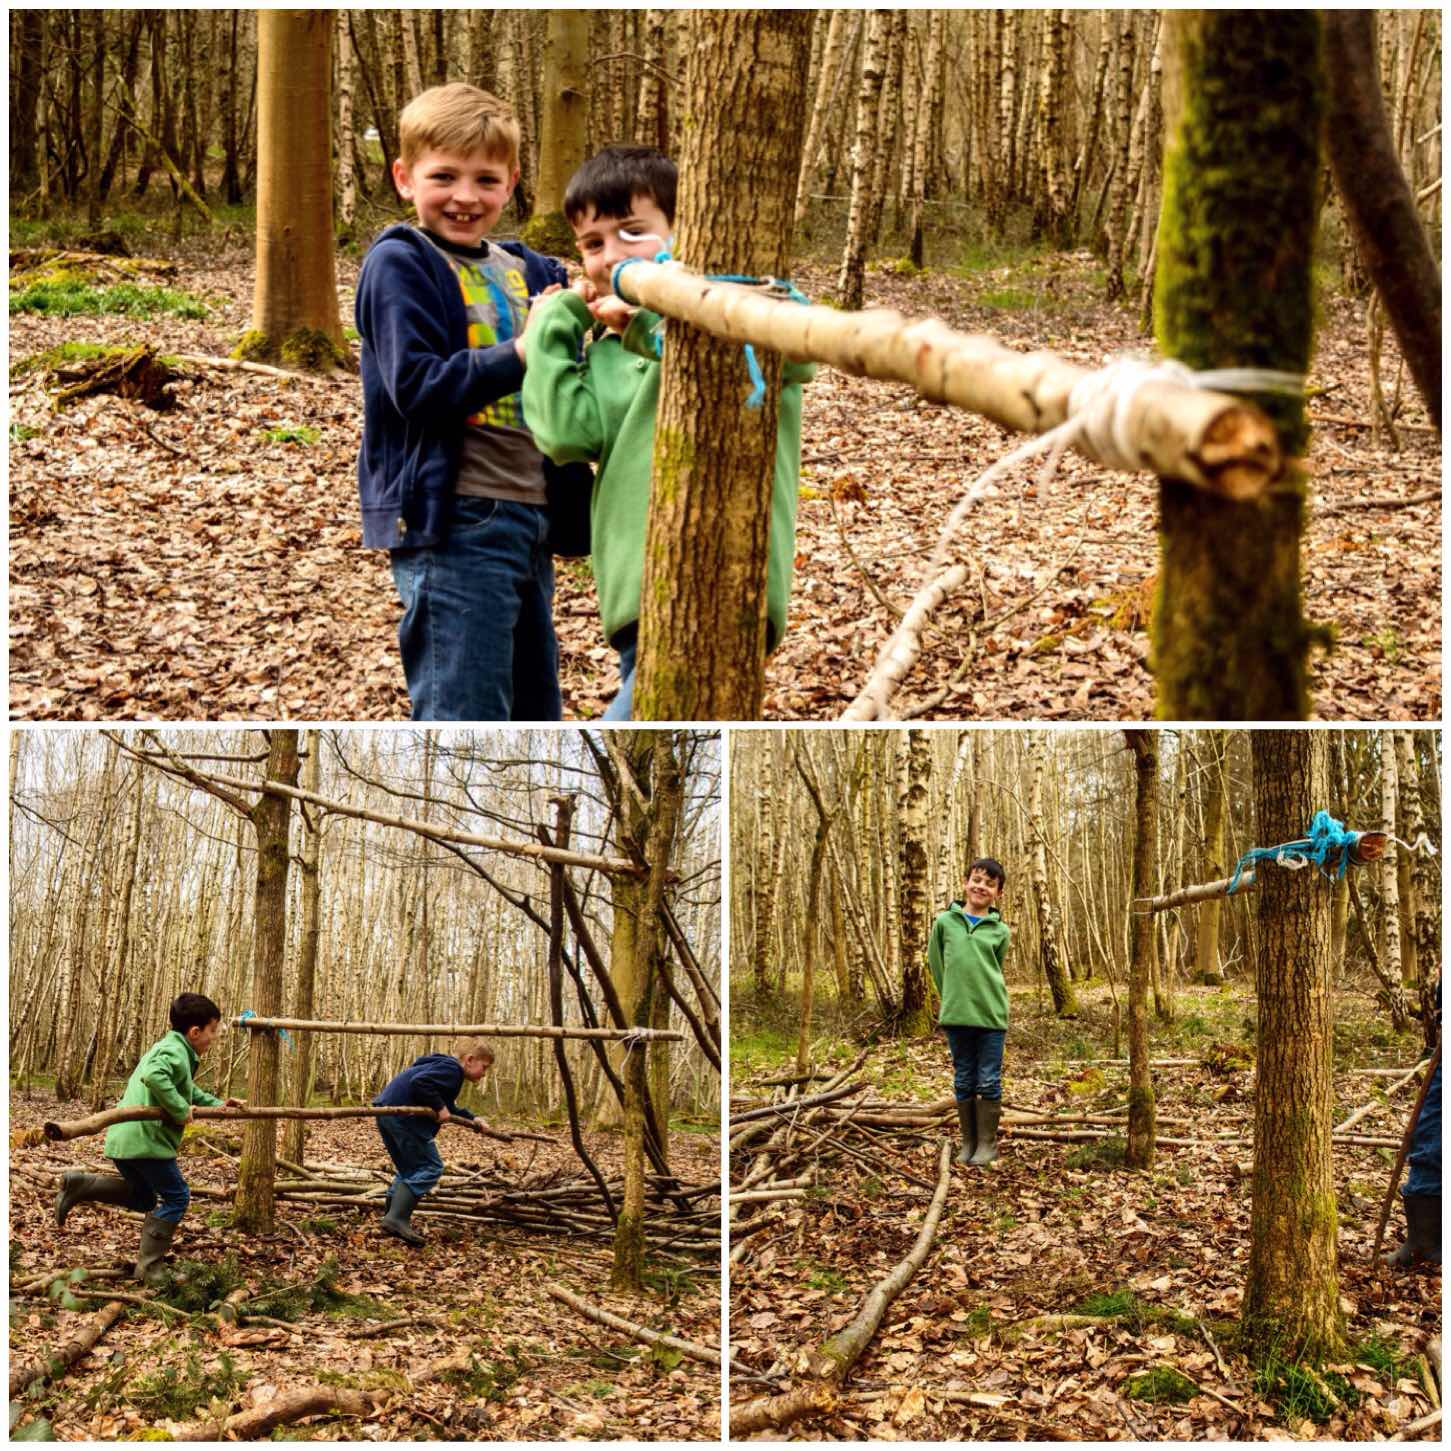
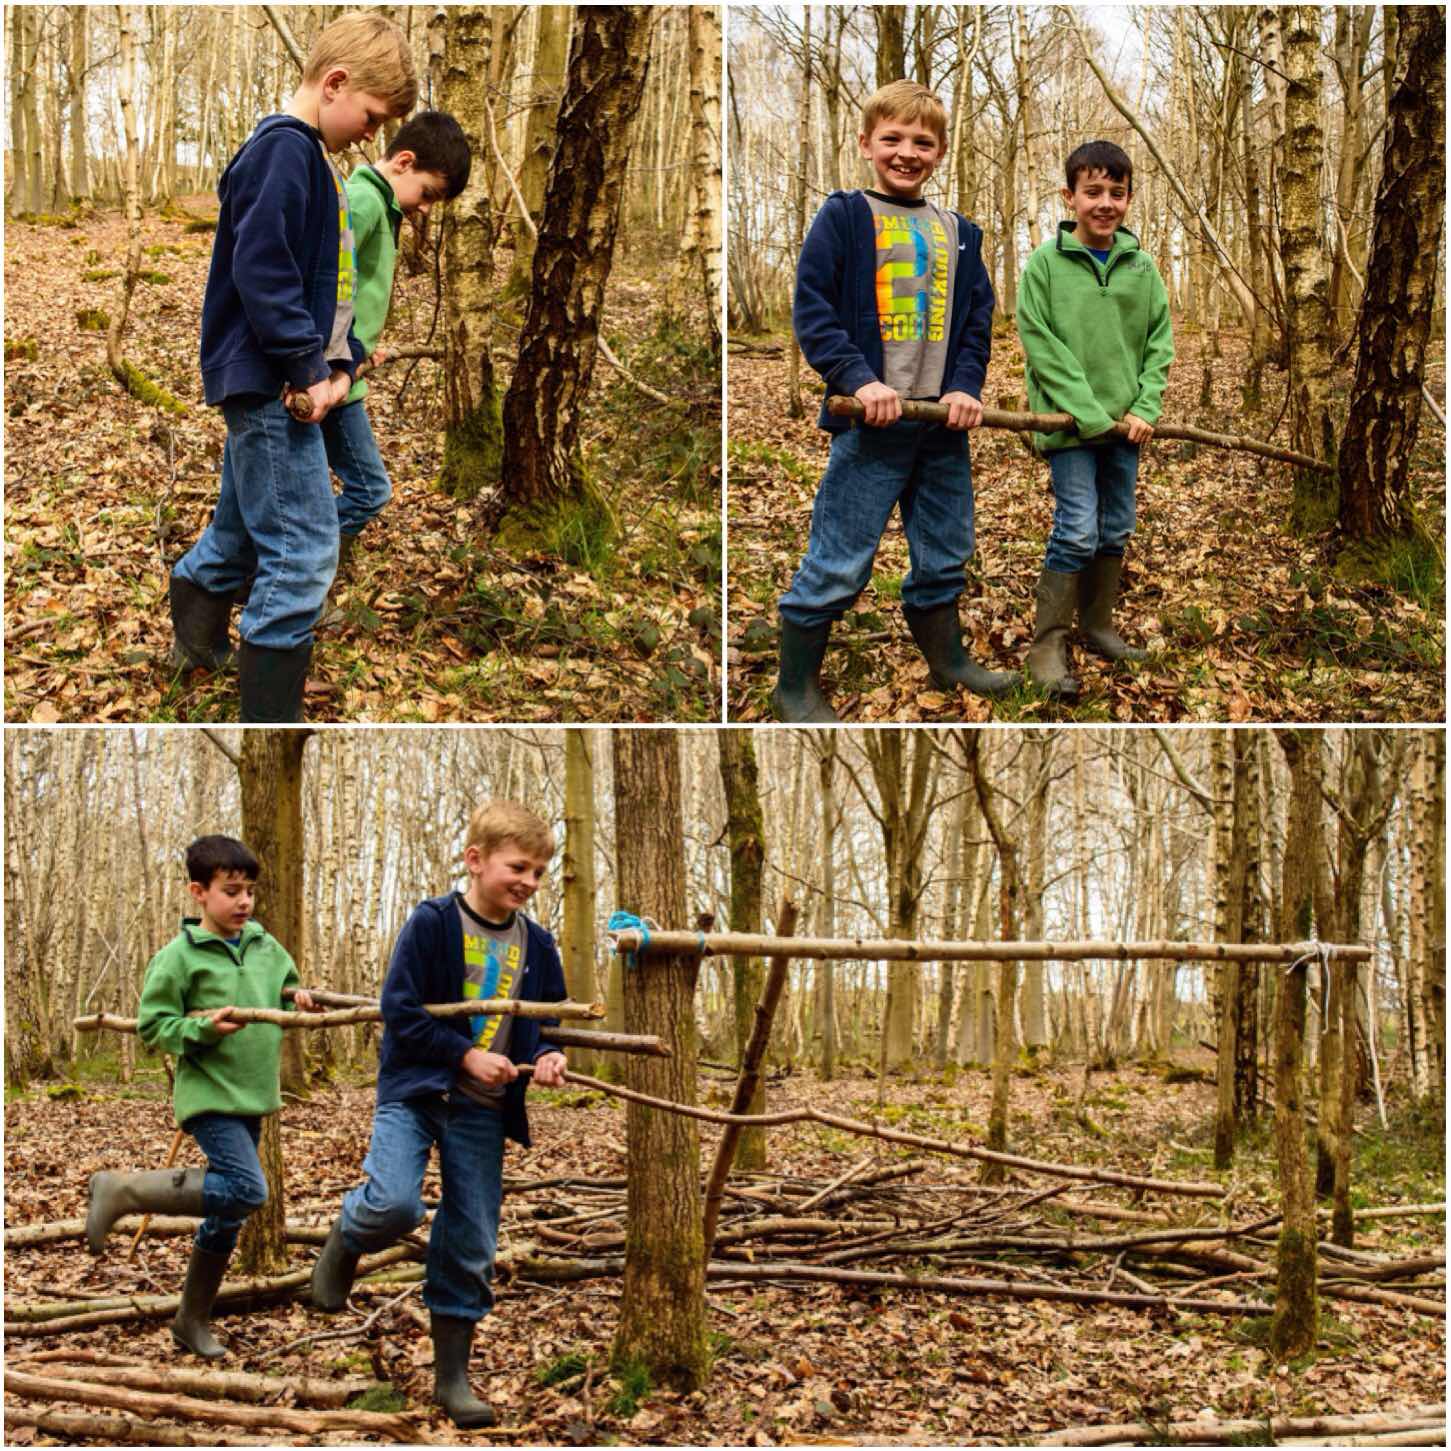
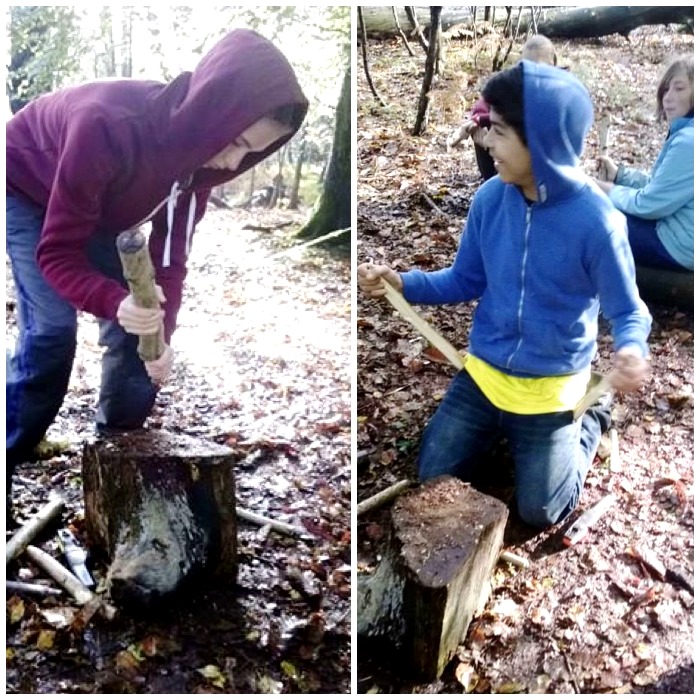
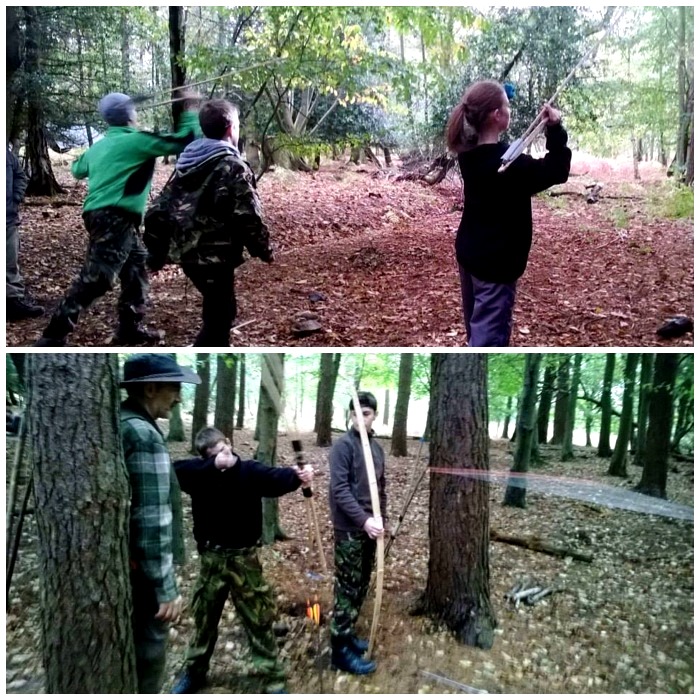
I told the lads that we only had time to build a small shelter (Sunday Dinner was calling) so they found some rope and wood and I showed them how to tie everything together to form a spar. We had no tools at all so had to work with what we had.
Setting out
After a chat they opted to go for a simple lean to shelter as this they felt would take the least amount off time.
I told them they would need lots of sticks to lean up against the spar (more than they thought) and that they needed to be roughly the same size. After a quick demonstration on how to snap wood using the base of two tree trunks that were close together they were soon hard at work.
Sizing up
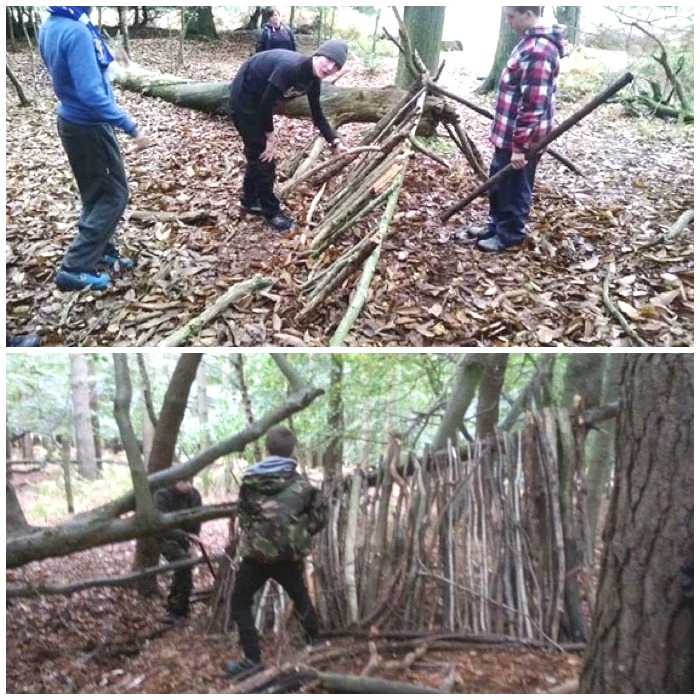
We put a pole on the ground to roughly mark out where each pole should be driven in and soon they had the basic skeleton of the shelter formed.
The Skeleton
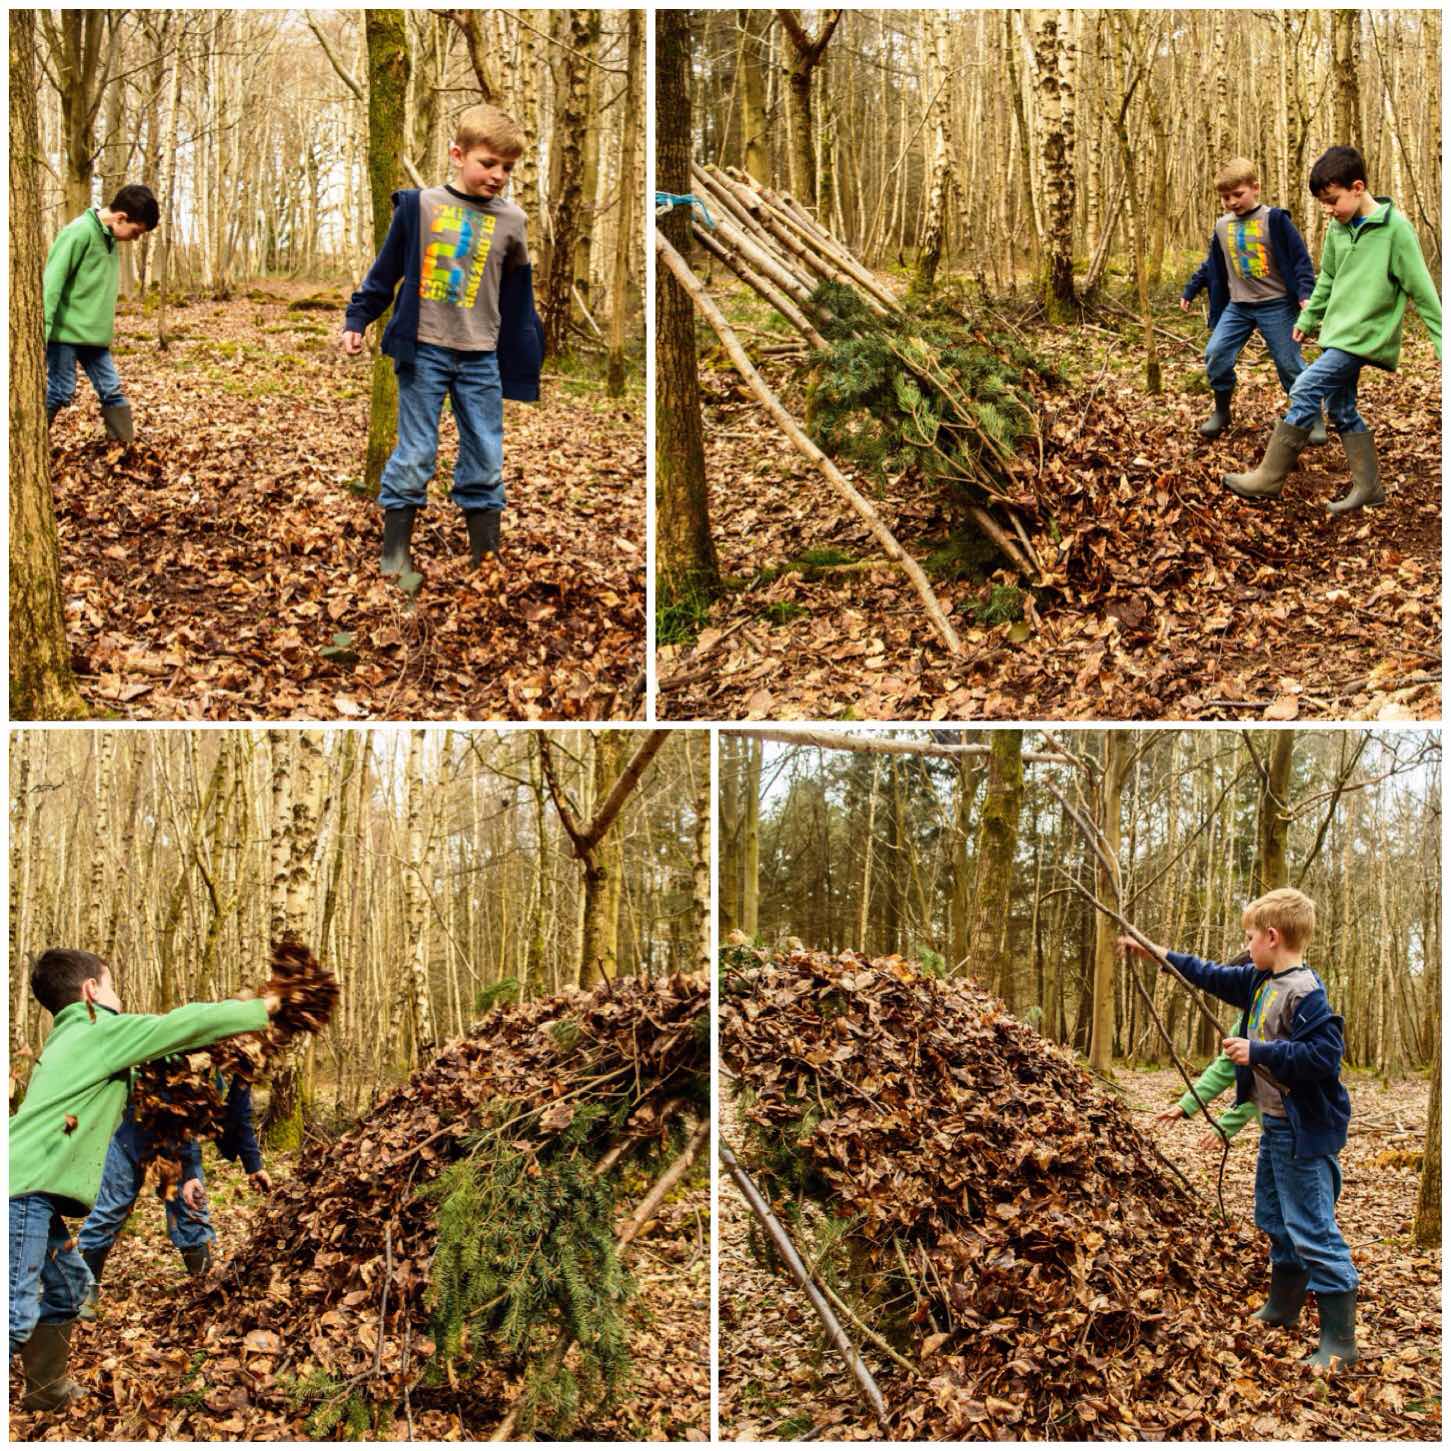
One of the hardest things to get across to them was the need to always have a tidy working area. we had lots of dead wood lying about so I made them clear it all away from the shelter so we had a safe area to work in.
Once that was all done we had a good forage around for some spruce boughs. There were plenty lying around that had been cut down by the foresters for the kids to use (I wish all woods had an area like this).
Tidying and foraging
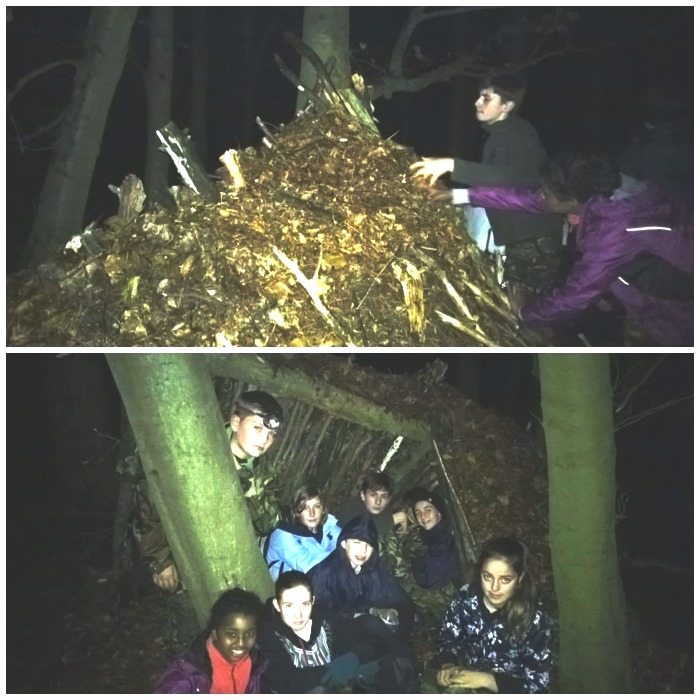
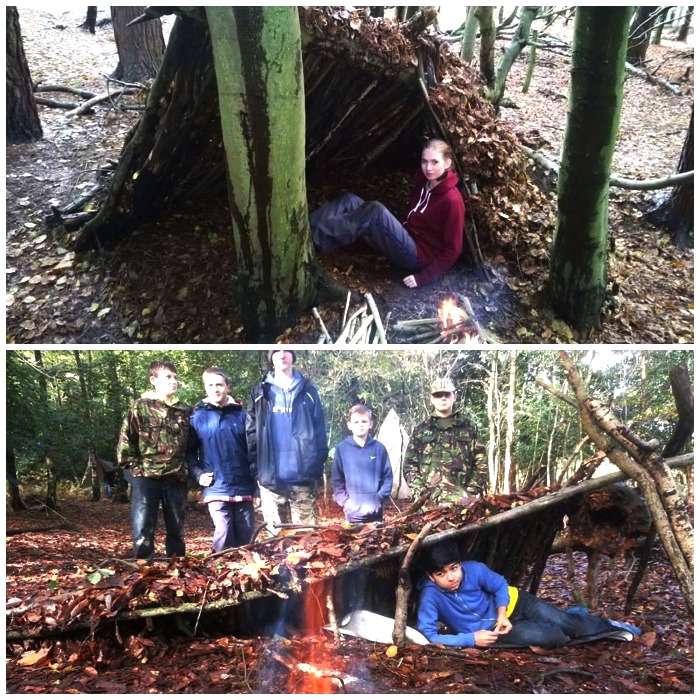
After layering some of the spruce boughs onto the skeleton of the shelter I got the boys doing the penguin walk. This is the way I get the kids to gather up lots of leaves in a very short space of time. They would quickly make little piles of leaves and throw them over the spruce boughs.
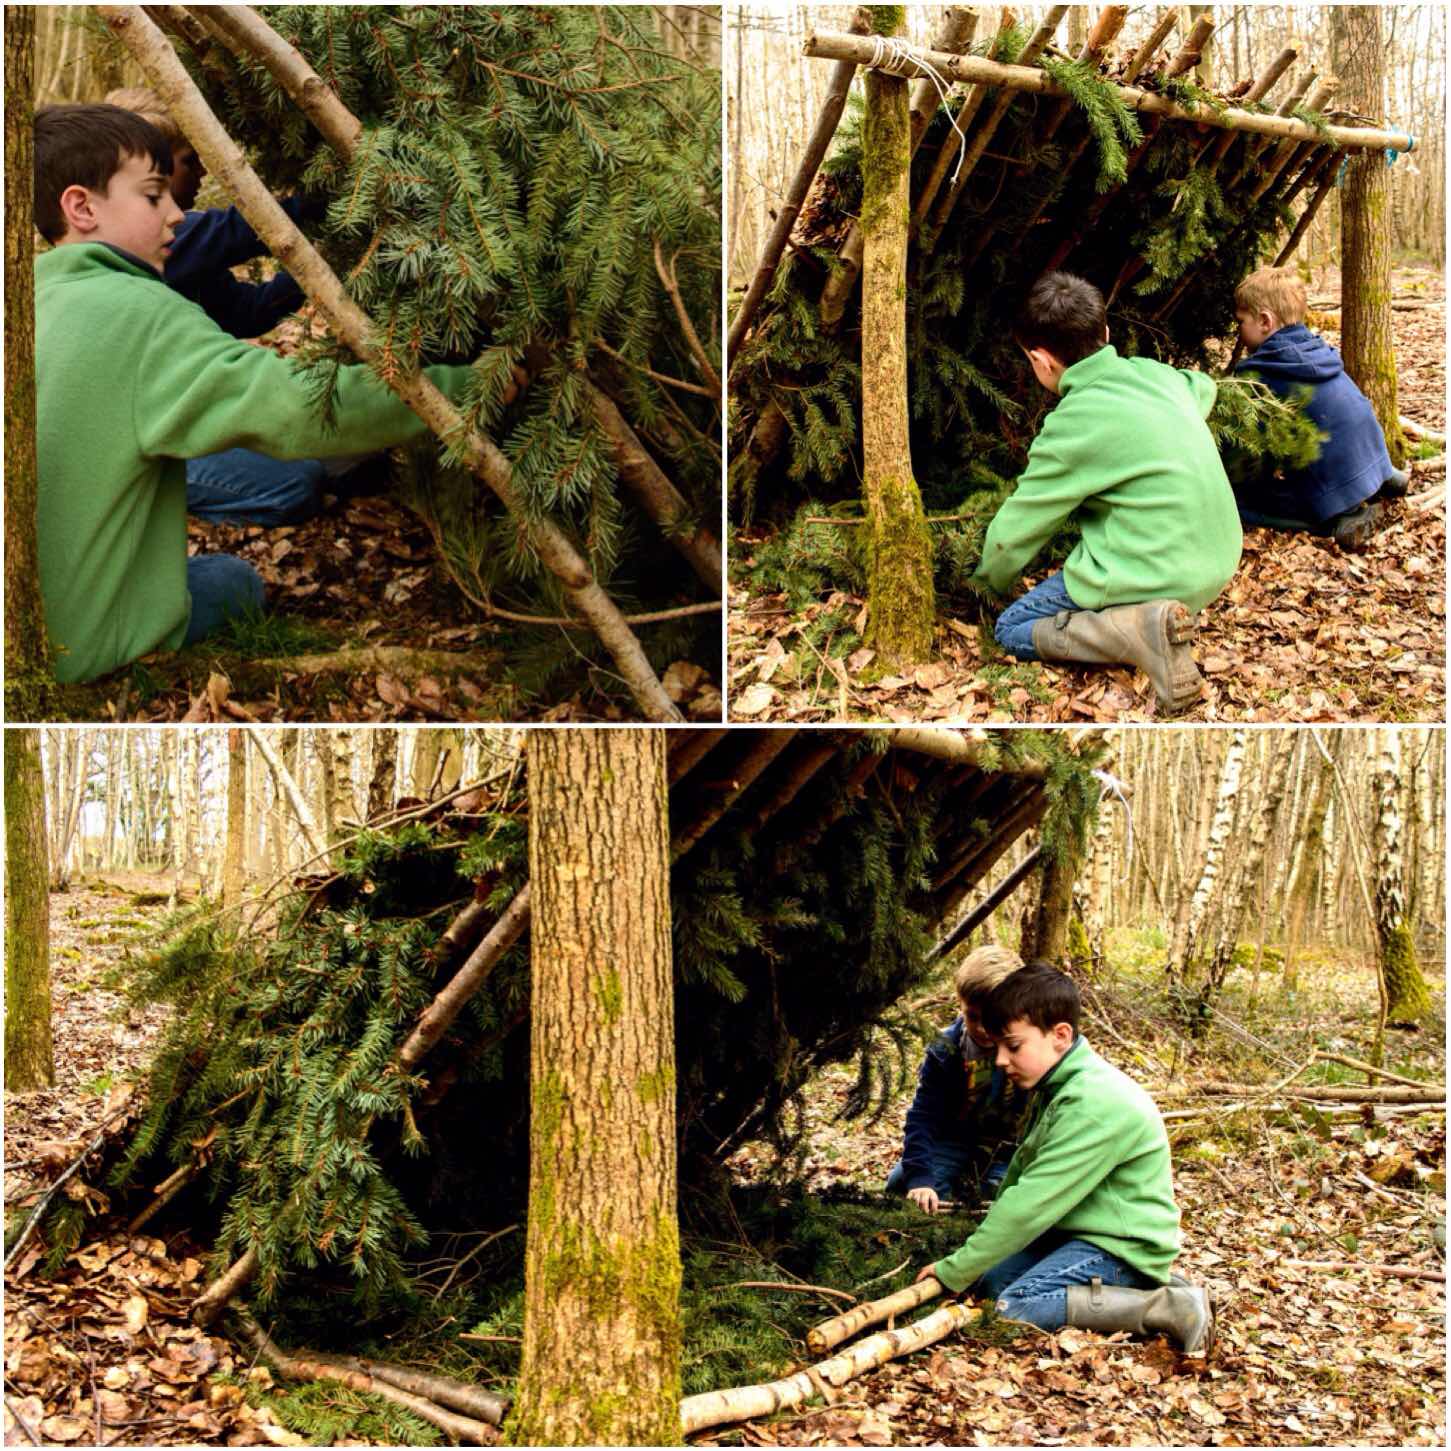
Once the bottom half was all done they got some more spruce boughs for the top and covered that in leaves as well. Finally to keep the leaves in place they laid a load of small sticks over the leaves (to try and help stop the wind from blowing it all away).
The layer system
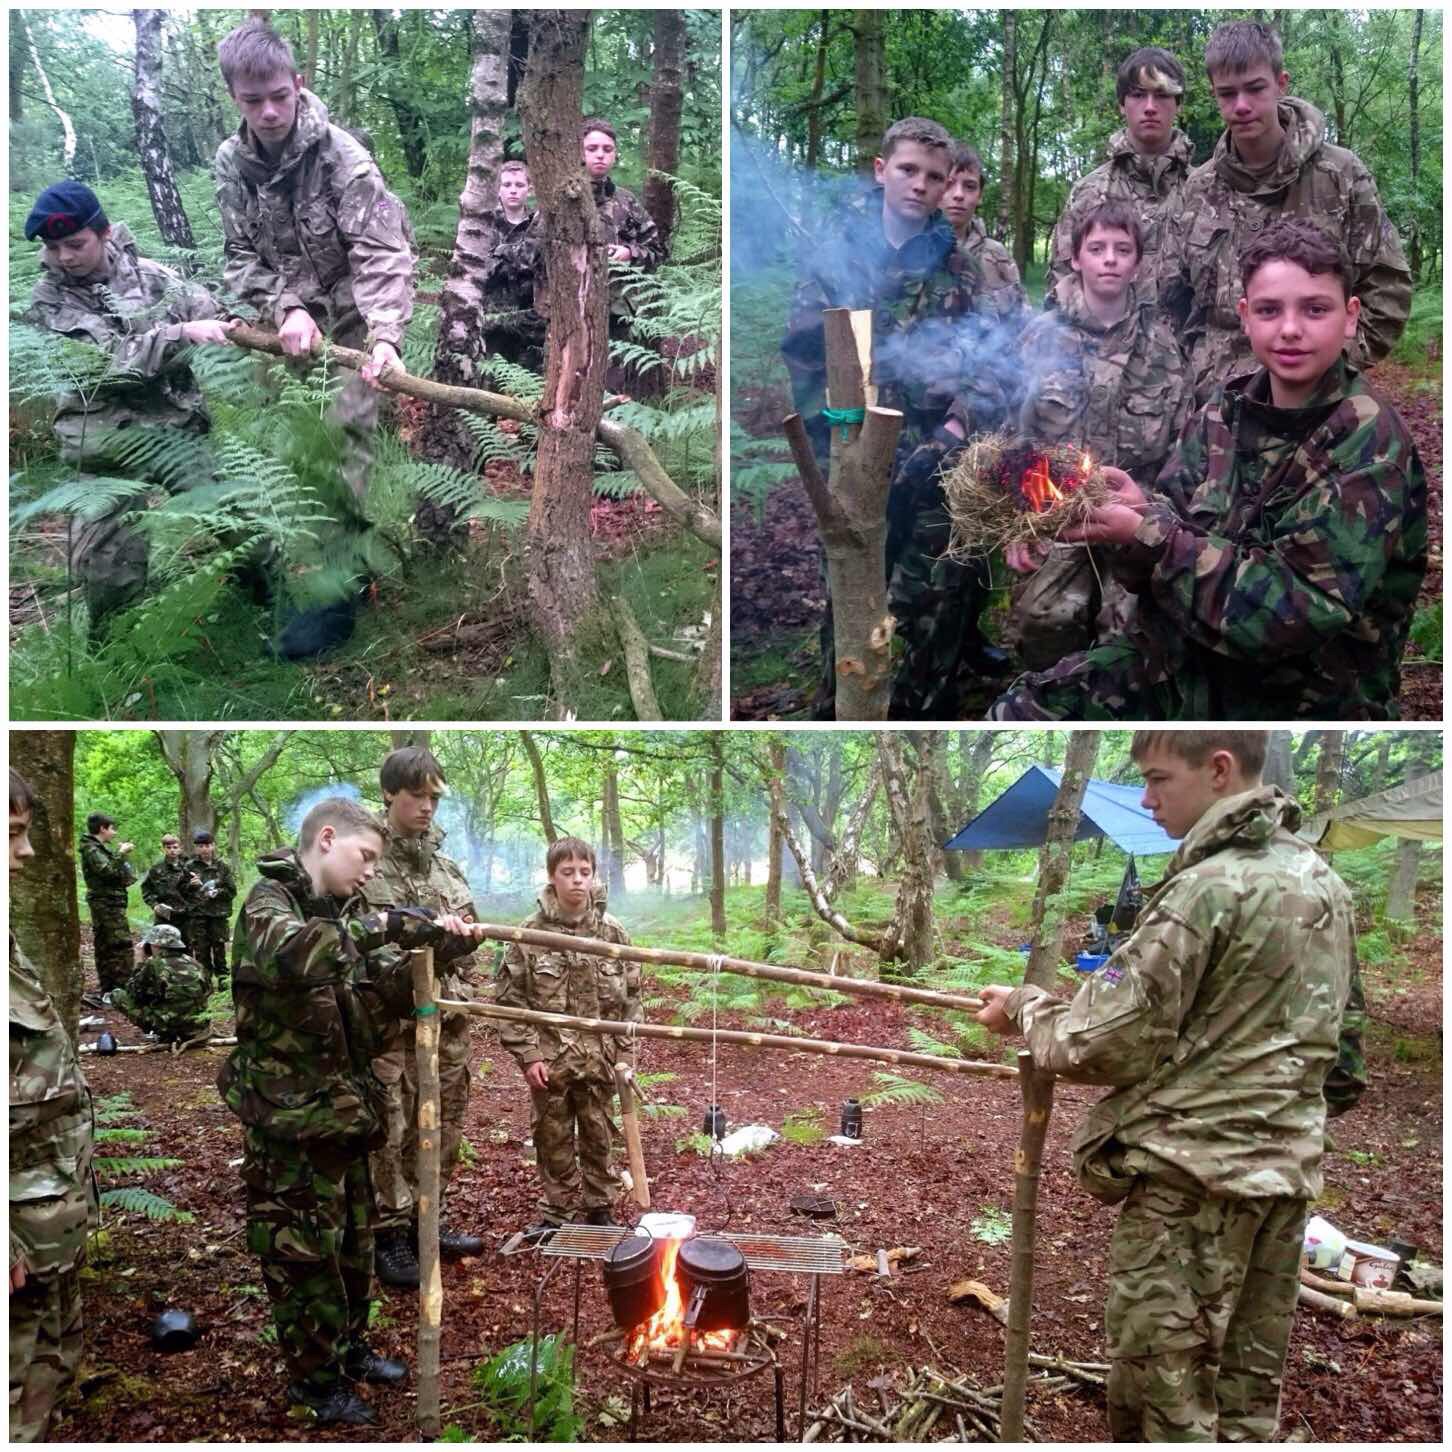
Once they had finished the outside it was time to sort out the interior design. They spent a little while weaving back in all the loose (well some of them) spruce needles back into the thatch.
Once that was done they foraged for some more spruce and made themselves up a little bed to keep themselves off the cold earth.
Interior design
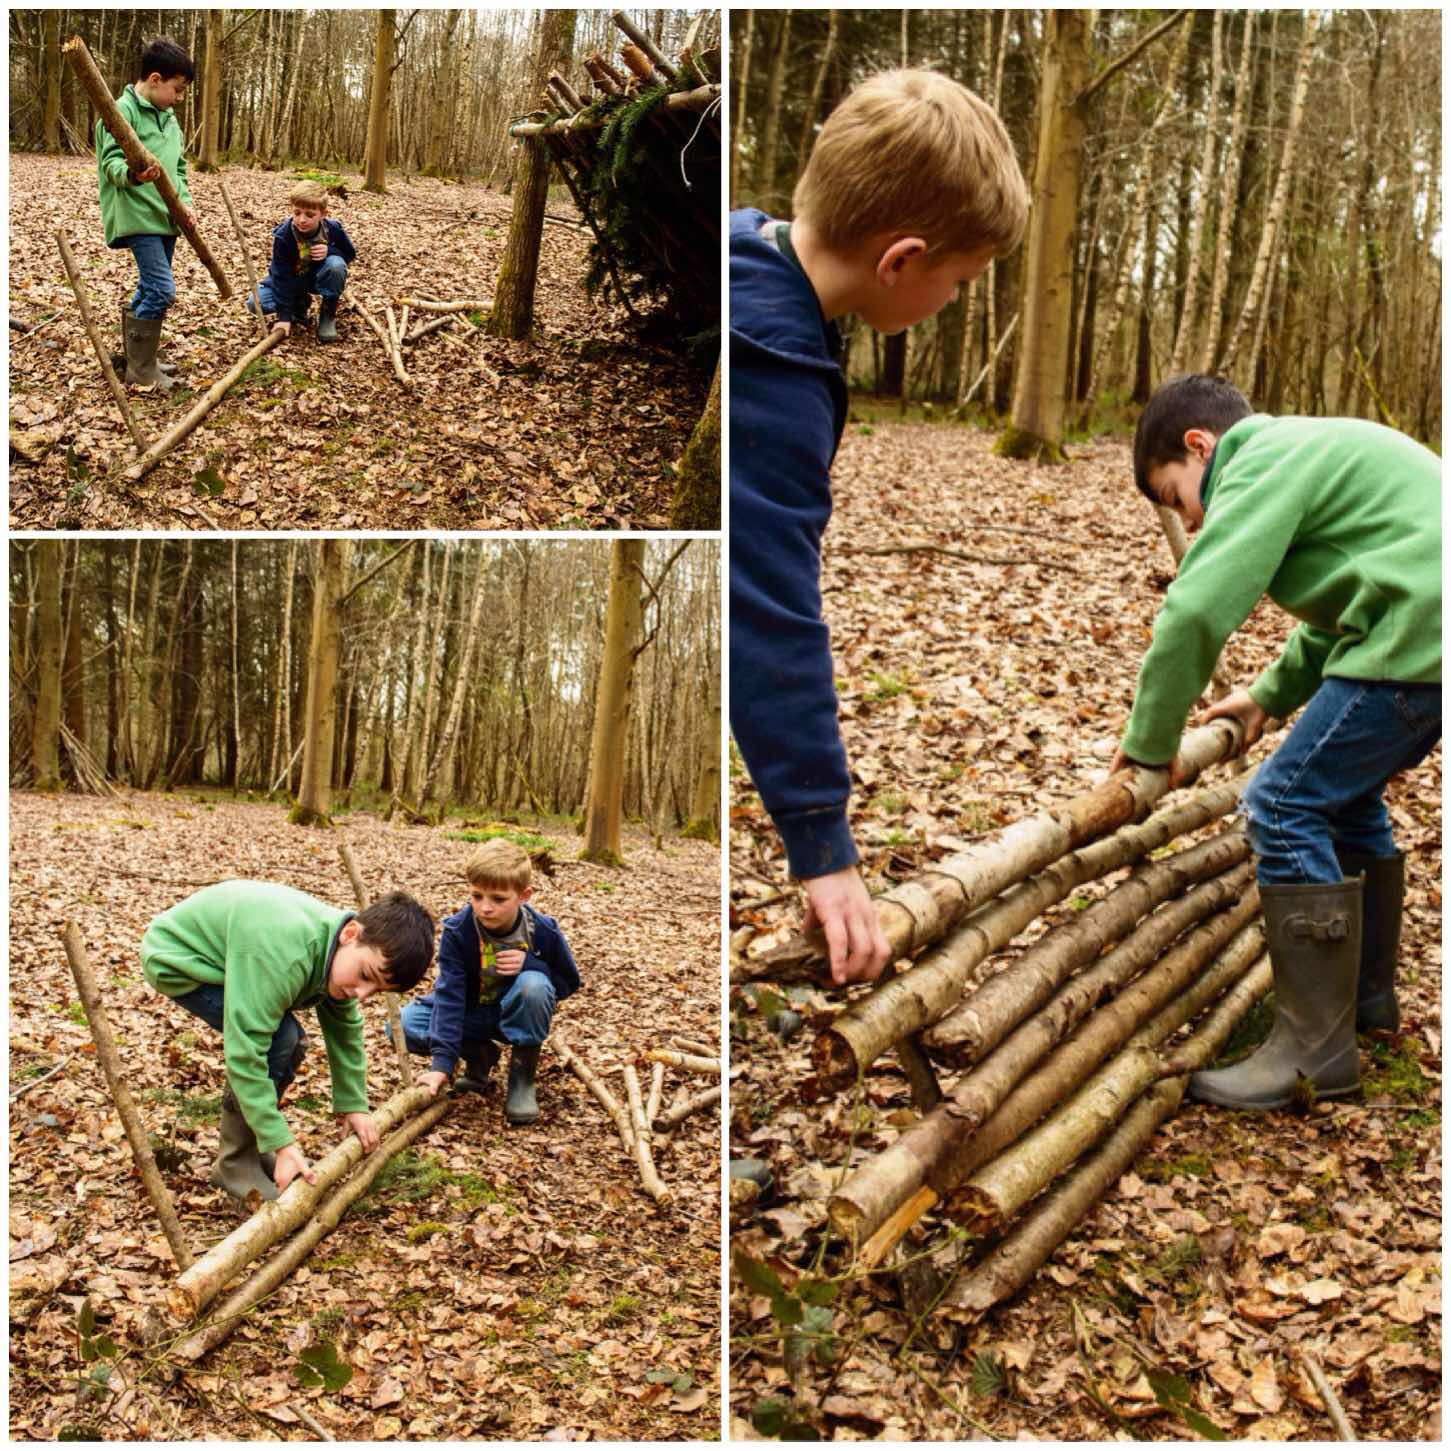
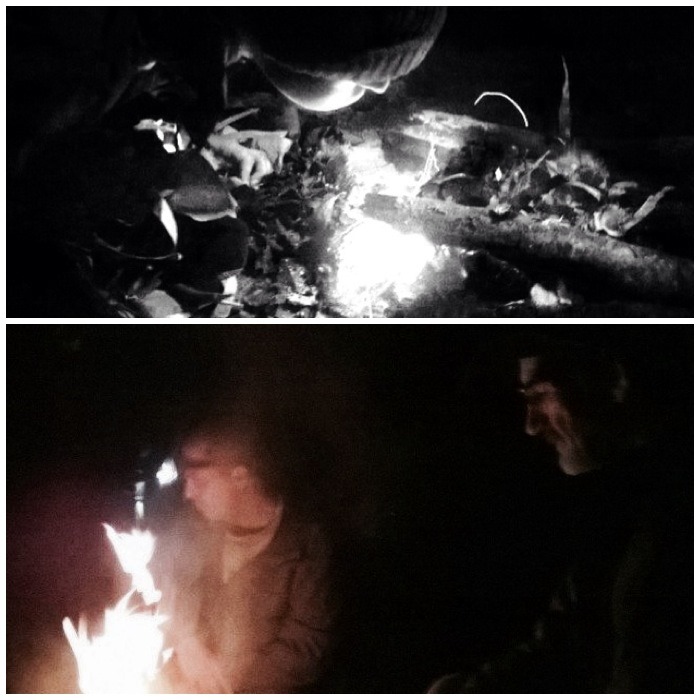
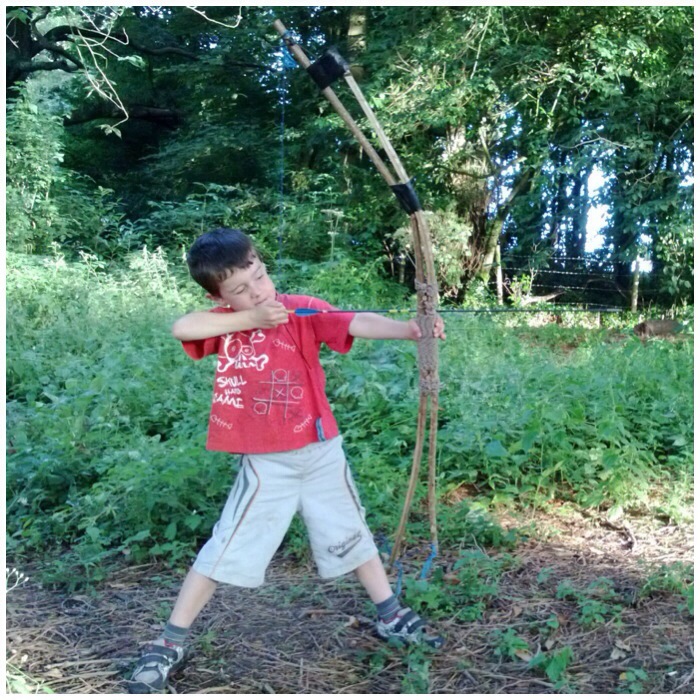
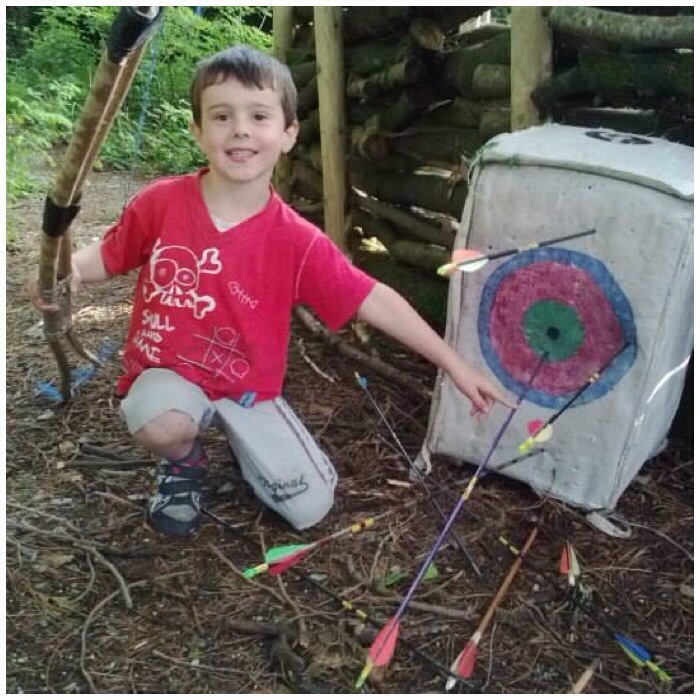
We did not have permission to have a fire in the woods but that did not stop us from pretending – after all that is what we kids do 🙂
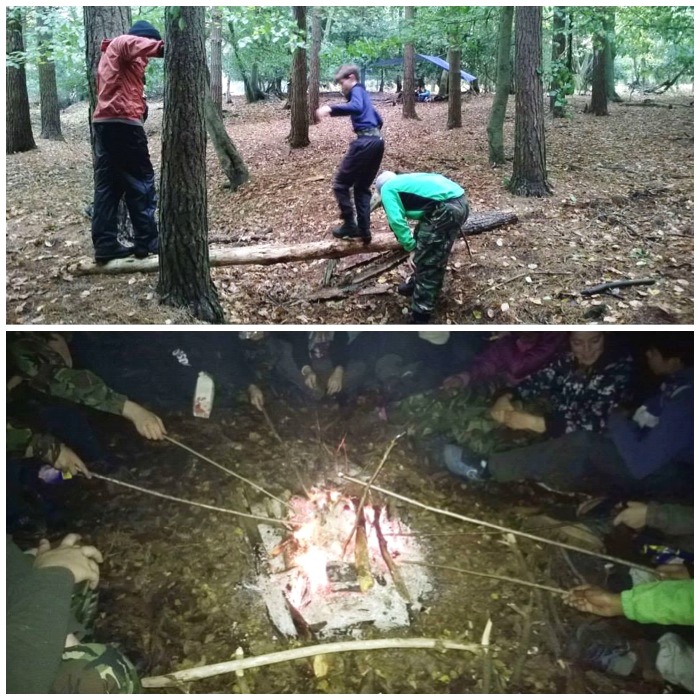
I got them to build themselves a heat reflecting wall in front of the shelter (about two paces from the shelter). They just pushed two sticks into the ground and stacked some logs up against them.
Reflector wall
All that was left for them to do was construct their long log fire (one step away from the shelter) and relax.
Fire and finish
This took us about one and a half hours to complete and managed to have fun along the way as well.
As I said this was more about the principles of shelter building (done really to help towards one of their Cubs badges) and not a full on How To…. to building a shelter. If we had more time we would have put about 3 times as much debris over the top, the bed would have been raised up with a much thicker mattress of spruce and the sides would have been closed in.
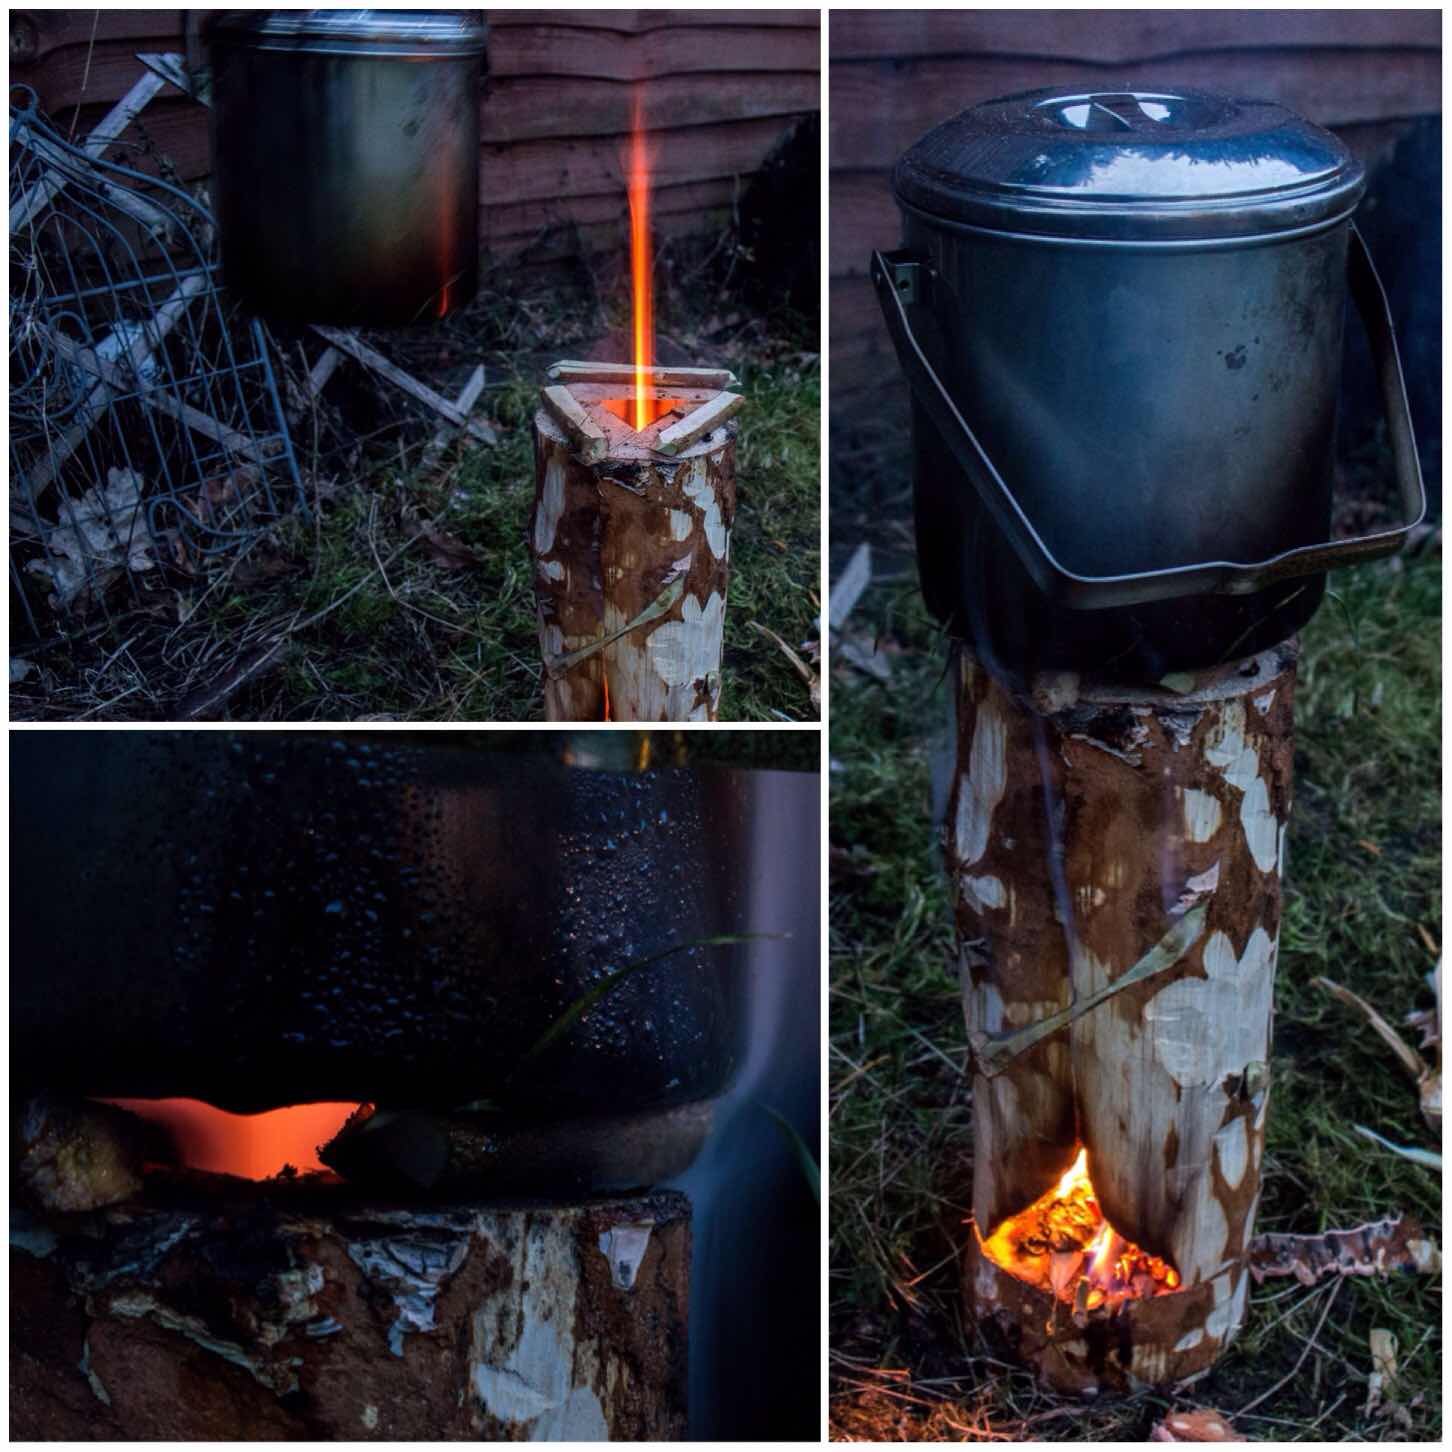
In my continuing research into Log Rocket Stoves I came across a Wikipedia page called the Schwedenfeuer and in it details of a type of log rocket stove I had not come across before, with a built-in fire tray and a chimney formed by simply cutting away the inner corner of one section.
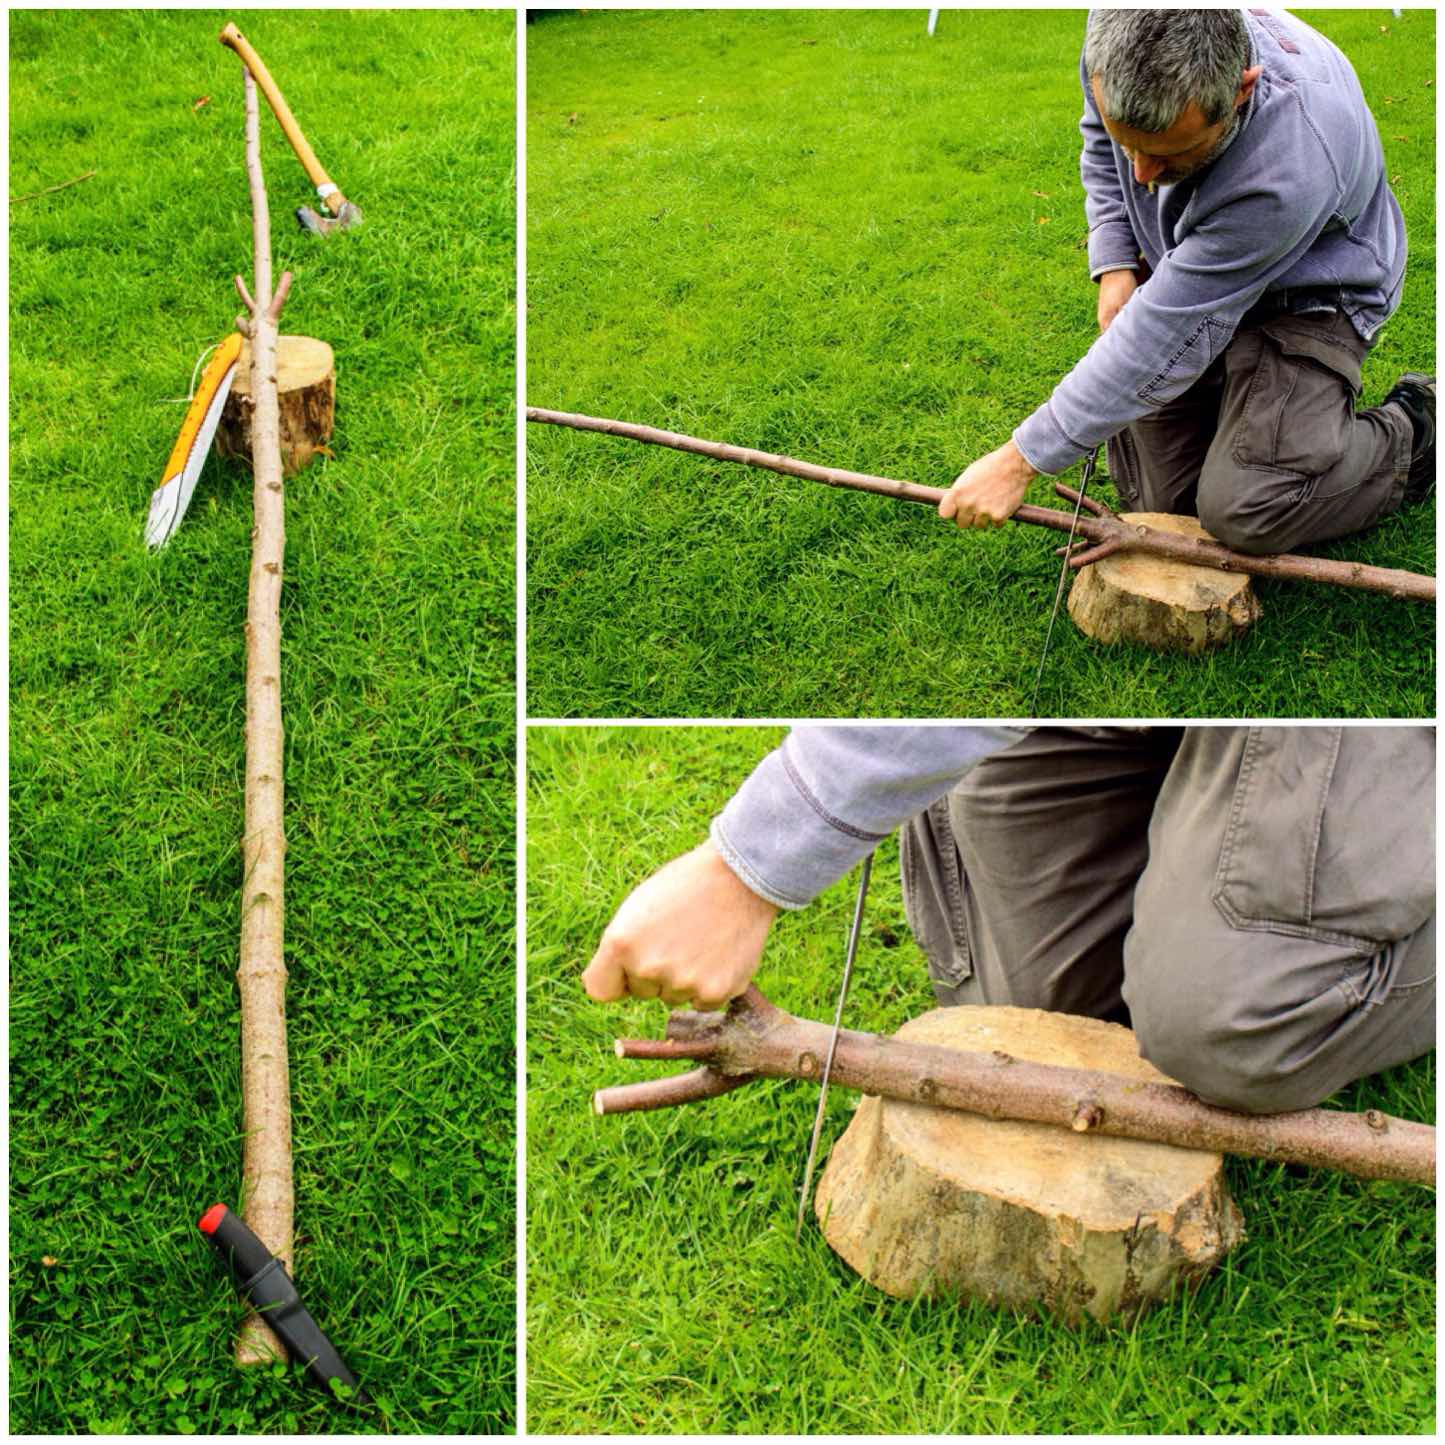
Clever though it was, though, this stove still relied on string or wire to tie the sections together. As these stoves have been around for a long time I figured there must be other ways of holding them all together. I thought perhaps that green wood dovetail wedges might do the job, so I set out to test this.
The Dovetail Log Rocket Stove
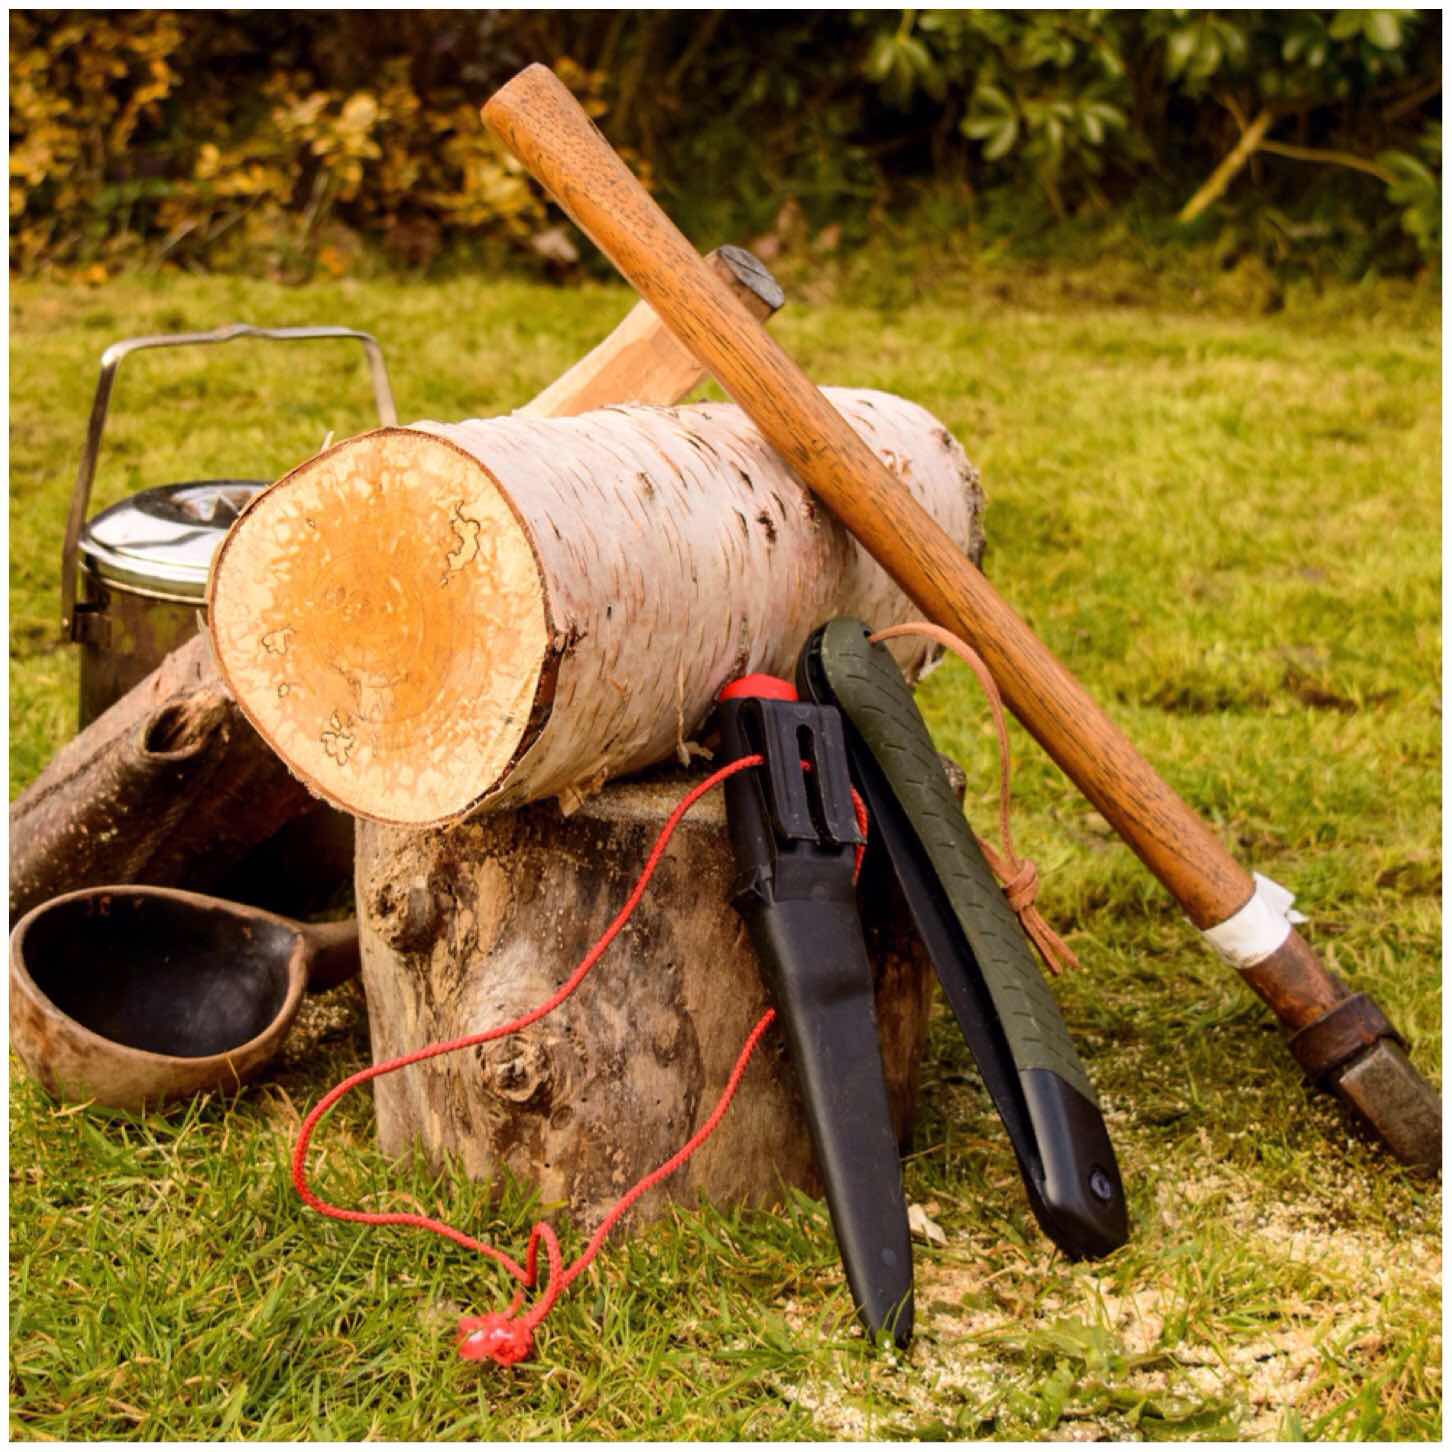
Tools and Material
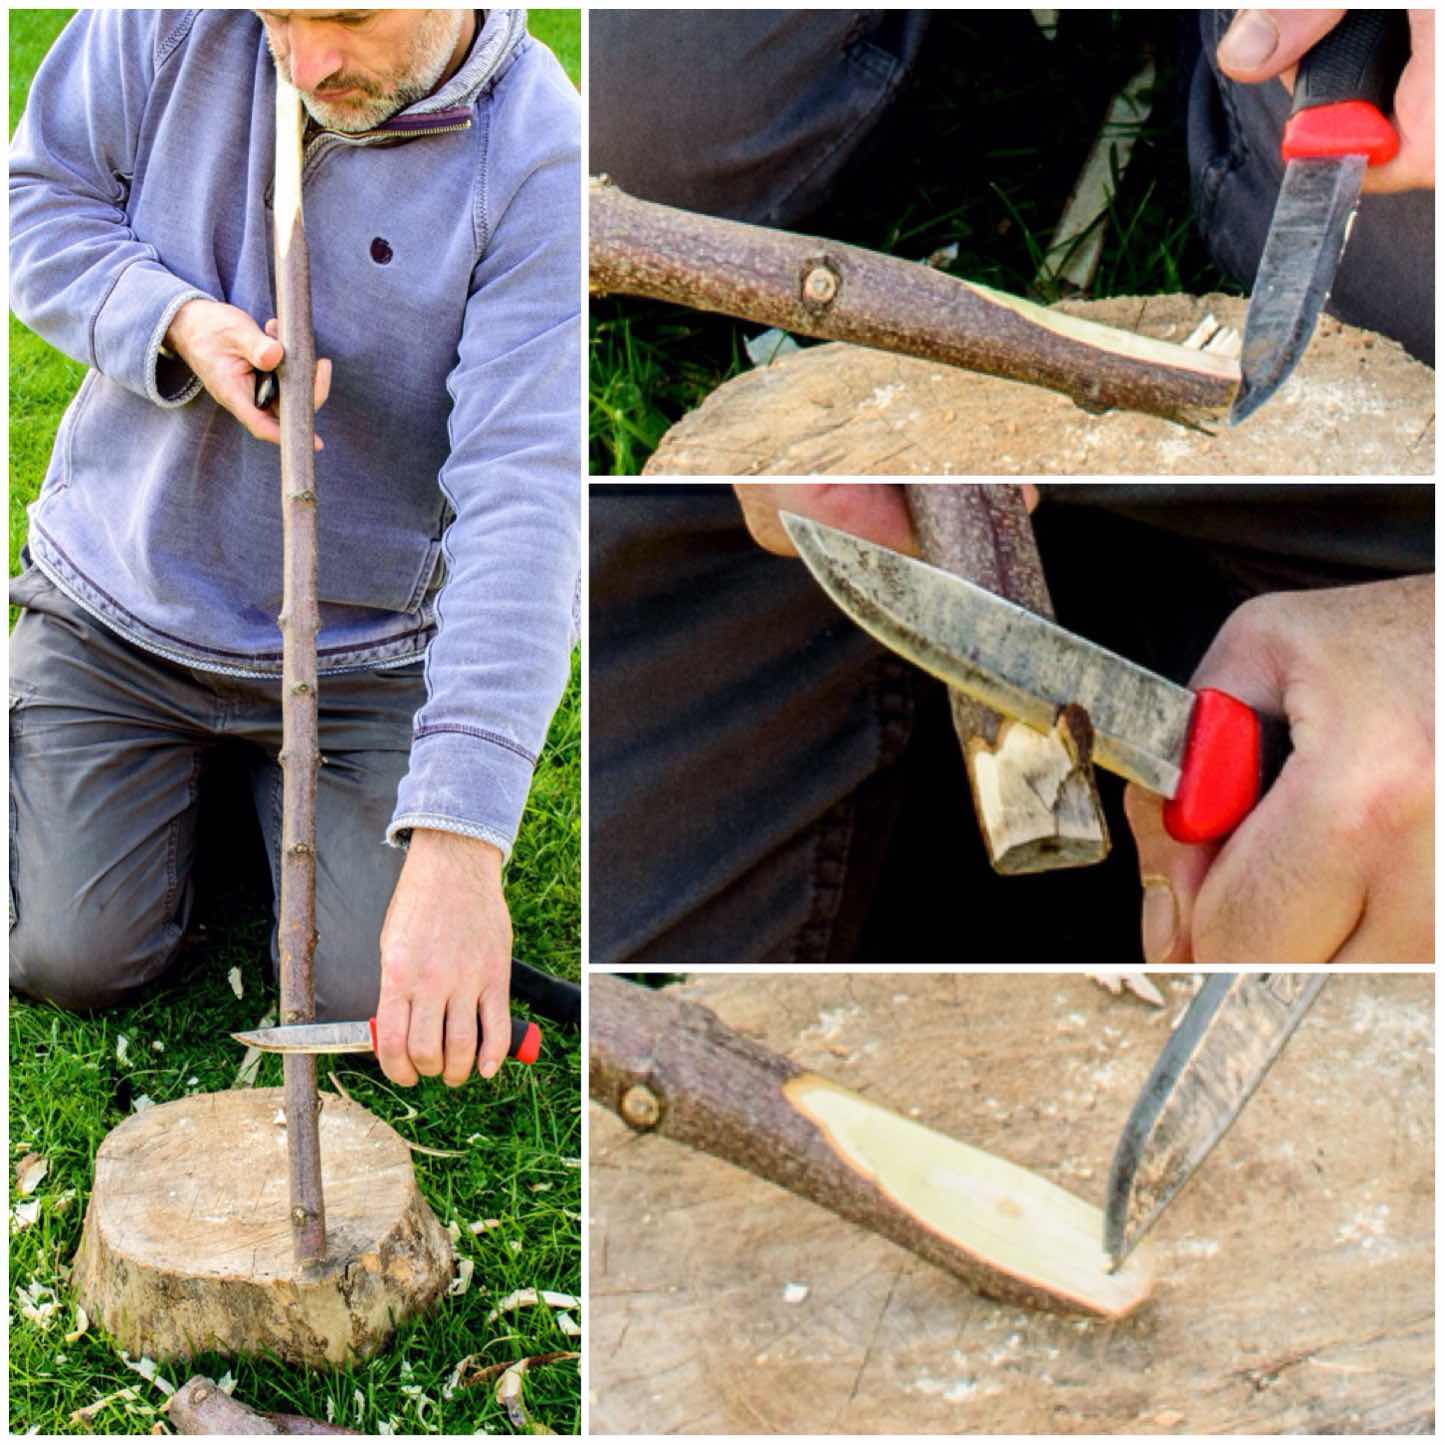
As usual I limited myself to the tools I would usually carry in my backpack, including a knife, saw and axe. A pen or pencil is handy for this project as well.
I’ve had a piece of birch stored in my garage for over a year however it had absorbed moisture over the winter and was fairly damp in its core.
Tools
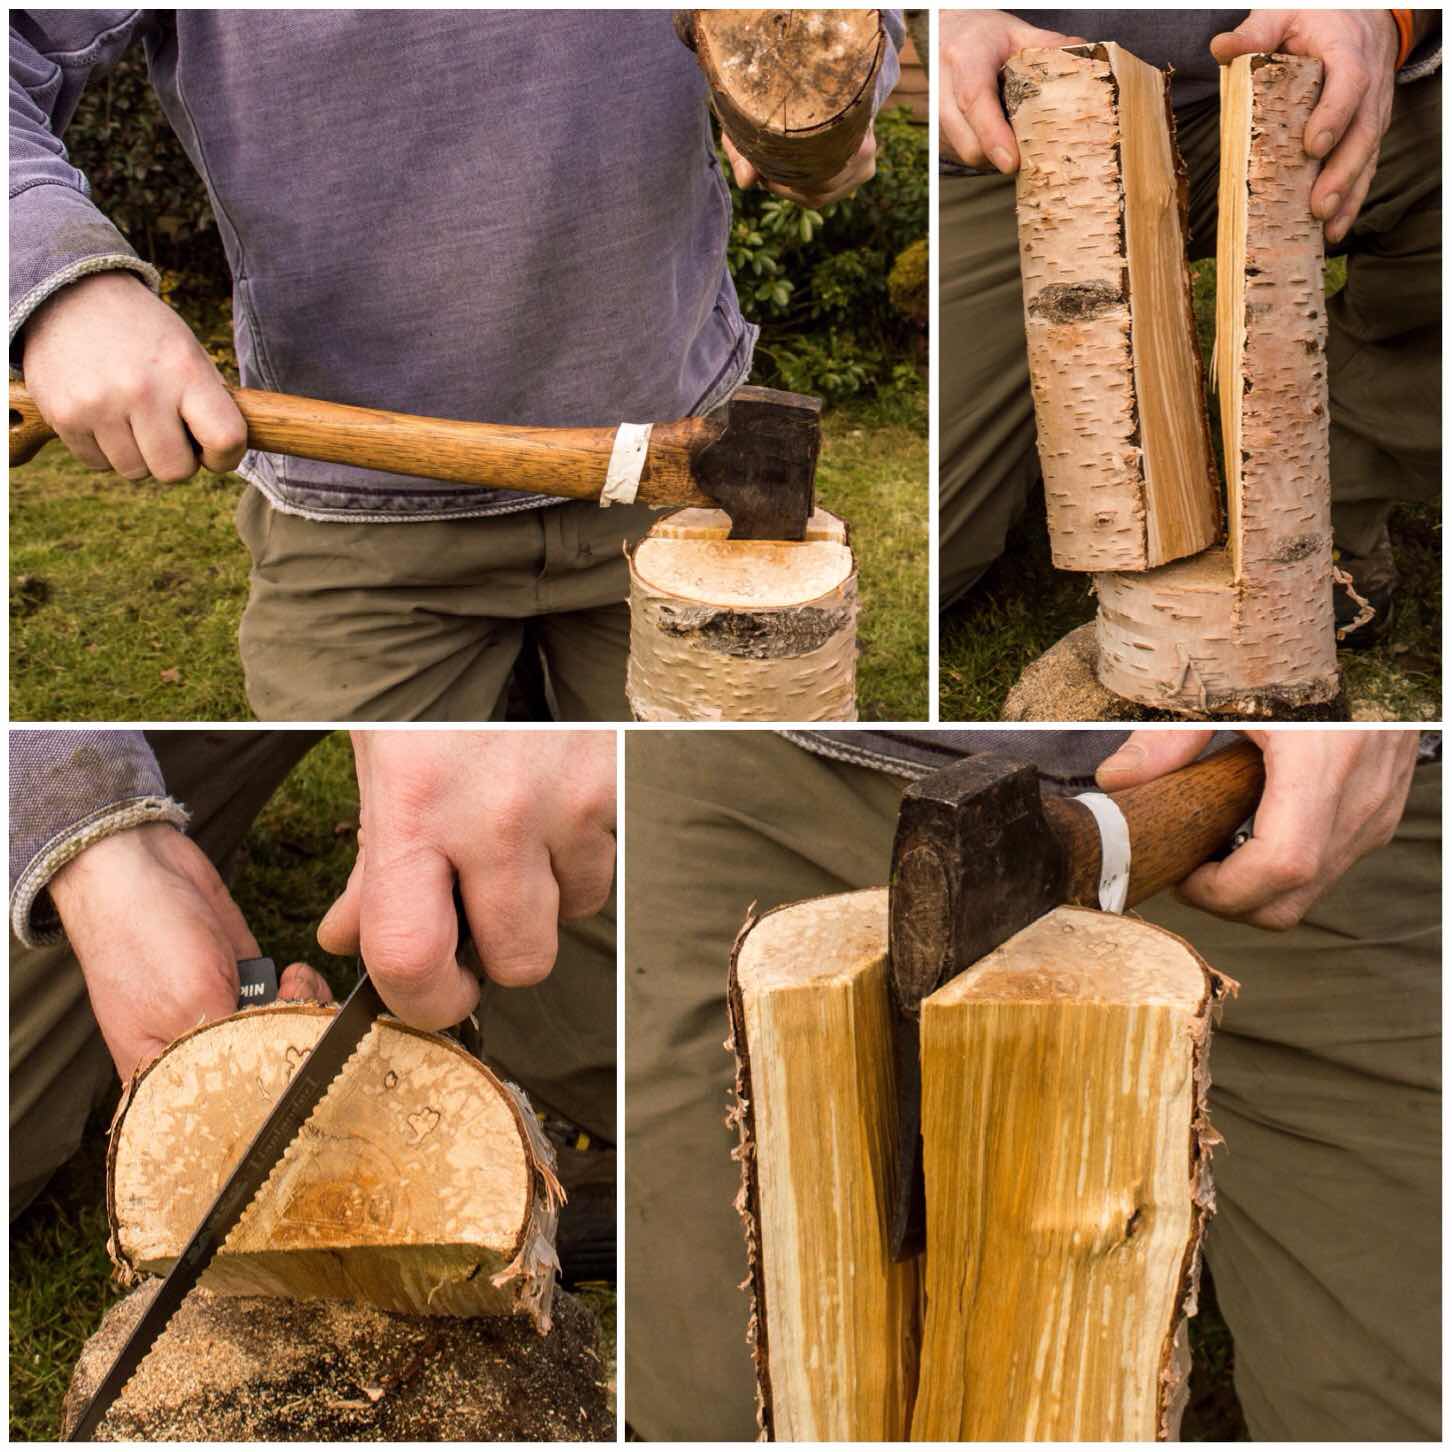
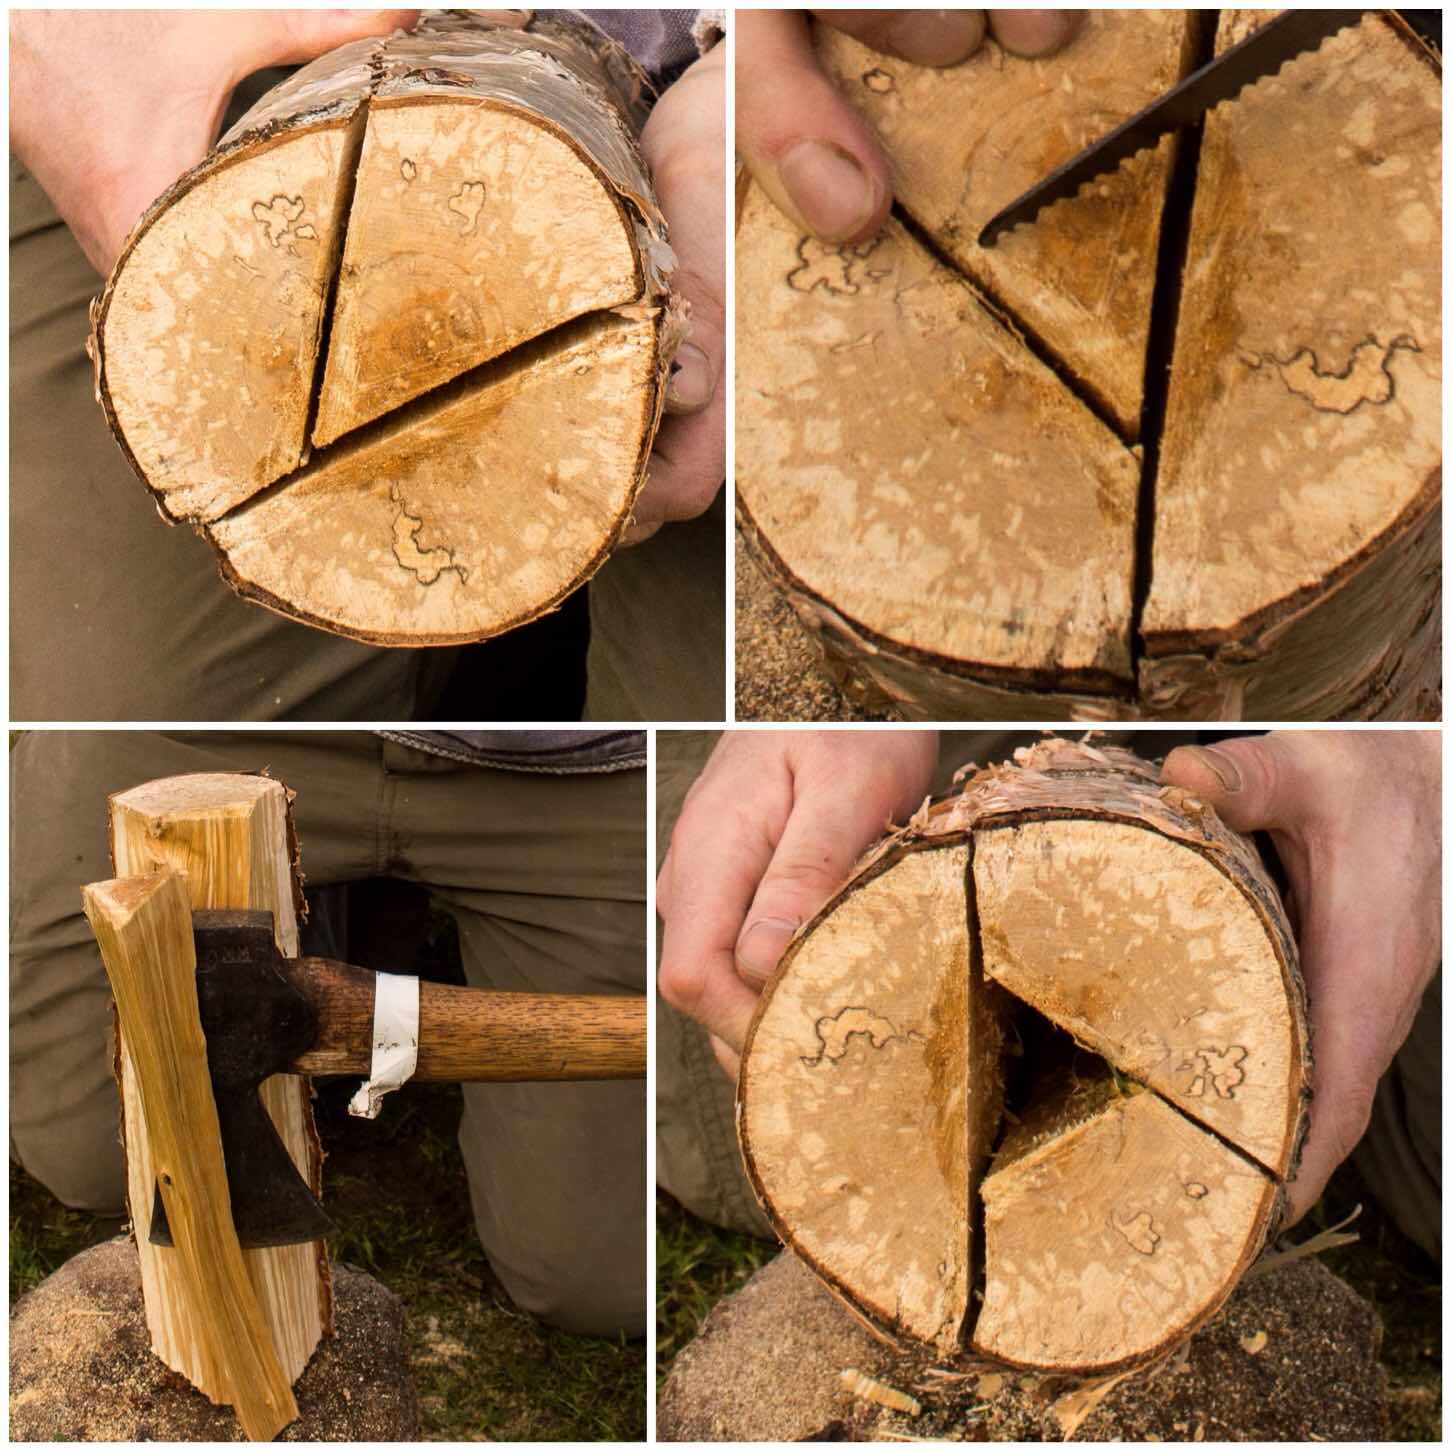
Splitting Out
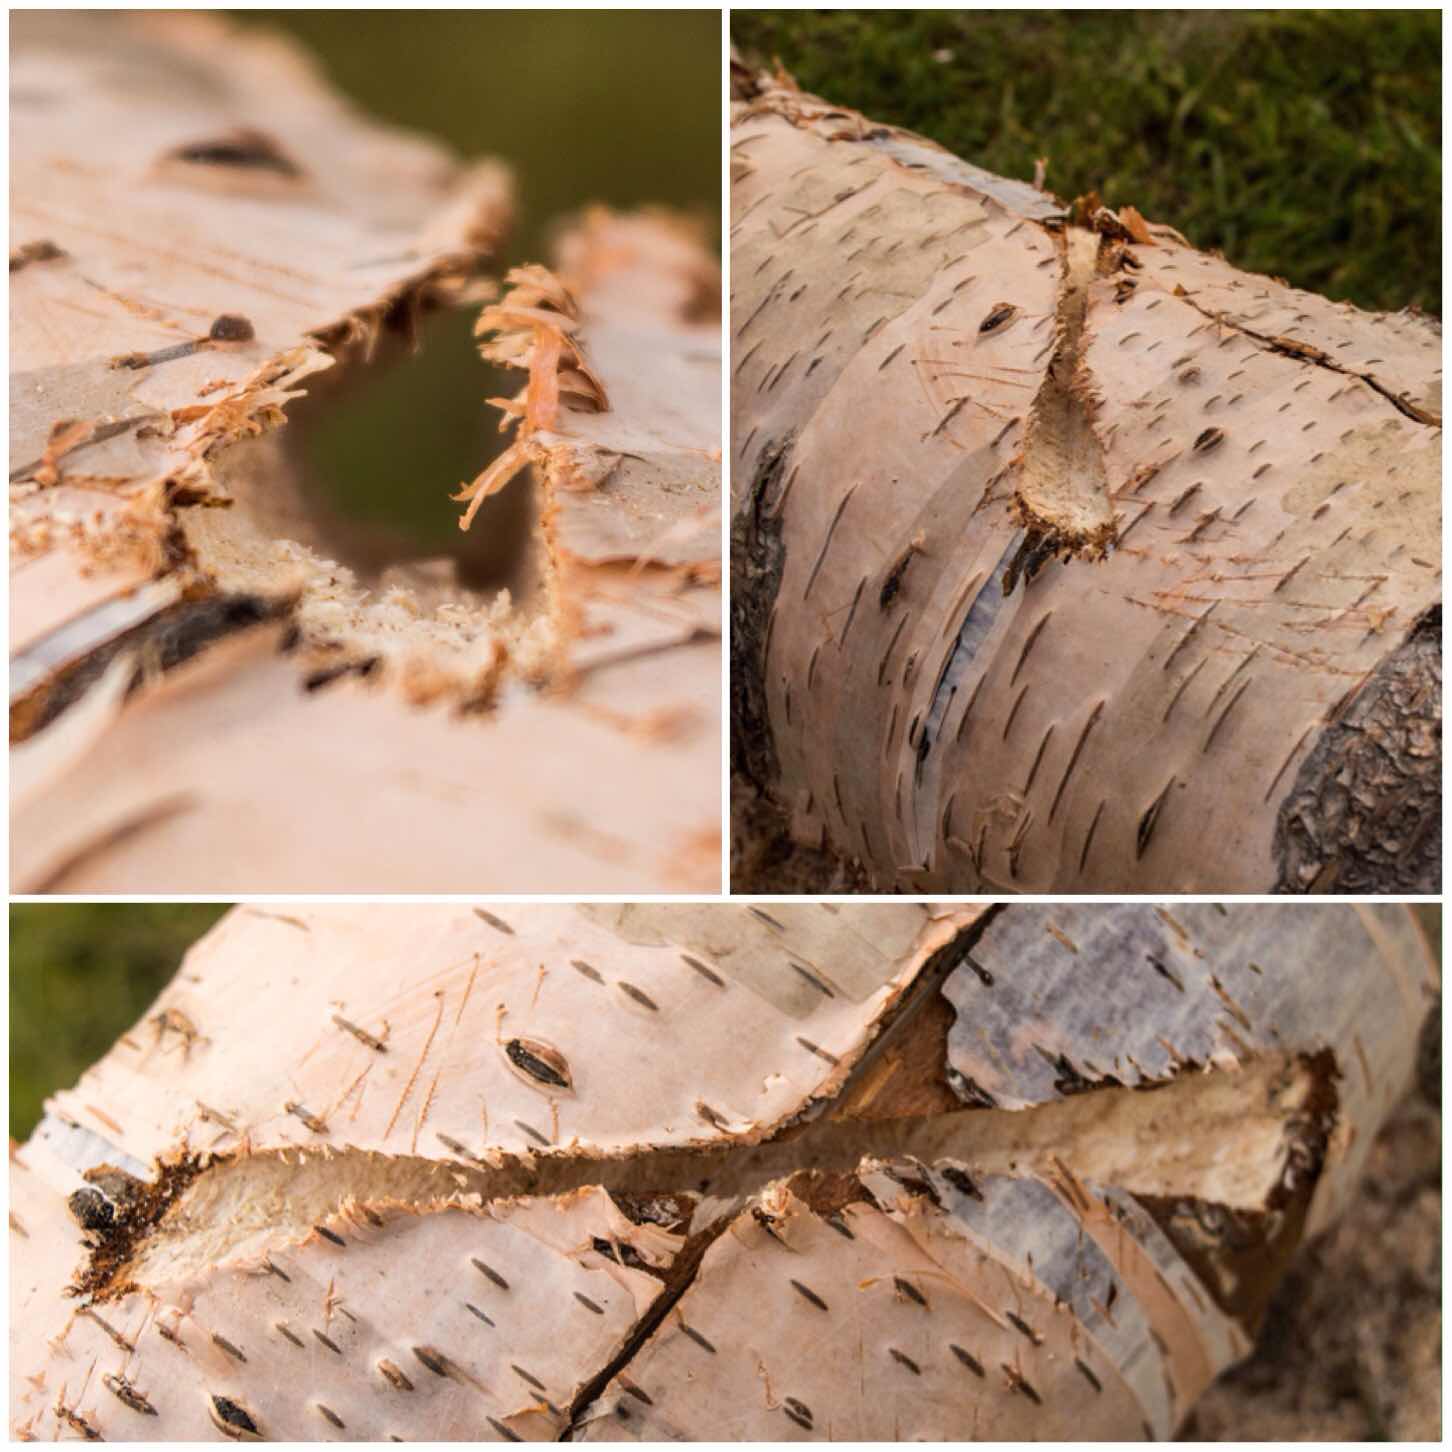
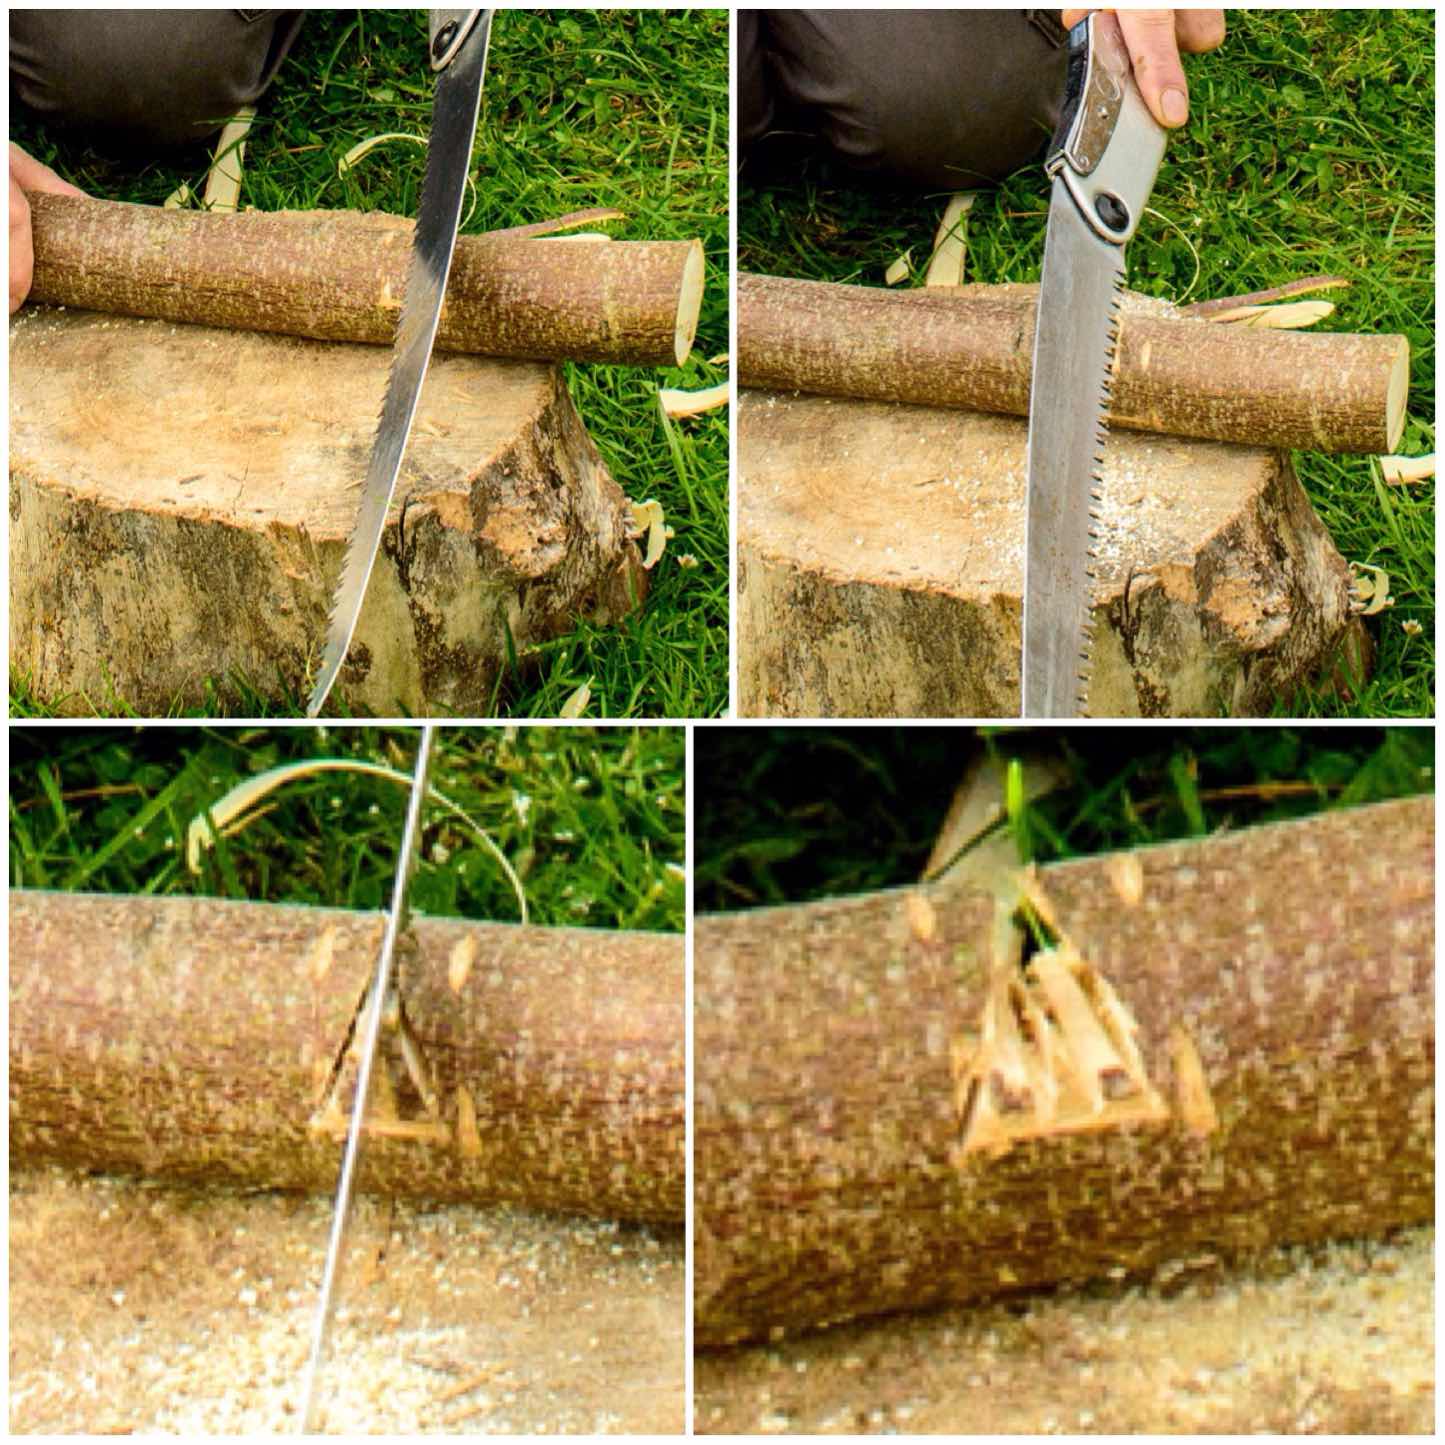
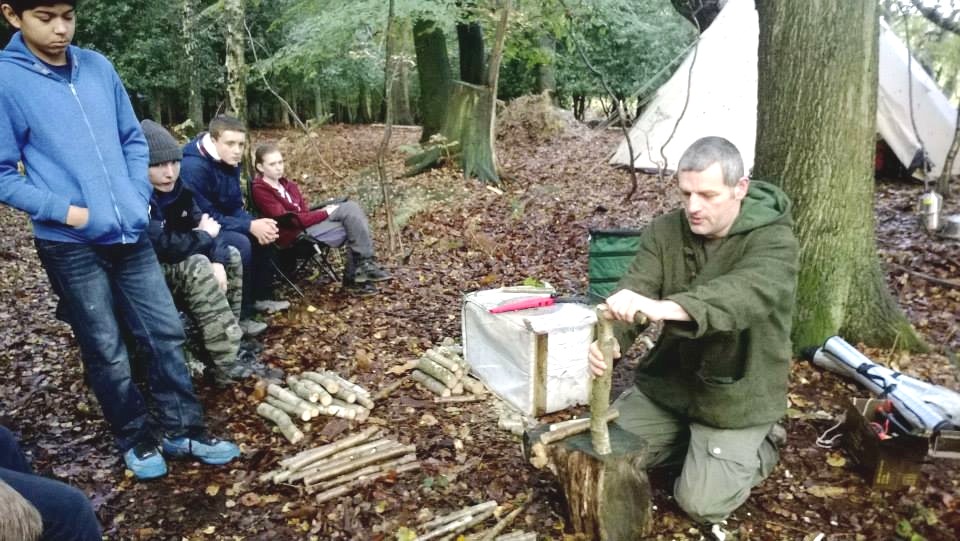
This style of log rocket requires you to put a stop cut into the bottom of the log to about two thirds of its width. You can see in the top left picture below the cut is about 10 to 15 cms from what will be the bottom of the stove.
The top right picture below shoes you how far I put my stop cut into the log. The bottom two pictures show me marking out with my saw the approximate area I would be battoning out.
Bottom cut and marking out
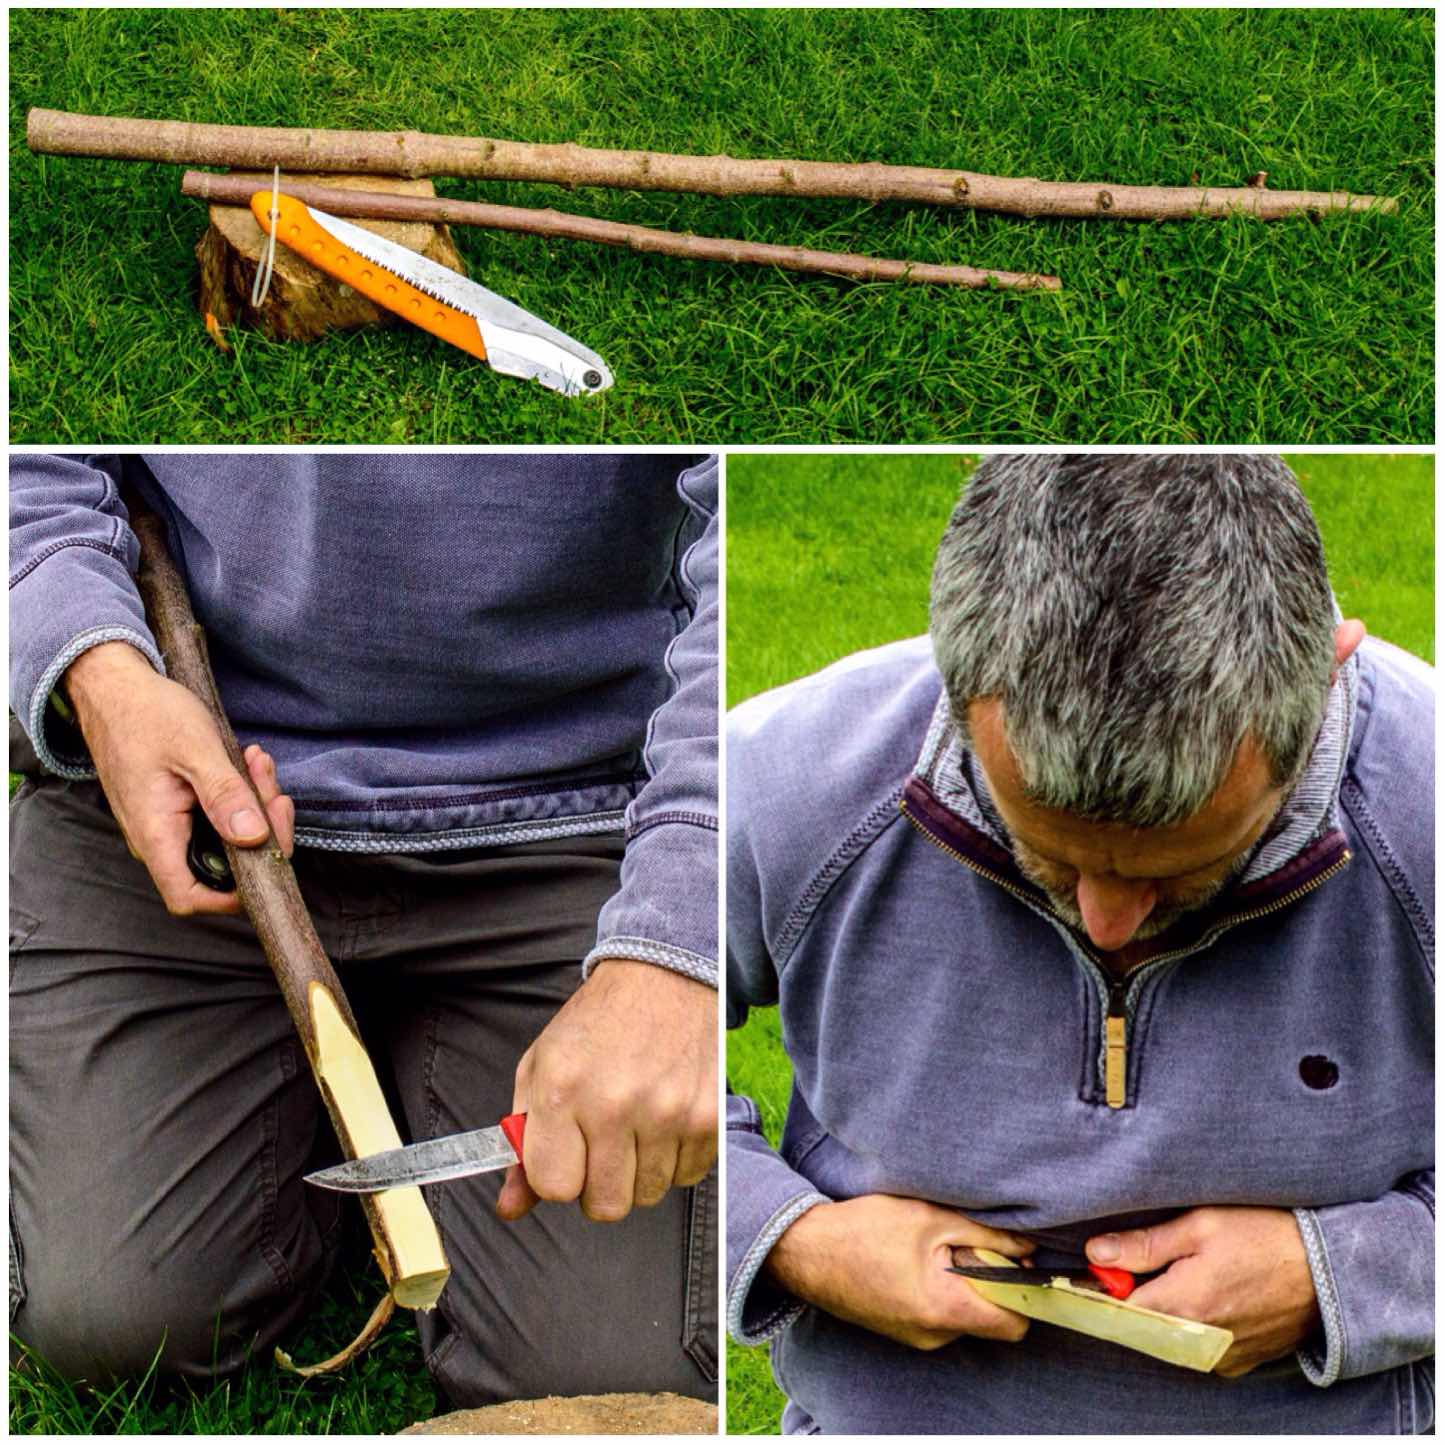
I used my axe and a large piece of wood to batton out the the wood. You can see the shape of the stove at this stage with one segment in an inverted ‘L’ shape (Segment 1) and a smaller piece (Segment 2).
The bottom two photos show me marking out the smaller piece for further splitting. This piece is not split exactly in two as this configuration allows you to form the chimney very quickly.
Splitting
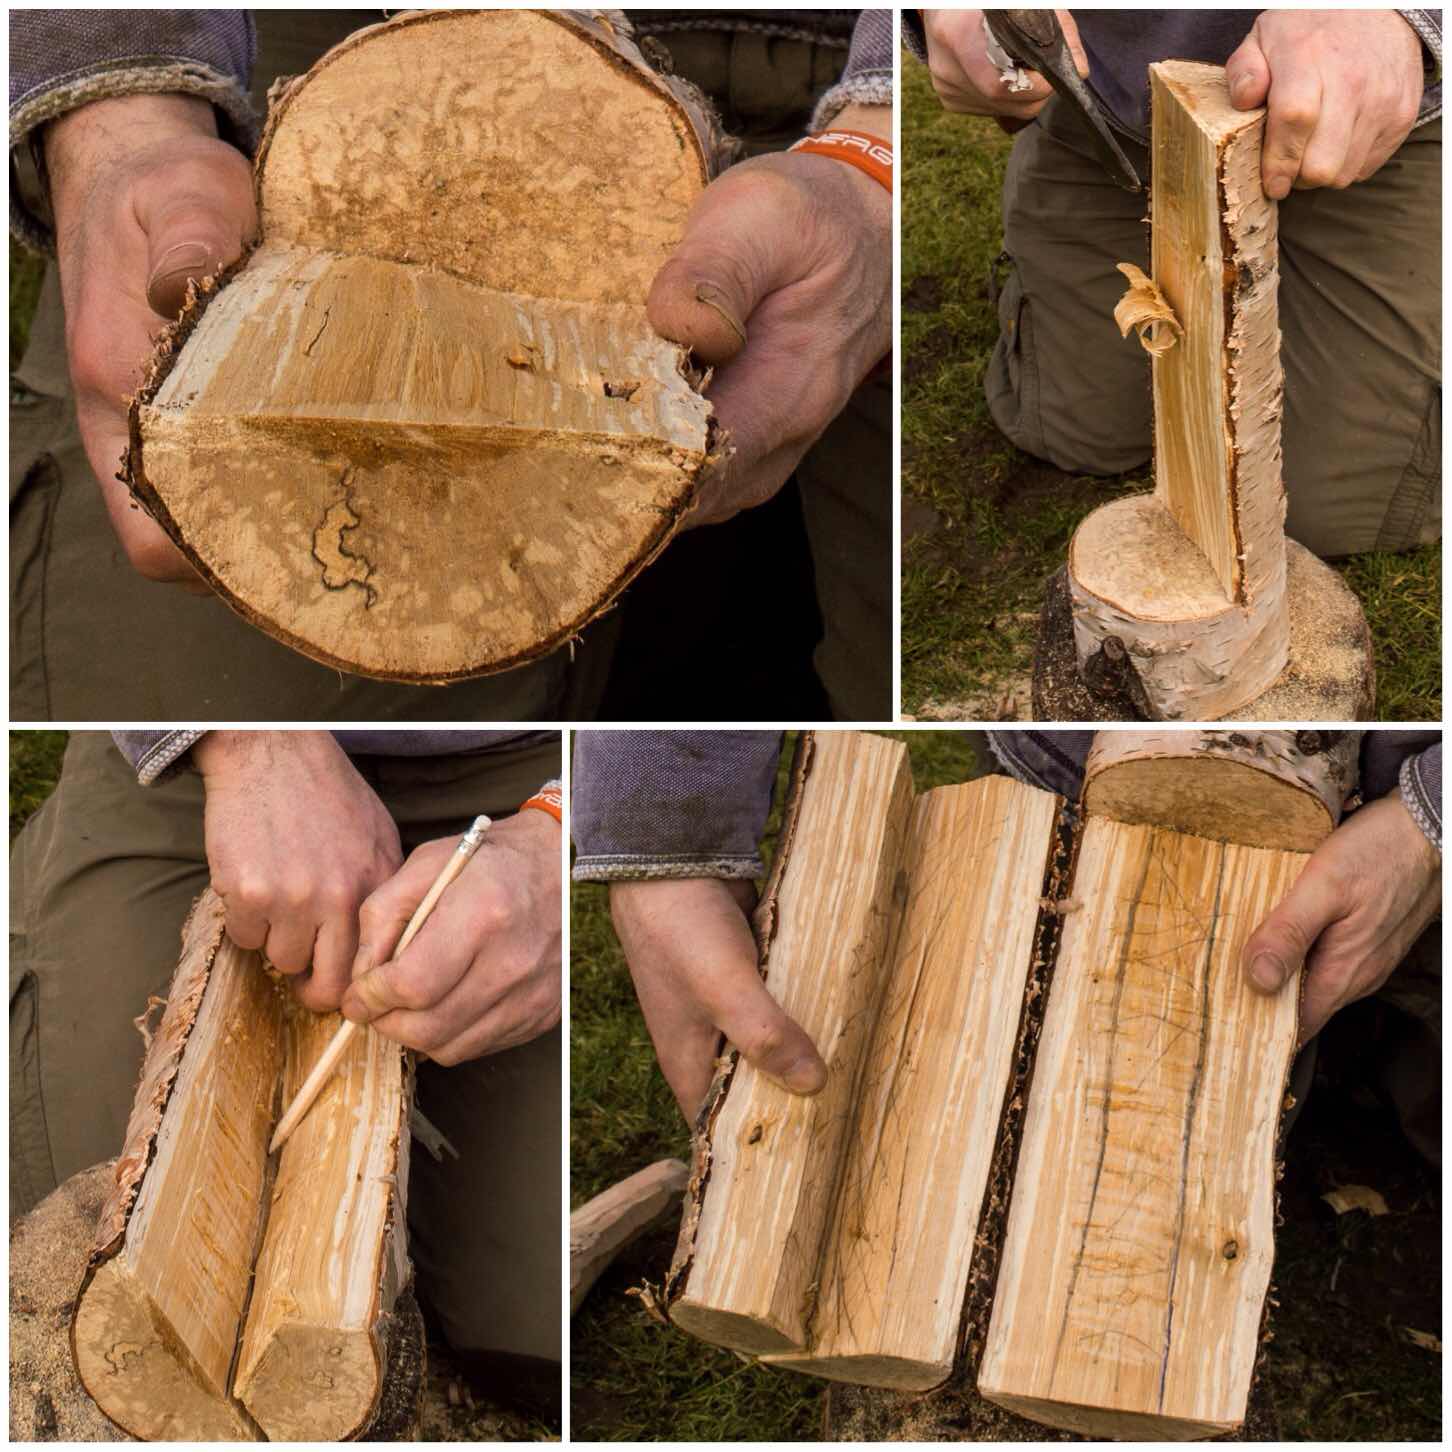
The Chimney
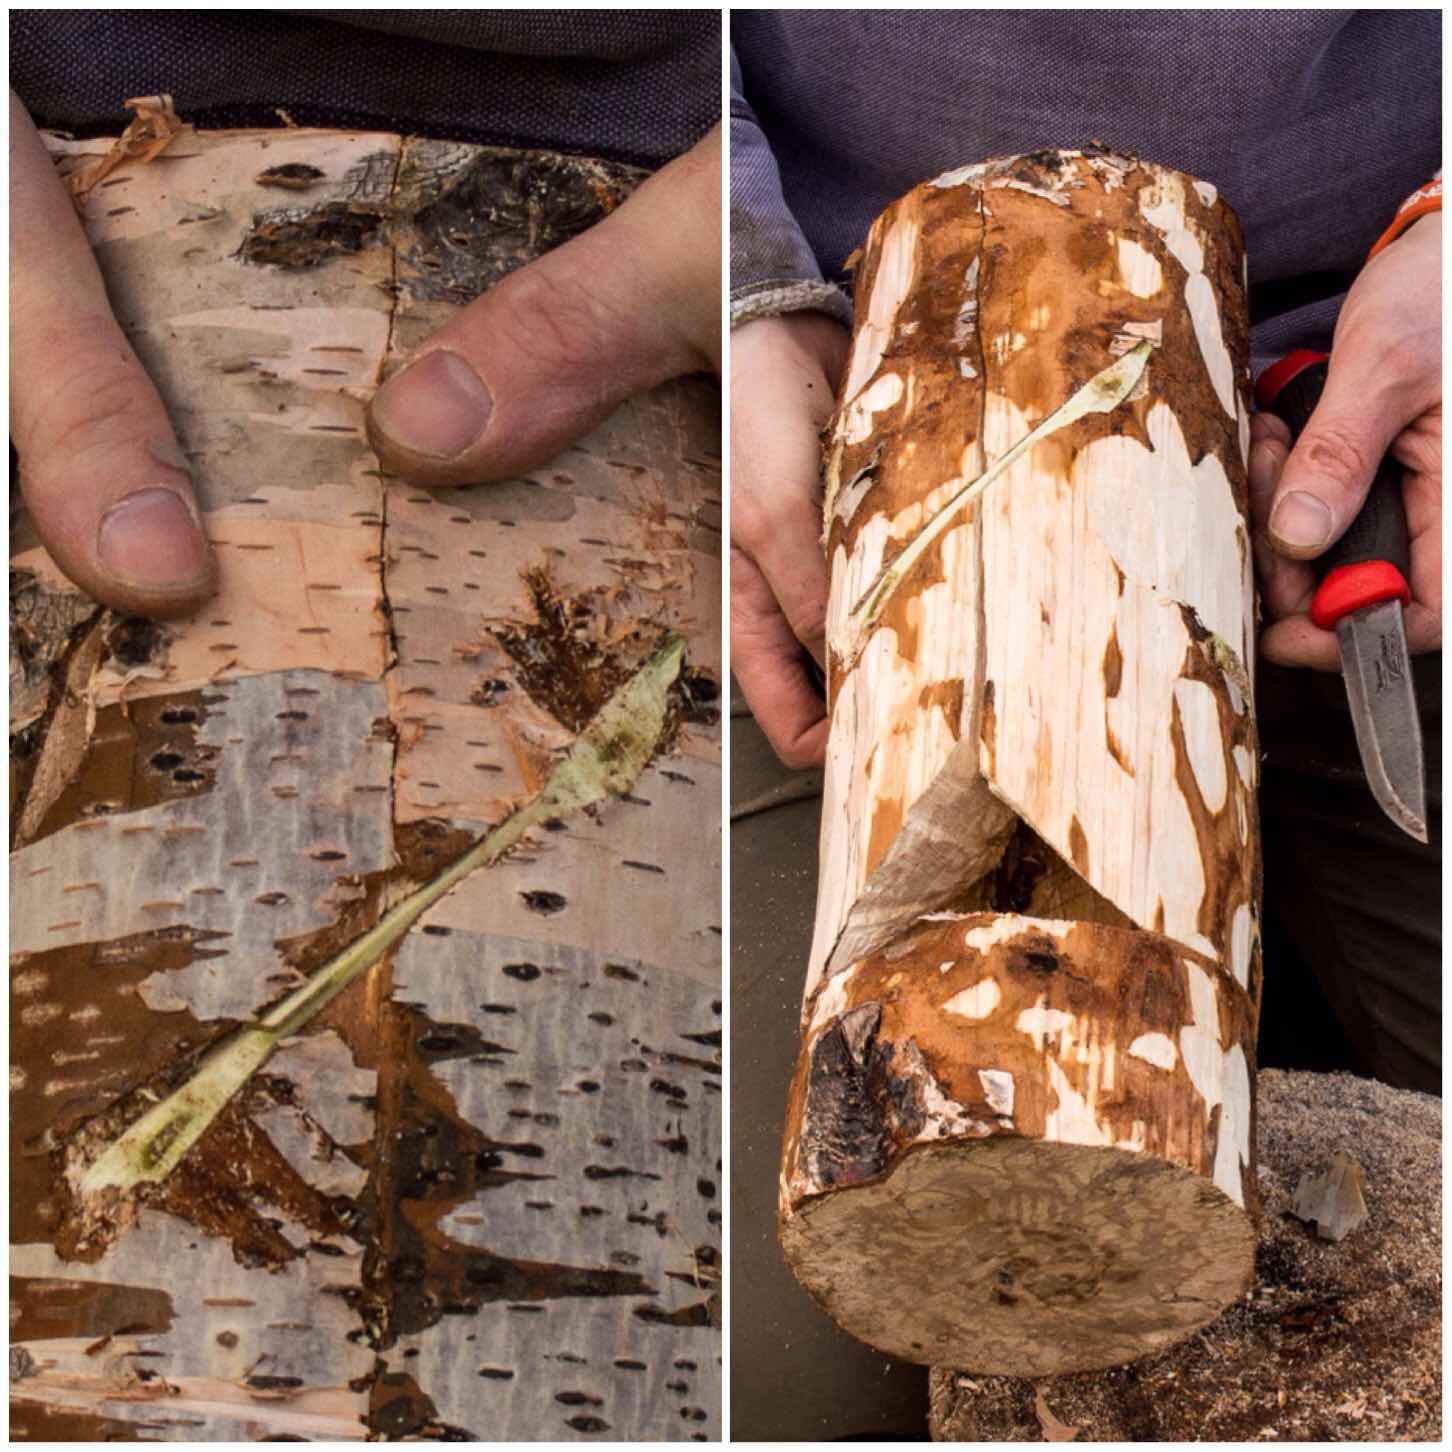
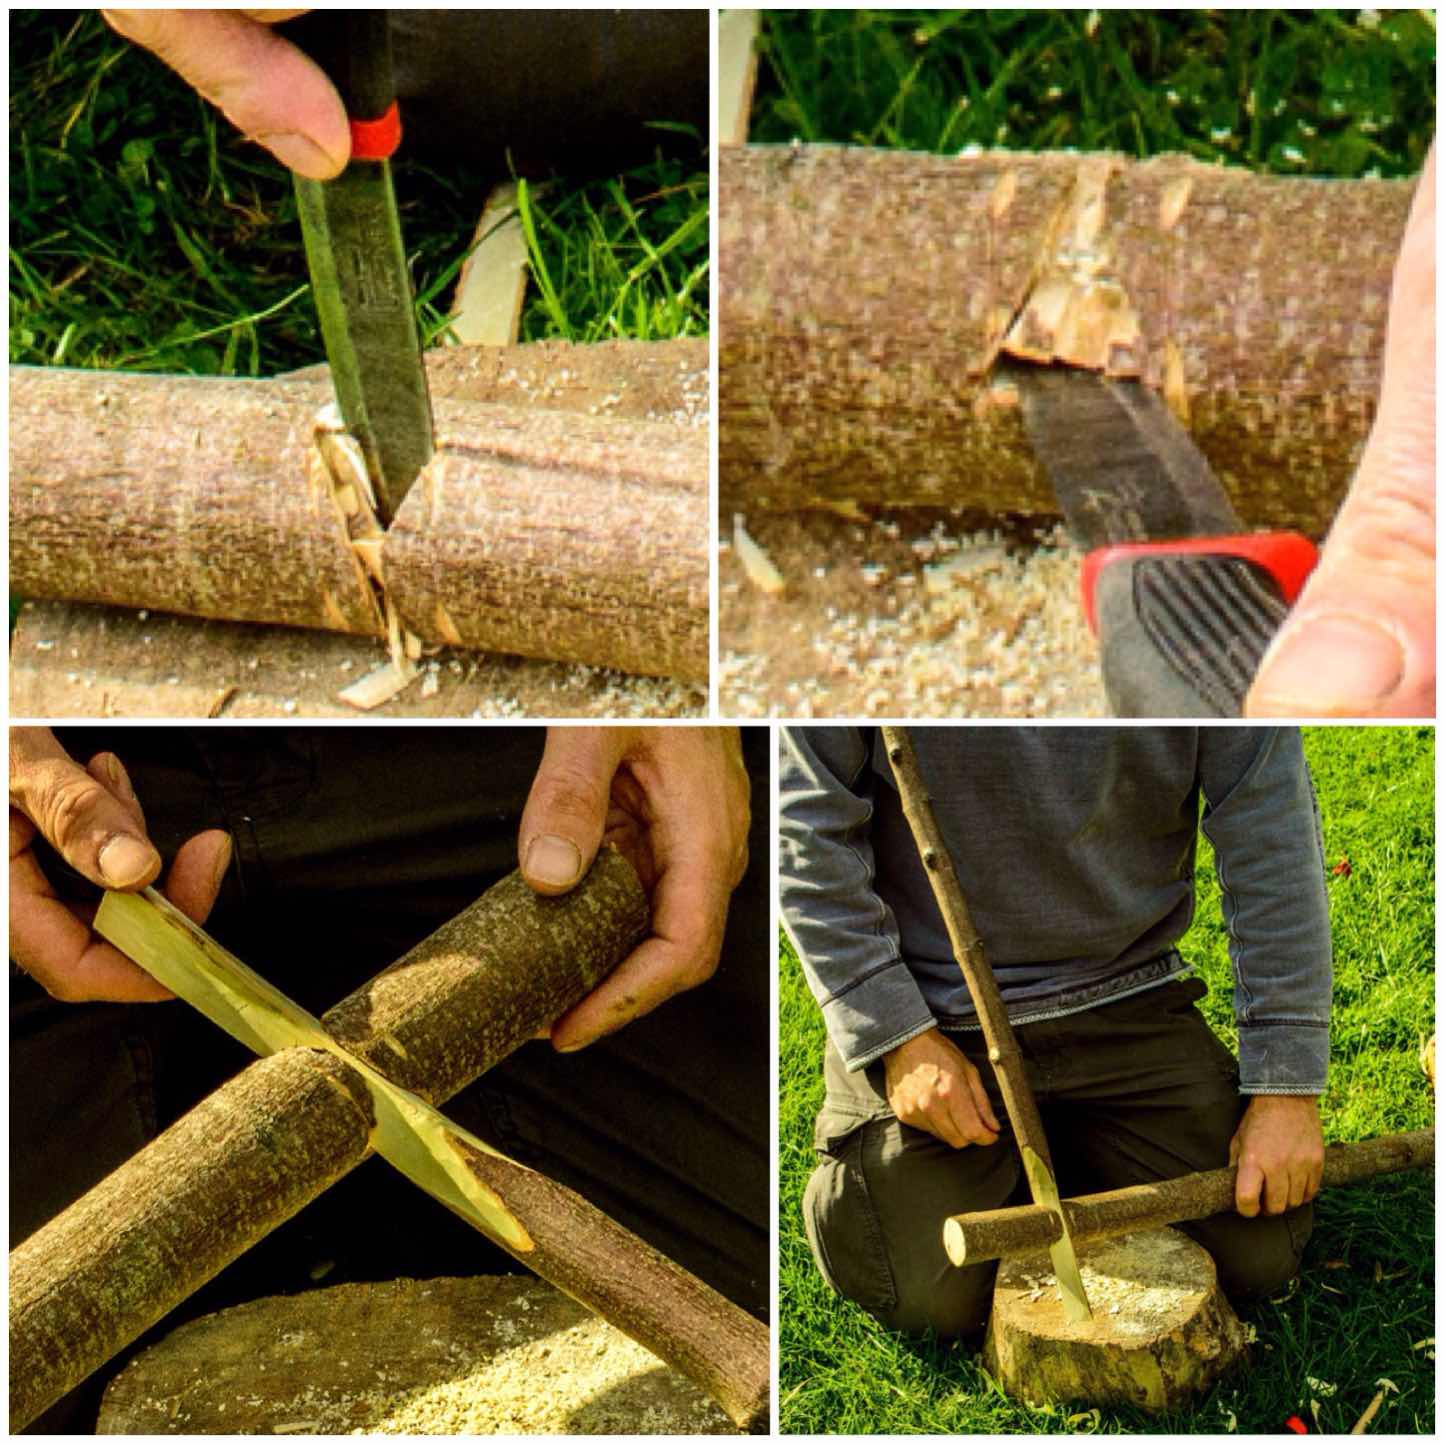
Below you can see the shape of all the pieces when they are put back together . I then battoned off the tip of the larger piece from Segment 2 so that a chimney would be formed. This piece of battoned-out wood I further split into fine pieces to act as kindling for the stove.
The One Cut Chimney
Once I had the chimney battoned out I trimmed off some excess wood from Segment 1 and then used a pencil to mark out the chimney area.
I did this so I could put some Raappanan tuli cuts into the chimney area. It is important to keep the sections of the log rocket that join together as smooth as possible for a good fit so marking out the chimney area ensures I do not cut into the wrong area.
Trimming & Marking out the chimney
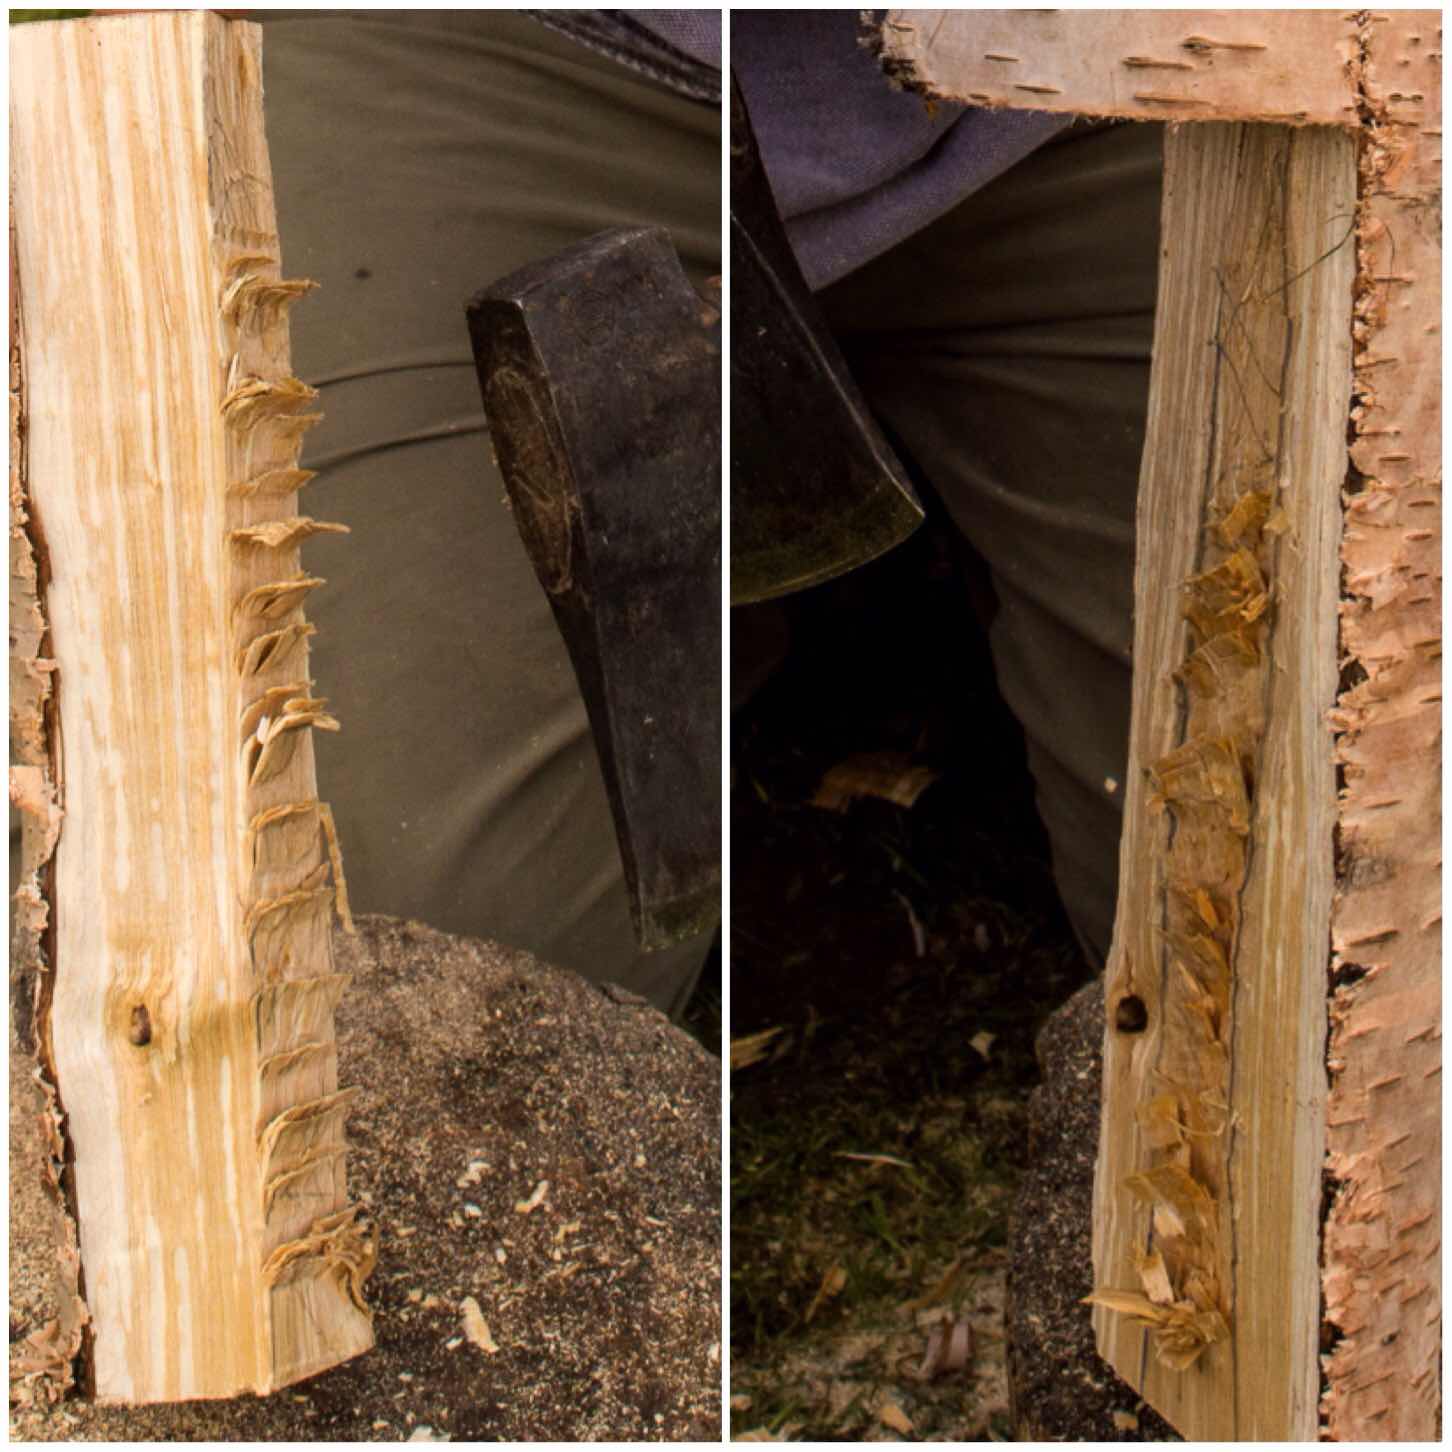
The Raappanan tuli cuts are fairly simple to make with my axe. I just ensured I cut only into the wood in the chimney area and that the cuts were made upwards, towards the top of the chimney.
These cuts are particularly helpful when using damp wood as it offers far more surface area to the initial flame, allowing it to catch more quickly, and also it helps to dry the damp wood out.
Raappanan tuli cuts
The Firebox
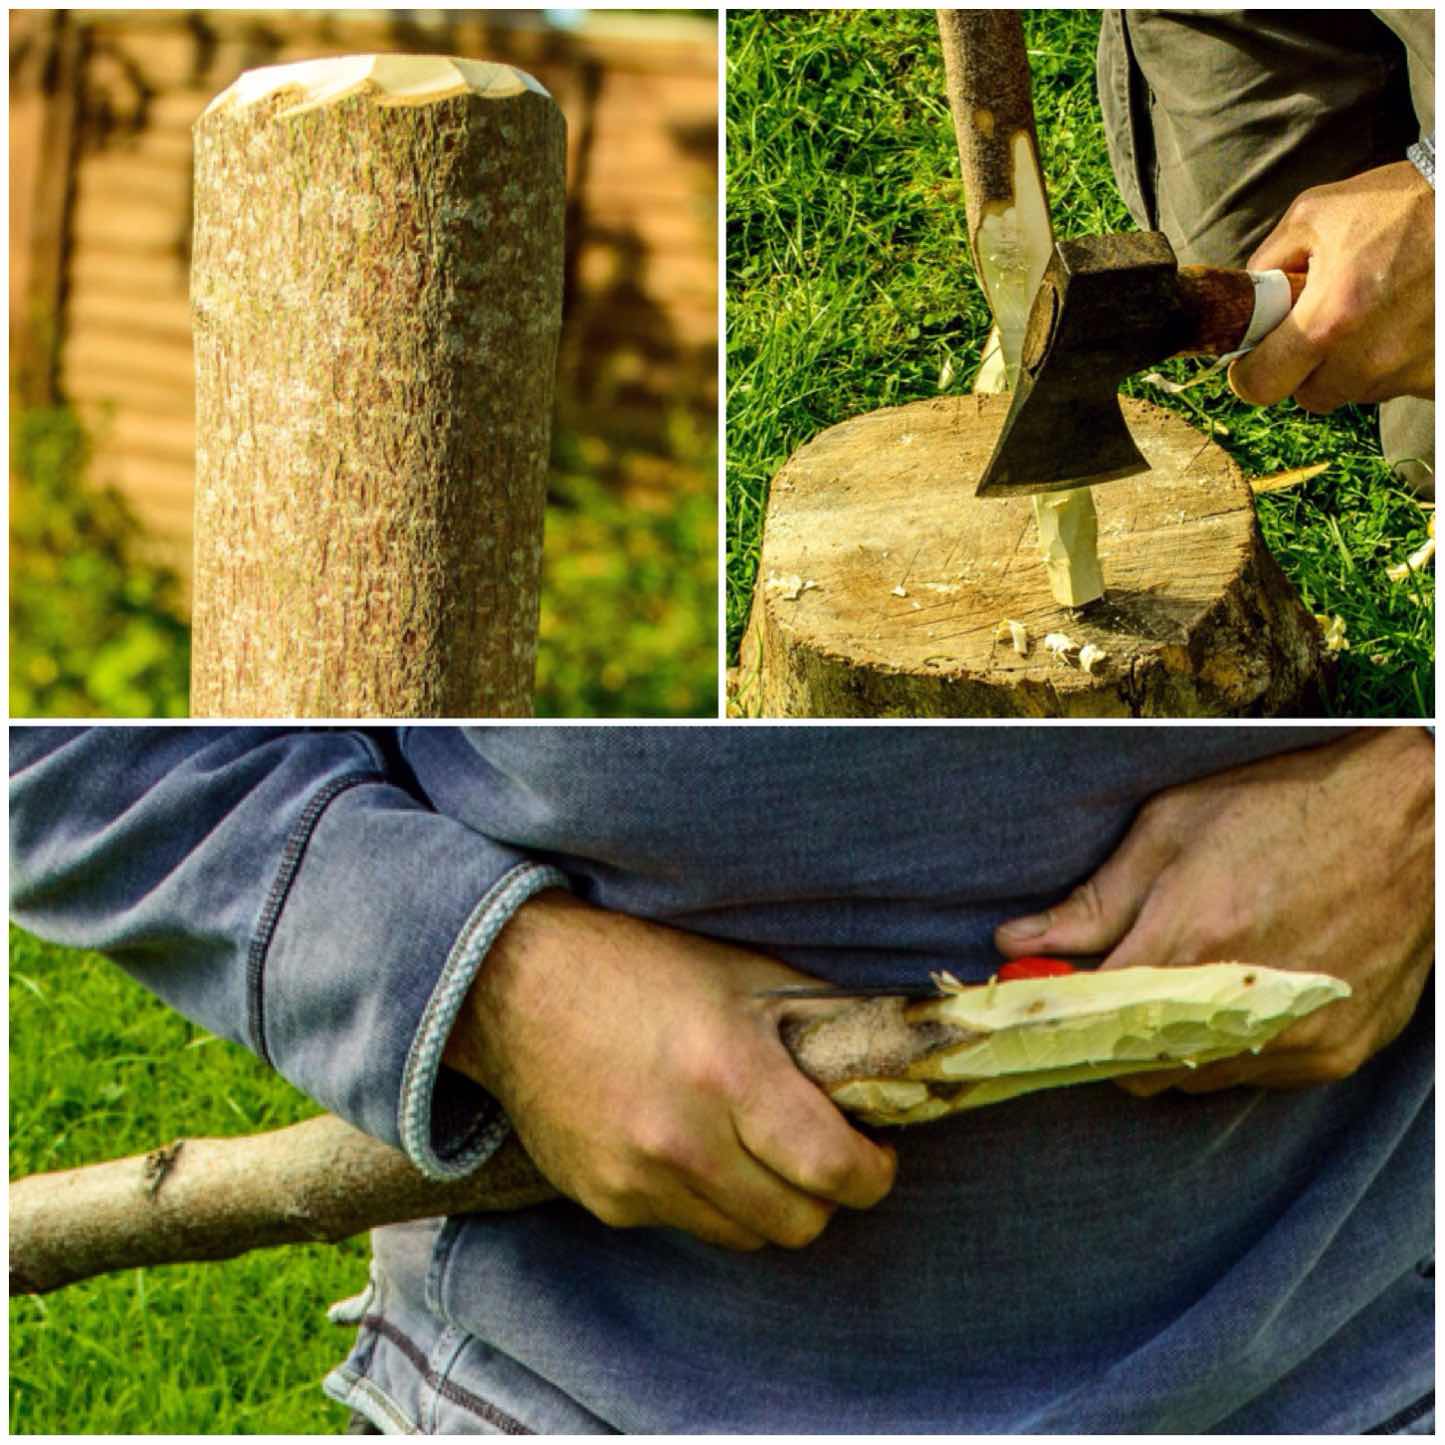
The next stage I worked on was the firebox opening. This can be done in a number of different way however I elected to go for a triangular opening.
I formed the opening by cutting a small triangle at the base of both pieces from Segment 2. I also tapered the inside of the cuts to open the firebox up a bit. I made this firebox slightly larger than normal as the wood was very damp. My thought was that the extra air intake would help to keep the fire going at the start before the insides of the stove became fully lit.
The firebox opening
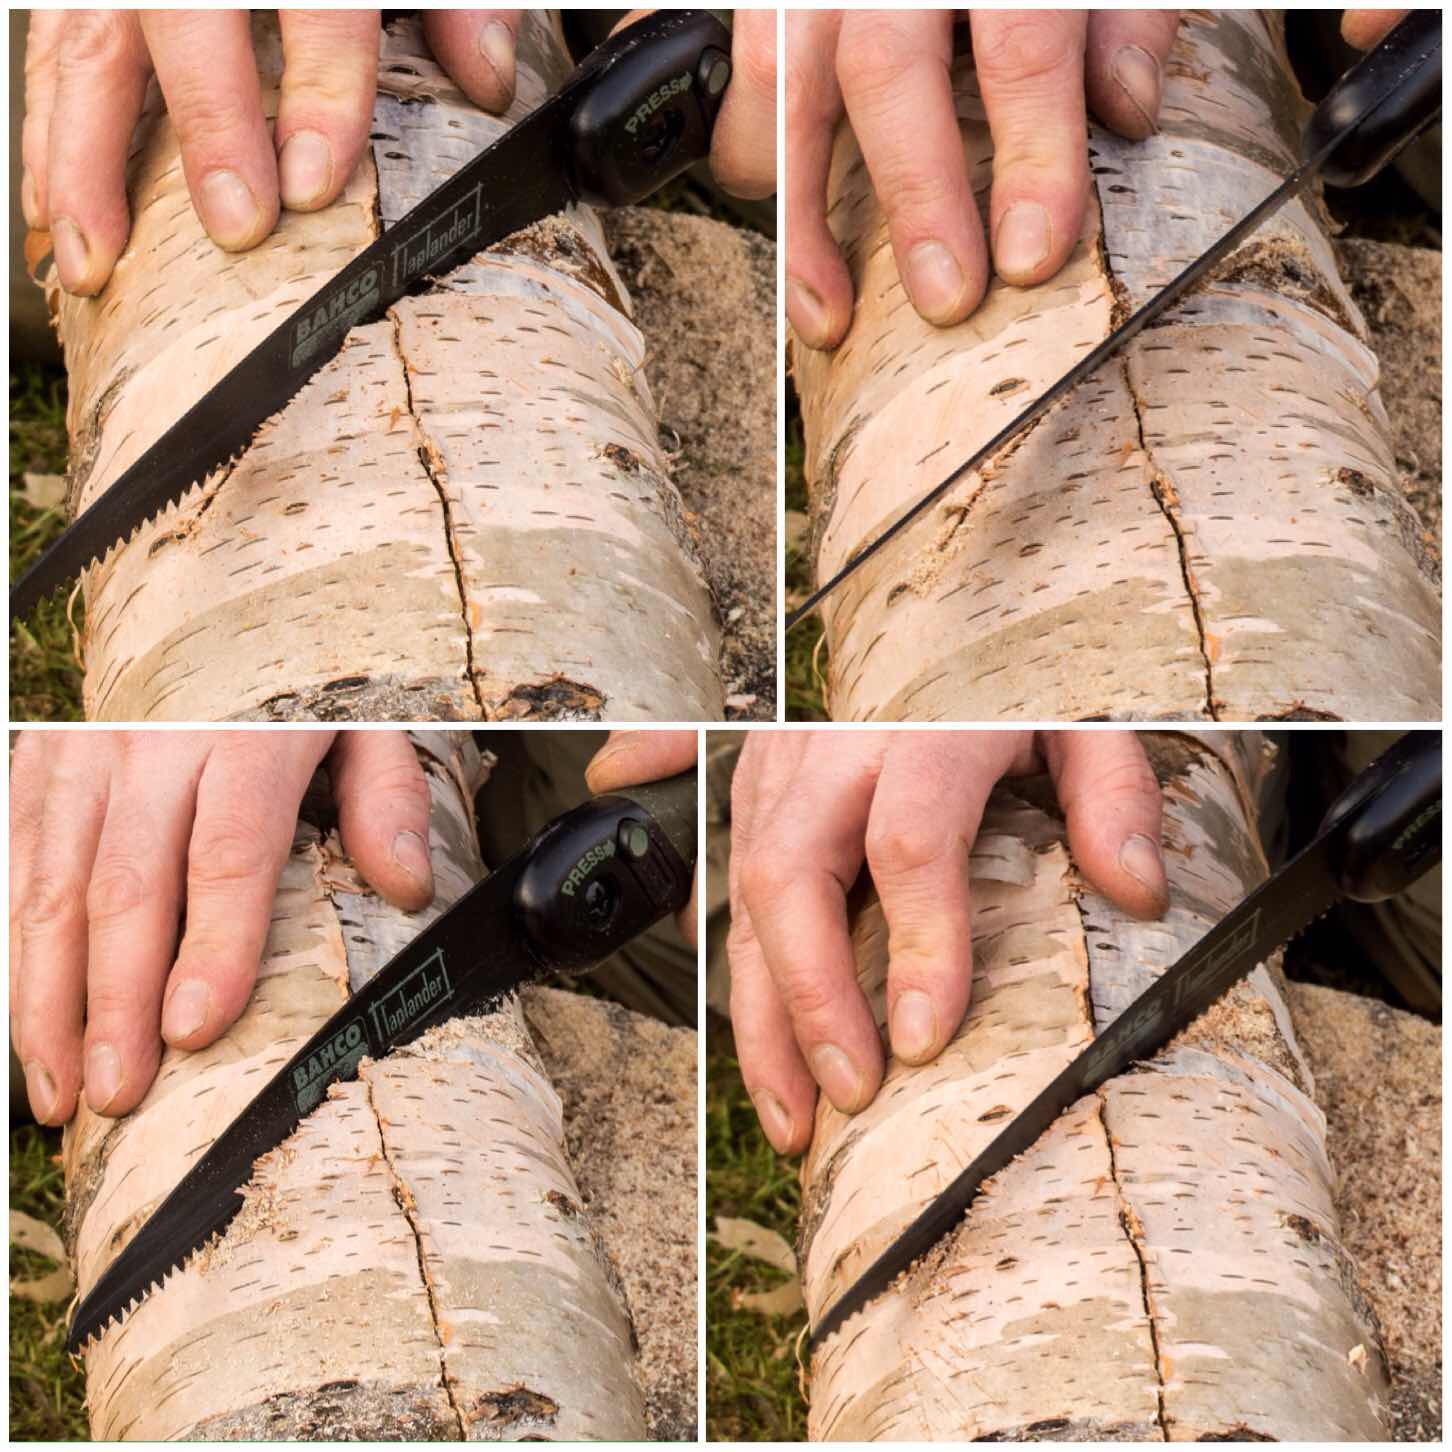
The Dovetail Joints
These joints were a total experiment. I put all the pieces together again and, holding them tightly, sawed a line to the depth of a centimetre across two of the joints. (I recommend you use some string or maybe a belt to hold everything together as you make the cuts – I didn’t and I wished I had.)
I then did the same cut but flared my saw out slightly (about 45 degrees) to the same depth. I then repeated the cut with the saw flared out 45 degrees in the opposite direction to the original cut to the same depth (there will be a picture of the cut further down the post).
Once that was done I used my saw like a rasp to carve out all the excess wood to form what is called the dovetail ‘Tail’.
Cutting out the ‘Tails’
Below you can see this ‘Tail’ part of the dovetail joint. It forms what I think of as a bow tie shape when done properly. The important point is to start each cut from the same place, saw to the same depth each time and ensure that the middle of the tail is centred over the split in the segments.
I found that as I had not strapped the segments together I had to really hold them firmly together – this is where you will appreciate your belt or piece of string. Also while sawing these ‘Tails’ in be aware at all times where the saw is in relation to your thumb and forefinger on the hand holding the stove.
I made three of these tails (one over each split) to hold all the segments together.
The Tails
To hold the segments together you need to carve some ‘Pins’ to insert into the ‘Tails’. I used green hazel wood to make the pins and made sure that they were carved into a triangular shape but initially too big for the tail.
Carving in this manner allowed me to insert the pin into the tail and then progressively carve off smaller pieces from the pin until it started to slide in. I also used my large piece of wood to hammer the pins in to ensure a very tight fit.
If you find that your pin is too small just get a fresh piece of green wood and try again. They only take seconds to make. To finish the pins off I trimmed the ends with my saw.
Cutting and inserting the ‘Pins’
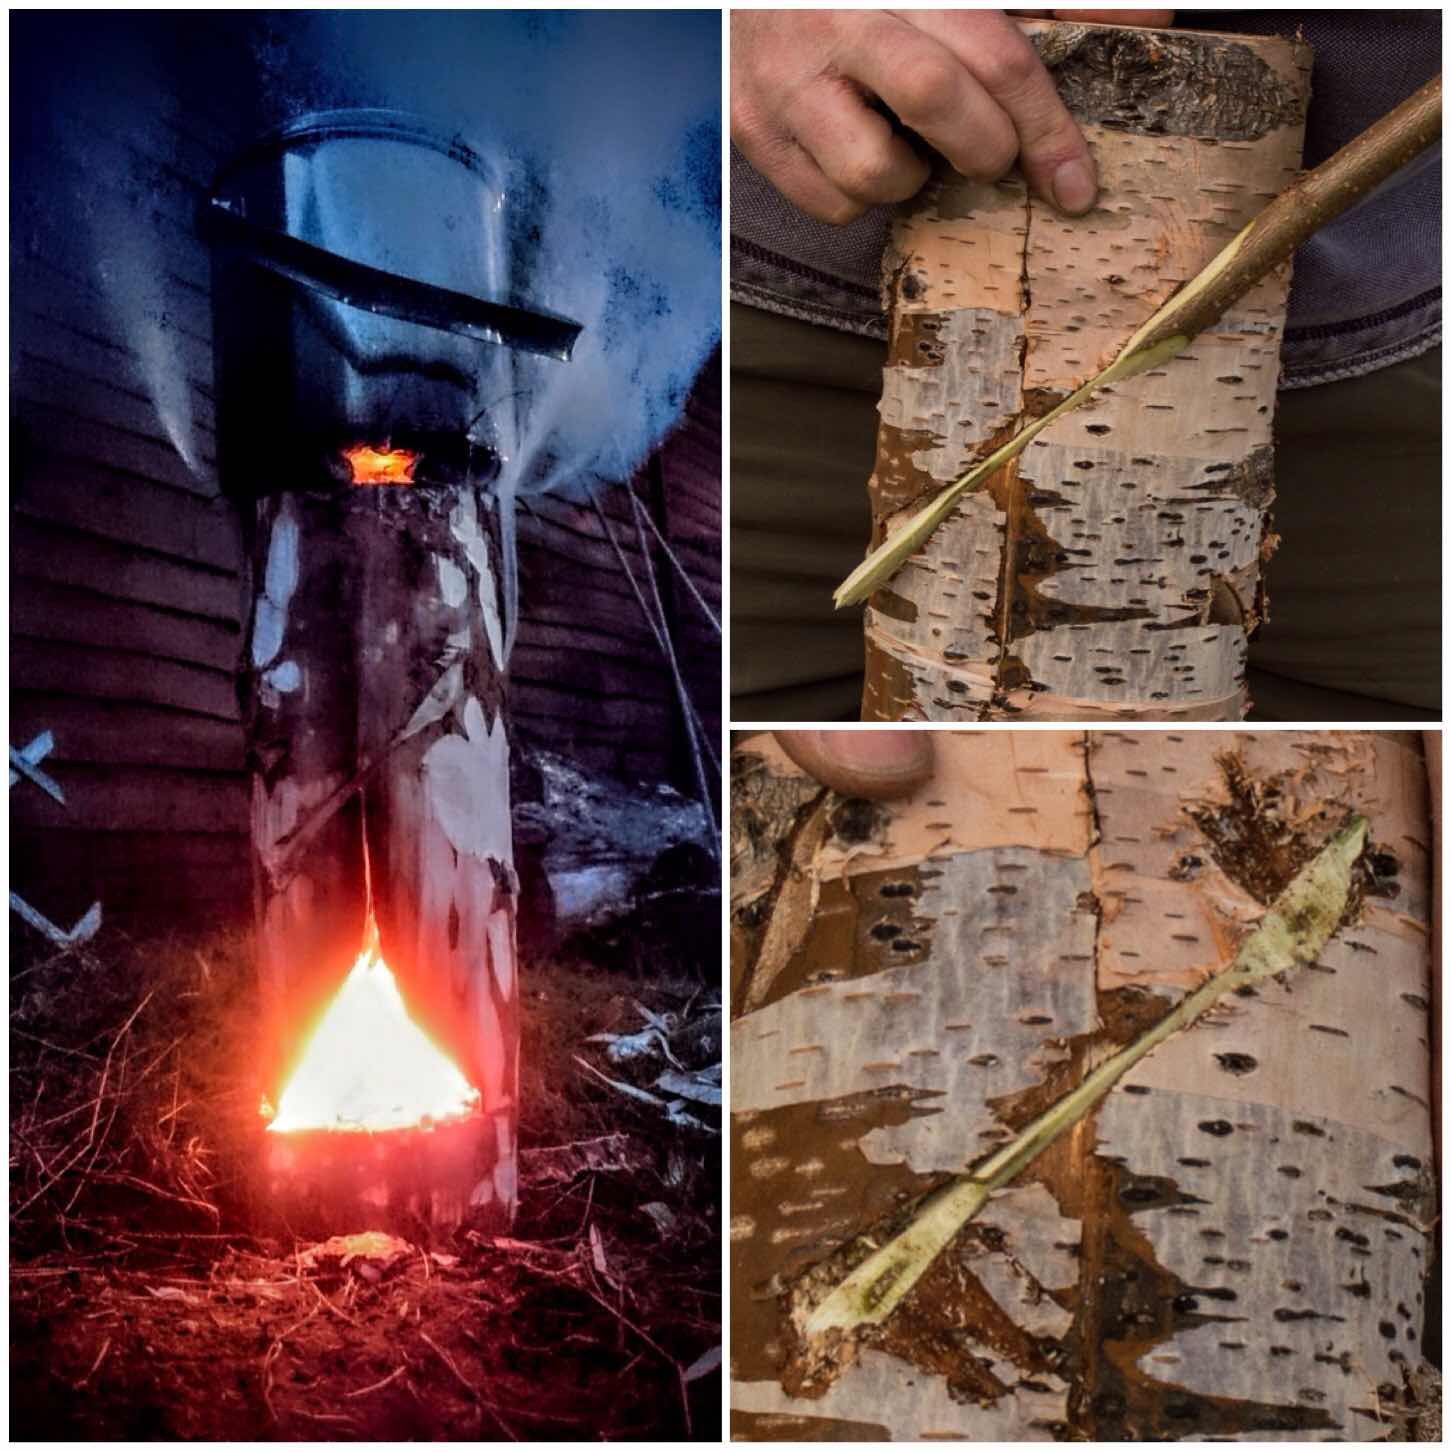
As the bark of the birch tree is very flammable I stripped it all off and kept it to the side to use later as kindling to get the fire started. The dovetail joints if fitted snugly will keep all the segments locked together tightly.
Trimming
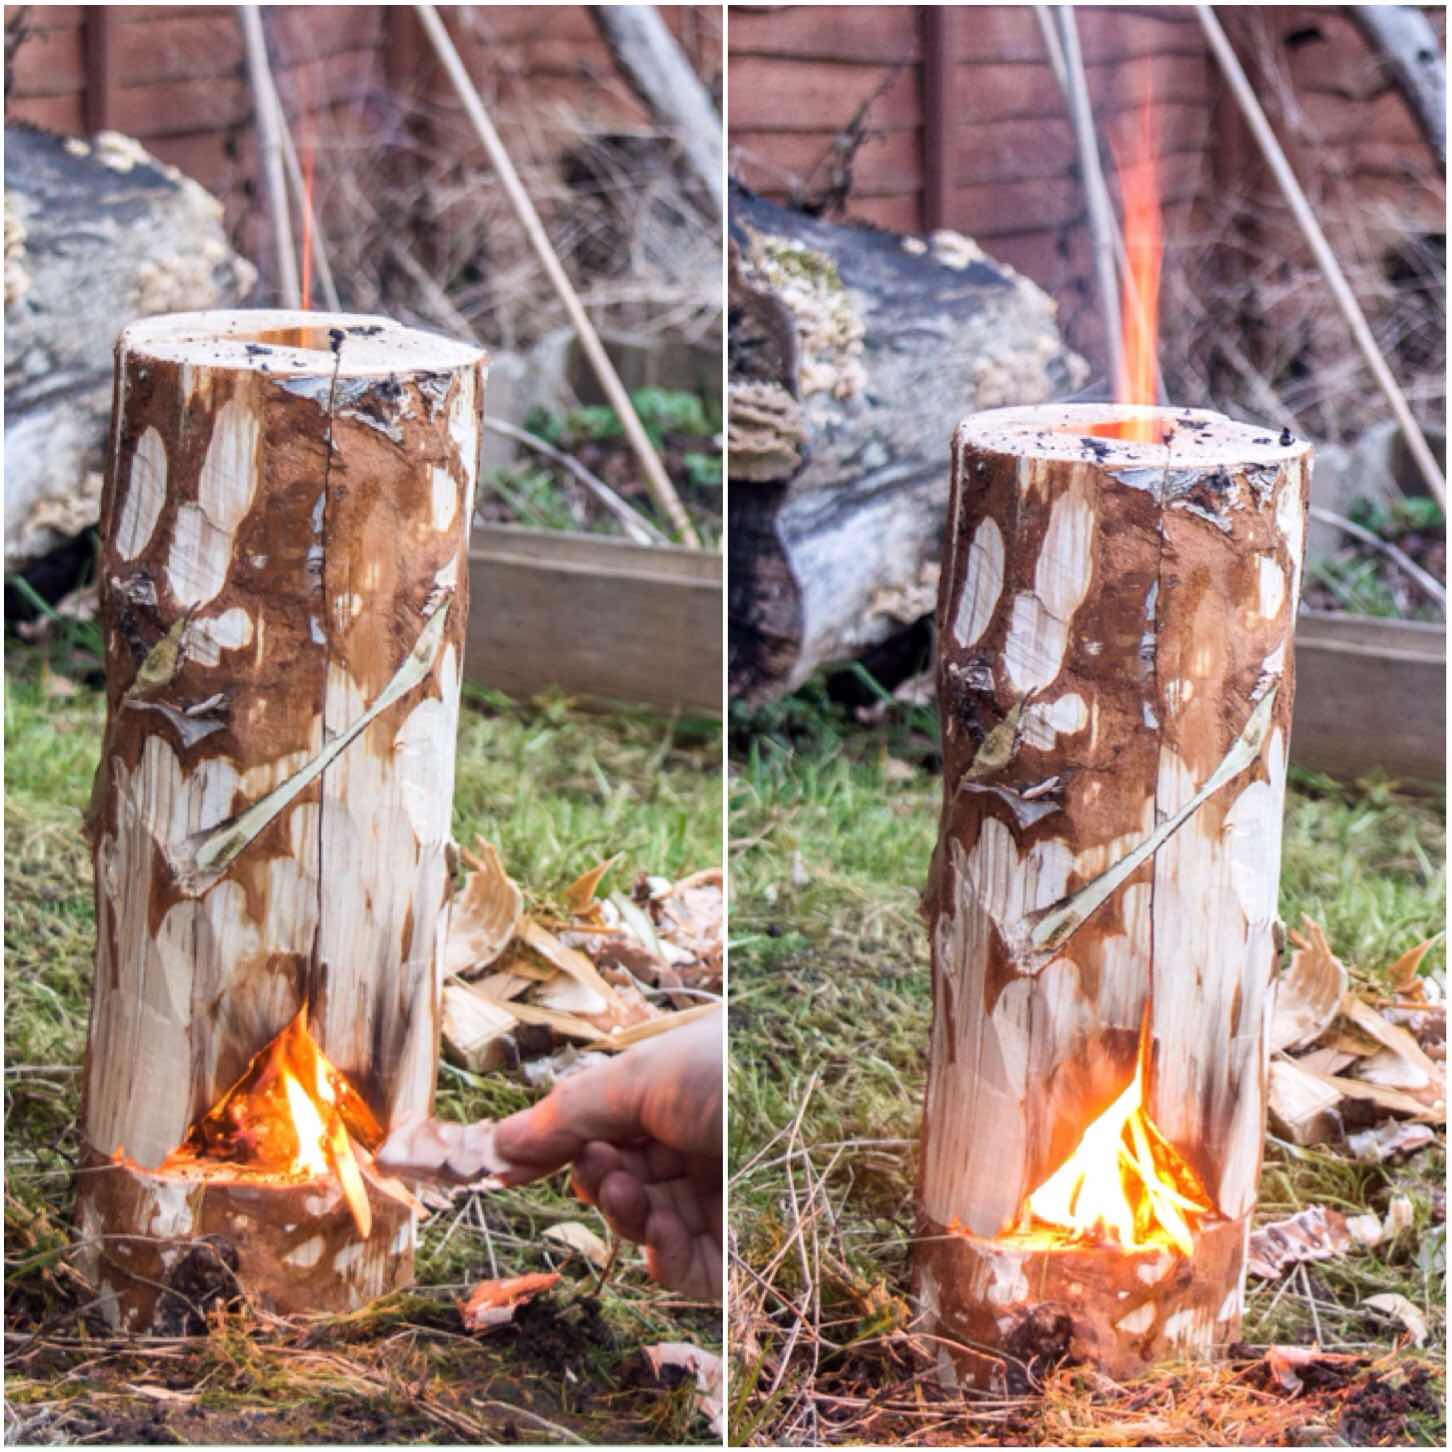
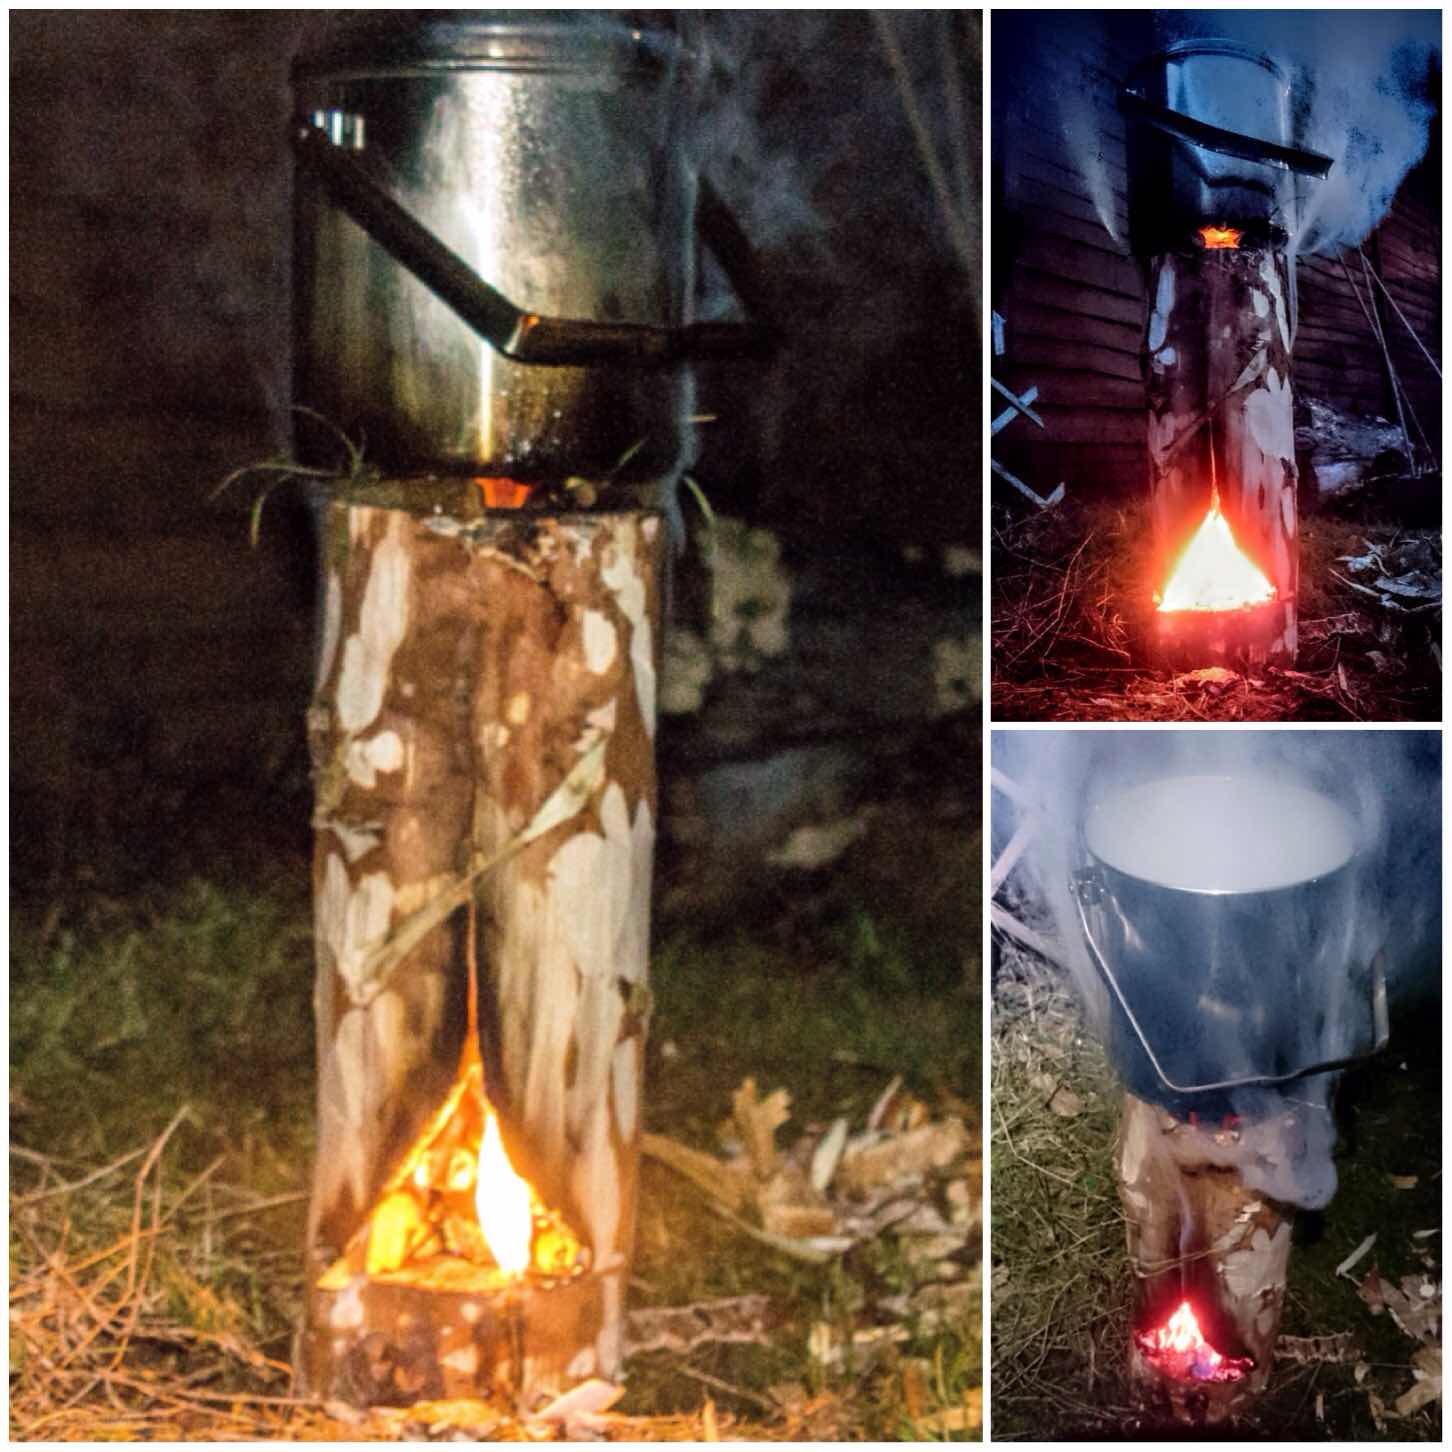
Firing Up
I lit the stove with some Vaseline-soaked cotton wool balls (which I always carry with me) because everything was so damp. The wind was non existent that day so it took me a while to get the stove going well.
Normally these stoves fire up really easily when there’s a little bit of wind to create the rocket effect up through the chimney
Firing up and drying out
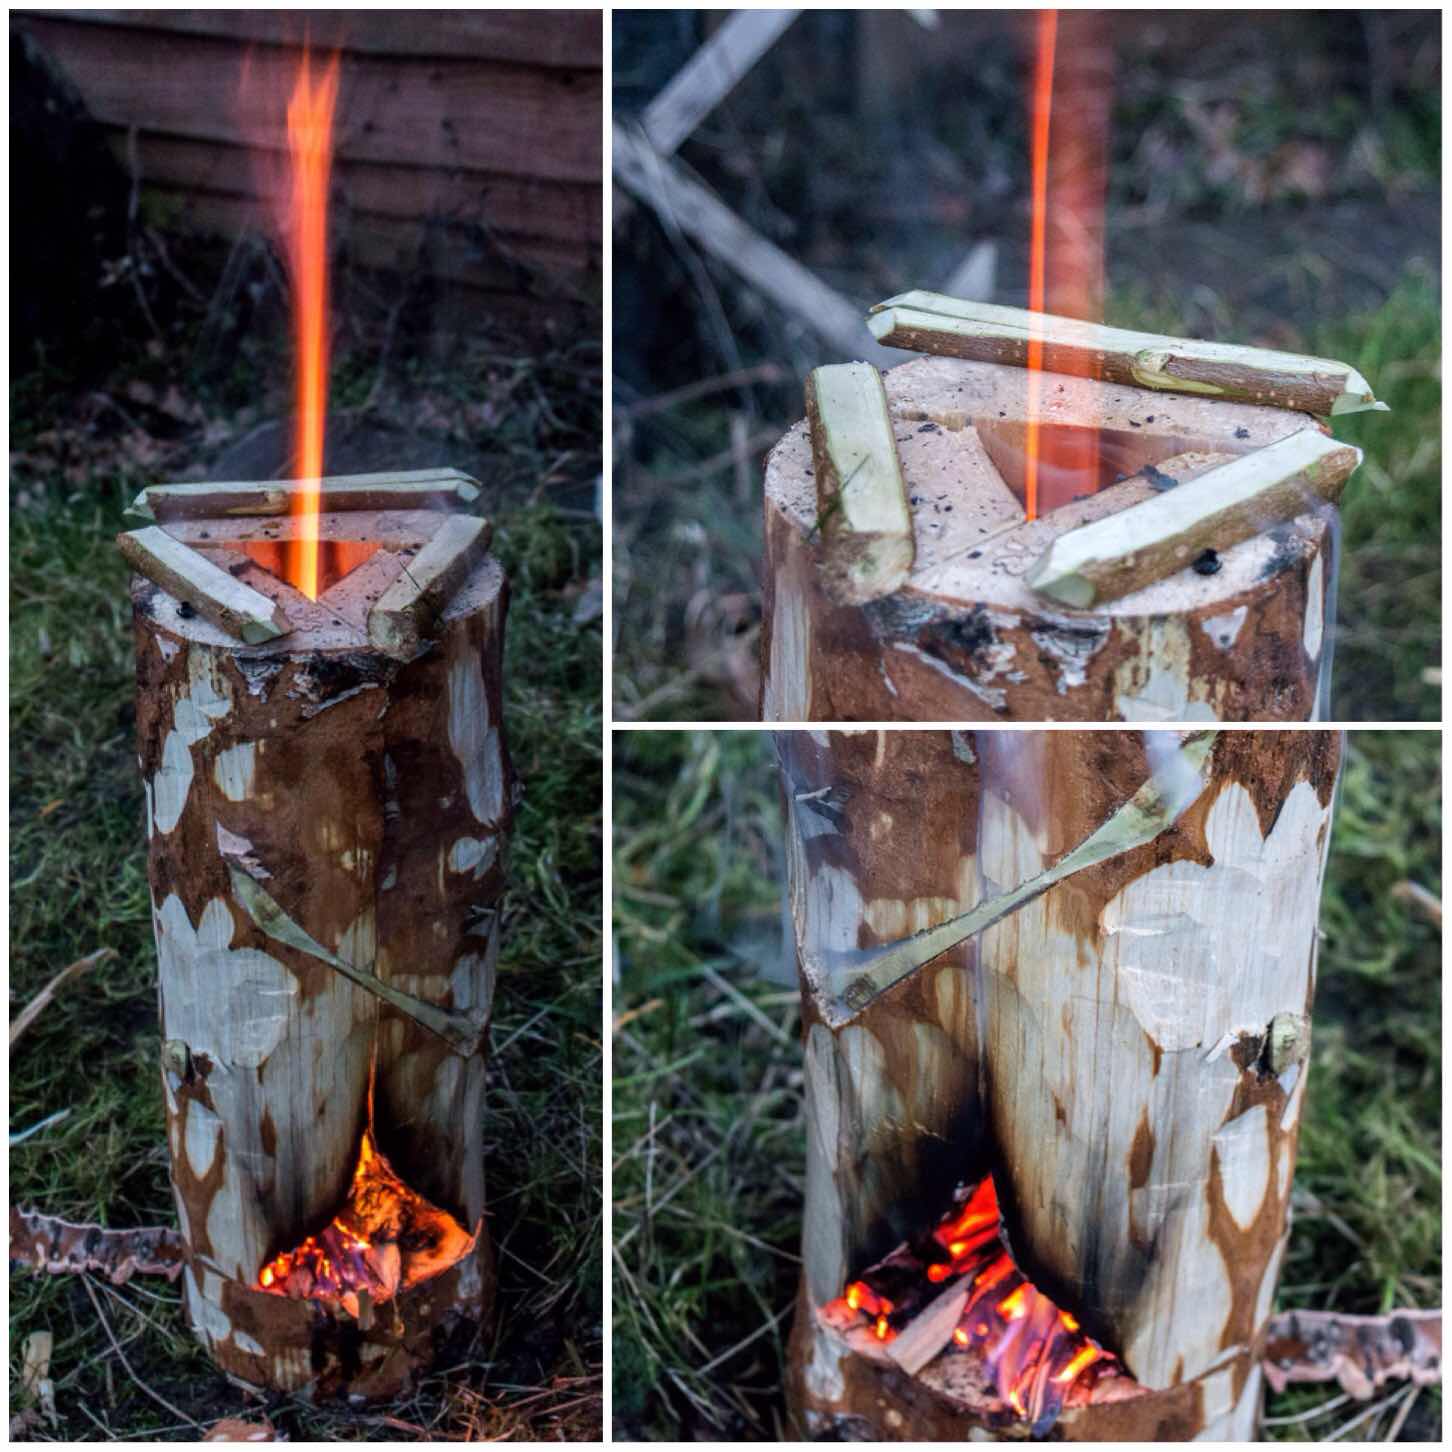
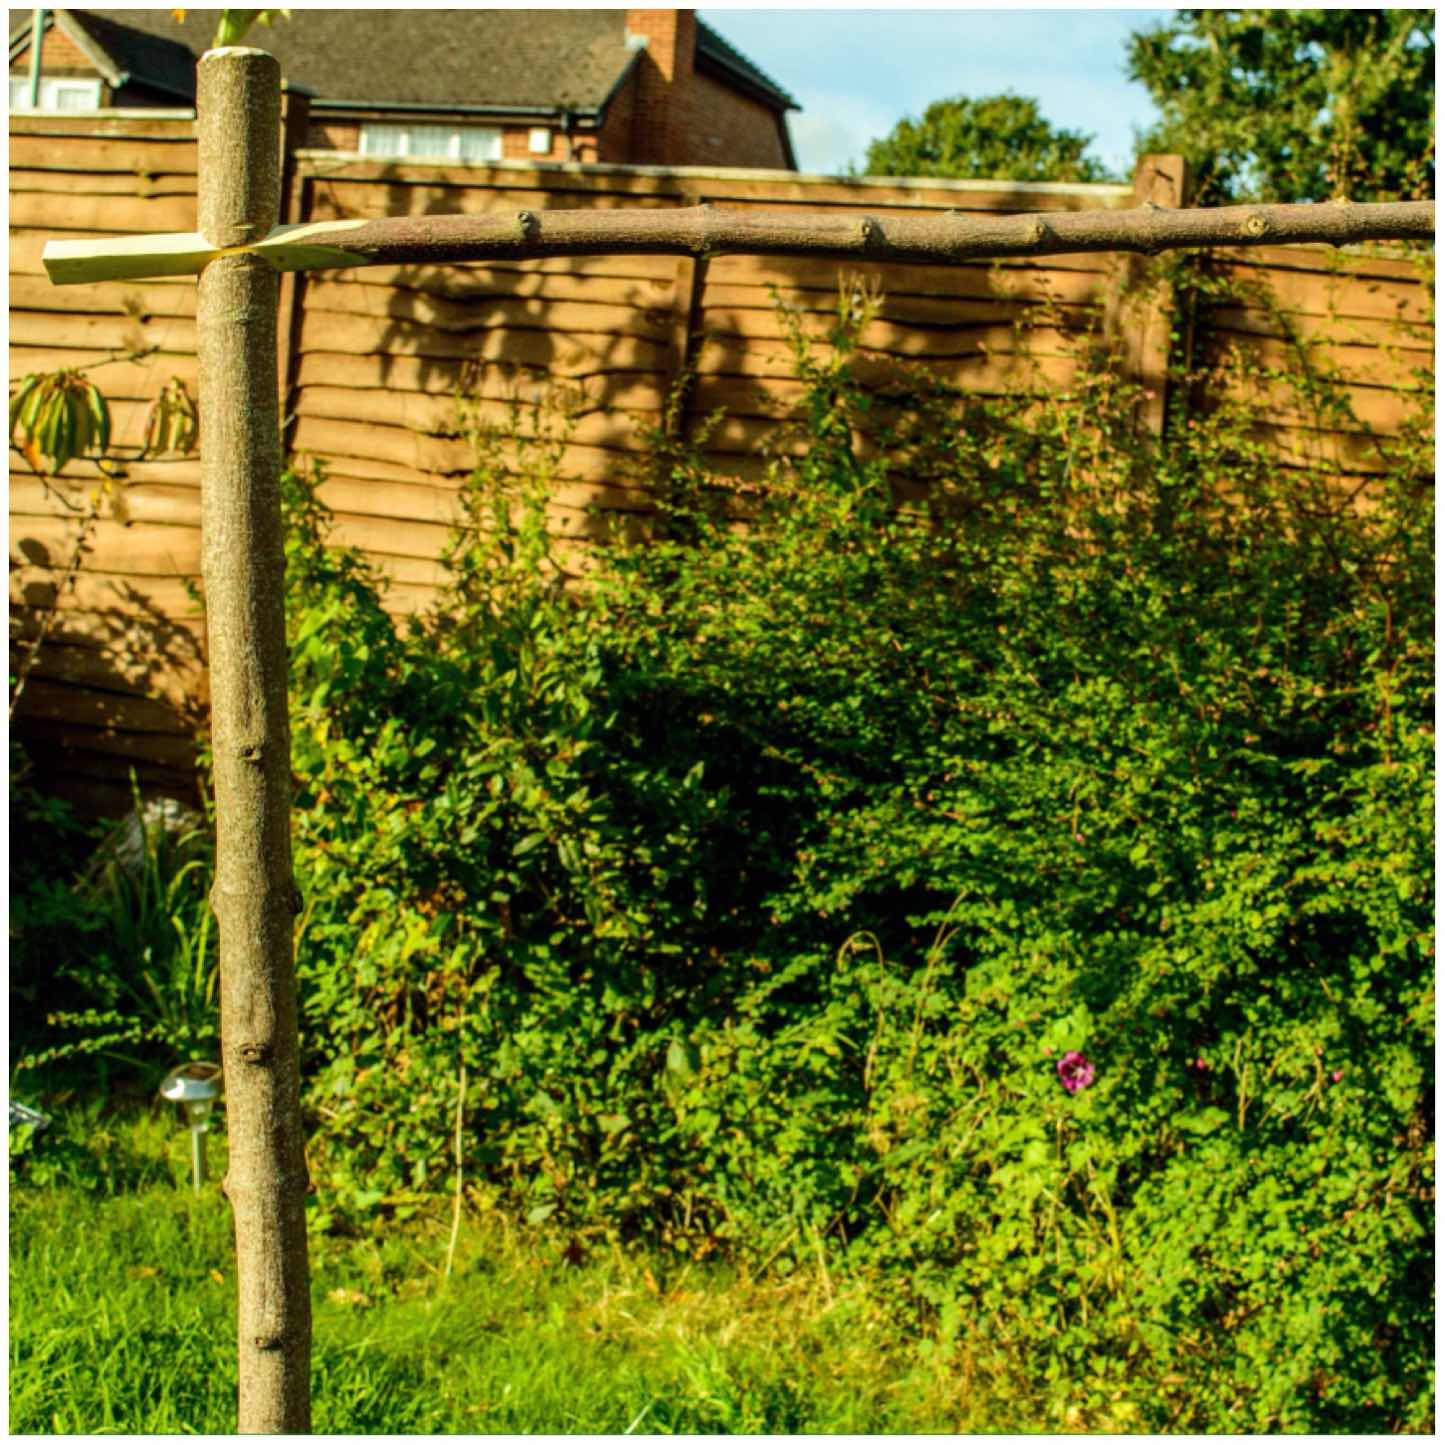
Eventually the rocket effect started and I placed three pieces of green wood onto the top for my pot to sit on. These were fairly thin pieces but would last long enough to boil some water. Have a few pieces spare on standby though if needed.
Green wood pot stand
Once the pot was on (about 10 minutes after initial burn) I needed to keep popping small pieces of wood into the fire box to keep the fire going. If your wood is really dry or resinous (like spruce or pine) you may not need to keep tending the fire as the internal walls of the chimney will probably be well lit.
Now it is a stove
It took me just under 15 minutes to boil this pot of water (enough for approx 3 cups of coffee) and the dovetail joints remained strong throughout.
Roaring
After 45 minutes the first of the joints burnt through however the stove remained standing until it burnt out. Due to the lack of wind the majority of the wood did not burn through.
I made this short video of another Dovetail Log Rocket Stove to show it in action.
I like to experiment with log rocket stoves and this reliance on using string or wire to hold them together (although you can dig the segments of some types directly into soft ground) has always bugged me.
This Schwedenfeuer type of stove lends itself well to the dovetail joints I think, and once you have practised making a couple you will be able to knock together a stove very quickly with just natural materials.
As usual I am open to ideas and suggestions on creating more log rocket stoves and Scandinavian candles. If you have not seen my other posts on this subject have a look at my summary post on this subject titled – Candles, Rockets and Long Fires.
It has been a dream of mine to one day head on over to Scandinavia to practise my bushcraft skills, particularly in winter time. Time and money have so far not allowed me to do that however that has not stopped me from researching some of the ways of lighting fires in the snow or wet conditions.
I have seen many a Scandinavian (sometimes referred to as Swedish candles though Finnish seems the origin for many ) candle at bushcraft meets that have been carved using a chainsaw however I do not own one. My research showed me that chainsaws were not required and there are many other ways to light a fire in the snow or on wet ground other than candles, such as long fires and log rocket stoves.
This post brings together all my posts over the last couple of years on this subject. You will find if you click on the title for each section it will bring you to a more detailed post on making these fires.
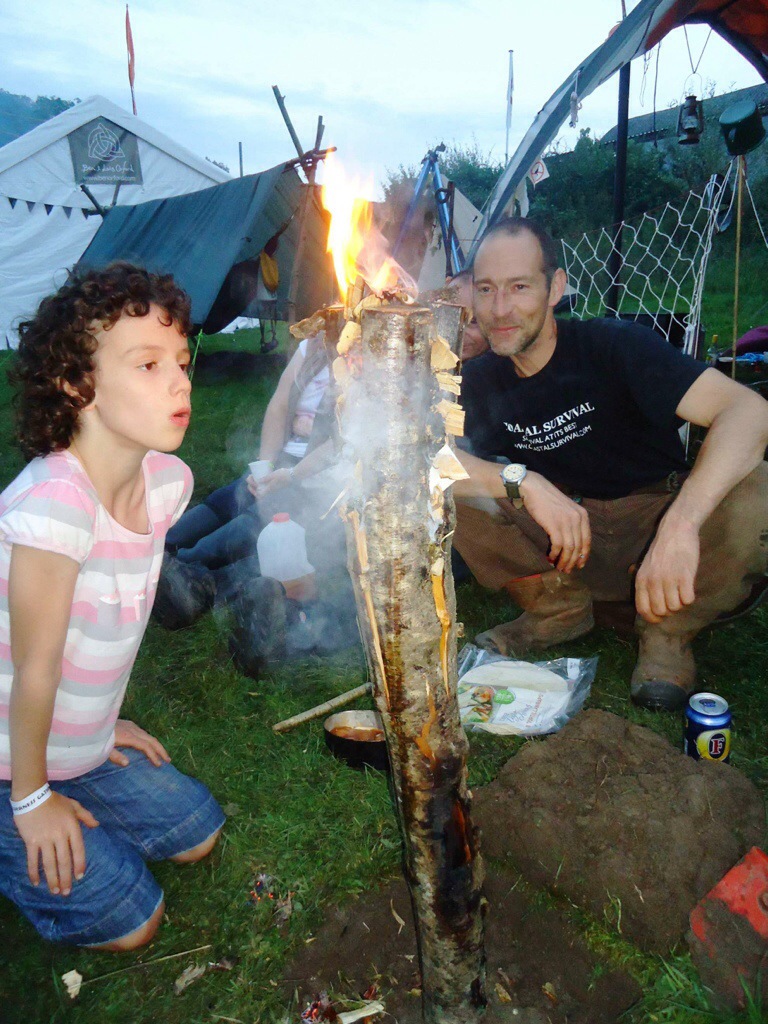
Trawling You Tube one evening a few years ago I came across a video titled the Log Stove from Hobbexp. Up until that point I thought to make a candle you needed a chainsaw. Hobbexp showed me that you could make a perfectly good candle with just an axe and some kindling.
The one below was made using a birch log and stuffed with birch bark and spruce resin (and a couple of battoned-down pieces of green wood to keep the splits open). These candles can burn for a good couple of hours, are easy to set up and look great. I have no idea how many I have made over the last couple of years.
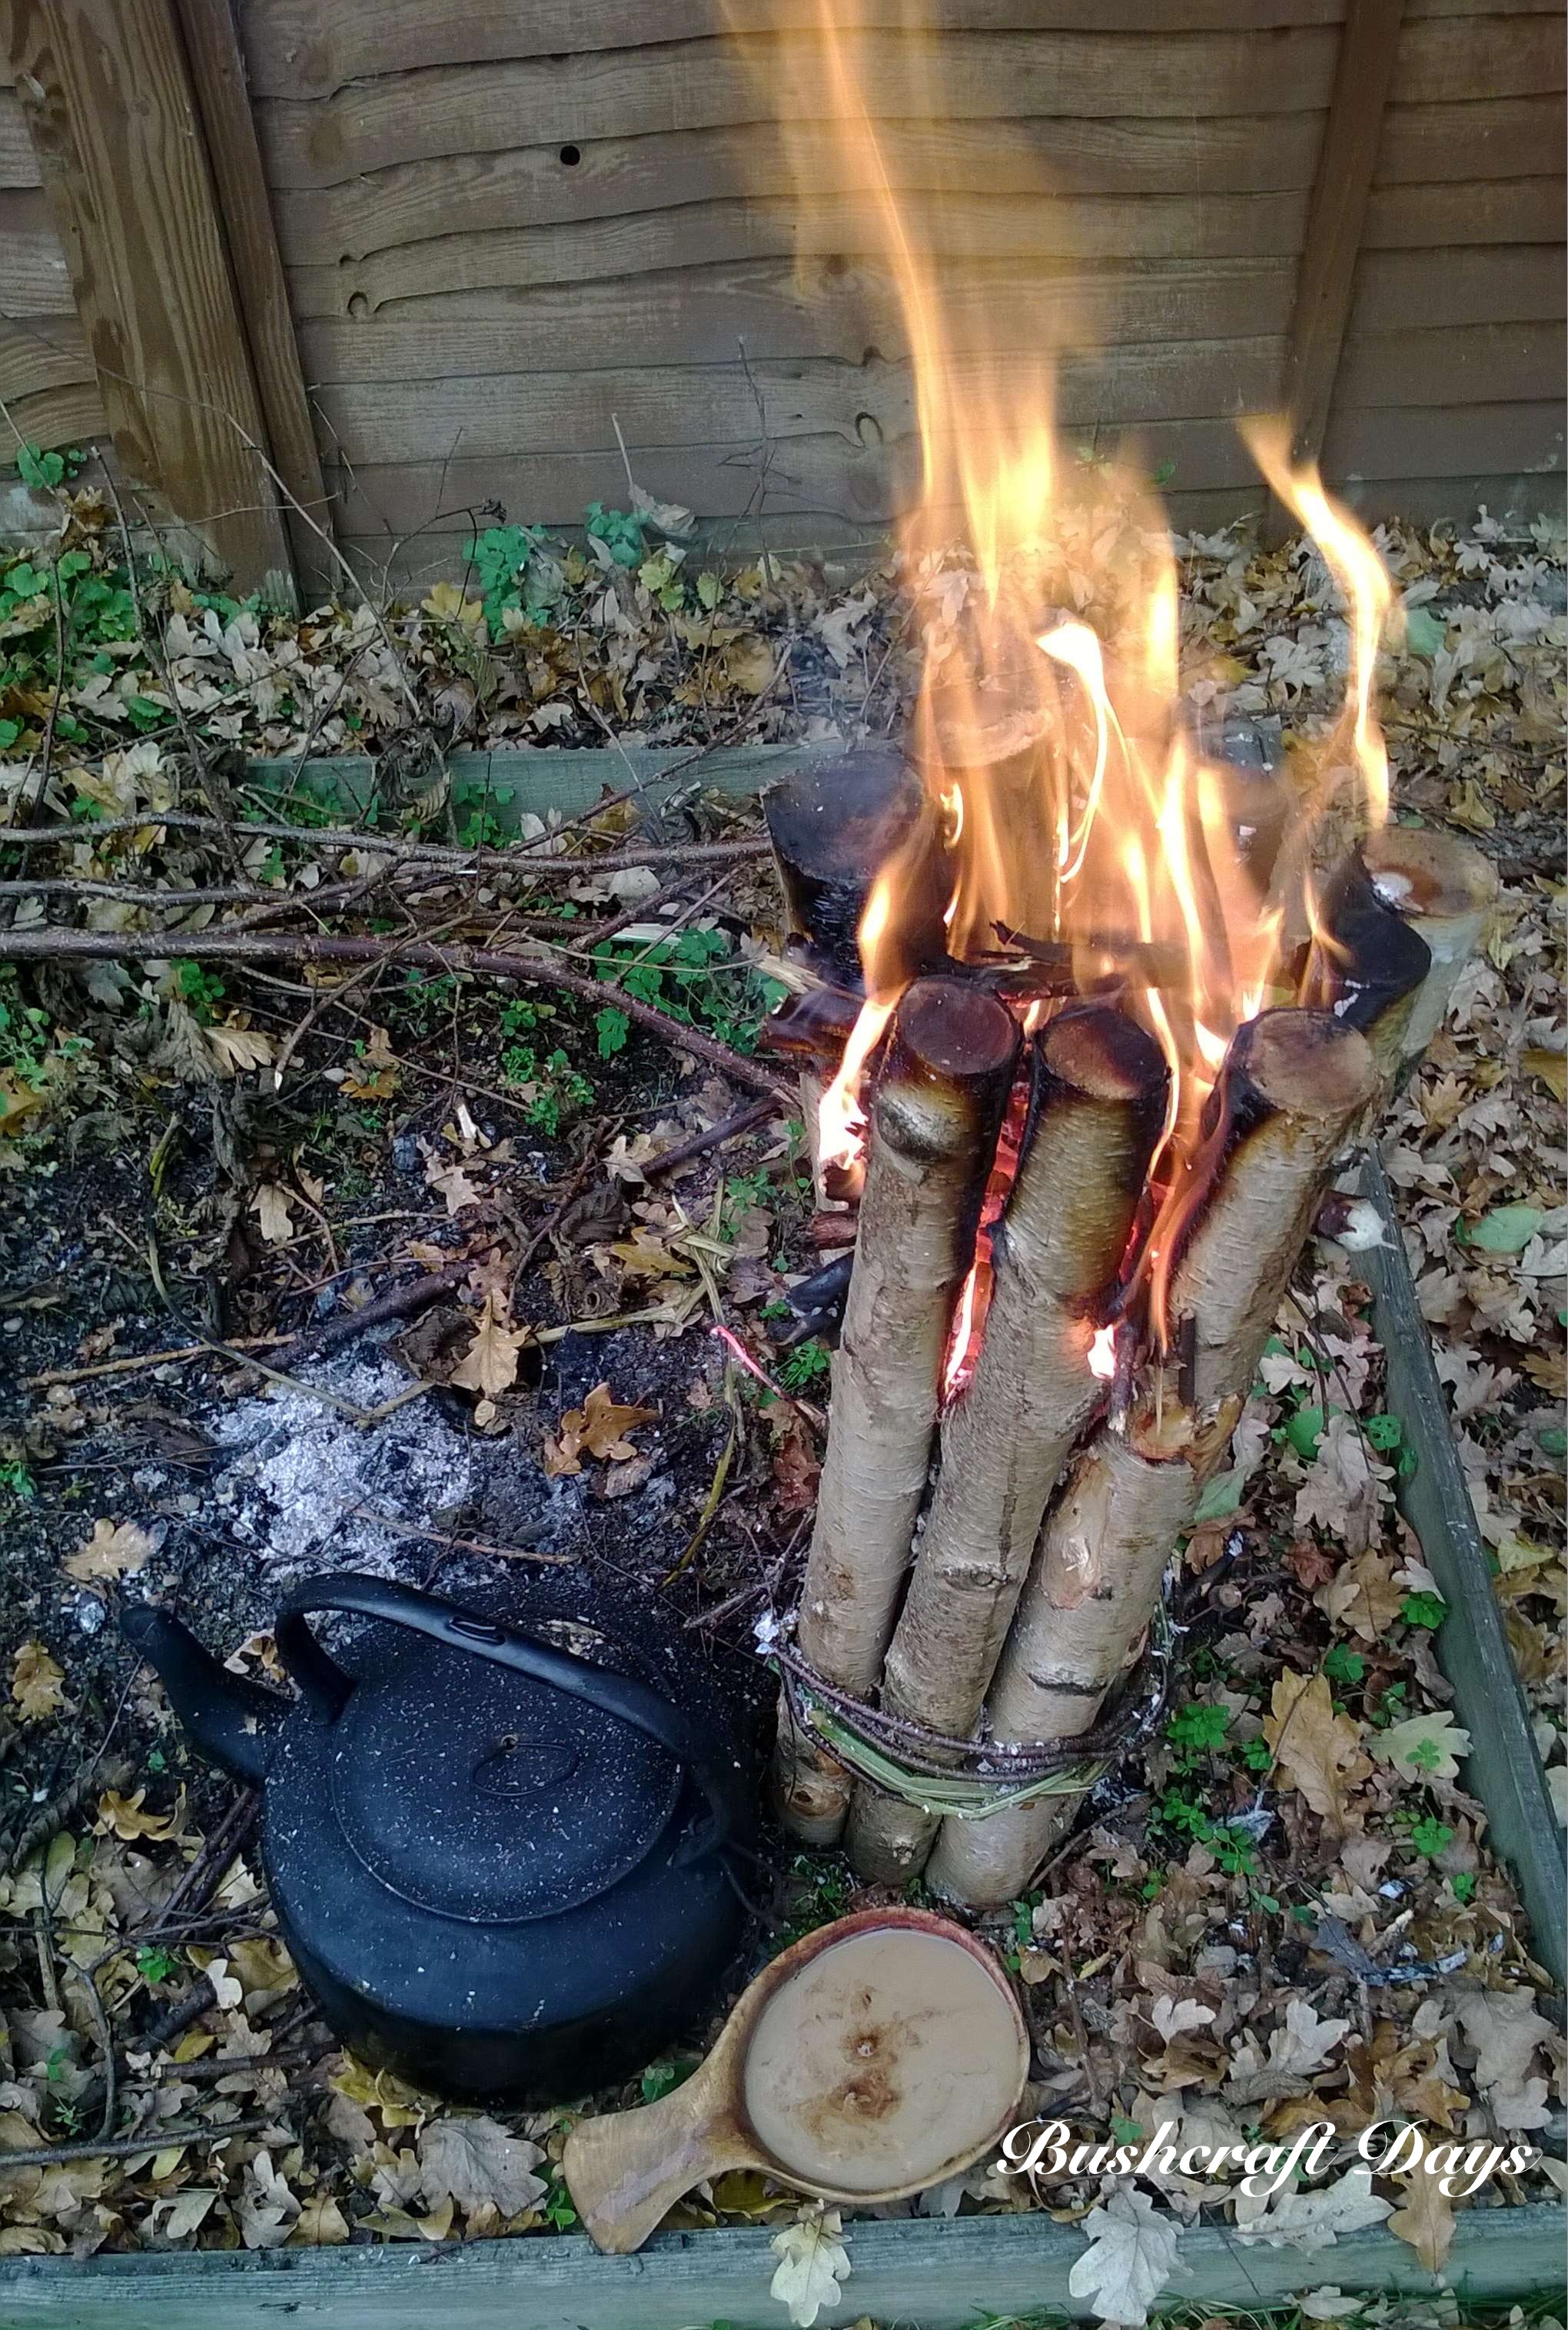
I got another idea for a candle during my research once again from You Tube from ‘bushcraftmyway’ titled the swedish torch/stove – my way. I liked this stove as it could be made from damp wood (ideal in the UK).
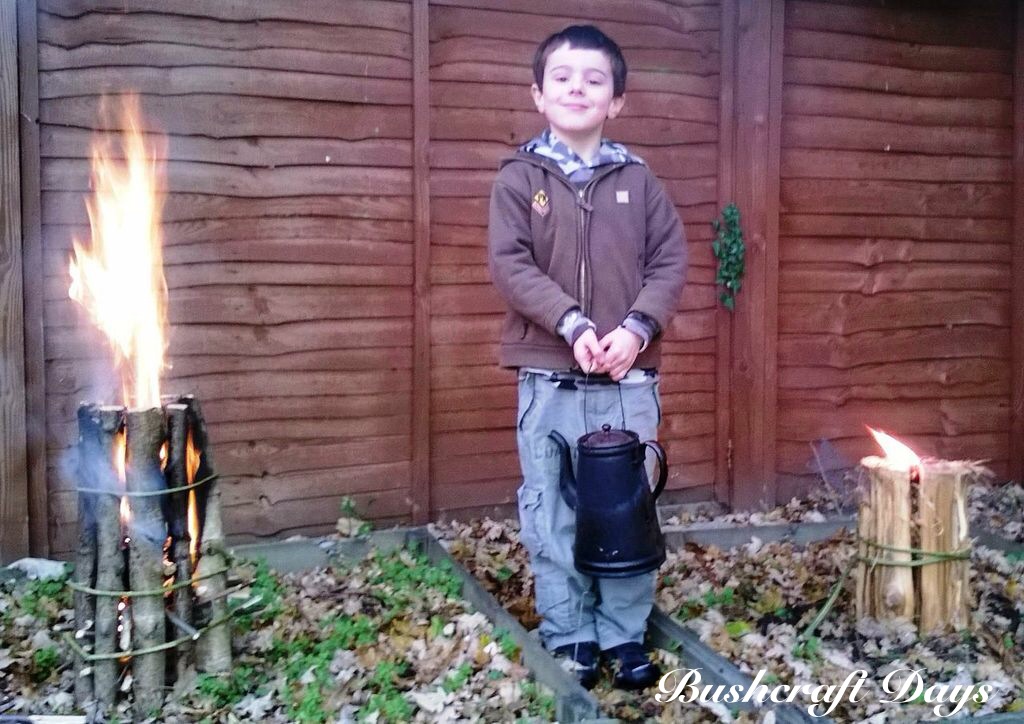
I tied some seasoned but damp birch rods together with bramble strips and willow bark then stuffed in tiny pieces of kindling and Vaseline-coated cotton wool. I decided to use the Vaseline and cotton wool so as to give the damp wood a chance to dry out.
After a bit of tender care the wood started to dry out and I easily managed to boil a kettle on it. This is an excellent way to get a fire going in damp/wet conditions. The remains of the candle after it had burnt down provided me with a great bed of coals to maintain a more traditional firelay.
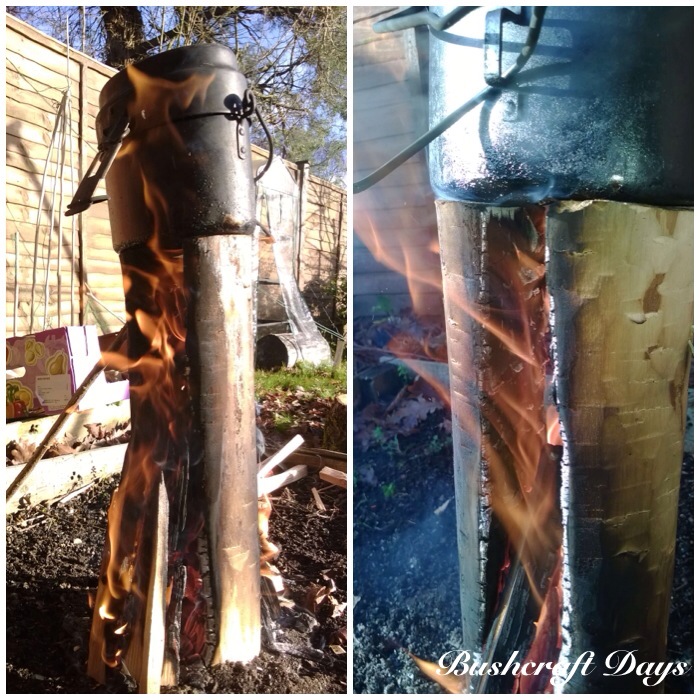
All this research led me to compare this rod style of candle with the more commonly split log candle. I set up the rod candle this time with very dry rods and split a spruce log with my axe into a number of wedges.
I tied them all together with natural cordage and lit them. The rod candle took off very quickly as it was stuffed full of very fine kindling however the split log candle lasted longer as it took longer to fully get going.
Again I managed to easily boil a kettle on both of these candles. Both are simple and easy to make.
The idea for this one came from Perkele’s Blog Spot but the post is no longer available. I think this candle is regarded by many as the original Finnish Candle.
A log is split from top to bottom and pieces from the central core are then axed out to act as kindling. Lots of cuts are made into the inner faces of the candle to give the flames plenty of surface area to catch onto.
It took me a while to get the flames self sustaining, but once they’d caught the candle worked well. It looked precarious as the two pieces of wood are not lashed together but they stayed upright till the end.
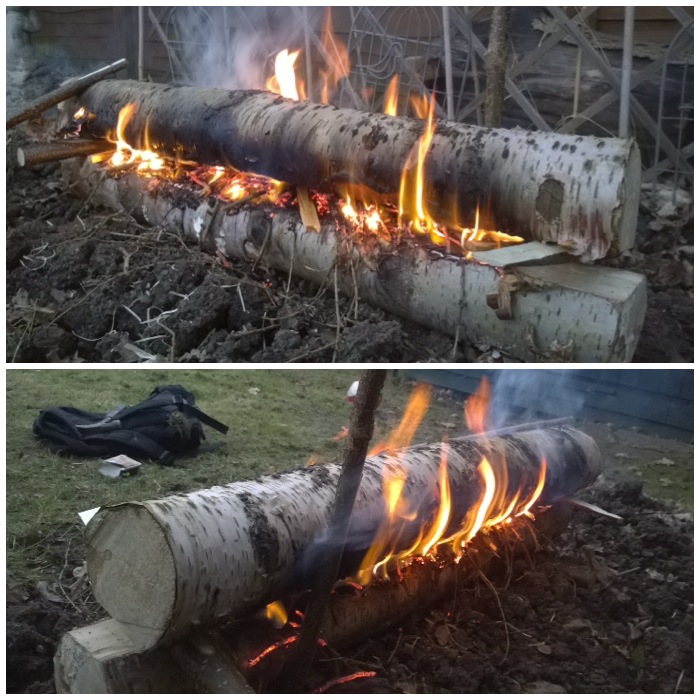
The Rakovalkea Gap fire hails from Finland and I was taught a similar method by my friend Kevin Warrington (Laplanders Natural Lore) back in 2007. I came across the term Rakovalkea around about 2011 after seeing pictures of this fire being made by the Finnish army on the internet.
This is a scaled-down model I made however it was fully functioning and its set up makes for a long burn time with easy adjustment to increase or decrease the flames. This has proved to be the most most popular post on my website.
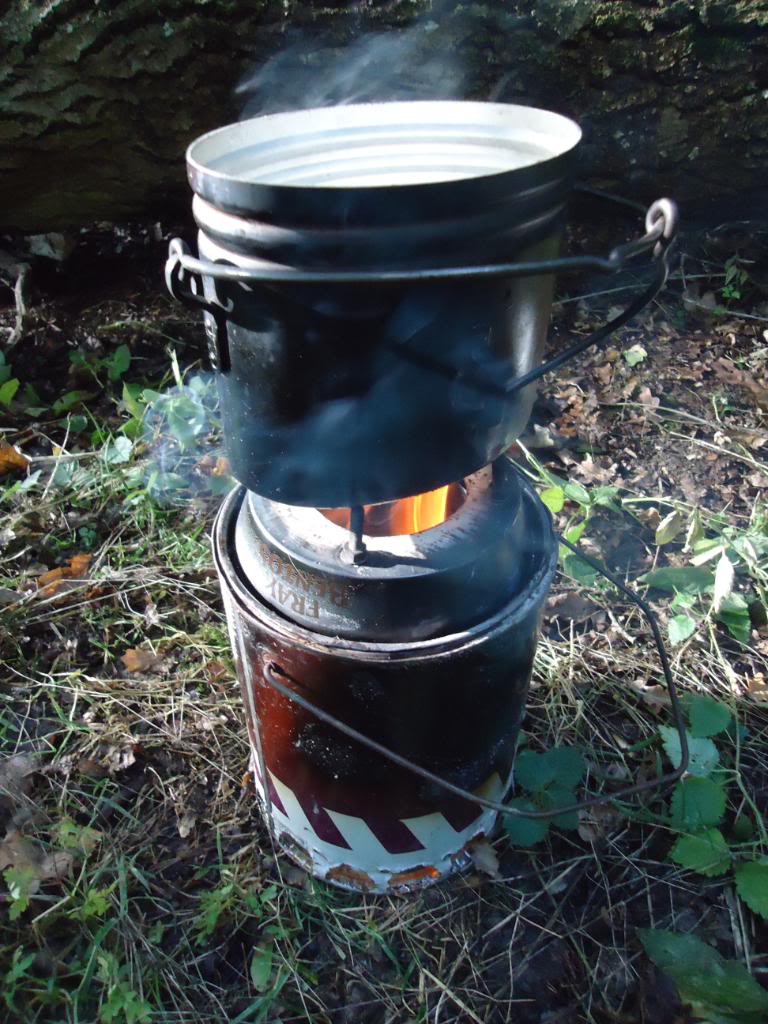
I decided to include this little fella as it is excellent for cooking in damp or wintry conditions. It is a wood gas stove and burns very efficiently. I was shown this by my friend Ian Woodham back in 2011 at the Bushcraft UKBushmoot. As soon as I got home I made one up and documented it on my blog.
I made this out of a metal paint pot, a large dog food tin, a Fray Bentos pie tin and a few bits and bobs. It works a treat and needs very little fuel to keep it going. I like to use dry seasoned pine/spruce/larch cones in the stove as they burn for a good length of time.
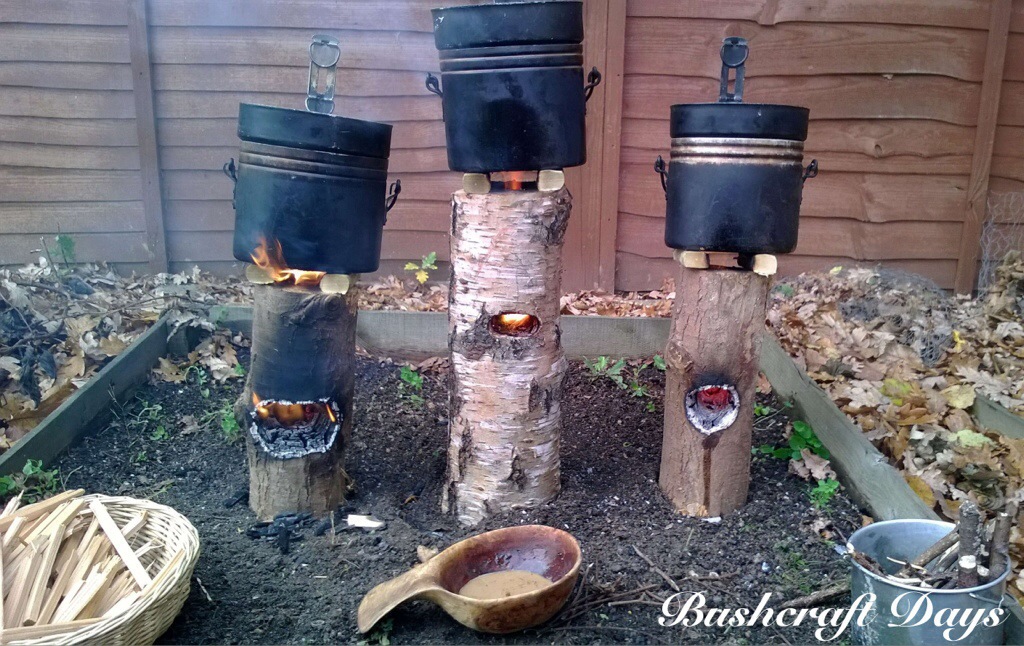
The next type of candle I came across was what has been termed the log rocket stove. I spotted a video by James Hookway and soon set to work in my workshop creating 3 stoves from different woods.
Log rocket stoves really intrigued me as they require very little kindling to keep them going (the damper the log the more kindling you require).
Have a look at the original post here to see how they compared.
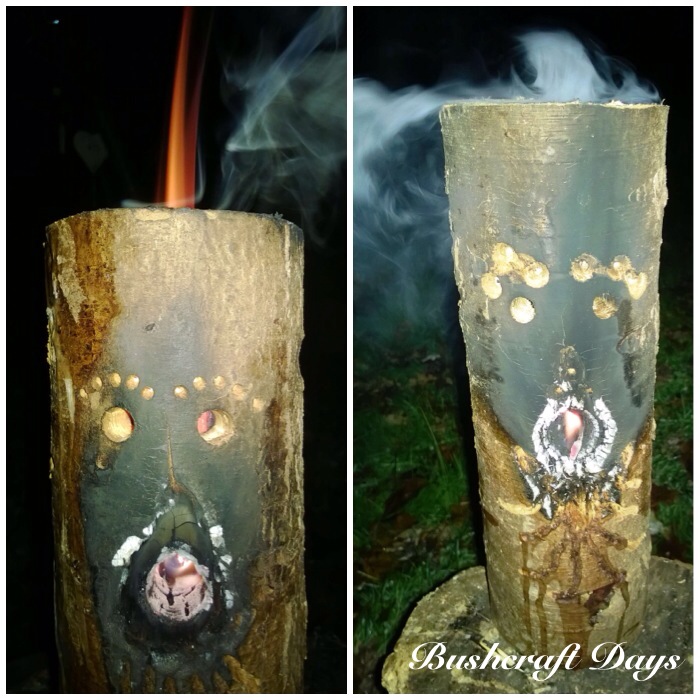
Now the kids love this stove – whenever you are having a barbie in the garden or if you are having a family camp make one or two of these up.
The principles are the same as the log rocket in the previous post except for the faces you can carve on them. Once they get going the faces really light up. They are perfectly able to be used as a normal log rocket stove for cooking or boiling but have the extra appeal factor of the face. A good video on this is the one made by Marcels Workshop.
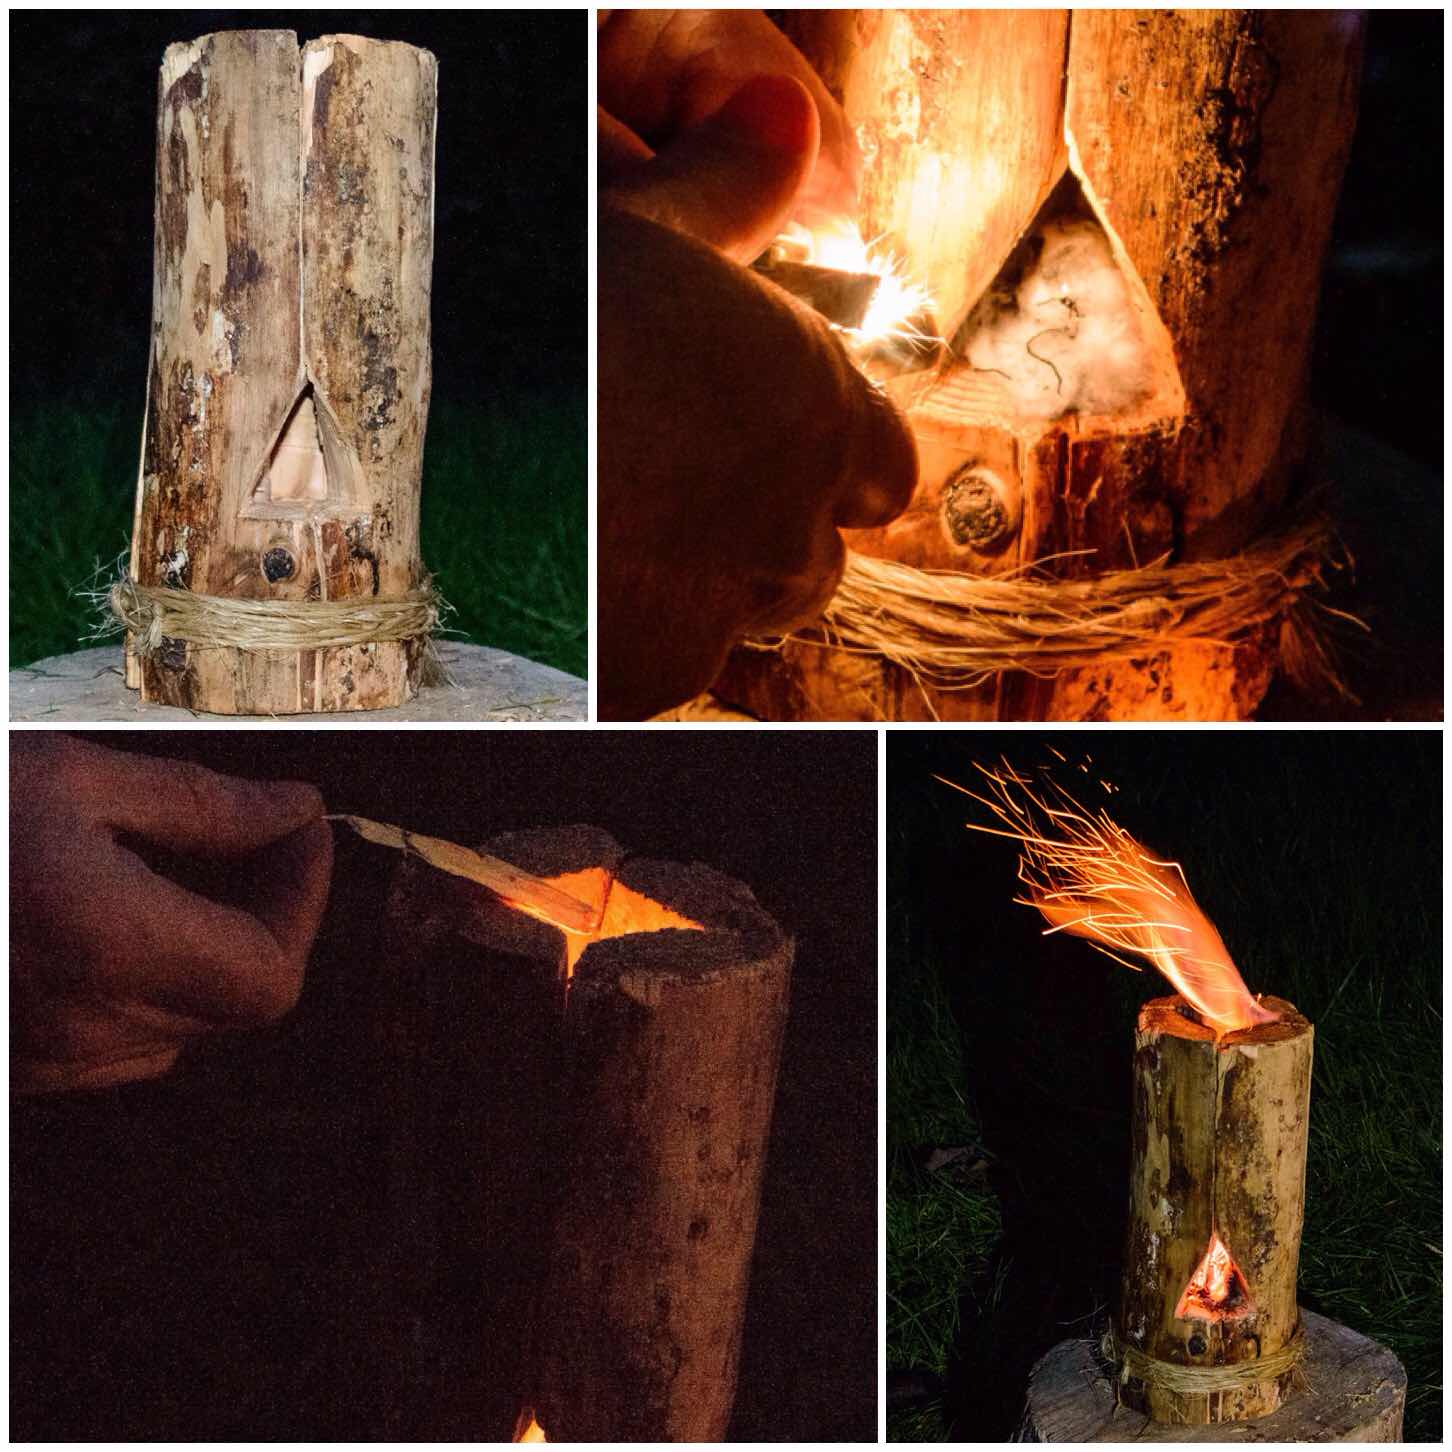
Log rocket stoves have always appealed to me as a woodsman however when I am lightweight camping I do not fancy carrying around pre-prepared ones. Recently on Facebook Paul Hasling posted an article on making one with an axe and saw with no need for a drill. One of the other Scout leaders posted up a step by step guide on making one but it is in Spanish – the pictures though speak for themselves – Rocket Stove de Madeira.
I was instantly attracted to this method however when I was next out in the woods I could only find damp logs. To overcome this I split the log into six pieces and added Raappanan tuli cuts inside the chimney. This damp log rocket stove took slightly longer to get going as the internal wood slowly dried but once it was going there was no stopping it.
The final post in this series came to me one evening when I was wondering how I could operate in the woods without an axe. I figured it was worth a go trying to make a log rocket stove with just my Mora knife (I did use a small saw to trim the log).
With some battoning and the use of a wooden wedge I was able to split a decent sized log and fashion a perfectly good log rocket stove.
This exercise really is an excellent way to test out your knife skills.
Log Rocket using a Knife
Is the story over on candles, long fires and log rocket stoves? – I think not. I will continue to research this intriguing subject and if you have any ideas that I could try out to add to this library of knowledge I would really appreciate hearing from you.
The Moot will have something for you – be that firesteels, bowdrills, handrills, pumpdrills, bamboo fire saws or the secret art of lighting fire from damp tinder
Many many years ago I stumbled upon a website called Bushcraft UK and realised that there were many folk out there just like me, struggling to get to grips with all the different ways of making fire.
The results on the site only took me so far so I was even happier when I spotted a thread on the Bushmoot. This was the second Bushmoot way back in 2005.
Since then I have discovered many different ways of making fire when out and about. This post is about just some of the ways we make fire at the BCUK Bushmoot.
Bushmoot Fire
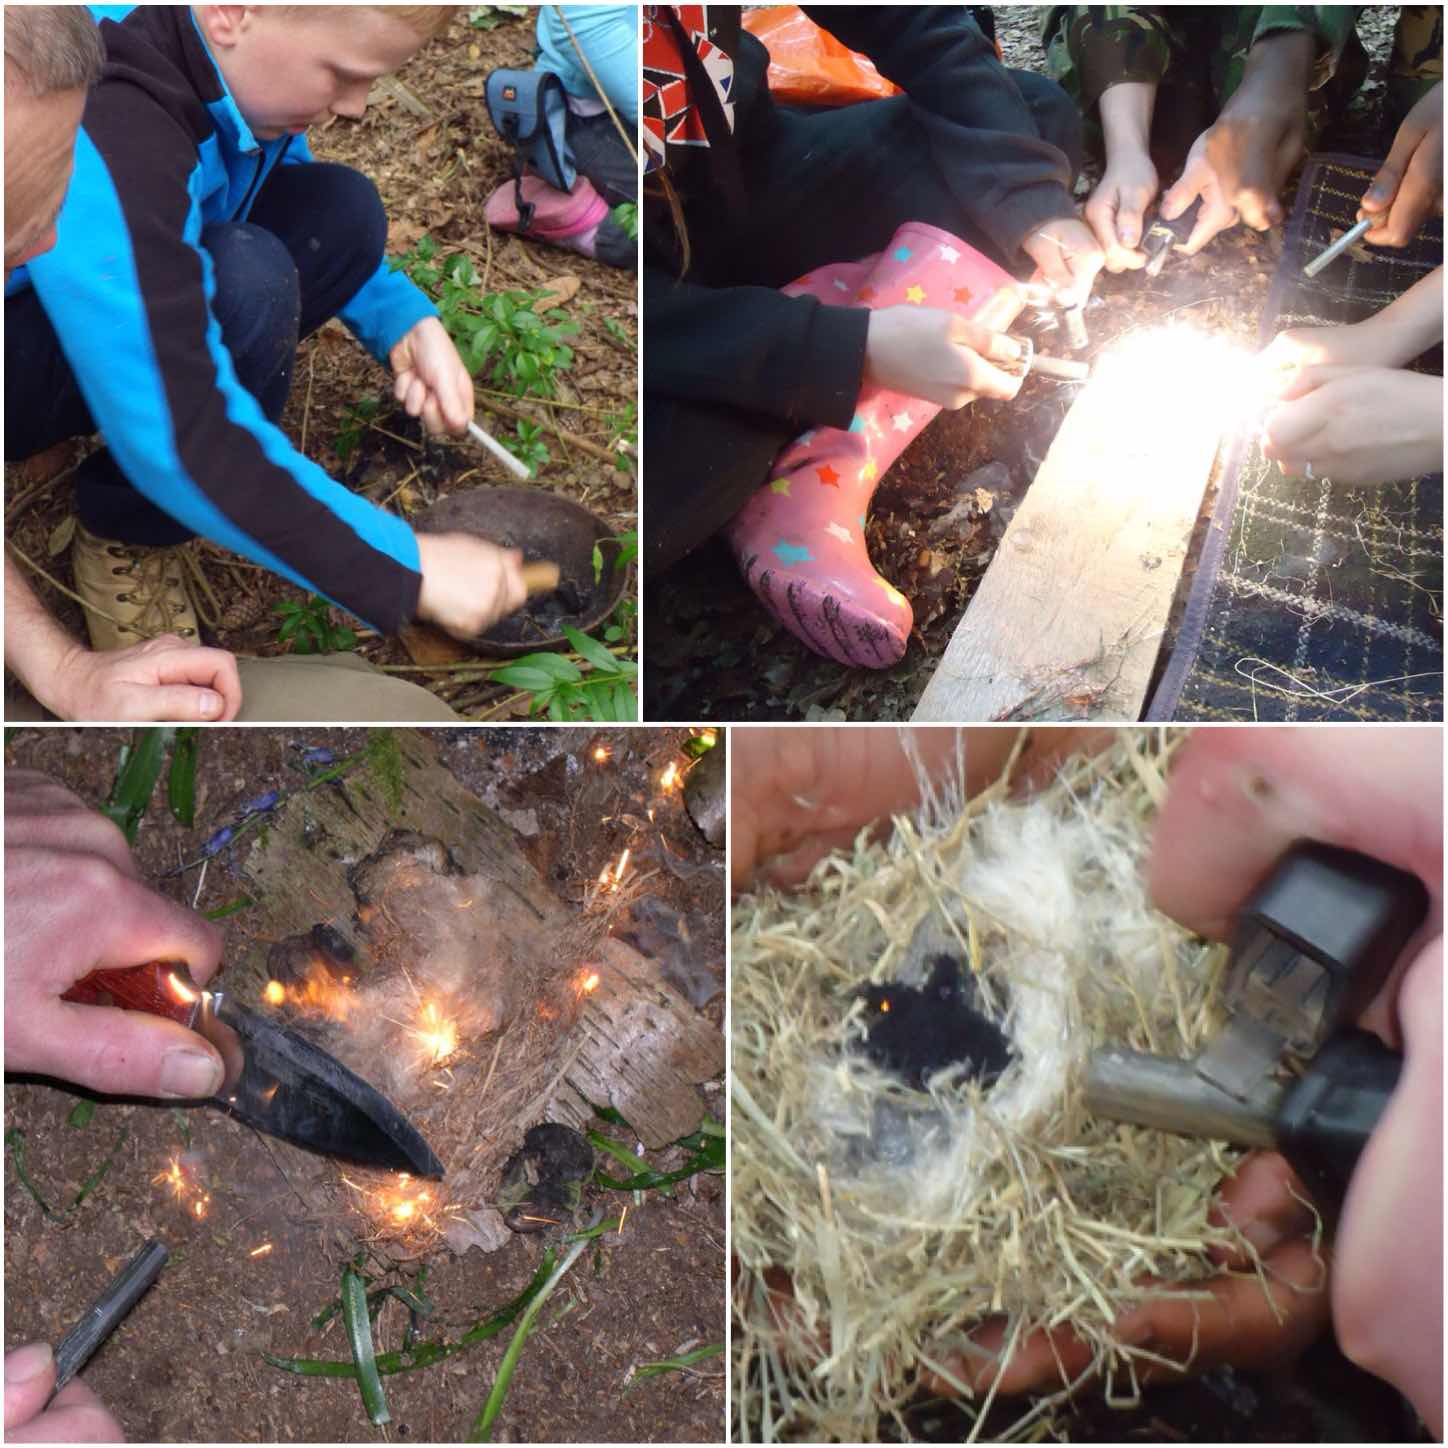
Firesteels
One of the most common methods a bushcrafter will use to light a fire is a Firesteel, so there are plenty of people willing to share with you how they use theirs and explain what tinders they use.
We have included the use of Firesteels into our ‘Starter Course‘ at the Moot. They are easy to use and the kids love them. When teaching very young kids (pre school) I liken them to creating Fairy lights and this seems to catch the children’s imagination.
The first person to teach me to use a Firesteel properly at the Moot was Kevin Warrington (Laplander’s Natural Lore Blog) and after I attended his bowdrill class he asked me to come back and assist him with fire-making the next year. We have been good friends ever since and I have to thank Kevin for getting me started on the road to instructing others in the world of bushcraft.
Fairy Lights
The Starter Course
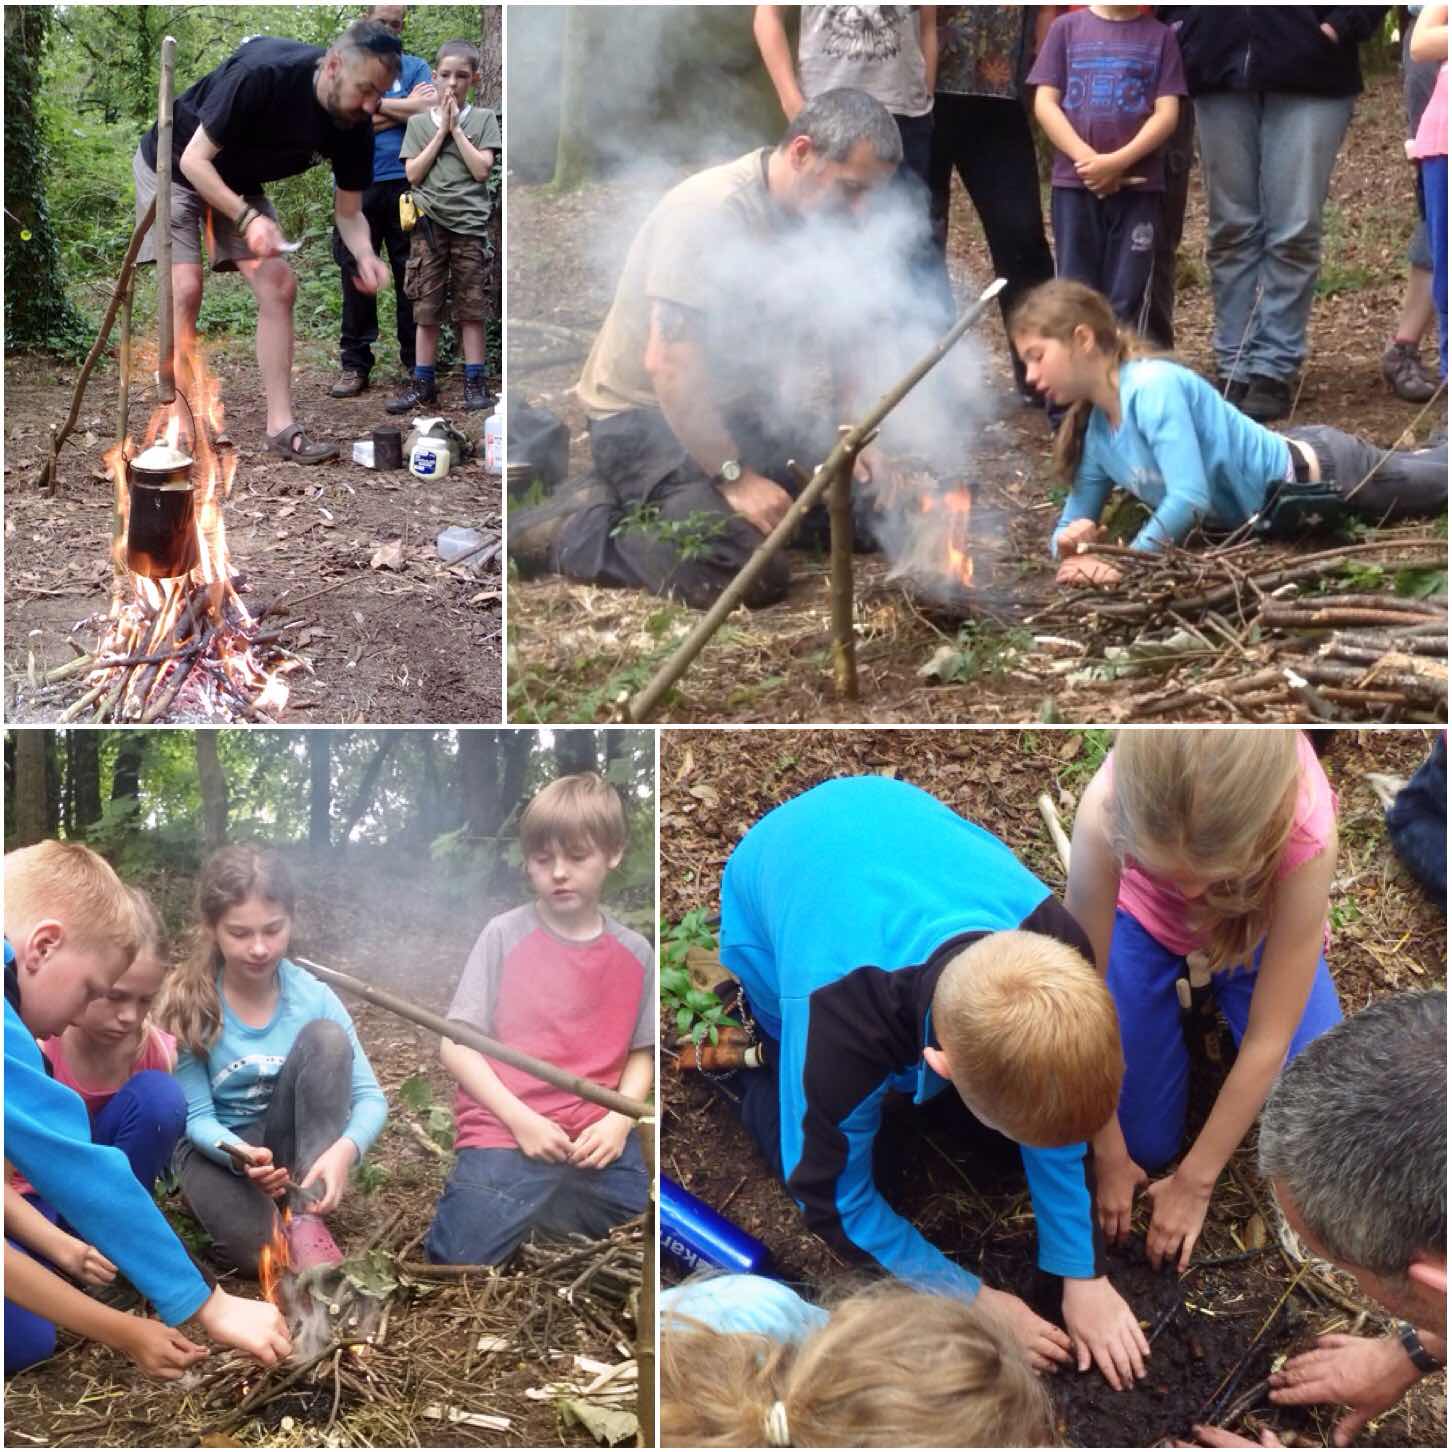
The Starter course at the Moot is not just about lighting a fire, it is also about making anyone preparing and maintaining a fire, and just as importantly it is about putting a fire out safely.
It is great to see a whole family come together to learn how to work as a team to get all the resources they need for their fire and to coax that initial burst of heat into a well-established fire.
Creating a Fire
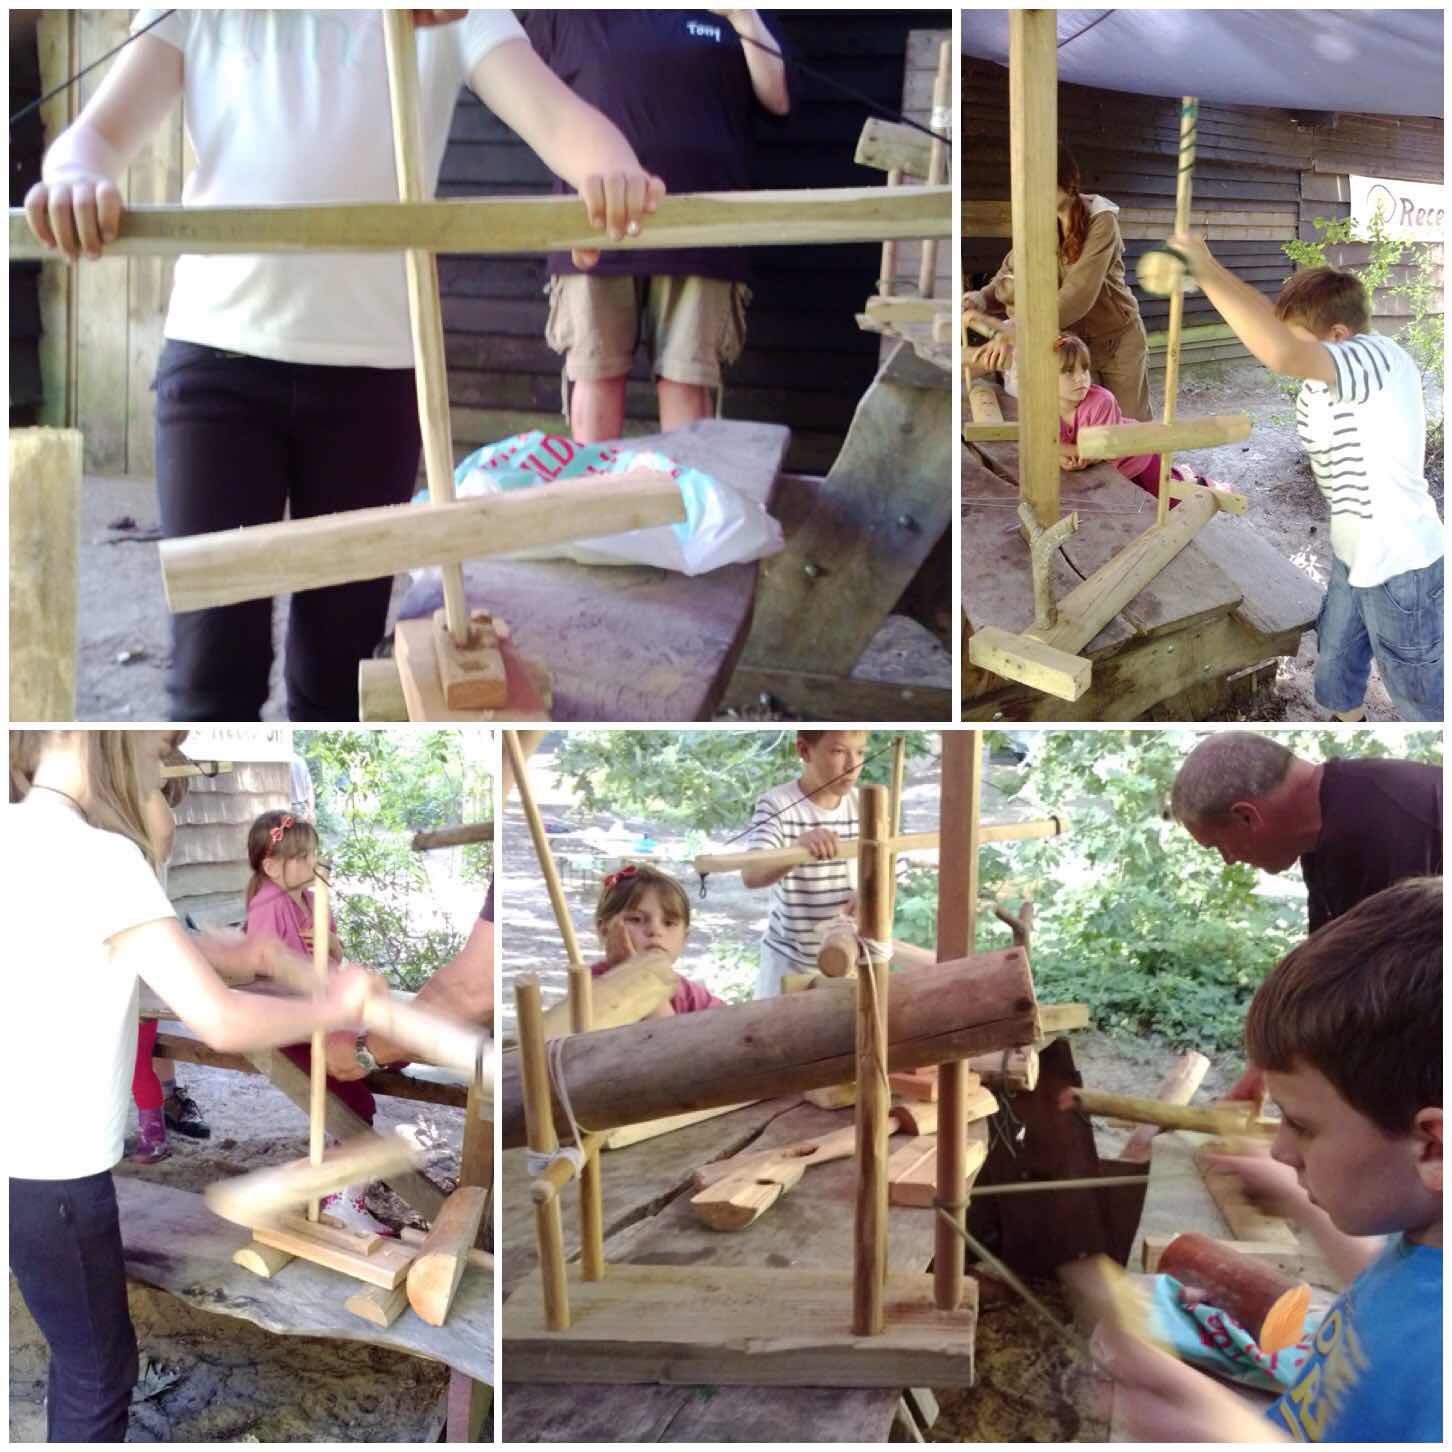
Pump Drills
From time to time some of the instructors will bring along some of their pump drills or other similar training aids. The pump drills prove a great hit with all the kids and once they get the hang of the system they soon have them spinning madly away as they attempt to produce some smoke.
These drills were supplied a couple of years ago by Perry McGee of the National Tracking School.
Fire Drills
Bowdrill
A favourite of mine over the years has to be the bowdrill. I have lost count of the number of people I have helped master this skill at the Moot. One of the reasons I love teaching this skill is that there are so many factors to take into account when bowing you can easily lose a whole day when teaching it.
Recently a number of other instructors like Mark Oriel have stepped forward to teach this skill enabling me to focus on other areas to develop myself.
Bushmoot Bowdrill – Pictures courtesy of Ian Woodham
Bowdrill Methods
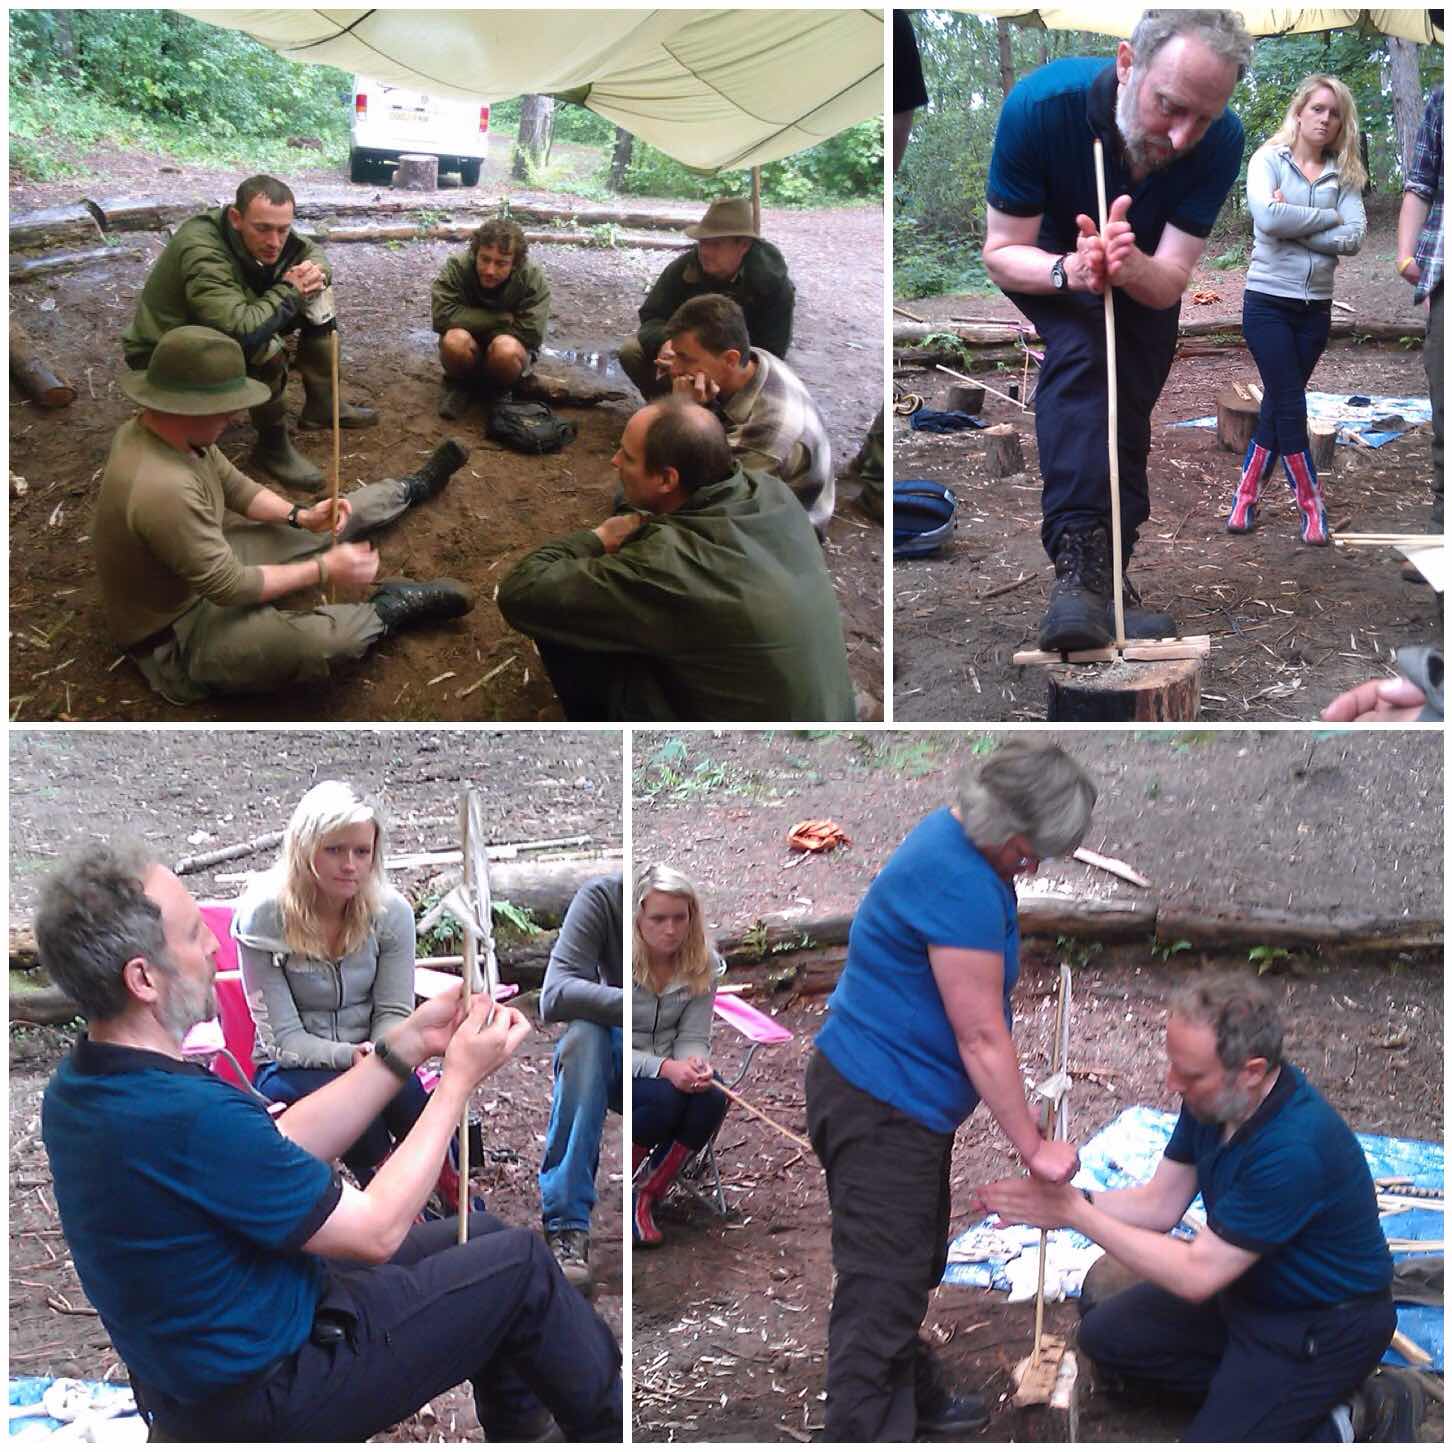
While teaching bowdrill I use two methods. One is with a single wrap of cord around the drill piece and the other is with multiple wraps (the Egyptian method).
The single wrap is easy to set up however it puts a lot of strain on the cord and if the drill and the bearing block become separated the drill piece tends to ping off to the side.
The Egyptian method relies on multiple wraps, it takes longer to set up and can be more difficult to control. It does though have the advantage of not putting so much strain on the cord and the drill does not ping off to the side when it becomes detached from the bearing block.
Single twist and Egyptian
Here is the bowdrill in action using the single wrap method.
Group Bowdrills
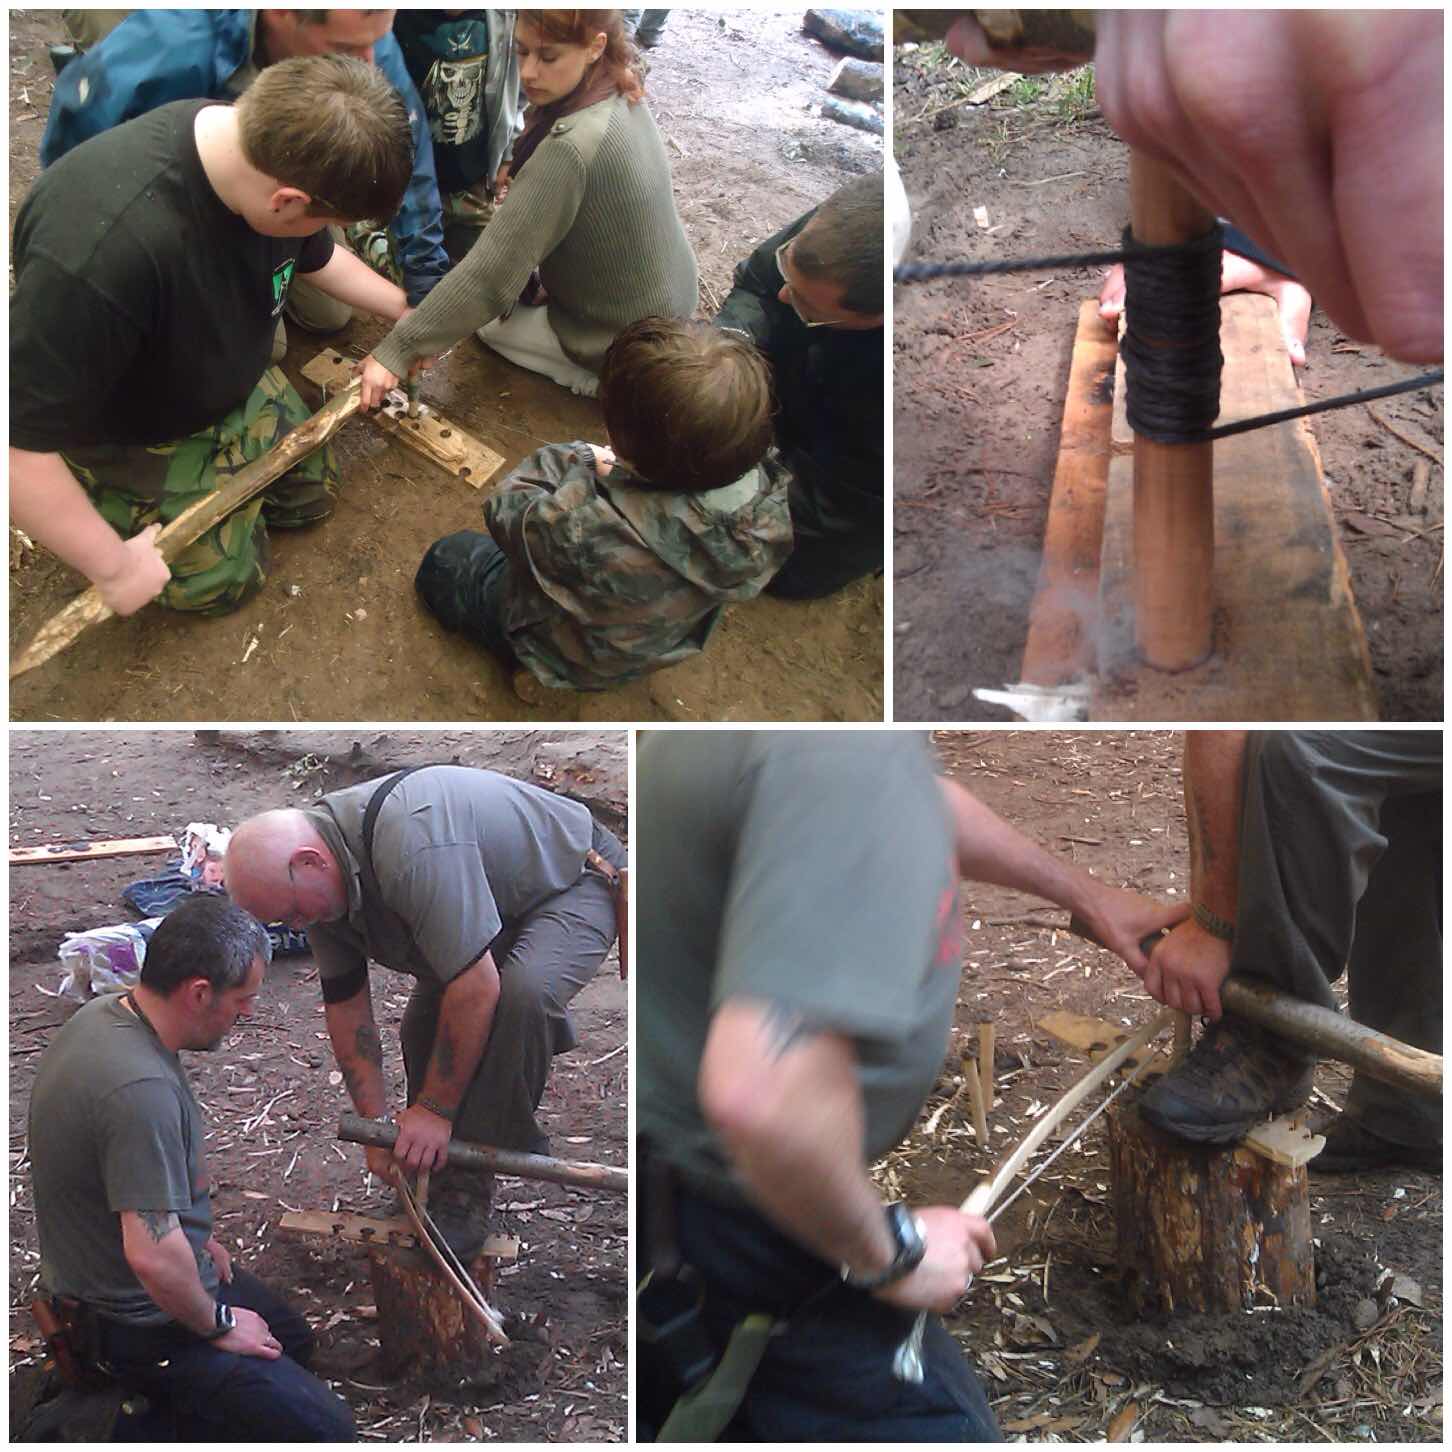
As we get a lot of children at the Moot and from time to time someone carrying an injury you need to devise other strategies for bowdrilling. Historically I believe bowdrilling was a communal affair as it requires a lot less effort from individuals to get fire when they work together.
I set up Group Bowdrill sessions for families where a couple of people can hold a large bearing block in place and a couple of others can push the bow back and forth to generate the heat required (approx 425 degrees Celsius) to produce an ember. This method usually results in a massive ember, which increases the chance of getting a flame.
Another method is to use the large bearing block with the bowyer holding one end as a bearing block with the other end dug into the ground. In the bottom two pictures you can see that Dave is also using a ’round’ of wood to raise the hearthboard making the act of bowing easier.
Teamwork
I made a short video of a bow in action with the Egyptian method at the Moot a couple of years ago. This was to show how easy it was to create an ember using this method with two people on the bow.
Handrills
A Master fire maker who has been coming to the moot for years now is Richard (Rich59 on BCUK) and what he doesn’t know about firemaking is not worth bothering about. He is an expert with the handrill and regularly brings along a range of woods such as Elder, Teasel, Buddlia, Mullein and Reedmace for students to try out.
Richard is a keen experimenter and will try out different techniques like attaching cord to the drill to see if that technique makes life easier for people.
Handrill
This is my short video on using a handrill.
Bamboo Firesaw
This year Richard experimented with Bamboo Fire Saws. He managed to get some spare bamboo from Wayne Jones of Forest Knights (Wayne was making Bhutenese bows) and we soon had a pile prepped up around our camp.
I did not get to see Richards class as I was running one myself but the reports were all positive with successful fires being made, Maybe next year I will make time to see his class.
Bamboo Fire – Bottom picture courtesy of Andy McDonald Photography
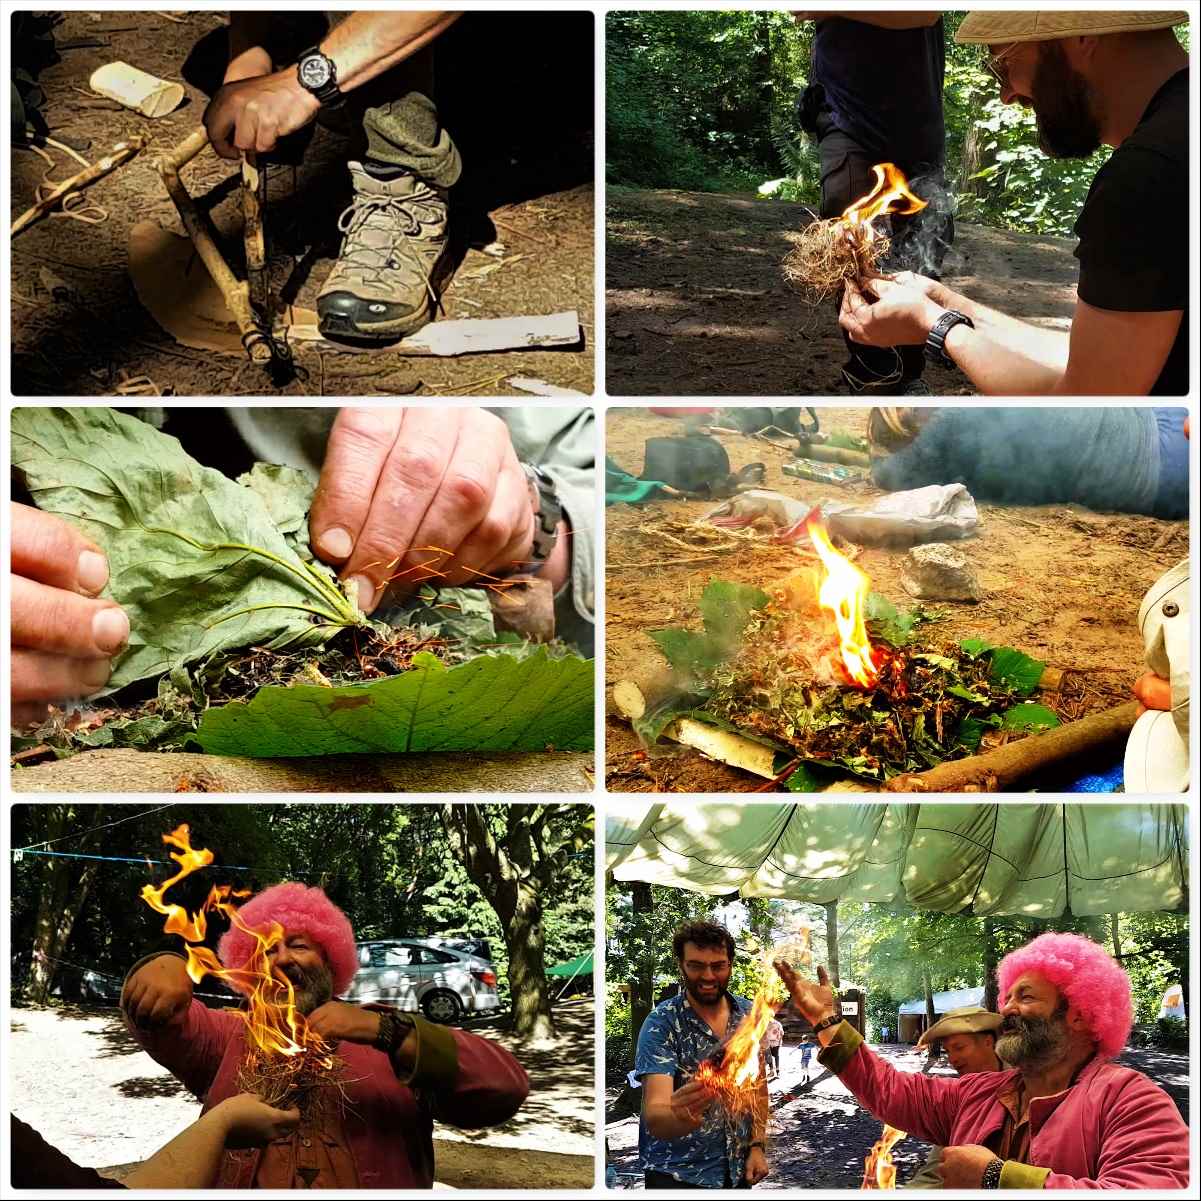
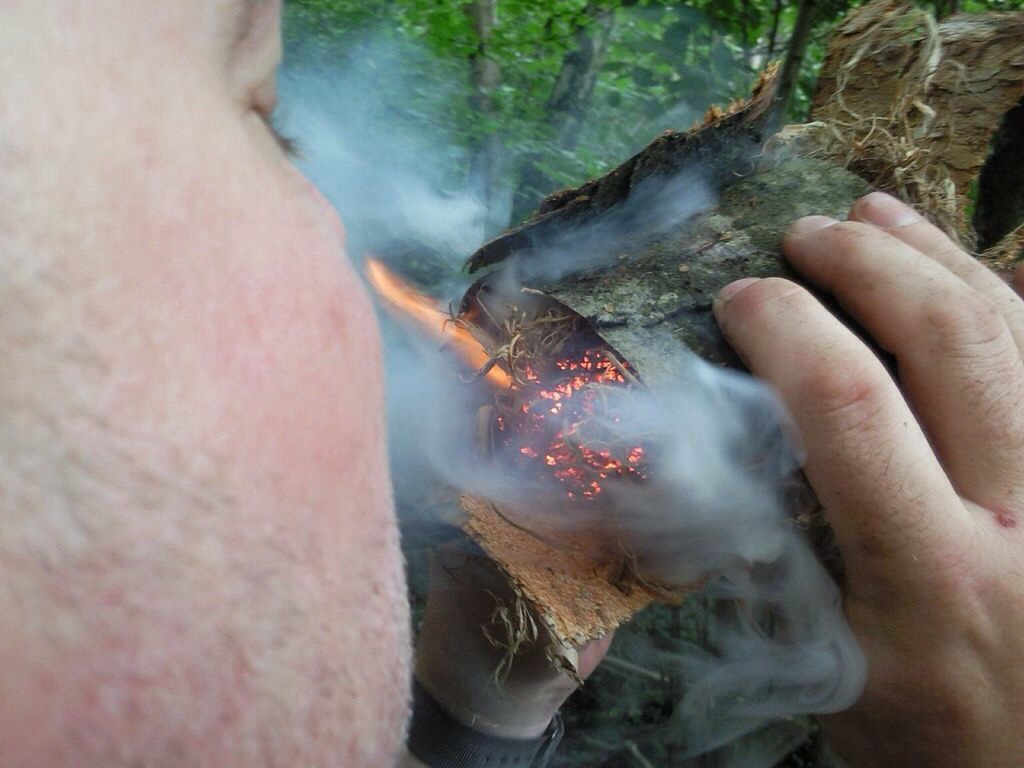
Dry Tinder
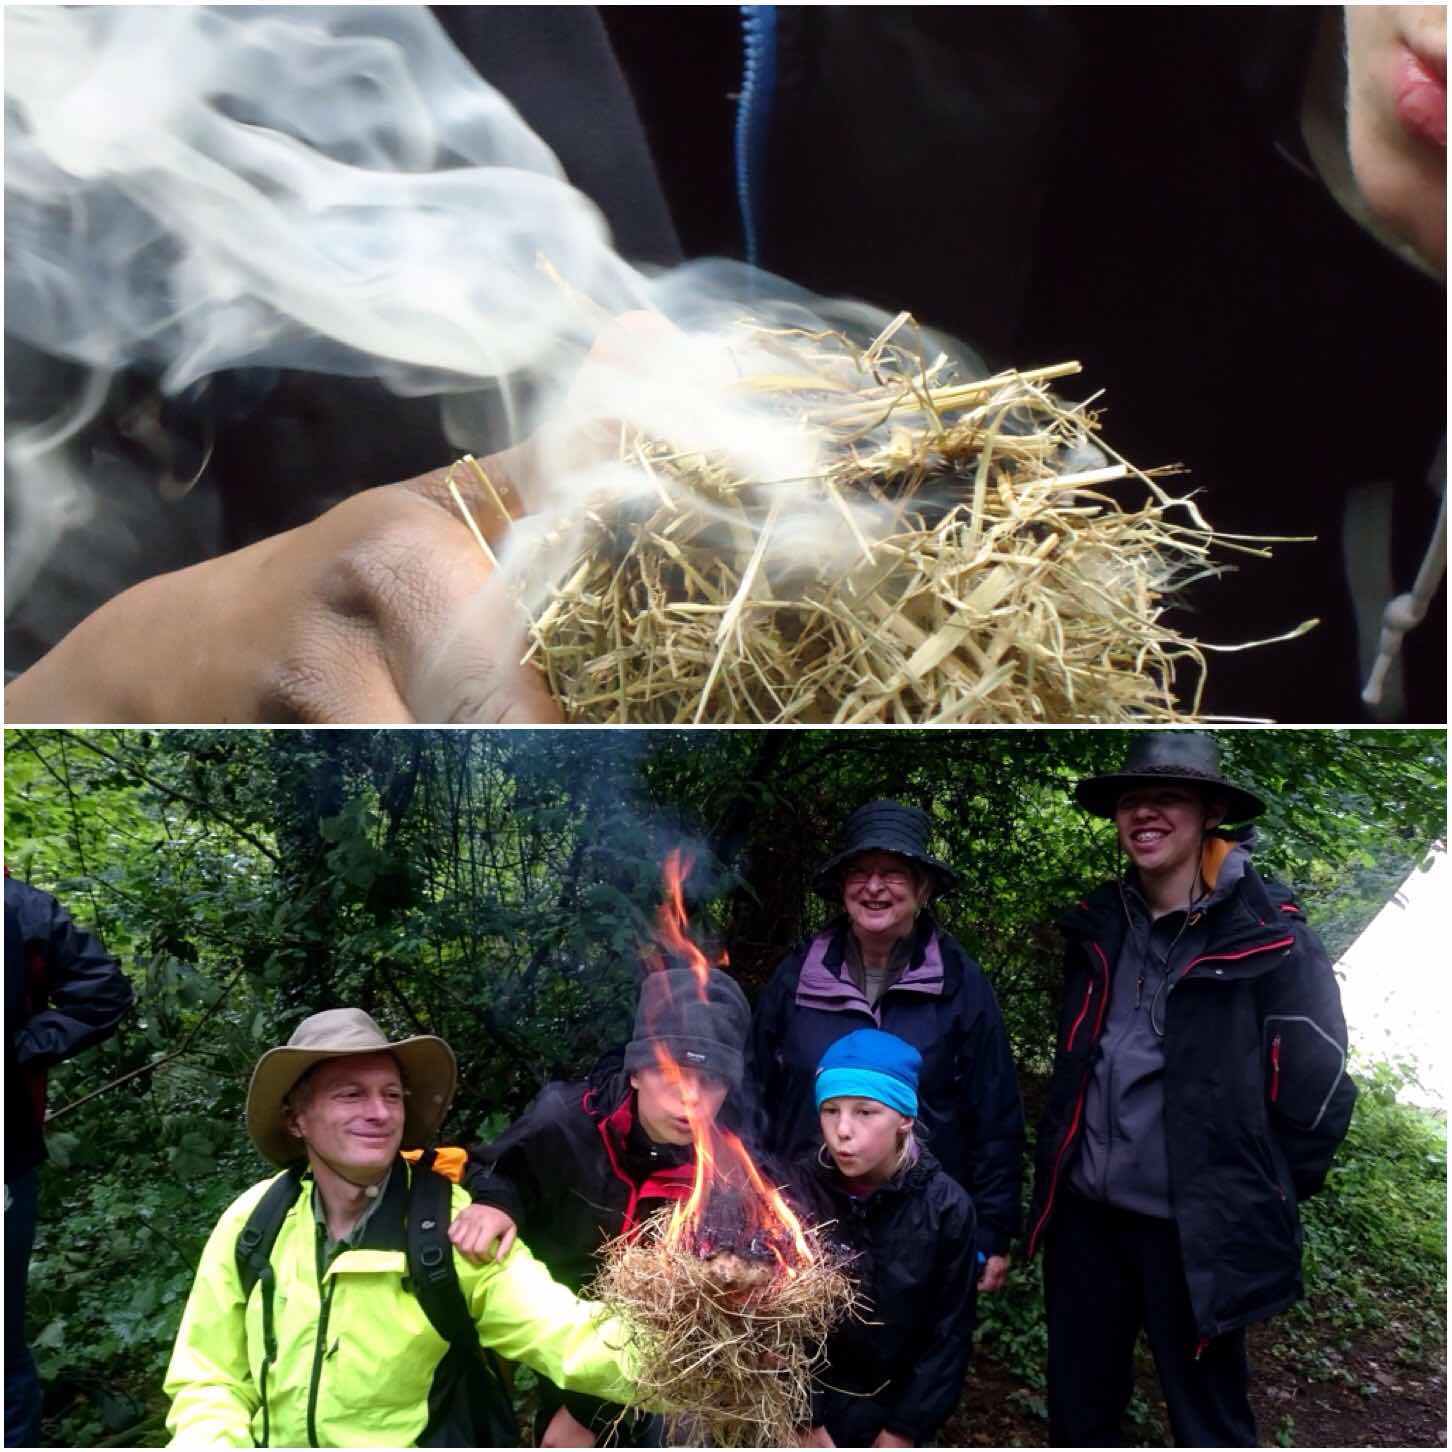
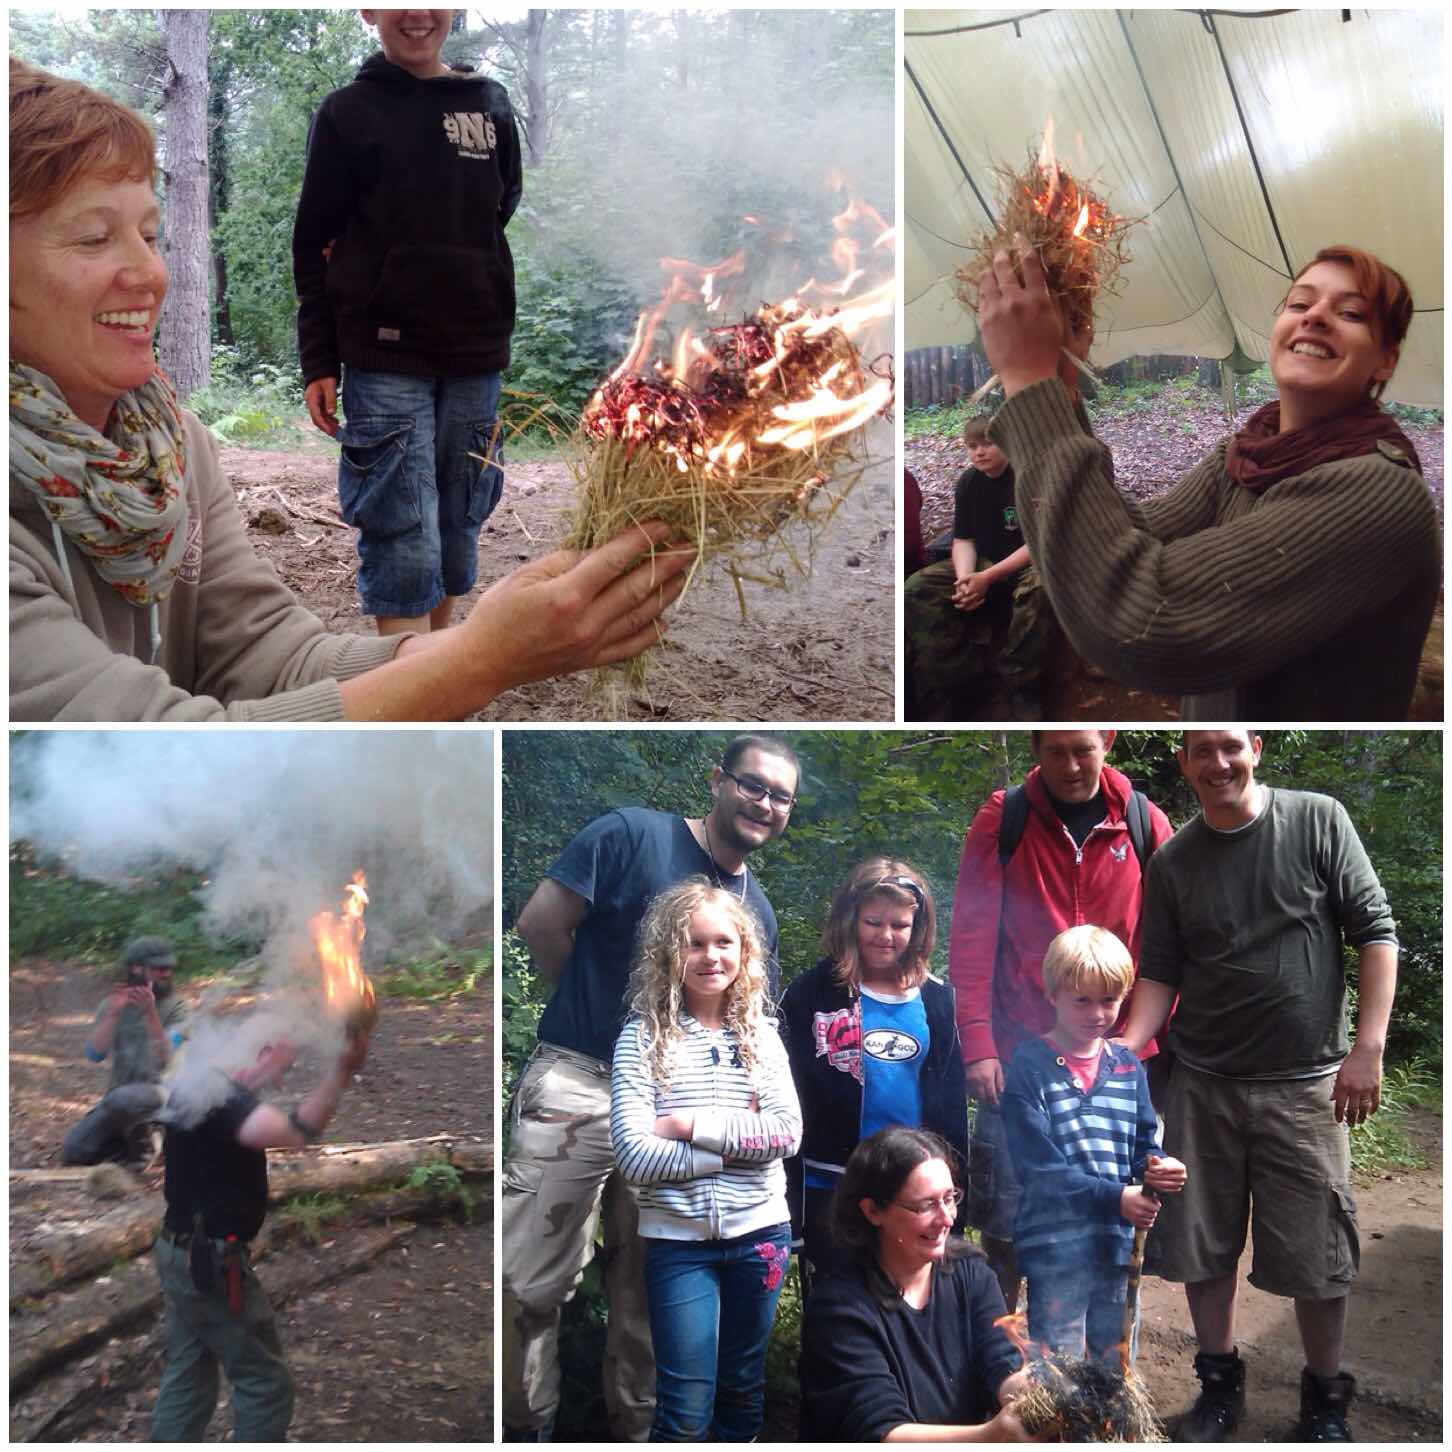
Once you have your ember created (however you do that) it is time to coax that very fragile bundle of hot dust into a fully formed ember and – with the use of whatever tinder you have at hand – to get that much sought-after flame.
It is at this stage that you can see students’ faces transform from concentration into sheer joy – one of the reasons why I love this subject.
Flamage
Damp Tinder
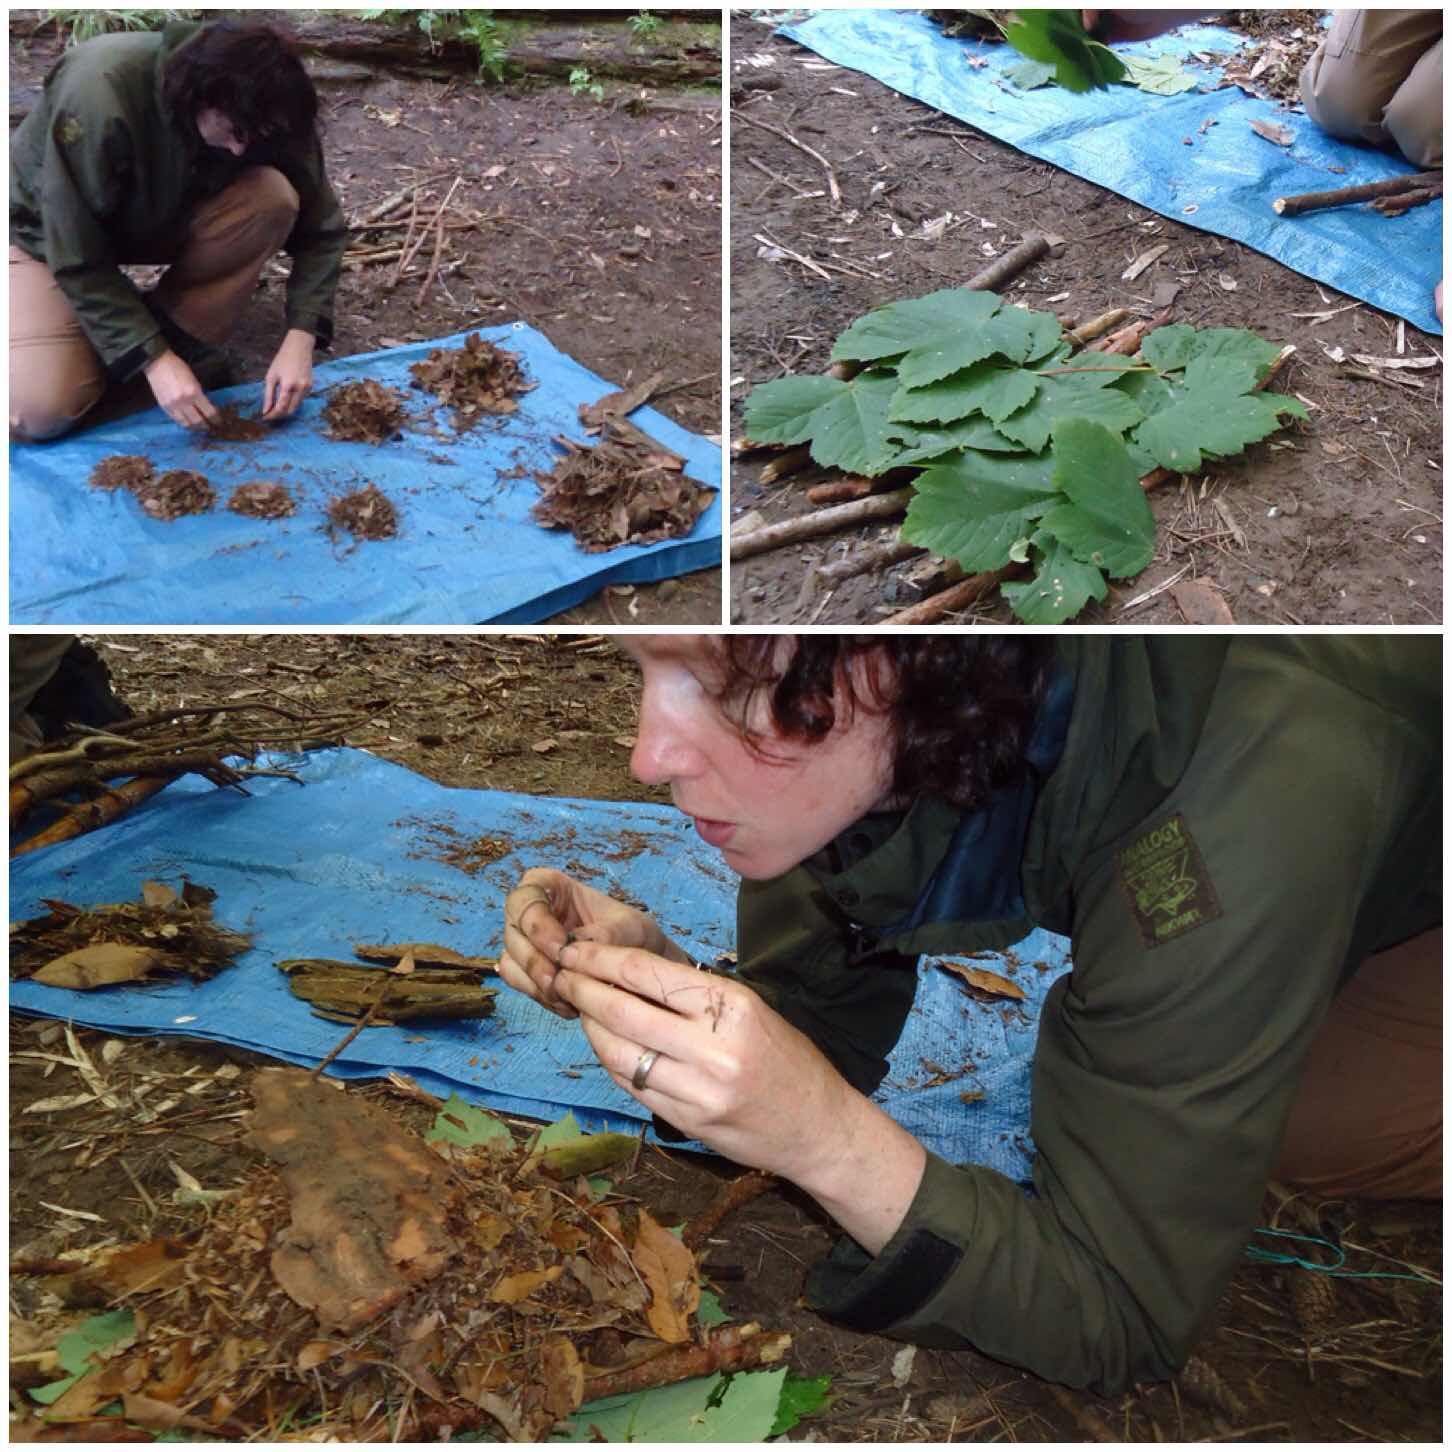
Normally you try and find the driest tinder possible to turn your ember into a flame, however Richard turned that idea upside down a few years ago. We had a chat one evening around the fire and he explained his idea to me: dimply that it was possible to walk off into the woods and pick up damp dead leaves and process them in a certain way to make tinder to start a fire.
After collecting a pile of damp leaves (take the driest ones from the top of the leaf debris) start to break them up by rubbing them vigorously. Collect the flaked pieces and grade them from minute up to piles of the skeletal remains of the leaves.
From this make a small pile wjth the finest flakes in the centre of your pile.
Damp Tinder fires – Prep
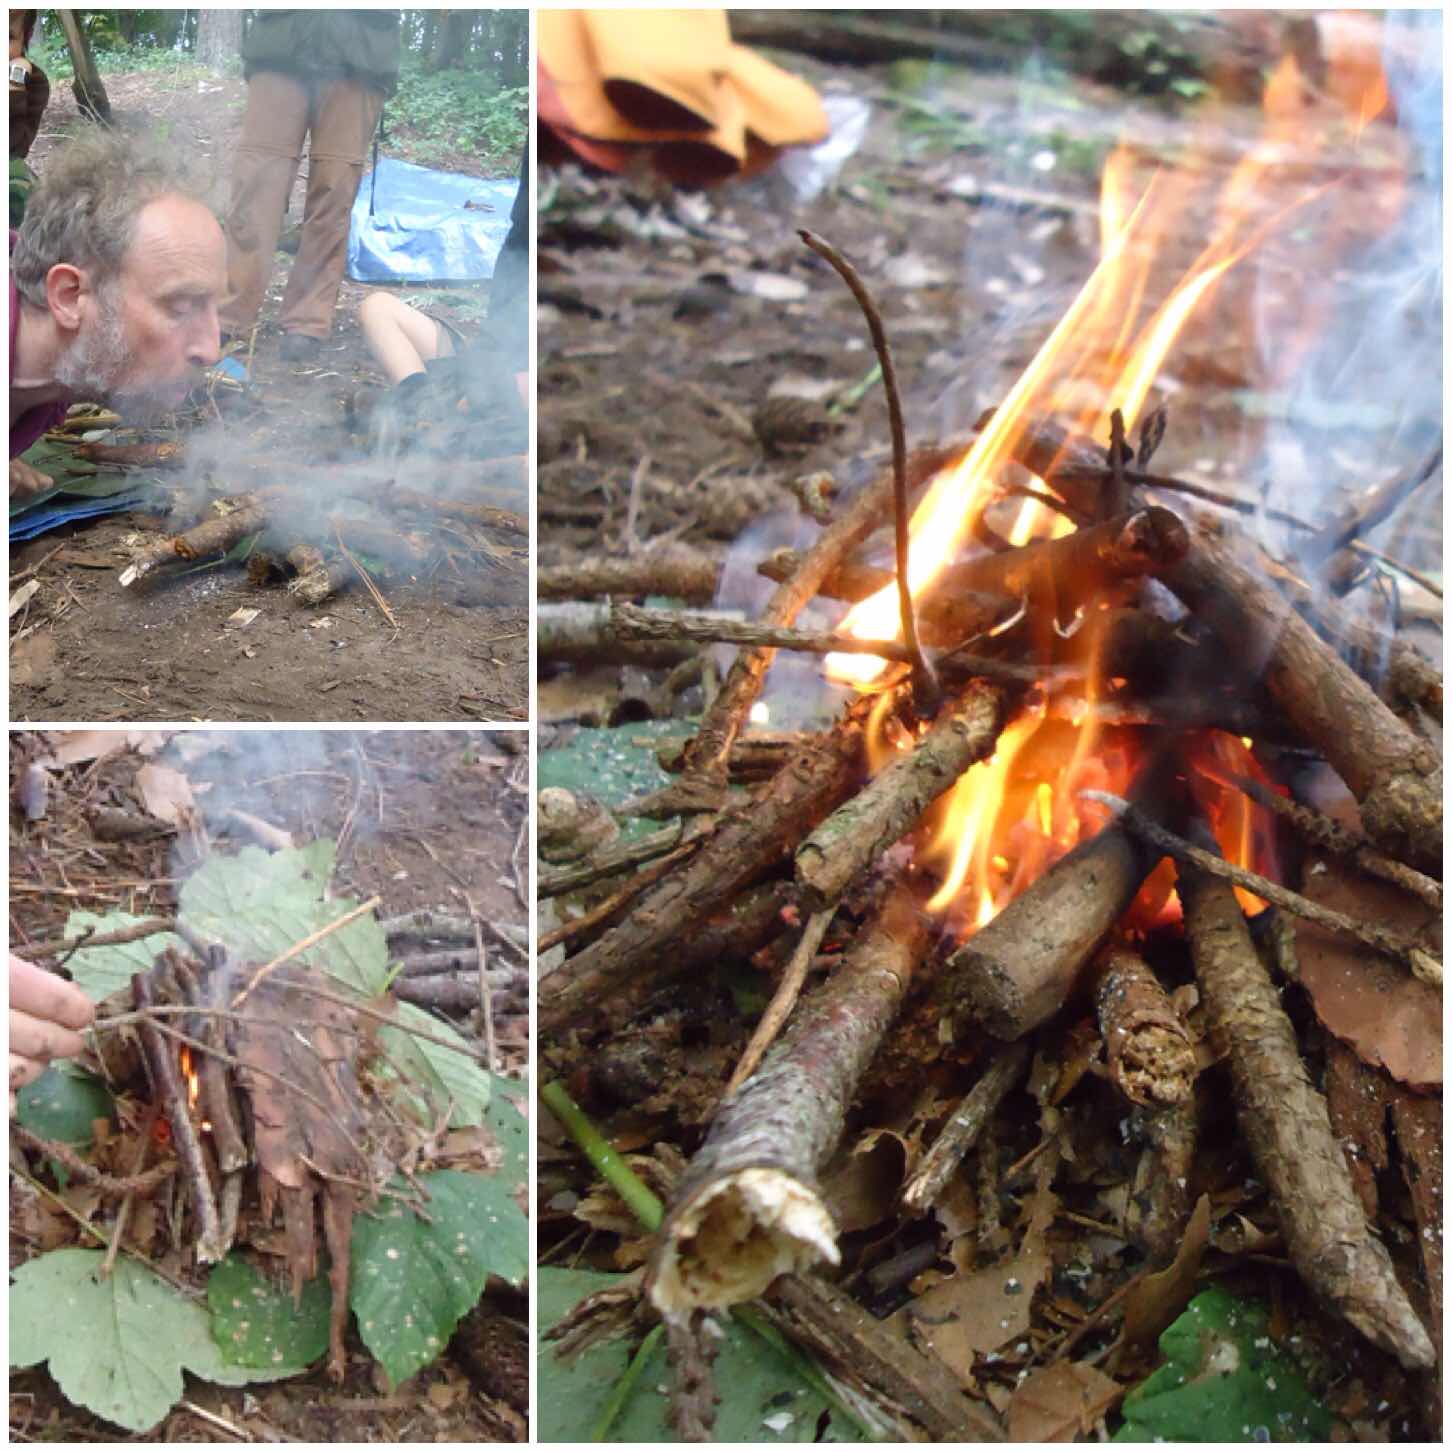
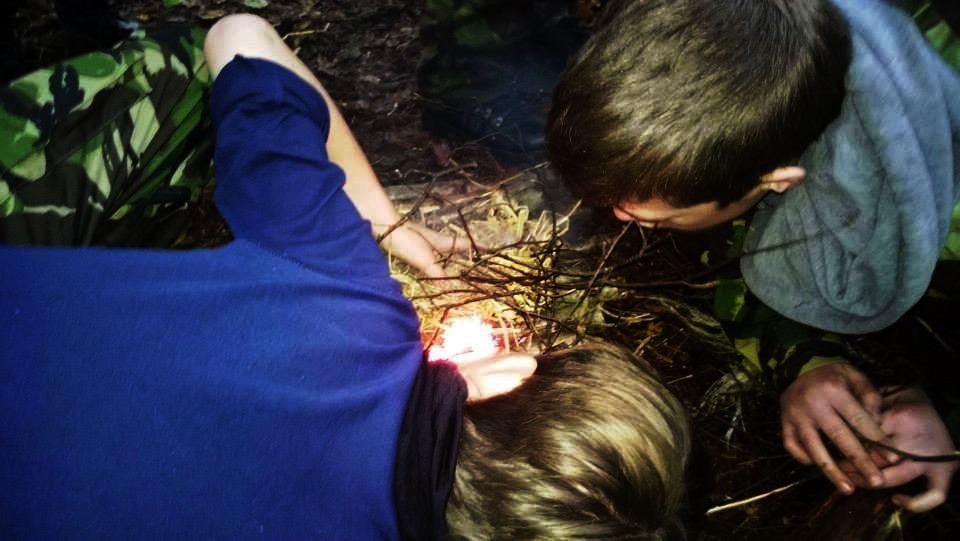
Make a small hole in the side of your pile to the centre and pop an ember (create that in whatever way you wish) and start to blow gently into the ember.
The trick is to do this slowly so that you create an ever-expanding dry area. If necessary you can place some green leaves or bark over the top to trap all the broken debris and stop it all blowing away. After about 10 to 20 minutes you usually get flame. Just shows you should always persevere with your fire.
Damp Tinder Fires – Flammage
Challenging Yourself
Whether you are a novice to fire making or an expert looking for a new challenge the Moot will have something for you – be that firesteels, bowdrills, handrills, pumpdrills, bamboo fire saws or the secret art of lighting fire from damp tinder.
In this digital/technology dominated world we live in today I always try and make time to keep an eye on what Mother Nature is up to around me – obviously with a camera about my person 🙂
One place where I can really immerse myself back into nature is every year at the Bushcraft UK Bushmoot for a couple of weeks. This post will concentrate on some of the different ways we at the Moot interact with nature.
Bushmoot Nature
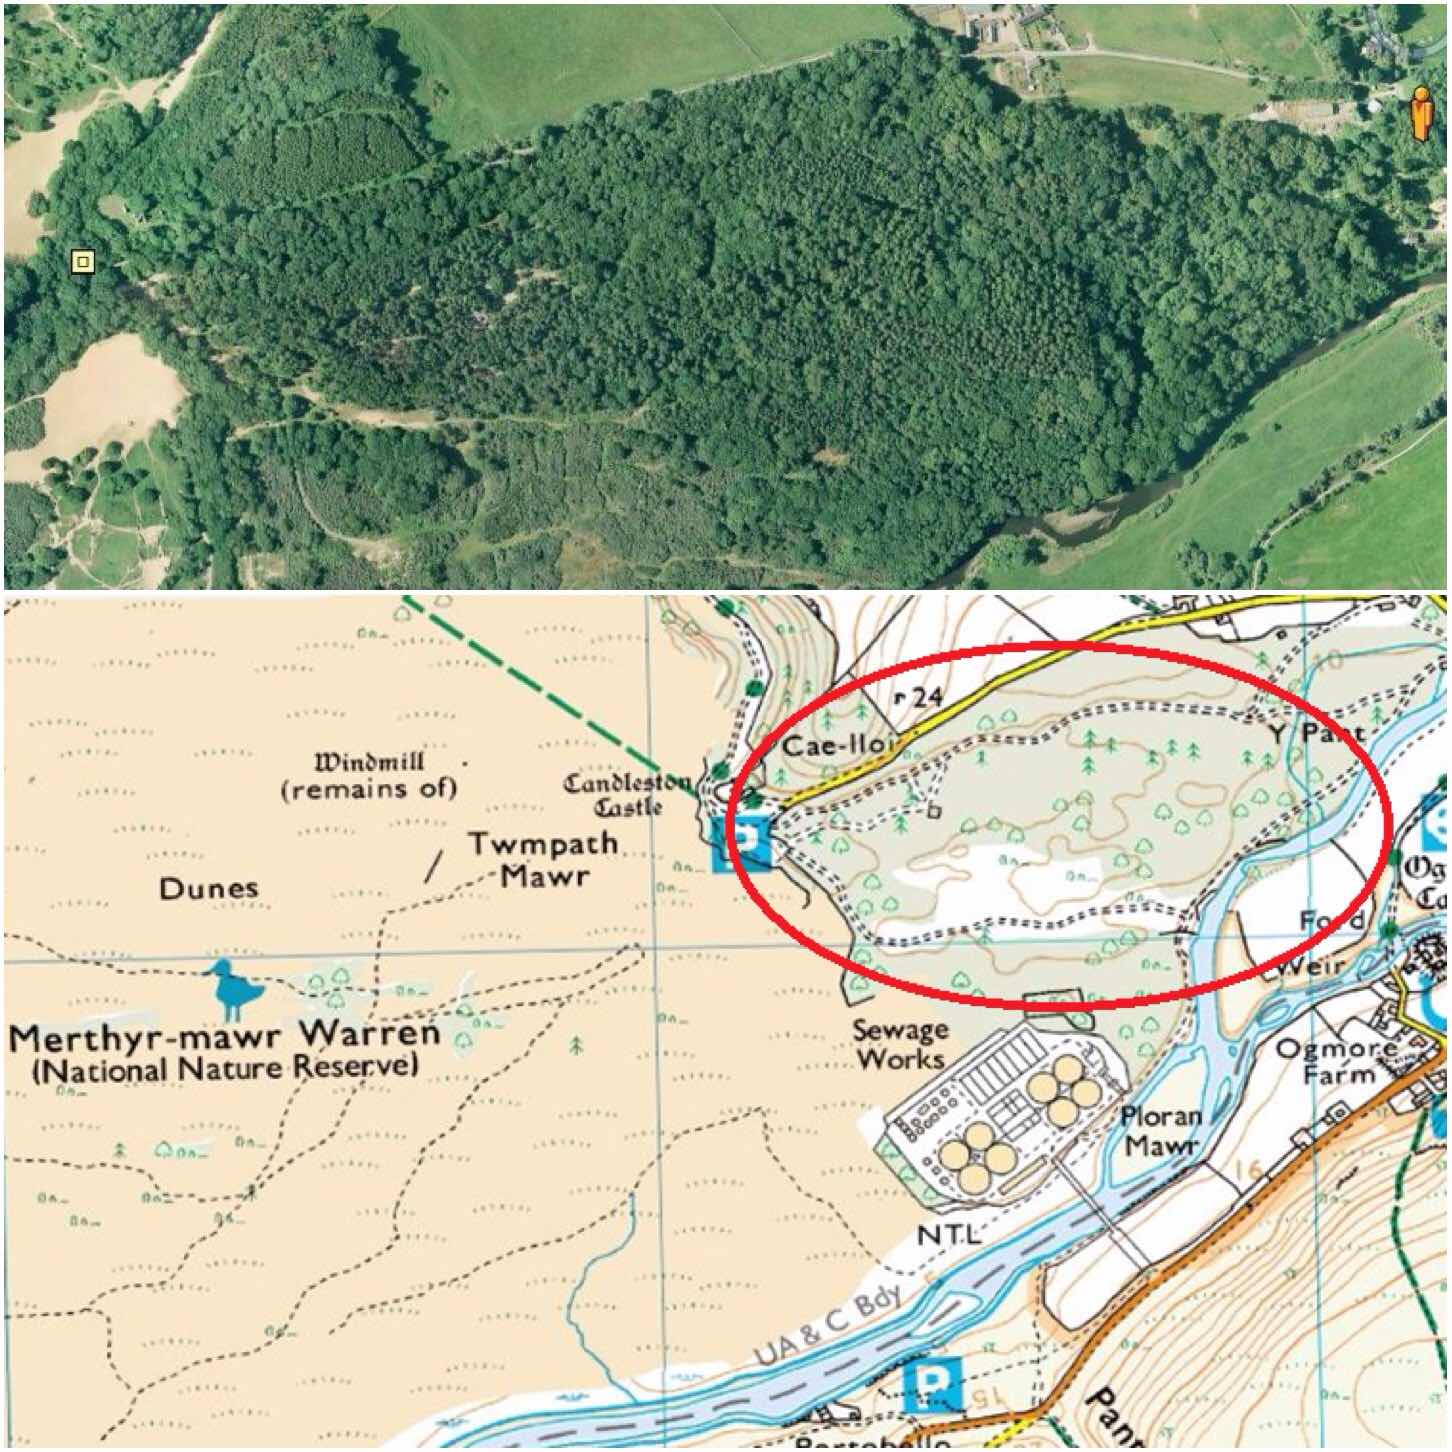
The Moot is located in a wood on the edge of the National Nature Reserve at Merthyr Mawr Warren in South Wales. Merthyr Mawr Warren is I am told the site of the second largest sand dunes in Europe.
The wood we use is on the edge of these dunes and was heavily planted with a variety of plants/trees after the Second World War by the local estate owners to help stabilise the dunes.
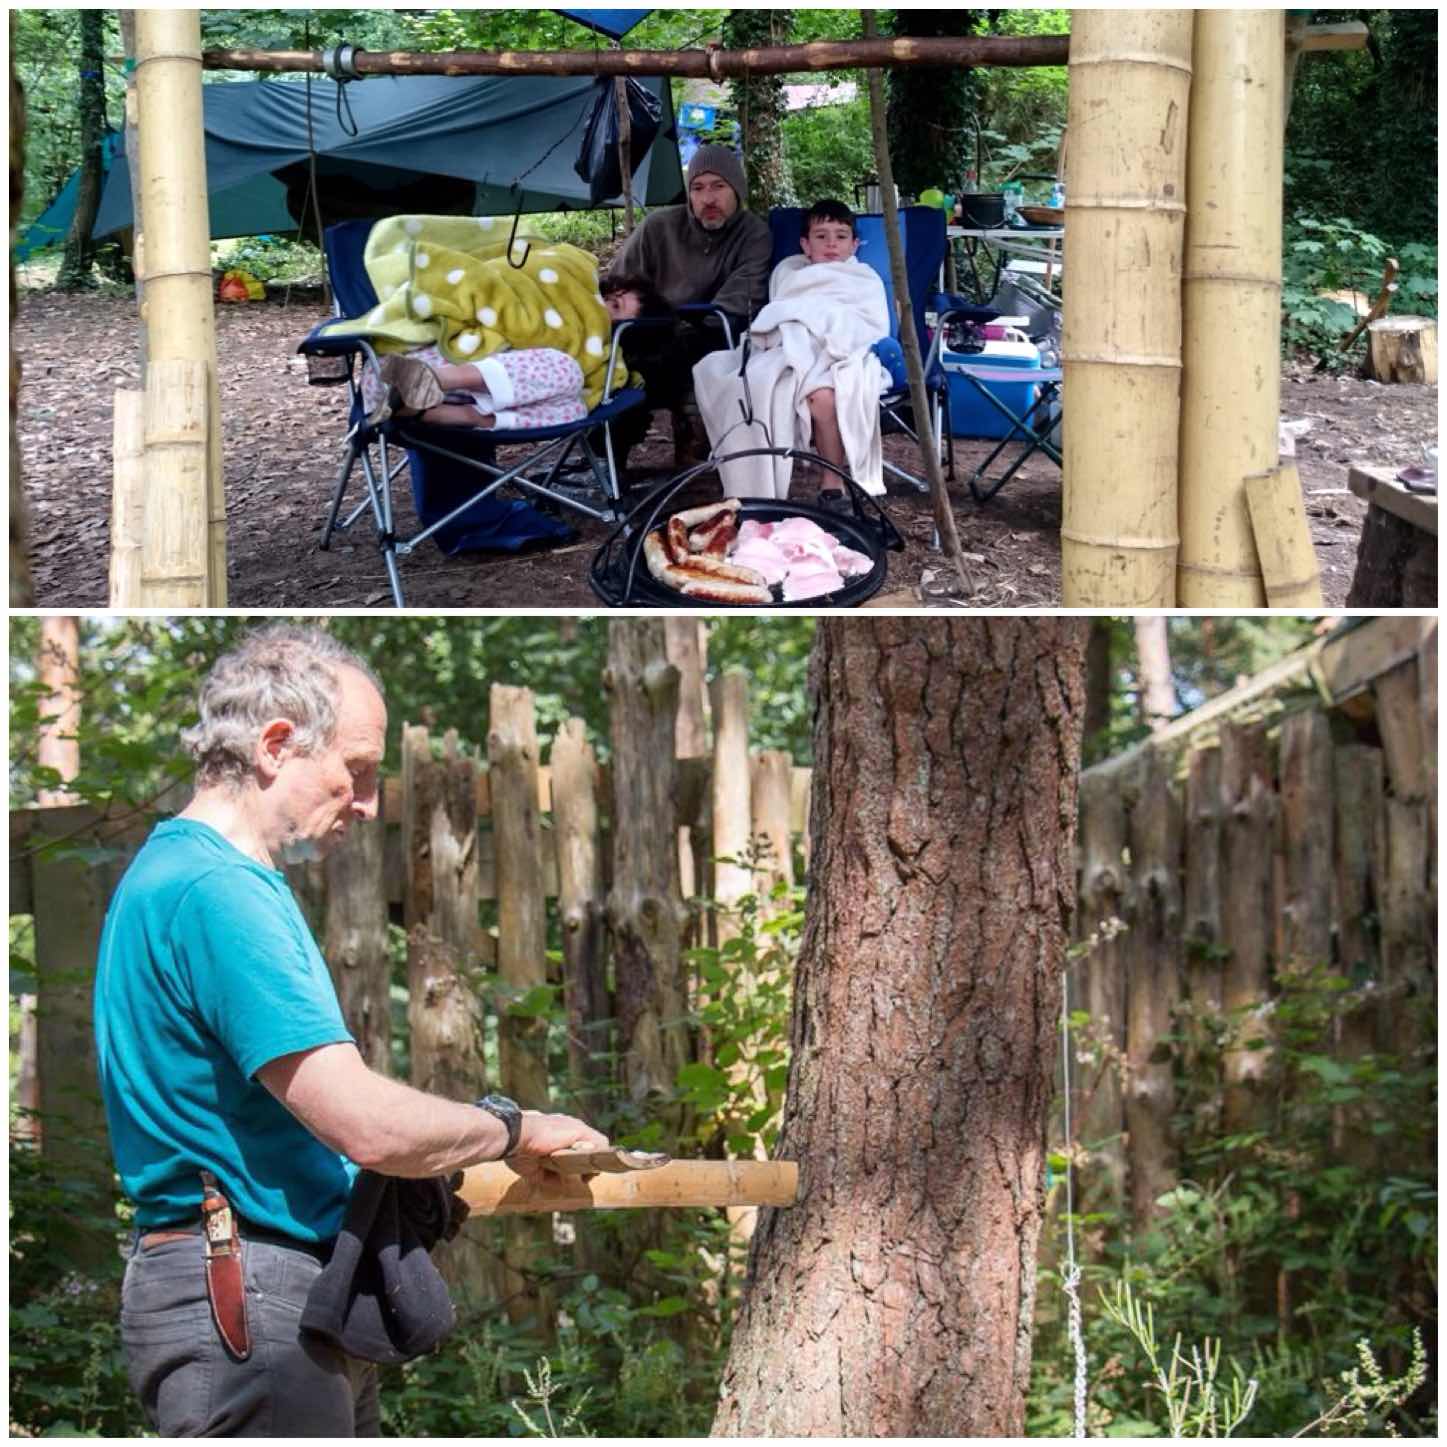
The Playground
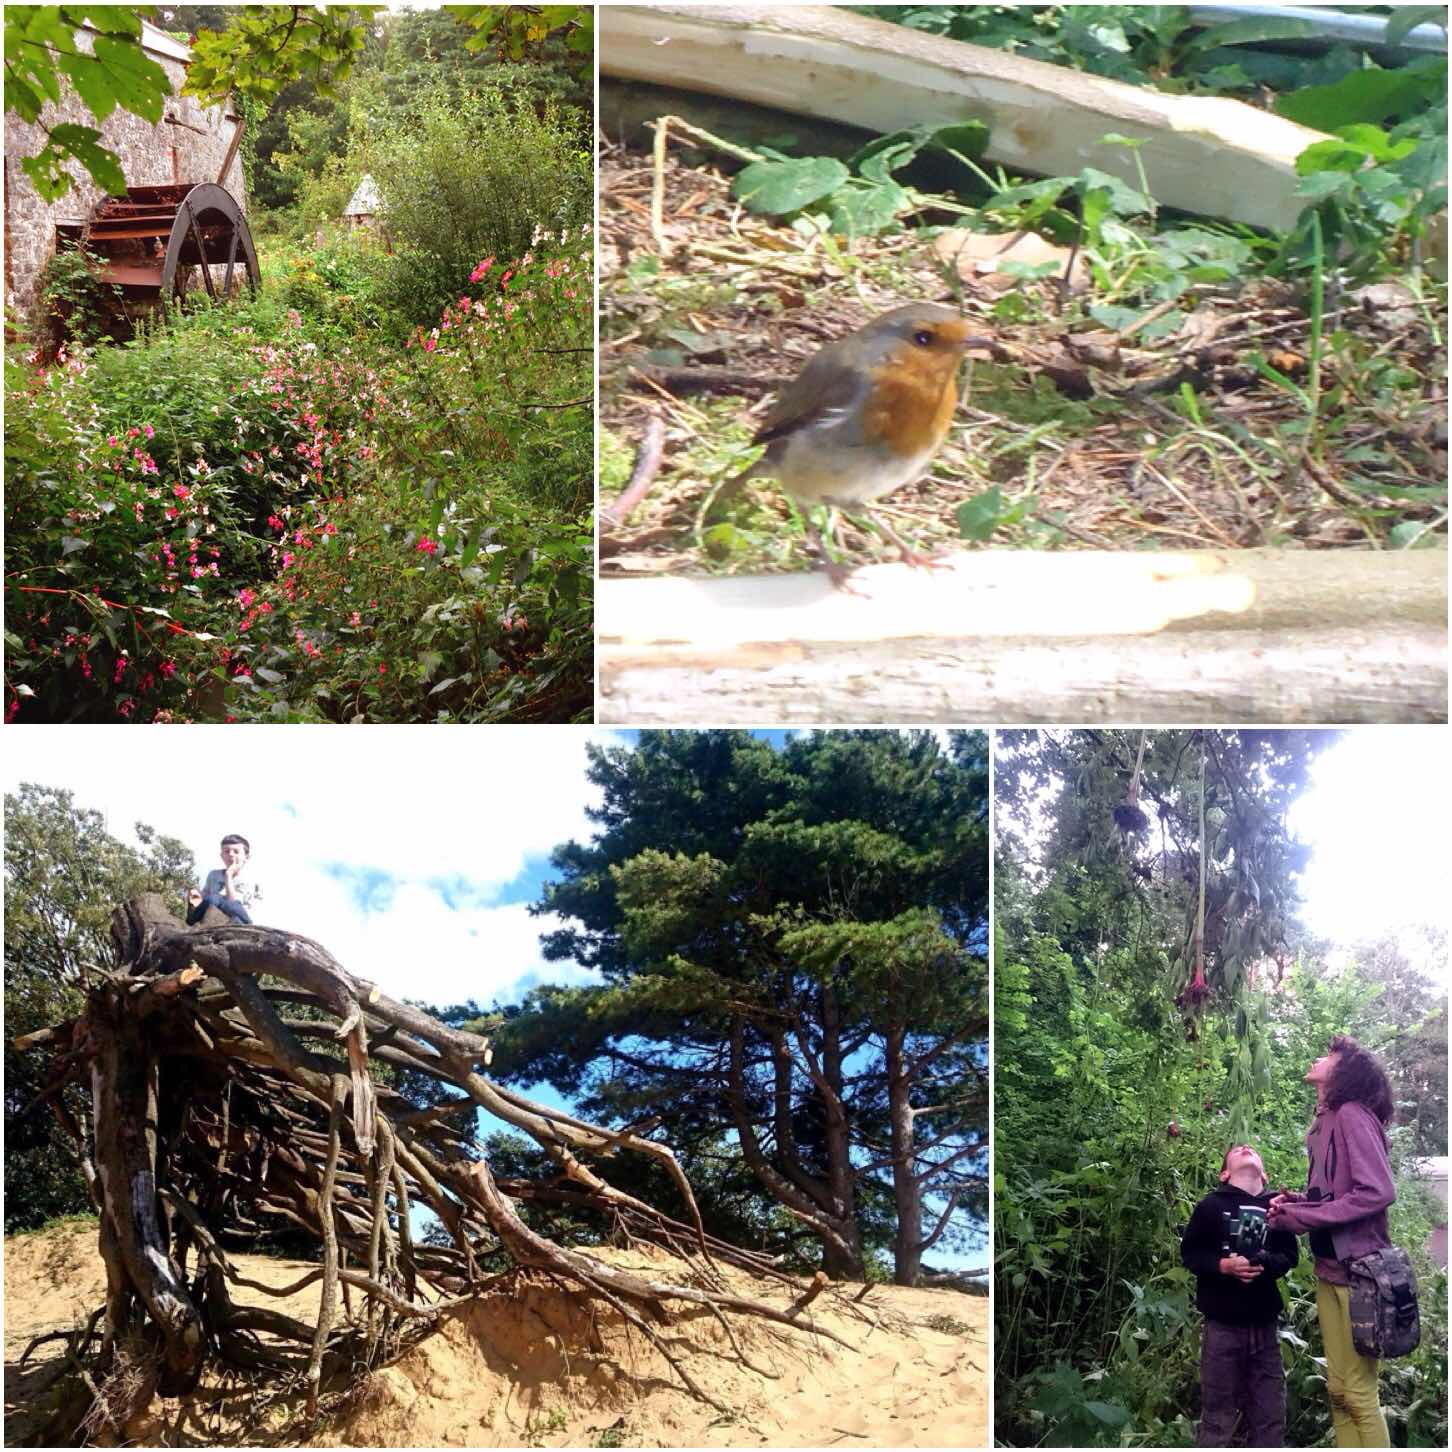
I like to take a walk around the site as often as possible while I am at the Moot to see what I can spot. One of my favourite spots was this little old water wheel at the edge of the site. It is a most beautiful and quiet spot to sit and observe nature.
I have a little Robin (Ok I am sure there are different ones every few years) who comes to visit me at my camp. This little fella is not shy and is always on the lookout for scraps.
My kids make this site their playground and interact with nature all the time, from climbing strange looking tree roots to making their own art by throwing Himalayan Balsam up into trees so that they hang down (quite a weird site passing these trees). As we are continually clearing back the Balsam I do not mind them doing this.
Variety
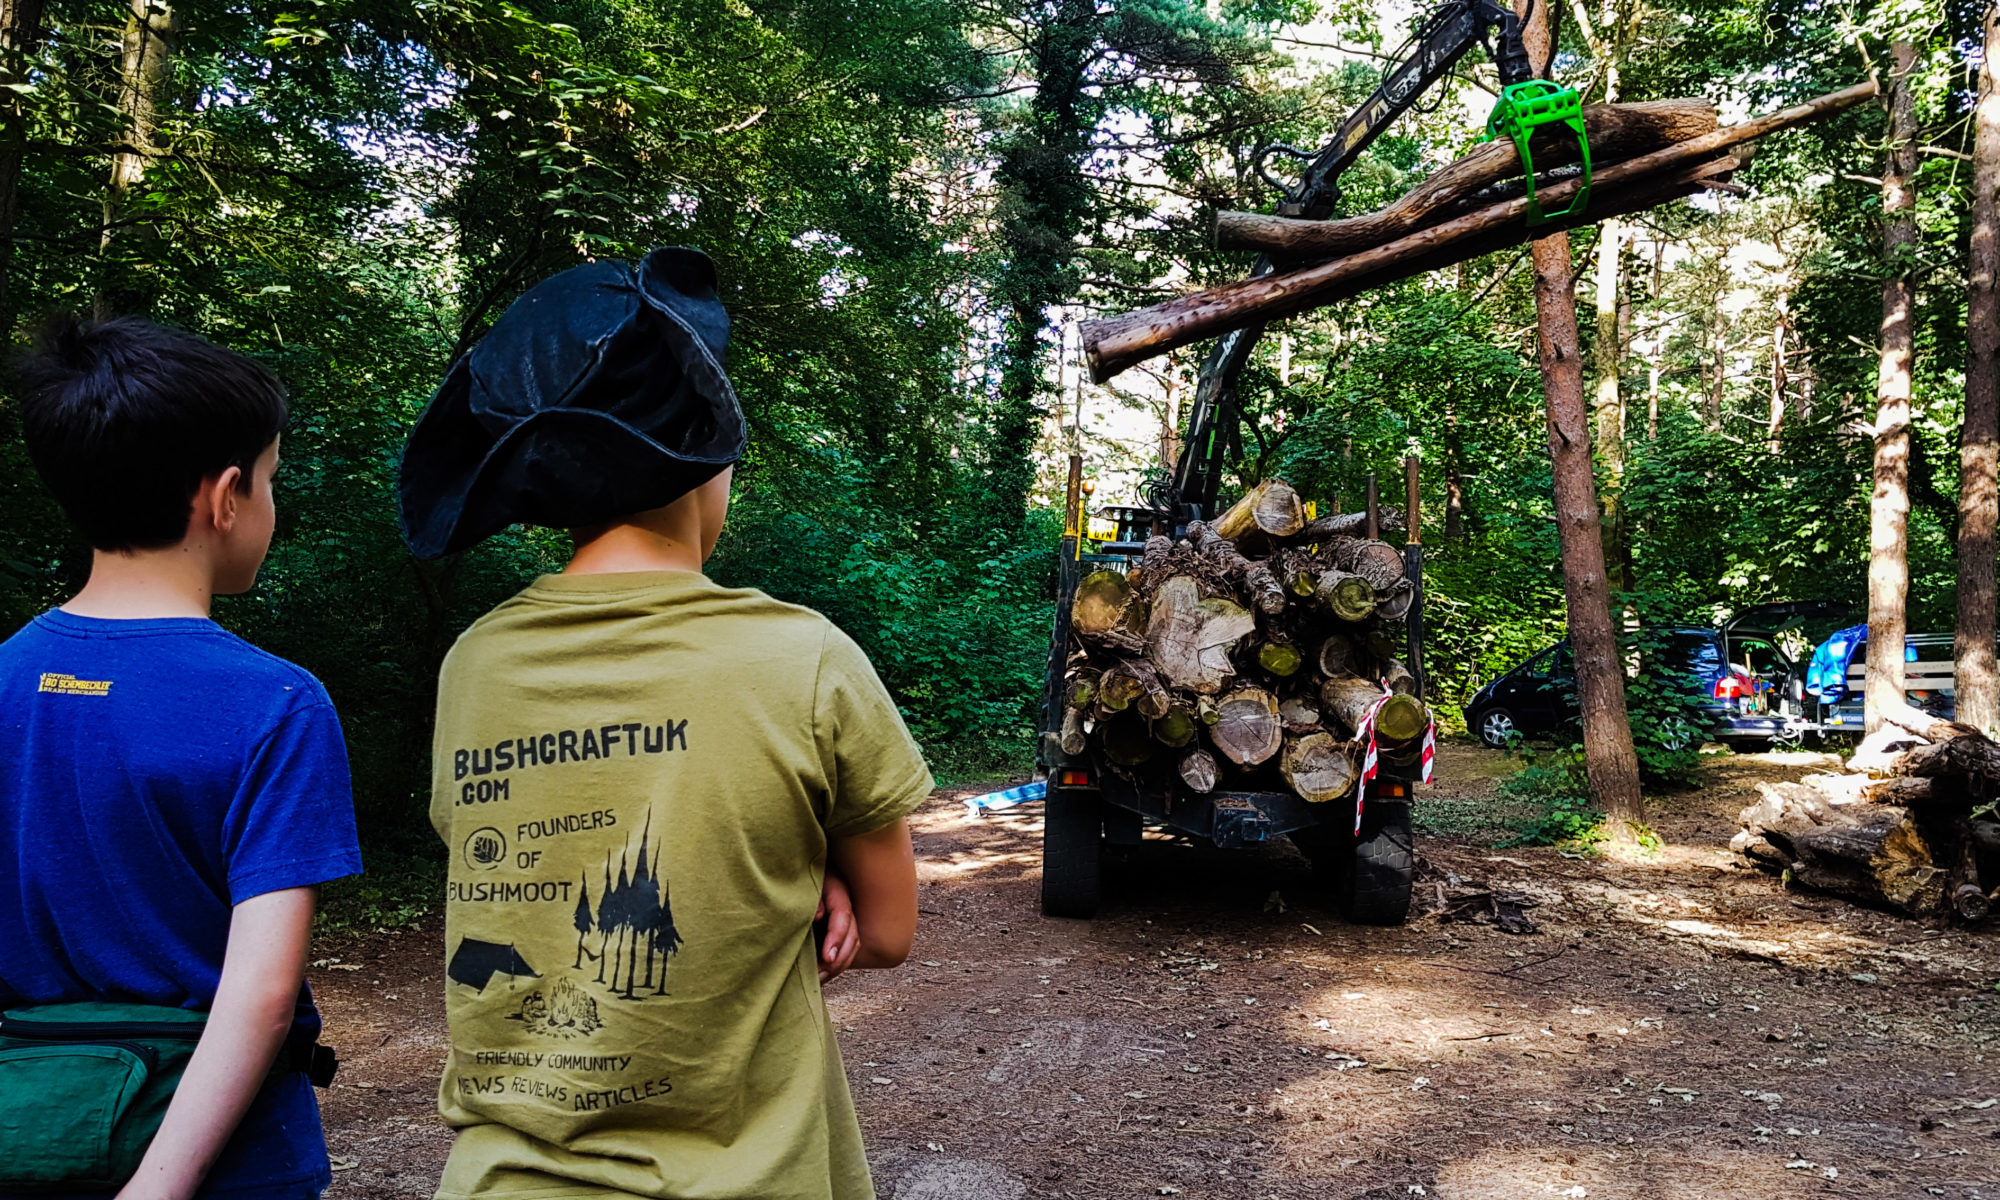
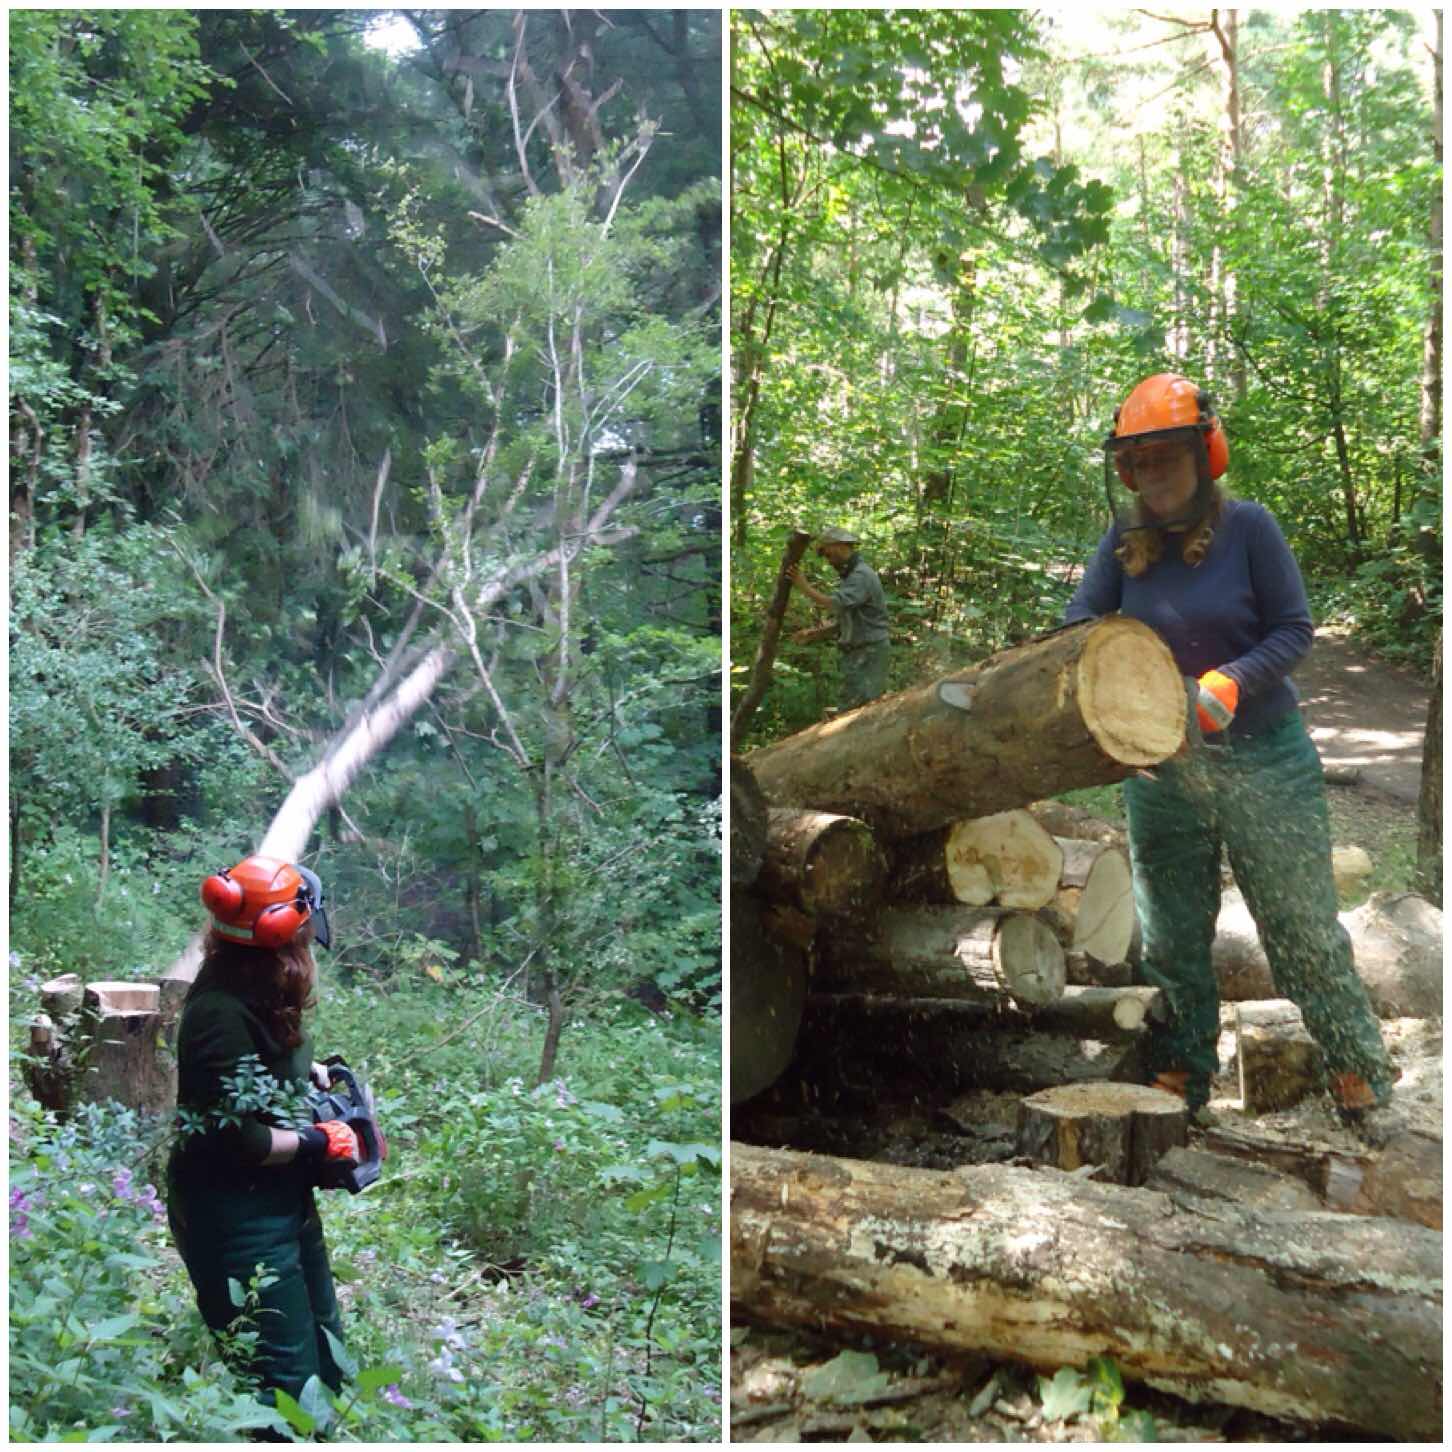
As bushcrafters we try and minimise the impact we have on the site. For firewood we have an agreement with the local estate to buy in timber from them so as to not strip out the local wood for firewood.
Occasionally with the agreement of the estate we will take out a tree or two that has become a danger to those camping in the woods.
We have been coming to the site for over ten years and this policy of minimal impact has meant that the site remains a place of real natural diversity.
Keeping the balance
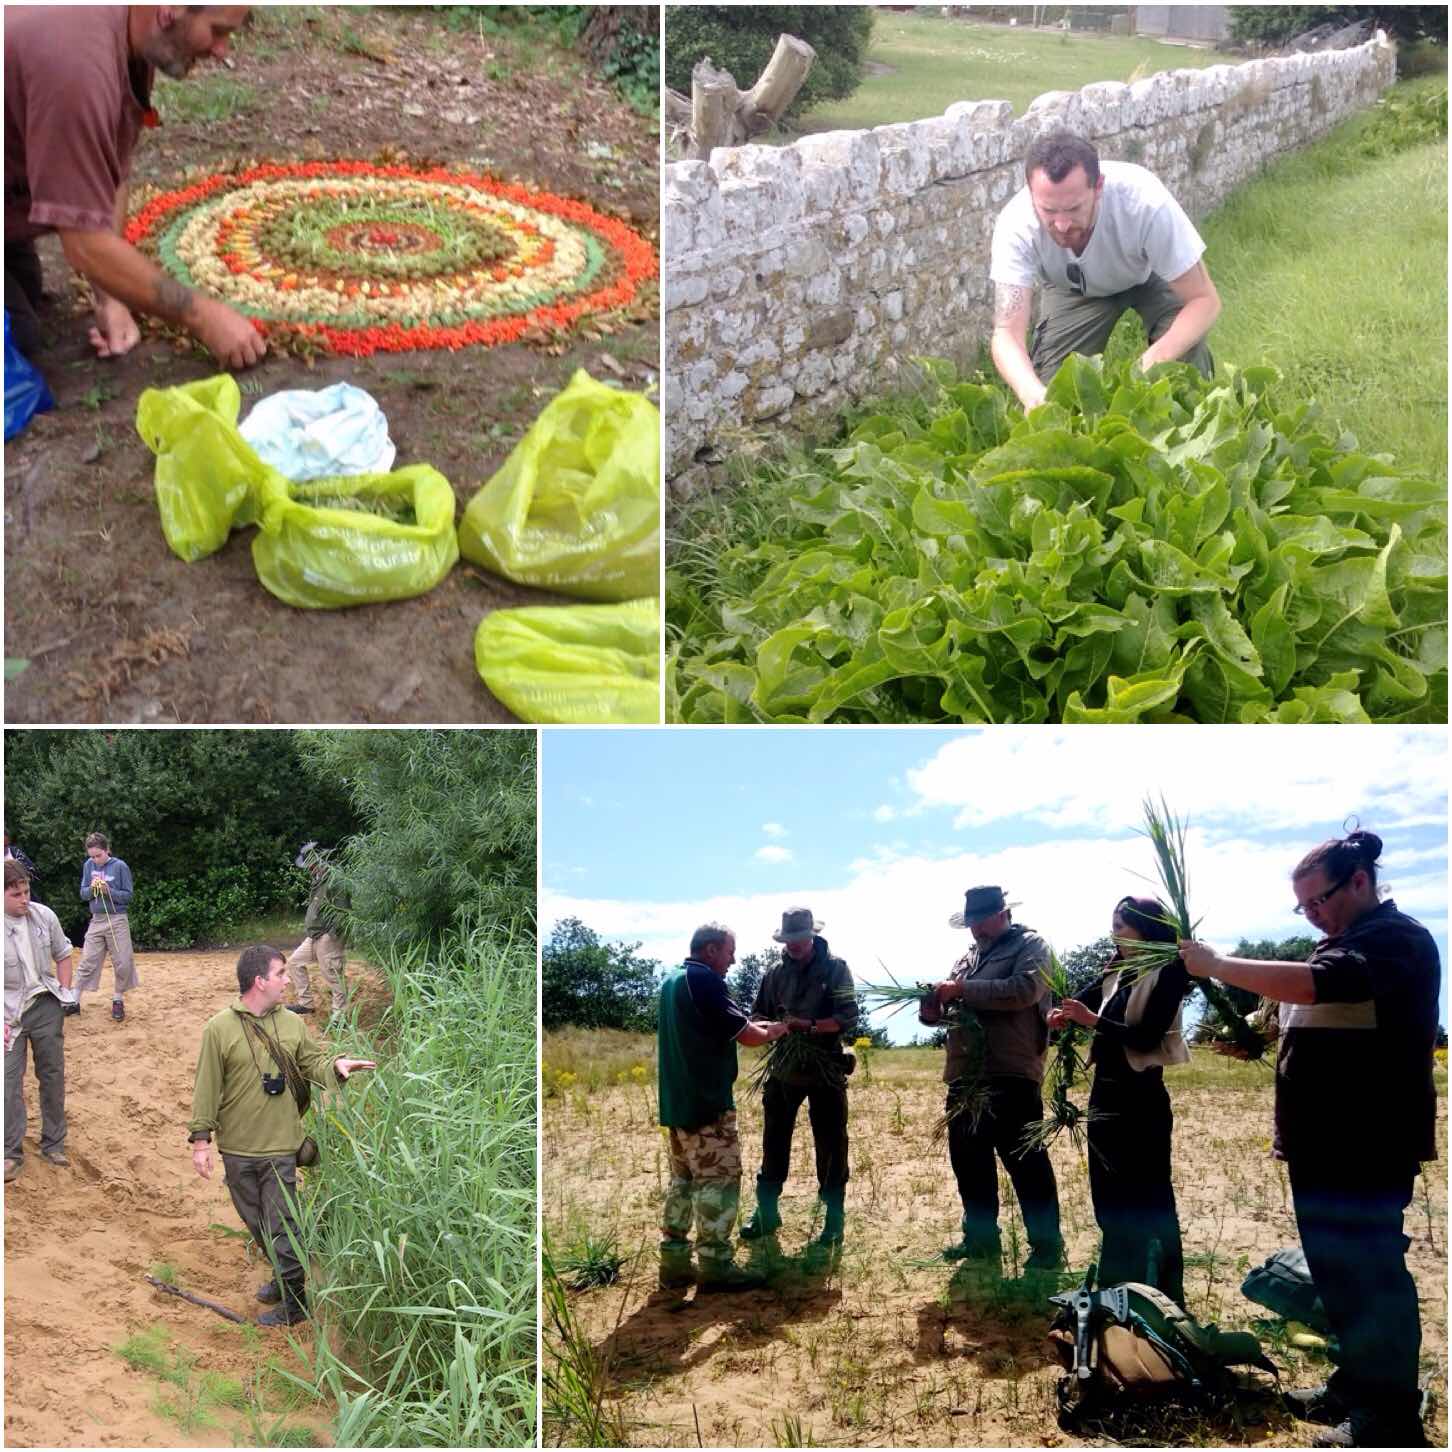
A key attraction that the Moot has is of a place of learning. We have many highly experienced instructors that come along each year to teach. This can range from creating natural art, foraging for edible plants, understanding how everything interacts and using natures raw materials to make useful items.
Great instruction
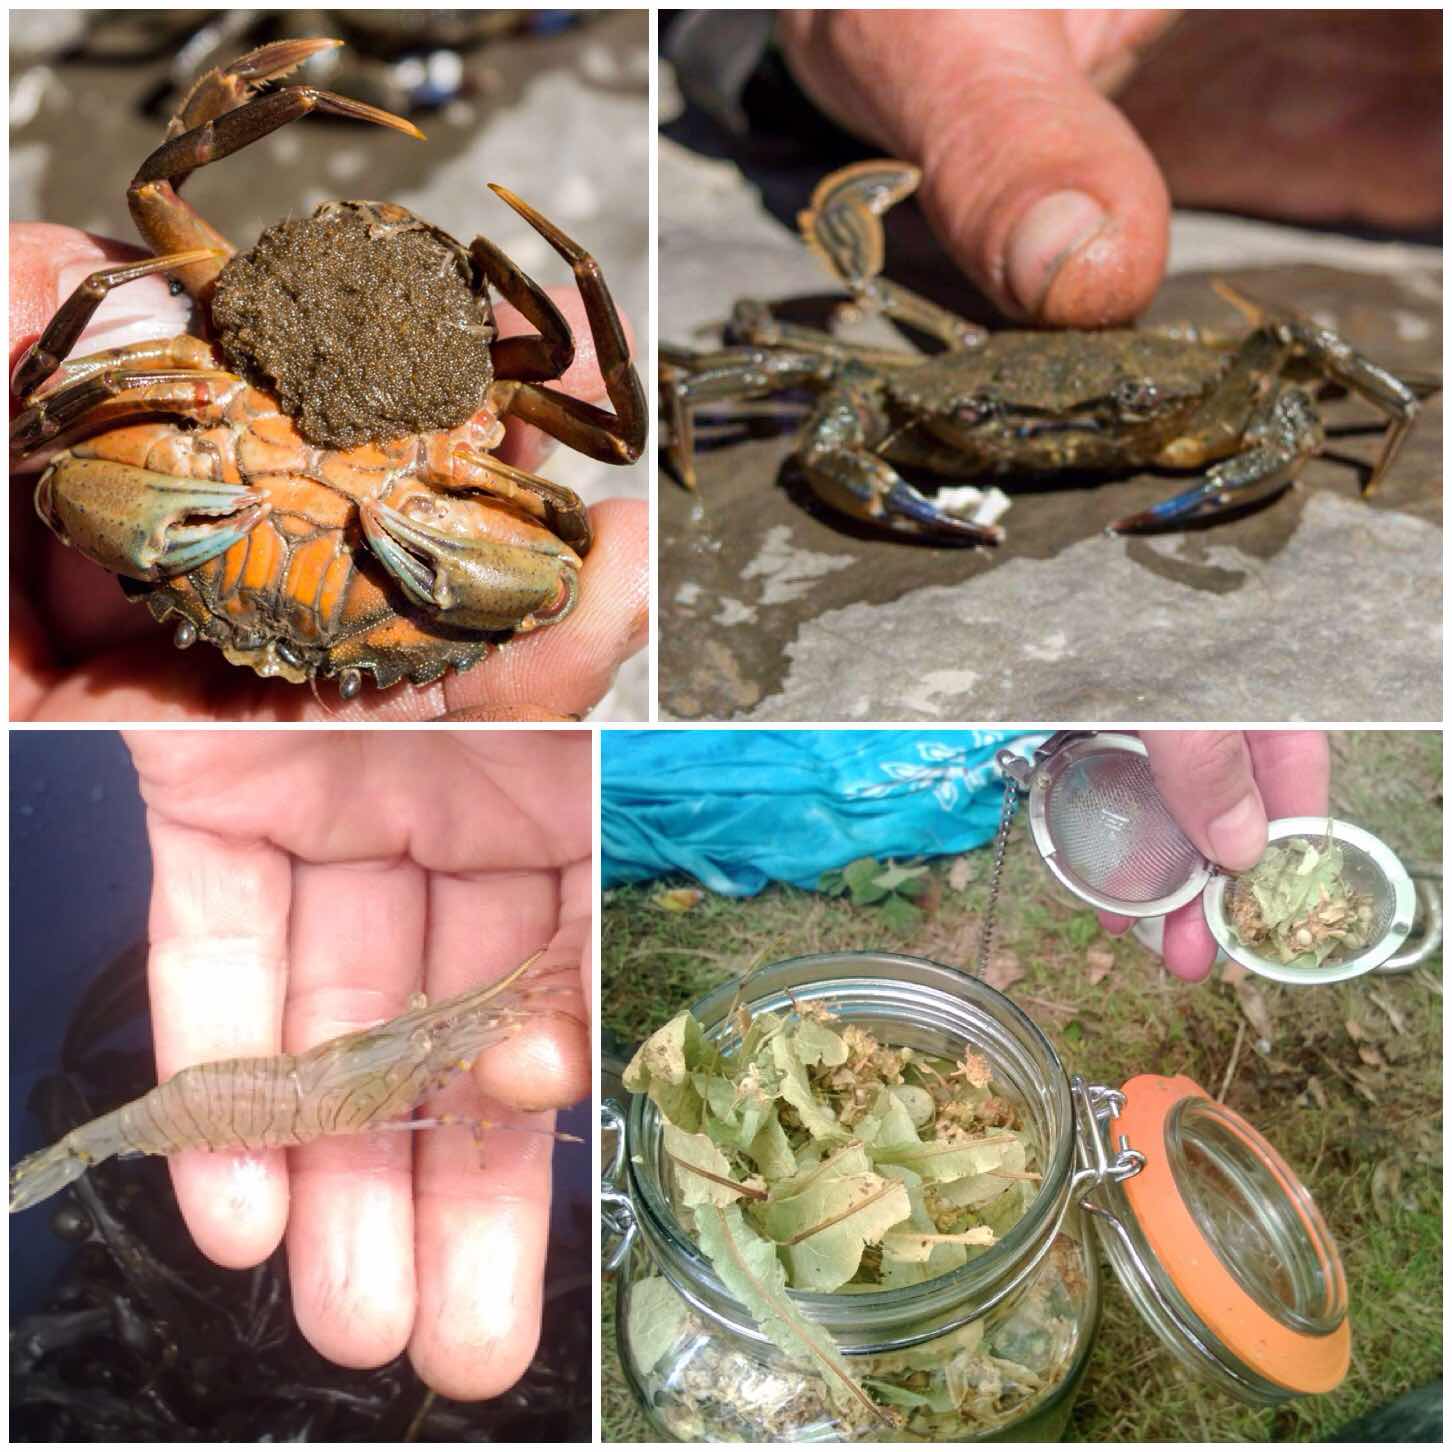
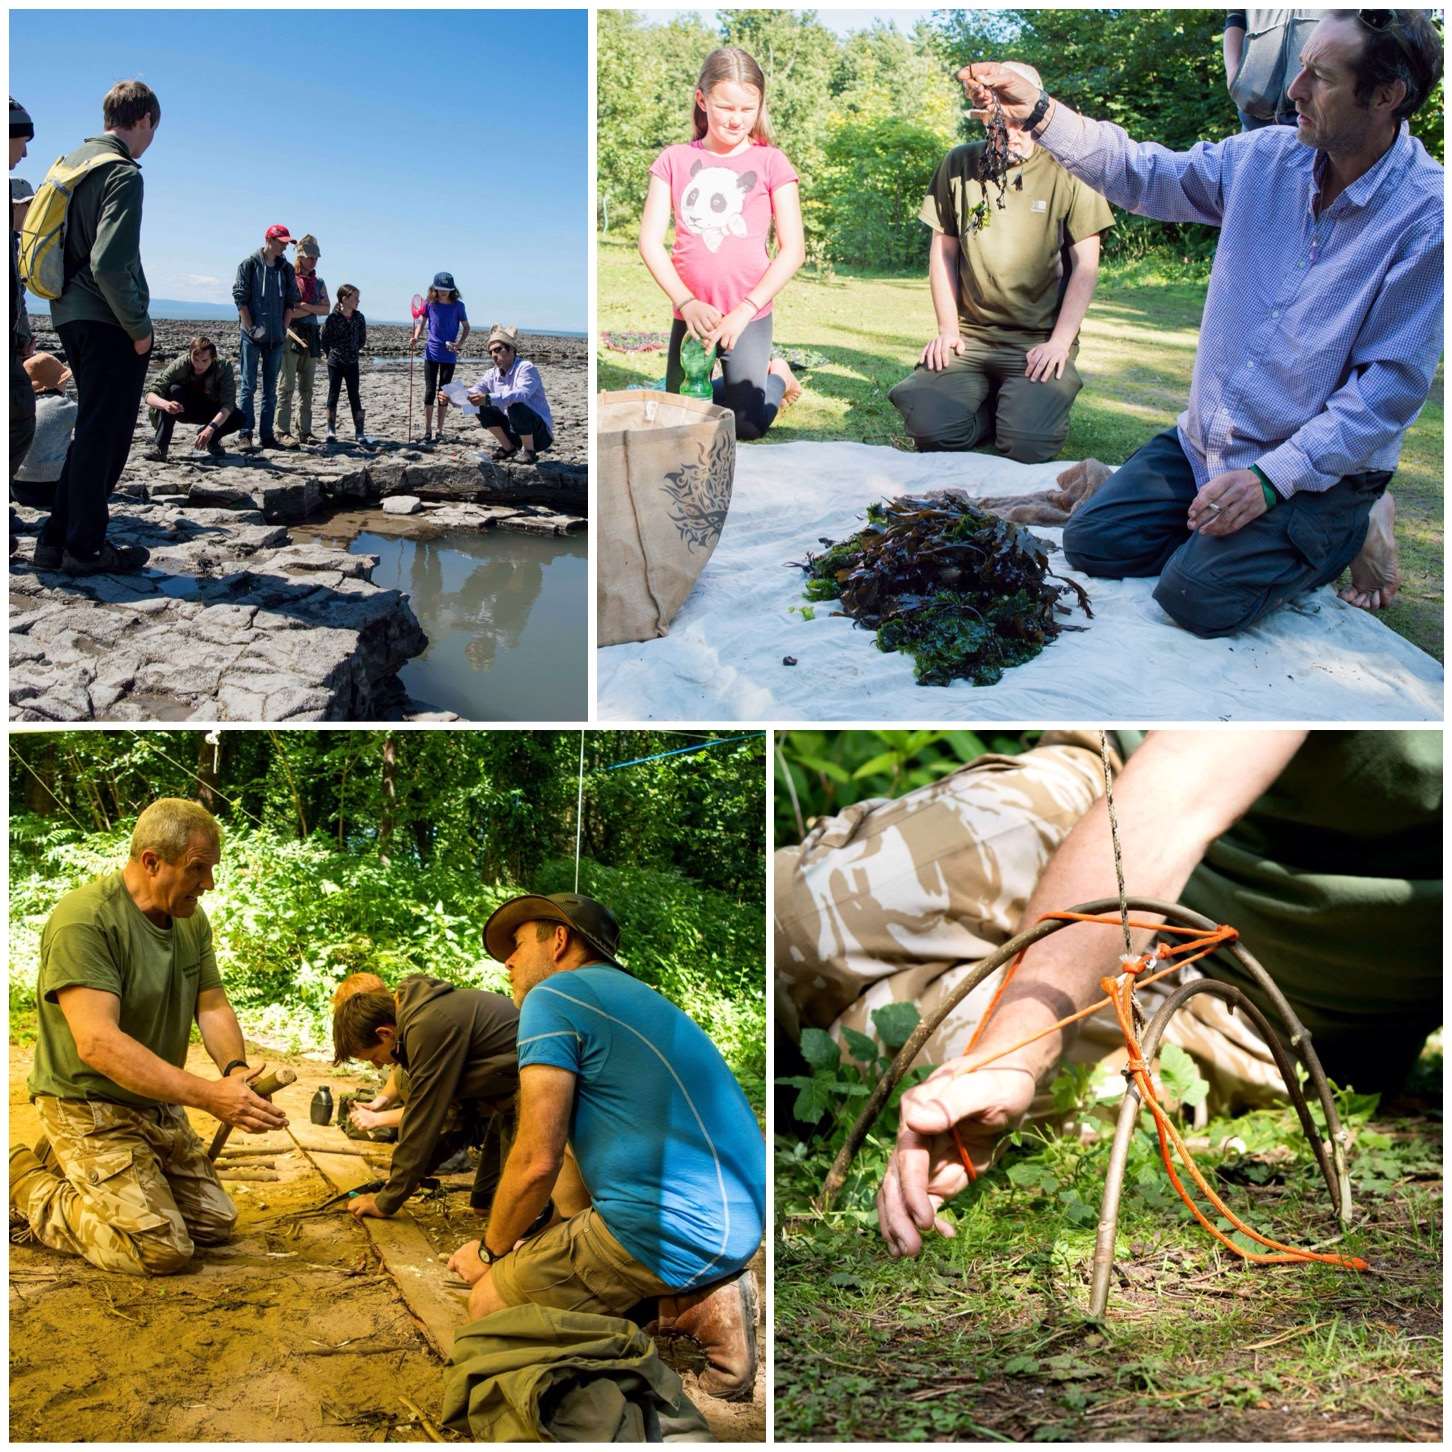
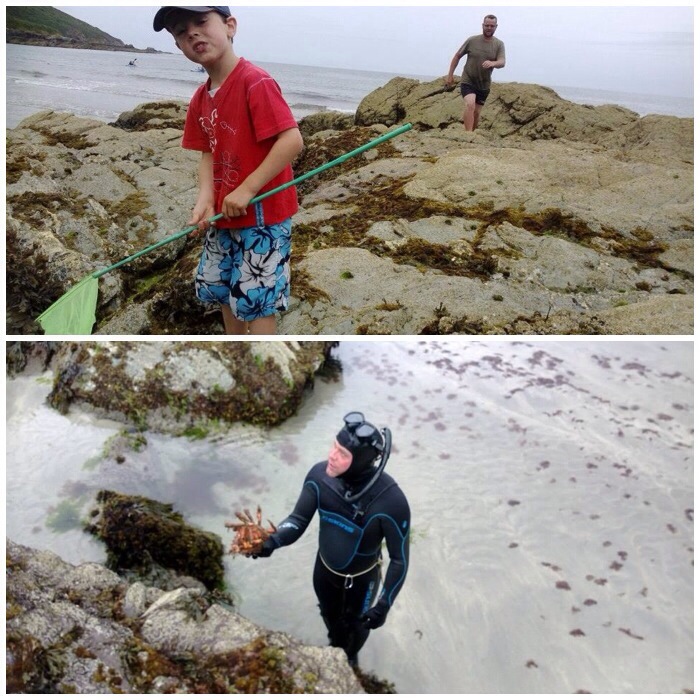
Part of all this learning is to know when to forage and when not to forage. In a class with Fraser from Coastal Survival this year we foraged on the coastline. We looked at many of the crabs that could be found in the rock pools and returned the many smaller ones or ones carrying eggs to where we found them. There were plenty of big crabs and shrimps though to harvest for the pot.
We also forage for lots of plants that make great teas.
To forage or not to forage
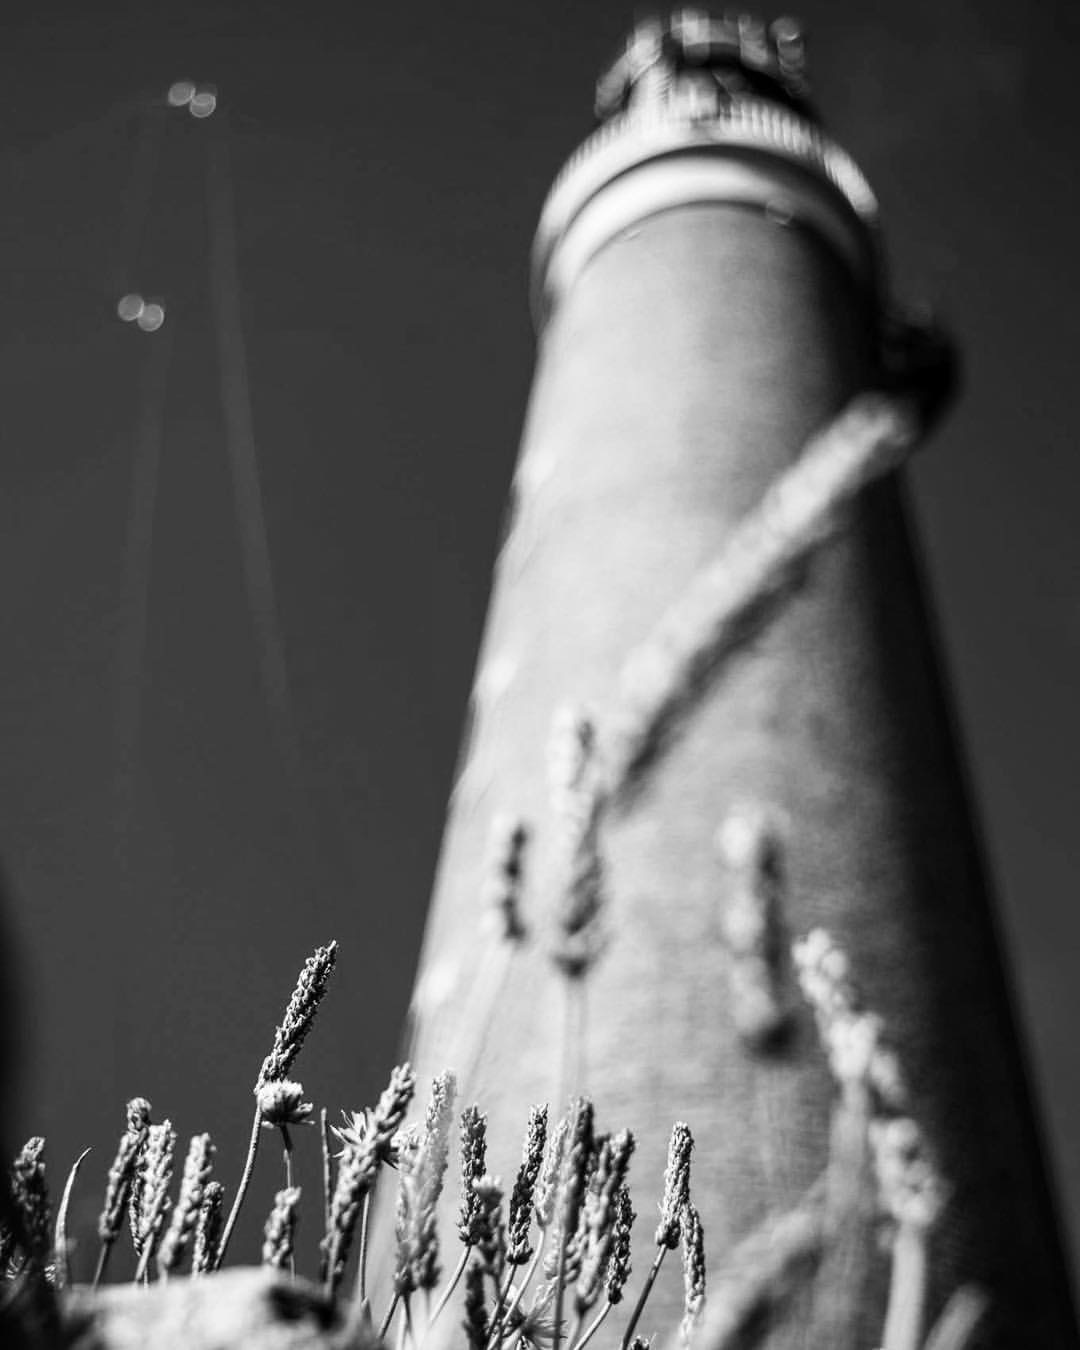
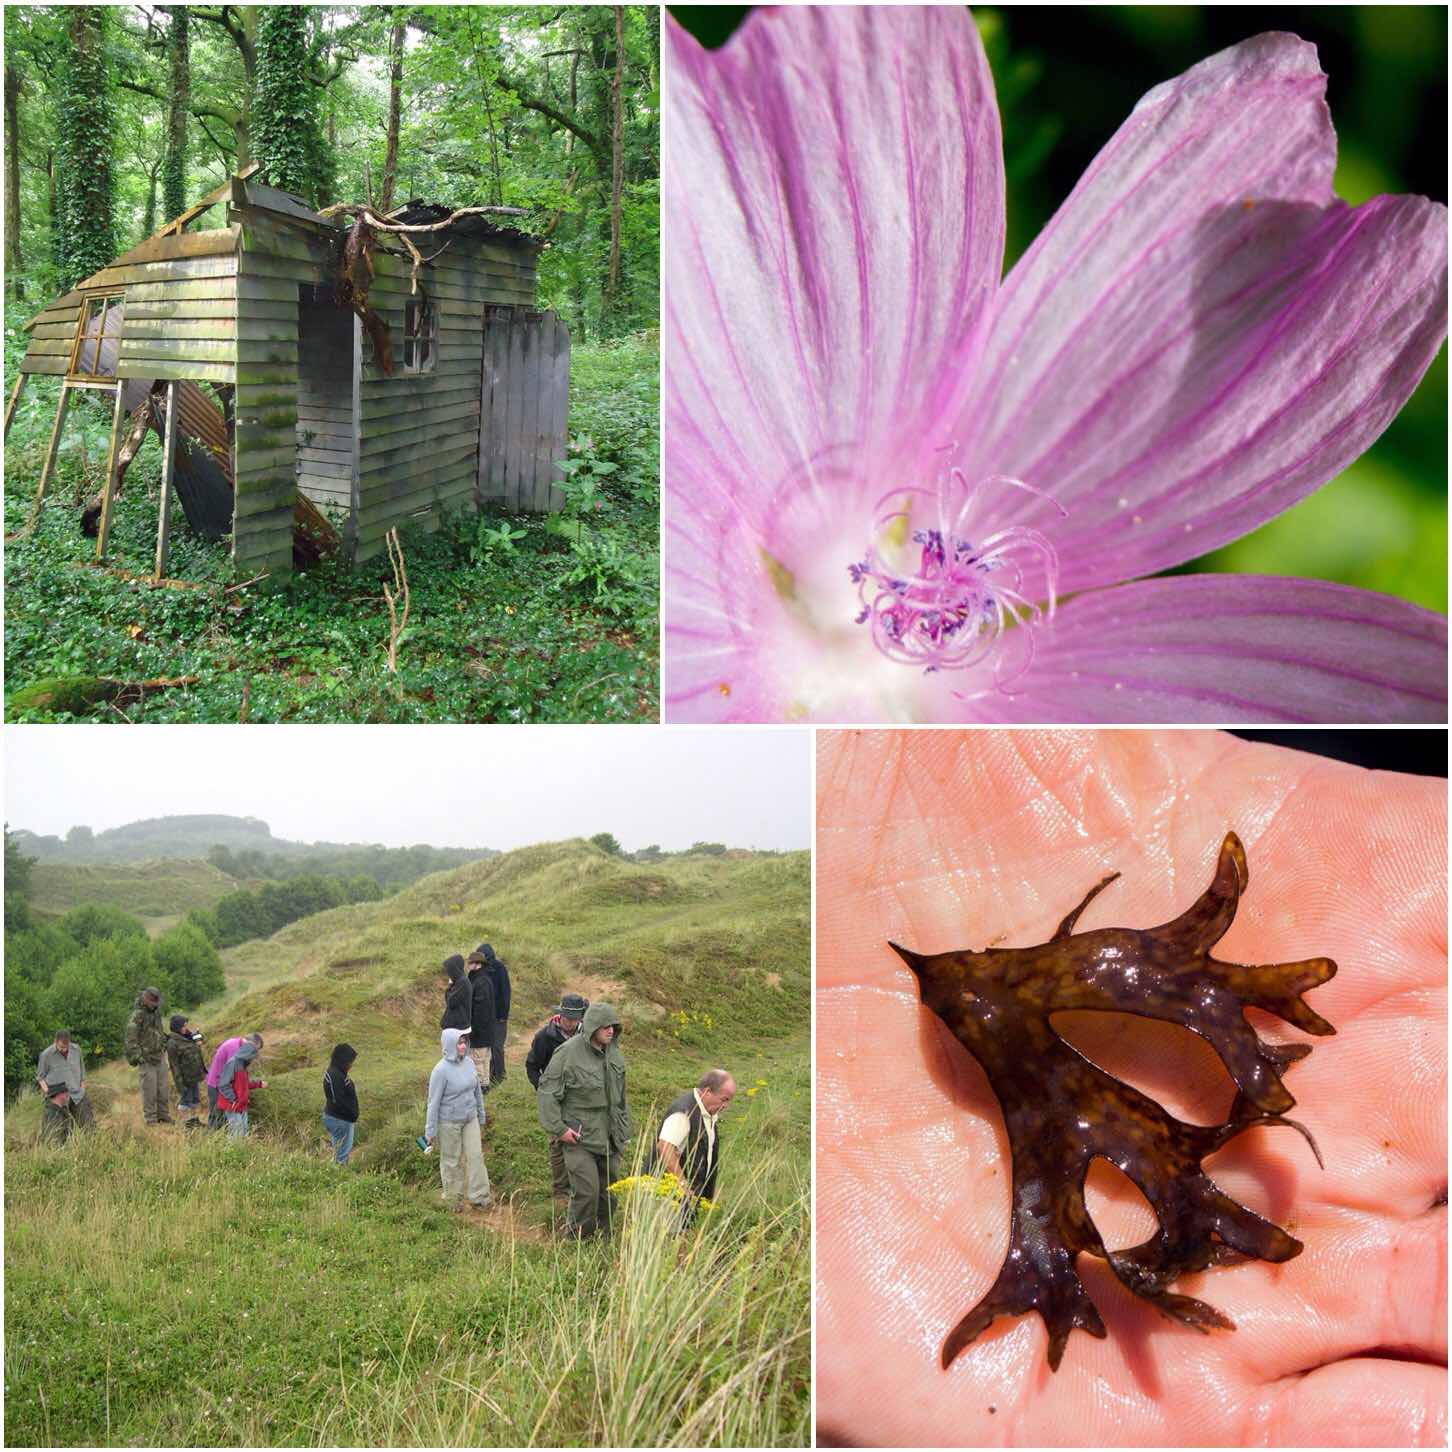
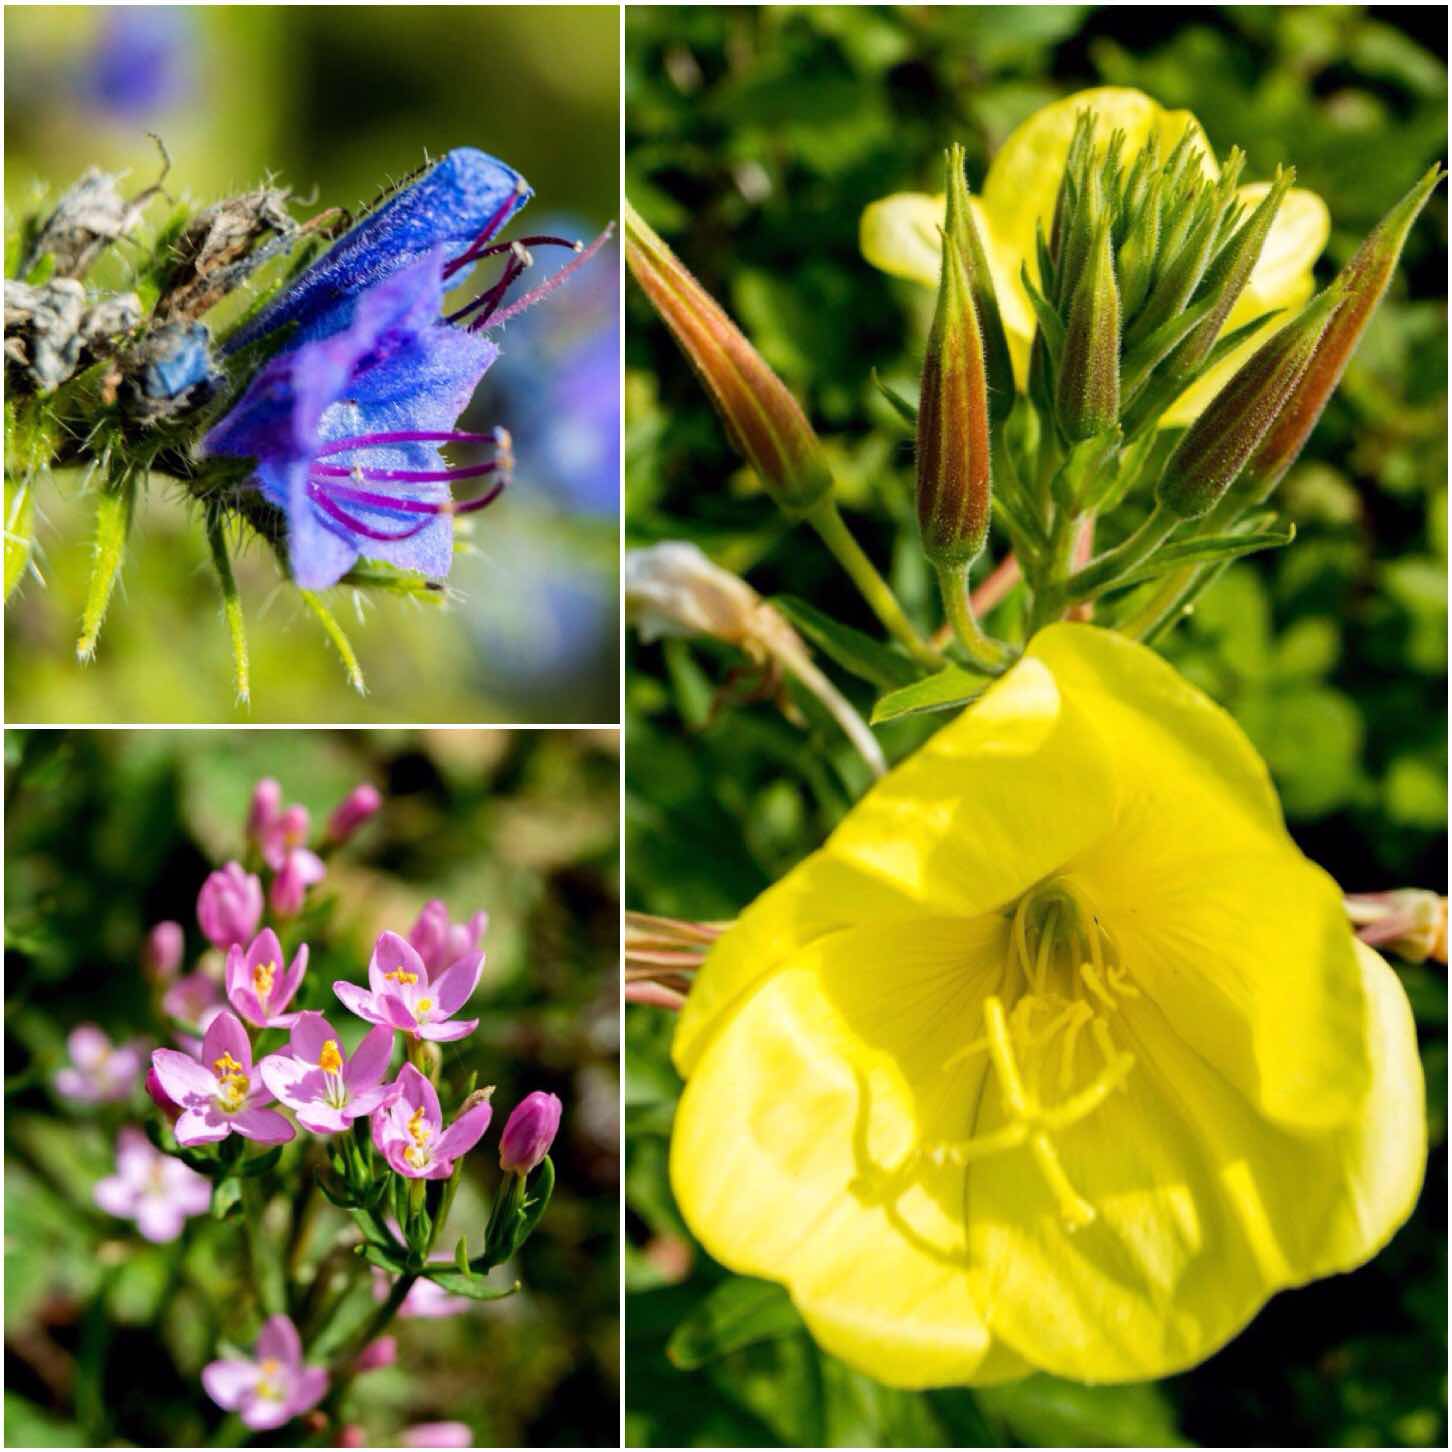
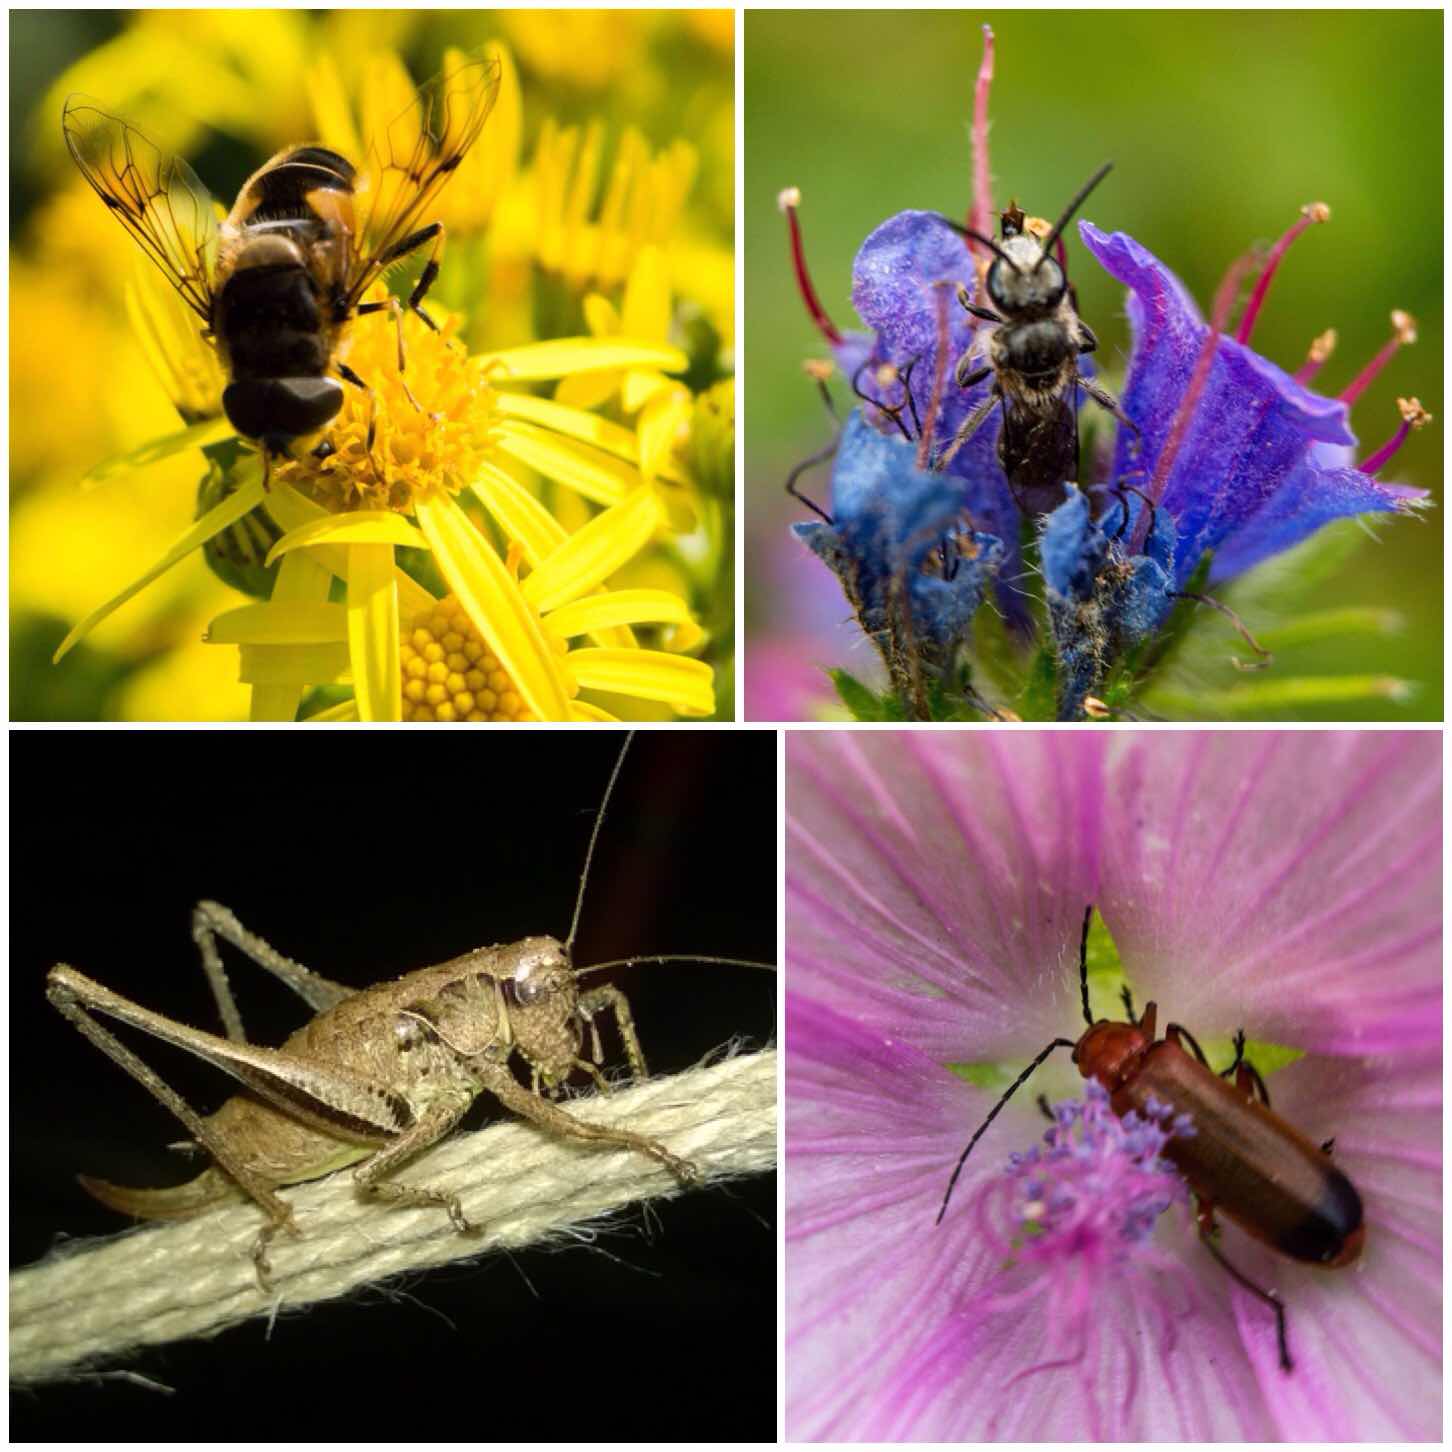
If you like wild flowers then the Moot is a place to go to see them. Take a wander along the edge of the wood by the dunes and you will spot some real beauties like the Vipers Bugloss, Evening Primrose and the Common Centaury.
Stunning flowers
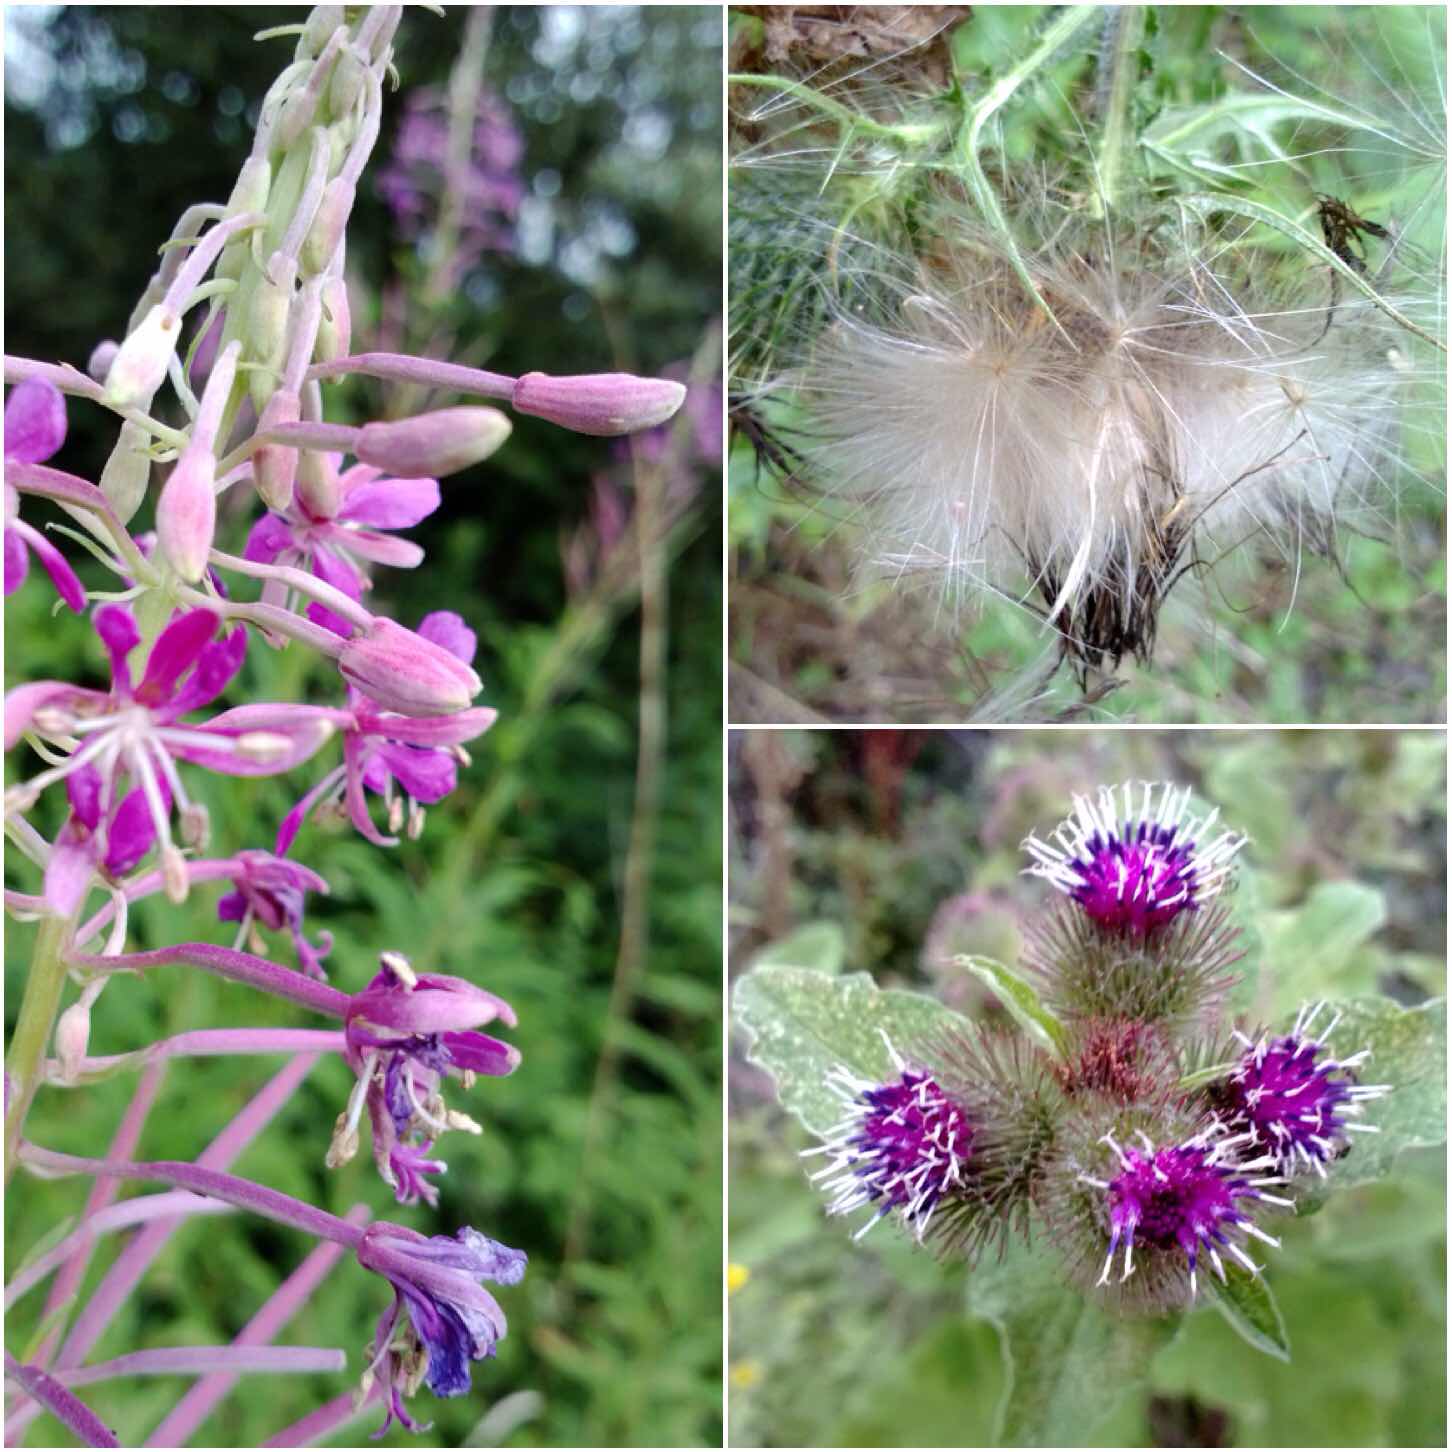
Bushcrafters like to forage plants that they find useful and there are plenty of plants to be found here like the Rosebay Willowherb, Thistles and Burdock.
They are beautiful in their own right when in flower but it is for their uses that I look for them.
Willowherb is known as Fireweed or Bombweed and Paul Kirtley has written an excellent piece on this plant – Rosebay Willowherb: Taking The Pith
Thistles come in many varieties and I like to collect the downy seed heads for use as an ember extender. A good source of information on this plant can be found on the Eat The Weeds site – Thistle: It’s That Spine of Year
The final picture you can see at the bottom right is the bushcrafters old favourite – Burdock. As well as having an edible root at the end of its first year I collect the second year stalks to make hangers for my kit. I wrote a post on this last year – How To…. Make a Simple Burdock Hanger
Bushcrafters plants
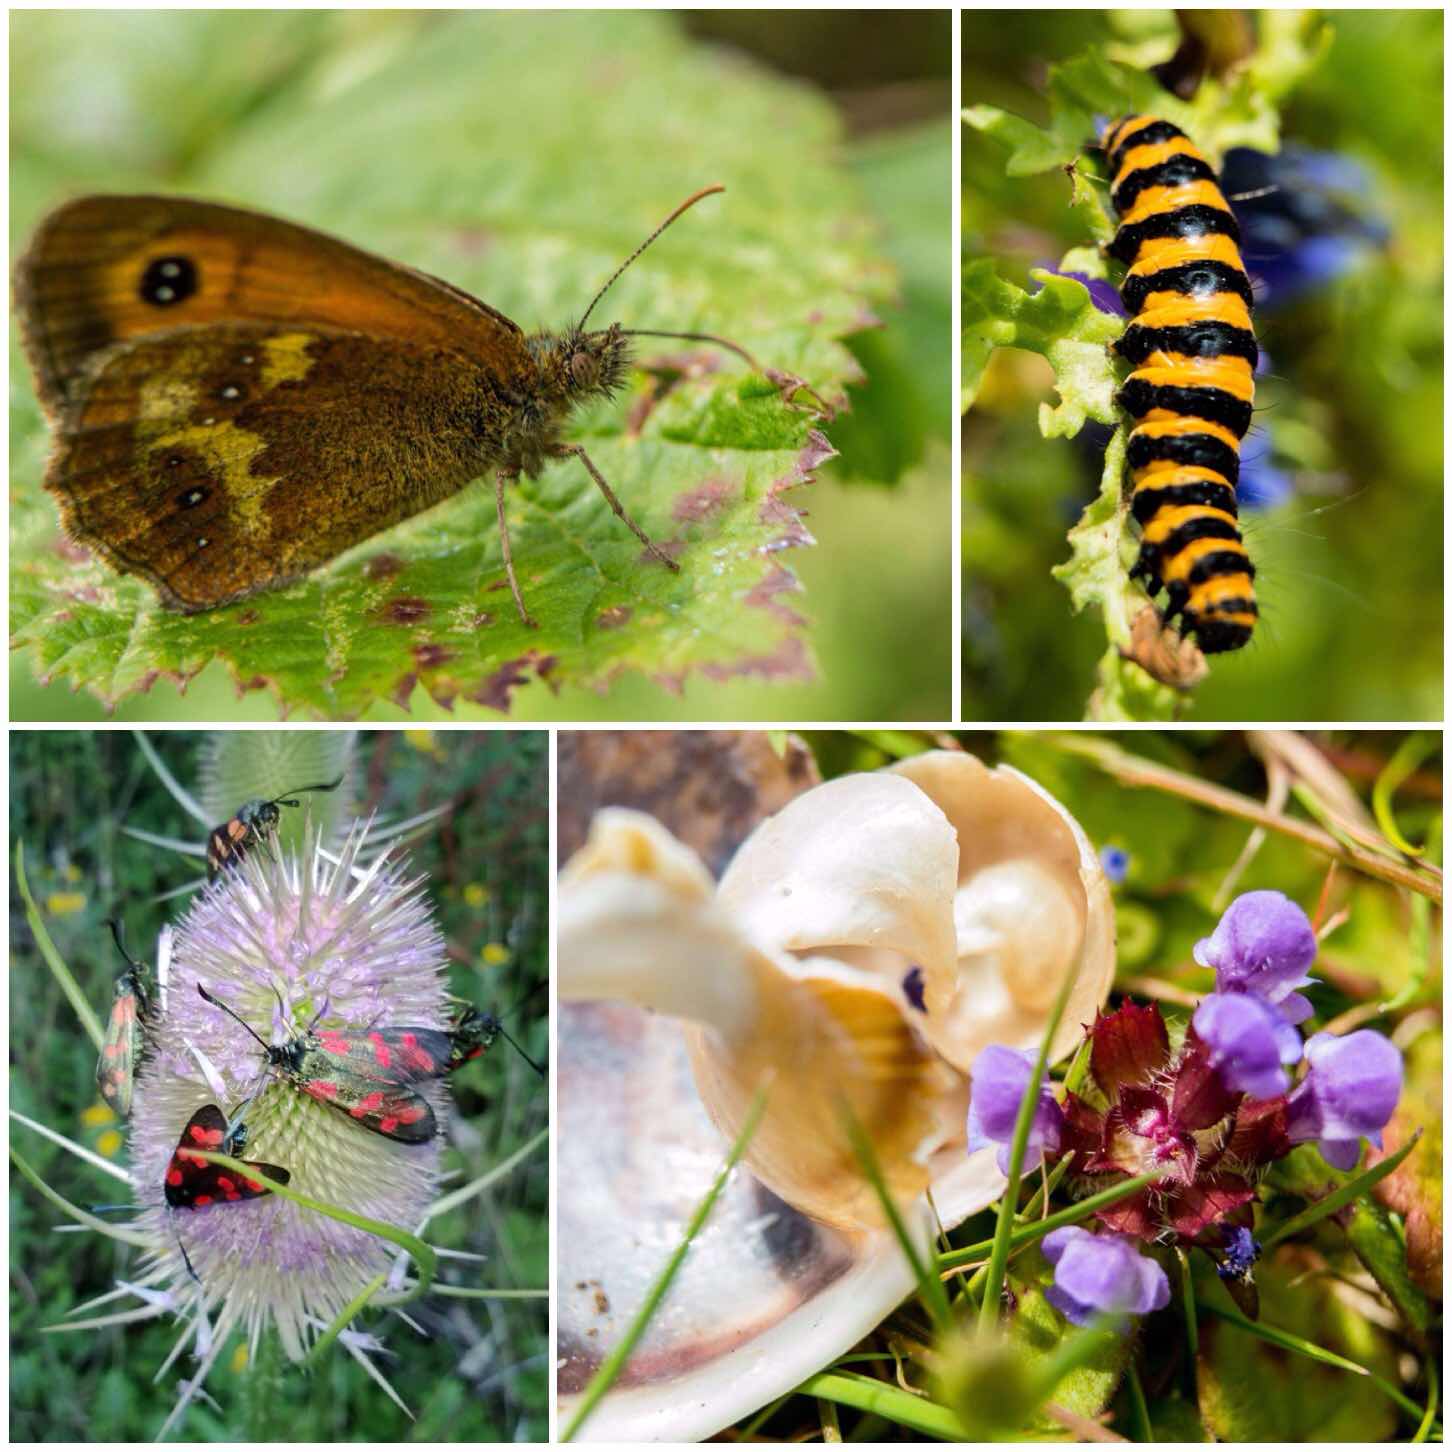
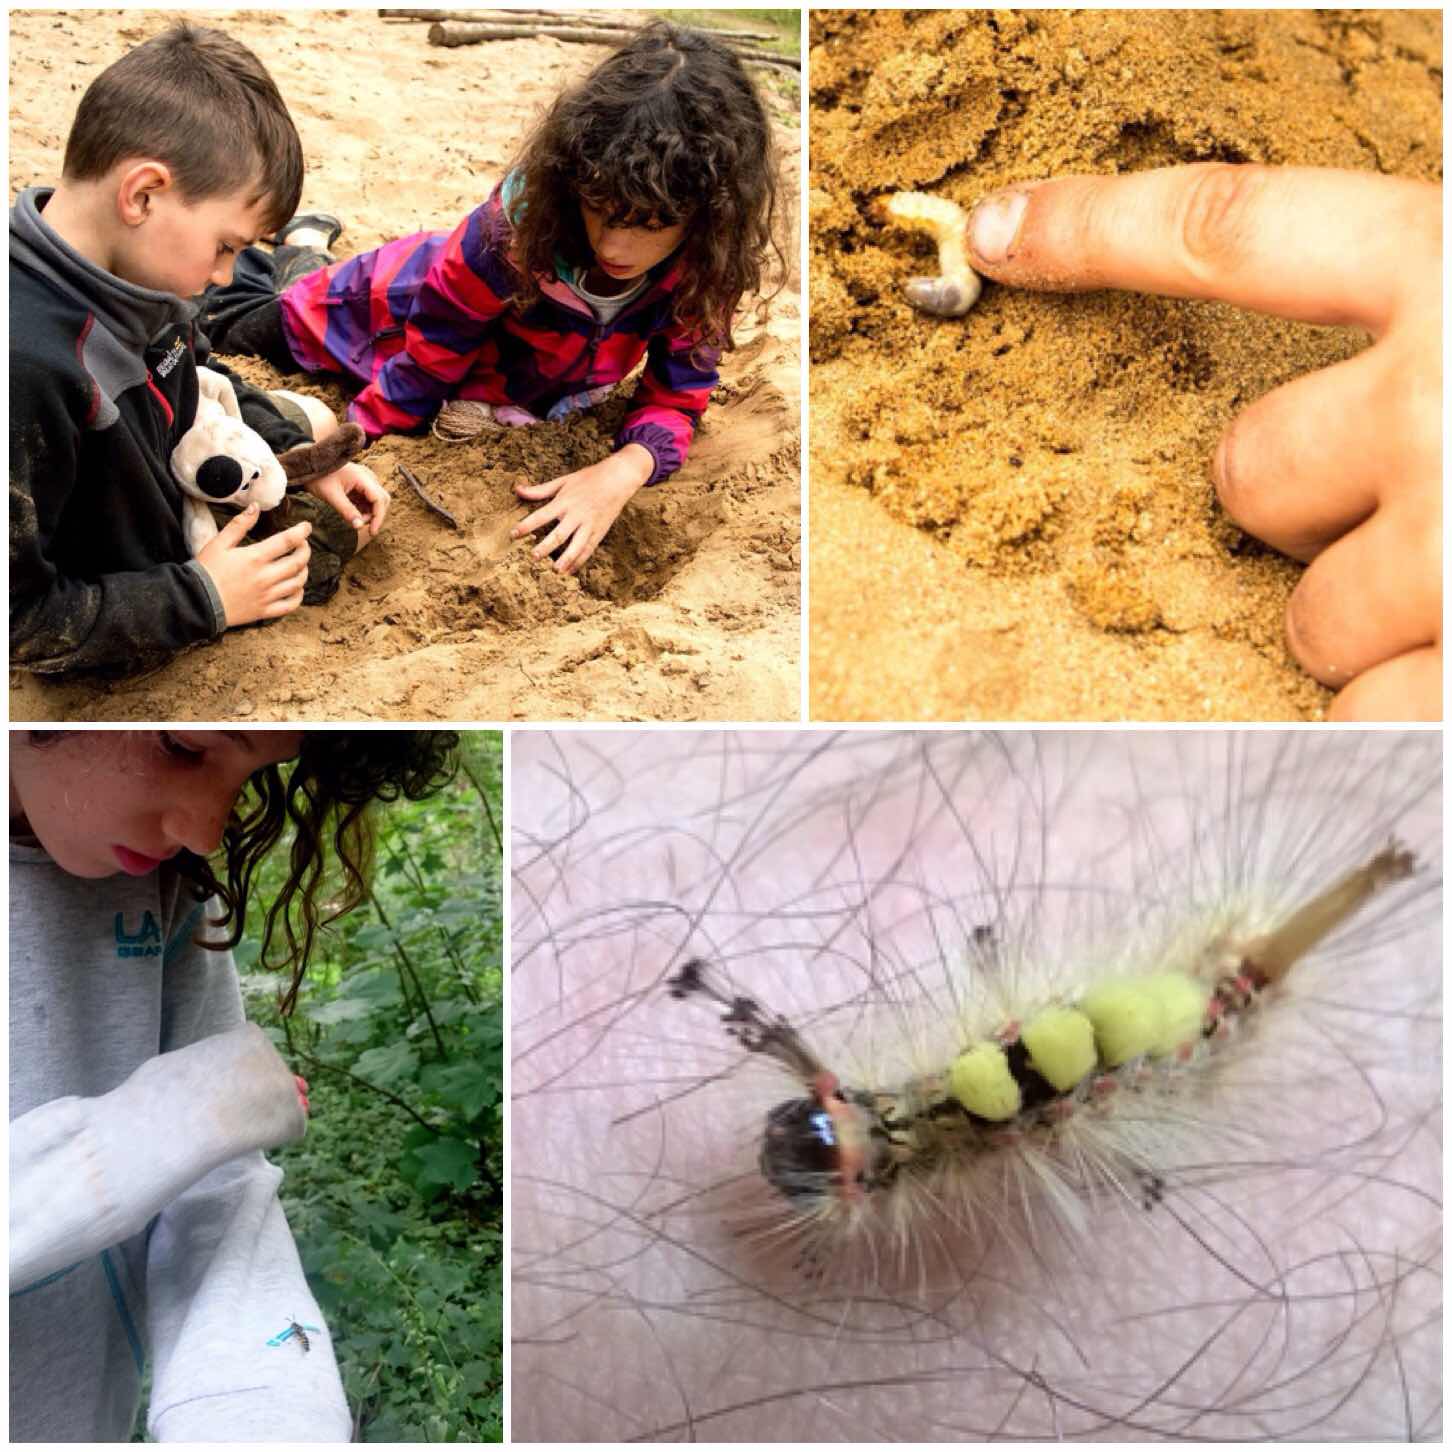
I like to do a bit of Macro photography from time to time and there is plenty of scope to do this at the Moot with plants and insects. Below are just some of the shots I have taken there recently showing the cycle of life.
Below you can see the lovely stripes of the Cinnabar caterpillar, the delicate features of what I think is a Meadow Brown Butterfly sunning itself, the busy life of the feeding Six Spotted Burnett to the beauty of a discarded snail shell.
The Cycle of Life
Children and adults can be put off by insects however with a little bit of play and observation you can soon learn to live alongside insects.
My daughter had a real dislike of wasps before coming to the Moot but now is quite intrigued by them. The caterpillar you can see in the bottom picture dropped onto my friends arm one day. He was quite beautiful to look at but thankfully not poisonous in any way.
Observing
I love to photograph insects and they come in many forms at Merthyr Mawr.
A Bugs Life
A skill I learnt a couple of years ago from Perry McGee of the National Tracking School was the art of Dowsing. Perry taught me this in minutes and I was able to located water sources and even follow a buried hose. I do not know how this really works but it is a force of nature that intrigues me.
Unseen Nature
Whatever interests you about watching or interacting with nature the Moot is a place to do that.
I love to photograph what I see and I have found a great place to do that at the Moot.
One thing that the BCUK Bushmoot is renowned for is its kid friendly environment. The Moot provides a massive playground for both structured (by lessons) and unstructured learning (through play).
As I grew up as a kid on the Isle of Lewis I would head on out in the morning to find adventure and return home when my stomach demanded attention. As I live in a village now that has busy roads running through it the Moot is one of the few places I know of that I am happy for my kids to go out and make their own adventures as I once did.
Bushmoot Fun
We stress that parents are responsible for their children however we encourage a sense of adventure. I let my kids run off and play within the main area of the Moot site and under adult supervision on the massive expanse of the sand dunes of Merthyr Mawr.
There are plenty of woods, dunes, trees and buildings to explore in the area around the Moot to satisfy the sense of adventure in any kid.
Adventuring
There are workshops specifically for the kids and other workshops where they learn alongside adults. Kids are encouraged to attend the Starter Course we run for anyone new to bushcraft or looking to work on their basic skills.
These basic skills include learning about knots, fire lighting, carving and safely using a saw (to name just a few). Wherever possible I like to get the kids learning these skills alongside their parents so that they can work together later as a family. Kids under 16 are allowed to use knives and saws however they must be under the supervision of an adult when they are using them or carrying them.
Key skills
Even in this digital age of the xBox and the Playstation kids are always attracted to sticks, be that the Atlatl, bows or staffs. I like to think that the classes we teach kids bring some of that make believe digital world to life without any of the violence or gore. We always teach the kids to treat these tools with respect and only to use them when permitted.
Historical learning
My good friend Fraser Christian of Coastal Survival has been coming to the Moot for a number of years now. Fraser is always keen to teach kids in his classes. Some of his courses include campfire baking, net making, coastal foraging and survival training.
Fun with Fraser
One thing I love about the Moot is that it is situated on sand dunes that have over the years become a woodland. This makes for an amazing place to launch yourself of heights or climb trees. Natures own playground you could say.
Hanging Out
There are lots of activities aimed primarily at the kids from treasure hunts with our resident Pirates under the leadership of Cap’n Badger, to craft courses and games.
One of the games I run from time to time is a stalking game. Below you can see the kids trying to leopard crawl up to get some sticks without being soaked. This is a great game to teach kids all about their senses and in particular about staying quiet in order to see more wildlife around them.
Games
For many a year now we have had story telling sessions around the fire of an evening for the kids (and adults too). Womble is a great story teller and keeps the kids captivated with his interactive stories.
The Moot organiser is Tony Bristow and depending on the dates of the Moot his birthday sometimes falls during it. It usually is a time to bake a cake and dish it out. Needless to say Tony gets a little piece however there are many hungry little ones looking for their share 🙂
Stories, Cakes and Pirates
The Moot is for kids of all ages be that young at heart (yes I mean you Spikey) or taking their first steps out in the adventure of life. My kids love coming along to see their ‘Moot friends’ and I hope they will continue to do so for years to come.
Kids – Young and not so young
Looking at the BCUK forum I see that there is talk already about organising activities for the kids for next year.
My search to find and document as many different campfire cranes brought me to this simple type of dovetail crane. I first came across this idea from a blog post by Ken Cole Jr on the Scout Pioneering site. I expanded on their idea with adding an adjustable pot hanger to the crane.
It is similar in concept to the Cooking Crane I documented previously except that the socket on the upright is created by cutting into the side of it instead of through the middle of the upright. This leads to a far quicker construction time.
Simple Dovetail Crane
I also like these vertical campfire cranes as there is little for people to trip up on around the campfire and like my previous post on the adjustable dovetail crane this simpler version is built using just a single pole.
Trimming
I used a sycamore pole on I had on hand trimmed it into two pieces using my folding saw.
One pole trimmed to size
The larger pole you can see below was destined to be the upright and the thinner piece was to be the cranes arm.
The arm
I started work on the arm first carving a triangular end on one side. I took my time here to make all the sides even in shape.
Carving the triangular bed of the arm
Once the arm had the correct shape carved out I used it as a template to mark out the dovetail socket I would cut into the upright.
The upright
It is worth the time doing this as you want to produce a socket that the arm will fit into snugly.
Using the arm to score out the shape of the socket
Once the shape had been marked out with my knife I used my saw to cut into the upright, one on each side and then a couple of cuts through the middle.
Roughing out the socket
I used my knife then to carve out all the loose excess wood and to smooth all the sides out.
I continually kept trying to insert the triangulated end of the arm to see if it would fit. As I wanted to keep as much wood on the arm I just used my knife to keep carving of more wood from the socket area on the upright to enlarge it. Eventually the arm was able to be inserted into the socket and released without too much force but still fitted snugly.
Finishing with the knife
To finish the upright I chamfered the top so that it would not split when I hammered it into the ground and carved a strong point on the other end.
Chamfering and pointing the upright
I hammered the upright and checked to make sure all the angles looked good. I like to have my crane uprights to have a little lean away from the fire but not too much as this could cause the arm to swing when it had a heavy load.
Checking the angles
Hanging the pot hanger
The arm needs a little flat platform carved on the end with a little dimple in it the pot hanger to balance on. I have explained in a previous post on carving an adjustable pot hanger on how to make one of these.
Just make sure that you carve the flat platform on the correct plane in relation to how the arm fits into the upright – I used the triangular end as a guide for this.
Carving the pot hanger end of the arm
You can see in the picture below the end of the arm has a slightly flattened surface and a slightly curved surface underneath it.
Completed
If your pole is long enough you could carve your pot hanger from it. In this case I had plenty on hand so just used one I had made before.
Testing
You can see in the picture below how the pot hanger sits on the tip of the arm in the little dimple. It looks very fragile but it can hold a lot of weight if everything is carved properly.
Attaching a pot hanger
I decided to shorten the arm of the crane as it bent a bit with the weight of the full kettle so rather than cut the end with the dimple I just extended the triangulated area of the arm so that it could be adjusted easily(I did trim the back of the arm later).
Shortened arm
I was quite happy with the arm being this length for the weight of the full kettle.
I also brought out one of my Dutch Ovens and filled it with water to test out the crane. I decided though to carve another shorted arm so that it would stand up to the extra weight better.
A full kettle – little bend in the arm
This shorter arm did bend a little bit but it did not break. Just to make sure I left the pot hanging off the crane for two days without any problems.
Shorter arm for a heavy pot – more pronounced bend but still workable
I took the crane to a Sea Cadet camp last weekend and it was used all weekend to keep the kettle on the go. There were a lot of staff around the campfire most of the time but due to its minimal footprint the crane did not get in anyone’s way.
Kettles on
I really like this crane for various reasons, these being it is simple, quick to make, tidy and strong.
If you have never made a crane before I recommend this type as one to experiment with.
The Bushmoot(referred to generally as the Moot) is an annual event here in the UK and for many years now has taken place at Merthyr Mawr in South Wales. The name Bushmoot comes from the word Bushcraft (as popularised by Richard Graves and Mors Kochanski) and the Saxon word Moot (used to describe a gathering of people).
I like the Moot as it is a gathering of like-minded people with a multitude of skills to share with each other. Not only can kids run free and have fun but so can the adults and I am a firm believer in learning through fun .
Fun learning
I am writing 10 blog posts on the Moot this year and this first one is on the theme of Learning. I tried to write just one post however I really struggled to choose just a few pictures out of the many hundreds I took. My wife Alison suggested a number of short blog posts on different themes from the Moot and so here we are.
A couple of well-attended courses nowadays are the Startercourse (a full breakdown of the course can be seen here on the BCUK site) and the Spoon carving course run by Dean Allen. Alison and our kids did the spoon carving course this year with Dean and carved their very first spoons.
The basics
I managed to fit in a few courses this year and did a cracking traps course with Perry McGee.
The Moot is usually run over 2 weeks with a core 5 days in the middle where many short courses (2 hrs to 1 day) such as fire making, bow making, spoon carving, tarpology, knife safety, axe work, net making, cordage making, bread making, foraging, atlatl making and knotwork, to name just a few, are run.
There are other longer courses run either side of the core days (with an additional fee) such as an accredited First Aid course, Bhutenese bow making, coastal survival, tracking and lobster pot making with willow.
Fine detail
Many of the courses are based on using different materials, from basket making, pottery, sling making to learning about different knots.
I enjoyed running the ‘show and tell’ workshop on campfire cooking constructions and observing the father and son bows being made.
Working with wood
One of the things I love about the Moot is the sharing of knowledge such as how a stove was constructed or that Ikea make good quality drying racks that double up as brilliant cooking grills.
A bit of metal
A favourite of mine is the art of fire making. At the Moot you can learn about making fire with firesteels (old and modern), bowdrill, handrill, with damp tinder, pump drills and in many other ways.
Flamage
Shelter building is a big subject and is covered well, from simple tarps and debris shelters to large group tarps, permanent constructions and the magical art of tarpology.
Shelter in many forms
There are many other courses to attend at the Moot with new ideas coming up each year. I have found that the Moot has really broadened my knowledge of all things Bushcraft over the years and I expect will continue to do so for many more to come.
Catch up time again – I ran a bushcraft course with my colleagues Charlie, Dave, Cliff and Alan for the Southern Area Royal Marines Cadets last June in the military training area around Aldershot here in the UK.
This is an excellent area with lots of woodland to roam around and learn about the art of bushcraft.
A great bushie weekend
I wrote three short articles about this weekend back in June for the Wildlife Trusts 30 day Challenge I undertook however this is the full report on the weekend now.
Set up took most of the Friday and we were joined by a number of the Royal Marines staff so it did not take too long.
Setting up the HQ
I wanted the cadets to experience sleeping in hammocks so brought a dozen or so along. They took a while to set up but it was worth it in the end.
A dozen tarps and hammocks to put up
The cadets arrived in the evening and after a safety briefing, some supper and a stroll it was time to bed down for the night.
Some cadets were in the hammocks and some under their tarps on the ground. It was a wet night however everybody was mostly dry in the morning.
Bedding down
We ran a number of classes starting with building different types of shelters, and looking at how the tarps and hammocks were set up.
Shelter building
The camp chores such as gathering wood and getting fires going were soon under way. At this stage we taught the cadets how to use firesteels to light their fires.
I had also brought a number of cooking rigs for them to try out. The one in the bottom picture is the Double French Windlass rig and is one of my favourites.
Setting up the cookhouse
I wanted the cadets to feel comfortable so we spent quite a lot of time setting up different apparatus for cooking such as this Broiling rig or just taking time to chill out (bottom left).
One rule I had made at the very beginning was that unless there was an emergency there was to be no running. Quite hard for Marine Cadets to do I know however the feel of the weekend was to be one of a relaxed atmosphere.
Learning the art of Broiling and doing nothing
So relaxed that magically some cup cakes appeared in Dave’s lap.
Charlie had a good time ponnasing some trout around the fire and it tasted equally as good as it looked cooking.
Taste comes in many forms
We spent quite a while learning about knife safety, battoning and carving. Then later in the evening Dave and Cliff ran a stalking game and Atlatl range.
Knife work, stalking and Atlatl
Once the cadets were bedded down the staff relaxed around the woodland TV to plan the next day out (and have a cupcake or two).
Some Woodland TV
I think you can tell by the happy smile on this cadets face that the hammocks were a success.
Morning all
Our resident master chef Alan soon had breakfast organised with plenty of sausages and bread on the go.
Brekkie time
Classes began again soon after and I ran the group bowdrill sessions. Every team that did this got an ember and successfully blew it to flame. No mean feat considering how damp everything was.
Group Bowdrill
We tried out the handrill however without success. The cadets and myself gave it our best shot but the conditions were not with us for this one so we went back to using the bowdrill.
Having a go at Handrill
Some groups also carried on with carving their butter knives. Some ended up as pointy sticks (teenagers tend to do this for some reason) however we did get a number of very nicely shaped and functioning wooden knives carved in the end.
More knife work and archery
Cliff ran another stalking game involving water pistols however they all failed to work so improvised with squeezy bottles instead (worked a treat so I will be using them in the future).
I had also brought along a number of Father and Son survival bows for the cadets to use on a short range and they were soon happily pinging the arrows down range.
Stalking and archery to finish
We had to pack up on the Sunday lunchtime so it was over before we knew it however it was a great weekend.
My aim was to show the cadets how to make themselves comfortable in the outdoors and to have fun so that when they went back out again to practice their field craft skills they would have a wider and better understanding of the nature around them.
May brings about City of London Sea Cadets‘ annual pilgrimage to the New Forest to remember the 1,415 crew members of the mighty Battlecruiser HMS Hood who lost their lives on the 24th of May 1941 and also to provide a range of adventurous activities for our cadets to try out in the beautiful countryside.
Our campsite was in the large Scouting site of Ferny Crofts in the New Forest.
HMS Hood Remembrance Service
This year we had a number of cadets from visiting units of ages ranging from 10 to 17. They were split into a class for the Juniors (10 & 11 year olds), a course on basic campcraft and one on more advanced skills. This weekend was also a chance for us to let the younger members of staff have a go at teaching outdoor skills to the cadets and which I was very happy to see worked out very well. We laid on a variety of classes including navigation rucksack packing, first aid, outdoor clothing, cooking and conservation.
Outdoor classes
For the Juniors the Saturday morning included a class on responsible firelighting. This was run by Charlie who is a fire fighter in his day-to day-life and is always keen to show the cadets how to light and manage fires in a fun but safe manner. Charlie had them using modern and traditional firesteels, and also had the cadets assisting him in creating fire by friction using the bowdrill method.
Bushcraft classes
Soon it was time to head out and about. The day was very hot so I made the decision to try and keep to the woods as much as possible. Even though it was hot, the ground in many areas was saturated, making for wet feet for some.
Out and about in the New Forest
Along the way we would stop to have an impromptu classes on navigation, conservation, first aid or leadership. As far as I am concerned this is the best type of classroom.
Classes on the go
A nice spot for us to stop for a restful break is the hotel near the Beaulieu Railway station. The cadets can relax or run around the small play park for a while while the staff can plan the evening’s activities. it is around this time that Simon heads off to prepare a great meal for everyone in the Roundhouse at our camp.
Rest and excellent food
After all the learning it is time to play and relax. The kids and staff all took part in the the tug of war and the volleyball games.
Fun and fitness
Someone managed to get hold of the water cannons I had brought along for bushcraft games and put them to good use in the evening as well.
Pure fun
After dark we had the usual marshmallows around the fire and I lit a couple of my Scandanavian candles. Dave though had brought along his laptop and small projector. he put a film on (Brave, I think) and projected it onto the inside of the parachute. The whole set up could not be filmed because of the dark and the smoke from the fire but it did work and kept everyone happy.
Nightlife
As my wife Alison was also away that weekend I took my two kids (Catherine and Finlay) along with me. They got on really well with all the cadets and Finlay managed to sleep all weekend in a hammock for the first time. Not bad for a six year old.
Sleepy mornings
As part of their Green Module the cadets learnt how to cook over an open fire on the Sunday morning and I was happy to sample the fare.
Campfire classes
We try and set up lots of events on the Sunday morning, some to really test the cadets and some to just have fun just like they are having on the Atlatl range.
Atlatl fun
Over the weekend one of the cadets turned 18 and so became a member of staff. We managed to get some cakes and candles together for a good old Happy Birthday sing a long.
Birthday celebrations
I have been experimenting with video over the last few months so managed to put a short piece together of the weekend.
While we were running around the woods on the Sunday morning Paul. Andy and some of the older cadets attended the HMS Hood Remembrance ceremony at Boldre church. In all my years attending this event (since 1999) I have never gotten to the church; I’m always left behind in the woods 😉 These are official City of London Sea Cadet pictures.
Remembrance
As usual I am looking forward to my trip to the New Forest next year. I also made a small video of what my kids got up to over the weekend.
The cadets knuckled down, worked hard, had great fun and made things comfy for themselves – that’s bushcrafting for you.
The end of October last year found me down at Crowborough Army camp in the Ashdown Forest. I set up a bushcraft area in the woods near for the camp to run a course to introduce some of our younger Sea Cadets to bushcraft.
Helping me on the weekend were Dave Lewis and Charlie Brookes (and at different times Christine Weston and Emma Deasy).
The weekend’s weather was pretty poor to say the least with a lot of rain and some quite high winds.
A team of hardened Sea Cadet Bushcrafters
The high winds were a concern for me so I told the cadets that sleeping in hammocks over the weekend was not an option. A few were upset but soon got on with things. The cadets ended up sleeping in their tents in the grounds of the main camp nowhere near any trees.
They had to set up the main tarps to work under, after a bit of instruction on knots they were left to their own devices and managed to get two big tarps up by themselves.
They had to set up their own campsite
Once the tarps were up the cadets had to collect dry wood from the surrounding area. As it had been raining heavily there was very little in the way of dry wood lying around so we taught them how to identify dead standing wood. Thankfully the woodland had been coppiced in the past and left untouched for many years so there were plenty of dead standing coppice poles in the area.
Once all the wood had been collected and graded it was time to play with some firesteels.
Learning how to use a fire steel
(NB The light levels in the woodland were poor and I only had my phone camera to hand so some of the pictures have been brightened slightly or have had the colours in them deepened slightly.)
Once they got the hang of lighting char cloth the cadets experimented with other tinders such as pampas grass and birch bark.
Practising using different tinders
Everything was very damp but the cadets persevered and eventually had two good fires going to get a hot brew on. As we were running the course in the woodland within the grounds of the camp all the cadets were being fed from the main camp galley. This freed us up to concentrate on different bushcraft activities without having to worry about getting food cooked over the open fires.
They kept persevering through all the rain
One of these activities was to introduce the cadets to a bit of safe knife use. After discussing safety issues and the legalities of using a knife, the cadets learnt how to carve themselves a small wedge. I like this simple activity as it involves using a variety of carving techniques.
Good knife safety was practised
The cadets practised cutting techniques safely, making cuts away from themselves and in front of them or off to the side. We spent a good hour trying out different cuts and everyone managed to finish their wedges.
Working well off to the side
The wedges were needed because the next lesson was about battoning – where you use your knife more like an axe to split small logs. I did a demonstration to the class showing the whole process and then we split into two groups to let the cadets have a go themselves.
I find battoning is best done kneeling down and with the use of a stump on which to rest the piece of wood that needs to be split.
The knife is positioned on top of the piece of wood at 90 degrees to the body and the back of the blade is struck with the ‘hammer’ (a small but weighty stick) so that the edge of the blade is driven into the wood. I published an article on knife safety last year that covers battoning in more detail.
Later we introduced the cadets to the art of battoning
Here you can see that the knives have been driven well into the wood and the wedges are now being used to widen the split further.
Dave and Charlie led one class while I led the other
The cadets got the hang of it pretty quickly and were soon splitting the wood down.
Using the knife and then the wedge to batton
Here the knife has been removed and the cadets are using the stump to help drive the wedge into the wood to split it.
Hammering the wood and wedge into a stump to split the wood
Later that afternoon we started on two shelters. Normally I would ask for volunteers to try and sleep out in them but due to the high winds I did not offer the cadets the option this time. The weather was quite cold, but this activity kept them moving and warm.
An early start to shelter building
It was not until well after dark that I called a halt to the shelter building but they did a good job and worked well together.
They worked well into the evening
Even though the weather was not kind to them and we worked them hard there was still time to play and chill out around the fire with a marshmallow or two.
Plenty of time to just play and chill with a marshmallow
We stayed a couple of hours around the fire before sending the cadets back to the main camp and getting our own heads down. All the instructors stayed in the woods with our hammocks and it was a slightly ‘swaying’ night to say the least with lots of creaking from the trees above us.
An evening around the fire
Charlie had a brew on first thing and also showed the cadets how to use the Kelly Kettles safely.
The day starts with a brew
There was time for a couple of posed pictures in front of the shelters before the cadets dismantled them both and scattered the debris back around the site so as to leave no trace of them. Apart from becoming unstable if left up, shelters tend to attract rodents to the site (since it’s not just humans who seek shelter) – so down they came.
A few daylight shots of their shelters before dismantling them
For the next couple of hours it was time for Atlatls, bows and stalking games.
A morning of games including Atlatls and Bows
Once the cadets got their eye in some had pretty good groupings.
Some good groupings
Even the staff managed to get a shoot in 🙂
Not that the staff were competitive 😉
Even though the cadets did not get to use the hammocks and tarps this time we did get some out for them to try.
Checking out tarps and hammocks
The final part of the weekend was to return the campsite to the condition we found it in, if not better. This was the easy part of the weekend as the teams were now working well together and everything was stripped down and packed away quickly.
Wrap up and home time
I hope to run one or two more bushcraft courses for the cadets this year and give them the chance to sleep out in a hammock.
Even though the weather was against us this time the cadets knuckled down, worked hard, had great fun and made things comfy for themselves – that’s bushcrafting for you.
I wasn’t going to post about our family summer holiday as I thought it wasn’t particularly relevant to this blog but after having a look at the pictures again I noticed there were quite a few bushcrafty ones. This post will just focus on some of the fun bushcraft stuff we did and I will not bore you with all the hundreds of beach and plant pictures I took.
Our good friend Lou worked as a manager at the YHA in Golant in Cornwall so we pitched our tipi in the gardens of the hostel, combining a holiday with a visit to her. The hostel itself is a Regency period building so it felt quite grand to be camped out in front of it for a week.
Alison got the hammock for herself and a cup of tea in bed every morning, I got the tipi and the kids.
Our Holiday Homes
This was at times a very busy holiday but I certainly found time to catch up on my sleep loss. Over the whole holiday I concentrated on getting as many pictures of different plants as possible. This beautiful one of Catherine was taken in the grounds of the Eden Project.
Sometimes restful, sometimes beautiful
We got a visit one day from our friends Steve, Kirsty, Buddy and Herbie. As per usual the barbie was down to the boys but I got the feeling Steve was in a managerial mood
Checking for wind direction I presume!!
The boys were happy to re stock the fire as boys do and a relaxing dinner was had by all. Steve and Kirsty live with the boys in Cornwall where Kirsty runs her own business Kirsty Elson Designs (Kirsty is a fabulous artist) and Steve works in youth development and would like to do more in the way of bushcraft.
Fire and Food
You just cannot beat some time with a bow and your kids. The Father and Son bow is excellent for introducing kids to bows as they are quite easy to draw.
Quality boy time
Catherine had a ball wherever she went, be that with the ducklings or with sand. Our kids love their toys and gadgets but they’re good at making their own fun as well.
Exploring Nature
I got a message on Facebook one day from one of my bushcrafting buddies Jonny Picket, inviting us to a birthday bash in his woods he was organising for his partner Janie Sarchet. We were camped just the other side of the River Fowey from them. Jonny and Janie have a lovely farm near the coast and had decorated part of their woodland for the party.
After arriving I took Finlay down to the coast with Jonny and one of his friends to watch them spear fishing. No fish but a pretty spectacular spider crab was found. Finlay and I had a great time rummaging around all the rock pools.
Coastal Foraging
After getting to know everyone it was a case of chilling and waiting for the meat to cook in the massive metal hangi type oven. Alison got talking to Janie and has since published in the Kindle store a book that Jane had written called Project Egg. Janie also has an excellent blog site called The Hedge Combers and as best said by Janie – “Our ultimate aim is to build up a resource of useful posts, ideas & recipes, invaluable to anyone starting out on their own self sufficiency, gastro-adventure“.
It was great to catch up with other bushcrafting buddies including Pete Thomas and Ashley Cawley. They all made our family feel very welcome.
Janie’s Birthday Bash with roasted Pete
I had fun helping to cut up all the meat from the hangi and nibbling on a piece or two but best of all was the junk drumming session we all had at the end – we did not roast Pete in the end as it might look from the picture above :-).
Food and Fun
A happy Lou and Finlay taking some time out to shoot (well Finlay patiently waiting his turn).
Aunty Lou having fun with Finlay
I took time out to just sit and carve. It was such a beautiful campsite it would have been a shame not to.
Holiday carvings
Other nice memories were finding this nest of little chicks and watching the slightly bigger ones idily poking the fire (what kid does not like doing this).
Happy Chicks
Every day was either spent on the beach or wandering through the woods exploring – we went to some fabulous places including The Eden Project, the Lost Gardens of Heligan and St Michael’s Mount.
Exploring we go
I had a great time with Finlay working on his archery and look forward to getting out to some camps with him this year to shoot some more. I think Catherine and Finlay will get quite competitive in the future with their bows.
Excellent stance
I do not know who was happier about hitting the target.
Happy Lad
This has got to be my favourite picture of the holiday with the kids playing happily in the flowers.
Beautiful wanderings
And finally back to Alison. As I said she got not only the hammock but also a cup of tea every morning. She does make hammocking look stylish.
Around a fire some time last year my friend Kev Lomas asked me about helping out the Royal Marine Cadets (RMC) in his area (Southern Area Sea Cadets) with some Bushcraft. As Kev had helped us in London Area a lot over the years I was keen to help out.
Another reason was that the course would be on the Isle of Wight and there is nothing better than walking through dappled woodland in the Spring on a sunny day on the island (there are no deer on the island to eat all the flowers).
The course was at the end of April this year and the weather was fine and warm. I had a smooth trip over the Solent with with just a little fog to begin with but it soon cleared up.
Beautiful ferry crossing
I went down on the Thursday to set up camp and I am glad I did as it took us all Thursday afternoon and Friday to set everything up. The camp we stayed at was deserted and the woodlands were beautiful – though I did manage to get my heavily laden van well and truly stuck in the mud trying to set up. Luckily once emptied she leapt out of the mud to save my embarrassment.
There was to be about 25 cadets on the course with about 5 instructors. One of the instructors called Sgt Tony Moore had attended the same instructor course with Woodcraft School that I had completed so it was good to swap stories. (The chicken below, by the way, is a plastic one we found in the woods.)
Prepping the camp
When the cadets arrived they were briefed on the activities. I think some were a bit disappointed to find out I was a Blue Jacket (a Sea Cadet instructor) rather than a RMC instructor but when I began describing all the skills they would cover and how these could cross over into their field skills they started to come around (I think also that it helped when Kev mentioned I was ex-Airborne).
Briefing time
We had the Padre around for the weekend and he was keen to be involved. As well as trying out a normal hammock he was very taken with my UK Hammocks EDC chair.
The Padre was around all weekend and keen to take part (in a relaxed sort of way)
A tradition in the RMC is to introduce the cadets to the Coca Cola tree. Many of the older ones had seen this before and sniggered at the back watching younger ones’ confusion as Kev pulled the ‘tree’ out of the ground all the while explaining how rare it was 🙂
The rare Coca Cola tree
Many of the cadets brought their own knives along so we had a good chat about the pros and cons of the various different types. I then issued some fixed-blade bushcrafting knives for them to practise with.
Knife class
They all managed to make wedges and learn the art of battoning wood, making the kindling they’d later use for their fires.
Knife skills
They used firesteels to get their fires lit and then we boiled water in our Kelly Kettles for a brew. I love using the term ‘brew’ to Marines as you can see the grimace appear on their faces. To them the correct term is a ‘wet’ and they are very proud of the difference (no idea why).
Make a Fire – Make a Brew (sorry I should say a Wet)
We bought in some mackerel and the cadets prepared them and made up some Ponassing rigs.
Ponassing class
A bit of a scrum to be fed but they all enjoyed it.
Enjoying the fruits of their labour
During the day we went out for a wander looking at tracks and signs. We found some owl pellets, scavenged birds’ eggs and also some early orchids.
Owl pellets
In the woods there were clear Badger trails which were easy to follow. We came across this nice print near their latrine.
Badger print
On the Saturday afternoon we dug up some worms so they could be cleaned out overnight. The next day a quite passable omelette was made with a bit of worm as protein.
Digging up worms for an omelette
Tony had fun showing the cadets how to prep rabbit.
Rabbit prep
As we had quite a lot of fish that was not Ponassed we fried it off in the Muurrika.
Frying up the remaining fish the cadets had prepped
In the evening the staff helped the cadets set up 10 hammocks. This took quite a while but was worth it as some were very keen to try them out. One cadet was about 6 foot 5 inches and was determined to have a go. His head could not fit in the hammock so it was quite a challenge to make him comfortable. He survived the night however, and said it was a relaxing sleep.
We set up 10 hammocks
Again on the Sunday we went for a wander to see was out there in terms of foraging. The cadets were introduced to hawthorn, birch and beech leaves (all tasty in the spring). The small plants we looked at were nettles, wood sorrel, burdock, plantain, reedmace and primrose to name just a few.
Foraging – Primroses
The ranges were an ideal spot to get the bows out.
Arrow away
We also introduced the cadets to the Atlatl.
Airborne Atlatls
You do not often see so many being launched simultaneously like this.
Broadside
I had a fantastic weekend and so did the cadets, based on the feedback I received. I am looking forward to doing something similar with the RMC in London and also with the Southern Area RMC again next year.
Since about 2007 one of my local Bushcrafting locations has been in the woods near Silchester.
This was organised by my good friend Mark Beer as he was a Forester working for the Benyon Estate. My last overnight visit was in February this year but I did pop up and visit the lads for a few hours while they were out this summer.
Sadly access to the site is very limited now as Mark no longer works there so I thought instead of just writing about my last visit I would write about some of the different Bushcraft activities we got up to over the years.
Marks Moots – My last picture
This was probably the last picture I took in February.
Apart from Mark Beer and Adam Cottrell who are in this picture other regular members who attended were Nick Currie, Mat Howes, Andy Smith, Jon Searle and Rod Anderson Boyle. There have been many more who have attended in the past so please forgive me for not listing everyone.
As usual we had a parachute set up most of the time as our main admin area. I have spent many a happy hour around the fire under this chute. I was either carving, building something, listening to the music from all the different instruments, eating, planning my next picture, drinking endless tea from the old civil service kettle or just usually shooting the breeze and accepting the usual jibes from my friends relating to my Scottish ancestry
The sitting room with bedrooms off to the wings
My kids have visited the site a few times over the years where they were always welcomed. Catherine was very happy to sleep in her hammock here and was always keen to dance around the fire to the music of one of the flutes. They are always keen to learn but this is one place where I could generally relax (cadet free zone) and learn from all the guys who would be there.
One of the things I liked about spending time here was to listen to all the different music that was played. If it was not someone playing a guitar you would be listening to flutes or the Jaw harp. It made sitting there carving all the more pleasurable.
A great place for kids to play
Plenty of good food
Great Jamming
I have learned a lot here while out and about on the mooches from the guys. So much so that my colleague Sea Cadet instructors have been known to raise an eye brow or two when I start on about looking for Pignuts (or some other such environmental subject).
Great Mooches
One of my passions is to get my bows out on these meets. I have shot some remarkable bows over the years here that the lads have brought along.
Spot on as usual Mat
This target by G-Outdoors has been used here for a few years now and is still going great after all the abuse we gave it.
We only get a little bit competitive
I will let the pictures say it all now.
Catties were always popular
I started my fascination with Fire Faces here – Dutch Nun
Some wicked set ups over the years
Our excellent chef Jon
I got to experiment
Lots of time for the usual Bushie practices
Remember Rich59’s Wet Tinder experiment?
Cheers for a great time lads
Hopefully I will get back out there sometime soon.