A Colourful Winter

As winters past have gone this last one here in the southern part of the UK has proved to a bit quiet on the snow front. However even though much of nature has been lying dormant there was still plenty to see and do here over the last few months.

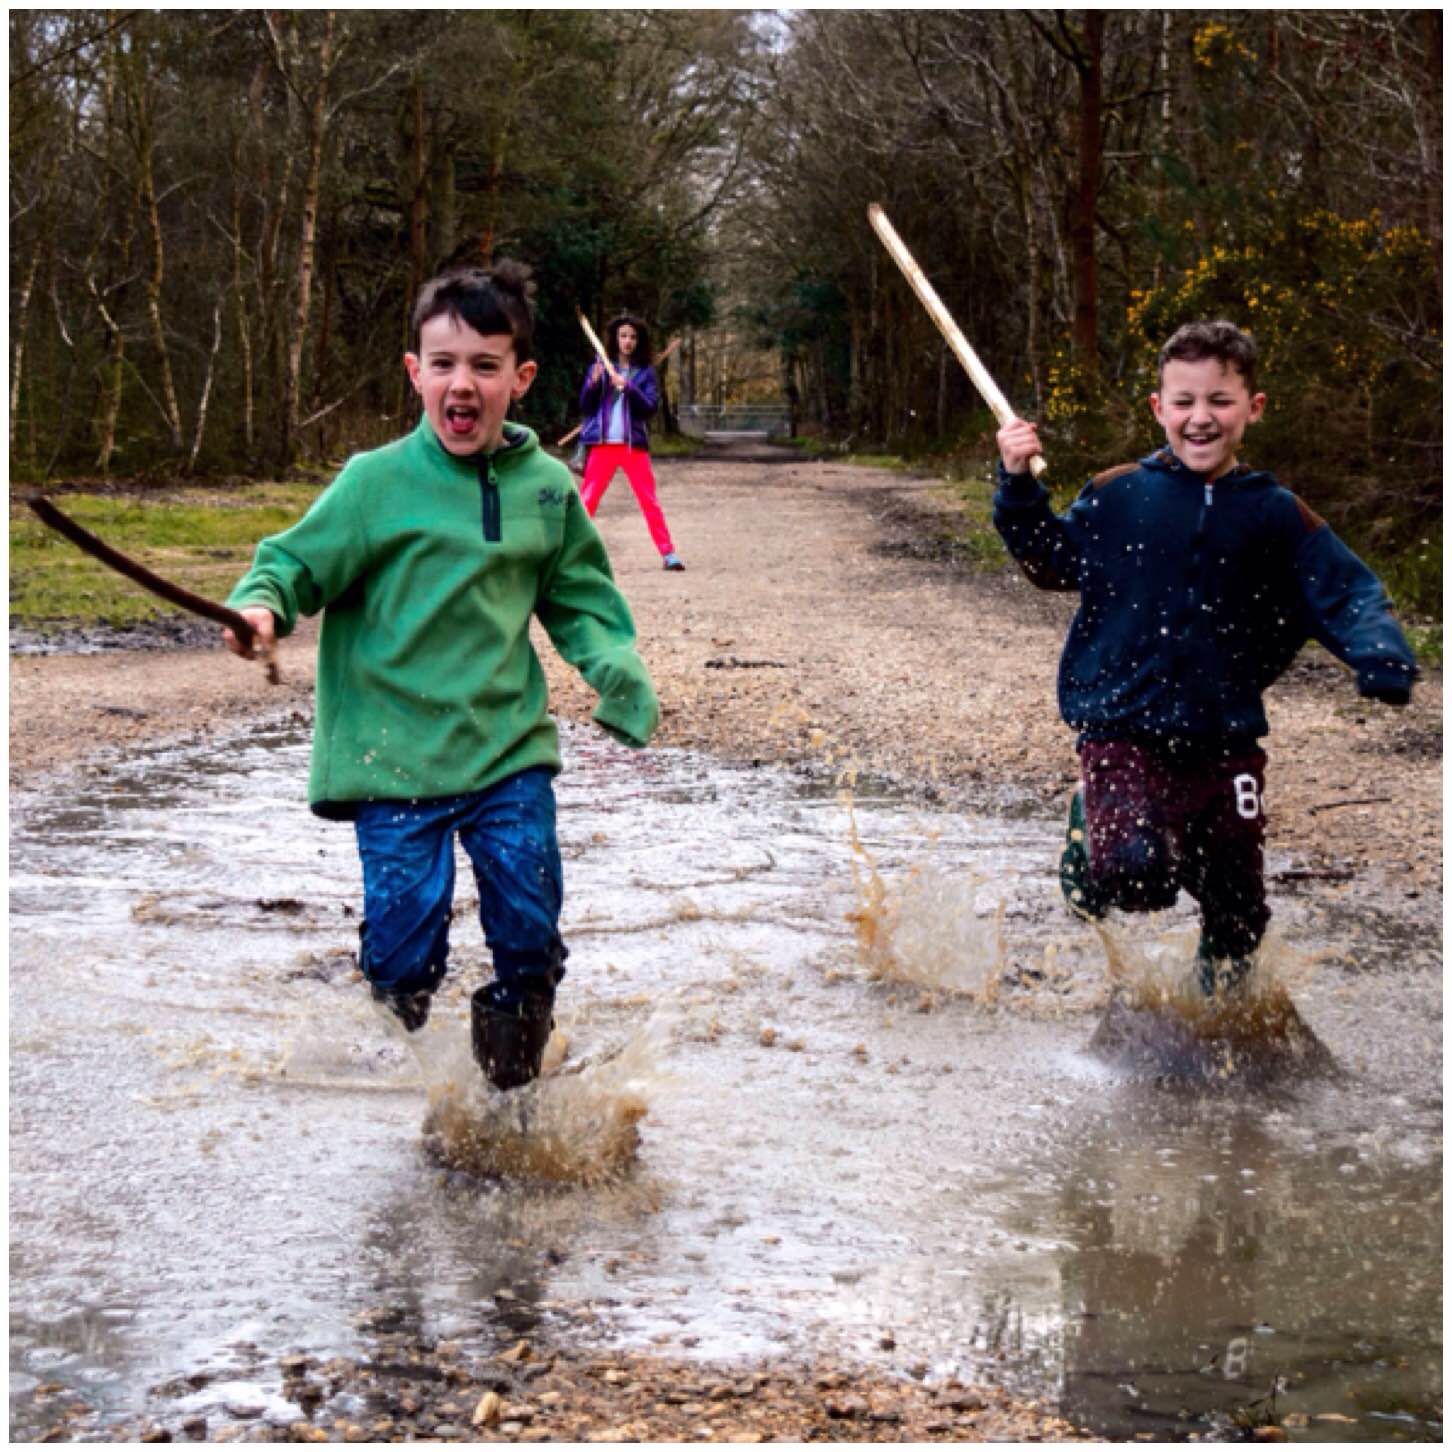
The following ‘grouped’ pictures are some of the favourites I have taken (apart from one taken by my wife Alison) since last December. I have spent as much time as I could outdoors with my family however I feel that it could have been more (work has kept me away from home a lot recently). We are definitely a digital family however we try and balance all that screen time out with some quality dirt time.

Photo 29-03-2016, 17 21 30 (1)
Family Fun

I use a Nikon D3200 Digital camera and shoot in RAW format so that I can use Adobe Lightroom to its fullest. I like Lightroom as it allows me to extract from the images (I am still learning about all the settings on my camera) I take something closer to what I saw originally or in some cases something slightly enhanced.

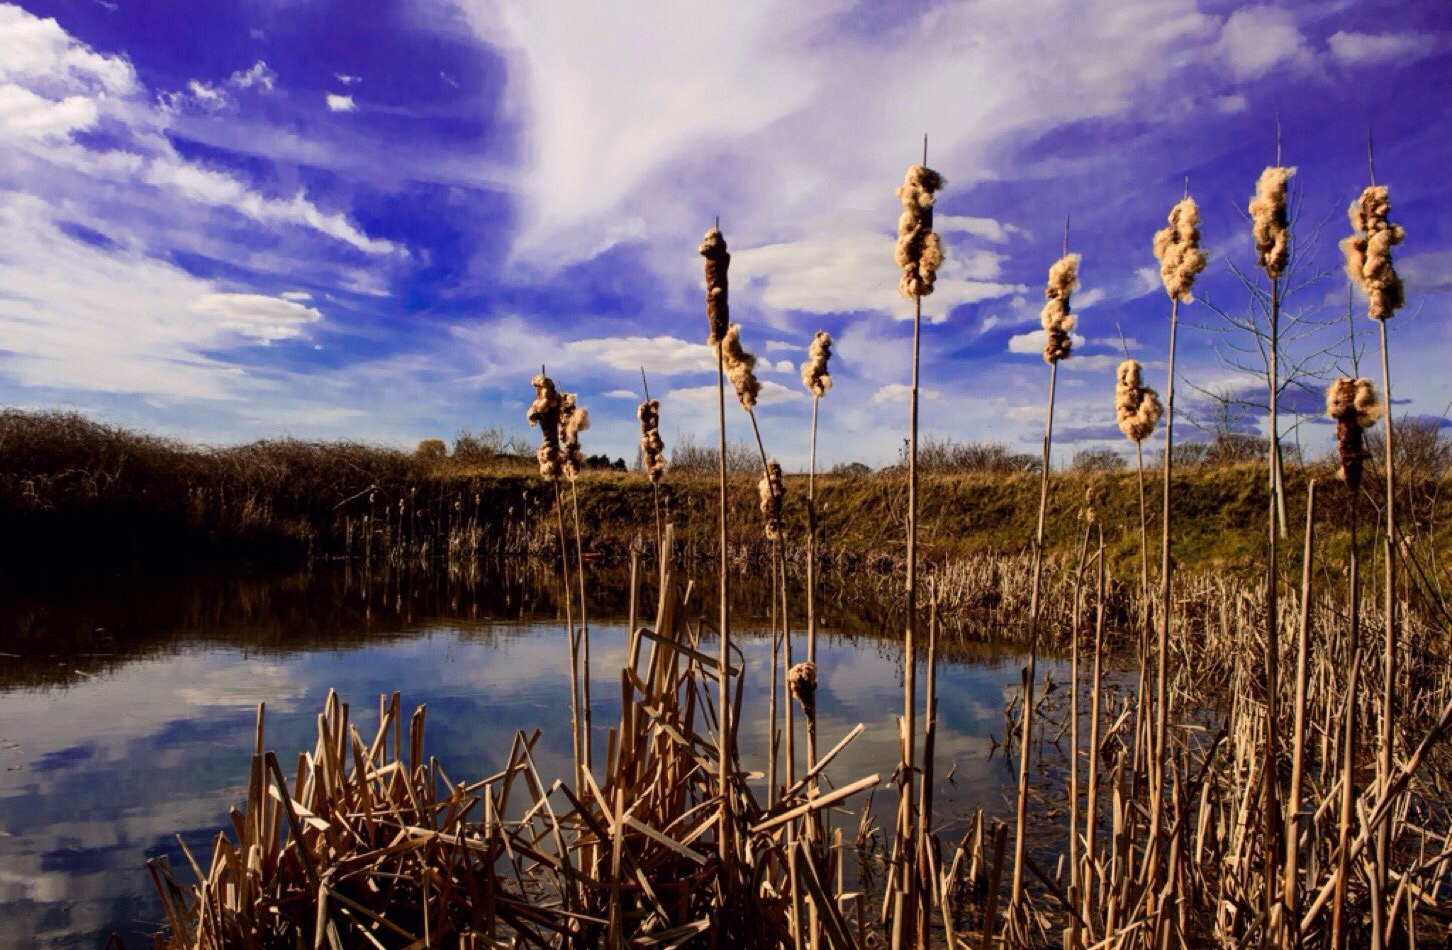
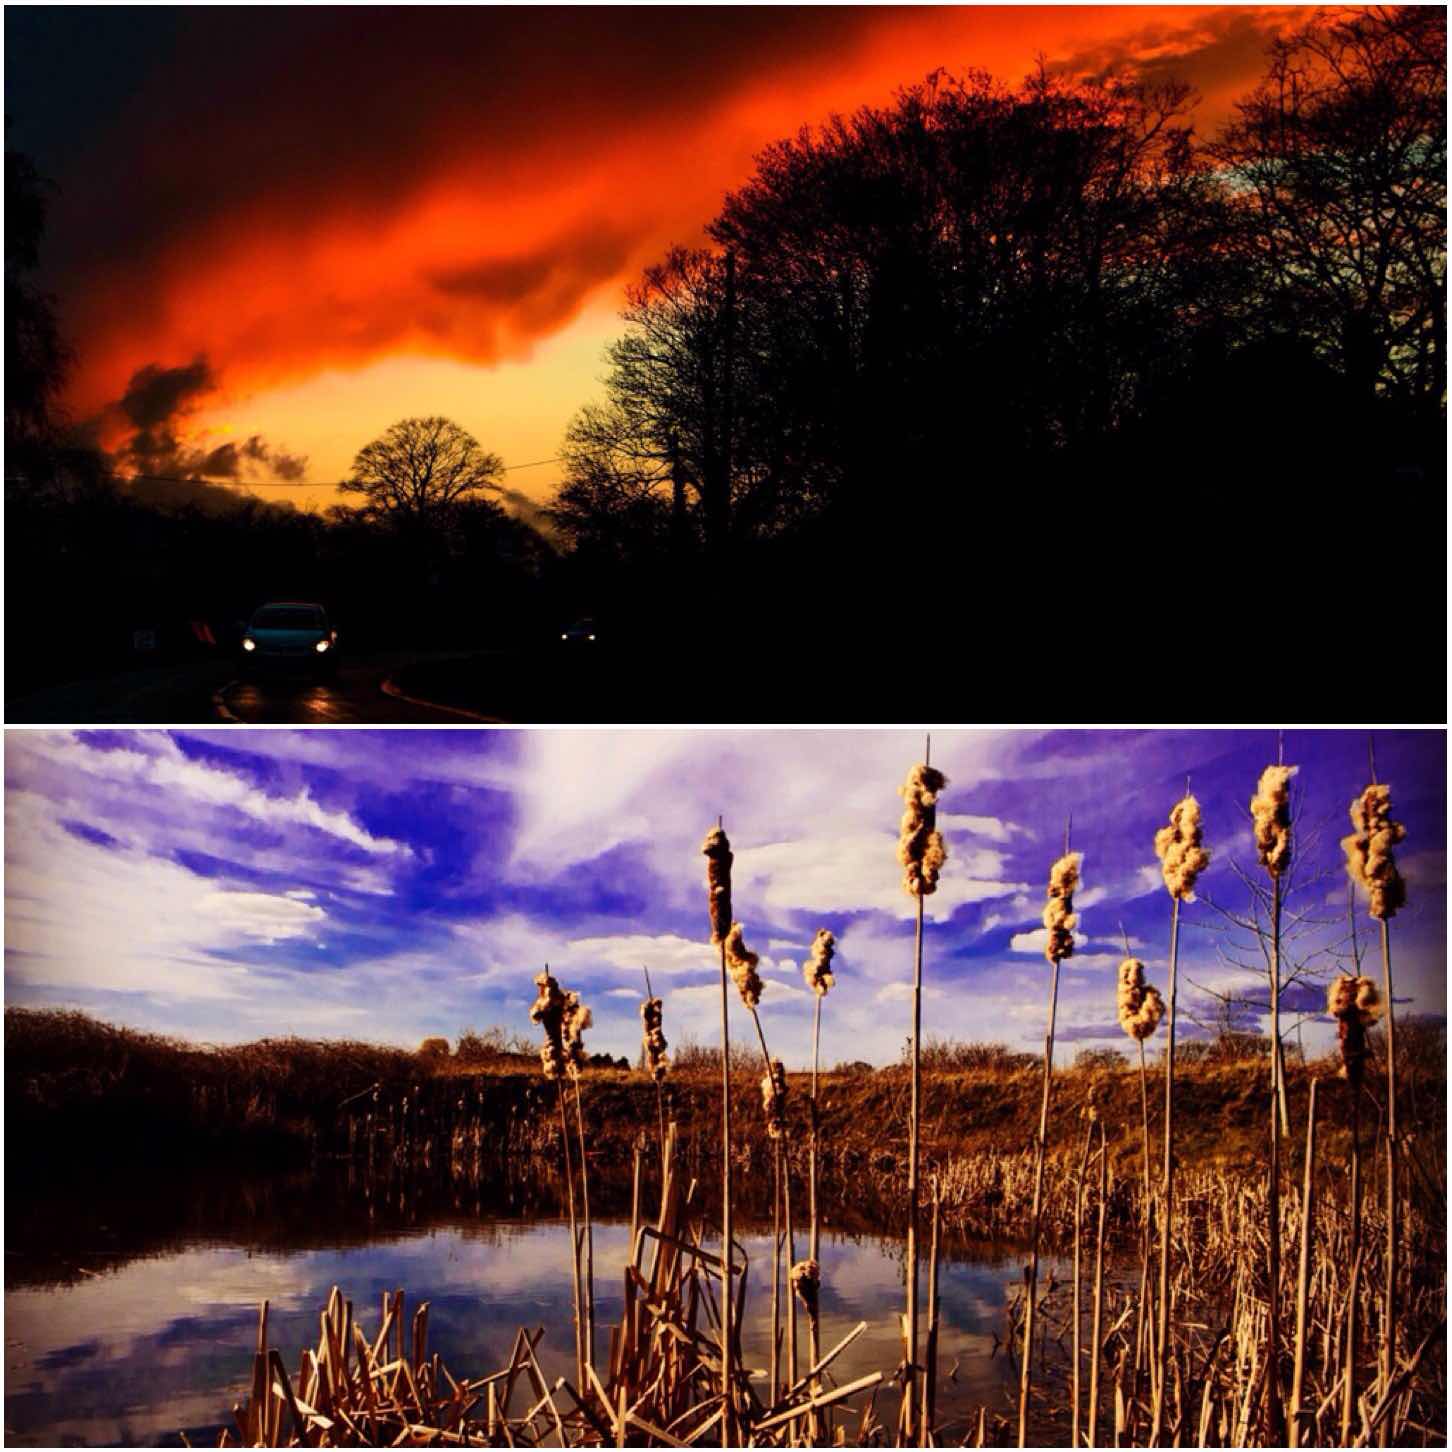
The sunset below was certainly not as dark as that originally however Lightroom allowed me to produce this moodier shot. The blue skies in the bottom picture were like this on the day however the shot I took the blues were all washed out. With a few tweaks though it was looking good again.

Photo 29-03-2016, 17 21 30
Dramatic skies

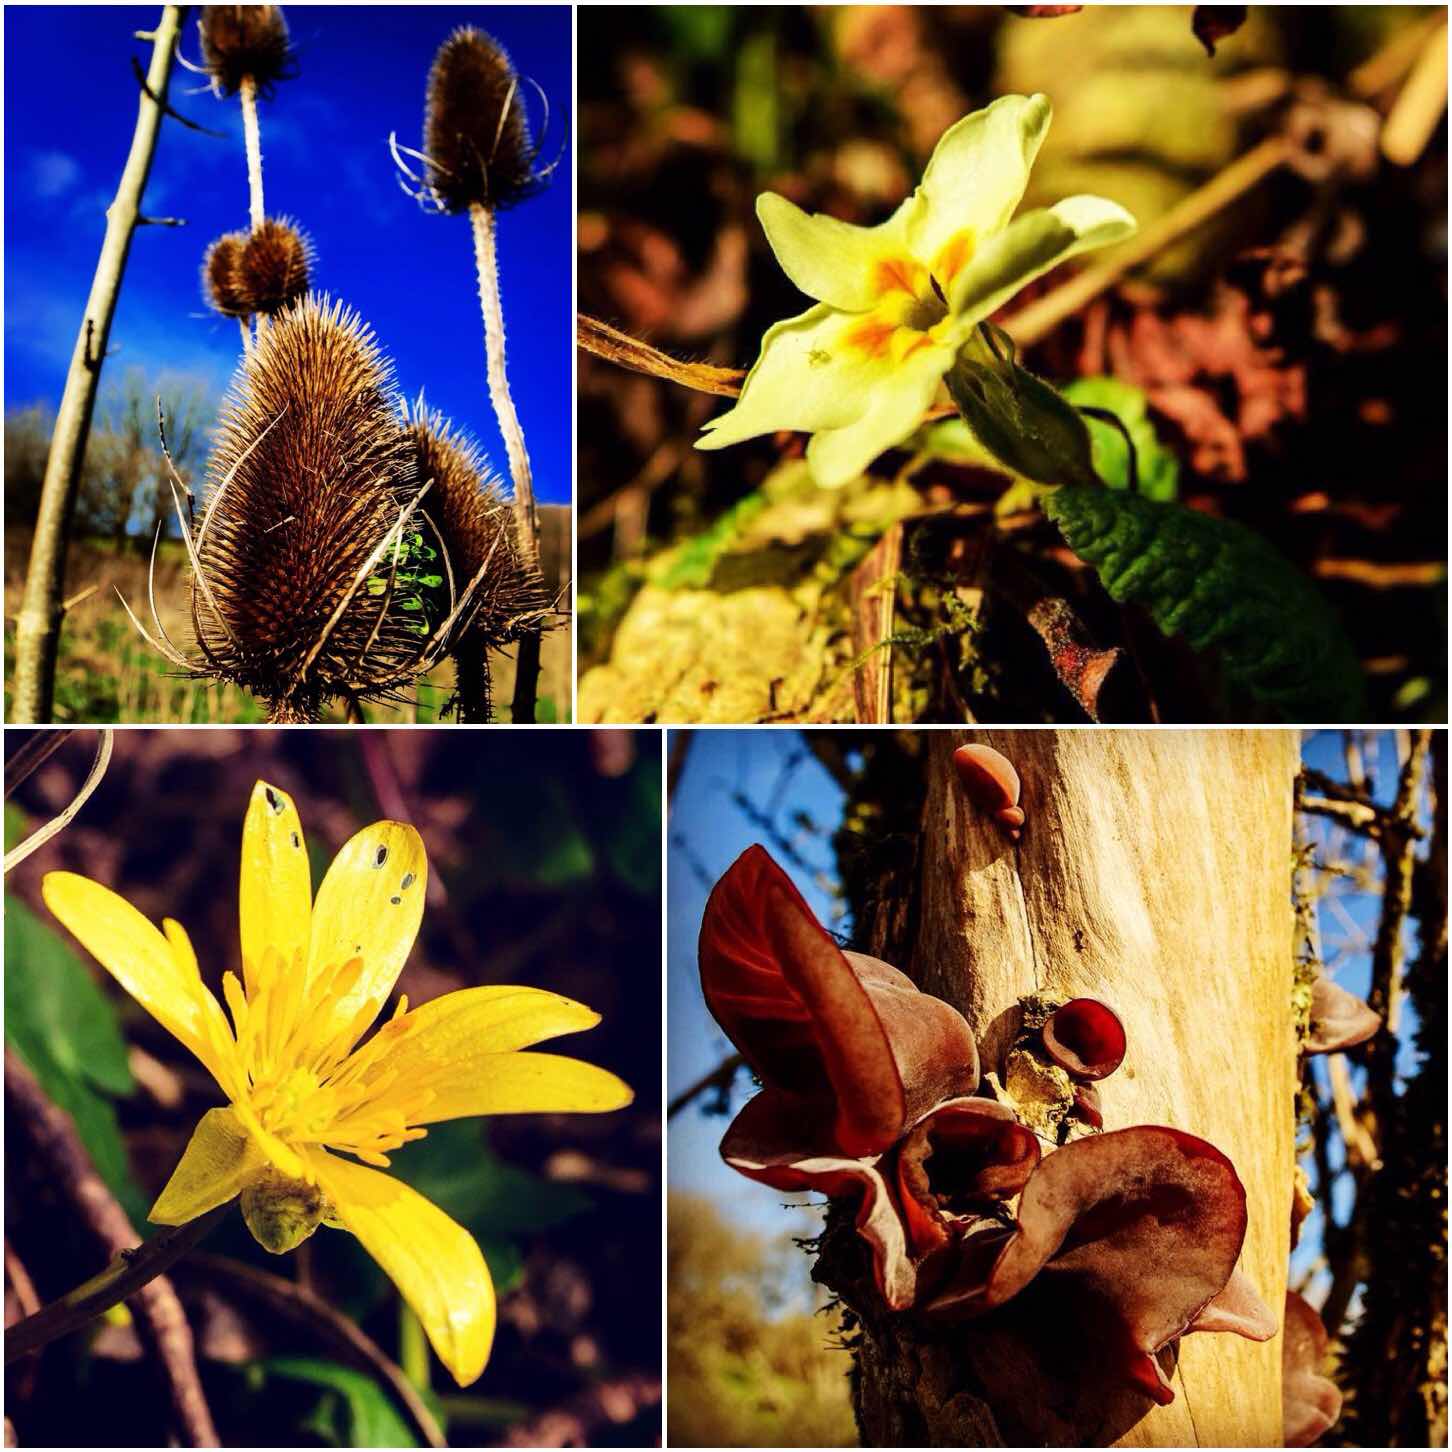
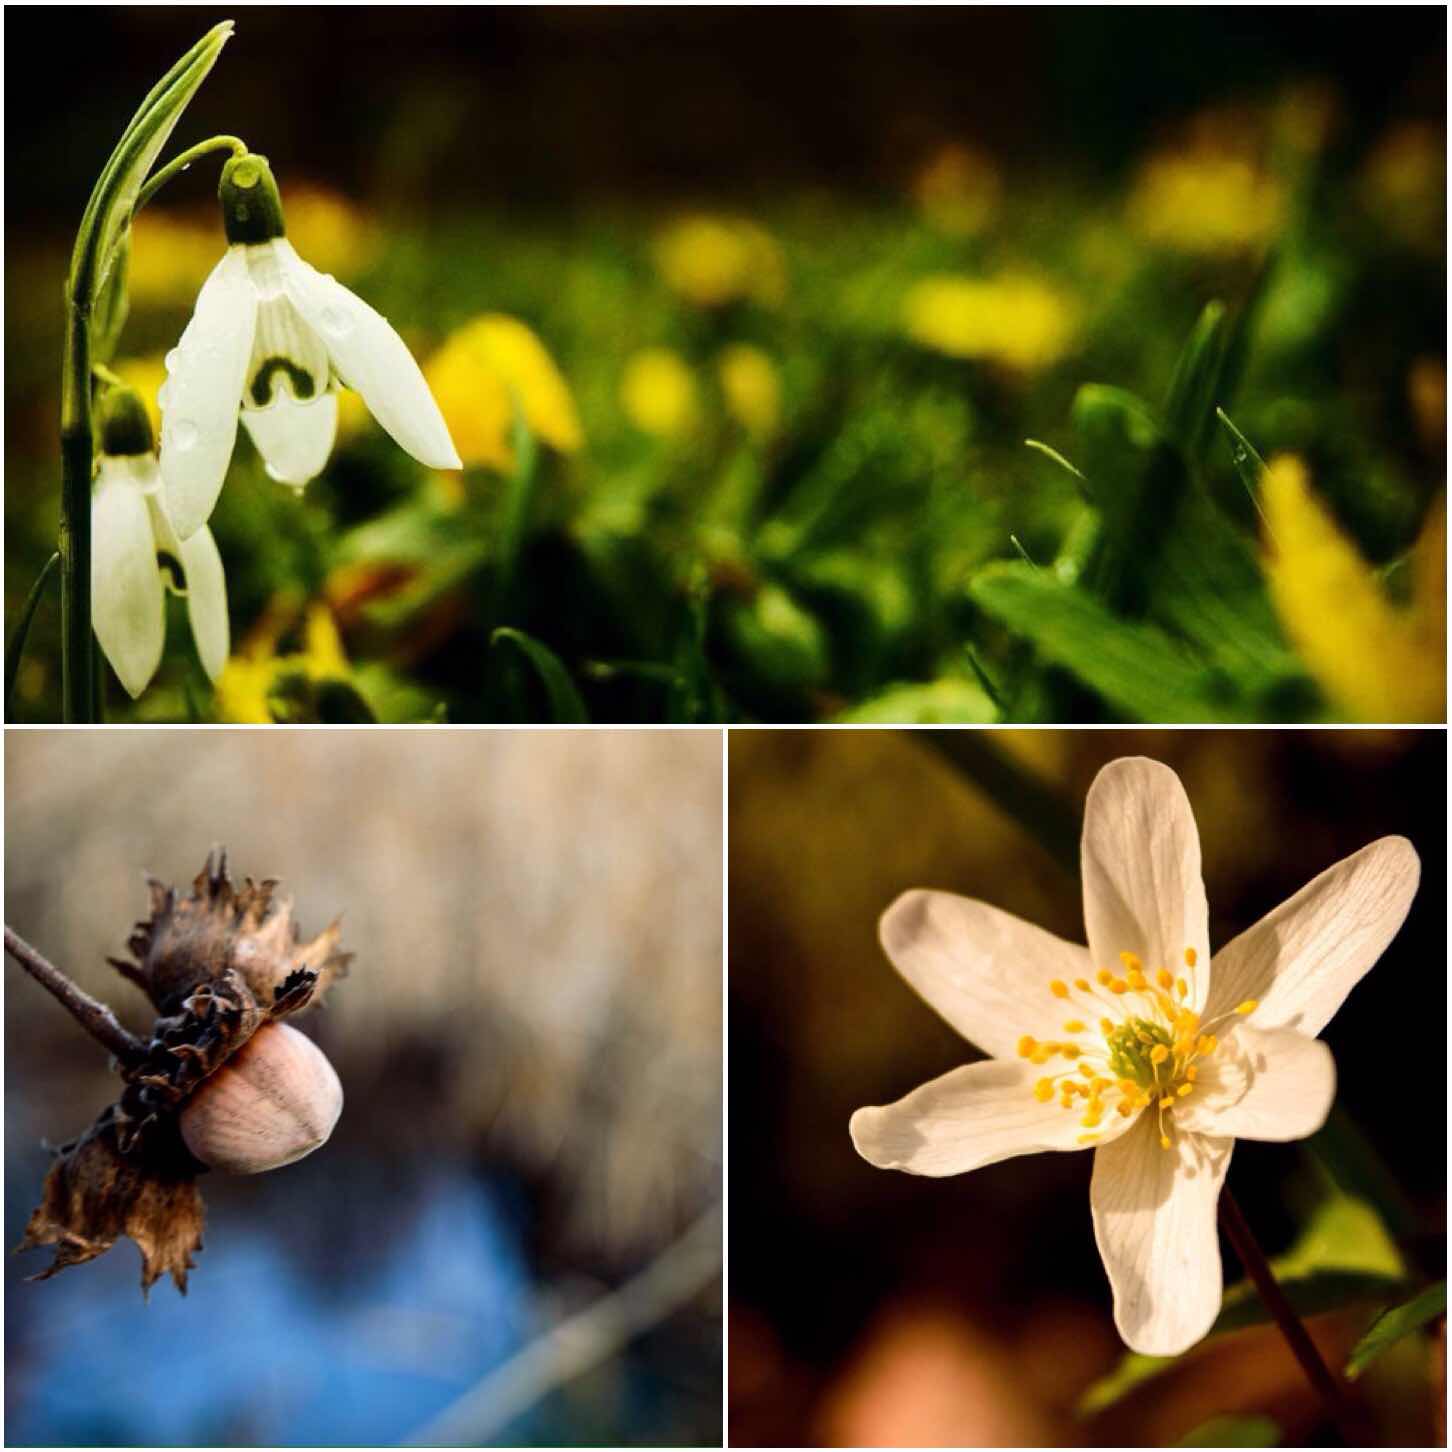
The snowdrop and the forlorn looking hazelnut were both taken in mid winter but the wood anemone was shot just a few days ago. I included the wood anemone as it is one of the first woodland spring flowers to pop up and to say that winter is now over.

All beautiful in their own ways and all photographed in different weather conditions.

Photo 29-03-2016, 17 21 31
Beauty in the detail

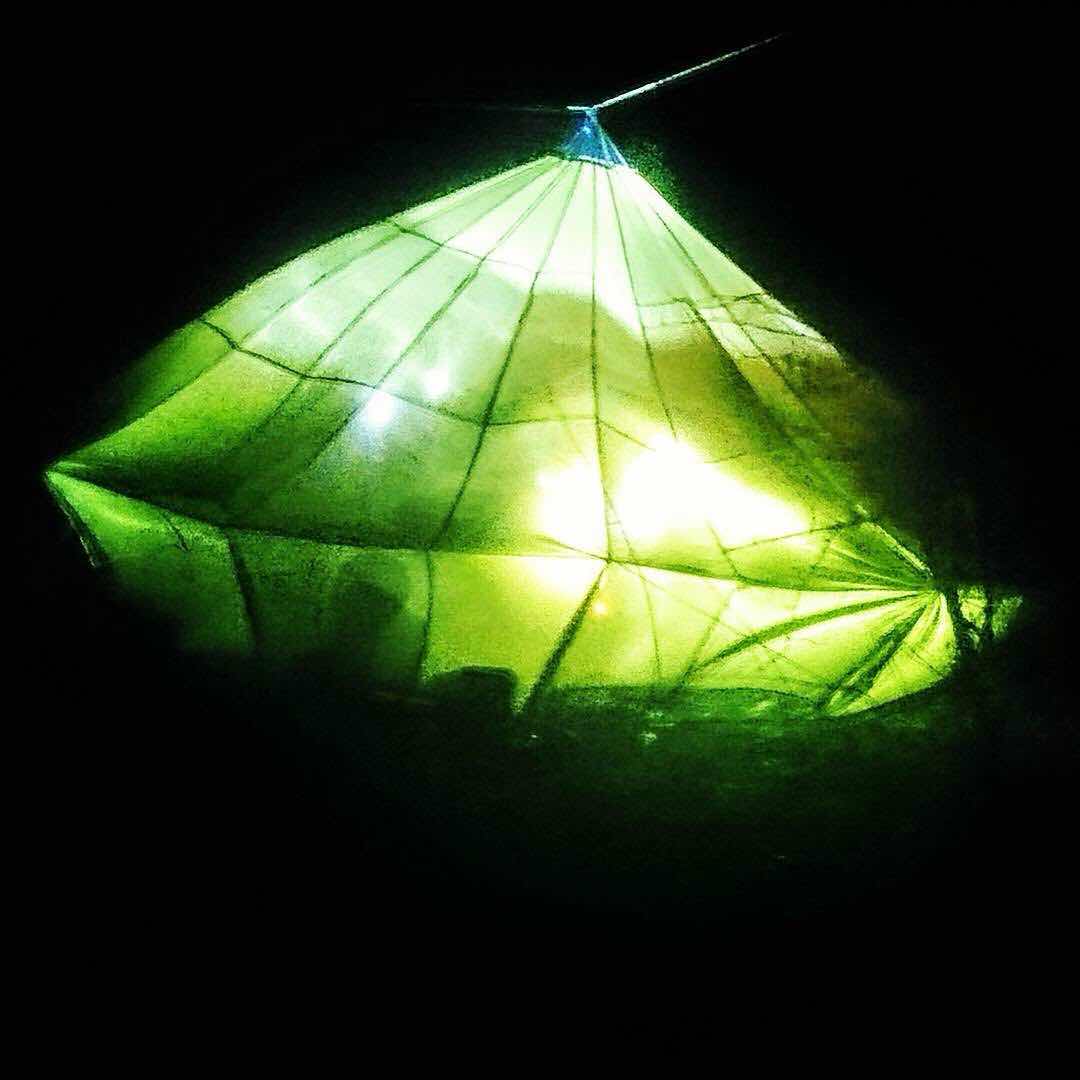
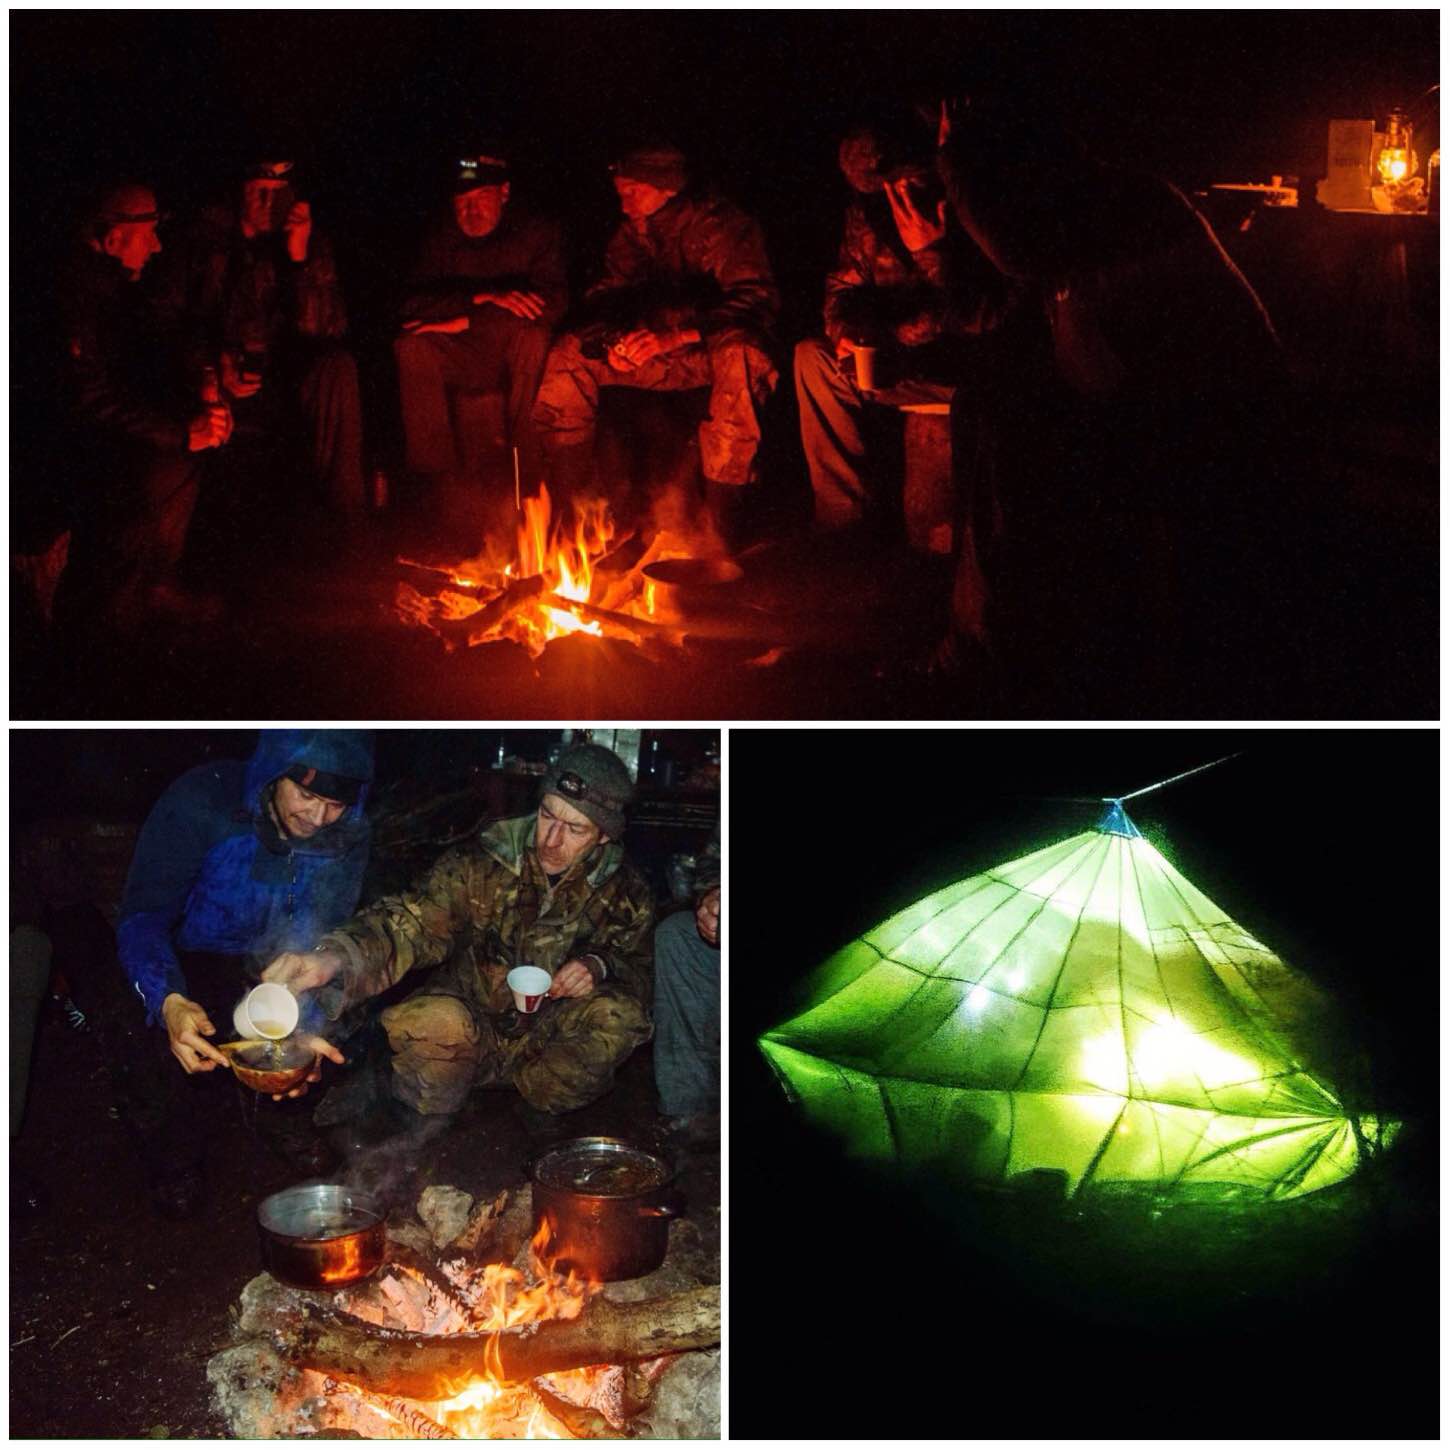
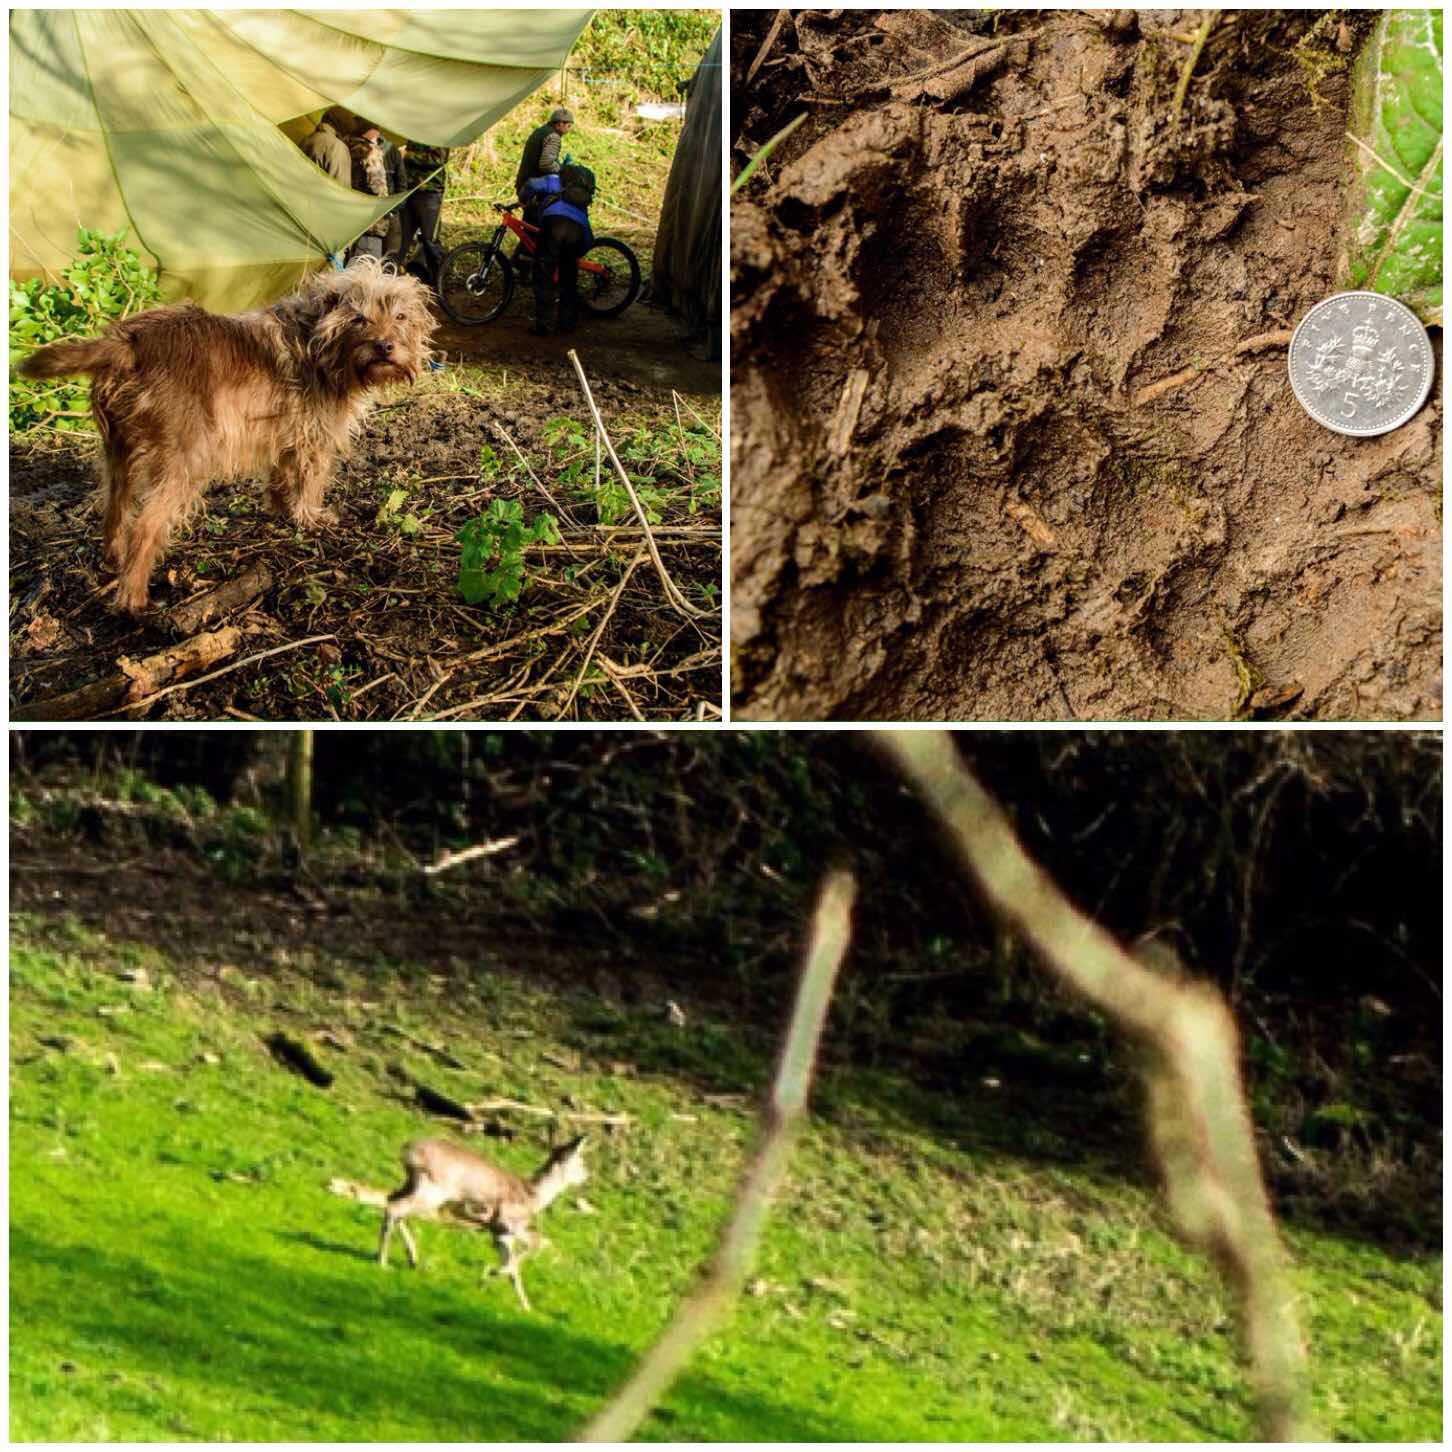
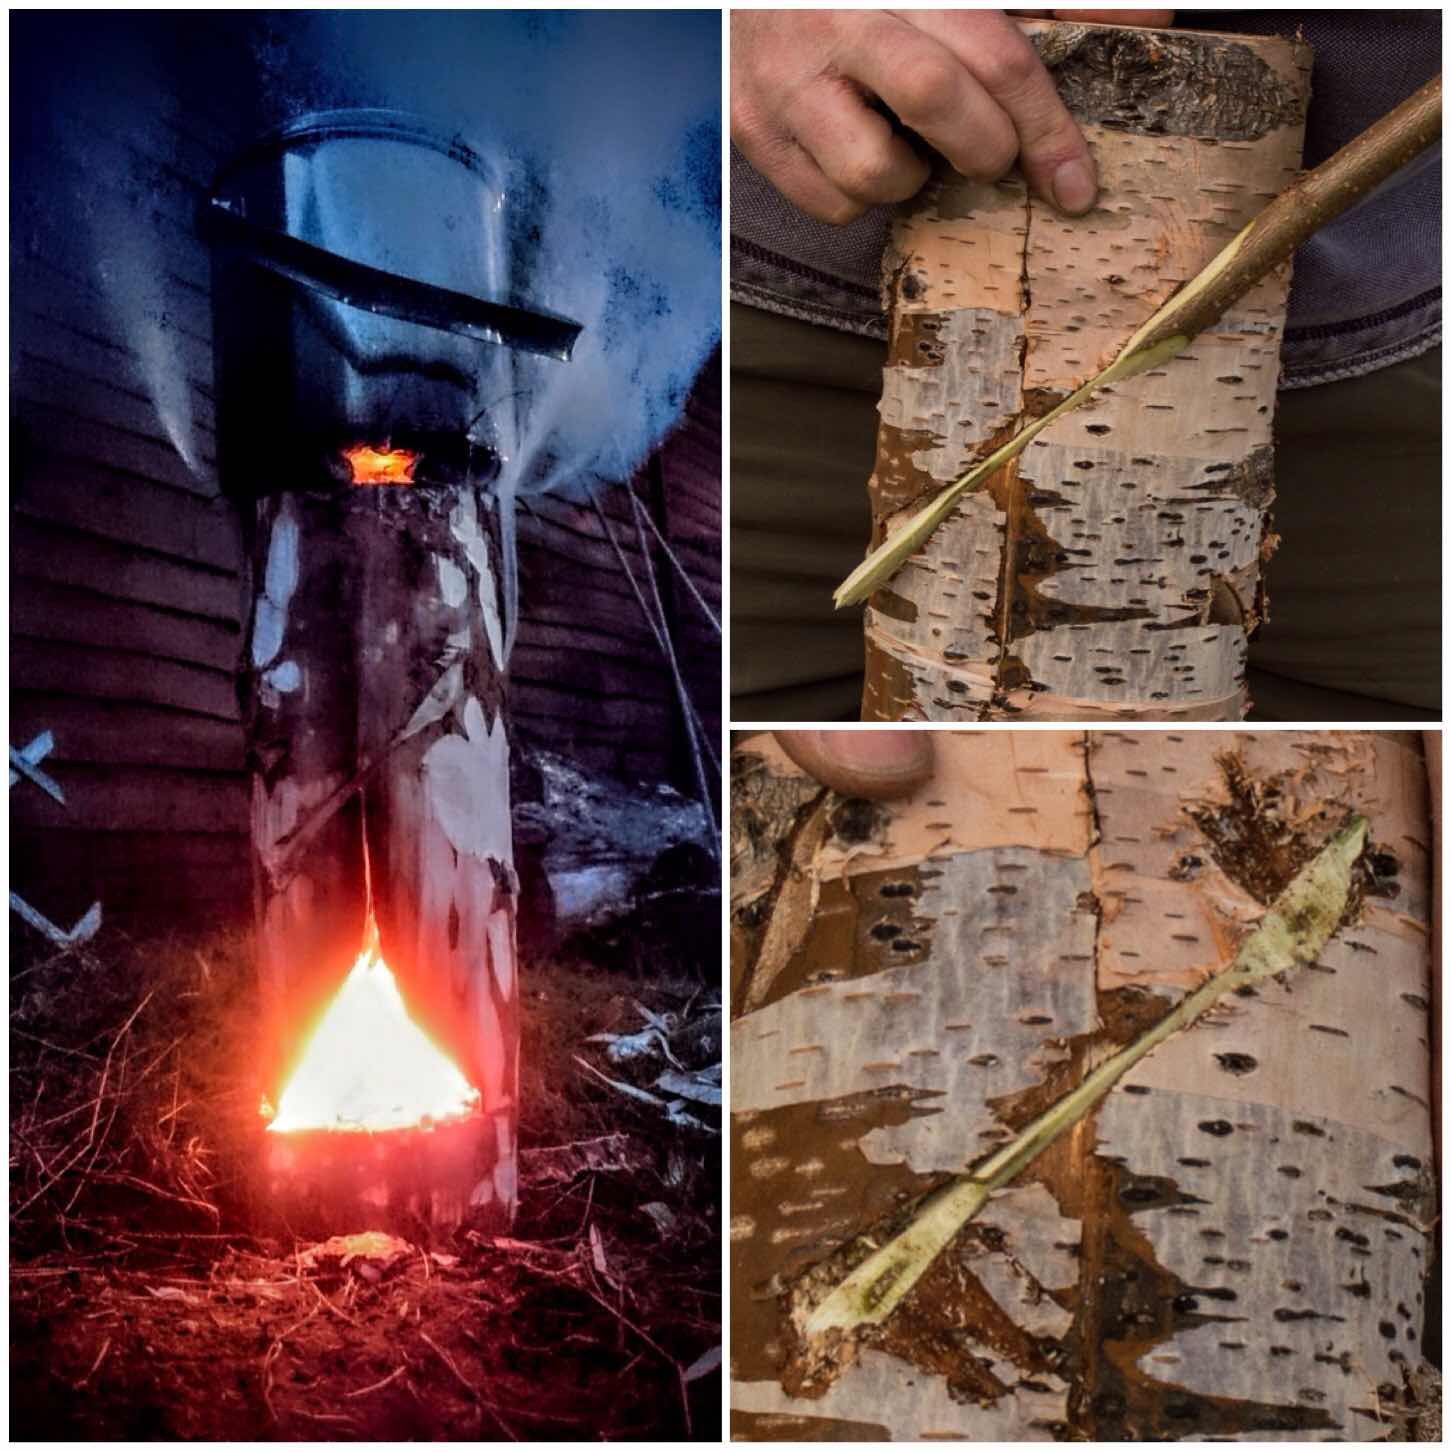
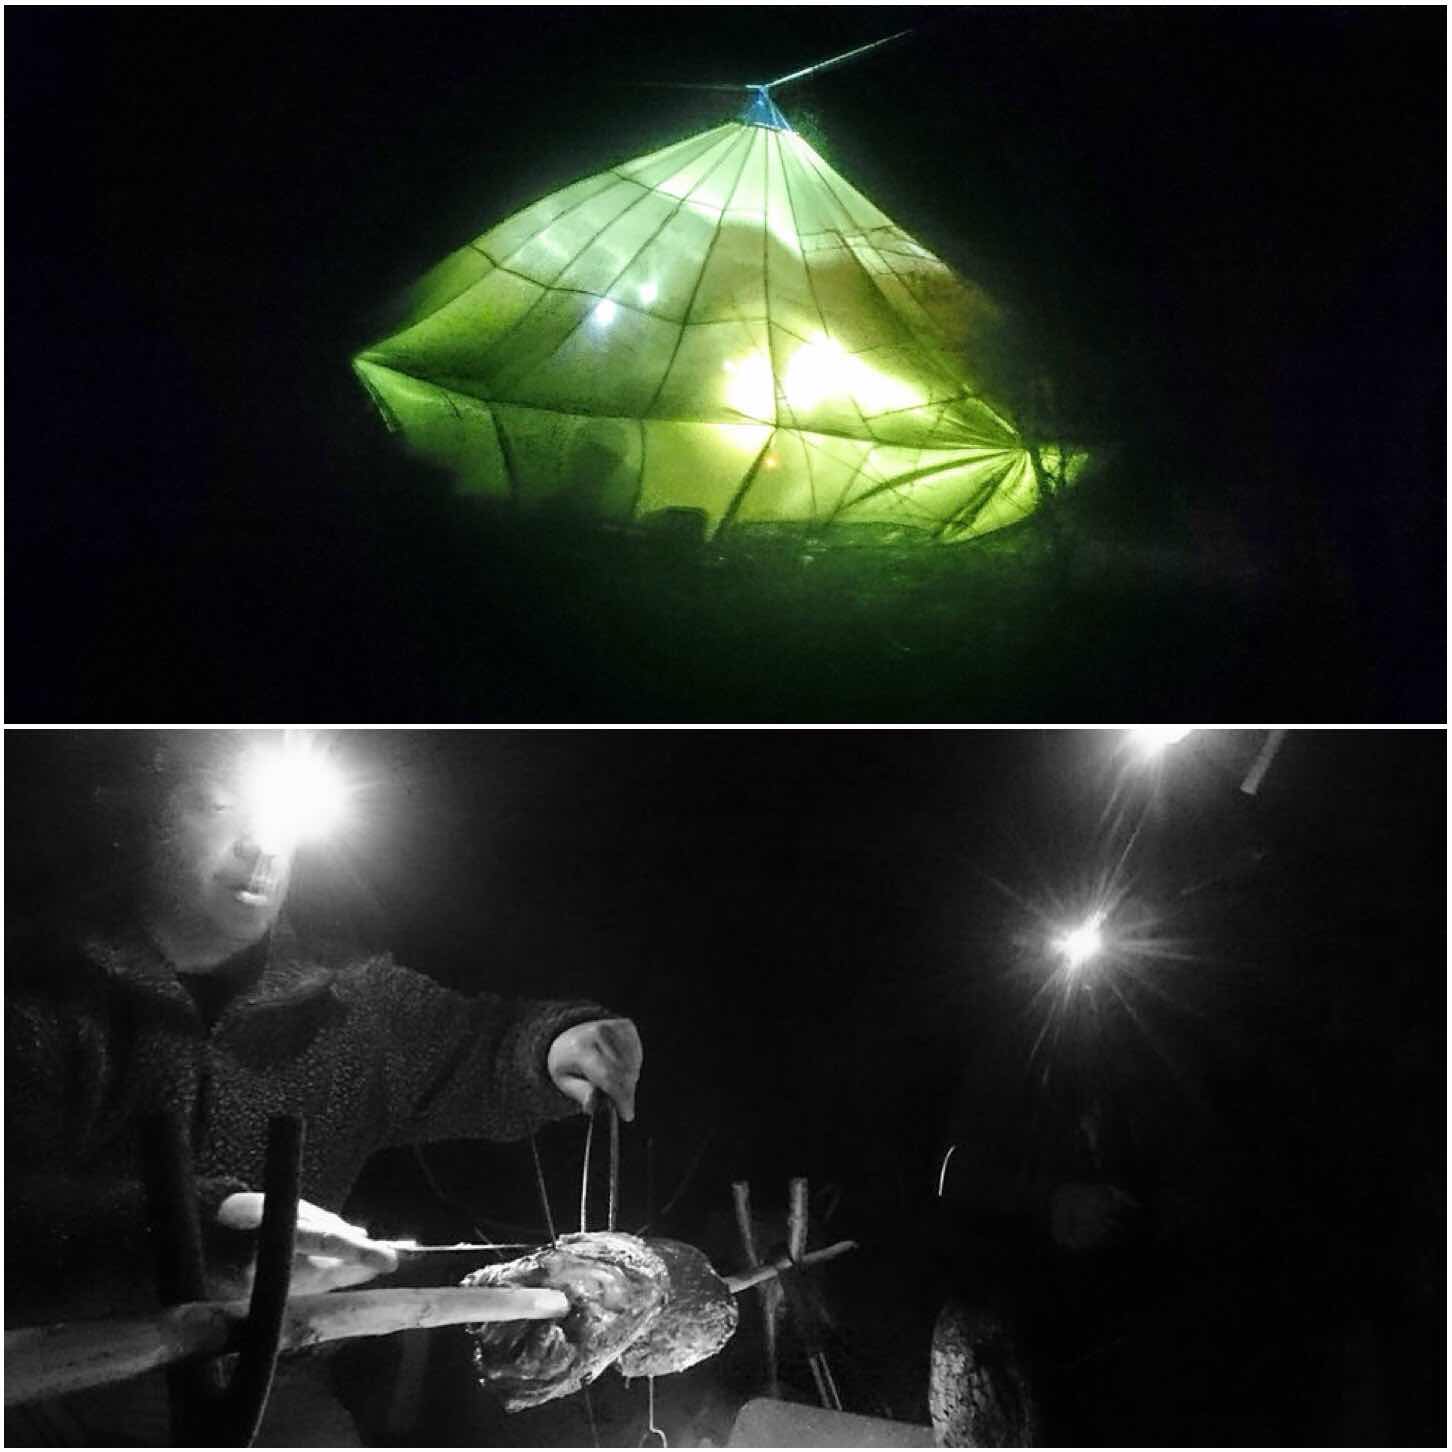
I took both these pictures with my Sony Z3 mobile phone as the weather conditions were to bad to bring out my Nikon. The top picture was a bit of an experiment with the guys lighting up the inside of our group parachute with their torches making it look like a downed UFO.

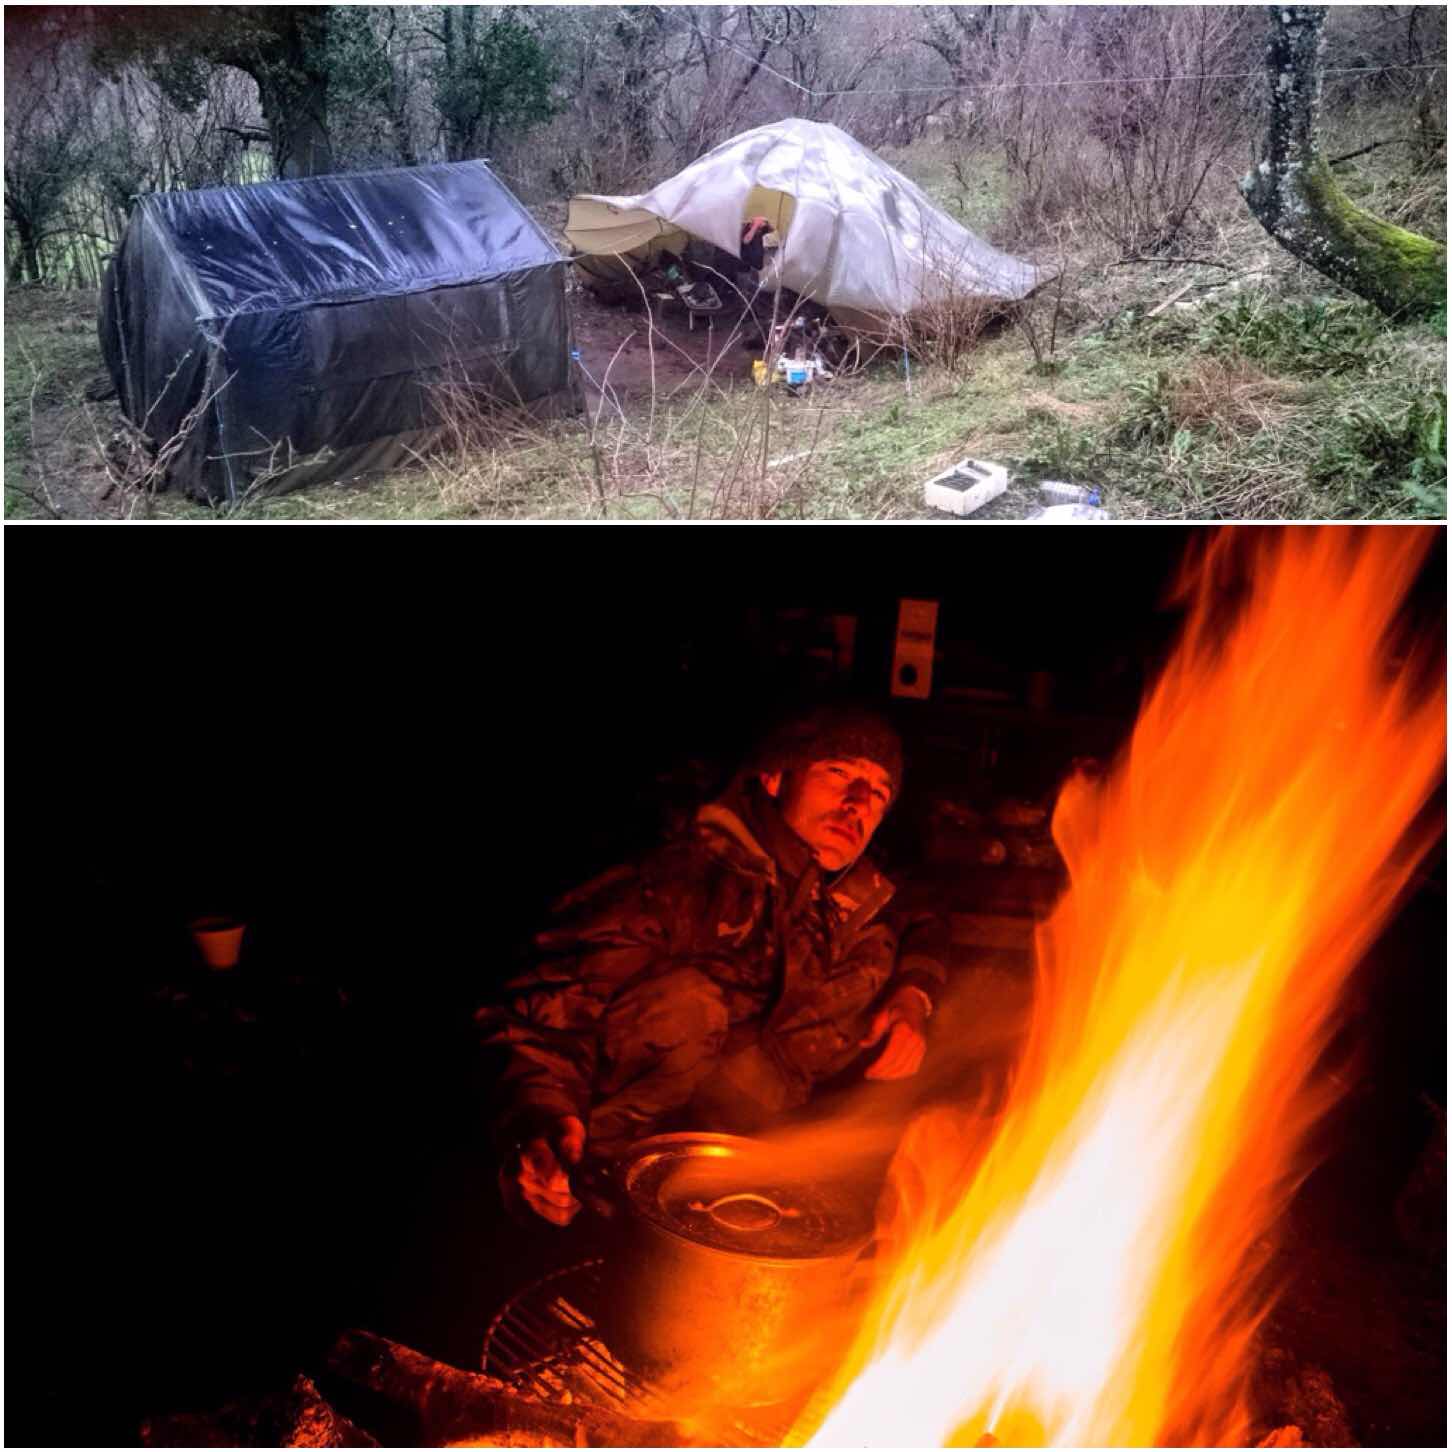
The bottom picture was taken inside a group parachute while we were huddled around the fire on a cold evening awaiting in anticipation for the feast to come being cooked by Dave.

Photo 29-03-2016, 17 21 32 (1)
Parachute time

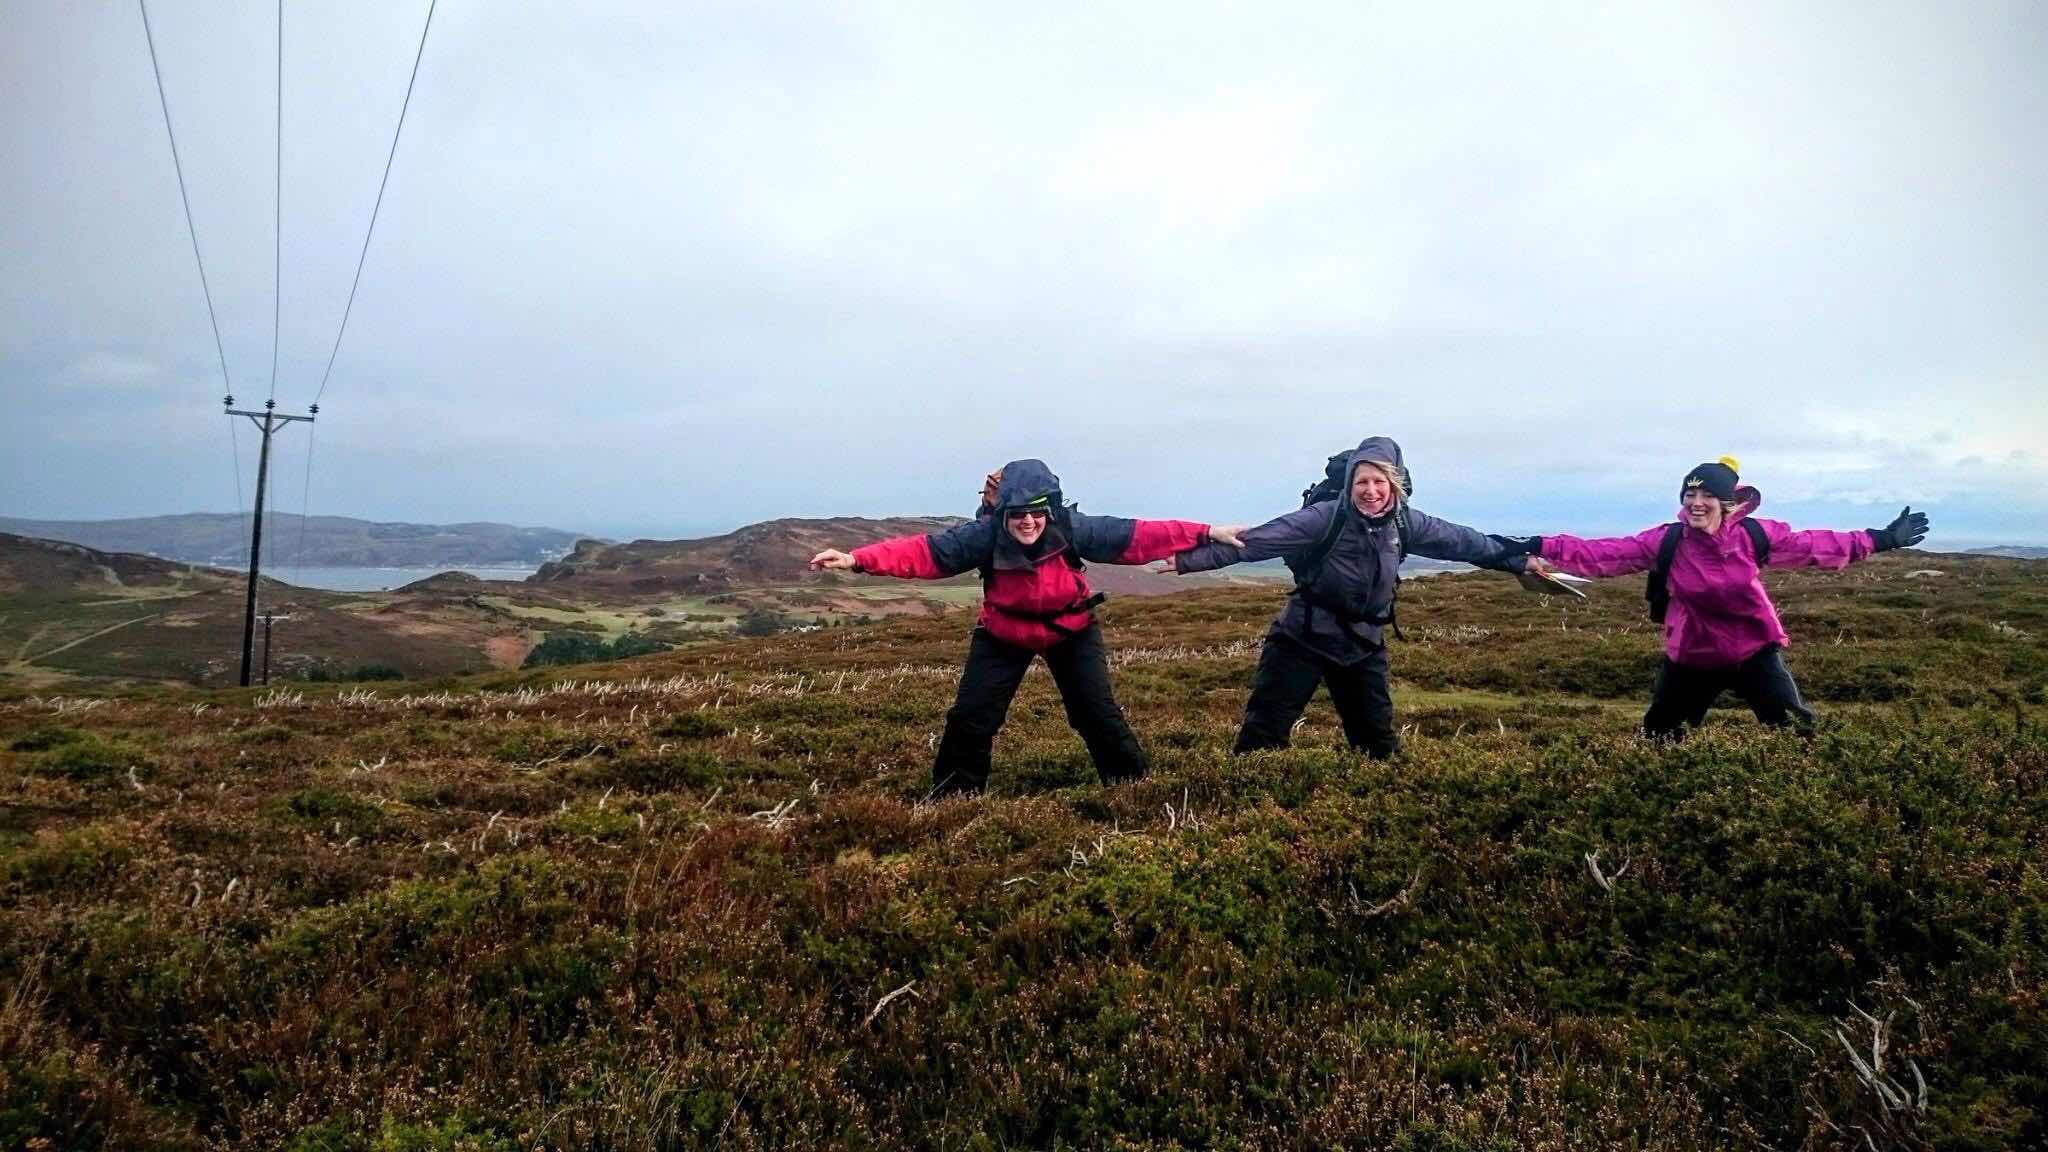
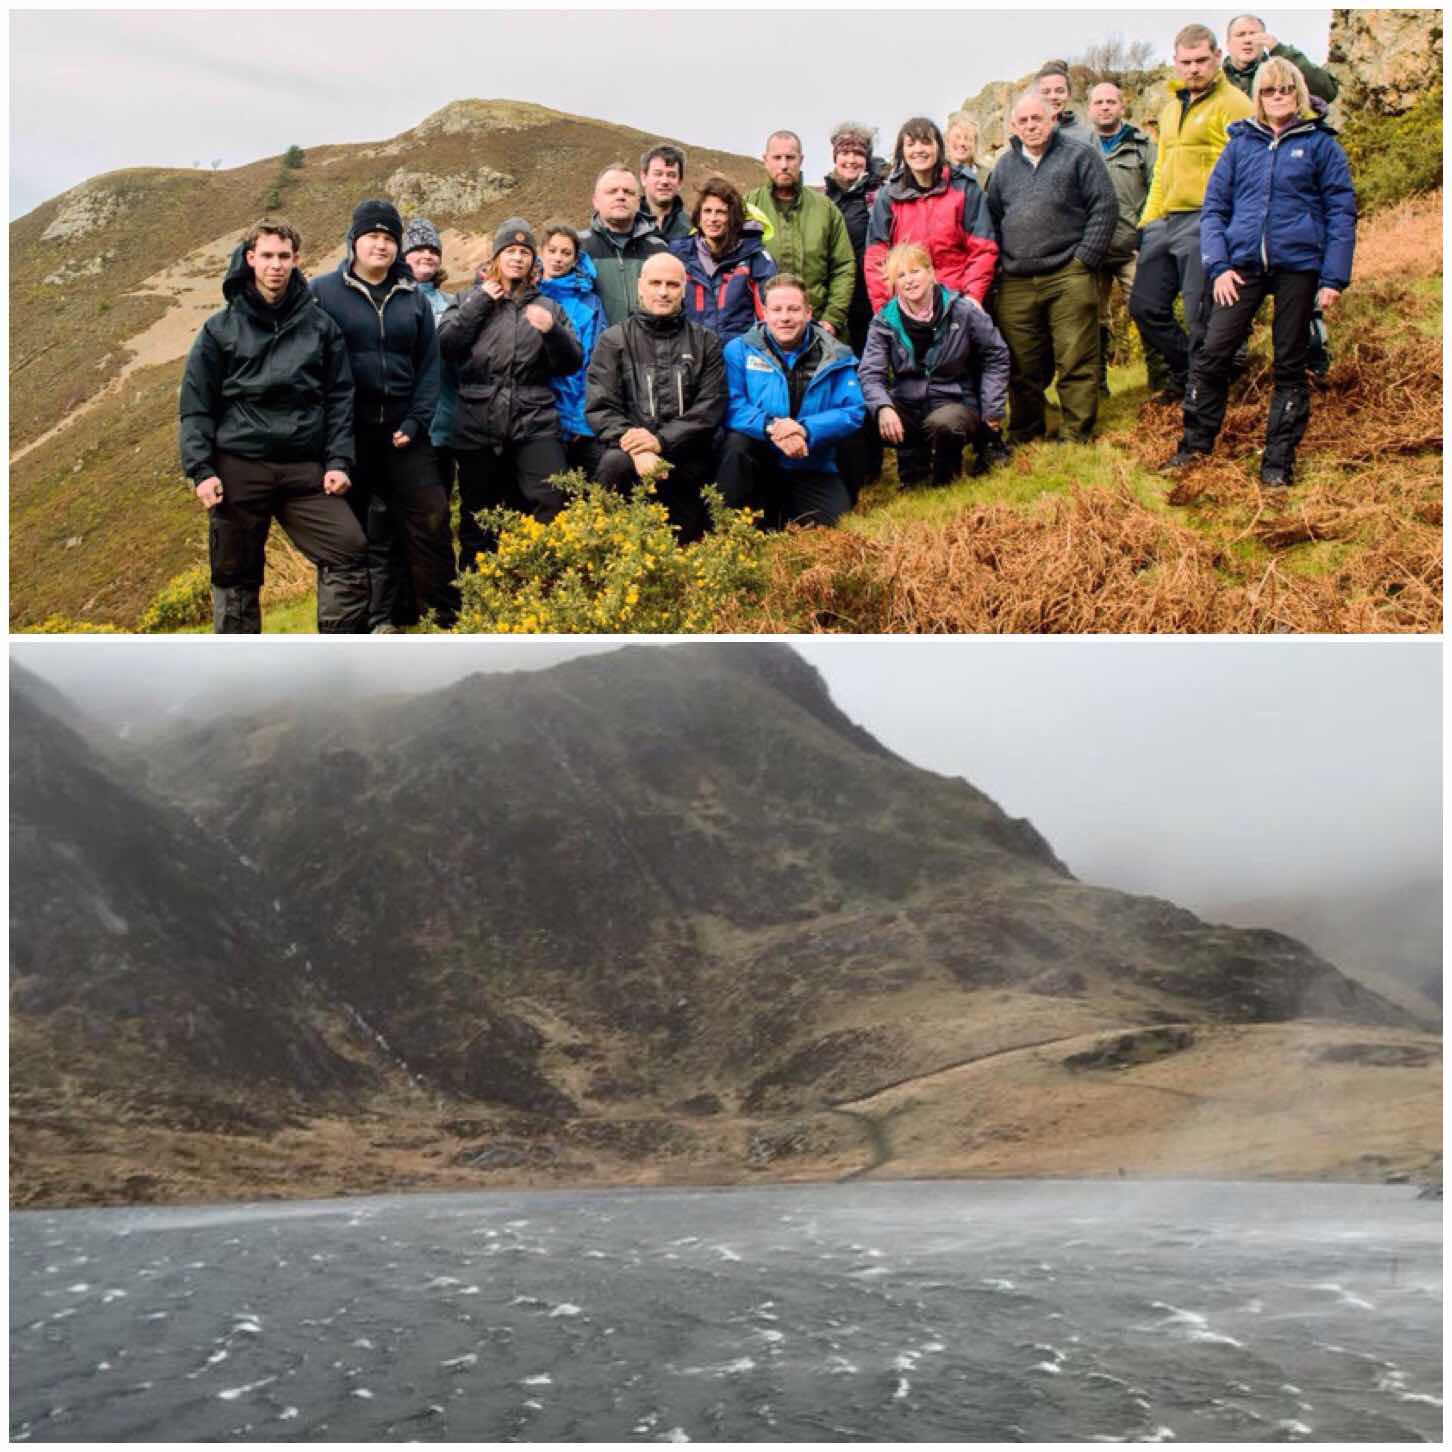
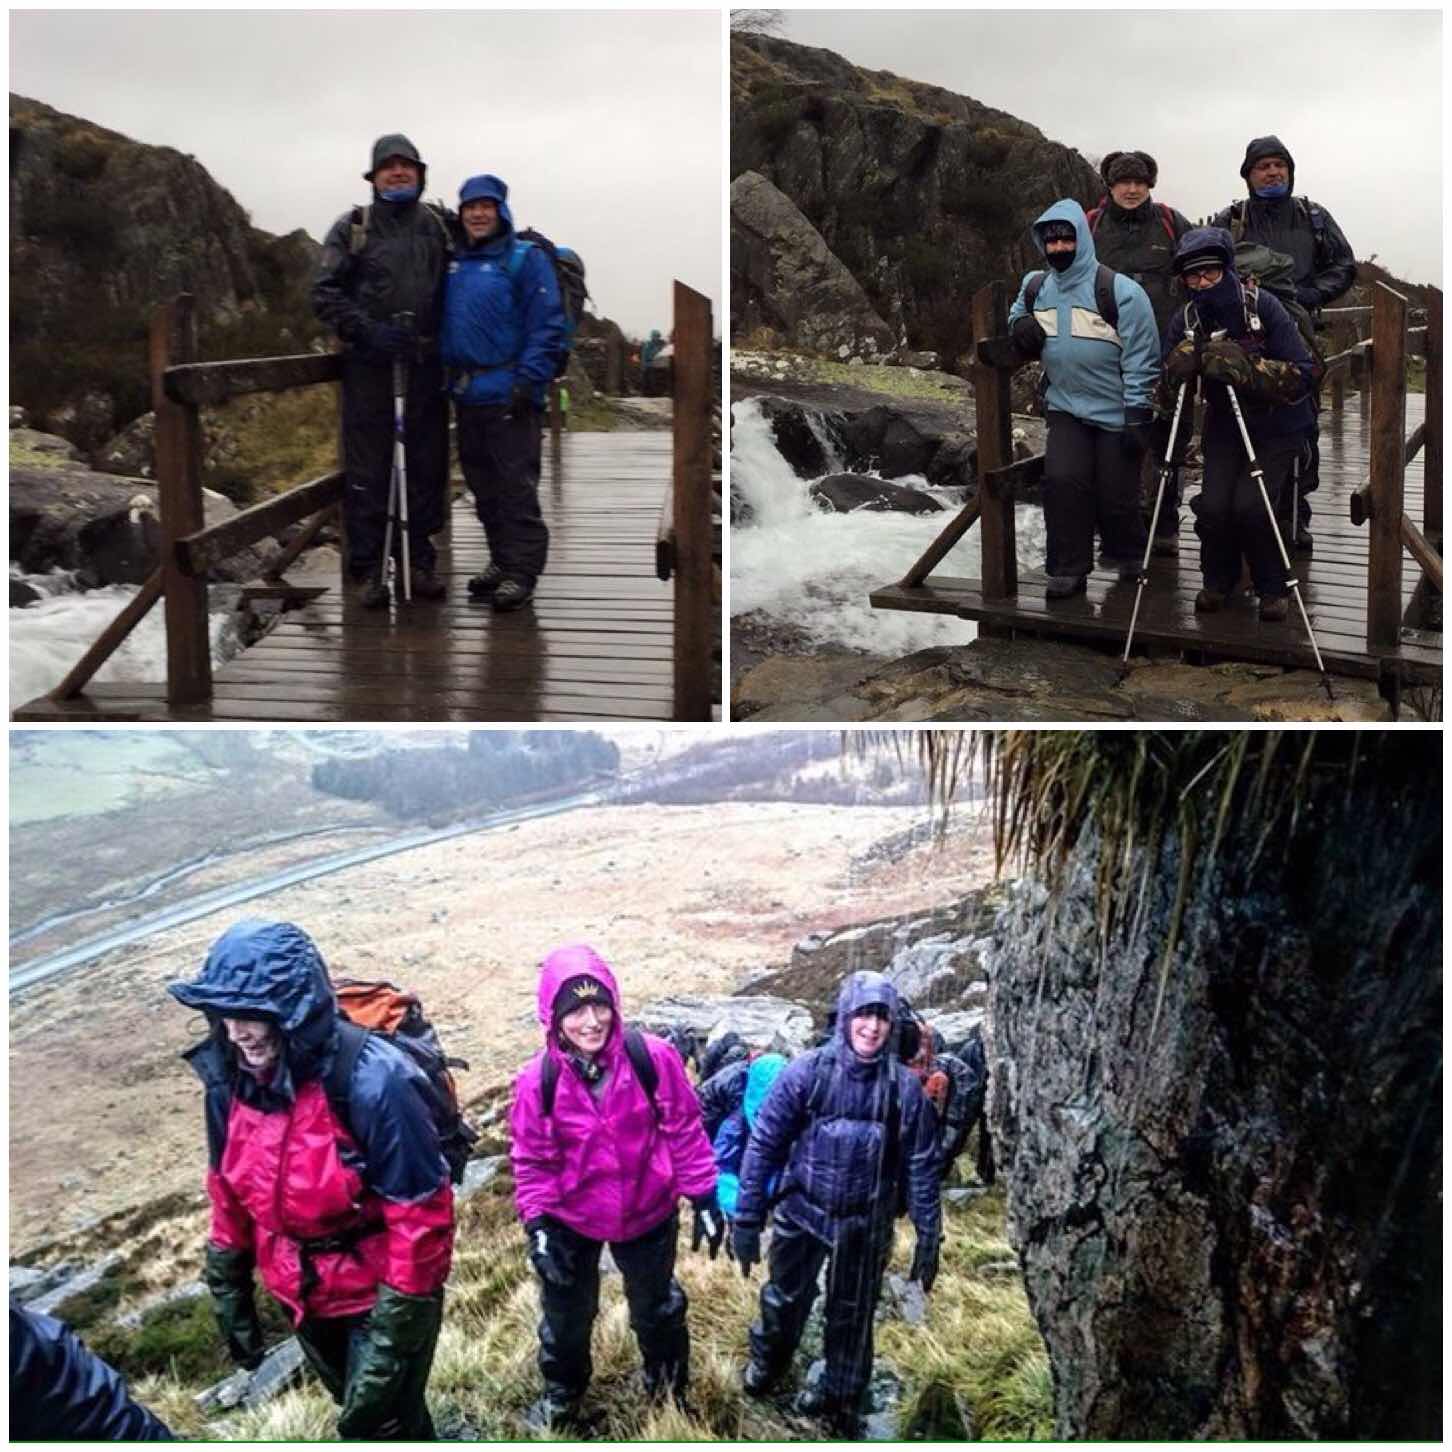
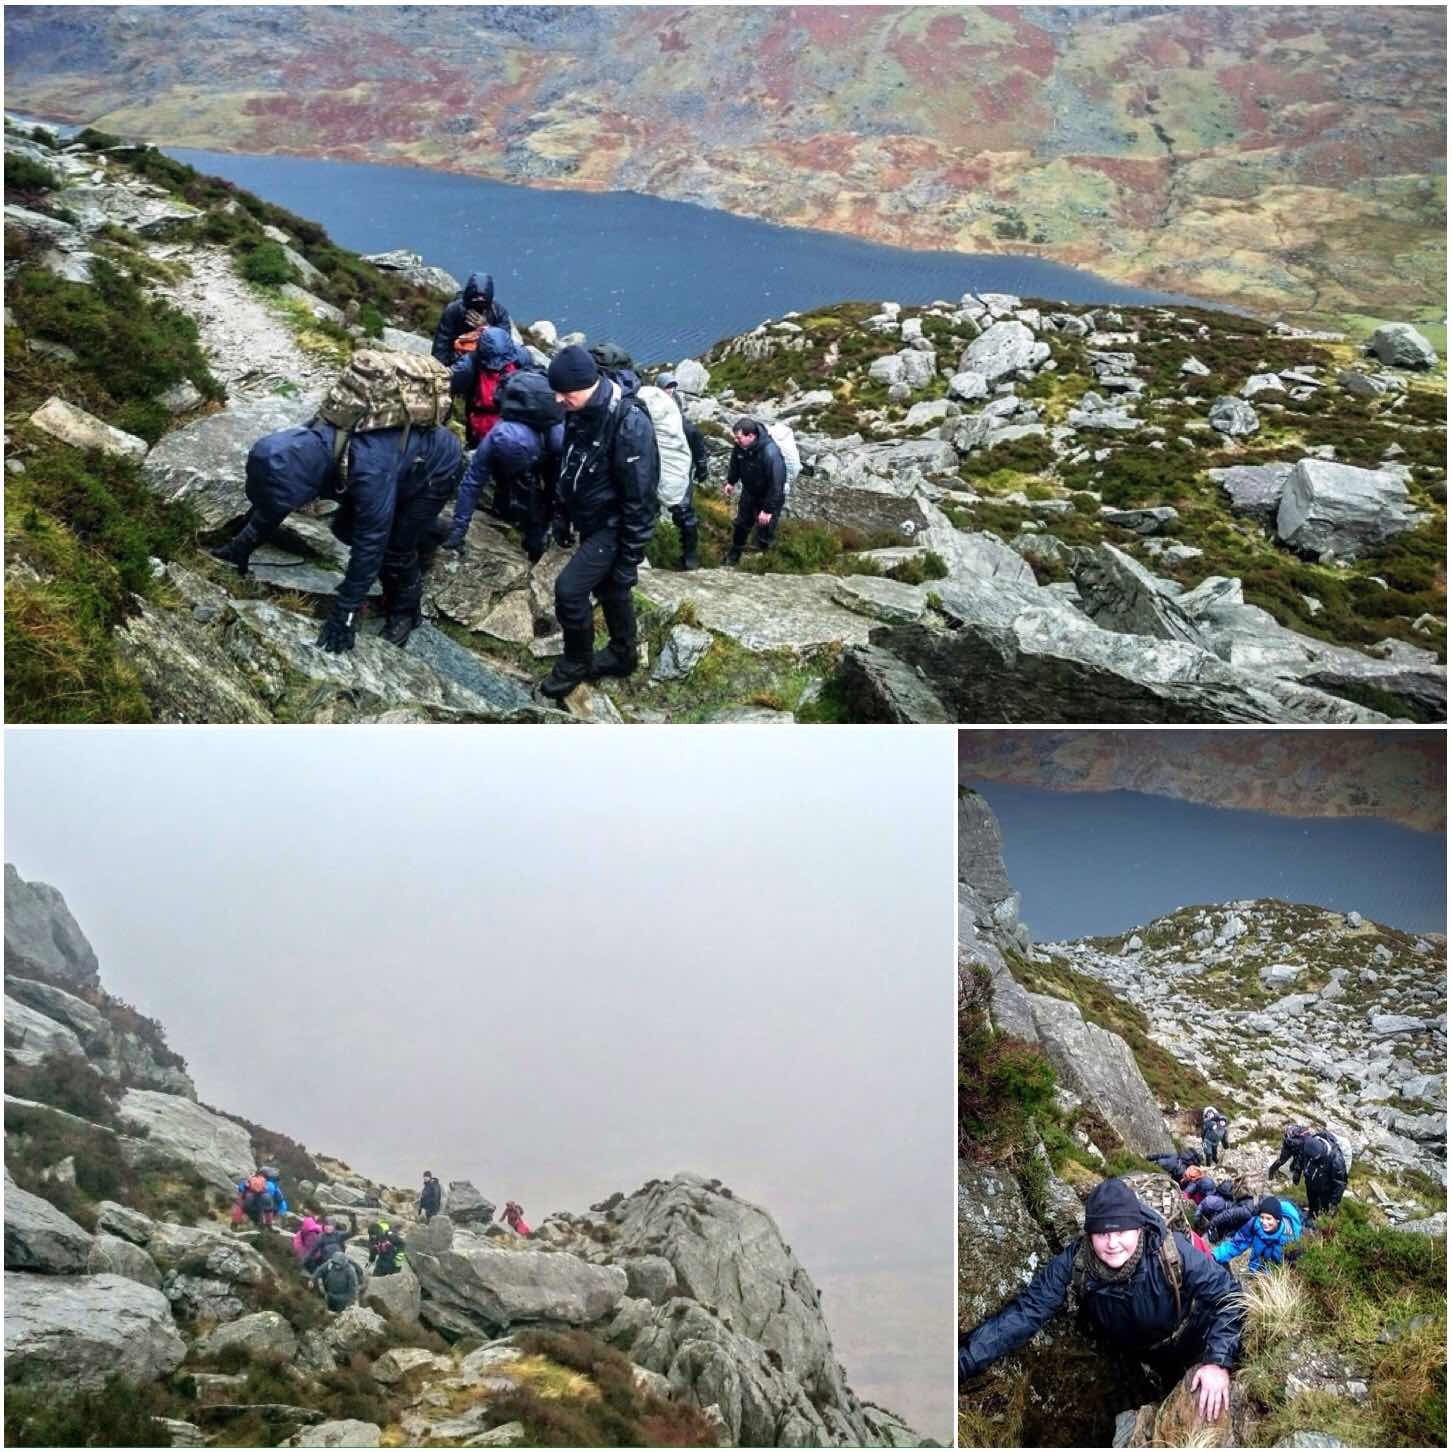
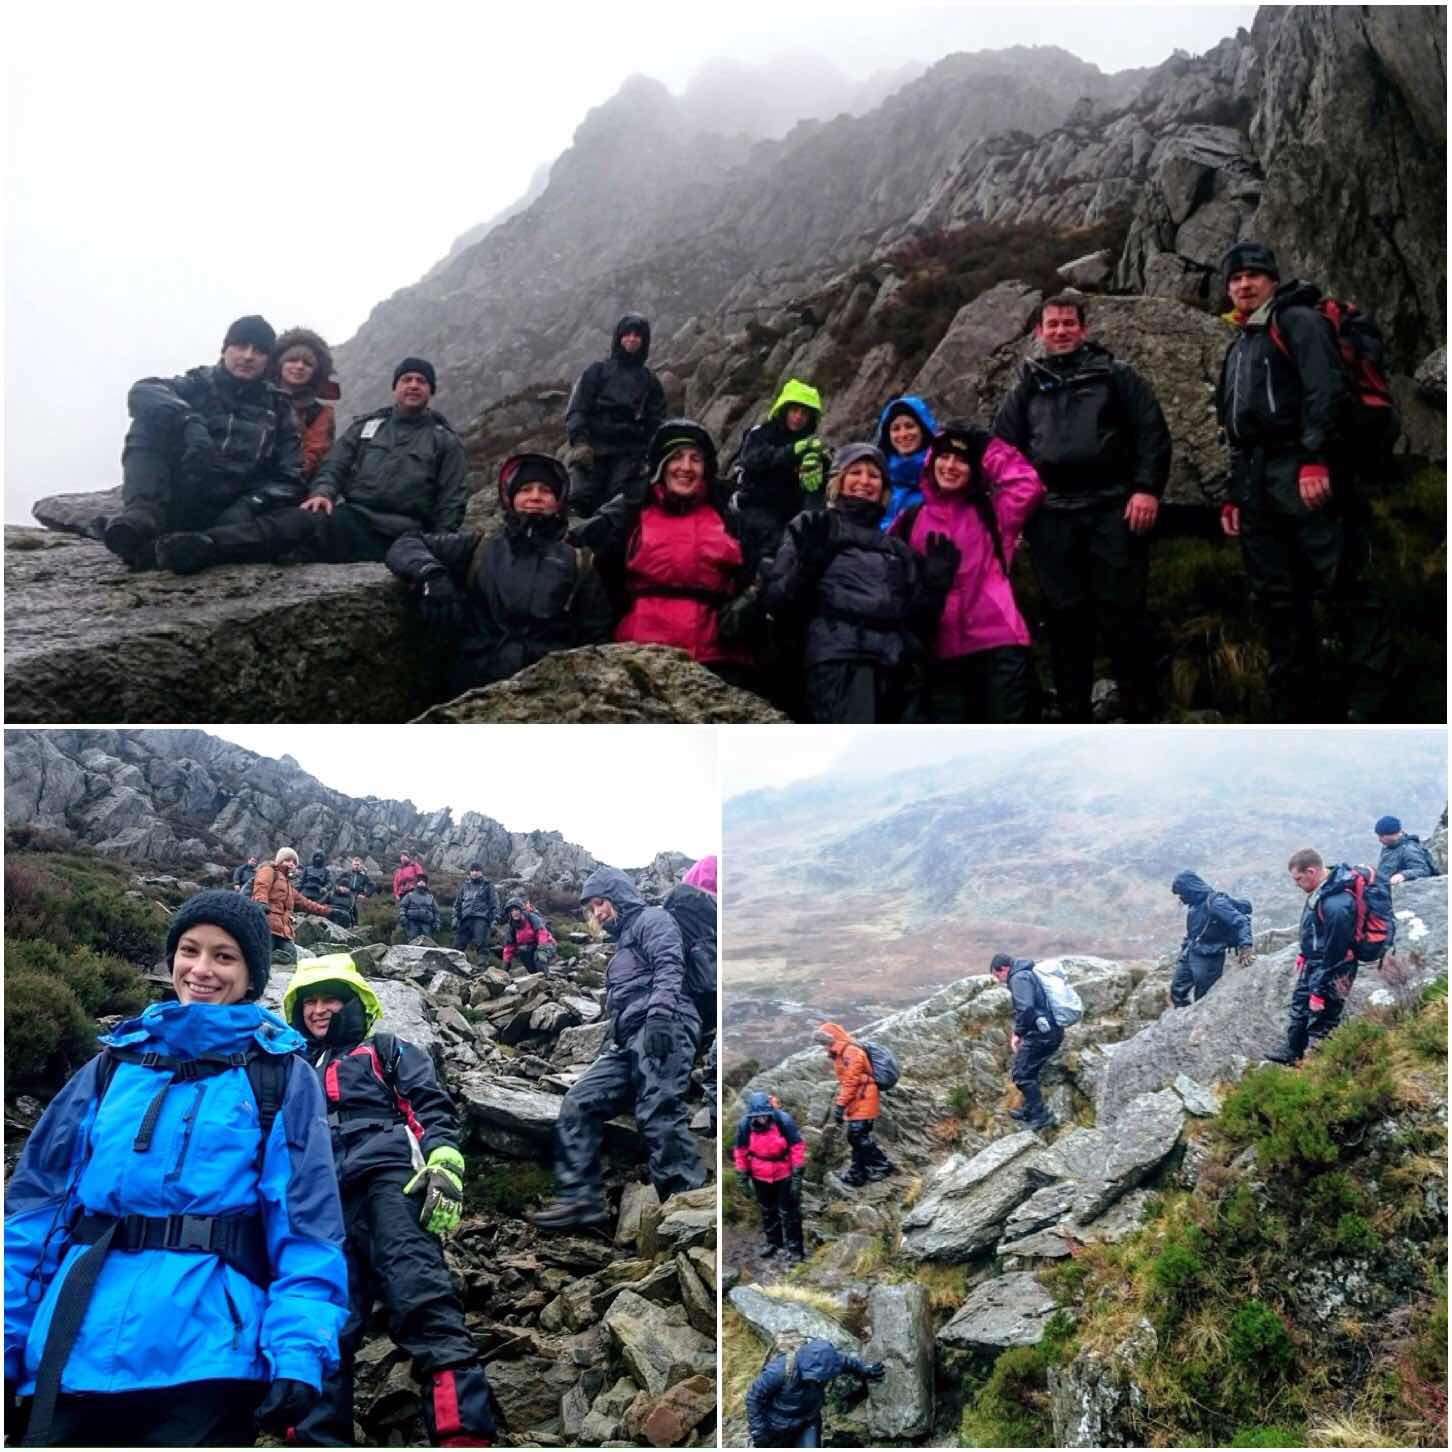
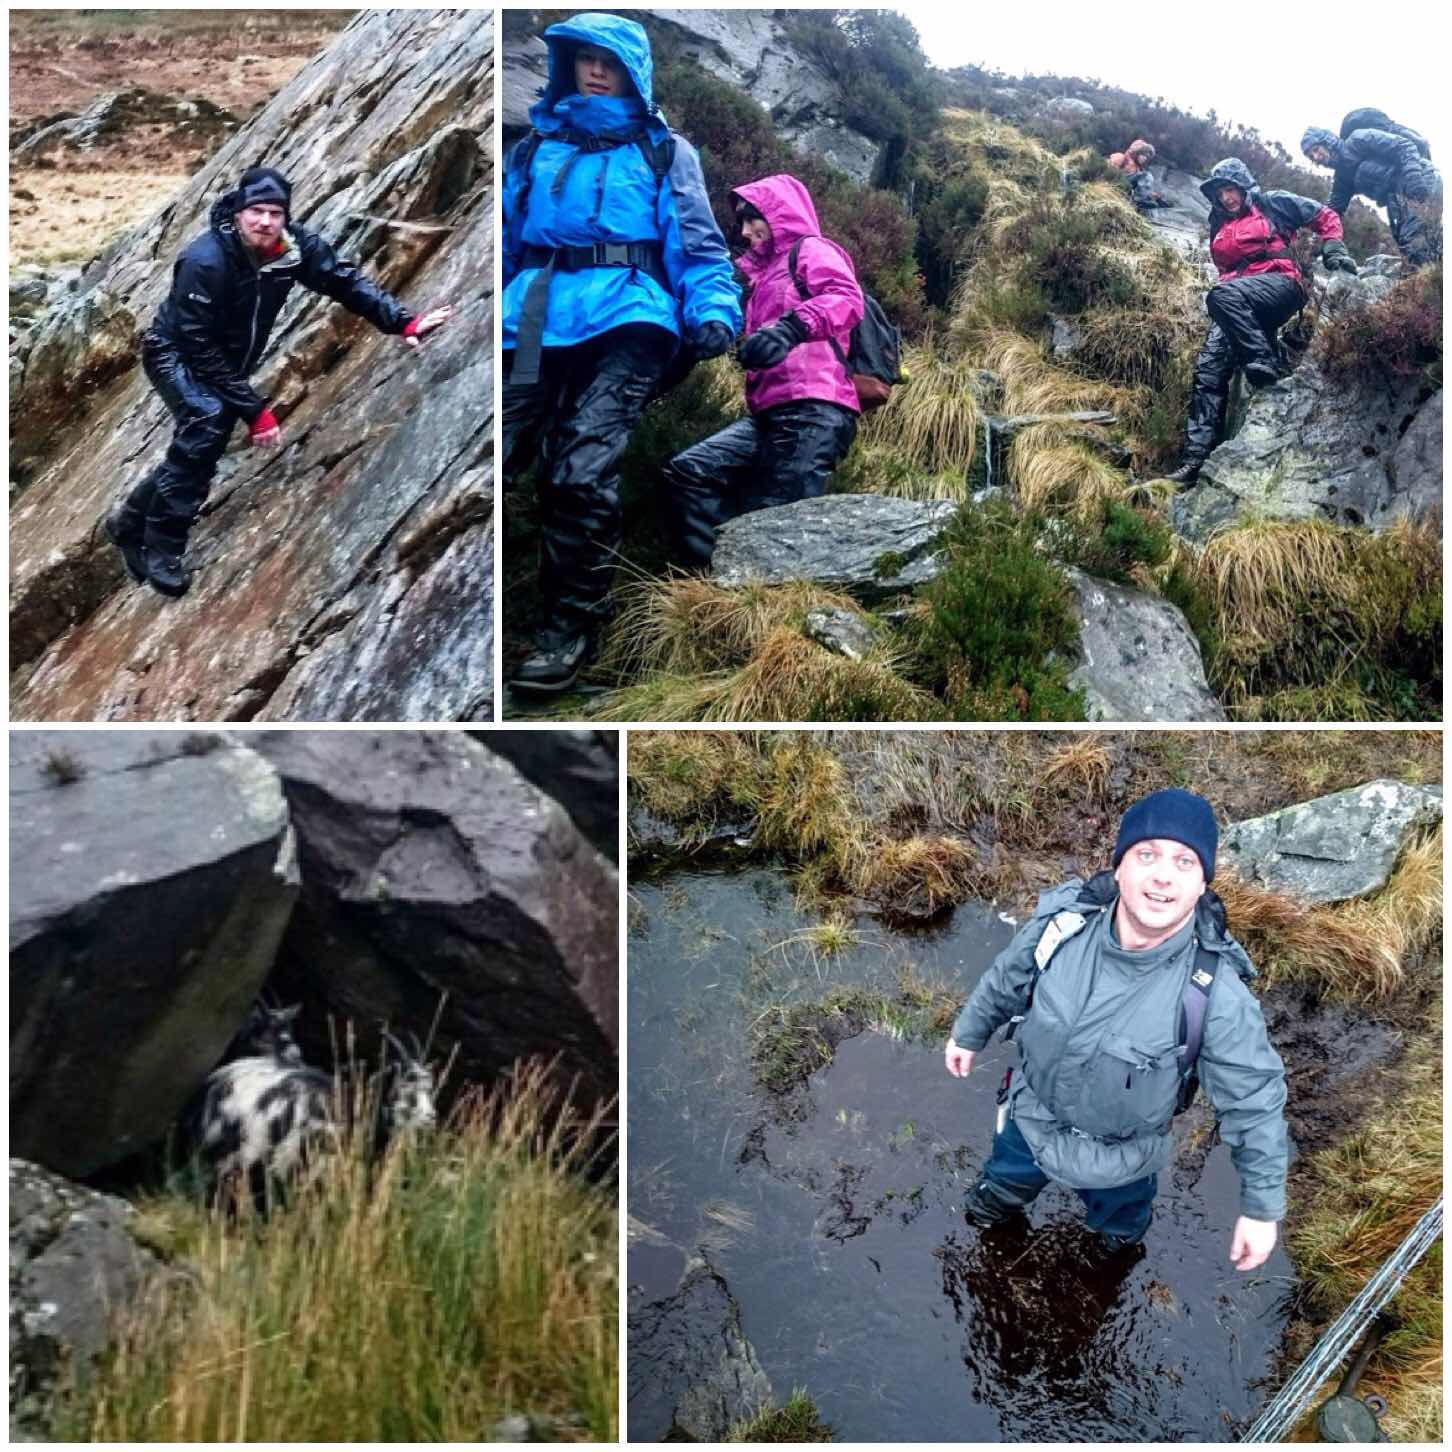
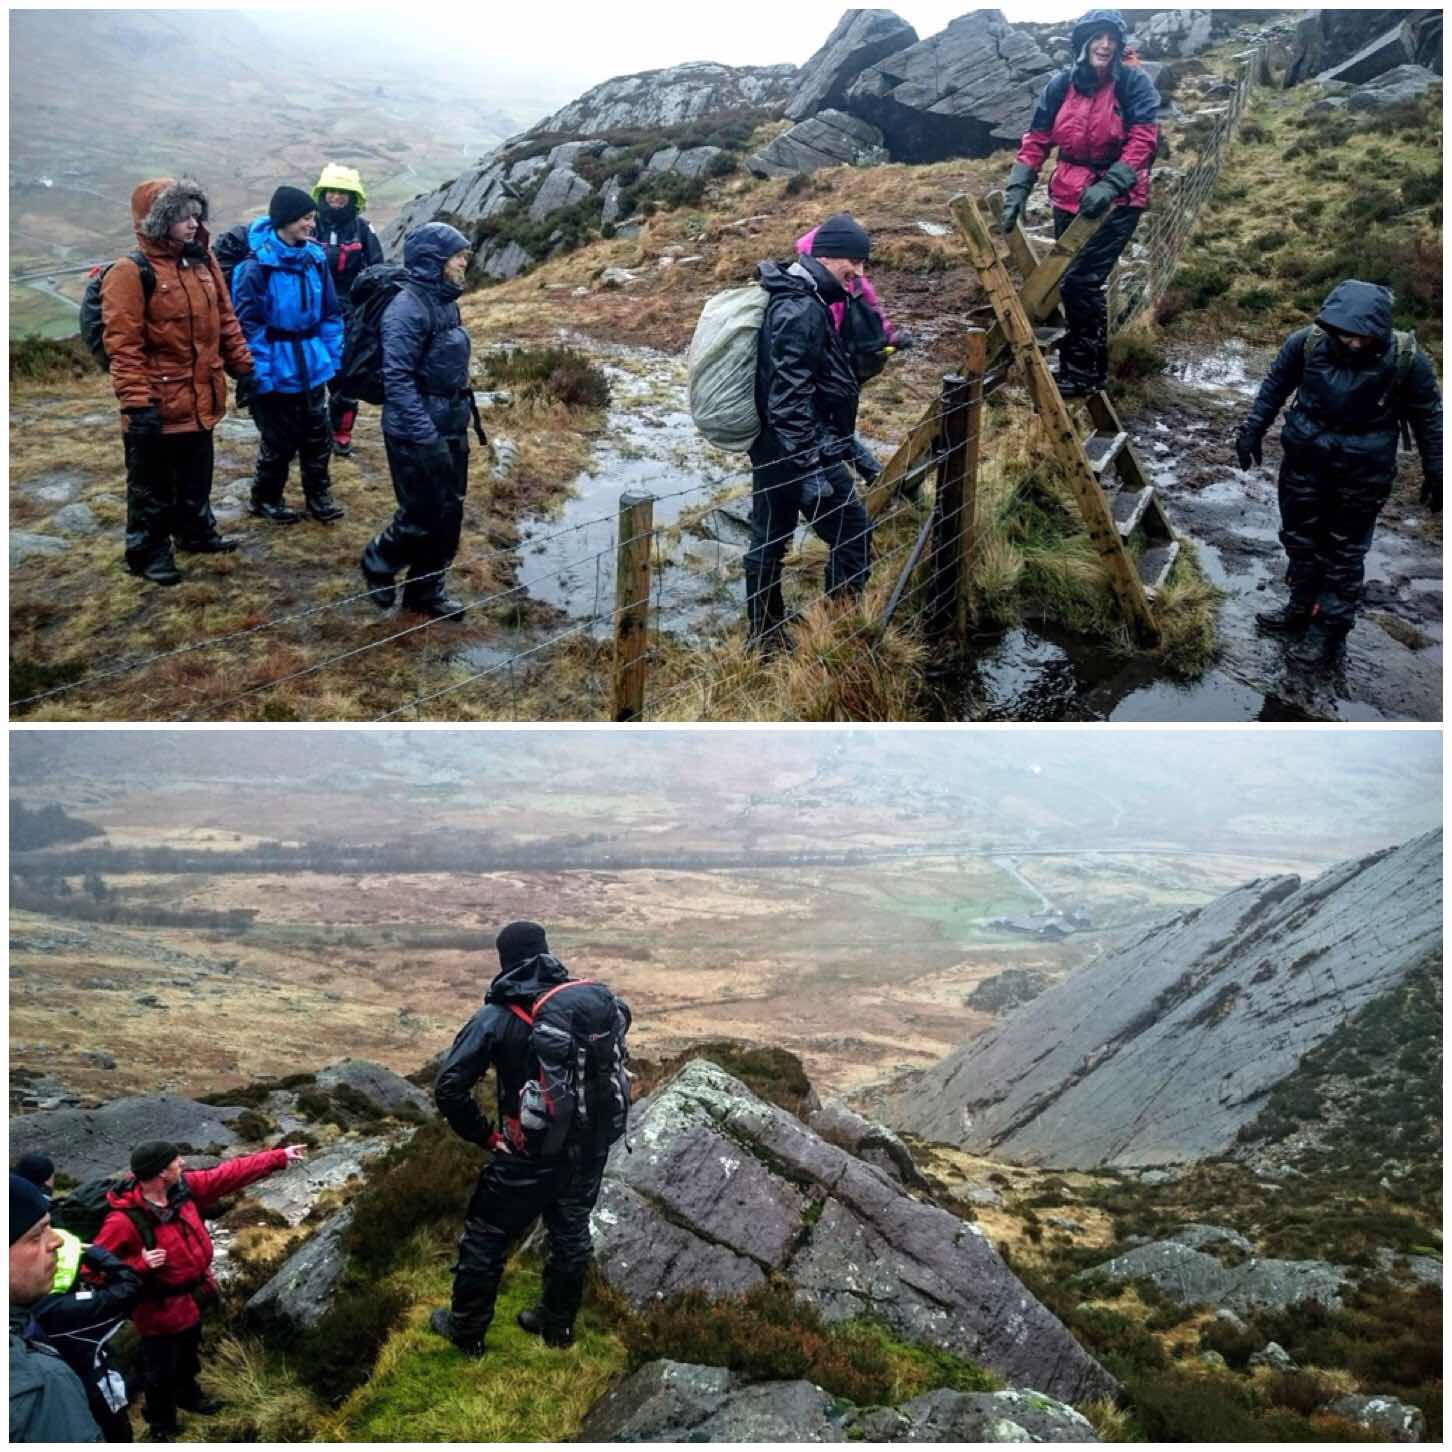
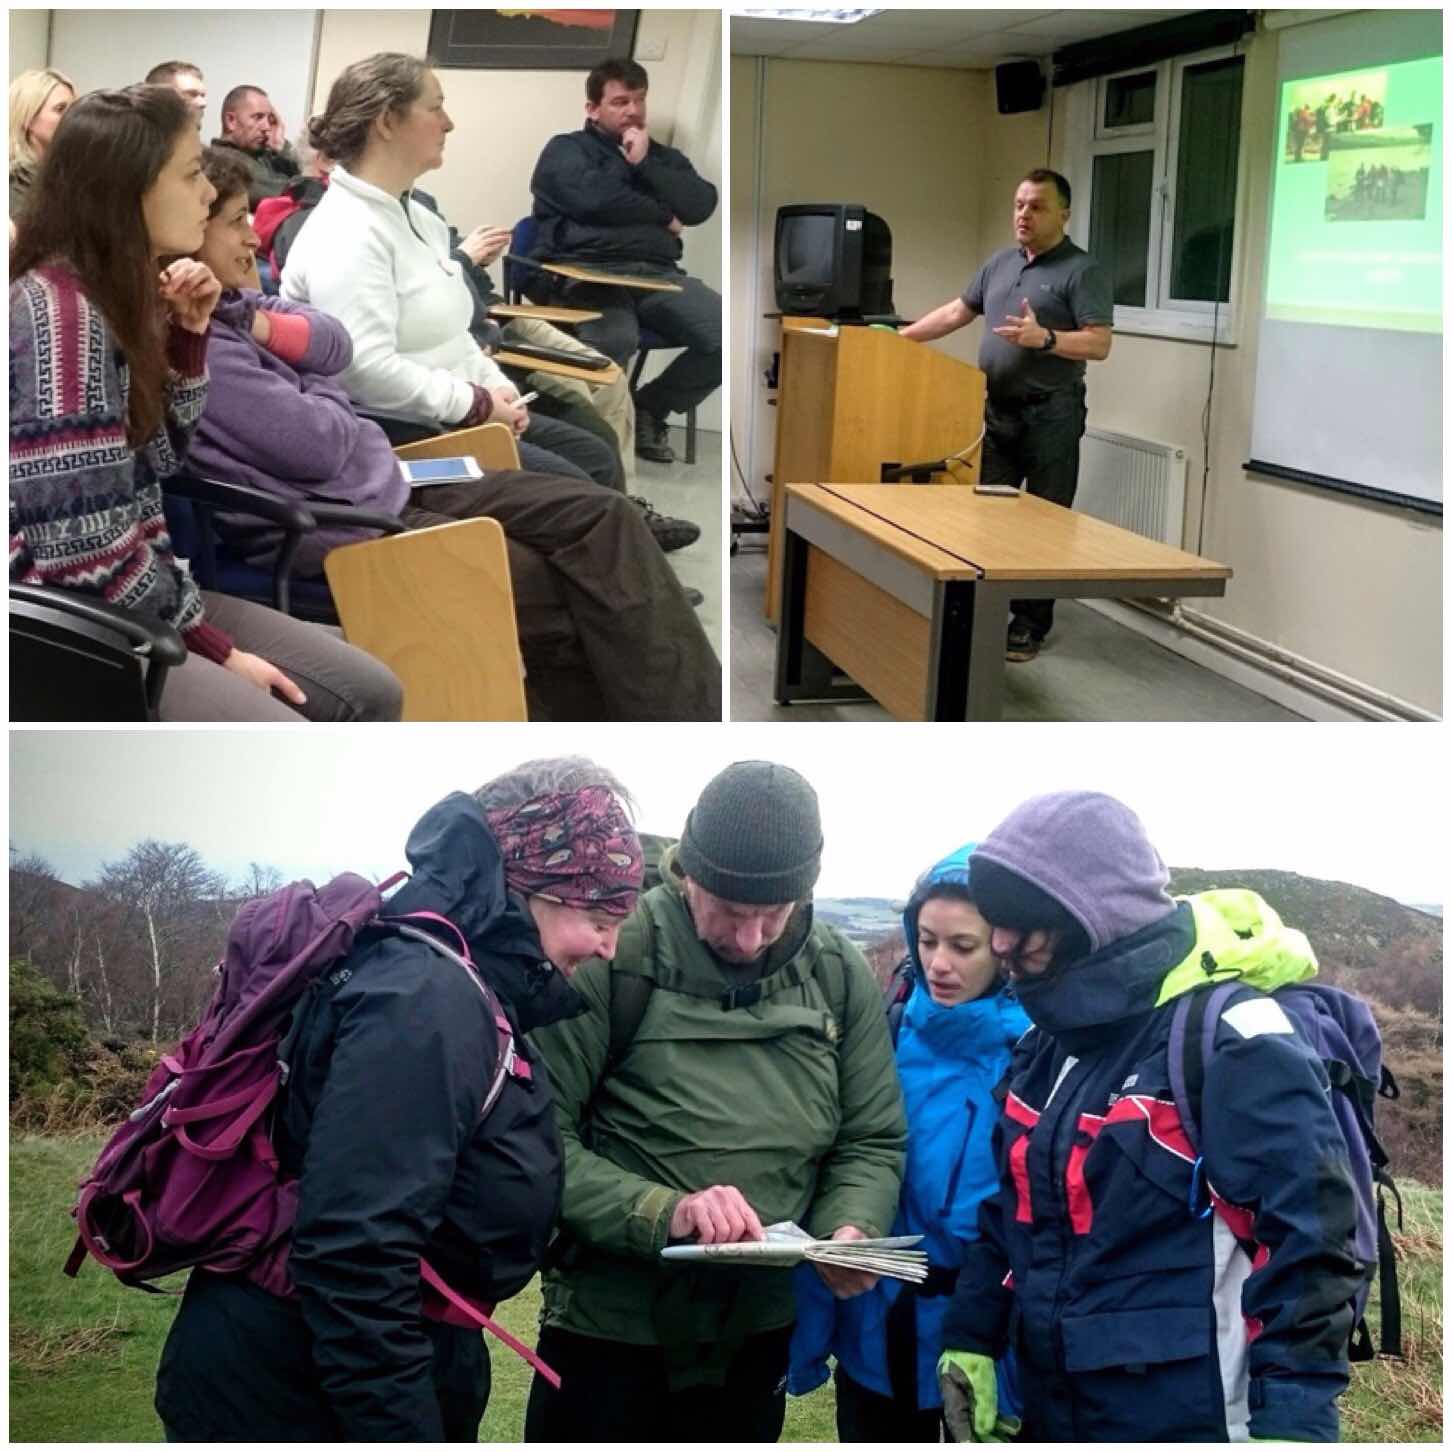
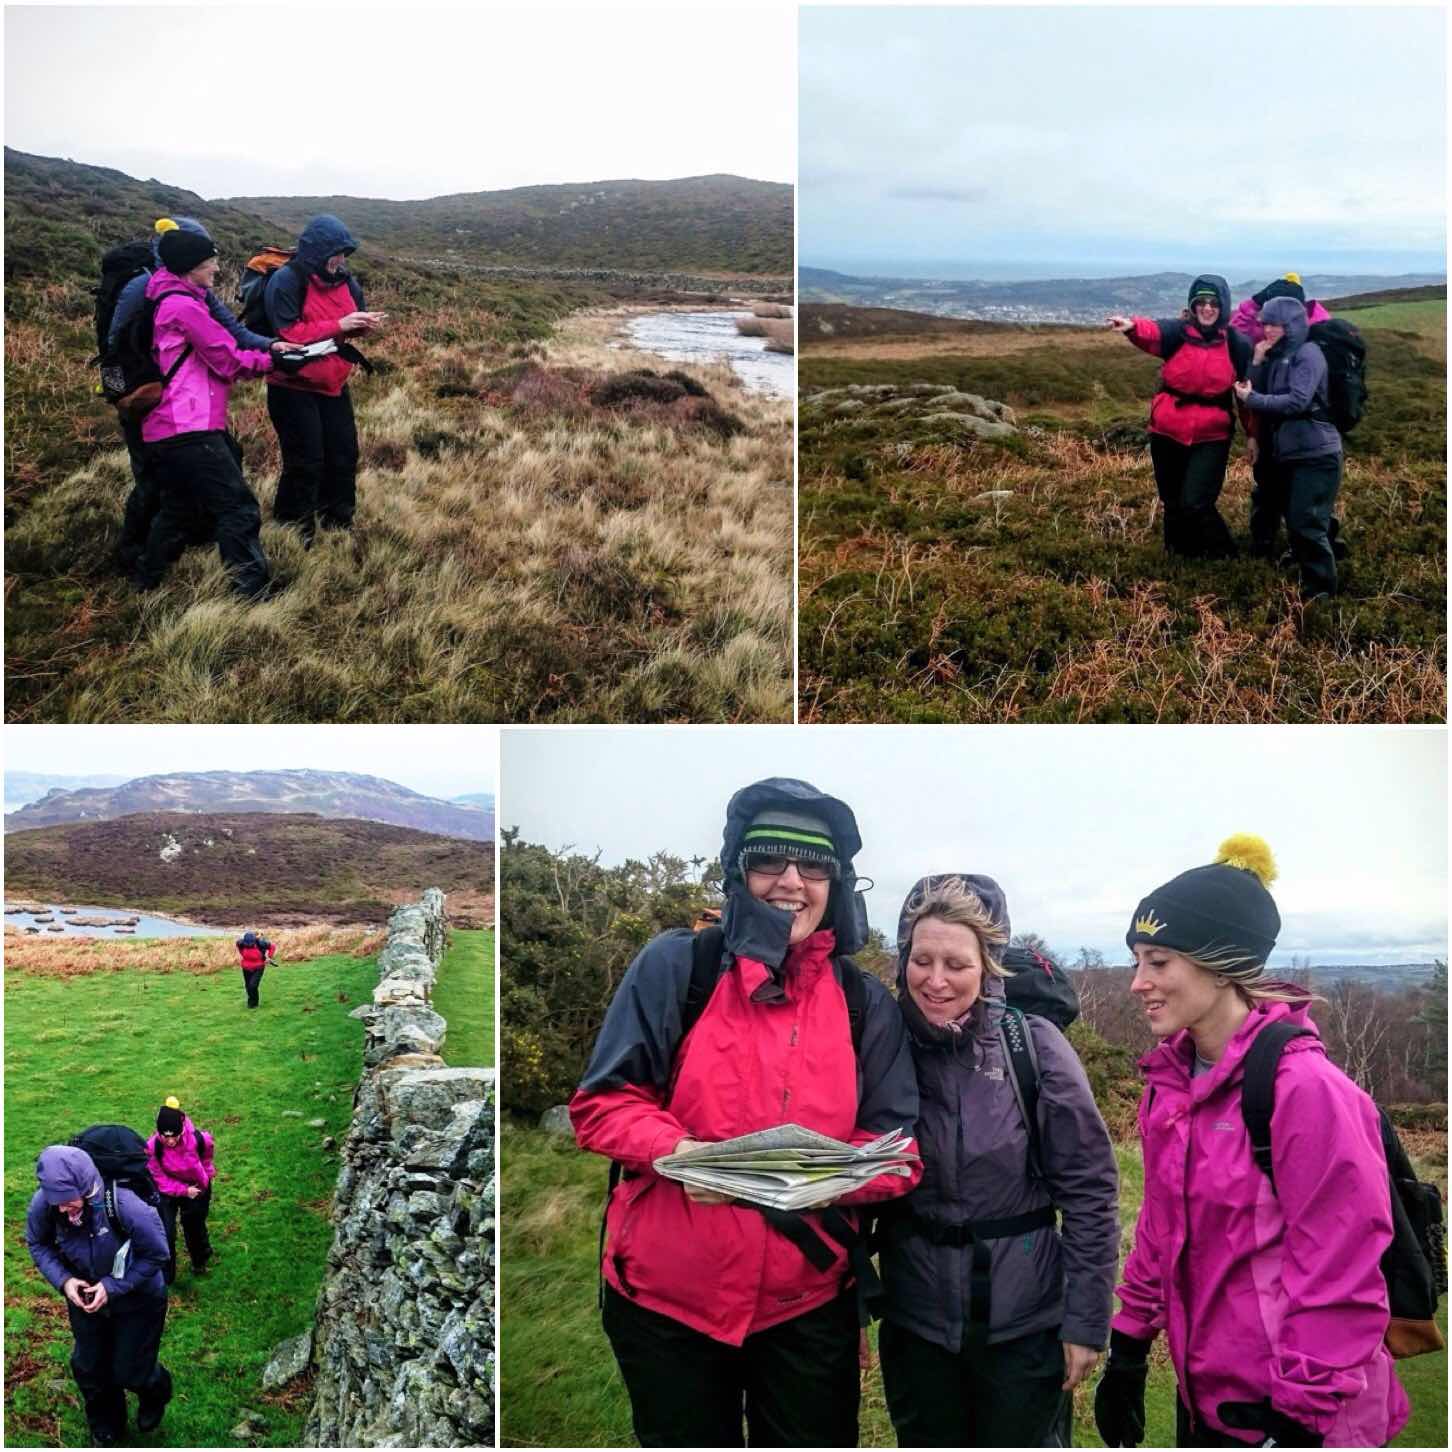
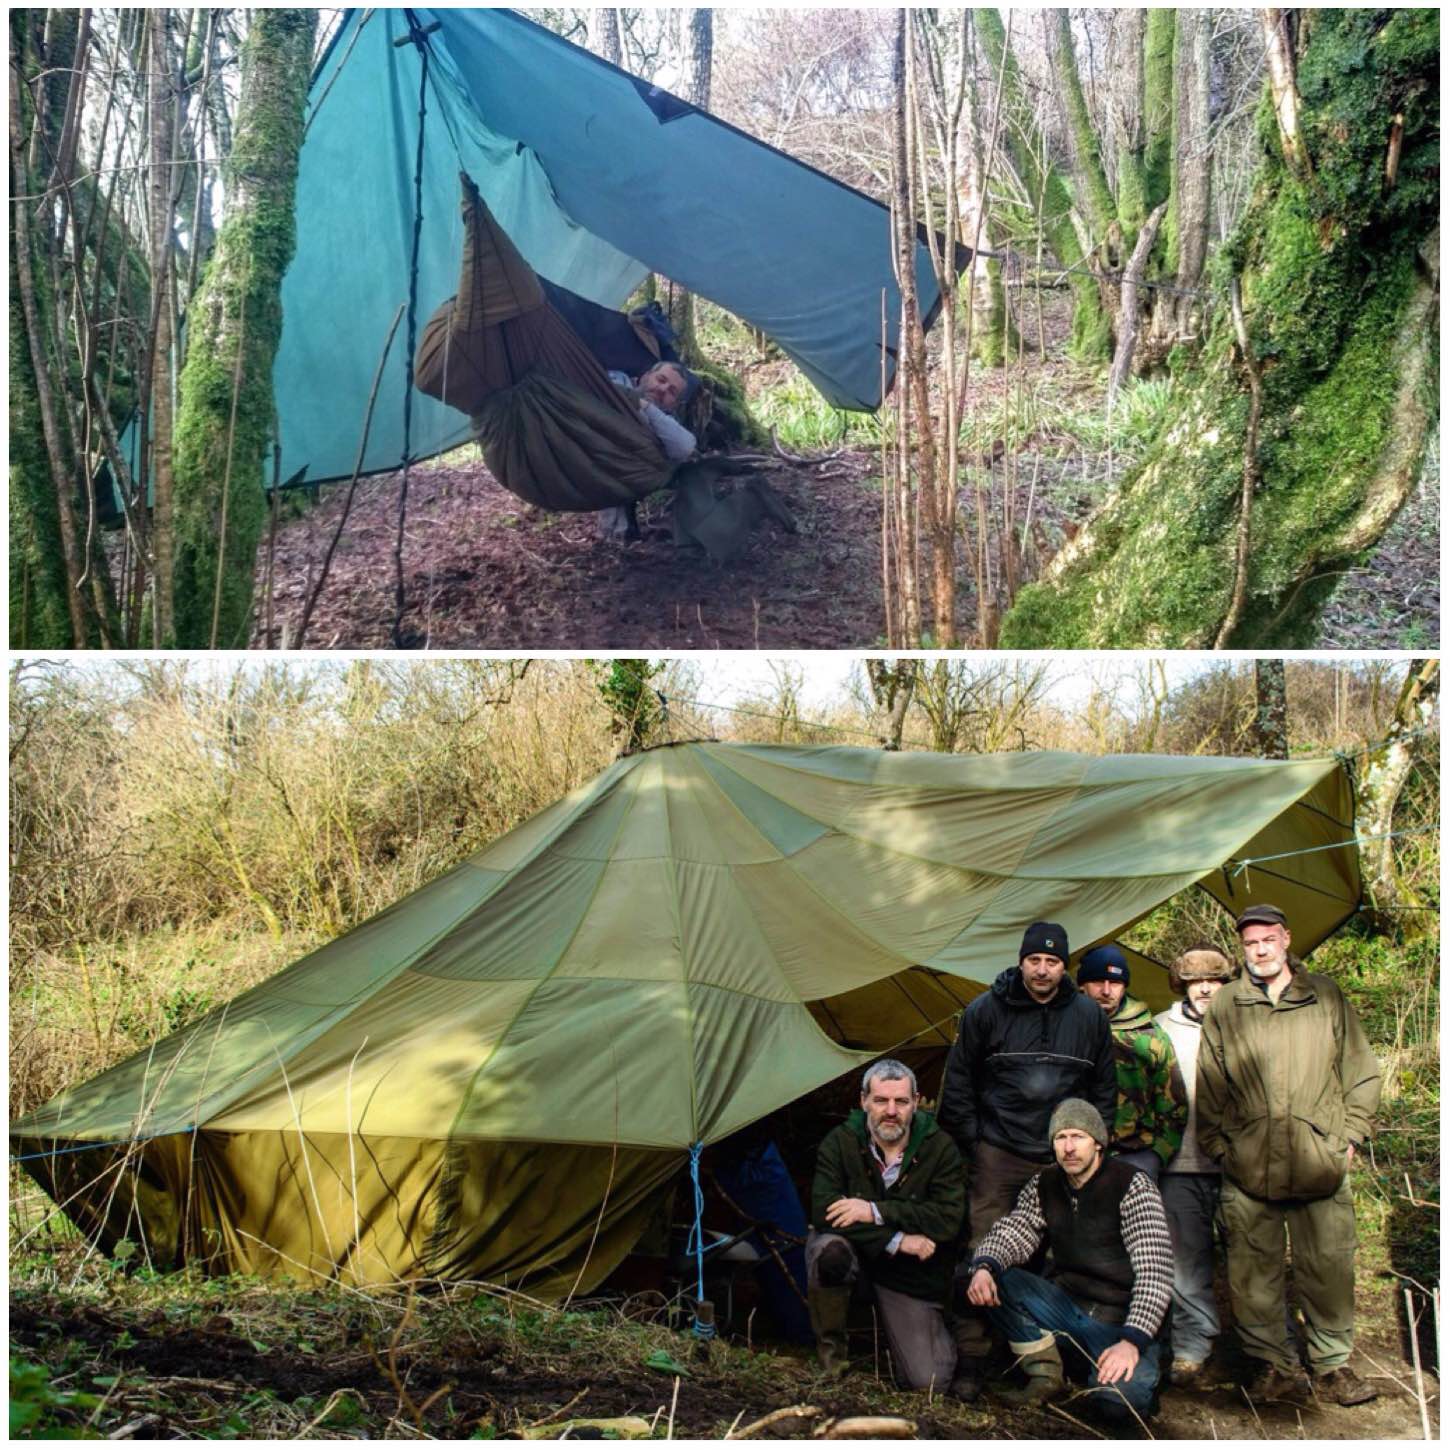
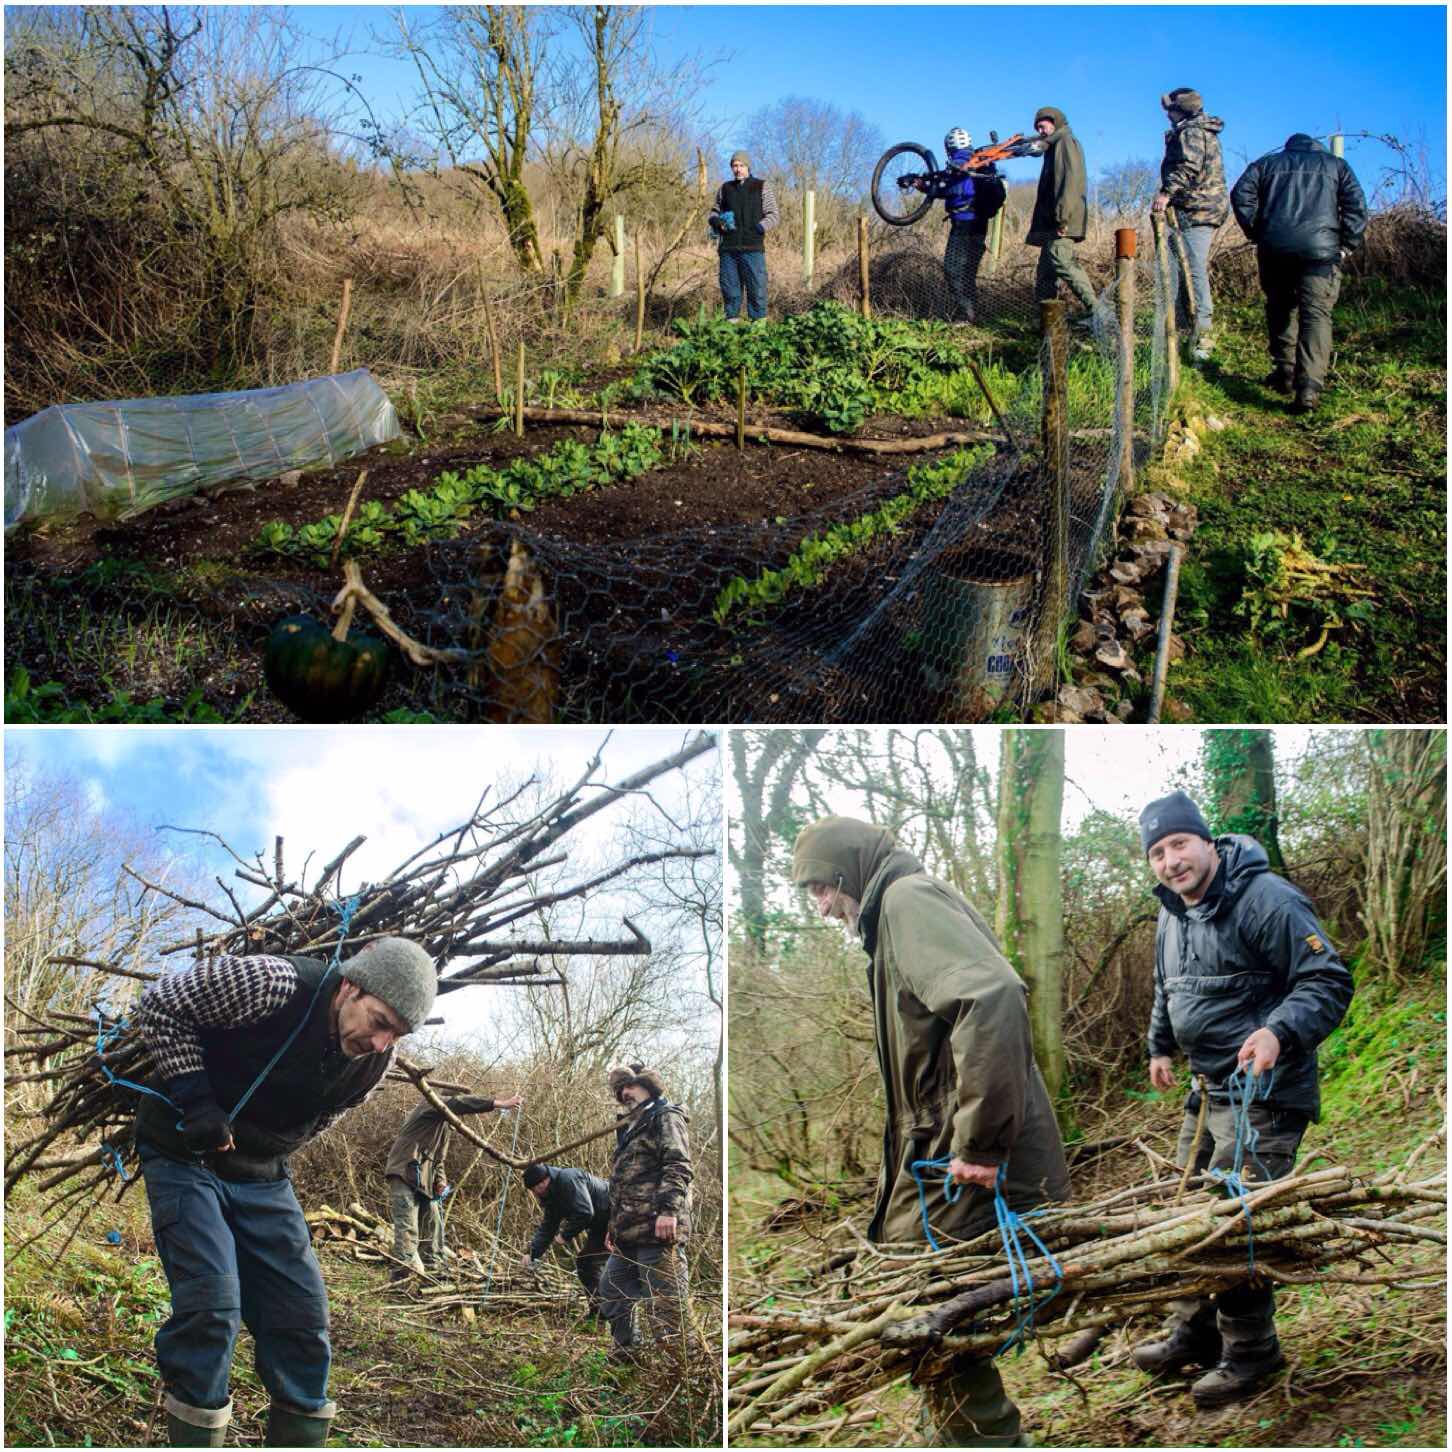
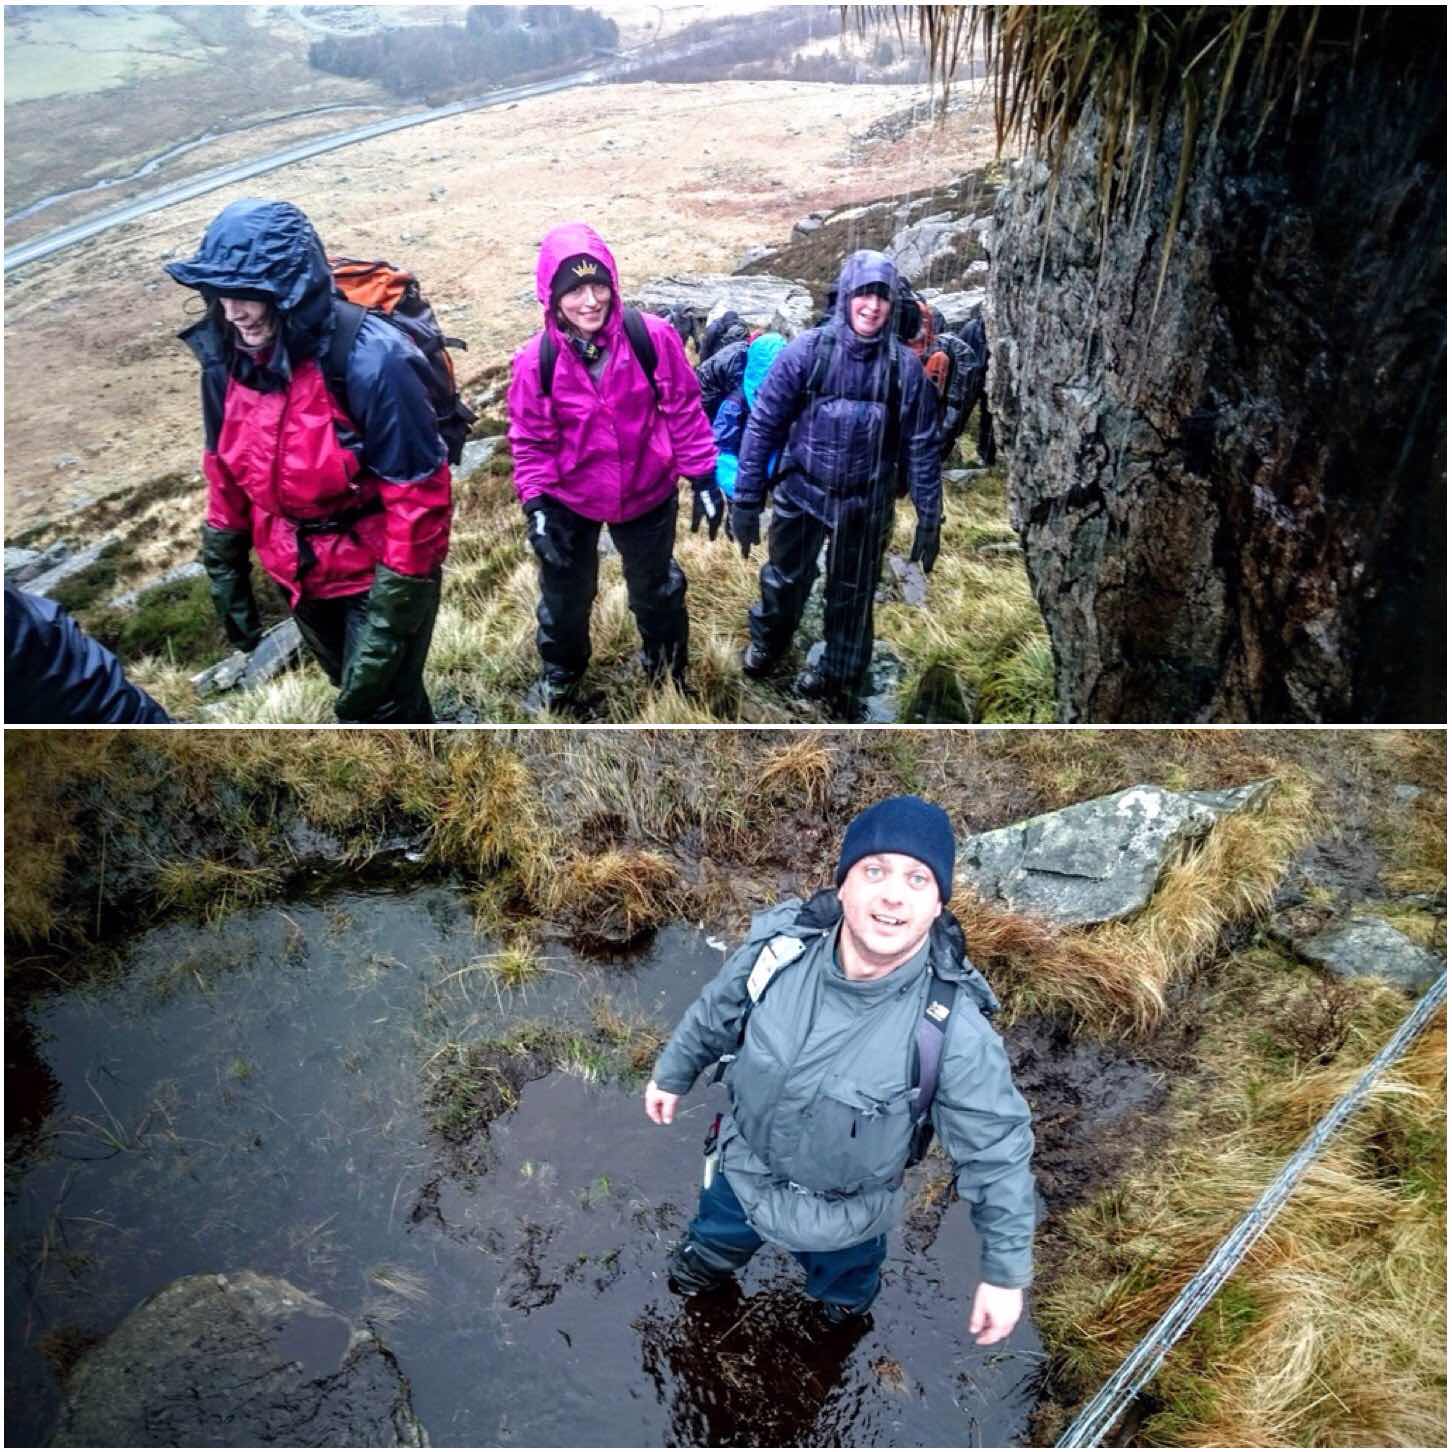
Mountain time this winter was limited to only one weekend however it was one to remember. The wind and the rain was incessant however this did not dampen the spirits of any of the guys I was walking with – in fact they seemed to revel in all that rain (might be due to the fact we are all either Sea or Royal Marines Cadets instructors).

Photo 29-03-2016, 17 21 32
Mountain madness

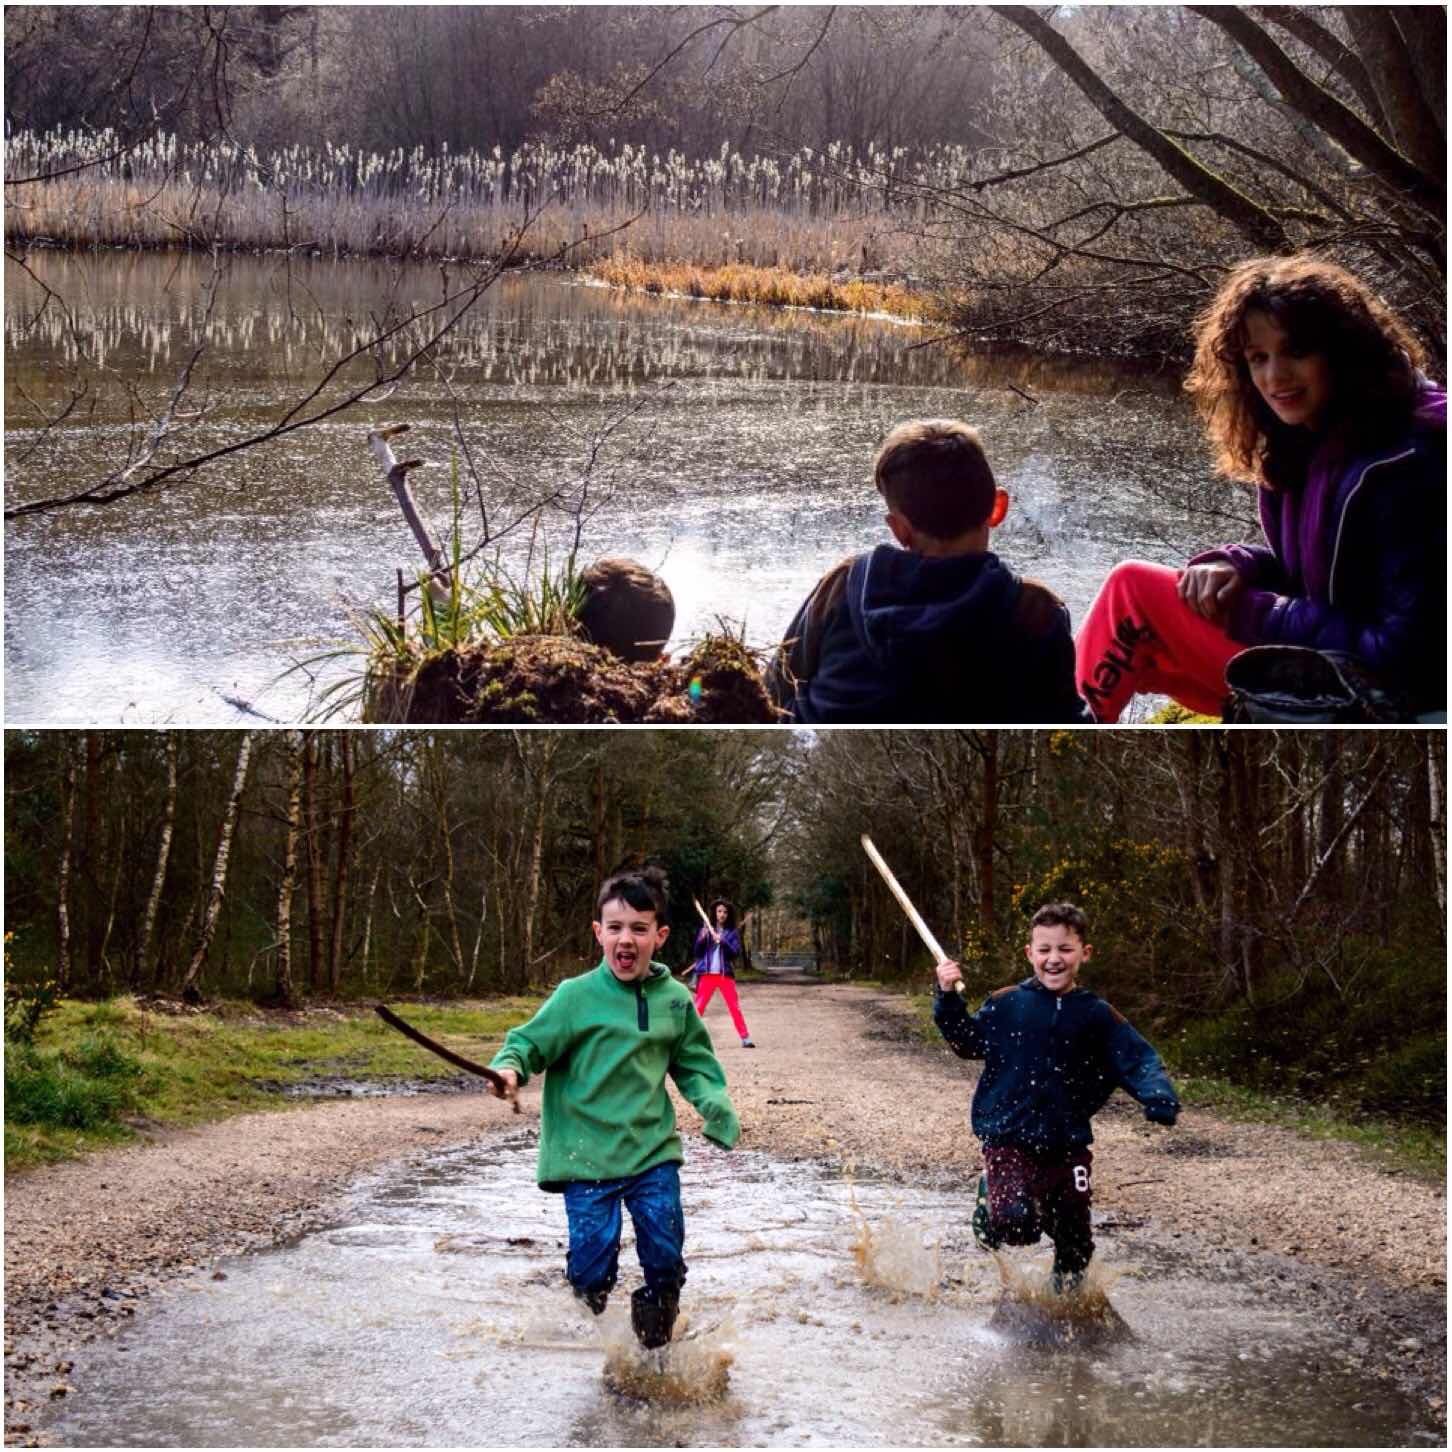
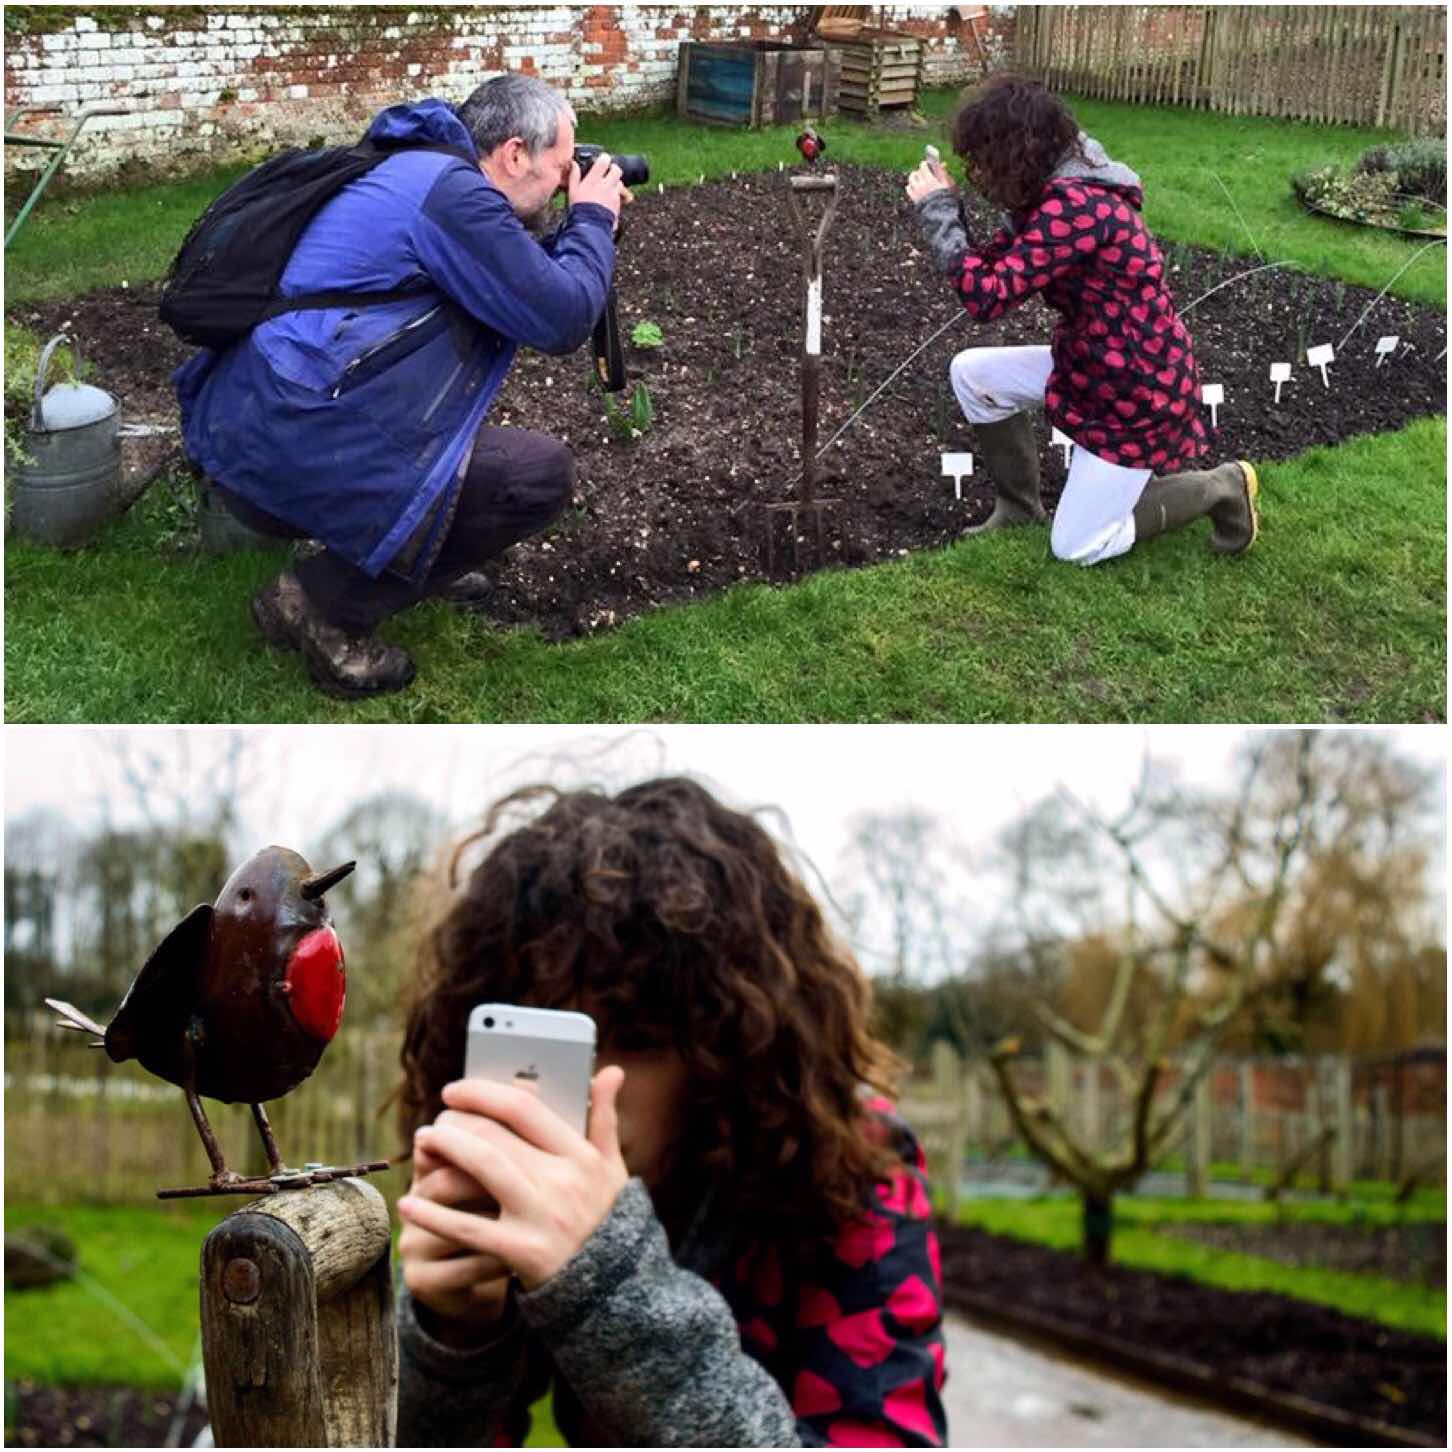
My daughter Catherine is a keen photographer and she really does think about what she wants to shoot and how to approach each shot.

The top picture was taken by my wife Alison and I like how it contrasts with the one I took of Catherine lining up for her shot.

Photo 29-03-2016, 17 21 33
Photographing the photographers

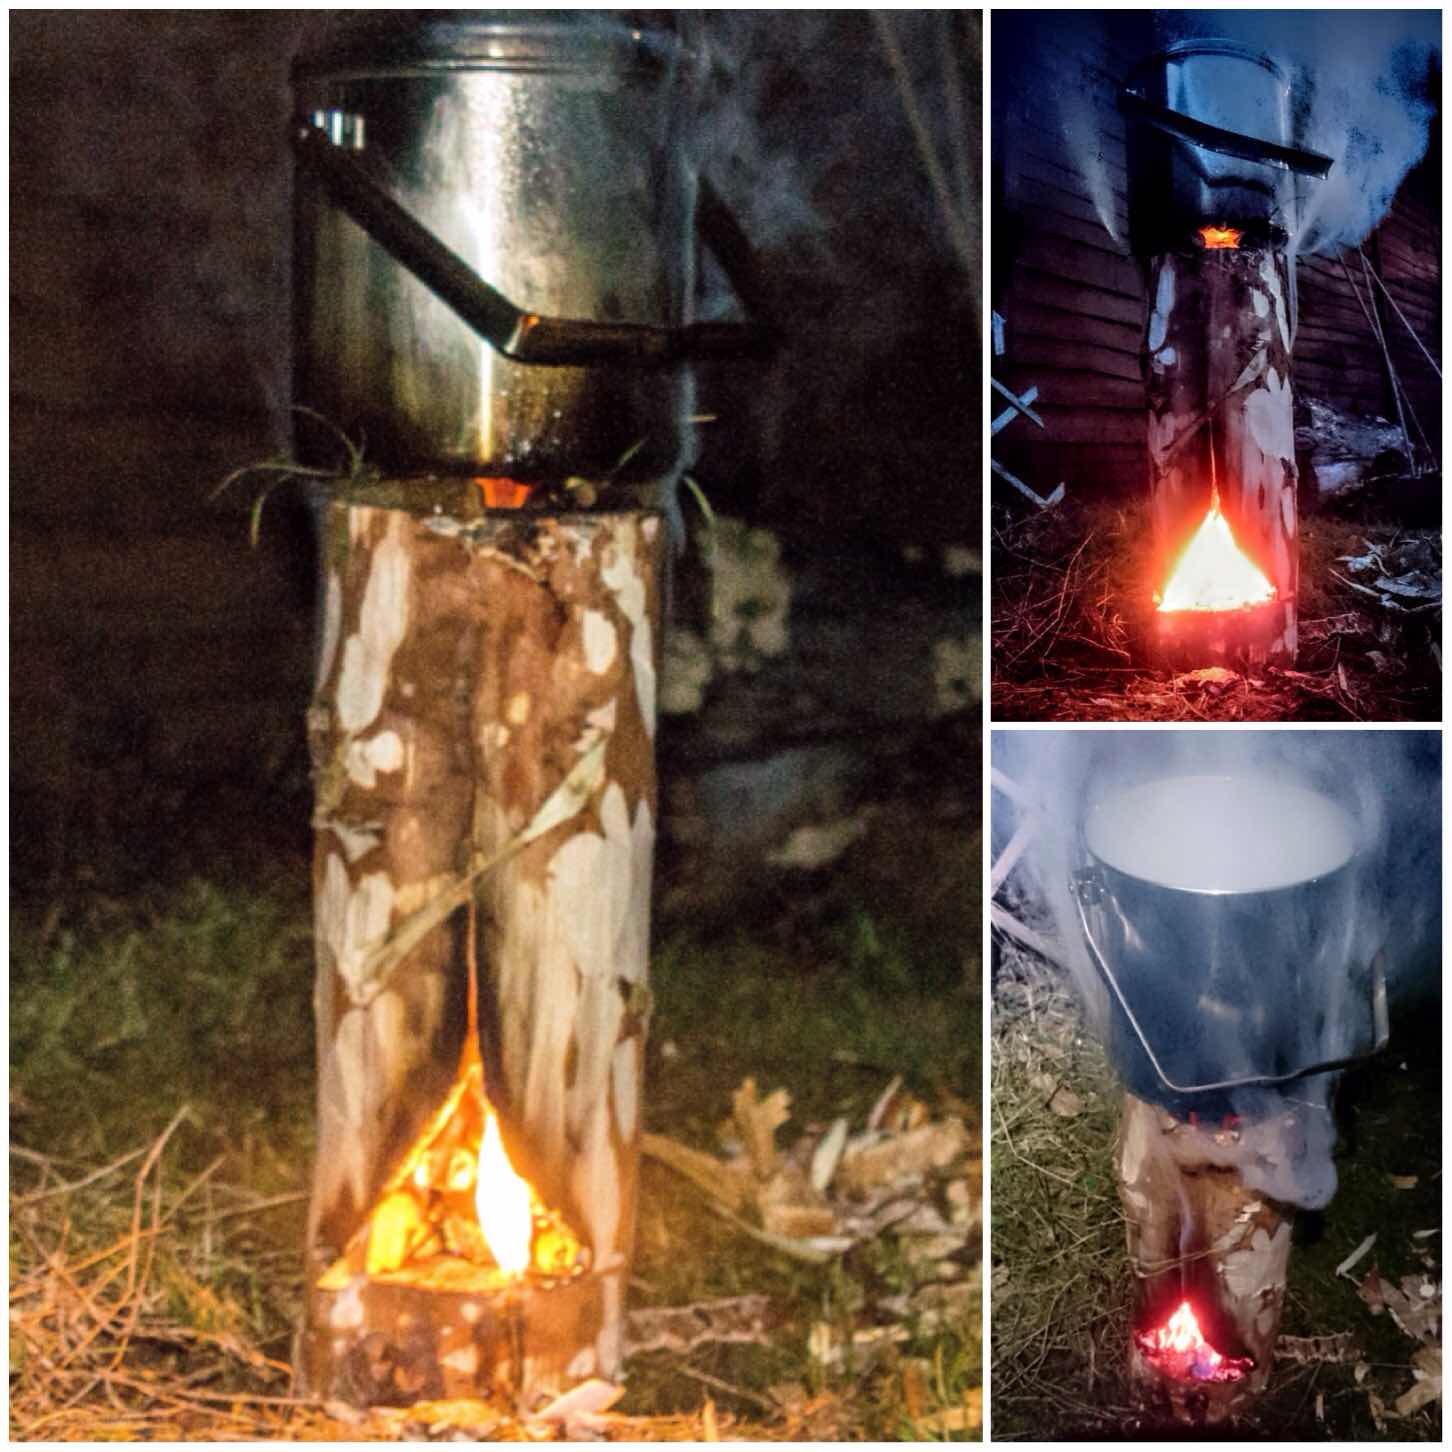
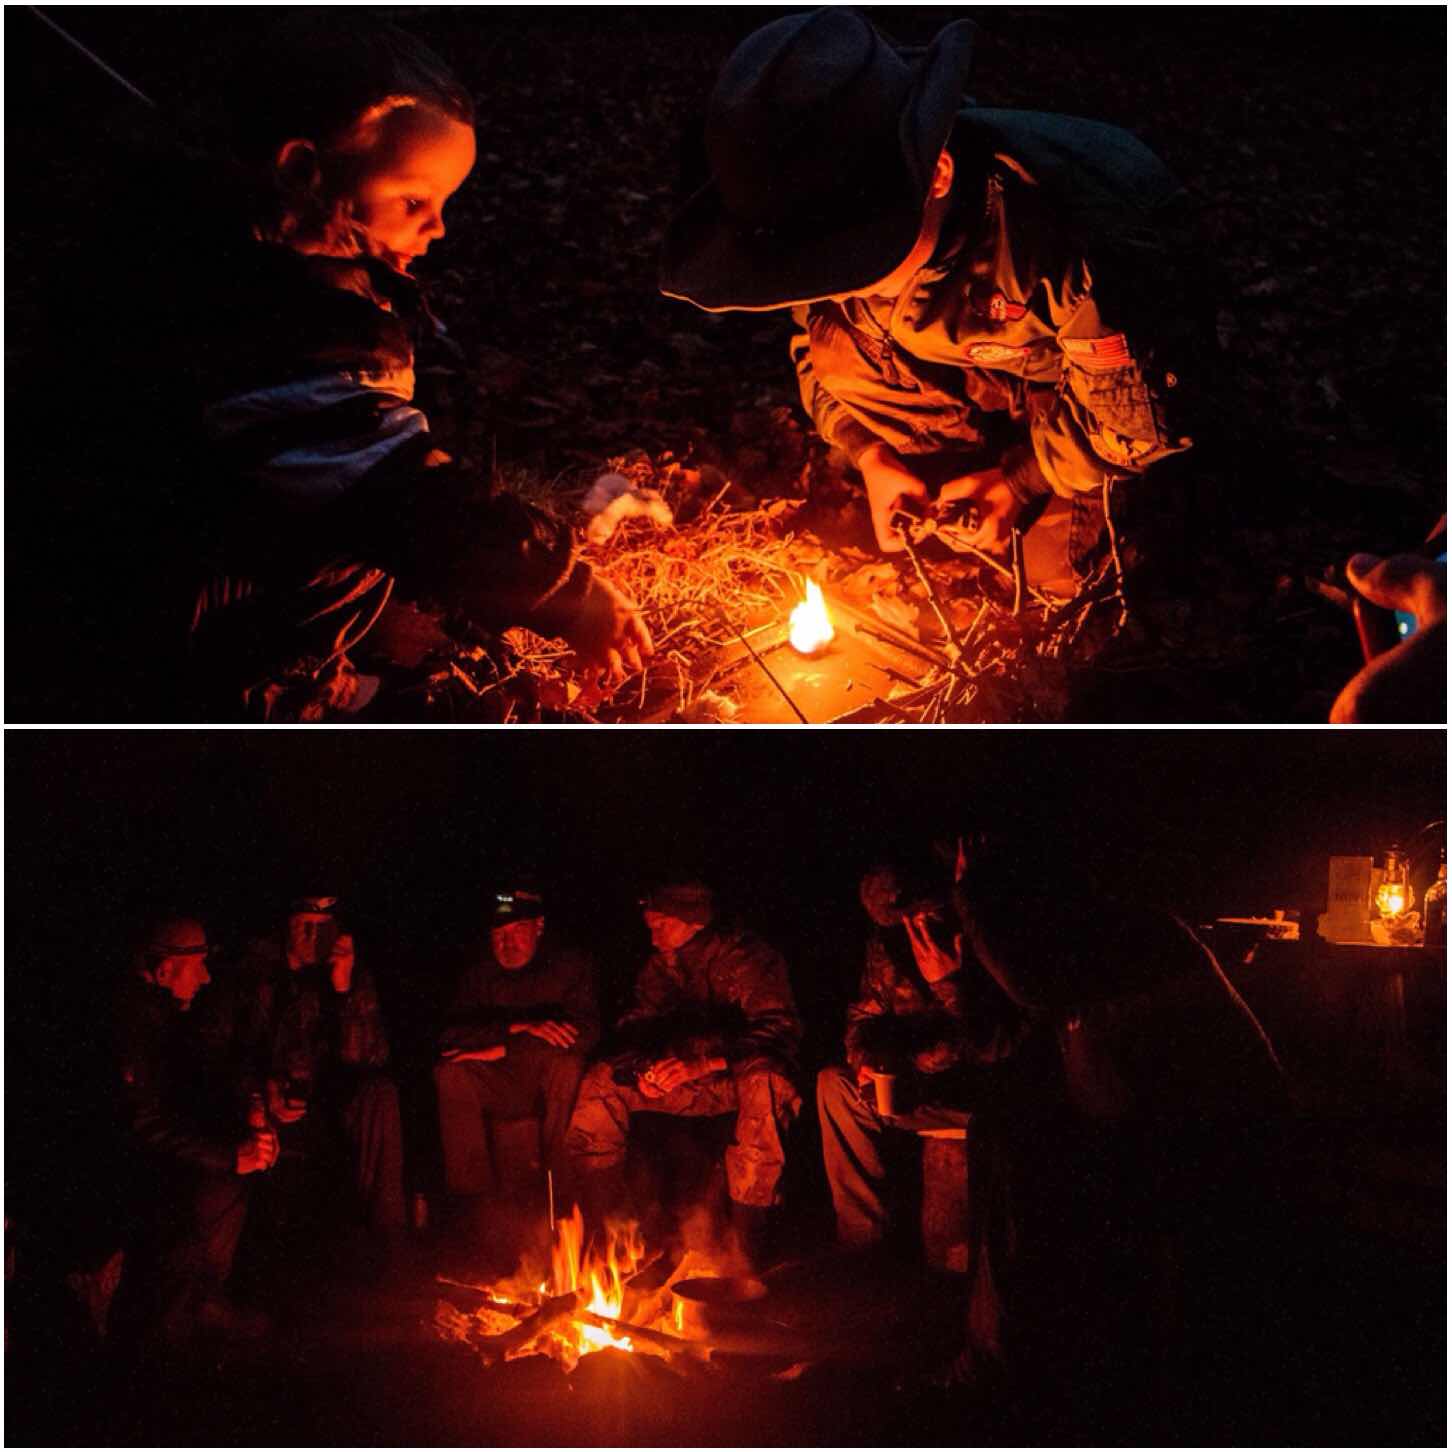
I have been experimenting with low light level photography so I do not have to rely on using the flash all the time.

I have found that a great time for that is when there is a fire going. These two photographs were taken on cold winter nights however I have fond memories of both evenings. The young boys had a great time learning to light a fire and the slightly older boys had fun putting the world to right around their fire.

Photo 29-03-2016, 17 21 34
Friends

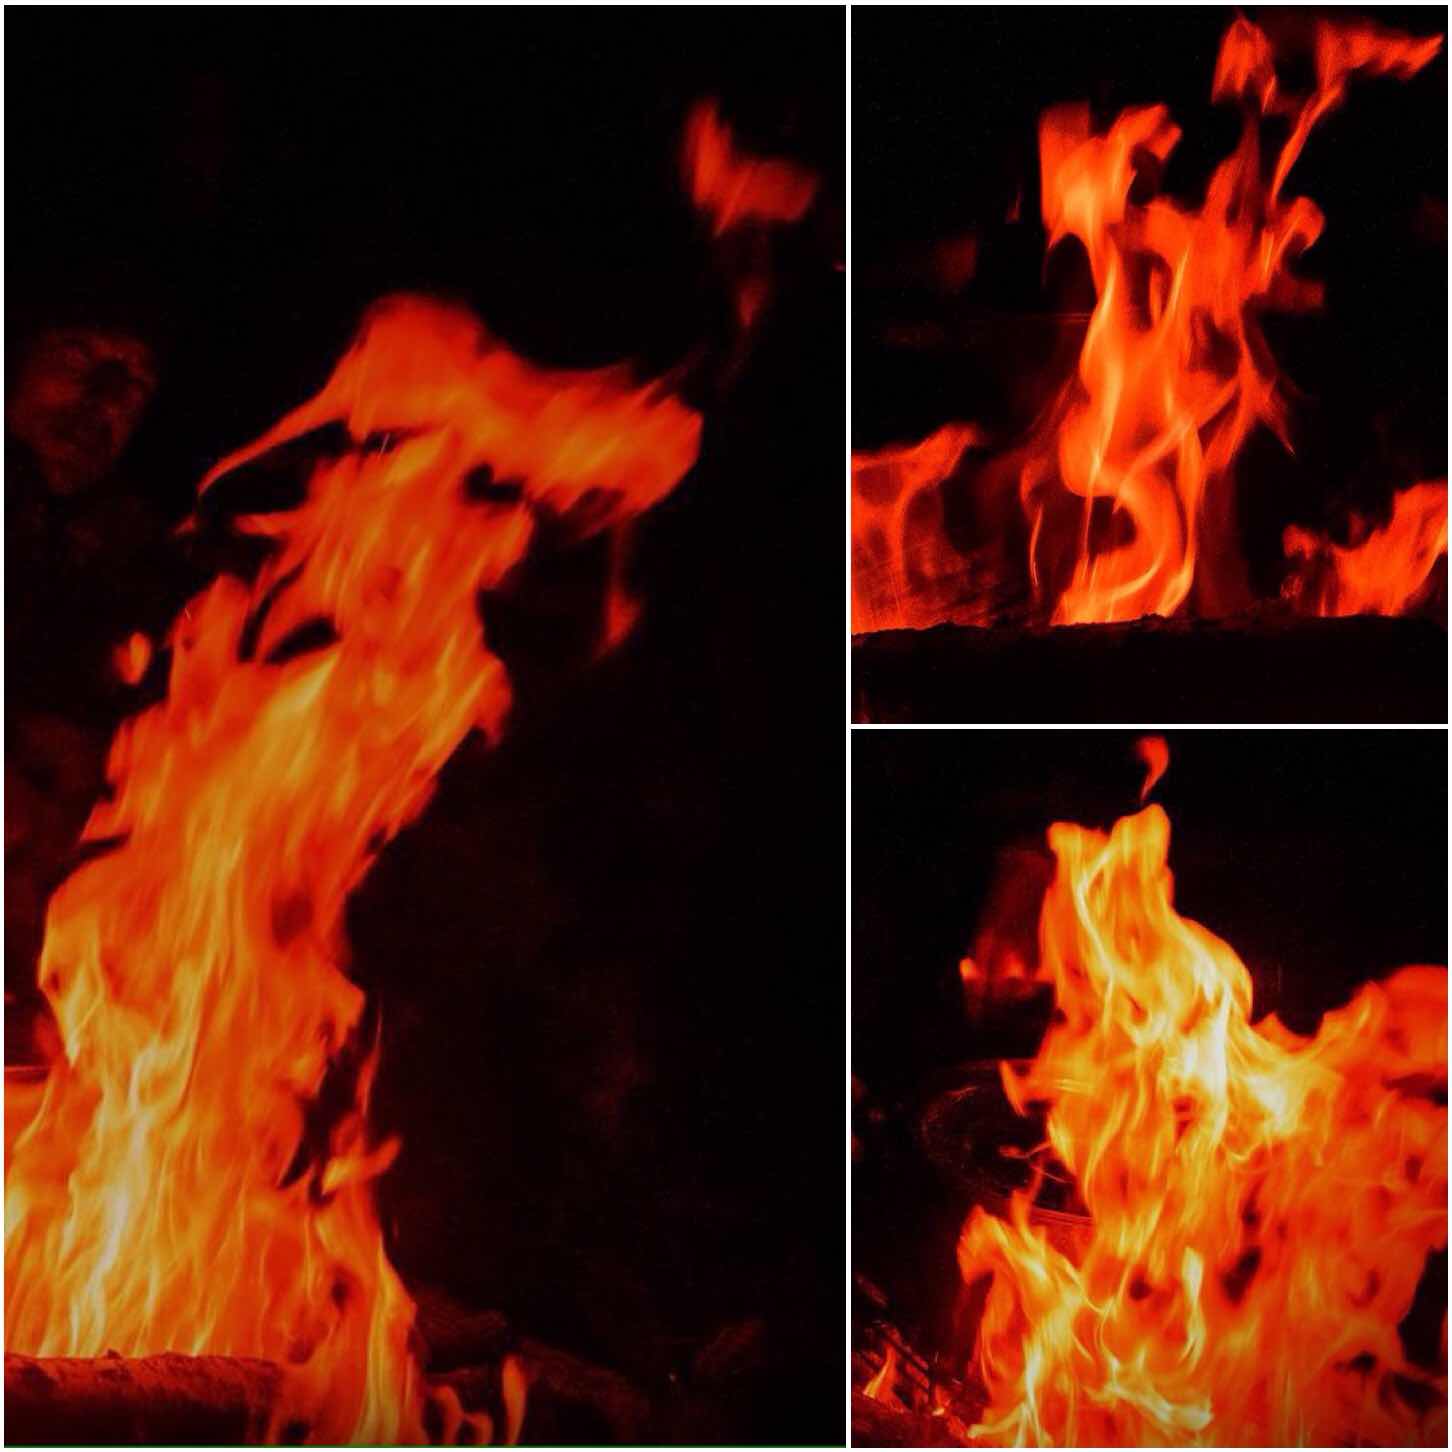
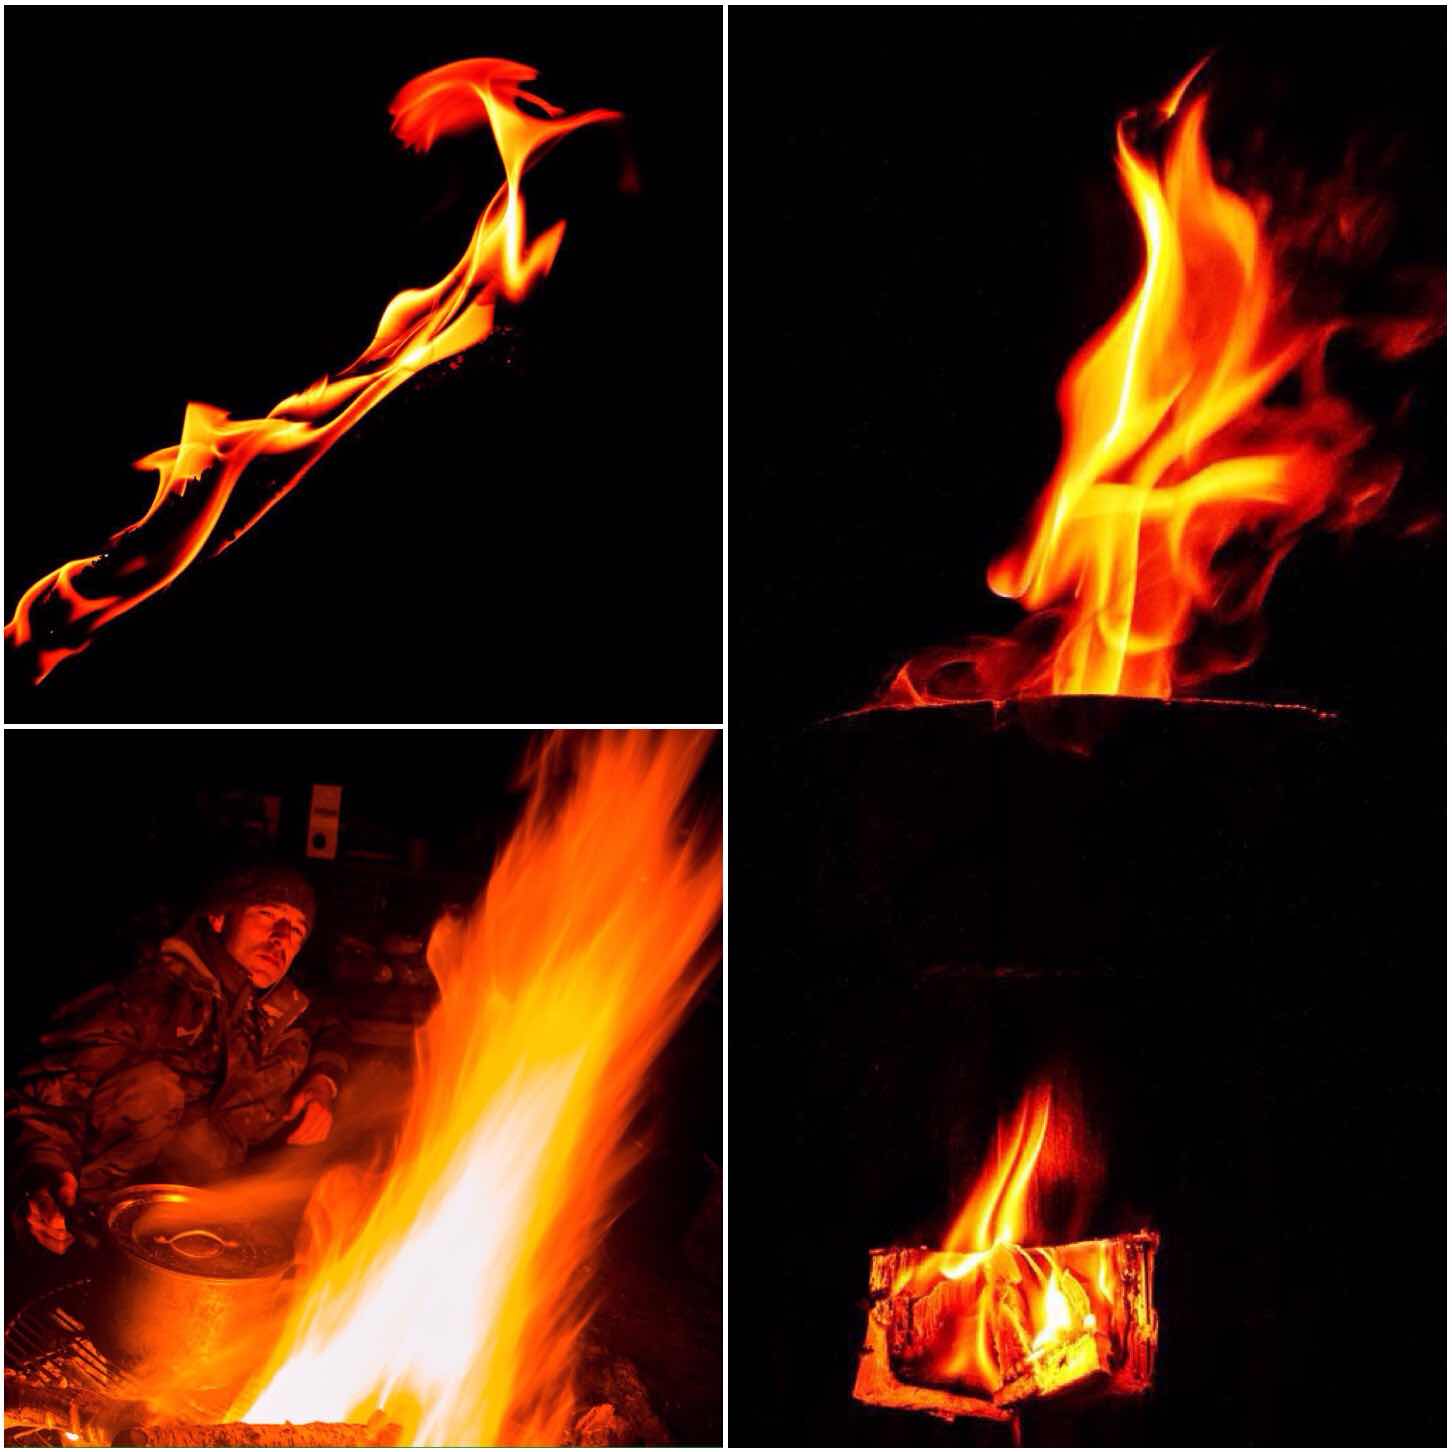
Still on the fire theme I have to mention ‘Fire Faces’. I have been photographing flames for years now looking for faces or figures in the flames. Two of my favourites this year were of the Roadrunner (top left) and a Dove (on the right).

My friend Fraser gets his face included as he always seems drawn to the fire when the camera comes out – kinda like a moth I suppose 😉

Photo 29-03-2016, 17 21 35 (1)
Fire, fire and more fire

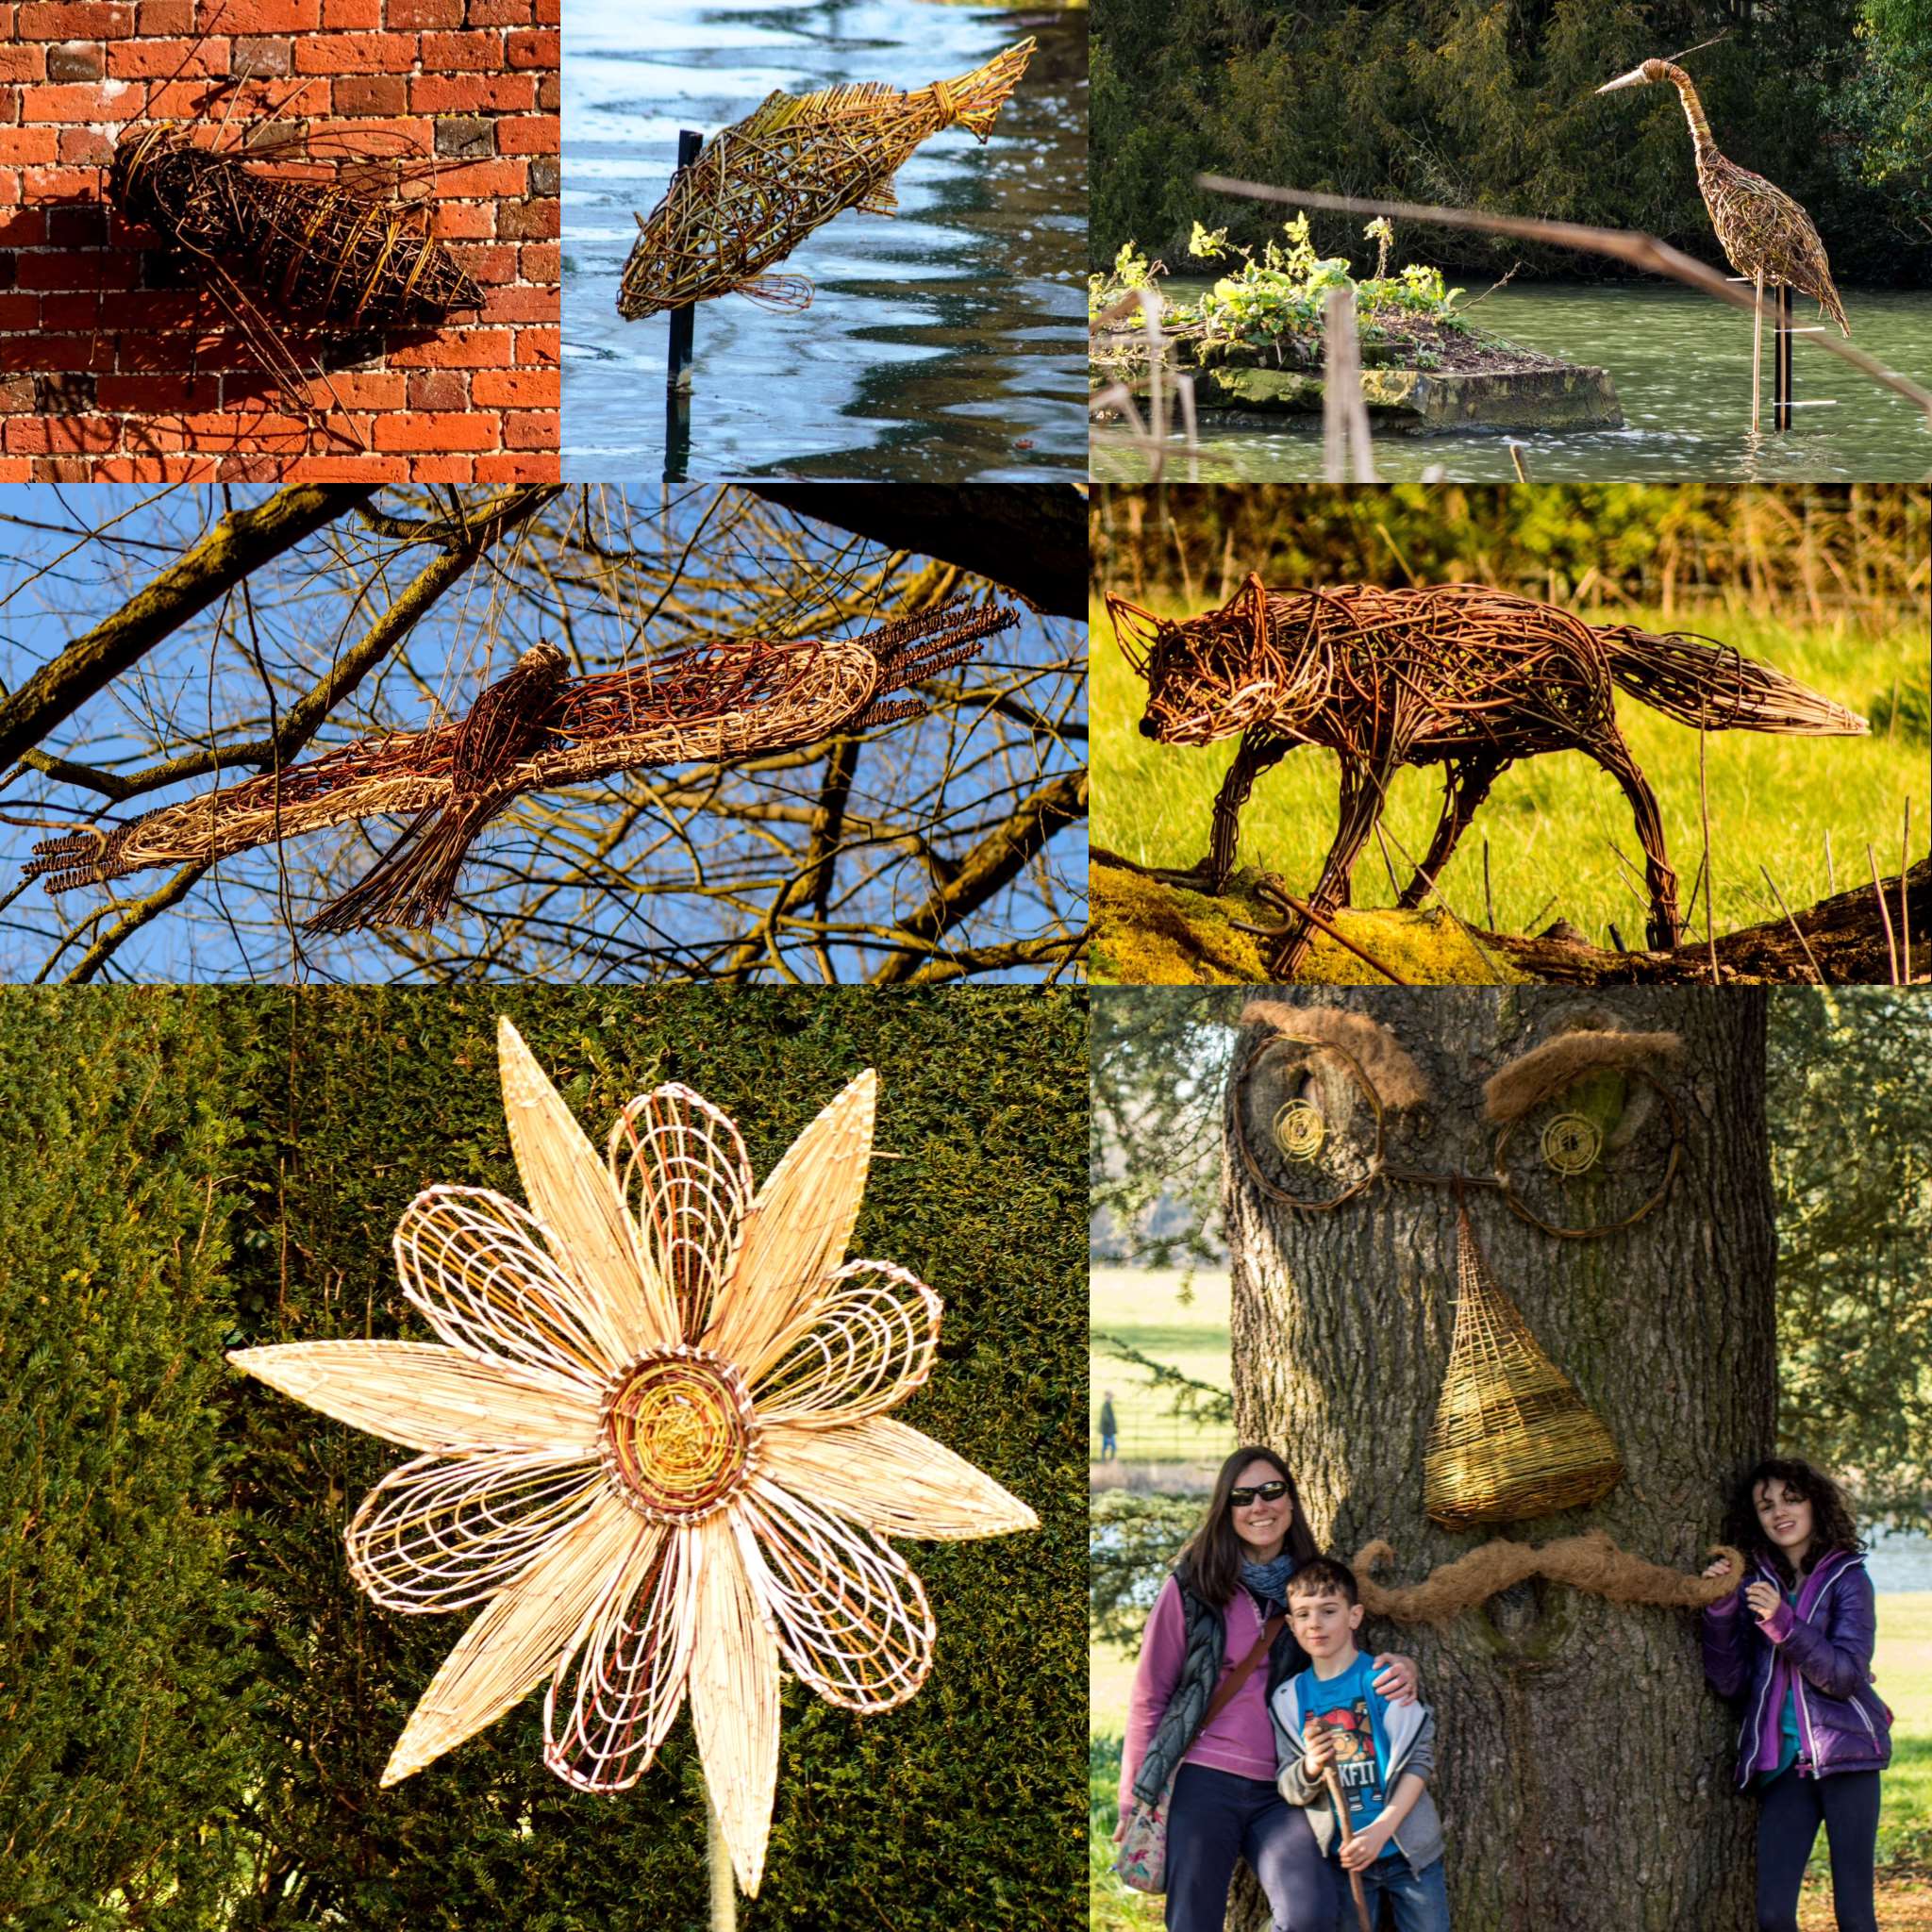
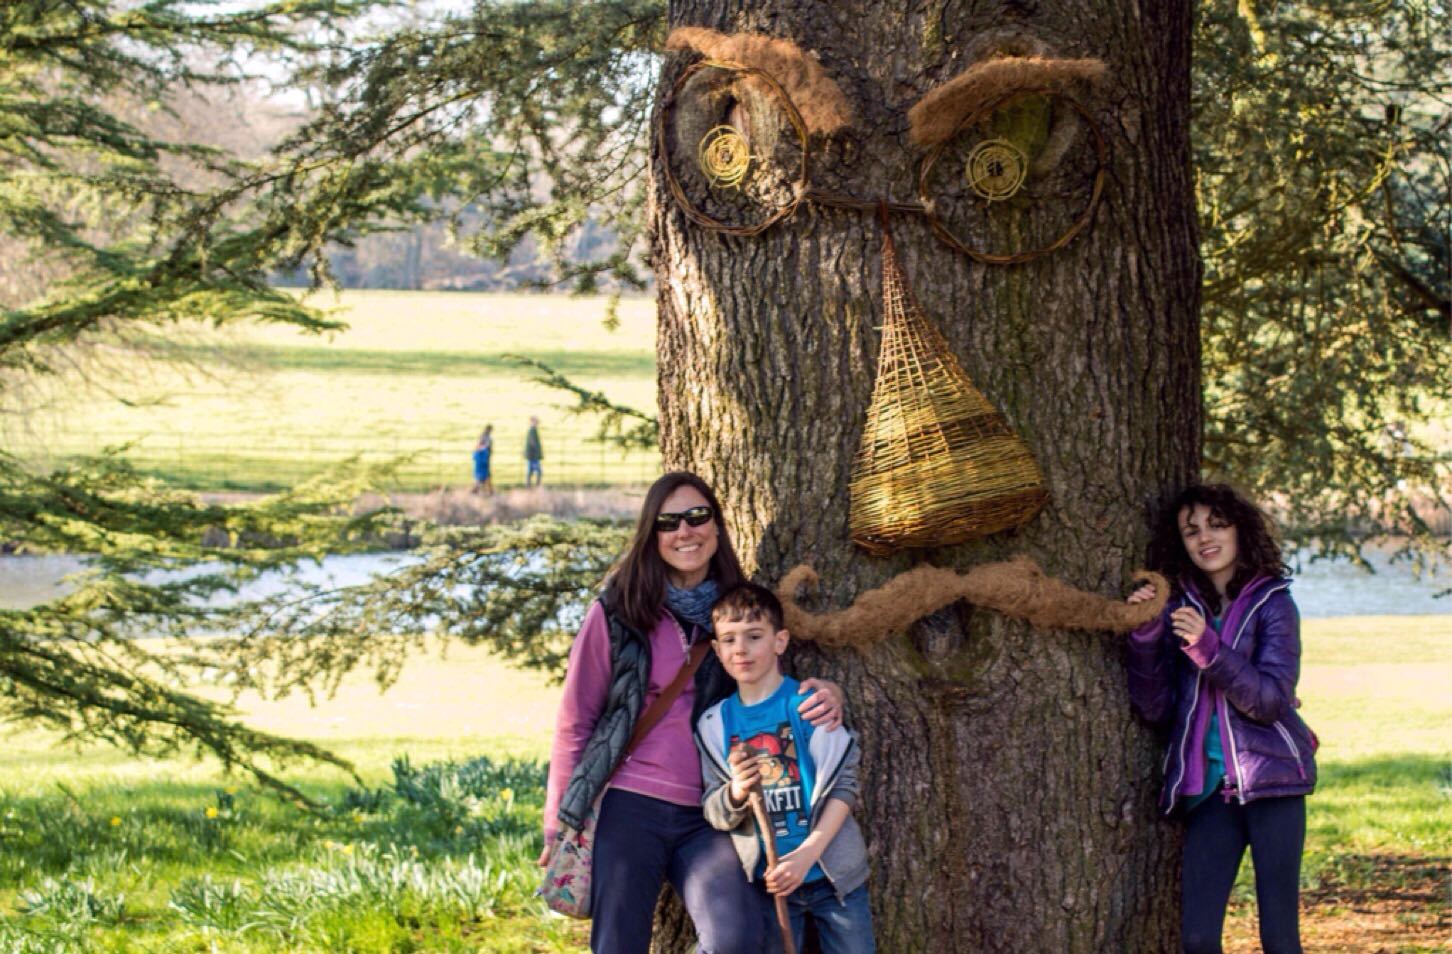
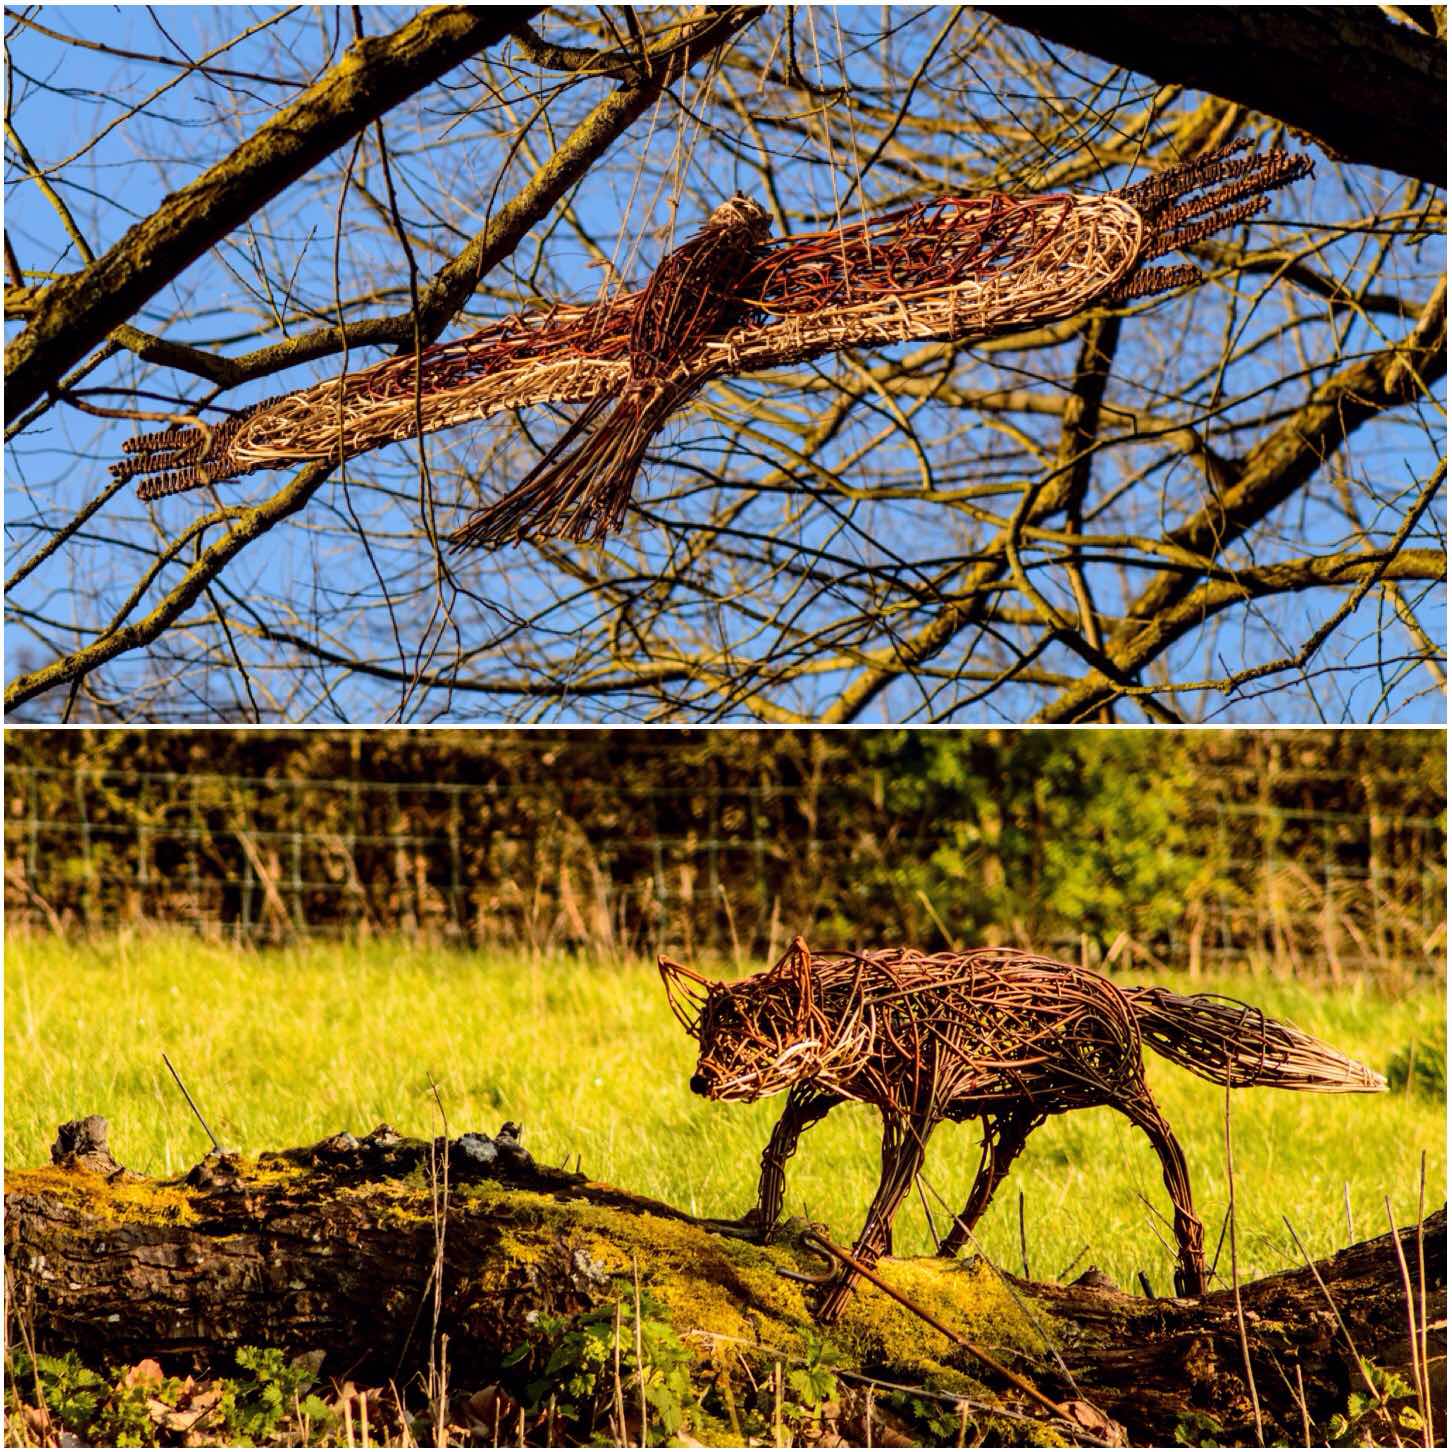
My last two pictures were taken just at the end of winter at the Vyne National Trust property in Hampshire. As many of the trees and flowers were dormant they set up a ‘Wild Wicker Trail’ in the grounds. There were plenty of wicker figures to spot including a heron, flowers and a fish however these two stood out for me – the Hawk and Mr Fox. Both beautifully crafted and positioned in the woodlands.

Photo 29-03-2016, 17 21 35
Woodland wonders

This last few days (been resting up with a torn calf muscle) I was thinking that I hadn’t gotten out as much as I would have liked this winter however after looking through my albums I must admit that when I did get out and about – they were good times.

Cheers

George

Picture of the Week – Week 12 – The Sit Spot

Welcome to the view from my favourite ‘Sit Spot’ near where I live.

To those that are not familiar with the term Sit Spot it is a place to go and sit in a comfortable manner and observe the beauty of nature around you.

The Sit Spot
The Sit Spot

This reedmace fringed pond near my village in Hampshire has plenty of activity from fish, voles, waterfowl, dragonflies and nocturnal visits from deer and badger (plenty of tracks to testify to this).

I like to sit here for a half hour or so on some of my bimbles to quietly re-connect myself with the goings on with mother nature all around me.

Get out there and find your own Sit Spot and re-connect with nature – it is not hard.

Cheers

George

Stormy Snowdon – ‘Earning Mountain Wings’

My last trip out into the mountains proved a bit draftier and damp than I was expecting. Last January I headed off with some other instructors from the Sea and Royal Marines Cadets into the mountains of Snowdonia in Wales.

We run this every year as a weekend for experienced instructors to expand on their mountain navigation and as an introduction to mountain skills for the less experienced. Twenty two of us set off and thankfully the same returned – the weather though, was something to behold that weekend.

Photo 27-03-2016, 14 57 49
Stormy Snowdon (bottom picture courtesy of Perry Symes)

The winds were particularly strong that weekend and my friend Perry Symes (he is an International Mountain Leader) said that the winds were some of the strongest he had ever experienced. You can see the white tops on the surface of Llyn Idwal (picture above) and when you see the surface like that it is not advisable except for the most experienced to climb further.

Photo 27-03-2016, 14 57 49 (1)
Batten down the hatches (top two pictures courtesy of Perry Symes)

We decided to have one group stay low around Idwal and one to climb up on the rather more sheltered side of Tryfan up to an area called Heather Terrace. Perry and John took the lower route and Graham and myself took the higher route.

When I spoke with Perry and John later that day they said that at one stage they could not stay standing and had to hold onto the rocks to prevent them selves from being blown away.

We thankfully were not affected by the wind as we were in the lee of it on the other side of Tryfan. Our group was made up of instructors with different skill levels and fitness levels. We took the day at a slow pace introducing the newer members to scrambling. Even though the wind was not a problem eventually everyone was soaked through from the persistent rain.

Photo 27-03-2016, 14 57 55 (1)
Scrambling

The higher we got though the tougher the going got. We could hear the wind cracking like a whip in the crags above us once we got to about 650m’s. We took one last look at the towering crags of Tryfan and decided that the mountain could wait another day for us.

Photo 27-03-2016, 14 57 52
Tryfan – Wind ‘Cracking’ above

It was not all doom and gloom (though a few of us did want to top out) as we had fun slithering down again, doing a spot of bouldering, spotting some local mountain goats or like Dave did, partaking in some mountain paddling :-).

Photo 27-03-2016, 14 57 53
Fun for everyone

It was an extremley hard day on the mountains that day and I was particularly impressed with everyone’s patience and resilience. To some of the instructors this was nothing new but to some it was their first experience on the mountains. We had a couple of students develop some slight aches and pains however they persevered and completed the day safely.

Everyone was soon back in one of the Moel Siabod Cafe in Capel Curig drying off and drinking coffee.

Photo 27-03-2016, 14 57 53 (1)
Homeward bound

To finish off the Saturday we had a de-brief on the day back at Capel Curig Training Camp before heading off down to the Swallow Falls hotel for an enjoyable evening.

As the wind was just as strong the next day we decided to stay low down in the hills and concentrate on micro navigation. We headed off from Snowdonia up into the hills just above Conway.

Photo 27-03-2016, 14 57 54
Re-cap and start of day 2

We split up into smaller groups and I was joined by Mandy, Tara and Sian. They all had different levels of map reading skills however they were all keen to get on and have some fun along the way.

I gave each of them different locations to find, sometimes with the map, sometimes with just a compass and sometimes by dead reckoning alone.

Photo 27-03-2016, 14 57 54 (1)
Micro nav with a smile

We had fun along the way and met some of the other groups on our travels. The wind got so strong at times we had to stay away from the cliff edges and were able to lean right into the wind without toppling over.

Photo 27-03-2016, 14 57 55
Taking it in there stride (top left picture courtesy of Sarah Diss)

Even though we did not top out mother nature tested us all out in her own way. For me it was to make sure everyone learnt, had fun along the way and came back safely.

Those that earned their mountain wings (you could say that after the winds we had) were Mandy Blackmore, Tara Green, Sian Avenell, Thomas Conway, Jasmine Turner, Sarah Diss, Lee Diss, Maria Griffiths, Amy Pizarro-Griffiths, Alan Lewis, Dave Lewis,  Ben MacDonald, Rob Hina, Carol O’Brien, Jess Edwards, Jennifer Burdett, Rachel Selby, and Chris Cooke. The instructors were John Kelly, Perry Symes, Graham Brockwell and myself.

Cheers, George

One Stormy Night

At the beginning of February this year I drove down the A303 towards Dorset here in the UK in ever worsening weather conditions.

My good friend Fraser Christian of Coastal Survival had organised a meet up of some of the guys who help him out at various events throughout the year. By the time I got to his village the weather had deteriorated to storm conditions.

The pictures below show his parachute getting a right battering and even later on in the shelter of the parachute the airflow really helped shoot the flames of the fire up.

Photo 20-03-2016, 07 28 17 (1)
A Stormy Night

Before going to up to Fraser’s woodland location I met some of the the guys – Fraser, Steve, Si, Danny and Nick in the local pub to have a few beers (and to dry off from the drenching I got from walking from the car park to the pub).

Even though the weather conditions were still extremely poor when we got to Fraser’s woodland site we soon made ourselves comfortable. The food and mulled cider were soon on and I even managed to get a picture of the parachute looking like some sort of downed UFO.

We were joined later in the evening by Tom who is one of the other Coastal Survival instructors. He had cycled his way through the storm to get to us but seemed happy to be out there in the wild conditions (I think that it is a pre-requisite of any outdoors pursuit instructor to show they can be comfortable outdoors whatever the weather throws at them).

Snugness
Snugness

Due to the high winds the flames of the fire kept shooting up, so as usual I had my camera out grabbing some shots of fire faces and figures in the flames. If you look closely you will see a few faces. I can also see a deer and a water buffalo in the left hand picture below.

We spent the evening listening to the wind, catching up on the year gone by and planning trips for the coming months. Around about 10pm the wind dropped sufficiently I felt it safe enough to venture out and put my own hammock and tarp up.

Photo 20-03-2016, 07 28 18
Fire Faces

I slept for a full ten hours that night and woke the next morning feeling calm and refreshed. The guys already had the kettle on the go so all I needed to do was fill my cup and wait for my breakfast from Fraser.

One thing about working with Fraser is that you never go hungry and I will never get in the way of an expert chef wanting to cook me breakfast :-).

The Clan
A calm morning

As part of our bed and board for the night we agreed to get out and collect some of the brash wood Fraser had stored around his woodland to replace the wood we had used the night before.

We said goodbye to Tom at this stage before stringing up the brash wood to take back to camp.

Photo 20-03-2016, 07 28 20
Morning re-supply

Once the chores were done I set off on my own to see what flora and fauna were about that morning. Little Tinker always makes for a great shot but I soon found an excellent badger print in the damp ground.

I spooked a deer on my travels through the wood but managed to get one decent long range shot of her as she ran across a field.

Photo 20-03-2016, 07 28 21
Local fauna

Even though this was early February there was a dash of colour about with the plants.

The teasel was looking particularly majestic with new seeds sprouting  within the previous years seed head. I spotted a number of primroses for the first time this year at Fraser’s and the lesser celandines were  sunning themselves nicely.

Finally I spotted an elder tree covered in some lovely looking jelly fungus.

Photo 20-03-2016, 07 28 22
Local flora

It was soon time to head home again however the drive back was a delight due to feeling refreshed and the sun was out 🙂

Thanks to Fraser for hosting us for the weekend and the rest of the guys for being such good company.

Cheers

George

Picture of the Week – Week 10 – Wild Wicker Walk

Ok, not so much a picture of the week but a collage of the week.

I had a delightful walk last Sunday with my family at The Vyne National Trust property in Hampshire. The gardeners have installed a number of wicker figures around the gardens and named the trail the Wild Wicker Walk.

The Wild Wicker Walk

Some are easy to spot but some are not (the Hawk in particular) however they kept our whole family happily busy as we hunted for them.

My favourite (they are all excellent) because of its location on a fallen log has to be the Fox.

Thanks to all the gardeners for taking the time to make these wicker characters and placing them in some beautiful spots for us to find.

Cheers

George

How To…. Build a Dovetail Log Rocket Stove

In my continuing research into Log Rocket Stoves I came across a Wikipedia page called the Schwedenfeuer and in it details of a type of log rocket stove I had not come across before, with a built-in fire tray and a chimney formed by simply cutting away the inner corner of one section.

Clever though it was, though, this stove still relied on string or wire to tie the sections together. As these stoves have been around for a long time I figured there must be other ways of holding them all together. I thought perhaps that green wood dovetail wedges might do the job, so I set out to test this.

Photo 13-03-2016, 07 35 28
The Dovetail Log Rocket Stove

Tools and Material

As usual I limited myself to the tools I would usually carry in my backpack, including a knife, saw and axe. A pen or pencil is handy for this project as well.

I’ve had a piece of birch stored in my garage for over a year however it had absorbed moisture over the winter and was fairly damp in its core.

Photo 13-03-2016, 07 35 28 (1)
Tools

Splitting Out

This style of log rocket requires you to put a stop cut into the bottom of the log to about two thirds of its width. You can see in the top left picture below the cut is about 10 to 15 cms from what will be the bottom of the stove.

The top right picture below shoes you how far I put my stop cut into the log. The bottom two pictures show me marking out with my saw the approximate area I would be battoning out.

Photo 13-03-2016, 07 35 30
Bottom cut and marking out

I used my axe and a large piece of wood to batton out the the wood. You can see the shape of the stove at this stage with one segment in an inverted ‘L’ shape (Segment 1) and a smaller piece (Segment 2).

The bottom two photos show me marking out the smaller piece for further splitting. This piece is not split exactly in two as this configuration allows you to form the chimney very quickly.

Photo 13-03-2016, 07 35 30 (1)
Splitting

The Chimney

Below you can see the shape of all the pieces when they are put back together . I then battoned off the tip of the larger piece from Segment 2  so that a chimney would be formed. This piece of battoned-out wood I further split into fine pieces to act as kindling for the stove.

Photo 13-03-2016, 07 35 31
The One Cut Chimney

Once I had the chimney battoned out I trimmed off some excess wood from Segment 1 and then used a pencil to mark out the chimney area.

I did this so I could put some Raappanan tuli cuts into the chimney area. It is important to keep the sections of the log rocket that join together as smooth as possible for a good fit so marking out the chimney area ensures I do not cut into the wrong area.

Photo 13-03-2016, 07 35 42
Trimming & Marking out the chimney

The Raappanan tuli cuts are fairly simple to make with my axe. I just ensured I cut only into the wood in the chimney area and that the cuts were made upwards, towards the top of the chimney.

These cuts are particularly helpful when using damp wood as it offers far more surface area to the initial flame, allowing it to catch more quickly, and also it helps to dry the damp wood out.

Photo 13-03-2016, 07 35 33
Raappanan tuli cuts

The Firebox

The next stage I worked on was the firebox opening. This can be done in a number of different way however I elected to go for a triangular opening.

I formed the opening by cutting a small triangle at the base of both pieces from Segment 2. I also tapered the inside of the cuts to open the firebox up a bit. I made this firebox slightly larger than normal as the wood was very damp. My thought was that the extra air intake would help to keep the fire going at the start before the insides of the stove became fully lit.

Photo 13-03-2016, 07 35 33 (1)
The firebox opening

The Dovetail Joints

These joints were a total experiment. I put all the pieces together again and, holding them tightly, sawed a line to the depth of a centimetre across two of the joints. (I recommend you use some string or maybe a belt to hold everything together as you make the cuts – I didn’t and I wished I had.)

I then did the same cut but flared my saw out slightly (about 45 degrees) to the same depth. I then repeated the cut with the saw flared out 45 degrees in the opposite direction to the original cut to the same depth (there will be a picture of the cut further down the post).

Once that was done I used my saw like a rasp to carve out all the excess wood to form what is called the dovetail ‘Tail’.

Photo 13-03-2016, 07 35 34
Cutting out the ‘Tails’

Below you can see this ‘Tail’ part of the dovetail joint. It forms what I think of as a bow tie shape when done properly. The important point is to start each cut from the same place, saw to the same depth each time and ensure that the middle of the tail is centred over the split in the segments.

I found that as I had not strapped the segments together I had to really hold them firmly together – this is where you will appreciate your belt or piece of string. Also while sawing these ‘Tails’ in be aware at all times where the saw is in relation to your thumb and forefinger on the hand holding the stove.

I made three of these tails (one over each split) to hold all the segments together.

Photo 13-03-2016, 07 35 35
The Tails

To hold the segments together you need to carve some ‘Pins’ to insert into the ‘Tails’. I used green hazel wood to make the pins and made sure that they were carved into a triangular shape but initially too big for the tail.

Carving in this manner allowed me to insert the pin into the tail and then progressively carve off smaller pieces from the pin until it started to slide in. I also used my large piece of wood to hammer the pins in to ensure a very tight fit.

If you find that your pin is too small just get a fresh piece of green wood and try again. They only take seconds to make. To finish the pins off I trimmed the ends with my saw.

Photo 13-03-2016, 07 35 36
Cutting and inserting the ‘Pins’

As the bark of the birch tree is very flammable I stripped it all off and kept it to the side to use later as kindling to get the fire started. The dovetail joints if fitted snugly will keep all the segments locked together tightly.

Photo 13-03-2016, 07 35 37
Trimming

Firing Up

I lit the stove with some Vaseline-soaked cotton wool balls (which I always carry with me) because everything was so damp. The wind was non existent that day so it took me a while to get the stove going well.

Normally these stoves fire up really easily when there’s a little bit of wind to create the rocket effect up through the chimney

Photo 13-03-2016, 07 35 37 (1)
Firing up and drying out

Eventually the rocket effect started and I placed three pieces of green wood onto the top for my pot to sit on. These were fairly thin pieces but would last long enough to boil some water. Have a few pieces spare on standby though if needed.

Photo 13-03-2016, 07 35 38
Green wood pot stand

Once the pot was on (about 10 minutes after initial burn) I needed to keep popping small pieces of wood into the fire box to keep the fire going. If your wood is really dry or resinous (like spruce or pine) you may not need to keep tending the fire as the internal walls of the chimney will probably be well lit.

Photo 13-03-2016, 07 35 39
Now it is a stove

It took me just under 15 minutes to boil this pot of water (enough for approx 3 cups of coffee) and the dovetail joints remained strong throughout.

Photo 13-03-2016, 07 35 40
Roaring

After 45 minutes the first of the joints burnt through however the stove remained standing until it burnt out. Due to the lack of wind the majority of the wood did not burn through.

I made this short video of another Dovetail Log Rocket Stove to show it in action.

I like to experiment with log rocket stoves and this reliance on using string or wire to hold them together (although you can dig the segments of some types directly into soft ground) has always bugged me.

This  Schwedenfeuer type of stove lends itself well to the dovetail joints I think,  and once you have practised making a couple you will be able to knock together a stove very quickly with just natural materials.

As usual I am open to ideas and suggestions on creating more log rocket stoves and Scandinavian candles. If you have not seen my other posts on this subject have a look at my summary post on this subject titled – Candles, Rockets and Long Fires.

Cheers

George

The Dovetail Log Rocket Stove – A Video Post

For a while now I have been making Log Rocket Stoves in different ways.

The ones I make in the workshop are easy as all you require is a drill however if you make one in the woods things become more complex. A common theme about these woodland Log Rocket Stoves is that you need something like string or wire to hold everything together.

I thought about this a lot recently and came up with this adaptation of the Log Rocket Stove using green wood dovetail joints.

I will post a full step by step tutorial in the near future in my How To…. section.

Cheers

George

Picture of the Week – Week 9 – Schwedenfeuer

Ok, I know it is supposed to be one picture every week however I thought I needed to zoom in on this one a bit more so I added another for detail.

Many of you know I love to tinker with log rocket stoves so today found me once again working on another design.

Dovetail Log Rocket Stove

I came across an old Swedish design for a log rocket called the Schwedenfeuer (Swedish fire) however like many other log rockets all the parts were held together with wire. As these stoves are supposed to date back to at least the middle ages they had to be held together with something else then.

I came up with the idea to use green wood wedges carved into the stove in a dovetail fashion. They worked perfectly, I got my coffee made and also a video (to follow). I will also be popping a How To…. blog post soon to show how to make one.

Cheers

George