
Building a bow – from a log to a beautiful bow
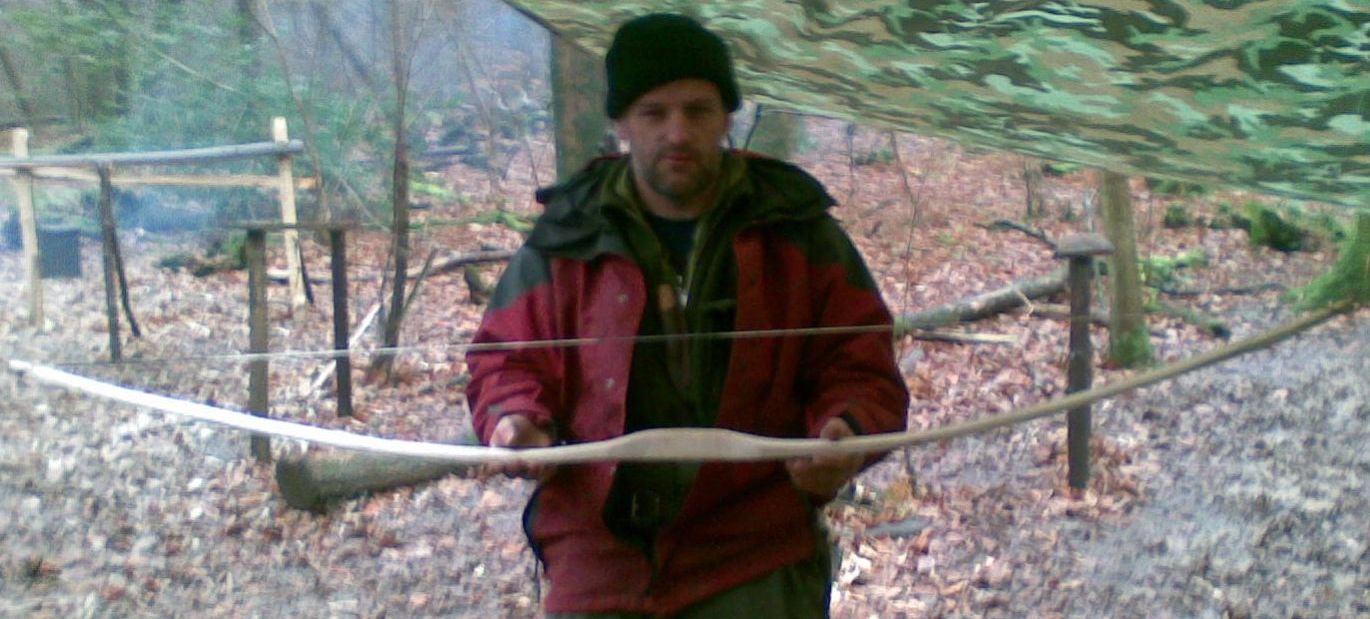
I carved this Ash Flatbow back in 2008 while I was on my Bushcraft Instructors course with Woodcraft School and has since been used by scores of my Sea Cadets, and many of my friends and family. The two instructors who taught me to make this bow were John Rhyder (head instructor at Woodcraft School) and Nick McMillen (now of the Field Farm Project). Both of them as well as being professional outdoorsmen are top bowyers.
This How To…. is designed to lay out all the main steps I undertook to make this bow and if you have reasonable woodworking skills then it will aid you in building a bow for yourself. If you think your skills are a bit rusty then I advise that you attend a bow-making course. In addition to John and Nick who still offer courses I can recommend Wayne Jones of Forest Knights School, Paul Bradley from The Bushcraft Magazine (though I’m not sure if he runs courses anymore) and Will Lord as excellent bowyers to learn from.
I made some drawings on my initial write-up in 2008 and thought it easiest to take some screen grabs of this bow theory for this blog.
Bow theory, terminology and scale
So the first question is – What is a bow?
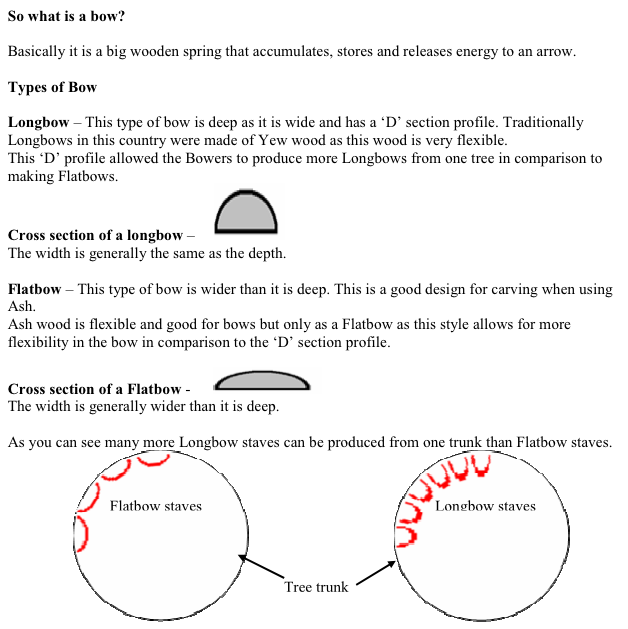
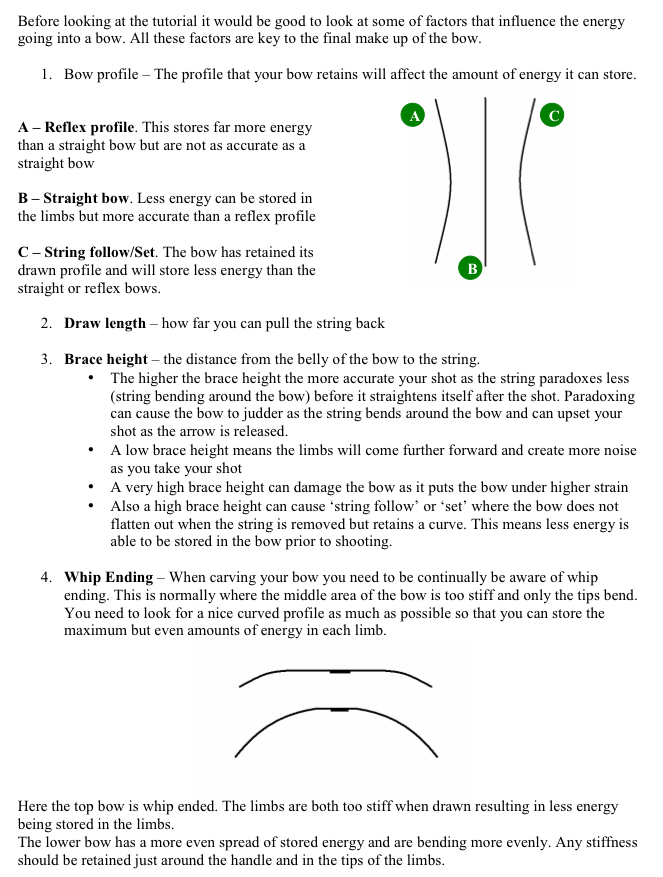
Some bow terminology for you to remember as I will be mentioning some of this in the post:
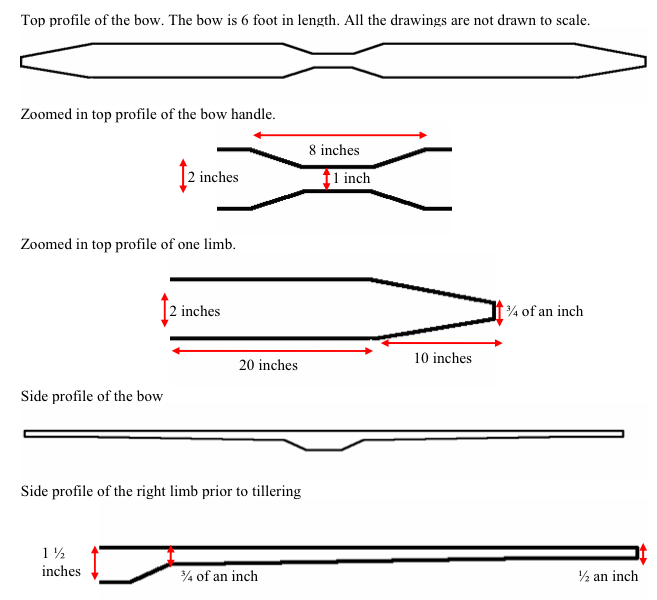
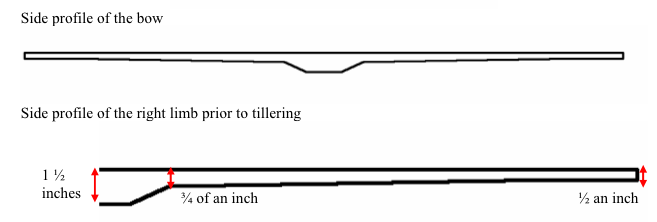
Not to scale, but these are the dimensions I mapped out for my bow:
Splitting out staves
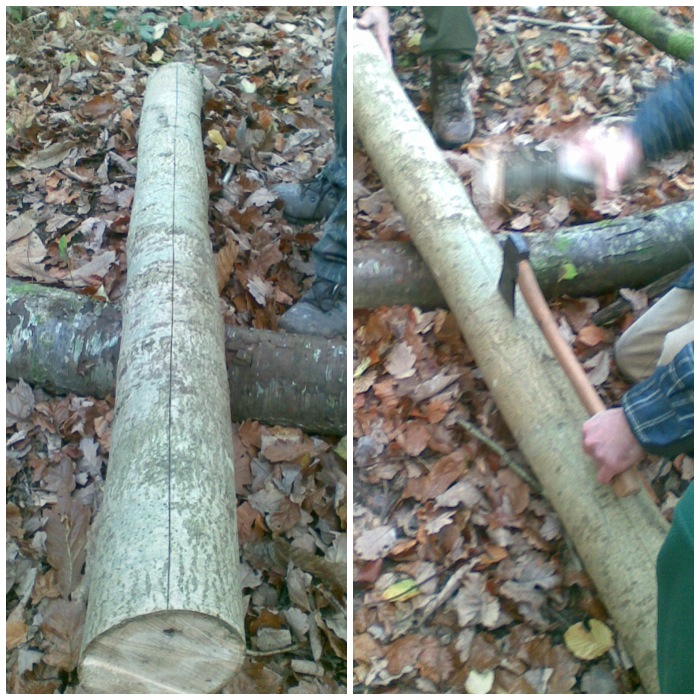
The ash tree was felled by the course instructor, John Ryder.
We scored a line down the length of the log, all the way through the bark and just into the sap wood, using an axe. This helps with guiding the split of the log.
We then drove an axe into the scored lined to start the split.
Note that the axe is at 90 degrees to the person hammering it in. This maintains a safe position for the worker.
The first axe is followed by a wedge and another axe to widen the split.
The scored line helped greatly with controlling the split.
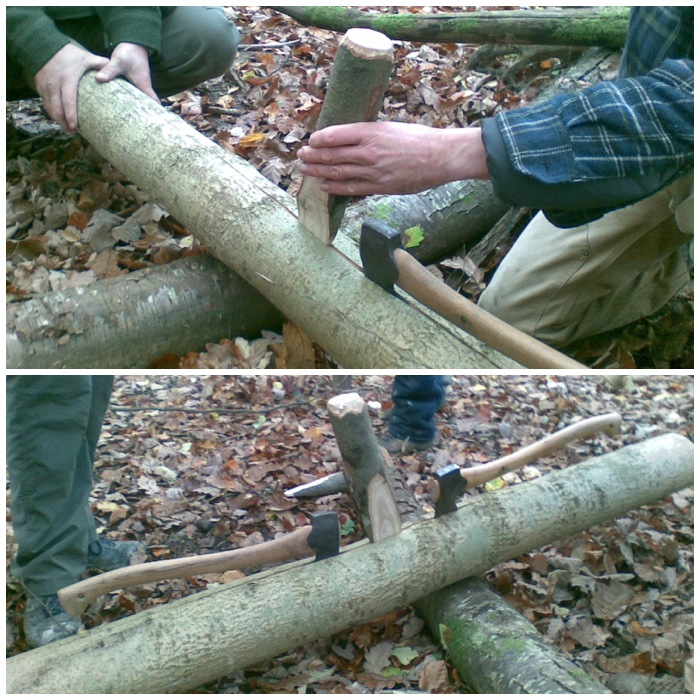
As other wedges are driven deeper into the split the previous ones can be removed to be used again.
An axe can also be used to cut the wood fibres not split by the wedges.
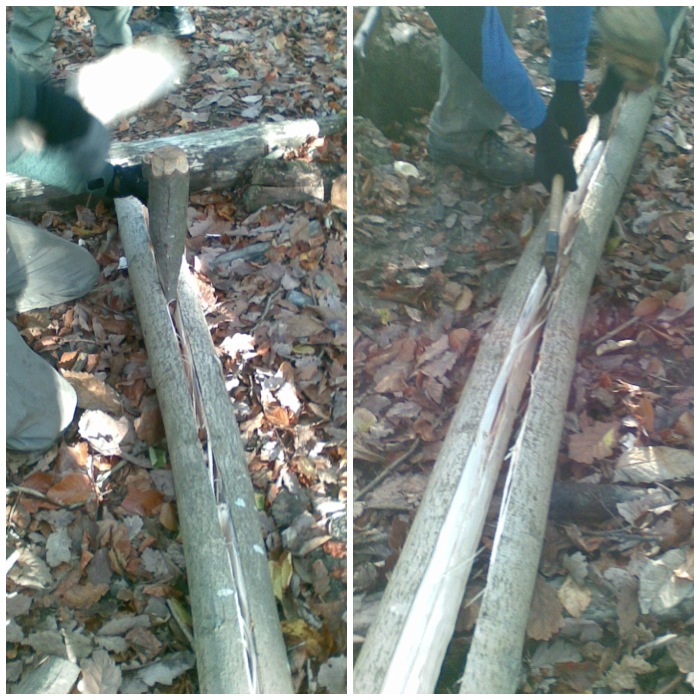
Once the log has been split the process is repeated again and again until you have the staves you require.
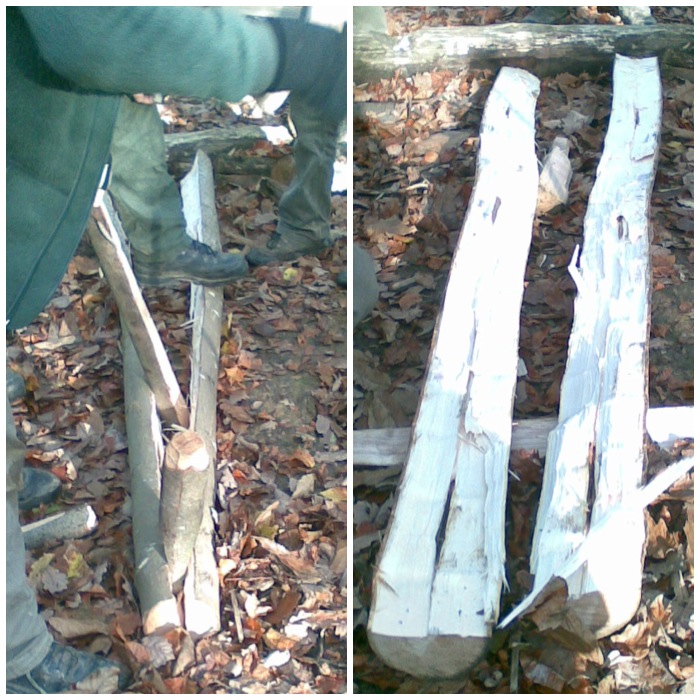
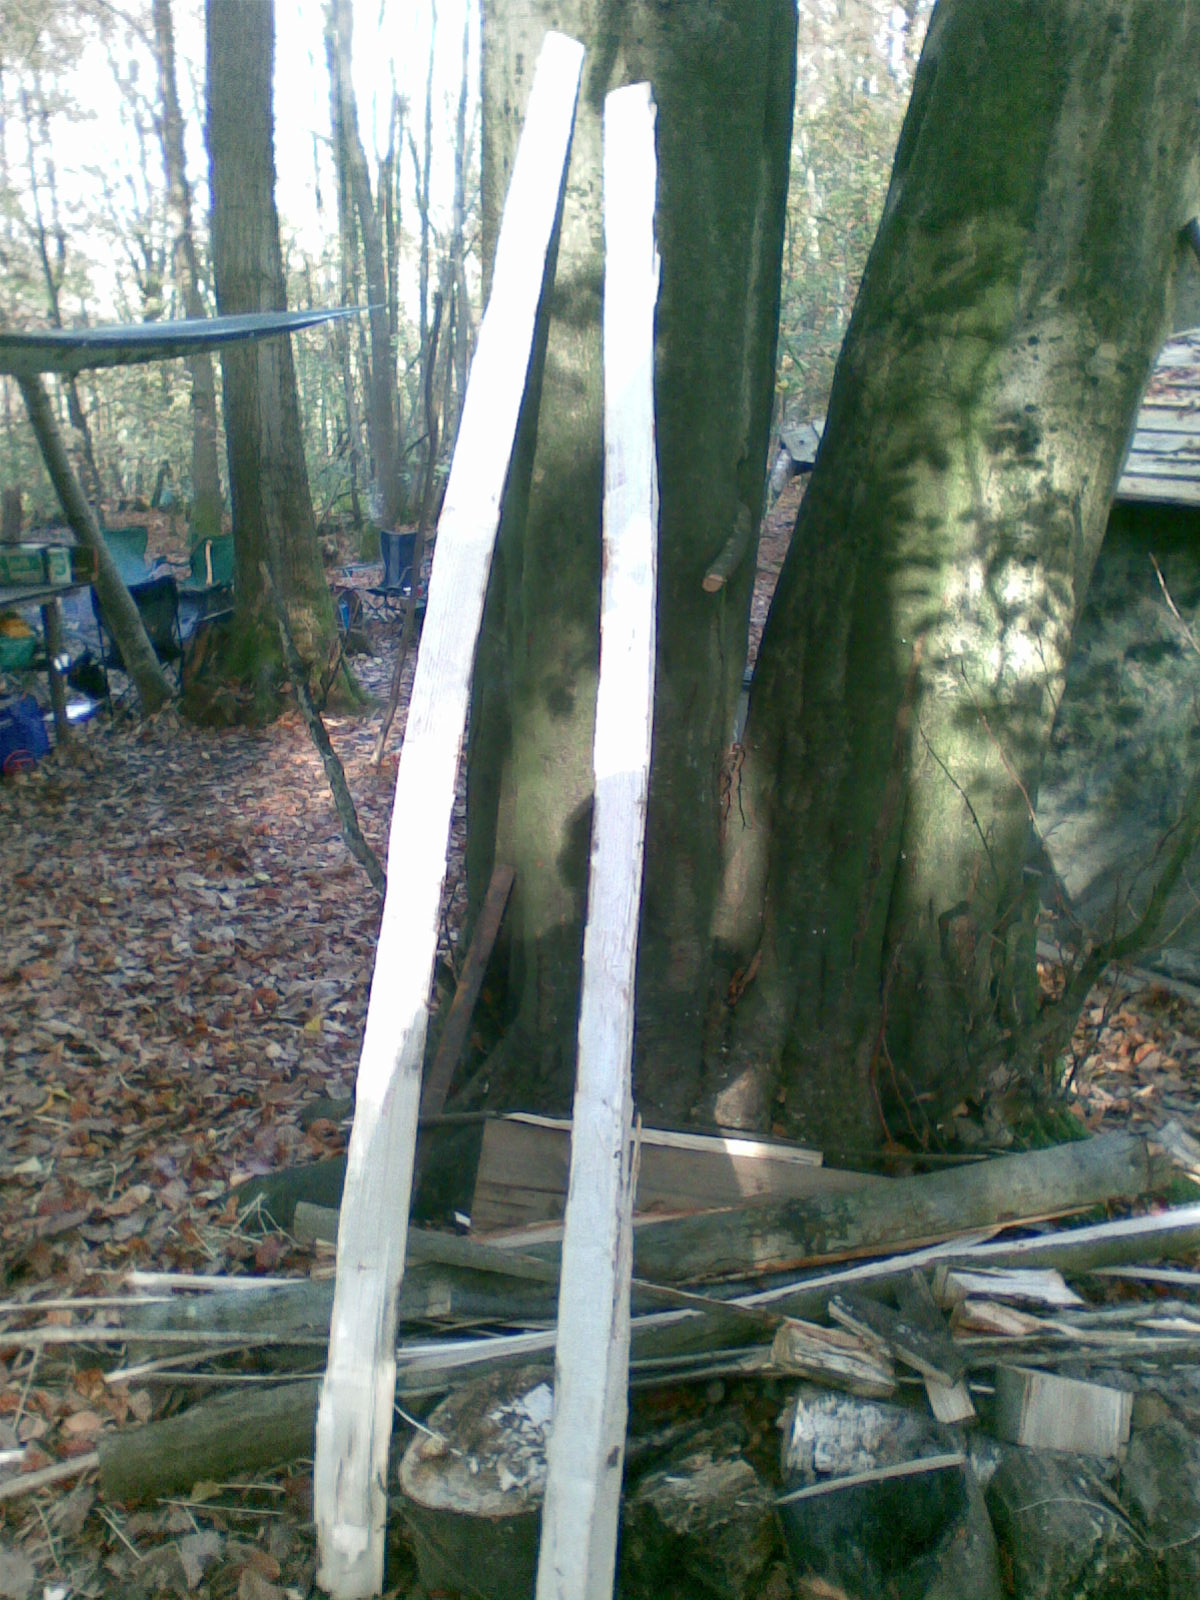
Here are two staves ready for shaping.
Shaping the bow
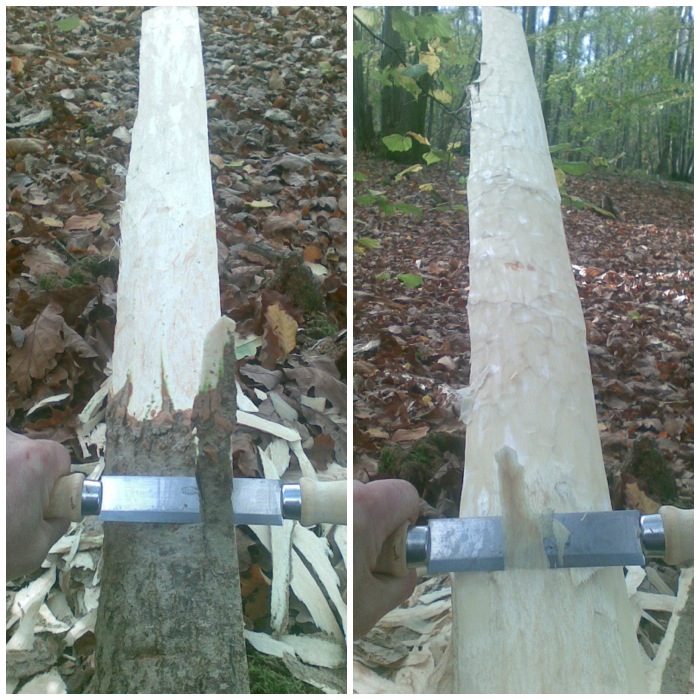
Using a draw knife I shaved off the bark of the stave. I was very careful only to remove the outer and inner bark and not touch any of the wood.
The sap wood found just under the bark is the most flexible and will form the Back of the bow. Apart from light sanding, this area of the bow is left untouched. All of the work on shaping the bow will be done on the sides and on the Belly (the part of the bow facing your belly when shooting).
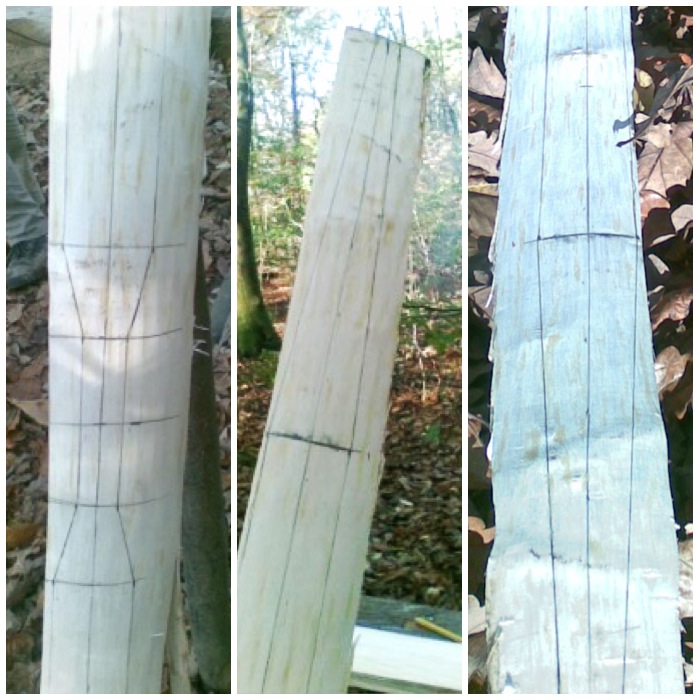
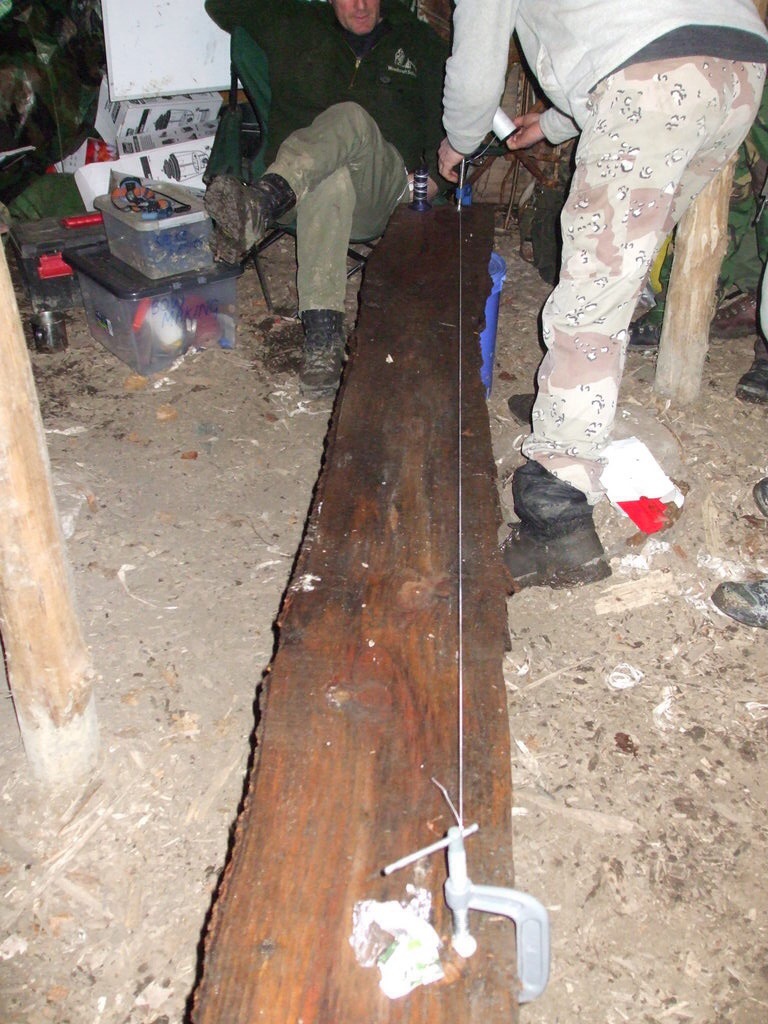
Using a string I marked out a centre line down the length of the stave.
I then drew onto the stave the shape of my bow (using the measurements shown at the beginning of this post).
The first picture is the handle area and the other two are of the limbs.
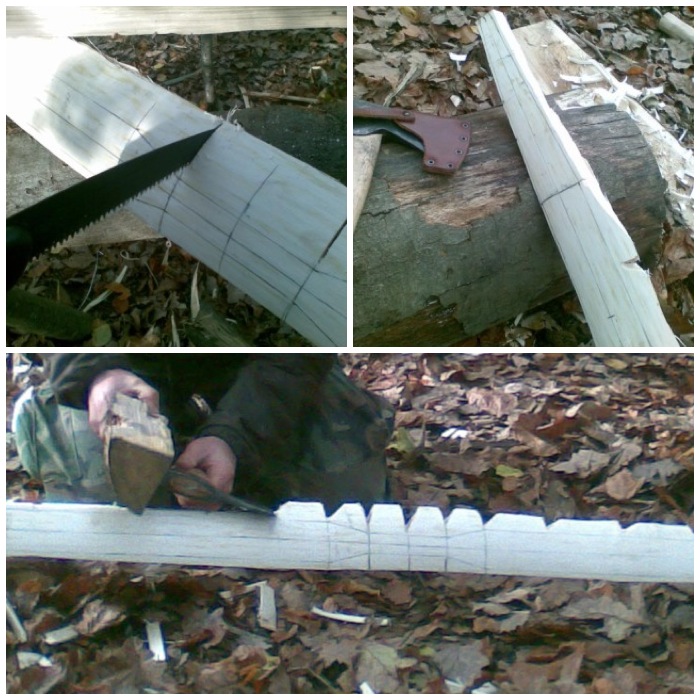
I then sawed stop cuts all along the stave: as a piece of wood is cut out with the axe the stop cuts stop a split running through the whole bow, meaning you only cut out the wood you want to remove.
Here you can see the stop cuts. Note too how the bow is wedged against a tree and resting on a stump and the axe is in front of me and at 90 degrees away from my body for safety.
Once the top profile is cut out the side profile is next.
Using stop cuts again I roughed out the stave until I got the basic shape of the bow. The drawing below shows the shape of the side profile (I didn’t take a picture of this I am afraid).
A finished blank stave ready to be seasoned for a while.
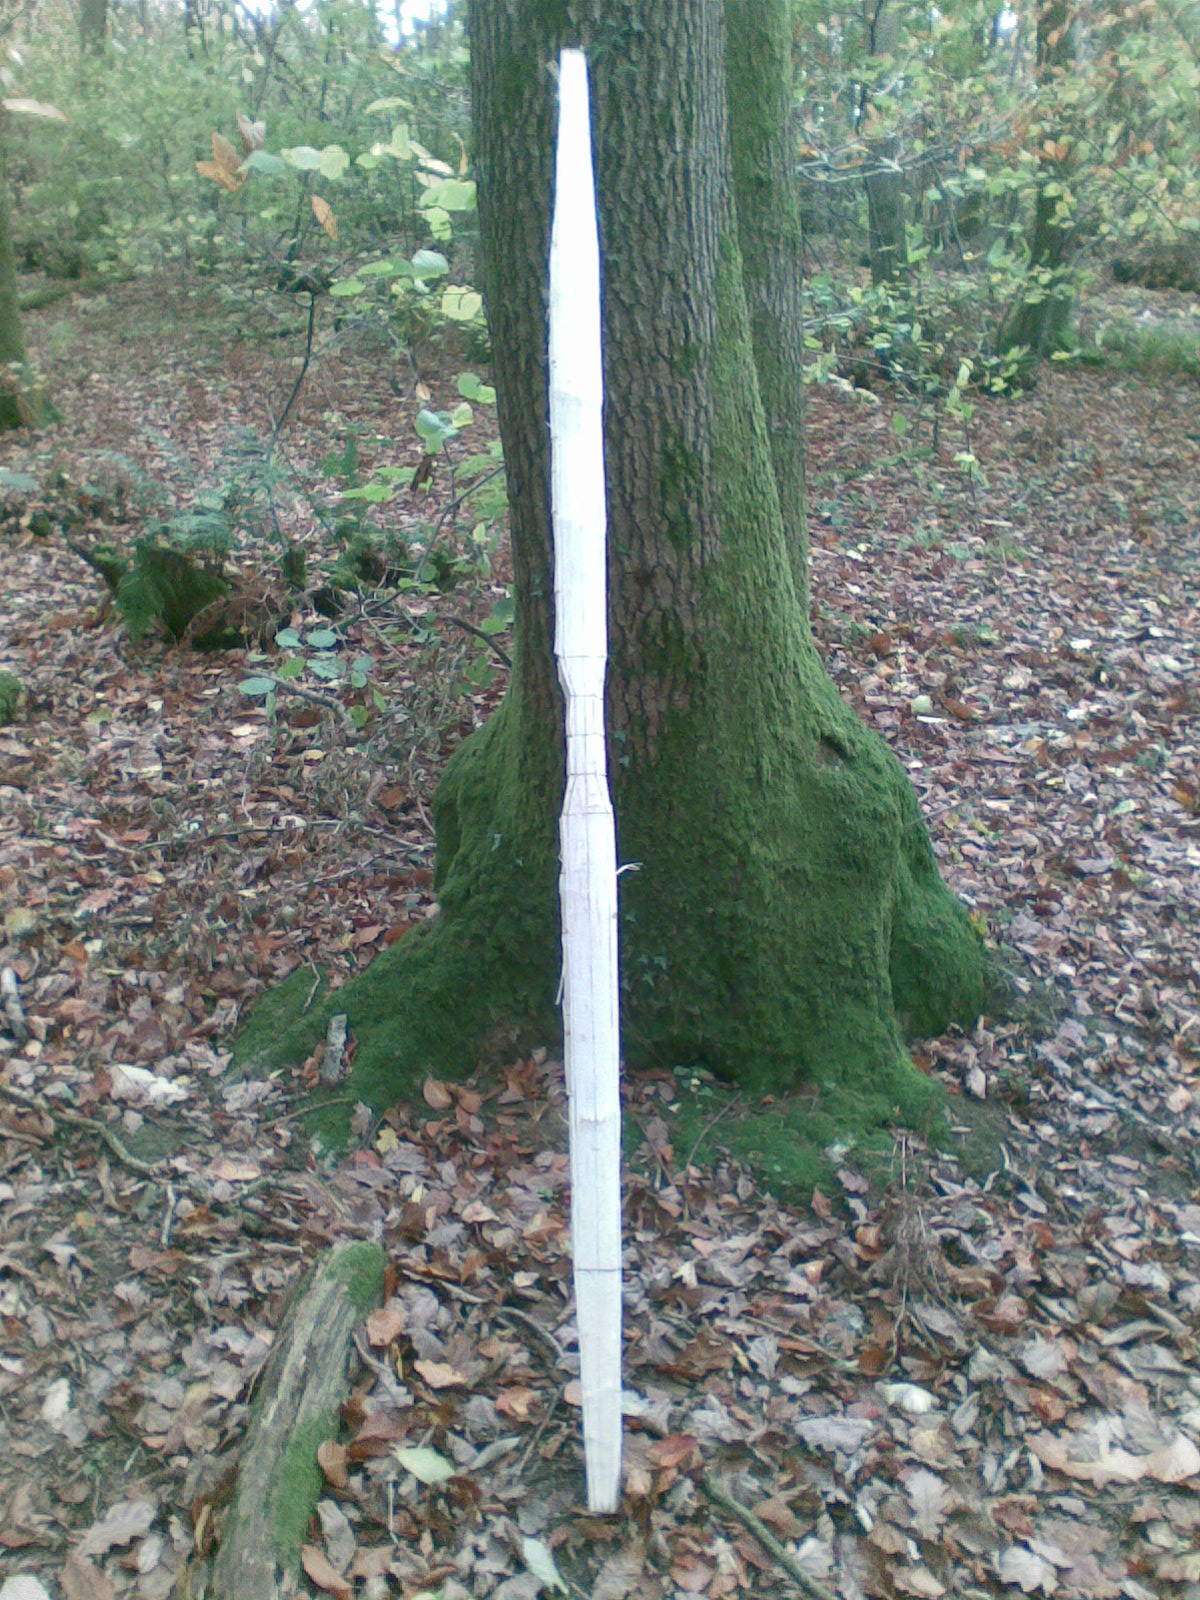
At this point I left the bow to season for a month: one week in my garage and then three weeks in a cool spot in my house.
This allowed the wood to season enough to start the fine work.
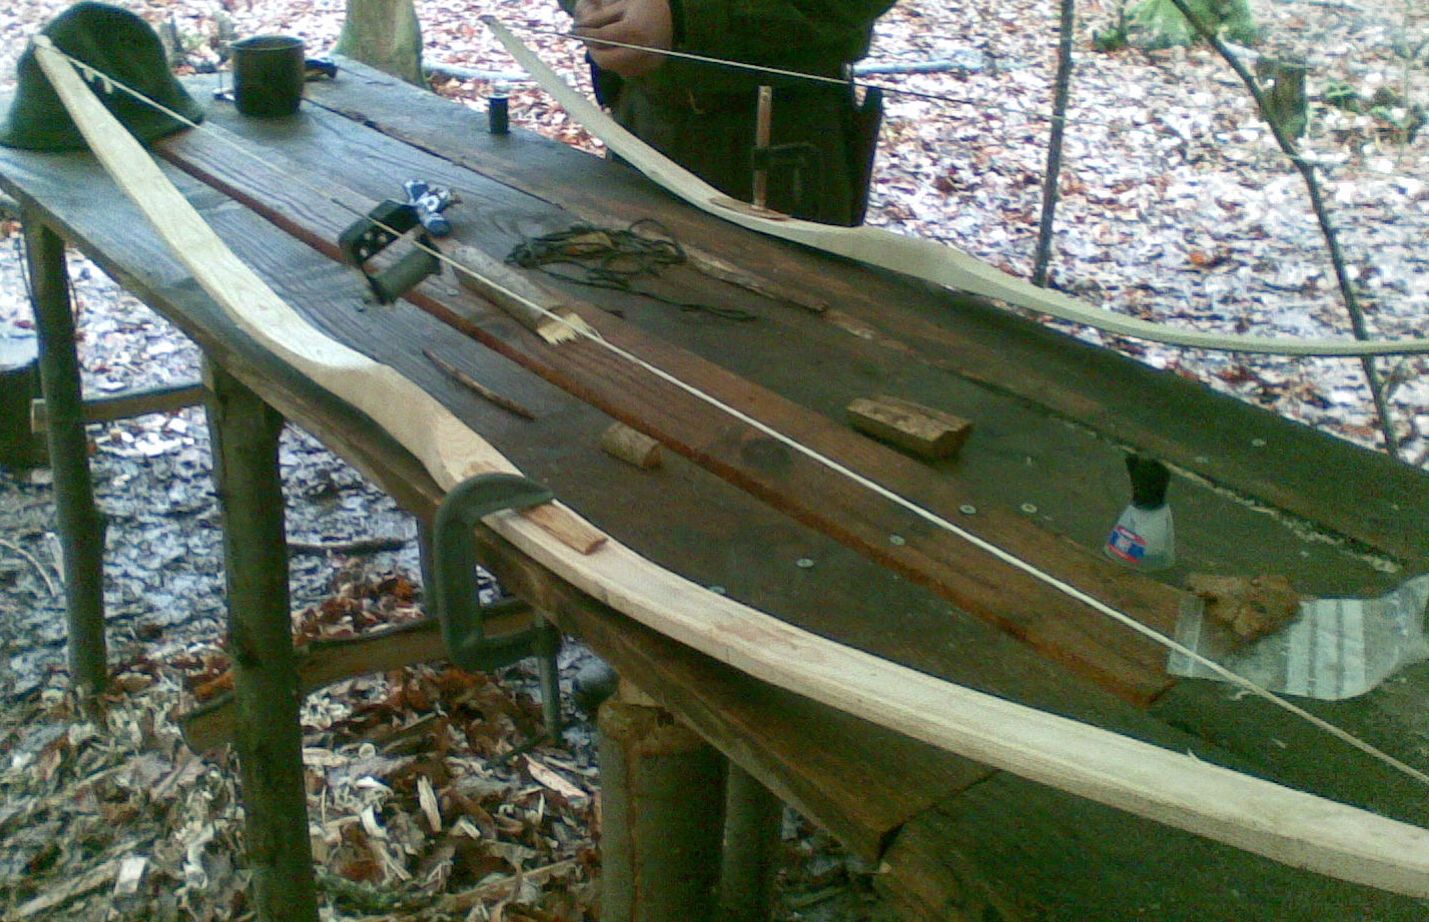
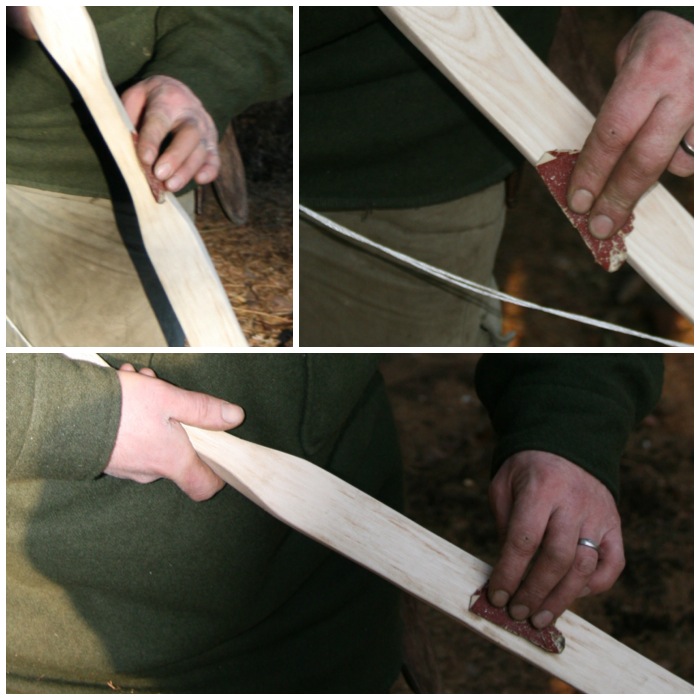
In the pictures below the bows are clamped down for the fine work.
A clear picture of the bow’s rough profile can be seen in the bottom picture.
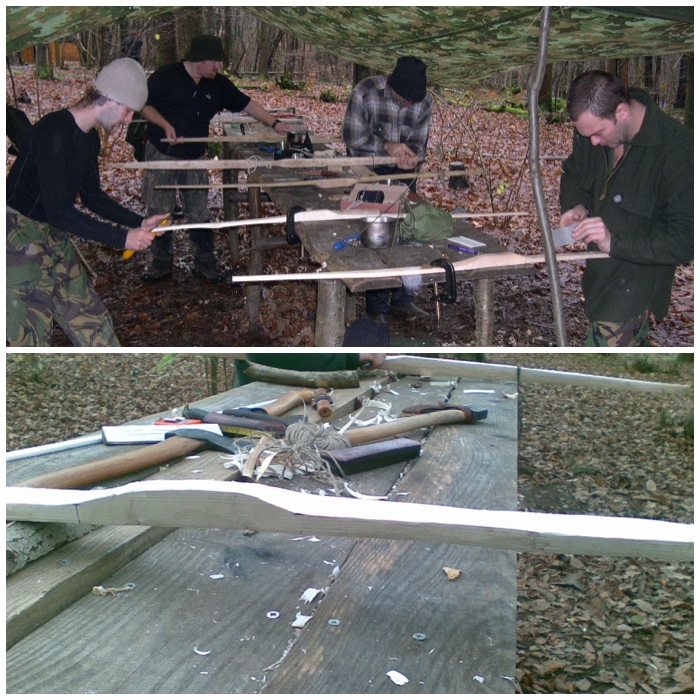
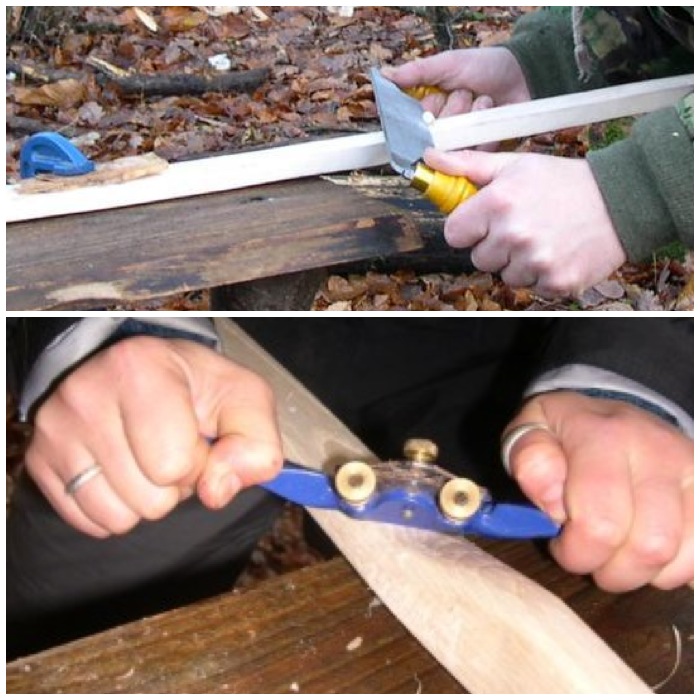
To begin with I used a draw knife and then moved onto a spoke shave.
Having the bow clamped allowed me to use these tools safely and with precision. I took the pictures so the hands you see aren’t mine: the top picture is Phil Brown of Badger Bushcraft using the draw knife and the bottom picture is Mollie Butters of the Field Farm Project using the spoke shave.
For very fine shaving I used a cabinet scraper. With all of these tools I only worked on the belly and the sides of the bow working down to the tips of each limb. I was looking to get a neat taper effect from the handle to the tips as shown in the plan in the picture on the bows dimensions.
Tillering
Throughout this fine work I tested the bow’s flexibility by floor tillering it.
This involves pushing down on each limb to test its flexibility (check out this thread on the Primitive Archer site on floor tillering).
I was looking for an even flexibility in each limb.
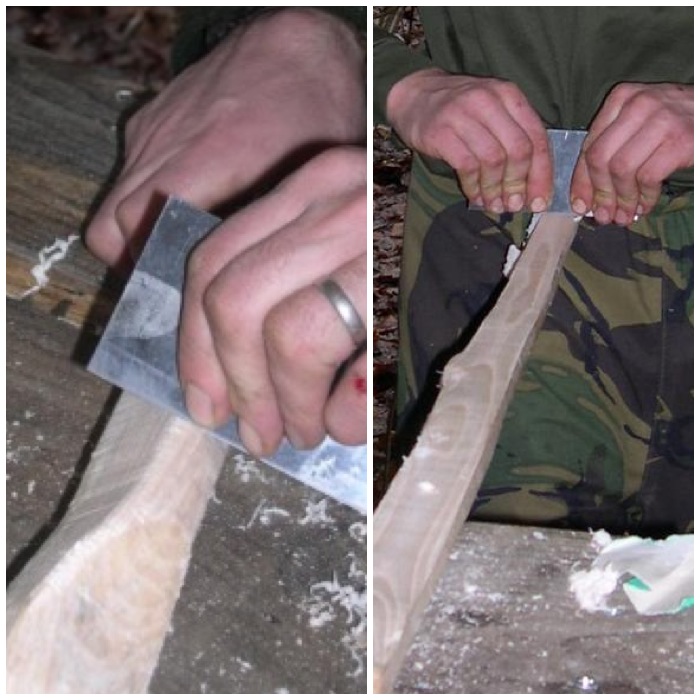
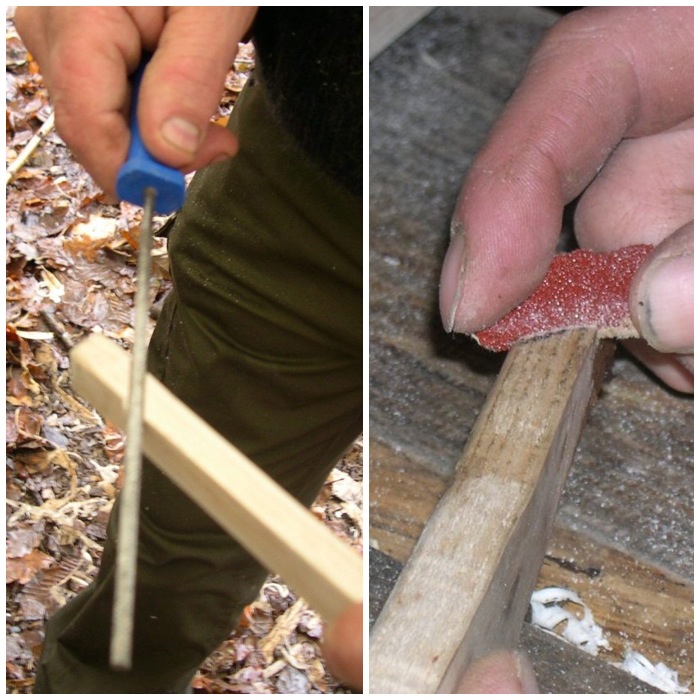
Once floor tillering couldn’t tell me any more I needed to move to the tiller stand, so I carved out the knocks on each limb to hold the string using a round wood file.
The knock needs to be at an angle of 45 degrees and deep enough so that the string doesn’t slip off.
Finally I sanded the knock so that the edges would not abrade the string.
I just used some strong nylon string at first.
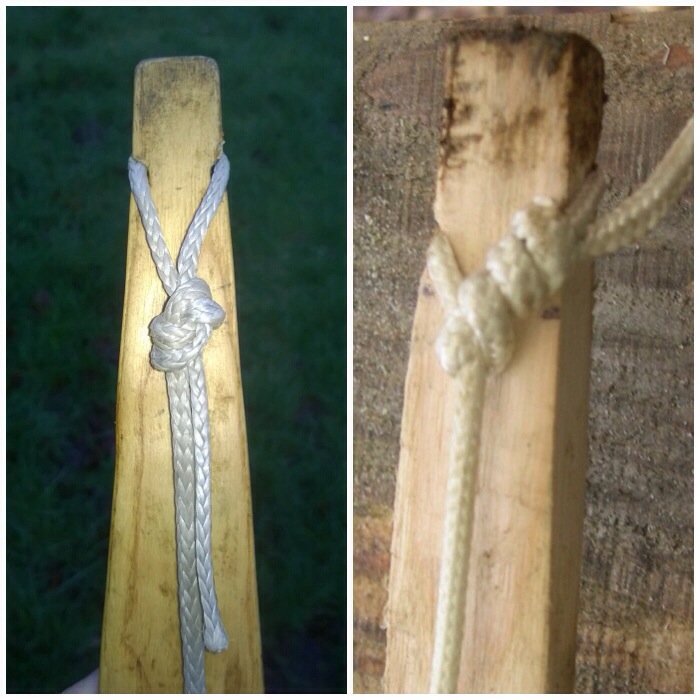
One end of the string is tied on with an Overhand loop and the other end with a Timber hitch.
At this stage the bow was not put under any tension by the string. This was so that I could train the bow to bend incrementally by using the upright tiller. Putting the bow under too much tension would lead quite quickly to it snapping or cracking.
Dick Baugh wrote a good article on tillering on the Primitive Ways website that is worth a read.
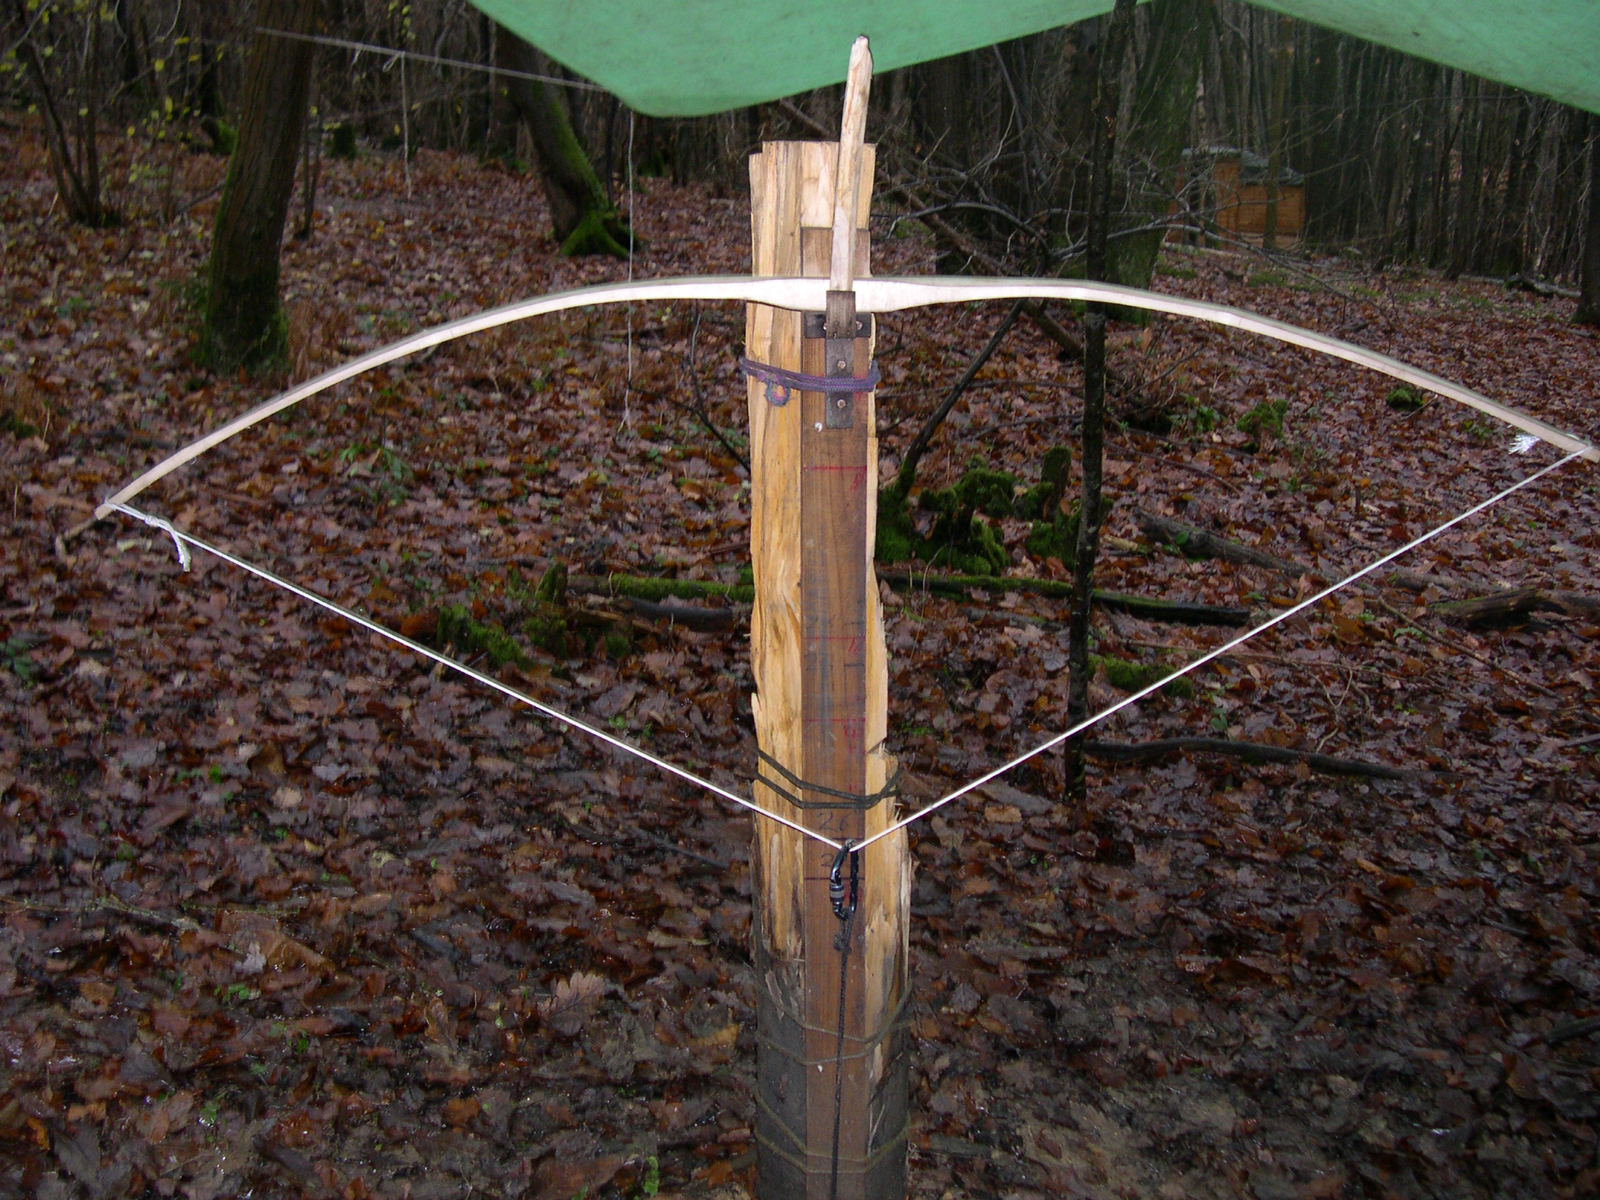
I then placed the bow on the tiller post and in increments slowly bent it, carefully watching the curve on each limb.

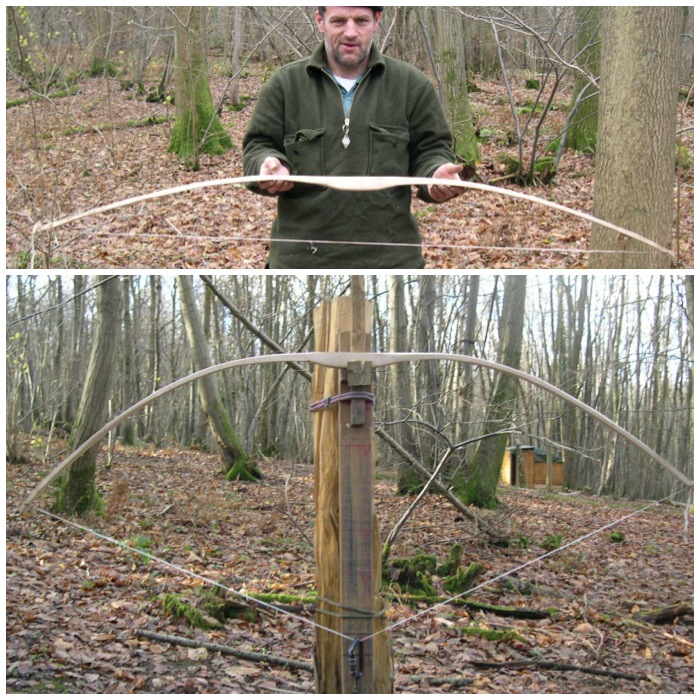
The following pictures are of the bow during the tillering process. After viewing it each time I would return to the workbench to scrape wood from areas of stiffness using the cabinet scraper or spoke shave. The close up pictures show in detail the top and bottom of the tiller when set up.
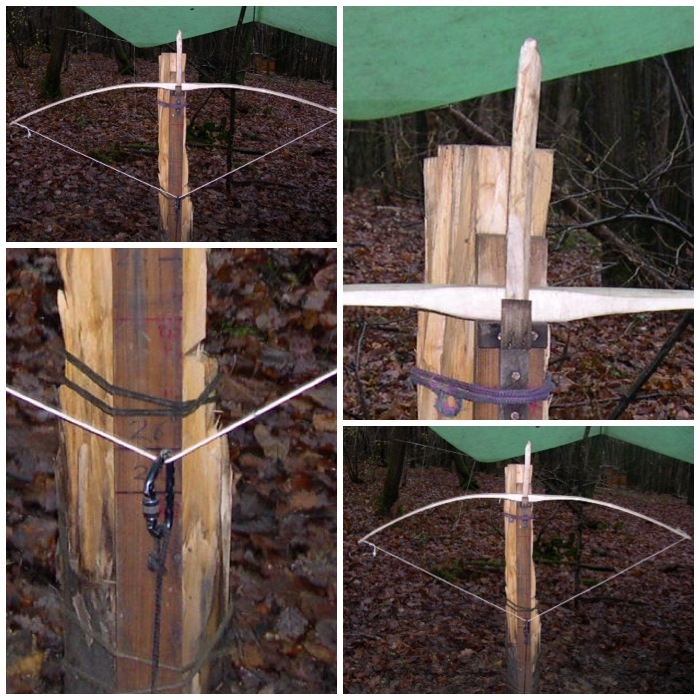
The shape of the limbs can be viewed easily on the tiller: here I could see that the right hand limb was still stiff and needed working on.
The next stage involves shortening the bow string so as to raise the brace height (the height of the string above the handle when the bow is strung up) then testing the bow on slowly increasing brace heights on the tiller. To do this you have to unstring the bow (at this stage that simply means sliding the loop off the knocks and loosening the Timber hitch) and adjust the Timber hitch to shorten the string.
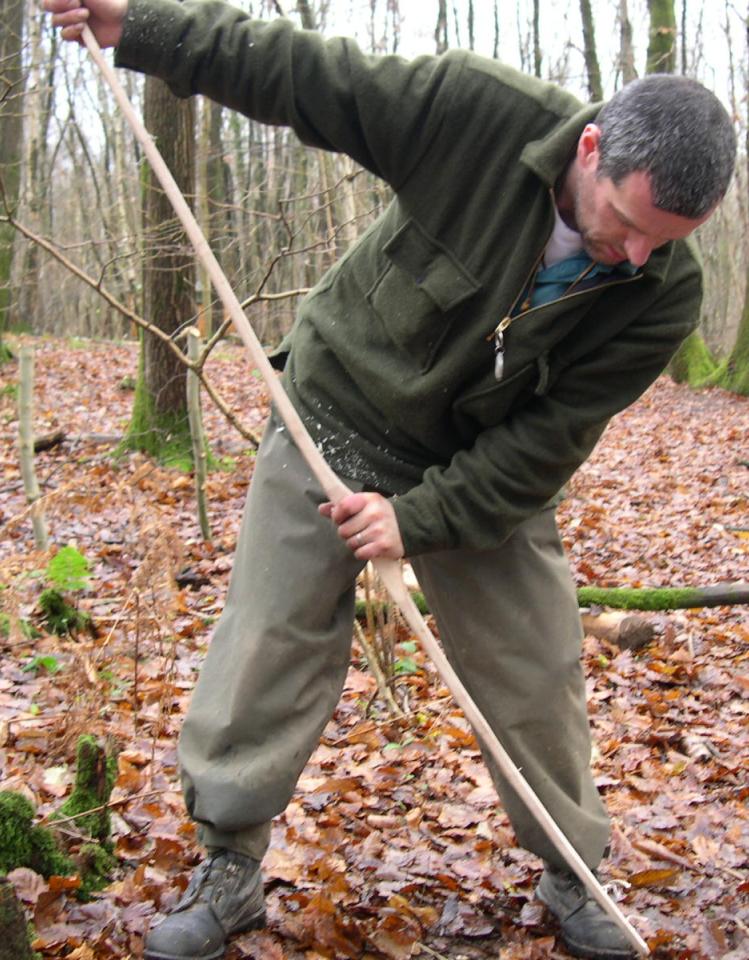
To re-string the bow after the Timber hitch has been adjusted and re tightened, hold the bow with the bottom limb (the one with the Timber hitch) trapped against your instep of your foot. Have the back of the bow facing you and with your left hand (if you are right handed) firmly hold the handle, then with your right hand slide the loop back up to the knock.
The first brace height I set the bow at was very low (the string touching the handle) as I only shortened the string by about an inch. A good site explaining how to string a bow can be found on the Archery Library website.
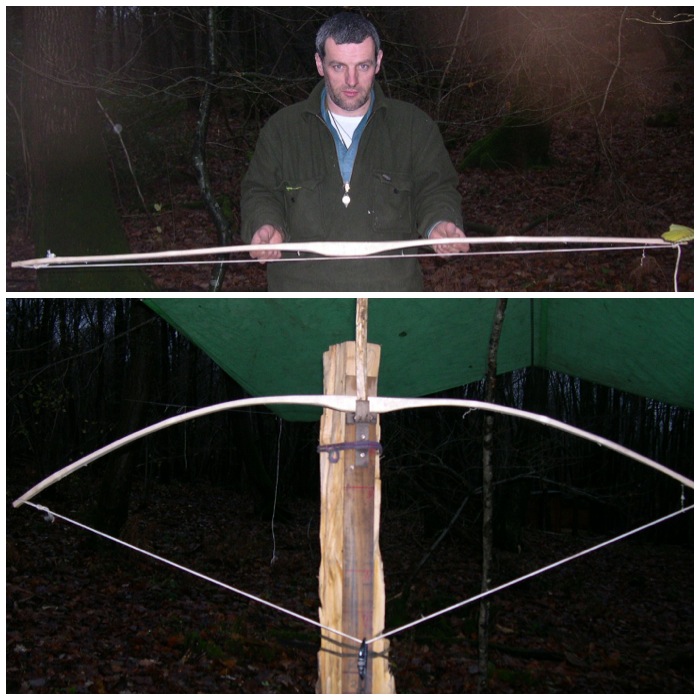
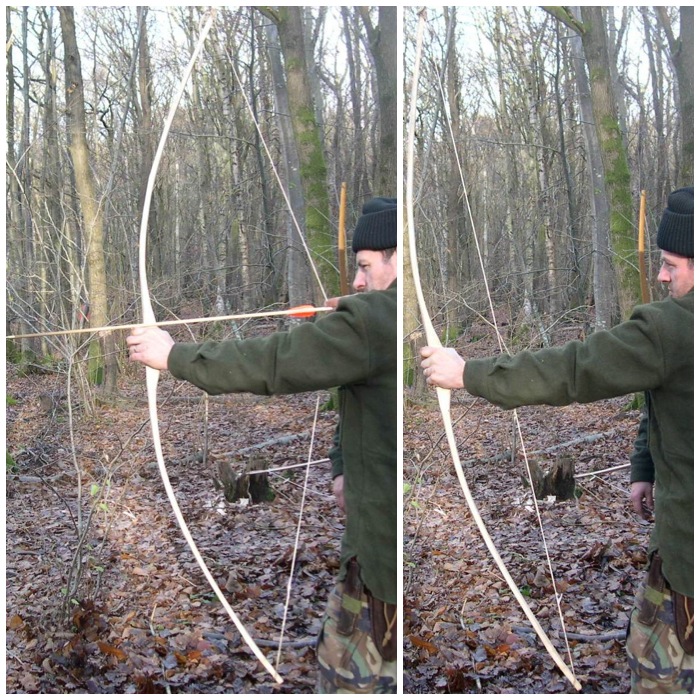
A two inch brace
Tillering by hand with a two inch brace
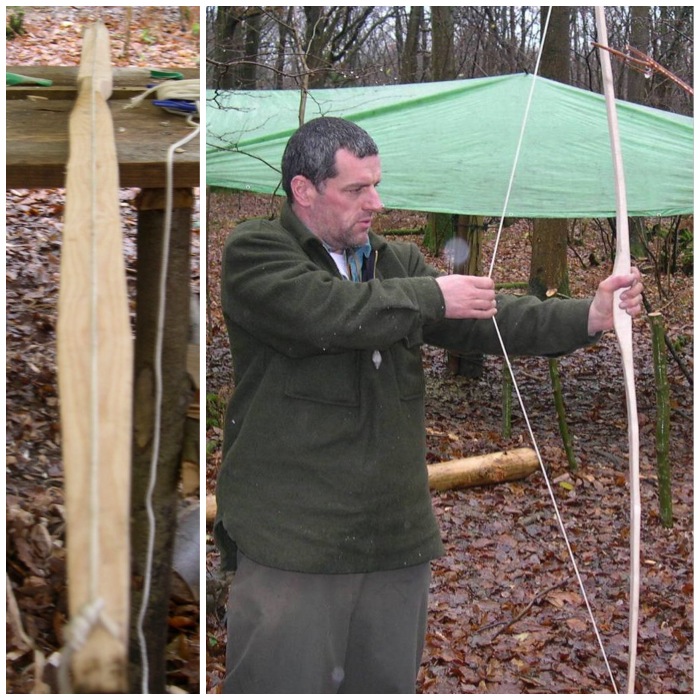
Final brace about six inches. Tillering now complete with evenly curved limbs
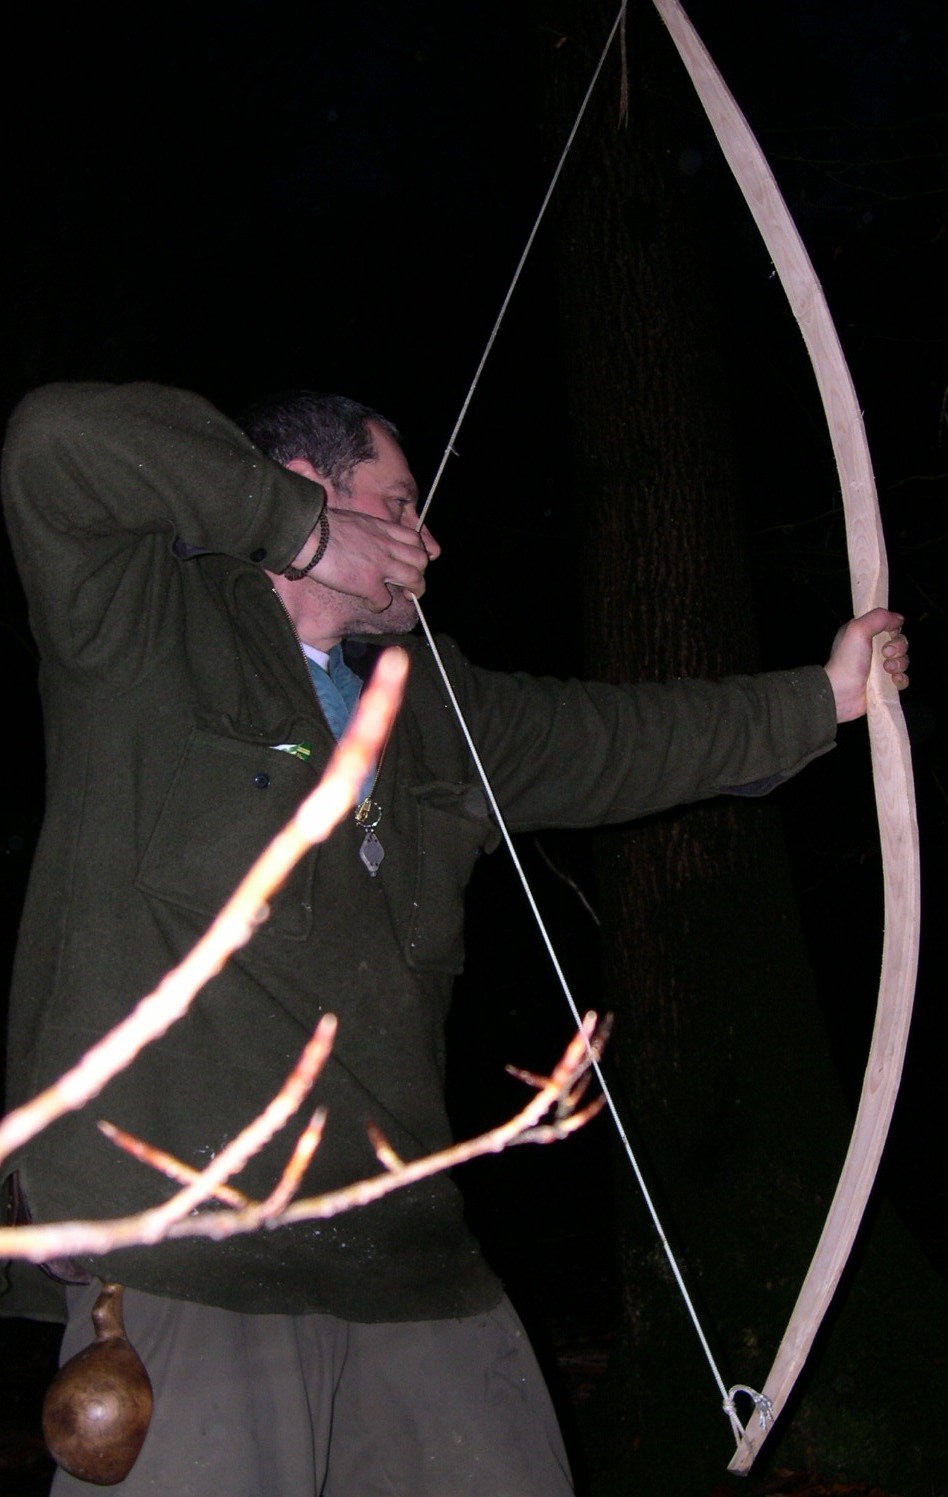
After a bit of tuition from Scott it was time to take my first shot and I even managed to hit the target.
I did not pull a full draw on the first shot in case the bow split.
In the picture below you can see one that did not make it: Charlie’s bow had developed a hinge in one limb that gave under tension.
I think he took it in his stride.

String making
The next stage is to make the string for your bow.
Traditionally natural materials such as sinew, rawhide, plant fibres (nettle) or linen were used but we used modern materials for our bows. As modern string such as Dacron B-50 (50lb) is non biodegradable there is less chance of the string breaking, which means less chance of your bow breaking.
To make the string we used a plank with a clamp at either end, at a distance from each other of 18 inches longer than your bow length. Tie one end of the string to a clamp and run the string around the other clamp, then around the first one again. Keep doing this for five more cycles.

Cut the string at each clamp and you should be left with two sets of five strings.
Then follow the steps in Sam Harper’s site Poor Folk Bows to make a Flemish string. I did not document this step but he has a good tutorial on making the loop, twisting the string together and making the timber hitch at the other end.
The new string is attached by sliding the loop over one end down past the knocks and attached at the other end with a Timber hitch. You need to adjust the Timber hitch so that the string length is the correct length for the brace height you want. When you have the string set at the correct length, restring the bow and clamp it to a workbench.
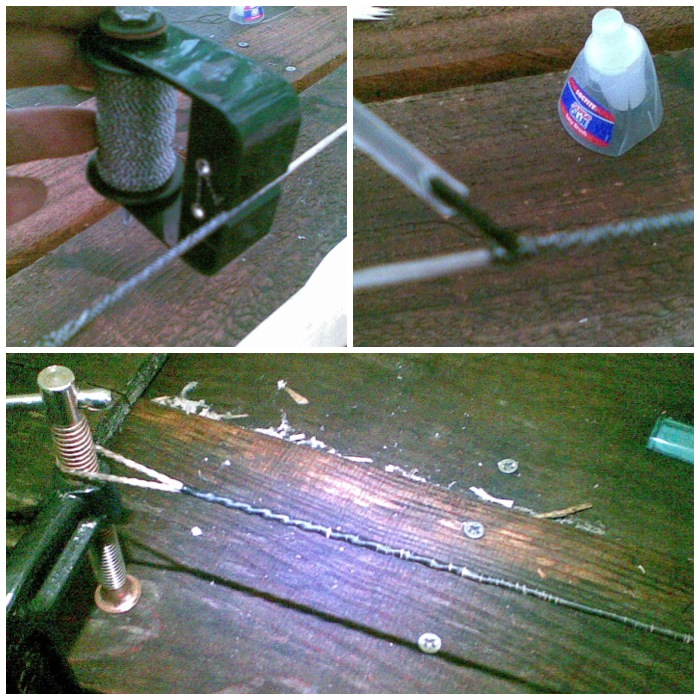
The string now needs to be ‘served’ in the centre of the bow where the arrow will be knocked. The Archery Talk forum has a good thread on serving a bow string. Have a look, as my pictures on this part of the process are not the best.
The serving of the string is basically a whipping to keep the individual pieces of string that are loosely wrapped around each other together and provide a firm area to knock into your arrow. I also served the top of the string near my loop to stop it unraveling. The little device you see in the pictures is known as a Serving Jig. After finishing serving the string I put some superglue at the end to keep it in place
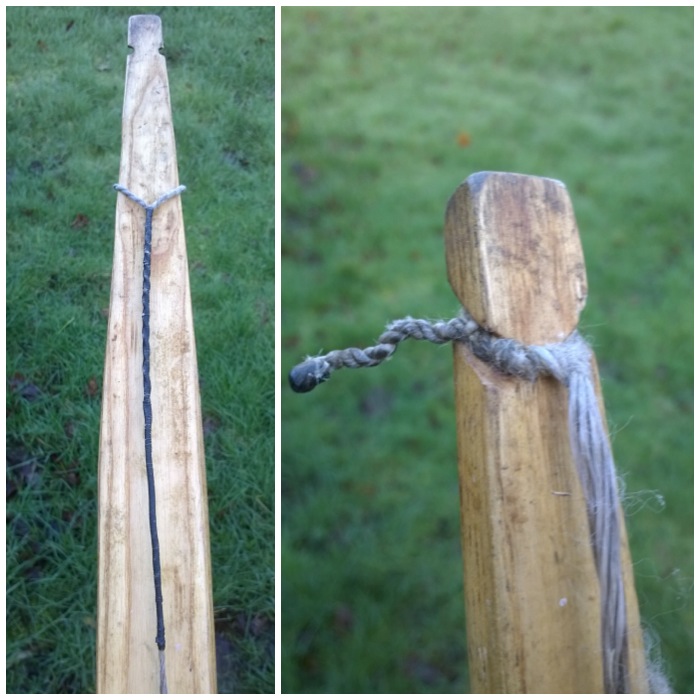
The finished loop needs to be wide enough to slip off the knocks but small enough to grip them when in place. In the picture on the left below you can see that it has been served for about 12 cms right up to the loop. The bottom limb just needs a timber hitch, though I did twist the end as if making cordage to keep it neat.
Final touches
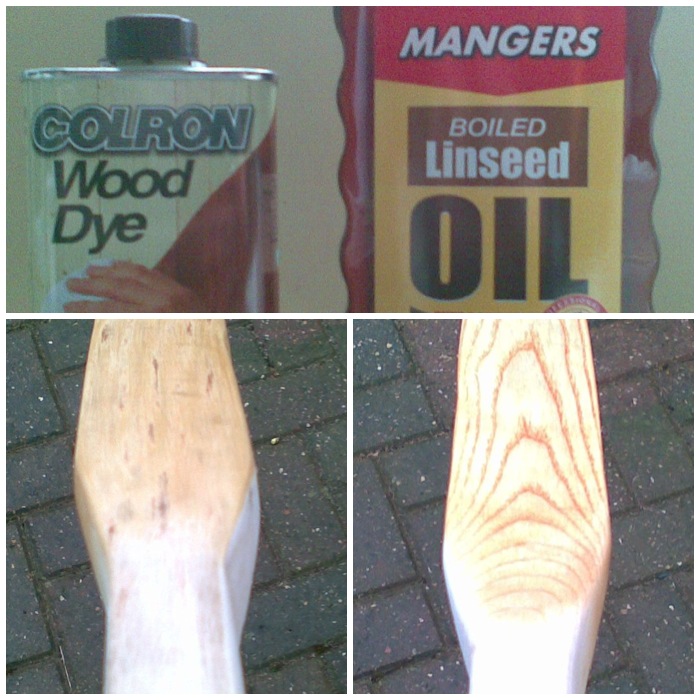
The bow was now ready for some final sanding and oiling.
Using various grades of sandpaper, I sanded the bow down to get rid of any marks and sharp edges.
To protect the bow I stained the wood slightly then applied a mixture of boiled linseed oil and white spirits (50/50 at first). After this had dried I reapplied more oil, but with less white spirits each time until finally I just applied oil.
Lastly, I glued on a small leather handle. I thought about stitching one on but wanted to keep the clean line of the flat leather.
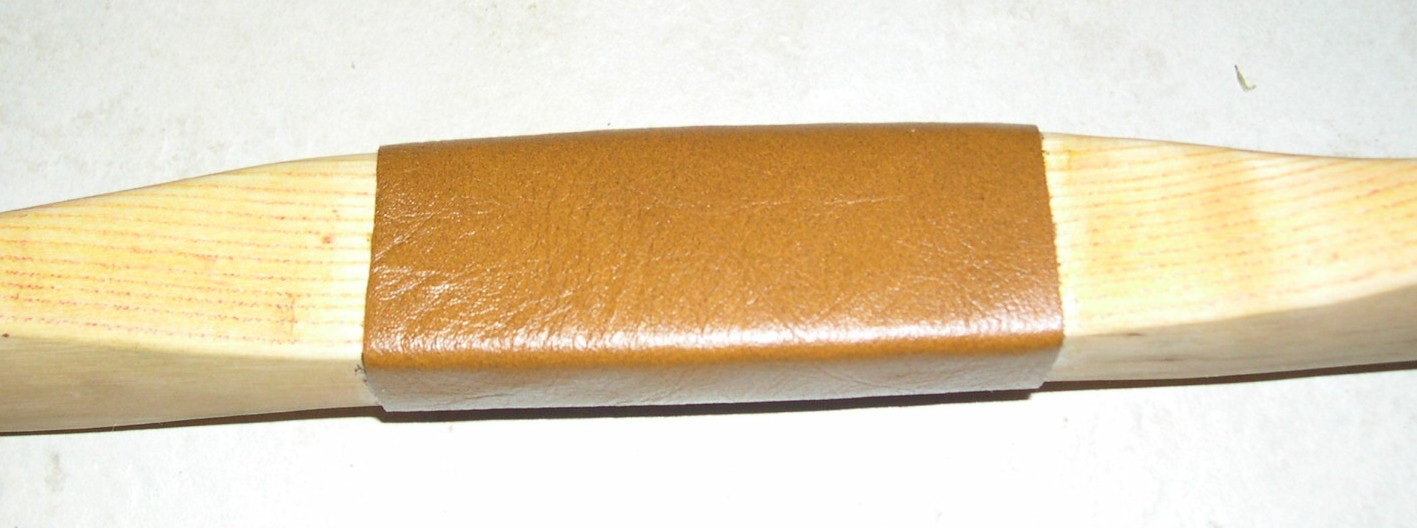
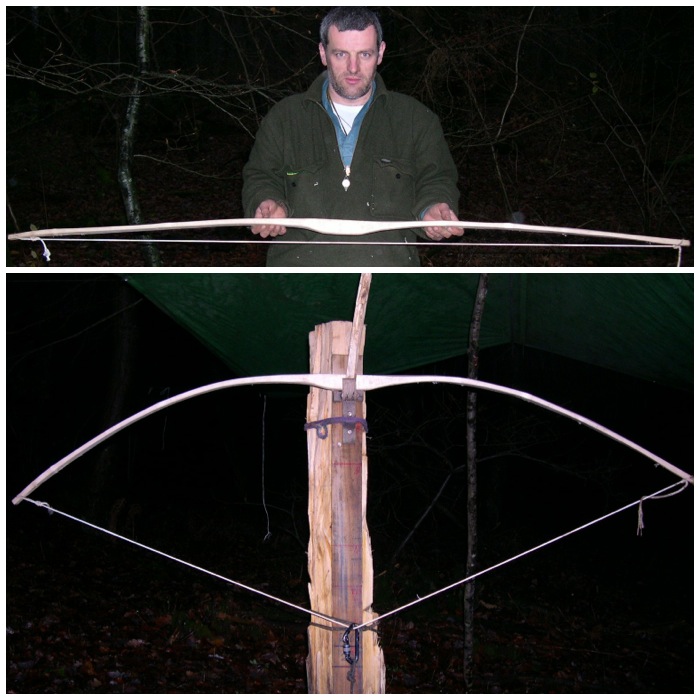
The completed bow.
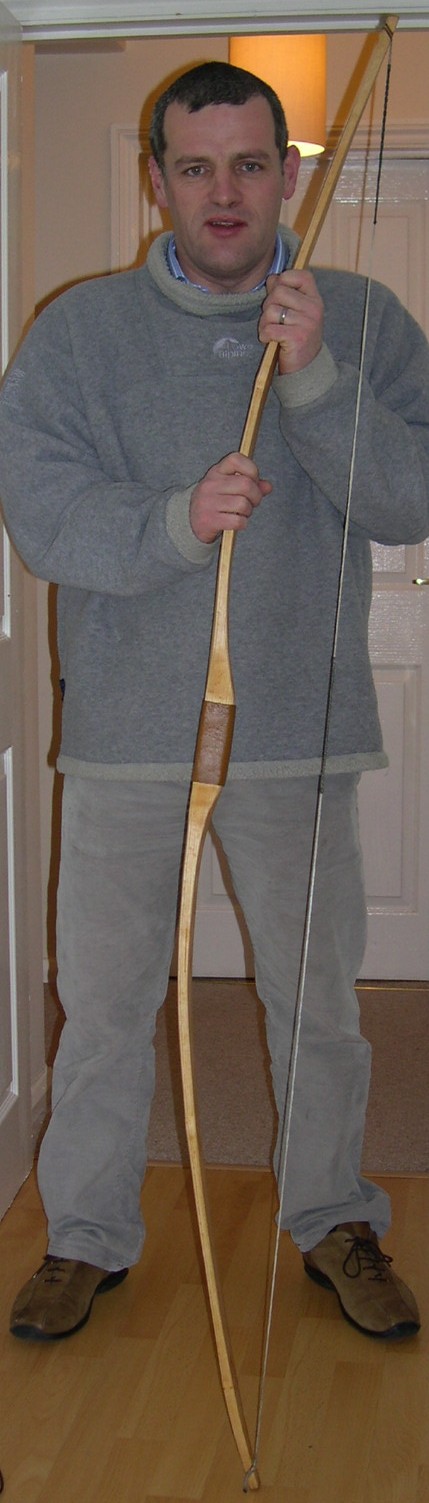
This bow has been used by scores of my Sea Cadets over the last six years and still shoots as sweet as the day I finished her.
I enjoyed making this bow, it was my first but it was definitely not my last.
Cheers
George
George it seems like only yesterday we made these! Nice write up and great pictures – good work buddy! All the best, Phil
Cheers Phil
Going through all these pictures triggered some good memories.
Lovely ‘how to’ George.
Glad she is till shooting after all this time.
Hope to see you guys soon.
Nick
Cheers Nick
A pretty robust bit of kit if you ask me after the number of kids that have used and abused it in the past.
We will get down to the farm over the spring hopefully.
Cheers
George
That’s a fine bow you made there George. Some great advice in the article as well, thanks for sharing.
Hi Hannah
Glad you liked it and thanks for the kind feedback.
Cheers
George
Hi, great article – thanks for that – the step by step detail is really useful. Was wondering, however, could the bow be ‘shaped’ to final, er, shape by steaming and setting in a form. Would this lower its pull power or was it that isn’t how they traditionally shaped bows using tillering instead? Cheers >Callum
Hi Callum
I have never found the need to steam a bow to give it extra shape. I have though seasoned a blank in a jig with the arms held back to try and induce a different shape than it naturally wants to. In my holmegaard Cheers, George
Aye, was thinking more about just getting it to the shape you achieve by tillering. Thought steaming might be a way of achieving the incremental bend from tillering, in one go. But wasn’t sure if this makes the bow less powerful, etc.
cheers
How far away did you put the nocks from the end of the bow?
Hi Brian
My nocks are a couple of centimetres from the end.
Cheers
George
Nice job and nice presentation too! Thanks a lot! Happy I found out that thing about ASH wood as that’s what I’ll be using so I’ll go with a flat design rather than longbow.
I loved the article and am just getting into bow making but as silly as it sounds, I am having difficulty in making sure I have the correct type of wood. I cut down what I assumed was hickory but am not entirely sure because it has a deep red center then mostly white all the way to the sapwood which was deep brown. Any thoughts on if this is hickory or not?
Glad you liked the post Jake. I am not sure about Hickory as it is not a wood I have ever worked with.
There is a good post on the Paleotool’s Weblog on this wood and prepping a bow that may help – https://paleotool.com/2012/02/06/prepping-bow-staves/
Cheers, George
Looks awesome. I followed this whole tutorial and went to order a flemish string from http://www.60xcustomstrings.com but couldn’t find one there so i went to the site you referred. Thanks for taking the time to post all of this.
Glad it was useful Mike
Very usefull guide on wooden long bow making. Thank you very much.
hi George,
Great post, thanks – i’ve just carved out my first stave using your guide, now leaving to season.
In next stage (drawknife shaving) how slim did you take it down to?
Thanks!
ps. Is that Scott from EarthCraft?
Hi Joseph. The final thickness after tillering brought each limb down to around 3/4 of an inch depth by the handle and 1/2 an inch at the tips. I would give yourself an inch at the handle and 3/4 at the tips before using a draw knife. It will though depend on your confidence. As you use the draw knife you will start to hand tiller it giving you an idea whether to use the draw knife or a scraper.
Yes – you are right it is Scott in the picture.
Wonderfully explained with pictorial representation.
Thanks for the post.
https://www.ishootastan.com
Glad you liked it – she still shoots well