This winter I have seen no snow at all where I live in the southern part of the UK (plenty up north but none down here). Normally we get at least a few days’ worth of snow giving me the chance to try and take some decent winter photos.
Not this year it would appear (so far, he said with crossed fingers) so I have been looking elsewhere for inspiration. The next three or four posts will be about these snowless winter days and the beauty I could find in what first appears to be a rather drab time of year.
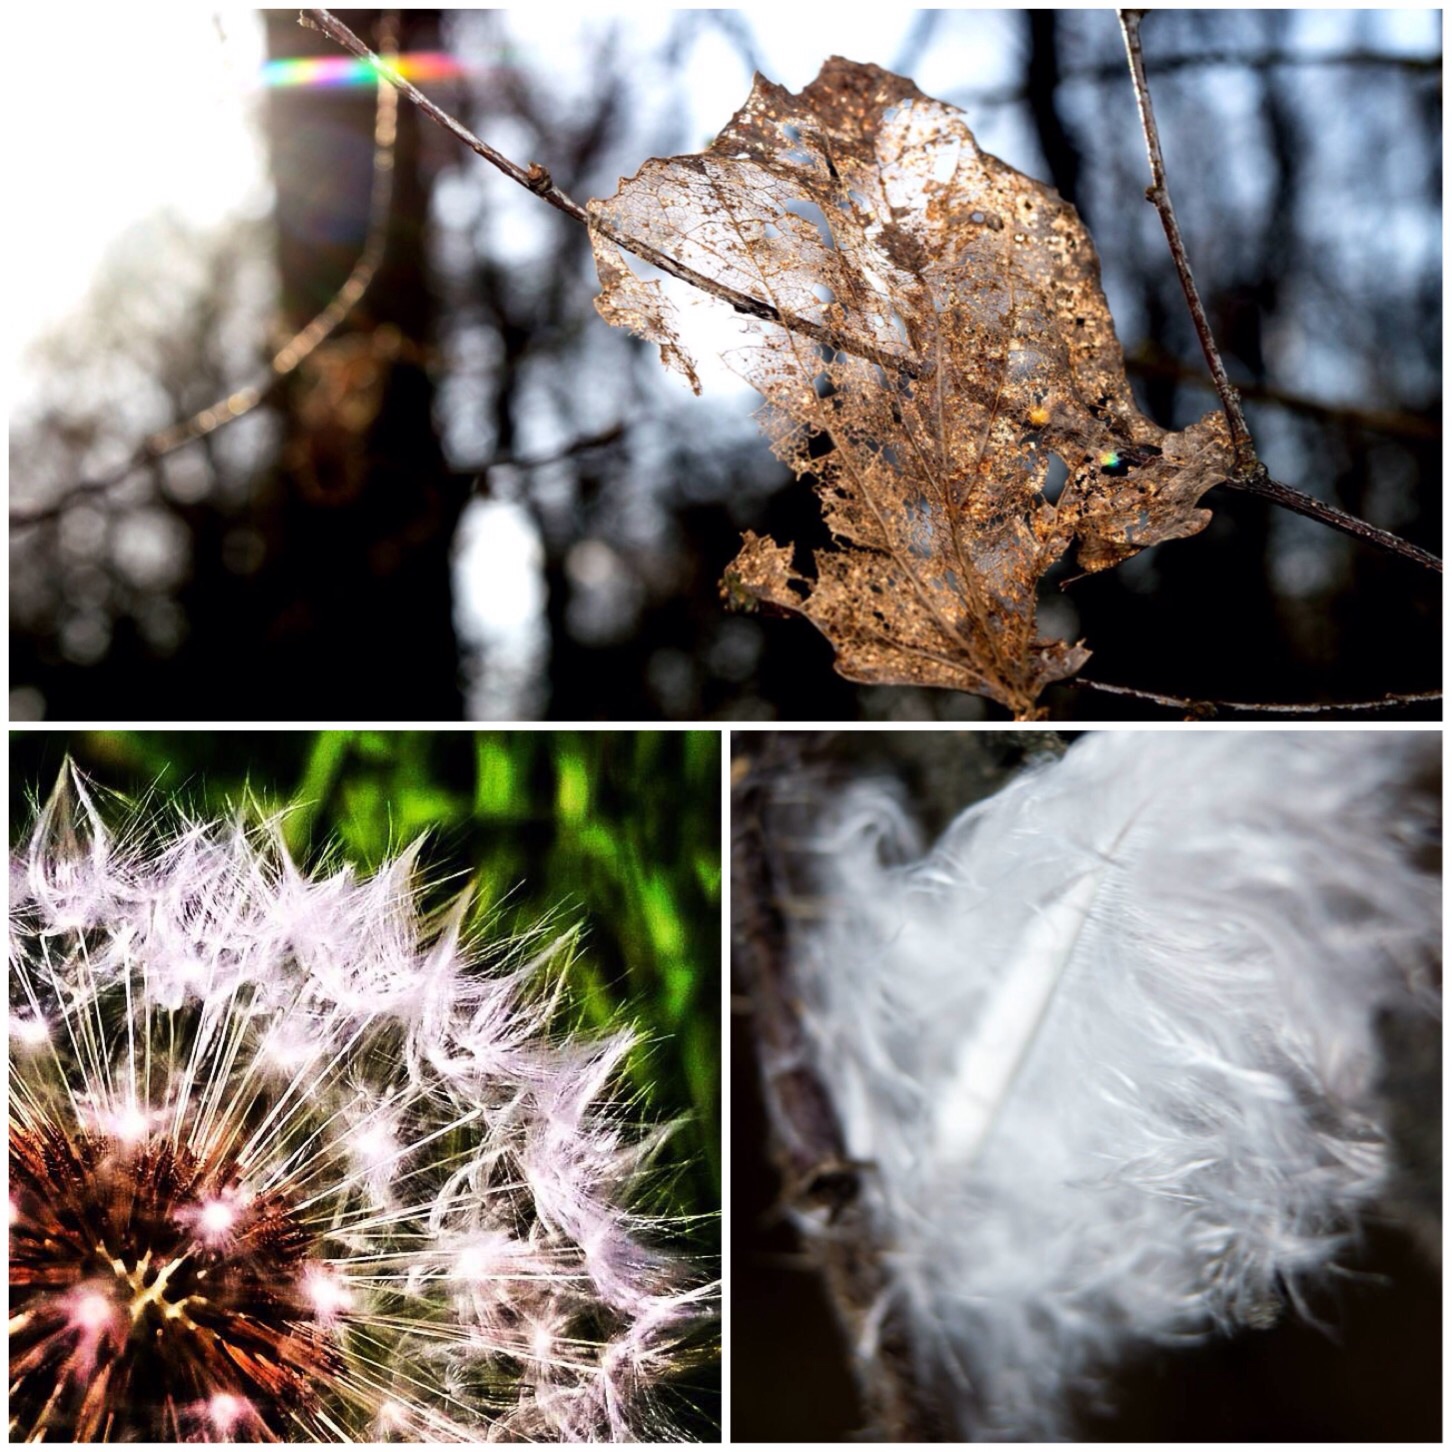
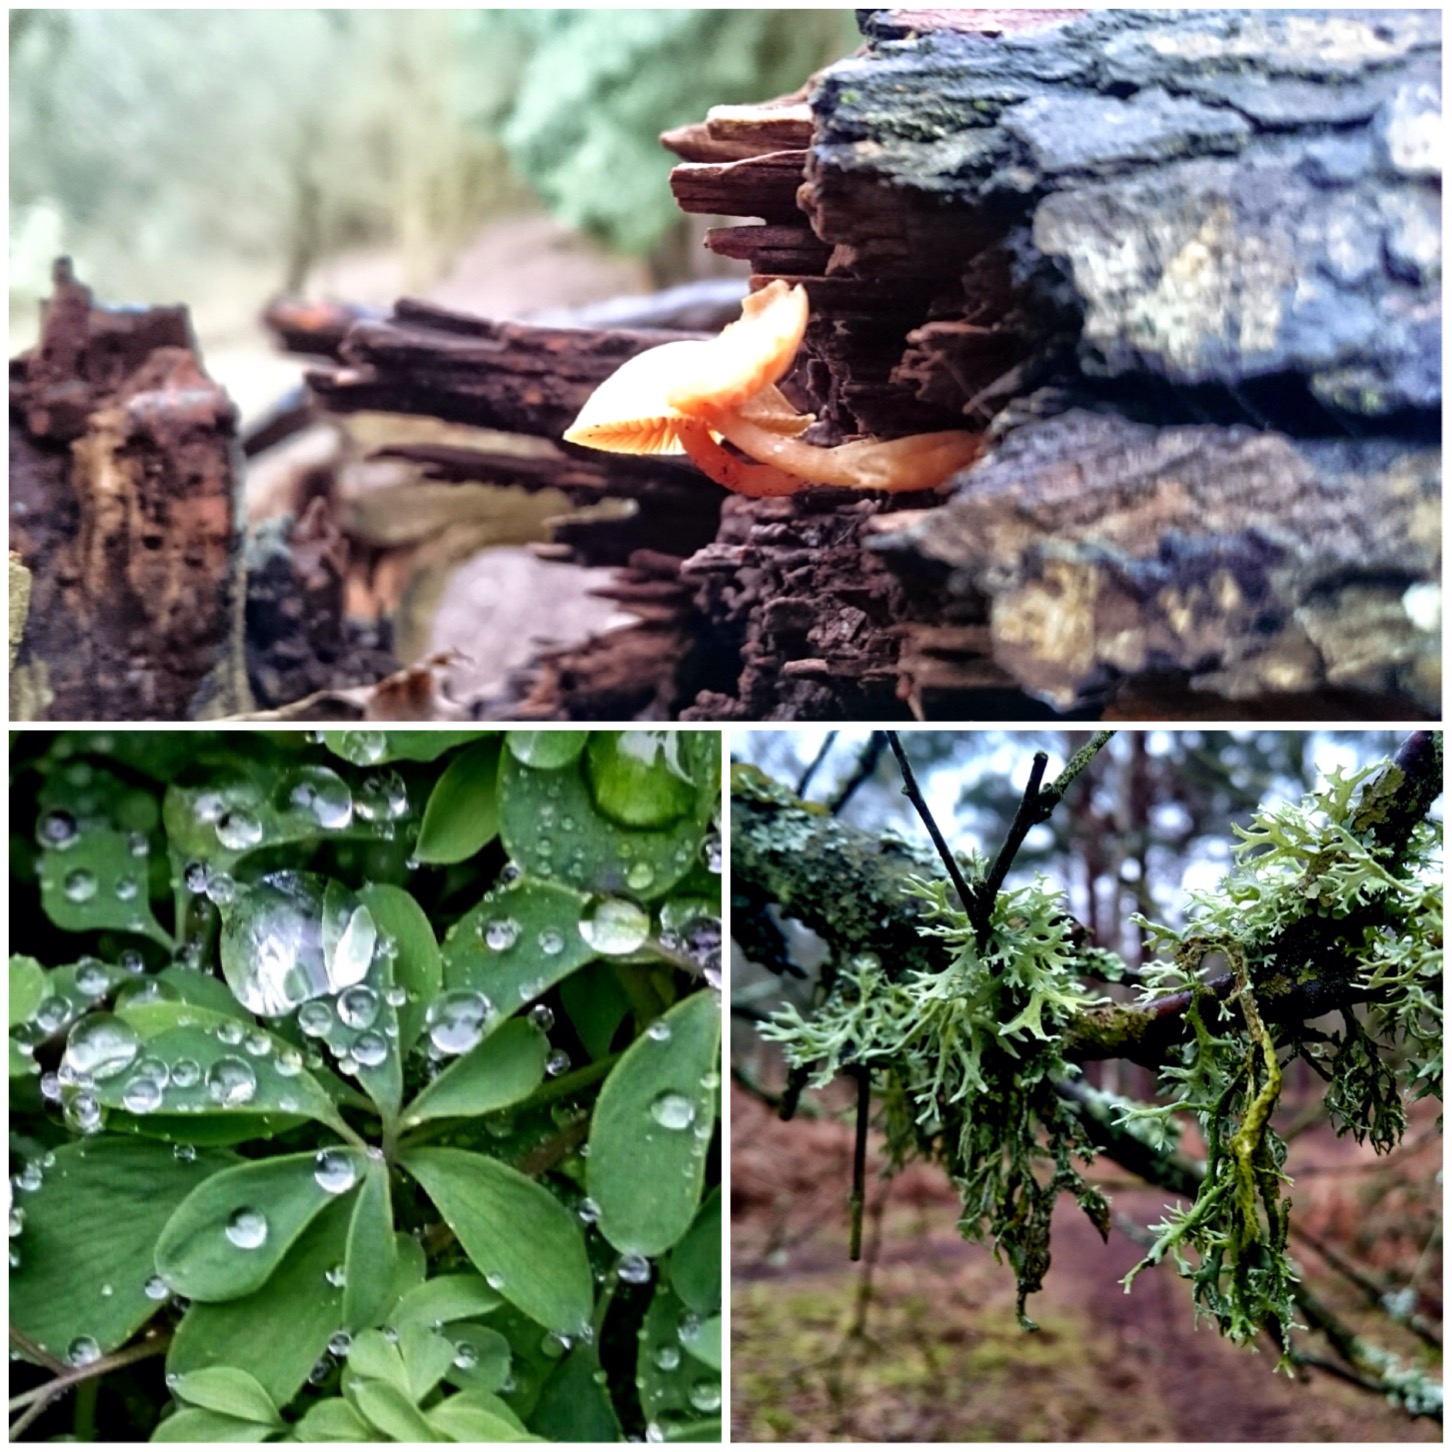
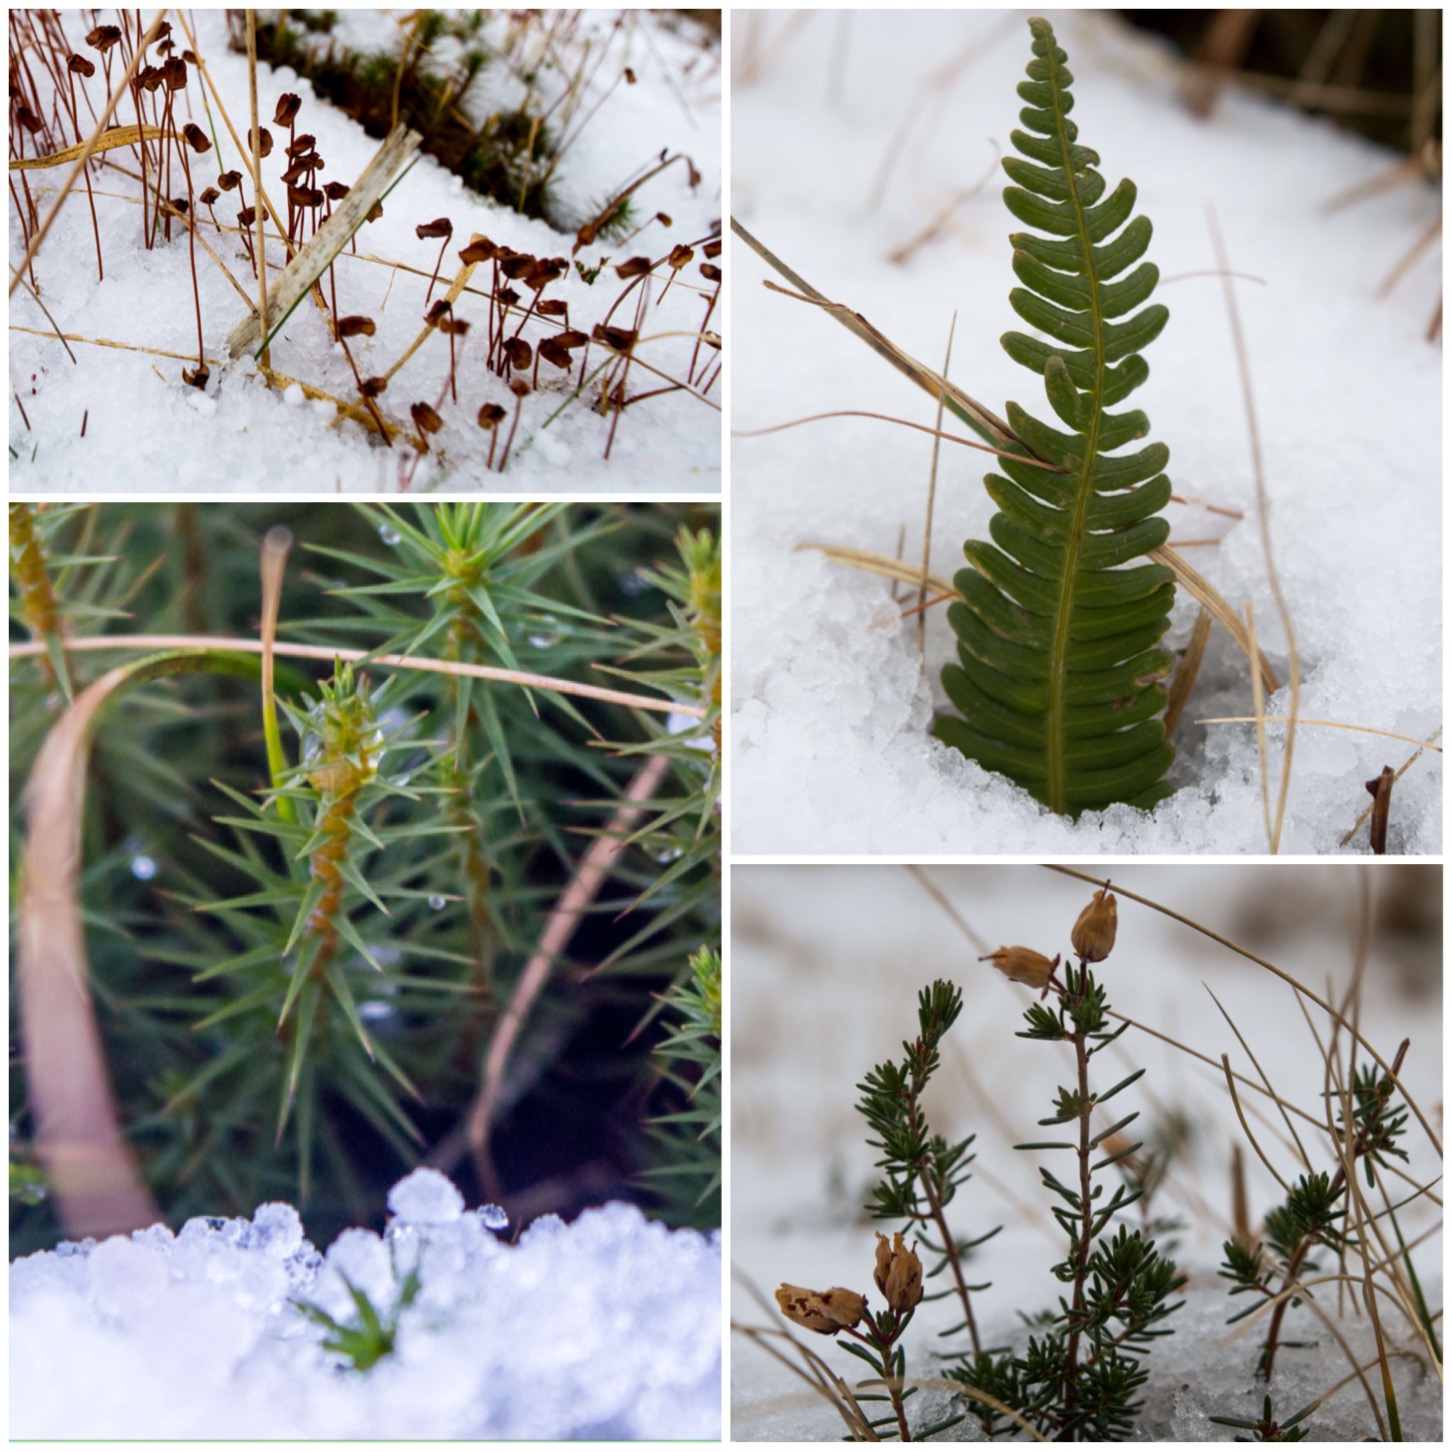
At the end of last year I started dabbling in macro photography and playing around with light, and found a whole new world opened up to me. I also started noticing the different textures that were all around me – a skeletal leaf, a dandelion seed head, a trapped downy feather – all have beauty in their own way if you look closely enough.
Different textures
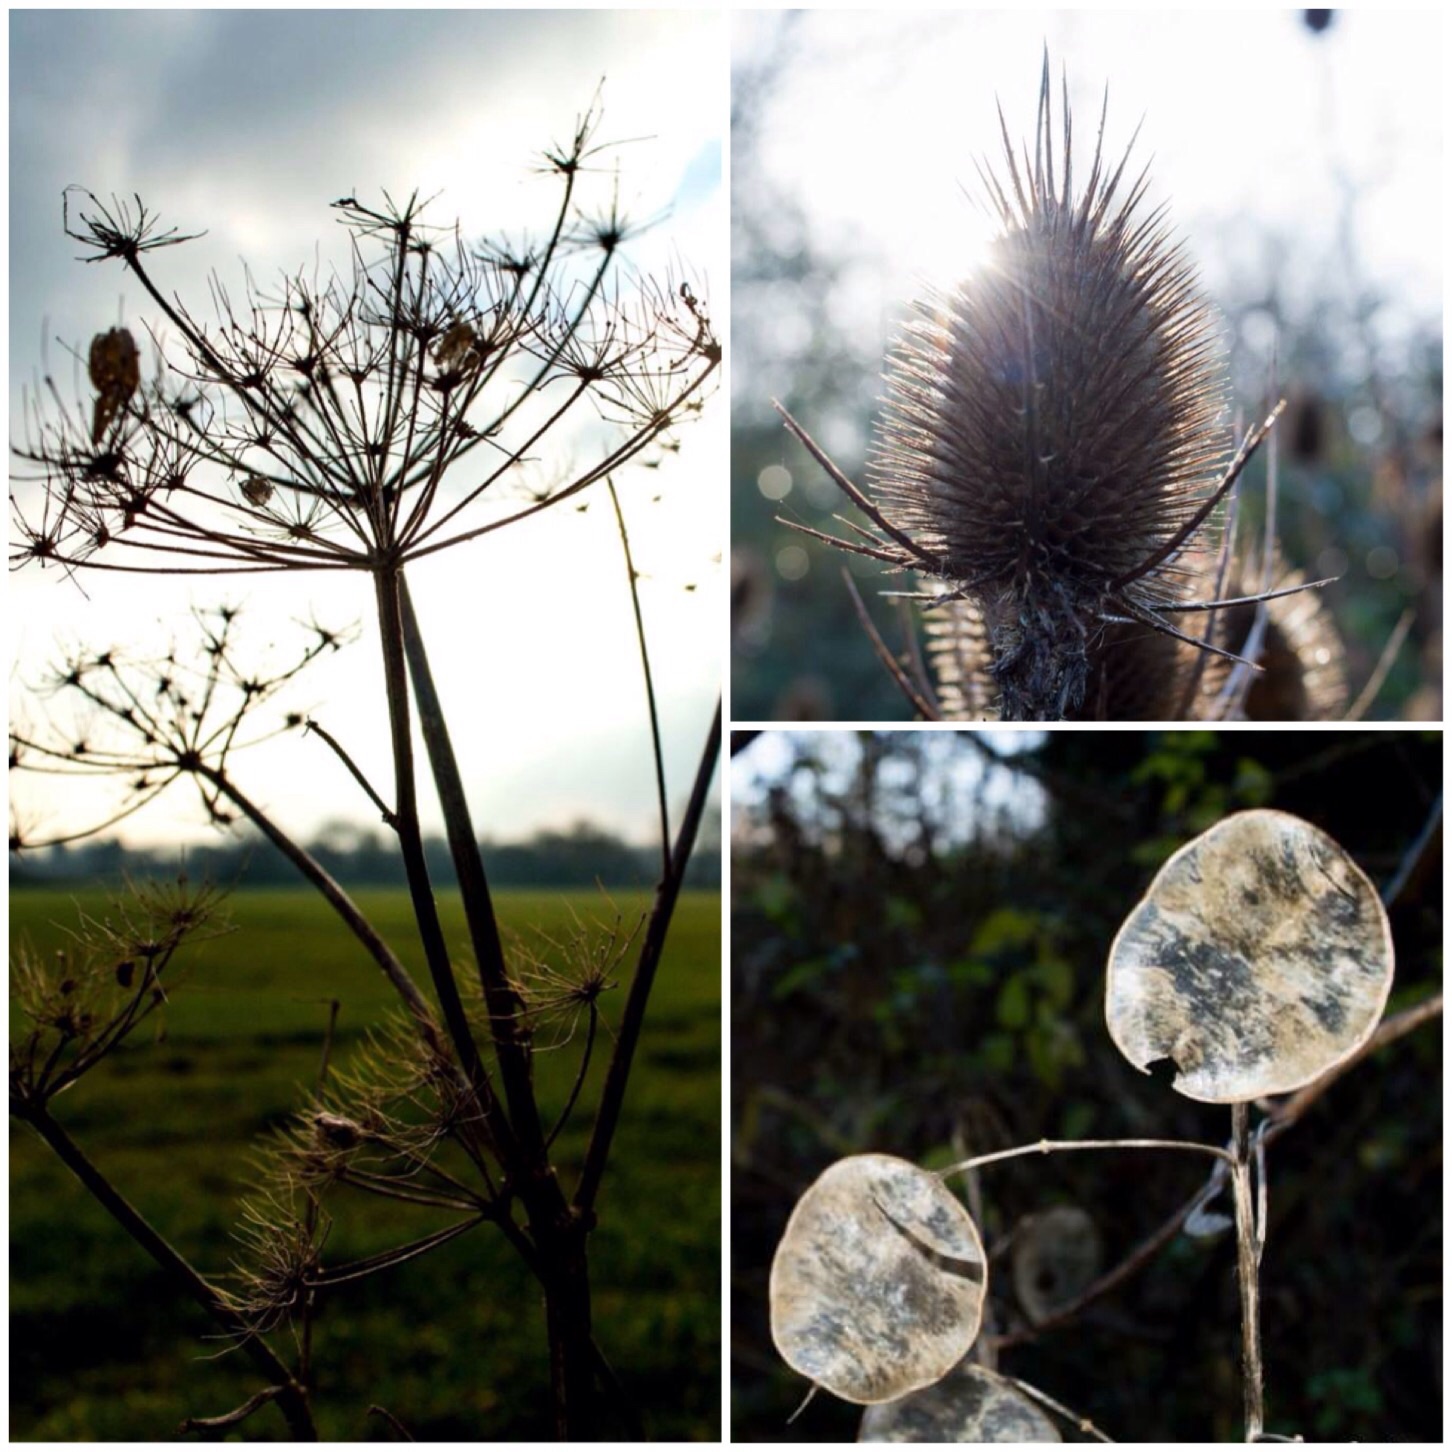
Since I started using my Nikon D3200 DSLR I have been dabbling with the manual settings more and more to try and capture pictures where the beauty of them is enhanced by the thoughtful use of light levels. Many of my past pictures, taken on my camera phone, were either way over-exposed or look washed out.
I like the effect of silhouetting a plant against the skyline or directly into the sun or even reflecting light off a plant as in the bottom right picture.
Playing with light
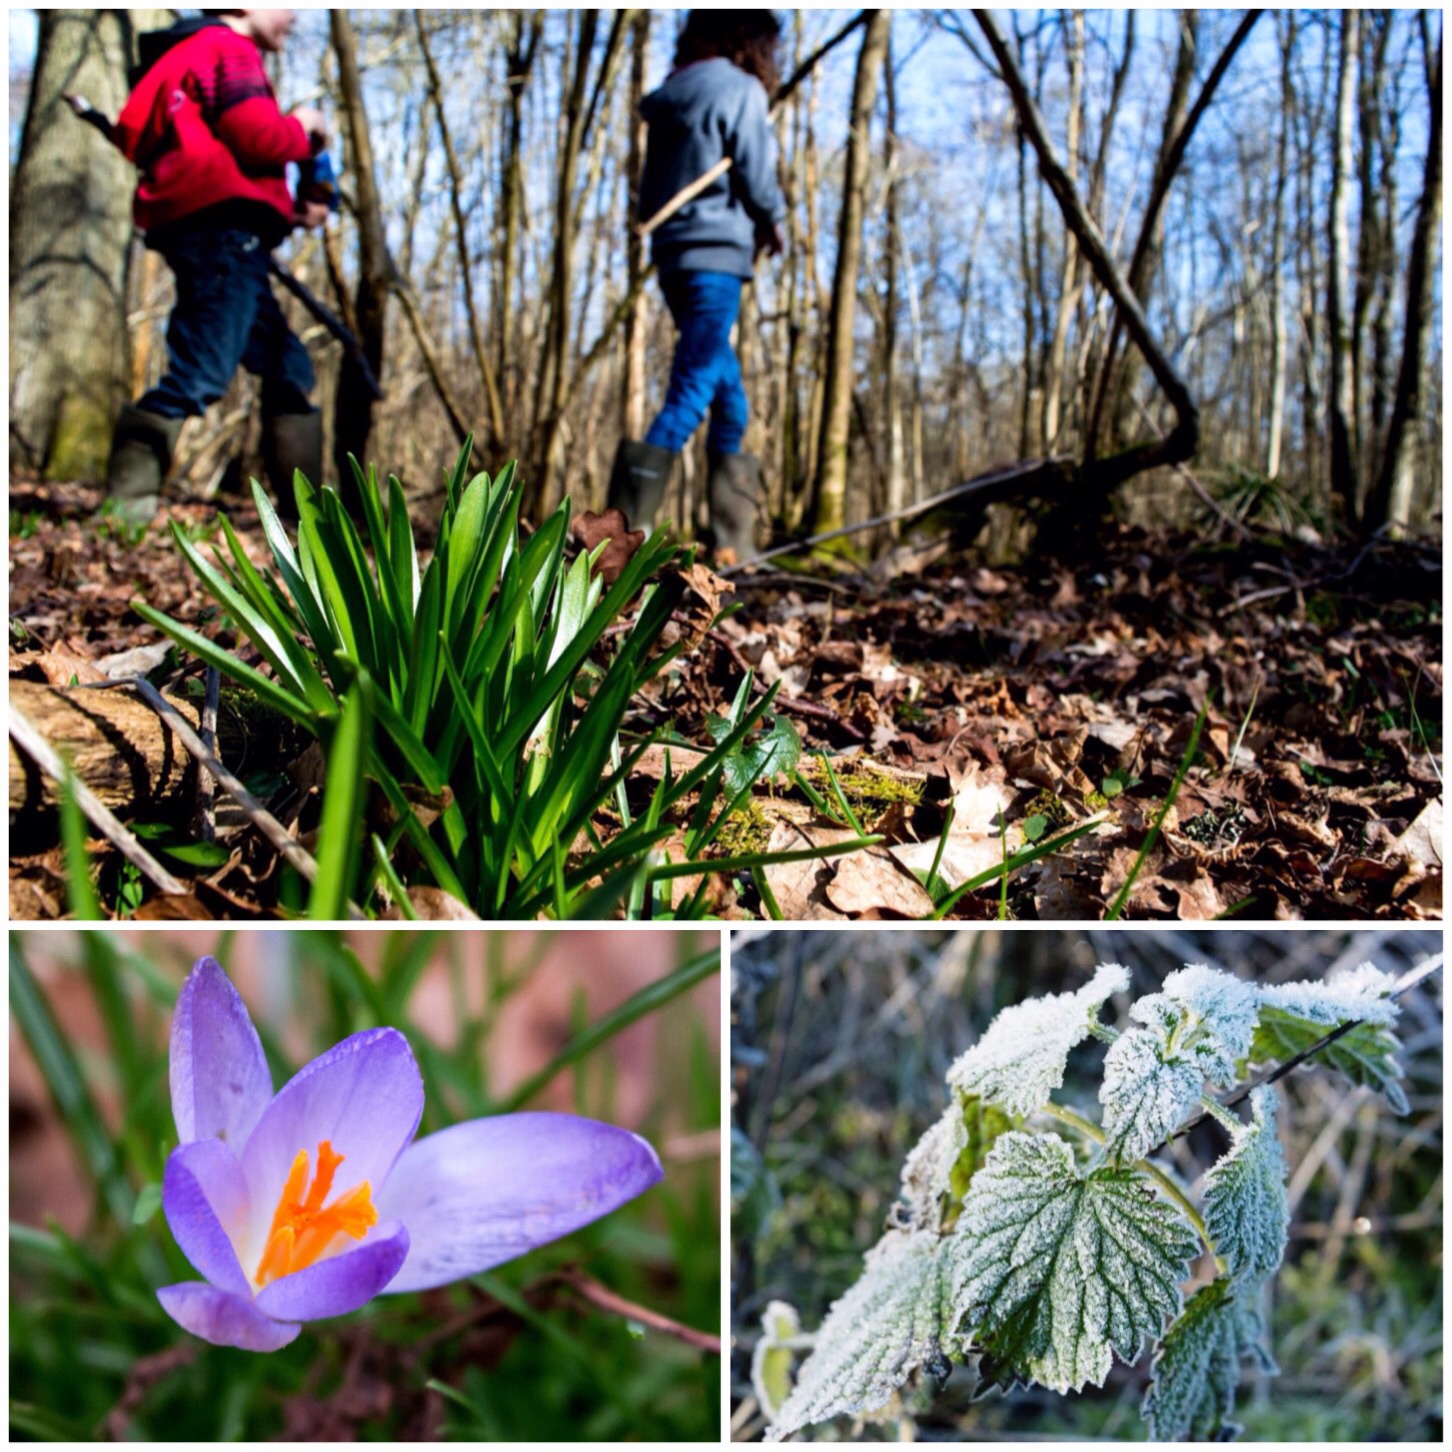
The other area I have been trying to capture is just how much colour is still out there during winter. Just because flowers aren’t popping up everywhere doesn’t mean there is no beauty to be seen.
The picture of the emerging bluebell leaves I felt was enhanced by seeing my kids walk past in the background just as I took the picture, the crocus is just beautiful and there is something lovely about the crispy white frost you find on leaves during a morning stroll.
Finding colour
A few more posts to follow in this theme so keep your eyes open for them, and for all the beauty around you out there as winter changes into spring.
The final project I was involved in during the working weekend at John Rhyder’s Woodcraft School Hampshire HQ was to build a raised firepit for the students to use. John wanted this placed inside the new cookhouse to protect it from the elements.
The raised firepit
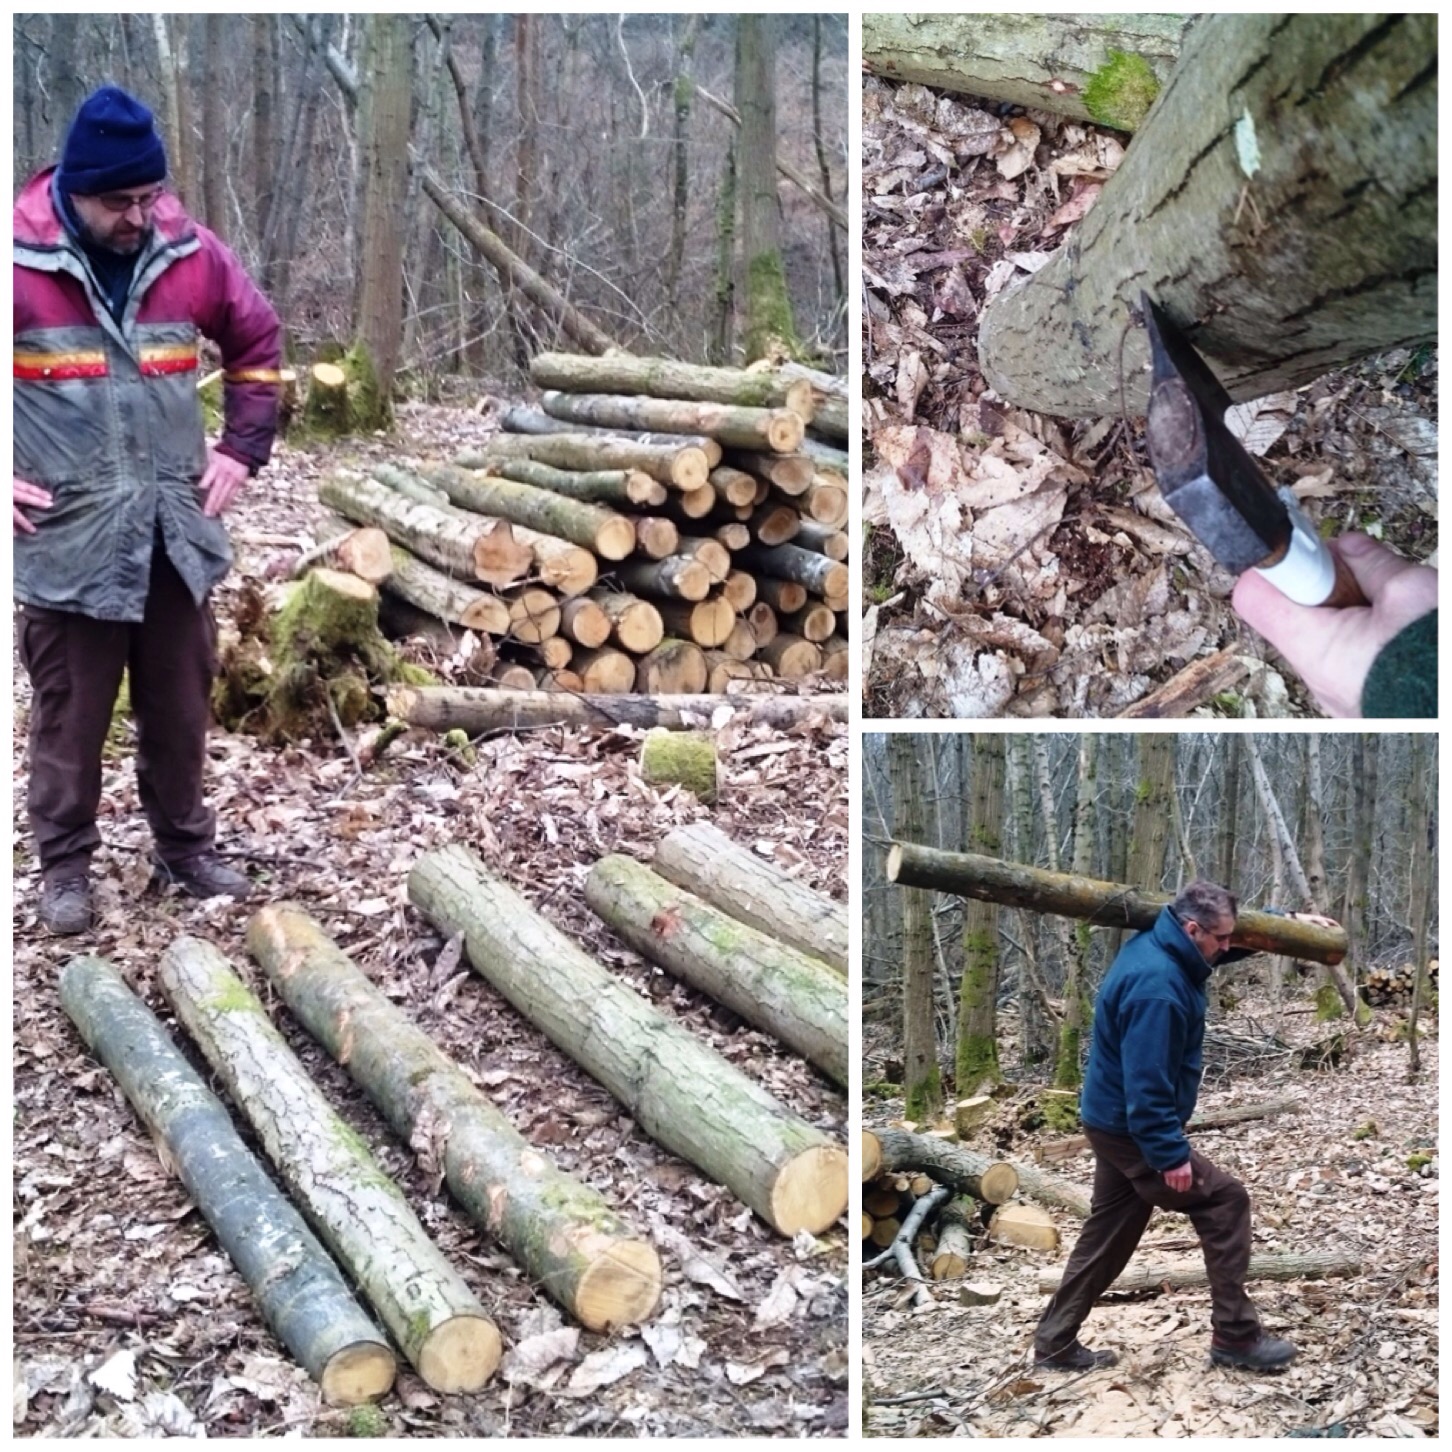
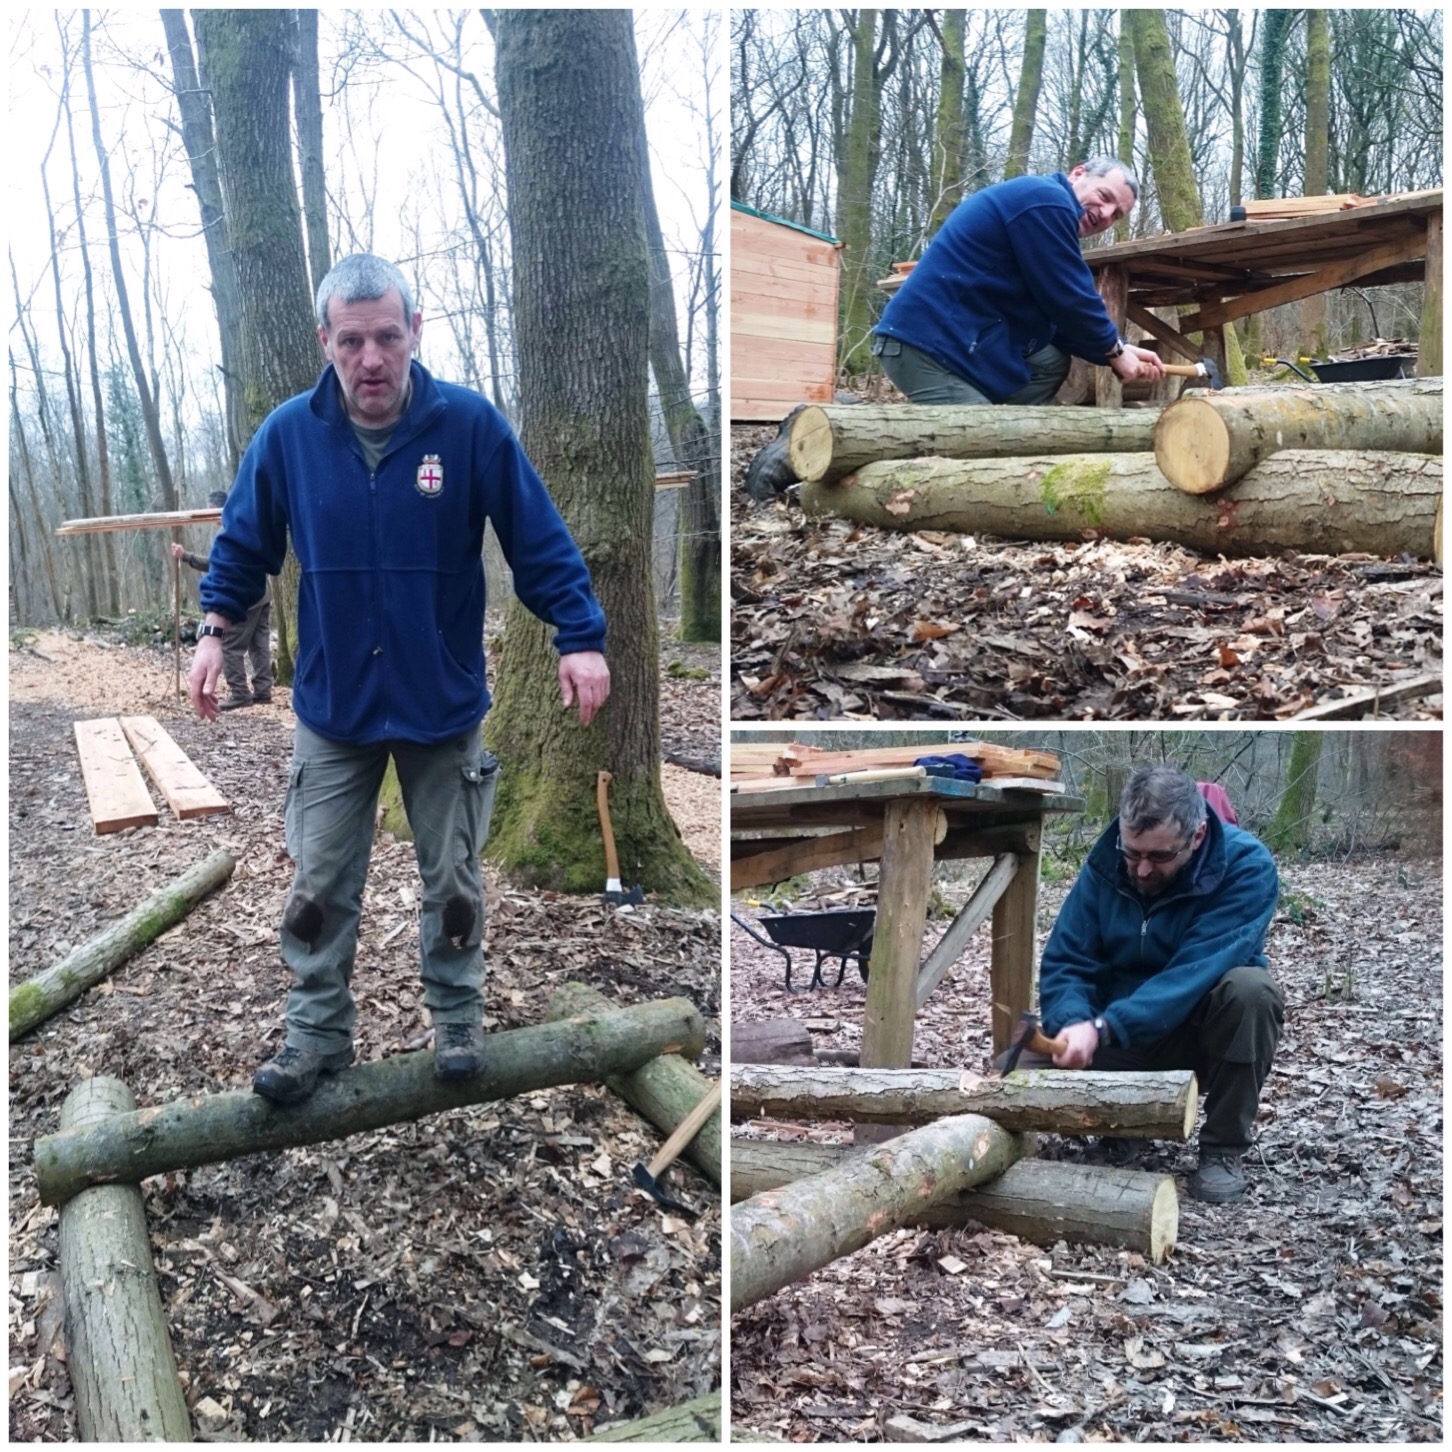
I volunteered to do this with Jumbo Jim (he flies planes) and after a bit of a chat we decided to make it out of sweet chestnut logs that had been cut down to about 5ft lengths. There were plenty to choose from so after a bit of a trimming we lugged them back to the main camp.
Selecting the logs
We found a flat area to work on (to make the build easier) as its final placement was to be on a slope. After we finished the build we moved everything to its final location in the cookhouse.
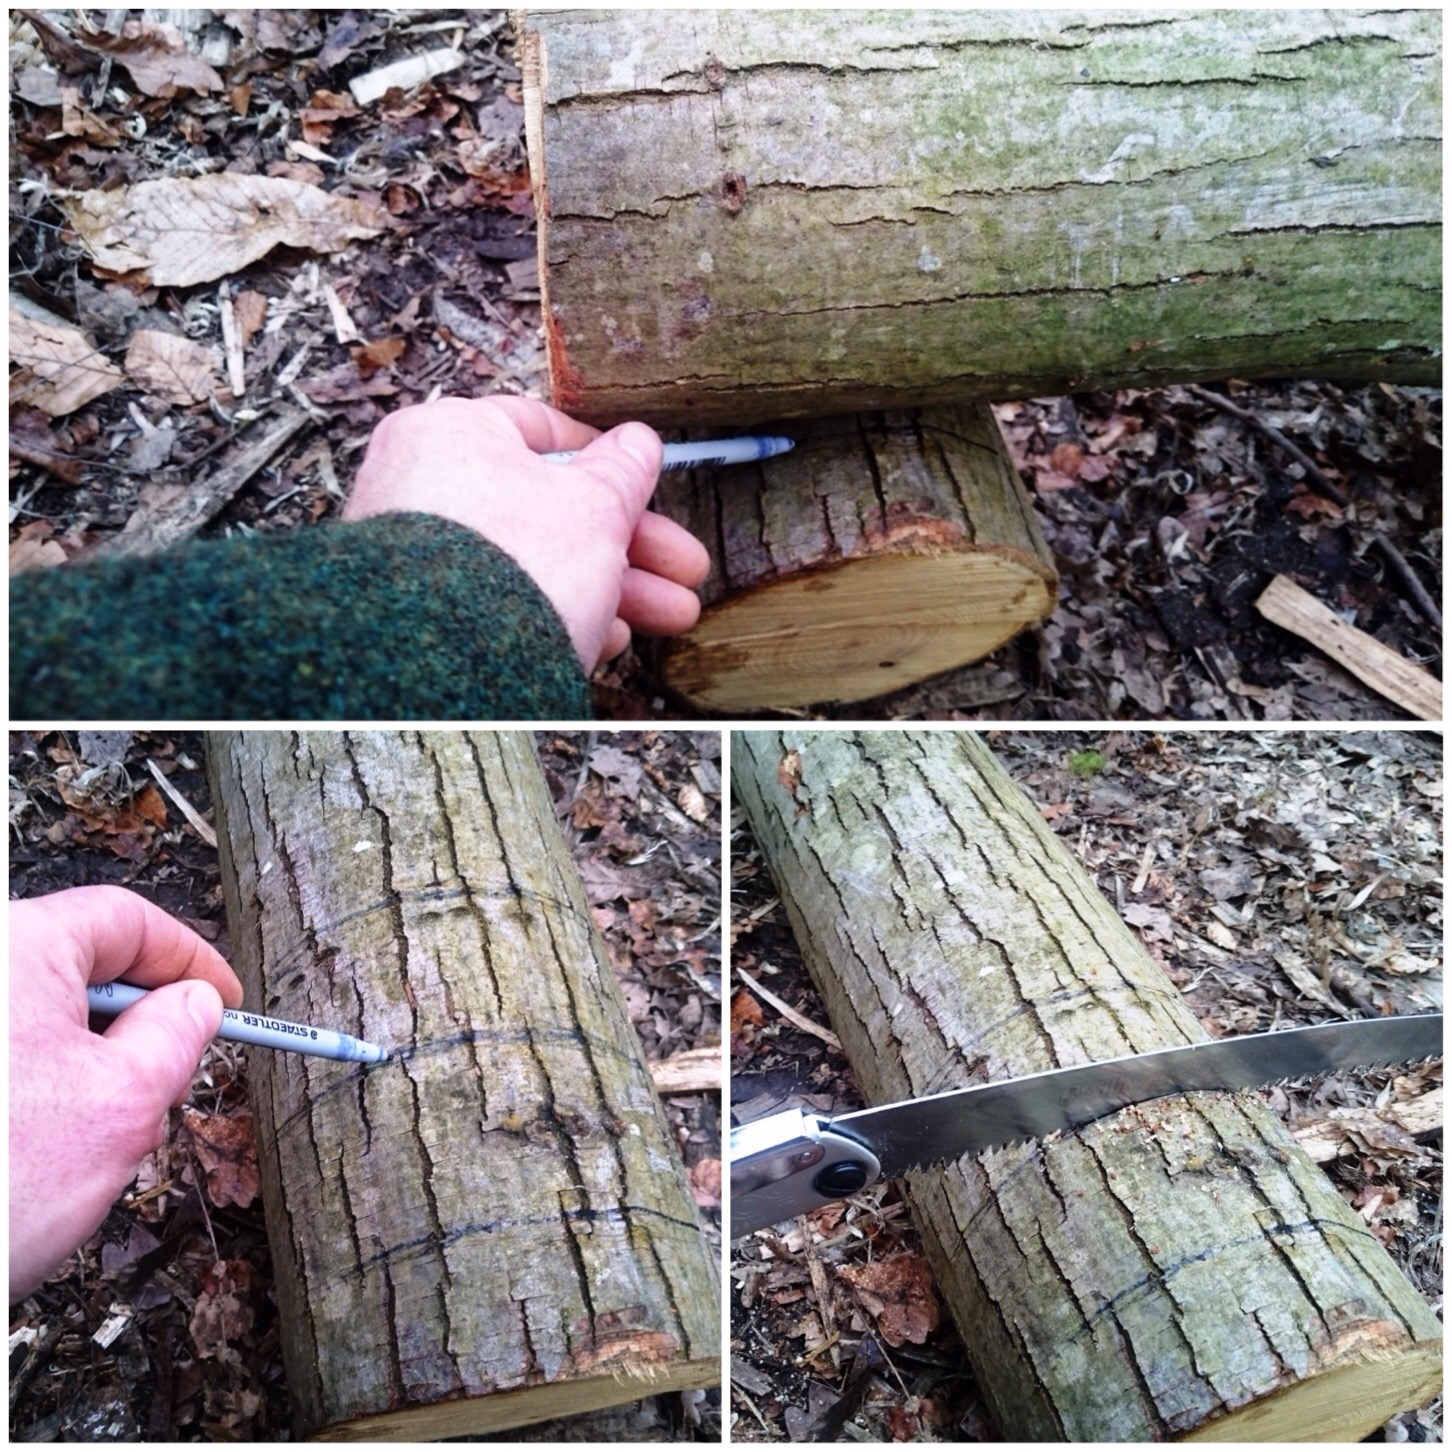
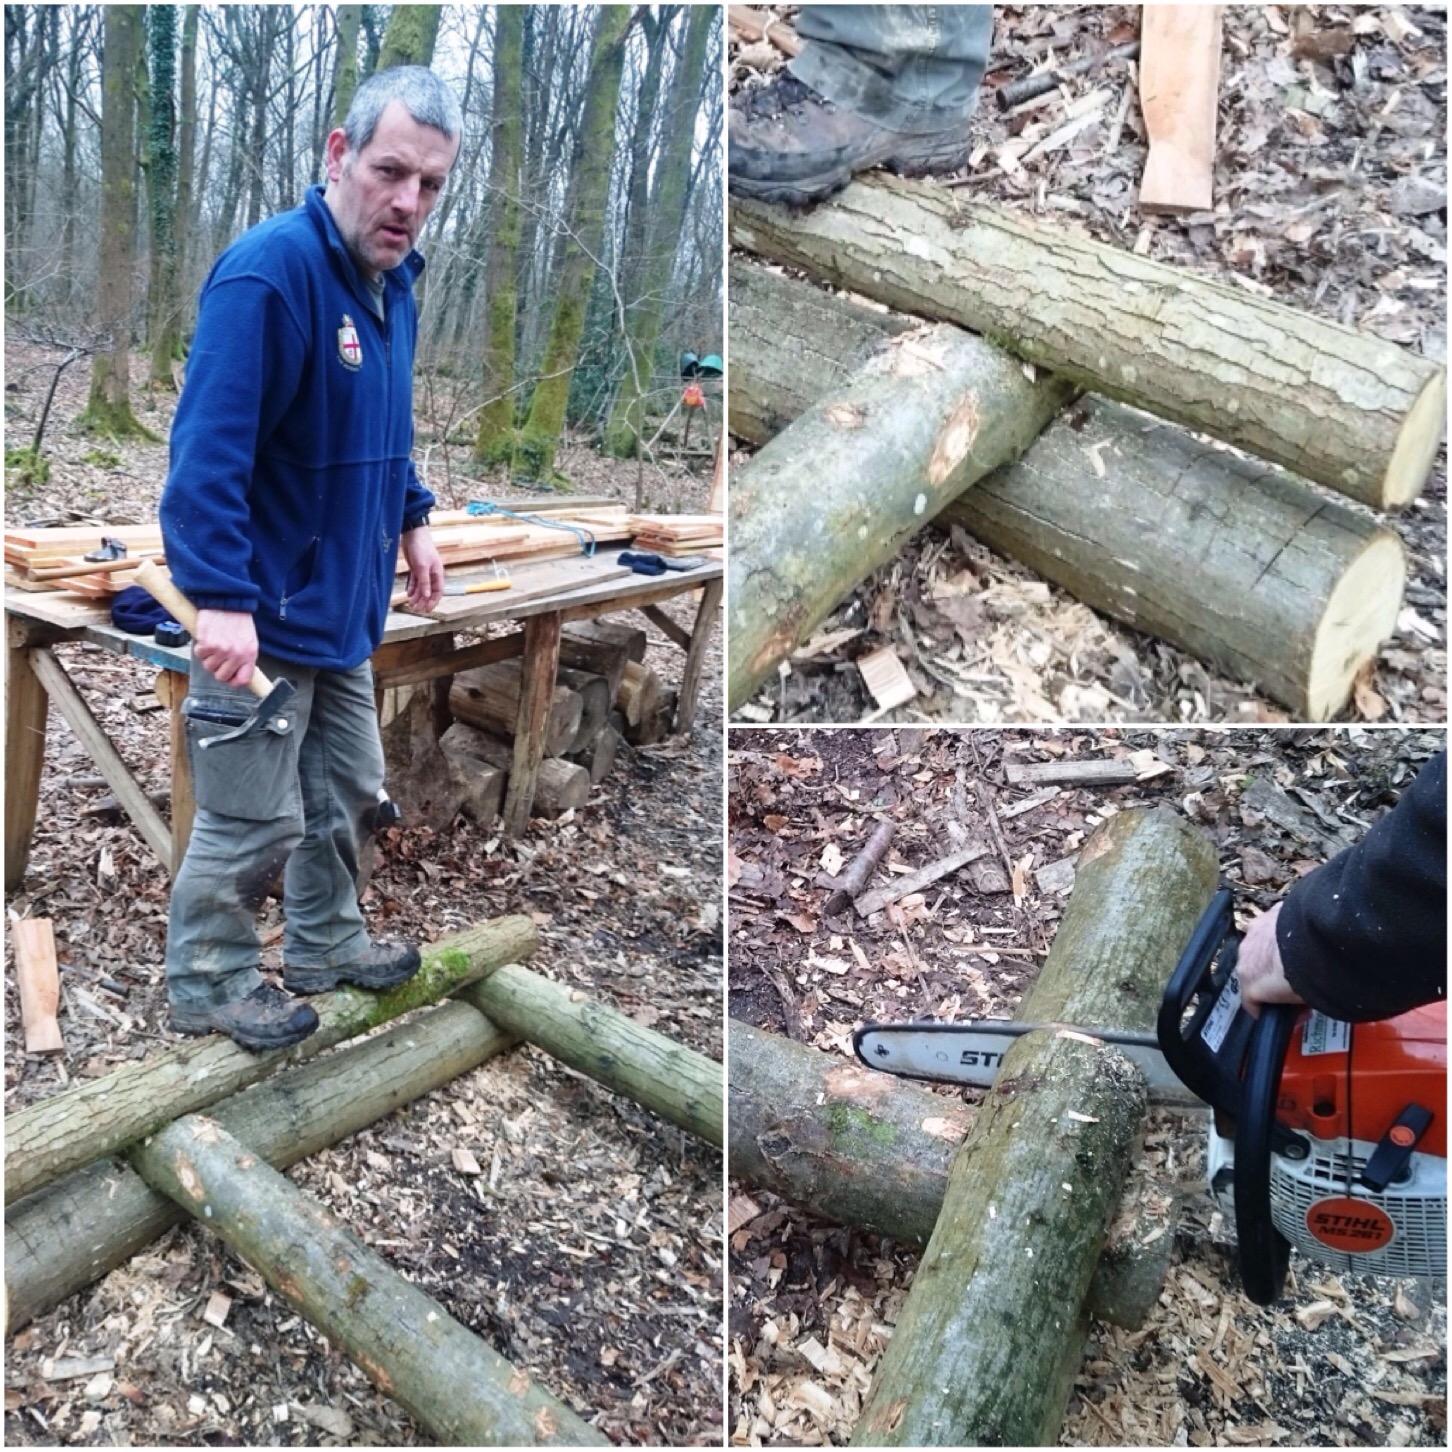
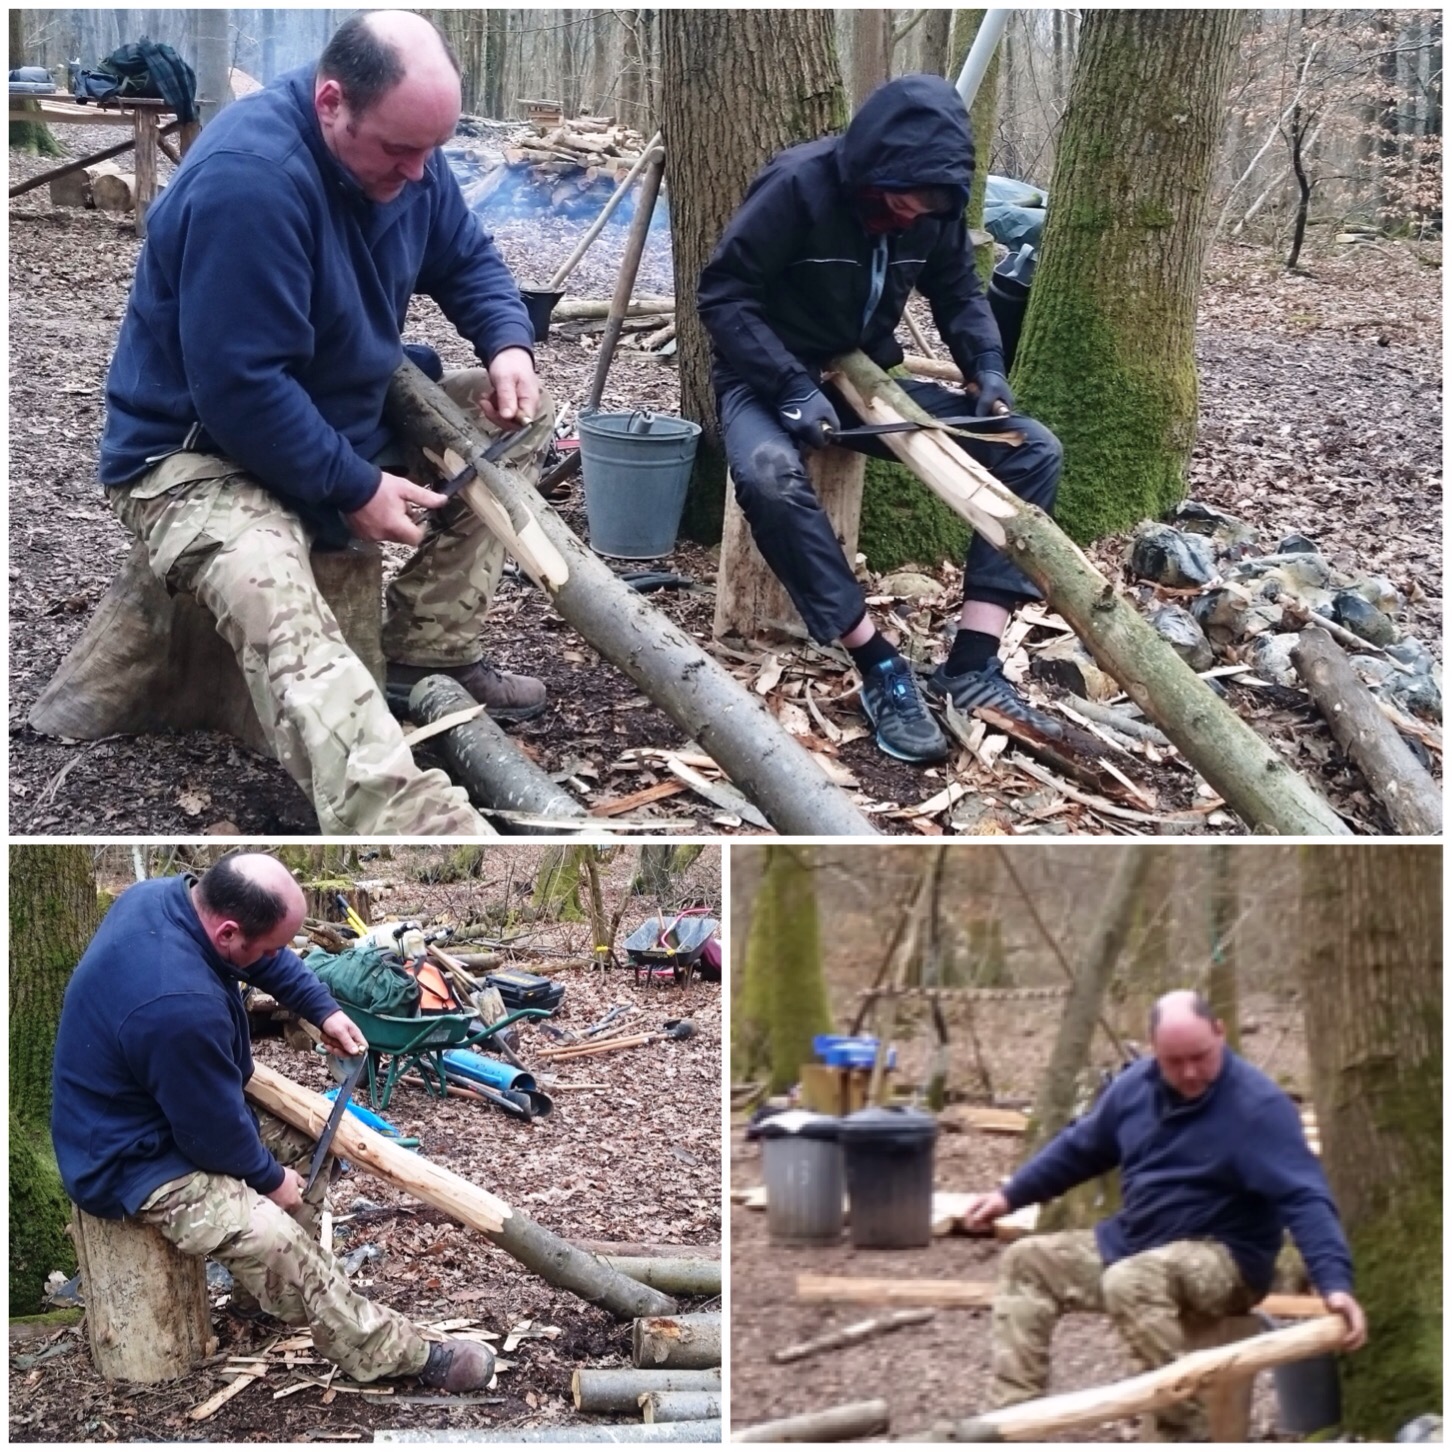
We decided to lock the logs together by carving notches out near the end of each log to form a square. We used each log as a template for marking another one out before sawing in some stop cuts.
Marking up and putting in stop cuts
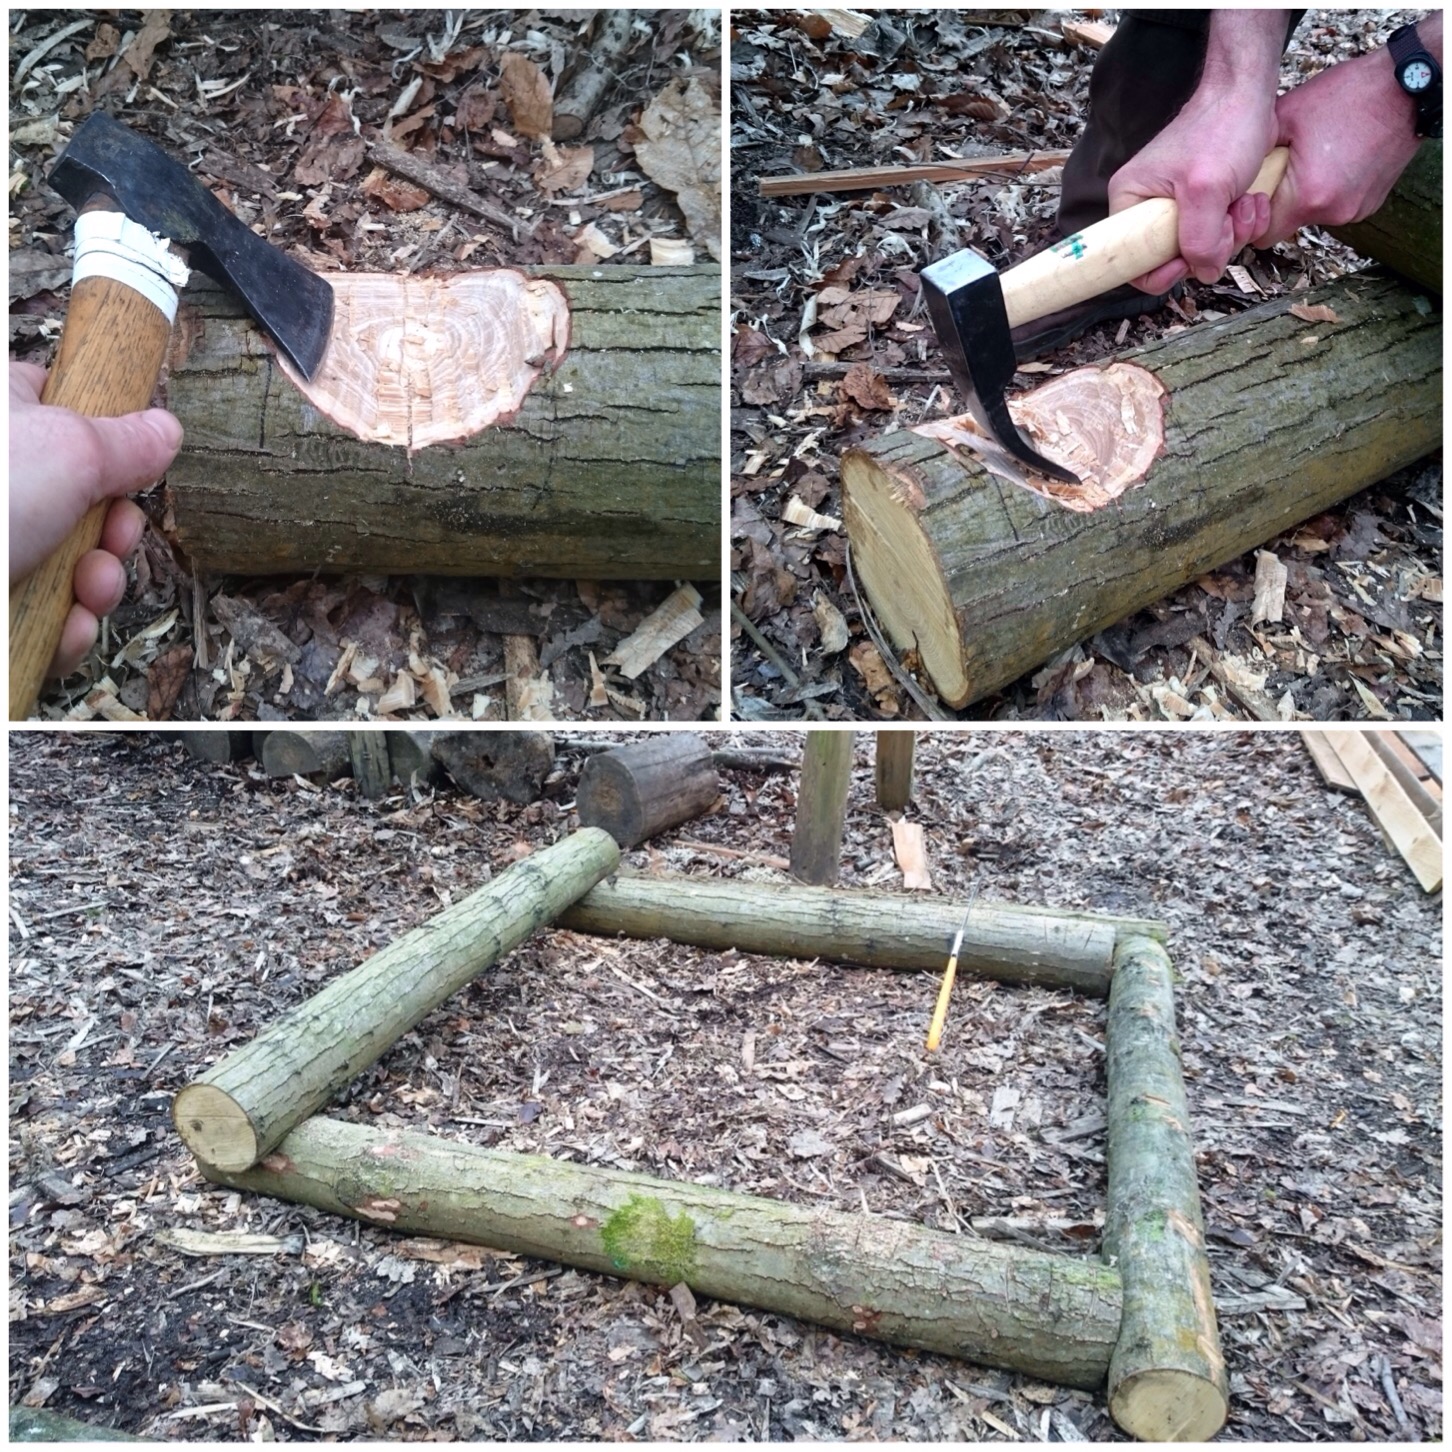
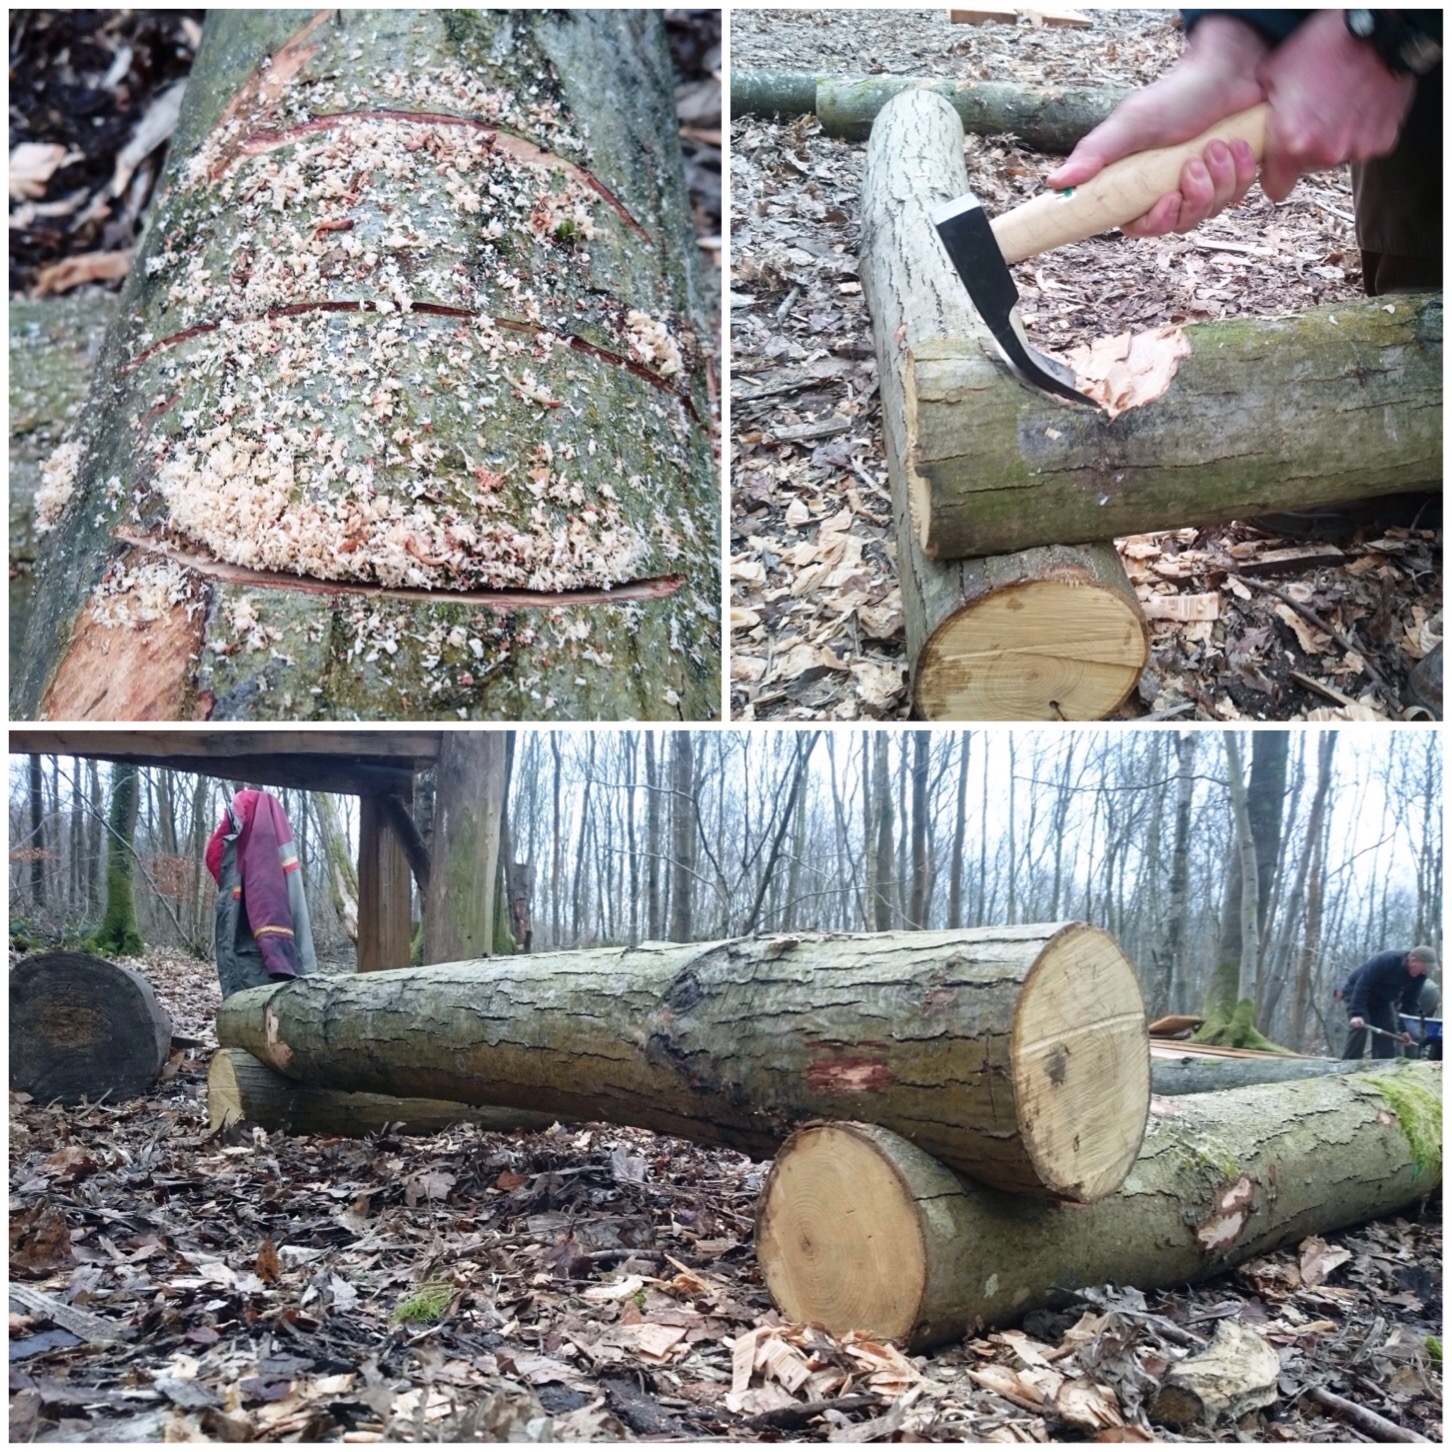
The axing and adzing out (these were the tools we had available) did not take long. I thought we might need to go for a square cut for each notch but we decided to try a curved notch at first as they are quicker to carve. Even though the curve would not lock the logs perfectly the curved notches worked surprisingly well, with no movement on the logs when they were locked together.
Axing and adding the connection points
Once we were happy with the style of the notch it was then just a case of repeating this on each end of the logs so that everything locked together well.
Repeating the process
I tested the strength of the locks between the logs by walking and jumping (with the odd jig) on each level as we built it up.
Initially we’d planned a 5ft square but after discussing this with Caron and John we went for a 5ft by 4ft rectangular shape. This was to allow the students easy access to most of the firepit without having to lean too far to reach the centre. You can see the excess wood at the ends in the bottom right picture that needed to be trimmed off.
Testing and re-adjusting the size
After some more notch cutting, locking together and jumping around we got John to trim the excess wood off with his chainsaw.
More testing and trimming
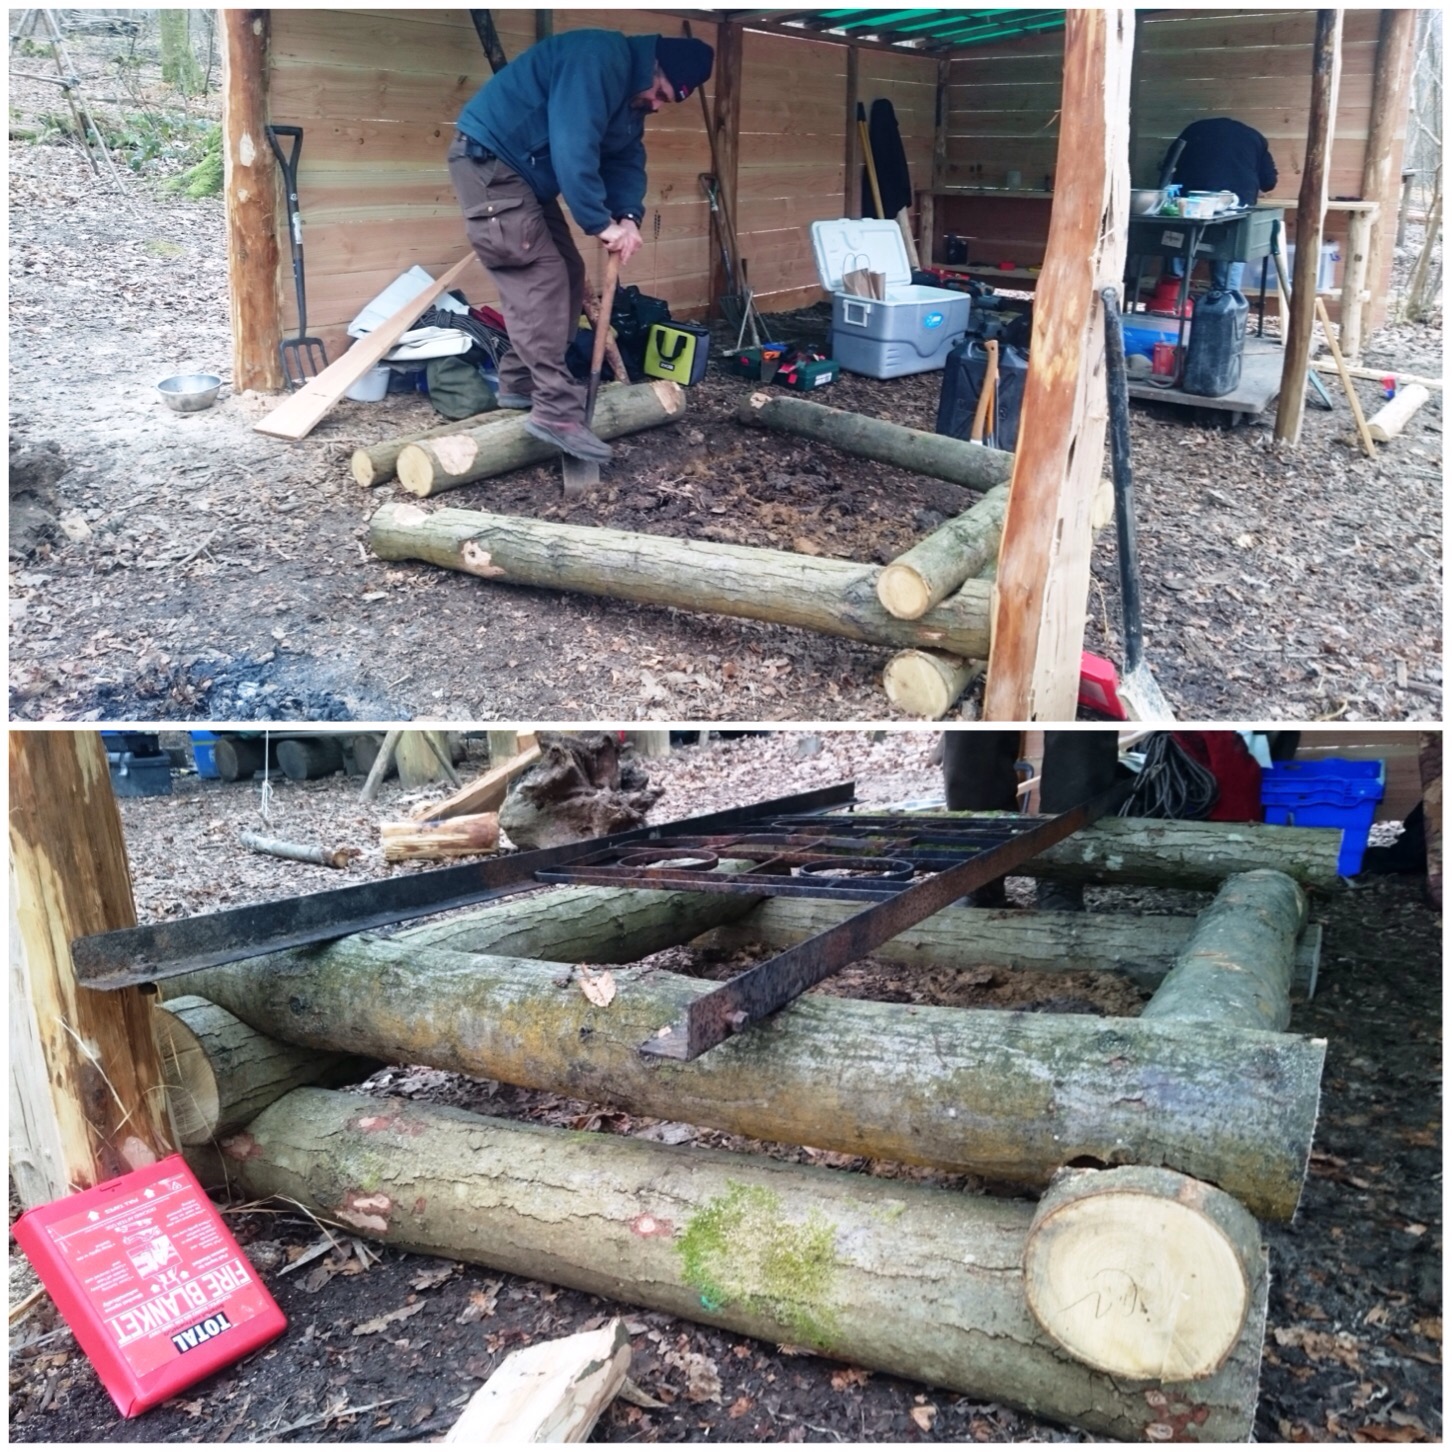
We positioned the firepit where it was to sit in the cookhouse and dug out a small trench on the upslope section to flatten the firepit out a bit and lock it in place. On reflection I think we could have dug the trench a bit deeper but the depth we dug held that top log well enough even though the firepit was not perfectly flat..
Digging in the firepit
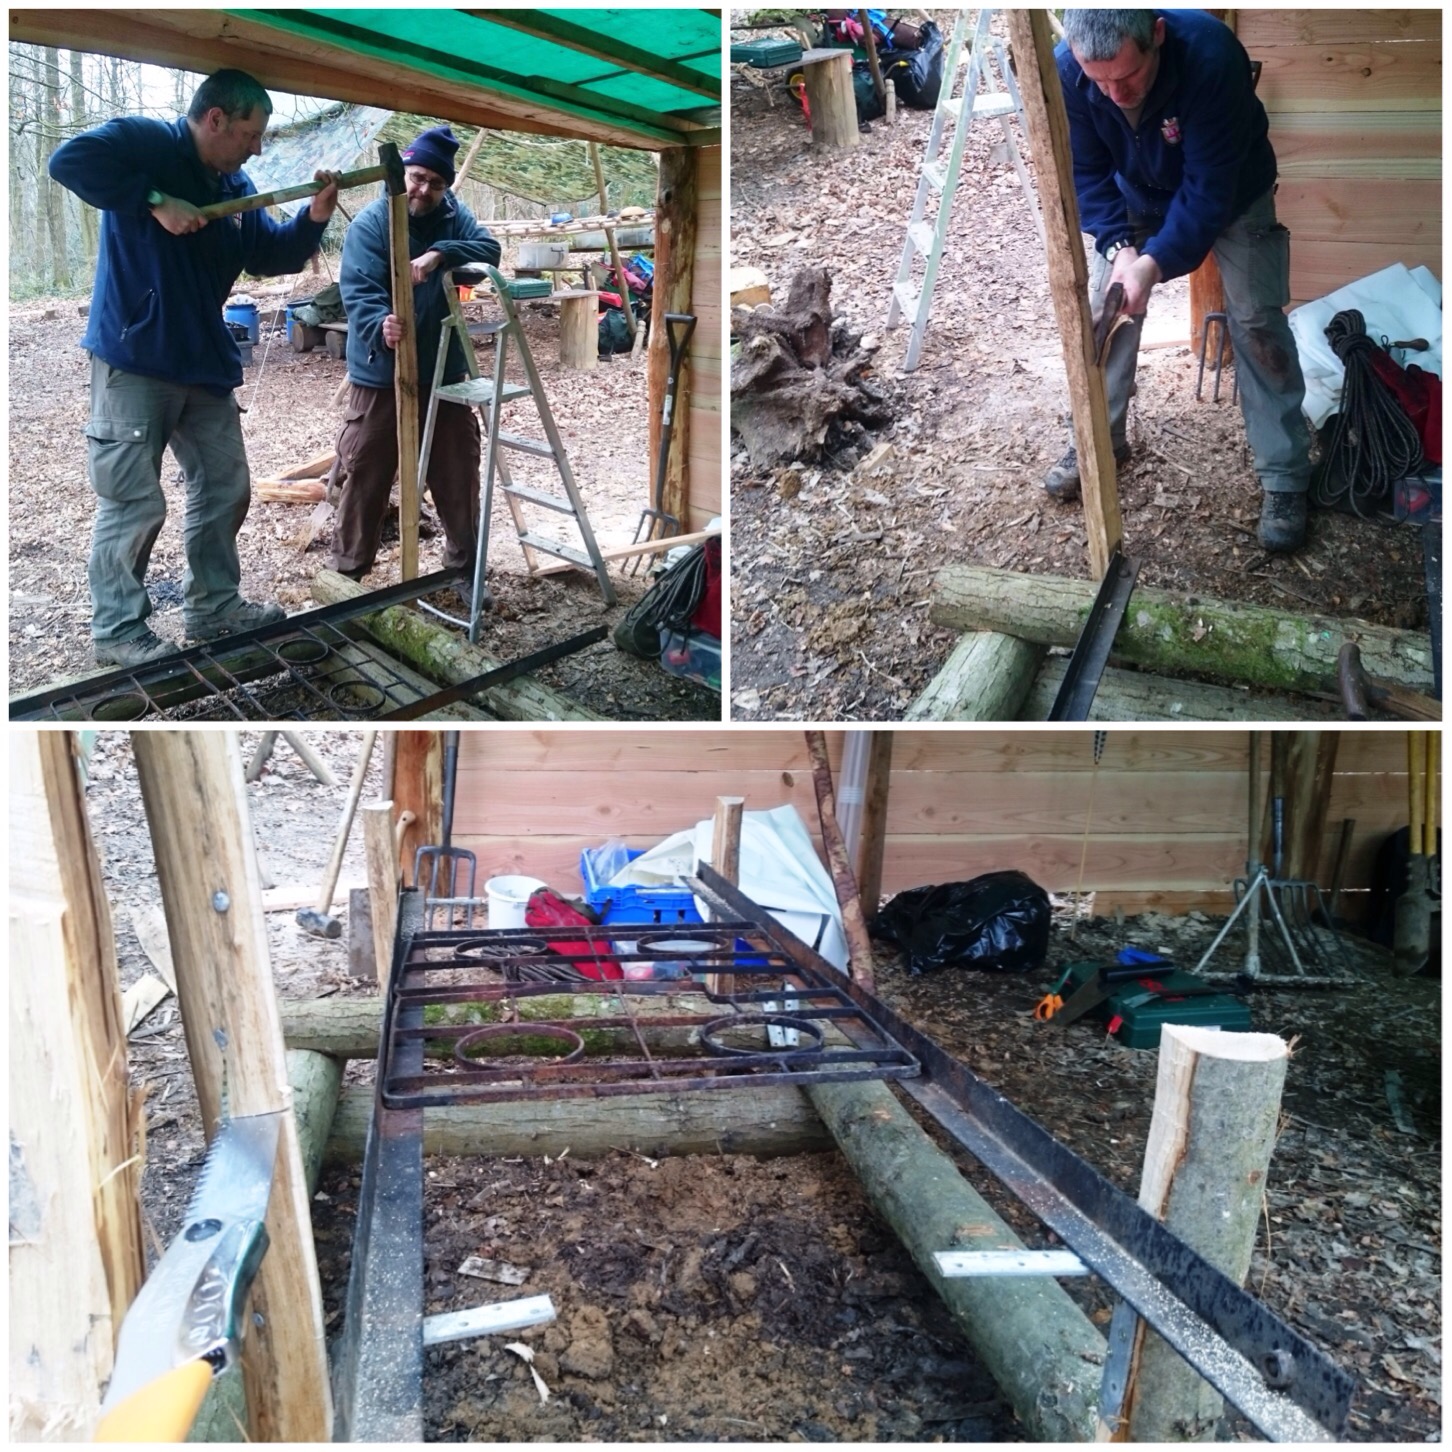
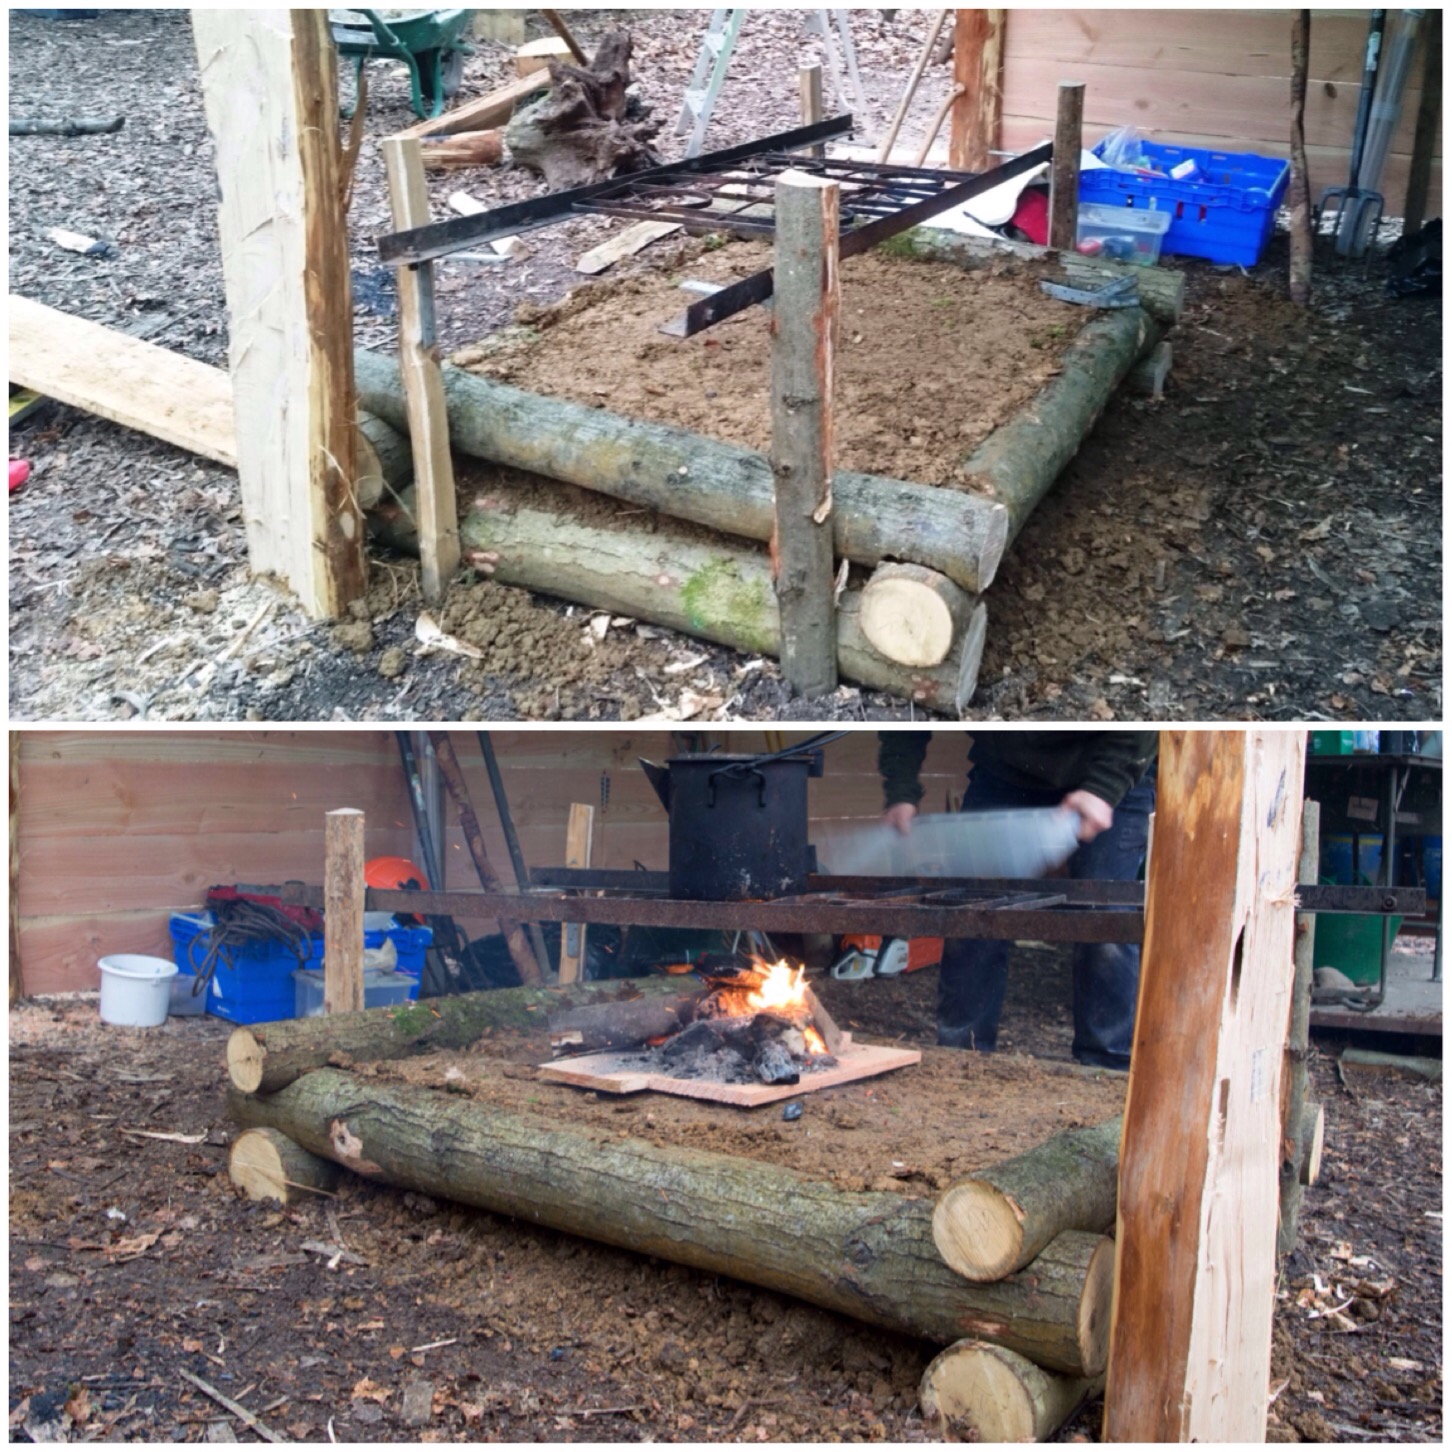
When we had locked all the logs into place we had a chat with John and agreed that we would drive in four stakes to act as supports for the grill. We found four brackets to attach to the stakes to hold the bars of the grill in place and left enough room on the stakes to add another four brackets so the grill could be raised (we left John to attach these later when he got some more brackets).
Constructing the grill stand
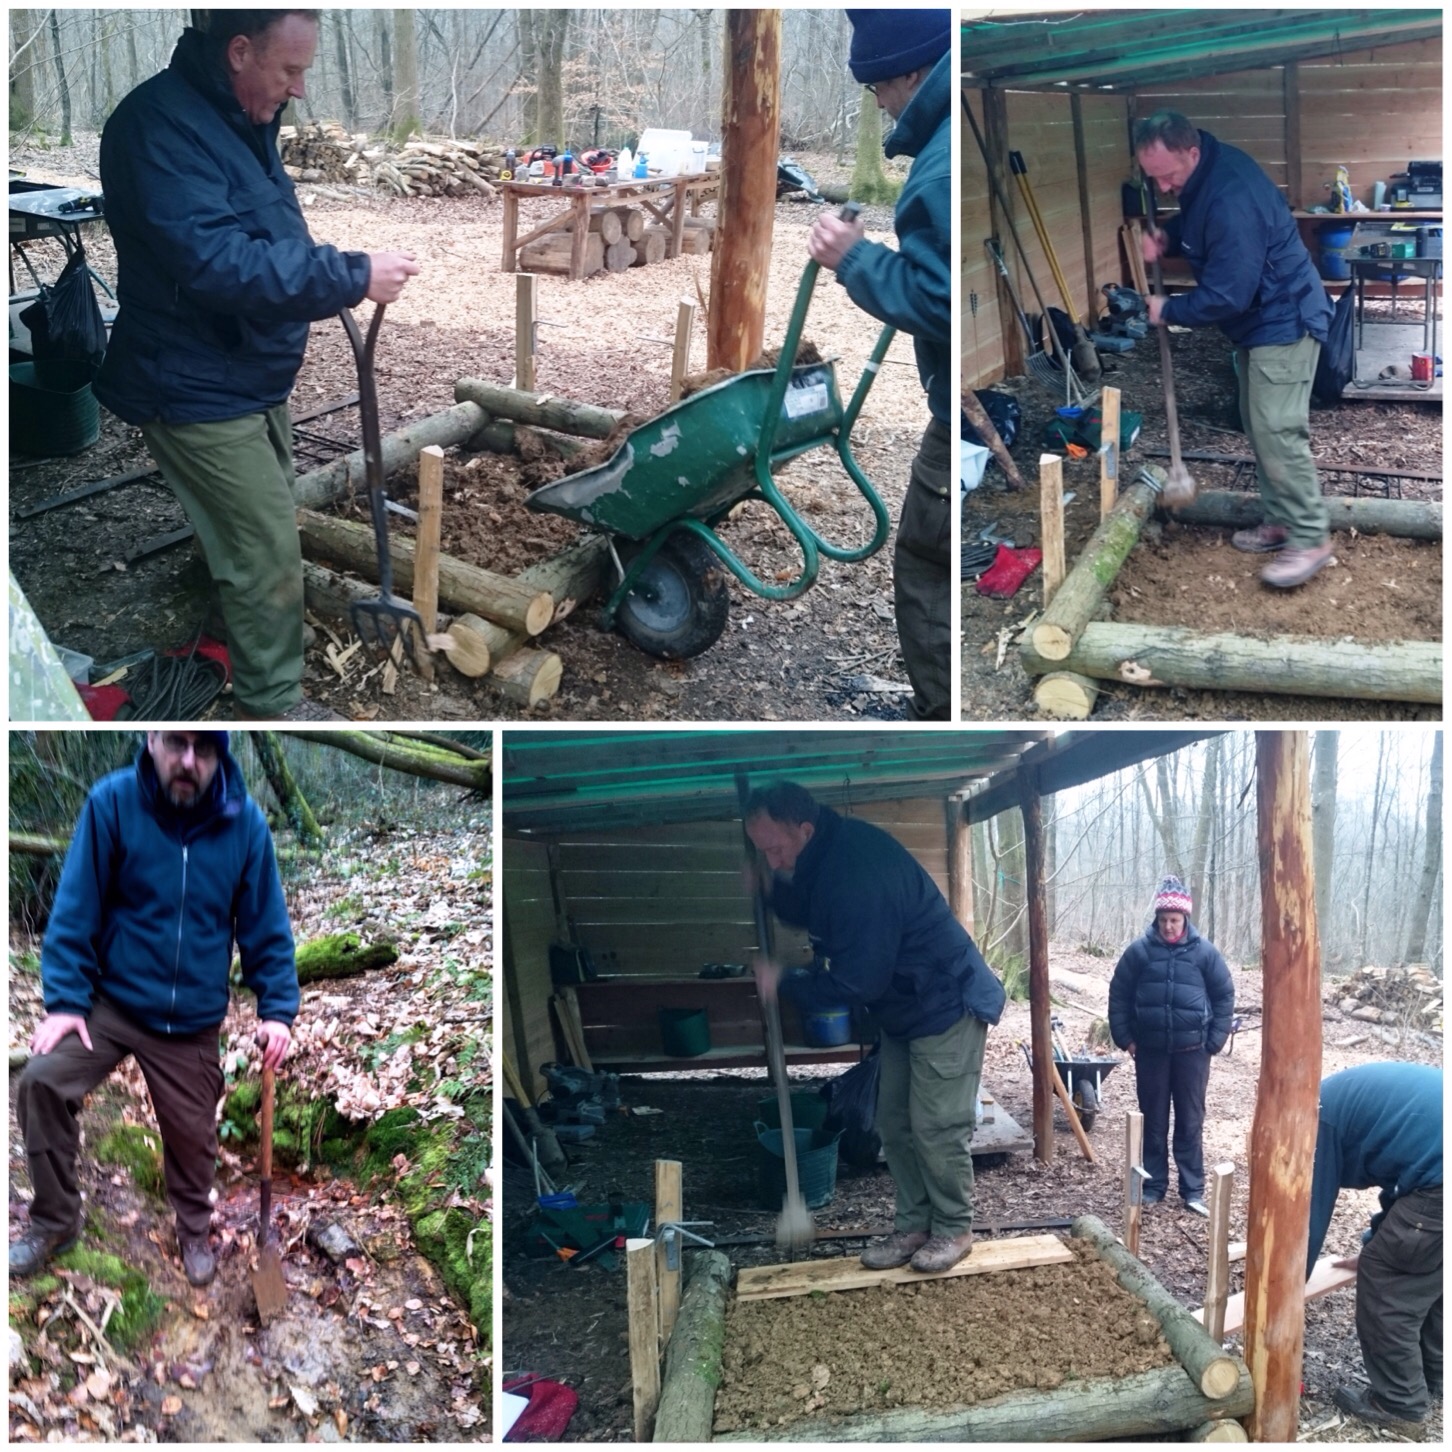
The filling in of the firepit was the easy bit as we simply dropped about 5 wheelbarrow loads of earth into it. Nigel was on hand while we dug the earth to tamp it all down.
The top layer of fill was taken from the edge of a small stream where there was a high concentration of clay. I hope that over time this layer of clay will harden and make for a good surface to light a fire. I suggested to John that as the top layer dries out he could add a few more layers of clay to build the surface up a little more to be in line with the top of the logs.
Filling in the firepit
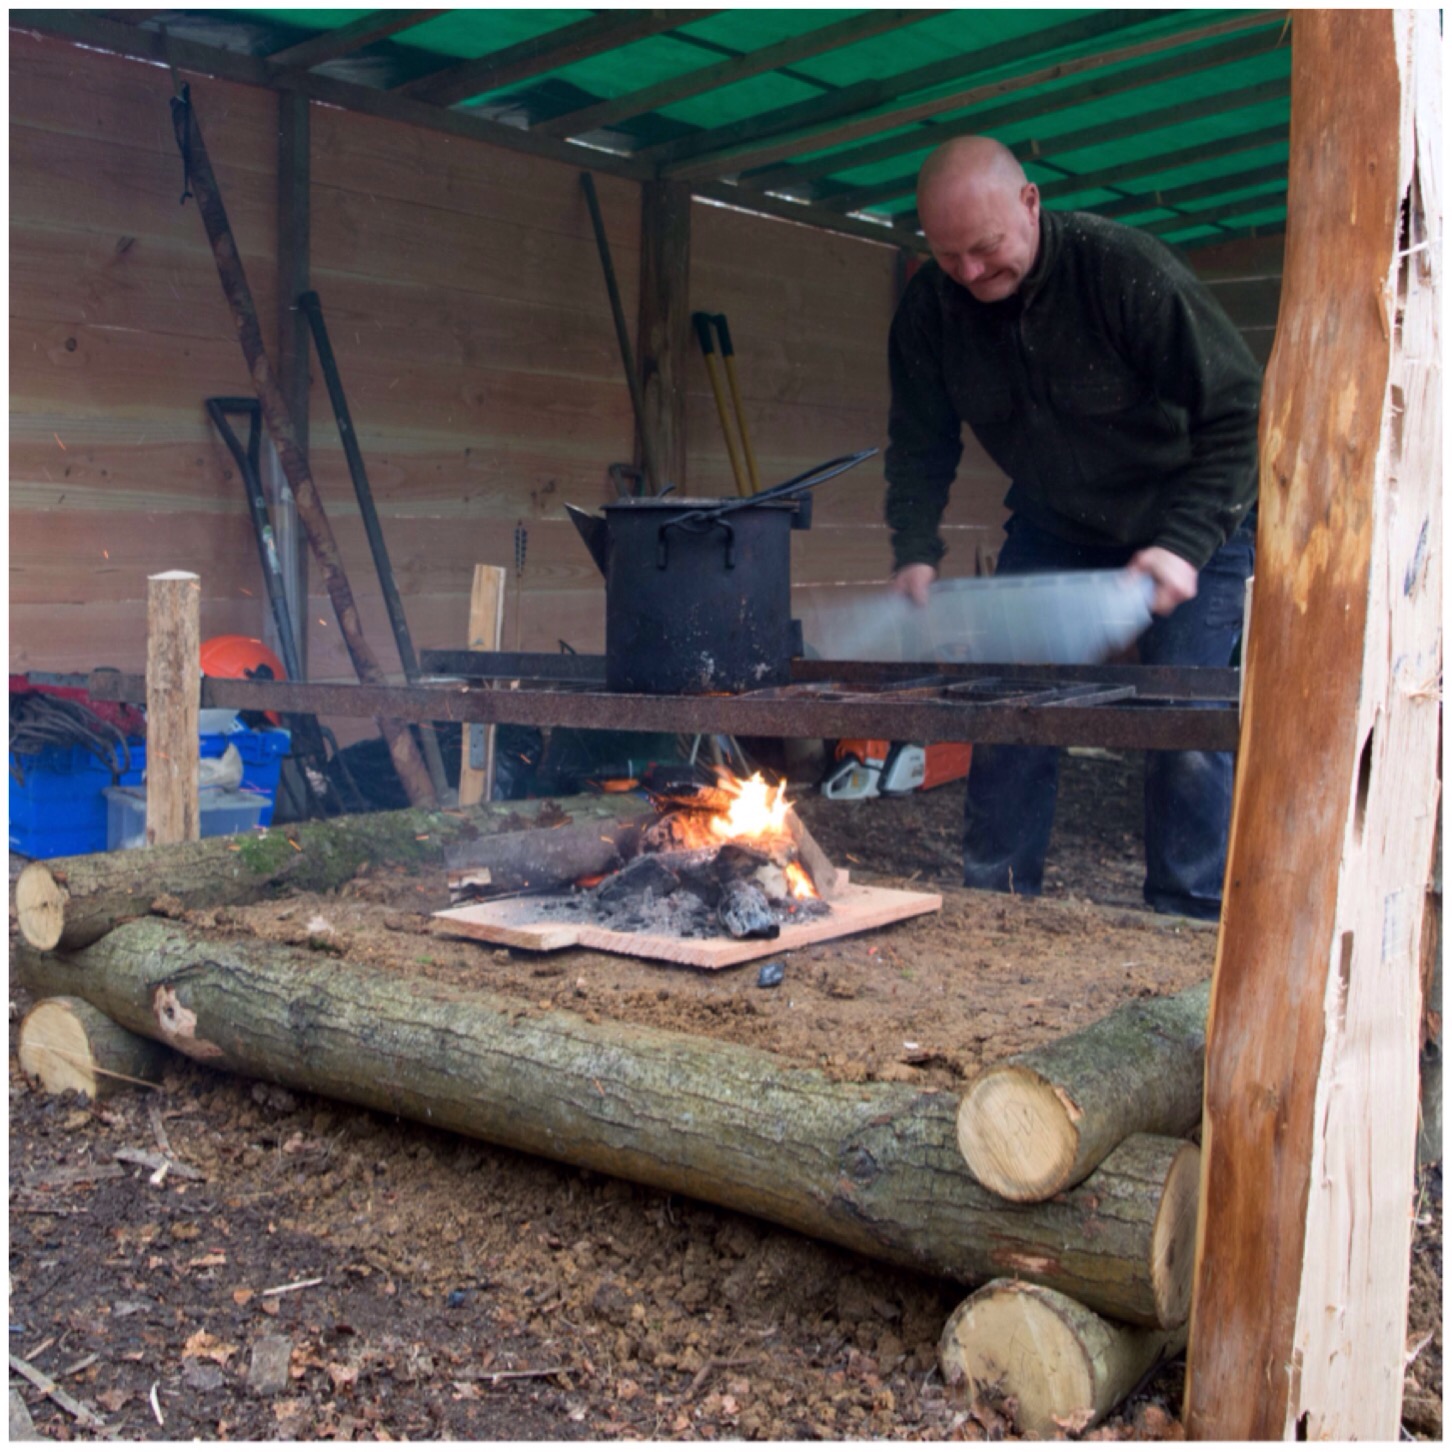
When we had finished tamping the soil down it was just a case of putting the grill back on and lighting a fire. I placed some dry off-cuts over the damp soil to give the fire a good chance to get going. With a little bit of waftage from Kev it was soon going nicely.
As soon as John adds a layer or two more the surface will get a bit closer to the grill for a fast cooking time and when the other brackets are added higher up they’ll allow for slower cooking too.
Topping off and first firing
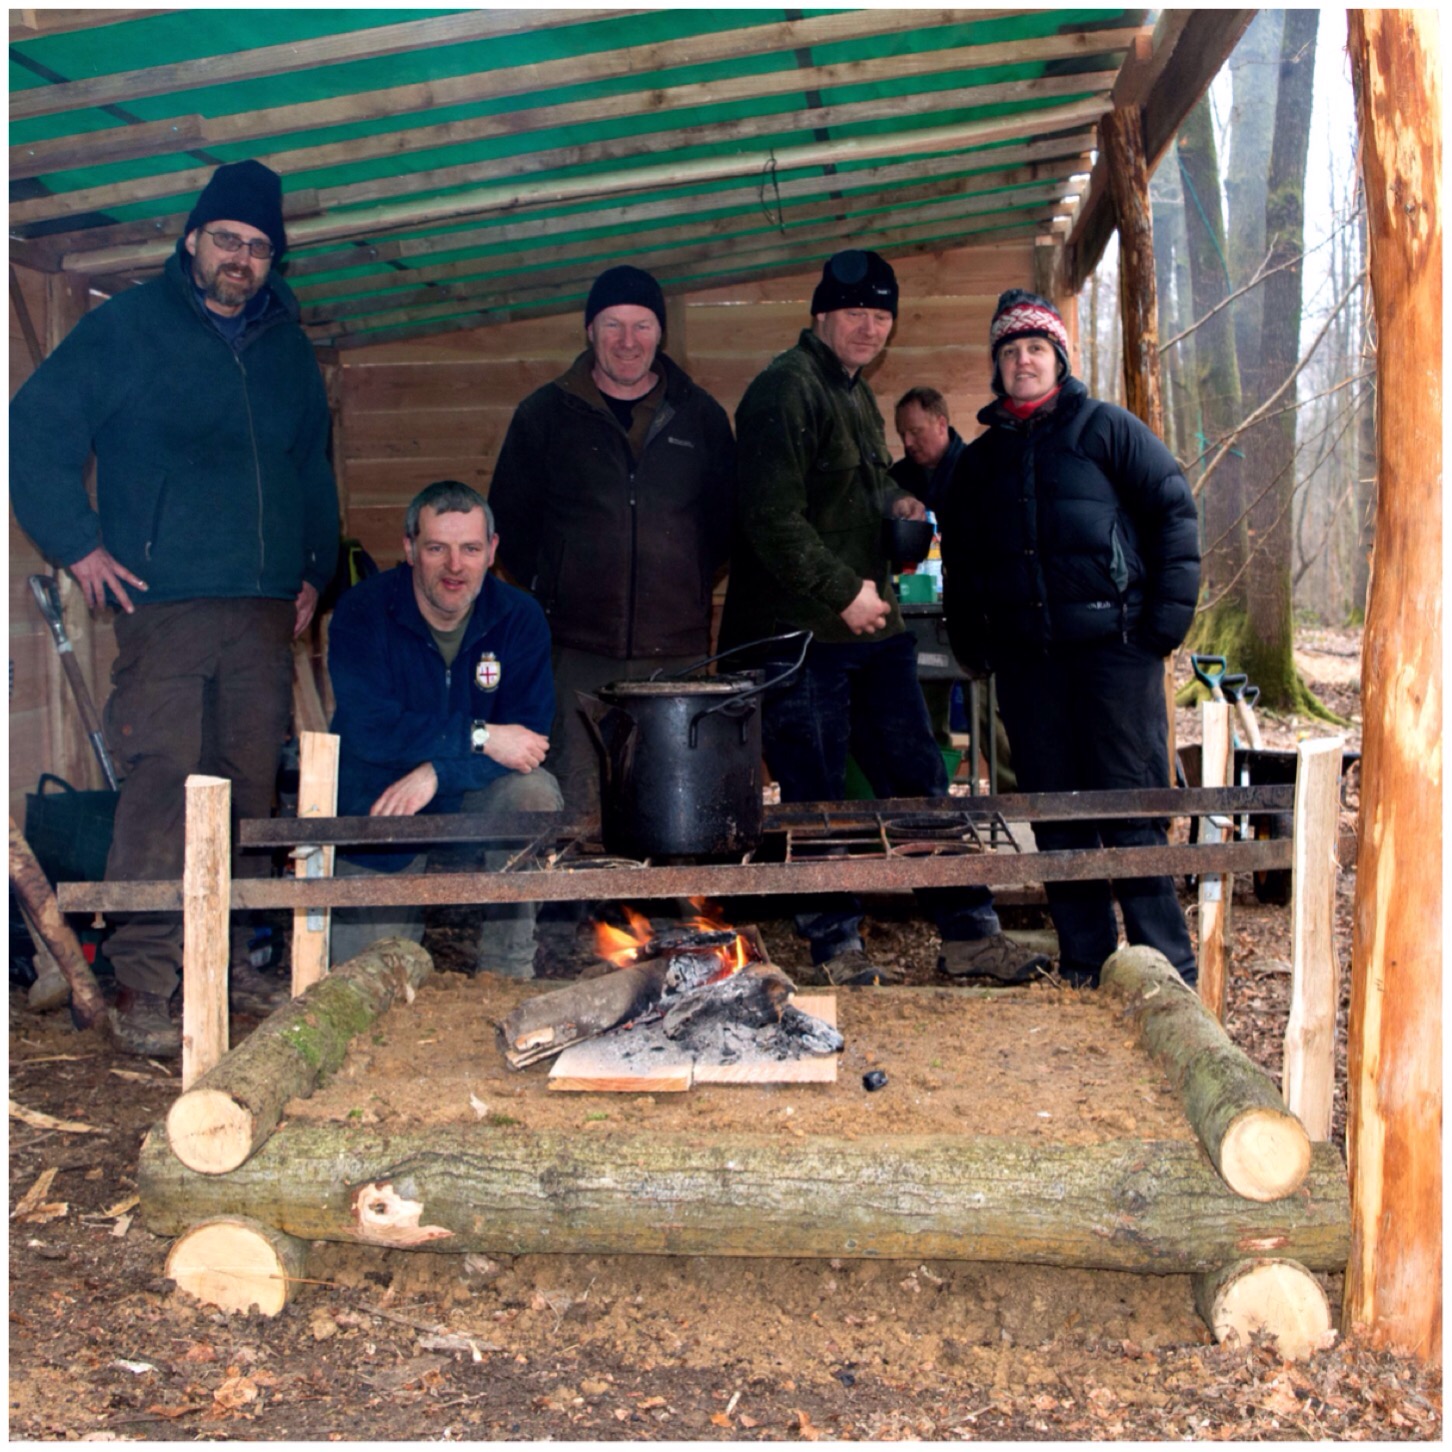
The grill is as flat as we could make it although it appears to slope, because the ground isn’t level.
I had a great time building this firepit with Jim, figuring out how it would all link together and finally putting it all in place with the grill on top.
A happy team
There are two more posts on projects we did that weekend. They are:
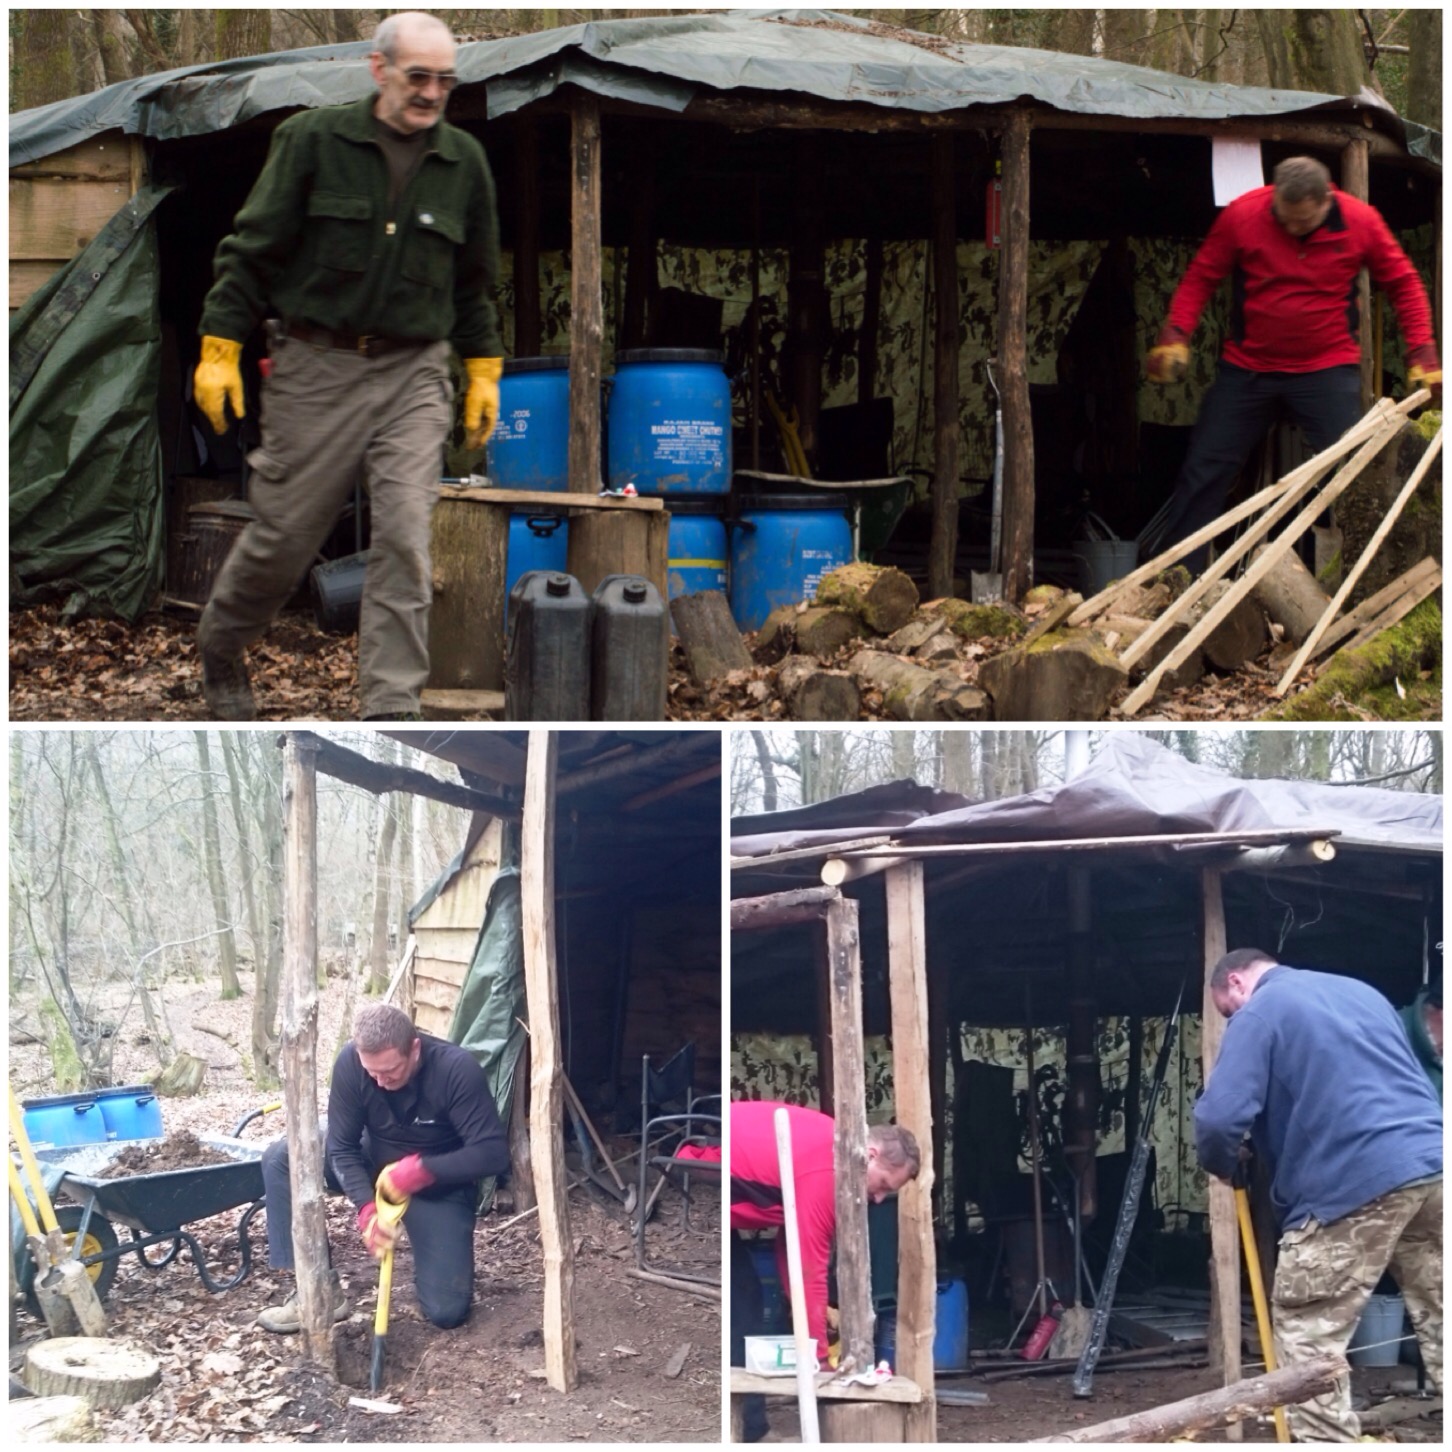
Earlier I wrote up a post on re-building the roundhouse at John Rhyder’s Woodcraft School HQ in Hampshire. This post is all about the new cookhouse we built that weekend as well.
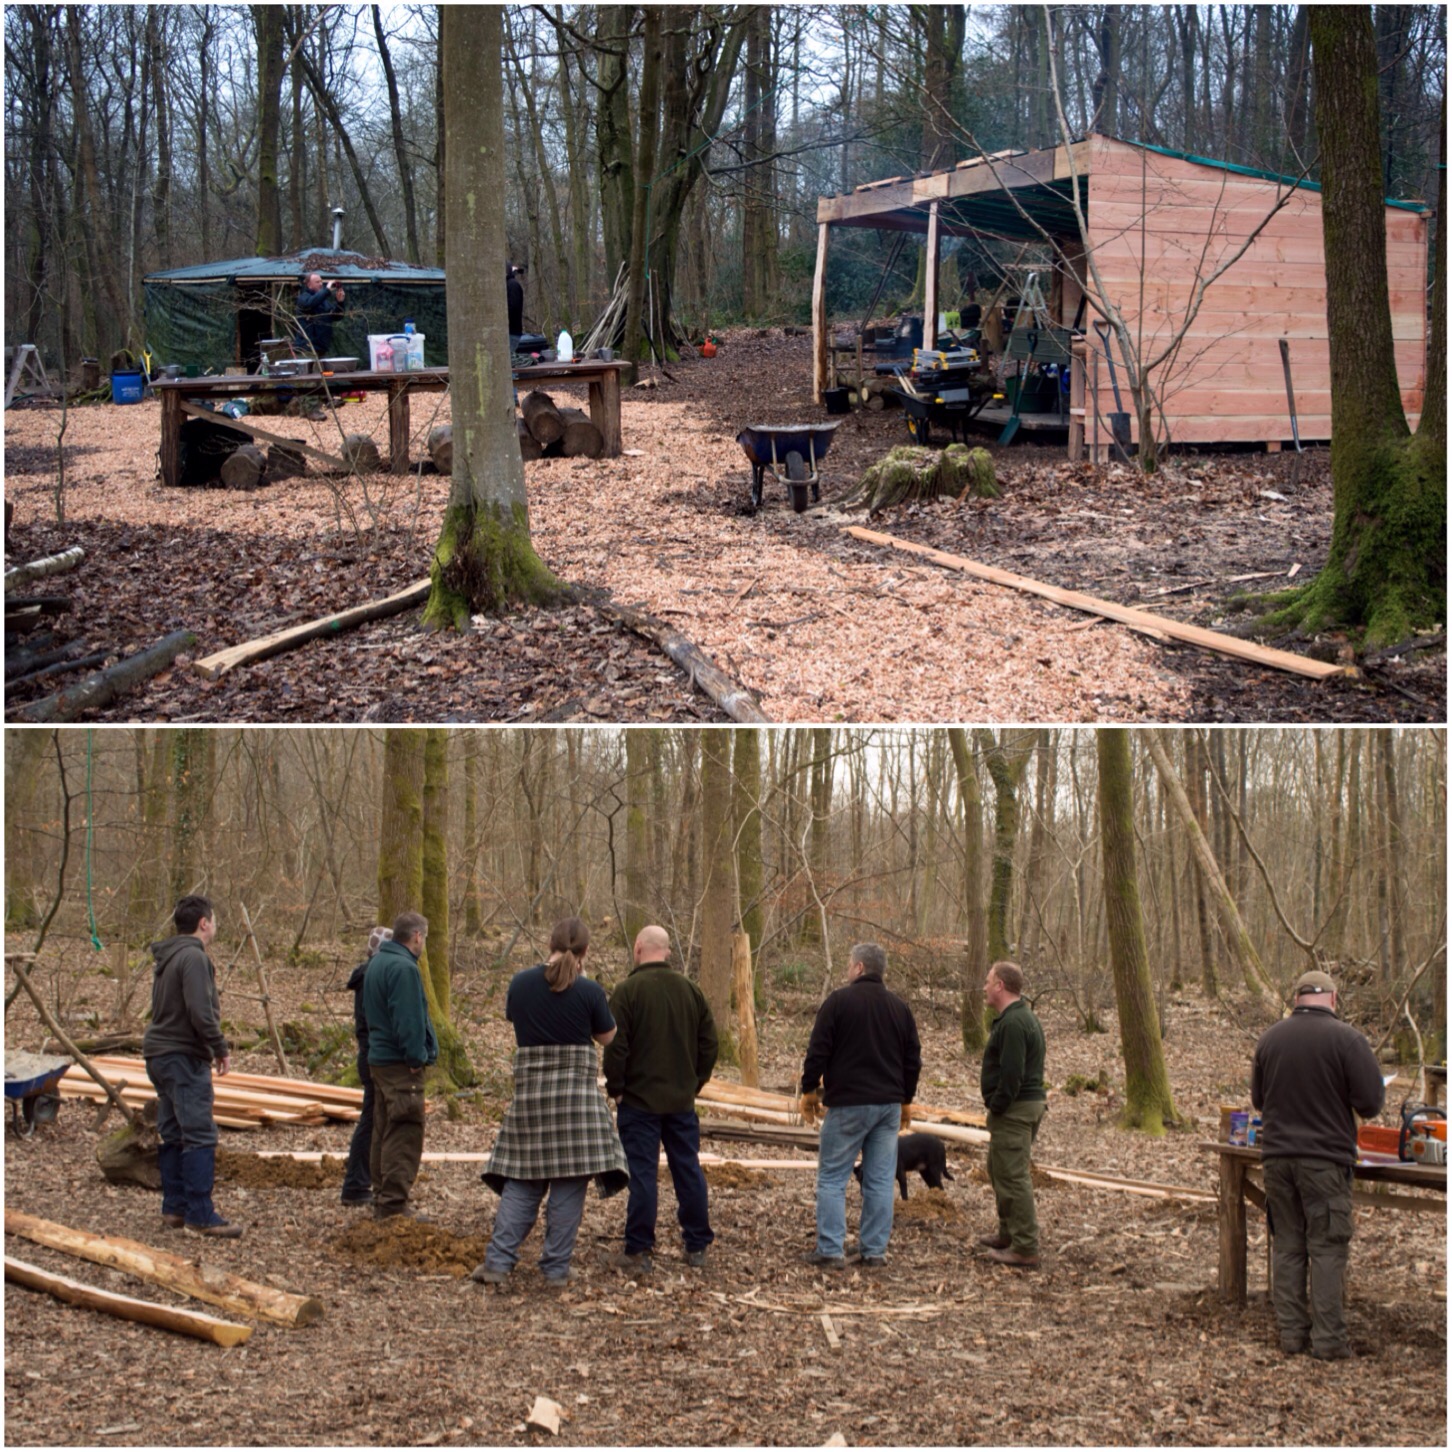
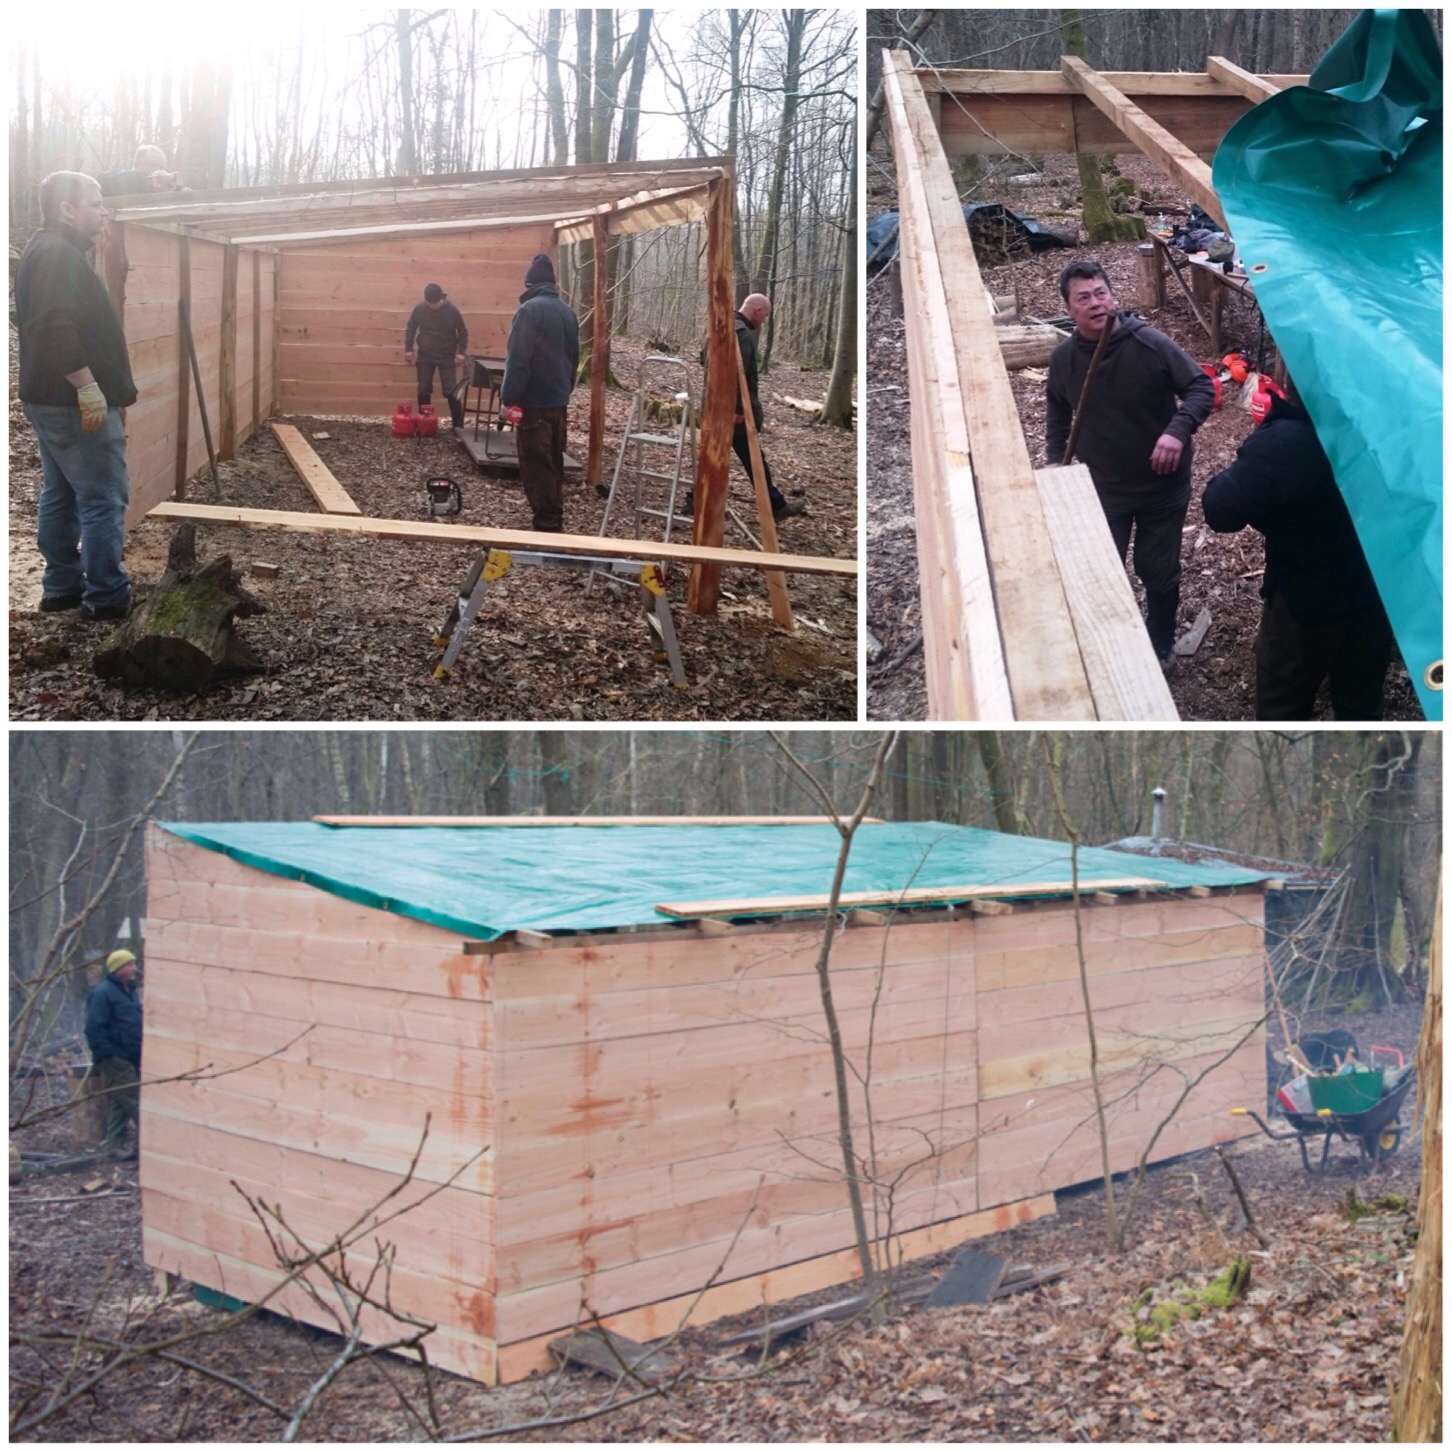
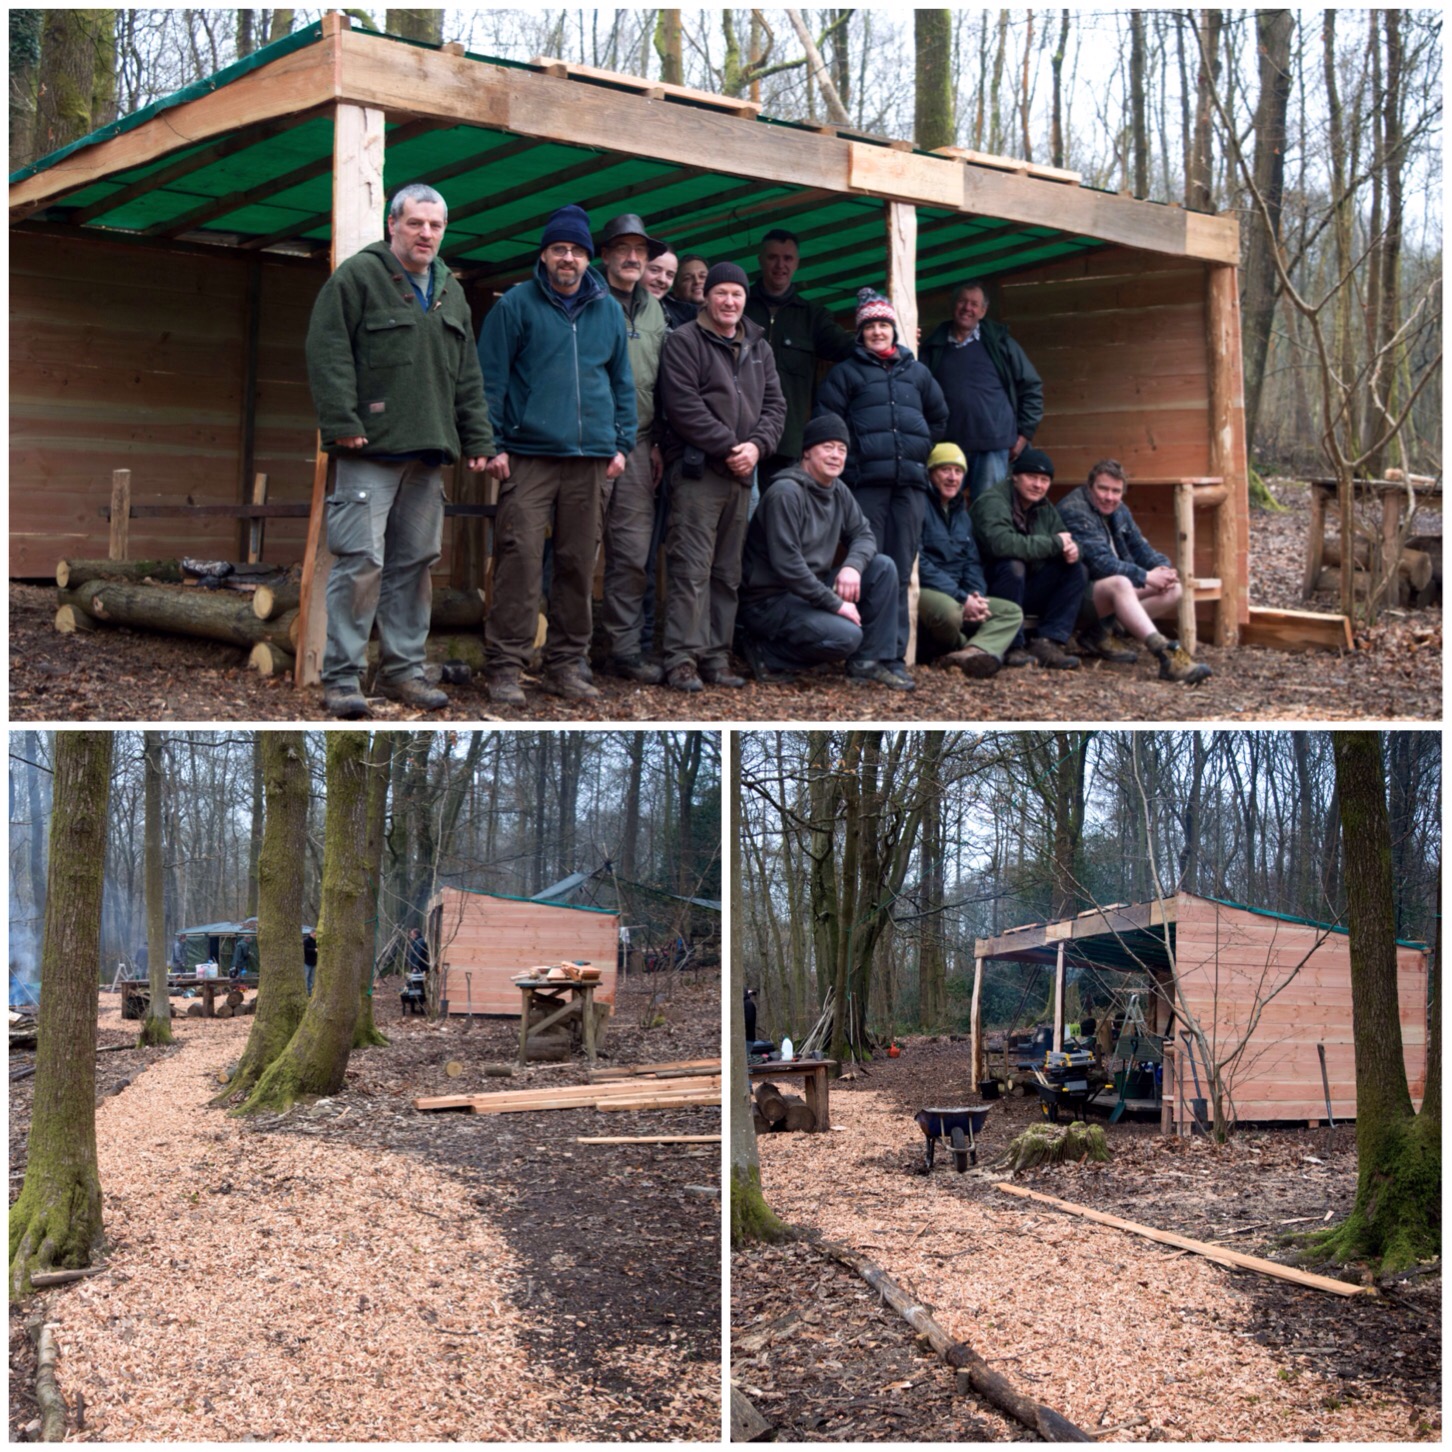
In the top picture below is the open-fronted cookhouse we built and in the bottom picture how it all looked on the Saturday morning when we first arrived – a few post holes in the ground.
After and before
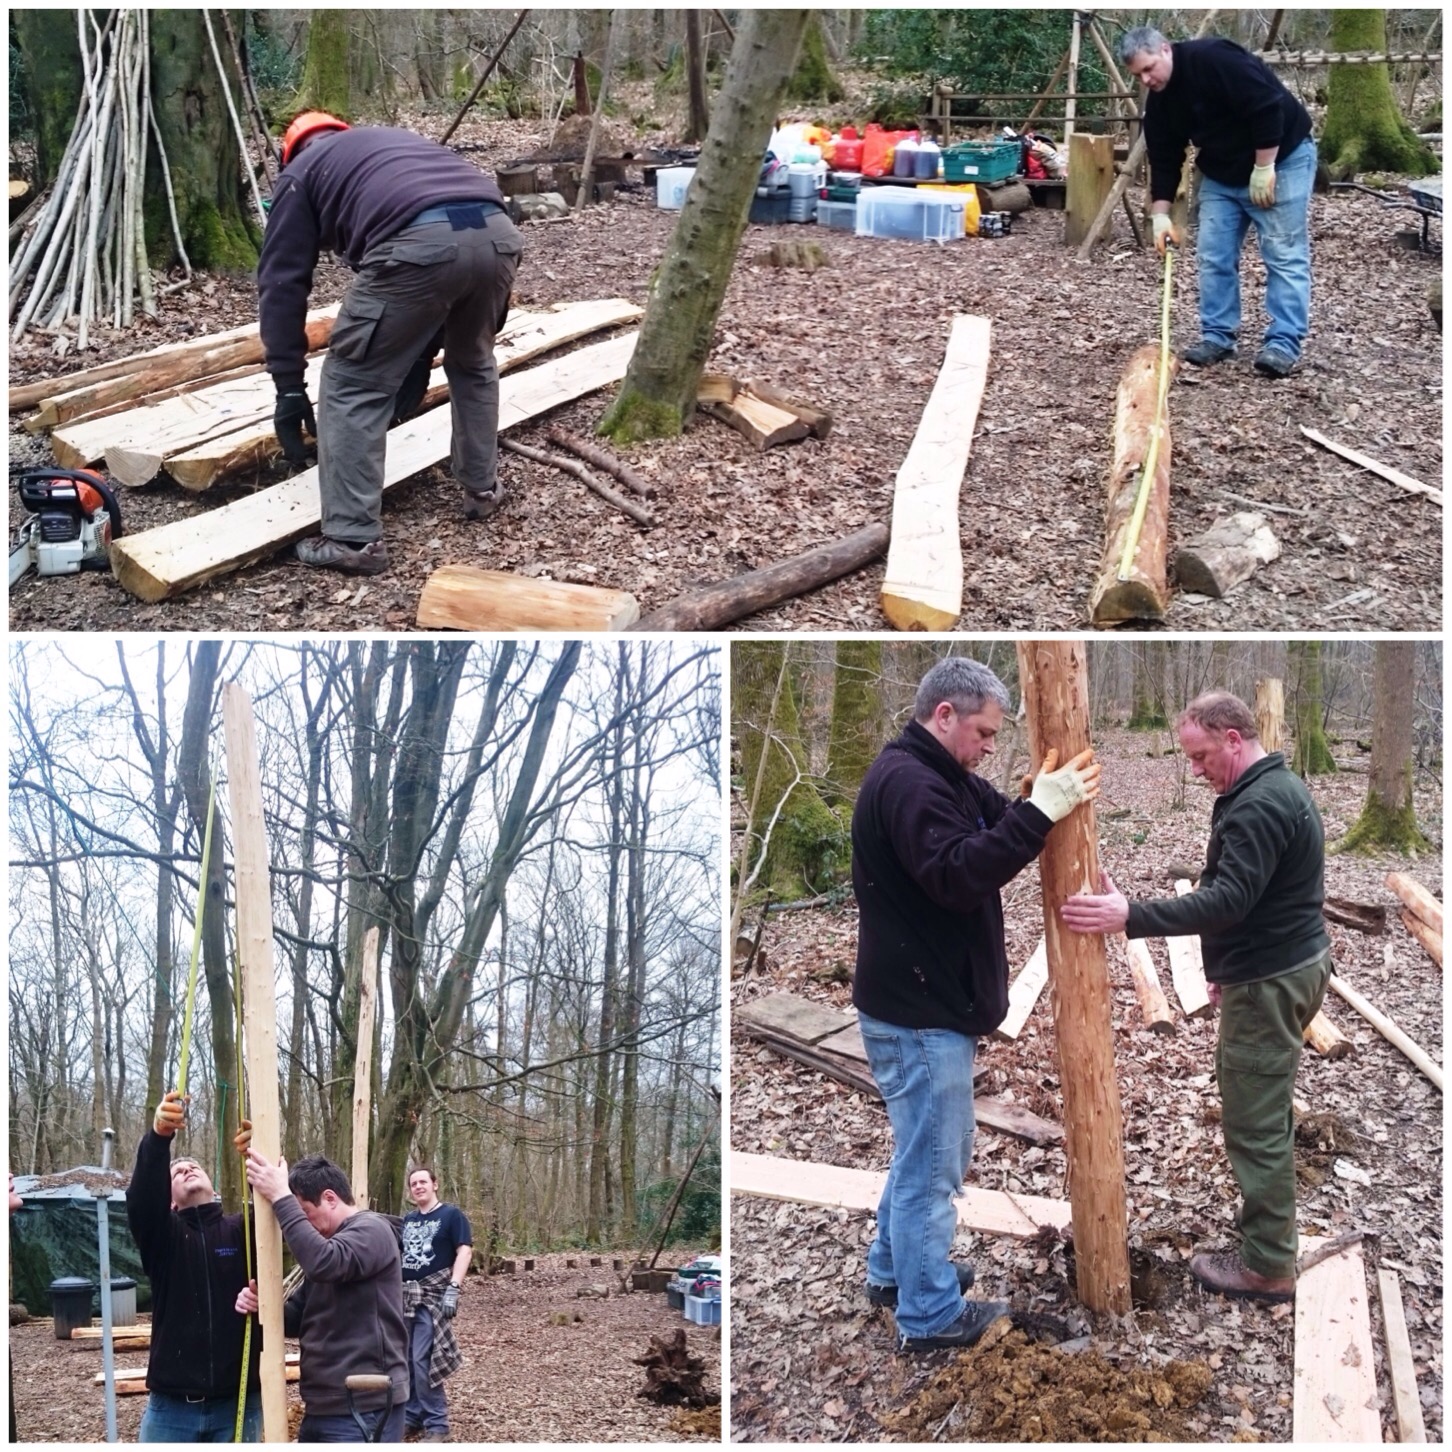
In the group building this were Scott Batty, Kev Howlett, Jumbo Jim, Nigel Painter, Paul Workman, Chen, David Willis, John Rhyder and myself. John had split a load of sweet chestnut to use as the uprights and brought into the site a load of timber to build up the walls and for battoning and rafting.
We selected six pieces for the uprights and started on the back wall first. The plan was to have the kitchen closed off on two sides (to protect from the prevailing wind) and to have it open on two sides.
The first post went in easy enough and we compacted earth and stones around it to keep it secure.
Measuring up and digging in
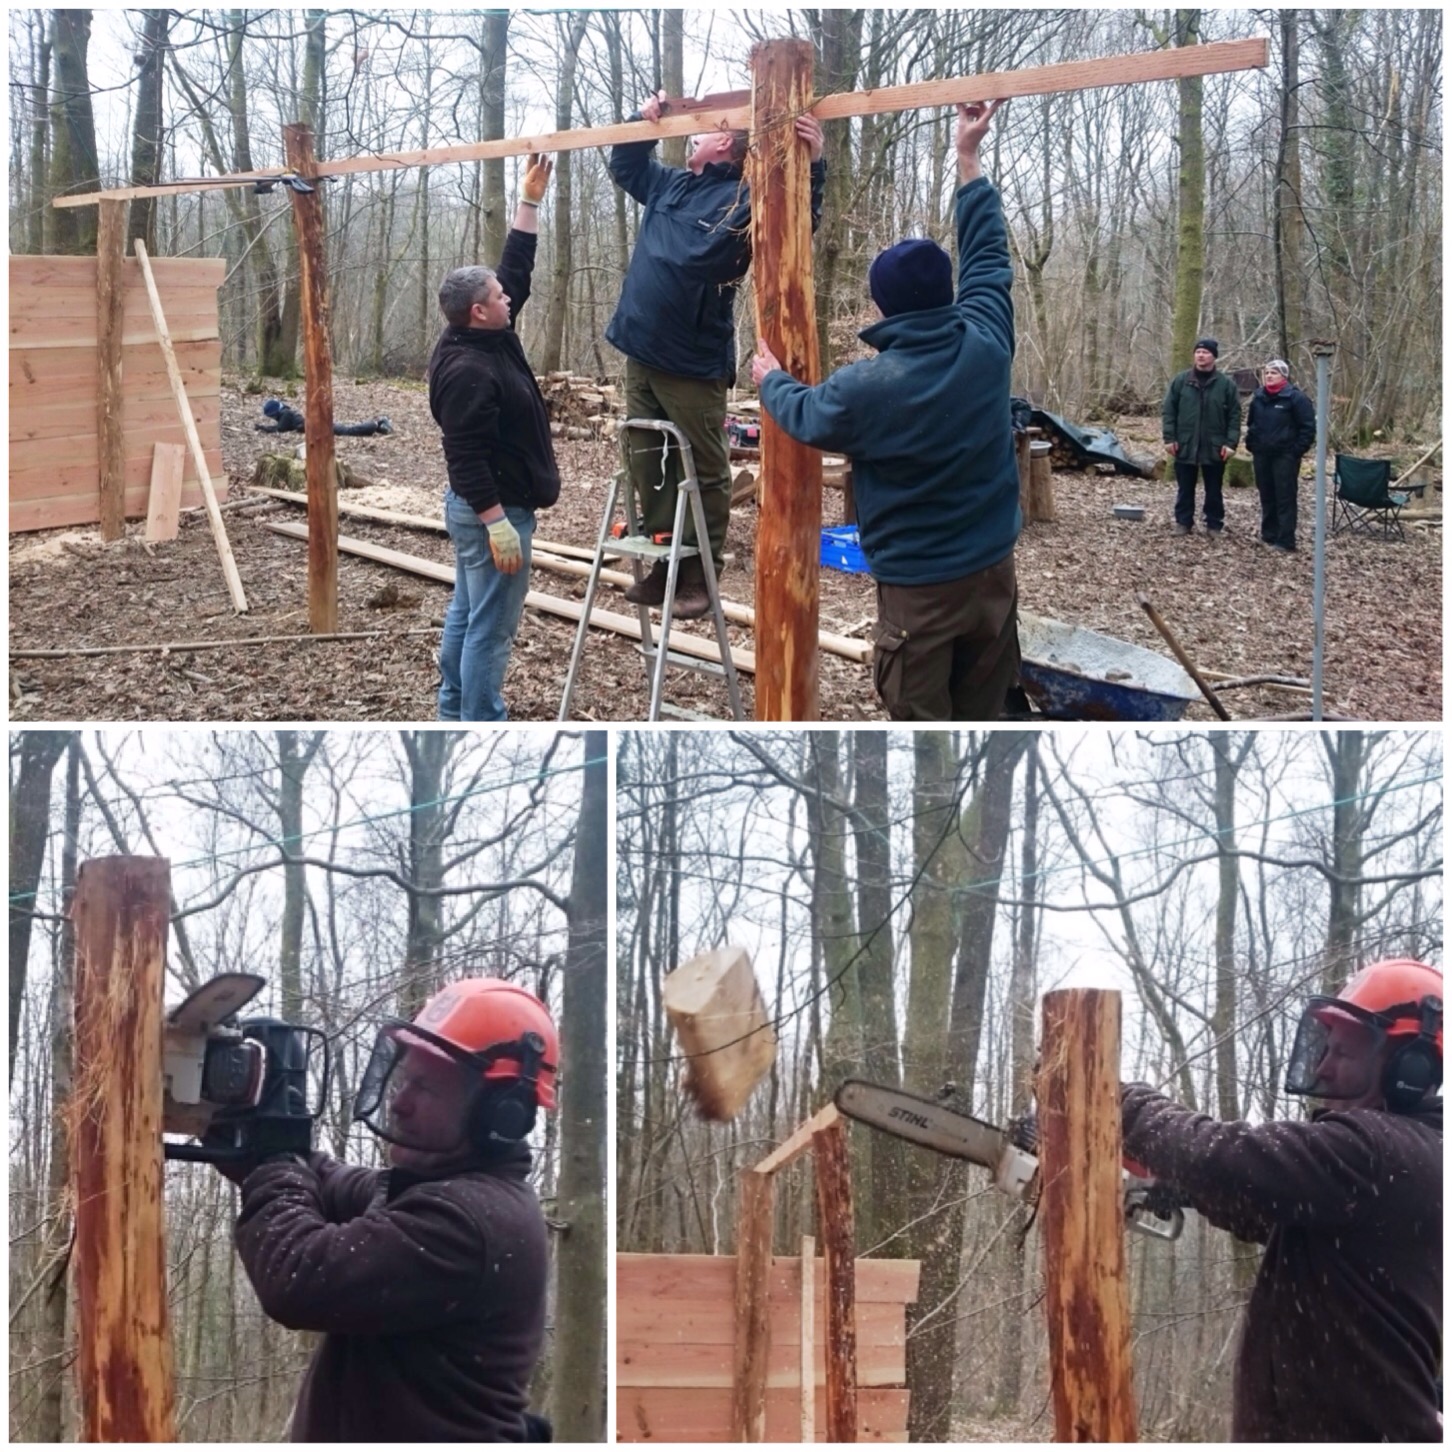
The other posts were put in and we used large pieces of straight timber to make sure the these posts lined up properly (mark one eyeball – carpenters measures).
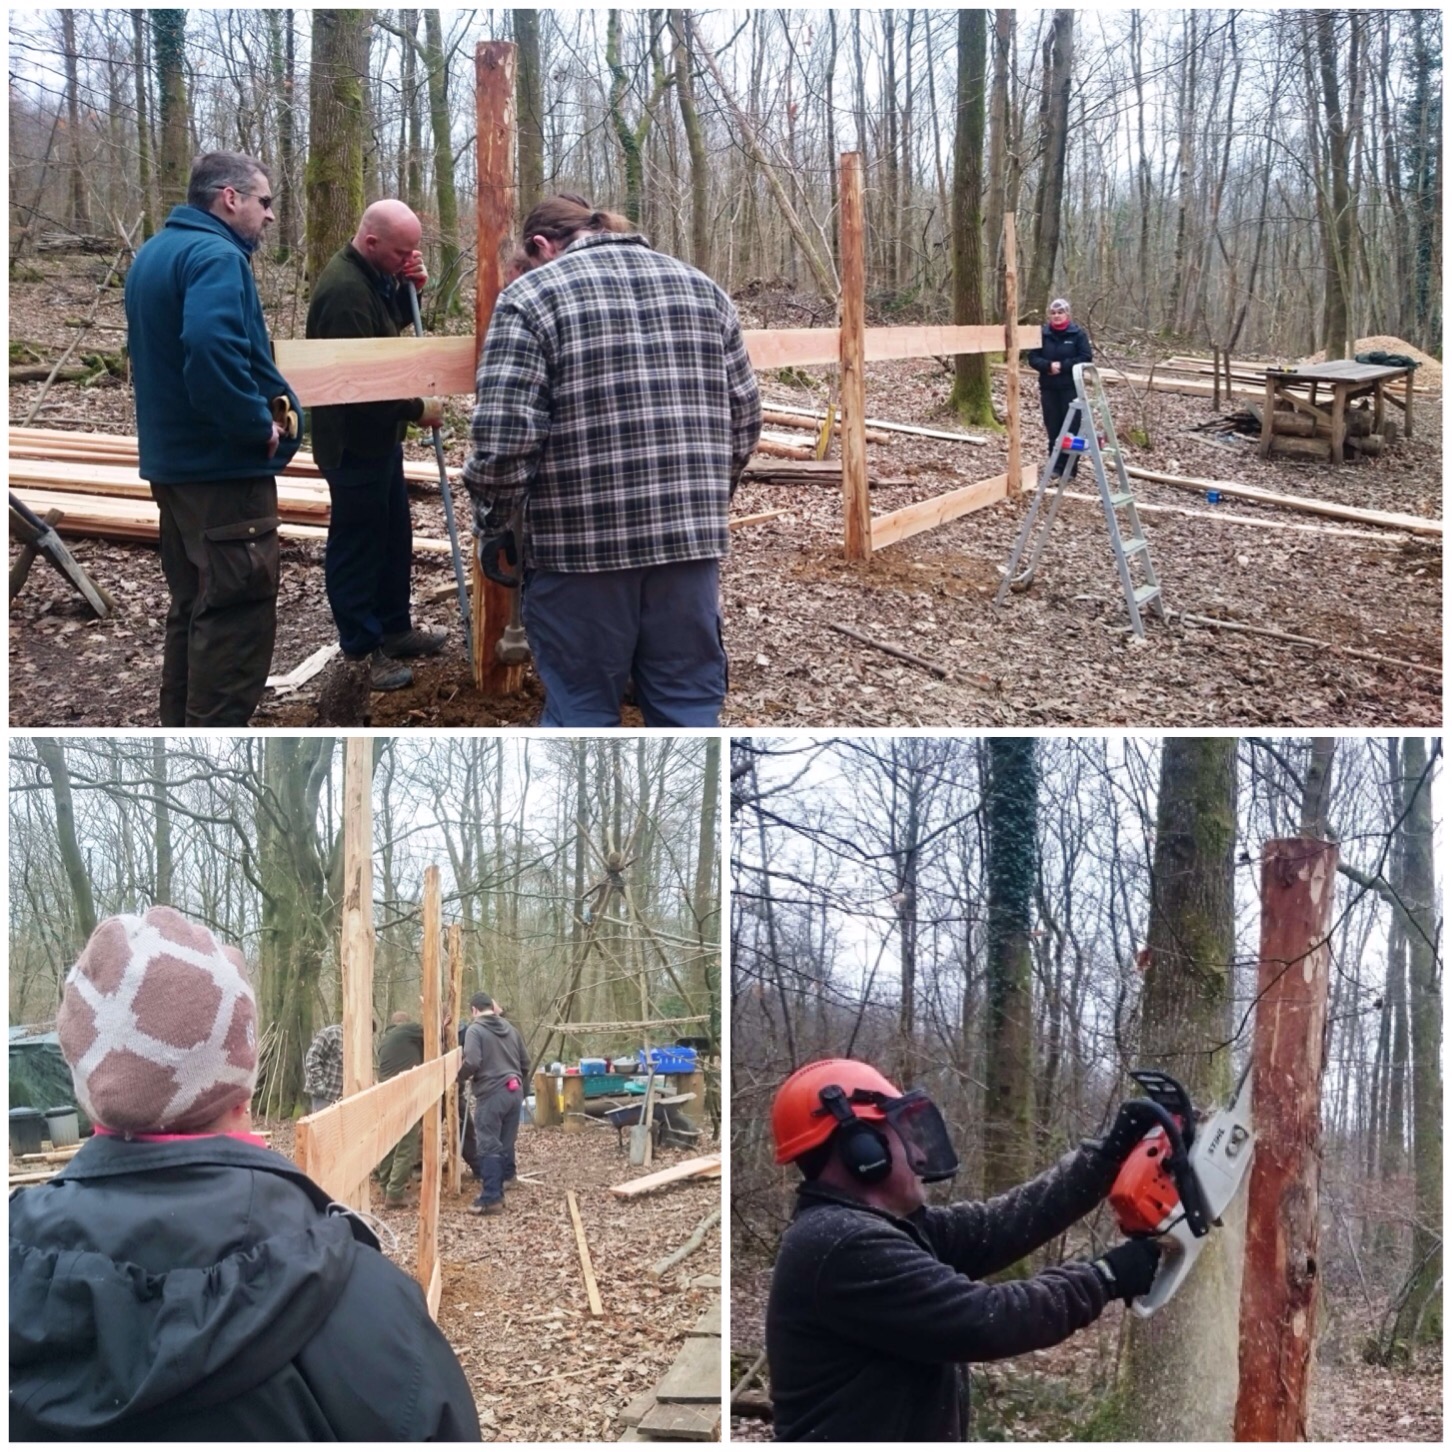
John then used his chainsaw to make the facings of the uprights smooth so we could attach the timber for the walls.
Aligning and smoothing
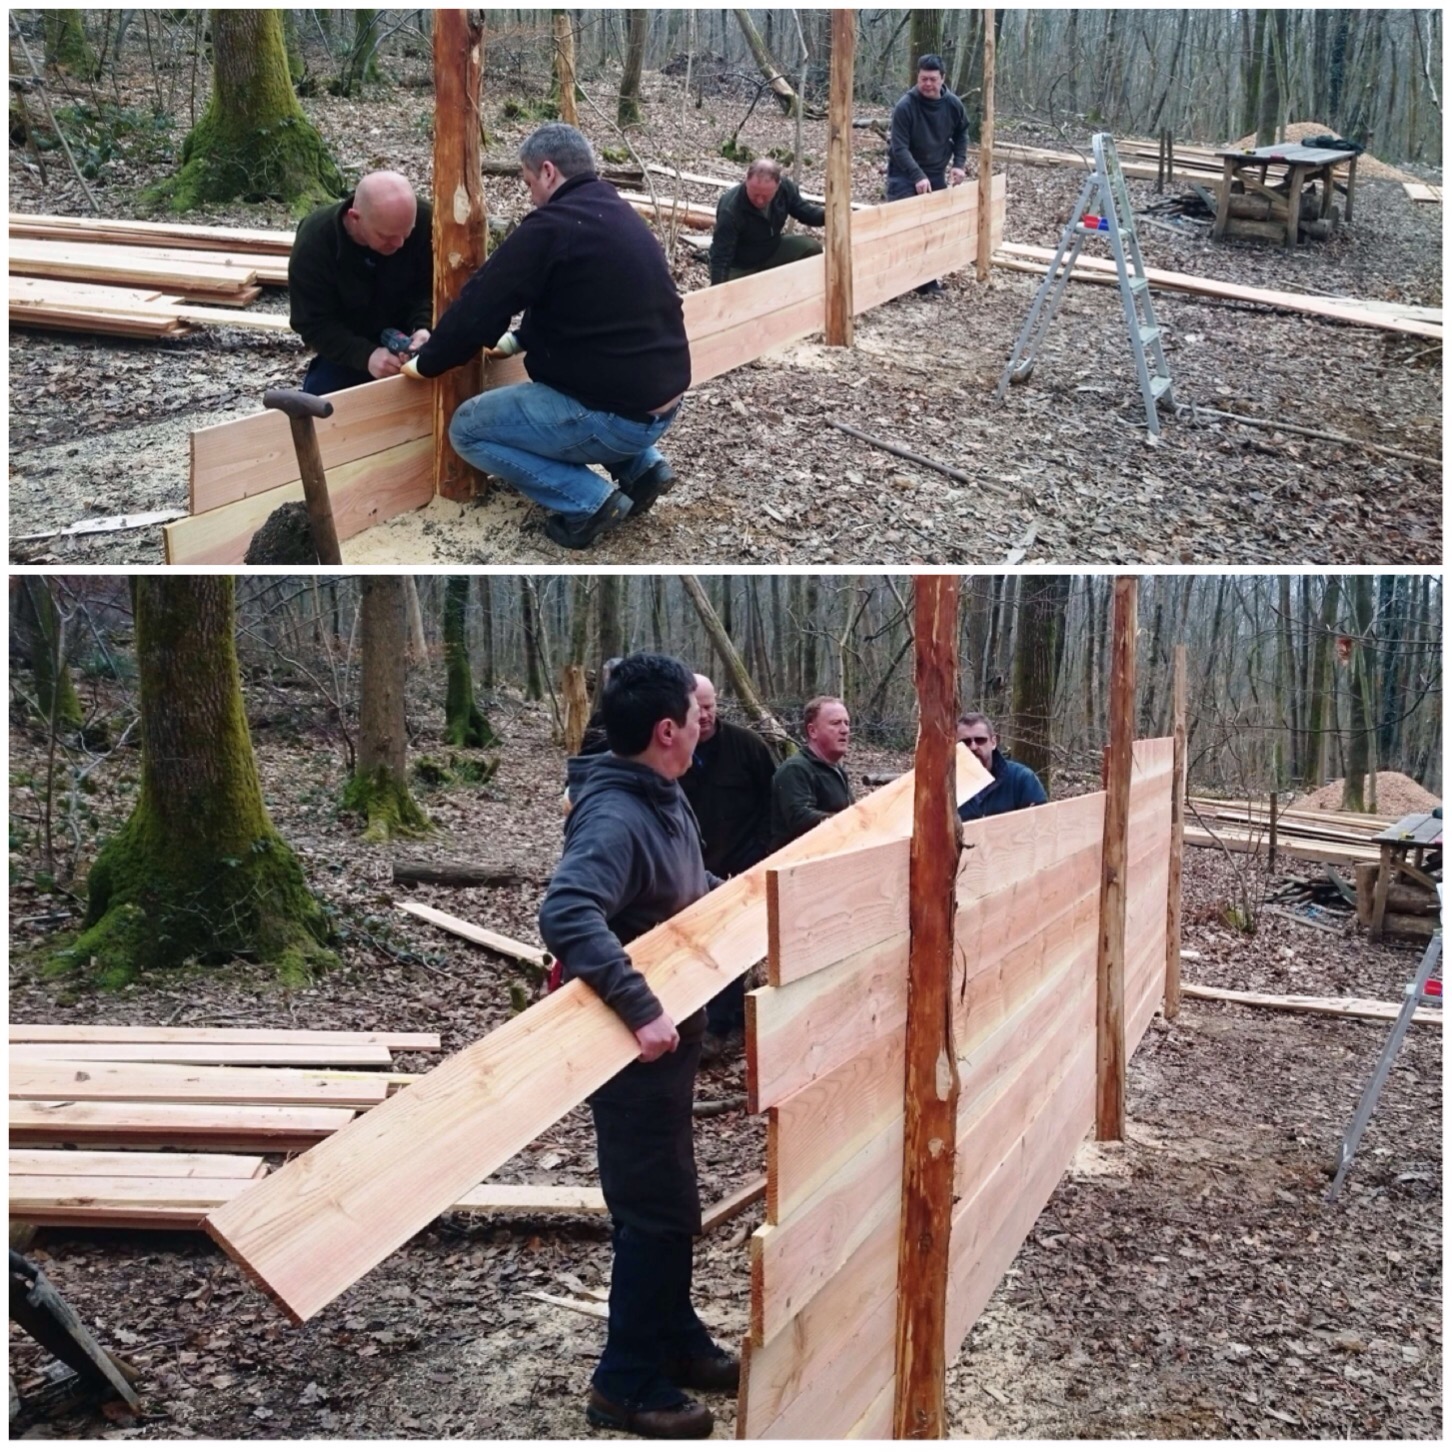
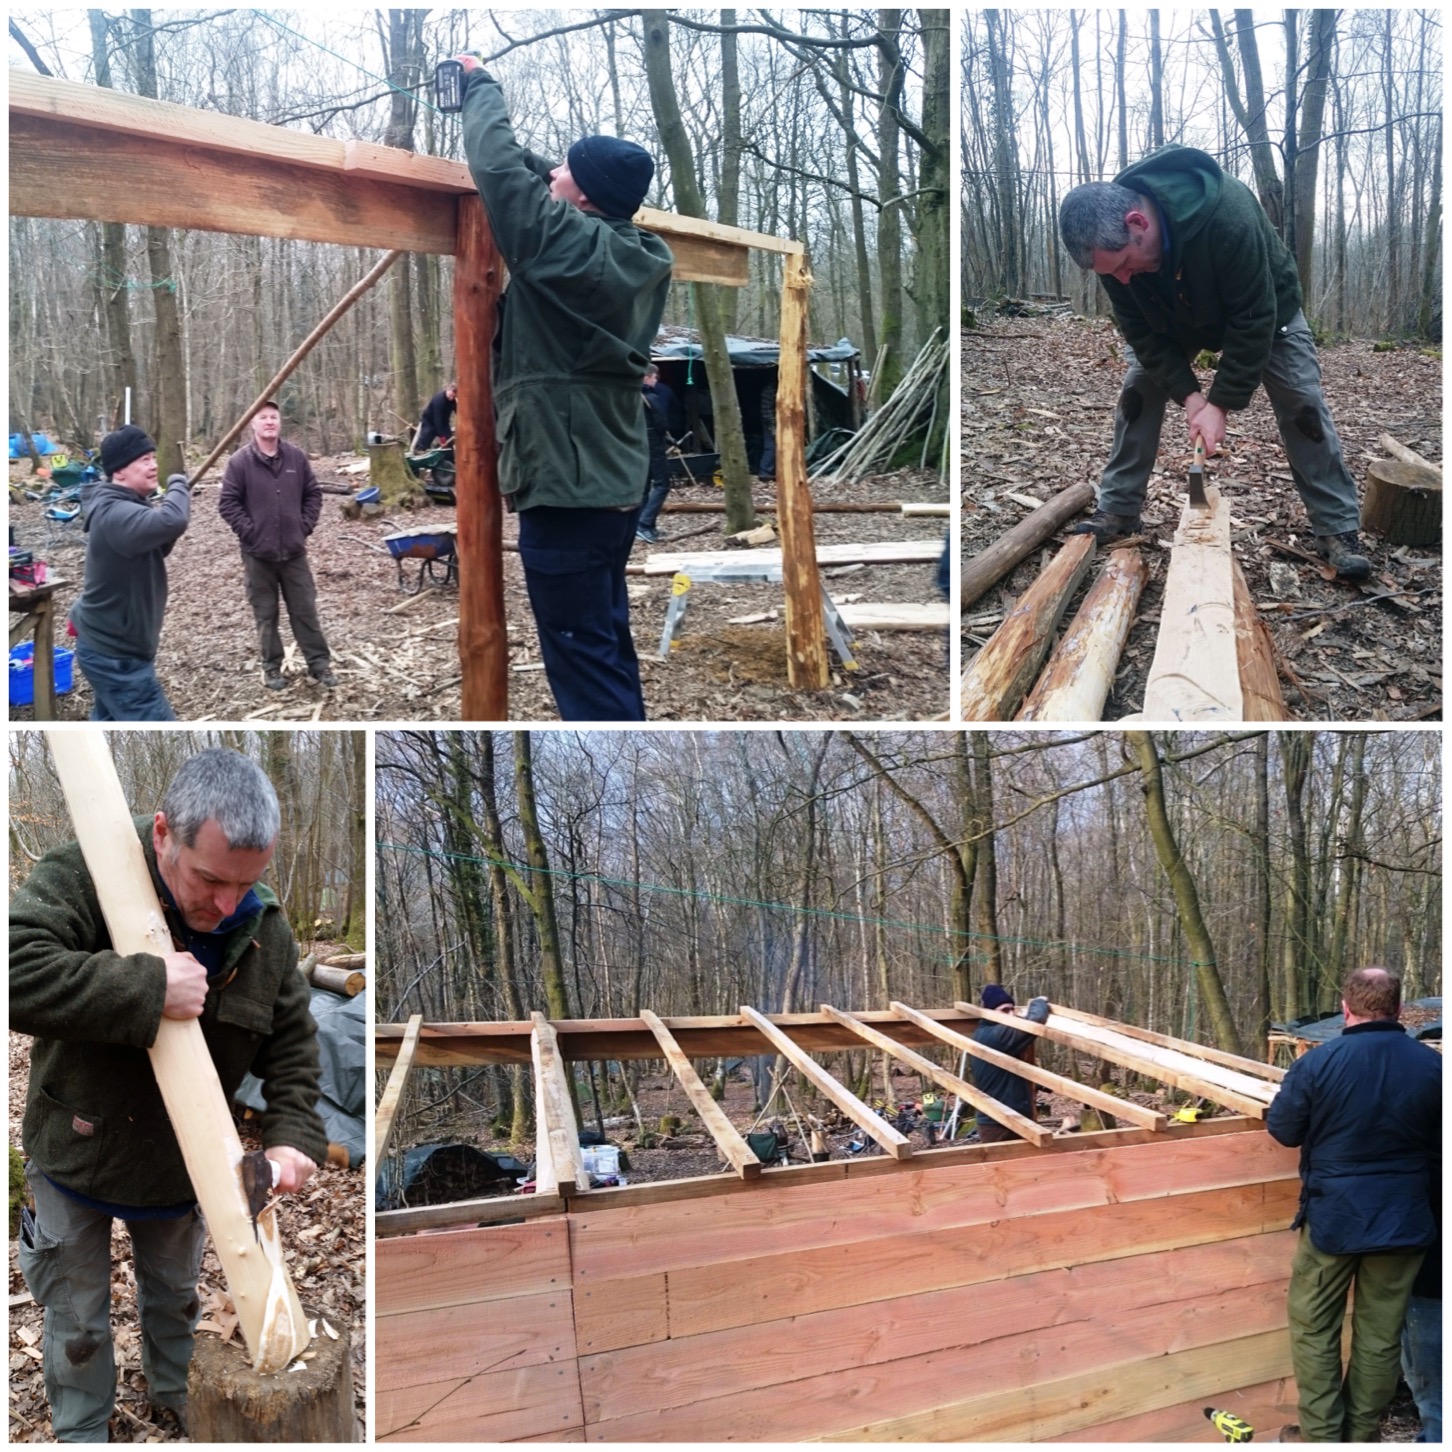
We actually built the back wall rather quickly. One person would select the timber, another held it in place, then pilot holes were drilled in by someone and finally someone else screwed the planks in. We all took turn about and soon had the back wall up.
The plan initially was to overlap the planks of wood so as to let the water drain off but we estimated at the start there were not enough to do that so we had to place them directly on top of each other.
Racking up
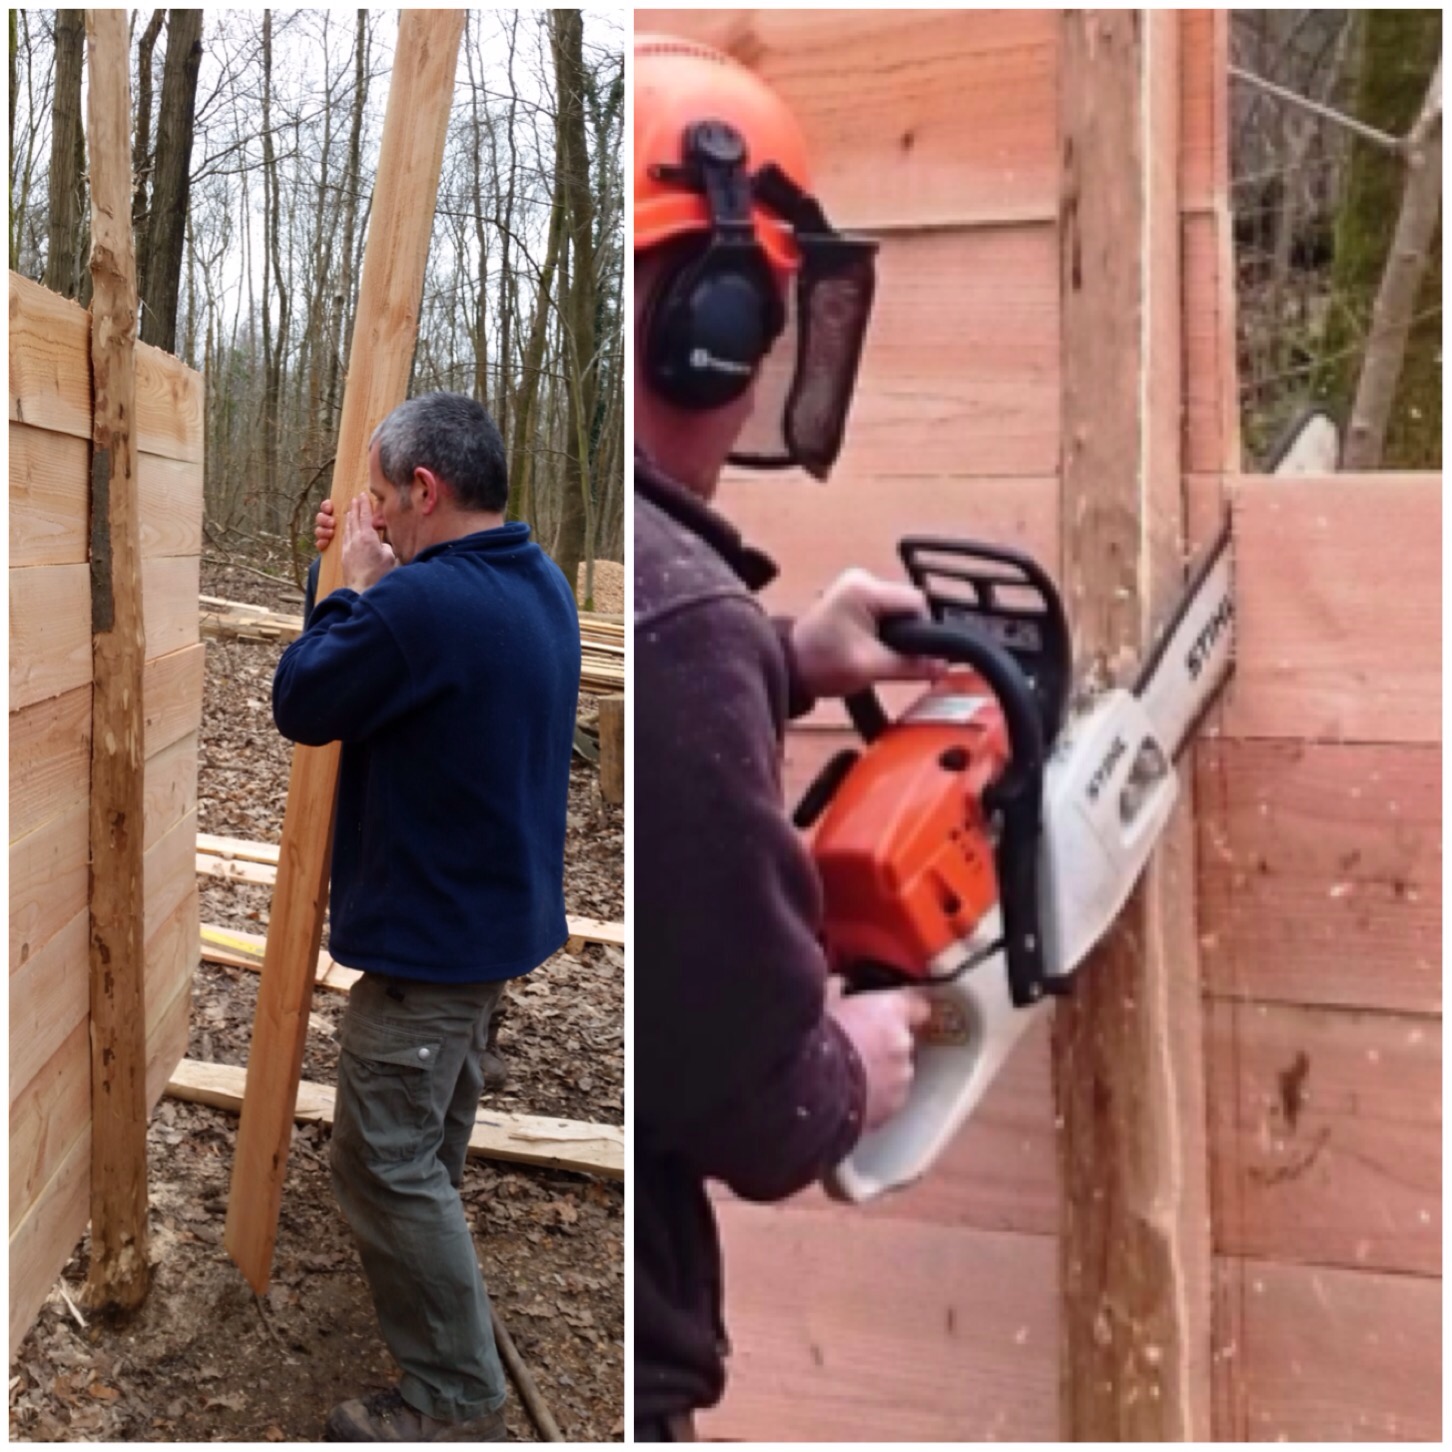
There was excess wood on one side so after using a plank as a measuring device John trimmed the excess off with his chainsaw. We left just a lip of wood at the edge to overlap with the side wall that was to go up next.
Trimming off
Once the back was completed we built the side wall in the same way as the back wall (no pictures I’m afraid) and then started on the front.
The cookhouse is on a slope and John and Caron wanted a decent slope to the roof to help with runoff of rain (but not so tall as to be a problem in high winds). The first thing we did was decide on the height, then we marked it off on the uprights and got John to trim each pole to the right height.
Preparing the open front
We built a strong lintel at the front and I trimmed a couple of sweet chestnut poles to act as main rafters. We also had a selection of smaller machined battons to act as rafters.
I secured one of the sweet chestnut rafters in the middle and the other one at the open end of the cookhouse. The other machined rafters were all spread evenly along the roof and screwed down.
Rafting up
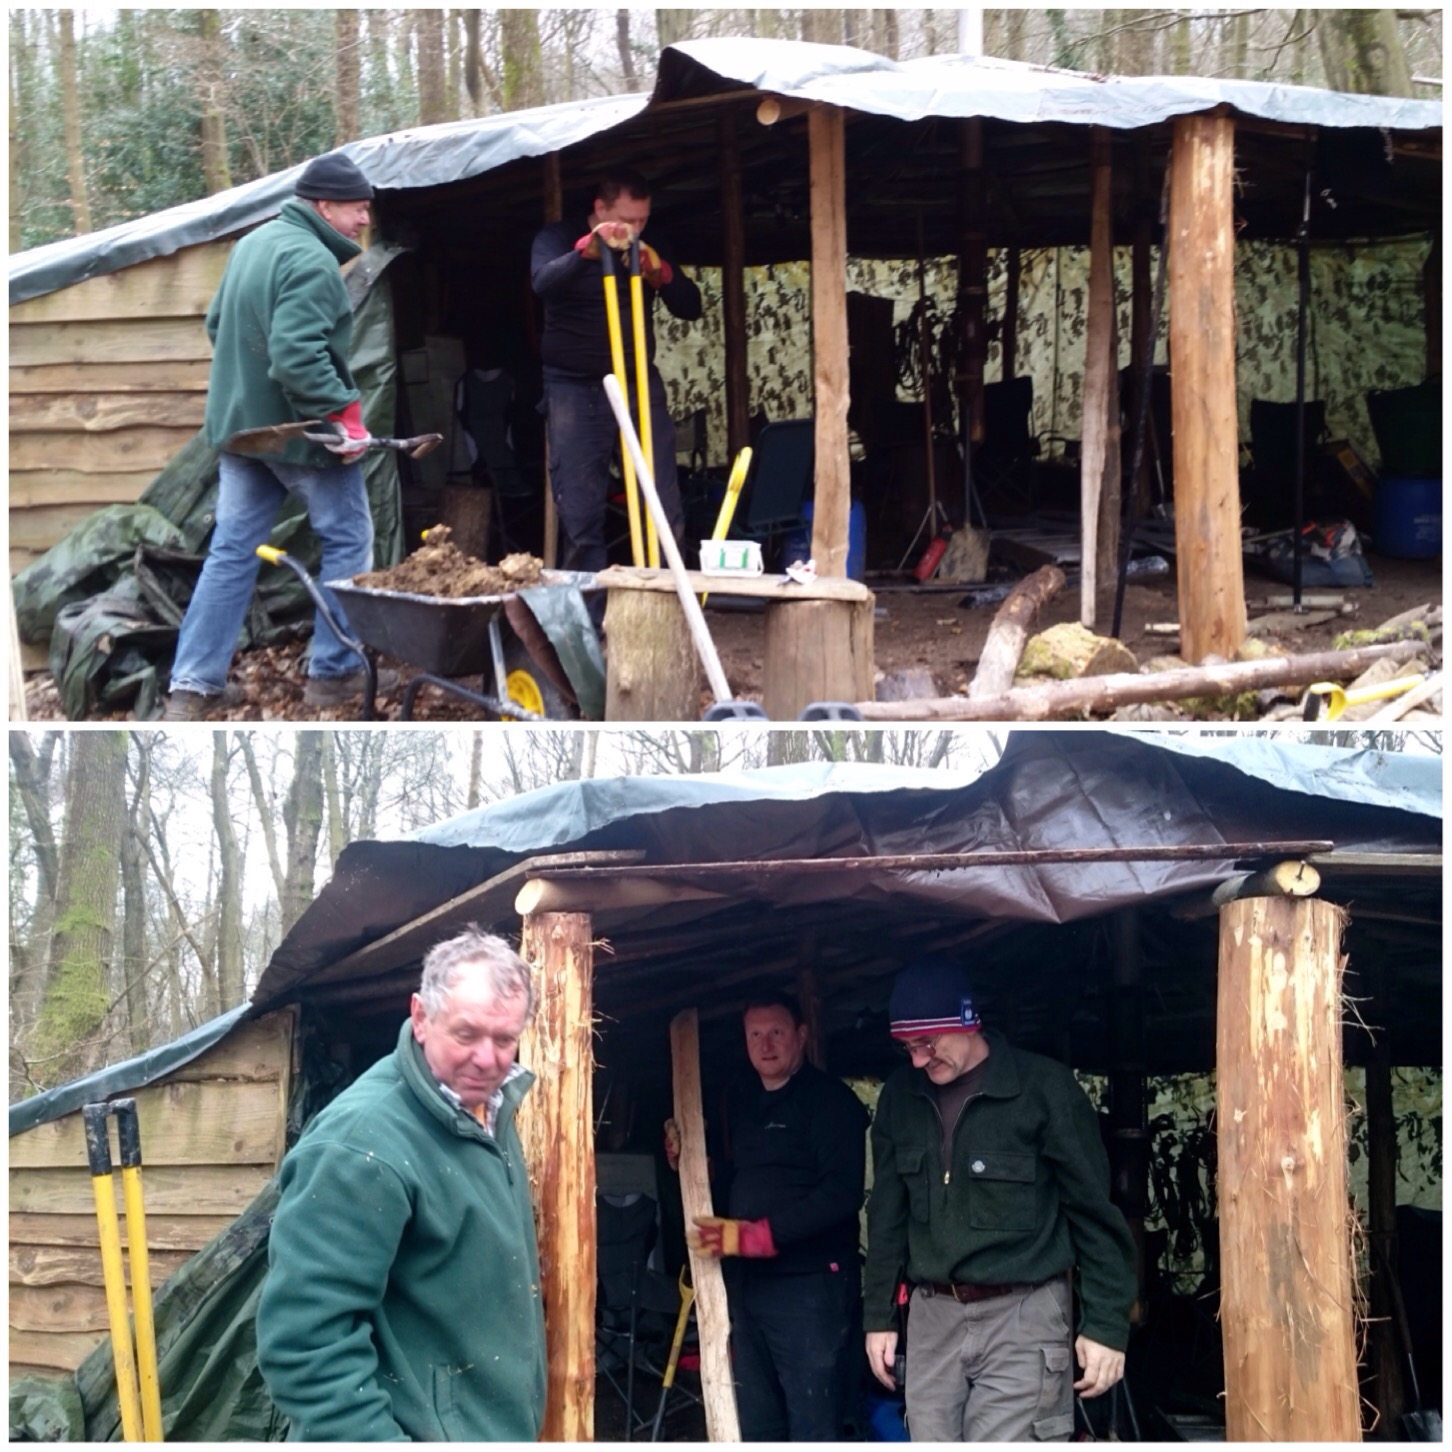
We did not have the shingles for the roof so we just nailed down a large tarp as a temporary cover.
In the bottom picture you get a feel for the angle of the slope the cookhouse sits on.
The temporary roofing
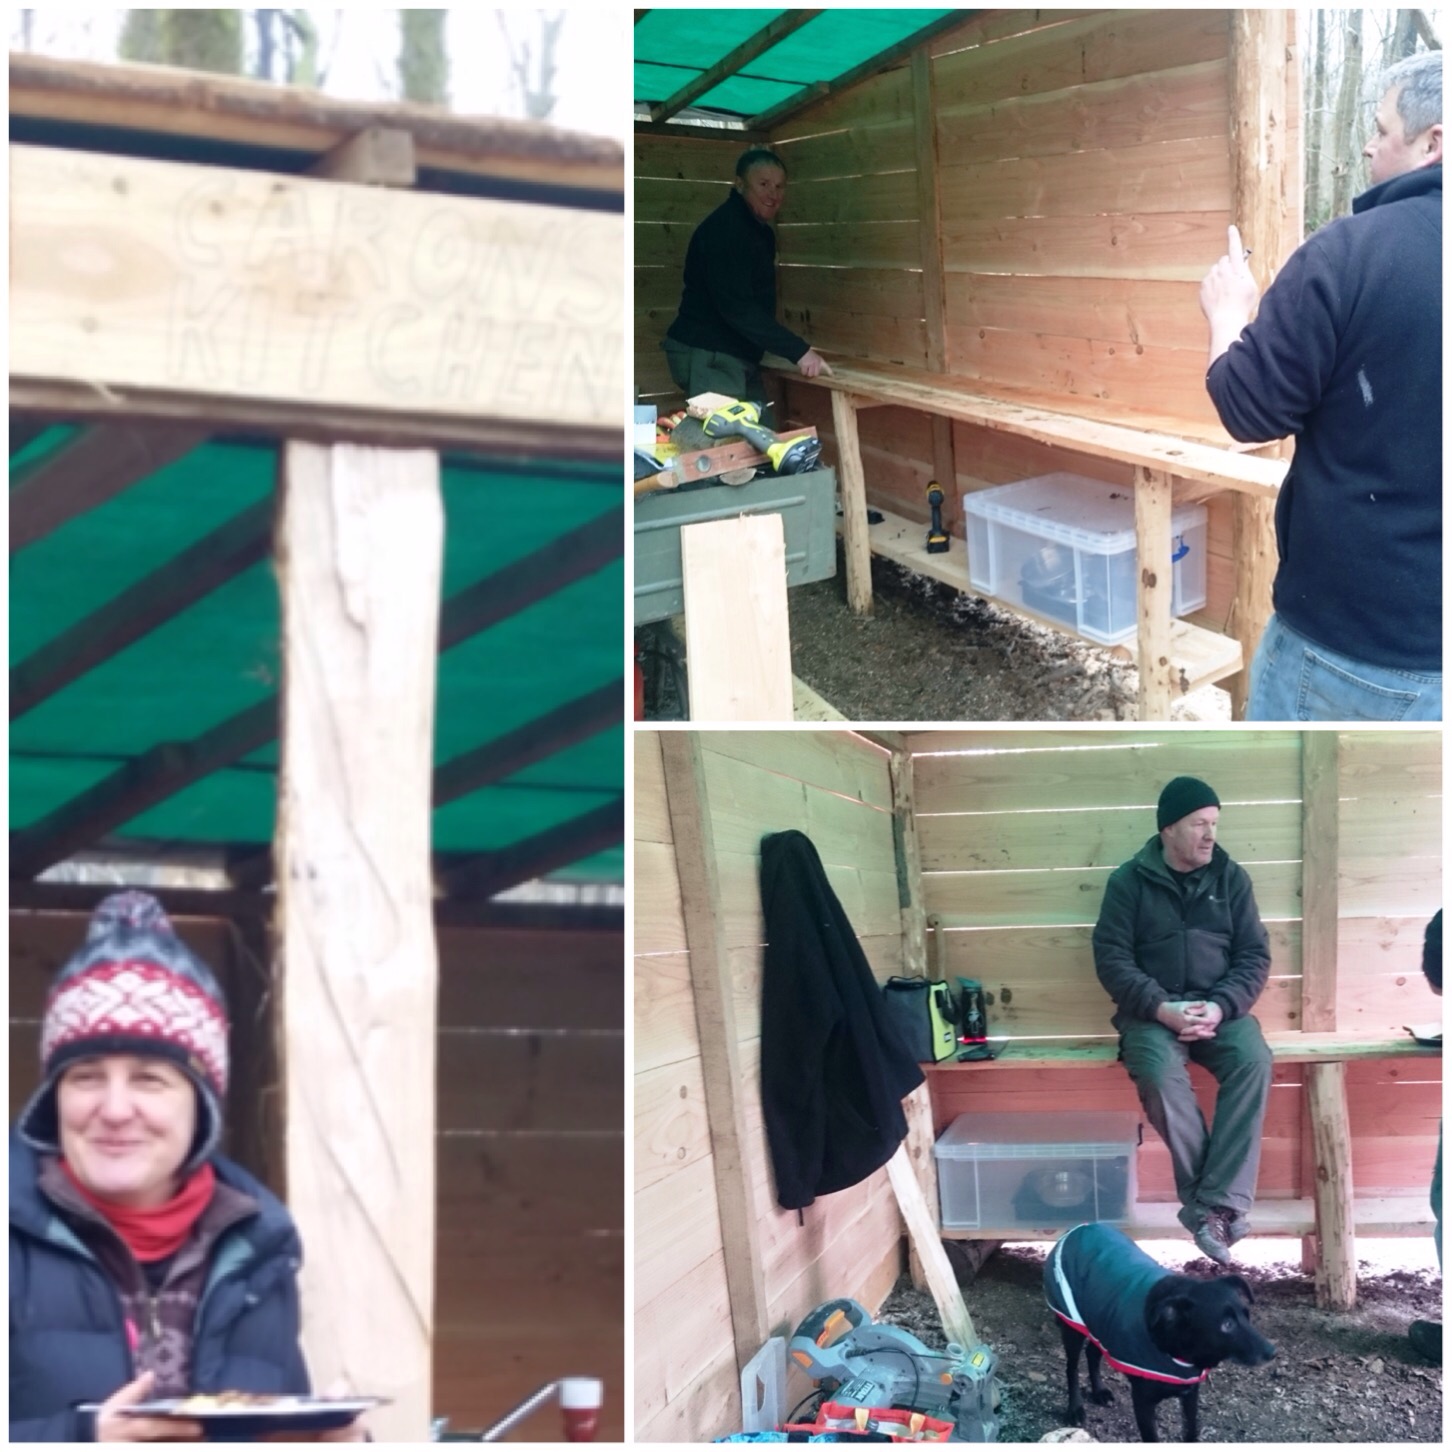
You can just make out the sign above Caron naming her kitchen (I have no idea who wrote it). In the pictures on the right you can see the shelving unit that Paul and Nigel built. Seemed pretty secure as it offered a perfect seat for John to survey it all.
You can also see the internal battoning (to the left of the jacket in the bottom tight picture and also to the right of John). This really strengthened the walls as we dug the battons deep into the ground.
Signs, shelves and snagging
Kev and Chen moved the kitchen platform from its old spot to inside the cookhouse. They did spend a good bit of time getting it secured properly on poles and perfectly flat.
We had some great food over the weekend with our dinner on the Saturday evening and breakfast on Sunday morning cooked inside it.
First cooking
There were some other projects going on involving re-building the shower house, laying new chippings on the paths and building the raised firepit you can see in the picture below (that will be my next post in this series).
The Sunday was a very frantic day as we strived to get everything done. When we took the group photo some of the lads had already left (about three or four I think) so apologies if i have not mentioned everyone involved in this project.
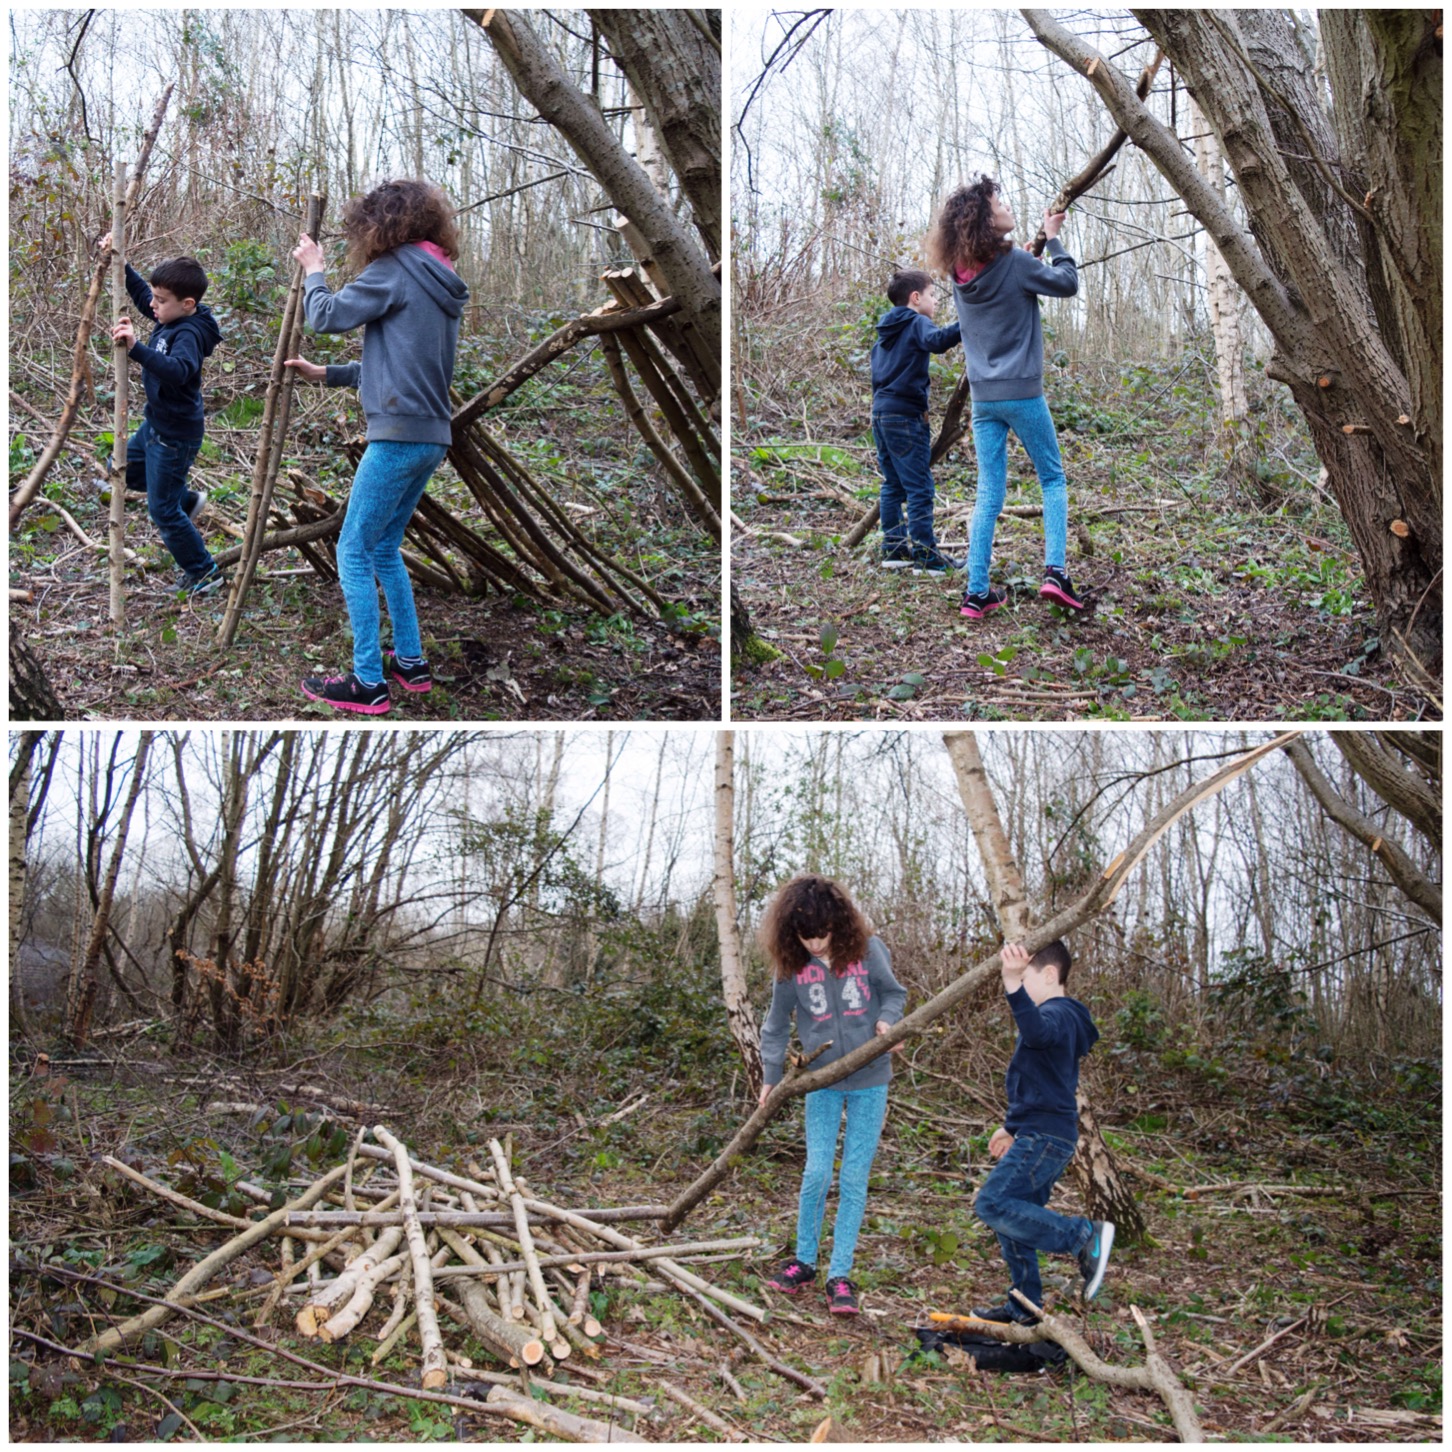
I went for a woodland walk with my kids last weekend to try and spot some signs of spring. We came across an area of the woods that had been recently thinned out and all the trimmed logs were lying around in piles.
My kids started to build themselves a little den from this wood but wanted me to show them how to make something both of them could get under.
A little shelter for two
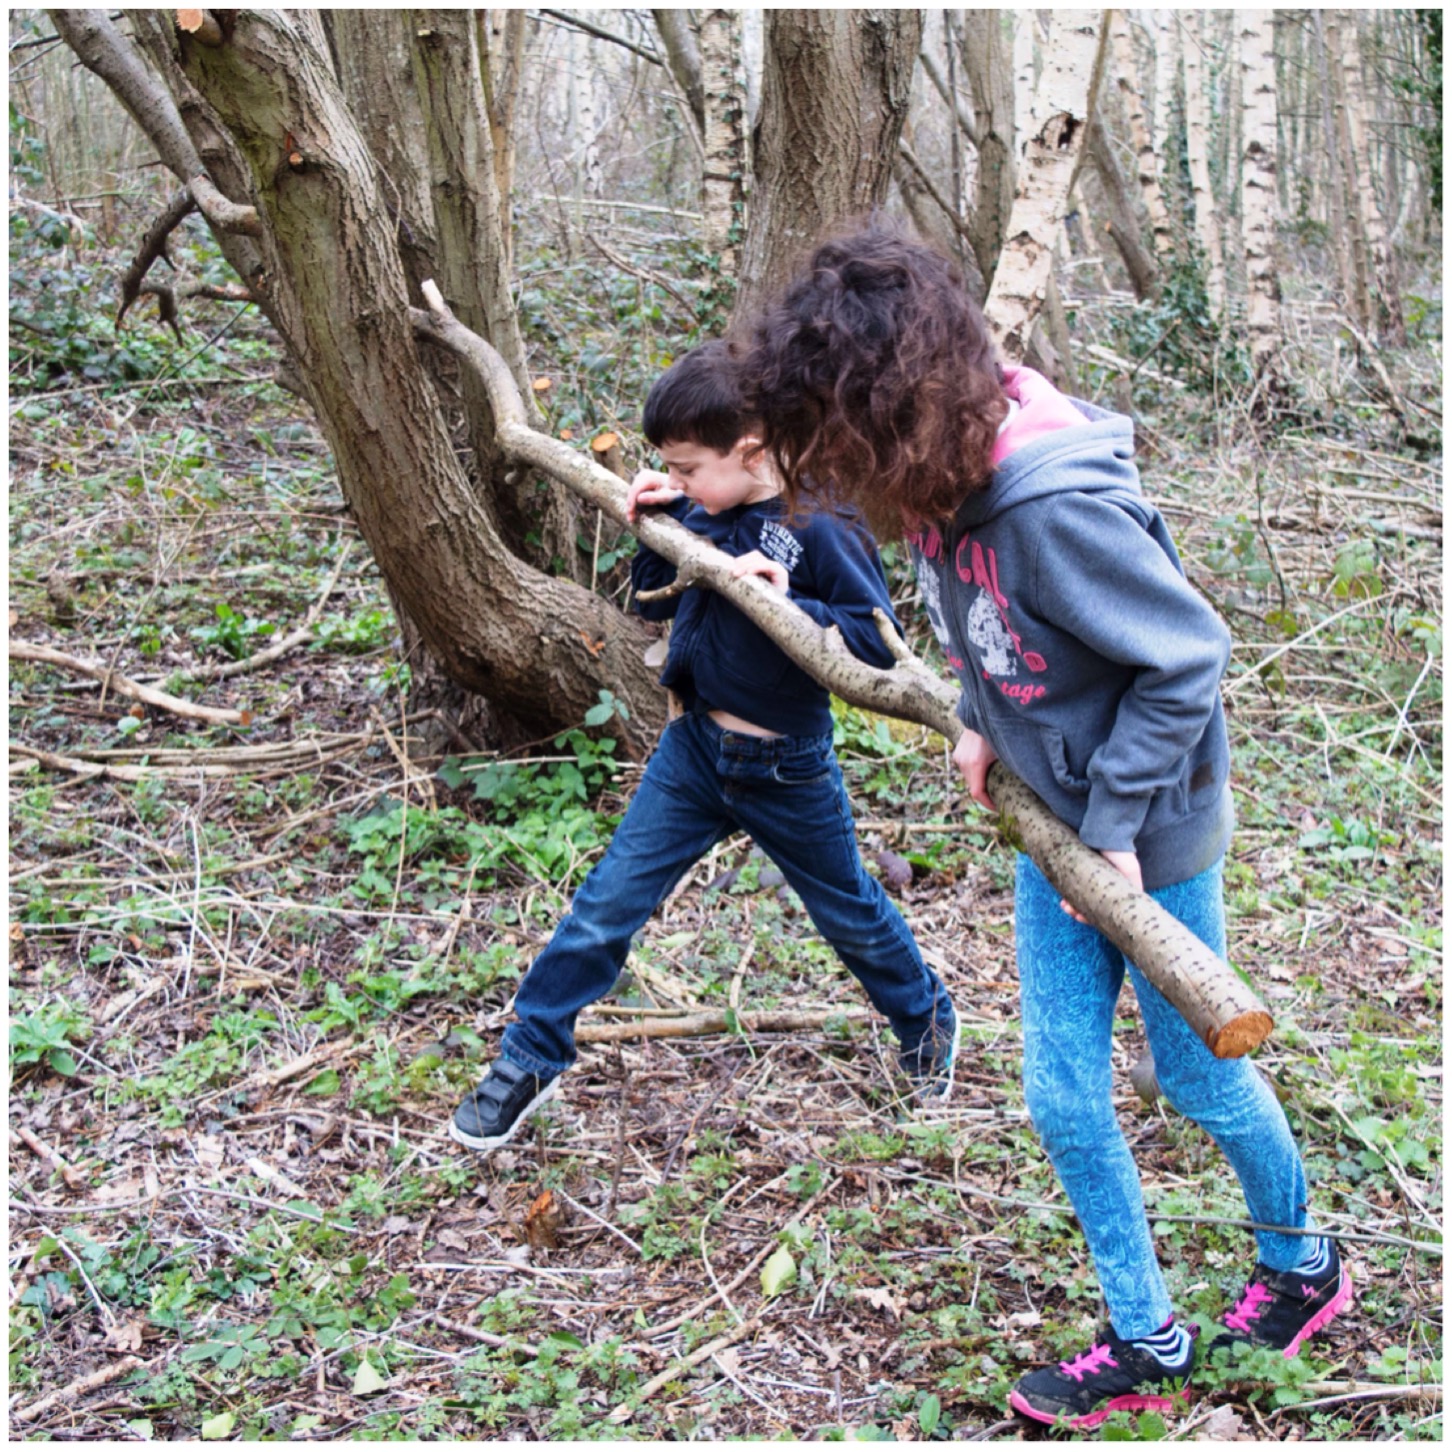
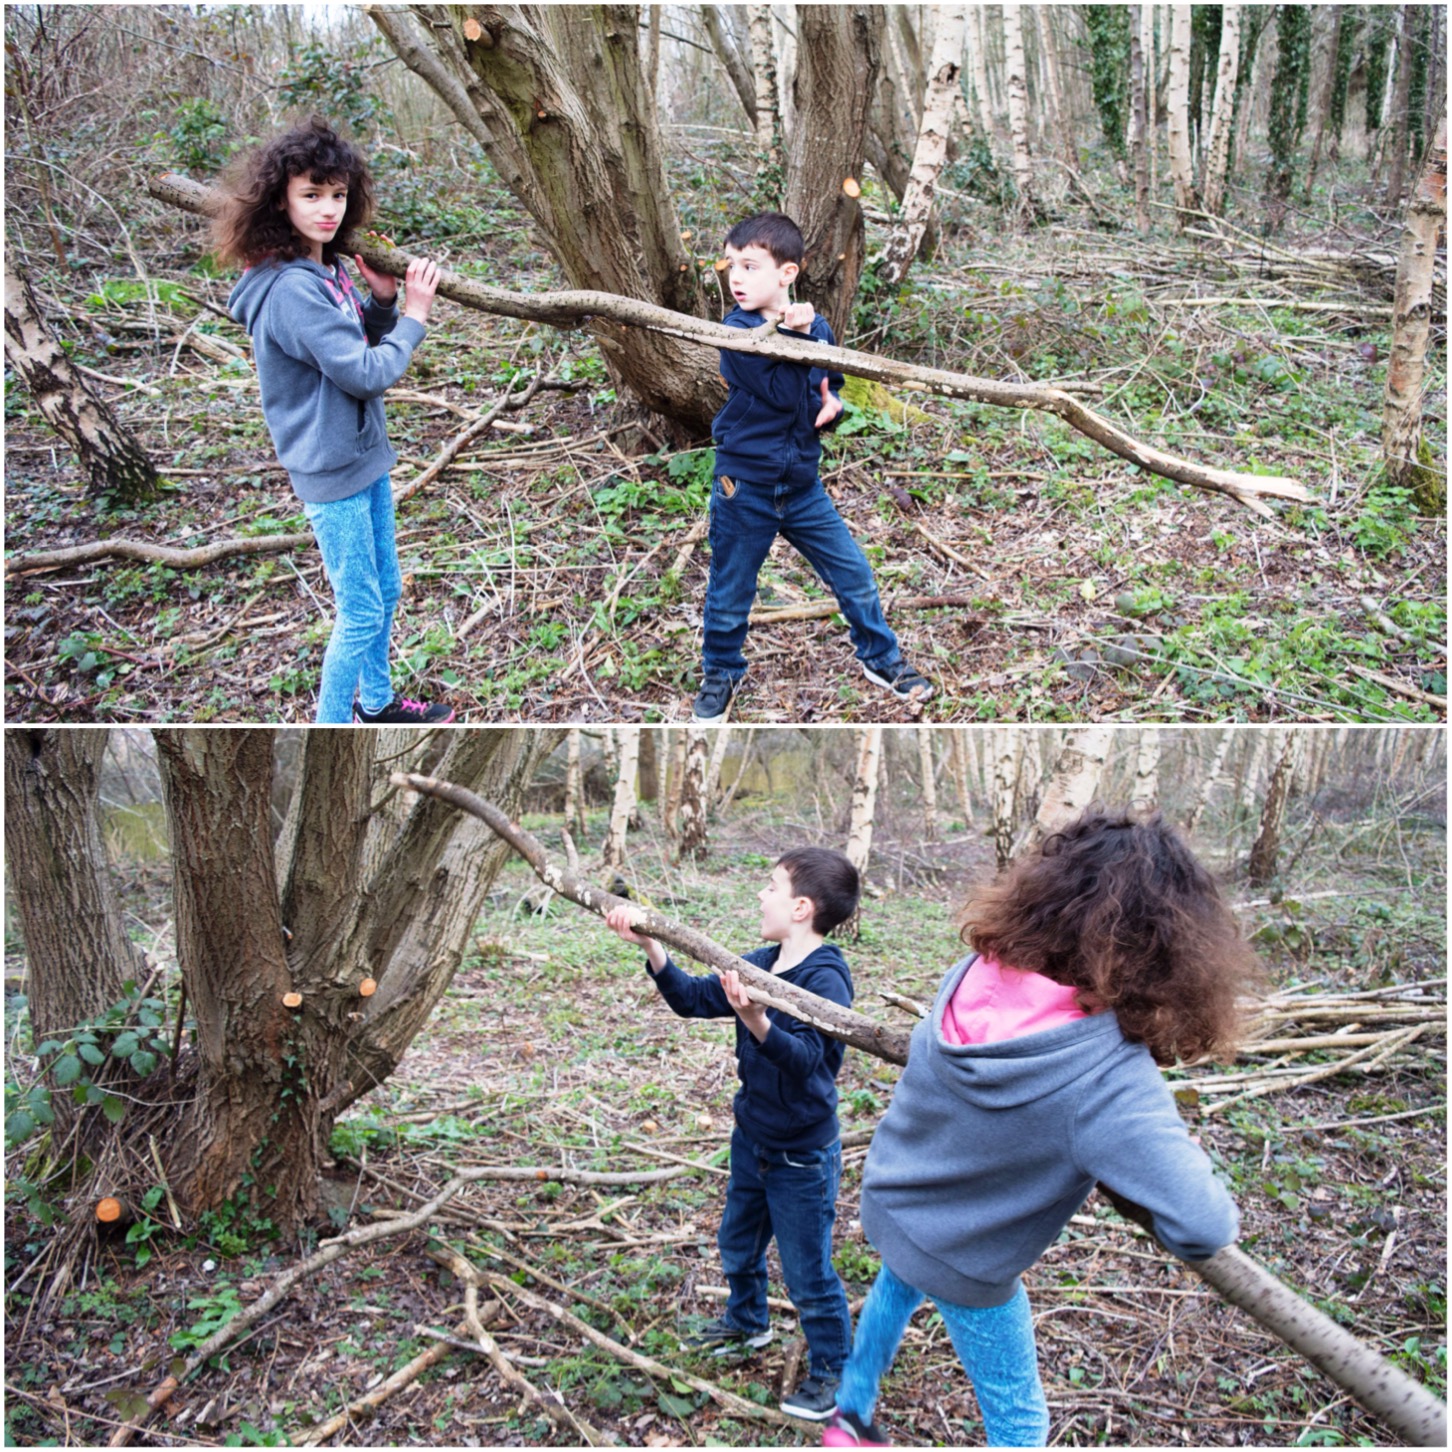
We only had an hour to build something so I decided to show them how to construct a quick lean to shelter. We spotted a large piece of wood and after a quick chat they inserted one end in between two trunks of Goat willow and snapped it to the size the wanted for a main roof beam.
Snapping the main beam
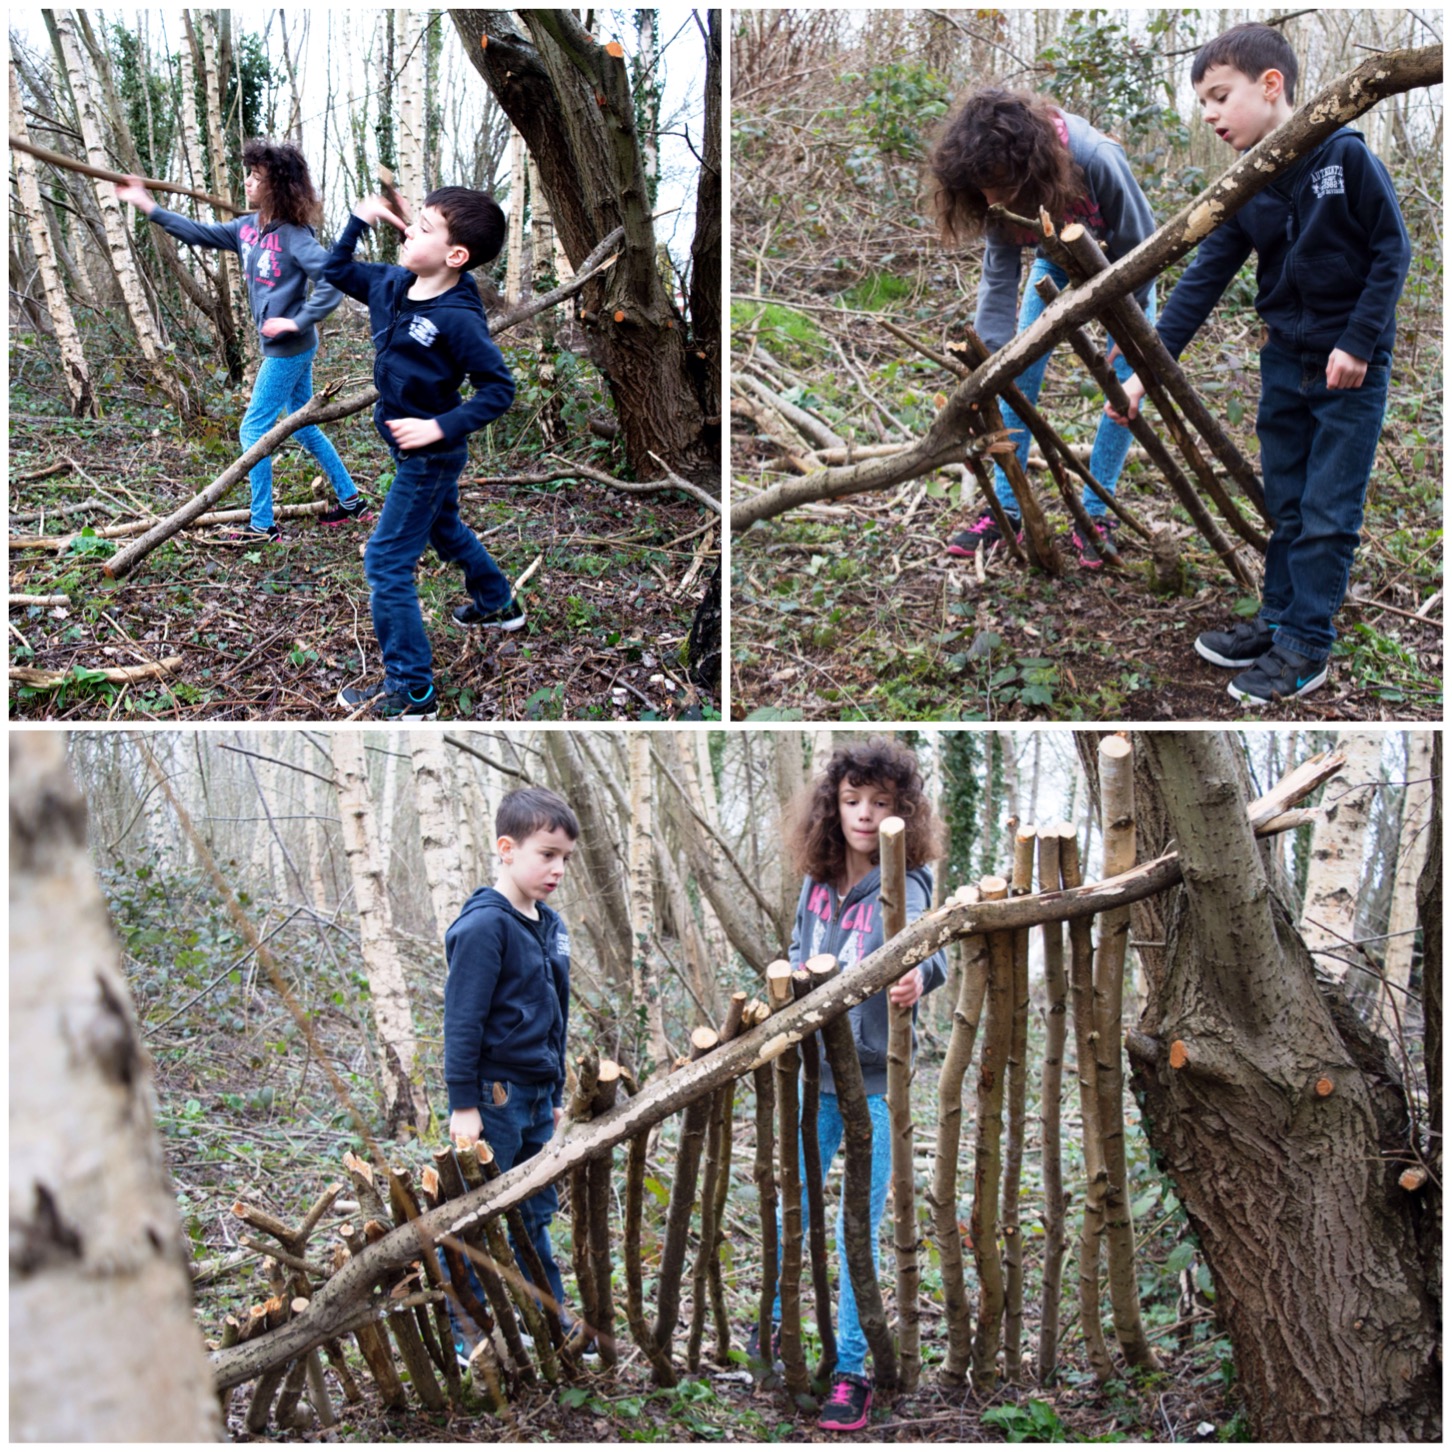
Then we found a flat area of ground and laid one end of the beam into a crux in the coppice stool and laid the other end on the ground.
Picking a site
They cleared the floor of all the sticks and stones lying there and used the sawn off cuts of wood from the log pile to construct the wall of the shelter. I helped them out with this but as it was already pre cut it was just a matter of finding the right lengths.
Rafting
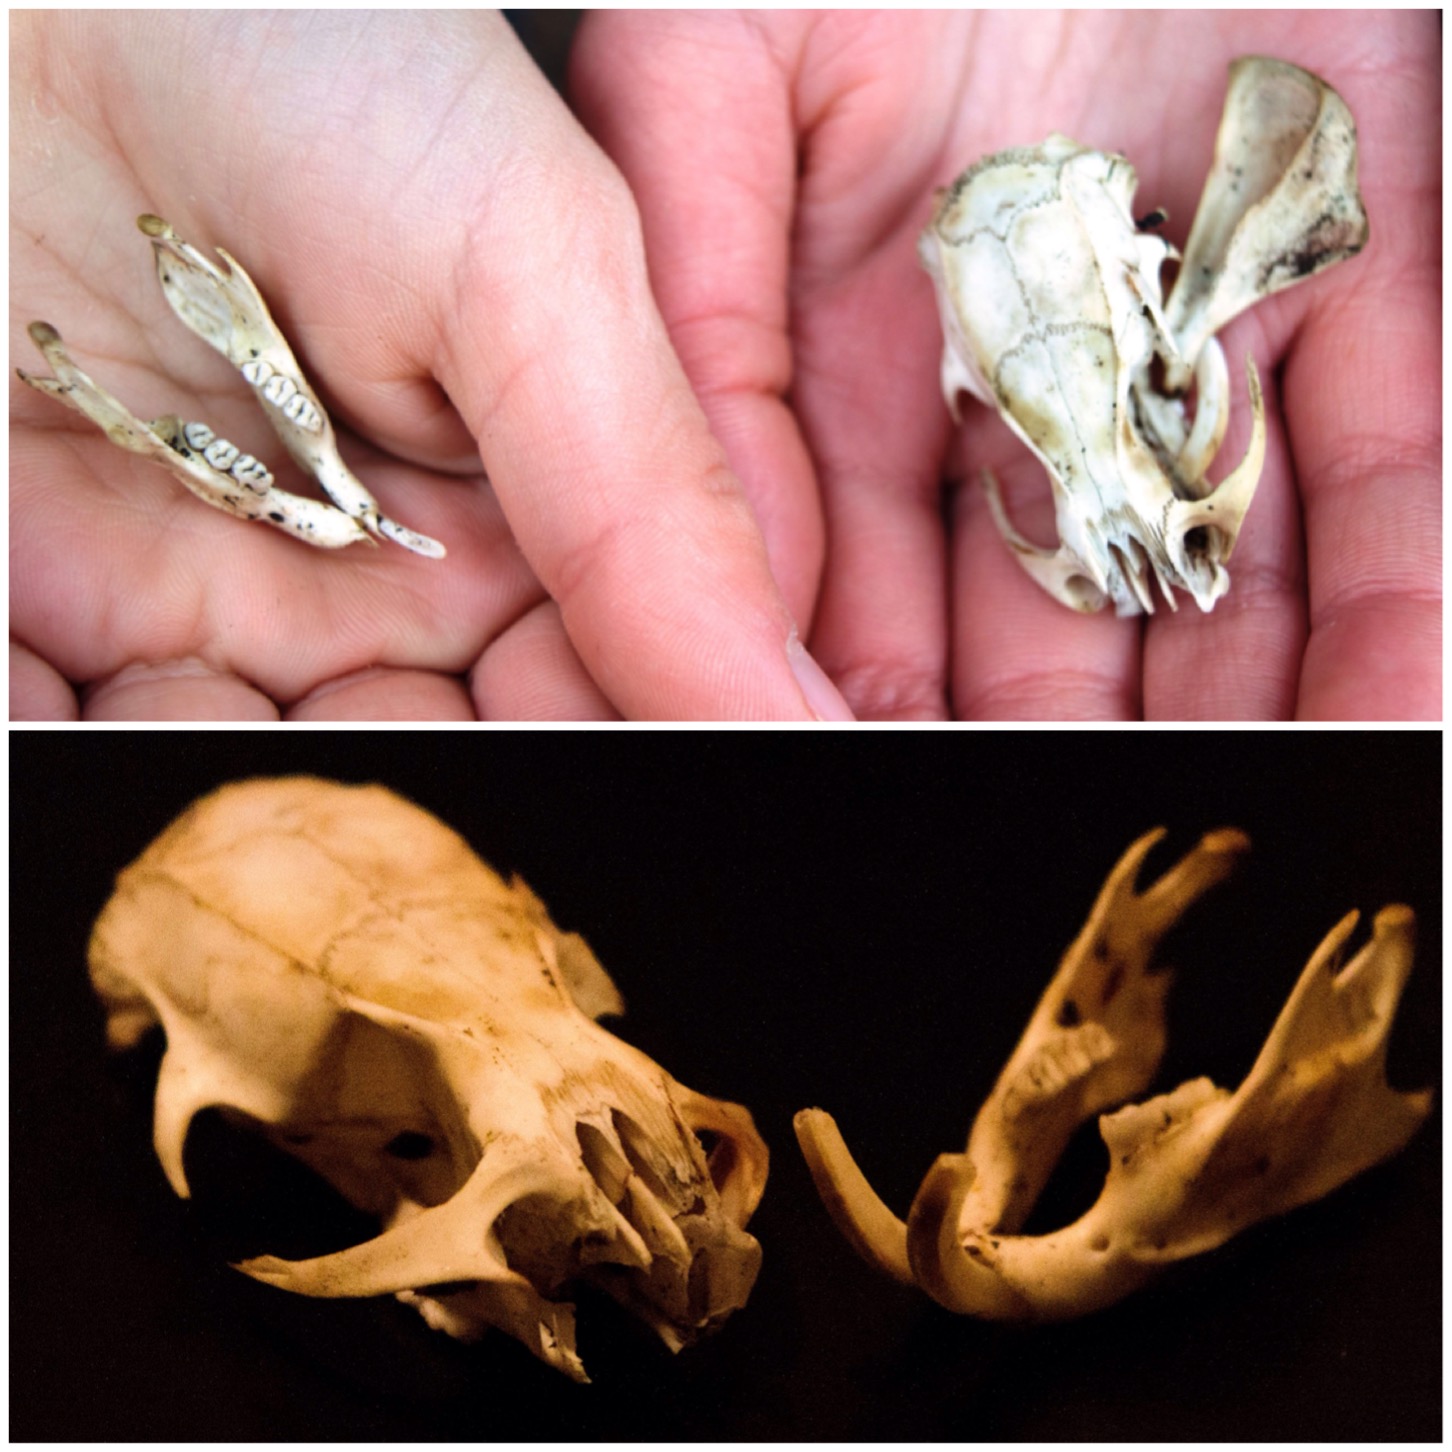
While we were building the shelter my daughter Catherine came across this rather lovely little squirrel skull. I am glad she spotted it quickly as it could so easily have been trampled under foot.
Squirrel find
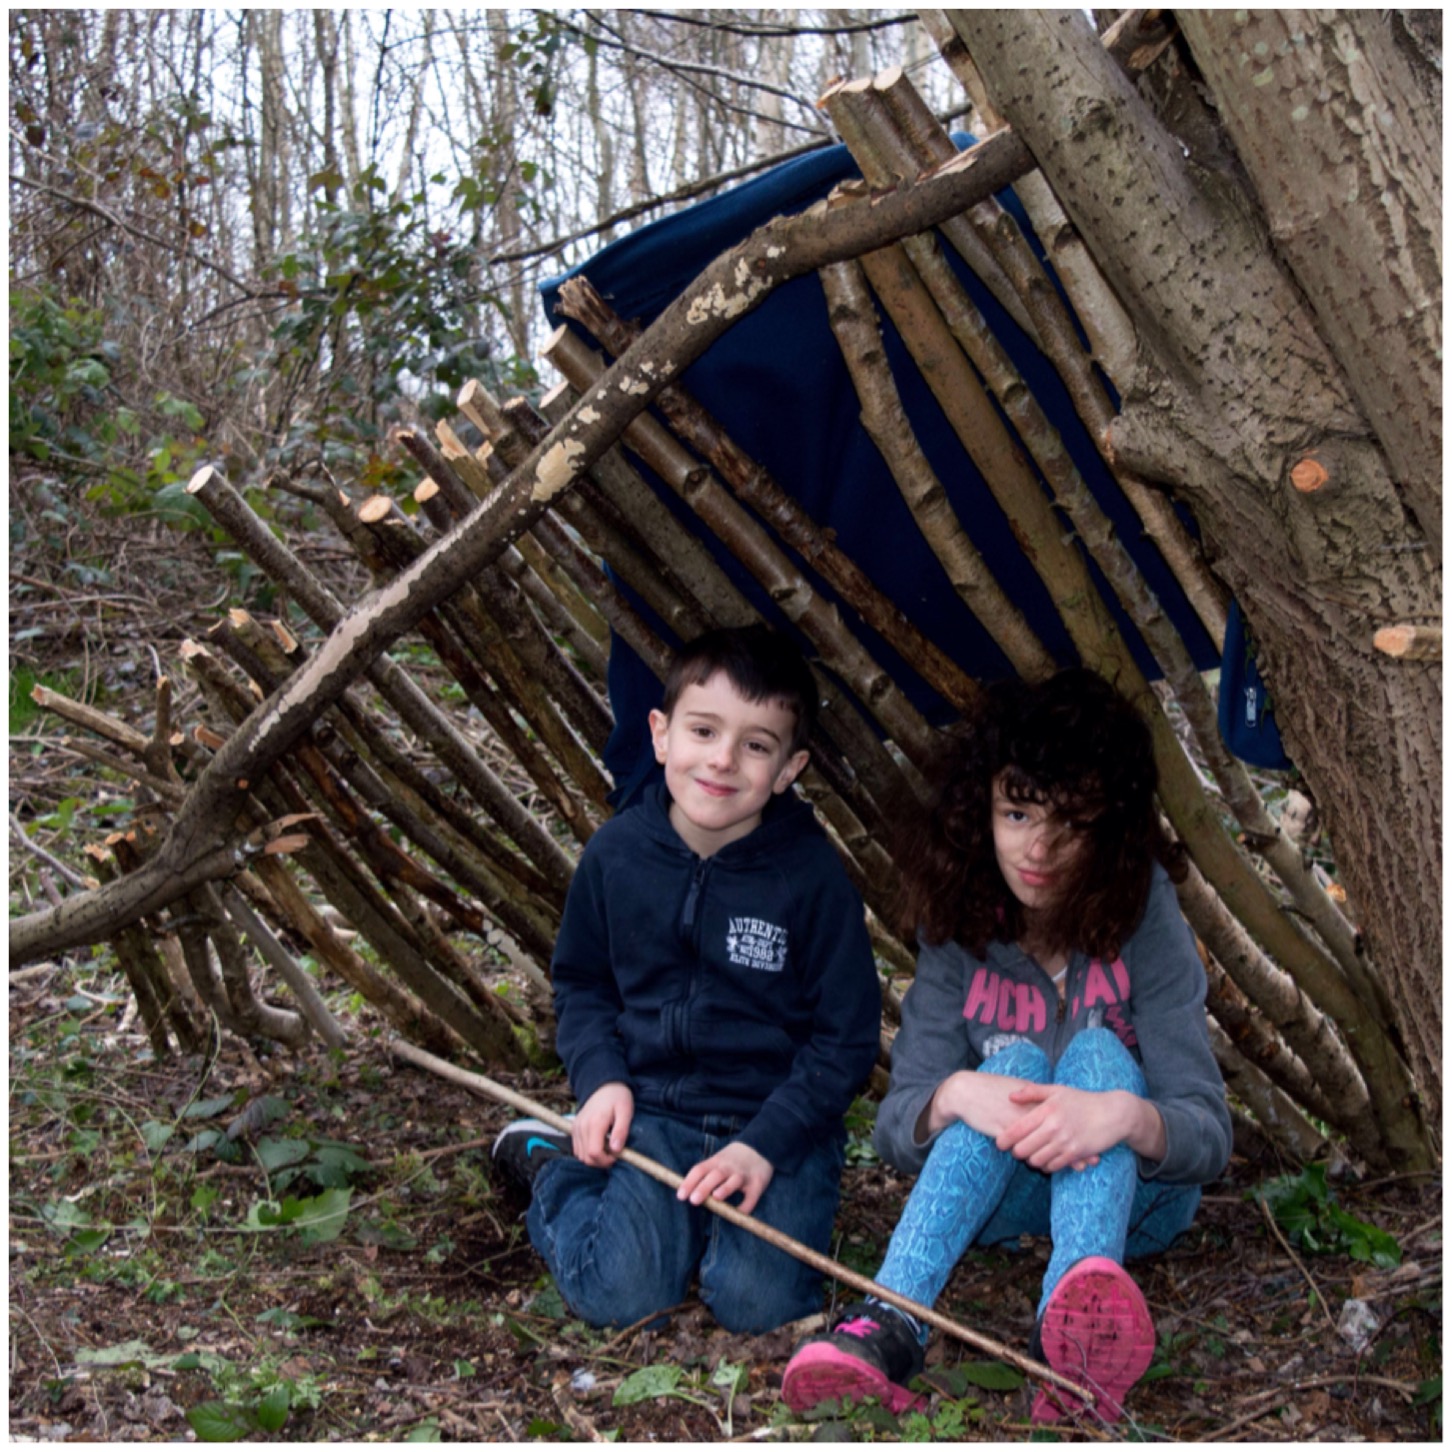
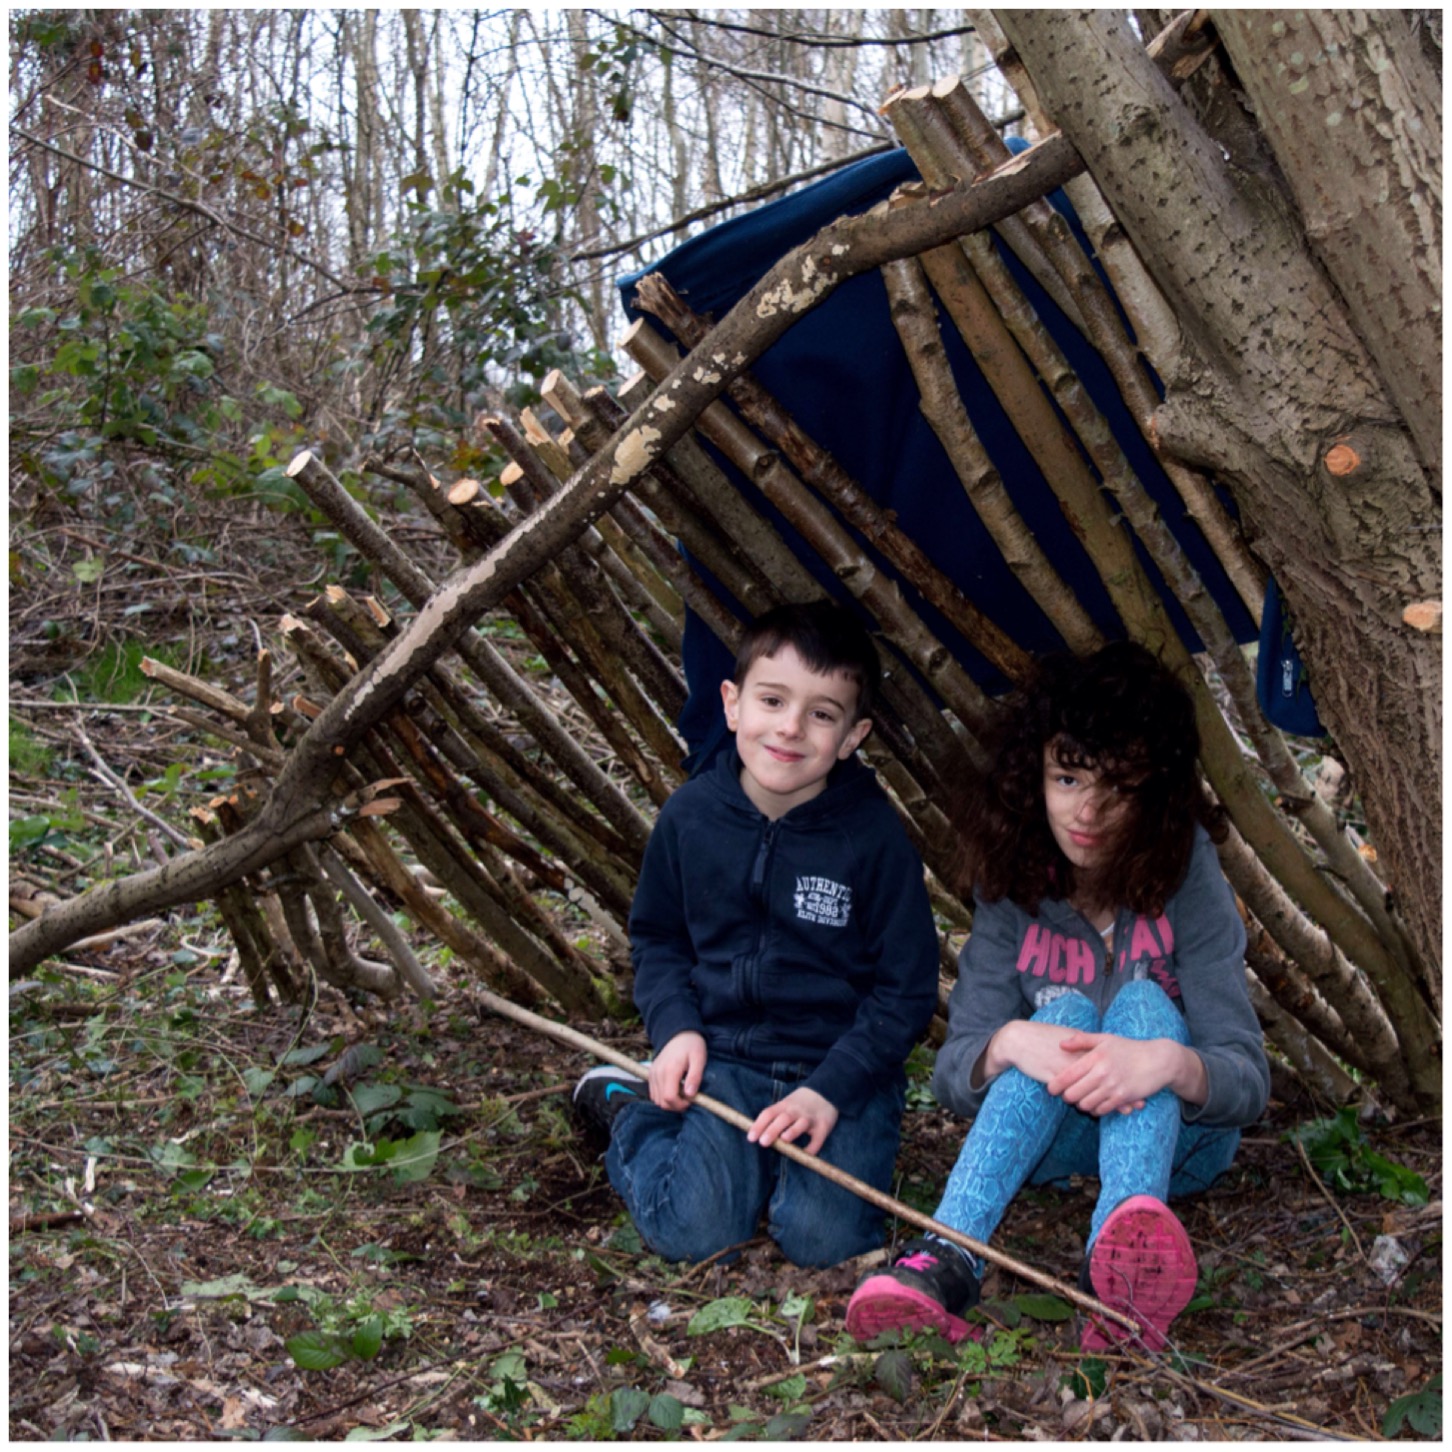
As we only had an hour we did not have time to lay thatch on the roof or make a raised bed but the kids got the idea and thoroughly enjoyed making their den. When we go camping in the summer I think this will be a good project for them to do so that it is fully weather tight.
Half finished shelter
Lastly I got them to return the site to the way they found it by stripping all the logs of and putting them back on the pile.
Leave no trace
I appreciate that we did not finish the shelter but it did give my kids a little bit more insight into shelter building so that the next time we build one they understand the basics of what they are doing.
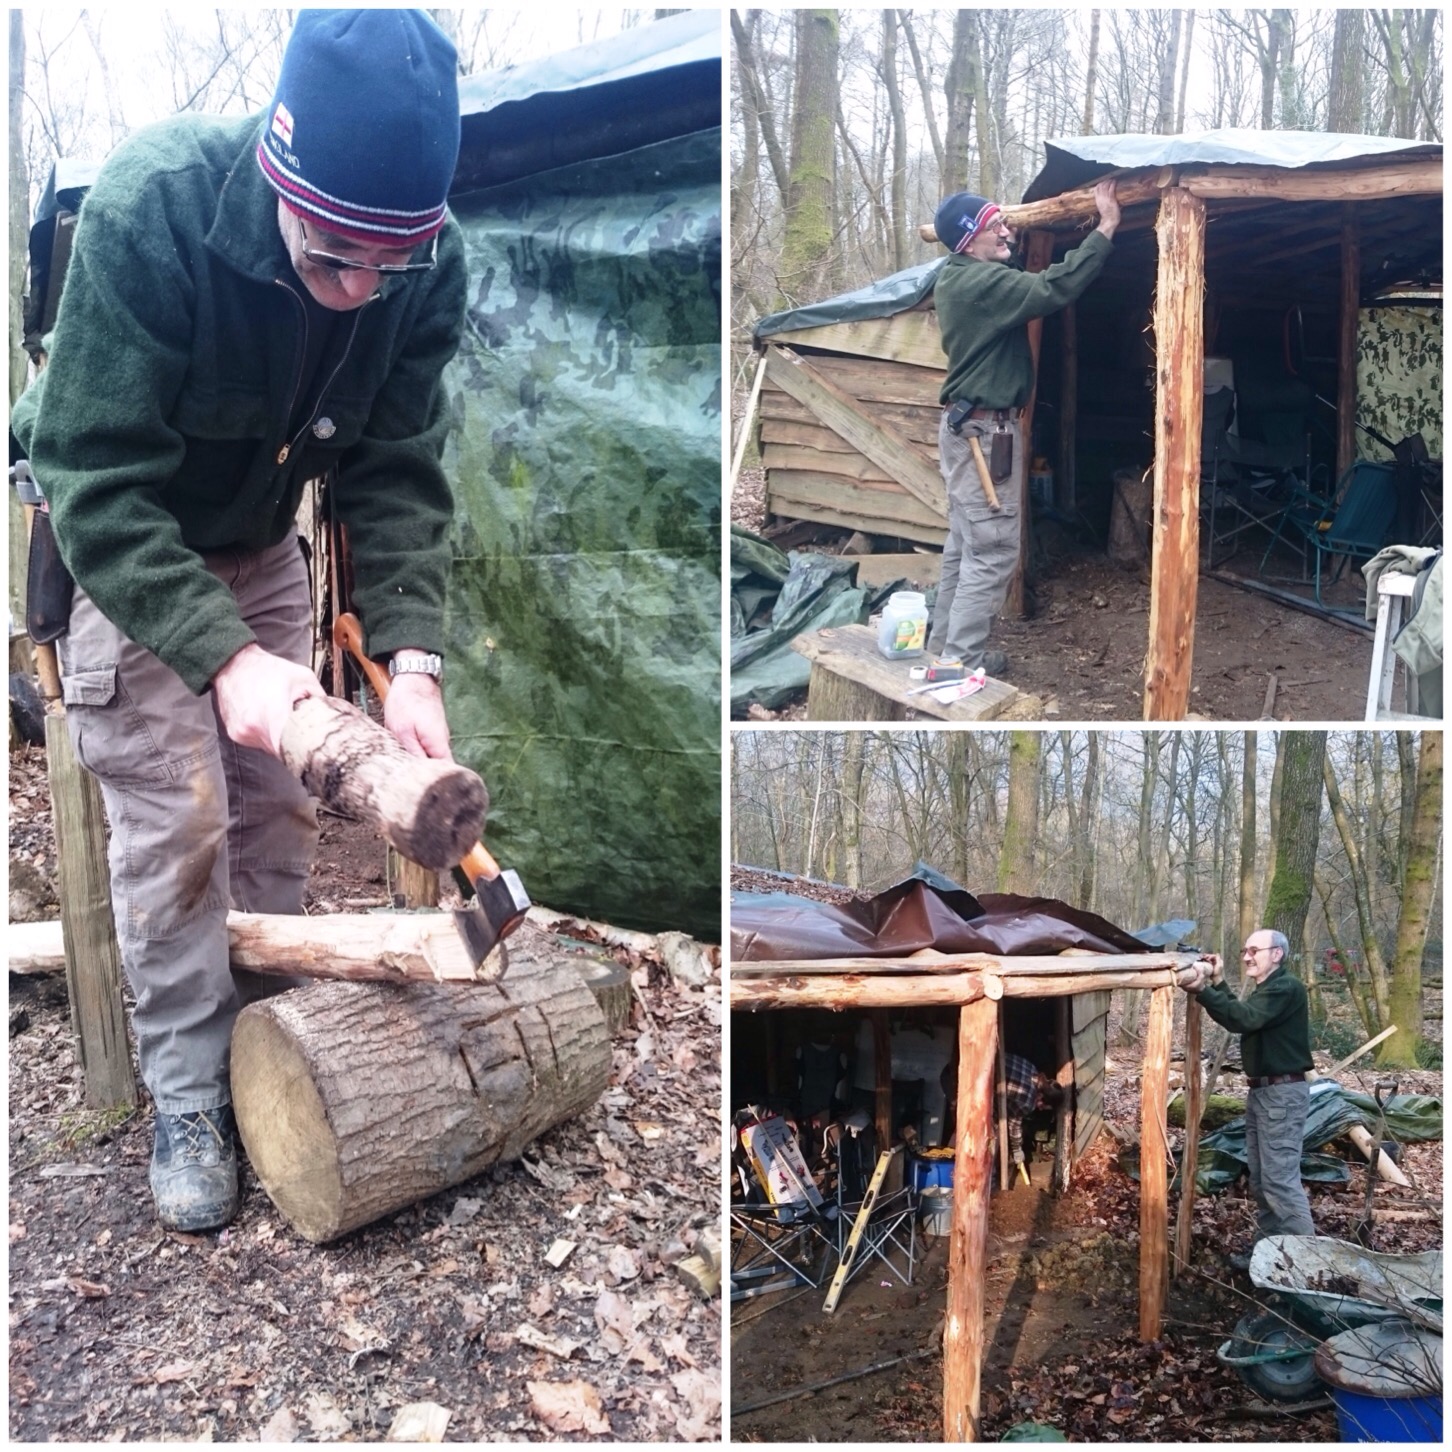
If anyone reading this has been on one of the Woodcraft School courses run by John Rhyder at his woodland site in Hampshire you will certainly remember the roundhouse. This little building has been a refuge on many a cold night for many people including myself.
Every now and thenthe roundhouse needs a bit of TLC. John had recently replaced the roof beams, so now it was the turn of the walls.
A group of us who are all ex students of John’s agreed to spend the weekend with him working on improving the camp facilities at his woodland HQ. I was not involved in working on the roundhouse (I was helping to build the new kitchen and raised fire pit) but I did get a number of pictures of the guys working on it.
Stripping out the old poles
Working on the roundhouse were Charlie Brookes, Keith Bosely, Scott Batty, Jack (aka Warren Frost) and Pete Bastable, helped from time to time by Fin Rhyder.
The guys stripped the tarps away from the sides to expose the outer ring of poles. They were well worn but some were showing signs of damp at the base. The guys started in one section by putting braces in to keep the roof in place and then dug out the outer pole for that area. They would then slot in a new piece of split sweet chestnut and trim it to size. You can see all that happening in the pictures above.
Preparing the lintels
The new uprights had already been split and de-barked so Pete and Fin got to work de-barking the poles that would be uses as lintels between the uprights to support the roof.
Soon the guys had a few of the uprights in place and they put some temporary lintels in place until the permanent ones had been finished.
Putting in the new uprights
After the lintels had been debarked, the lintels ends were carved so that they could be attached securely to each upright. This involved a bit of axing out to produce a flat platform at the end of each lintel.
Inserting the lintels
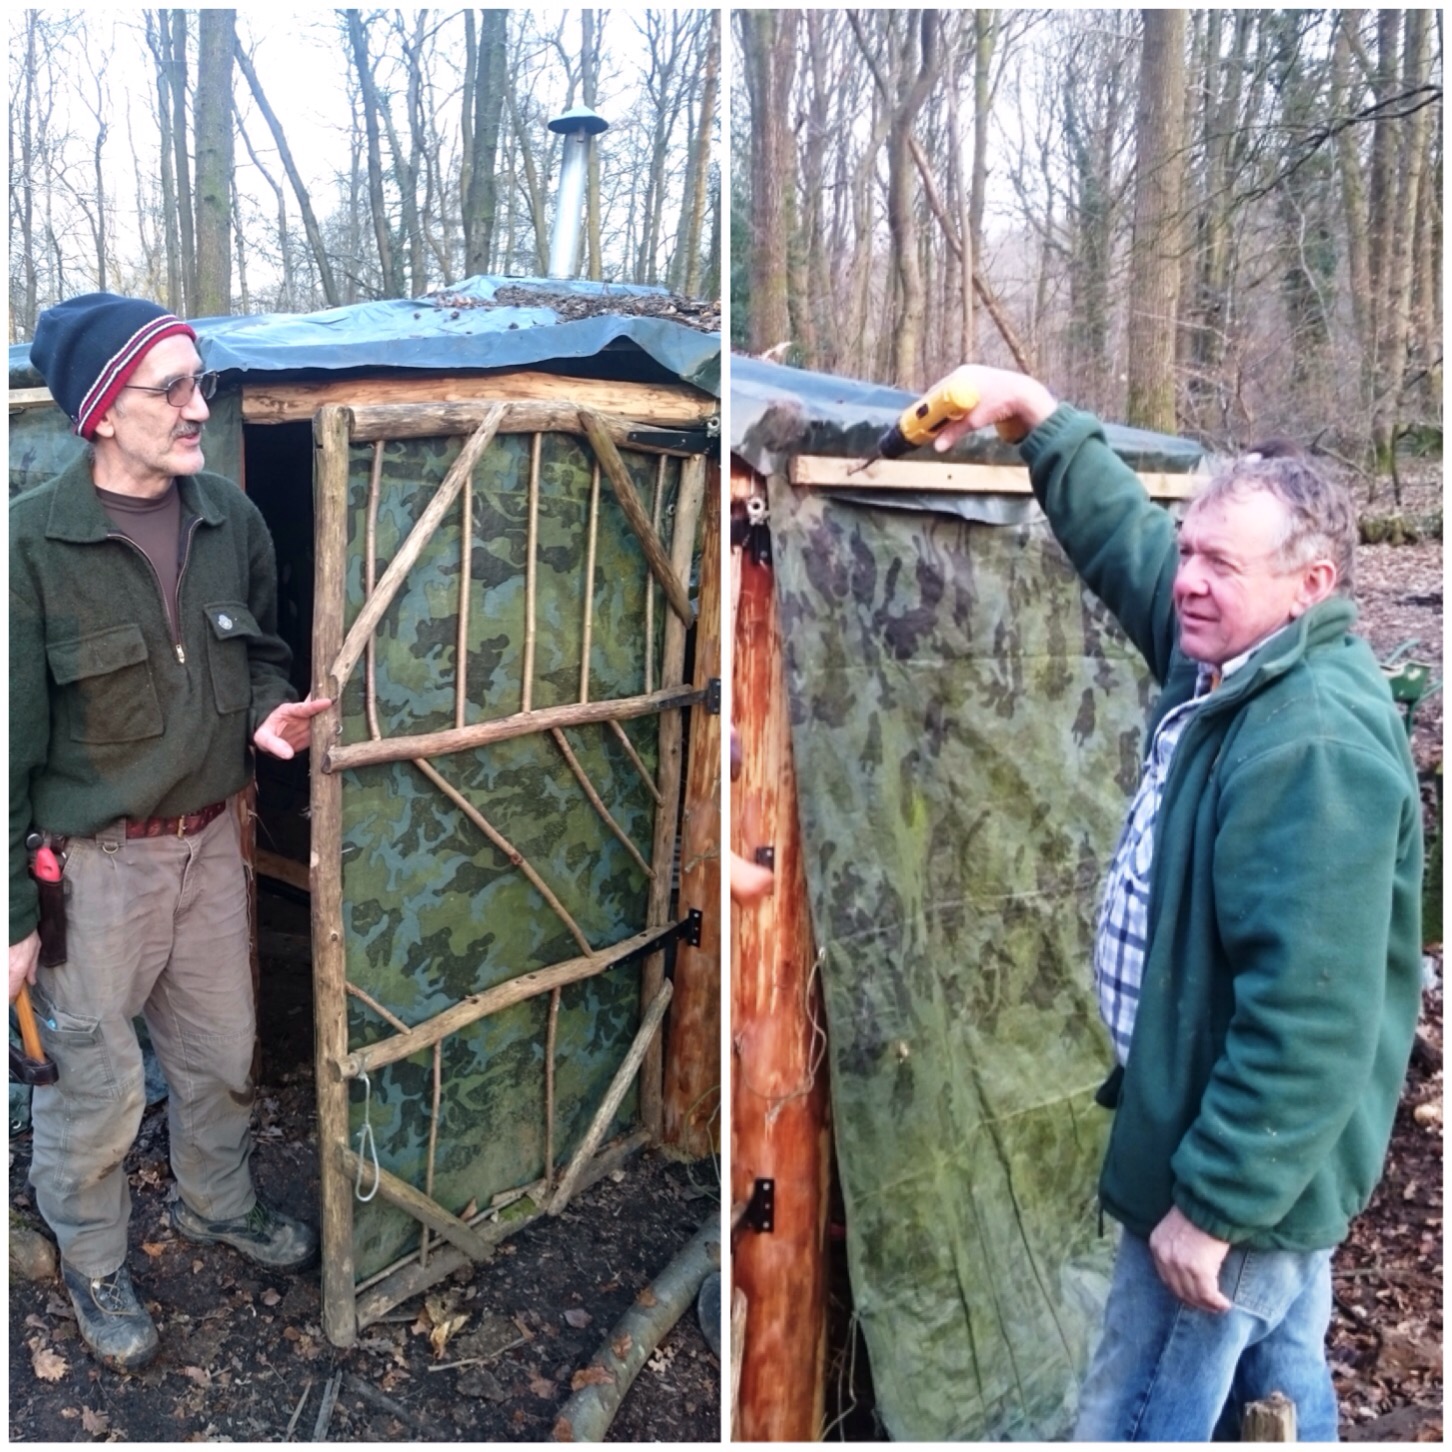
The door of the roundhouse also got a makeover and was rebuilt to fit in with the lintel above it. Also as each section was finished the tarp walls were put back securely in place with some battons.
John uses these tarp walls as they can be easily rolled up in the summer to give good airflow through the roundhouse.
The re-built door and snagging
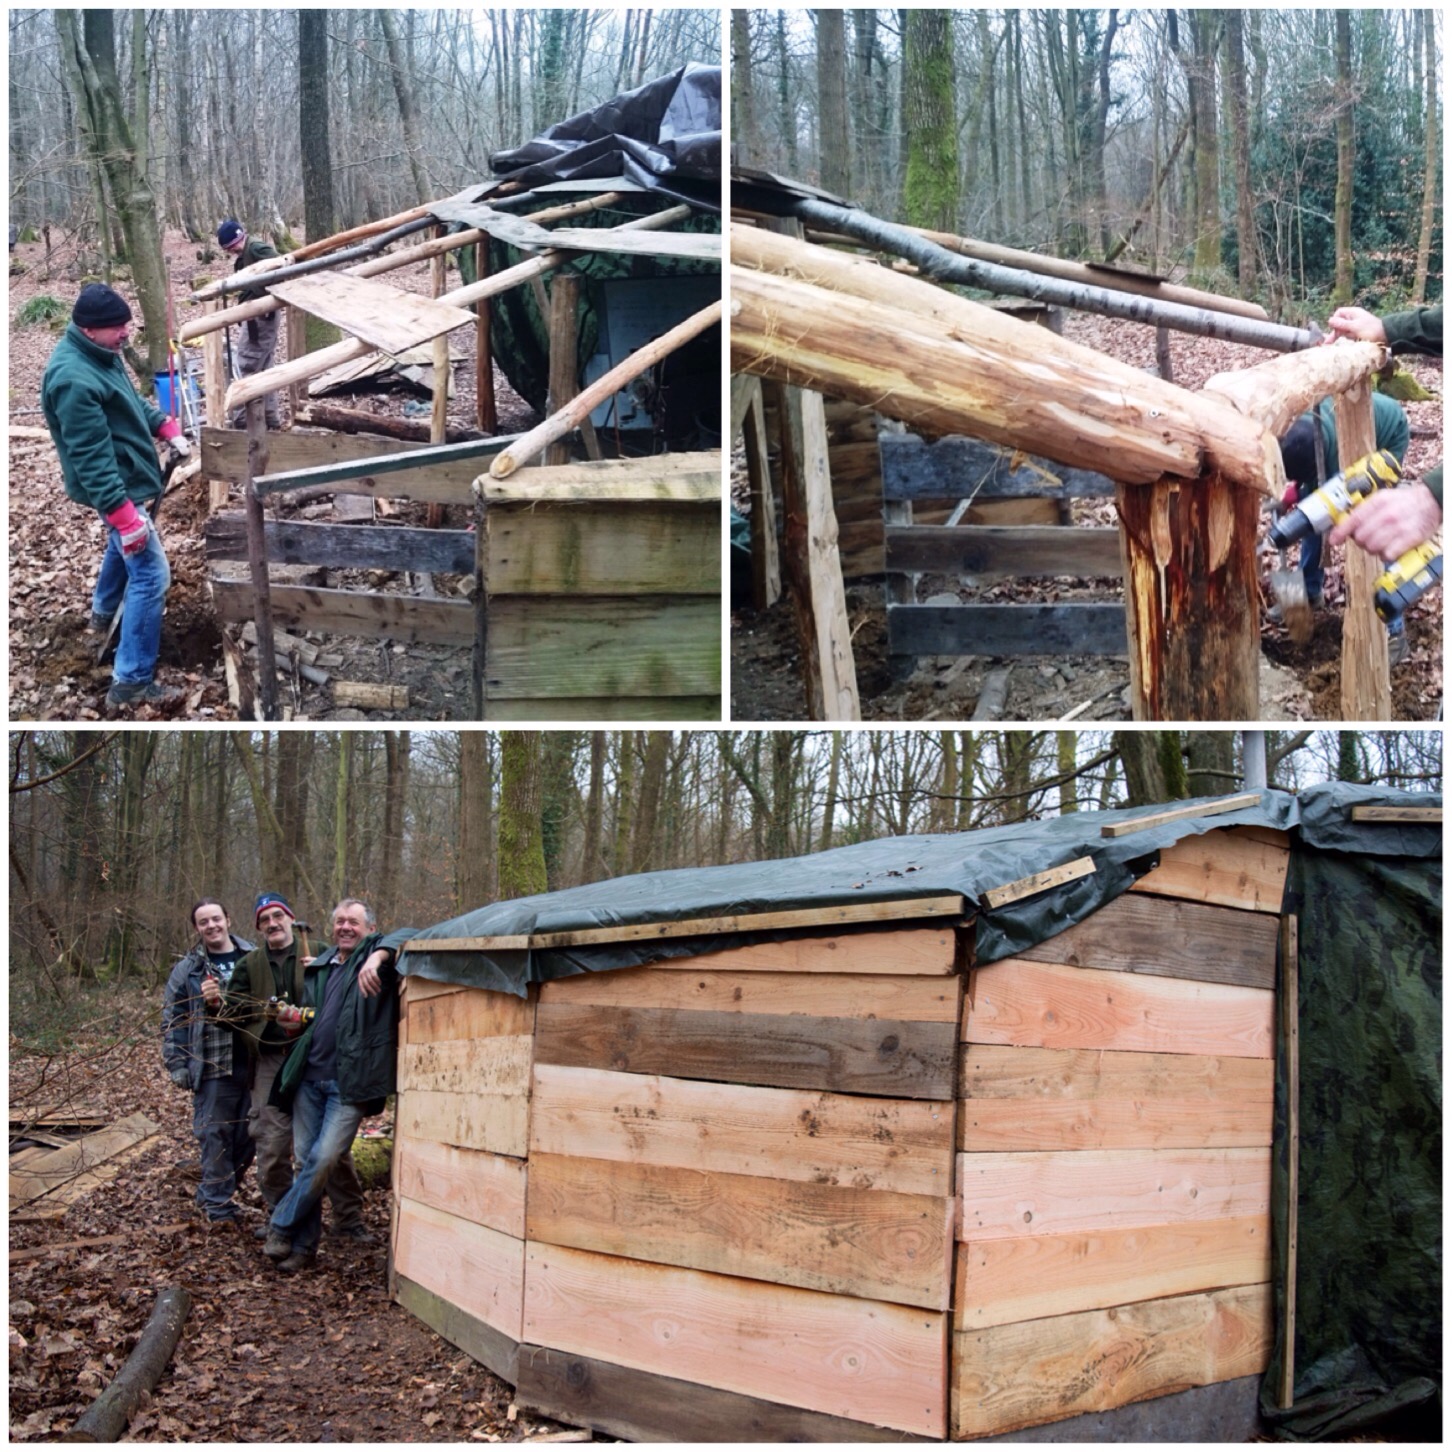
The roundhouse has a small extension at the back covered in wood instead of tarps on the walls. This area is used for storing wood for the stove . The uprights and lintels were replaced here but the wood panels had deteriorated so they were stripped off as well and replaced.
I think the guys did a good job of this area making it secure and water tight in a very short period of time.
The back extension – the storage area
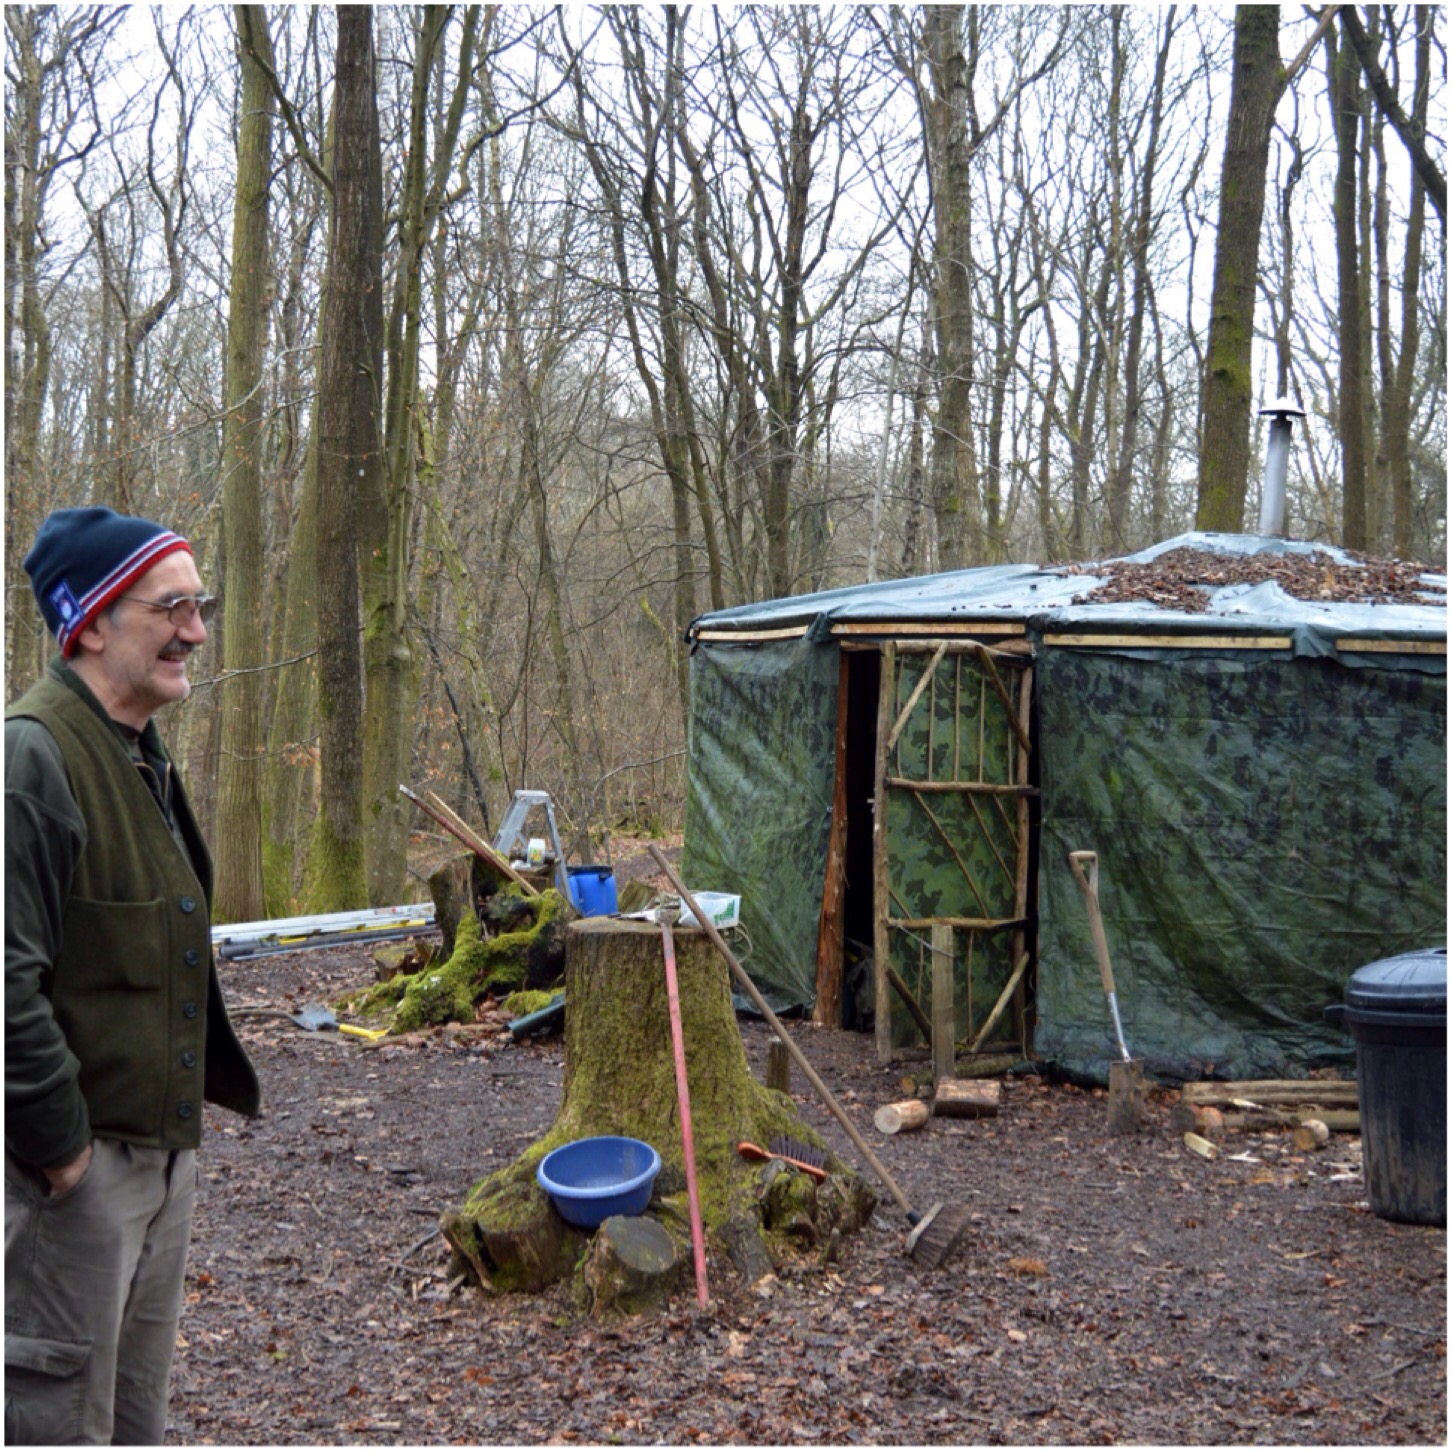
The job took the guys a day and a half to do and by the Sunday afternoon the outside of the roundhouse was looking good and strong again. At some stage John will be adding new shingles to the roof as tiles instead of just the tarp they have at the moment.
Looking good
This is just a brief summary and no doubt misses out many of the issues they faced as I did not work on this project, but I do know they did a cracking job.
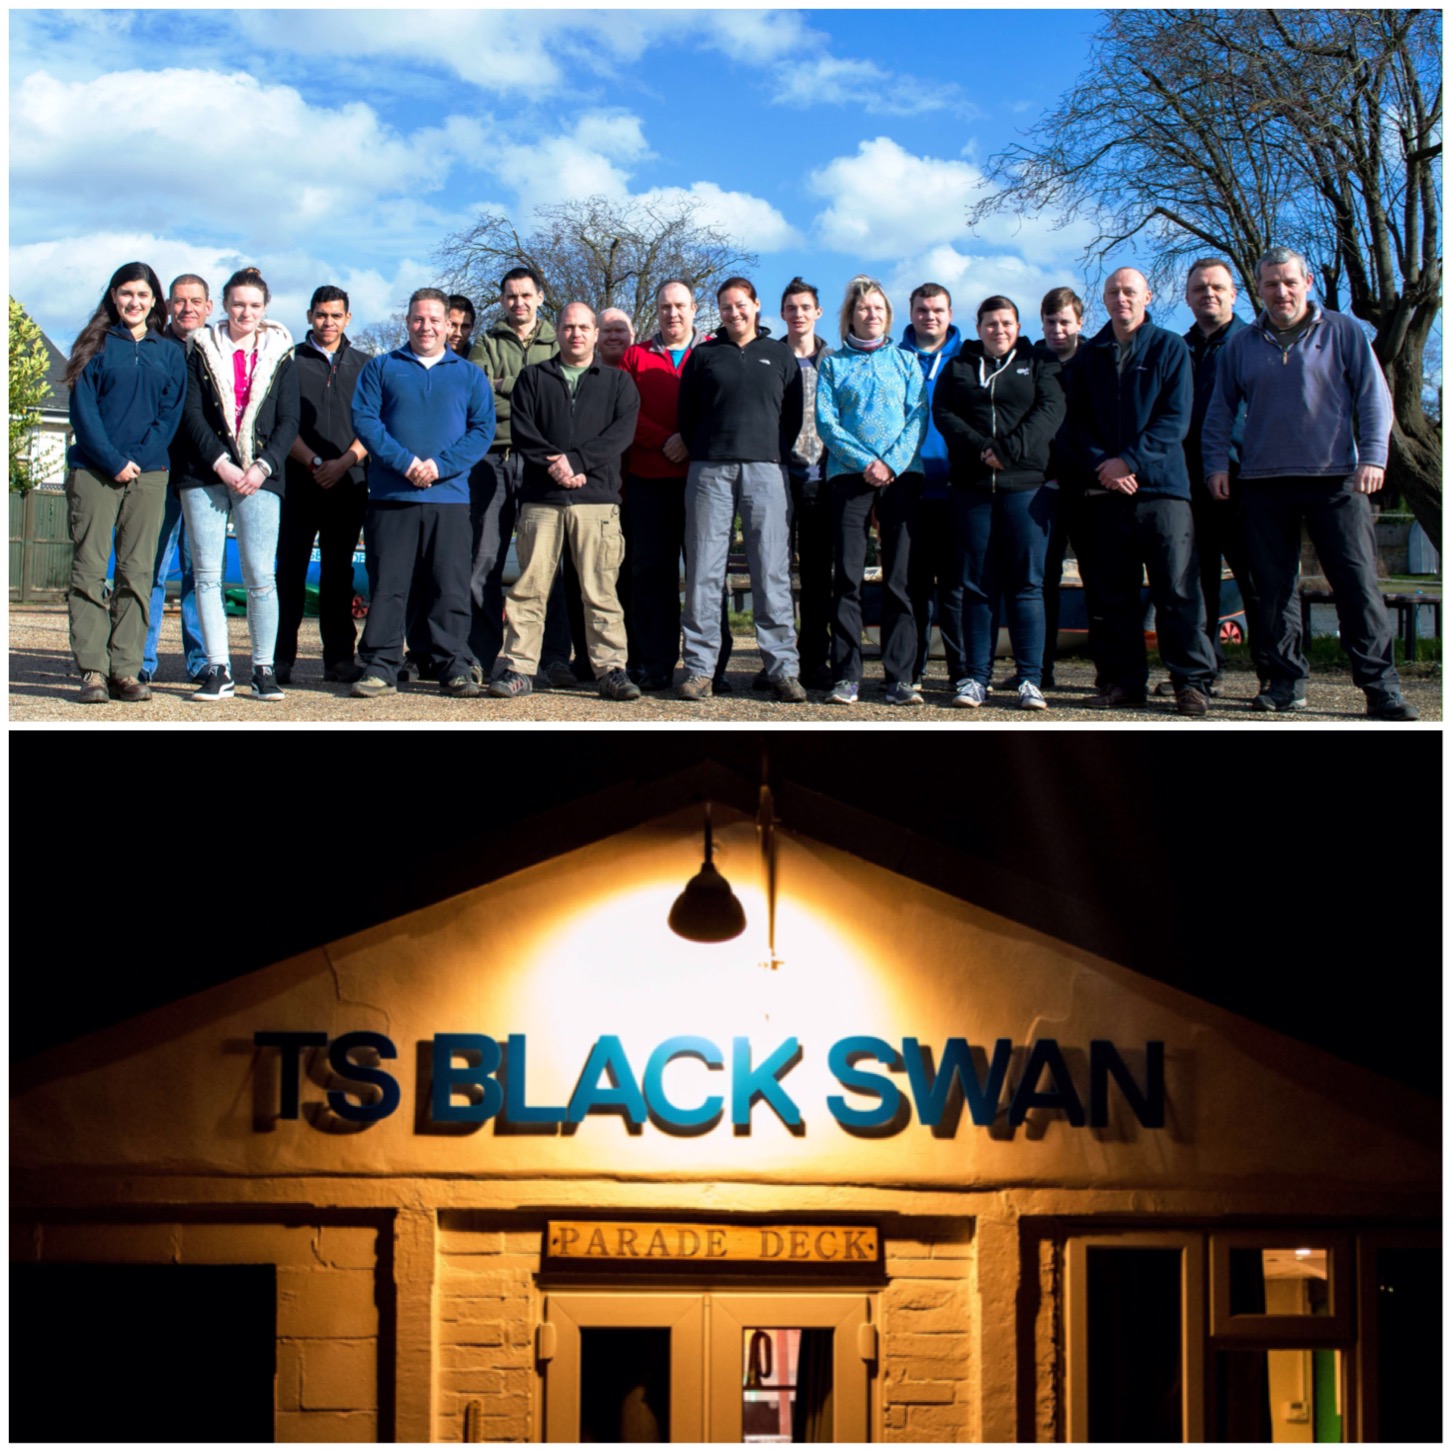
This year I became the course director in London Area Sea Cadets for the nationally recognised qualification in Basic Expedition Leadership (BEL). This is the third time we as a Sea Cadet area have run the course and yet again it has proved very popular, with 13 instructors applying. I had set the limit at 12 but with one extra applying I thought that 13 had to be lucky for some 🙂
The course is spread over 4 weekends throughout the year (the final weekend is an assessment) and is aimed at training our instructors to a nationally recognised level where they are qualified to lead day and overnight expeditions in lowland environments. We were supposed to run the first course out of Crowborough Army Camp but due to overbookings there the Sea Cadet unit TS Black Swan (Sunbury & Walton) offered us the use of their building as a base for the weekend. This was ideal as the North Downs were a short 30-minute drive away.
BEAL and BEL 2015 – Weekend 1 at TS Black Swan
The weekend ran at the end of February and the Friday night was the usual madness of arrival and paperwork that needed to be attended to. Running alongside the BEL course that weekend was also the Basic Expedition Assistant Leadership (BEAL) course run by my good friend John Kelly. This is also a nationally recognised qualification and we run it to allow our older cadets (16 and 17 year olds) the chance to gain valuable outdoor experience as well as the qualification. The BEAL allows you to assist in an expedition, leading your own walks but not in overall control of the expedition.
Saturday morning, after a fantastic breakfast from the unit staff, was spent going over how the BEL certificate works in terms of the legal stuff and how it fits with Sea Cadets more generally.
We have candidates this year with a wide variety of experience, from very little to many years, so it was all new to some and for others the start of a period of Continuous Professional Development, but all will face an equally exacting assessment at the end of the year.
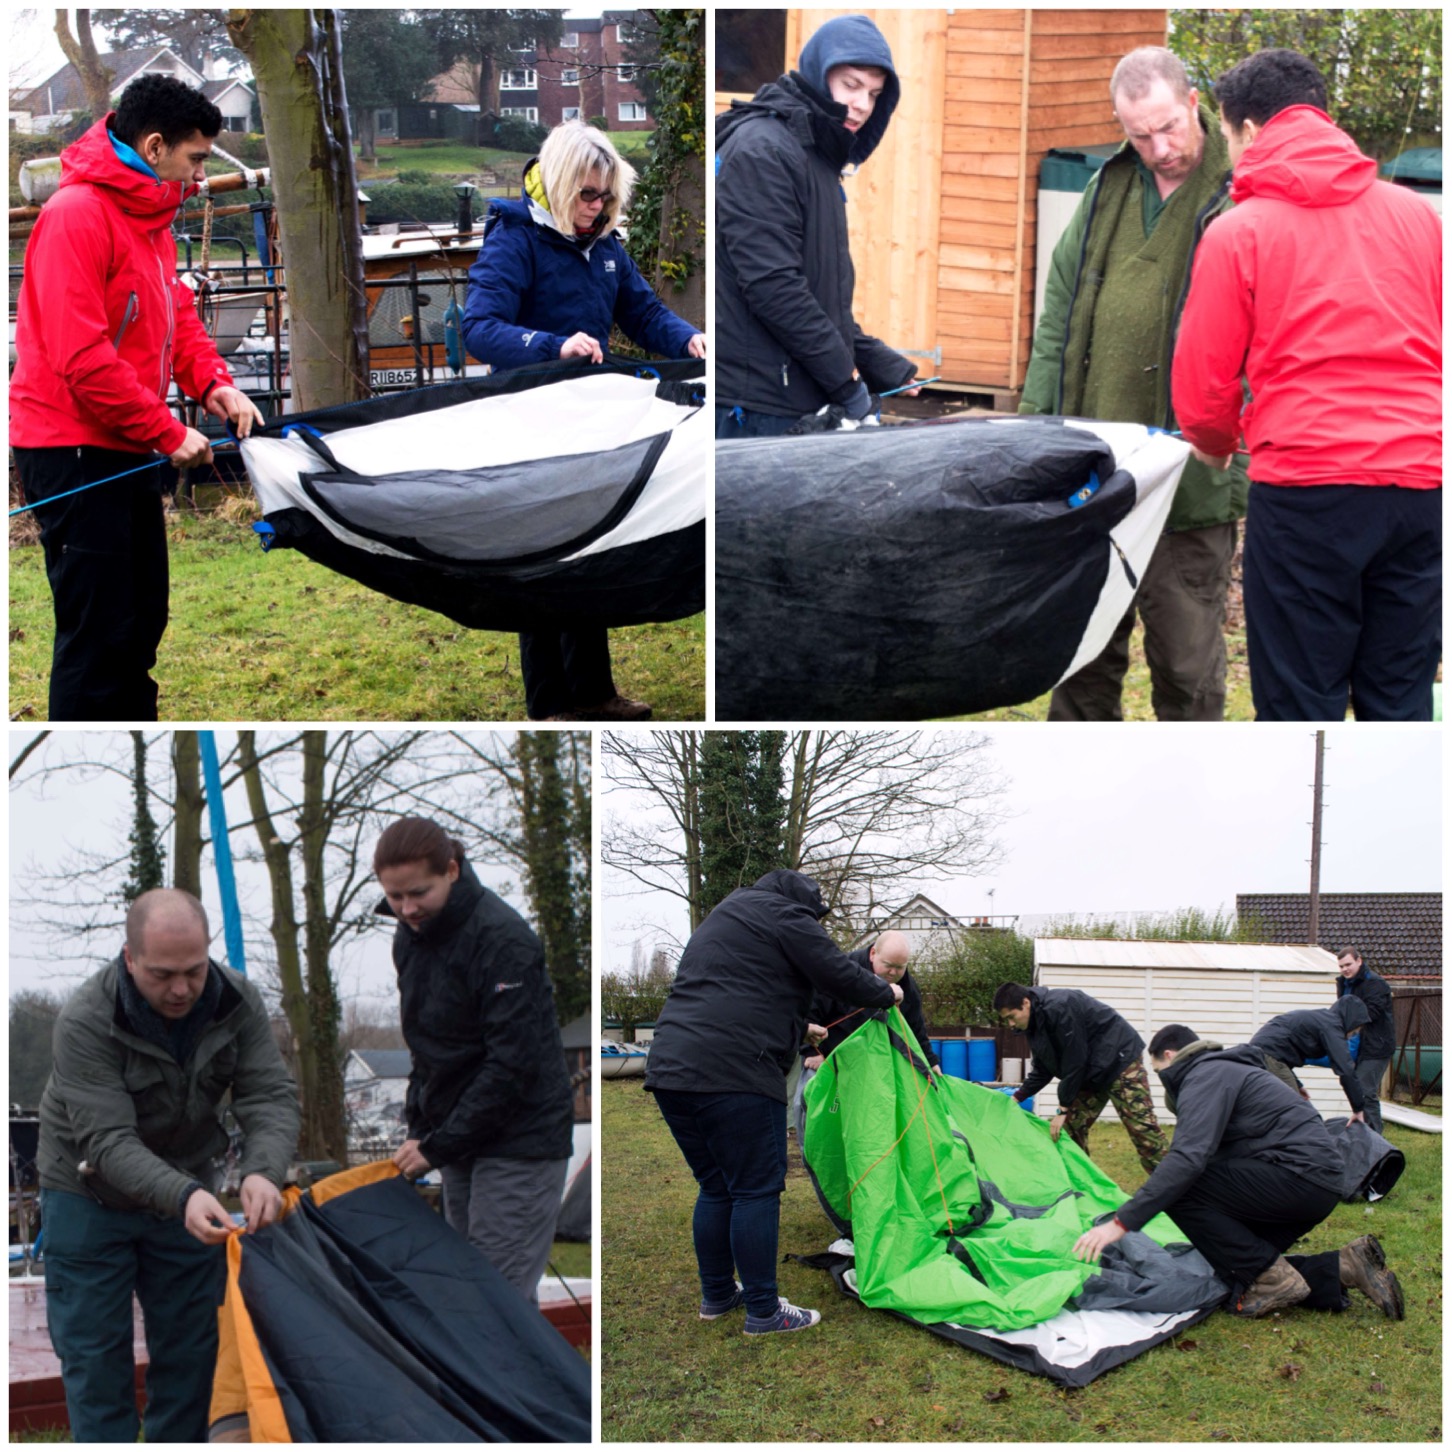
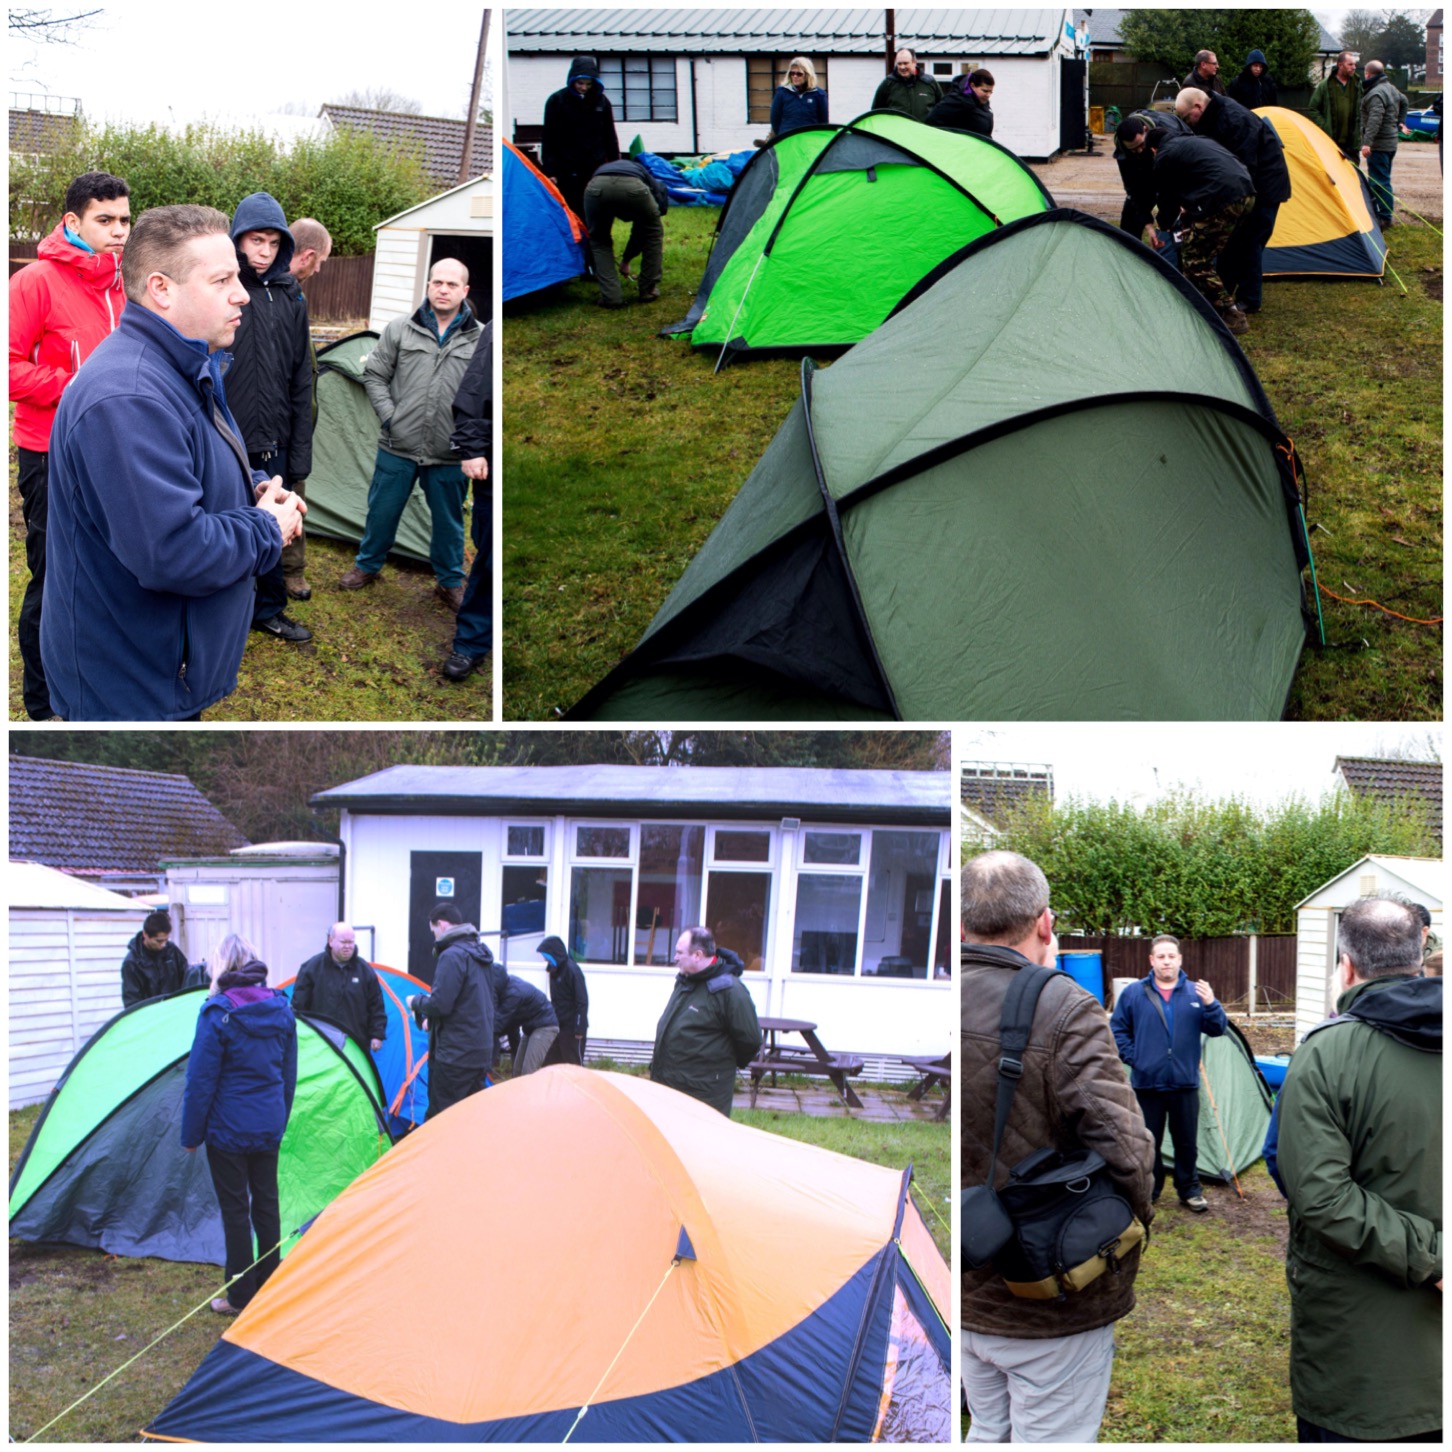
As soon as we got outside Graham Brockwell led the class on tents.
Different types of tents
This class was designed to show the students the wide variety of tents they will come across in the future and give them hints and tips on setting them up and, crucially, hints and tips on explaining all that to the cadets they will be training in future.
Pros and cons of different tents
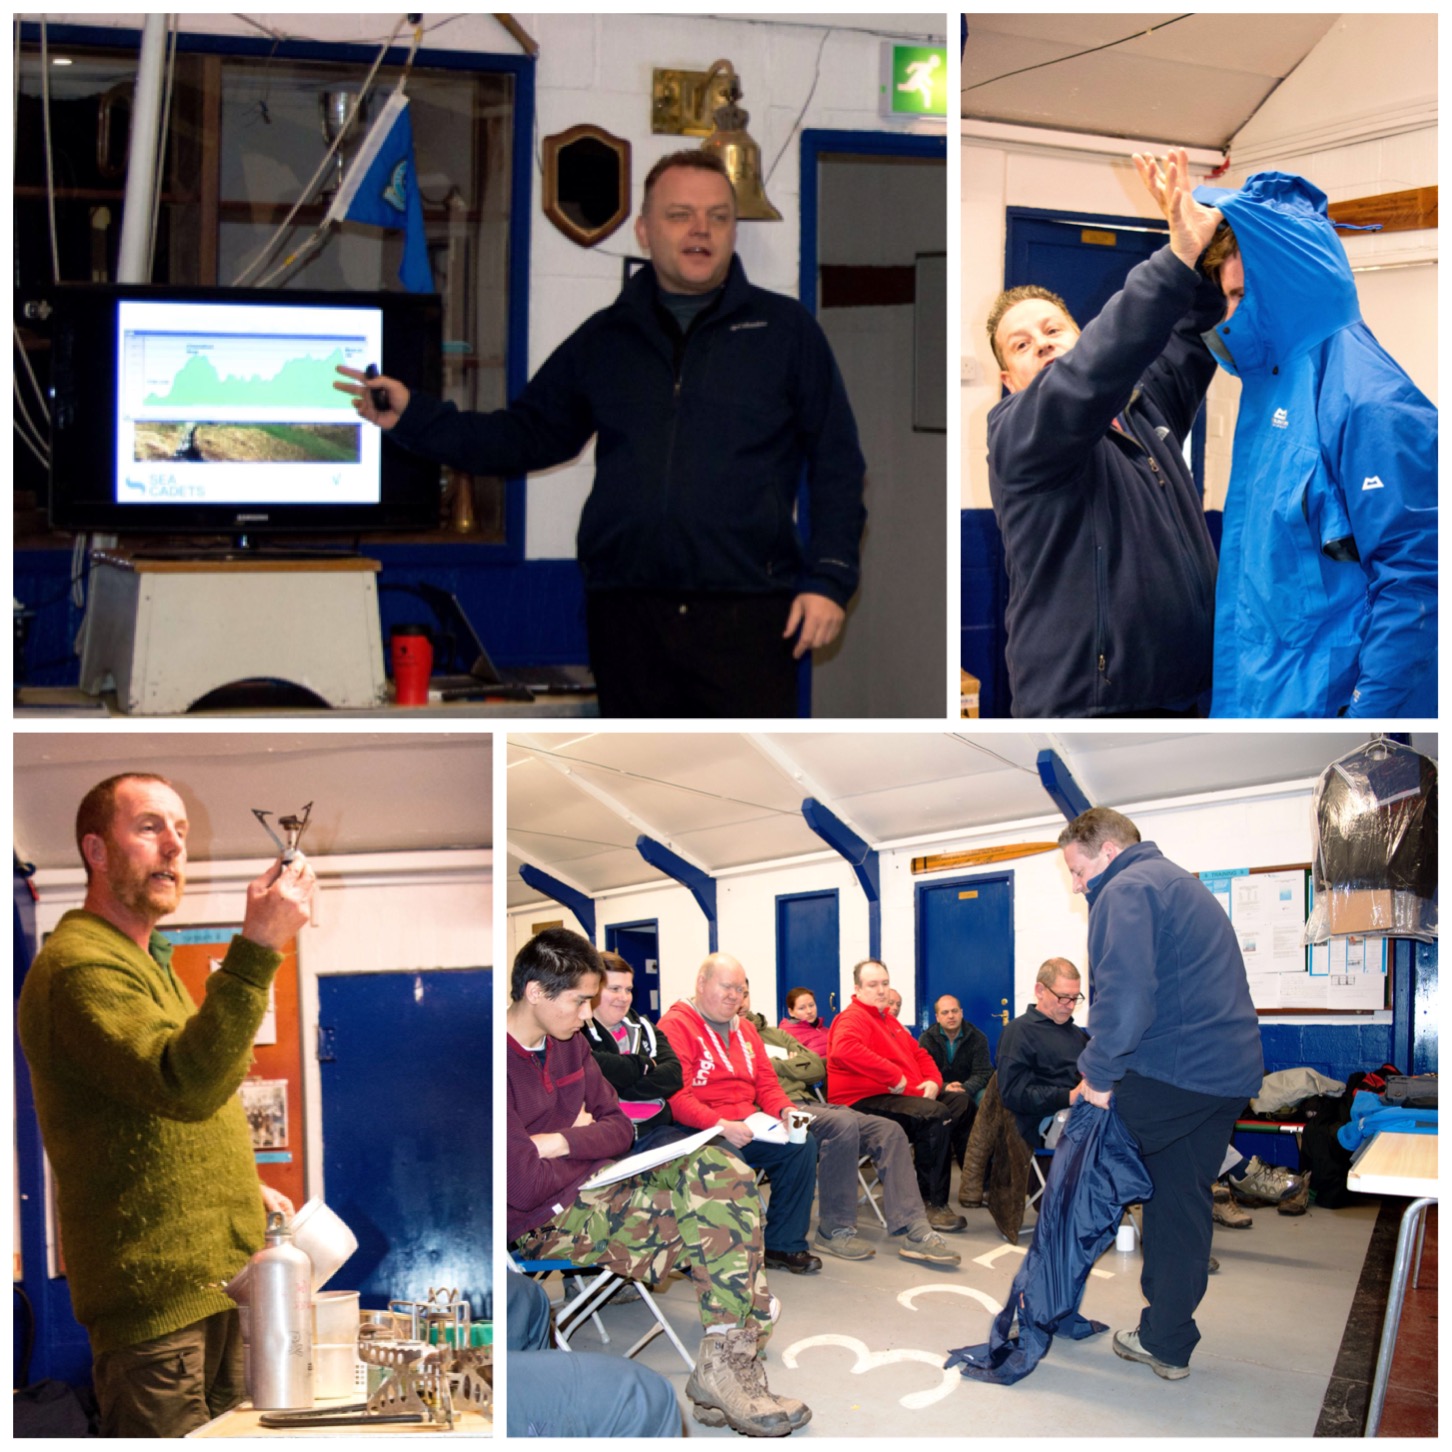
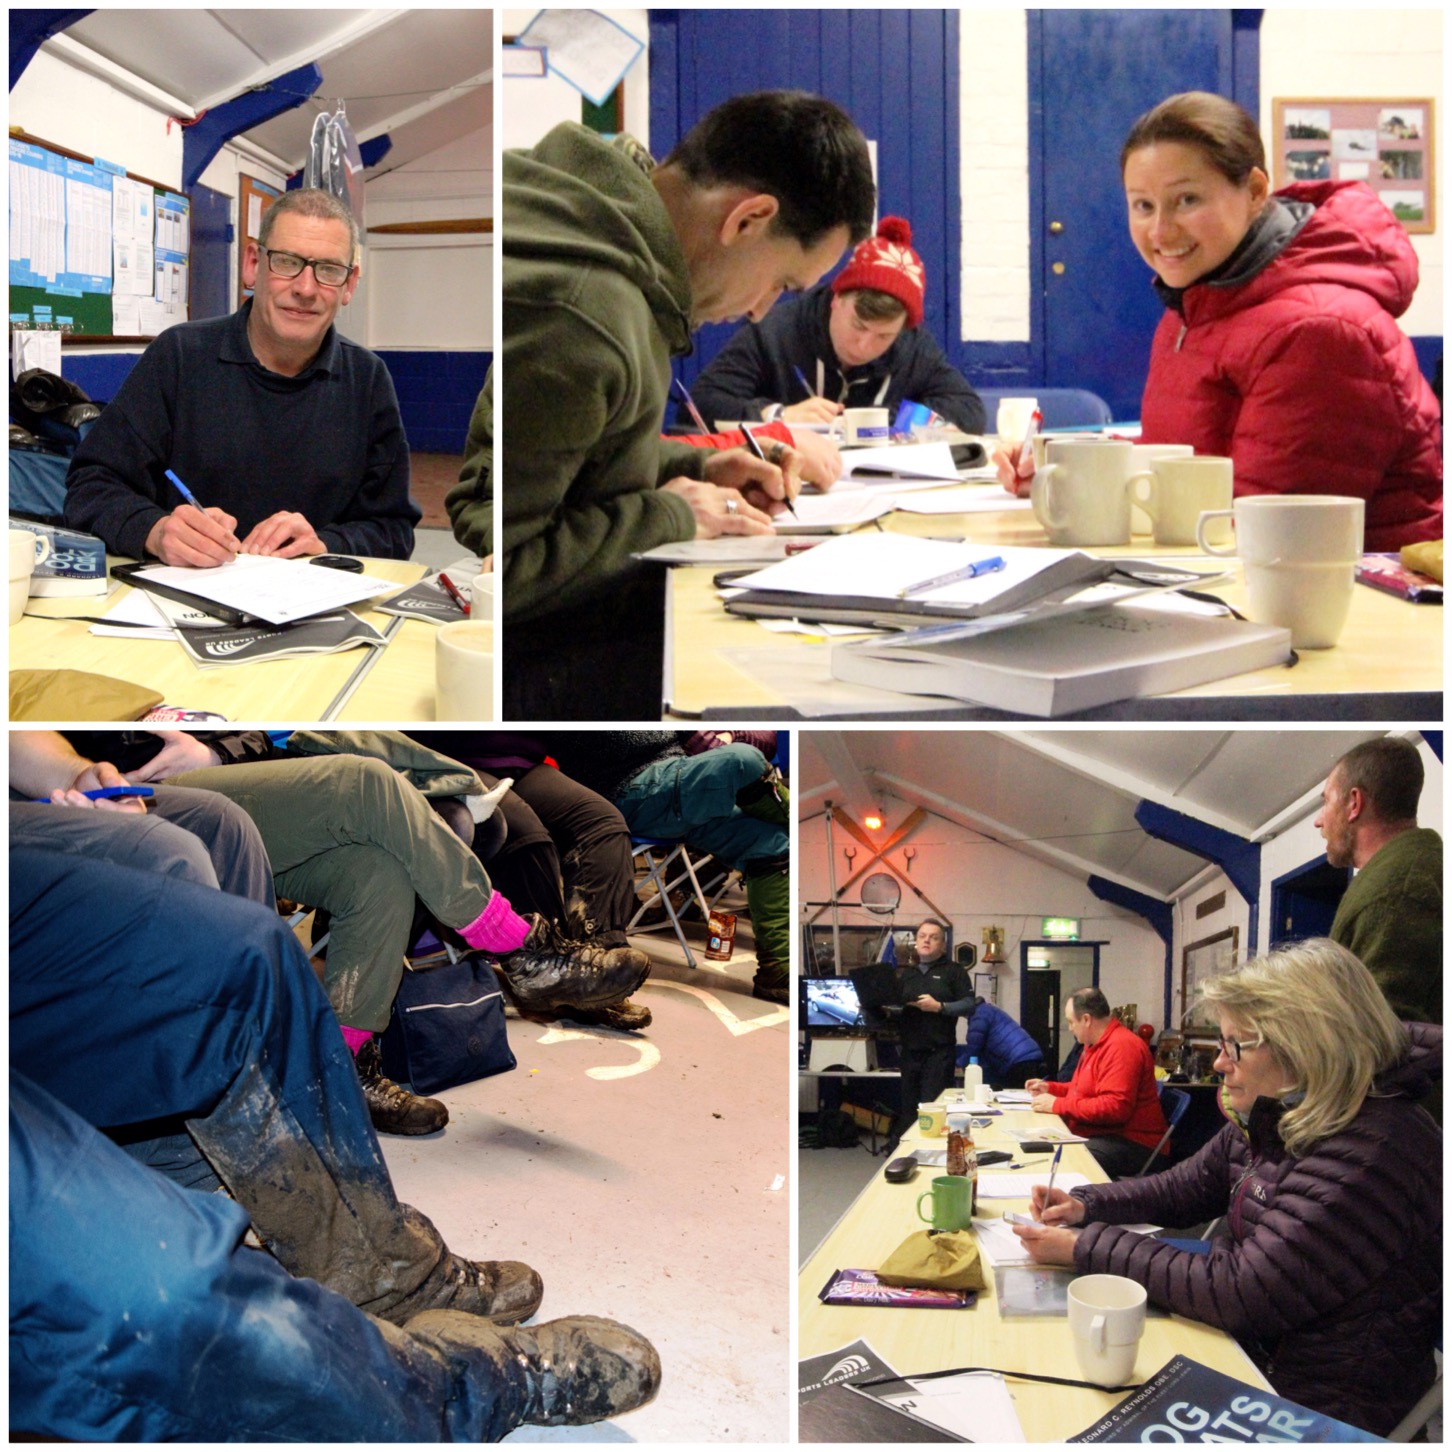
One of the reasons I was very happy to take up the kind offer of Sunbury & Walton unit to use their building was that this first weekend involves a large amount of classroom time. As the weekends progress most of the classes need to be undertaken outdoors, giving the students time to practise everything they have learned.
Classes we gave included basic map work, legal definitions, risk assessing, meteorology, and also on clothing and equipment.
Lots of classroom work on the first weekend
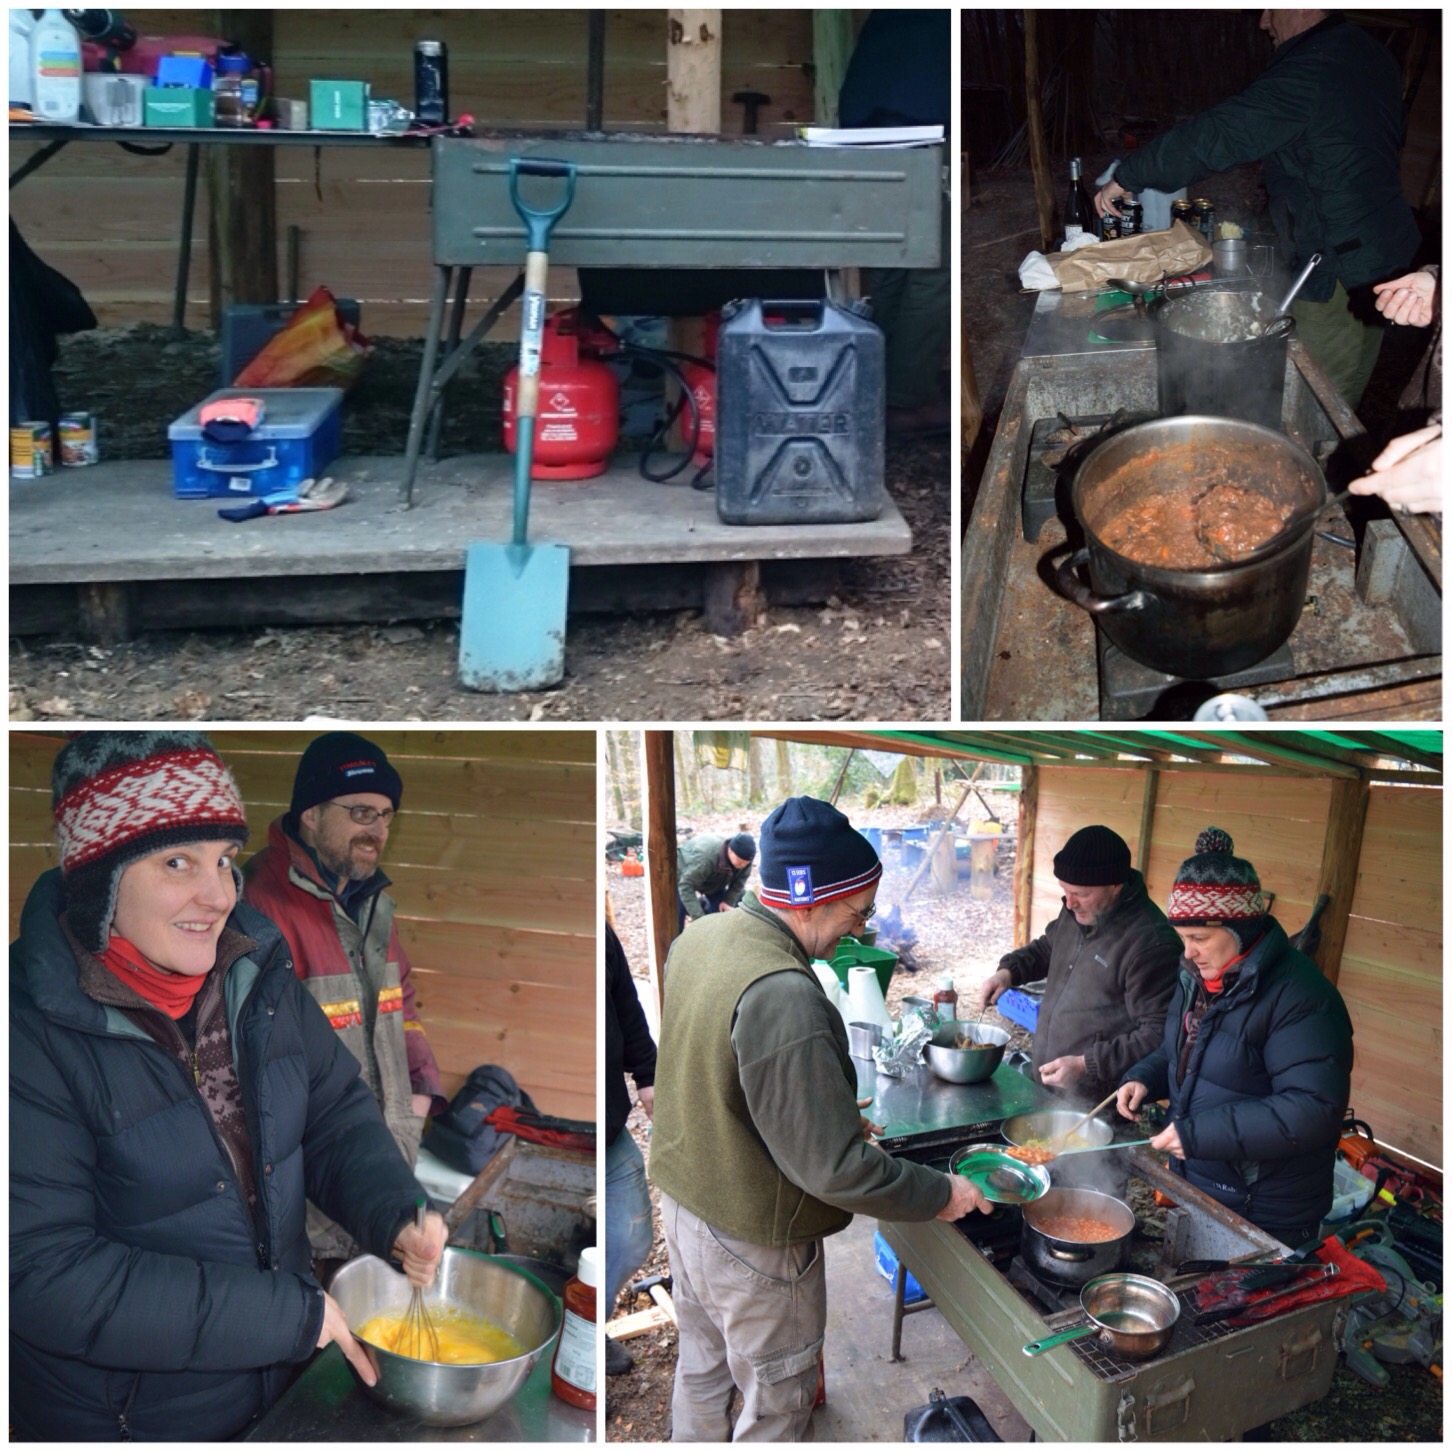
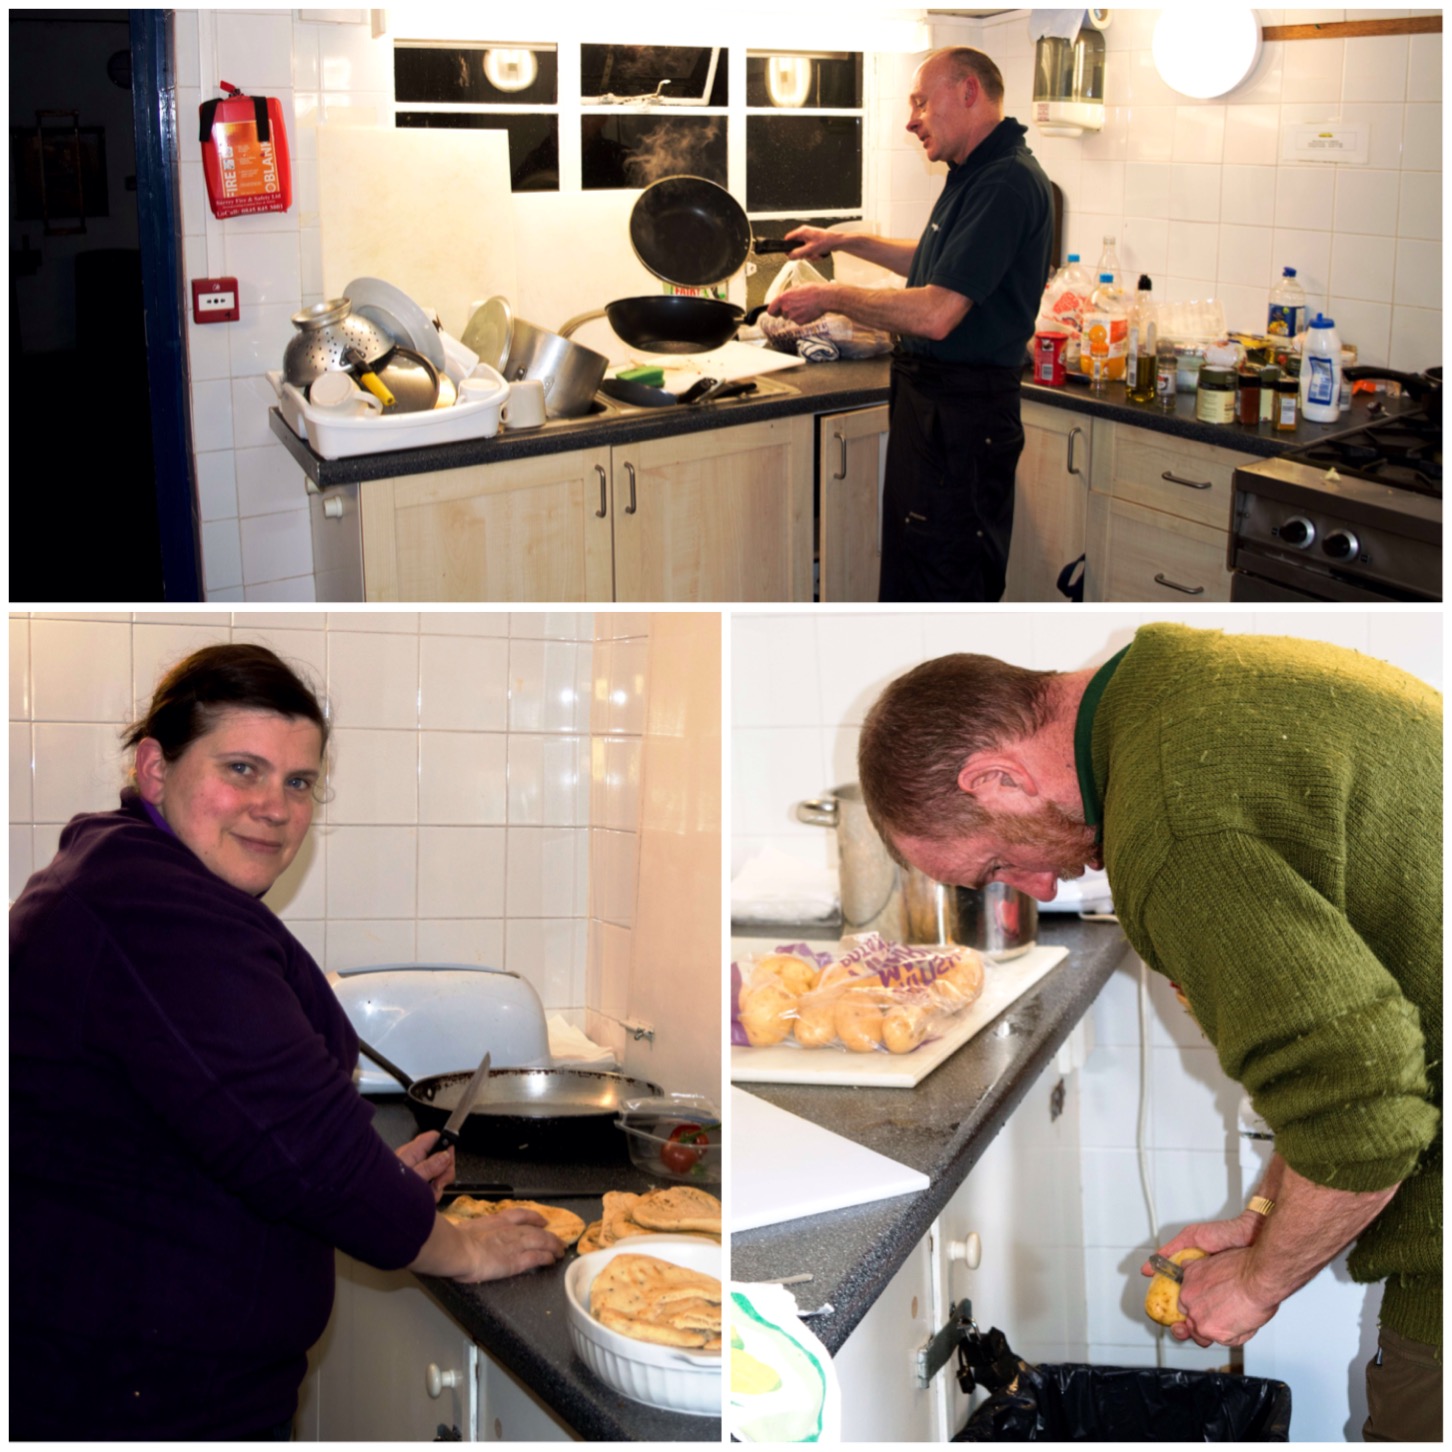
As the course goes on all the students will have to cook for themselves on their own camp stoves but for this weekend we had Paul Kelly and staff from the unit cooking for us. All I had to sort out for myself was some lunch on Saturday. A great job guys – it was really appreciated.
Hard work in the Galley
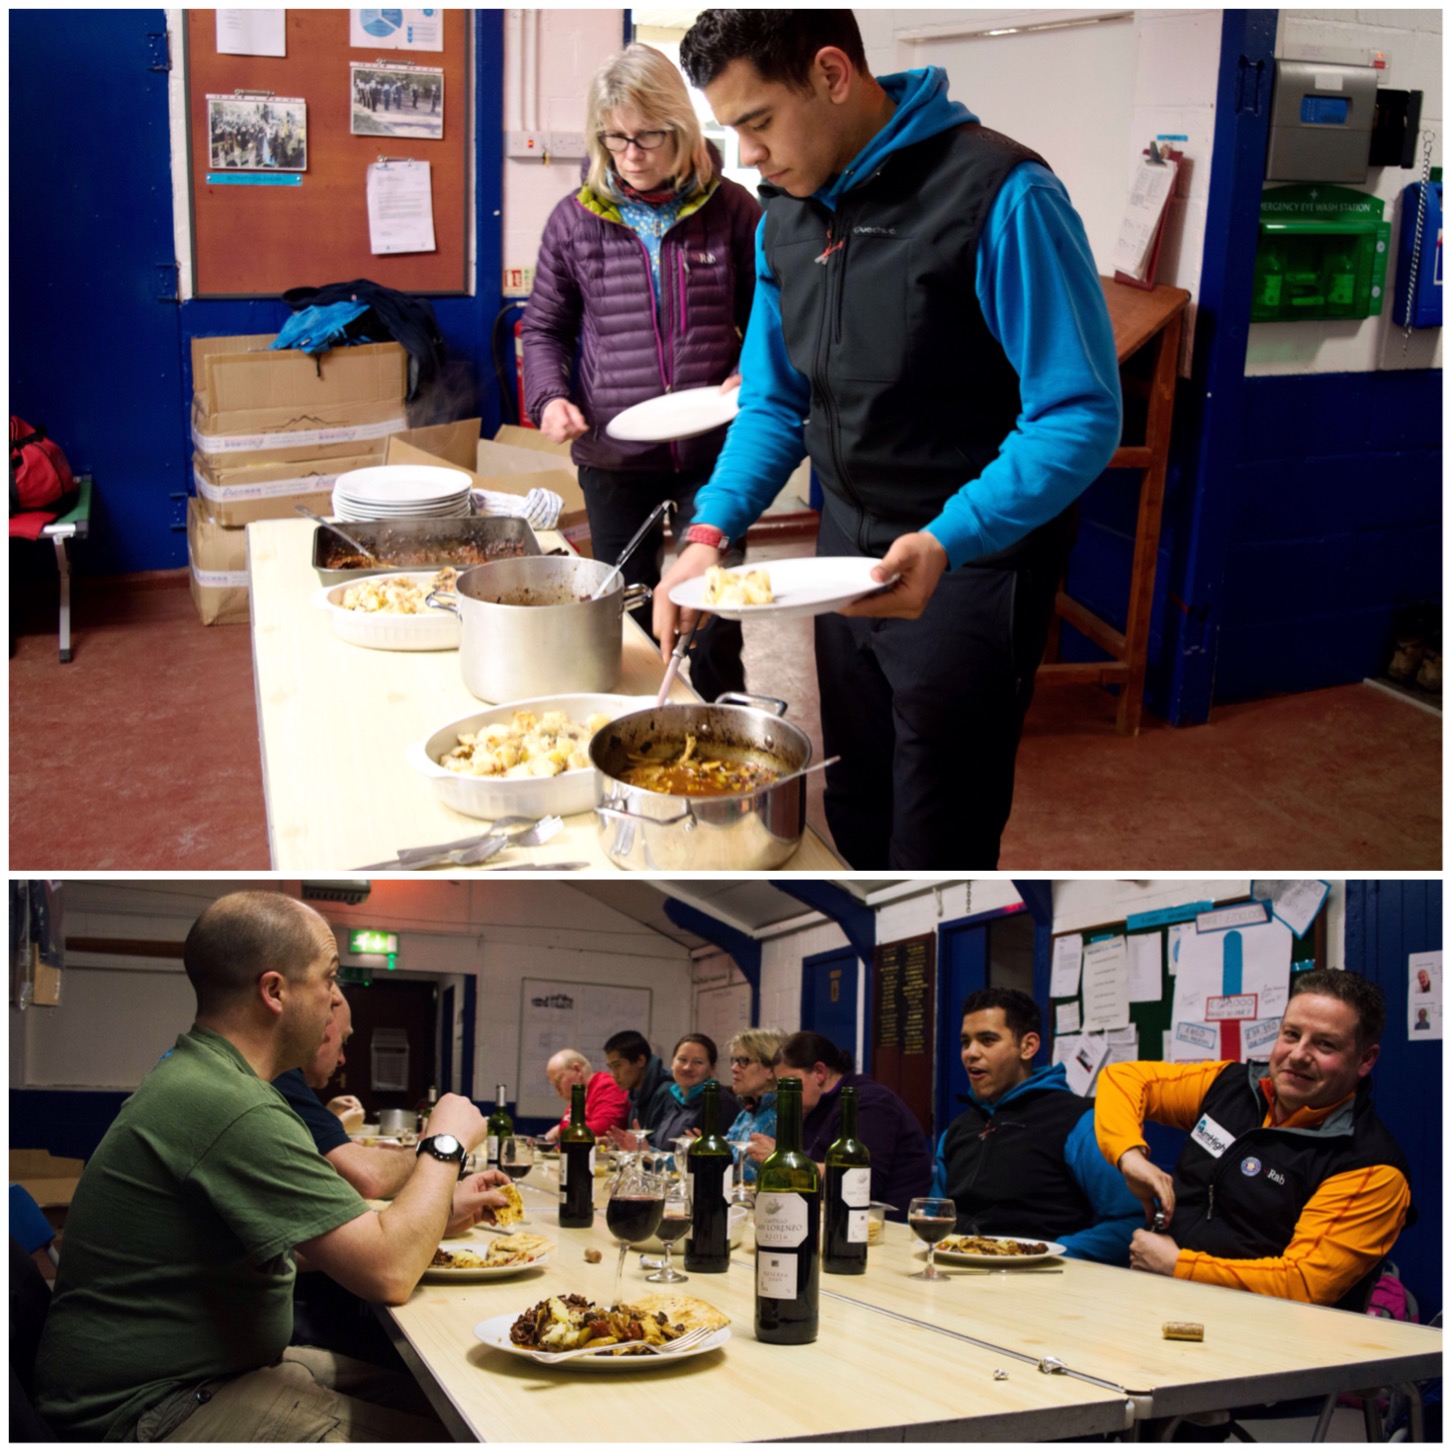
Saturday night’s meal was really worth a mention. We all chipped in ten pounds and Paul and the gang produced a wonderful curry with some wine to wash it all down.
Great food all weekend
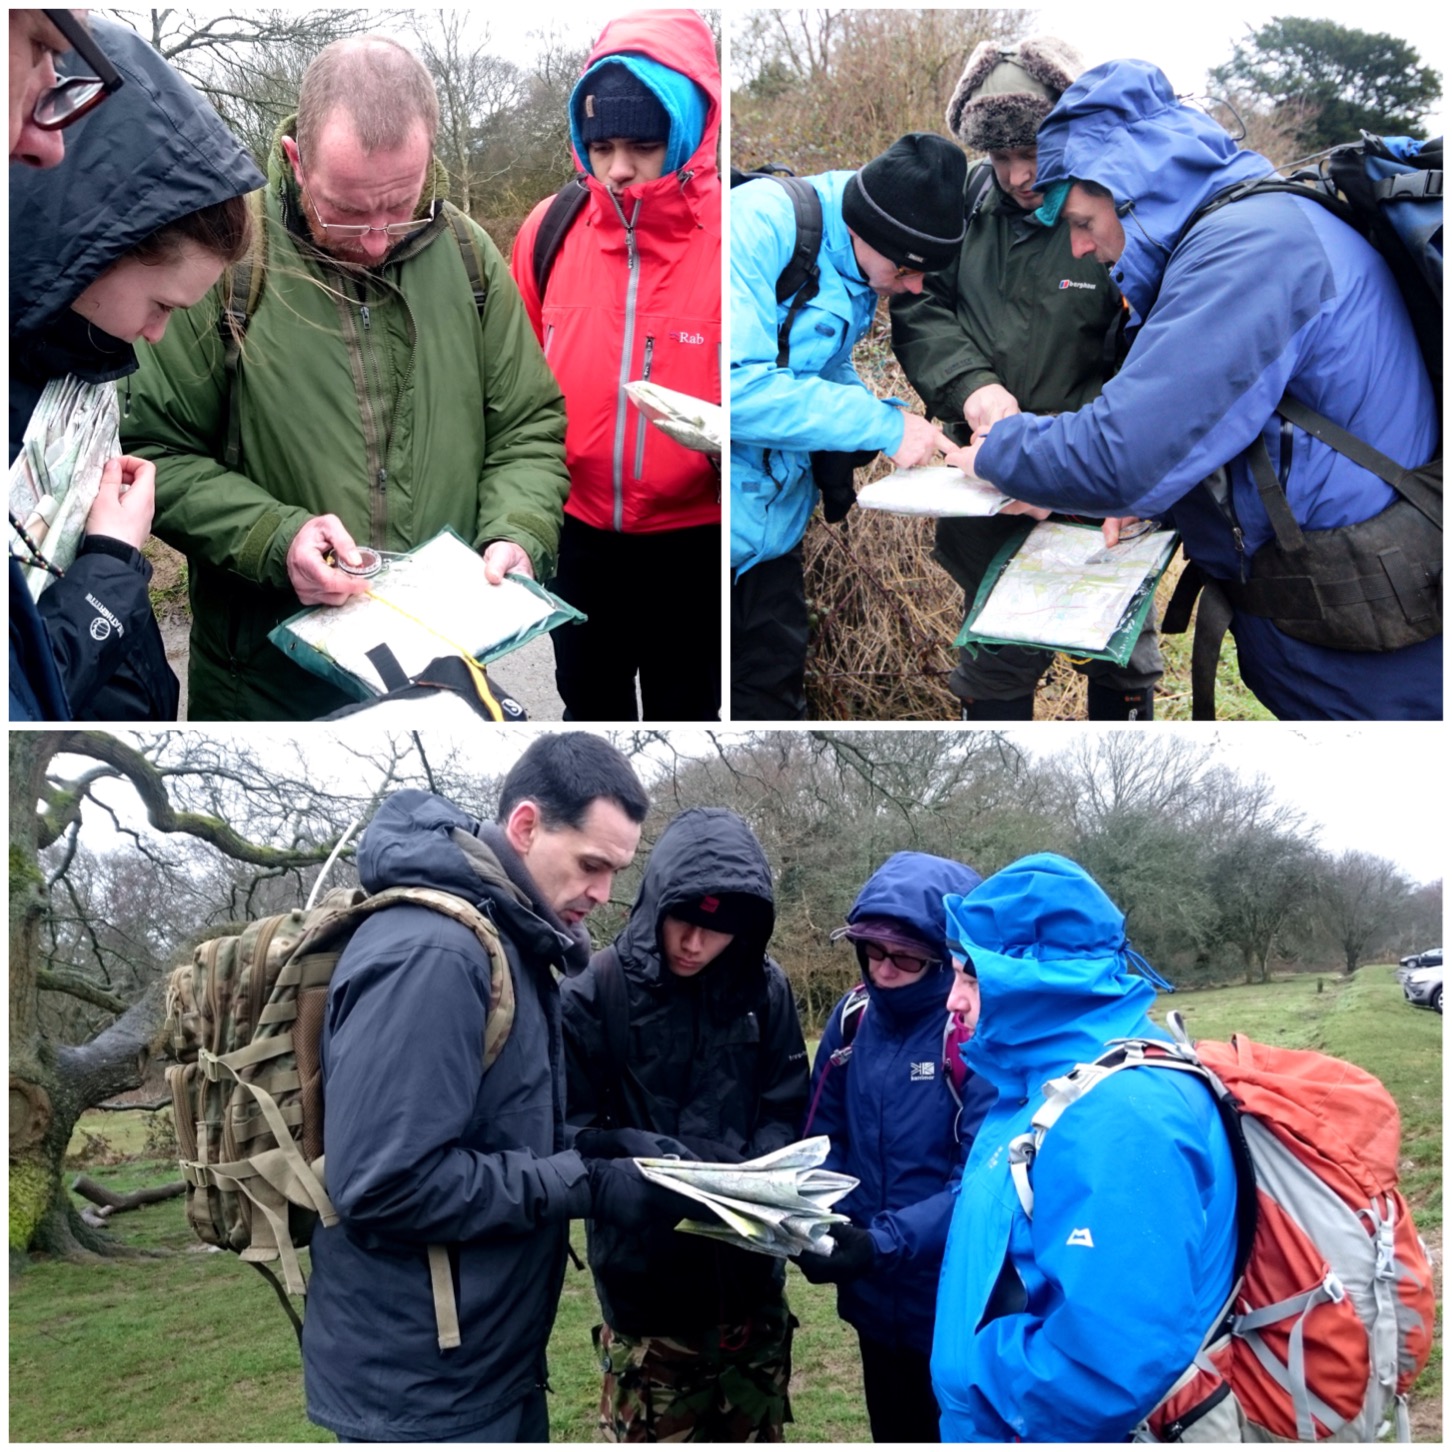
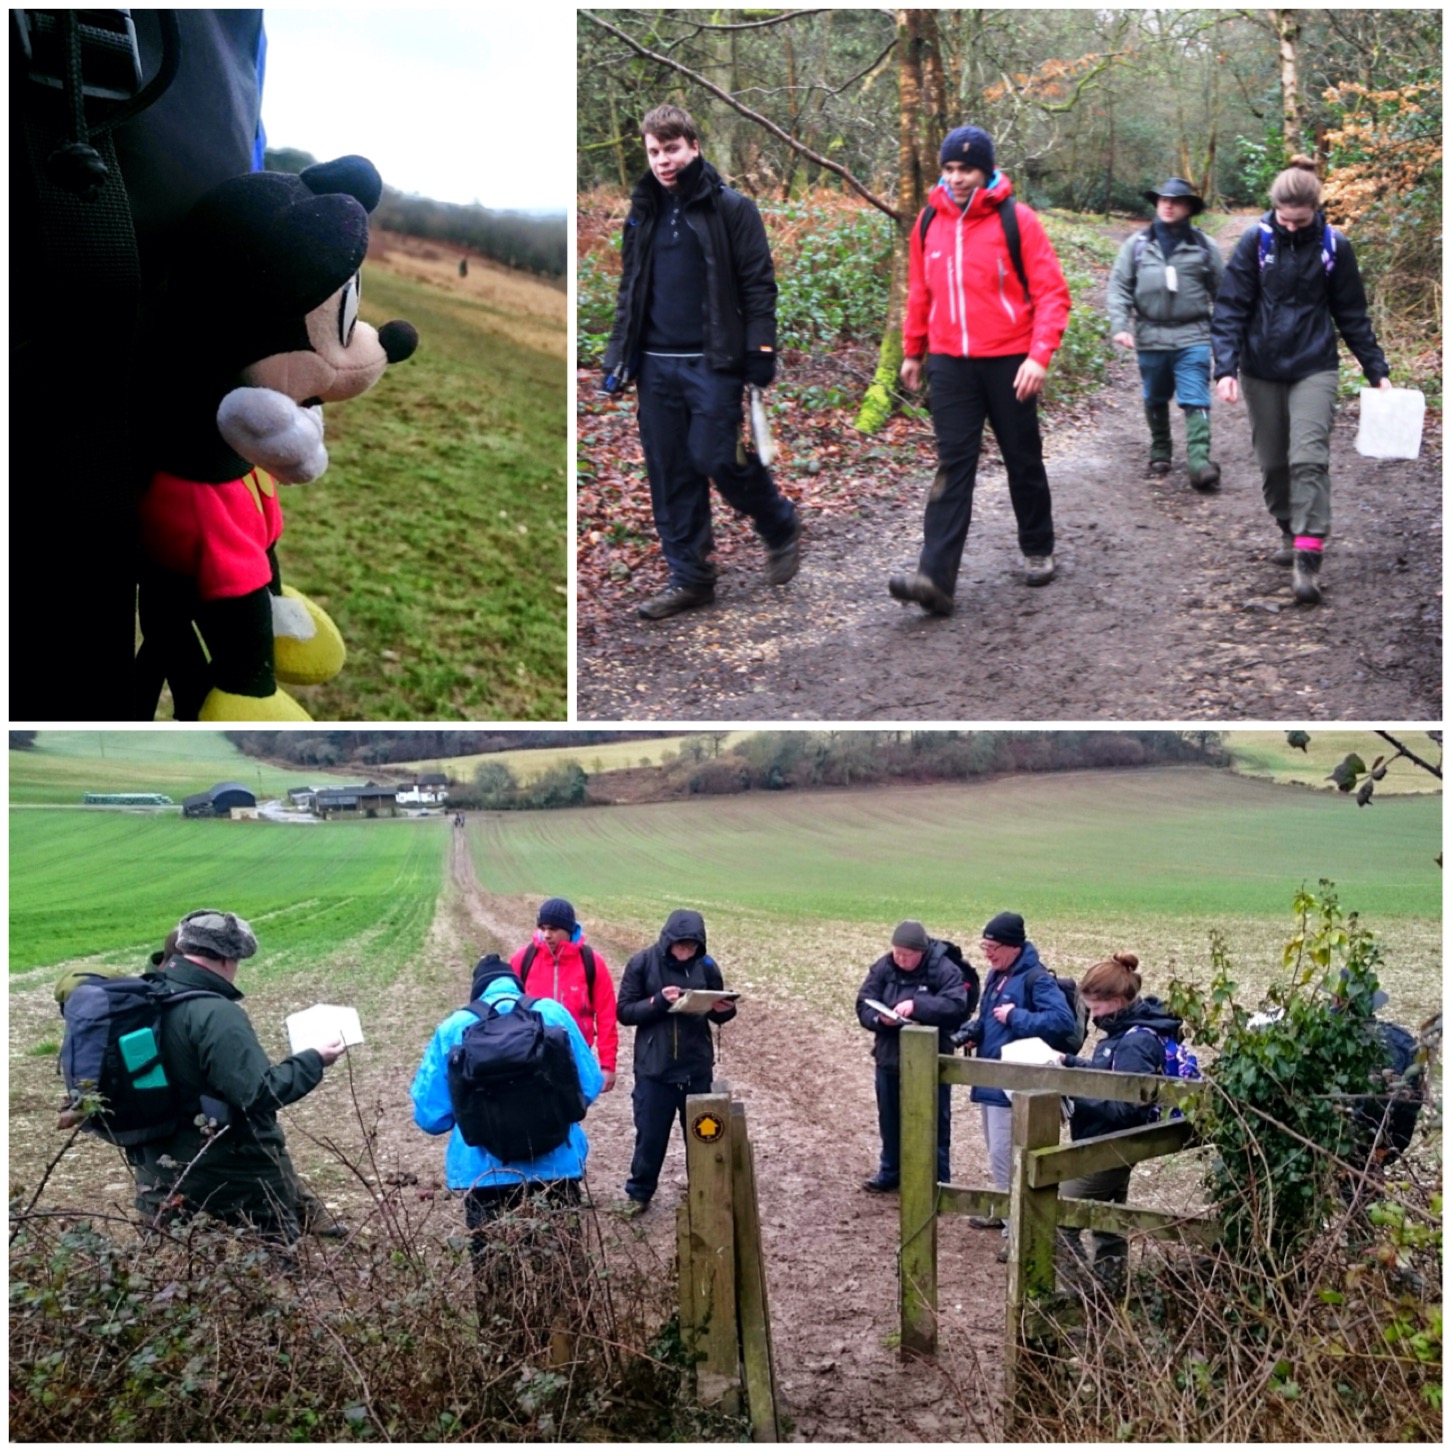
After lunch on Saturday we headed out to the North Downs for some map work. To begin with the instructors took the lead in delivering this training. Everyone went back to basics with using a map (no compass at this stage) as we had such a wide variety of experience within the group. I found this helpful later when the very experienced students were able to assist their colleagues.
It was a damp and windy day but I find I am most comfortable in this kind of environment.
Lots of trainer led mapwork
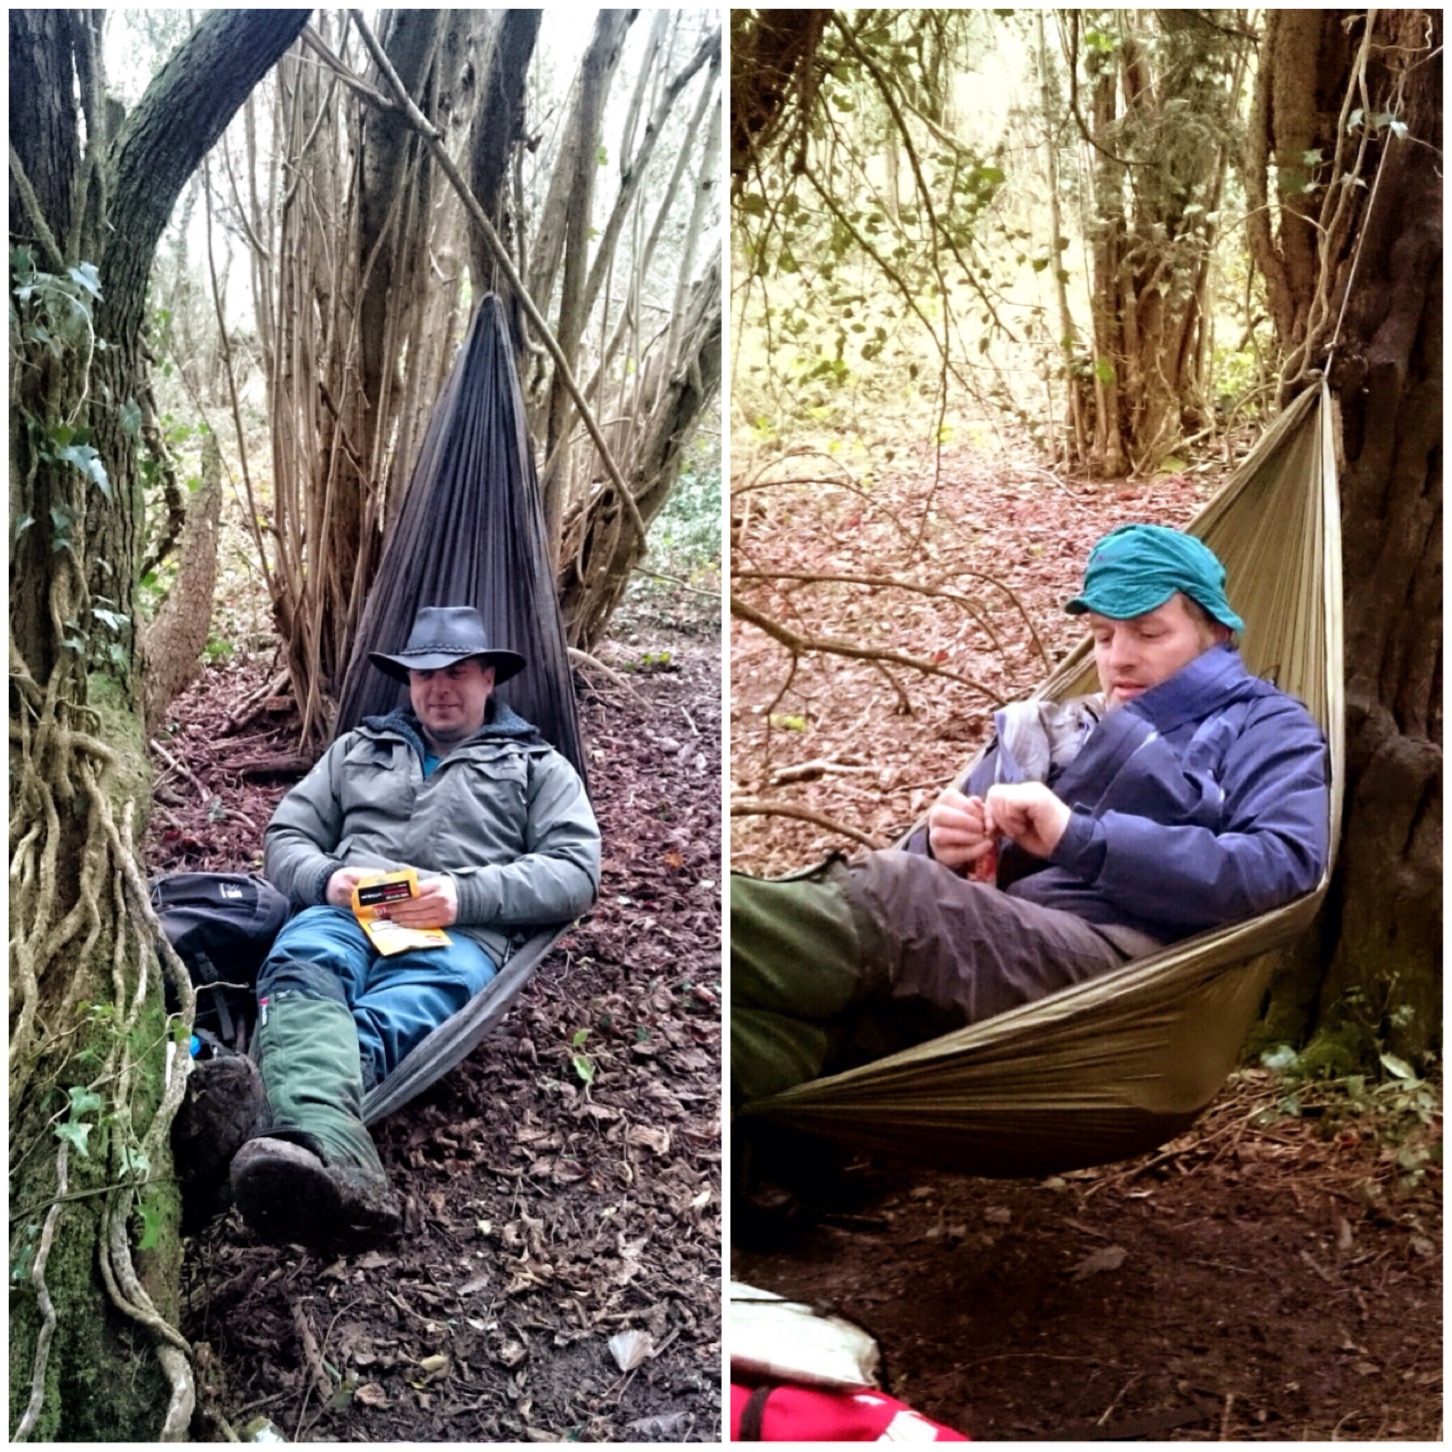
Needless to say, in between sessions when we were out and about we needed to take the occasional break. I like about 10 minutes’ break for every hour of travel so I found ample time to deploy my small EDC hammock chair (UKHammocks). Both Dave and myself are of the school of thought ‘if you can sit – sit, if you can lie down – lie down, if you can sleep – sleep’.
Chillax time
While we were strolling on the slopes of the North Downs there was little in the way of flowering plants on display but I found plenty of other beauty around – I just had to look a little bit harder.
Some winter flora
Once everyone had gotten the basics of scale, symbols and setting their maps to the ground we gave everyone individual legs of the journey to lead. Later we brought in the use of the compass, pacing, and talking about tick-off points, cut-off points and hand-railing.
Lots of individual work
The rest of the weekend was spent getting to grips with all the BEL paperwork, more classes on maps and routecards, planning for the next weekend in Dartmoor and a bit of relaxation on the Saturday evening.
Mapwork, paperwork and muddy lectures
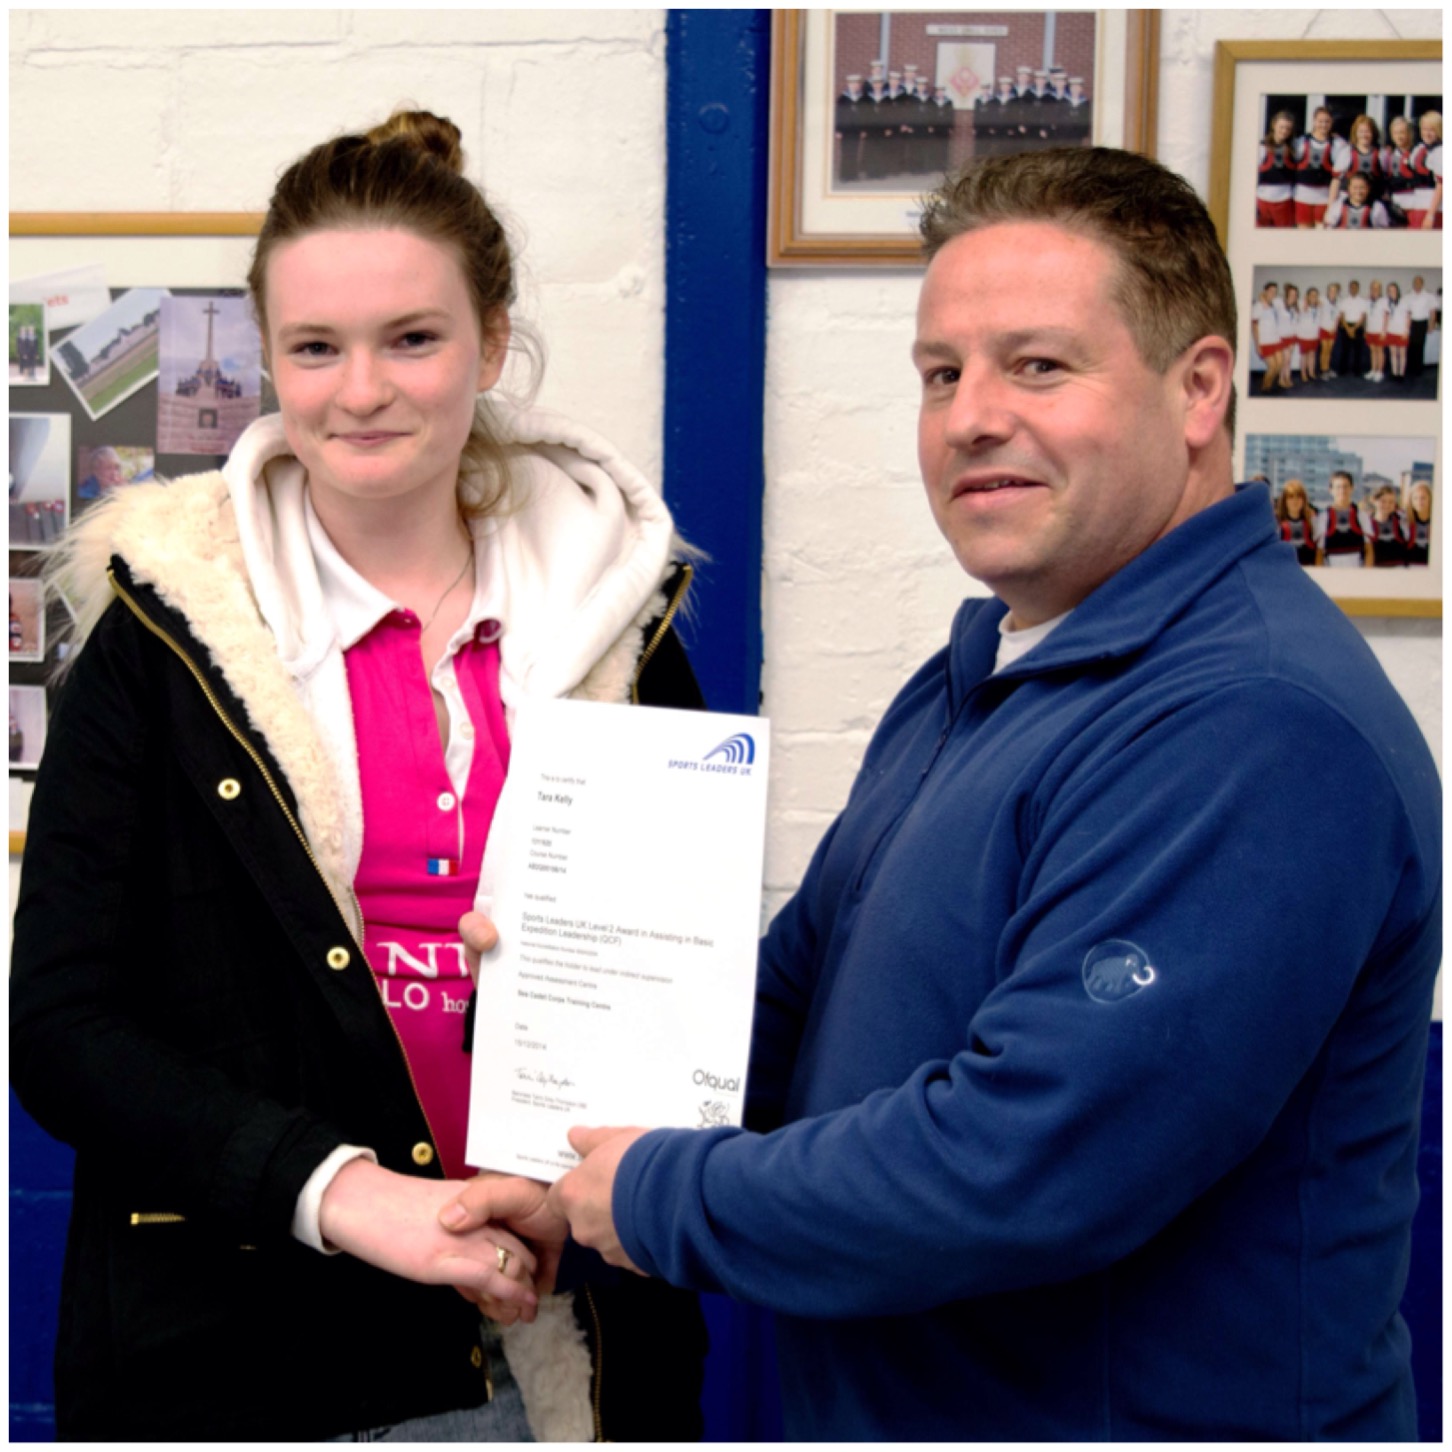
We finished the weekend on a high when Perry presented Tara Kelly with her BEAL certificate. Tara undertook the BEAL last year while she was a cadet and the weekend was a good opportunity to present her with her pass certificate.
The BEAL certificate for Tara
The next weekend is in April and we will be heading down to Dartmoor to give everyone a chance to appreciate what type of countryside they will be allowed to work in and what type they will not, also to continue working on all the skills they learned on this weekend.
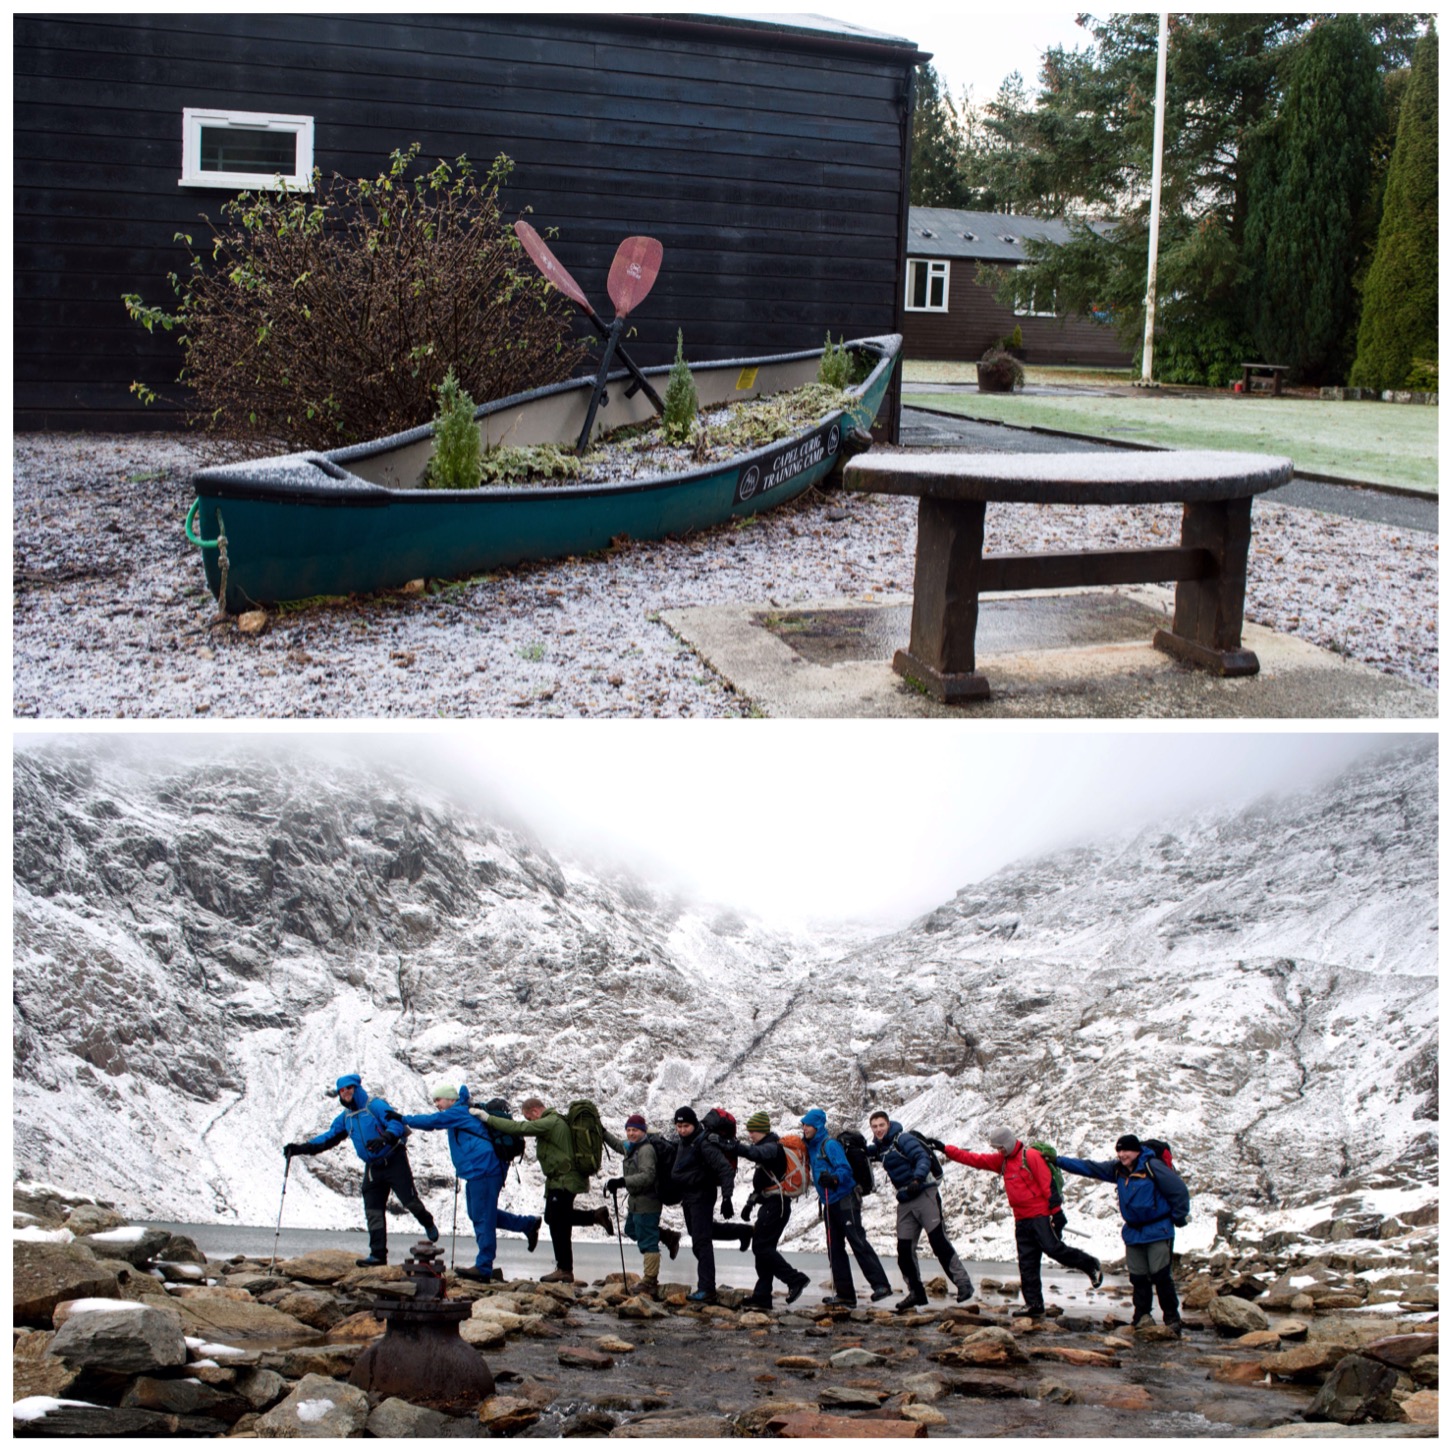
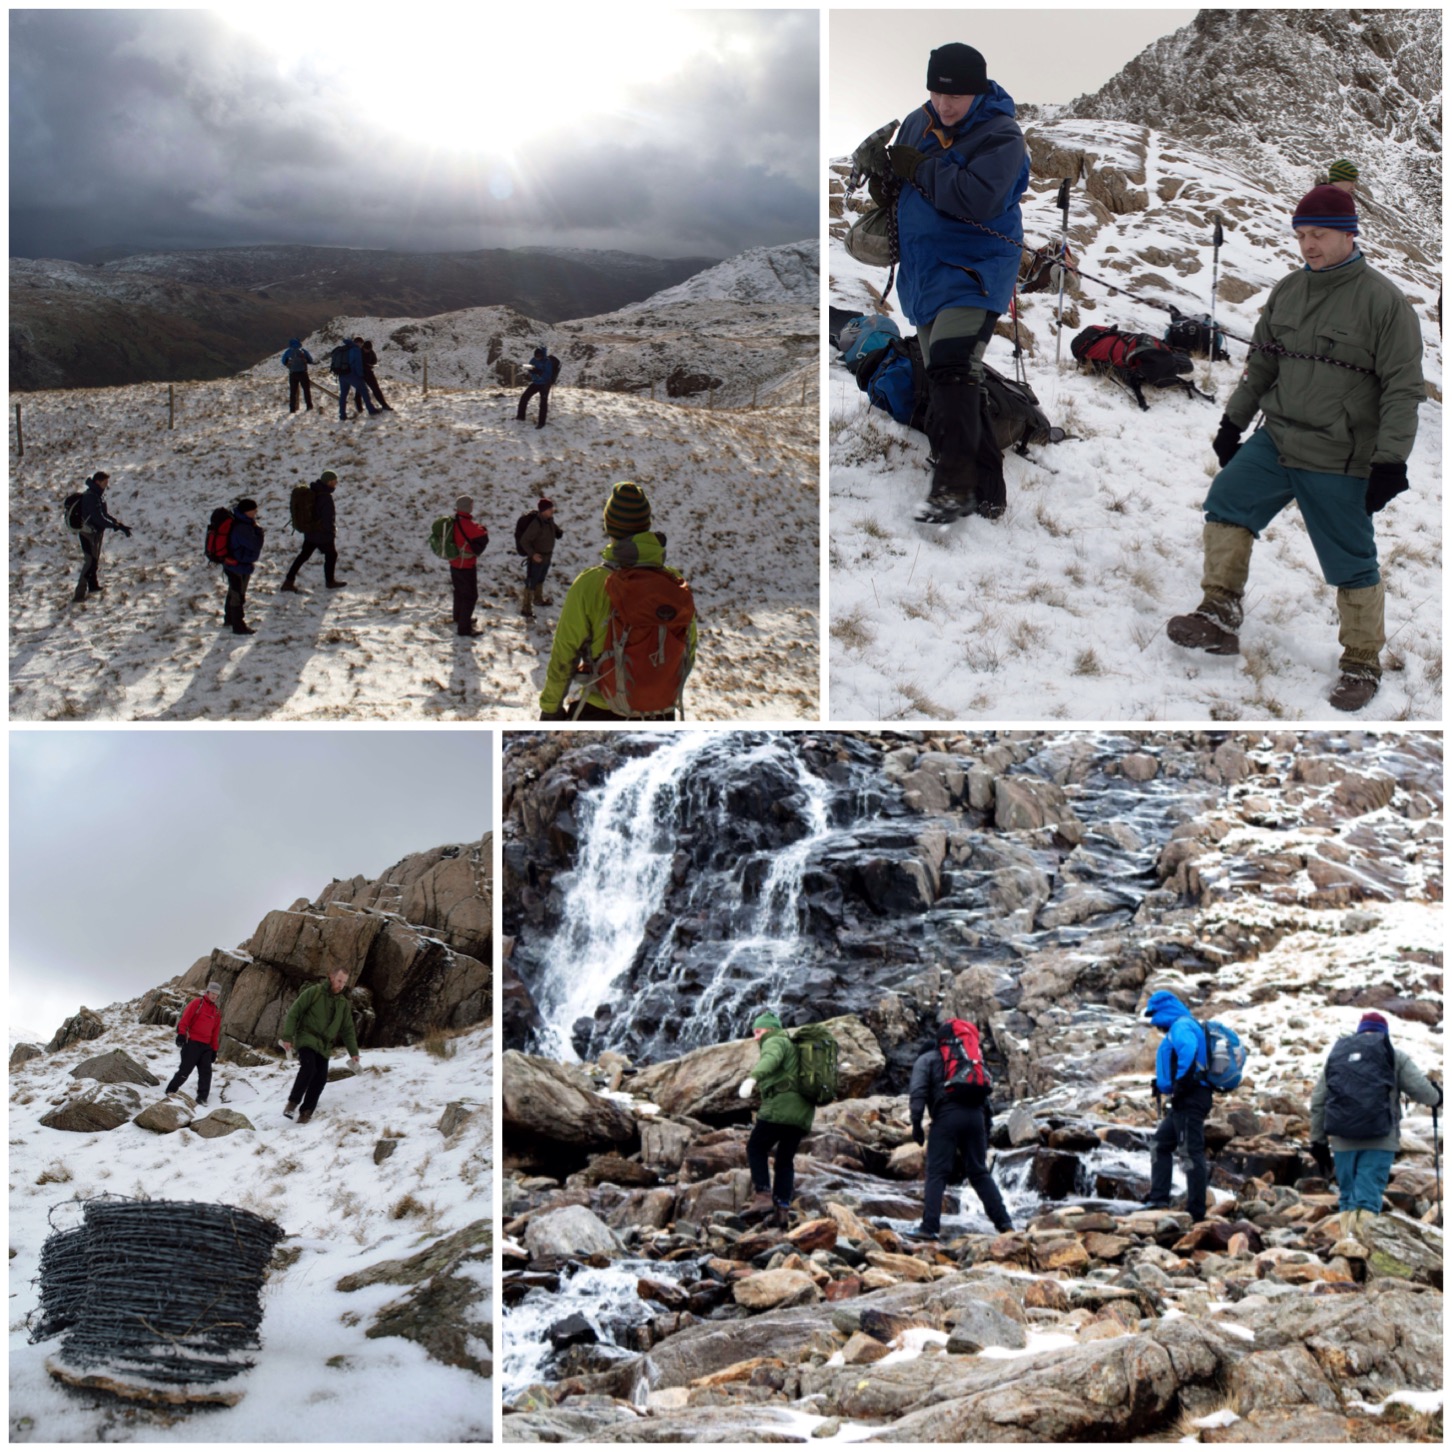
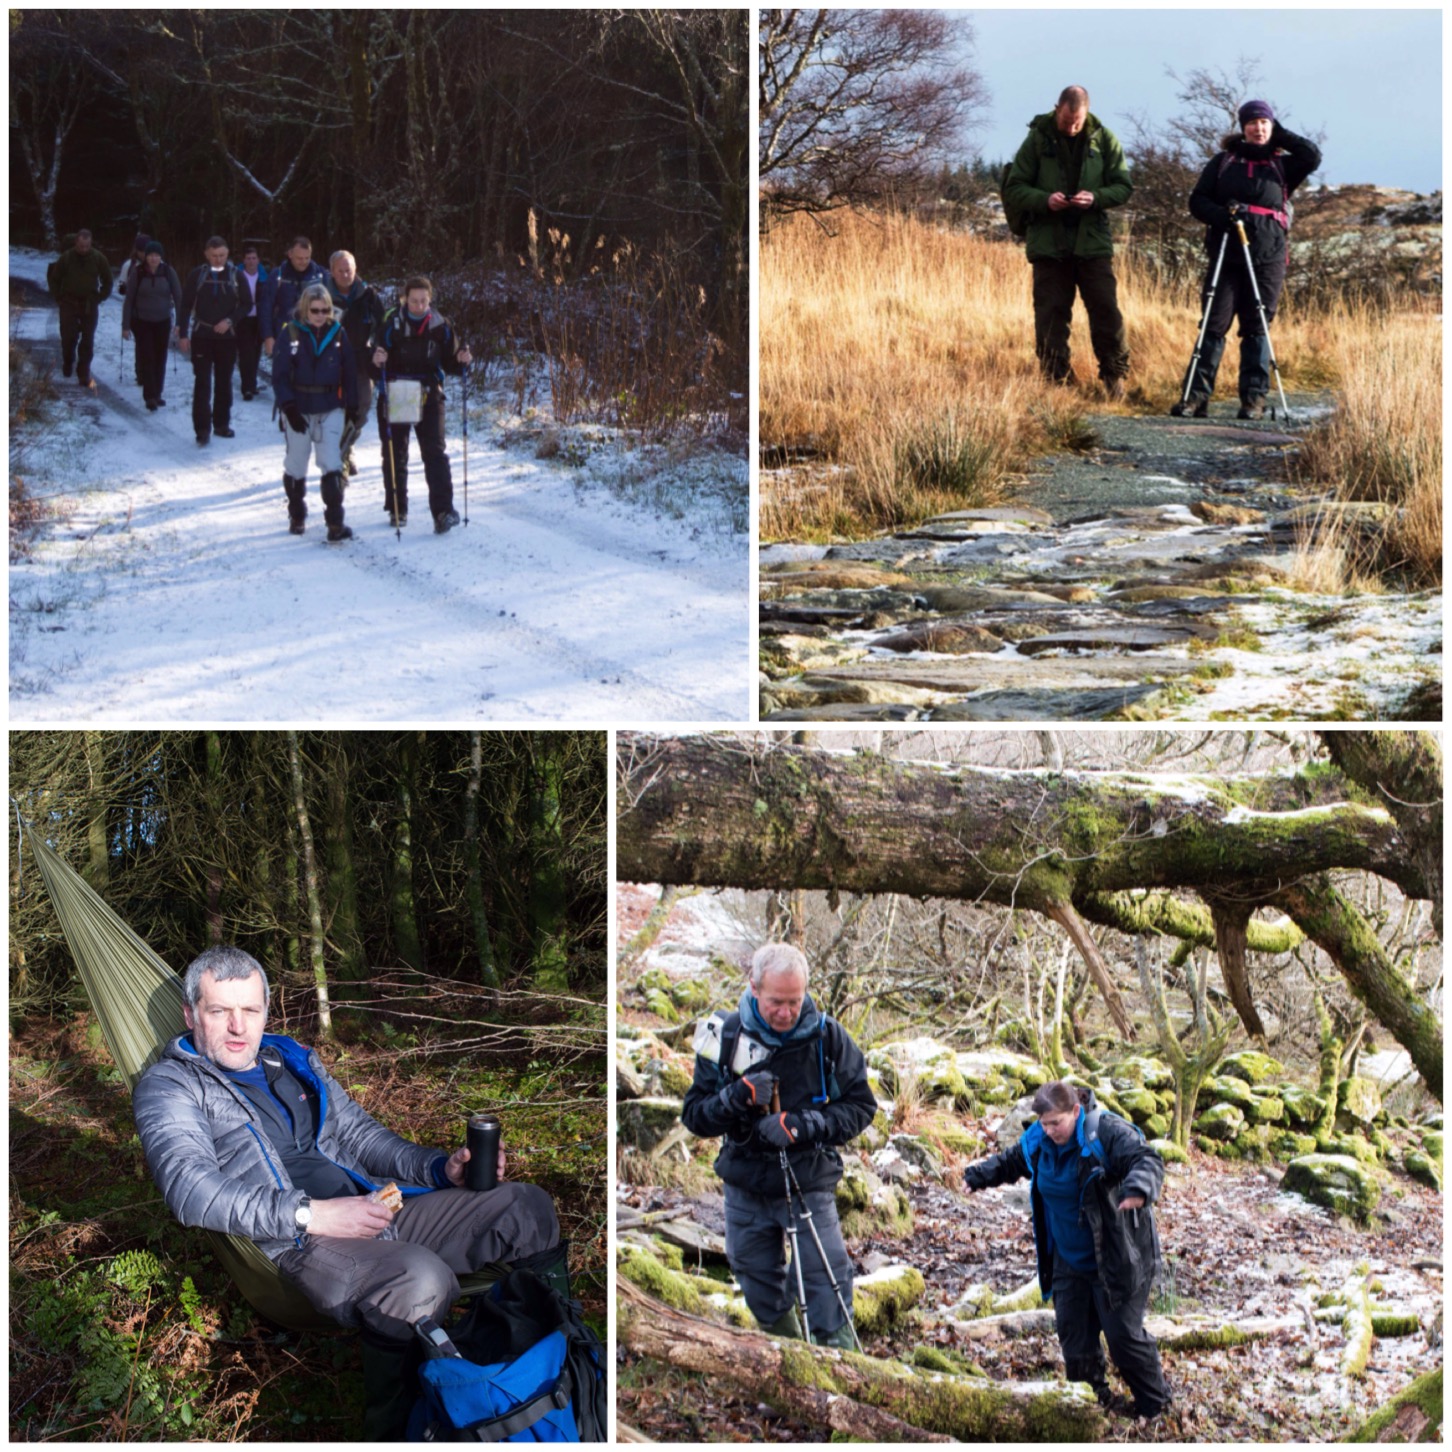
January is usually the time that as outdoor pursuits instructors in the Sea Cadets we venture up into the mountains and moors to do a bit of skills training. This is just not as a bit of extra training for ourselves but as a way of introducing some of the newer instructors to the world of hillwalking and mountaineering.
There was a smattering of snow on the mountains when we arrived but not a great deal. The winds had been very high in the few days leading up to our weekend and had blown most of it away. The weekend was organised in quite a relaxed manner. One group decided to walk over Moel Siabod and the surrounding area while the group I was with decided to do a bit of scrambling and winter skills around the base of Mt Snowdon.
We had arranged to meet up with some non-Sea Cadet friends that day who were also training in the area and set off early on Saturday. We were not aiming to summit that day but concentrated on working on our micro-navigation skills, leadership and group management. For me, it was also a good opportunity to practise my photography skills. I have a separate post on these pictures in this post on Special Snowdon Scenes.
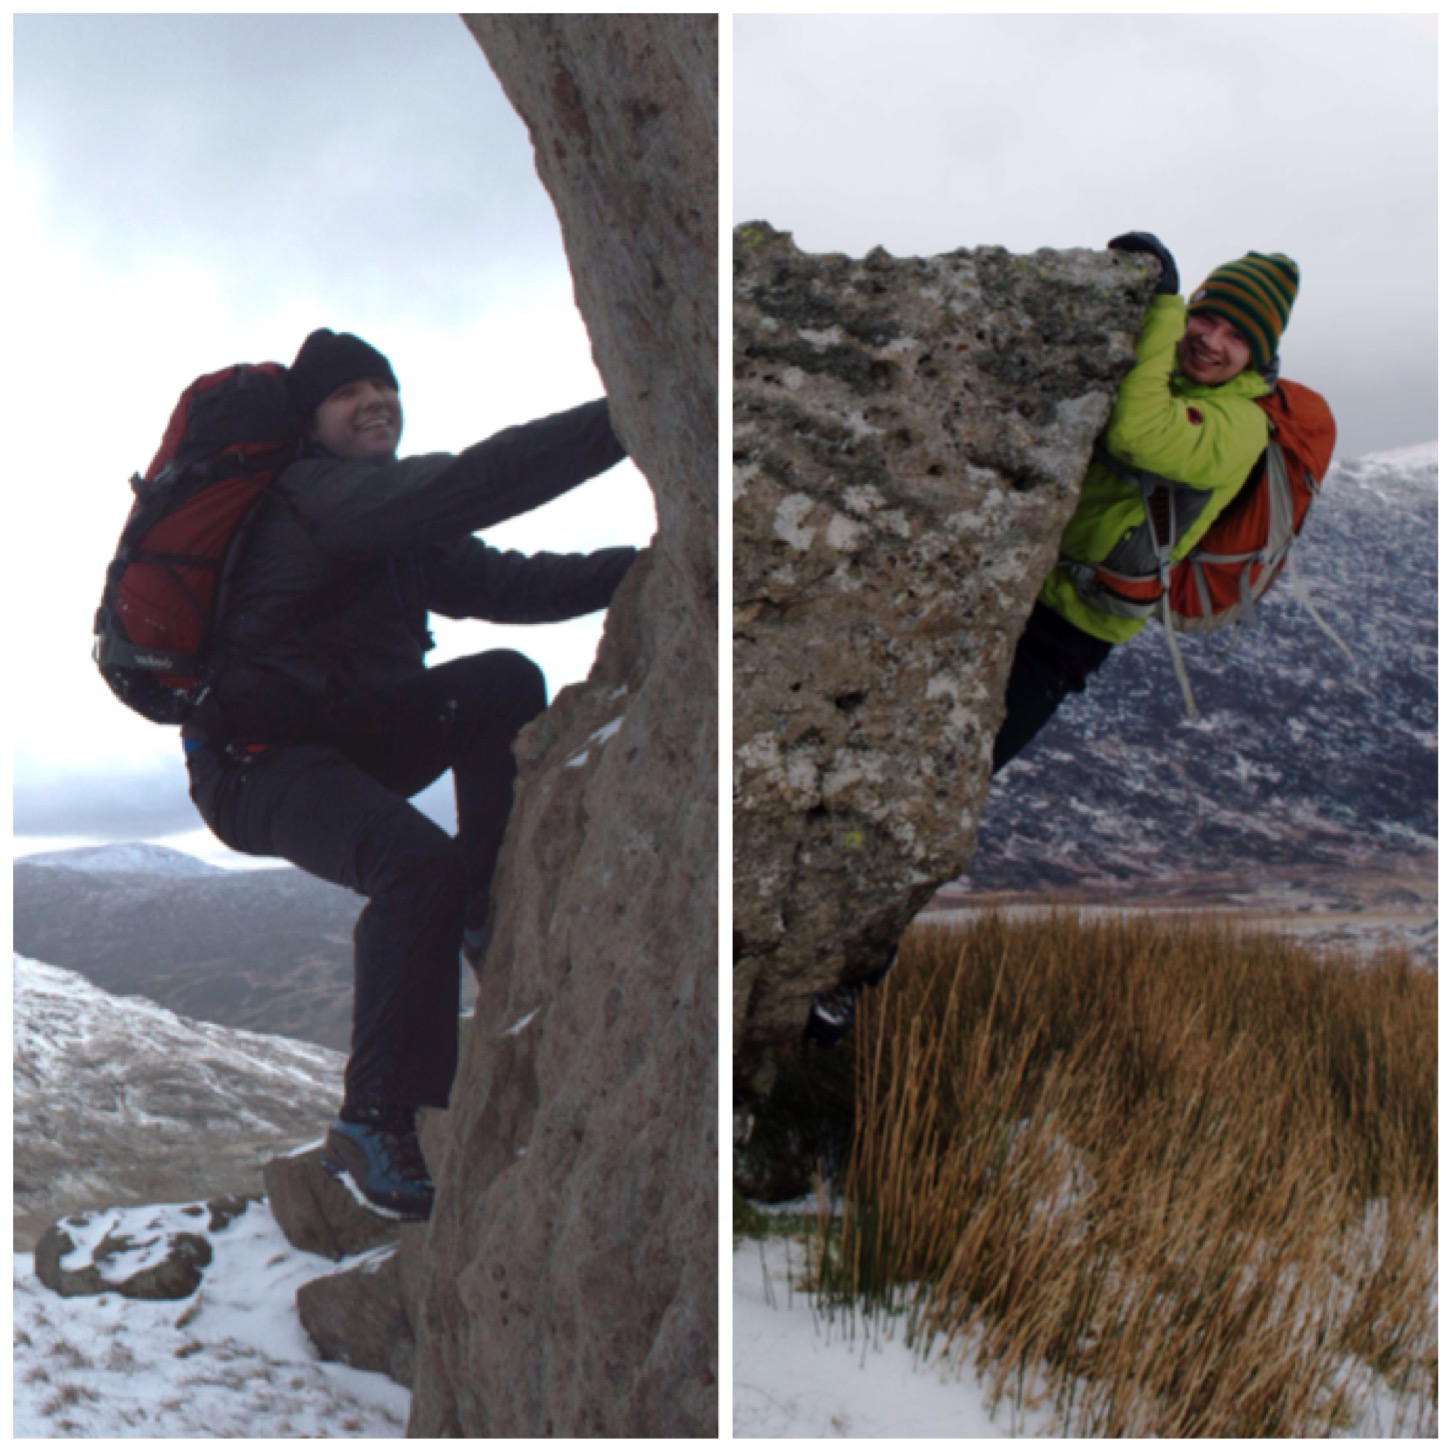
While we were ascending up to The Horns and then onto the base of Crib Goch some of the lads took the opportunity to get a bit of bouldering in. The weather was cold but clear, making it ideal for keeping what little snow we had and perfect for photography as well.
Bit of Bouldering
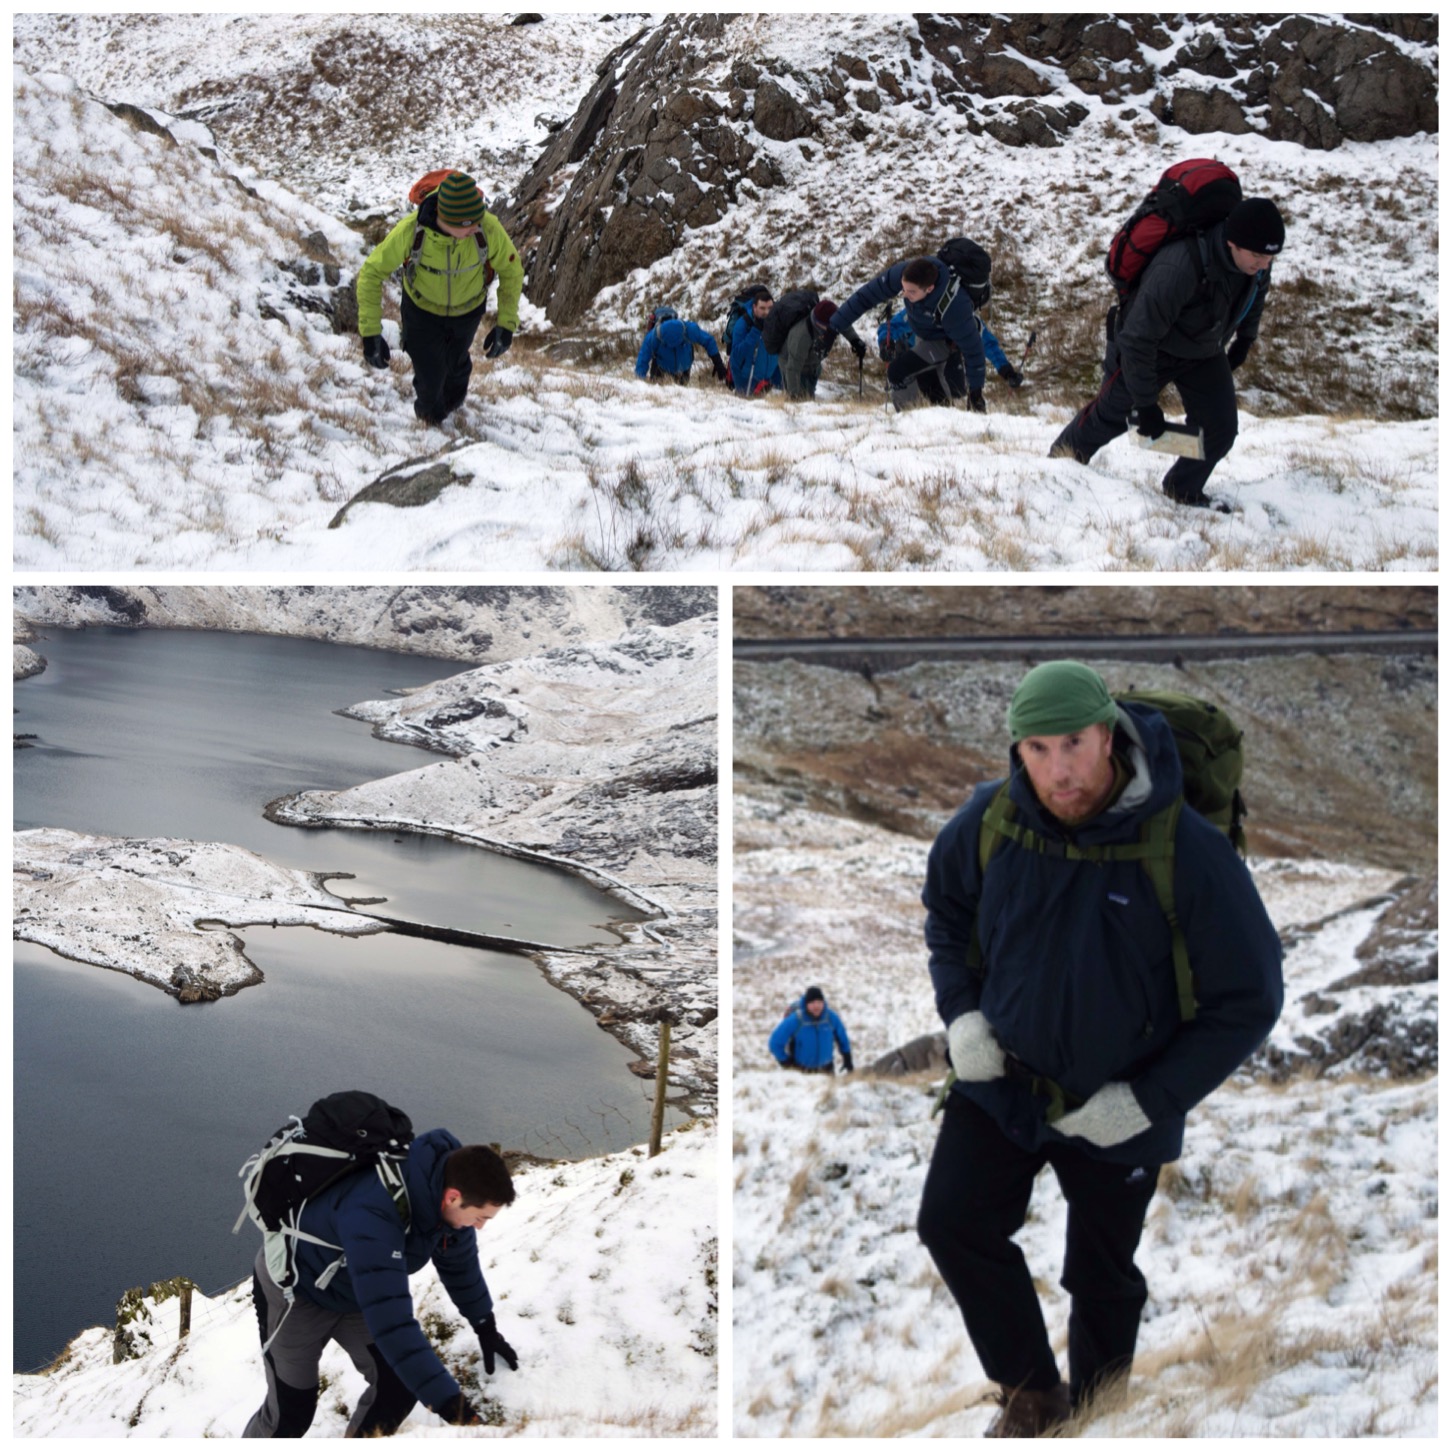
We got some good views as we worked on taking bearings on near and far features so as to double check our positions. Also we spent some time working on rope skills, learning to ‘dog lead’ a nervous student over tricky terrain.
Route finding is always a good skill to practise, whether that is to avoid great big coils of barbed wire or picking your way across a stream.
Skills training
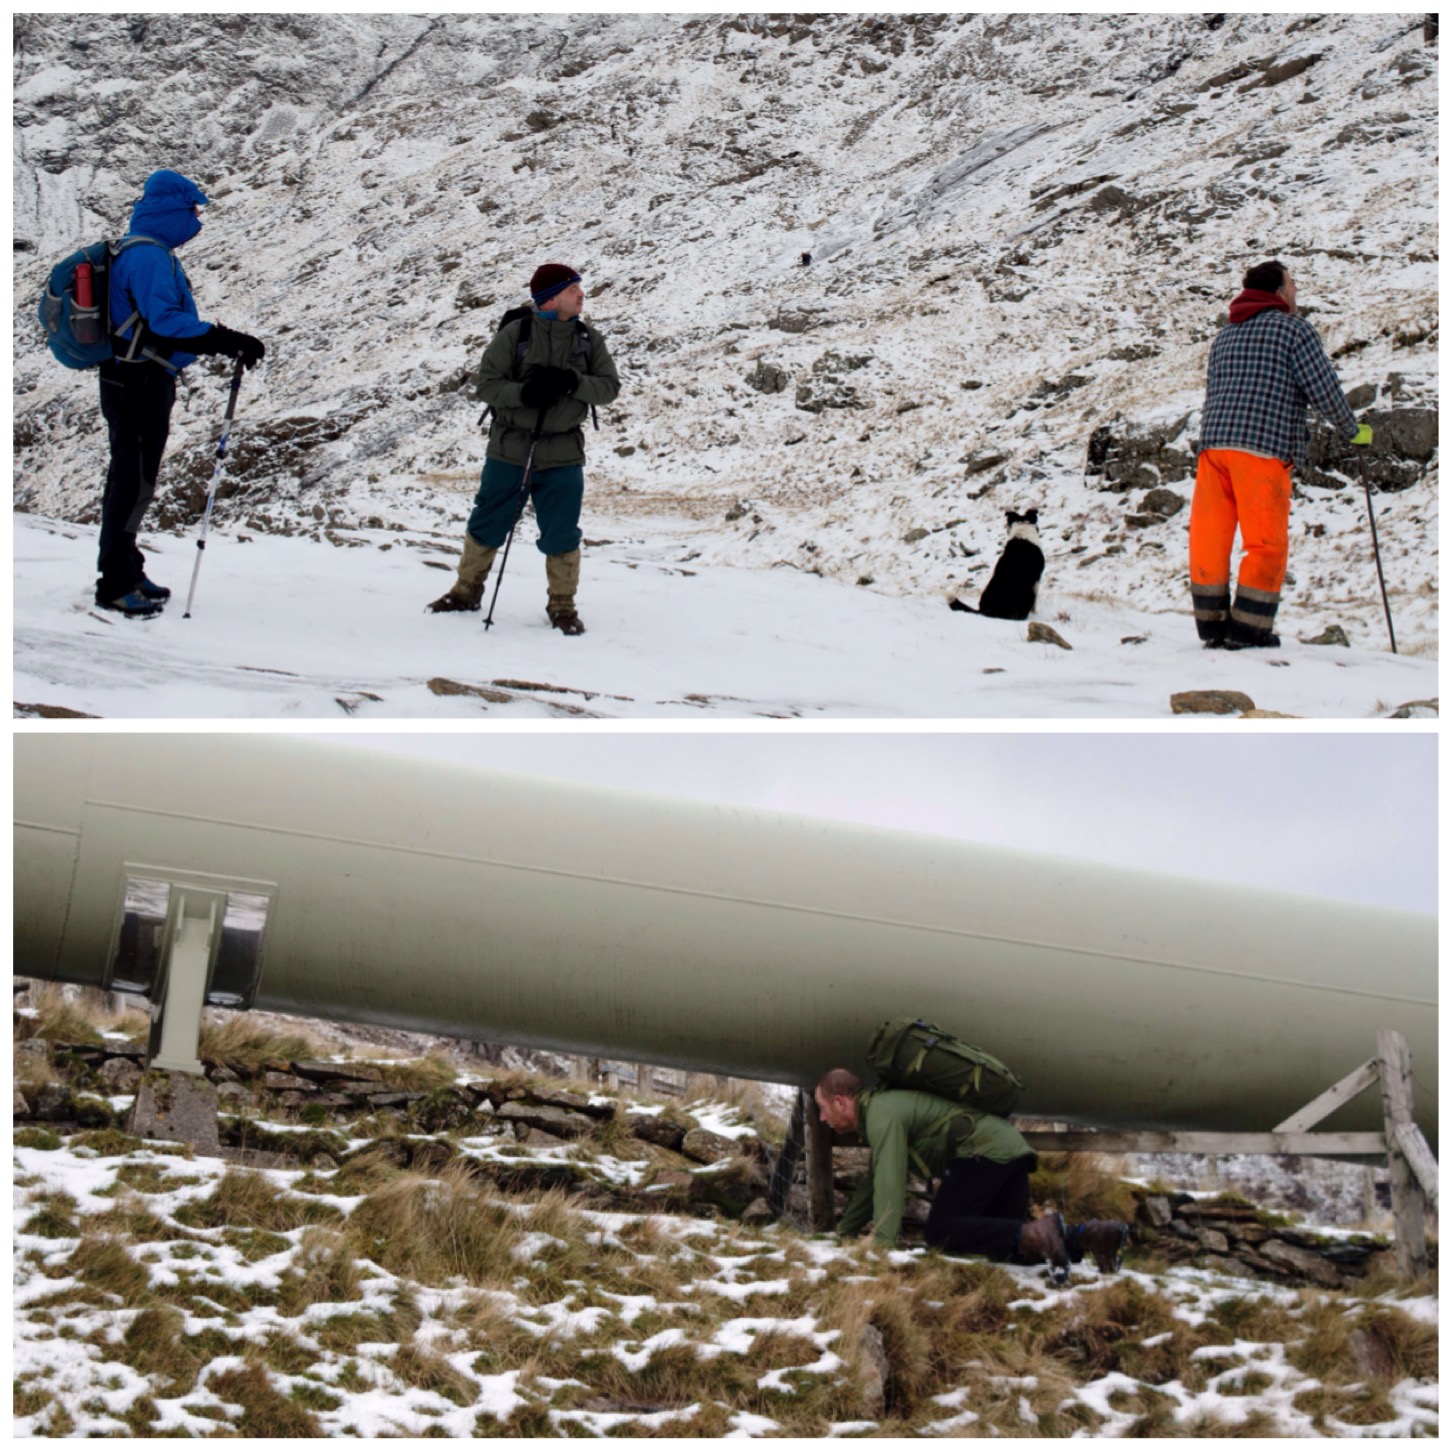
While we were wandering around having a good time a shepherd and his collie dog came by. As soon as the shepherd stopped the collie sat perfectly still. They both looked around, scanned the mountainside and then were away. In a couple of minutes both the shepherd and collie had disappeared. This moment reminded me that our playground is also someone else’s workplace.
Later in the day Graham and myself came across the Cym Deli pipeline that feeds water down to the oldest hydro electric station in the valley below. It is known locally as ‘the chapel in the valley‘ due to its design. I did not know this until I read the wiki page on the site but the pipelines appeared in the James Bond film ‘The World is Not Enough’
Working Snowdonia
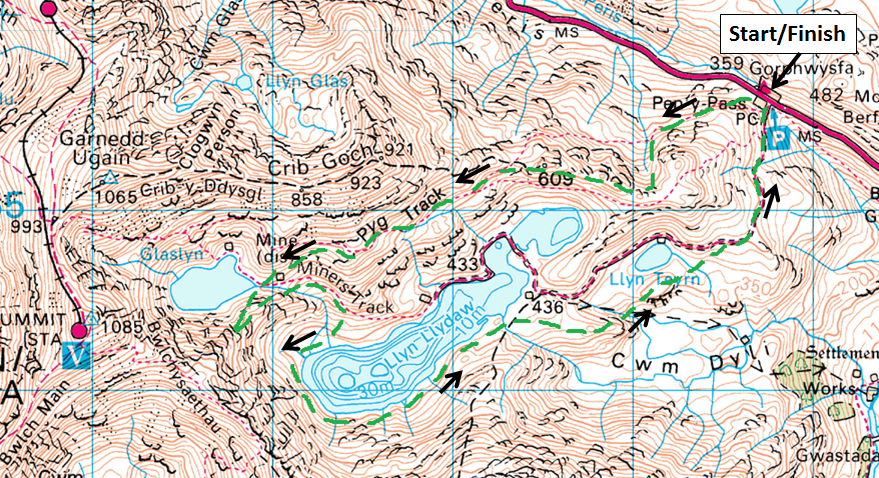
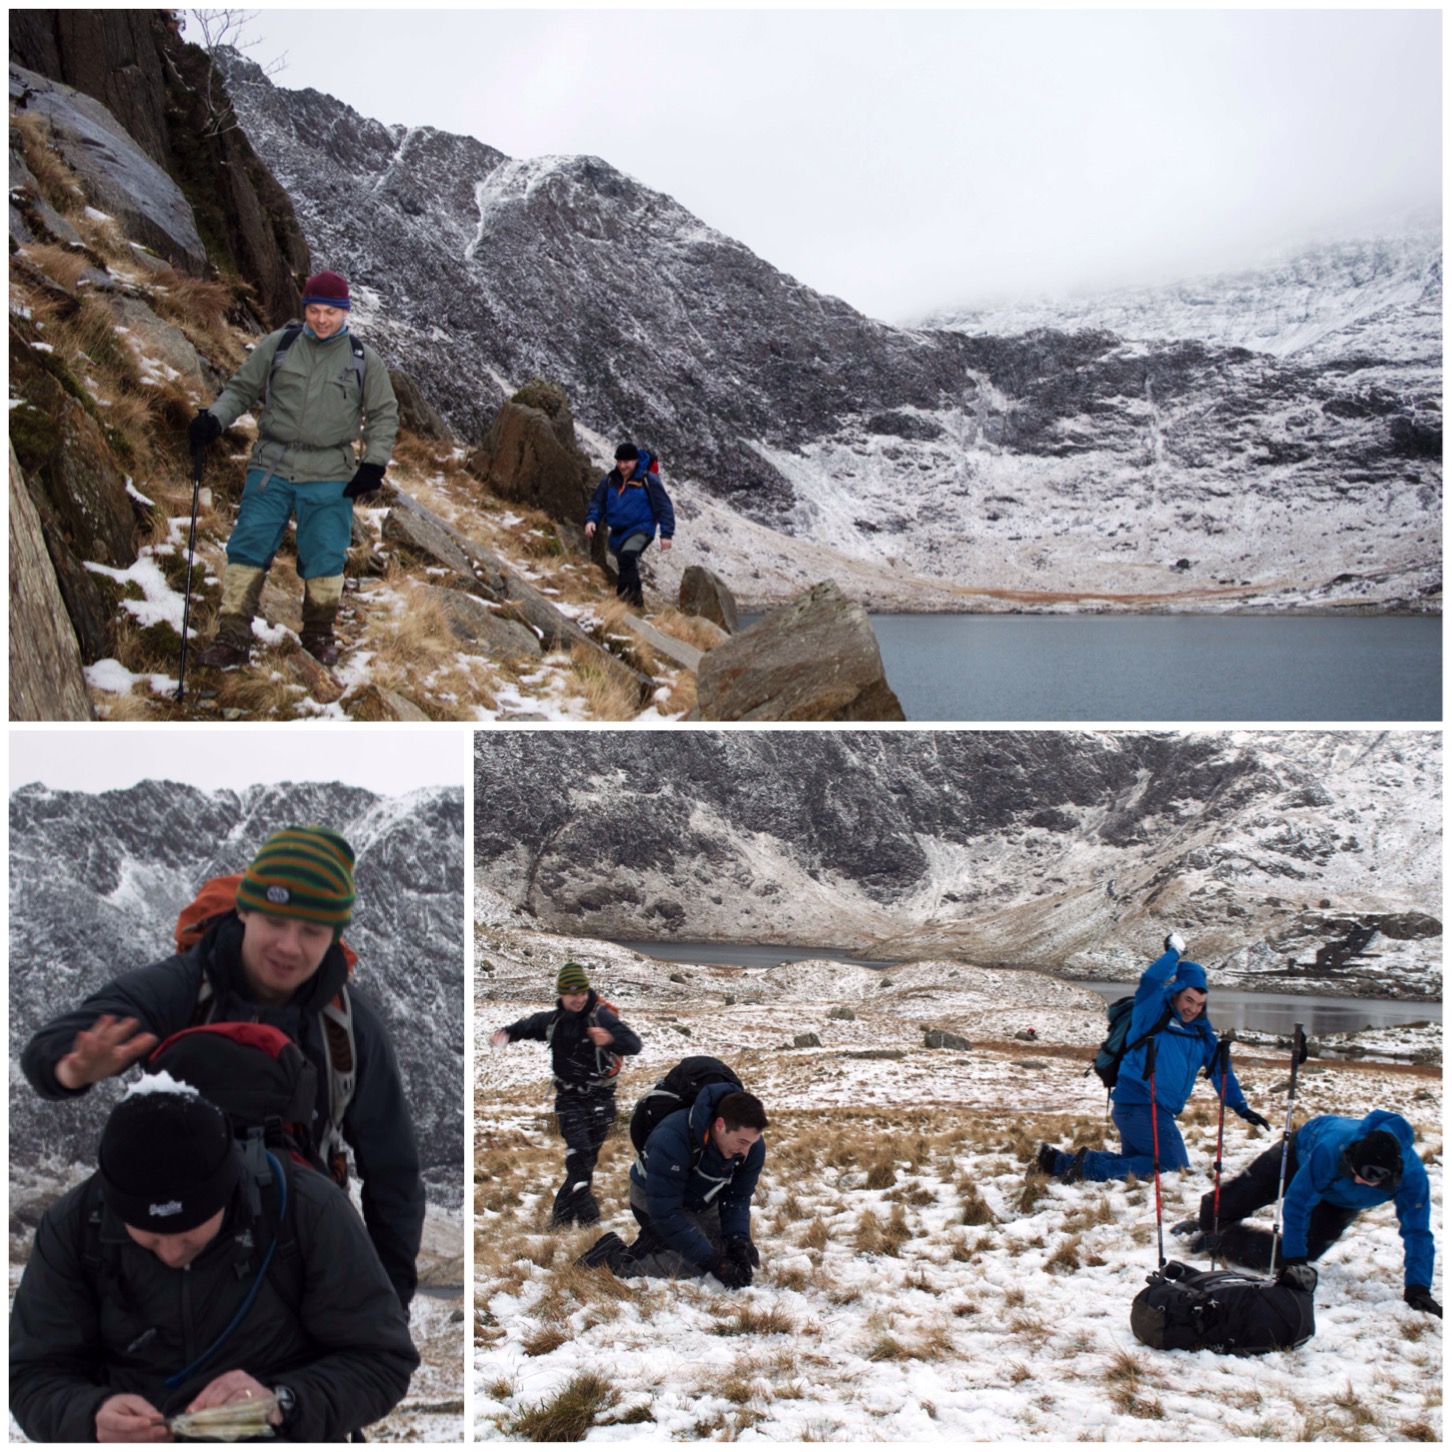
We had hoped to scramble up Cribau but decided against it as there was a lot of ice at the top. Not everyone had crampons or ice axes so we decided to head down to Llyn Llydaw instead. We walked around the southern shore of Llyn Llydaw to get off the beaten track and concentrated on micro navigation.
The route is not obvious but well worth the effort. When we reached Cwn Dyli it was time for a snowball fight. Needless to say no prisoners were taken.
Enjoyment in different forms
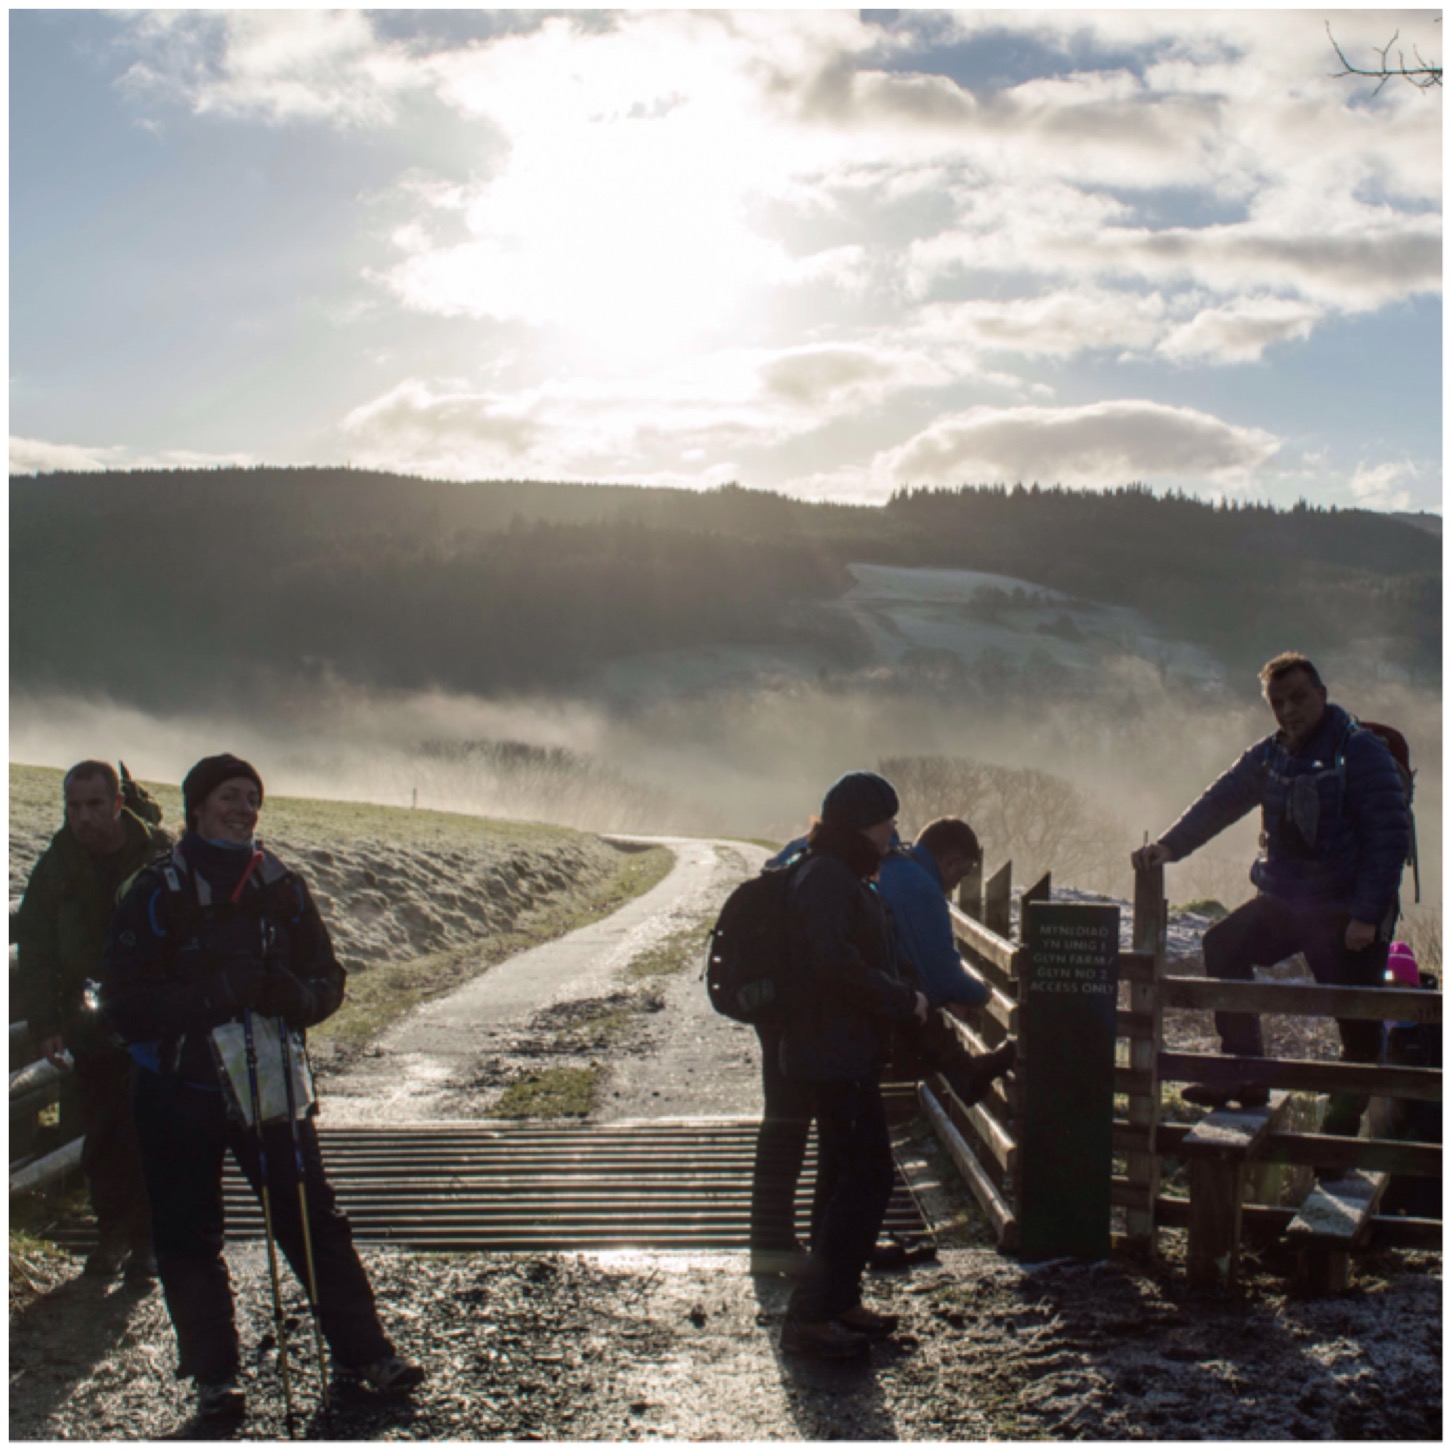
We all decided to stay down low on the Sunday morning. Some of the guys went to the Pinnacles to do a bit of rock climbing and the rest of us walked from Capel Curig Training Camp up to the cafe in Capel Curig.
It was a stunning morning with low-lying mist and beautiful sunshine.
Sunny Sunday
We did a little bit of navigation but to tell you the truth we mainly just enjoyed the walk. It got a bit muddy in places but we just took our time.
Navigating and a bit of R & R
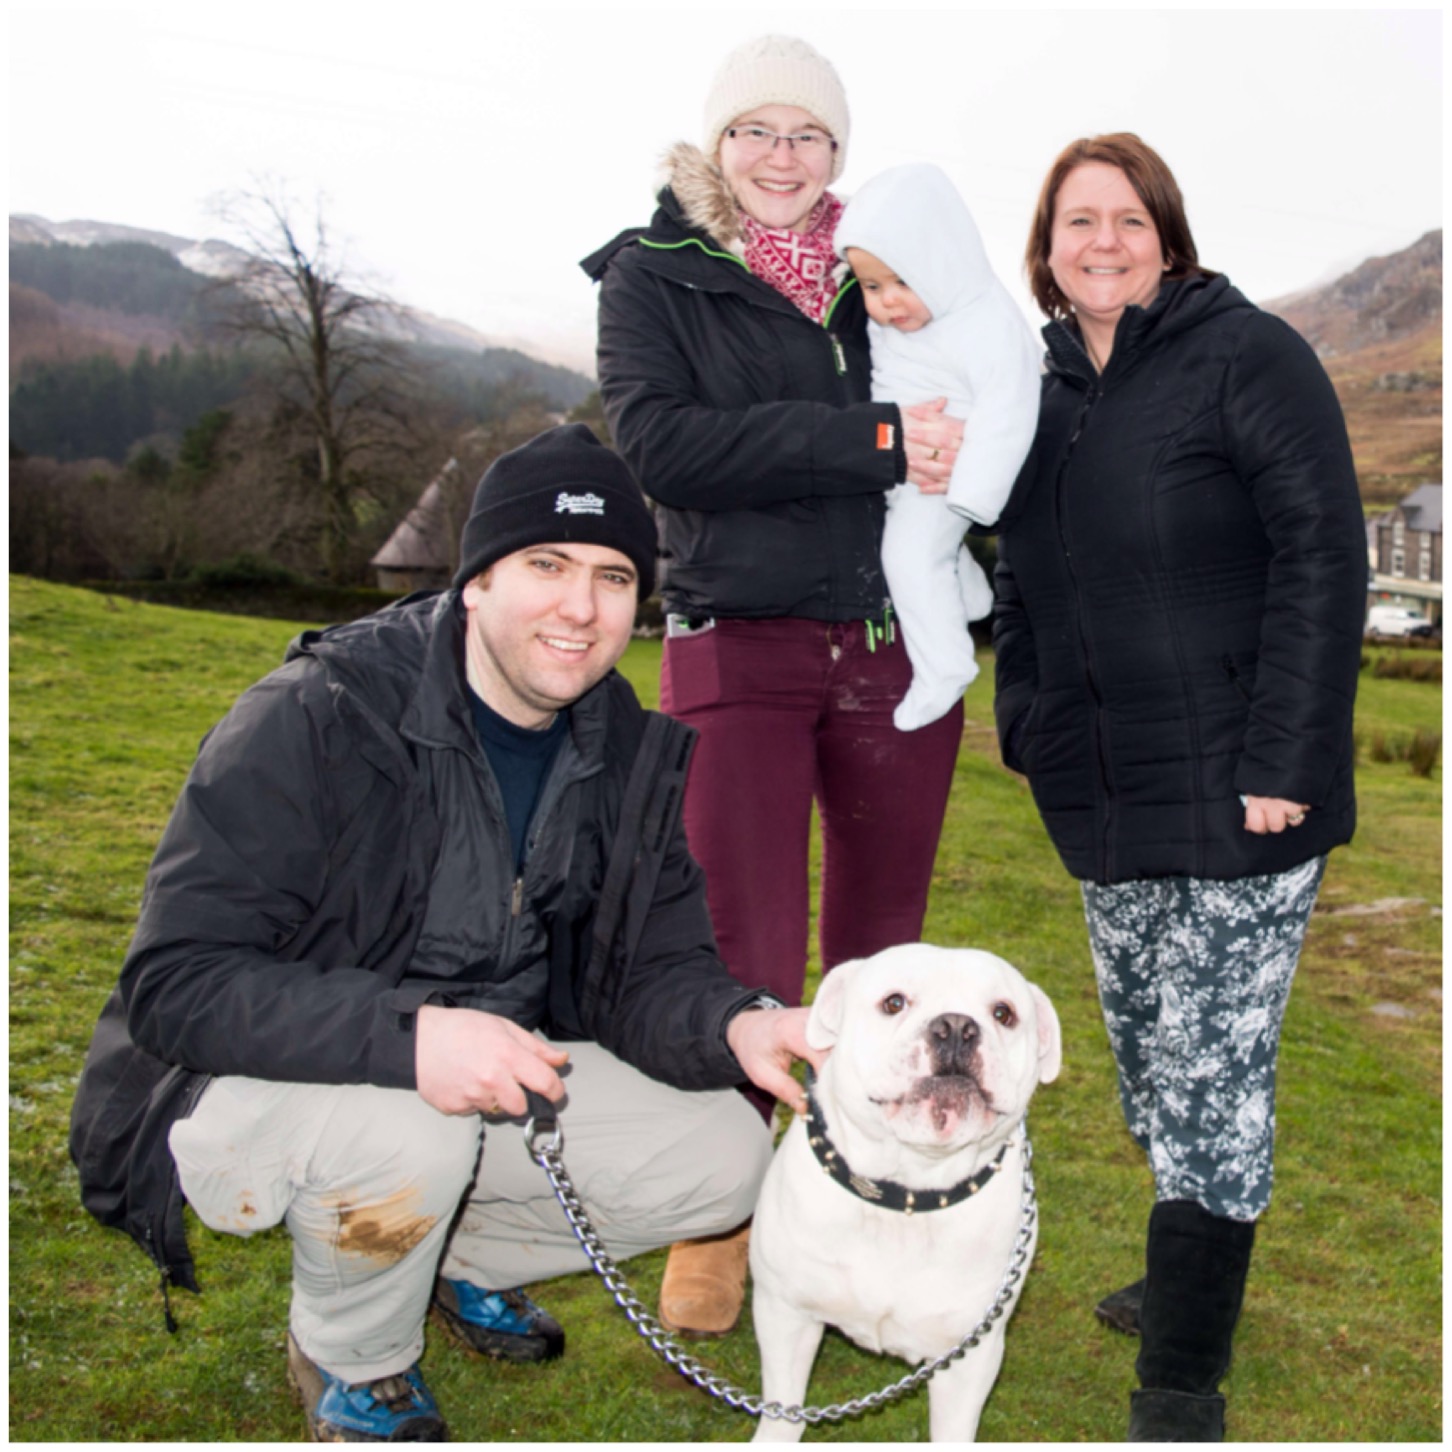
Just before we reached the cafe at Capel Curig I met up with Dan Keefe and his lovely family. They had all come up for the weekend and were staying at Llanrwst to celebrate Dan’s birthday. This was also the first time I had met Dan’s little lad Oscar.
Meeting the Keefe clan
The rain came in just after I took this picture so it was time to get a bit of lunch before heading off home in the minibus.
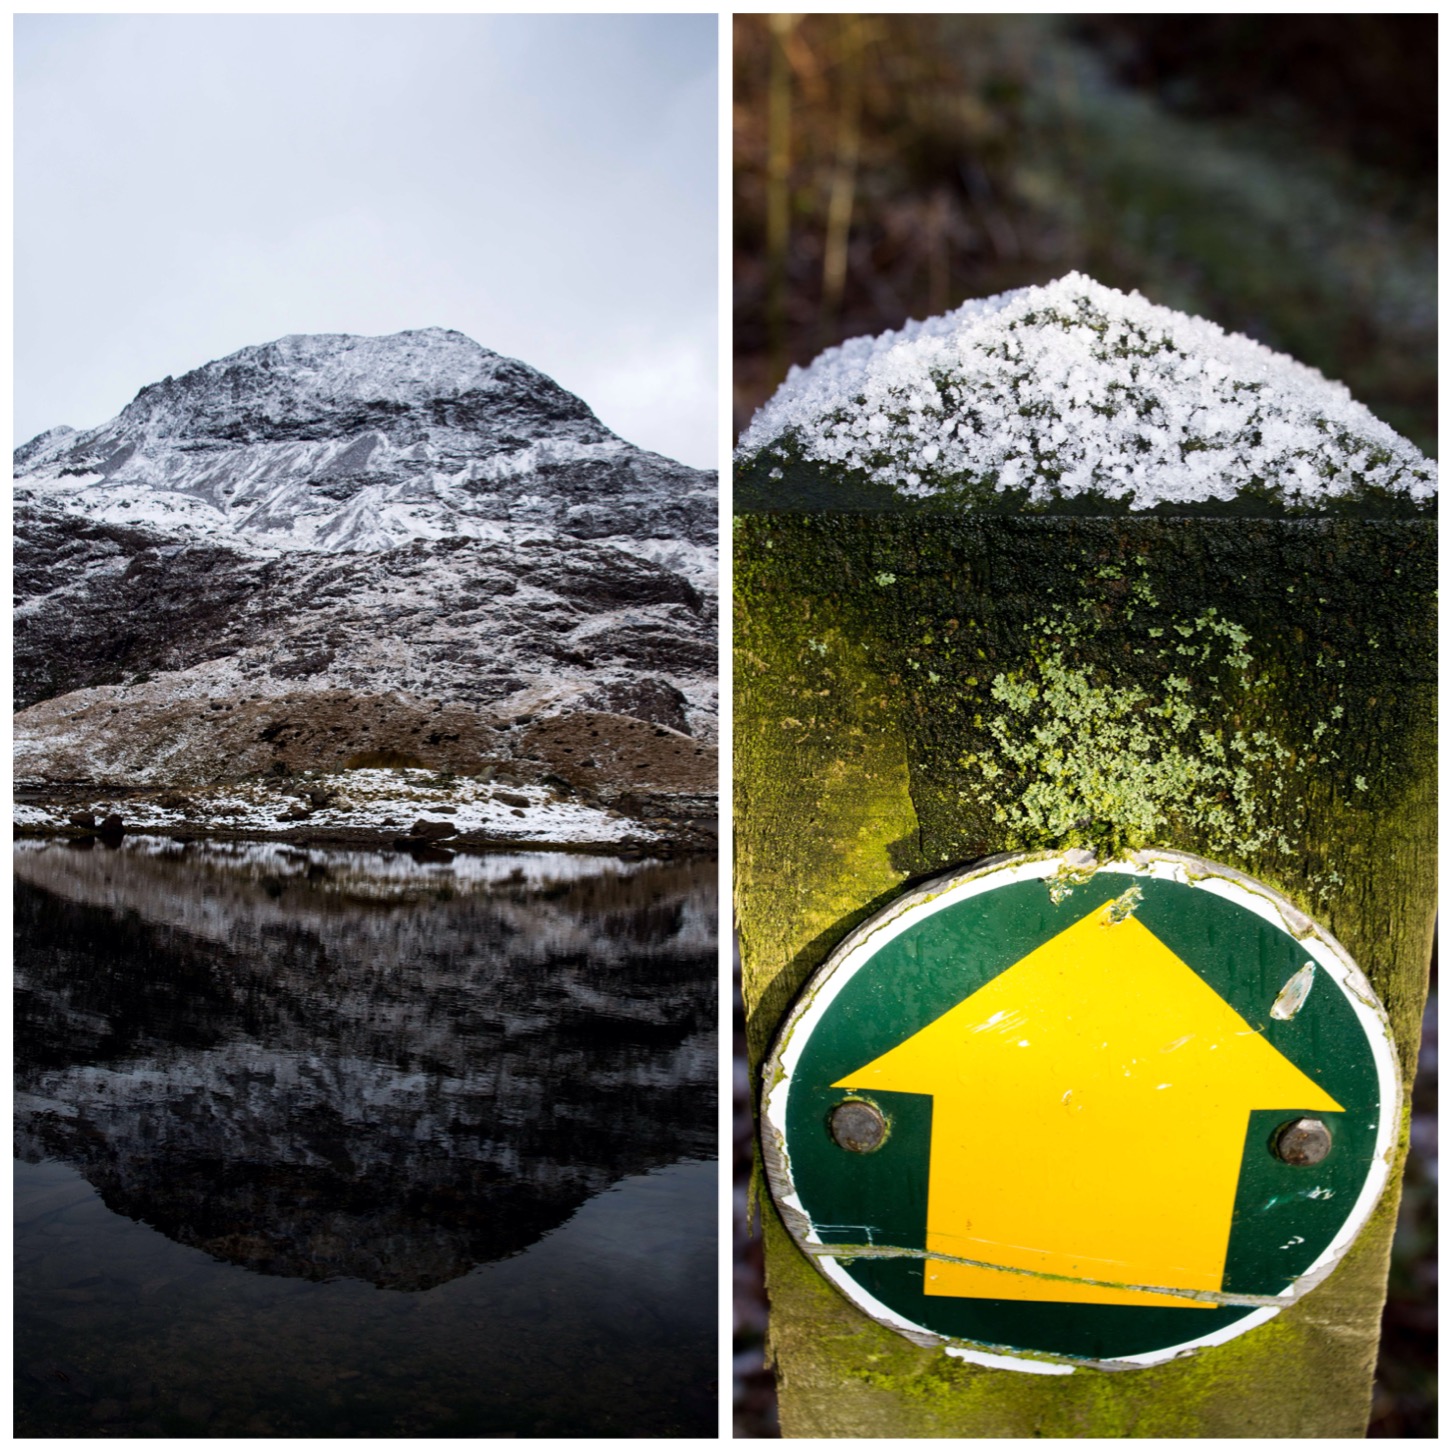
While we were walking and climbing in the park I set myself the challenge of photographing the beauty of the park in as many ways as possible.
I aimed to try and capture the big scenes, the little ones, the natural ones and the man made ones. This is my record of that attempt.
Stunning Snowdonia – big or small – natural or man made
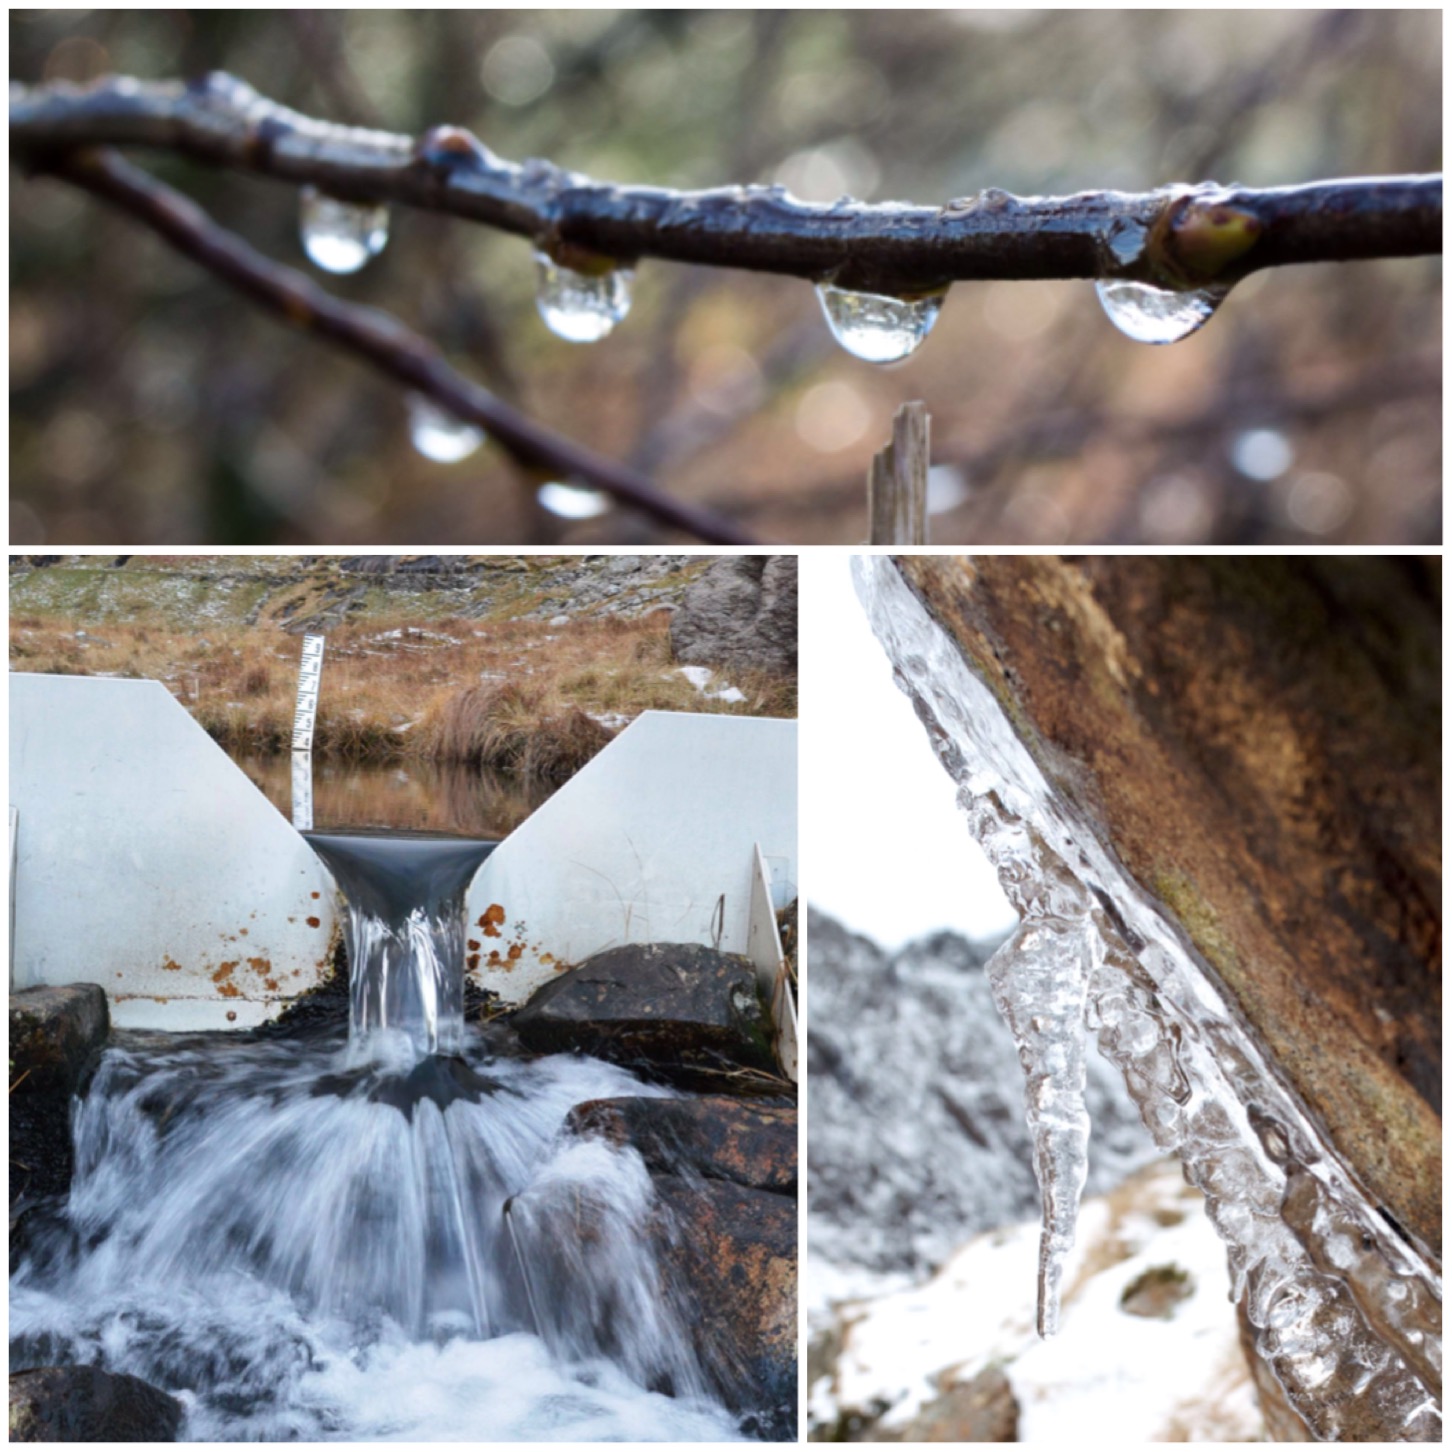
Those who have ever been to Snowdonia will know that water is a very dominant force in this mountainous terrain. I found beauty in simple drips hanging off branches, the outflow from a stream monitoring station and the drip drip from an icicle.
Water – beauty in many forms
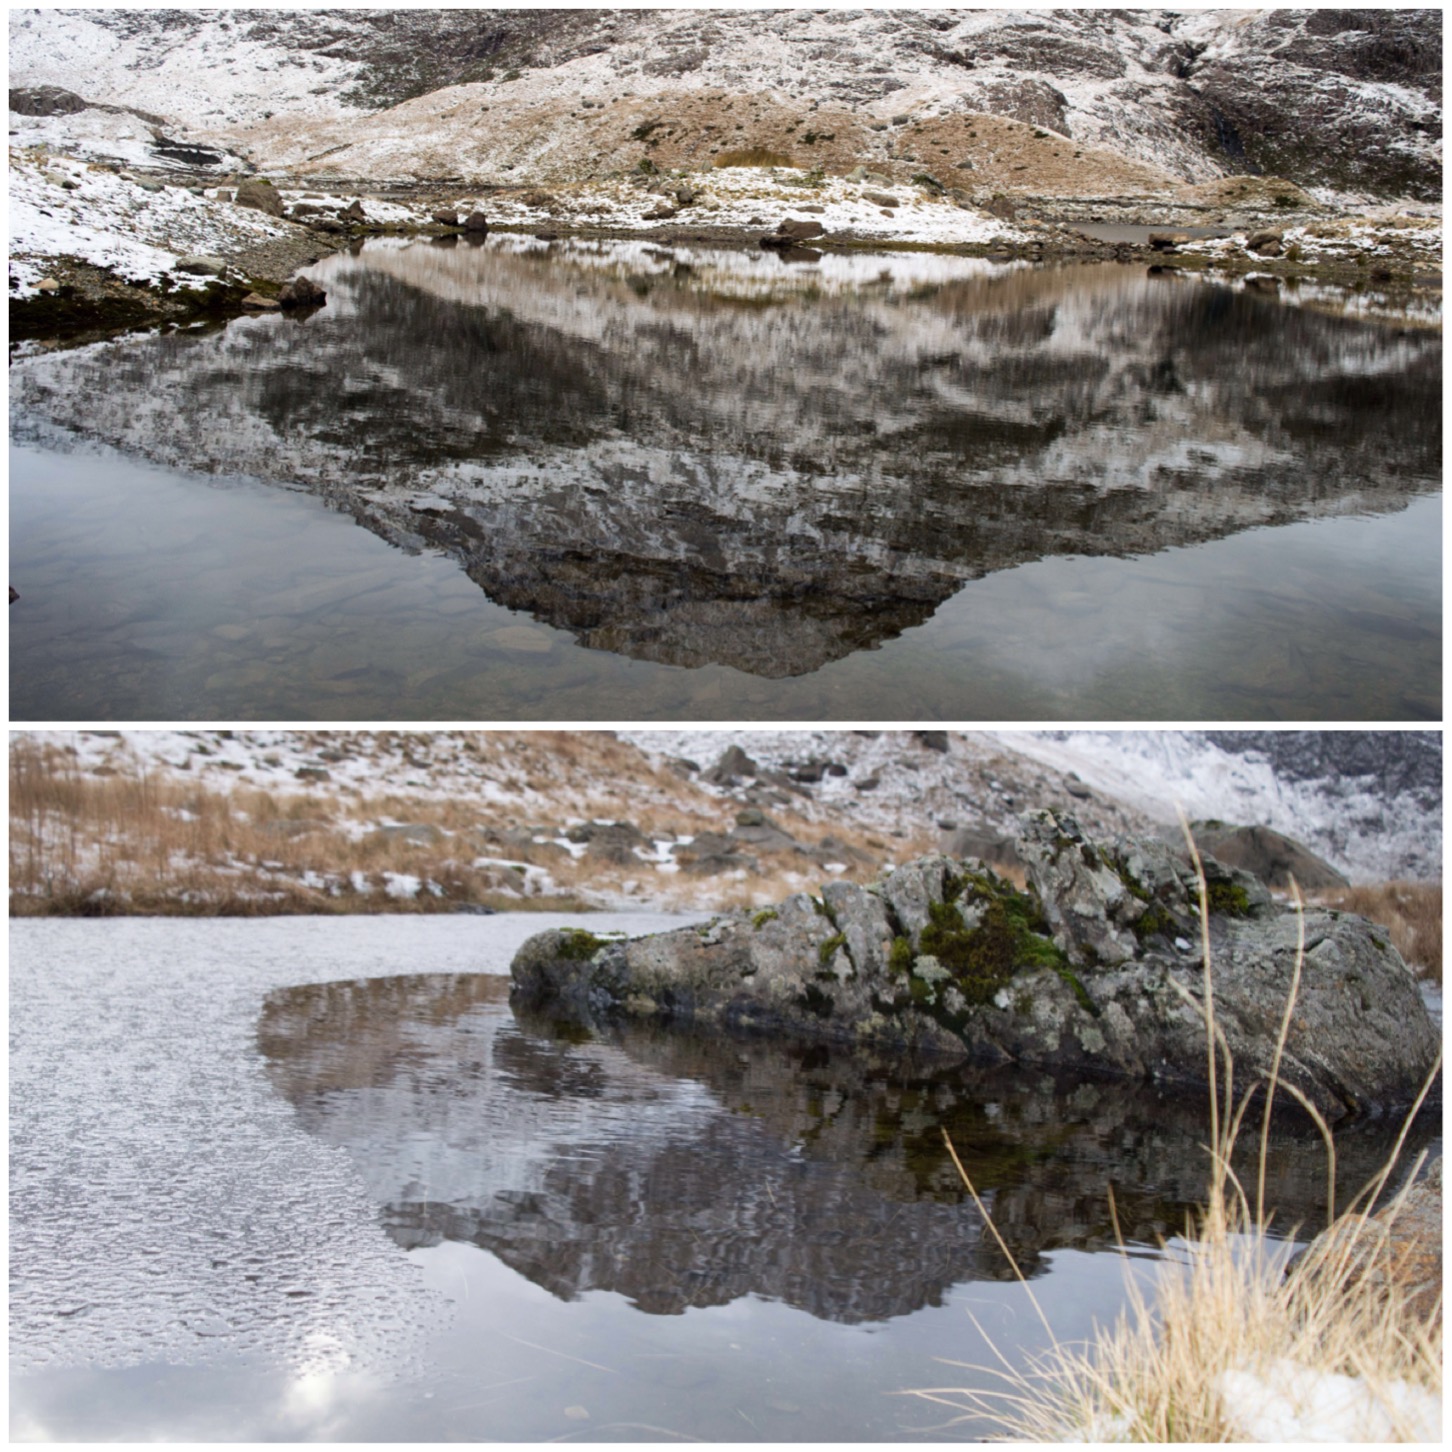
I have always been fascinated by reflections on water. I tried to capture the full reflection of Crib Goch in the picture below but could not quite get the angles right to get the top of the mountain in the picture as well.
The bottom picture I liked not just for the reflection from the mountains and the small rock but the texture of the water surface, with half of it semi frozen and half of it unfrozen.
Reflections – big and small
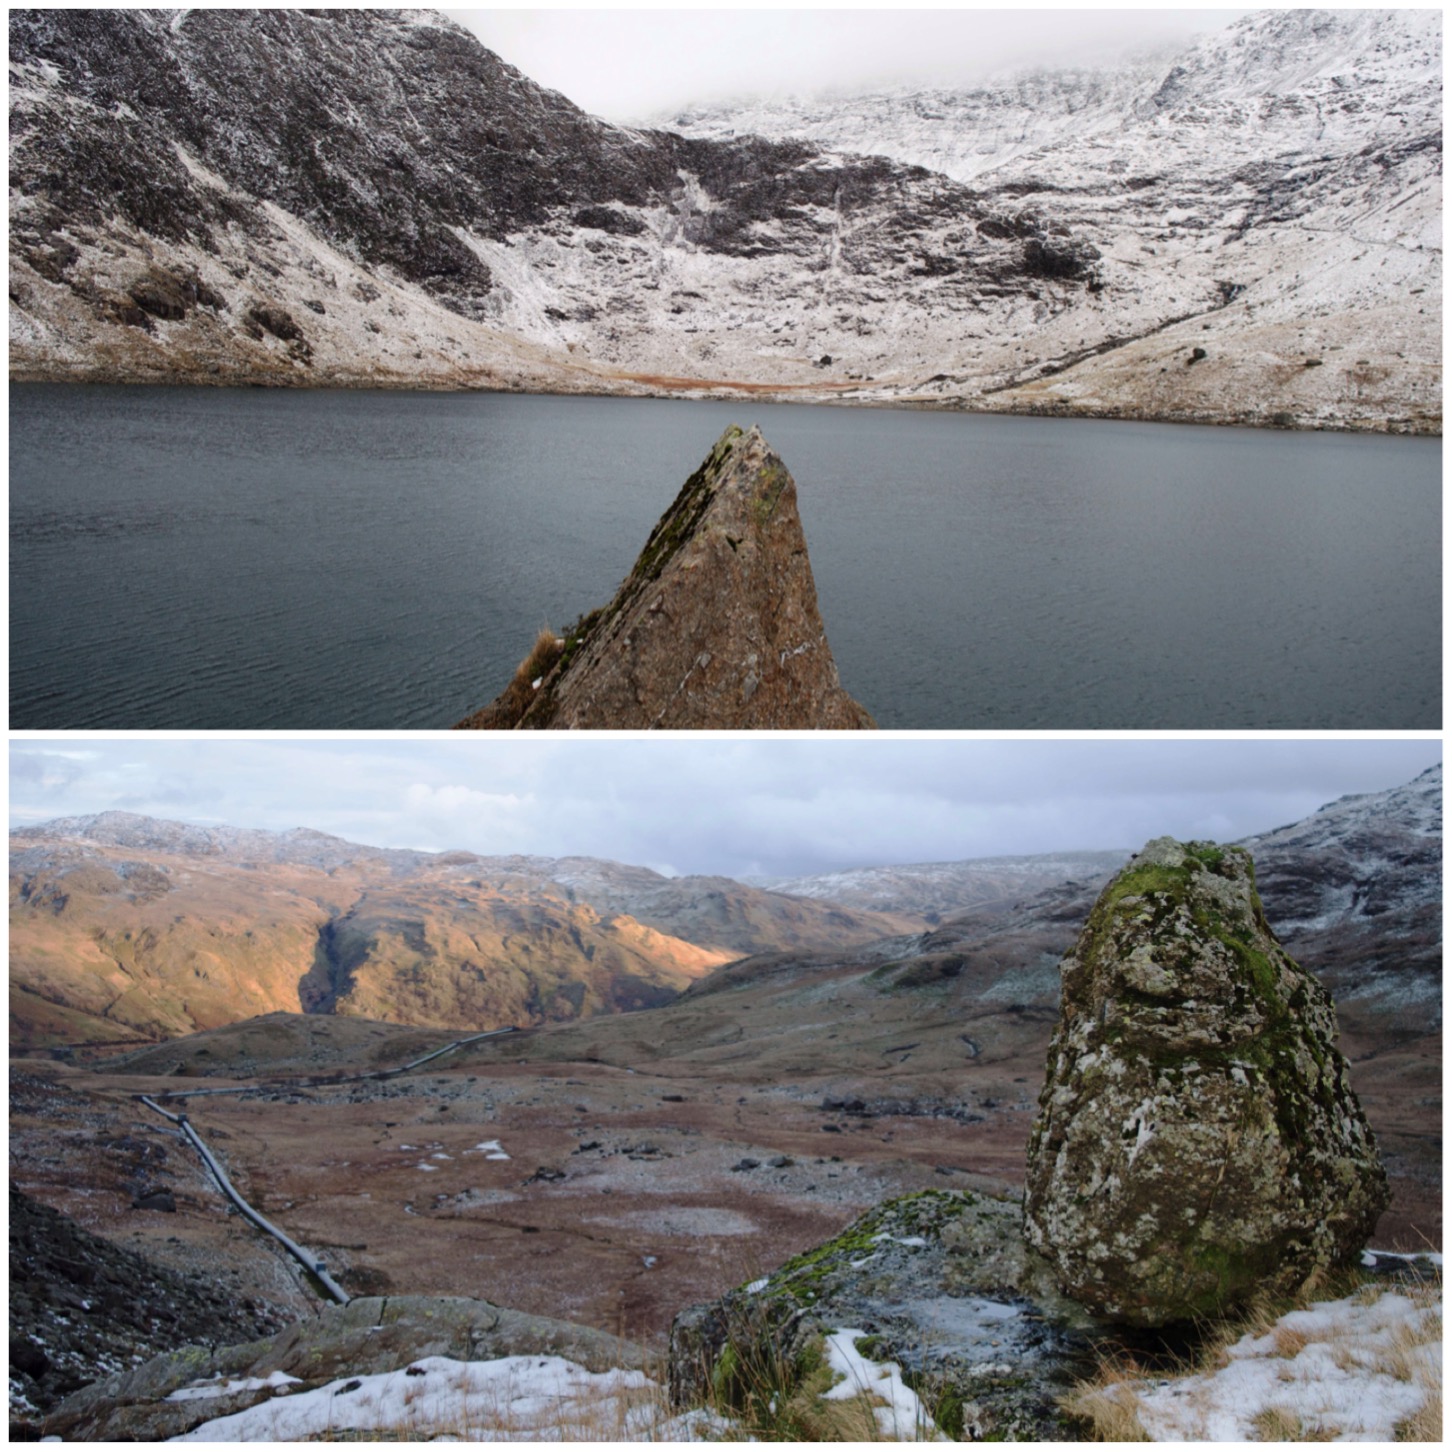
The geology of the park always catches my eye. I aimed in these two pictures below to capture the ruggedness of the scenery both in the sharpness of the rocks in the near distance and the rolling majesty of the land in the far distance.
Geology – sharp and rolling
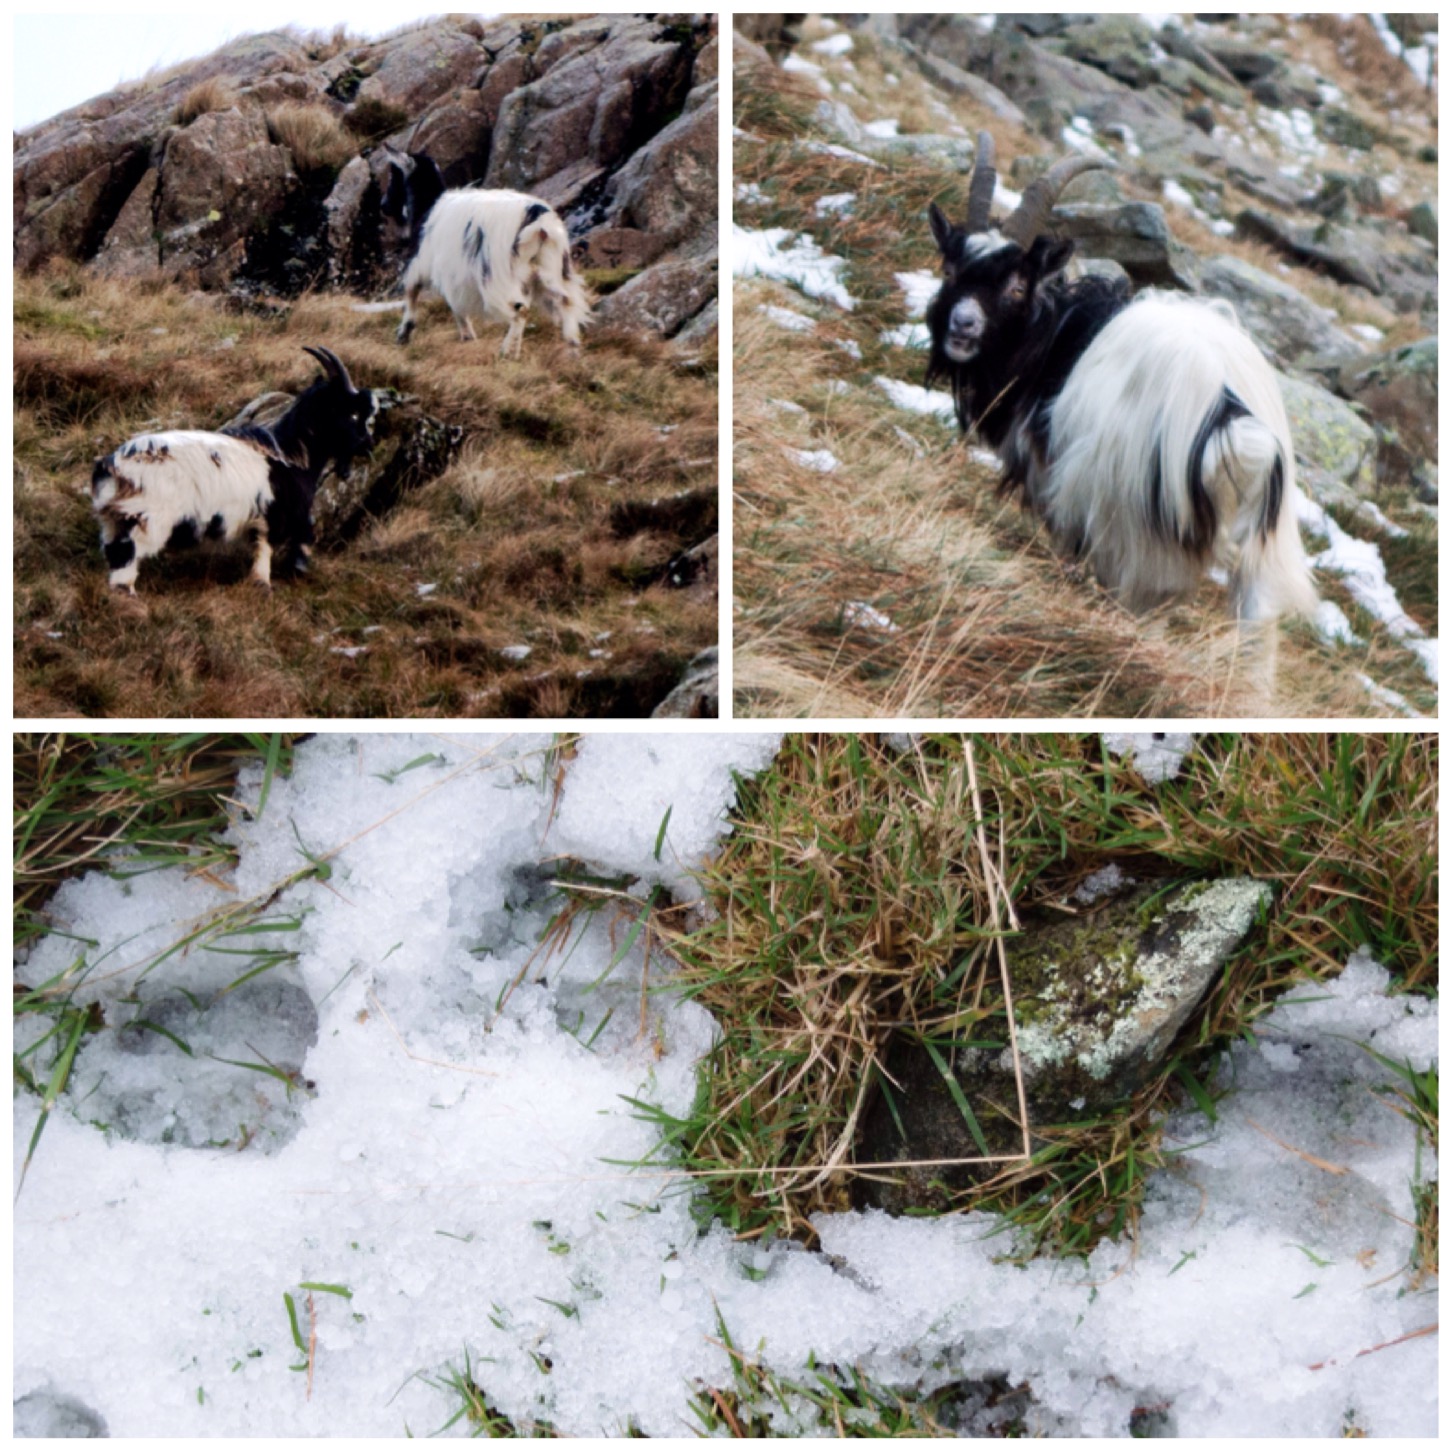
While walking around Snowdon I came across these hardy little souls. The mountain goats were well at home on the steep slopes and hardly fazed by our presence.
I stood watching them for a good half hour as they jumped about in search of green shoots and even got some of their tracks in the snow.
Fauna – the beautiful mountain goat
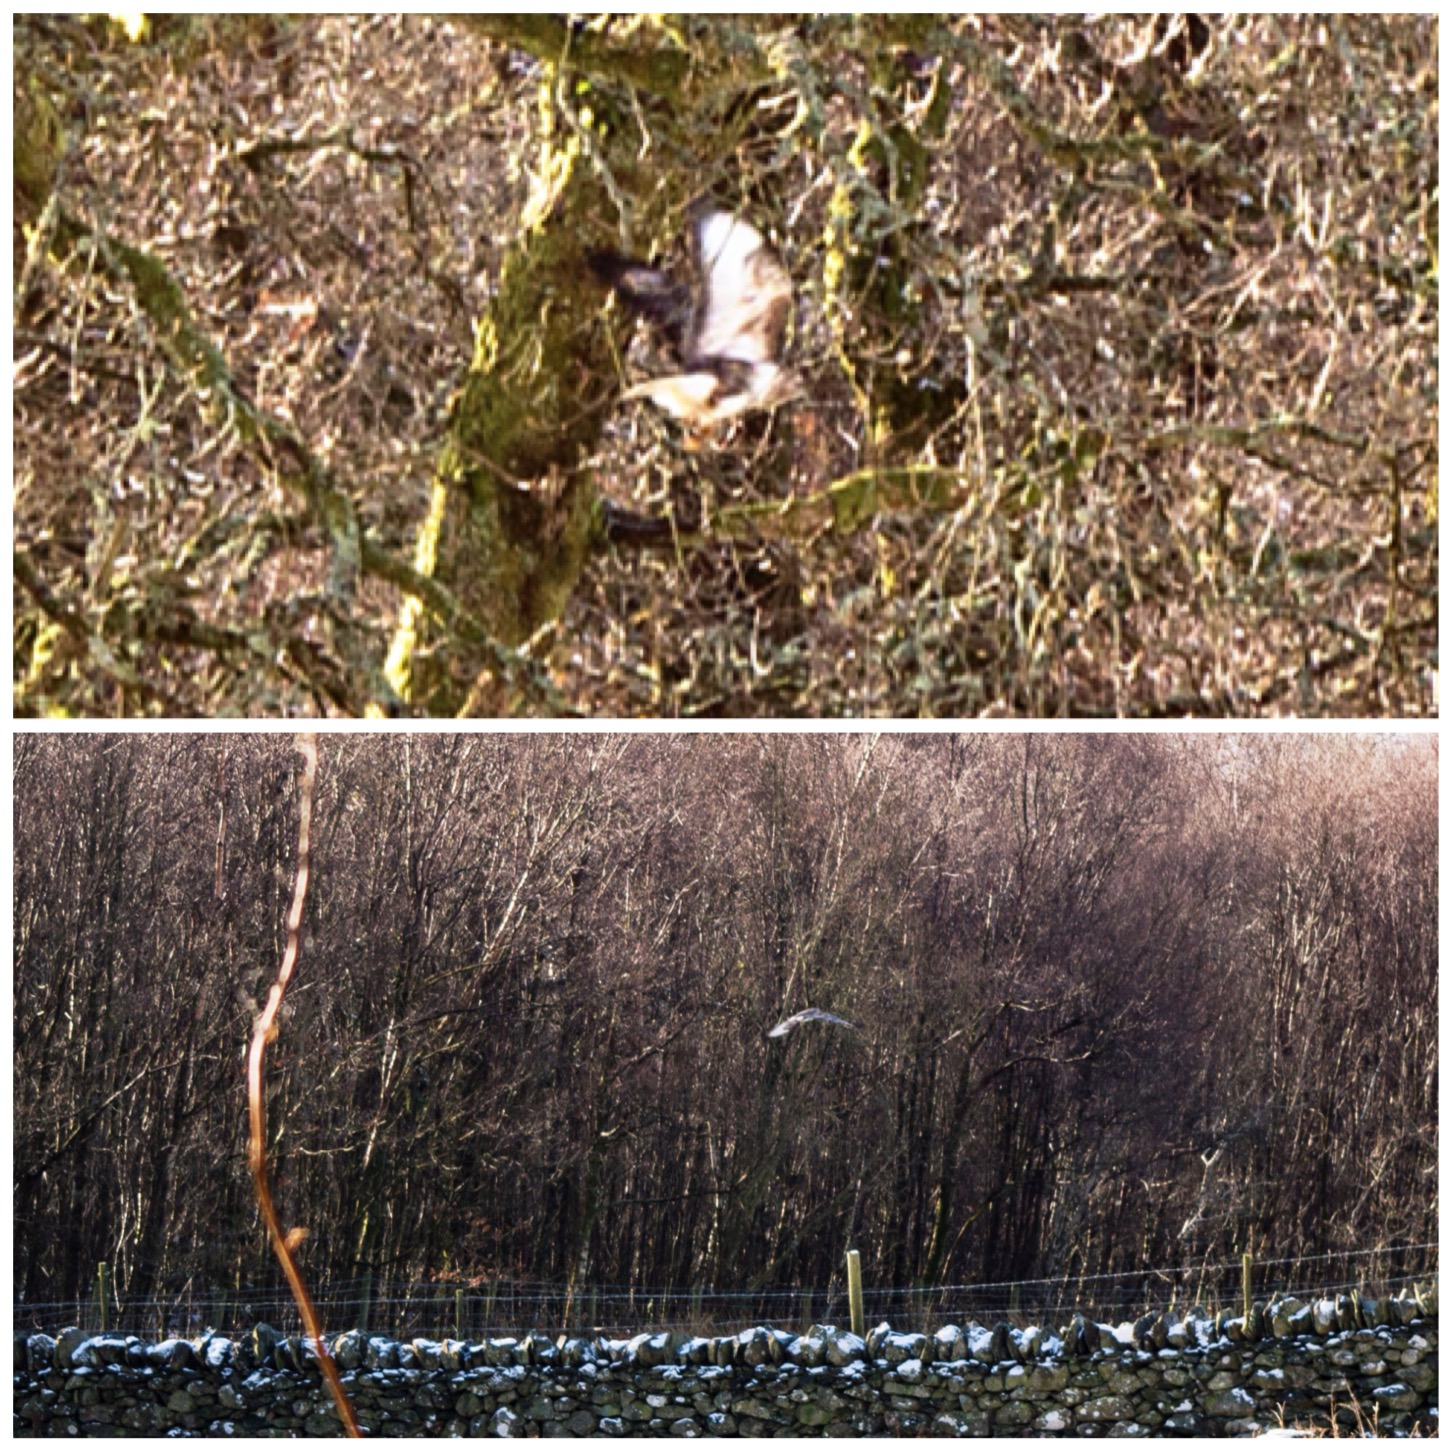
The pictures below of a large bird of prey do not do the actual moment any justice at all. My lens is not the telephoto type so I could not get tight onto the bird to get a close up.
We were walking as a group in the woods near Capel Curig when I spotted the large brown bird land in a tree. We walked as close as we could to it and managed to snap these long range shots as it flew away. I am not sure if it was an owl, a hawk or buzzard but it was big and beautiful and majestic in its flight.
Fauna – the airborne sort
Lastly not to forget the beauty poking its head out of the snow. I spent a lot of time lying in the snow getting close up shots of whatever plant life I could see.
At this time of year the ferns, mosses, grasses and heathers are the dominant flora on the mountainside. To really appreciate this beauty you need to get down close and personal.
Flora – spikes in the snow
I find that photography is starting to awaken in me a greater awareness of all the beauty that surrounds me, even in environments where I think at first glance very little is going on.
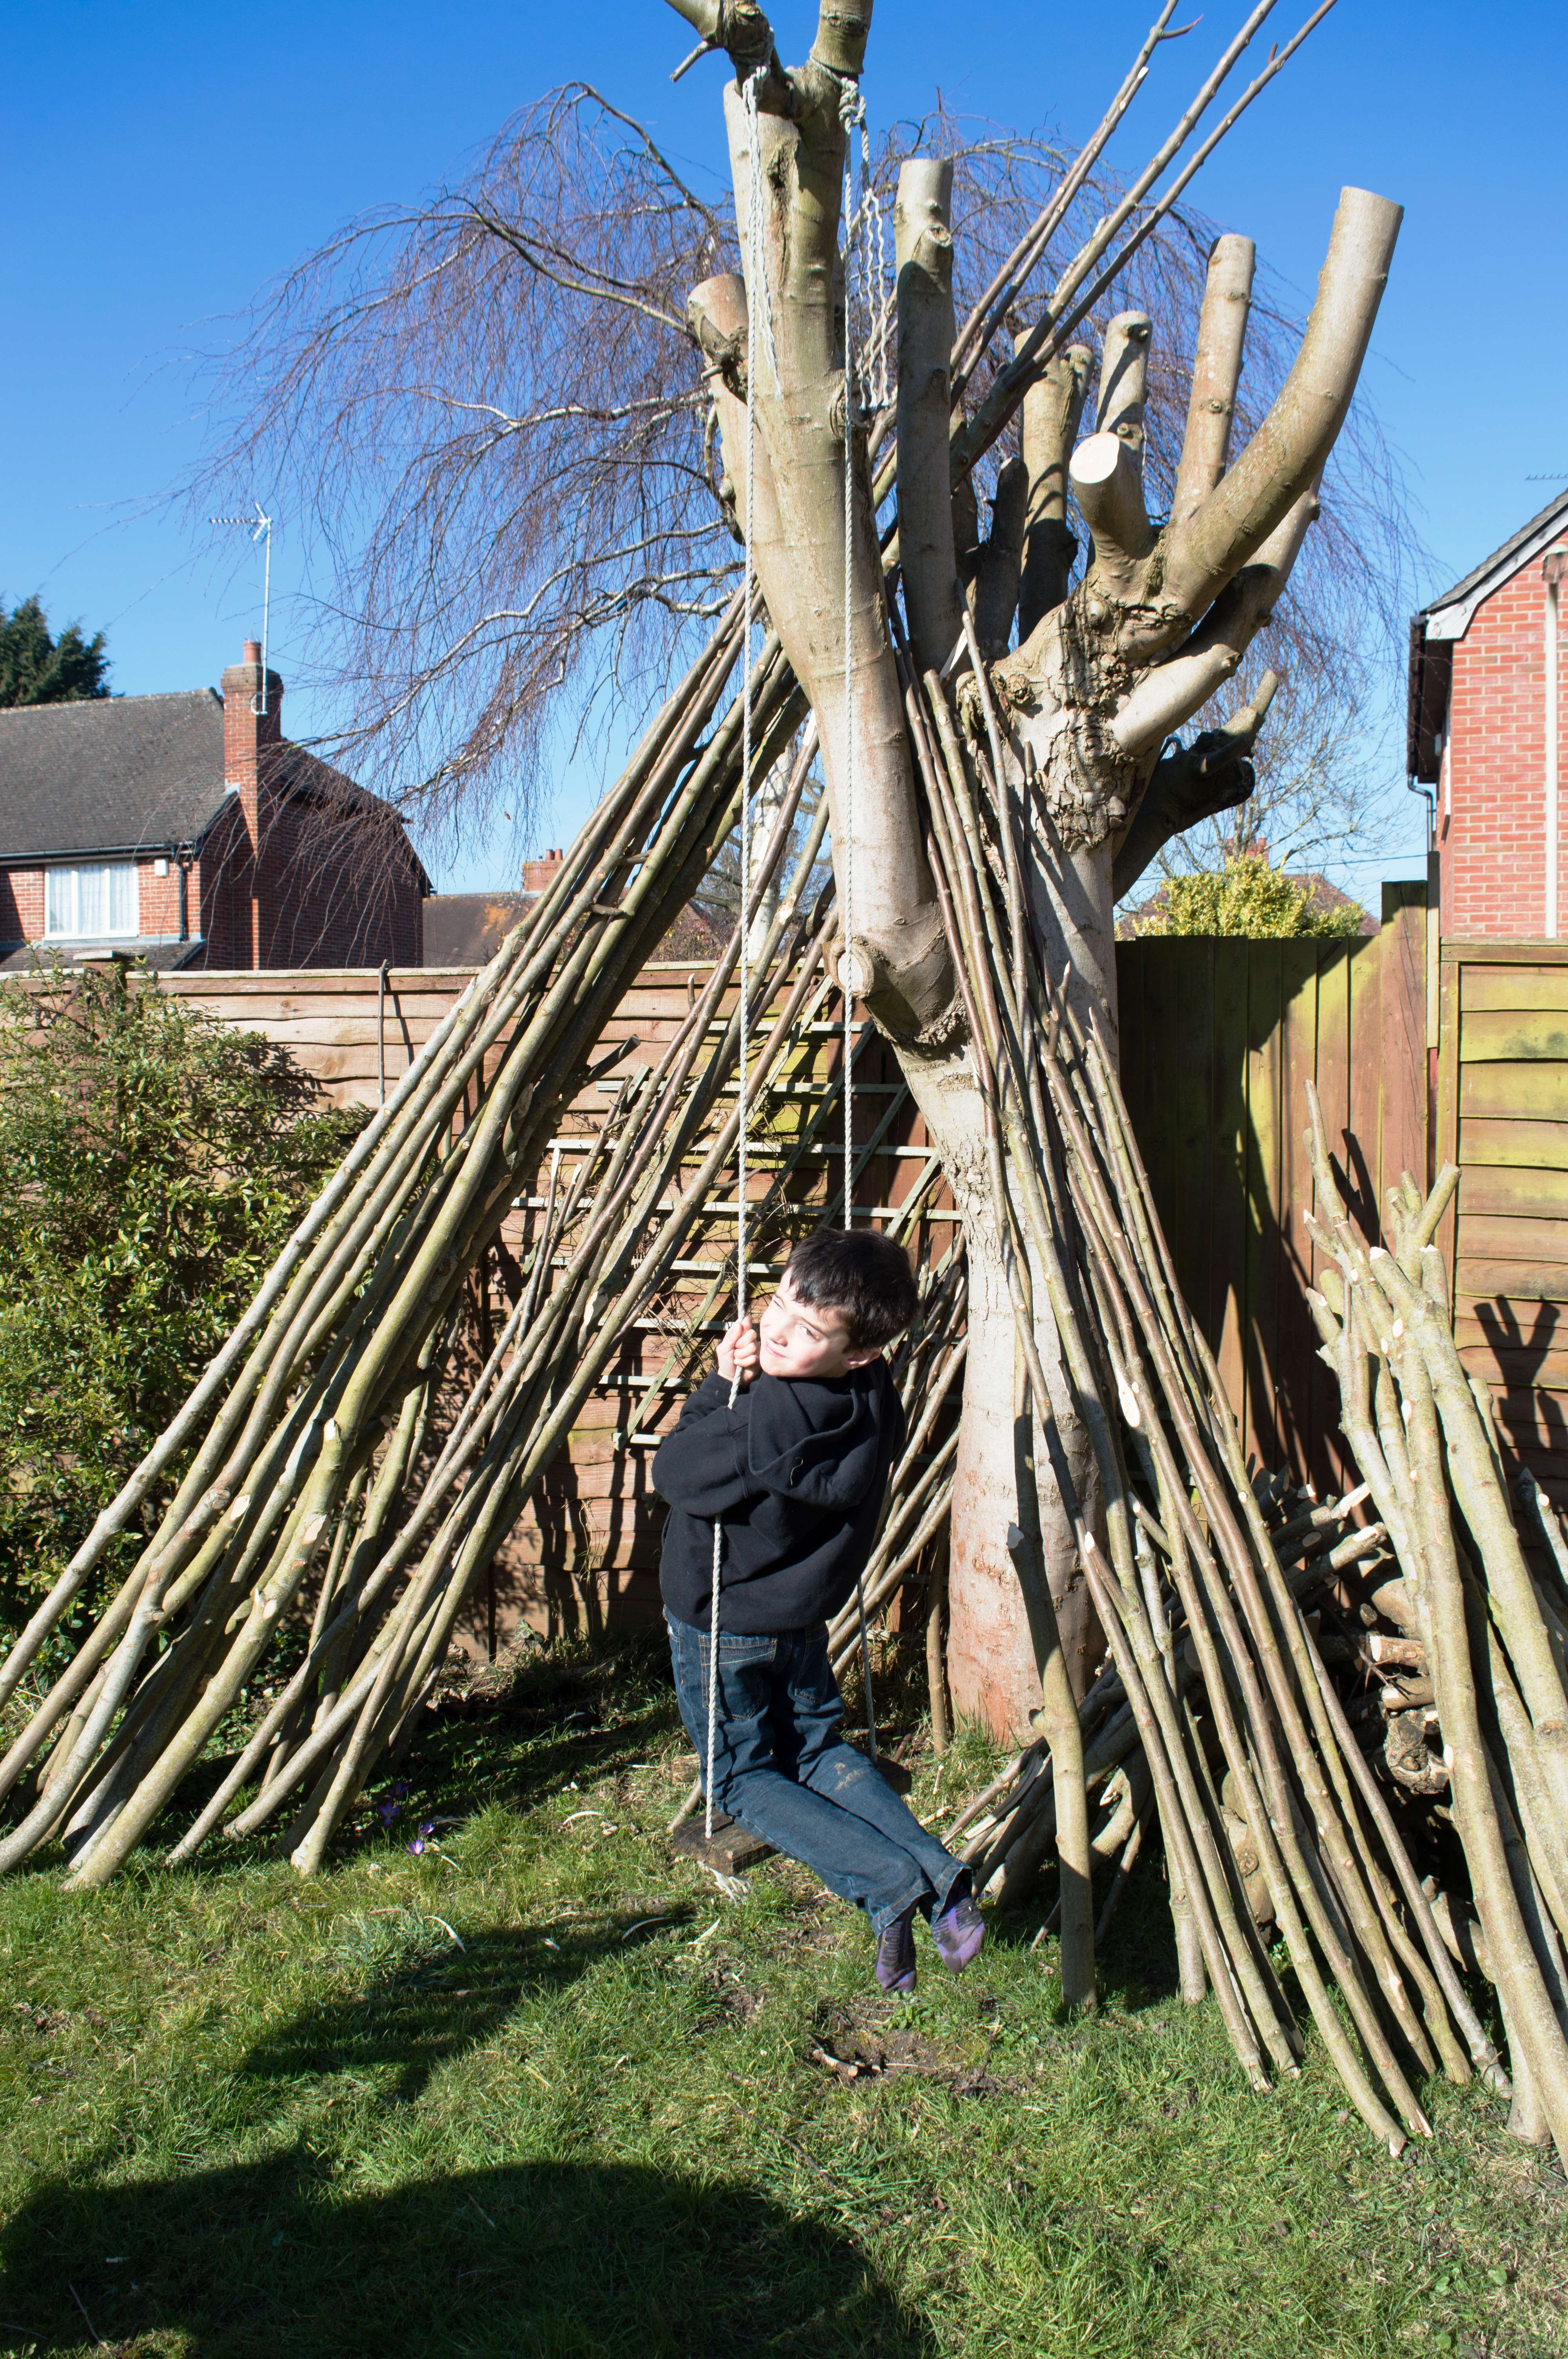
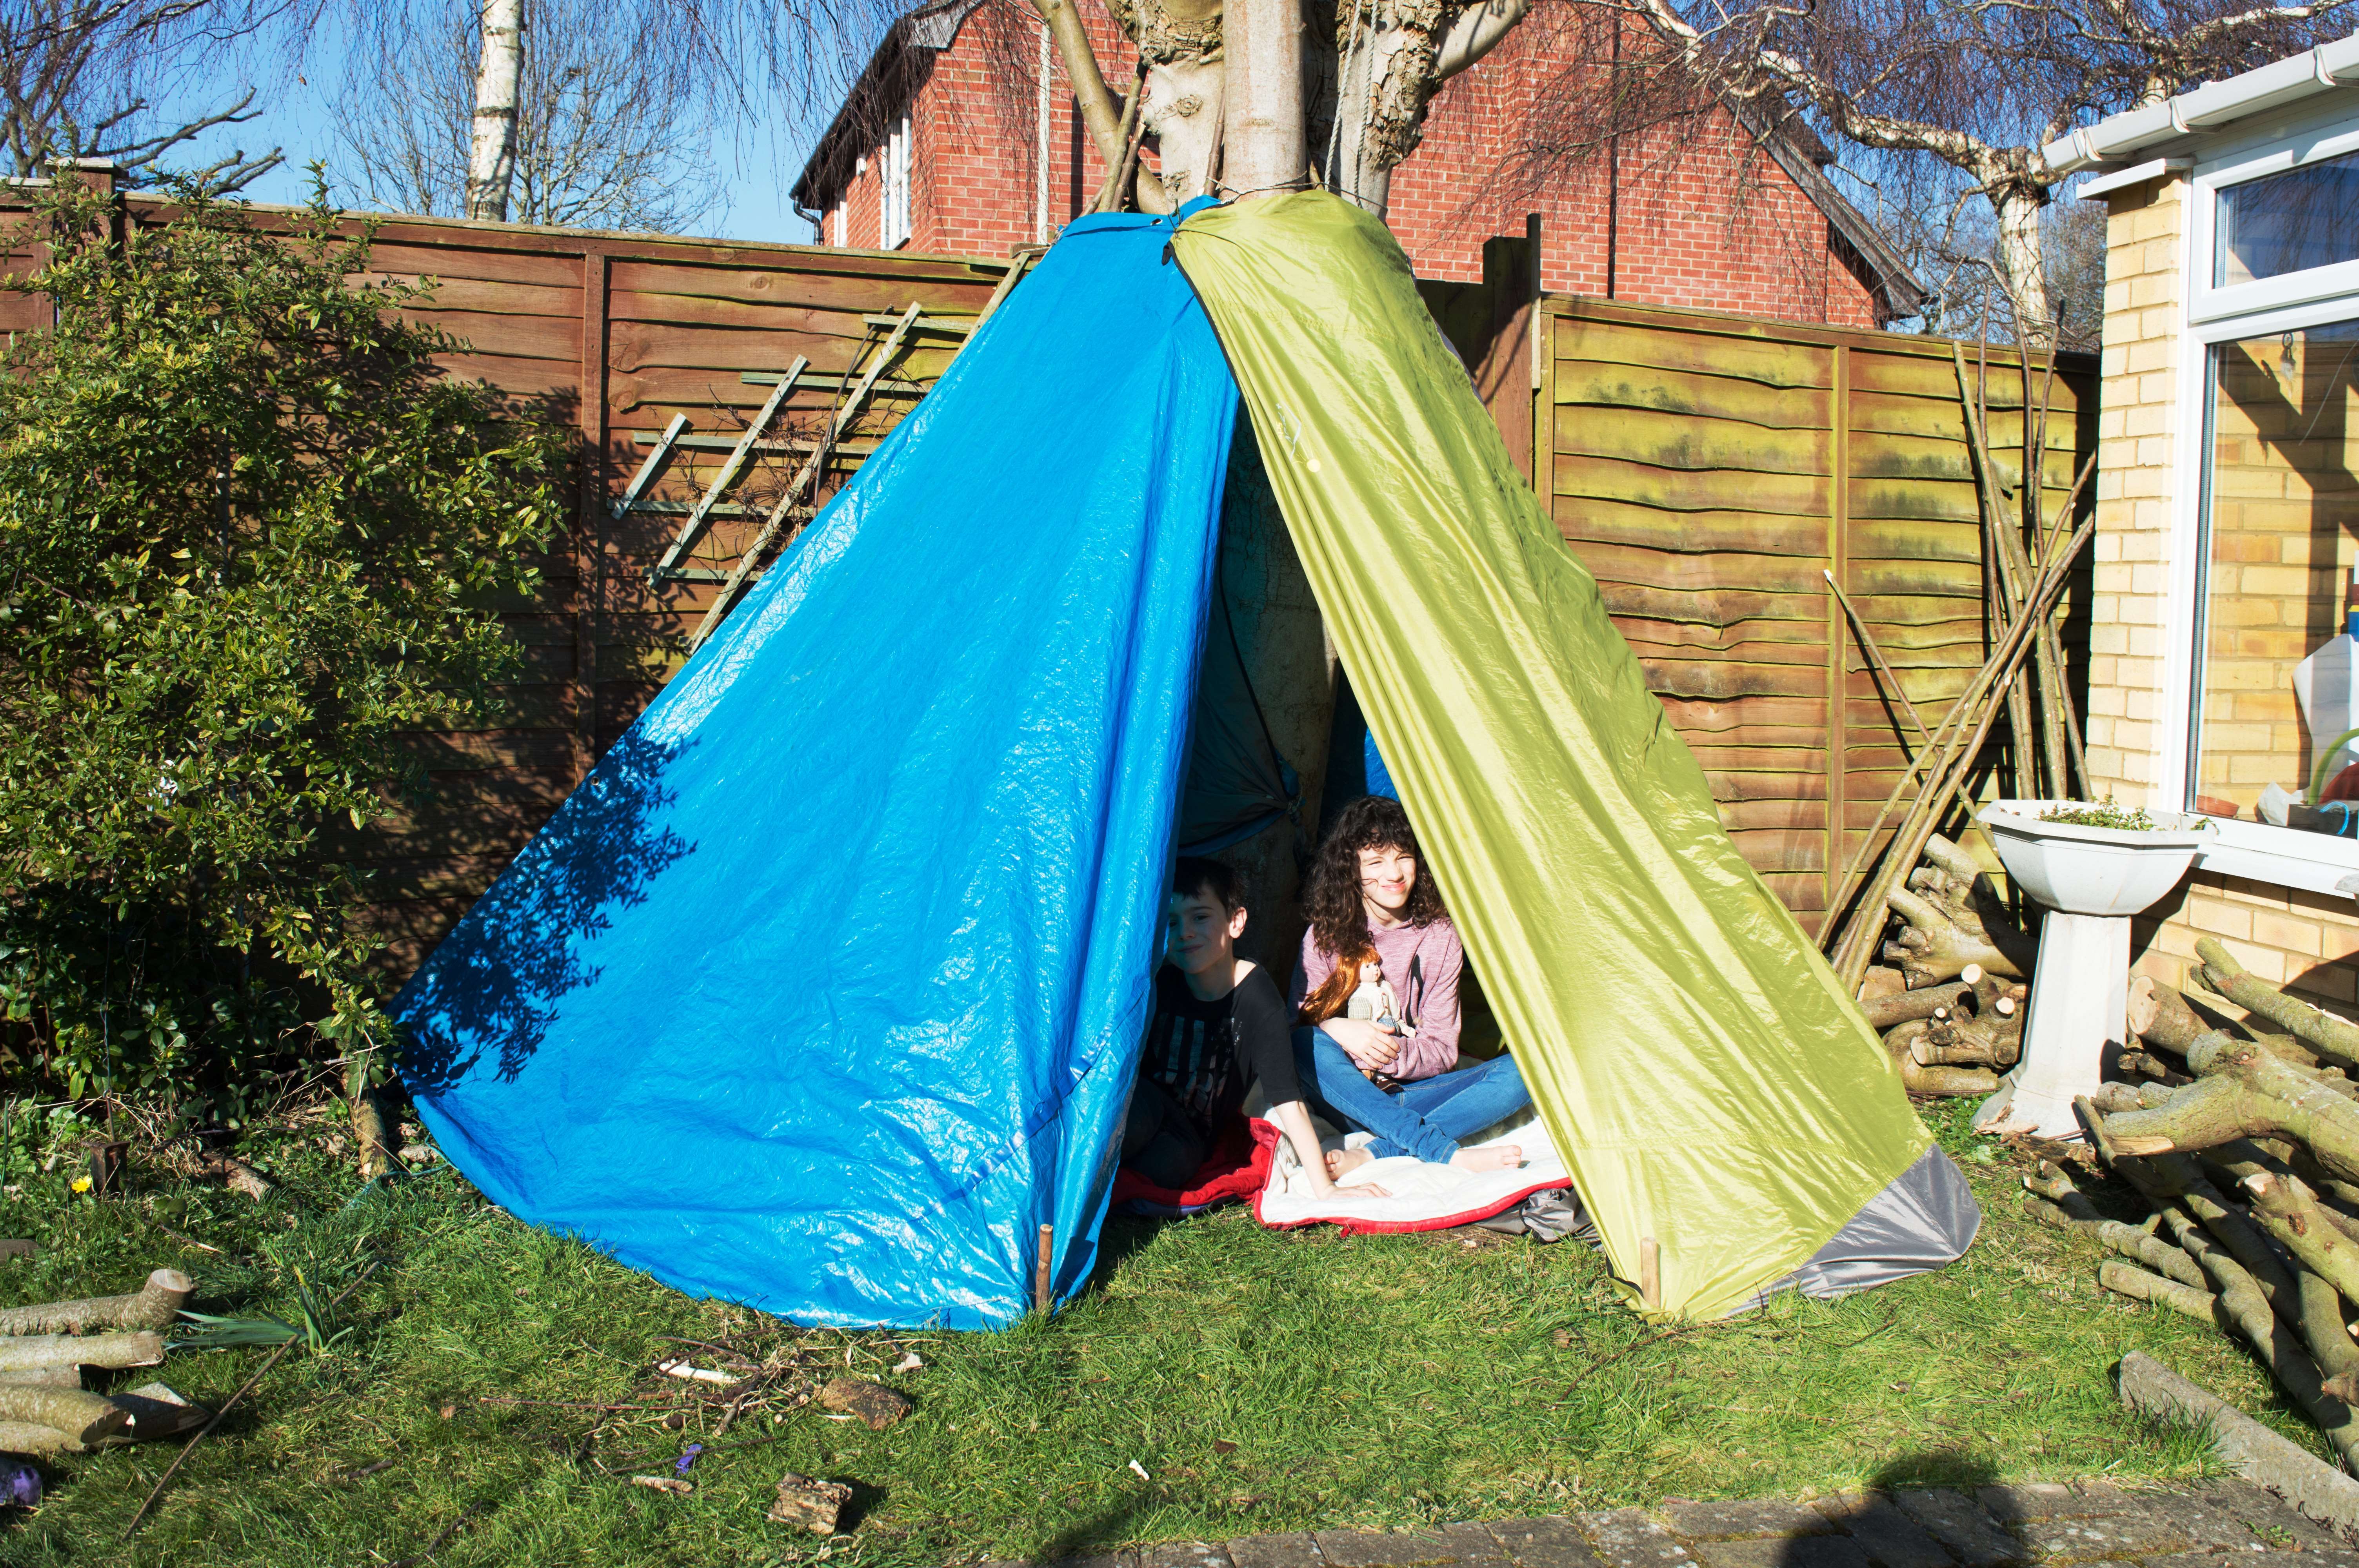
I had pollarded a sycamore in my garden during the winter and had stacked up all the rods for use in bushcraft projects this year.
One pollarded sycamore
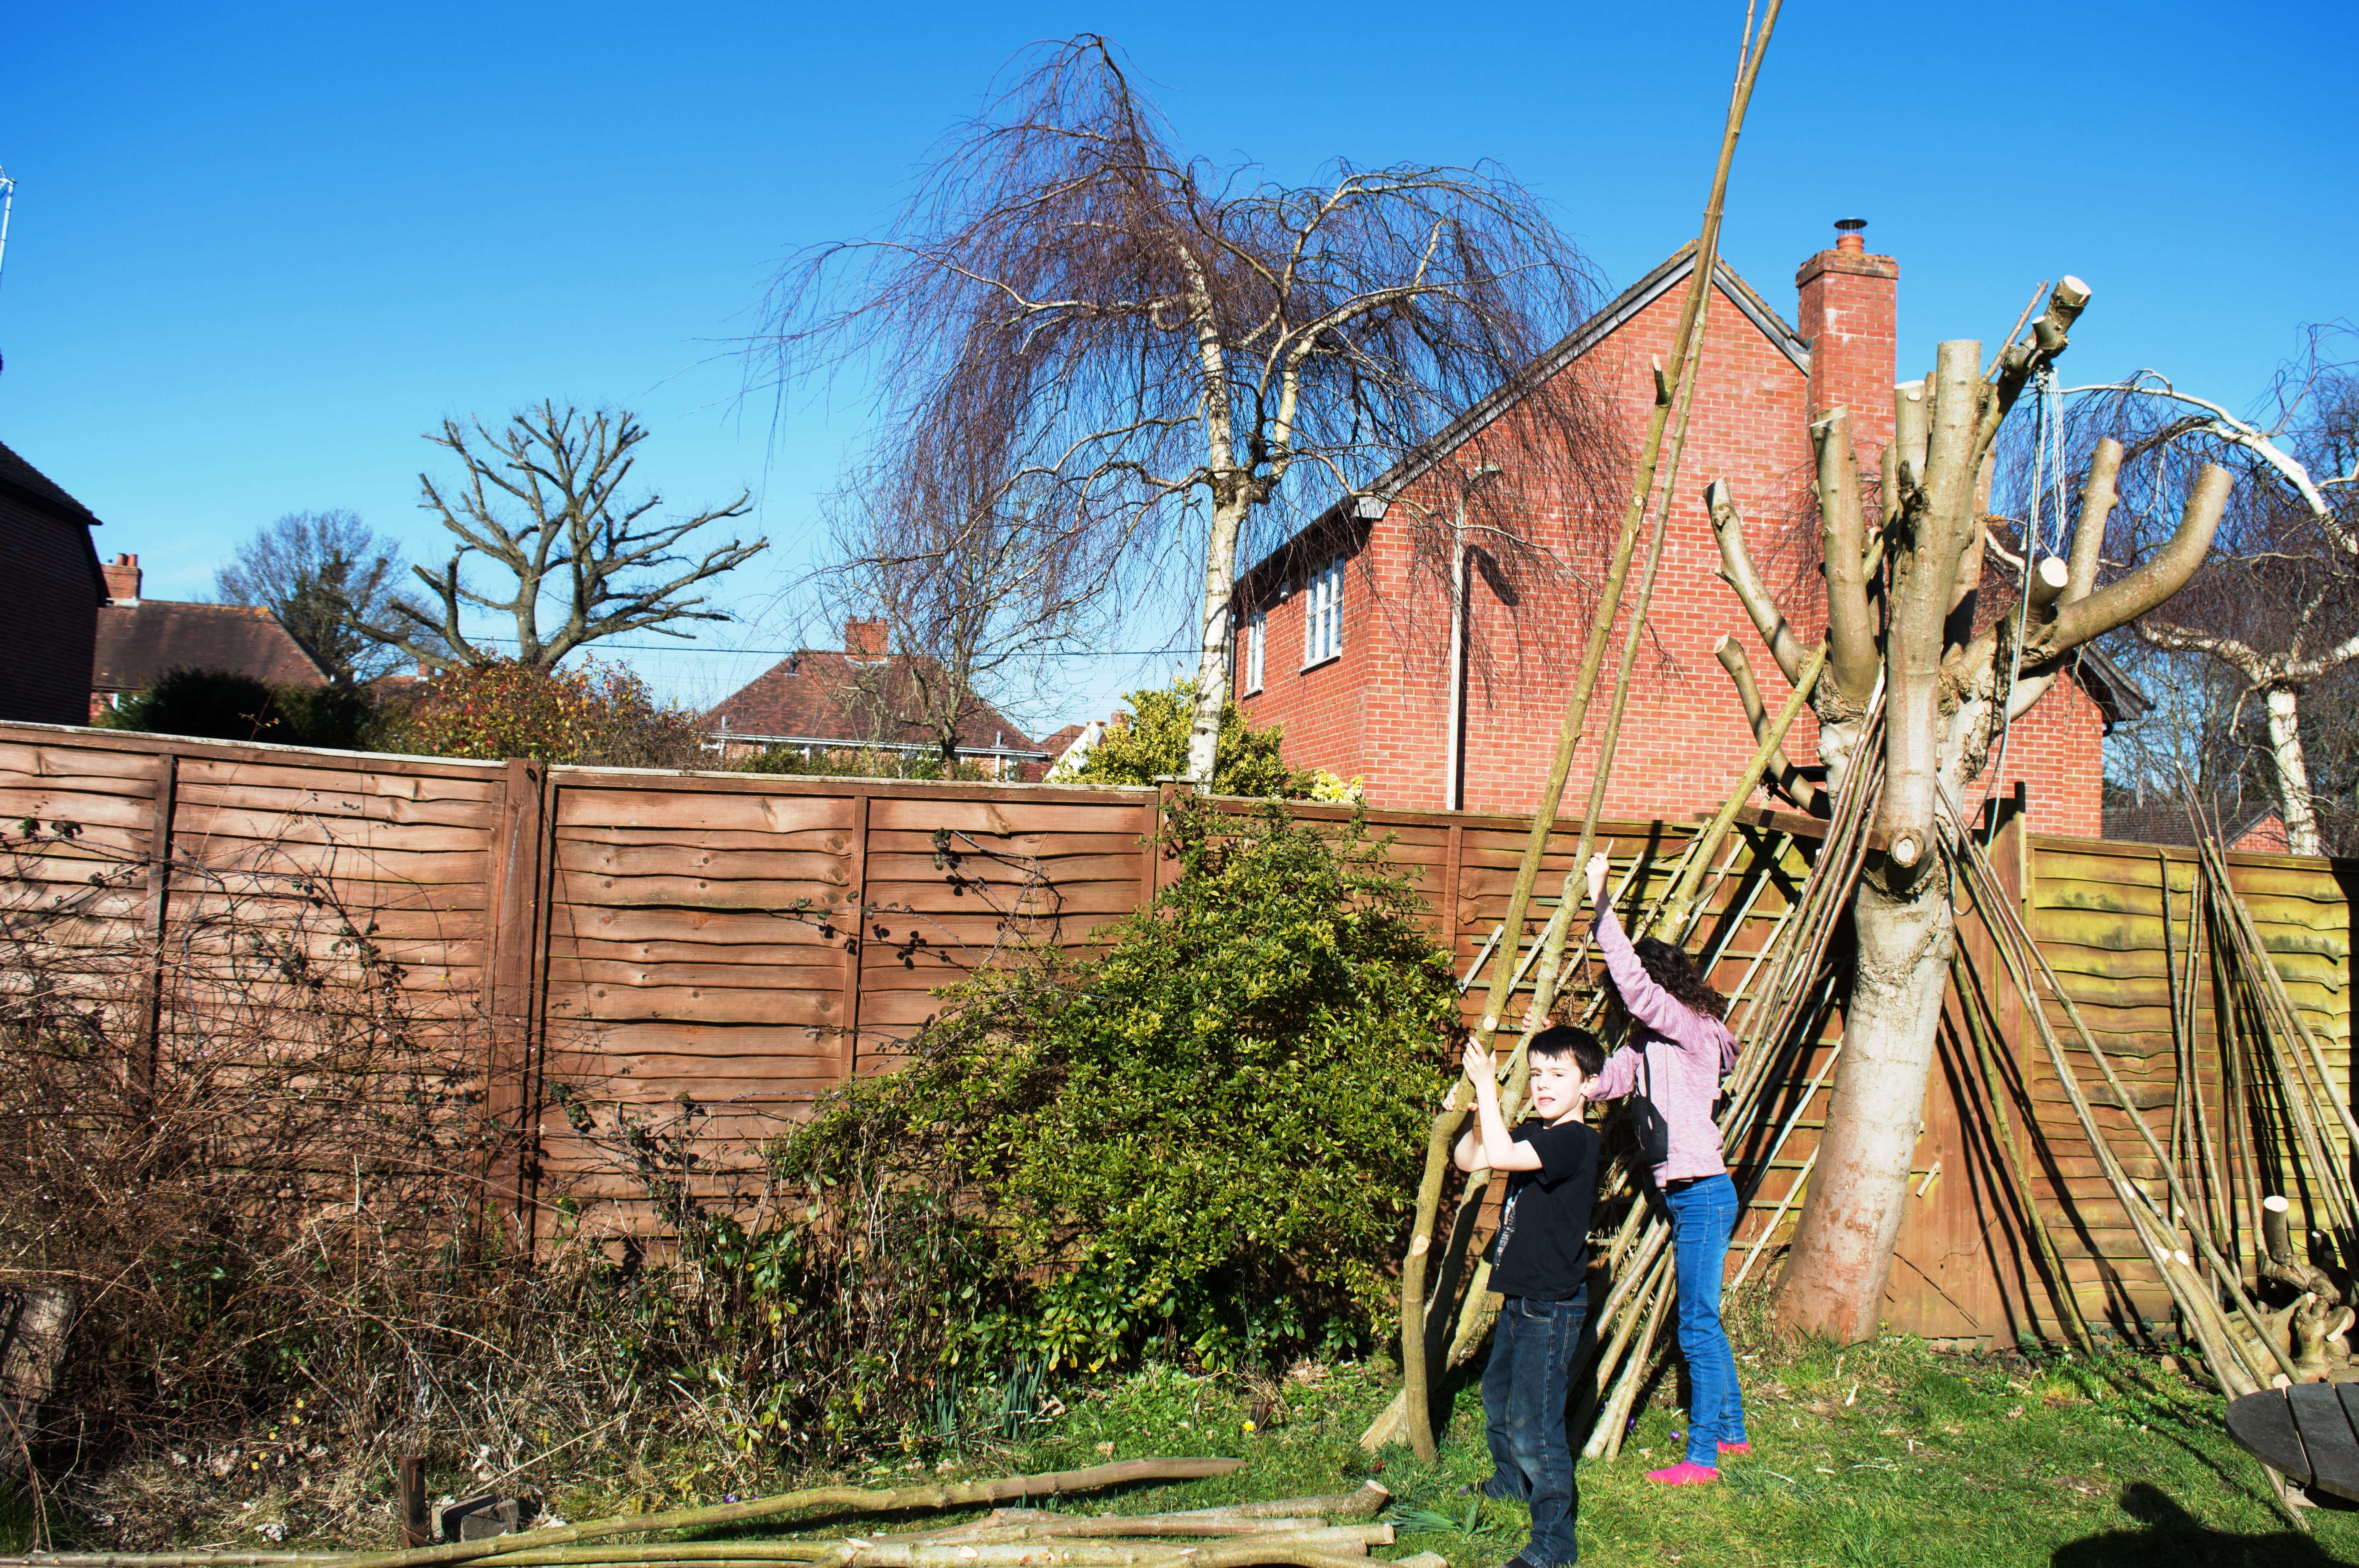
My kids though had other ideas and wanted a den built with the rods. As the rods were laid up against the tree I got the idea for a quick tipi style of den for them.
We stripped away all the rods that were either too big or too small.
A little help from the kids
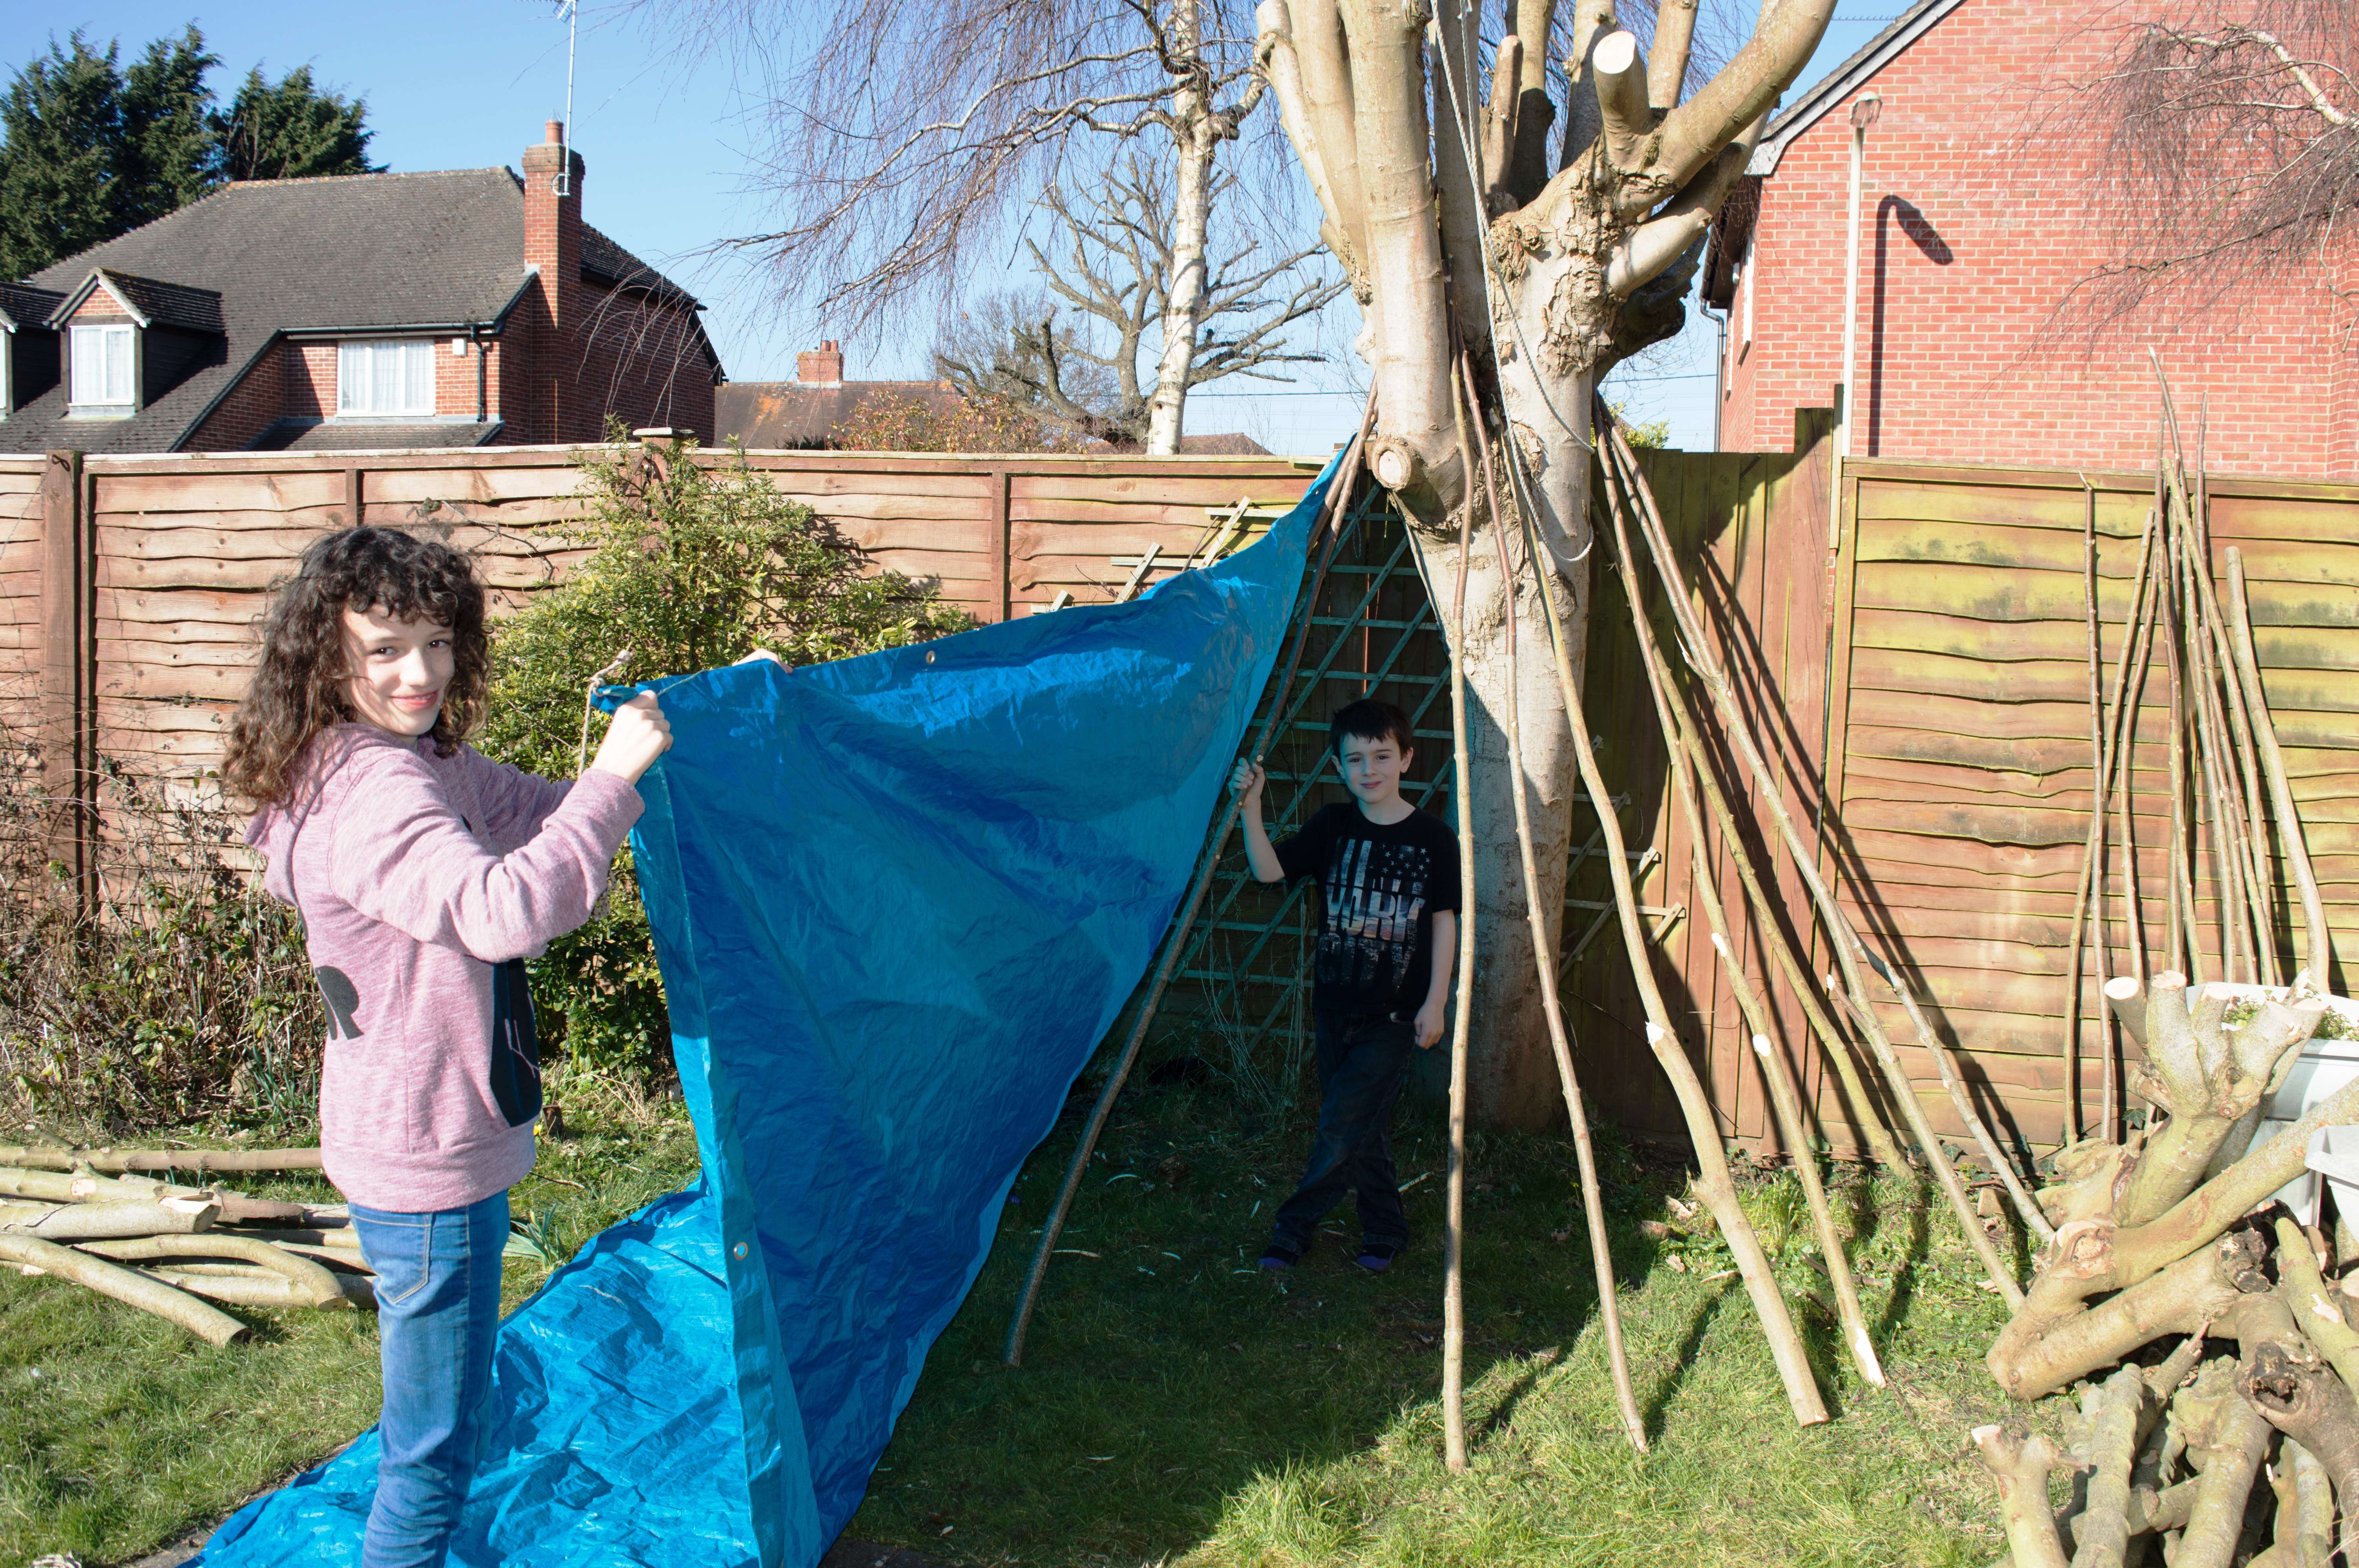
We laid the remaining rods around the tree in a tipi style and then wrapped some old tarp around it all.
Wrap some old tarps
I cut up the middle of the tarp to form an opening and then with the kids tacked it all down with wooden pegs. I then added another tarp to reduce the size of the opening.
Cut and tuck
I added a few old sleeping bags to make it comfy and the job was done.
One den ready to go
My kids spent a lovely afternoon in the early spring sunshine playing out in their new den and it took about 45 minutes to make.