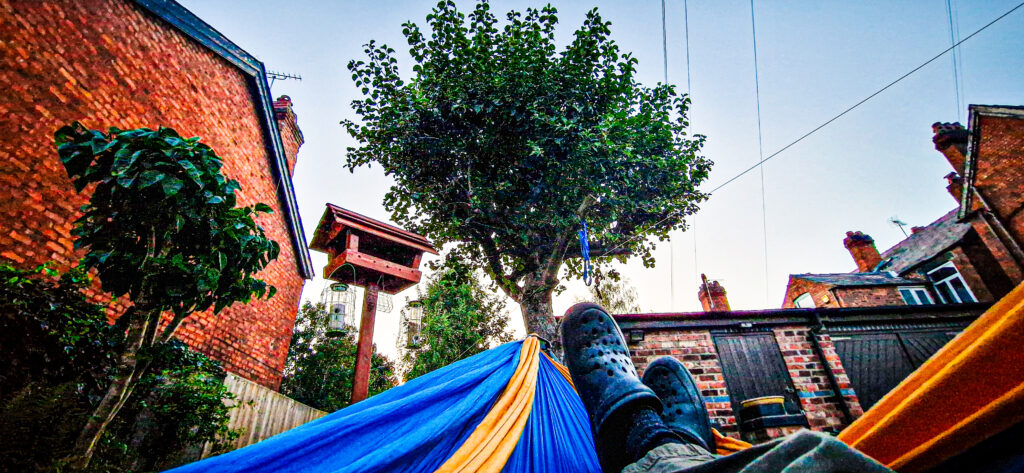
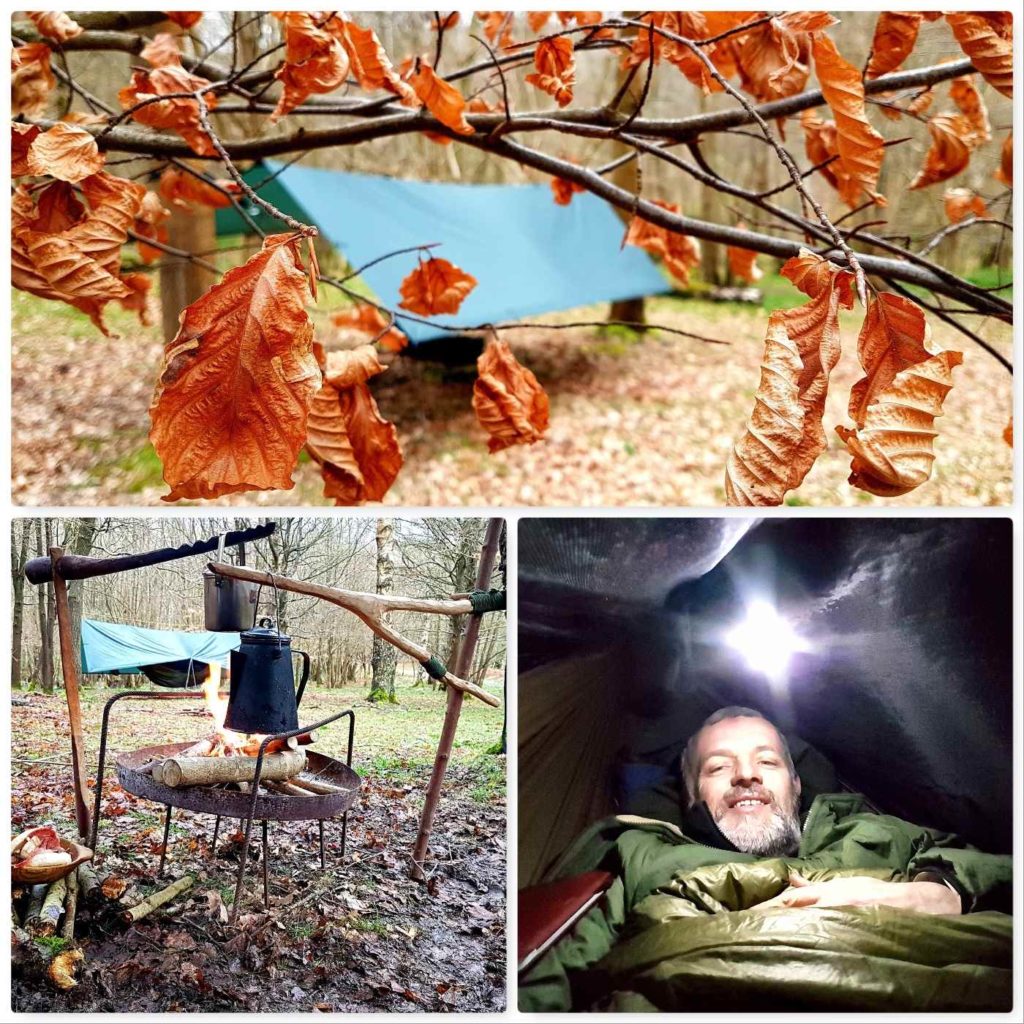
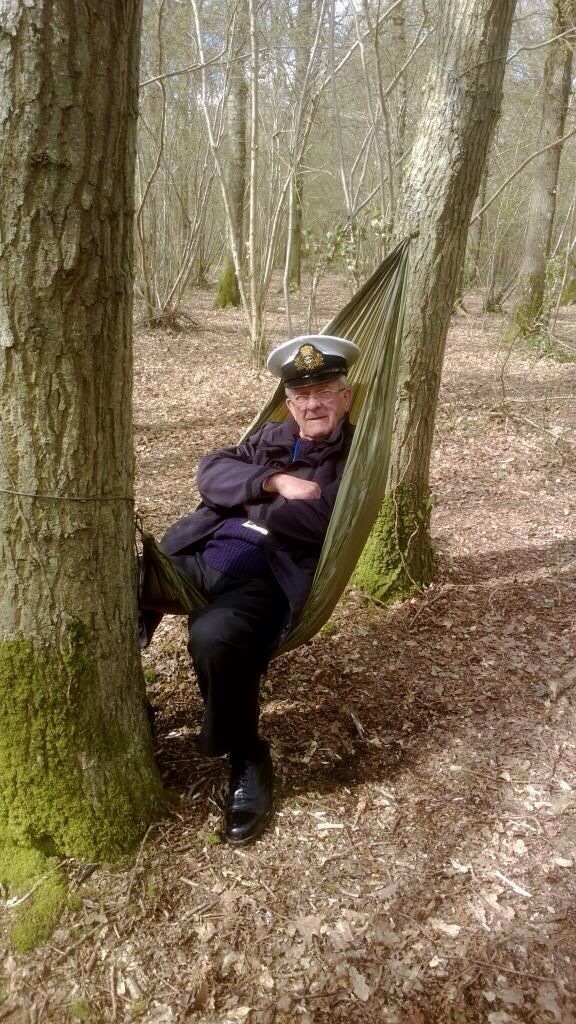
Currently, I am in the hammock in the garden – it struck me while here my blogging has gone out the window these last few years – I suppose that I should not feel surprised at that as I am no professional writer and am easily distracted.
Contemplating the toes
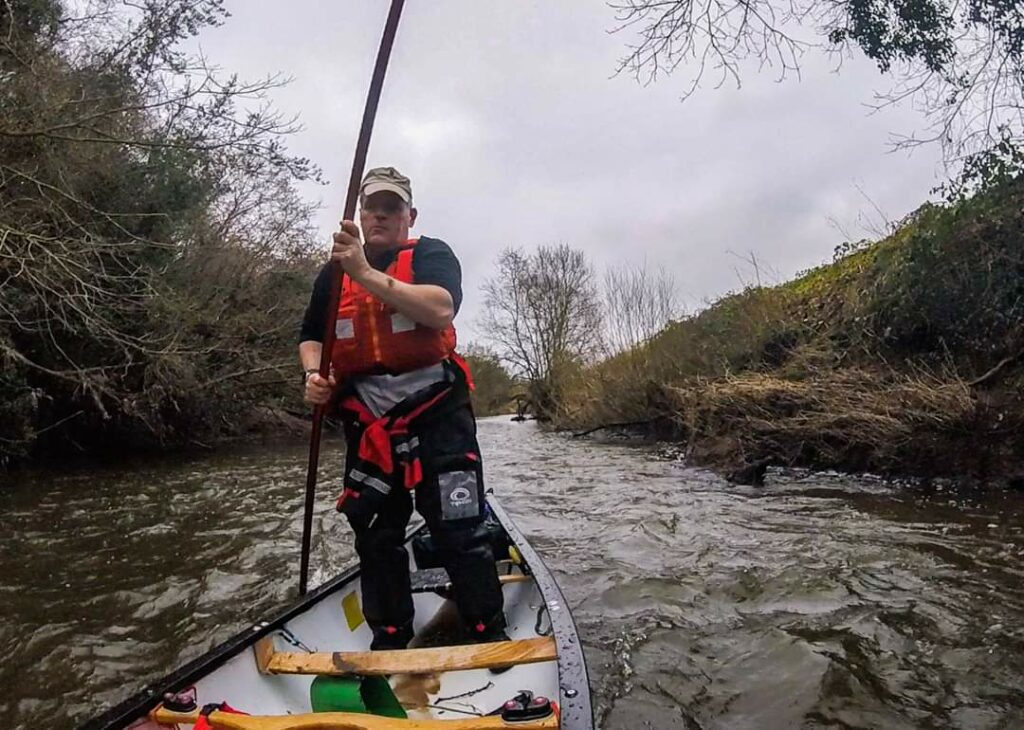
Bushcrafting has been always ticking along for me however these last few years I have been distracted with the world of Canoeing once again.
Poling on The Weaver
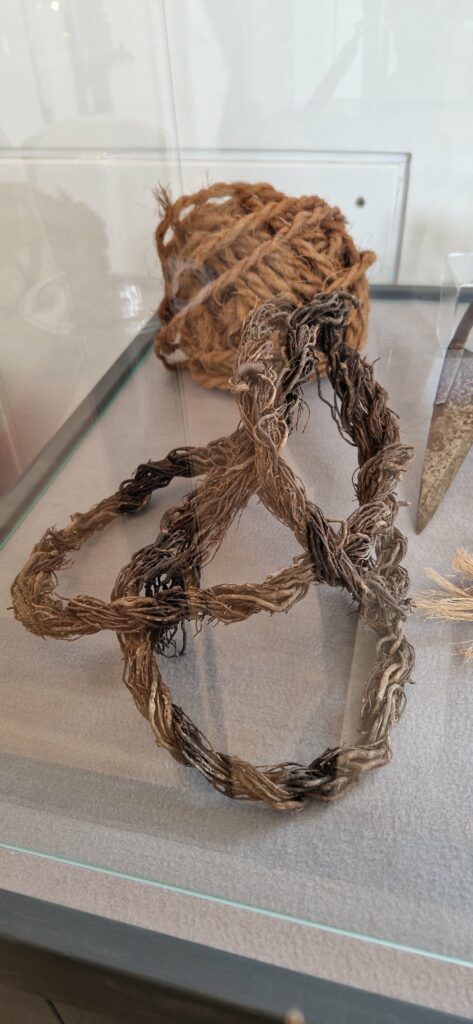
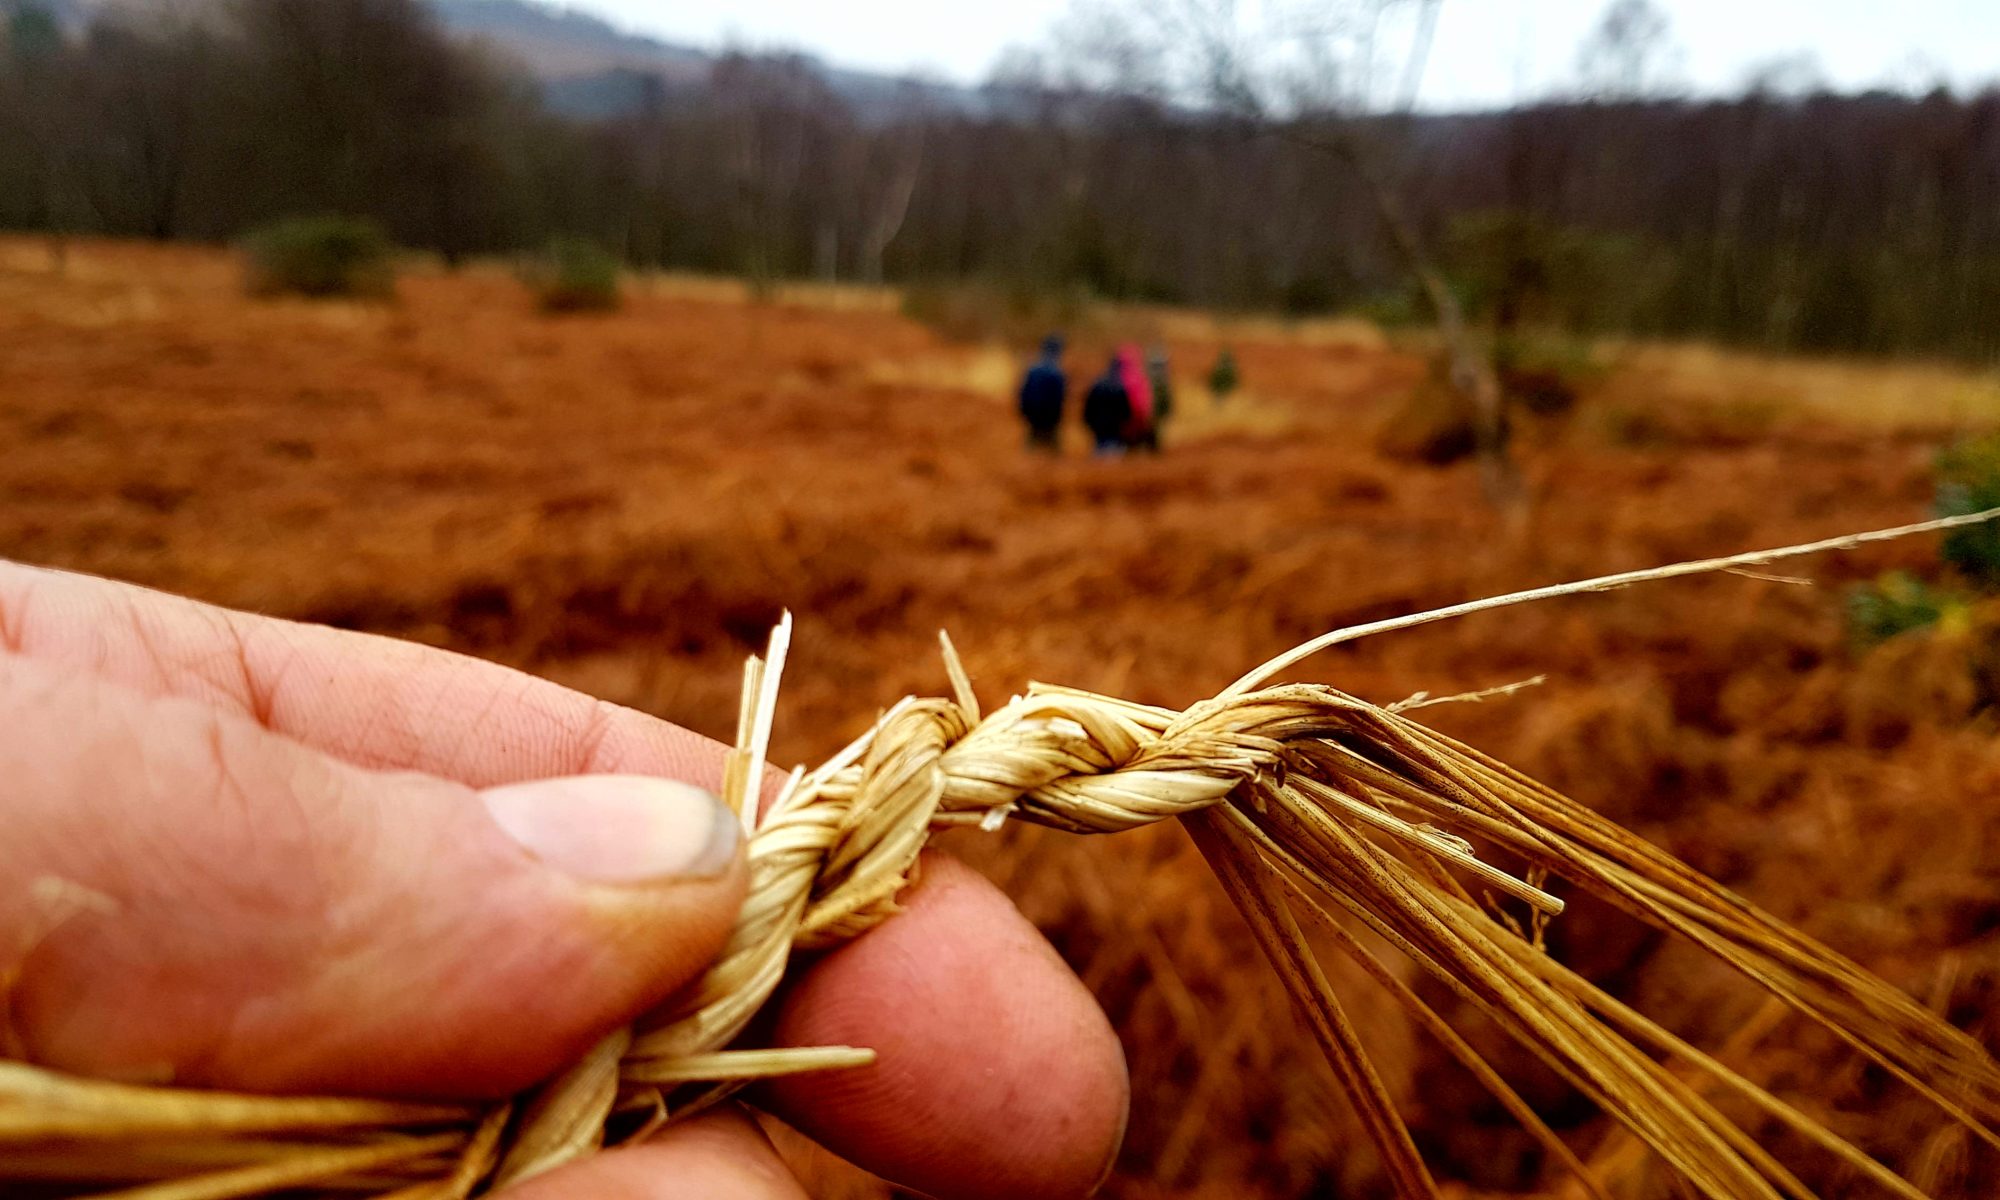
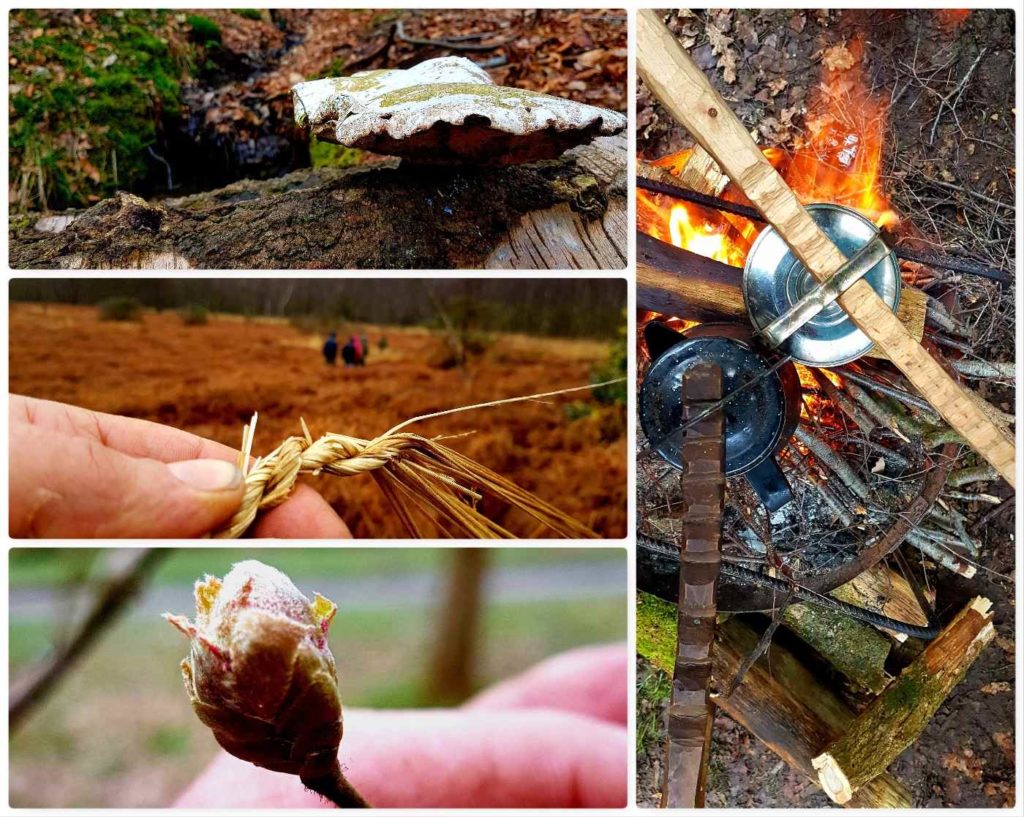
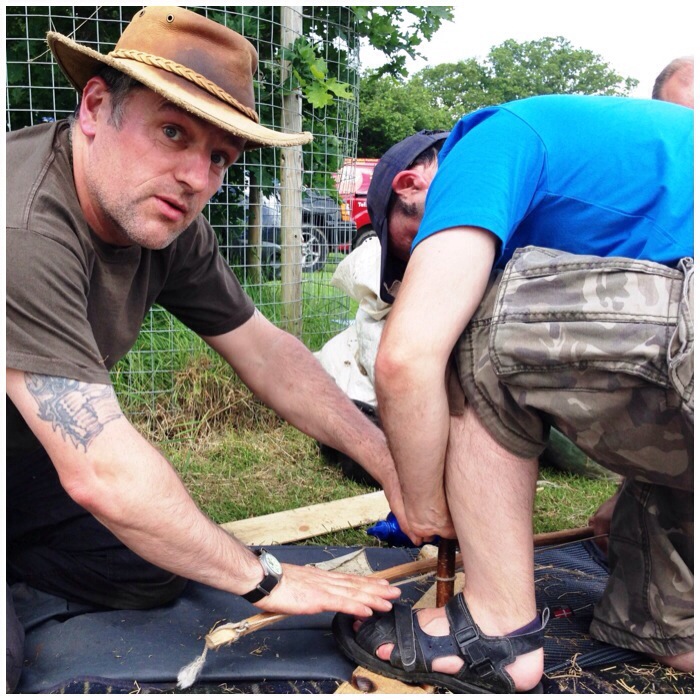
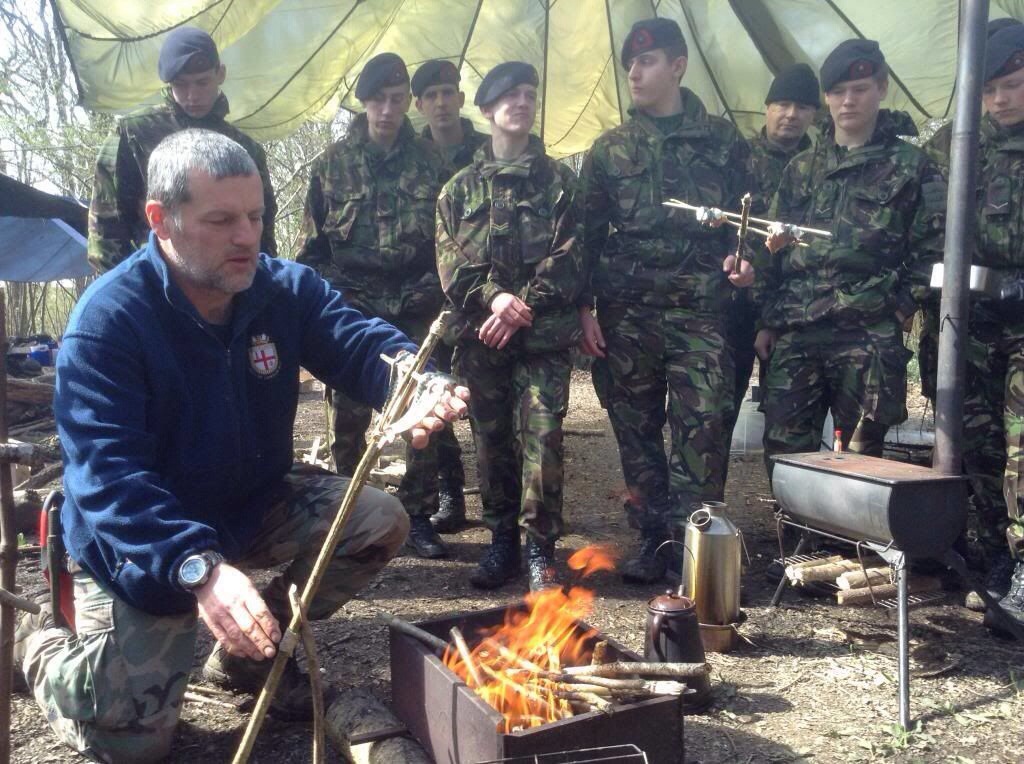
Have a lot to catch up on here with Bushcraft but here is my latest little piece of Bushcraft experimenting – using a Thrawhook to make rope.
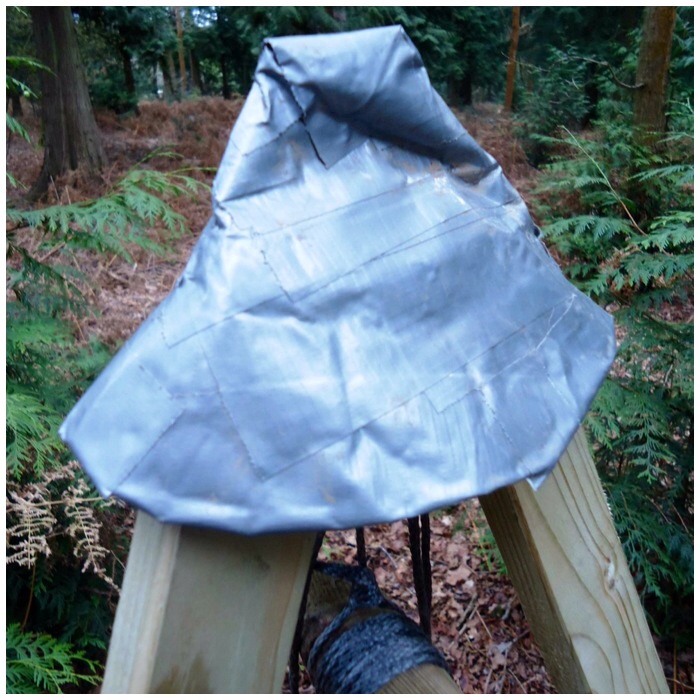
The Thrawhook
So hopefully I will figure out how to finally make Heather rope. This was used extensively for centuries all over Scotland and seems to be quite a lost art.
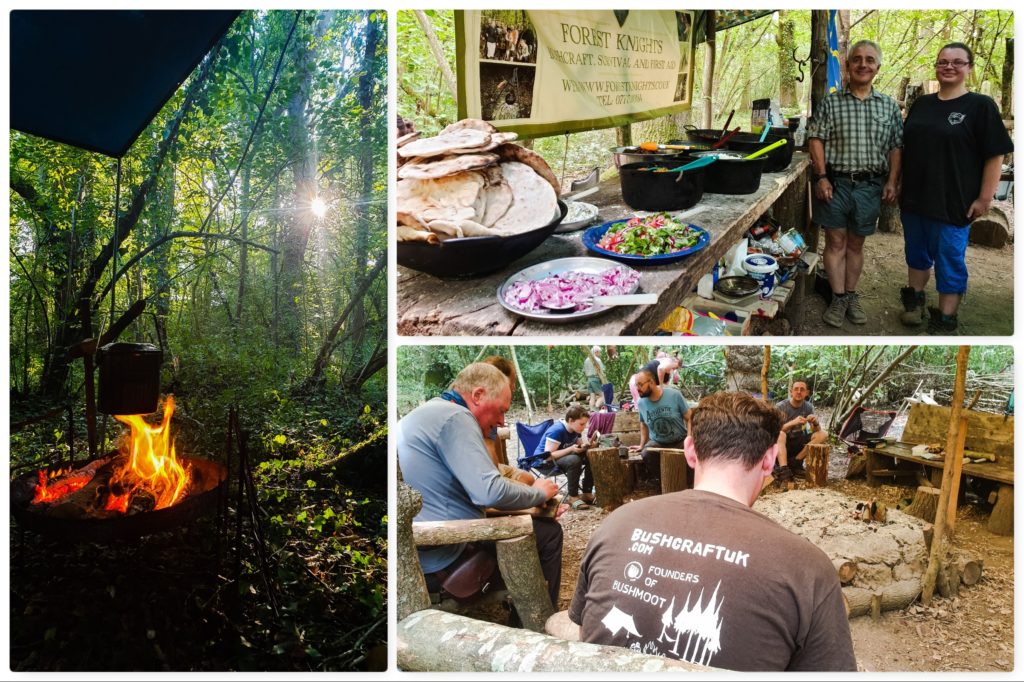
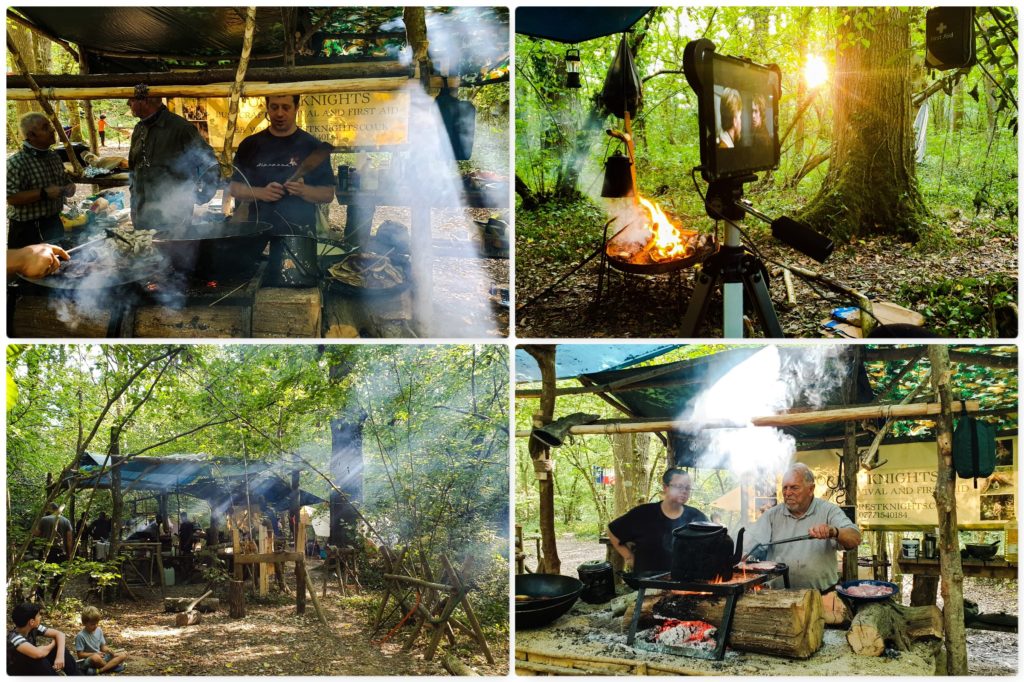
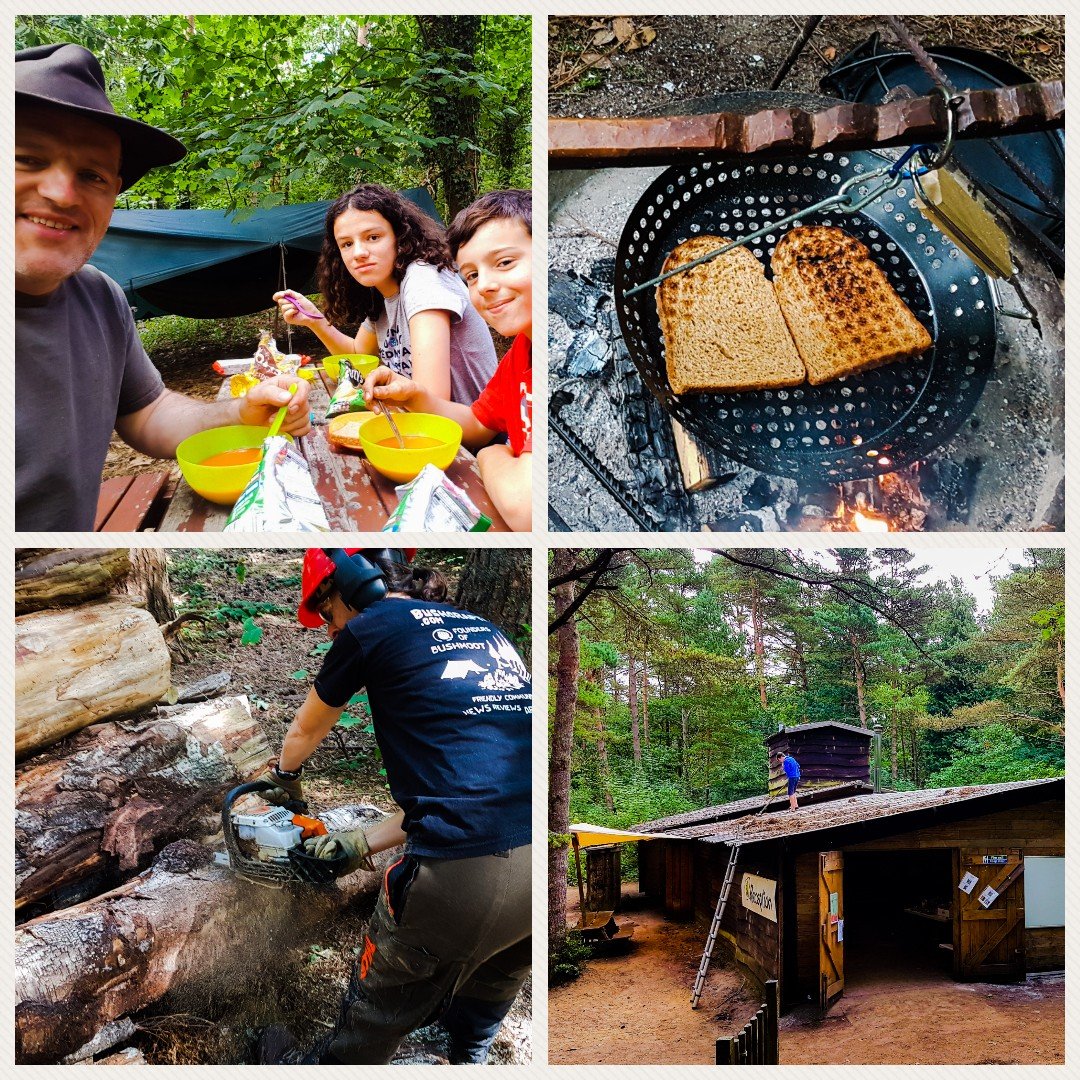
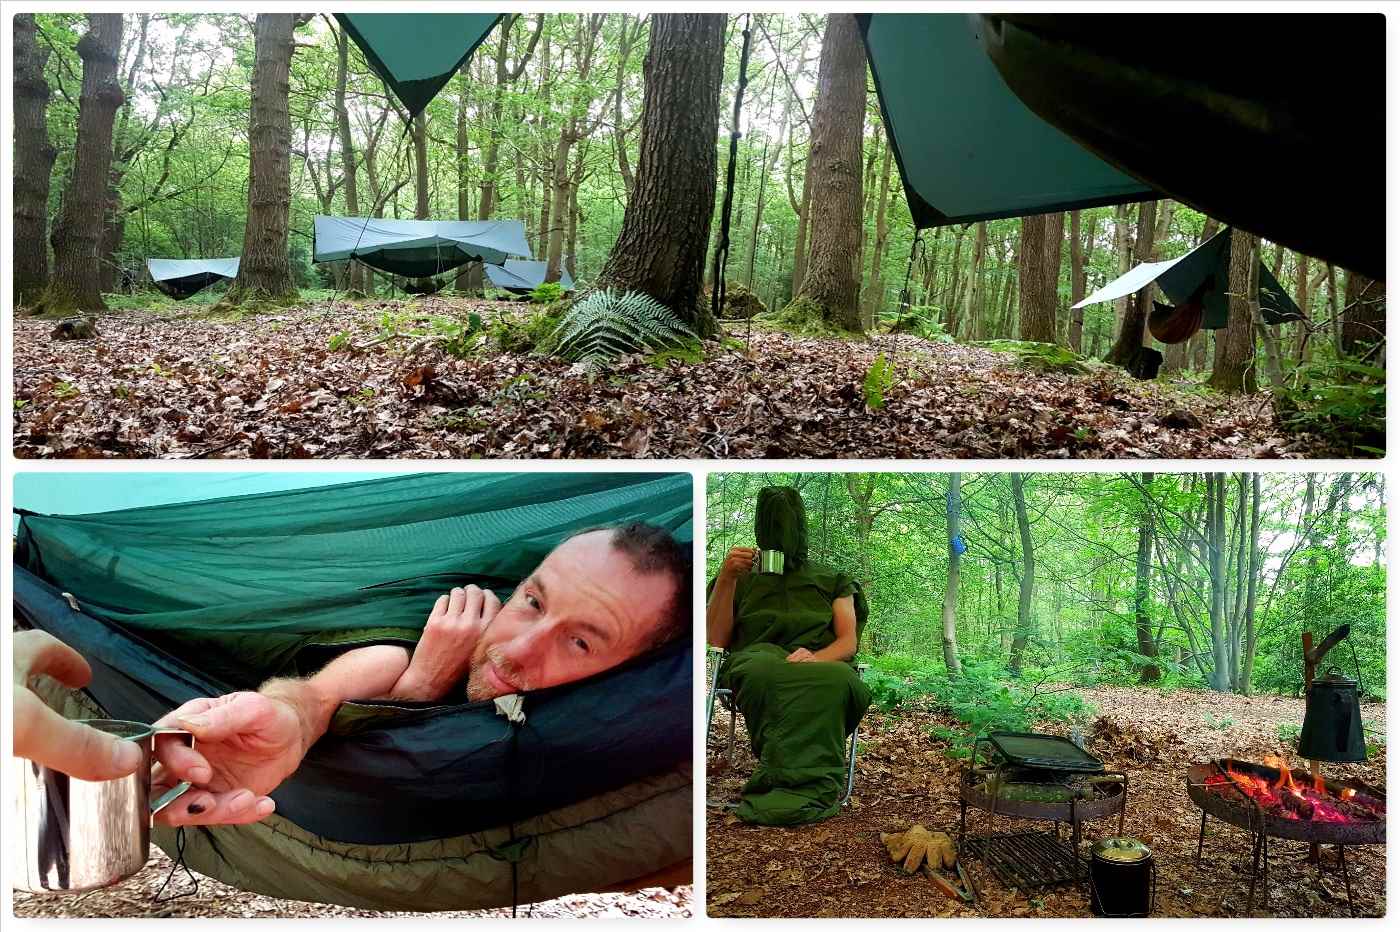
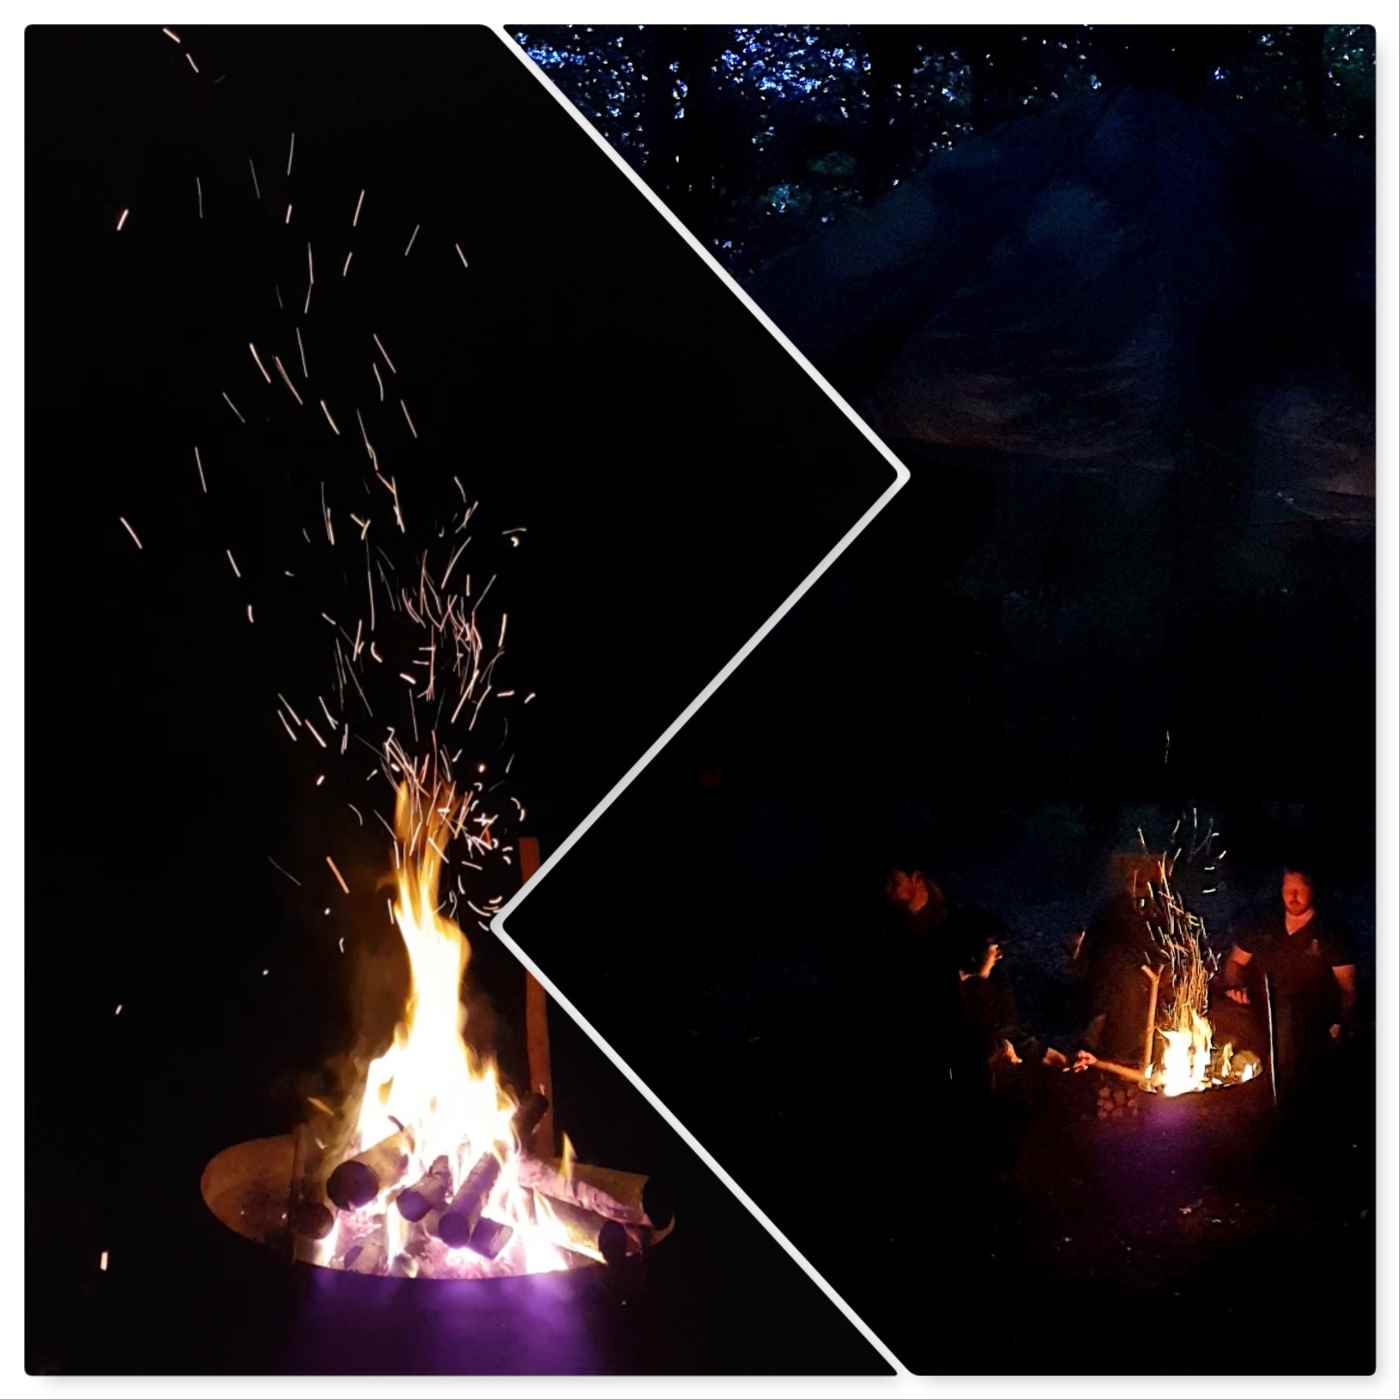
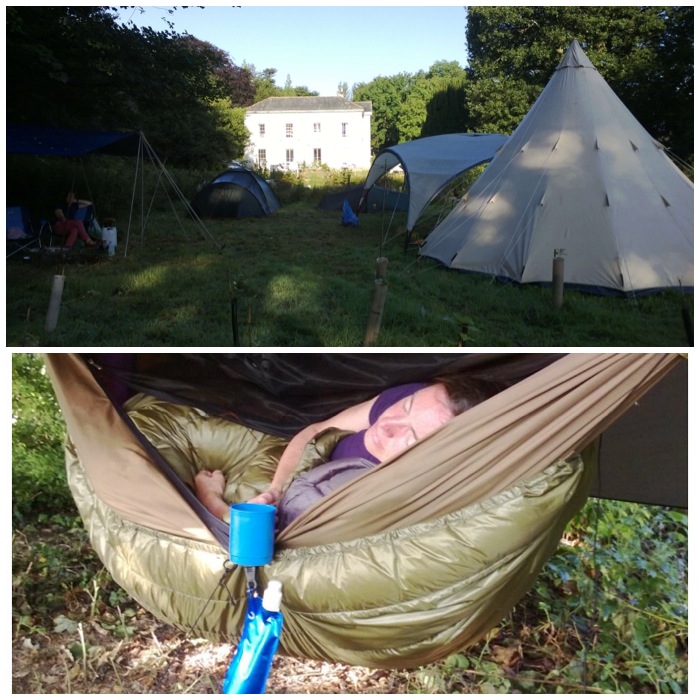
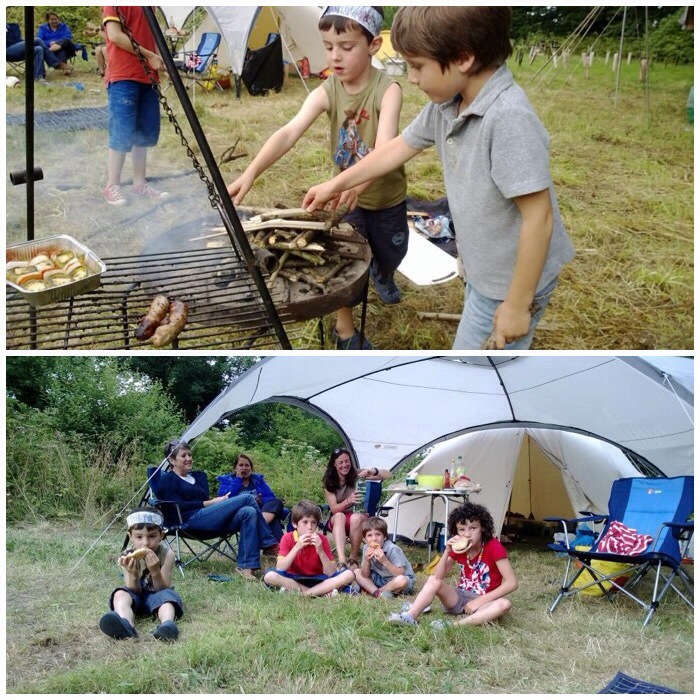
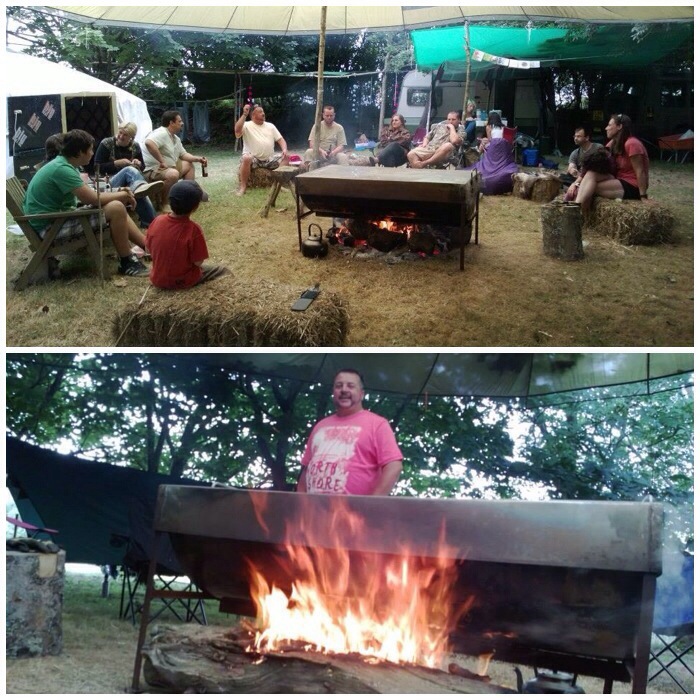
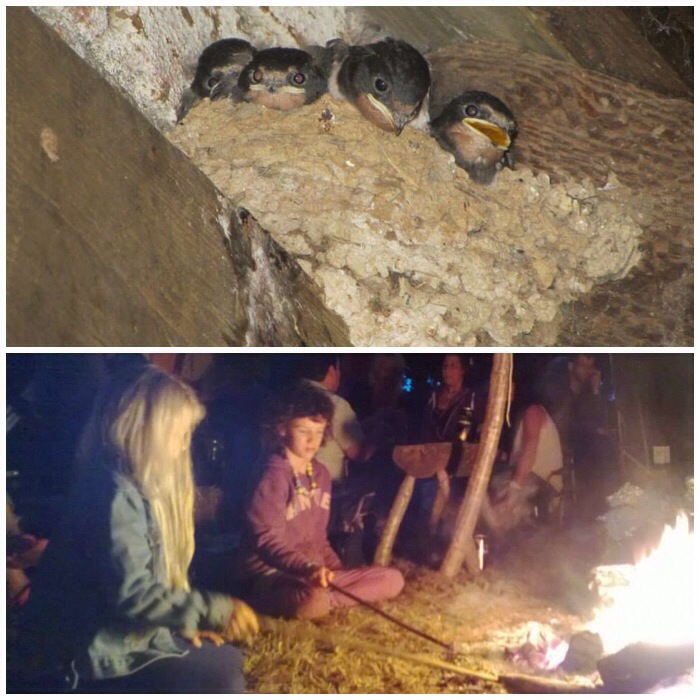
The Bushcraft UK (BCUK) Bushmoot was supposed to be held this August however like many other big events had to be cancelled due to worries around Covid.
Wayne Jones from Forestknights Bushcraft (a fellow BCUK Moderator) along with his co-worker Beth Shepheard offered to run a small (for 20 to 30 people) Minimoot at his woods near Arundel for anyone who felt they could make it.
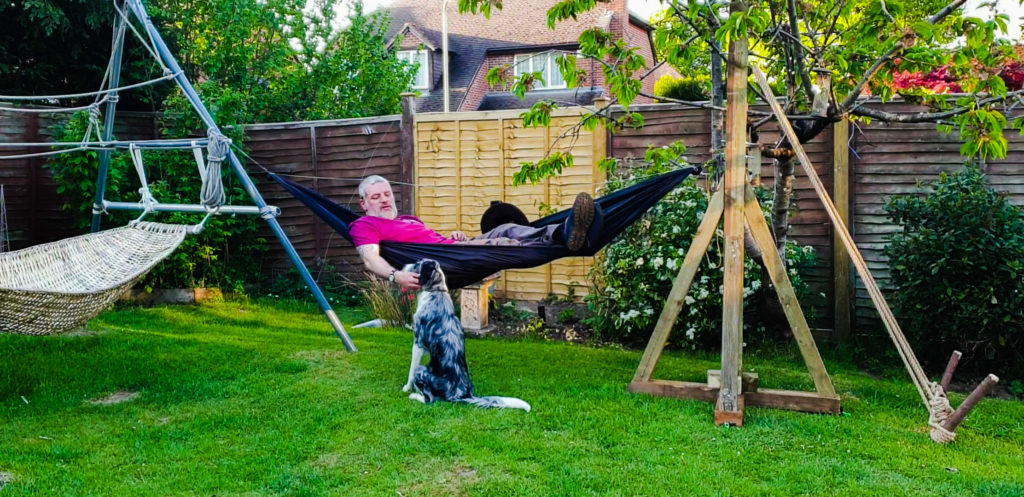
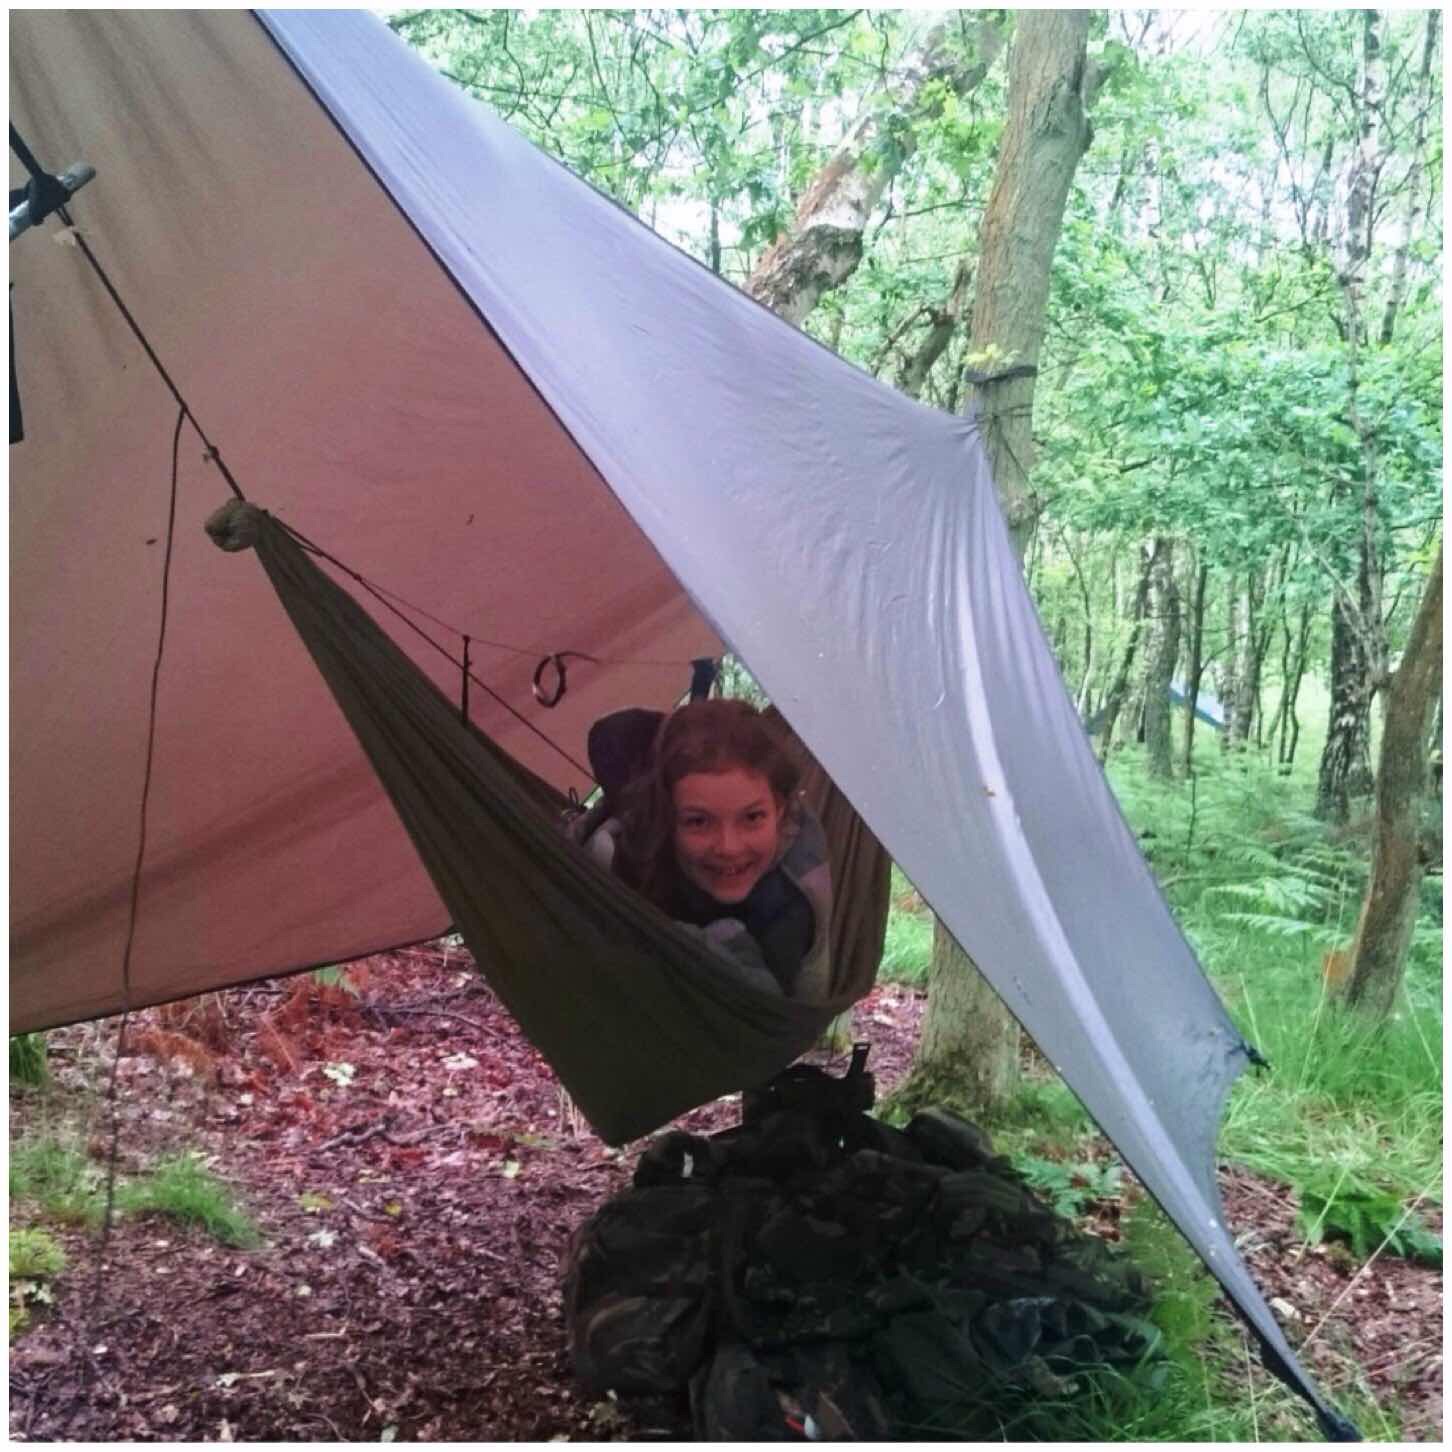
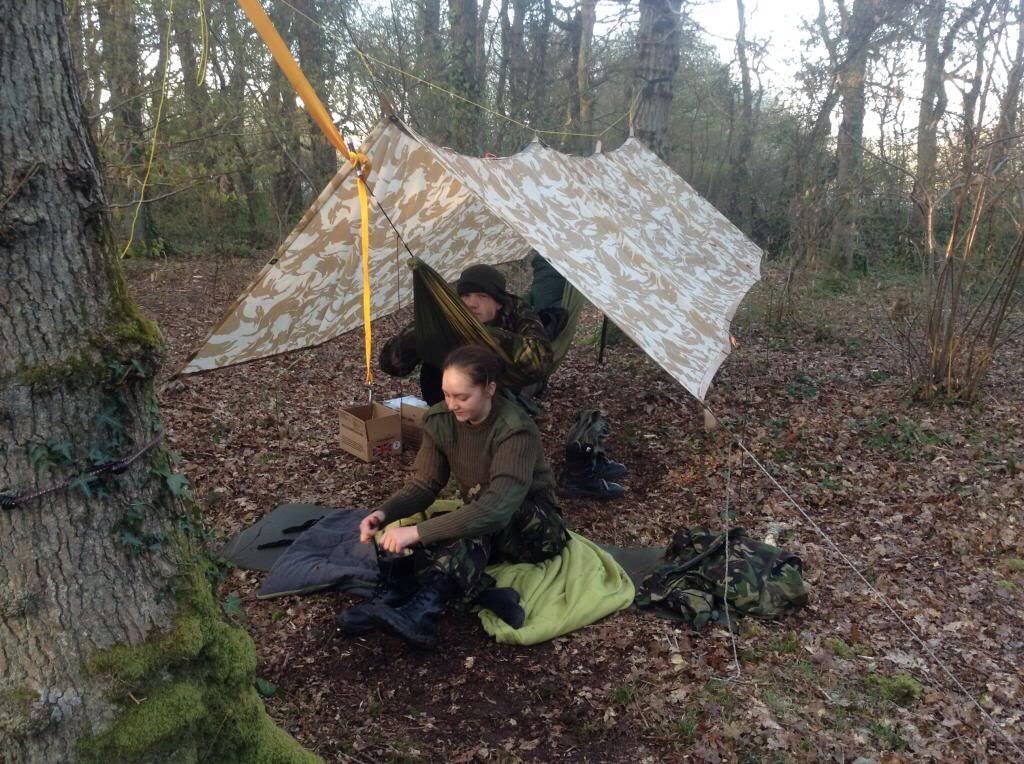
Home in the woods
This was proper camping (no cars anywhere in the woods) and after a few trips back and forth with the trolley we soon had our hammocks up. I was joined by my son Finlay and our friends Dave and Alan.
We had a communal cooking area and Fin managed to sneak a movie in each evening around the fire (got to make allowances for this day and age).
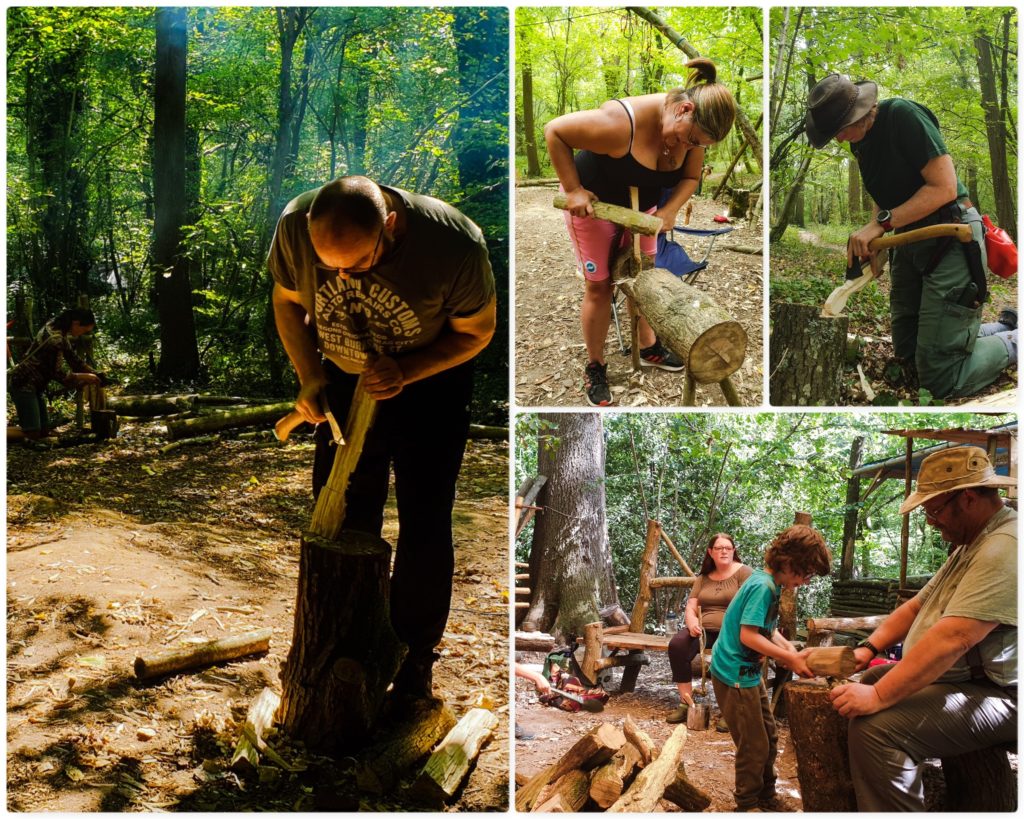
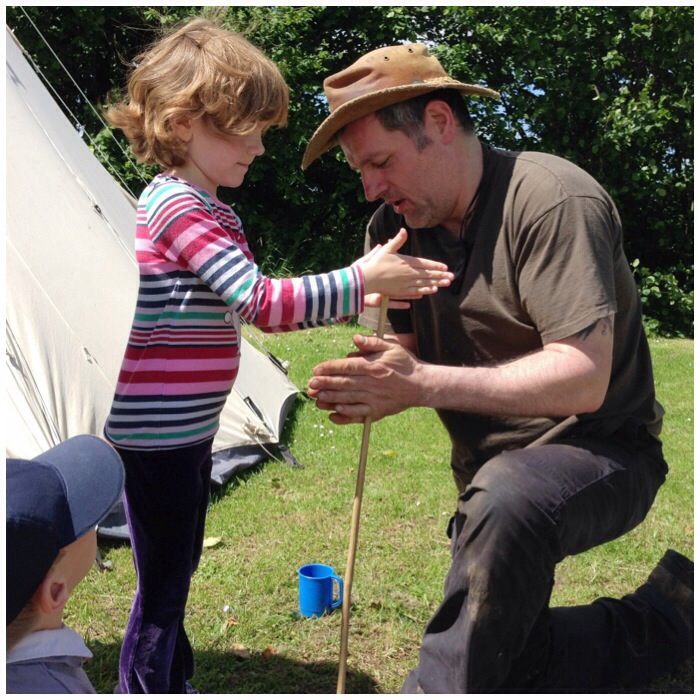
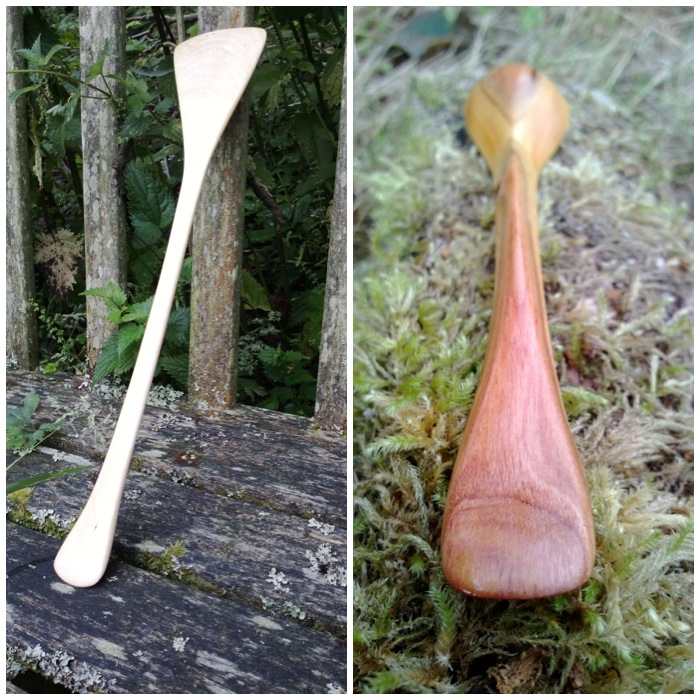
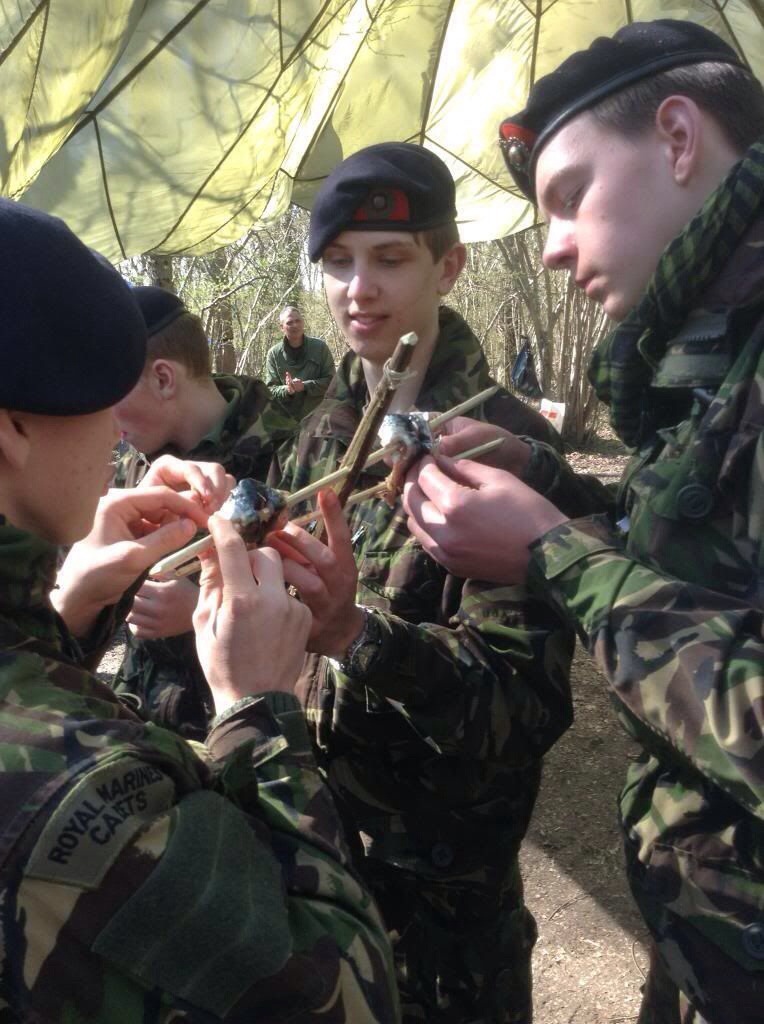
A little bit of whittling
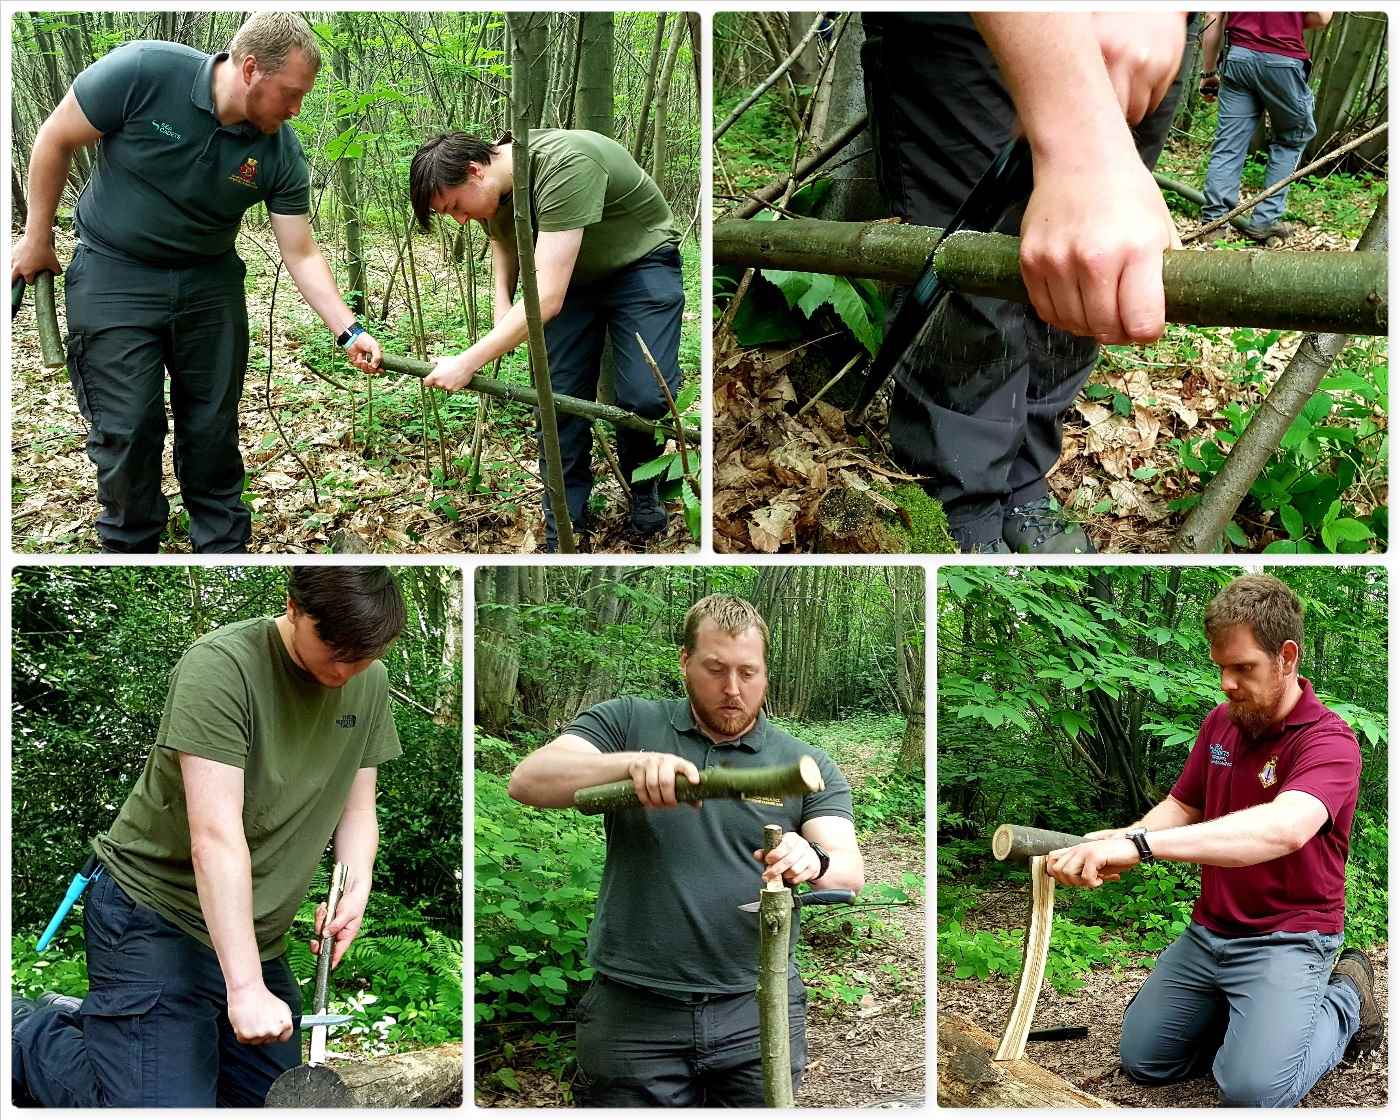
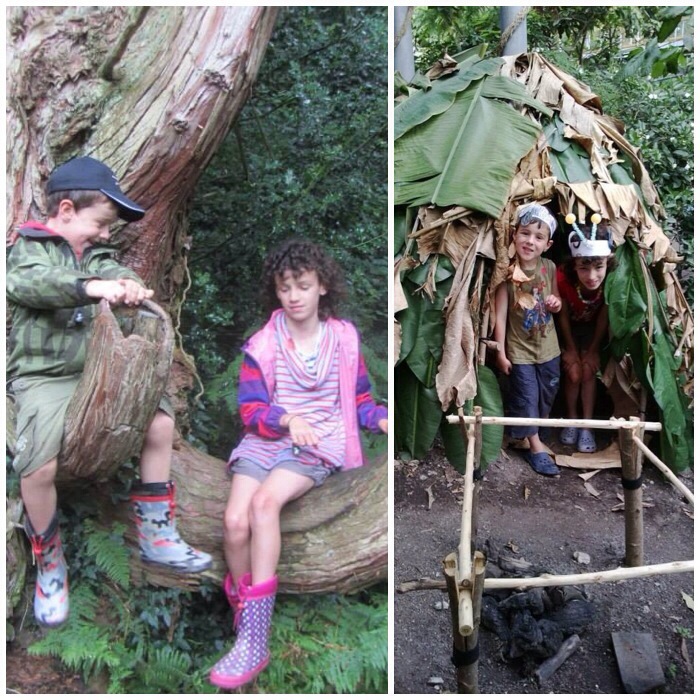
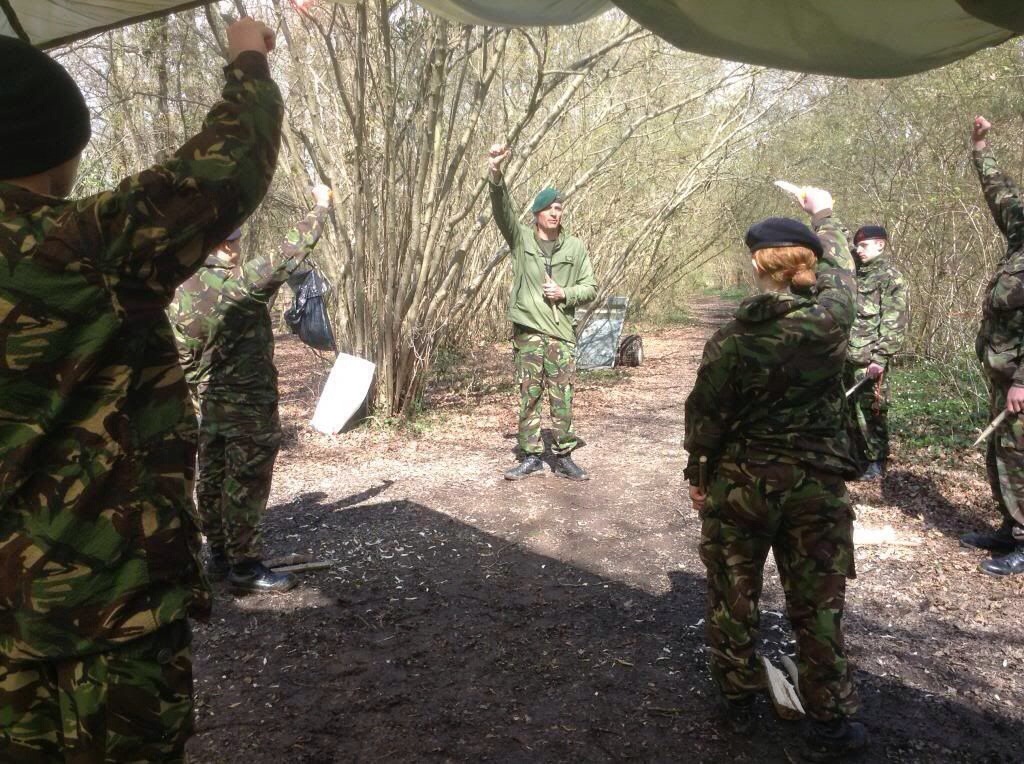
The Minimoot, like the Bushmoot, was a relaxed affair however there were a few classes. One of the first that many asked for was spoon carving – this one went to Wayne to organise with all ages involved – it was great to see all that knowledge being shared.
Multi activities
If spoon-whittling didn’t appeal, we had a lot more going on over the weekend including;
Net needle carving
Log rockets
Nordic braiding
Campfire cooking constructions
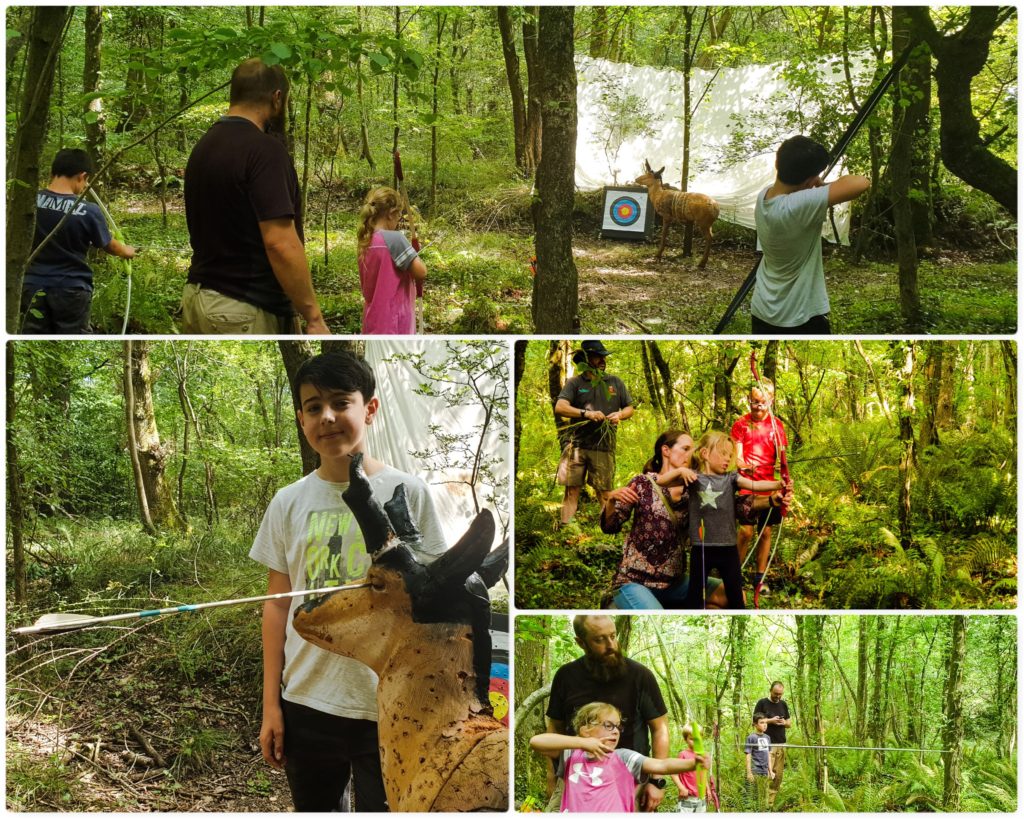
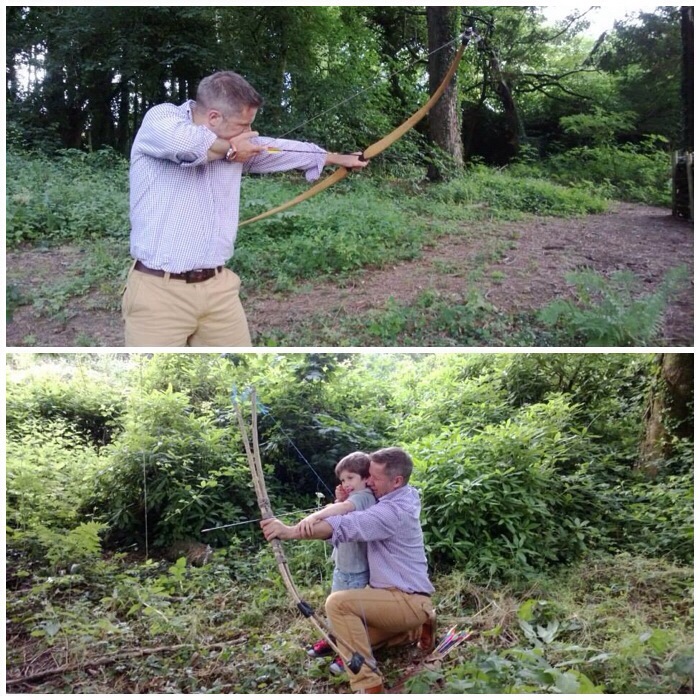
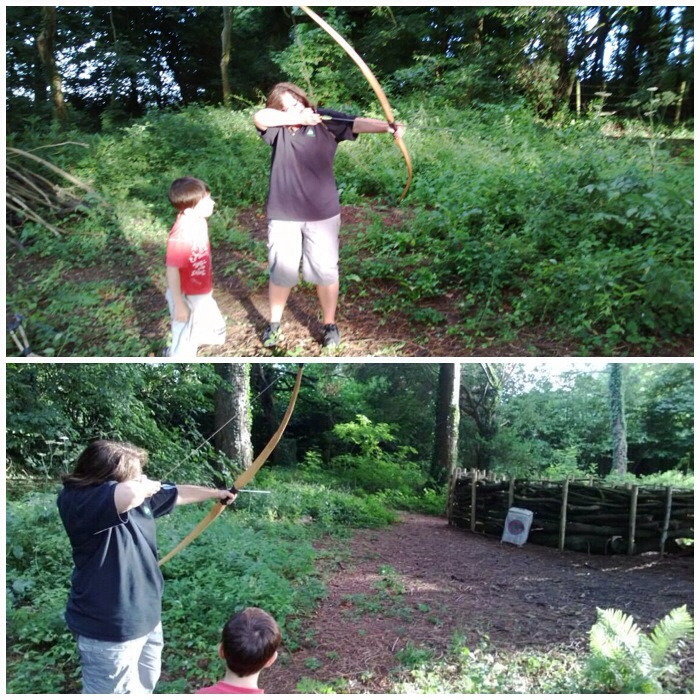
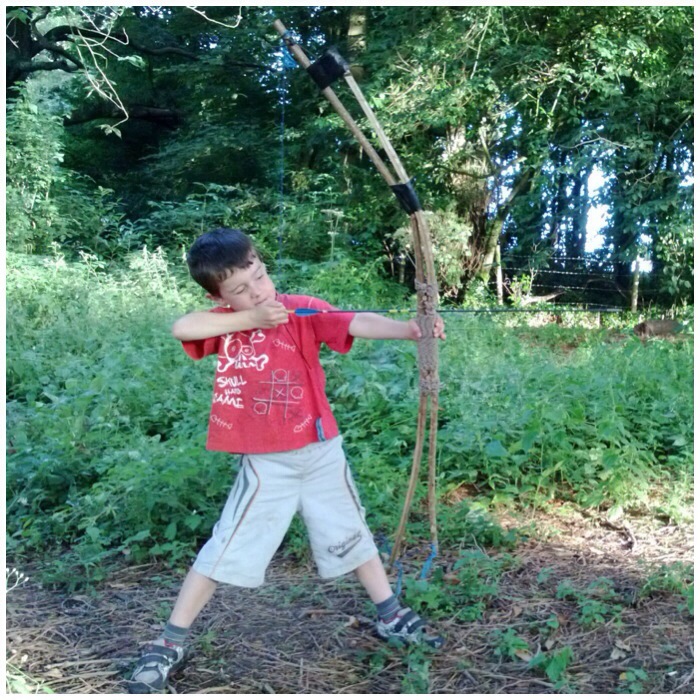
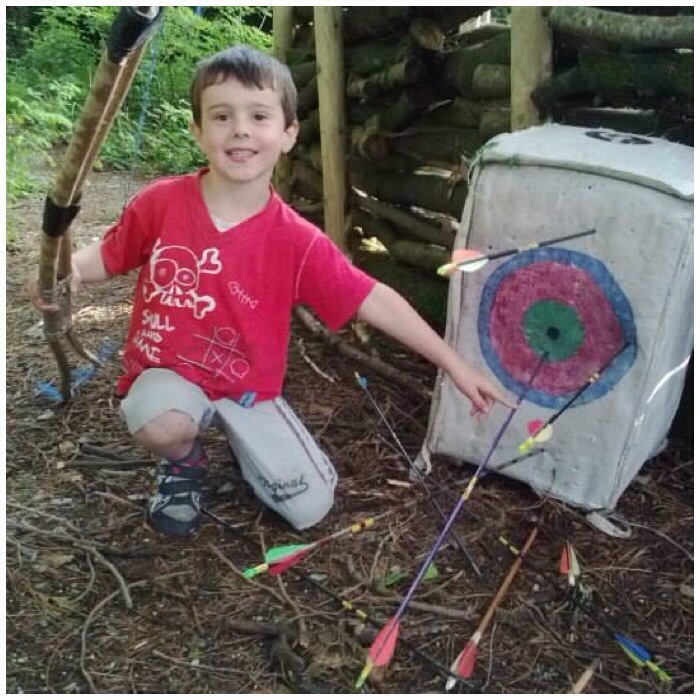
Down on the Range
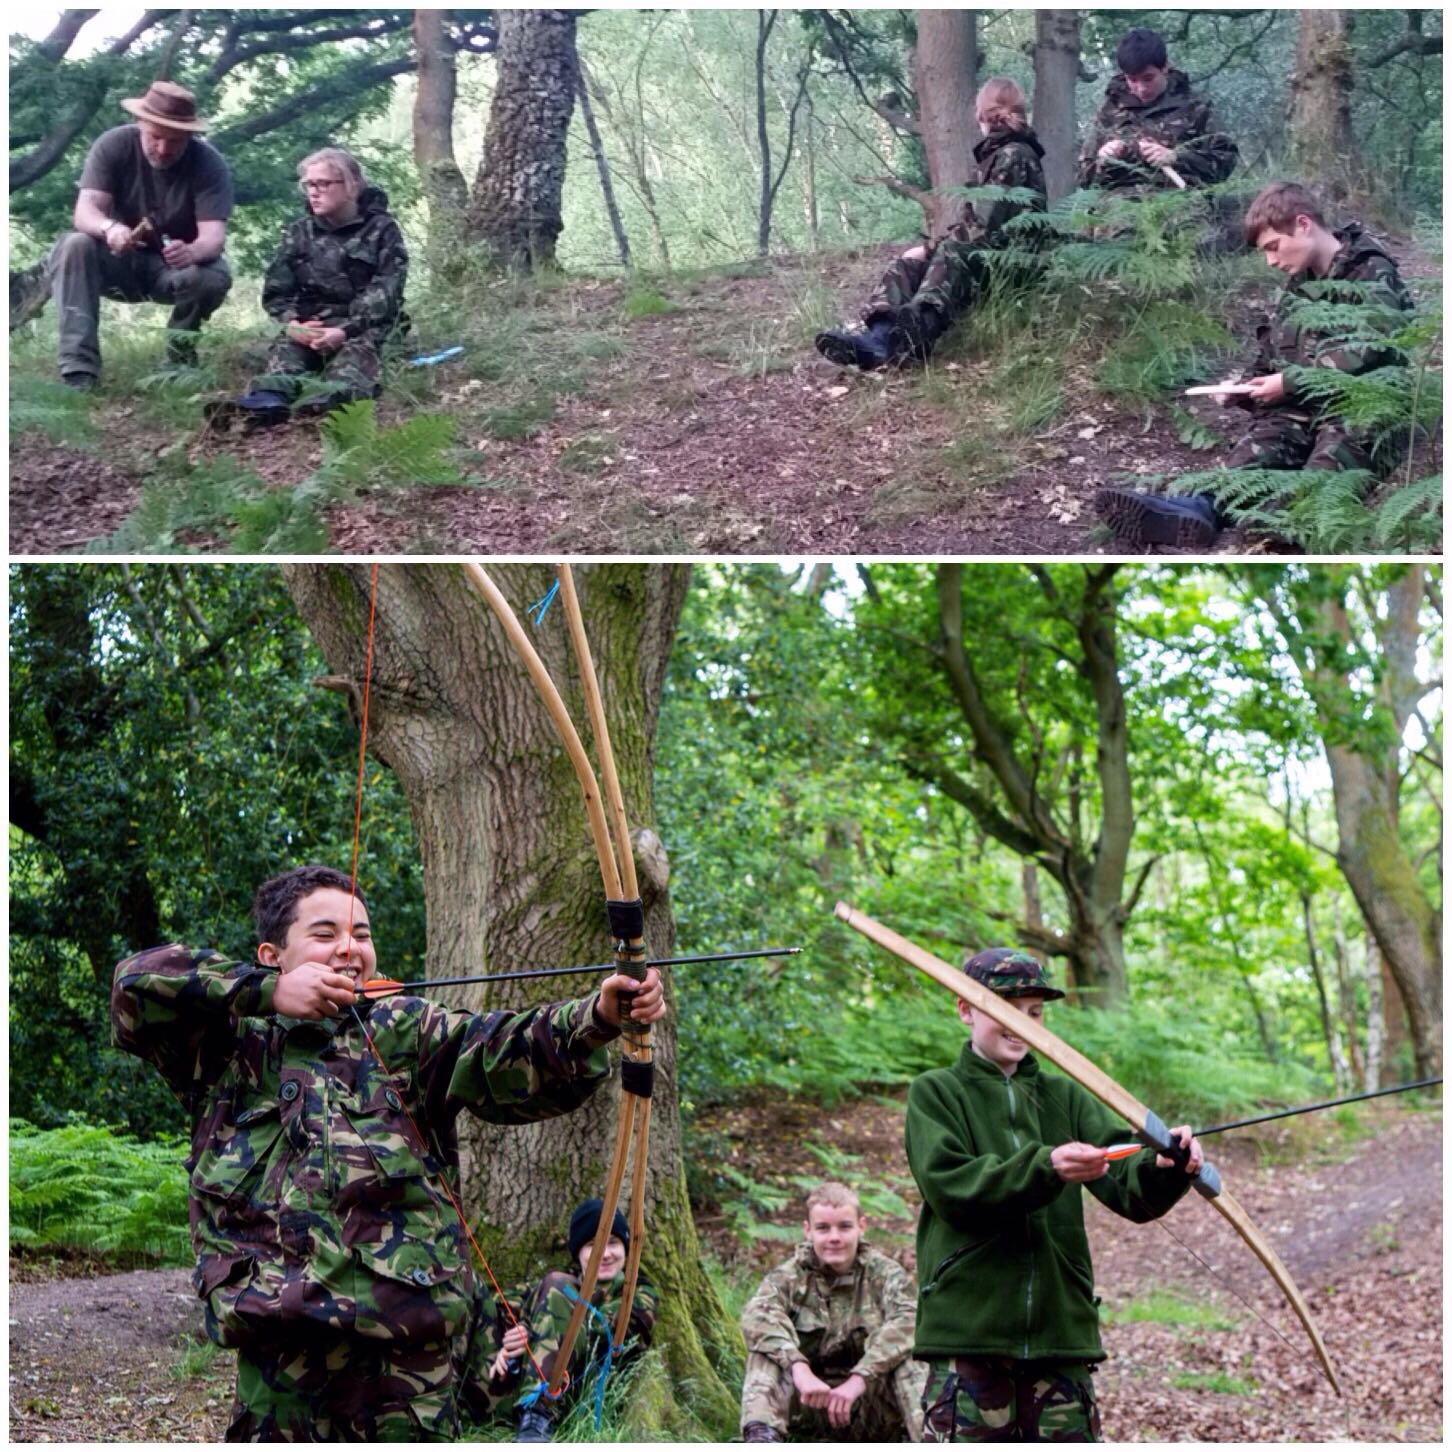
Usually in the afternoon we had the range up and running – we had all sorts of bows to choose from and Finlay was happy to be shooting some Mint Imperials down the range from his catapult.
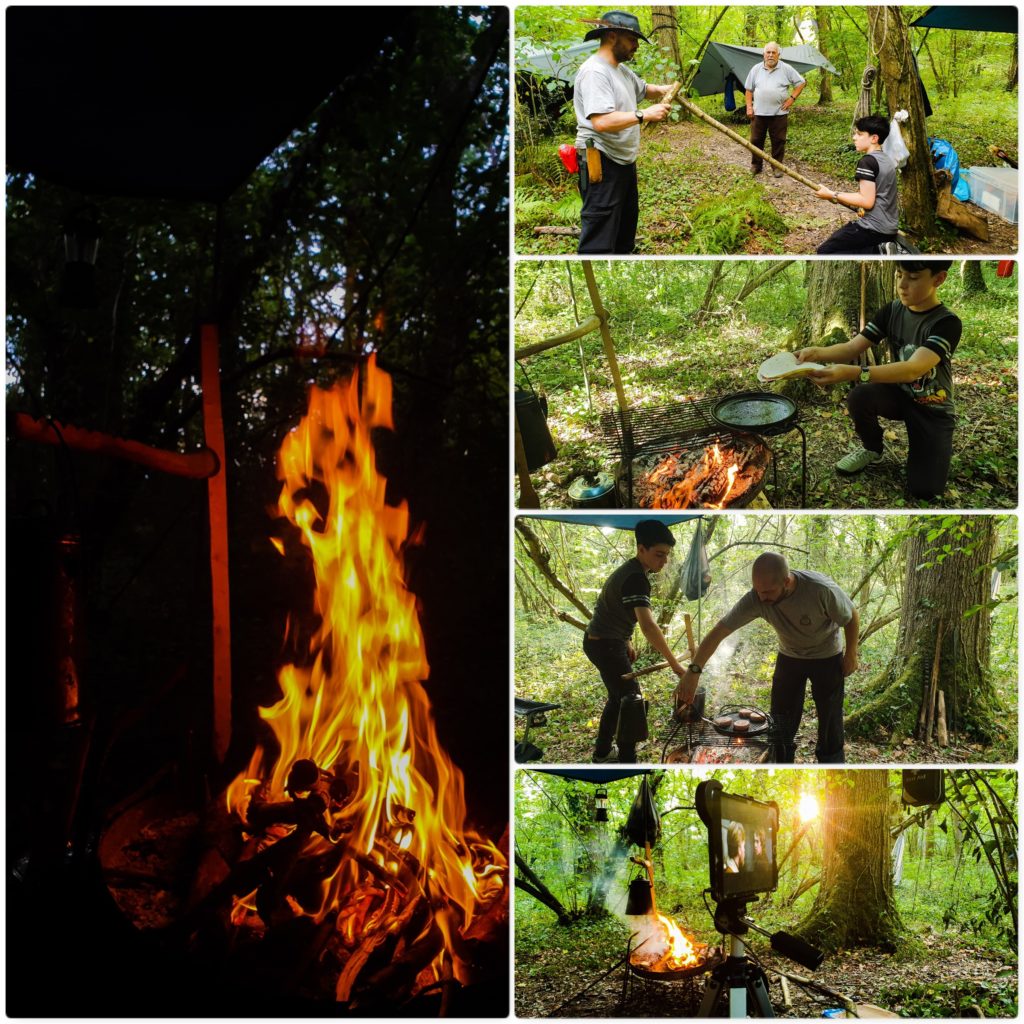
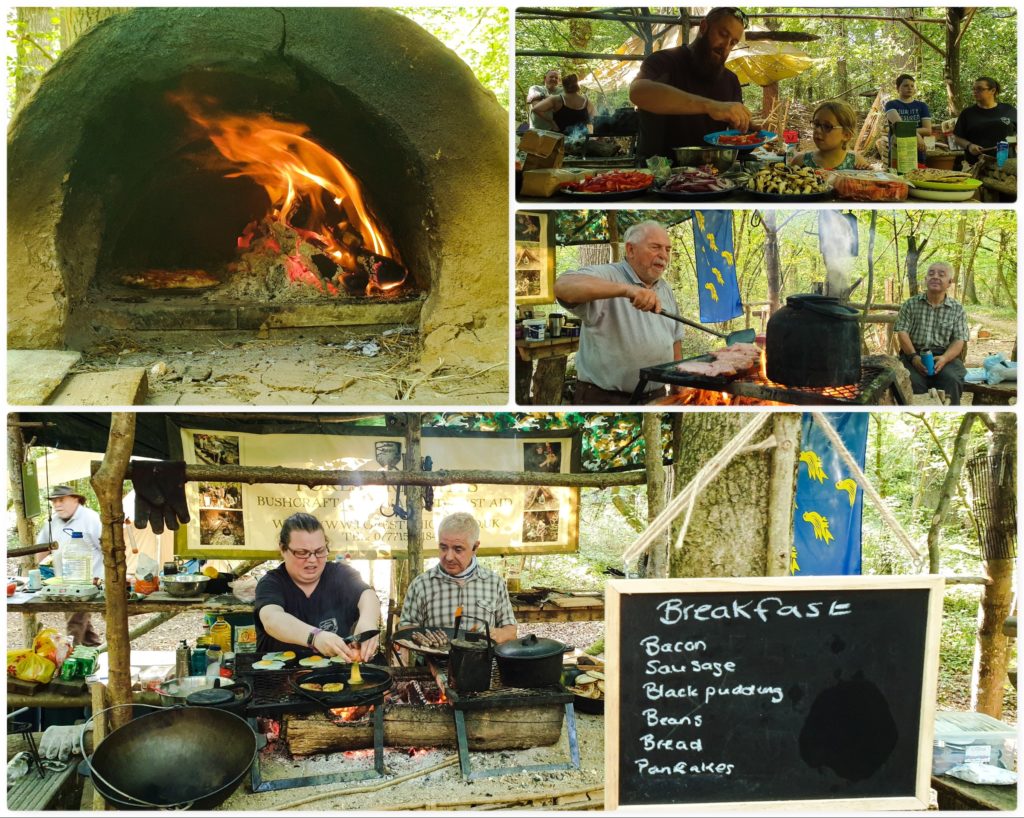
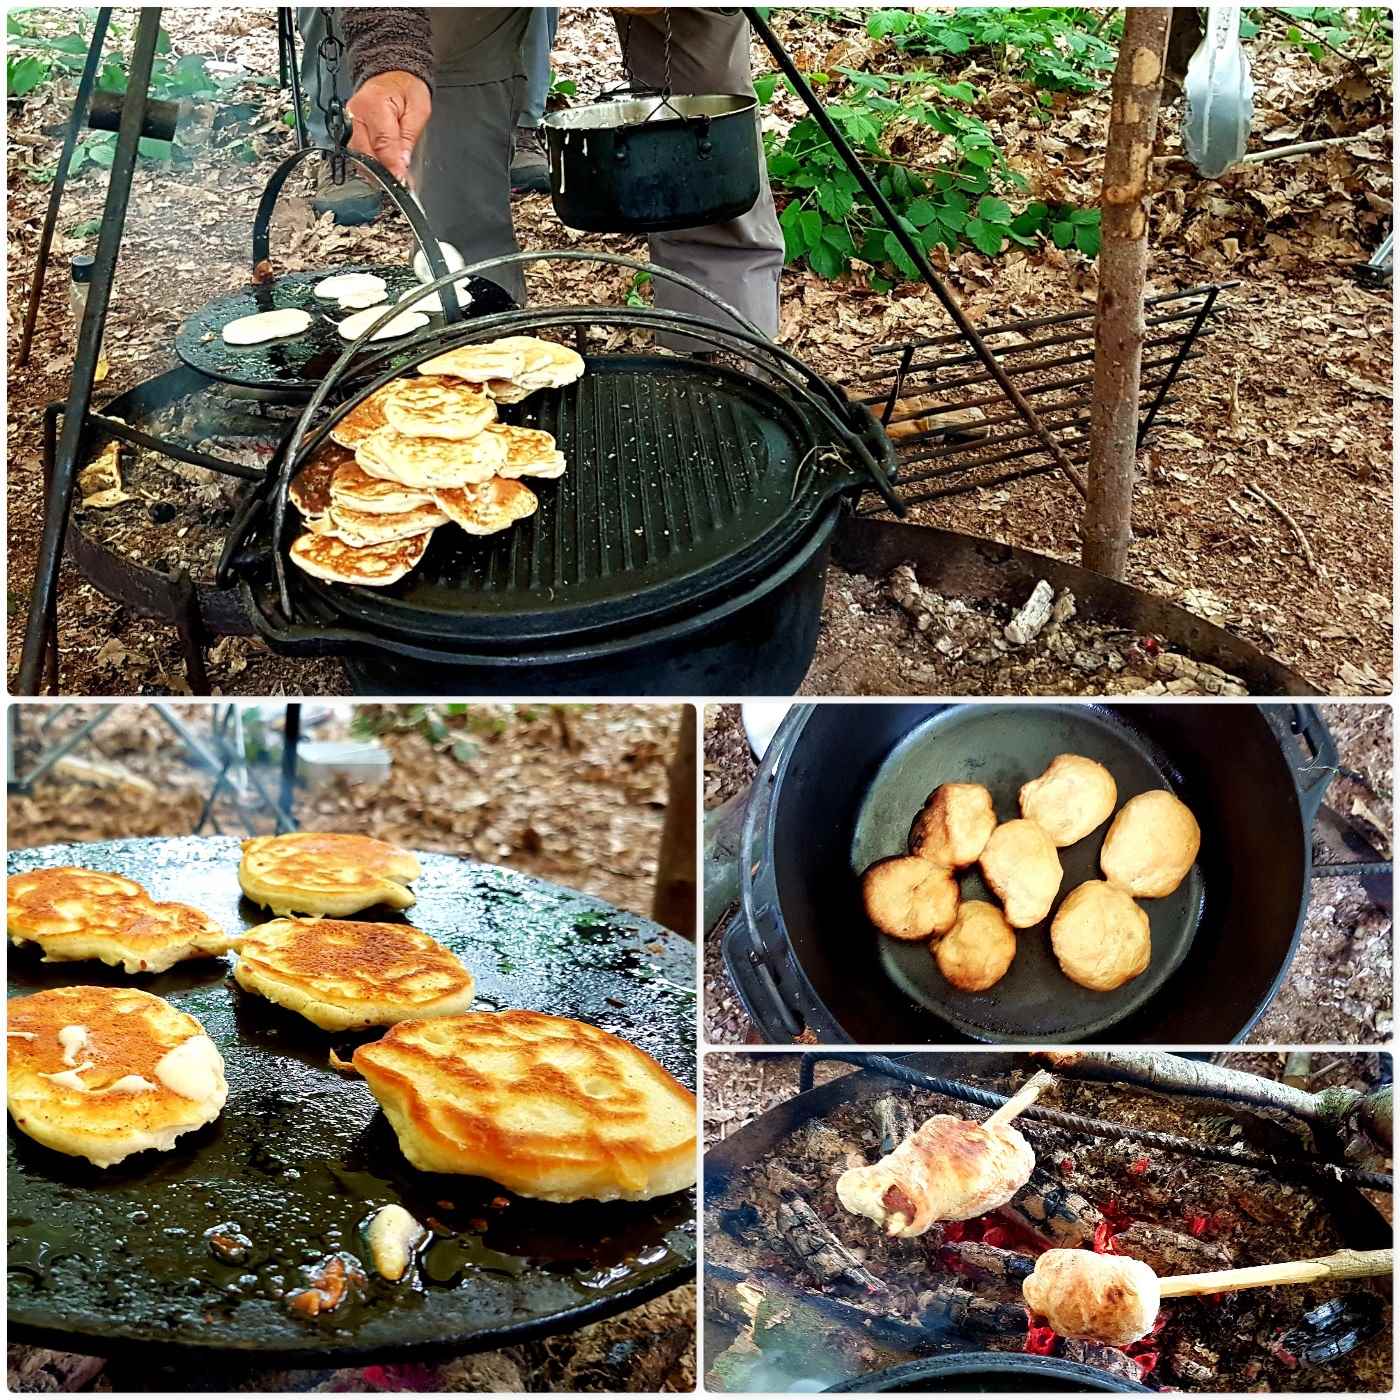
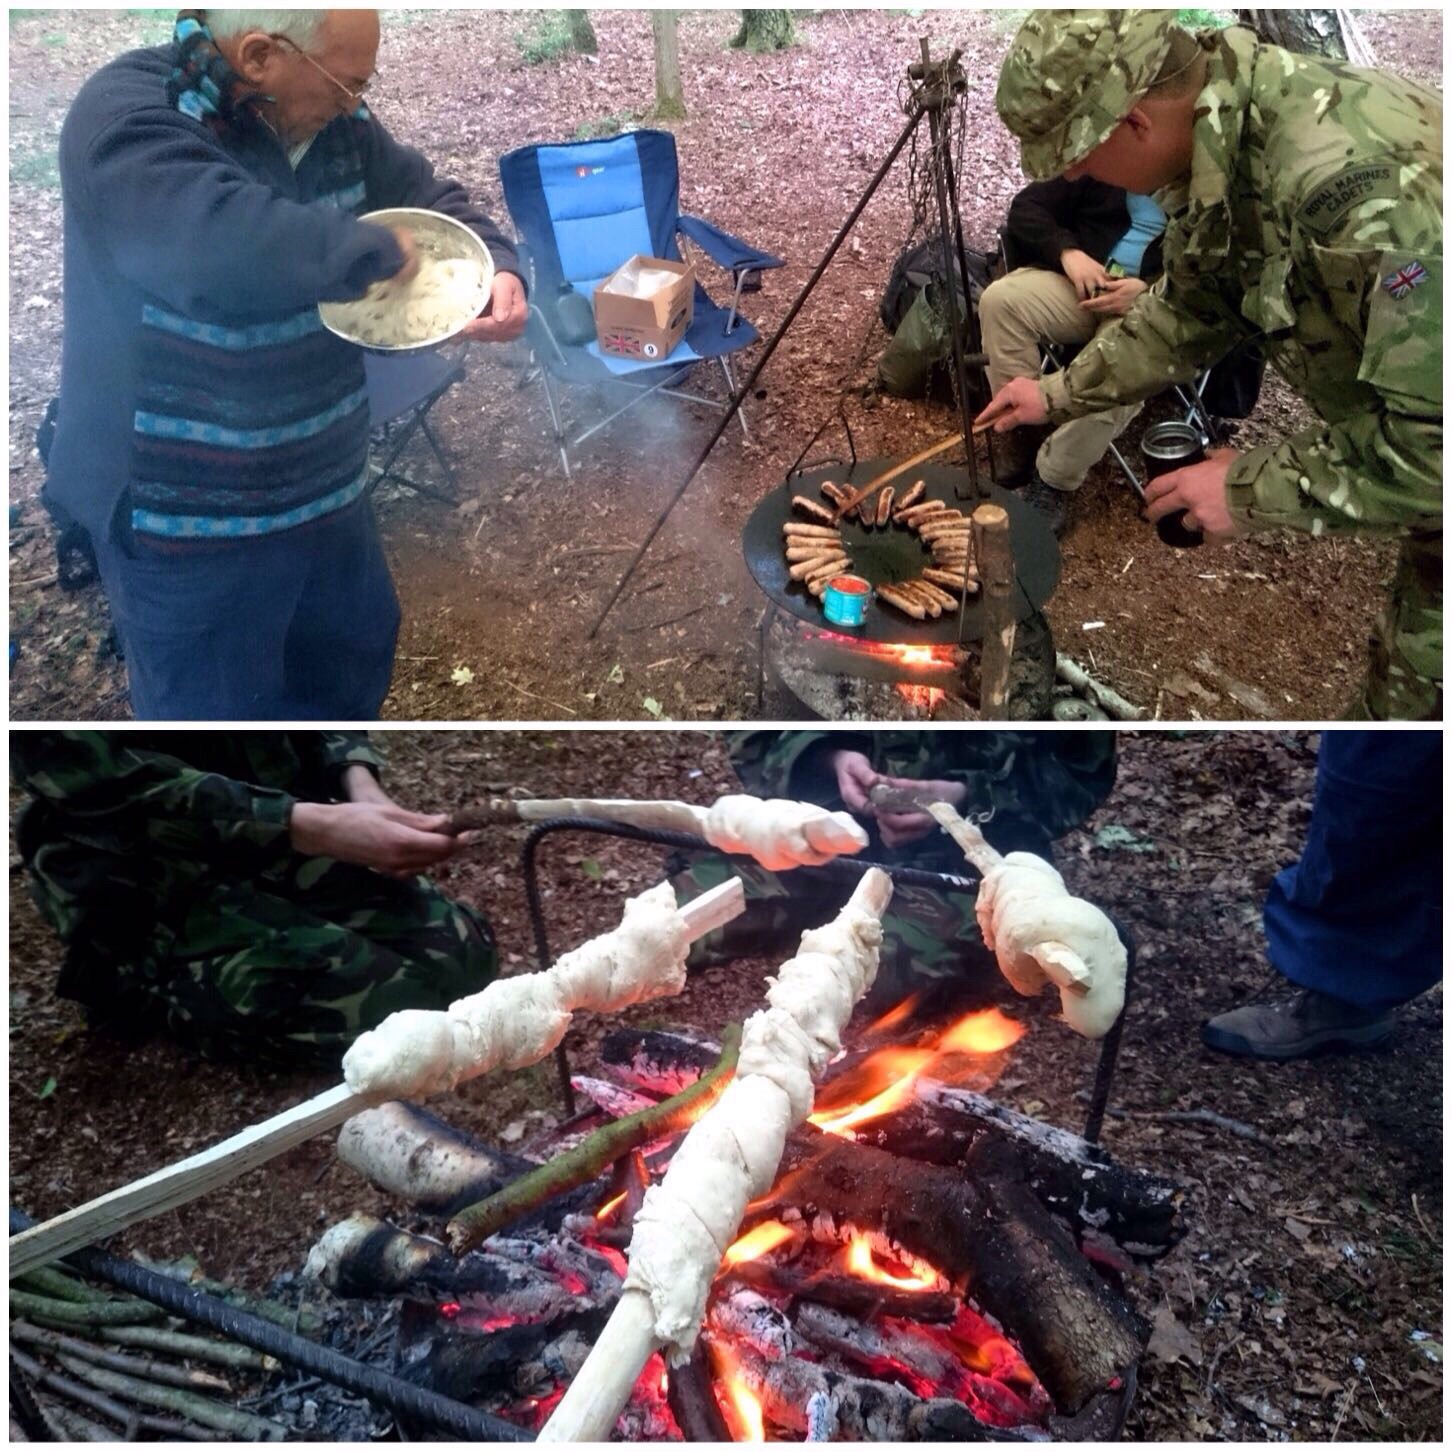
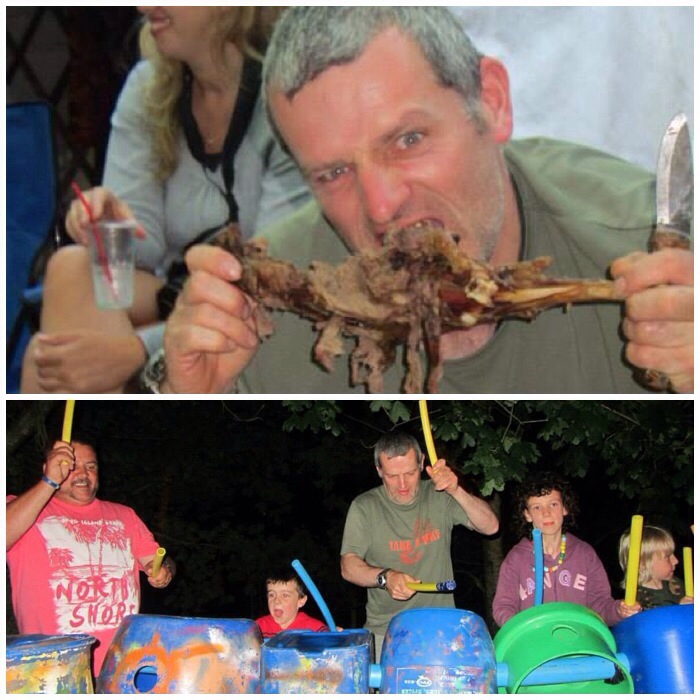
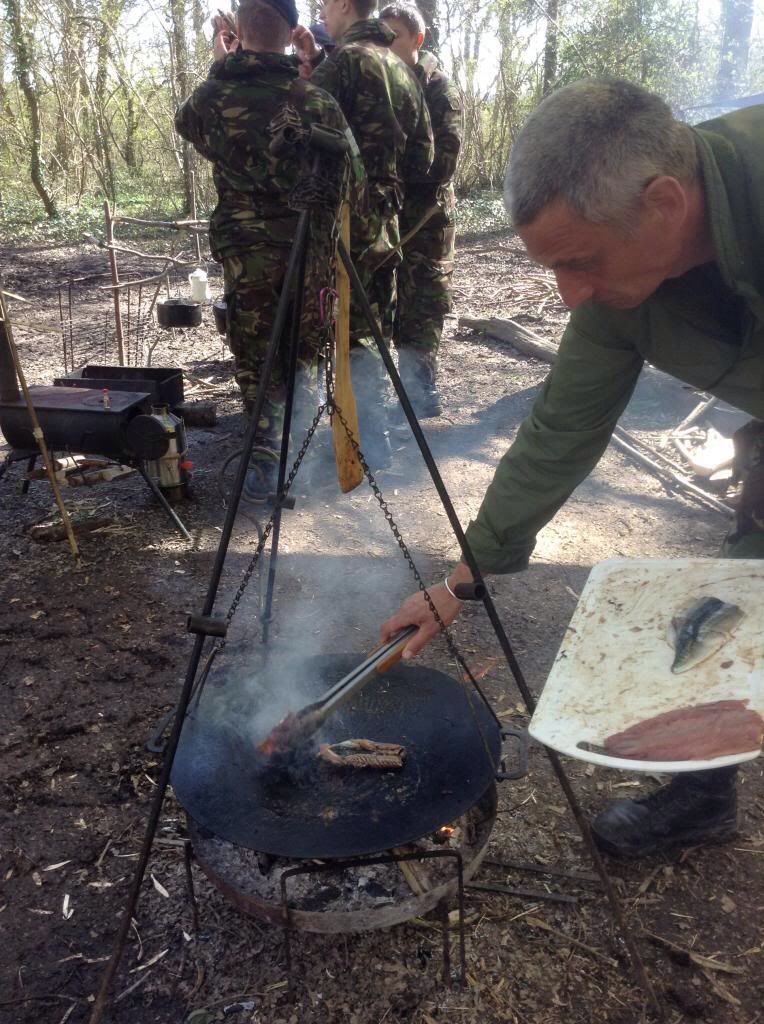
Food – Glorious – Food
One thing that did not happen on this weekend was going hungry – Beth and Wayne (I will put them in order of priority here) are renowned for their cooking skills around a campfire. They cooked a mega breakfast every morning, a curry on the Saturday night and had the pizza oven fired up on a number of occasions.
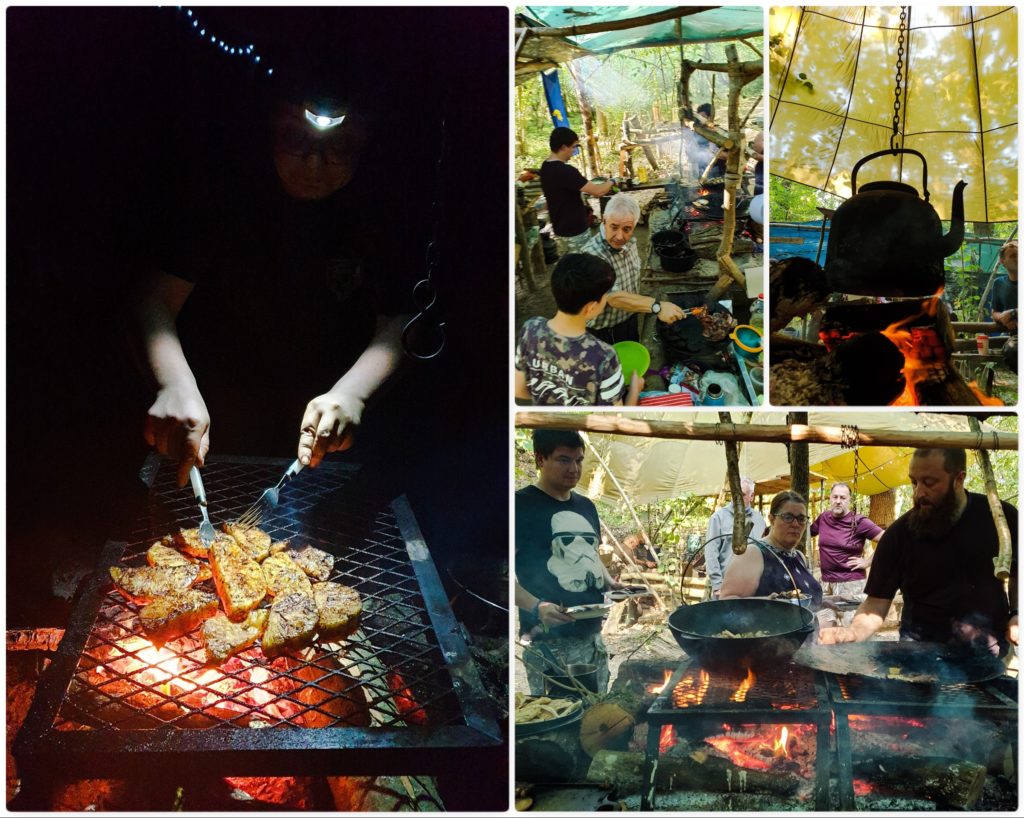
Life around the fire
It was not just Beth and Wayne around the fire – eveyone got stuck in. My son Finlay loved making pizzas and Alan (being a cheffy-type person) loved the raised firepit – I was happy to stick the kettle on every now and then 🙂
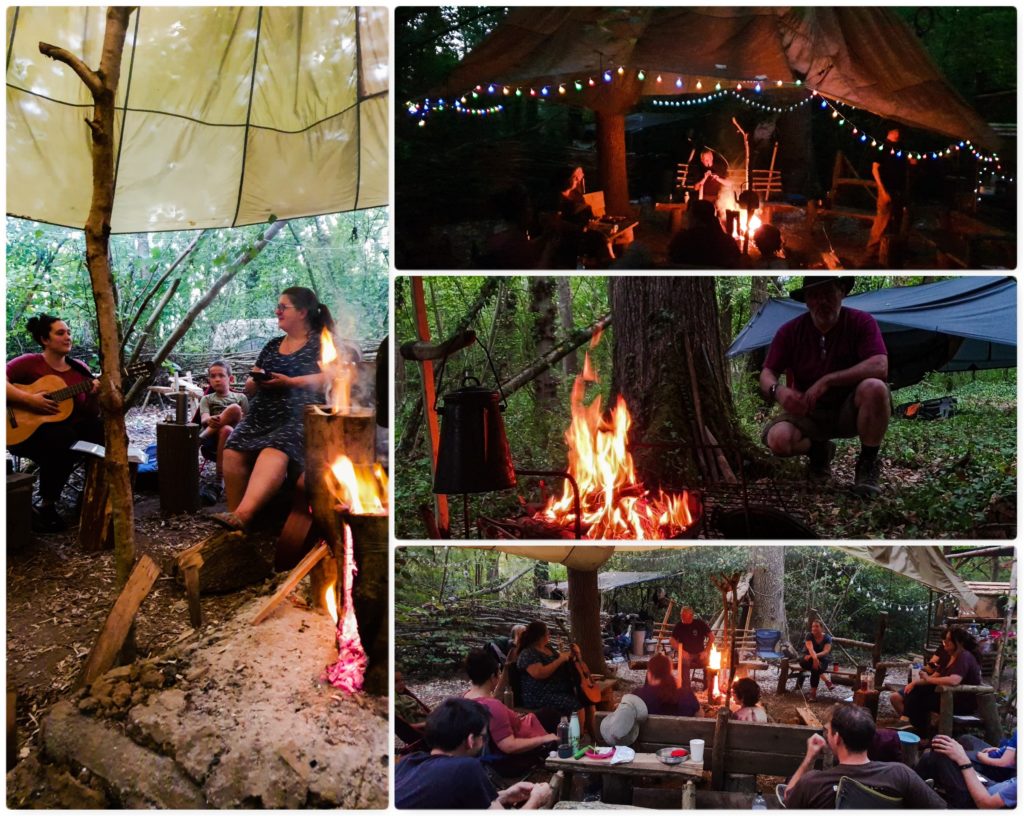
Evening Relaxation
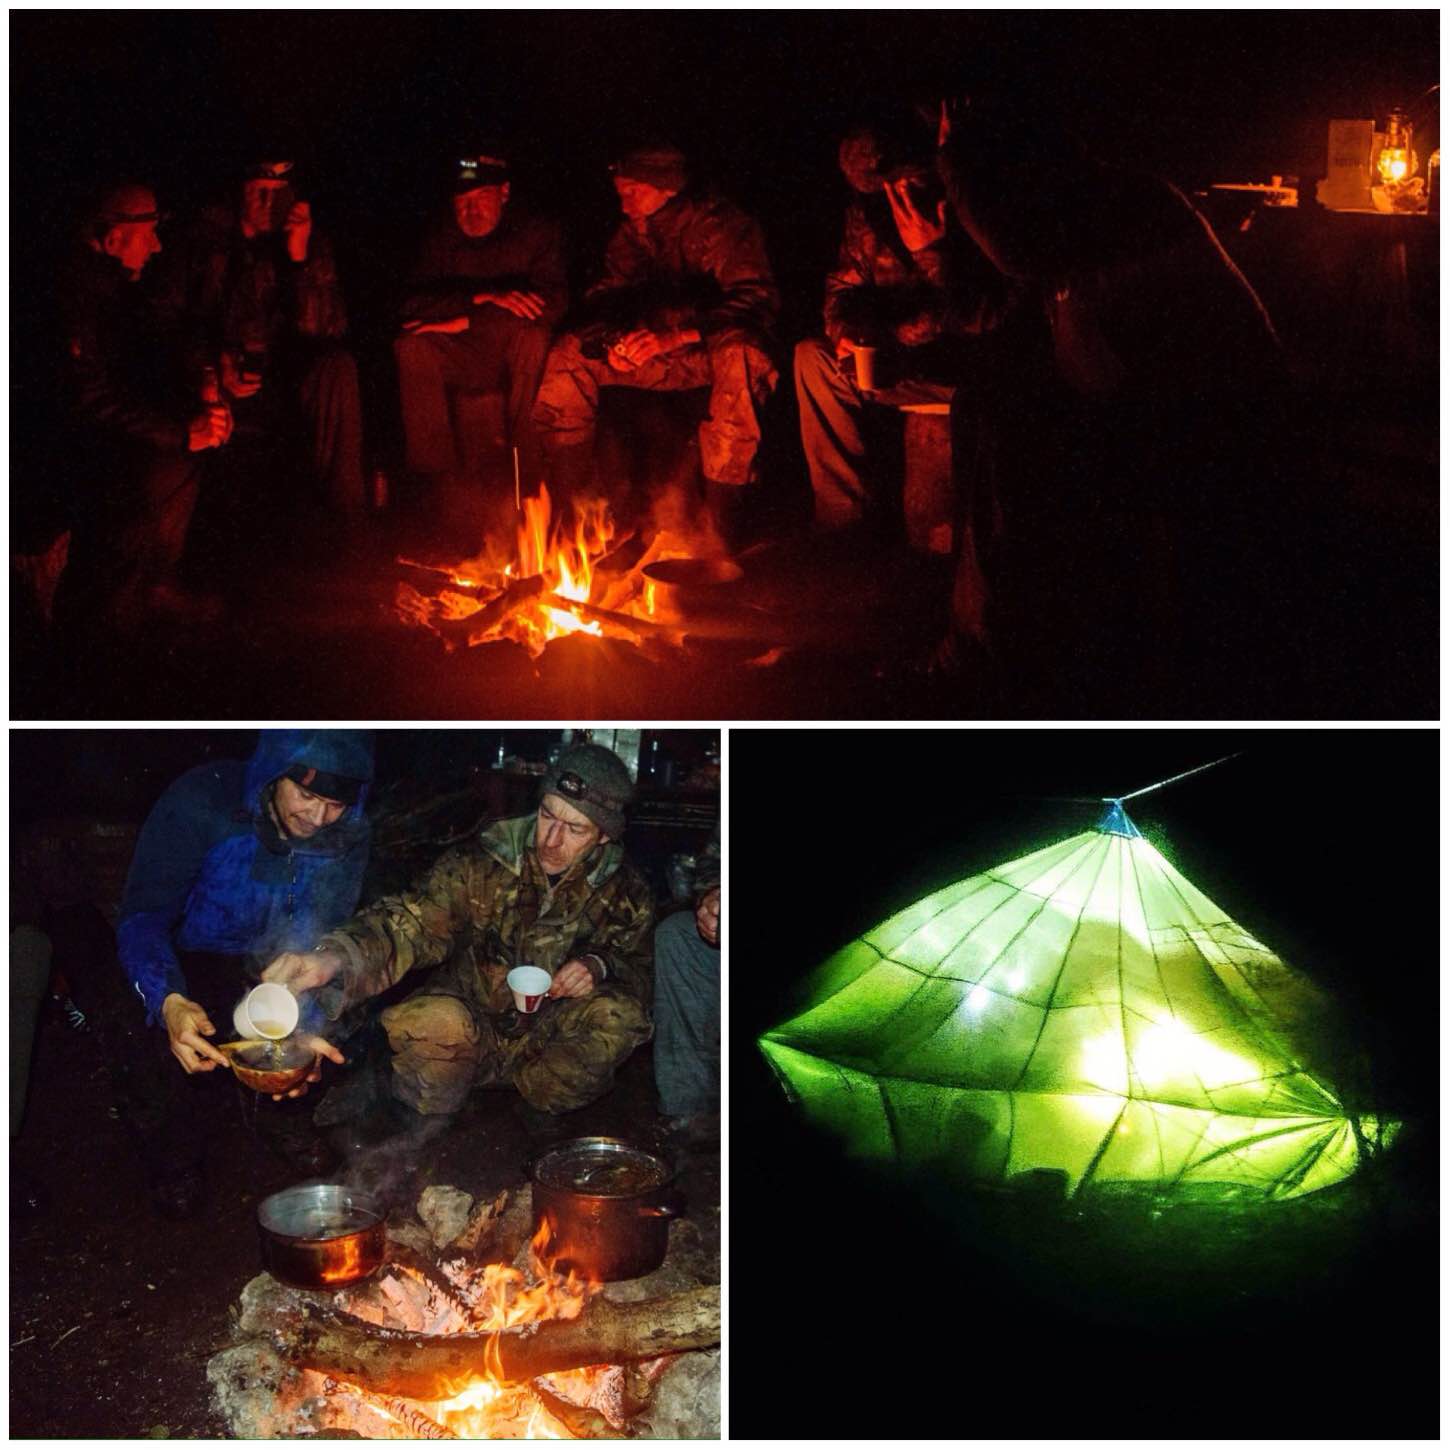
It was not all hard work (though that heat really made doing simple chores twice as hard as they actually were) and in the evening we would sit around our campfire before joining a socially distanced group fire when it was fully dark.
Most evenings you could hear the penny whistle from the likes of Stephen Crump and on the Saturday we had great singing (and guitar work) from Ruth and Mel.
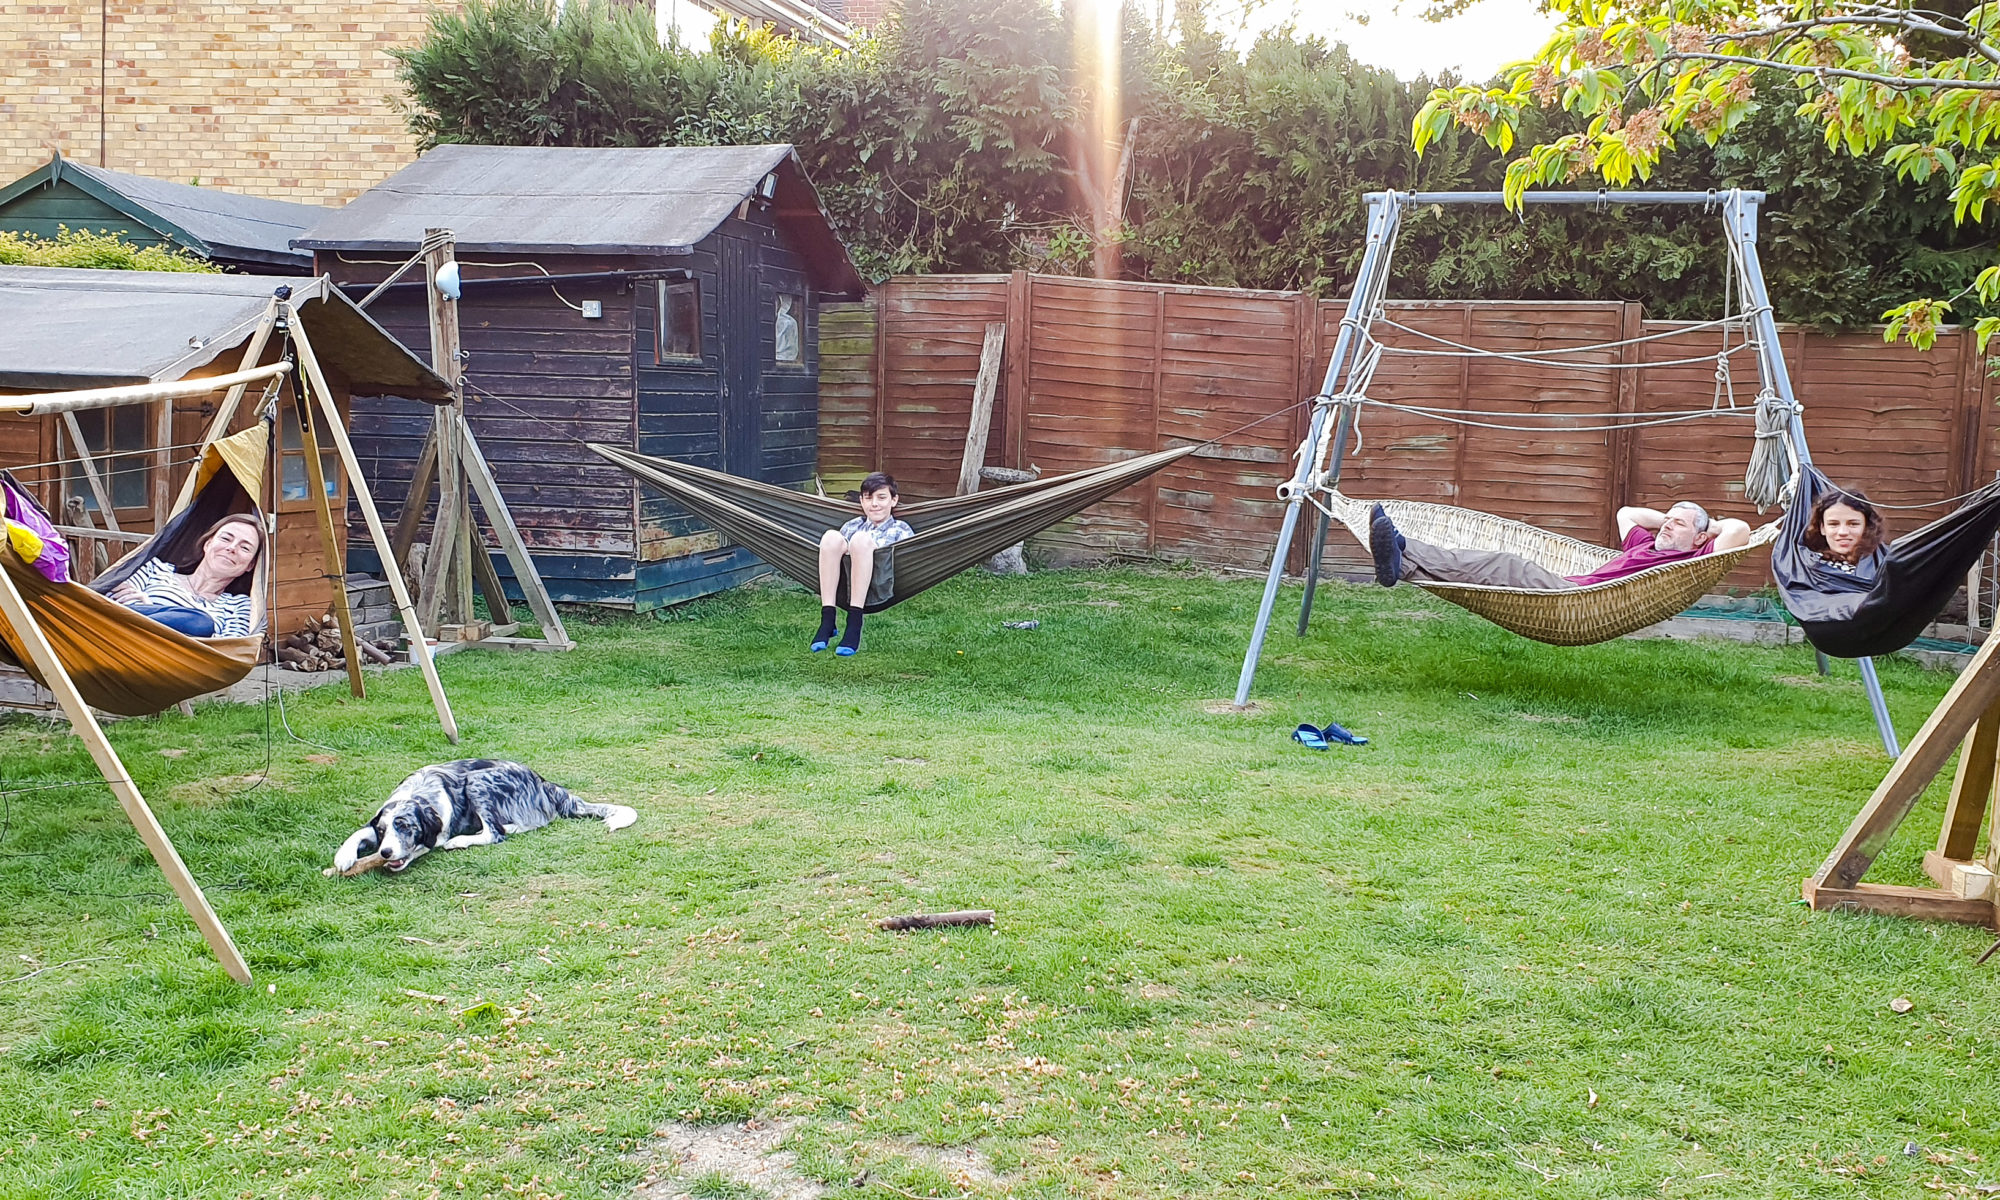
Glorious light
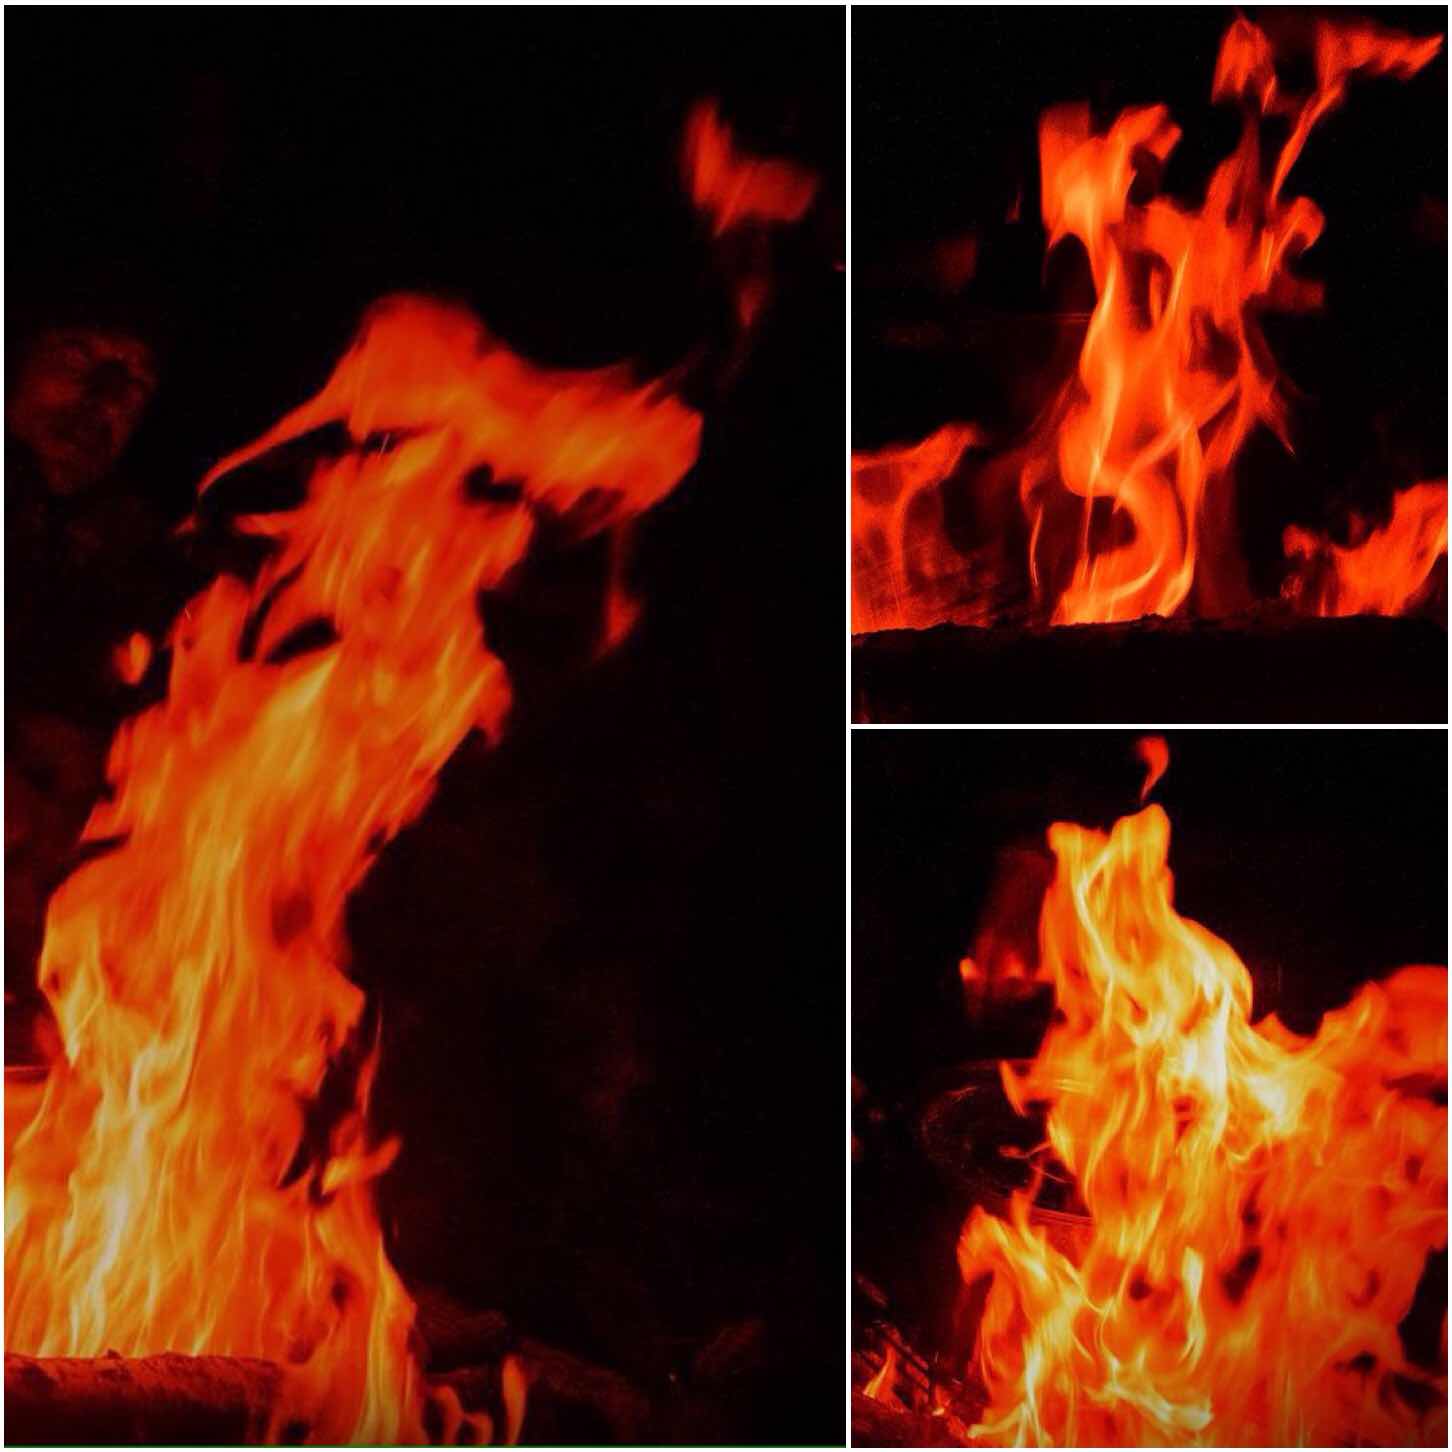
As a photographer I usually struggle to get good shots in the woods with my phone camera and have to rely on the big old DSLR. But on this weekend the light was fantastic, so my DSLR never left my rucksack. Loved seeing all these rays through the canopy with the smoke from the cooking fires.
Thanks again to Wayne and Beth for hosting the Minimoot – the first camp I had attended since lockdown. It was great to see some friends again in a relaxed and socially responsible way – there was plenty of room in these woods.
Cheers (and look forward to future Minimoots alongside the main Bushmoot), George
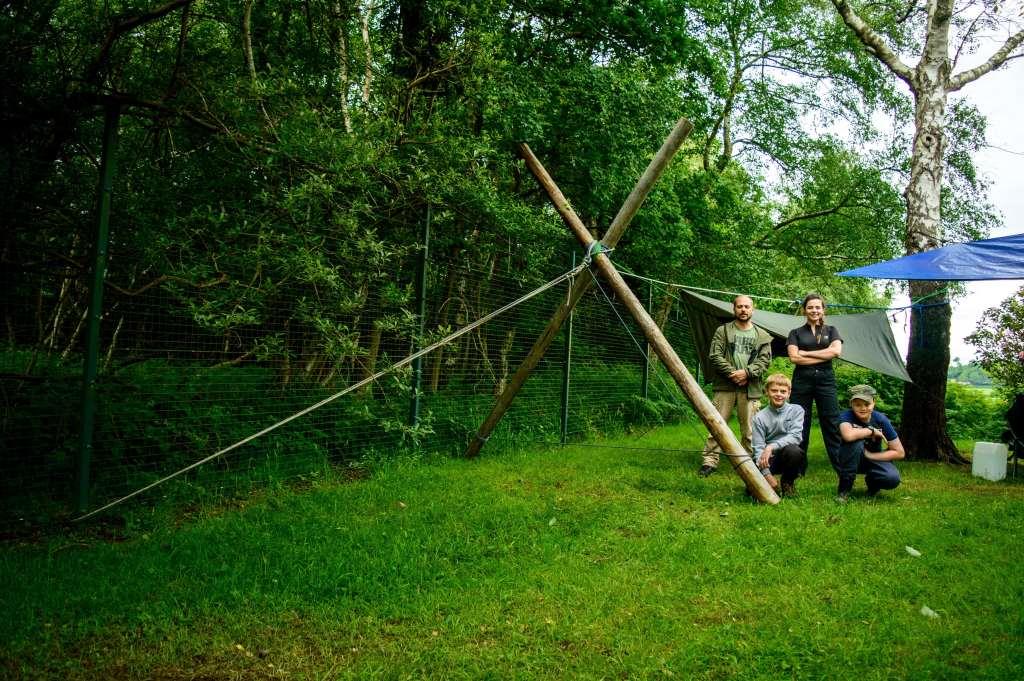
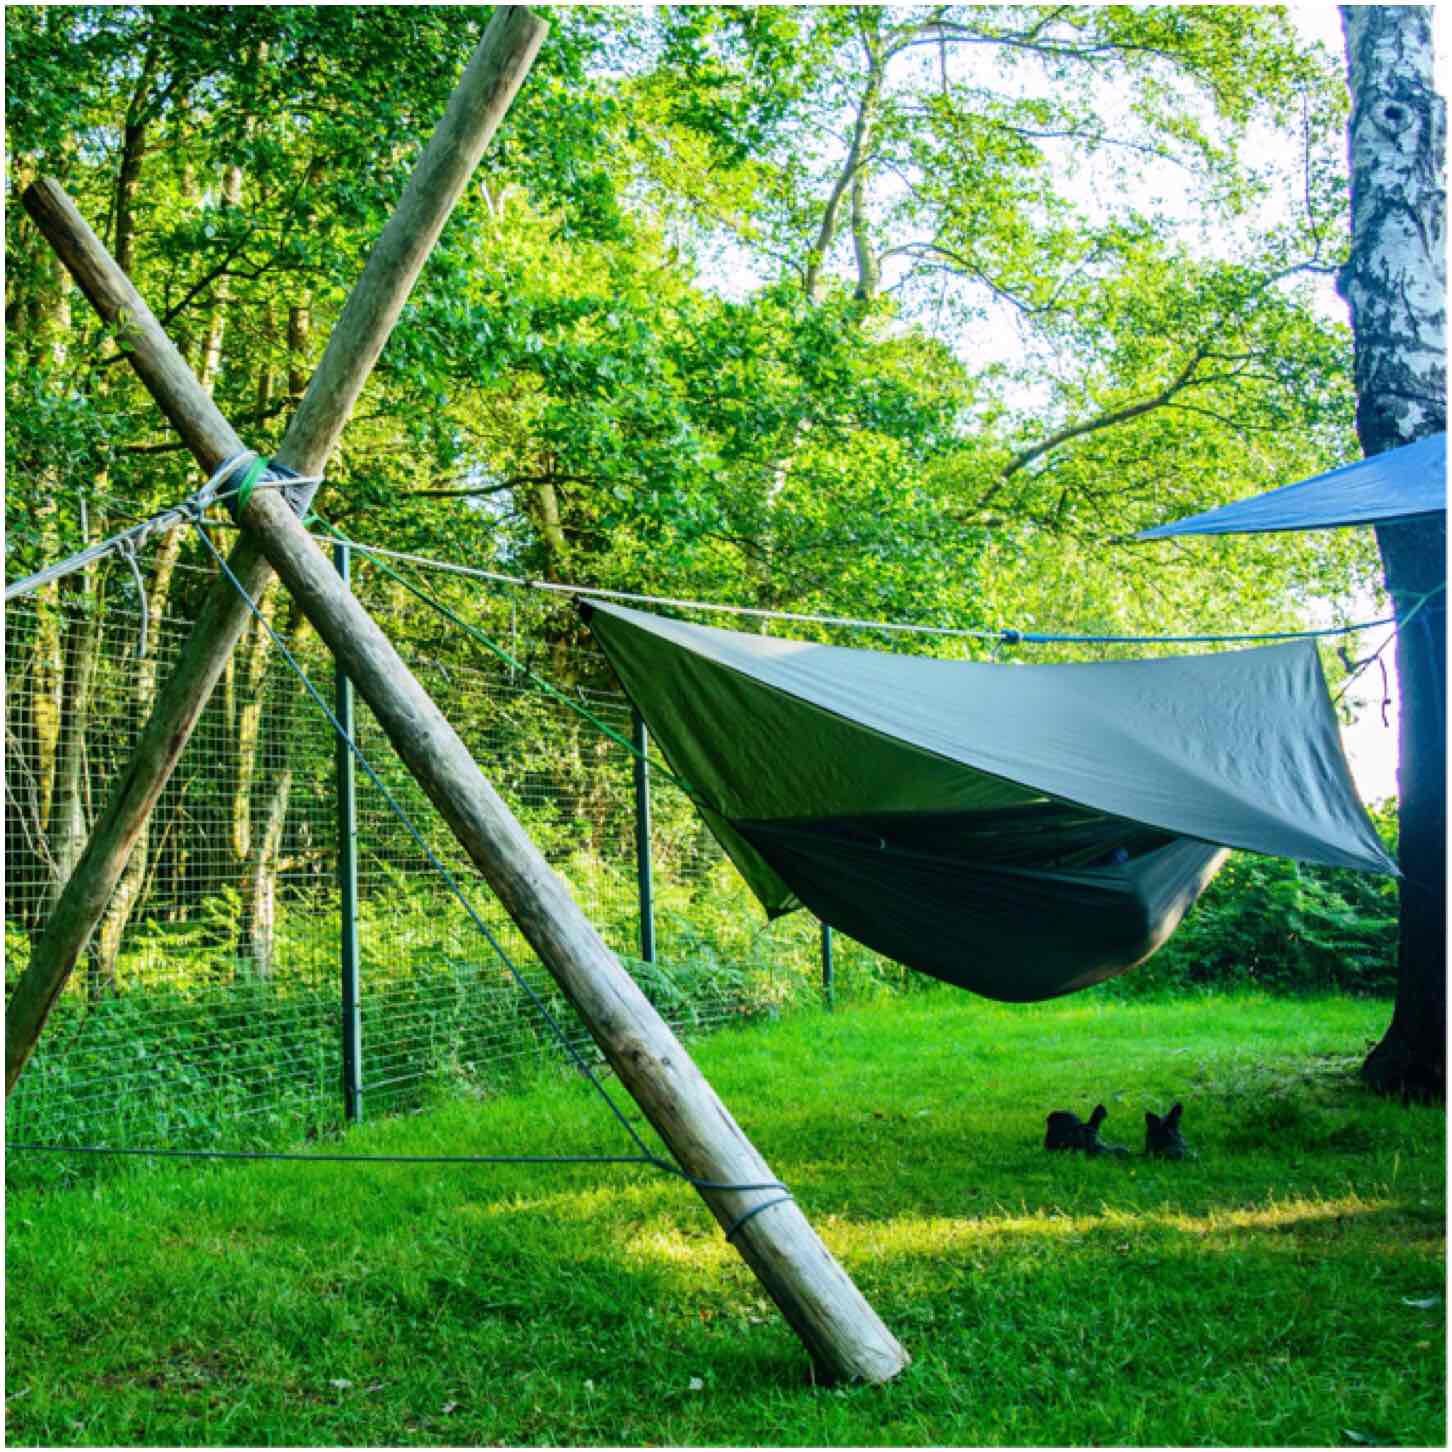
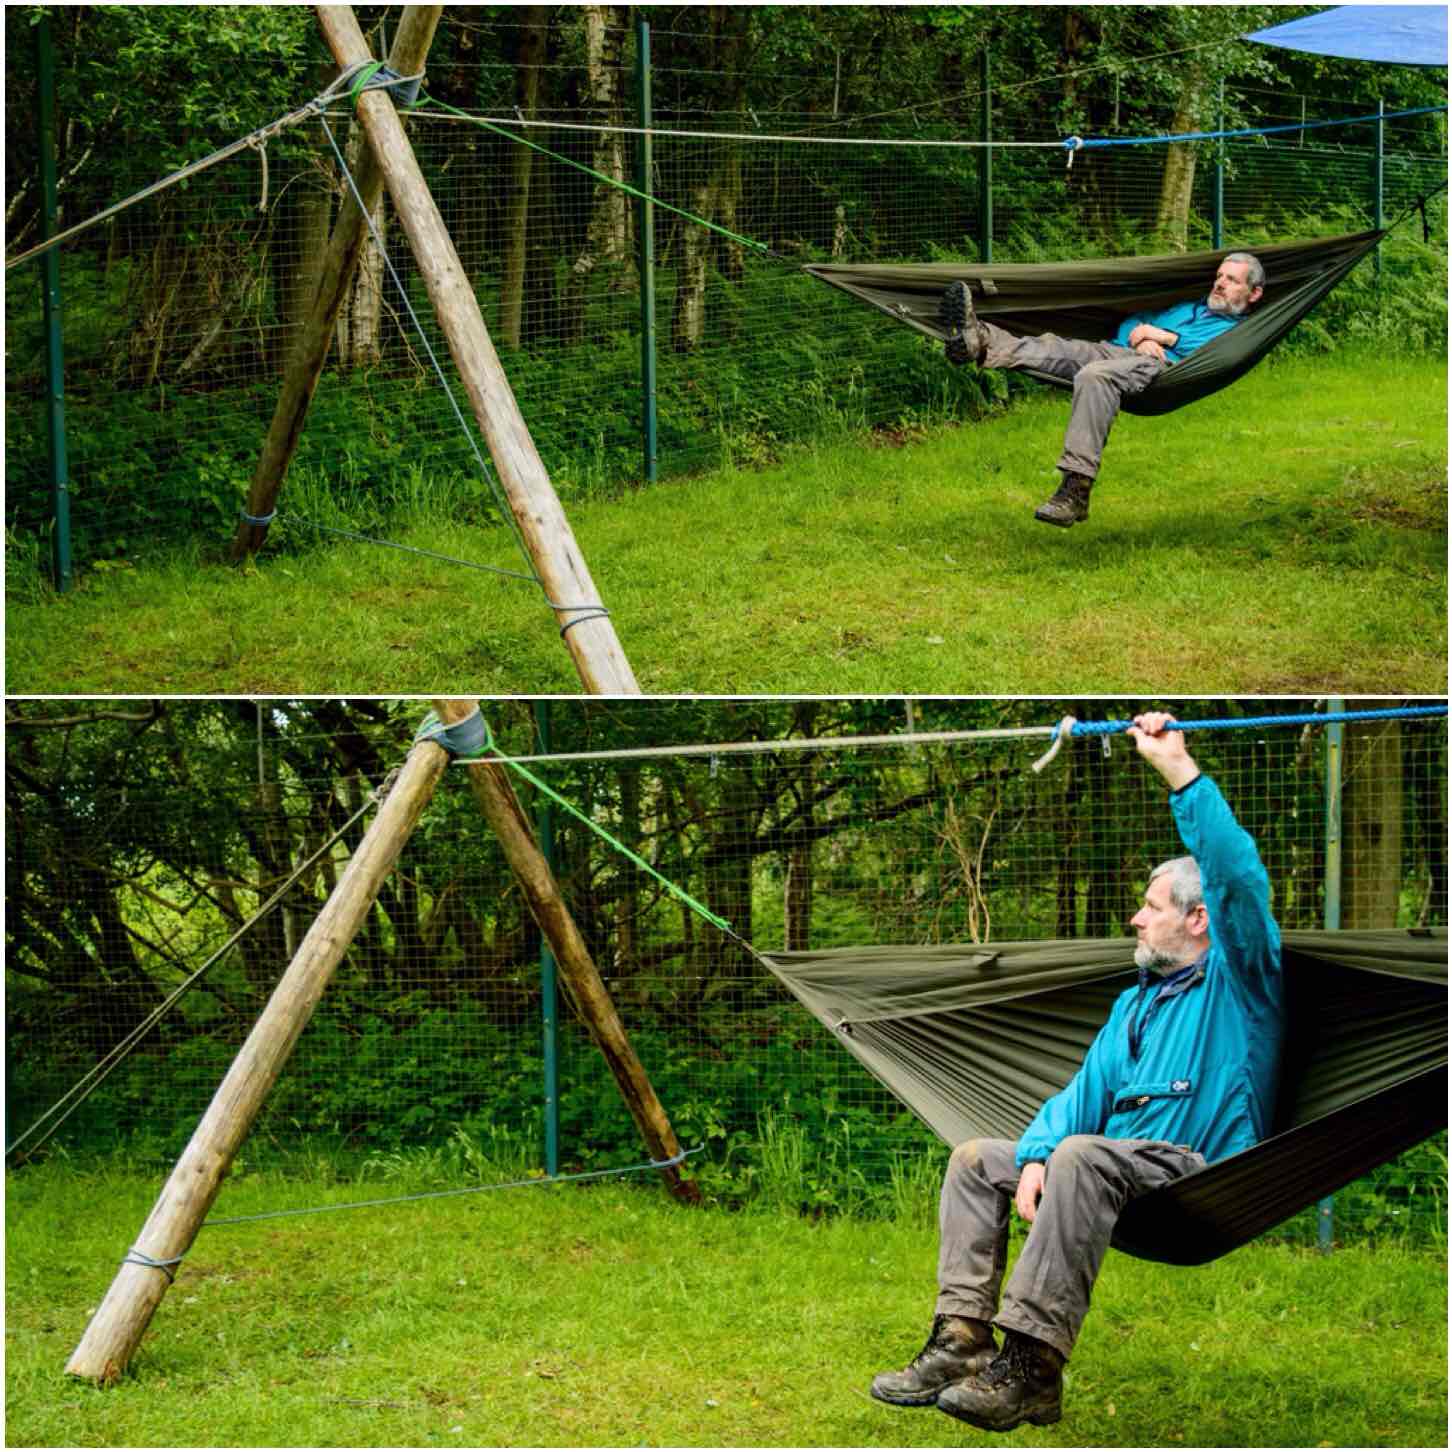
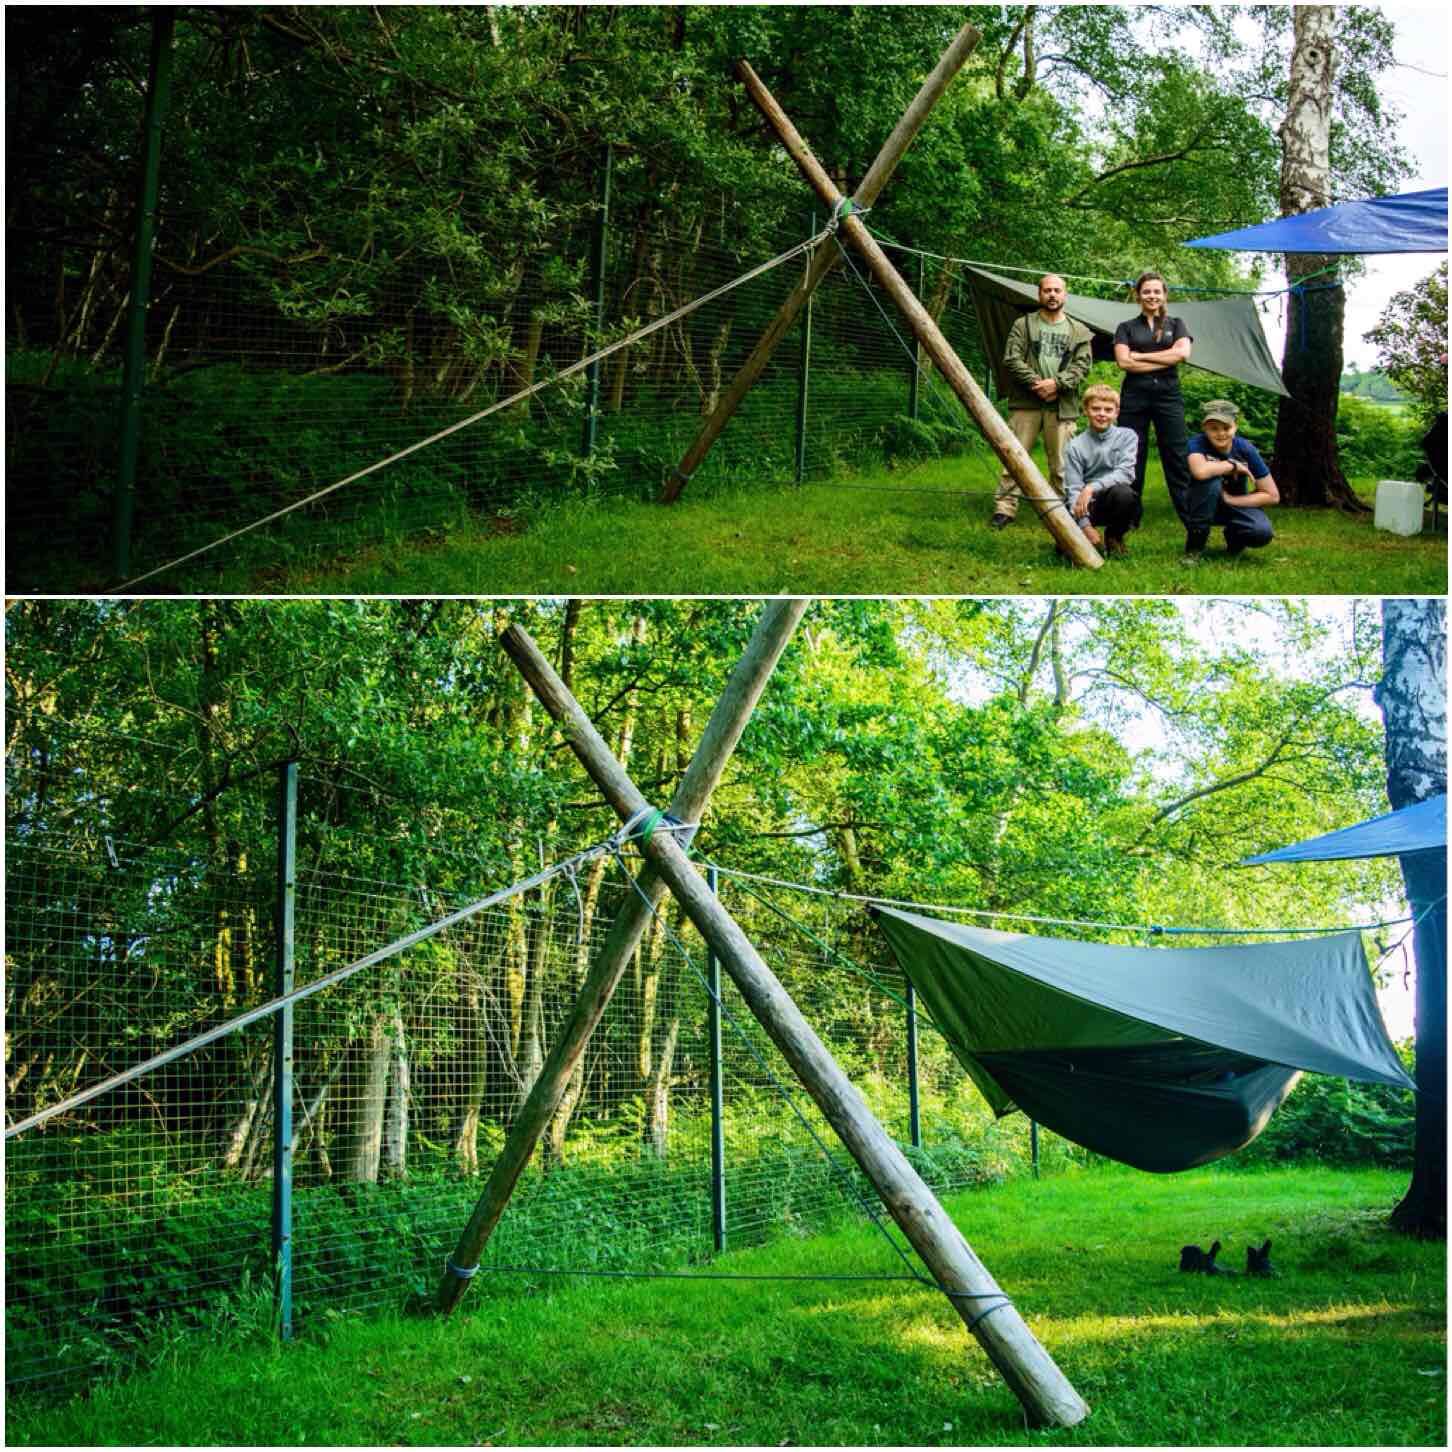
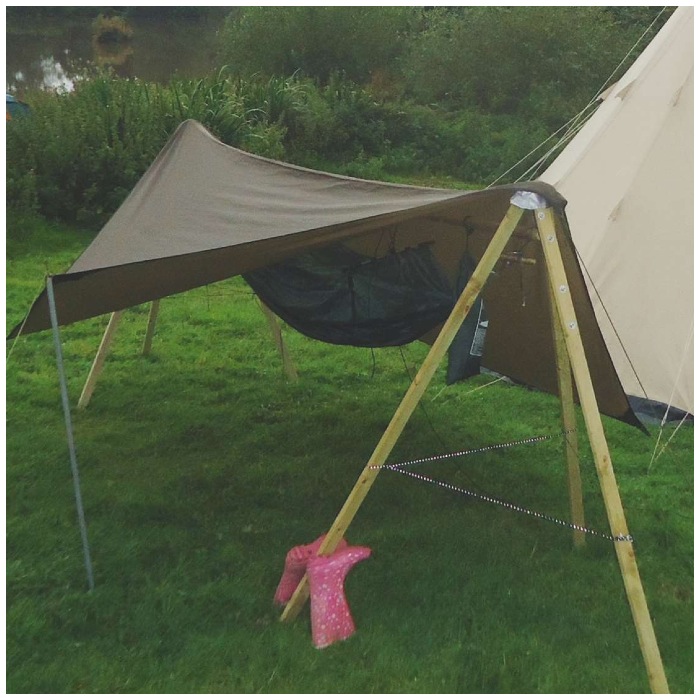
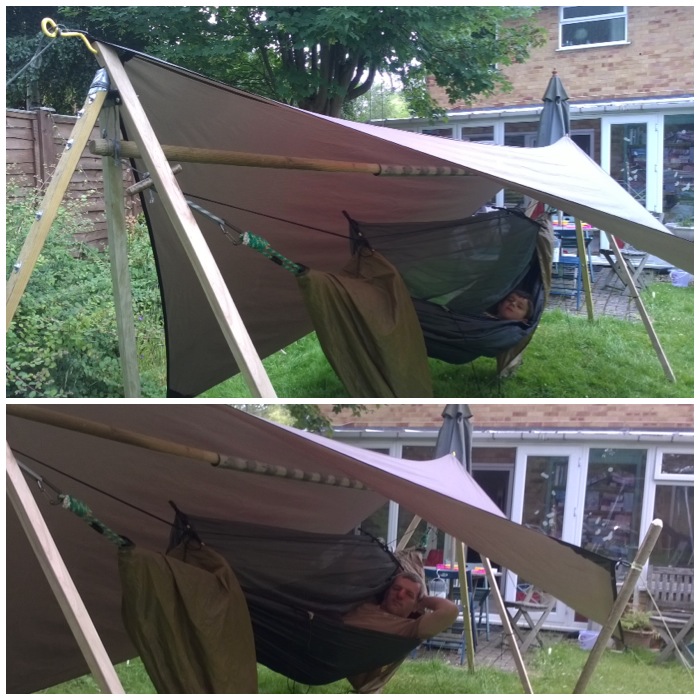
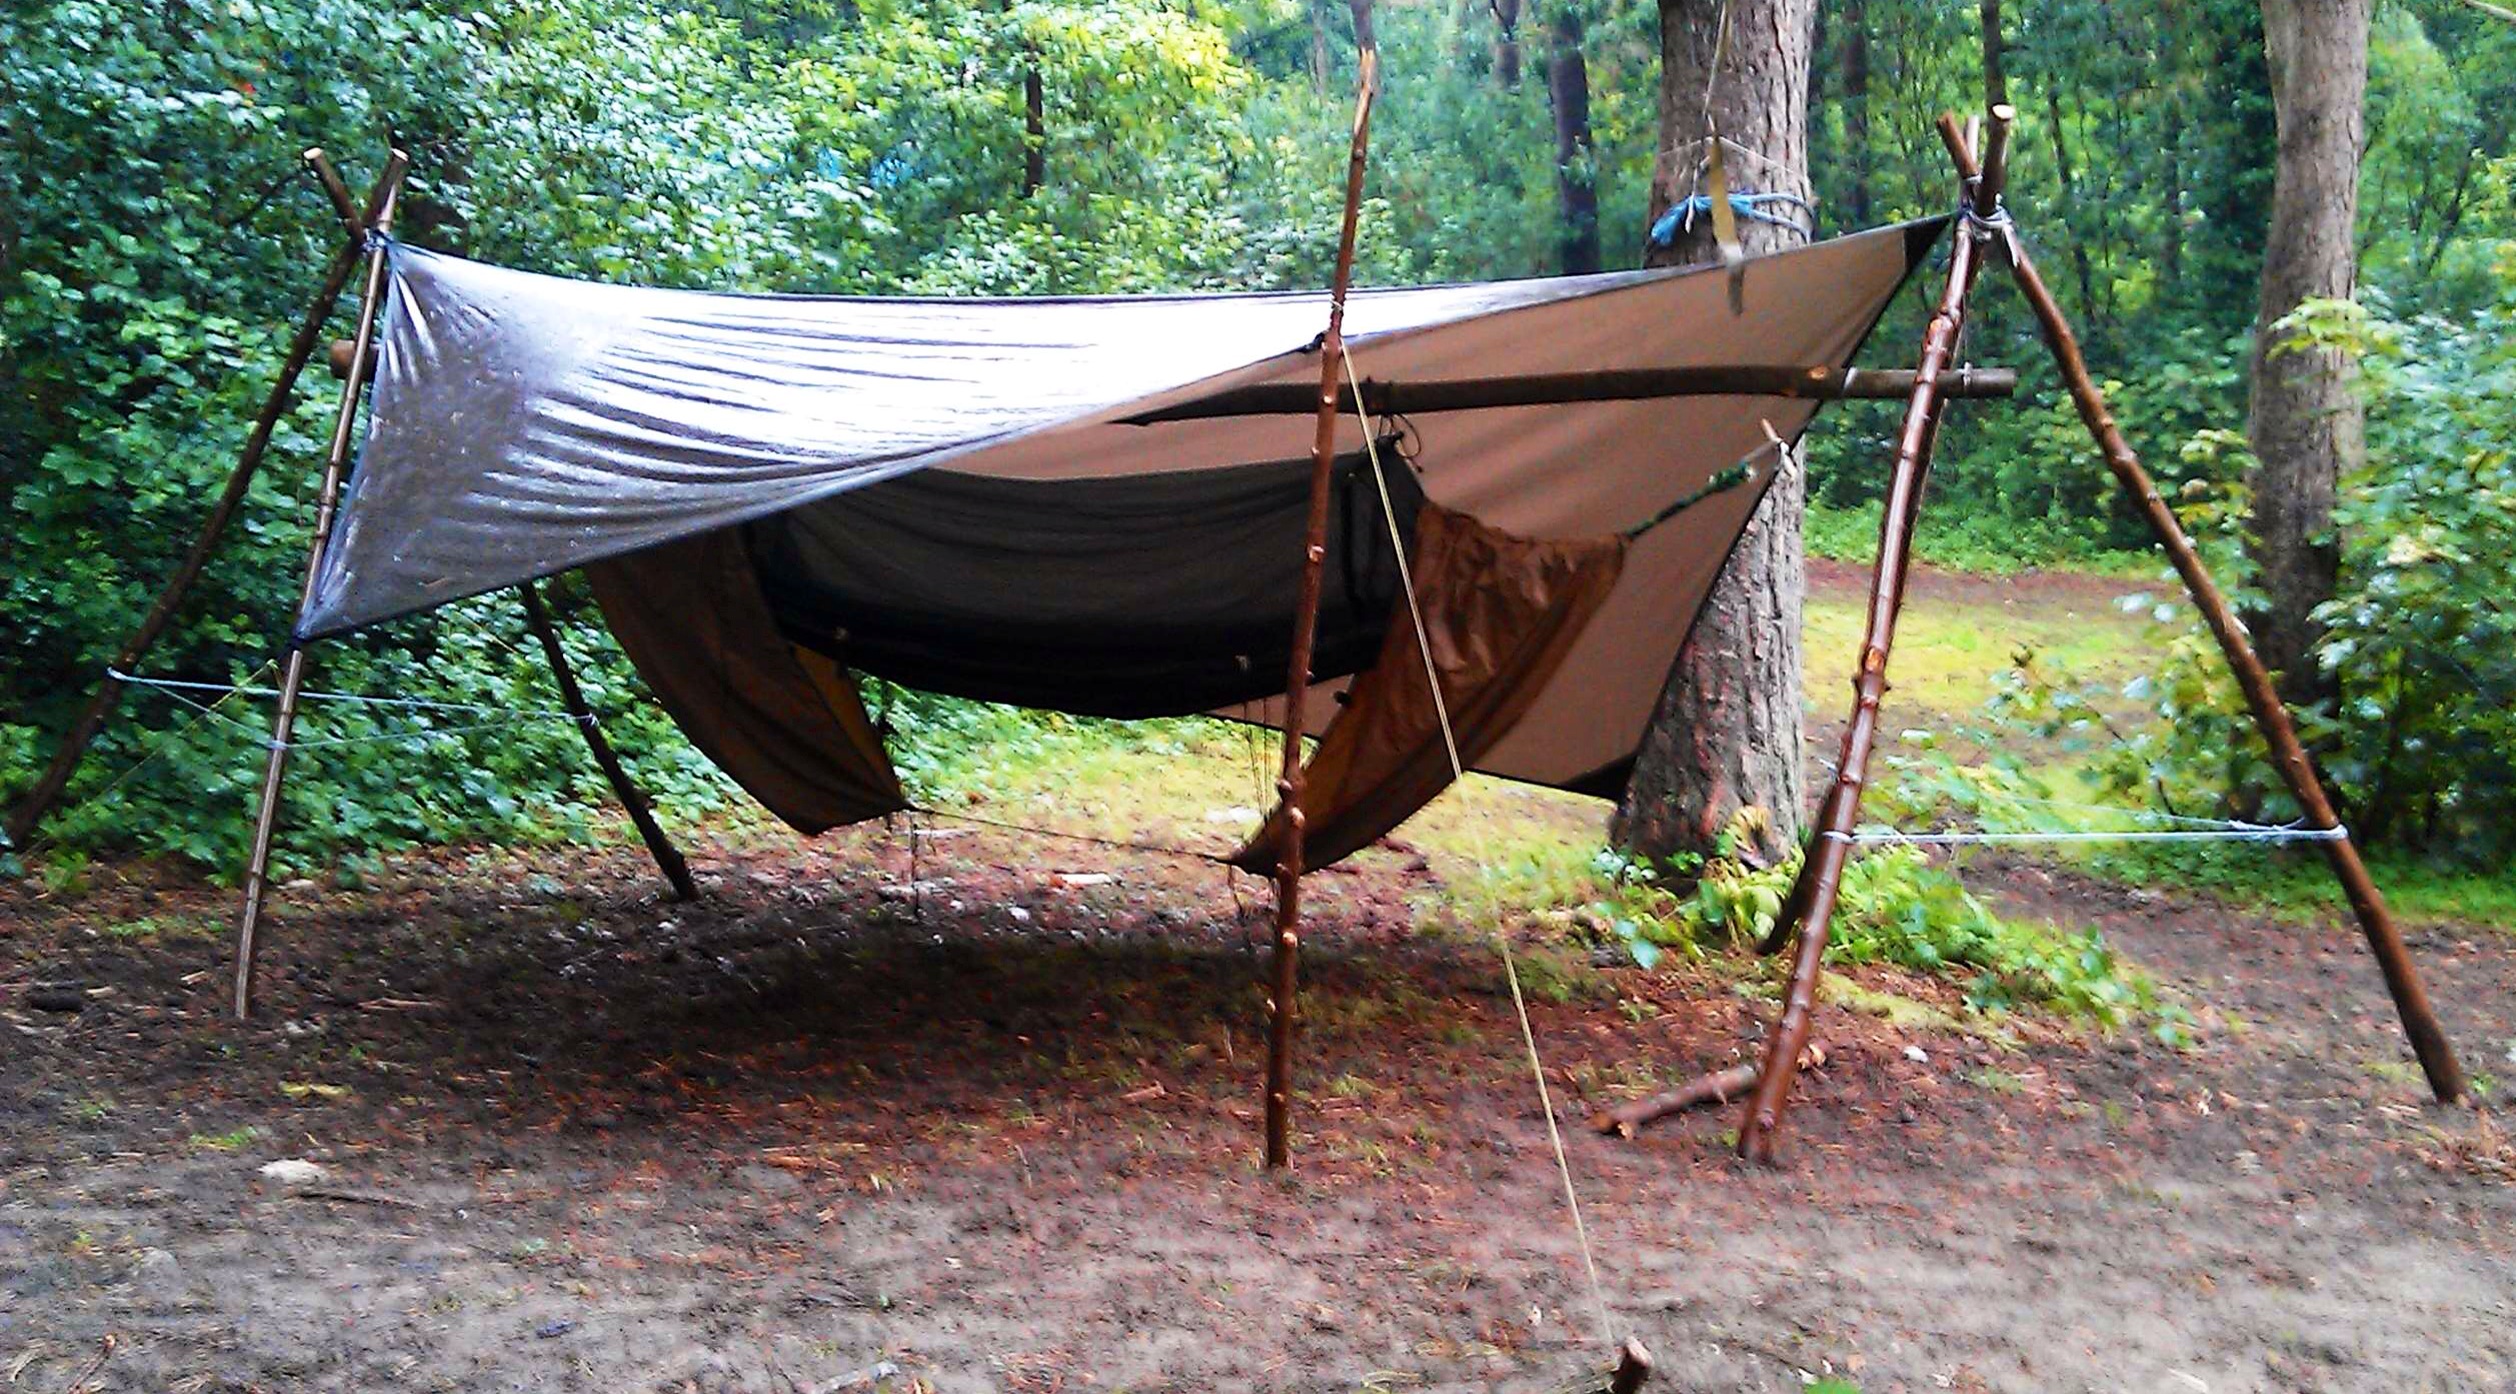
Over the years building hammock stands have really intrigued me.
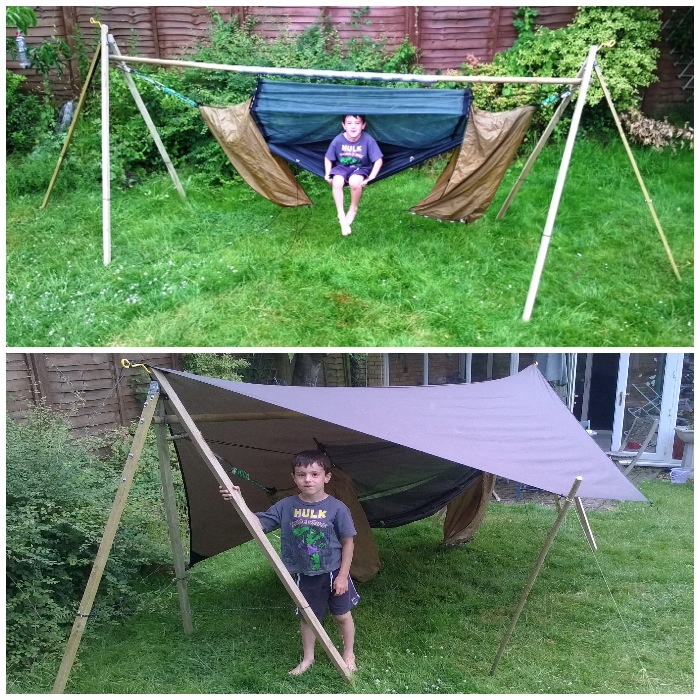
My Freestanding Hammock Stand is great for popping up in the garden or putting in the back of the car to take to events – however I have only one and with this current Covid crisis found I have been spending more time in the garden – so more hammock stands were needed. I did not have all the wood I needed for another Freestanding Hammock Stand however I found I had a lot of old fence posts that could be turned into something.
I have only one decent tree in my back garden and an old swing frame (they are too far apart to use together) that I can hang a hammock off so I needed some kind of ‘Hammock Upright’ that did not need to be dug into the ground.
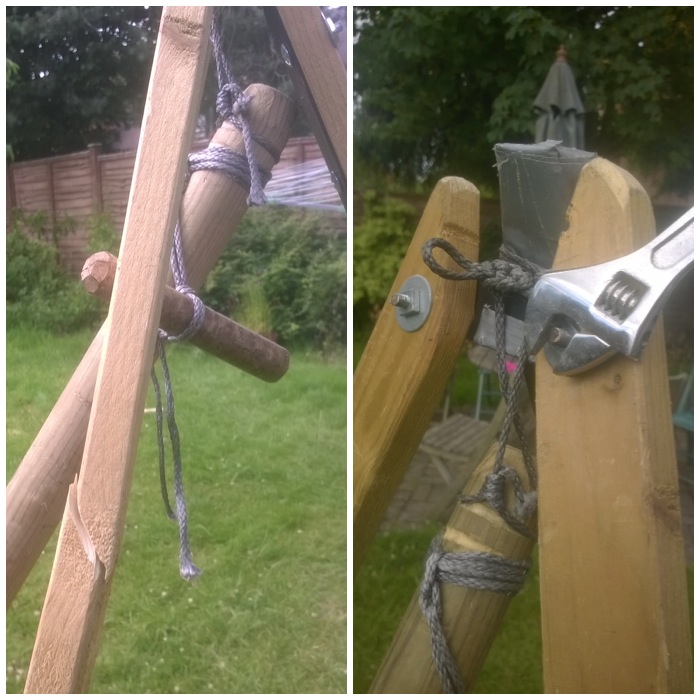
The ‘Hammock Upright’ you can see below is the one I built and it shows it being secured by land anchors. It is not portable (well I can move it around the garden easily) but it is robust. I know that there are ways to make them lighter however I wanted to use the wood I had on hand.
Land Anchor Secured
While making a video on the upright it struck me that iron pins would do the same job as the land anchors.
Iron Pins
So to see how it is all built have a look at my video below.
Cheers, George
Update (02/05/2020) – Brought the two uprights together and used pins on both.
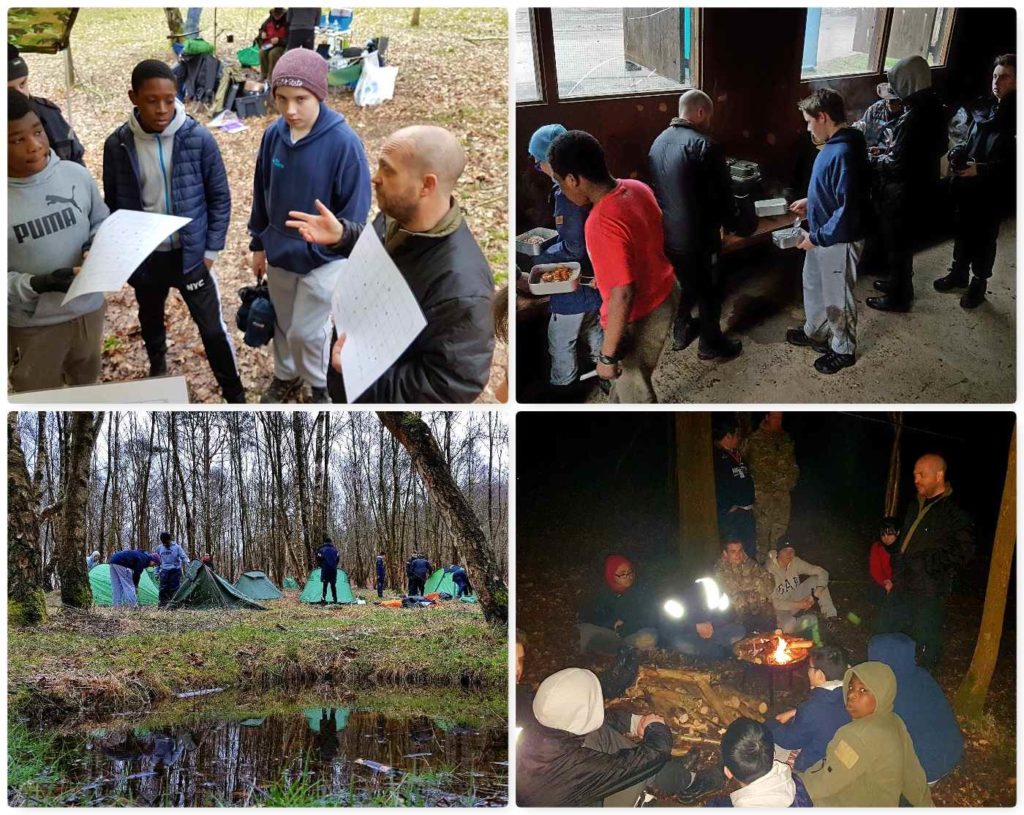
Seriously behind on my blogging now – life has lots of distractions for me at the moment (trying to learn Coding and French to name two). Looking back on my photographic filestore I came across some pictures of a cadet campcraft come bushcraft weekend from last Easter.
Friday
The Sea Cadets were only joining us on the Saturday so the Friday was a relaxed day of set up in the beautiful Pippingford Park in the Ashdown Forest. I was working with my friends Dave, Alan and Jess.
Friday set up
Saturday
The cadets joined us first thing and thankfully brought the breakfast along with them – courtesy of the camp chefs. Then it was straight down to classes such as erecting tents, mapwork and kit. Evening time was spent around the campfire – these introductory campcraft weekends are for some cadets the first time they have ever slept out in the countryside.
Cadet time
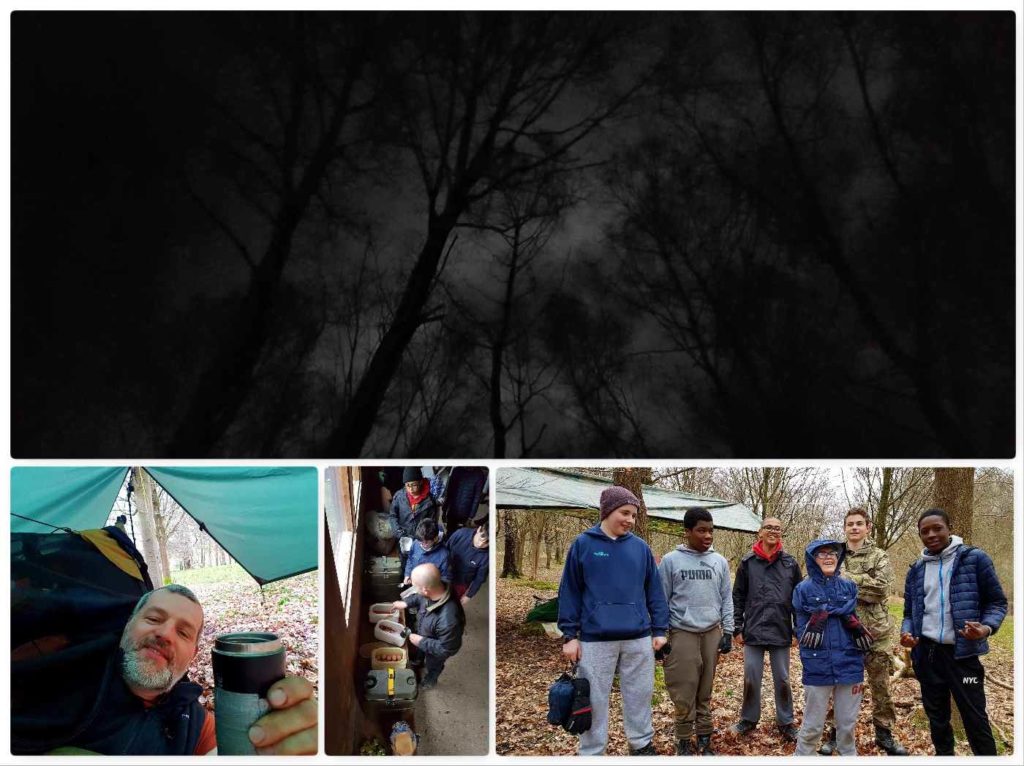
After the cadets had bedded down for the night I tried out a little night time photography with my Samsung phone camera – I was surprised that the lens captured all the detail of the tree tops.
Sunday
Early Sunday morning found me with a cup of coffee in my hand – supplied by our very own Warrant Officer – Dave Lewis – not often a Petty Officer receives such an honour – I did think he was after something 🙂
Settling in
Straight after breakfast it was back into class. The cadets covered some First Aid, cooking on stoves, packing kit away and some more nav.
Classes and more classes
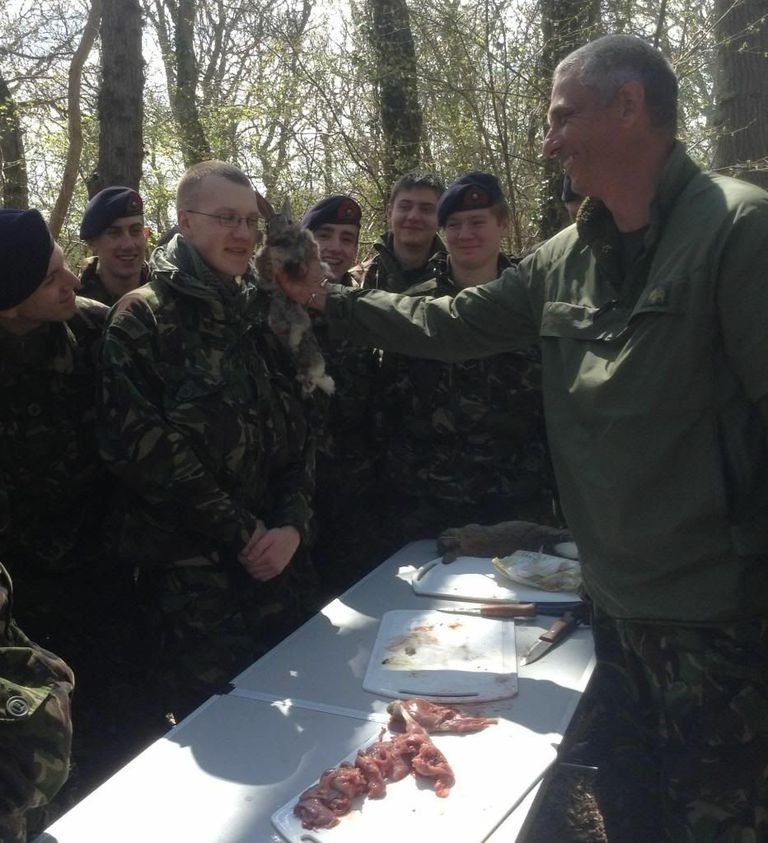
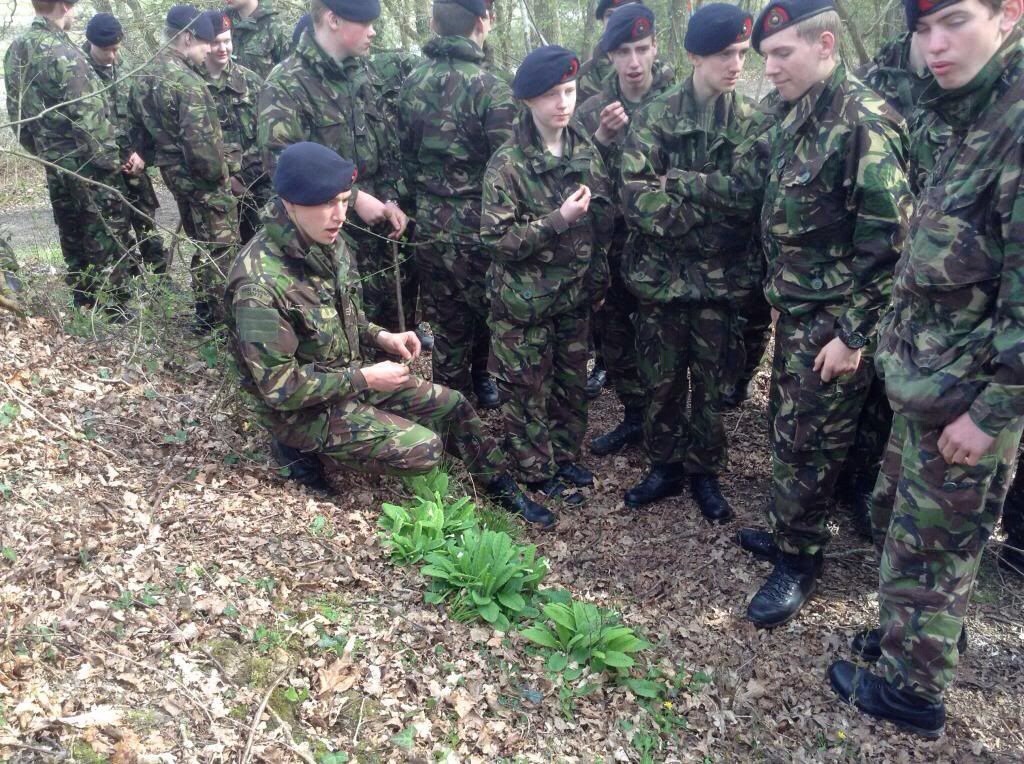
A Bit of Bushcraft
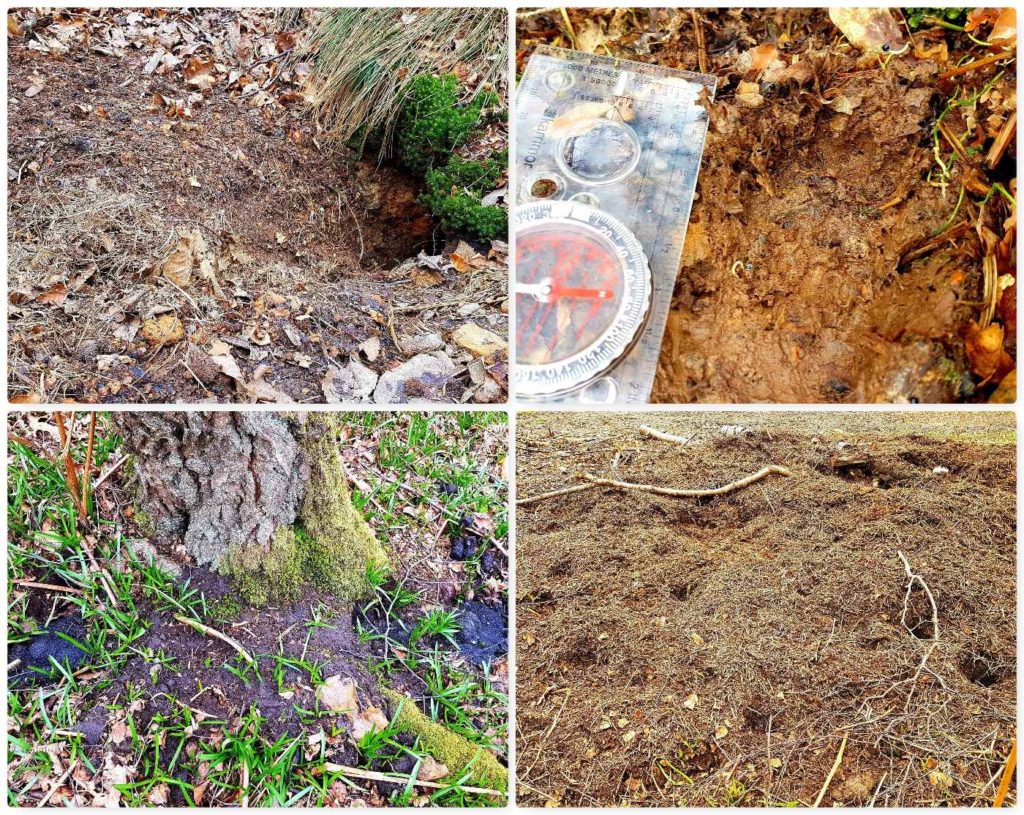
While out and about I did come across a Badger Set that was covered in tracks and other sign. The other sign included spotting their latrine and the snuffle marks their snouts leave in the humus layer.
Badger time
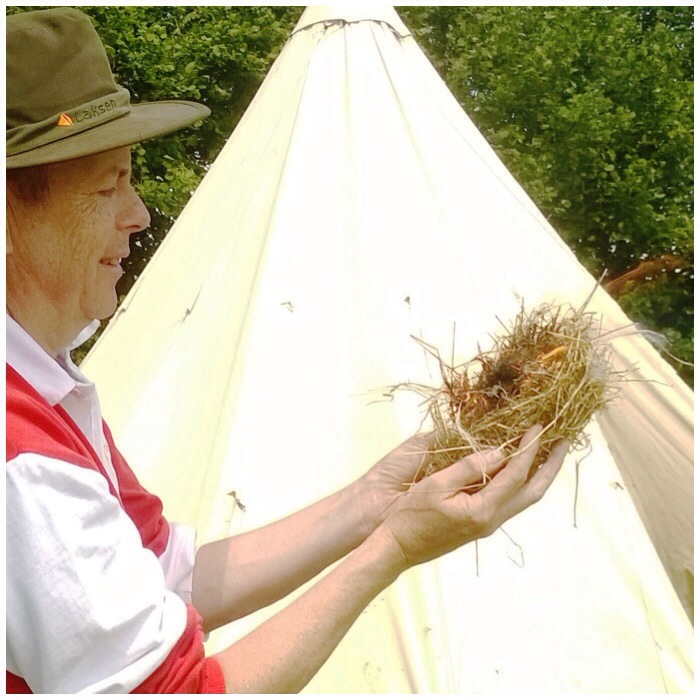
There was little in the way of fungus at this time of year except for the big Bracket fungus and the Birch Polypores. I also spent time turning grass into rope and looking out for early buds starting to poke out.
As per usual there was time to have a brew (and gave me an excuse to use my cranes).
Keeping my hand in
It will not be long to the next cadet camps in 2019 however I am told it will be an Advanced Campcraft course in the mountains of North Wales – looking forward to that one.
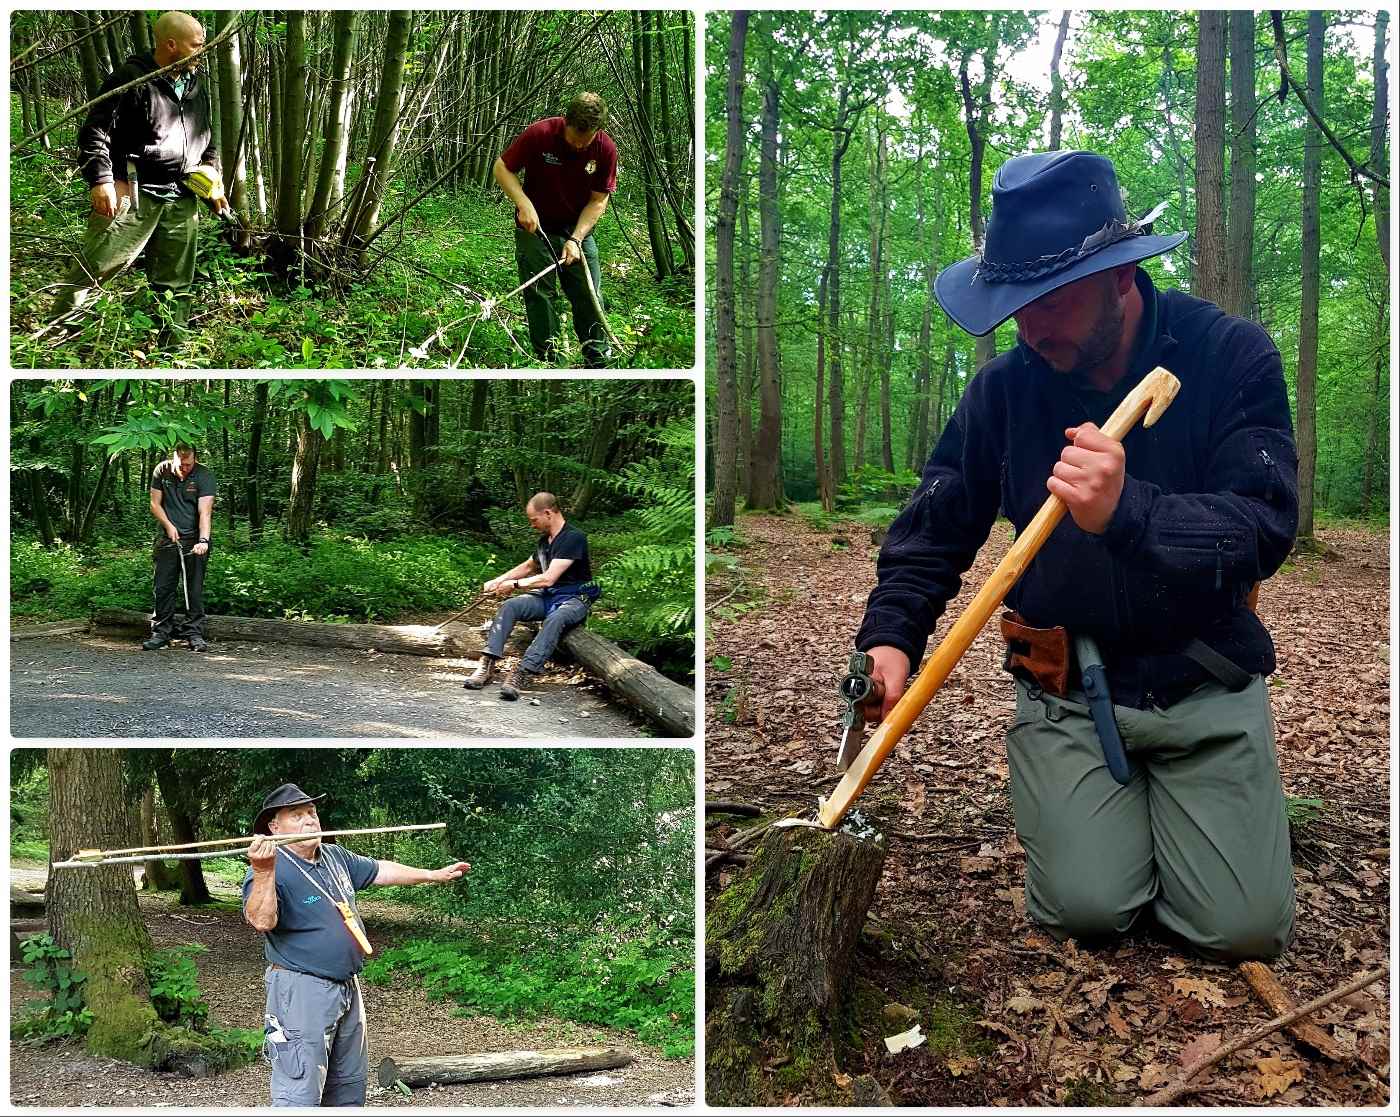
Things have been settling in here at the Bushcraft UK Bushmoot here in Merthyr Mawr.
Took time out to test out my new barbeque pan – well tested it out as a toast rack really – works a treat so everyone is happy 🙂
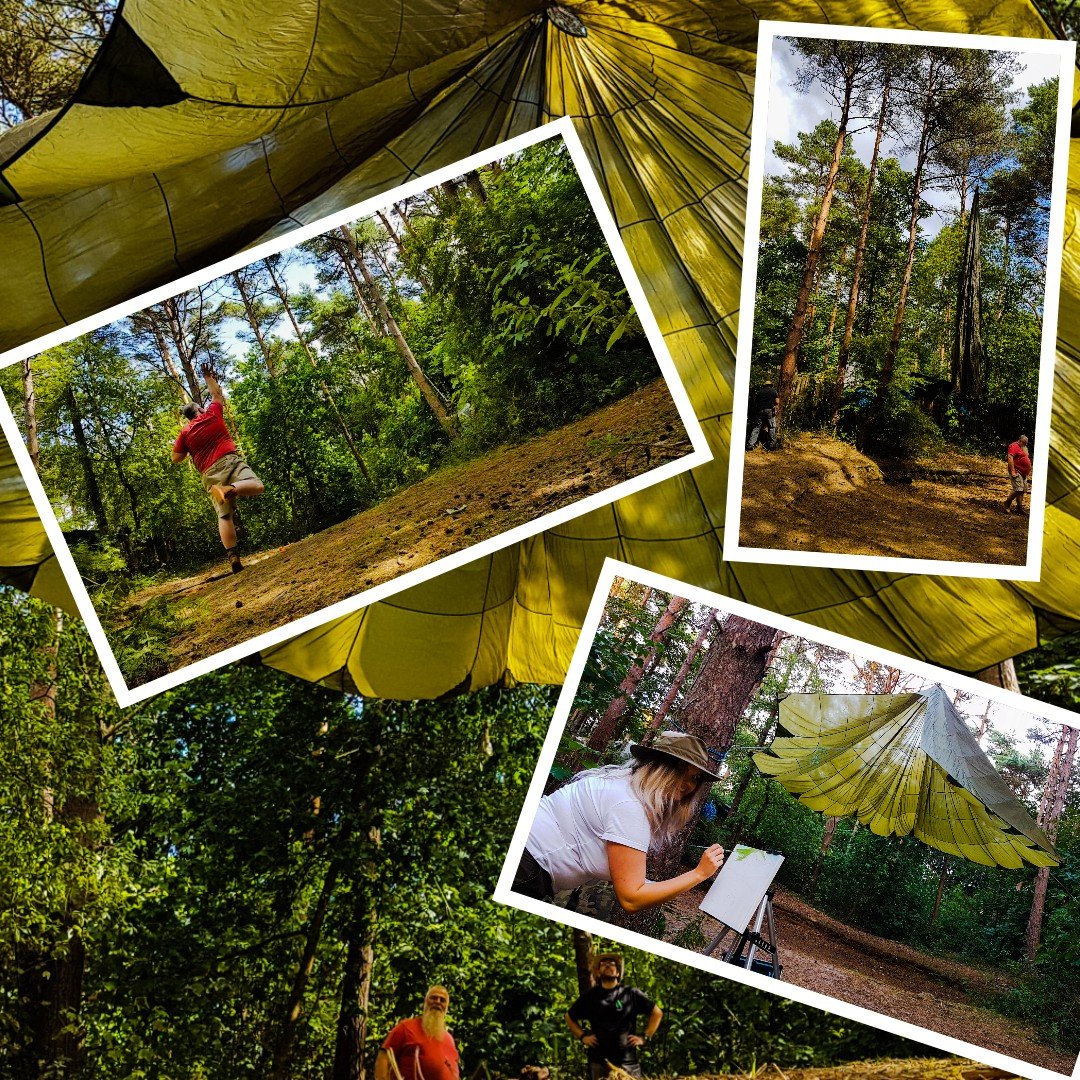
There was much to do in terms of getting the site ready for all the visiting Bushcrafters so we were all soon getting stuck into the prep.
Getting Started
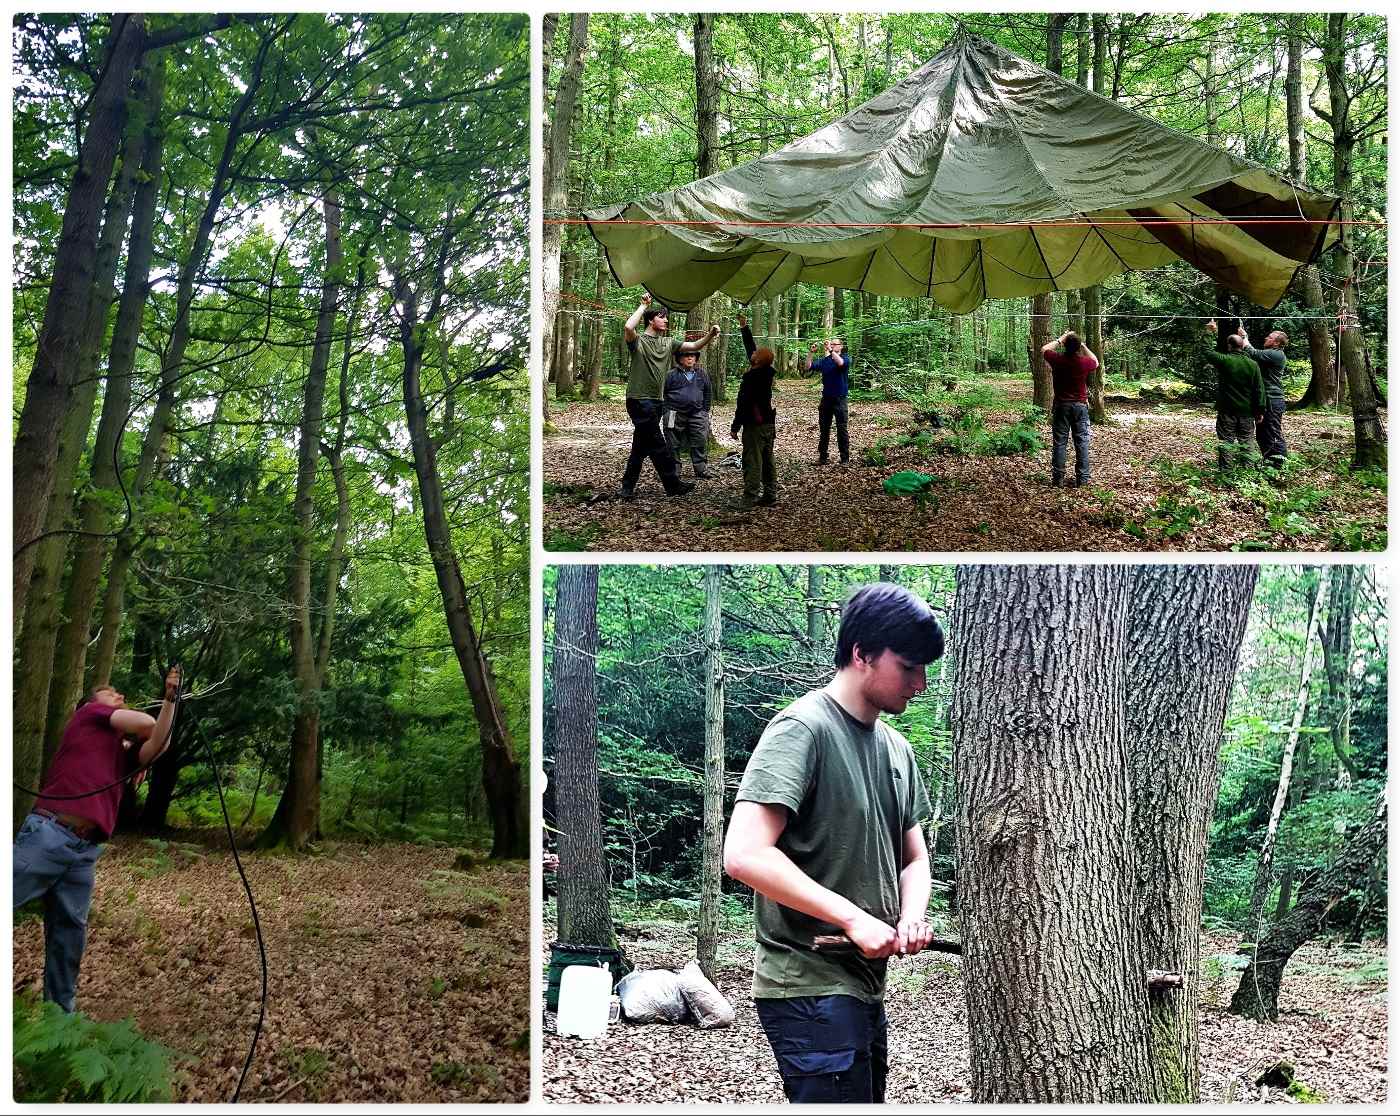
A favourite of mine is helping out getting all the chutes up. Our secret weapon ‘Pete’ is a dab hand at shooting a line high into the trees.
Later that day I spotted that our handiwork was receiving some attention in terms of some art work.
Parachutes and more parachutes
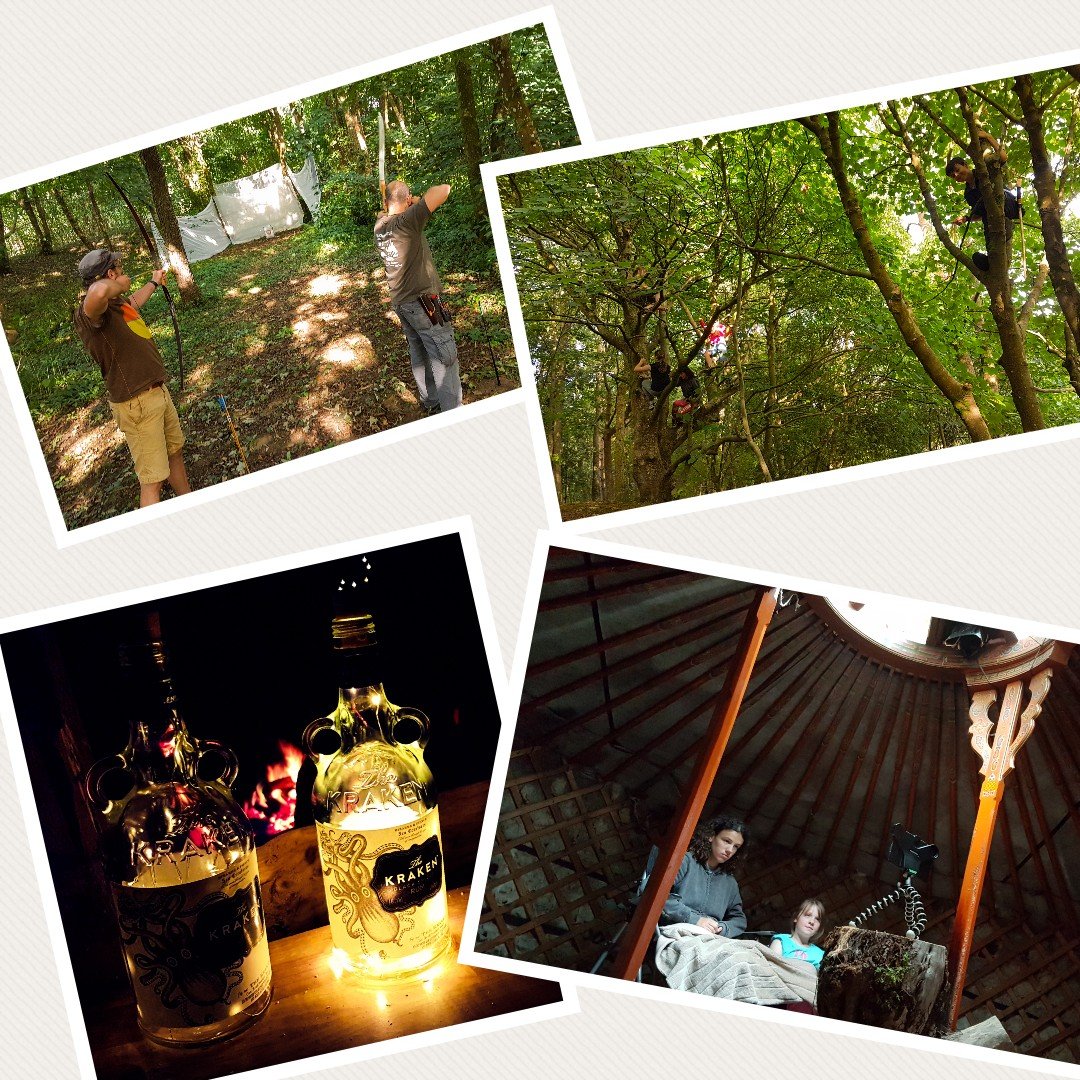
My kids did help out a little however they are on holiday and soon got into the swing of things. They have been out playing every day getting dirty, crafting and generally having a great time.
Kid time
We got the range set up and it was soon on use. We will use it every day and have our annual competition next week.
Later in the evening I let the kids watch a movie and I spend a little time up at the Naughty Corner.
Evening time
Things are well set up now and we have everybody arriving – more on that in my next post.
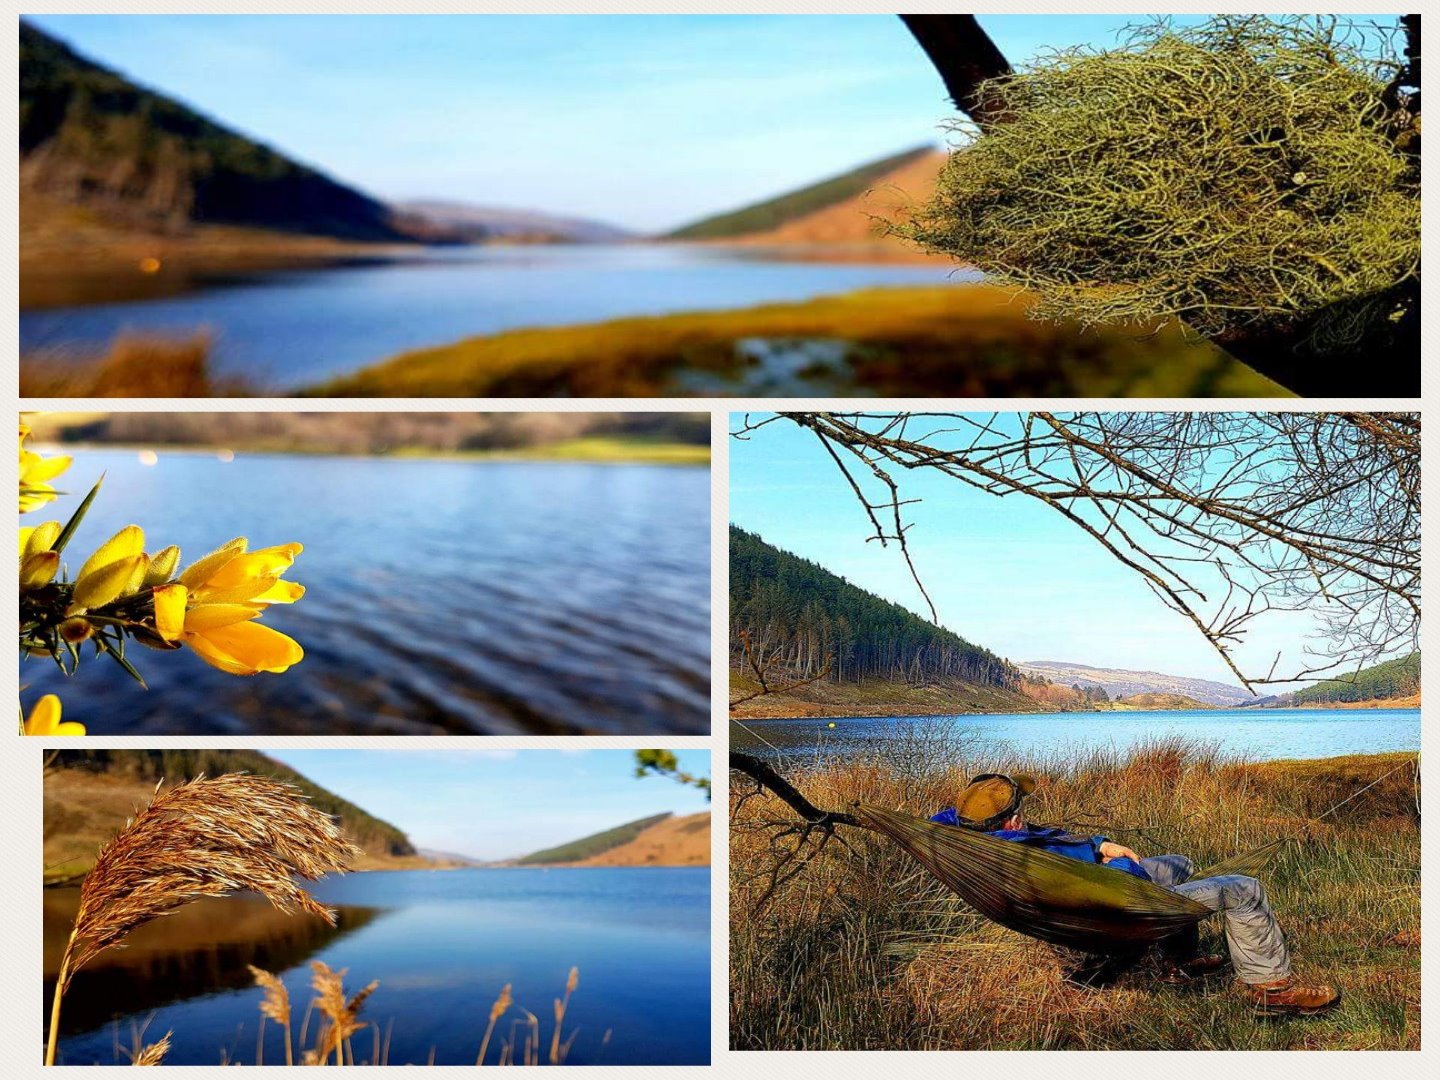
Some days are just meant for relaxing – Day 3 of my Mountain Mooch in Snowdonia was a thoroughly relaxing affair – The Snowdon Horseshoe did tire me out a bit the day before so all I wanted was a stroll and some hammock time.
I set out for Llyn Geirionydd on my own (everyone was doing their own thing on this day) with my rucksack packed with sandwiches, cameras and my hammock.
Chilled Day
Llyn Geirionydd is a stunning lake and thankfully had some nicely spaced trees to relax and watch nature go by. I did take a stroll around part of the Lake and tried to capture some of the colour that was around. It was late winter with little new growth happening but still enough to keep me happy.
Back to Nature
Feeling relaxed and renewed I headed back to camp to await the arrival of the rest of our group.
Over the last year or so I have found that my Bushcrafting has been taking a bit of a backseat to my other Adventure Training responsibilities so it was great to get back to some Bushcraft with fellow instructors from London Area Sea Cadets at one of our regular Multi Activity Staff Training (MAST) weekends.
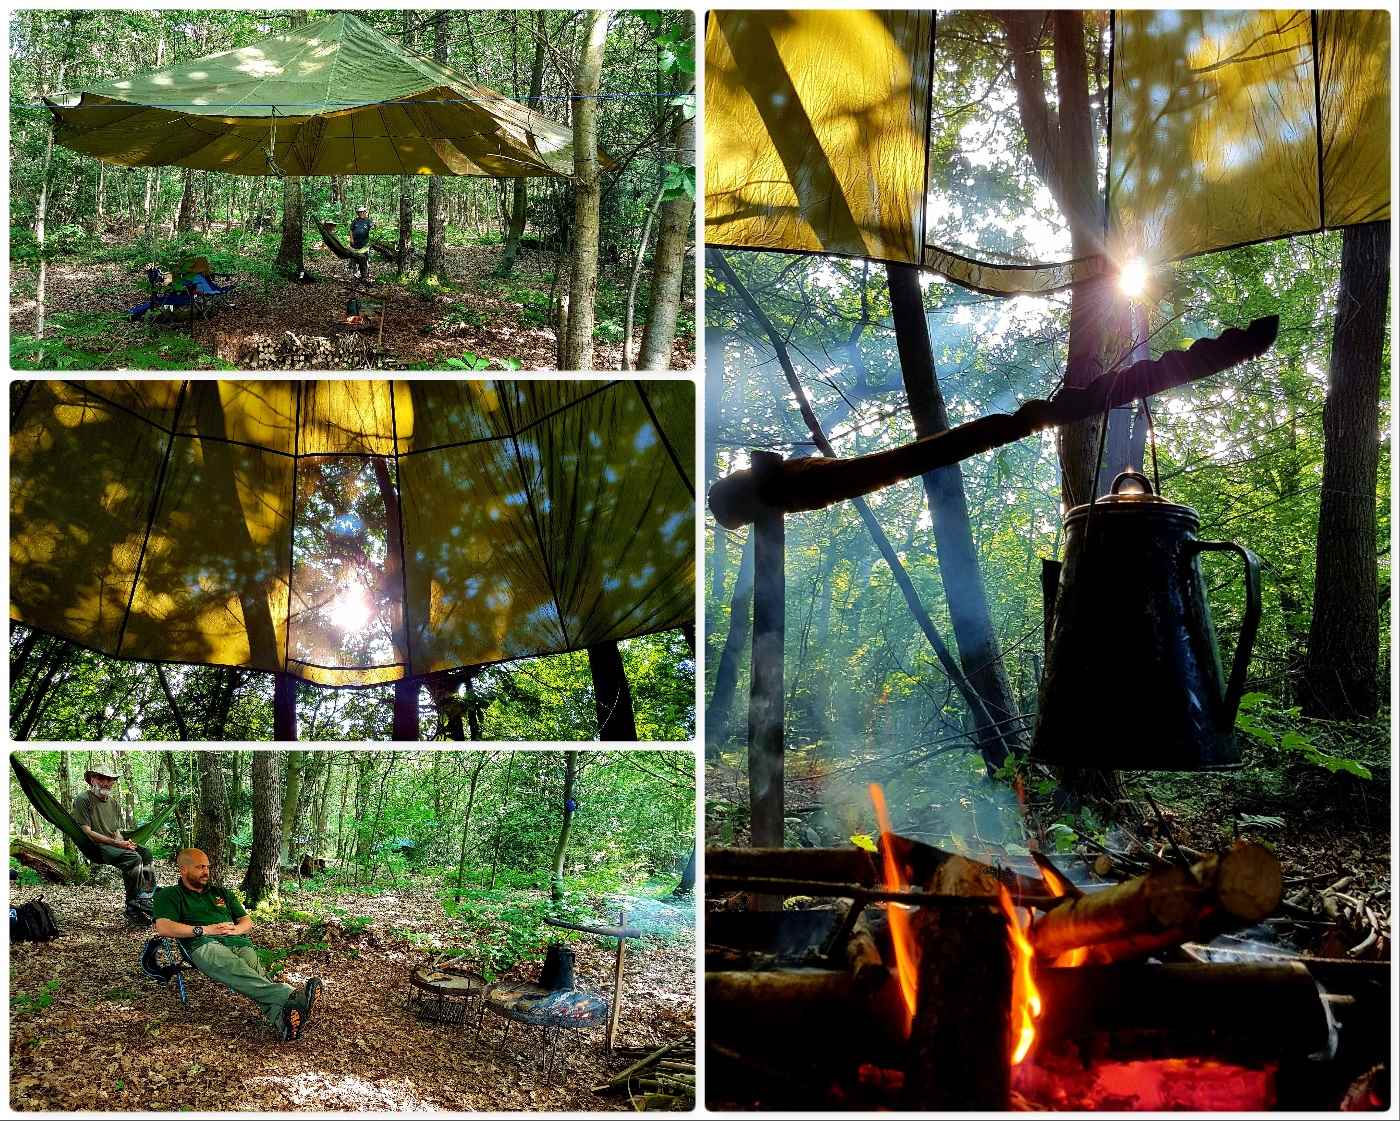
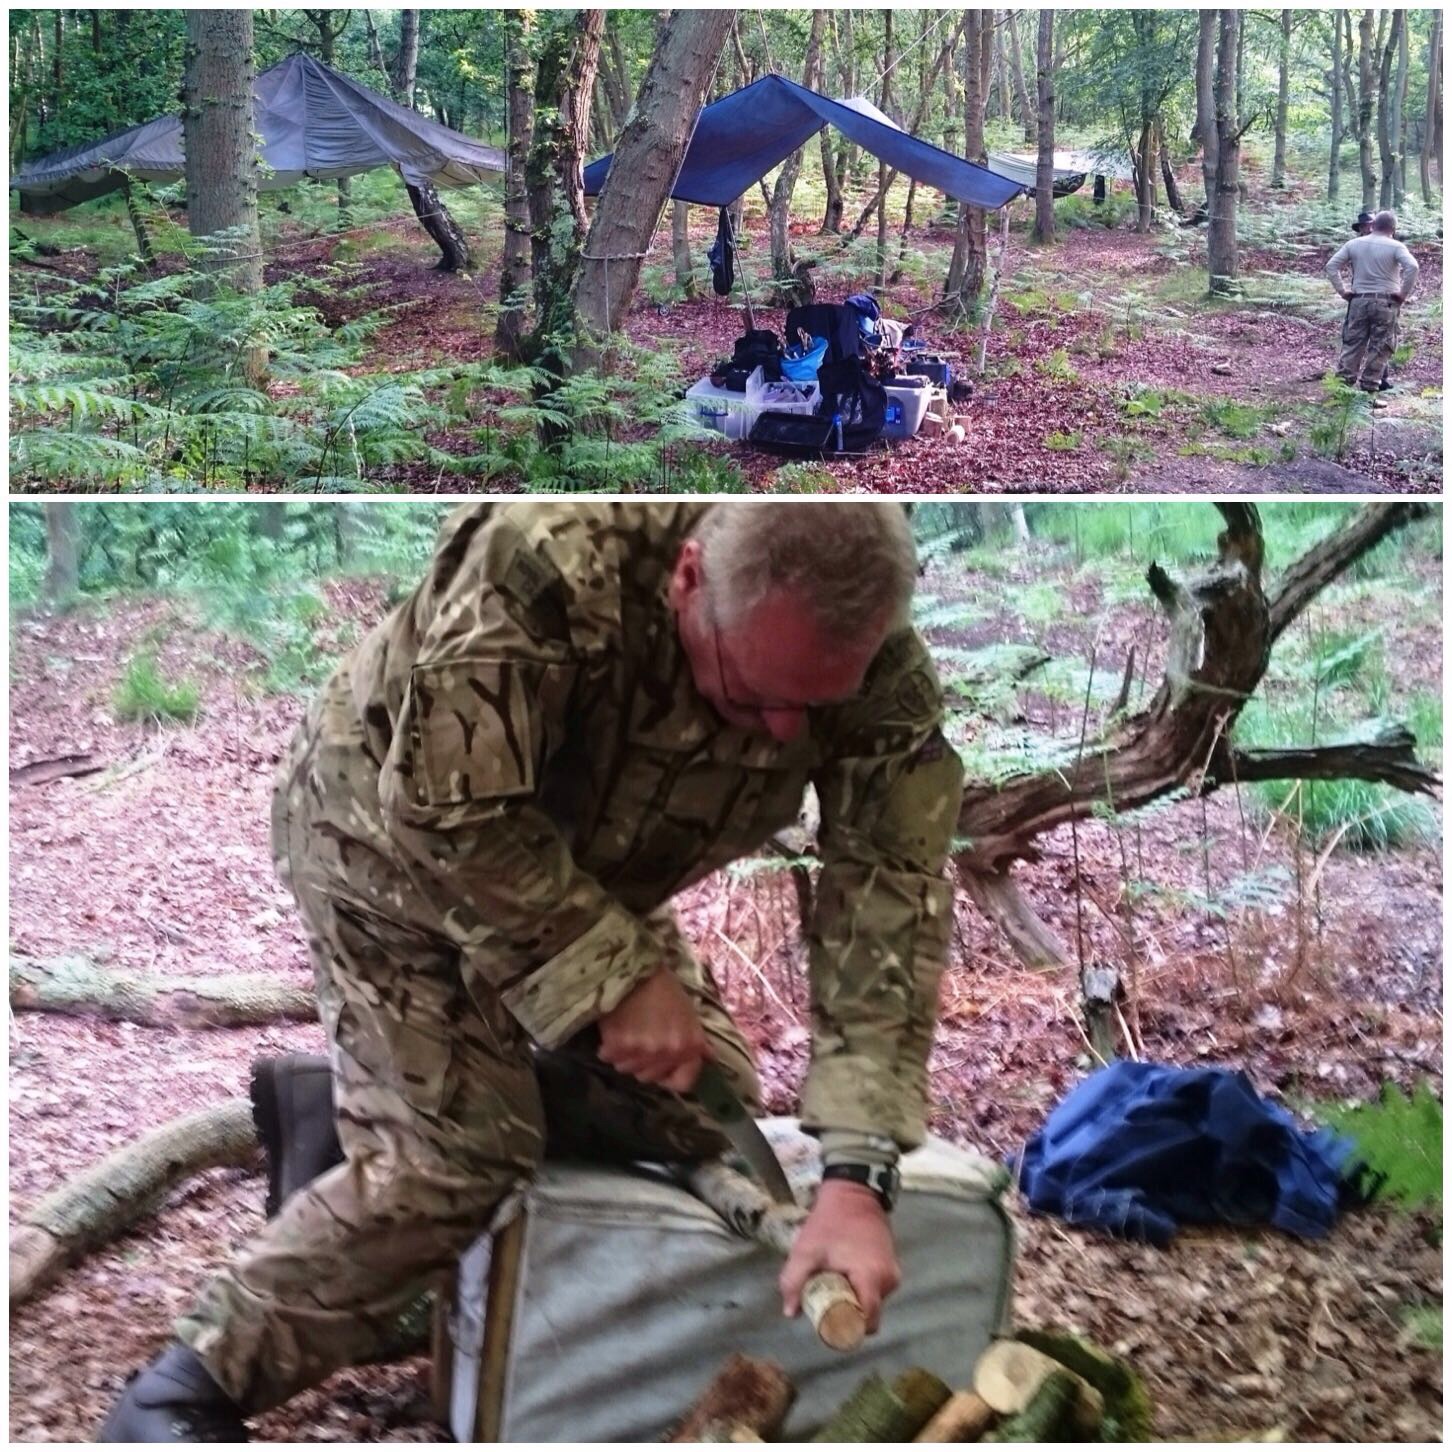
It was a bit of CPD weekend for some and a bit of a new adventure for others. We took our time setting up camp on the Friday in the Mereworth Woods training area we had been given access to as the students were not due to join us until the Saturday morning – a kind of calm before the storm you could say.
Back to Bushcraft
Saturday
The weather was on the whole kind to us with no major showers but the tarps were up just in case. Graham got his cuppa in bed that morning (being an officer and all that) and then modeled his Buffalo sleeping bag for us by the fire – I have no idea why the thing has a full face zip – weird 🙂
Morning Sir
Along to help out and do some CPD were Dave, Alan, Charlie and Graham. The instructors from the Adventure Training team looking to learn the basics of Bushcraft were Ben, Lee, Sam and Gary. We like to run these Bushcraft courses from time to time to expand out Expedition Leaders skill set so that they can pass the knowledge onto their cadets.
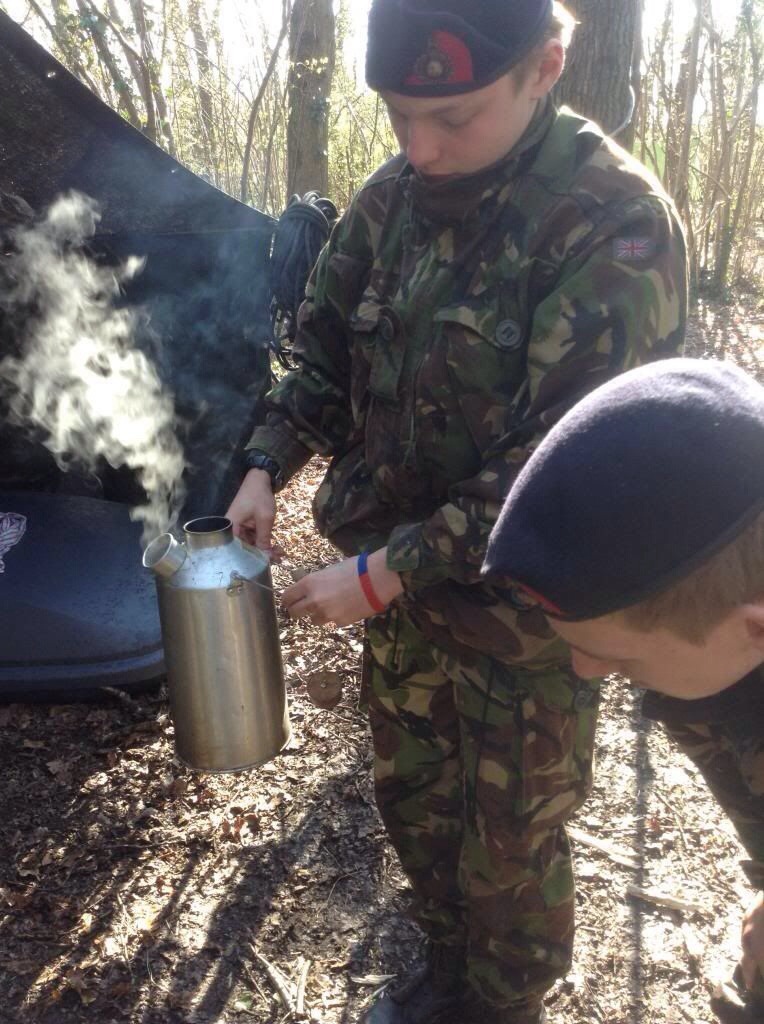
Time for Tea
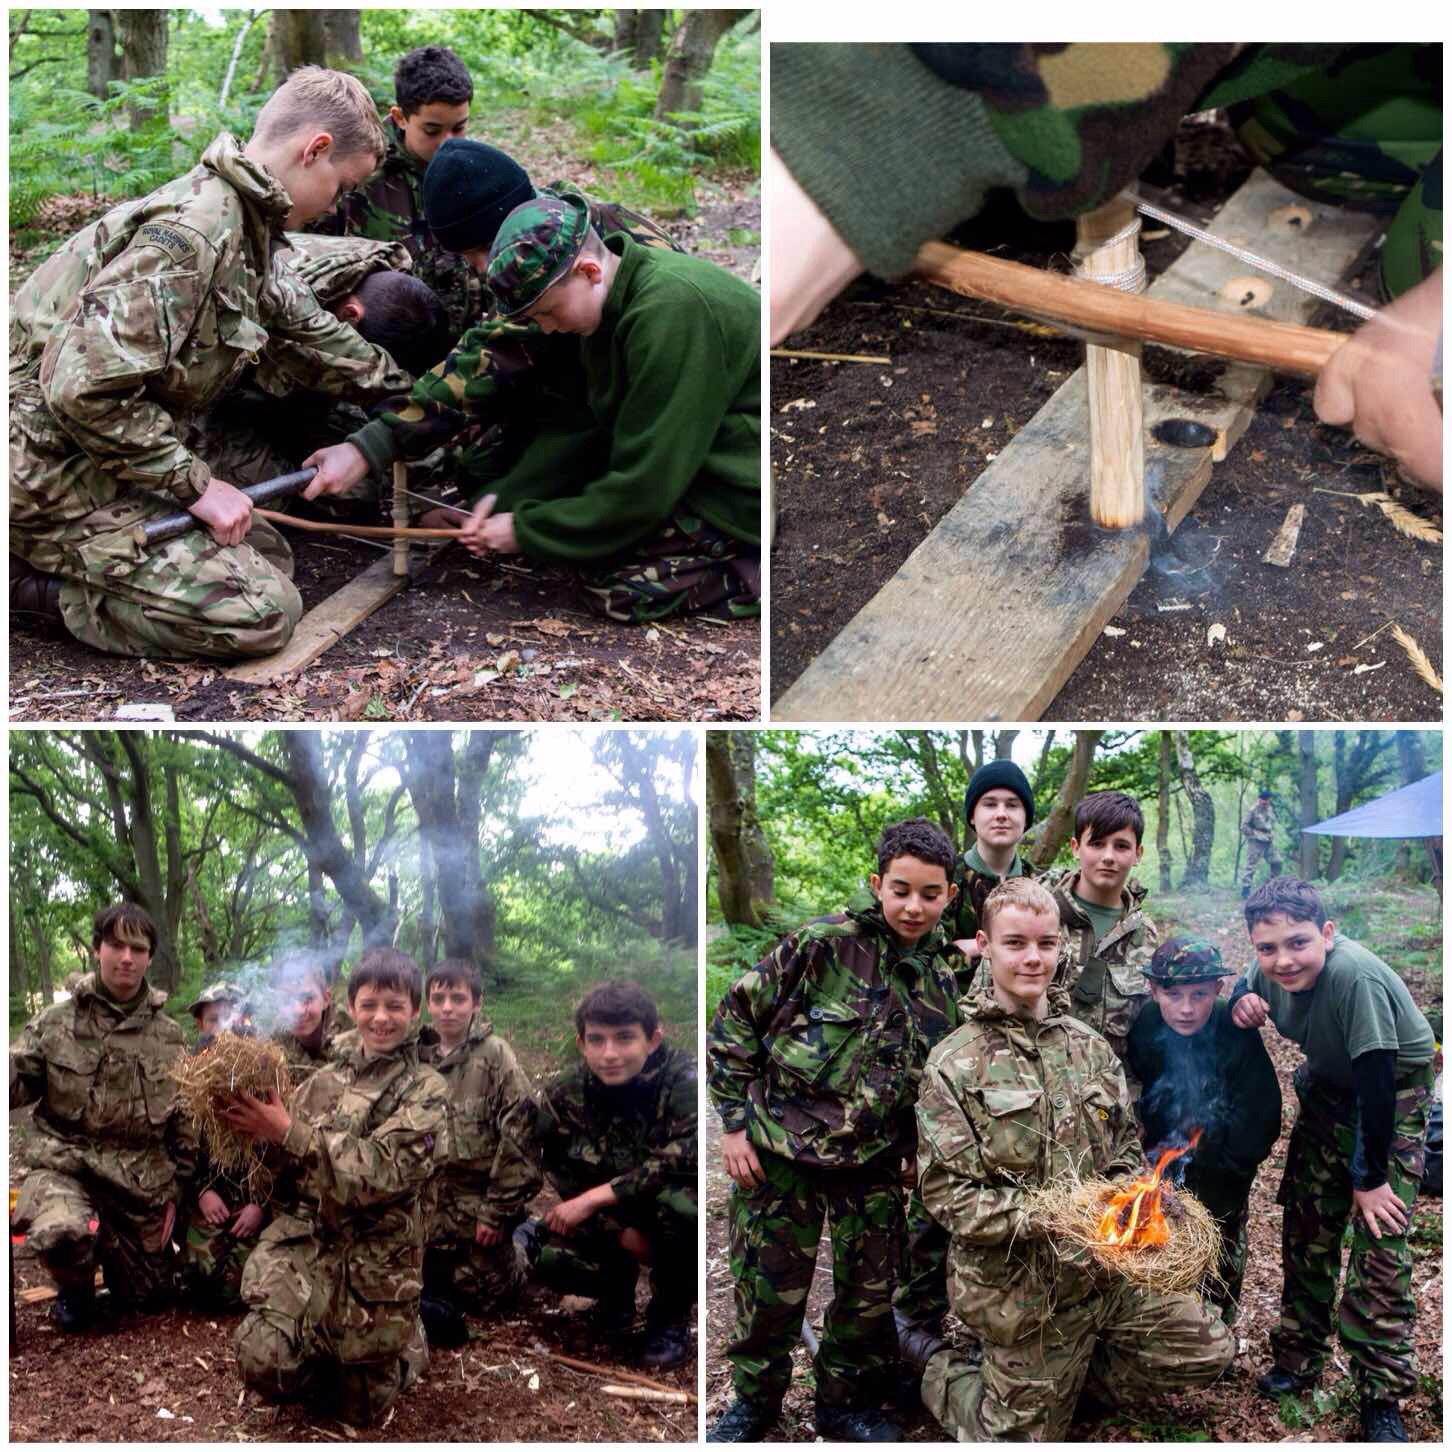
Before they were allowed to have a cuppa on the Saturday morning the students had to learn about lighting a fire. Off they went to learn about gathering dead standing wood, processing and grading it before learning to use firesteels – needless to say the tea and coffee was soon brewing.
Brew Time
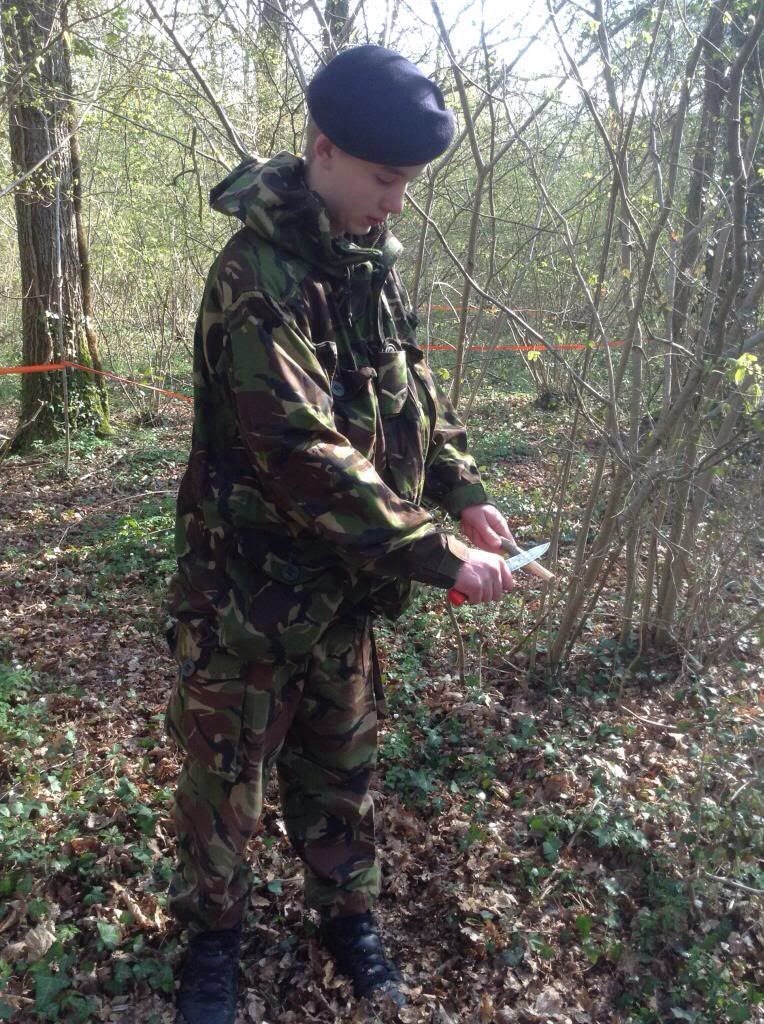
Saw and Knife use
After their brew it was time to learn how to use saws and knives safely. Once the wood was gathered they learnt about safe knife cuts and battoning. I like teaching in this way as there is no need to get axes out (and we did not have time to cover them anyway). The students produced some strong tent pegs and looked at the techniques for making feather sticks for fire lighting.
Saws and Knives
Camp Set Up
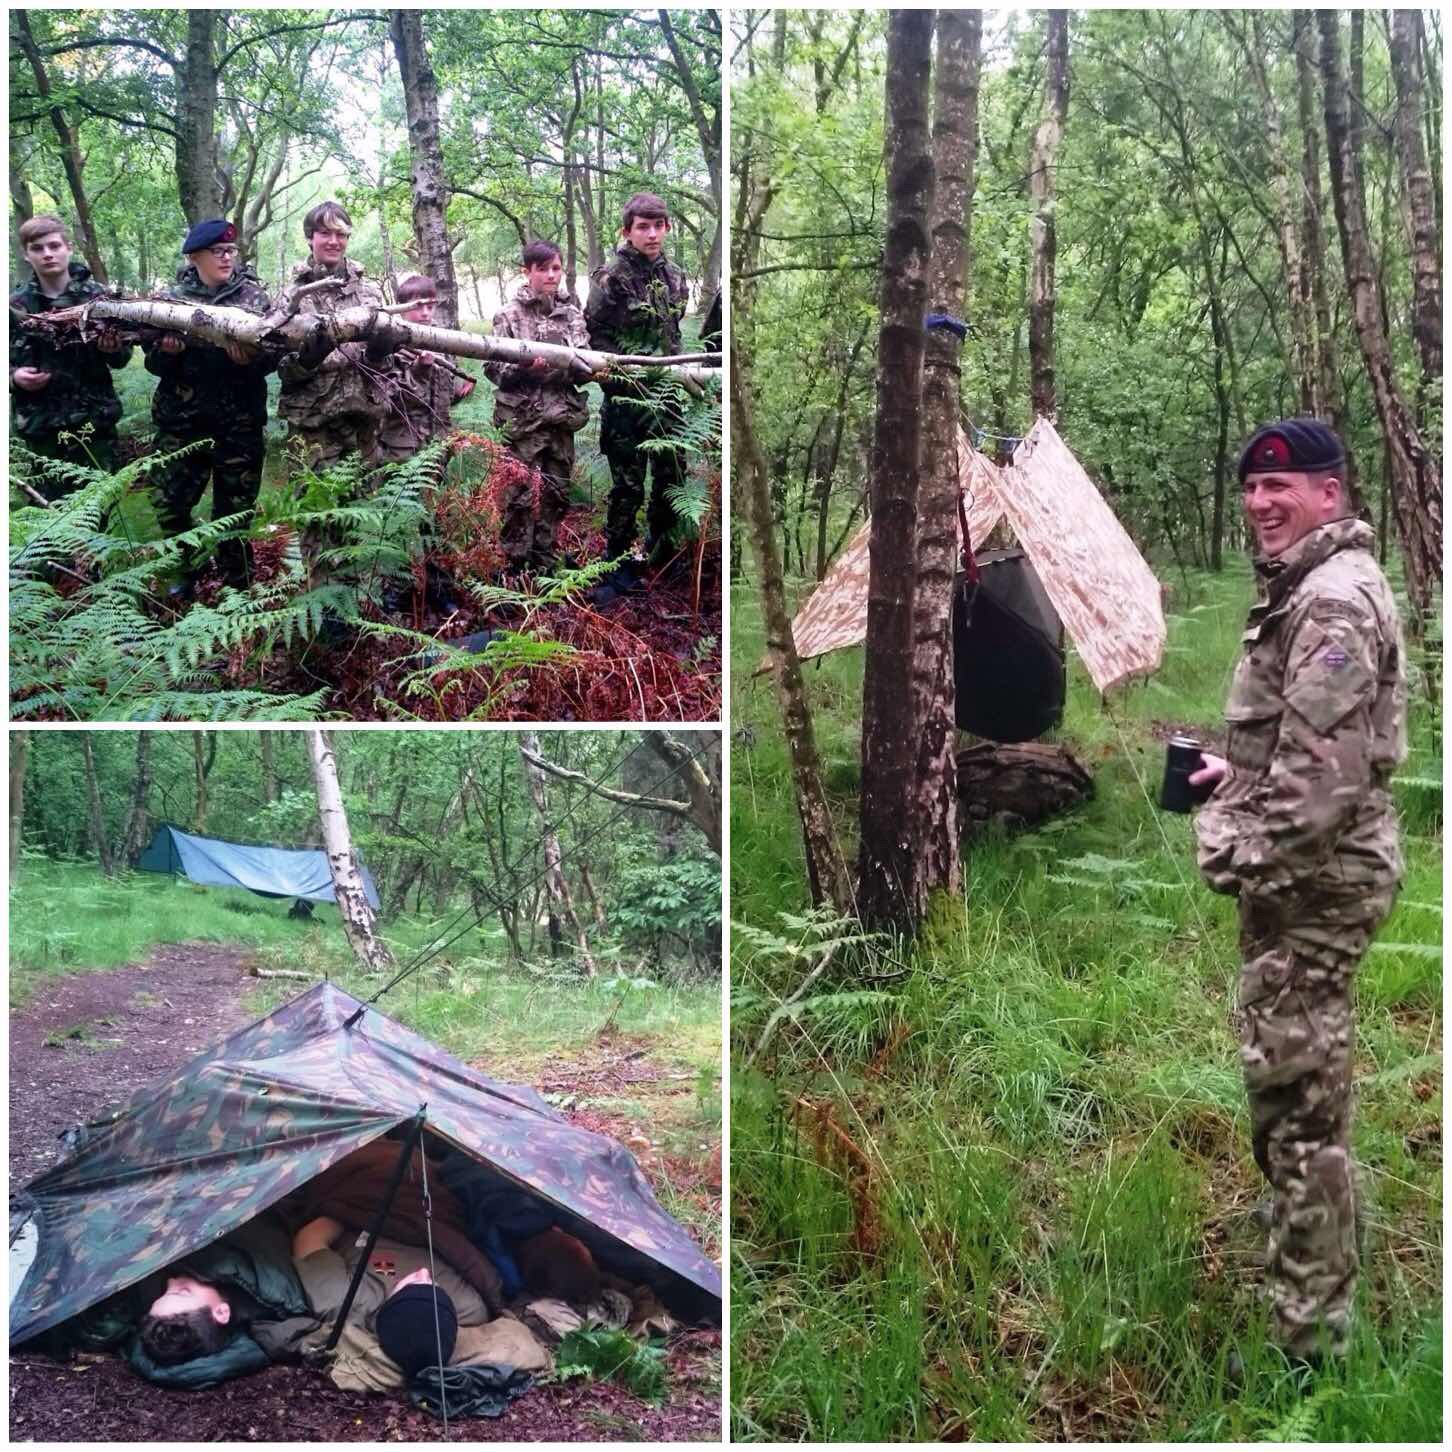
One of the things I wanted the students to do over the weekend was to set up their own camp. They learnt some of the basic Bushcraft knots with Charlie and how to throw a line through the trees. Soon they had their parachute up and firewood collected. Once that was all done they spent time with Dave and Graham learning how to put hammocks and tarps up (no ground dwelling on this weekend).
Camp Set Up
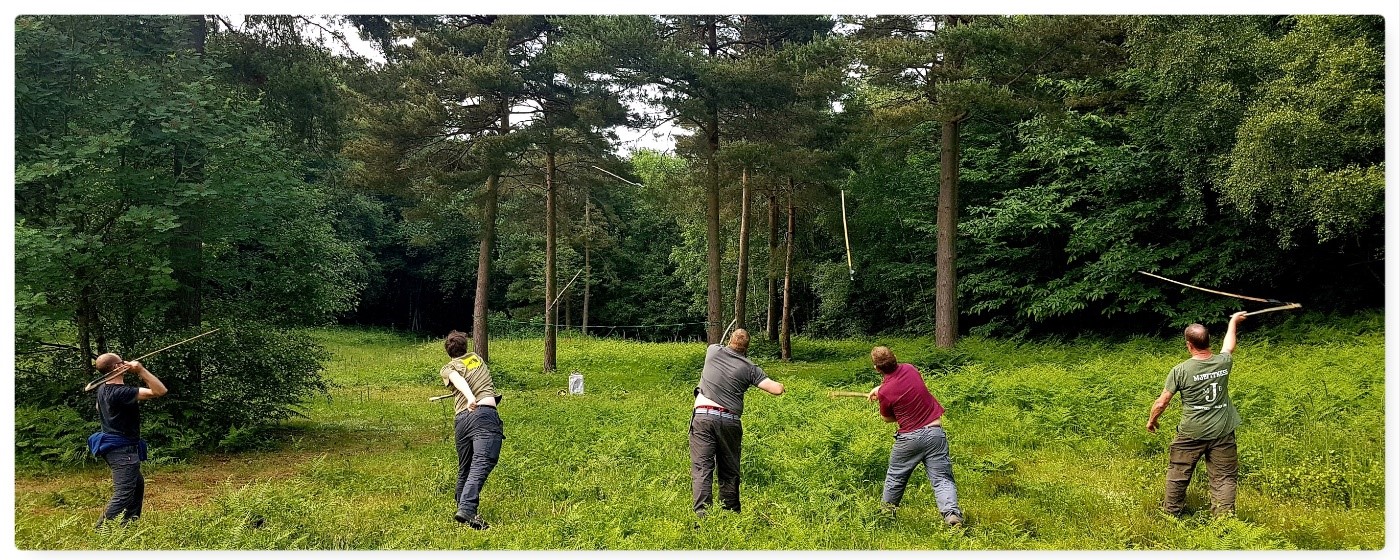
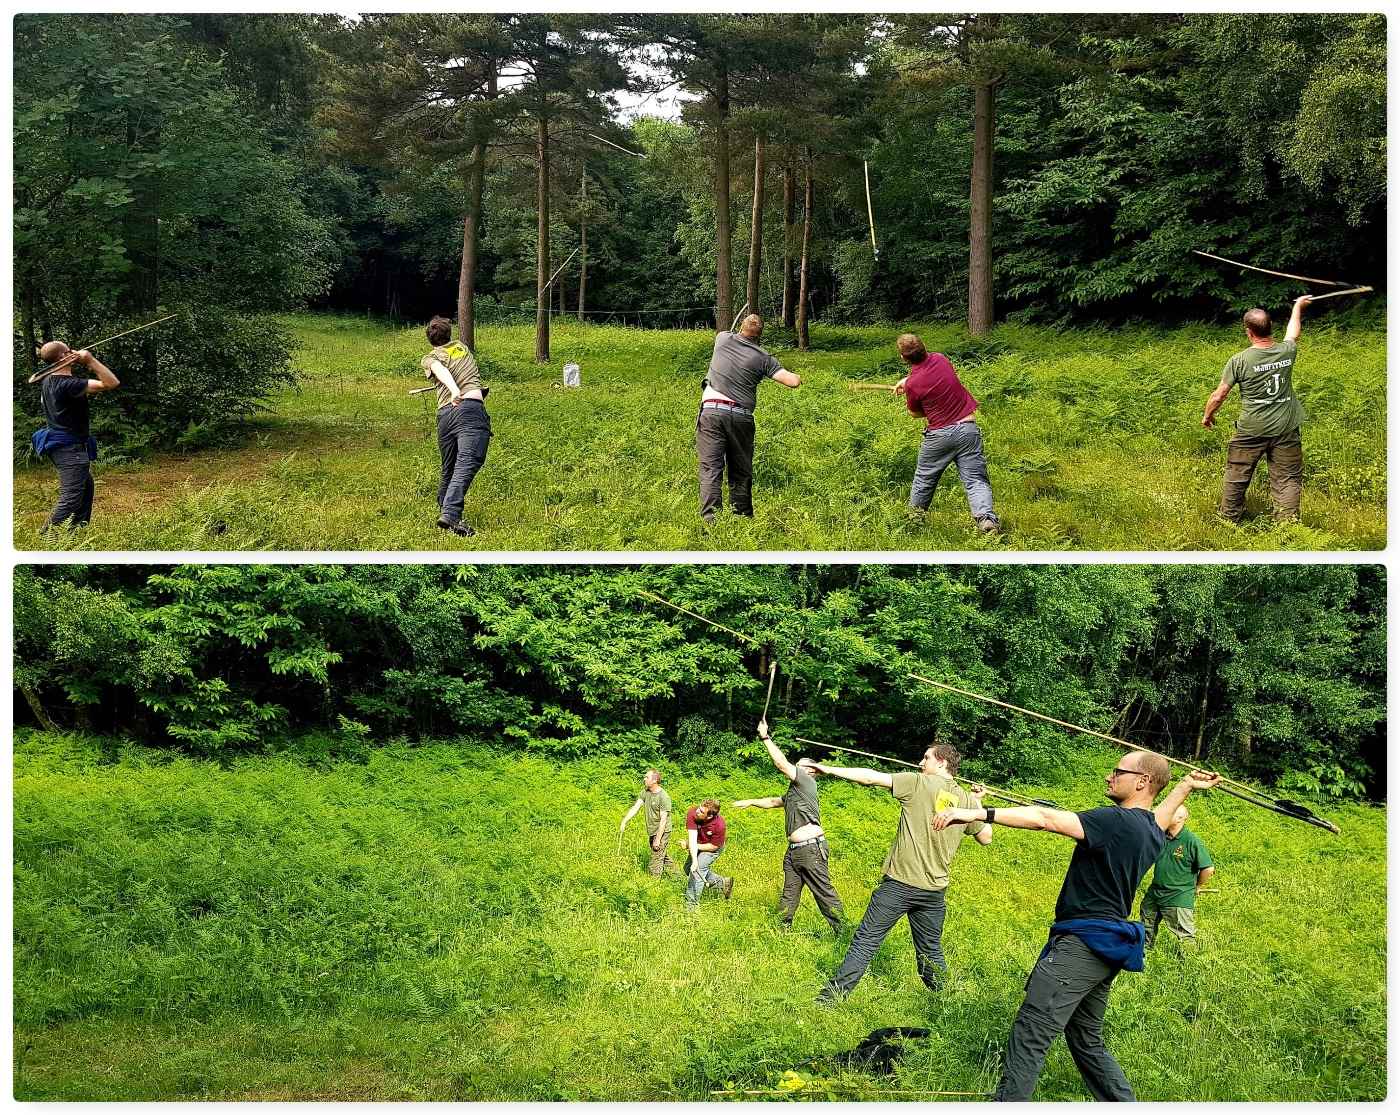
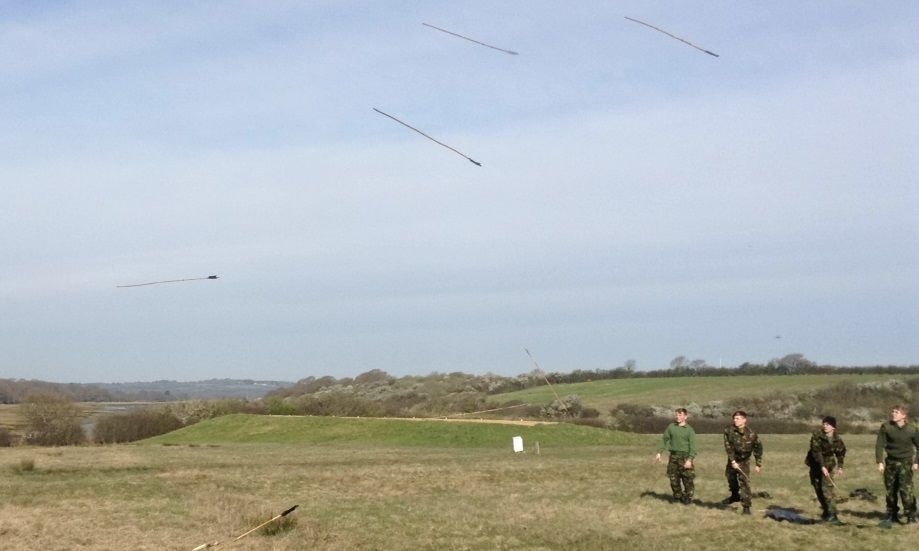
Atlatl Carving
A popular activity at cadet camps is Atlatl dart throwing so Dave and Alan spent a couple of hours with the students getting them to carve their own Atlatl throwers. All the skills that they had learnt in the morning with the saws and knives were used here with some finer knife cutting technique thrown in to get the points done.
Atlatl Carving
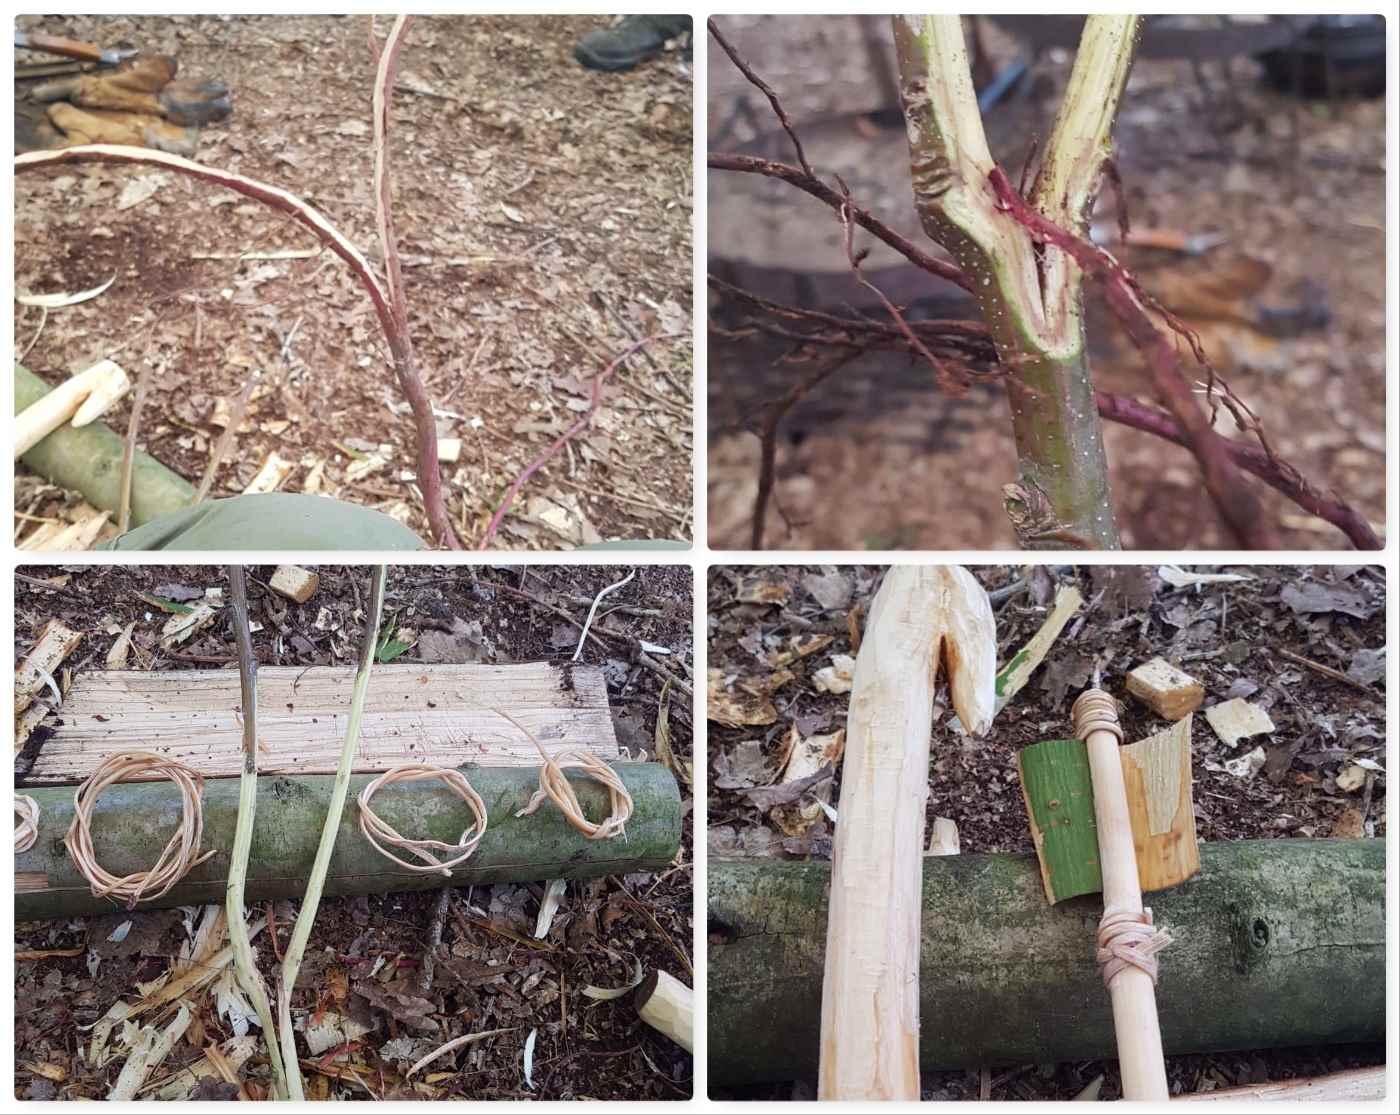
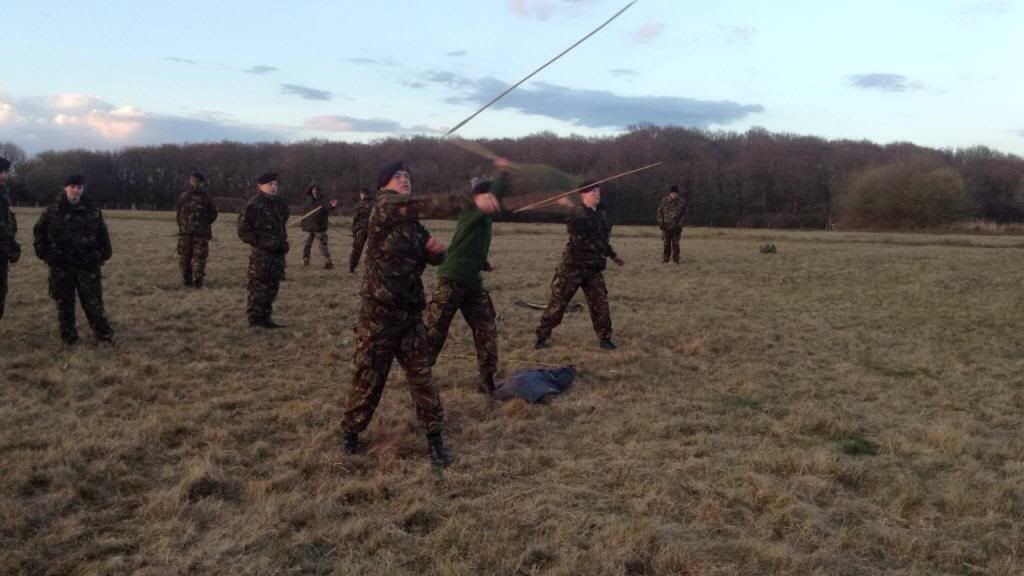
As this was CPD time for the experienced instructors Dave went off earlier on the Saturday and experimented with Spruce roots as cordage. After digging up a little he split them down and removed the bark (with the forked stick) before using it to bind his demonstration Atlatl dart for his class. He also used Sweet Chestnut bark as a flight for his dart – worked perfectly well.
Natural Cordage -pictures courtesy of Dave
We had a nearby glade that was soon set up as arrange and the darts were soon pinging away. I have used Atlatls for years and shown hundreds of people how to use them – they never fail to intrigue people and offer hours of fun either in their construction or use.
Time on the Range
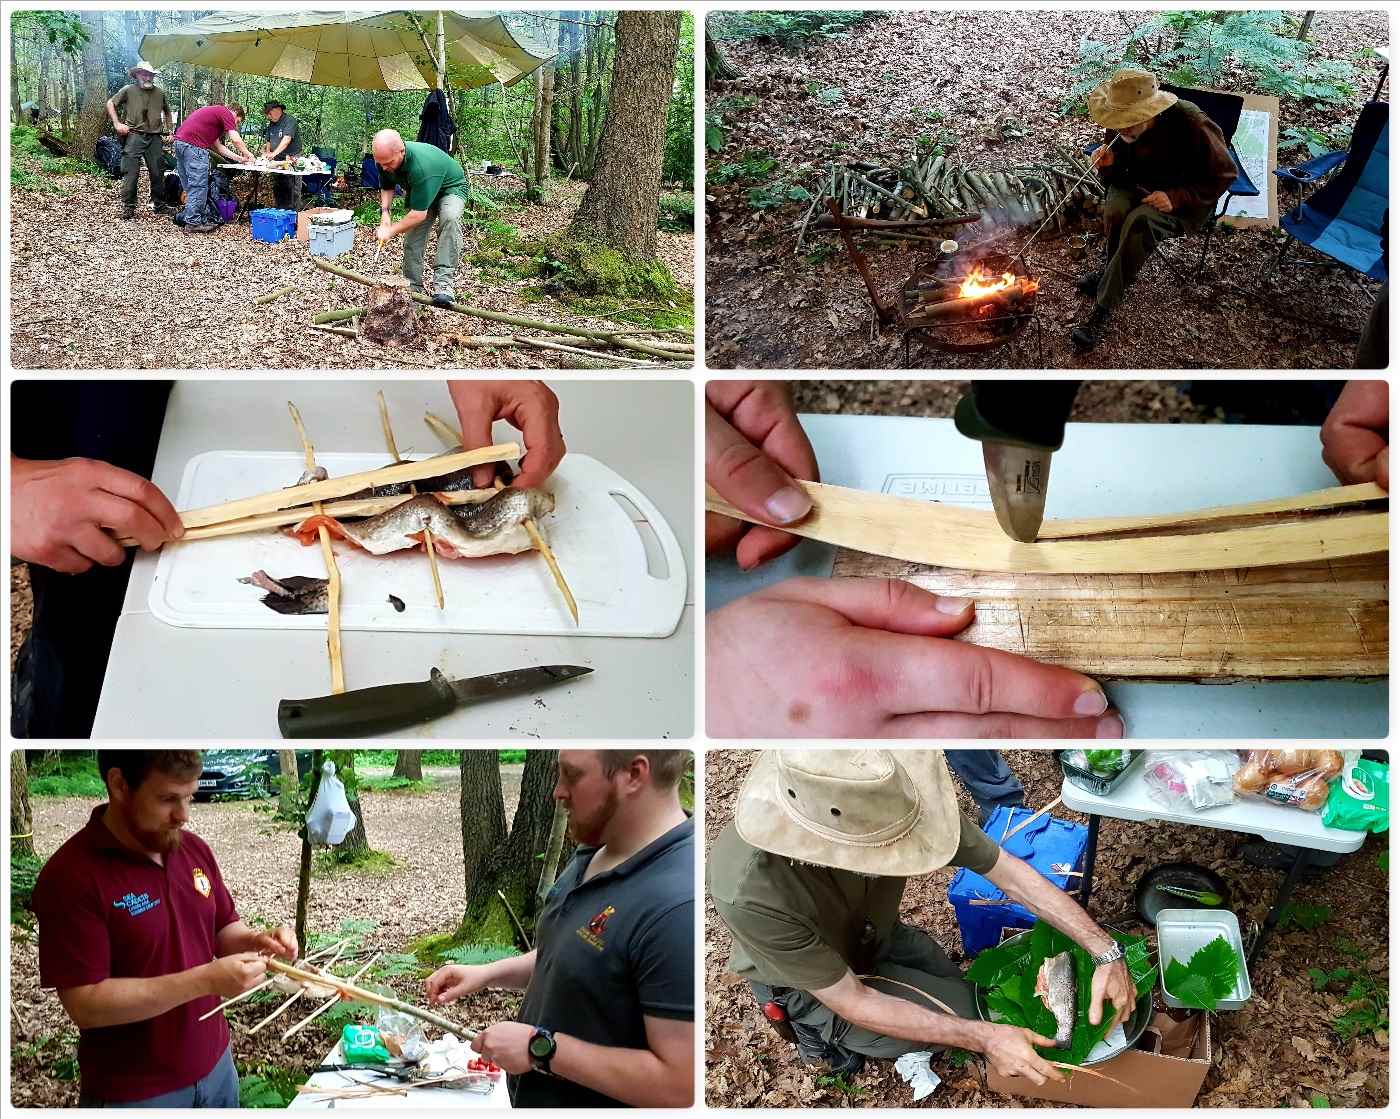
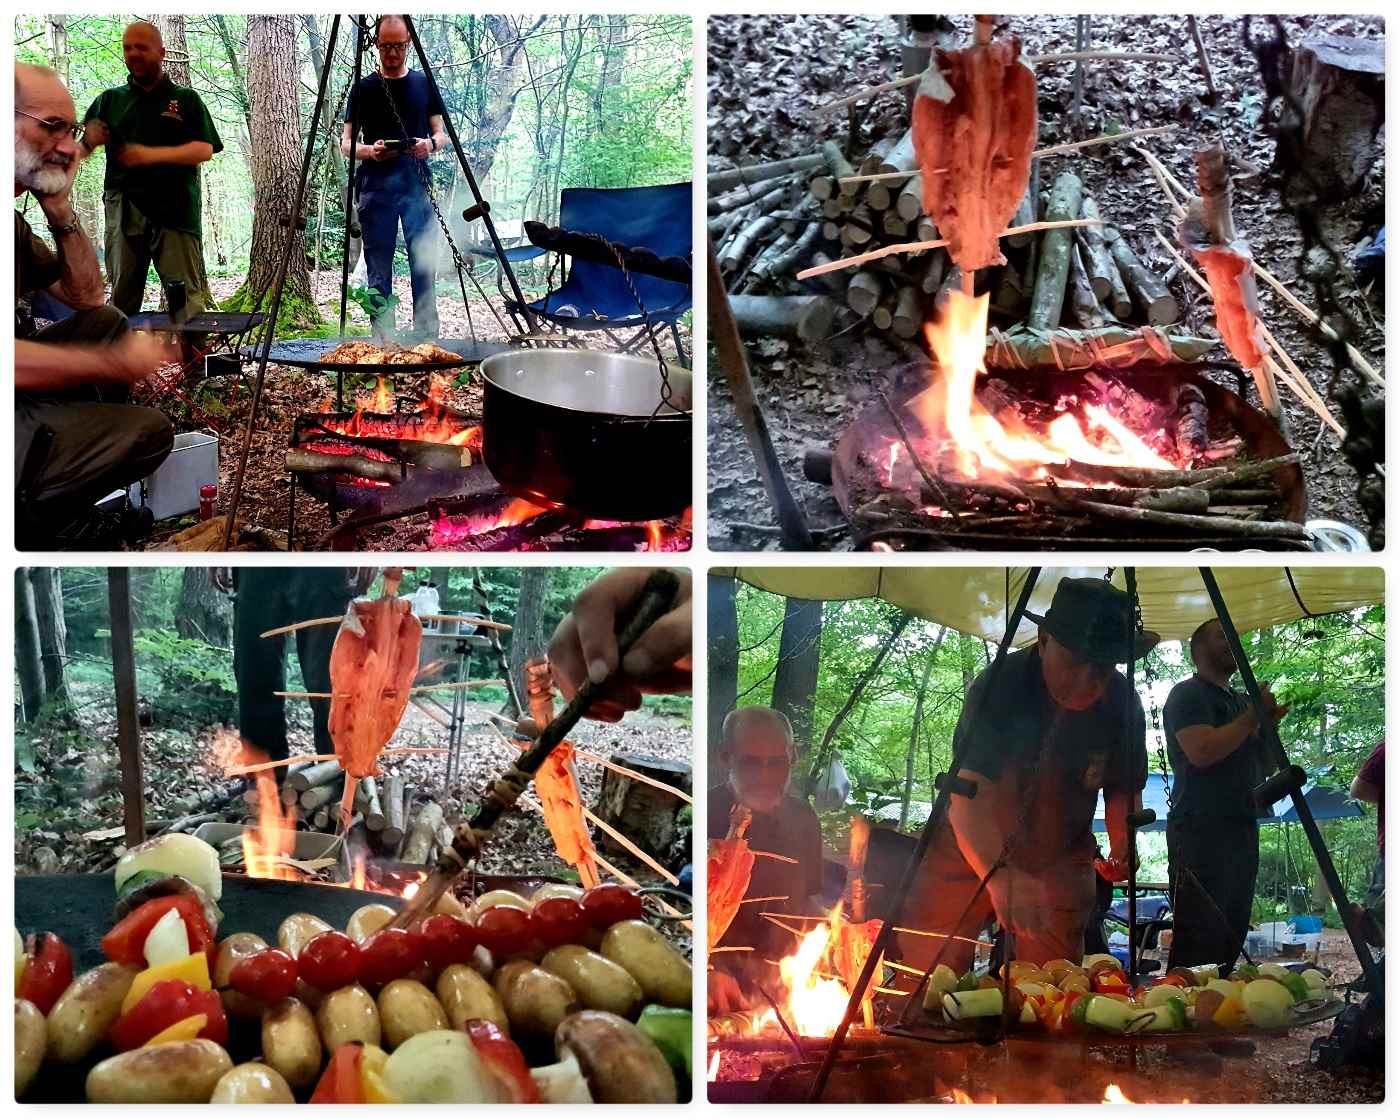
While Dave and Graham ran the range I went back with Charlie and Alan to help gather the material for ponassing some fish. Dinner was to be Trout, Chicken and Vegetable Kebabs. As well as ponassing we wrapped and bound one Trout in Sweet Chestnut leaves (these were the biggest we could find) and its inner bark. The fish was then cooked over the open fire when the coals were nice and ready.
Dinner Prep
Alan ran our little galley and had the students helping him out on all the stages. It was not long before everything was cooked and even less time until everything was eaten.
A Busy Galley
We retired to the students parachute for the evening to watch the fireworks display – Sweet Chestnut wood sparks fantastically. Luckily we did not get one of the many thunderstorms we could hear nearby pass over us, so we remained dry while we watched the fireworks.
Kick Back Time
Sunday
After a good nights sleep it was time for the breakfast feast. My wife Alison had made me up a pancake mix and Alan soon had the skillet working hard cooking pancakes (with a few rolls baking away on the side in the Dutch Oven). As well as pancakes we had the students cooking fresh sausage rolls over the fire (another great cadet pastime.
Breakfast Delights
Bowdrill
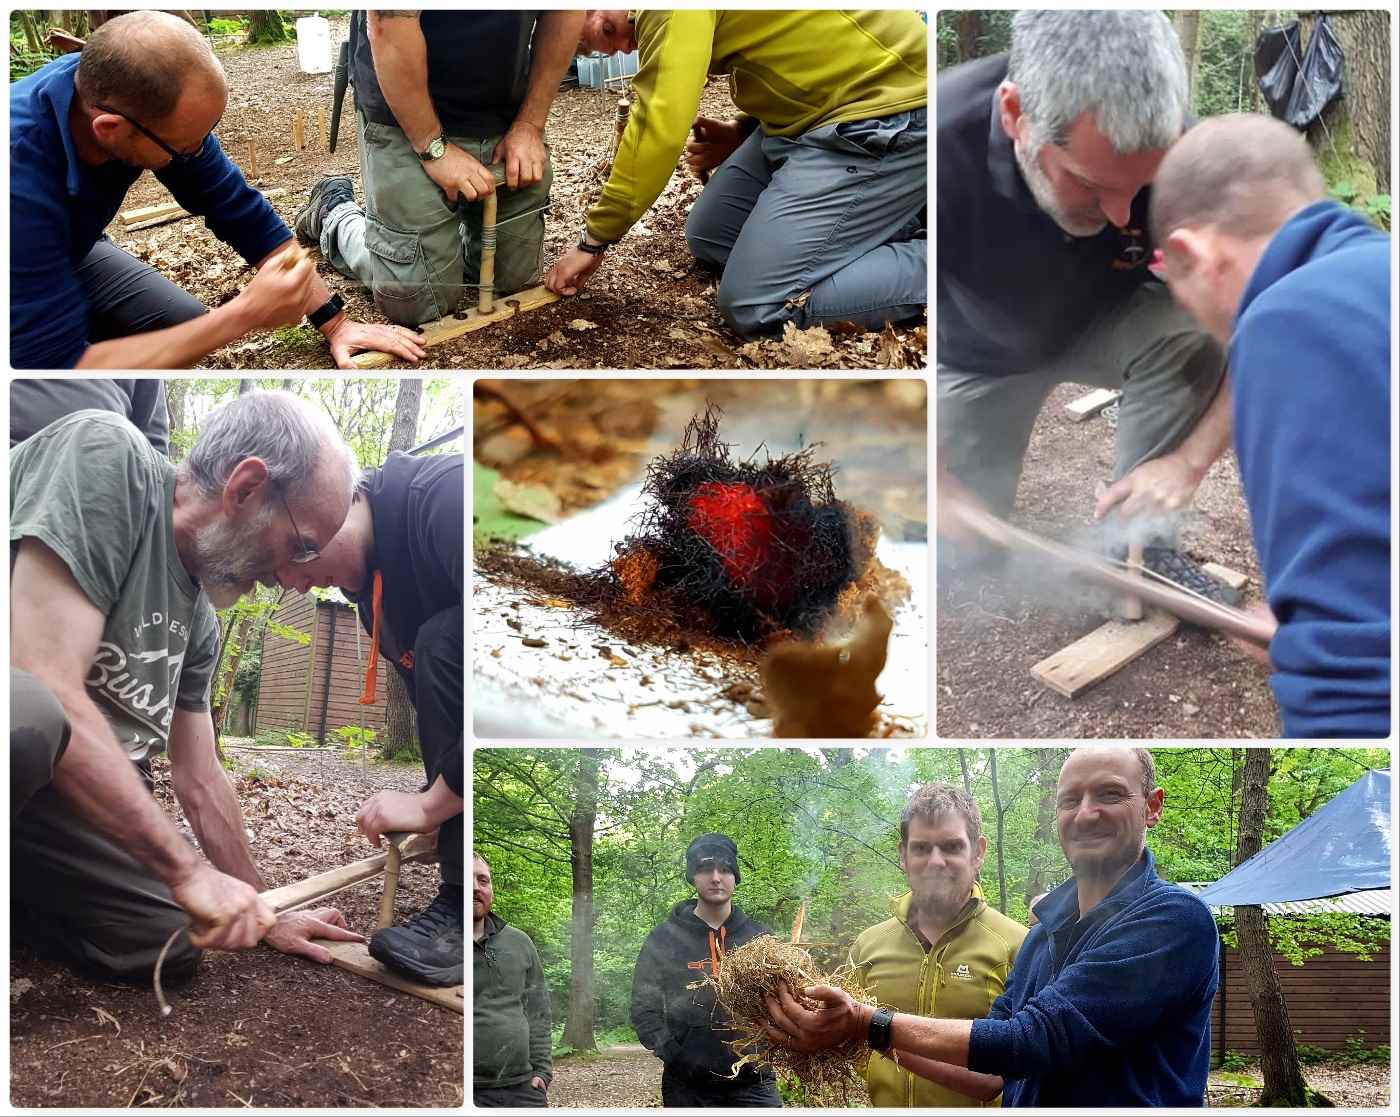
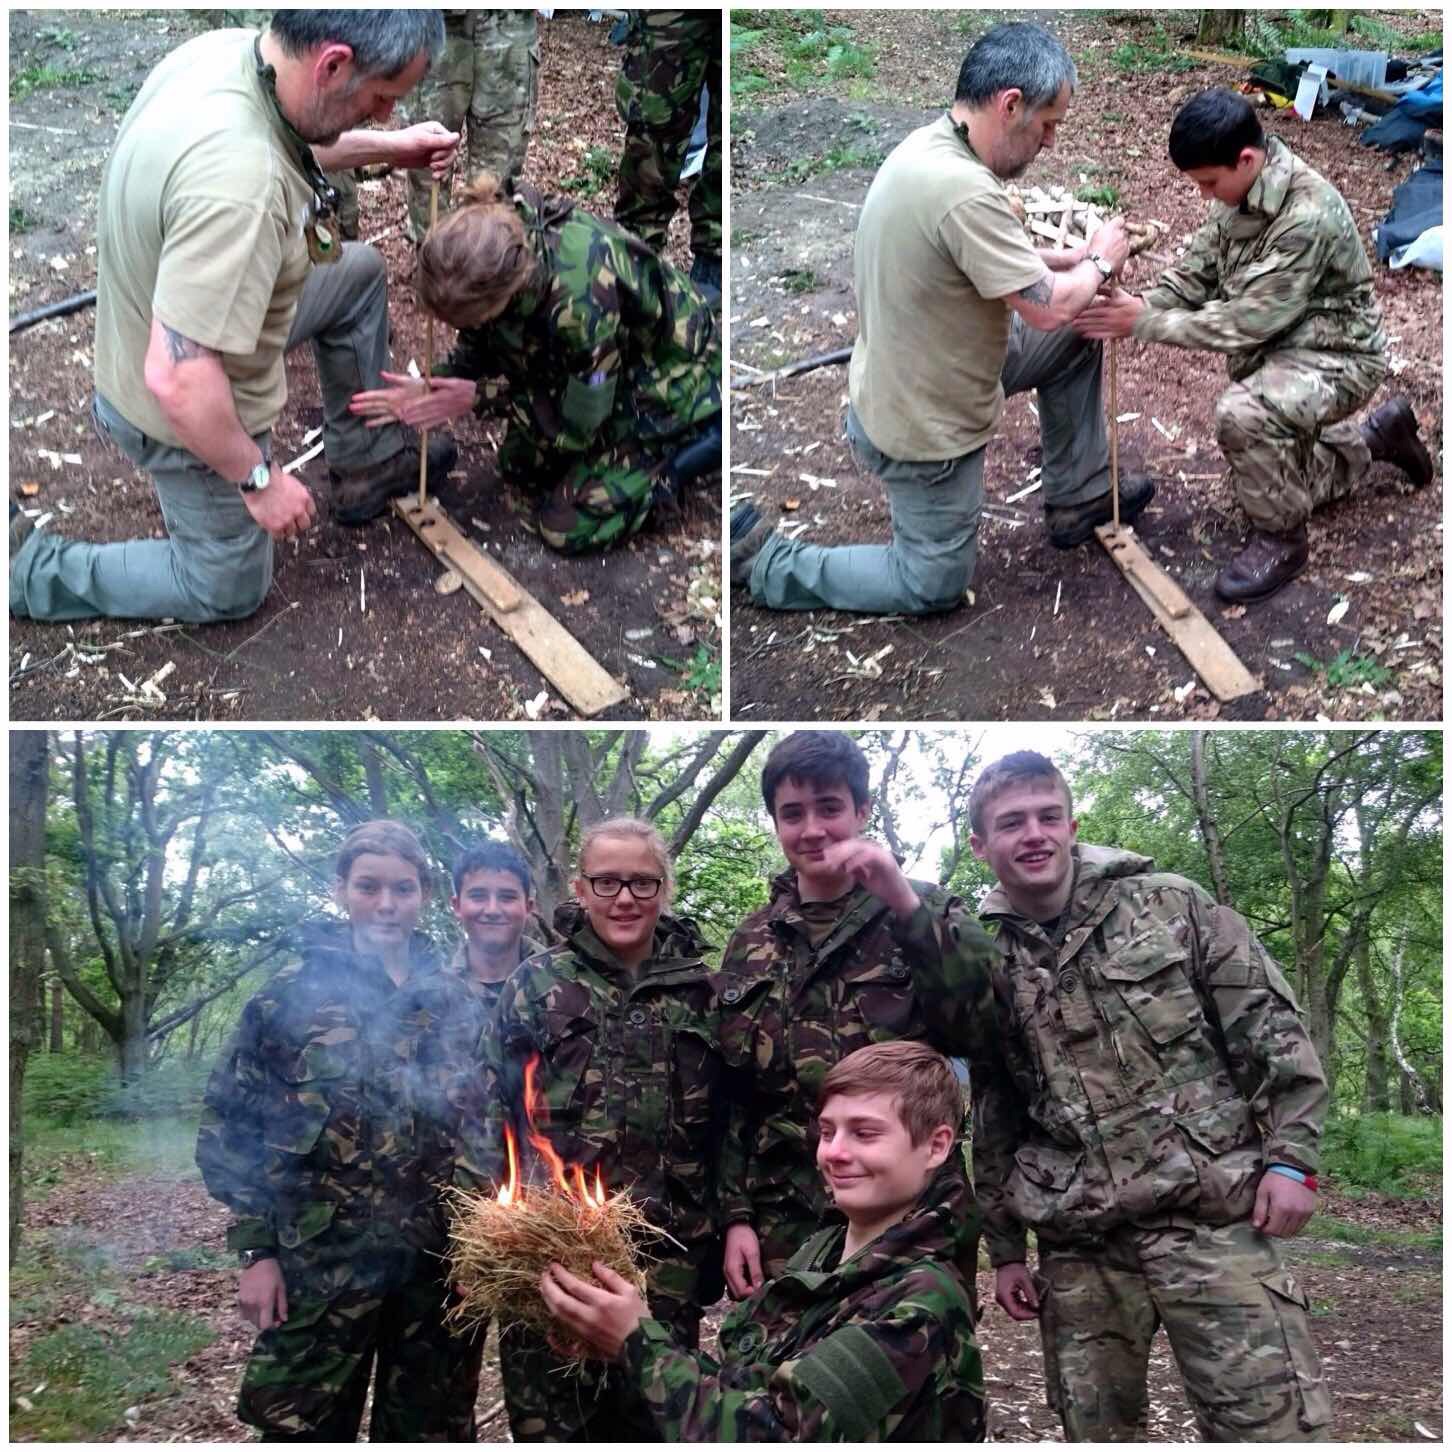
Straight after breakfast – out came my bow drill kit. This was not a full on bowdrill workshop but a taster to show how ‘assisted bowdrill‘ works. When we do this activity with cadets we always do it with the assistance of an instructor (or as a group of four or five) due to a lack of time usually. We used a couple of different methods and got good embers every time.
Bowdrill Techniques – pictures courtesy of Dave and Ben
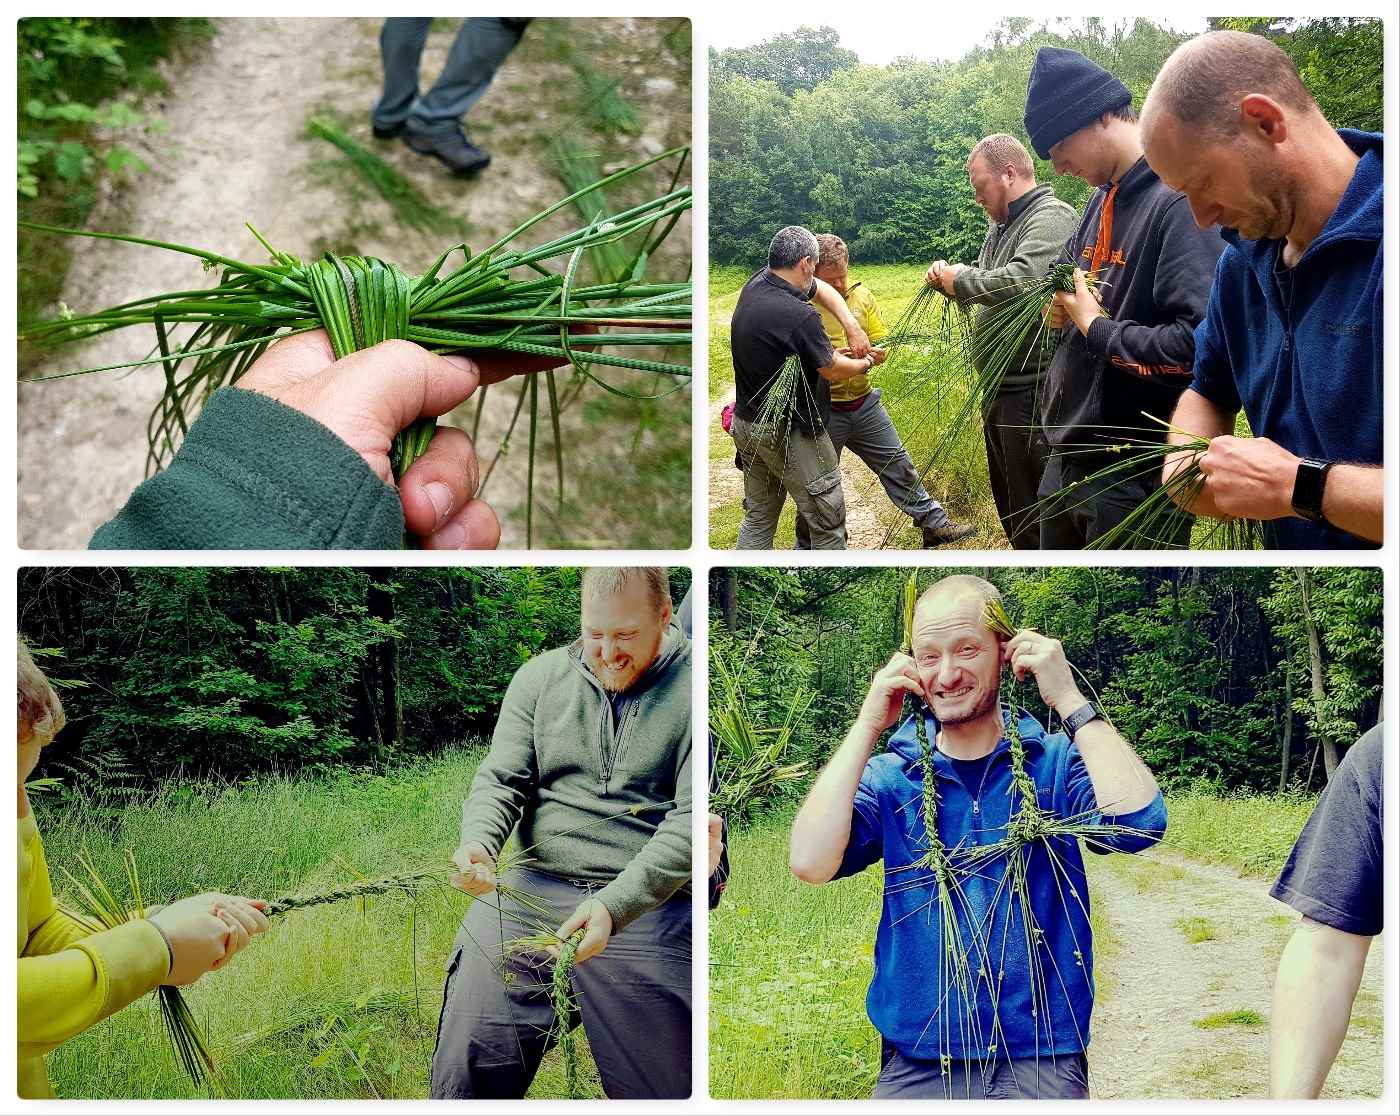
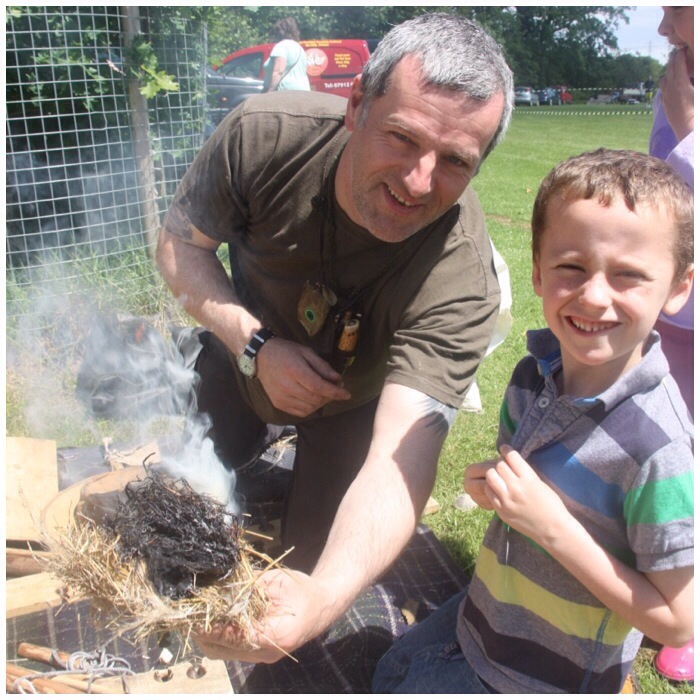
Grass Rope Making
In the Sea Cadets we work with ropes a lot (seamanship and all that) so I showed the guys how to make rope using grass. This is a fast rope making technique and we can create enough (with the right material) to make enough rope to do a seamanship class if needed (or just make earrings).
Rush Rope
Char Cloth
To finish Dave showed the students how to make some char cloth in a tin – we did not have time to finish it all off but they got the principles.
It was soon time to pack everything up and head home. Normally it is just the instructors that do most of this work so it was great to see all the students getting stuck in to put everything away in the correct manner so that it can be deployed quickly the next time we run a course.
A bit of Charcloth and Wrap Up
It was great to be back out doing Bushcraft again and sharing knowledge on the subject. I hope some of the guys are with us in a few years helping to deliver this course as having a good understanding of Bushcraft really enhances their skill set for teaching cadets. I hope to be back running another course at MAST next year.
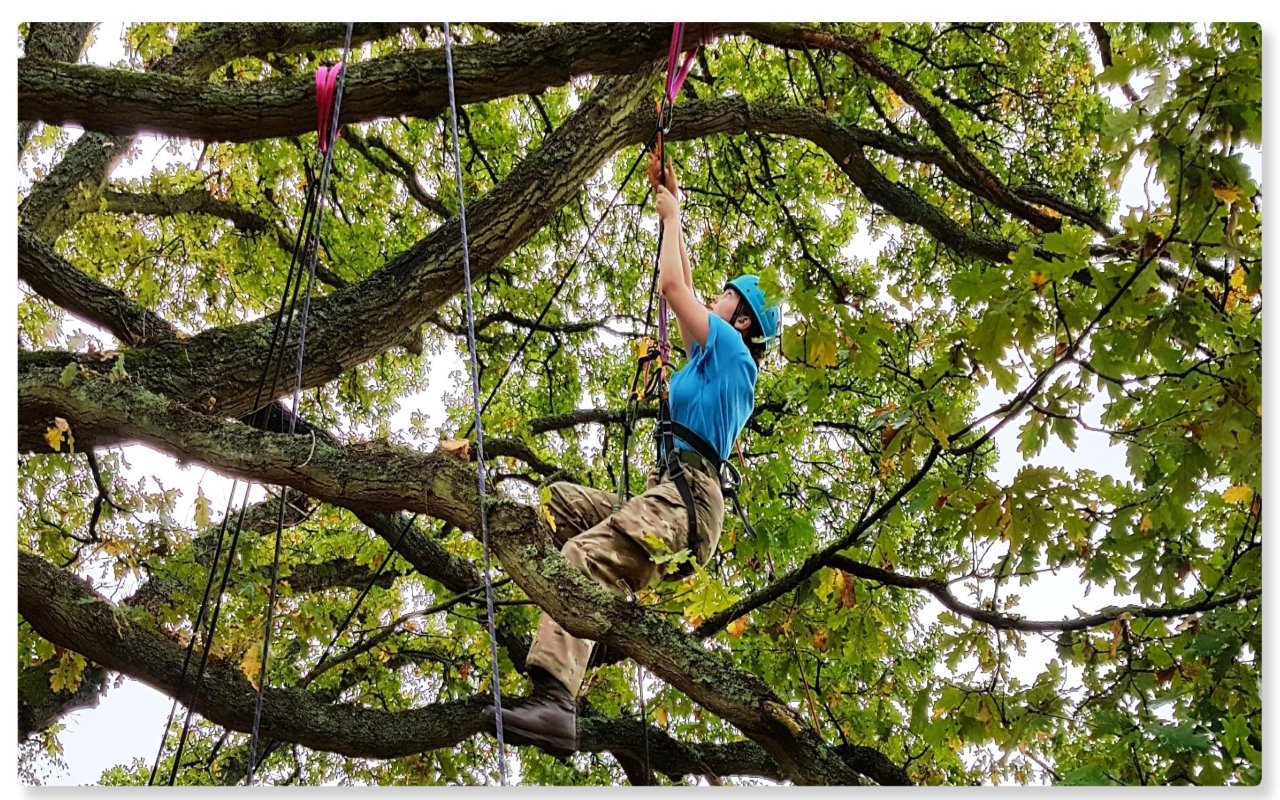
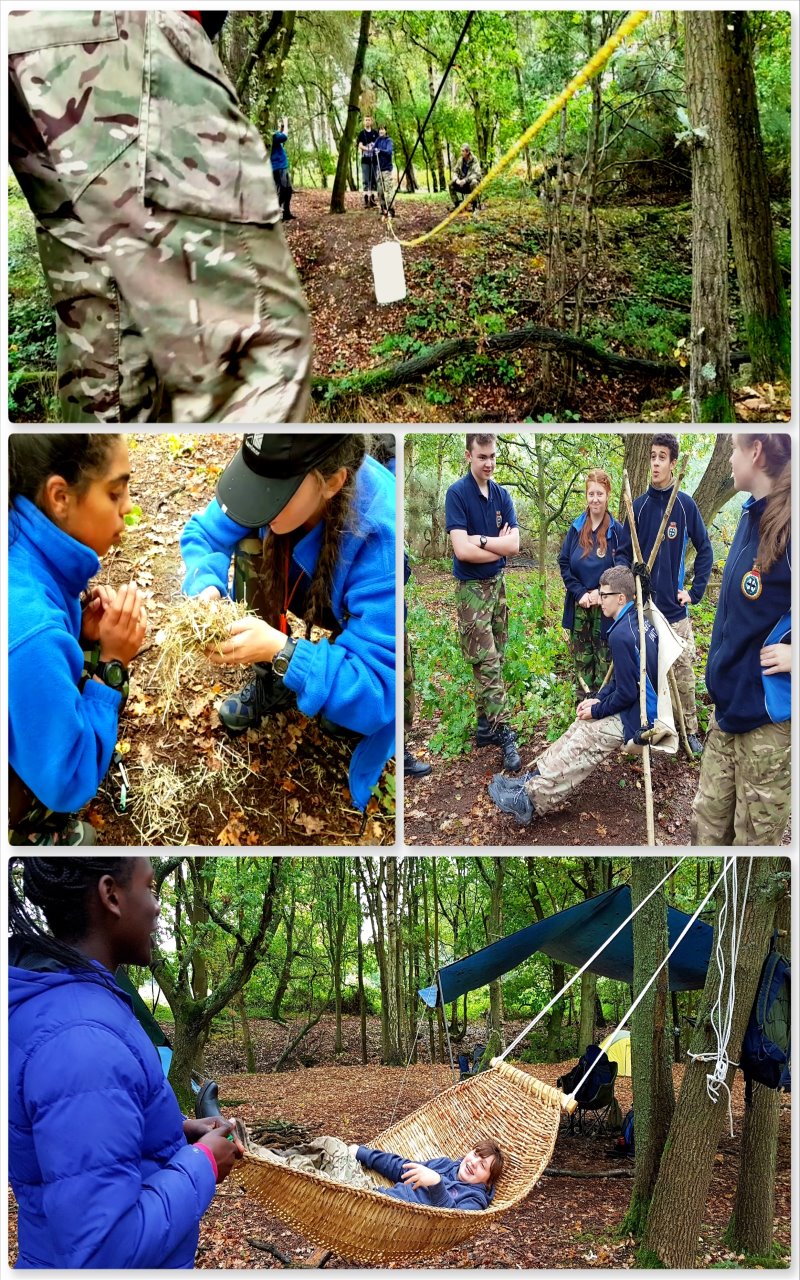
Unlike the Saturday where navigation skills were the focus the Sunday at Chosin Cup is all about testing the cadets skills such as teamwork, ropework, first aid and archery – to name just a few (there will be a further post on the Endurance Race).
After a short briefing the cadets were sent out in their teams to various stances set out in and around the woods earlier that morning.
Being Sea Cadets a weekend without testing their Seamanship skills in some way would not be proper so they soon found themselves having to construct a pulley system to transport water across a ‘raging river!!‘.
Bushcraft is a key part of their training now so their firelighting and pioneering skills were also tested however there was always time to take a few minutes’out‘ on the hammock.
Seamanship and Bushcraft Skills
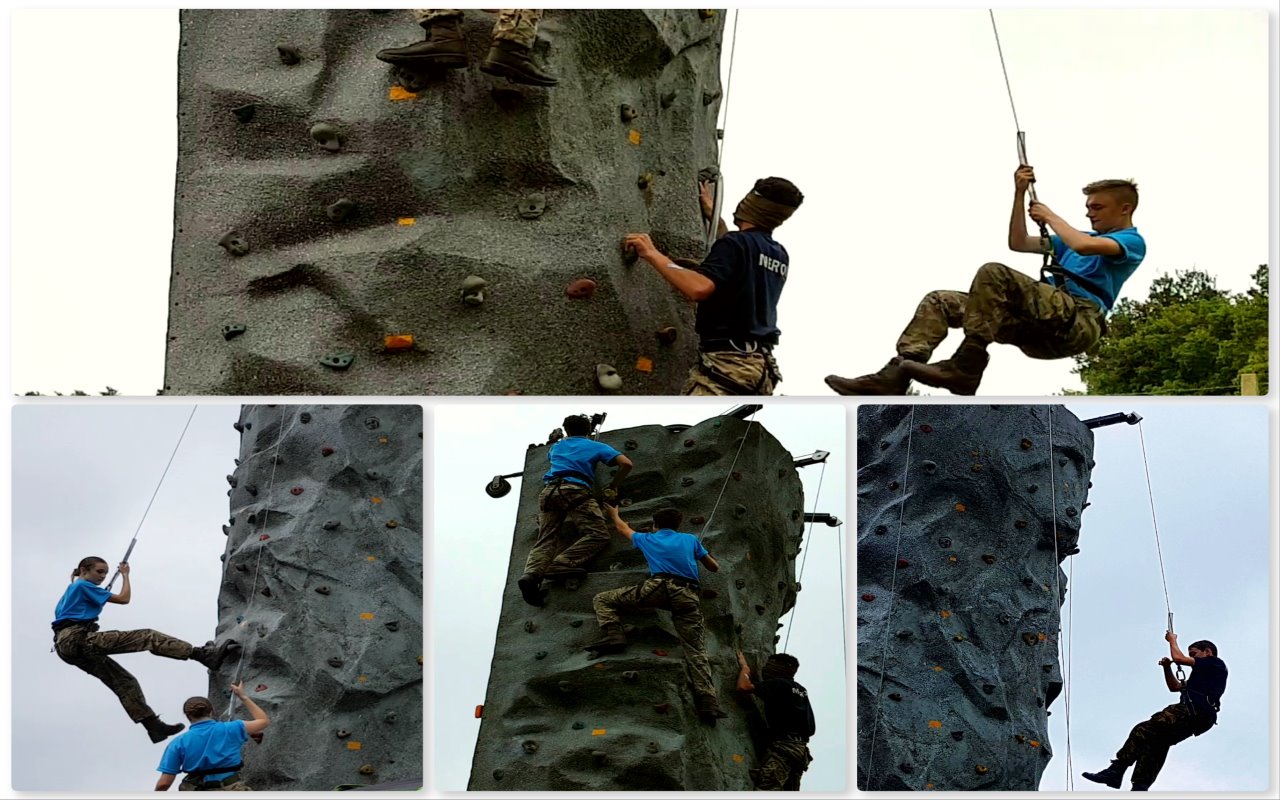
Our adventure training boss Ben McDonald had organised for a mobile climbing wall to turn up that morning. I have no idea how they scored this event however the cadets were up and down it like yoyo’s.
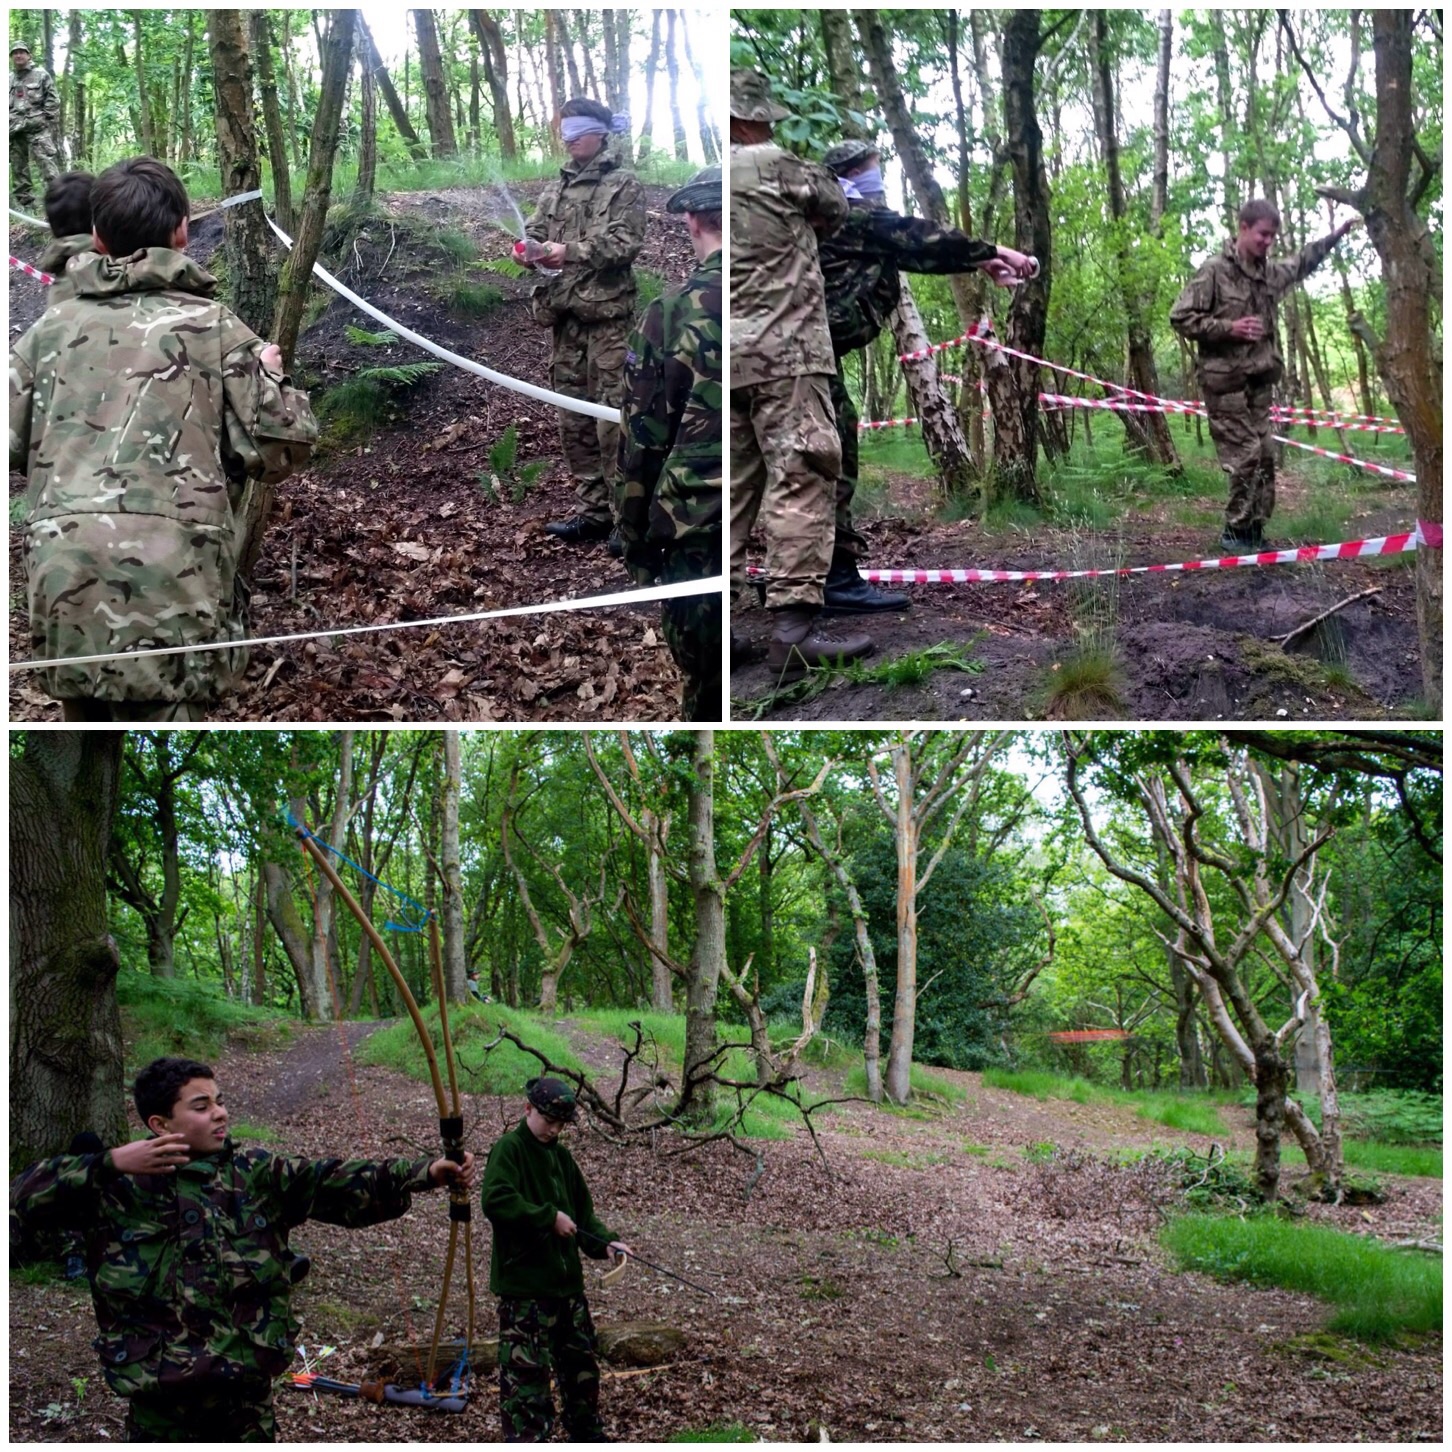
A couple of challenges they faced involved climbing in pairs carrying a ball between them and making the climb blindfolded – both more difficult than you would think.
The Wall
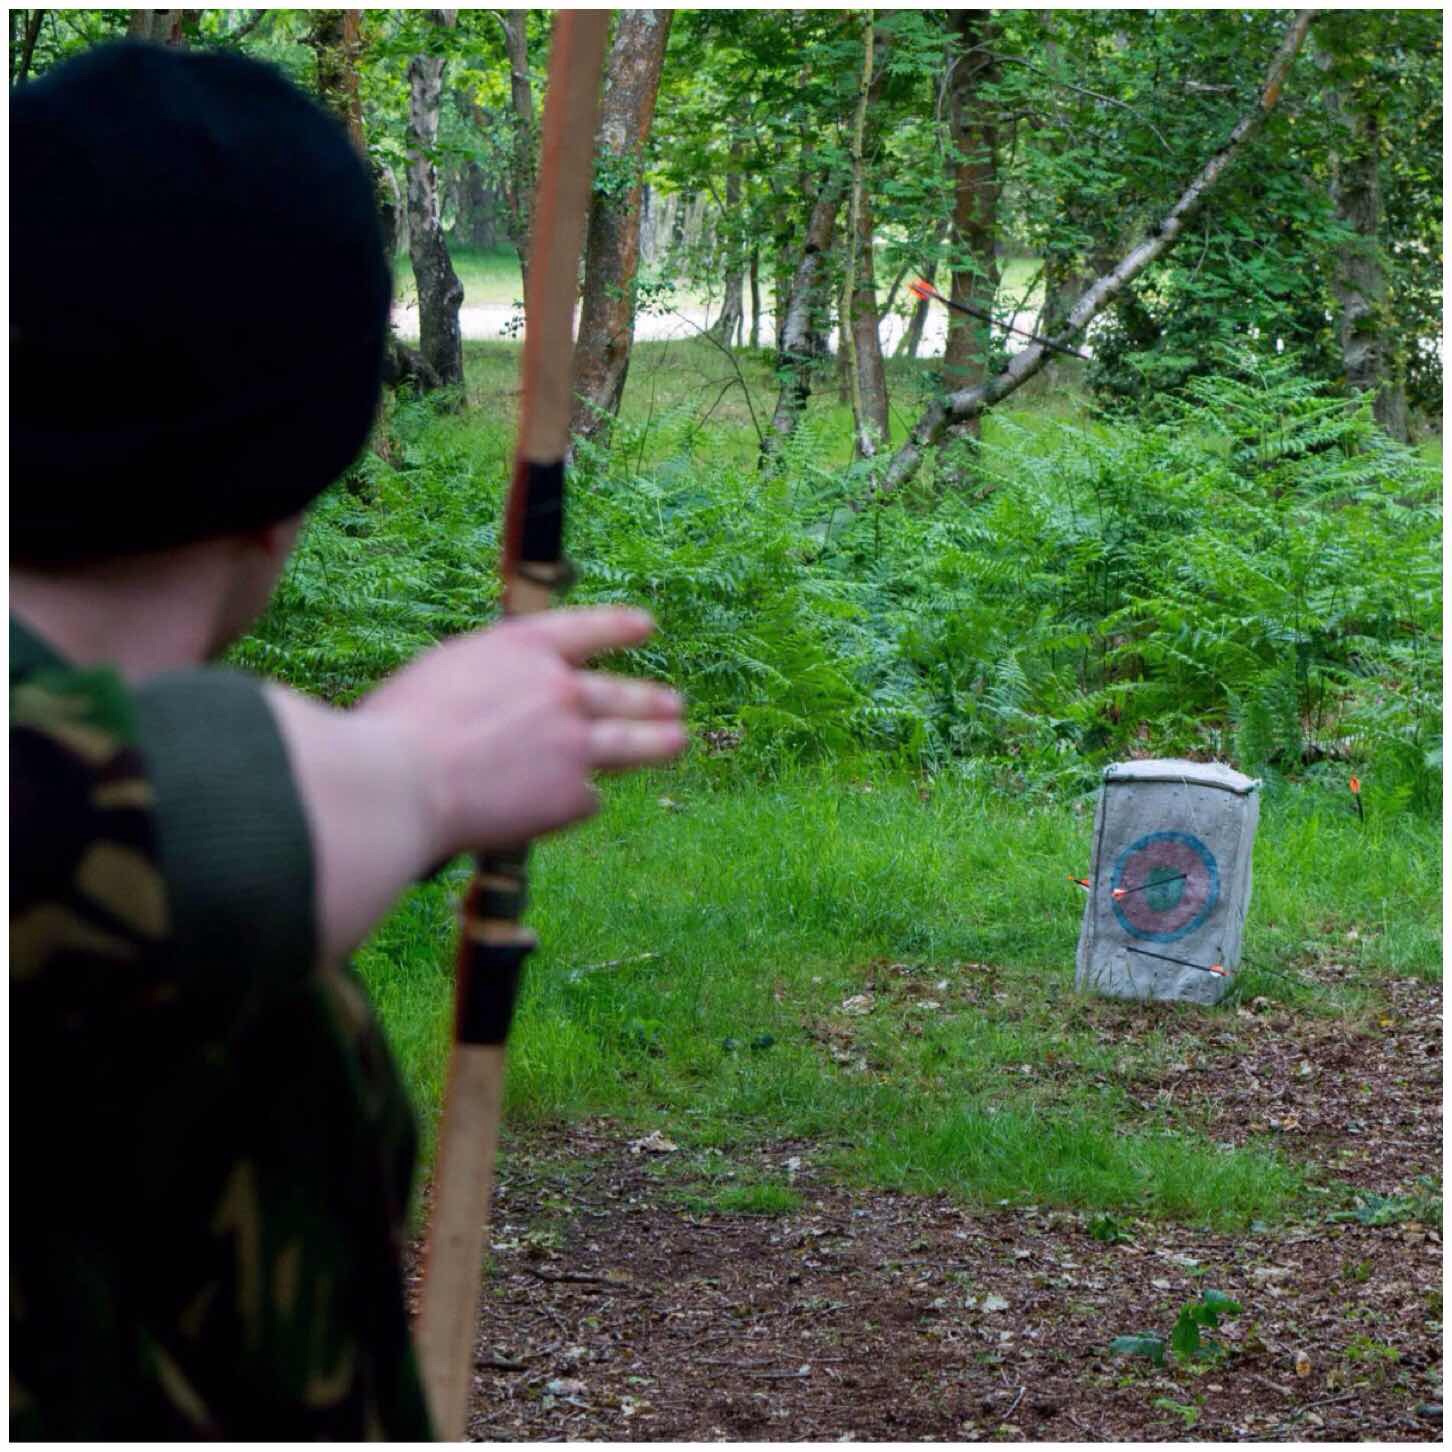
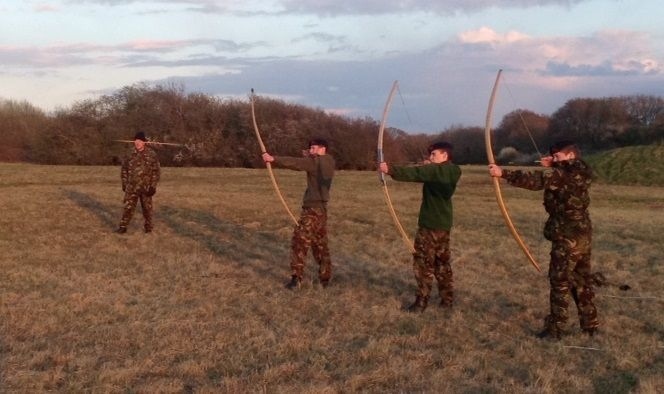
A favourite of mine is archery. This year our archery instructor Jacob brought along his Area kit so my poor bows could have a year off (I broke one a year ago so glad we have new kit). It proved a ‘hit‘ with both the cadets and staff and even the visiting VIP’s had a bash.
The Range
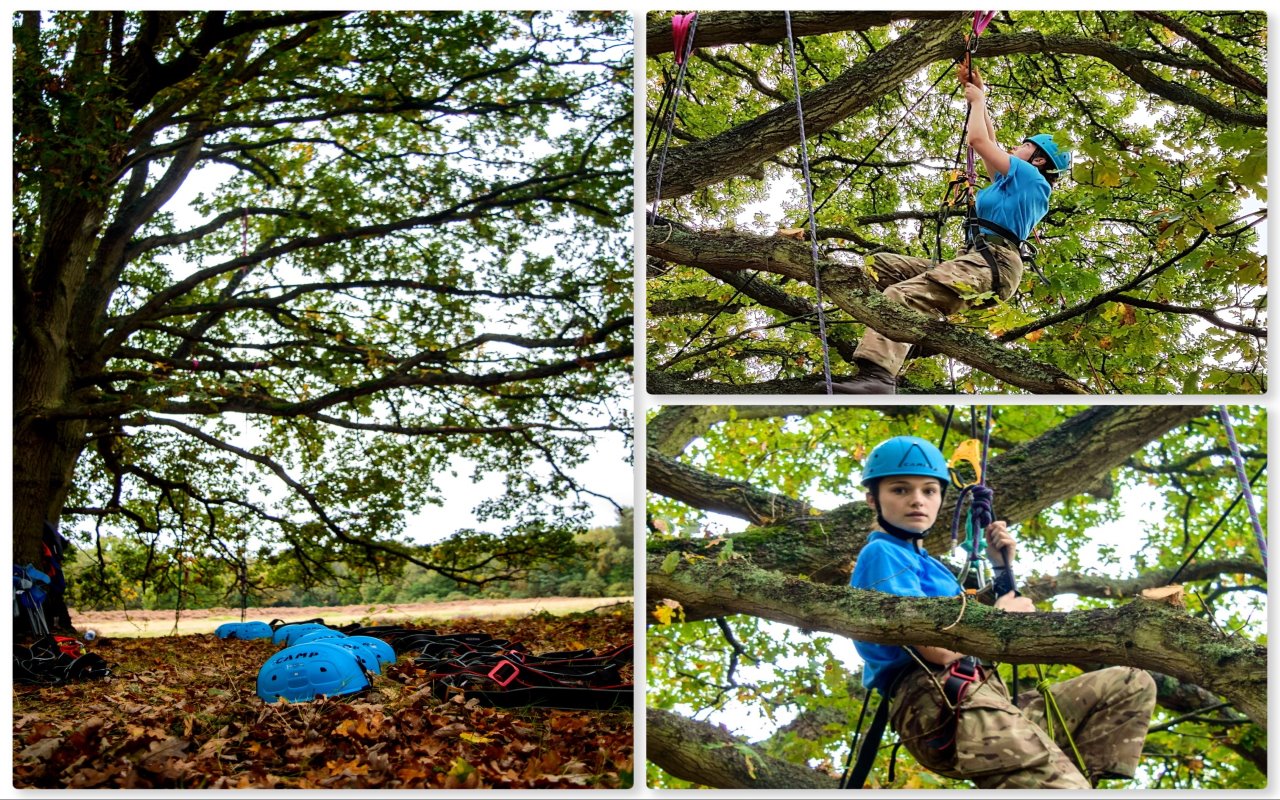
Perry and Deano spent the morning running the tree climbing stance. The cadets had to use ascending devices to climb up into the big old oak tree. This was done to varying degrees of success as it can be difficult if you do not get the knack right.
Ascending
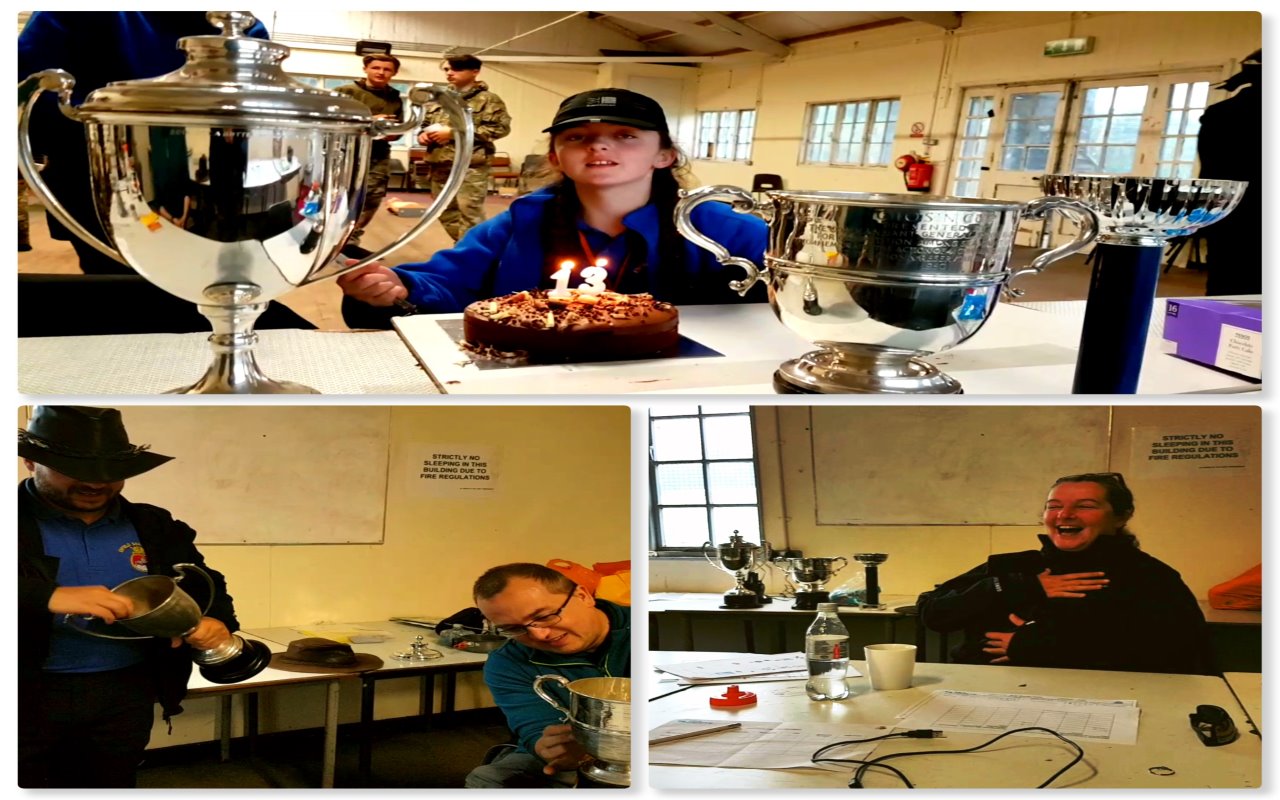
We had a birthday that weekend – Frankie Mae Edwards turned 13 on the weekend and the cadets had brought her along a cake to celebrate. Needless to say the staff did not get to see much of the cake – thankfully I missed out on all that polishing – well done Cliff and Dave – vary shiny job.
Busy times in the office
Normally all our classes are located outdoors but this year for some reason the First Aid and the Navigation quiz was hosted indoors – no idea why and hopefully will not be repeated next year 🙂
First Aid and Navigation
The one activity missing from this post is the Endurance Race – that deserves a post all of its own which will follow after this.
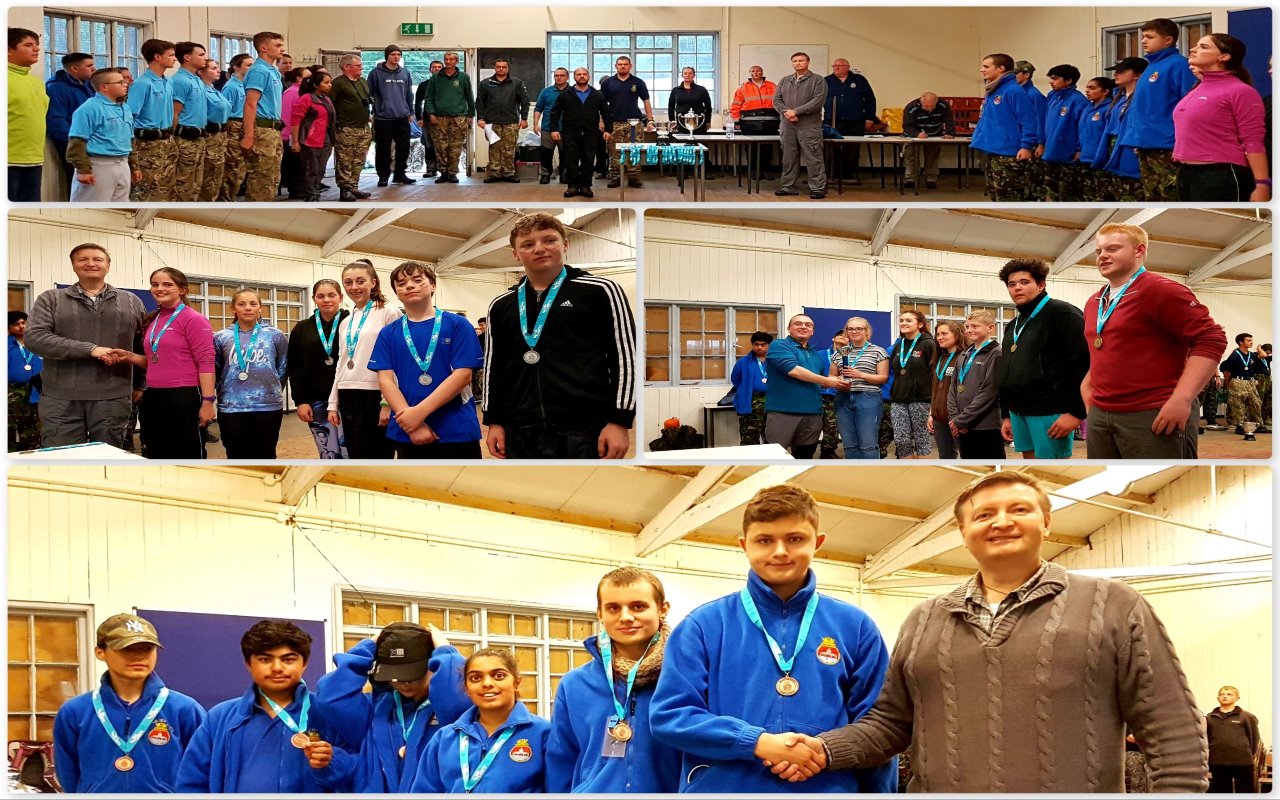
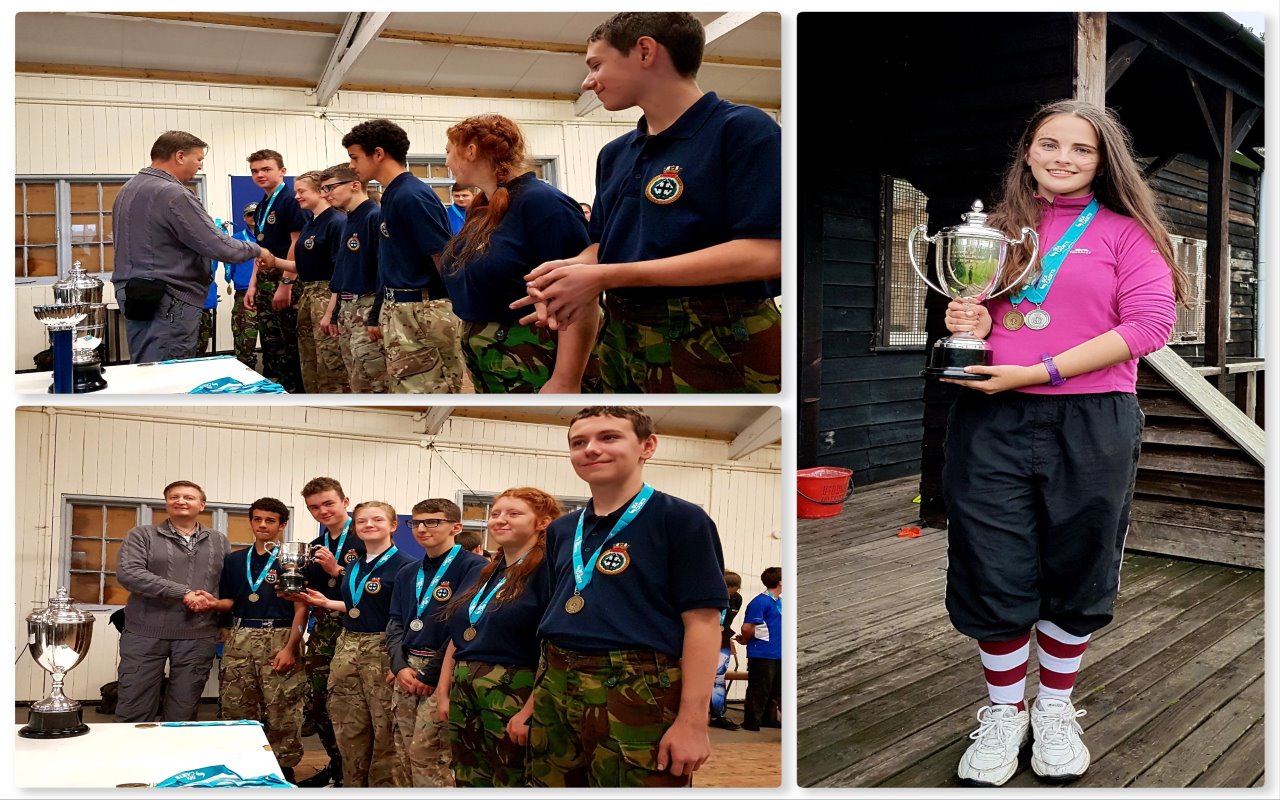
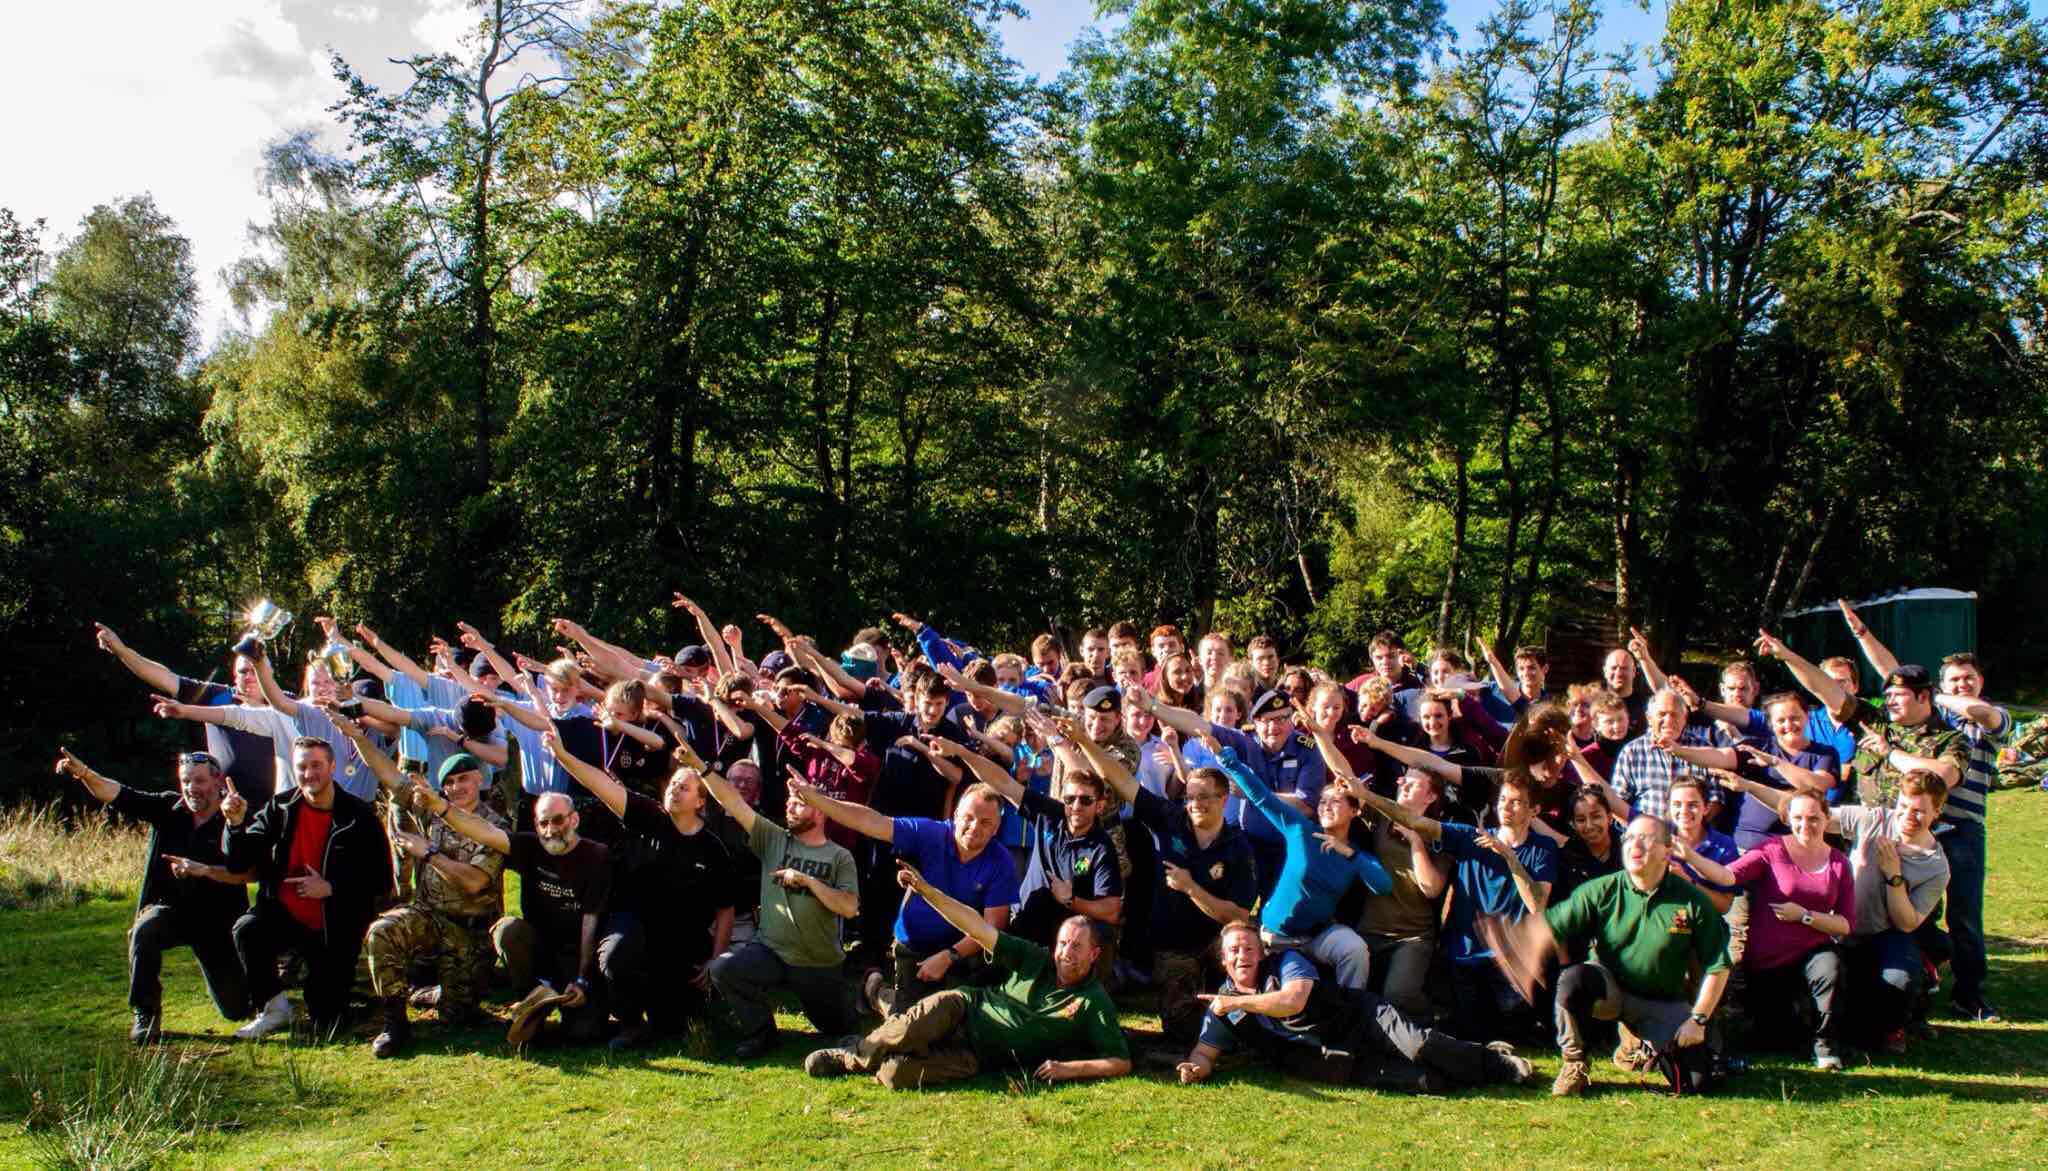
Soon it was time for the awards and we all paraded in the massive troop shelter on the training area. Enfield unit came 3rd, Sunbury & Walton unit came second and Poole unit won the visitors trophy.
Runners Up
First place went to Merton unit and the Team leader trophy went to Niamh Kelly. Well done to everyone – cadets and staff for taking part in what was a great weekend.
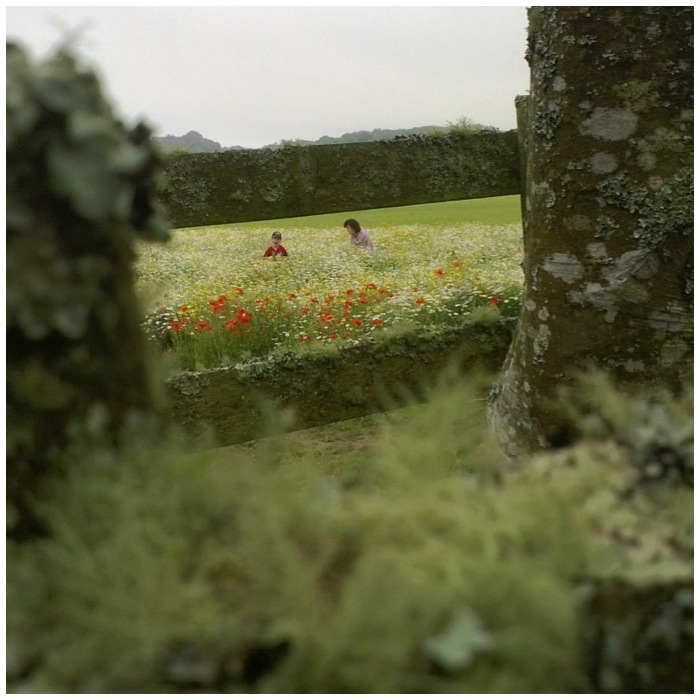
Groups of friends usually have something in common – with my chums from Crisis it is Grumpiness ;-( The ‘Grumps’ are Rick (1), myself (2), Gordon (3) and Stu (4). Gordon has numbered us however there is much debate about his 3rd place in the grumpiness rankings. We do grumble a lot and it is remarked upon from time to time however we like it and it makes us happy 🙂
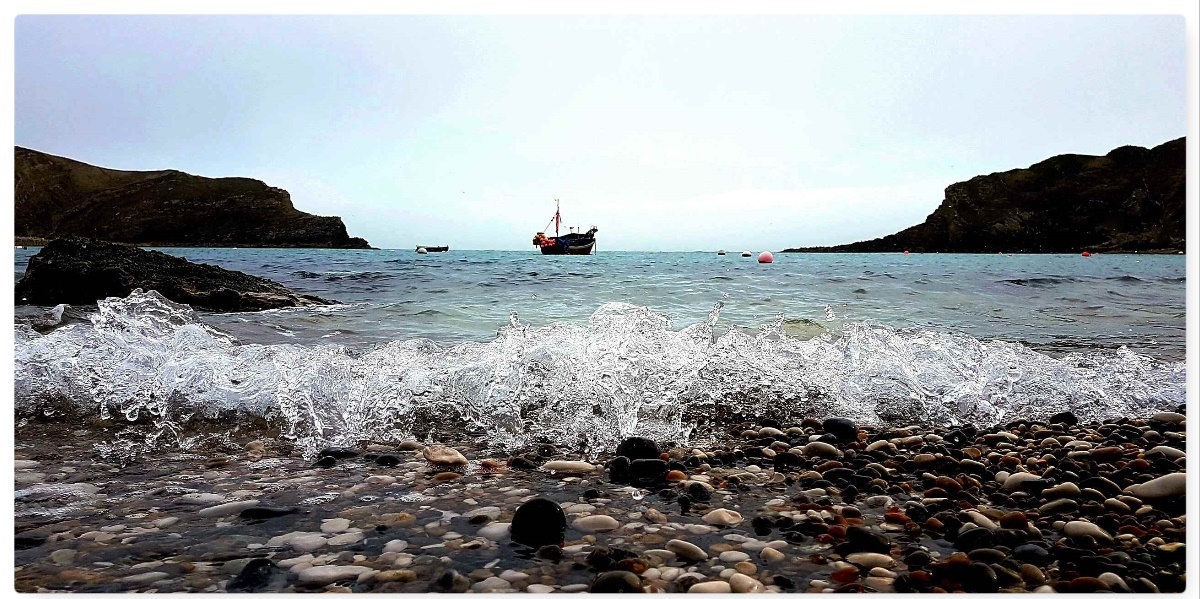
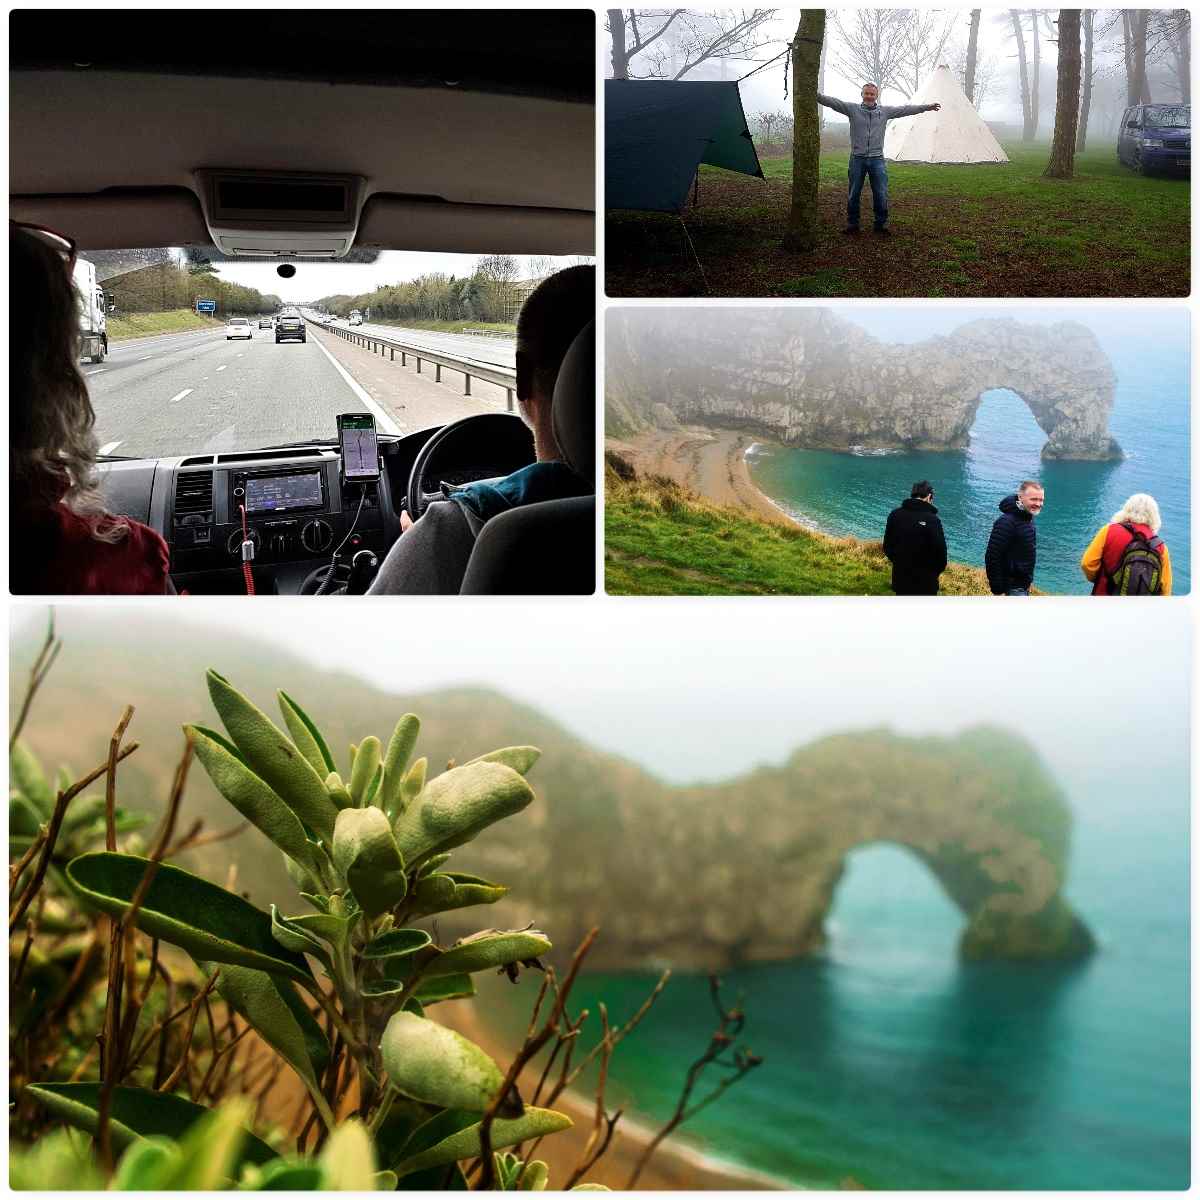
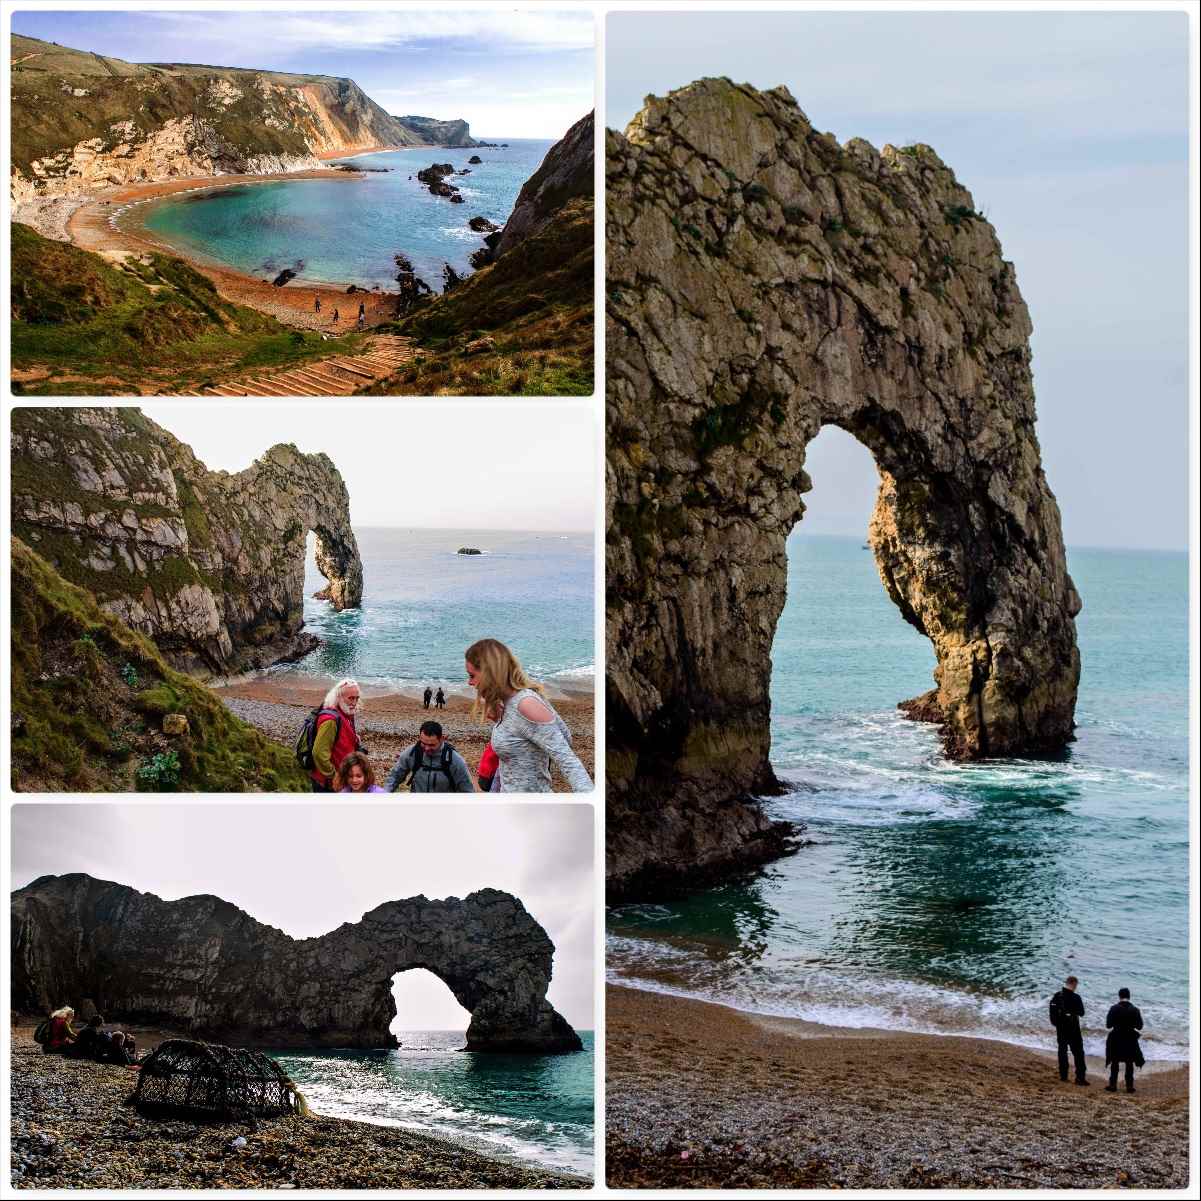
We have worked together each Christmas for 20 years or so at one of the homeless centres for Crisis in London. During the year we always try to get away together. This year Gordon organised a trip down to Durdle Door on the Dorset coast here in the UK early in March.
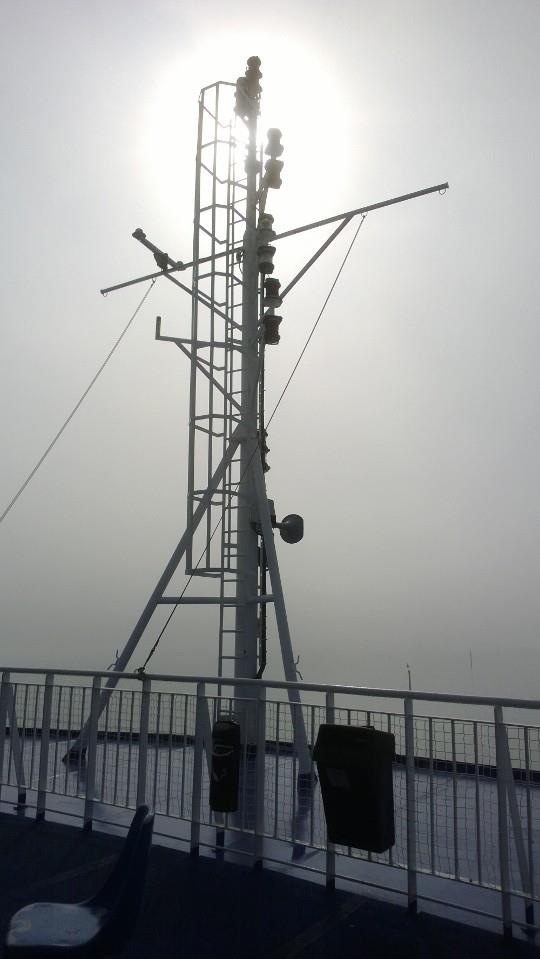
Foggy Friday
I had never been to this part of the coast before so was keen to go. We set up camp at Durdle Door Holiday camp (I insisted on sleeping in my hammock while they all got the tipi) and then headed off towards the coast.
The fog was well in but I insisted we go all the way down to see the arch at Durdle Door. I am glad I did as it looked stunning in the fog.
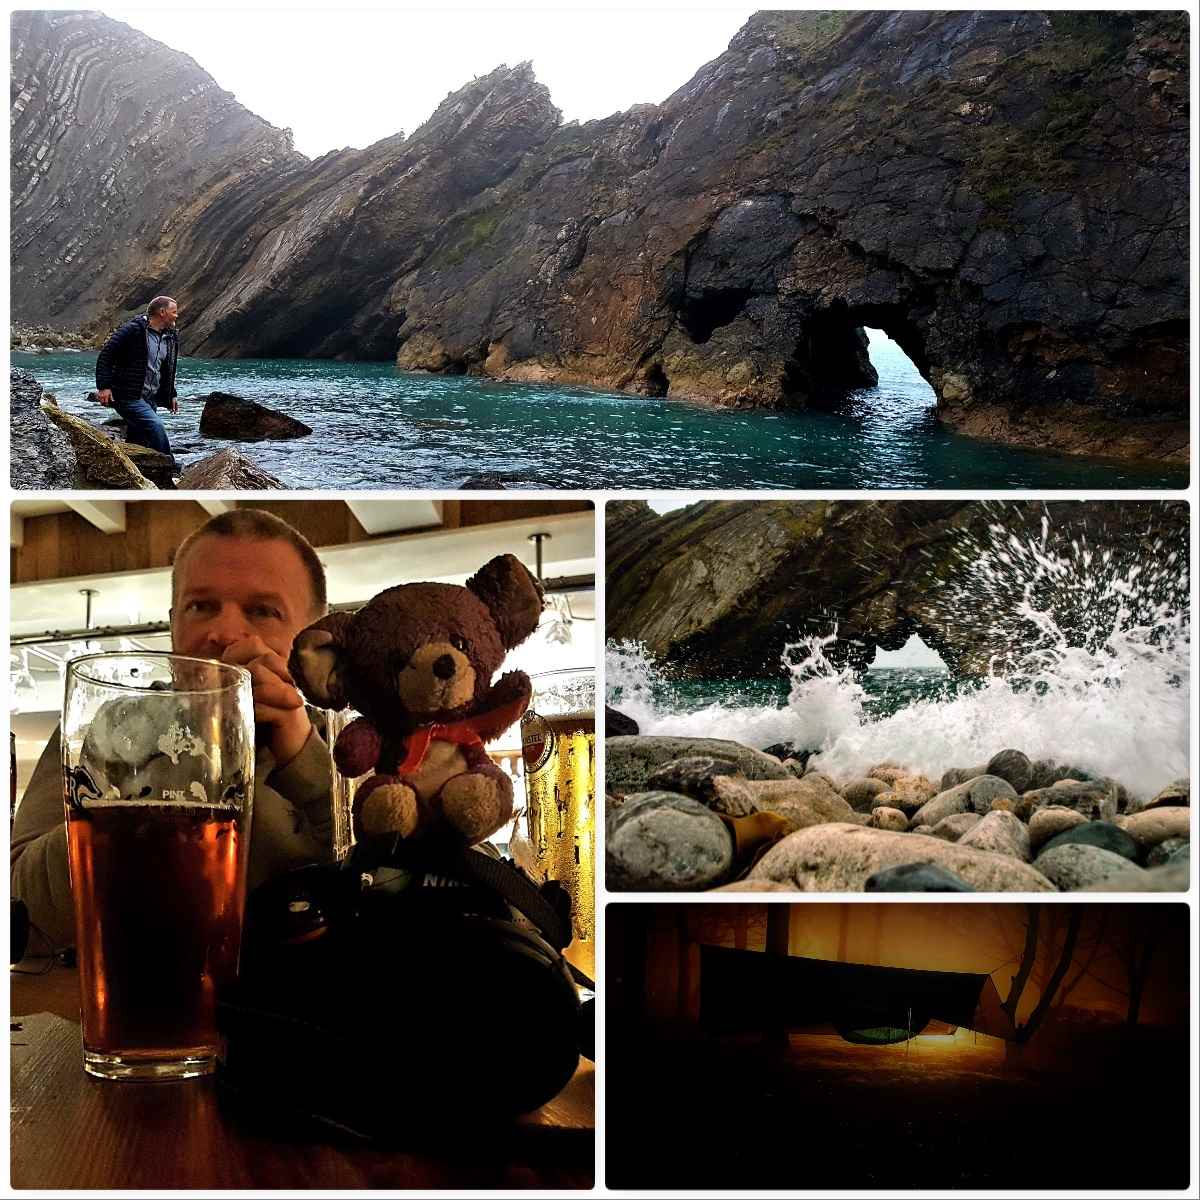
Once we had finished there we headed on over to Lulworth Cove and Stu and myself headed on down to see Stair Hole. It was a bit of a hike down but it was worth it to get the pictures. The rest of the evening was spent between the pub in Lulworth Cove and the one in the campsite where I was presented back with my Flossie Anne. She had just come back from one of her epic trips with Rick – this time she travelled from Japan through China, Mongolia, Russia and the Baltic states (she must be the most well travelled bear in the world).
Friday Night
The Saturday
I woke up at daft o’clock on Saturday morning to the sound of the Crows roosting above my hammock. The tranquil nature of the rest of my view made up for that racket though. The rest of the morning was a relaxed affair (apart from the Crow poo all over my tarp and tipi) and Stu had brought along some great coffee to brew up.
Once brekkie was over we headed back down to Durdle Door (Rick was very concerned for a young lady as she descended the steps!!) and I got a good look down the coast over the Man O’War beach – it really is quite stunning. We pootled around Durdle Door itself (well I faffed really trying to get a good picture of it) before heading west.
Durdle Door
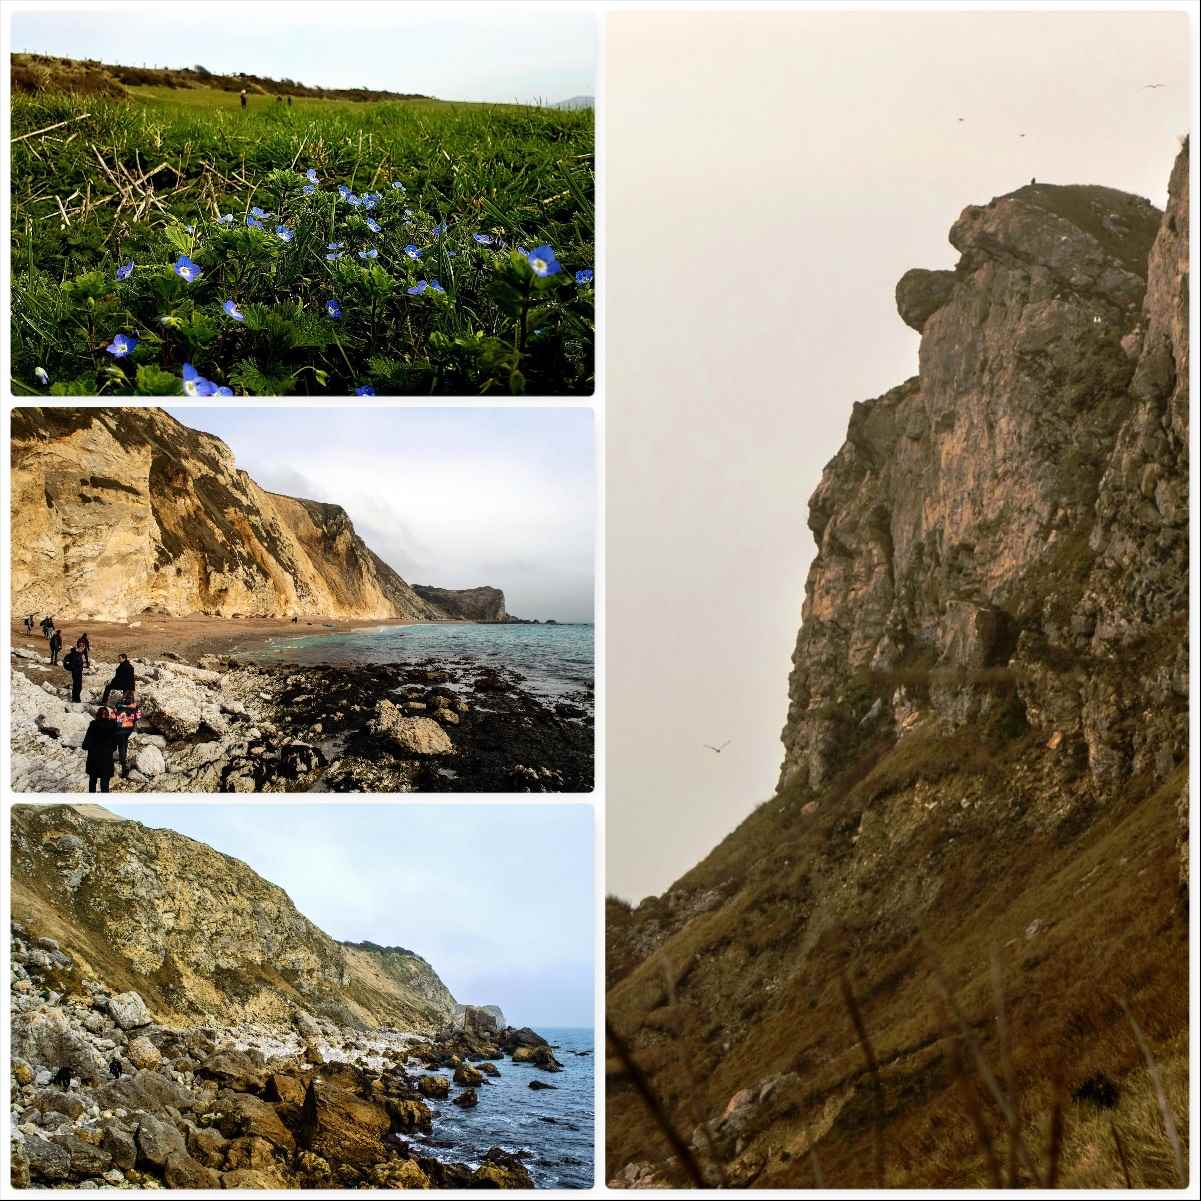
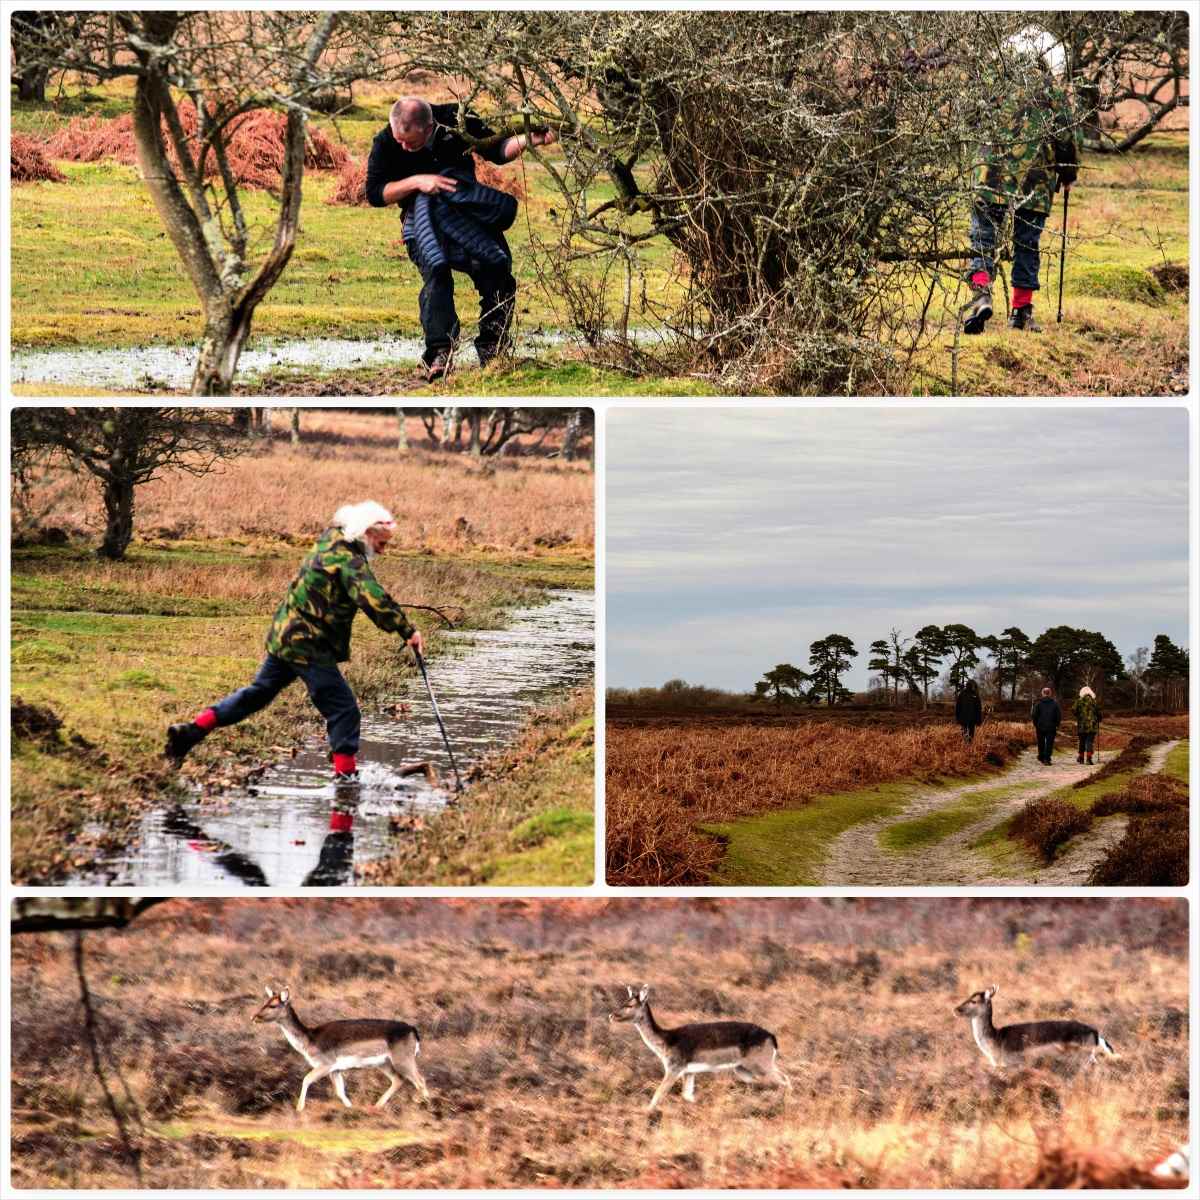
As you head west you approach a great big headland named Bat Head with an archway called Bat Hole. It is beautiful to look at however there was no way round it for us with the tide being so far in (I have no idea if you can get around the headland at low tide).
Gordon and Stu were not paying attention and were soon ankle deep in swash 🙂 We back tracked and spotted an escape route up off the beach. It was a ravine with a weighted rope in it. After a quick recce everyone was soon up on the coastal path overlooking the beach.
We had a leasurley stroll up the coastal path to Swyre Head where we enjoyed the views and I stalked a crow to get a good shot of him 🙂
Along and Up
From Swyre Head we moved off inland around a natural bowl in the landscape called Scratchy Bottom – there are some brilliant place names in this country. It was here Rick spotted a group of wildflowers. Once I got up close I could see they were Speedwells – this being early March it was my first spot of them this year.
We made our way back to Durdle Door through the campsite (after cleaning off some more Crow poo from my tarp and tipi) down onto Man O’War beach. There were plenty of people on the beach but as we travelled on the numbers soon thinned out. Eventually we were onto rocks and we were the only ones in sight. Looking back Stu spotted the strange rock formation at Dungy Head you can see in the picture below (on the right) – Looks like a large bloke with a big round nose and a woolen hat on his head to me 🙂
Changing Scenery
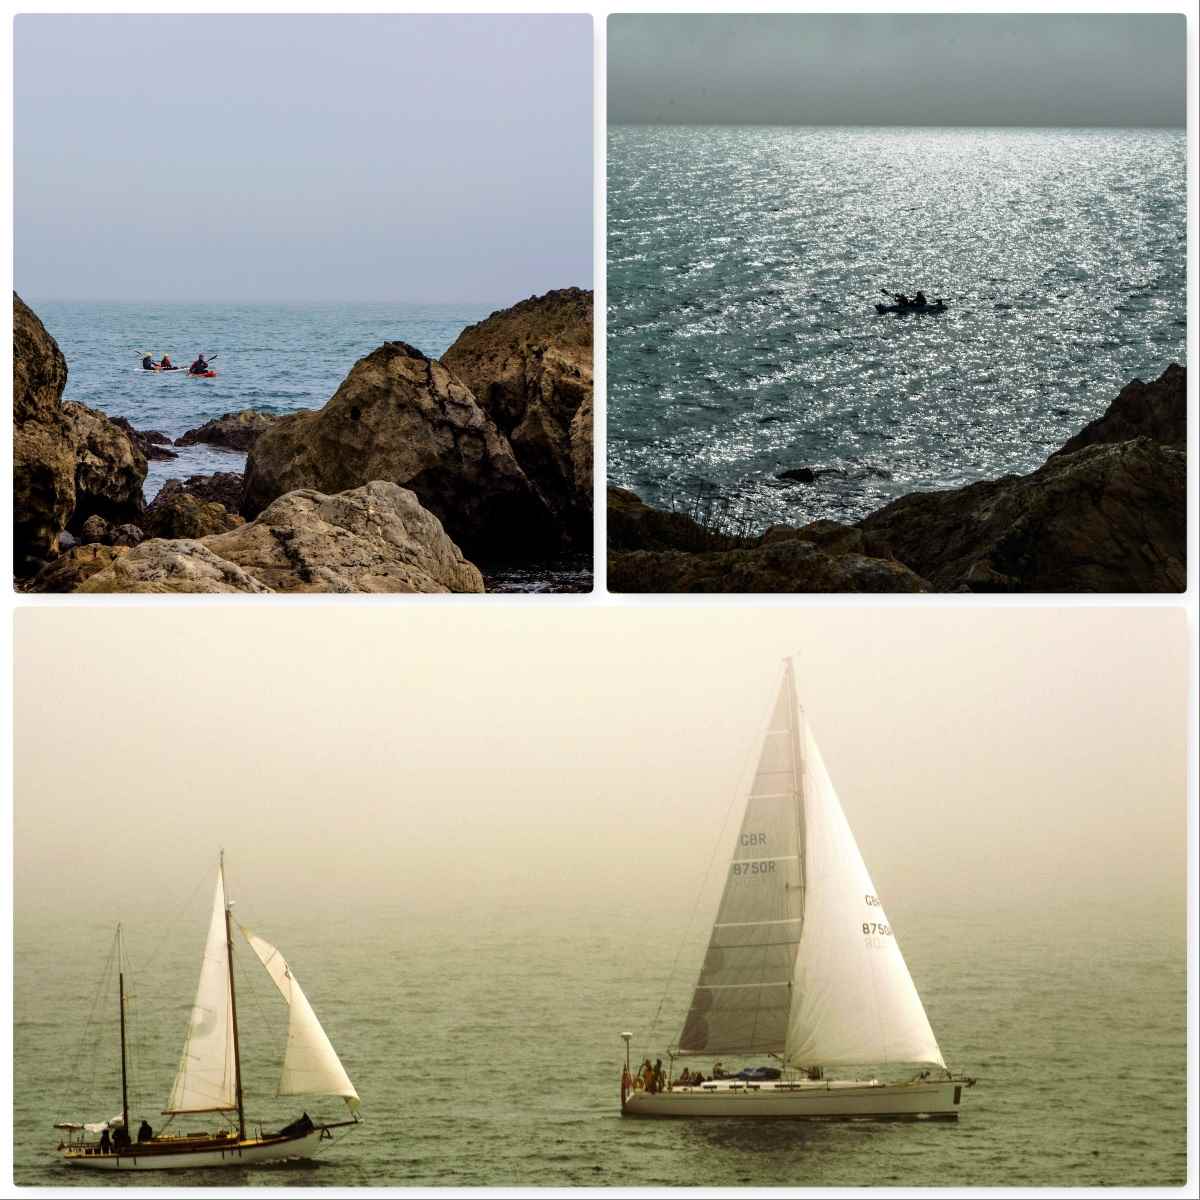
There were a number of kayakers on the water and they made for some lovely photography but I could see that the fog was starting to come in again. As it thickened up two beautiful yachts came out of Lulworth Cove and headed west along the coast. It was really difficult to photograph them with the fog and because they were both white but I think I got a decent shot in the end.
Sea View
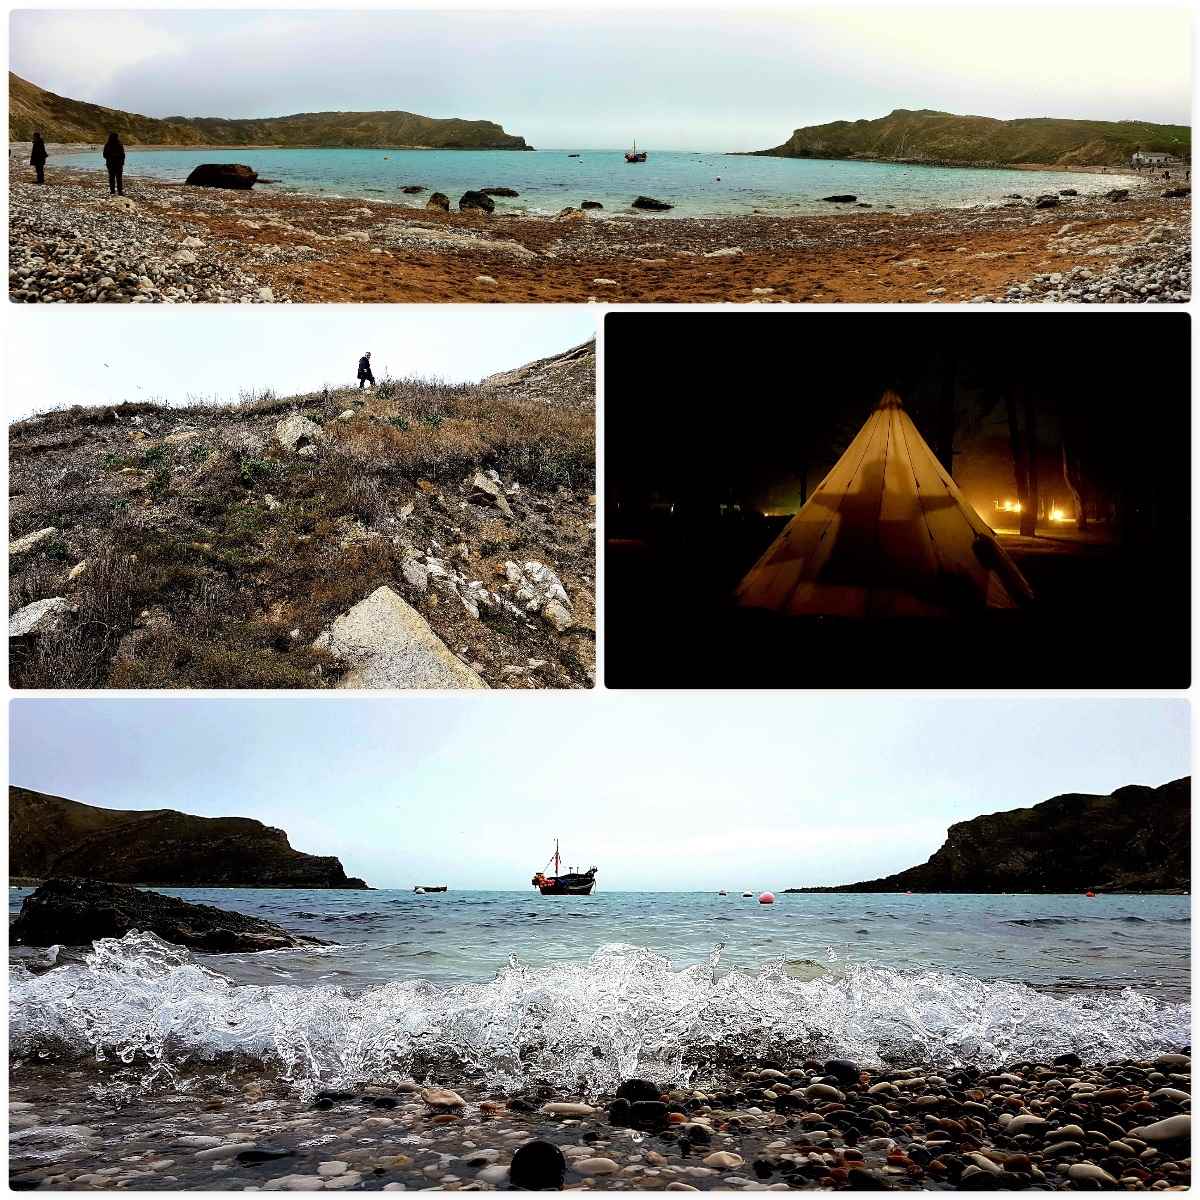
We tried to get all the way to the entrance of Lulworth Cove but it was just not possible. We found a section of Cliff that was easy to scramble up and were soon in Lulworth Cove once again.
I left the lads to potter around the village (code for pub) and spent a half hour down on the cove photographing it. The waves were non existent so I had to get down really low to get a half way decent shot (bottom picture).
We had an evening of watching rugby and trading grumps before heading back to camp. Somehow I ended up getting Stu to do ‘shadows’ in the tipi and when I looked at the picture below his shadow looked to me like a giant ginger bread man 🙂
Saturday Evening
The Sunday
We had decided the night before to de-camp straight away and head on over to the New Forest on the Sunday morning. It did not take long to pack everything away (after cleaning of more Crow poo) however due to the rain overnight (Rick ended up a tad damp in the morning) we had to have Stu’s VW van pulled off the campsite.
Once in the New Forest we stopped off in Lyndhurst for lunch and where I got myself a proper camp coffee pot for hanging over the fire – I did though leave it behind in the cafe and had to go running back 🙂
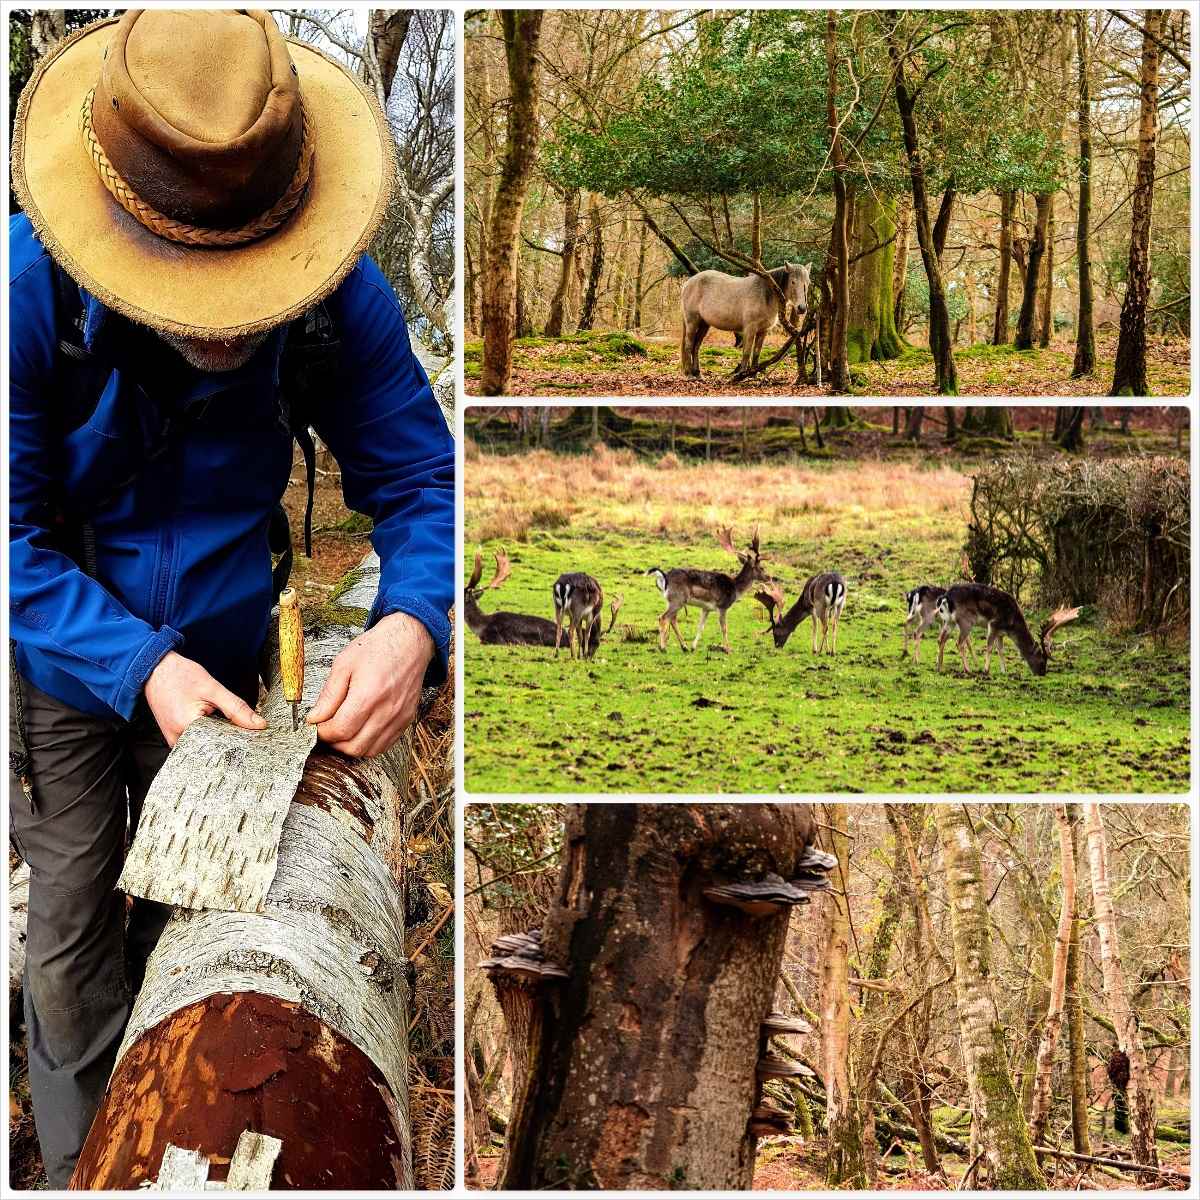
We drove onto the carpark by Beaulieu Rd Railway Station and headed off to the woods by Denny Lodge. There were plenty of ponies around and quite a few deer – though the first lot were in an enclosure (all stags in an enclosure called Stag Park). I spent some time making up some birch firelighters and looking for fungi and burrs.
Sunday New Forest
There was still plenty of standing water on the heathland so a detour here and there was required and just as we headed back to the van we spotted a herd of female deer in the open.
I took my time and got as close as I could to them. They were very flighty and soon they were off but I did manage to get a decent picture.
A Great Bimble
I liked the campsite in Durdle Door so much I am back down there in a weeks time with my family to stay at one of the camping pods they rent out – fancy a break from always having to put the tent up.
Thanks to Gordon for organising the weekend and for all my fellow Grumps for being ………well so Grumpy 🙂
Spring is a time I am normally found out and about with my camera looking to see what is afoot. This year my work has kept me much busier than usual so my usual bimbles have been curtailed slightly – though some may disagree 😉 I did though get out a little and here is a little taste of my bimbles this last month.
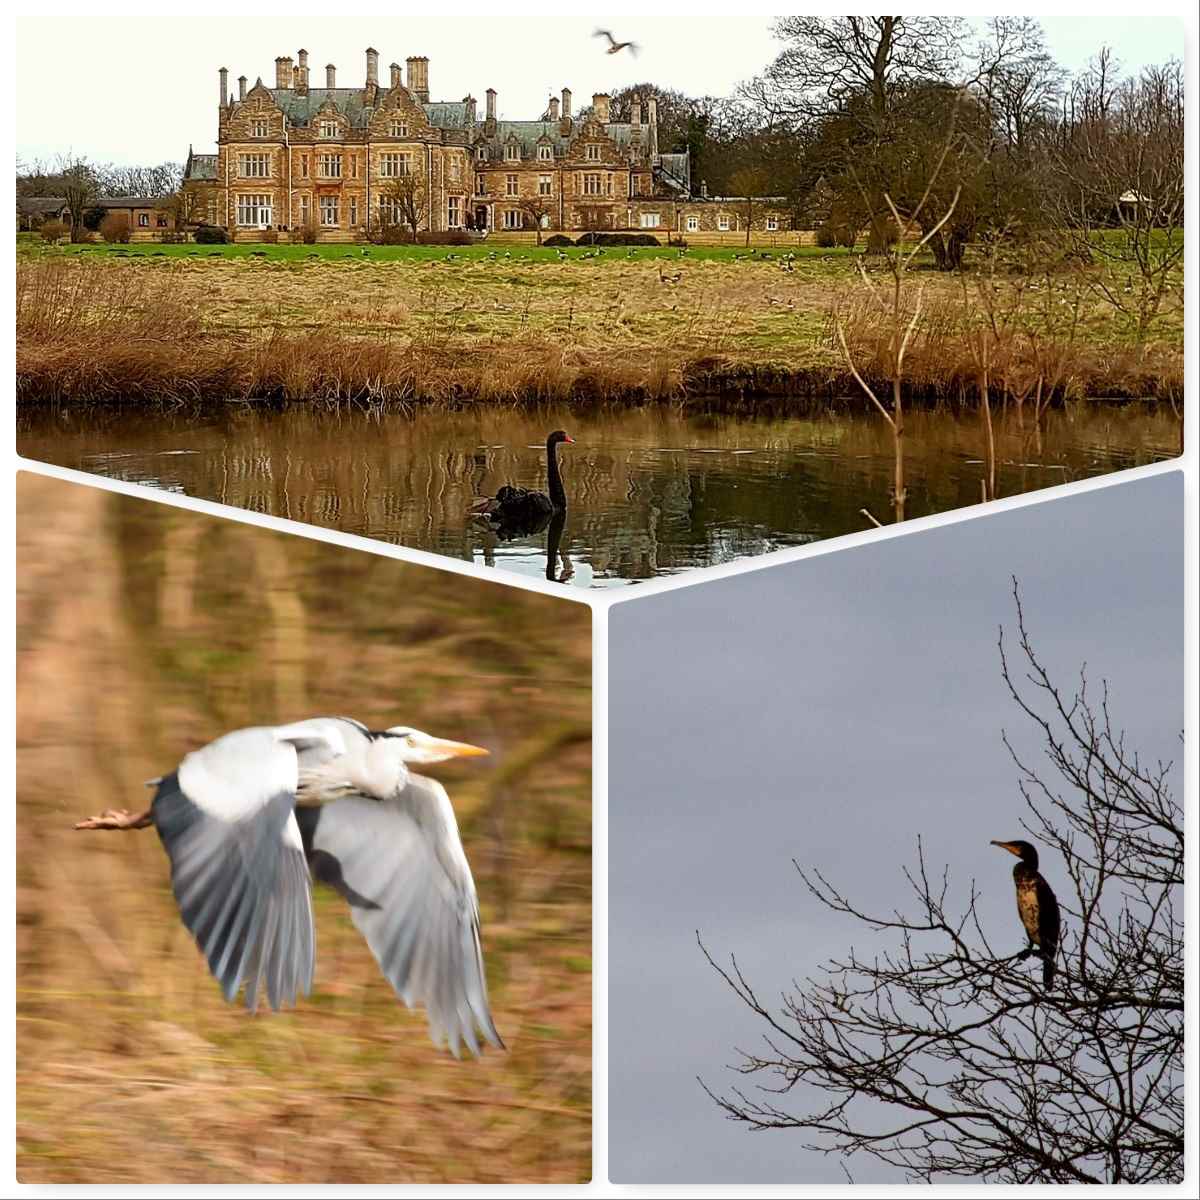
Early in March I was at a conference in Lincoln and as all the town centre hotels were full I ended up at the Branston Hall Hotel on the outskirts of Lincoln. As soon as I booked into the hotel I was straight out to explore its beautiful gardens.
There was not much in the way of wild flowers about but the local birds put on a fantastic display. The Black swan was majestic, the Cormorant stayed aloof and kept an eye on me and the Heron came blasting by.
Lincoln Life
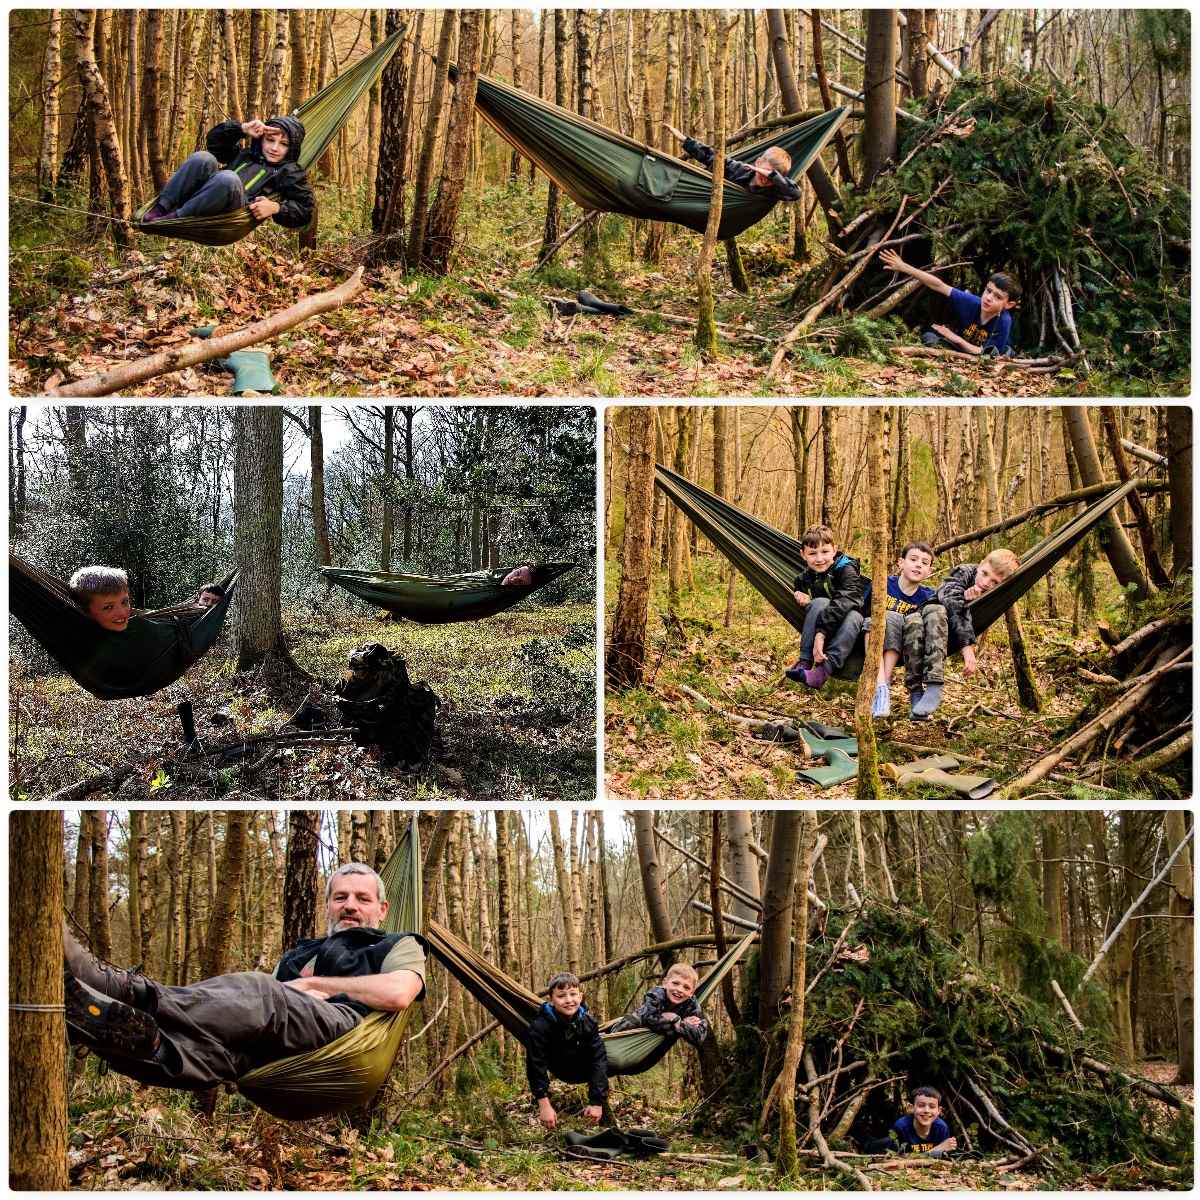
When I am out and about I keep a little pocket hammock seat (the EDC Hammock) in my bag. As I was out on a couple of trips with the kids and their pals I needed to carry an extra hammock with me.
We did lots of exploring but we did a lot of relaxing as well – the kids just loved using the hammocks and I was always hard pushed to get them out of them.
Hammock time
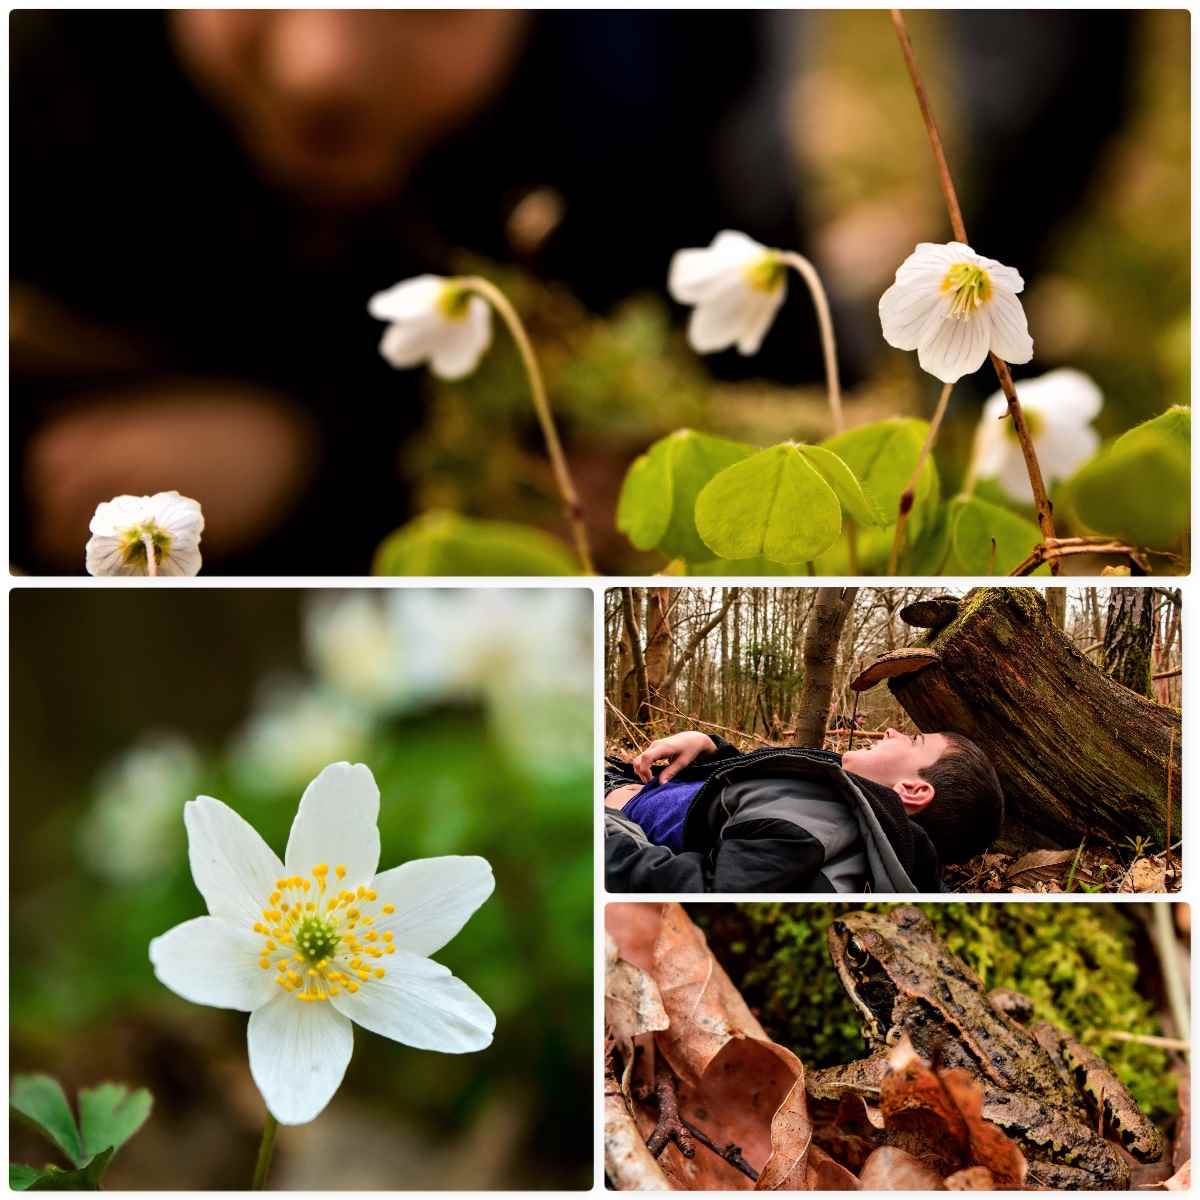
Over the last two weeks the early spring flowers like the Wood Sorrel and the Wood Anemone have started to appear. They are so easy to pass on by but when you get down close their beauty really shines through.
Rustling through the leaves we came across quite a few frogs and occasionally the odd boy 🙂
Exploring nature
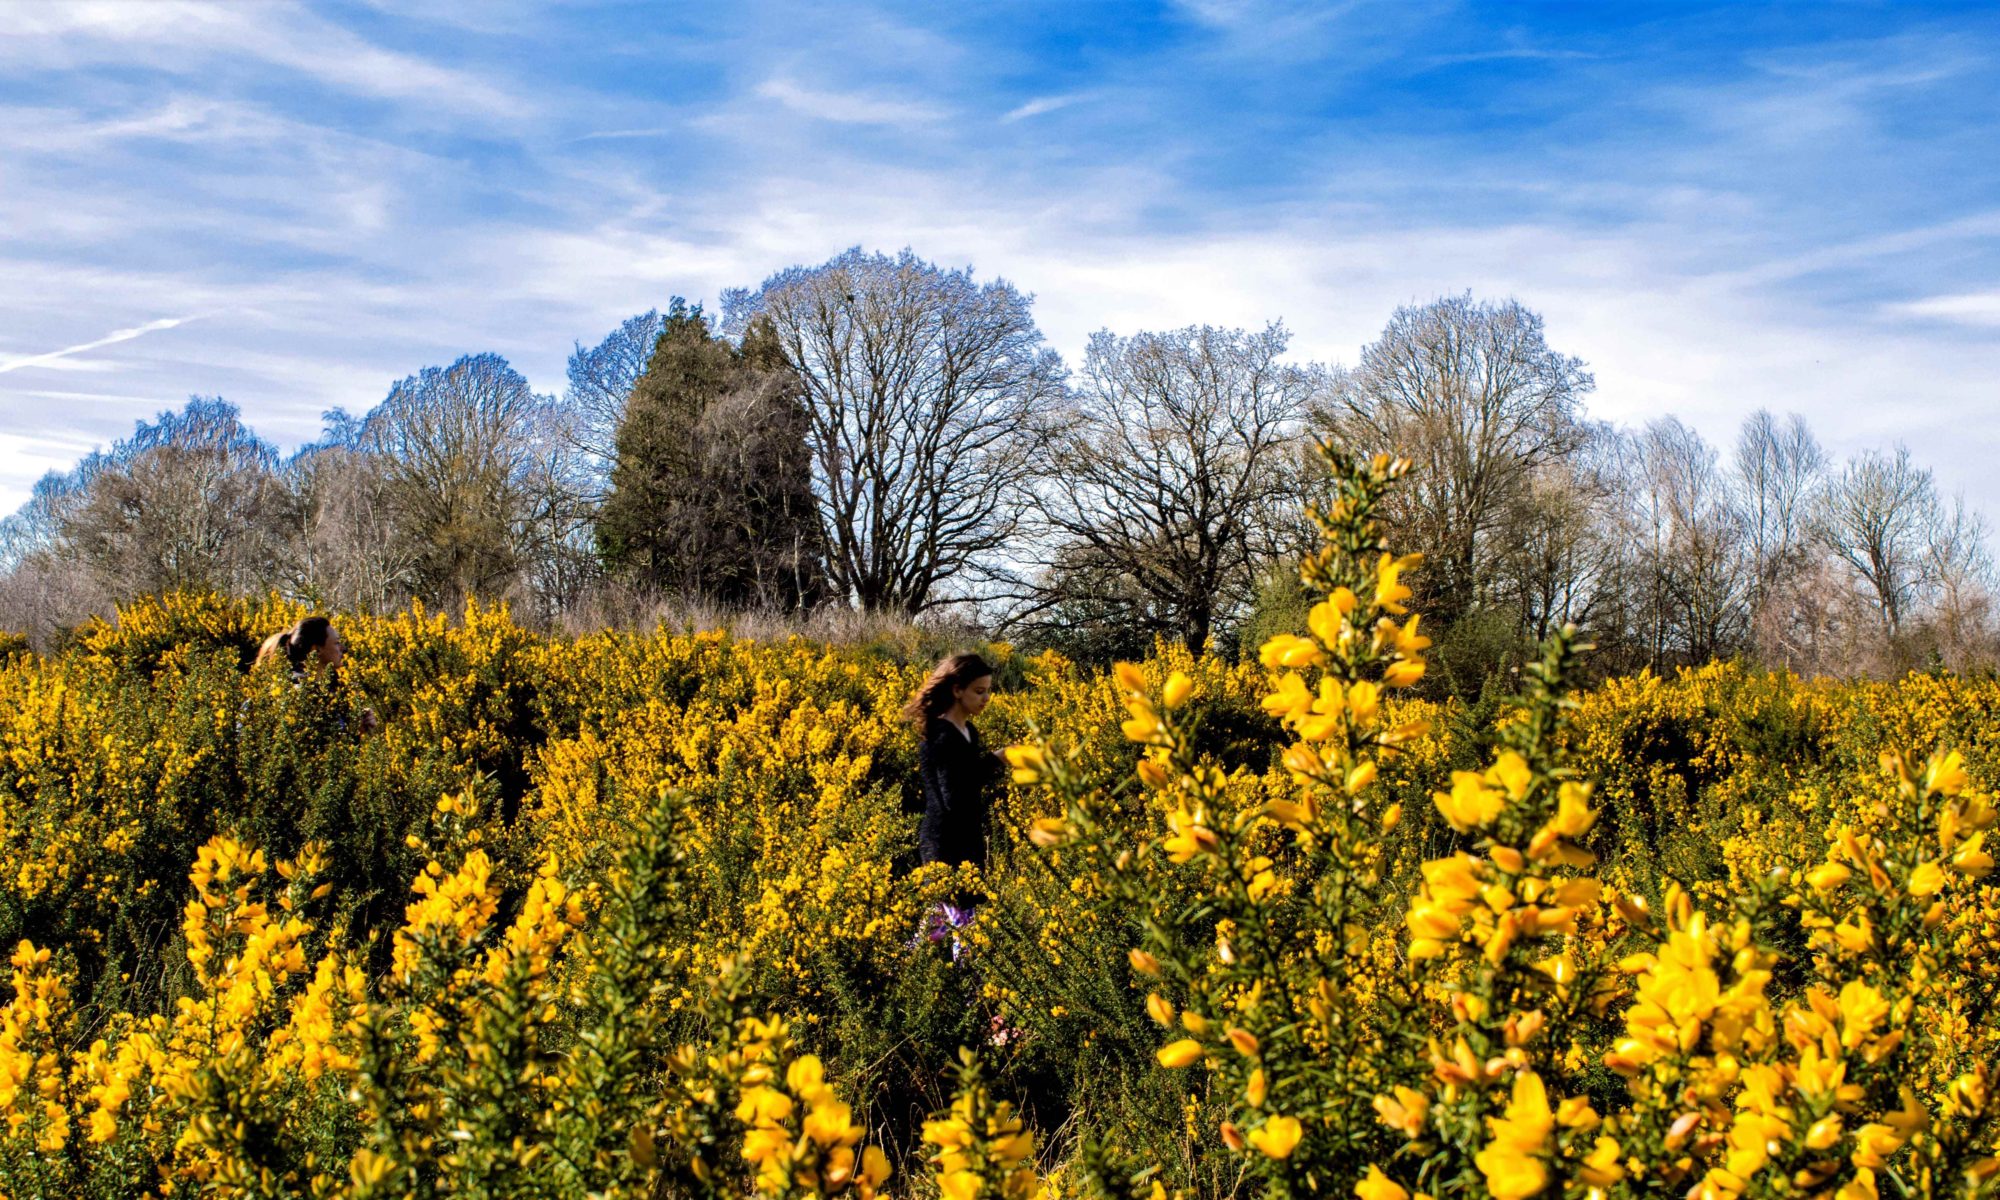
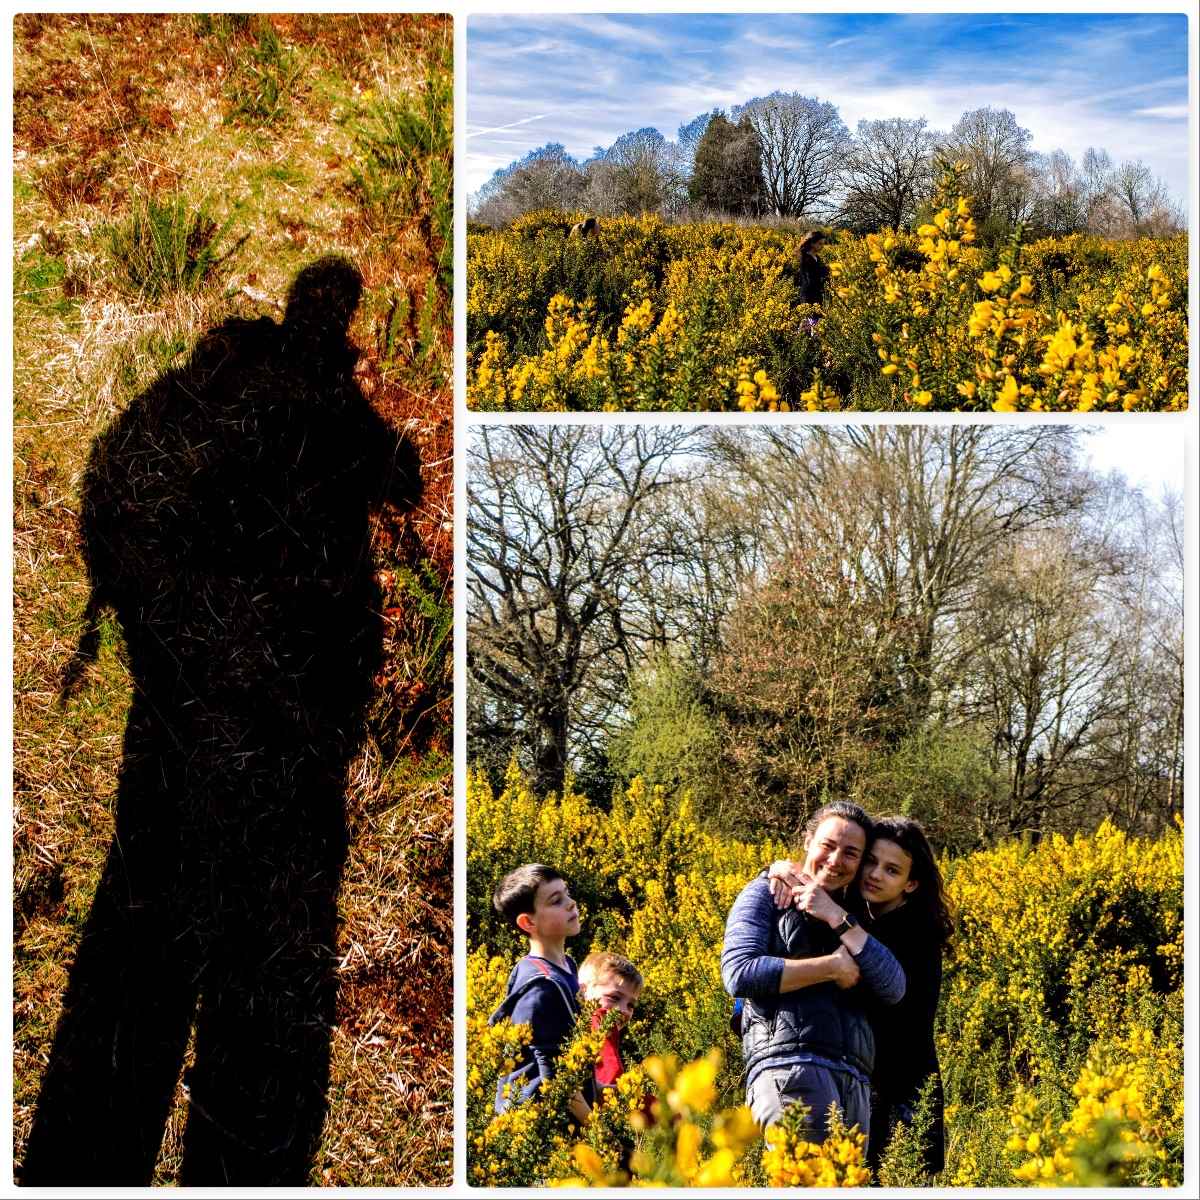
Last weekend I was in our local woods at Pamber with my family and our friends Katie and William. The weather was gorgeous and the gorse was in full bloom making for a blaze of colours to photograph.
I took the picture of my shadow as it struck me I looked like a Teenage Mutant Ninja Turtle – comes with having a nine year old son in the family I suppose.
Family time
As we move into April there will be another riot of colour and I hope a few more bimbles.
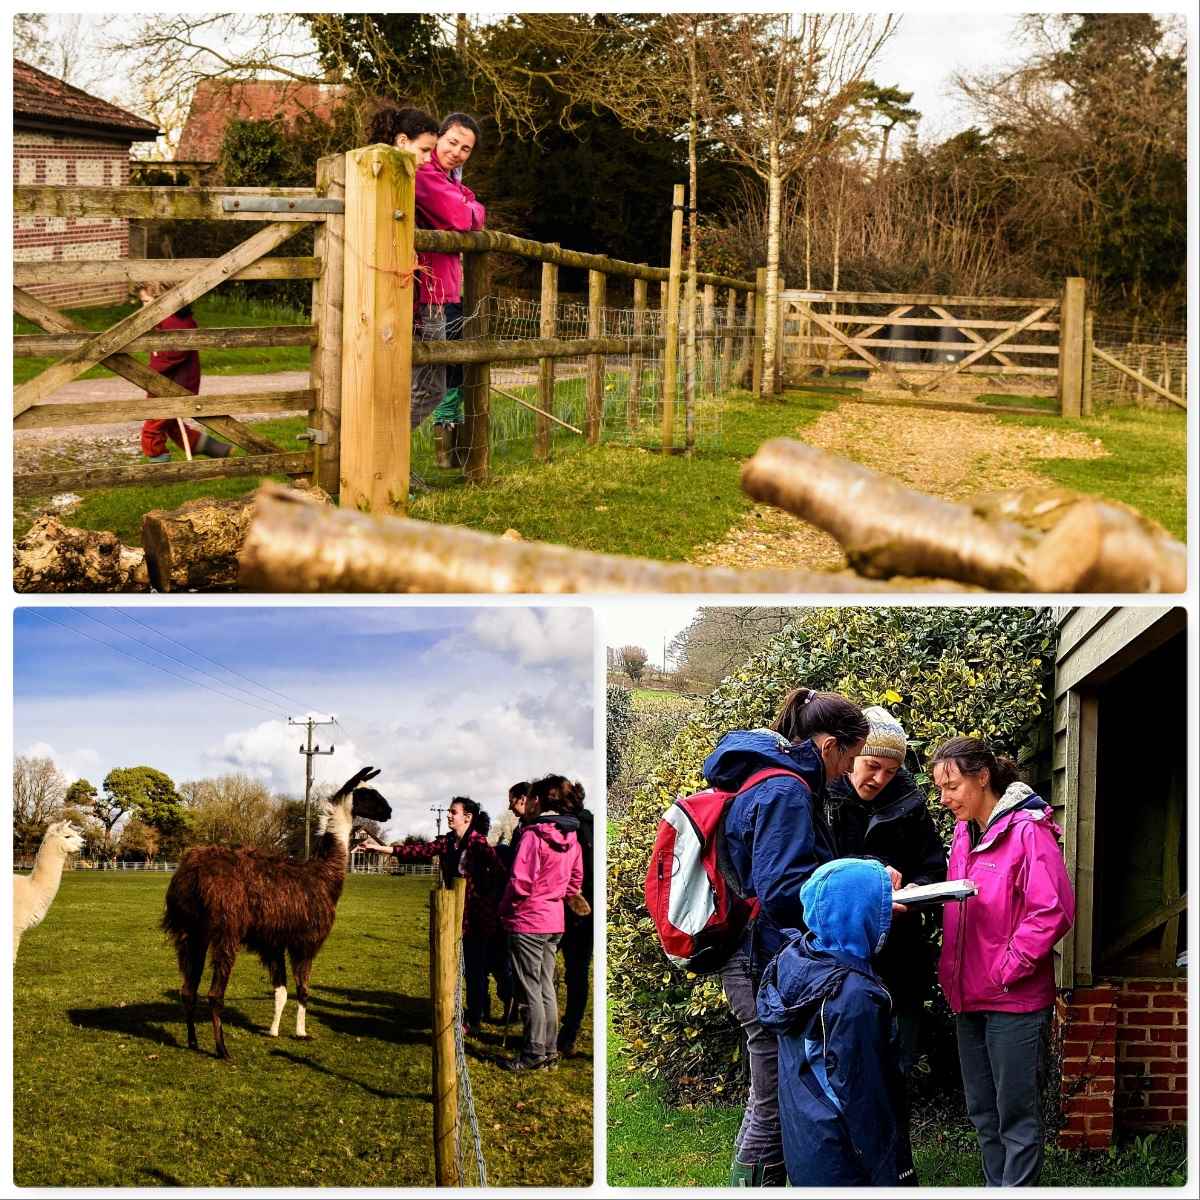
Life is all hustle and bustle at times – so when it is you need some time out. A great place for this time out can be found at the Field Farm Project.
Our friends Mollie and Nick run this project and I feel as if I have entered a different world when I pop into visit. They certainly live up to their business tagline: Grow – Study – Make.
A Field Farm Day
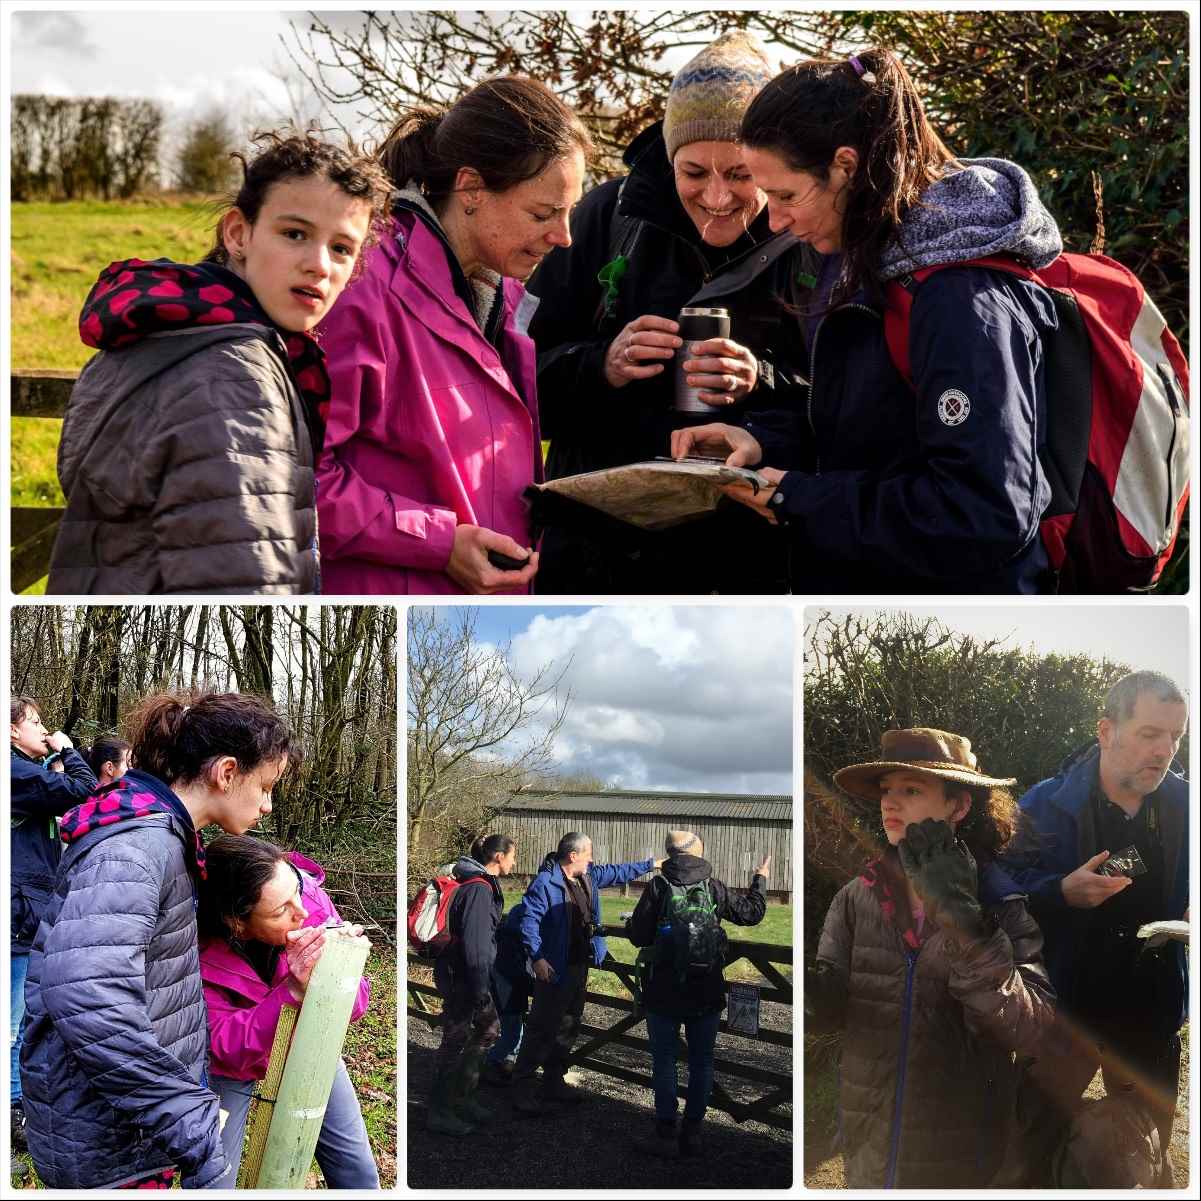
I met Mollie on a Bushcraft instructor course at Woodcraft School and part of the course was to undertake the Basic Expedition Leadership (BEL) award. I did not do this part of the course as I was already a qualified Mountain Leader however as I run this BEL course myself now Mollie wanted to do a bit of a refresher on her navigation as she runs lots of outdoor classes.
Along for the day’s training as well was my wife Alison, daughter Catherine, Mollie’s friend Debbie and her young son. It was a lovely sunny day but with the northerly wind it was bitterly cold at times. Before setting off we were fortified by some hot home-made celeriac/parsnip soup with a side of freshly baked breadsticks.
Lots of Nav
It was not all map and compass work (though there was a fair bit of it), we had lots of fun along the way.
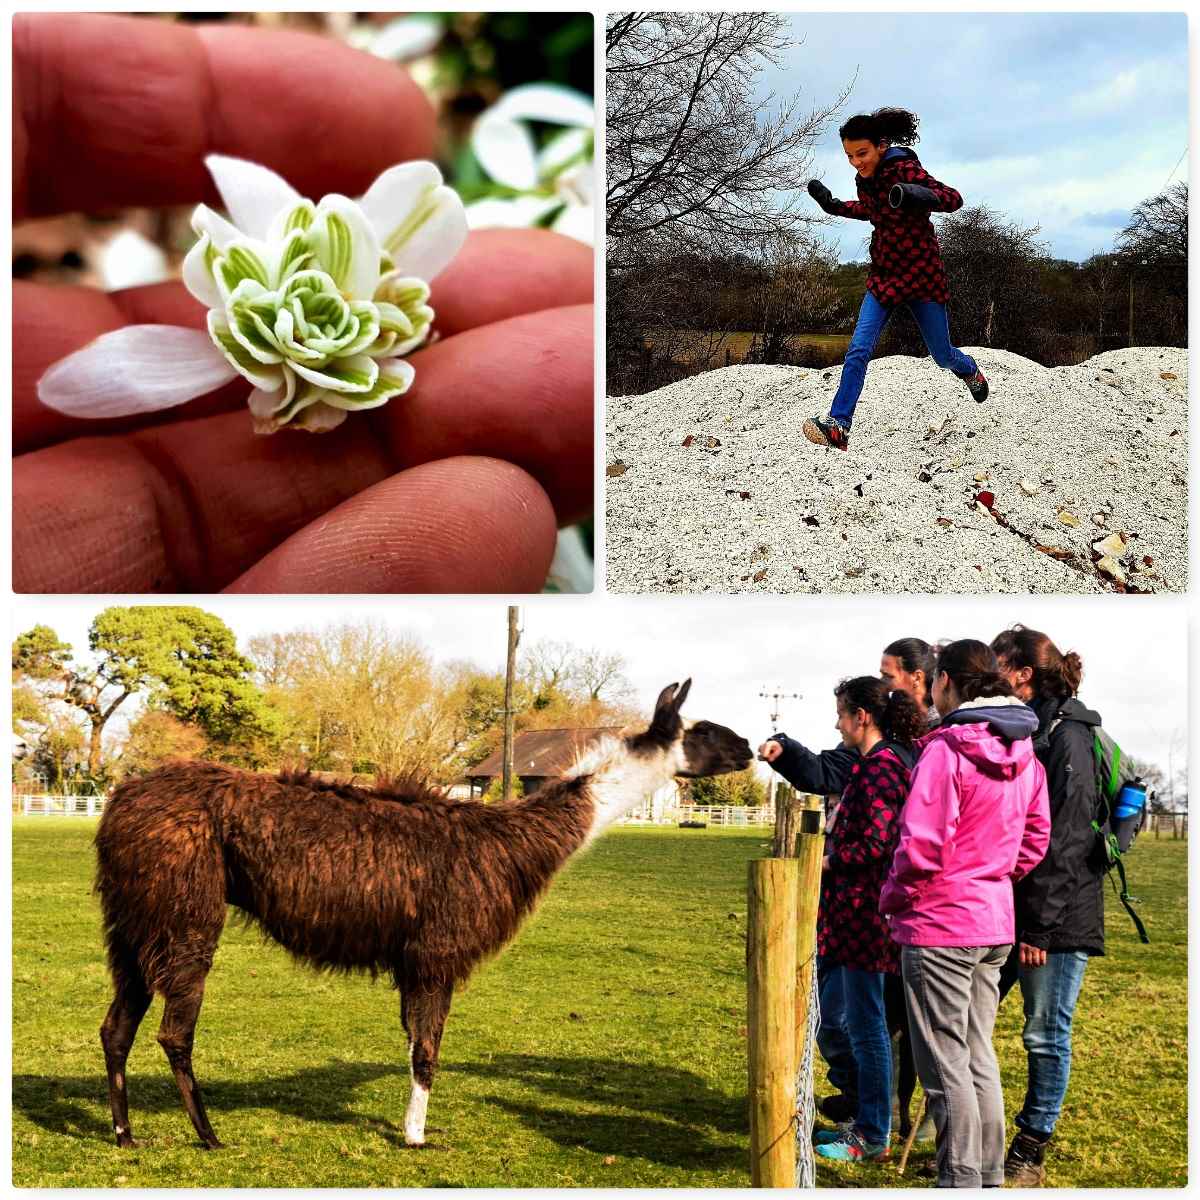
The snowdrops were still in full bloom and we investigated the colourful world that is their underside, had a stomp around a flint/chalk pile and petted the odd Llama and Alpaca.
Explorations
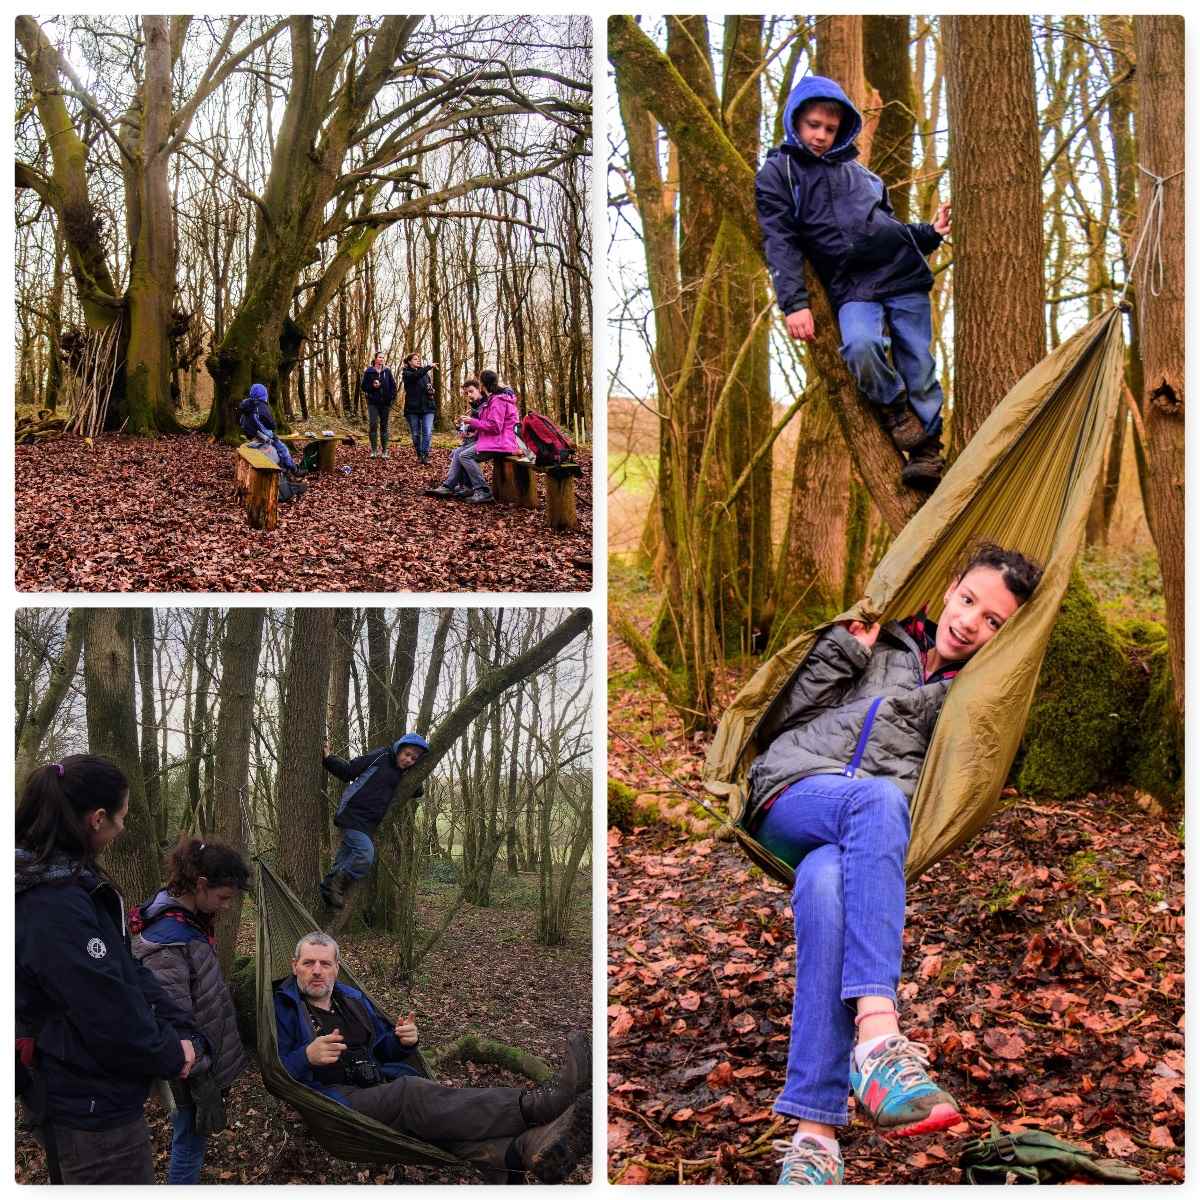
Eventually we wound our way through the footpaths and country lanes to one of Mollie’s outdoor training areas. The central Beech tree was festooned with woodland art that Mollie’s classes had made, there was a small shelter and plenty of benches.
Personally I prefer to use my hammock seat however my daughter Catherine soon had me out of that 🙂
A bit of bushcraft
The weather changed in the latter part of the walk with some heavy showers but that did not dampen our spirits. We were soon back at the farm where I took a little time out just to photograph the animals.
As we arrived home we were treated to a fantastic double rainbow over our house – a fitting end to a great day.
Back on the Farm
So if you are looking for somewhere to get away from the hustle and bustle of life then I thoroughly recommend spending some time with Mollie and Nick at the Field Farm Project.
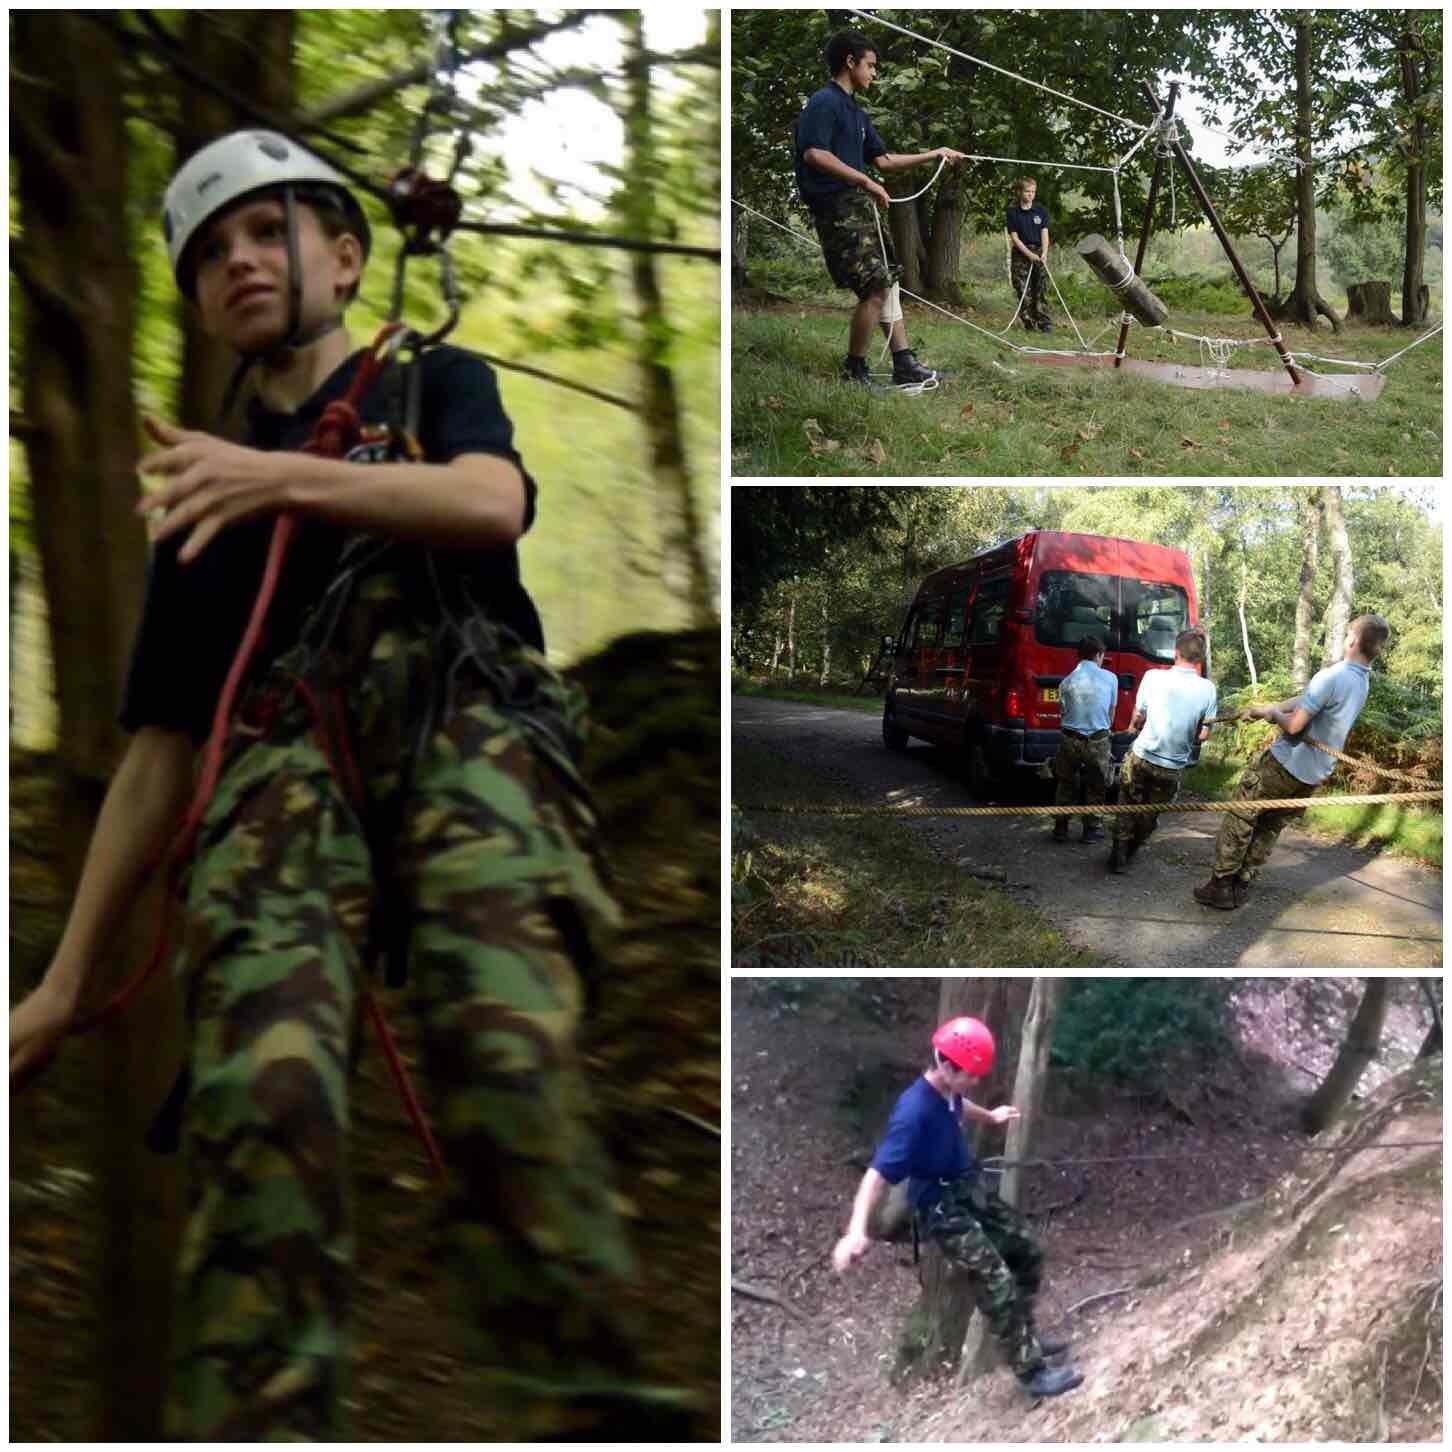
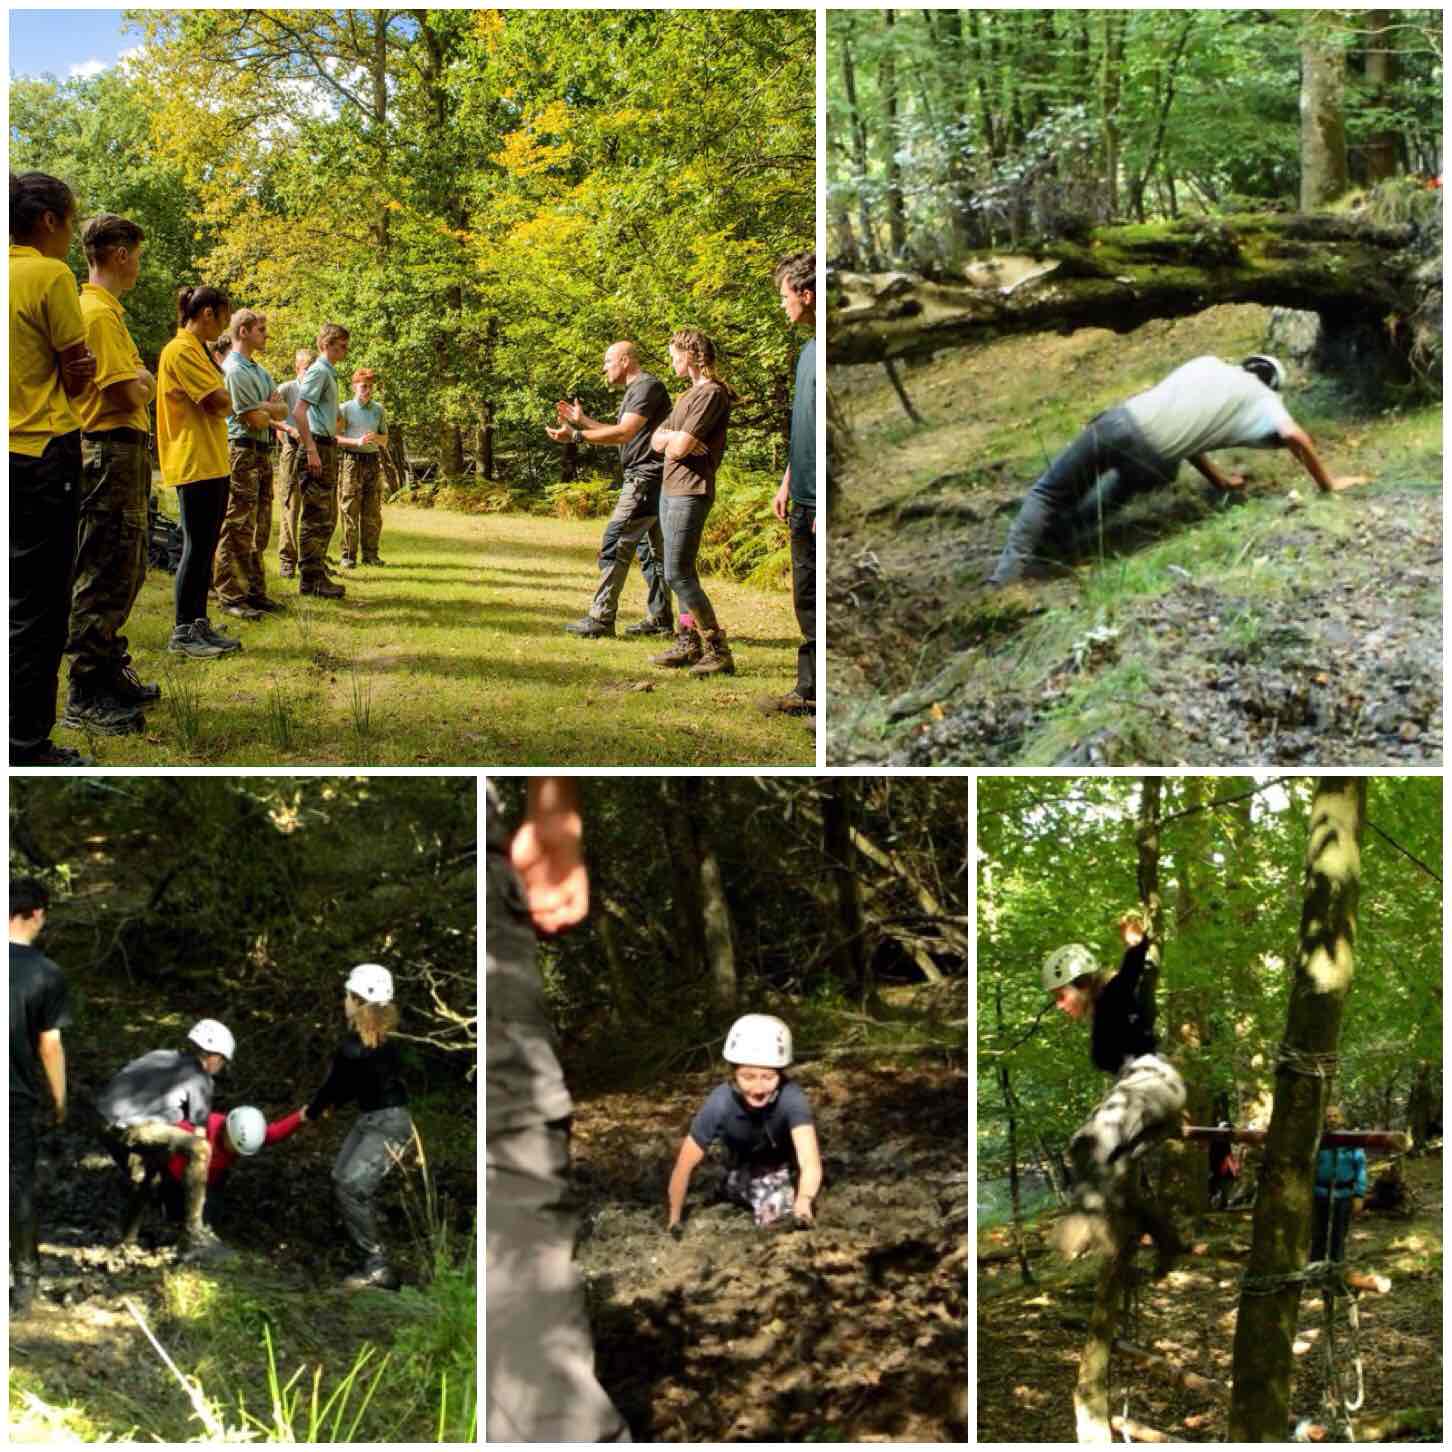
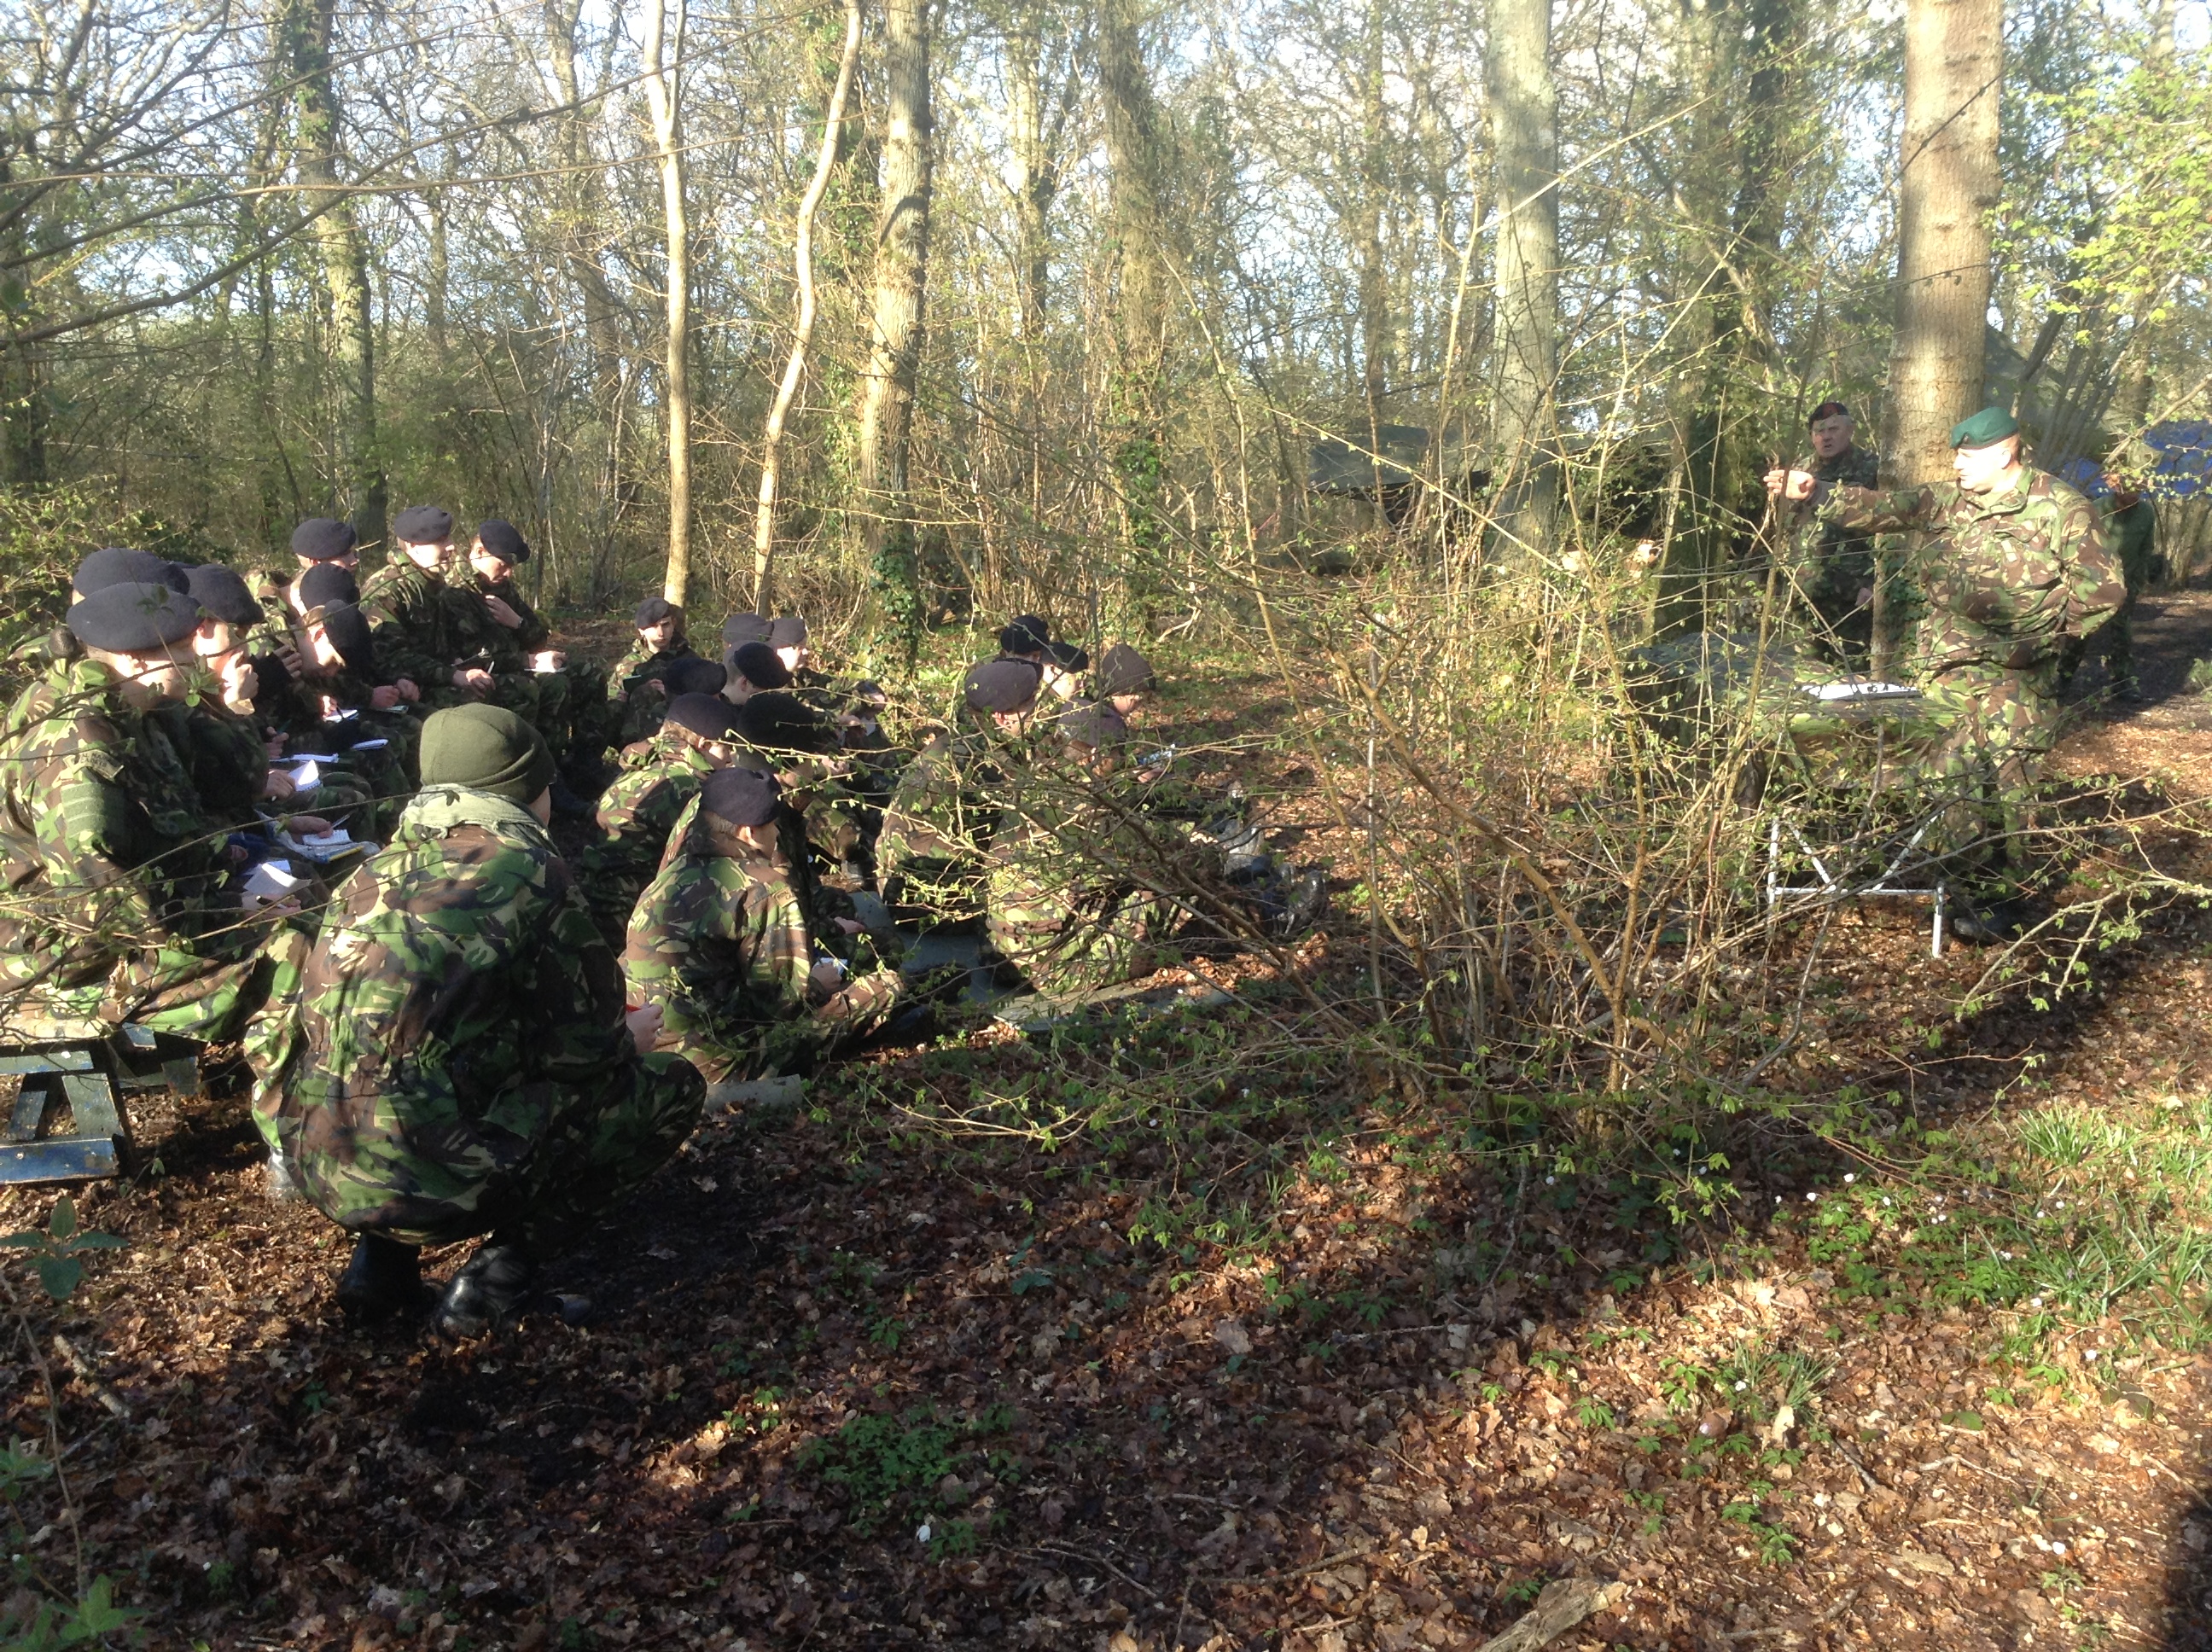
The London Area Sea Cadets annual Chosin Cup competition is one event I look forward to every year. Since 1999 I have been attending this event and this year may not have been the hardest in terms of the weather but it sure was hard due to the sheer number of different tests the cadets had to undertake.
Friday
Kick off is on the Friday night (late September) with the cadets marching in to their bivvie sites and working on their route cards. The staff though were up into the early hours prepping everything for the weekend.
Saturday
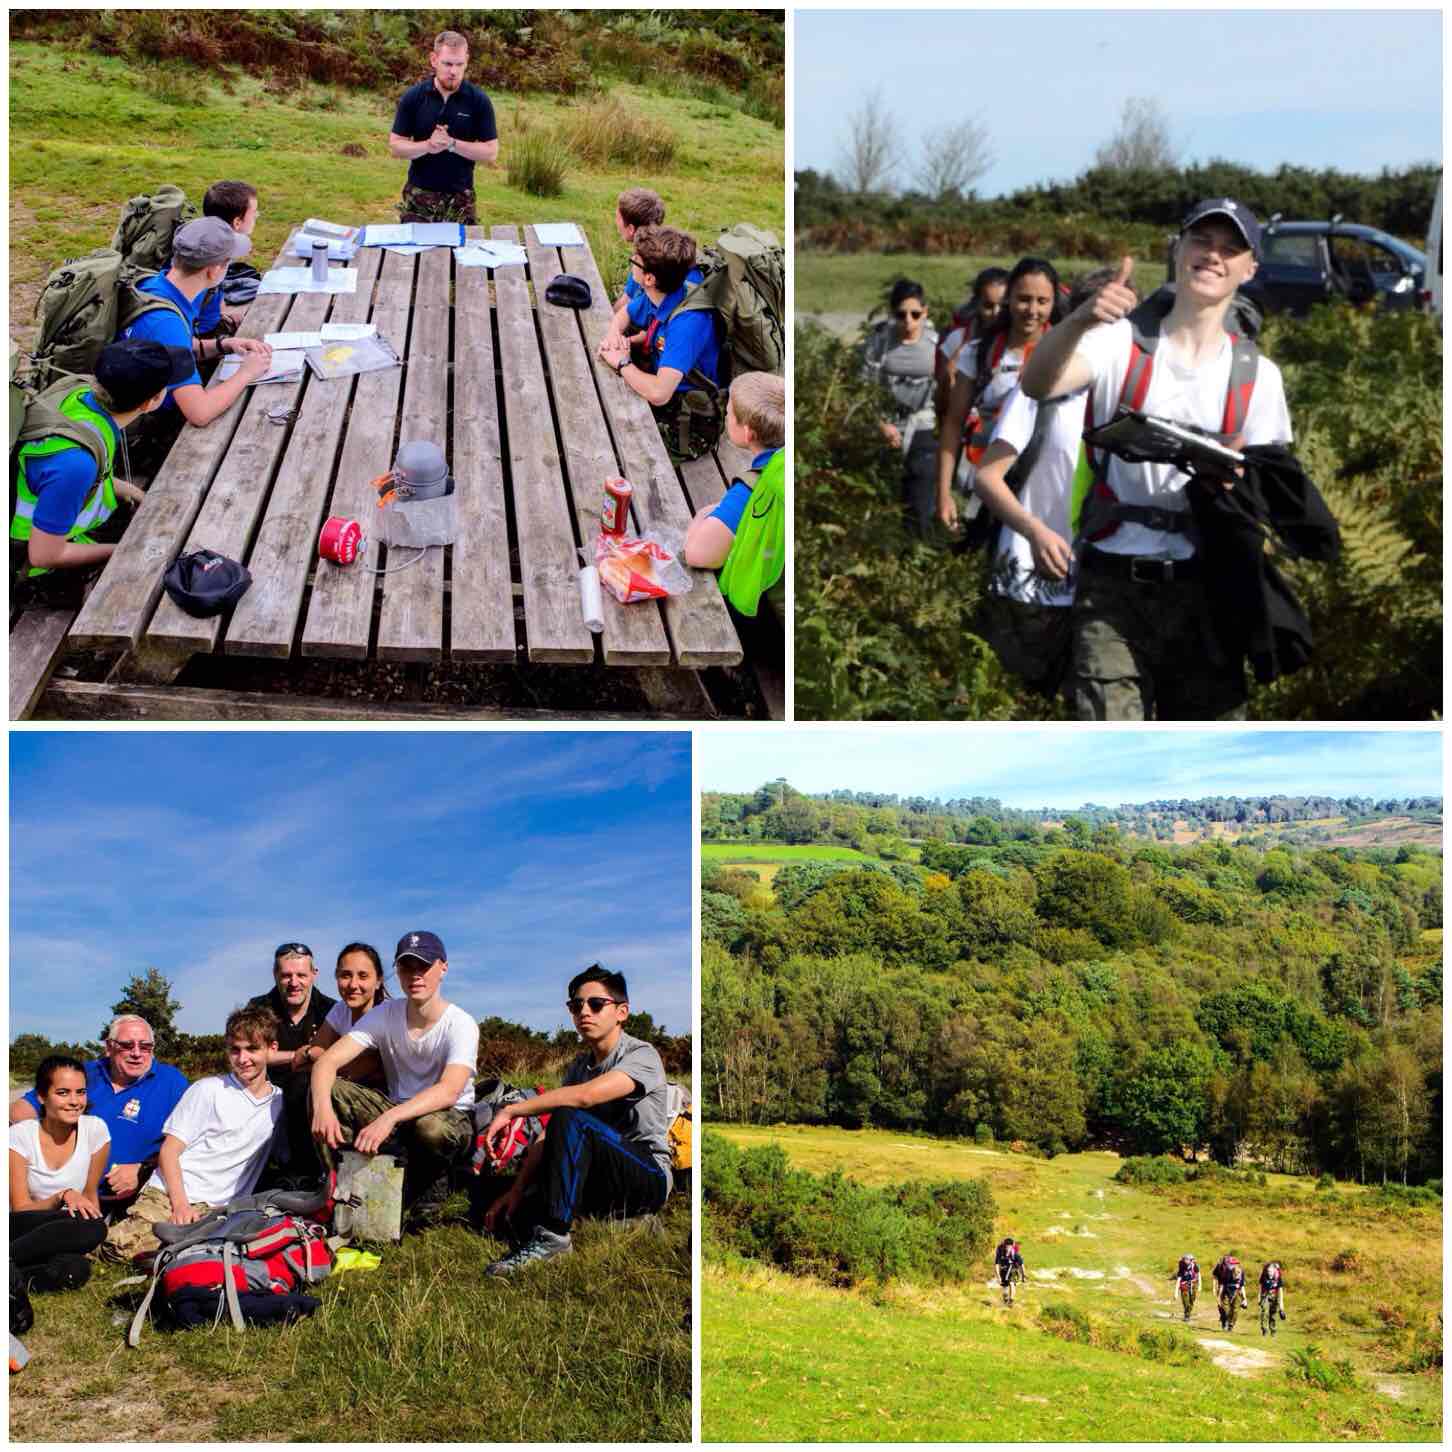
First thing on Saturday morning they were briefed in their teams and then they were off. They needed to navigate a route inside and outside Pippingford Park military training area (located in the beautiful Ashdown Forest in the UK).
Out and about
This year the Chosin Cup was run by our ‘soon to be‘ new Area Staff Officer Ben MacDonald. Ben is keen to really test the cadets and brought in some new activities for them to try out.
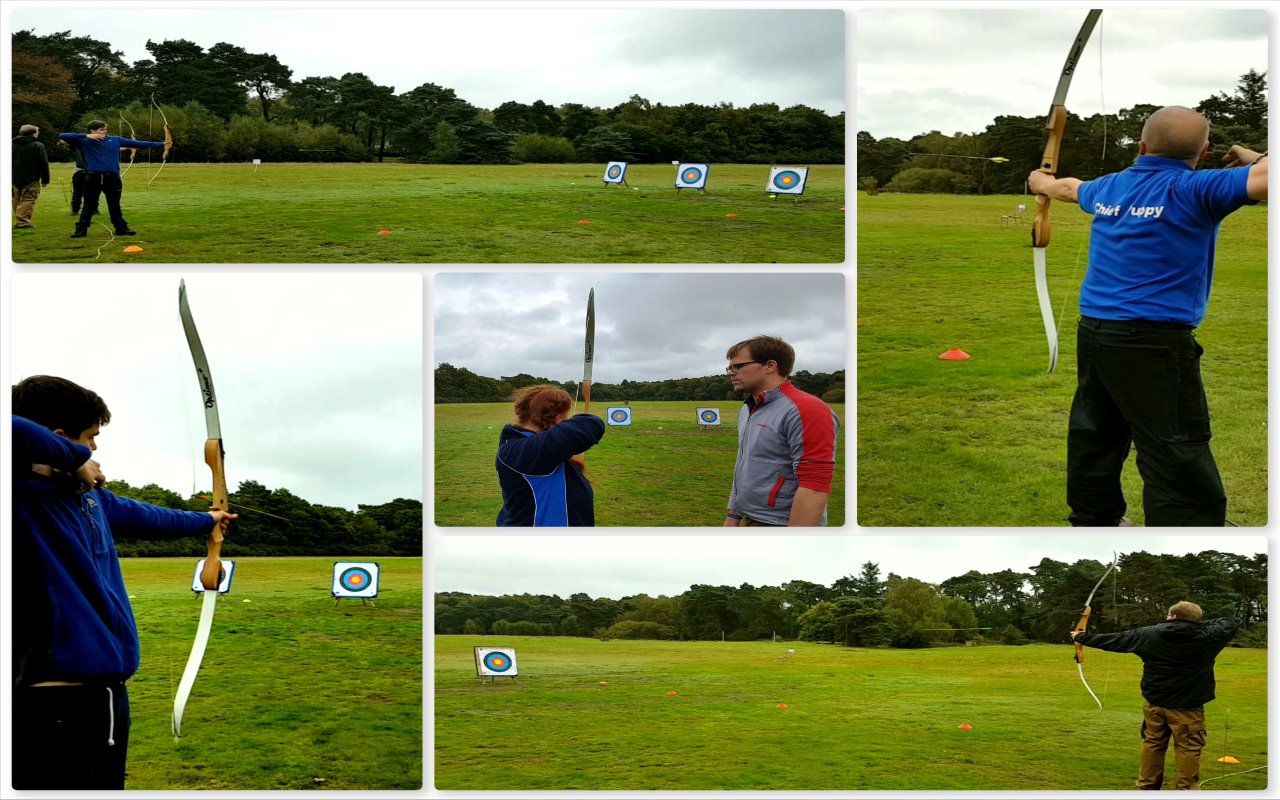
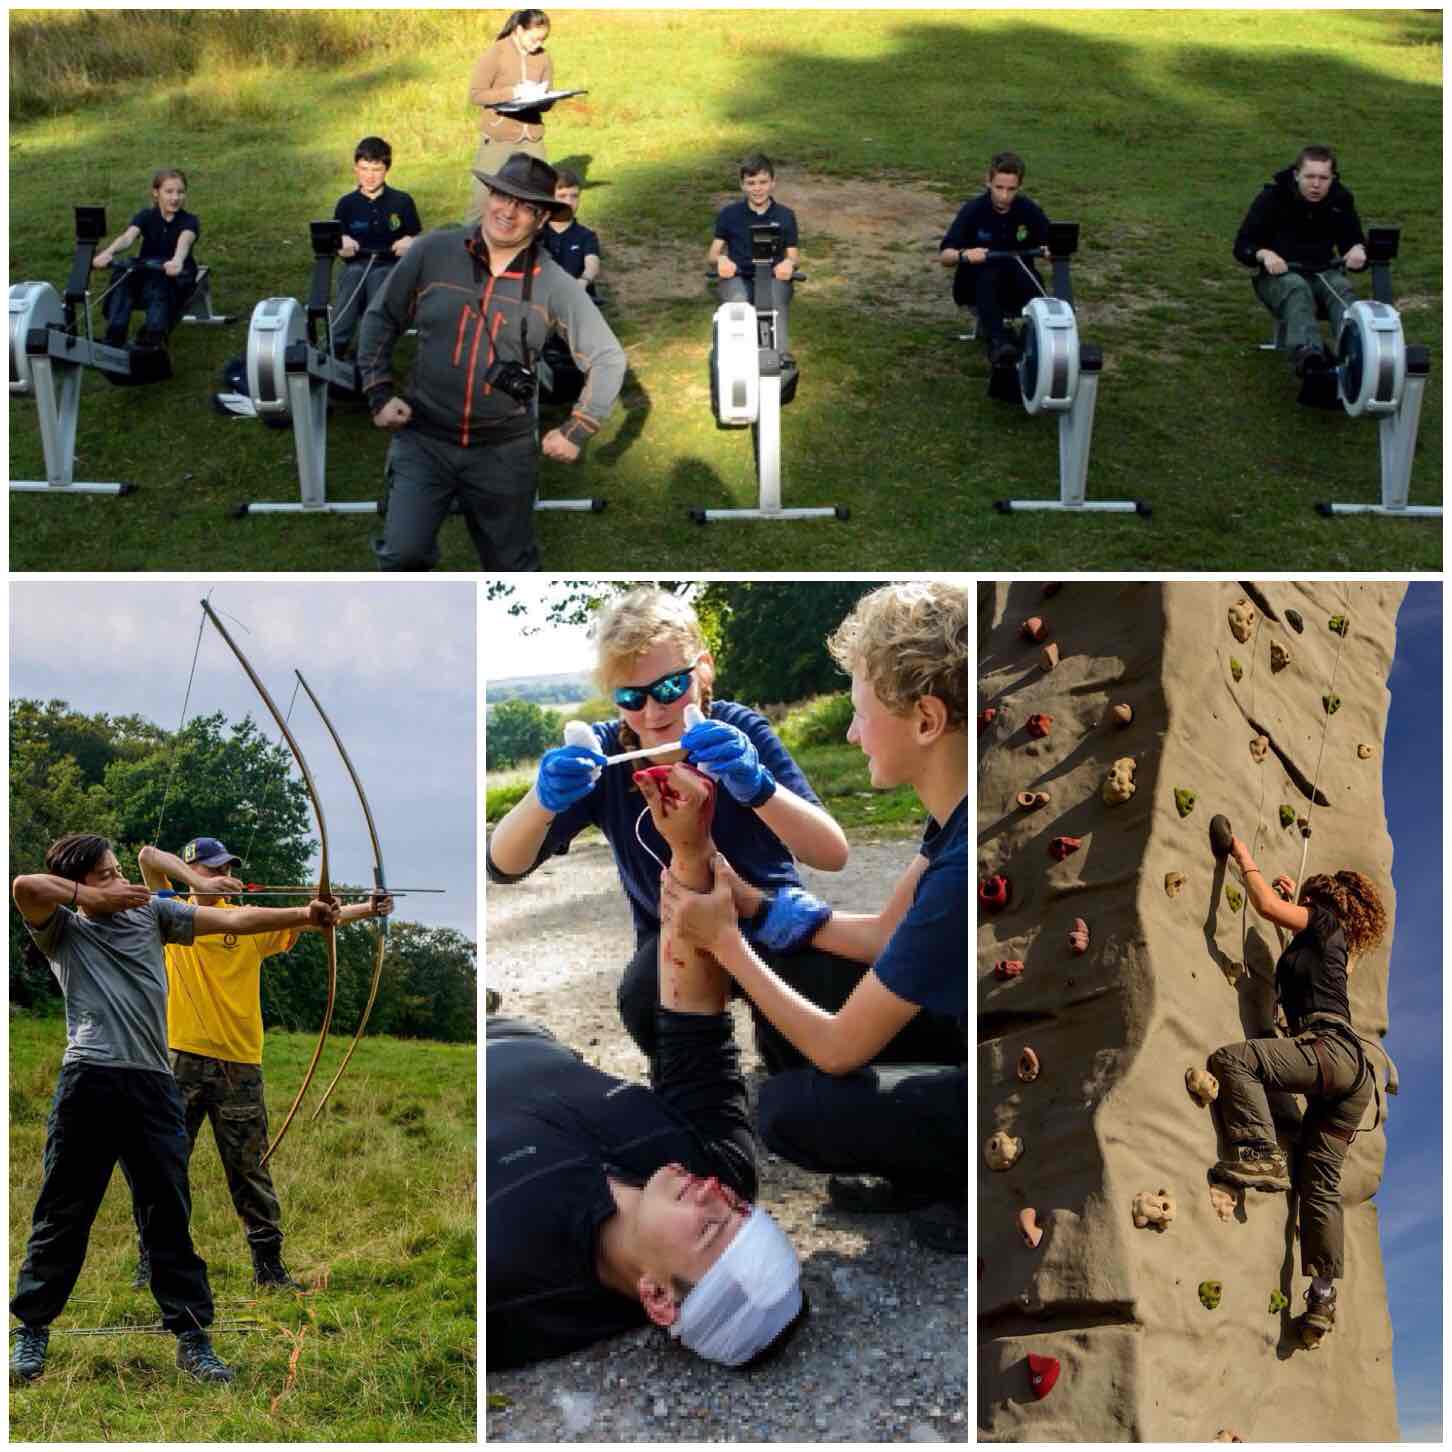
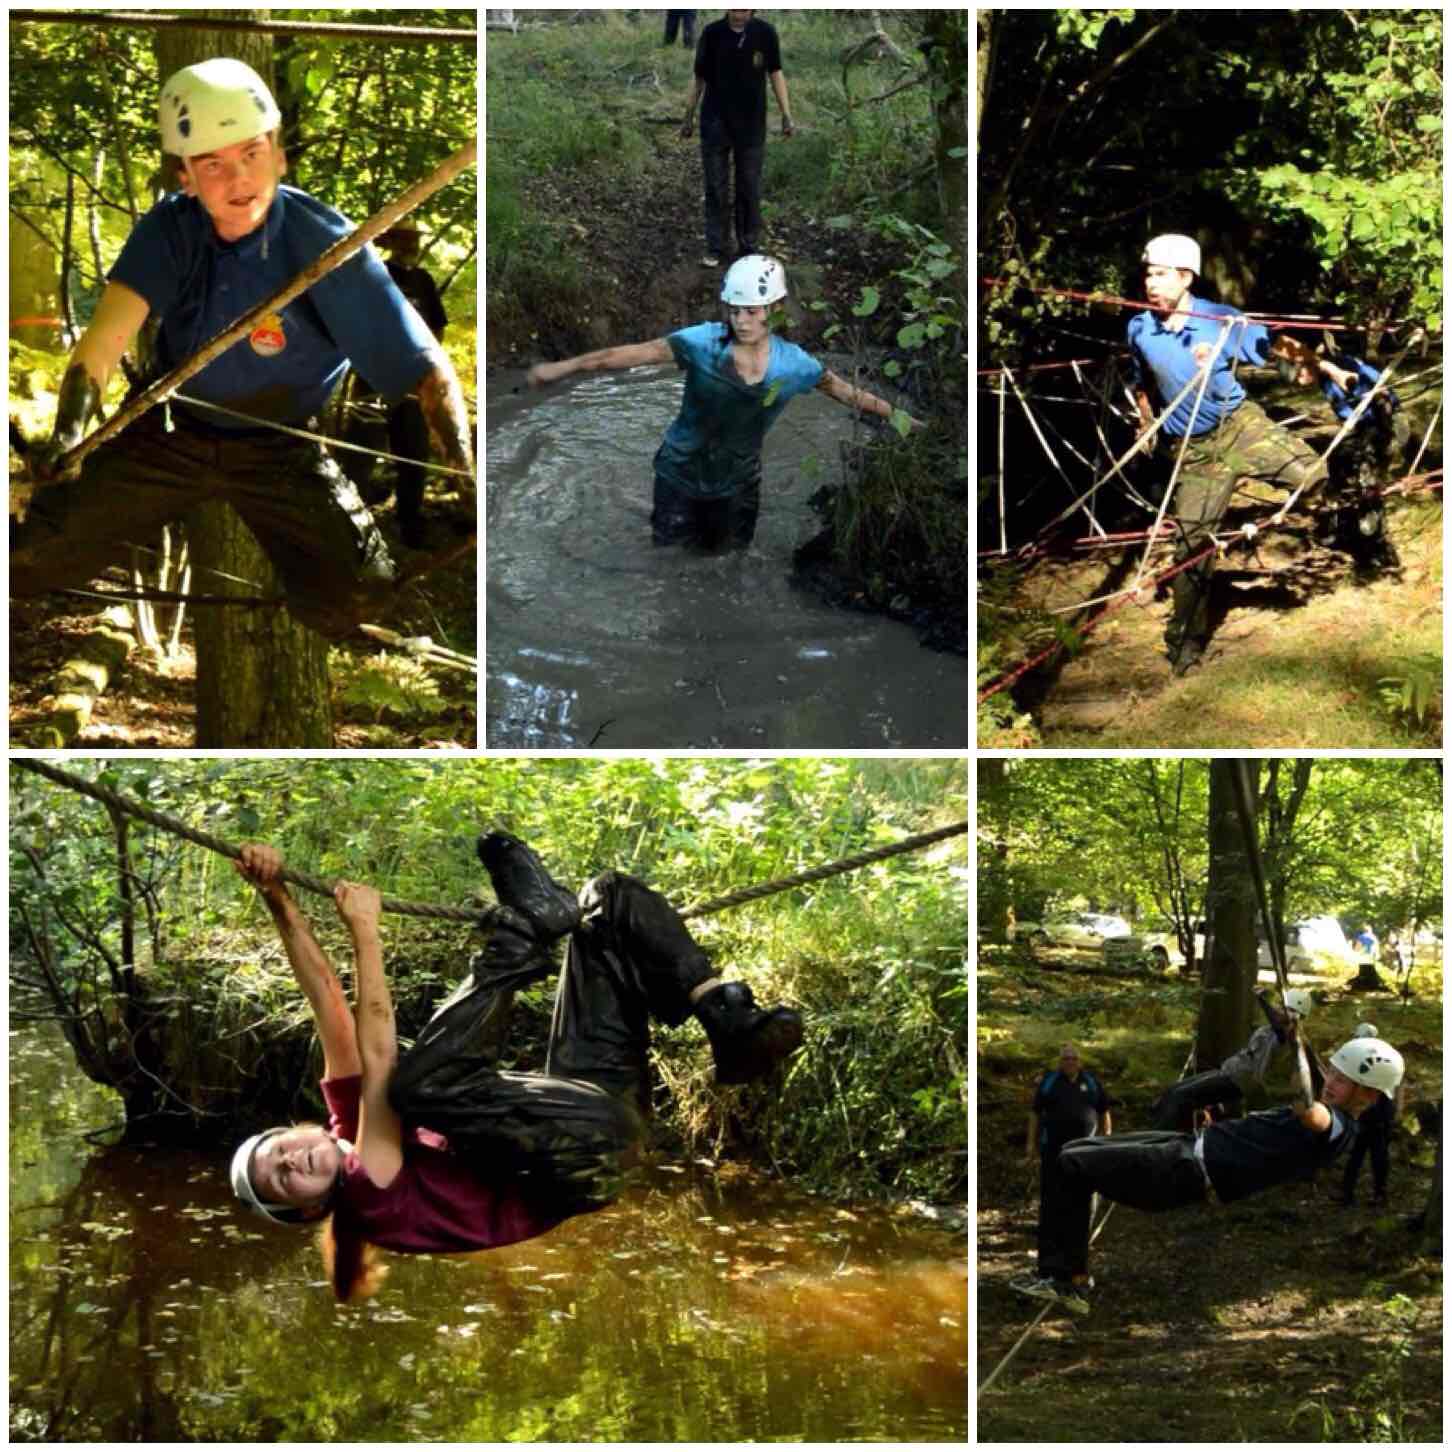
Cliff Lewis was in his element running the timed rowing race, there was plenty of archery to test the keen eyed ones, loads of fakeblood for the hardy at heart to stem and a fantastic climbingtower to let the cadets scurry up.
Multi activities
In between each stance the cadets had to keep navigating and pushing themselves to get to each one as quickly as possible.
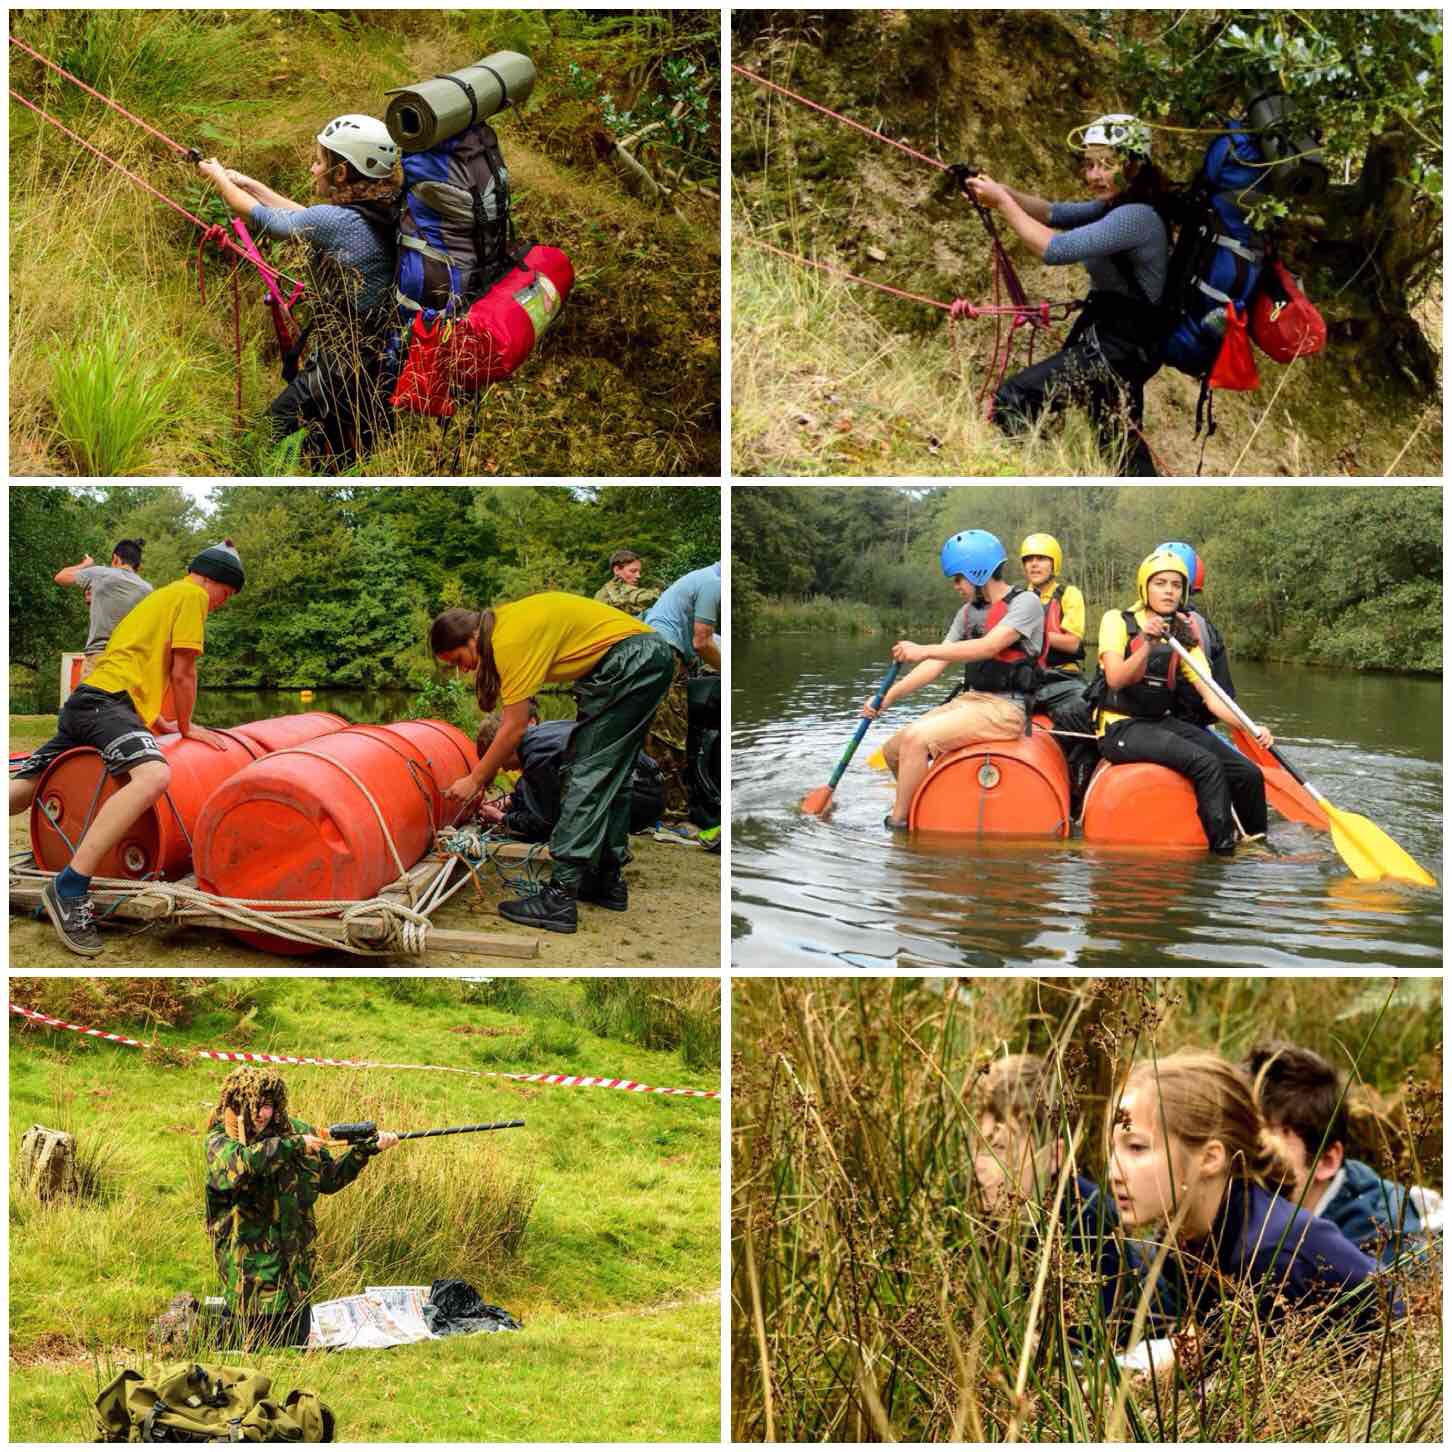
The TyroleanTraverse and the Minibuspull tested the cadets teamwork and strength while the Seamanship stance worked on their core Sea Cadet skills
Skills and Stamina
In between all this tooing and frowing of cadets the staff were busy running the stances (well some got a bit of R&R in between) and we had a visit on the Sunday from the Senior London Area officers (that kept us on our toes).
Busy Staff
As for myself I was in the enviable position of being the roving safety officer/official photographer (my car ended up totally covered in dust from all the dirt tracks).
I put together a couple of short videos of the weekend and below is the first one with snippets of the Saturdays activities.
The Saturday night was not a quiet affair, as soon as it was dark, they were off again. This time on a night navigation excercise working from point to point using compasses and maps – they all made it and were soon safely back at camp.
Sunday
All the activities on the Sunday morning were located within the confines of Pippingford Park (no hardship there as it is a beautiful site) and so after a good breakfast it was time to get started again.
The cadets were kept busy hauling themselves and all their kit up steep inclines, building rafts (a few did come apart) and stalking the enemy 🙂
Sunday morning activities
My friend Charlie Brookes ran the Fire Race. This involves collecting different tinders and twigs then lighting them (using a firesteel) and getting the flames high enough to burn through a suspended horizontal rope – not as easy as you might think.
Fire Race
The event culminated in each team having to run the EnduranceRace. This was set up by our friend Kev Lomas from Southern Area Royal Marines Cadets and he knows how to set a tough race (he knows his stuff as he runs a company called Muscle Acre).
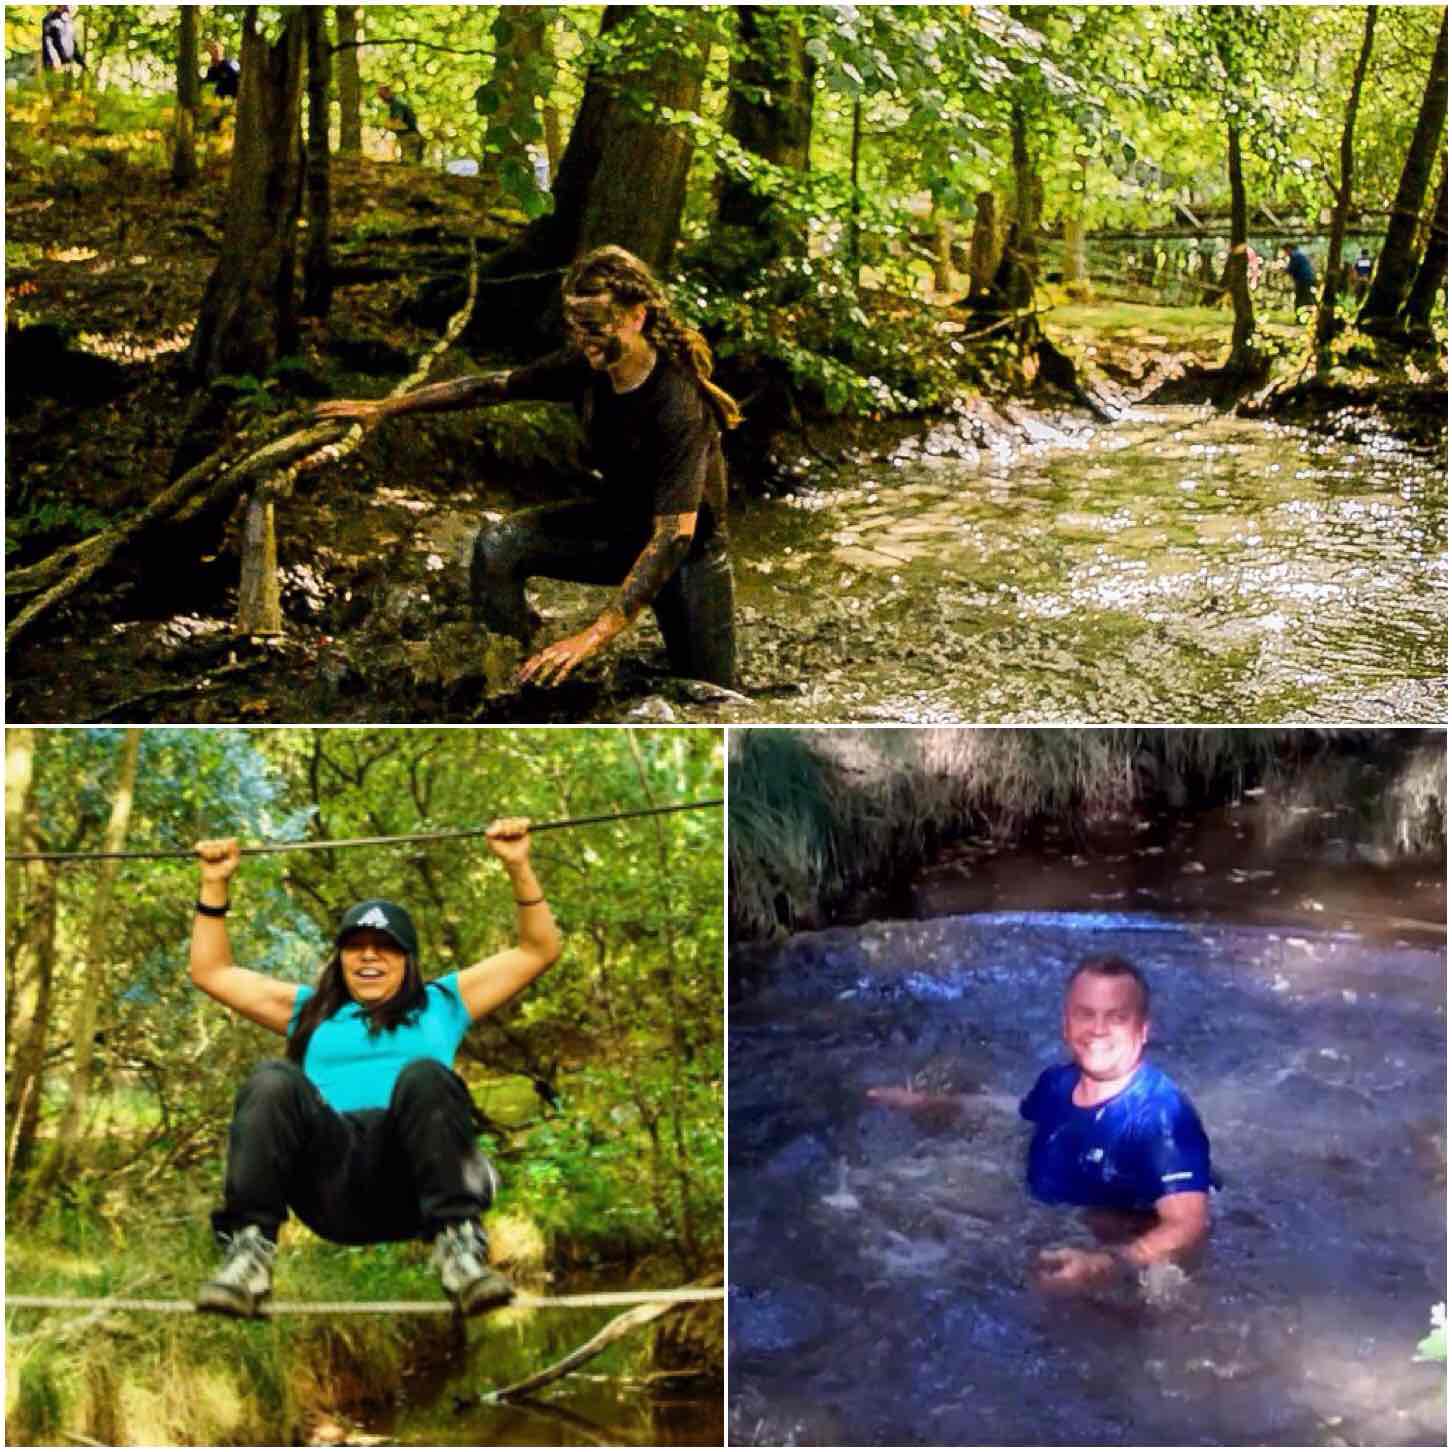
After a briefing they were off – each team took about 15 minutes to complete the race. It was a mixture of natural and man-made obstacles but the general theme was mud, ropes and water.
Start of the Endurance Race
It was great to watch the cadets pushing themselves over the race and really come together as individual teams. There were staff located all around the site to encourage the cadets and ensure they were always safe. It was hard for them but the looks on their faces when they finished showed that they really enjoyed themselves.
Pushing On
For many years I have run with the teams around these races however this year it was time to let others have a go and as the official photographer I encouraged/poked/prodded some of the other staff to have a go so I could film them (you have to have some sort of R&R when you reach 50!!)
The staff having a go
Below is the second of my videos showing the Sunday activities including the Endurance Race.
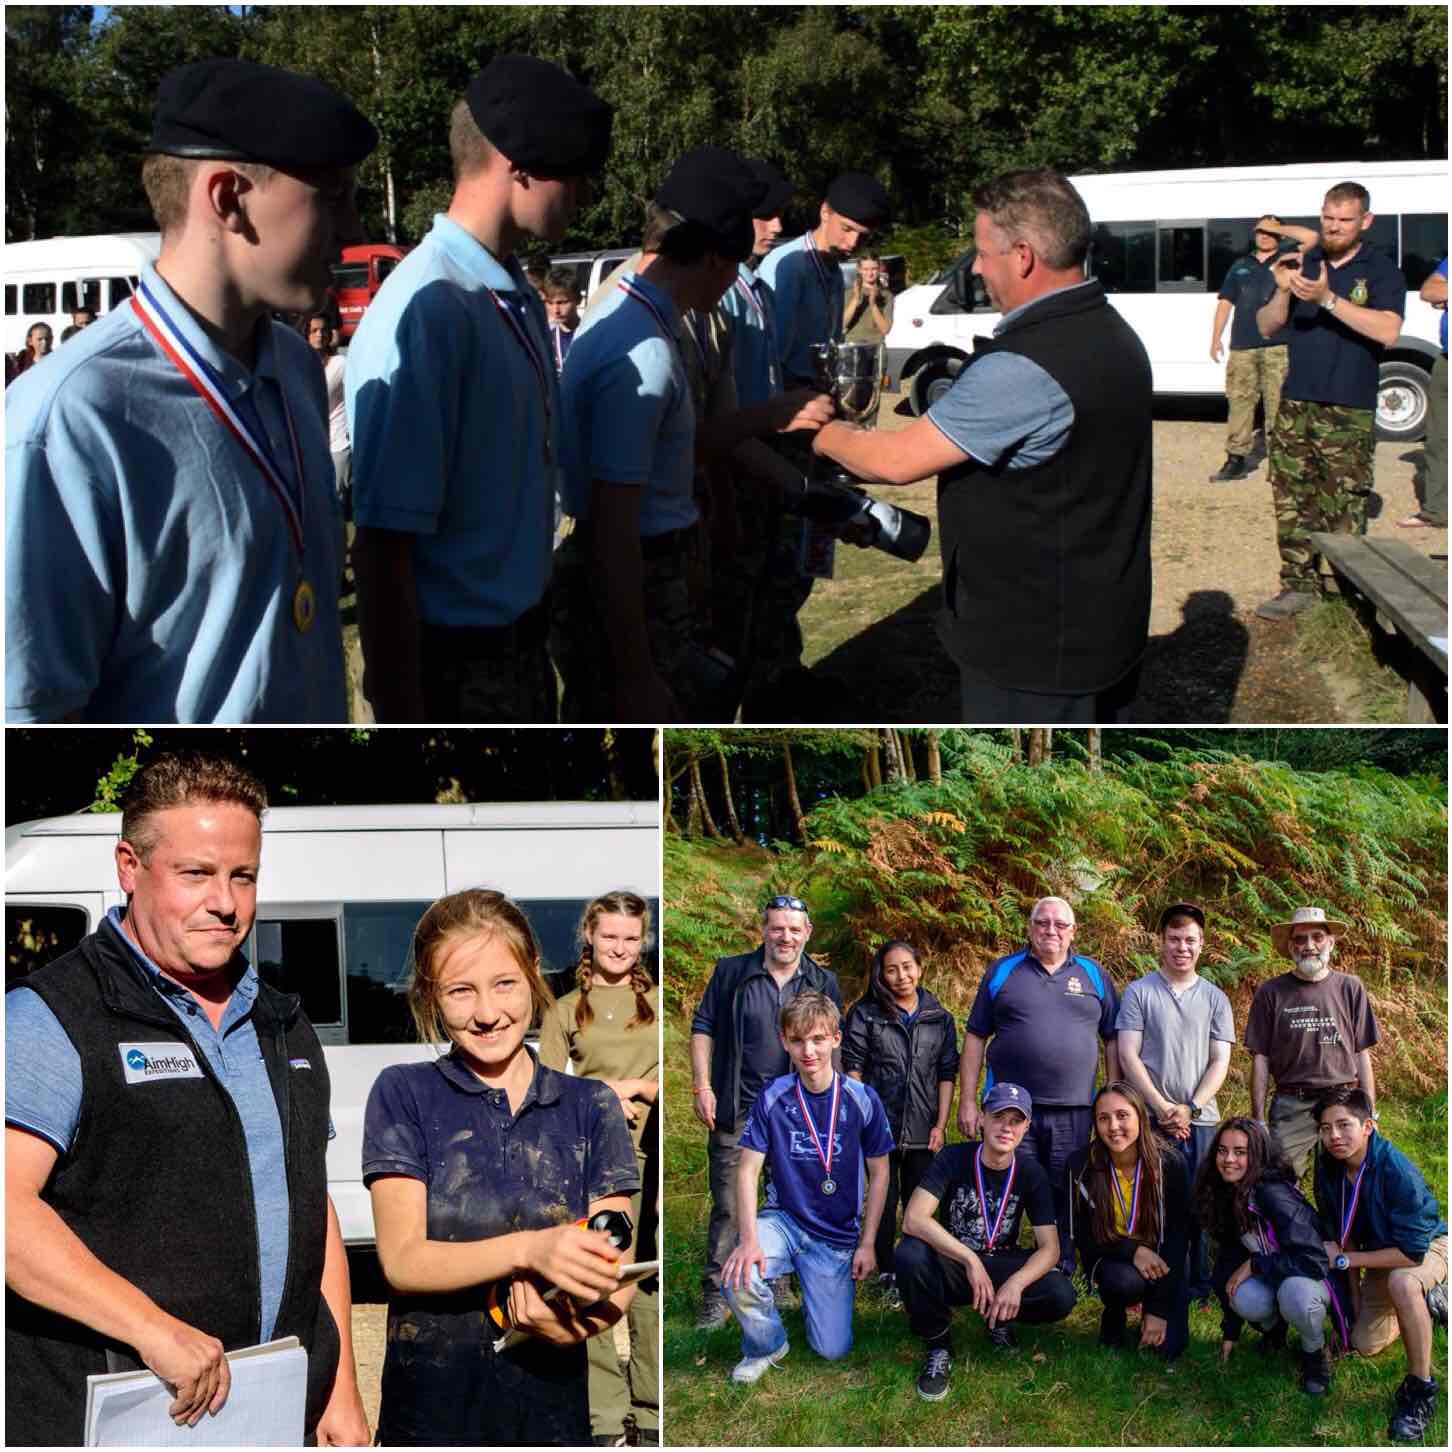
After a quick wash up it was time for the awards. There were 9 teams entered in the event this year and a close run thing it was too.
Merton Unit came 3rd, City of London came 2nd and the winners were Maldon Unit – BZ guys.
The Awards
For many years the Chosin Cup has been overseen by our two Area Staff Officers Perry Symes and Graham Brockwell. They are standing down now to make way for some younger members of staff such as Ben MacDonald to take over and test themselves. This post then, I am dedicating, (like my videos) to these two stalwarts of the Adventure Training world in the Sea Cadets – Perry and Graham.
Chosin Cup
The weekend could not have been run without all the staff that volunteered to come along and run it so thank you to each and every one of you.
Thanks to all the cadets that came along and really tested themselves in what I regard as the toughest competition the Sea Cadets and the Royal Marines Cadets run.
Finally thanks must go to Ben MacDonald for putting it all together and making it a fine one for Perry and Graham to bow out on.
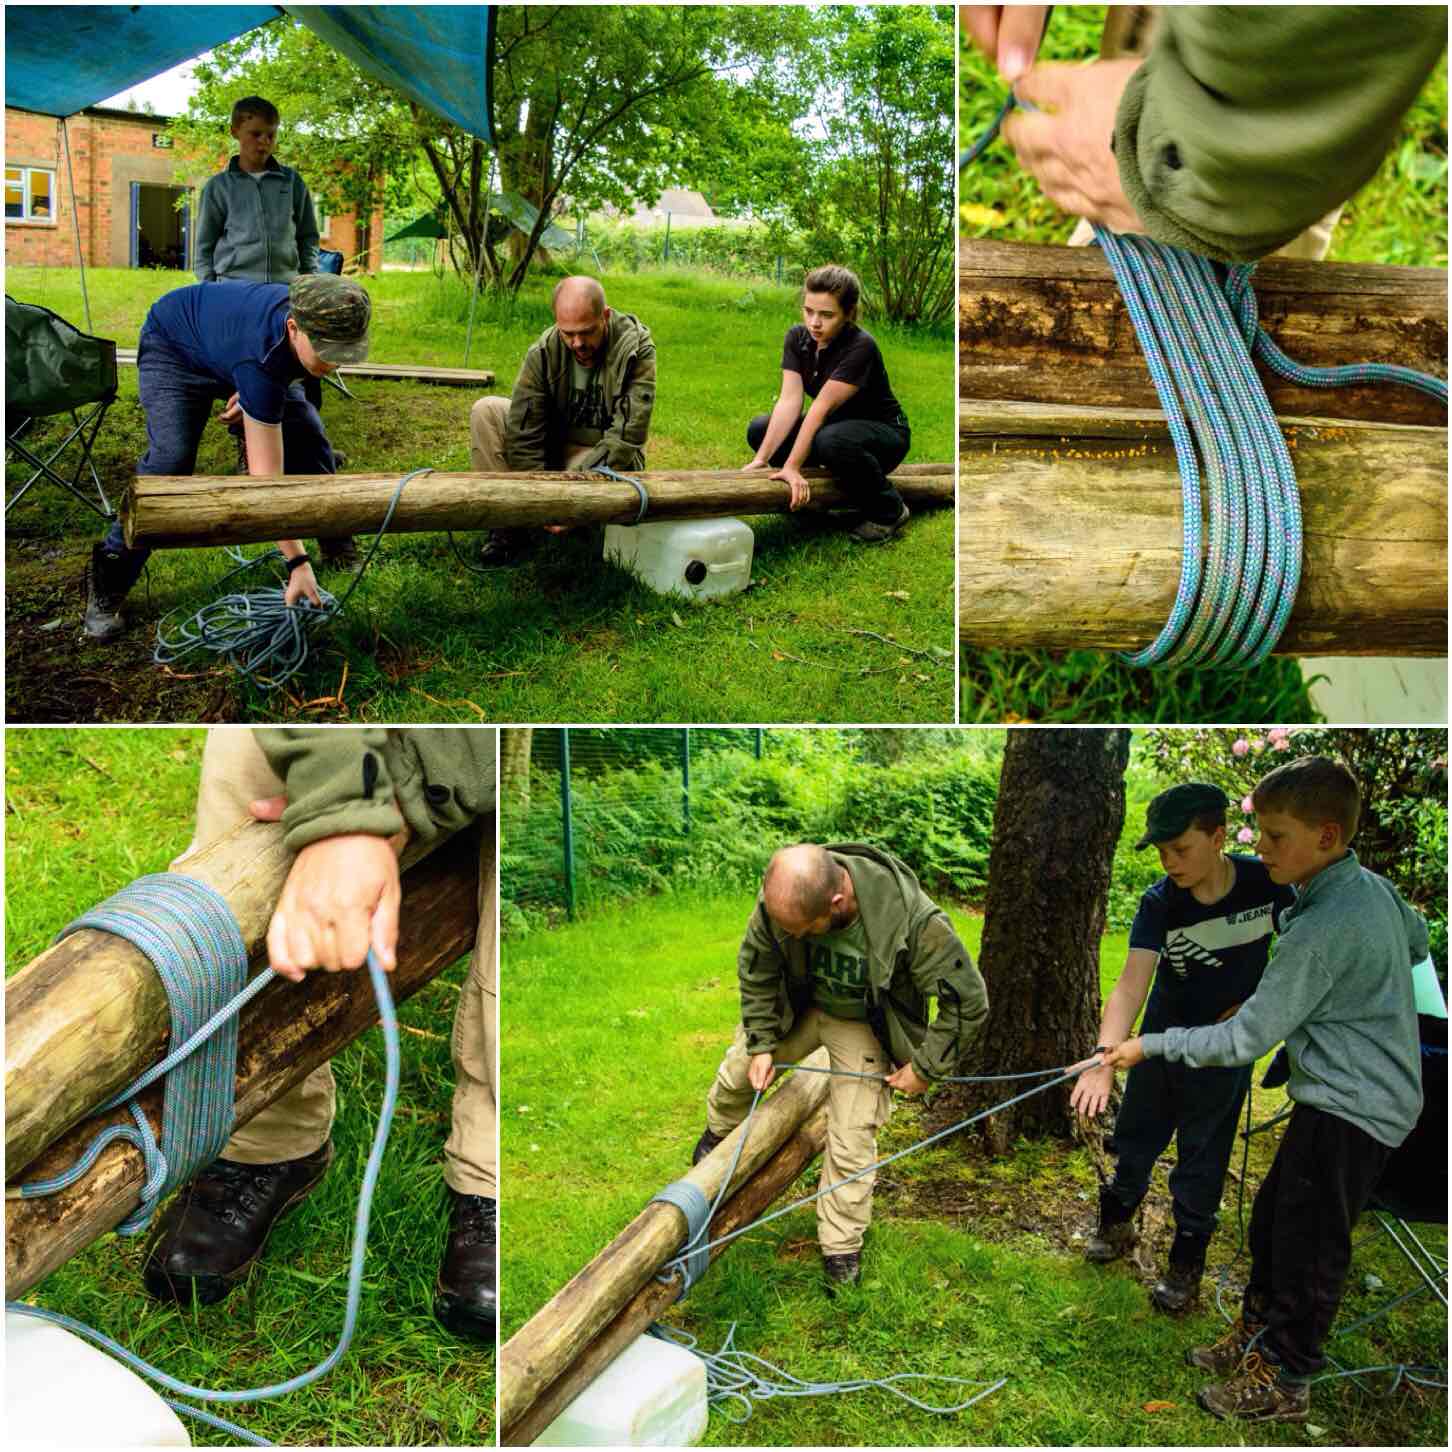
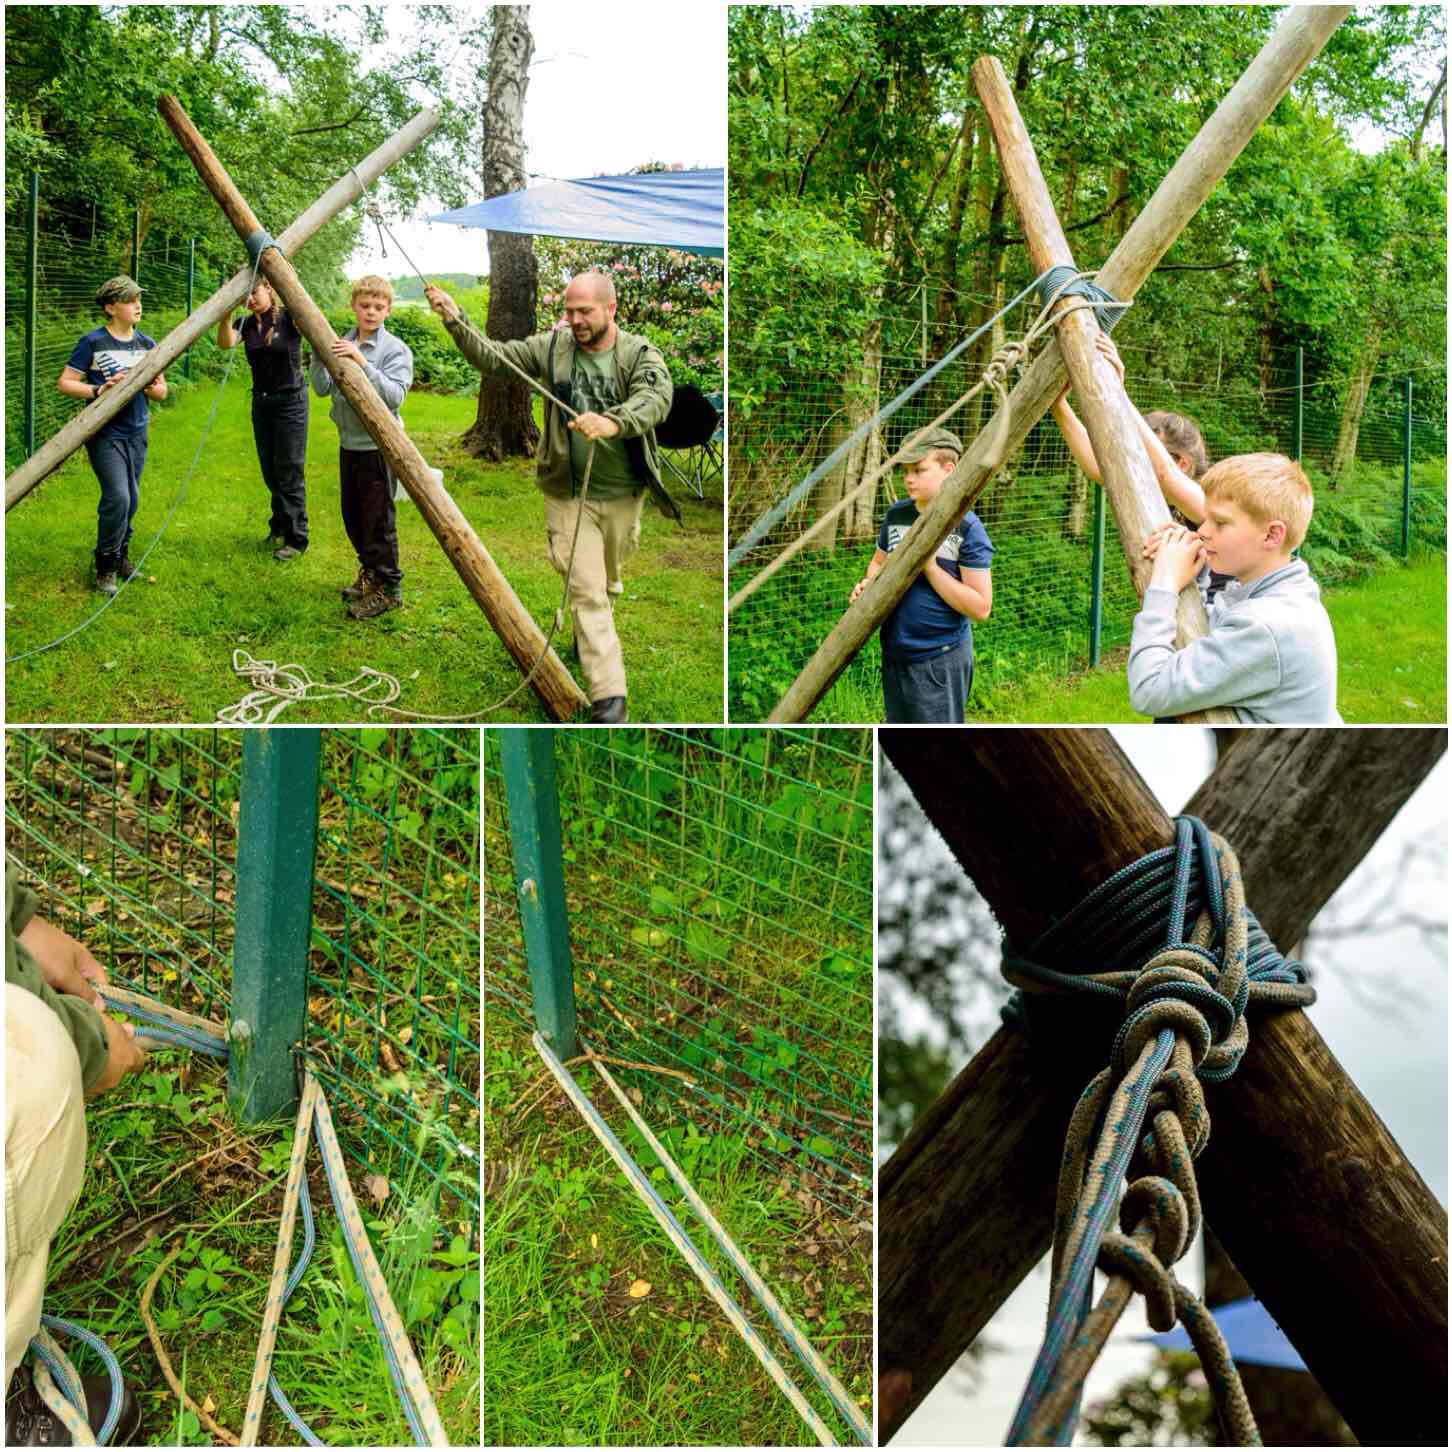
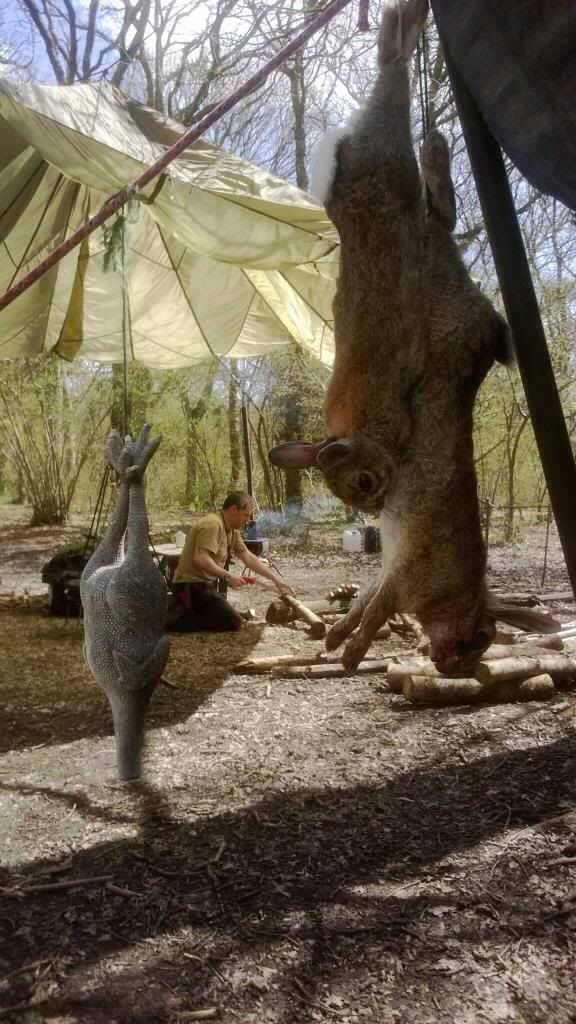
This is a post that came about because someone decided to chop down a tree. On a recent Sea Cadet training weekend we ended up with one instructor (Jess), one hammock and one tree – my friend Dave and myself had bagged the other trees for our hammocks :-). Not an ideal situation for Jess you could say.
We could not camp elsewhere and there was nothing in the way of available natural material to help us (we were on a military camp). Thankfully my friends Alan and Dave spotted some old poles (used for team building exercises) at the back of of a building. So Dave with Jess as his assistant in true Seacadet style, set out to apply their seamanship talents to our problem.
Shear Leg Stand
The Shear Lashing
They collected some assorted pieces of rope and a couple of cadets to help out. The poles were quite long and thick so they decided to tie the poles together about two thirds of the way along their length. The poles were tied together using a shear lashing (I will be using Grog’s Knots to help describe how they did this).
To start the shear lashing they attached the rope to one pole using a timber hitch and then wrapped the rope a number of times around both poles (this is known as wrapping). To make this easier the poles were raised slightly of the ground and the cadets helped to pass the masses of ropes around the poles.
Wrapping
Once the wrappings were completed the lashing was tightened by being frapped (nothing to do with Facebook). Frapping is the nautical term to describe the tightening of a rope or cable. Dave did this by completing a number of turns around the centre of the lashing and pulling it all in tight.
To finish the lashing off he secured it with a clove hitch to the pole without the timber hitch. There was plenty of rope left over as well to help with anchoring the shear legs down.
Frapping
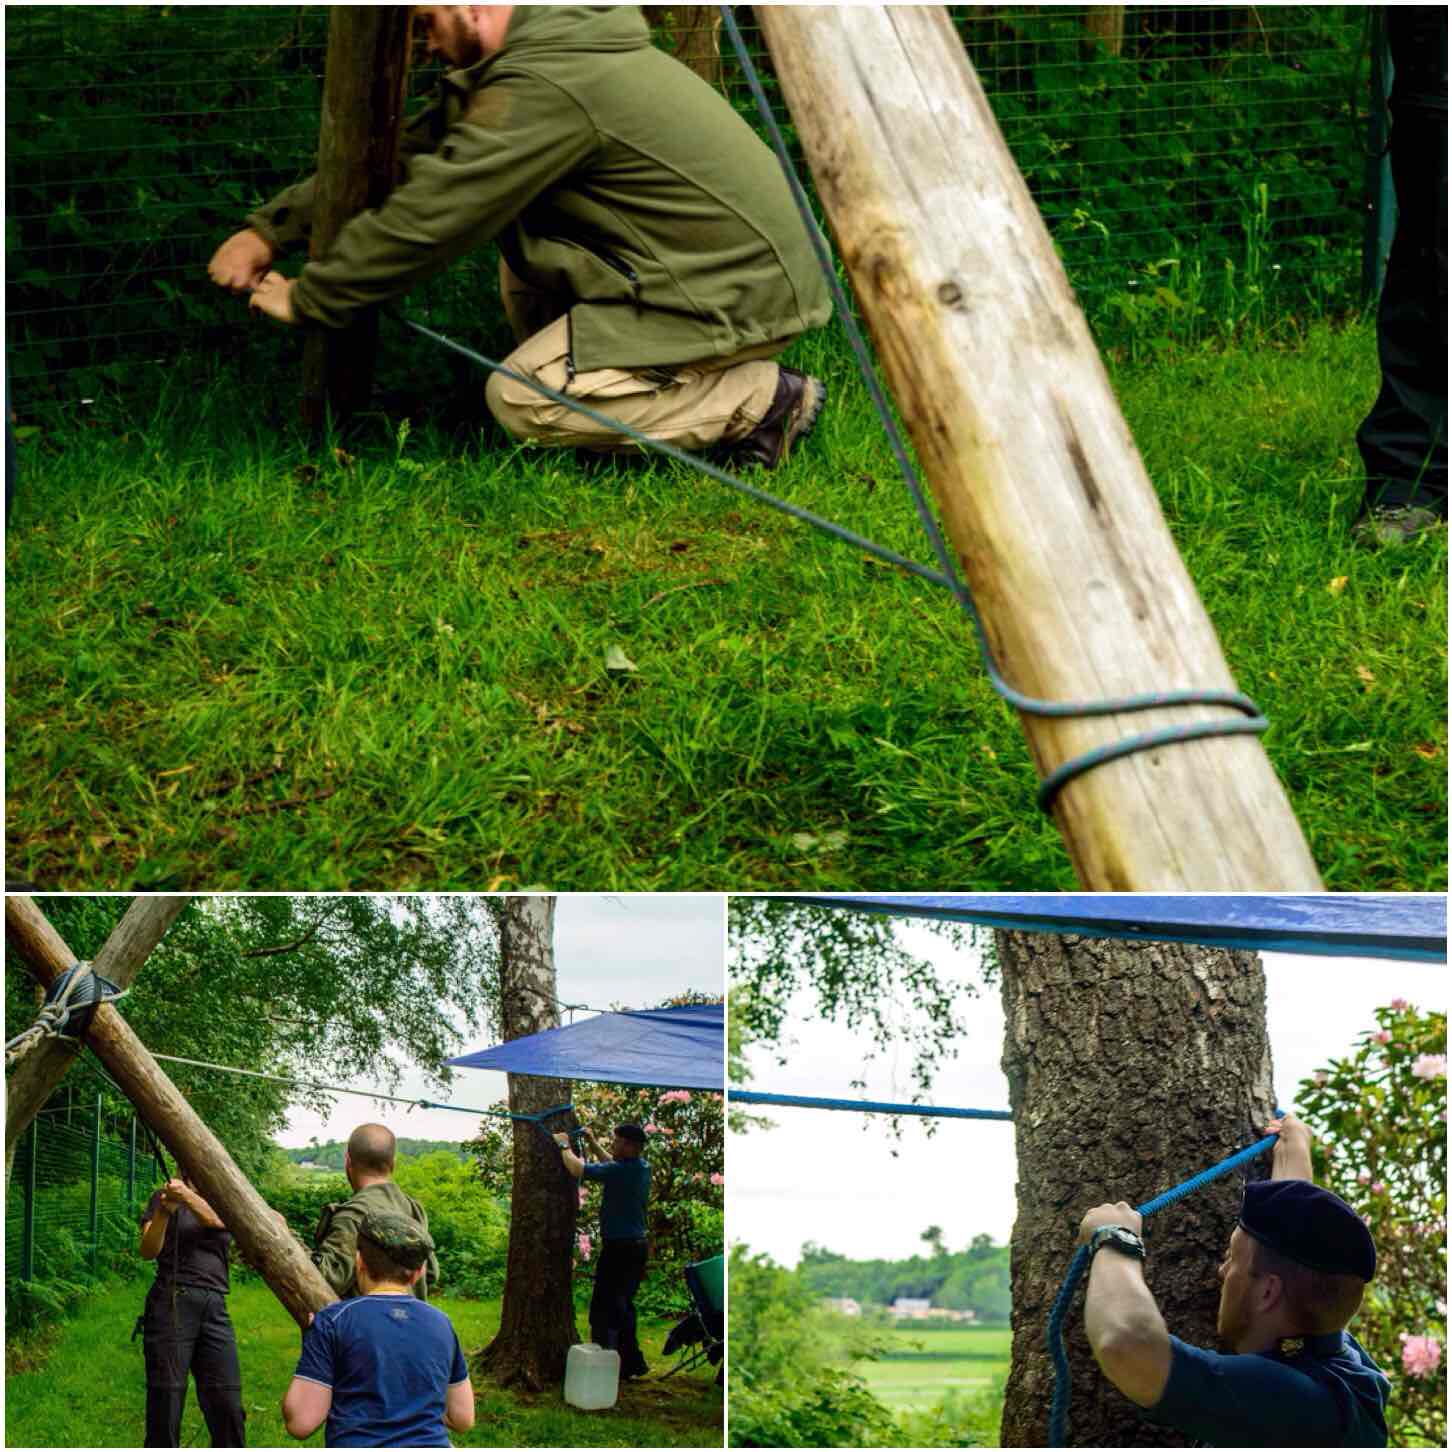
Anchoring
Though the poles were large they were surprisingly light so they were soon standing vertical. A spare piece of rigging line was looped over the pole with the timber hitch on it and with the spare rope from the shear lashing the legs were securely anchored by wrapping both ropes around base of a solid fence post.
Both ropes were then tied off around the shear lashing on the poles to make it all secure.
Anchoring
Alternative Anchors
If you do not have a handy anchor like our fence post you can make your own. In the past I have had shear legs and tripods for hammocks anchored safely with three large wooden stakes.
Alternative Anchors
Securing
If you cannot drive your shear legs into the ground I would advise you to tie them together near the bottom so that they do not inadvertently splay out. Dave used the last of the lashing rope (it was a rather long piece of old climbing rope) to do this.
Finally, to finish the set up the shear legs were tied securely to our single tree using a top line. This top line as well as securing the shear legs was to act as a line to hang Jess’s tarp off.
Securing
Testing & Set Up
I did a bit of testing after we had hung the hammock. I figured if it took my weight then Jess would have no problems. The top line went slightly slack when the system took my weight so that was re-tightened while I was in the hammock.
Testing
After that it was a simple case of rigging the tarp and Jess setting up home for the night.
Setting up home
This was a great solution from Dave to our missing tree problem and took less than an hour to complete. Jess slept the whole night soundly in her impromptu sleep system and I was chuffed that I managed to capture most of the stages in its construction.
A Good Nights Sleep
If you are interested in making a slightly smaller and more mobile hammock stand yourself have a look at my two other posts on this subject,
At the beginning of February this year I drove down the A303 towards Dorset here in the UK in ever worsening weather conditions.
My good friend Fraser Christian of Coastal Survival had organised a meet up of some of the guys who help him out at various events throughout the year. By the time I got to his village the weather had deteriorated to storm conditions.
The pictures below show his parachute getting a right battering and even later on in the shelter of the parachute the airflow really helped shoot the flames of the fire up.
A Stormy Night
Before going to up to Fraser’s woodland location I met some of the the guys – Fraser, Steve, Si, Danny and Nick in the local pub to have a few beers (and to dry off from the drenching I got from walking from the car park to the pub).
Even though the weather conditions were still extremely poor when we got to Fraser’s woodland site we soon made ourselves comfortable. The food and mulled cider were soon on and I even managed to get a picture of the parachute looking like some sort of downed UFO.
We were joined later in the evening by Tom who is one of the other Coastal Survival instructors. He had cycled his way through the storm to get to us but seemed happy to be out there in the wild conditions (I think that it is a pre-requisite of any outdoors pursuit instructor to show they can be comfortable outdoors whatever the weather throws at them).
Snugness
Due to the high winds the flames of the fire kept shooting up, so as usual I had my camera out grabbing some shots of fire faces and figures in the flames. If you look closely you will see a few faces. I can also see a deer and a water buffalo in the left hand picture below.
We spent the evening listening to the wind, catching up on the year gone by and planning trips for the coming months. Around about 10pm the wind dropped sufficiently I felt it safe enough to venture out and put my own hammock and tarp up.
Fire Faces
I slept for a full ten hours that night and woke the next morning feeling calm and refreshed. The guys already had the kettle on the go so all I needed to do was fill my cup and wait for my breakfast from Fraser.
One thing about working with Fraser is that you never go hungry and I will never get in the way of an expert chef wanting to cook me breakfast :-).
A calm morning
As part of our bed and board for the night we agreed to get out and collect some of the brash wood Fraser had stored around his woodland to replace the wood we had used the night before.
We said goodbye to Tom at this stage before stringing up the brash wood to take back to camp.
Morning re-supply
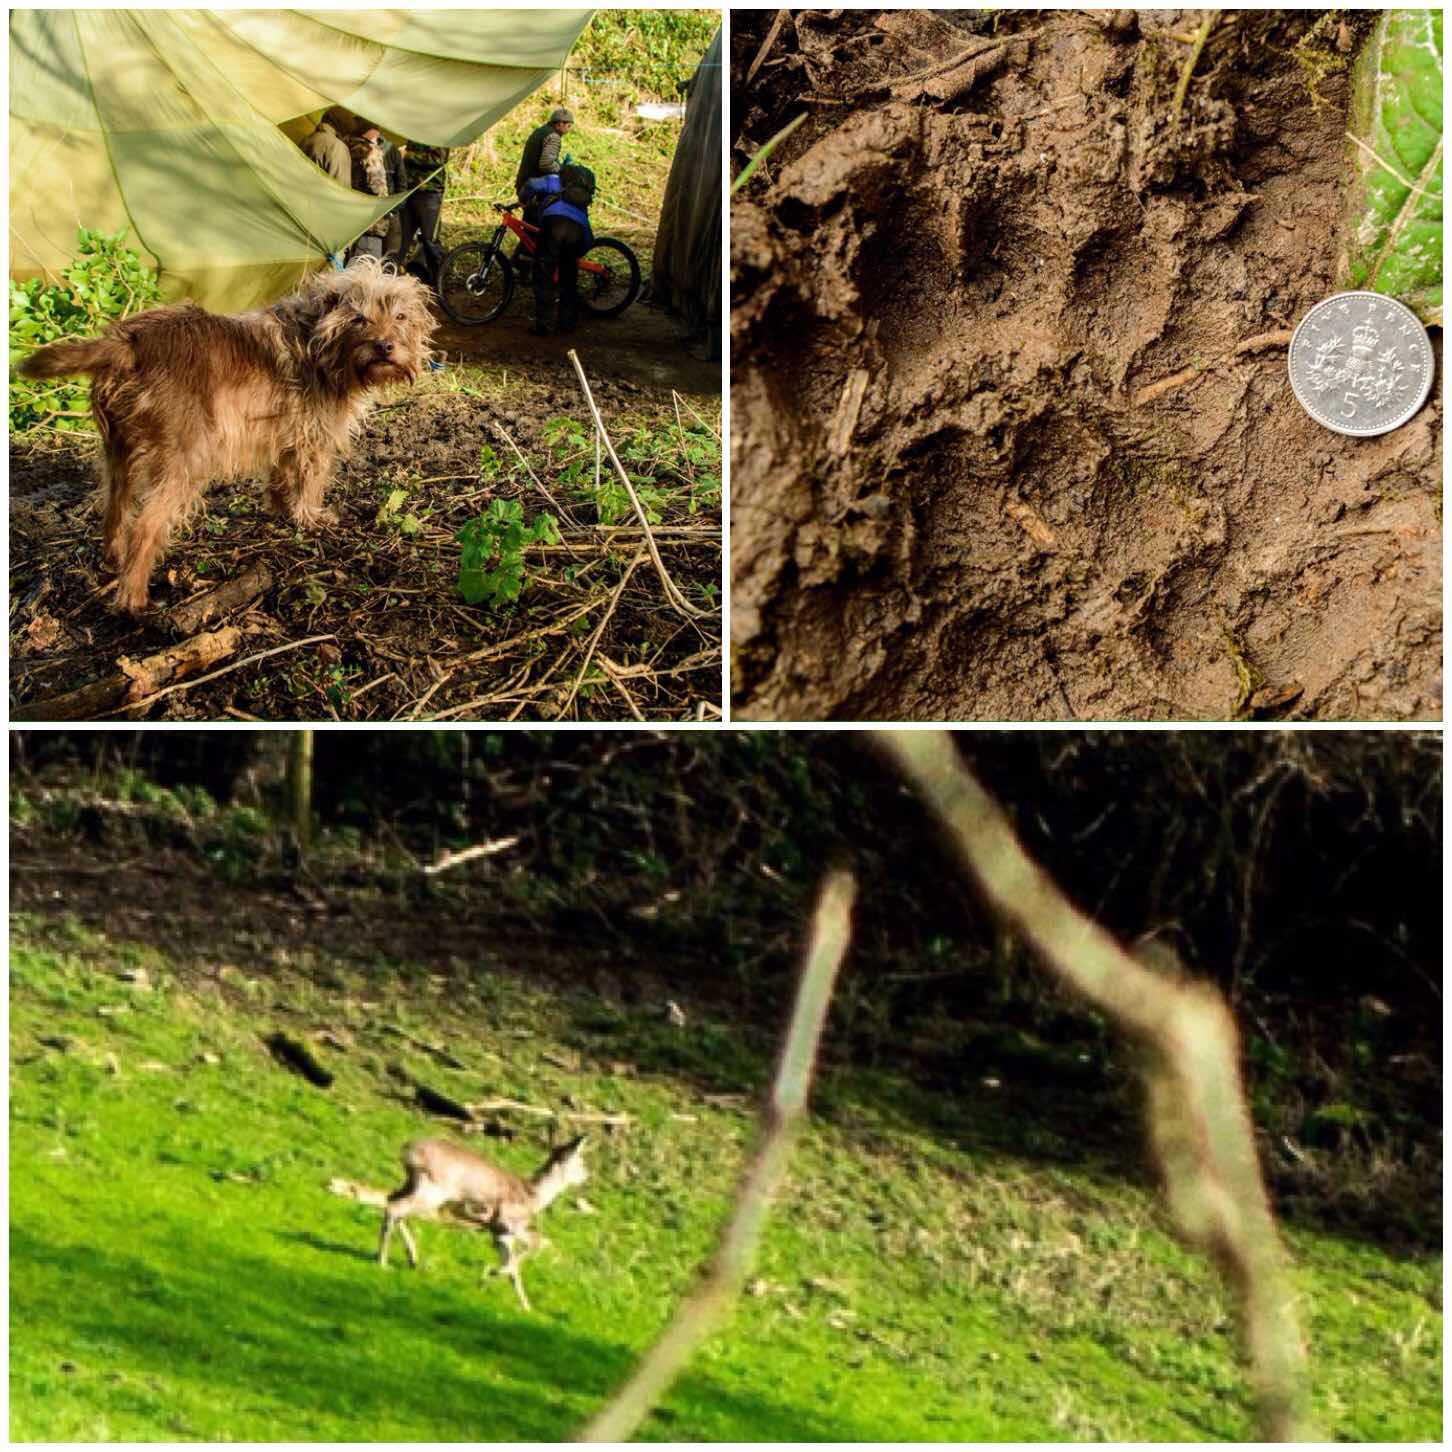
Once the chores were done I set off on my own to see what flora and fauna were about that morning. Little Tinker always makes for a great shot but I soon found an excellent badger print in the damp ground.
I spooked a deer on my travels through the wood but managed to get one decent long range shot of her as she ran across a field.
Local fauna
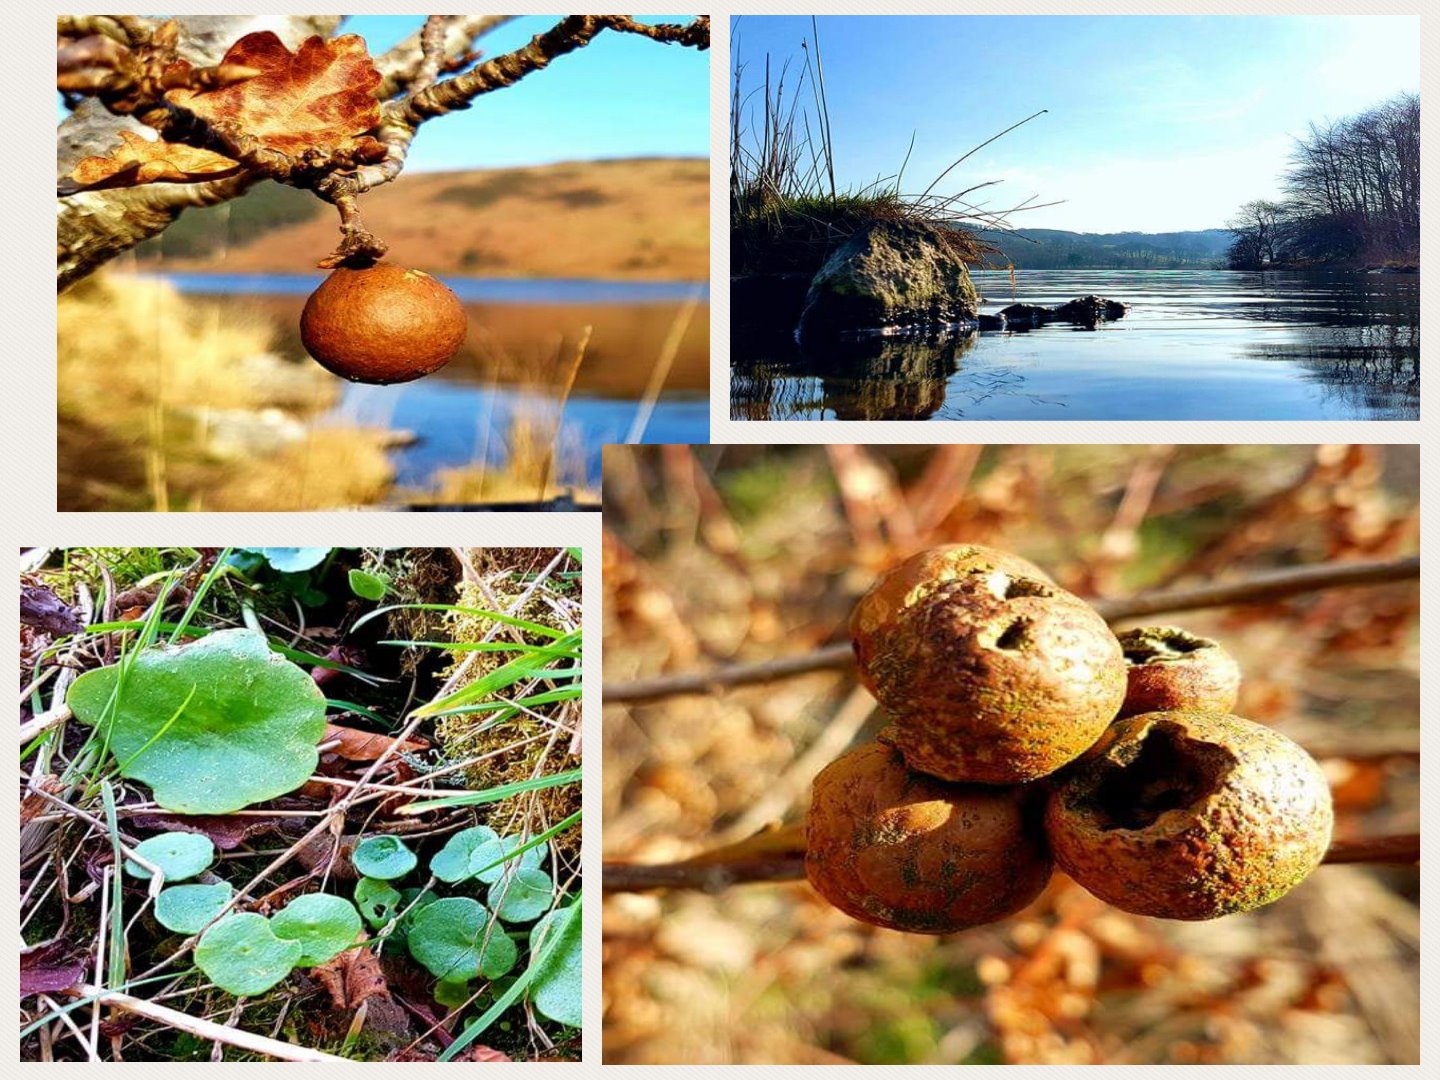
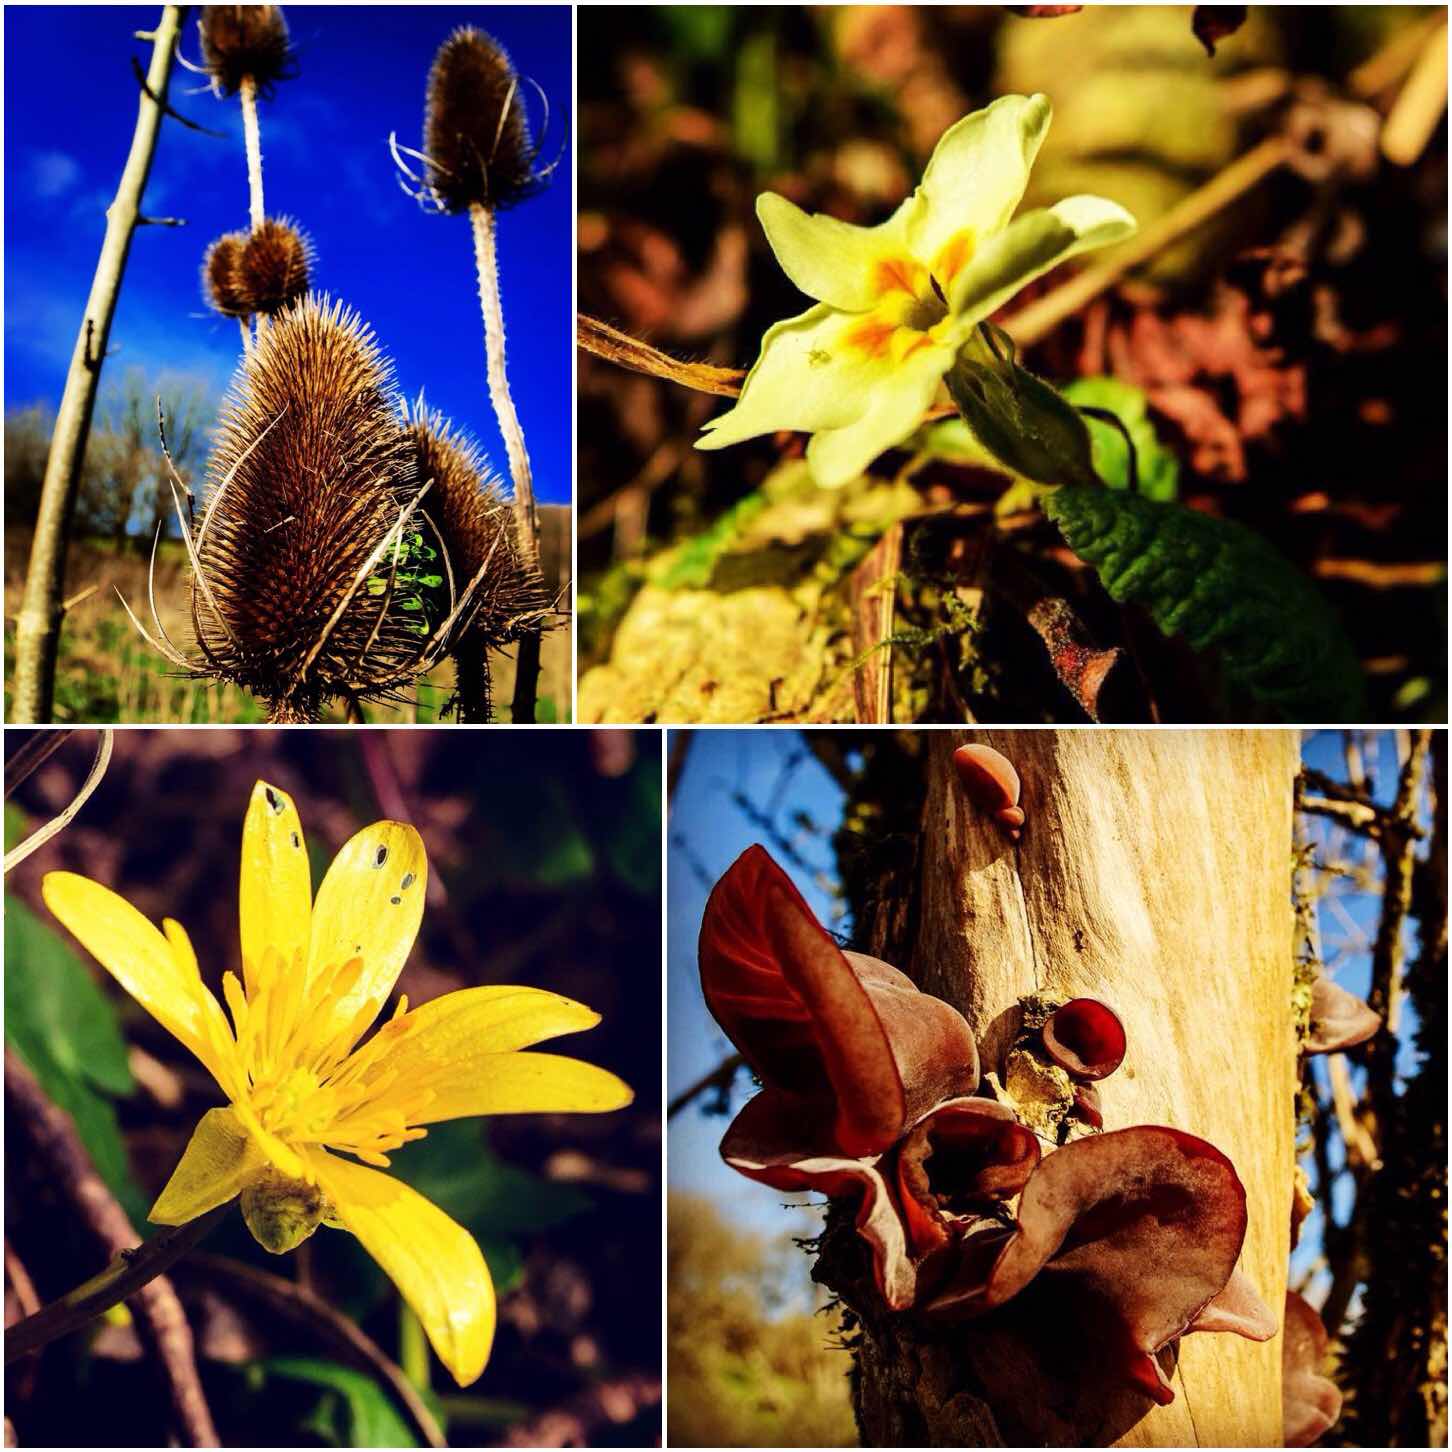
Even though this was early February there was a dash of colour about with the plants.
The teasel was looking particularly majestic with new seeds sprouting within the previous years seed head. I spotted a number of primroses for the first time this year at Fraser’s and the lesser celandines were sunning themselves nicely.
Finally I spotted an elder tree covered in some lovely looking jelly fungus.
Local flora
It was soon time to head home again however the drive back was a delight due to feeling refreshed and the sun was out 🙂
Thanks to Fraser for hosting us for the weekend and the rest of the guys for being such good company.
Carrying on with the Memorable Moments theme I thought a post on my favourite family pictures of the year was due. Each of the 12 pictures I have chosen have some special memories for me.
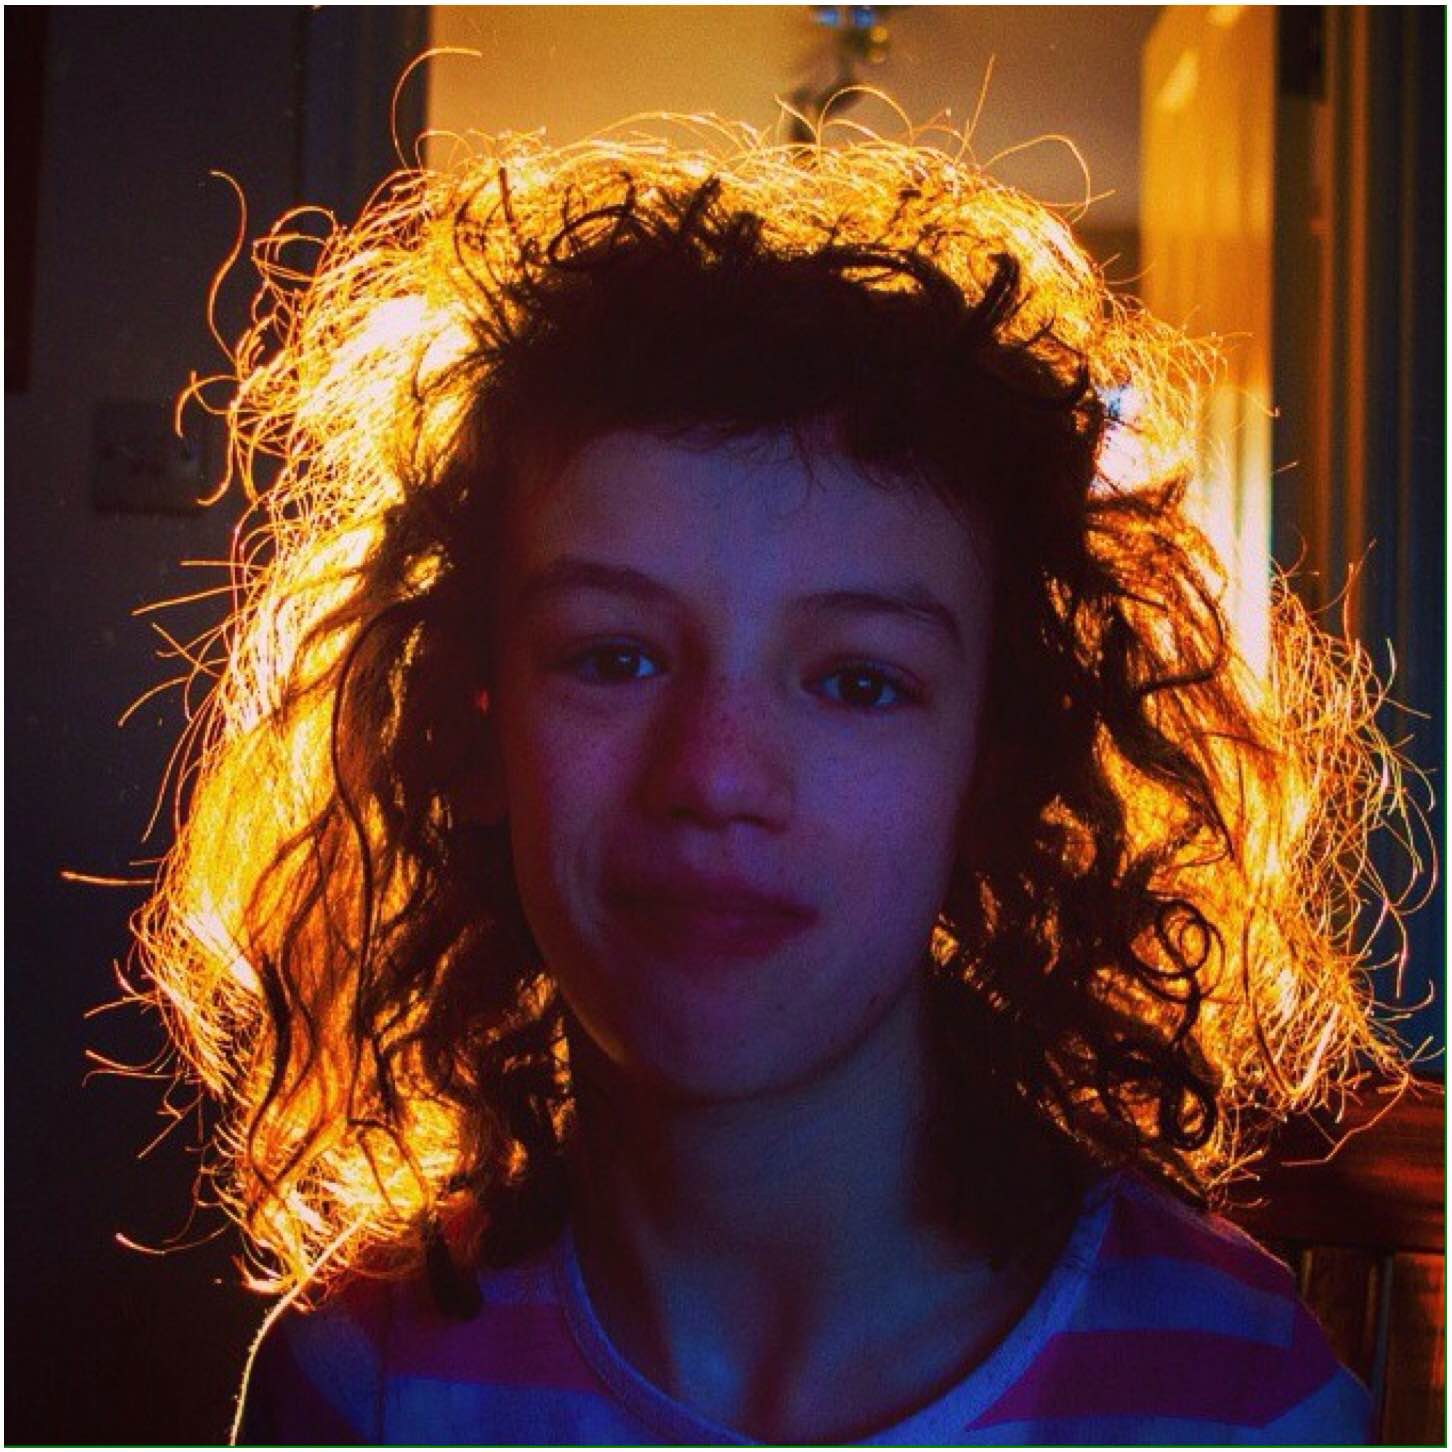
Starting off with my beautiful daughter Catherine who has the most amazingly curly hair. I captured this picture early in the year of her backlit by the morning sun. The moment caught individual strands of hair framing her perfectly.
Mad Catherine Hair
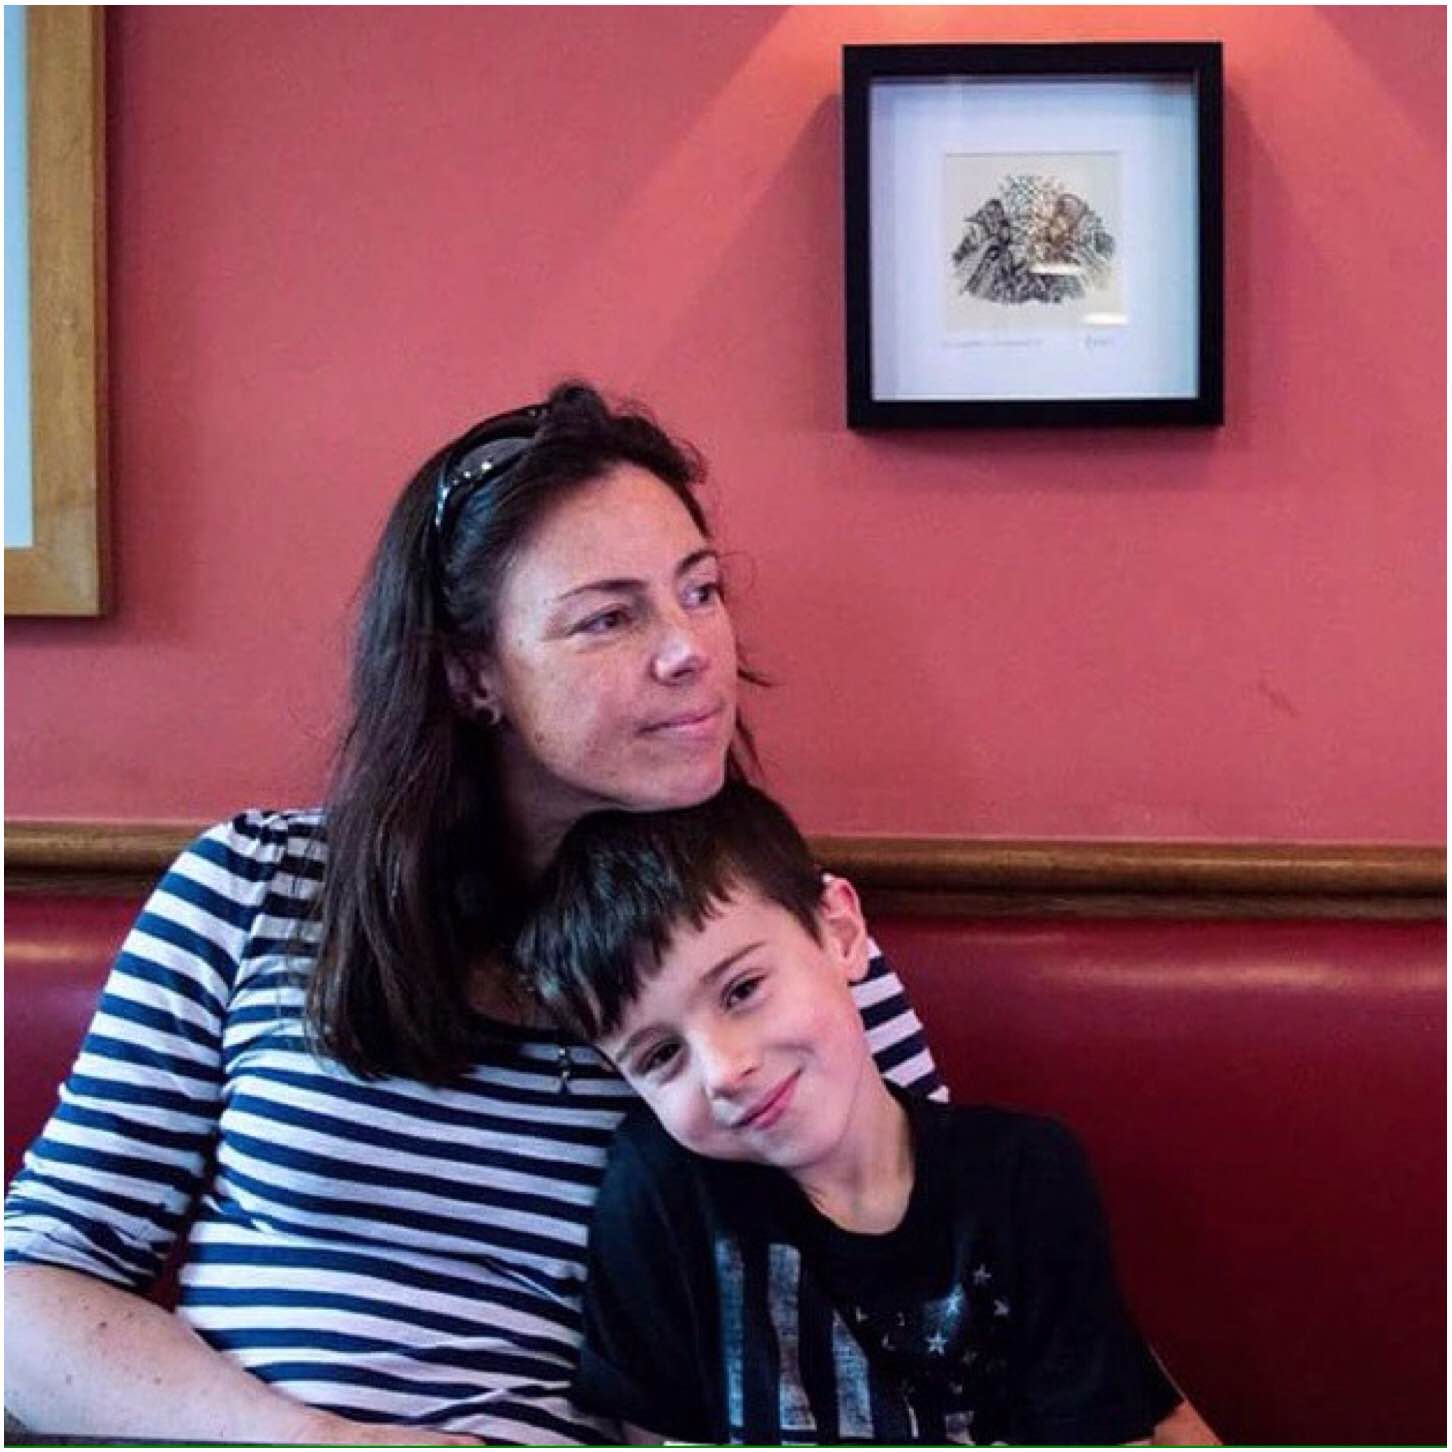
We had a lovely day trip to Winchester in the spring. While we were relaxing in one of these small cafe’s you find in the Medieval backstreets I caught Alison looking perfectly relaxed with a cheeky little Finlay snuggled up to her – quite a beautiful moment you could say.
I Love my Mother
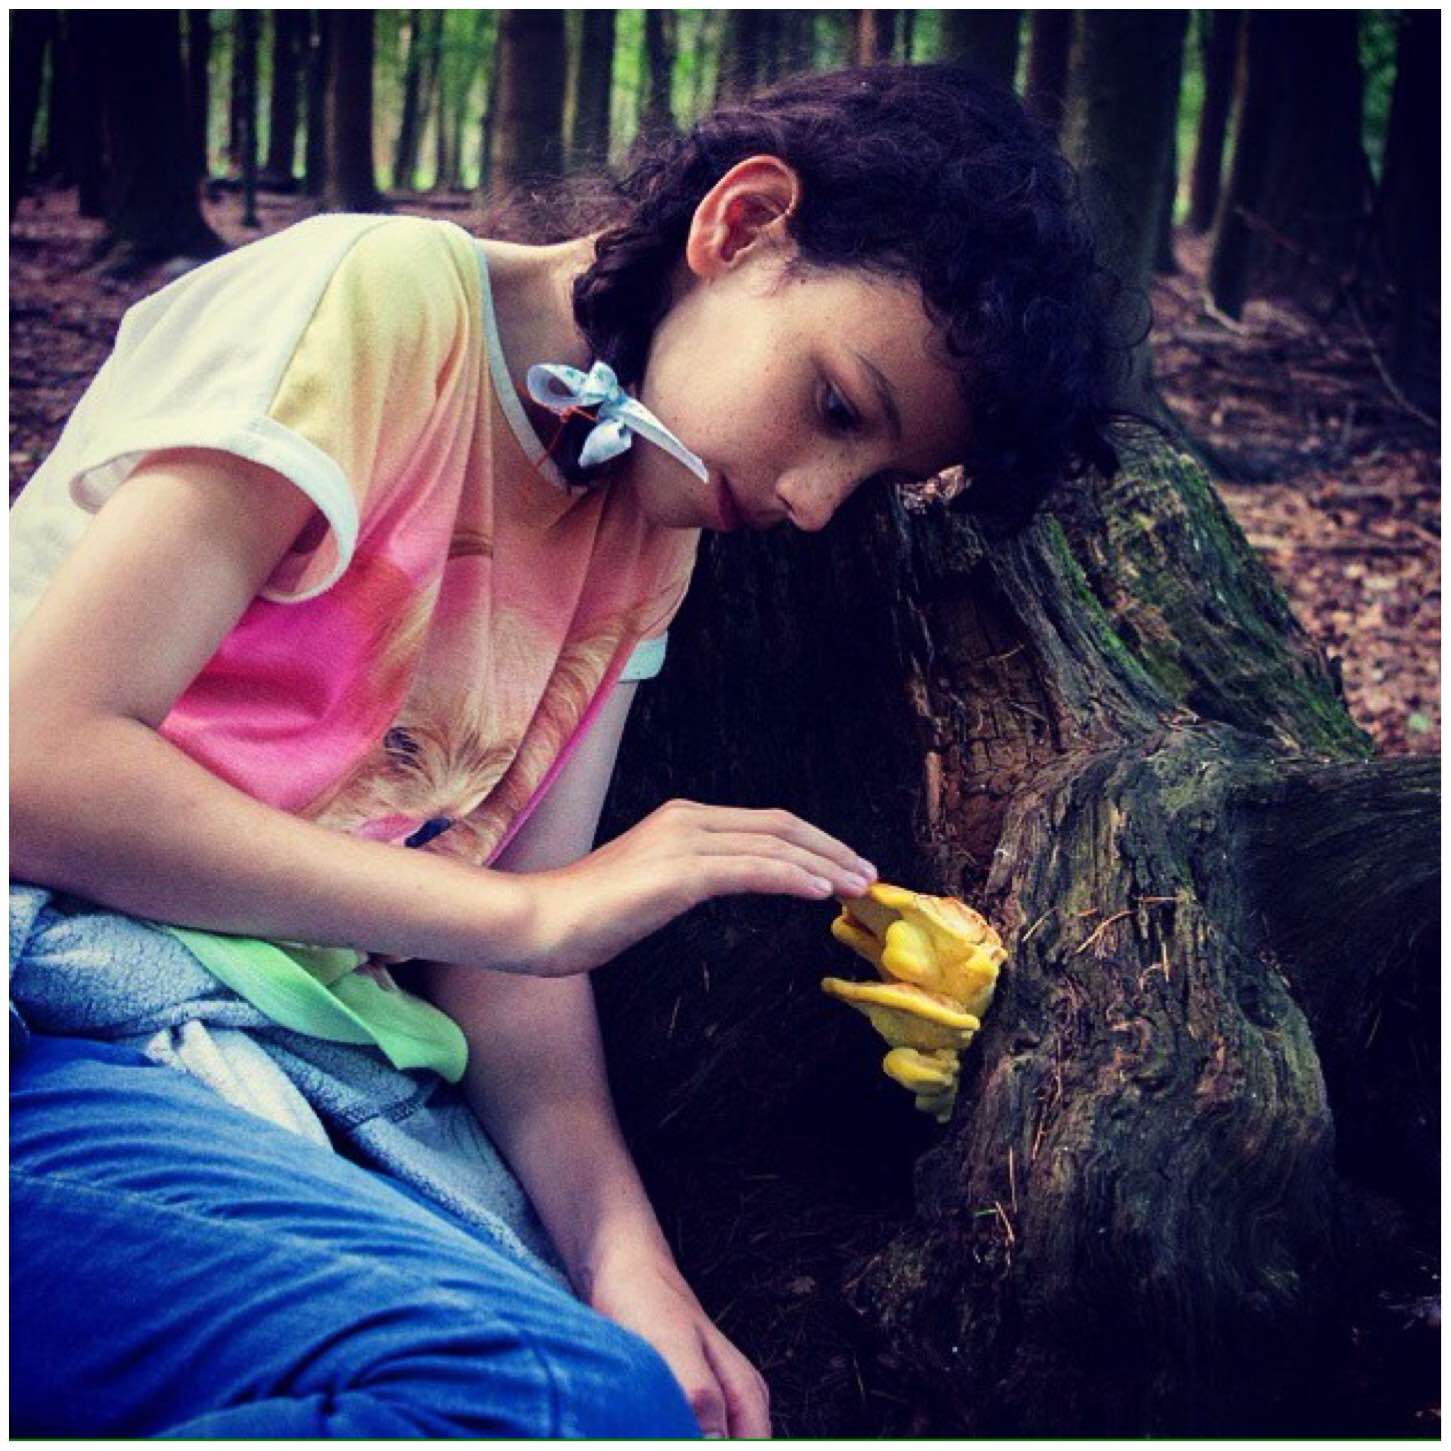
One of my favourite pastimes is to head out for a Bimble around our village of Bramley. I spend a lot of time photographing what I find. Catherine spotted some Chicken of the Woods fungus one day and was really taken with its colour.
The resulting picture taken in such a dark coniferous woodland I found both striking and beautiful.
Bramley Bimbles
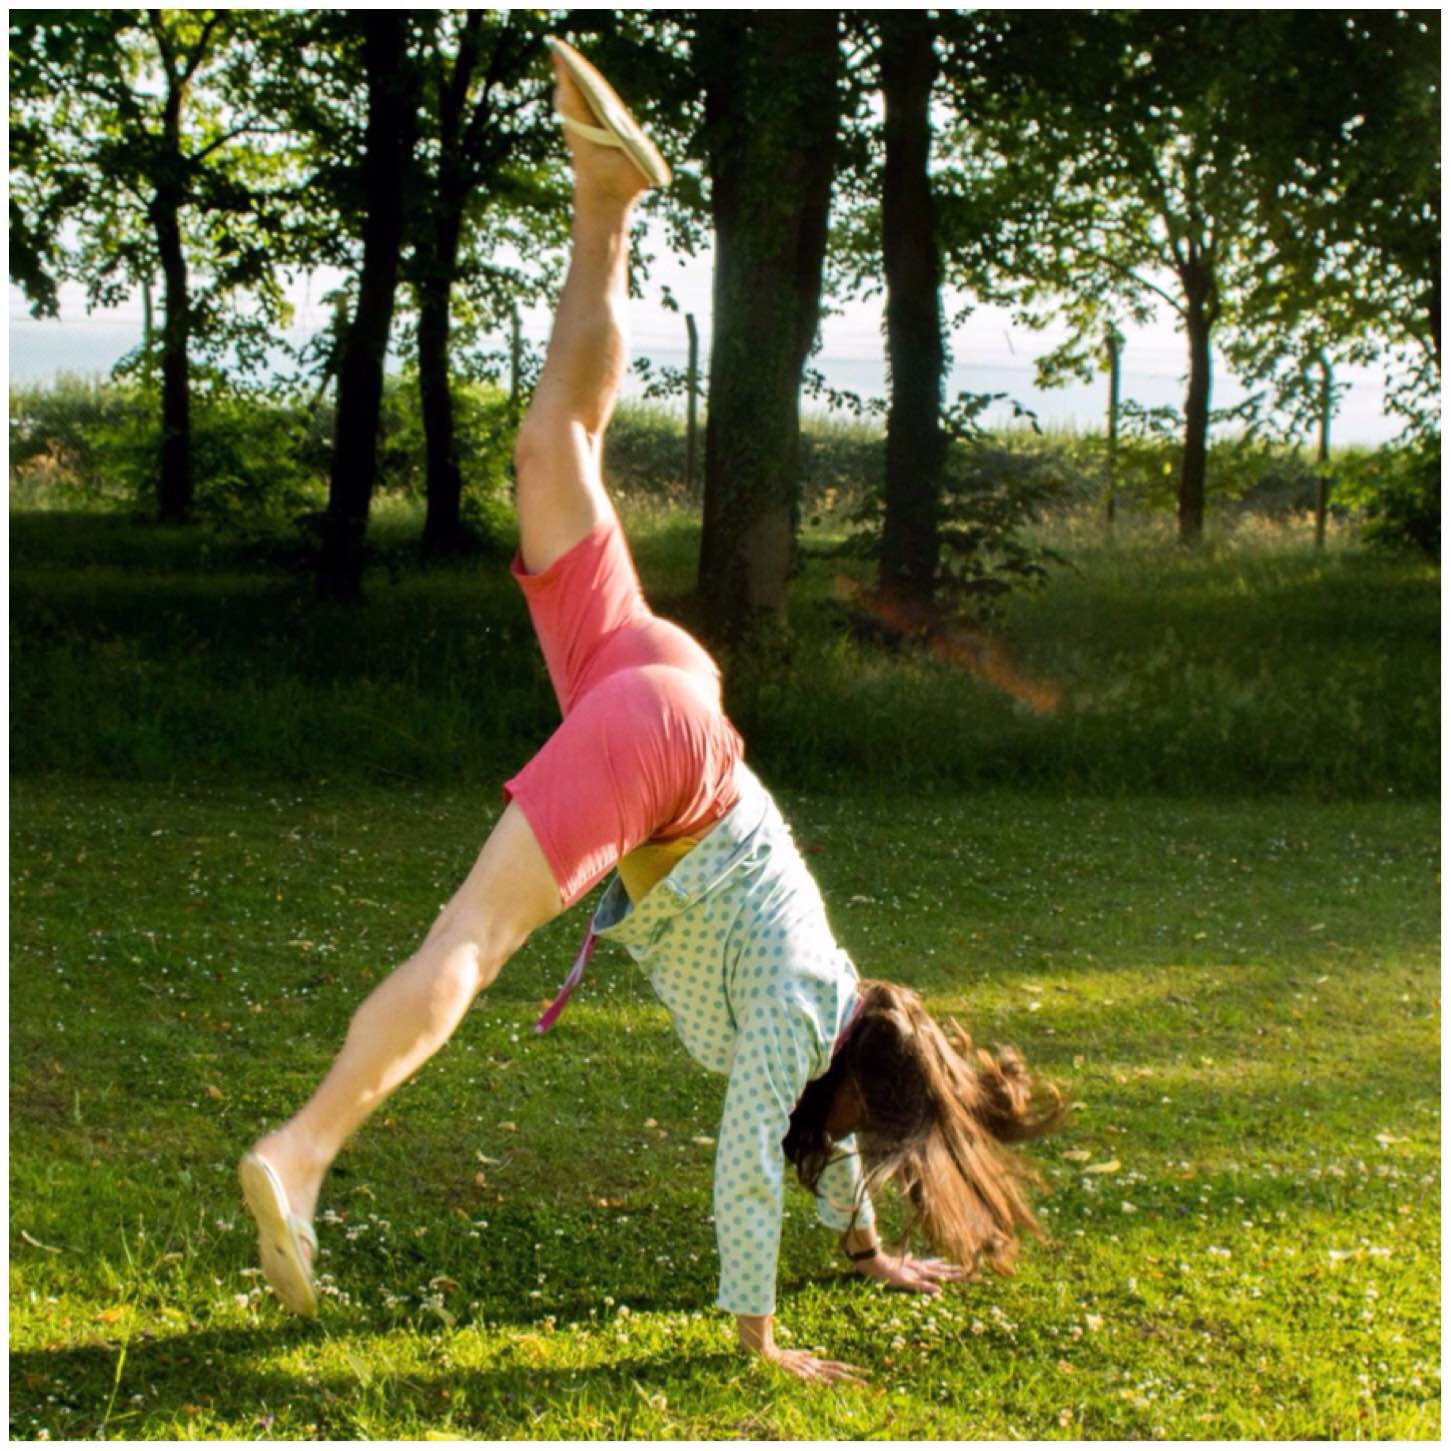
A moment of joy is how I would describe this picture. We were visiting our friends Tracey and Neil on an RAF base one day and after a lovely barbie Alison decided it was time for for some gymnastics with the kids.
This picture reminded me to always be on the lookout for the unexpected – excellent style by the way Alison.
Taking a Turn
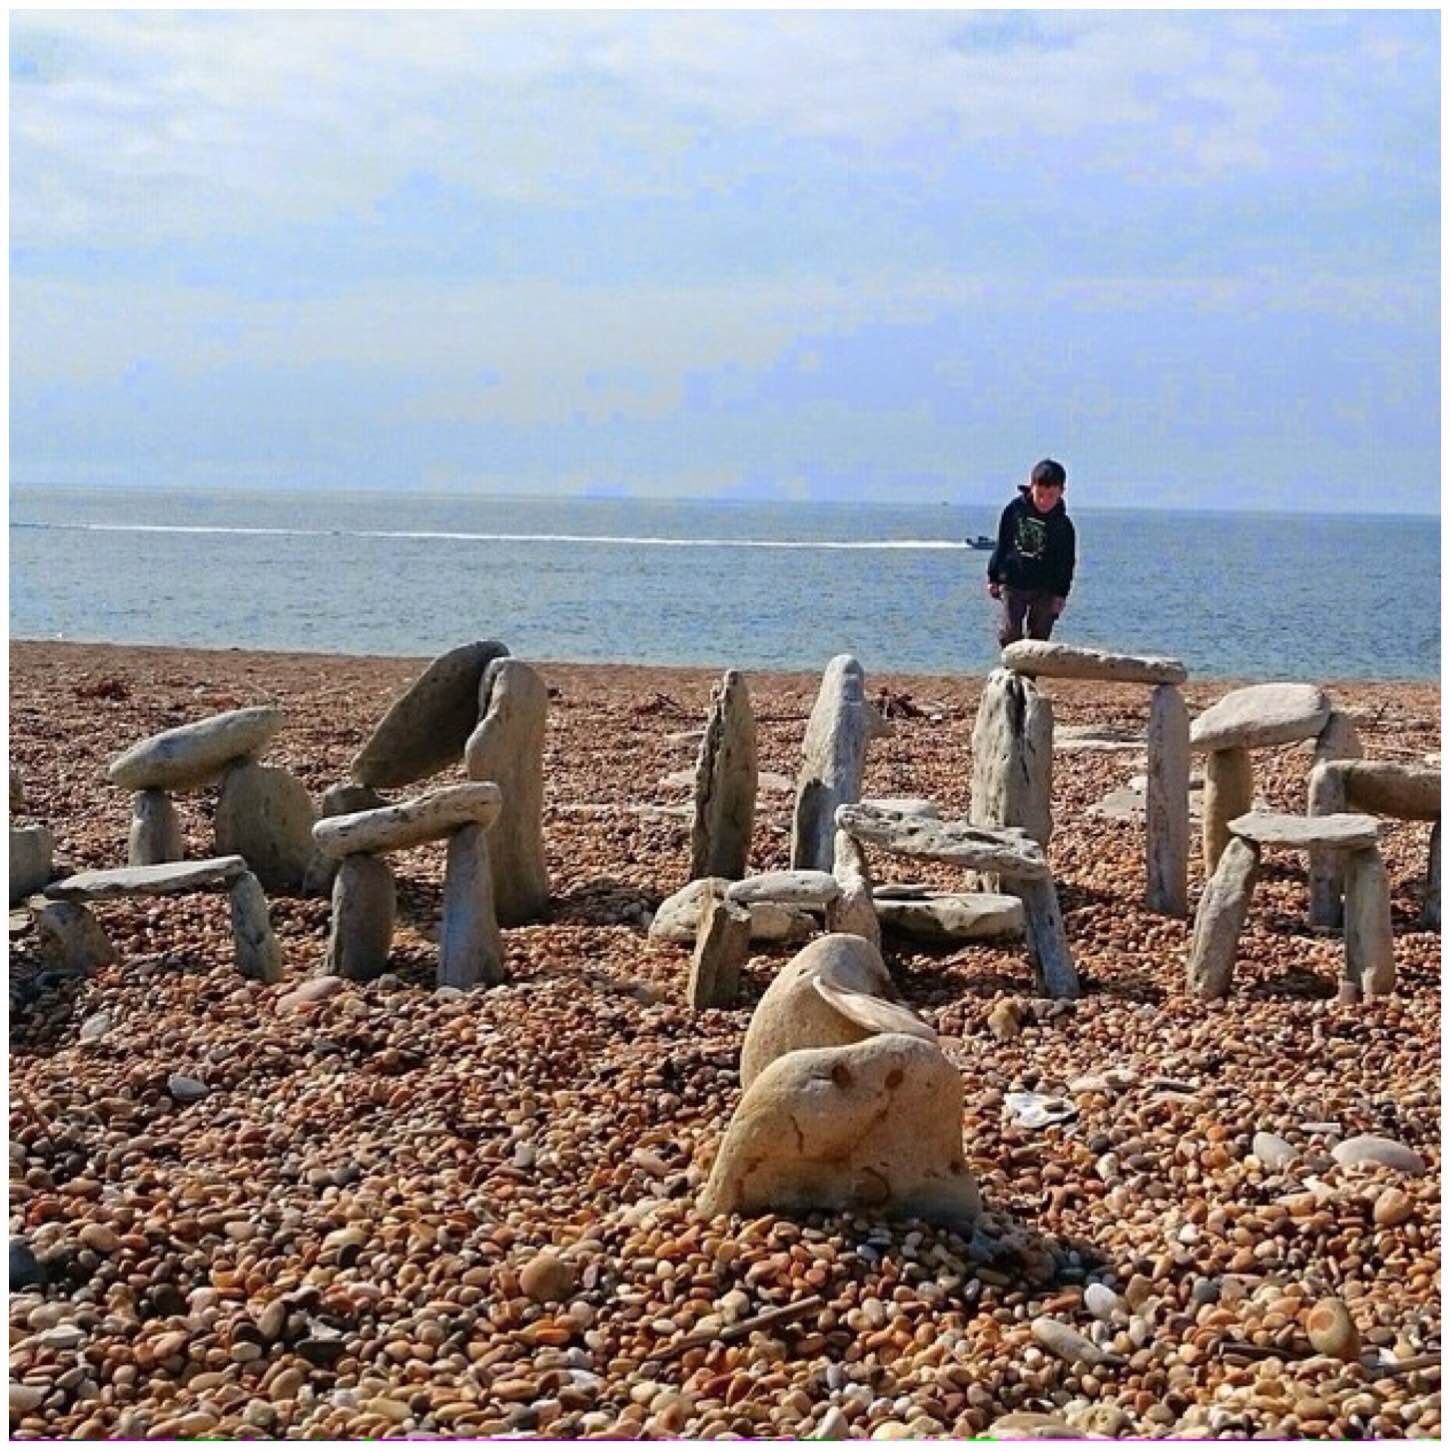
While visiting our friend Fraser from Coastal Survival we spent an afternoon on Chesil beach in Dorset. Someone had decided to build themselves a mini Stonehenge on the beach. Myself and the kids were very taken with it and it made for some great pictures.
Once I got down low to the mini monument the whole look of it changed transforming it into a picture I wanted to keep.
Mini Stonehenge
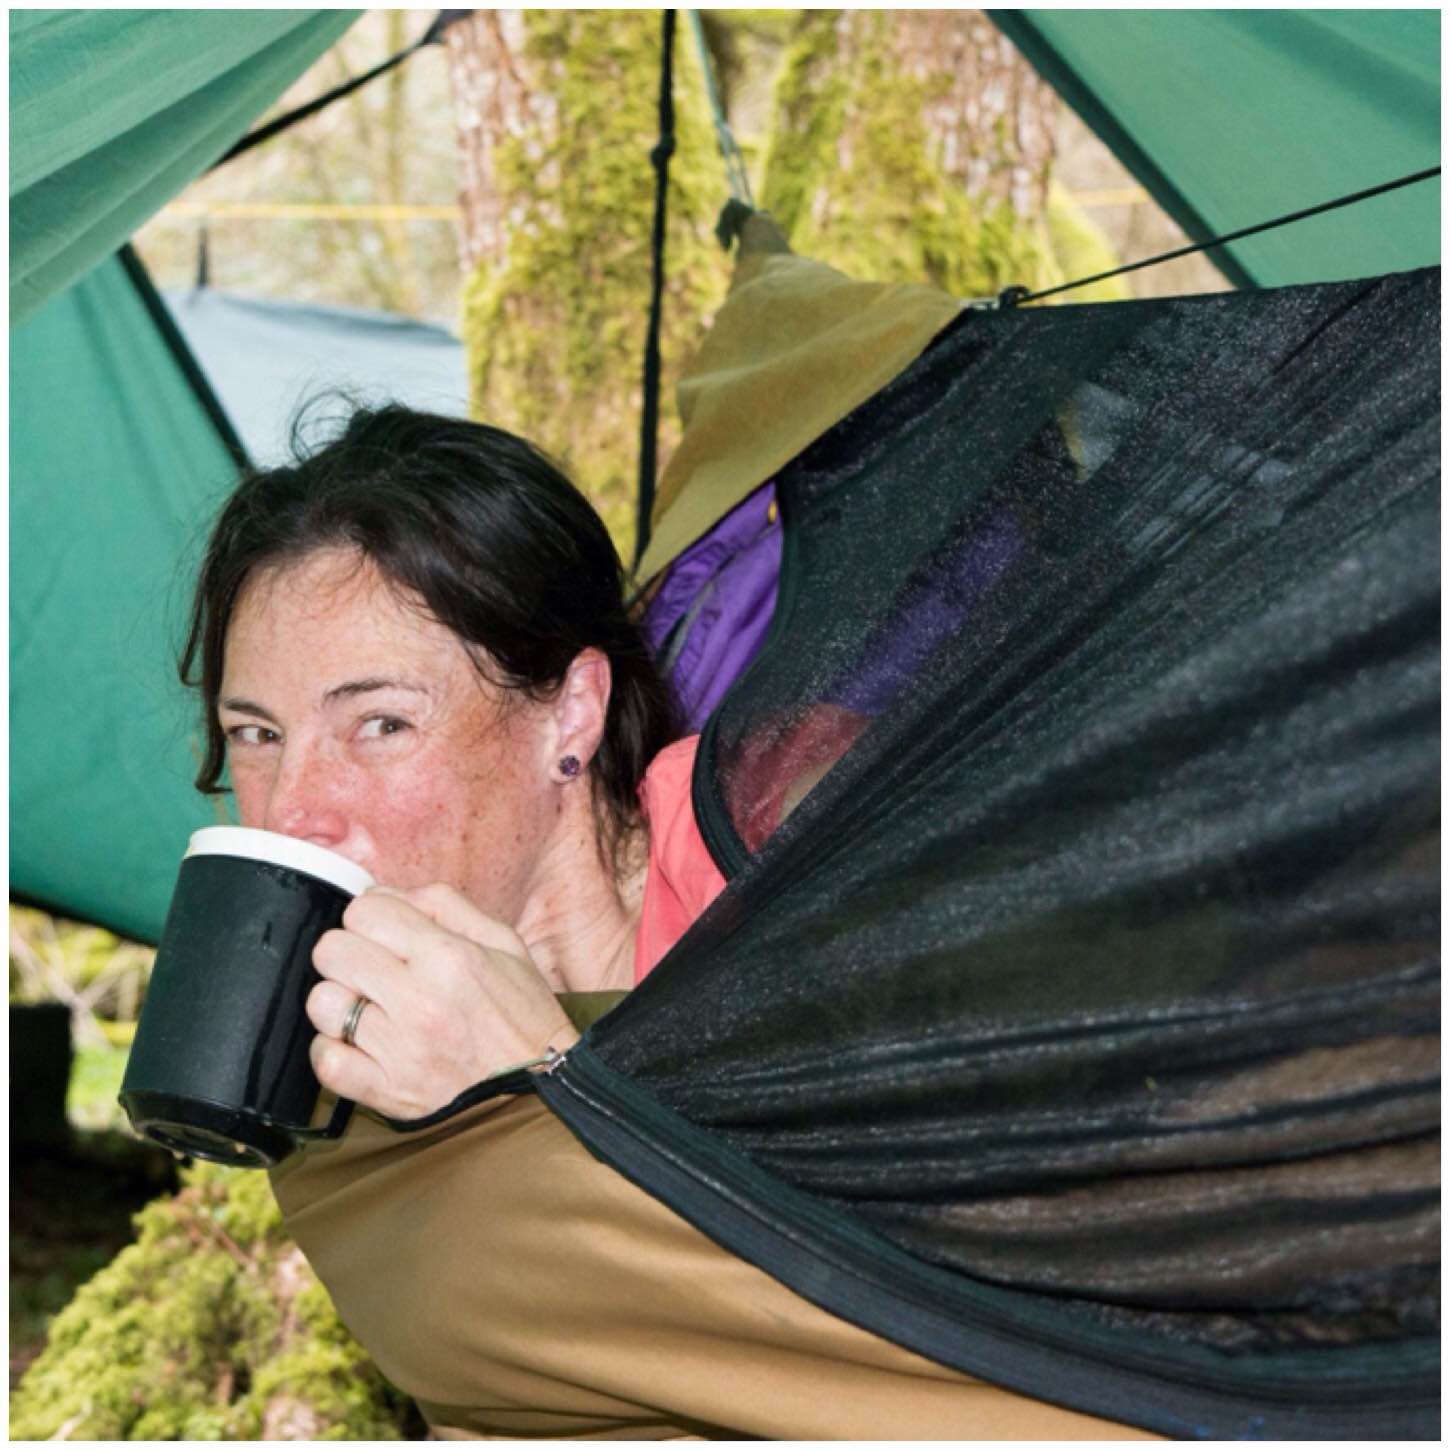
When we go camping as a family we can mostly be found sleeping in hammocks. Alison insists though that before she gets up that a cup of coffee is produced. It is a bit of a tradition now this coffee business but one I am happy to maintain – needless to say Alison is in full agreement with me.
Quality Hammock Time
Last June I took part in the 30 Days of Wildness organised by the Wildlife Trust. I blogged about my nature adventures for 30 days. On one of these little adventures I was exploring the ruins of the Roman amphitheatre at Silchester with my daughter Catherine.
We stopped for a rest and Catherine spotted a beautiful thatched cottage through the trees. She sat there and told me later that she had found her ideal home. To me this picture is like a painting and I can sit and look at it for a long time without getting bored.
30 Days of Wildness
As memorable moments go there are plenty to be found at the BCUK Bushmoot. We go every year and it is a great location for families.
I caught my son Finlay mucking about with some stocks ( they belong to the Live Action Role Players who use the site as well) and as I took the picture the parachute set up beside it suddenly puffed up with the wind. Not your typical outdoorsy picture but one I felt lent to a bit of B & W manipulation.
Moot Time
I took a lot of pictures while on holiday in France this year of some really beautiful places however it is this simple picture that sticks with me.
We were walking through a small industrial estate to get to a river walk when I grabbed this picture of the kids walking along holding hands. A little moment in time so easily missed you could say.
Brother and Sister
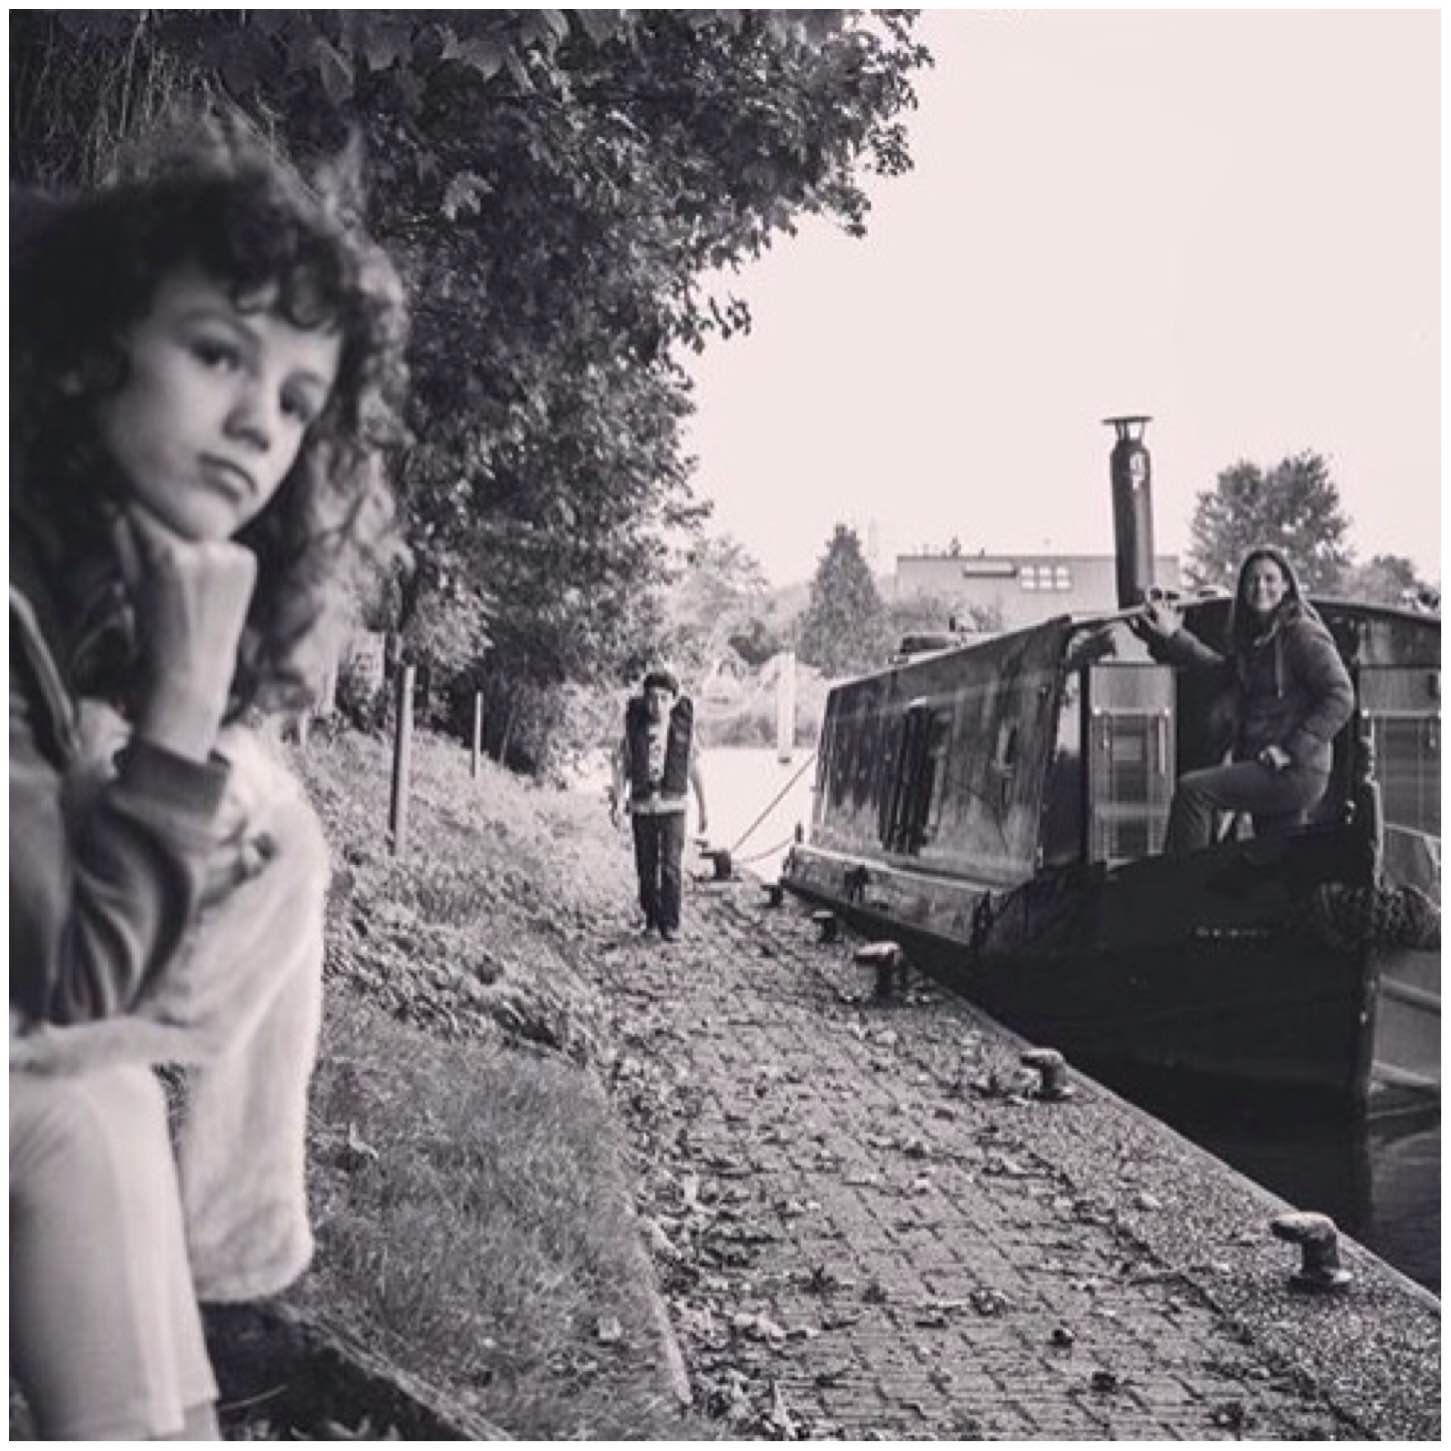
My friend Paul Kelly runs his own canal boat hire company called Thames Boat Training and I have been out twice this year to photograph his boats for his web site. On the last trip we moored up waiting for a lock to open when I snapped this little moment in time. I like the picture for its feeling of depth and sheer peace.
Reflections afloat
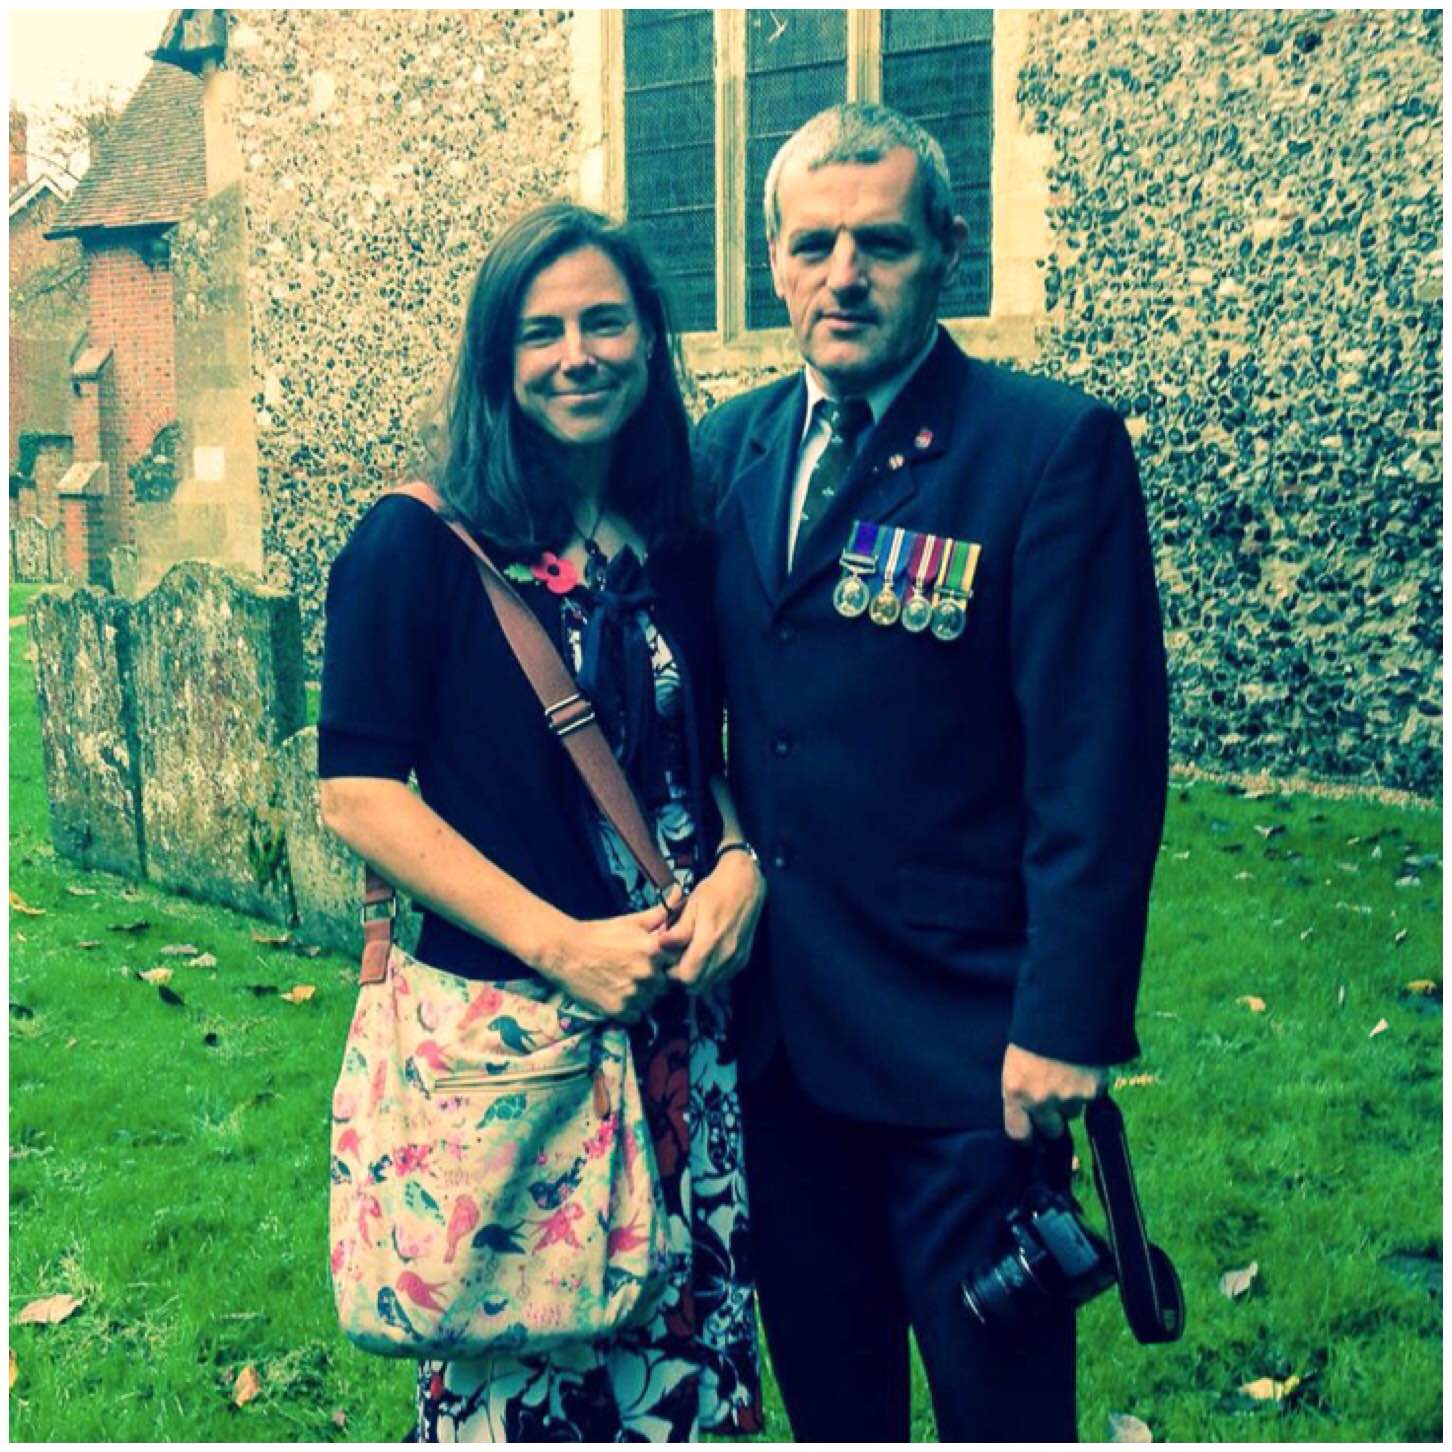
Remembrance Sunday was a lovely day in Bramley. After the service I took some group shots of all the Scouts, Cubs and Beavers however my daughter Catherine wanted to take some pictures with her iPhone.
I think Catherine has an eye for photography and I am keen for her to explore this talent of hers. Catherine took this slightly dark picture of Alison and myself with one of these Instagram filters you can load onto your iPhone. Not often anyone gets what I think is a good picture of me and I think Catherine did well here – As for Alison, well – she always looks good 🙂
Remembrance
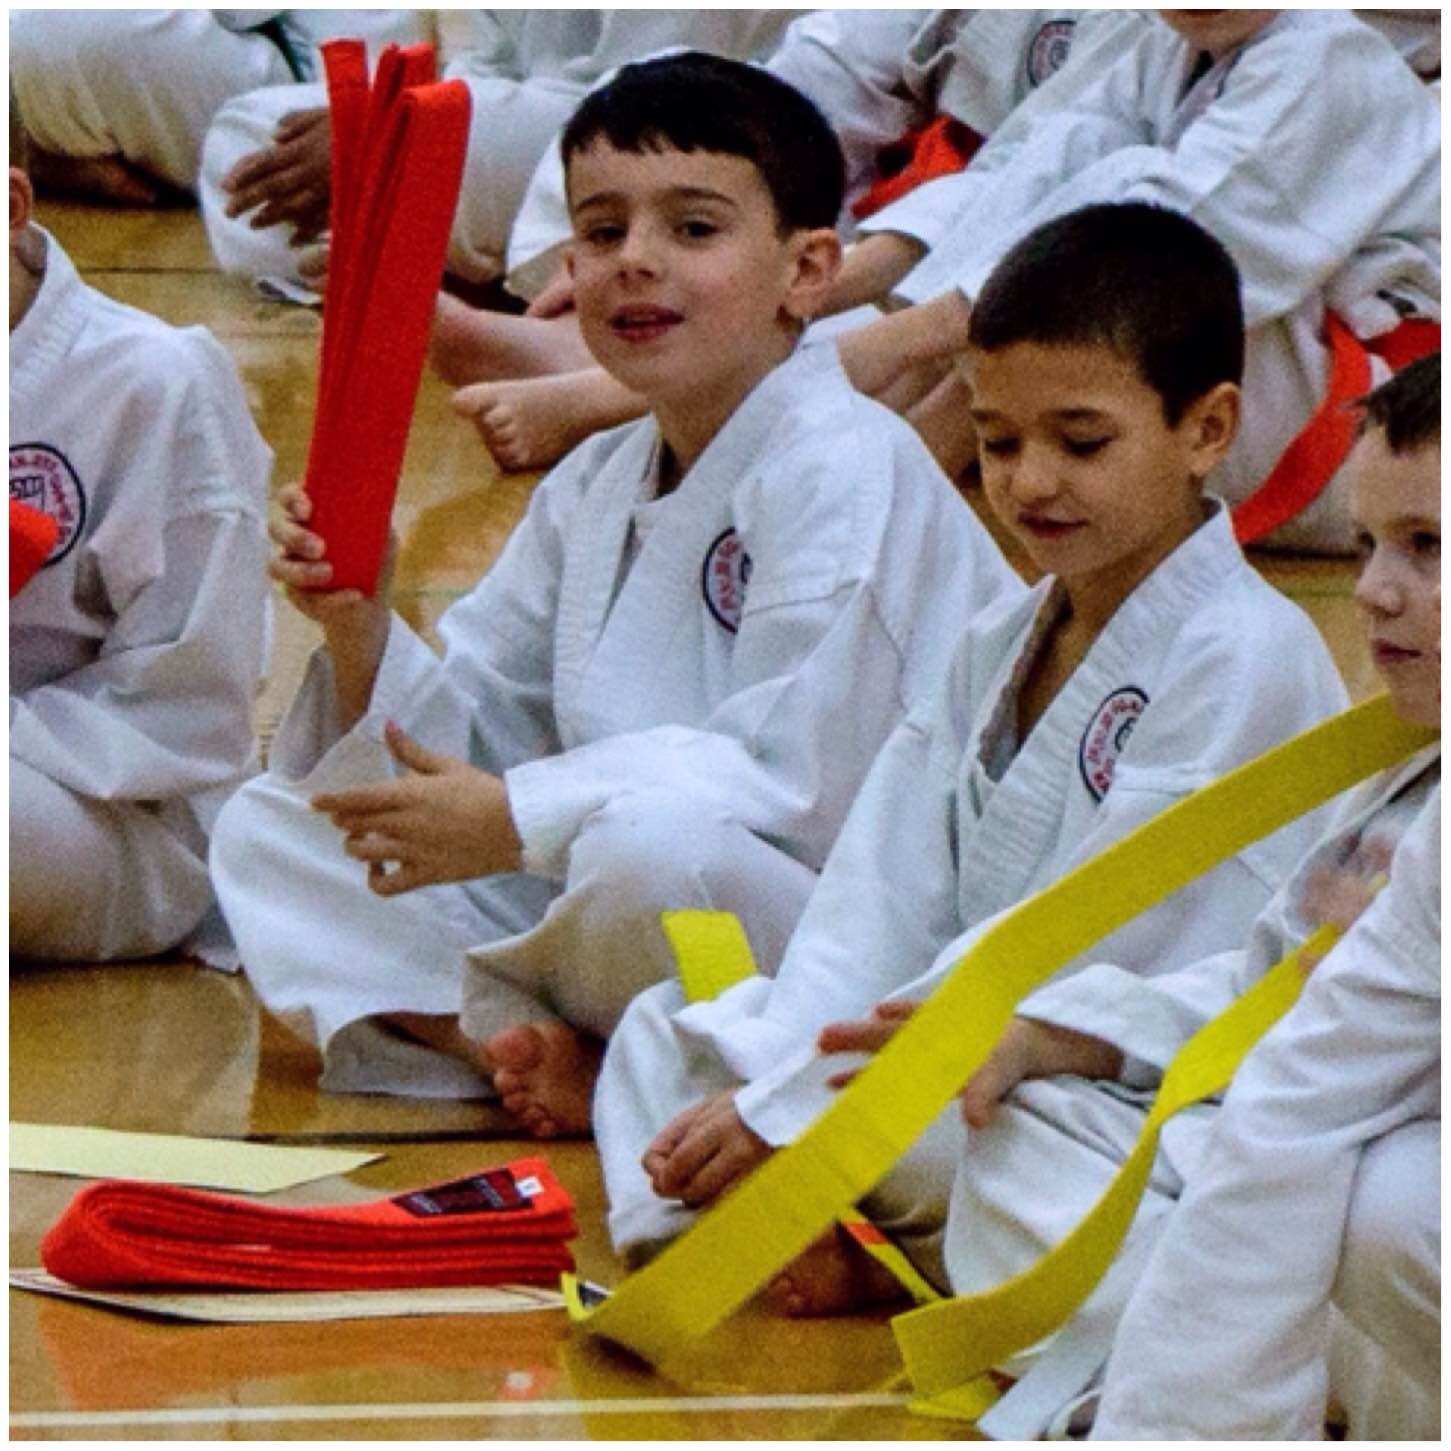
I started with Catherine so I will finish with Finlay. He has been keen on Karate now for a year now and I was very proud to watch him recently get his Orange belt. Finlay is only 7 and can be as mischievous as any other young lad however when he applies himself to something he can show some excellent self discipline – so well done son.
Orange Moment
The next instalment in the Memorable Moments series will be on some of the nature photography I have taken this last year.
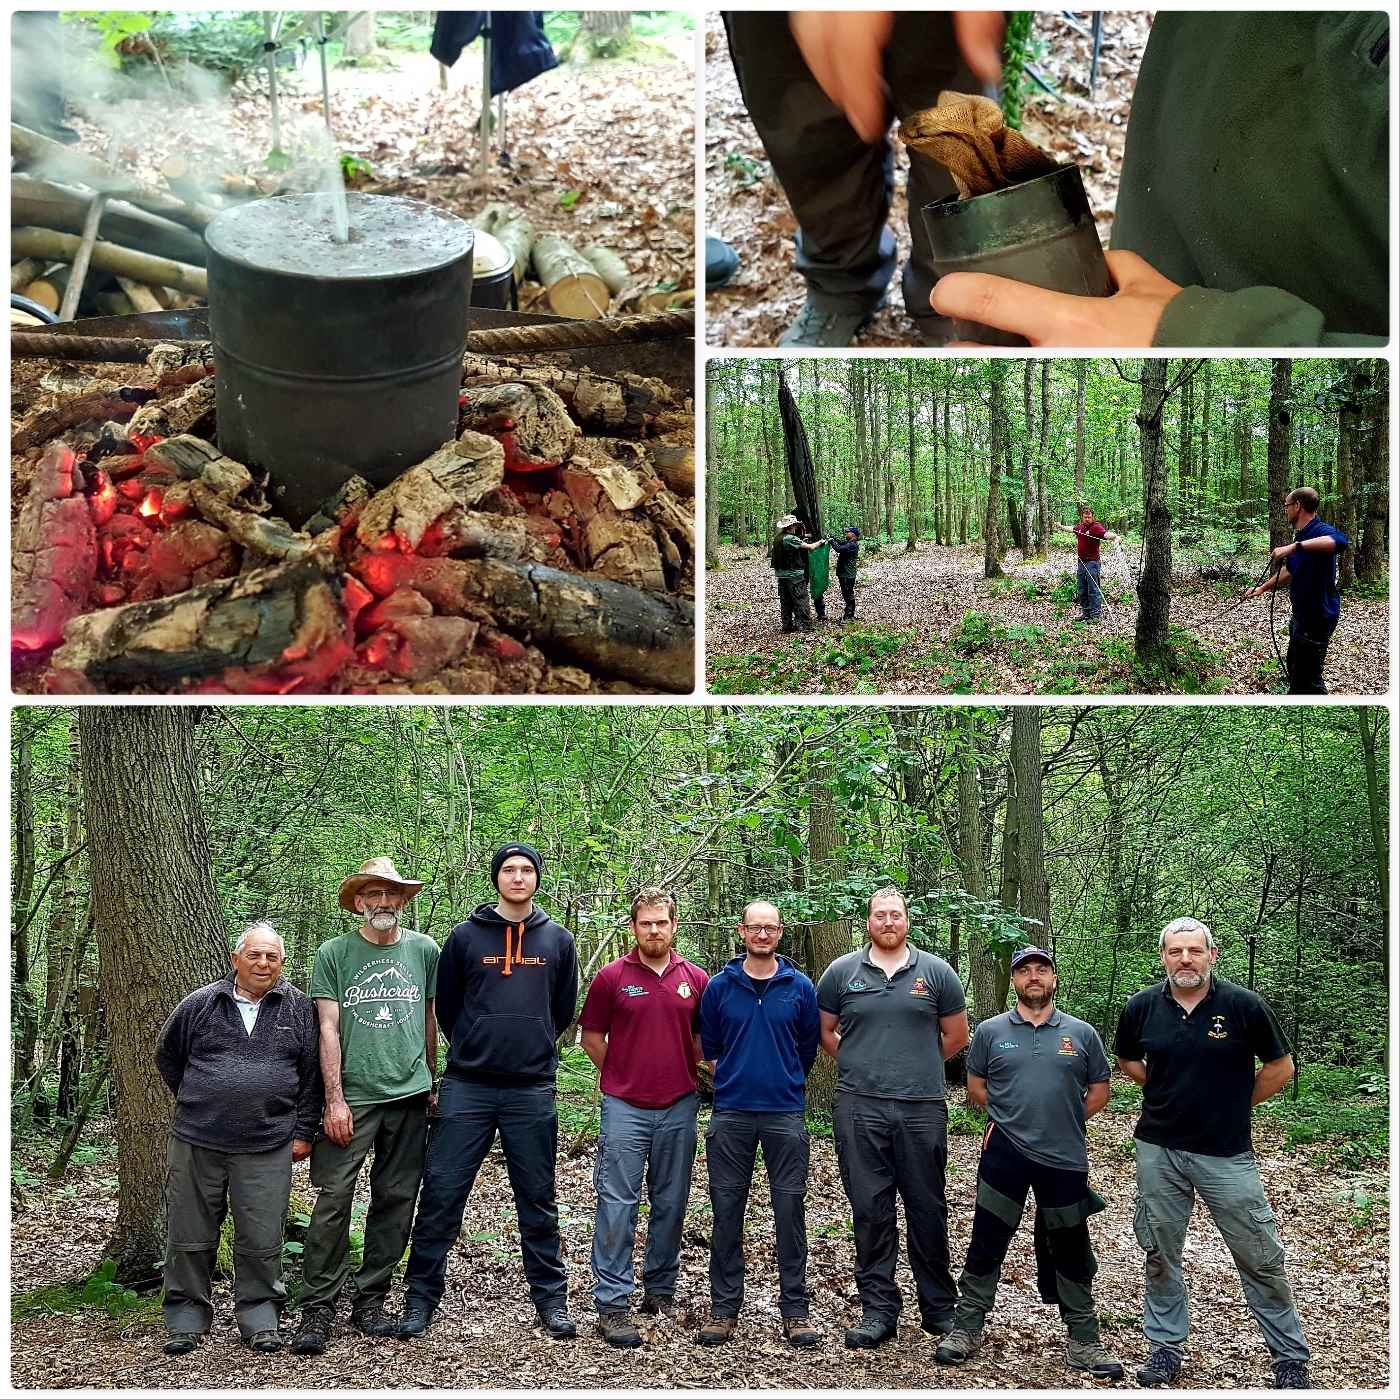
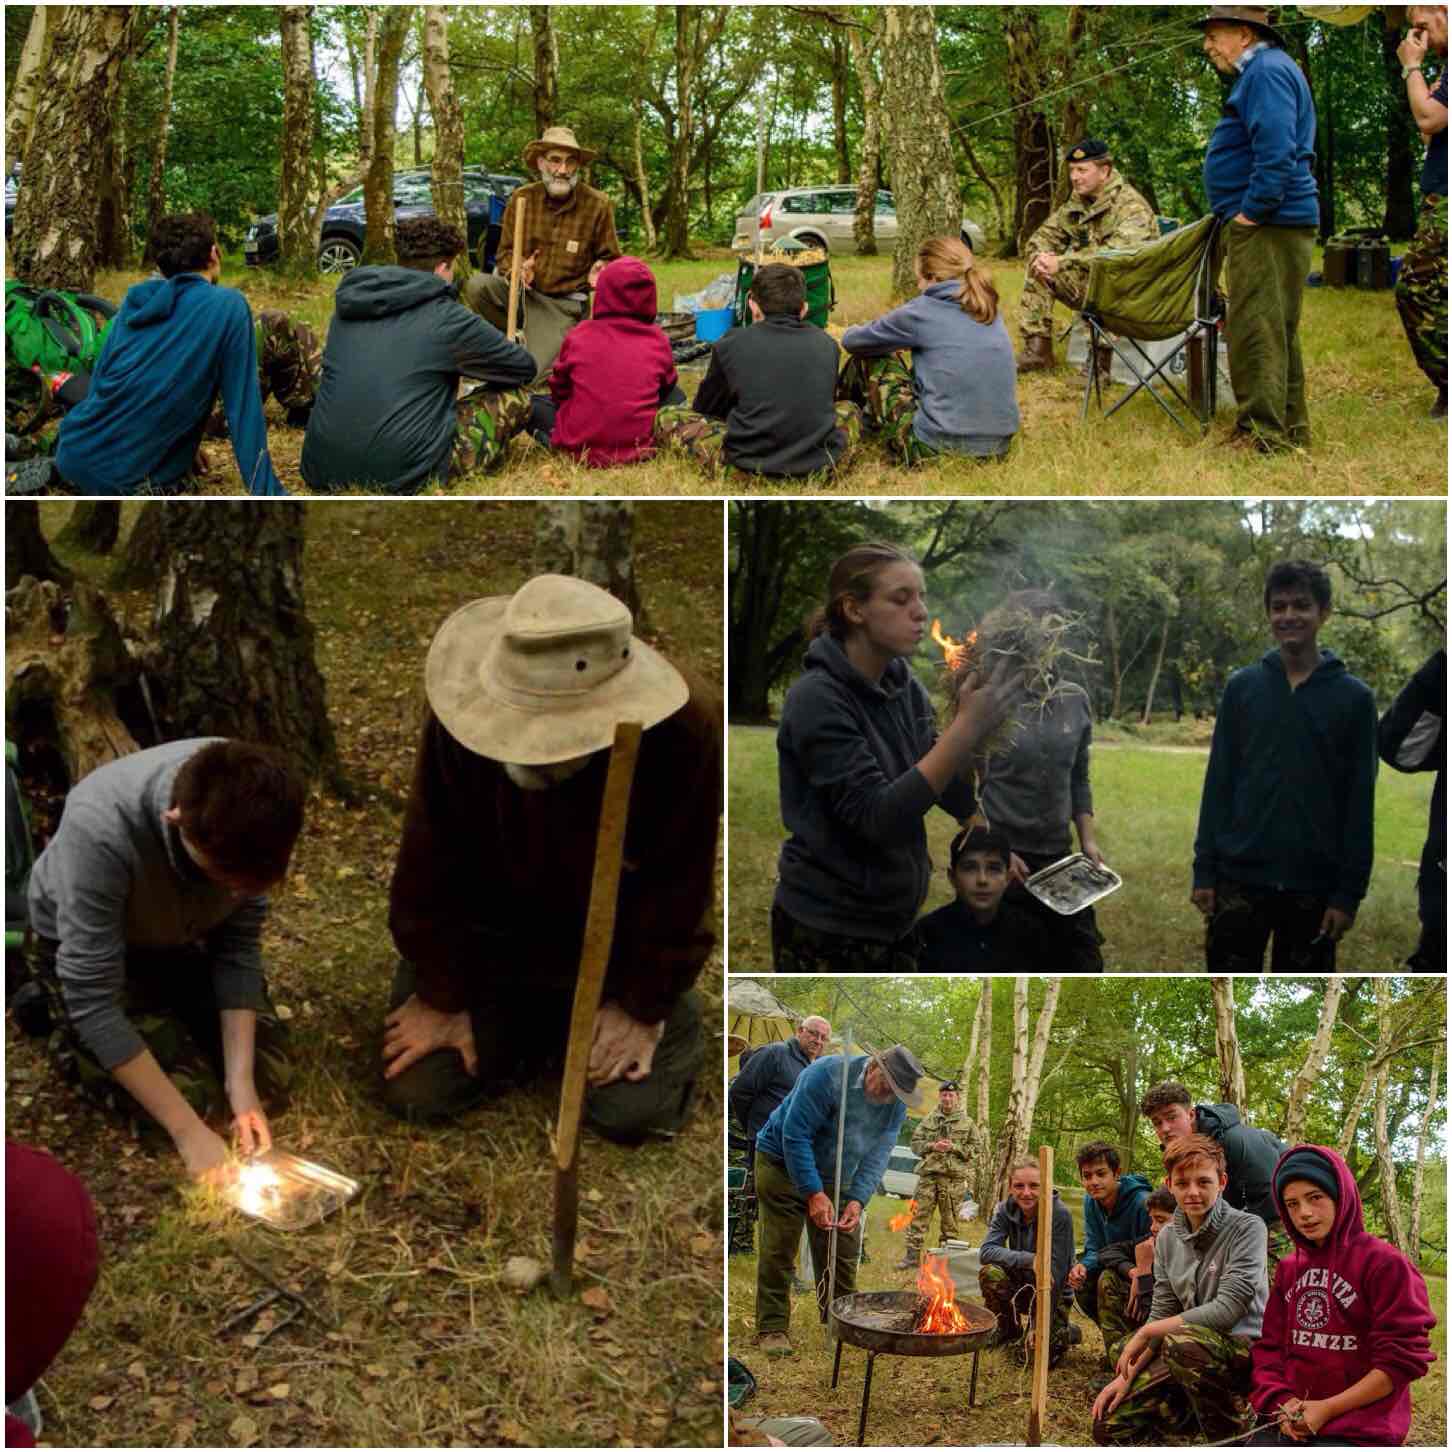
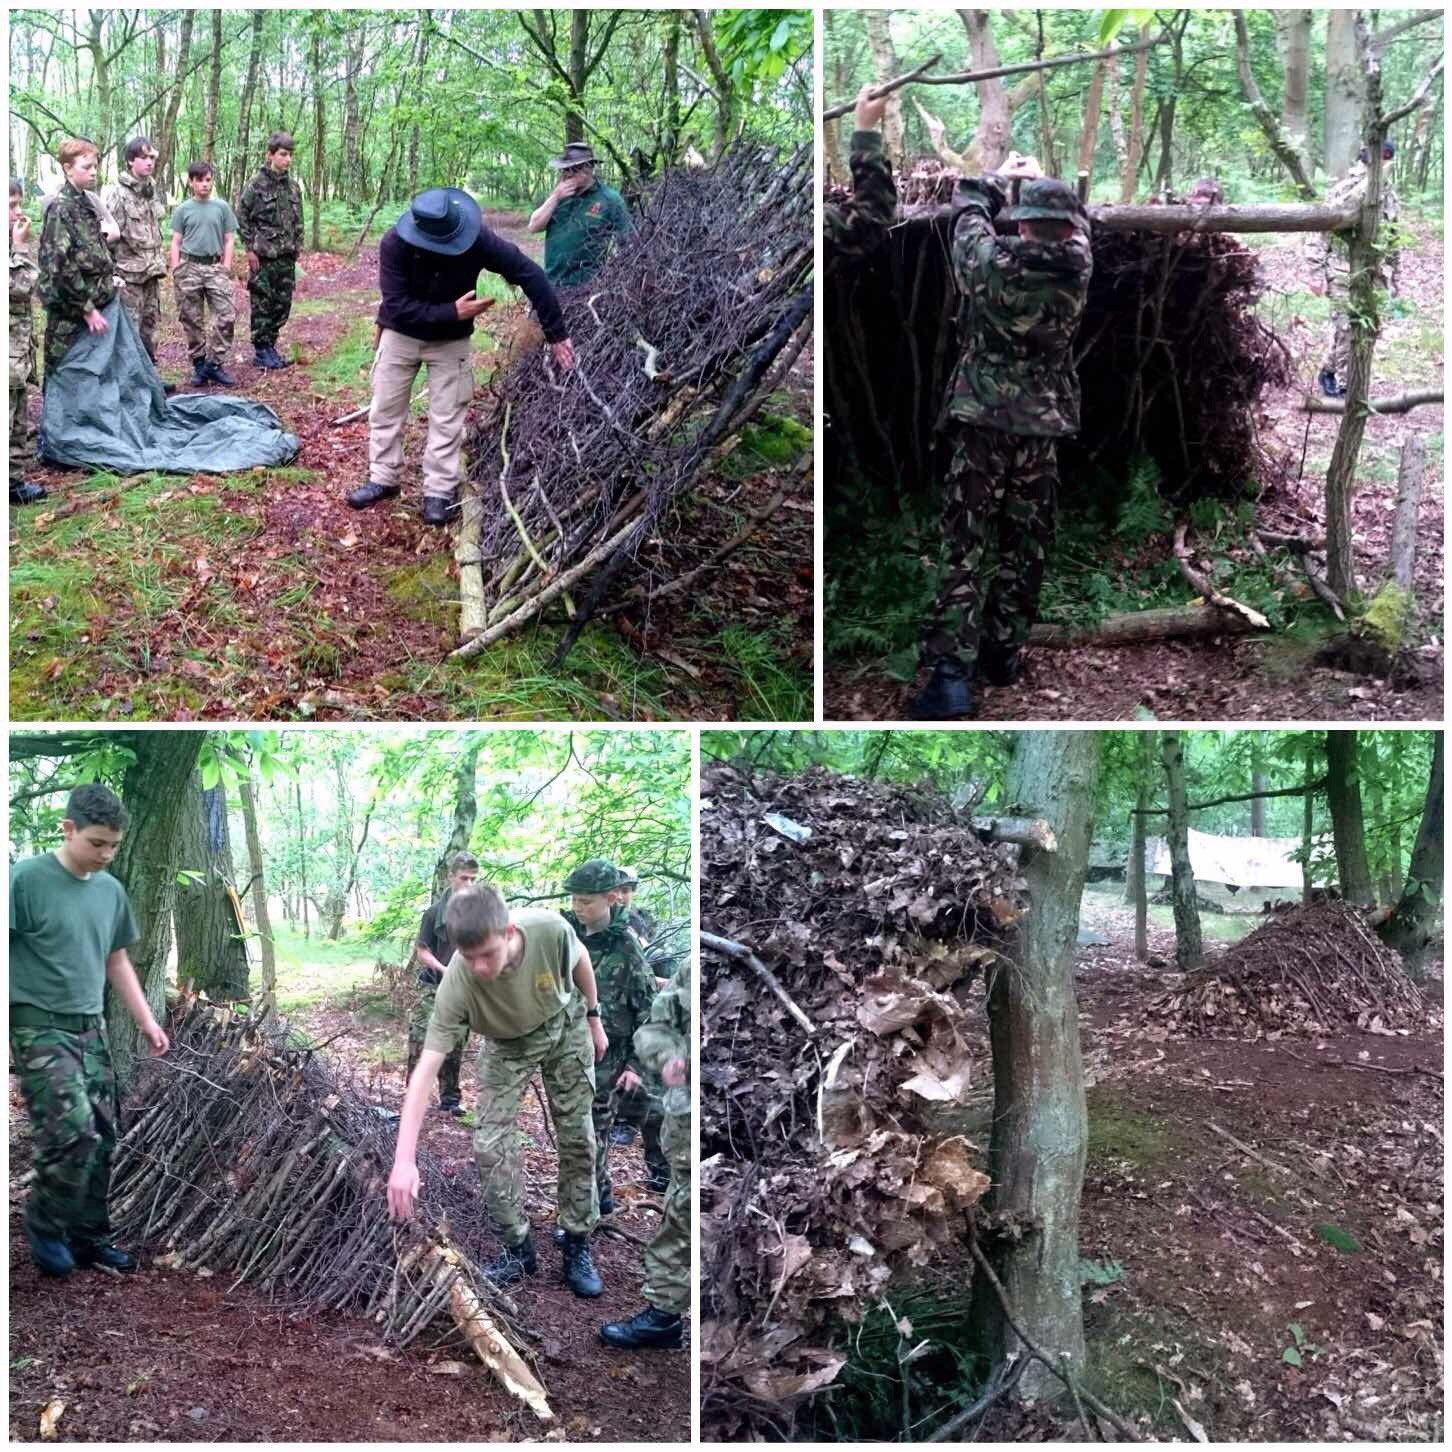
Catch up time again – I ran a bushcraft course with my colleagues Charlie, Dave, Cliff and Alan for the Southern Area Royal Marines Cadets last June in the military training area around Aldershot here in the UK.
This is an excellent area with lots of woodland to roam around and learn about the art of bushcraft.
A great bushie weekend
I wrote three short articles about this weekend back in June for the Wildlife Trusts 30 day Challenge I undertook however this is the full report on the weekend now.
Set up took most of the Friday and we were joined by a number of the Royal Marines staff so it did not take too long.
Setting up the HQ
I wanted the cadets to experience sleeping in hammocks so brought a dozen or so along. They took a while to set up but it was worth it in the end.
A dozen tarps and hammocks to put up
The cadets arrived in the evening and after a safety briefing, some supper and a stroll it was time to bed down for the night.
Some cadets were in the hammocks and some under their tarps on the ground. It was a wet night however everybody was mostly dry in the morning.
Bedding down
We ran a number of classes starting with building different types of shelters, and looking at how the tarps and hammocks were set up.
Shelter building
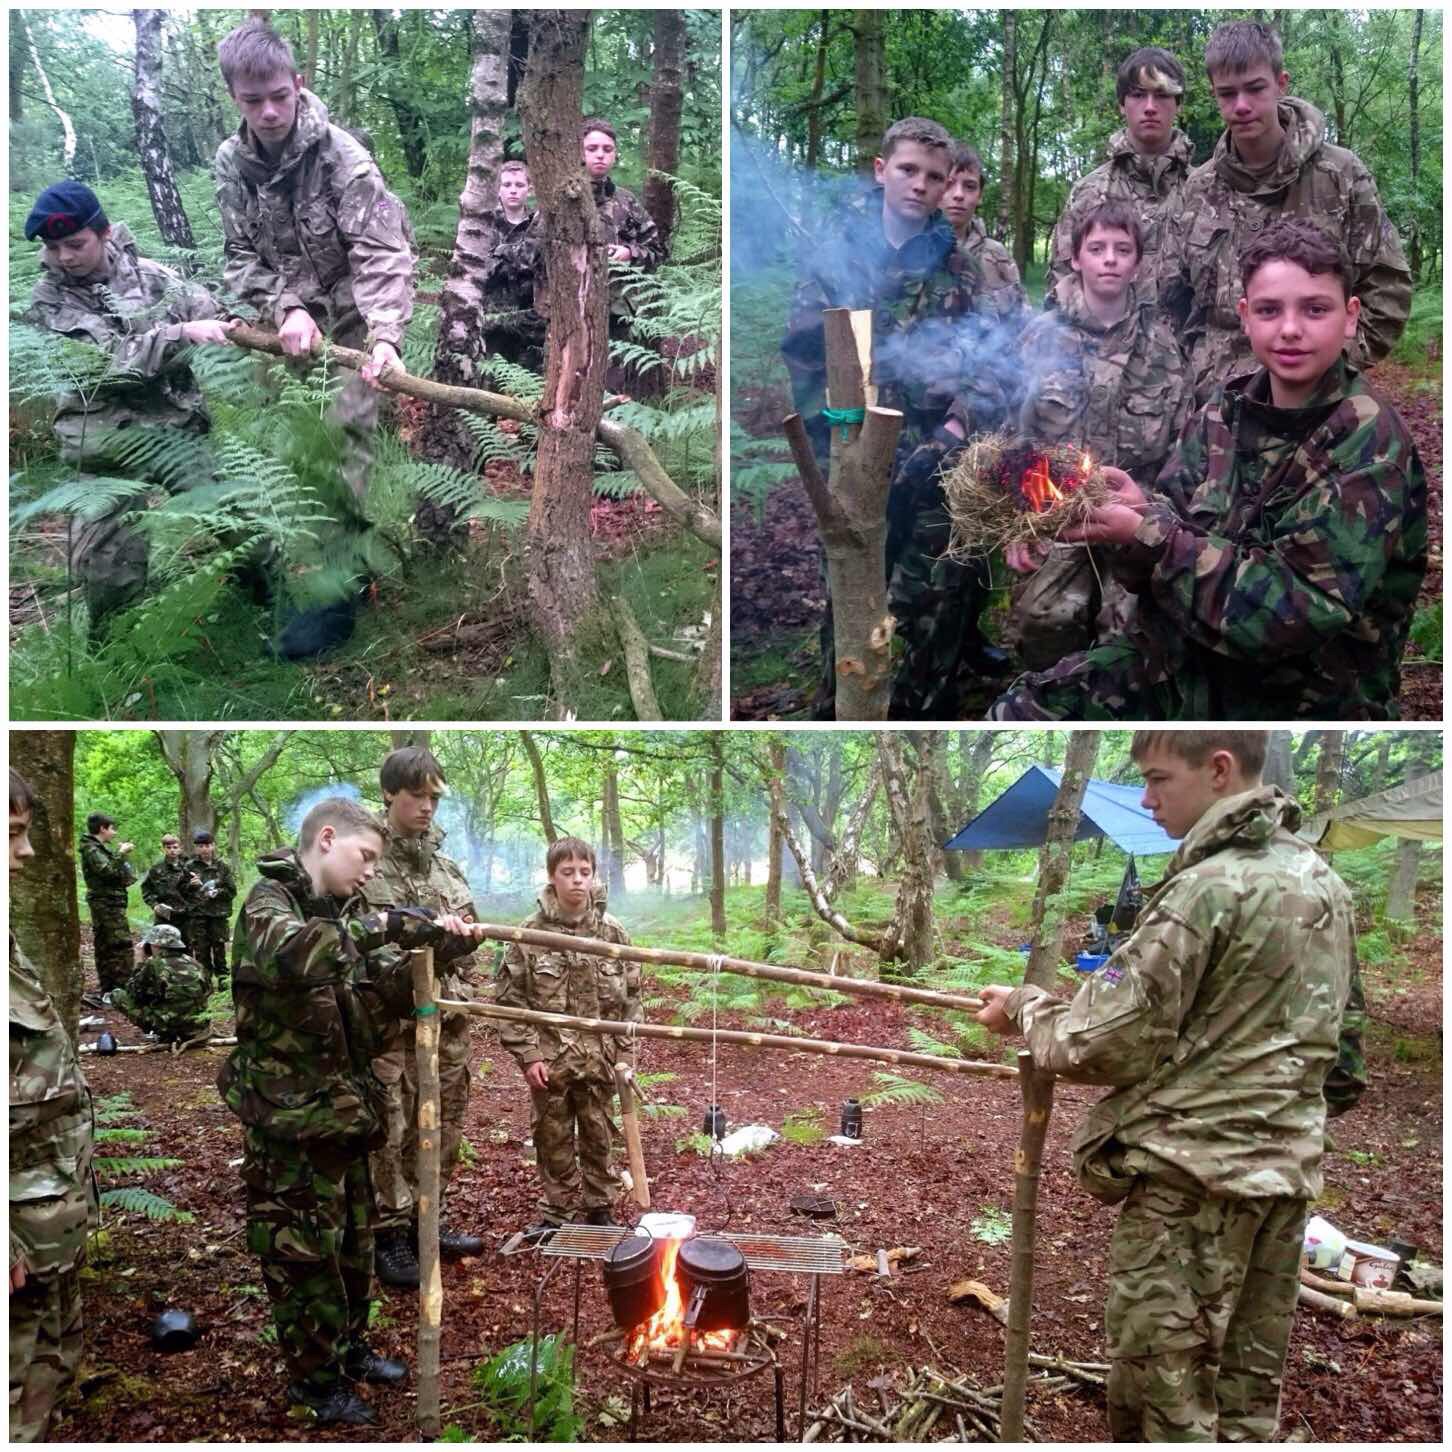
The camp chores such as gathering wood and getting fires going were soon under way. At this stage we taught the cadets how to use firesteels to light their fires.
I had also brought a number of cooking rigs for them to try out. The one in the bottom picture is the Double French Windlass rig and is one of my favourites.
Setting up the cookhouse
I wanted the cadets to feel comfortable so we spent quite a lot of time setting up different apparatus for cooking such as this Broiling rig or just taking time to chill out (bottom left).
One rule I had made at the very beginning was that unless there was an emergency there was to be no running. Quite hard for Marine Cadets to do I know however the feel of the weekend was to be one of a relaxed atmosphere.
Learning the art of Broiling and doing nothing
So relaxed that magically some cup cakes appeared in Dave’s lap.
Charlie had a good time ponnasing some trout around the fire and it tasted equally as good as it looked cooking.
Taste comes in many forms
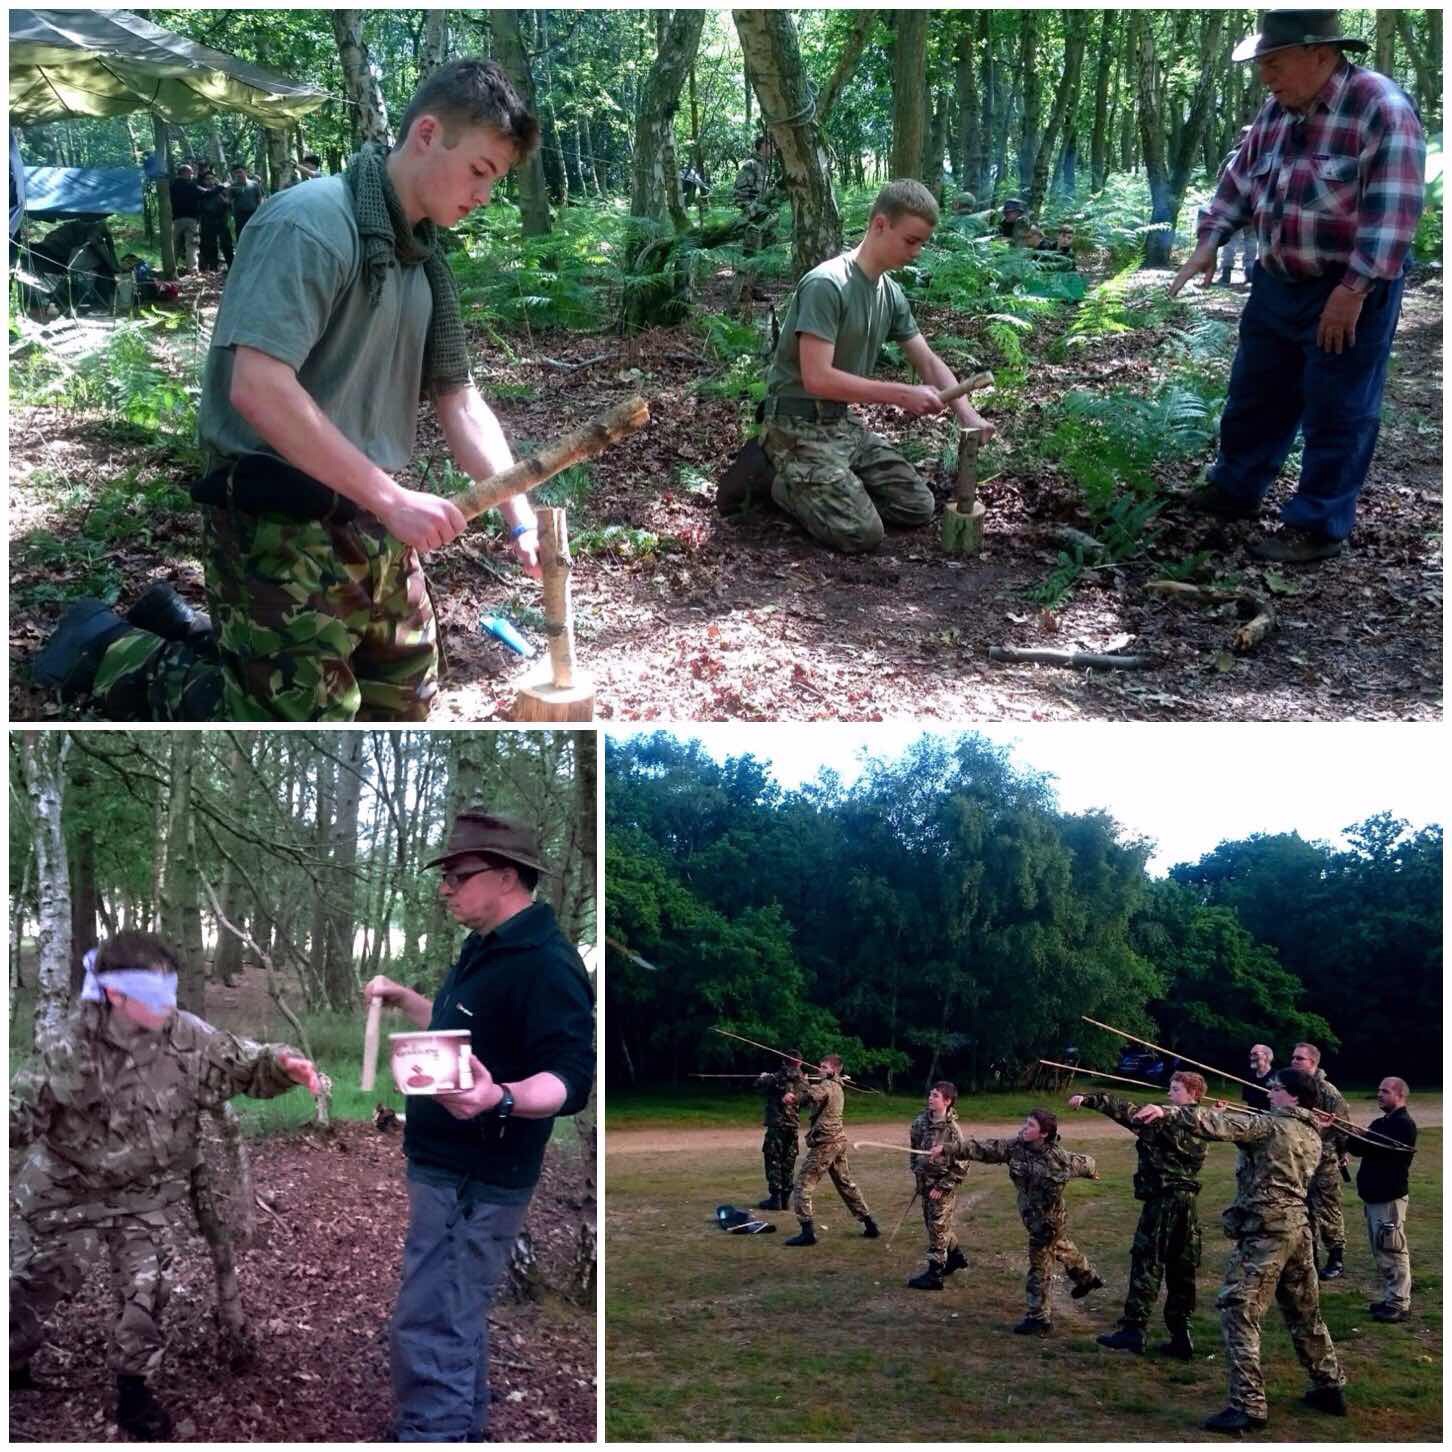
We spent quite a while learning about knife safety, battoning and carving. Then later in the evening Dave and Cliff ran a stalking game and Atlatl range.
Knife work, stalking and Atlatl
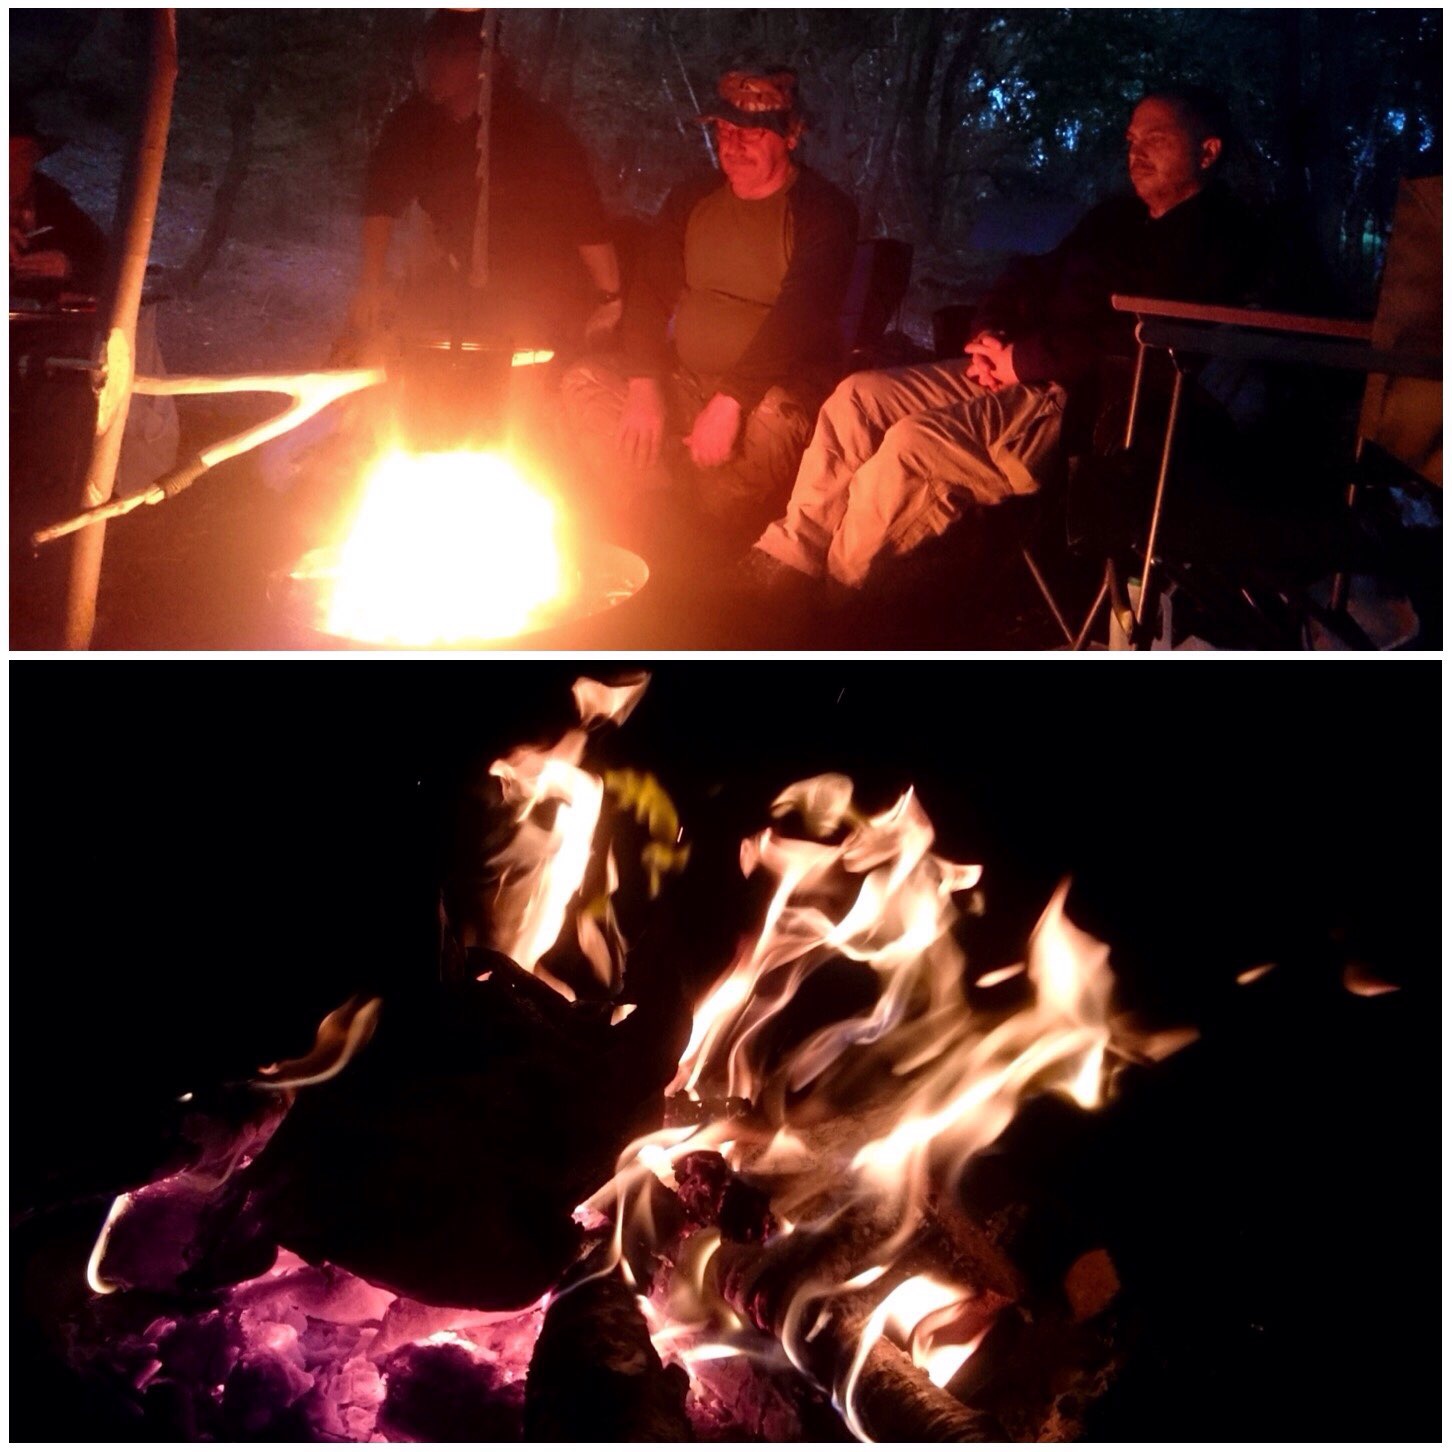
Once the cadets were bedded down the staff relaxed around the woodland TV to plan the next day out (and have a cupcake or two).
Some Woodland TV
I think you can tell by the happy smile on this cadets face that the hammocks were a success.
Morning all
Our resident master chef Alan soon had breakfast organised with plenty of sausages and bread on the go.
Brekkie time
Classes began again soon after and I ran the group bowdrill sessions. Every team that did this got an ember and successfully blew it to flame. No mean feat considering how damp everything was.
Group Bowdrill
We tried out the handrill however without success. The cadets and myself gave it our best shot but the conditions were not with us for this one so we went back to using the bowdrill.
Having a go at Handrill
Some groups also carried on with carving their butter knives. Some ended up as pointy sticks (teenagers tend to do this for some reason) however we did get a number of very nicely shaped and functioning wooden knives carved in the end.
More knife work and archery
Cliff ran another stalking game involving water pistols however they all failed to work so improvised with squeezy bottles instead (worked a treat so I will be using them in the future).
I had also brought along a number of Father and Son survival bows for the cadets to use on a short range and they were soon happily pinging the arrows down range.
Stalking and archery to finish
We had to pack up on the Sunday lunchtime so it was over before we knew it however it was a great weekend.
My aim was to show the cadets how to make themselves comfortable in the outdoors and to have fun so that when they went back out again to practice their field craft skills they would have a wider and better understanding of the nature around them.
I finally got around to updating my Freestanding Hammock Stand (based on the post from Turtle Lady post on the Hammockforum) last weekend. I replaced two of the limbs on each tripod with stronger ones and devised a new attachment point at the top of each tripod for securely attaching a tarp.
Freestanding Hammock Stand Mk2
I have used the original hammock stand a number of times now and found it quite easy to transport in my van. I recently traded my van in for a car but I have obtained a large enough top box to fit the stand in. I wrote a blog post on this stand last March and it goes into detail on making the Mk1 version. If you have not read it and want the measurements you can find it here – How To…. Make a Free-Standing Hammock Stand.
Freestanding Hammock Stand Mk1
To fit a tarp to the Mk1 stand I made little caps to go over the top of each tripod (so that the tarp would not be ripped by the wood) but I found that the tarp would slip off if the wind got strong.
Loose Tarp attachment in the Mk1
I also noticed two weeks ago that one of the limbs that had a knot in it was looking a bit weak. I applied a lot of pressure to it to see if it would last and the wood failed (left hand picture). I am glad that this did not happen while it was in use. The lesson I’ve taken from this is to make sure I select knot-free wood wherever possible when making one of these stands. To build the new tripods I unbolted the old side limbs from the two hinges and decided to replace all of them with new stronger knot-free limbs.
Broken Limb in Mk1
I made a short video of the new set up to give you an overview of it first.
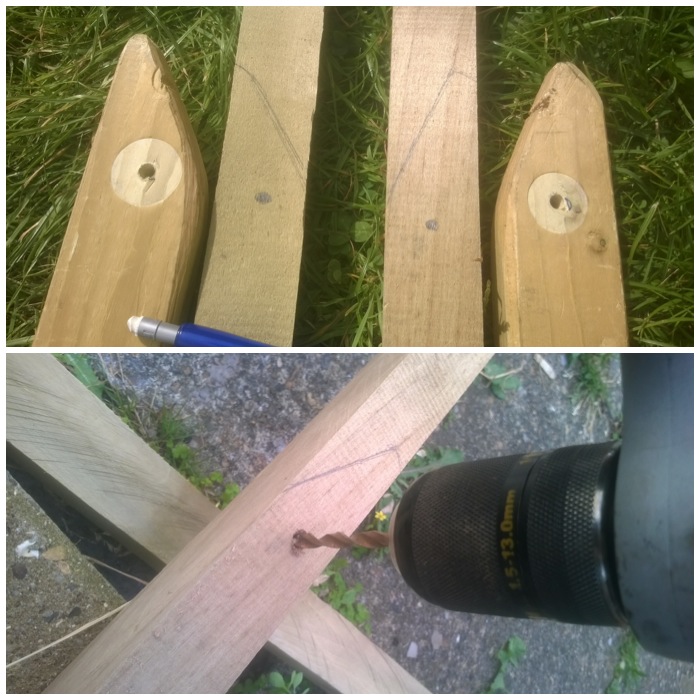
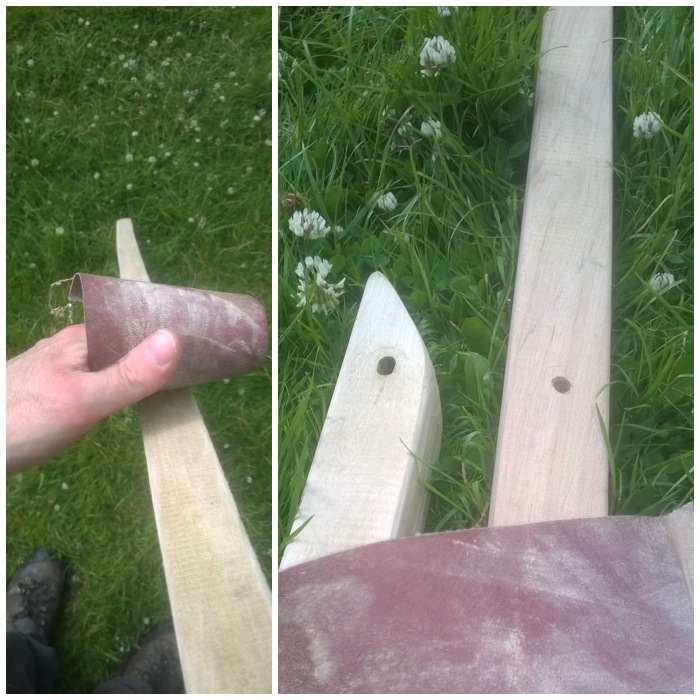
I bought some square tree stakes (2.4m lengths) and used the old limbs to mark out the bolt holes then drilled them out to re-build the first of my two tripods. The new limbs were 35mm by 35mm in diameter comparison to the old ones which were 47mm by 22mm.
Old limbs used to mark out the new limbs
I decided that just one of the new limbs (more on the other limb in a minute) on each tripod would be the same height as the old limbs so trimmed the excess wood off then used my rasp to roughly smooth all the surfaces and edges down.
Trimmed the short limb and rasped smooth
After a quick sanding (I just used a rough piece of sandpaper) the first limb was ready. I rasped the other limb (which was not trimmed to size as yet) and then sanded that one as well. You can see the two finished limbs for the first tripod in the right hand picture. it is important you do not trim the second limb to the same size as the first limb as this one will have the tarp attachment fitted to it.
A rough sanding
Using the original bolts I then attached the new limbs to the original limb that was fitted with the hinge.
Re-bolted
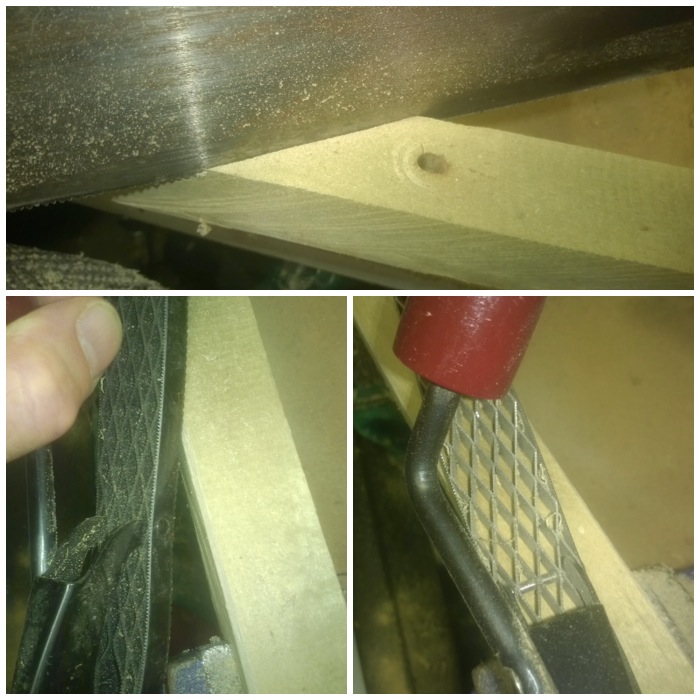
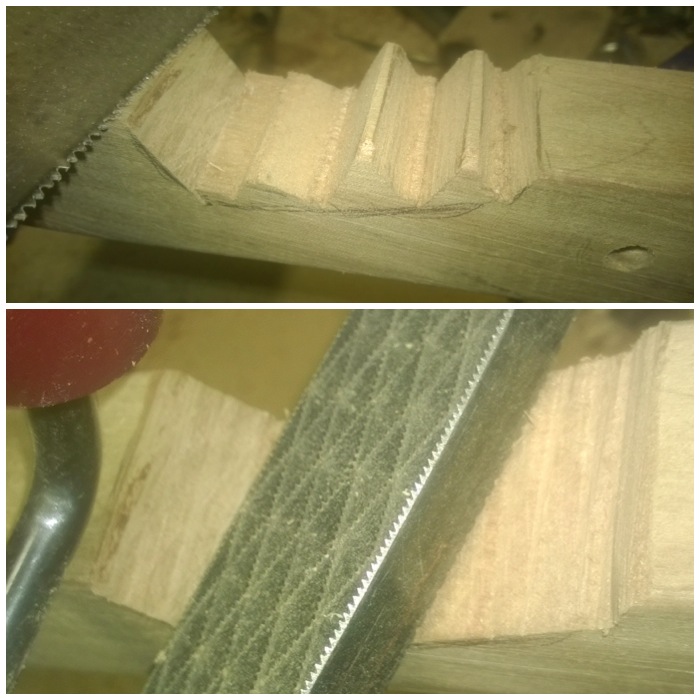
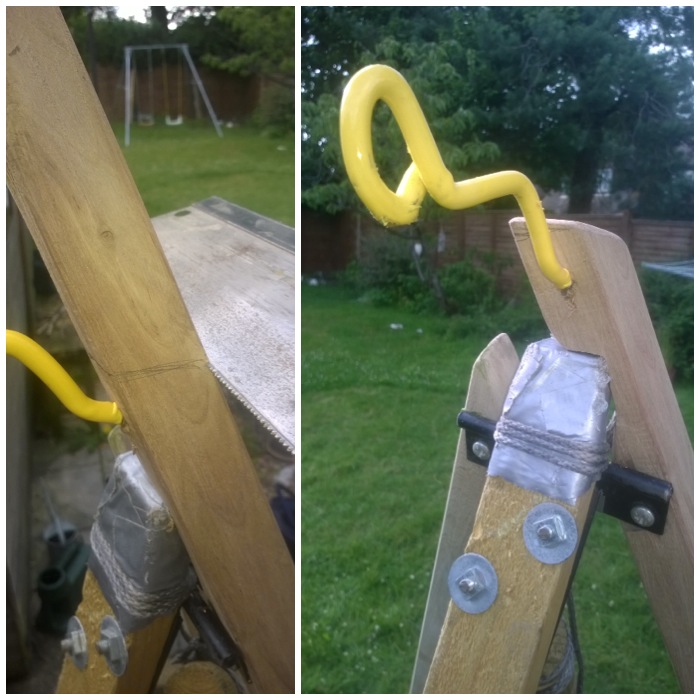
I set the tripod up as best I could with the new limbs spread out at about 1.4m width at the base (the limb with the hinge cannot be opened fully until the excess wood is removed). I then drew around the area on the larger of the limbs the piece of wood that needed to be removed.
Marked out the groove on the long limb
I unbolted the limb and put it into a vice to cut the excess wood out. I just used a small saw but a carpenter’s coping saw would have been far better suited to the job.
Removed the excess wood
After I removed the excess as best I could I used my rasp to smooth it all out before giving it a final sanding.
Rasped smooth
After re-bolting I checked to make sure there was enough clearance to open all the legs up fully. I actually used my knife at this stage to trim off a little bit more of the wood as the fit was very tight.
Snug fit
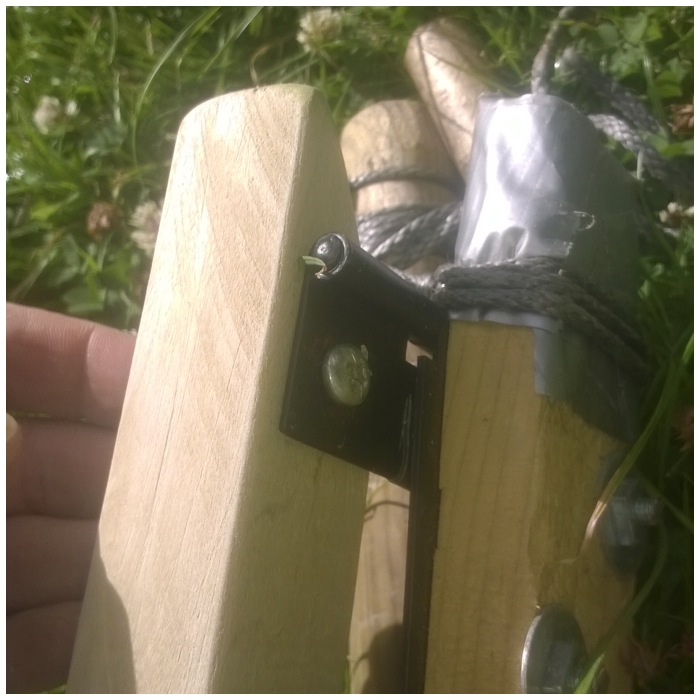
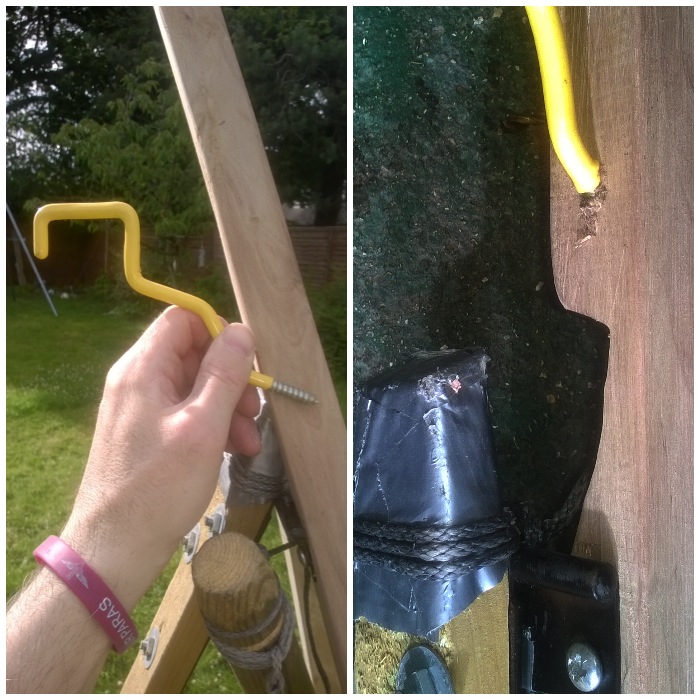
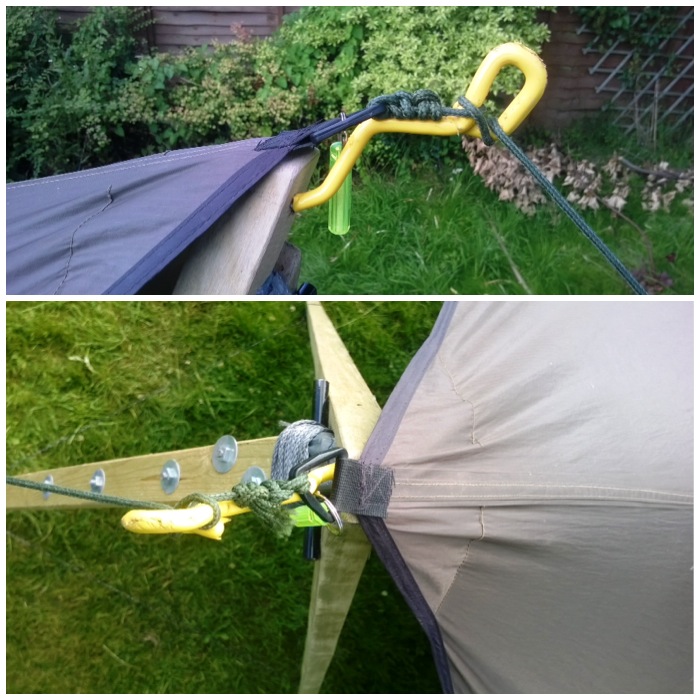
I had thought of lots of different ideas to add a hook to hang my tarp from but in the end remembered I had some of these cheap hooks you can buy to hang things from the rafters of your workshop or garage. They have a tip that allows you to screw it into wood and they can be bent into different shapes using a vice and hammer or pliers. I marked out where I wanted to put the hook, drilled a pilot hole and screwed the hook in.
Attached the hook
I trimmed the limb so that it finished just below the hook point to give the tarp some clearance. The final length of this larger limb was 1.8m.
Trimmed off the excess wood from the long limb
You can see the set up clearly now. I then repeated the whole process to make up the second tripod.
Ready for set up
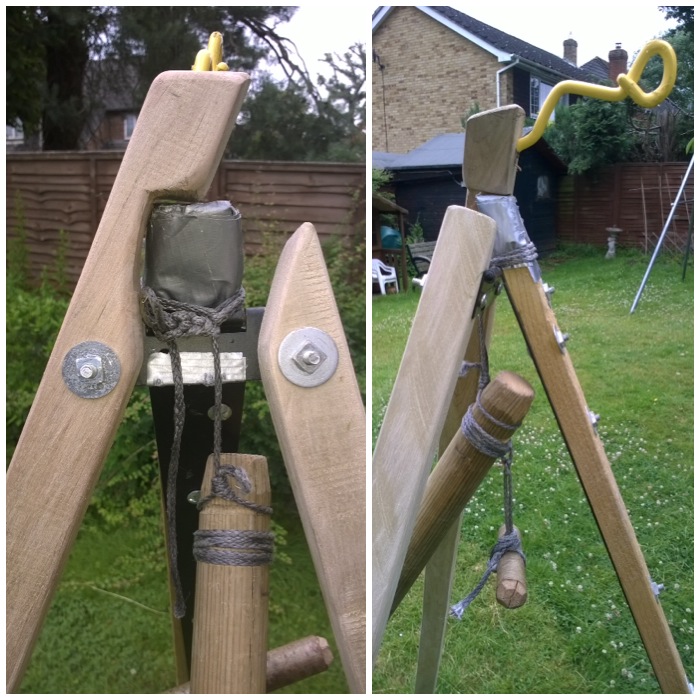
To ensure the legs will always open to the correct distance from each other I attached string to them, secured with small nails. I have found that if the legs are not set far enough apart then there is the potential for the stand to tip over.
Splay lines attached
Eventually I had two stands ready for setting up. The overall height of each tripod is 1.6m and the front limbs on each tripod are spaced 1.4m apart from each other.
Repeated the process for the other tripod
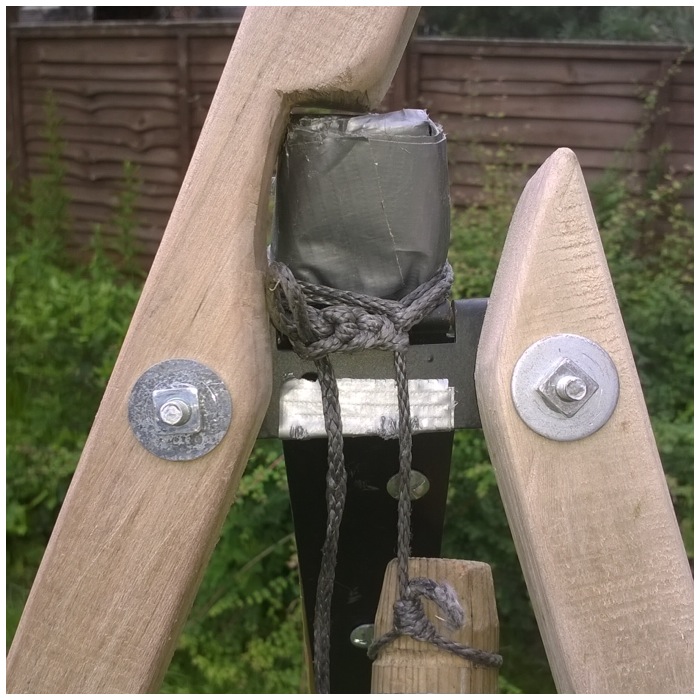
I spent a few minutes getting the tripods well set up (I spread the legs then hung off each one to make sure they were secure) and getting them the correct distance apart (for this set up, about 2.8m apart from the base of the front limbs). The crossbars need to be raised up so that they just touch each other and the Amsteelstring that they are tied onto the tripods with is hanging vertically.
Raise the topbars
Once they are touching it is simply a case of sliding the connecting sheath over until it is centered.
Slide the sheath to secure
At this stage I tend to make slight adjustments to one of the tripods so that the string is hanging vertically from each tripod as that is very difficult to achieve first time. If you do not have the strings hanging vertically you could end up tipping the tripod over.
Hanging line should be plumb
The hammock I use for this set up is my DD Frontline one and I attach it to the Marlinspike Hitch using a quick release Karibiner. The first How To…. covers how I set all this up in more detail.
Karibiner clip around the Marlin Hitch
Once it’s finished I test the set up by sitting in it before lying down. All the compression forces I create by lying in the hammock are kept in the crossbar. The tripods take my weight but do not get pulled together using this method. As I move about in the hammock the crossbar moves slightly but the tripods stay still as the bar is suspended from each tripod.
Test by sitting then lying down
I then attached my Hennessy Hex tarp to the hooks and just used small wooden pegs on the ends and corners to peg it all out.
Attaching the tarp
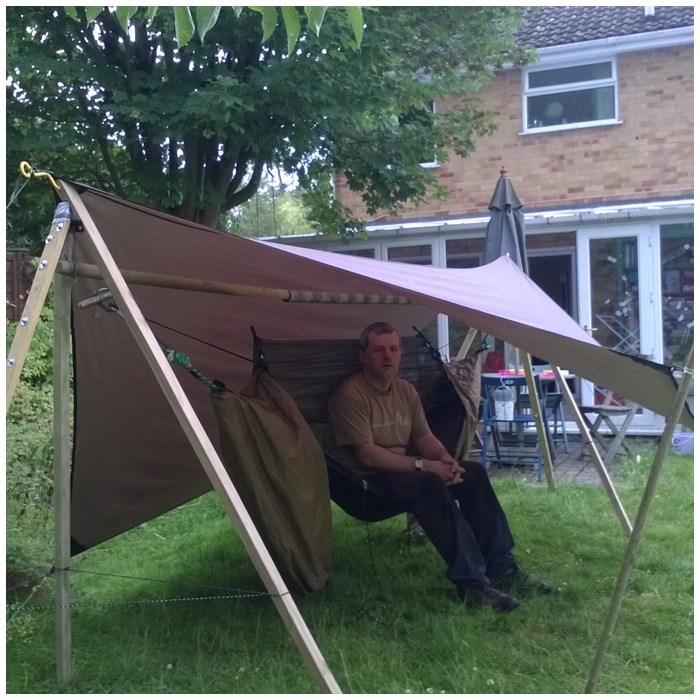
This set up gives me good head room for sitting and doing my admin.
Good head room
The tarp is a snug fit as the ridgepole was cut to a length to ensure the tarp fitted perfectly. It seems quite strong and I am looking forward to trying it out in the near future at a campsite where I know good hammocking trees are not available. I weigh about 14 stone and I have sat in the hammock with my son who weighs about 4 stone so I am quite confident in this set up.
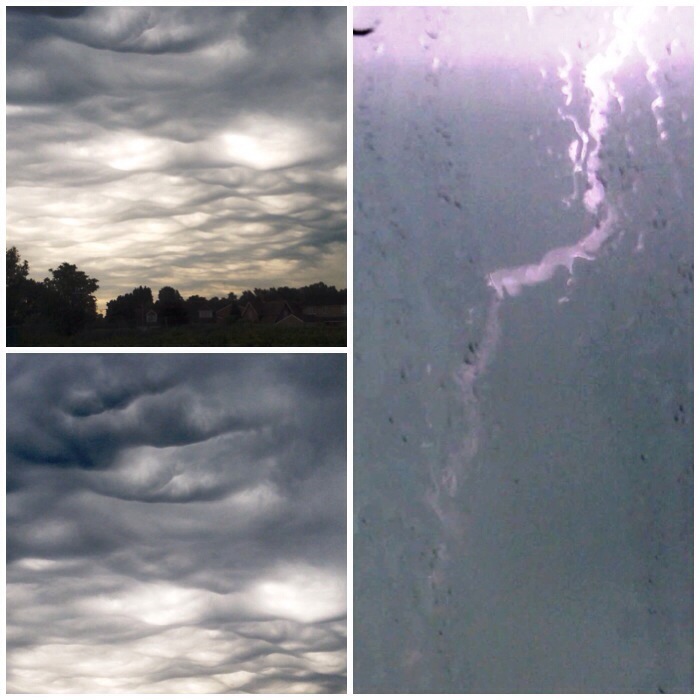
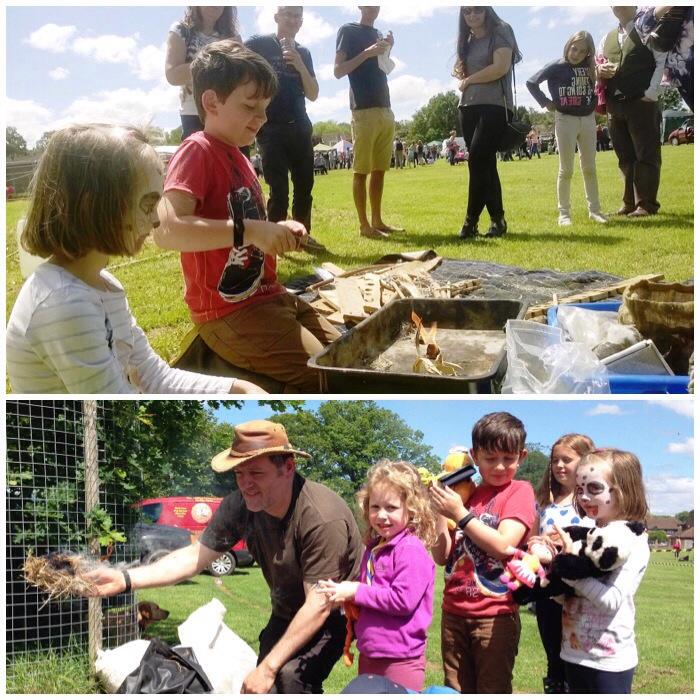
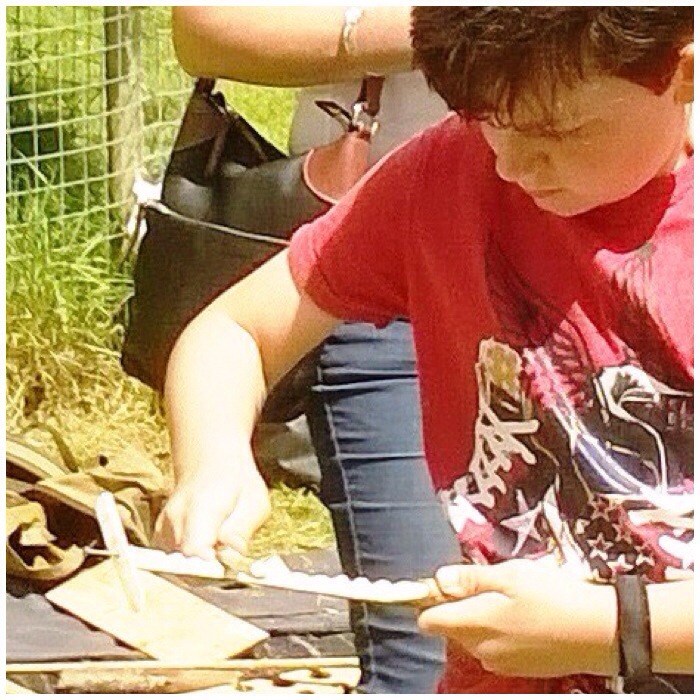
About a month ago I was asked to help out at my local village fete by running some bushcraft activities. Space on the field was quite limited so I could not set up ranges for the bows or the Atlatls– my first choice – so instead I opted for fire, hammocks, camp set-ups and the whimmy diddle.
Bramley Bushcrafting
I arrived at 8.20am to be greeted by these dramatic mammatus clouds (known as upside down clouds). They are sometimes spotted preceding a thunderstorm. In a matter of minutes the rain was lashing down and the picture on the right is a still of a lightning bolt I caught on video.
The rain carried on in bursts for the rest of the morning as I set up. I was a bit concerned that all my tinders and fire sets would be a bit damp. I set up my tipi, a fire area, some campfire cooking set ups and a hammock for folk to try out. Thankfully by the time the fete opened at midday the rain had stopped and the skies were clearing and my kit was all still dry.
Stormy Set Up
As soon as the fete opened I was kept busy. There were lots of different activities, some you paid for and some you did not pay for. I had agreed to run my activities for free partly because it was a nice opportunity give something to the community and partly because I love seeing people try out bushcraft and discover these ancient skills for themselves.
A quick and easy-to-learn activity is the use of modern firesteels. In no time at all the kids were lighting up Vaseline-smeared cotton-wool balls and using smouldering char cloth to get tinder bundles going. I try to make each of these activities into little classes that include a little discussion at the beginning around permissions and the safety of making a fire.
Busy times straight away
One of my favorite bushcraft toys is the whimmy diddle. This was taught to me a few years ago by the guru of bushcrafting Mors Kochanski. I love the way I can make the little propeller go one way and then the other as if by magic but best of all I love watching other people trying to figure out for themselves how to do it.
Introducing the Whimmy Diddle
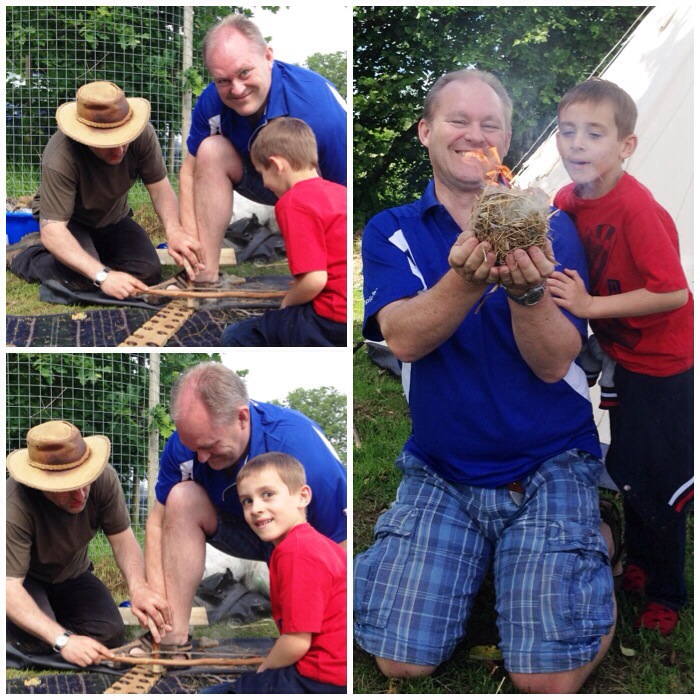
During the day a number of dads came up to me (no mums this time, for some reason) and asked me to help them make fire using the bowdrillwith their sons. I think this set of pictures kind of says it all in terms of how special a moment this can be.
Quality Father and Son time
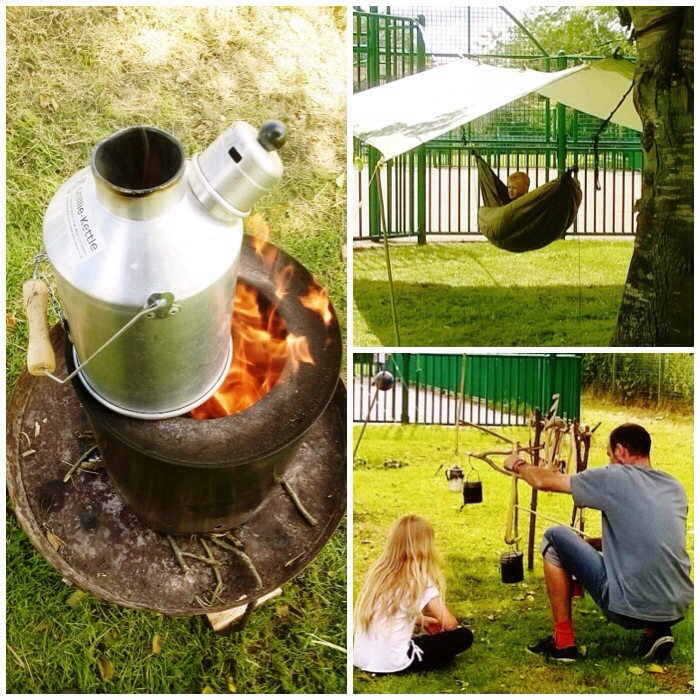
It was not all work work work; I was able to keep the gas wood burning stove my friend Fraser from Coastal Survival gave me and so I always had a brew on the go.
While I was busy teaching, others just chilled out in the hammock (this was very popular and quite a queue formed) or studied the various campfire cooking set-ups I had put up.
Plenty of brews and chill time
I hadn’t really planned to use the handrill but someone asked about it so I gave a demonstration (thankfully I got an ember), and then before I knew it I had loads of kids asking to have a go. I explained that this would usually be done in family groups (and in some societies still is) so to make it easier for everyone. Before long we were twirling away taking it in turns. I think we only had one failure, but we kept the dust we had produced from that one to help build up a successful ember using the bowdrill instead.
At the end of the day I lost count of the number of handrill sessions I did: I do remember having really sore hands (even sorer the next day) but it was all worth it.
Never too young to learn the handrill
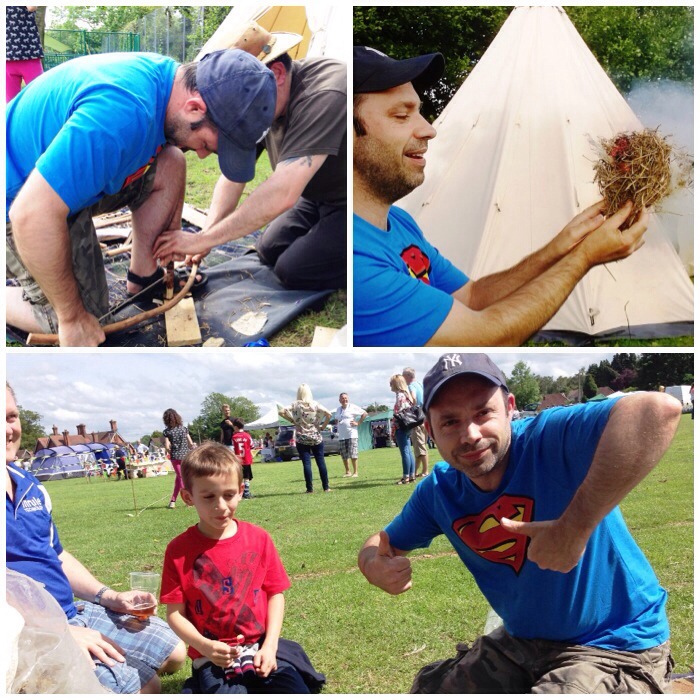
Occasionally I gave some one-to-one tuition on the bowdrill to give my hands a little rest from the handrill.
Adult to Adult teaching
As I did not have a great deal of time with each person I tried to help out where I could. In the picture below all I am doing is showing the student how to keep the bearing block still and my right hand is stopping the bow from see sawing (I am not holding it at all).
Guiding
It was not all handrill with the kids – sometimes we got the bowdrill out with spectacular results.
Big kid teaching little kid
Plenty of smiles after each time.
Smilers – Picture courtesy of Ian Evett
All in all I had a fabulous day lighting fires, teaching the whimmy diddle, discussing campfire cooking set-ups and ensuring as many kids as possible got to try the hammock out.
Flamage
I am told that the rest of the fete was a success with loads of activities but I never got to see any of it. I managed to get away from the stand once to go to the toilet and my wife Alison brought me what must have been the largest pork roll ever from the hog roast stand (and for taking all these pictures).
My kids had a great time and managed to pop back to see me every now and then.
What I missed
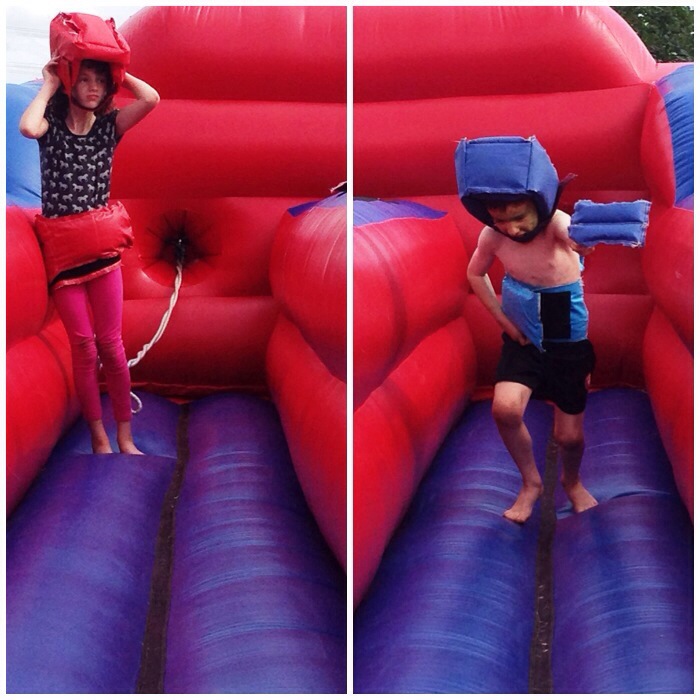
The only problem with being part of an event like this is that you miss seeing all the other activities, such as this inflatable tag challenge which my kids obviously loved.
It was at this point Spikey had his Eureka moment: ‘Why not try and find a piece of sycamore that’s oval shaped instead of round?’
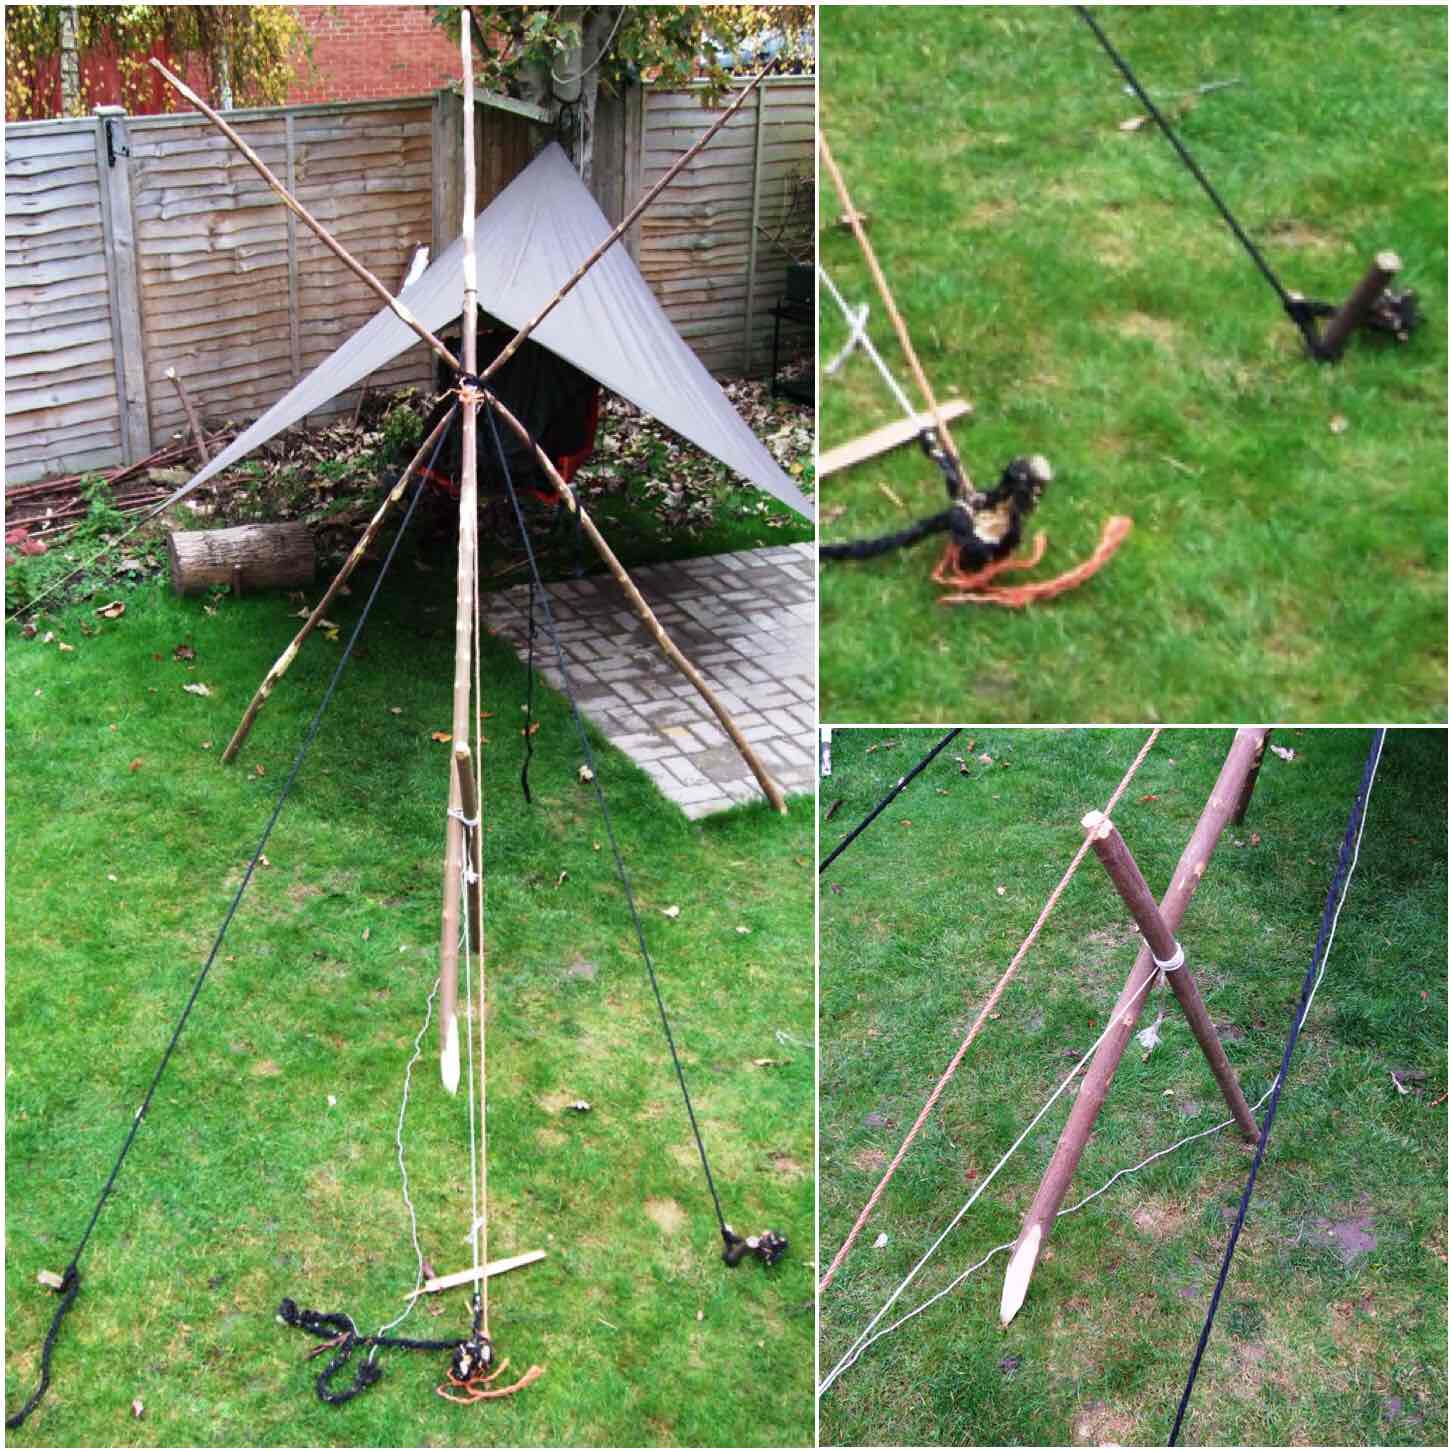
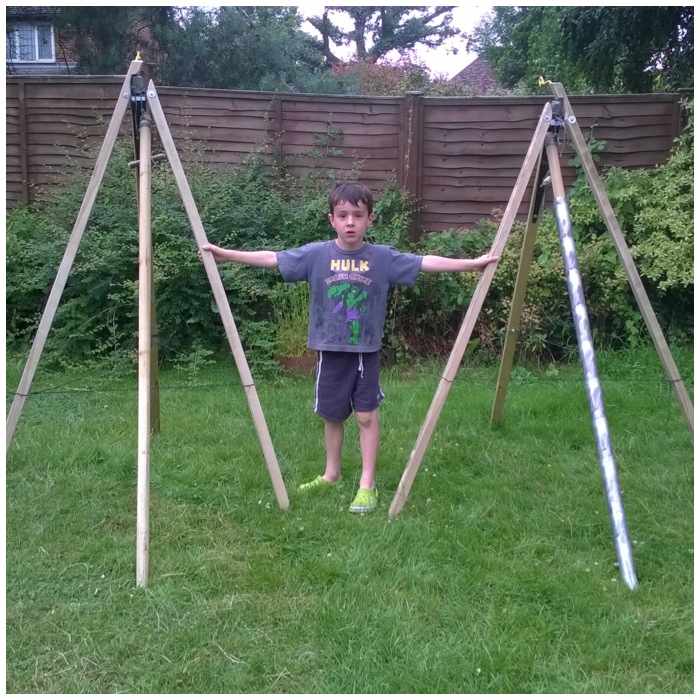
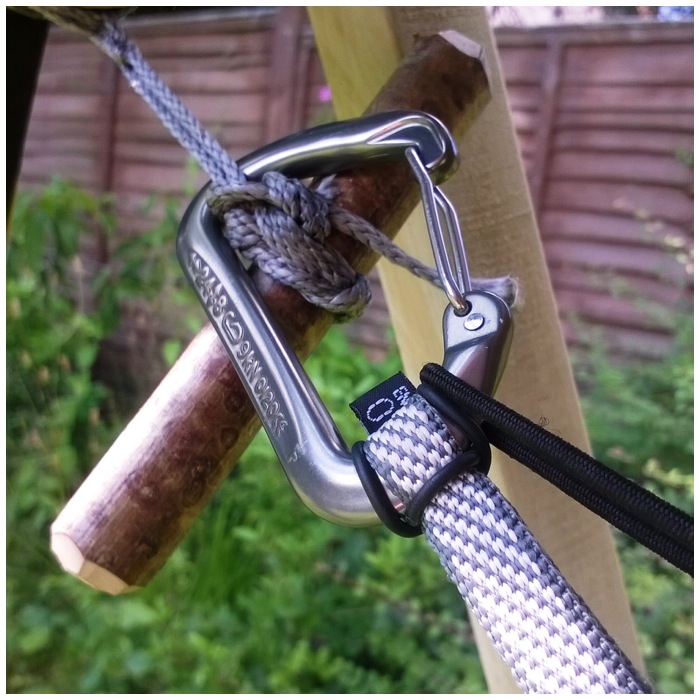
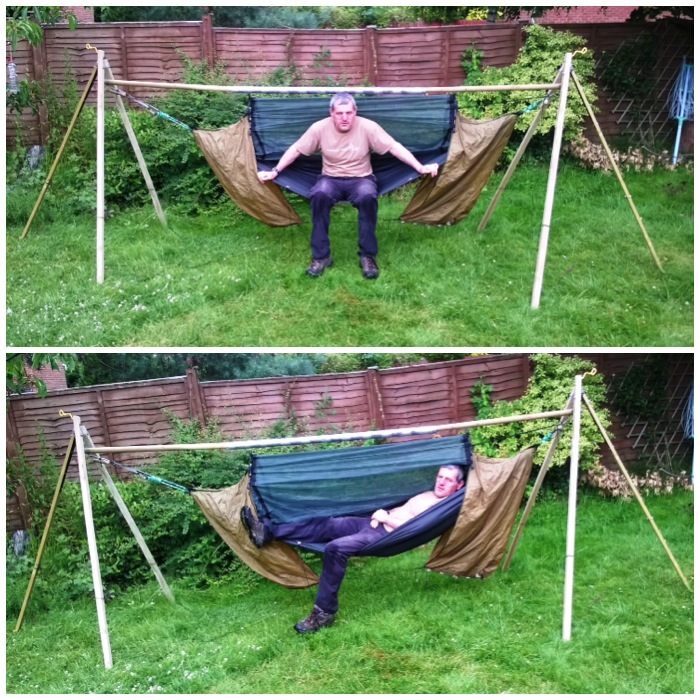
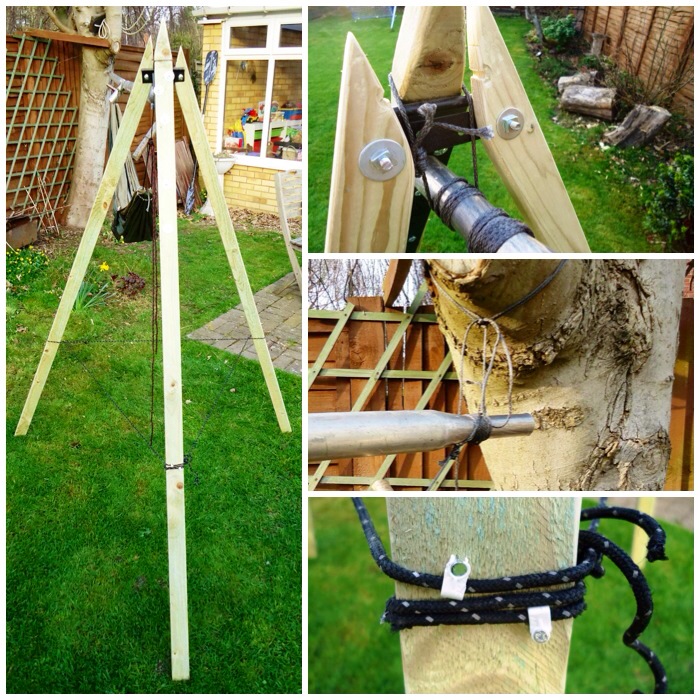
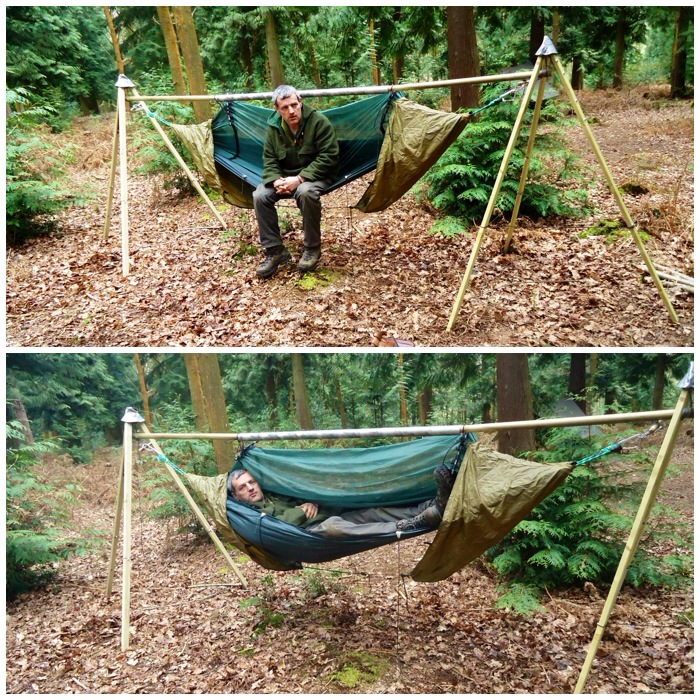
This post is for my friend Spikey who had one of those Eureka moments that pop up out of the blue. It happened when we were experimenting with the building of a green-wood, free-standing hammock stand at the 2012 BCUK Bushmoot. If it hadn’t been for his inspired idea this hammock stand would never have worked. More on that later but to begin with I need to explain how I got into building these free-standing hammock stands and explain a bit more about what they are.
A free-standing hammock stand comprises a couple of tripods with a ridgepole hanging down between them. The ridgepole is not directly attached to the tripods but slung on some Amsteel cordage. I like to use Amsteel cordage as it is fantastically strong, does not stretch easily and is very rot resistant. The hammock is tied off to the ridgepole so that the compression forces from someone lying in the hammock are solely on the ridgepole. The tripods only take the vertical forces caused by the person’s weight. As the forces are separated there are no compression forces on the tripods that could cause them to topple over, which means you do not need ground anchors.
The two pictures below show two free-standing hammocks I made, one with green wood and one from machined wood.
Woodland-made and workshop-made free-standing hammock stands
To me there is nothing better than finding a nice spot with two perfectly placed trees where you can set up a hammock, have a great sleep and waken up in the morning to a great view. Sadly this is not always possible: the trees may not be placed perfectly, or may not be strong enough to support a hammock, or there may simply be no trees about.
At times like this you have to start thinking out of the box if you want to still sleep in your hammock.
Relaxing hammocking when the trees are perfectly placed
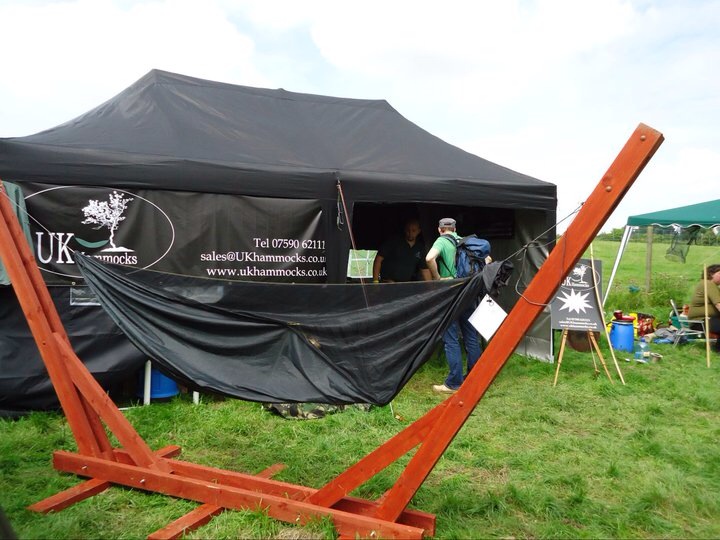
If you have the tools and the ability to transport your own hammock stand you can make something as good as my friend Mat made for displaying his UK Hammocks.
The deluxe version
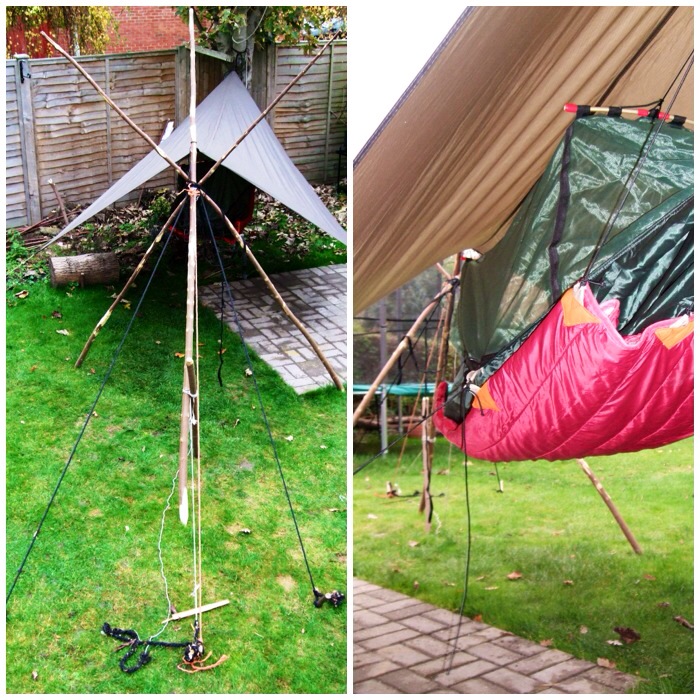
I can’t transport or store a hammock stand like Mat’s so I started experimenting with what I called the one-tree hammock stand. I set up a tripod made of sycamore rods that had lots of wooden anchors to hold the tripod in place. I then tied one end of my hammock to the only big tree in our garden and the other end to the tripod.
The tripod was held in place by lots of anchor points and worked well until my wife Alison pointed out all the holes I was making in the garden, and muttering about ‘trip hazards’.
One-tree hammock stand with multiple ground anchors
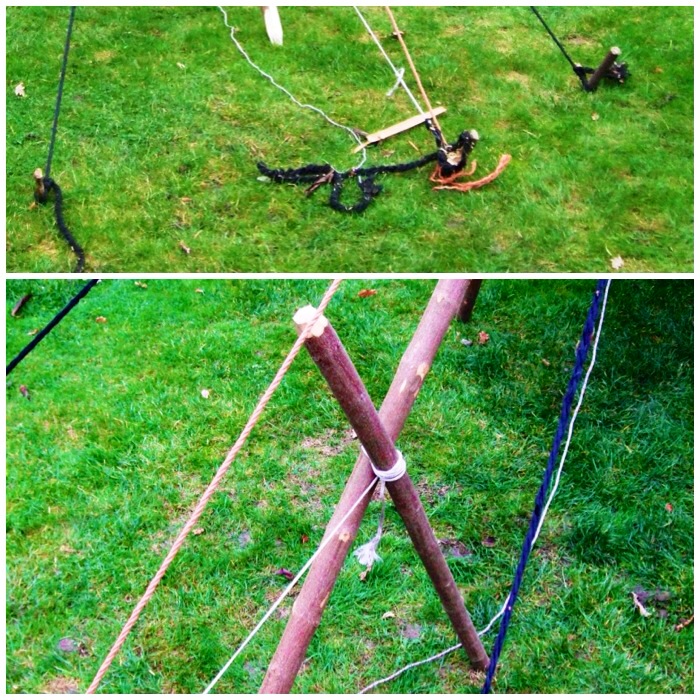
Not only did I need anchors to stop the tripod from toppling over, I needed to set up further spikes on the tripod to give it extra strength and keep it in place. I suppose this was due to the fact I was using wooden pegs and ropes of different strengths which tended to stretch a bit.
A lot of rope is required for this set up, and backwards facing pegs
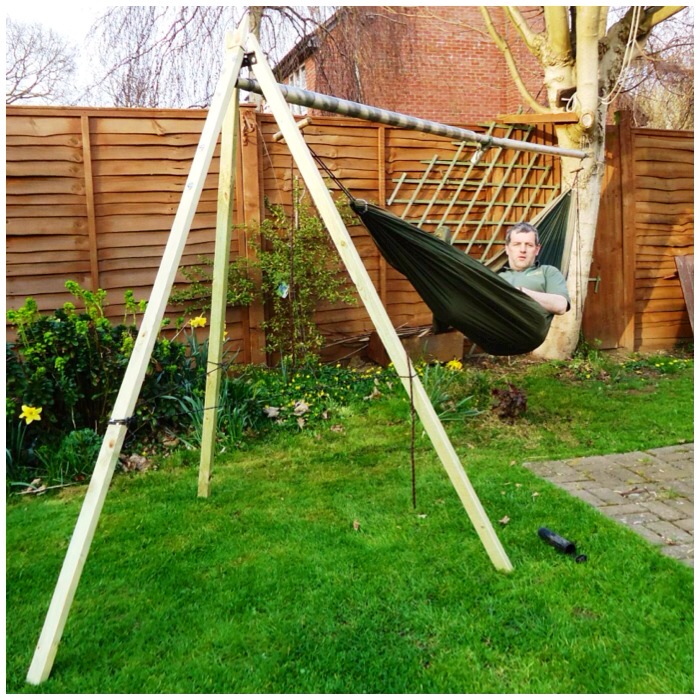
My friend Paul Bradley (Bardster) cracked all this with a hammock stand he made that had 10″ screw anchors and used top-quality non-stretch rope. Paul plans to experiment with delta anchors in the future. I however did not have screw anchors and had never heard of delta anchors.
I wanted something I could just put up in my garden for the kids to use, as and when required, something that did not take up much space, was not dependent on land anchors and could be easily transported in my van.
Paul Bradley’s single ground anchor hammock stand (Photo courtesy of Paul Bradley)
Turtlelady’s post gave me ideas for experimenting with just one tripod and a single tree. I suspended the ridgepole (two old army tent poles) between the tree and the tripod using Amsteelrope and then slung the hammock directly to the ridgepole. As the hammock was not tied directly to the tree or the tripod the ridgepole absorbed all the compression forces, meaning no ground anchors were required.
One-tree free-standing hammock
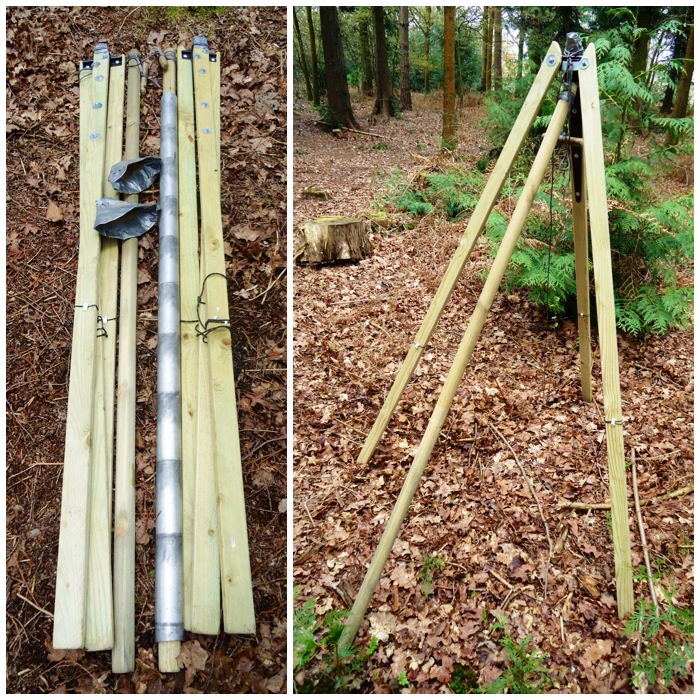
The tripod I made was from ‘Sawn Treated Softwood’. I bought a pack of 8 x 1.8m length pieces (47mm x 22mm) which cost just under £10. I cut the legs of the tripod to approx. 1m 70cm lengths so as to fit easily in my van.
To connect the tripods I used a ‘T’ Hinge (about 45cm in length) at a cost of about £2.50. I attached the hinge to one of the legs using bolts of about 4cms (cost about £3). As you can see in the top right picture below I shaped the wood as best I could so that when the tripod was open the tops did not touch each other.
I used Amsteel rope to connect the ridgepole to the tripod. As you can see the ridgepole is hanging off the centre tripod leg on a length of Amsteel. I bought 5 metres of Amsteel rope for this job costing me about £5.
The other end of the ridge pole I hung directly from the tree (I now use a hammock strap to go round the tree and tie the Amsteel rope directly onto the strap). This tree has a handy branch coming off the side to tie directly onto, allowing the rope to hang down directly. Where you have only the trunk of the tree, a strap grips the bark better than just cordage.
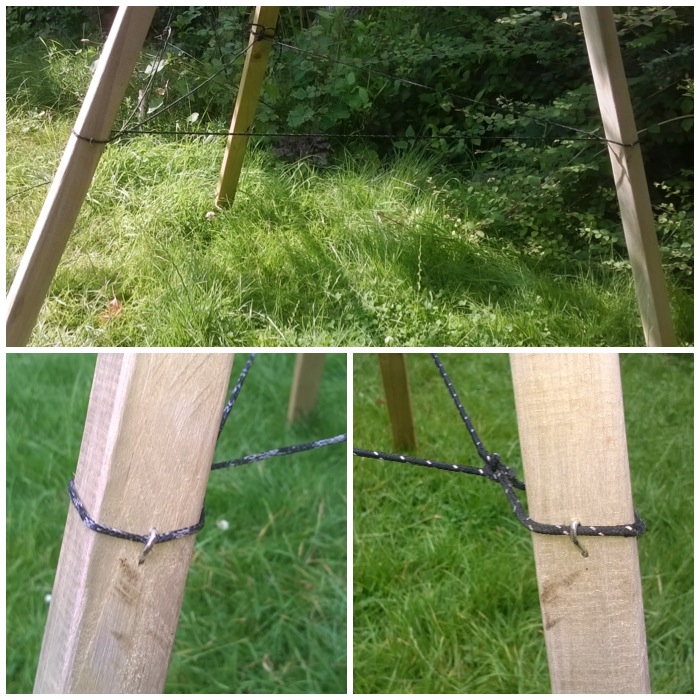
Finally I tied off some old guyline rope around the tripod legs to stop them splaying out when they were under load.
Make up of the one tree free standing hammock
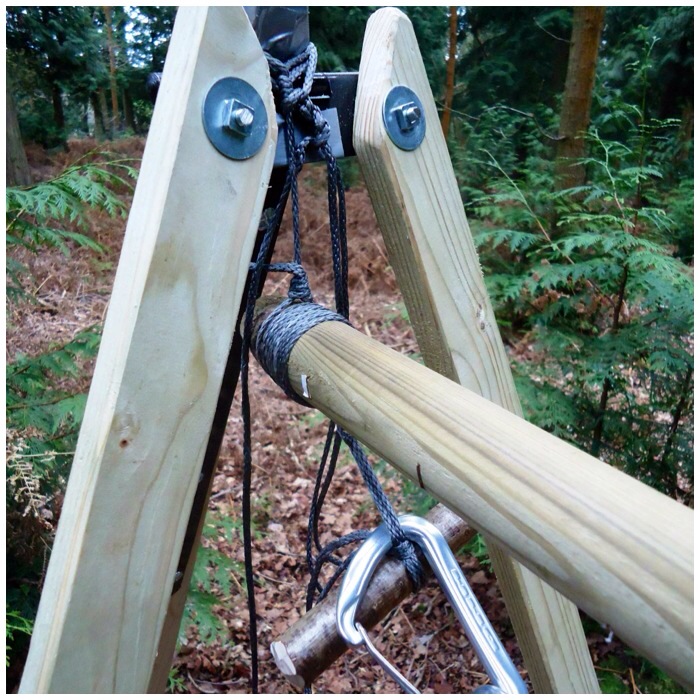
After testing out the one-tree set up I made another tripod and changed the ridgepole.
I made the second ridgepole from two large tree stakes from from a local garden centre (cost about £3.50 each). Each stake was 1.8m x 40mm but I cut each one down to 1m 74cm to get rid of the points.
I connected the rods with an old army aluminium tent pole. I cut the ends off the tent pole to allow it to slip easily over the tree stakes. I saw these old army aluminium tent poles for sale on eBay for about £6 (a single ridgepole would never have fitted it in my van).
Below you can see both tripods collapsed and ready for transport and one of them set up. The little caps you can see in the left-hand picture are protectors for a tarp.
Freestanding – tripod set up
Below you can see a close up of the ‘T’ bar hinge set up and how the ridgepole is connected to the tripod.
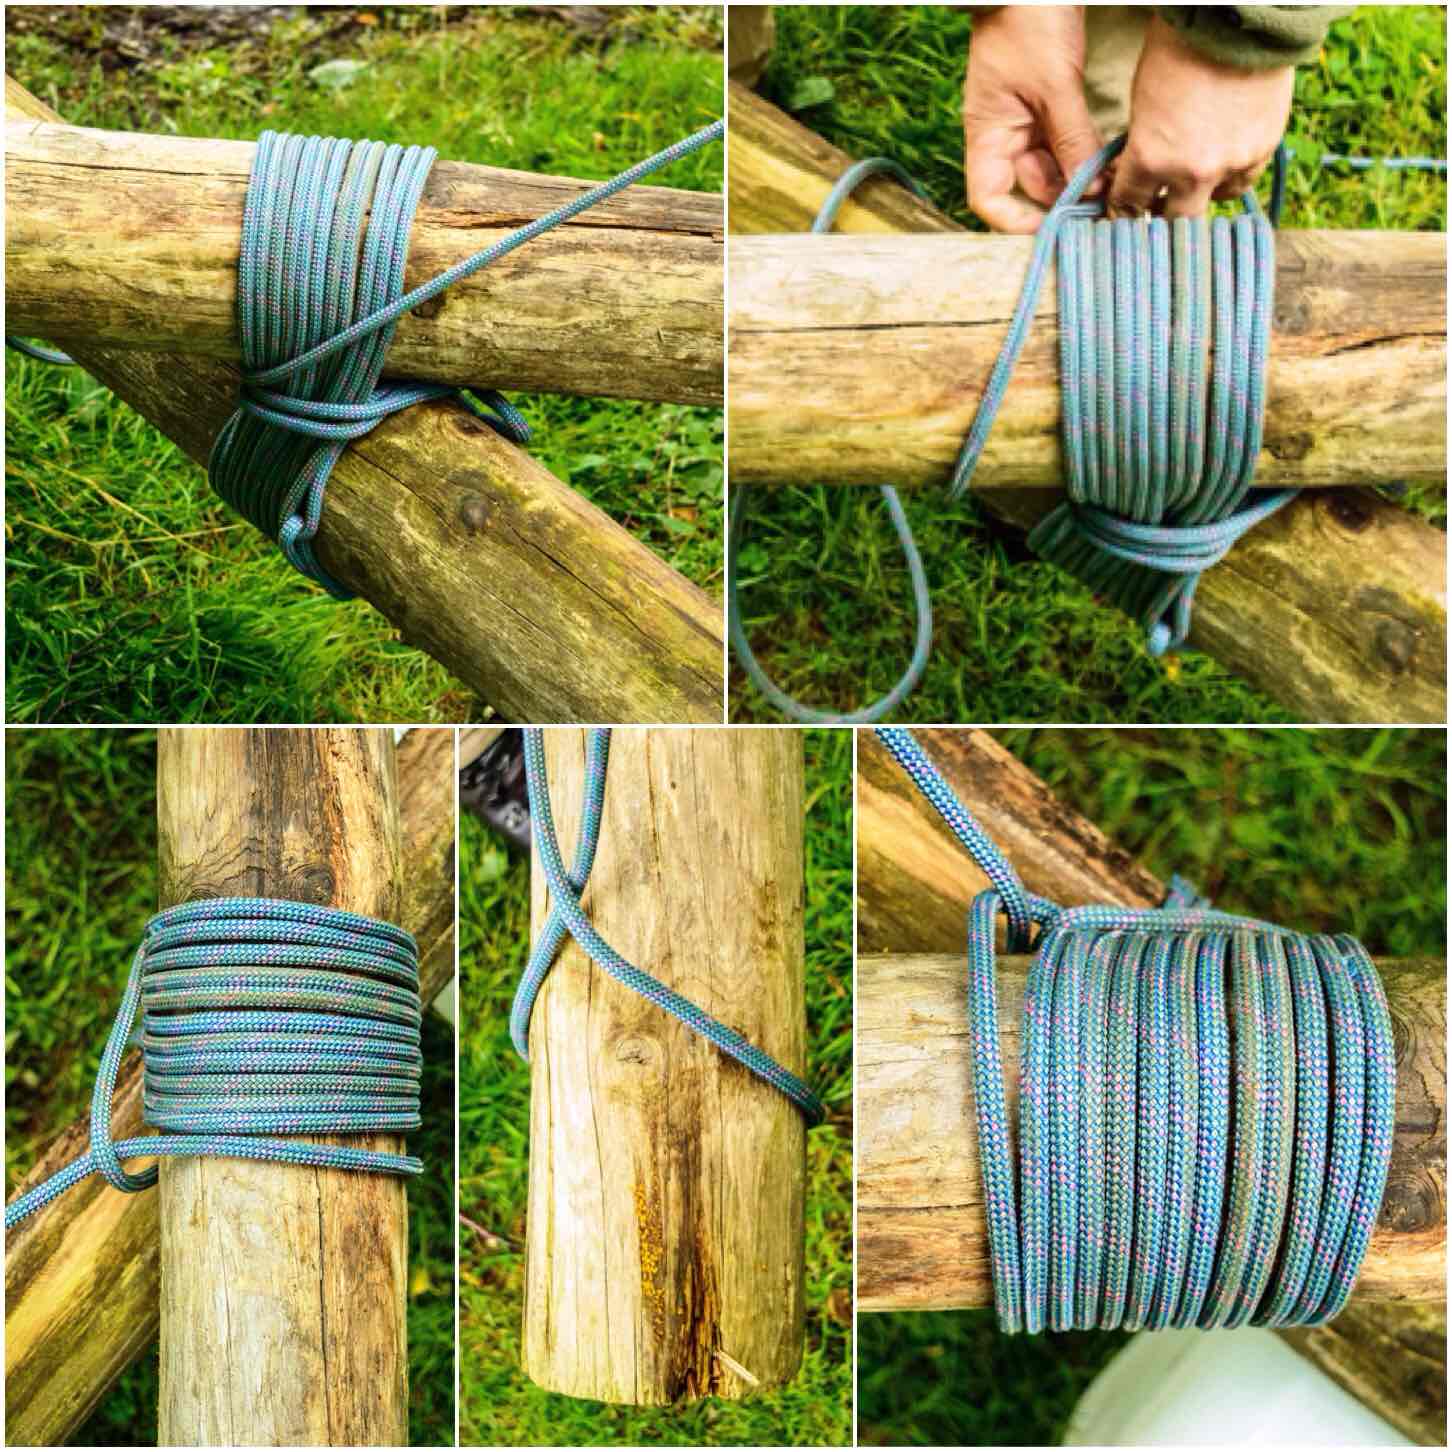
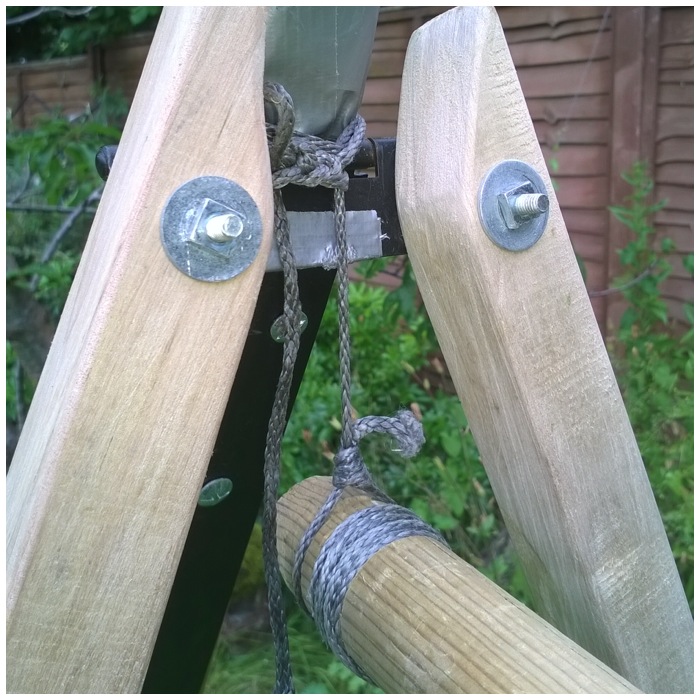
I carved 3 grooves all the way round the the ends of the ridge poles to give the Amsteel rope something to grip onto. The ridgepole is attached by means of an adjustable loop that is hung from the tripod and around the first groove on the ridgepole.
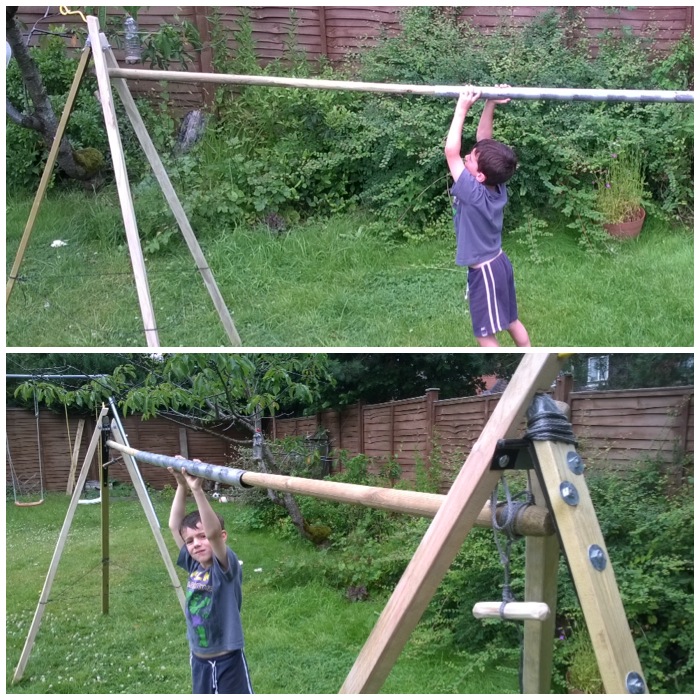
The wrapping of Amsteel you can see on the ridgepole is a common whipping that is wrapped around the area where I had carved the other two grooves. This whipping has a tail on it that can be used to create a marlinspike hitch to allow the hammock to be hung off.
Free standing – tripod back
Below you can see the marlinspike hitch and the hammock clipped to it with a carabiner. This set up makes attaching the hammock very easy and the common whipping ensures that the Amsteel does not slip when I get into my hammock.
Free standing – tripod front
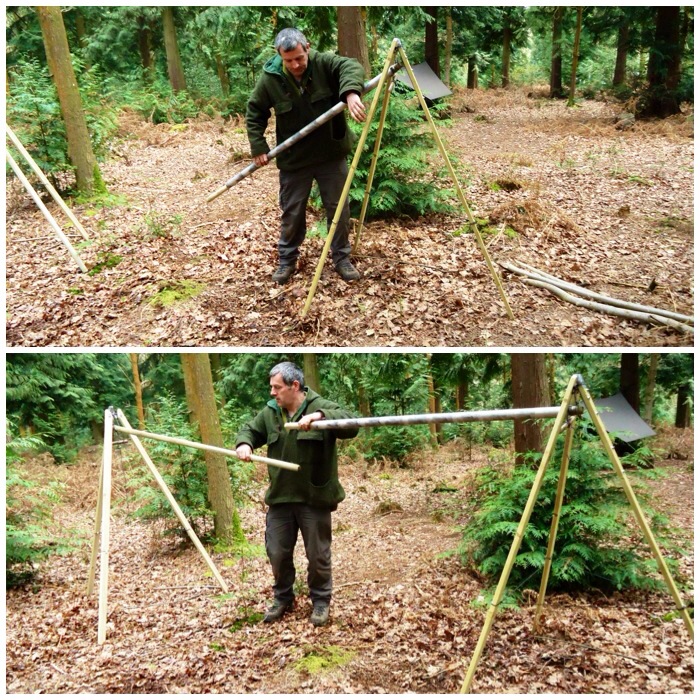
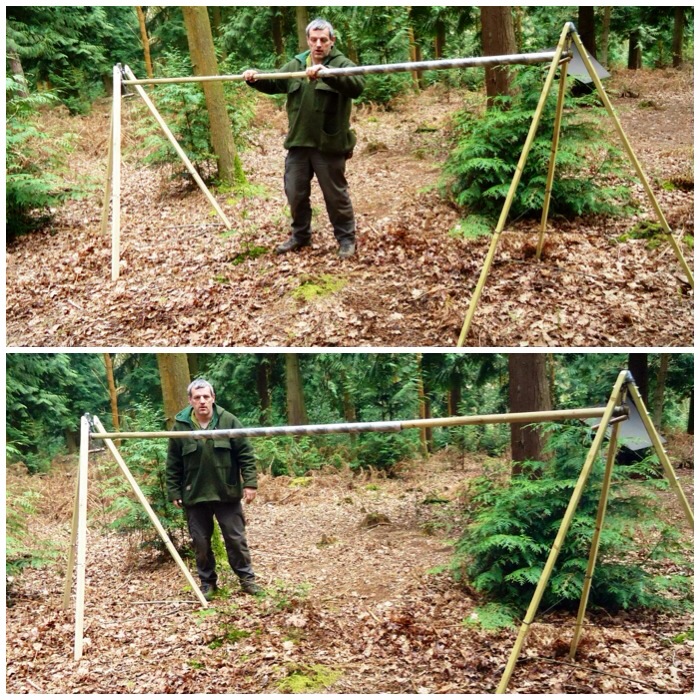
To put it all together I simply open up the tripods and place them roughly the correct distance apart from each other (the length of the two ridgepoles).
Free standing – set up part 1
I then connect the two ridgepoles with the tent pole sleeve. I usually re-position the tripods so that the two ridge poles are touching inside the sleeve and that the Amsteel rope attaching the ridgepole to the tripod is hanging vertically.
Free standing – set up part 2
As the tripods are not that far apart the tarp will actually lie on top of them, so I made a cap for each so that the wood would not damage the material. I took an old hessian sack and cut off two of the corners, then covered these corner pieces with duct tape to make them more durable.
Tri pod cap
Whenever I use a hammock, whether slung between trees or tripods, I always test it by pushing down on the material of the hammock first, then I sit in it gently before finally lying back into it. This tests all your knots, tightens them up and gives you confidence that everything is ok.
With the free-standing set up what you need to watch for is the ridge pole over-bending with the compression forces you are placing on it from lying in the hammock. In this set up the old tent pole sleeve is so strong that there is very little bend in the ridgepole. I weigh about 14 stone (including all the kit I generally wear while bushcrafting) so if it takes my weight easily I am happy for my kids to use this set up.
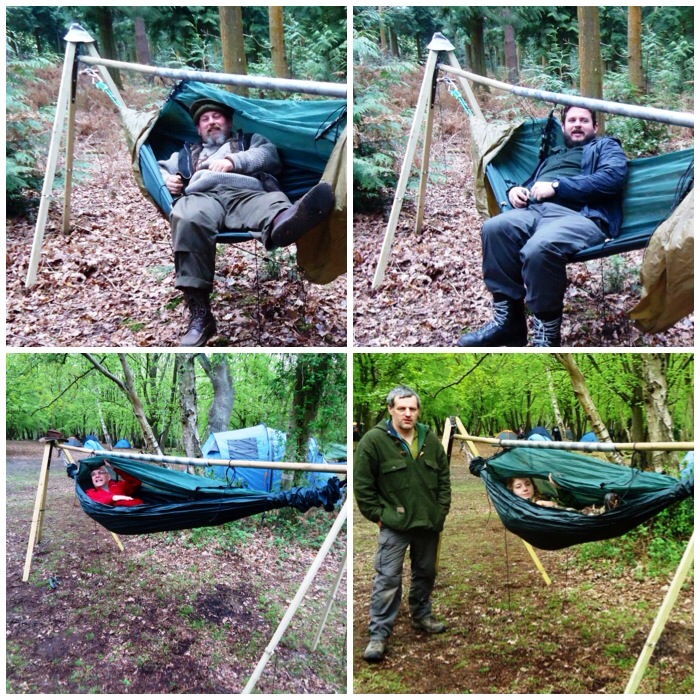
Testing and relaxing
Over a few months I used this hammock at various meets and got different people to test it out. After some initial trepidation most people got on well with it. You just have to remember not to bang your head on the ridgepole when you get up.
Further testing
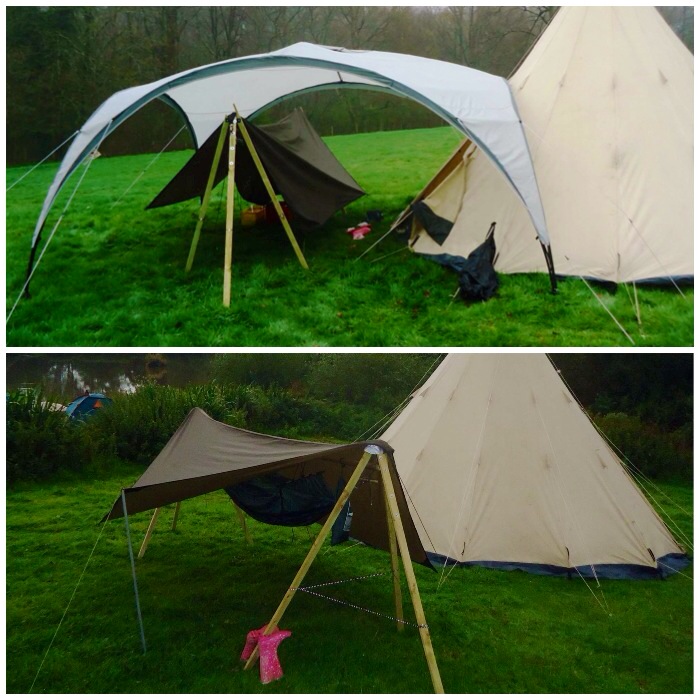
Setting the tarp up on this is quite simple as I just lay it on top of the tripod caps and peg it out. The first night I slept in the set up I put it under our group shelter as it was very windy and wet. I figured if the tarp came off in the night the big shelter would offer me some protection from the rain.
I slept well that night apart from wakening a couple of times to the creaking of the ridge pole as I changed position in my sleep. I have got used to these noises now and trust the ridge pole to take my weight. Now I am happy to set this up with just the tarp for cover. In the bottom picture I had the hammock stand set up at the Wilderness Gathering last year for my daughter to use as a nest to go and relax in during the day and for visitors to come and see the design.
Tarp testing
Back in 2012 I had promised some of the guys at the BCUK Bushmoot I’d bring the stand along for them to look at. In all the usual confusion of preparing and setting off for the Moot I forgot to put the stand into my van. Undeterred, I decided to try and make a similar stand using sycamore poles, of which there are plenty on the site at Merthyr Mawr, so I set off to gather the wood I would need: this is when my friend Spikey spotted that I was up to something and asked if he could help.
After I explained the concept Spikey helped me cut the poles to make up two tripods. We lashed the tripods with Amsteel rope and made little adjustable loop danglers to hang from each tripod for a ridgepole. Also each tripod had rope tied around each leg to stop them from splaying out when put under load. We tested each tripod by both doing pull ups together on each one. Our combined weight is about 28 stone so we were quite happy each tripod would be up to the job.
Green wood tripod set up
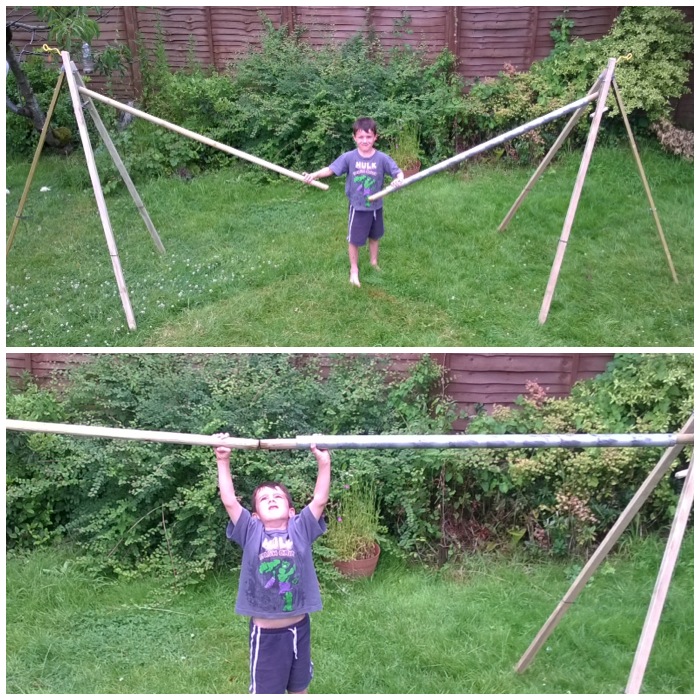
I did not have a handy old army tent pole to act as a sleeve for the ridgepole this time so I had to find a length of sycamore that was long enough (about 3.5 metres) and strong enough not to bend with the compression forces. I wanted a piece that was fairly uniform in girth along its length and as straight as possible. Spikey and I spent quite a few hours trying to find this perfect pole but when we found a couple that seemed to be ideal they both bent horribly when a load was applied. I did not want to put a massively thick ridgepole above my head and was getting quite frustrated at this point.
It was at this point Spikey had his Eureka moment: ‘Why not try and find a piece of sycamore that’s oval shaped instead of round?’ I could see what he meant – an oval pole would have two sides with fairly flat surfaces and two sides with sharply curved surfaces. These sharp curves would take far more load without bending than the flat surfaces, so off we went to find this magical ridgepole.
As you can see below we found it, and set it up so that the ridgepole hung beneath each tripod. I attached more Amsteel with some simple whipping to each end of the ridgepole for the hammock to hang off and slung my tarp over it all. The ridgepole hardly bent as the sharply curved sides of the pole were very rigid. I got lots of different people to try this set up out and it took the weight of everyone who tried it out easily.
Green-wood free-standing hammock stand
I slept for 5 nights in this set up and had a great sleep every time. I like the fact now that if I am stuck for somewhere to sleep in my hammocks (if for example there are no lovely big trees around) I can now set up a system that will still keep me well clear of the ground.
I wasn’t going to post about our family summer holiday as I thought it wasn’t particularly relevant to this blog but after having a look at the pictures again I noticed there were quite a few bushcrafty ones. This post will just focus on some of the fun bushcraft stuff we did and I will not bore you with all the hundreds of beach and plant pictures I took.
Our good friend Lou worked as a manager at the YHA in Golant in Cornwall so we pitched our tipi in the gardens of the hostel, combining a holiday with a visit to her. The hostel itself is a Regency period building so it felt quite grand to be camped out in front of it for a week.
Alison got the hammock for herself and a cup of tea in bed every morning, I got the tipi and the kids.
Our Holiday Homes
This was at times a very busy holiday but I certainly found time to catch up on my sleep loss. Over the whole holiday I concentrated on getting as many pictures of different plants as possible. This beautiful one of Catherine was taken in the grounds of the Eden Project.
Sometimes restful, sometimes beautiful
We got a visit one day from our friends Steve, Kirsty, Buddy and Herbie. As per usual the barbie was down to the boys but I got the feeling Steve was in a managerial mood
Checking for wind direction I presume!!
The boys were happy to re stock the fire as boys do and a relaxing dinner was had by all. Steve and Kirsty live with the boys in Cornwall where Kirsty runs her own business Kirsty Elson Designs (Kirsty is a fabulous artist) and Steve works in youth development and would like to do more in the way of bushcraft.
Fire and Food
You just cannot beat some time with a bow and your kids. The Father and Son bow is excellent for introducing kids to bows as they are quite easy to draw.
Quality boy time
Catherine had a ball wherever she went, be that with the ducklings or with sand. Our kids love their toys and gadgets but they’re good at making their own fun as well.
Exploring Nature
I got a message on Facebook one day from one of my bushcrafting buddies Jonny Picket, inviting us to a birthday bash in his woods he was organising for his partner Janie Sarchet. We were camped just the other side of the River Fowey from them. Jonny and Janie have a lovely farm near the coast and had decorated part of their woodland for the party.
After arriving I took Finlay down to the coast with Jonny and one of his friends to watch them spear fishing. No fish but a pretty spectacular spider crab was found. Finlay and I had a great time rummaging around all the rock pools.
Coastal Foraging
After getting to know everyone it was a case of chilling and waiting for the meat to cook in the massive metal hangi type oven. Alison got talking to Janie and has since published in the Kindle store a book that Jane had written called Project Egg. Janie also has an excellent blog site called The Hedge Combers and as best said by Janie – “Our ultimate aim is to build up a resource of useful posts, ideas & recipes, invaluable to anyone starting out on their own self sufficiency, gastro-adventure“.
It was great to catch up with other bushcrafting buddies including Pete Thomas and Ashley Cawley. They all made our family feel very welcome.
Janie’s Birthday Bash with roasted Pete
I had fun helping to cut up all the meat from the hangi and nibbling on a piece or two but best of all was the junk drumming session we all had at the end – we did not roast Pete in the end as it might look from the picture above :-).
Food and Fun
A happy Lou and Finlay taking some time out to shoot (well Finlay patiently waiting his turn).
Aunty Lou having fun with Finlay
I took time out to just sit and carve. It was such a beautiful campsite it would have been a shame not to.
Holiday carvings
Other nice memories were finding this nest of little chicks and watching the slightly bigger ones idily poking the fire (what kid does not like doing this).
Happy Chicks
Every day was either spent on the beach or wandering through the woods exploring – we went to some fabulous places including The Eden Project, the Lost Gardens of Heligan and St Michael’s Mount.
Exploring we go
I had a great time with Finlay working on his archery and look forward to getting out to some camps with him this year to shoot some more. I think Catherine and Finlay will get quite competitive in the future with their bows.
Excellent stance
I do not know who was happier about hitting the target.
Happy Lad
This has got to be my favourite picture of the holiday with the kids playing happily in the flowers.
Beautiful wanderings
And finally back to Alison. As I said she got not only the hammock but also a cup of tea every morning. She does make hammocking look stylish.
Around a fire some time last year my friend Kev Lomas asked me about helping out the Royal Marine Cadets (RMC) in his area (Southern Area Sea Cadets) with some Bushcraft. As Kev had helped us in London Area a lot over the years I was keen to help out.
Another reason was that the course would be on the Isle of Wight and there is nothing better than walking through dappled woodland in the Spring on a sunny day on the island (there are no deer on the island to eat all the flowers).
The course was at the end of April this year and the weather was fine and warm. I had a smooth trip over the Solent with with just a little fog to begin with but it soon cleared up.
Beautiful ferry crossing
I went down on the Thursday to set up camp and I am glad I did as it took us all Thursday afternoon and Friday to set everything up. The camp we stayed at was deserted and the woodlands were beautiful – though I did manage to get my heavily laden van well and truly stuck in the mud trying to set up. Luckily once emptied she leapt out of the mud to save my embarrassment.
There was to be about 25 cadets on the course with about 5 instructors. One of the instructors called Sgt Tony Moore had attended the same instructor course with Woodcraft School that I had completed so it was good to swap stories. (The chicken below, by the way, is a plastic one we found in the woods.)
Prepping the camp
When the cadets arrived they were briefed on the activities. I think some were a bit disappointed to find out I was a Blue Jacket (a Sea Cadet instructor) rather than a RMC instructor but when I began describing all the skills they would cover and how these could cross over into their field skills they started to come around (I think also that it helped when Kev mentioned I was ex-Airborne).
Briefing time
We had the Padre around for the weekend and he was keen to be involved. As well as trying out a normal hammock he was very taken with my UK Hammocks EDC chair.
The Padre was around all weekend and keen to take part (in a relaxed sort of way)
A tradition in the RMC is to introduce the cadets to the Coca Cola tree. Many of the older ones had seen this before and sniggered at the back watching younger ones’ confusion as Kev pulled the ‘tree’ out of the ground all the while explaining how rare it was 🙂
The rare Coca Cola tree
Many of the cadets brought their own knives along so we had a good chat about the pros and cons of the various different types. I then issued some fixed-blade bushcrafting knives for them to practise with.
Knife class
They all managed to make wedges and learn the art of battoning wood, making the kindling they’d later use for their fires.
Knife skills
They used firesteels to get their fires lit and then we boiled water in our Kelly Kettles for a brew. I love using the term ‘brew’ to Marines as you can see the grimace appear on their faces. To them the correct term is a ‘wet’ and they are very proud of the difference (no idea why).
Make a Fire – Make a Brew (sorry I should say a Wet)
We bought in some mackerel and the cadets prepared them and made up some Ponassing rigs.
Ponassing class
A bit of a scrum to be fed but they all enjoyed it.
Enjoying the fruits of their labour
During the day we went out for a wander looking at tracks and signs. We found some owl pellets, scavenged birds’ eggs and also some early orchids.
Owl pellets
In the woods there were clear Badger trails which were easy to follow. We came across this nice print near their latrine.
Badger print
On the Saturday afternoon we dug up some worms so they could be cleaned out overnight. The next day a quite passable omelette was made with a bit of worm as protein.
Digging up worms for an omelette
Tony had fun showing the cadets how to prep rabbit.
Rabbit prep
As we had quite a lot of fish that was not Ponassed we fried it off in the Muurrika.
Frying up the remaining fish the cadets had prepped
In the evening the staff helped the cadets set up 10 hammocks. This took quite a while but was worth it as some were very keen to try them out. One cadet was about 6 foot 5 inches and was determined to have a go. His head could not fit in the hammock so it was quite a challenge to make him comfortable. He survived the night however, and said it was a relaxing sleep.
We set up 10 hammocks
Again on the Sunday we went for a wander to see was out there in terms of foraging. The cadets were introduced to hawthorn, birch and beech leaves (all tasty in the spring). The small plants we looked at were nettles, wood sorrel, burdock, plantain, reedmace and primrose to name just a few.
Foraging – Primroses
The ranges were an ideal spot to get the bows out.
Arrow away
We also introduced the cadets to the Atlatl.
Airborne Atlatls
You do not often see so many being launched simultaneously like this.
Broadside
I had a fantastic weekend and so did the cadets, based on the feedback I received. I am looking forward to doing something similar with the RMC in London and also with the Southern Area RMC again next year.