
Welcome to the first of my Bushcraft Step by Steps.
I will be building a range of Step by Steps in the future.
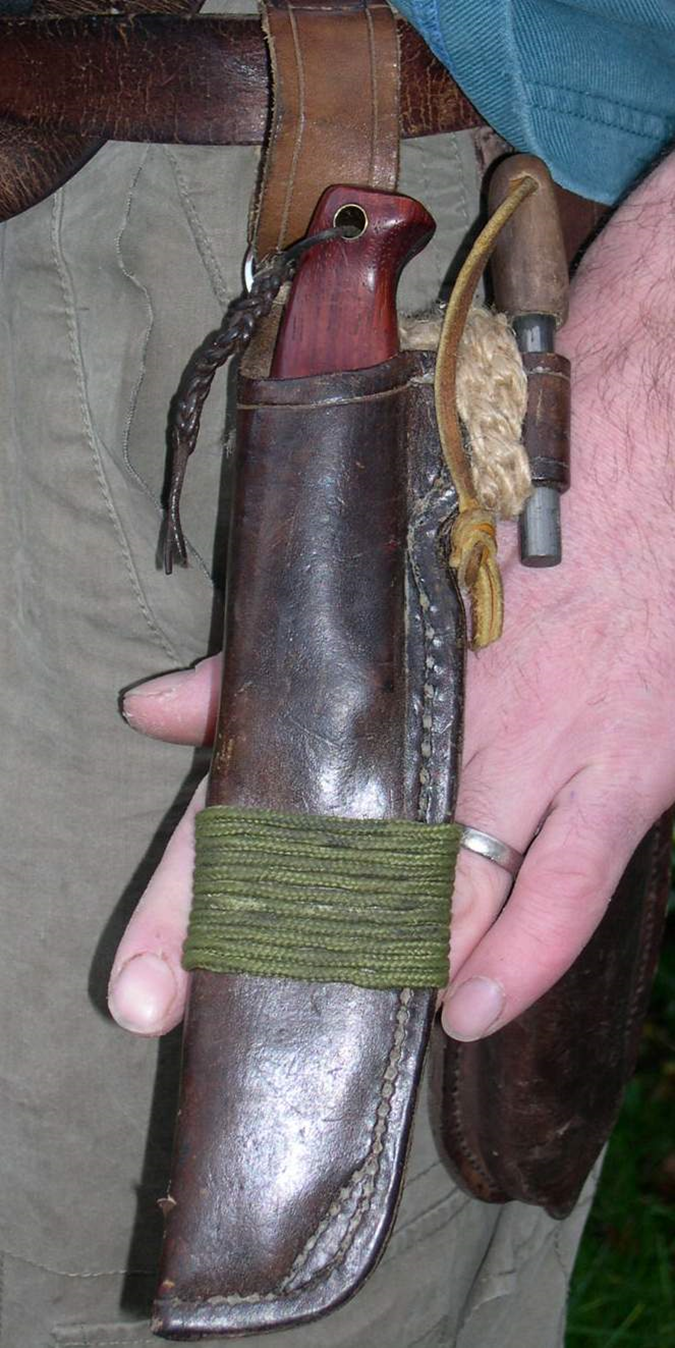
Like all good Bushcrafters I like to use a knife for much of my work and over the years I have taught many Sea Cadets how to use a knife. The following Step by Step covers some safe knife handling techniques. At the end of the article I have included a link to an excellent article on Knife Law in the UK. The first thing to consider about your knife is the sheath. Ensure your knife sheath is in good repair and is attached securely to you. Here (picture 1) my knife is attached via a dangler to my belt. I also carry a small necker knife on some cord around my neck. This sheath is made of leather but when I use a knife when prepping any food I prefer to use a stainless steel Mora knife (or similar) that has a plastic sheath as plastic is easier than leather to clean after preparing food (I try not to put my knife back in the sheath while prepping food but do forget sometimes).

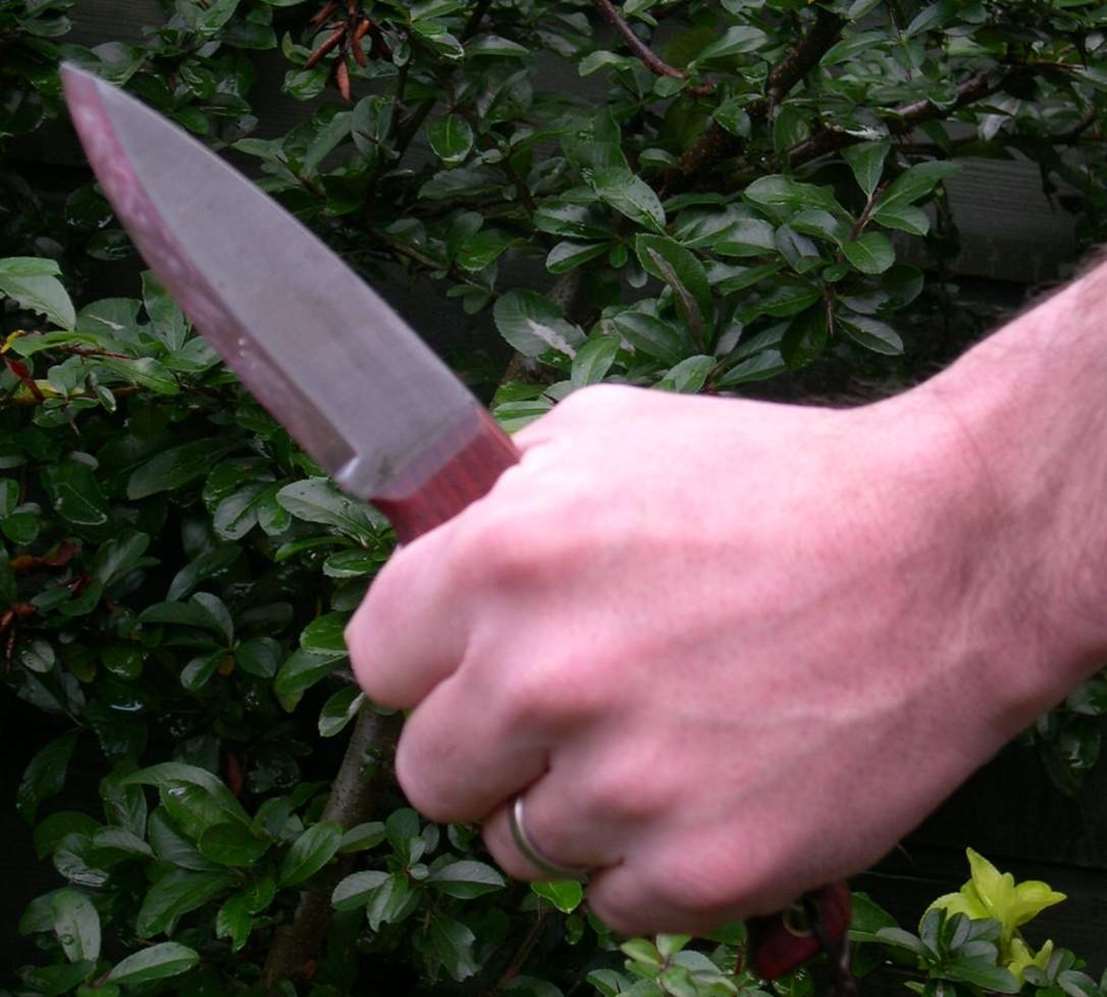
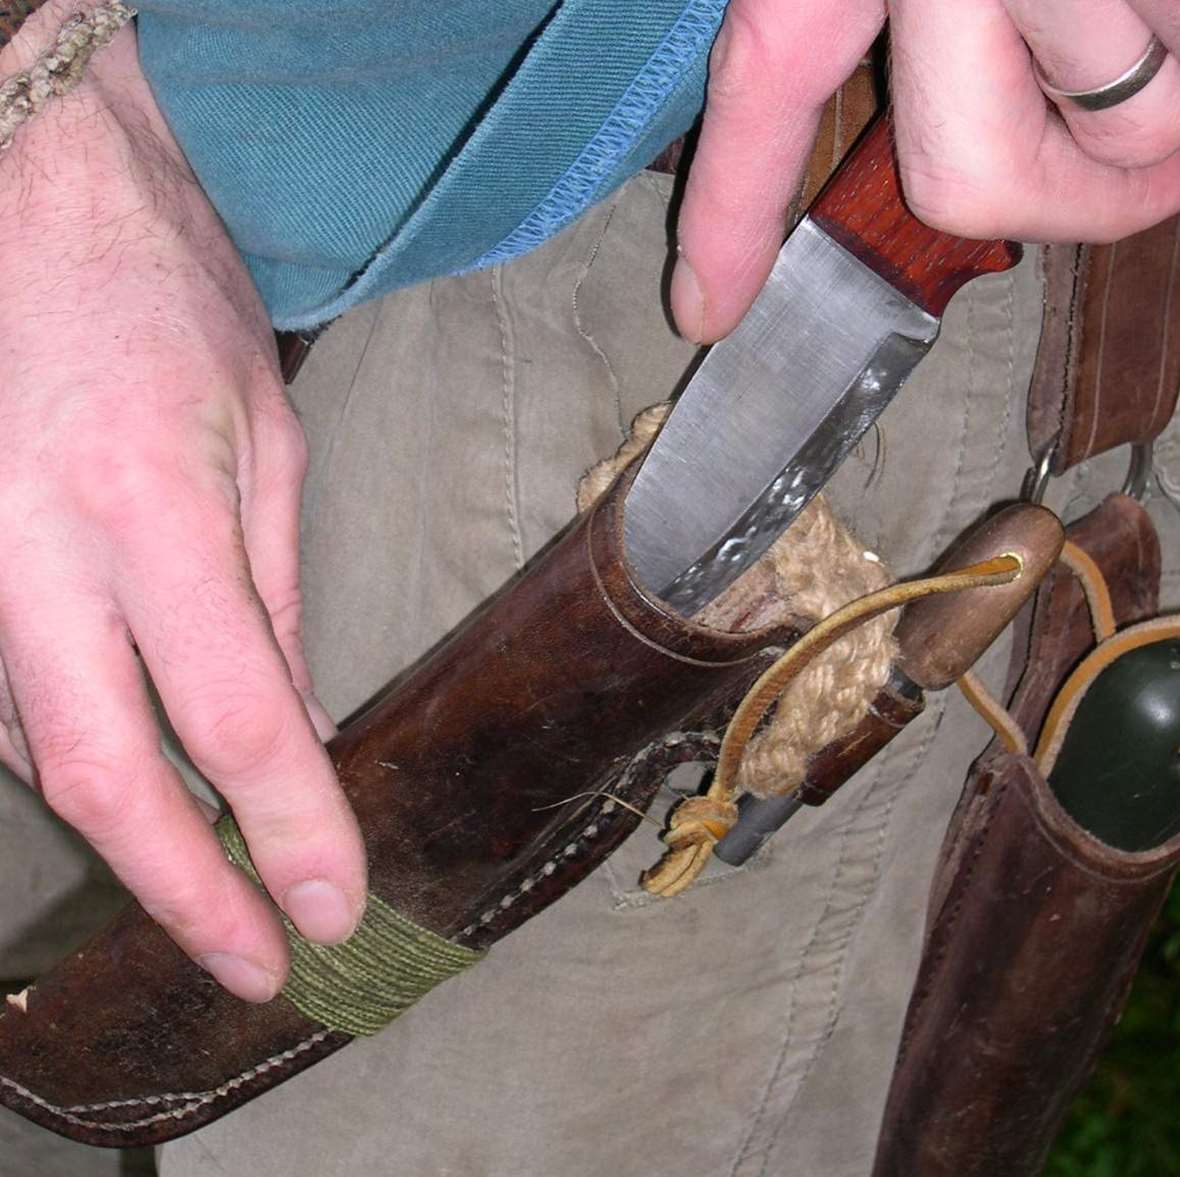
When un -sheathing your knife look at what you are doing (Picture 2). Always be aware of where the knife edge is. This sheath has been wet formed around the knife so when the knife is sheathed it is locked in. I pull on the knife gently so that it unlocks from the sheath then I draw the knife out slowly with the back of the blade touching the leather. When using a knife that is not attached to me I again pull gently on the knife to unlock it but then rather than removing the knife from the sheath I remove the sheath from the knife. This means that the hand holding the knife is still and it is the hand holding the sheath that is being moved. Far safer to teach this method with groups of children.
To begin with hold the knife in an all round grip being careful to make sure your forefinger is clear of the edge of the blade (Picture 3). Be aware of who is around you at all times. I was taught to consider the ‘blood bubble’. Your blood bubble is the area around you out to two arm lengths. Anyone coming into that area while you are working with a knife has a good chance becoming a ‘burst blood bubble’. All potentially very messy so if someone comes into your bubble stop work and put the knife in its sheath.
A good safe position when trimming some wood is to work to your side (Picture 4). Here I have my knife arm locked with the blade at 90 degrees to my arm. Rather than moving my knife I moved the piece of wood I am working on. When using this position I like to use the part of the knife edge closest to the handle as this causes least movement to the knife. This technique works equally well with the knife held out in front of you while standing up.

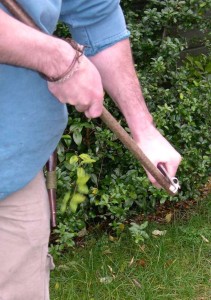
Here the movement can be seen in the wood and not the knife while in a sitting position (picture 5).
Using a log to rest the work piece on you can get some very powerful and safe cuts.
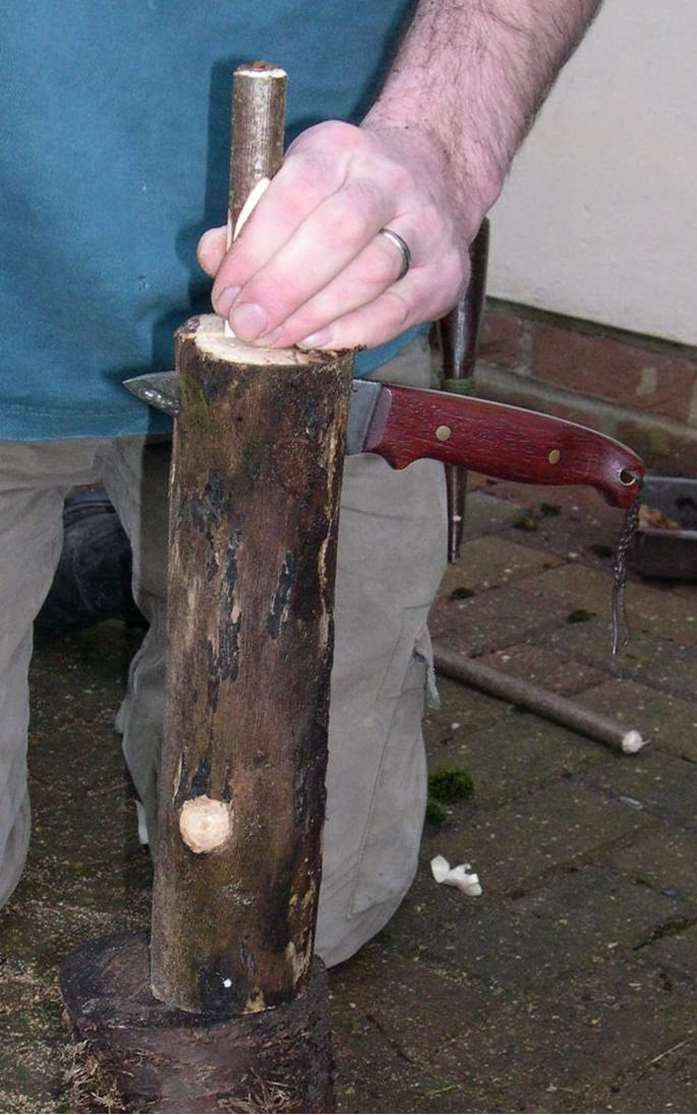
Place the end of the work piece on a log (to your side or well in front) and with your knife arm kept straight push the knife down on the work piece (Picture 6). If your knife arm is kept straight you will be using your shoulder and back muscles so giving you a much stronger cutting force. Be aware where on the log the end of the work piece is located so that it does not tip the log over or that you end up rapping your knuckles. I like to use this technique working off to my side.
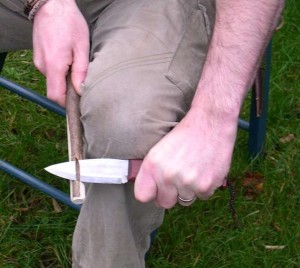
A very safe and powerful cut is to use your knee as a brace for the back of your knife (Picture 7). Again the knife is locked and you are moving the work piece to make the cuts. Brace the back of the blade below the front of the knee (if sitting) or against a small tree (move the wood not the knife). Here your main area to keep an eye on is that your forefinger on the hand holding the work piece does not come into contact with the blade tip.
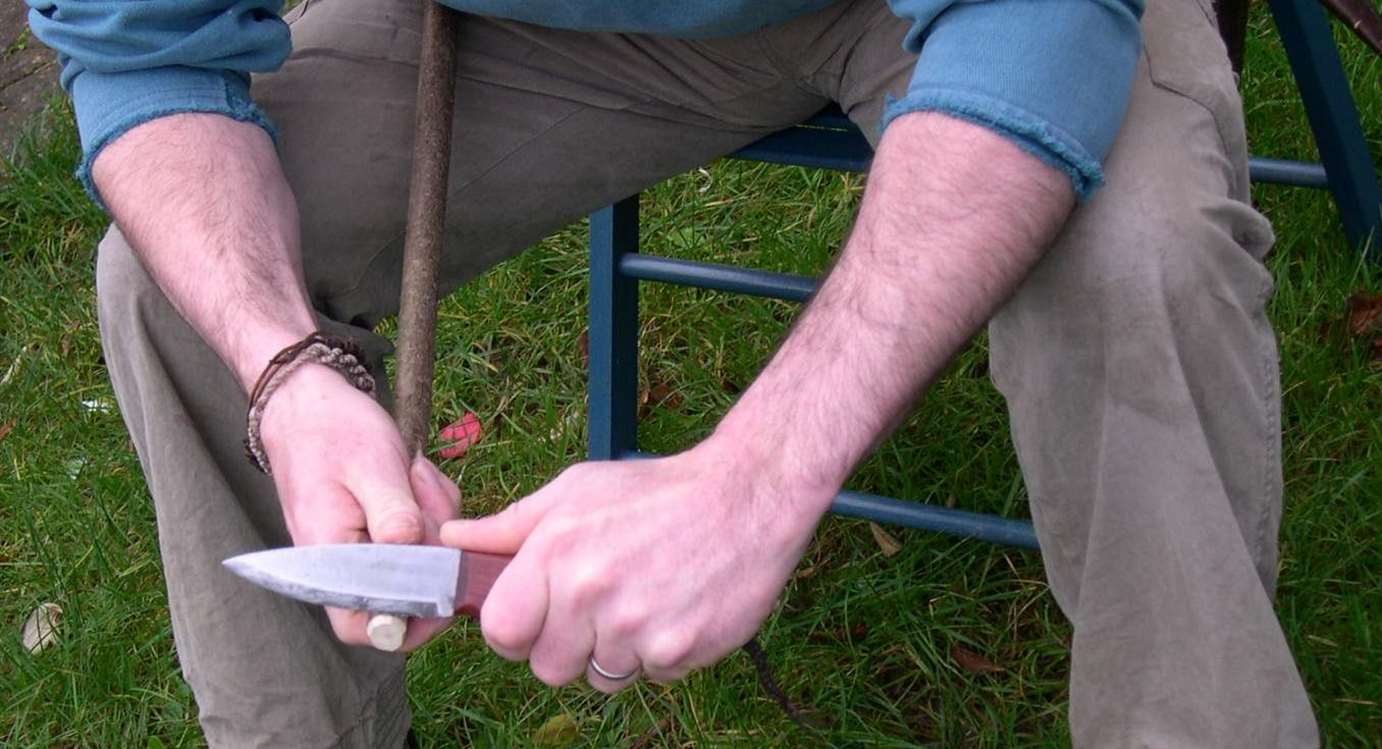
When sitting and you do not want to work to your side then place your elbows on your knees while working with a knife (Picture 8). This ensures that the tip of the knife is well away from your ‘Triangle of Death’ – that is the area from your groin out to your knees. Any cuts in this area are potentially fatal due to the close proximity of the femoral artery in your thighs. In this picture I am making very fine cuts with the knife creating a bevel at the end of the work piece. I like to use my thumbs for fine work to push on the back of the knife as I find this gives me more control. Be careful not to put undue strain on your thumb as this can lead to stress on your lower arm. If more pressure is required then return to a full grip with the arm locked out.
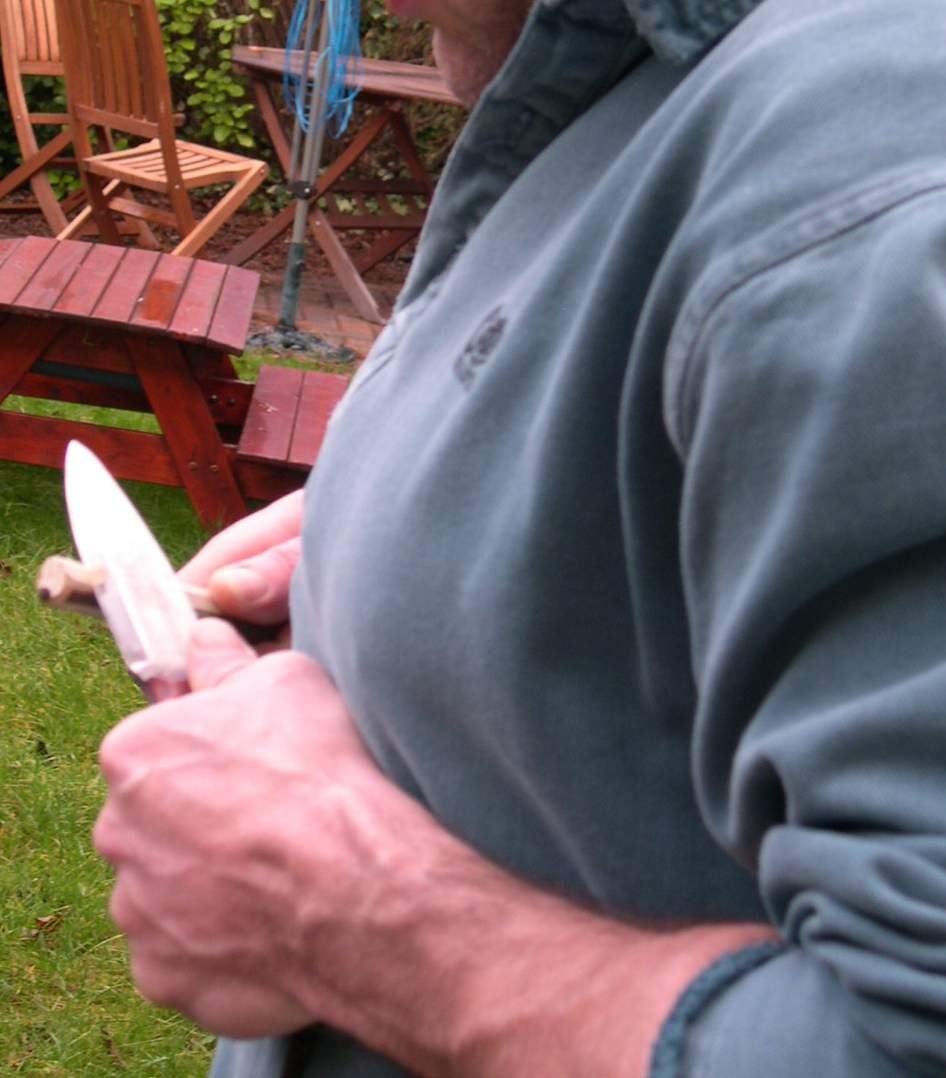
A very powerful and controlled cut is to use the Chest Lever position (Picture 9). With your arms locked against your chest and pushing your ellbows into you while expanding your chest provides a powerful cut. This is actually a very safe method when done properly as the knife hardly moves.
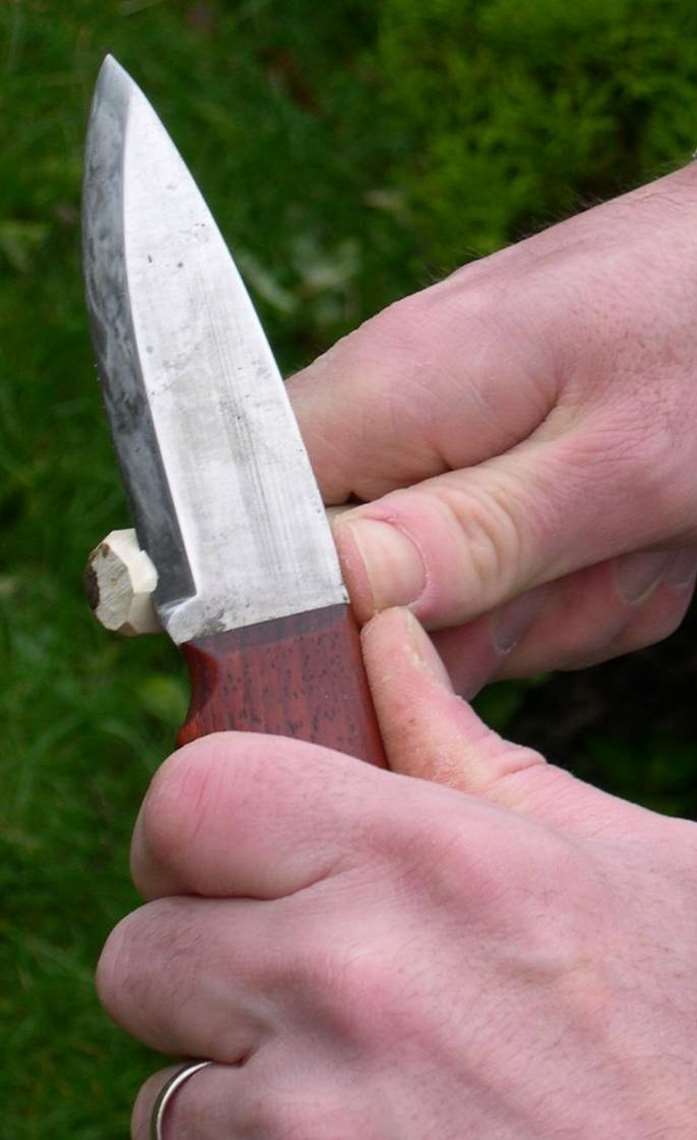
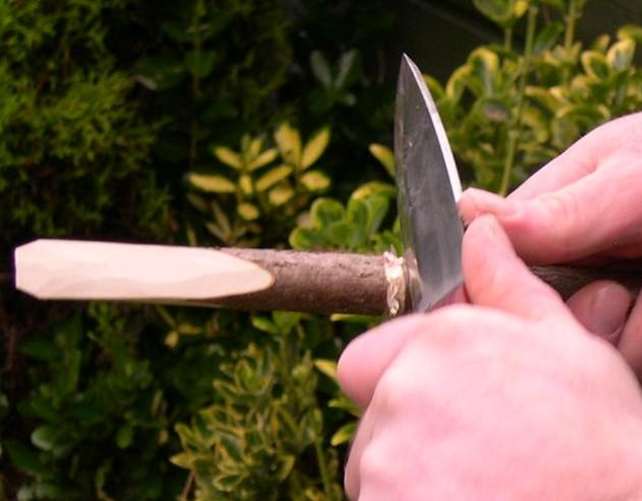
For fine cuts, push your thumbs against the back of the handle or blade (or some people prefer one thumb on top of the other) (Picture 10). Remember this is only for fine cuts requiring little pressure.
You can make these fine cuts safely all the way around a stick in order to snap it cleanly (Picture 11). When you have made fine cuts all around the stick turn the stick around and make another series of cuts around the stick to produce a V-shaped channel.
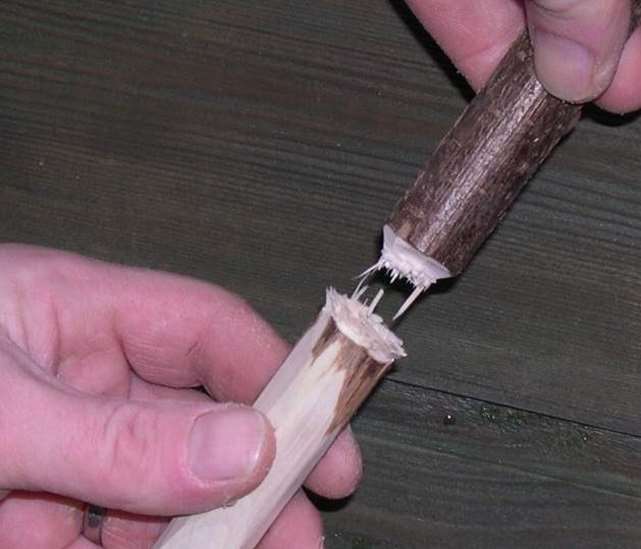
Keep repeating this until the stick snaps easily (Picture 12).
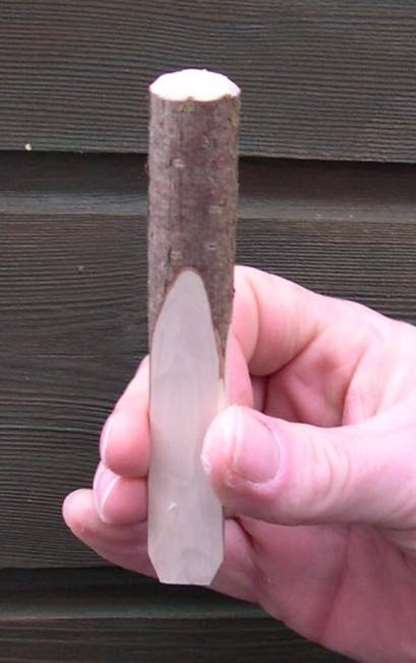
Here I have created a wedge to use when battoning with a knife (Picture 13).
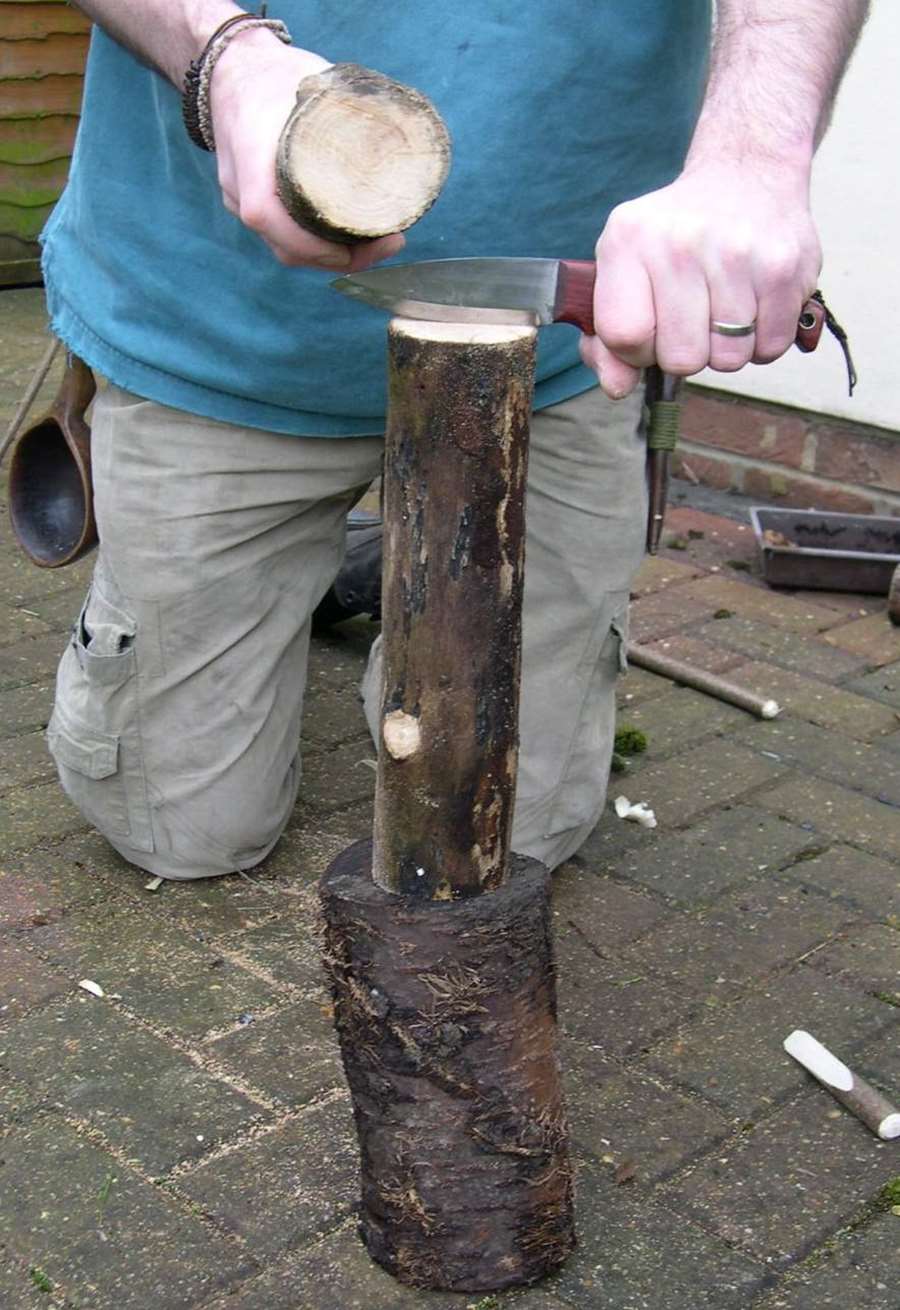
When battoning with a knife ensure the work item is on a stable platform well in front of you and the knife is placed in a position 90 degrees from your body (Picture 14). If the knife then slips the follow through line is away from you.
Then use your wedge that you created before to safely split the wood and release the knife (Picture 15). With the wedge you can split the wood far enough apart so that the knife can be removed smoothly or it drops out onto the ground.
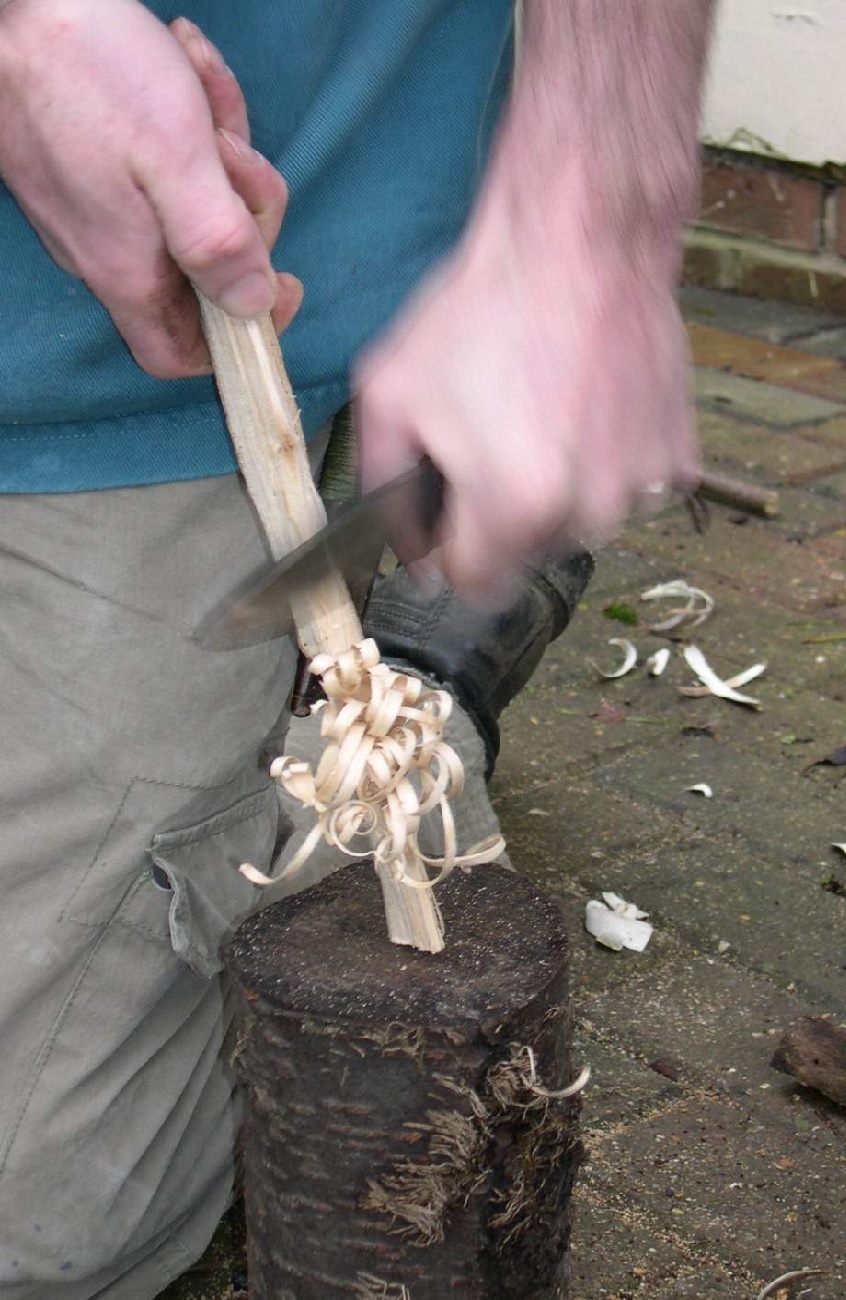
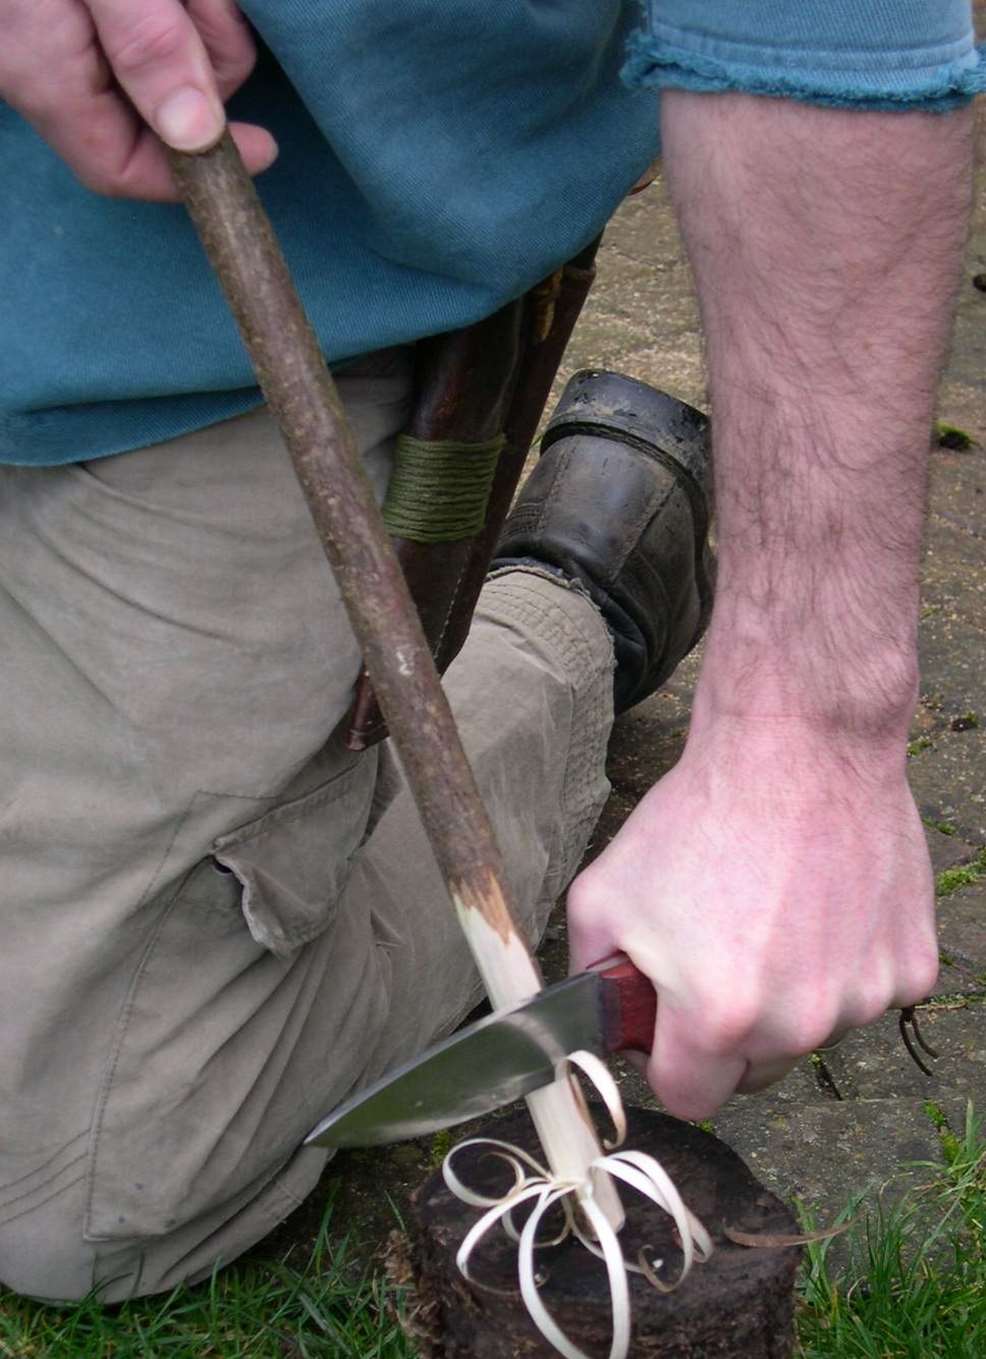
With your split wood you can make some feather sticks to get your fire started (Picture 16). Here I am kneeling, my arm is locked out and the work piece is off to one side on a stump.
When you have completed your task, put the knife back in its sheath keeping your fingers away from the blade as you do so (Picture 17). (Take care: this is a common time for cuts).
An excellent article on knife law in the UK can be found on the Bushcraft UK site – UK Knife Law
