Bushcraft UK Bushmoot 2013 – For my friend Drew

The beginning of August found me preparing for my annual trip to Merthyr Mawr in South Wales to attend the Bushcraft UK Bushmoot.

I have written this post as a record of the classes and events at the 2013 Moot but it is in its own way a dedication to our Drew.

WP_20130811_118
BCUK – What it is all about – Sharing and having fun

I have been attending the Moot since 2005 and always have a great time. Not always relaxing but always a good time. This year we lost a good friend in the Bushcrafting world – Andrew Dunn. He was known to us as Drew but the handle he liked to be known as was Drew Dunn Respect. This year’s Moot was dedicated to our Drew.

20131227-201125.jpg
Drew

The Bushmoot is normally held at the beginning of August each year and can last up to two weeks. I usually get there for a week and a bit depending on what else is going on. I like to think of the Moot as a meeting of like-minded people with a vast diversity of skills and experiences that they are happy to share with each other.

20131227-201436.jpg
The whole 2013 Bushmoot gang

My arrival at the Moot was delayed this year by a day as I ran some bushcraft classes at our village summer school so I was very happy to see on my arrival that my whole camping area had been taped off for me. Eventually I found out it was my friend Charlie Brookes who had done this and I was very grateful he had as I have become very attached to my little pitch (I got thrown out of my original pitch years ago by the owners of the ‘Naughty Corner’).

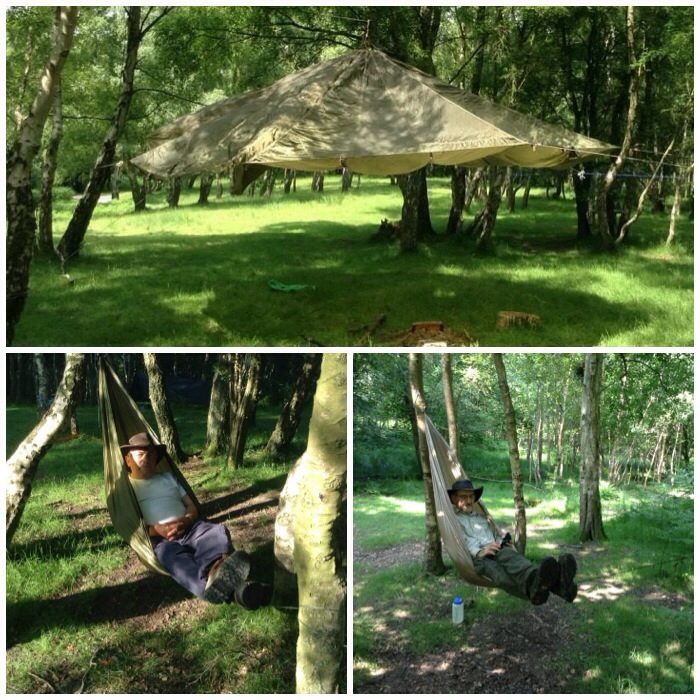
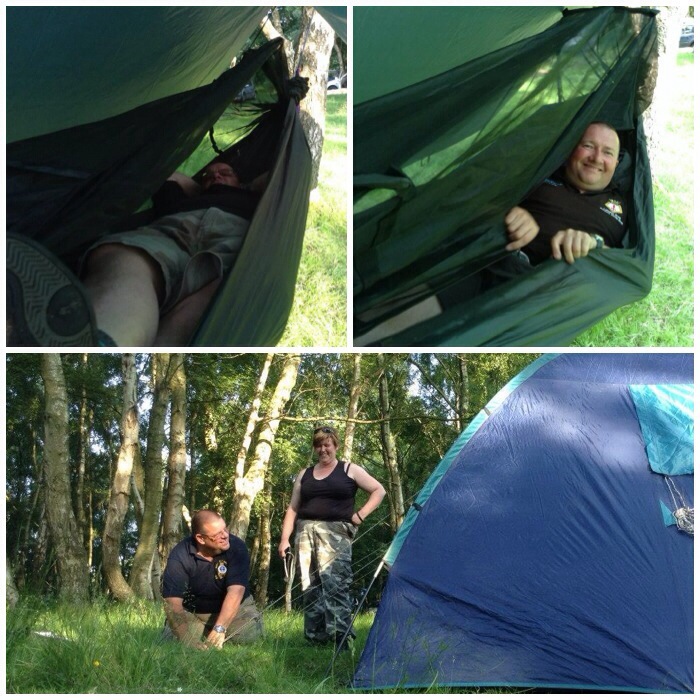
The first few days for me are usually a time to catch up with good friends, prep my classes and take time to chill out in my hammock.

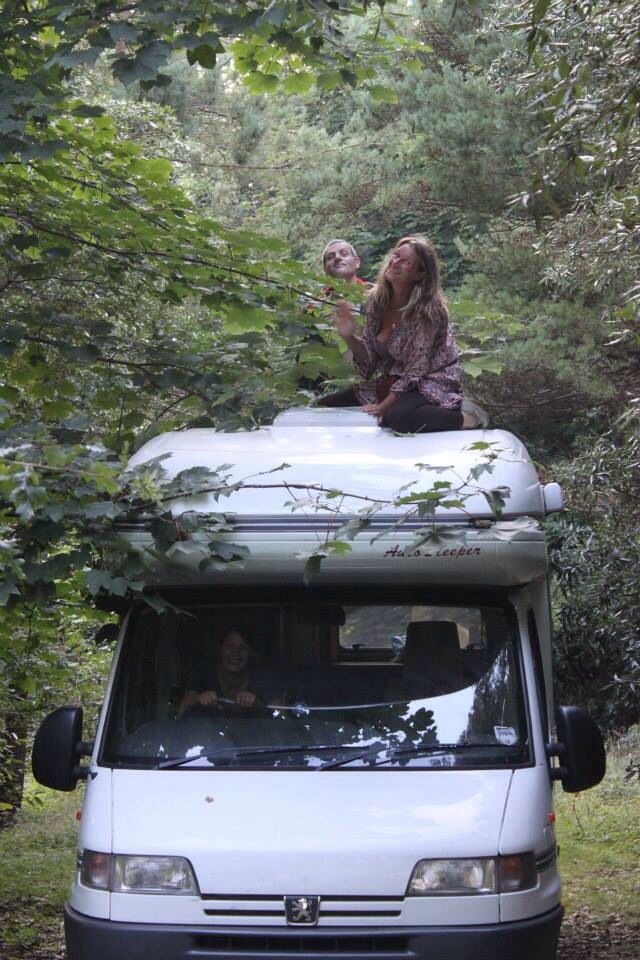
A couple of days later Karen and Clare turned up, not with their usual tents and tarps but with this mobile palace. Seemingly Clare said it was a wedding present she and her husband had given to themselves. It was fun though getting the mobile palace through the trees to a decent spot.

20131227-201334.jpg
The Glampers

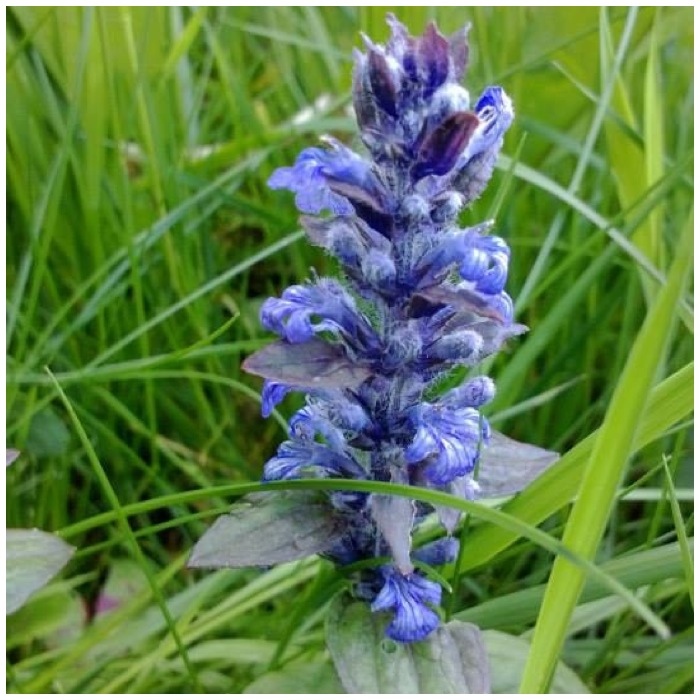
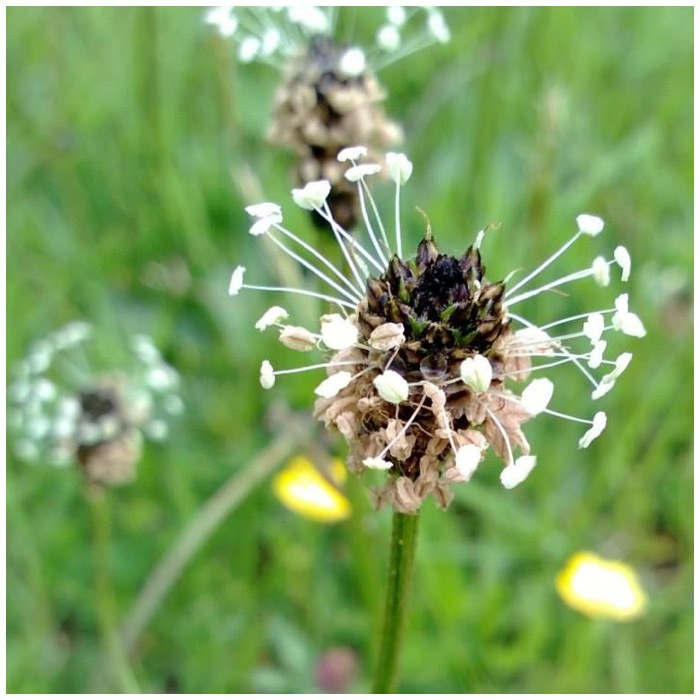
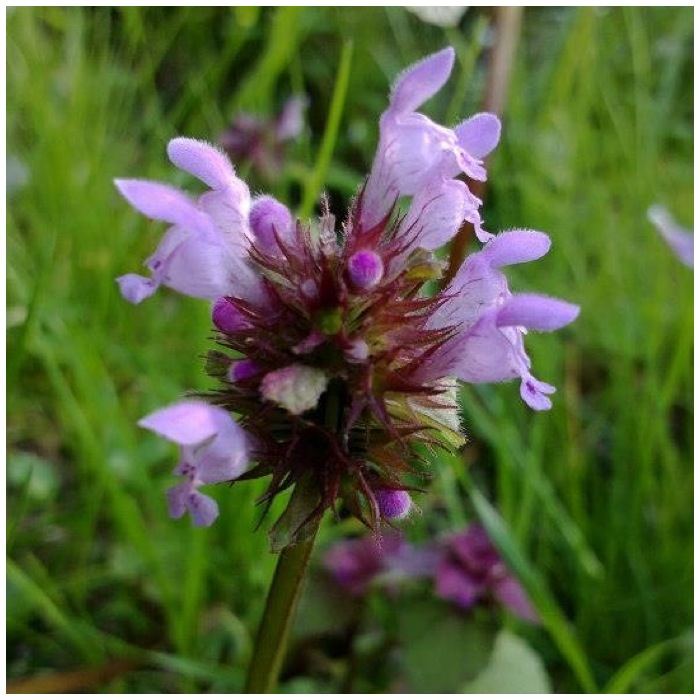
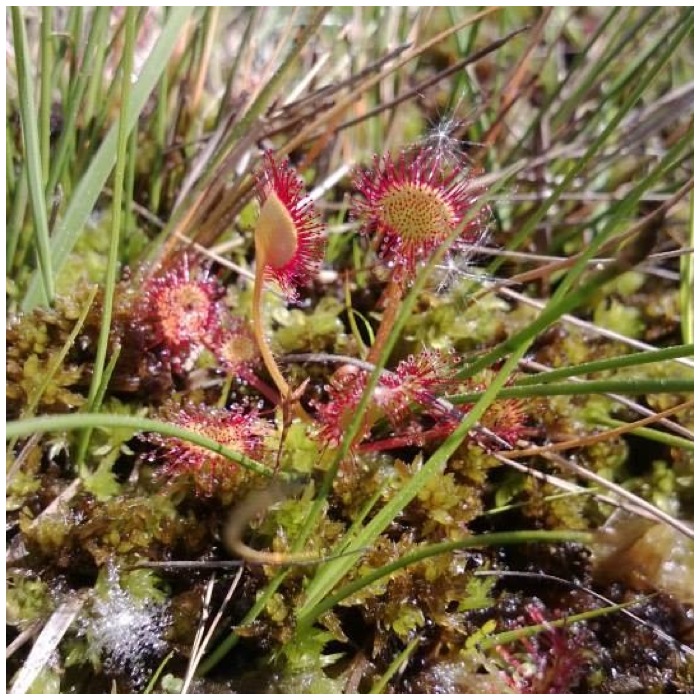
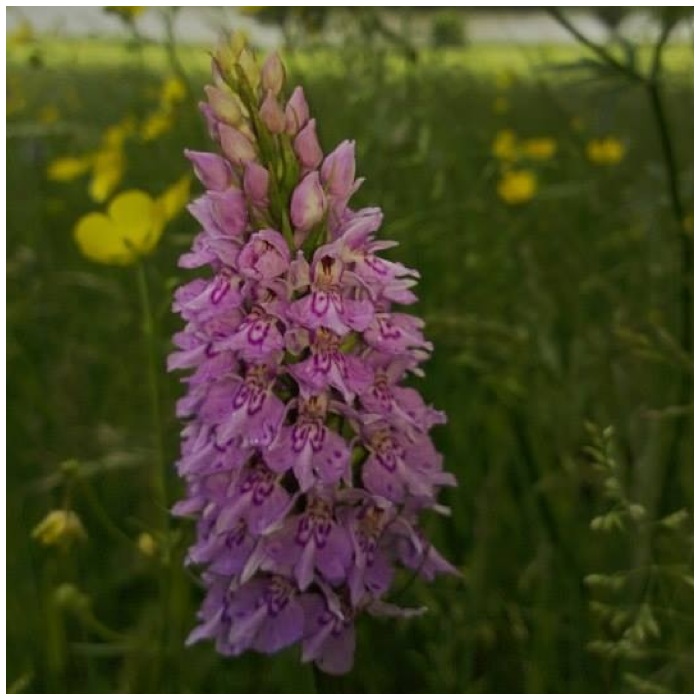
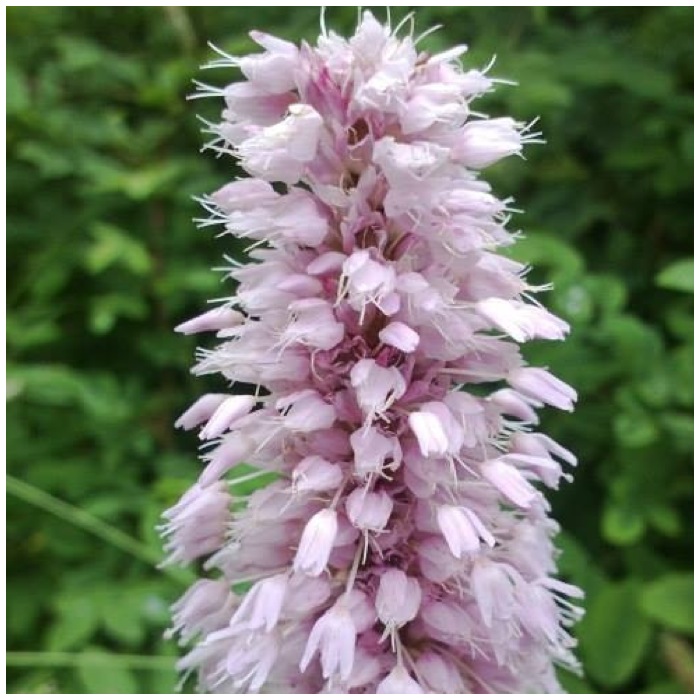
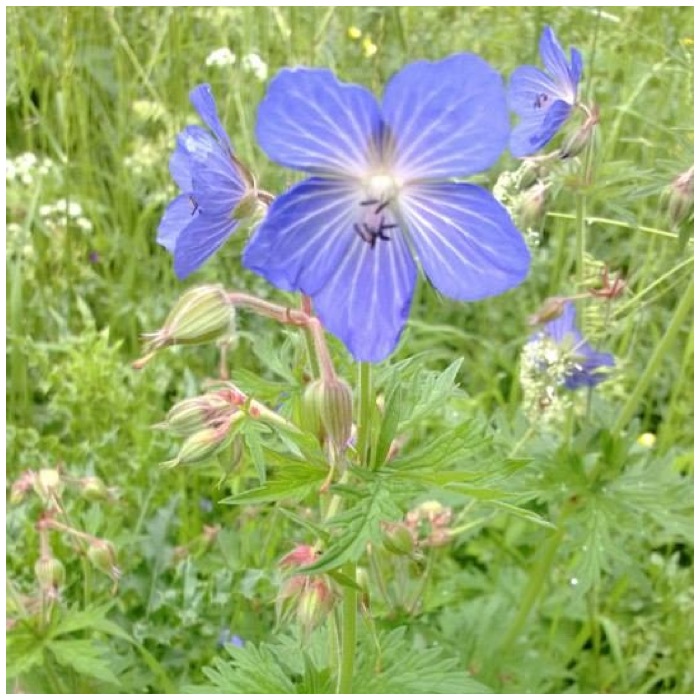
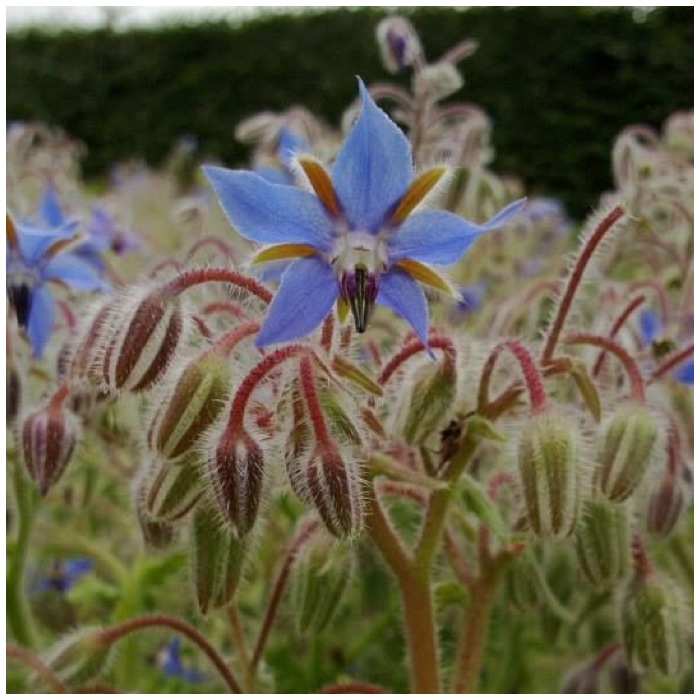
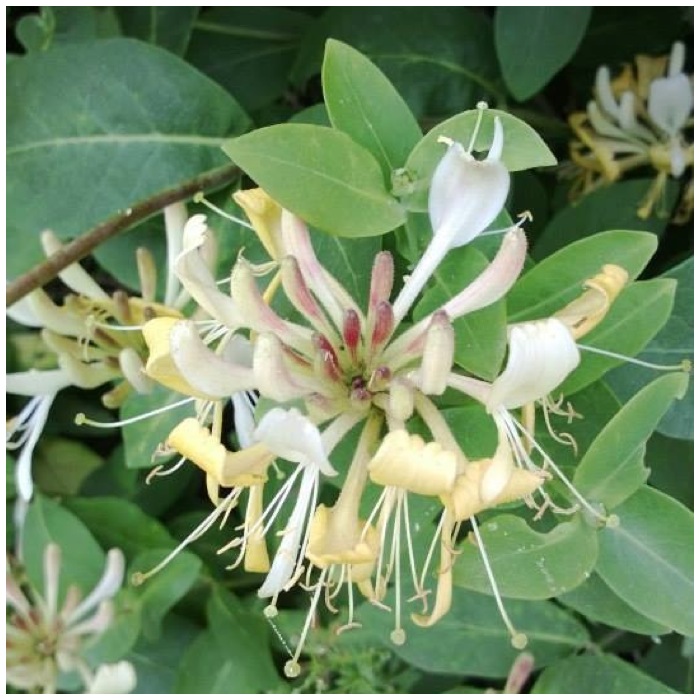
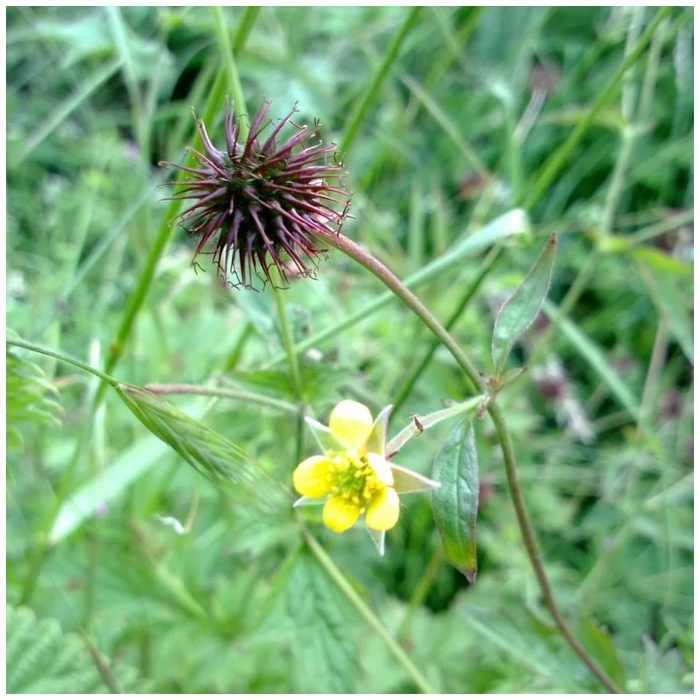
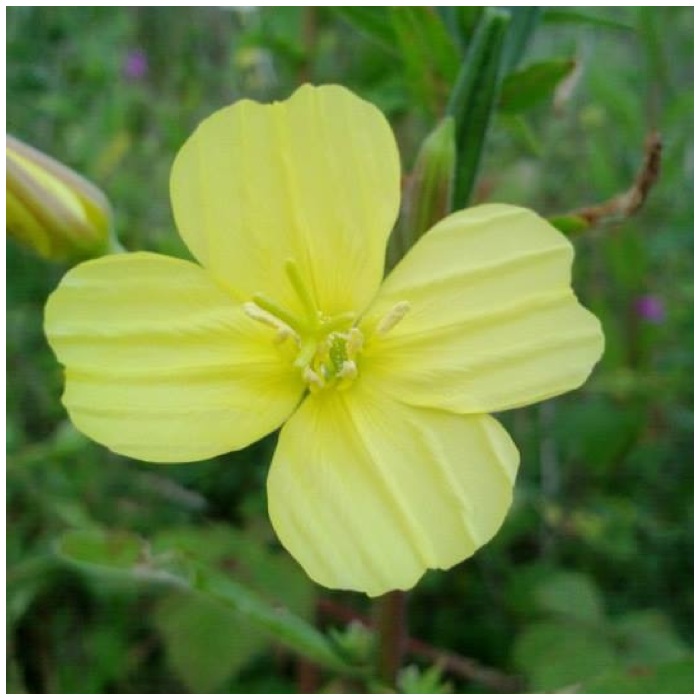
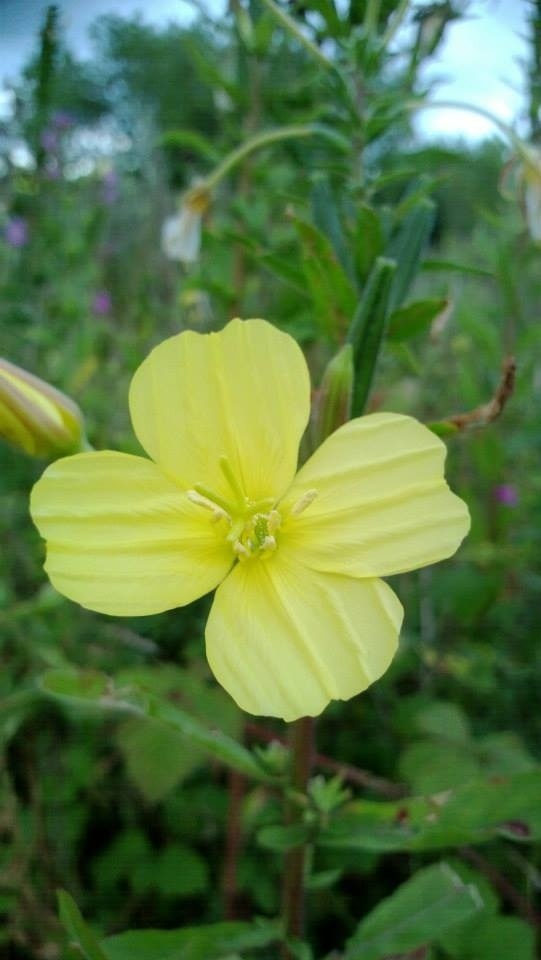
The mobile signal is pretty bad in Merthyr Mawr but there’s a particular spot I go out to where I can get a signal to phone home. The spot looks out onto the dunes and there every year I find these beautiful Evening Primroses growing. One of the great things about Merthyr Mawr is the diverse range of plants that grow there and so makes it a plant photographer’s heaven.

20131227-201246.jpg
Evening Primrose

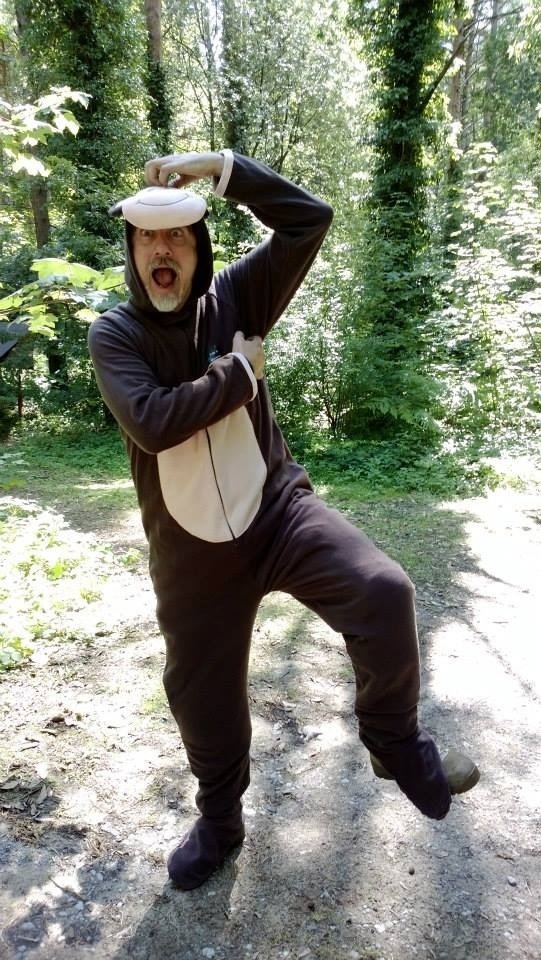
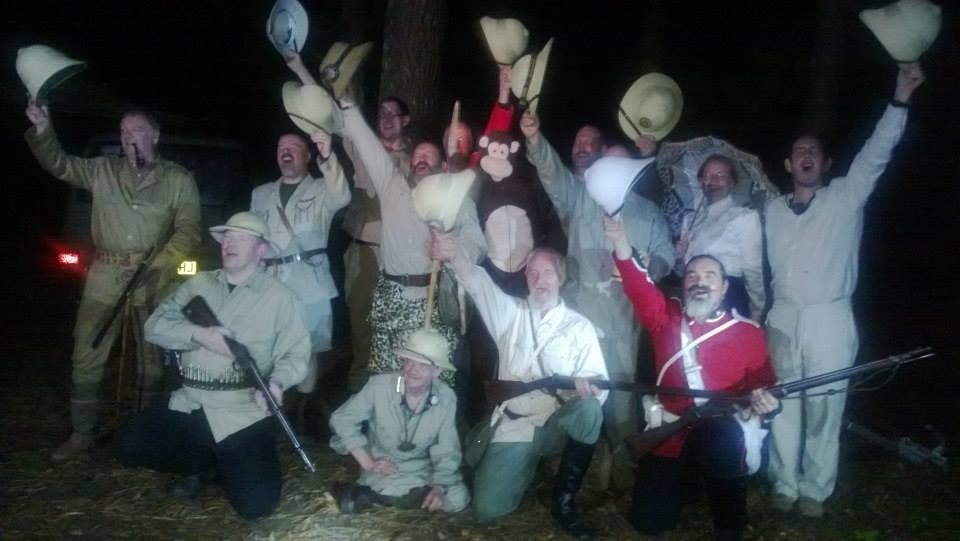
This year there was Victorian theme to the Moot but Spikey being Spikey decided to come as a monkey.

20131227-201227.jpg
Spikey Monkey

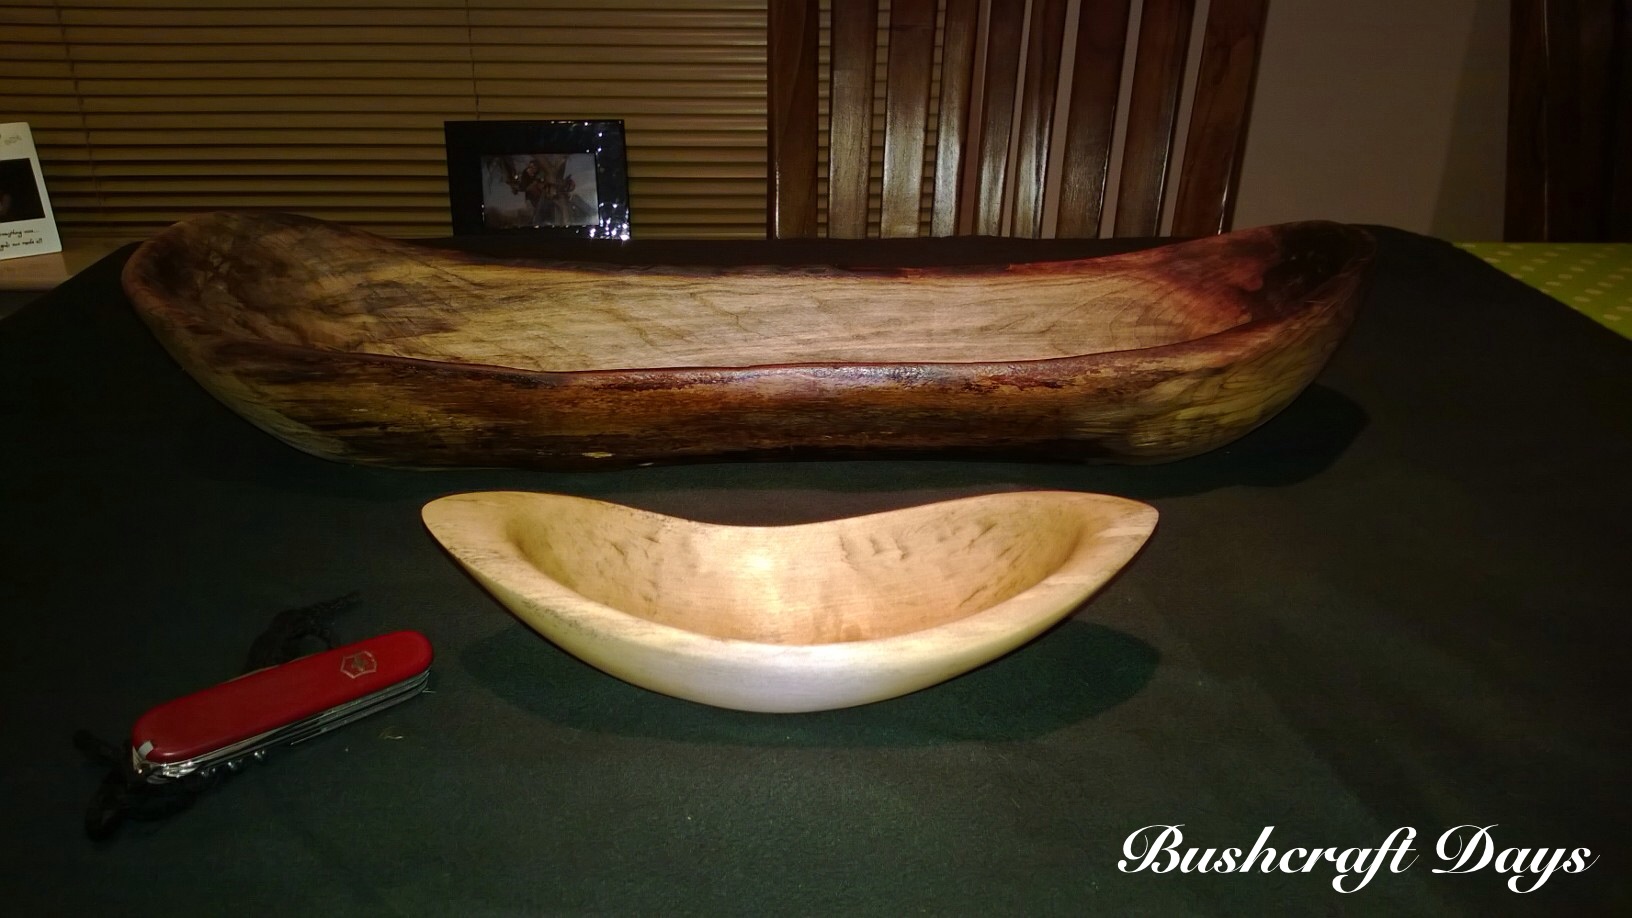
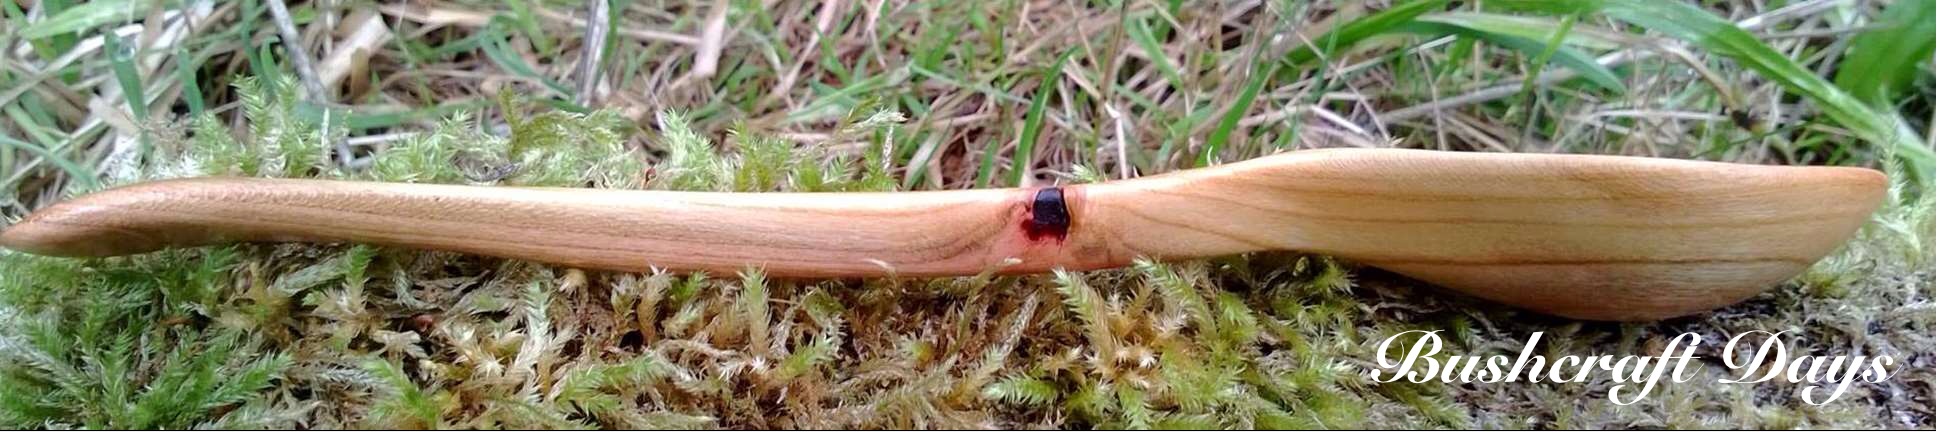
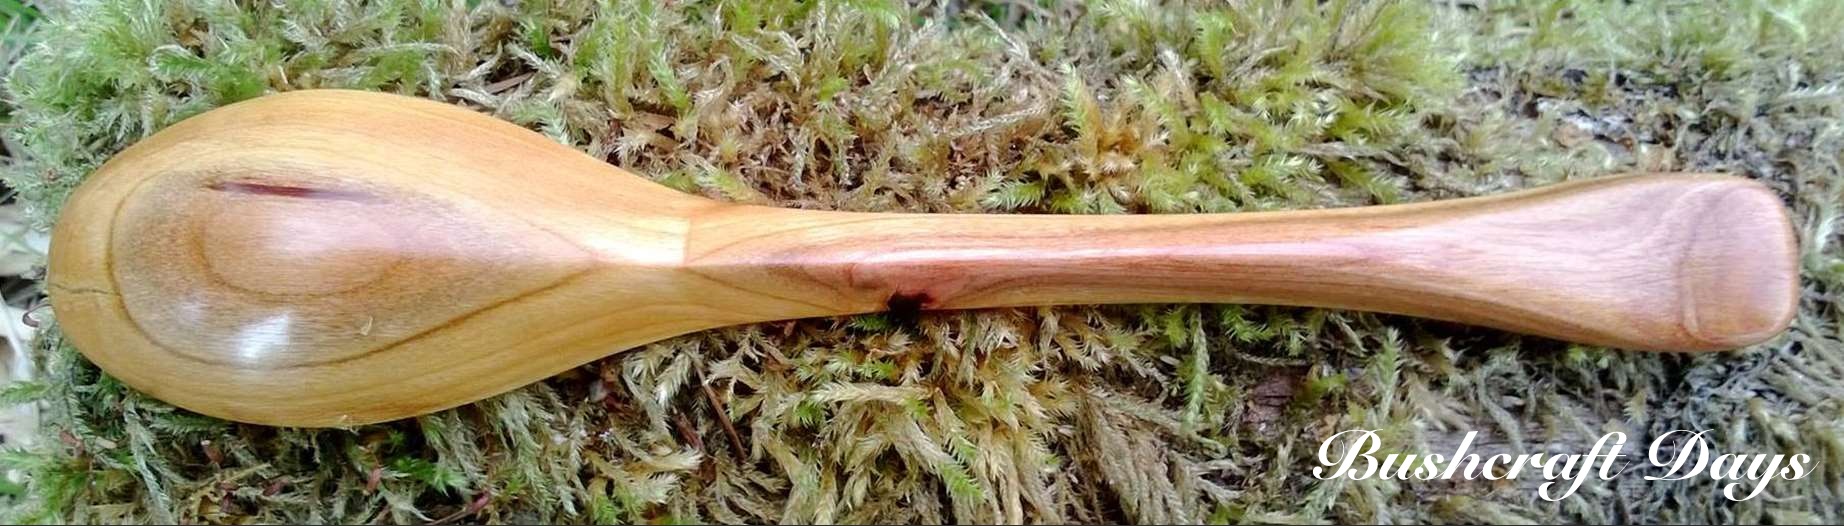
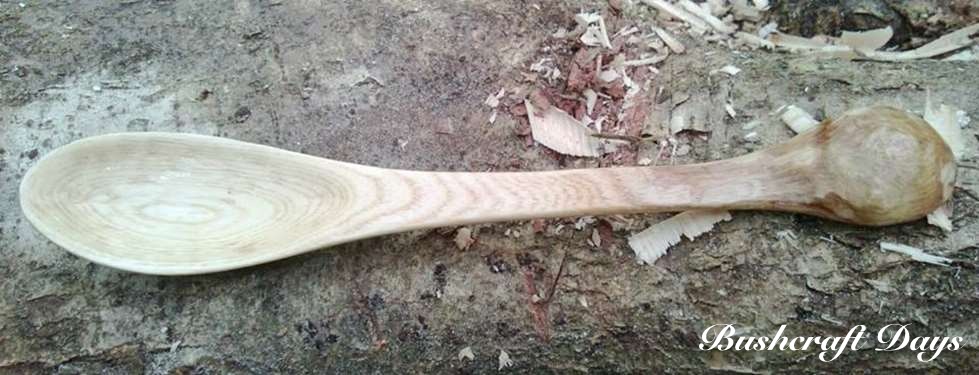
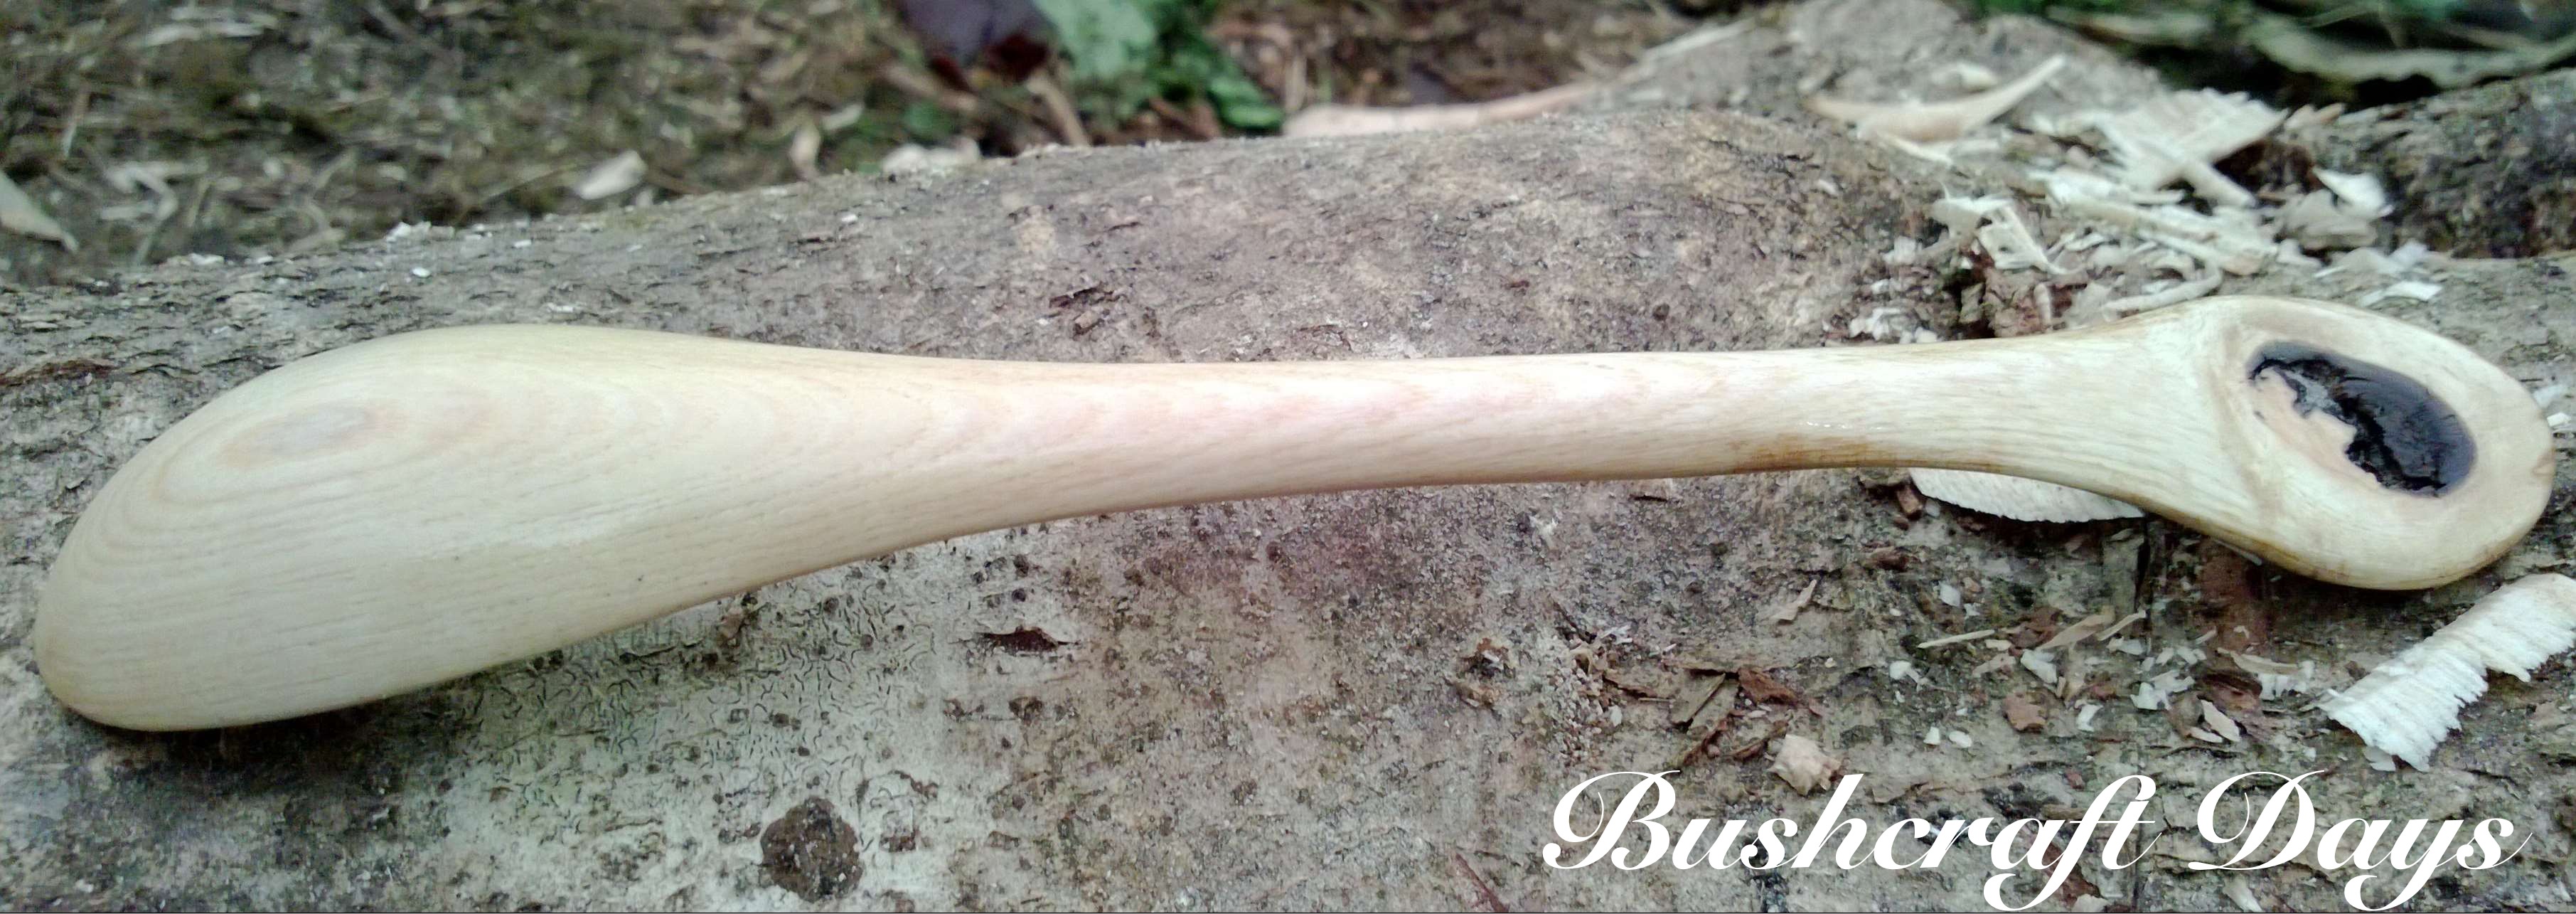
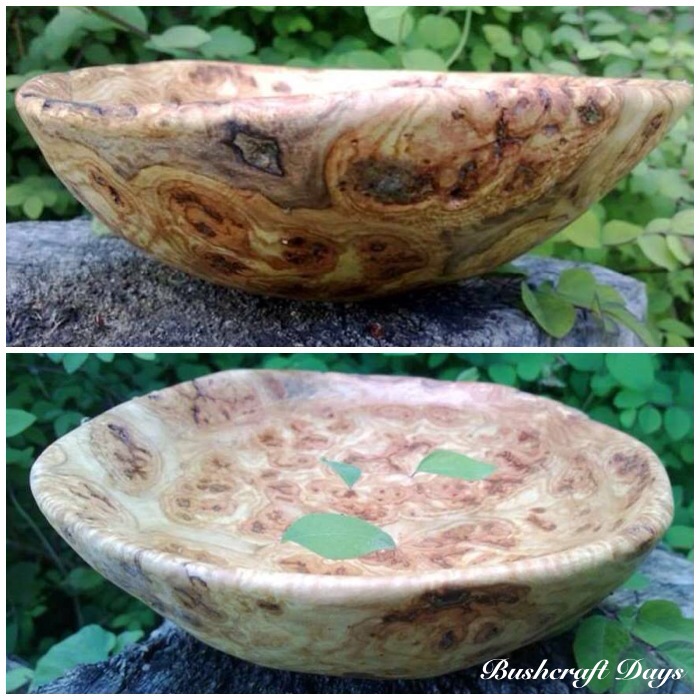
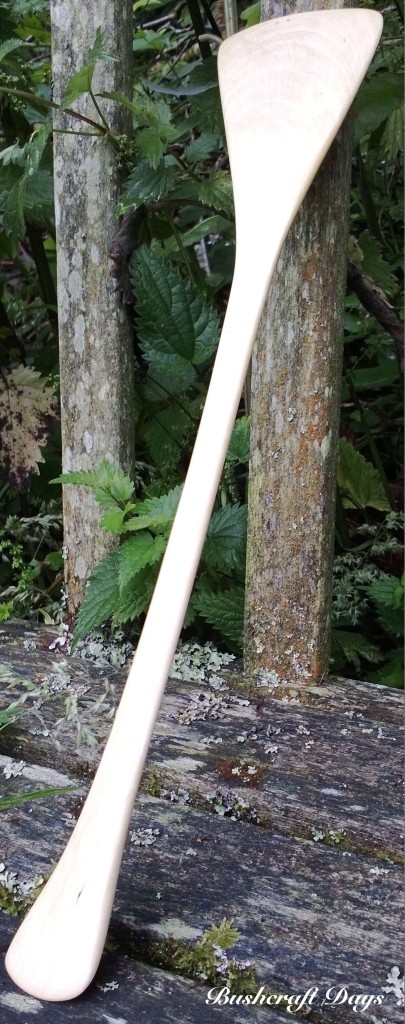
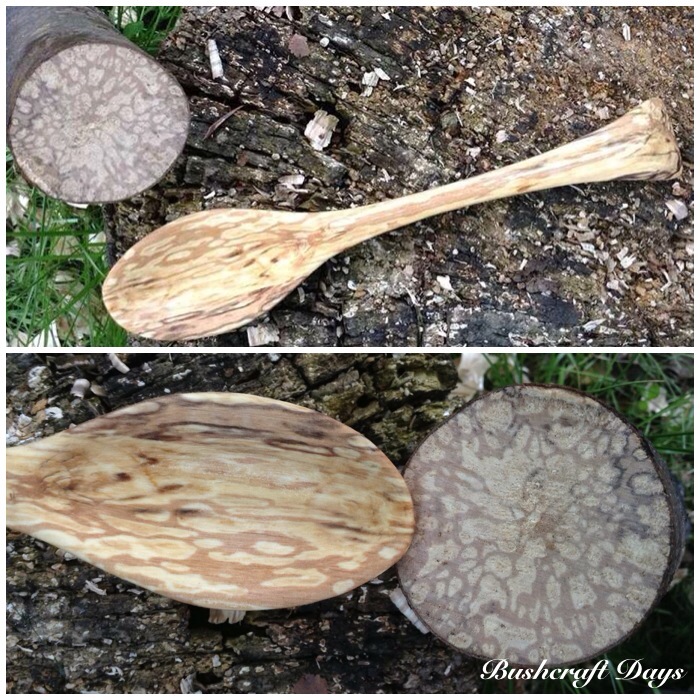
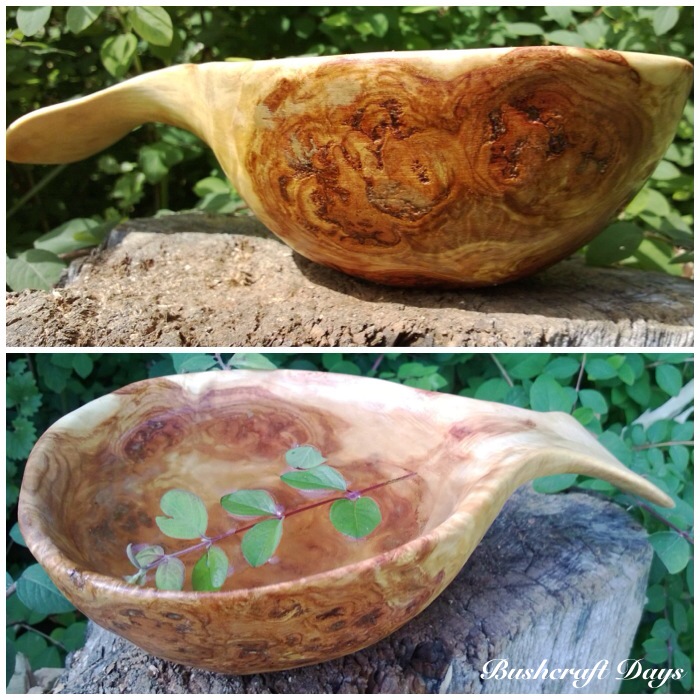
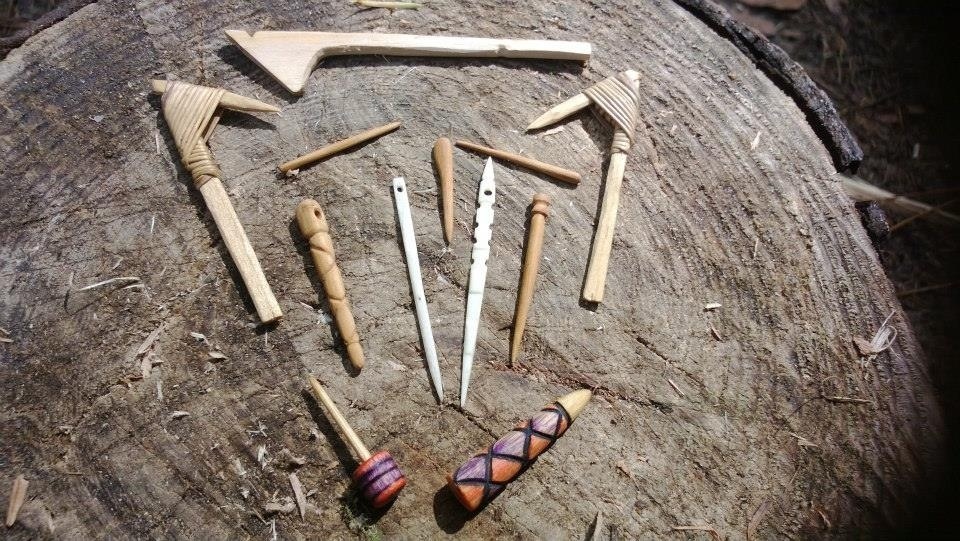
I was chatting with my friend Dean Allen one day at my campsite discussing the Welsh spoons he carves. The conversation got onto his other work and I had to take this picture. Dean has a great eye for detail as this picture shows.

20131227-201315.jpg
Dean’s fabulous work

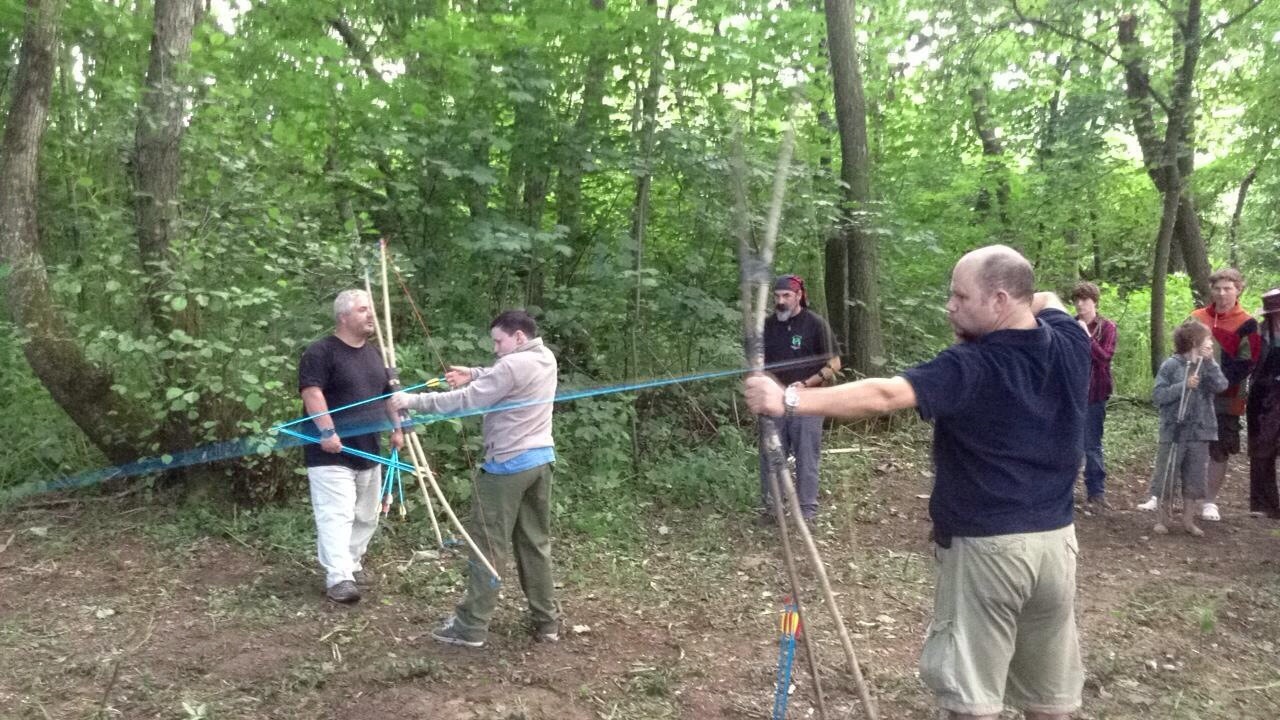
Quite a few of the guys are bowyers and we set up an archery range at each Moot. For a few years I have run a class making Father and Son bows as they are so quick to make.
As I was helping to run the Starter Skills course this year one of the other instructors ran the bow-making course. These bows take only an hour to make but can easily shoot sixty or seventy metres.

20131227-201526.jpg
Father & Son Bow Making

Cap’n Badger, Wayne Jones of Forest Knights, Paul Pomfrey and myself normally run the archery range. The Father and Son bows are double limbed and are great for the kids.

20131227-201200.jpg
Flying Arrows 1

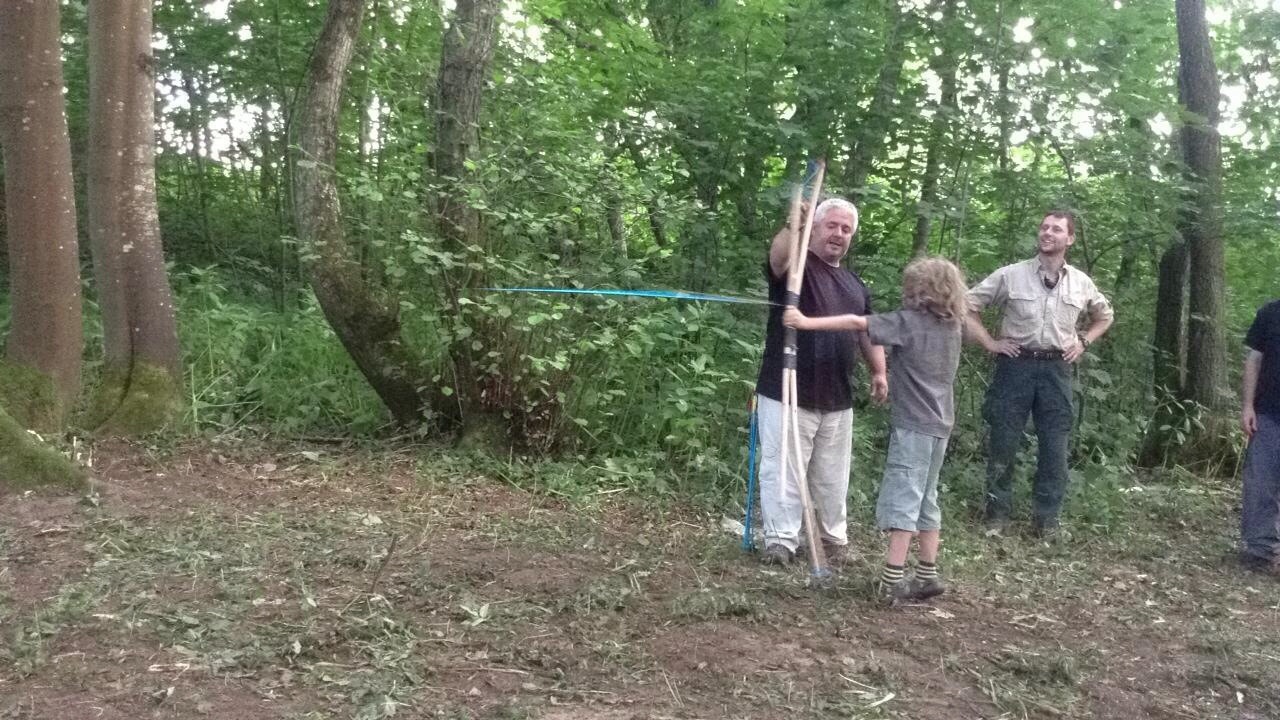
The adults love shooting them as well. Over the last couple of years I have developed an interest in getting these pictures of flying arrows. The slightly slower speed of these arrows being released makes for a good picture.

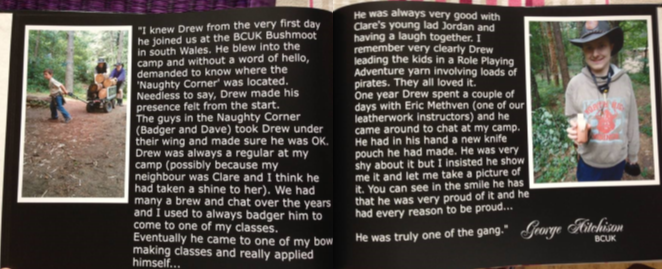
A couple of years ago Drew worked with me to build one of these bows. He was not sure if he could at first and was quite shy about starting but once he got going there was no stopping him.

20131227-201212.jpg
Flying Arrows 2

My good friend Fraser runs a company called Coastal Survival and has been coming to the Moot for a few years now. Sad to say that Bella (the larger dog) passed away this year due to complications from a possible snake bite earlier in the year. She was a great dog, always inquisitive and great with the kids.

20131227-201301.jpg
Fraser and crew

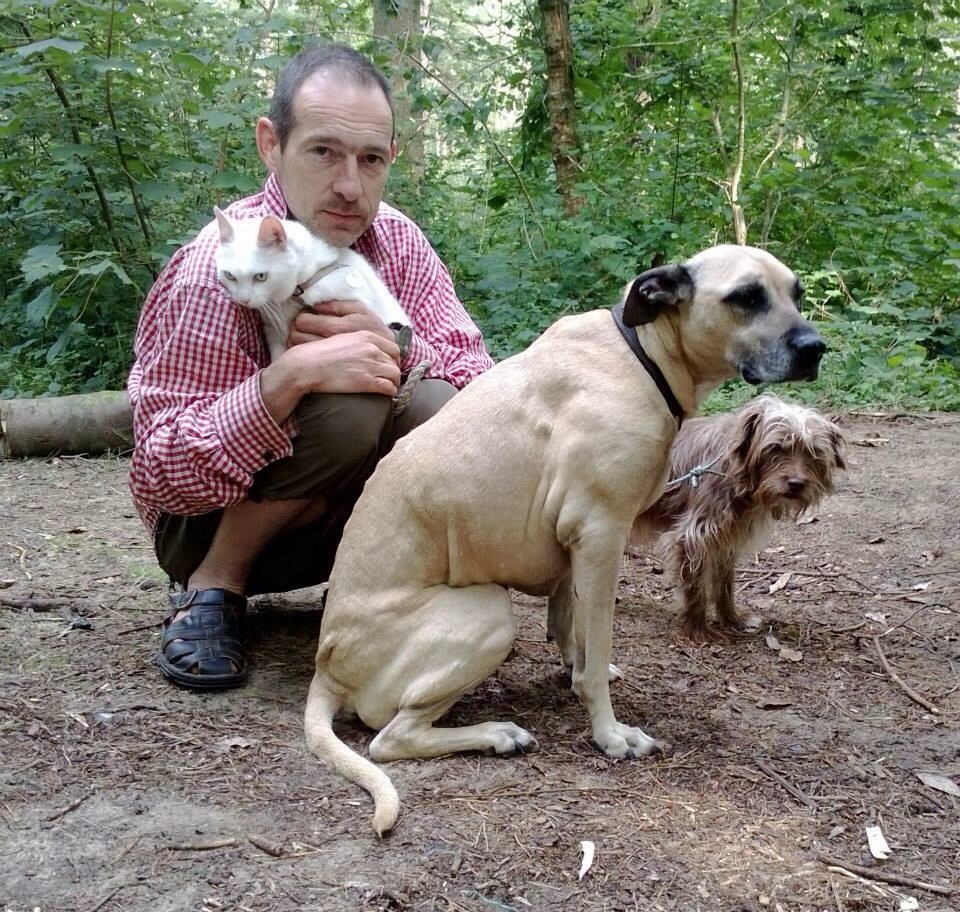
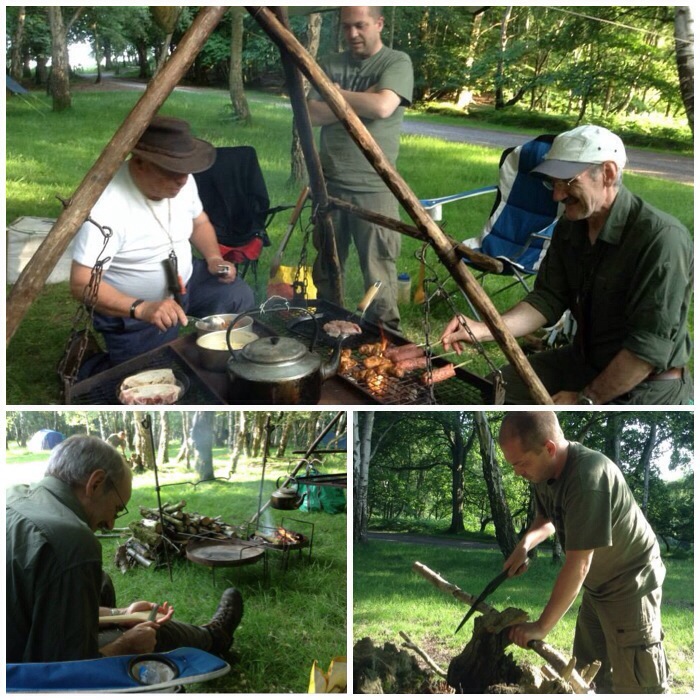
Alongside Fraser is our big Al and what a lovely pair of chefs they make 😉 between the two of these guys I have had some fantastic food at the Moot.

20131227-201347.jpg
Pretty Chefs

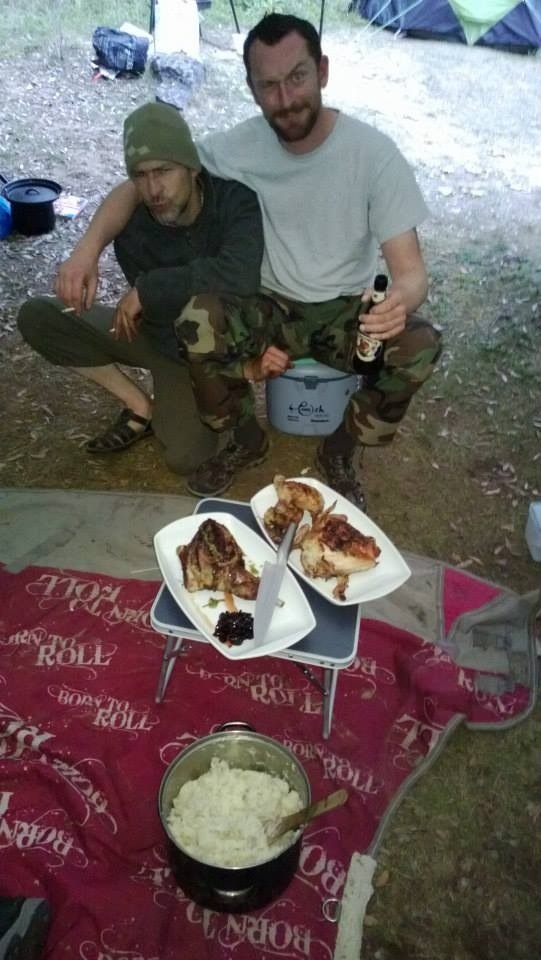
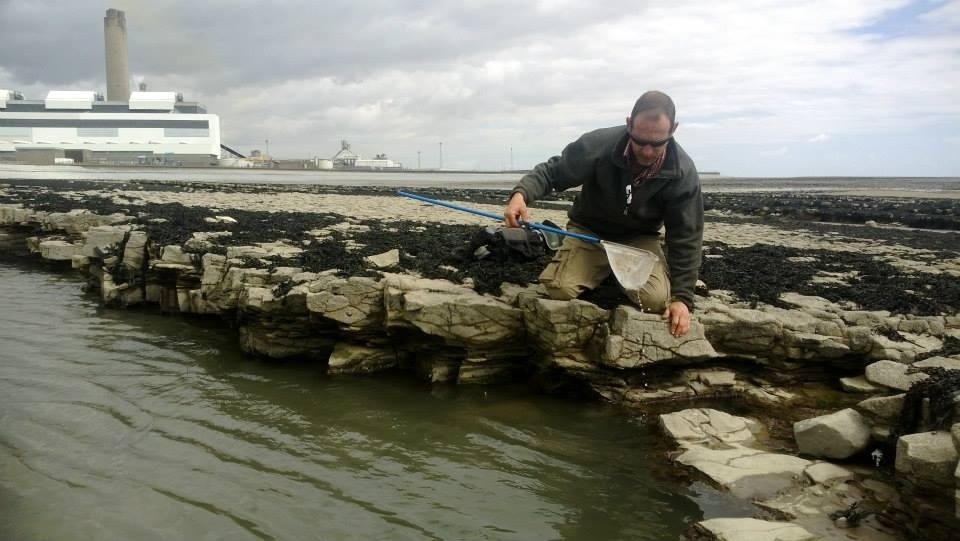
On one of the days I popped down to the coast to do a bit of foraging with them. No fish that day but plenty of shrimp and limpets. Drew did a few Coastal trips with Fraser so I know he would have loved this.

20131227-201400.jpg
Coastal Foraging

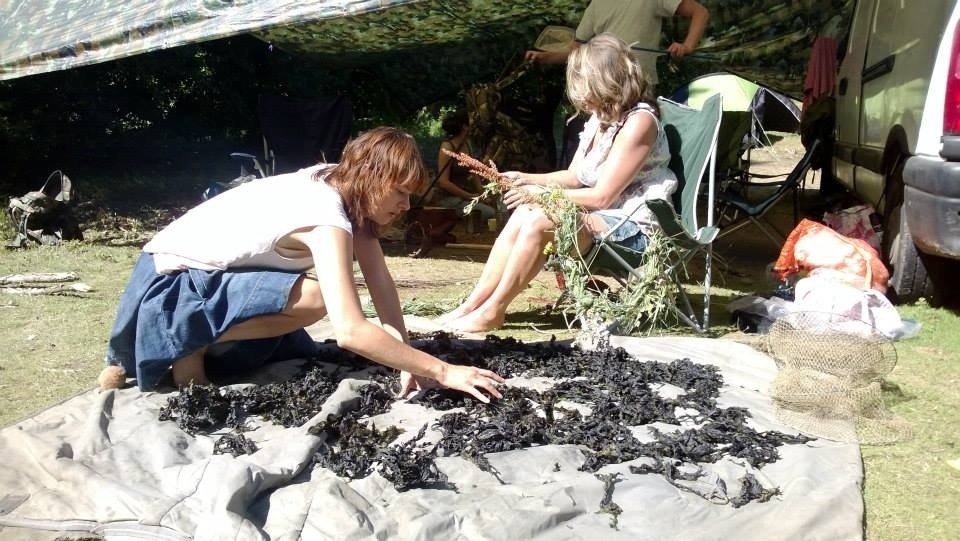
We also collected a lot of sea weed (sea lettuce I think) which Clare was laying out to get rid of sand particles and to dry it out. Karen is making grass rope in the background as a decoration for the mobile palace.

20131227-201904.jpg
Seaweed prep

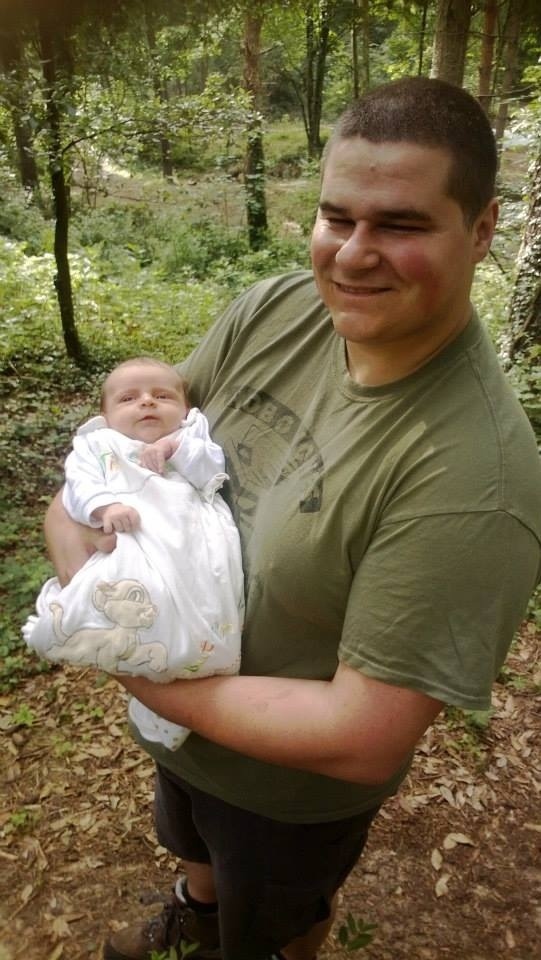
It was great to meet Craig’s baby son Sion for the first time at the Moot.

20131227-201411.jpg
Happy Craig with his son Sion

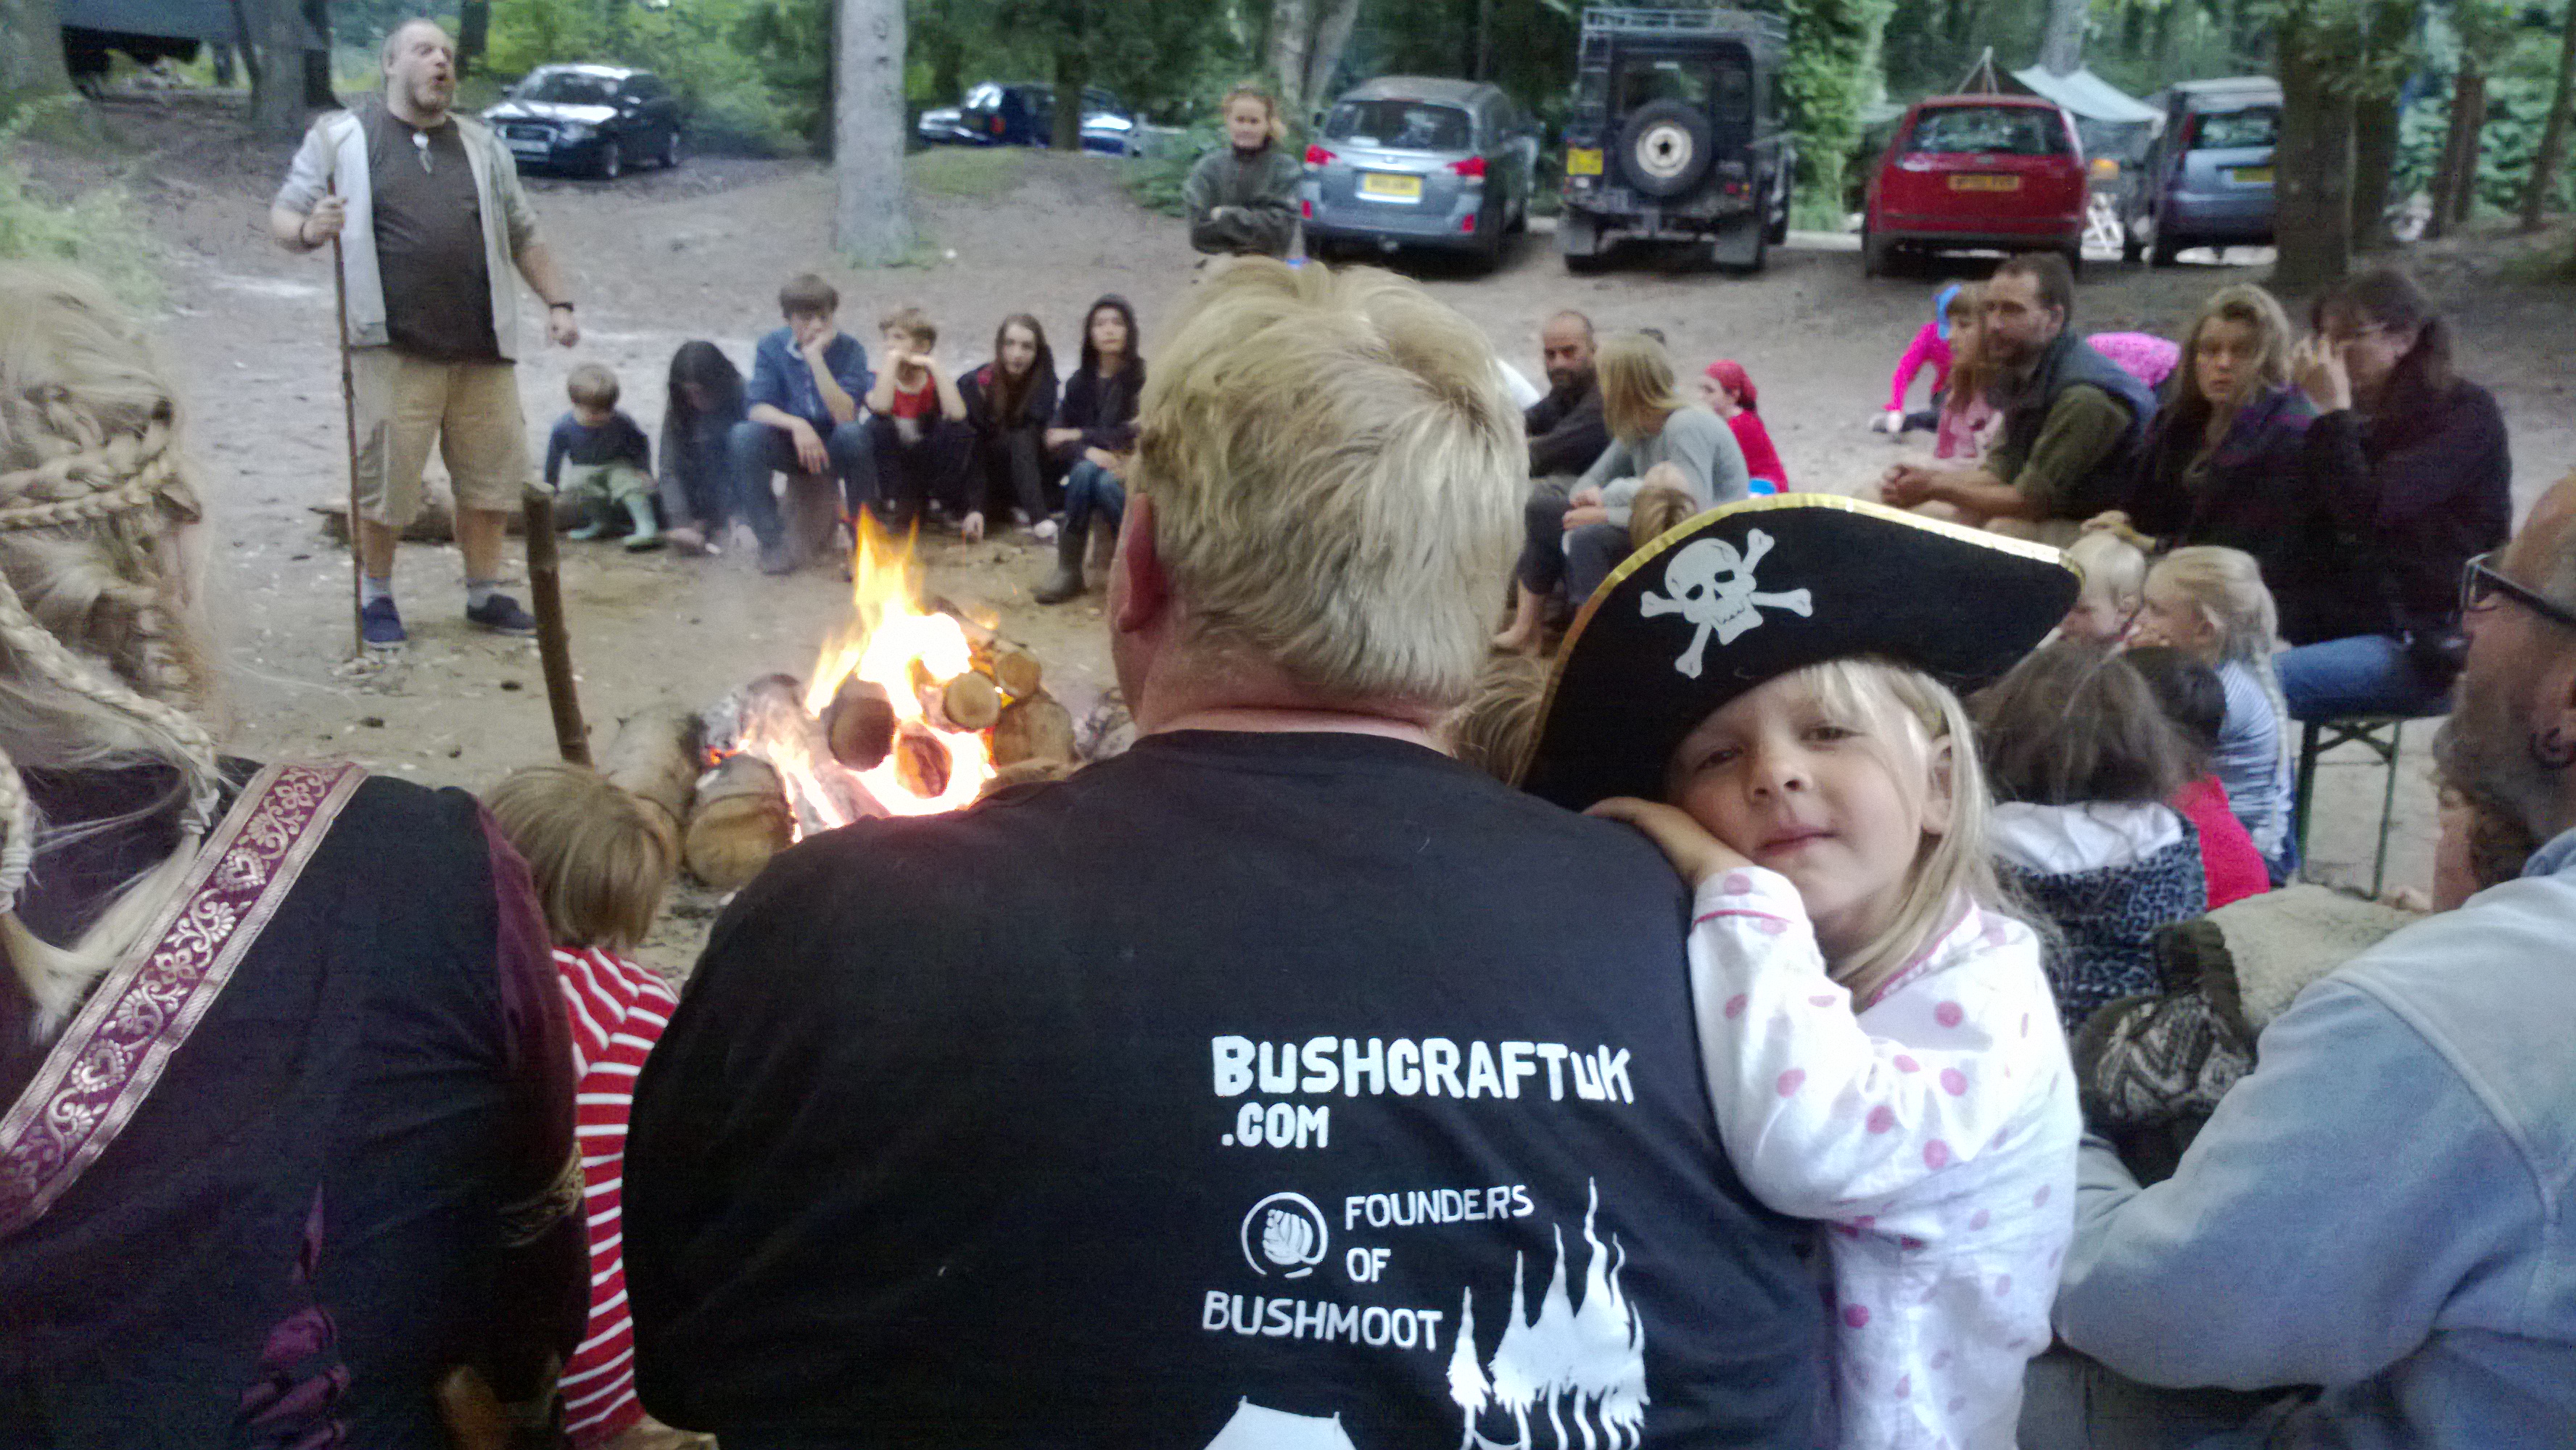
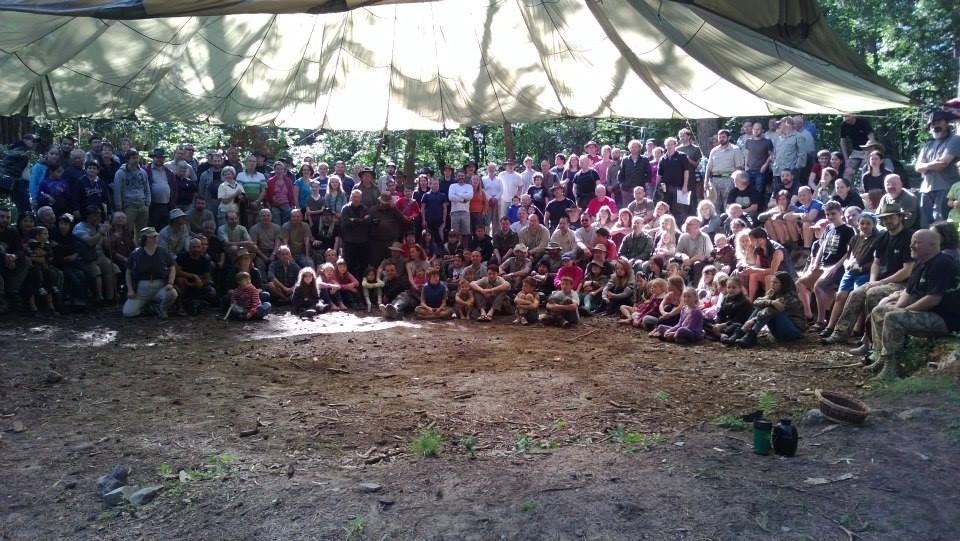
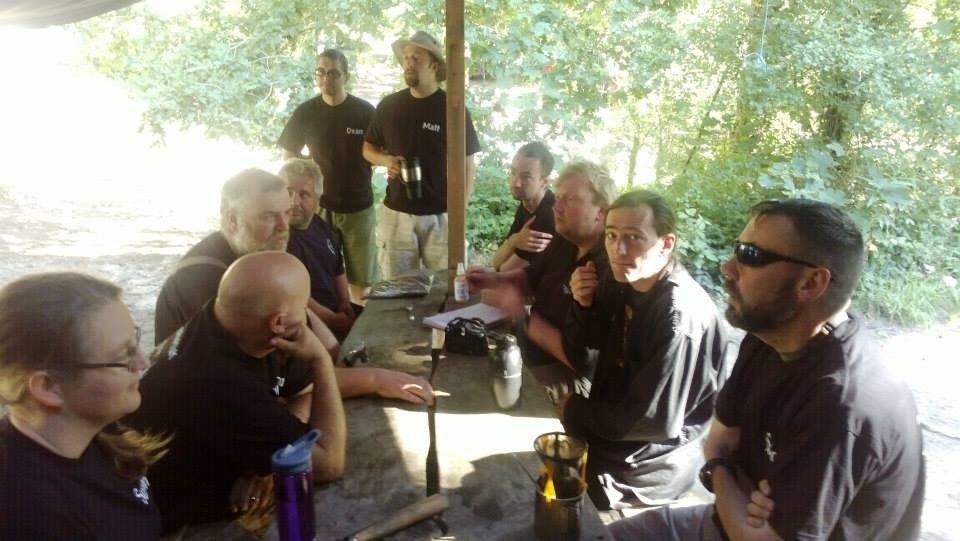
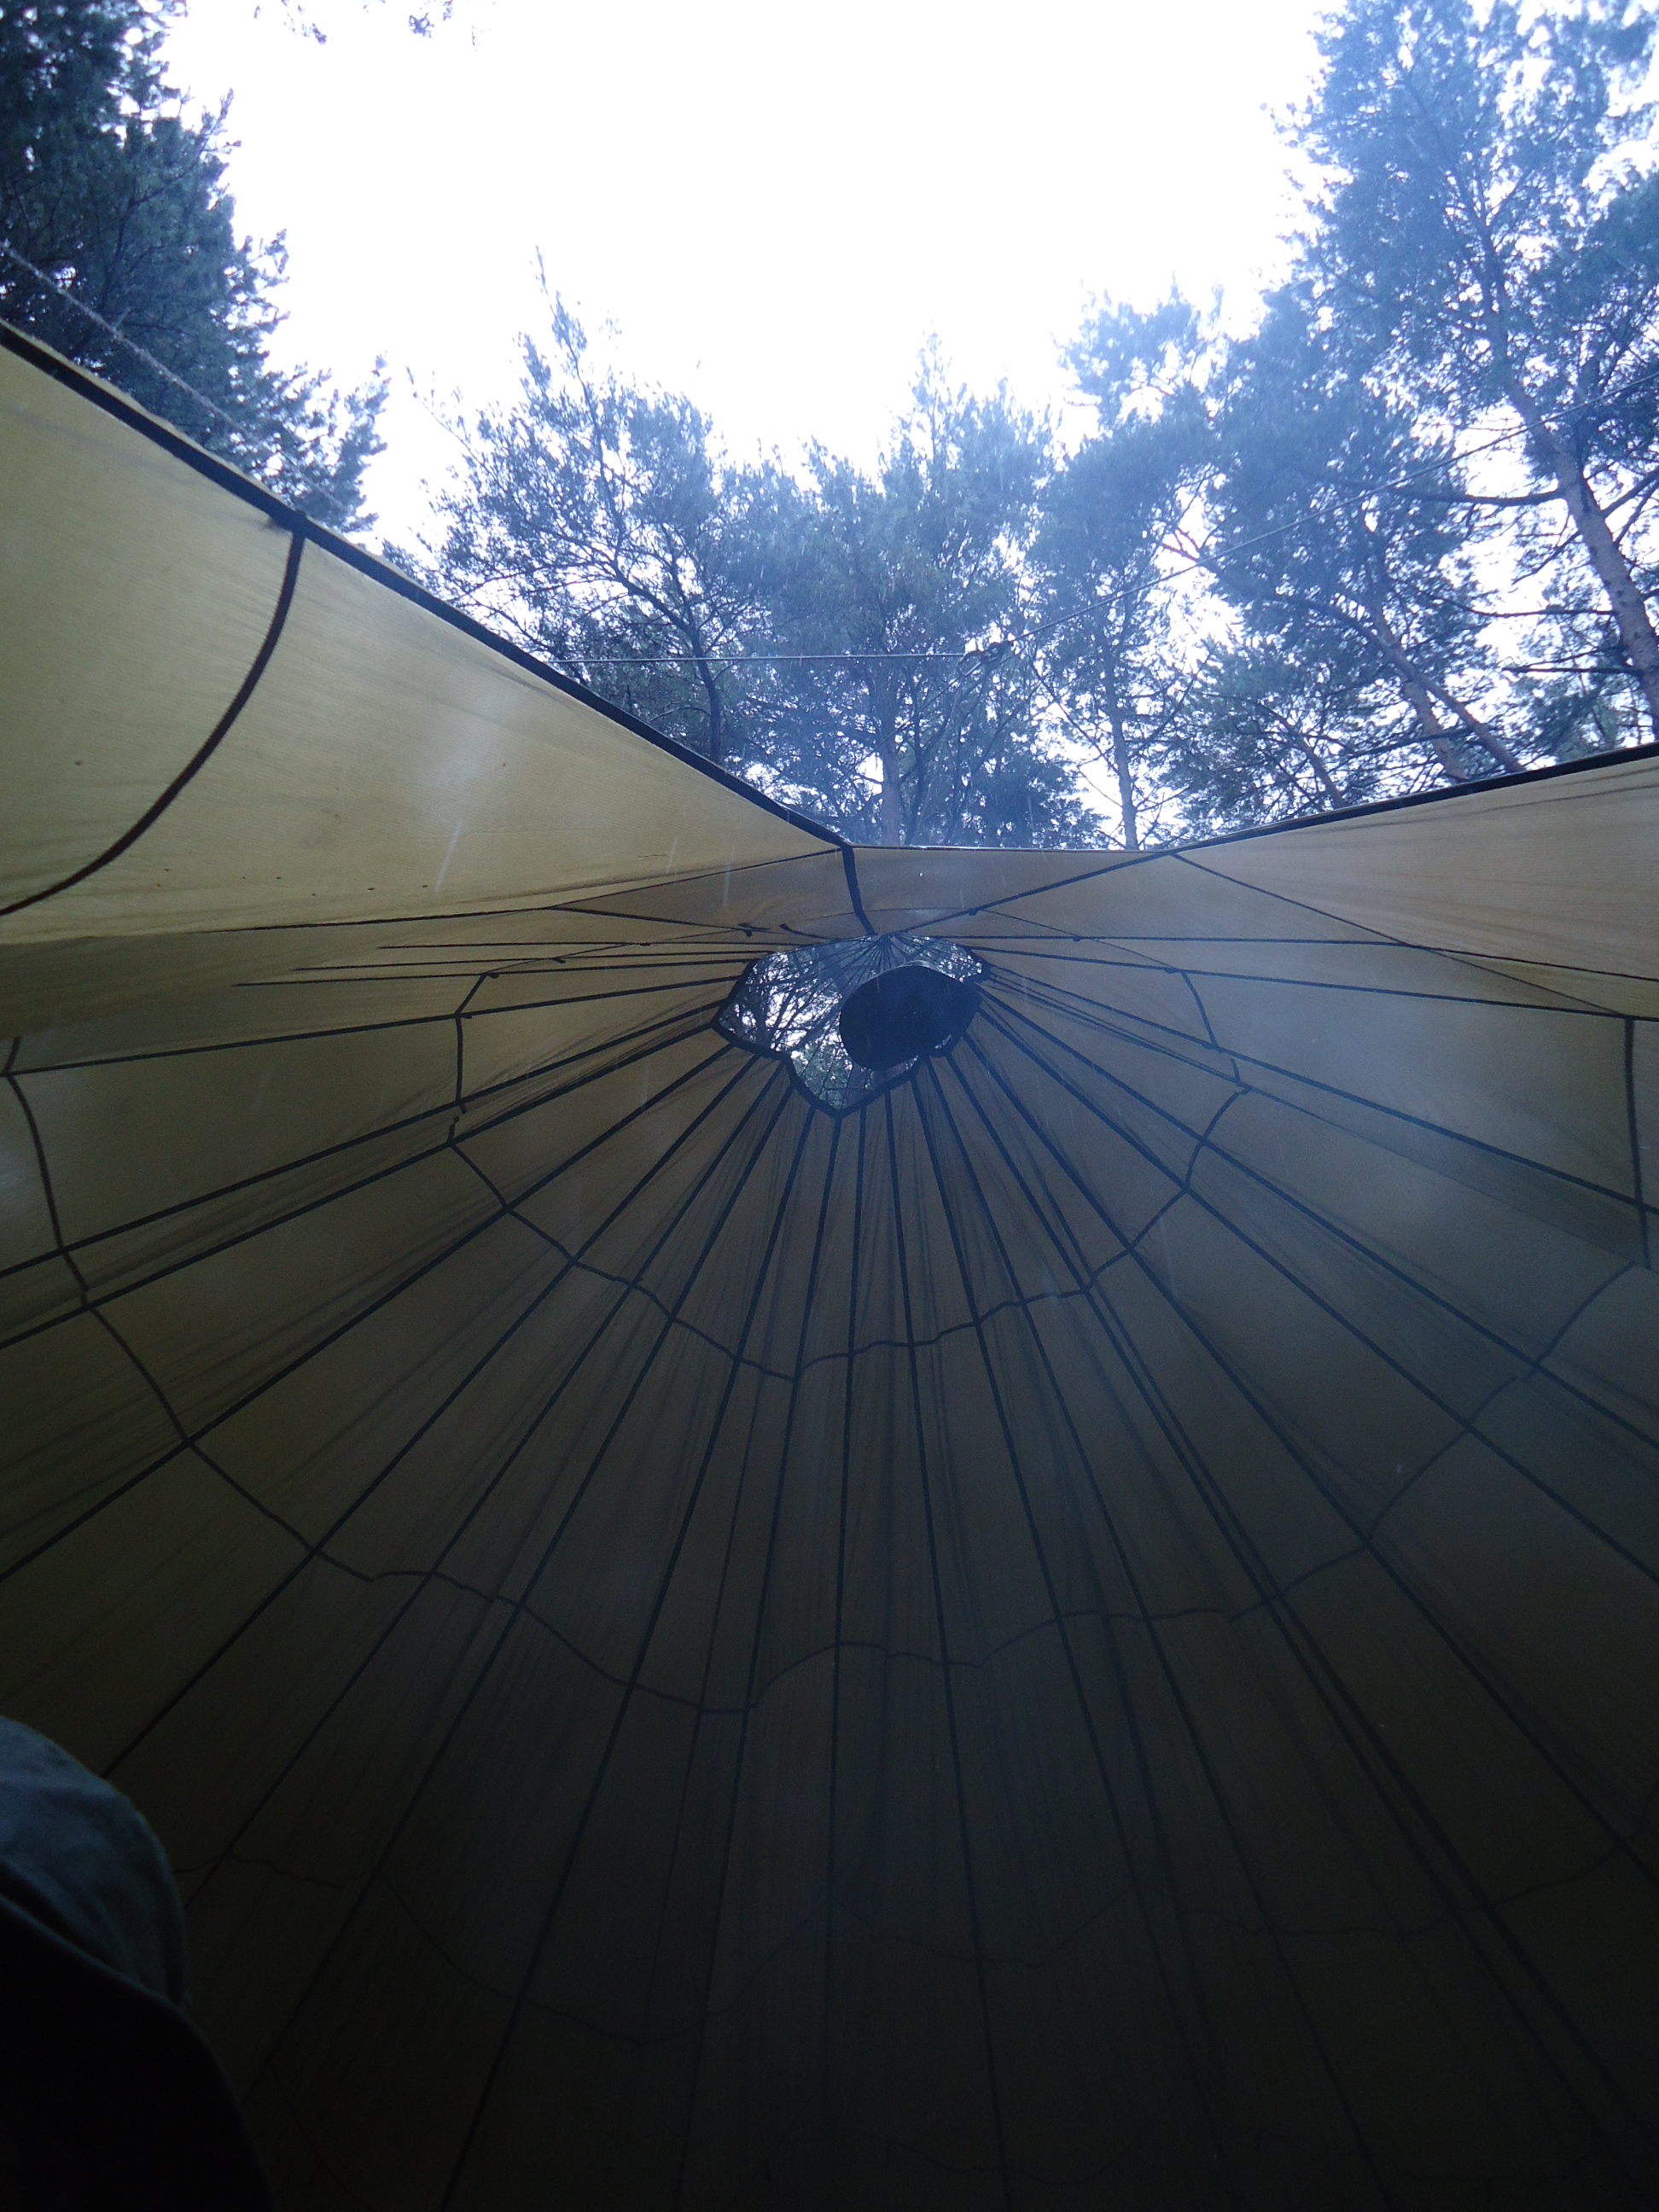
For myself and the rest of the Mods the day starts with ‘morning prayers’ (Tony’s morning briefing) and this is soon followed by a larger meeting with everybody under the main parachute.

20131227-201423.jpg
Morning Mods Meeting

This picture was taken in 2011 and shows the main parachute where we have the morning meetings to discuss the day’s events. Ever the practical joker, Drew found his hat missing one day and finally spotted it at the apex of the chute.

DSC02273
Drew’s Hover Hat

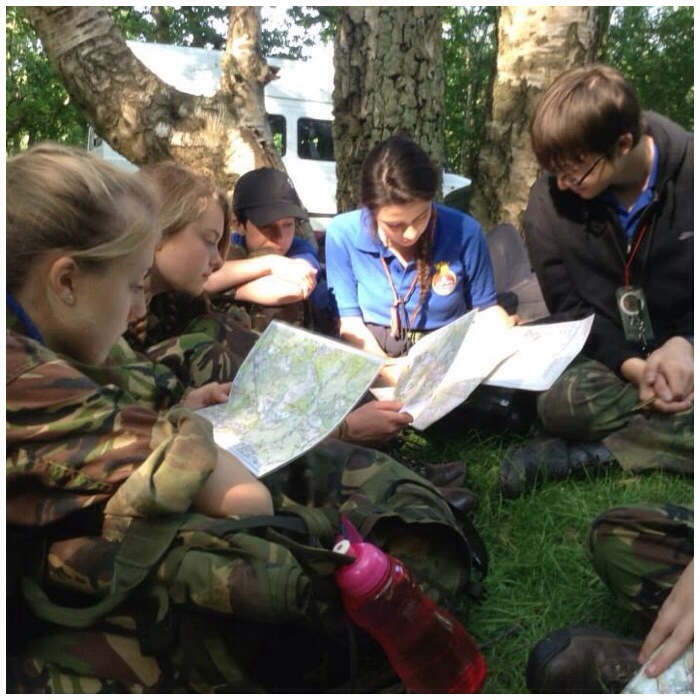
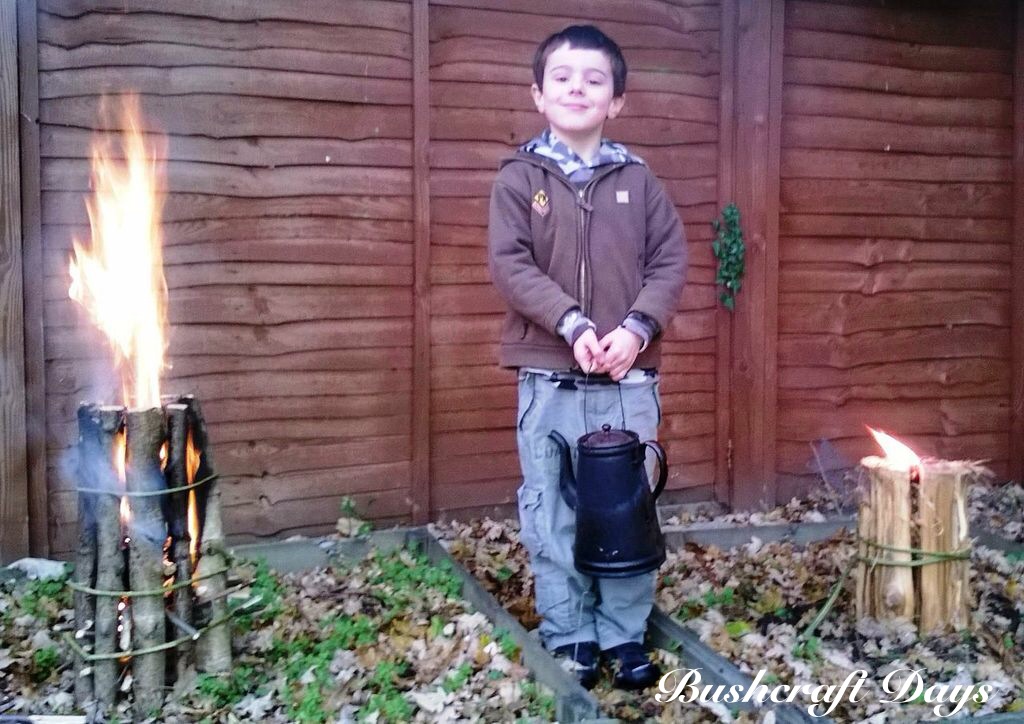
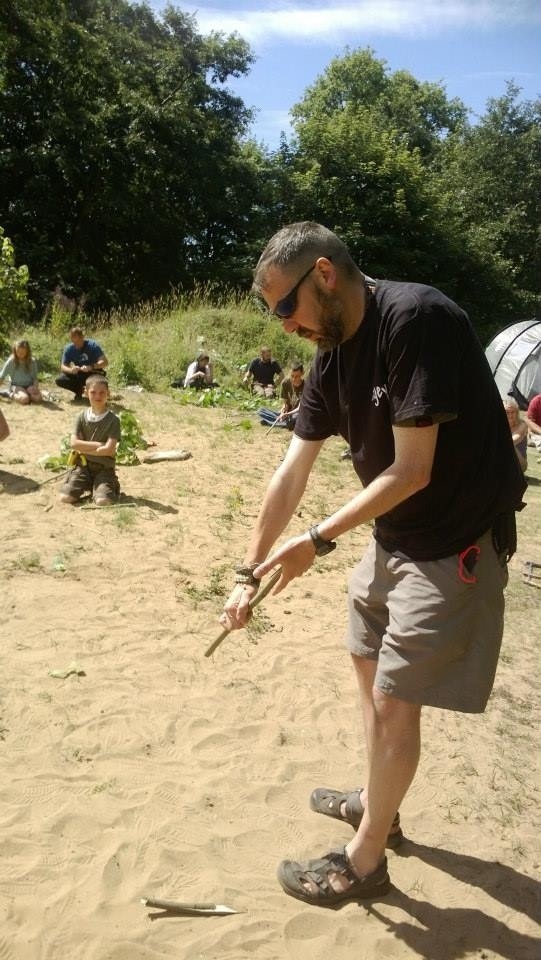
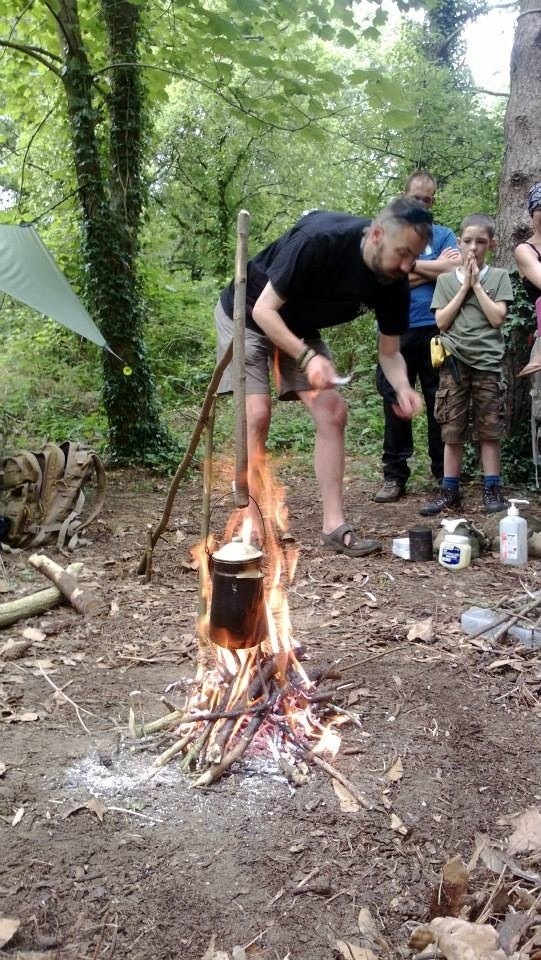
In one of the Mods’ meetings we came to the conclusion that a’Starter Skills’ course was required, covering knife safety, carving (we made tongs for the fire), knots, fire lighting and some simple pot stands.

20131227-201450.jpg
Starter Skills – Knife Safety

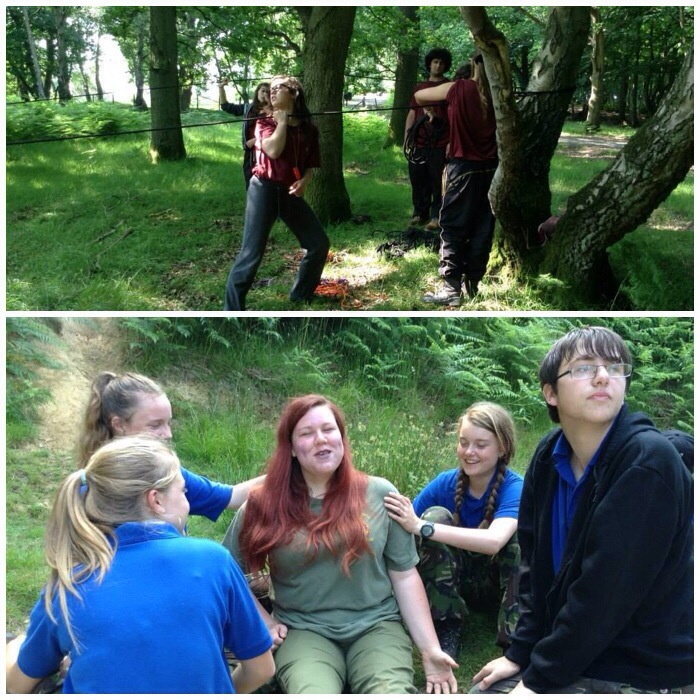
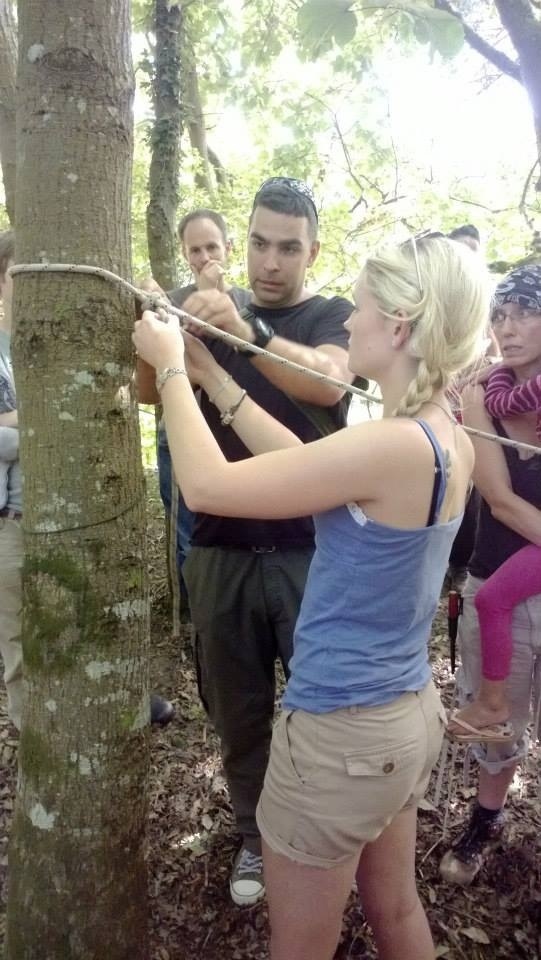
Emily having a go at the Evenk knot.

20131227-201516.jpg
Starter Skills – Bushcraft Knots

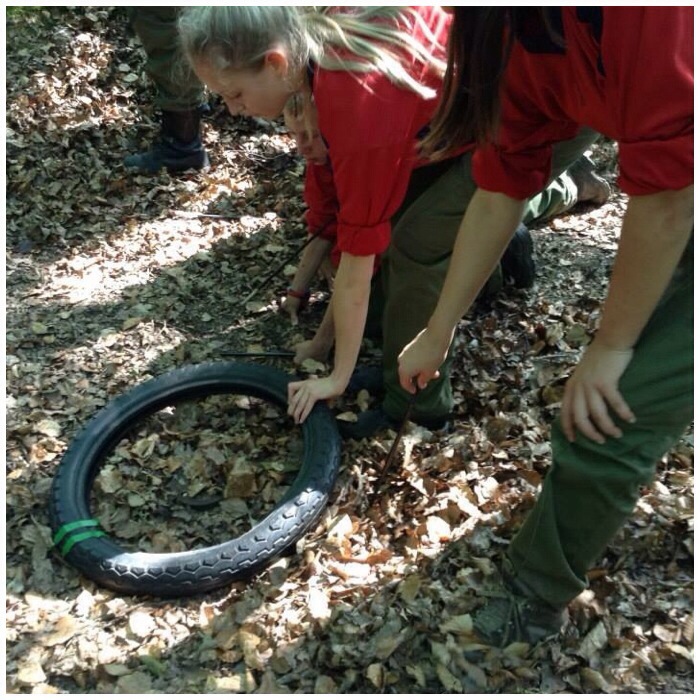
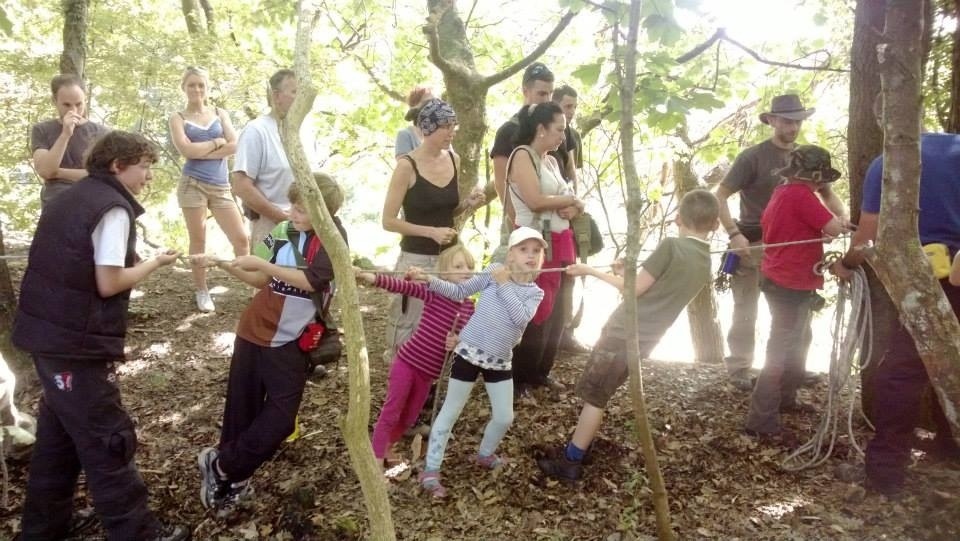
The kids all learnt the skills at the same time as their parents and had fun here testing that the knots had been set up properly.

20131227-201502.jpg
Starter Skills – Knot testing

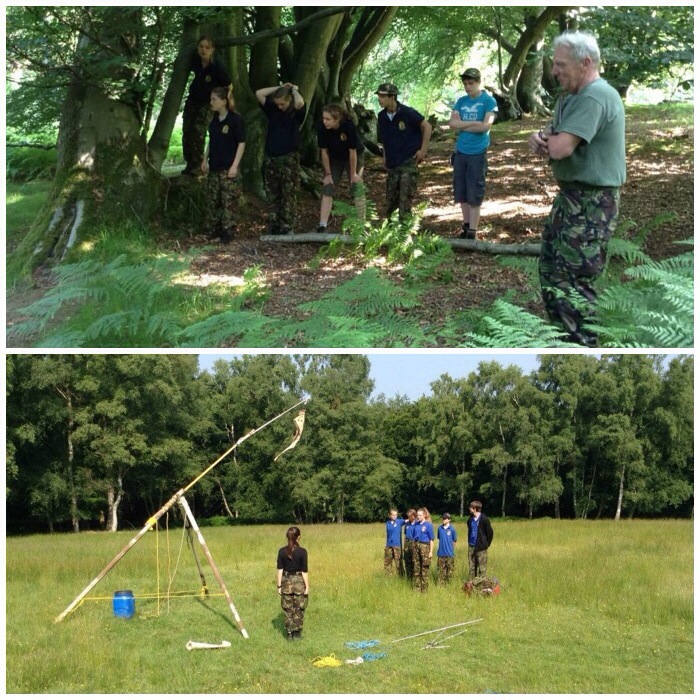
Sargey finishing off the fire lighting class of the Starter Skills course. This course got a lot of good feedback so we will try and run it again next year.

20131227-201546.jpg
Starter Skills – Fire Skills & Pot Set Ups

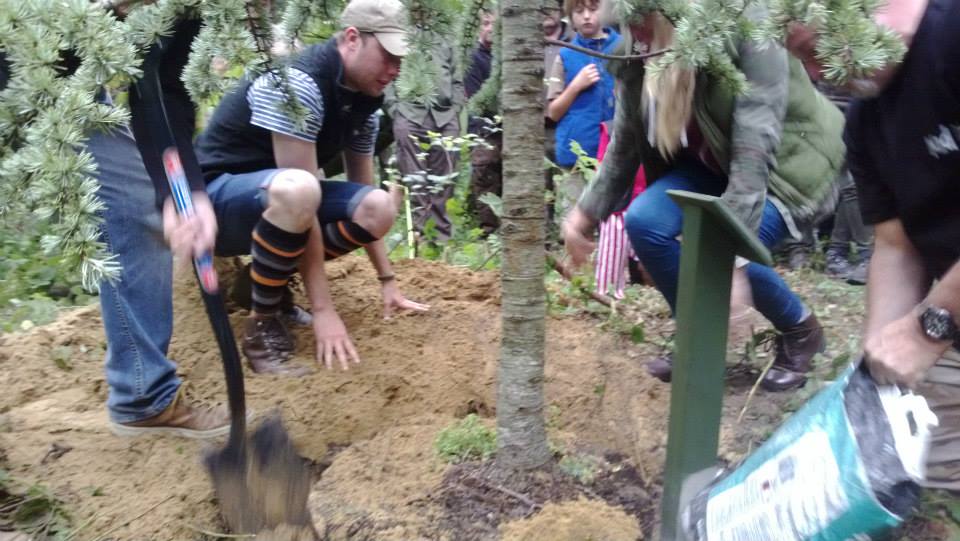
Some of the members (Cap’n Badger and crew) had organised a very special Memorial Service for Drew. His parents Jean and Philip attended the Moot this year for the service along with Drew’s brother Steven and sister Stacey.

Steven and Stacey helped to plant the Atlantic Pine tree in Drew’s memory.

1175406_10151631159364385_1316345356_n
Tree planting

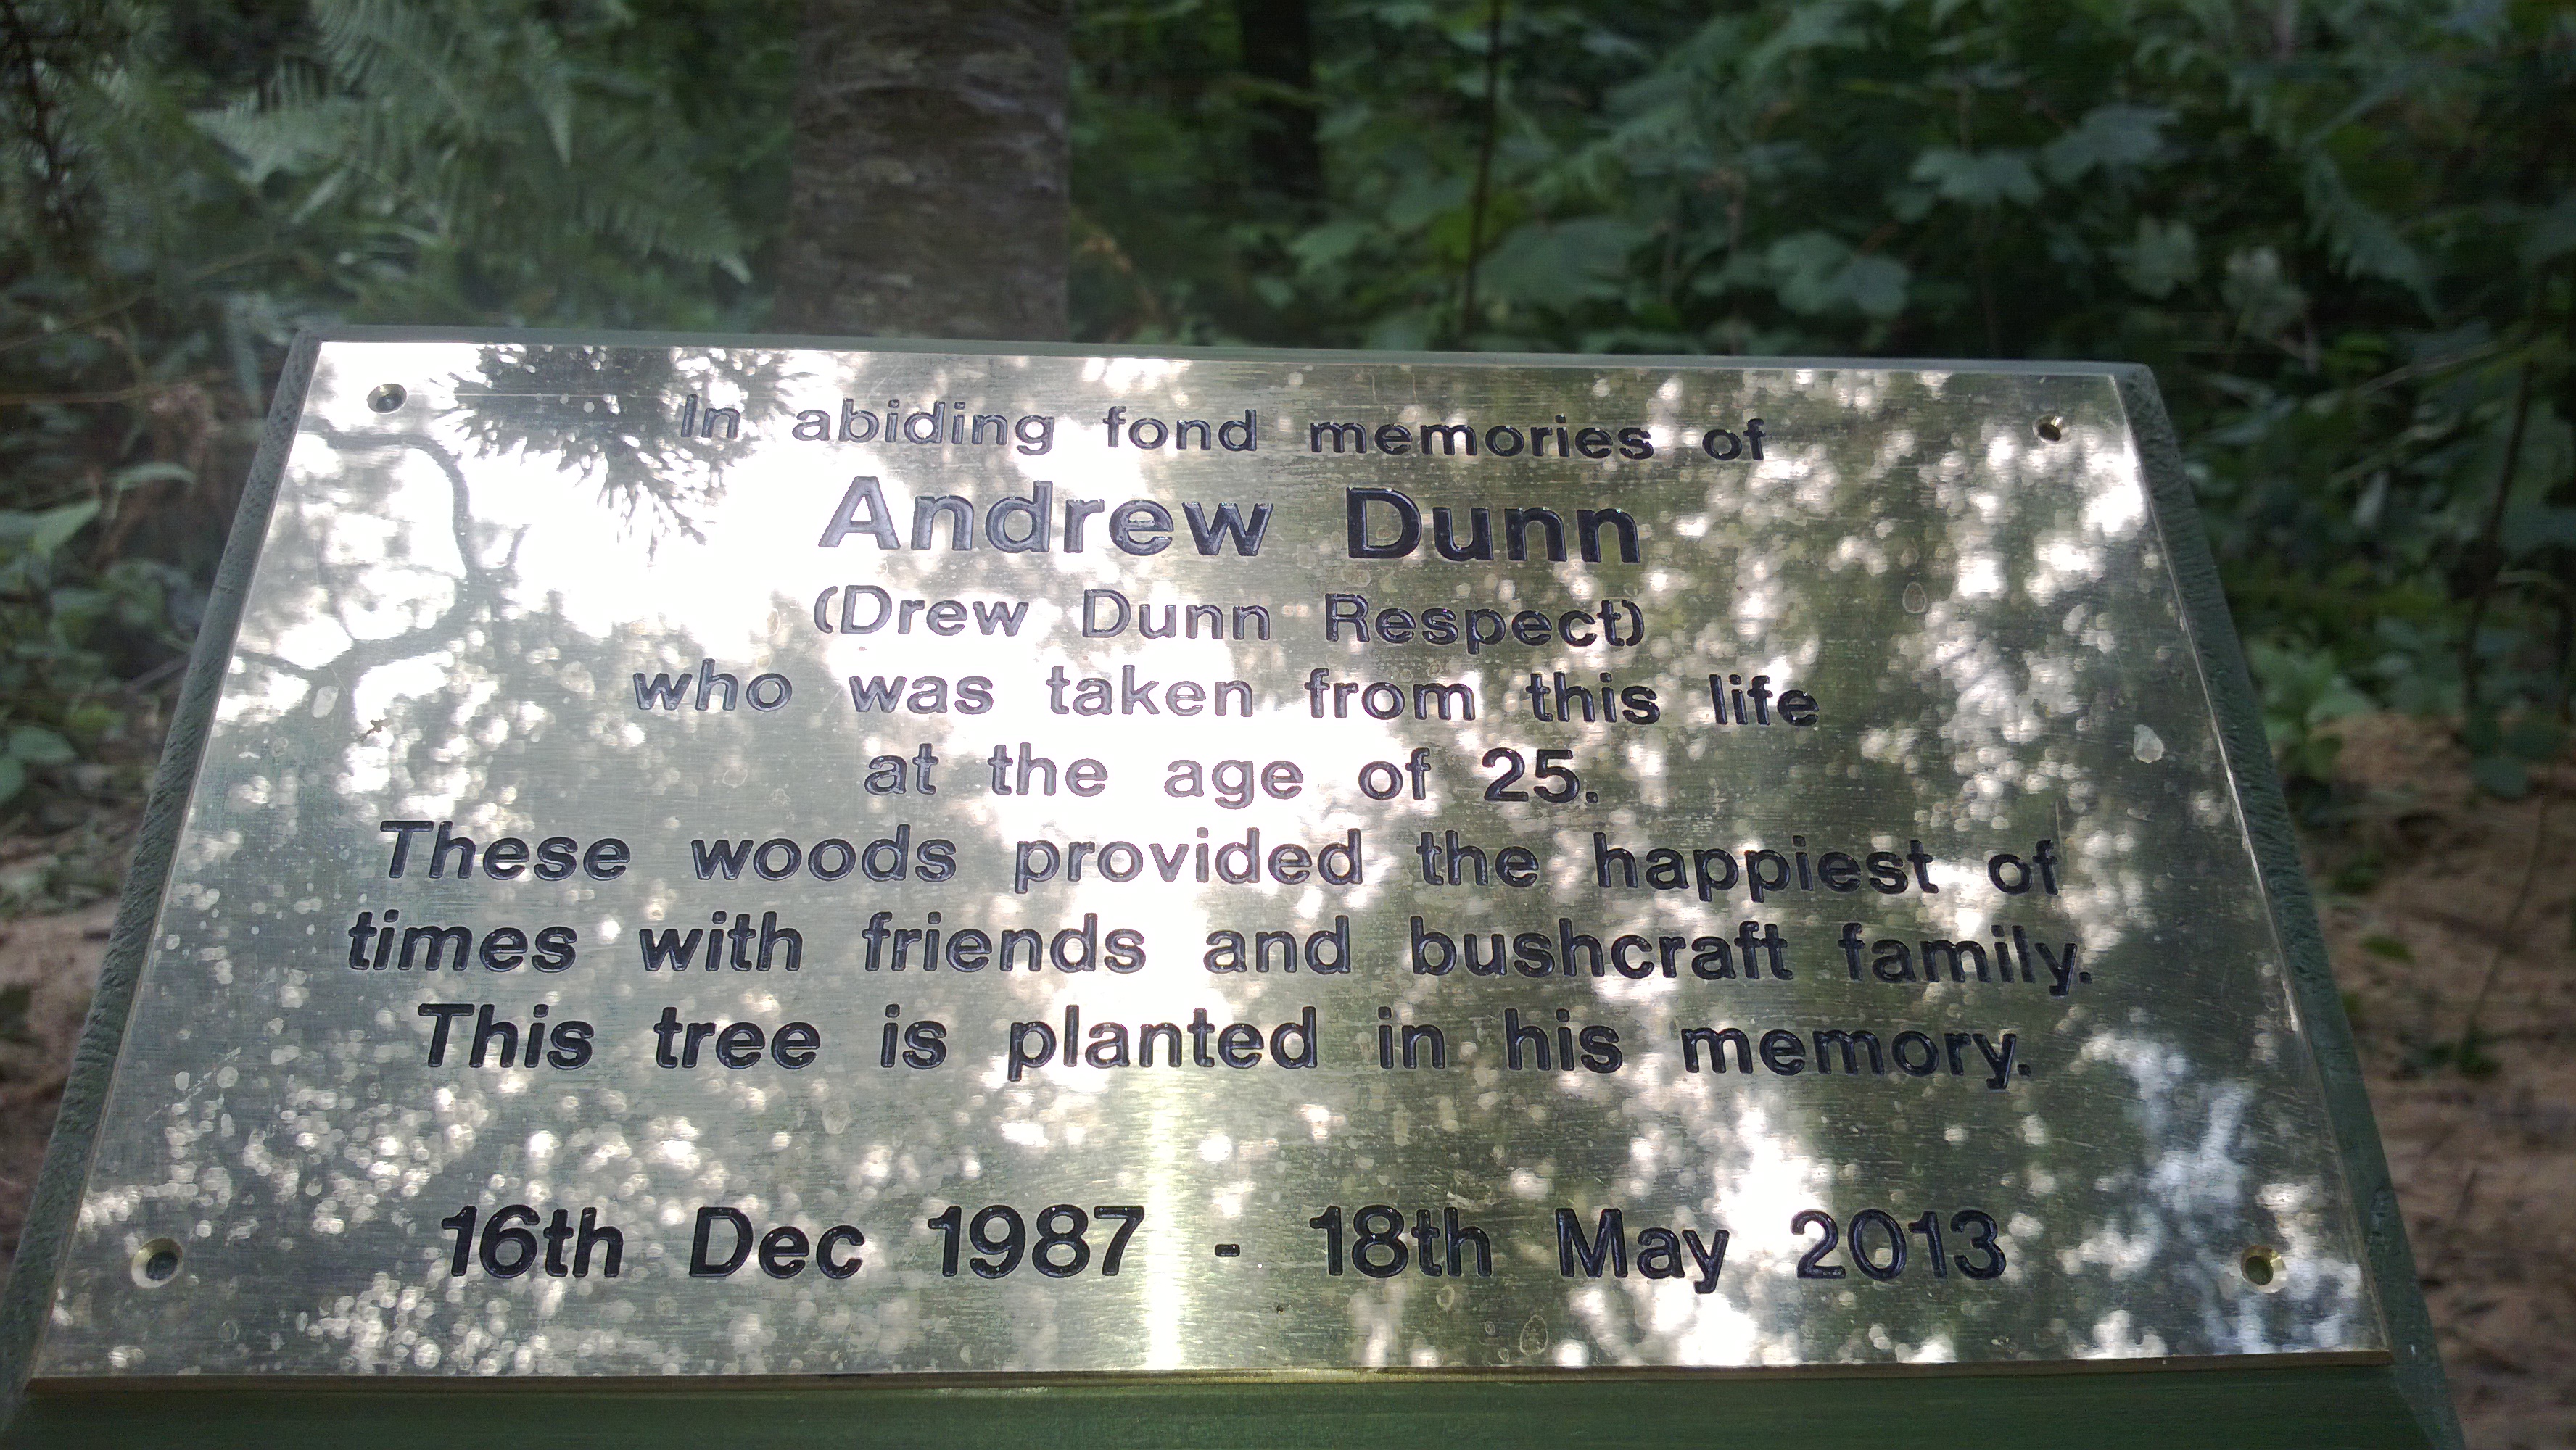
After the tree was planted we put in a plaque that the guys had commissioned. The whole ceremony was extremely moving. Dave finished the service with a very moving eulogy to Drew. There were not many dry eyes in the glade.
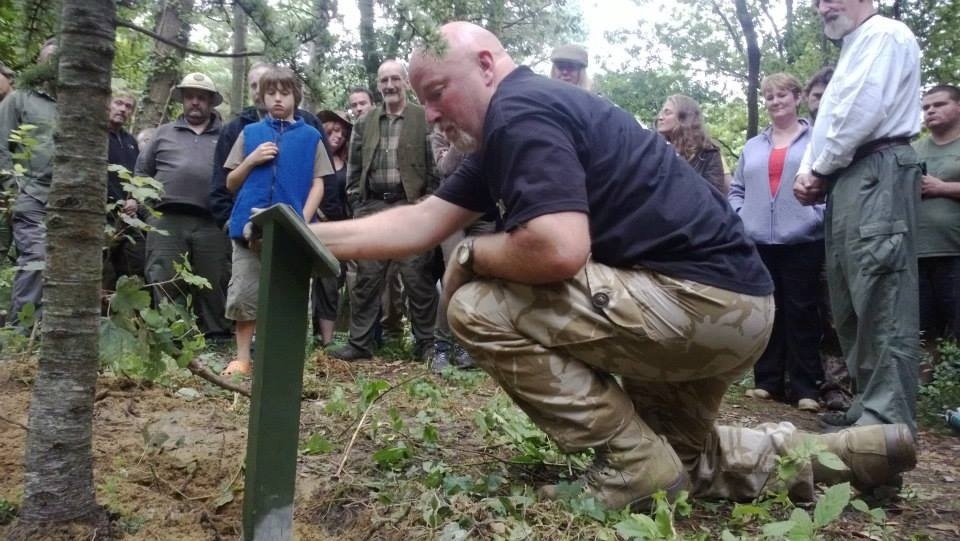
20131227-201600.jpg
Drew’s plaque & tree

Beautiful words.

WP_20130813_014
Andrew Dunn – Our friend – Gone but not forgotten

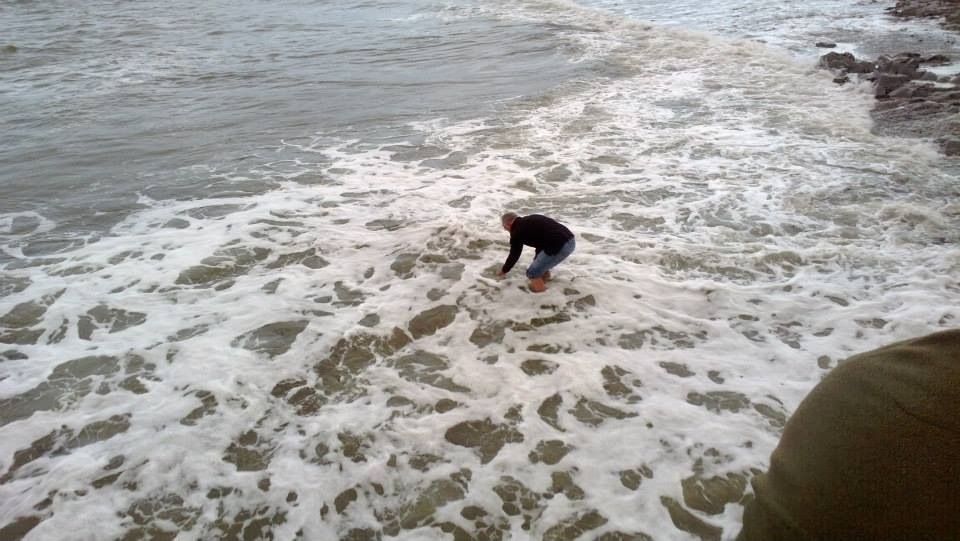
The service was finished when Drew’s father Philip spread Drew’s ashes in to the waves at Methyr Mawr.

20131227-201612.jpg
Goodbye to Drew

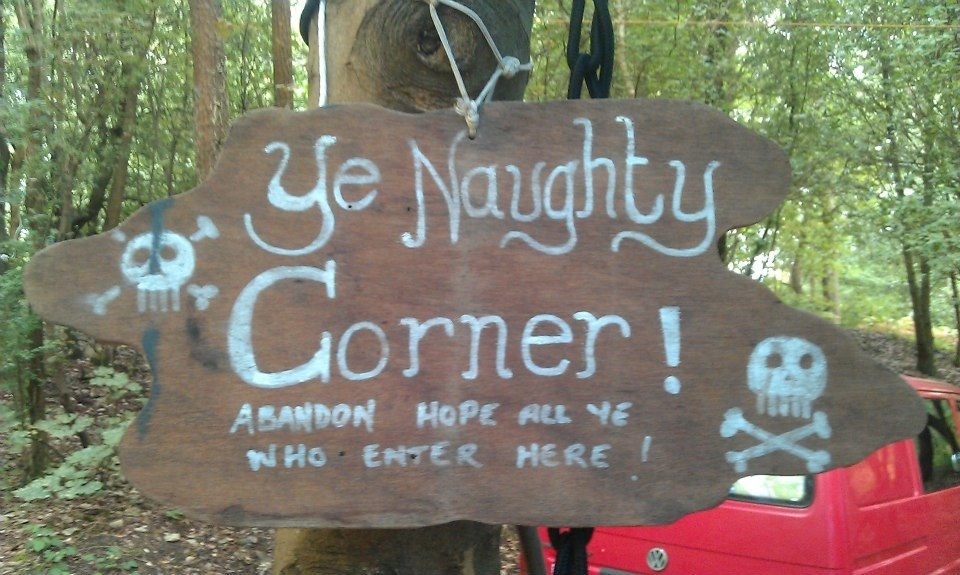
Taken a couple of years ago, this is the sign for Drew’s favourite place at the Moot. The Naughty Corner was set up as a place for people to come to and relax without worrying too much about noise levels. Drew was always at the centre of things here and was the first place he asked to go to when he first joined us. One year the roof of the shelter here got badly damaged in a storm and it was Drew who took it upon himself to climb up and fix it.

20131227-201140.jpg
Ye Naughty Corner

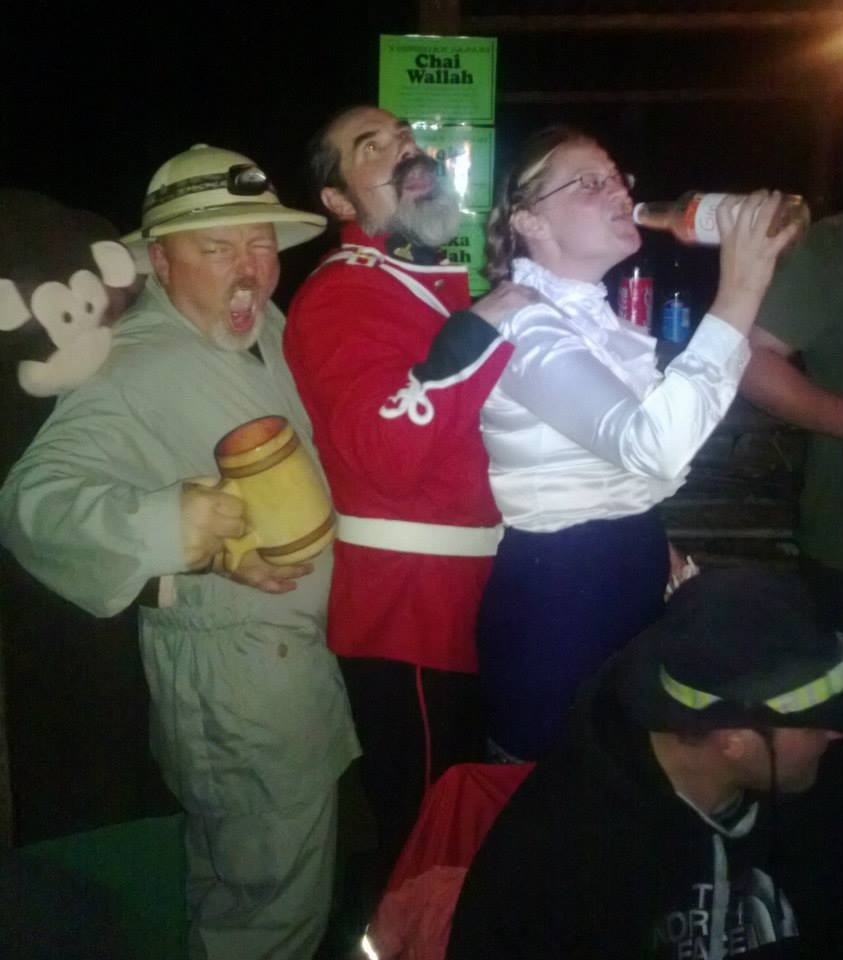
In the evening after the service we had a Victorian themed party. Jean had a great time chatting with everyone

20131227-201630.jpg
Drew’s Mum and Lady Eleanor

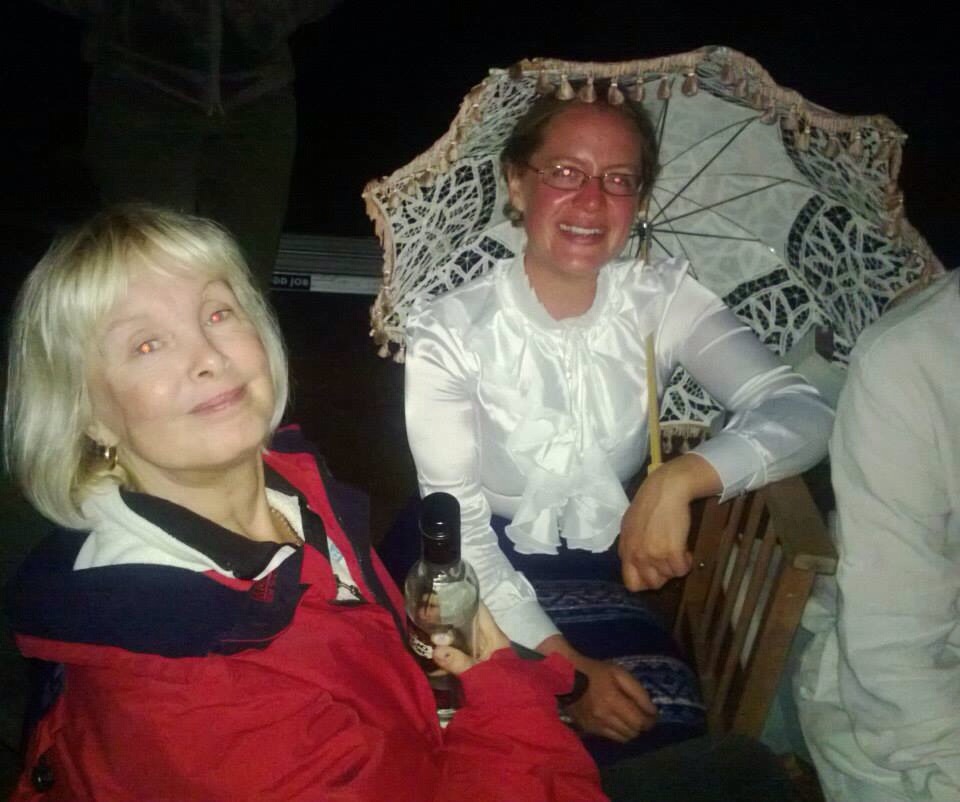
The costumes were brilliant.

20131227-201643.jpg
Spot Spikey?

I managed to get the majority of the Victorians together for a group shot and was quite surprised to see how many rifles they had brought along. The majority were actual period pieces.

20131227-201700.jpg
Three Cheers

Back to the other activities being conducted at the Moot. There were a lot of classes being run all over the site so my pictures only reflect a portion of the classes but I hope it gives you a feel for what we do.

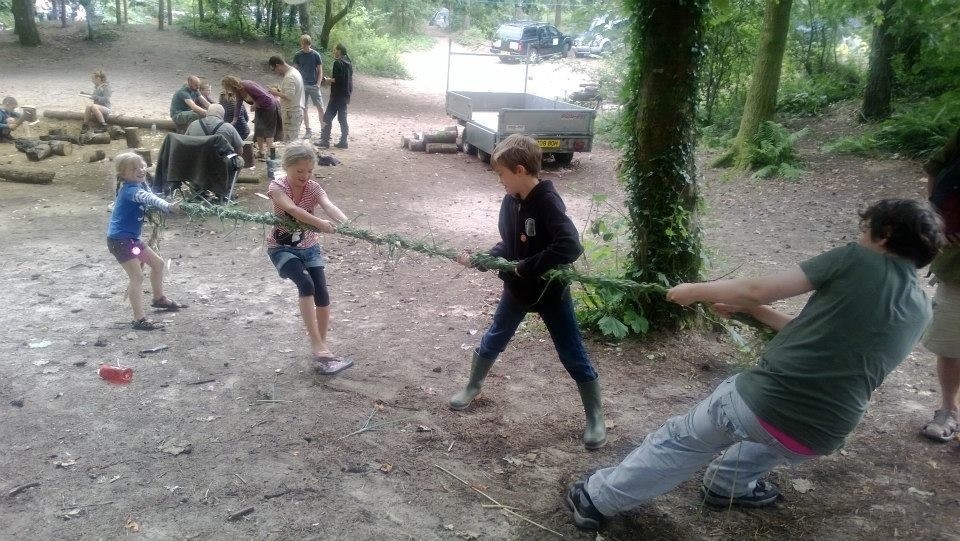
Perry Magee from the National Tracking School came to the Moot this year. I did not get to the grass rope making class but watched the kids having a tug of war with what they had made.

20131227-201719.jpg
Grass rope tug of war

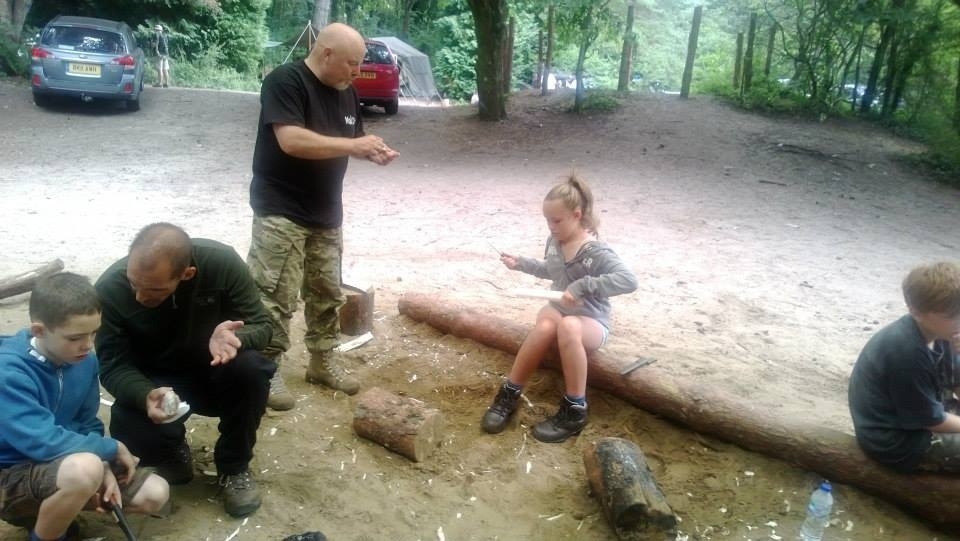
Dean Allen, Mad Dave and a few others had an introductory class on carving. These lads know their stuff and the kids got some really quality tuition.
I have spent many an hour around the campfire carving with Drew as this was something he really wanted to get to grips with.

20131227-201737.jpg
Carving

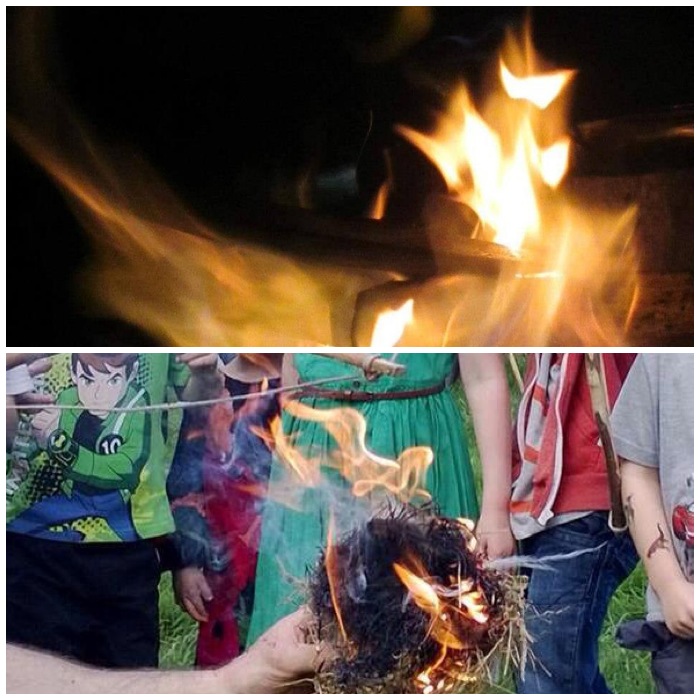
I ran the usual bowdrill classes for individuals and groups. No matter how many times I teach someone this skill I still love to see that smile the first time they get an ember.

WP_20130813_052
Bowdrill Face

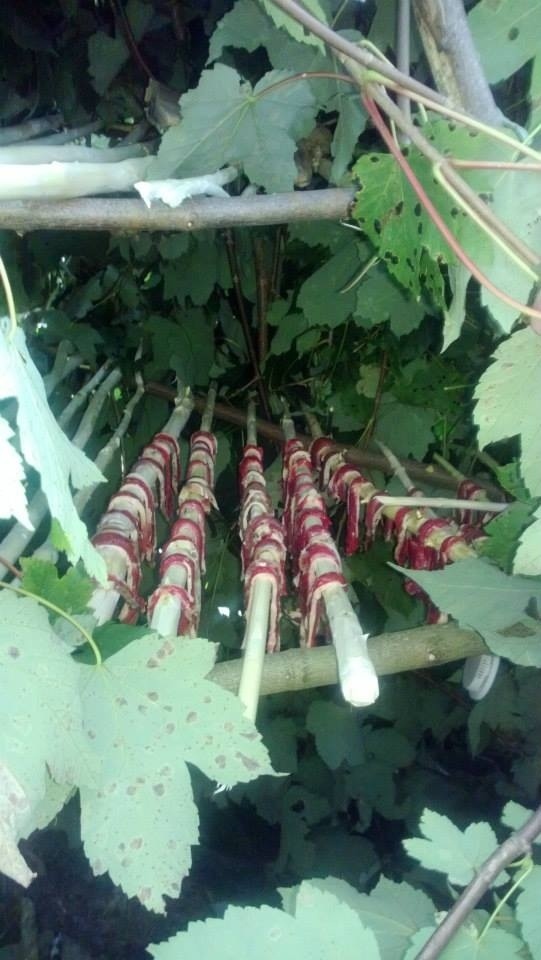
My friend Mark Oriel is a butcher by trade and now manages a small farm in the West of Wales where he runs his own bushcraft/homesteading courses. This year Mark ran a very successful Jerky smoking class.

20131227-201752.jpg
Woodland Smoker

All lined up neatly.

20131227-201835.jpg
Tasty snacks

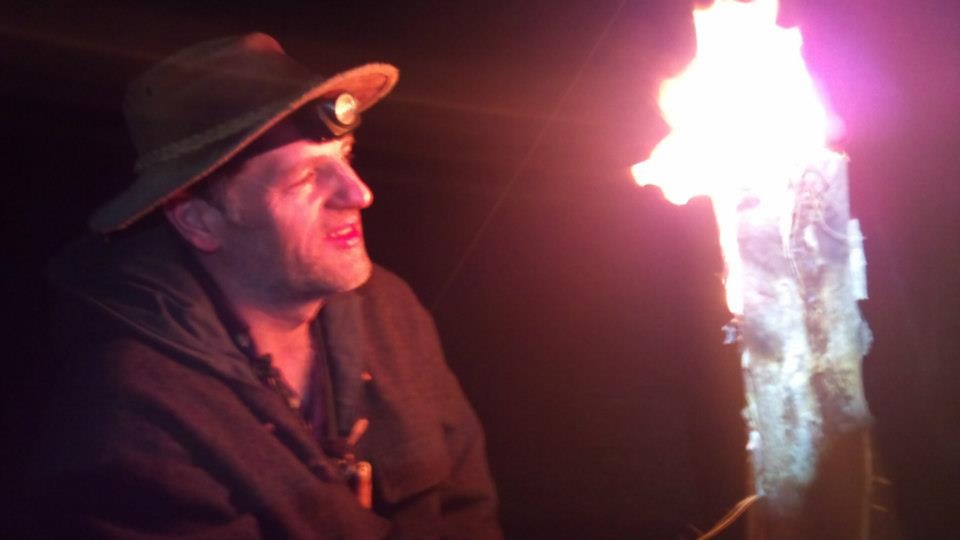
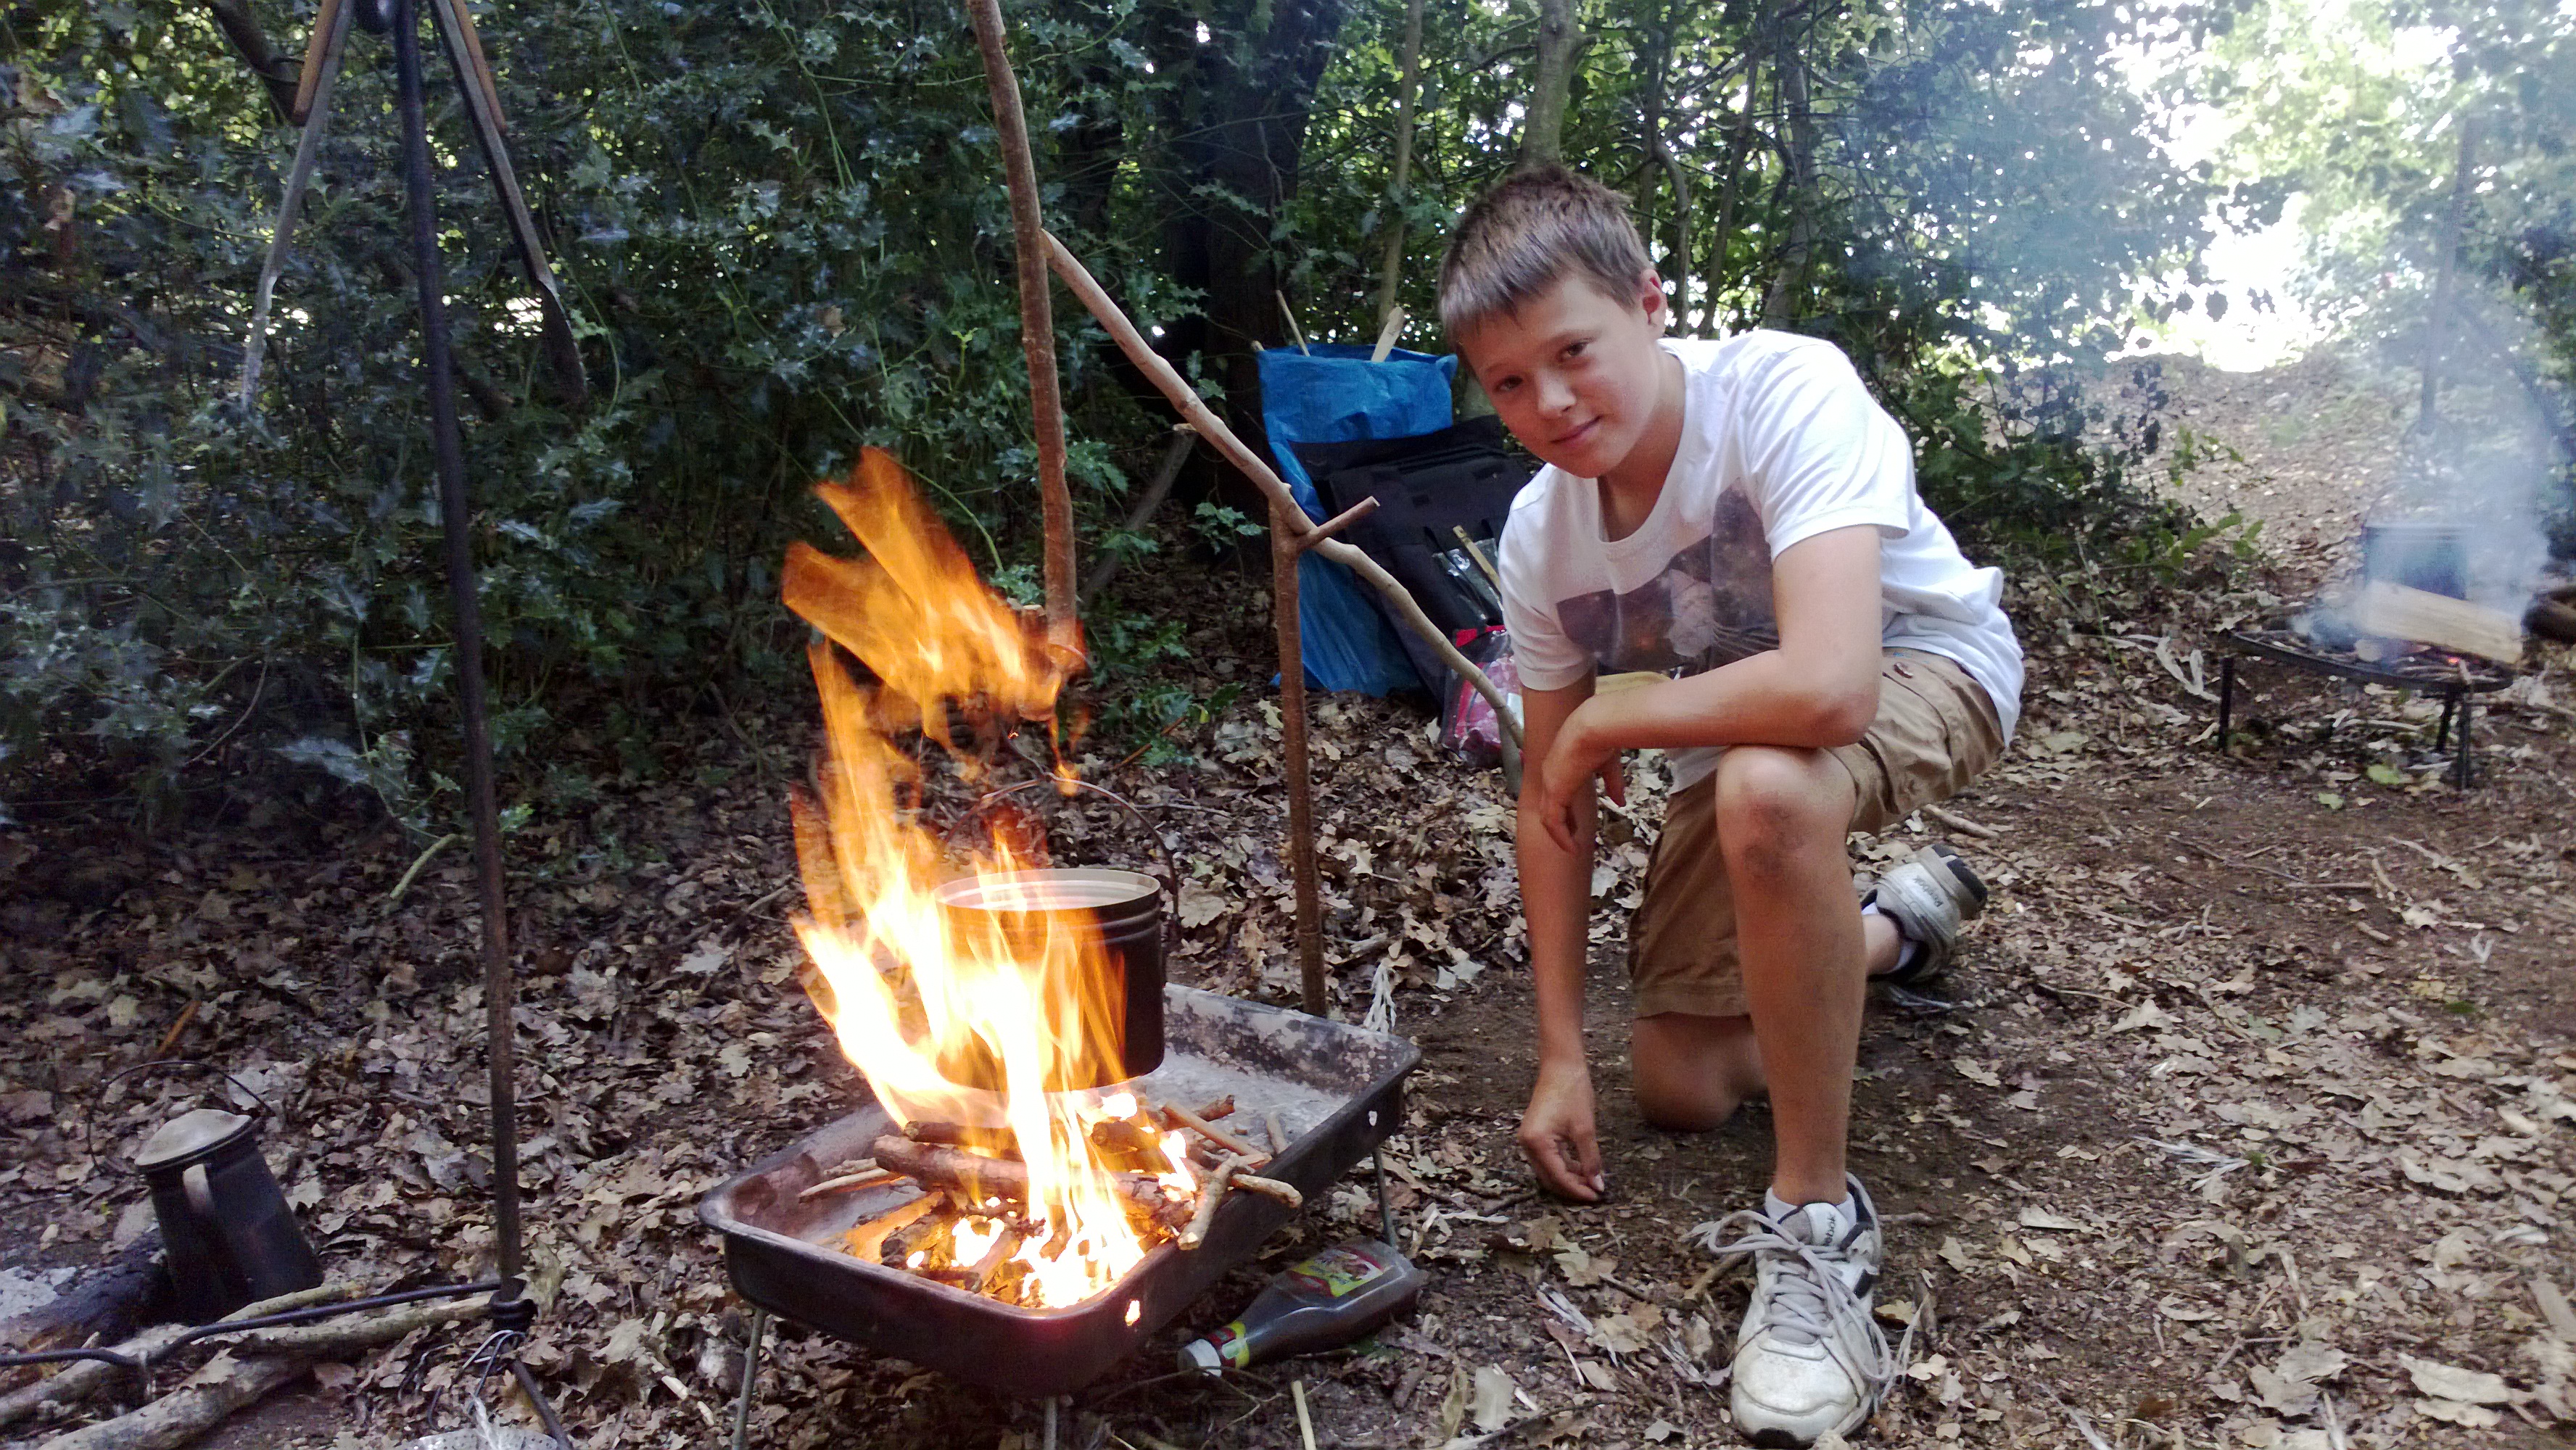
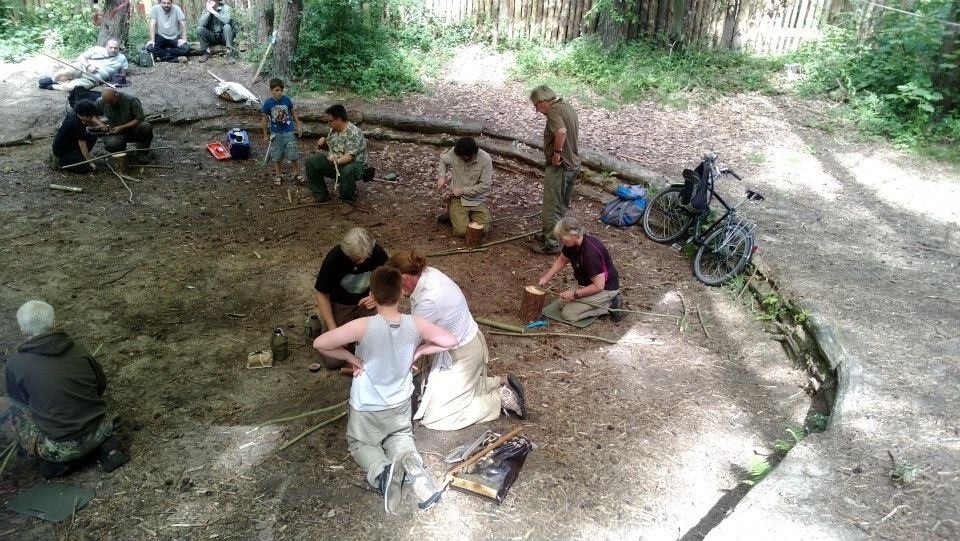
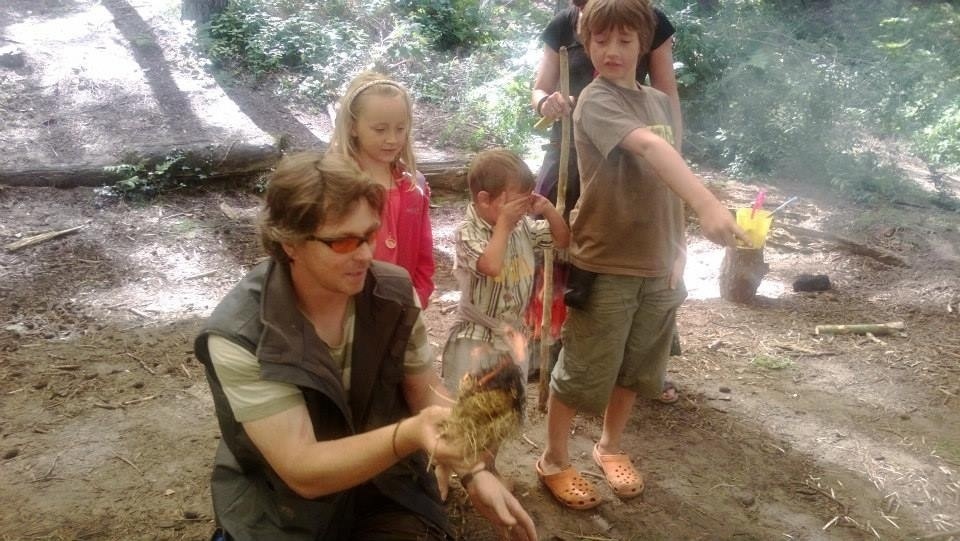
One of my classes focuses on getting families working together to create fire using the bowdrill. There are not many things that bring everybody in a family together but the group bowdrill is one.

20131227-201807.jpg
Group Bow drill success

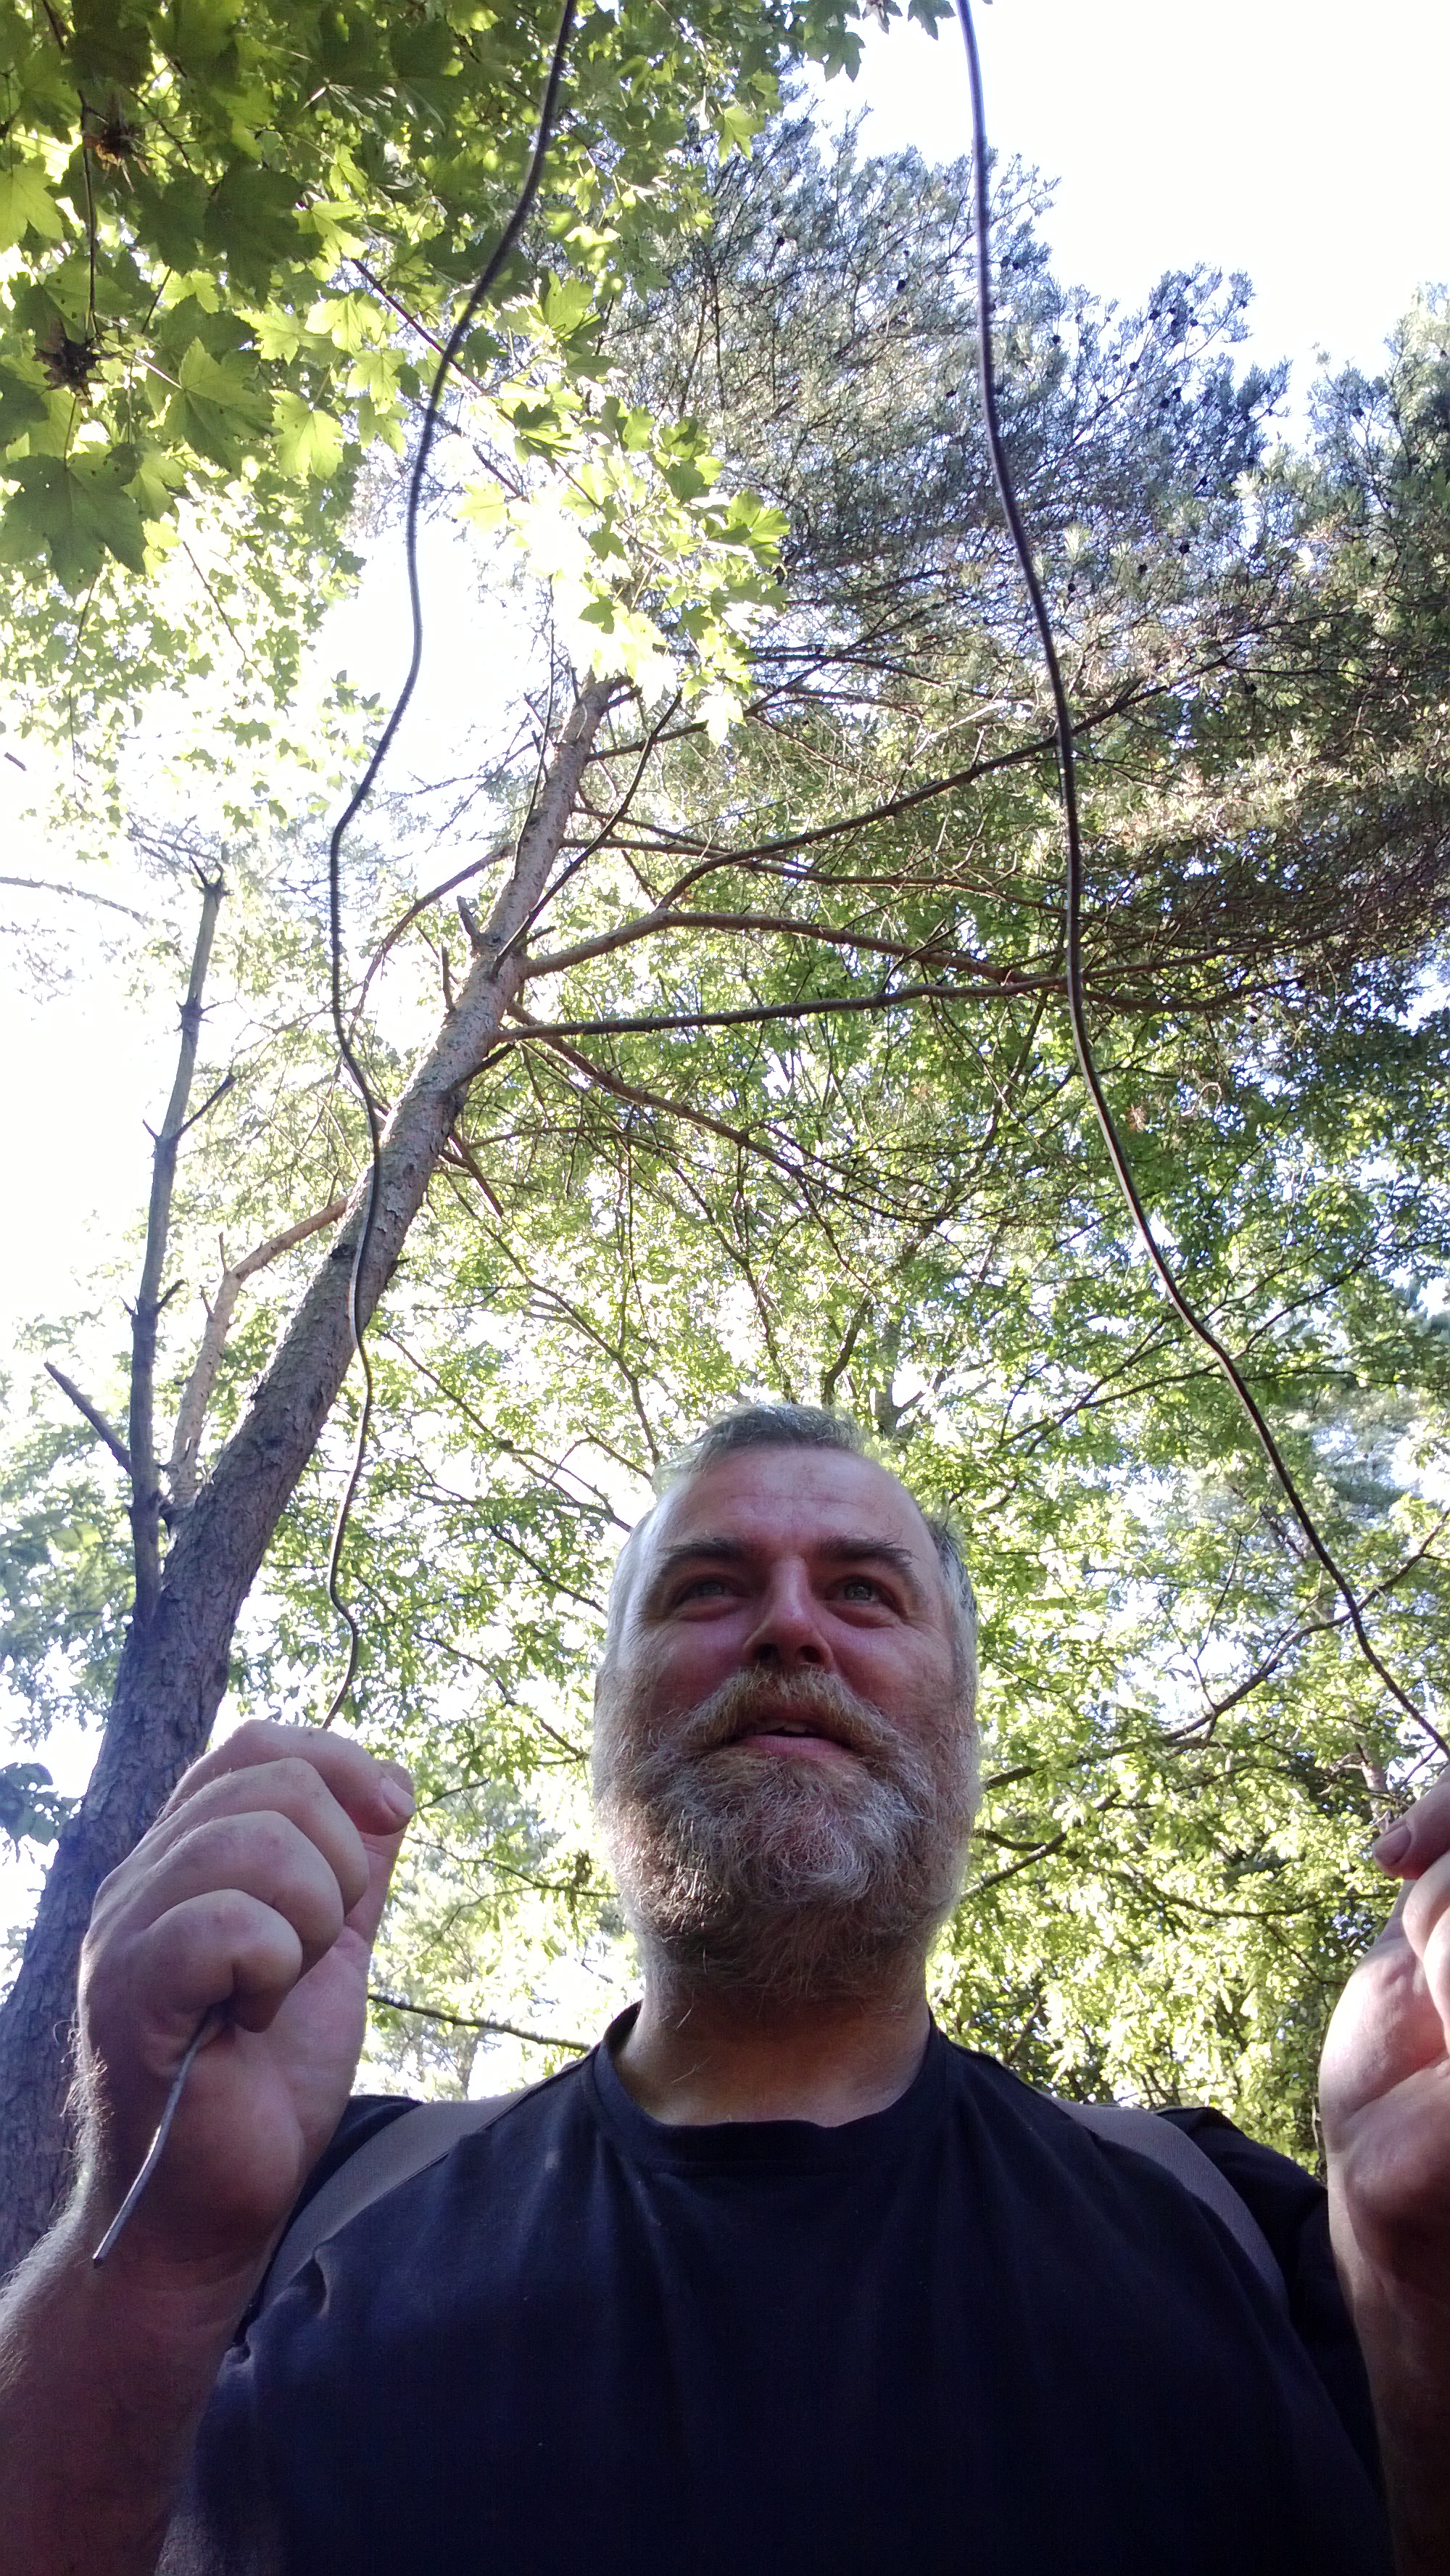
I was chatting with Perry Magee about some fire drill mechanisms he had and the conversation got onto water divining. I was sceptical at first but after some expert and clear teaching from Perry we were off. I found underground water, managed to follow a pipe and here Pete was trying to see if the rods would indicate human presence (me) and it worked. How it works no one knows, but it works.

WP_20130811_110
Water Divining

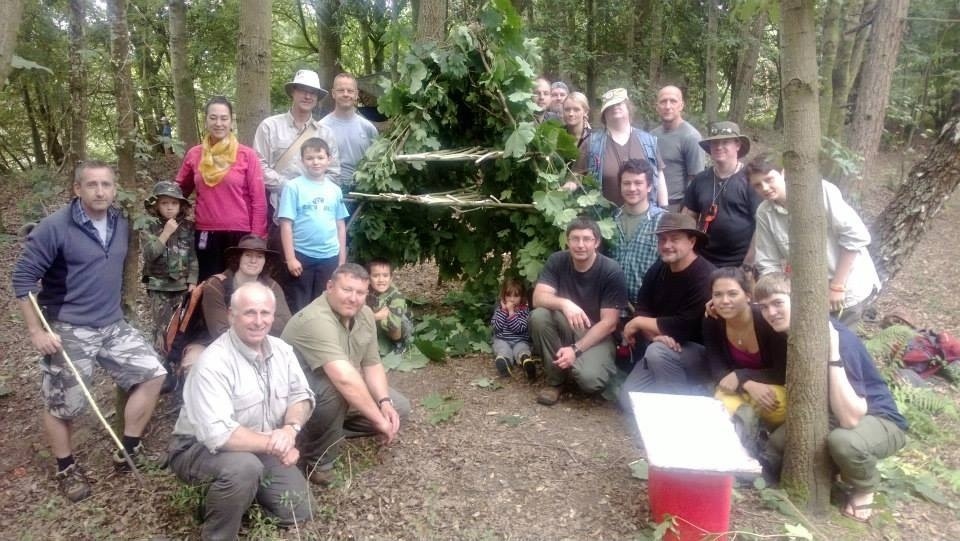
Fraser from Coastal Survival runs a few courses at the Moot and this one was on breadmaking. Fraser created a sand oven to cook some rolls in. I did not take part in the class but the ladies who did thoroughly enjoyed themselves.

20131227-201820.jpg
Roll making in a sand oven

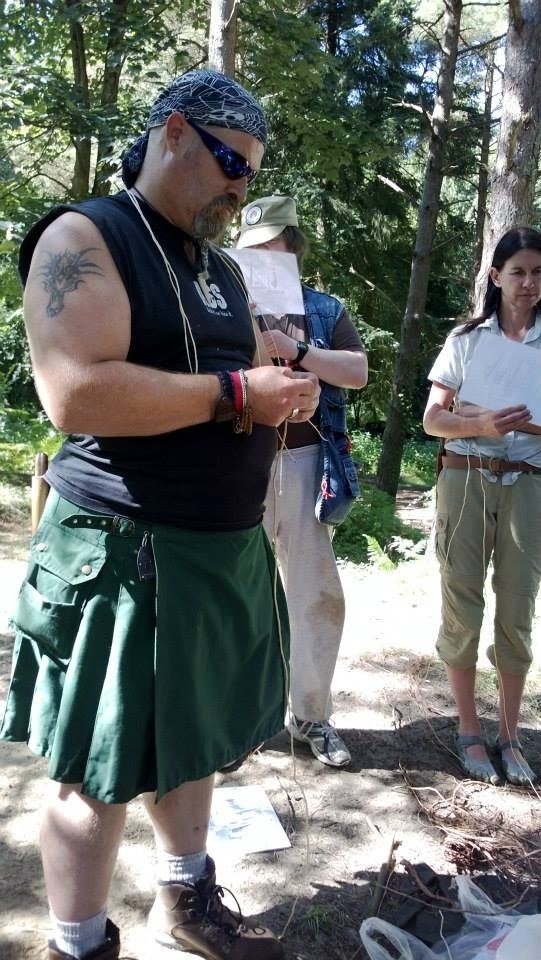
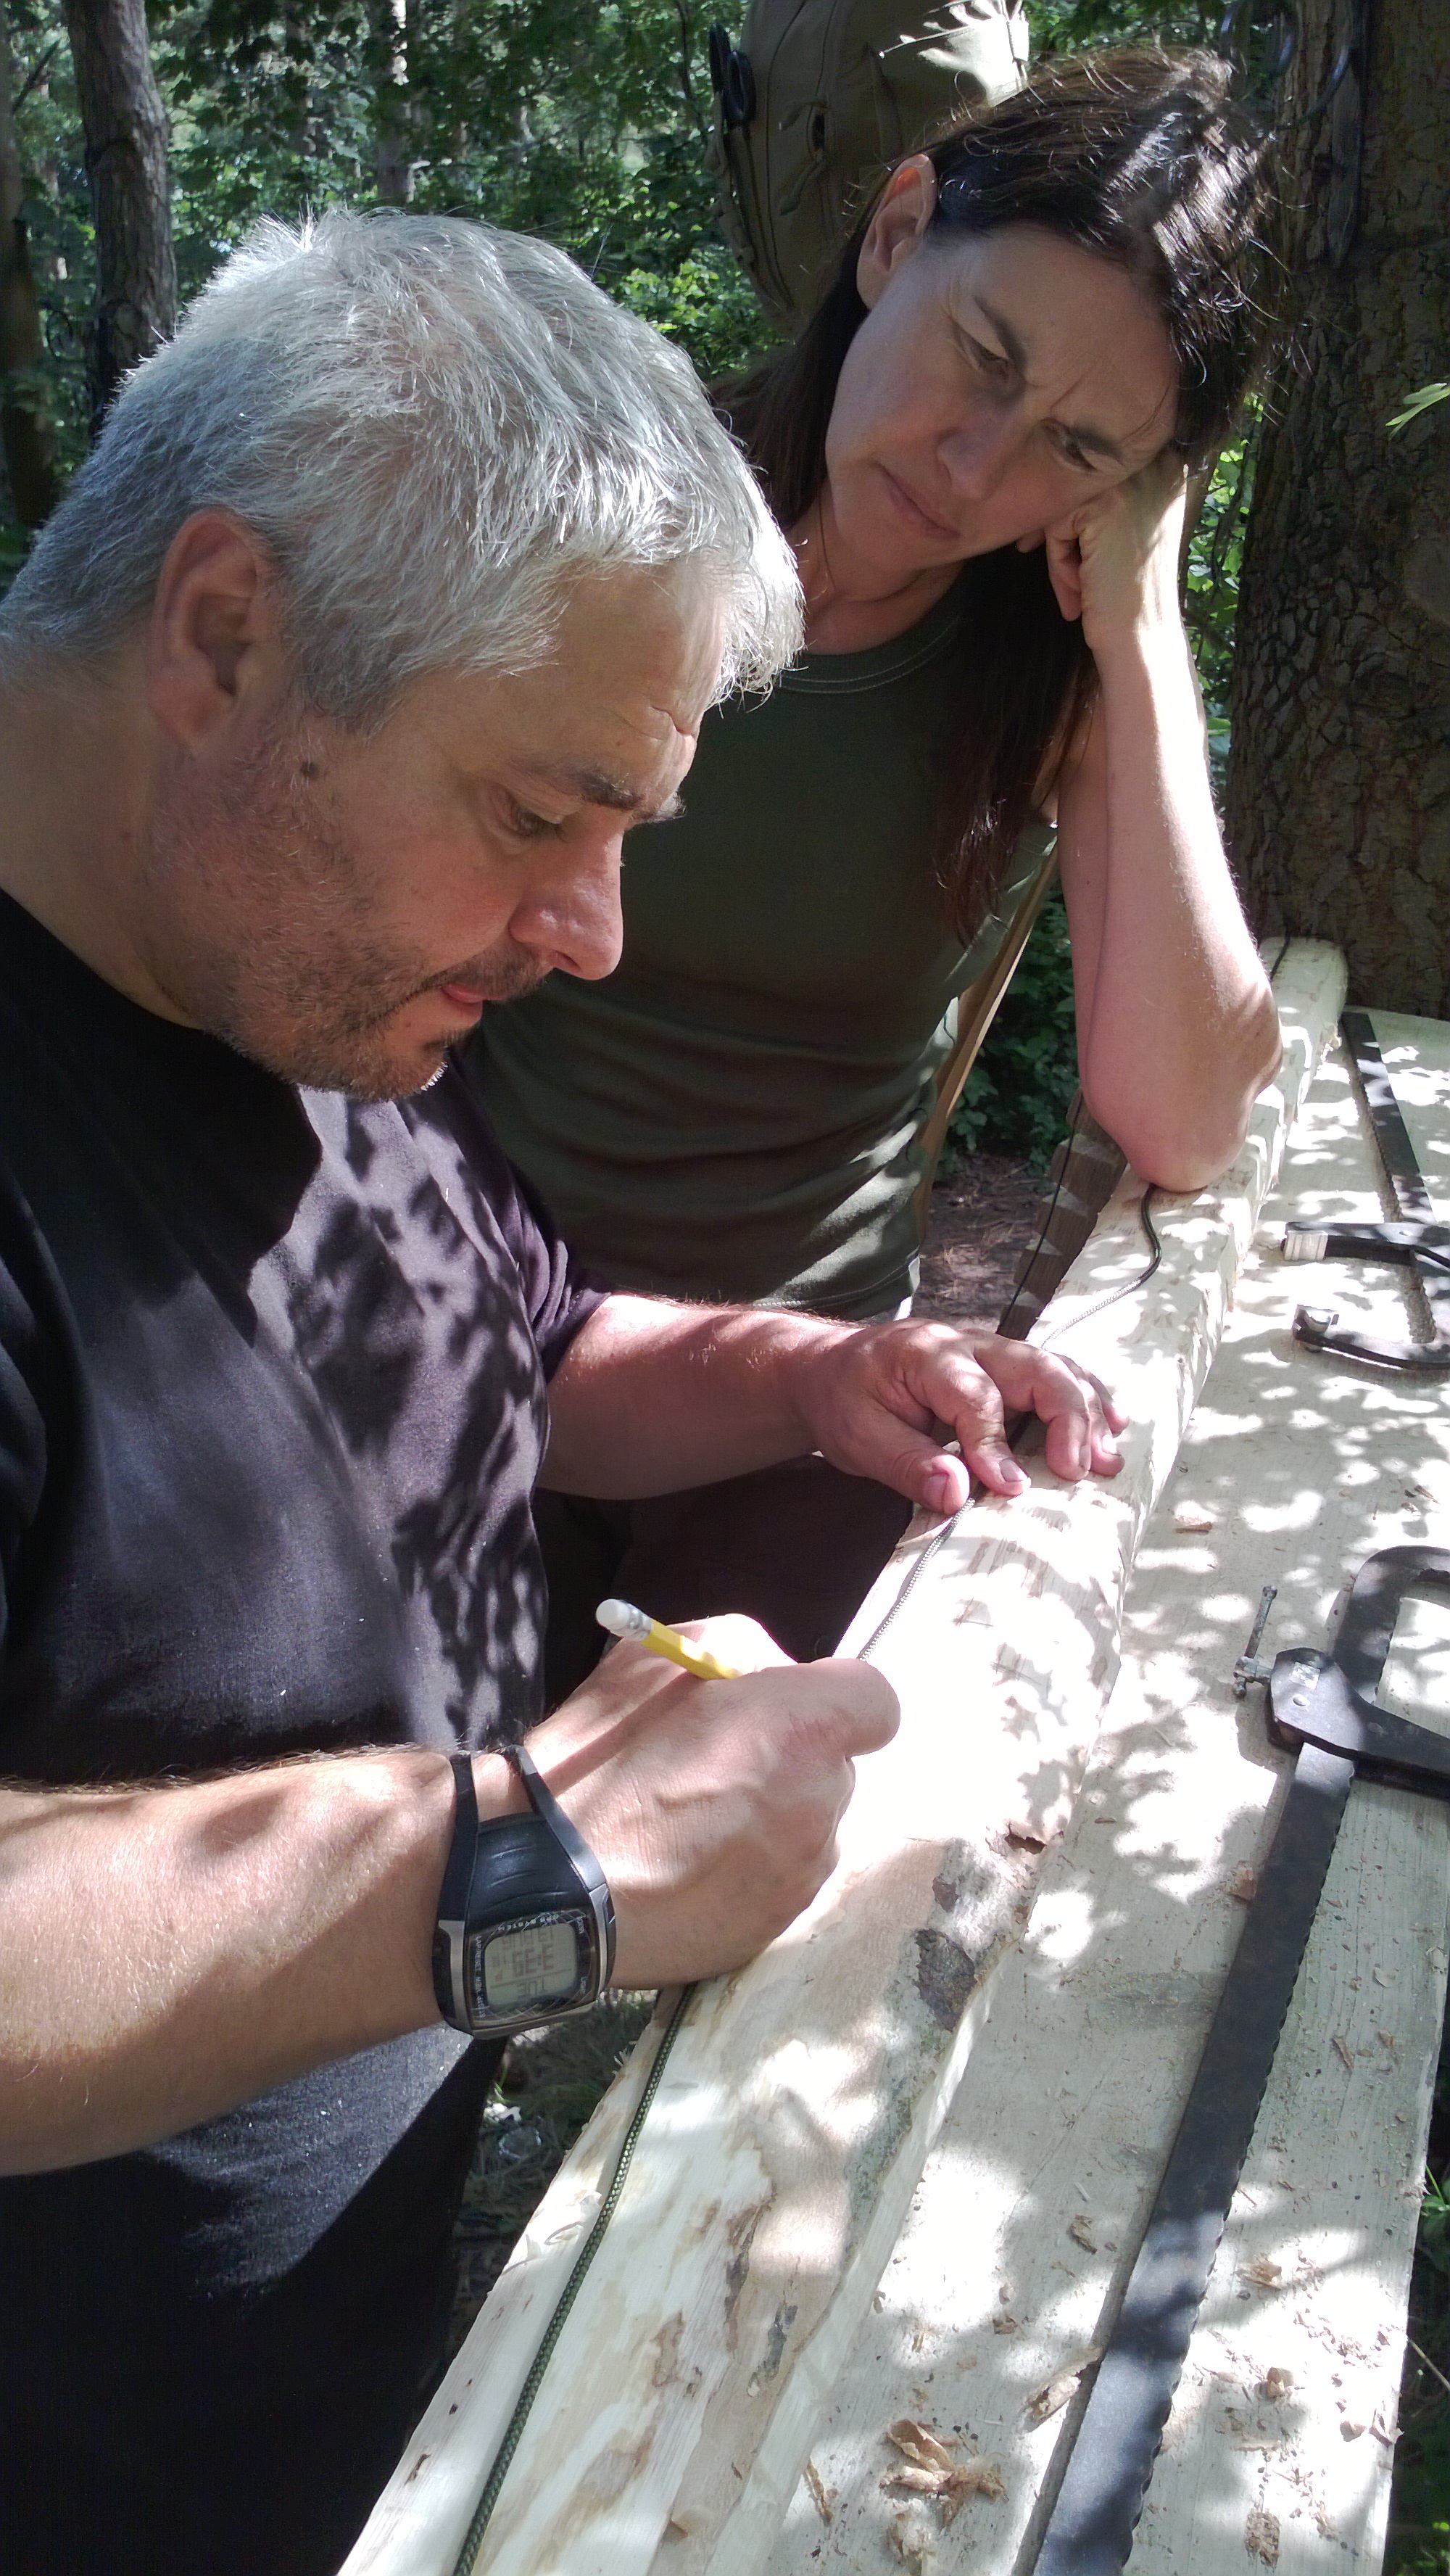
This was the fish hook carving class run by Steve Mesquite Harral – Paul Pomfrey (looking dashing in his utilikilt) was splitting down spruce root for the binding.

20131227-201850.jpg
Fish hook carving

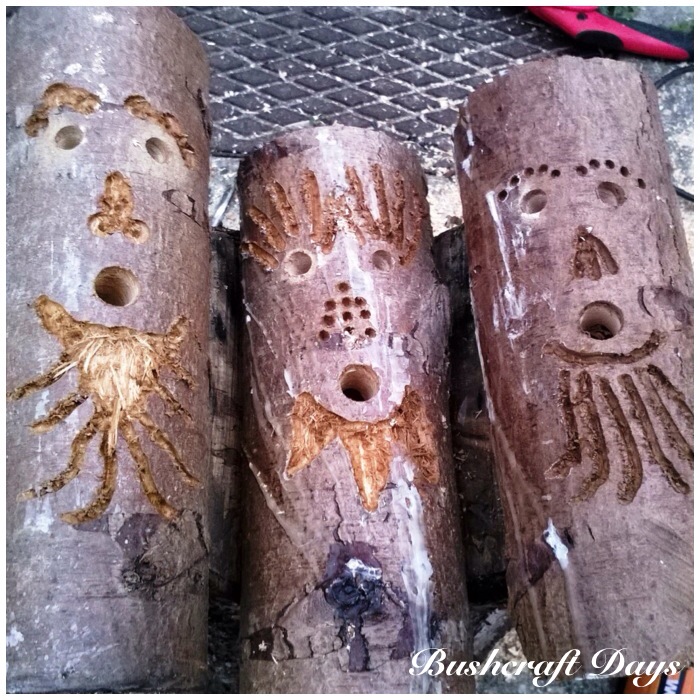
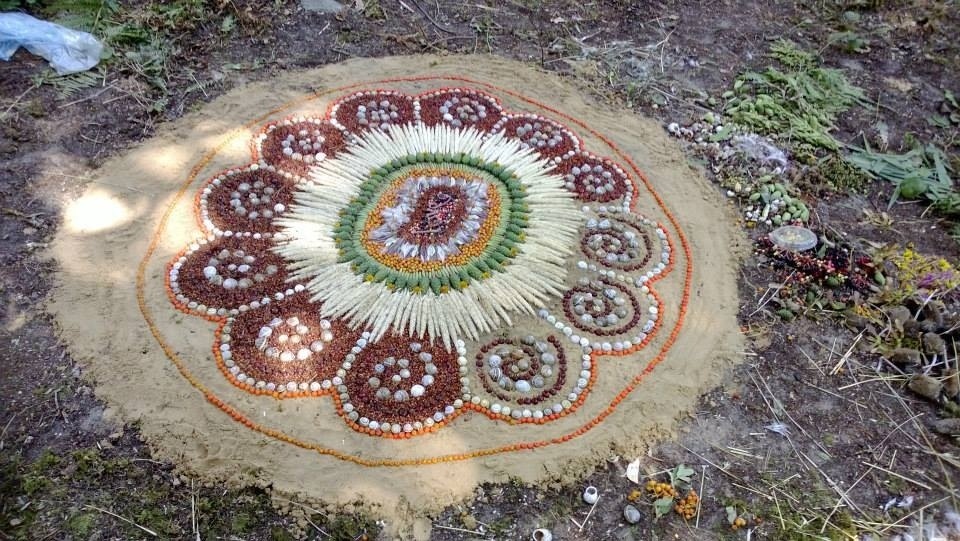
Some stunning artwork was seen in the woods. I cannot remember who produced this but it certainly inspired the kids to get out there and make their own woodland art.

20131227-201918.jpg
Woodland Art

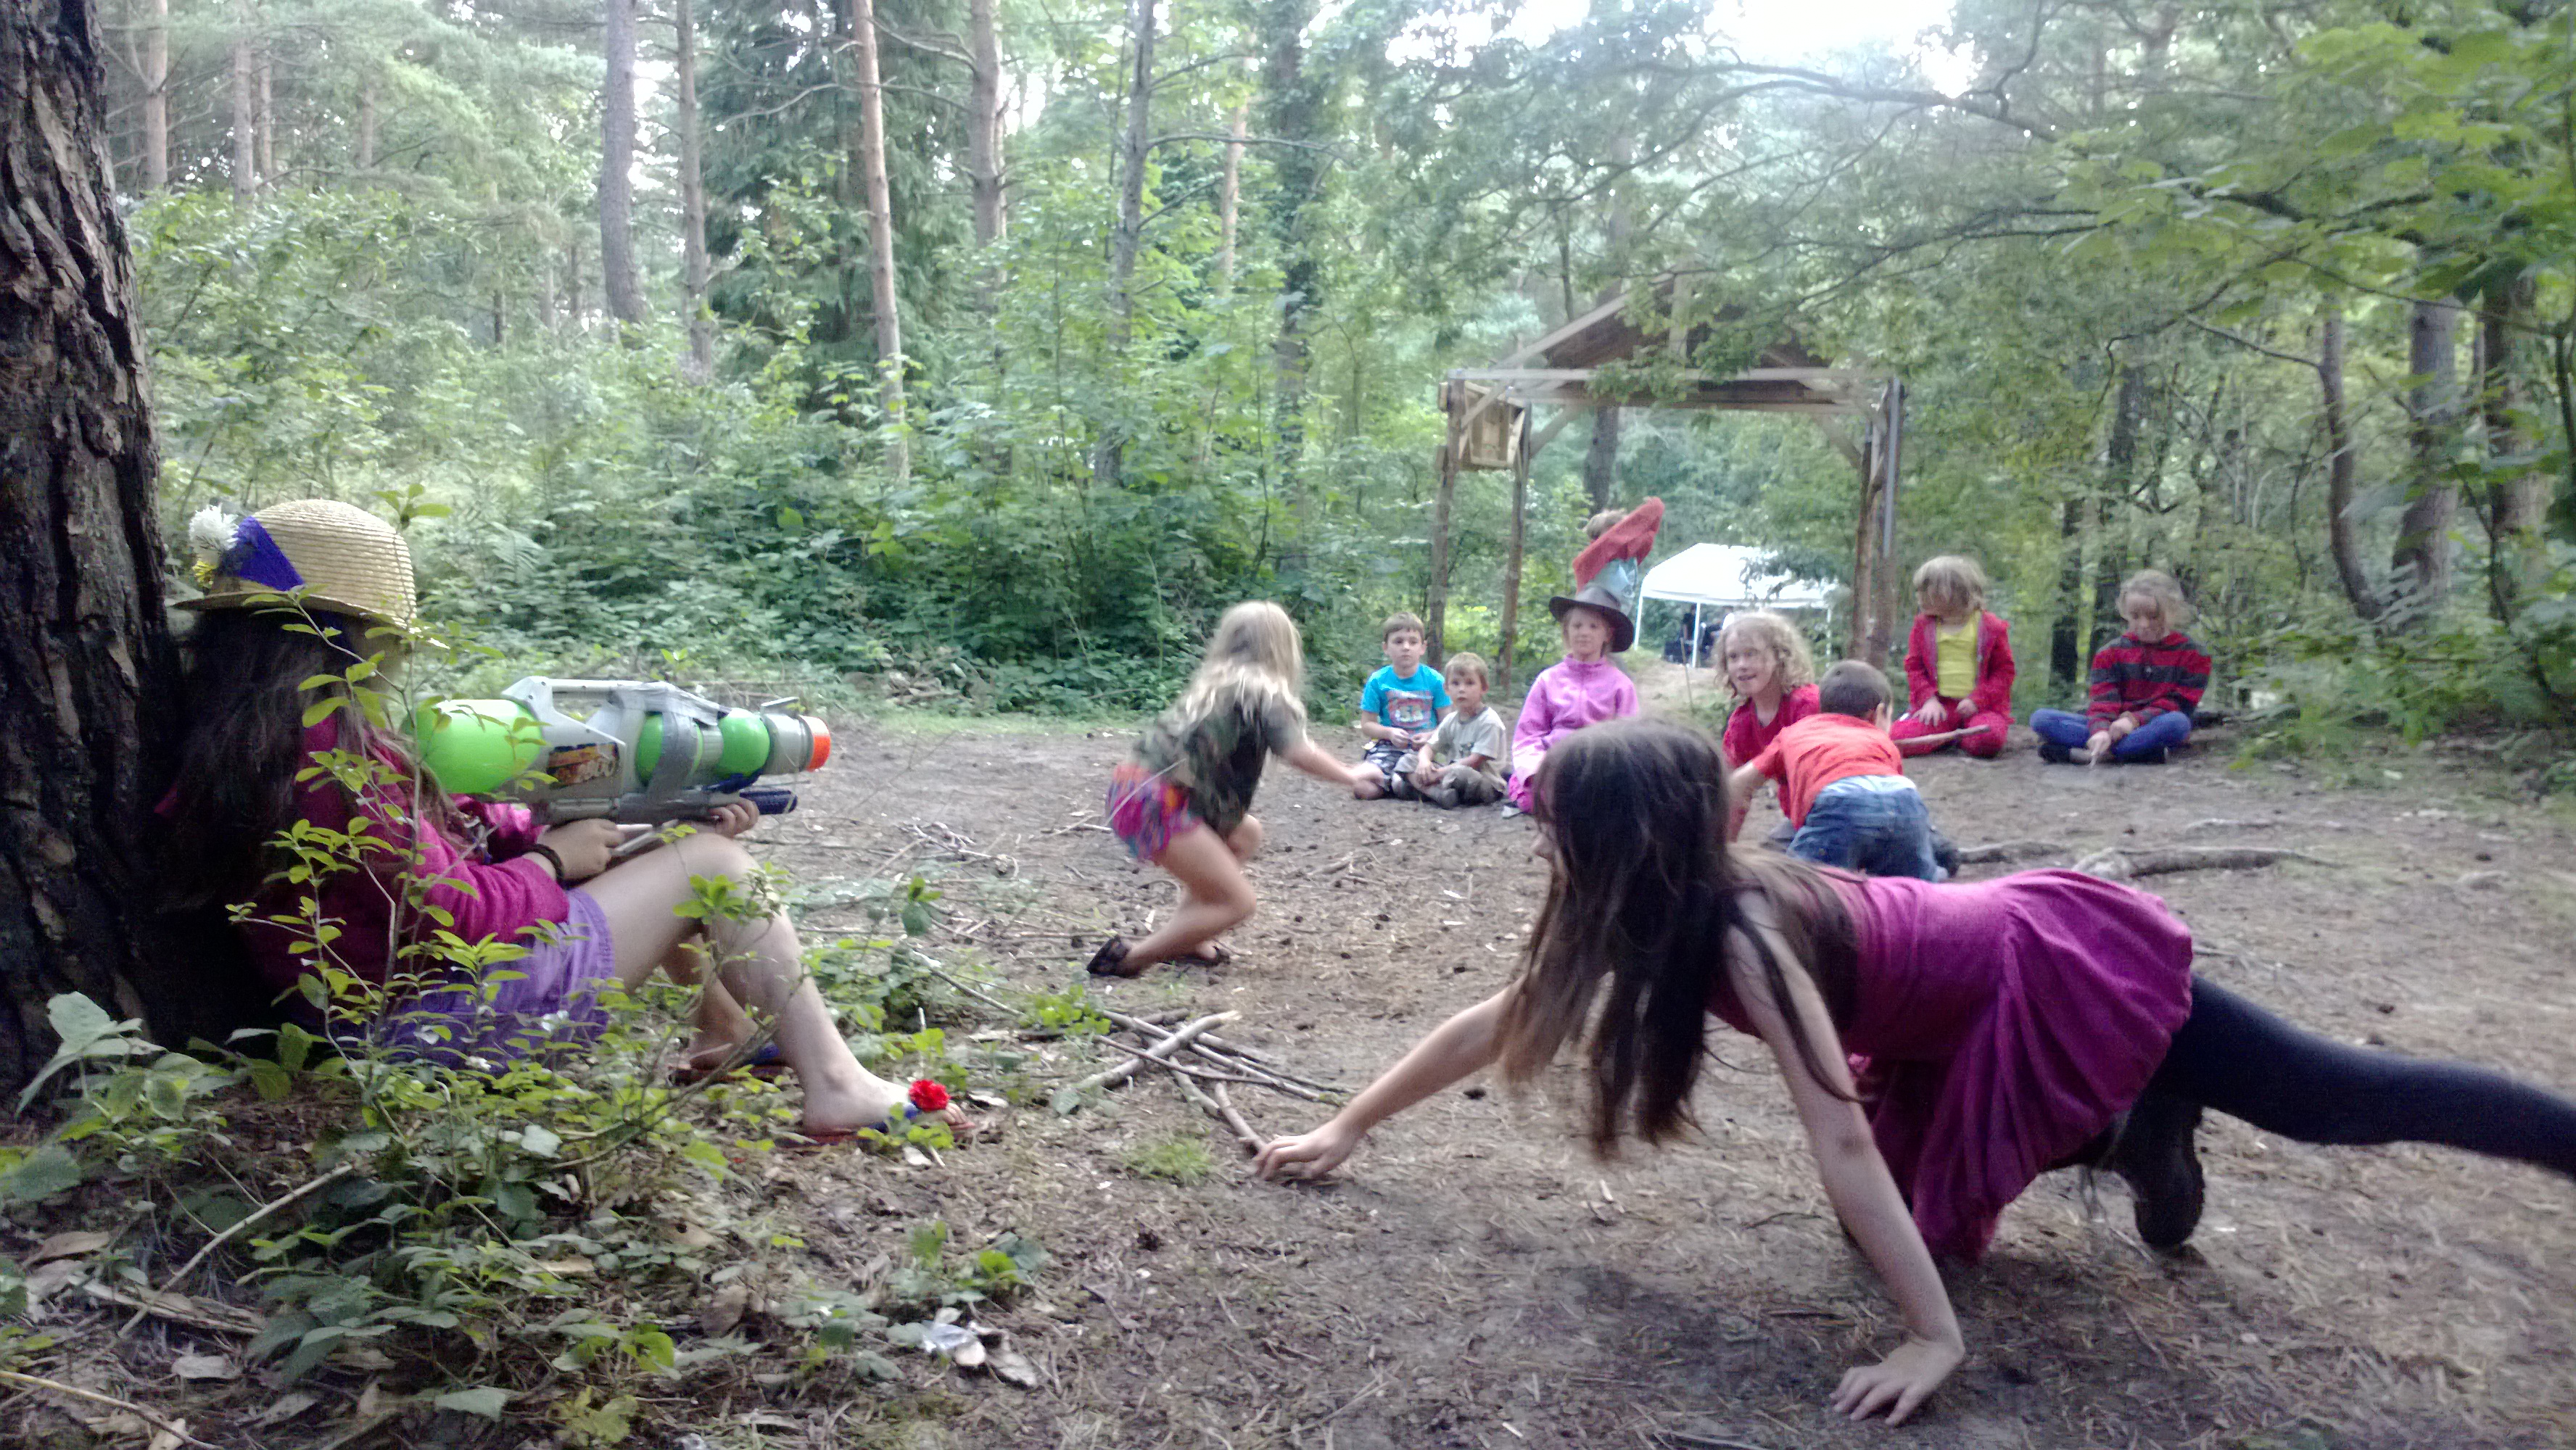
One type of game the kids love are the stalking games. I call this one the fox stalk and is just organised madness.

WP_20130813_119
Fox Stalk

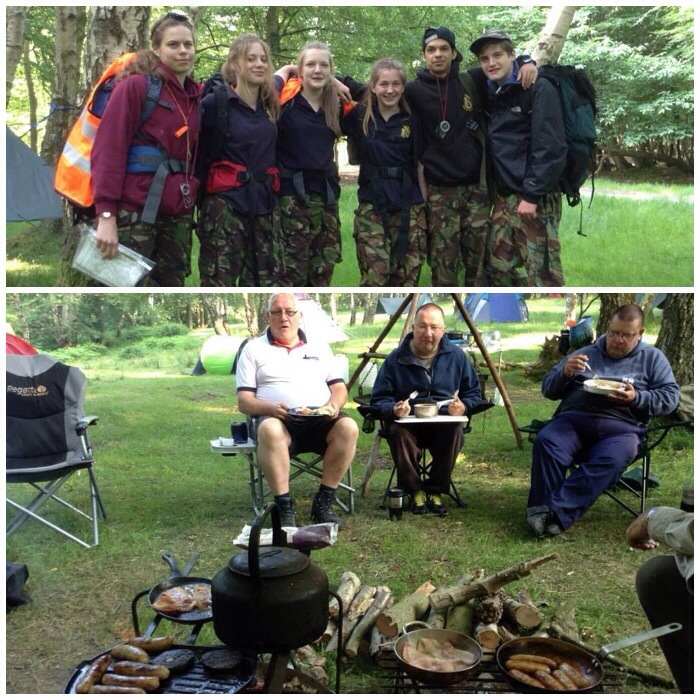
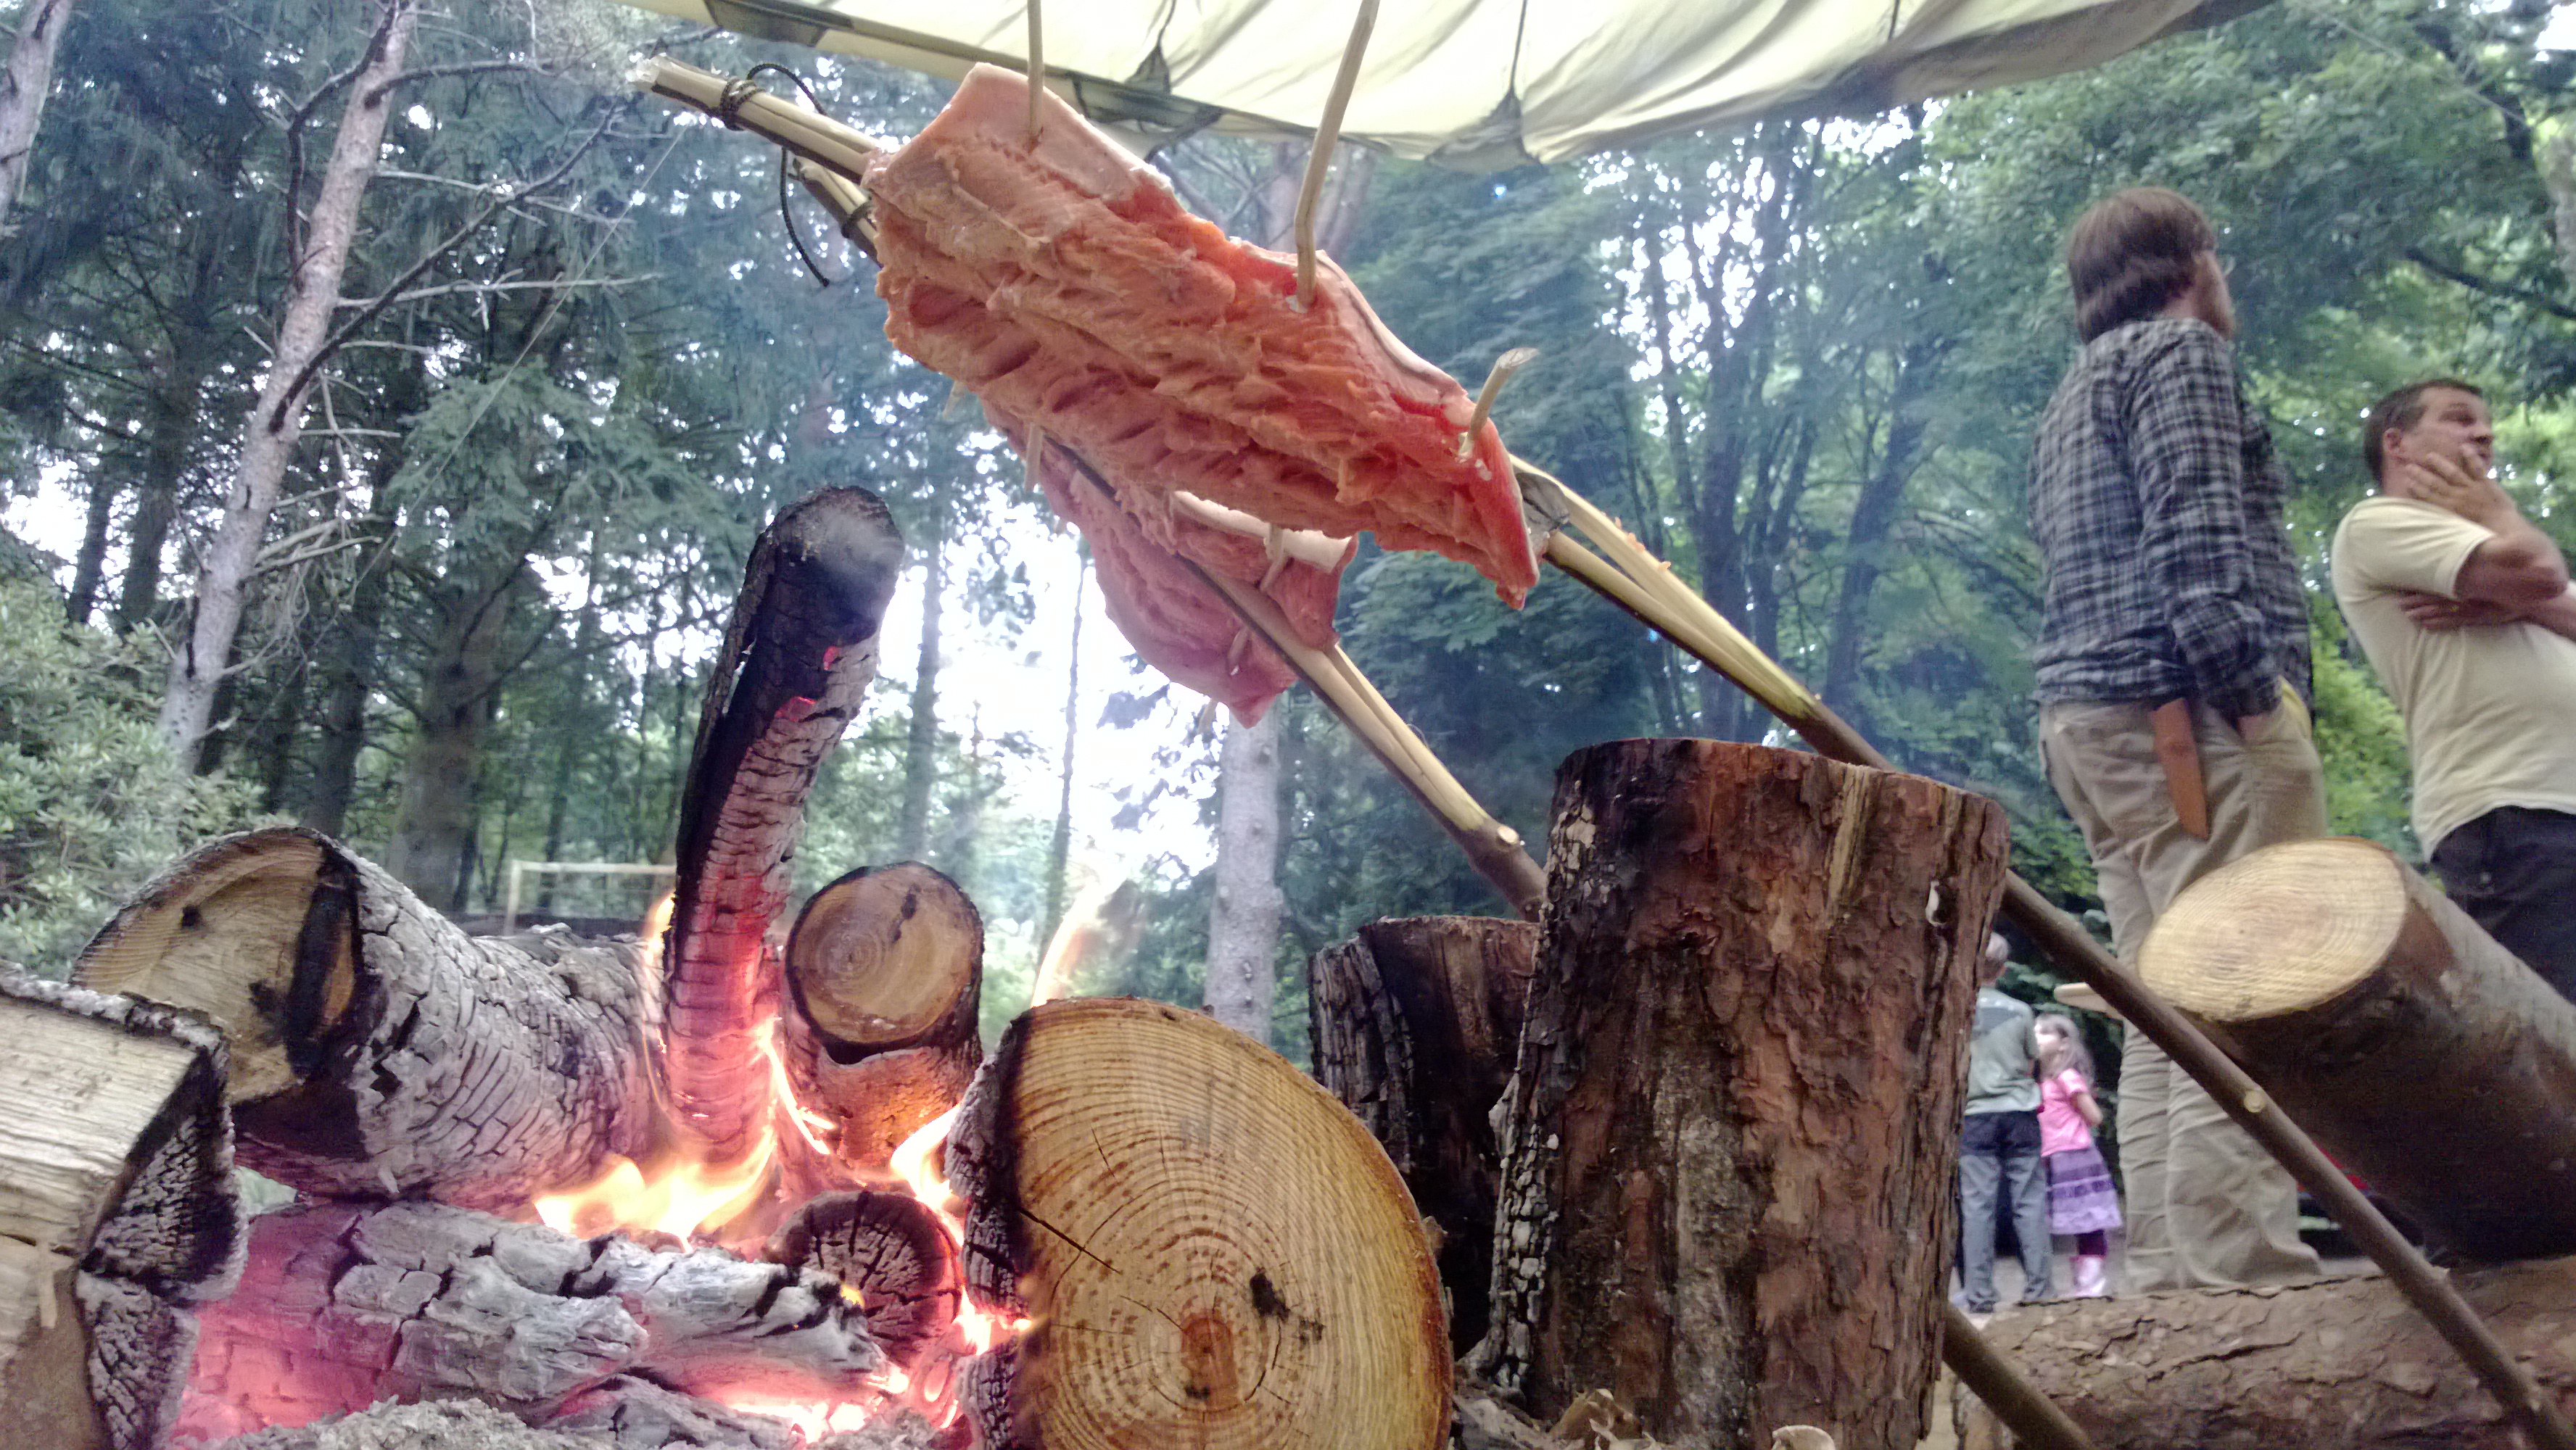
At the end of the Moot we always have a group dinner where everyone either cooks something for everyone or helps to organise it. The ponnased salmon went down a treat.

WP_20130813_125
Final Food

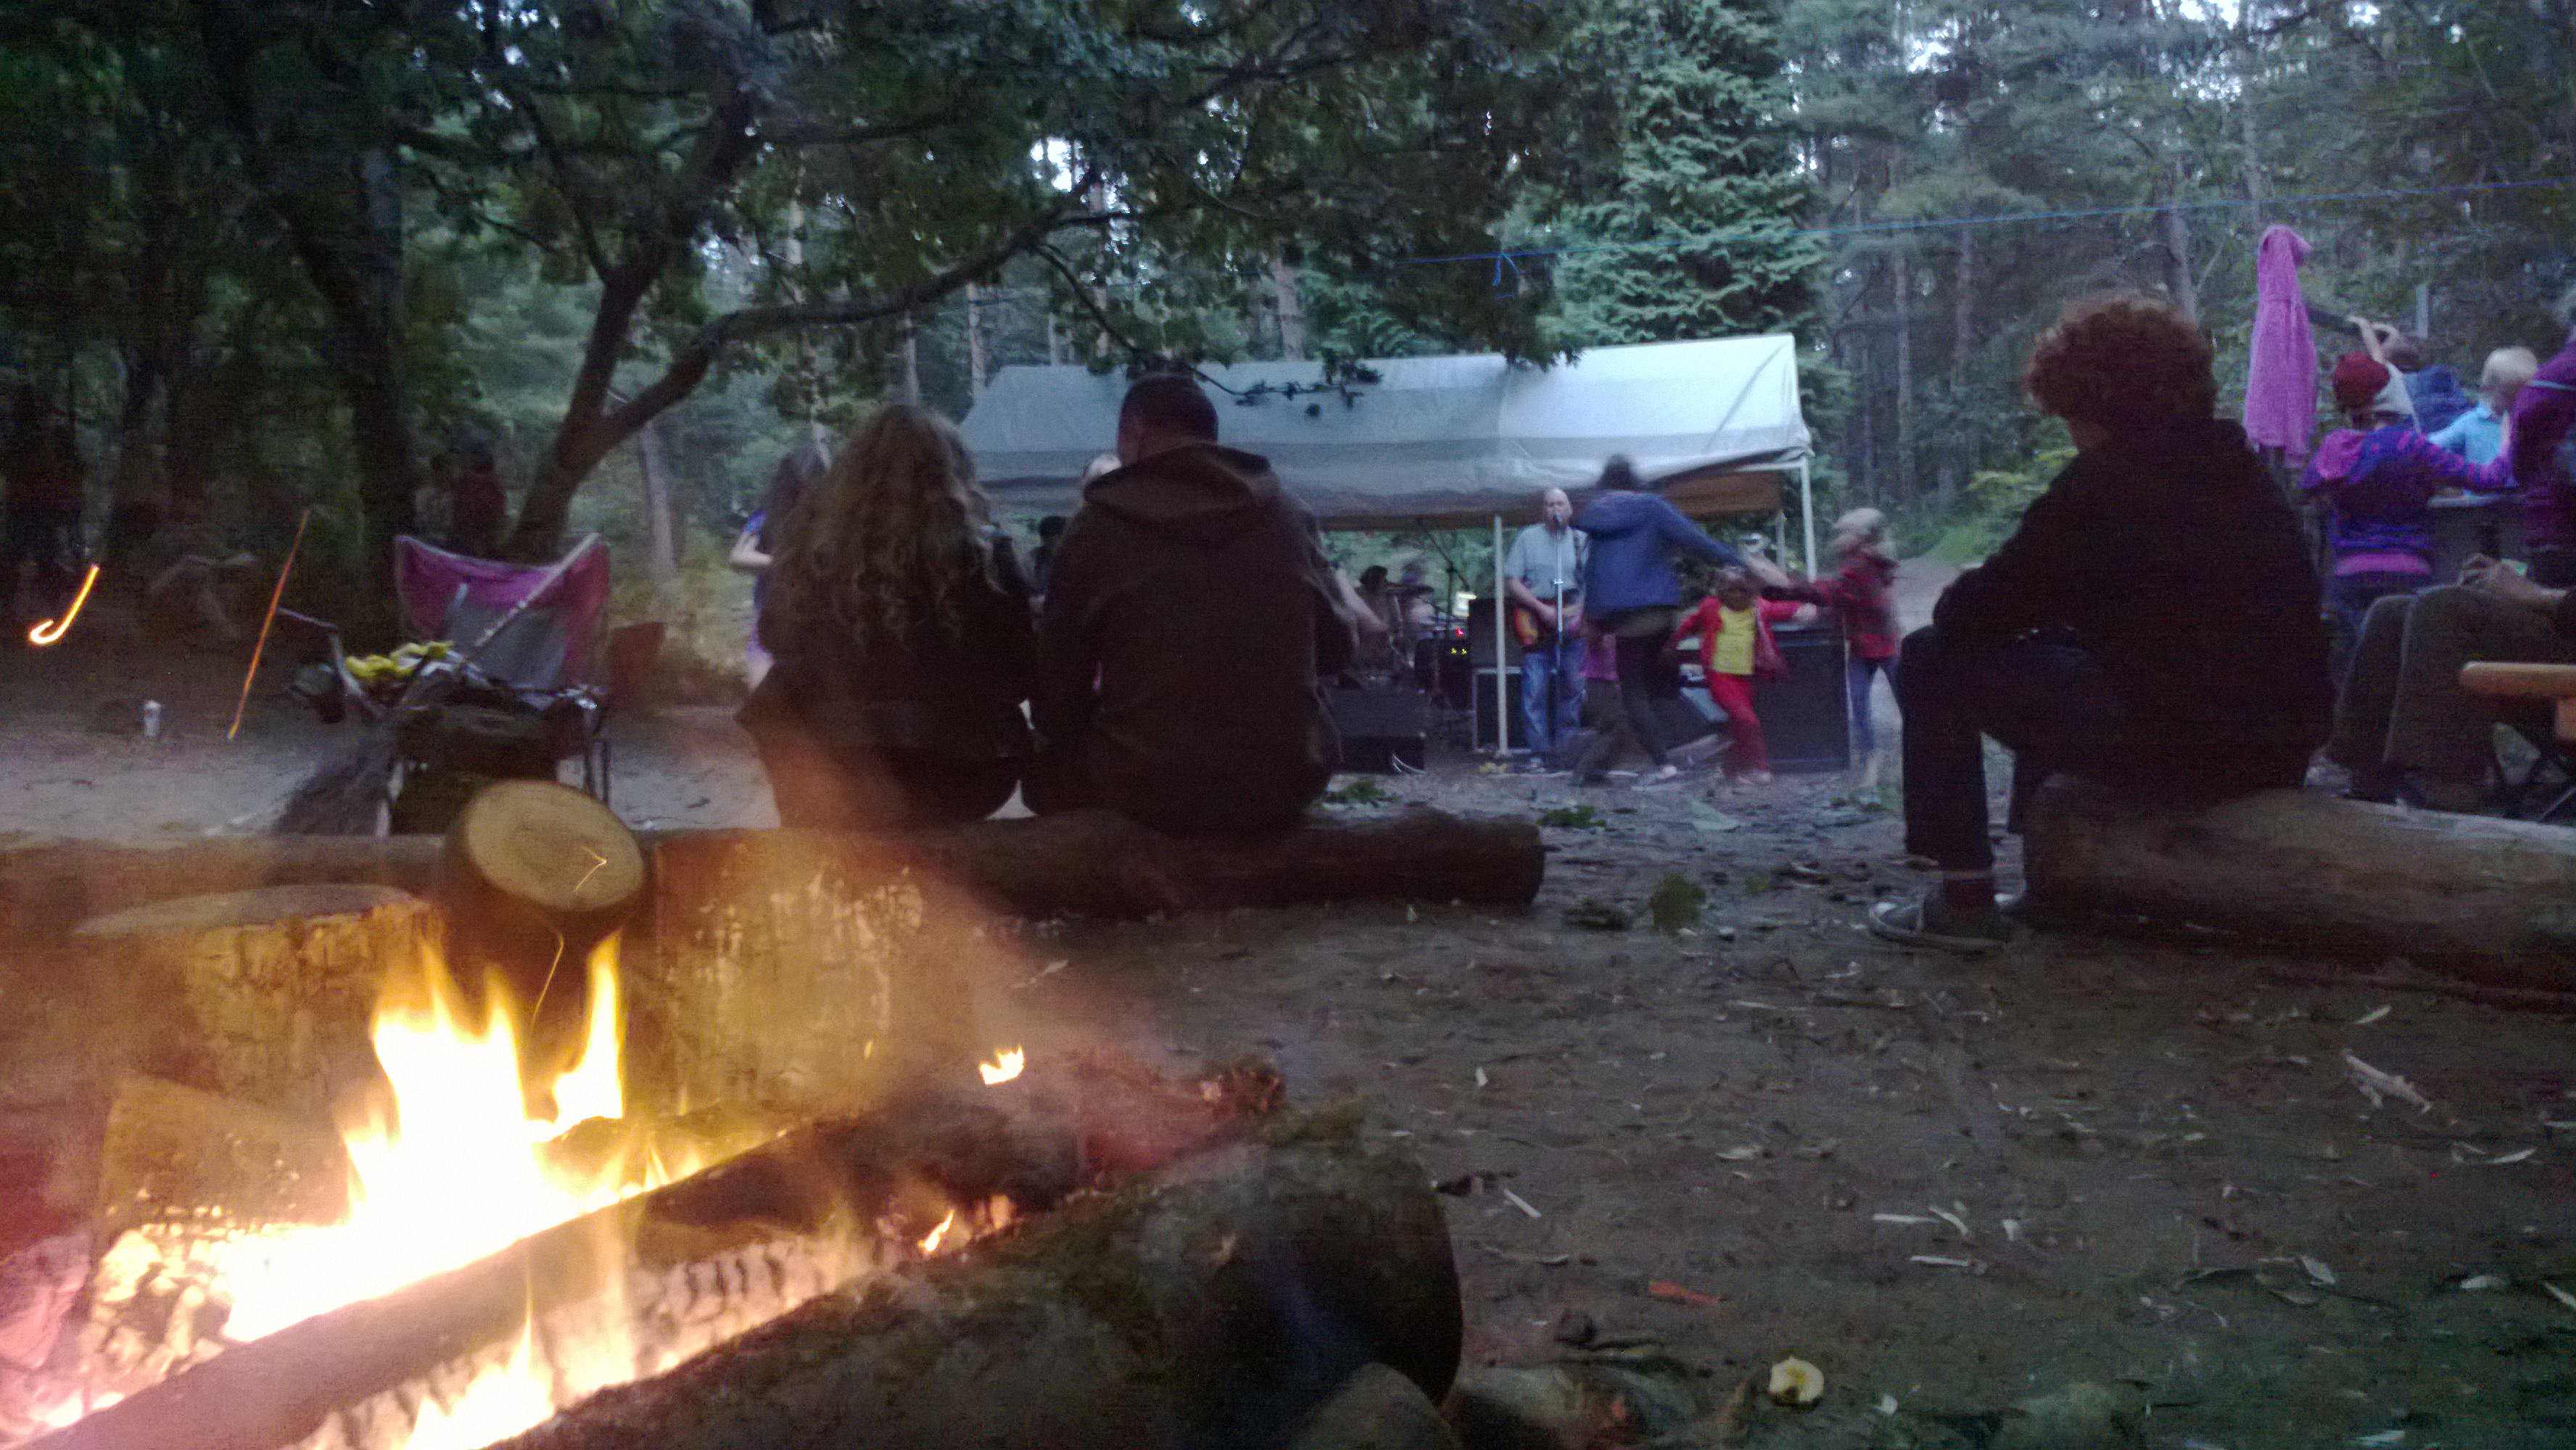
This year musical friends of the boss (Tony) agreed to come over and play for us. I think they were called the Merthyr Tydfill Country Band but were all based over in Nashville. Tony had just asked them on the off chance they would turn up and turn up in style they did. The generator we had blew the lights out if I remember rightly but we all still had a cracking time that evening, drinking, eating, dancing and listening to good music.

WP_20130813_135
An evenings entertainment to finish

After the main training days were over there were a few private courses run. Here Wayne from Forest Knights was running a bow making course. I learnt to make a Bhutaneese bow with him the year before.

WP_20130813_059
Wayne at Work

Everyone agreed that the 2013 Moot was dedicated to our friend Drew. I do miss Drew but hope to see his parents, brother and sister at one of the Moots again sometime in the future.

Book
Drew’s Story Book

Cheers

George

My favourite 2013 plant pictures

Happy Christmas to everyone. I hope you are having a great time and looking forward to a good New Year.

As the weather here in the UK has been a tad damp and windy I thought it would be good to just bring a bit of colour at this time.

My Facebook friends will no doubt have seen the monthly albums of plants I have been posting over the year. I took a look at them again and decided to pull a few of the ones from each month that I particularly liked for the blog.

The plants may or may not have a bushcraft use, they are just the ones I really liked and not some sort of ID guide.

If I decide on a bit of foraging I only pick plants that I have 100% identified and that it is legal to do so. If you have positively identified a wild plant and have never tried it before then I advise you to test your tolerance to it first. A great explanation on this can be found on Robin Harfords Eat Weeds site. The test is clearly laid out and simple to remember.

I will name each plant and one or two uses (if I know of any). Apart from online references which I will link to in the post my main source of reference will be from the excellent and little-known plant ID book by Charles Coates called The Wildflowers of Britain and Ireland.

February

One of the hidden gems of the Common Holly tree (Ilex aquifolium) is found on its leaves. Here you will find the home of the Holly Leaf Miner larvae (Phytomyza ilicis). I studied this little larvae in university and it still intrigues me to this day. The adult fly lays an egg in the stem of the leaf and when it turns into a larvae it burrows into the leaf. A large circular exit hole (over 1mm) usually means the larvae has hatched successfully. A small circular hole usually means the larvae has been predated by a parasitic wasp and a triangular tear as you see here means a blue tit has had a snack.

I have put a link to an excellent PDF on the Miner by the Field Studies Council at the bottom of the post.

Holly
Holly – Ilex aquifolium

Learning to identify plants when not in flower is a must for bushcrafters so as to be able to forage successfully year round.
On the left you can see the purple spotted leaves of the Arum plant sometimes known as Cuckoo-pint or Lords and Ladies (Arum maculatum) and on the right the crinkly leaves of the Wild/Common Primrose (Primula vulgaris).
I advise people not to touch Arum as it can cause quite nasty allergic reactions if not handled correctly. Arum has traditionally been used as a soap (called Portland Sago) and the starch from the root was commonly used to stiffen Elizabethan ruffs. My favourite use though I found in Coates: “Victorians omitted it from their flower guides because of its suggestive shape. For some reason, young men placed it in their shoe to gain the prettiest dance partners”. Unless you are an expert in processing this plant I would advise you just to identify it in all its different stages and leave it be.

The Primrose is a different resource entirely. The word Primrose comes from the latin Prima rosa meaning ‘first rose’. Once identified properly this makes an excellent addition to any salad or a tasty snack while foraging as the leaves and flowers are edible. The leaves and flowers can be used to make tea and I have heard of friends making a wine using the flowers.

Lords & Ladies - Primrose
Cuckoo-pint/Lords and Ladies (Arum maculatum) & Common Primrose (Primula vulgaris)

March

The beautiful Blubell (Hyacinthoides non-scripta) starts to stick its leaves out in March. I loved the way this one had managed to pierce some leaf litter from the previous year. Bluebell in conjunction with some other species can be an indicator species for ancient woodland.

Early Bluebell leaves
Early Bluebell leaves (Hyacinthoides non-scripta)

The picture of these Crocuses was taken outside our church and it is a sight I love to photograph every year.

Crocus
Crocus

April

Another lovely sight in the early spring is the appearance of the catkins on the Goat/Pussy Willow (Salix caprea). This tree, apart from its medicinal uses, makes for excellent cordage from the inner bark and is a great bowdrill wood. Watch out when you burn it as it does tend to spark a bit. These are male catkins I think and are one of the earliest indicators of spring, appearing long before the leaves.

Pussy Willow
Goat/Pussy Willow (Salix caprea)

I took this picture of the Primrose with the flowers and the Foxglove (Digitalis purpurea) on the right without the flowers as a comparison. When both do not have flowers they can be confused for each other. The Primrose has a more rounded leaf tip and the Foxglove has a very pointed leaf tip. As a forager in the early spring/late winter it is important you can comfortably identify both these plants. Foxglove is still used today in a synthetic form as a heart drug, so is, as Coates states, “Best left for the Bees”.

Primrose & Foxglove leaves
Common Primrose  & Foxglove leaves (Digitalis purpurea)

Until I looked in Coates I did not know much about Snowdrops (Galanthus nivalis) other than that they always appear in late winter. Turns out they are not native to the UK and were only first documented in the wild in 1770. In the past the flower was likened to a death shroud so it was seen as unlucky to bring a single one into your house but OK to bring in a bunch. These flowers as you can guess come from the local graveyard – kind of apt in the light of this new knowledge for me.

Snowdrops
Snowdrops (Galanthus nivalis)

Butterbur (Petasites hybridus) is not a plant I see too often in the wild. This one I found on the edges of a wood in the grounds of a stately home. As well as being rather beautiful it has some medicinal uses for treating migraines.

Butterbur
Butterbur (Petasites hybridus)

May

A sight that cannot be beaten is a carpet of Bluebells. I did watch a programme where Ray Mears crushed the bulb up in his mouth and spat it out to make a form of primitive glue. Not something I’ve tried personally but I have had limited success using the crushed leaves for fletching primitive arrows.

Bluebells
Bluebells

This picture I took at Mottisfont House in Hampshire. I think it is a Magnolia tree but it does makes a perfect canvas for some climbing children.

Magnolia
Magnolia tree (Magnolia)

According to Coates the Fritillary (Fritillaria meleagris) is a favourite of rabbits which is possibly a reason I do not see it very often in the wild. It is such a striking flower with these drooping petals.

Snake Head Fritillaria
Fritillary (Fritillaria meleagris)

Bugle (Ajuga reptans) is a common plant found around my village growing in the long grass of the meadows. This plant has long been used to treat wounds but from reading Coates it seemingly has been used by herbalists to help treat hangovers. You just never know sometimes.

Bugle
Bugle (Ajuga reptans)

Bugle

Ribwort Plantain (Plantago lanceolata) like the other plantains is a great bushcrafters’ plant. It is a hardy plant able to withstand a lot of foot traffic. The leaves can be made into a poultice or ointment to help stem bleeding or to soothe burns and stings. One herbalist explained to me that chewing some of the seeds helped to keep mozzies away and some of my bushcrafting friends have made cordage from the fibrous sinews in the leaves. My favourite use is to squeeze the juice out of the leaves and rub it on nettle stings to ease the pain. I have put another good link at the end of the post about Plantain.

Ribwort Plantain
Ribwort Plantain (Plantago lanceolata)

Self Heal (Prunella vulgaris) is one of these plants that most people do not give a second glance. Personally I think it is one of the most beautiful flowers we have. Traditionally used by woodland workers to help close up cuts.

Self Heal
Self Heal (Prunella vulgaris)

June

I always come across Sundew (Drosera rotundifolia) while leading groups out in the New Forest in the early summer. It is an easy plant to miss but if you keep your eyes open for well lit, low lying boggy areas you will spot them. Apart from its medicinal properties for treating breathing issues it seemingly has a reputation as an aphrodisiac – Coates notes: “Known as a love charm for its ability to lure insects, it was secreted in girls’ clothing by amorous men”.

Sundew
Sundew (Drosera rotundifolia)

I think that this is the Common Orchid (Dactylorhiza fuchsii) but I may well be wrong. I have spotted quite a few different types this year either in long grass or in woodland glades. In Scotland I have found many on the coast growing in sheltered areas of rocky outcrops.

Orchid
Common Orchid (Dactylorhiza fuchsii)

There is one ditch in my village that has a clump of Common Bistort (Polygonum bistorta) growing in it. This is a plant that likes ditches and damp places. I have no bushcraft use for it but I do enjoy the sight of it as I pass by.

Bistort
Common Bistort (Polygonum bistorta)

The Meadow Crane’s Bill (Geranium pratense) was used to treat wounds in the past. Coates notes that it has been used as a medicine since Roman times. It seems a very versatile plant for herbalists treating a wide range of ailments including diarrhoea, as a gargle for sore throats and for treating toothache.

Meadow Crane's Bill
Meadow Crane’s Bill (Geranium pratense)

July

This fine example of Borage (Borago officinalis) was from the Eden Project in Cornwall though I do spot this plant on many of my trips. It is edible and has medicinal uses. It’s originally from Southern Europe where the leaves are added to different pasta dishes and soups. Before we added cucumber to Pimms seemingly the preferred addition was Borage leaves (source Wikipedia)

Borage
Borage (Borago officinalis)

Honeysuckle (Lonicera periclymenum) is another bushcrafter’s friend. Not only is the peeled bark/skin an excellent source of tinder, it is the little devil that makes all those beautiful spirals on young shoots such as hazel that make great walking sticks. Coates suggests it has some medicinal uses as the leaves and flowers contain the active ingredient of aspirin.

Honeysuckle
Honeysuckle (Lonicera periclymenum)

The Wood Aven (Geum urbanum) is one useful plant and has quite a history. Medicinally it has been documented in use as far back as the Greeks and to this day herbalists still use it to help treat fevers and other ailments. The root has a clove-like smell and so was traditionally hung in houses to keep away evil spirits. My favourite use however was as a flavouring for beer. Coates lists lots of other uses: one to know and try out.

Wood Aven - Herb Bennett
Wood Aven/Herb Bennett (Geum urbanum)

August

I took this picture of the Evening Primrose (Oenothera biennis) at our BCUK Bushmoot in South Wales. A visitor from the States and another medicinal/edible plant. Coates notes that the roots were once eaten as a prelude to wine drinking as we eat olives today. He adds that it contains vitamin F which is helpful with protecting arteries from fatty decay.

Evening Primrose
Evening Primrose (Oenothera biennis)

I love to look at the Teasel (Dipsacus fullonum): as far as I am concerned it is a work of art. I use the stem as a hand drill and love to watch the Six Spotted Burnetts feeding off the head. The heads were traditionally used in the clothing industry to raise the fibre of cloth after weaving.
I ask the young ones to feel the leaves (gently) and I love seeing the look on their faces when they feel the barbs on the back of the leaf. When they spot the water that collects as a small pool at the base of the leaf I tell the little ones that this is where fairies come to drink. As a small child you could well believe this as the plant does look like it has magical properties.

Teasel & 6 spotted Burnetts
Teasel (Dipsacus fullonum)

Burdock must be one of the most well known bushcrafters’ plant. It has a two-year life cycle and the root of the plant at the end of its first year’s growth provides good carbohydrates and vitamins. Coates comments that the young leaves are edible which I agree with, but personally I cannot stand the taste of the leaves at any time. The base of the stem when the plant is young is quite palatable though.
I have friends who use the dried-out base of the second year plant attached to a bow drill spindle and swear by it. I like to use the second year stem as a clothes and kit hanger, trimming the branches from the stem leaving a small point protruding where each branch was and hanging it up in a tent for my bits and bobs. This was a traditional method on the Isle of Lewis where I come from as there are very few trees on the island so wood is hard to come by.

Burdock
Burdock (Arctium lappa)

A plant of many names is the Reedmace (Typha latifolia), other names being Cattail, Fairy Woman’s Spindle and now officially Bulrush (caused so much confusion that one). The root, like that of Burdock, is a great source of carbohydrates, you can make a flour out of the seed head (also makes great flash burn tinder) and a passable hand drill. A plant with too many uses to list.

Reedmace
Reedmace/Cattail (Typha latifolia)

If you have reached this far well done. I did not want to put in so many pictures but it was very hard to choose which pictures to put up.

Apologies if I got anything wrong but I hope you enjoyed them.

Have a great Christmas

Cheers

George

Links

What happened to the holly leaf-miner?

PLANTAIN IS FOR MORE THAN JUST STINGS AND BITES

How To…. Build a Finnish Candle – Raappanan tuli – Part 6

Welcome to Part 6 of this series on bushcraft candles.

On my ‘to do’ list was the Raappanan tuli candle. From my research on candles it seems that this is the original Finnish candle. I became aware of this type of candle from reading Perkele’s blog (link to the aticle at the end of the post).

It is a simple but effective system using only one log. The log provides the support limbs and the tinder/kindling.

This system works very well in dry cold environments where you have well seasoned dead standing timber. I, on the other hand, had a few pieces of damp birch collected from the woods a couple of weeks ago, but decided to try it out anyway.

Photo 22-12-2013 13 05 48
Raappanan tuli candle/stove

The log I used was 45cms in length.

Photo 19-12-2013 16 54 09
One slightly damp birch log

Firstly split the log but not right in the centre – slightly off centre.

Photo 22-12-2013 13 03 04
Split off just over a third

Then split off another piece about the same size from the other side so that you are left with a flat piece of wood in the centre.

Photo 22-12-2013 13 03 17
Split out just over another third

The wood did not split straight down so I ended up with two centre pieces.

Photo 22-12-2013 13 03 28
The wood in the middle gets split into kindling

After splitting the centre pice into kindling I shaved off all the bark to use as tinder.

Photo 22-12-2013 13 03 37
Shave the bark off as well

Then using your axe, chop into the split areas of the support limbs (the full length) to create a fuzz stick effect. This will give something for the flames from your initial fire to catch on to so that the limbs start to burn quickly.

Photo 22-12-2013 13 03 47
Chop into each half of the wood to create a fuzz effect

Two large fuzz sticks. This technique multiplies the surface area the flames have to catch on to.

Photo 22-12-2013 13 08 45
Glorified fuzz sticks

The set up is very simple. I banged one limb into the ground, laid some kindling flat on the ground (the ground was wet) and banged in the other limb. If you were using a wider but smaller log stability would not be such an issue.

Photo 22-12-2013 13 04 07
Set up

The support stick was just a twig dug into the ground and jammed up against one of the limbs that I was concerned might fall over.

Photo 22-12-2013 13 04 31
Support stick in place if needed and ready to go

I stuffed loads of birch bark and small wood shavings into the gap and lit it.

Photo 22-12-2013 13 04 45
Plenty of birch bark as tinder

The kindling went up well but due to the dampness of the log the limbs would not catch fire at first. I had to continually feed the kindling into the burn area and soon ran out without the limbs catching fire.

Photo 22-12-2013 10 36 24
Instant flame

The bottom of the limbs had caught fire but would not self sustain.

Photo 22-12-2013 13 05 15
Everything was damp so hard to keep going

Plan B was to get a dry log from inside my house (one that had been intended for our open fire), split it and place the dry kindling in a vertical position instead of a horizontal lay. This totally transformed the candle.

Photo 22-12-2013 13 05 31
Added dry kindling in a vertical position

In no time the candle was lit the whole way up both limbs.

Photo 22-12-2013 13 05 48
Took off well

From the point when I added the vertical kindling the pot took less than ten minutes to boil.

Photo 22-12-2013 13 05 59
Boiling water in no time

Happy to get my brew.

Photo 22-12-2013 13 06 17
Usual Brewage

I let the kindling burn down to see if the limbs would stay alight but they were still too damp.

Photo 22-12-2013 13 06 29
A continual battle with the damp wood

Here you can see the area on the top where the moisture was being boiled out.

Photo 22-12-2013 13 06 39
Boiling wood

About 30 minutes after the start of the fire the logs finally started to burn on their own. Got quite a nice fire face out of it as well.

Photo 22-12-2013 13 06 50
Baby dragon fire face

I added the last of my damp tinder and kindling and the limbs finally started burning freely.

Photo 22-12-2013 13 07 03
Final Flames

I found this candle a real challenge to keep going but that is not because the concept is wrong, but because this type of candle needs to have really dry wood to work well.

I am sure that when I try this again with dry wood it will go like a rocket. It is such an simple and effective method and I wish I had been making this type of candle years ago.

I have written six articles on different candles so if anyone has ideas on other candle types please leave a comment on their idea below.

Cheers

George

Perkele’s post on the Raappanan tuli candle

How To…. Build a Finnish/Swedish Candle – Log Rocket Stoves – Part 5

Welcome to Part 5 of this series on bushcraft candles.

Take one log, drill a couple of holes, add some combustibles and strike a match – you have yourself one Log Rocket Stove.

20131216-104222.jpg
Three Log Rocket Stoves in action

After building the Fire Face Candles I was intrigued by Marcels Workshop video on You Tube (link at the end of the post) where he mentioned that his candles would make good stoves. I was sure that they would but after seeing another You Tube video by James Hookway using a slightly different method I was unsure which one to use. So this post is not just a How To…. on building a Log Rocket Stove but it is also a report on comparing the two types.

I wanted to investigate these stoves as I felt that they fitted in well with the Finnish/Swedish Candle theme of this series. I also added a third stove to test out using a damp log just to see if it would work.

I have numbered the stoves 1), 2) and 3)

1) A dry western red cedar log to be fed with dry kindling
2) A damp birch log to be fed with damp twigs picked off the ground
3) A dry western red cedar log fitted with a wick and filled with wax

I should have tested each log separately but for ease of photography I decided to test all of them at the same time.

20131216-103709.jpg
Take three logs

I drilled a small pilot hole into the centre of each log with 12mm drill piece. Then after marking my 24mm drill piece to the required depth I drilled out the main chimney.
While drilling I secured the log between my feet but if you do not feel comfortable with this method I advise securing the log to a workbench.

20131216-103739.jpg
Drill a pilot, measure and drill a chimney

Next you need to measure where the burn chamber will be. I normally mark the log somehow (with tape this time) above the base of the chimney. This will create a small chamber in the burn area you can fill with combustibles for your fire and still allow plenty of airflow into the stove.

20131216-103758.jpg
Measure for the burn area

Again after securing the log, drill into the side at your marked spot until your drill piece enters the chimney. For stoves 1 & 2 I drilled two holes (side by side) to create a wider burn hole to feed kindling into the burn area. For Stove 3 I only drilled one burn area hole as I would be using a wick in the stove.

20131216-103822.jpg
Drill the burn area out

I used a knife to trim the excess wood in the burn areas of stoves 1 & 2.

20131216-103856.jpg
For the wood-fed stoves drill two holes for the burn area and finish with a knife

The finished burn area holes.

20131216-103918.jpg
Burn areas for all 3 stoves

Here you can just see the holes at the top of the logs where the chimneys are and the holes for the burn areas.

20131216-103938.jpg
Stoves ready to be filled

Stove 3 – I melted some candle wax and dipped a wick into it, ensuring the wick got fully soaked in wax, and then inserted it into the stove. I used a pair of pliers and a stick to push the wick into the burn area hole and then from the top pushed all the excess wick into the well at the bottom of the chimney.

20131216-103842.jpg
Insert a wick if you want to make stove 3

I decided to try combustibles I would normally find in my bushcraft bag.
I stuffed Vaseline coated cotton wool into stove 1, crumbled fire lighters into stove 2 and pored melted wax into the well of stove 3.

20131216-103959.jpg
Fill with your choice of flammable material. 1) Cotton wool & Vaseline 2) Crumbled firelighter 3) Wax to cover the wick

I cut and trimmed some green hazel to act as pot stands and placed them all side by side in the garden.
There was very little wind again that day so I made sure I had a chopping board handy to use as a wafter.

20131216-104014.jpg
Set up to fire up and with green wood pot stands

I decided to feed dry split kindling into stove 1, damp twigs into stove 2 (stove 2 was also a damp log itself) and stove 3 would have only the wick and wax.
My daughter lit each candle with one match each.

20131216-104030.jpg
All the additions 1) Dry kindling 2) Damp twig kindling 3) Wax wick

I needed to keep an eye on each stove (this is why I should have tested each one separately) as each one went out in turn as I was dealing with another. After relighting they all managed to stay alight. Stove 3, which had the wick, needed no further tending whatsoever.
Stoves 1 & 2 required constant attention to maintain the flame in the burn area. Too much kindling choked the air off, too little and the flame died out.
At this stage the burn area of the log started to burn but not much of the chimney, so I relied on feeding twigs into the burn area to keep the stove going.

20131216-104046.jpg
5 minutes burn time

After 10 minutes I put the pots on. Each had half a litre of cold water in them. Stove 3 was going well and needing no tending as the wick was well alight now. Stoves 1 & 2 were still struggling and requiring constant attention. At this stage stove 2 was still giving off a lot of smoke as the wood around the burn area dried out.

20131216-104107.jpg
10 minutes burn time

After 15 minutes stoves 1 & 2 started going well with the burn area in stove 1 getting bigger.

20131216-104127.jpg
15 minutes burn time

Stove 3 was getting stronger and stronger with no help required.

20131216-104140.jpg
15 minutes burn time

The flames were steady now under the pots.

20131216-104159.jpg
2 & 3 going strong

After 20 minutes even stove 2 (the damp log) was going well.

20131216-104222.jpg
20 minutes burn time

25 minutes after ignition (20 minutes of heating) the first pot was boiling.

20131216-104355.jpg
25 minutes burn time

Stove 3 was the winner as it had held a steady flame throughout. With a little bit more wind I think we could have knocked a few minutes off this time.

20131216-104421.jpg
Stove 3 is the winner

Stove 1 was fully lit now (the chimney wall was burning well) and did not need any more kindling. The burn area had widened to a point that you could not easily add any more fuel (it just fell out) but all it needed was a bit of wafting to keep the flames going. Again if the wind had been there I think this stove would have performed much better.
I had given up on the damp twigs in stove 2 by now and added some of the dry split kindling I had been using in stove 1. This made a vast difference and the stove suddenly burst into life.

20131216-104714.jpg
30 minutes burn time

Five minutes after coming to life stove 2 had boiling water with stove 1 shortly after. These two stoves I feel would have performed much better if I had been giving them individual attention rather than trying to keep all three going, photograph them and analyse what was going on (I find the multi-tasking thing difficult!).

20131216-104736.jpg
Stove 2 comes in second

An hour after ignition, winning stove 3 had burnt right through to the back.

20131216-104752.jpg
Stove 3 (the winner) at 45 minutes and 60 minutes burn time

I started to add dry kindling into the top of stove 2 and we had a proper candle now.

20131216-104814.jpg
Stove 2 dried out and now with dry kindling after one hour burn time

After one hour I would have said that stoves 1 & 3 were a bit too delicate now to use as stoves. Stove 2 was still going well but I had to waft the other two to get the flames you see in this picture as there was still no wind.

20131216-105556.jpg
Experiment over after an hour

Two hours after ignition all the stoves had burnt out. I put all the fallen pieces of wood into stove 2, gave it a quick waft, and away it went again.

20131216-105619.jpg
Two hours after burn time a little waft and number 2 stove is flaming again

I thoroughly enjoyed doing this experiment with the three stoves but in retrospect I should have either tested each stove separately or had some helpers to tend individual stoves.

Given time (and some more logs) I will be redoing these stoves and seeing how they operate on their own and with a bit of wind. I also want to get myself a drill piece about 35mm wide as I feel that will help when it comes to larger log stoves.

Definitely not a stove for the ultra-light bushcrafter but one to be chucked into your wagon before going on a trip.

I will make a few more up for the New Year and bring them to some of my courses to see what people think of them.

My thoughts on each stove

Stove 1) Did not perform well without wind and the burn area became unusable quickly. When given steady wind by wafting this stove worked well and soon the chimney area was alight. It took longest to boil the water but that was because the flame kept dying out as there was no wind and I was too busy with stove 2 to keep it fed with kindling. I wonder if a large dry log (possibly of a harder wood) would be better for this type of stove rather than the small one I used.

Stove 2) As I expected, this stove took longest to get going. Everything was damp (log and twigs) so I used a number of broken pieces of fire lighter to keep it going. When I started to use the dry kindling the stove really took off. This stove was also bigger than stove 1 so the burn area was bigger and I think that helped it to perform better.

Stove 3) Apart from needing to be re-lit at the beginning, this stove was a dream to use as it required no maintenance. The wick that is encased in wax in the well of the stove ensures ample burn time for the log itself to light up.

Summary

There’s a lot of detail here but actually the principle is very simple:

Take one log, drill a couple of holes, add some combustibles and strike a match – you have yourself one Log Rocket Stove.

Cheers

George

Links

Marcels Workshop – ‘How to make a Fire Log 2013′

Wooden rocket stove or alternative swedish fire stick

Bushcraft Days Carvings – 2013

Carving is my therapy

I do love to sit by a campfire and do a spot of carving. To me it is a very therapeutic pastime but often I don’t get much chance to do it when I’m out running a course. Thankfully though this year I managed to squeeze in a spot of carving on a few trips.

Ash Platter

Early this year I had been helping out at my friends Phil and Philippa’s farm. We were cutting up an old ash tree that had been blown over in the winter gales. I spotted a piece of wood that had been split open down its length and so was fairly easy to carve into a thin platter.

Photo 12-12-2013 22 37 47
Ash platter from a wind blown tree

Pointed Hazel Spoon

This spoon was made when I realised I had come away with no eating utensils for the weekend – but thankfully I had remembered my knife 🙂

Photo 23-08-2013 21 23 26 (1)
Pointed Hazel spoon

Birch Bowls

The large dark bowl was from a piece of birch my friend Stephen found in a hedge at this year’s Wilderness Gathering. The log was partially burnt out and then dumped when no longer required. It was very spalted and rotten in places. I carved out the charcoal with a flint adze and scooped as much of the wood from the bowl as I could with a crook knife.
I left this bowl to dry very slowly over four months. I also painted the ends with gloss paint to try and stop any cracks from happening. So far it seems to be crack free.
The smaller bowl was a demonstration piece I carved at the Kent County Show with Phil Brown of Badger Bushcraft. Again the wood is birch and this one is destined to be a Christmas present.

Photo 07-12-2013 21 44 27
Burnt Birch bowl & a Scooped Birch bowl

Cherry Spoon

I was given a piece of cherry wood by my friend Charlie Brookes earlier this year. On holiday in the summer in Cornwall I decided to pass an evening around the fire carving a spoon for my friend Louise.

Photo 12-12-2013 22 35 47
Cherry Spoon – side view

The wood was very dry but when it was finally sanded, oiled and boned it developed a small crack on the bowl. I was gutted but Louise loved it 🙂

Photo 12-12-2013 22 36 00
Cherry spoon – underside

Quaich

A few years ago I came across a wind blown hornbeam with the most fantastic burl growth on it. The thing filled my rucksack after I had removed it from the tree (I had to give all my kit to the cadets I was with in order to carry the burl myself).
I made a number of items from it this year. This one is a Quaich which to any non-Scottish people I would describe as a communal drinking cup – in particular whisky.

Photo 12-12-2013 22 37 59
Hornbeam Burl Quaich

Knobbly Spoon

I made this spoon in the summer for my friend Jennifer while I was on the Coastal Survival Hunter Gatherer course. I just like the knobbly bit and thought it would make for a good handle.

Photo 12-12-2013 22 36 17
Knobbly spoon (cannot remember the wood type)

The underside of the handle really showed up the gnarled wood.

Photo 24-08-2013 11 45 58
Knobbly spoon – underside

Burl Bowl

Another from the burl. This time I made up a large dinner bowl. It is very rough looking as you have to go with what the wood is saying to you. I gave this bowl away to the parents of a very dear friend of mine who passed away this year as he was a fellow carver.

Photo 12-12-2013 22 40 23
Hornbeam Burl bowl

Spatula

Another implement for my friend Louise. A simple spatula but a pleasure to carve. We had a great holiday this year in Cornwall and camped in the front garden of a Georgian house. The house has been converted to a Youth Hostel and was managed by Louise.

Photo 27-07-2013 08 44 25
Ash spatula

Spalted Spoon

I was sawing up some wood for a campfire this summer and picked up this piece. It had been left in an old fire that had not been cleaned up. The spalting looked too good for the fire so it provided a good hour’s carving for me.

Photo 12-12-2013 22 40 38
Spaltef Hazel spoon

My Noggin

My last piece from the burl was this cup. In Scandinavia a popular name for this type of cup is a Kuksa or Kasa. I prefer the Old English name of Noggin myself.

Photo 12-12-2013 22 40 13
My new Noggin

I am looking forward to the New Year and seeing what different woods I find to carve around the campfire.

Cheers

George

Northern District Advex Competition – July 2013

A particularly tough walk as the route was 27km long with full kit

In July this year we had our annual Sea Cadet District Adventure Training competition in a rather sunny Pippingford Park in the Ashdown Forest.

Five teams from Northern District within London Area Sea Cadets attended the weekend. There was supposed to be a sixth but seemingly they thought it was the following weekend.

The weekend itself is a competition to test the cadets’ skills in navigation, team working, seamanship, first aid, communication and campcraft skills. The top three teams get invited to attend the London Area Chosin Cup competition later in the year to compete against the winning teams from other Districts within London. Over the last few years we have relaxed this criteria so that if a unit comes outside of the top three, they can enter for the Chosin Cup if they really want to. The competition is still very competitive but a bit more open now at all the levels.

Thankfully I do not have to do much of the organisational paperwork for the event as my good friend Keith Coleman has that firmly taken care of. Admin has never been my strong point.

20131212-084447.jpg
Our little Minion Mascot for the weekend

I try to arrive early on the Friday and set up the parachute and the rest of the admin area. I was a bit gutted this year as I left the long extending pole I use to put up the parachute rope behind at the site and have never seen it again.
My hammock seat was well used this weekend but thankfully since then some of the guys have bought their own ones now.

20131212-070424.jpg
Base camp set up and a bit of hammock seat testing

Once we are set up it is a case of chilling out until the cadets arrive. The campfire cooking rig has been donated (on a long term loan) to the Sea Cadets by my good friend Mark Beer. It made a big difference to the amount of food that can be cooked quickly over the open fire.

20131212-070449.jpg
Friday camp set up

Our District Officers Mark Macey and Mark Weston were both keen to try out a hammock but as yet have not volunteered to sleep in one. Apparently for Mark Weston this was the first time since he was a young lad that he had camped out. Good on you Mark for staying out. It seems though that his good lady Chrissie has learnt the art of delegation and supervised the whole tent set up business 😉

20131212-070506.jpg
Officers relaxing

The teams all arrived on the Friday evening and set up camp. After they sorted themselves out they were sent straight out for a night navigation excercise with all their kit. We found all the teams eventually and had them set up camp.

Saturday

In the morning I managed to get a group picture of each of the teams before the hard slog began.

20131212-070522.jpg
Enfield & Haringey Units

Each team is supposed to have 6 cadets and they need to be totally self sufficient for the whole weekend. Kit checks are undertaken as soon as they arrive to ensure they have all the basics such as a sleeping bag, tent, waterproofs, water etc. They loose marks for any kit that is missing from the kit list they are sent out before the competition. I always bring extra sleeping bags, tents, jackets, roll mats and gloves as there are usually a few missing pieces.

20131212-070542.jpg
City of London & Waltham Forest Units

While the cadets sort themselves out on the Saturday morning the staff tuck into a good breakfast as the day is a long one. By the time any night navigation exercise is finished at the end of the day they could have been on the go for 18 hours.

20131212-070603.jpg
Finchley Unit and some of the staff relaxing over breakfast

As part of the navigation assessment, each team has to produce a route card for the day’s walk. The route goes all around Ashdown Forest and there are various checkpoints they have to get to. At some checkpoints they are set various tests on Sea Cadet skills. This was a particularly tough walk as the route was 27km long with full kit – do not ever say that being in the cadets is a breeze, it can be tough.
I do not have any pictures of the cadets while they were out but by the end of the day two teams had completed the whole course and the others were either picked up or had just missed out one or two checkpoints.

20131212-070628.jpg
All the units had to produce a route card for the weekend

Sunday
This part of the competition is undertaken just in Pippingford Park. The cadets have to navigate to different stances in the training area and complete different tasks.
All the stances are designed to test personal skill, team work, leadership and communication skills.
One of the stances was to rope up a river crossing system, using their seamanship skills, to be able to carry the whole team across.
All cadets are trained in First Aid so we usually have a stance on this. It can be quite weird listening to all the theatrical shouts and groans that come from this stance 😉

20131212-070704.jpg
River crossing and First Aid stances

Teamwork and communication are skills scrutinised on the mine clearance stance. Pretend mines are hidden and the cadets have to probe for them. If they find one they mark it with a tyre.

20131212-070738.jpg
Mine clearance

The Observation stance is set up with objects or people set out in front of the cadets. Some are obvious to spot but due to the skill of the Royal Marine Cadet instructors who set up these stances can be extremely difficult to find.
The challenge on this year’s Seamanship stance run by Paul Townsend was to use a variety of ropes, poles, blocks and tackles to set up a rig to conduct a Colours ceremony. I like this stance as it brings together Sea Cadet skills originally aimed at use on board ship out into the woods.

20131213-092513.jpg
Observation and Seamanship stances

My favourite – the Archery stance – was run this year by Charlie Brookes. All the cadets look forward to this stance both for the fun of it and for its competitive spirit within each team and between teams for the highest scores.

20131213-092644.jpg
Archery stance

At the end of the Sunday we have an Endurance race. A course is set up through the woods going through streams, over logs, under them, up and down steep slopes. Each team gets to run it twice: first to get to know the route and secondly as a timed event that can be scored.

20131212-070759.jpg
Endurance race

We finish with a final river crossing and a group picture. The looks on the cadets faces tell you very clearly that they had a great time.

20131212-070826.jpg
Final crossing and a happy group

A special award was given to Enfield unit for saving a Fawn that had become tangled up in some wire fencing. Well done guys.

20131212-070845.jpg
First place for animal rescue. They rescued a fawn trapped in a fence.

Enfield receiving the Fawn award and Waltham Forest receiving their Third place certificate.

20131212-070914.jpg
Enfield Unit receiving the ‘Fawn’ award and Waltham Forest Unit receiving the 3rd place award

Second place (and the Team Leader award) went to Enfield and the winners were Finchley unit. Both these teams scored highly in what was a very tough but fun weekend.

20131212-072157.jpg
2nd place to Enfield Unit and 1st place to Finchley Unit

As well as being a weekend full of assessments this course was a great training event for the teams that went forward to Chosin Cup later in the year but more on that later.

Cheers

George

Links

The Sea Cadets

How To…. Build a Finnish/Swedish Candle – Fire Face Candles – Part 4

Welcome to Part 4 of this series on bushcraft candles.

This type of candle is slightly different to the others I have been building in this series. The main difference is that these Fire Face Candles require the use of power tools for speed of build. (I suppose they could be built with carpenters’ hand tools but that will be for another post.)

In my research on this series I came across a You Tube video on this type of candle from Marcels Workshop called ‘How to make a Fire Log 2013’. I have put a link to the video at the end of the post.

These candles were made for decoration only in my garden (for a party) but they could be used as stoves if you want. My last post in this series I think will be on testing slightly different variations on this method as rocket stoves.

As you can see you can get excellent Fire Faces out of these candles. Here is how you make one.

Photo 08-12-2013 19 22 19
Read on to see how to make yourself a Fire Face Candle

I used a long western red cedar log for the candles. After sawing it into 3 smaller logs I marked a hole on the top and drilled a small pilot hole down into the log. I did not place the mark dead centre so as to ensure the faces when they were completed lit up well.

I found it helpful to drill a pilot hole before switching to a larger drill piece (24mm): I did test going directly to the larger piece without a pilot hole and found for this type of wood drilling in through the top with a pilot first worked better.

The drill piece for the pilot I used here was 12mm. As it was shorter than the log I did not need to mark it with tape in case it came out the bottom. I secured the log between my feet as my vice was not big enough. If you are concerned about this drilling method I would advise that you secure the log to a work surface somehow before drilling.

Photo 10-12-2013 10 46 50
Drill a Pilot hole

Then with the 24mm drill I used tape to mark out how deep I needed to go and drilled the chimney out.

Photo 10-12-2013 10 47 19
Mark your depth and drill out the chimney through the pilot hole

I laid the drill piece beside the log again and using the tape marked off the area where I would drill the mouth. The trick is to make sure that the mouth is above the bottom of the chimney. This will create a ‘well’ that you can fill with the wick and wax.

Photo 10-12-2013 10 47 08
Mark the height where the mouth will go

I used an 18mm drill piece to create the mouth. The 24mm drill would have worked just as well I imagine (I will use that for the Rocket Stoves). Here you can see on the right that the mouth connected with the chimney nicely.

Photo 10-12-2013 10 47 35
Drill the Mouth until it reaches the chimney

I drilled out some eyes (connecting to the chimney) and using the drill decorated the logs with facial features. I did secure the logs for this but if you have the time and skill a good knife will do the same job.

Photo 10-12-2013 10 47 47
Decorate with eyes and facial features

In all it took me about half an hour to get to this stage.

Photo 10-12-2013 10 48 02
Three candles decorated with the drill

I filled a pot up with wax and three wicks and heated it til the wax melted.

Photo 10-12-2013 10 48 14
Melt candle wax and soak the wick

Using pliers and a stick I pushed the wick into the mouth down towards the base of the chimney. Leave a good 2 or 3cms protruding from the mouth at this stage.

Photo 10-12-2013 10 48 27
Insert the wick in through the mouth

I used a stick pushed down the chimney to tamp the wick down into the well. If you do not leave some wick protruding through the mouth it may all get pushed into the well. Then I filled the well with melted wax by pouring it in from the top of the chimney. The wax goes everywhere: I did all this outside.

Photo 10-12-2013 10 48 40
Tamp the wick down into the chamber and fill with wax

So after about 45 minutes I had three Fire Face Candles ready to fire up.

Photo 07-12-2013 16 06 35
Three Fire Face Candles ready to fire up

I set them out in the garden ready to be lit later.

Photo 10-12-2013 11 43 10
Set up as background lighting for the marshmallow fire in the evening

To fire them up just take a match and light the end of the wax-coated wick protruding from the mouth. In no time I had one going well.

Photo 10-12-2013 11 42 52
Firing up with the first one going well

This picture was taken through the mouth and you can see the wick is burning well at the base of the chimney.

Photo 10-12-2013 11 43 28
Wick burning in the base of the chimney

The other two candles did not fire up initially. That was because I hadn’t trusted the wick alone and had inserted some pig fat impregnated paper into the chimney of each of these two. I thought this would help them along but all it did was cut the airflow and so the wick kept going out. After a bit of faffing about and decision making I stripped everything out apart from the wick and re-lit them.

Photo 10-12-2013 10 49 22
First one going well but the other two failed initially

They did not take long to fire up properly. Lesson learnt I think.

Photo 10-12-2013 10 49 38
Blockage removed and now going well

I was quite surprised how long they lasted for. This picture was taken 45 minutes into the burn and you can see the face on the first one is starting to burn out. Next time I may place the chimney more centrally in the log.

Photo 10-12-2013 10 49 52
45 minutes into the burn and the first one (on the left) is burning through

The kids loved the candles and would come right up to them to peer into the faces. I think that the next time I set them up I will put them in a cordoned off area as I was a little bit concerned that some of the more boistrous kids could knock them over.

Photo 10-12-2013 10 50 10
The kids loved them

I brought them all together to get a better picture and also so that they were in one area where I could keep an eye on them. This picture was taken about an hour after I had lit the first one.

Photo 10-12-2013 10 50 23
One hour into burn time (from the first one) and all three are working well

One hour 15 minutes later and the first one had lost its face but was still going strong. There was a bit of wind on the night I tested them and this really helped maintain the flames. When I tested my first candles there was no wind and I had to continually waft them to keep them going.

Photo 10-12-2013 10 50 38
One hour 15 minutes

My favourite picture of the evening. It looks like the front face of a Saxon warriors metal helmet to me.

Photo 08-12-2013 19 22 19
Now that is what you call a Fire Face

A view from above .

Photo 08-12-2013 19 20 57
View from above

In the end the candles lasted just under 2 hours so I was very pleased with the results.

Photo 10-12-2013 10 51 20
One hour 30 minutes (left) and two hours (right)

As there was plenty of wood left on the candles I popped them on the fire and finally sat beside it relaxing with my wife Alison after everyone had gone, the kids were in bed and we’d finished clearing up.
The candles had one last spurt of life and I got a few more Fire Faces to add to my collection.

Photo 10-12-2013 10 51 40
Onto the fire for some more Fire Faces – Can you spot them?

A wonderful end to a wonderful day.

Photo 10-12-2013 10 51 54
Final Faces

In summary I would say that these were a pretty easy candle to make if you have the tools and they do last for a decent amount of time.

If I do get hold of some bigger logs I will try this again to see if I get the same results.

My last post in this Finnish/Swedish Candle series will be to look at using power tools to create rocket stoves from logs.

Cheers

George

Link

Marcels Workshop – ‘How to make a Fire Log 2013’

Fire Faces and Figures

Just for fun this post.


I am no artist but I like to capture what I see in the flames of a fire. I find it quite therapeutic watching a good campfire and I always have a camera ready for when a fire is giving off the right type of flame to see some faces or figures.

Here is a selection of just some of the faces and figures I have captured over the last couple of years. In some, the pictures of the face or figure are very clear to see (one or two have more than one face) but for a few they are not so easy to spot.

I am not going to describe what I see as you may see something totally different.


DSC_0214
Watership Down Ghostly Bunnies


Photo 17-08-2014 23 55 04

WP_20140517_074

Photo 04-12-2013 22 58 53

WP_20130829_023

Photo 04-12-2013 23 24 29Photo 04-12-2013 23 22 50Photo 04-12-2013 23 28 14

Photo 04-12-2013 23 01 45Photo 04-12-2013 23 30 39

Photo 04-12-2013 23 26 34Photo 04-12-2013 23 30 02

Photo 04-12-2013 23 23 43

Photo 04-12-2013 23 20 46

Photo 04-12-2013 23 01 41Photo 04-12-2013 23 19 45

Photo 04-12-2013 23 00 56Photo 04-12-2013 23 18 13

Photo 04-12-2013 23 00 51

Photo 04-12-2013 23 00 47

Photo 04-12-2013 23 00 37

Photo 04-12-2013 23 00 33

Photo 04-12-2013 23 00 30

Photo 04-12-2013 23 35 01Photo 04-12-2013 23 00 14

Photo 04-12-2013 23 00 02

I enjoyed taking them and I hope you enjoyed looking at them as well.

Cheers

George

How To…. Build a Finnish/Swedish Candle – A Comparison – Part 3

Welcome to Part 3 of this series on bushcraft candles.

If you have not seen Parts 1 or 2 of the series you may want to have a read of them first. Follow these links:

How To…. Build a Finnish/Swedish Candle – No Chainsaw – Part 1

How To…. Build a Finnish/Swedish Candle – Wet/Damp Wood – Part 2

I must admit to having taken thousands of pictures of flames over the years – they are very much alive to me

Part 3 is a comparison between two different candle types. I decided to fire up two candles at the same time to see how they fared against each other.

The candle on the left was made by driving a cluster of very dry birch poles into the ground and filling the centre with different tinders and kindling. The candle on the right was made from a single western red cedar log split into segments and again filled with different tinders. (All of the tinders in this test were natural. As the wood in both candles was extremely dry I did not feel the need to use anything man made such as Vaseline or cotton wool.)

Photo 03-12-2013 13 26 39
Three little Hot Rockets

Western red cedar log candle set up

I had stored this log in my garage for a number of years and it was bone dry. I like using cedar for a candle as the inner bark makes excellent tinder.

Photo 03-12-2013 09 33 52
Western red cedar

I placed the log on top of another log and, using a batton, hammered the axe into the log (picture 1). It’s important to keep the handle of the axe pointed away from you at 90 degrees so that the blade will swing away from you if it slips.
Then keep battoning the log until you get a number of segments (picture 2). I went for 8 segments as there was very little wind and I wanted as many air gaps as possible for a good draft: if there had been a bit more wind I would probably have settled for just four segments.

Photo 03-12-2013 09 39 26
Battoned out sections

I used bramble to tie it all together and also to test how long the bramble would last just on its own (picture 3).
In between each segment I placed a folded piece of the bark (picture 4). This acted as extra tinder but also helped open the segments up to create airflow.
Into the centre I placed natural fluffy tinders and lots of birch bark I had collected earlier that day (picture 5).

Photo 03-12-2013 09 56 23
Bramble wrap and birch bark filling

Birch logs candle set up

These logs had been cut off a dead standing birch tree that day. They were all bone dry and about 60 to 70 cms long (picture 6). I hammered them into some soft ground in the shape of a circle. They need to be well hammered in, deep enough that they are sufficiently stable to hold a kettle or pot.
Into the centre I added layers of twigs and fluffy tinders filling up the whole candle (picture 7).
I wrapped bramble around the candle just as an experiment to see how long it would last. This type of candle does not normally need a cordage wrap around it if you have secured it properly into the ground.

Photo 03-12-2013 09 58 06
Dry Birch logs and a fluffy centre

Comparison

If you were out and about in the woods you would more than likely go for something like the birch log set up as these logs are easier to come across. The cedar log set up though is I think quicker to set up as the splitting out with the axe is faster than the time it takes to saw all the birch logs up.

Photo 03-12-2013 09 34 12
Set up  ready to be fired up

I got my son to light the cedar candle first as I thought that this one may take the longest to get going (picture 8). My daughter then lit the birch candle next (picture 9). Both were lit with just one match and from the centre of each candle.

Photo 03-12-2013 09 59 59
One match ignition

The cedar was slow to catch but remained steady for about 15 minutes (picture 10). The birch went up like a rocket so I decided this would be the one to put the kettle on (picture 11). Picture 12 shows a good comparison between the two candles. This was about 5 minutes after ignition.

Photo 03-12-2013 13 22 14
Cedar = slow start – Birch = fast start

Here you can see the difference between the candles after about ten minutes.

Photo 03-12-2013 13 23 42
Brew time again

Makes for good Woodland TV as well.

Photo 03-12-2013 09 34 35
A flame wrapped kettle

The bramble wrap was looking a bit toasted at this stage but was just hanging in there.

Photo 03-12-2013 09 34 52
The bramble just about hanging in there

The cedar started to produce a good flame after about 15 minutes (picture 15) just as the kettle started to boil (picture 16) on the birch candle. It was at this stage that the bramble fell off the birch candle. The section of the bramble wrapped around the bottom of the cedar candle did not get burnt through,  I noticed (as in the Wet/Damp wood candle in Part 2 of the series).

Photo 03-12-2013 13 24 50
Cedar kicks in while the kettle boils

Another fuzzy picture I am afraid but it does show a good comparison of both candles after about 20 minutes (took this after making my brew).

Photo 03-12-2013 09 35 08
A fuzzy comparison

This picture was taken at about the 30-minute stage and shows the burn area extending nicely with a good eruption of sparks (common with cedar): notice that the bramble is still holding strong.

Photo 03-12-2013 09 35 27
Cedar fireworks

Pictures 17 & 18 were taken one after another at different angles about 50 minutes after ignition. The birch candle had burnt out but I was very impressed to see that the cedar was still going strong. The bramble on the cedar candle I am afraid to say had had it by now and was burnt through. Thankfully I had also pushed each segment of cedar slightly into the ground so it stayed upright.

Photo 03-12-2013 13 25 26
Death of the Birch – Long live the Cedar

Look closely into the flames – can you see the Fire Face?

Photo 03-12-2013 09 35 52
First Fire Face

And another one. I must admit to having taken thousands of pictures of flames over the years – they are very much alive to me.

Photo 03-12-2013 09 35 41
Second Fire Face

Still with the cedar candle, picture 19 was taken about 1 hour 30 minutes into the burn and picture 20 after about 2 hours. I did not want to finish with a shot of some embers so it was a simple case of……………

Photo 03-12-2013 13 26 12
Is it the end of the Cedar?

pushing the segments into a tipi shape and within seconds we had flame again.

Photo 03-12-2013 09 36 06
Final Flame

Conclusion

Set up – I would say it was very close as both were fairly easy to build but the cedar was marginally quicker. I will probably use this method more often in some sort of camp where you have access to these rounds of cedar (or similar wood types) but when out and about I would more often use the birch log method (and I do).

Ignition and initial burn – Both were equally easy to light with dry tinder. For the initial burn the birch log candle wins out for me with that rocket effect at the start and getting me that brew quickly. If all I was after though was a gentle candle effect then the cedar is the one I’d want.

Ongoing flame – For me the winner in this category was the cedar. It lasted twice as long as the birch and gave off some great faces and fireworks to keep me interested. The birch log candle must not be totally discounted even at this stage though, as the hot embers left were of good enough quality that I could have used them to start up a more traditional fire lay.

Overall – My preference goes to the cedar candle as it gave a strong enough flame after 15 minutes to boil water or cook some food on, lasted a long time, was a great Woodland TV and, like the birch log candle, there were enough hot embers at the end to kindle a more traditional fire lay.

Part 4 in this series will look at some Rocket Stove Log candles I came across in my research for this series. They are quite fun to make but I am still looking into them – aka I have not got it quite right yet 😉

A nice video on the cedar type candle is Bushcraft Swedish candle Fire Log

Cheers

George

How To…. Build a Finnish/Swedish Candle – Damp/Wet Wood – Part 2

This is Part 2 of my bushcraft candles experiment, if you have not read Part 1 yet have a look here How To….Build a Finnish/Swedish Candle – No chainsaw – Part 1.

Part 2 – Damp/Wet Wood

Never, ever give up on your fire: your life may depend on it

I went for a wander with my children in the woods last weekend to collect some wood and tinder for one of my candles. We had a chat about dead standing wood and how to identify it. Thankfully there are still enough leaves on the trees to make that job easy for them. They selected a birch that had lost the race for light and had no leaves on it. All the small side branches snapped easily off it and, much to my children’s delight, when I pushed the tree it tipped over easily exposing the root.

I trimmed and sawed the tree on site but quickly realised that even though the wood was not rotten in any way it was wet to its centre. Not an ideal situation for a making a quick and easy candle, just a situation that required a bit more preparation.

As you can see from the picture below, even though the wood was wet I still got my coffee.

Read on to see how to put one of these candles together.

Photo 01-12-2013 11 19 00
Brew time

This type of candle is ideal for ground conditions where it is very hard (it is self supporting and easy to reposition) or where the ground is waterlogged (the burn area is raised up off the ground). I have used this method on a number of occasions but until now I have always hammered the individual logs into the ground to form a circle. It was on one of my occasional trawls of You Tube that I came across a video from Bushcraftmyway showing this adaptation that is free standing. I have put a link to the video at the bottom of the post.

To begin with I trimmed the small logs to a length of about 50cms and collected a mixture of flexible bramble (scraping the hooks off), willow and birch shoots to use as cordage.

Photo 01-12-2013 10 10 59
What you need

I gathered all the logs between my thighs and lashed them together with the bramble at first. I used bramble to begin with as the willow and birch I had gathered was quite thin and I thought might snap too easily. I also wanted to test the bramble out to see how useful it was in its ‘raw’ state, without actually stripping it down and turning it into cordage.

Photo 01-12-2013 10 15 25
Form a tube with the logs

It was easy to wrap the birch and willow around the candle for extra support after the bramble was on. I also kept the cordage near the bottom to keep it all away from the flames of the candle.

Photo 01-12-2013 10 28 18
Secured with natural cordage

If you are smart you will have cut all the poles to the same size, as you can see I had not (picture 1). However with the bundle tied up you can turn the whole thing on its side and trim them to size (picture 2). It will never be a perfectly flat surface but it’s good enough for a kettle ( picture 3).

Photo 01-12-2013 22 15 17
Making a flat surface

I pulled the tops of the logs apart and put a smaller, pointed log in the centre to keep the top slightly open (picture 4). Then I stuffed very fine kindling (broken branch tips) into the centre and placed on top some Vaseline-smeared cotton wool and some resin (picture 5). (When you are lighting up wet wood you need to use the best fire-lighting method to hand). One match and the candle was away (picture 6).

Photo 01-12-2013 22 17 41
Lighting up

I had some charcoal ends left from a previous fire so added them on top. These are great for adding that extra heart to the fire.

Photo 01-12-2013 10 52 59
Charcoal as an extender

Next I added small twigs in a criss cross pattern on top of the charcoal. This is a good fire lay for the candle as it is stable and you can make a number of layers (picture 7). Once the fire is going properly pop the kettle on (picture 8). I half filled this group kettle which would have made brews for at least six people.

Photo 01-12-2013 22 18 58 (1)
Ready to boil

I had prepared a mixture of twigs for maintaining the fire. Some had been hung up and some had been found on the ground. As you can see here they did contain a lot of moisture but thankfully the fire was hot enough to boil that moisture off easily.

There were enough gaps at the top of the candle to keep popping twigs in to feed the fire.

NB if you think there is any possibility of the candle falling over, do not let small children feed twigs into the fire: if they push too enthusiastically they could topple it.

Photo 01-12-2013 11 07 01
Adding twigs

In about 15 minutes I had a boiling kettle and a nice cup of coffee made.

Photo 01-12-2013 11 19 00
Coffee ready

By the time I had my coffee the fire had died down as the support logs were so wet (picture 9). I added some more twigs and had to ‘waft’ it for a while (using the white board you can see in picture 10). I happened to build this candle on a day with no wind in a sheltered spot so wafting was a must. If you have a gentle breeze flowing through the logs all you’ll need do is keep adding twigs.

Photo 01-12-2013 22 19 55
Back to life

Here you can see how wet the logs were, the moisture is being boiled out of the top.

Photo 01-12-2013 11 19 24
Boiling logs

At this stage I fed the candle with some bigger pieces of wood and left it to burn for half an hour.

Photo 01-12-2013 11 38 57
Stocking up

This picture was taken after about one hour of burn time. When I came back to it the flames had died down to just dark embers, but after about 30 seconds of gentle wafting the flames were back again. Never, ever give up on your fire: your life may well depend on it.

Photo 01-12-2013 11 55 53
Half hour later

I was thinking at this stage about what my friend Rich59 from BCUK had taught me about tinders many years ago. He broke all the rules when he showed me how to get a flame from damp tinders so I thought what the heck and grabbed a load of damp (some quite wet) leaves and pressed them into the candle (picture 11). After a bit of wafting I got the leaves really glowing with a small amount of flame (picture 12).

Photo 01-12-2013 22 21 15
Wet tinder

Using the criss cross fire lay method again I built up quite a few layers of twigs for a second time. This method really helps to draw the air up through the twigs and so boost the flames.

Photo 01-12-2013 12 52 37
Flames again

Now my candle was quite dry and it produced a great flame for a good two hours. Granted it did need to be maintained but for a pile of unpromising wet logs I was very happy with this candle.

Photo 01-12-2013 12 54 02
Dried out

The cordage wrap lasted right until the end so I would be happy to use some old rope if I had to.

This is a good project to try because many bushcraft skills are covered, from knife and saw use, natural cordage-making, fire-lighting and fire lays, and most importantly it’s a reminder to always persevere when it comes to maintaining your fire when the going gets tough.

Part 3 – How To…. Build a Finnish/Swedish Candle – A Comparison – Part 3

Cheers

George

Bushcraft skills: the Swedish torch/stove – my way