Spring is well and truly under way now and I have been getting out as much as possible either by myself, with my family or with friends.
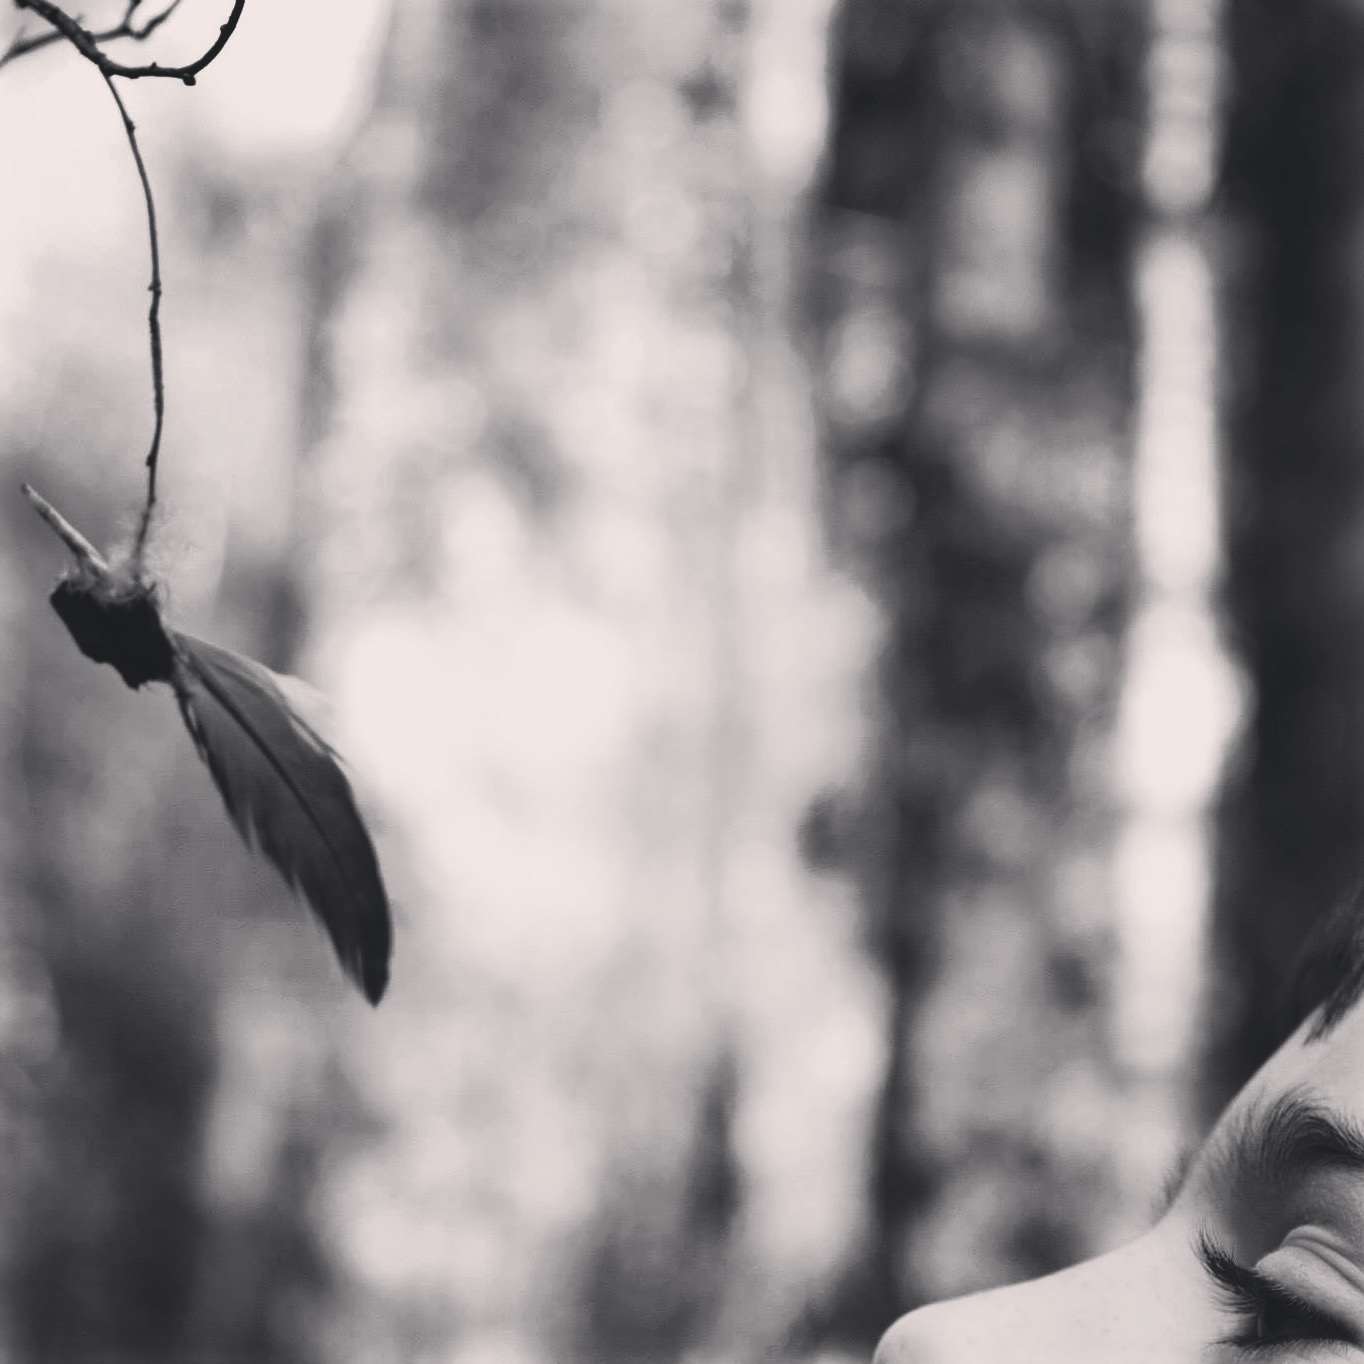
There is a lot to see if you look close enough as my son is with this suspended feather trap. I love feather traps (that is anything that catches a feather) as they make for beautiful pictures.
Feather Trap
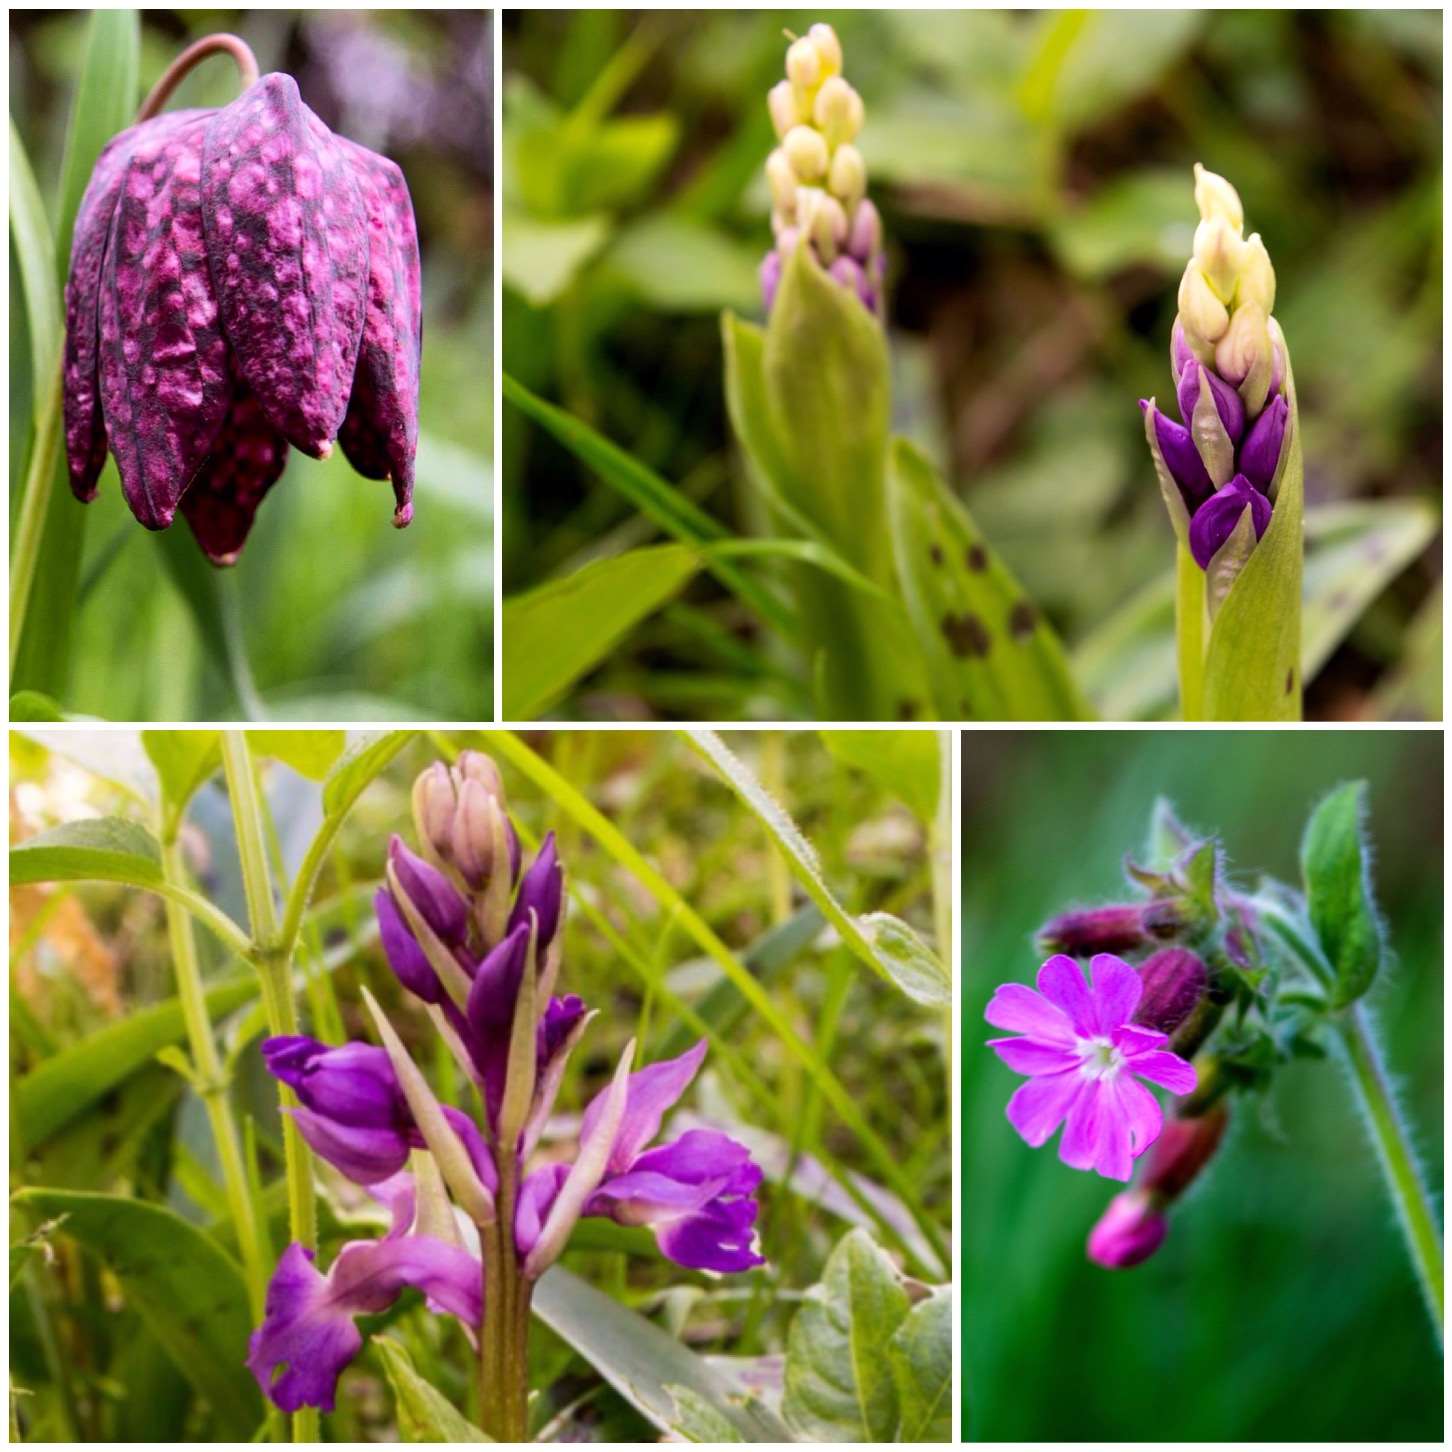
While reviewing my spring pictures I noticed there were dominant colours coming through. Below (from left to right) are the purples of the snakes head fritillary, two emerging and an emerged early purple orchid, and a lovely red campion.
I was particularly pleased to capture the orchids just emerging from their leaf sheath.
Purples
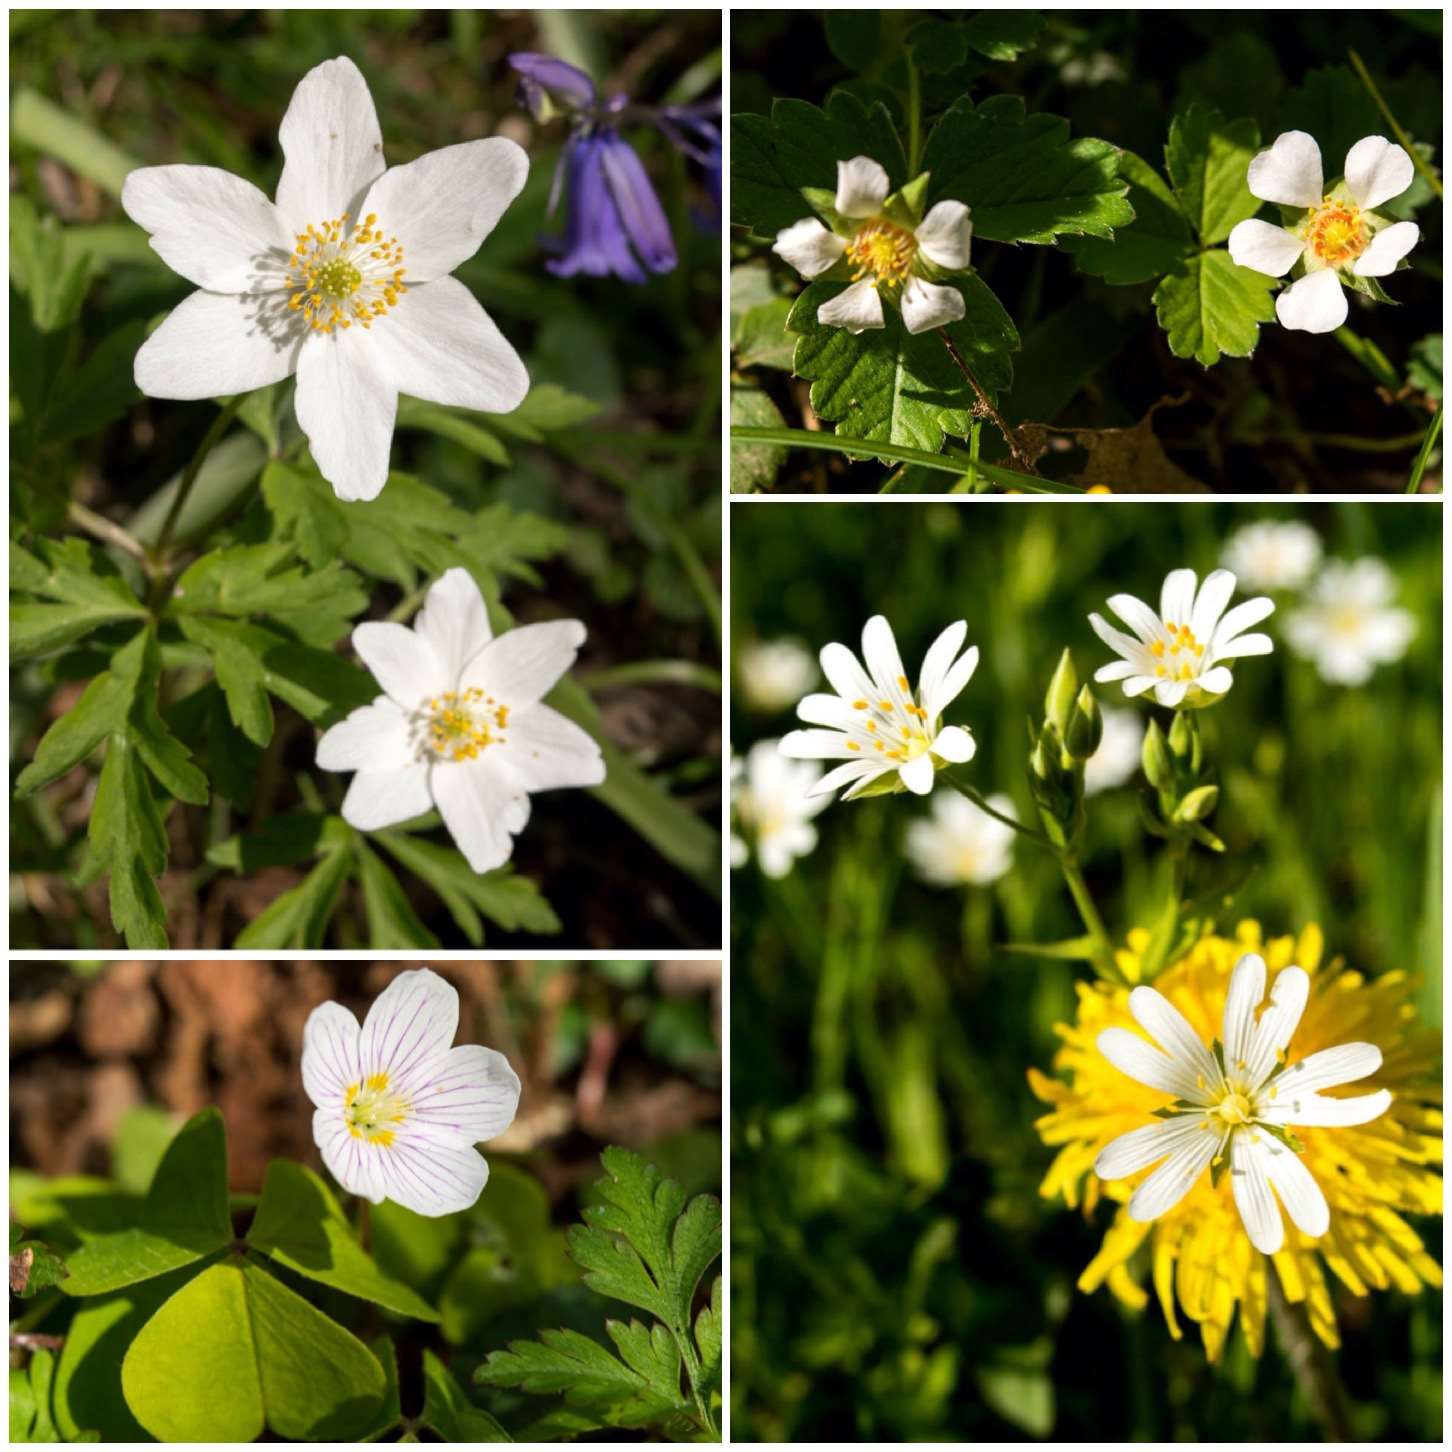
The woods and the hedgerows are awash with small white flowers at the moment. I was pleased to see that our local woods (The Frith near Bramley, Hants) sports such a wide range.
For a few weeks at this time the wood anemone’s can be easily spotted (top left) and if you look close enough you will spot the delicate wild strawberry flowers (top right) just coming through. One day I will take the time to work out whether they are the barren or the fruiting types.
Also hiding out in the woodland glades are the beautiful but tasty (the leaves that is) wood sorrel (bottom left). Like the wood anemone the wood sorrel is best viewed on sunny days while it is fully open.
Bottom right is stitchwort (‘greater’ I think). I have been finding this in great patches alongside hedges where they receive a lot of sunlight. I particularly liked this picture with the single stitchwort being framed by the dandelion.
Whites
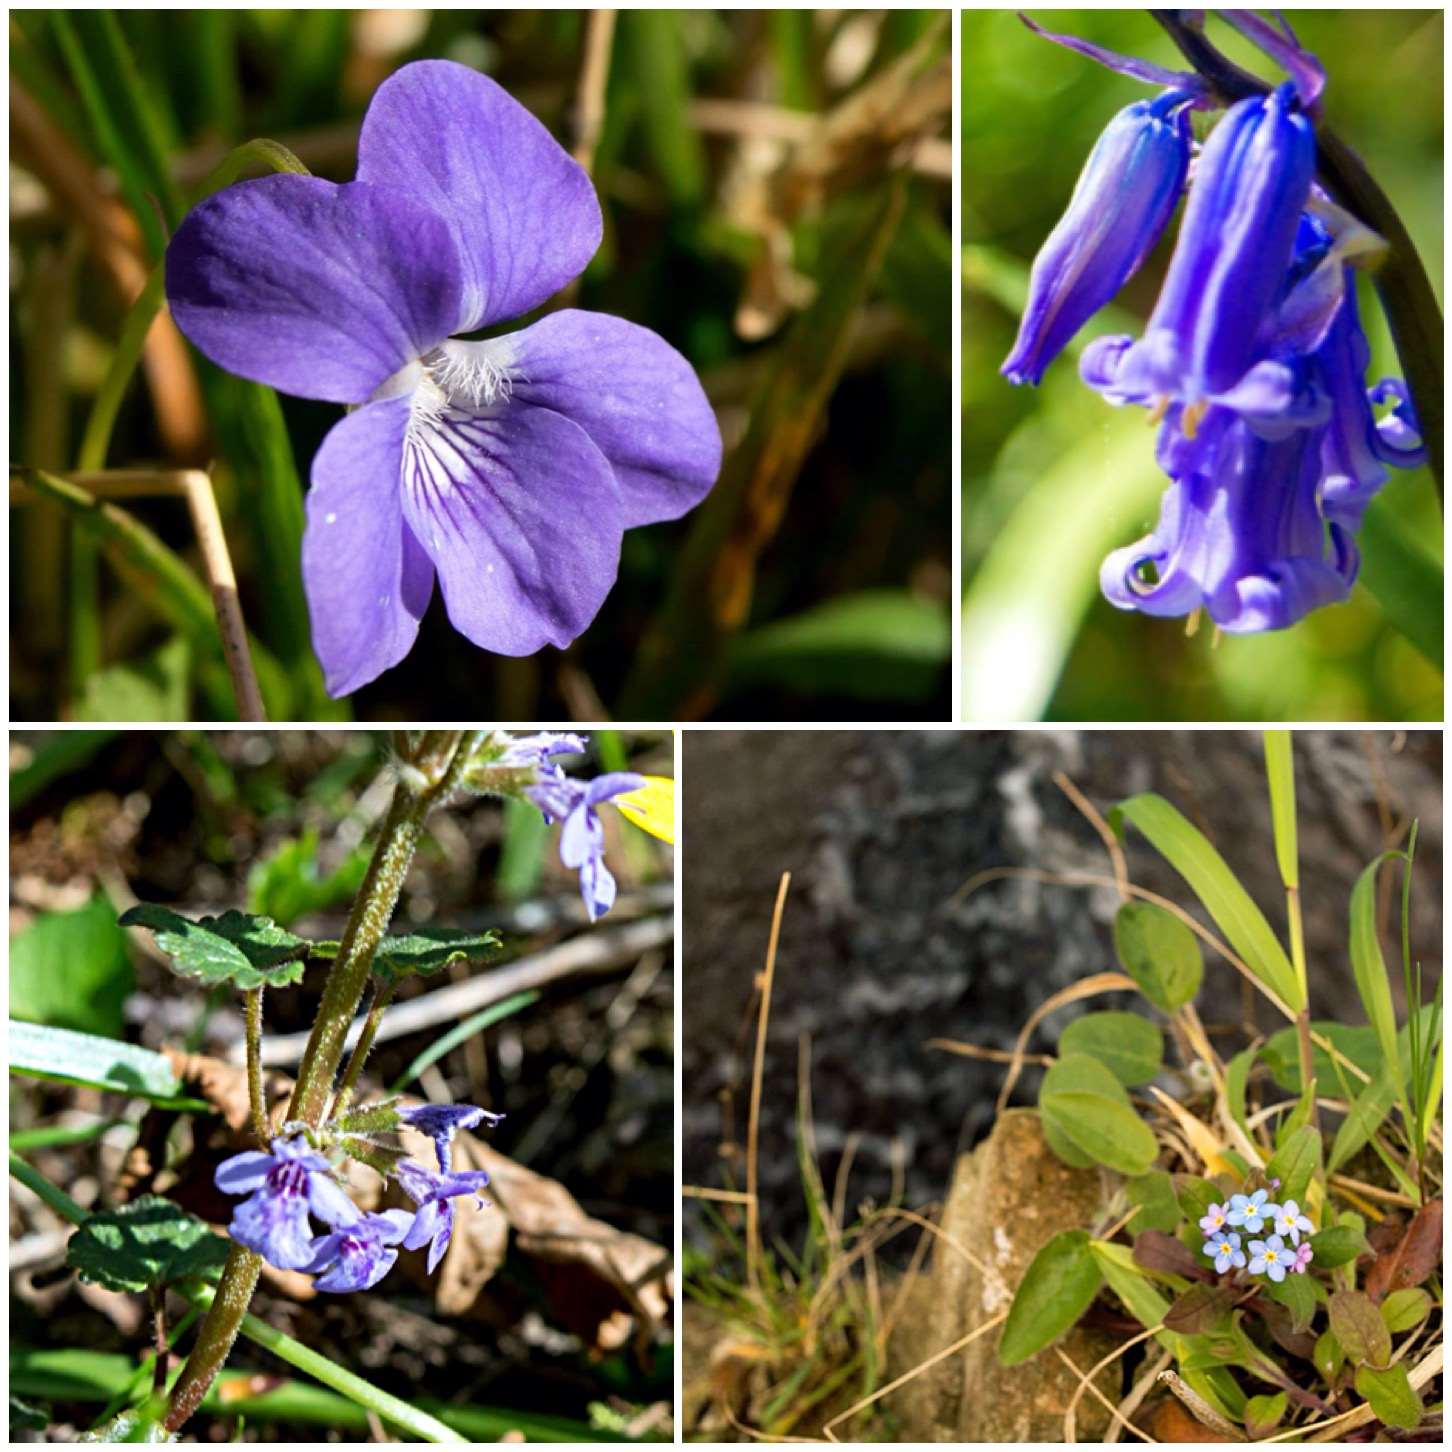
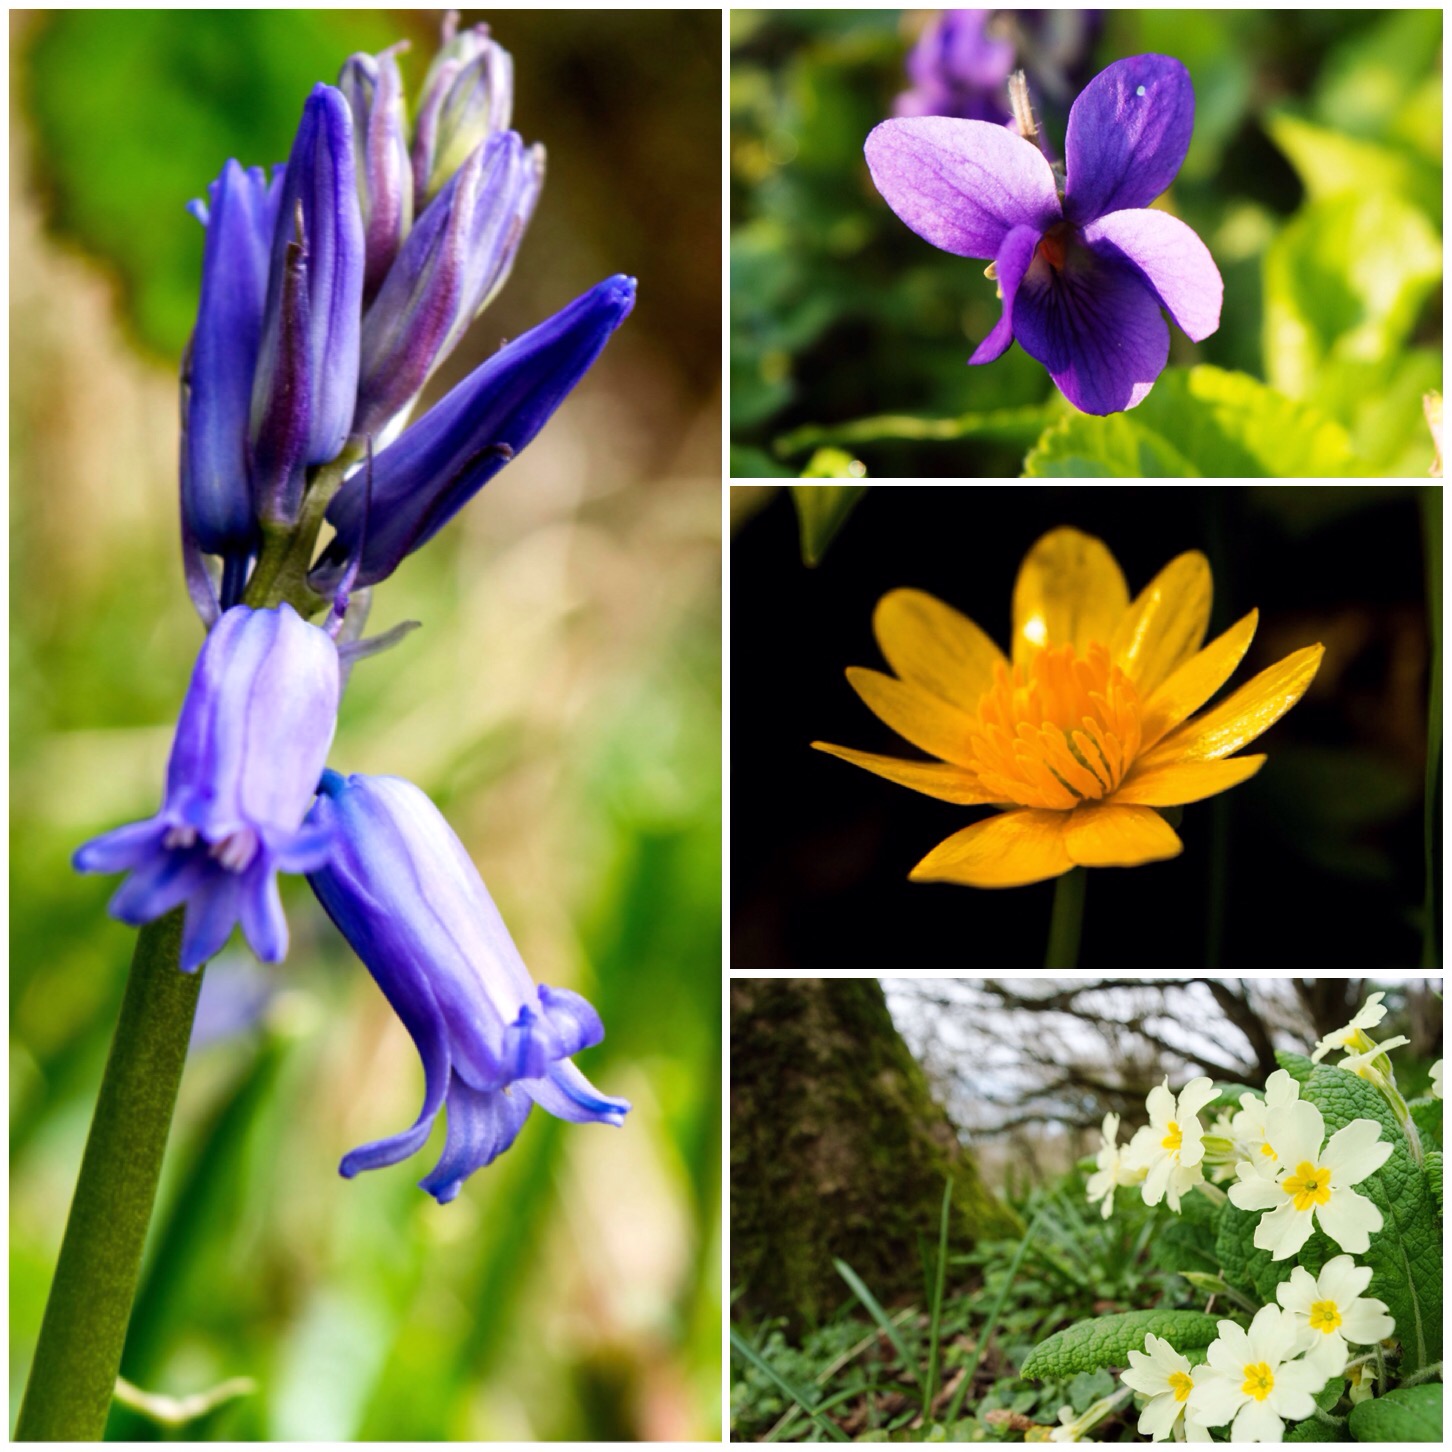
As I write this the early dog violets (top right) where I live are on the wane but the beautiful bluebells are really coming through now in great carpets.
Bottom left is the often overlooked blue flower of ground ivy. As this little plant grows easily on disturbed ground you find it in your vegetable patches if you do not clear it out regularly. I like it though as it does add a lovely tinge of blue to an otherwise mass of green.
One of the nicest blue flowers (even more than bluebells I think) out at this time is the forget-me-not (bottom right). I took this picture by a riverside outside Dundee as it clung precariously to an old stone wall.
Blues
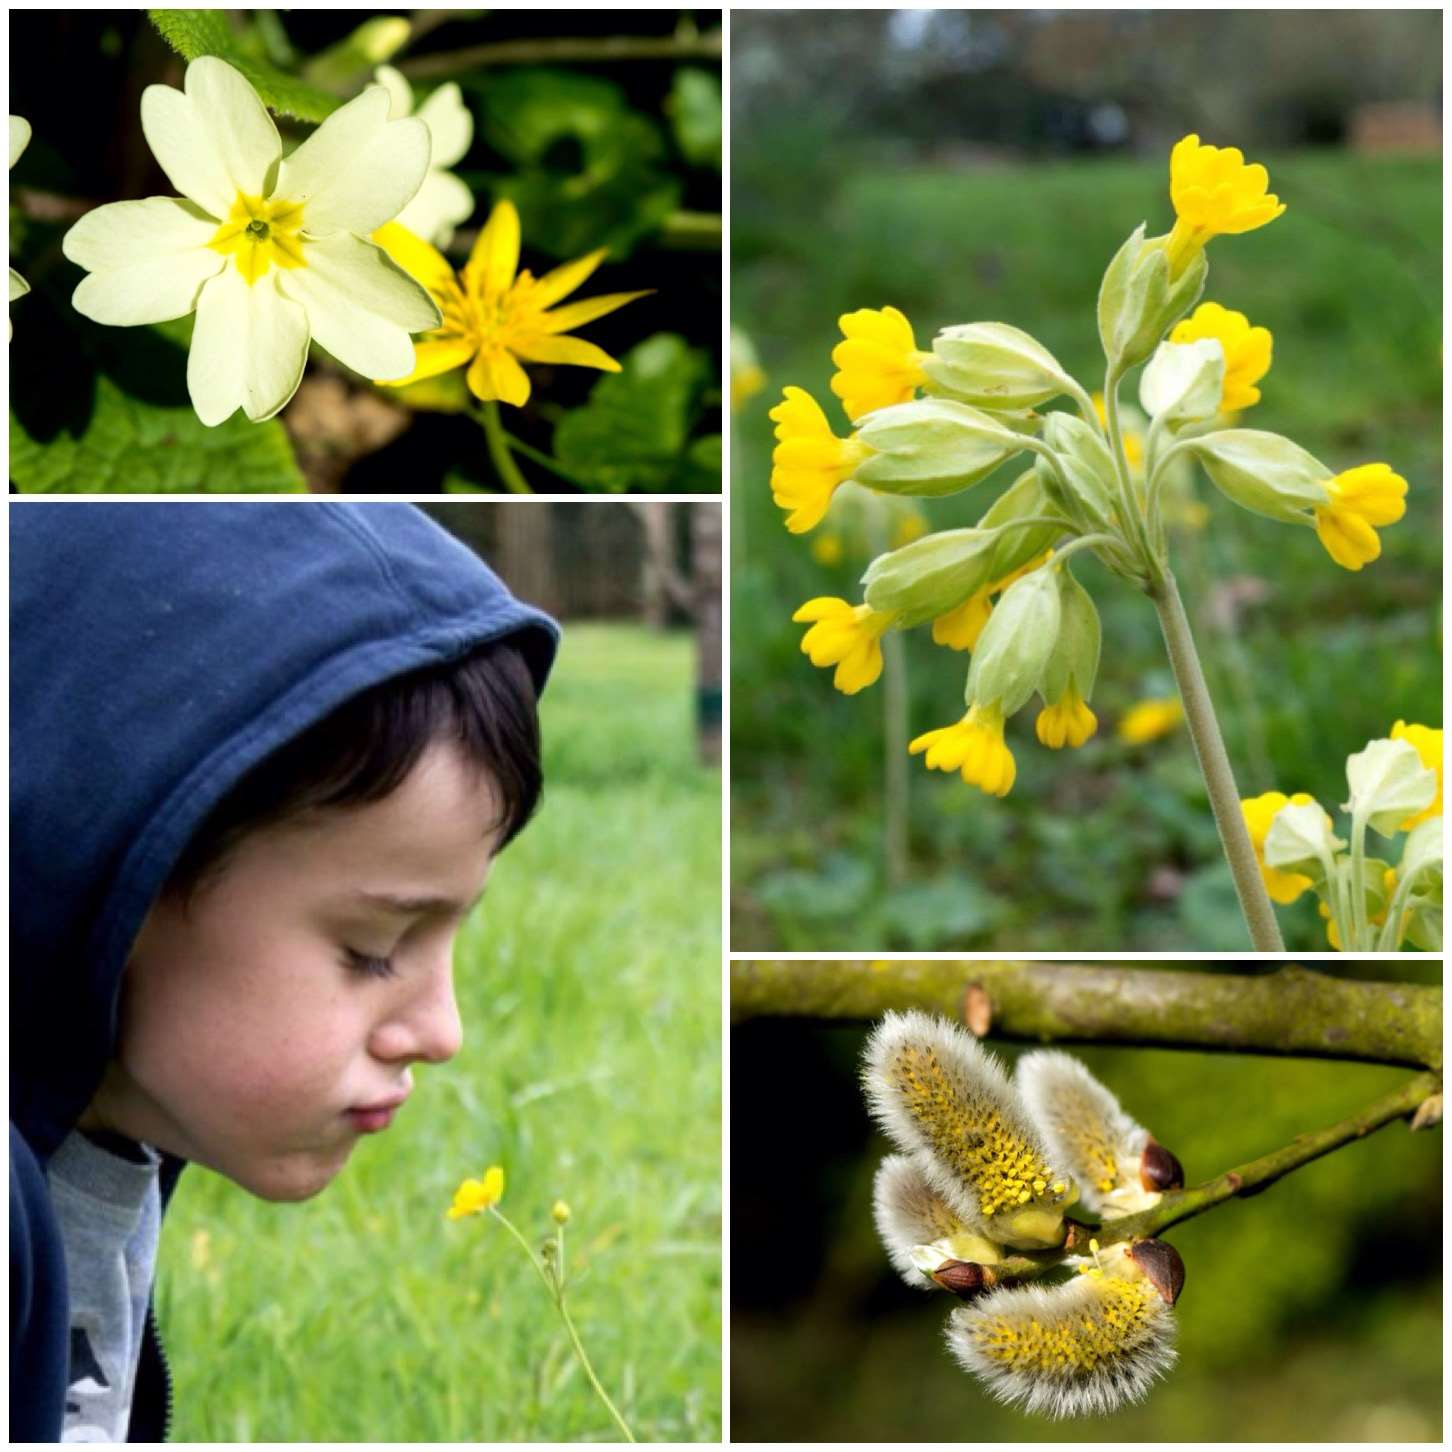
The last dominant colour I have noticed this spring is yellow. One of the earliest and for some reason this year one of the most abundant (top left) is the primrose. I am finding this delicious little plant everywhere.
The other three (top right), the cowslip, the buttercup and the male goat willow catkins are just coming out around here. There are so many dandelions out at the moment so it is good to see that carpet of yellow being broken up by other yellows.
Yellows
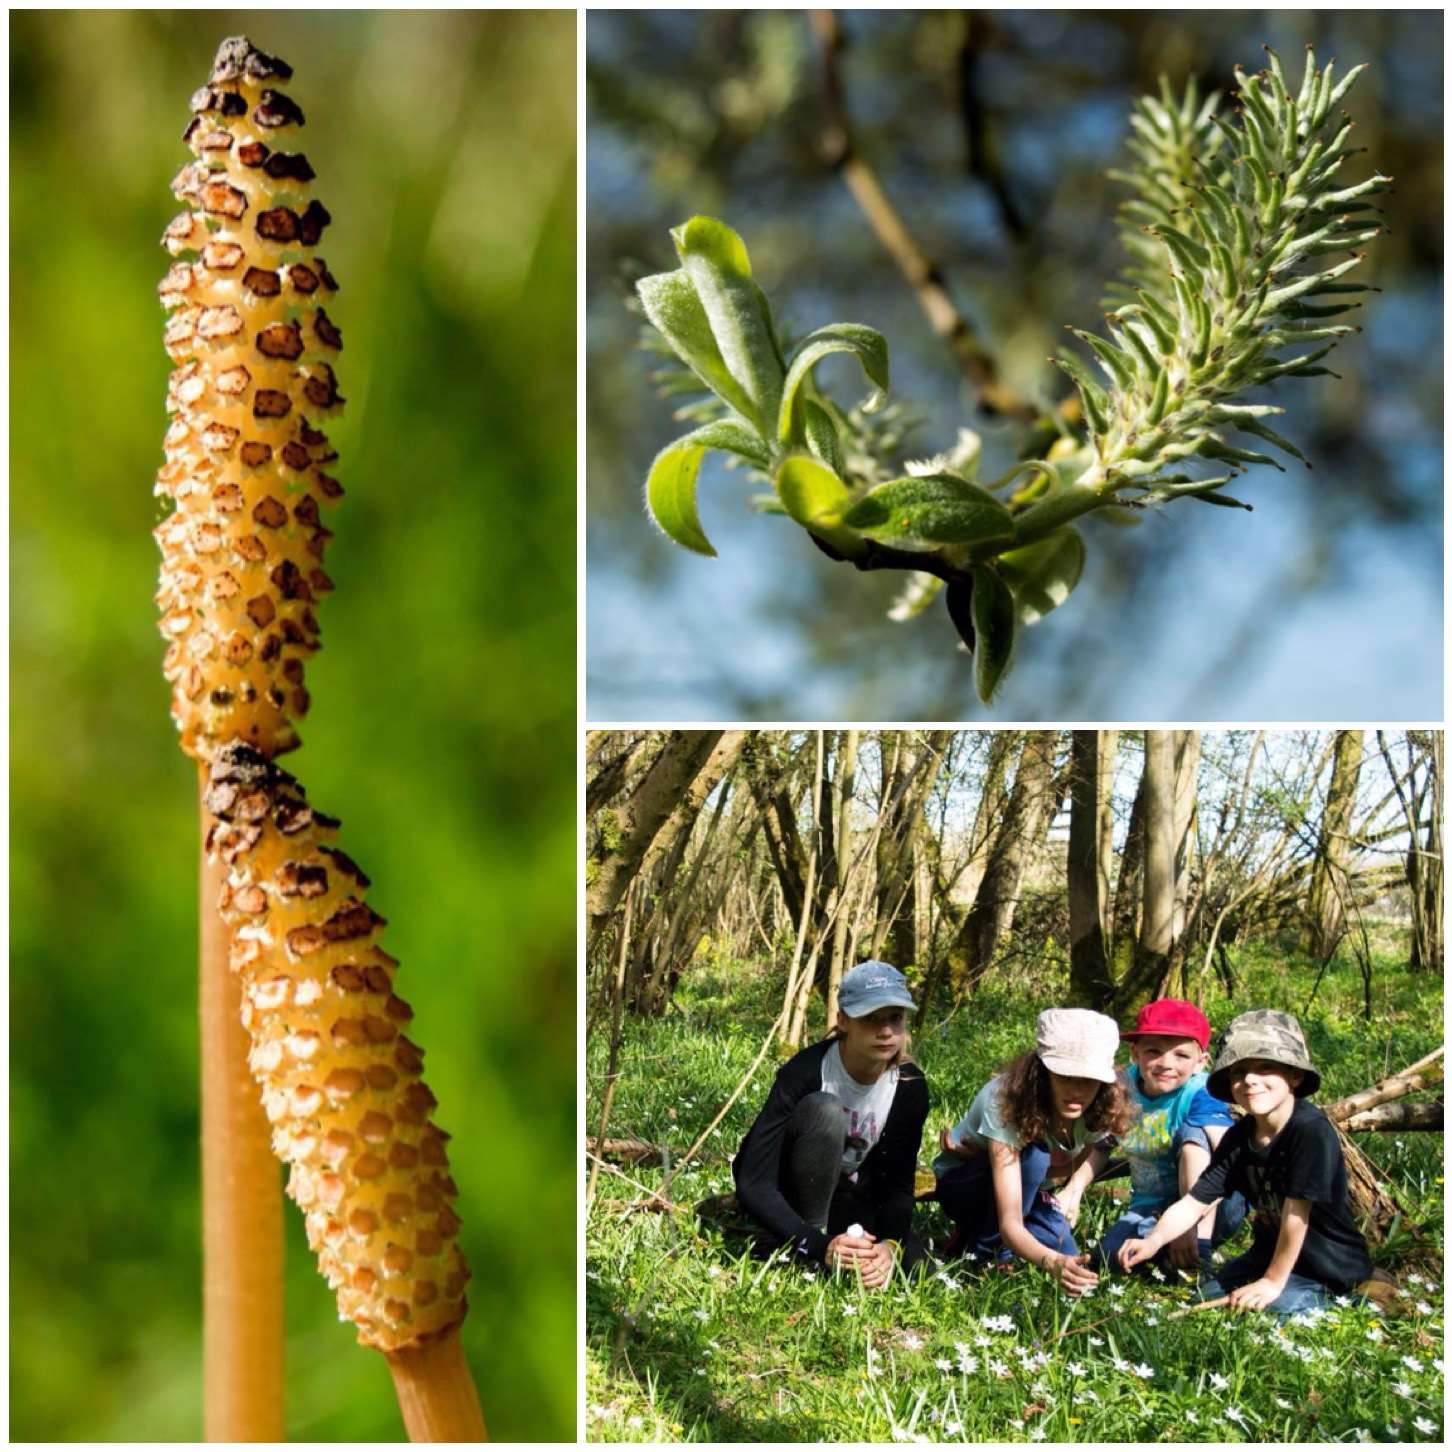
The final picture is of the odds and sods I have taken over the last few weeks. The horsetail and the female goat willow catkin up close look very striking but it is the picture of the kids getting out and about from their usual digital world and enjoying a bit of sun and flowers that I love the most.
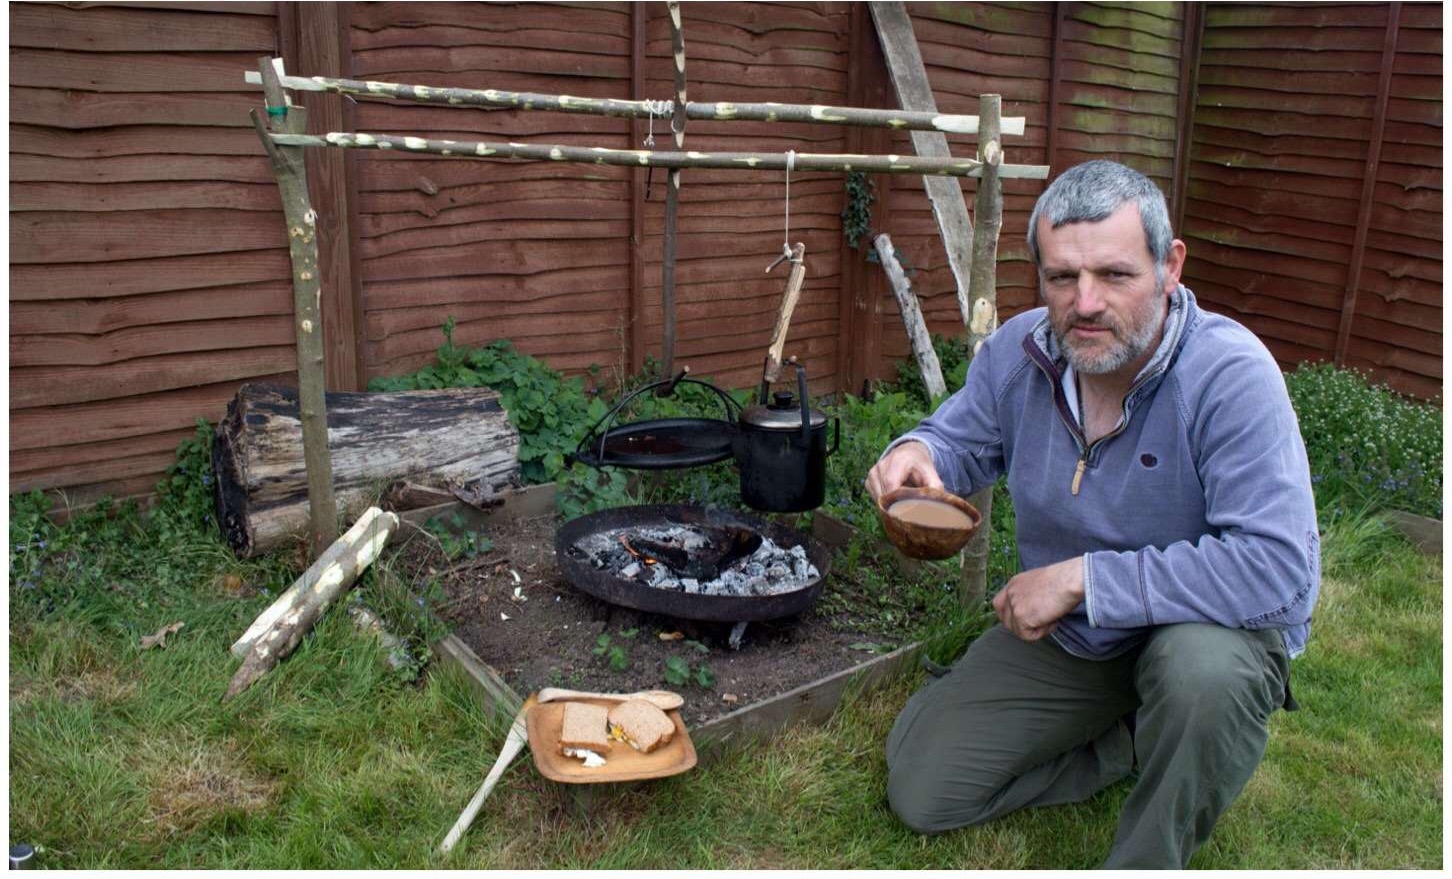
A few years ago at the BCUK Bushmoot in South Wales I ran a class looking at different campfire cooking set ups. As well as showing the students my set ups I had asked them to bring along examples of their own if they could. One that caught my eye was from my friend Steve Mesquite Harrall. It consisted of two forked uprights and a top bar that could be turned to raise or lower a pot that was suspended beneath it on a piece of string.
Steve had learned this from Wayland of Ravenlore Bushcraft and there is a good picture of the set up on Wayland’s Ravenlore site – Hang up your Billy. Wayland told me he’d got the idea from a book by the French adventurer Nicolas Vanier called ‘North’. The rig did not have a name and it was Wayland who used the term French Windlass (Windlass meaning to ‘haul or lift’). I have just added the ‘Double’ so I can cook with more than one pot.
I really liked this rig when I first saw it but soon felt the need to be able to adjust the height of more than one pot at a time. You do not easily find two decent poles with a double fork in the right place to do this so I had to come up with another idea. The solution in the end was so simple that I had to laugh at my own stupidity for not thinking of it quicker – just make a new fork by splitting the pole above the natural fork.
Double French Windlass Cooking Rig
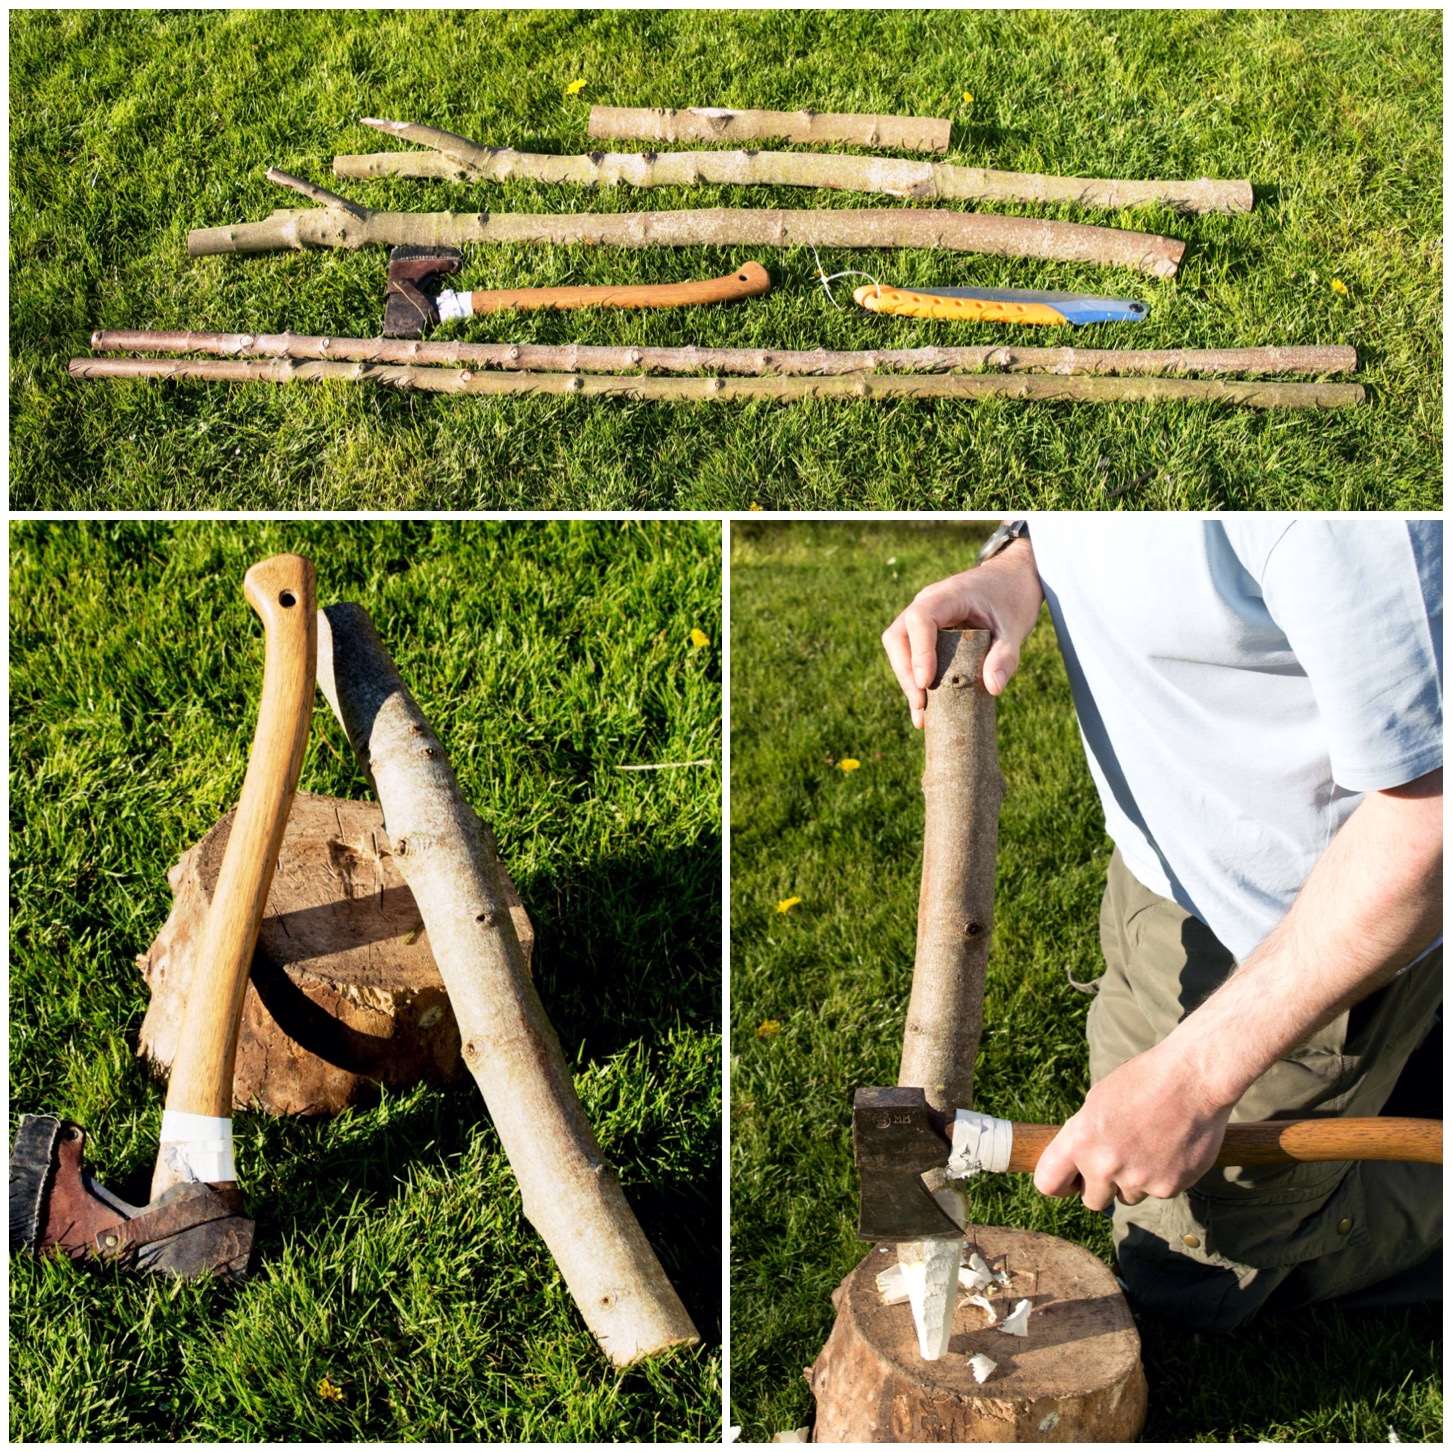
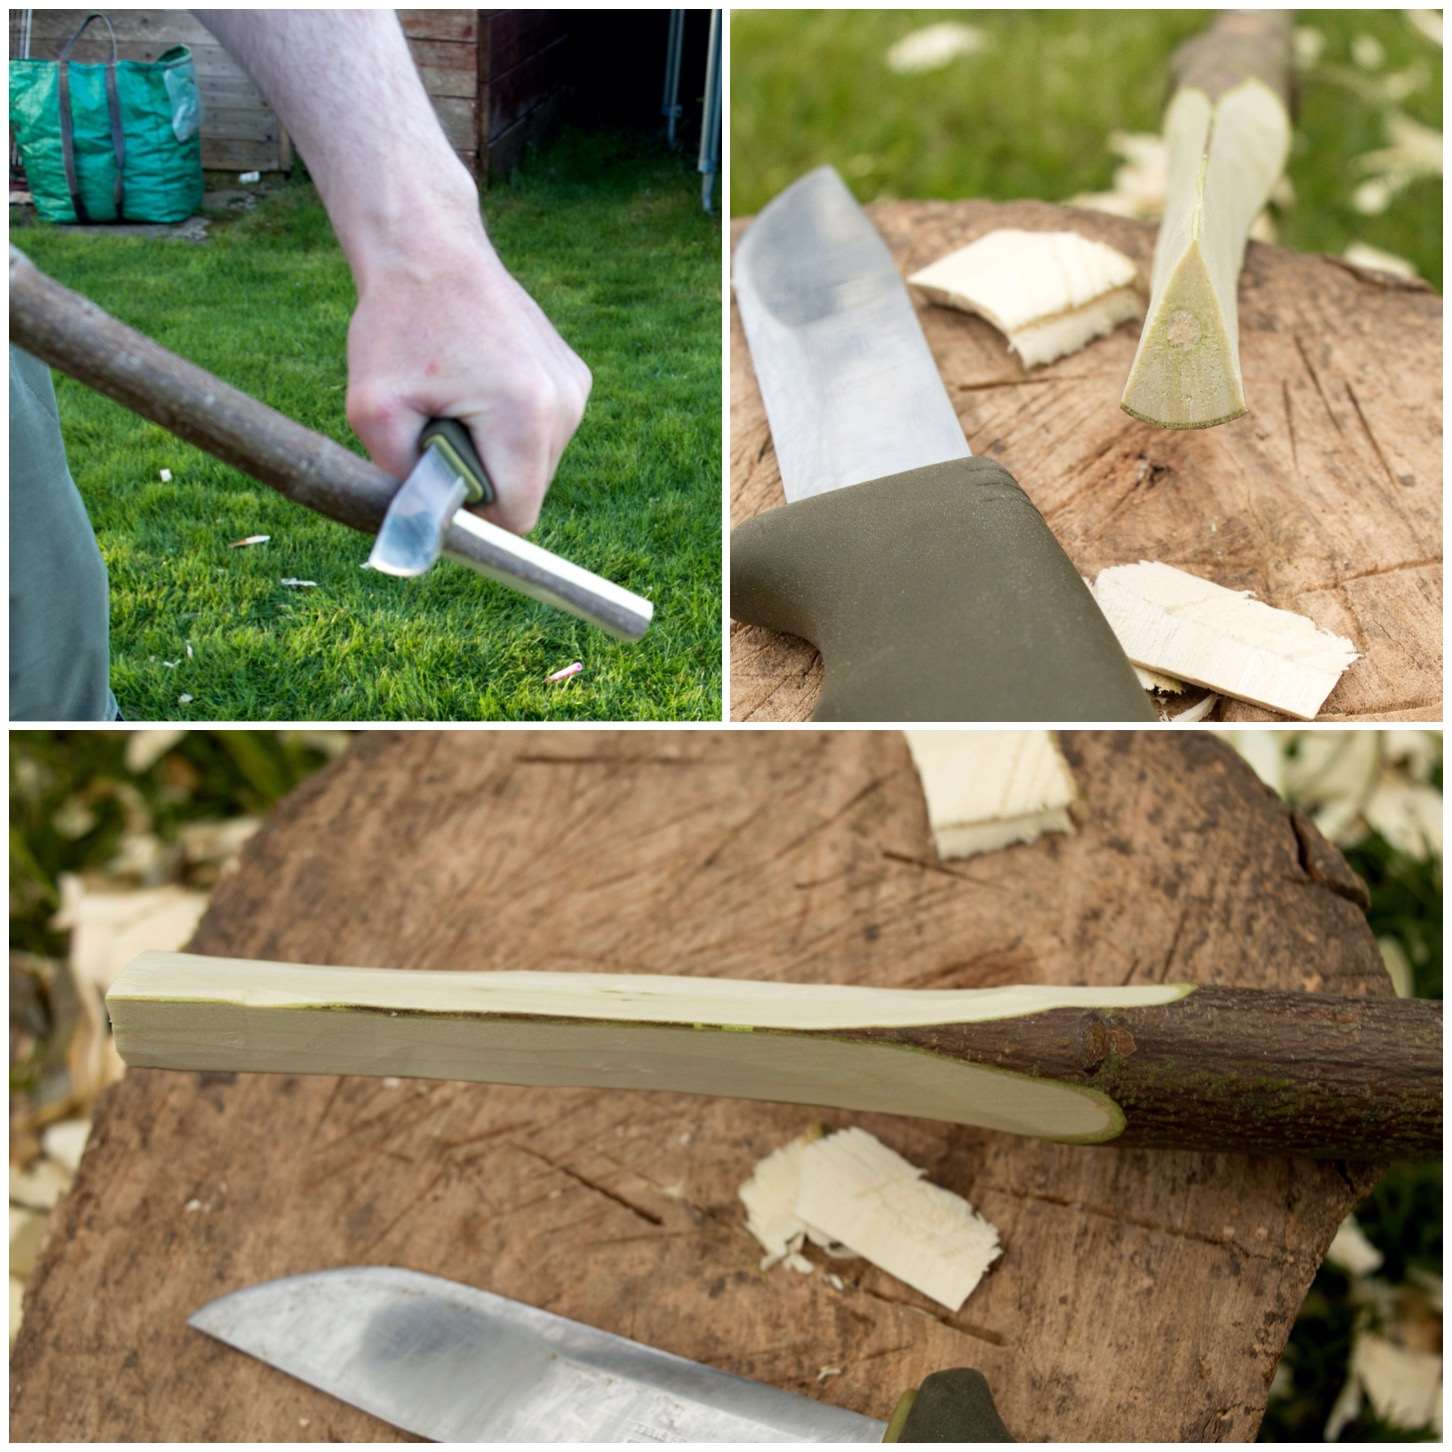
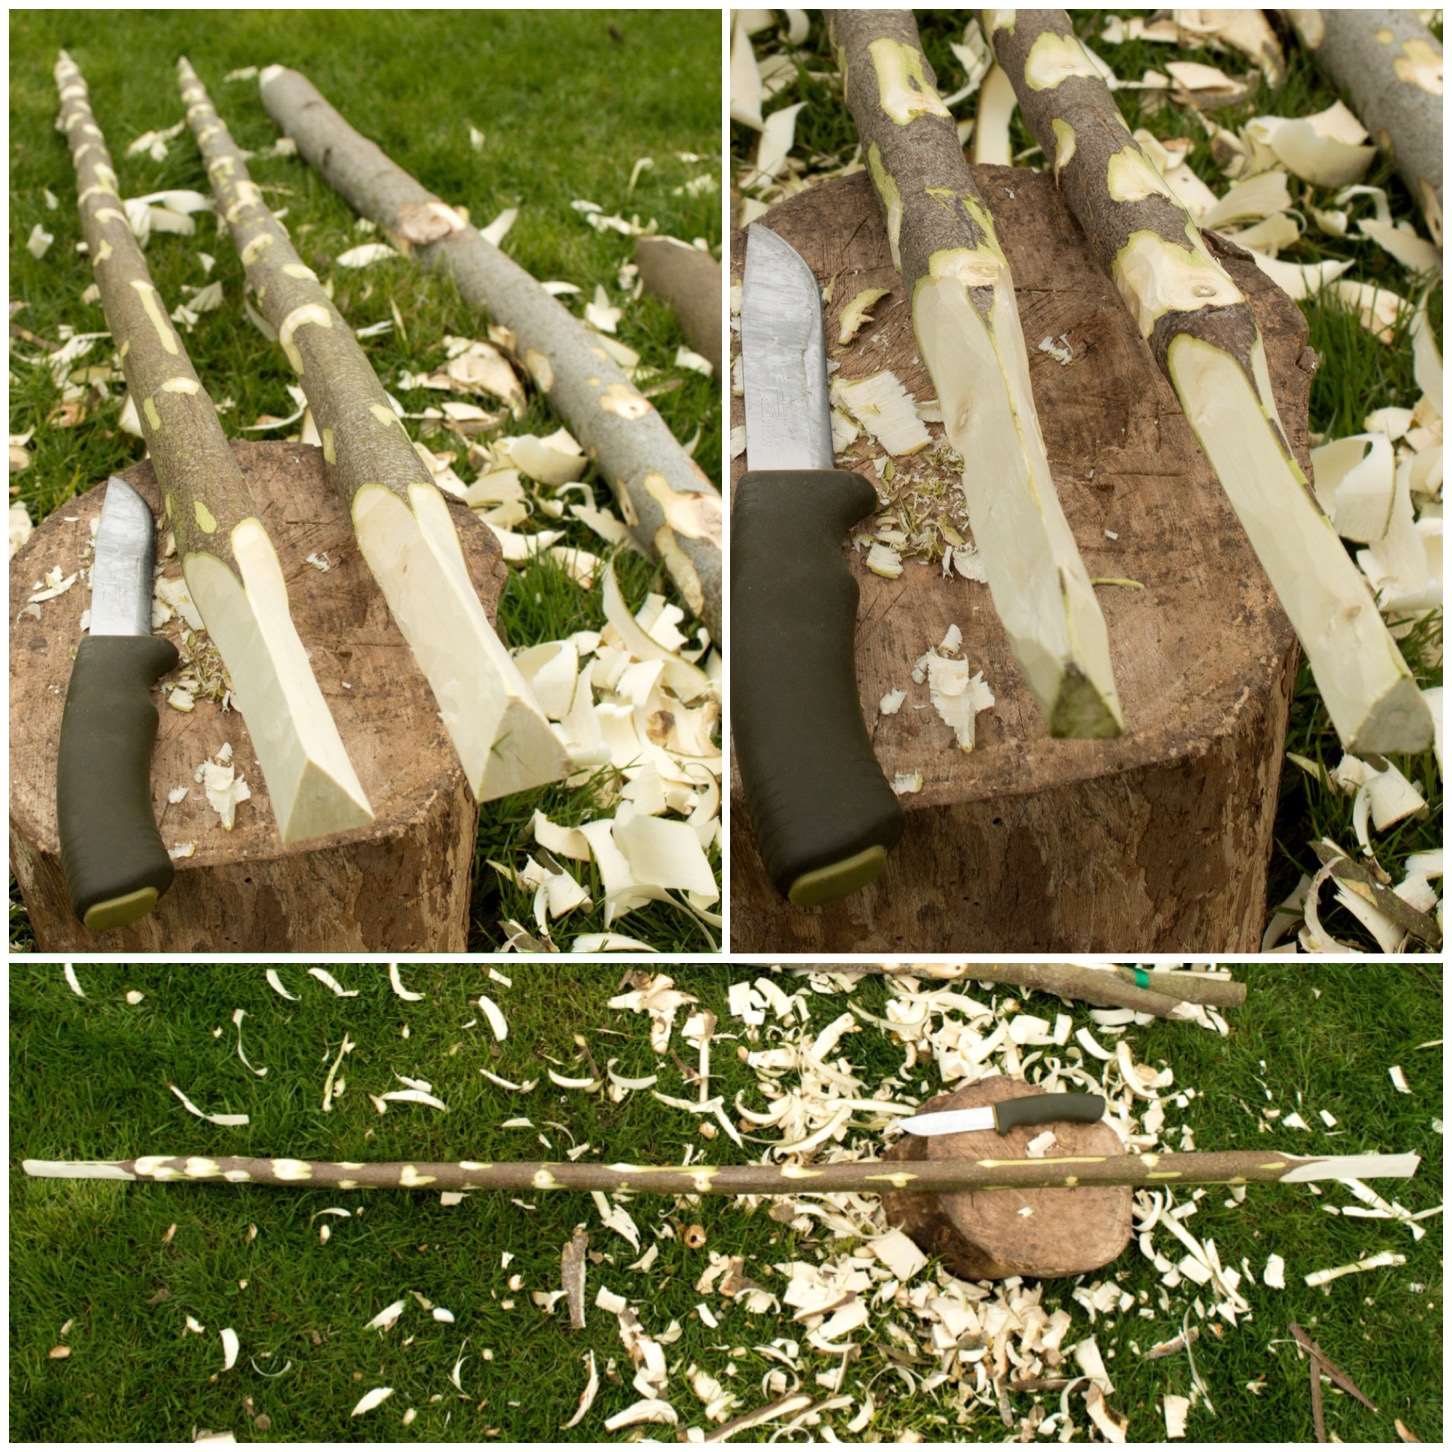
The basic parts I used were one small piece of wood to make a pile driver (I’ve heard this called an El Salvadorean pile driver) to create holes for the uprights, two forked uprights and two poles to act as spars.
I trimmed a point on the piece I was going to turn into my pile driver first. I used a small round of wood to act as a work surface and kept my axe work to the far side of the round for safety.
The basic parts and the start of the El Salvadorean pile driver
Once the point was finished I put a chamfer on the top of the pile driver by cutting out little pieces of wood all around it. Doing this helps stop the pile driver from splitting as you hammer it into the ground to create your hole.
Carving the pile driver
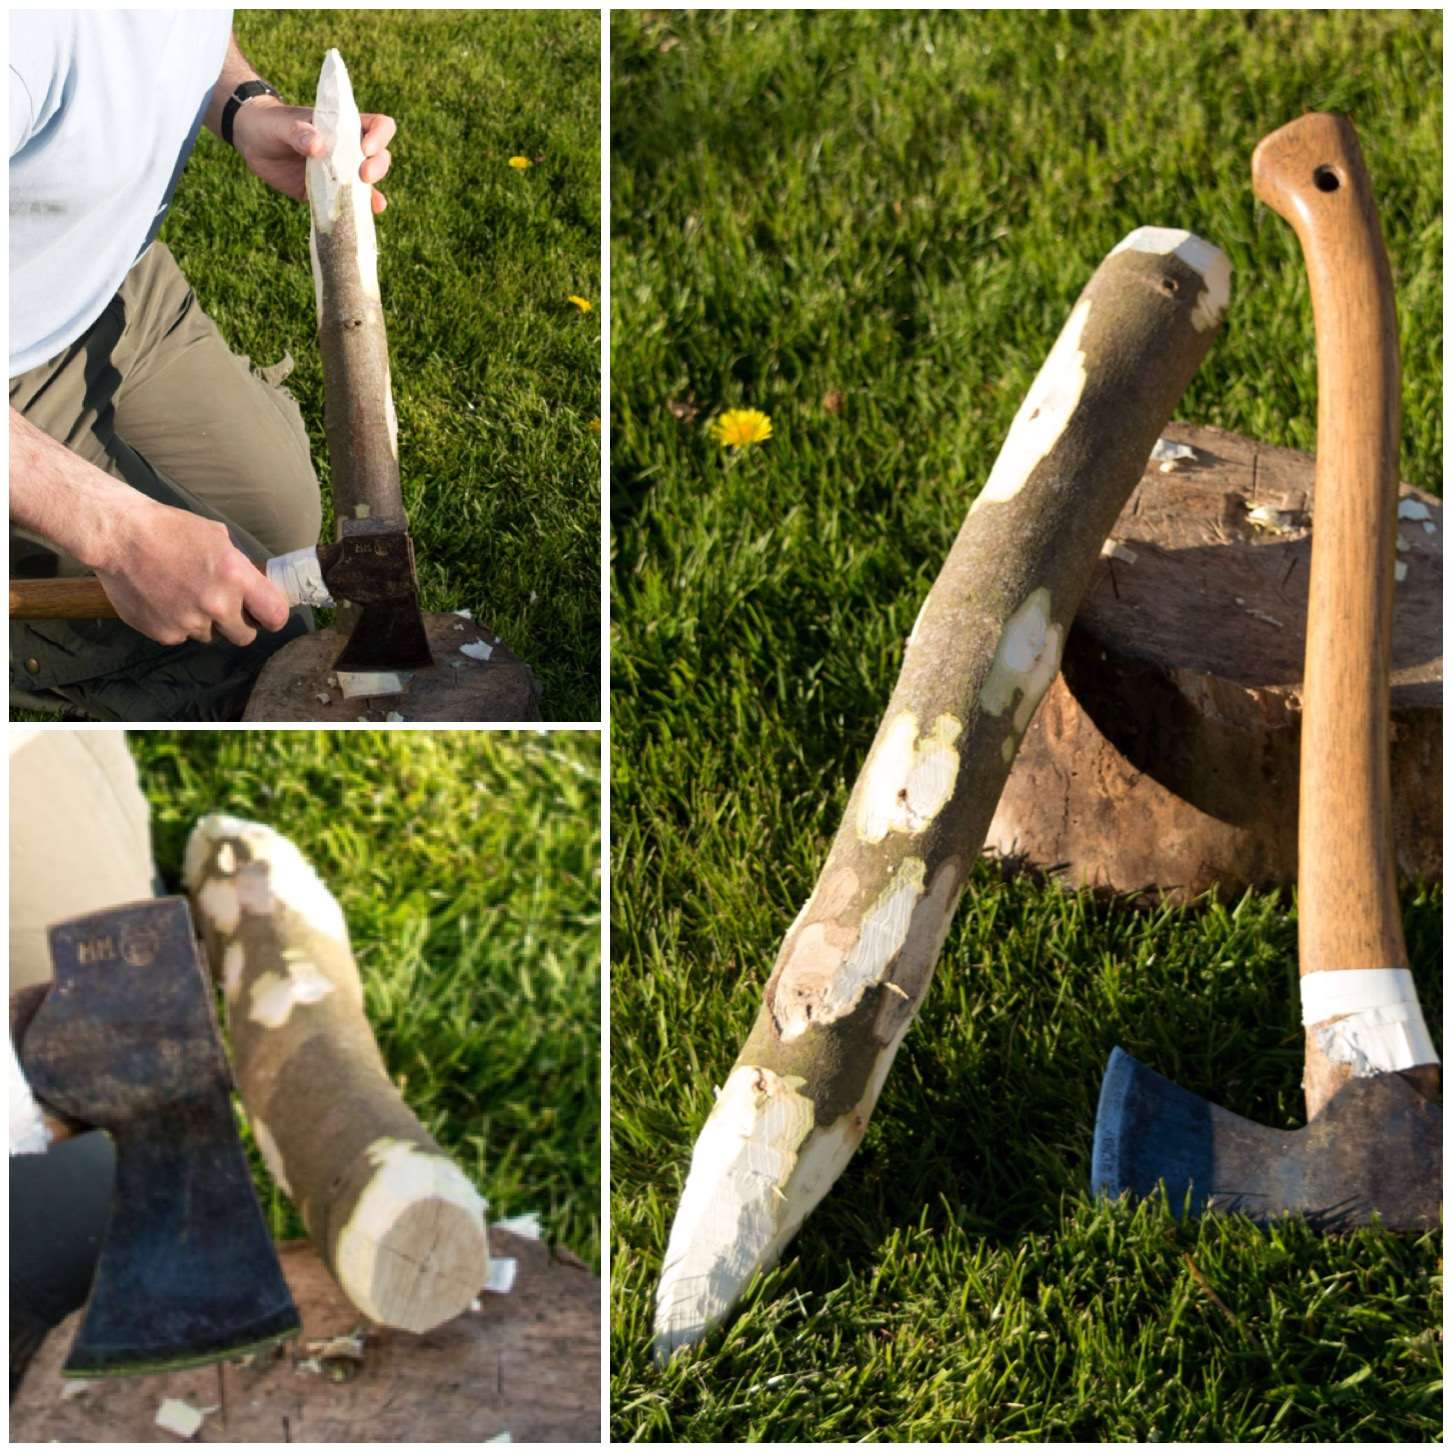
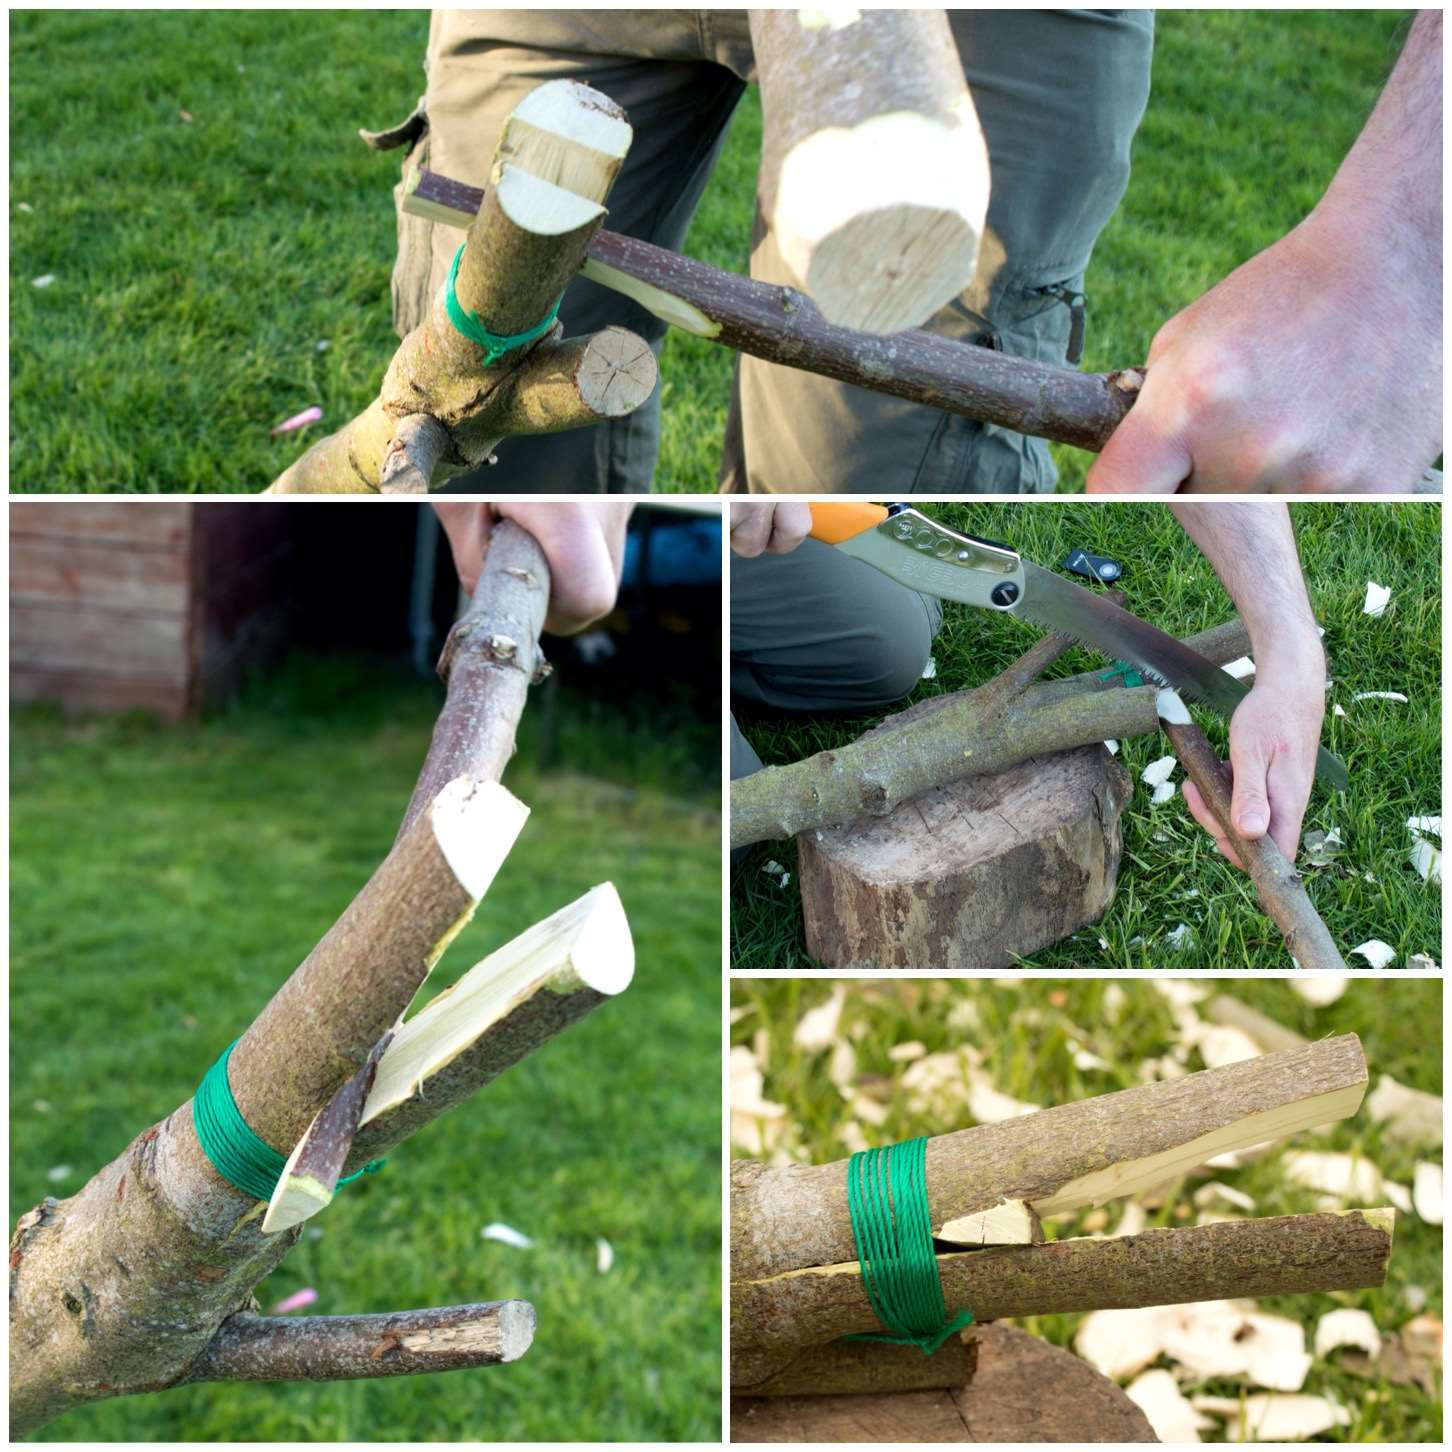
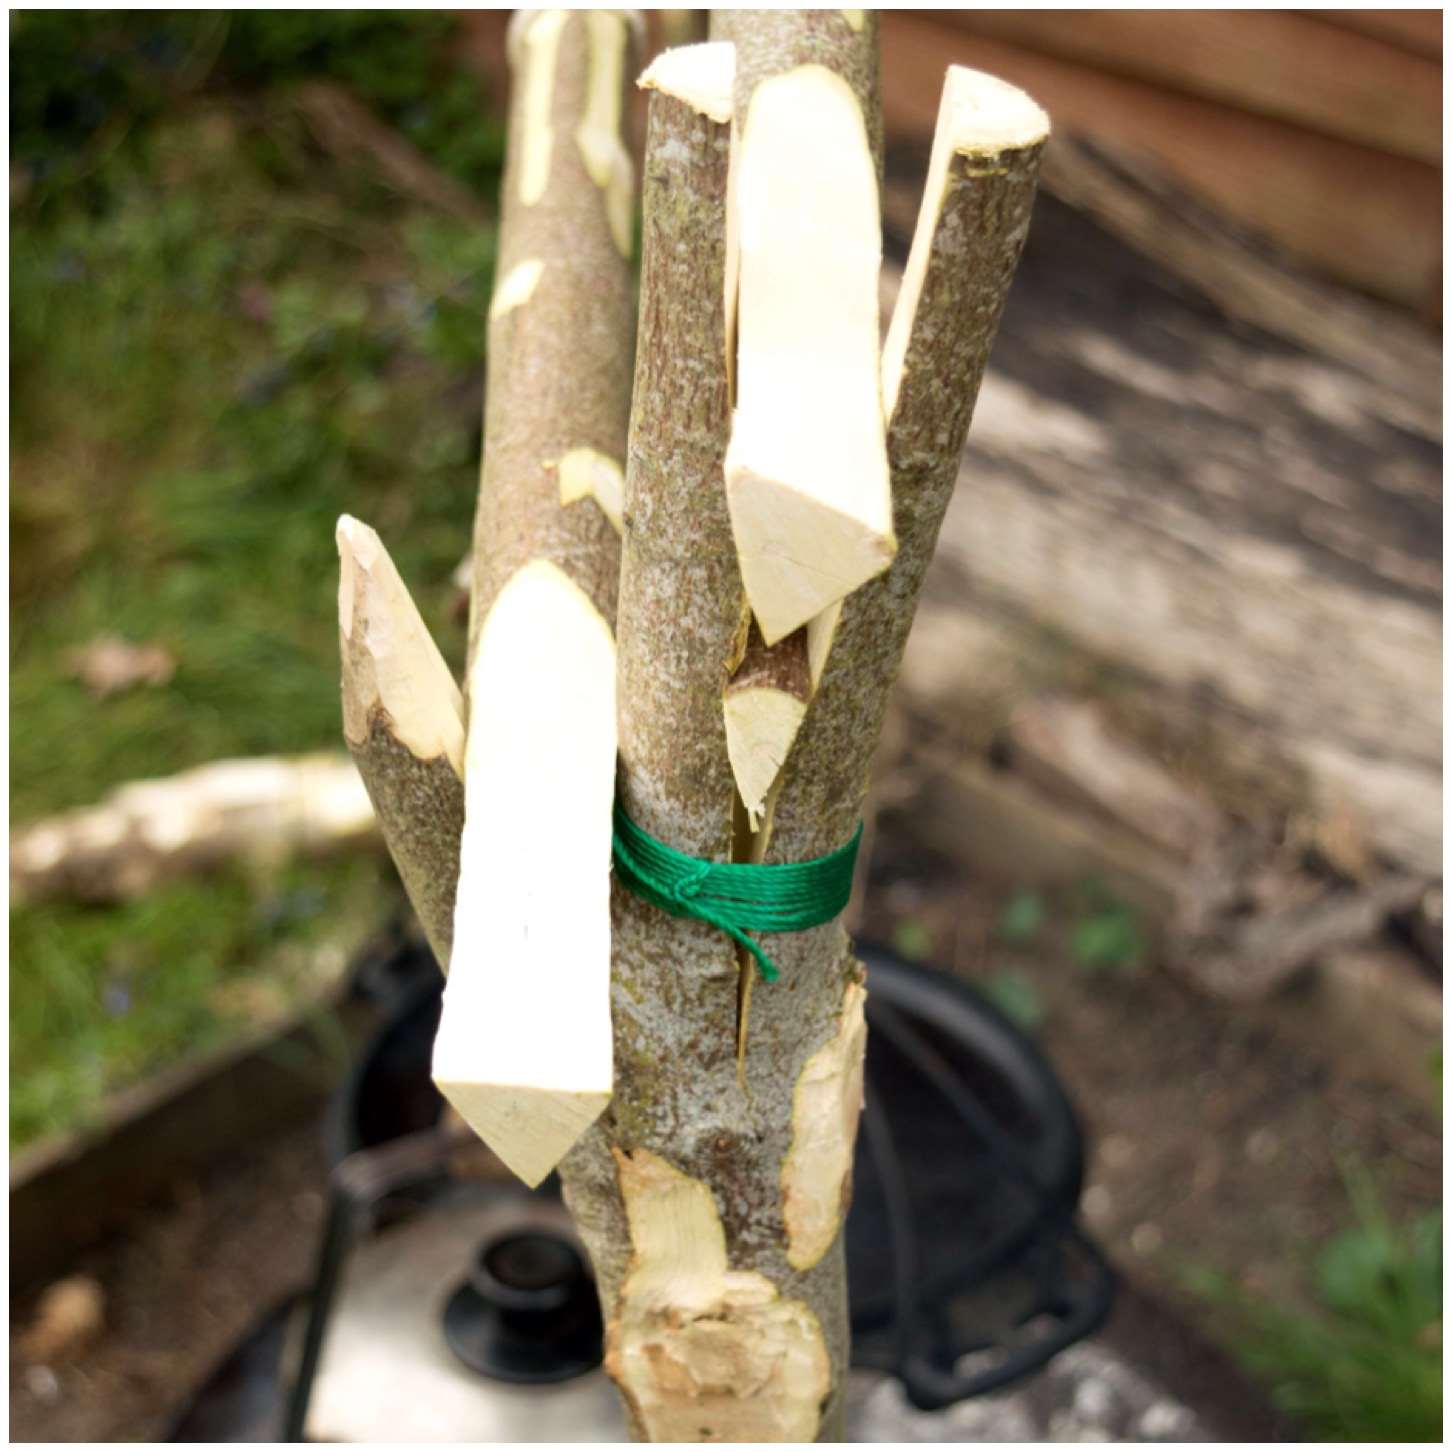
As the pieces I picked for the uprights were fairly thick I had plenty of wood to split to create my second fork. You need to ensure that the split you create is on the same plane as the natural fork.
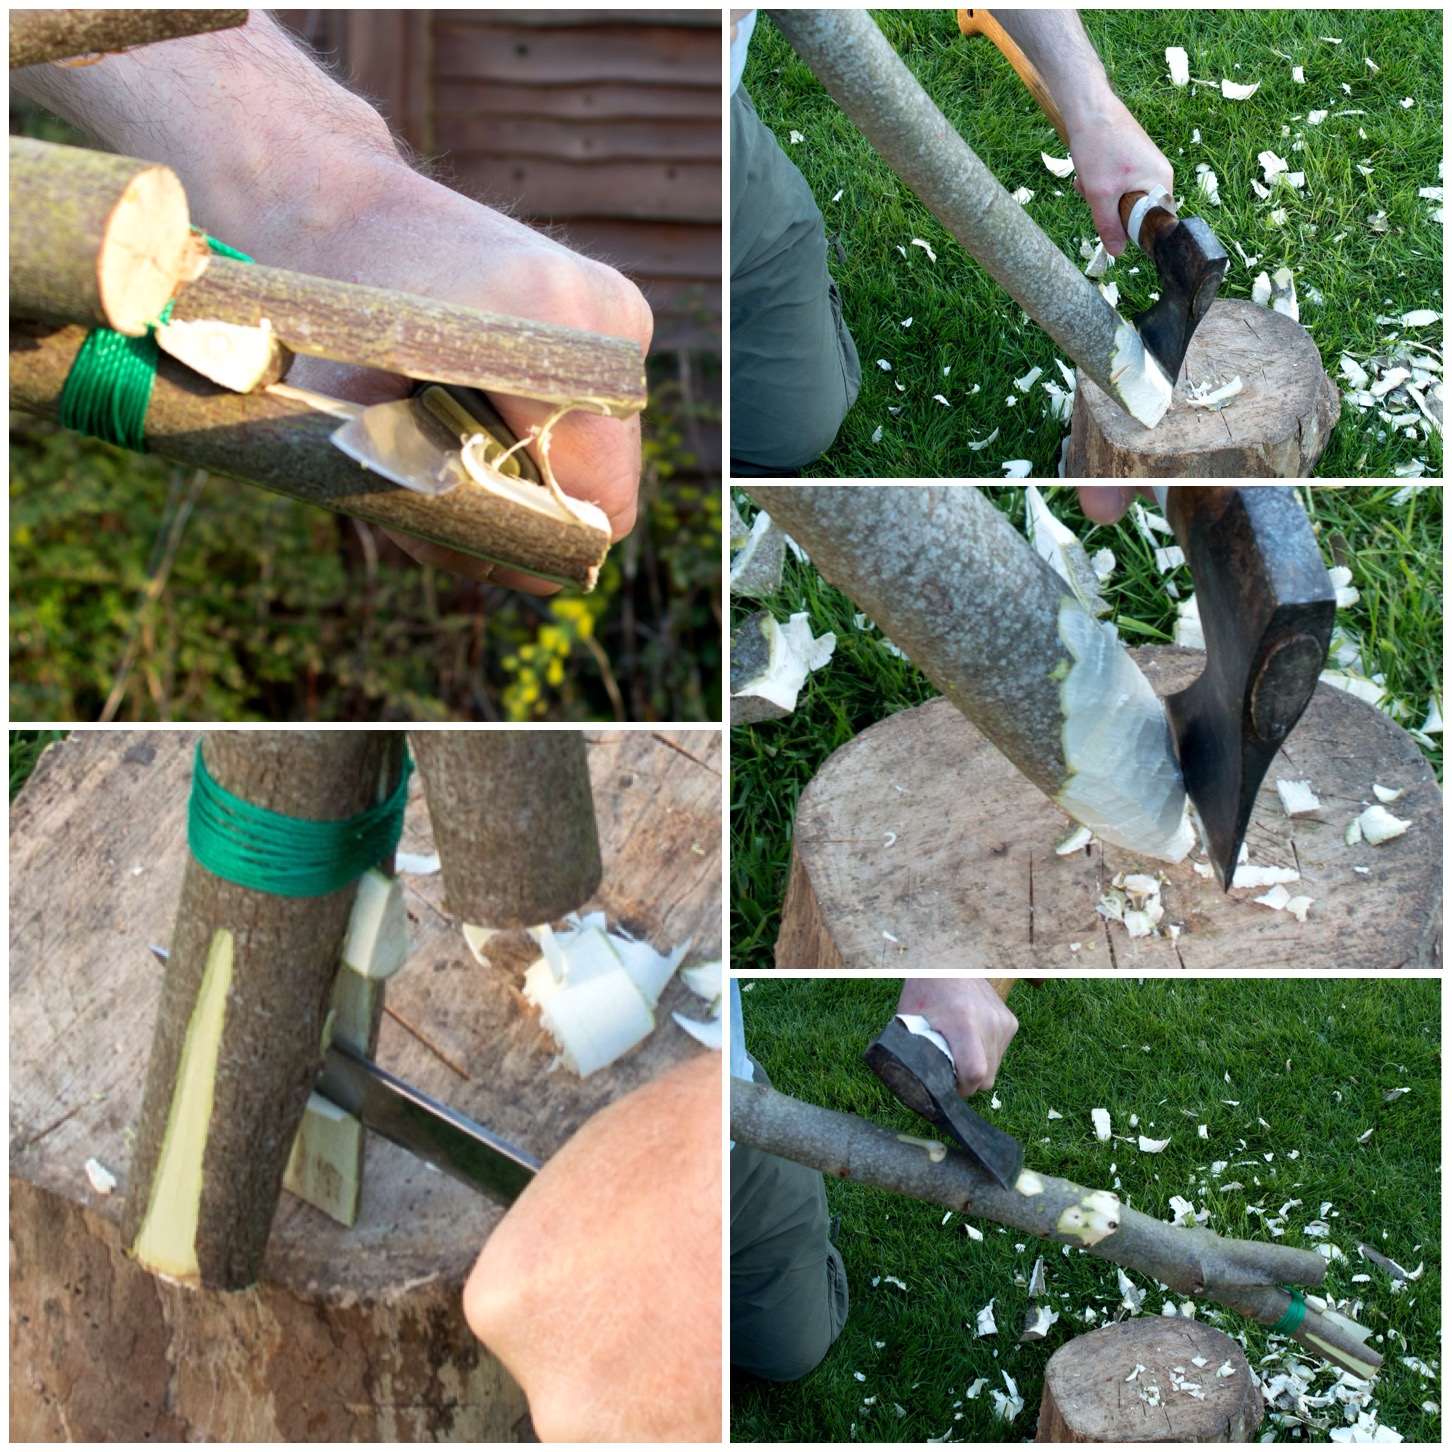
To batton safely, make sure the bottom of the upright is secure and hold the axe so that the blade is at right angles to your body. I used the pile driver as a batton to create the split. Once the split reached the level of the natural fork I stopped.
Battoning out the second fork
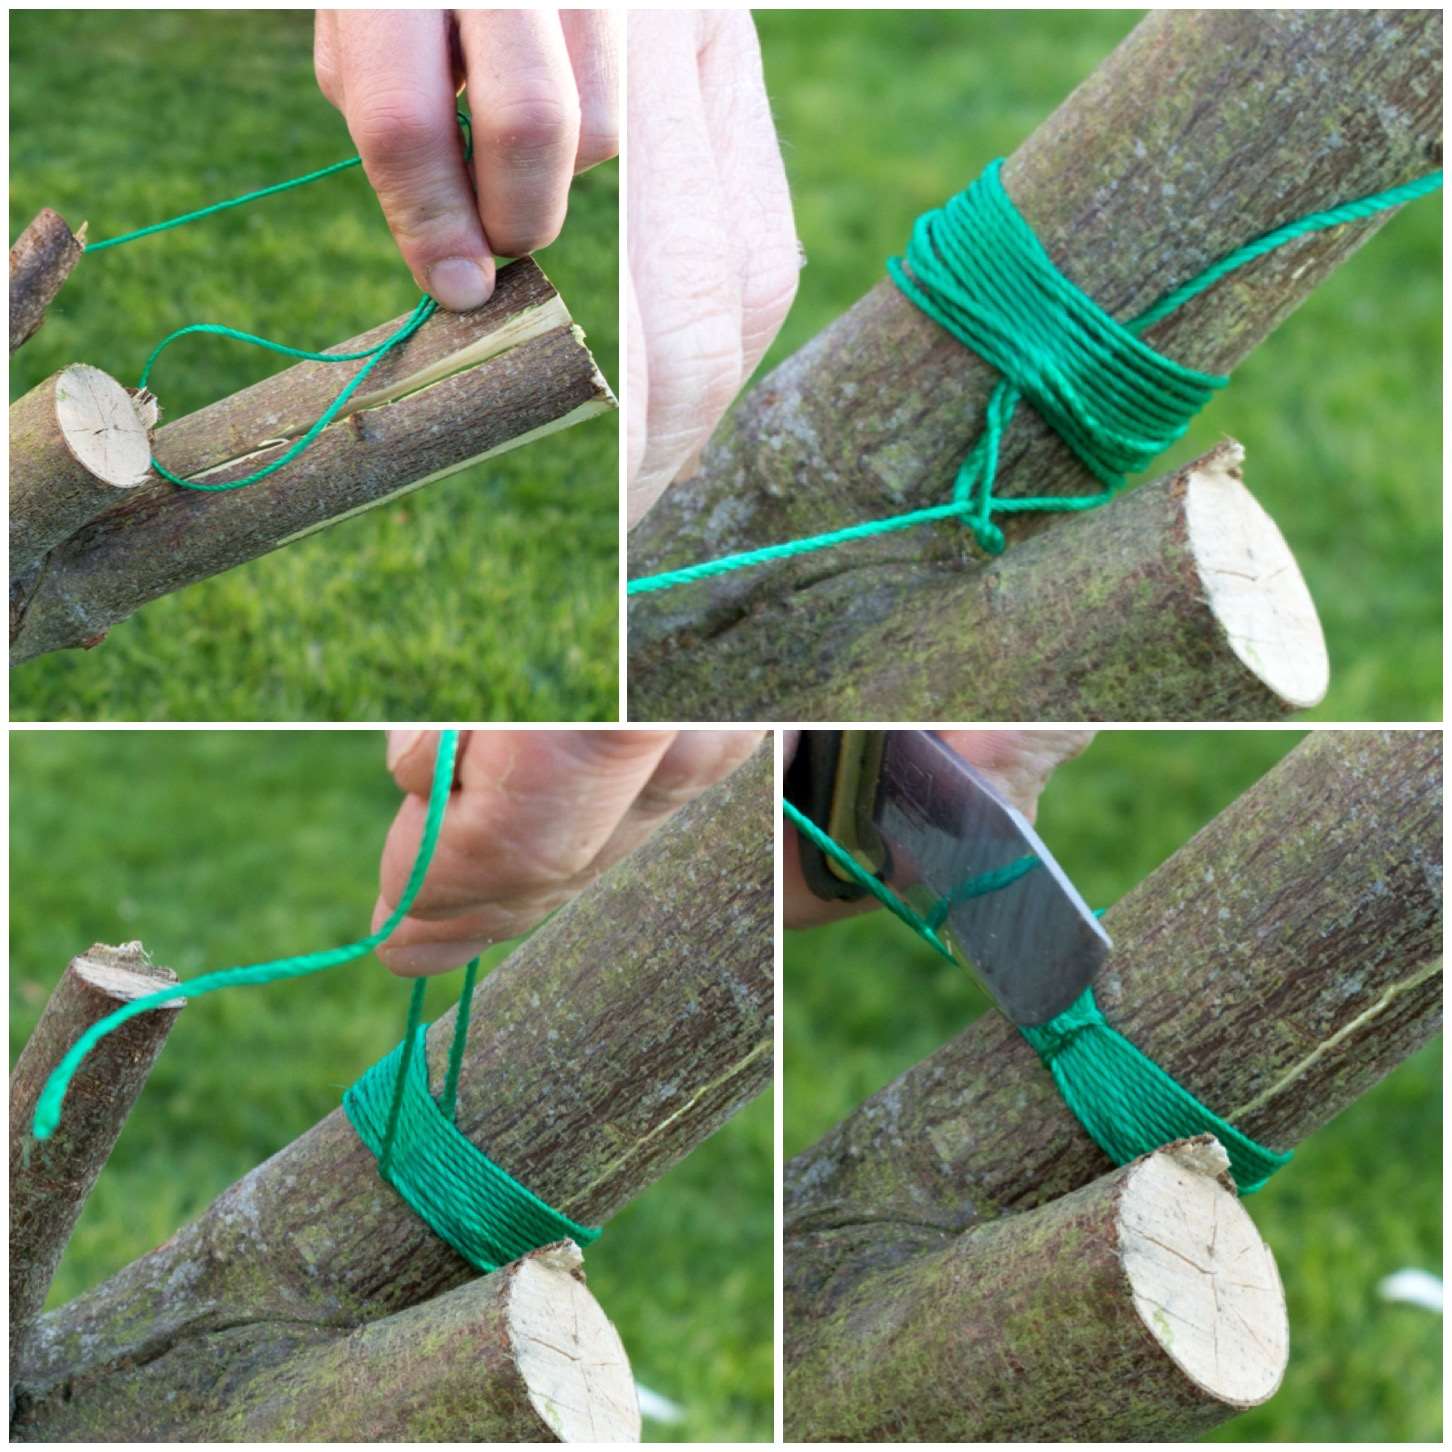
To stop the split going any further I whipped some twine around the upright at the base of the split. To keep the fork open you will need to add a wedge and the whipping will stop the split travelling down the upright when it is inserted.
A little whipping
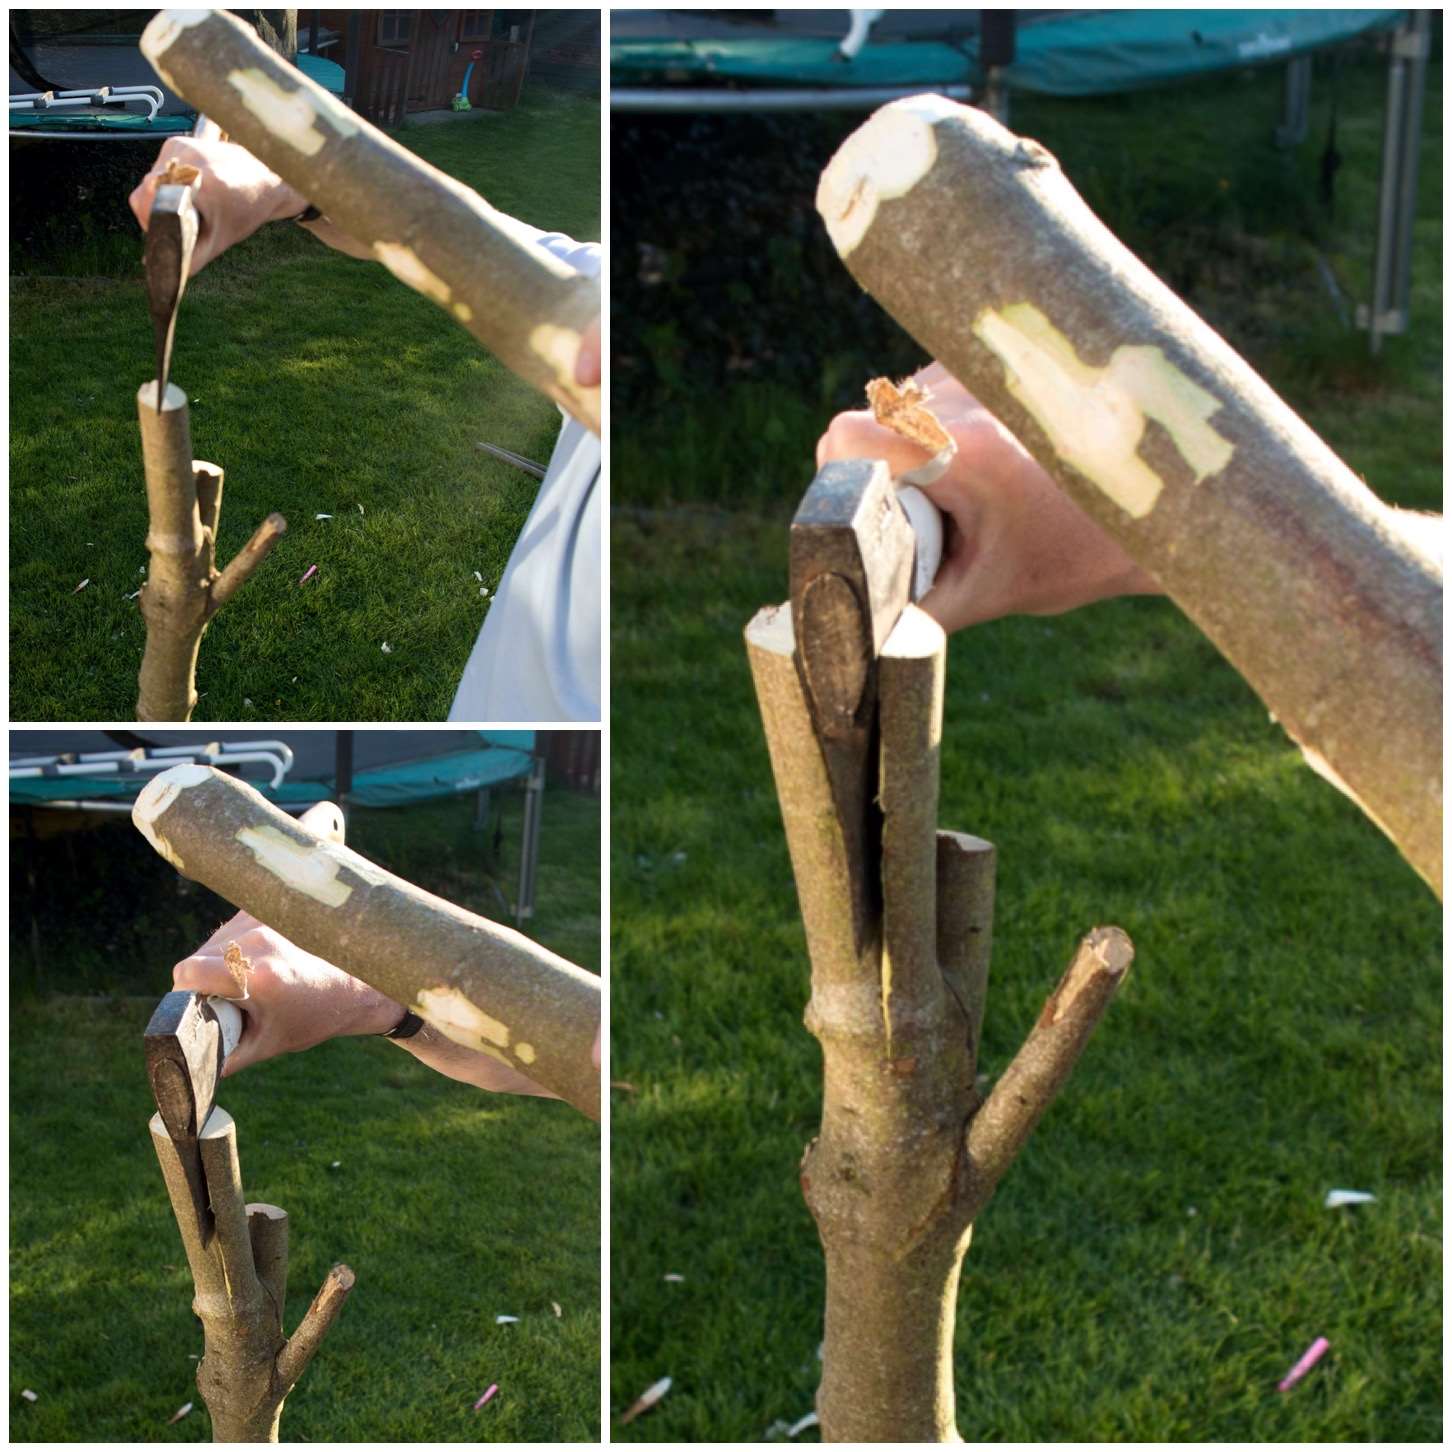
I took one of the spars and carved a triangular end to it – the thin end of this will be the wedge to hold open the split in which the spar will sit.
Carving the wedge
I used the pile driver to batton the wedge down into the new fork until it reached the whipping. Then it was a case of just trimming the wedge to finish.
Inserting and trimming the wedge
I felt that my fork needed to be a little bit wider still so with my knife I cut out some wood from inside the fork. Once that was done it was a case of giving the upright a pointed end and trimming off any knobbly/sharp pieces from it.
Widening the fork, pointing and trimming
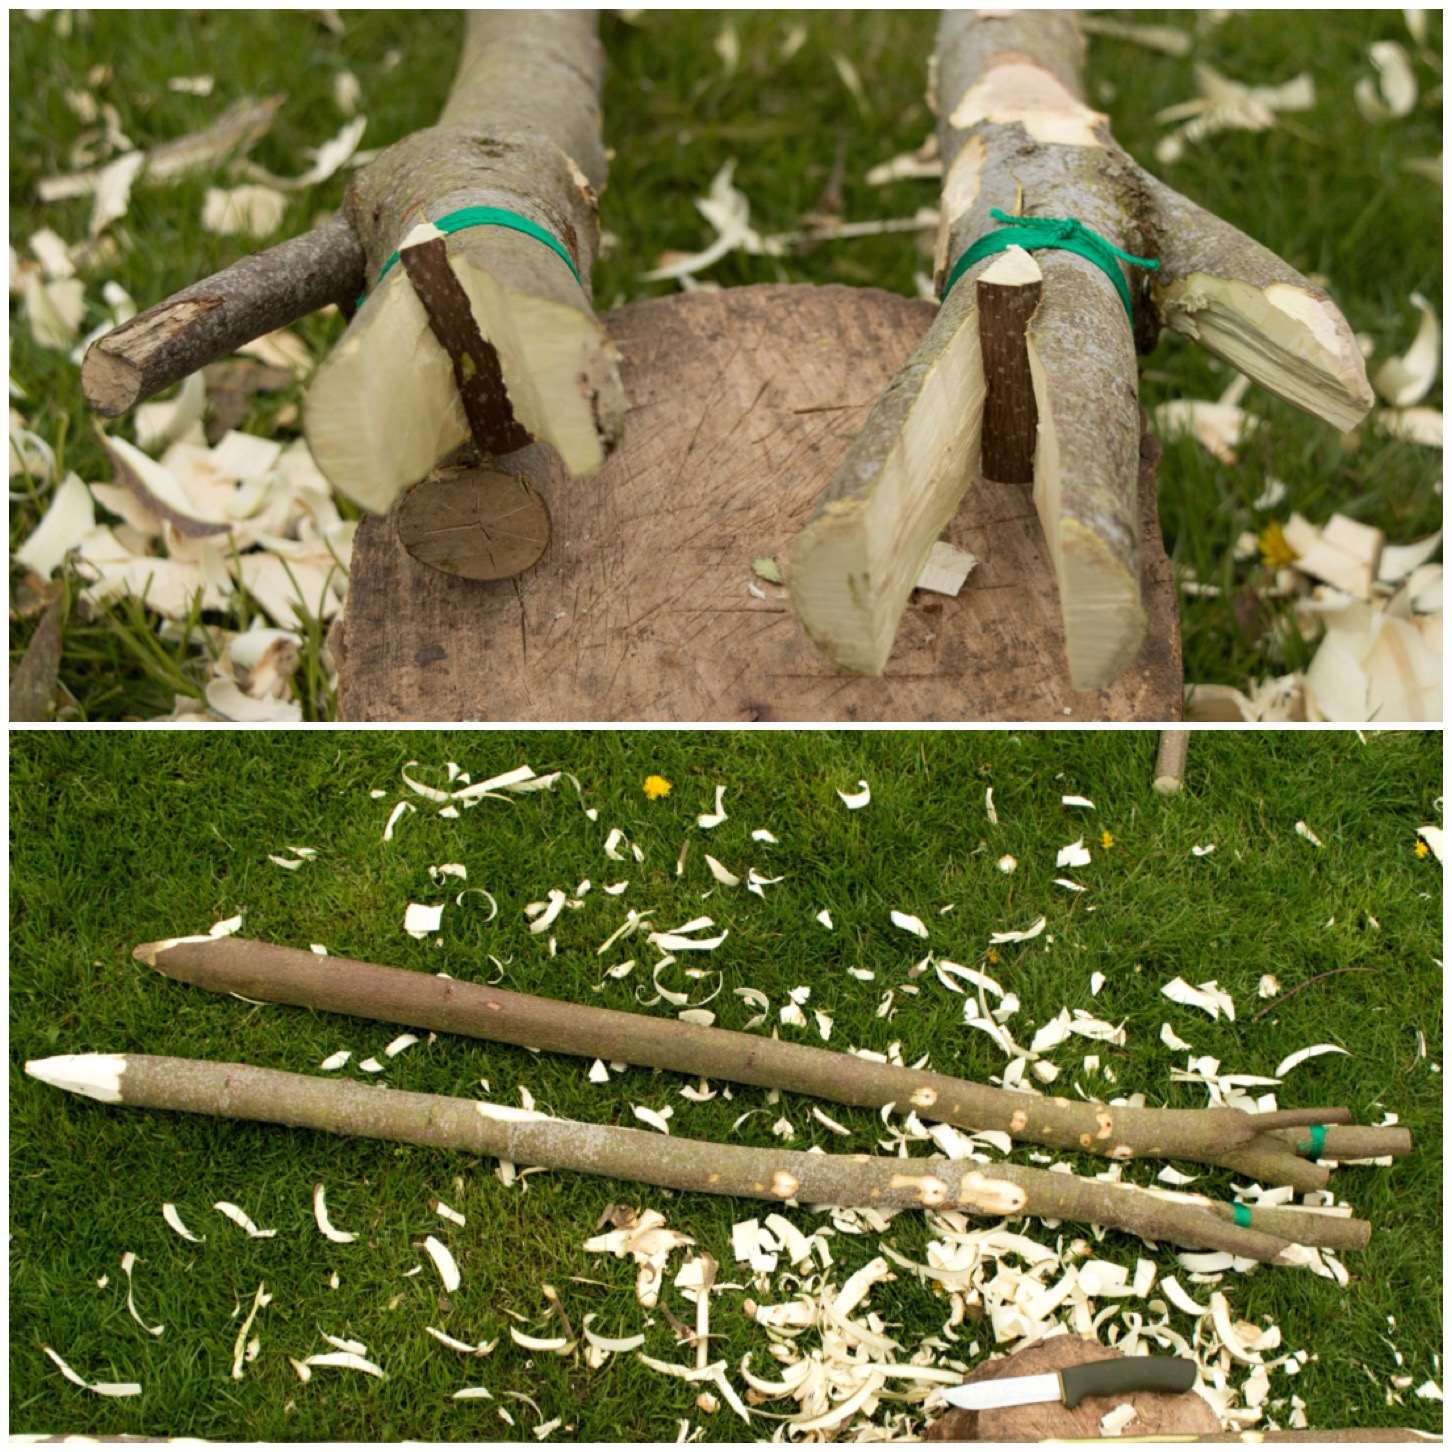
The second upright was produced in the exact same manner and they were soon both ready to go.
Finished uprights
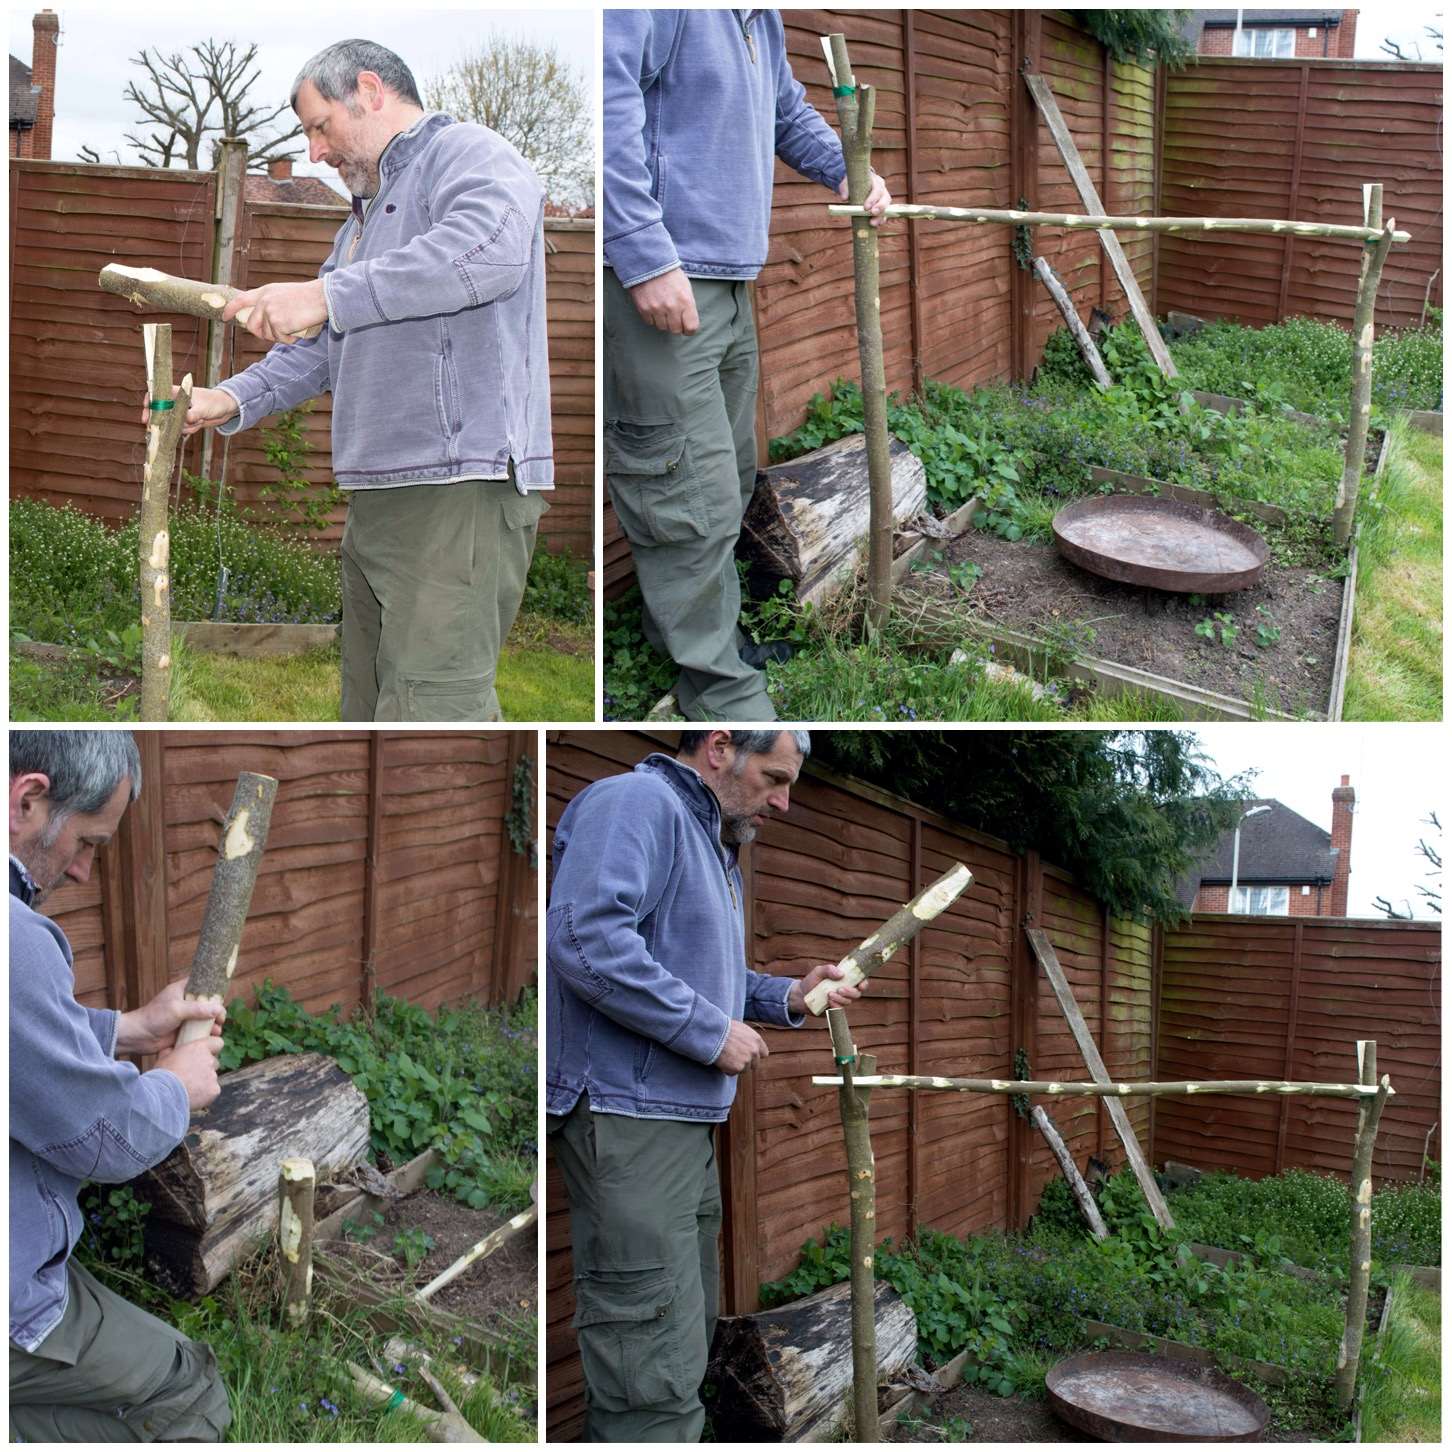
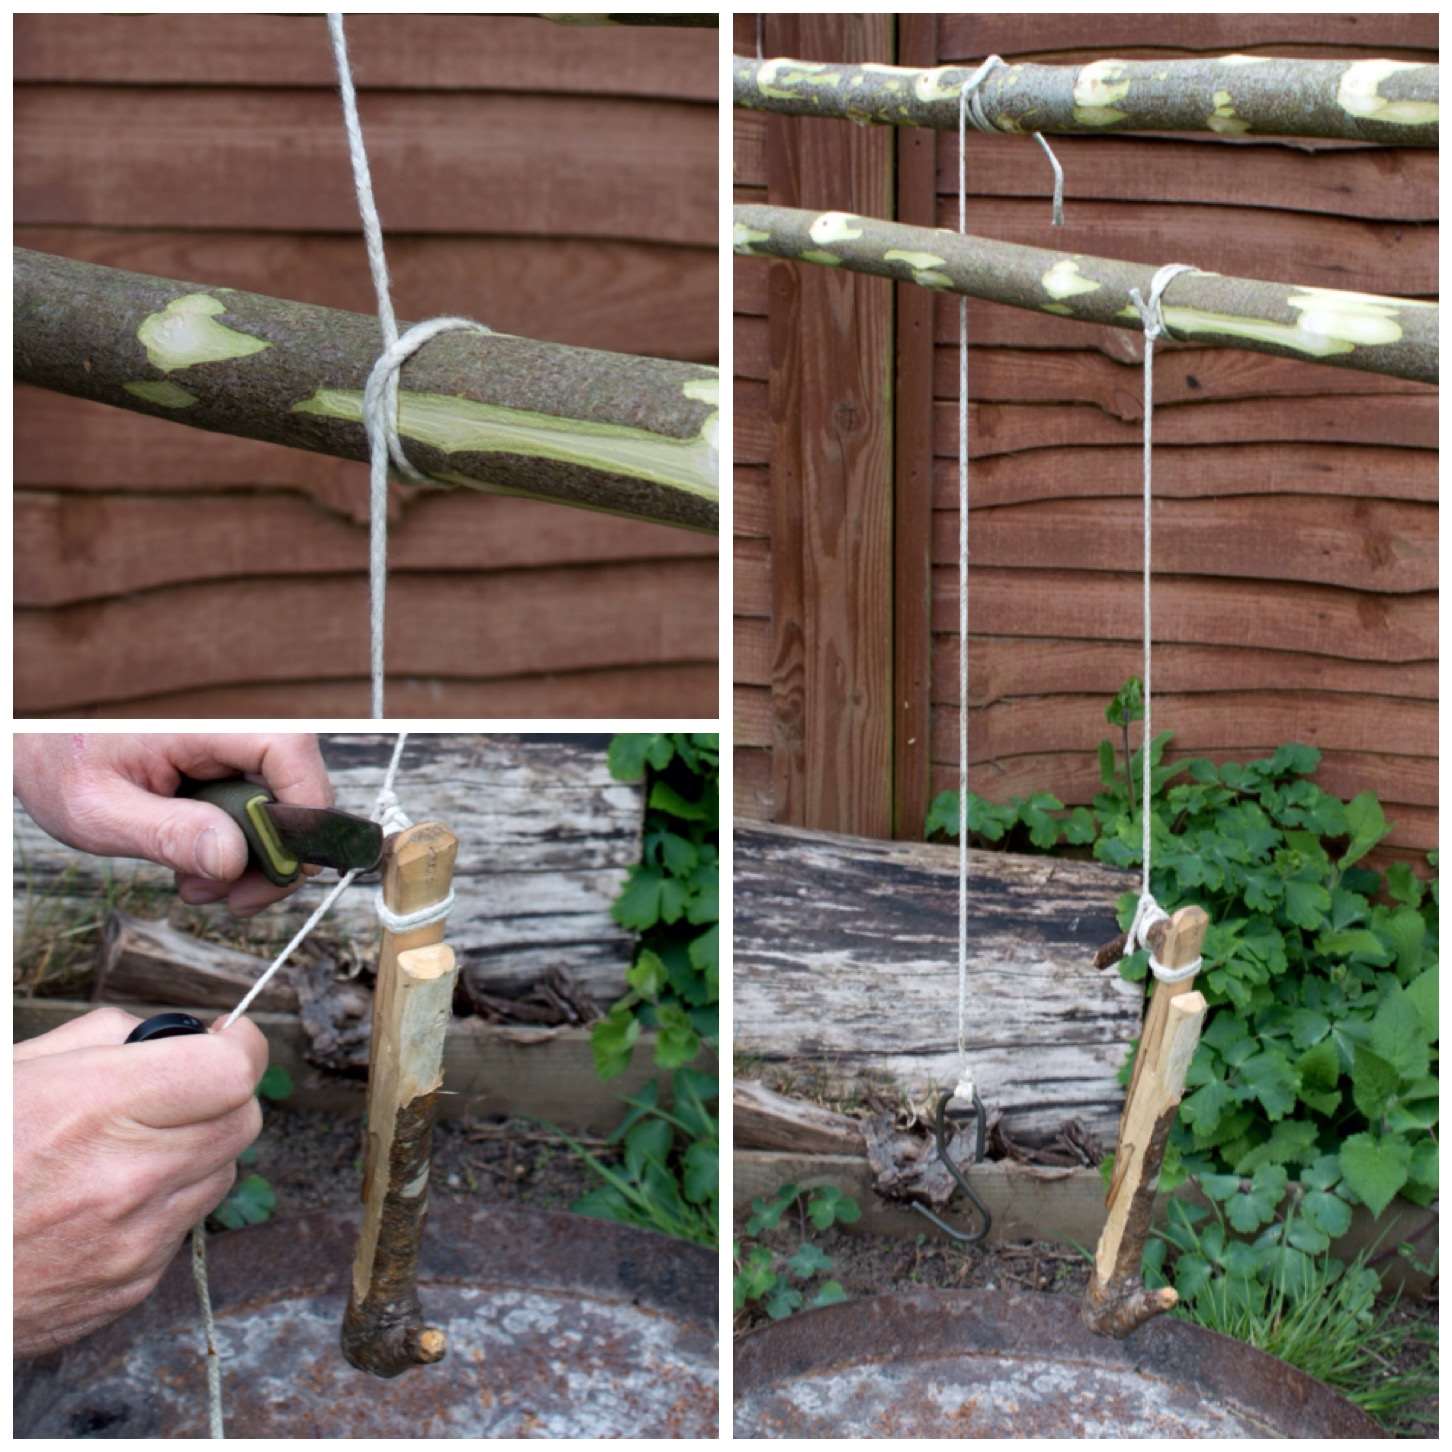
The rig works on the principle that the weight of the pot locks the spar into the forks on the uprights. To make this work you need to carve triangular-shaped ends to your spars (Wayland likens this to a prism shape on his blog). I ensured that the points of the triangles at each end of the spars matched up with each other. Take your time with this and before each cut ensure they are lined up.
Carved triangular shaped ends on both spars
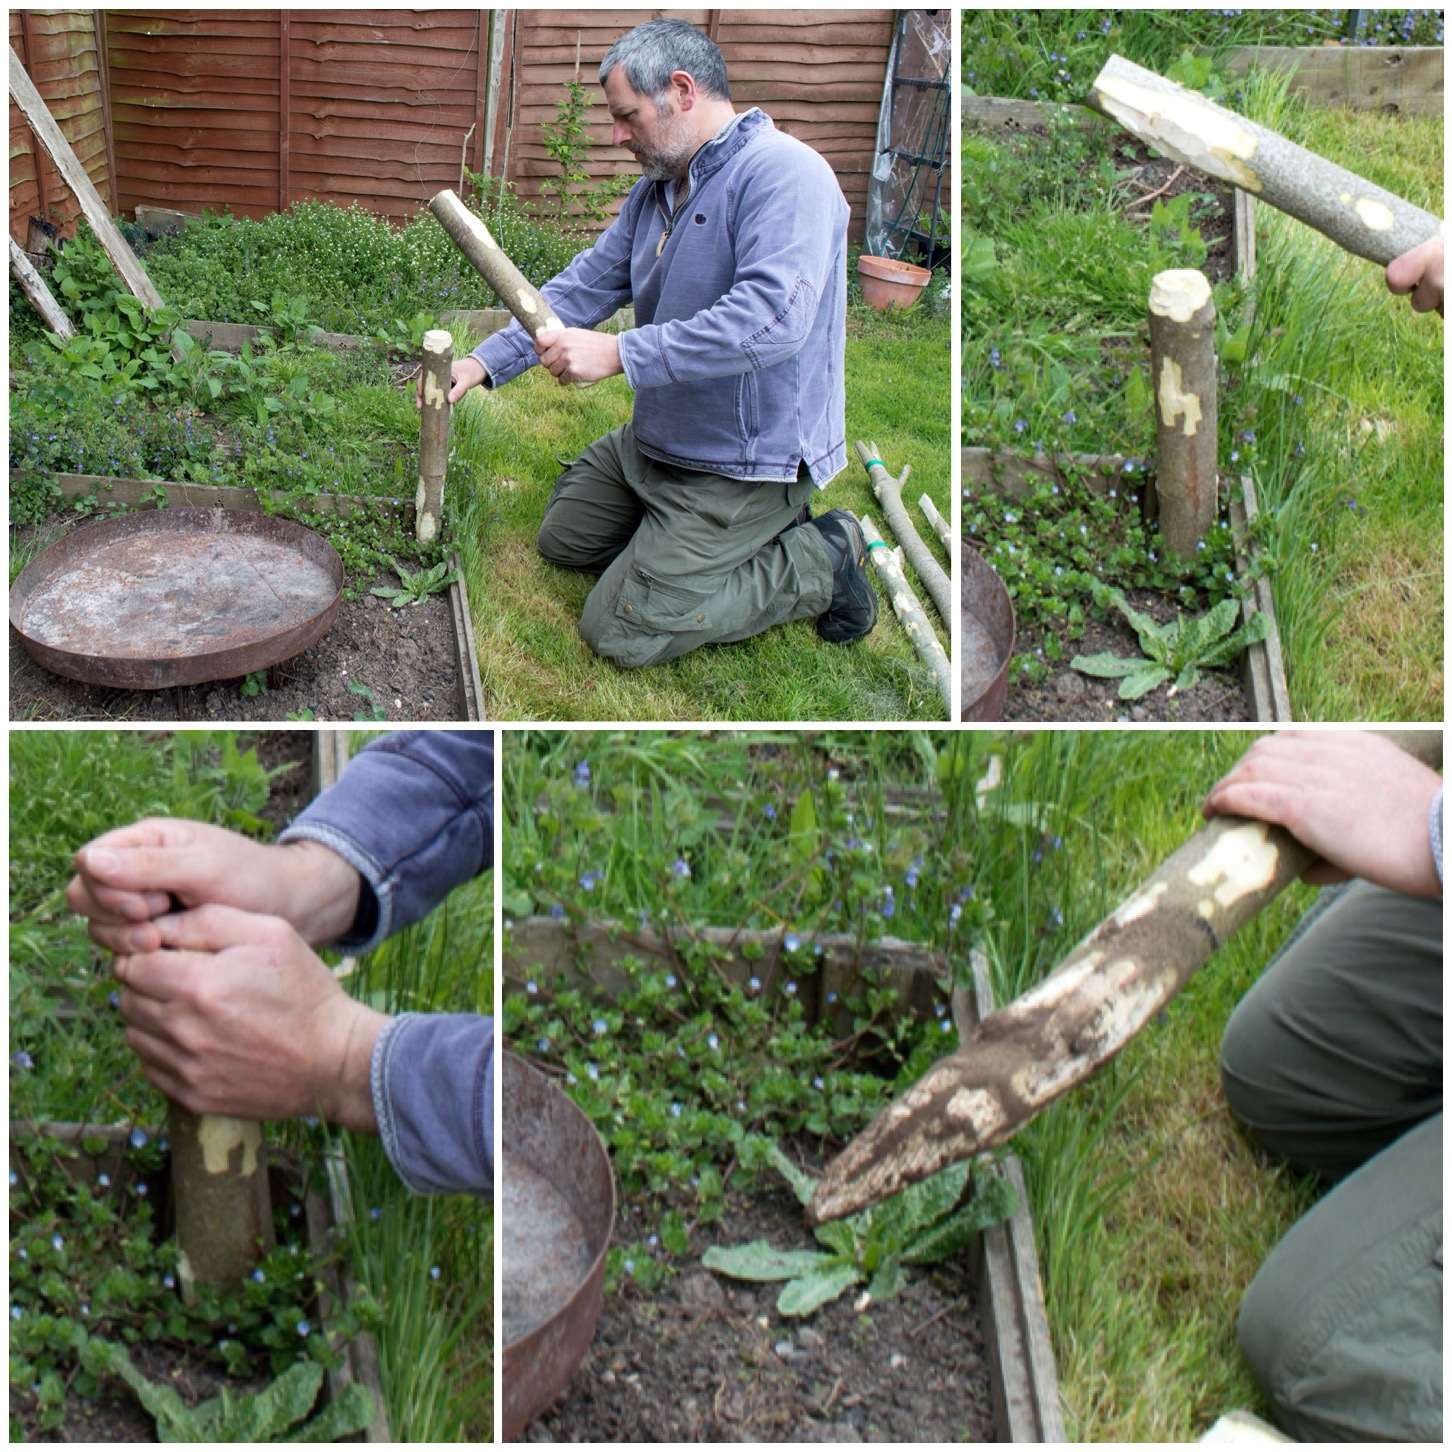
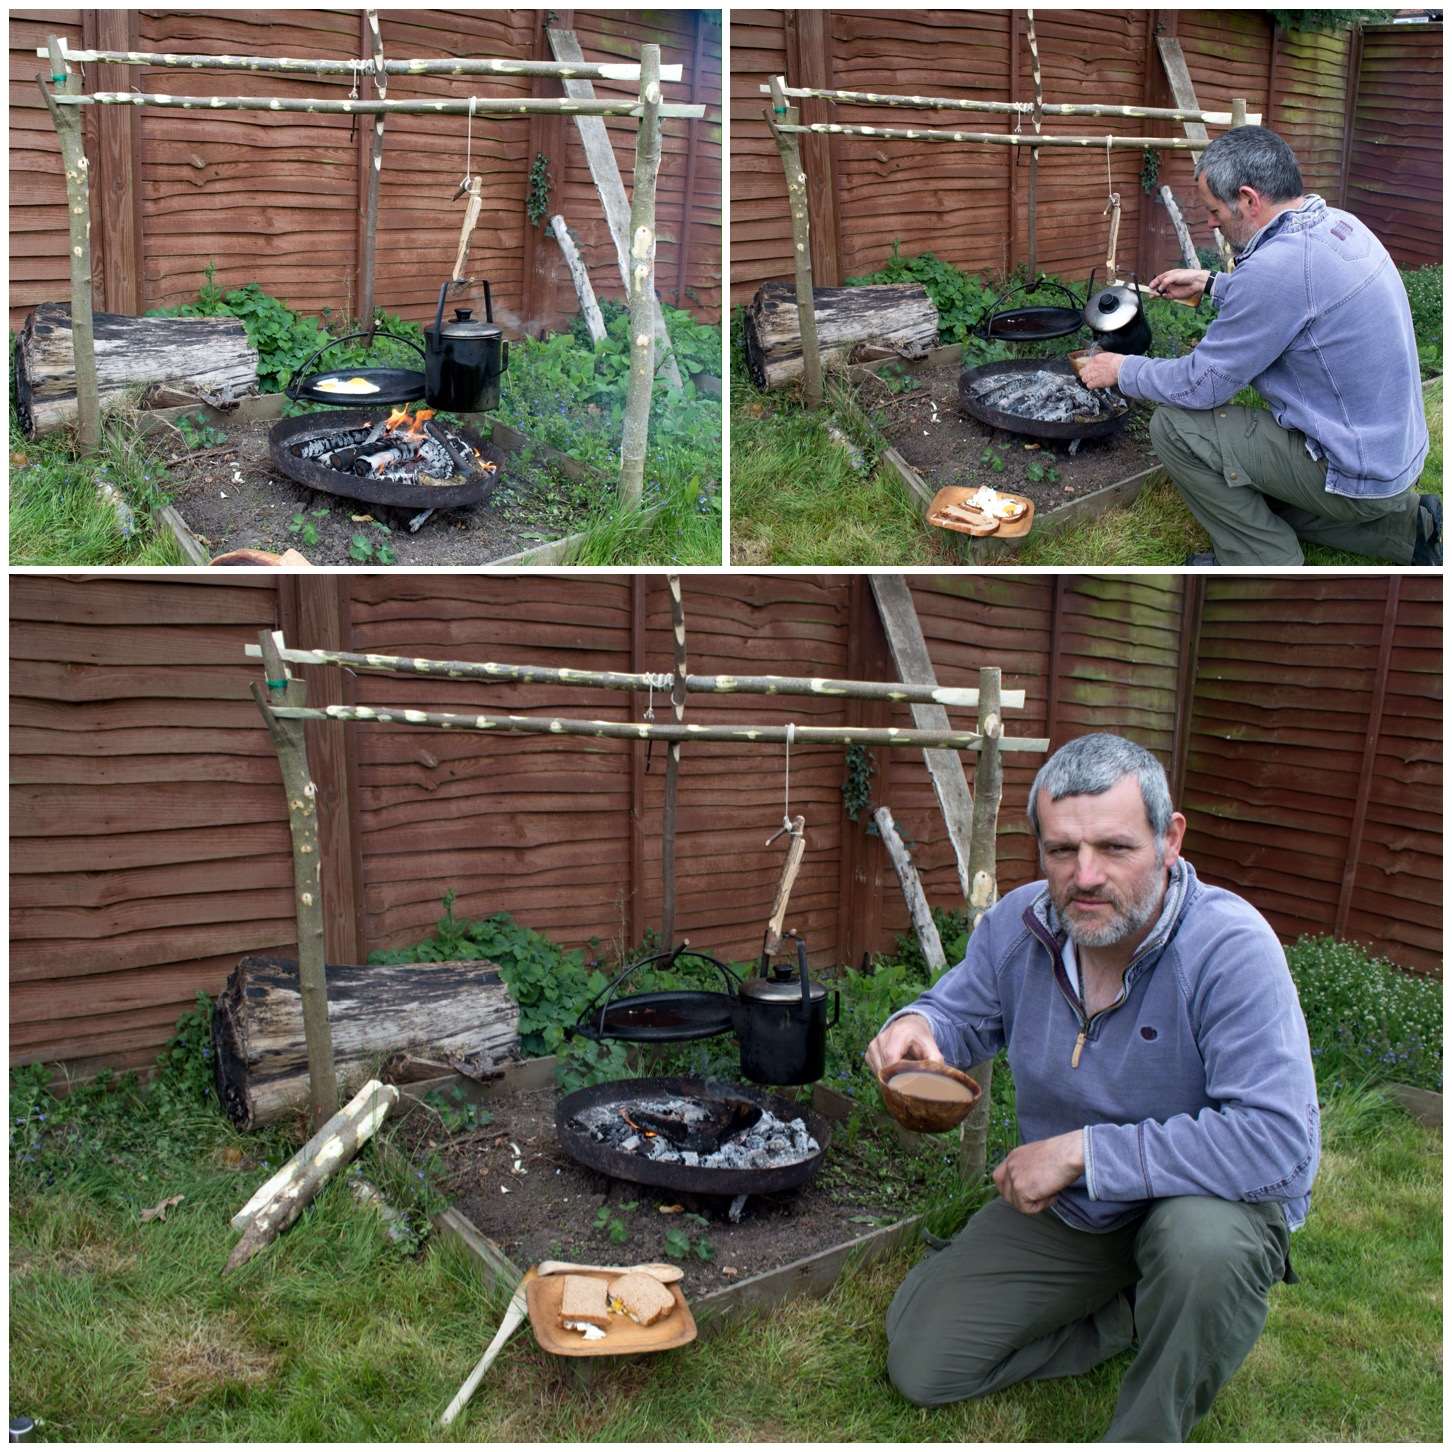
The ground where I was testing this out was at the back of our garden in an area that was about to be weeded and planted so it was a little soft but even so if I had just hammered the upright into the ground it would have split the top fork. The pile driver came into its own here as I was able to really hammer it into the ground (try and make your pile driver slightly smaller in diameter to the upright to get a snug fit) and create a hole for the upright.
Use the pile driver to create a hole for the first upright
Once the first upright was in I gauged the distance to where I needed to put the other upright in using one of the spars and repeated the process starting with the pile driver and then gently tapping in the upright.
Gently tap in the first upright and repeat the process for the second upright
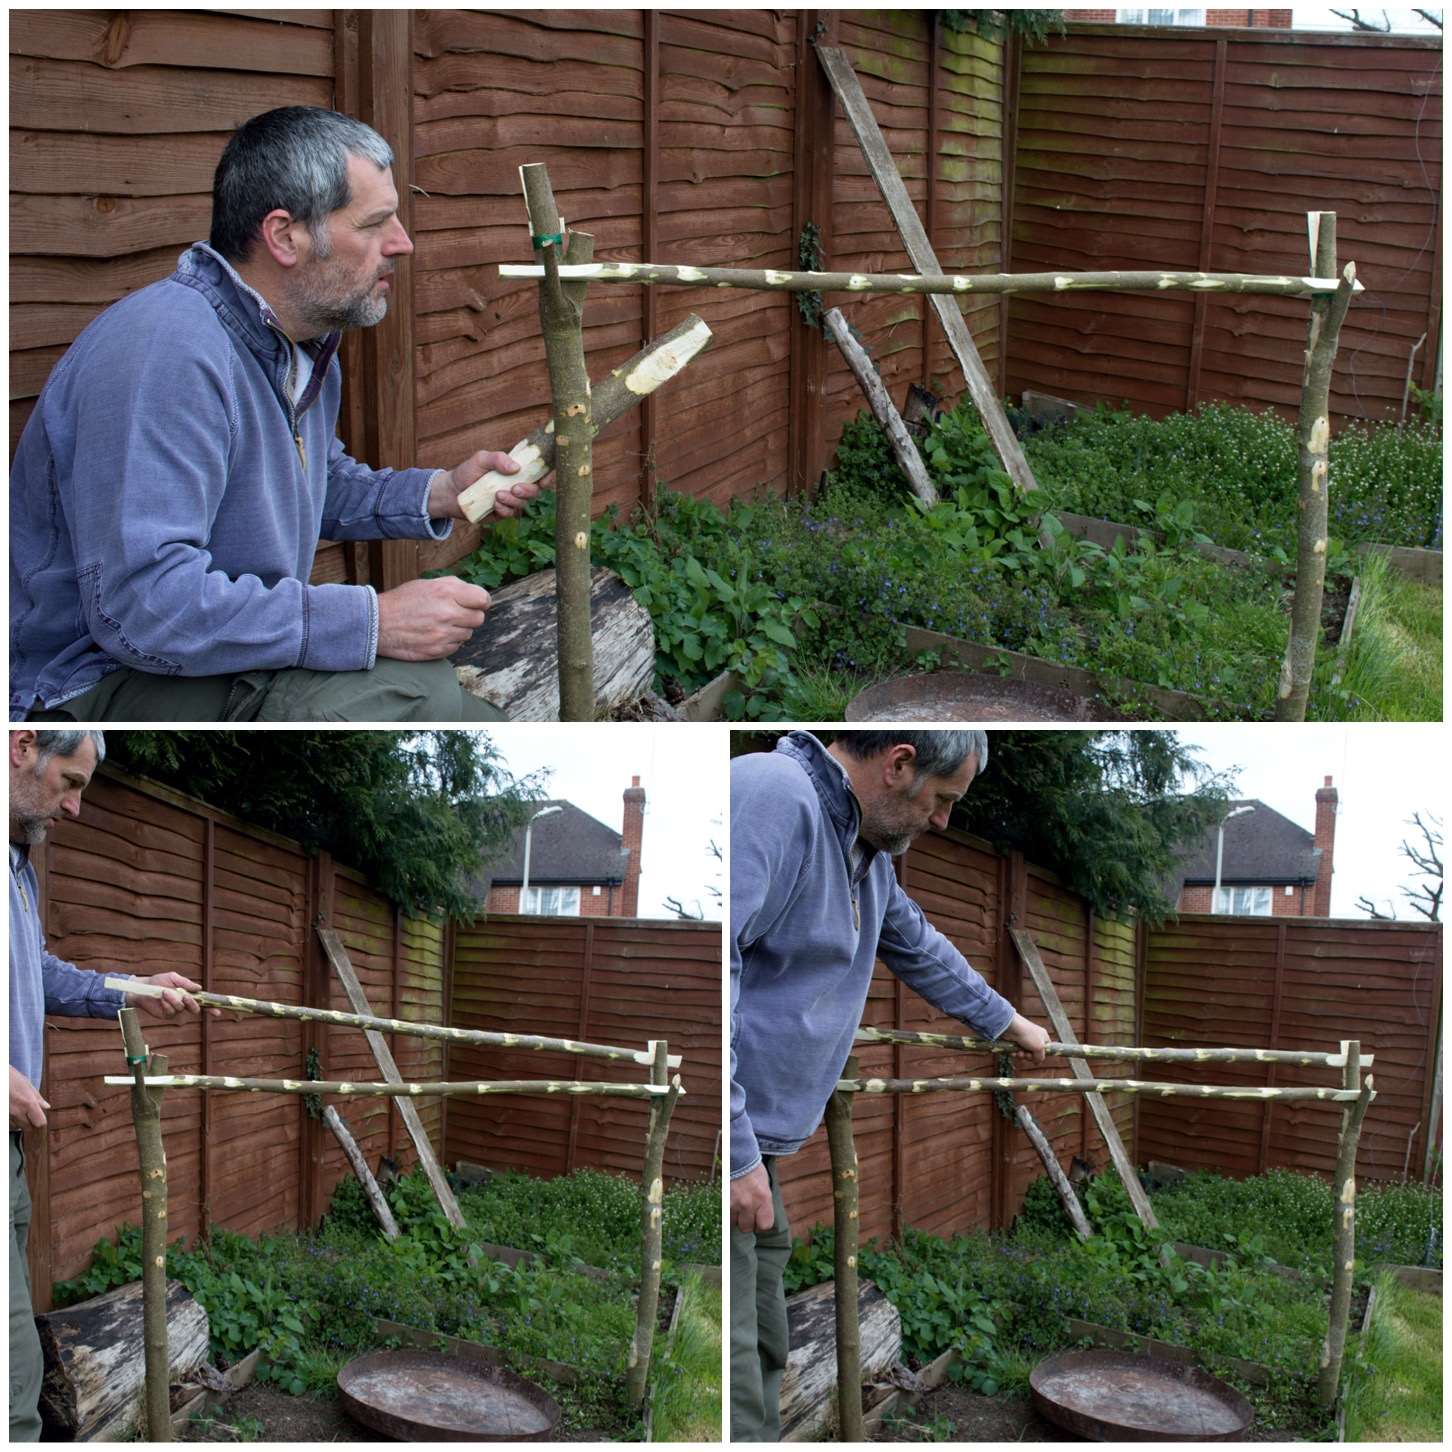
Check your alignment is correct by lining up the forks and place both spars into their forks. I tested the spars were locked in place by trying to turn them gently. No need to force them as the weight of your pots will lock them down further.
Check your alignment, place the second spar and ensure they lock well
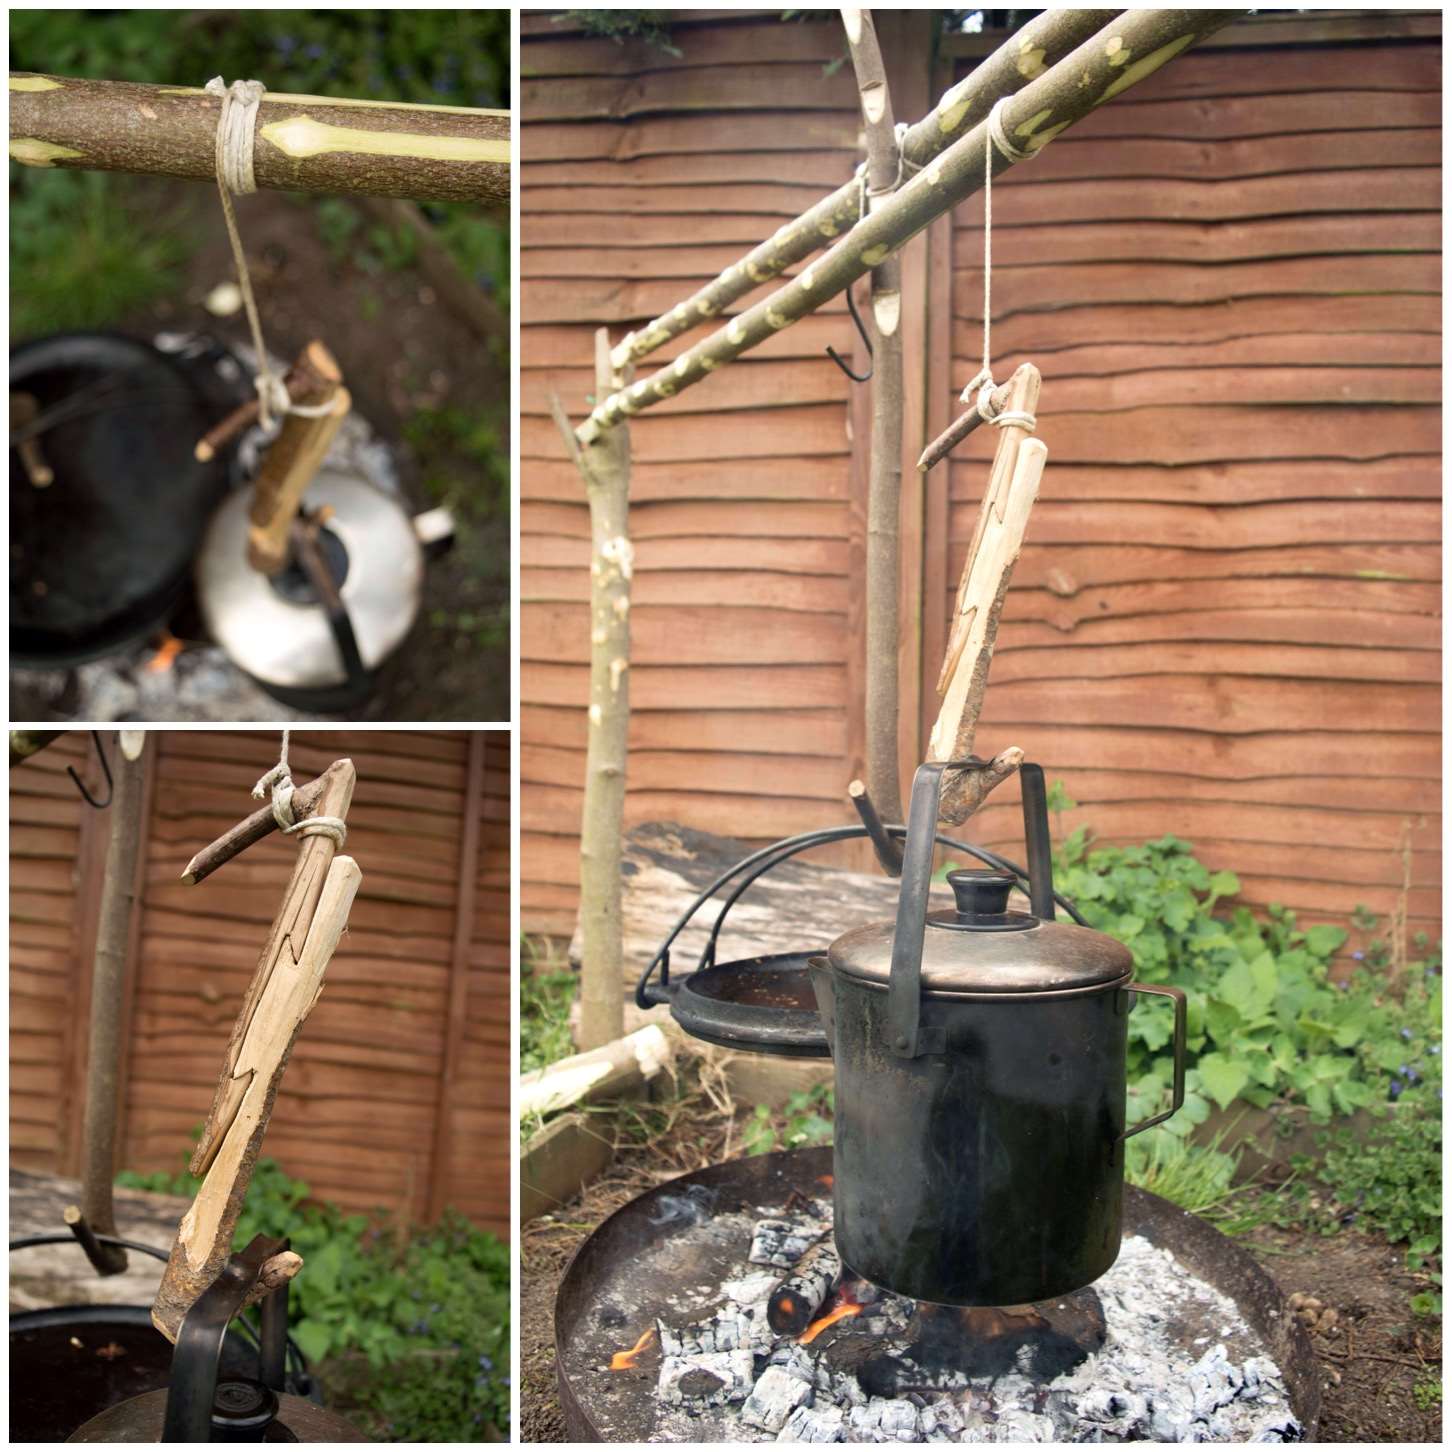
I took this shot to show you how the spars fit into the forks. All very basic but works surprisingly well.
Locked in
To suspend the pots I used some old string and tied it on with a clove hitch and then a couple of overhand knots to finish. I did not make them overly tight because I wanted to be able to release them easily to re-position them. Once that was done I attached the hooks. Use whatever knots you are comfortable with but make sure they and your string will hold the weight of your pots when full.
If you are worried that the string will burn then dampen it with some water (avoid string that will melt easily). I have never had the string burn through as when I am cooking I do not let flames grow big enough to go near it. Also when starting your fire ensure that the spars are not in place so that the initial flames do not burn the string.
Use a clove hitch and tie on your hook. Add one to both spars.
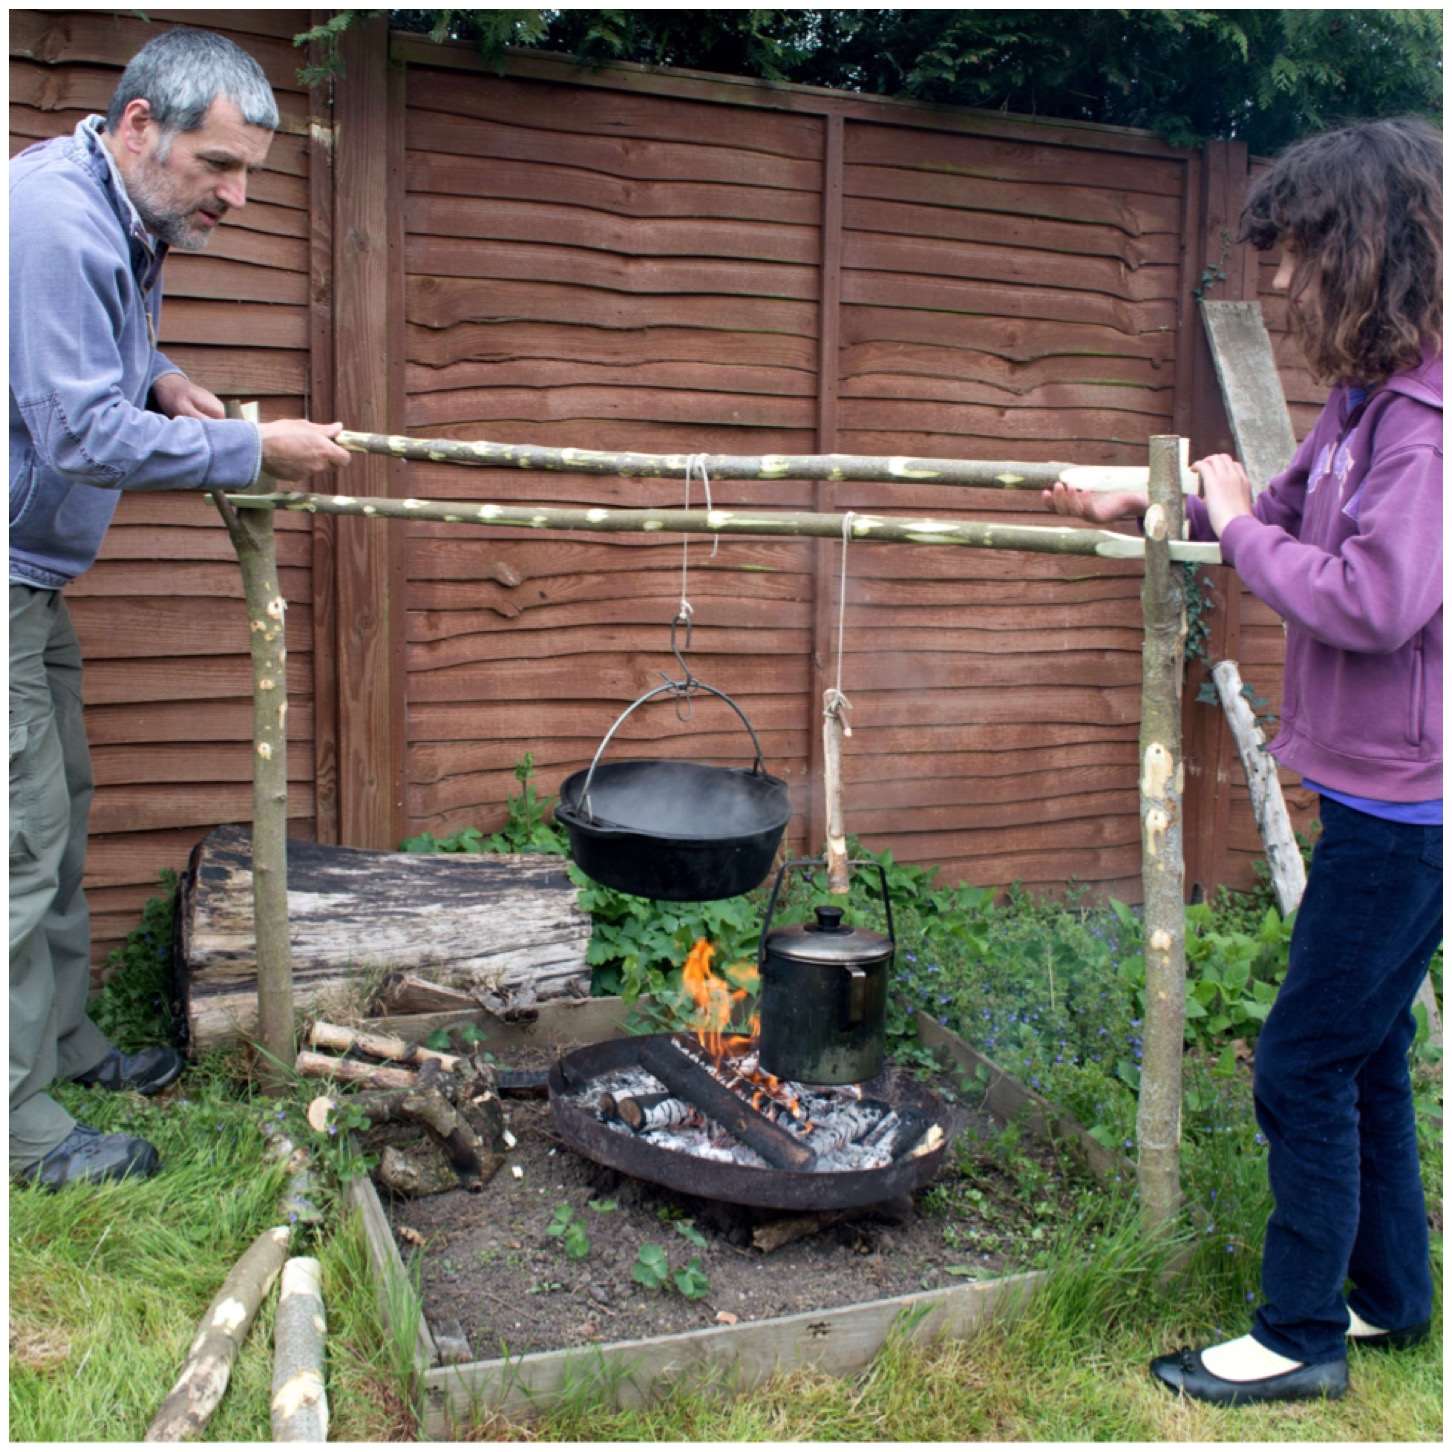
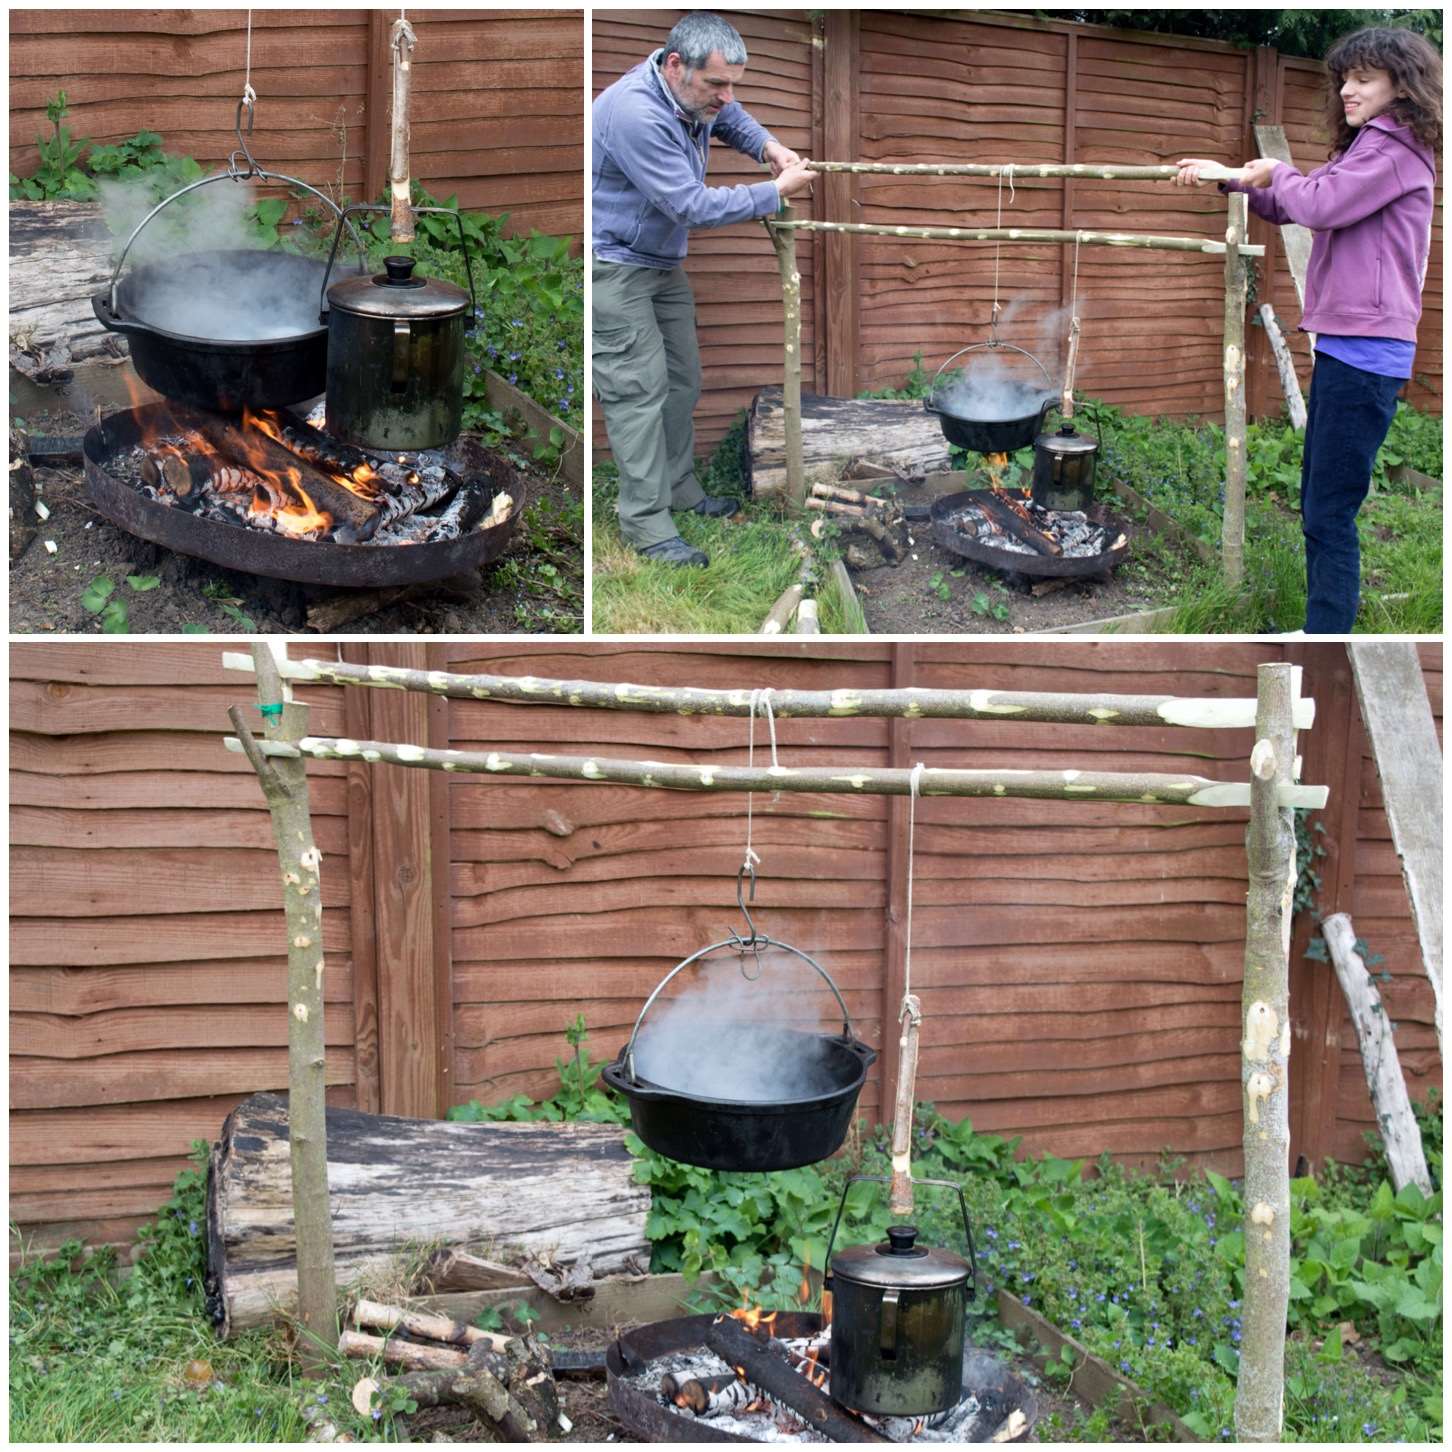
Once you are cooking it is very easy to lift and rotate one of the spars to raise or lower a pot by winding or unwinding the string. As we were boiling some water in the Dutch oven I got my daughter to help me but if the pot is light enough then you can do this easily by yourself.
To adjust the height lift the spar and turn it a few times
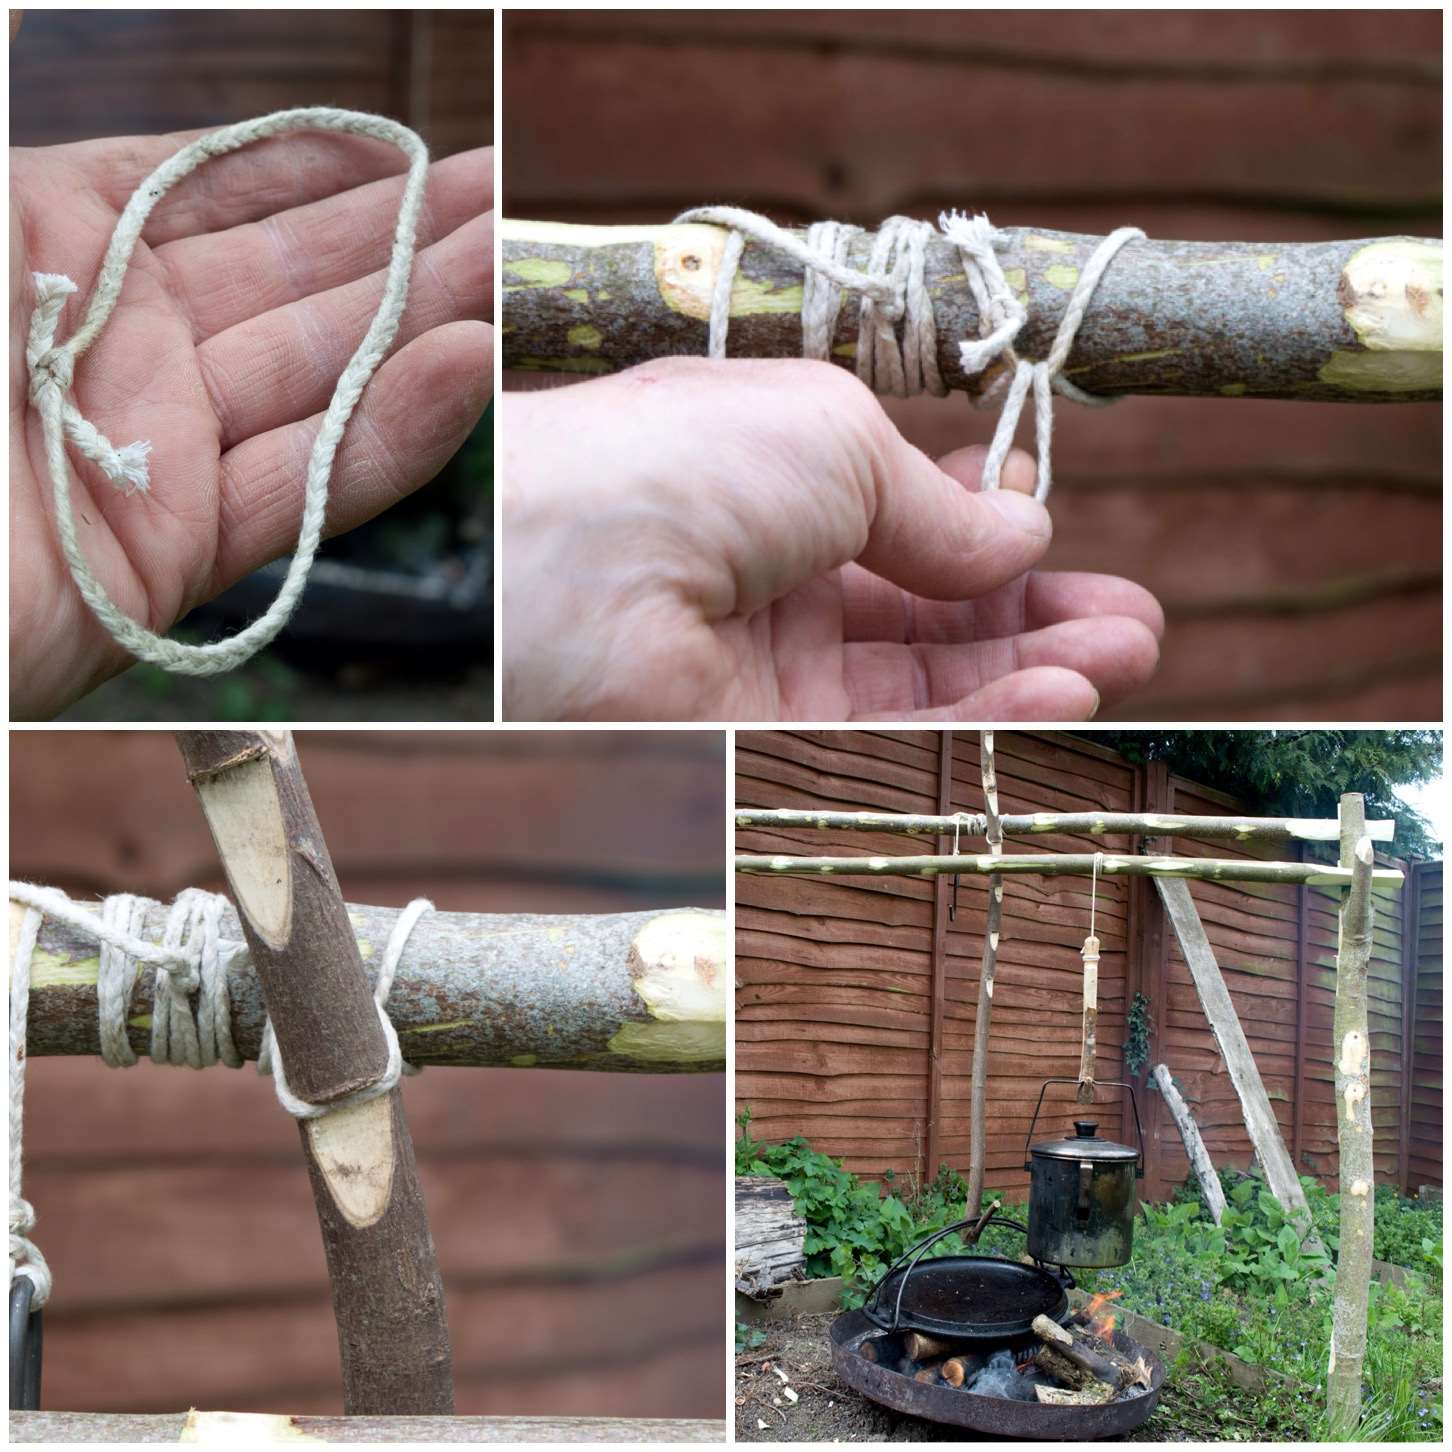
I also use another style of pot hook quite often (I learnt this from one of Ray Mears’s videos) which involves the use of a lark’s foot knot. All you need is a small loop of string that is able to go around the spar and through itself to leave a smaller loop to insert a traditional adjustable pot hook. To raise the pot all you need to do is loosen the lark’s foot and re-position it on another hook.
Alternative method with a larks foot and traditional pot hook
This is the set up from various angles so you can see how all works in more detail.
An angled view
I am glad I finished this little project as it has been on my list of things to do for a while now. It is a great set up that does not take long to do and it’s an easy way to cook foods that requires different temperatures at different stages.
The Easter holidays were fast approaching and the question in our household was – where should we go? A camping trip was asked for but also a bit of seaside fun on the side.
The answer was not difficult as my good friend Fraser Christian of Coastal Survival had been asking when we would come down to visit him in Dorset. Fraser lives off grid and runs excellent courses on the coast – All the boxes were ticked so off we went.
Family Fun at Fraser’s
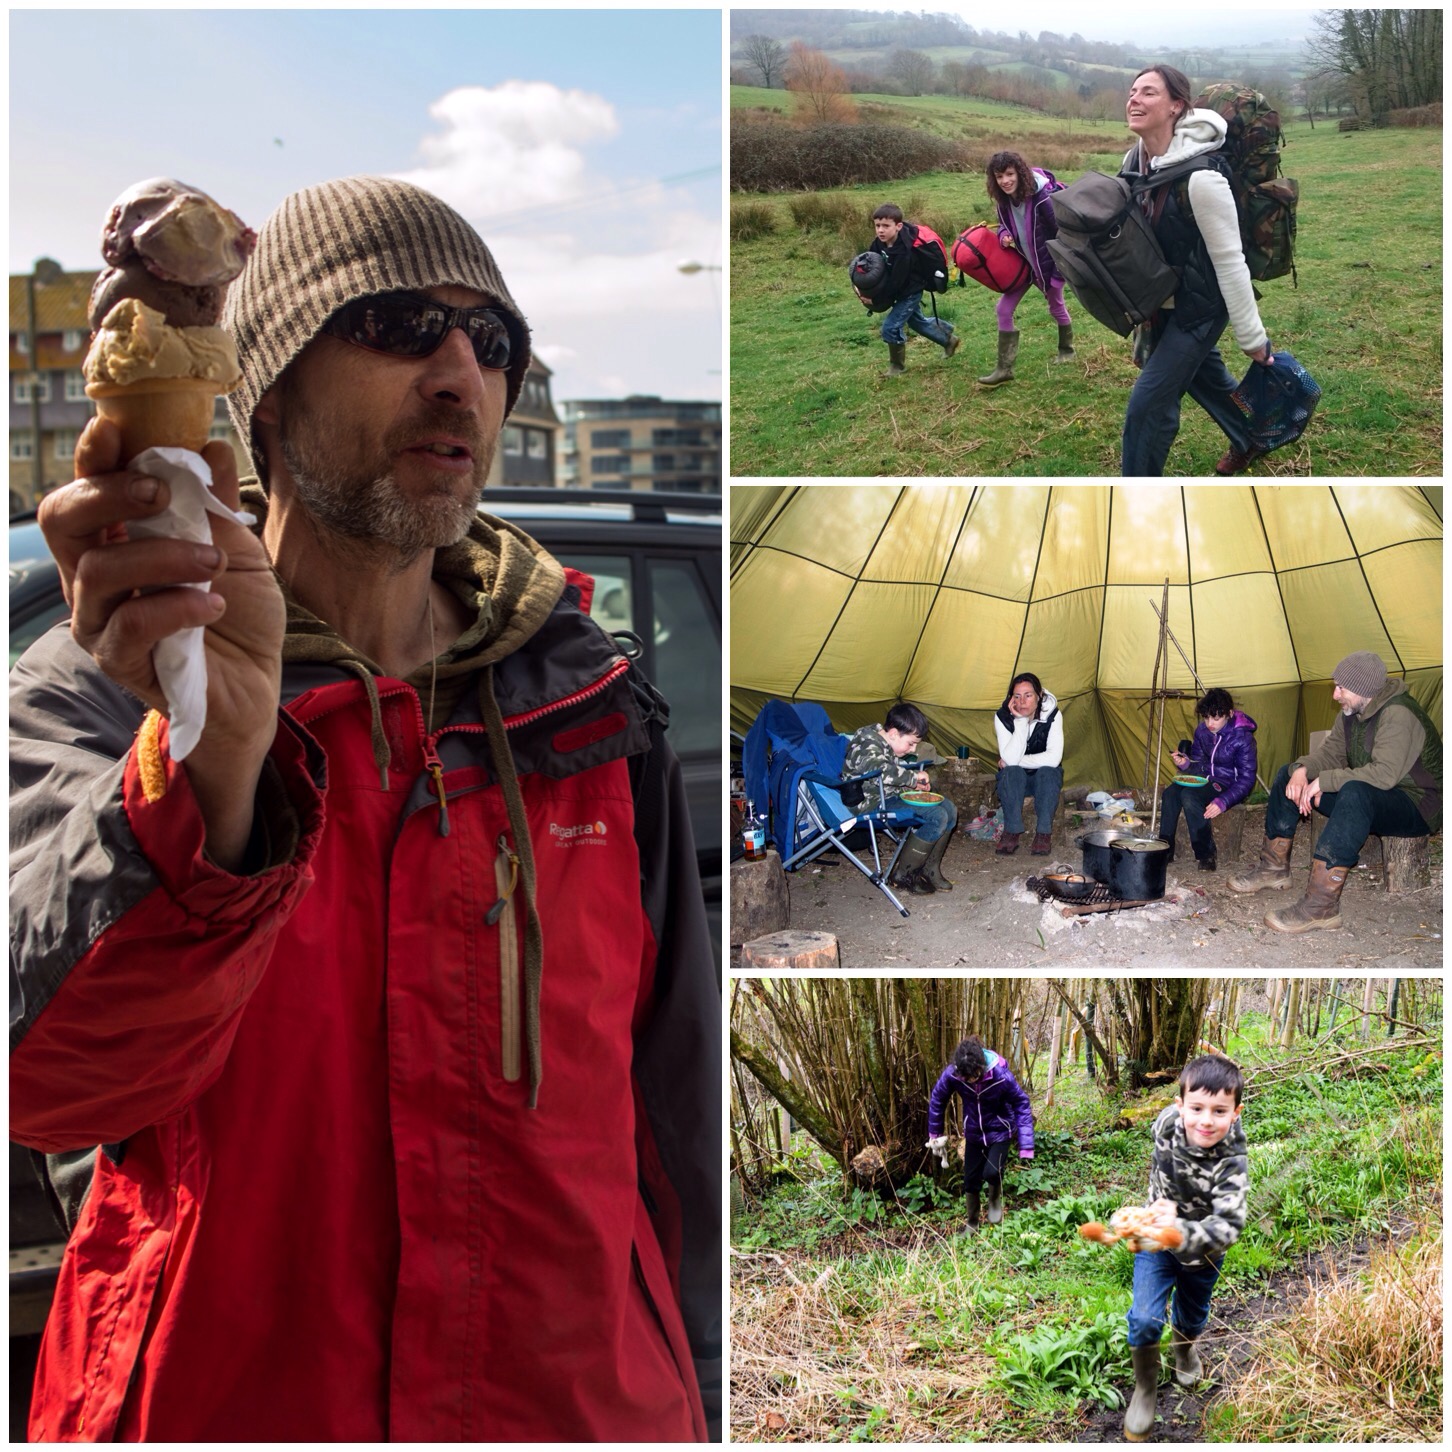
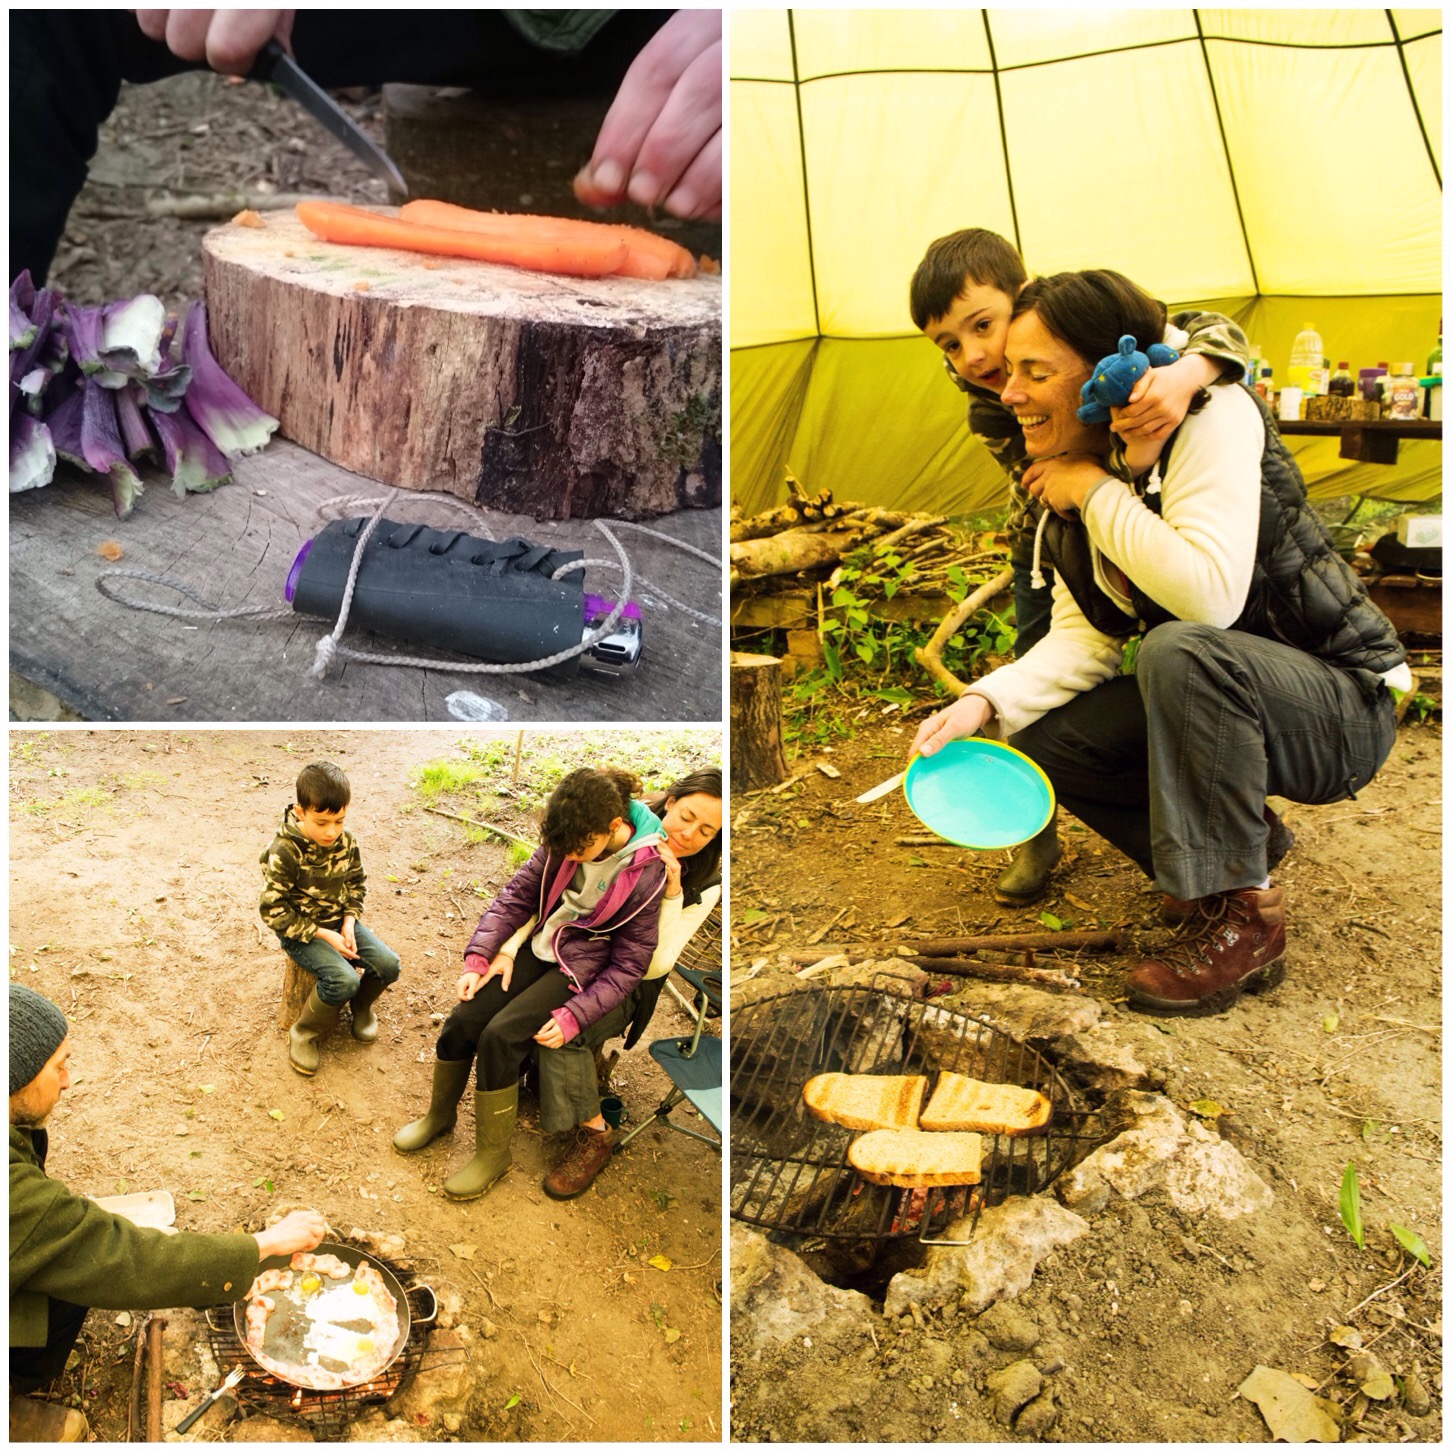
I have written before about the food that Fraser collects and cooks up and this time there was no change in that high standard (Memorable Meals). My kids Catherine and Finlay had to be very careful in who they said was the best cook around the campfire – just for the record I was not included in any of that praise 😉
I did though collect the Sea Kale you can see in the top left picture below (the purple coloured stems).
Fantastic Food
Last time I was at Fraser’s the weather was wet and windy, this time even though it was still windy it was dry (and warm when not in the wind). The sun was out and the skies were clear leading to cold but pleasant evenings around the campfire. Stories were told, woodland TV was watched, marshmallows were toasted and a relaxing time was had.
Fireside Fun
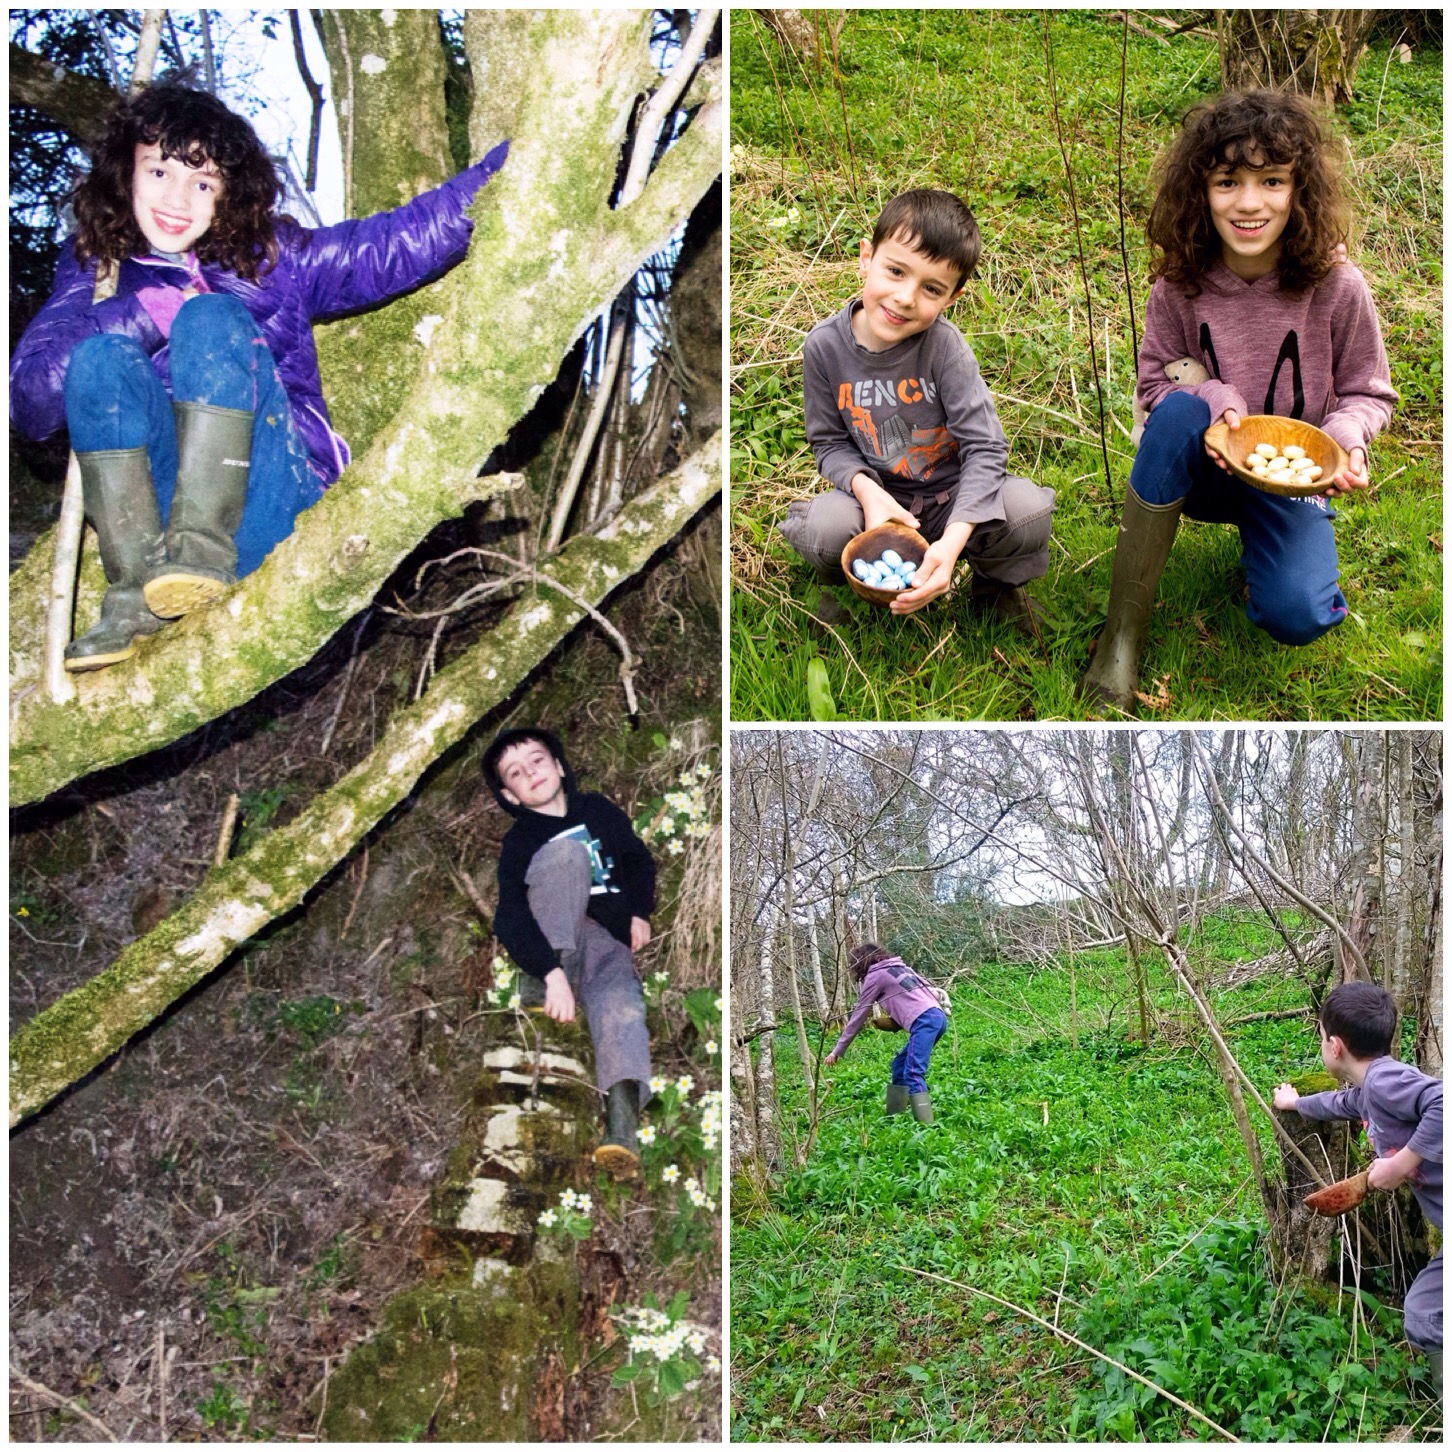
Catherine and Finlay had great fun all weekend – they made their own secret den (into which I was eventually initiated) and had great fun searching for lots of Easter eggs.
When I was a kid it was expected that I’d go out in the morning, return for lunch and dinner but otherwise do my own thing. Even though we live in a village my kids do not normally have that freedom but here at Fraser’s they experienced so much more freedom: off they went exploring the woods and every now and then they popped back to the main campsite to have cuts, bruises and empty tummies attended to.
Adventuring
As usual I was on the lookout for some spring flowers and find them I did.
I found my first bluebell of the year at Fraser’s as well as plenty of primroses (is it just me or has this year been particularly good for primroses?). Also in evidence were plenty of early dog violets and lesser celandine.
Spotting Spring
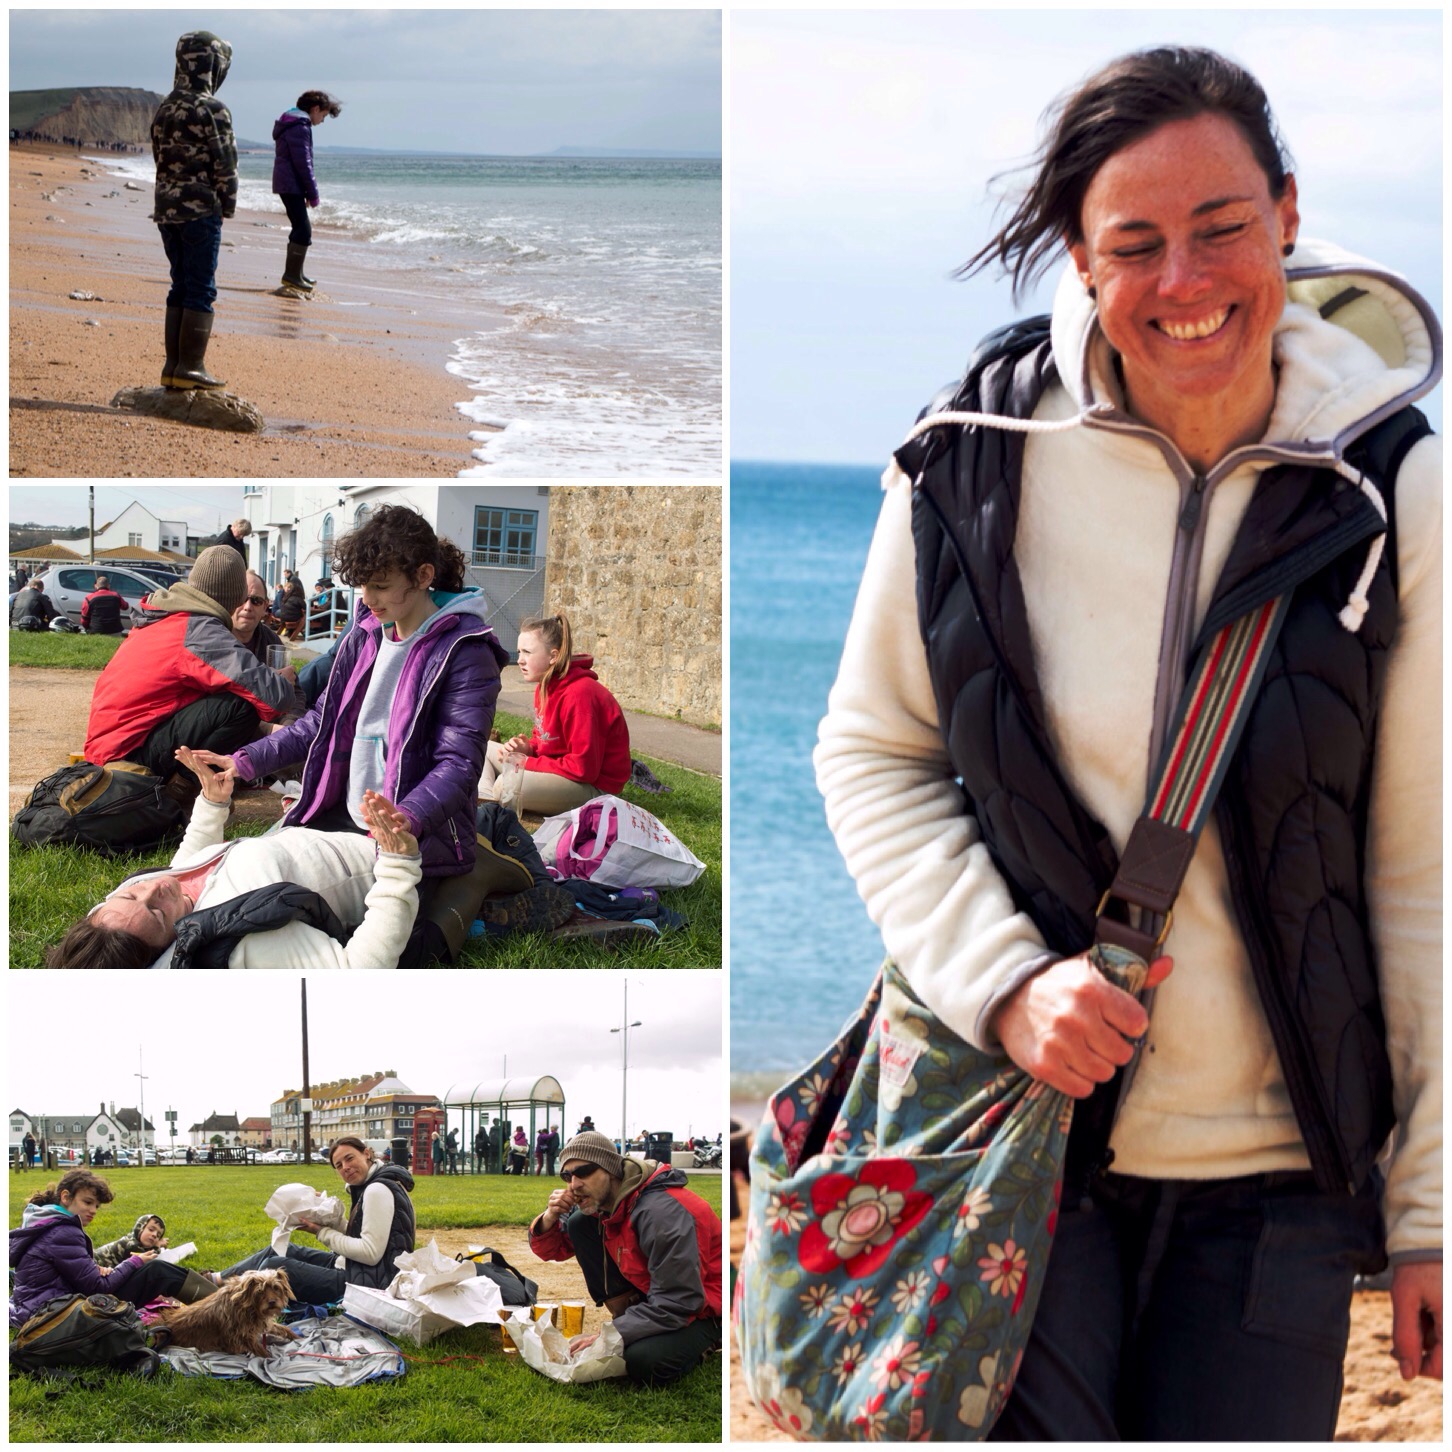
One of the tick boxes for the weekend was time at the sea. I do not do beach holidays where you just sit about tanning yourself (my Scottish skin doesn’t like the sun too much) but like to spend time on the coast exploring and being generally active.
Our first day at the sea was sunny but very windy. The kids had their wellies on but were soon in paddling. We tried to fly a kite but it was just too windy: after nearly hitting a few people I put it away (quite grumpily) and we headed inland to find some of the best fish and chips I have ever had (washed down with a nice pint).
Seaside Snaps
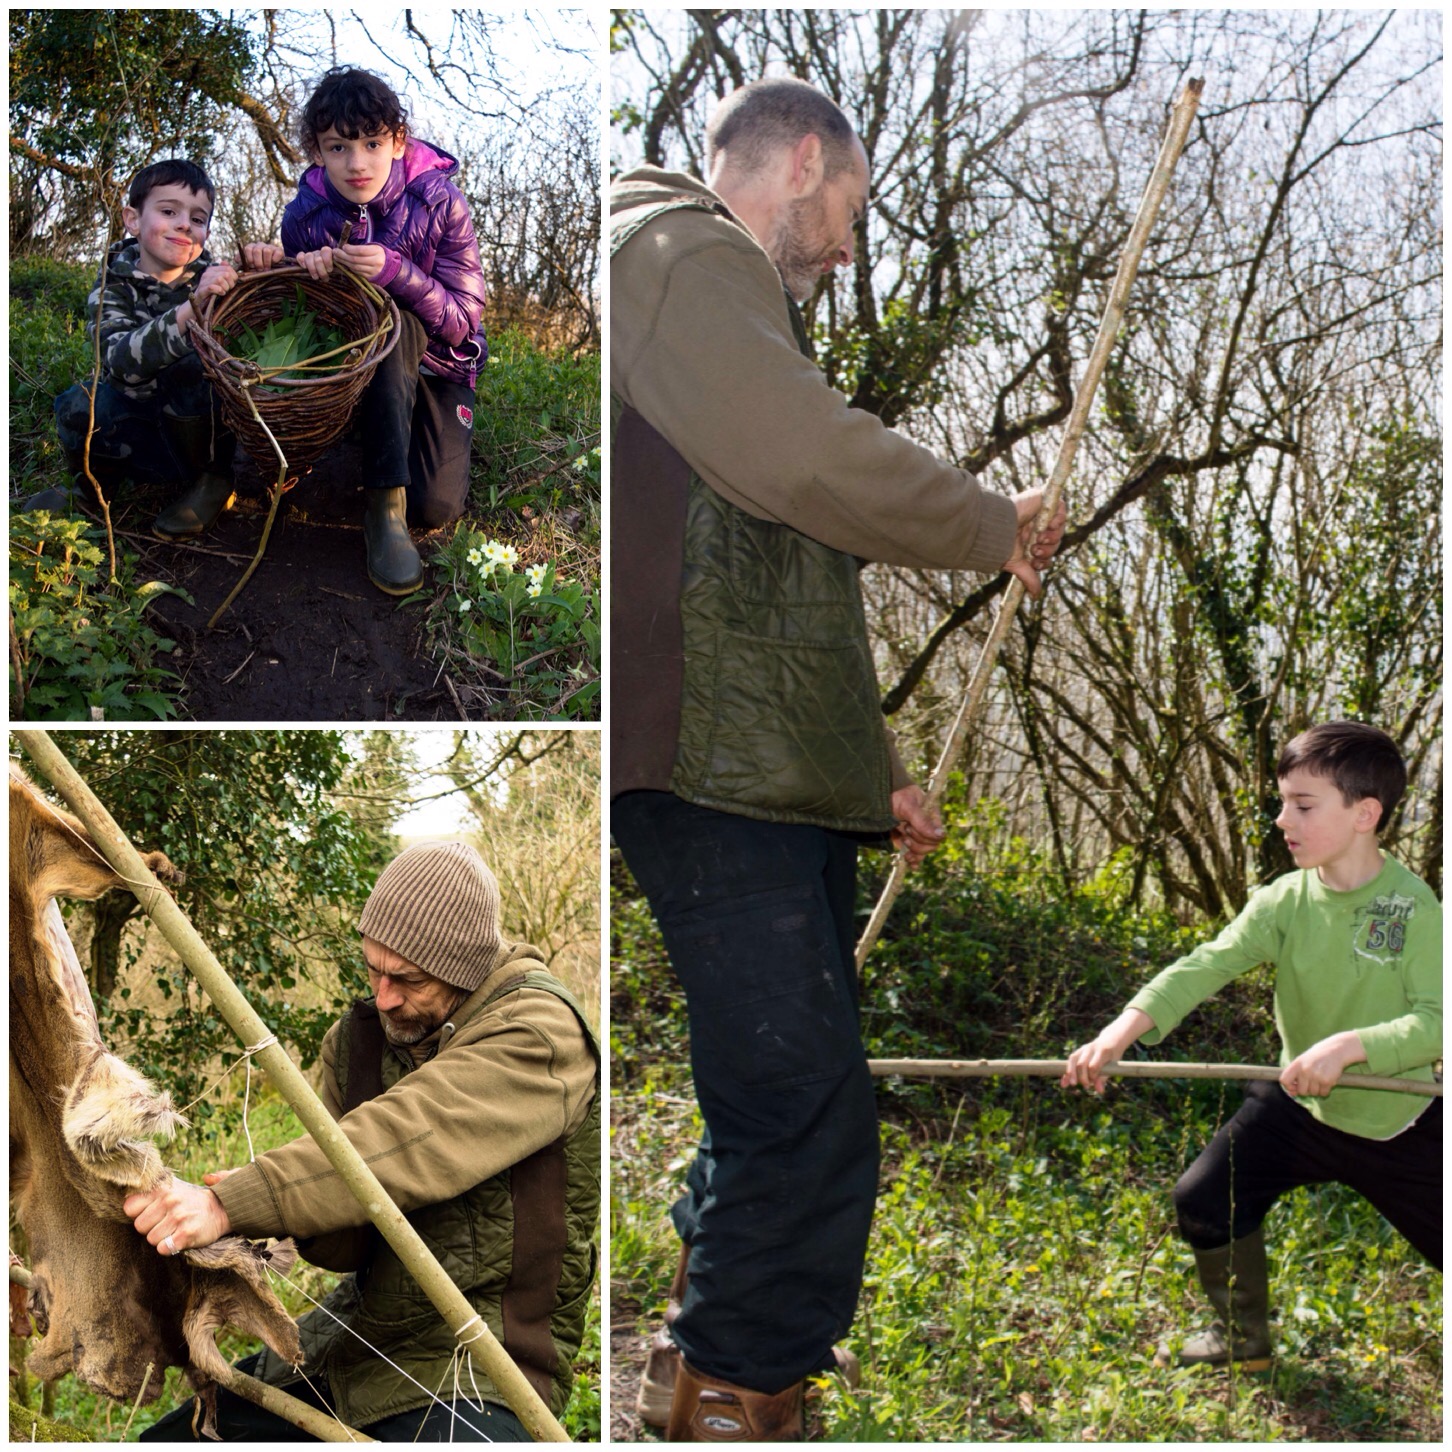
The kids learned about wild garlic and went out on their own to collect a massive basket full. Finlay and Fraser had fun practising some woodland ninja techniques (they are both competitive types so this was fun to watch).
Fraser had recently found a deer that had been killed by a car and he had the hide loosely stretched as he de-fleshed it
Being Busy
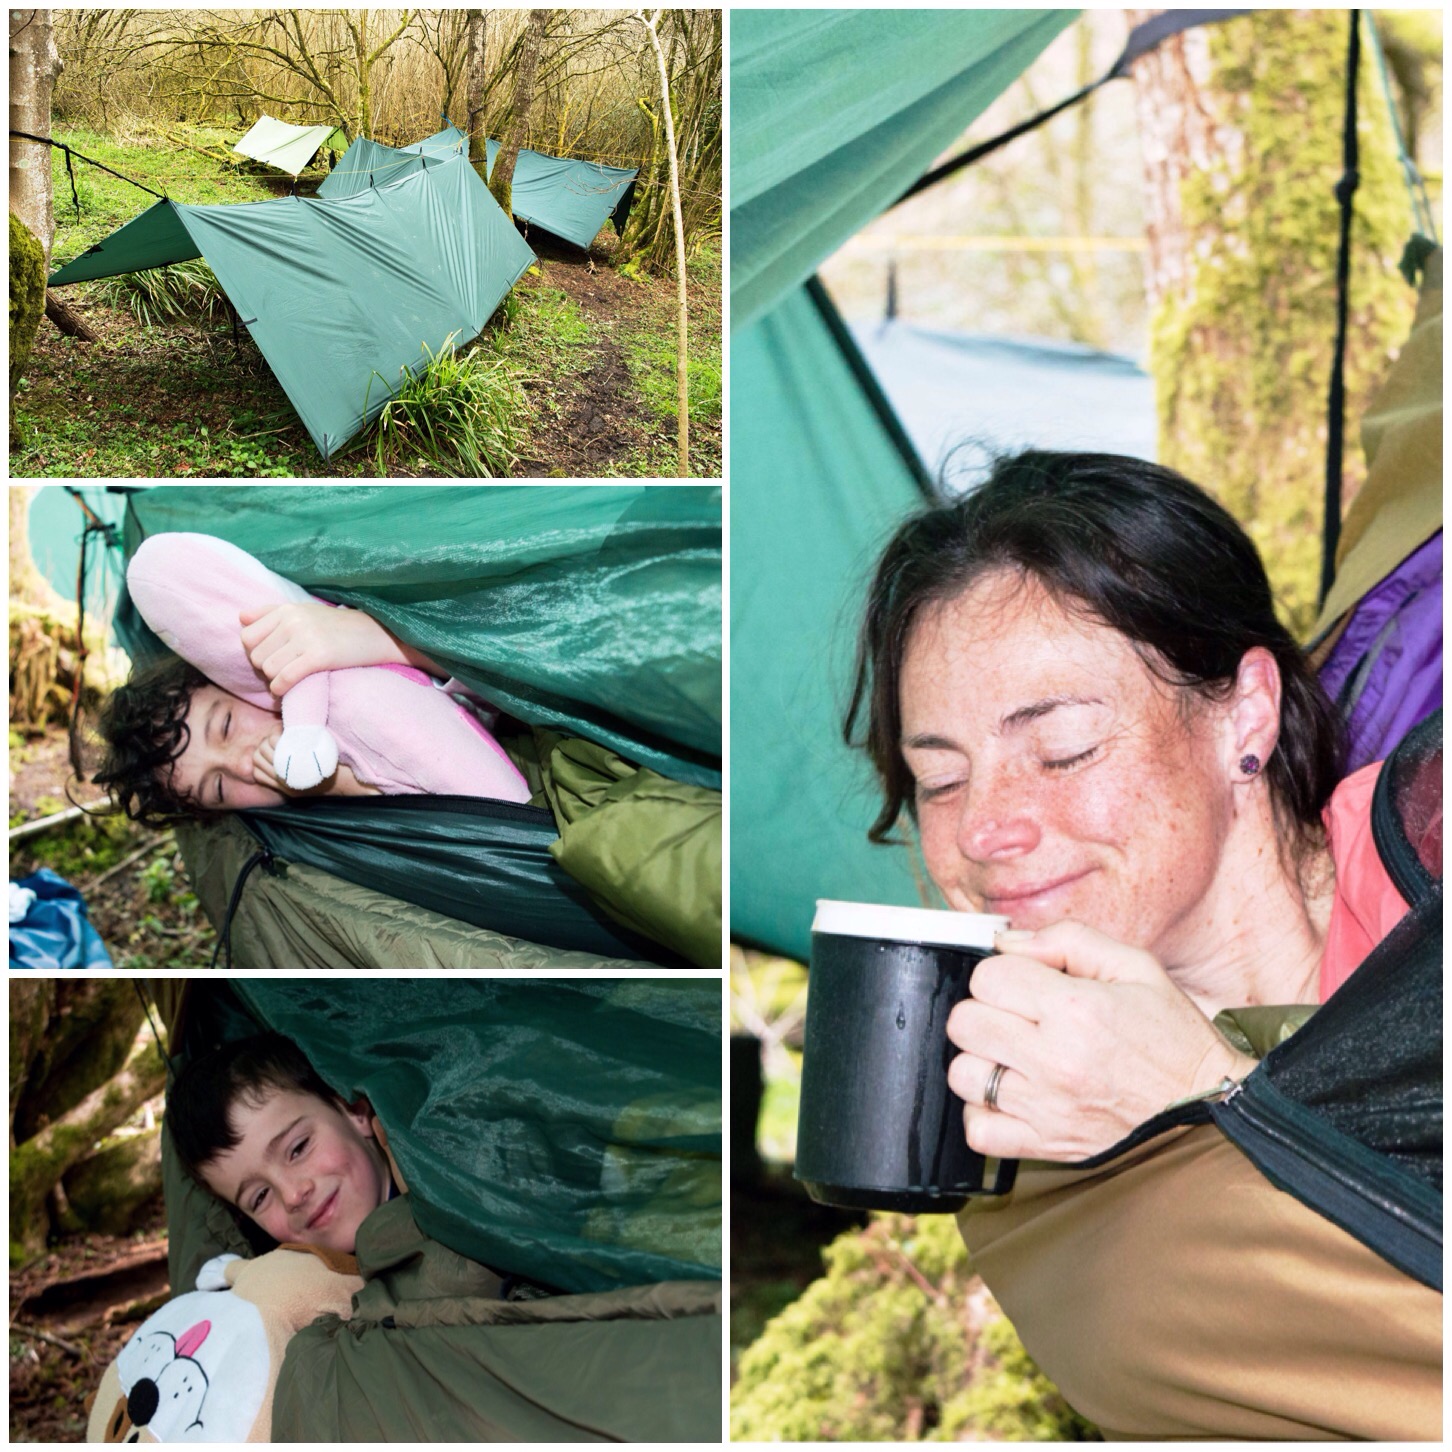
Our accommodation for the weekend was in hammocks. My kids are very happy now to sleep in them. I set up four under individual tarps. Each hammock had an under blanket attached to keep out the cold air, a roll mat, sleeping bag and top quilt.
Everyone was as snug as a bug in a rug you could say.
A tradition we have these days is for Alison to get a cup of coffee in the morning while still in her hammock – I failed with this on the first morning I am afraid but tried to make up for it on the other mornings.
Hammock Heaven
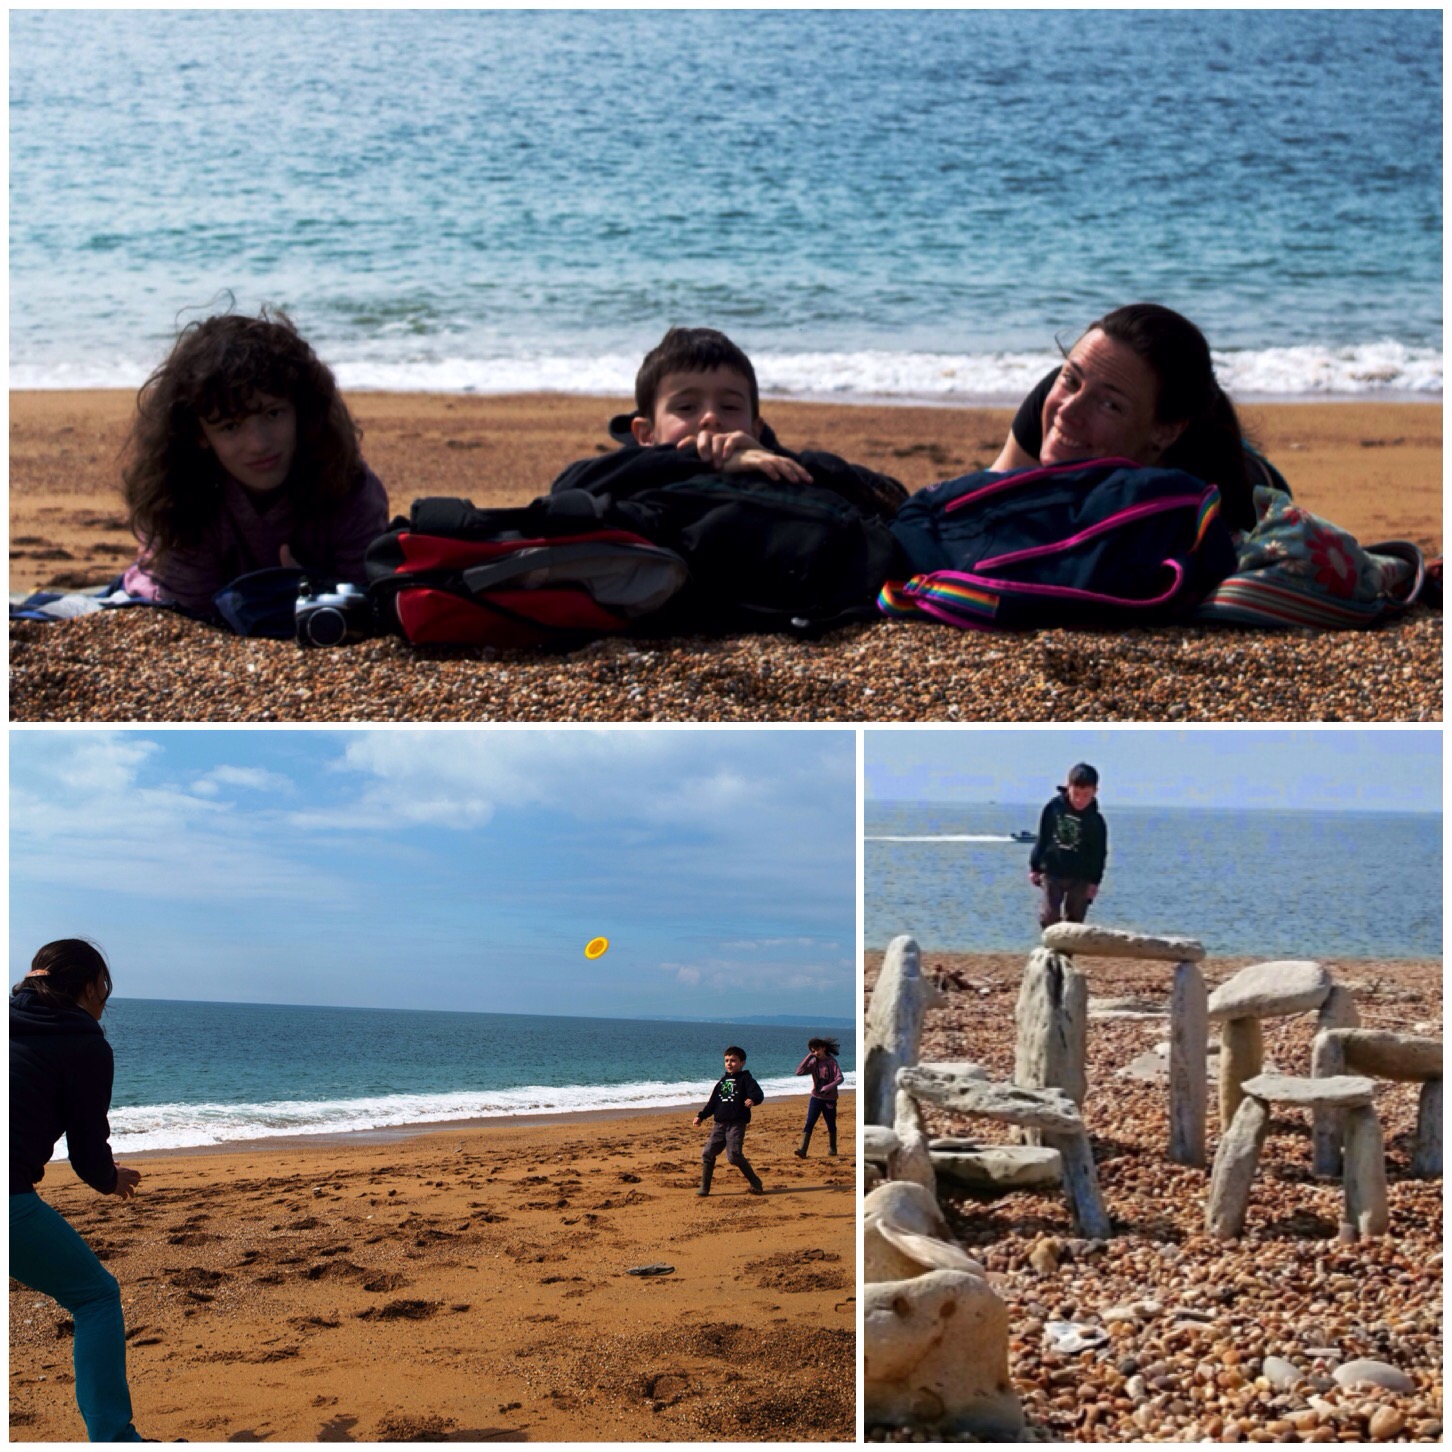
Our second day on the beach was spent playing with a frisbee, watching the fishermen cast and discovering and building little beach henges.
Sun, Sand and Sea
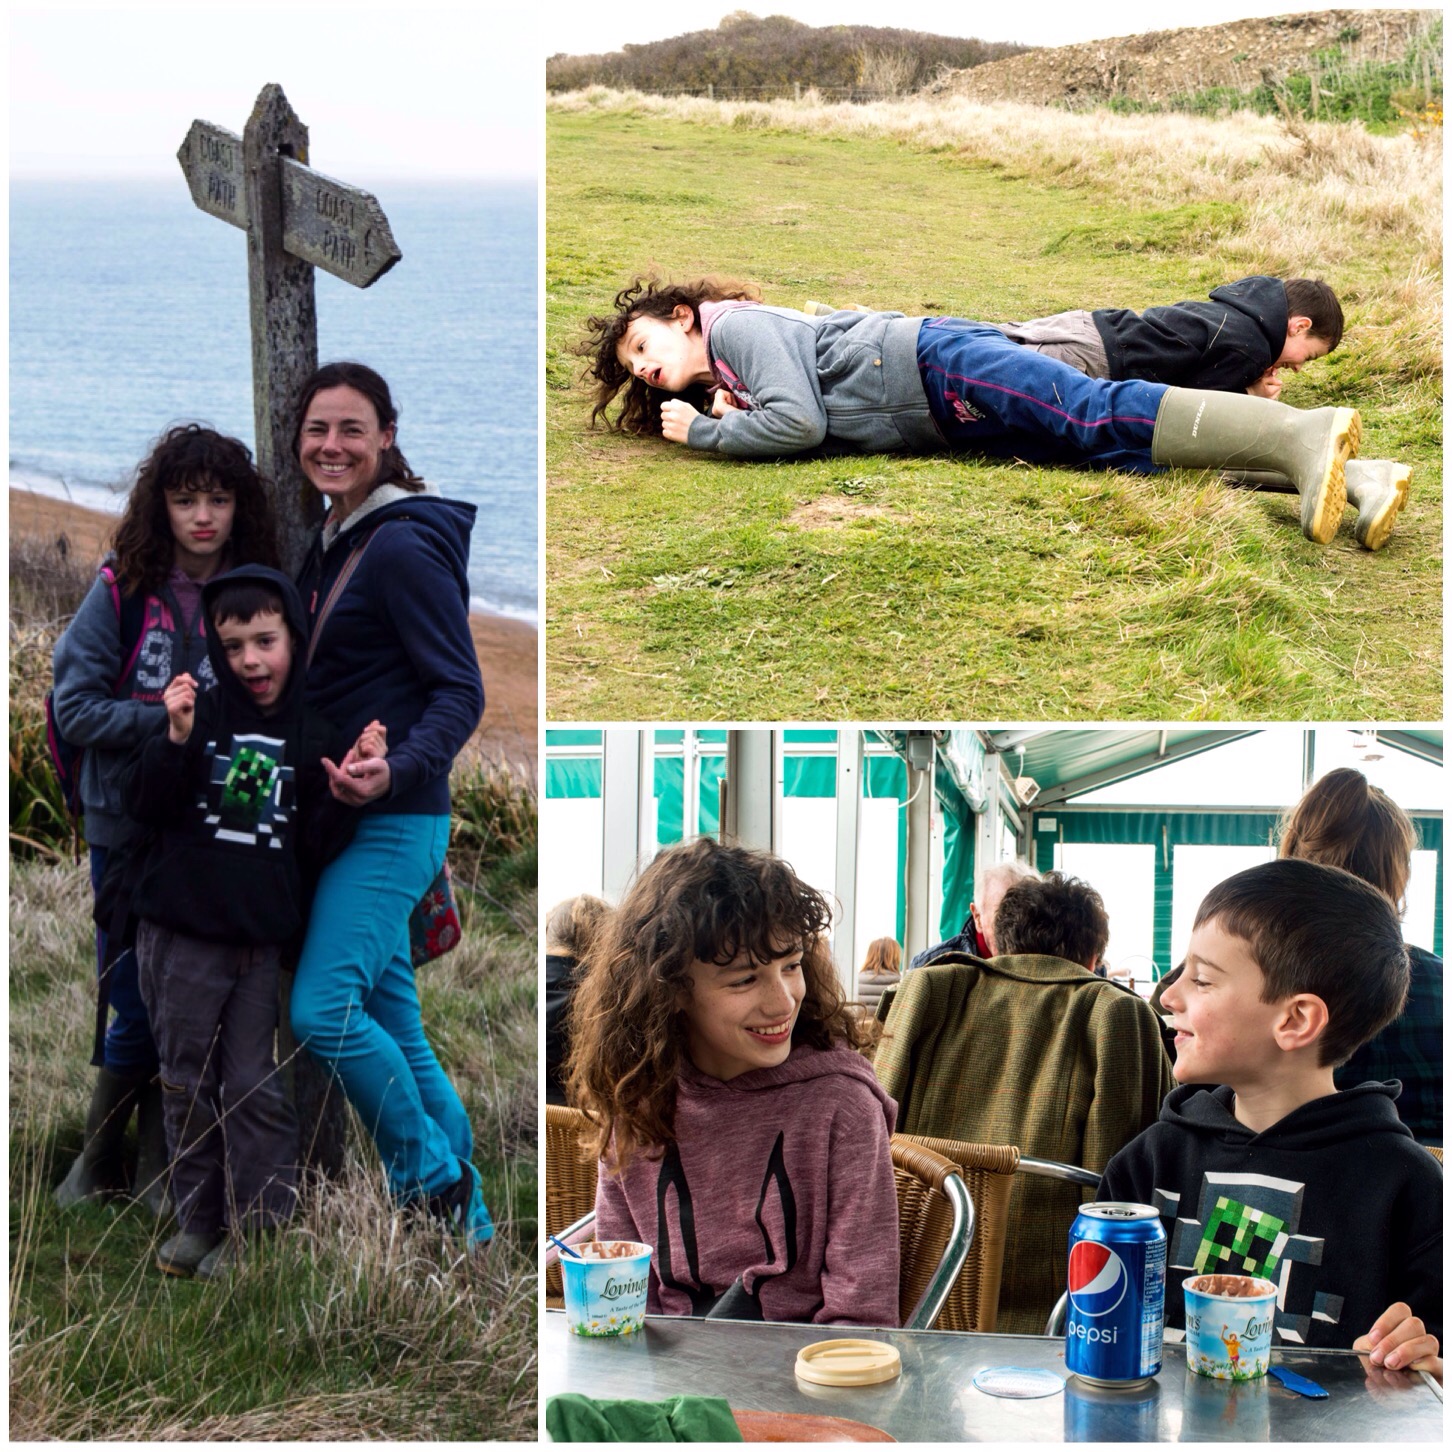
We had a lovely stroll along the coast foraging for sea kale and some scurvy grass. I found plenty of sea kale but no scurvy grass (as expected, comments were made about my poor foraging skills).
We found a nice beachside café to rest up in and a lovely grassy slope for the kids to roll down – perfect.
Together Time
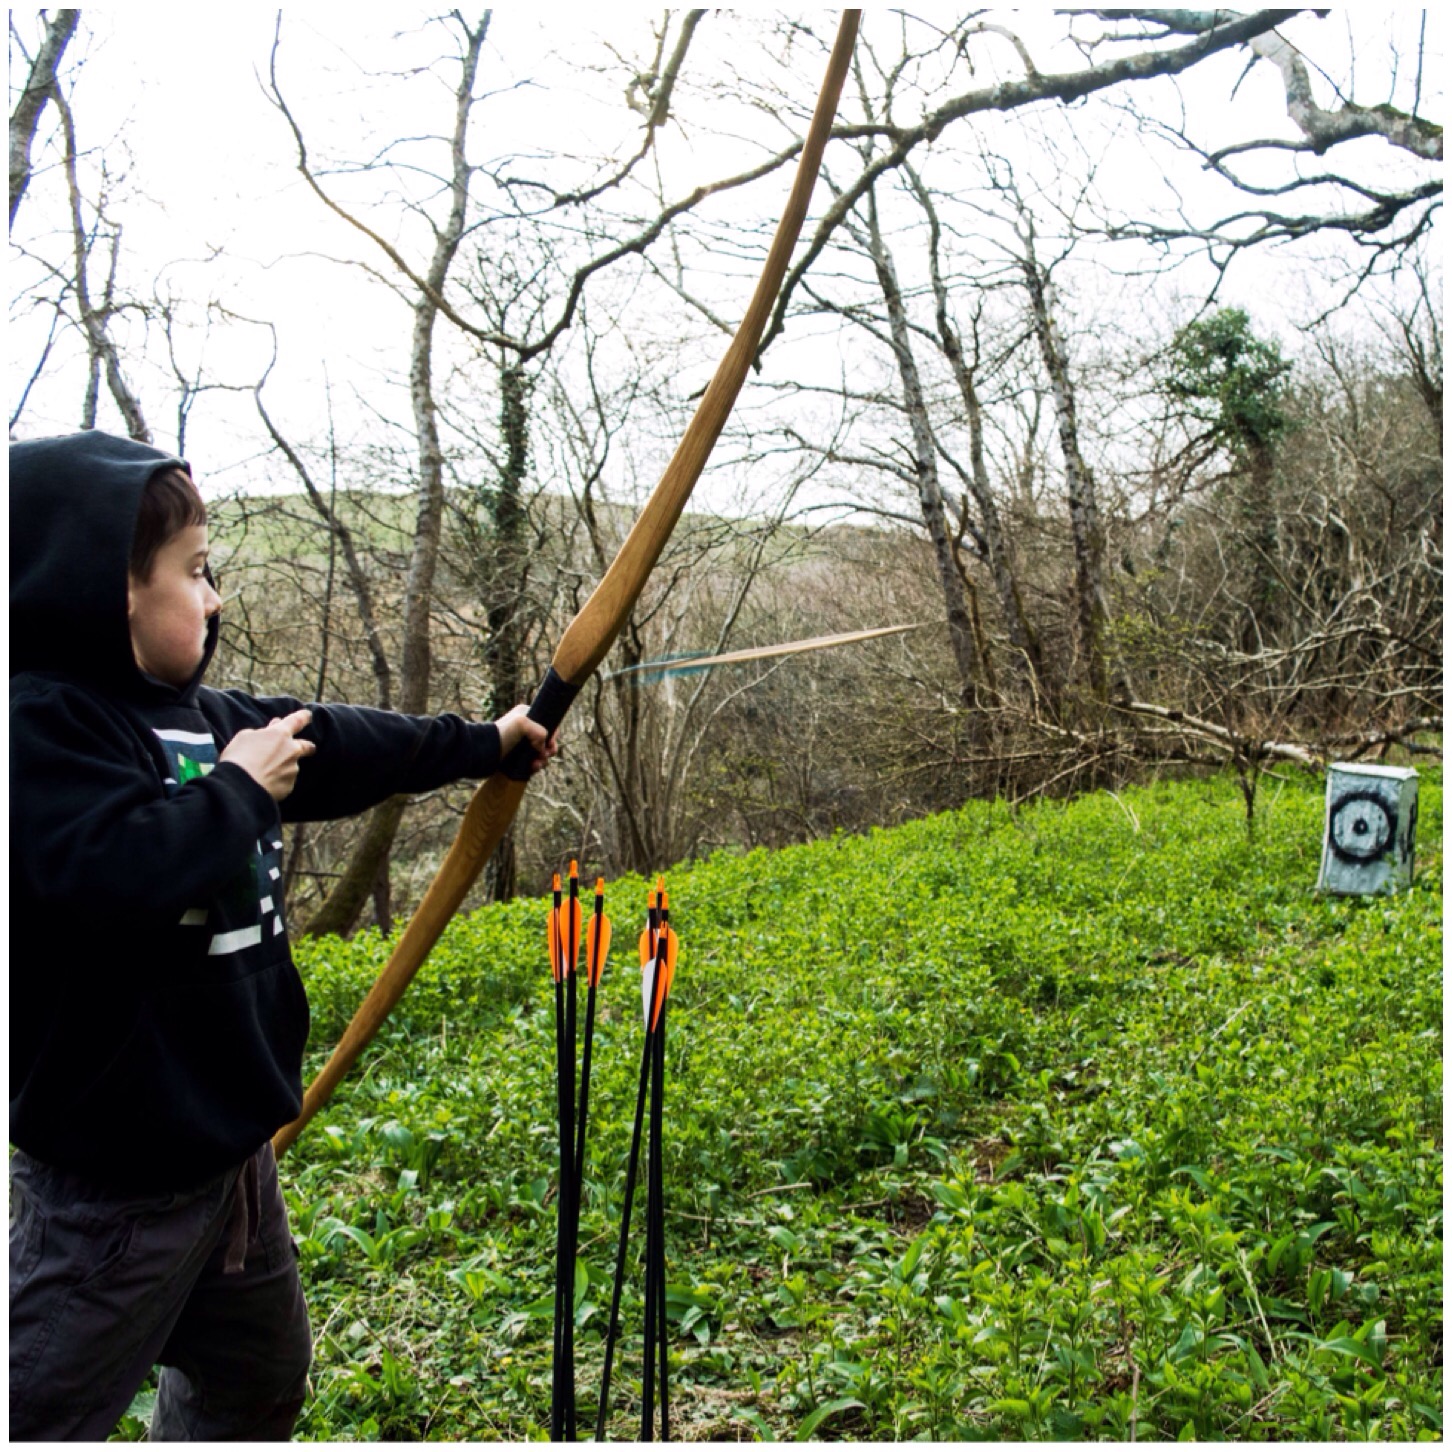
On the last evening before we left I asked the kids if they wanted to shoot some arrows. Only Finlay took me up on my offer and off we went. Finlay is seven and has shot before with his own smaller bow or with me on the larger holmegaard you can see here. This was the first time he had shot the holmegaard on his own. It is a full-sized bow but not heavy in terms of draw poundage.
I was impressed with his stance and his ability to shoot with so large a bow and equally chuffed to capture this great shot of the arrow in flight.
Airborne Arrows
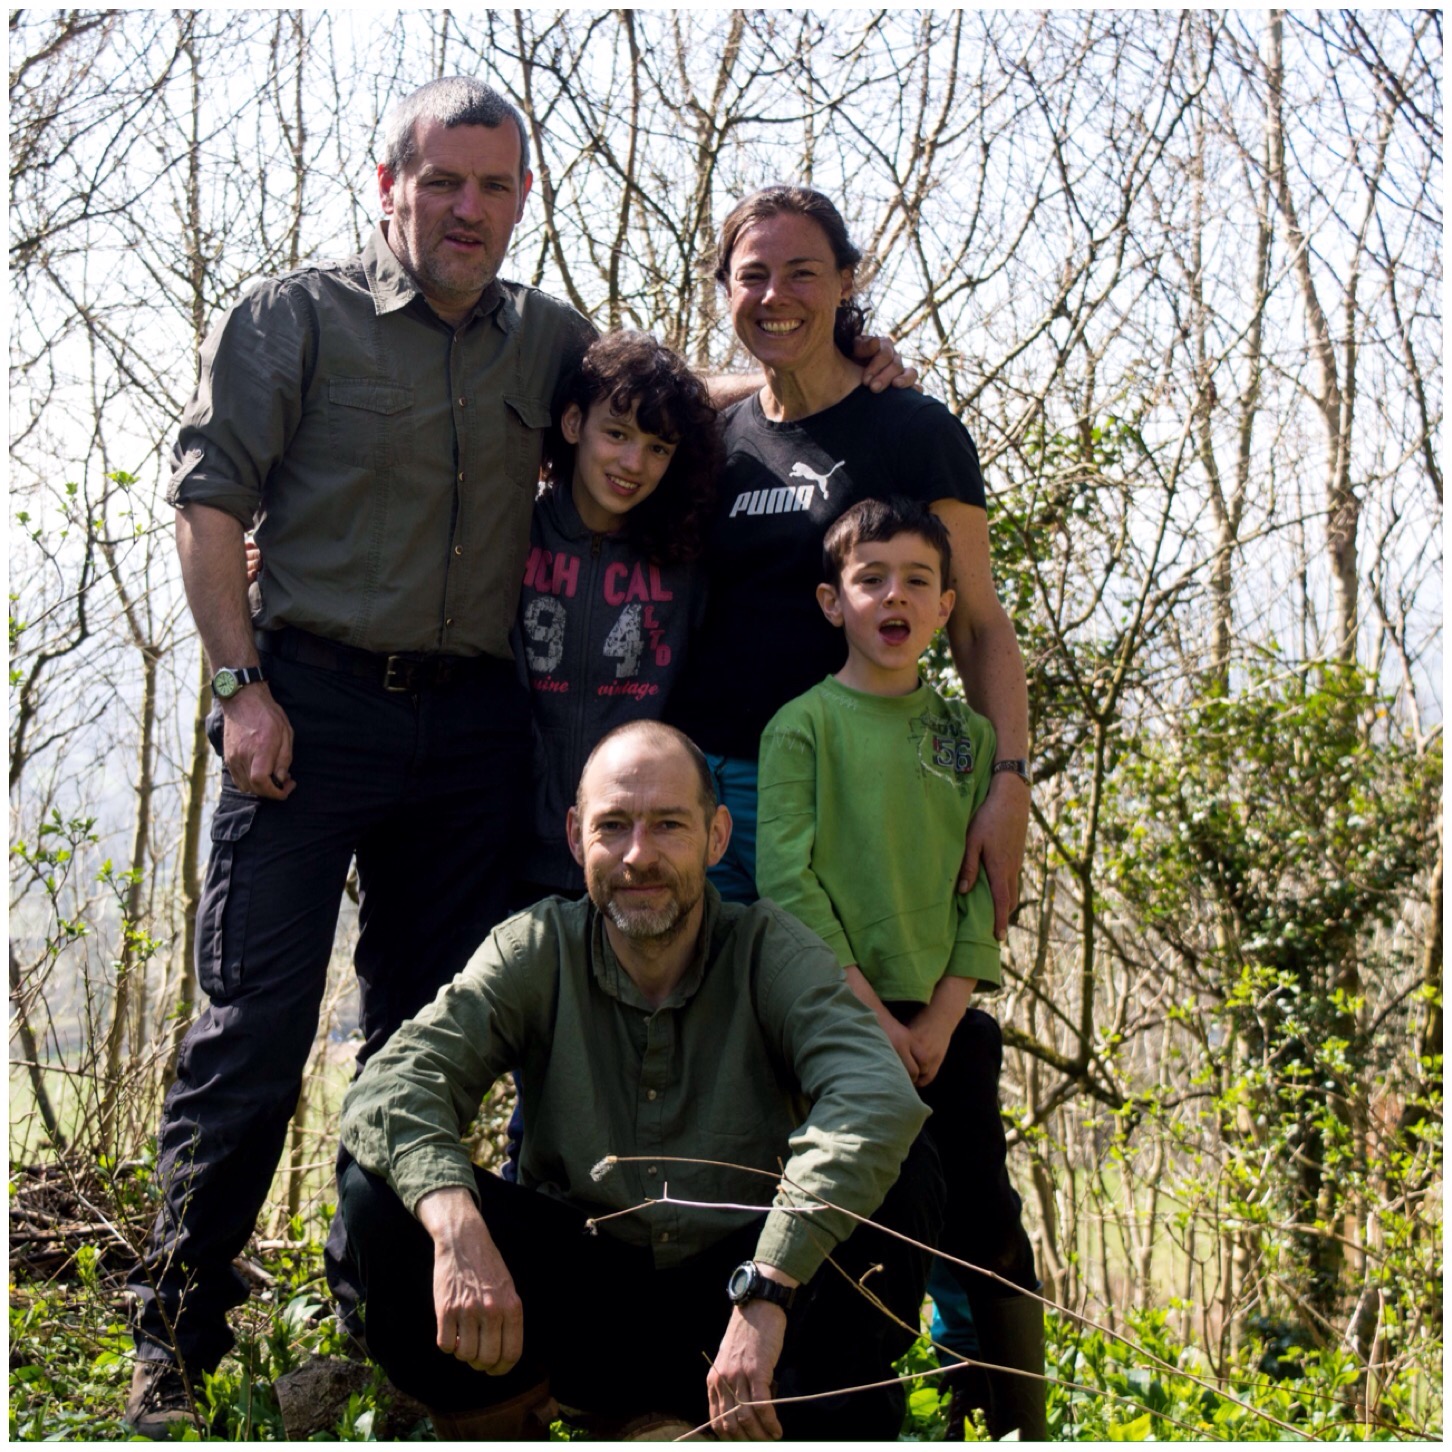
So all the boxes were ticked and we took a group picture of the happy campers before heading off.
Fraser was a great host and we were all sad to leave, however we will be back again if Fraser will have us.
Farewells
As well as taking my usual mass of pictures I put together this short video of the weekend.
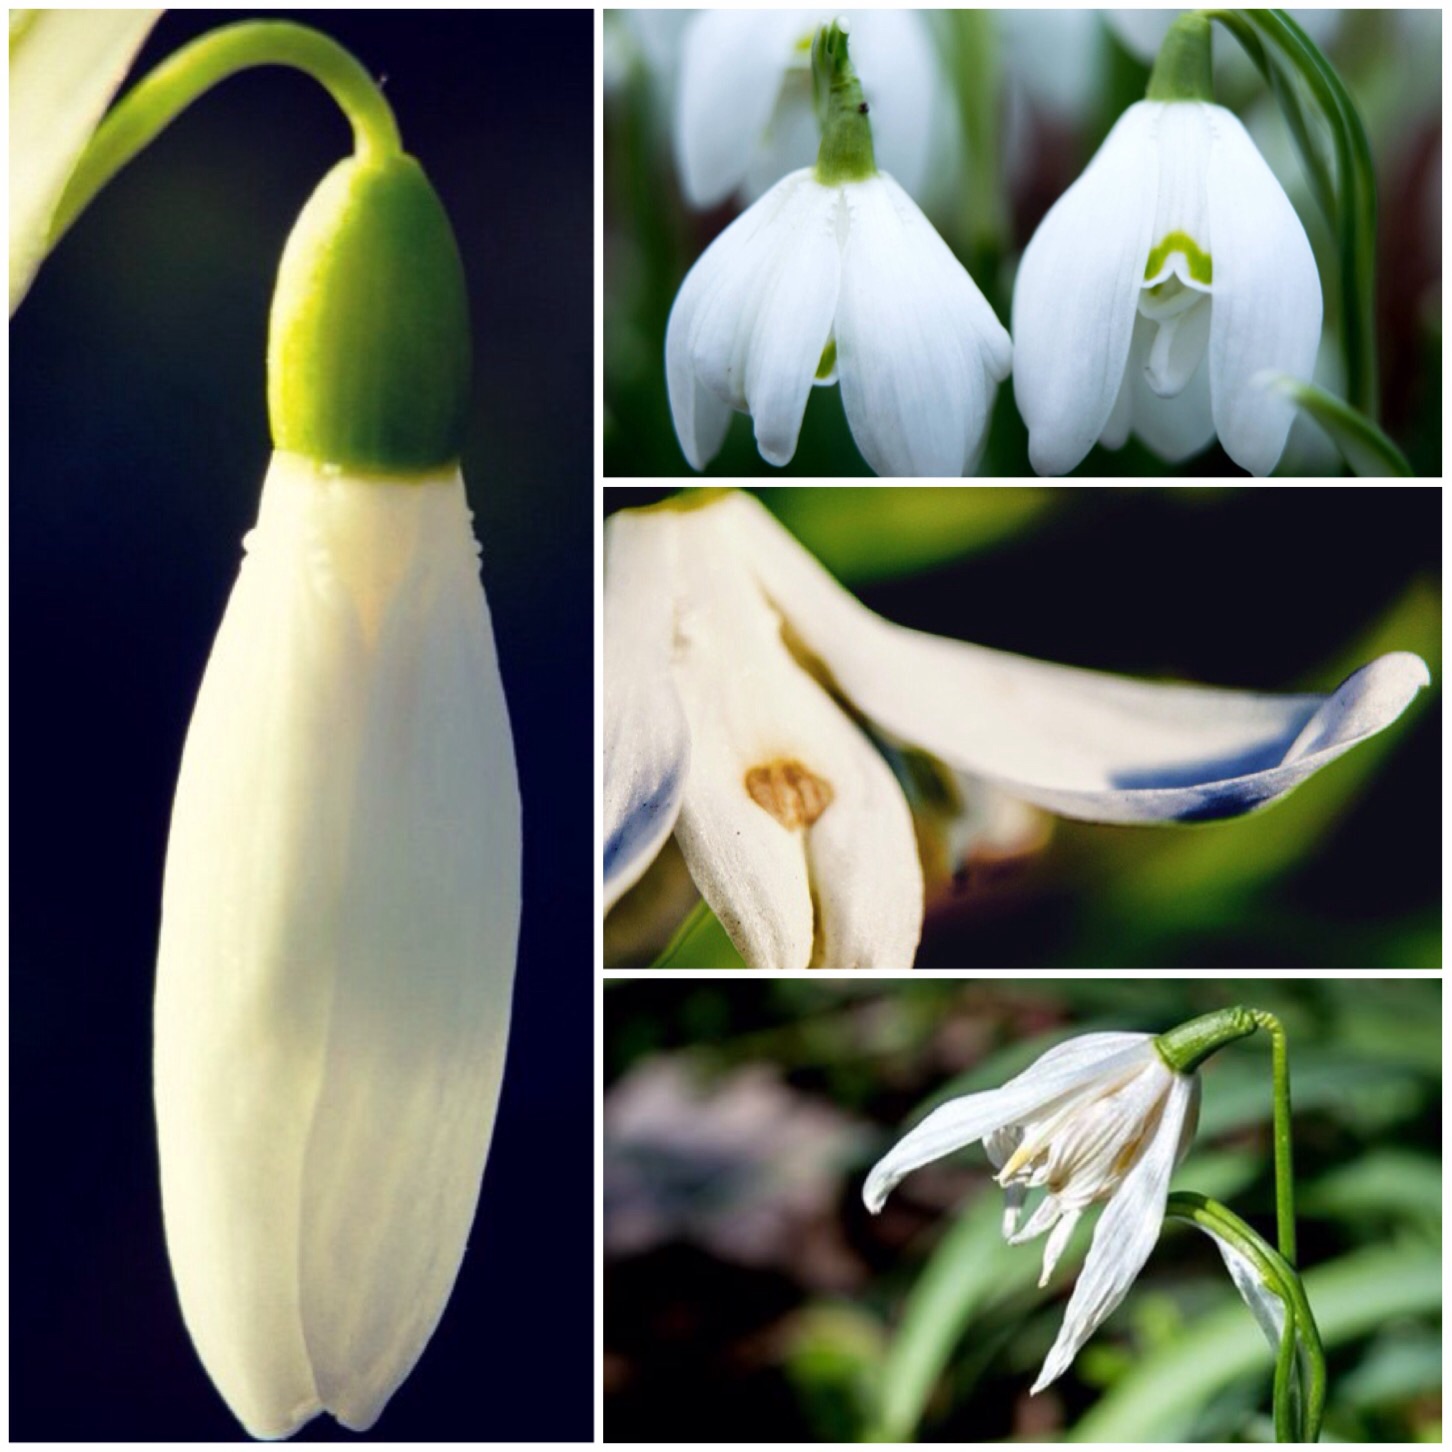
Carrying on in the winter wonders theme I took a close look at the snowdrops this year. All the way through their life cycle they are a beautiful little plant . From the simple beauty of the drooped heads as they emerge, to the majesty of them as they open, through the dramatic flaring as they mature and finally to their dignified withering as they die.
The snowdrop in its glory
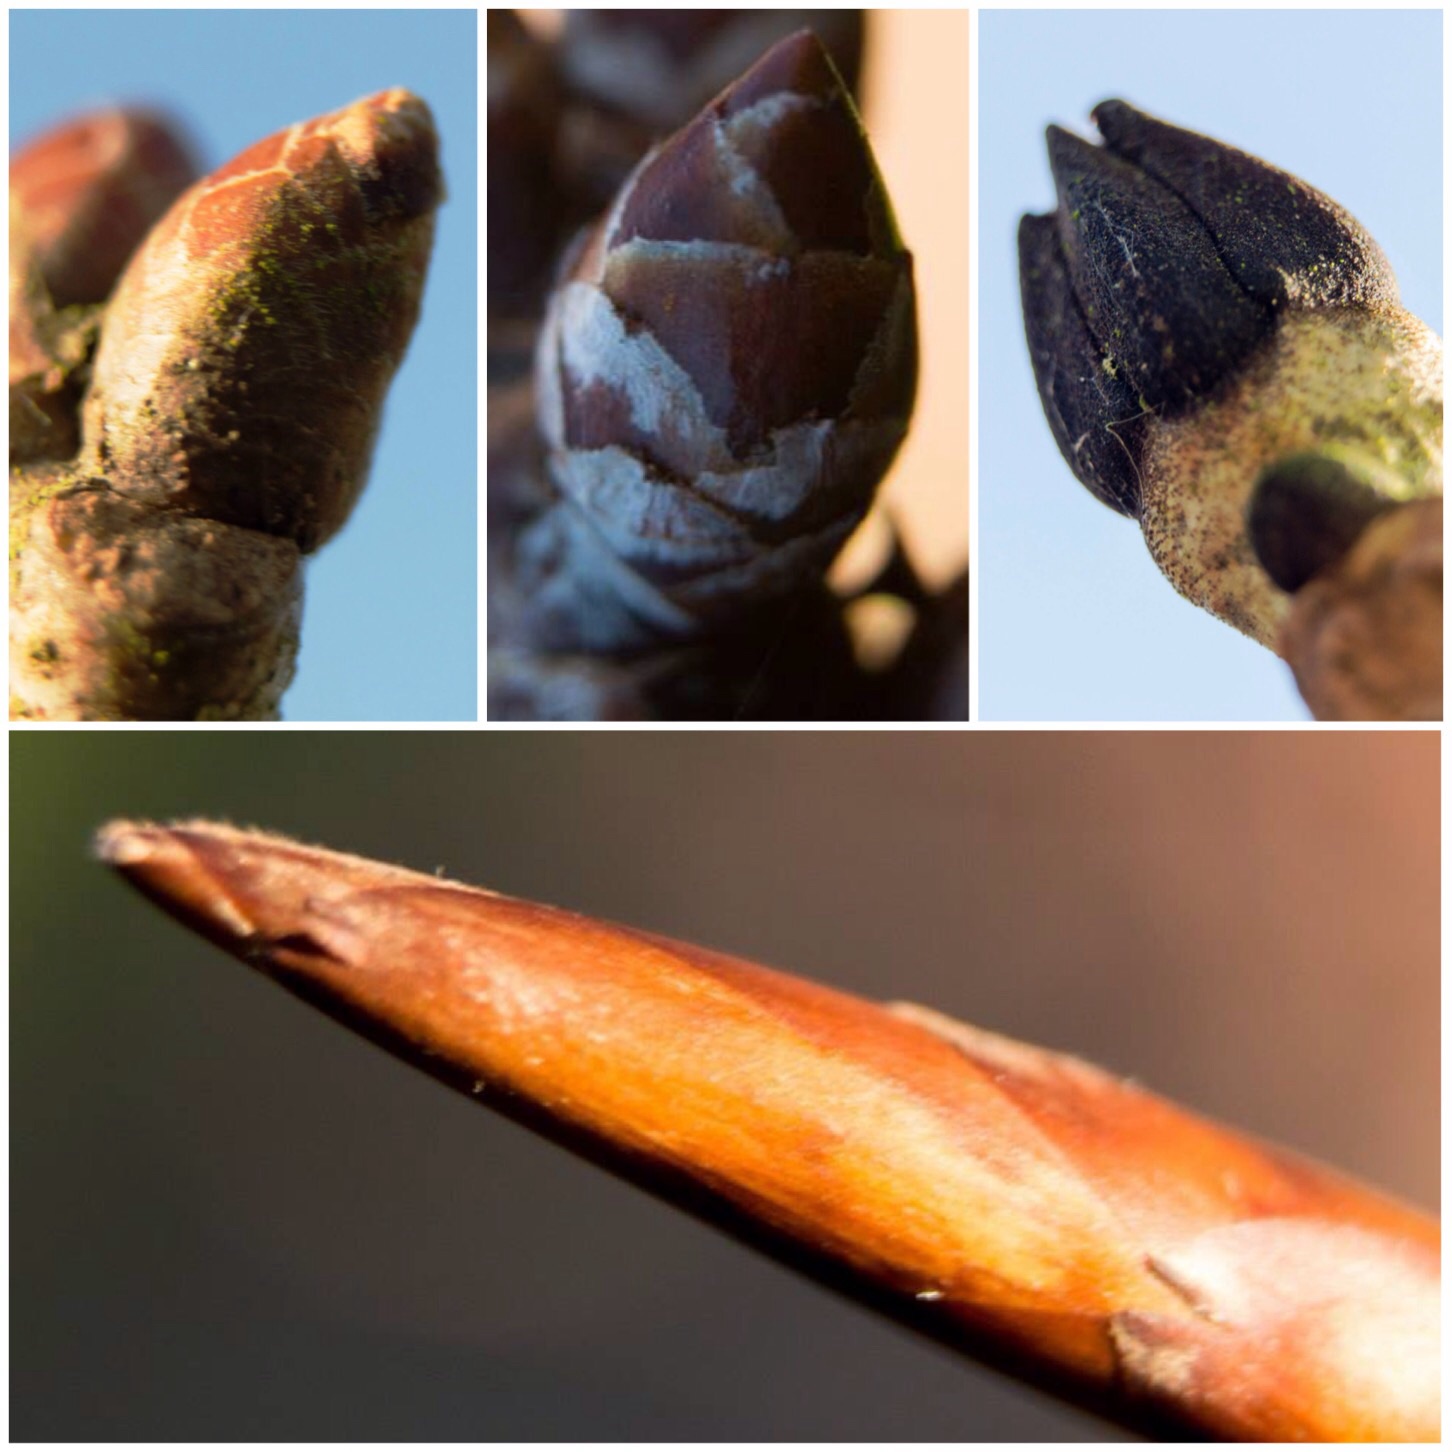
The buds on the trees at this time of year at first glance seem very simple and not worth a second glance but when you get up real close you start to really appreciate the complexity of these little compact power houses. Some like the long pointed beech bud look very smooth, others like the oak and cherry are covered in scales and the dark mitre of the ash looks rough to the touch. All though are biding their time to start that cycle of life again.
Buds biding their time
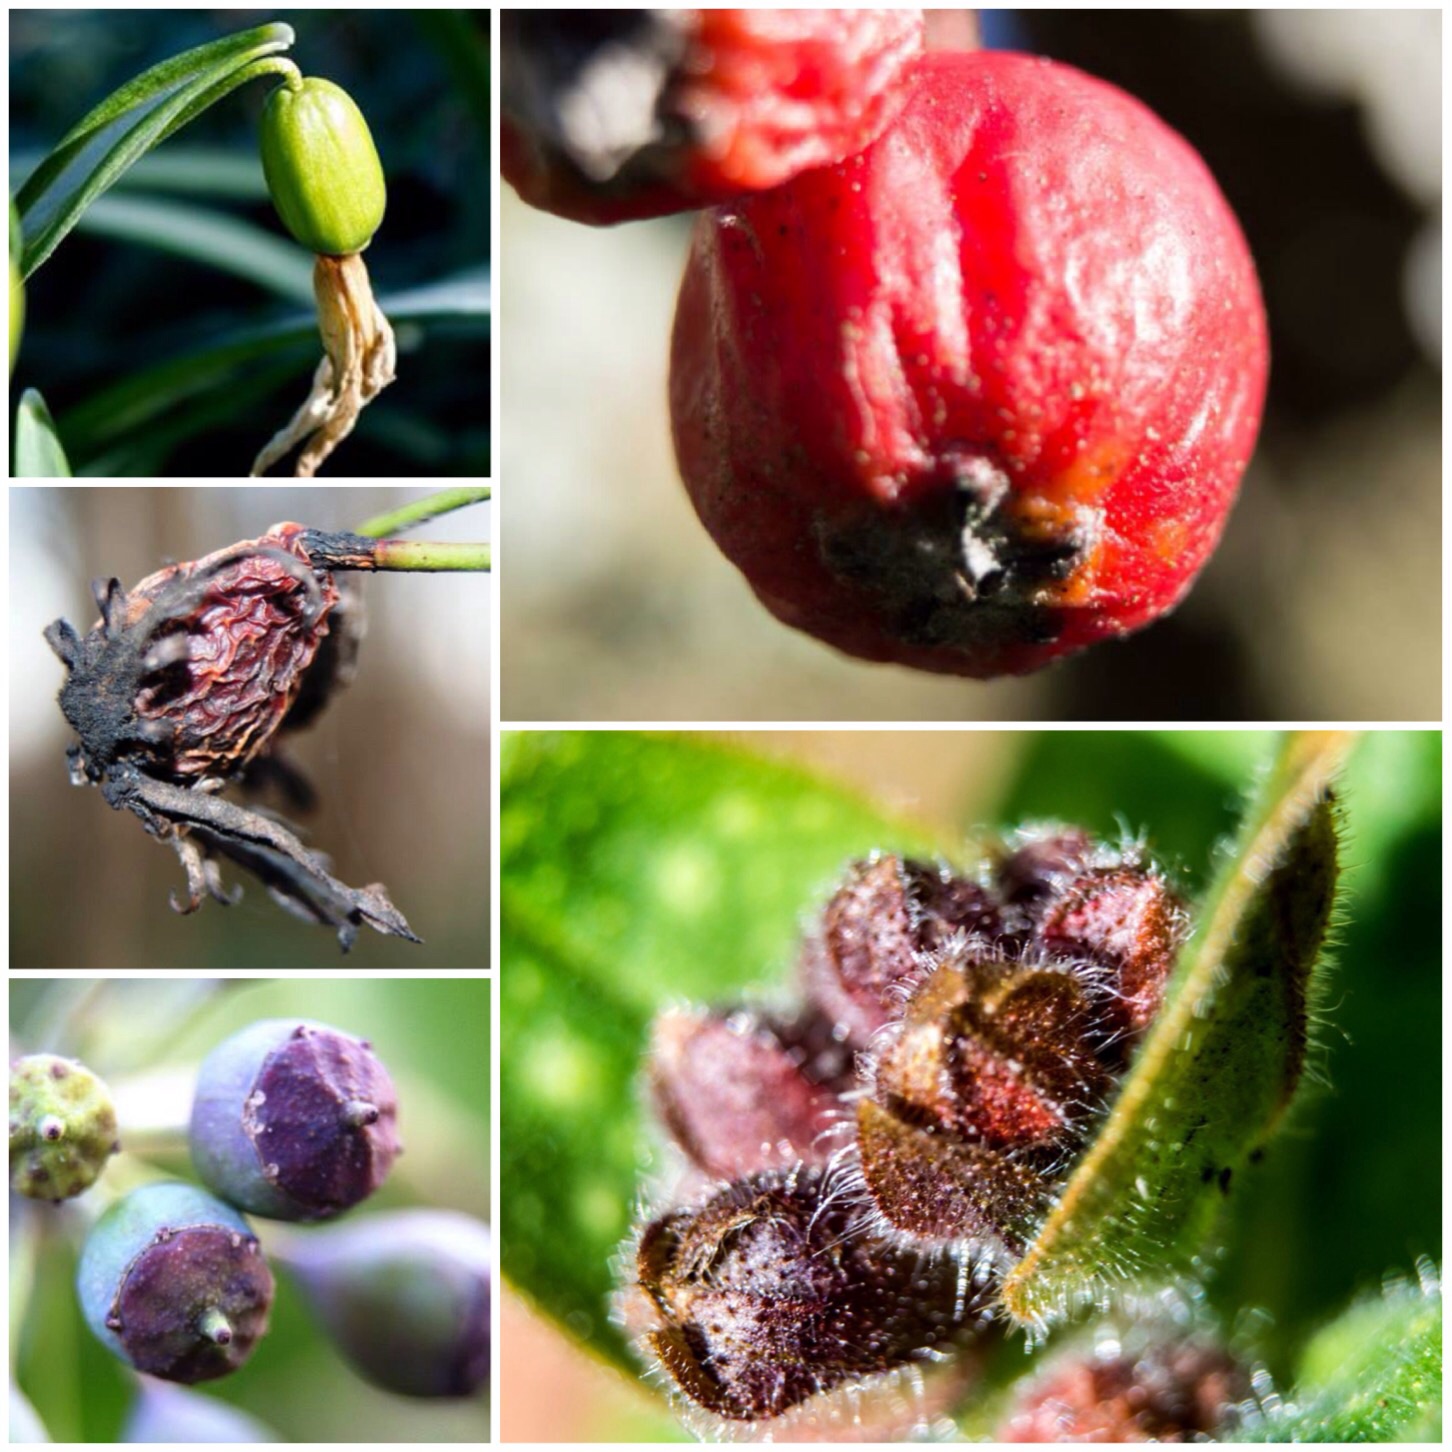
A lot of the colour over the winter is to be found with the seeds and nuts hanging everywhere. The red of the hawthorn (haw) berry can still be very striking but the deep red of the rosehip has gone as it has shrivelled up. The ivy seeds are all still hanging in there in their regimented clusters but emerging through are the tiny snowdrop seeds and the furry little pods of the lungwort nutlets.