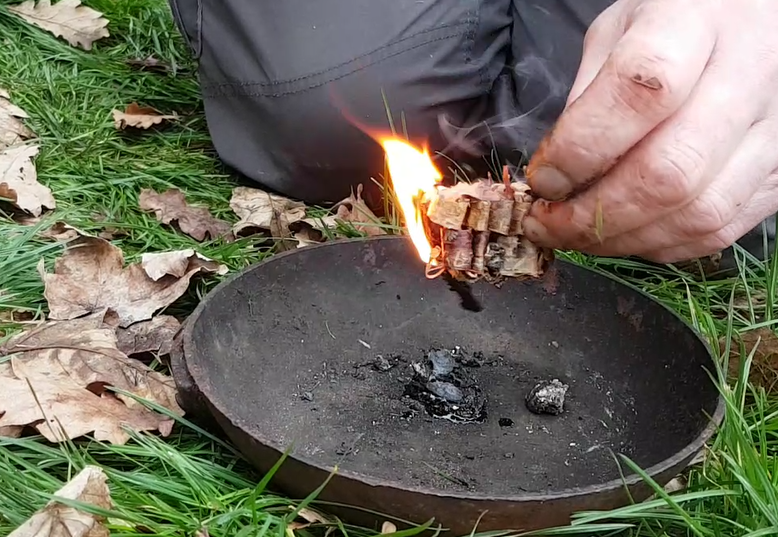
I will post a full How To…. on weaving this totally natural firelighter soon but for now here is a video on making one.
Cheers
George

"to adventure"
I will post a full How To…. on weaving this totally natural firelighter soon but for now here is a video on making one.
Cheers
George
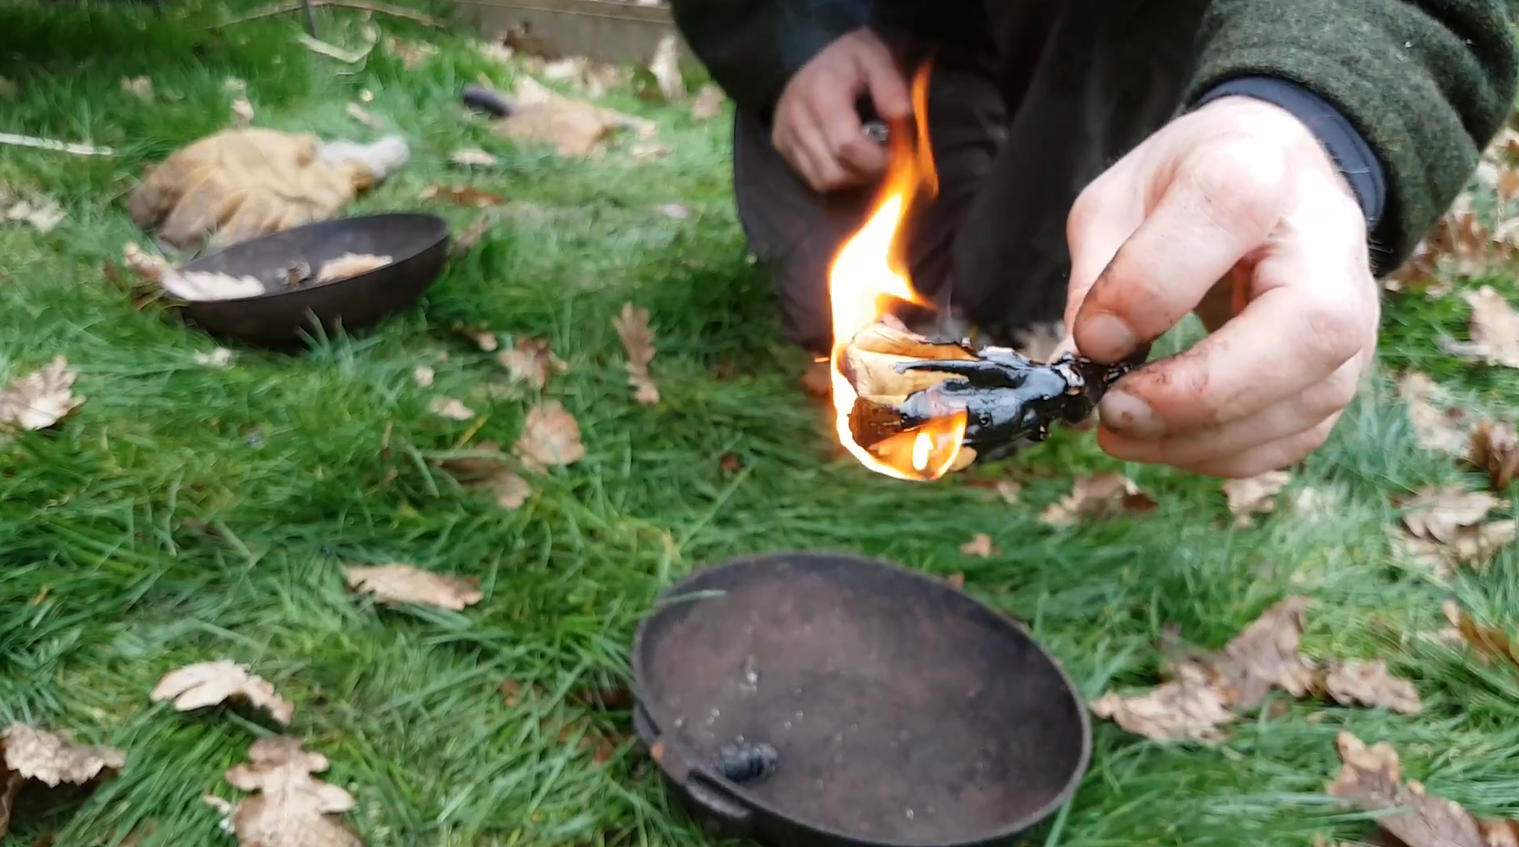
I will post a full How To…. on harvesting the Birch Bark and making the fans but for now here is a short video post on an excellent bit of homemade bushcraft kit.
Cheers
George
As a bushcrafter I like to keep an eye on what is going on around me. As an amateur photographer – ditto. This habit of always looking for an interesting shot has led to a few comments recently about my ‘Geek’ levels 🙂
Perusing my albums over the last few months though I felt a number of shots lent themselves to this blog of contrasts and colours – Geeky I may be but I enjoy it.
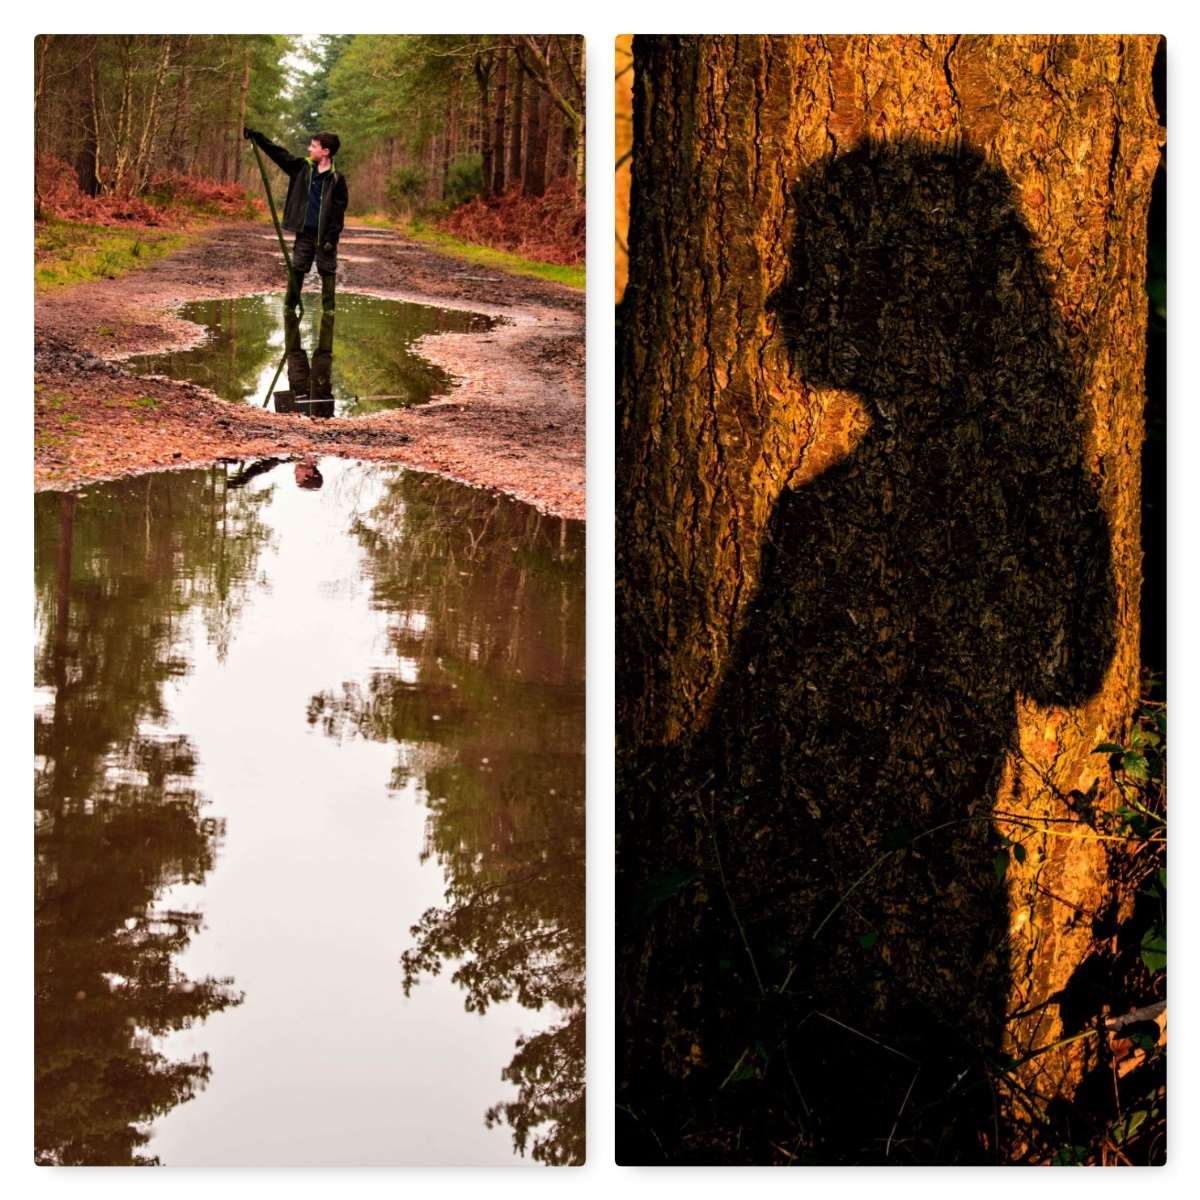
The two ‘In Profile’ pictures above are of my kids Finlay and Catherine. Both shots were in separate locations but truth be told they were well posed. It was great to walk past a site – see its potential at that moment in time and then get the shots I wanted.
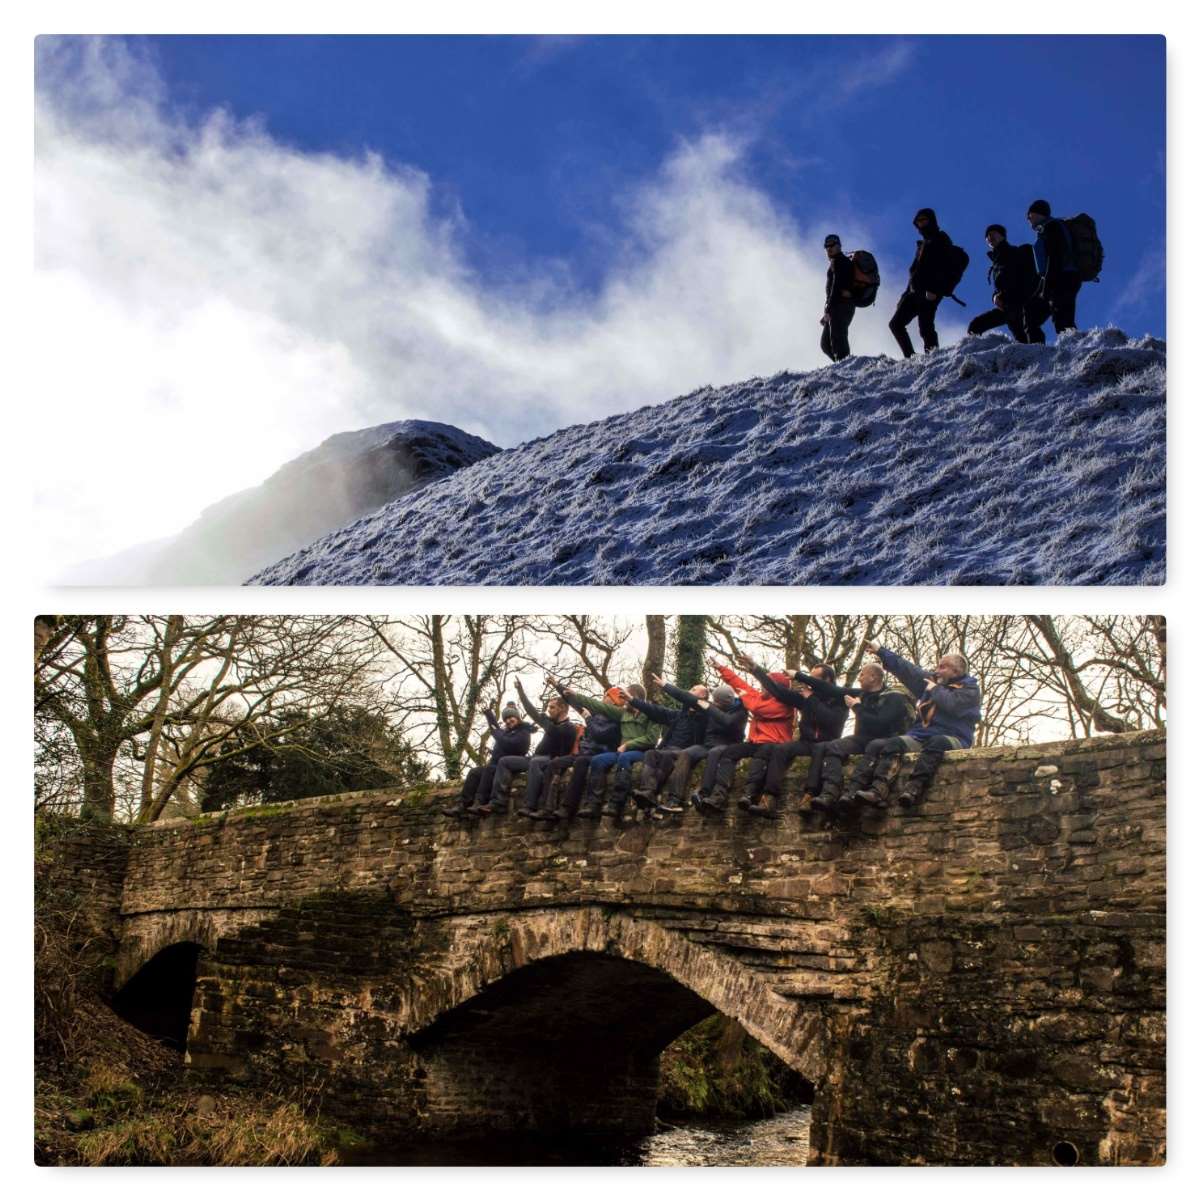
Recently I was with a group of friends in the Brecon Beacons having fun in the mountains. I spent a fair bit of time scouting around on my own to get what I think are decent shots like the top picture above. I had fun ordering the guys around on the mountain until I was happy with the shot but it was hard work.
In contrast the picture of the guys sitting on the bridge, low down in the valley was at the last moment after an impromptu group photo. They all just decided to do a ‘Bolt‘ at the end of it and I just clicked away – easy.
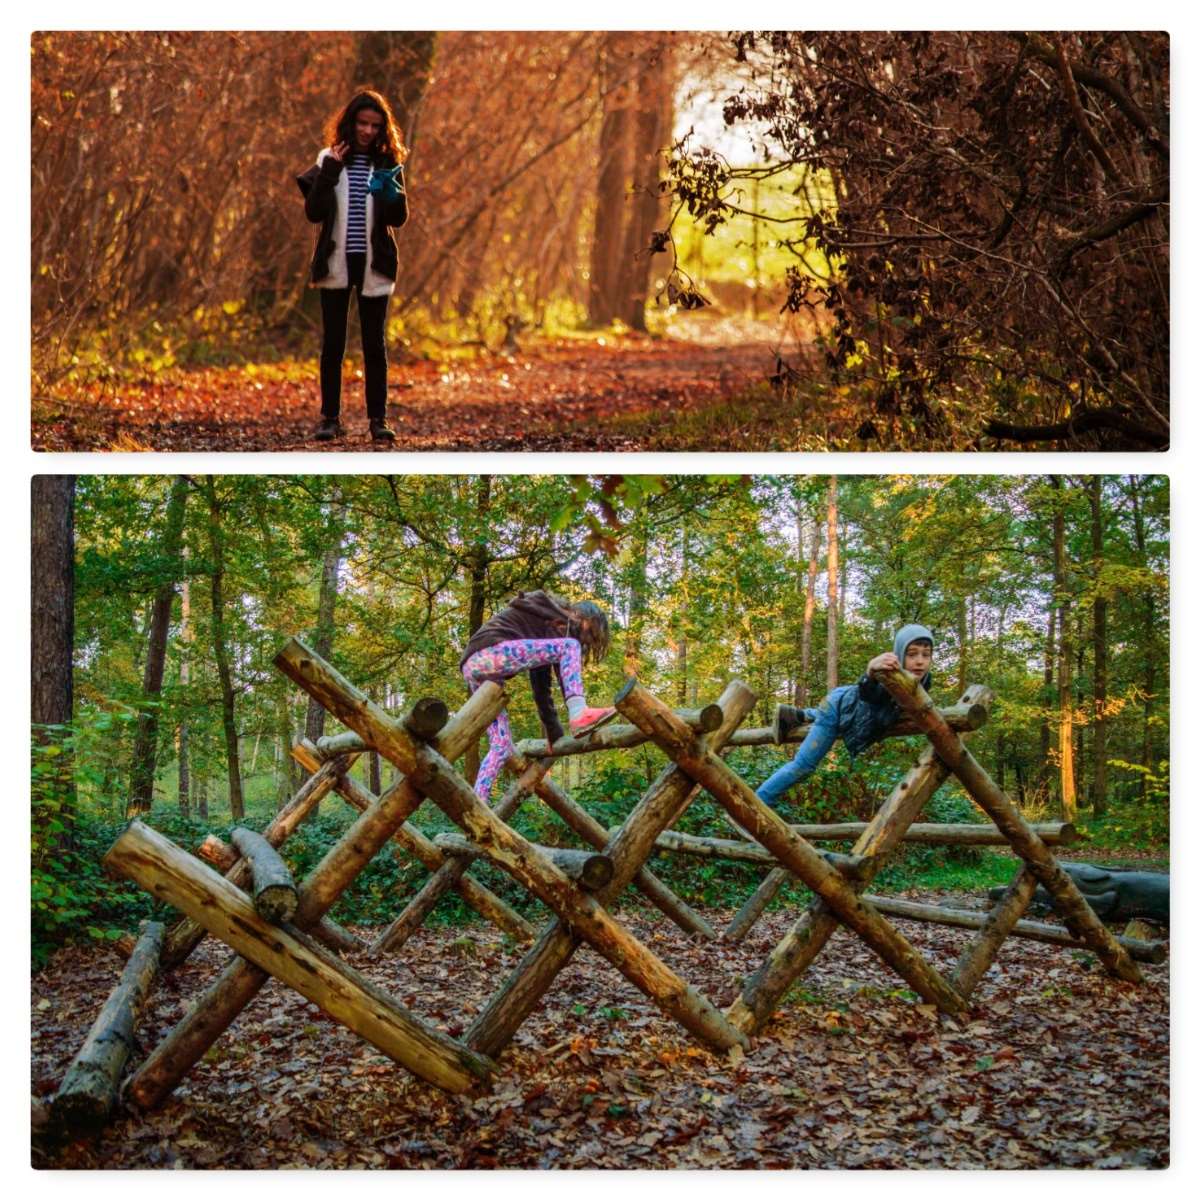
I love to photograph my children and they love to be photographed. Colourful pictures in the late autumn and winter can be hard to find at times but they are out there.
The two pictures above were shot on different days however with a bit of good sunlight coming through the different colours in the woodland really stand out – a bit of action always helps to 🙂
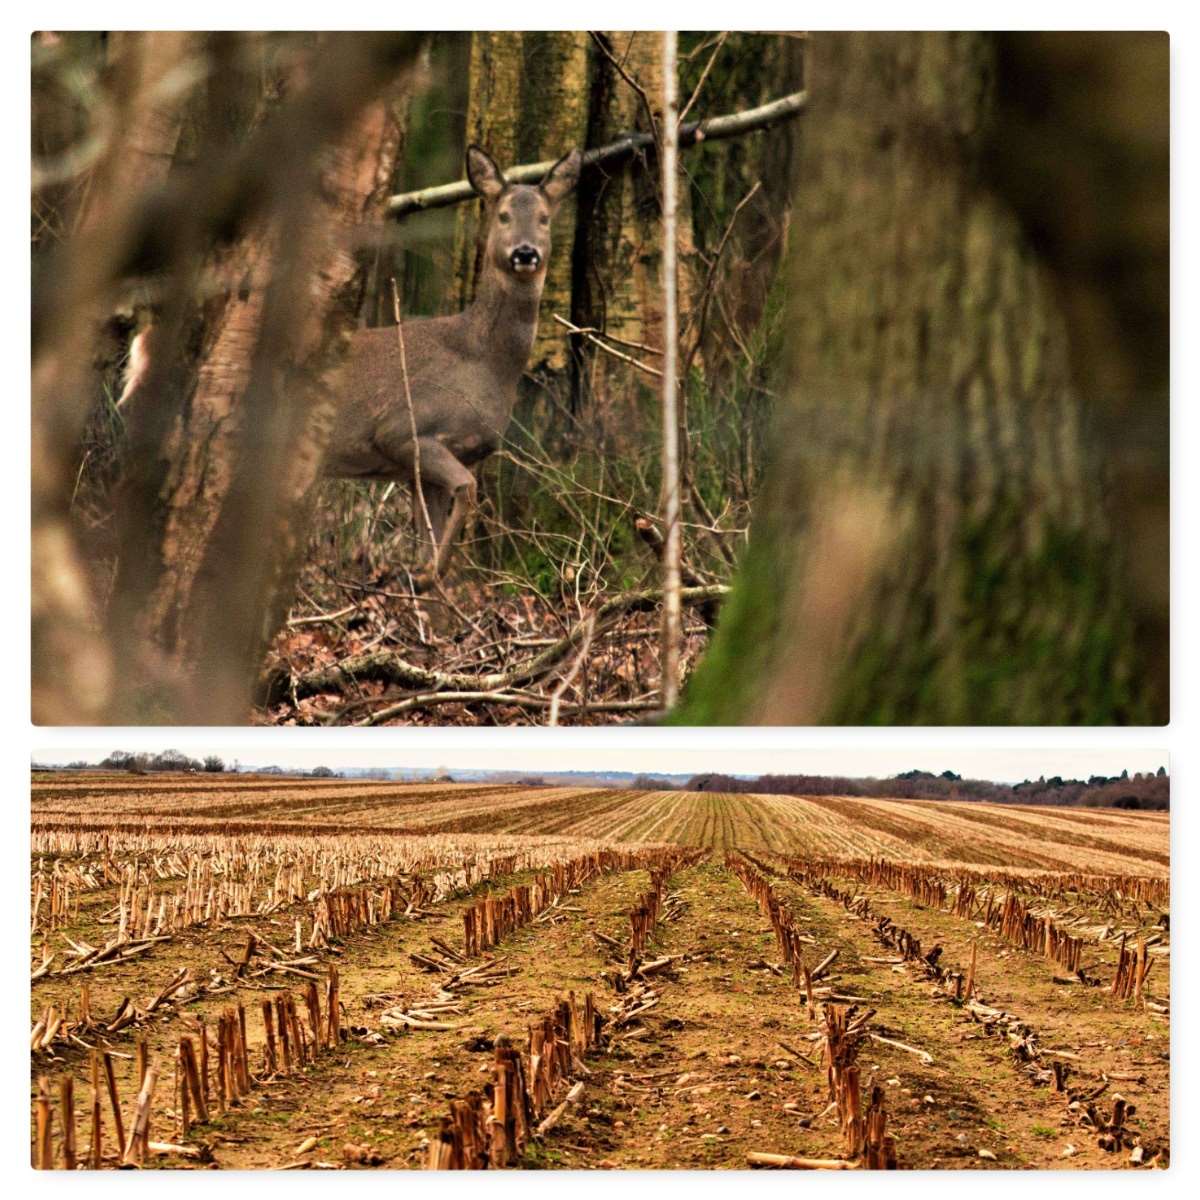
I really liked the contrast of the two pictures above. I stalked the deer for quite a while and waited until I could get the best picture of her as she finally noticed me. The woods were very closed in with lots of underbrush and noisy from the leaf litter.
The field though was different in every way and I only decided to take this shot as I passed by. It was so quiet and open however when I looked at the picture later I could see the subtle greens of the weeds coming through. Even though the pictures are so different there are similarities with the colours of the weeds and moss in both pictures.
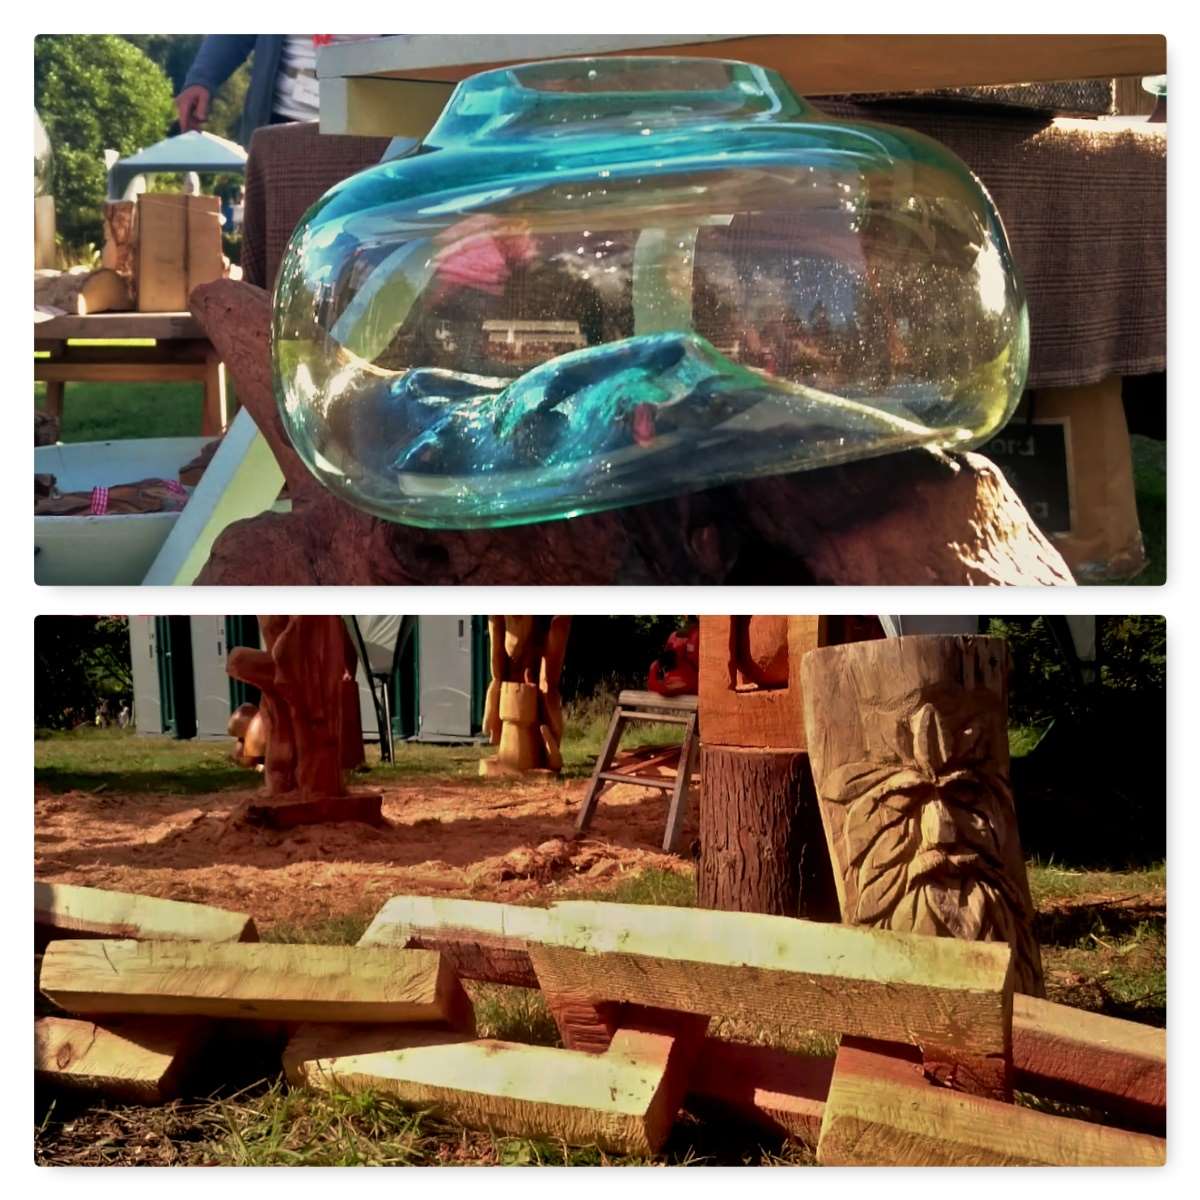
The ‘Curves and Corners’ pictures are stills from some video I shot at the Surrey Hills Wood Fair last October. Not the greatest quality however these were two scenes that had me entranced.
The skills needed to form the glass bowl over the log and the carving of the links out of a single trunk make my mind boggle.
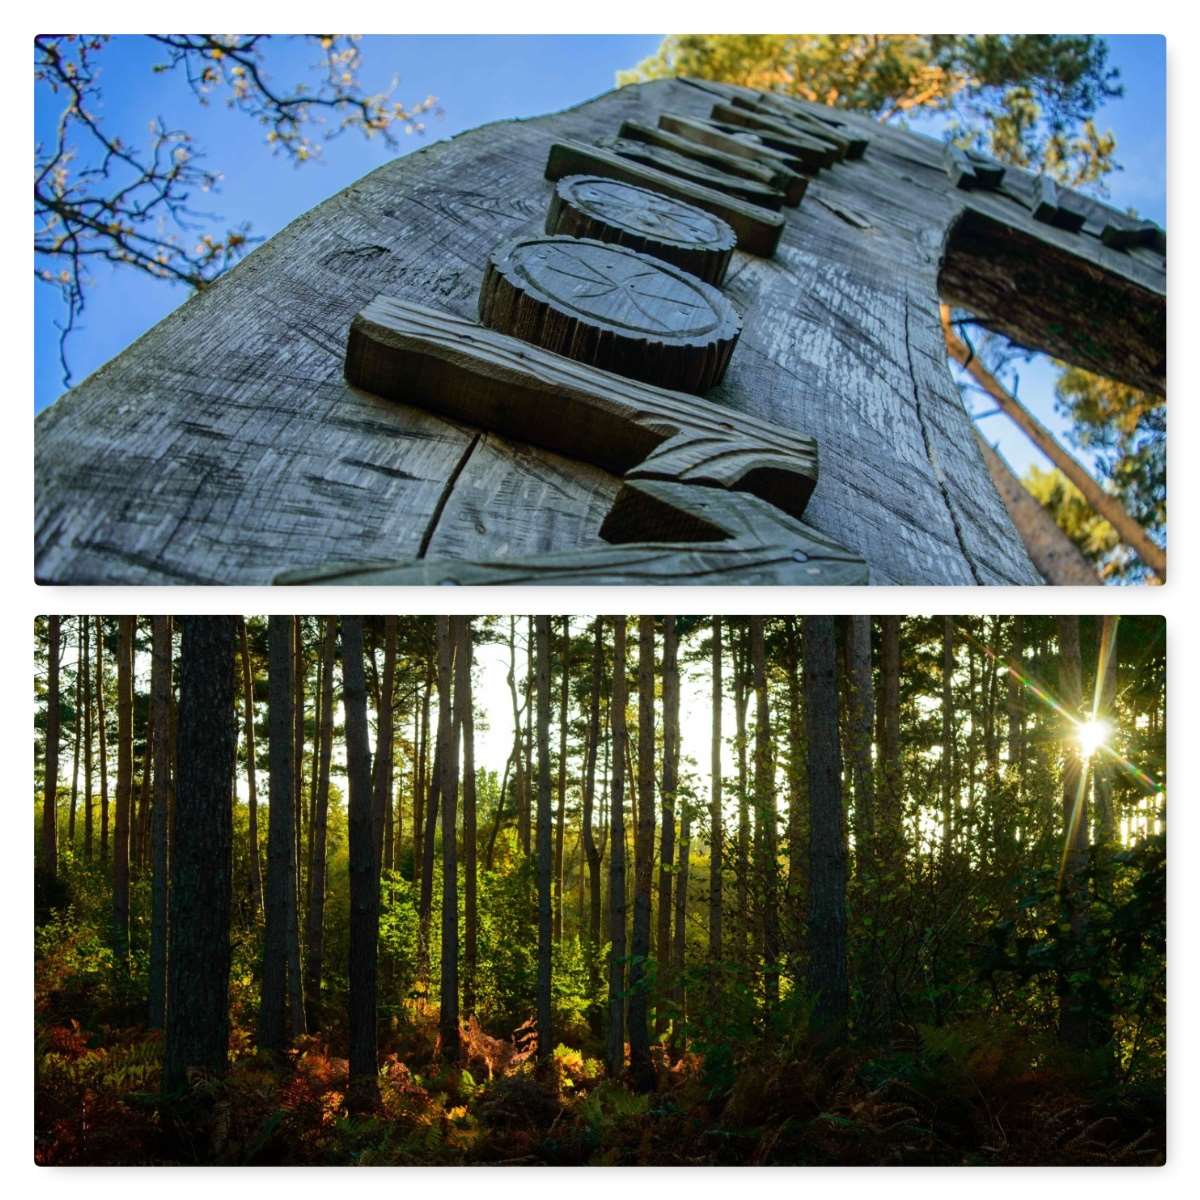
I went for a walk with my family in Basing Wood at the end of last year. It was a dark and dreary winters day – the type that could really do with a great dollop of snow to cheer you up.
Not to be put off with this greyness I kept looking for something a bit cheery. I found this where the trees met the sky when the sun finally came out.
The kids woodland play park arch came alive when shot from below – its depth really stood out at this angle. The bottom picture I love because of the bands of colour you can pick out in the weak afternoon sun. My wife Alison was the one who suddenly stopped me and pointed me in this direction – so easy to just walk on by…………
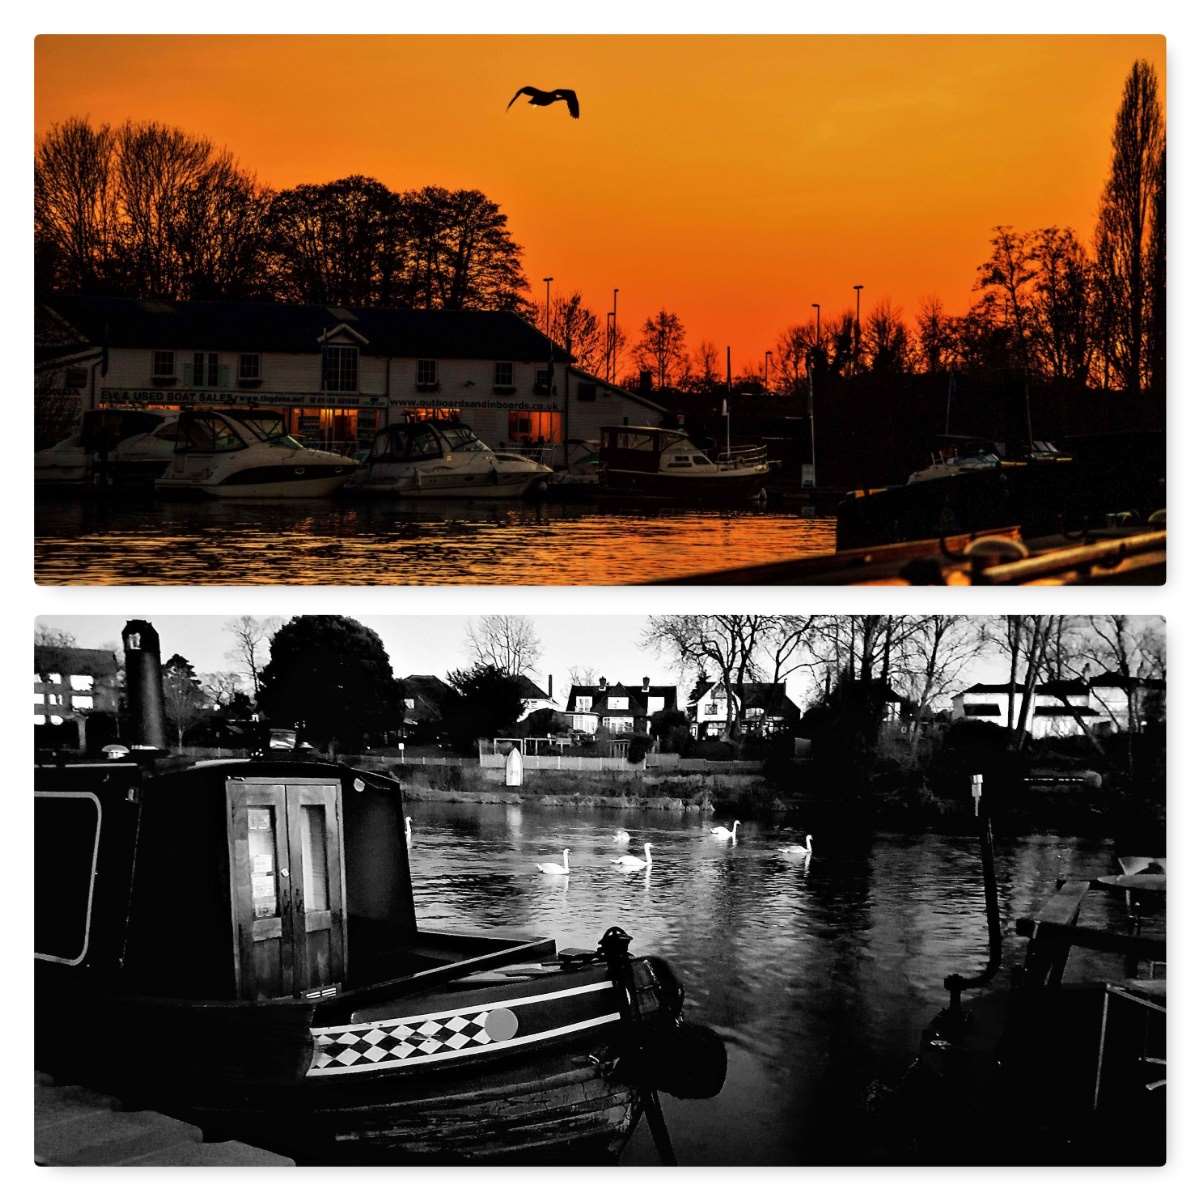
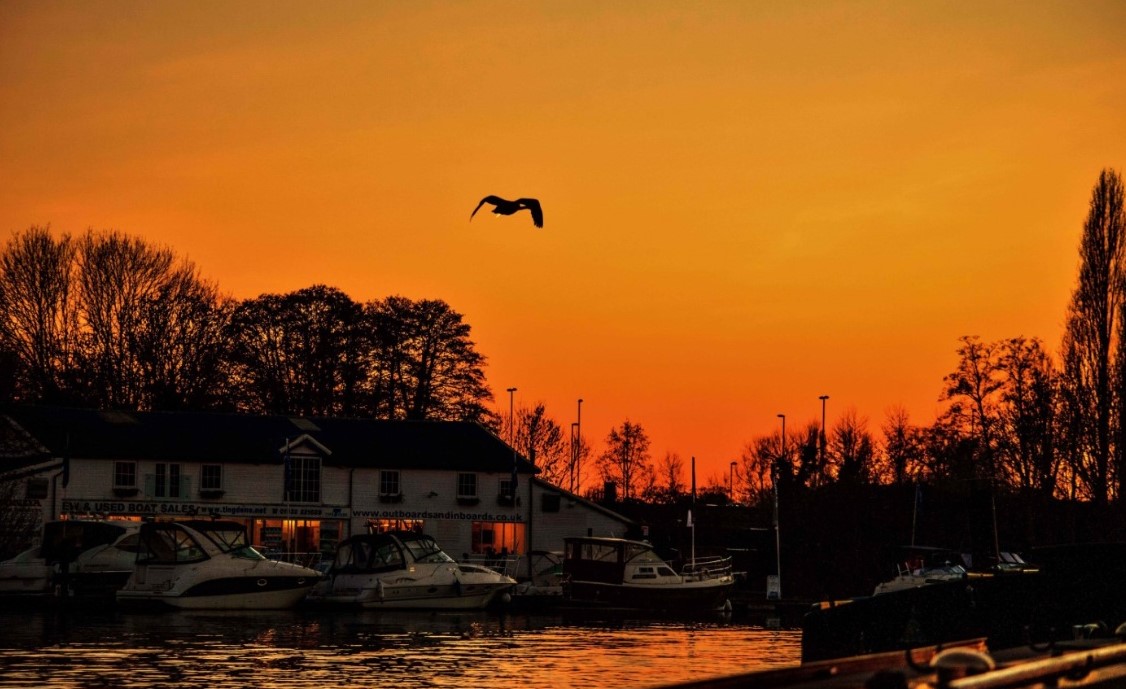
Last weekend I was teaching near the River Thames and in the evening spent some time standing by the river waiting to see what happened. One Swan swept by and I managed to get a shot of him clear of all the buildings. I enhanced the evening skyline to make the picture warmer and was pleasantly surprised by the results.
In contrast the B&W picture below I nearly deleted. It was a nice enough picture in colour but nothing special I would say. A niggly thought bugged me as I hovered over the delete button so I went with it. Glad I did as the B&W version really works for me.

A single last picture – no contrast – would not dare 🙂
I love this picture of my beautiful wife Alison as she led the Christingle service at our local church – St James here in Bramley last year. I could not use a flash and relied on a zoom lens. The colours and the smile really make this picture for me and a fitting one to end on.
Good luck with your experiments.
Cheers
George
Where have the last few months gone? – life and work have been hectic recently so I am only now catching up on my trips from late last year.
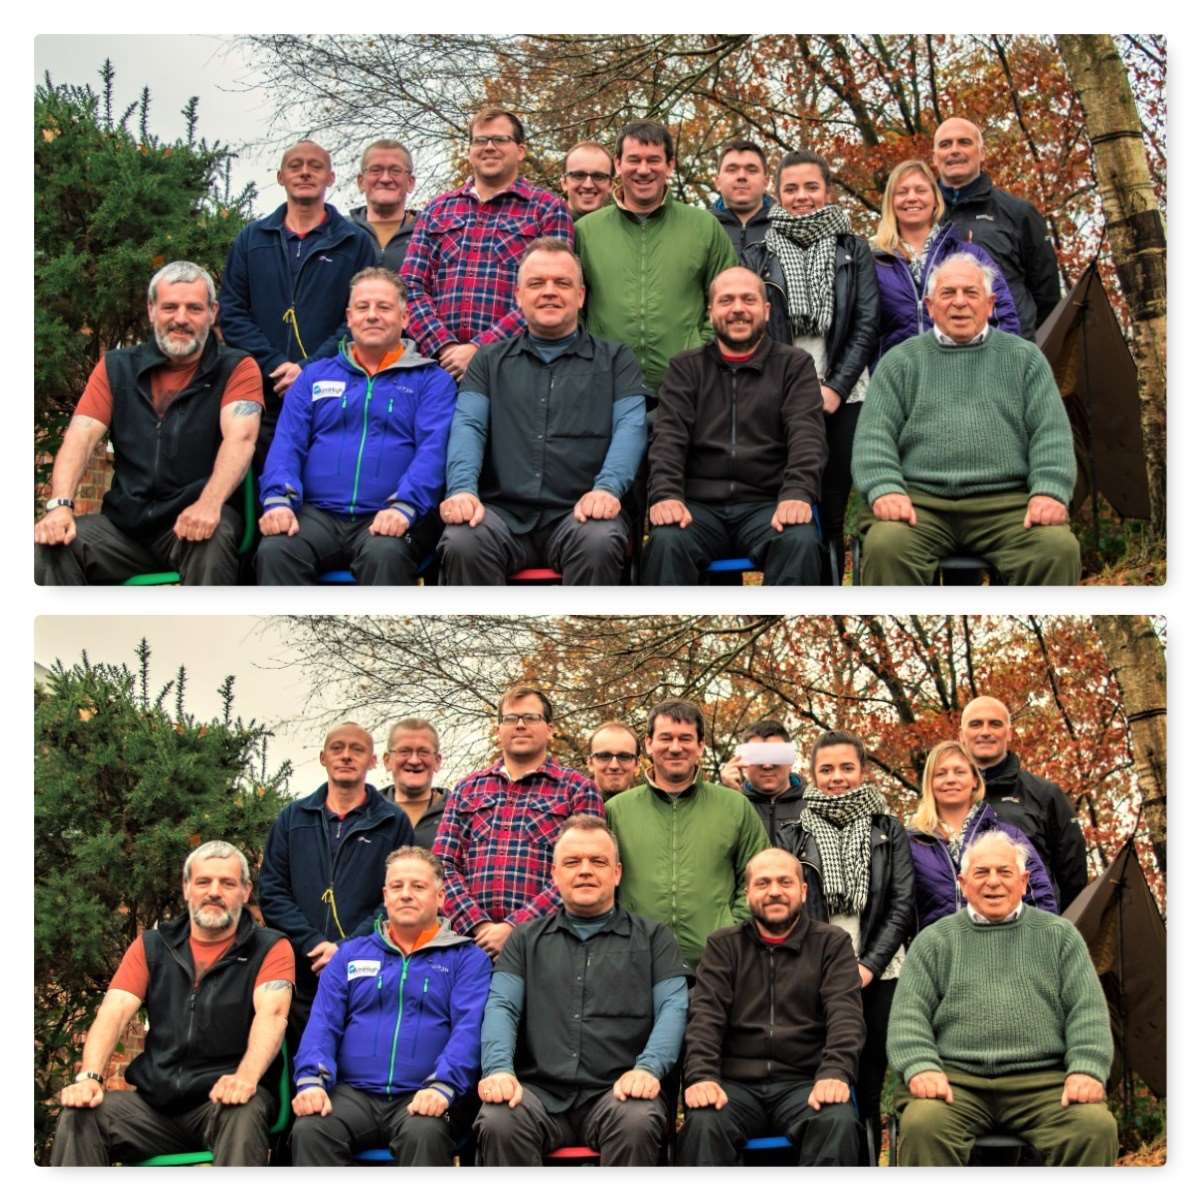
November last year found me in the Ashdown Forest here in the UK with the Sea Cadets assessing our latest group of expedition leaders. These Sea Cadet and Royal Marines Cadet instructor/students had a busy year preparing for their assessment but it was worth all the effort. The qualification they were looking to gain was their Basic Expedition Leaders Award (Level 3). This is a nationally recognised qualification from Sports Leaders UK.

I was joined by my colleagues Perry Symes, Dave Lewis, John Kelly, Ben McDonald and Alan Lewis for the weekend.
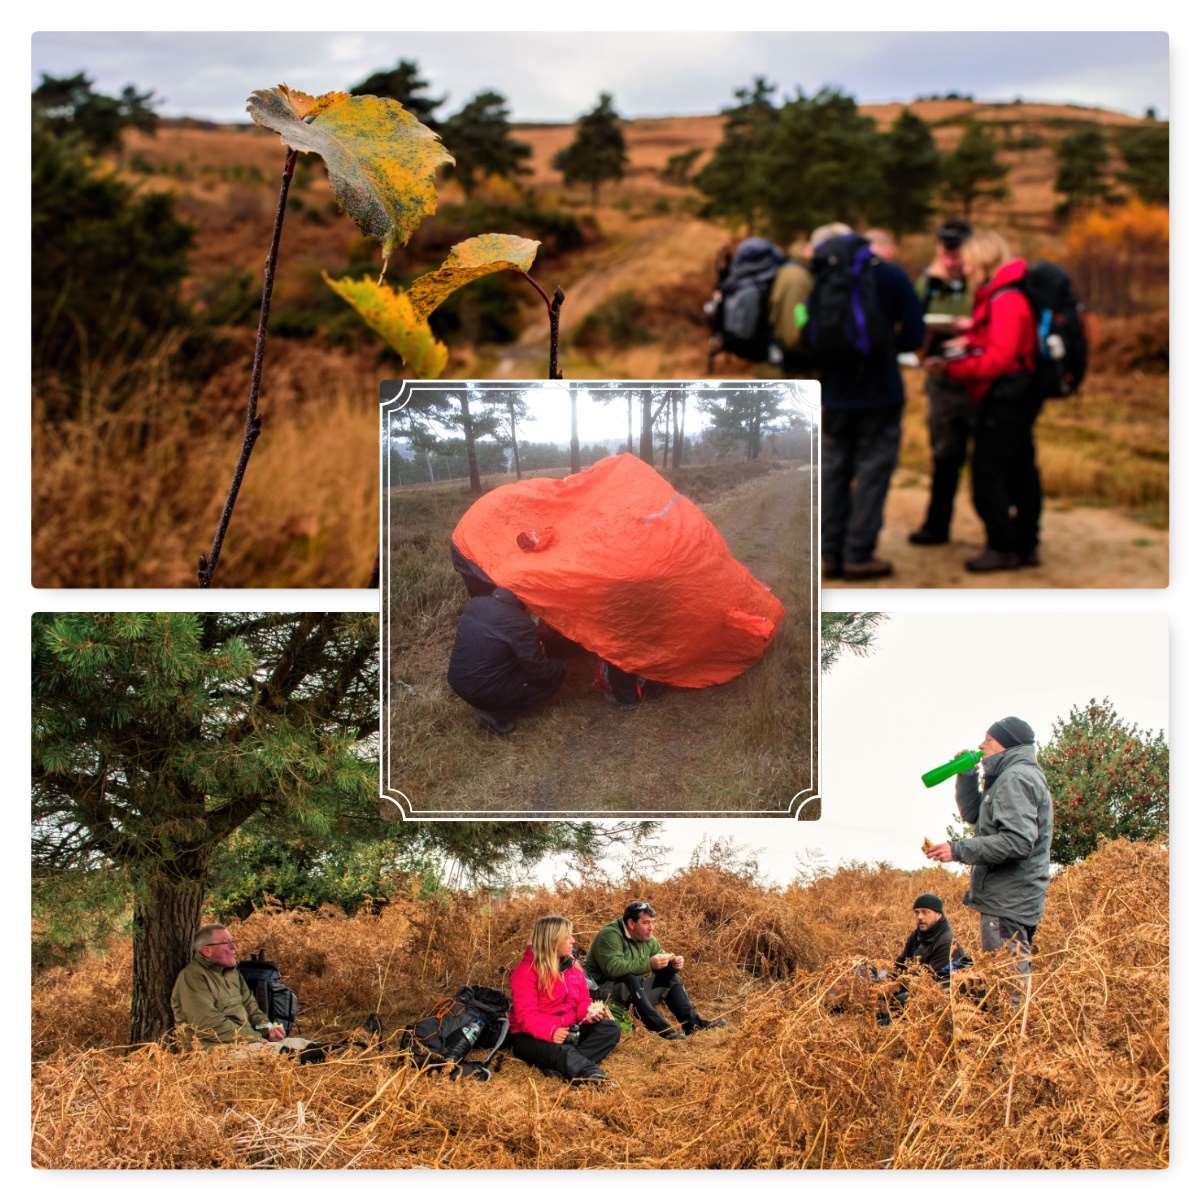
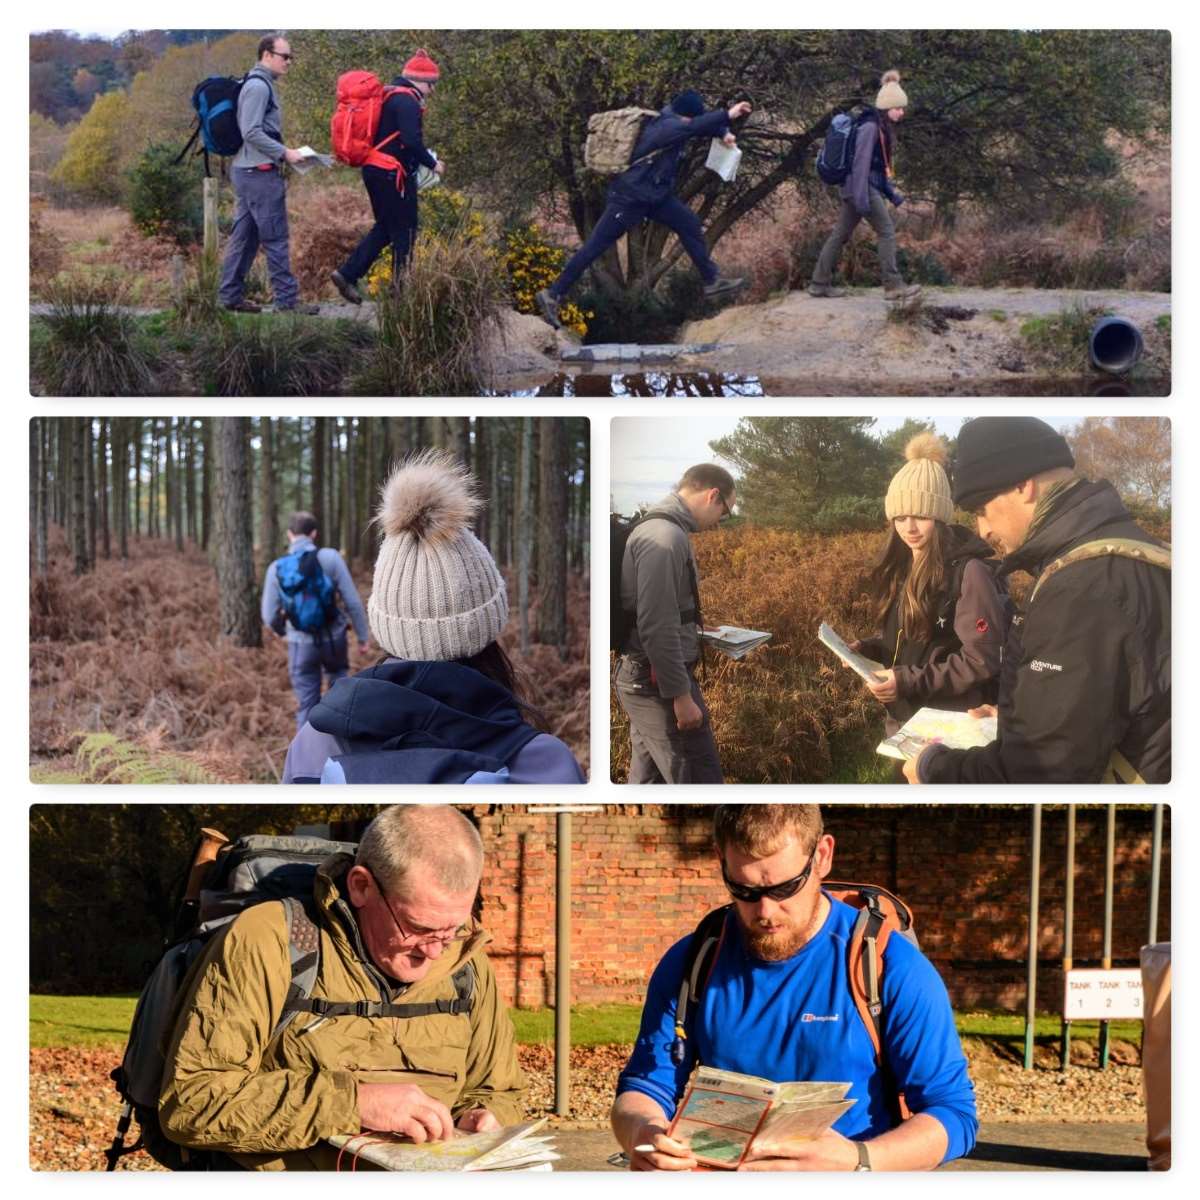
We were soon split into a couple of teams and out on the heathland and in the woodland testing their skills. Some of these students started the course with very little knowledge so it was good to see them putting all their new found skills to the test.
As well as observing their group management skills as they navigated they all had to give ‘short on the hoof’ presentations to the others. These could be given under the relaxed canopy of a tree or under a windswept bothy bag 🙂
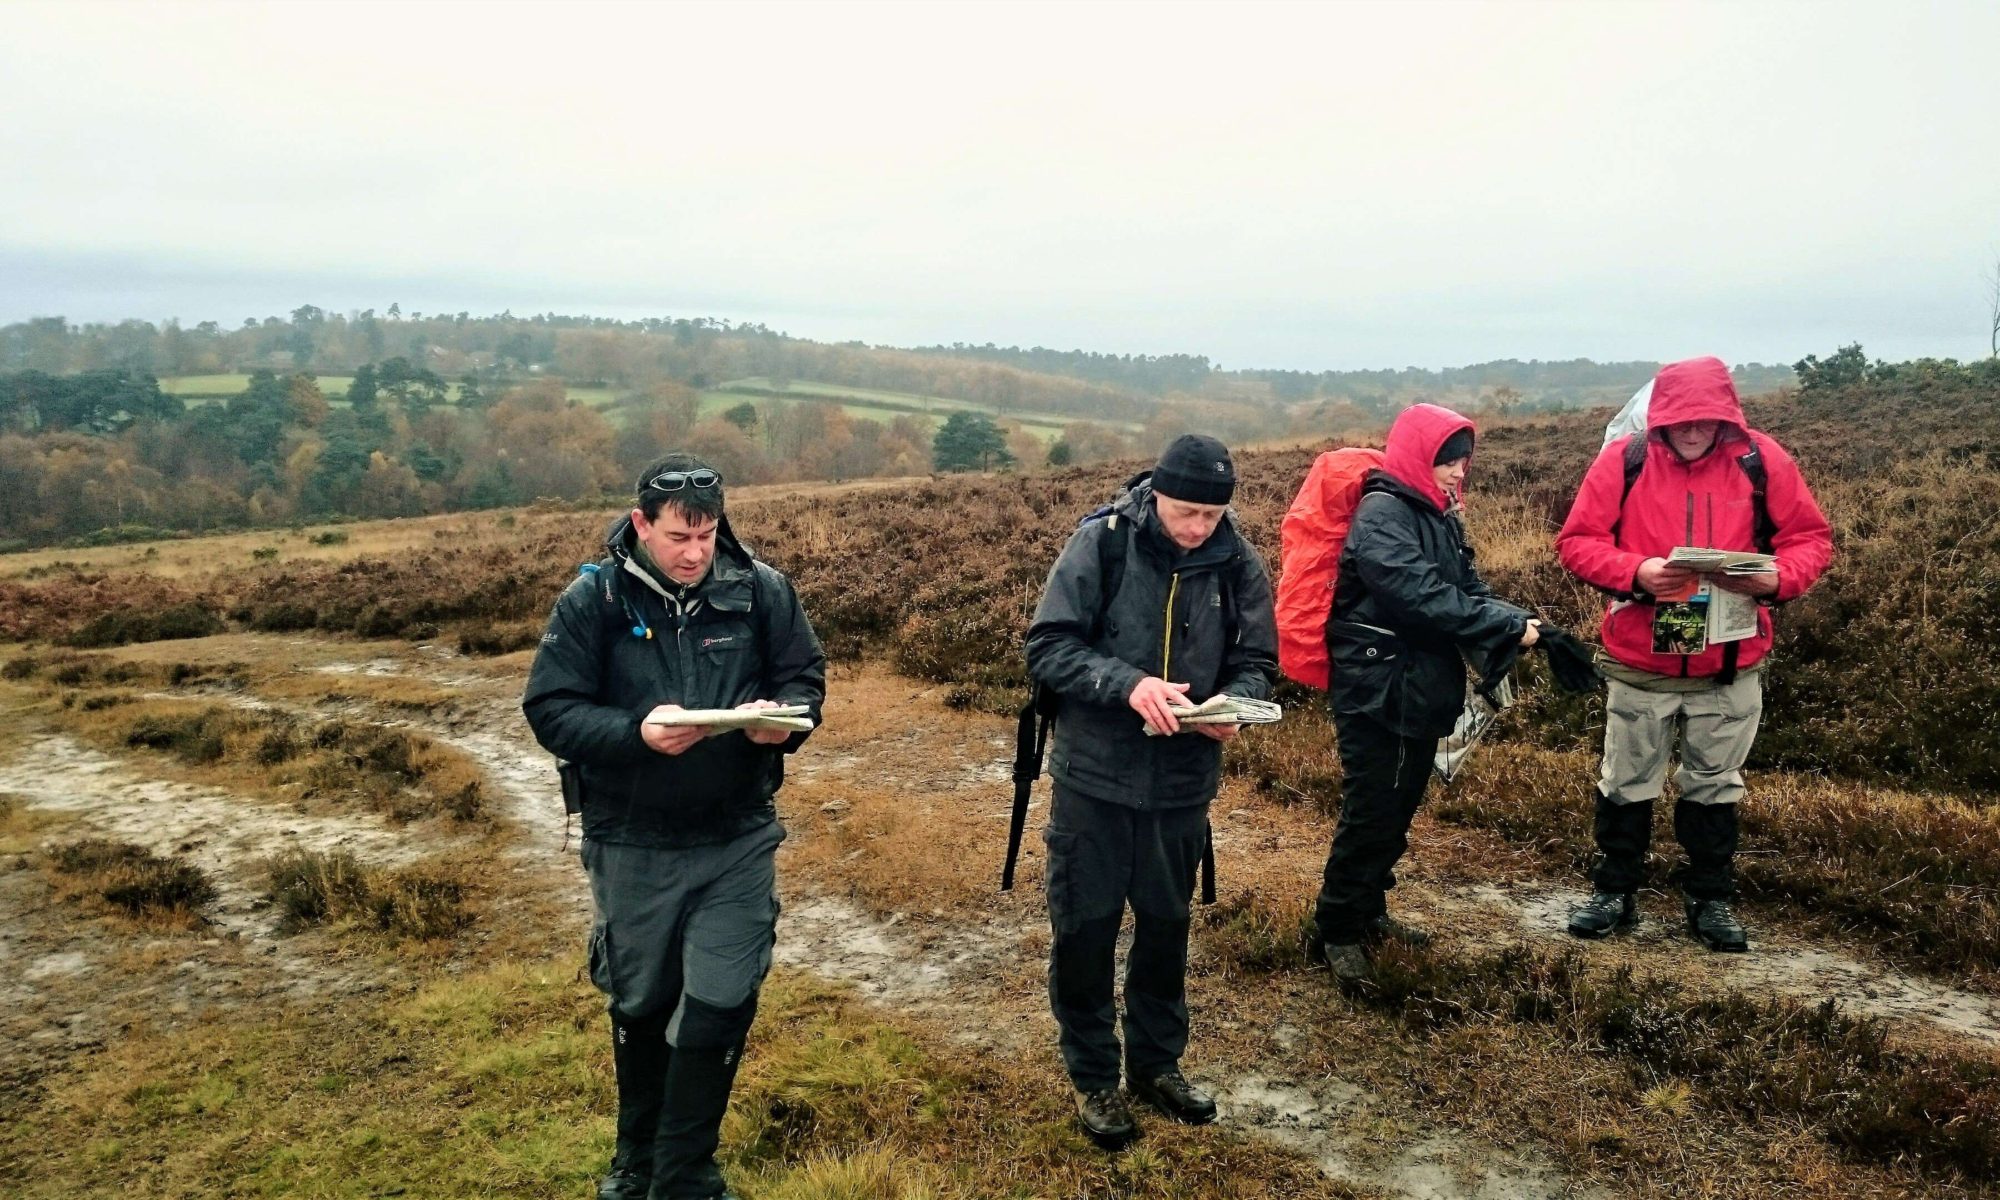
One of the most crucial skills any expedition leader should have in my opinion is to be able navigate to a high standard. The students were not only expected to be able to use a map and compass without thinking about it but also to be able to teach the skill to others as well.
Modern navigational aids are looked at on the course however it is the use of the ‘Mark 1’ eyeball, map and compass that are assessed. We spent the whole of the Saturday out and about doing this (hard work some may say).
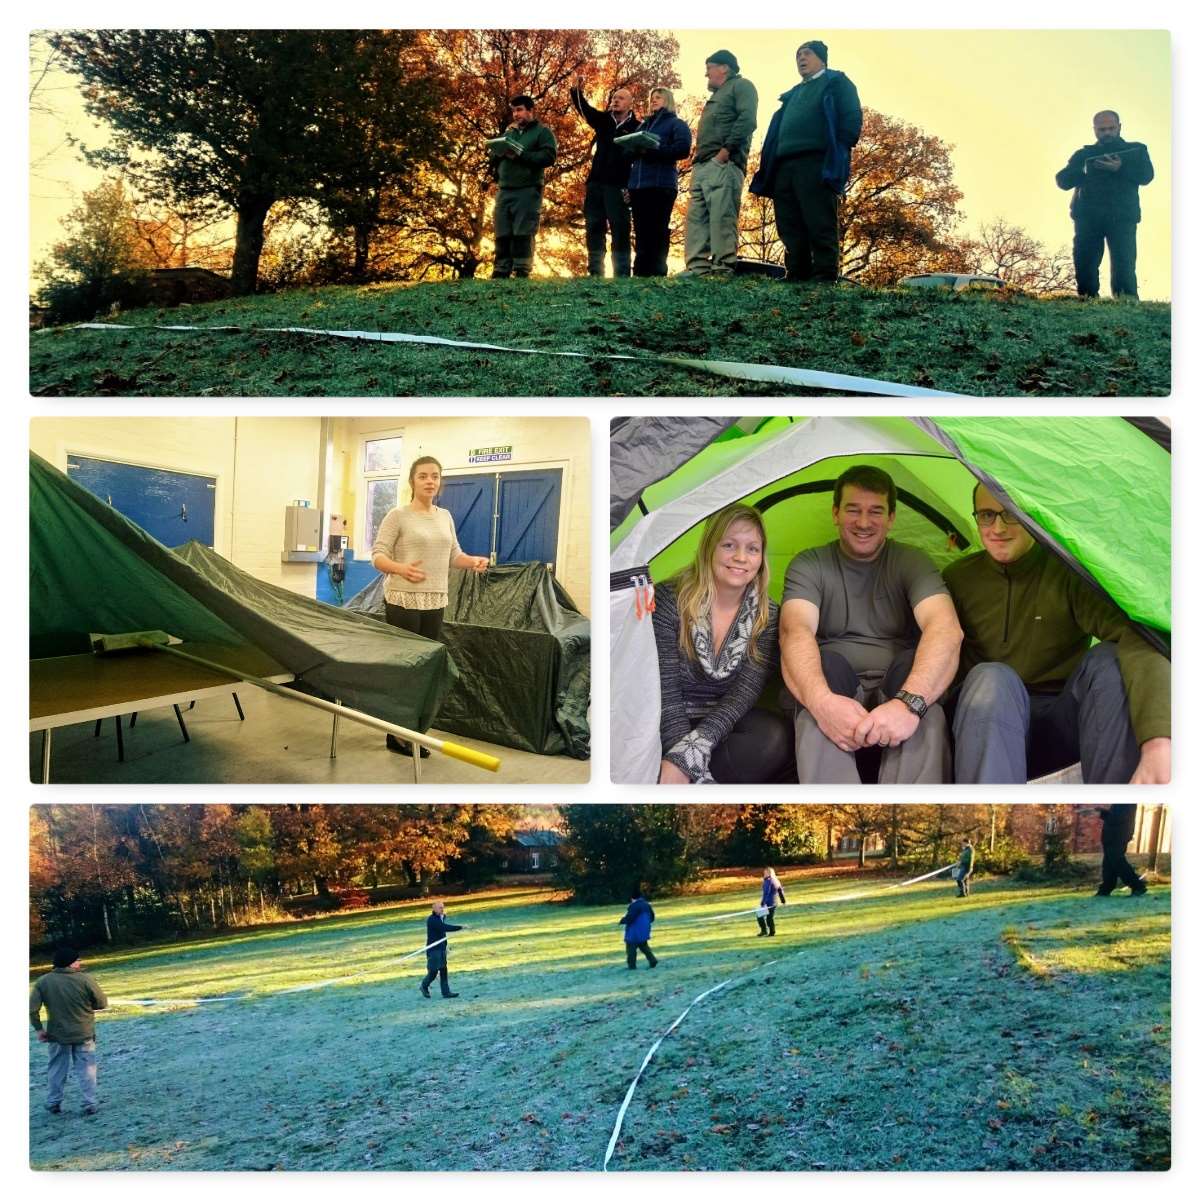
Sunday was a day mostly of testing knowledge and each of the students had to run a class. Subjects covered included expedition food, kit and the theory of navigation.
While some of the assessors were observing the classes the rest of us were busy catching up on all the admin that Sports Leaders UK need us to complete to run our centre- admin as many of my friends know is not something I enjoy 🙂
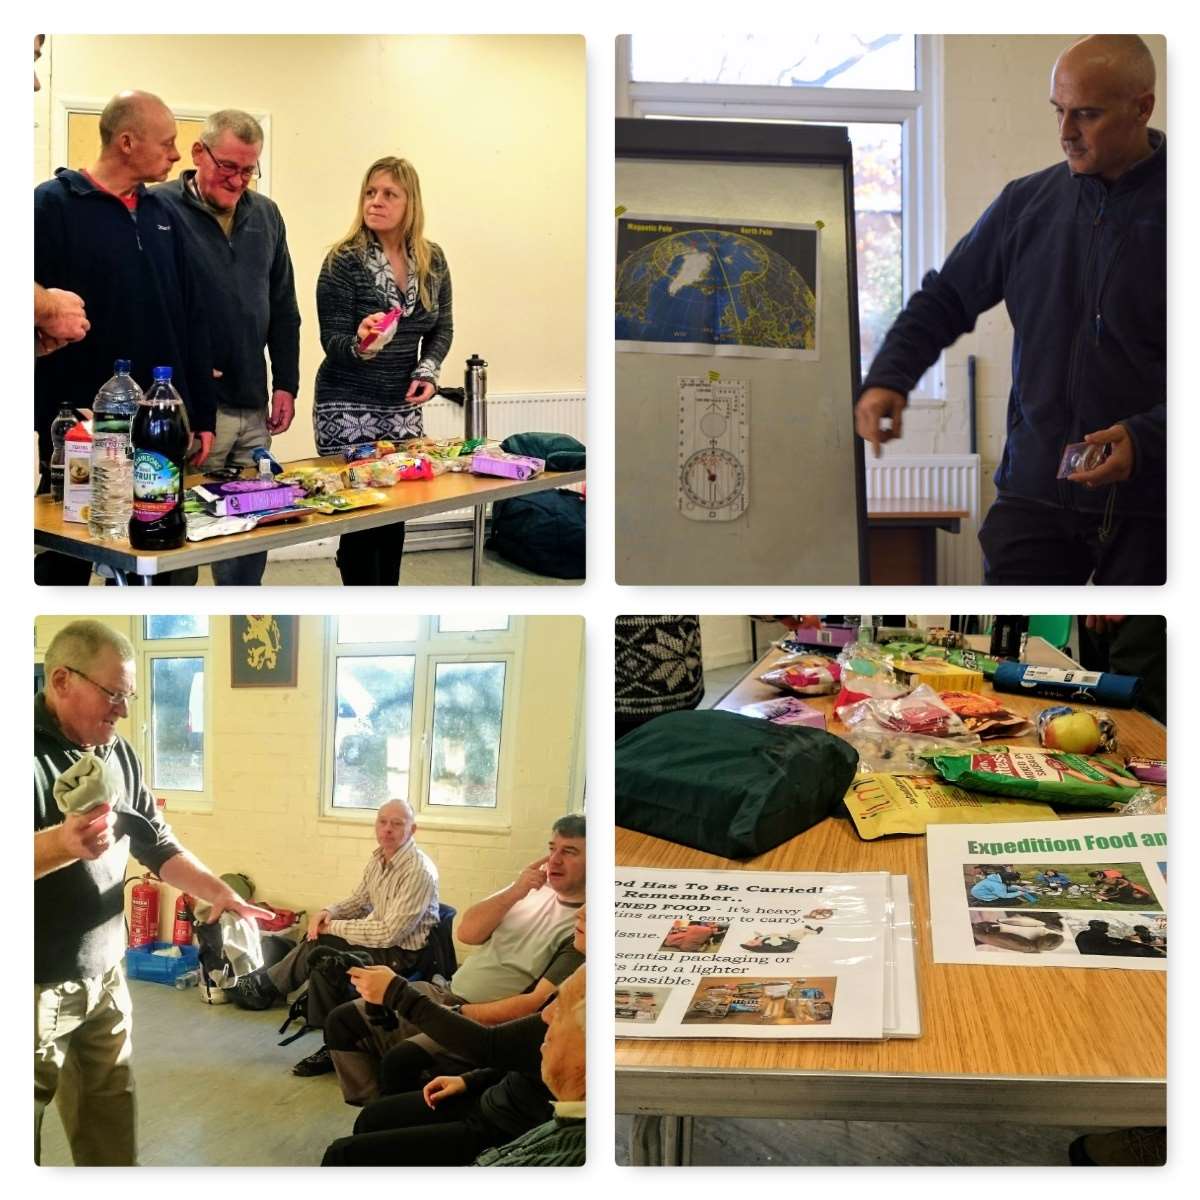
One of the things I like about helping to run this course is that I keep on finding new ideas for classes from the students like using this mine tape to highlight contours.
Everyone who was assessed on the weekend came up to the standards to be an expedition leader so it was great to receive the certificates and to help award them.
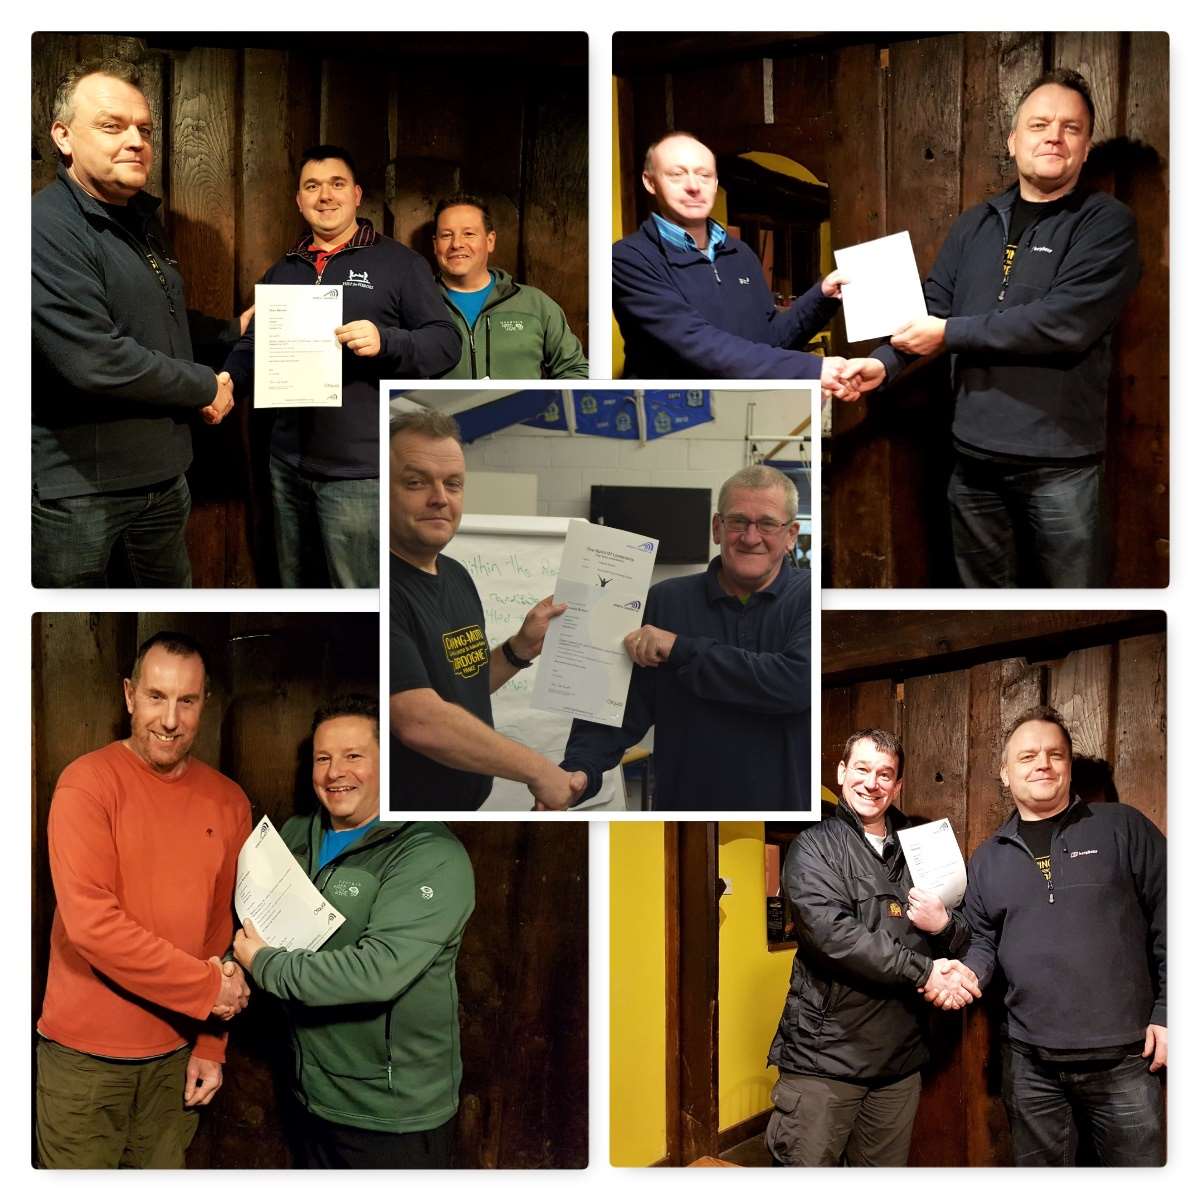
We have been running this award in the Sea Cadets since 2010 now (I think we have missed one year) and I have worked with every group. We have a great team that is growing all the time and other Sea Cadet areas are now sending students to us or looking to emulate us.
By the way can you spot the difference below? 🙂
The 2017 group has already started so that one will be up on the blog sometime soon – so loads more trips planned.
Cheers
George
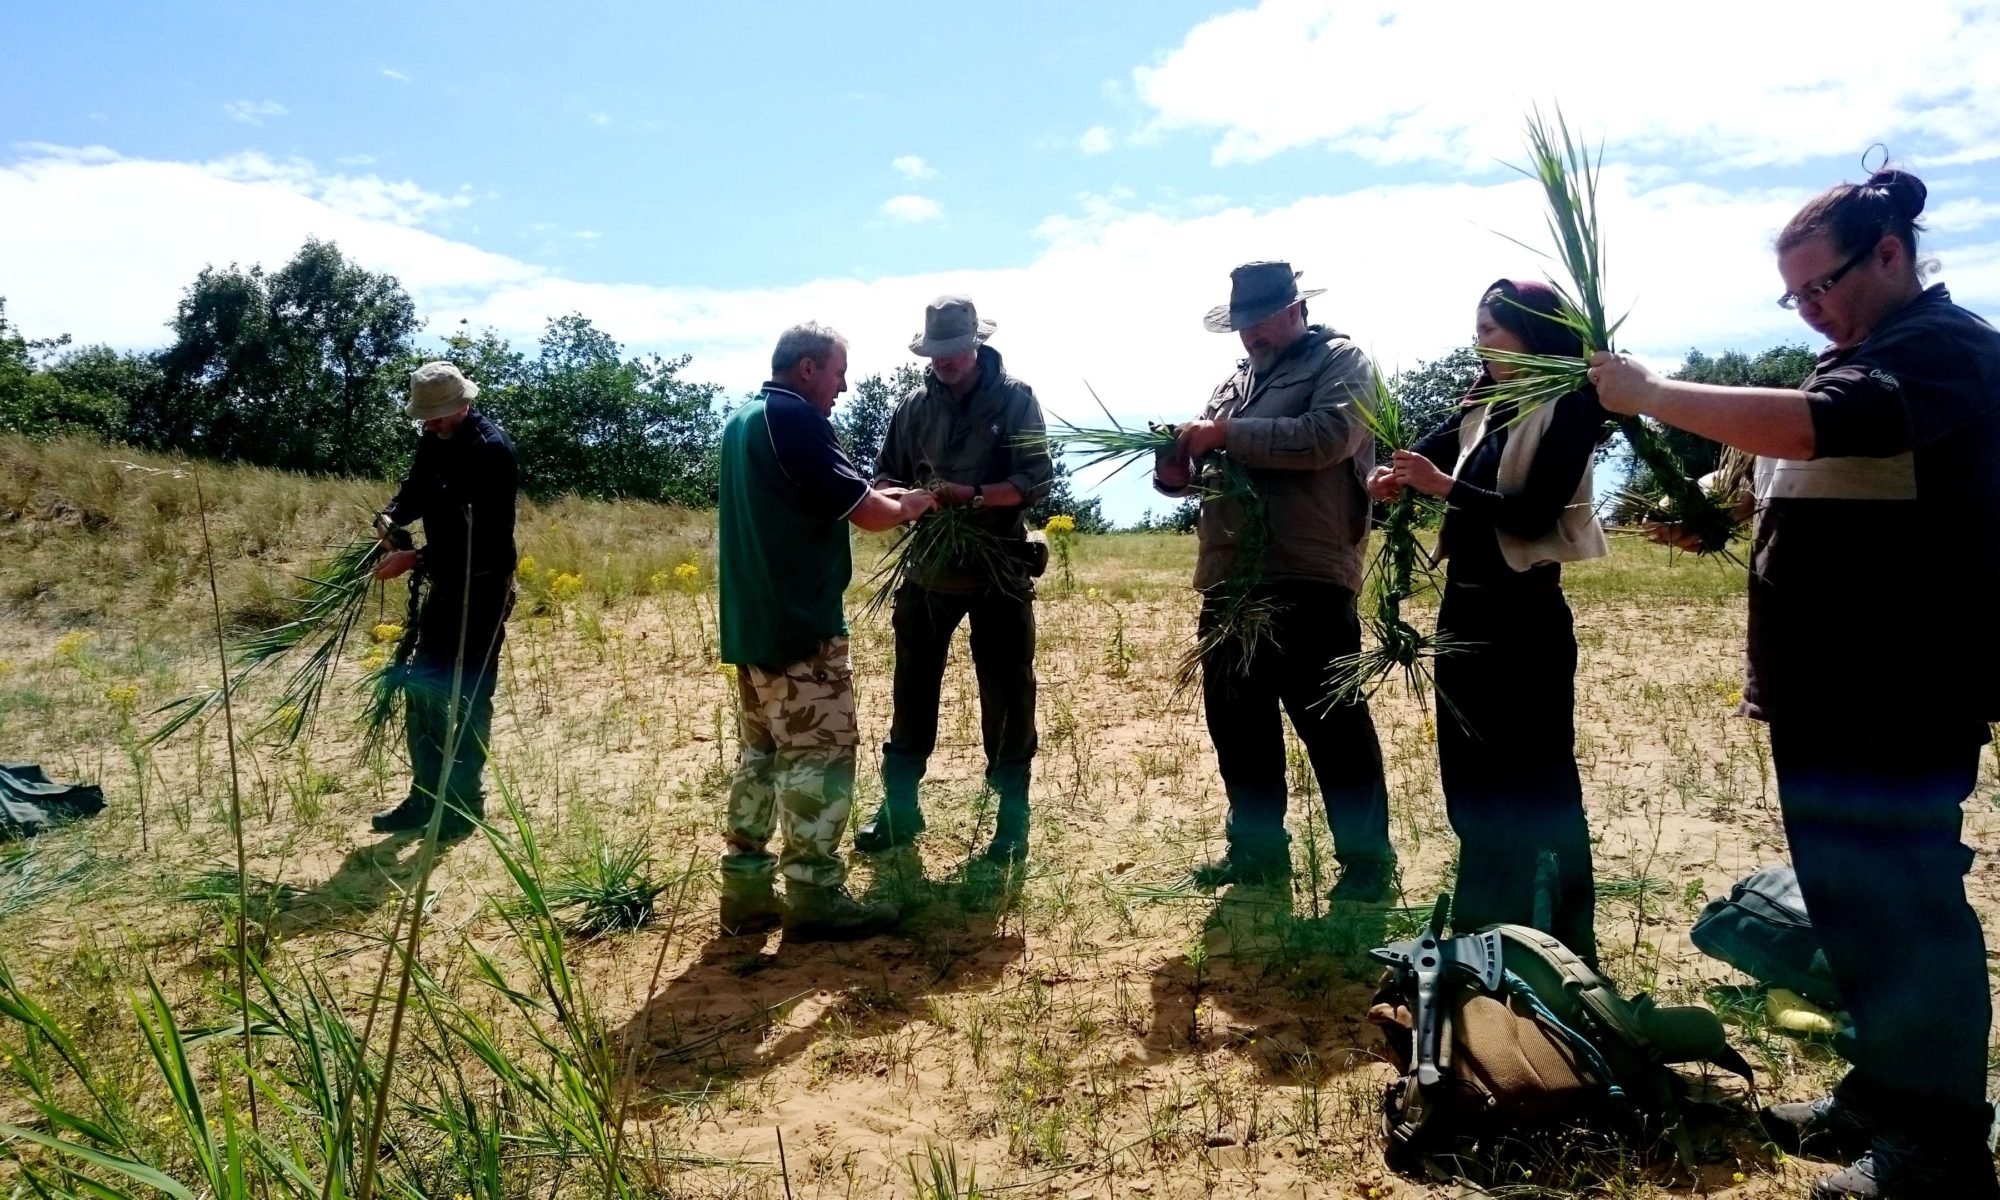
For years now I have been making rope out of various different natural materials. This has generally been a relaxing though time-consuming process for me, until Perry McGee from the National Tracking School taught me at the Bushcraft UK Bushmoot that it could be a fun and frantic process as well.
Now this may not be the prettiest, smoothest or most perfectly formed rope, but it is fast to make, strong enough for most camp jobs and can be made out of many different grasses. This is a technique that is not just for bushcrafters but for any outdoor pursuits leader (I am a Mountain Leader as well) as a way of putting a rope together in an emergency.
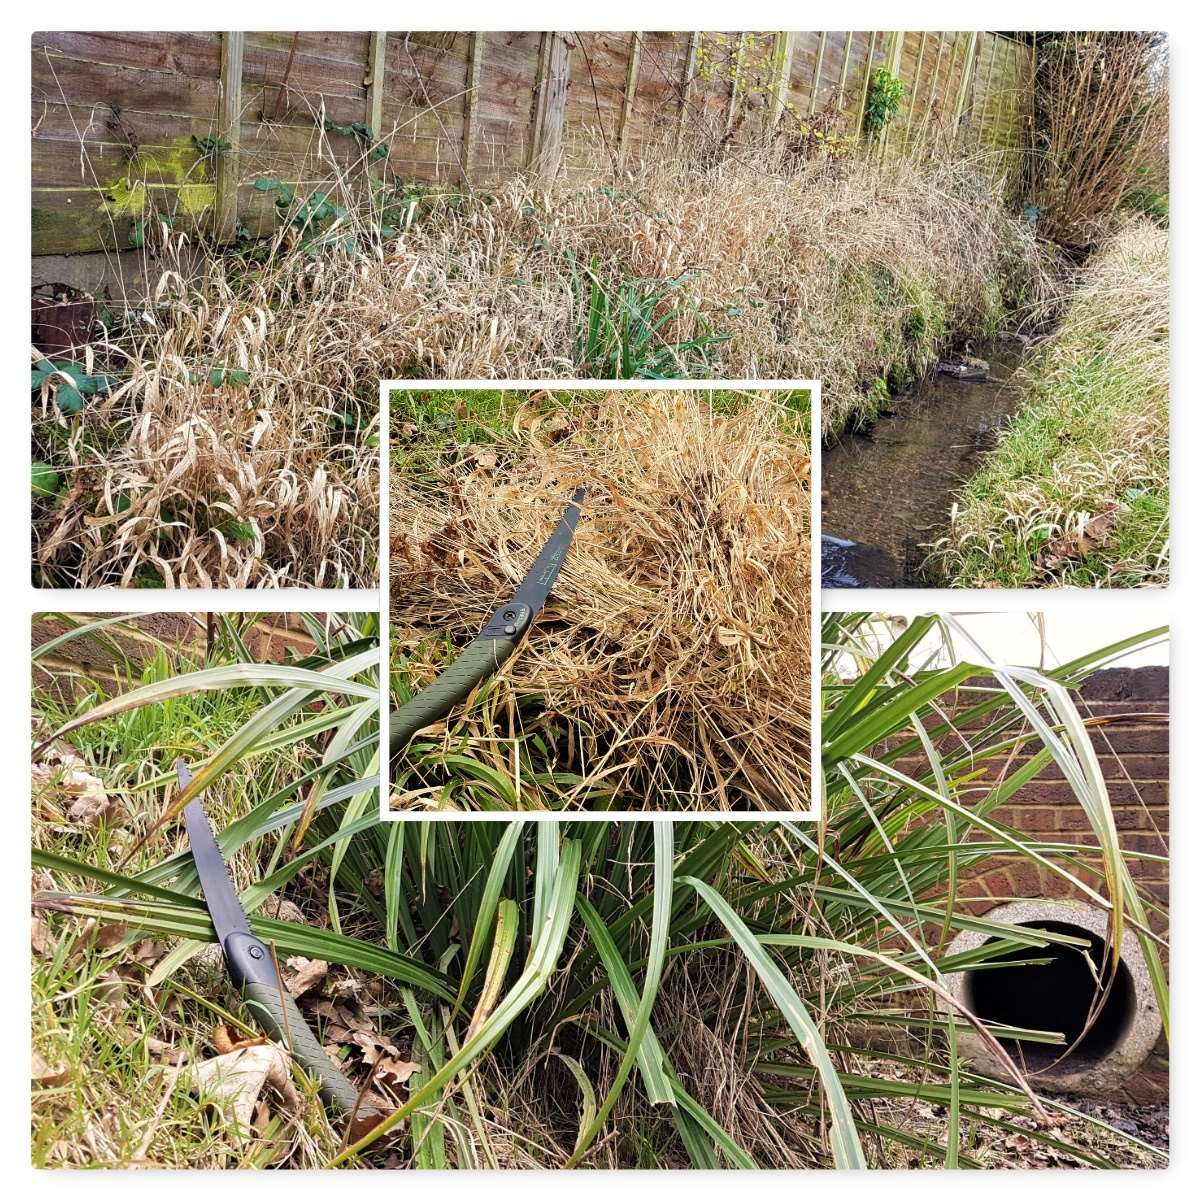
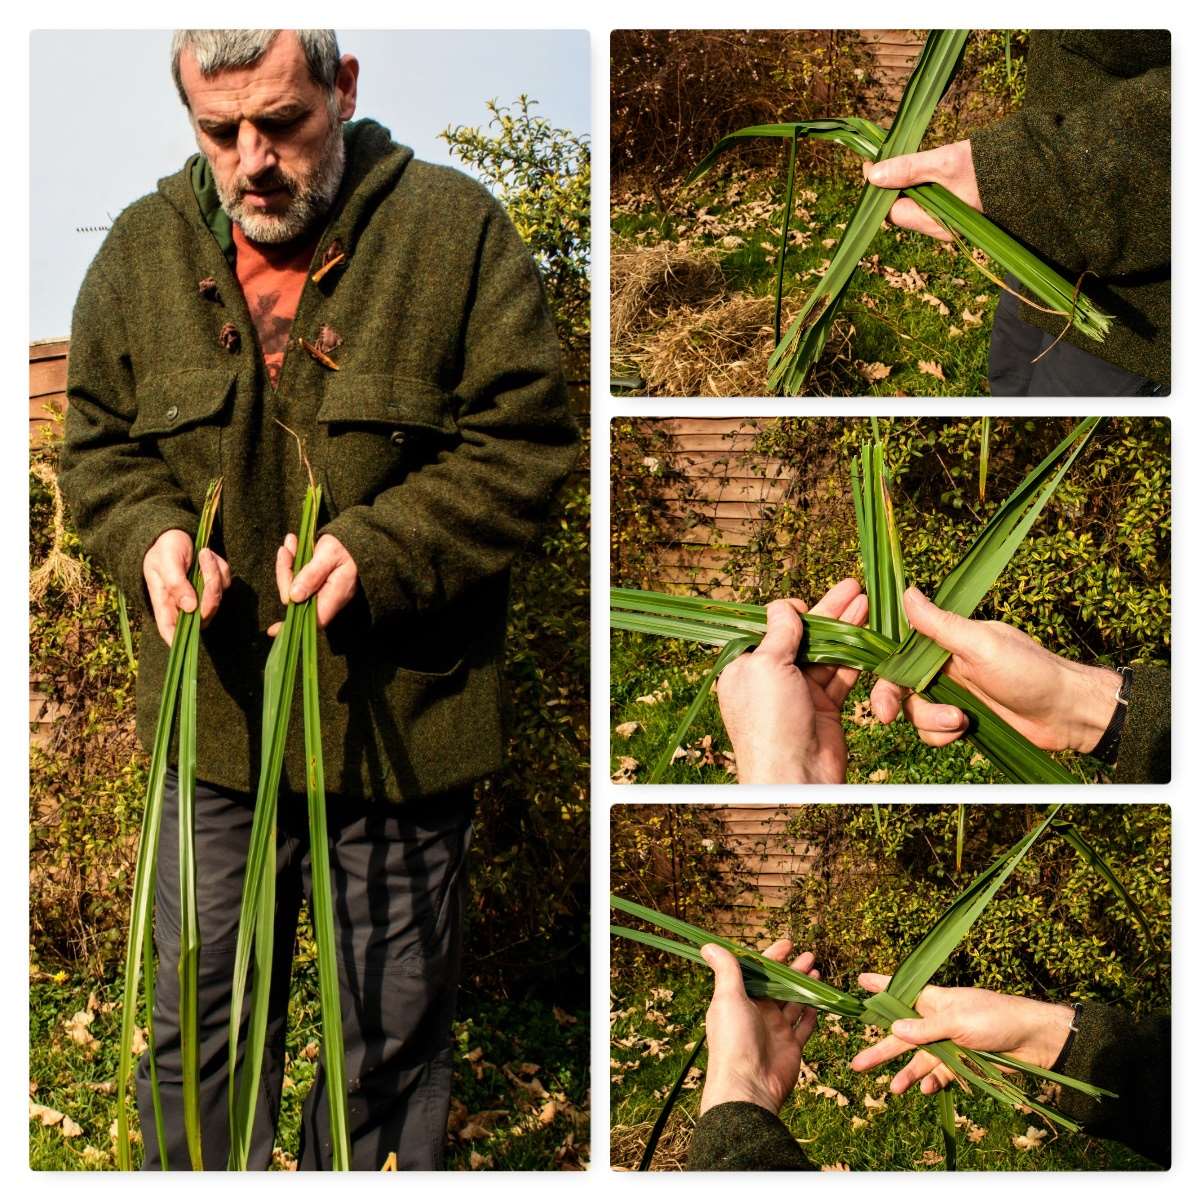
Harvesting
For this blog I had a wander along a nearby stream and harvested some dead grasses and some leaves from a Pendulous sedge. To harvest the grasses I would advise you to wear gloves and use something like a Laplander saw to cut the grass.
Gloves are useful to protect you from hidden brambles etc and also because you can easily slice your fingers open on some grasses. I do not use a knife as I find grass quickly blunts its edge, so instead I hold the grass firmly half way along its length and sweep the base of it with the saw before pulling the grass away. Pulling grass straight out of the ground with bare hands will eventually lead to cuts on the inside of your fingers.
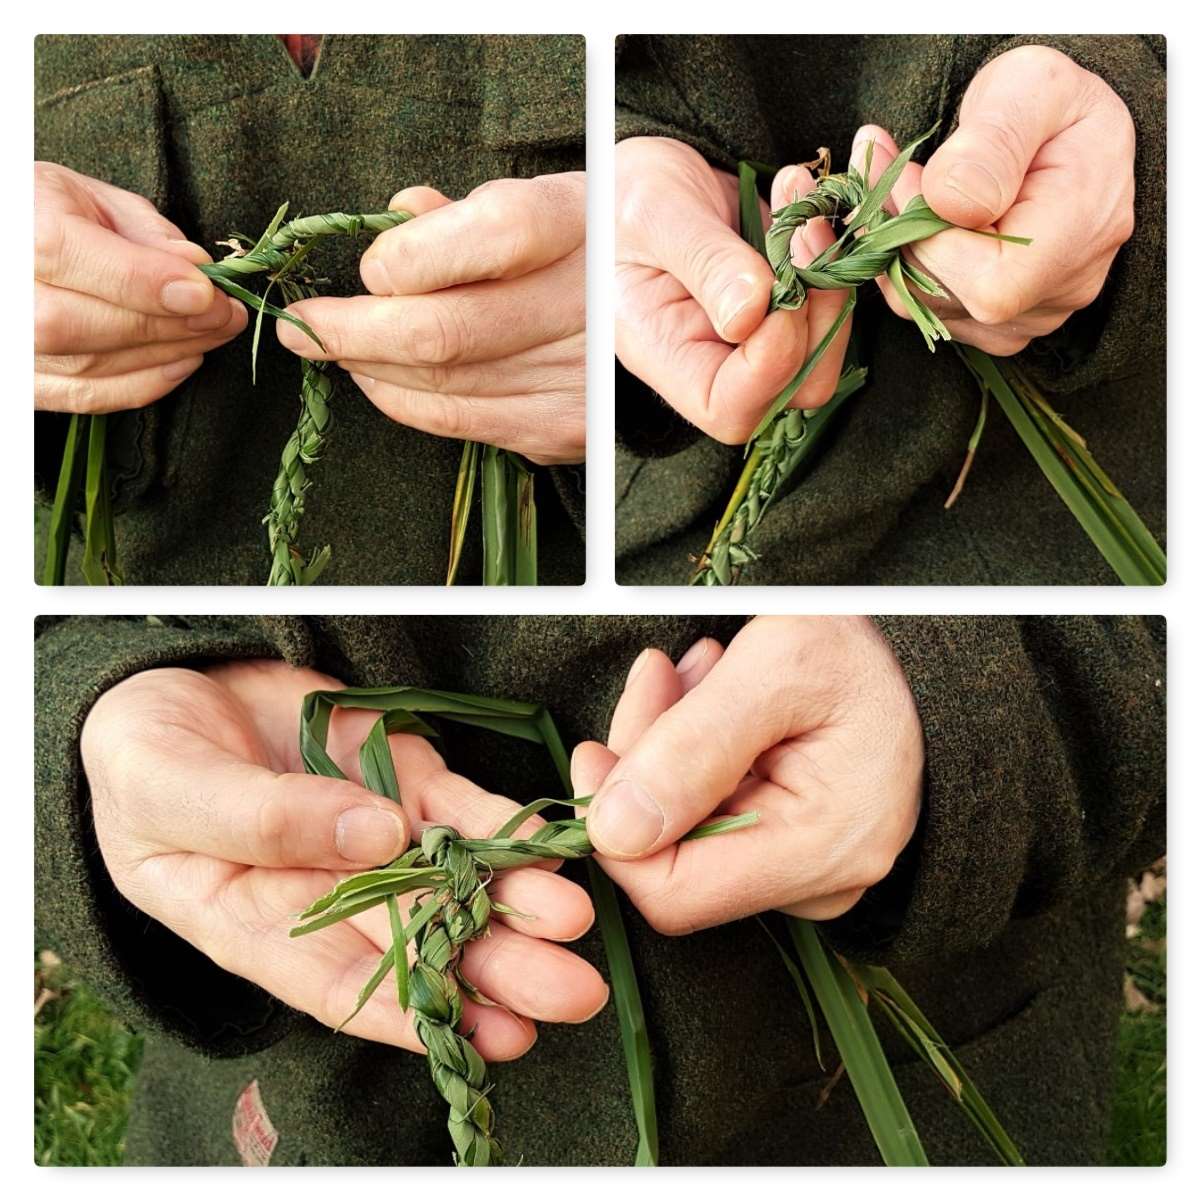
The X and Y start
To start your rope off begin with two evenly thick strands (this thickness will determine the overall thickness of your rope). I vary the individual lengths of the grass within each strand so that as it thins out and I add in more grass later the joins will be staggered (this will make a stronger rope).
Form the X first (the ends of the grass nearest to me are called the standing ends) close to the standing end and then wrap one of the standing ends under the other strand, back through the middle, and join it to the other standing end to form the Y shape. You can see all the steps below.
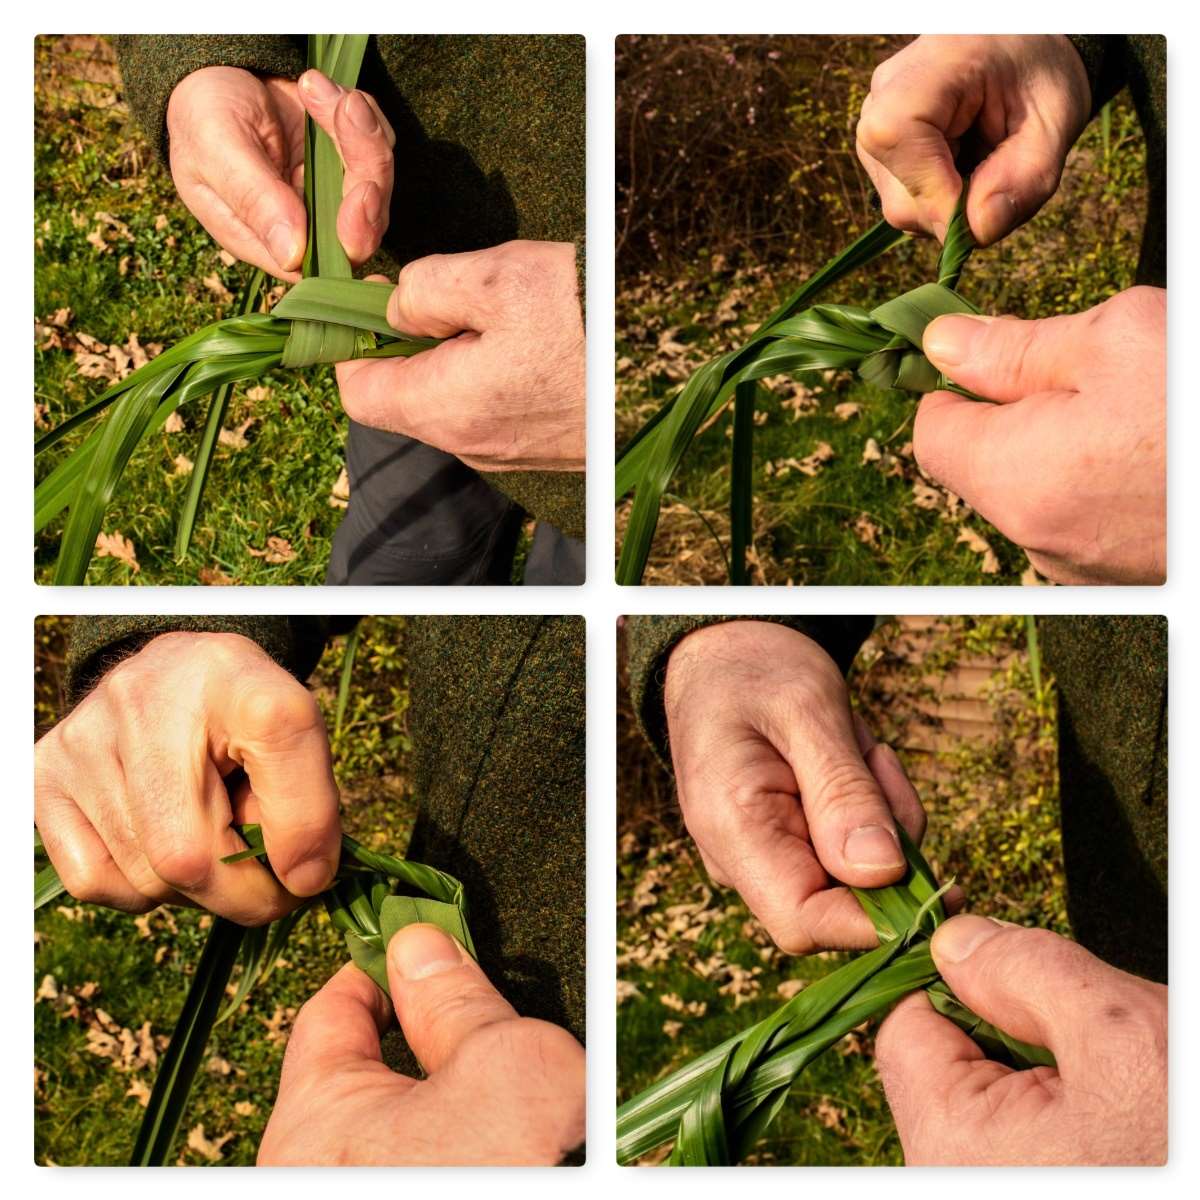
Laying in the rope
In the pictures below I am holding both the standing ends in my left hand (on the right in the picture) and twisting the strand closest to me a couple of times towards myself.
Keeping the tension on the twist, I then turn the newly twisted strand away from me over the top of the other strand and clamp it in place with my left thumb (I have added a video at the end of the post to show you this in more detail). Once done this means the other strand will be closest to me, and it’s simply a case of repeating the process of twisting the closest strand towards me a couple of times, then turning it away from me over the top of the other strand and carrying on.
It does not take long to start forming the rope but you do have to be careful when using whole pieces of grass as you can easily cut yourself. The rope made from this fresh grass will be perfectly usable in the short term however as it dries out and shrinks the strands will loosen.
If I had wanted to make rope for long-term use I would have stored the harvested grass until it had dried out and then re-wetted it before making the rope. This would mean the rope would not shrink and loosen afterwards.
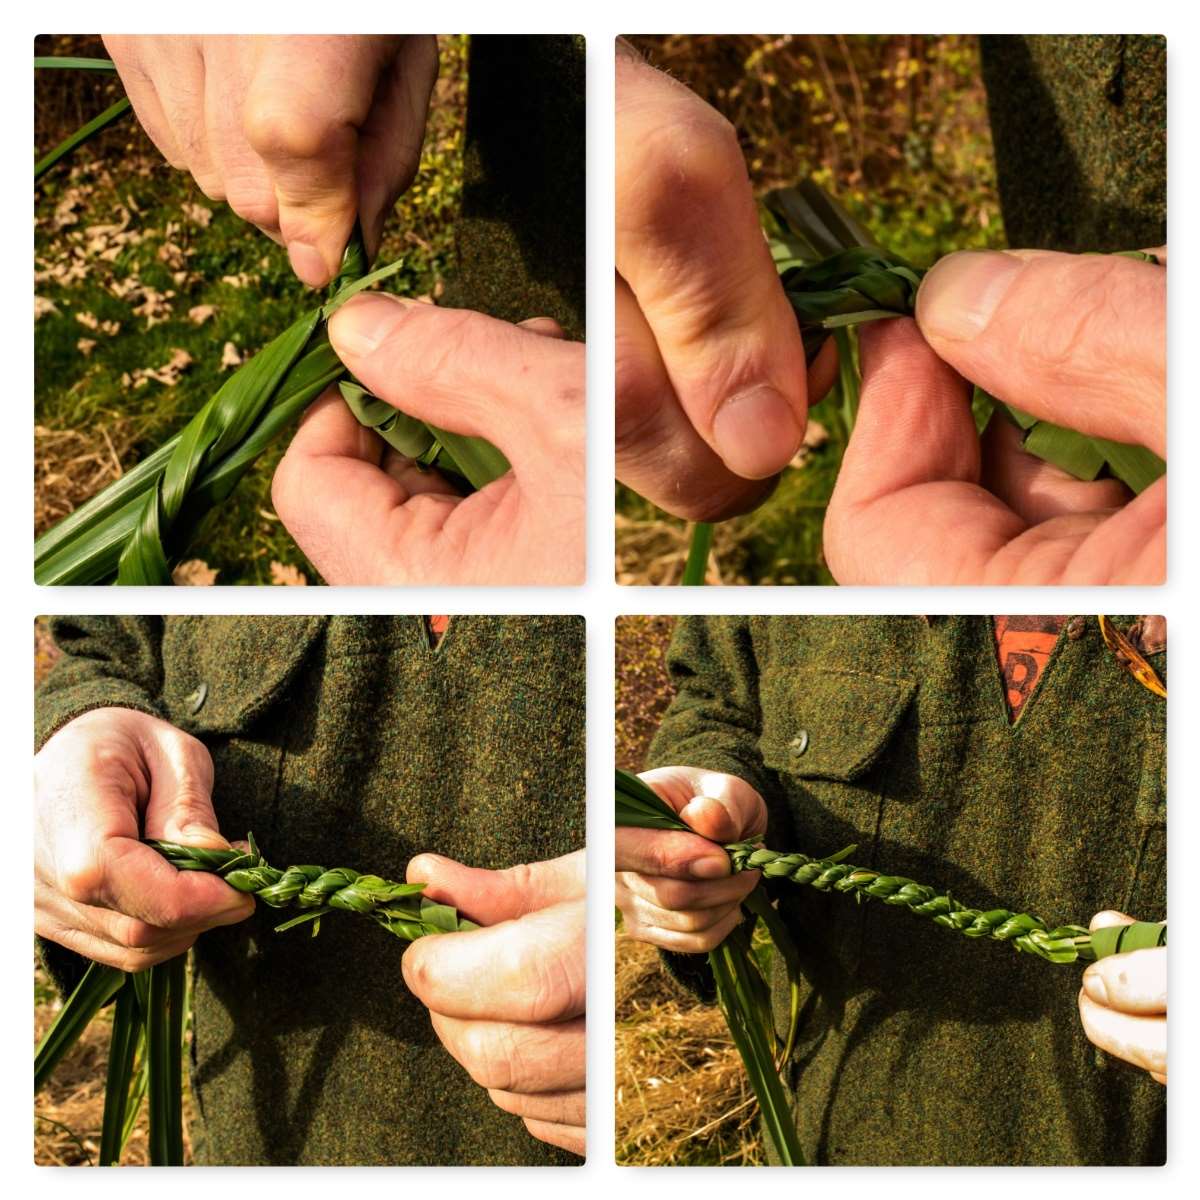
Adding more grass
Eventually one of the strands will start to get thinner. It is at this point you will need to add in more grass. I lay a fresh piece of grass into the strand that is thinning out with the short end sticking out by a couple of centimetres. After twisting and laying in the strand as normal I twist the small piece sticking out back and incorporate it into the other strand.
Every time a strand starts to thin out I add another piece of grass in this way.
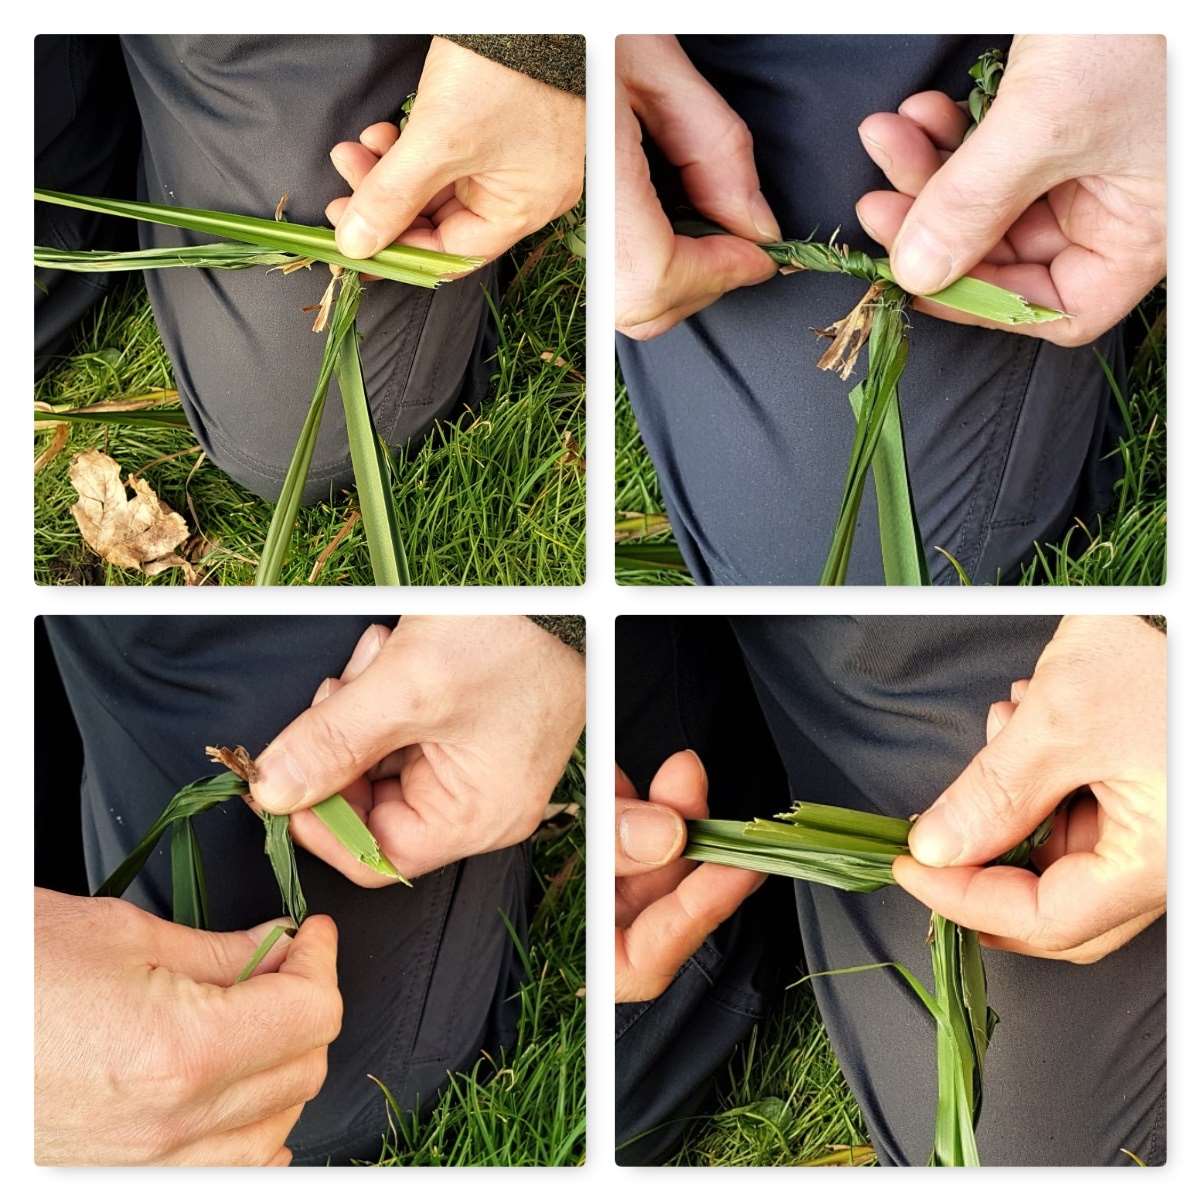
Once I have finished the rope to the length I want I finish the end of by twisting the two strands tightly and tie it off with an overhand knot.
To finish you can trim off any pieces of grass that are sticking out with a knife if you want to tidy it up.
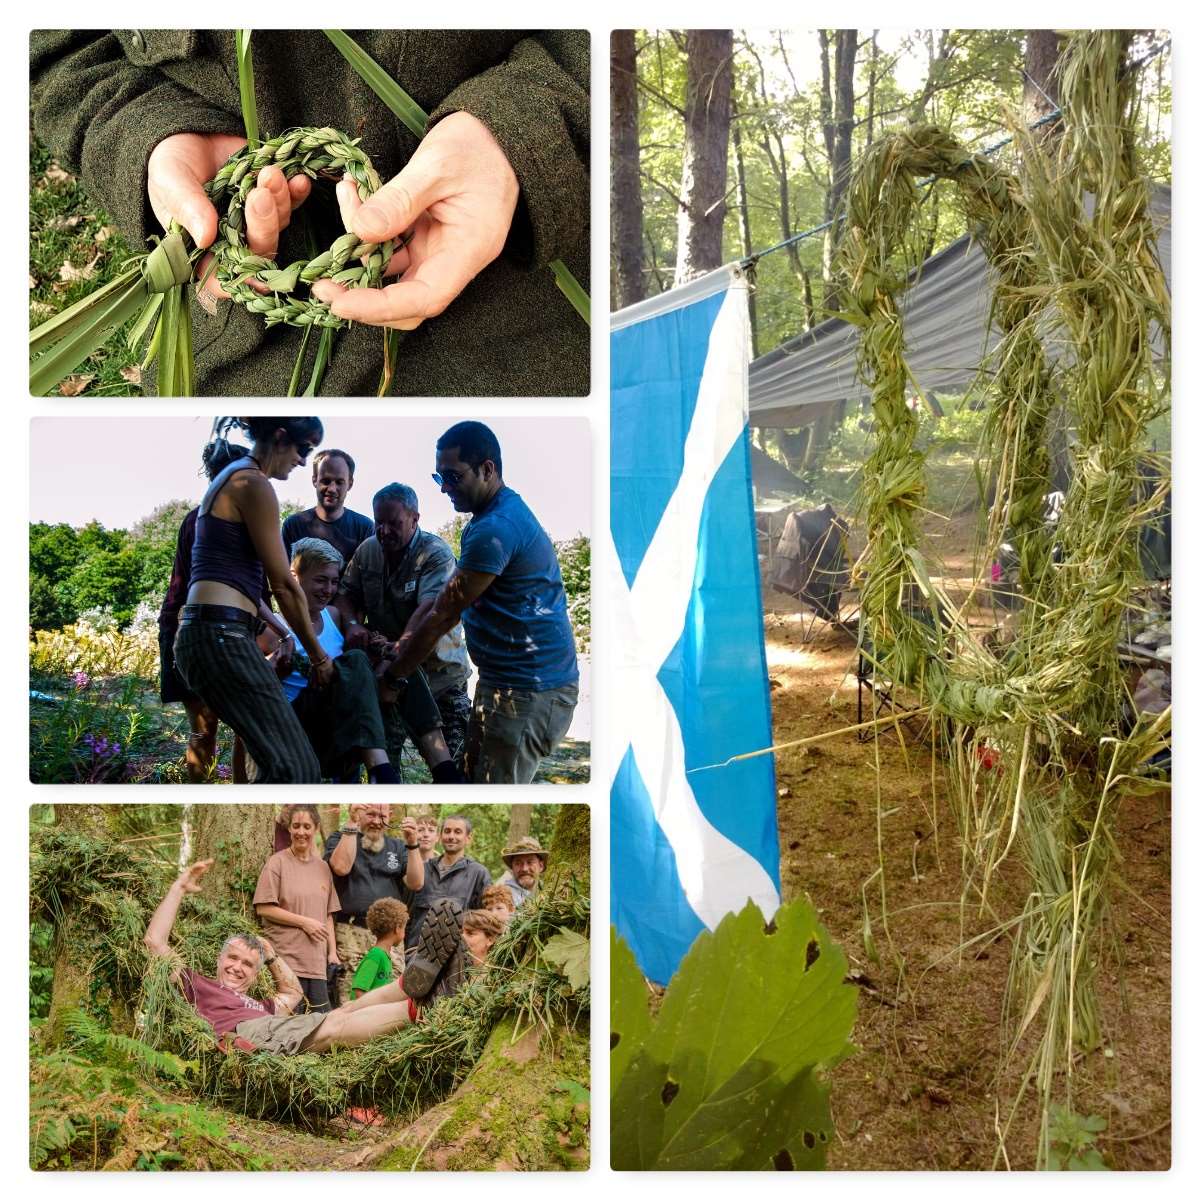
Uses
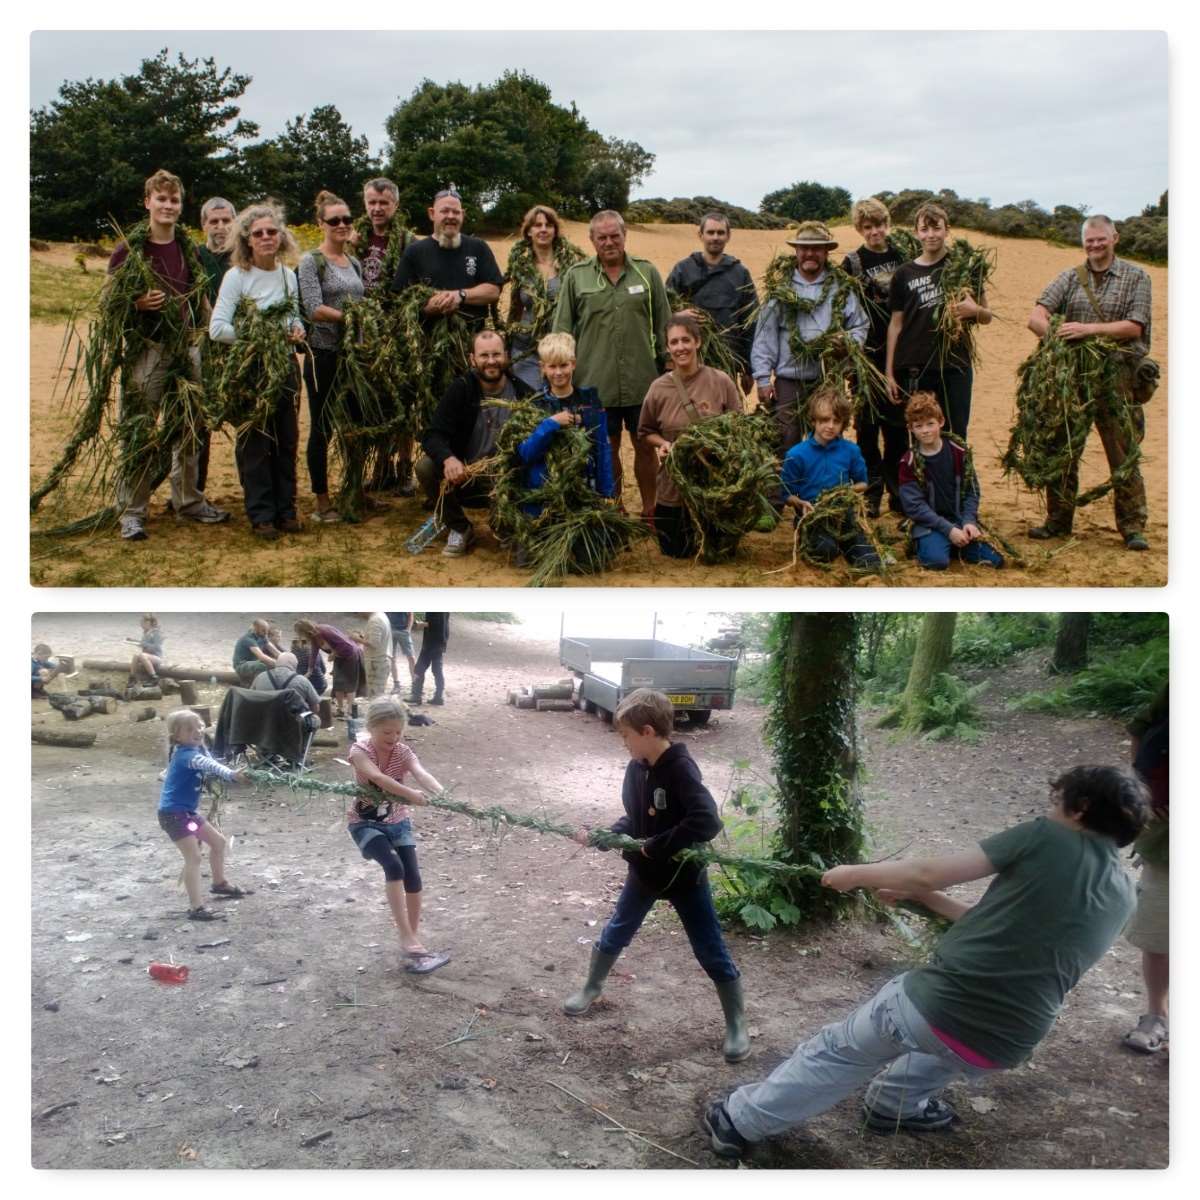
Perry insists that students on his tracking courses should be able to make thick coils of rope the length of their body in about a minute. I have a bit to go to be able to do that but as you can see below the rope – whether it is thin or thick – can be used for many purposes.
You can evacuate a casualty, construct a hammock, make coil baskets or even a great tug of war rope to keep the kids (of all ages) happy.
As the steps can be a little hard to follow with just pictures I put this short video together to show you the process in action.
Have fun, and I’d love to see pictures of the rope you make!
Cheers now.
George