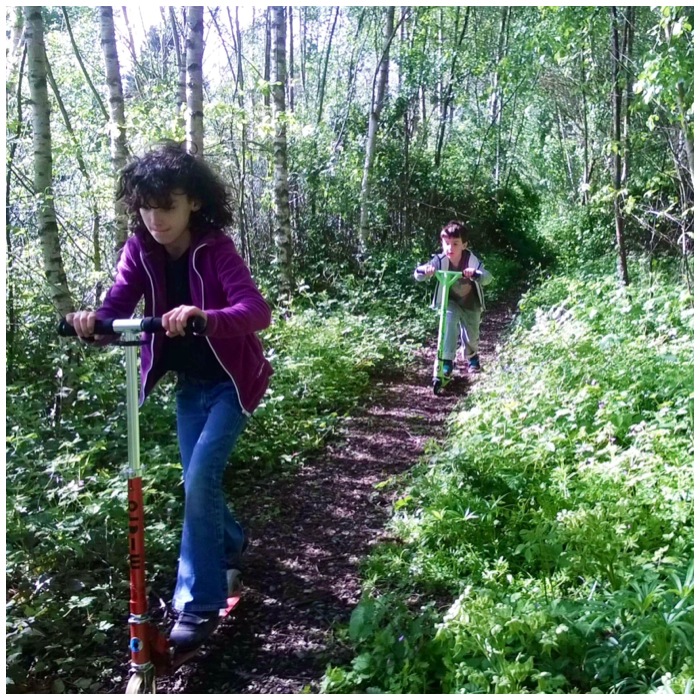
The 16th of May was a perfect day for a bimble around the village with the kids. They decided to take the scooters and even managed to keep them going on the rough woodland tracks.
Bimbling with my kids
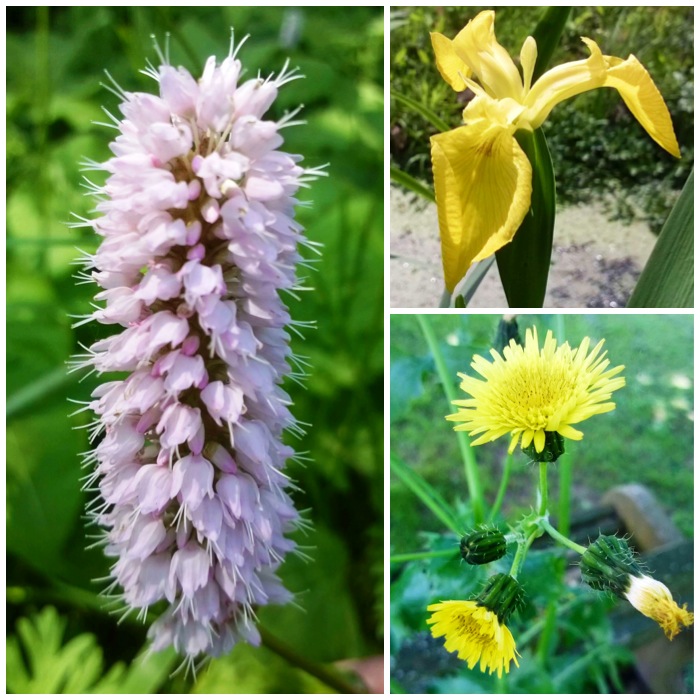
Looking good now is the common bistort and the yellow iris. I found the large sow thistle up near the Clift Pavilion.
Bistort, Iris and Sow Thistle
I passed by many dandelion seed heads but this one caught the light just perfectly.
Dandelion seed head
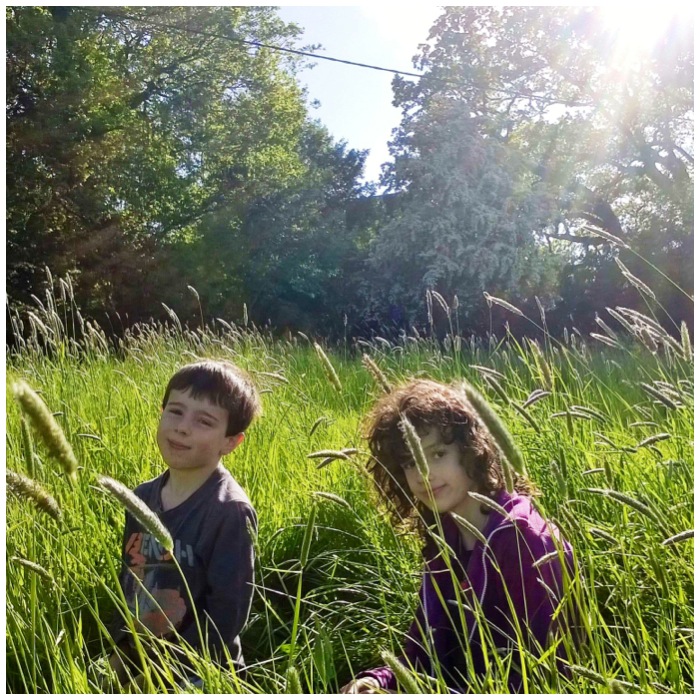
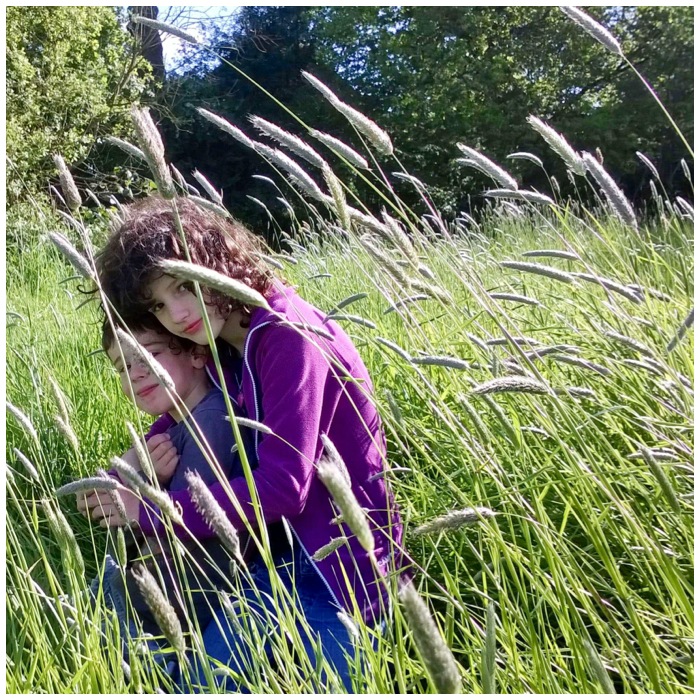
The meadow by Lane End proved a good place to explore.
Chilling in the sun
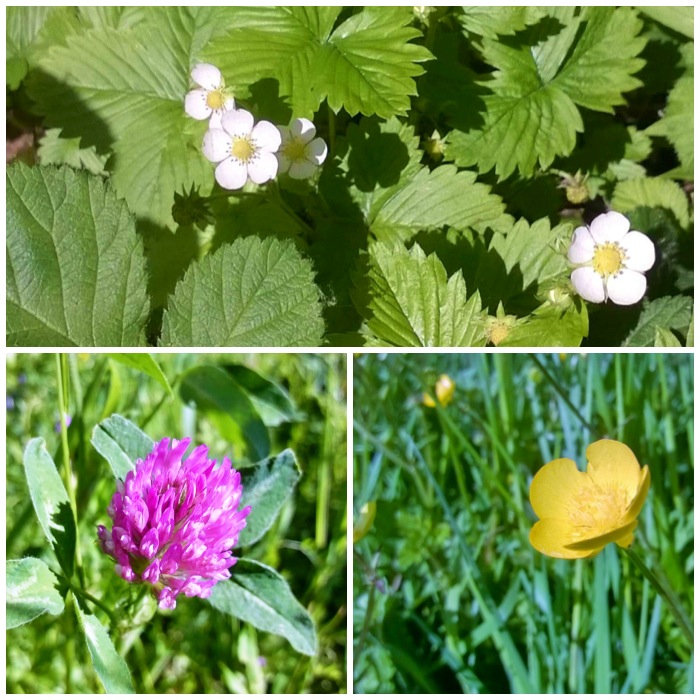
The wild strawberry leaves and flowers are well out around the whole village but I saw my first buttercups and red clover this week.
Wild Strawberry, Red Clover and Buttercup
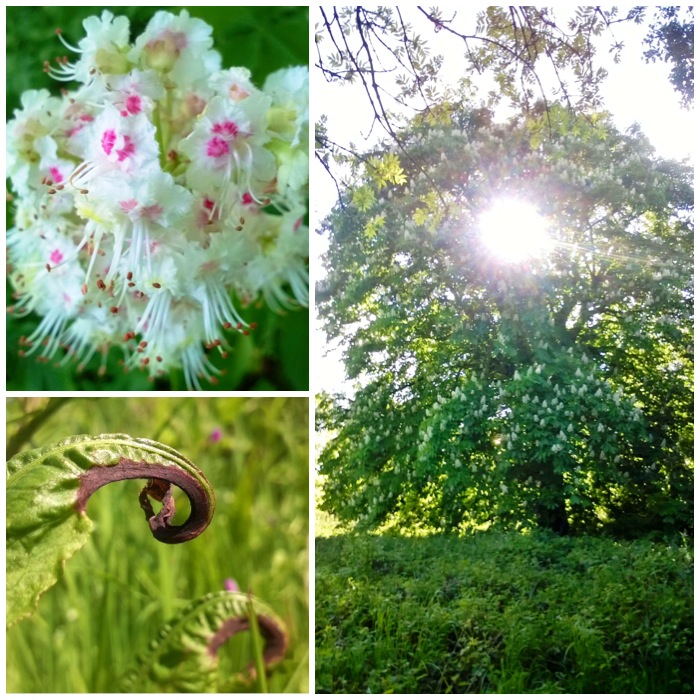
This large horse chestnut is one of the trees I am monitoring for the whole year. The sun looked nice as it shone through it. The blossom is still looking good on the horse chestnut and at the foot of it I found these ferns uncurling.
Horse Chestnut and unfurling Ferns
We had a good look around the meadow but there are not too many plants flowering yet.
Cuddles
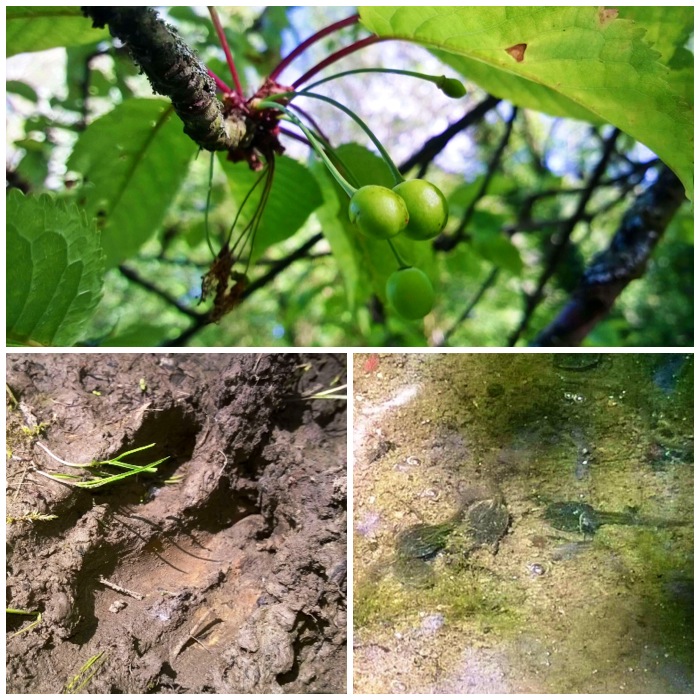
I did spot that the cherry tree near the pond is starting to produce its fruit now. Catherine and Finlay were also on the lookout for tracks (this one is deer) and tadpoles.
Cherry fruit, Deer slots and Tadpoles
One of my favourite snacks while out foraging is the pignut. I found that they had just started to flower in our area now.
Pignut flowers and leaves
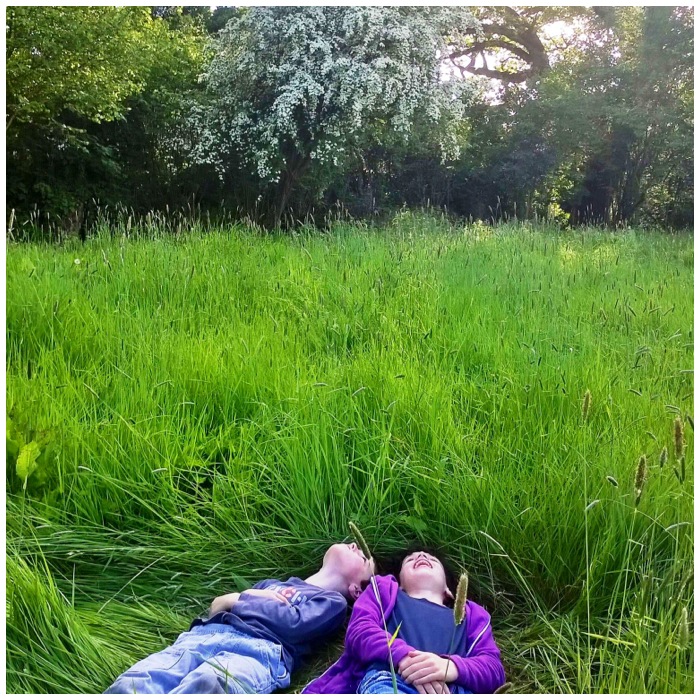
I do not really know my birds but Catherine and Finlay took some time out to lie back and see what flew over them.
Watching the sky
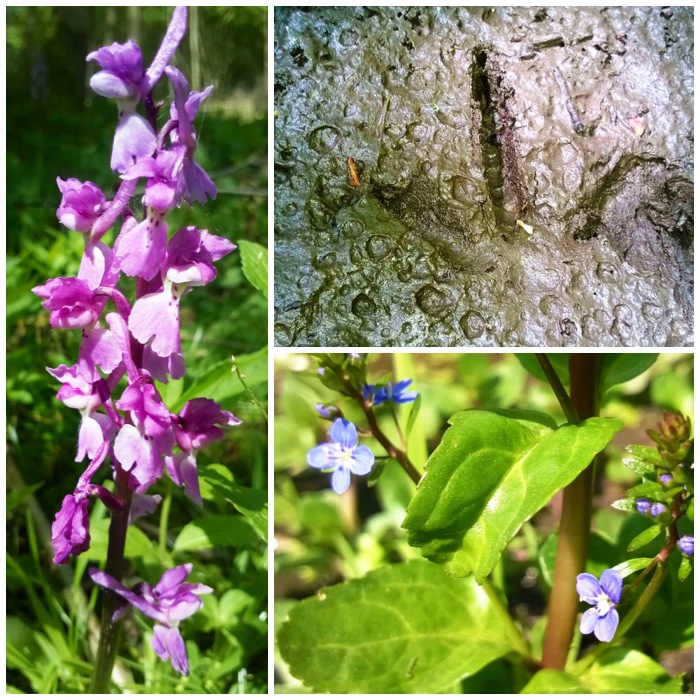
The orchids in the Frith are still hanging in there but I expect to see them disappear over the next few weeks. In the damp ground we did find a pheasant track and spotted that the Brooklime was appearing now.
Orchids, Pheasant print and Brooklime
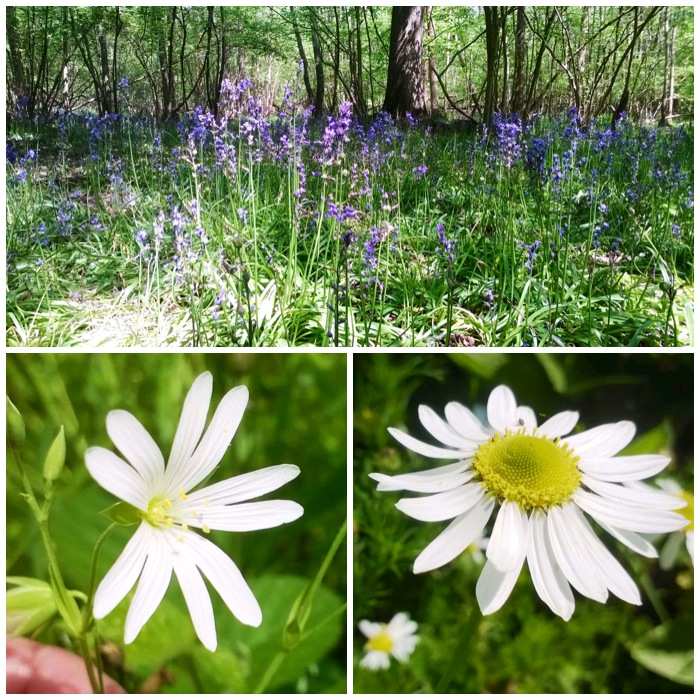
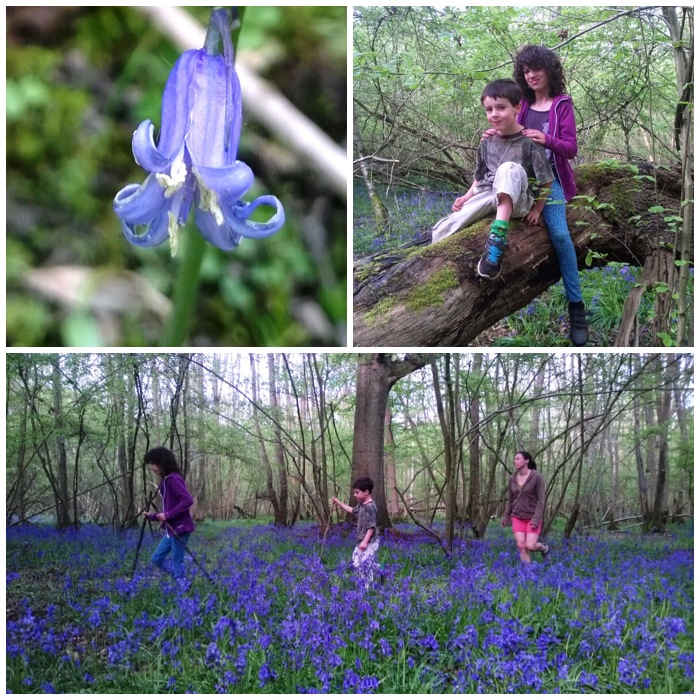
The bluebells have started to die back now but still make a beautiful sight. The stichwort and mayweed are looking at their finest though at the moment.
Bluebells, Stitchwort and Mayweed
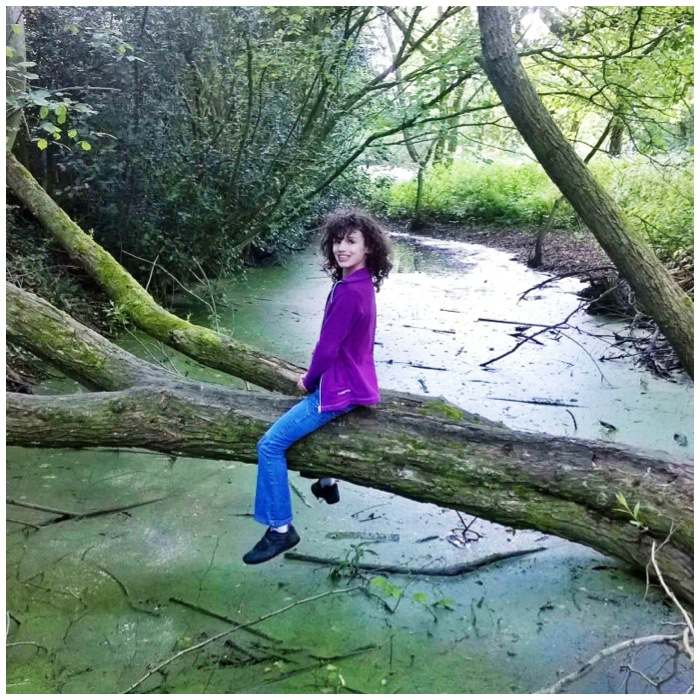
The kids had soon had enough of lying about and started scrambling over the alder and willow trees.
The Catherine Shuffle
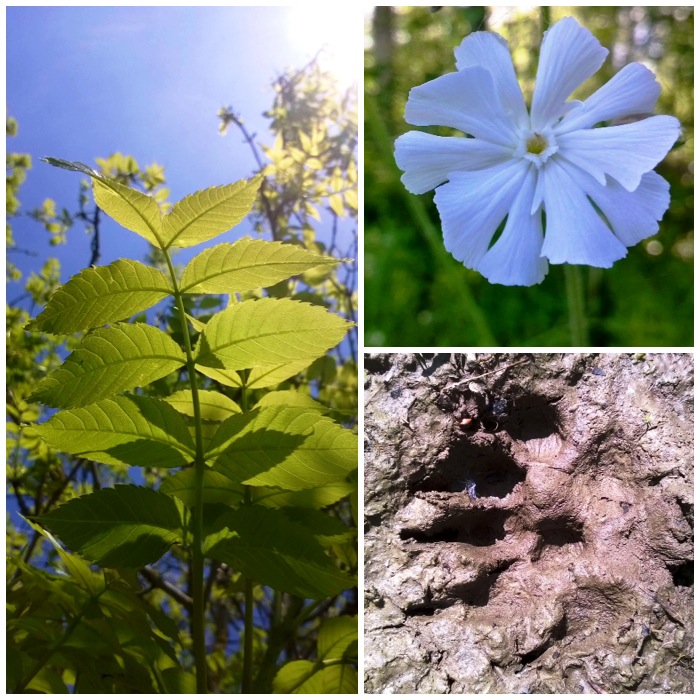
The ash is finally out: it must be one of the last trees to burst into life in the Bramley area. Out near the playground by the new estate the white campion is in full bloom and in the Frith we spotted what looked like a badger print, deep in the wood well away from dog walking tracks.
Ash, White Campion and possible Badger print
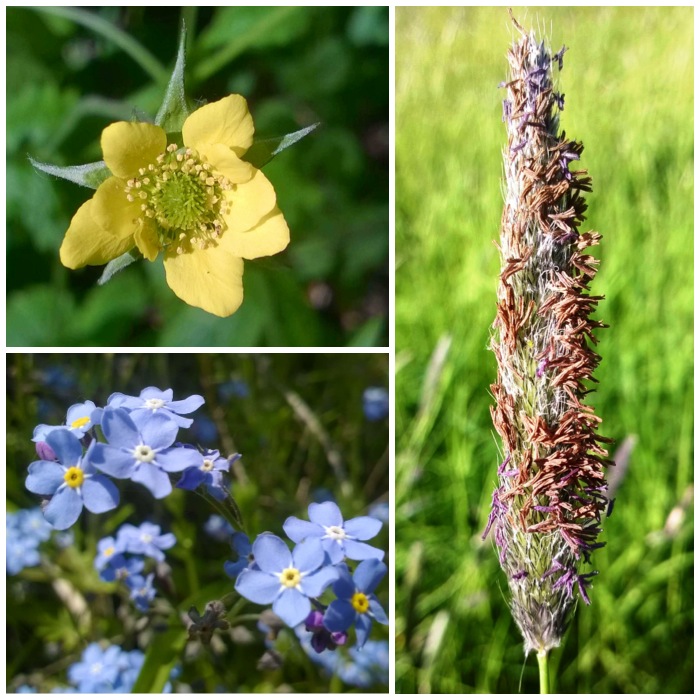
Still to be found there are the lovely yellow wood avens and blue forget-me-nots, and the grass seed heads are standing tall.
Wood Aven, Forget-Me-Nots and Grass Seed head
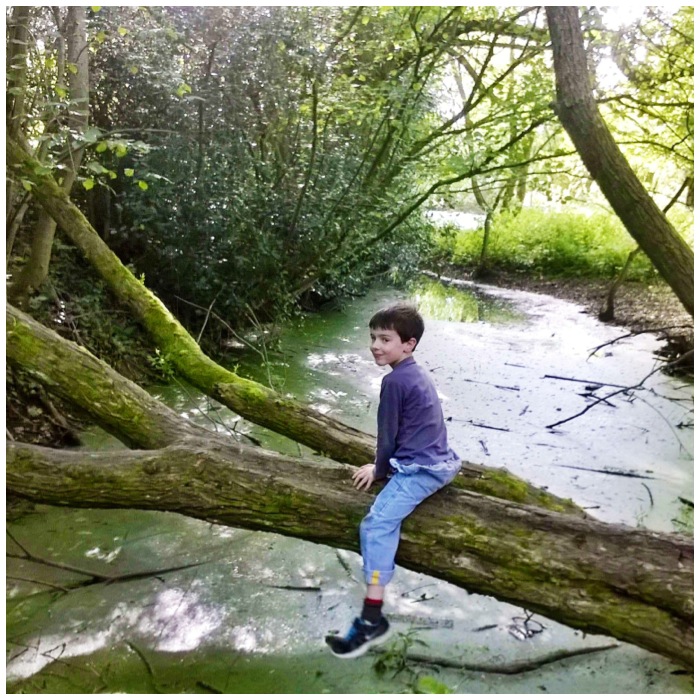
Needless to say Finlay needed to get in on the tree climbing act.
The Finlay Shuffle
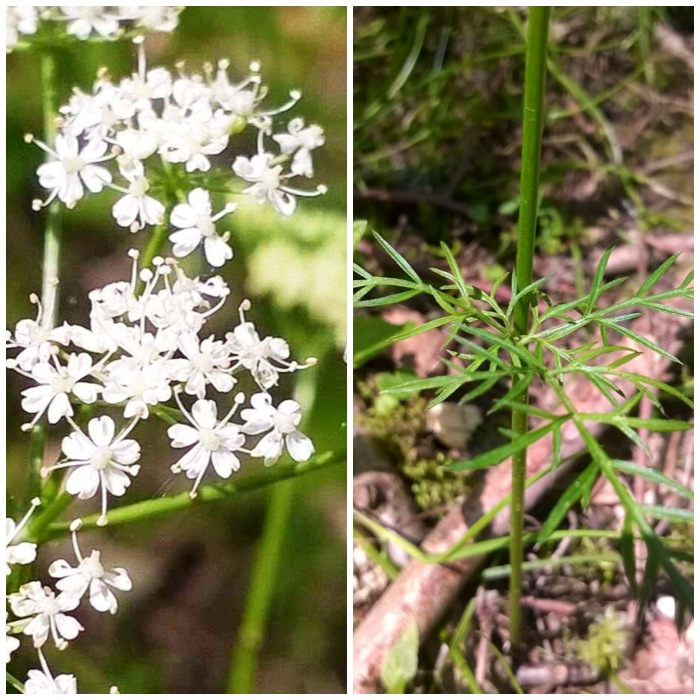
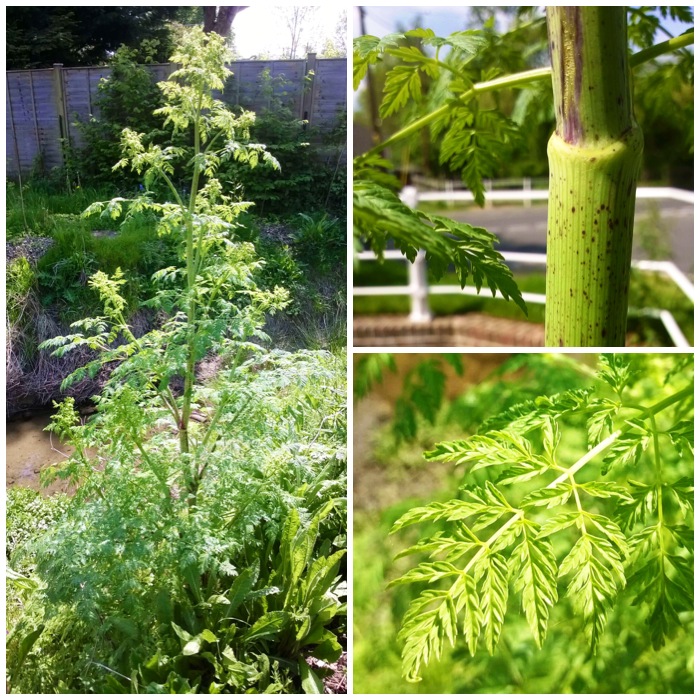
I found what looks like a water hemlock by the stream next to our house. Beautiful but deadly.
Water Hemlock
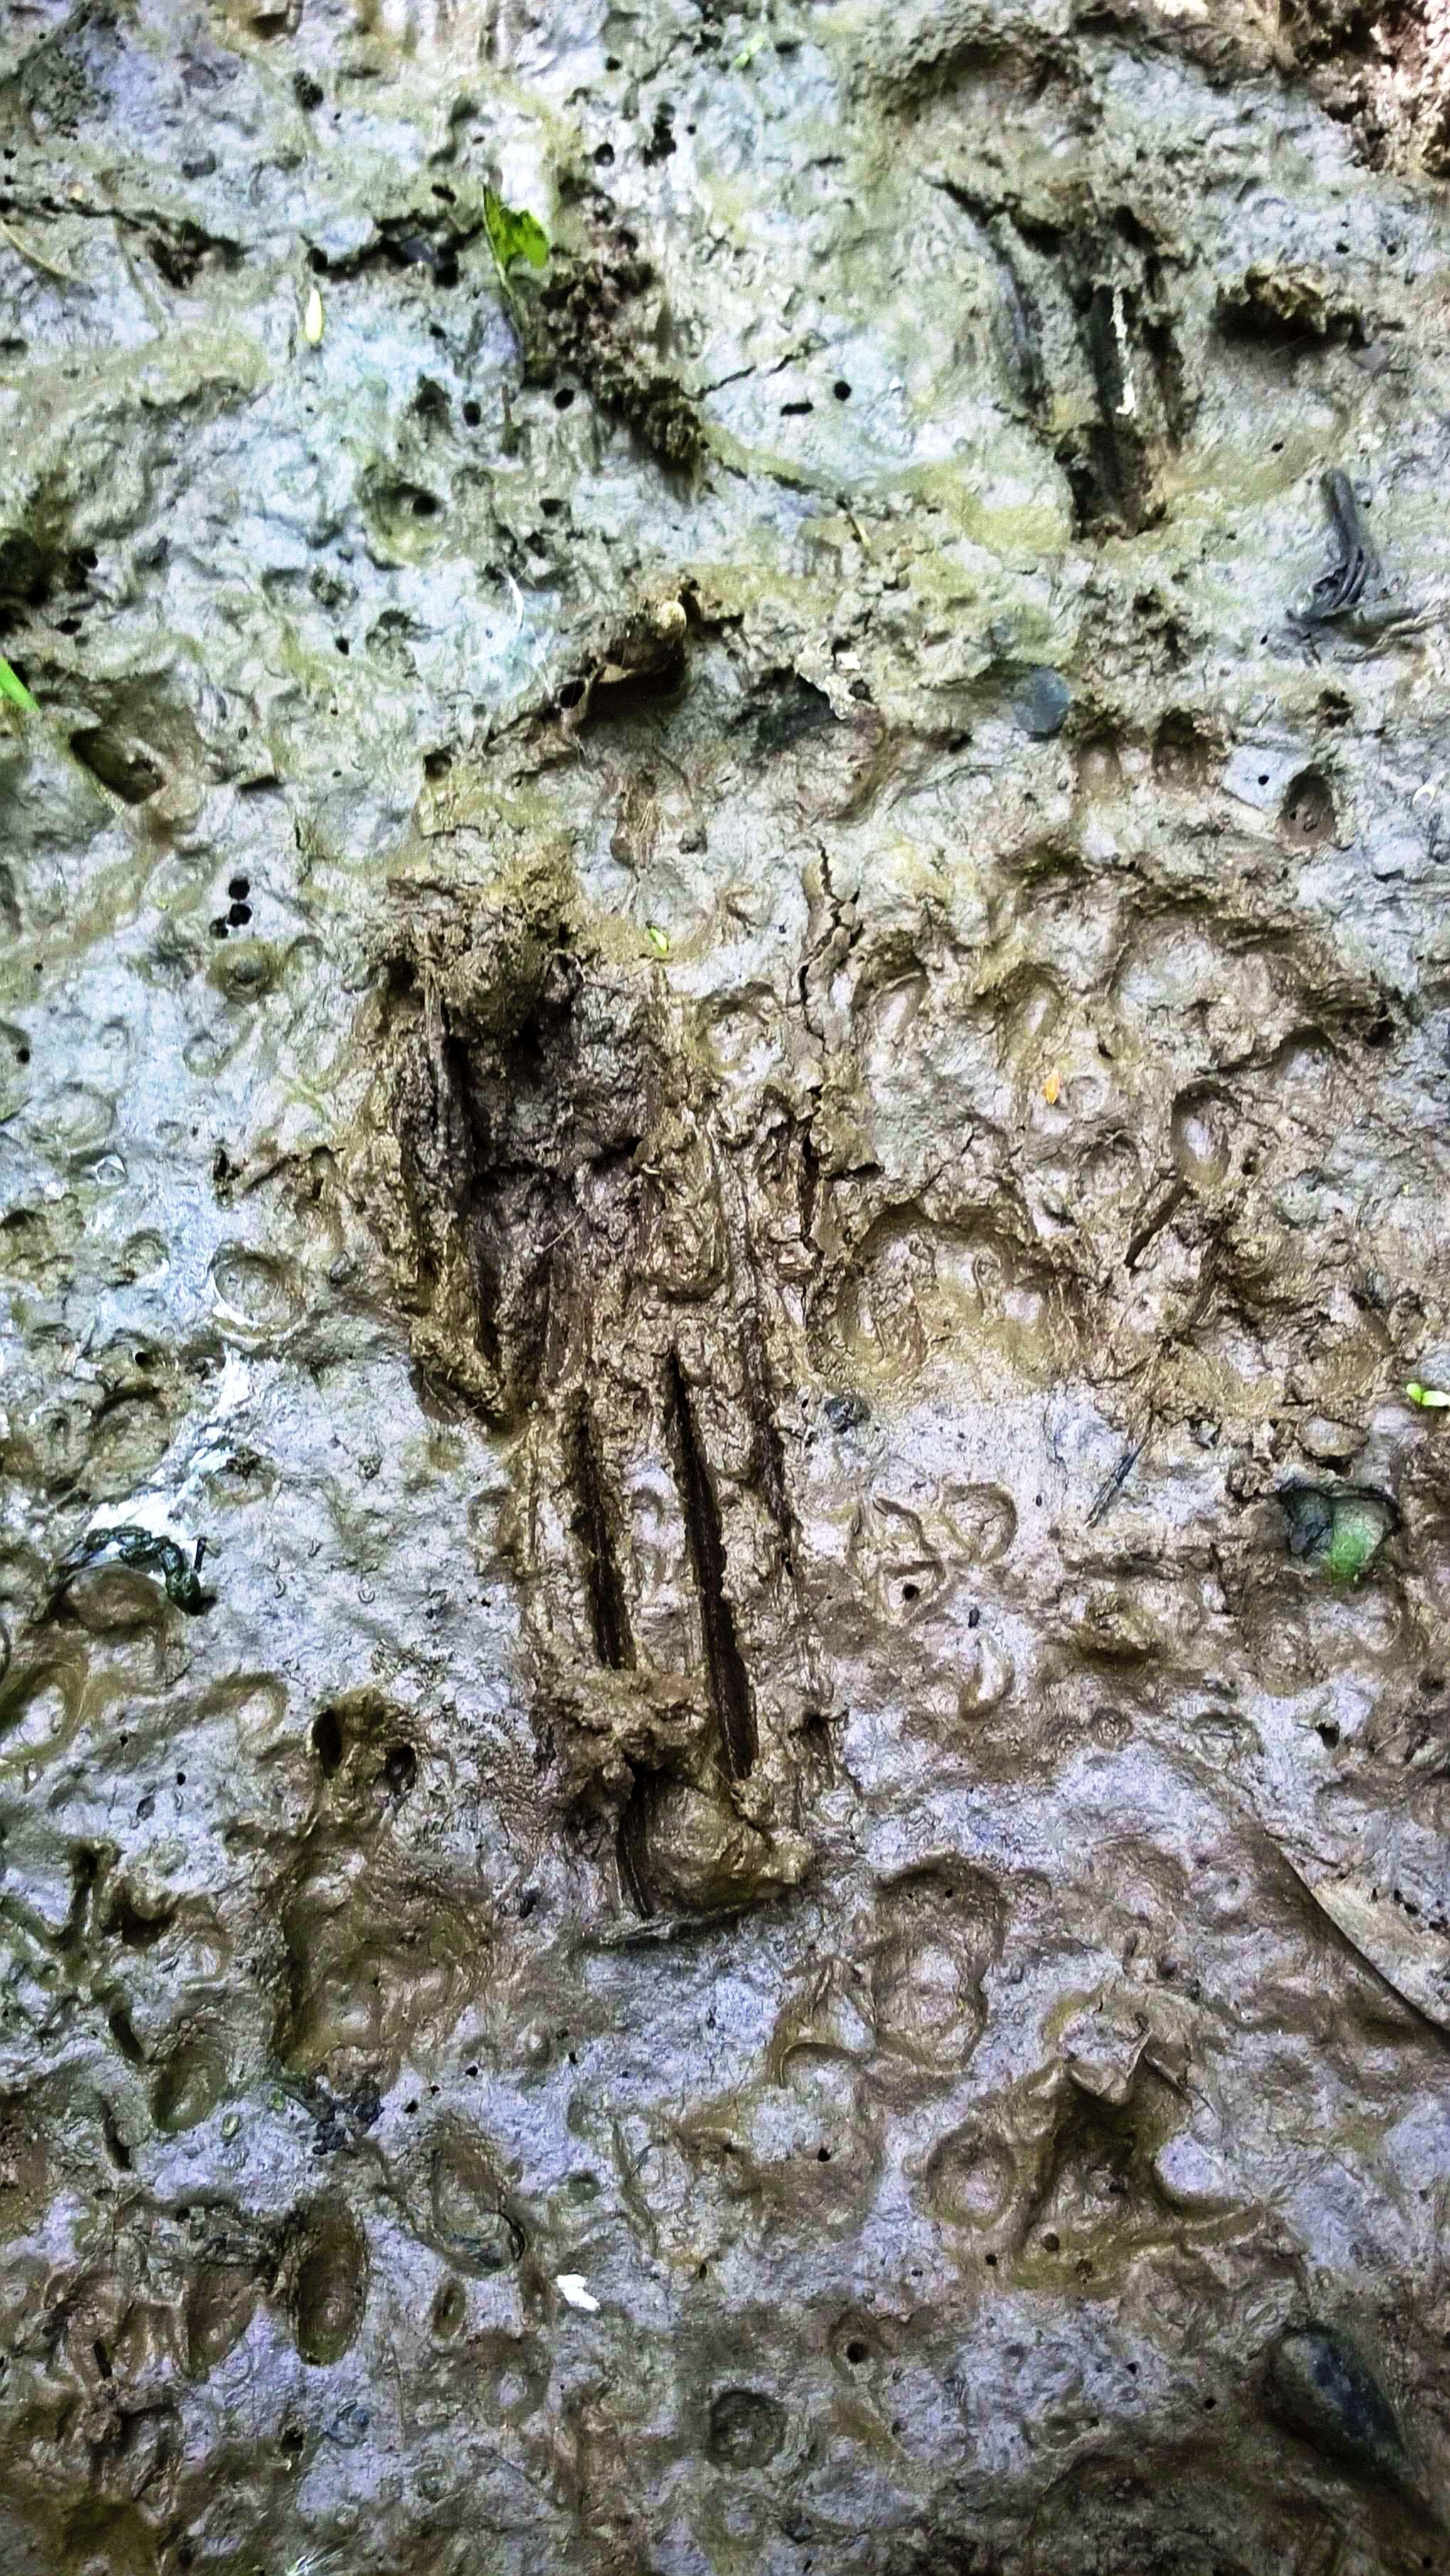
Last picture is of a couple of tracks from I have no idea what animal: any ideas?
Unknown print?
This was an excellent bimble around Bramley and I am now looking forward to seeing all the early summer flowers that will soon be appearing.
I was trimming an ash tree in my garden recently with my friend Paul and I managed to save a few pieces for Atlatls and pot hangers.
I have previously shown you how to carve a collapsible pot hanger so that it can fit into a pot when not in use but on a lot of occasions I just whittle one when I need one.
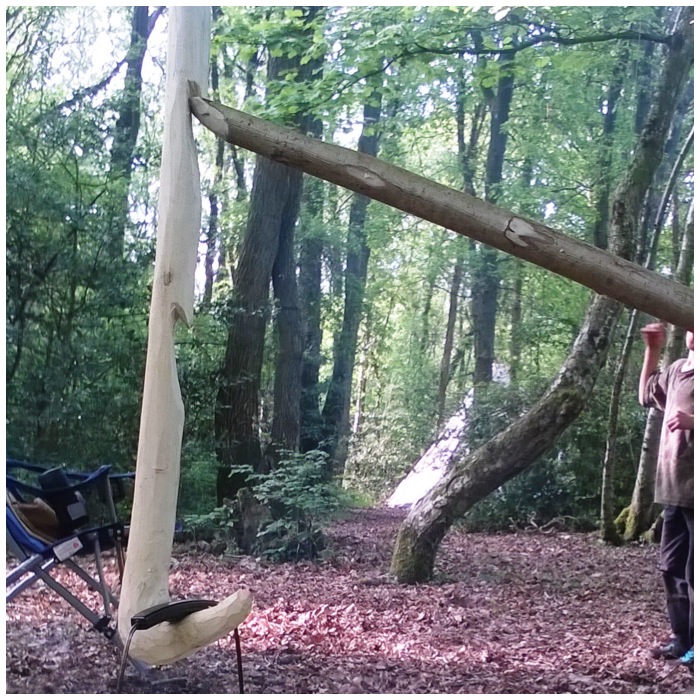
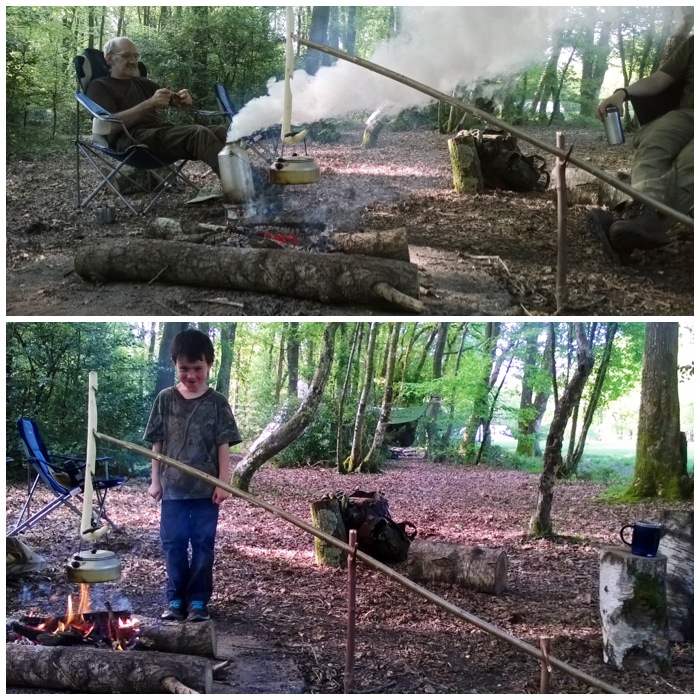
The type of pot hanger I am talking about is shown below hanging off a ‘Wagon/Waugan Stick’ (pronounced waygone or worgan – I hear different variations on this from different people) campfire set up. The pot hook is adjustable in that the pot is easily raised or lowered by using the different hooks on the pot hanger.
A simple pot hook
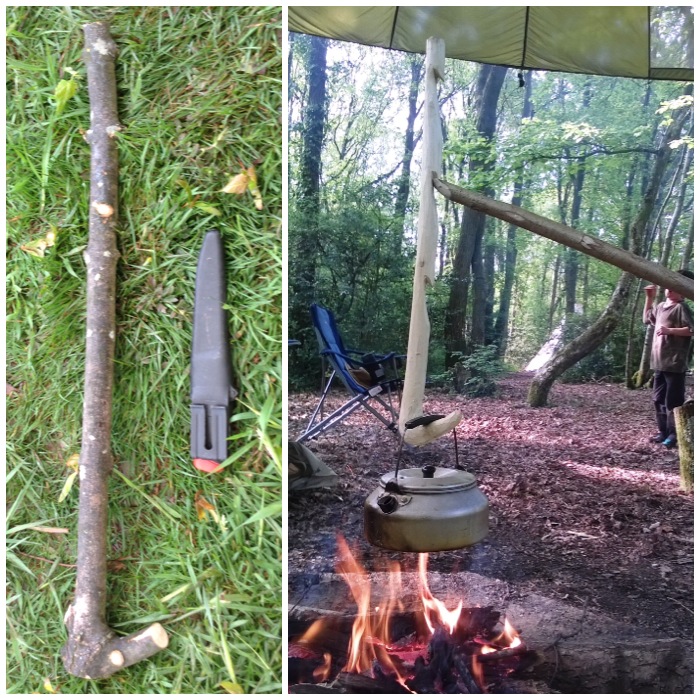
I started off with a piece of ash that had a fork in it at a good angle (to form a hook) and finished up with something that allowed me to be able to quickly or slowly cook/boil something.
On the right you can see the finished pot hanger in action. To help stop any confusion I will refer to the large hook holding the small kettle as the ‘pot hook’ and the small hooks as the ‘adjusting hooks’.
Before and After
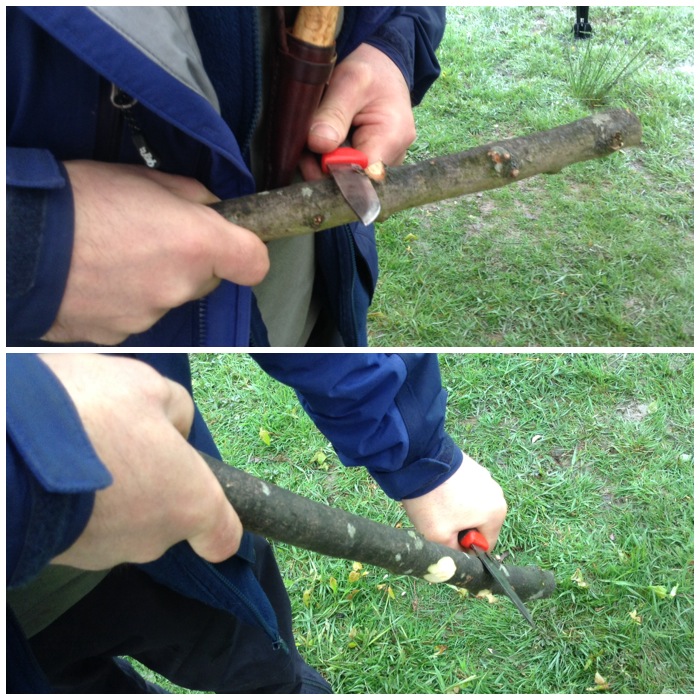
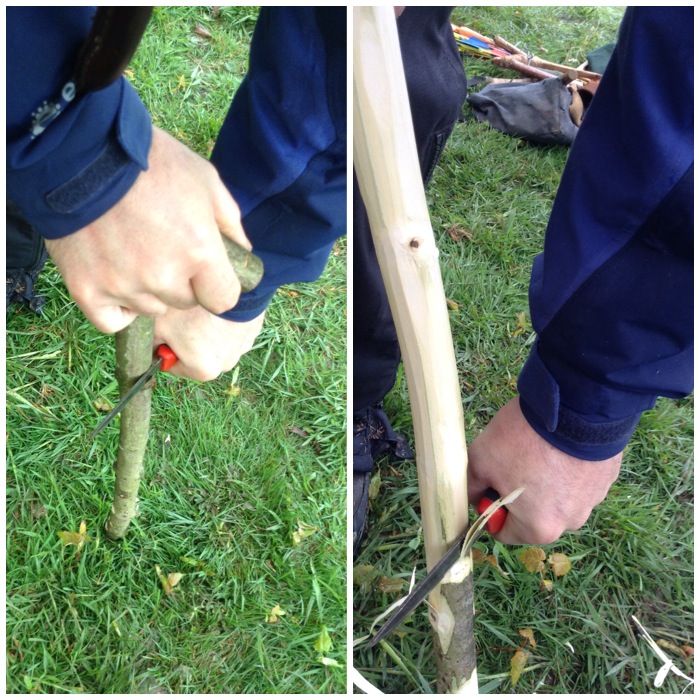
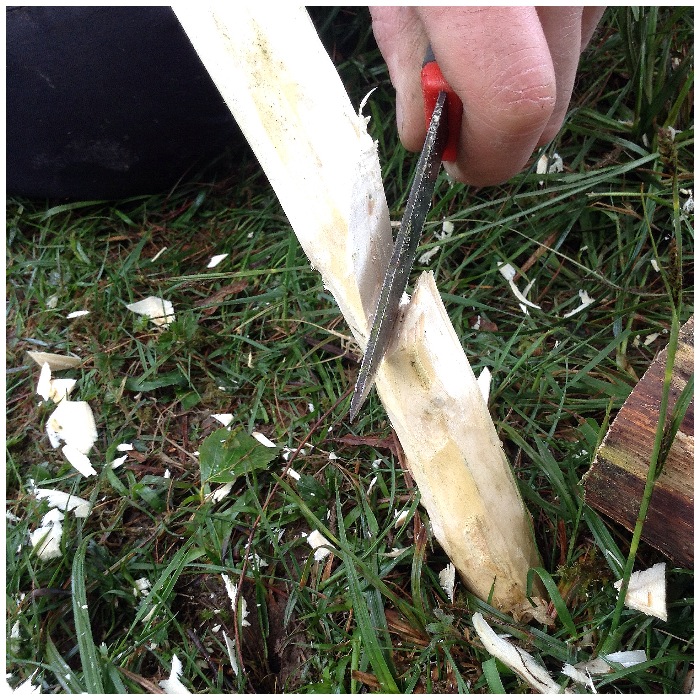
To begin with I trimmed off all the knobbly pieces using powerful chest lever and locked arm cuts. See my How To…. on knife Safety for more information on these types of cuts.
Powerful cuts
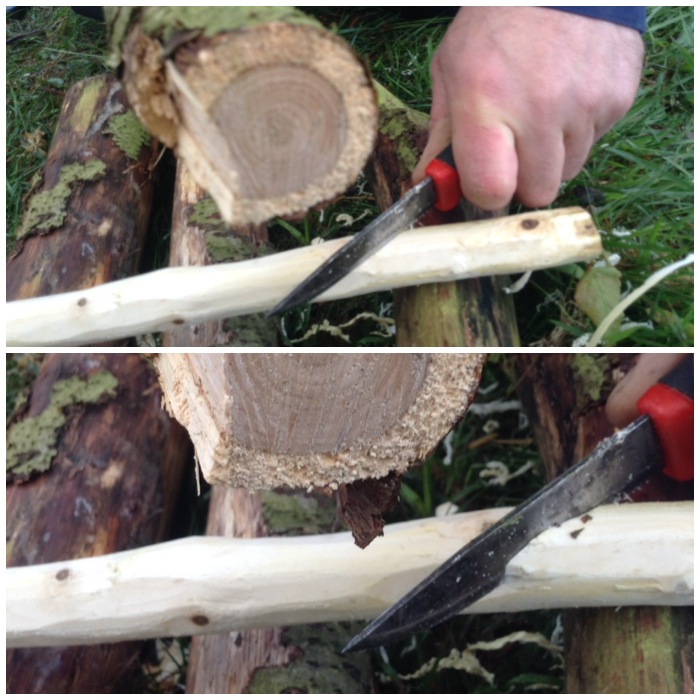
I then trimmed the bark off using a powerful shoulder cut. I had the work piece placed on the ground here off to one side so as to brace it and to work safely.
Braced
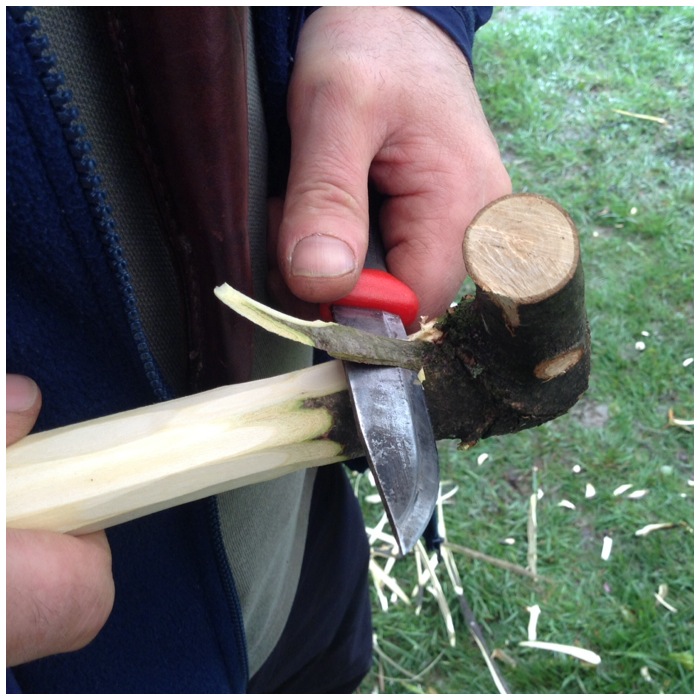
To strip the bark around the hook area I used a gentle chest lever grip.
Fine cuts
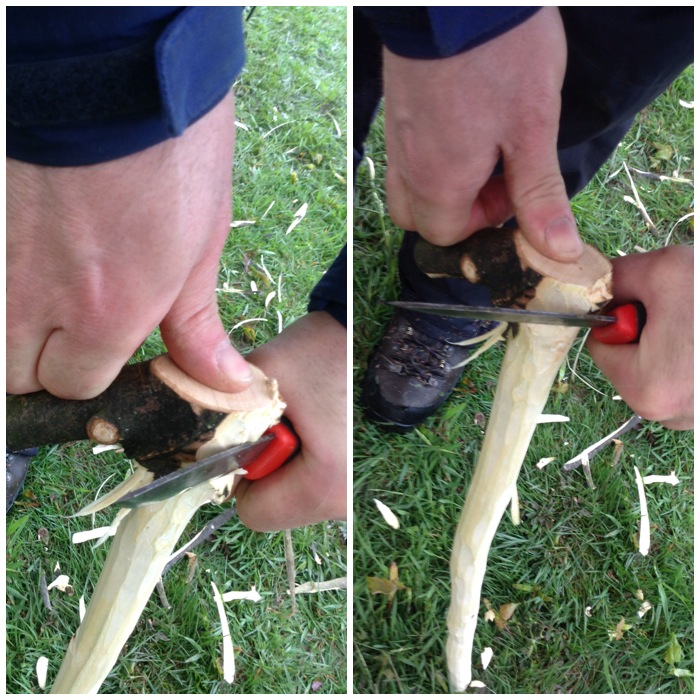
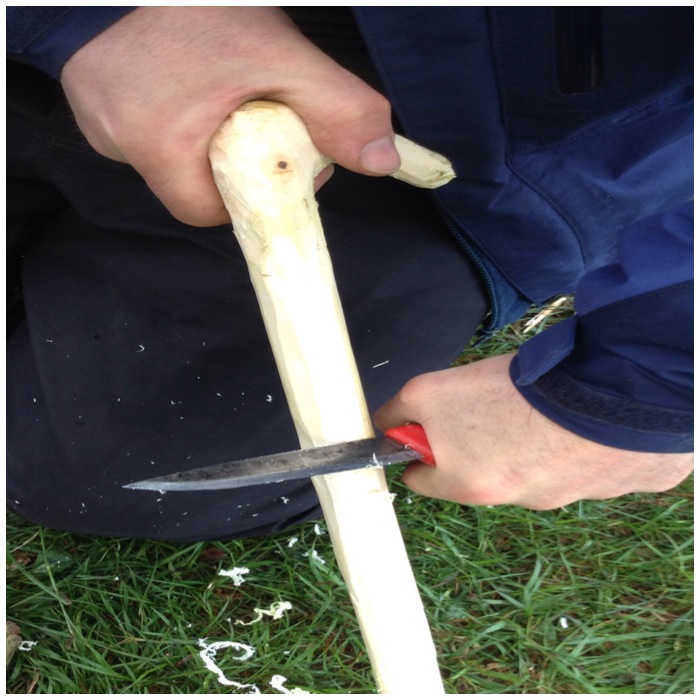
The bottom of the pot hanger was more difficult to trim as I had not left any excess wood to hold on to. The main thing I needed to consider here was keeping my eye on where my thumb was on the hand holding the pot hanger.
Work safely near the ends
As I needed to use the point area of the blade to trim around the hook I kept the pot hook resting on a small log so that if the knife slipped it would hit the ground. My friend Charlie showed me how to use the knife and the curve of the pot hook to create a fulcrum, making the stripping of the bark safer. I tried to photograph this but they did not turn out well.
De-barking the hook area
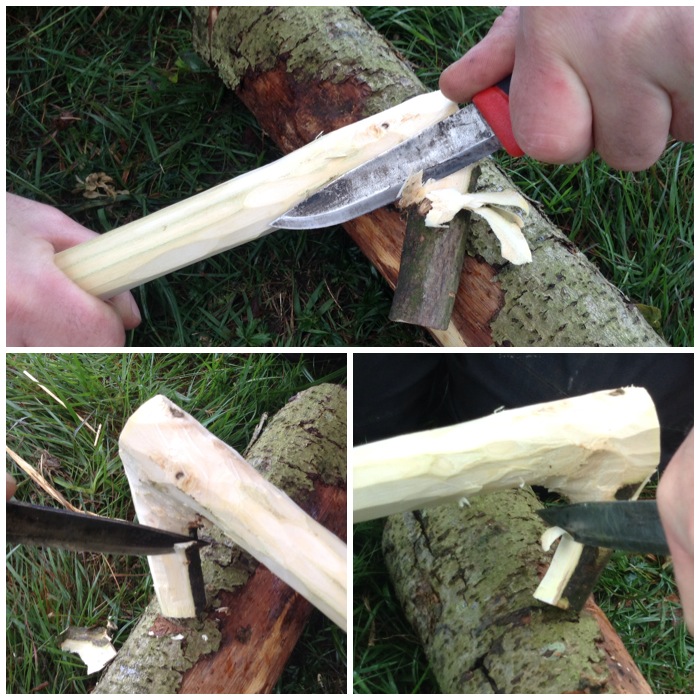
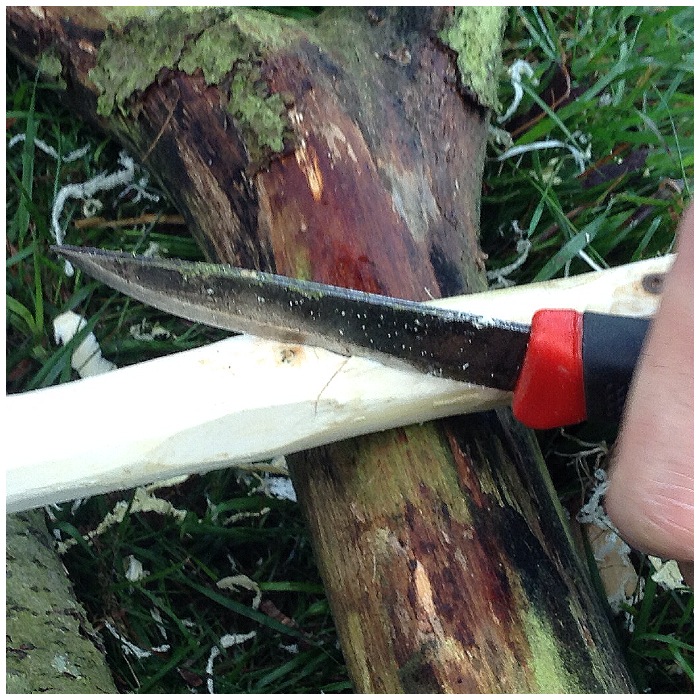
I also rounded the bottom of the pot hanger and then used the back of my knife to strip off the remnants of the inner bark.
De-barking with the back of the knife
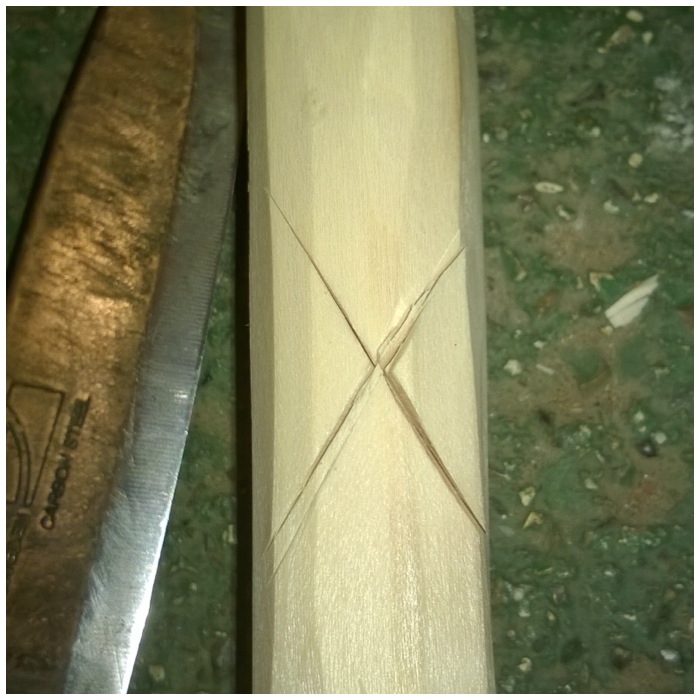
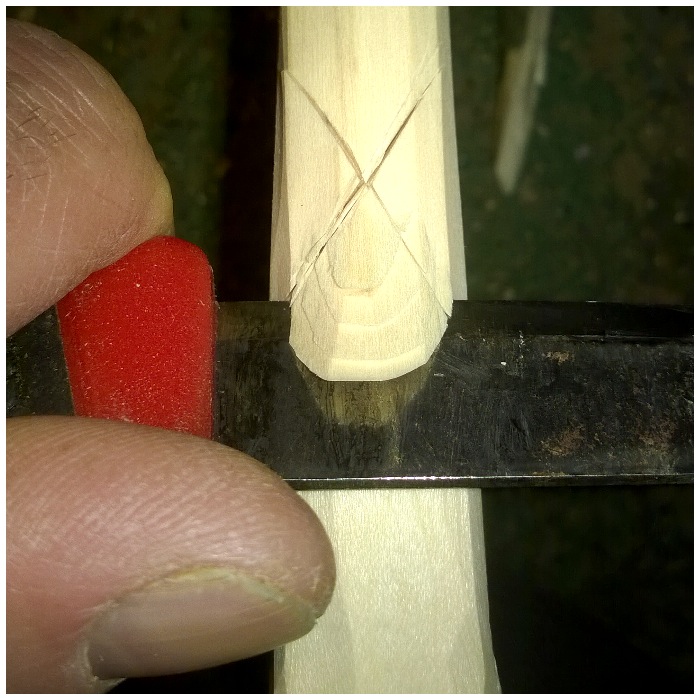
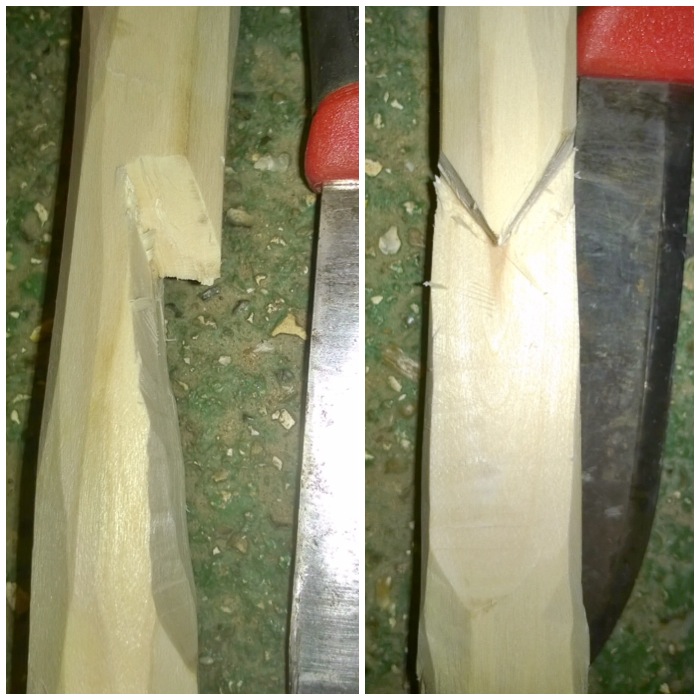
To make the adjusting hooks I used a batton (a large stick) to carve a cross into the wood – an X cut. I placed my X cuts in line with the pot hook as much as possible. After a couple of good smacks with the batton the knife had cut well into the wood.
Batton in the first X cut
I then repeated the process for the other part of the X cut.
Then the second X cut
A simple X cut – this cut makes the carving of the adjusting hook much easier.
The X cut
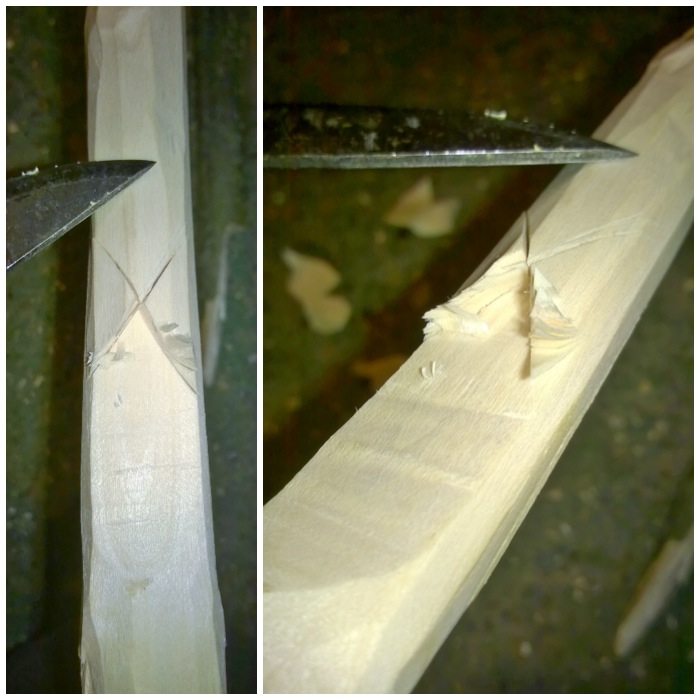
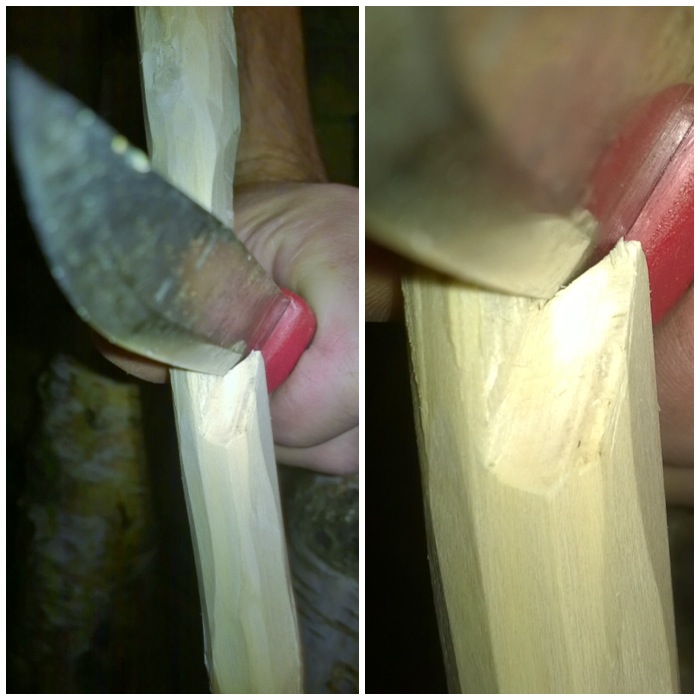
So that the pot hanger can hang properly you must remove the wood at the bottom of the X cut first (the bottom being the quarter of the X cut closest to the pot hook).
I use very fine cuts here and the original X cut acts as a stopper point so that you only cut away the wood that you need to.
Fine cuts
I normally remove a small area of wood just below the point of what will become the adjustable hook.
Remove the bottom of the X first (nearest the hook)
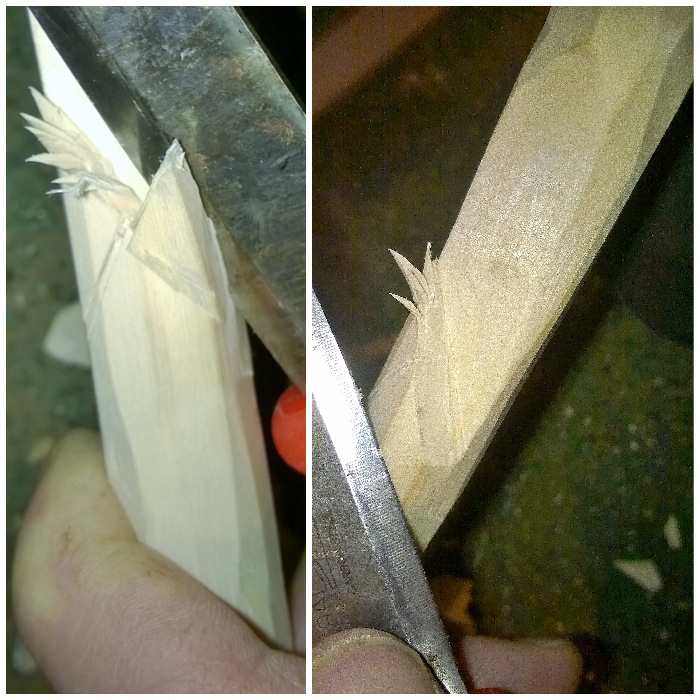
Once I’d removed the wood from the lower quarter I then removed the wood from one of the side quarters.
Remove the sides of the X
Then I removed the wood from the other side quarter leaving only the top quarter to act as the adjustable hook.
Deepen the sides of the X
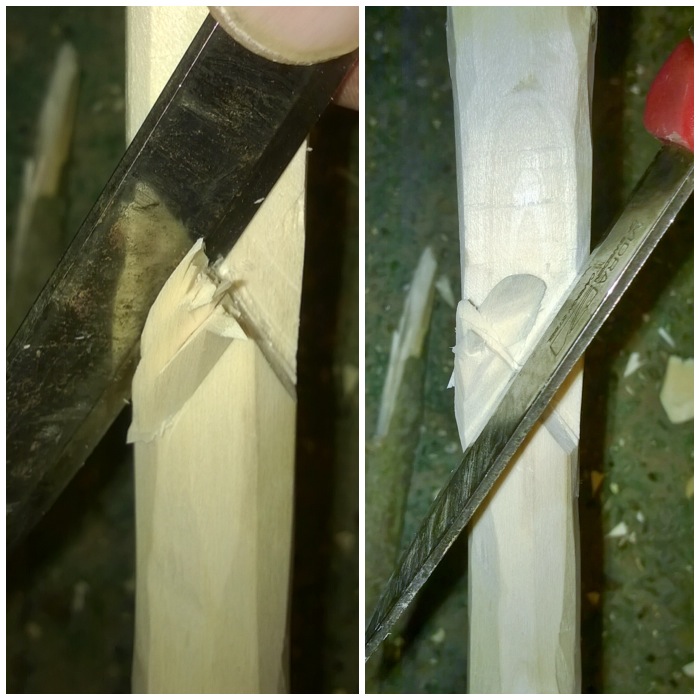
I kept carving down until I had exposed enough of the wood that I could carve out the final part of the adjustable hook.
Ready for the undercut
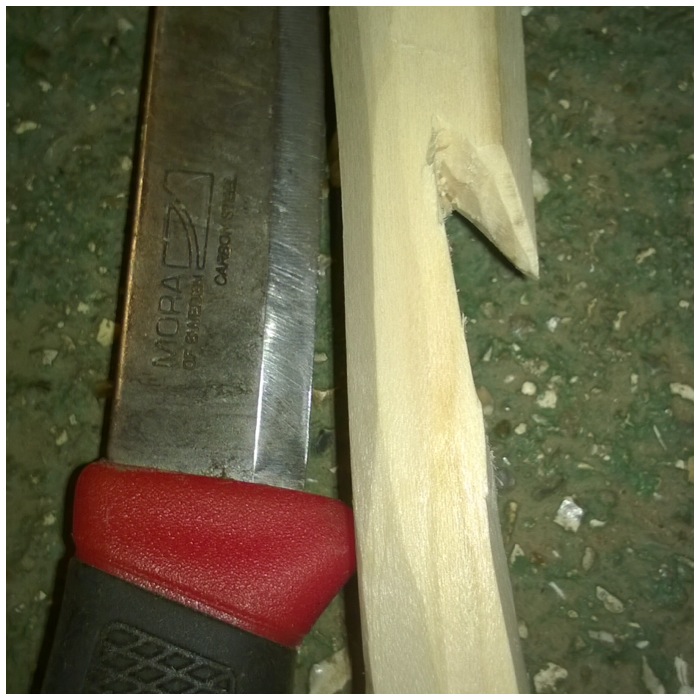
The final part I needed to do was to make an undercut below the point of the upper quarter. I kept reducing the wood until a nice point appeared.
Fine cuts again on the point
You can really see that undercut appearing in the picture below now. For safety I kept the pot hanger braced on the ground (a stump works as well) while I was carving it out.
For this pot hook I carved a further 2 hanging hooks along its length.
Carve deep but safely
This is the final rough shape you are looking for. Any further carving or sanding would be purely for decoration only.
A good point
This pot hanger is particularly suited to the Wagon set up – Wagon (‘way gone’) coming as far as I know from the old tale that if you leave this set up standing when you leave your camp, it points the way for the naughty wood spirits to follow you 🙂
Side view of the Way Gone set up
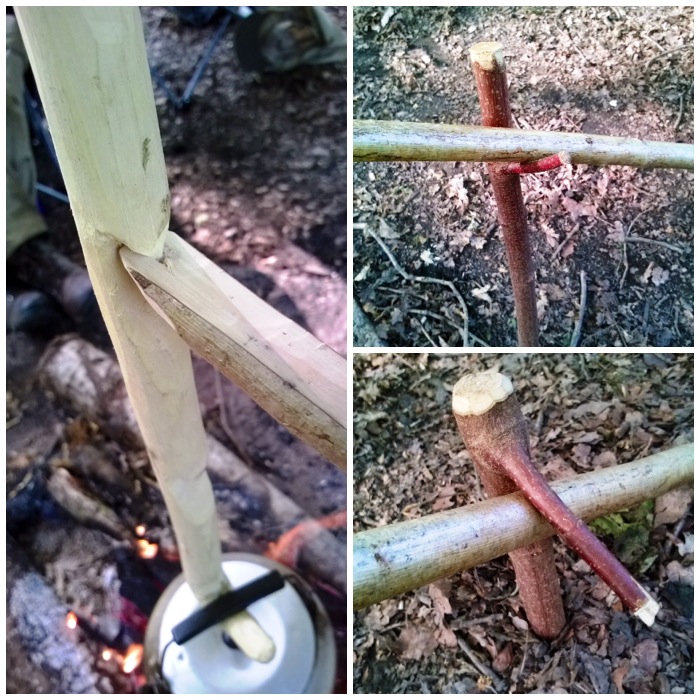
The hanging hooks attach to the Wagon stick by sitting in a small dimple on the end of it. In this set up I also used a forked stick to give the Wagon height and a smaller (Dead Man’s Finger) stick at the bottom of it to counterbalance everything.
In detail
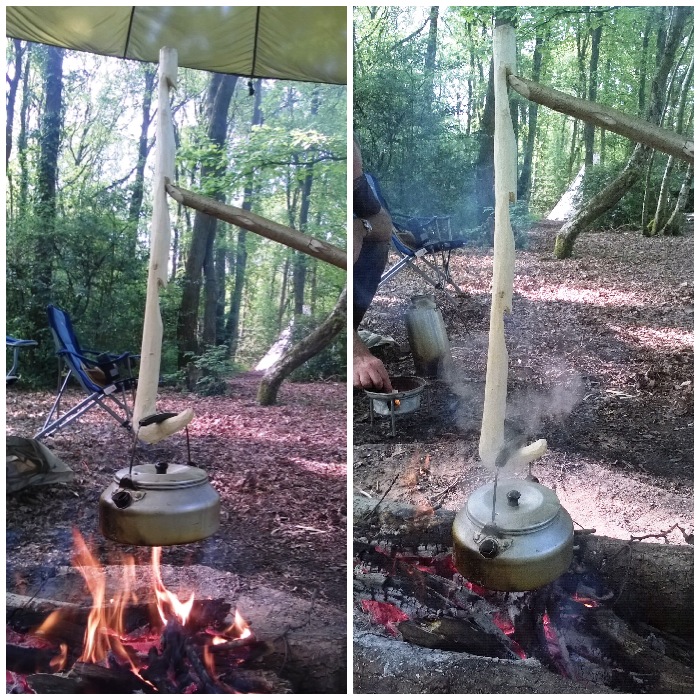
The whole set up is very easy to adjust for a fast or slow boil/cook.
Adjustable height
This is a great project for any bushcrafter to keep their hand in with simple carving techniques. It looks very simple at first but there are some tricky cuts that if you are not careful can cause a nick or two but the main benefit is – that the tea gets made.
No pressure, no assessments, no worries – just fun, fun and more fun – these were the requirements for the recent London Area Sea Cadet Juniors training weekend at Crowborough Army camp.
I was joined by my good friend Charlie Brookes for the weekend teaching some bushcraft skills to the cadets. Also helping us were one our new Adventure Training instructors Emma Deasy and Leading Cadet Jessica Edwards (Jessica is under training to become an Adventure Leader).
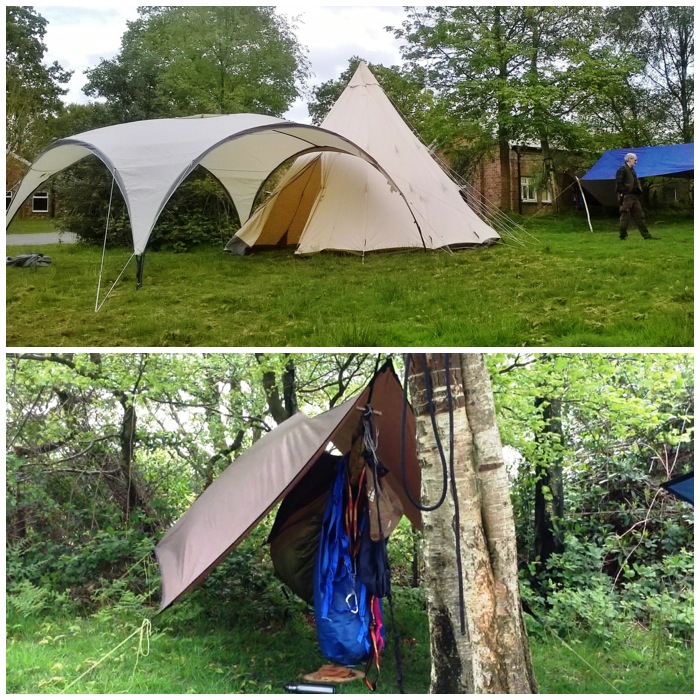
We set up our classroom and prepared for all our activities on the Friday afternoon. At this stage it was just Charlie and myself but as he is a top bushcrafter everything got set up in record time.
Our classroom and my billet
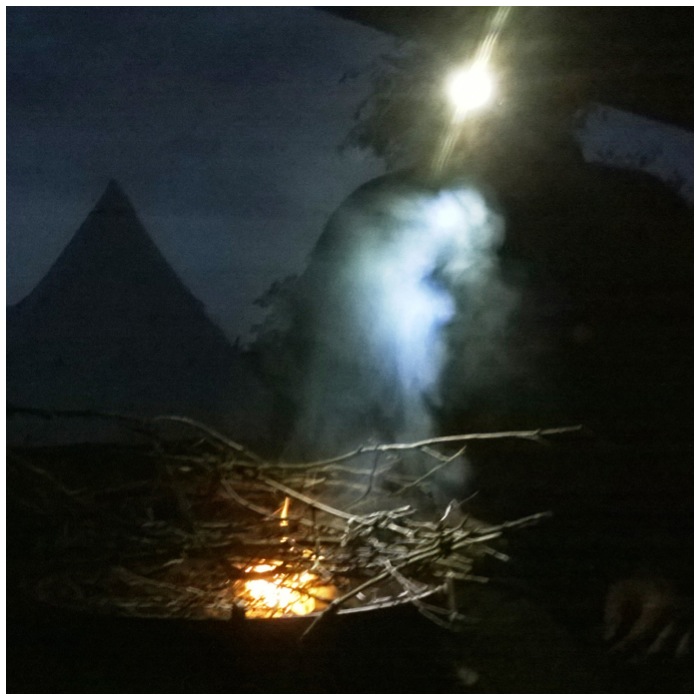
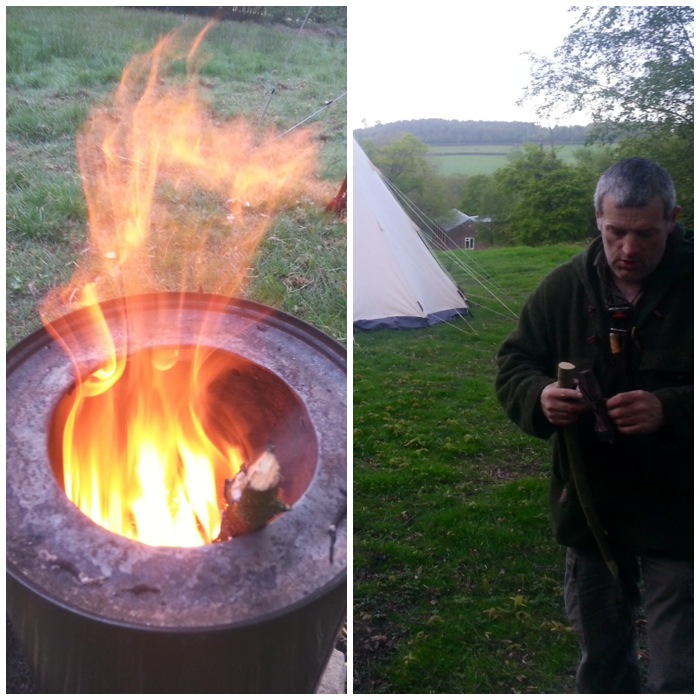
As the cadets arrived on the Friday evening Charlie and myself relaxed around a nice fire and discussed how best to run the weekend. We did not have to look after the cadets in the evenings as there were enough ‘Duty Staff’ around to do this.
A relaxing evening
There were lots of activities planned for the cadets. The plan was for us to be given six cadets for an hour or so and then they would be moved onto other activities. On the saturday we had 3 teams in the morning and 3 in the afternoon.
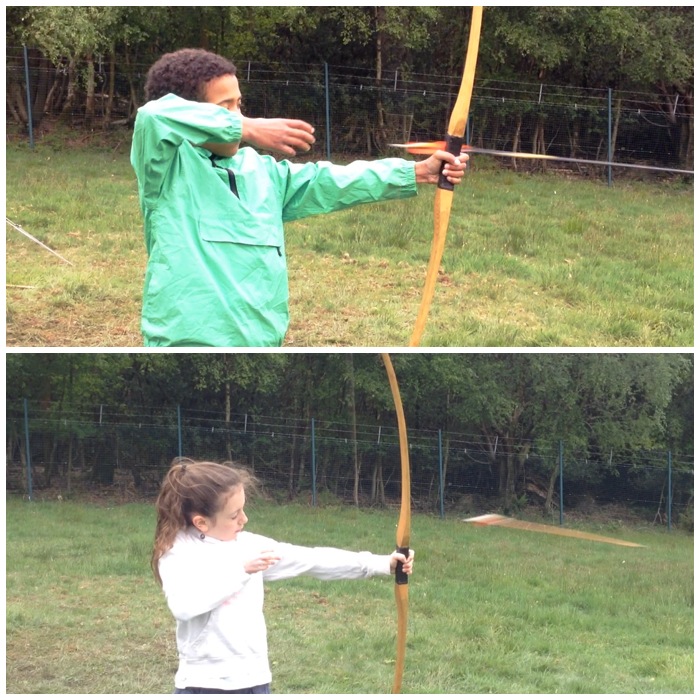
We ran various activities in each slot including the Atlatl, archery, fire lighting and stalking games.
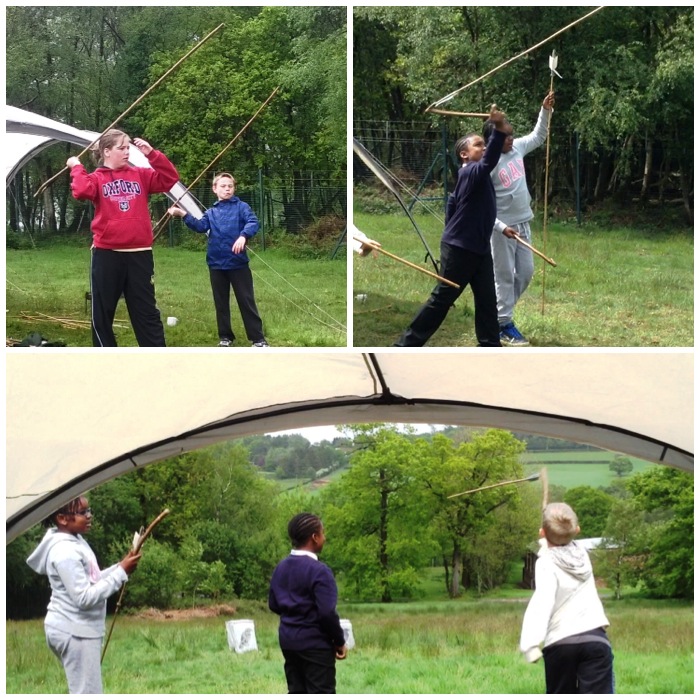
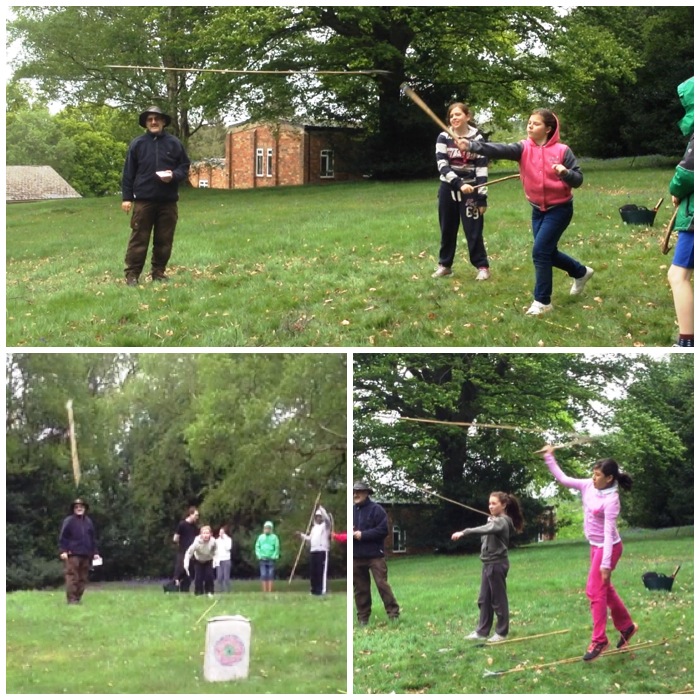
The Atlatl (a spear chucking device) has become a regular event at many of our courses. Just looking at these cadets you can see that they really enjoy this activity. I set up a short range of about 15 meters as I was more focused on accuracy rather than distance.
Atlatls in action
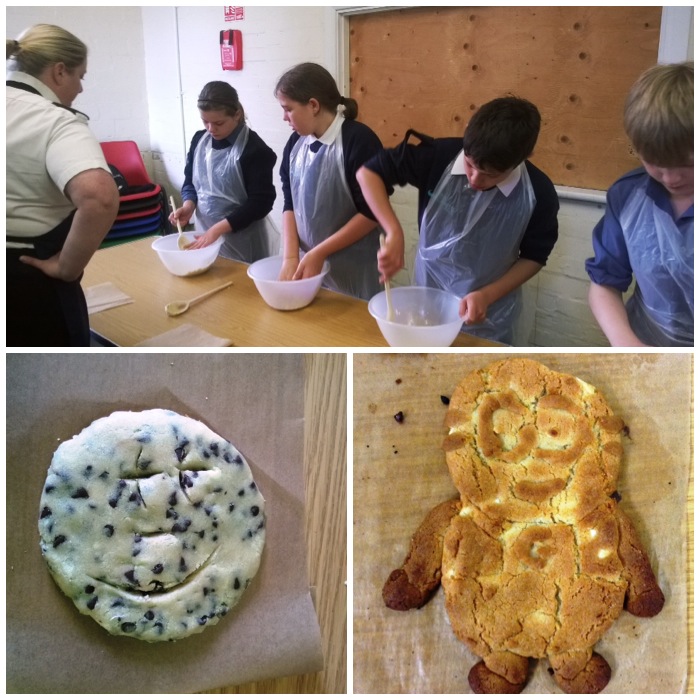
One of the other activities the cadets undertook was a cookery class (Cook Stewards course in the Sea Cadets). I was supplied on a number of occasions with some excellent cookies that were baked in this class and every time I went into the main building I was assaulted by a fantastic smell of baking biscuits.
Cookery class
As you can see that the little fella in the picture just above on the right turned out to be a proper little Minion. This was baked by one of the other instructors Emma.
Emma’s Minion
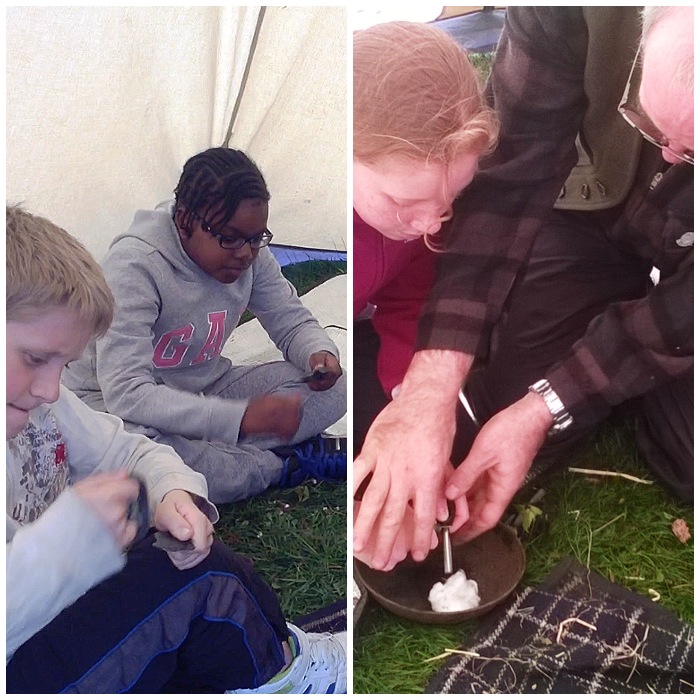
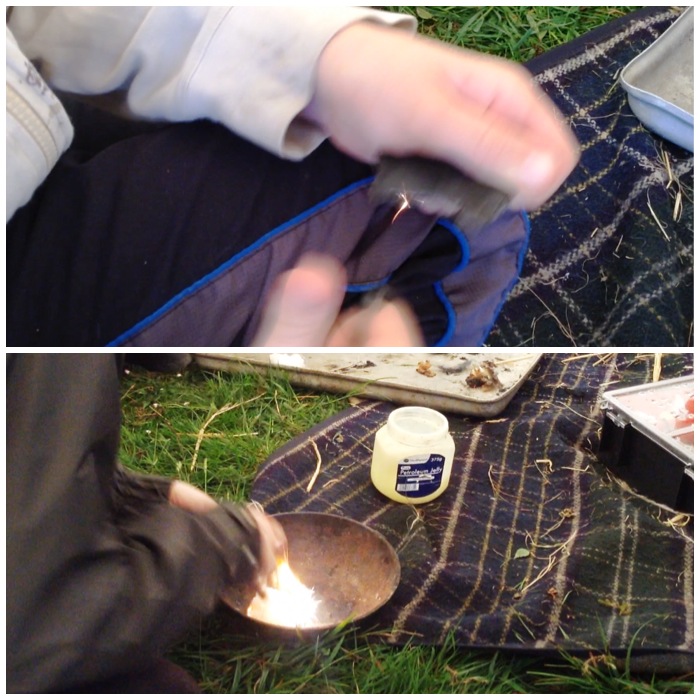
Charlie spent a great deal of the day teaching the cadets how to light a fire in many different ways and also about the responsibilities they need to think about when lighting a fire. In these pictures the cadets are using traditional flint and steels on the left and more modern firesteels on the right.
Some take to this straight away and others require a little bit of a helping hand.
Flint & Steel and Firesteels
In no time the cadets were creating good sparks from traditional flint and steels and lighting up cotton wool balls smeared in Vaseline with modern firesteels.
Sparks and flames
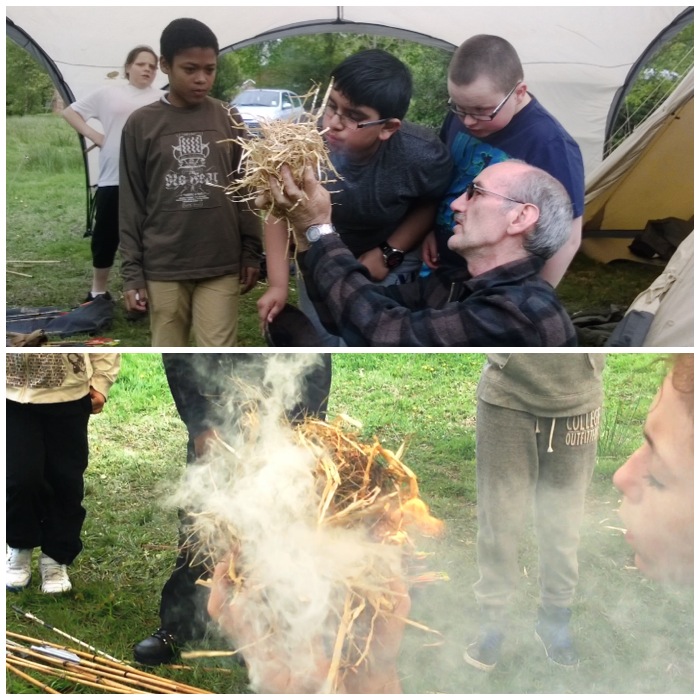
The cadets also lit lots of charcloth and soon had good tinder bundles going.
Flamage
I put together a short video showing all these activities.
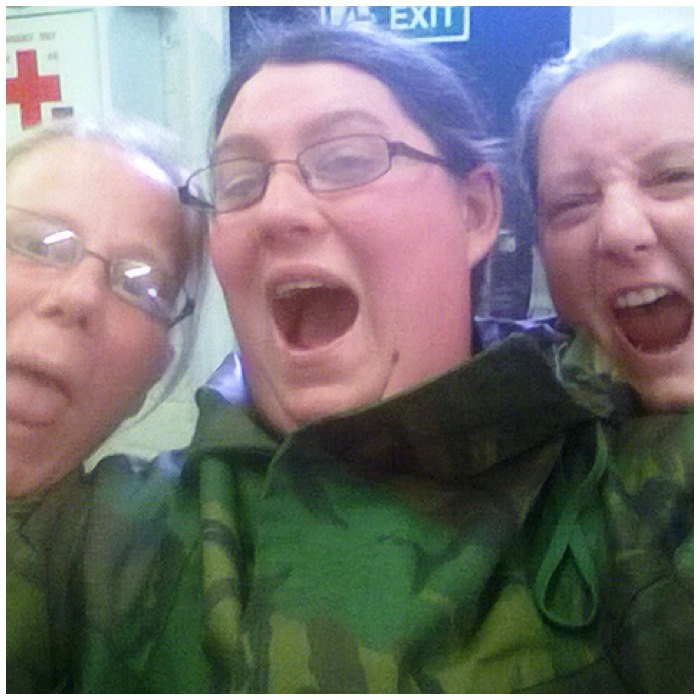
I asked Emma at some time on the Saturday to go around the other classes and get one or two pictures of each one. Emma did get some good pictures but I also found this on my camera – scary stuff 😉
The ladies taking a selfie
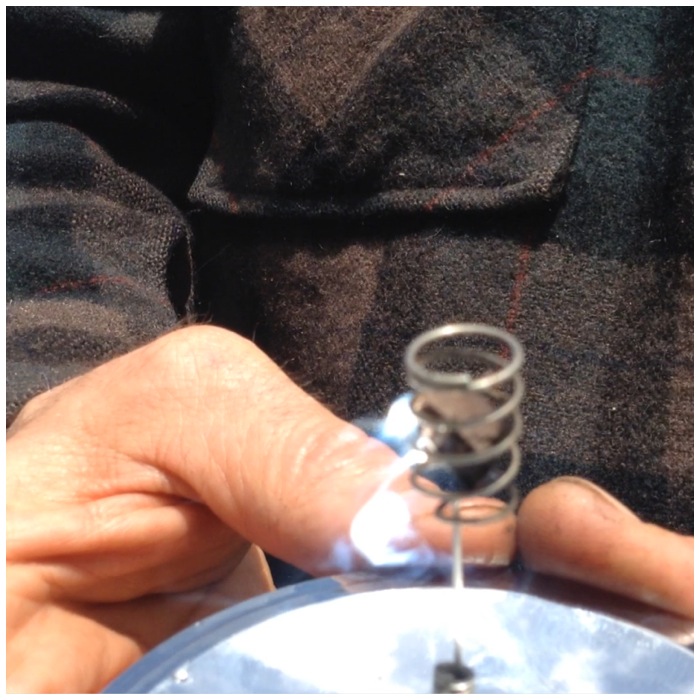
A little toy that really caught the attention of the cadets was the parabolic mirror. This is a concave mirror that you can use to light a small piece of material just using the suns rays.
Parabolic mirror
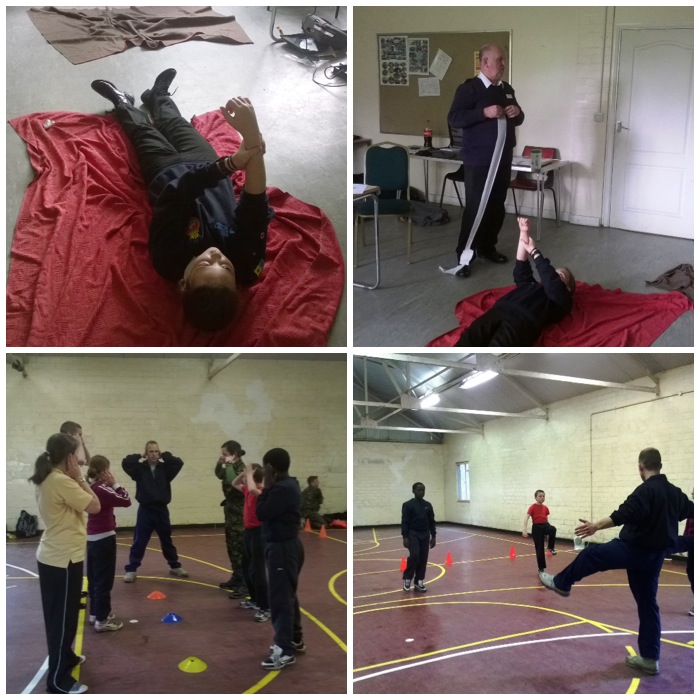
Other classes the cadets undertook included First Aid and Physical Training.
First Aid and PT
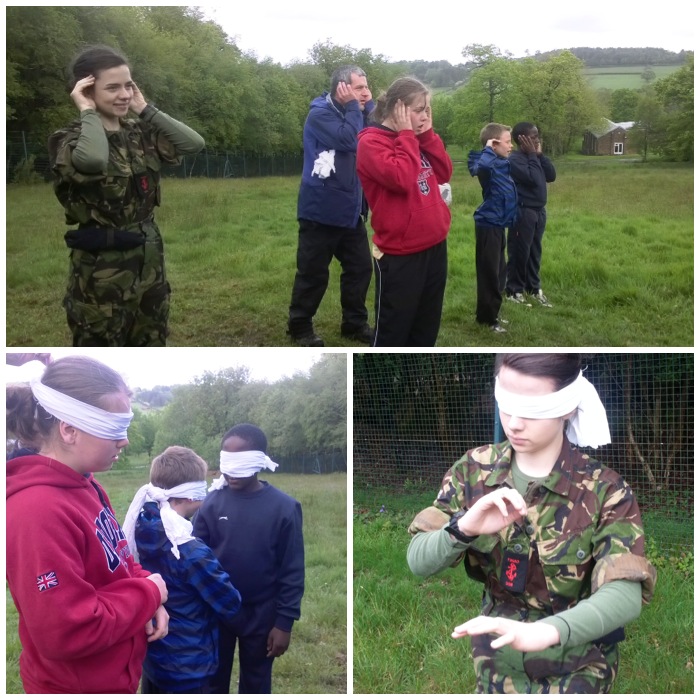
One of the activities I like to teach the cadets is about listening correctly while out and about. They all come from London so for many they do not truly listen to the countryside when out and about. to begin with I get them to focus their listening by cupping their hands to their ears. This really increases the sound volume from the direction they are facing and as they turn around they can clearly hear everything coming from quite a distance.
After they get used to this we blindfold them so that they can appreciate how much sound can help us with spotting animals in the woods.
Learning to listen properly
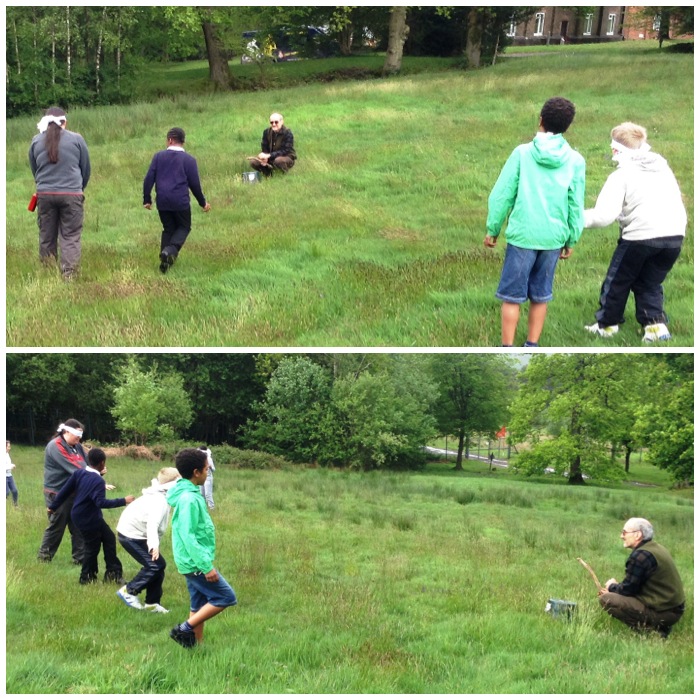
The drum stalk is a game where the participants are blindfolded and have to walk from an unknown spot (to them) and touch the head of the drummer. The drummer gently taps the drum (a bucket in this case) to give the participants a focus to walk to. Each participant has a guide walking by them to make sure they do not fall into any holes or trip over anything.
Drum stalk
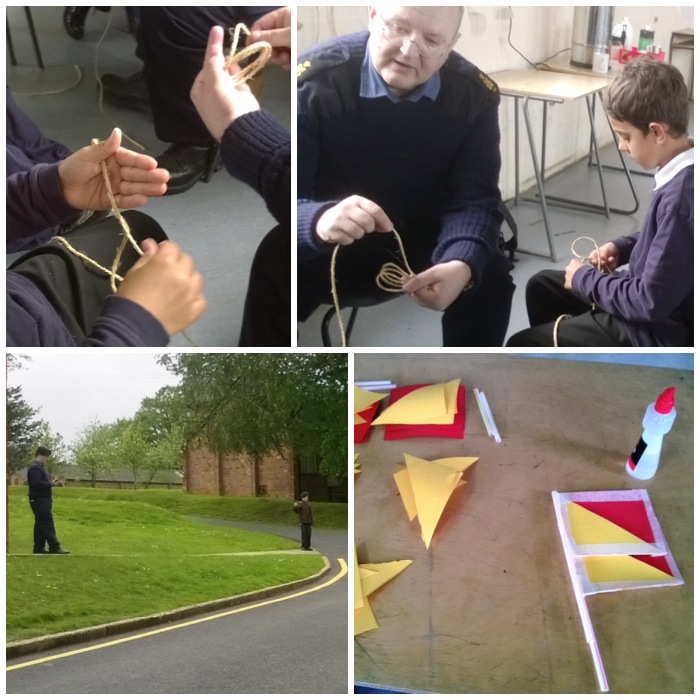
Being Sea Cadets a training weekend would not be complete without a class on Seamanship and on Comms skills. In Seamanship the cadets learnt how to make a monkeys fist – this is a type of knot that creates a weight using the rope and is used for throwing a heaving line from a boat to the shore in order to tie it up.
In the comms class the cadets learnt all about how to use radios properly by getting out and about using hand held radios and they also made their own semaphore flags.
Seamanship and communication skills
After each Atlatl session I also got the cadets to shoot some arrows down the range. I managed to get some cracking shots this time of the arrows being released.
Archery action
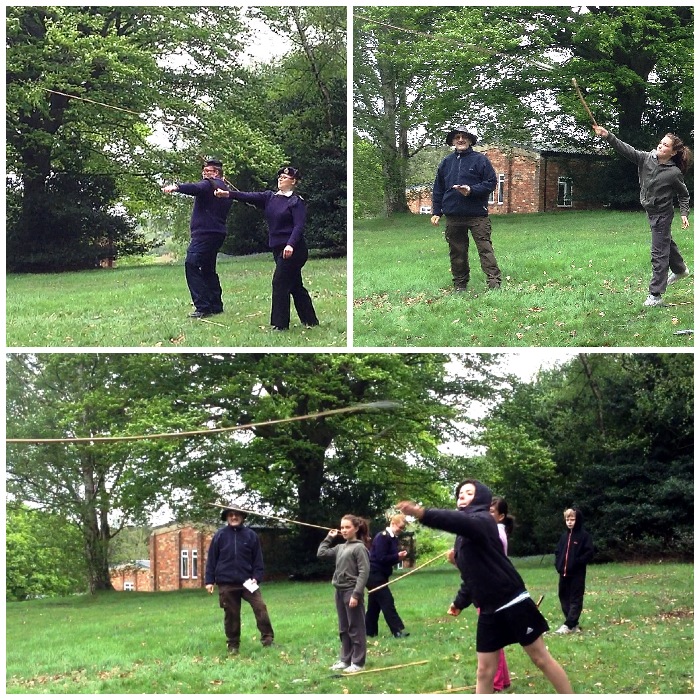
On the Sunday morning a competition was held and we set up an Atlatl range so that the cadets could try out all the skills they had learnt the previous day.
Atlatl competition 1
The cadets were definitely better than the staff with both accuracy and enthusiasm.
Atlatl competition 2
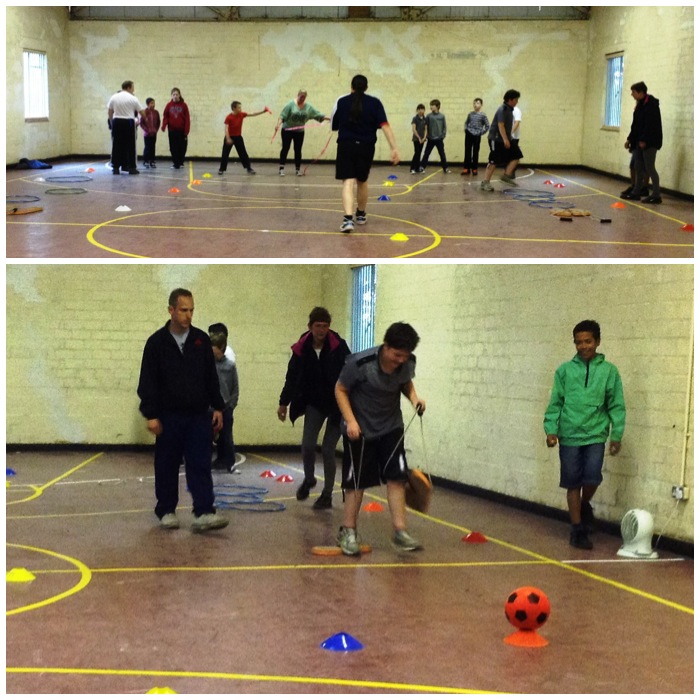
The PT staff also set up an indoor sports competition for the cadets. I walked into the hall and the noise of all the cadets egging their pals on was amazing.
Sports competition
A staff team was put together and thankfully as I was seen to be too busy filming was left alone. In all the madness and fun that was being had I have no idea who won.
Even the staff took part
In amongst all this fun we did find time to do some other stuff. Charlie tested out a Wood Gas stove and I managed to do a little pot hook carving (a How To on this to follow).
Testing and carving
A great weekend with great Sea Cadets both young and old.
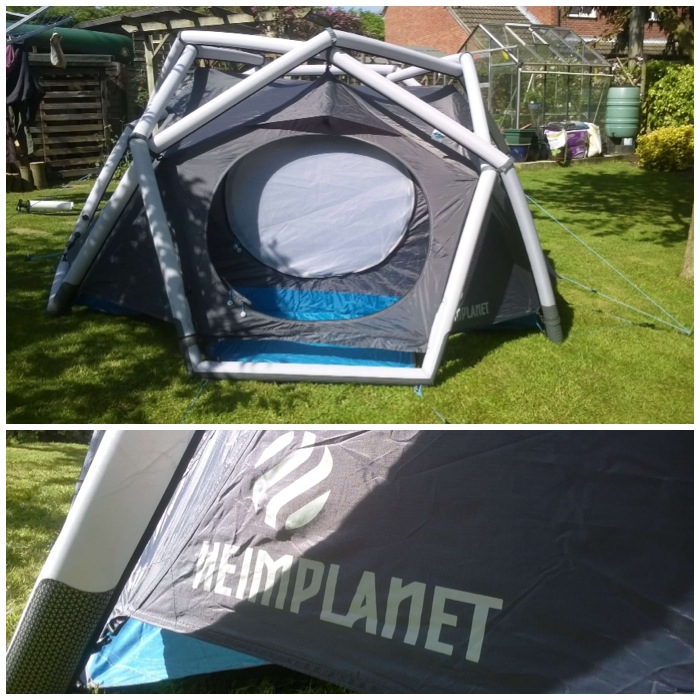
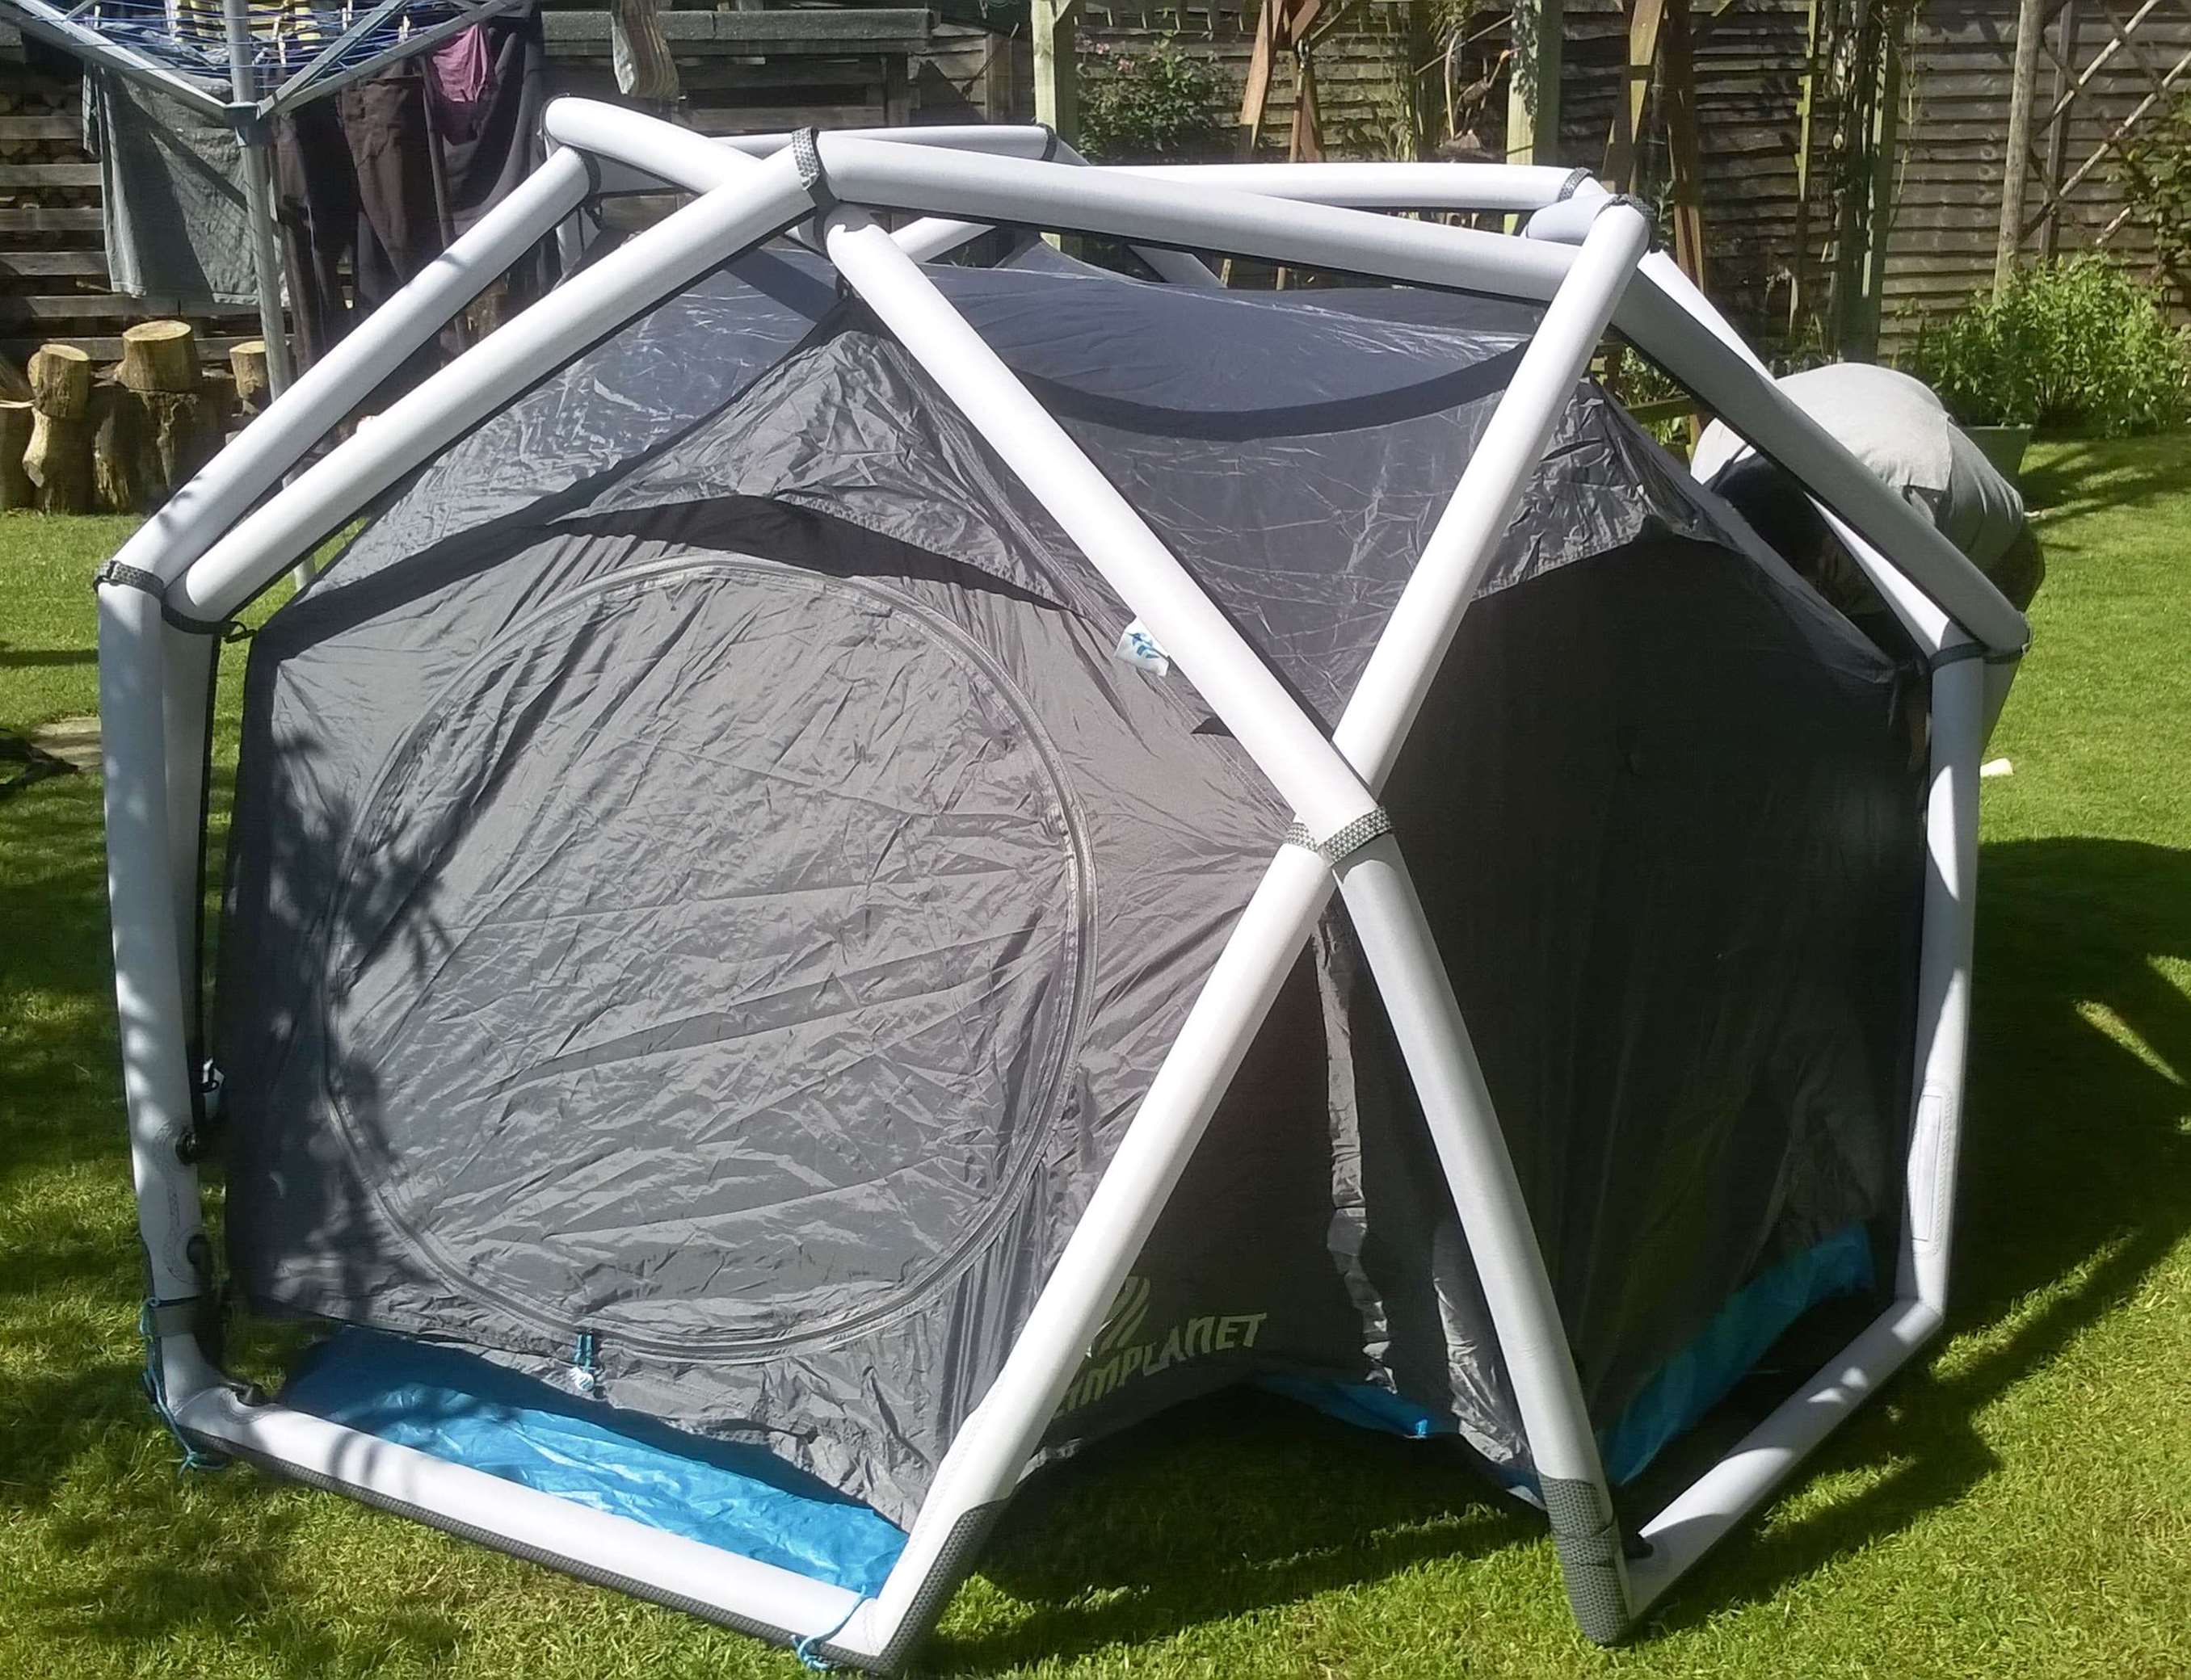
I was shown what I think is quite an ingenious tent two weeks ago by my friend Adam Cottrell. The tent is from a company called Heimplanetand is erected simply by inflating it. This post is not an in-depth review as I have only seen it once for a very short period. My initial impressions of it were very positive and I would be keen to try it out sometime.
The Cave
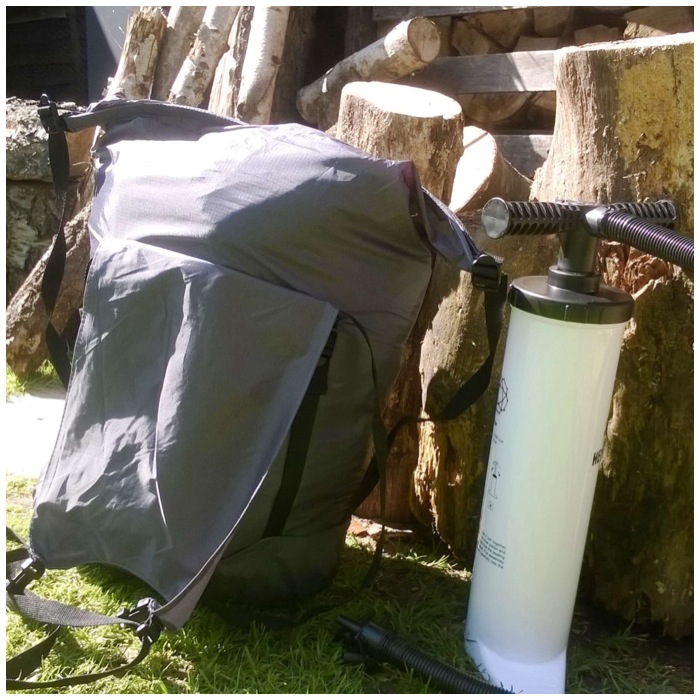
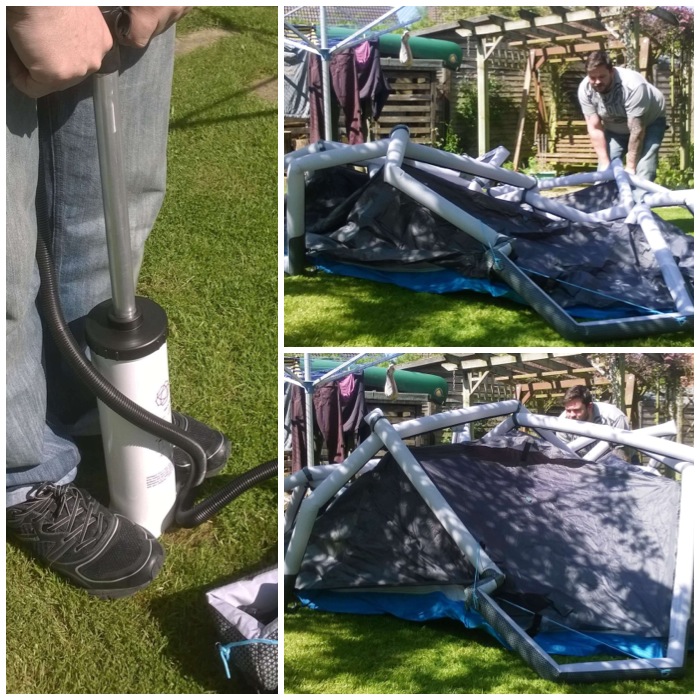
The tent weighs 11.5lbs (5.2kgs in new money) so one for the car I think rather than the backpack. The quality of the bag was very good with a ‘canoe bag’-type top that you roll down to compress and seal it.
One tent in a compression bag and pump
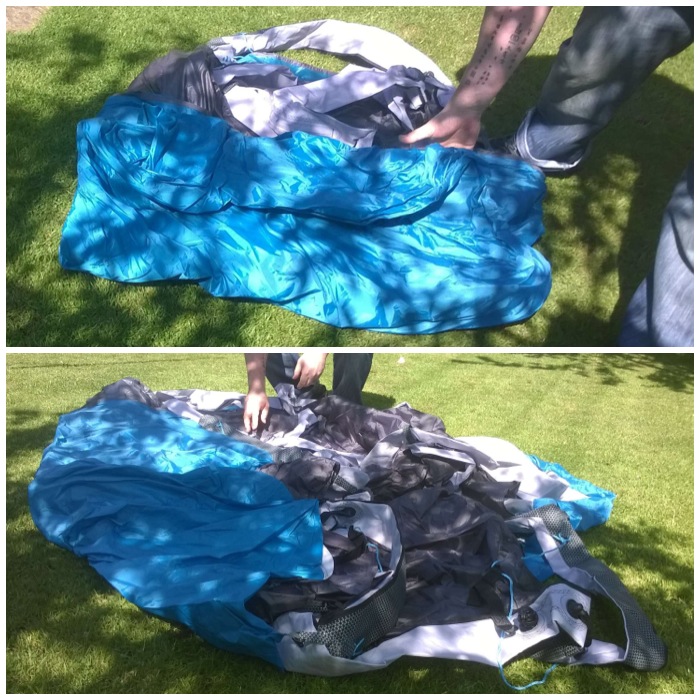
All the guylines were detached when Adam opened it up so there was nothing tangled up.
Laid out ready for pumping
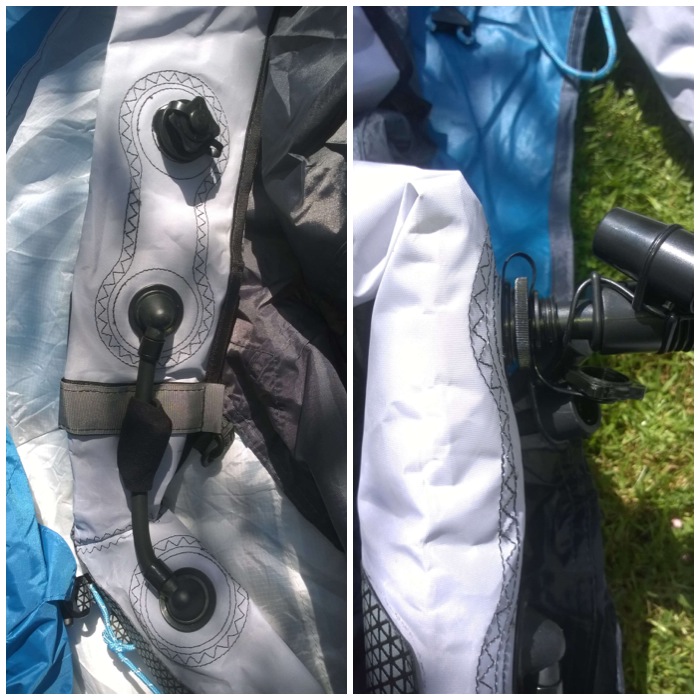
Dotted around the tent are 5 nozzle points; only one is needed for inflating the tent, but all the tubes can be closed off after they have been inflated so that if you get a puncture in one tube the whole tent does not deflate.
5 possible nozzle points
In about two minutes Adam had set everything up and inflated the tent.
Simple to inflate
I got Adam to re-do the inflation of the tent and took a short film of it to show you how simple the procedure was. I was quite surprised at the size of the tent and can see why they call it the Cave.
Inflated quickly
Each of the five sections of the tubing can be closed off by this simple locking valve that pinches the small connecting tube between the main tubes.
Each tube can be locked off with these valves
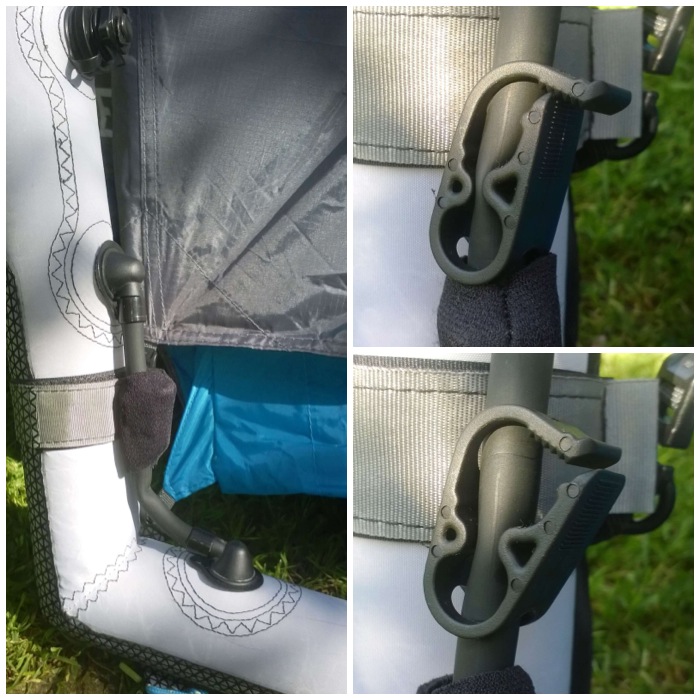
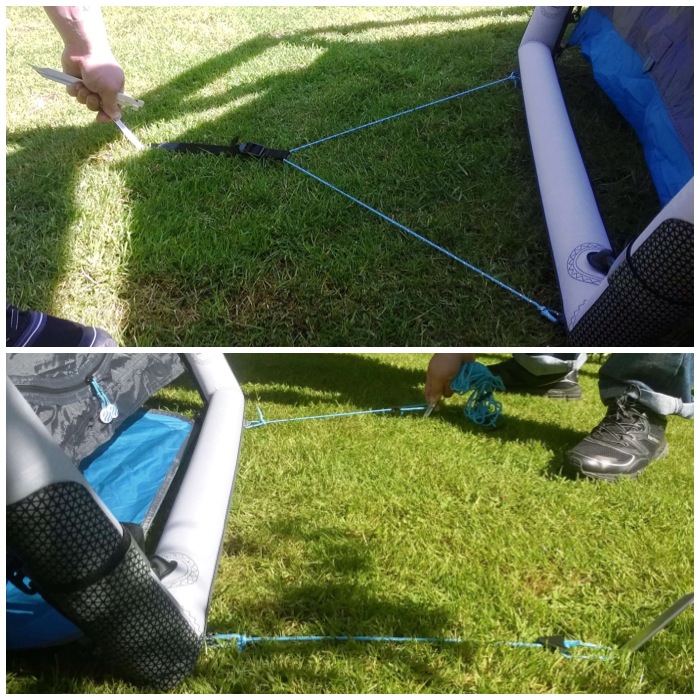
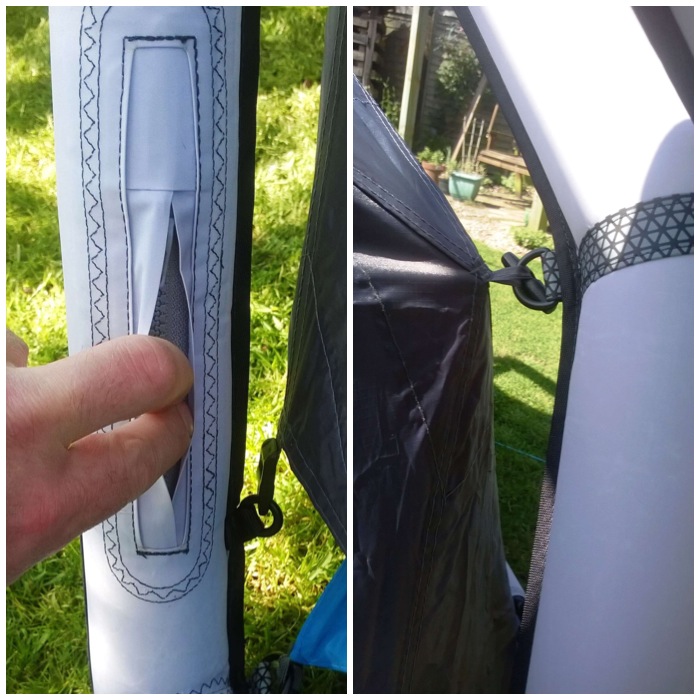
The guylines come in an unusual configuration. They are attached to the tent via toggles and one set of lines on each side is pegged out flat on the ground.
Simple low-lying guylines
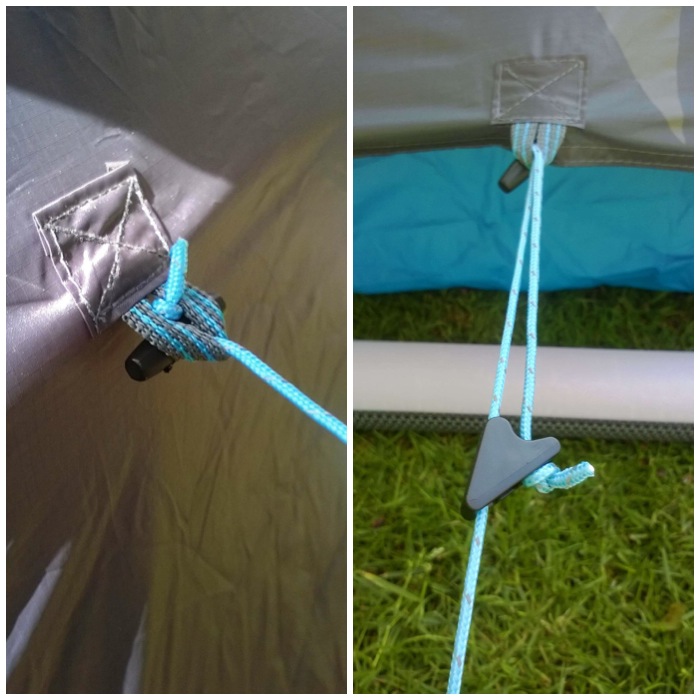
Here you can see a little more clearly how the toggles attach to the tent.
Toggles attach the upper guylines
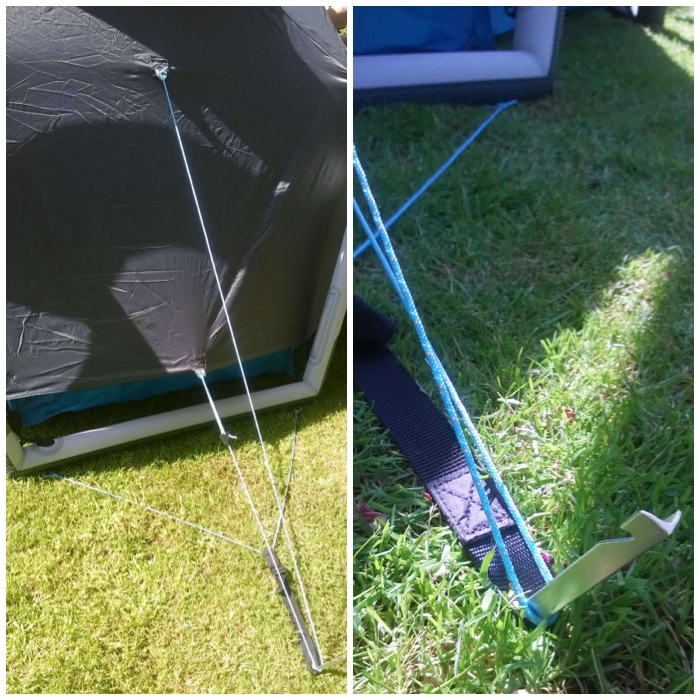
Both sets of guylines on each side attach to the same peg keeping things neat and tidy.
All the guylines on each side go to one peg
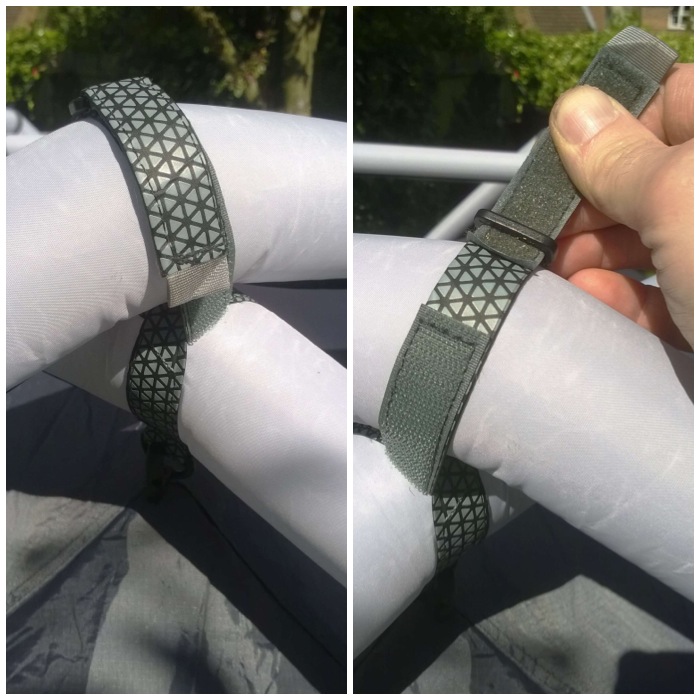
Everything is connected either by velcro straps or toggles. The tent can be erected without the outer sheet (but that’s probably not advisable here in the UK).
Tubes and the tent are connected with velcro and toggles
The workmanship I observed on this tent was very high. All the seams looked neatly sealed and the stitching was very accurately placed.
Strong velcro straps
As well as a locking valve on each section there are also 5 access points so that the inner tubes can be removed and repaired if need be.
Separate access to each tube
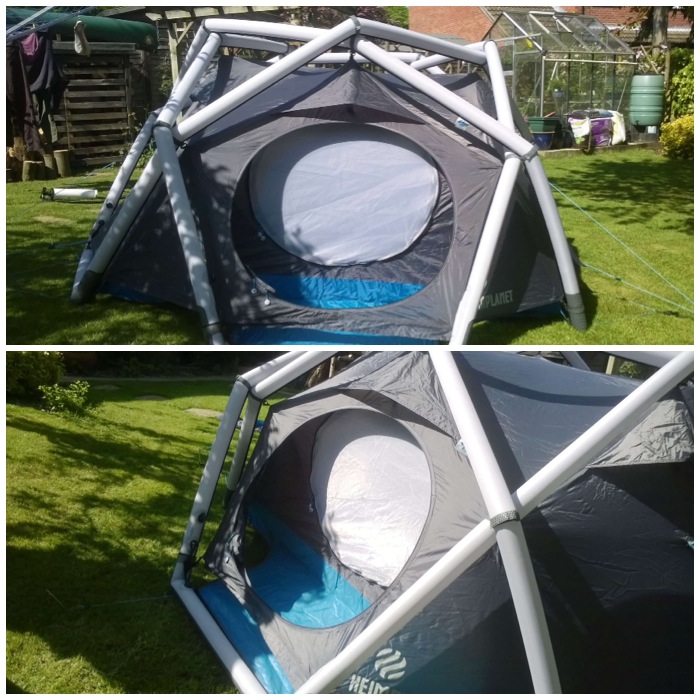
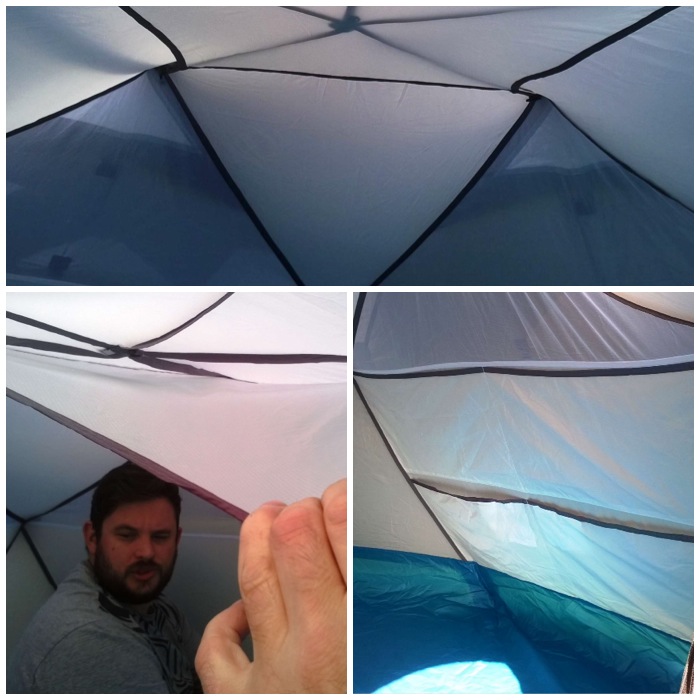
The tent has a small porch and the small front awning will stop rainwater dripping into the tent when you open it (but only just I think). However when this tent was fully inflated and the guylines were secured it was very stable and strong.
A very strong and stable tent
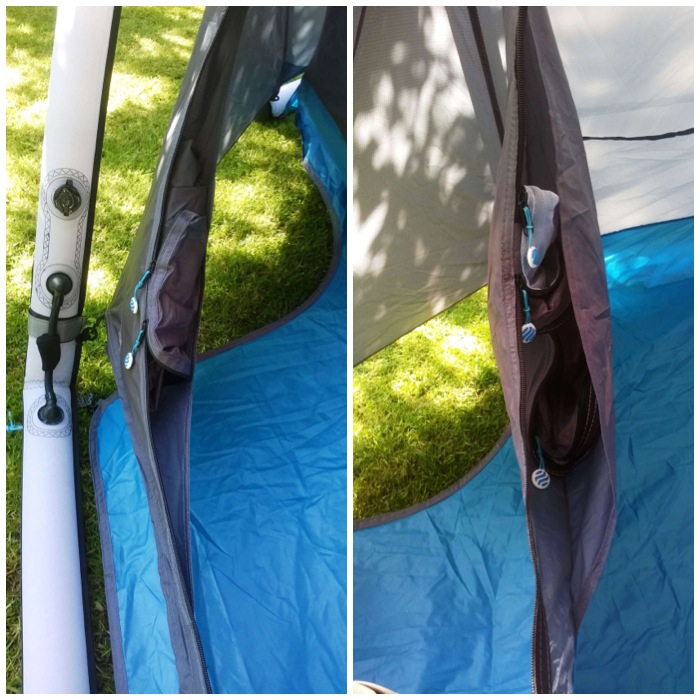
I liked the small pockets for stowing the door flaps. Very neat and a great idea.
Neat pouches to stow the entrance flaps
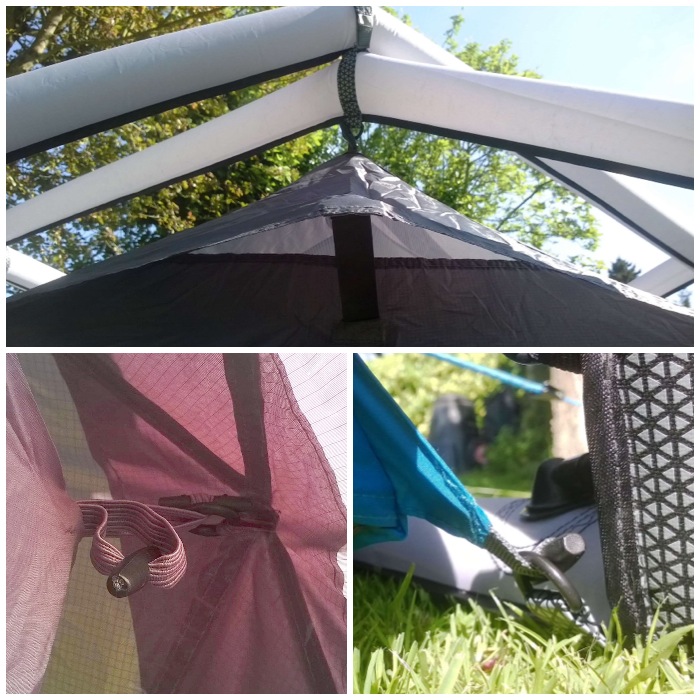
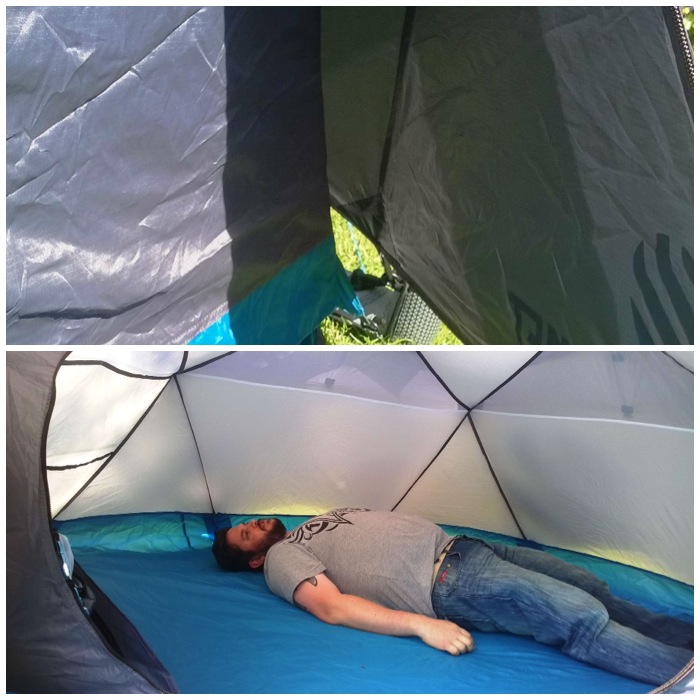
In terms of space you could fit two adults with lots of kit into it comfortably. If there were three of you then you would just need to be a bit more disciplined about things but you would be comfortable enough.
Good gap between inner and outer. Also plenty of space inside.
The tent had good ventilation with plenty of mossie-style nets on the inner and a number of covered openings on the outer. It also comes with a good loft storage area and loads of pockets. You cannot stand up in the tent but when sitting most folk will not touch the ceiling with their head.
Good internal ventilation and plenty of storage
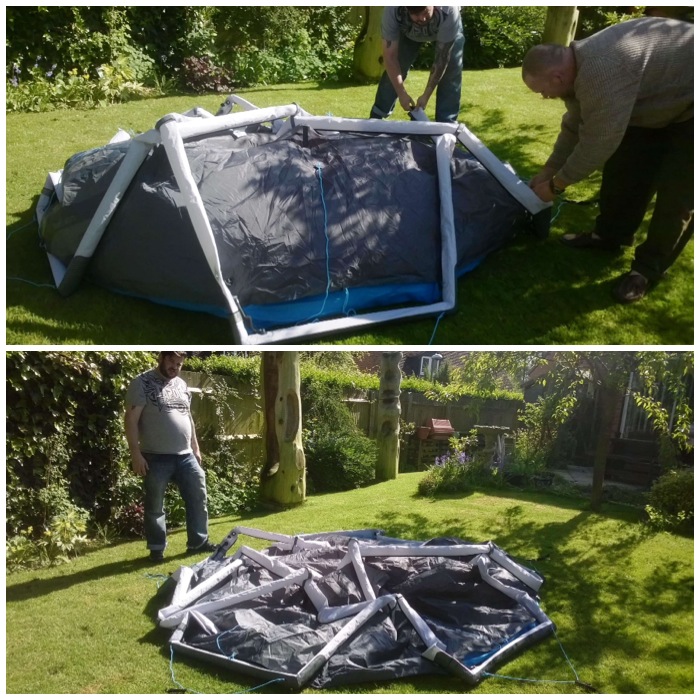
To deflate, simply unlock the valves and let the air out. The tent simply collapses in on itself.
Easy to deflate
You need to spend a couple of minutes just pushing all the air out of the tubes, otherwise the tent will be very difficult to put back into the bag.
Take your time pushing all the air out
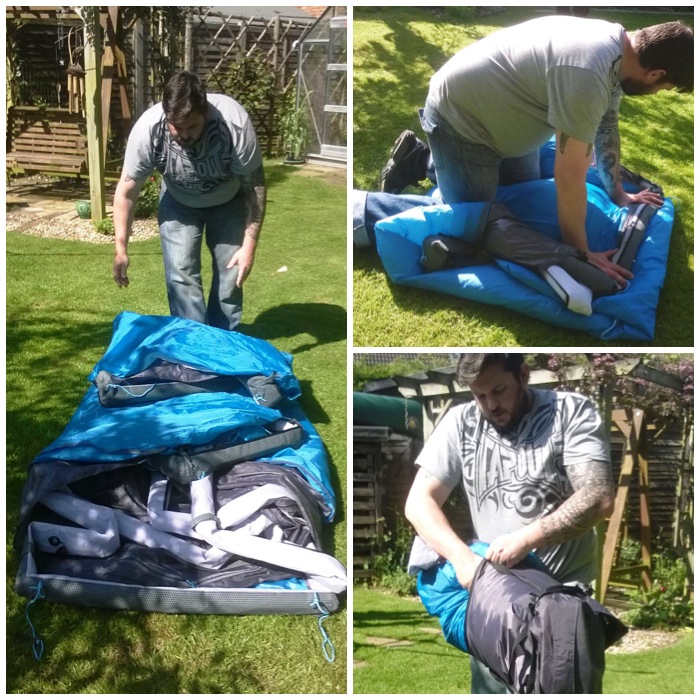
The tent is rolled up to the size of the bag as with most tents but you can use your knee to push out any trapped air. A good enhancement to the tent back would be to install a little valve so that as you rolled the top down the air could escape quicker.
Compression sack gets rid of the last of the air
As I said at the beginning I was very impressed with this tent. I initially thought that this could never work but after looking at the quality and the strength of the tent I soon lost any doubts. I like the fact that the sleeves covering each tube are very strong and that each section of the tubing can be locked off to aid quick repair. Amazon has these tents on sale for about £395 so they’re not exactly cheap for a 2-3 person tent but this certainly scores highly for quality and ease of erection. I had a look at the Heimplanet site and all the specs for the tent can be found here – The Cave.
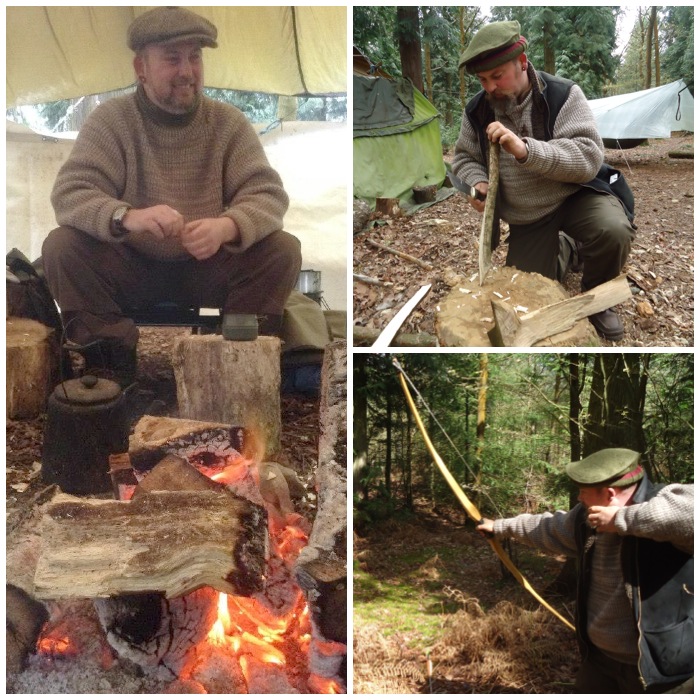
Meet my friend Mark Beer – a good friend and excellent craftsman.
Mark Beer – Top Craftsman & Good Friend
Mark has been a woodsman all his life and I met him about 8 years ago. I like to carve and since Mark has such skill in wood carving I always keep an eye on what he is producing so as to help develop my own skills.
I plan to spend some time with him this summer and pictorially document him creating one of his bowls at his wood carving studio.
Bowl carving
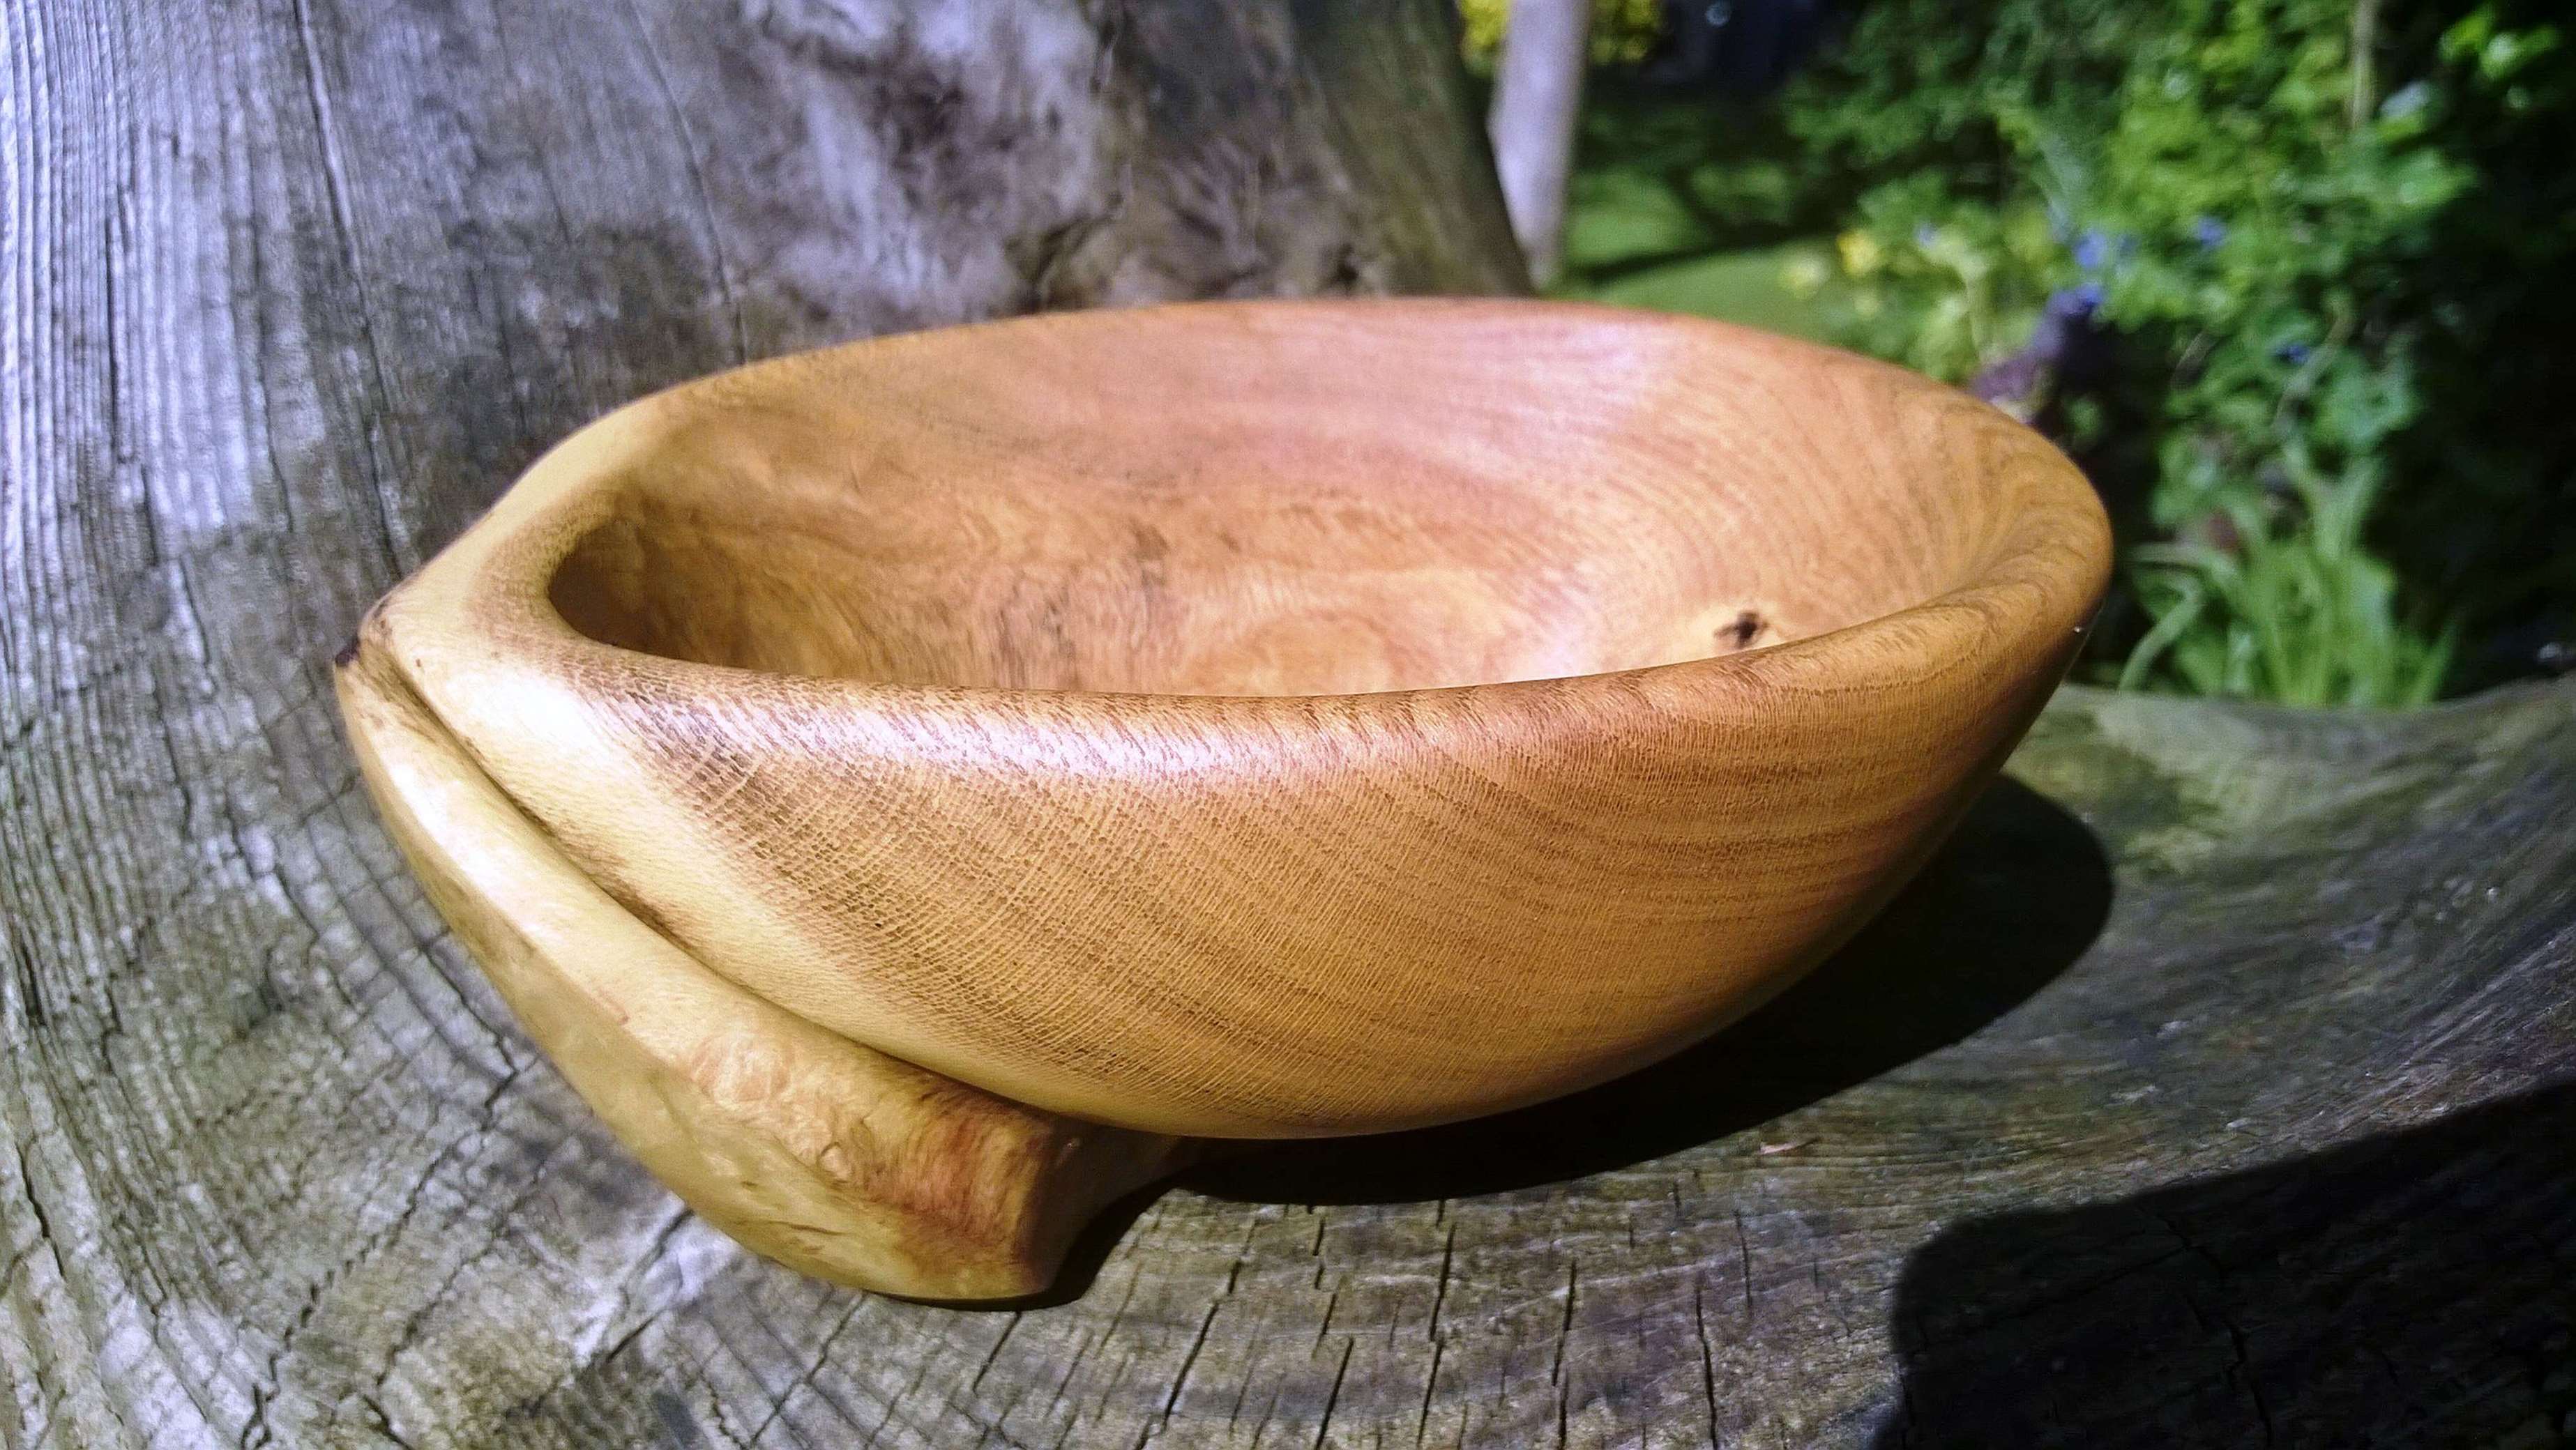
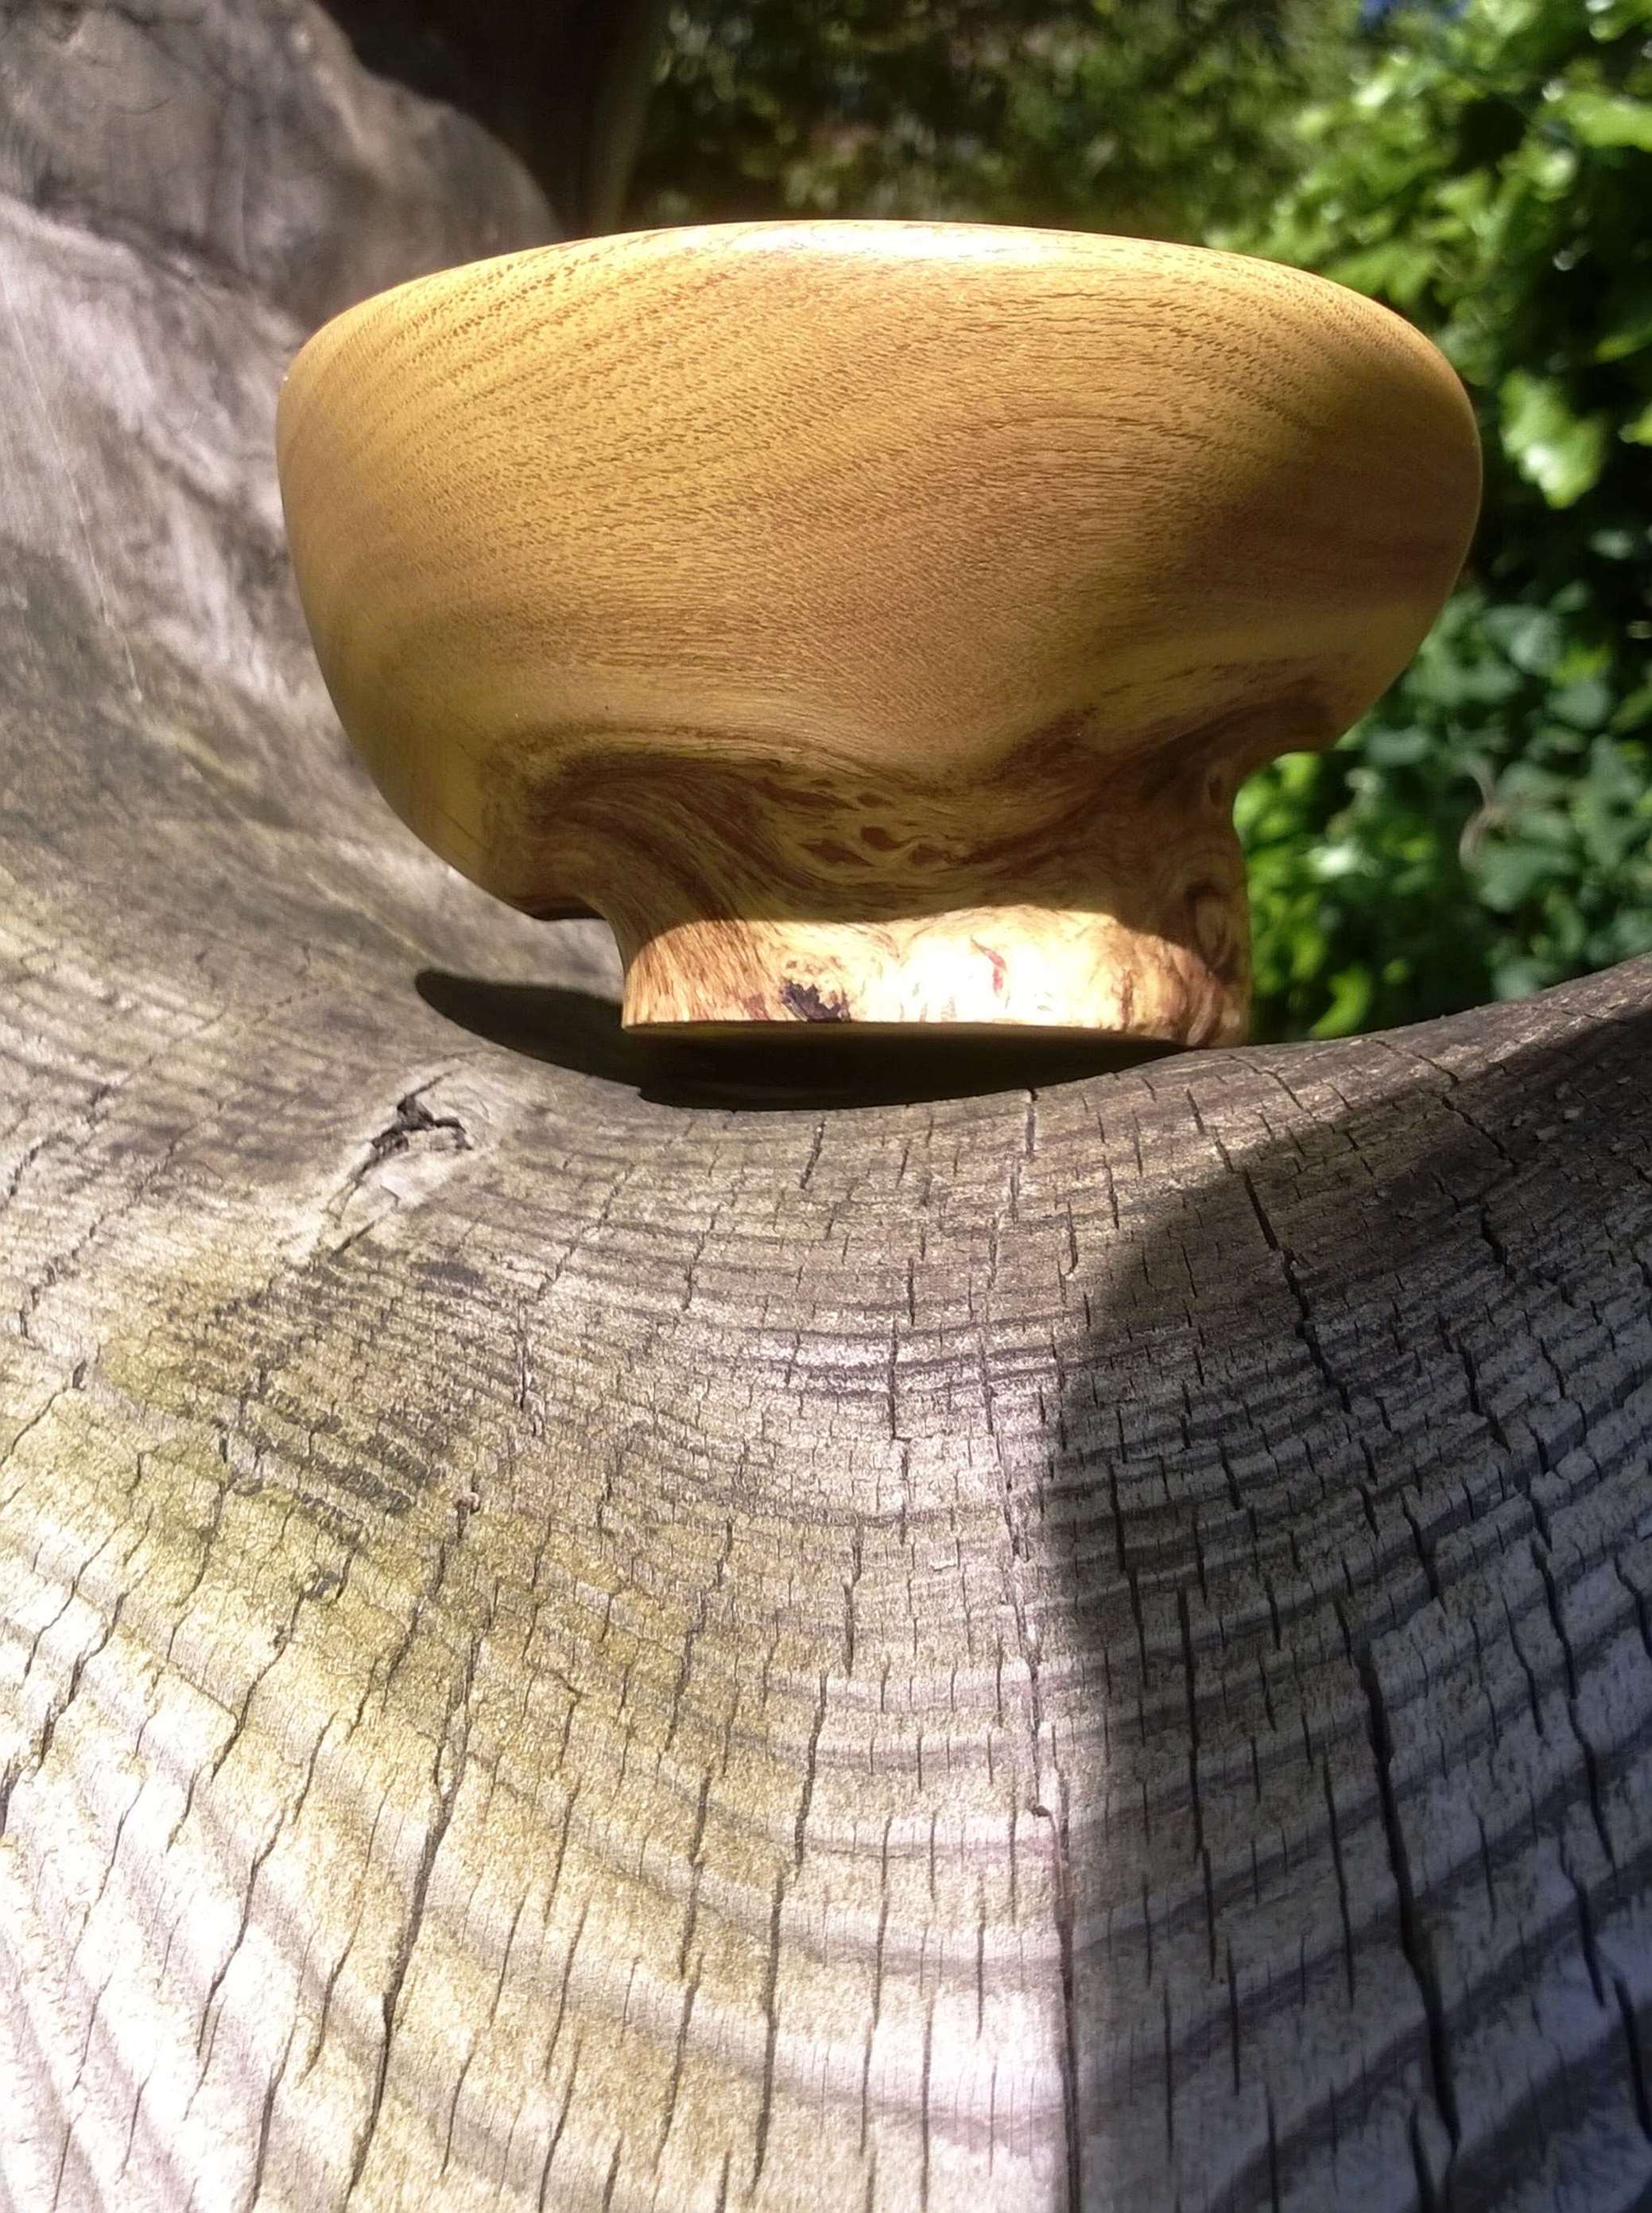
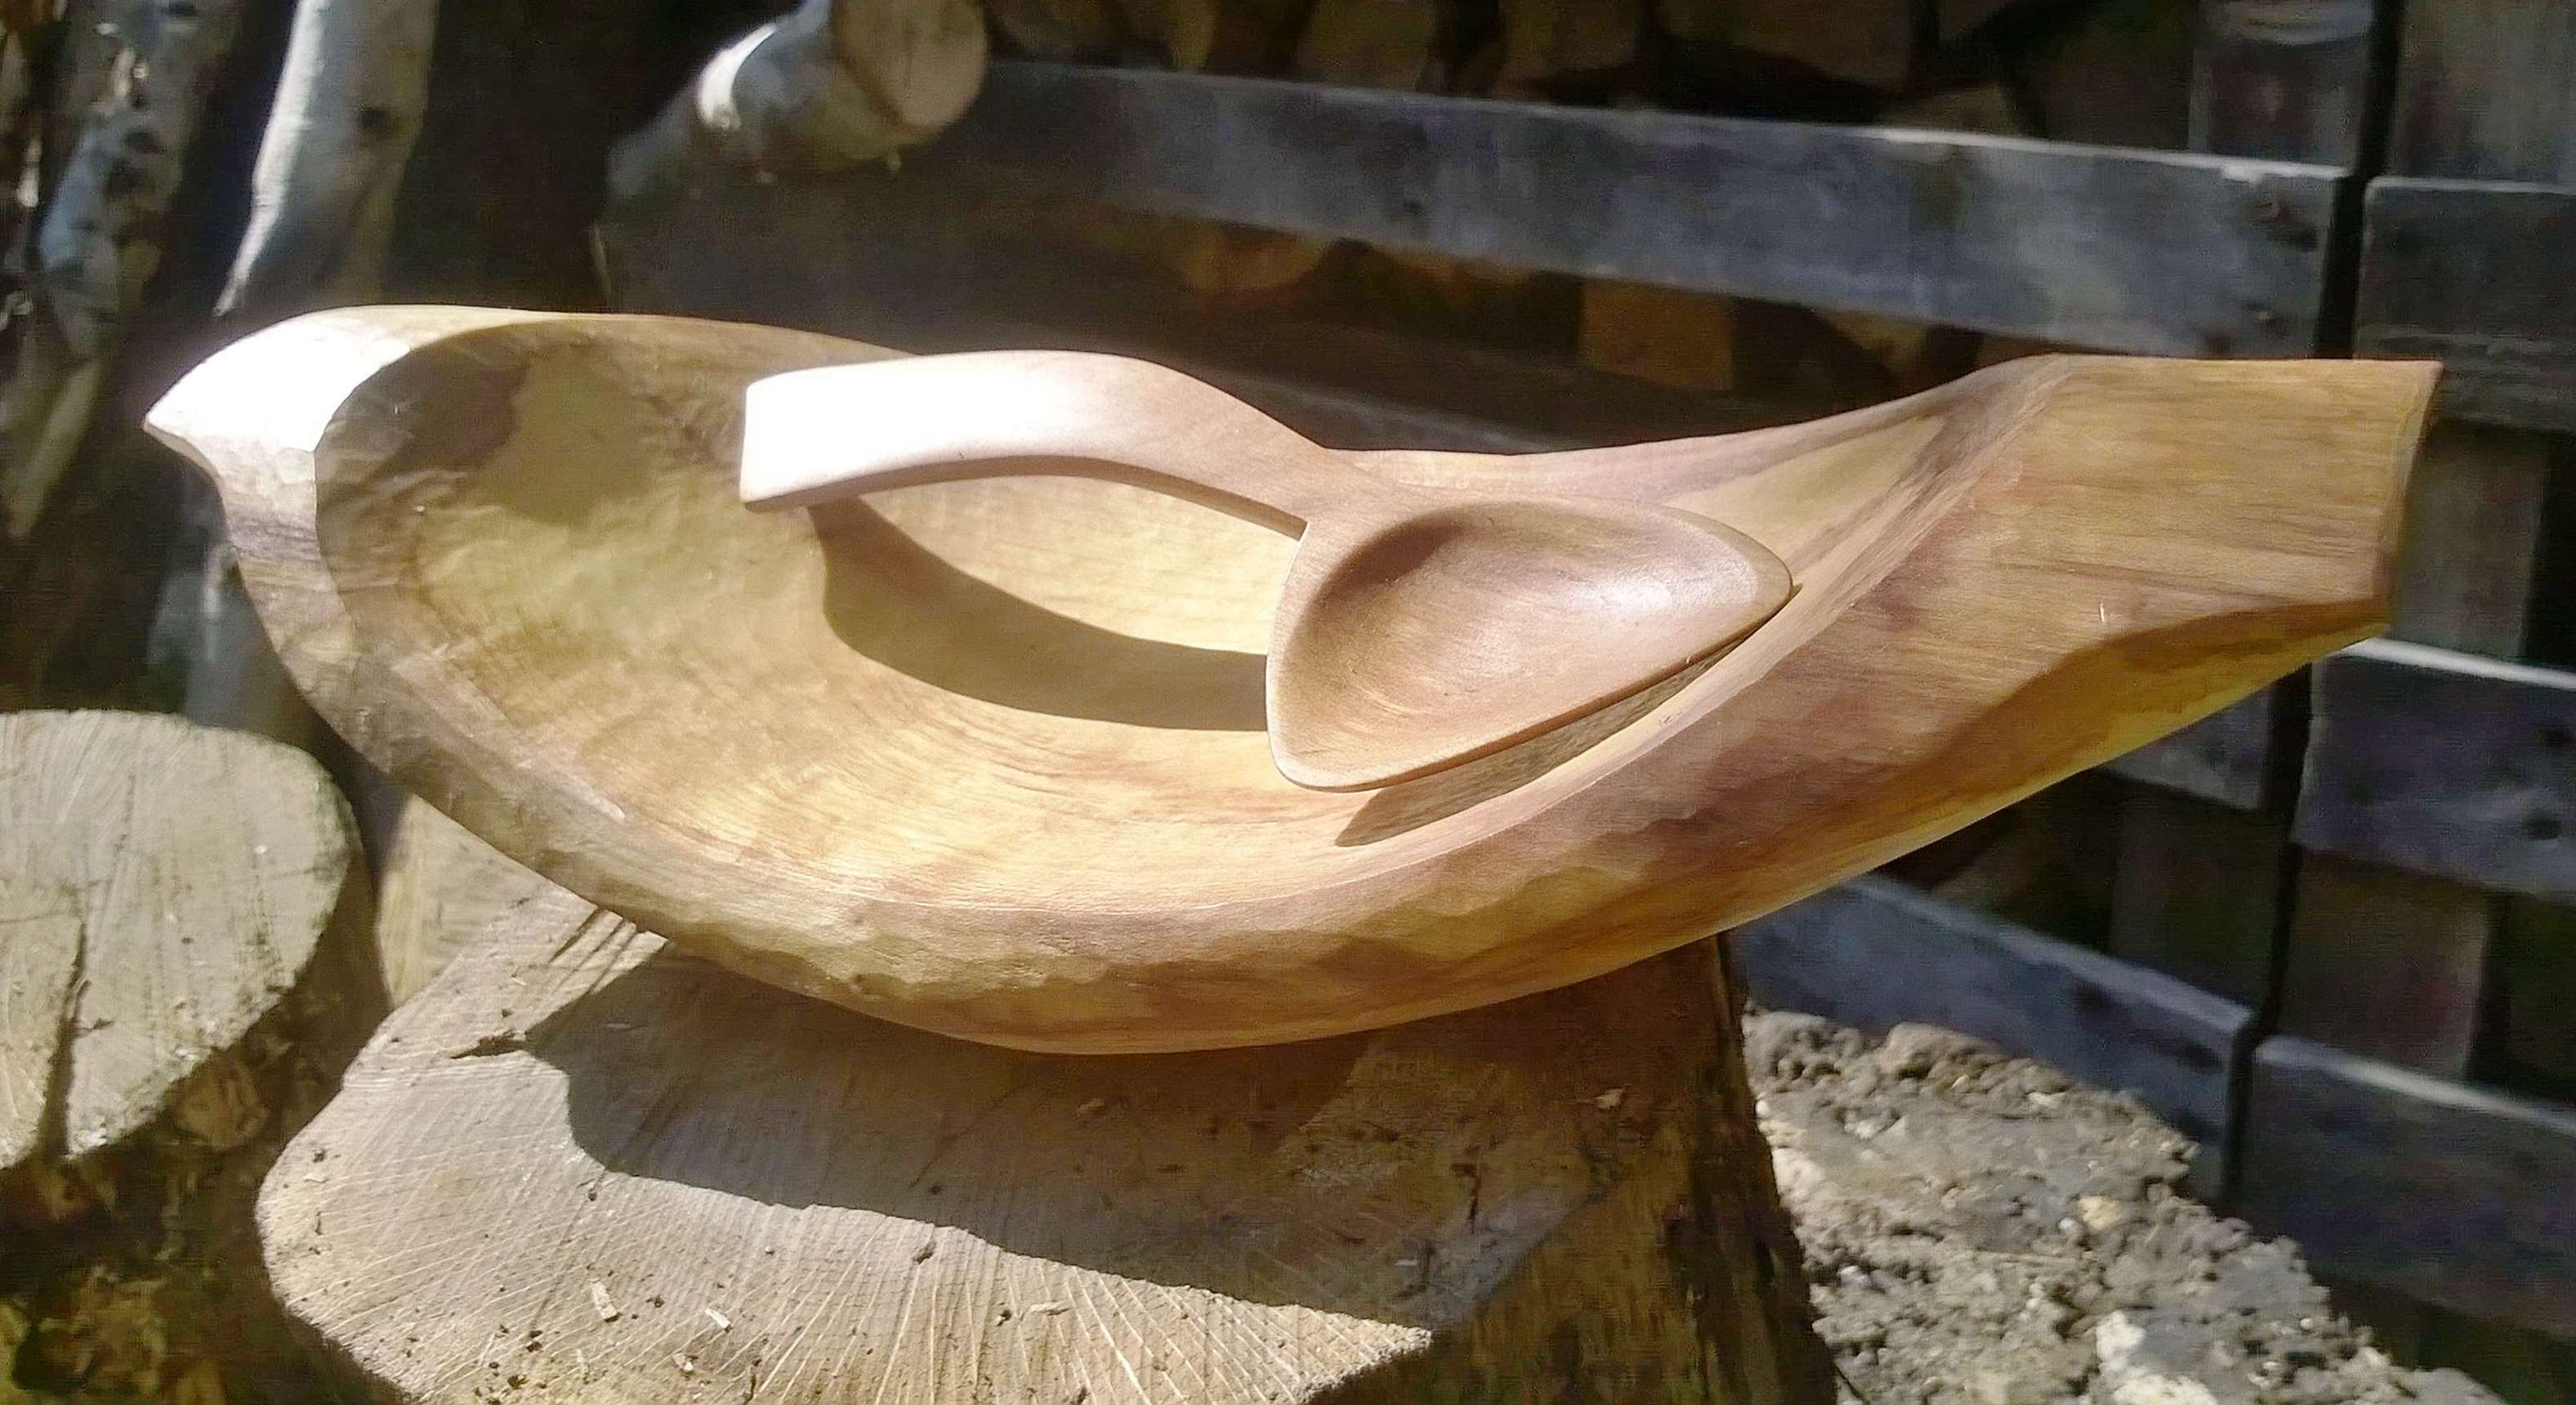
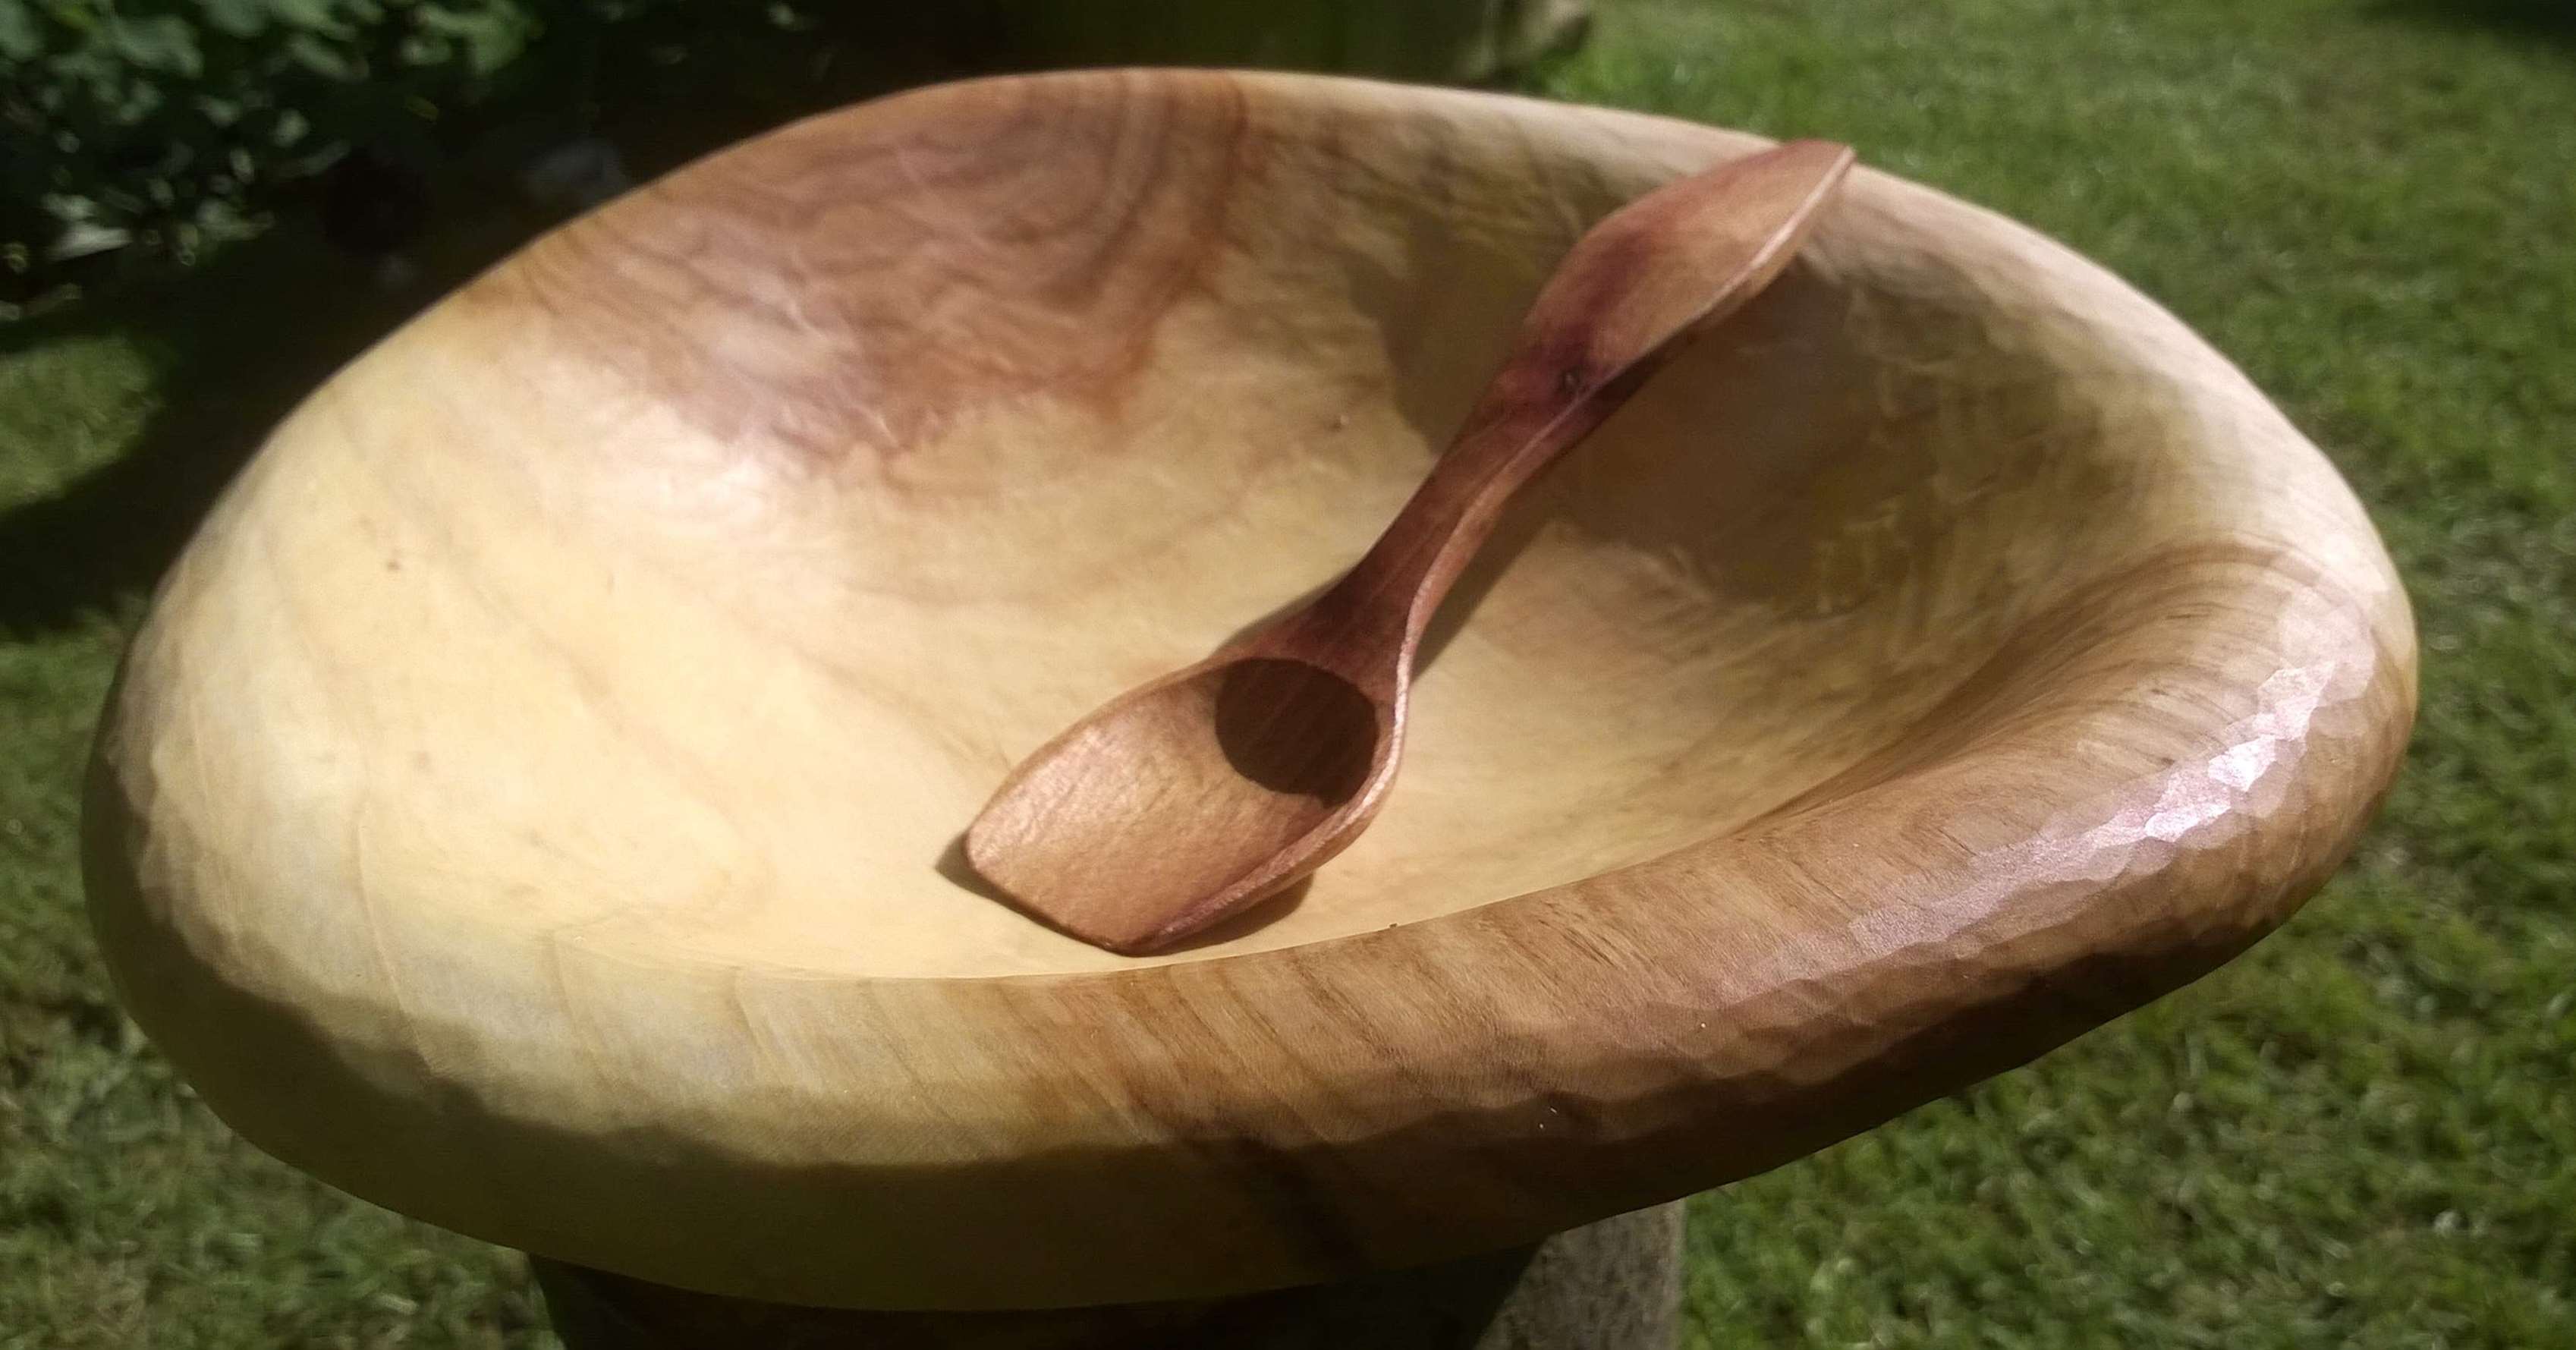
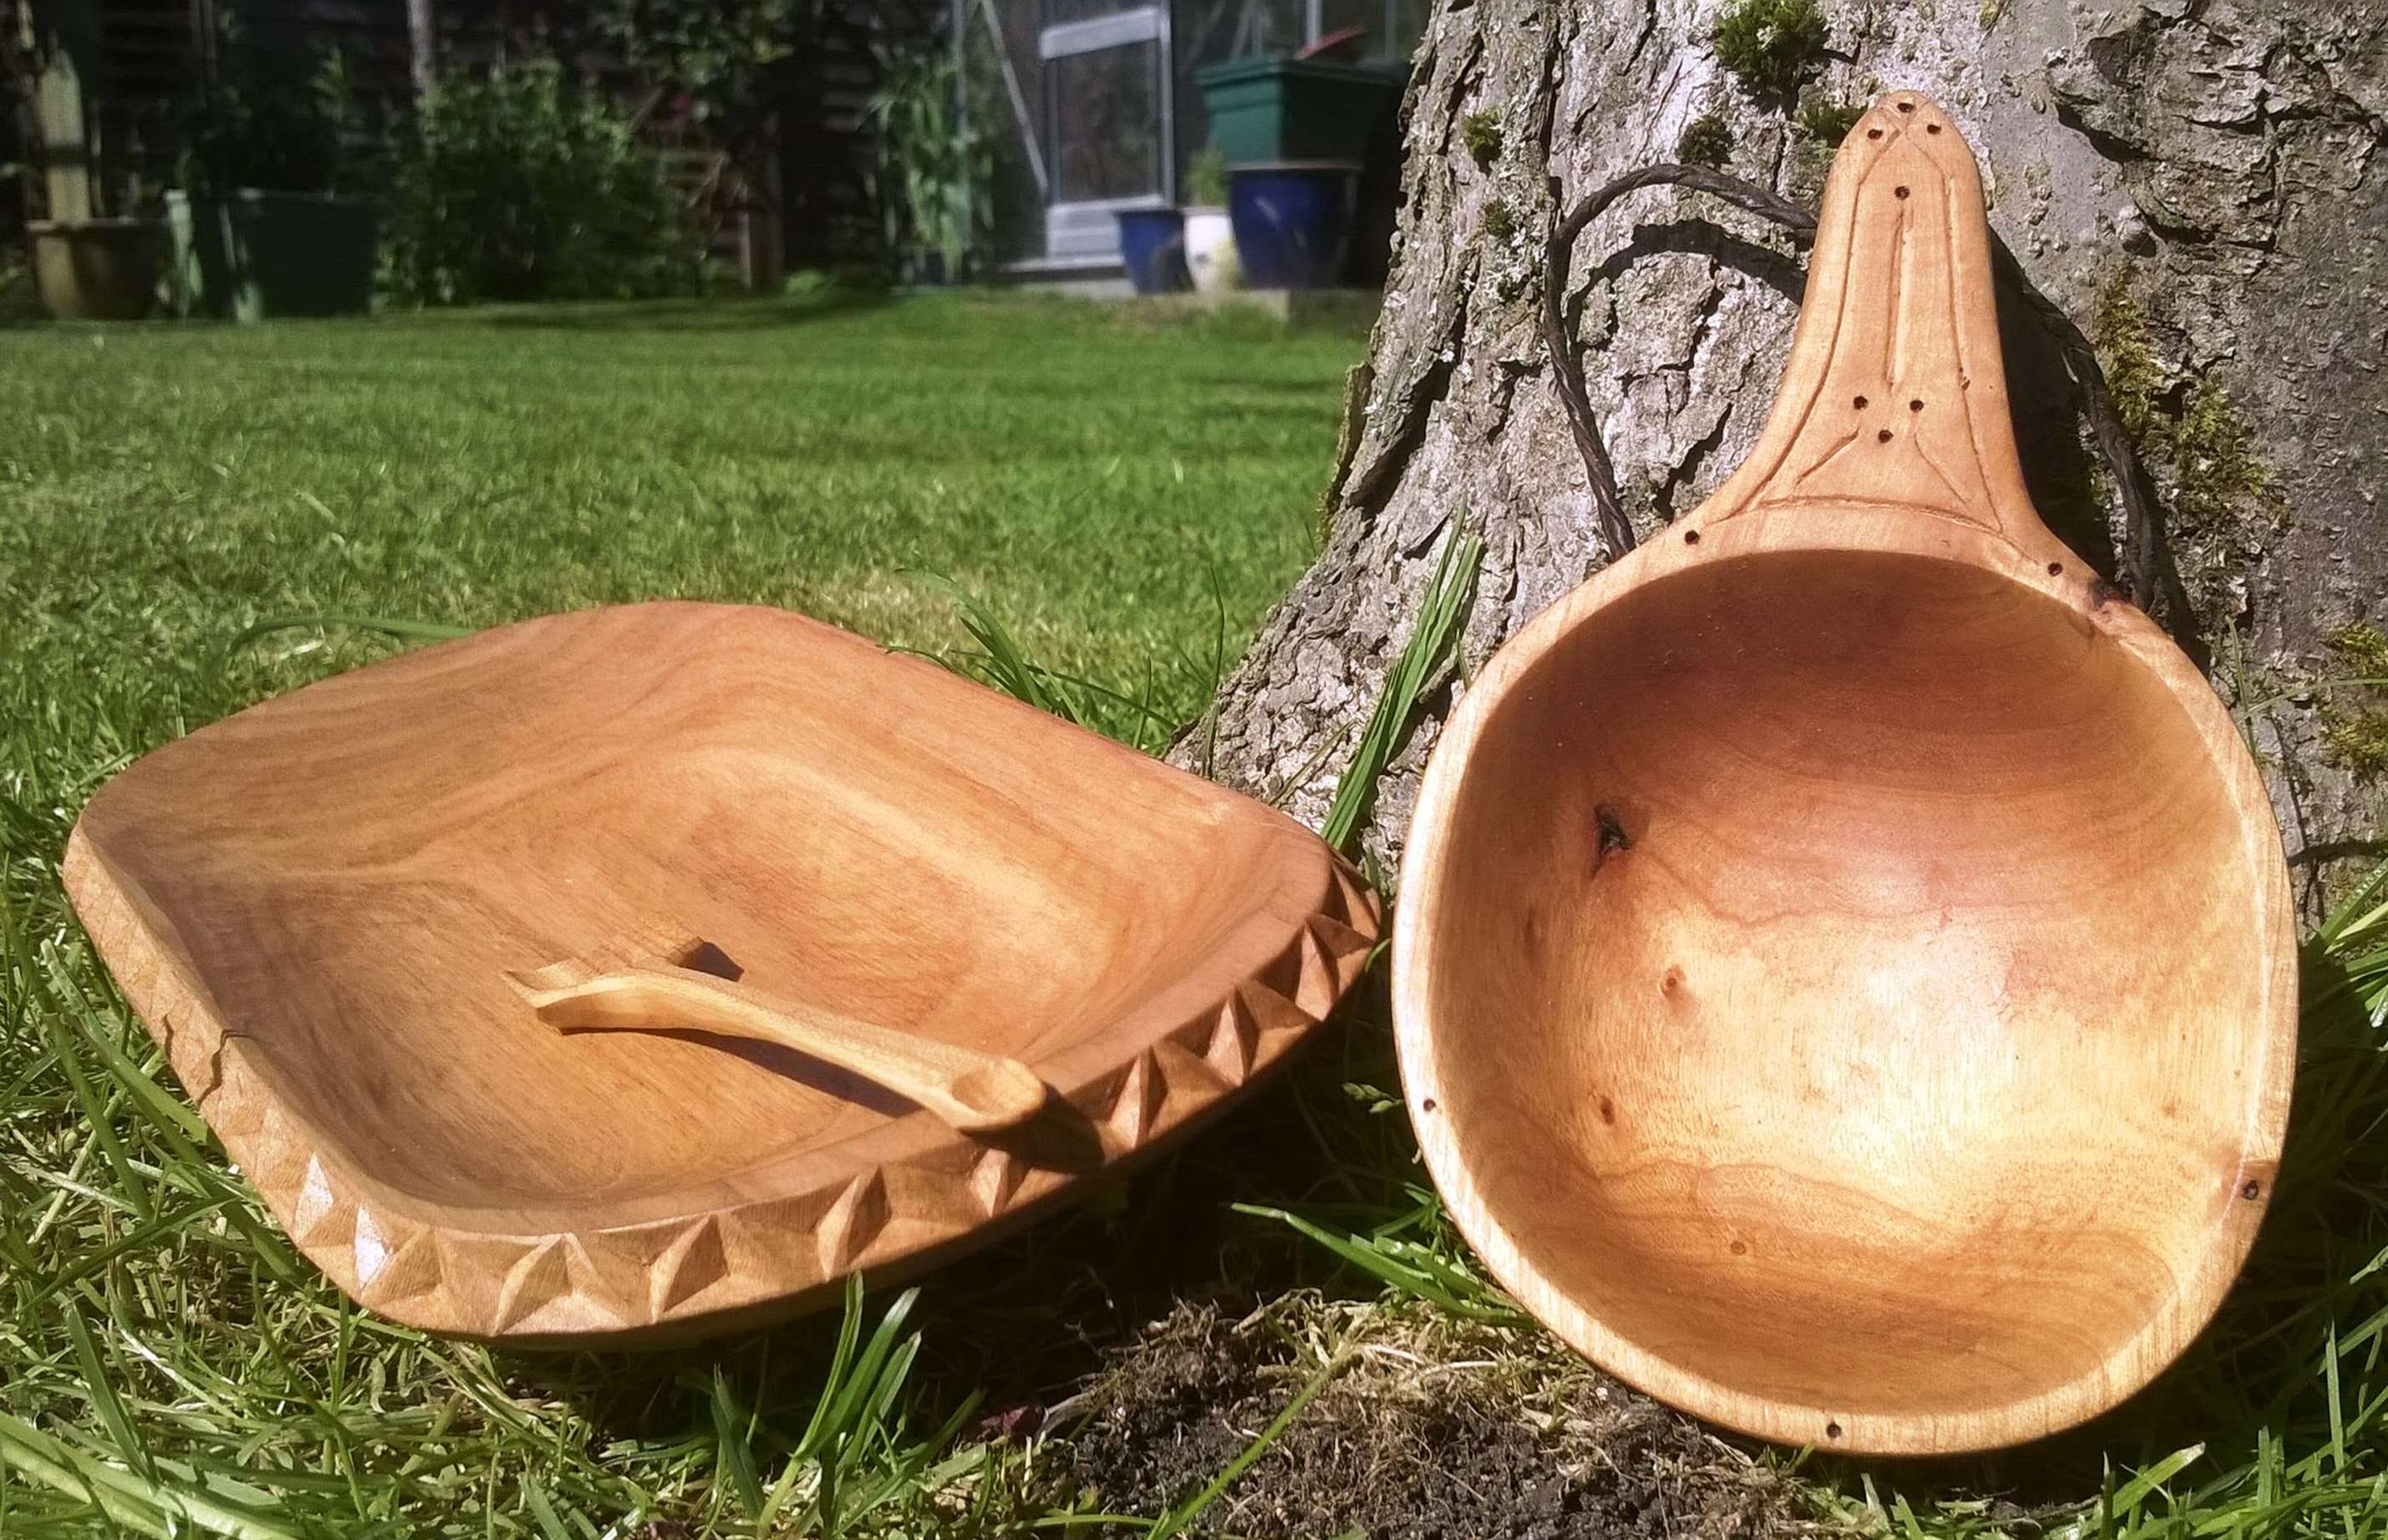
In the meantime here are some pictures of just a few of the carvings he has done over the years.
Mulberry CupMulberry CupSpalted beech bowl with curved cherry spoonLarge cherry bowl with mulberry spoonChip carved cherry dish with cherry snuff spoon and birch cup
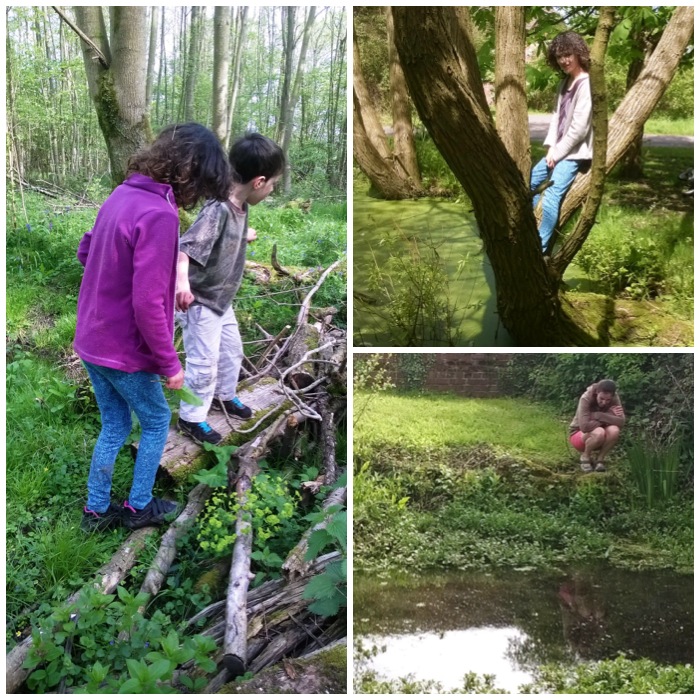
I took my whole family on my rounds of Bramley last weekend. The kids as usual had fun climbing, wobbling and generally getting muddy.
This was the first time that Alison was able to come on my rounds and she was keen to explore the village wildlife in more detail.
Checking out nature
I took a short video of the walk which I titled Happy finds and sad finds.
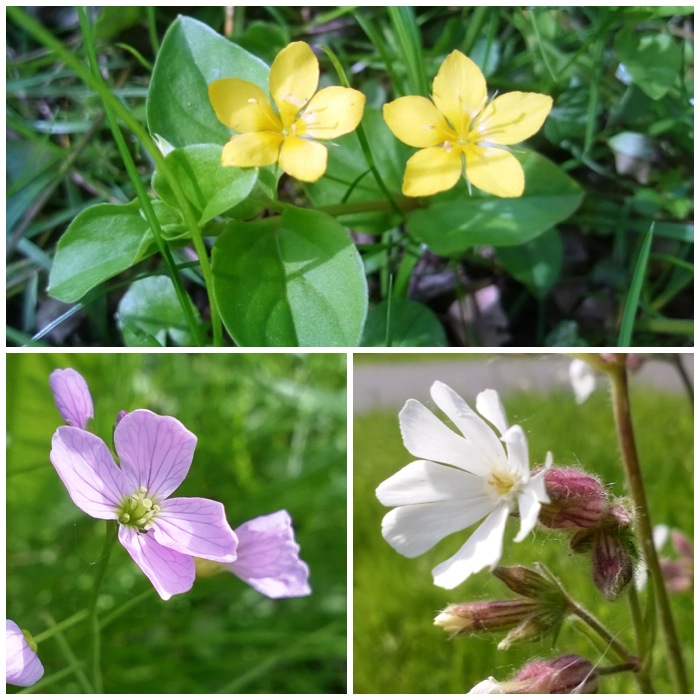
A few new flowers made an appearance this week.
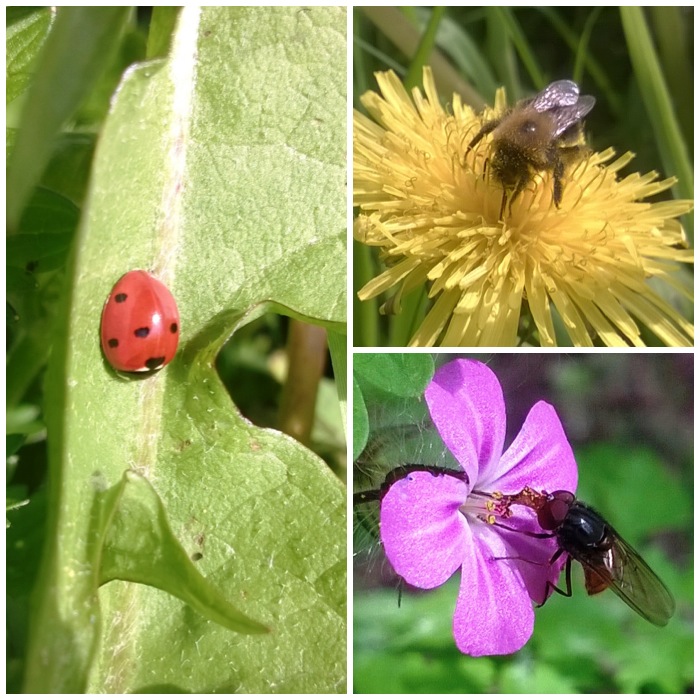
Yellow pimpernel, lady’s smock and white campion
I particularly like the bottom right picture. You can actually see the the probiscus of the fly. Not bad for a little phone camera.
Feeding time
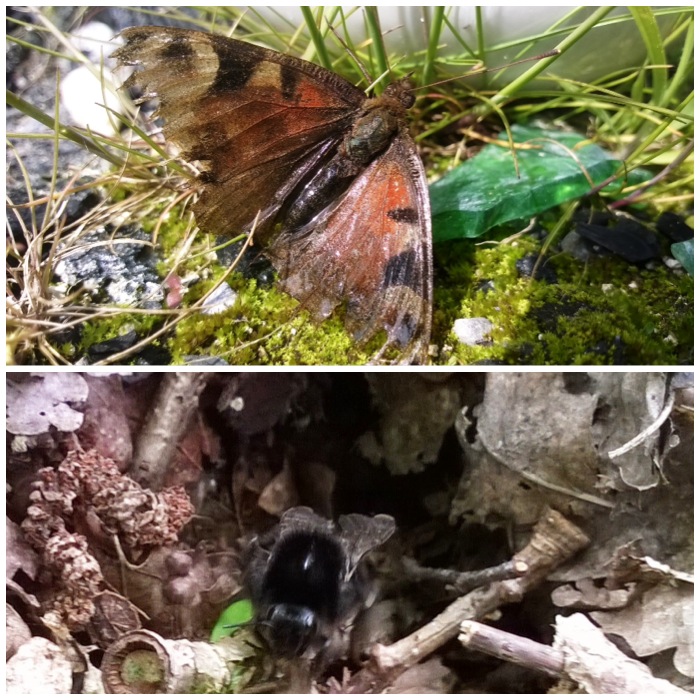
The moth was found in a bowl of water by my daughter Catherine and seemed to be recovering well as it dried its wings out. In the bottom picture you can just see a solitary bee emerging from its underground home.
Rescued moth and emerging bumblebee
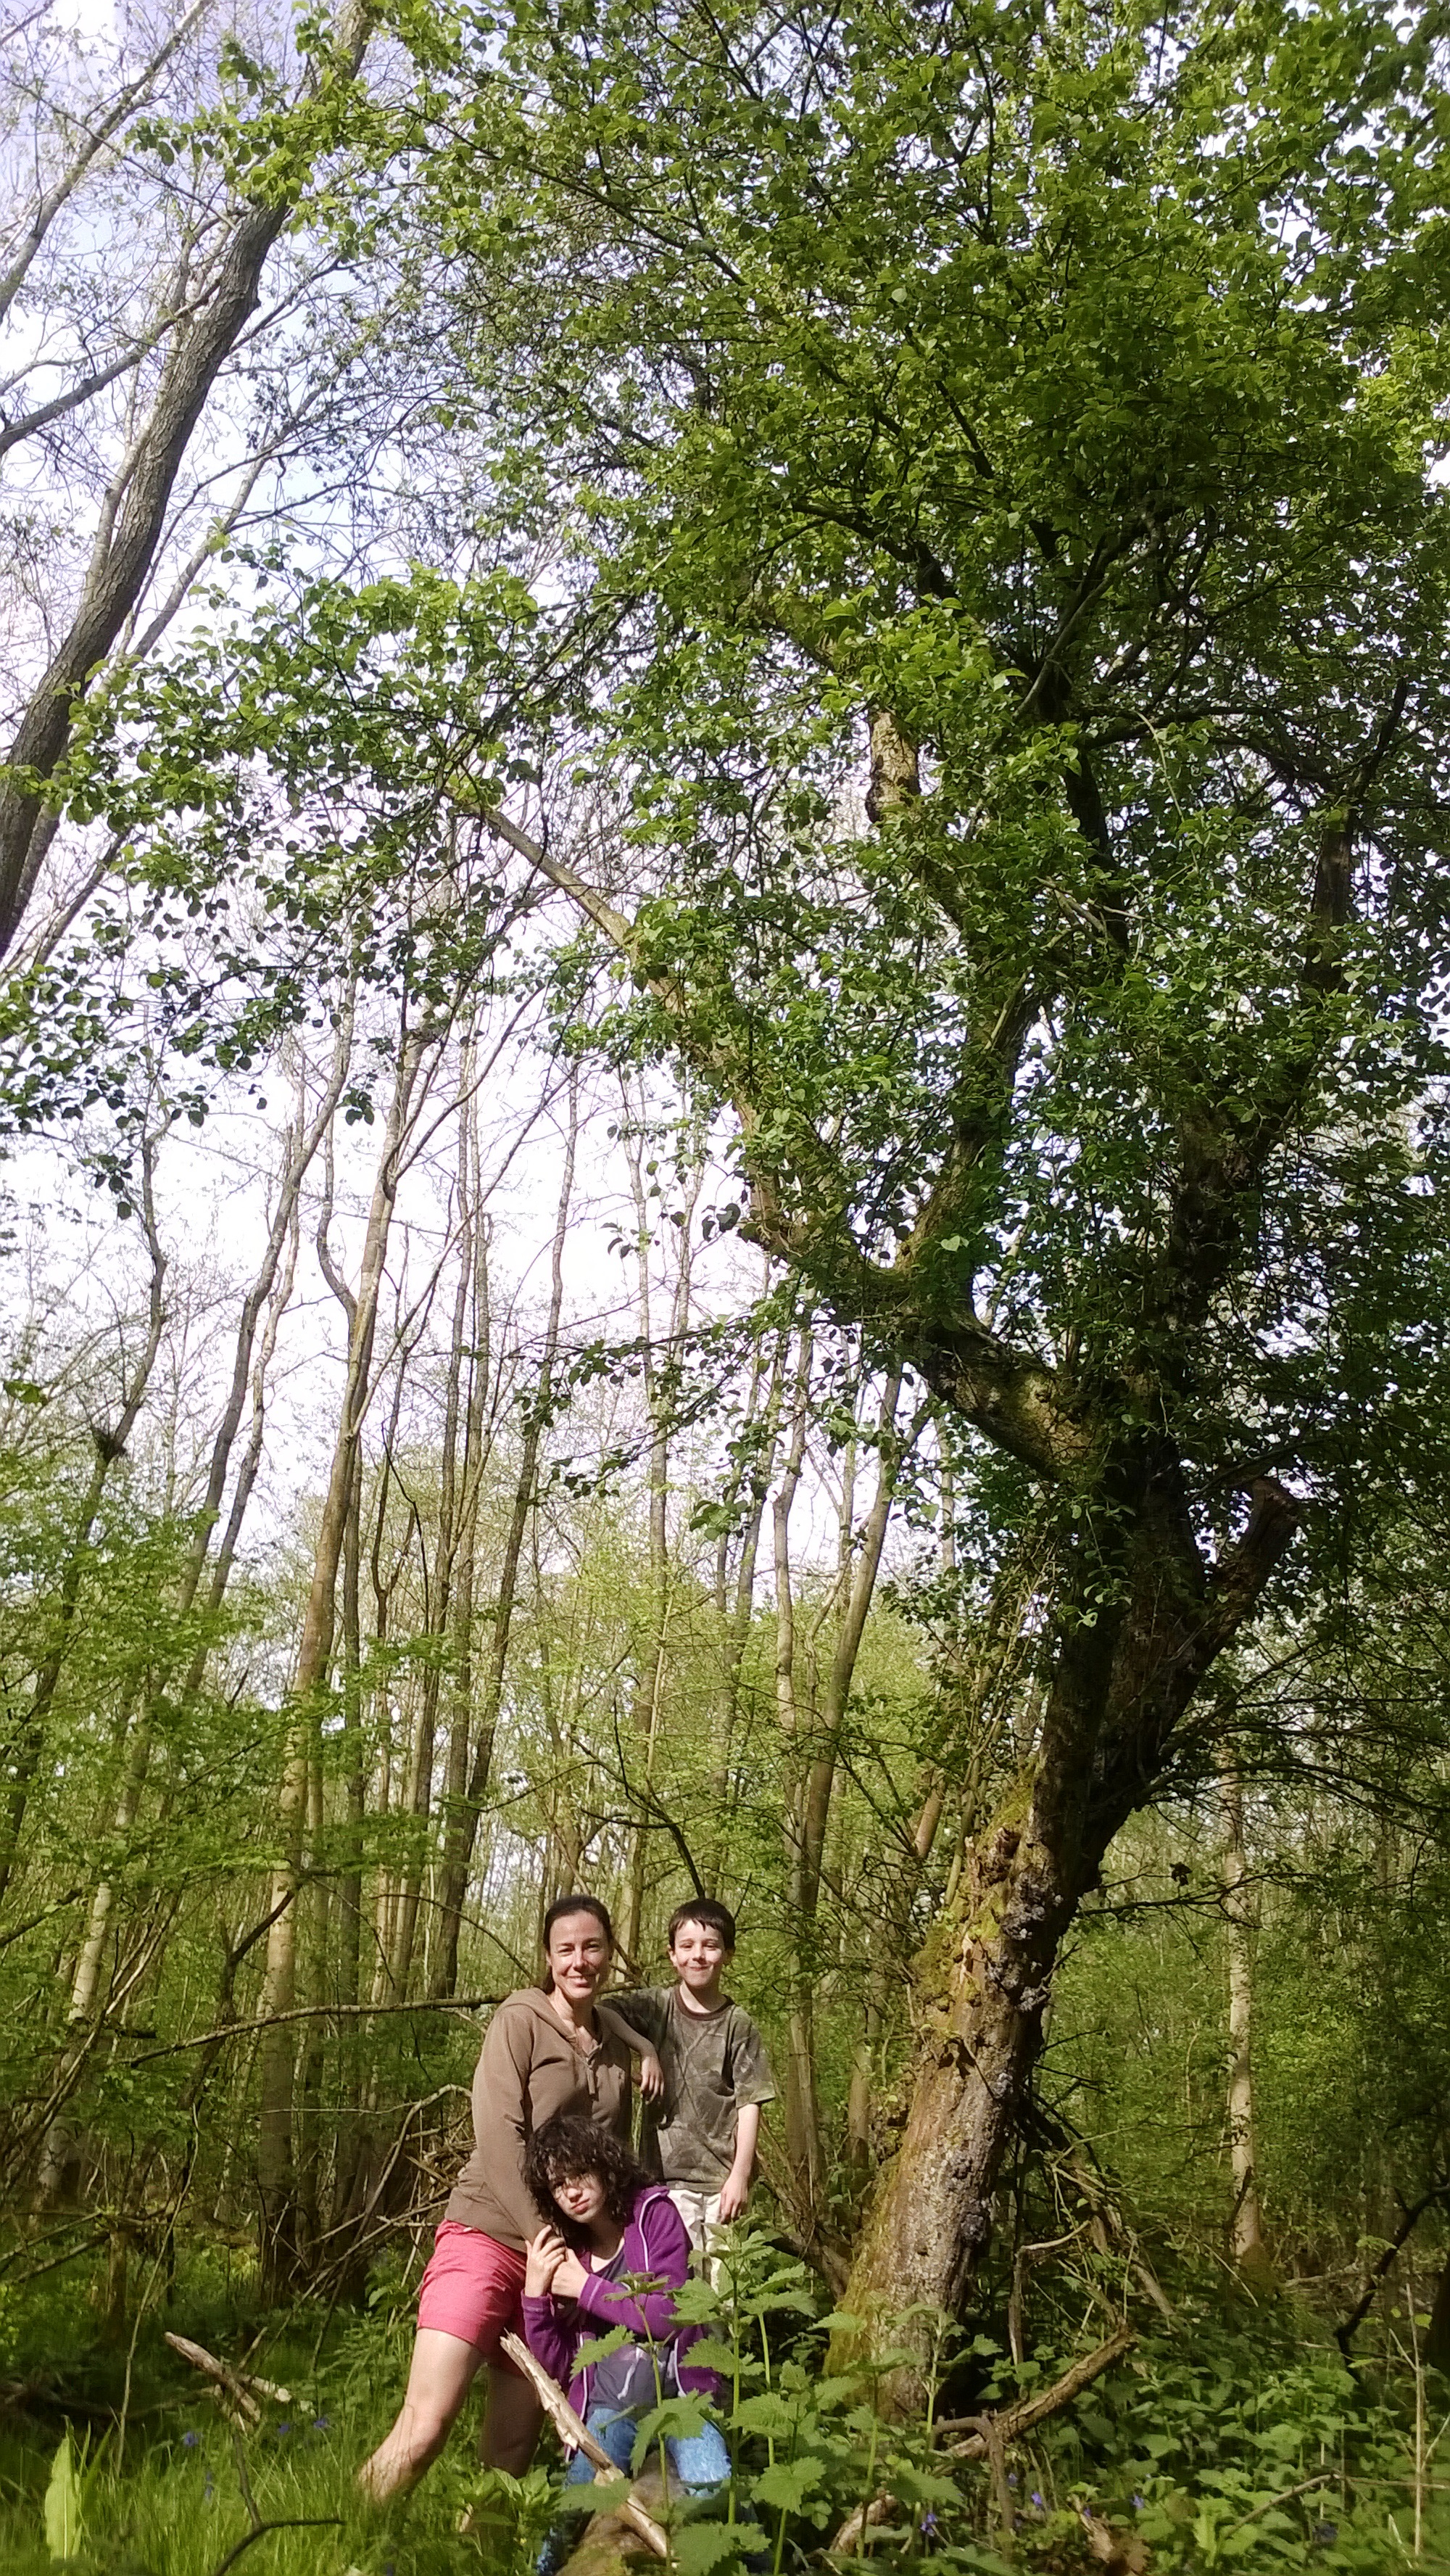
The crab apple tree on my rounds is finally in leaf now. I will be recording the growth of the apples closely over the following months.
The family under the apple tree
The yellow coltsfoot flowers (top left) have gone now and all that is left are the distinctive leaves and the beautuful puffy seed heads. Also the lungwort flowers have gone leaving only the distinctive white spotted leaves (top right).
At the bottom though I found that the orchids were still standing strong.
Coltsfoot seed head, lungwort and orchids
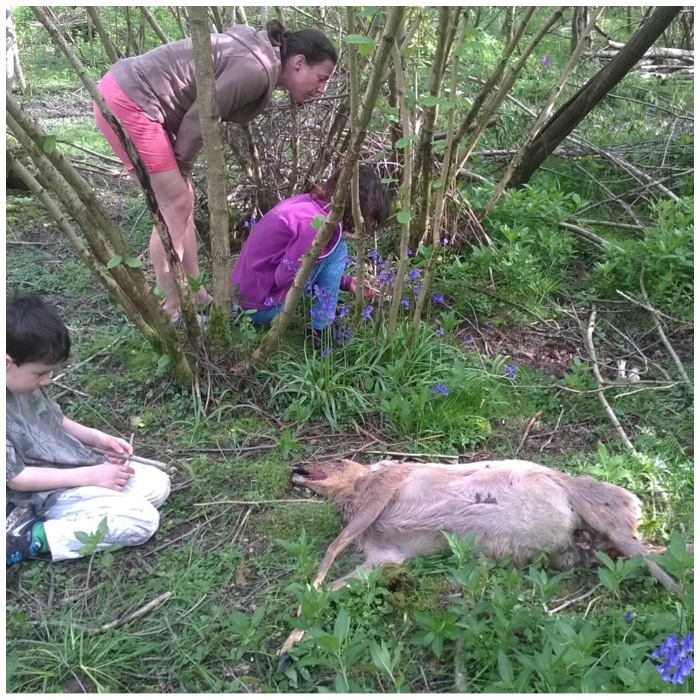
While we were looking for orchids Alison spotted a dead deer nearby. I couldn’t see any obvious cause of death but lying nearby were some deer leg bones recently stripped of flesh. As the deer (as you can see) still had all its legs I assume there must have been another dead deer nearby at some point as well.
A sad sight
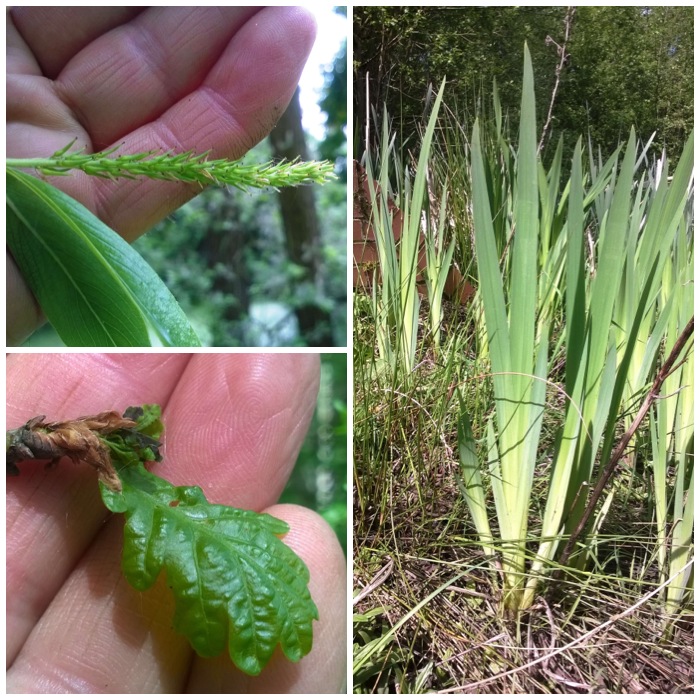
It was nice to see the willow and oak finally coming through this week (left-hand pictures). The reedmace leaves seem nearly full grown now so I will be looking out for the stems and flower heads starting to appear.
I have been patiently waiting for the ash(Fraxinus excelsior) tree in my local park to break open its buds. It has done so over the last two weeks and I am glad I did keep a close eye on it as the birth of its leaflets is quite a beautiful process to watch.
With the prospect of the spread of ash dieback increasing over the next few years I wanted to capture this process I have for so long taken for granted. I am studying plants this year in far more detail as part of the online course with Paul Kirtley from Frontier Bushcraft.
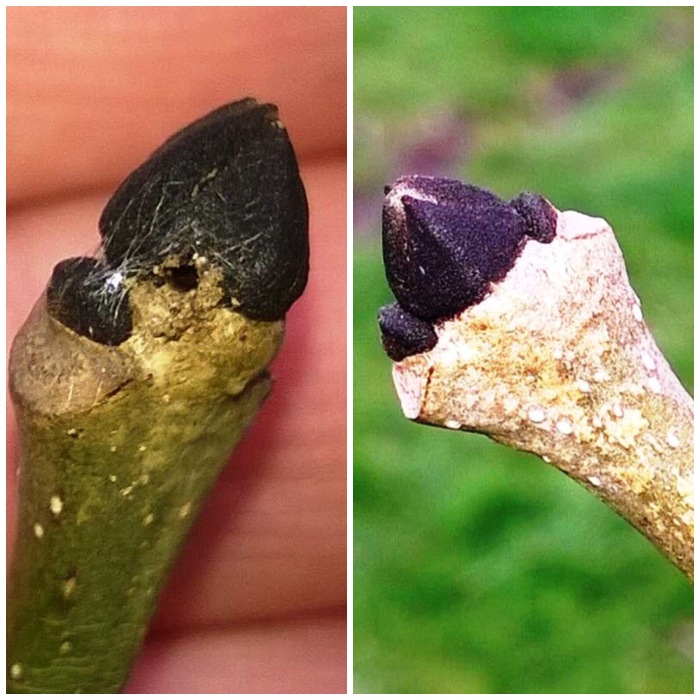
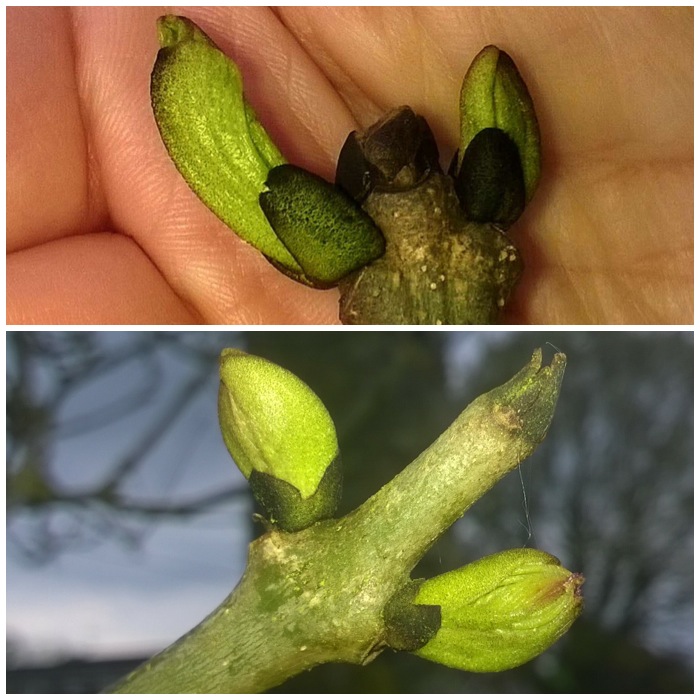
The buds of ash are typically black (likened to the shape of a bishop’s mitre) over the winter as they lie dormant and it is only as they are about to ‘break’ (when the green leaf tip first appears) that the bud changes to a slightly greenish tinge.
The black ‘bishop’s mitre’ ash bud
Here you can see the bud on the left is about to break and the ones on the right have just broken.
From black to green and the breaking starts
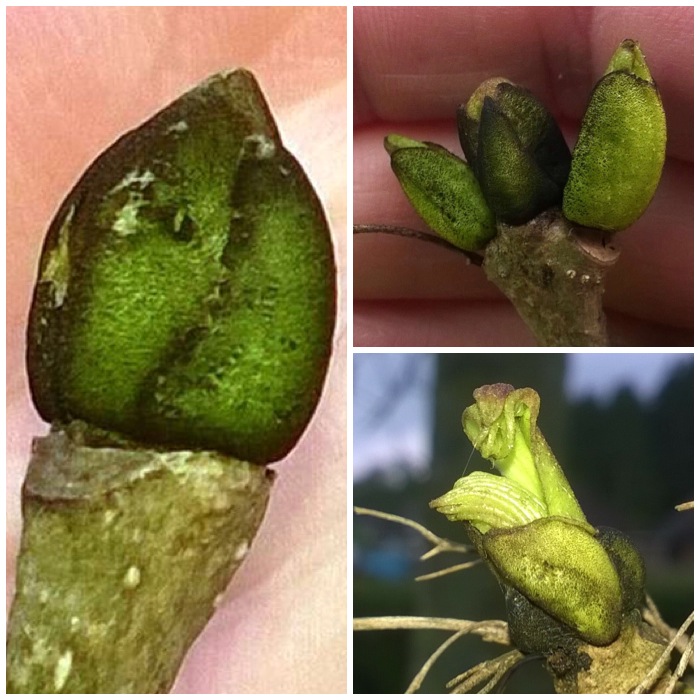
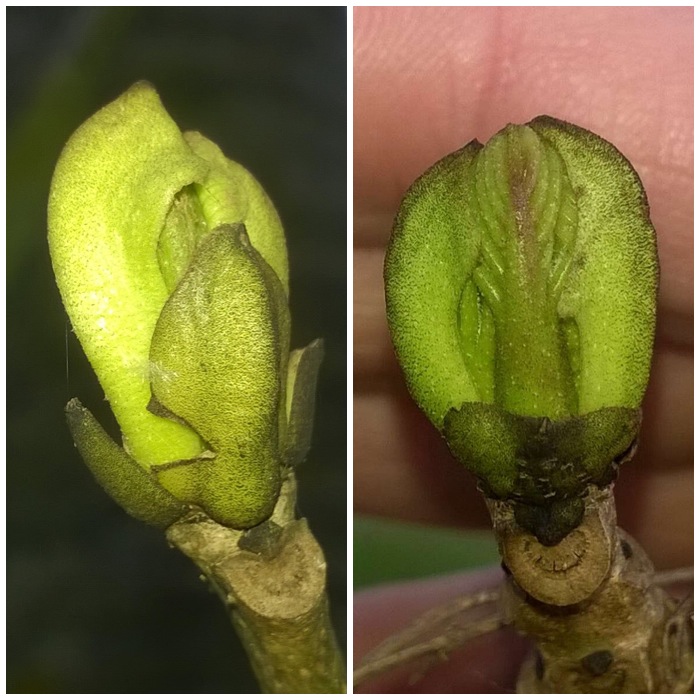
After this the growing leaves push out from the bud but are wrapped in a protective sheath. I am unsure what this sheath is called but hopefully someone who reads this can tell me. I liken it to an inner scale of the bud.
Truly broken out now
Once released from the bud you can clearly see the inner protective scale that is wrapped around the ash leaves. In the right hand picture you can just make out the small ash leaflets that are growing.
Ash leaves are wrapped in their inner scales
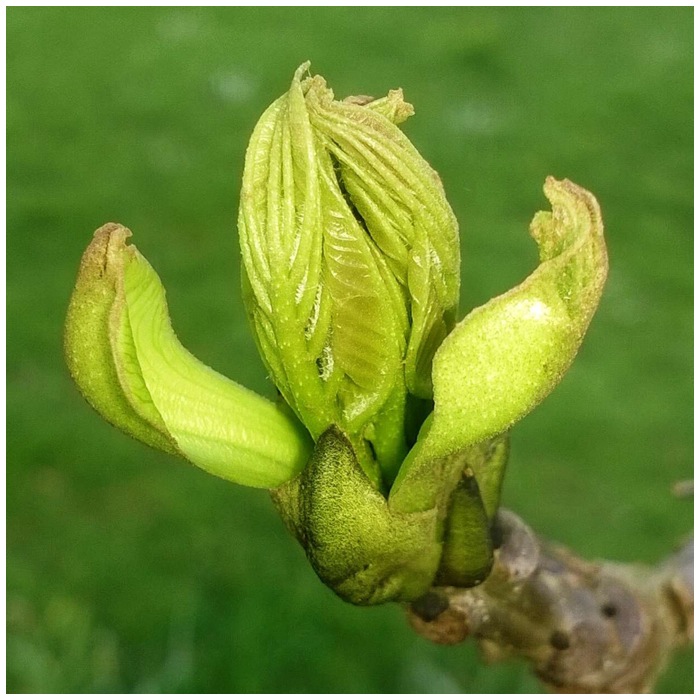
As the leaves and their attached leaflets push up, the inner protective scales are pushed aside to allow more growth to occur.
Inner scales are released
I noticed at this stage that the leaves continued to grow but still had a stickiness about them that kept them together. This causes the leaves to form into what looks like a small rugby ball.
Ready for the final stretch
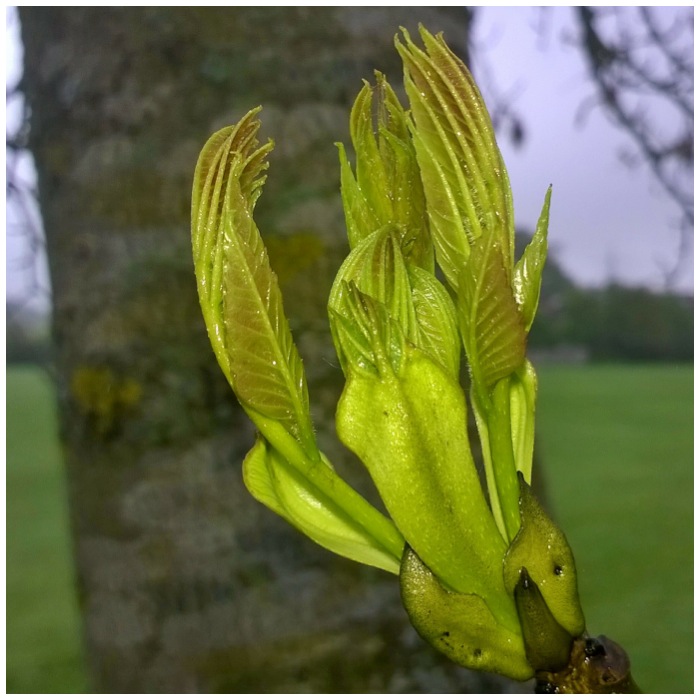
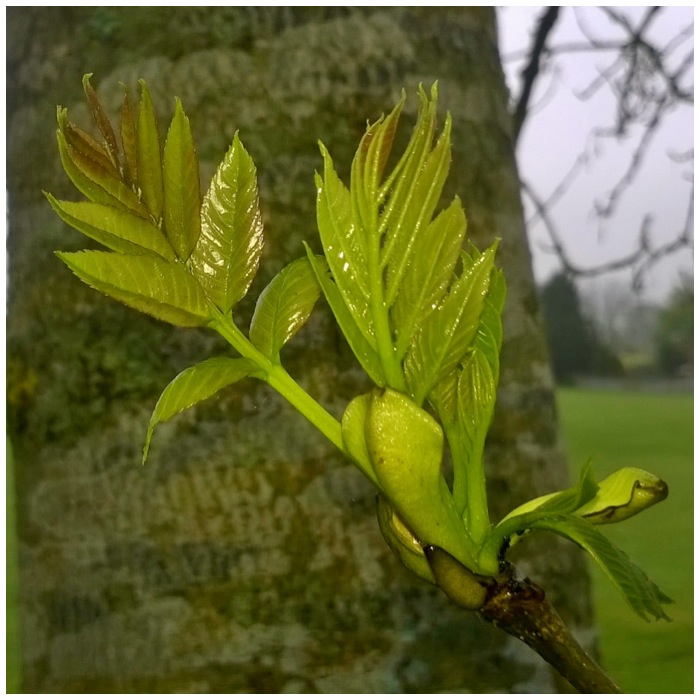
Finally the leaves were unfolded (that is when their full length is showing from tip to attachment at the stem).
The individual stems have separated and the leaves have unfolded
The individual leaflets then parted from each other; all that is left now is for them to grow to maturity.
The ash leaflets finally appear
I have noticed that the oak leaves round here have appeared a few weeks before the ash this year so if the old saying – ‘If the oak before the ash, then we’ll only have a splash, if the ash before the oak, then we’ll surely have a soak” – is correct then we should be in for a nice summer (here’s hoping, anyway).
All in all I think that this is a particularly beautiful sight and if you go out around now and look at some of the ash trees you will see it happening for yourself.
I have done a similar post called Stunning Sycamore if you’d like to see more of these amazing unfurling leaves.