Bumped from my hammock – With Enfield SCC Unit

Back in early September of 2013 my good friend Dave Lewis invited me over to Danemead Scout Camp to help work with some cadets from the North London Enfield Sea Cadet unit that he was planning to put forward as a team for the London Area Sea Cadet Chosin Cup competition in October.

I had worked with the team earlier in June focussing on their navigation skills so this time the focus was team working. The Chosin Cup marks highly on good team working and we both felt that Enfield had a very good chance of winning. As well as the teamwork we wanted to give the cadets some time to relax and enjoy the outdoors in a way that they would not normally have the opportunity to.

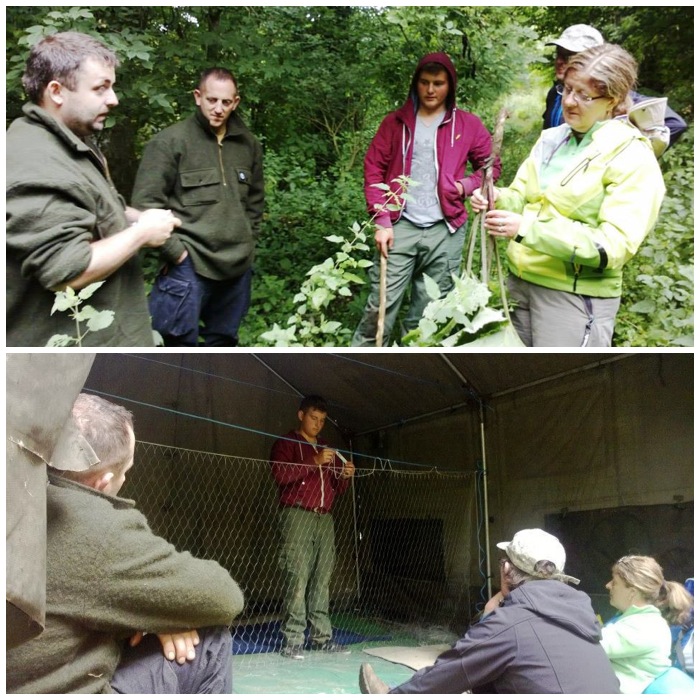
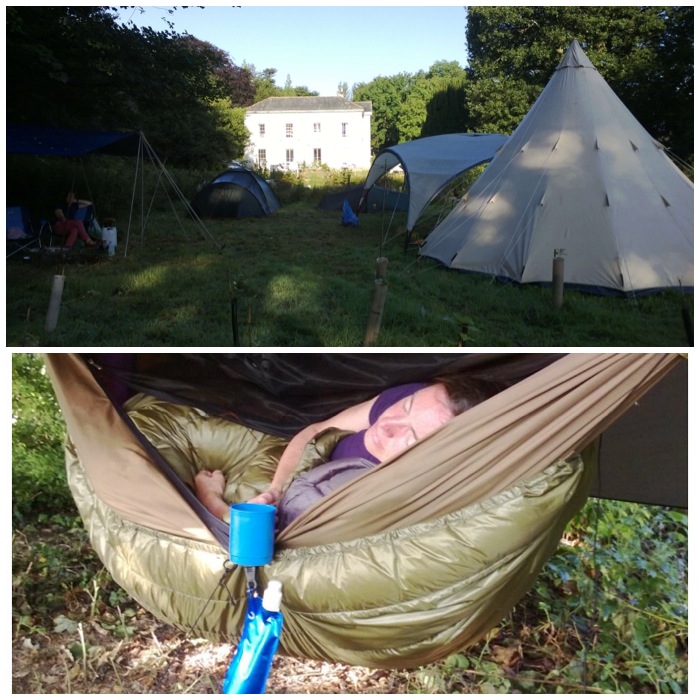
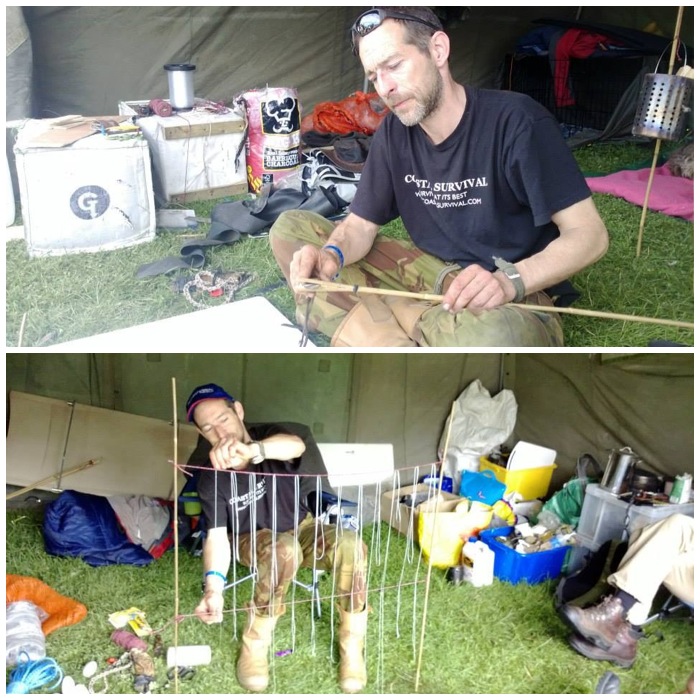
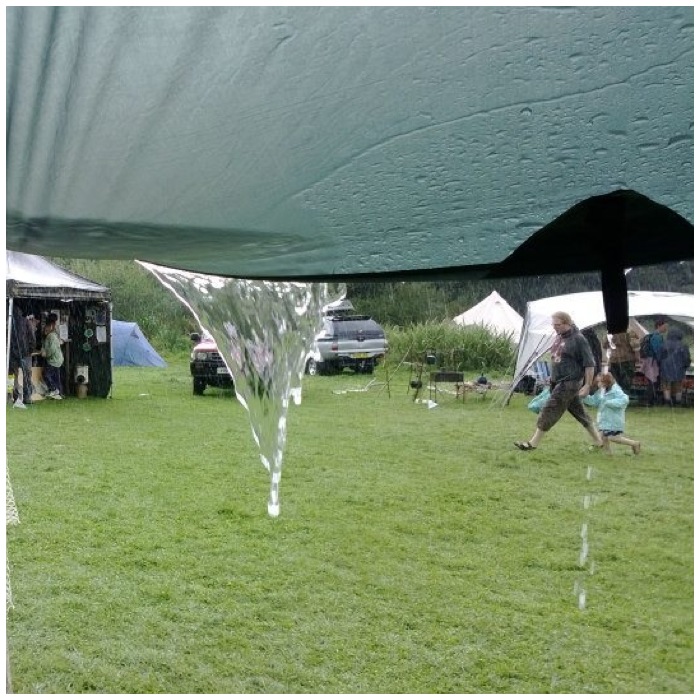
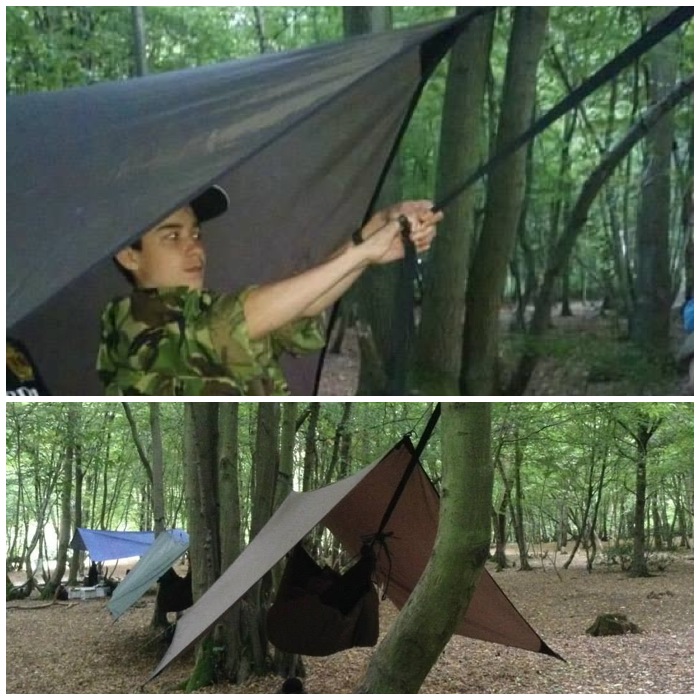
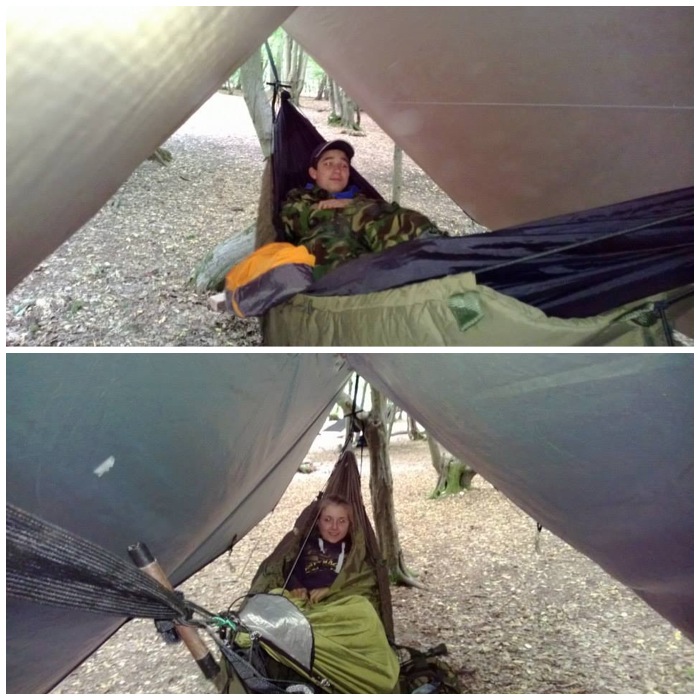
As part of the team working training I briefed the cadets that I wanted them to set up their own group tarp, fire and individual hammocks. They had learnt many of the necessary skills before so they just needed a little refresher on bushcraft knots and off they went.

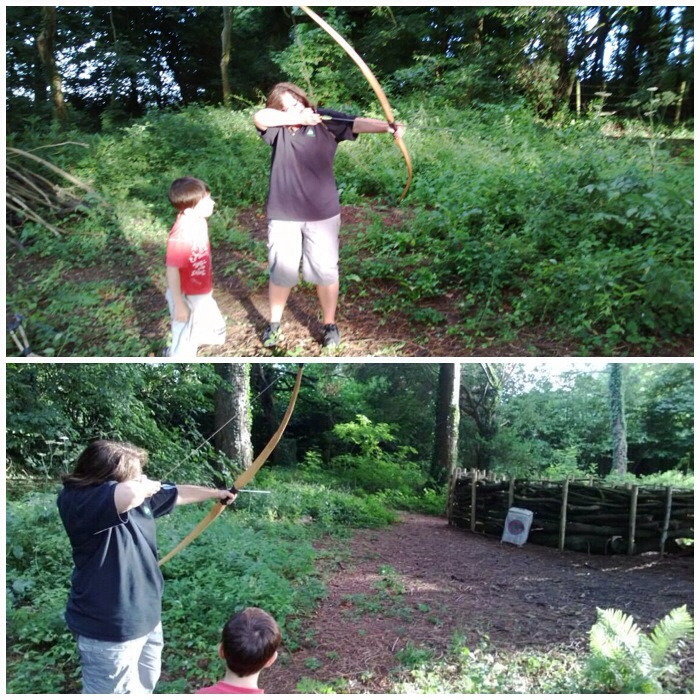
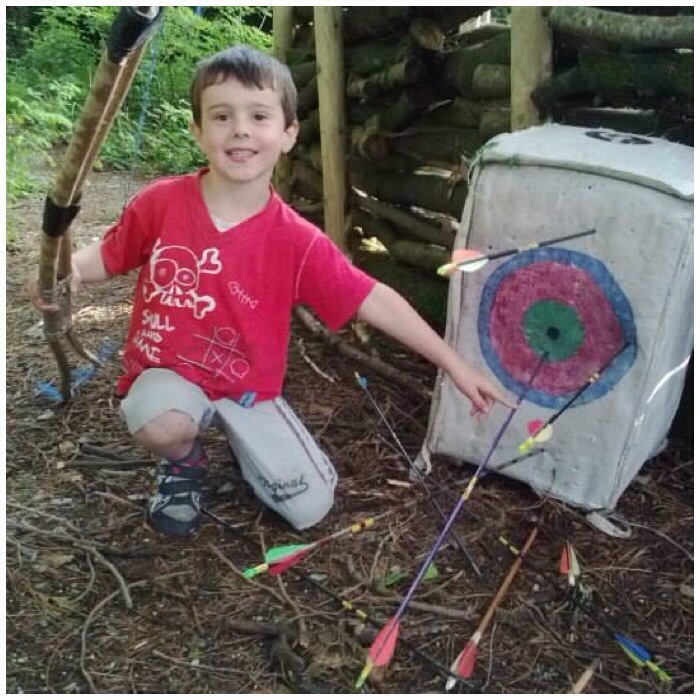
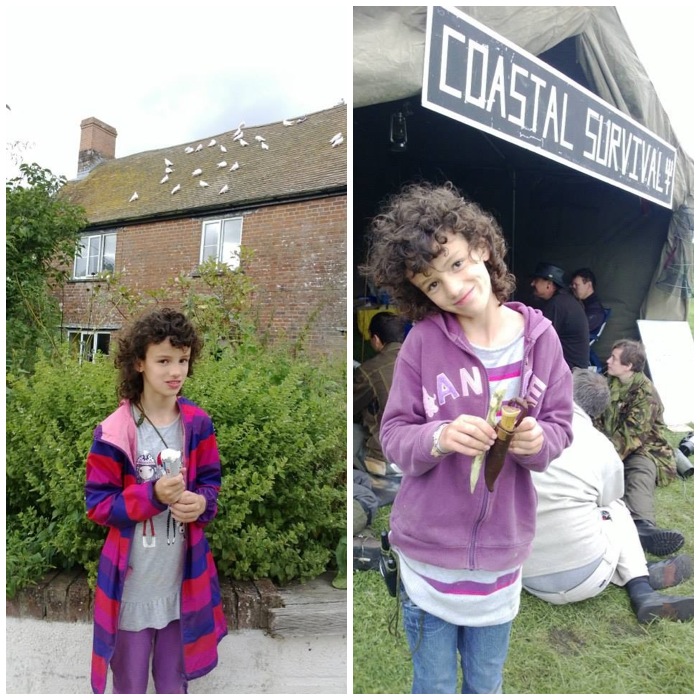
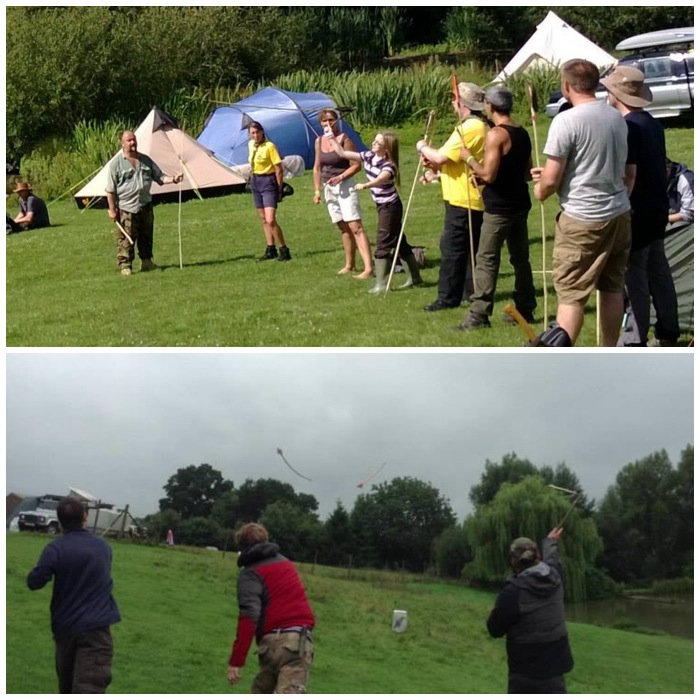
The white platform the cadet is standing on is actually one of my archery targets made by Mark Gater of G-Outdoor. An excellent bit of kit that has many uses other than just a target. I did a review of the G-Tuff Field target on Bushcraft UK back in 2011.

Photo 29-01-2014 16 37 49
Group and individual tarp set ups

We used a mixture of tarps including the DD Tarp XL, a Hennessy Hex and Extended Desert Cam tarps.
The hammocks were the Woodsman Uk Hammocks and DD Frontline hammocks. I had also managed to buy some Snugpack Underblankets for the cadets to use. These underblankets make a massive difference to the quality of sleep you get by blocking out the cold air beneath the hammock. A lot of this kit we’d bought after fundraising in 2012 by running a bushcraft course for a group from the City of London and after I received a grant from the Jack Petchey Foundation to buy bushcraft kit for the Sea Cadets.

Photo 29-01-2014 16 38 32
Hammock set ups

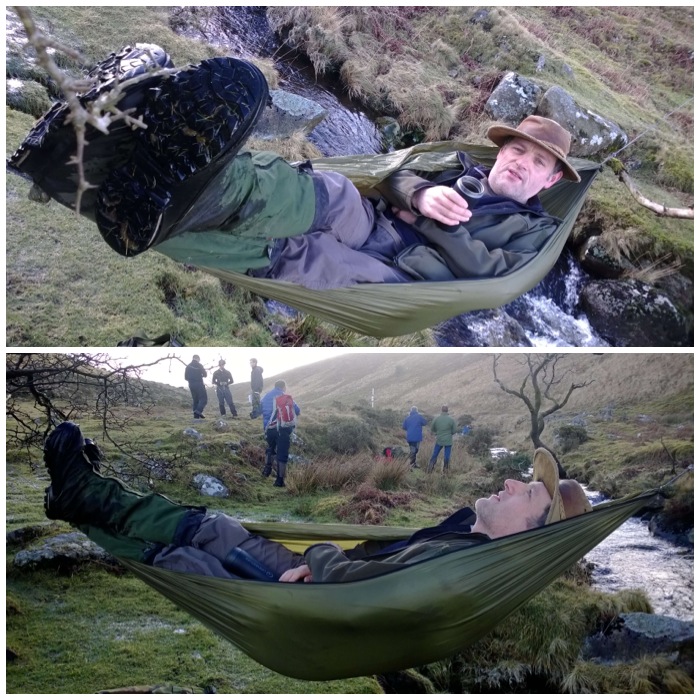
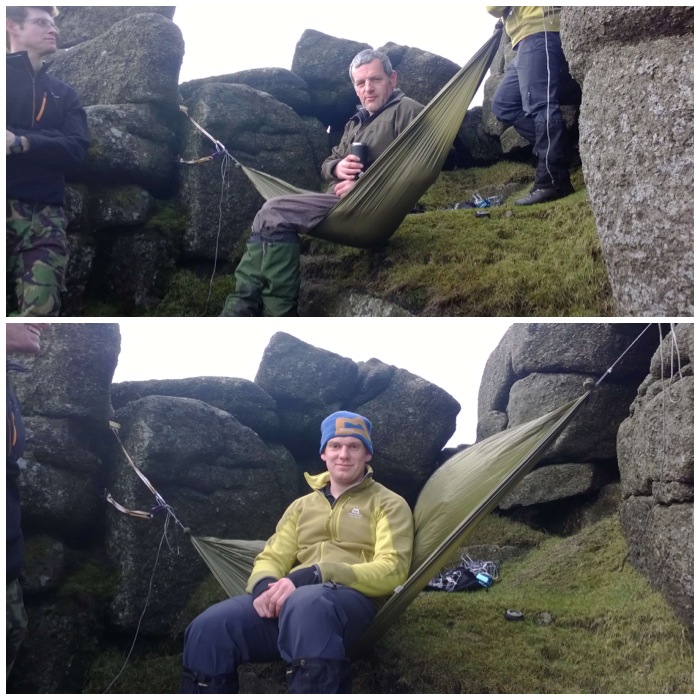
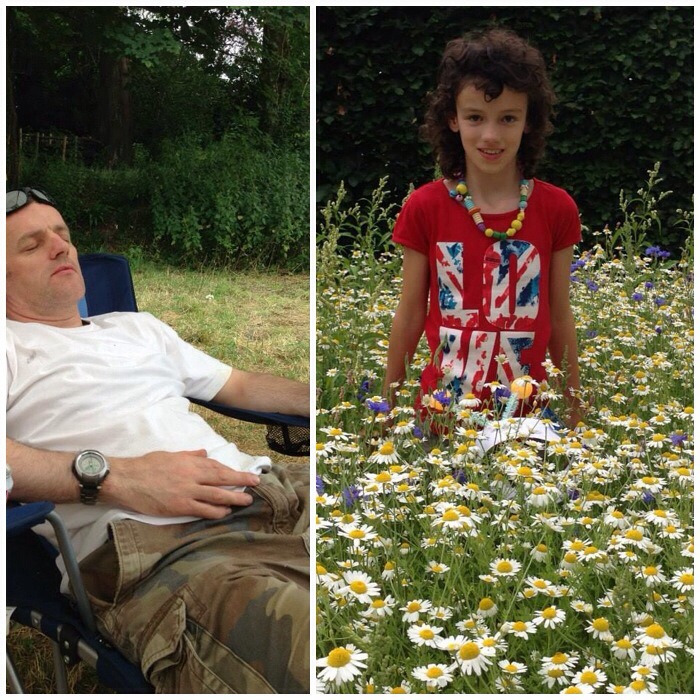
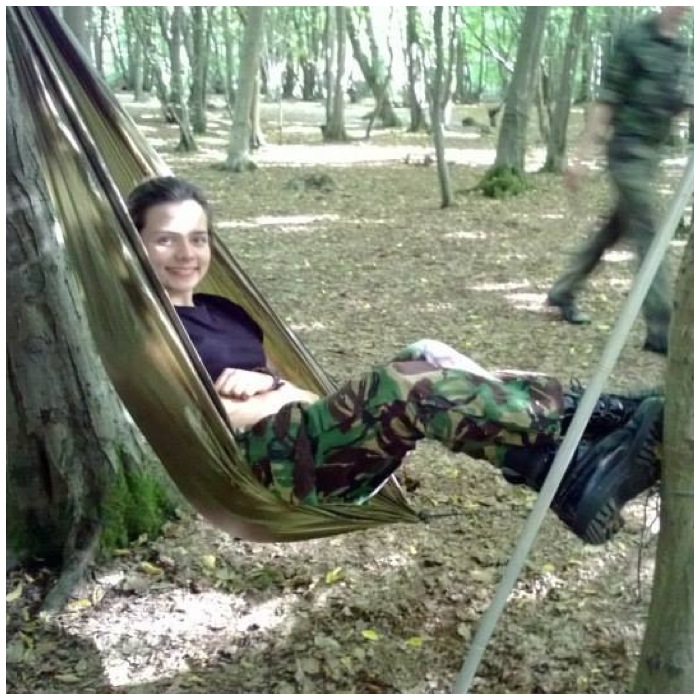
Now a recurring theme of the weekend was the lack of time I got to sit on my EDC hammock chair. I love this chair so I was a little upset at its overuse by others 😉

Photo 29-01-2014 16 35 27
My hammock chair was stolen

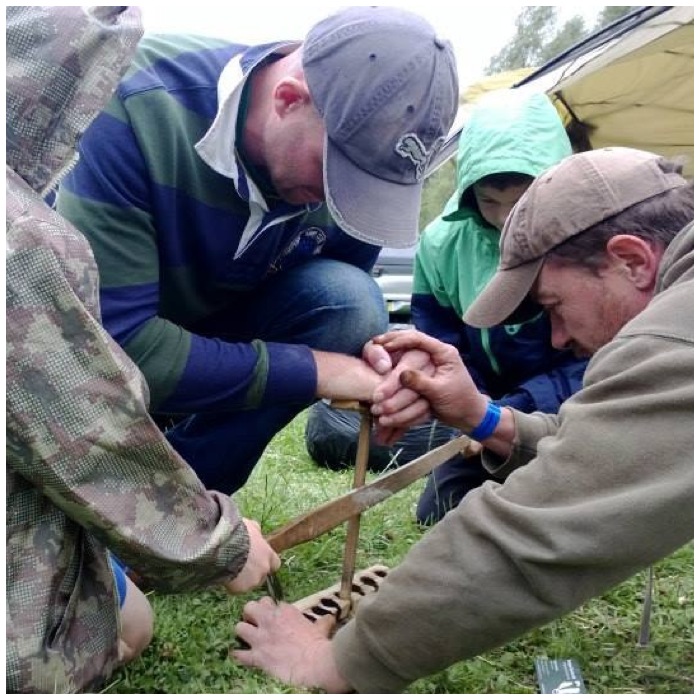
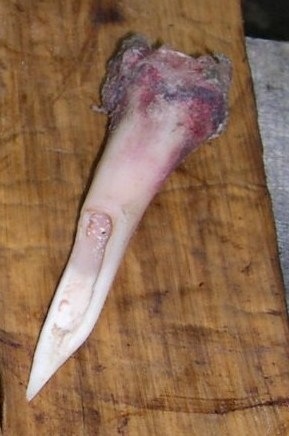
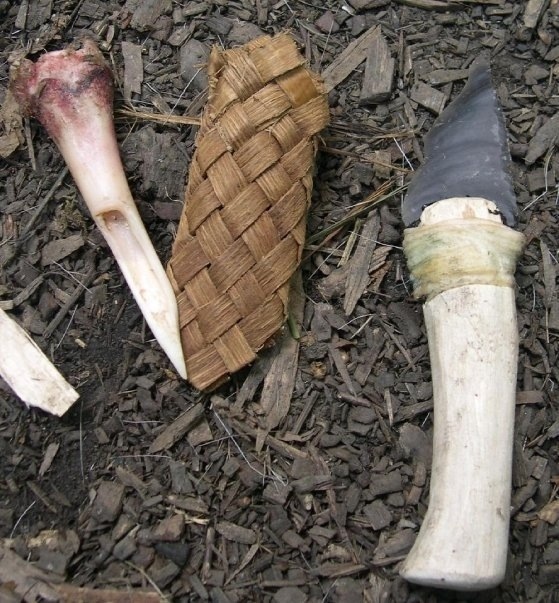
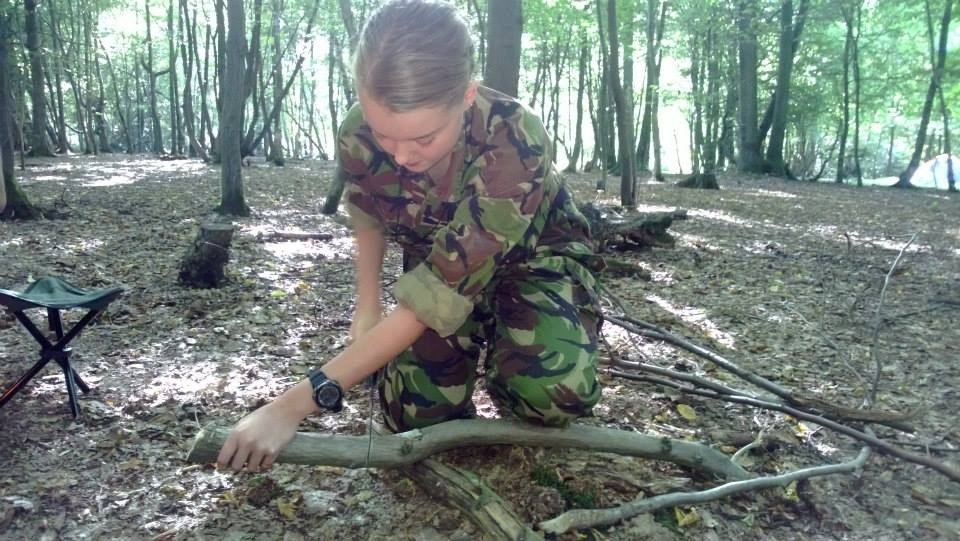
The cadets were also taught how to use Laplander saws safely so they could prep their own fire for the evening: the wood slightly propped up and sawn off to the side with the arm supporting the branch crossed over the top of the blade.

Photo 29-01-2014 16 24 54
Safe sawing skills

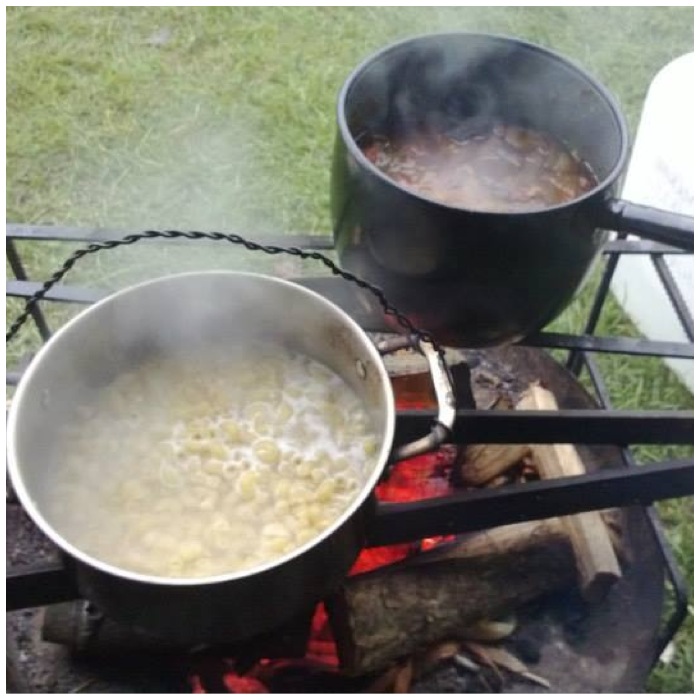
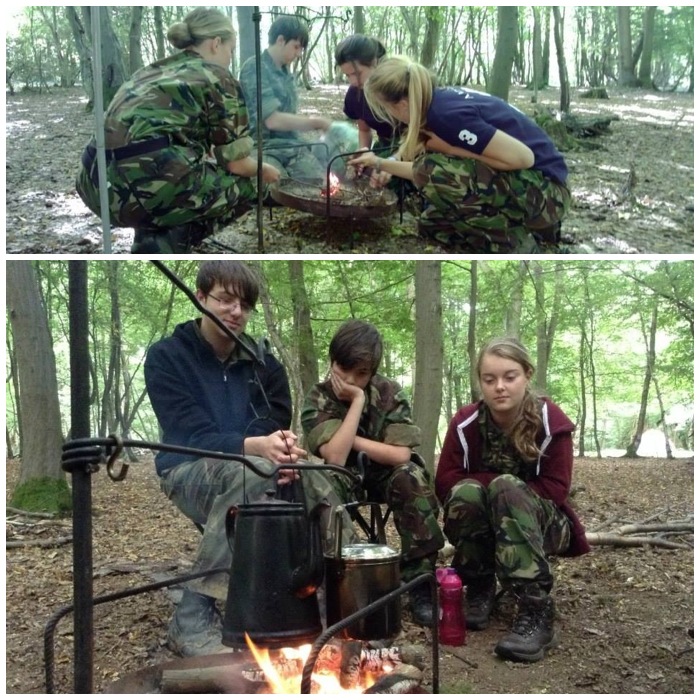
The cadets needed no help getting the fire going with firesteels as they had done this many times before, and then it was time for a well-earned rest.

Photo 29-01-2014 16 37 01
Fire set up and learning the art of doing nothing

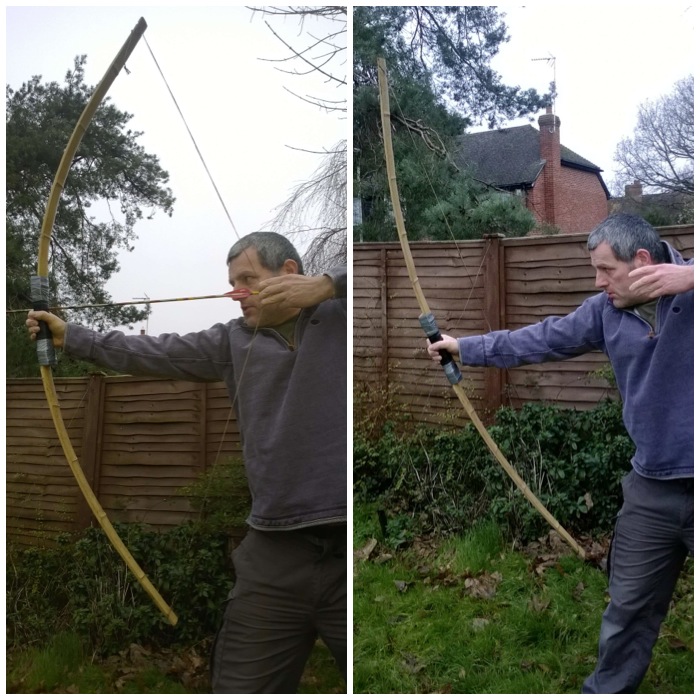
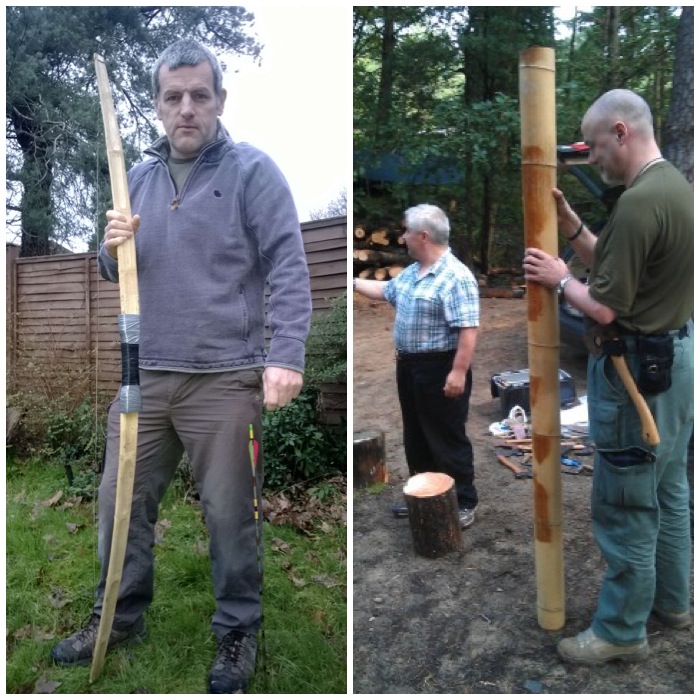
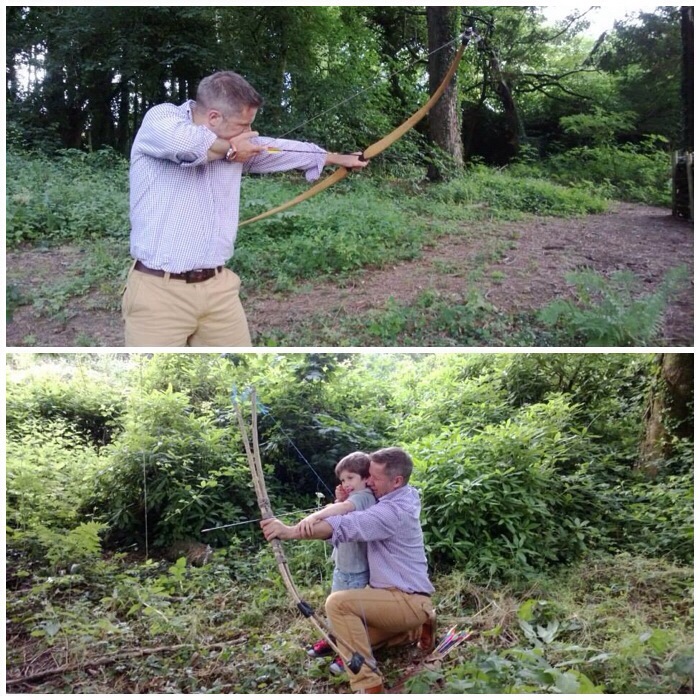
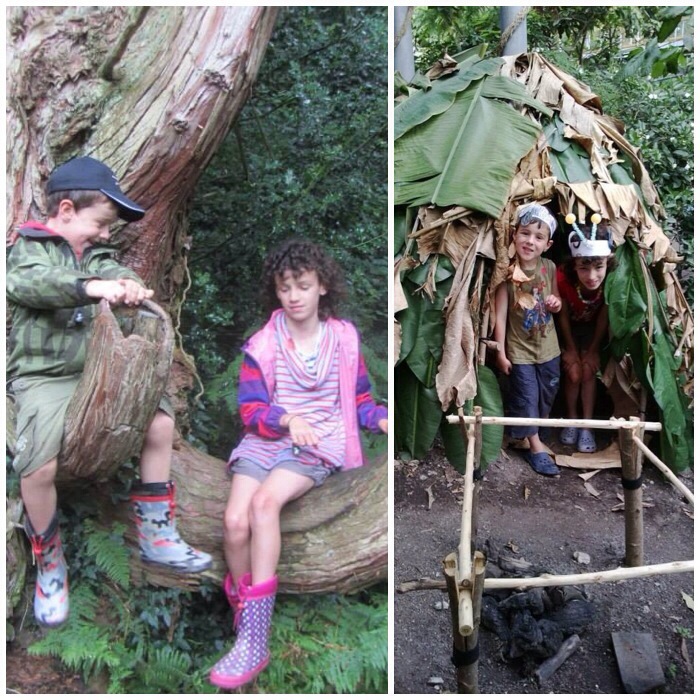
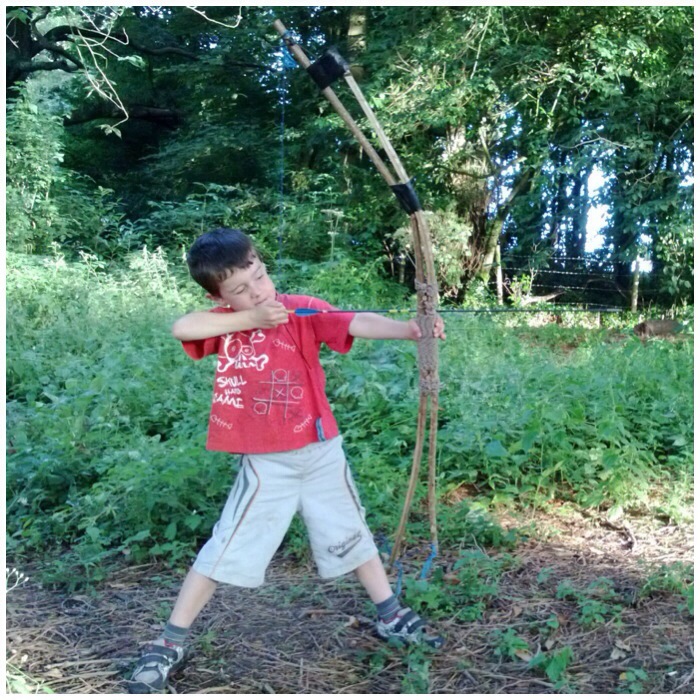
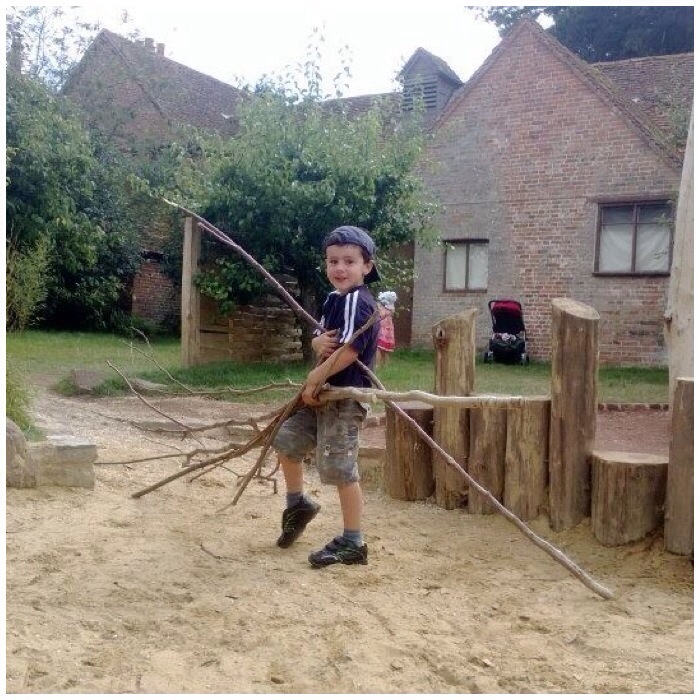
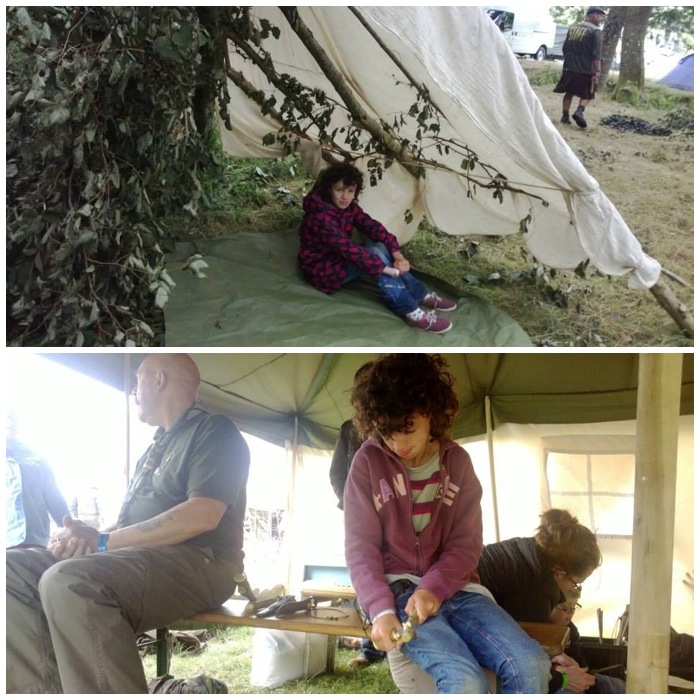
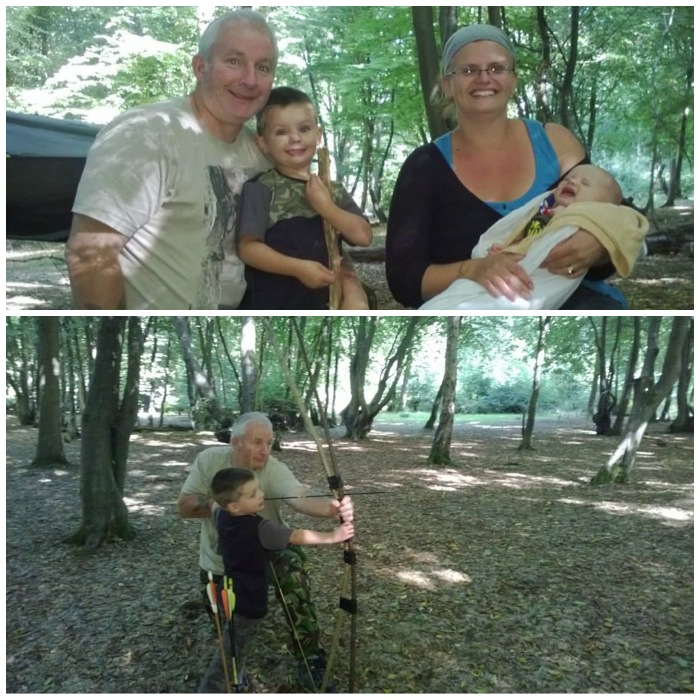
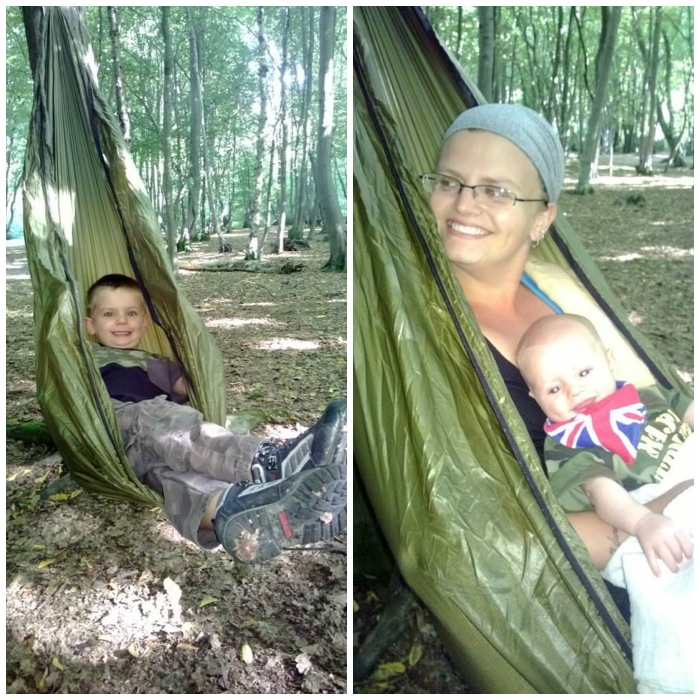
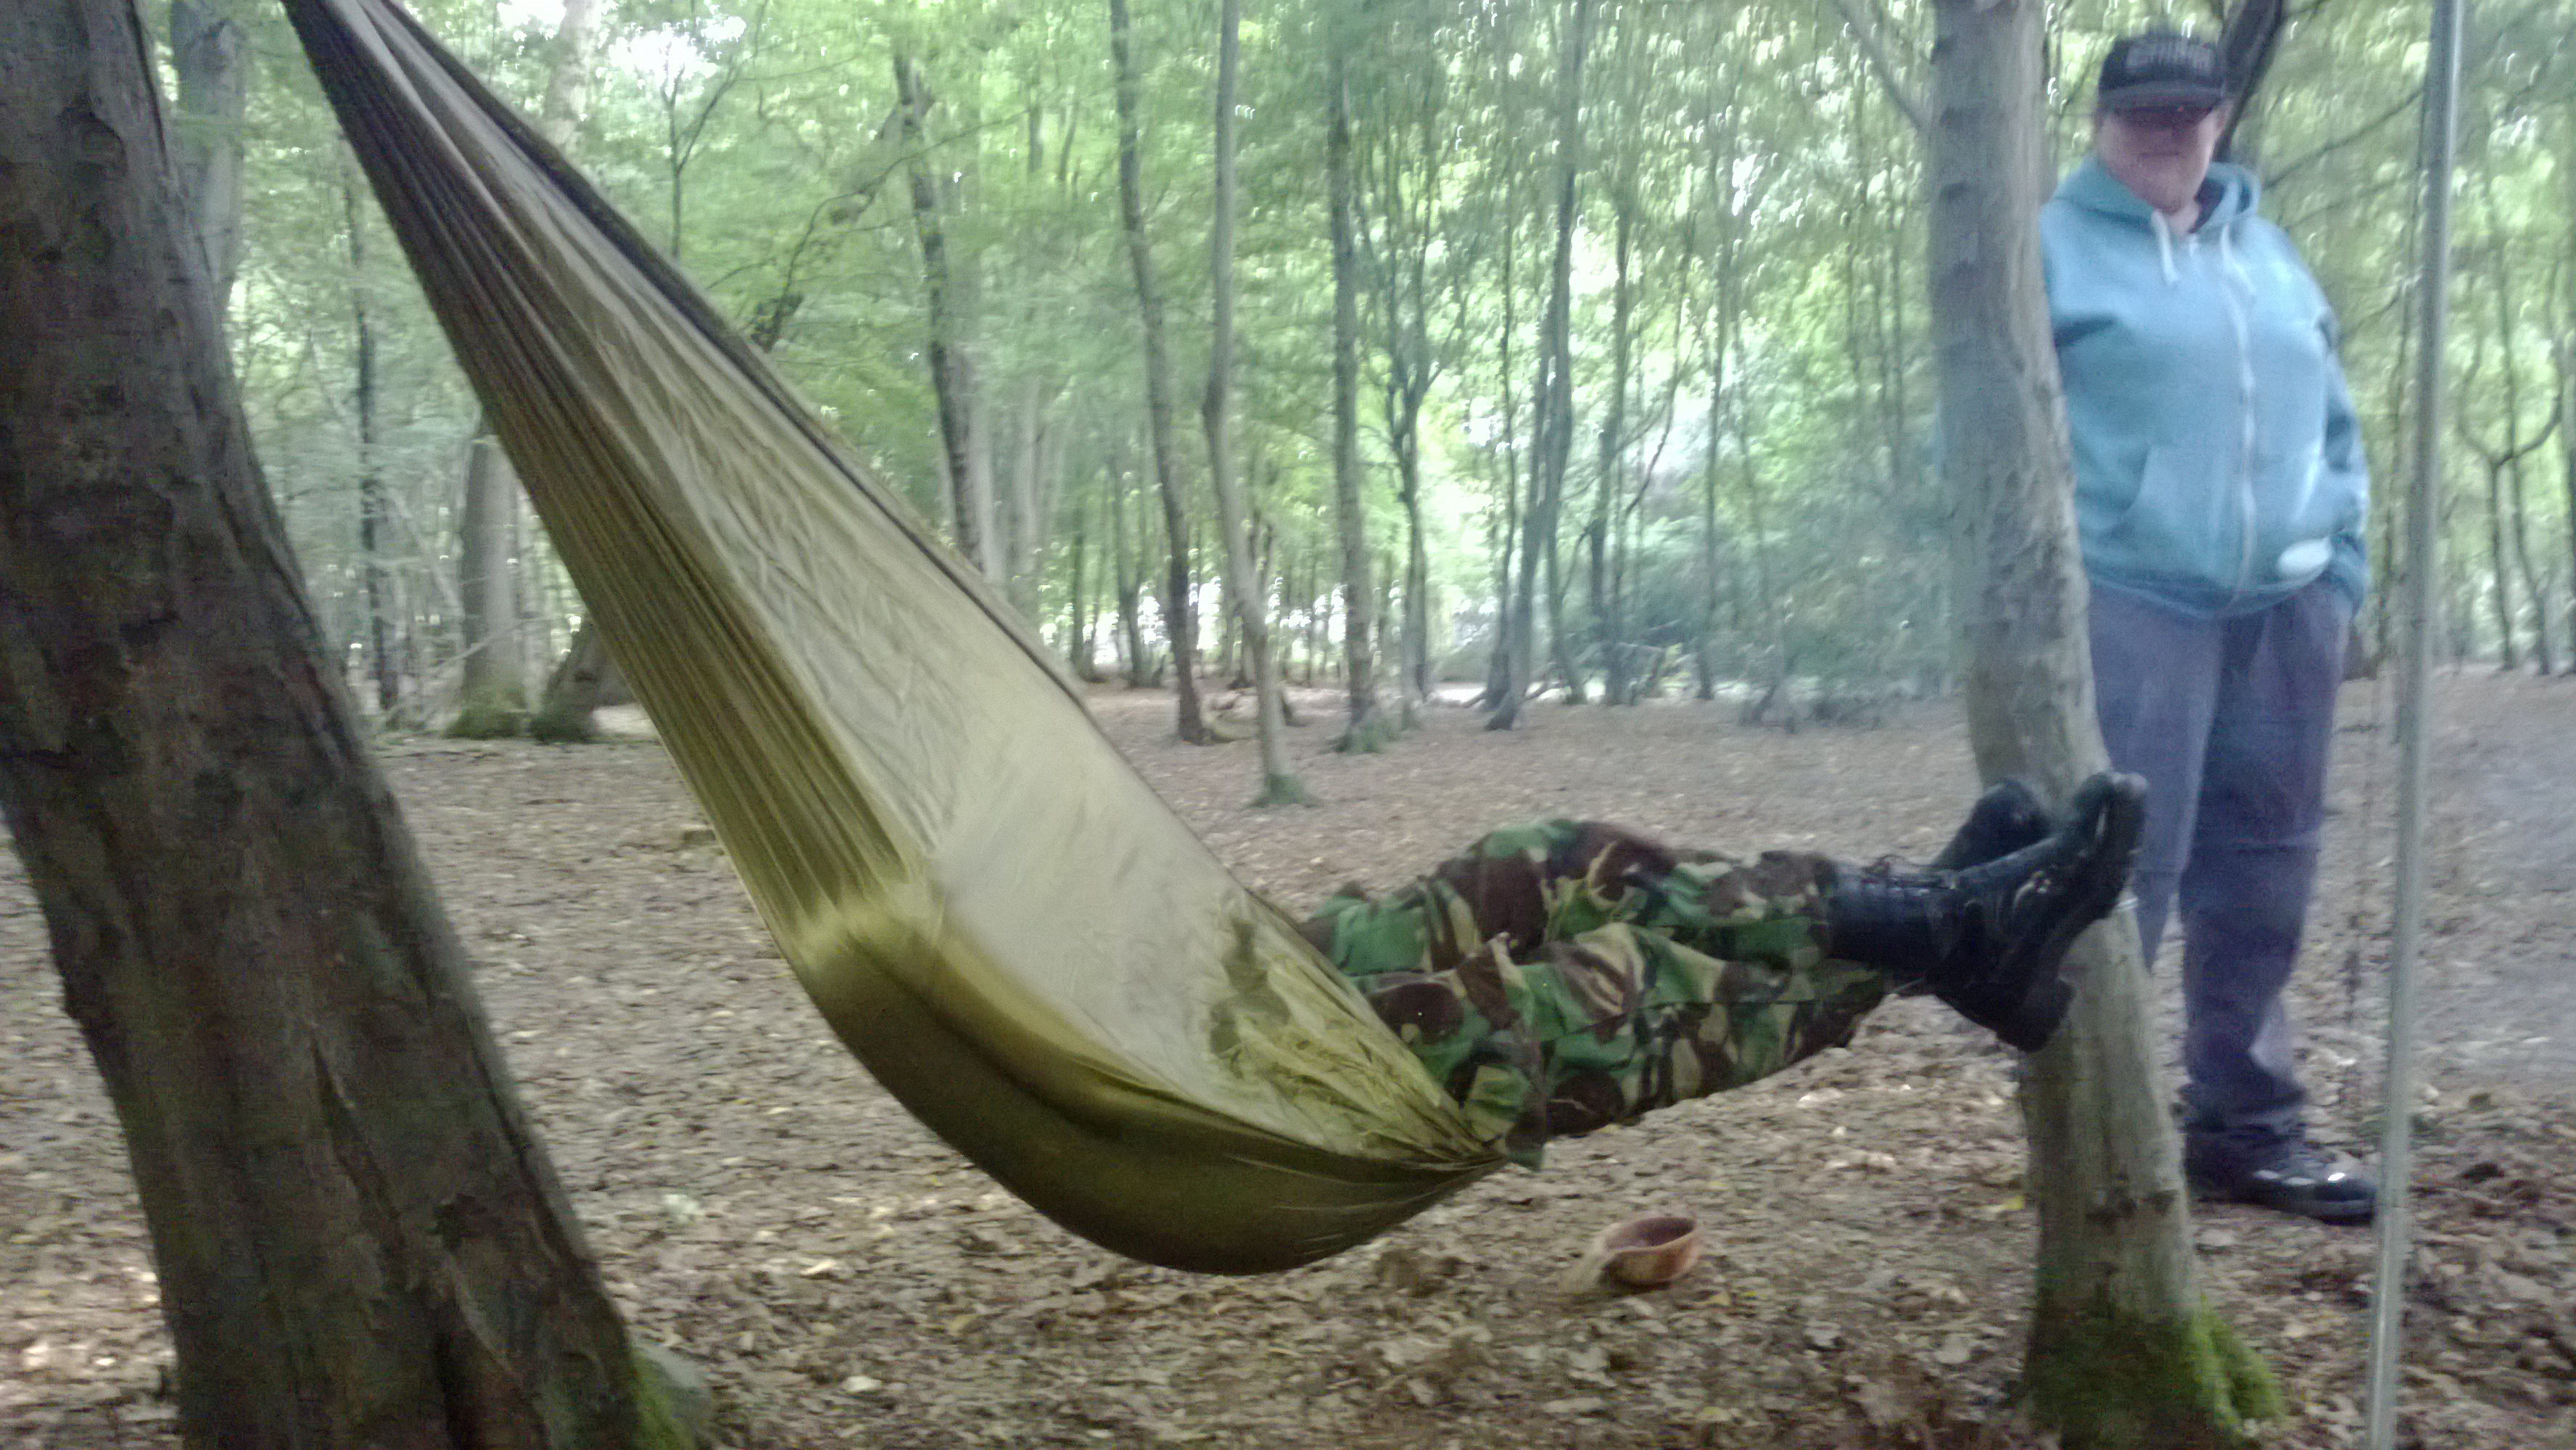
On the Saturday after noon we had a visit from our friends Jim and Maria Stilgoe with their sons David and James. I had never met baby James before so it was nice to do so out in the woods. David on the other hand is not one to sit around for long and was soon off exploring and had a great time with Jim shooting the Father and Son bow.

Photo 29-01-2014 16 39 15
A visit from the Stilgoe clan with a bit of Father & Son time

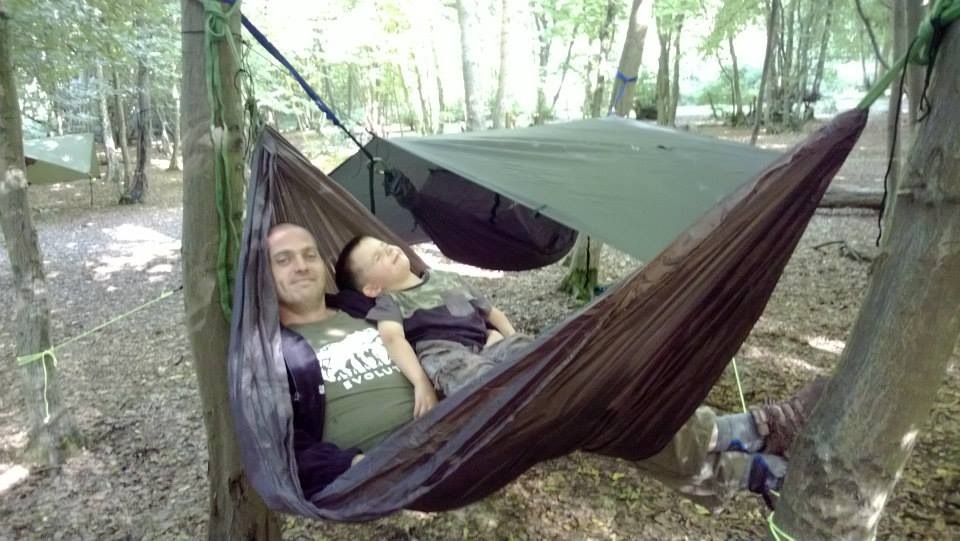
After a bit of shooting David needed a bit of a rest and soon found his first hammock – ‘And the little one said roll over’ comes to mind here 🙂

Photo 29-01-2014 16 24 21
A hard-working pair

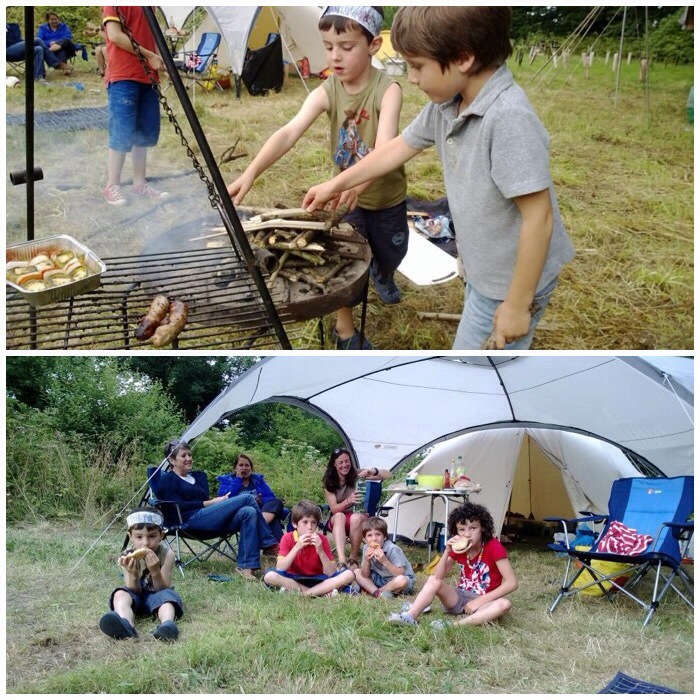
As I was saying earlier I did not get much of a chance to use my own hammock chair. It makes a perfect seat for mother and baby I think.

Photo 29-01-2014 16 31 39
Still not given back to me

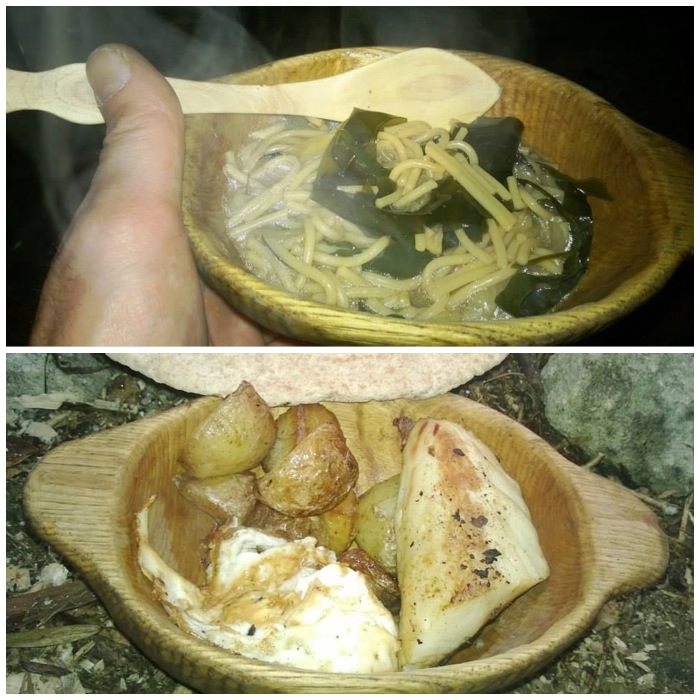
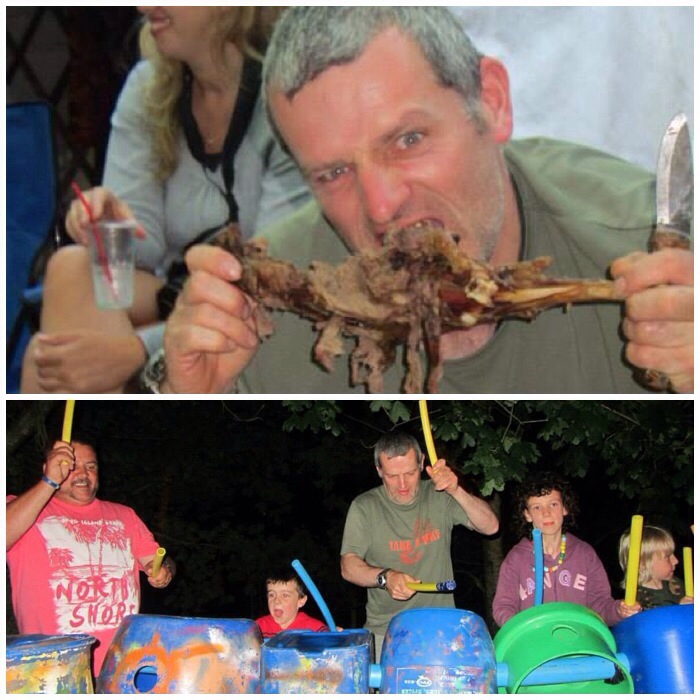
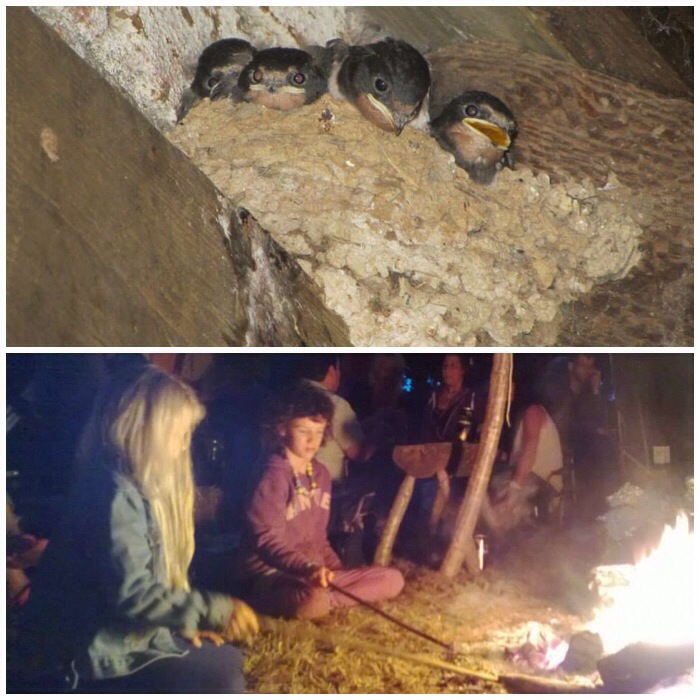
Camping would not be camping without a toasted marshmallow or two. And the occasional cremated one.

Photo 29-01-2014 16 34 14
Evening activities

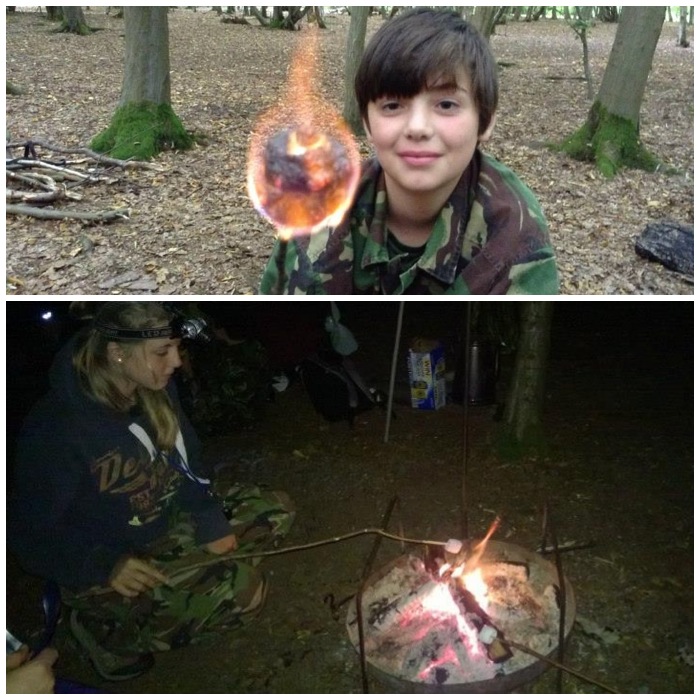
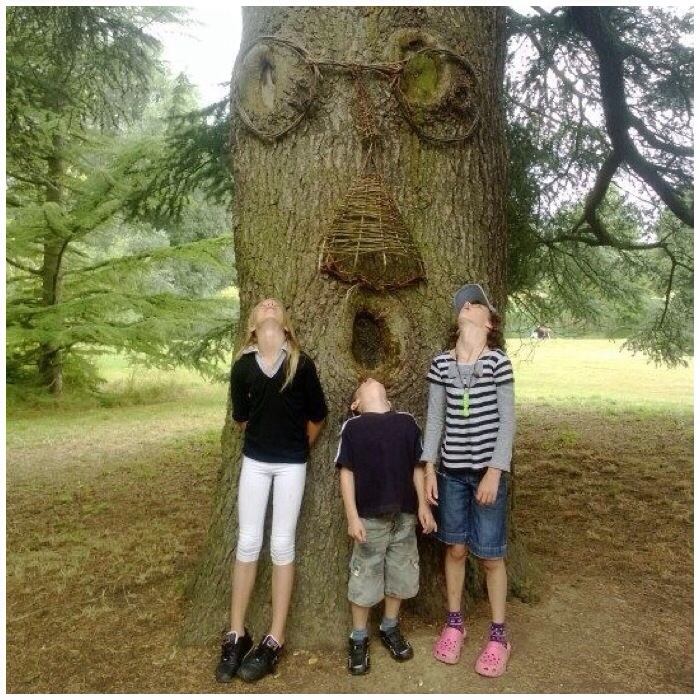
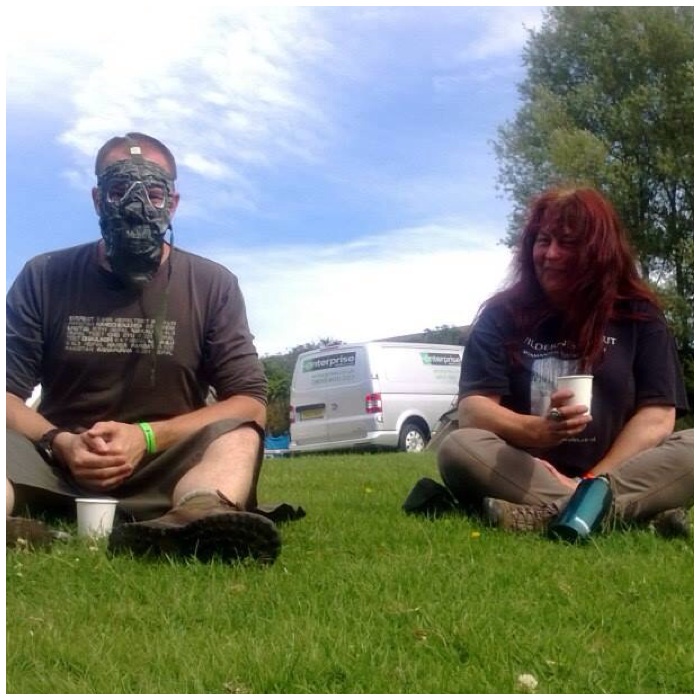
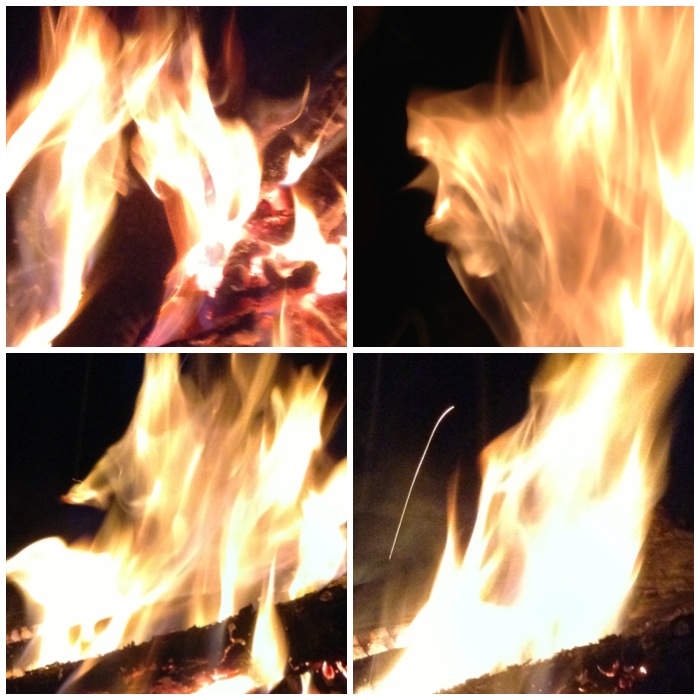
That evening around the fire the cadets had made I got some cracking Fire Faces.

Photo 29-01-2014 17 53 37
The weekend’s Fire Faces

After a good night’s sleep (we were only out for one night) it was time to crack on with more activities.

Photo 29-01-2014 16 32 11
Sunday morning wakey wakeys

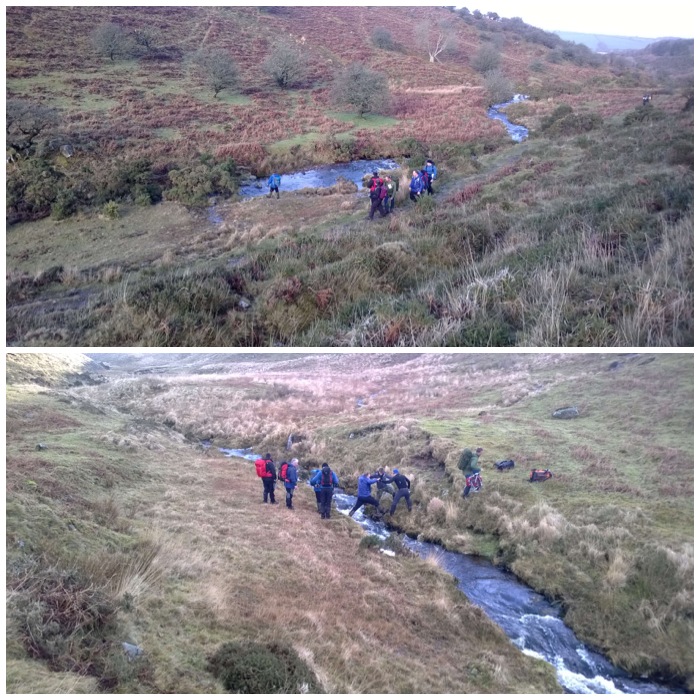
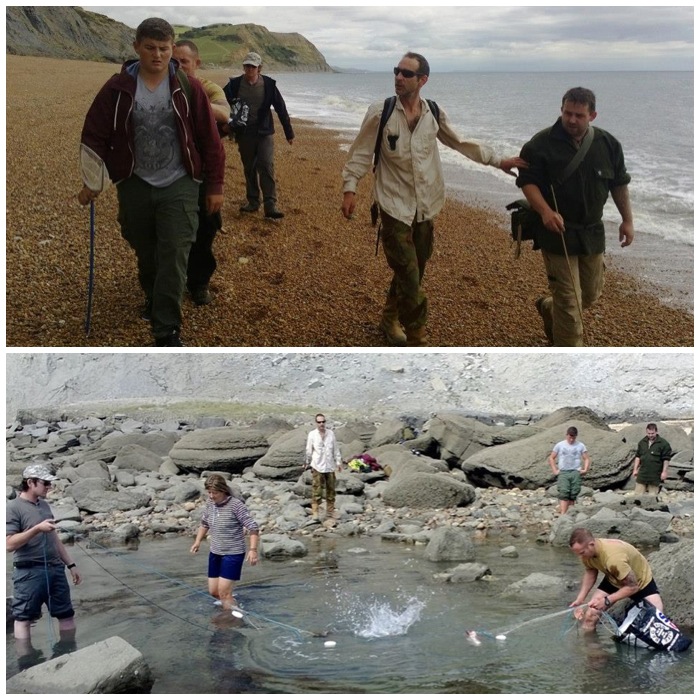
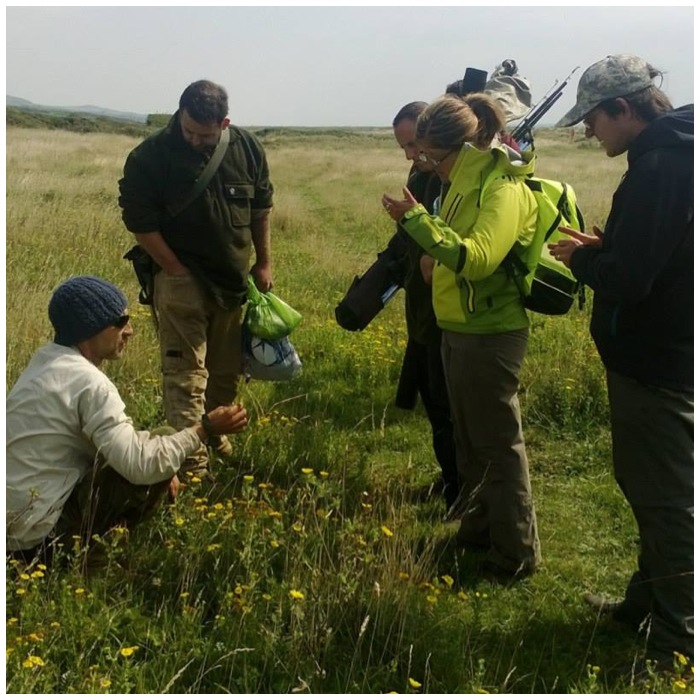
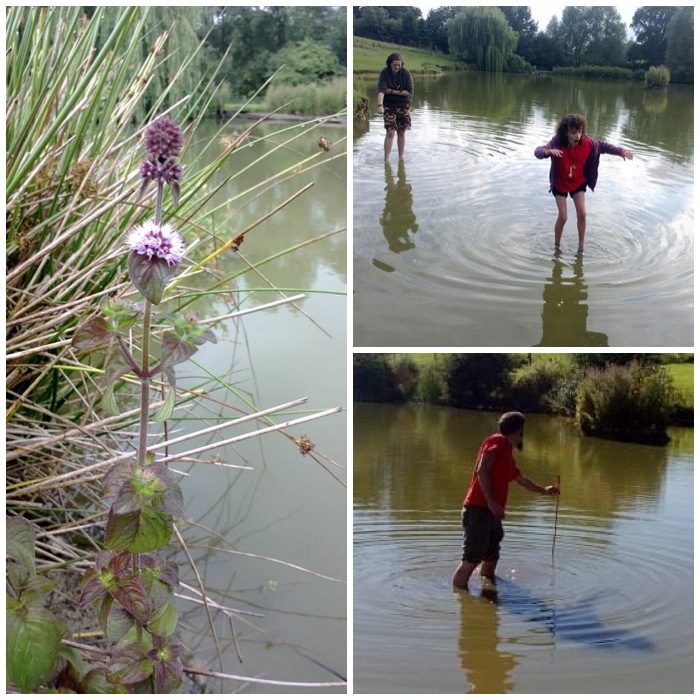
The focus on the Sunday was to improve the communication between the team members when doing tasks. Here the cadets are working together to set up a river crossing activity by manoeuvering a log to act as one of the make-believe river banks.

Photo 29-01-2014 16 25 59
Working together as a team

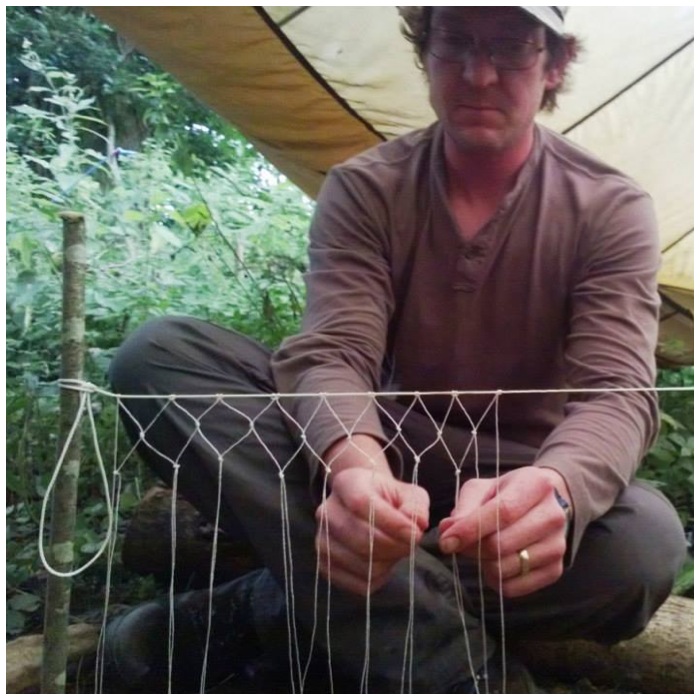
I taught them a new way to create an emergency stretcher from a single piece of rope (not the usual Mountain Leader version).

Photo 29-01-2014 16 25 04
Lift and shift

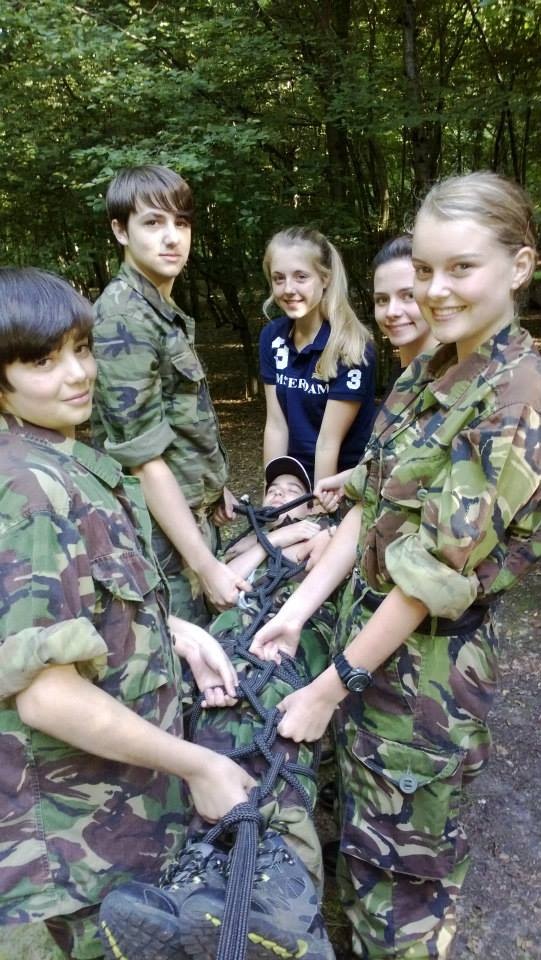
At break time you can guess I was still minus a hammock.

WP_20130831_040
Still hogging the hammock

Dave set up the river-crossing activity and talked the cadets through what he wanted. They set up an excellent crossing and soon all were over the other side.

Photo 29-01-2014 16 32 39
Practising river crossing techniques

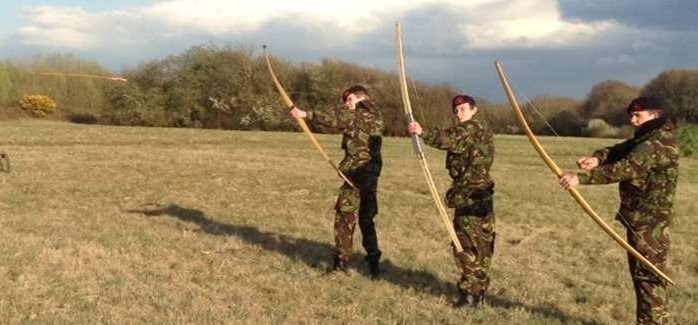
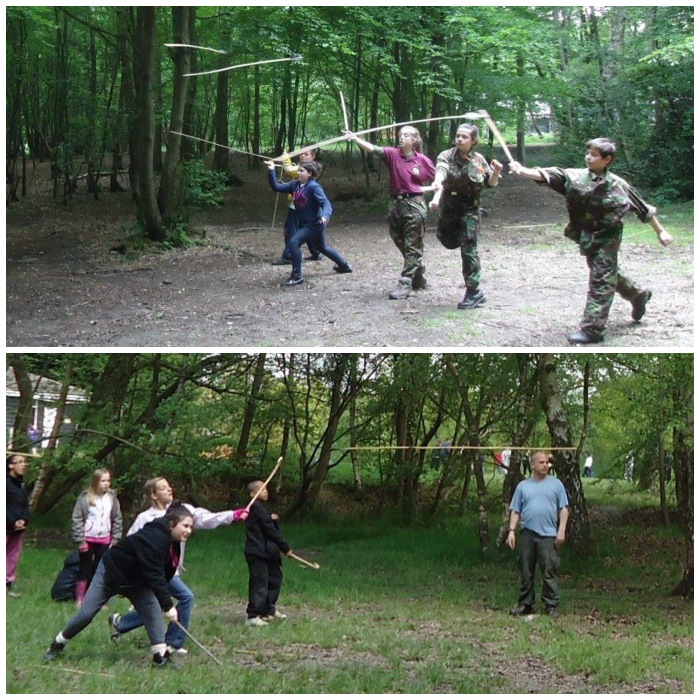
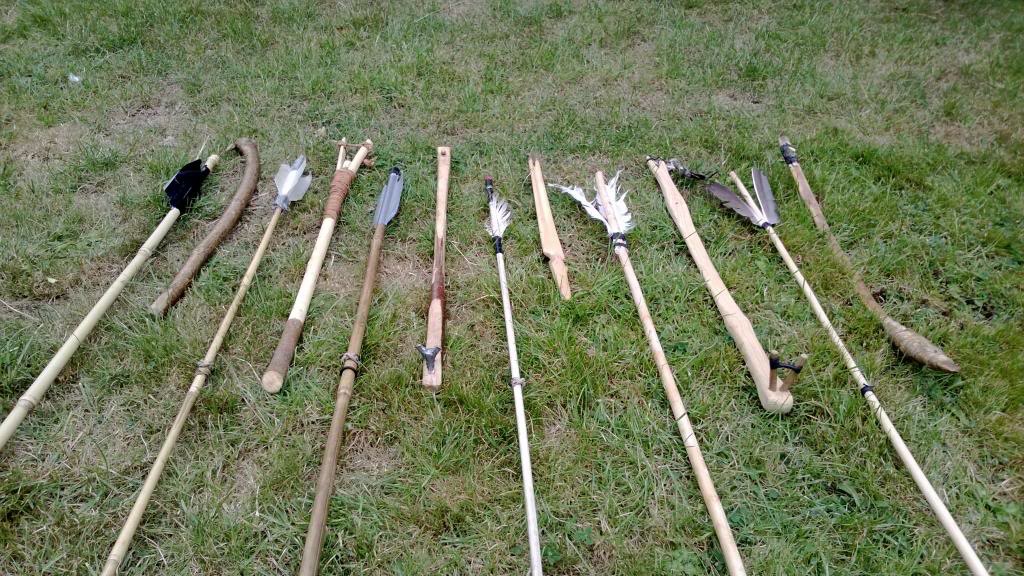
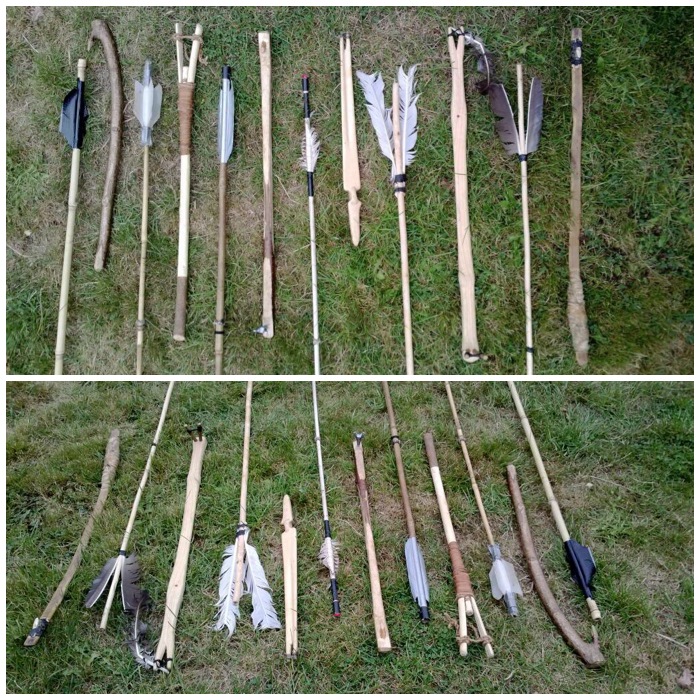
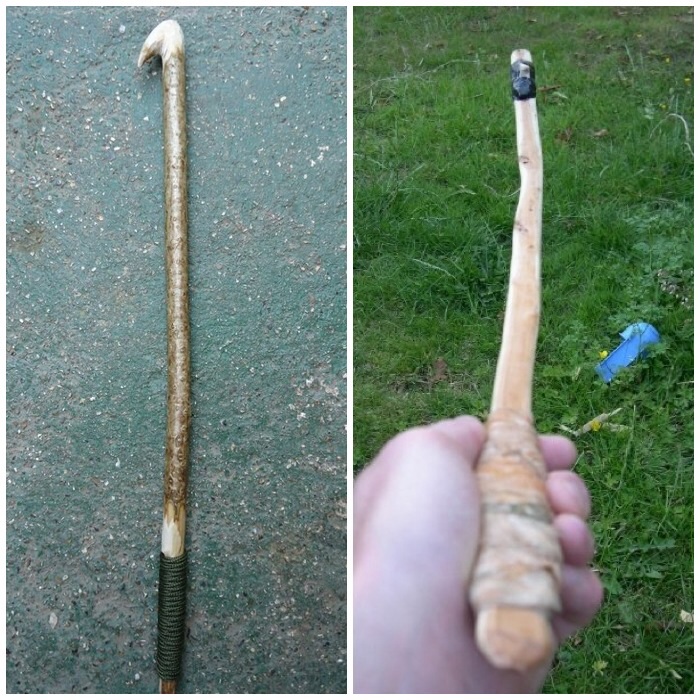
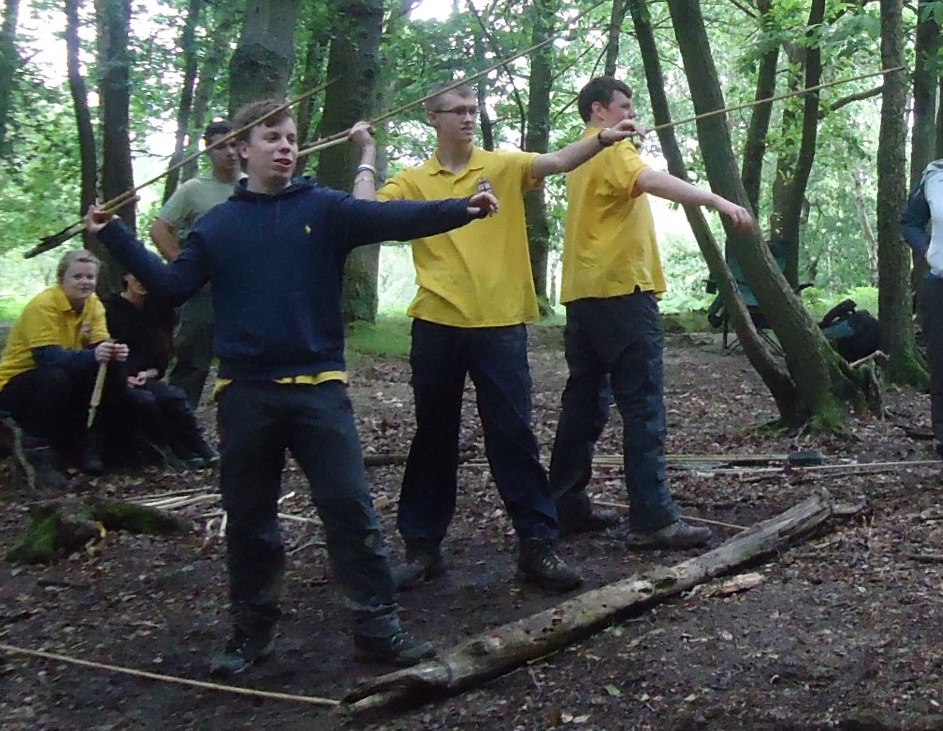
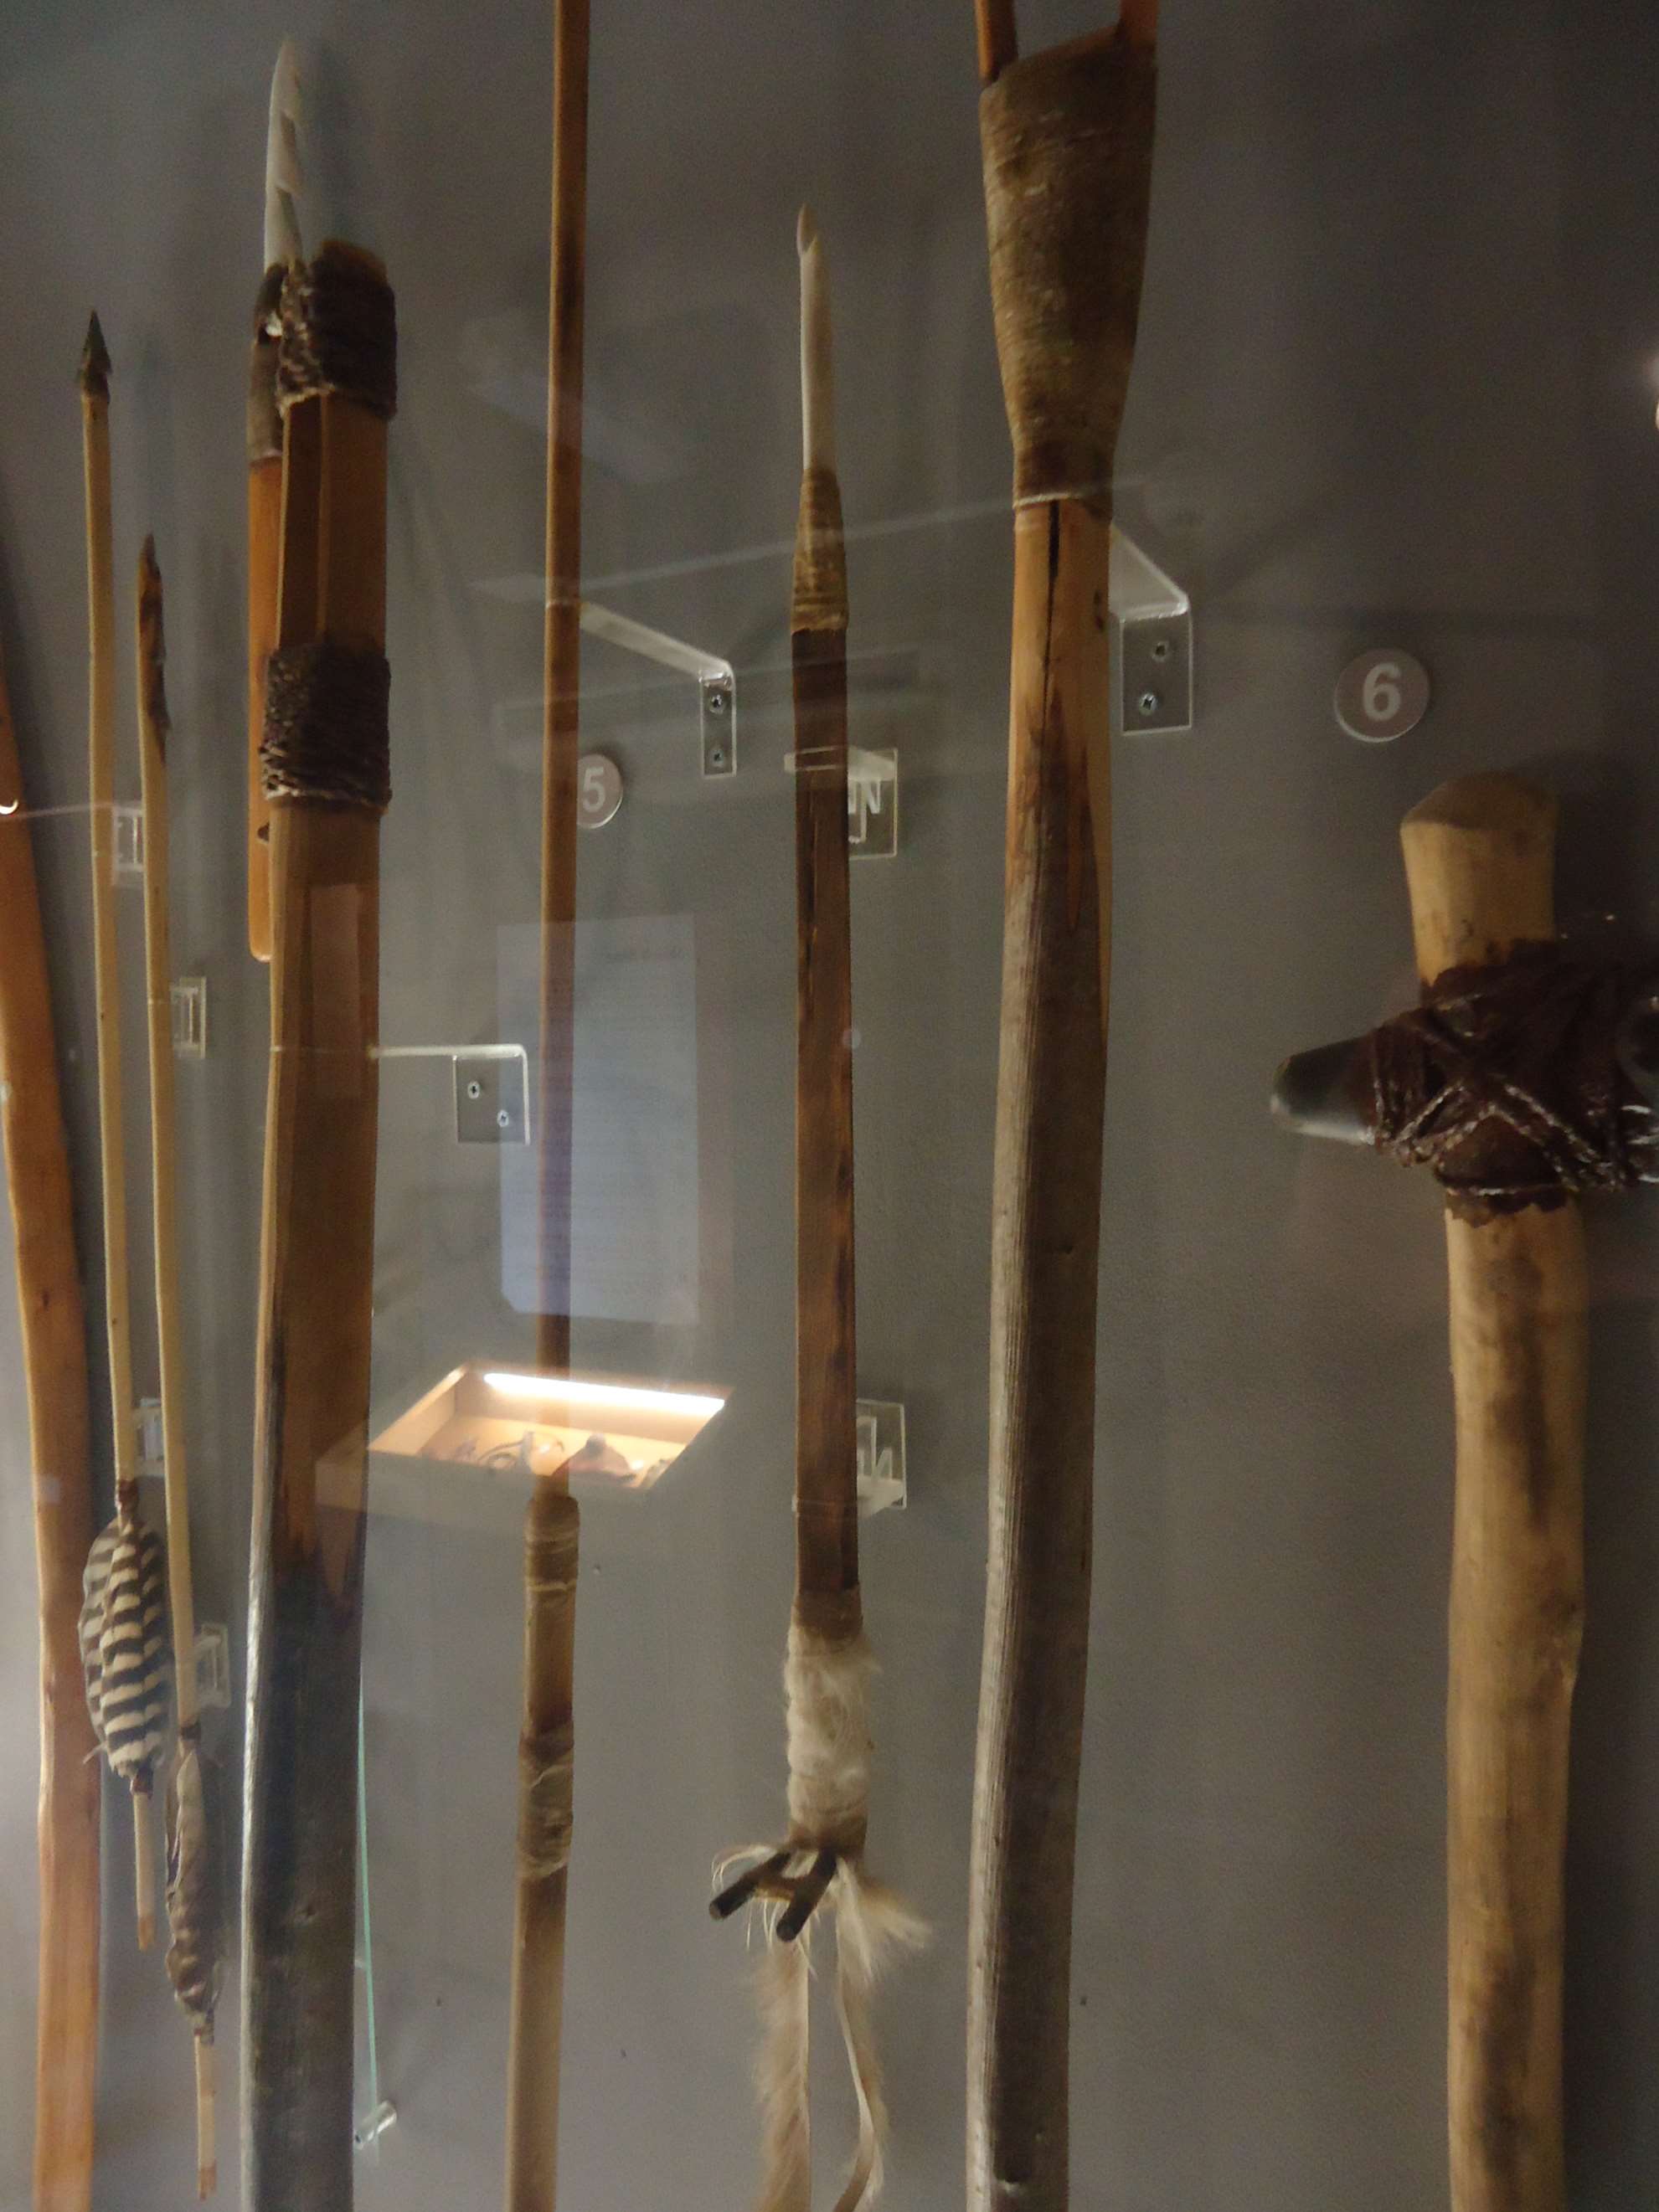
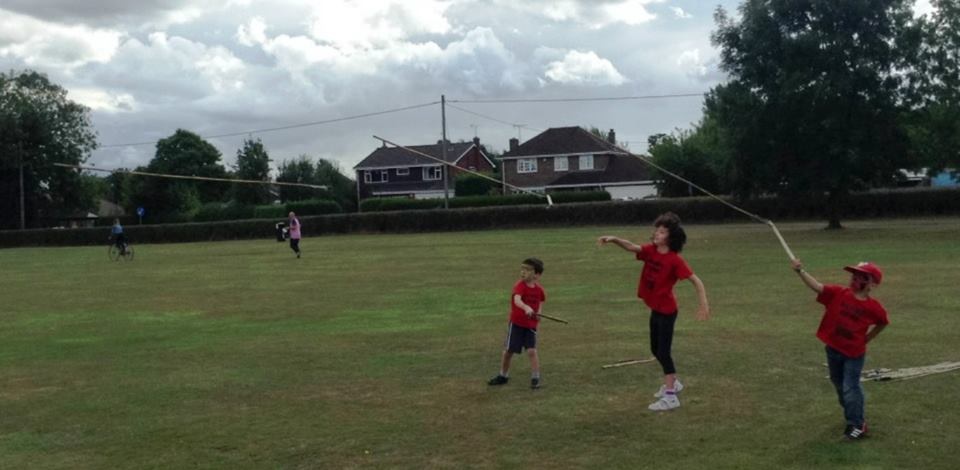
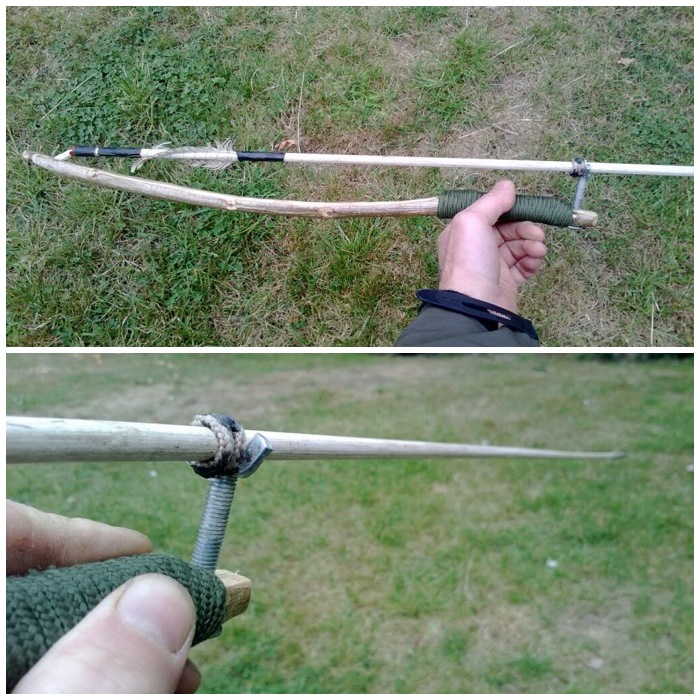
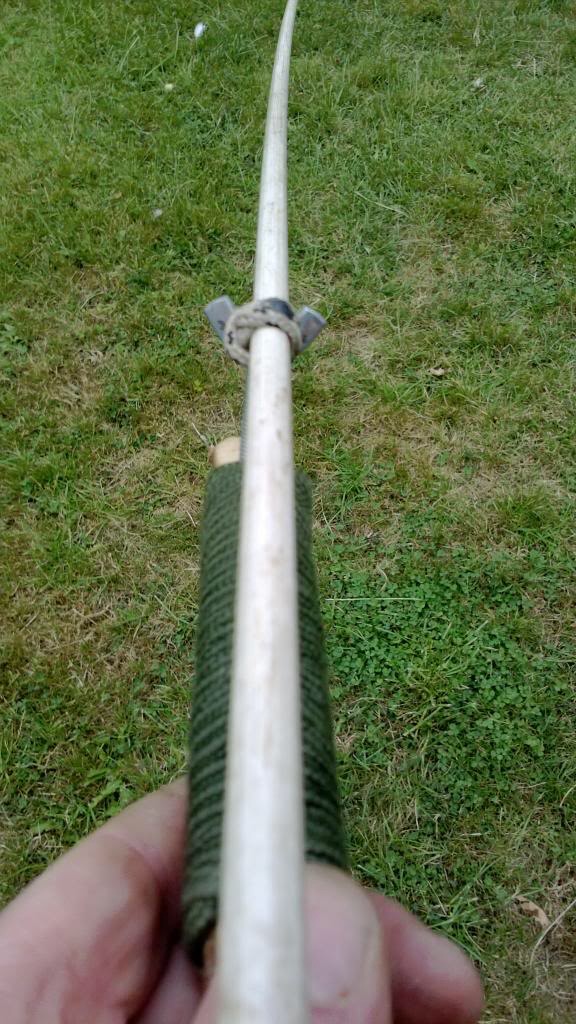
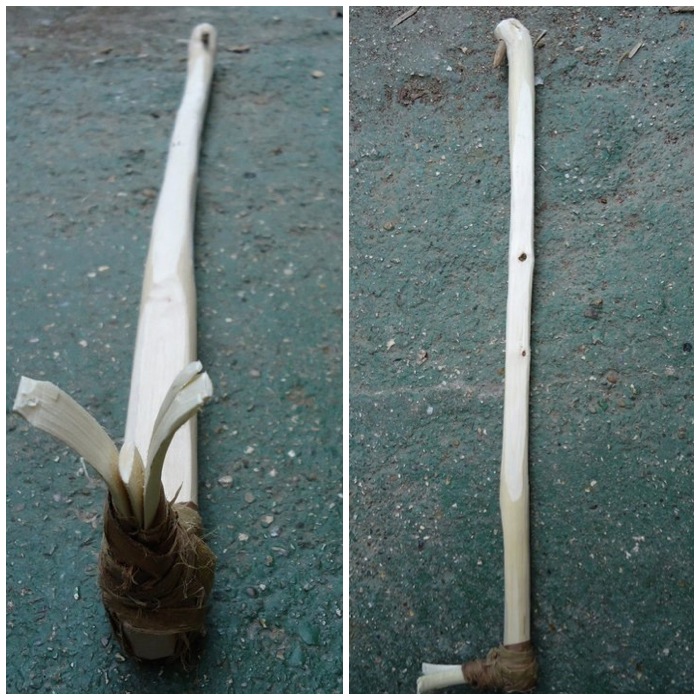
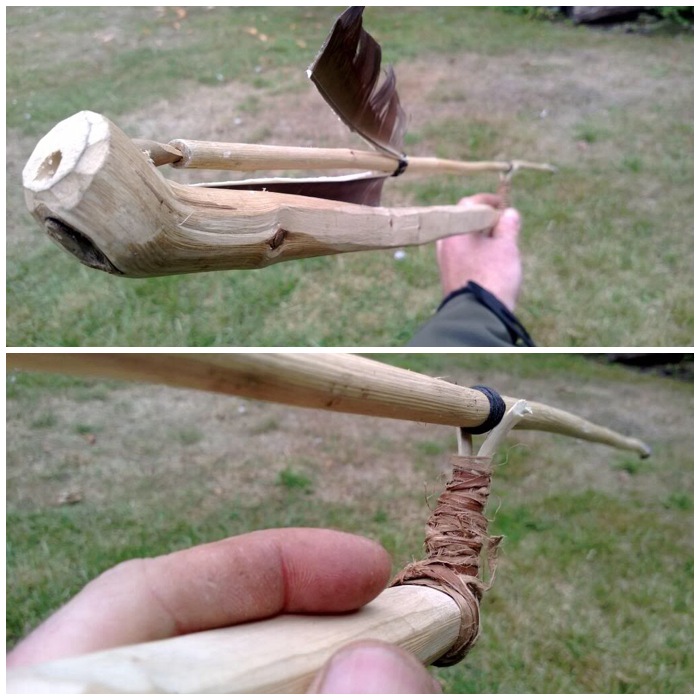
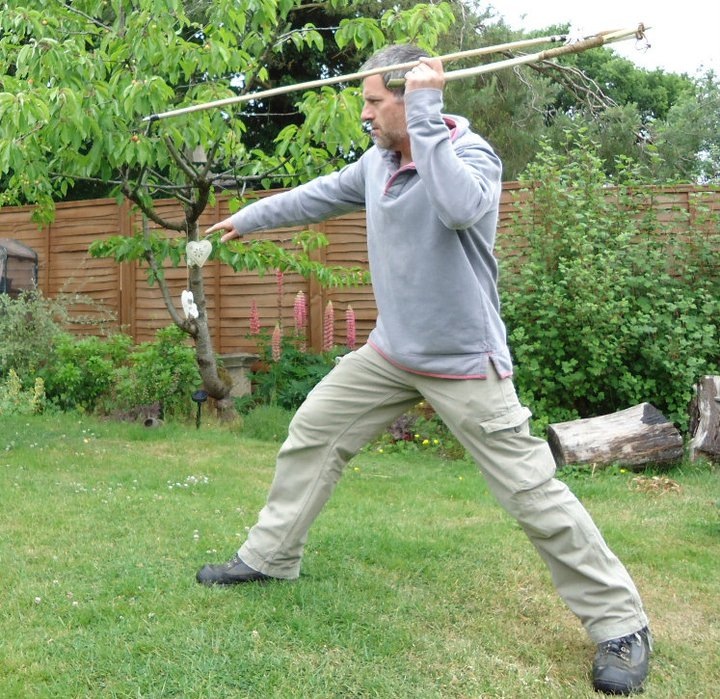
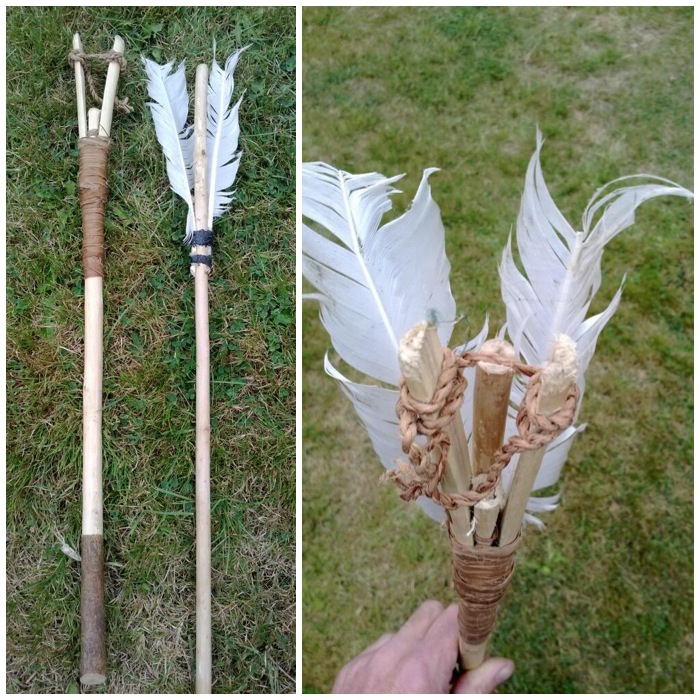
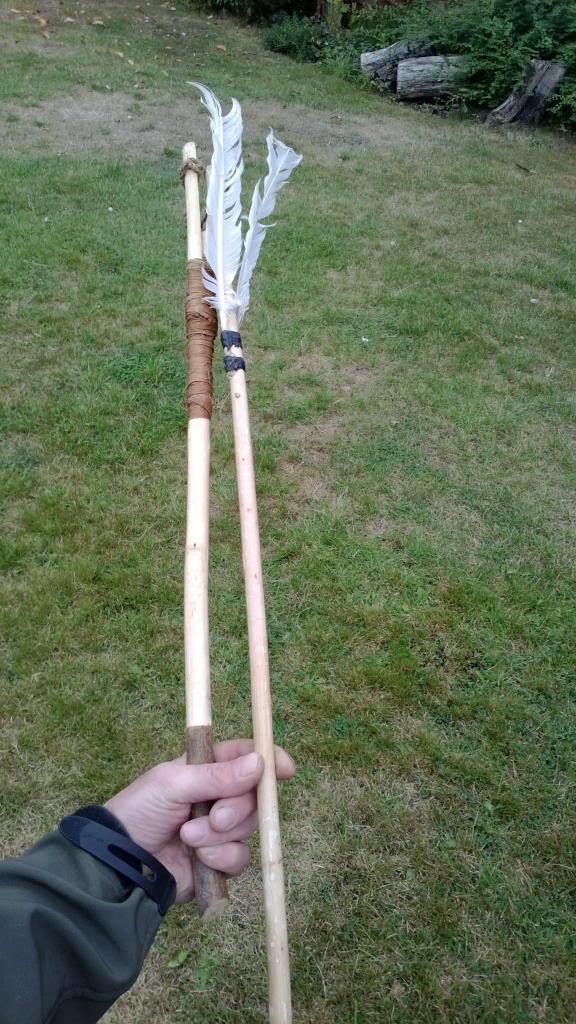
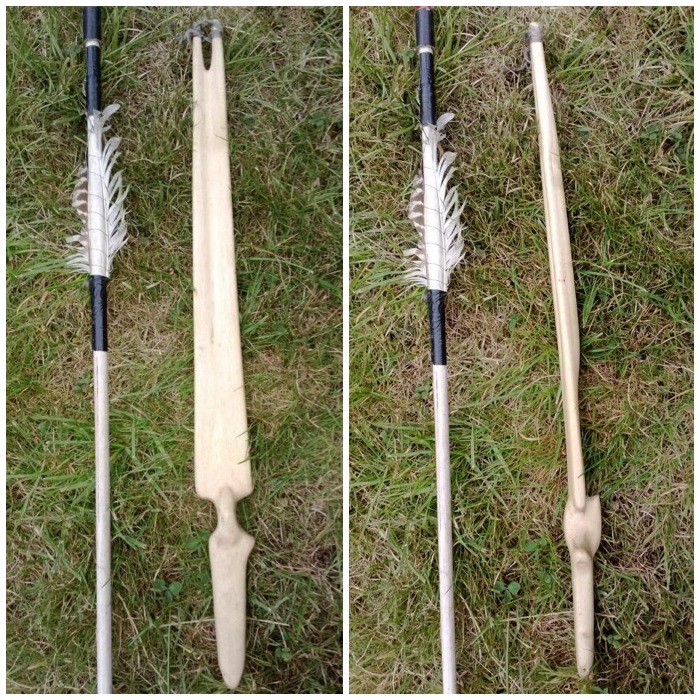
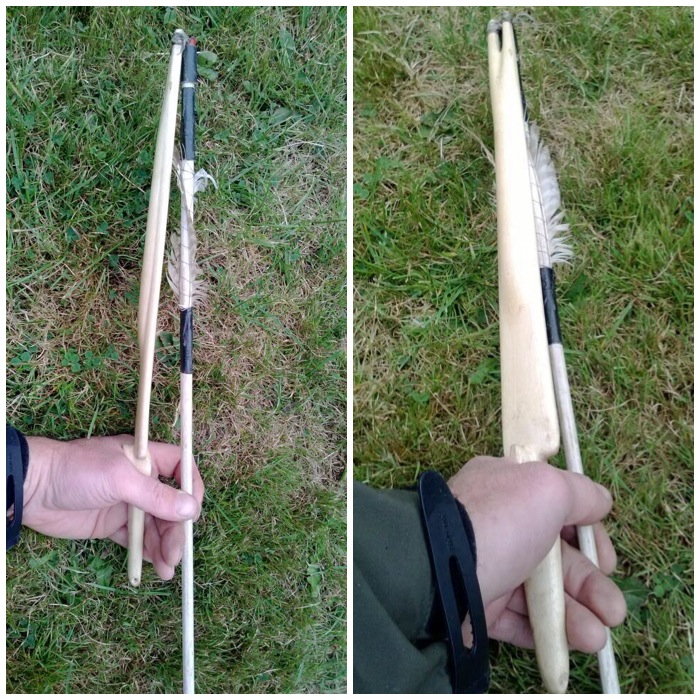
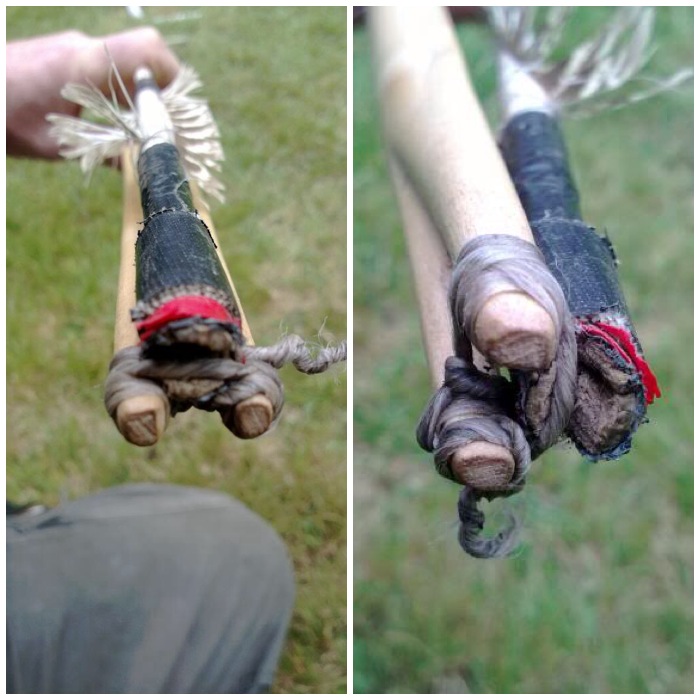
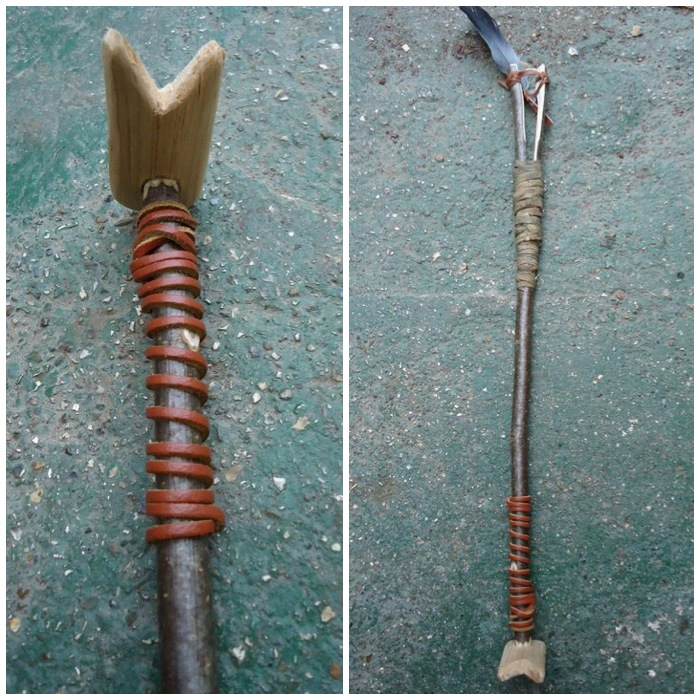
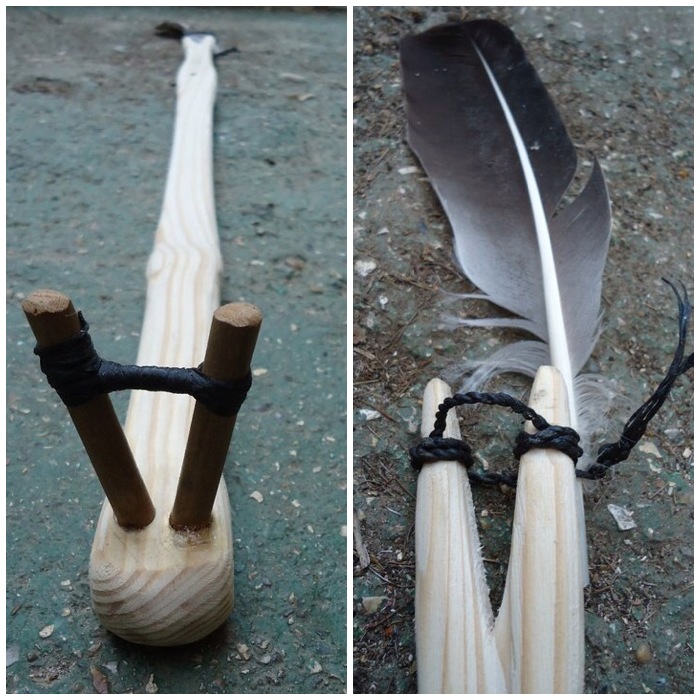
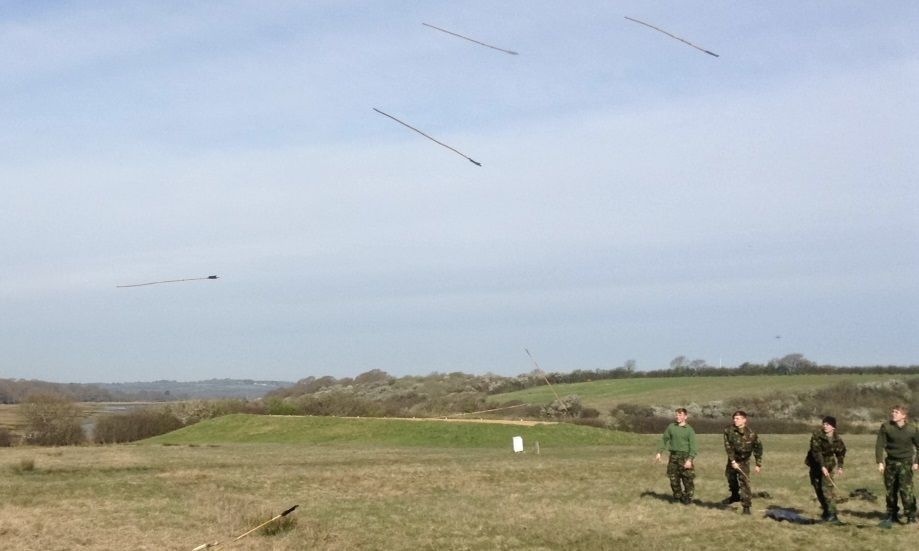
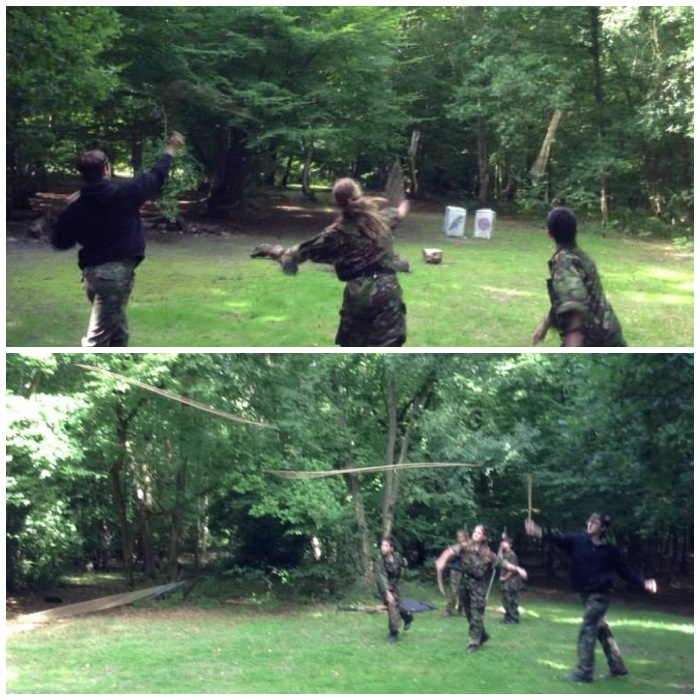
To finish off we got the Atlatls out and had a ping. It is good for the cadets to practise this as it is a standard test at the Chosin Cup now. I took a short video of the cadets using the Atlatl that weekend.

Photo 29-01-2014 16 33 14
Fun with the atlatl

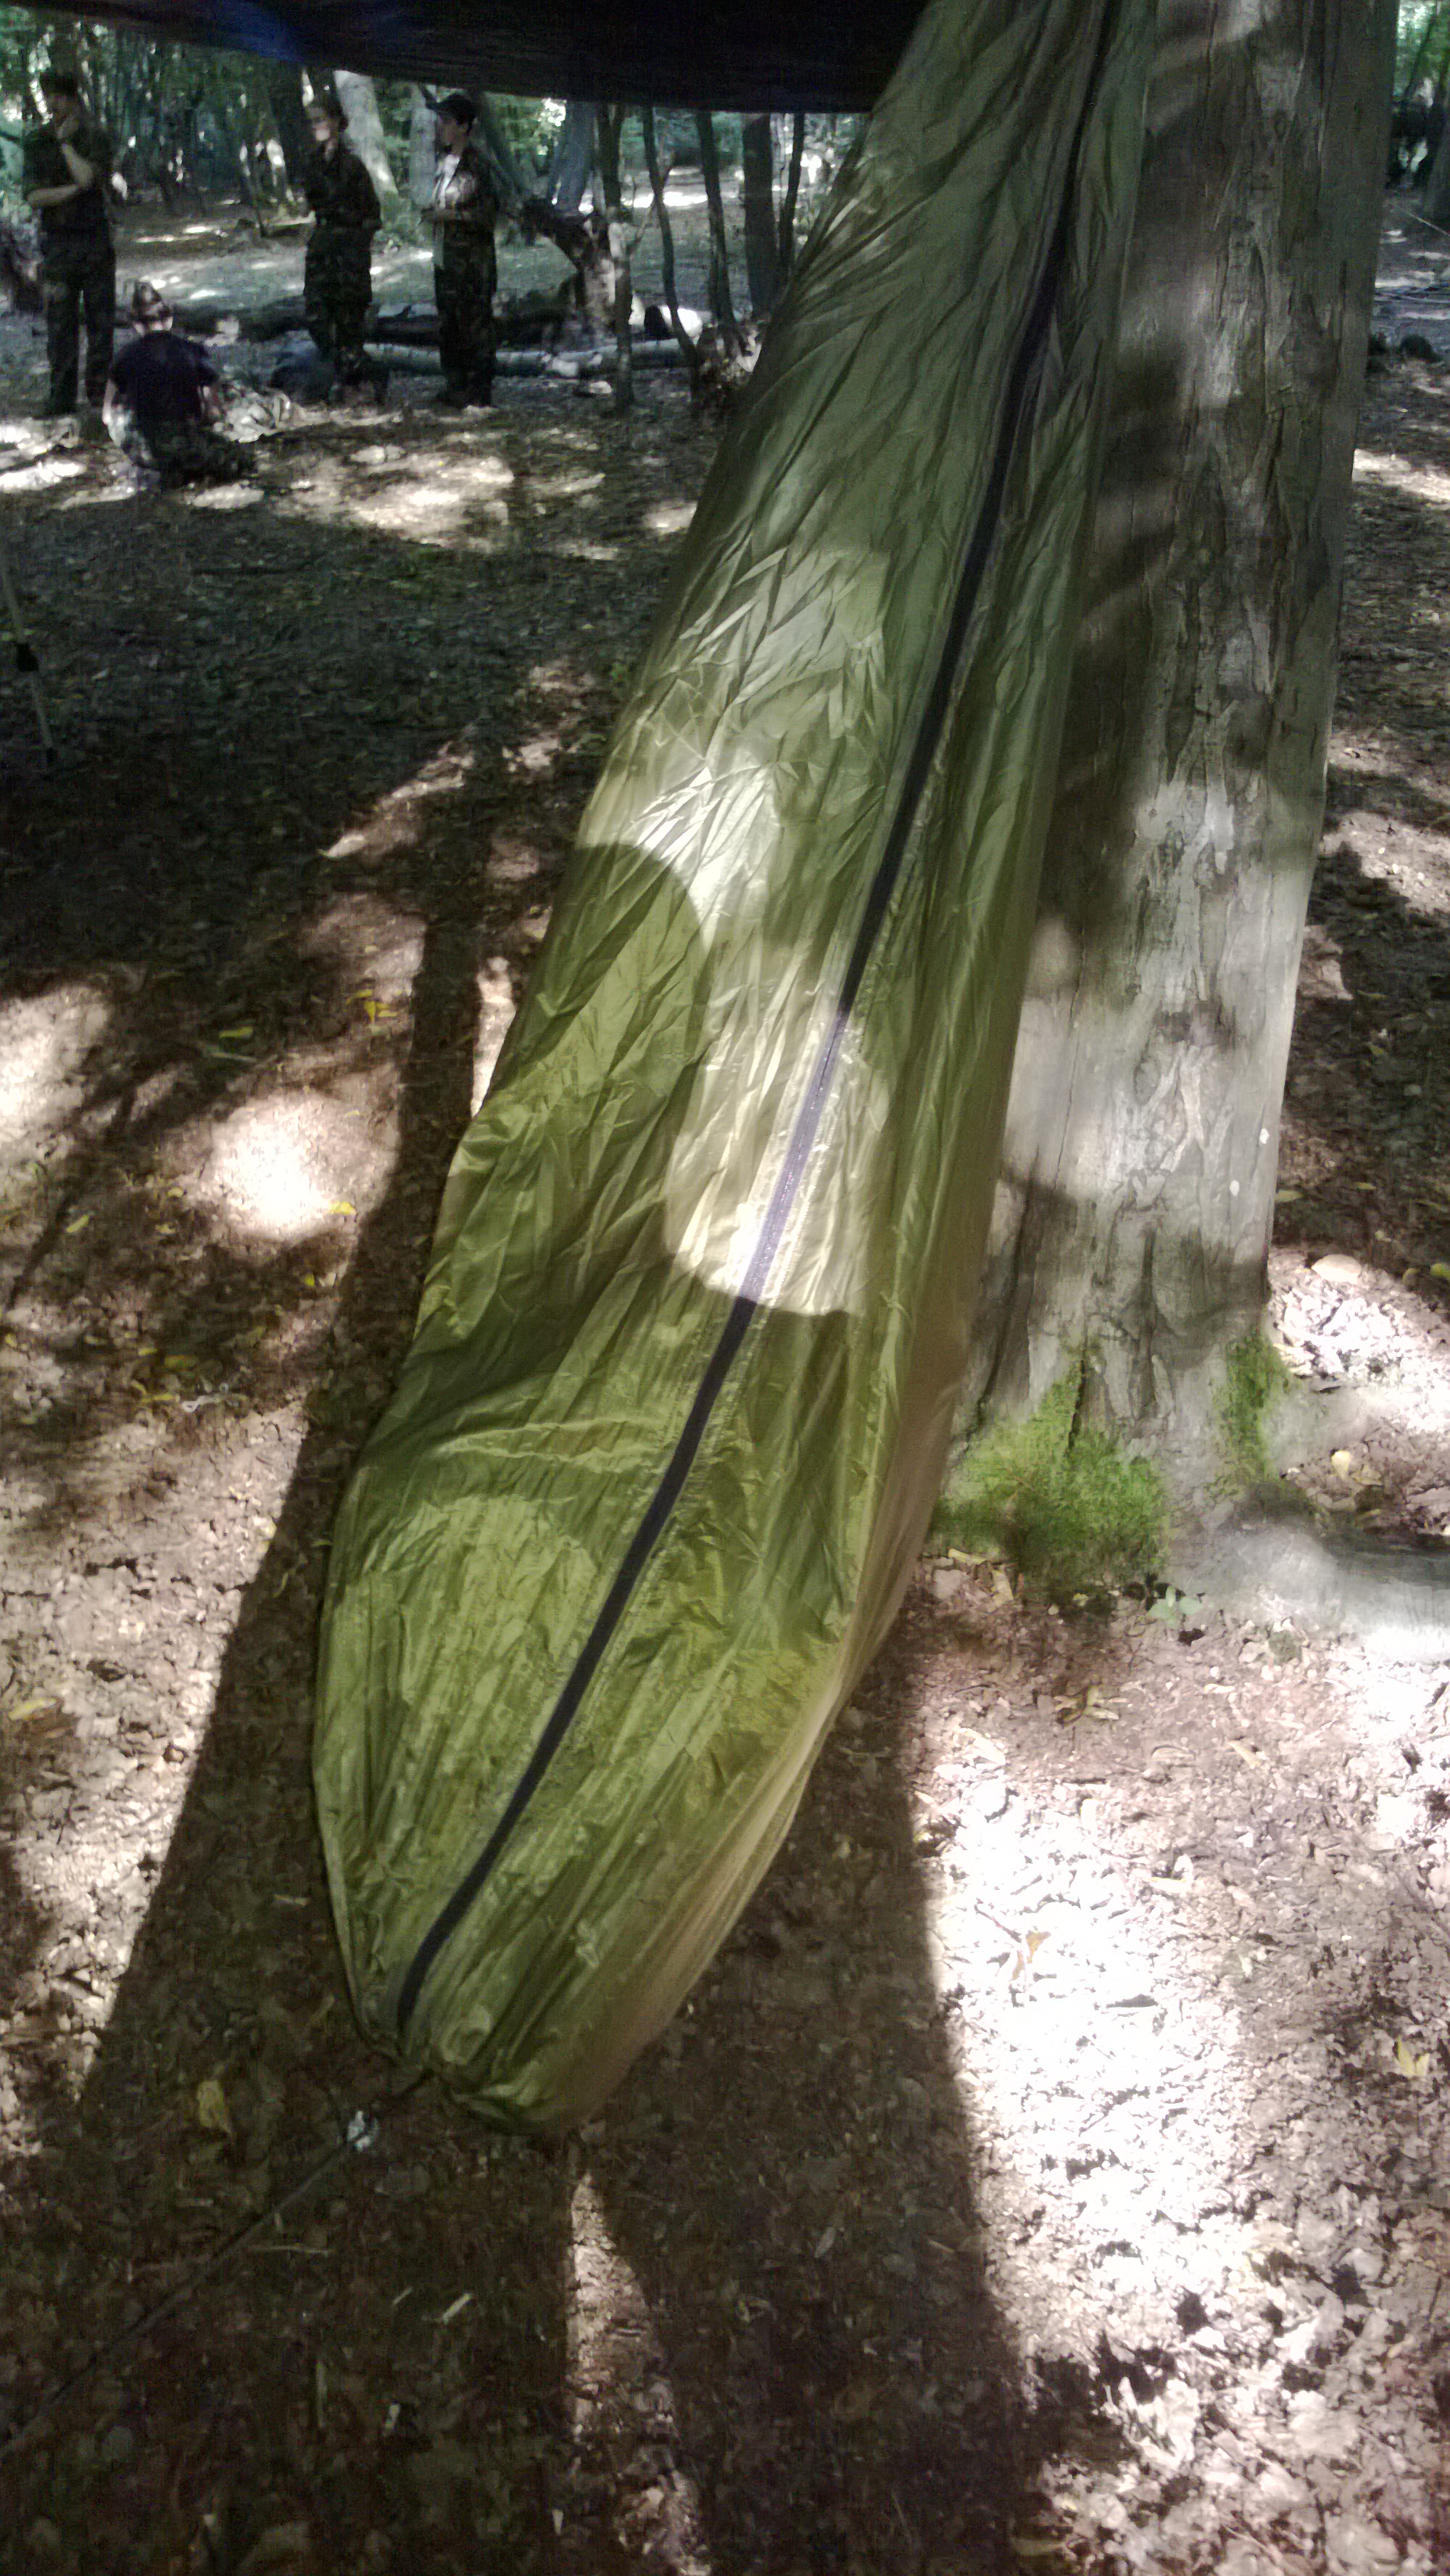
The best thing about the EDC hammock is that it has a zip. Somehow the cadets found this rather fun. I had given up now on ever getting a seat 🙂

WP_20130831_030
Had enough and just zipped them in 🙂

I had a great time over the whole weekend as all the staff and cadets knew what they were doing, they wanted to be there and the weather was perfect. You do not get that too often when teaching outdoor education so it is one weekend I remember fondly – apart from the hammock stealing!!!

Cheers

George

Hammocking and abseiling on Dartmoor

Once a year the London-based Adventure Training instructors of the Sea Cadets like to get together and have a training weekend in a remote location. Apart from having some time catching up with each other we use it as a time to skill up some of the newer instructors in map reading and climbing skills. Many of them are training to be assessed as Walking Group Leaders. Summer Mountain Leaders or the Single Pitch Award (outdoor single pitch climbing).

So this January we decided to head for Dartmoor as we managed to get booked into the army camp at Okehampton.

Photo 28-01-2014 09 38 41
Oakhampton Camp – Our B & B for the weekend – Picture courtesy of Jim Stilgoe

Everyone arrived on the Friday afternoon or evening and we spent our time catching up on things, prepping kit and planning the activities for the weekend. The weather forecast was a real mixed bag with Saturday looking good and Sunday looking atrocious. We decided to do the walking on Saturday and abseiling (and possibly climbing) on the Sunday.
We were up early and had an excellent breakfast before setting out. I had plenty of porridge before a good fry up. There was no one on the counter so I managed to get two sausages and two pieces of bacon 🙂 If you have ever eaten in an army camp you will know how rare that is.
We walked out of the camp and straight onto Dartmoor. It was quite windy but the sun was out so it was a pleasant start to the day. This was the first time I had been out on the hills for over a year and a half so I was looking forward to it.
Jacob took this picture I think on his GoPro camera strapped to his rucksack. That is one bit of kit I would like to get one day. It takes stills and video and you can attach it to just about anything.

Photo 28-01-2014 09 55 28
Start of the nav training – Picture courtesy of Jacob Leverett

We decided to have a look from on high at the viaduct we would be abseiling from on the Sunday but on the way we came across a year-old lamb with its head stuck in a fence. The ground was fairly churned up around it so it looked like it had been there for quite some time. Eventually Dan and Jacob managed to free the poor thing and before anyone asks I was not tempted to turn it into supper 🙂

Photo 28-01-2014 09 55 48
Lamb rescue

As the guys headed off I went off on my own slightly higher up to see what I could see in terms of plants and tracks. Jim took this picture of me sky lined and I think it is the best picture taken of me on the hills ever. Cheers Jim.

Photo 28-01-2014 09 56 03
Wonderful walking – Picture courtesy of Jim Stilgoe

After having a look at Meldon viaduct (with a few gulps) we headed off up to Yes Tor. The streams were very high so we had to follow them for quite a distance to get a safe crossing point. There are few bridges around here and to cross safely you need to be able to do it in one step. Eventually we found a decent spot where everyone could cross safely.
When choosing a spot to cross make sure that you can not only cross over in one step, but that you can also cross back the other way in one step. This is best done where both banks are at the same height.

Photo 28-01-2014 09 49 55
Safe Stream Crossing

I spotted a couple of small trees by the side of the stream and asked the guys if they were OK having a break there. As soon as they agreed, out came my little EDC hammock. Normally I just set this up as a chair but the trees were just that bit too far apart so I went for a conventional set up. I really rate this hammock. It crams down to nothing so I can stow it away in my rucksack but in a matter of a minute it can be set up. I normally set it up with an Evenk knot on one end and a Tarp Taught hitch on the other. You can pick one up from UKhammocks for about £15.
Anyway I was happy to get off the wet ground and have a break. Jennifer took these pictures but when I asked if she wanted a go was not too keen (need to convert you to hammocks this year, Jen).

Photo 28-01-2014 10 25 10
Who says life on Dartmoor is always tough

Moving on up to Yes Tor the ground became increasingly saturated. Even the rabbit holes were flooded.

Photo 28-01-2014 09 56 50
Waterlogged Warrens

I spotted very few flowering plants except some flowers on the gorse bushes (tasted nice) but spotted a few fungi and lichens. The Devils Matchsticks (Cladonia floerkeana) really stood out because of the lack of flowers. Also on the way up I spotted four separate clumps of fox scat and the hairs of the prey were clearly visible. There is a good write-up on the Dartmoor Fox here on the Legendary Dartmoor site.

Photo 28-01-2014 09 50 25
Devil’s Matchstick lichen (Cladonia floerkeana) and possible Fox Scat

Someone in the group spotted a puddle with some bubbles in it. After having a good look I could see that the bubbles were caused by escaping ground gas. When I bent down to take a picture I noticed Perry’s reflection in the water. With the walking poles it turned out surprisingly arty.

Photo 28-01-2014 09 57 05
Puddle gas bubble

The wind was in our faces the whole way up Yes Tor and we met a number of youngsters out doing the Ten Tors. I was happy to be doing just one Tor in that wind. No reports that night of anyone missing so they all must have made it back. Normally the challenge is in May so these guys had picked a tough time of year to do it.

Photo 25-01-2014 10 16 34
Approach to Yes Tor

A quick snap of Jim just after he had tied his shoelaces. It was good to see you back out with us Jim.

Photo 28-01-2014 10 24 25
Our Jim just redoing his laces

Up on the summit the wind was so bad you could hardly stand but Dean insisted on a picture. Next to the summit is a large flagpole on which the army hang a red flag if there is live firing in the area.

Photo 28-01-2014 10 25 46
Dean on top of a rather windy Yes Tor – Picture courtesy of Dean Barnett

After reaching the top I spotted a little alcove in the rock and asked Ben and Matt if they had any climbing kit to help me set the hammock up. They pulled out a full rack of kit and in no time the hammock was up again.

Photo 28-01-2014 10 23 44
Who needs trees when you have climbing buddies with you?

While I was chilling out Dan had gotten his rope out and was practising some abseiling skills as part of his Mountain Leader training under the watchful eye of the boss Perry. The hut in the background is for army personnel to use when the range is in use.

Photo 25-01-2014 11 04 00
Rope skills training

After a while, even sitting in the lee of the Tor, we started to feel the bite of the wind. A quick check of the map and we were off again. I think Jen and John were feeling the cold at this point, I know I was as my fingers were starting to stiffen up.

Photo 28-01-2014 10 24 06 (HDR)
Planning the next leg of the day

The next stage was out onto the open moorland to do micronavigation with compasses. We were looking for a metal marker out on a spur when we came across this lone pole. Up close you could see the gaping exit holes of high calibre bullets. The tiny marks were from lower calibre bullets that had just ricochted off and I think the small pyramid shapes were bullets that had gone through one side but not out the other. Not something you see very often.

Photo 28-01-2014 09 57 55
Impact marks

It was at this point that some of the guys headed off to do some more micronavigation training. I took a wander off down to the artillery range at the base of the valley, which is dotted with little ponds formed out of shell impact craters. The army use this area as the ground is so soft that much of the energy of the shells is absorbed by the peat. I would love to do a survey of this area as there are so many little microclimates dotted around down there.
Next to the impact area is a rock bunker for observers to sit and watch the shells impacting. It was muddy inside but would keep you pretty safe.
I caught up with the others heading back to the camp and had a great chat with Jen and John on the way back. This helped me as my right ankle had really tightened up at this point. A sign of old age, not being on the hills for ages or both (the latter probably).

Photo 28-01-2014 09 51 27
Military presence

All the blokes stayed in this building but as Jennifer was the only lady in the group she got one of the new buildings all to herself.

Sunday morning was all change on the weather front. As well as the wind it was the usual Dartmoor horizontal rain. Some of the group decided to walk around to the viaduct (about 2 miles away) and the rest of us took the minibus with all the kit we needed.

Photo 28-01-2014 09 58 27
Our accommodation on a rainy Sunday morning

After parking up I came across this elder tree covered in jelly fungus (Auricularia auricula-judae). A real tasty treat for foragers.

Photo 28-01-2014 09 58 45
Jelly fungus and lots of it (Auricularia auricula-judae)

Meldon viaduct outside Okehampton is 50 metres high and provides an excellent spot for abseiling. We had permission from the army to do this and were given the keys to access the underside walkways. It would have been far too dangerous to abseil from the centre in the high winds so we picked a spot about a quarter of the way along the span. The height at this point was about 25 metres. Some of the guys wanted to go over the kit that they would be using with Dan so while they did this I cleared the landing spot, set up my hammock again and had a bit of a chill. I needed a ladder for this set up but it was worth it.

Photo 28-01-2014 09 52 09
A wet and Windty Meldon Viaduct – Our abseil spot

The set up of the abseil did not take long and was done by Dan, Ben and Matt. Matt went first and I went second followed by Jim. This is a free abseil set up: no bouncing off a cliff face, you just launch yourself off the side and drop down at whatever speed you want.
Matt filmed his descent on his GoPro camera strapped to his helmet. I have not seen the video yet but will link to it when I can.

Photo 28-01-2014 09 53 57
Set up and Matt is first off

It was my turn next.

1425547_10202042146550088_412078289_n
George is away

Dean had never abseiled before (apart from a quick practice a few minutes earlier on a short section about 10 feet high) so this took guts to do. I remember my first abseil and can clearly remember seeing my legs shaking furiously.

Photo 28-01-2014 09 59 03
Deano ready to take the plunge

I took these pictures from the bottom after I had abseiled. Jim is on the left and Dean is on the right.

Photo 28-01-2014 09 53 27
Jim and Deano descending

After this I took three videos of the the others that abseiled that day.

Ben’s abseil video

Graham’s abseil video

Dan’s abseil video

We very nearly did not do the abseil at all owing to the atrocious weather earlier on but I’m glad we did in the end.
It was a great finish to the weekend. I got the picture of Graham and myself to show the amount of water flowing over the dam as it was an impressive sight.
Lined up below in the group photo in the Back row (left to right) are Dean Barnett, John Kelly, Jennifer Burdett, Jacob Leverett, Jim Stigoe and Ben MacDonald.
Front row George Aitchison, Graham Brockwell, Perry Symes, Matt MacDonald and Dan Keefe.

Photo 28-01-2014 09 53 00
Happy Instructors – Endex

A big thank you to Graham and Perry for organising this weekend, and to all of you for being such great company. To those who could not make it – there is always next time.

Loads more pictures can be seen here in my photobucket account.

Cheers

George

How To…. Build a Bhutanese Bow

Back in August of 2012 at the BCUK Bushmoot I learnt how to make a Bhutanese Bow with Wayne Jones of Forest Knights. As far as I know Wayne is the only instructor in the UK running classes in making this type of bow. I hope he runs another one at this year’s Moot.

Photo 24-01-2014 11 03 28
The Bamboo Bhutanese Bow

This is a quick bow to make when you have an instructor like Wayne to guide you. The bow is made up of two pieces of tapered bamboo joined together in the middle by some sort of cordage or tape around the handle area. I tried to take pictures of all the steps but must admit to missing a few as I got so wrapped up in the whole process. To make up for this I rehandled the bow at home and took some pictures of the missing steps.

I have done a bit of research about this type of bow. It seems that archery is a national sport in Bhutan with many villages in the country running archery competitions. Kids as young as three are taught how to use the bow. Due to the nature of bamboo the outer layer of the bamboo becomes the belly of the bow and the inner part becomes the back: as the outer layer is very hard it will not take the expansion forces exerted as you draw the bow (it will crack), but as it is a grass the inner area (which is fibrous) is more flexible.

Below on the left is a picture of the finished (reworked) bow and on the right Spikey is holding the tube of bamboo we used to make it.

Photo 24-01-2014 11 16 01
The finished article and how we started

Wayne Jones researched the bow for me as well and found this in the Bowyers Bible: ‘Unless the bamboo wall is unusually thick it’s best to overlap two billets at the grip secured by a couple of rivets made of nails or dowels, the grip is then wrapped with rawhide, sinew or even tape. Overlapping stiffens the midbow and increases poundage per bow length. Such bows can be made in minutes. Even though “quickie” bows, they are excellent in every regard.

This design is a good choice for kids’ bows: quick and easy to make, and fairly indestructible.’

Wayne brought a supply of large bamboo to the Moot for us to use. With this type of bow you need to use very large bamboo so that when you split it into quarters you get fairly flat limbs. I do not know the type of bamboo that was used or where Wayne sourced it but I am sure if you were to ask him he would help you.

In the first picture below Wayne is showing us two limbs made from one piece of bamboo he had carved earlier. As bamboo gets thinner as it grows higher you need to make both limbs from the same piece of the column to ensure both limbs are of the same width and thickness.

I cut out a section of tube that was 103 cms long to begin with so that when the two limbs were joined together the bow would be my height. NB I am not 2m 6cms tall, but as the limbs overlap at the handle these measurements produced a bow of my height. You will need to experiment for yourself.

Photo 20-01-2014 16 40 51
Finished limbs and start of the bow

I used an axe to batton out the bamboo into quarters and selected the best two pieces to work with. I made sure when I was battoning that I kept the blade of the axe at 90 degrees to my body. This would ensure that if the axe slipped out of the split it would swing away from me.

Photo 20-01-2014 16 39 33
Battoning out the limbs

Here you can see many of the battoned-out pieces of bamboo ready to be shaped into limbs. You can clearly see the node plates on the inside of each limb, which keep the structure rigid. These need to be knocked off and eventually filed flat.

Photo 20-01-2014 15 12 54

In this picture you can see Mark using the back of his axe to knock off each piece of the node plates.

Photo 20-01-2014 16 31 23
Breaking the node plates

To make full use of each limb it is best to use string to mark out its shape. Allow an extra half centimetre or so so you can finely trim the limb after you have axed the shape out. I made the handle area (thicker end) about 5 cms wide and the tip of the limb (thinner end) about 3 cms wide. Once you have blanked out the first limb you can use this one to mark out the second limb so it is the same shape.

Photo 20-01-2014 16 31 32
Using string to draw the limb shape

Keeping the limb to one side of my body, I experimented first with using an axe to cut the excess off but soon swapped it for a large chopping knife loaned to me by my friend Sargey (Andy Sergeant). This was so sharp with such a good weight behind it that I soon had the first limb blanked out. I then used a smaller knife to trim the limb down to the line I had marked with the string. I used this finished limb to mark out my second limb and repeated the whole process until I had two roughed-out limbs.

Photo 20-01-2014 16 41 39
Shaping the limbs

I used various tools such as my Japanese rasp, a cabinet scraper, a small knife and wood files to smooth out what was left of the node plates and to curve all the edges of the limbs. If you do not smooth off all the edges, you don’t just risk a splinter, there’s a good chance your finished bow will develop a split when you draw it.

Photo 20-01-2014 16 32 35
Smoothing the plates

Take your time smoothing the plates and edges down.

Photo 24-01-2014 10 07 40
Smoothed plates and sides

The outer layer of the bamboo is left untouched and this will become the belly of the bow. The smoothed inner side will become its back.

Photo 24-01-2014 11 08 17
The belly (left) is left untouched – The back (right) is smoothed

I used a rounded file to produce the nocks to hold the bow string. Make sure you get them the right way round.

Photo 23-01-2014 15 48 07
Nocks produced with a round file

Make sure the edges of the nocks are sanded down so there are no sharp edges. A sharp edge will potentially cut your bow string and could cause a split to occur.

Photo 24-01-2014 10 09 02
Lined up neatly and the edges rounded off

When I first built this bow I left the handle area as you see it in the picture below. After shooting the bow I found the handle area just too wide for a comfortable grip.

Photo 23-01-2014 16 37 27
Ready to work the handle area

I marked out one handle so I would lose 1 cm on each side, making the actual handle 3 cms wide. Then with a sharp knife I carved out the excess.

Photo 24-01-2014 10 11 27
Mark your handle area on one limb, trim off the excess and then use the first limb to mark out the second limb

I then used the first carved handle to mark out the second handle and carved that one as well.

Photo 24-01-2014 10 11 48
Trim off the excess from the second limb and you are ready to join them together

To take this picture I got my son Finlay to hold the tape taut and my wife Alison rolled the bow to tape the limbs together.

Photo 23-01-2014 18 00 54
I used help to bind the handle. Keep the tape taut and roll the limbs

This method ensures the limbs stay in the correct position and the tape is put on as firmly as possible. Once I had the limbs secured I taped up the middle of the handle by myself.

Photo 24-01-2014 10 13 57
Secure both ends

I find that the tape does not offer a good grip so I put on a leather handle using a common whipping technique.

Photo 24-01-2014 10 14 49
Finish taping the handle and add any leather for a comfortable handle

Tillering is the process of testing the bow to see if it forms a balanced curve on each limb. Initially we had just a piece of paracord attached to the bow to do this. The tillering stick in the picture allows you to see if the limbs are balanced. If they are not balanced you need to remove a small amount of the inner side of the bamboo using a light rasp or cabinet scraper wherever the limb looks stiffest. This is one part of the process that is very hard to show without taking a whole string of pictures and probably where going on a course and getting one-to-one tuition on it pays dividends. Dick Baugh wrote a good article on tillering on the Primitive Ways website that is worth a read.

Photo 20-01-2014 16 42 58
Tillering

Wayne supplied some Dacron for our bow strings. I twisted one end as you would do to make cordage and used that to make a timber hitch for one end of the bow.

Photo 24-01-2014 10 09 40
Timber hitch

For the other end I created a loop using the Flemish twist method. Sam Harper in his blog Poor Folk Bows has an excellent article including a video on making the Flemish twist and the timber hitch.

Photo 24-01-2014 10 10 26
Flemish twist

The finished bow. This was taken after I had reshaped the handle. I plan to wrap the exposed tape in strips of rawhide to cover them up.

Photo 24-01-2014 08 23 08
Ready to shoot

I like this bow much better now that I have rehandled it as it is far more comfortable to hold. I think some more of the cadets will also want to use it now because of the reduced handle size.

Photo 24-01-2014 11 03 28
Shoots well

A nice shot of the bow in action with an arrow in flight.

Photo 20-01-2014 15 34 03
In action with the cadets – Spot the arrow.

If I could ever source some of this bamboo I would definitely make one or two more. In comparison to my Ash Flatbow and Holmegaard this bow shoots just as well but took only a fraction of the time to make.

If you have further information or links on this type of bow I would love to hear from you.

Cheers

George

Atlatls – What they are and why I love them

I’ve mentioned the Atlatl several times in previous blogs, so I thought it was high time I wrote a post devoted to this, one of my very favourite bushcraft activities. I’m going to introduce you to the three different types of Atlatl I use when teaching this art, together with some historical references to them I’ve found in the course of my research. For one of my types of  Atlatl there is no historical record, and the exact makeup of other types are sometimes just a best guess, so please feel free to leave comments if you know more, as it is all a big learning curve for me. There are many different types of Atlatl but here I will concentrate on the three I regularly use.

What is an Atlatl?

An Atlatl is a spear-chucking device traditionally used for hunting or combat purposes It was developed in pre-history by many different societies. Some societies still use the Atlatl to this day, others used it alongside the bow while other societies stopped using the Atlatl after they developed bows. An excellent modern day comparison to help you understand how an Atlatl works is to watch a dog walker using a plastic tennis ball thrower. The ball travels much further than normal as the plastic ball thrower extends the thrower’s arm length and as the arm sweeps forward the plastic thrower is bent back, storing energy. This energy is released as the thrower does a final flick of the wrist. The dog is happy as it gets a longer run and the thrower is happy as he gets longer between throws :-).

The name Atlatl comes from the Aztec society but in Australia it is known as the Woomera. An excellent overview of the Atlatl can be found in Wikipedia.

Photo 22-01-2014 18 16 57
Atlatls in action with the Sea Cadets

I like Atlatls as they are relatively simple to make, cost me next to nothing to make, students can make them and learn to use them easily and will provide hours of fun for kids from the age of about three years up (I still classify myself as a big kid).

When teaching this skill I always set up a proper range so that the darts can be thrown safely. I normally work on a range of about ten to twenty metres but a good Atlatl can reach up to a hundred metres in a competent thrower’s hands.

I made a short video last year showing the Atlatls in action with some of my Sea cadets – Video of Atlatls in Action.

Here is a selection of some of my Atlatls. I will be posting in the near future a couple of How To…. guides on making some of these Atlatls.

Photo 22-01-2014 17 29 50
Some of my different Atlatls – Front View

I have simple Atlatls that just have a point at the rear to attach the dart to, Split Stick Atlatls with cordage instead of a point, and other Atlatls that have a front ‘Y’ rest for the dart.

Photo 22-01-2014 18 18 56
Some of my different Atlatls – Top and Back views

Simple Atlatls

The simple type of Atlatl shown below on the left just has a point at the rear to hold the dart in place before releasing it. You will see how this works later in the post. This is the easiest type of Atlatl to make. I generally use the base of a piece of hazel coppice (lots of other woods will work as well) for this where there is a fork in the wood near the ground. All I have to do is after cutting the shoot is to shape the smaller fork into a point with a knife and whip a para cord handle onto the main. The Primitive Ways website gives an excellent description of constructing a simple Atlatl.
The Atlatl on the right is also a simple one but made in a primitive manner, without modern tools. I used a thin yew branch, attached a rawhide handle and attached a carved antler point to the back.

Two simple Atlatls. One with modern cordage and one purely primitive

Once you have mastered the finger pinch grip these simple Atlatls are very easy to use and great fun can be had at very little cost. The Atlatl gives greater power to your throw by extending your arm length, enabling you to throw the dart faster and further.

DSC07963
Simple Atlatls being held in the finger pinch grip

Atlatls with Front Rests

I was on holiday in the Cheddar Gorge area of the UK a few years ago and spotted in the Museum of Prehistory some reproduction Atlatls on display. They had been reproduced as closely as possible to Atlatl finds in the local caves. One of them had a forked rest and I found that intriguing, as up to that point I had not found any reference to this type of Atlatl.

DSC01037
Cheddar Gorge Museum of Prehistory Atlatl (centre) with Rest

I soon found out that this style of Atlatl with a front rest is great for kids. As the dart is supported by the rest no finger pinch grip is required, making it easy for kids as young as three to use this type of Atlatl.

Photo 22-01-2014 18 25 00
Younger children prefer an Atlatl with a Rest to begin with

In my research into this type of Atlatl I also came across a post by Mike Richardson In Primitive Ways explaining how if the thrower has to wear gloves (for example in arctic environments), the normal finger pinch method of holding the dart is not an option so a rest is attached to the front of the Atlatl. This along with some cordage wrapped around the dart allows the gloved thrower to have the dart locked in place but still easily released with a flick of the wrist. I have used this method numerous times and the cordage wrap/lock has no detrimental effect on the release of the dart.

I made some Atlatls up with metal bolts as rests as I found the original wooden rests I had made were easily broken by my cadets so I had to design a ‘Squaddie-proof’ alternative. Not pretty but very effective and robust.

Photo 22-01-2014 18 04 13
The Squaddie-proof Atlatl with metal rest

In the picture above and the one below you can see that the cordage wrap on the dart is locked up against the fork of the rest, ensuring the dart does not fall off before release. After a short piece of tuition most kids (except the very young) are able to set this up for themselves.

Photo 22-01-2014 17 33 15
Locking mechanism in place

In the picture below you can see a wooden rest I made by wrapping a piece of shaved wood around the shaft of the Atlatl and tying it in place with some natural cordage. I inserted a further wedge piece in the rest to tighten the cordage wrap. This proved an interesting experiment but was too fragile for most of the cadets to use.

Photo 22-01-2014 18 06 03
An experimental rest made of a strip of shaved wood and bark cordage

Again in the picture below you can see that, as with the Atlatl with the bolt, the dart is well locked in place requiring only a flick of the wrist to release it. I have not come across any historical evidence for the cordage wrap on the dart as a holding mechanism. It may not be authentic, but I like it as it opens up the world of Atlatl to the very young who find holding the dart and Atlatl in one hand difficult.

Photo 22-01-2014 18 14 18
Dart locked in place – No finger hold required

The Split Stick Atlatl

The Split Stick Atlatl I found documented on the Primitive Ways website as well. No point is carved at the end but a piece of cordage is used instead to hold the dart in place. There is very little archaeological evidence for this type of Atlatl and much debate if it was ever used but I like it and with a little practice it is just as accurate as an Atlatl with a point. A good online discussion on this can be found in the PaleoPlanet forum.

Photo 22-01-2014 18 27 06
The Split Stick Atlatl

I call this one the ‘One Stick Split Stick Atlatl’: I made the whole thing using primitive tools and out of just one piece of willow just to prove to myself that an Atlatl could have been made just using one straightish piece of stick. I will be posting a How To…. guide on making this Atlatl.

Photo 22-01-2014 18 05 23
The ‘One Stick Split Stick Atlatl’

A sideways view of the Atlatl showing the finger pinch grip.

Photo 22-01-2014 17 34 55
Finger  Pinch Grip without a Rest

One of my favourite Atlatls is the Lovelock Cave Atlatl which I reproduced as closely to the original as possible. This Atlatl was found in a cave over a century ago but the original was lost; thankfully, though, not before someone had made a detailed drawing of it. A copy of the drawing can be seen in the post by Mike Richardson on the Split Stick Atlatl. It has a fork at the rear and the drawing shows a small groove around each fork. I have read that this was where a small piece of carved wood or bone was attached as a point to hold the Atlatl. I decided though to see if the Atlatl would work with just some cordage wrapped around it. Again there is no historical evidence that this was done but it does work well. A good comparison of both attachments to the Lovelock Cave Atlatl can be read in the PaleoPlanet forum here.

Photo 22-01-2014 18 09 25
The Lovelock Cave Atlatl

Sideways pictures showing the finger pinch method.

Photo 22-01-2014 18 02 16
The Lovelock Cave Atlatl and Alternative  Finger Grip

A couple of pictures showing the dart attached to the cord wrapped around the fork.

Photo 22-01-2014 18 03 01
The Lovelock Cave Atlatl – Dart Cordage Connection

A little experiment with a split stick and a rest. The rest did eventually split as the pine wood was quite weak with the hole drilled into it.

Photo 22-01-2014 18 12 57
Split Stick with Rest

The rest here is based on the Cheddar Gorge replica I saw but instead of a point at the end I made it into a fork with cordage. This works perfectly well with a bit of practice.

Photo 22-01-2014 18 03 29
My take on one of the Cheddar Gorge Atlatl reproductions

I really love making Atlatls and everyone I work with loves to have a go with them. I need to spend some more time on making different types of darts next to go with my shed full of Atlatls.

Photo 22-01-2014 17 58 46
An Atlatl Broadside from the Royal Marine Cadets

Cheers

George

Coastal Hunter Gatherer Course – Aug 2013

I was due to run a DofE course for the Sea Cadets in Brecon last August but sadly it got cancelled at the last moment due to a lack of funding. Thankfully though my friend Fraser Christian from Coastal Survival heard about that and invited me down to a Coastal Hunter Gatherer course he was running that weekend.

This was an excellent course, I learned a lot and would recommend it to anyone wanting to know how to live comfortably on the coast. It is not an easy course as you really have to work for your dinner but well worth the time.

Fraser runs the course on the Dorset coast and in the nearby local woodlands. I really liked the fact we could forage and fish on the coast during the day but retire to the woods in the evening. Kind of reassuring for an old bushcrafter like me.

Photo 14-01-2014 23 11 35
Set on the beautiful Dorset coast

The spot I managed to secure for my hammock turned out to have a magical view out over the Dorset countryside. There are not many spots suitable for hammocks  but Fraser does have a large army tent that some of the students slept in.

Photo 15-01-2014 16 42 22
My room with a view

After breakfast we headed out for the coast. On the walk out to the rock pools Fraser explained how to watch the local sea birds to spot the locations of possible shoals of fish.

I had missed the first day of the course when they had put out nets and lobster pots in the rock pools (we were in an area well away from any local fishery nursery area, the closed season had passed and all the nets used were of a legal size).

Overnight about 9 or 10 fish (a mixture of Wrasse, Mullet and Sea Bass) had been caught in the two nets they had put out. I have put a link to two videos at the end of the post showing the fish being pulled from the nets.

Photo 14-01-2014 23 12 21
Great walks and rock pool fishing

Fraser  then showed all the students how to de-scale, gut and bleed out all the fish we had caught. I don’t think he was too impressed with our efforts at de-scaling the fish 🙂

We experimented with trying to catch shrimps by throwing the offal from the fish into a rock pool to attract them. What really got them interested though was the blood on our hands. If you were quick you could just flick them out of the water.

Photo 14-01-2014 23 13 56
Learn how to easily catch shrimp

I was taught previously by Fraser just to bite the back of the shrimp for a quick snack. Not for the squeamish but tasty all the same.

Photo 14-01-2014 23 14 07
Lovely eaten raw

Jennifer had fun out in the sea collecting sea weed for the pot. We had fun just sitting there watching her as on quite a few occasions she nearly went under. Sea weed is best harvested from the sea as you will get less sand trapped in the leaves, making the preparation process for the pot later easier to do.
The limpets were harvested using a stone: walk quietly, a quick smack and they are ready to pick up. These limpets were cooked over an open fire in their shells, we ate some straight from the shell and some we chopped some up and added to a stew.

Photo 15-01-2014 16 44 19
Foraging for sea weed and limpets

We caught no lobsters in the lobster pots but plenty of crabs. These were used to make a stock for dinner later that night.

Photo 15-01-2014 16 43 04
Learning how to use crab nets

I think all the guys were pretty happy with the catch on the day.

Photo 14-01-2014 23 14 47
Happy Fisherfolk

Once they were all bagged up it was back to camp to prepare dinner.

Photo 14-01-2014 23 15 15
An excellent catch

The crabs were simply mashed up and made into a stock. Not too sure of the exact process here but I am sure Fraser would explain it all if you contacted him, or take a look at his book Eat the Beach which has lots of information on catching and cooking food from the seashore.

Photo 14-01-2014 23 15 28
Cook what you catch – making the stock

We prepared the sea bass and wrapped it in some burdock leaves. This was cooked directly on the embers of the fire and came out very moist and succulent.

Photo 15-01-2014 16 41 54
Ember cooked fish

Fraser taught everyone how to properly fillet the other fish and we cooked some of them directly on the grill. The fillets we did not use were hung above the fire to dry out and take on some of the flavours of the wood smoke. We ate these smoked fillets the next morning for breakfast.

Photo 14-01-2014 23 15 59
Lovely fillets

In between all this cooking I managed to take some time out and do a little bit of carving. This is my relaxation therapy.

Photo 15-01-2014 16 29 59
Time to relax and carve

A couple of my plates of food from the weekend. Fraser supplied a few of the basics like noodles and potatoes but everything else was foraged. The spoon in the top picture was also a little carving from the weekend.

Photo 15-01-2014 16 37 56 (1)
Catch and Cook

On one of the walks we collected some herbs for tea. This is a morning brew of Ground Ivy, Bramble and Wild Mint. Very refreshing.

Photo 14-01-2014 23 16 13
Learn about herbal teas

There were also foraging and net making classes. I thoroughly enjoyed both these classes and learnt new stuff in both.

Photo 14-01-2014 23 13 15
Foraging and net making classes

Each student gets shown how to make their own gill net which they can take home with them.

Photo 14-01-2014 23 16 32
Make your own Gill net

On the last day we went down to Chesil beach. We took a stroll along the land nextbeach looking and identifying all the edible and medicinal plants we could find. We found plenty of sea kale and horseradish (not in this picture) at that time of year.

Photo 14-01-2014 23 16 49
Coastal Plant ID

As soon as we got to the beach we set up the little shelter and Fraser taught us how he sets up his rods for beach casting.

Photo 14-01-2014 23 17 01
Learn to set up a rod and tackle

Then it was down to the shoreline to see how it should be done and then have a go ourselves.

Photo 15-01-2014 16 36 59
Learn to cast from the beach

No fish were caught that day but everyone had fun casting out past the surf.

Photo 14-01-2014 23 17 40
Final fishing and home time

I filmed three videos on my iPad while I was on the course, two bringing in the nets and one on the initial prepping of the fish:

Long Line Net Gather 1

Long Line Net Gather 2

Initial fish preparation

I was very chuffed to be invited along to Fraser’s Coastal Hunter Gather course and will be looking to attending again in the future.

Fraser is bringing out a video tutorial course this year so I looking forward to seeing how that develops as coastal survival is a subject I want to explore more now.

Cheers

George

Summer Bushcrafting in Cornwall

I wasn’t going to post about our family summer holiday as I thought it wasn’t particularly relevant to this blog but after having a look at the pictures again I noticed there were quite a few bushcrafty ones. This post will just focus on some of the fun bushcraft stuff we did and I will not bore you with all the hundreds of beach and plant pictures I took.

Our good friend Lou worked as a manager at the YHA in Golant in Cornwall so we pitched our tipi in the gardens of the hostel, combining a holiday with a visit to her. The hostel itself is a Regency period building so it felt quite grand to be camped out in front of it for a week.

Alison got the hammock for herself and a cup of tea in bed every morning, I got the tipi and the kids.

Photo 18-01-2014 17 54 43 (HDR)
Our Holiday Homes

This was at times a very busy holiday but I certainly found time to catch up on my sleep loss. Over the whole holiday I concentrated on getting as many pictures of different plants as possible. This beautiful one of Catherine was taken in the grounds of the Eden Project.

20140117-165949.jpg
Sometimes restful, sometimes beautiful

We got a visit one day from our friends Steve, Kirsty, Buddy and Herbie. As per usual the barbie was down to the boys but I got the feeling Steve was in a managerial mood

20140117-171355.jpg
Checking for wind direction I presume!!

The boys were happy to re stock the fire as boys do and a relaxing dinner was had by all. Steve and Kirsty live with the boys in Cornwall where Kirsty runs her own business Kirsty Elson Designs (Kirsty is a fabulous artist) and Steve works in youth development and would like to do more in the way of bushcraft.

20140117-170414.jpg
Fire and Food

You just cannot beat some time with a bow and your kids. The Father and Son bow is excellent for introducing kids to bows as they are quite easy to draw.

20140117-170232.jpg
Quality boy time

Catherine had a ball wherever she went, be that with the ducklings or with sand. Our kids love their toys and gadgets but they’re good at making their own fun as well.

20140117-170839.jpg
Exploring Nature

I got a message on Facebook one day from one of my bushcrafting buddies Jonny Picket, inviting us to a birthday bash in his woods he was organising for his partner Janie Sarchet. We were camped just the other side of the River Fowey from them. Jonny and Janie have a lovely farm near the coast and had decorated part of their woodland for the party.

After arriving I took Finlay down to the coast with Jonny and one of his friends to watch them spear fishing. No fish but a pretty spectacular spider crab was found. Finlay and I had a great time rummaging around all the rock pools.

20140117-170313.jpg
Coastal Foraging

After getting to know everyone it was a case of chilling and waiting for the meat to cook in the massive metal hangi type oven. Alison got talking to Janie and has since published in the Kindle store a book that Jane had written called Project Egg. Janie also has an excellent blog site called The Hedge Combers and as best said by Janie – “Our ultimate aim is to build up a resource of useful posts, ideas & recipes, invaluable to anyone starting out on their own self sufficiency, gastro-adventure“.

It was great to catch up with other bushcrafting buddies including Pete Thomas and Ashley Cawley. They all made our family feel very welcome.

20140117-170902.jpg
Janie’s Birthday Bash with roasted Pete

I had fun helping to cut up all the meat from the hangi and nibbling on a piece or two but best of all was the junk drumming session we all had at the end  – we did not roast Pete in the end as it might look from the picture above :-).

20140117-170924.jpg
Food and Fun

A happy Lou and Finlay taking some time out to shoot (well Finlay patiently waiting his turn).

20140117-170953.jpg
Aunty Lou having fun with Finlay

I took time out to just sit and carve. It was such a beautiful campsite it would have been a shame not to.

Photo 18-01-2014 17 53 12
Holiday carvings

Other nice memories were finding this nest of little chicks and watching the slightly bigger ones idily poking the fire (what kid does not like doing this).

20140117-171215.jpg
Happy Chicks

Every day was either spent on the beach or wandering through the woods exploring – we went to some fabulous places including The Eden Project, the Lost Gardens of Heligan and St Michael’s Mount.

20140117-171232.jpg
Exploring we go

I had a great time with Finlay working on his archery and look forward to getting out to some camps with him this year to shoot some more. I think Catherine and Finlay will get quite competitive in the future with their bows.

20140117-171249.jpg
Excellent stance

I do not know who was happier about hitting the target.

20140117-171312.jpg
Happy Lad

This has got to be my favourite picture of the holiday with the kids playing happily in the flowers.

Photo 18-01-2014 17 53 51
Beautiful wanderings

And finally back to Alison. As I said she got not only the hammock but also a cup of tea every morning. She does make hammocking look stylish.

20140117-165930.jpg
Morning Cuppa

Cheers

George

An Idyllic Day

Today I woke to some lovely sunshine, a rare treat so far this winter. I’m writing up all the little adventures I had last year, and looking back at my diary I realized the next one in line also happened on a lovely sunny day, in fact it was an idyllic day.

The day after I came home from the Wilderness Gathering in August I took my two kids and one of their friends to the local National Trust property, The Vyne in Hampshire.  The house itself is beautiful but the grounds and woodland are my real playground. They have a kids’ play area built around the theme of a Hobbit house with none of the usual swings or slides but plenty of cranes, water, stones, wood and sand to get stuck into.

I sometimes get so caught up with what I am focussed on when studying bushcraft that I lose site of the wonder of everything else. My kids remind me of this when they are out and about exploring and discovering new things.

I have walked past this tree a couple of times with my eyes down on the lookout for a new flower to photograph but when the kids look at it they see a magical figure with hairy nostrils. If you look at the tree from their angle (and I did) you can easily imagine this.

20140114-091936.jpg
Hairy Nostrils!!

To my son this ditch is a world of wonder: I just see the plants on the side but he see trolls under the bridge. It was here that I started to remember all the bridges I had crawled under as a kid in search of those damned elusive trolls. It was a fun time though a bit wet and even though my mother would scold me I would always find another bridge.

20140114-091907.jpg
Can I jump in Daddy?

The National Trust have built this excellent play area but all Finlay wanted to do was collect as many sticks as possible and build a shelter. This need to build something out of a pile of sticks must be imprinted somewhere in our brains and I guess for many people that need is erased as they grow up: thankfully for me that has never happened.

20140114-092050.jpg
Shelter building anyone

While Finlay was off building, Catherine was in the sand pit patting it all flat. I like to think she was creating a sand pit trap (to collect tracks) as she has done this before but I think she was just dreamily making shapes. I really like my daughter’s artistic side and it is nice sometimes to just sit and watch where her imagination takes her.

20140114-092216.jpg
Sand Pit Trap

We spent a bit of time around the pond where the kids lay down beside the edge and waited for the carp and ducklings to come a-calling. The kids asked if a carp would eat a duckling. I have no idea. I just told them that the carp were kept well fed so as to leave the ducklings alone (sometimes you just have to sound confident).

20140114-092011.jpg
Luckily the carp were not hungry today

I like this pond as the dragonflies put on quite a show of acrobatics. We spent a good half hour just watching what was happening here. I do not normally get that length of time for an activity like this but since Mother Nature was being kind and always up to something here the kids (and I ) were kept enthralled.

20140114-092257.jpg
Dragonfly spotting

Sometimes you can be wandering through the woods trying to keep the kids occupied and what you see just stumps you – No way could I beat these guys sending kids up and down the tree like yoyos. Next year I want to get the kids on this activity (that includes me of course).

20140114-092311.jpg
Strange happenings in the trees

Idyllic days require some fancy food – Catherine took the bottom picture just before we went home 🙂

20140114-092033.jpg
Fancy Foraging

A final stroll in the woods to end a perfect day.

20140114-092331.jpg
Strolling home

Cheers

George

Links

The Vyne

How To…. Primitive Skills – Bone Knife Bark Sheath

This How To…. lays out some simple steps to make a bark sheath for a knife. I have also used this method to make a quiver for my arrows and with a sightly different method you can easily make containers.

Photo 11-01-2014 23 44 34
Sweet Chestnut Bark Sheath

I took these pictures in 2009 when I was on the Woodcraft School Primitive Technology course. The sheath was made using only primitive tools as required by the course. To do this I made for myself a flint knife, flint adze, some discoidal flint knives and also used the bone bodkin that I showed you how to make in the previous post. For more modern methods I would say you could do this job with a small saw and a small knife.

I started the project by selecting a suitable Sweet Chestnut (Castanea sativa) limb from a coppice stool to take down. After checking the tops for any dead wood I started to clear away the undergrowth using some flint. Clearing the undergrowth away ensured a safe working area around the limb. I used a large sharp piece of flint for this. Also I made sure I had clear exit routes around the limb I could use when it came down.

Photo 11-01-2014 23 28 11
Trimming and starting the cut

I had created for the job a Flint Adze. This is a piece of worked flint attached to a handle with rawhide. Unlike traditional tree felling where a wedge is created and then a back cut made I am made a rosette cut all around the tree using short chopping motions. You can see the rosette cut appearing in these pictures. The small branch you can see in the foreground got in my way so I cut this down.

Photo 11-01-2014 23 28 26
The Rosette cut

You can see that the Adze creates tears in the wood but is very effective in cutting into it. As I got into the heartwood I had to support the limb as I did not want it to fall uncontrollably and eventually I was able to let the limb to fall under control. I did not need to back out of the coppice stool as the limb was light enough to control. Had it been any heavier, my cleared exit routes would have come into play.

Traditionally the stump would have been left like this. I however sawed the stump cleanly at the base. If a stump is cleanly cut (with a little angle) then it has less chance of getting infected and will eventually have new shoots grow out of it.

Photo 11-01-2014 23 28 40
A wooden flower

Using the Adze in a safe manner away from my body I trimmed off all the brash from the limb.

Photo 11-01-2014 23 29 02
Trimming the limb

Using the flint that I had cleared the undergrowth with I scraped off all the outer bark of the limb as this is too brittle to work with. All I wanted to use was the inner bark. My friend Paul held the limb to secure it: this speeded up the process as I could use both hands.

I scored a line down the limb through the inner bark with my flint and also scored a line around the limb at the top and the bottom. Then, using a small piece of wood I’d found on the ground, I peeled away the inner bark from the limb. This was done in April so the sap was rising, making the debarking of the limb very easy.

Photo 11-01-2014 23 29 38
Scraping and de-barking

The tools I used for the job:

1) Adze

2) Flint

3) Piece of wood

I cut a further piece of bark off the limb as well.

Photo 11-01-2014 23 29 55
Fresh bark ready for drying

I left the bark to dry out overnight and then re-wet it the next day before cutting it into strips. If you use the bark straightaway after harvesting it, anything you weave will become loose as the bark will shrink slightly as it dries. This shrinkage does not happen again if you let it dry out first then just re-wet it to make it supple enough to work.

To cut the strips I had a flint knife prepared for this.

Photo 11-01-2014 23 30 07
Re-soaked pliable bark

I cut the strips by eye only but I am sure you could rig up a worktop to cut consistently wide strips. The good strips are on the right and the offcuts on the left.

Photo 11-01-2014 23 30 18
Bark strips

With practice you will be able to gauge how many strips you’ll need for your size of sheath. This was a small sheath so I estimated 6 strips.

Photo 11-01-2014 23 30 33
Chosen strips

Firstly fold all your strips in half with the inner part of the bark showing as it is the smoother side.

Photo 11-01-2014 23 30 50
Fold the strips in half

I have documented the first 12 steps of the weave in the next 3 pictures. Each numbered bullet point relates to a numbered picture below.

1)  Lock the right hand strip onto the top half of the left hand strip.
2) Lock the next right hand strip onto the bottom half of the left hand strip.
3) Lock the third right hand strip onto the top half of the left hand strip.
4) Lock the second left hand strip onto the top of the first right hand strip and weave through the other strips.

Photo 11-01-2014 23 40 09
Weave 1

5) Lock the third left hand strip onto the bottom of the first right hand strip and weave it through the other strips. The ‘point’ of the sheath is now complete.
6) Fold back the top of the first left hand strip.
7) Fold the bottom of the first left hand strip diagonally over the other left hand strips.
8) Then flip back up the top of the first left hand strip.

Photo 12-01-2014 09 45 54 (HDR) (1)
Weave 2

9) Lock the next right hand strip onto the bottom half of the left hand strip.
10) Flip the whole sheath over. There should be a single strip on the right now.
11) Now fold the bottom right strip diagonally over the other right hand strips and weave it in.
12) Starting again on the left hand side keep repeating the whole process.

Photo 12-01-2014 09 47 13
Weave 3

Soon your sheath will take shape.

Photo 11-01-2014 23 43 41
Keep weaving

Keep going with the weave and stop when you have enough to securely hold whatever will be kept in it.

Photo 11-01-2014 23 43 54
Ready to close off

The top can seem a little bit tricky at first but all you need to do is turn the ends back on themselves and weave them into the sheath. Just tuck each end in as neatly as you can: it’s tricky as each end will be different, you might need to experiment.

Photo 11-01-2014 23 44 07
Closing off

When you have closed the top off, trim all the ends so that you cannot see where the weave ends.

Photo 11-01-2014 23 44 21
Trimming the excess

All the ends were trimmed so that the ends were hidden by the weave. The sheath is ready for a dangler strap now.

Photo 11-01-2014 23 44 34
Ready for a loop attachment

I used some raw hide I had left over from making a bag. I wet it to make it more pliable and then rolled it in my hand.

Photo 11-01-2014 23 44 52 (HDR)
Re-soaked rawhide

The bodkin I had made earlier came in handy here to make a gap in the weave. I then used a small stick to push the rawhide into the gap made by the bodkin.

Photo 11-01-2014 23 45 03
Bodkin in use

Attach it as you like and it is ready. I think I used a simple Larks Foot knot here.

Photo 11-01-2014 23 45 14
Dangler attached

This sheath completed my primitive belt order (the smallest one on the right).

Photo 11-01-2014 23 45 25
My Primitive belt order

This type of weaving can make some very useful items. I have been using the quiver on a regular basis since 2008 and it shows no sign of wear and tear.

photo (1)
Let your imagination create what you want

A How To…. on making the bone knife can be found here – Primitive Skills – Bone Knife/Bodkin.

Good luck and enjoy experimenting.

George

Wilderness Gathering – August 2013

Last August found my daughter Catherine and I making our way down to the Wilderness Gathering. Located near West Knoyle in the beautiful South Wiltshire countryside is the Bush Farm Bison Centre. I have been visiting this gathering for the last ten years.

The Wilderness Gathering has a commercial feel to it though it still maintains its bushcraft origins. I love the fact that it is so close to where I live, there are organised classes all day for my daughter, I get to meet lots of old friends, make new ones, learn new stuff and get some more kit. For the last two years I have been helping out Fraser Christian from Coastal Survival as he is a good friend of mine (I have added all the links at the end of the post). This helps me out a lot as I get a chance to learn lots of new bushcraft skills I can use with my Sea cadets.

The first thing Catherine headed for on arrival was the farm shop to get some ice cream but she soon got into the bushcrafting spirit, particularly keen on doing a bit of carving (this still scares me).

Photo 06-01-2014 12 00 47
First some Icecream – then later a bit of carving

There are plenty of stalls to visit such as the Bushcraft Magazine, to chat at, to buy from and to get some great ideas.

Fraser runs courses for the Coyote Kids Club such as making shrimp traps made out of recycled materials.

Photo 06-01-2014 12 08 40
A Bushcraft World

Like all the other visits I meet new friends such as the talented carver Jon Mac of Spoon Carving First Steps and good friends of old such as Phil and Ben Brown of Badger Bushcraft.

Photo 06-01-2014 12 06 05
Friends New & Old

The boys from Silchester – Mark Beer (Lupus), Nick Currie and from the Bushcraft Magazine Paul Bradley. I have learnt a lot from these guys over the years. Always good to catch up, chat and share skills.

Photo 06-01-2014 12 06 40
Have you seen these hoodlums?

This year I helped Fraser run a course on making fishing spears and nets (well, took a lot of pictures really). The fish spears are easy to make and the net making was run as a Masterclass.

Photo 06-01-2014 12 11 10
Fish Spears & Netting

A very popular class Fraser ran was how to cold smoke a fish in a cardboard box. Due to the damp weather the smudge fire kept going out but after a few hours we managed to smoke the fish and it was added to an excellent stew.

Photo 06-01-2014 12 17 03
Coastal Survival Class – Cold smoking fish in a cardboard box

My daughter Catherine always has a great time at the Gathering as there is plenty for her to do with the Coyote Kids while I am working.

Photo 06-01-2014 12 11 58
Coyote Kids Club

As per usual the food is good with Fraser cooking. I was trying out a new set up here on my fire pit using racks set at different heights for cooking different foods.

Photo 06-01-2014 12 12 47
Quick Dinners

No big meals this time as we were kept too busy with classes but excellent all the same.

Photo 06-01-2014 12 13 36
Lovely Food as usual from Fraser

Caught this shot in one of the many showers this year, thankfully though most people just shrugged the rain off and got on with things.

Photo 06-01-2014 12 13 05
A tad damp

Over the road from our stand was my friend Jason Sears teaching some group bowdrill. Every time he got the sets out he always had a good audience as folk knew they could participate. Rain was no barrier to this bushcrafter when it came to lighting a fire.

Photo 06-01-2014 12 13 54
Jason in bowdrill action

Other neighbours included Ben Orford demonstrating great green woodworking skills and JP from Woodlife Trails expertly taking the visitors through all the steps of creating fire by friction.

Photo 06-01-2014 12 15 32
My neighbours keeping busy

I try and get Catherine involved in as many activities as possible. She jumped at the chance to be a Pump Monkey for Dave Budd while he created some knives. I also got a present from my friend Stephen Herries of a burnt-out log – he claims I stole it off him 😉 – which gave me a chance to get my flint adze out and do a bit of primitive carving. The log is a rather nice long bowl now.

Photo 06-01-2014 12 16 46
Catherine the pump monkey and primitive carving

Steve Kirk of the Bushcraft Magazine ran an Atlatl making class this year which proved very popular. I learnt this skill at the gathering 10 years ago and have taught it to hundreds of people since then. The shooting of these darts make for some great pictures.

Photo 06-01-2014 12 01 26
Atlatl with Steve Kirk from the Bushcraft Magazine

I don’t know what Sarah (of Wilderness Spirit) thought when the Gimp appeared one afternoon – he is harmless really :-).

Image-1
The Gimp and the Lovely Sarah

Catherine was very chuffed to meet her friend Molly again this year. I think that Catherine will be able to turn her hand to many things as she grows up based on these pictures.

Photo 06-01-2014 12 03 36
Girls Just Wanna Have Fun

At the end of the Gathering I had a great evening with the guys from the Tribe watching Billy the Bushcrafter (Catherine really) being set upon by Beccy’s little ferret.

Photo 06-01-2014 12 15 06
Wilderness Gathering fun

Last but certainly not least is the pond in the centre of the farm. This is one of my favourite places, I have spent many a relaxed hour sitting beside it.

Photo 06-01-2014 12 05 14
The Pond

There is much more to the Wilderness Gathering than the few pictures I took last year so check out some of the links I have put below.

I am looking forward to this year’s Wilderness Gathering and catching up with everyone again.

Cheers

George

Links

Badger Bushcraft

Ben Orford

Bush Farm

Coastal Survival

Coyote Kids Club

Dave Budd Handmade Tools

Jon Mac Spoon Carving First Steps

The Bushcraft Magazine

Wilderness Gathering

Wilderness Spirit

Woodlife Trails

How To…. Primitive Skills – Bone Knife/Bodkin

Primitive Bone Knife

During the summer of 2009 I completed the  Woodcraft School Primitive Technology course. I do not know if John Rhyder still runs this course but he still does a lot of excellent craft courses.

I originally wrote this How To…. for Fenlander and his Natural Lore blog back in September of 2009. It is a subject I love so thought it would be good to include in my How To…. section as well. I apologise for the quality of some of the pictures, I think the light was poor at the time and my fingers were quite slippery from the marrow.

The course required that at least one our craft items had to be made using only primitive tools and techniques.

I decided to make myself a bone knife and a bark sheath for it. The knife I made from a Lamb’s thigh bone and the sheath was made from Sweet Chestnut (Castanea sativa) inner bark. The How To…. on making the sheath can be found here – Primitive Skills – Bone Knife Bark Sheath.

This post concentrates on the knife only. I have put another link yo the bark sheath at the end.

The techniques I used were from what I had researched at the time and I am sure there are many other methods to do this.

As a word of warning please do have a First Aid Kit on standby as the flint is very sharp and thoroughly wash your hands after wards.

20140104-154206
Bone Utility Knife and Sheath

I wanted to be able to use the knife as an Awl for working hides, as a Bodkin for when weaving and as a general knife for cutting cordage and meat.

This post will concentrate on how the knife was made. The next post will be about the sheath.

The bone I used was a thigh bone known as the Shank. Hence the names ‘Lamb Shank’ as a cut of meat and the word ‘Shank’ as a primitive knife.

20140104-153709.jpg
Fresh Bone and Flint

As I was using primitive tools and techniques only I scraped all the fat and flesh off with a piece of flint.

Other students tried burning the fat and flesh off but the made the bone brittle so it easily shattered. It is slippery work that requires a lot of patience. One slip and the flint will cut you as cleanly as any sharp knife.

20140104-153725.jpg
Slippery Work

After an hours work I had the bone cleaned up.

20140104-153740.jpg
Ready for Carving

I decided that one knuckle would make a good handle but the other had to be removed.

I scored a line around the whole bone near the knuckle I wanted removed. Apologies for the slightly out of focus picture. The score line was about a couple of millimetres deep.

20140104-153753.jpg
Removing a Knuckle

After scoring the line John Rhyder (course instructor) showed me how to scorch the line to make it a little brittle in that area.

20140104-153813.jpg
Scorching the Bone

A close up.

20140104-153826.jpg
Scorch line

Once the line was scorched all the way around a little gentle tapping was all that was needed.

20140104-153838.jpg
Gentle Tapping

A crack soon appeared.

20140104-153851.jpg
Cracked Bone

To finally remove the knuckle I carried on scraping with the flint.

20140104-153905.jpg
Removed Knuckle

Once the knuckle was removed then I decided on the shape of my knife point. I did this by gently scraping with the flint on the bone to define my knife shape.

20140104-153918.jpg
Flint Score Lines

Then making sure that the bone was on a stable surface and held in a secure grip the tedious scraping began. The carving out of the knife shape took a number of hours.

20140104-153931.jpg
Making the Groove

The awl tip taking shape.

20140104-153944.jpg
Awl Tip

Eventually I was able to prise a section of bone out.

20140104-154001.jpg
Removal of Bone

I went through two pieces of flint carving the bone out.

Eventually the general shape of the knife was produced.

20140104-154015.jpg
Basic Shape – Front

And the other side.

20140104-154030.jpg
Basic Shape – Back

A messy but necessary job is to remove the remaining marrow. I just used a small stick for this.

20140104-154048.jpg
Removing the Marrow

To give the knife a basic edge I used a piece of sandstone.

20140104-154116.jpg
Sanding the Edge

Any rough edges I tidied up with flint.

20140104-154127.jpg
Final Touches with Flint

Below you can see the side profile of the knife. This curve is useful as a Bodkin in basket weaving. In the next post you will see that this was the knifes first job.

20140104-154140.jpg
Side Profile of the Knife/Bodkin

Here the knife is sitting on the inner bark I used to make the sheath out of.

20140104-154154.jpg
Ready for a Sheath

Like any knife it needs a sheath. I did produce one using primitive methods and documented all the steps.

20140104-154206.jpg
The Sheath How To…. is next

This whole process took a whole afternoon for me but I did find it very relaxing taking my time and really thinking about each step.

Afterwards I left the knife hanging for a few months in my garage to air dry and keep it away from any inquisitive rodents.

More on the bark sheath can be found here – Primitive Skills – Bone Knife Bark Sheath.

George