
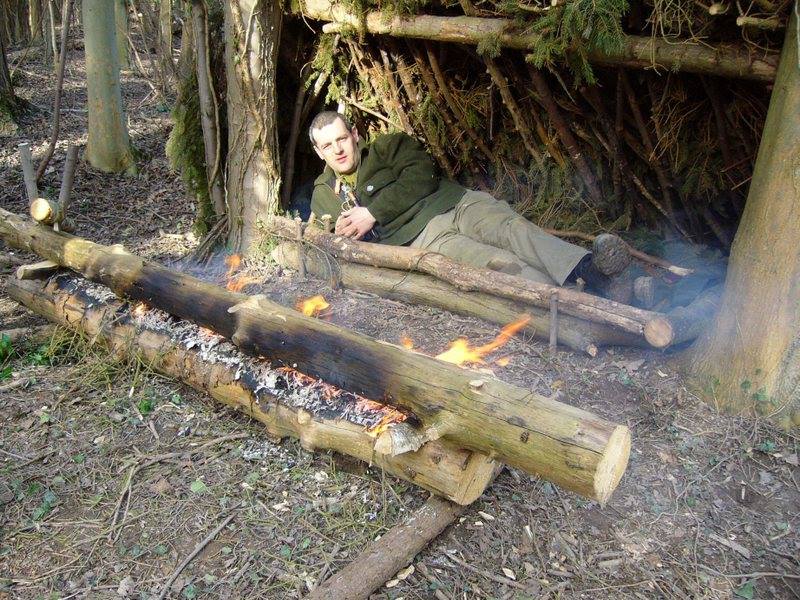
While writing my posts on my Scandinavian Candle series I recollected a long log fire I was taught how to set up by my good friend Kevin Warrington of Natural Lore. I like to think of it as a candle, but horizontal instead of vertical. The set up is basically two logs (usually pine) laid horizontally with one on top of the other.
This post is a step-by-step recording of how I set up what I have discovered is called the Rakovalkea Gap Fire.
Back in 2007 I was on a bushcraft course with Kevin Warrington and he showed me how to set up a long log fire. This isn’t quite the Finnish Rakovalkea but the idea is basically the same. These fires are great when you’re sleeping outdoors in a lean-to shelter or under the tree canopy in very cold or arctic conditions. Last weekend I came across an excellent post on making a large full length Rakovalkea Gap Fire by SKW Bushcraft (I used Google Chrome to translate the page).
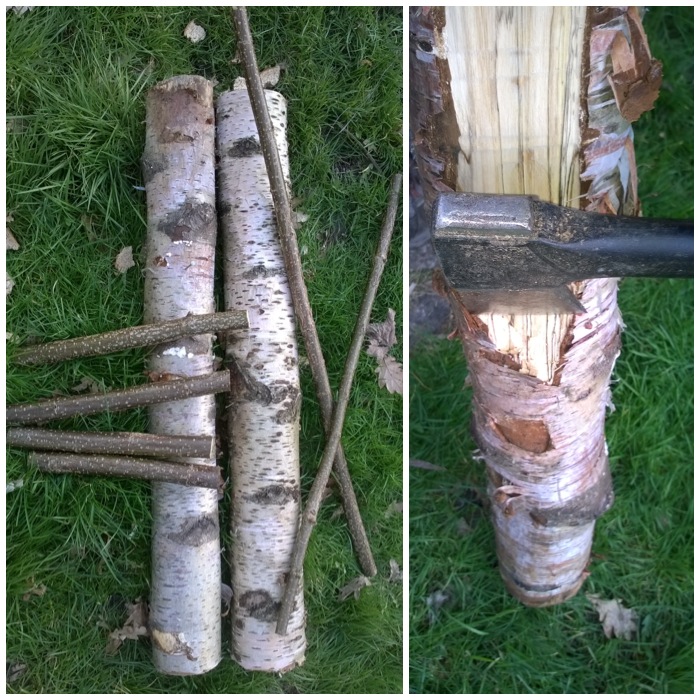
While out last weekend in the woods I came across some dead standing birch logs that looked ideal for the fire (normally pine is used but I do not have access to any at the moment), and luckily there were some handy, biddable children around to help transport it home.

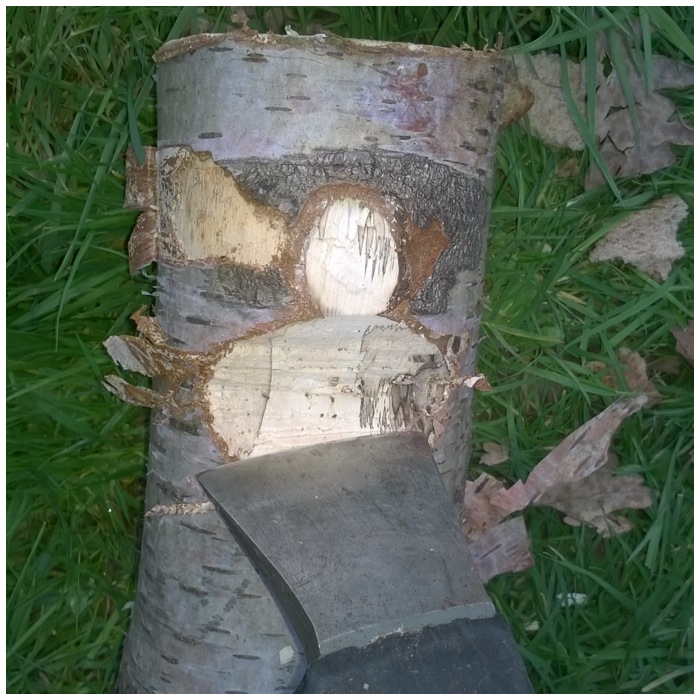
The component parts are two logs and various green sticks for supports and wedges. I flattened one of the logs in preparation for cutting out a groove in which to start the fire, keeping all the chippings for getting the fire going later. The log was not wet, exactly, but it was slightly damp owing to the heavy rain we have had recently. I could have left this experiment for the summer but thought that if I could get a damp log going then that would be a more realistic test for the UK environment. This type of fire is normally used in dry arctic environments where dead standing pines are abundant.
Once the log was flattened I carved out the channel. This is the dangerous bit, so cut the channel out with small cuts and with the log on the ground or well off to your side. I left flattened areas off to the sides but on reflection I think I should have made the channel the full length to maximize airflow.
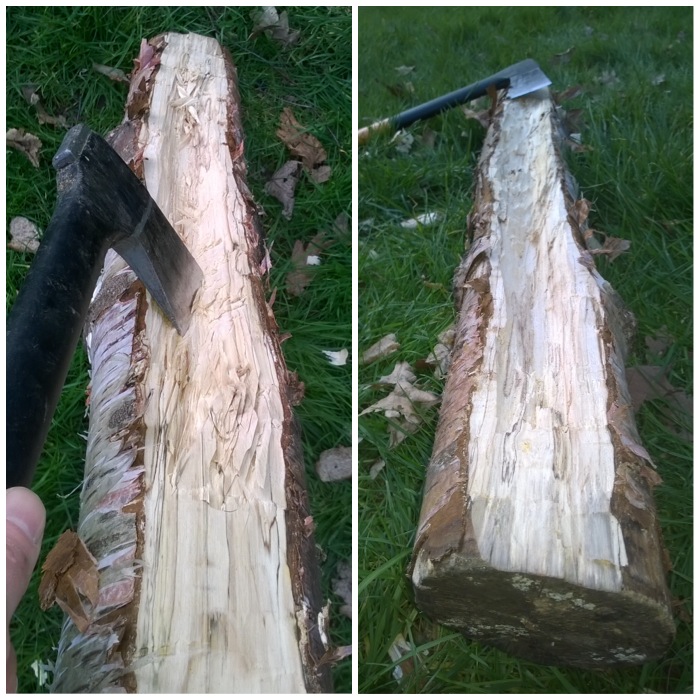
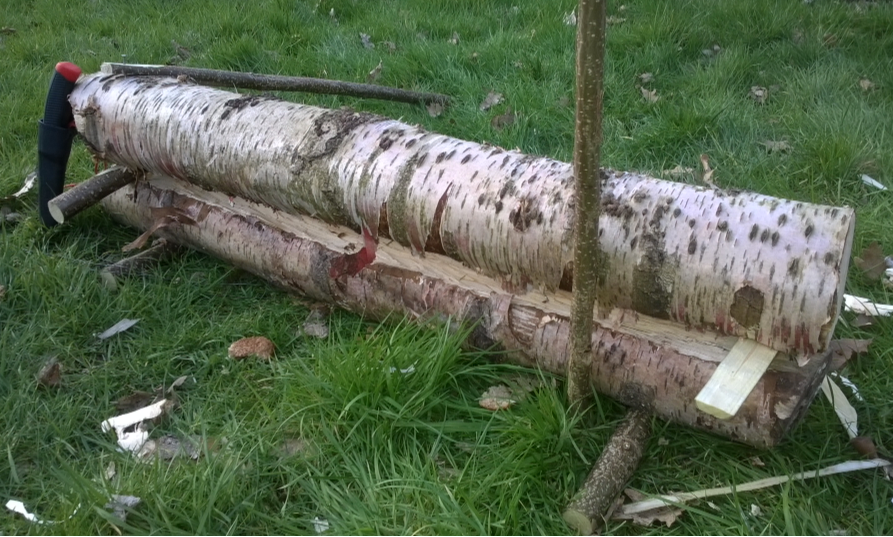
On the underside of the log with the channel I axed out two grooves for the support poles.
The support poles help to stop the log from rolling off to one side. I think if they were big enough they must help when the log is resting on snow to keep it secure.
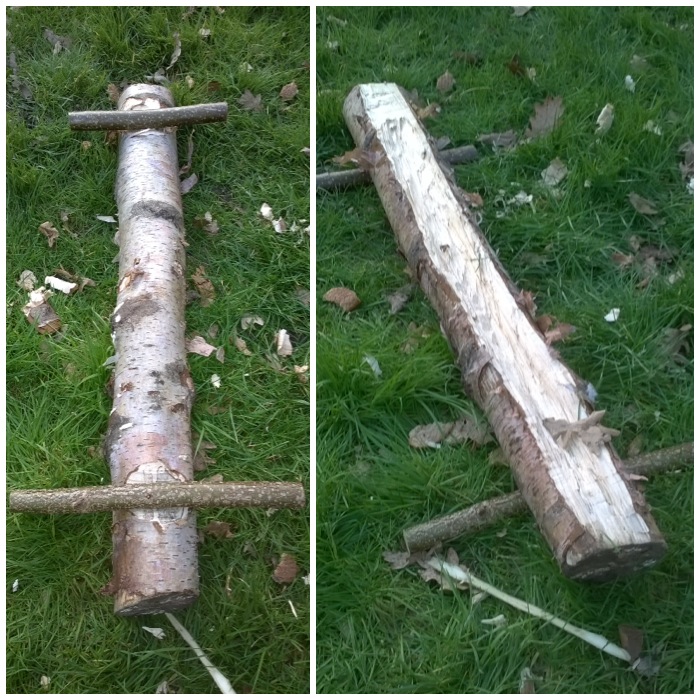
On the log that I was going to place on top I just flattened one side of it so it would rest securely on top of the bottom log. Again, on reflection, as the log was damp I should have made multiple cuts in this area with my axe to increase the surface area of the log and let the flames catch hold better. I came across this method when researching the Raappanan tuli candle.
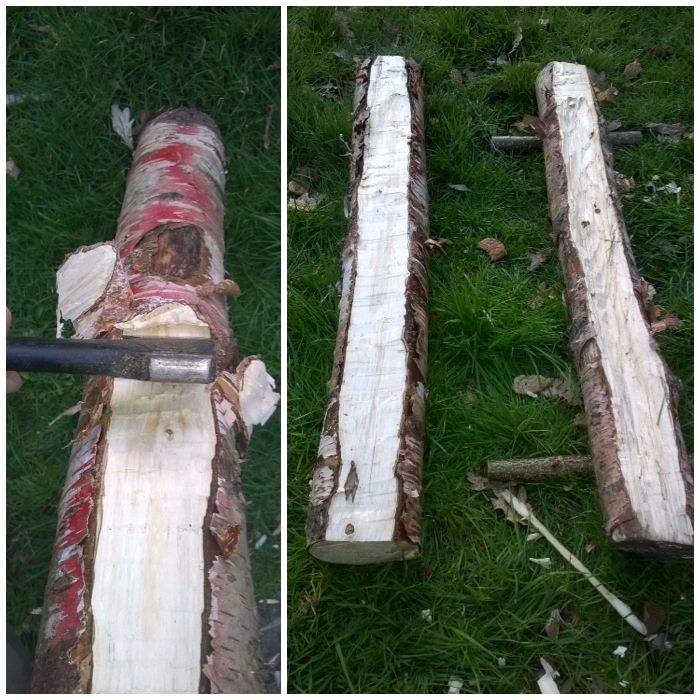
I carved two wedges that were to be used to vary the gap height between the two logs. These also proved useful as tongs later.
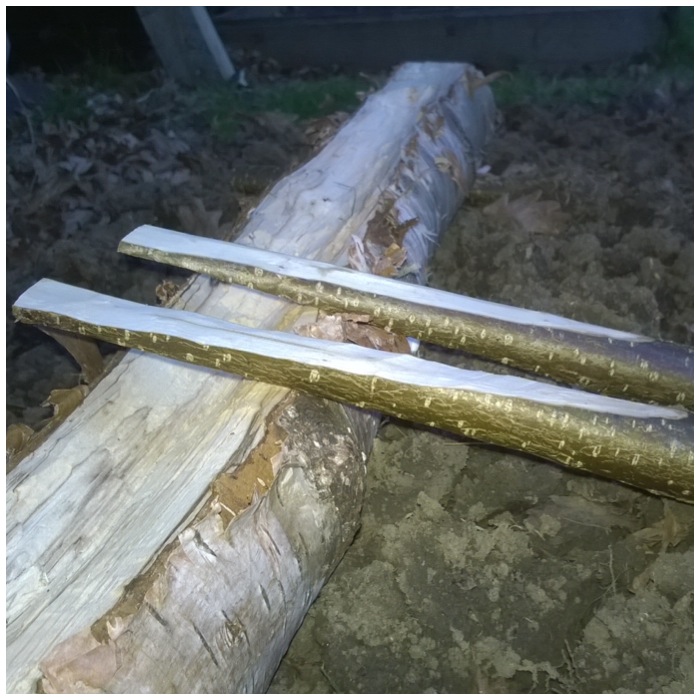
On one of the poles of green wood I carved a point and dug it into the ground beside the set up as support. I made this extra long as I was setting this up on soft earth (on the potato bed my wife had just dug over, in fact, but as it’s not been planted yet no potatoes were harmed in the making of this fire, and as I keep telling her ash is good for the soil).
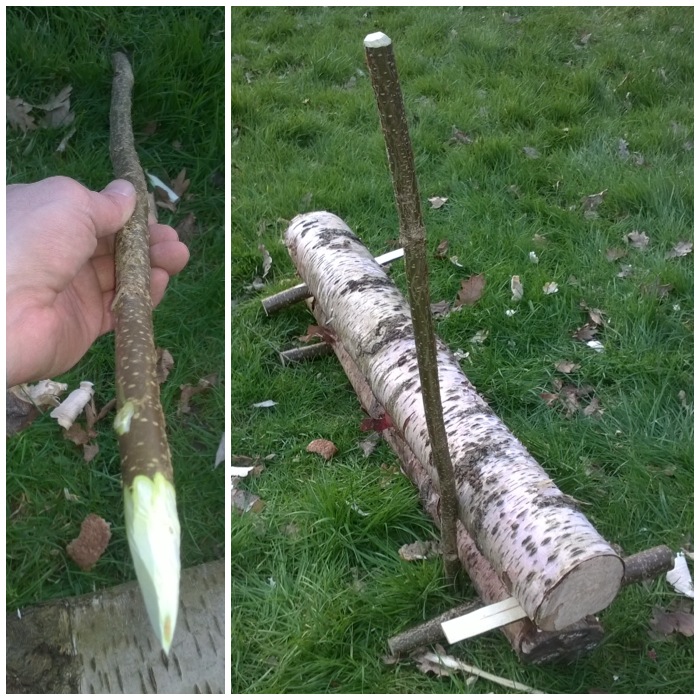
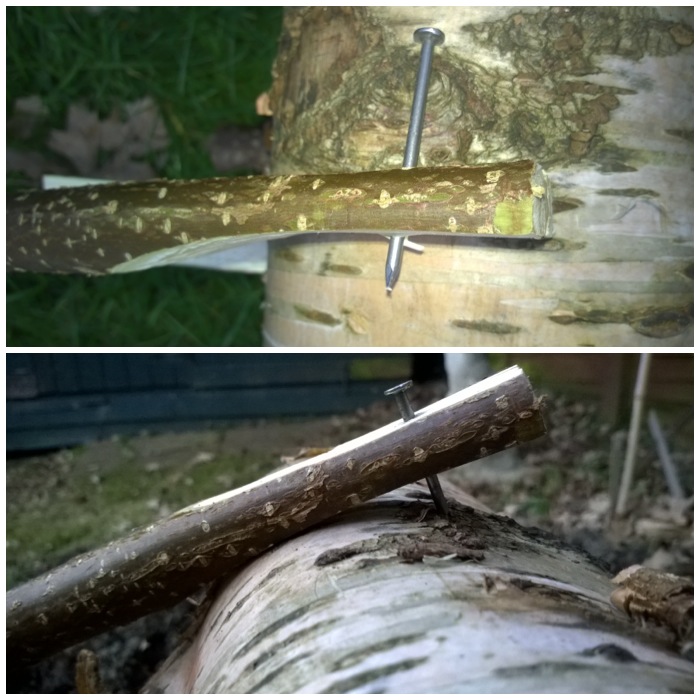
I slimmed down the end of another green stick and hammered a nail into it. One end of the stick is dug into the ground and nailed into the top log (diagonally opposite to the vertically upright green pole)
This is the basic set up without any tinders in the middle. All in all (not including foraging the wood) this set up took me about 15 minutes to do. I have read that with the much larger set ups (full body length) someone with good axe skills can set one up in an hour or so.
To get the fire going I used a mixture of waxed wood shavings, cotton wool balls smeared in Vaseline, and a lot of dry larch twigs. I did try and find some pine or spruce resin but to no avail. Resin is traditionally used along with pine fat wood.
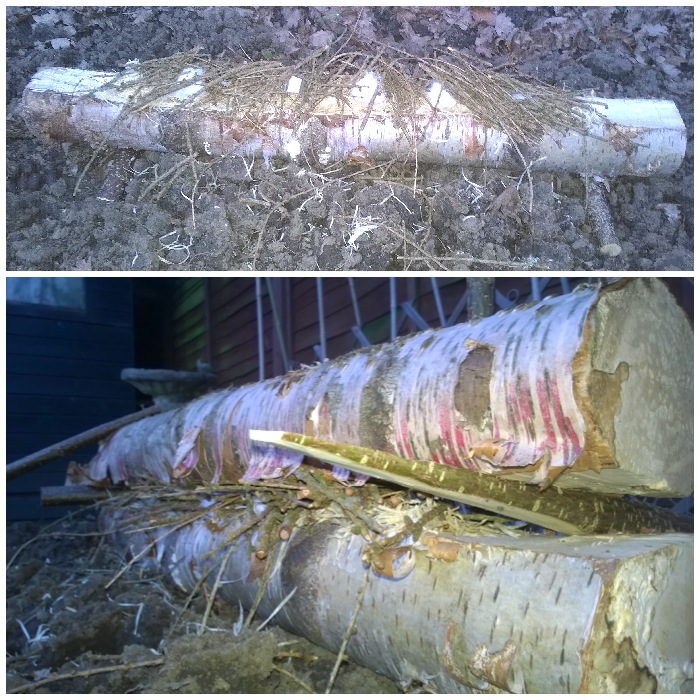
I lit the whole thing with just a couple of matches and in a few seconds the whole set up was alight.
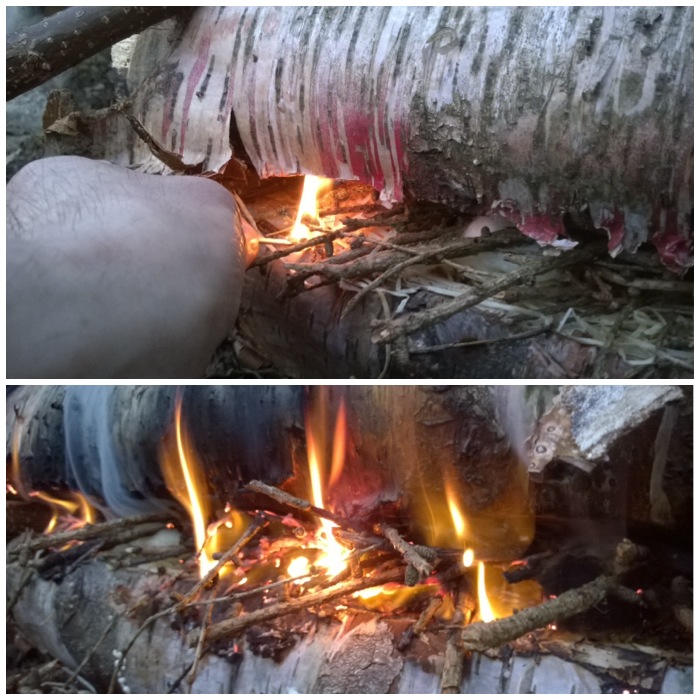
It was lovely to see the flames spread so quickly and on both sides.
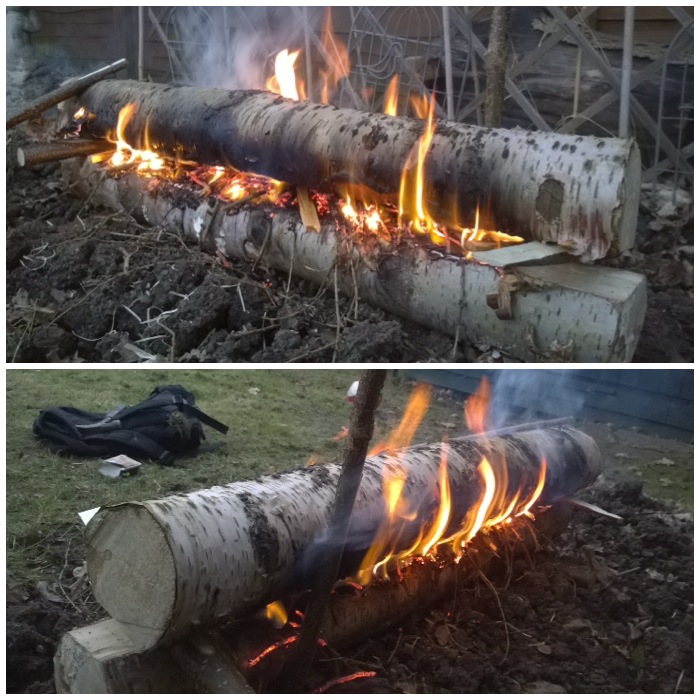
After about 5 minutes I started to add lots of pine kindling along the whole length. There was no wind so I had a small plastic plate to use as a wafter. The wooden wedges really came into their own as they allowed me to adjust the height of the gap so as to insert the kindling.
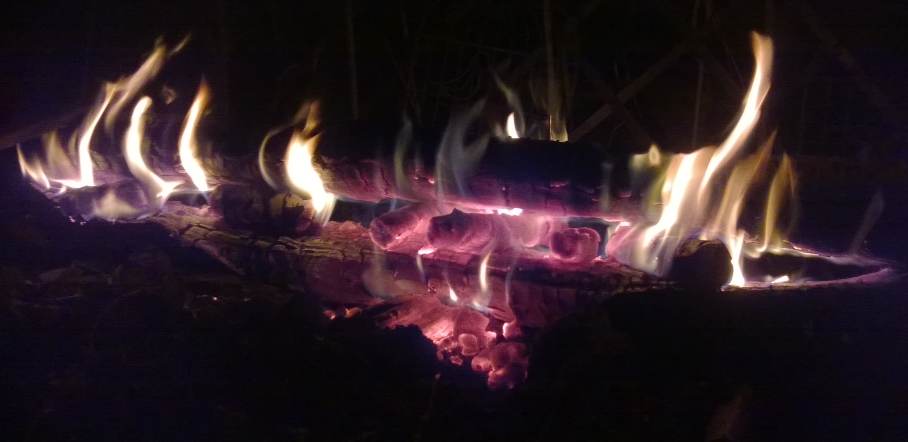
I tested the heat (with the back of my fingers) along the full length of the set up and it felt very uniform along its full length.
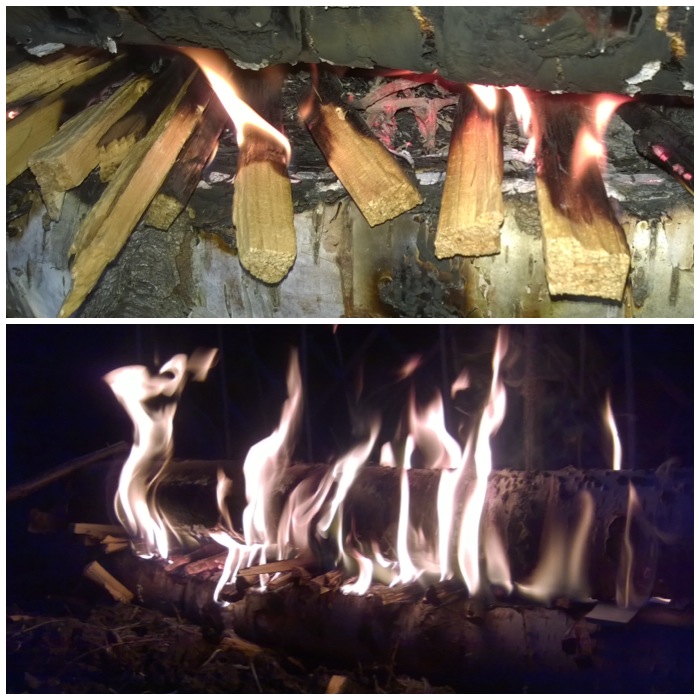
For the next hour I just kept giving the fire the occasional waft and added more and more kindling. I made a short video (the sound is quite poor I am afraid) of the fire at this stage.
After I had used up the kindling the gap had widened a fair bit between the logs so I did not need to use the green wood wedges anymore. I used the wedges after this to insert larger pieces of wood into the gap along the length of the fire. This greatly helped combating the dampness in the main logs. I had to use the wedges as tongs at this stage as the heat was quite fierce.
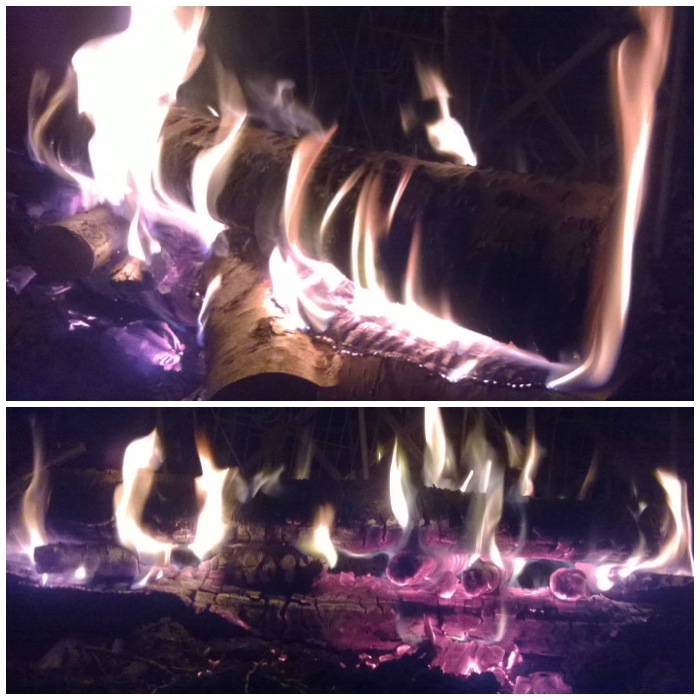
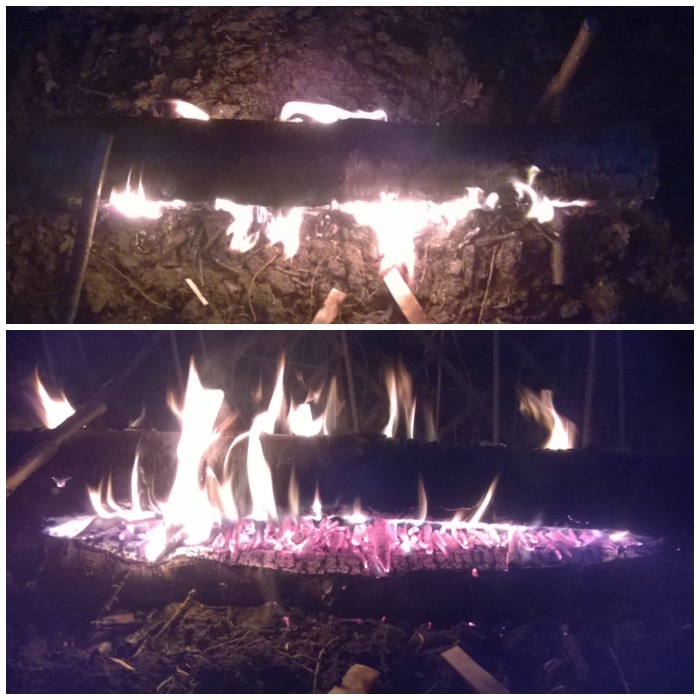
After two hours the bottom log was alight quite nicely and if I was sitting in front of this in the woods I would have been toasty warm. In comparison to a traditional set up I would normally use (criss cross lay for example) I needed to use very little wood to feed the gap.
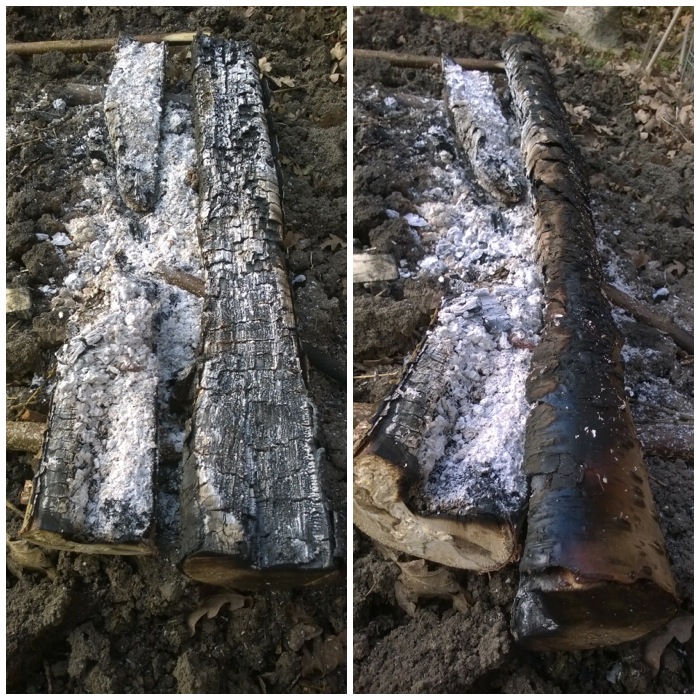
In the morning I found that the bottom log had burned through where I had placed the last of my small logs (I concentrated them on the centre section).
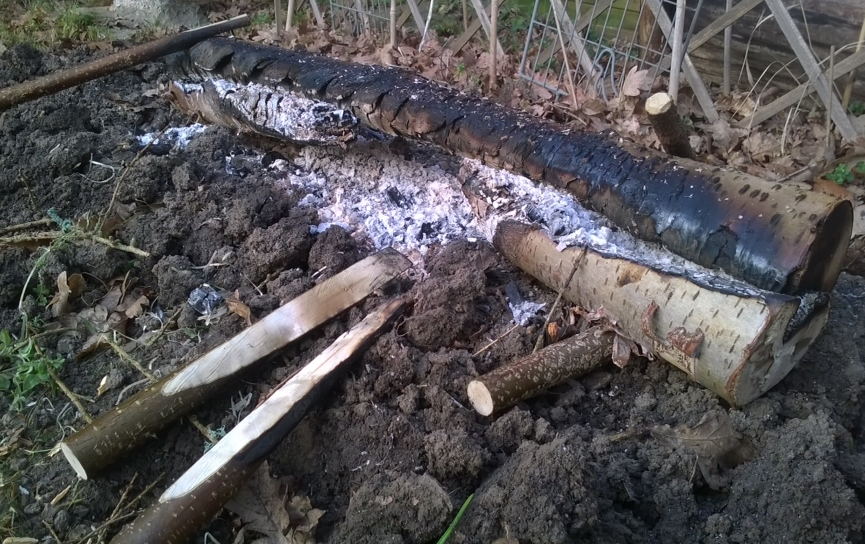
The top log due to its dampness had still not burnt through after all that heat but I was very impressed with this set up.
I am looking forward to later in the year when I can try this again but with larger pine logs and one day soon sleeping out in a lean-to shelter in an arctic environment with one of these fires to keep me warm.
There are some excellent long log fire pictures here on the Bushcraft UK forum to view and the Winter Trekking forum shows some good pictures of the Finnish army using the method.
Cheers
George
Nice write up and pics as usual George :0)
Was there any heat / embers left in your fire in the morning..?
Hi Jonny
Glad you liked it.
On the small scale one I did there was no embers however on the full scale ones I have used on open front shelters there are usually embers enough in the morning to get the fire going again.
These fires are designed really for cold climes and to get you through the night. From what I am told (never been to the Arctic) sleeping by one of these fires is like continually napping. You waken every time the flames die down, adjust the logs, go back to sleep and repeat.
Cheers
George
This was really cool and I thank you. Its very cool seeing ways my Finnish ancestors did things and this was new to me. I cant wait to try it.
Have fun experimenting Rob. I enjoyed doing the whole series.
Looks like white birch rather than pine
It was Birch Roy. I referred to it as Silver Birch in the post however noted that it is Pine that is normally used in colder climes when building this type of fire.
It looks like a fantastic way to stay warm. I cant wait to try it in the snow in a month or so.
Hi John
Have fun with it and remember to get the driest wood you can.
Cheers
George
Love this post. But come next planting season, your wife is going to very upset with you. Wood ash is great for beans, peas, tomatoes ect but not for root plants. Potatoes do not do well in high acidic soil. As soon as that ash gets wet it will be leaching g lye into your soil. So you may want to talk her into rotating the potatoes out and tomatoes in. Just trying to save you one heck of a butt chewing. ;). Sherry
Thanks Sherry
My wife has seen your post but thankfully has let me off with it down to sheer ignorance on my part 🙂
Cheers for the advice and heads up.
George
Hi there, nice post. I heard that the rule is one inch of diameter for every hour of heat, in other words, if you want it to last 8 hours you’d need 8 inch logs . How long did your fire last ? Did it last throughout the night ?
Good job by the way.
Hi Gerardo
Glad you liked the post. This was a slightly scaled down one (half the normal length) that I put together for the tutorial so it did not last all night.
Full scale ones I have used have lasted most of the night however like any fire you need to waken up every now and then to adjust it. The Rakovalkea thankfully lasts longer if properly set up in between adjustments than just adding a new log every now and then. I have heard people say you need logs 8 -10 inches wide to last the night however the type of wood has a great affect on how long a fire will last as well.
Cheers
George
seem like a lot of work wouldn’t 2- 8 inch logs laid about 6-8 inch apart with some wedges laid across with the 8 in log on top. what if you don’t have an axe with you at the time u need it
Hi Tom – This set up is highly adjustable with the wedges on either side, two logs are all that are needed and it does not take a competent woodsman long to make one. The Rakovalkea has been used in Scandinavia for a long time where dead standing dry timber is common place. All the chippings you take out of the trench you use to light the fire along with the likes of birch bark and pine/spruce resin.
I wrote this article to document this type of fire and so allow people the chance to try it out for themselves.
As to not having an axe out and about in the woods (especially in the winter) then there are plenty of other ways to get a fire going. An axe just makes the job easy. Remember that this is a scaled down model and you need to click on the links to see the full scale versions and the type of environment it is designed for.
Who goes camping without an axe? That’s like watching a video on parallel parking, and saying, great, but what if I don’t have a car?
I will be trying this soon. Thanks for the info. I will try a few different types of wood at same time. To see which is best for my neck of the woods. Thanks again.
Best of luck Travis. Happy experimenting.
George
Good luck on finding large logs in the basically treeless Arctic!
Can I ask why you say this Hazel when I wrote ‘Arctic conditions’ – referring to very cold environments?
I realy got to try this. it looks so cool and I love camping. I was thinkin to get like 4 8’by 8″ logs and drill 1 inch holes about 10″ from each end for a pcs of rebar so as the logs burn down I could ad another one on top of it so I would have two or there going at the same time. I would still put the notches in just in case I needed them to get it goin but as one burns down I can add another one just by sliding it down on the rebar and yes there would be spacers as needed. I would back it with some tin to reflect the heat at me . any feedback would be welcome thanks rick
Hi Rick
I think I can envisage what you are talking about. I have done something similar with a wall of logs supported by sticks.
I think I had the angle about 45 degrees and as the bottom log burnt out the next one rolled in. The angle of the wall was such that the flames could not lick up the side of it easily and burn all the logs in one go.
Best of luck experimenting though.
Cheers
George
I learned how to build a similar fire while studing the ways of the early American & Canadian fur trappers. The source said it was a version that Native Americans used when traveling in hunting parties during the frigid months in the Pacific Northwest areas of North America.
I was told that there were times when these fires would be burned for days at a time which meant they had to be fed somehow. Since I have never had to burn one for days I wonder how would I go about feeding/tending this fire in such an event. Any thoughts on the procedure for this?
Hi John
Many of these large fires were designed just so that they needed less tending than smaller ones require – so giving you longer periods of sleep in freezing conditions.
Apart from the Rakovalkea fire I have tried out long log fires with three main poles and one with a self feeding wall. It is something I will look into as so far i have concentrated my efforts on Scandinavian log fires. Maybe Mors has something on this in his Bushcraft book.
Cheers
George
Incredible photos!! Thank you so much for sharing this experience and for taking such great step-by-step photos!! Just shared your photos and website on Pinterest! Great job!!
Thank you for sharing this, living in the north our winters can get very bleak so knowing how to make a long burning hot fire like this could really be a life saver. Thanks for posting so many photos as well, much better to understand then just a diagram.
Thanks again,
The Broke Dad
Glad you liked it. Hopefully you will have a good supply then of dry dead standing wood for the job. All the logs here have quite a high moisture content (even when seasoned) so this type of fire is harder to maintain.
Cheers, George
Thank you for introducing this process to the rest of the world. I’m a novice at camping and have had experiences where I didn’t get hardly any sleep for keeping the fire going. I’ll try this out next time. It appears that the length of the logs would allow for sheltering on either side.
Thanks again
Just passing on knowledge given to me