
This is Part 2 of my bushcraft candles experiment, if you have not read Part 1 yet have a look here How To….Build a Finnish/Swedish Candle – No chainsaw – Part 1.
Part 2 – Damp/Wet Wood
Never, ever give up on your fire: your life may depend on it
I went for a wander with my children in the woods last weekend to collect some wood and tinder for one of my candles. We had a chat about dead standing wood and how to identify it. Thankfully there are still enough leaves on the trees to make that job easy for them. They selected a birch that had lost the race for light and had no leaves on it. All the small side branches snapped easily off it and, much to my children’s delight, when I pushed the tree it tipped over easily exposing the root.
I trimmed and sawed the tree on site but quickly realised that even though the wood was not rotten in any way it was wet to its centre. Not an ideal situation for a making a quick and easy candle, just a situation that required a bit more preparation.
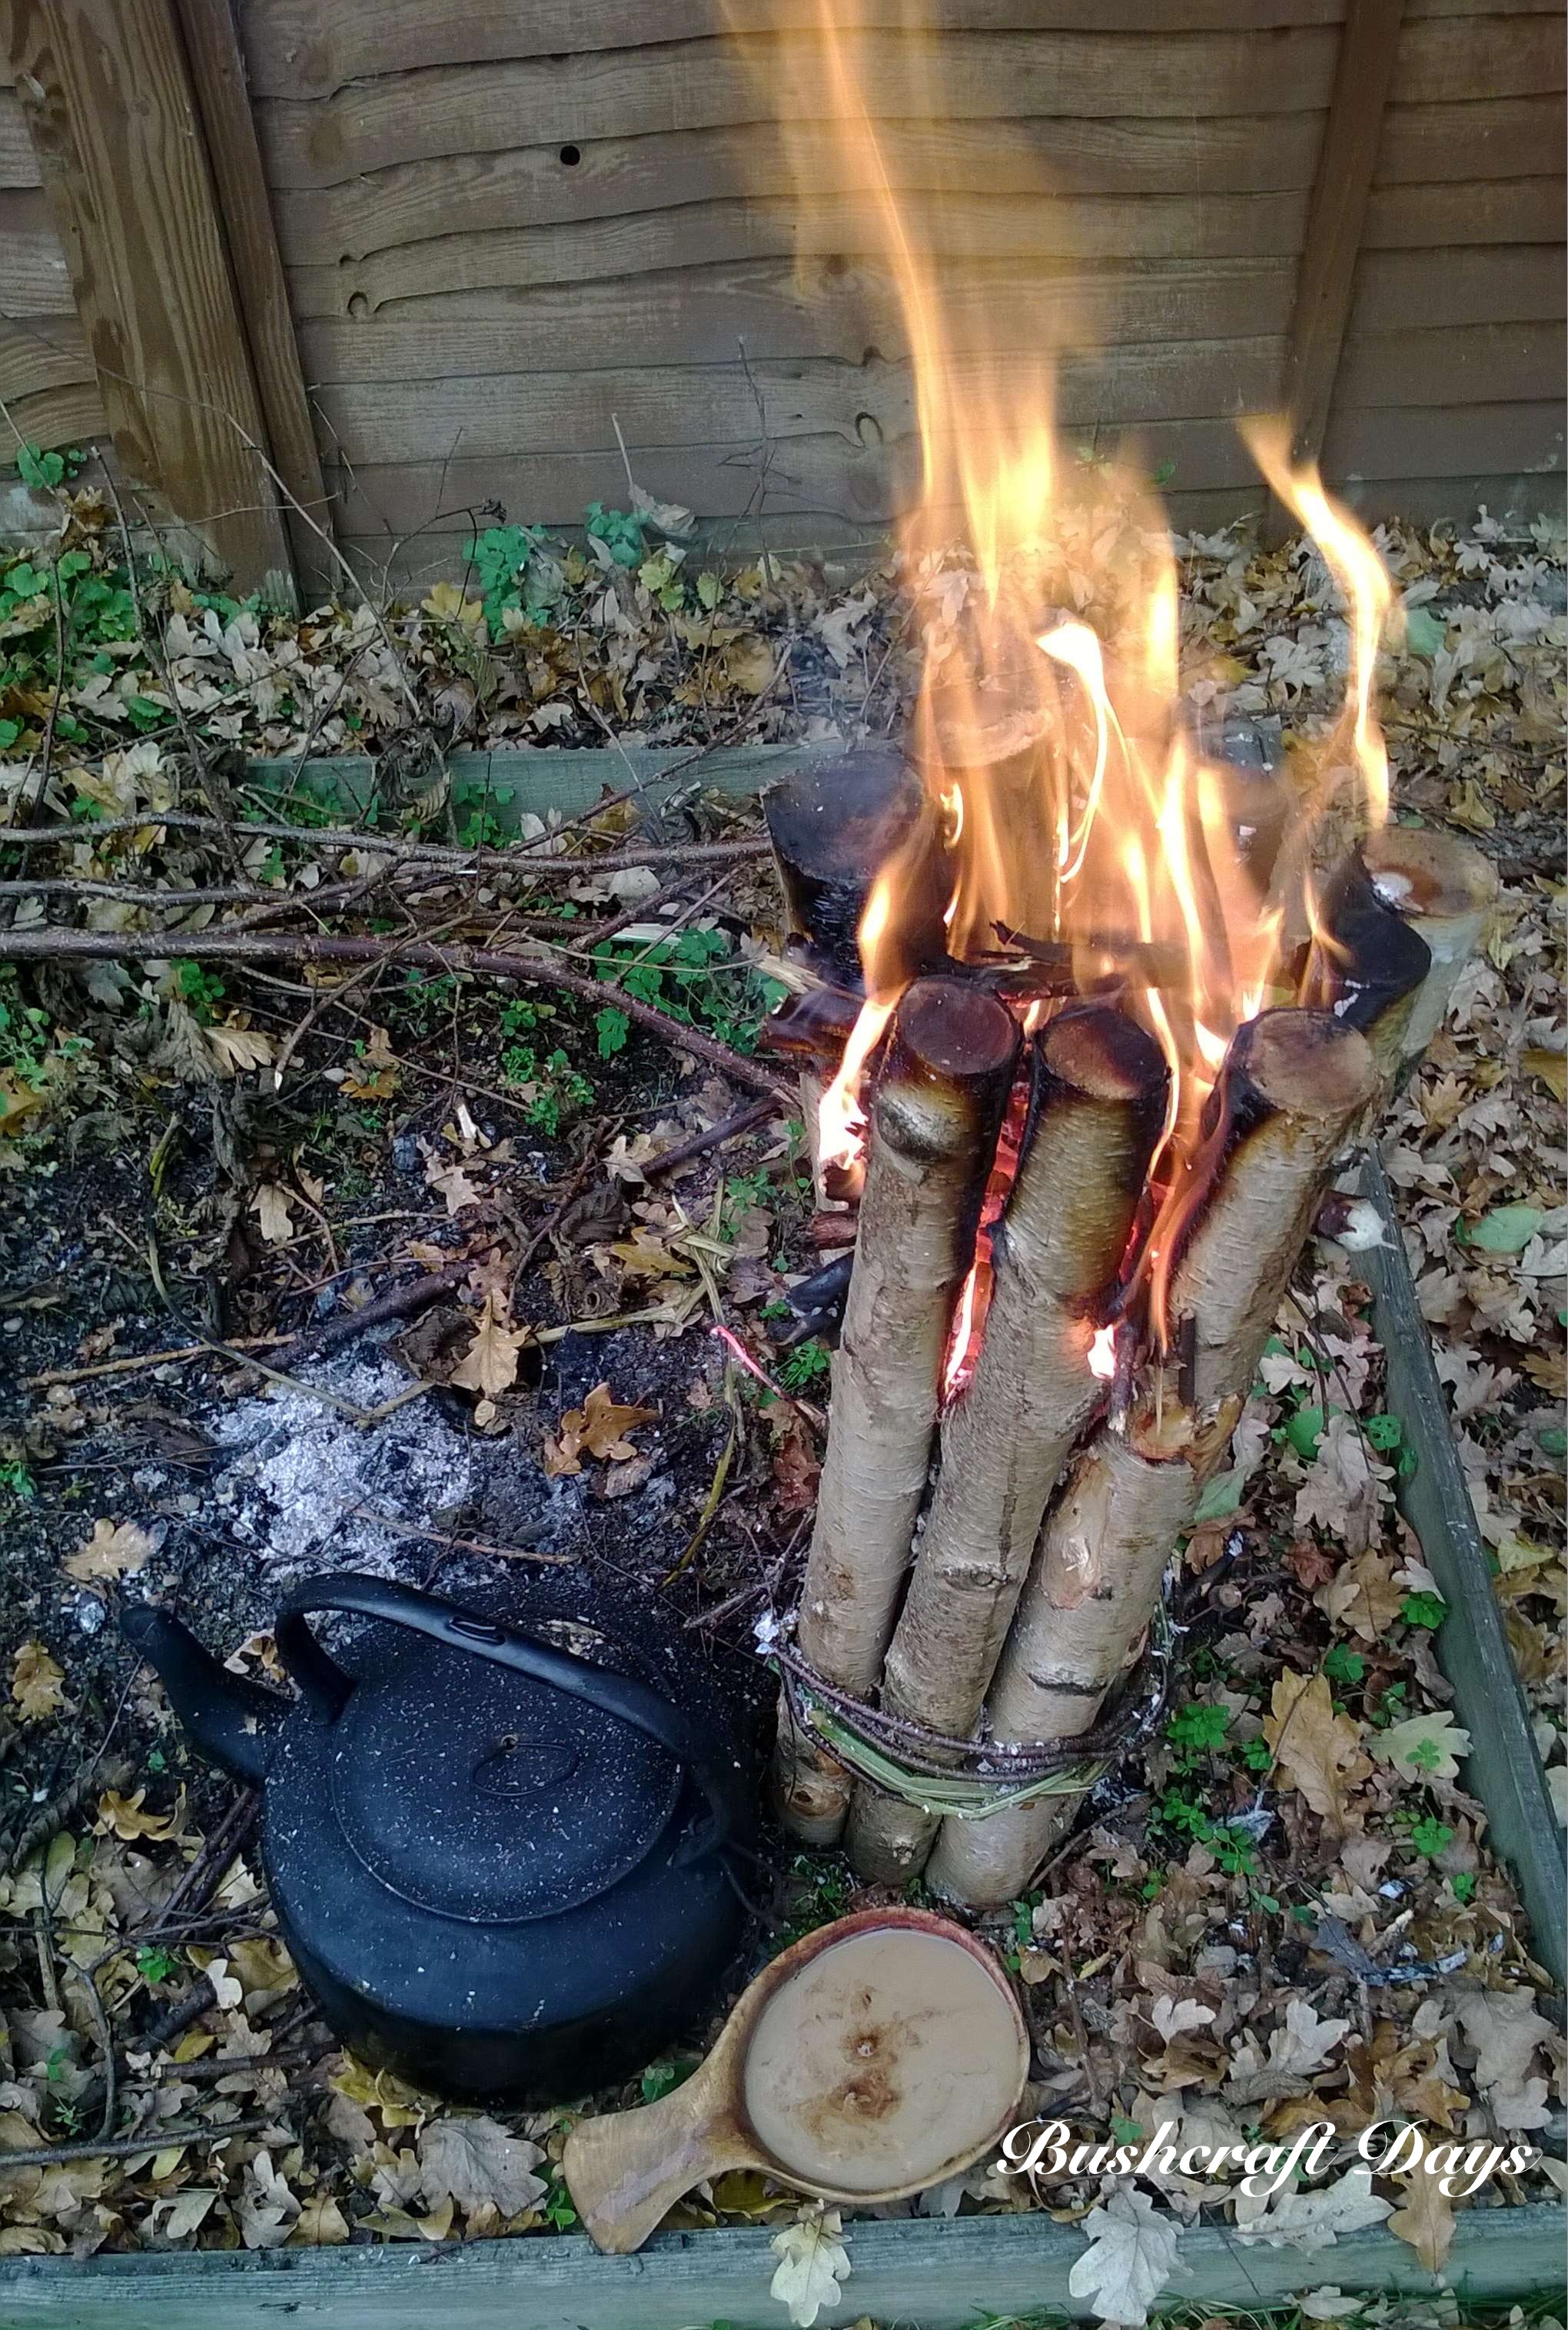
As you can see from the picture below, even though the wood was wet I still got my coffee.
Read on to see how to put one of these candles together.
This type of candle is ideal for ground conditions where it is very hard (it is self supporting and easy to reposition) or where the ground is waterlogged (the burn area is raised up off the ground). I have used this method on a number of occasions but until now I have always hammered the individual logs into the ground to form a circle. It was on one of my occasional trawls of You Tube that I came across a video from Bushcraftmyway showing this adaptation that is free standing. I have put a link to the video at the bottom of the post.
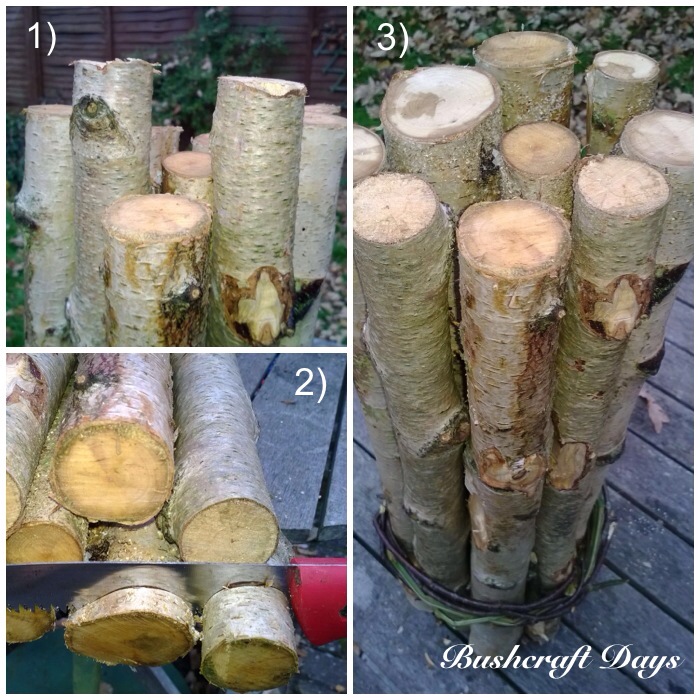
To begin with I trimmed the small logs to a length of about 50cms and collected a mixture of flexible bramble (scraping the hooks off), willow and birch shoots to use as cordage.
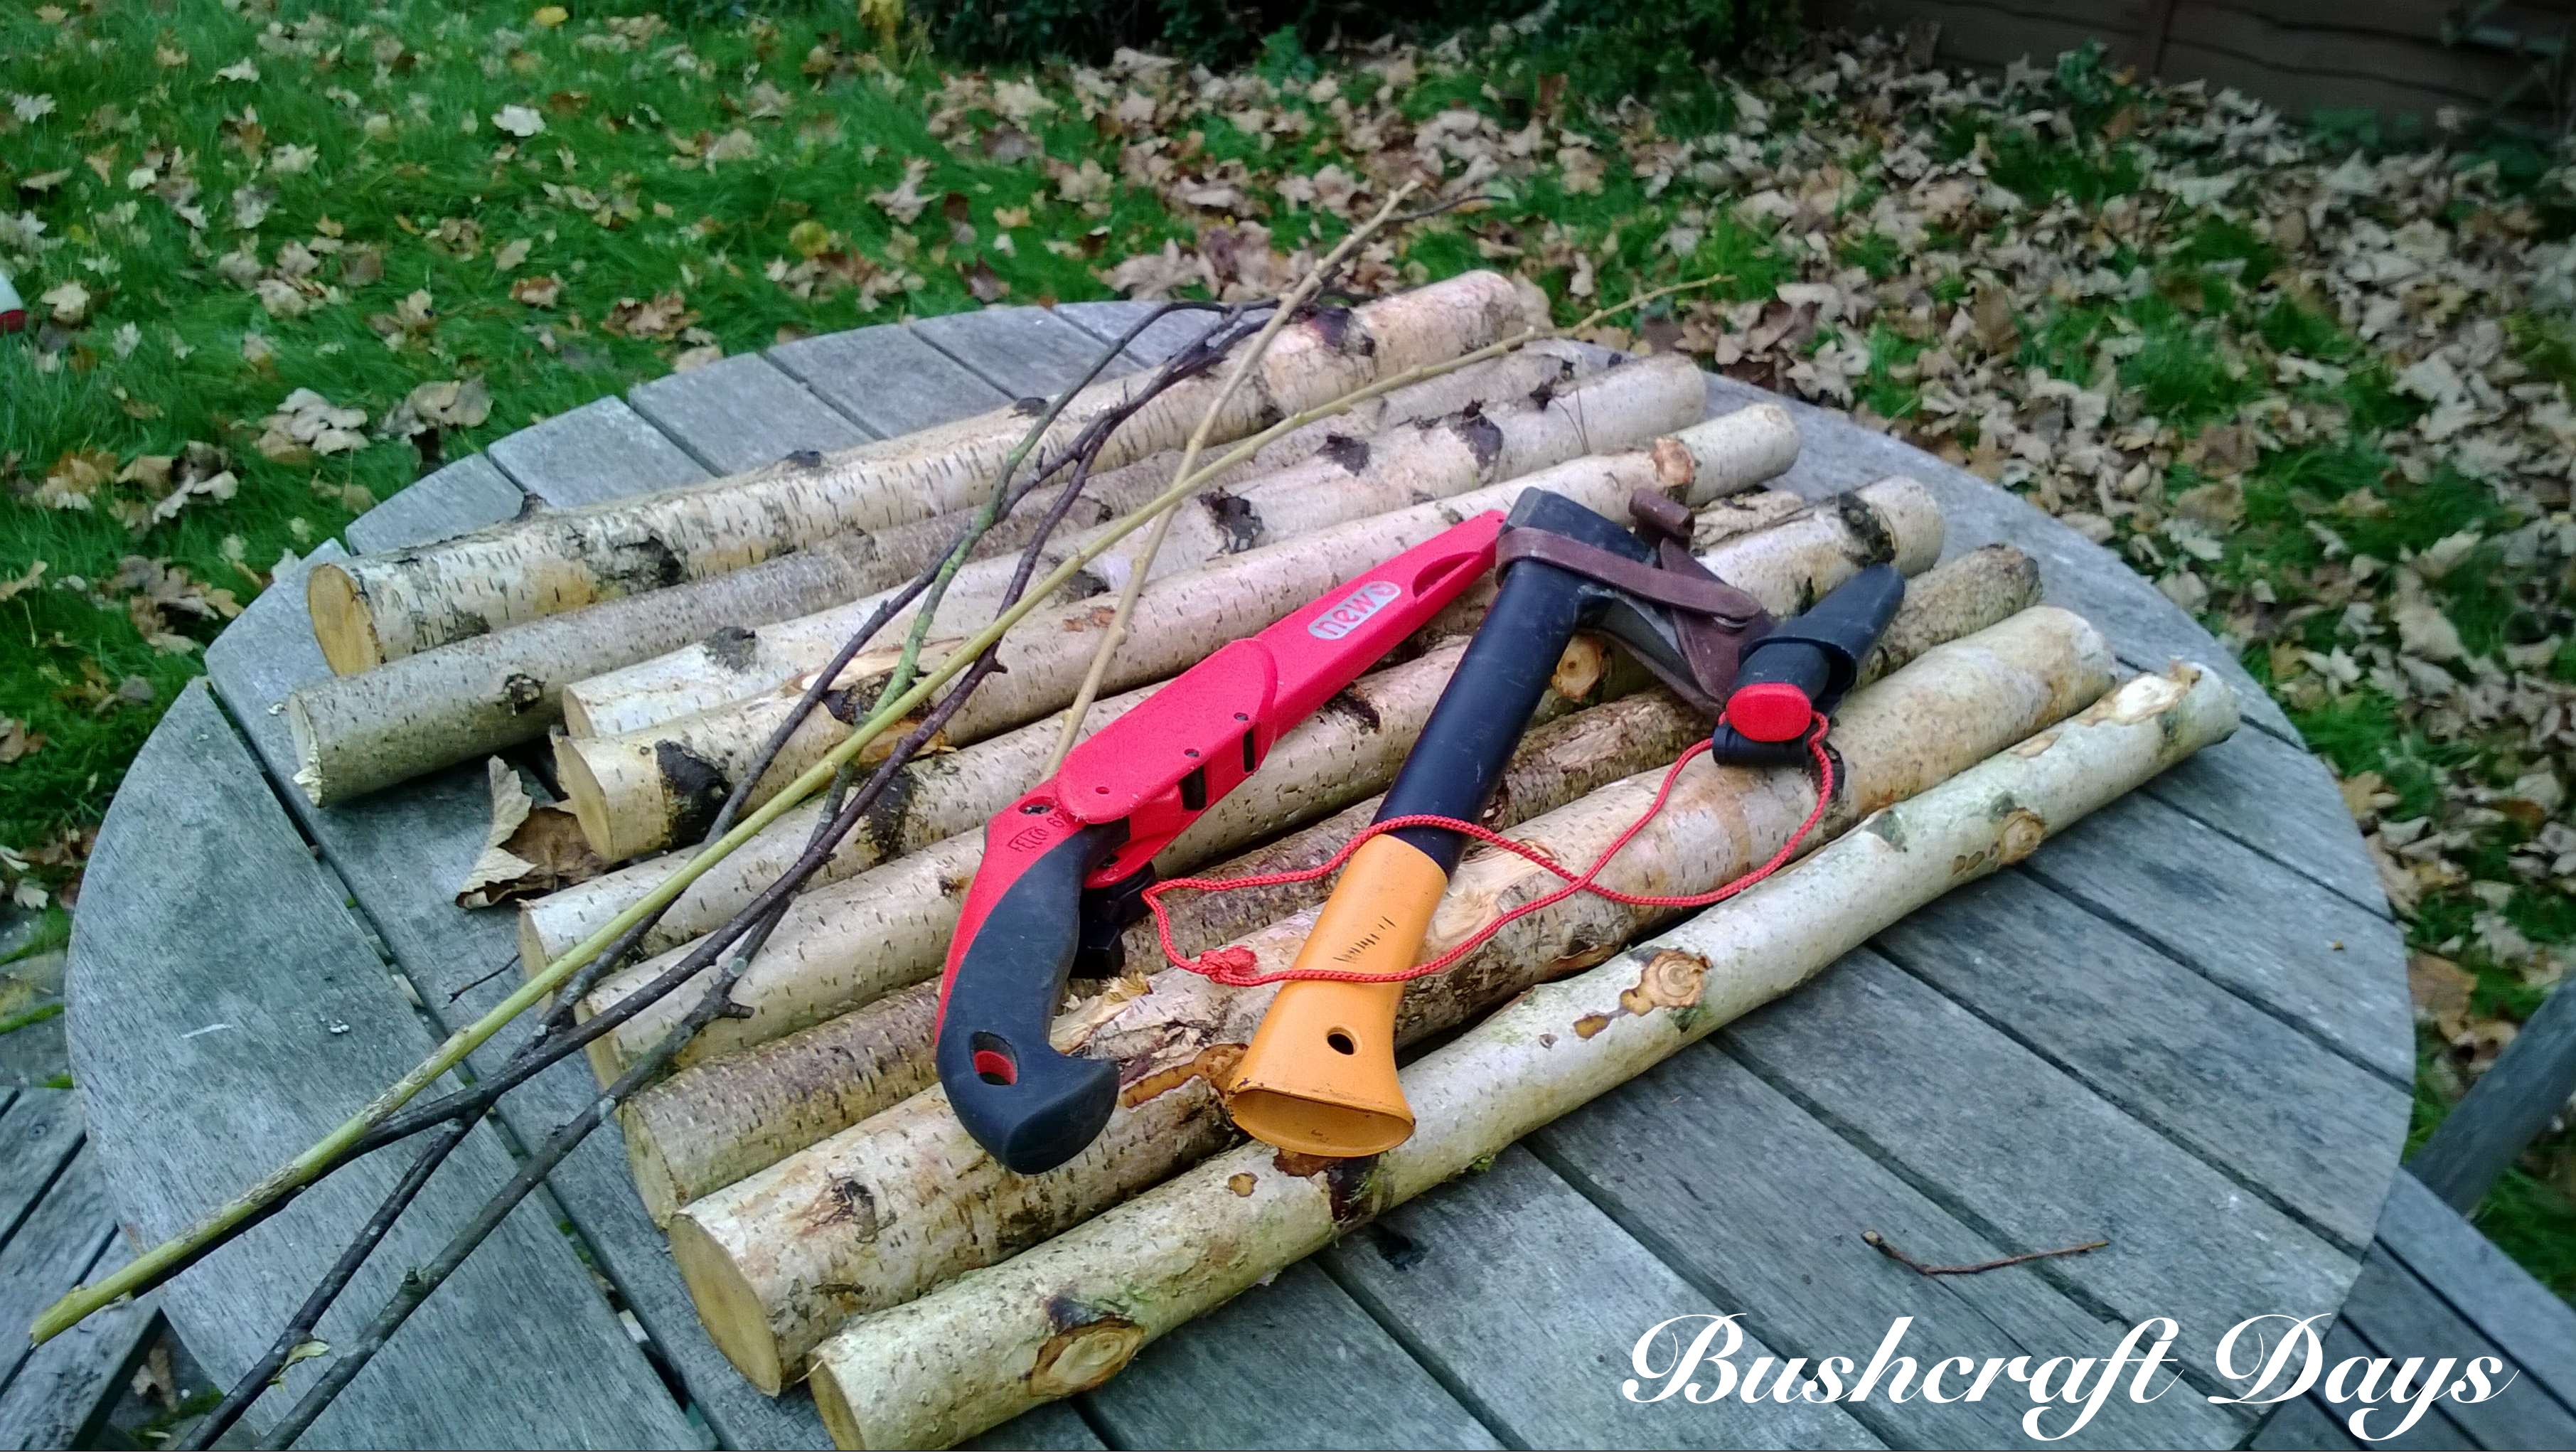
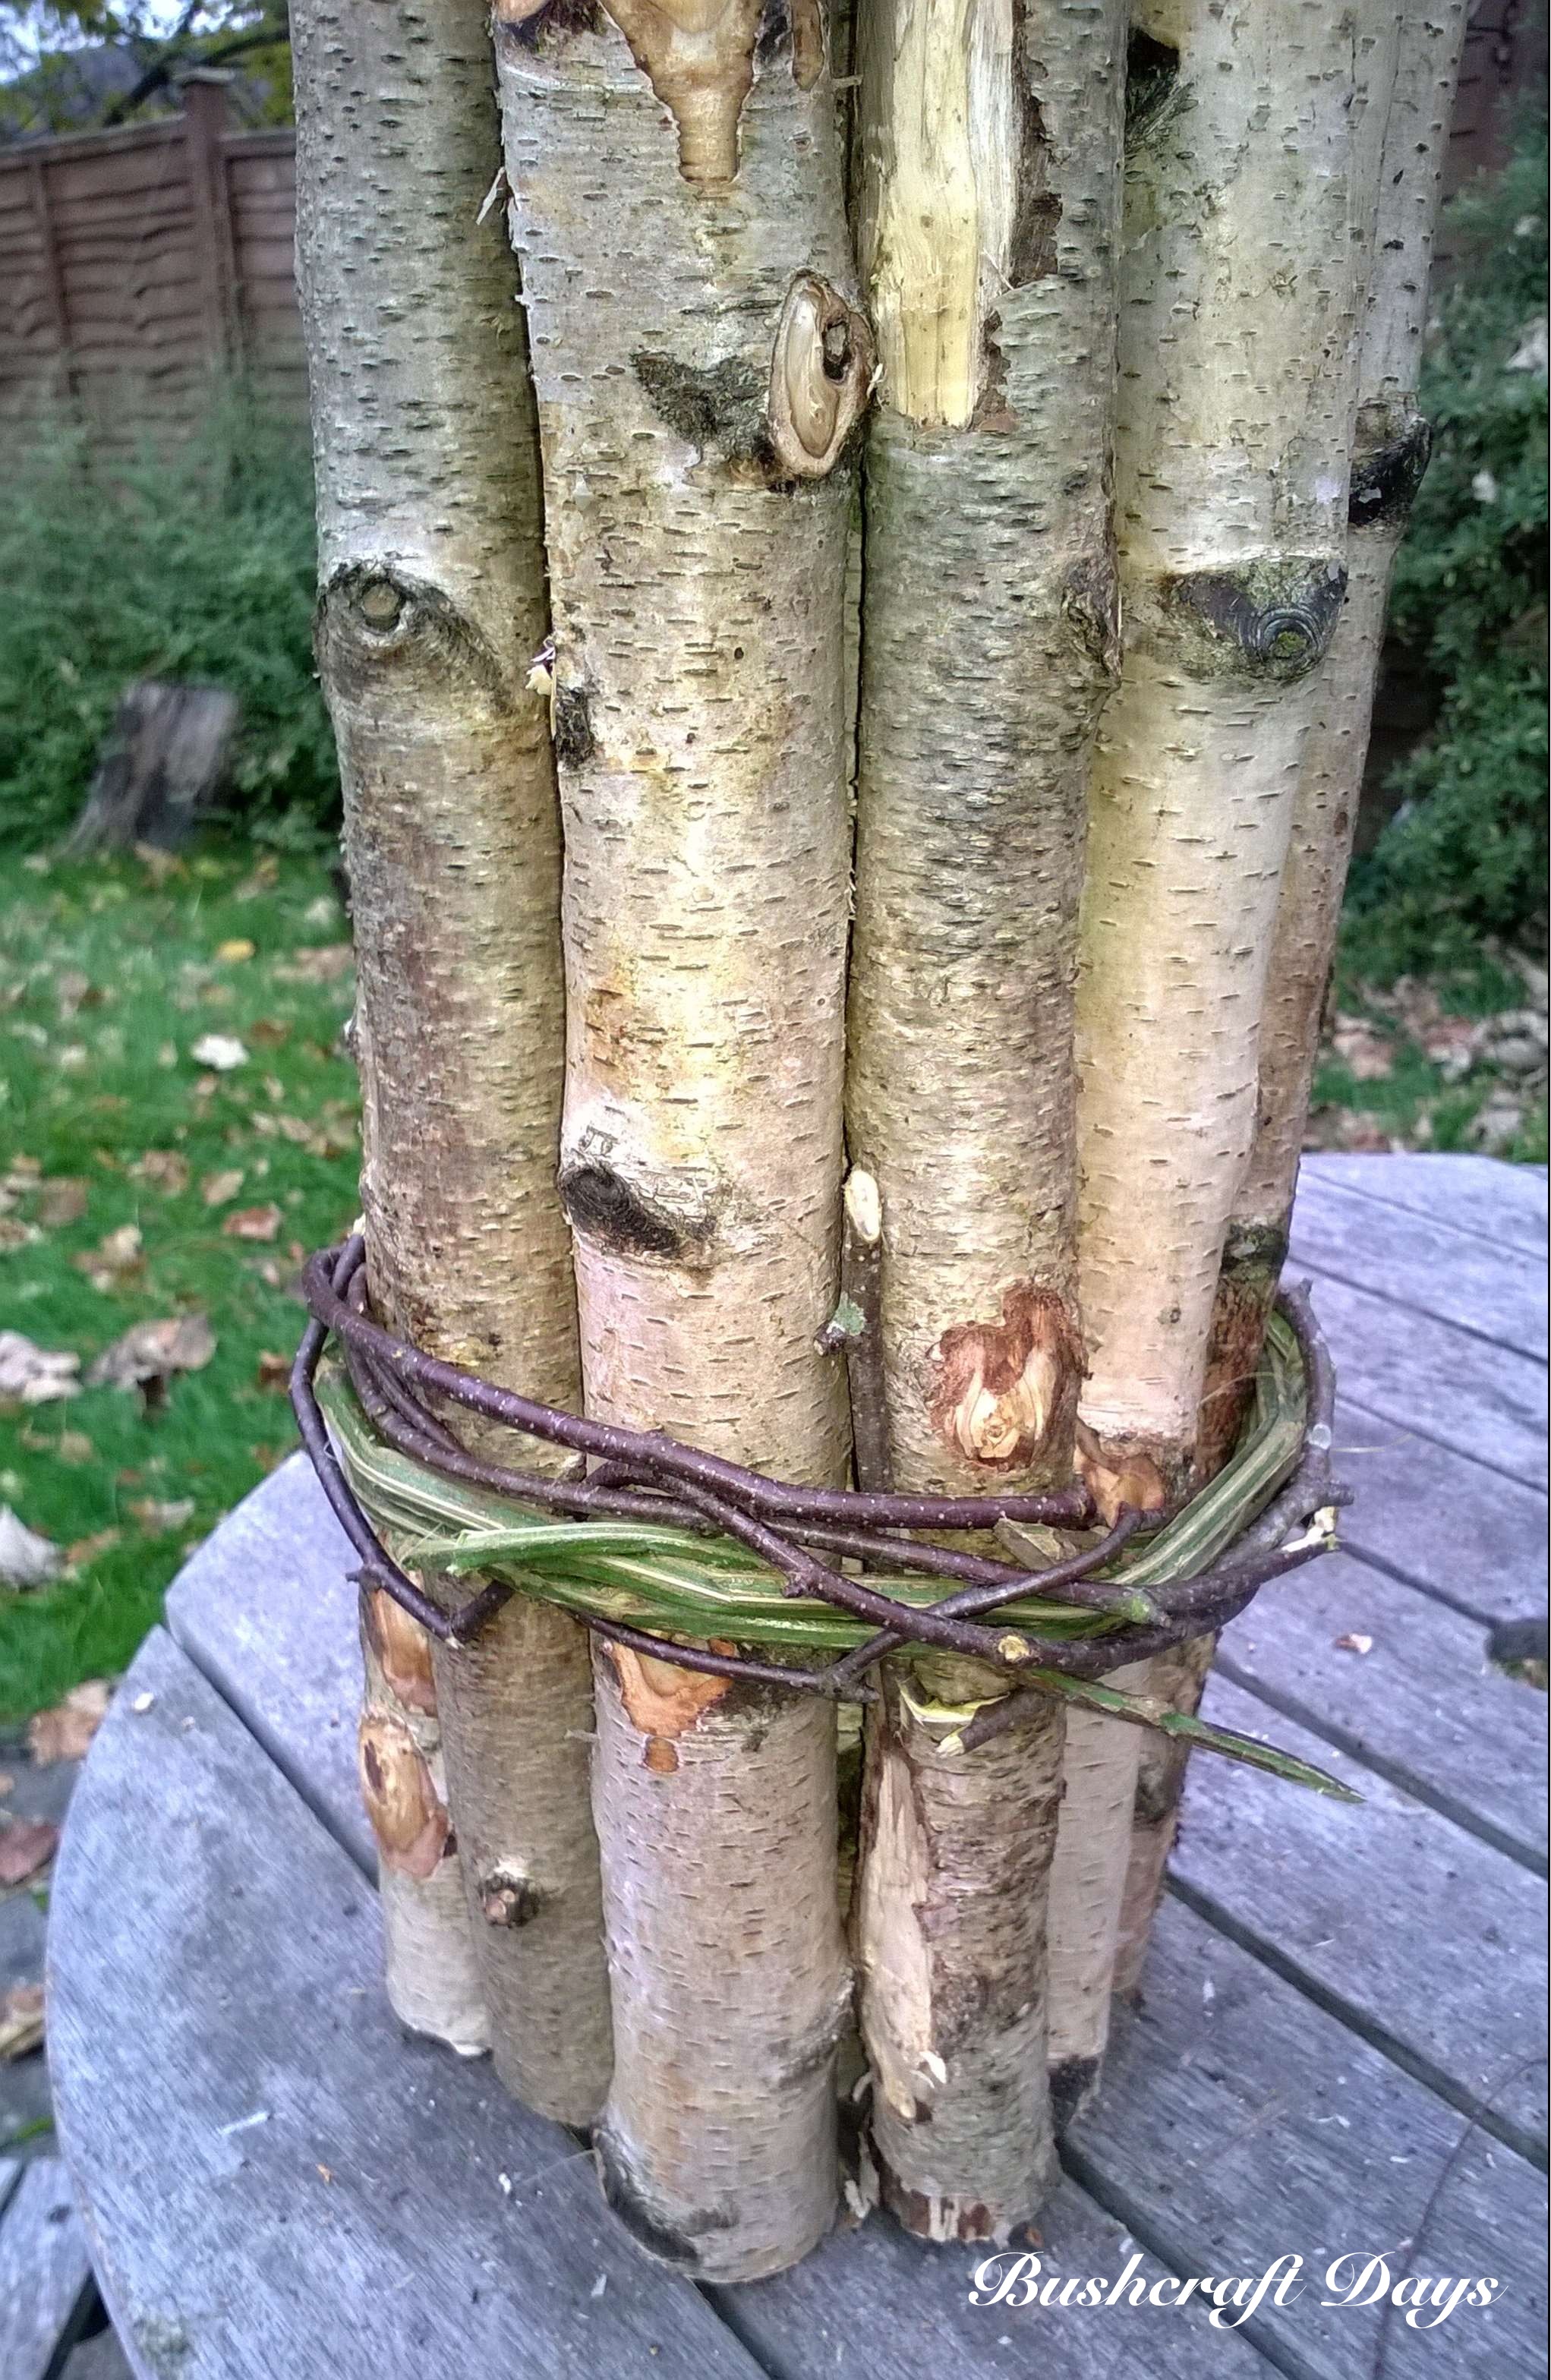
I gathered all the logs between my thighs and lashed them together with the bramble at first. I used bramble to begin with as the willow and birch I had gathered was quite thin and I thought might snap too easily. I also wanted to test the bramble out to see how useful it was in its ‘raw’ state, without actually stripping it down and turning it into cordage.
It was easy to wrap the birch and willow around the candle for extra support after the bramble was on. I also kept the cordage near the bottom to keep it all away from the flames of the candle.
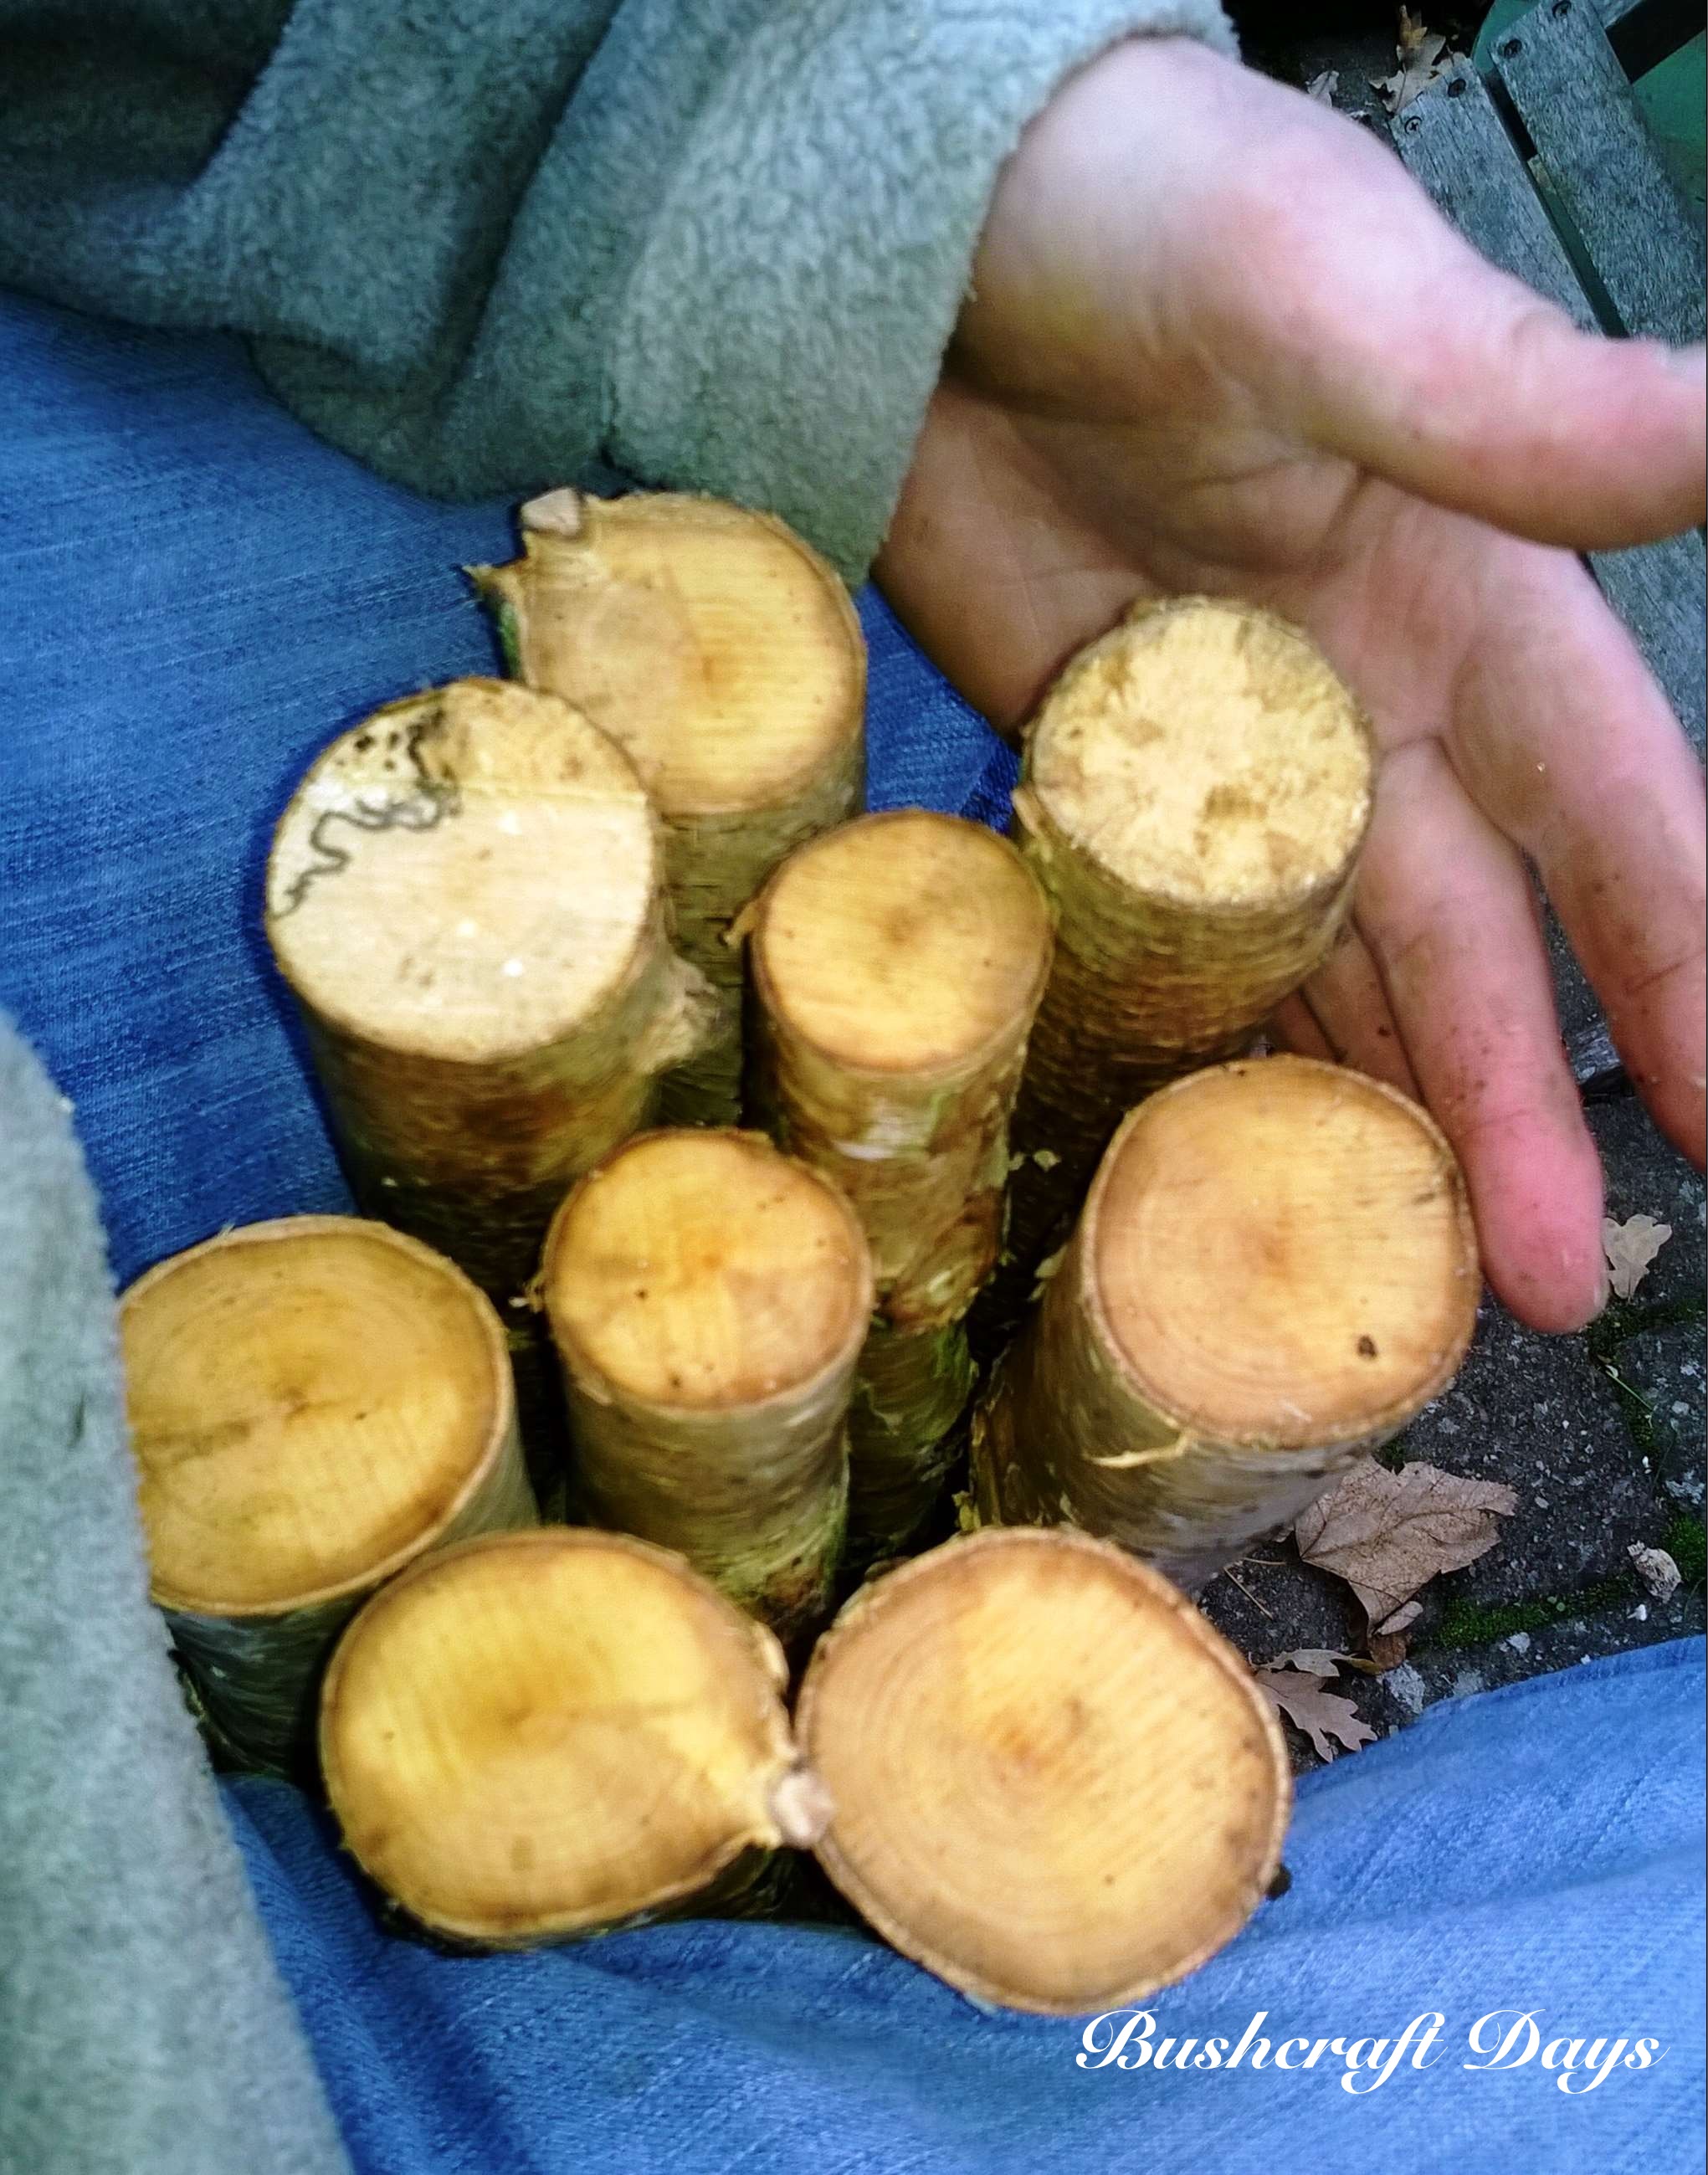
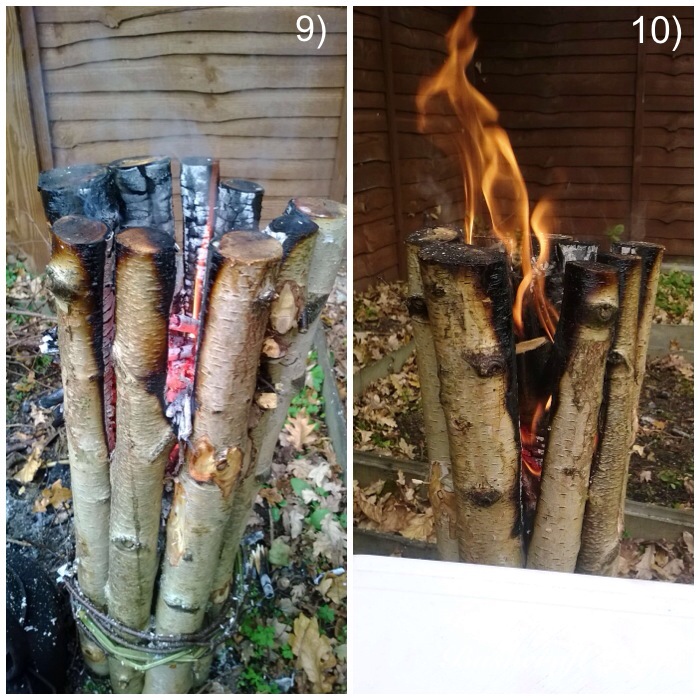
If you are smart you will have cut all the poles to the same size, as you can see I had not (picture 1). However with the bundle tied up you can turn the whole thing on its side and trim them to size (picture 2). It will never be a perfectly flat surface but it’s good enough for a kettle ( picture 3).
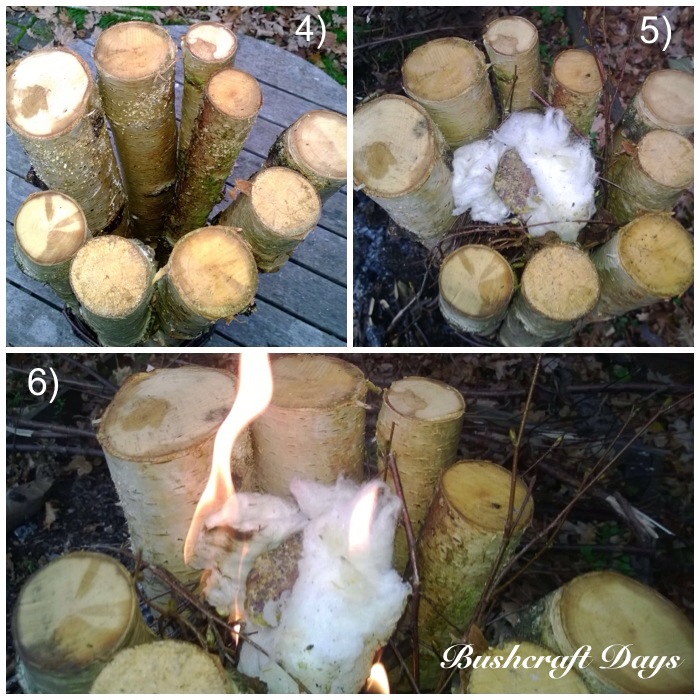
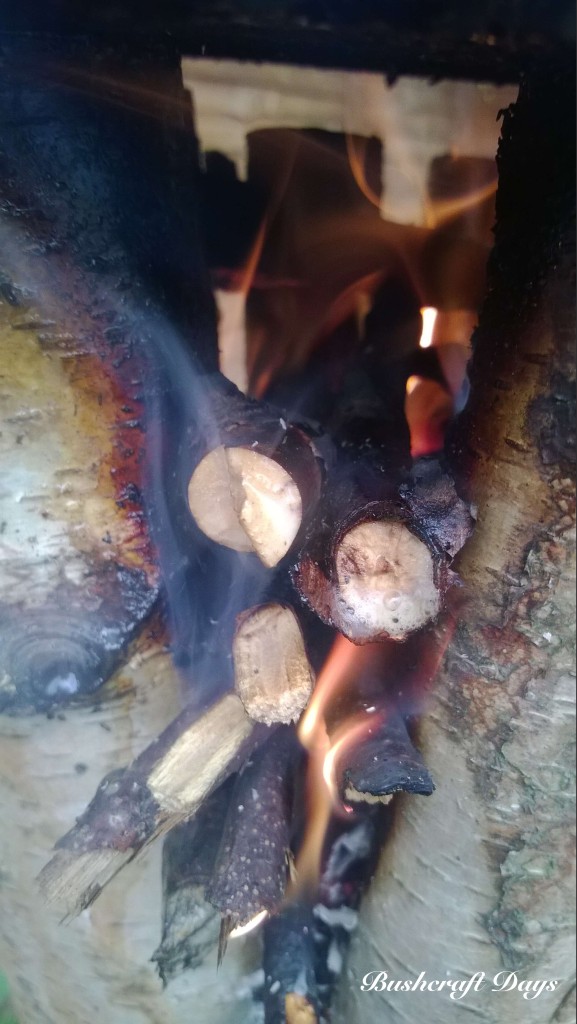
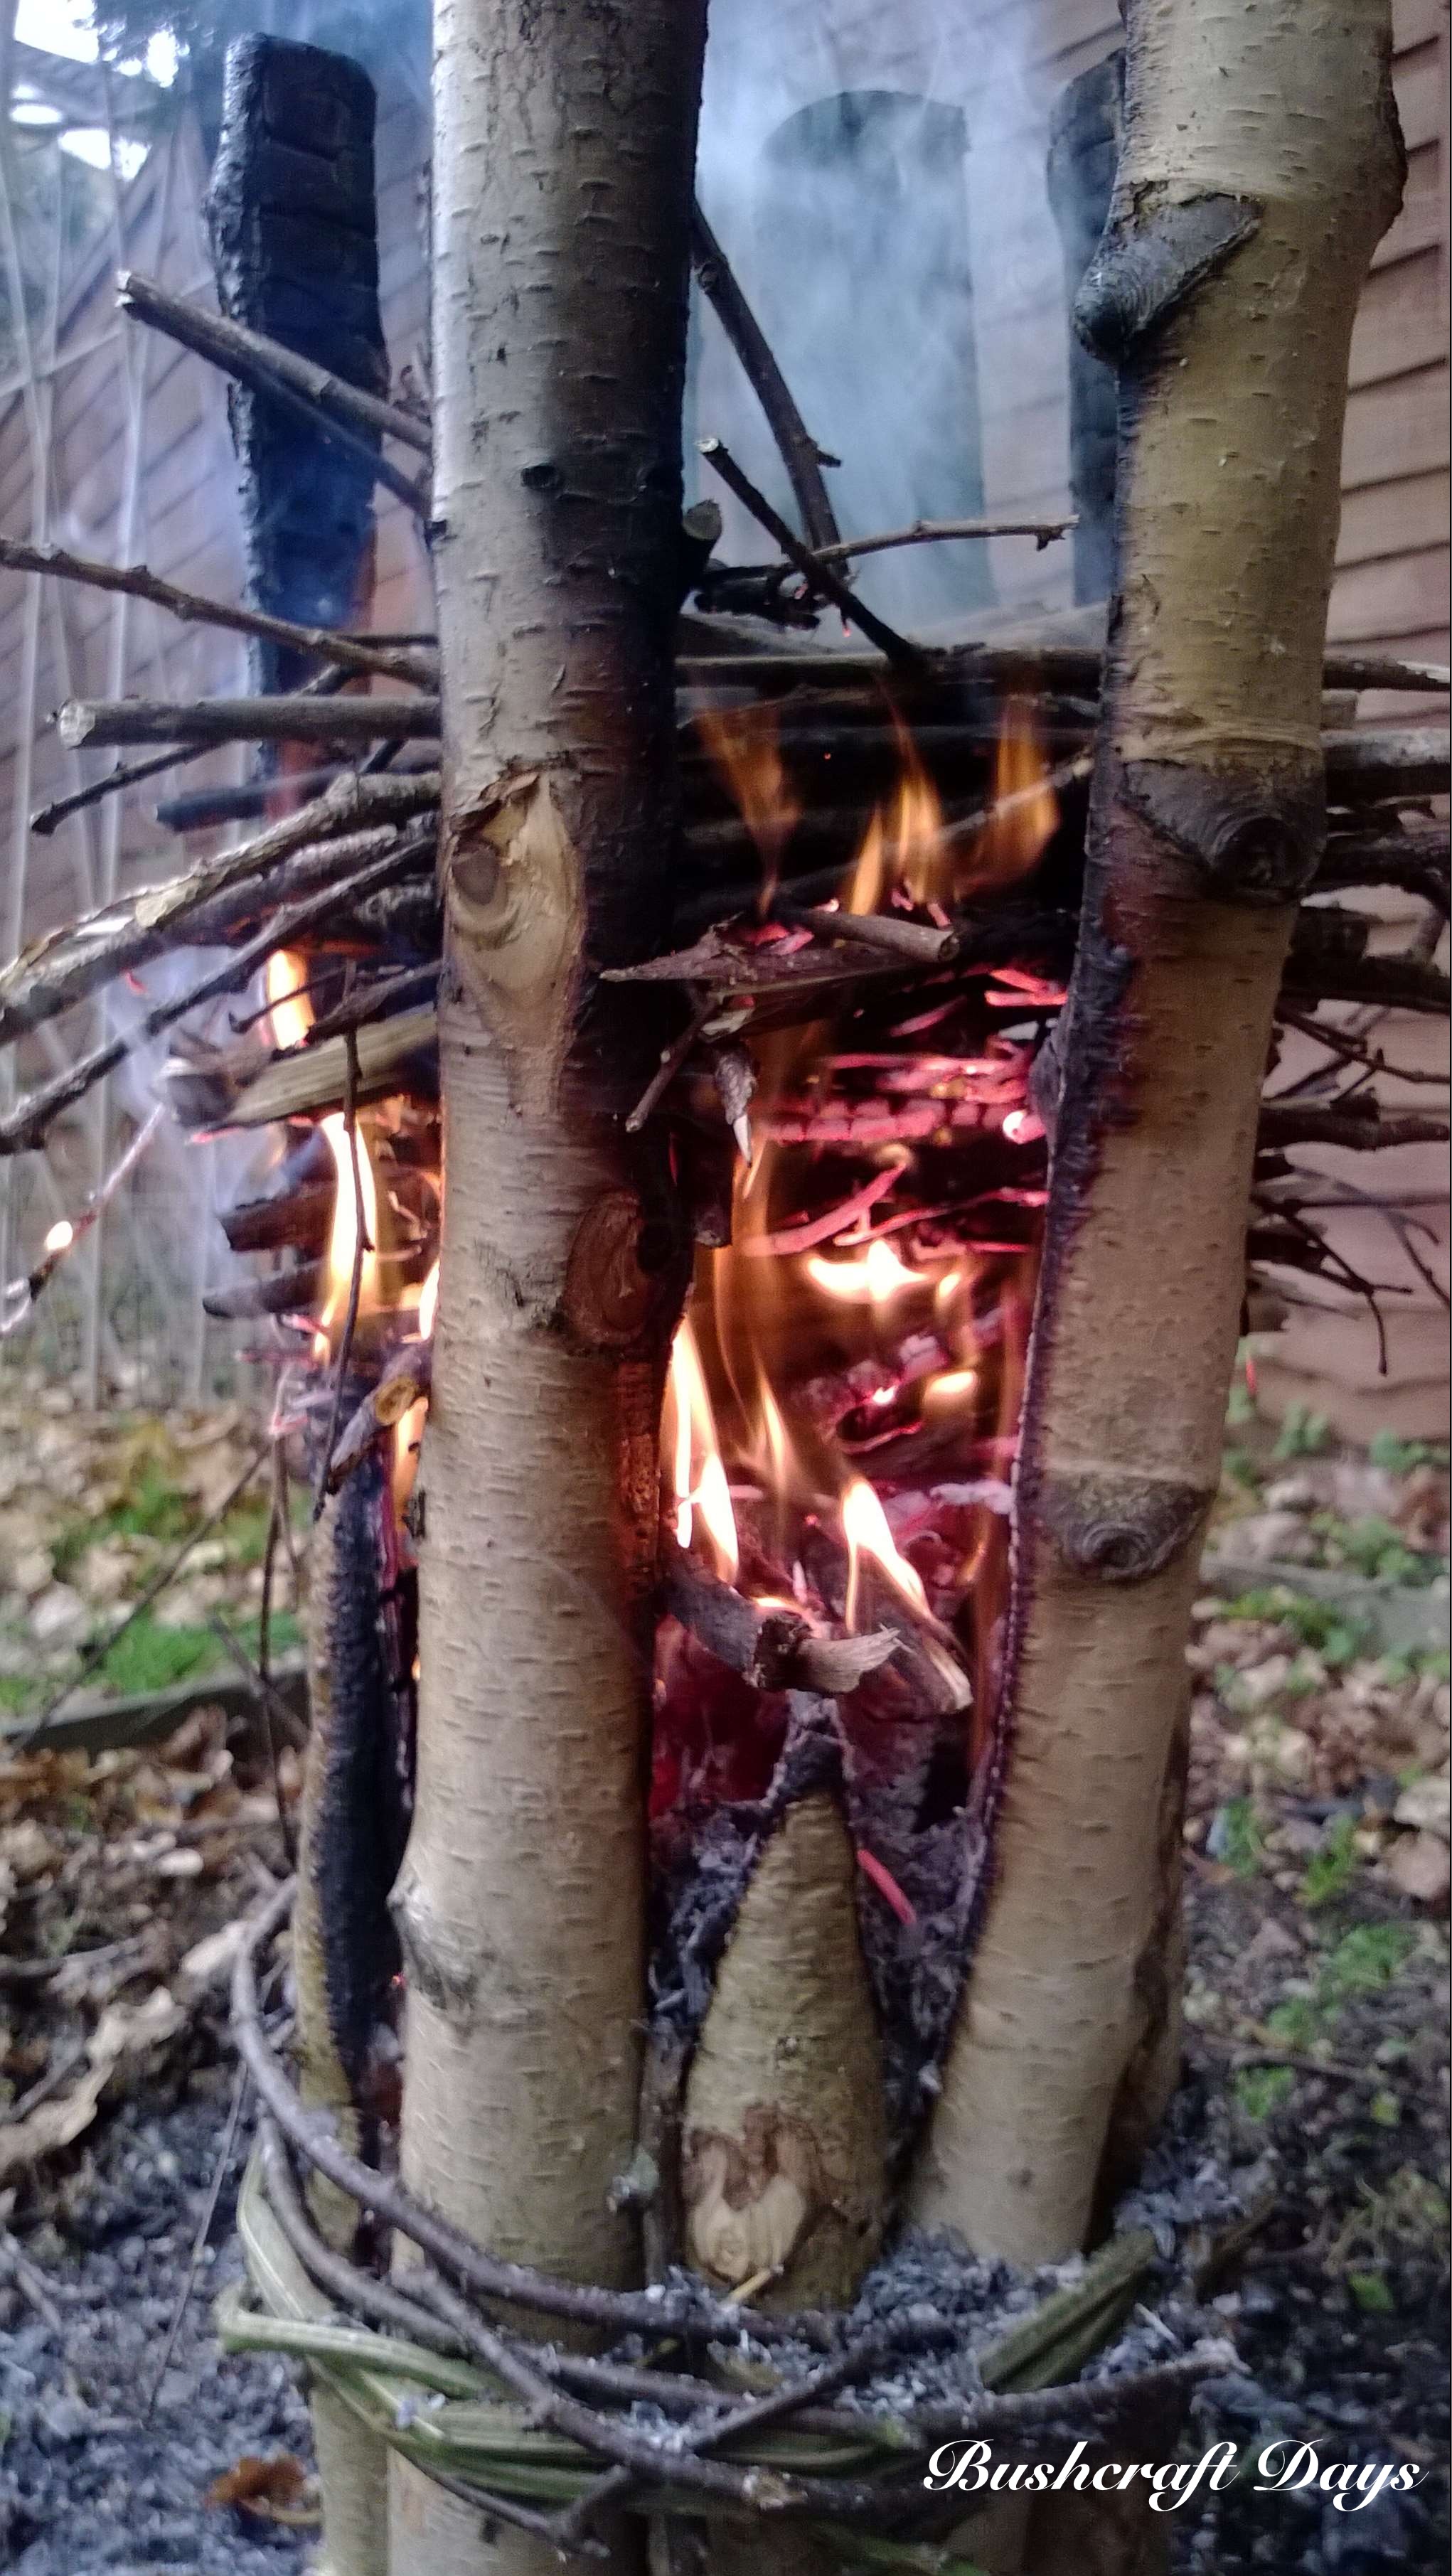
I pulled the tops of the logs apart and put a smaller, pointed log in the centre to keep the top slightly open (picture 4). Then I stuffed very fine kindling (broken branch tips) into the centre and placed on top some Vaseline-smeared cotton wool and some resin (picture 5). (When you are lighting up wet wood you need to use the best fire-lighting method to hand). One match and the candle was away (picture 6).
I had some charcoal ends left from a previous fire so added them on top. These are great for adding that extra heart to the fire.
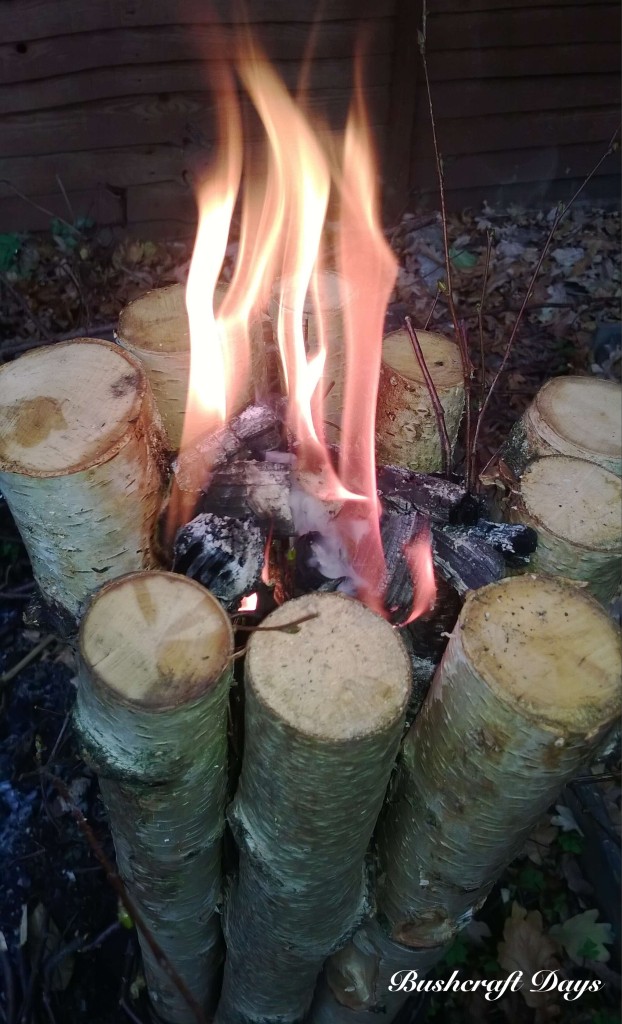
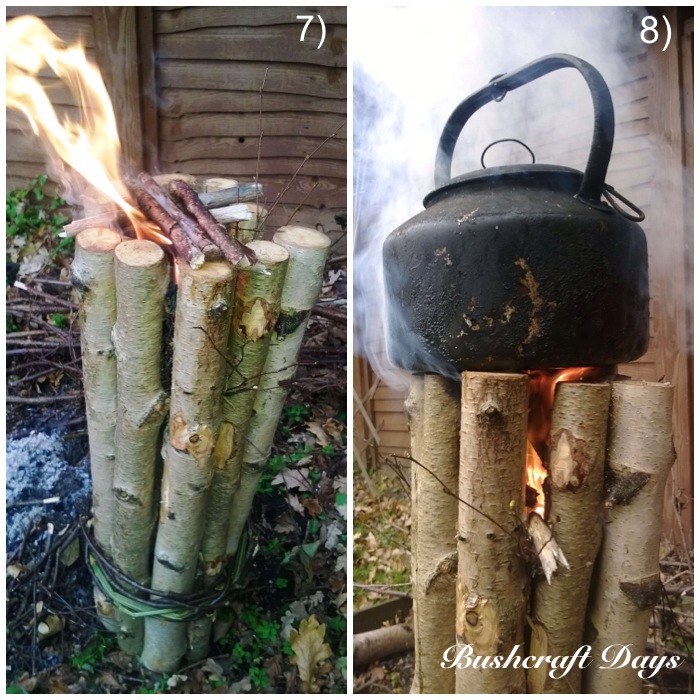
Next I added small twigs in a criss cross pattern on top of the charcoal. This is a good fire lay for the candle as it is stable and you can make a number of layers (picture 7). Once the fire is going properly pop the kettle on (picture 8). I half filled this group kettle which would have made brews for at least six people.
I had prepared a mixture of twigs for maintaining the fire. Some had been hung up and some had been found on the ground. As you can see here they did contain a lot of moisture but thankfully the fire was hot enough to boil that moisture off easily.
There were enough gaps at the top of the candle to keep popping twigs in to feed the fire.
NB if you think there is any possibility of the candle falling over, do not let small children feed twigs into the fire: if they push too enthusiastically they could topple it.
In about 15 minutes I had a boiling kettle and a nice cup of coffee made.
By the time I had my coffee the fire had died down as the support logs were so wet (picture 9). I added some more twigs and had to ‘waft’ it for a while (using the white board you can see in picture 10). I happened to build this candle on a day with no wind in a sheltered spot so wafting was a must. If you have a gentle breeze flowing through the logs all you’ll need do is keep adding twigs.
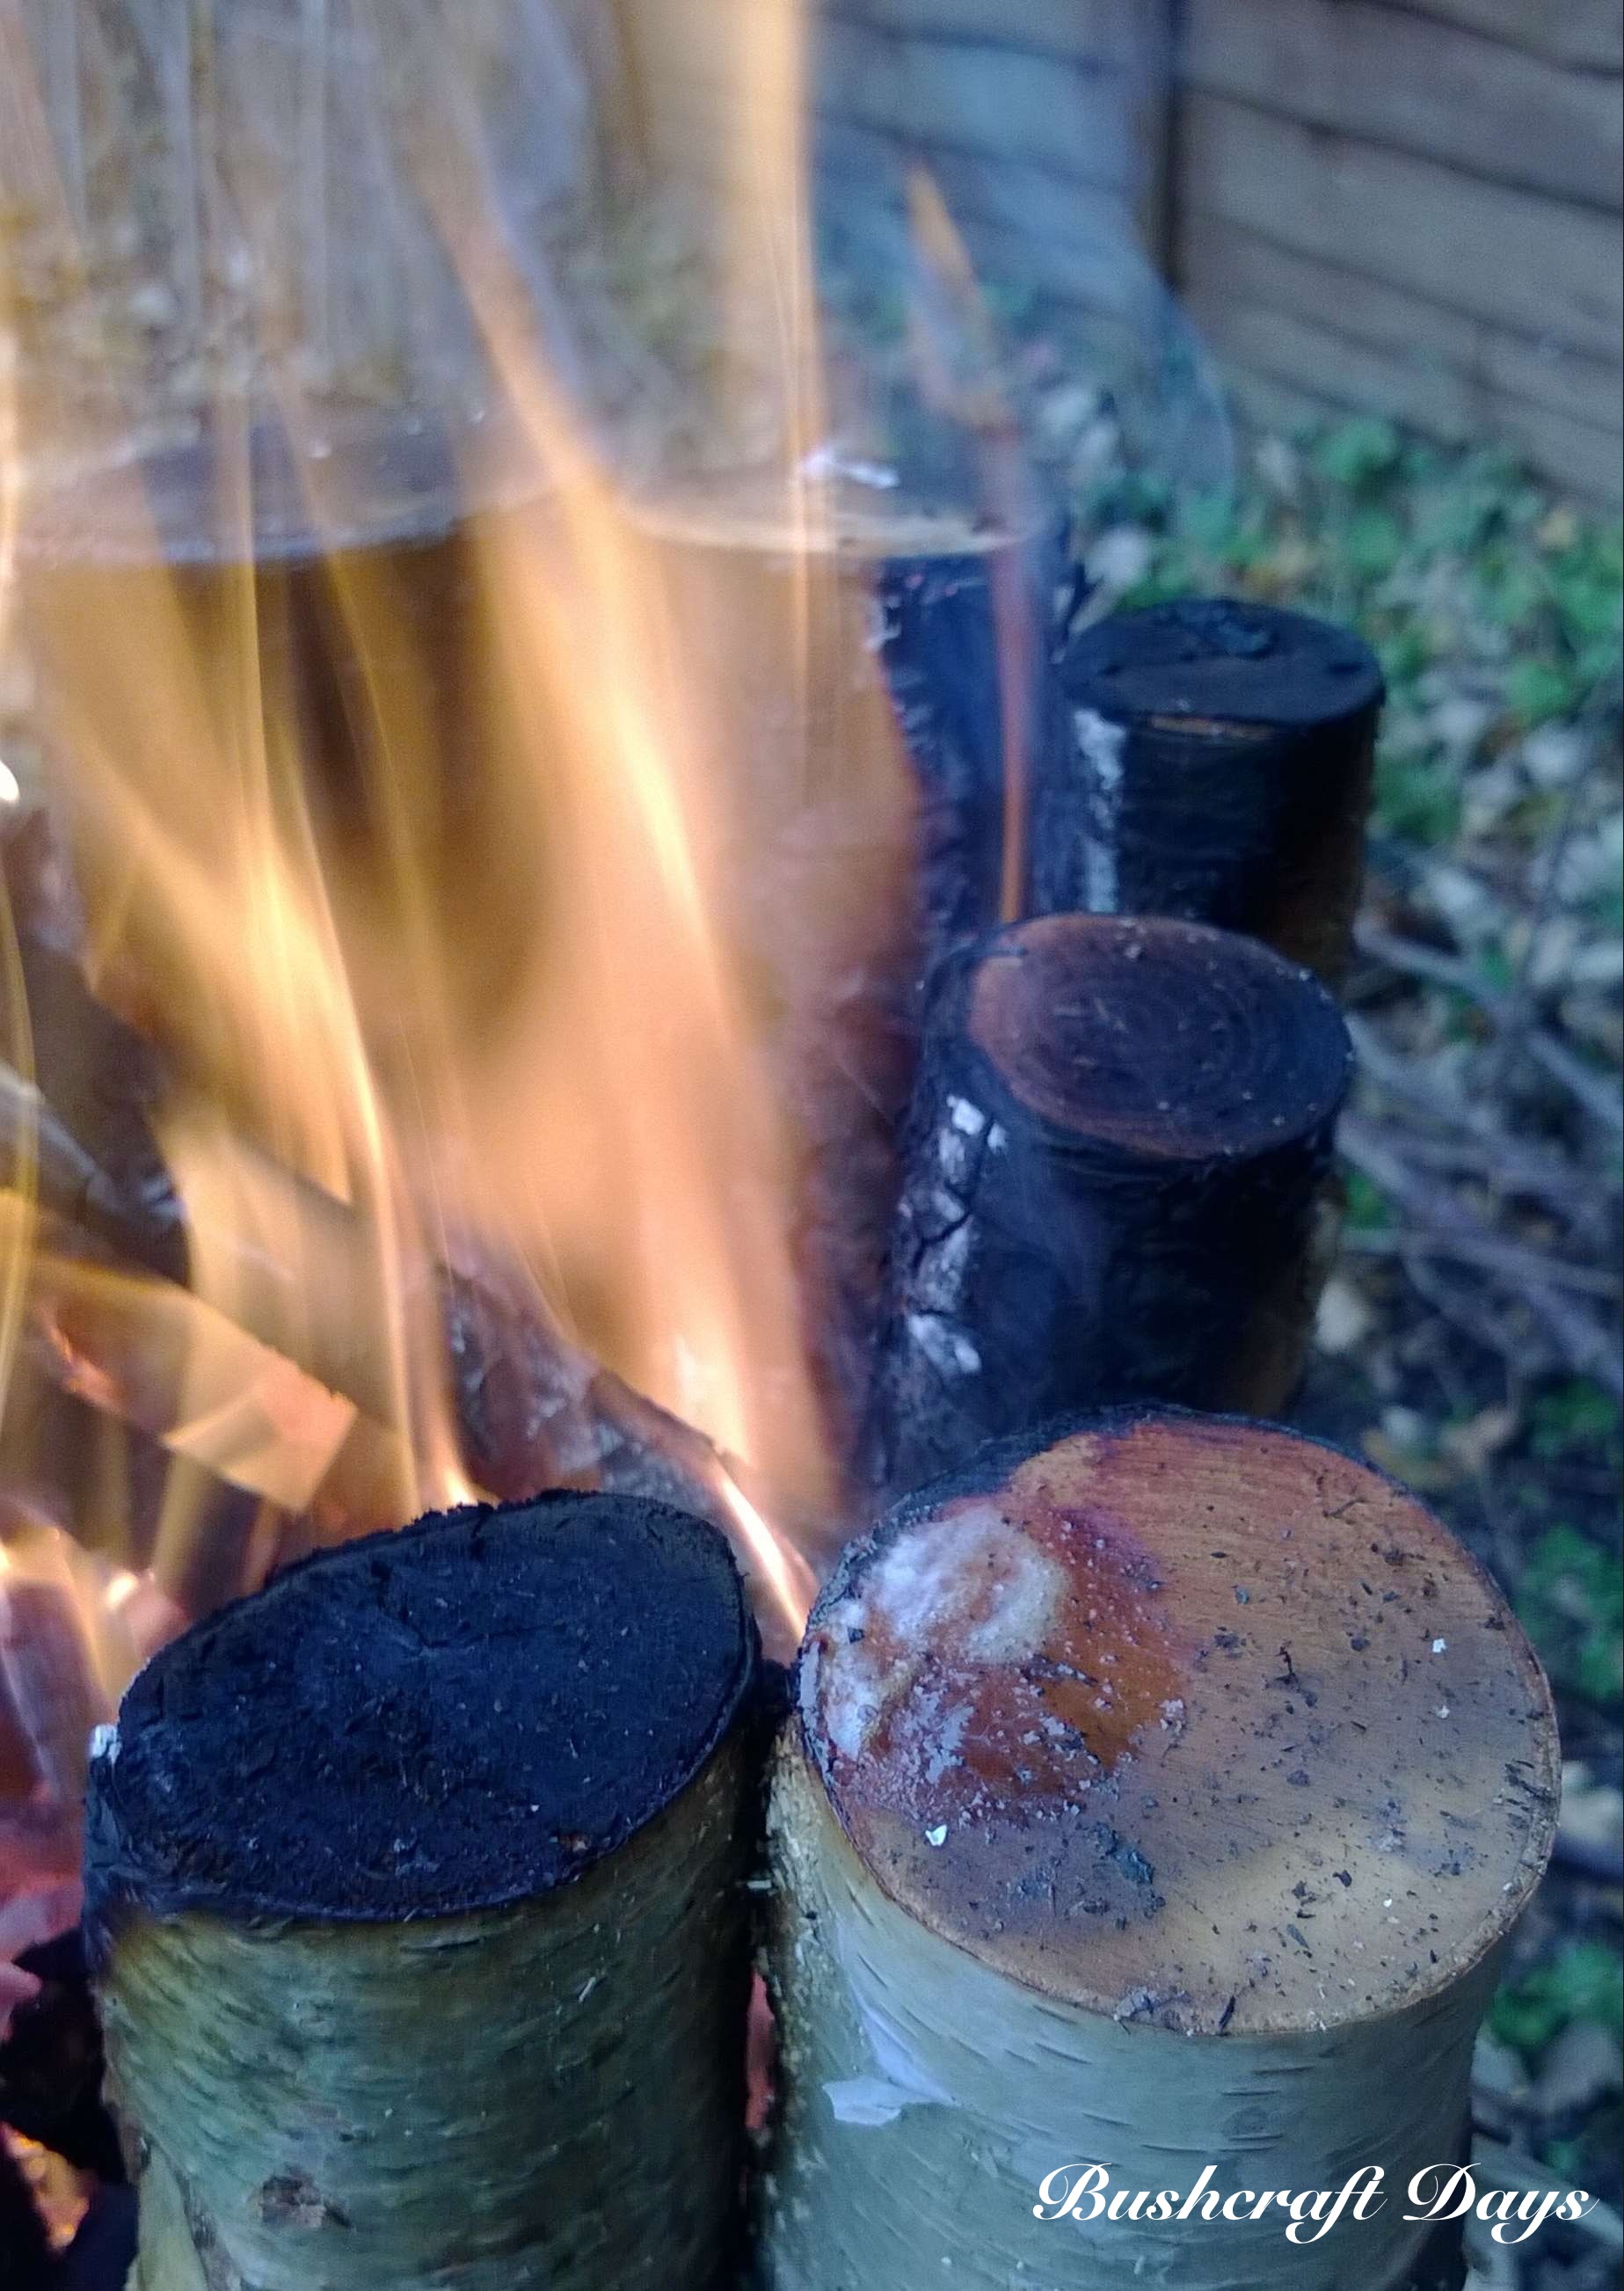
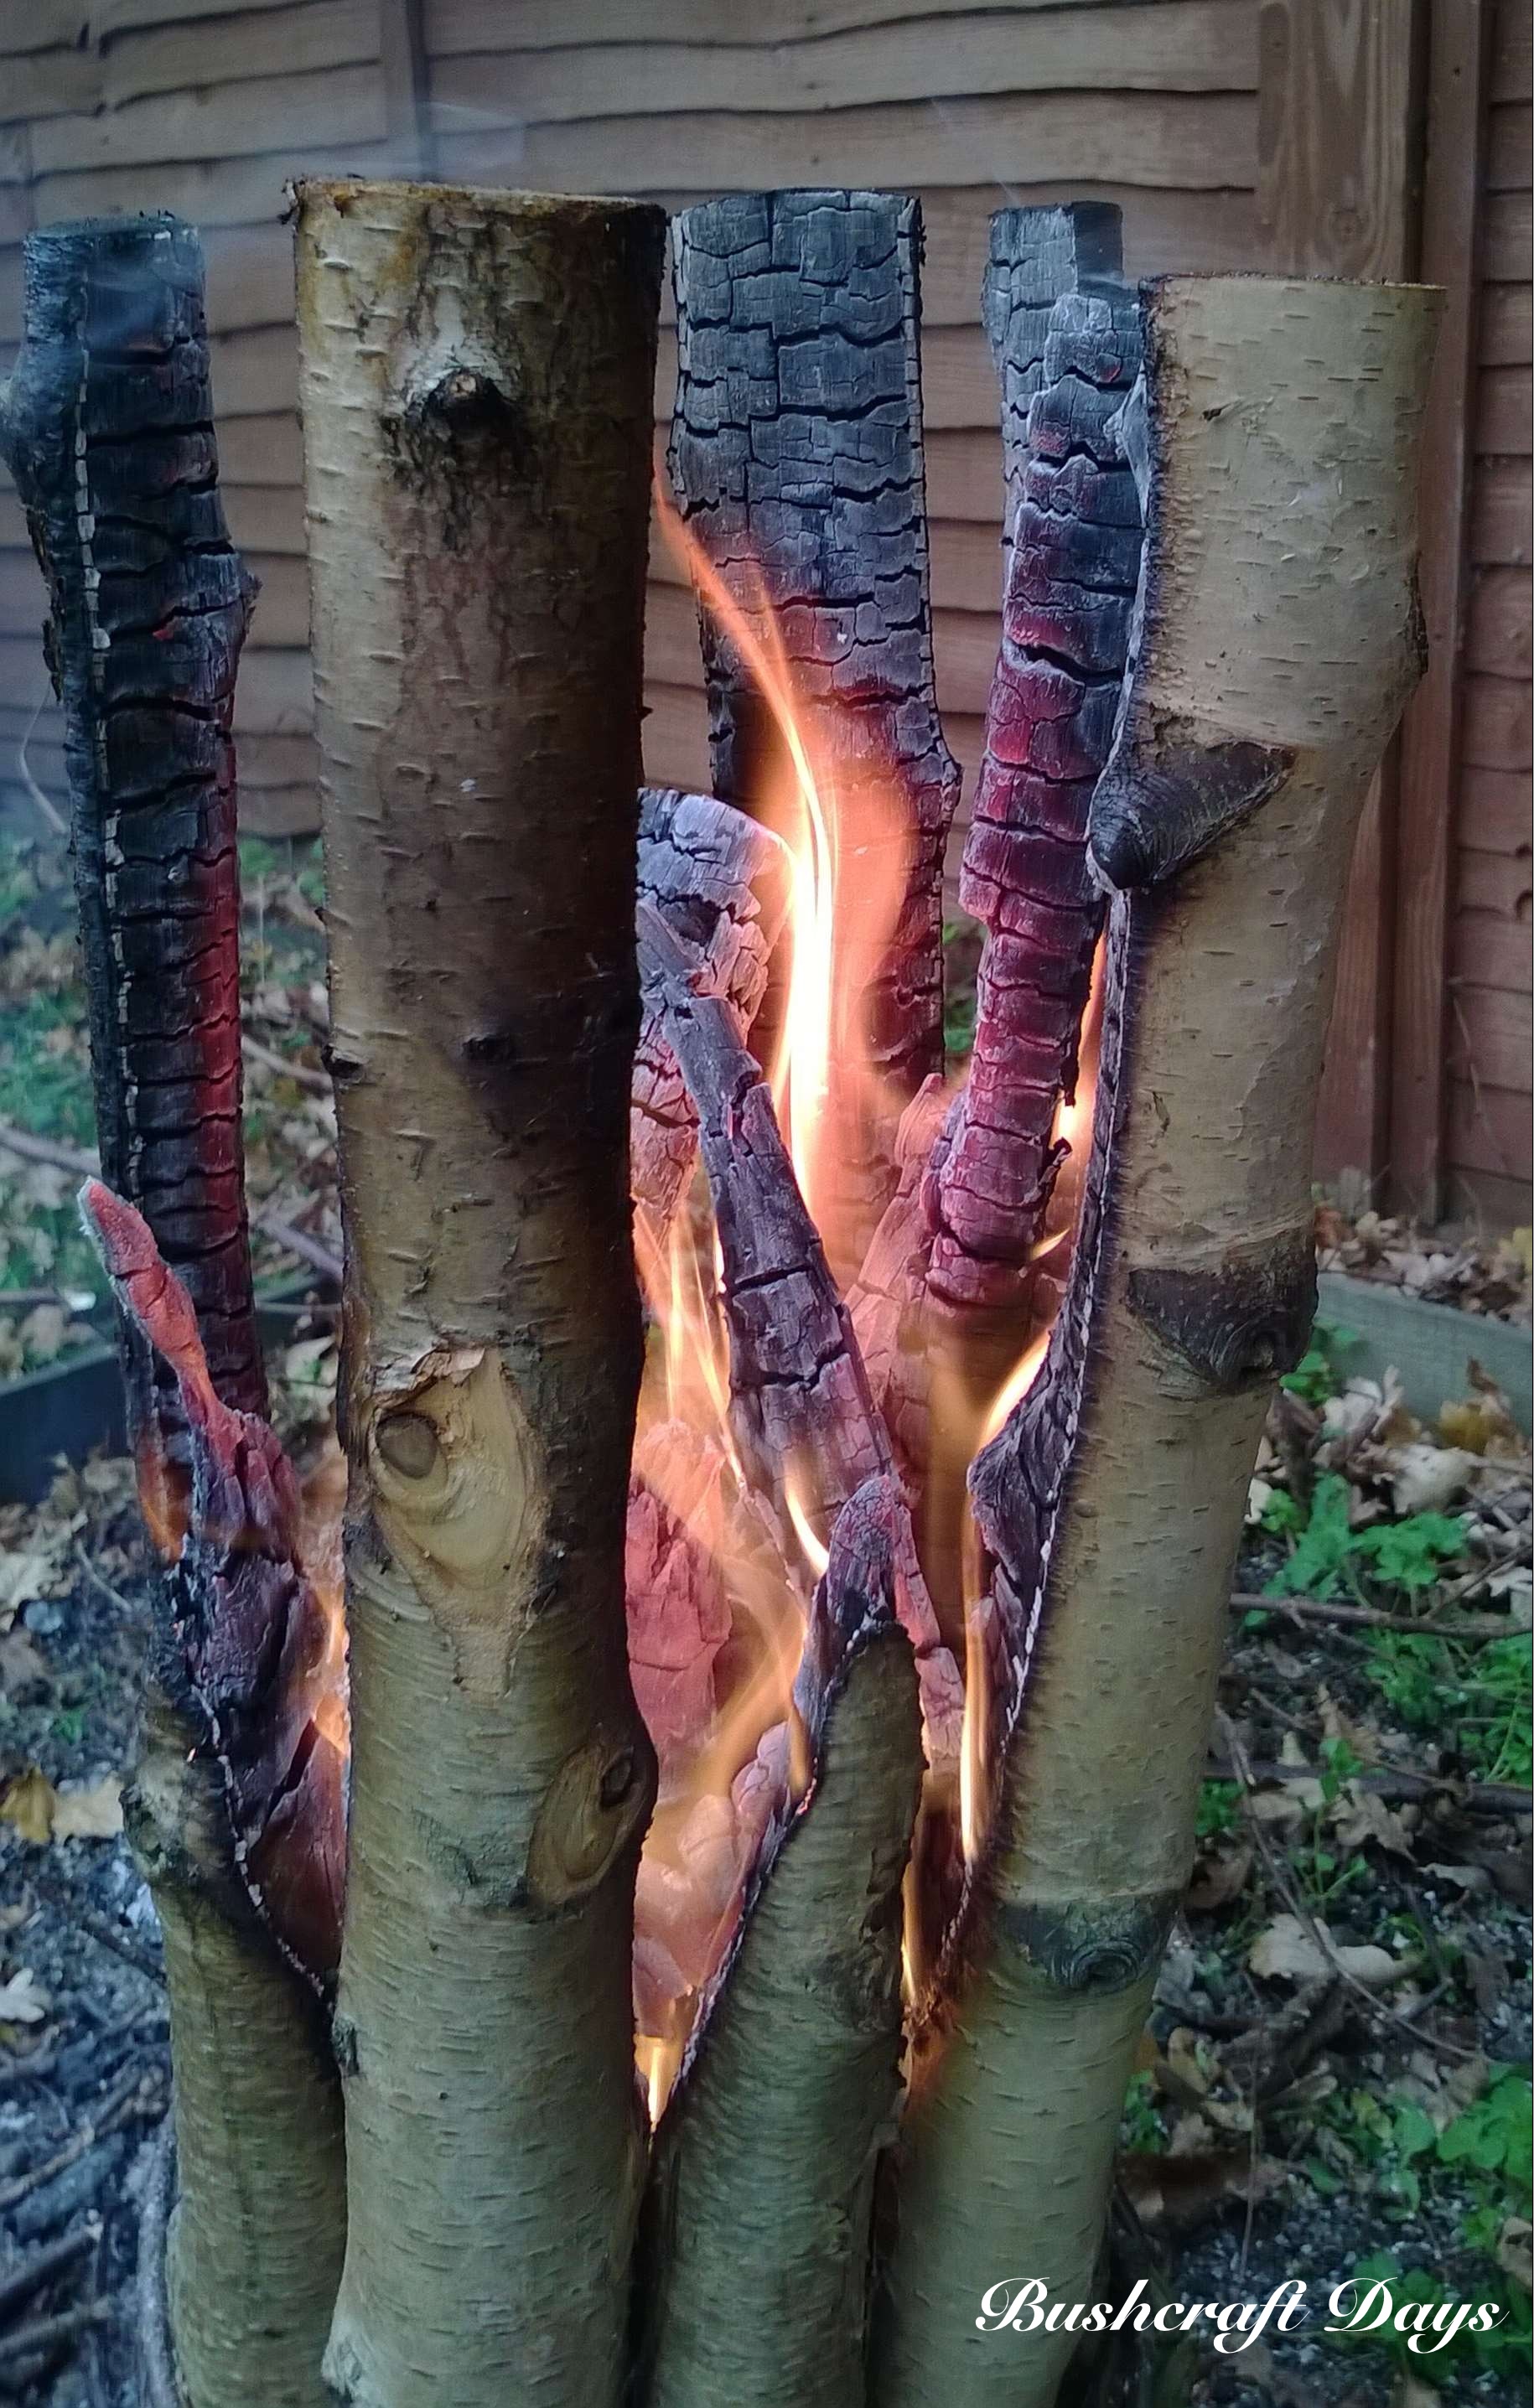
Here you can see how wet the logs were, the moisture is being boiled out of the top.
At this stage I fed the candle with some bigger pieces of wood and left it to burn for half an hour.
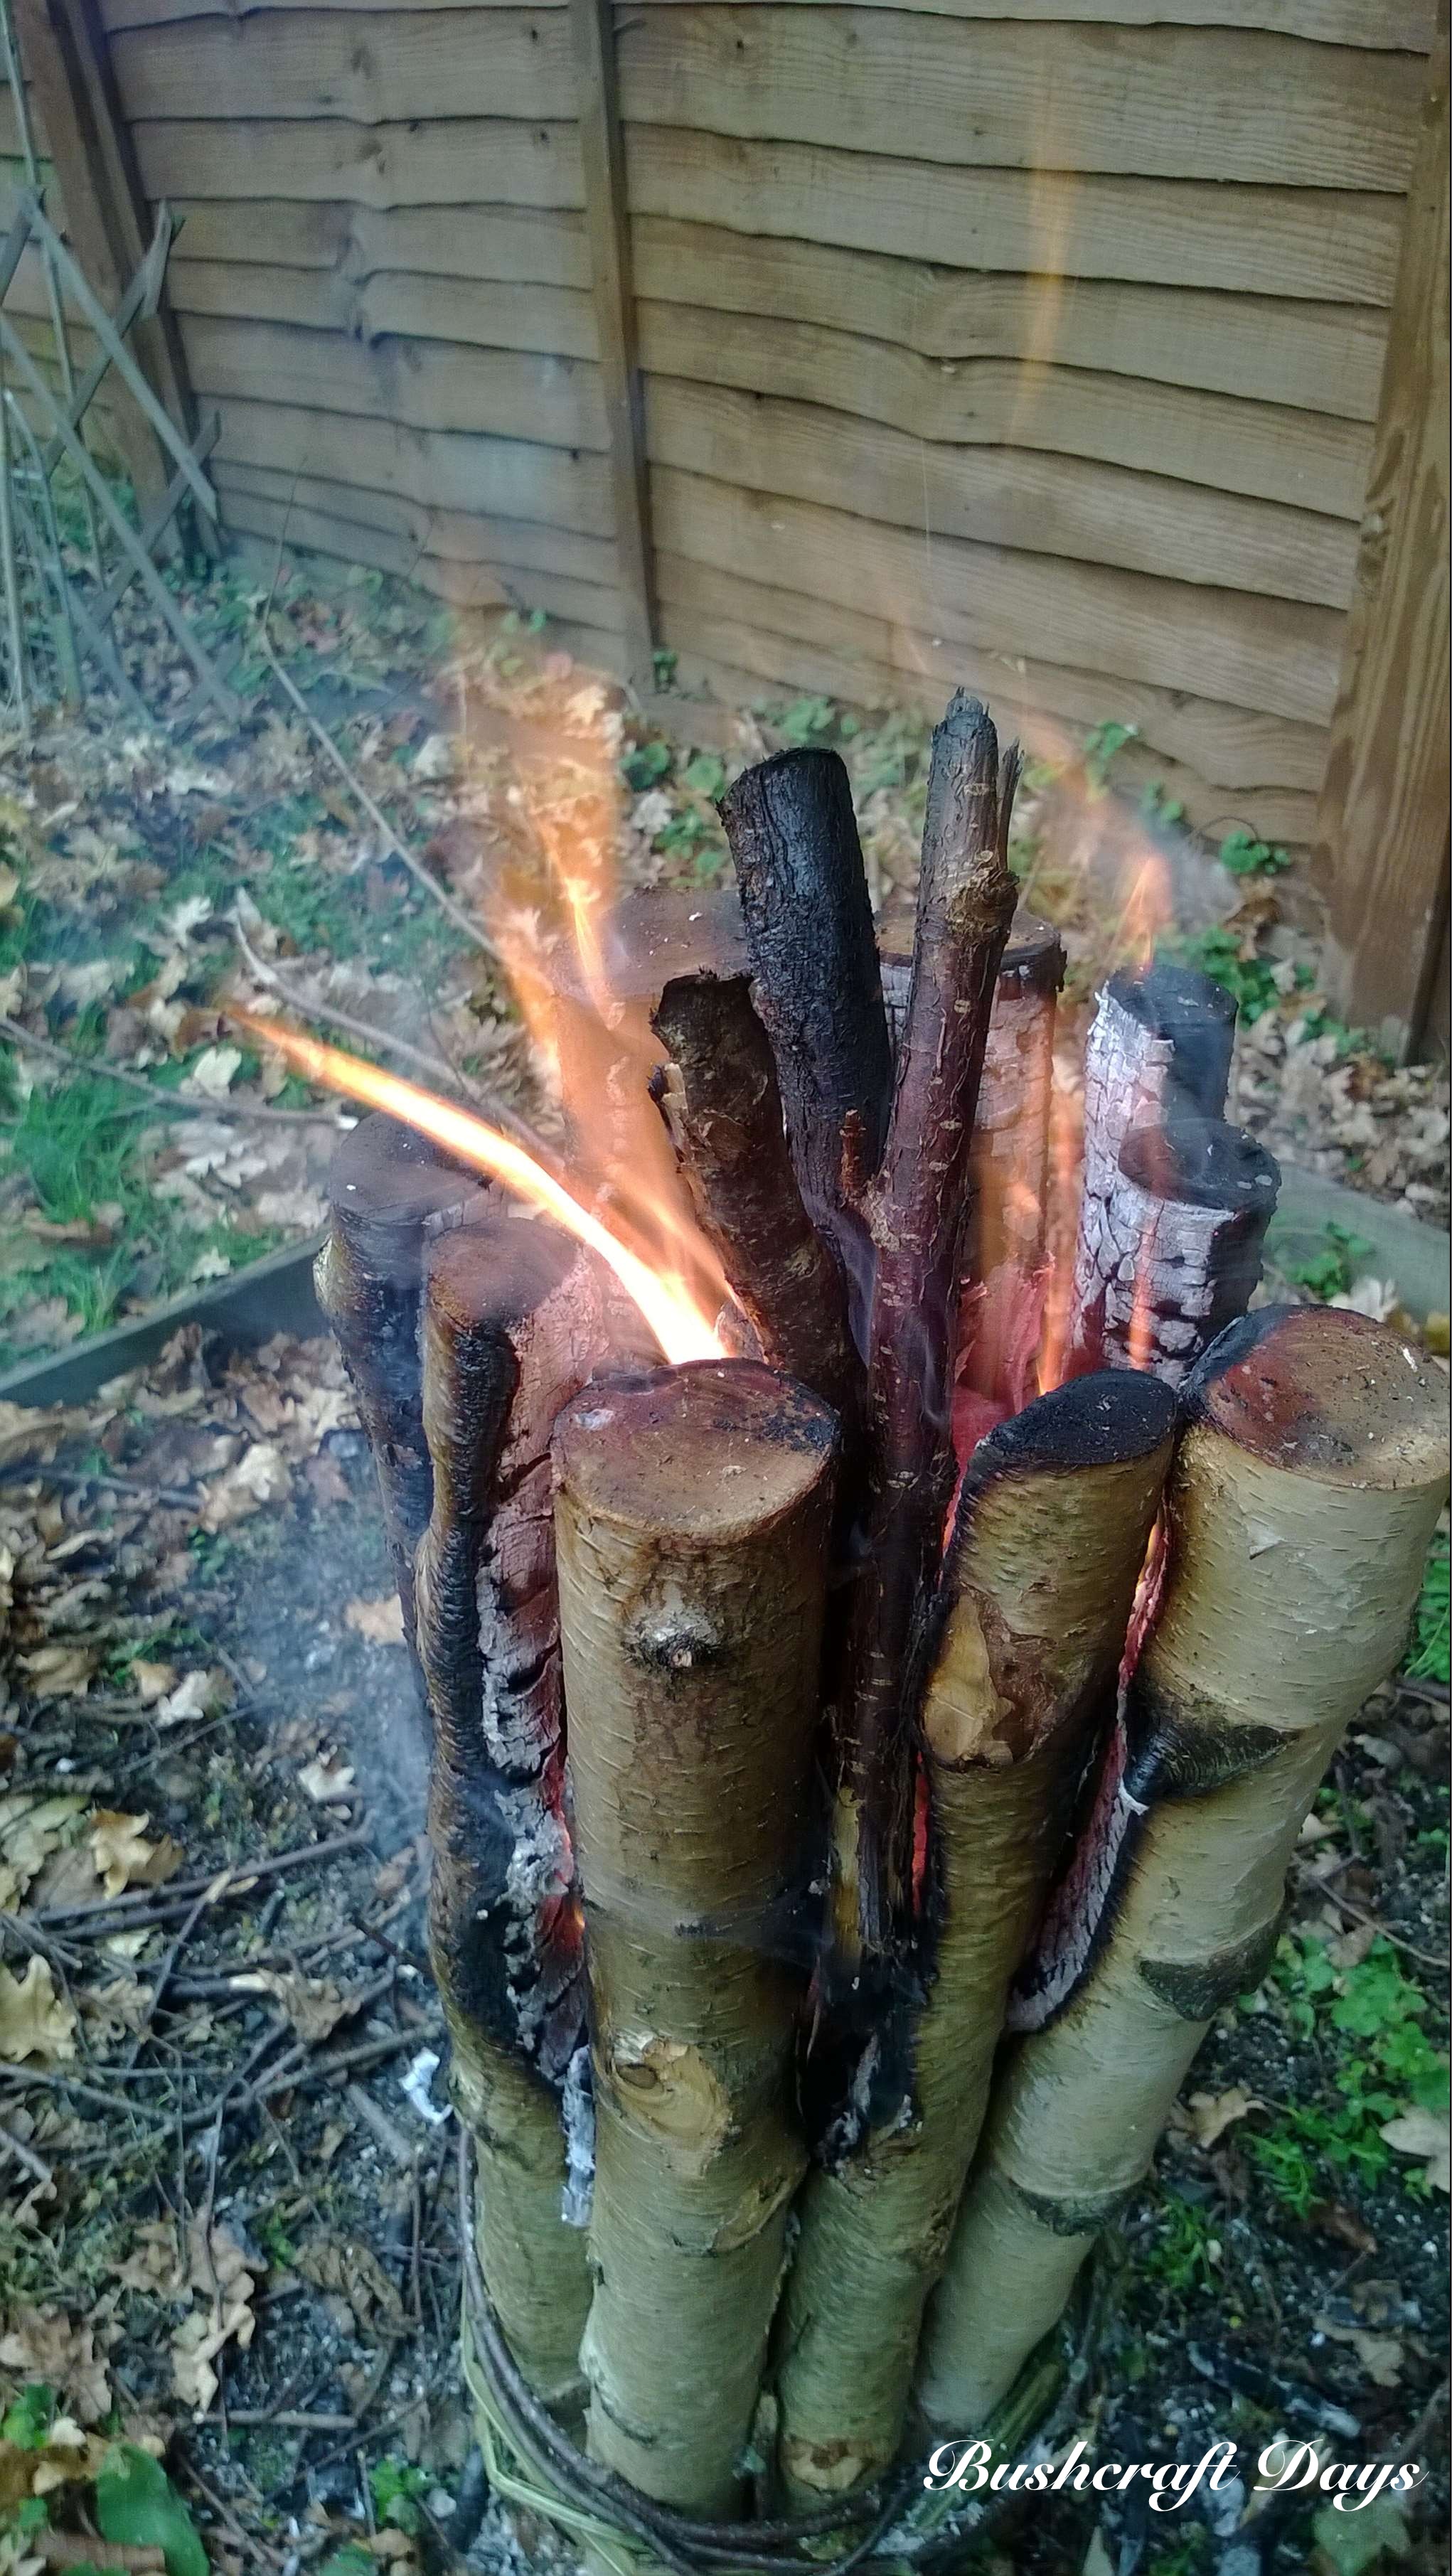
This picture was taken after about one hour of burn time. When I came back to it the flames had died down to just dark embers, but after about 30 seconds of gentle wafting the flames were back again. Never, ever give up on your fire: your life may well depend on it.
I was thinking at this stage about what my friend Rich59 from BCUK had taught me about tinders many years ago. He broke all the rules when he showed me how to get a flame from damp tinders so I thought what the heck and grabbed a load of damp (some quite wet) leaves and pressed them into the candle (picture 11). After a bit of wafting I got the leaves really glowing with a small amount of flame (picture 12).

Using the criss cross fire lay method again I built up quite a few layers of twigs for a second time. This method really helps to draw the air up through the twigs and so boost the flames.
Now my candle was quite dry and it produced a great flame for a good two hours. Granted it did need to be maintained but for a pile of unpromising wet logs I was very happy with this candle.
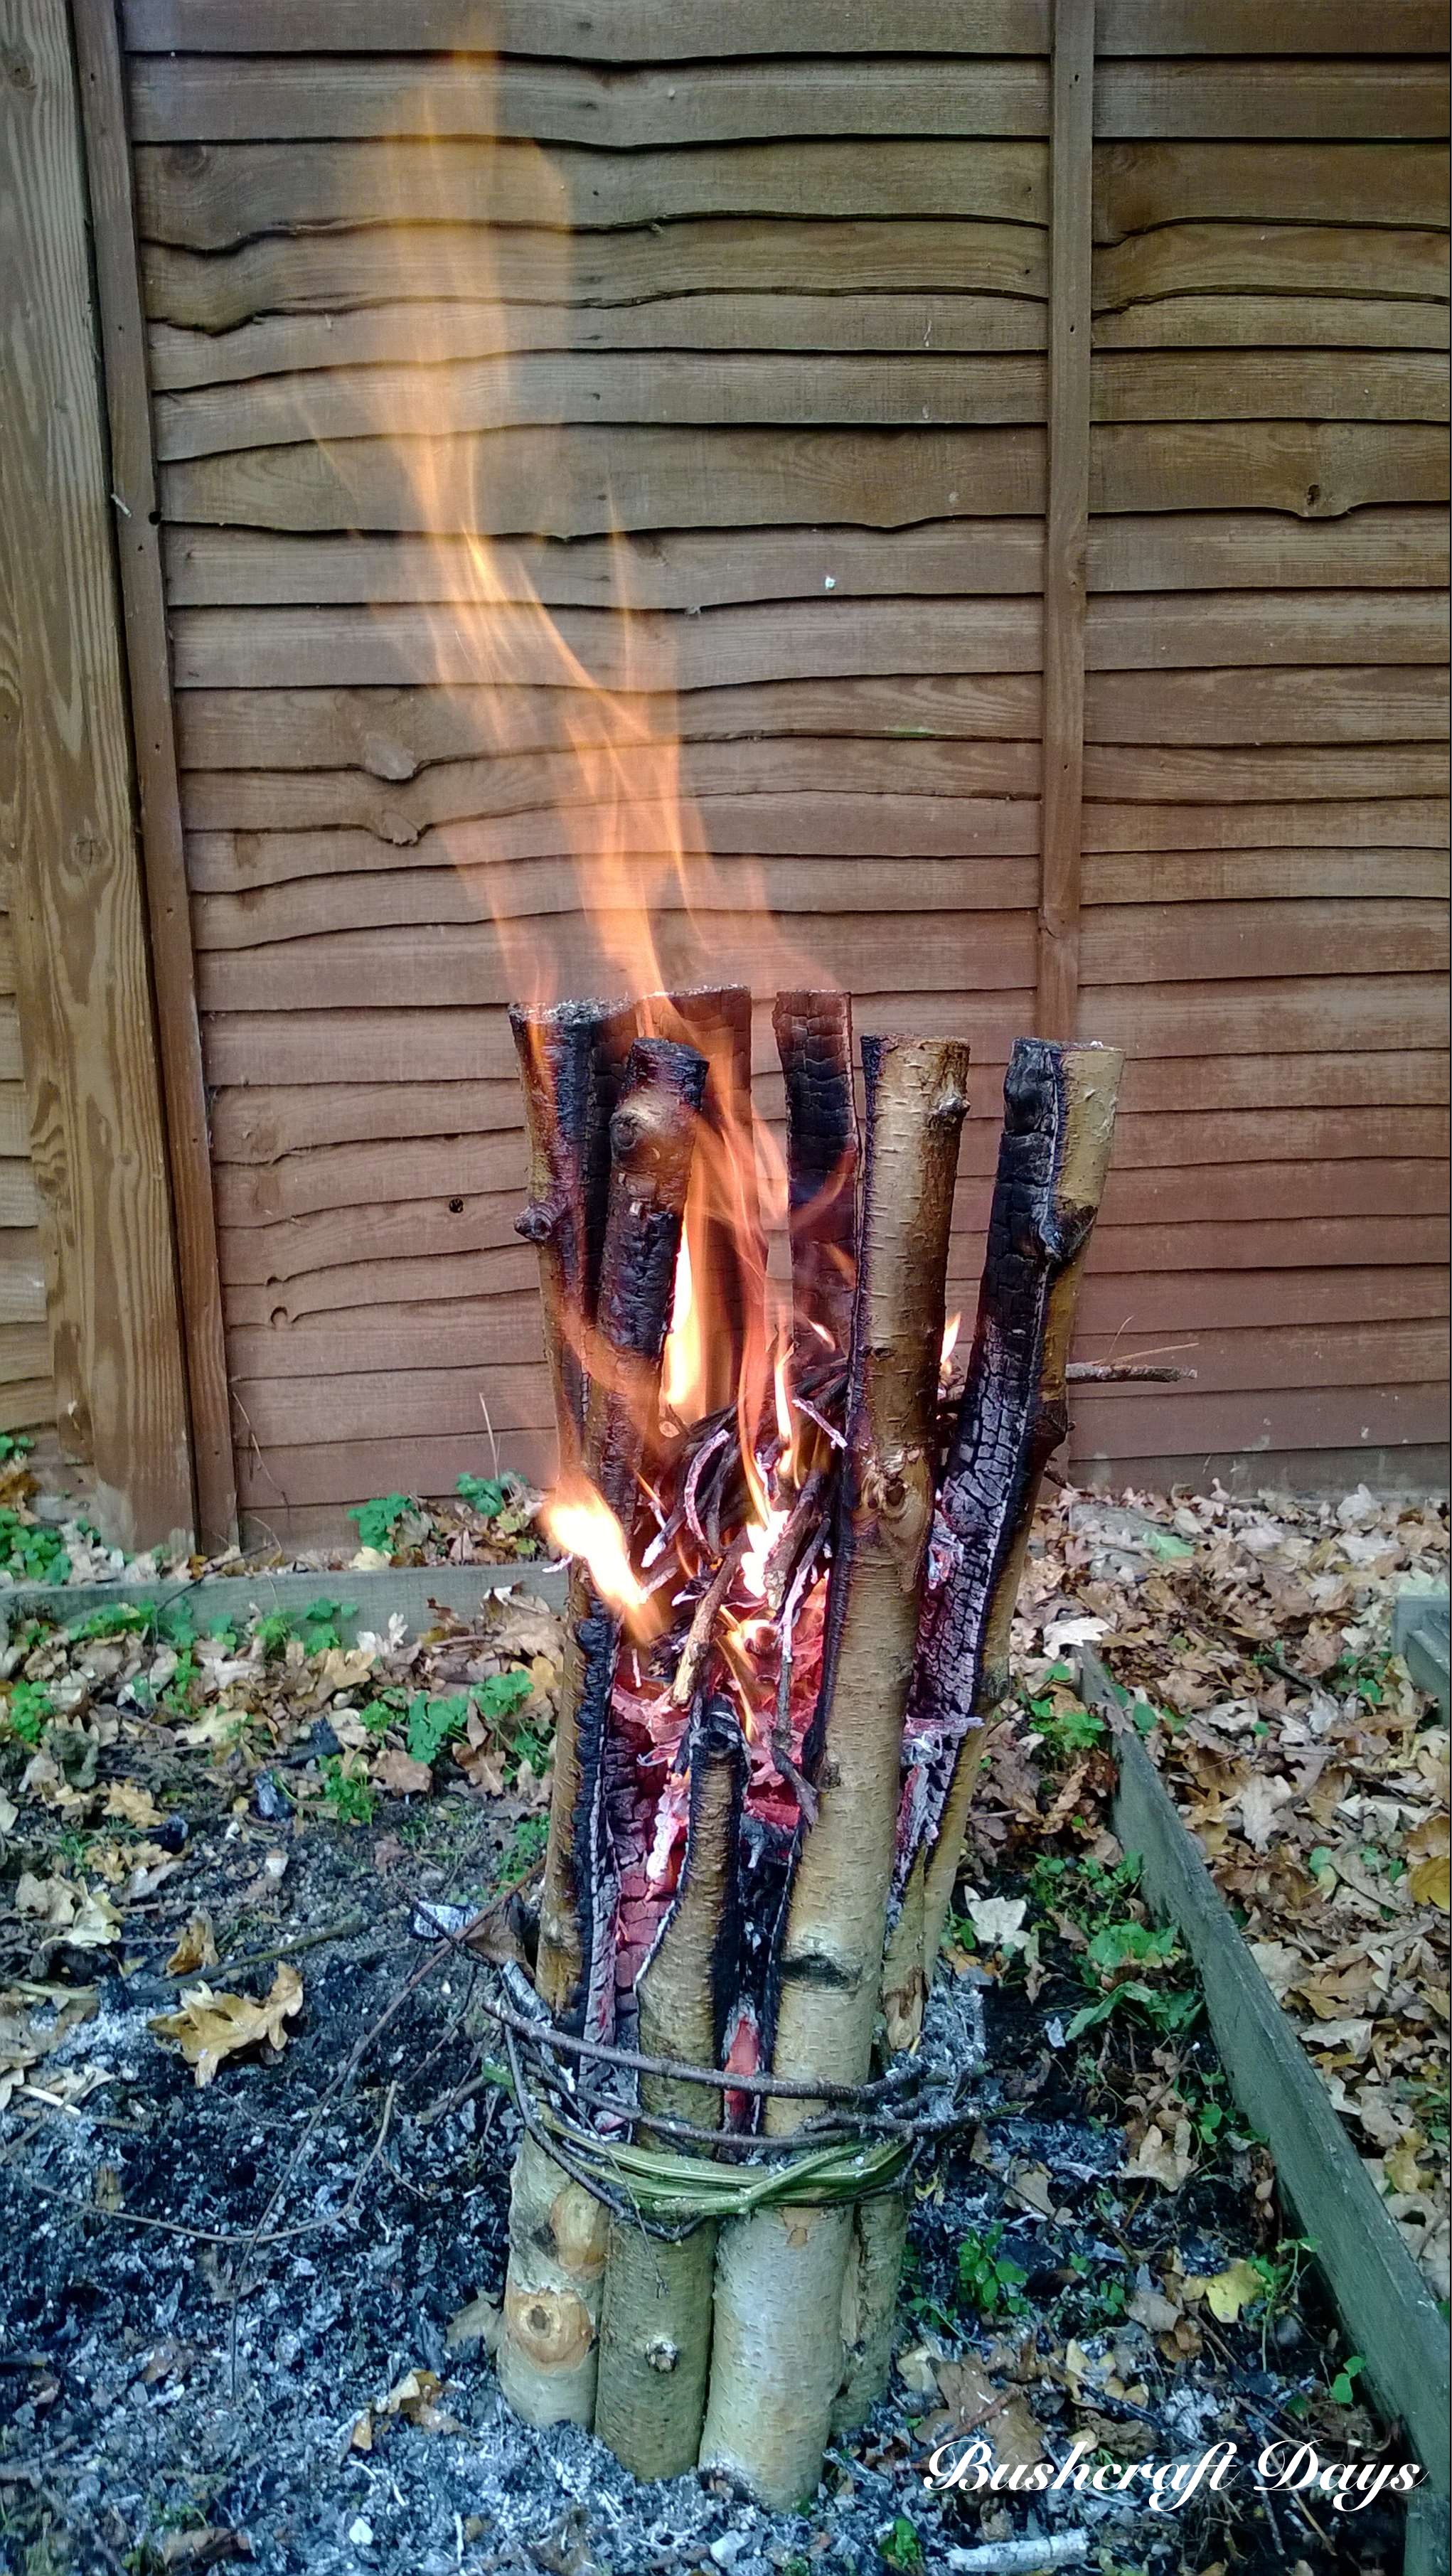
The cordage wrap lasted right until the end so I would be happy to use some old rope if I had to.
This is a good project to try because many bushcraft skills are covered, from knife and saw use, natural cordage-making, fire-lighting and fire lays, and most importantly it’s a reminder to always persevere when it comes to maintaining your fire when the going gets tough.
Part 3 – How To…. Build a Finnish/Swedish Candle – A Comparison – Part 3
Cheers
George
Thanks. Very well explained.
Thanks Gerardo, glad you liked it.