
When the weather is inclement and the ground is really wet then the option of making a rocket stove needs to be considered.
This How To…. sets out the steps I took on a wet and windy December morning to make a Damp Wood Log Rocket Stove with only the tools I normally carry in my rucksack.
I have dabbled with making different types of Finnish Candles for cooking on and they are excellent for when the ground is wet. Over the years I have also experimented with making Log Rocket stoves but restricted my activities to the workshop as I used drills to make them.
I recently stumbled on an idea on Facebook from the 1st Facebook Scout Group by Paul Hasling. This is the first time I have seen a log rocket stove done without the use of drills so I was instantly taken with the idea. Another Scout instructor José Xavier put Paul’s pictures together into a quick helpcard called the Rocket Stove de Madeira. This is a very simple design where a log is split four ways, a chimney and firetray are carved out and it is all put back together again with string. I will certainly be showing my Sea Cadets how to make one.
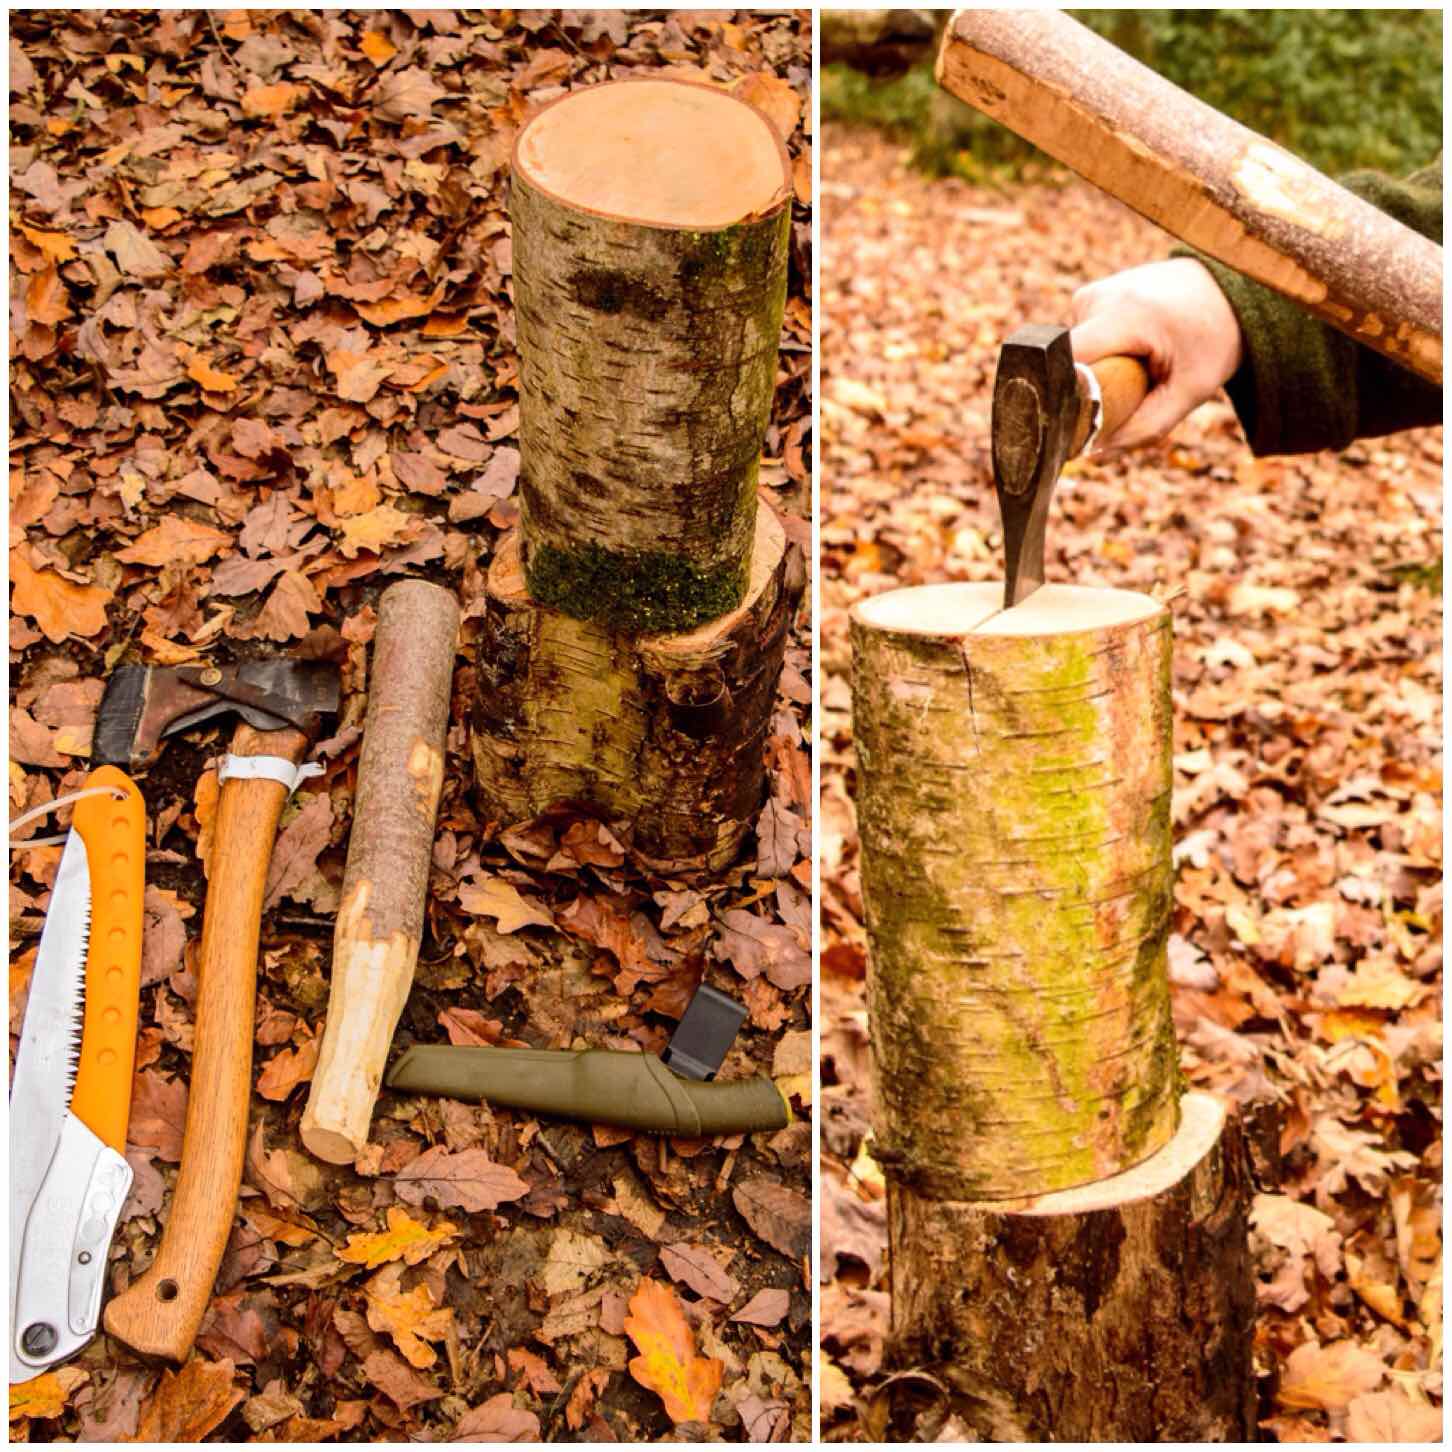
First though I wanted to make one when out in the woods with only what was to hand. It being December, there was nothing that was bone dry so I found a dead Birch and cut a section off. It was still damp to the touch, however it had been dead for over a year so it was slightly seasoned.
Splitting
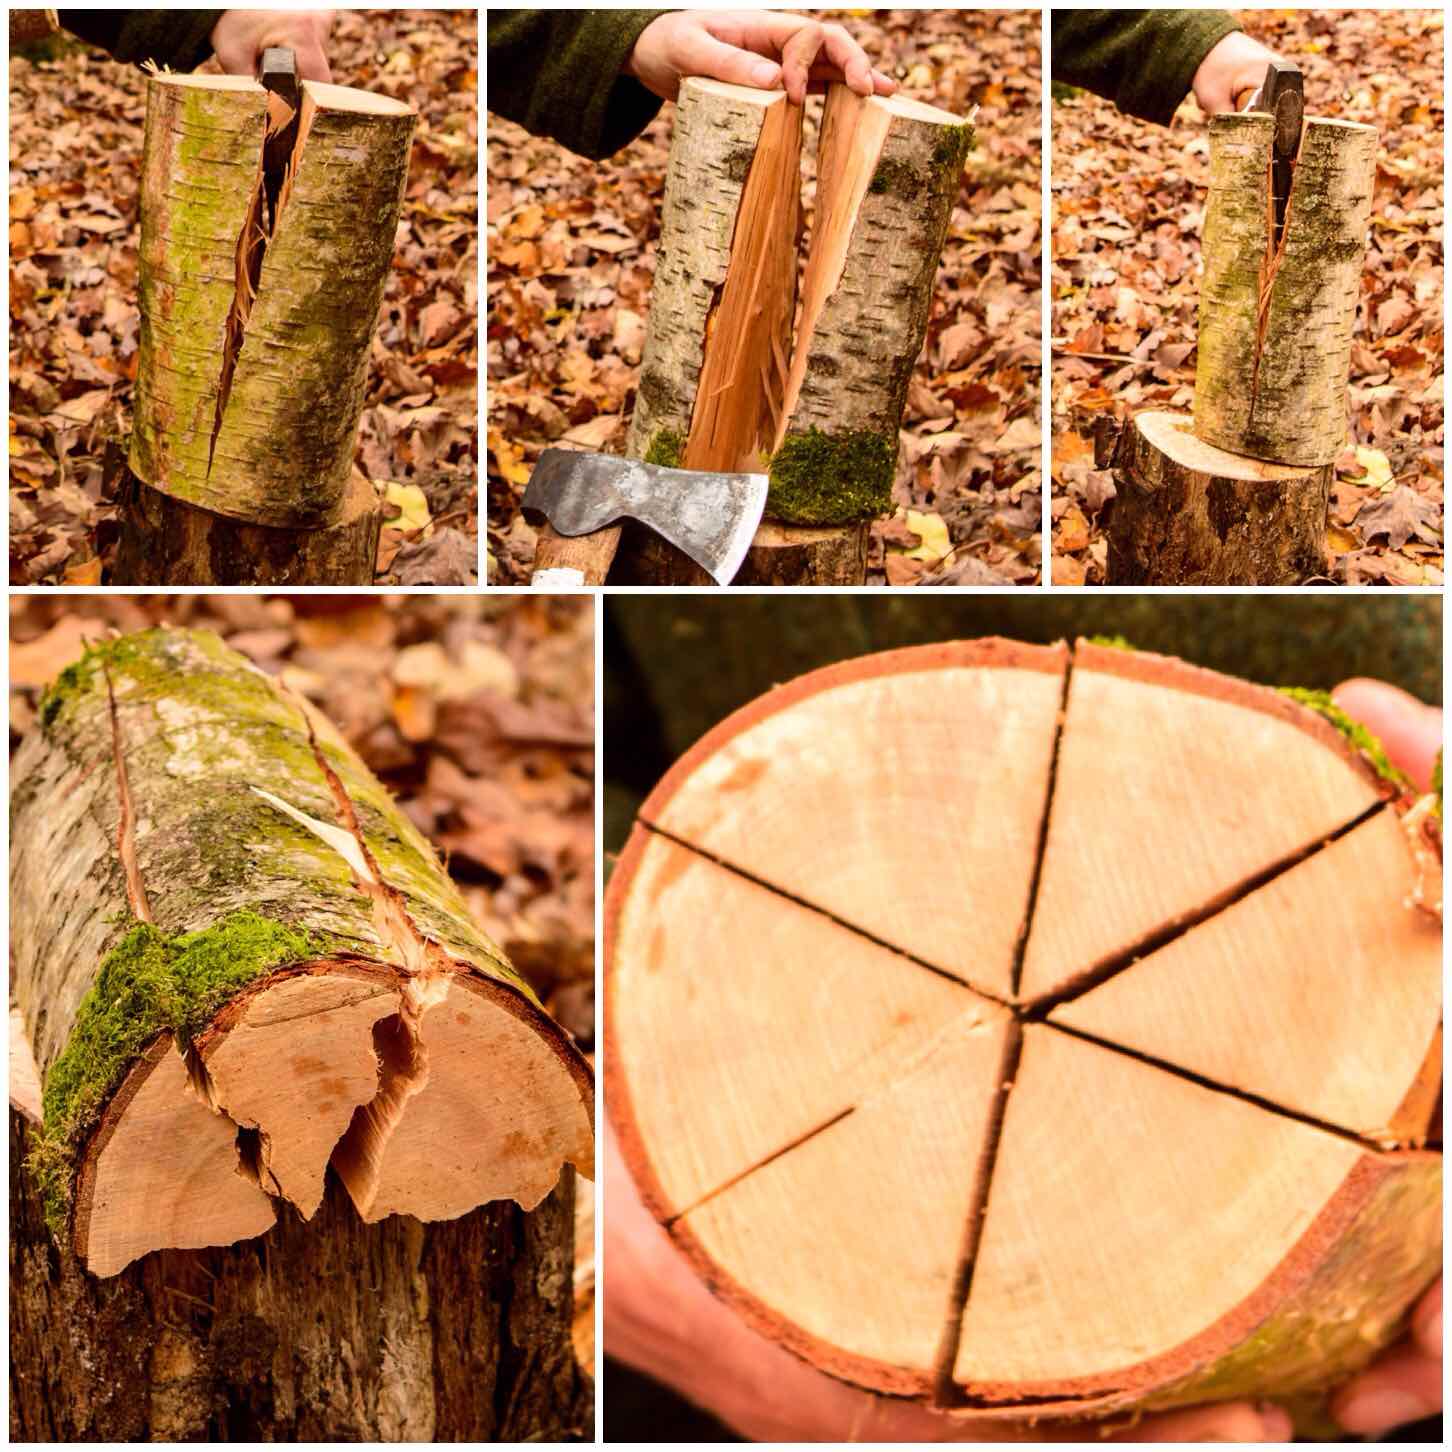
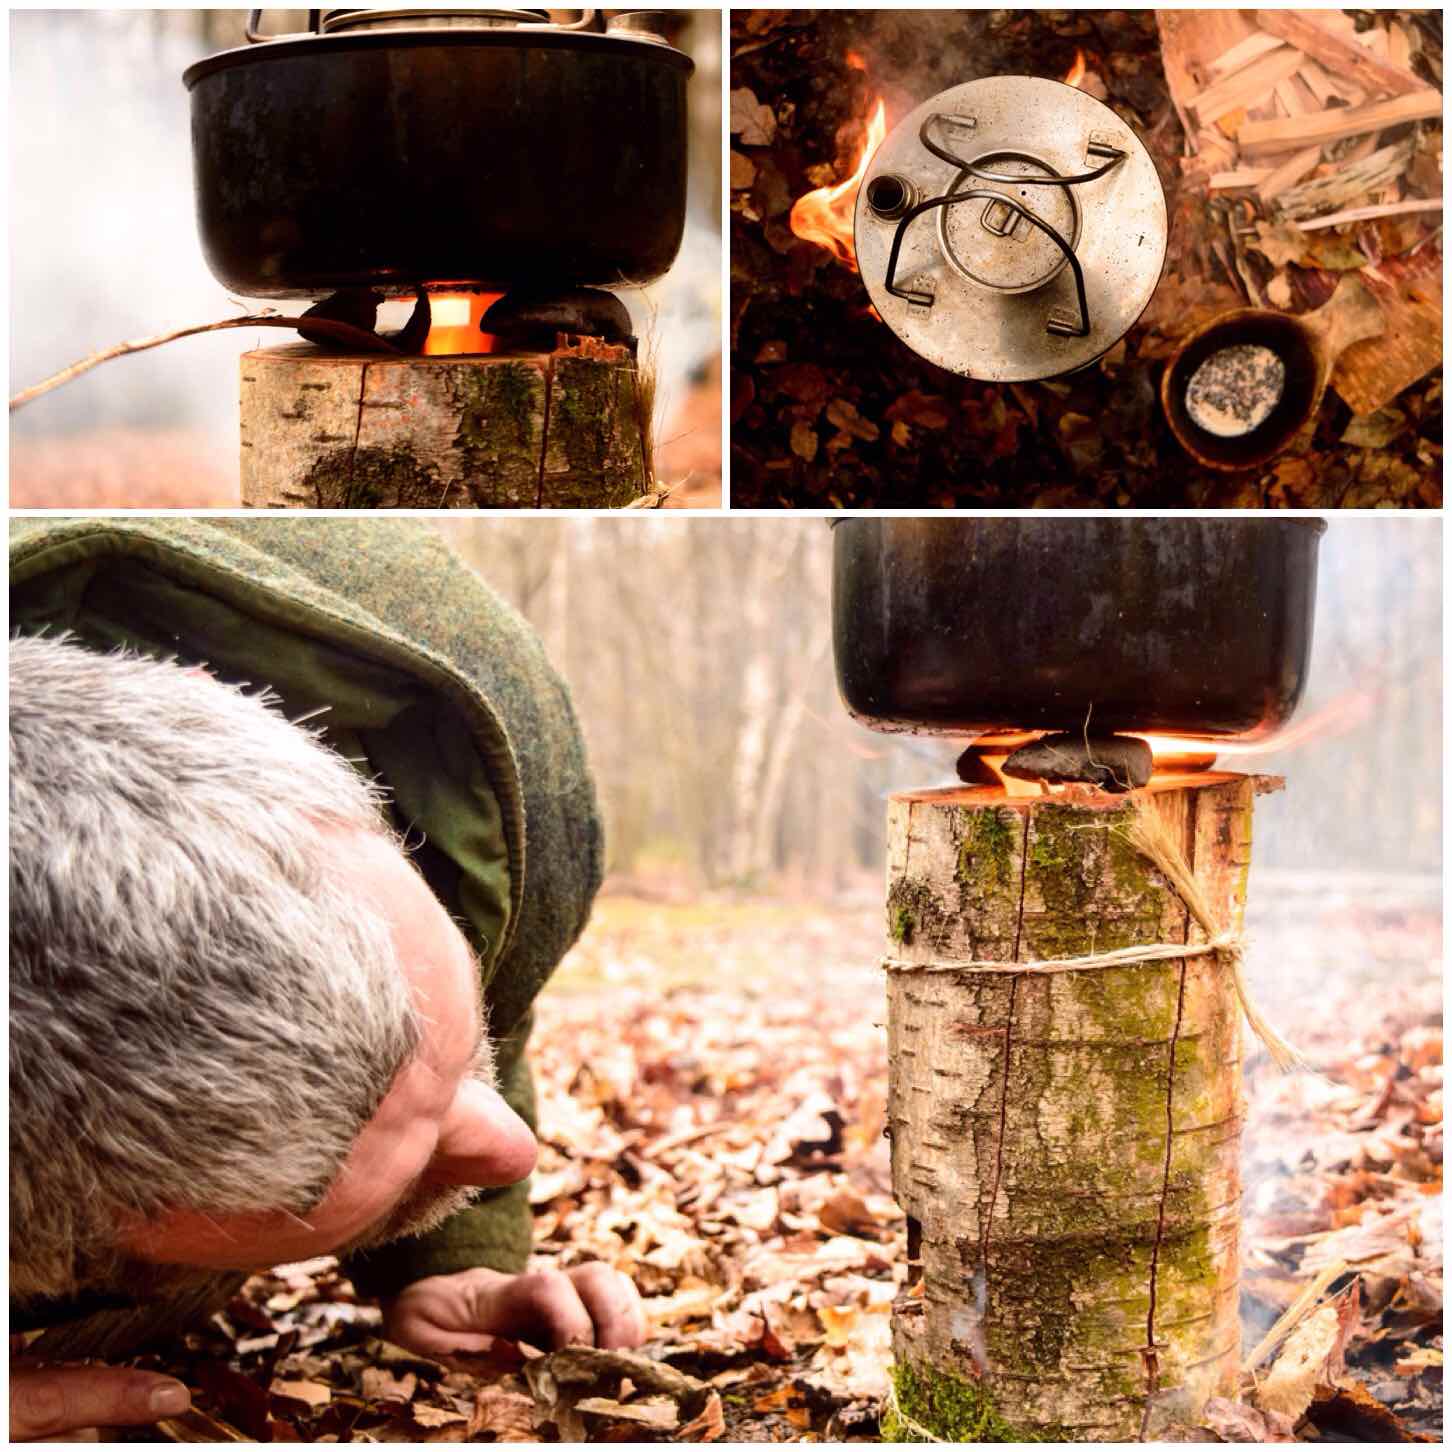
For the job I had my knife, saw, axe and a pen. Using another round of wood I split the log in half by battoning it with my axe (keep the blade of the axe at 90 degrees to your body when you do this).
After splitting the log in half I split each half into three even sections. With very dry wood you only need halve the halves again to make four sections however my wood was damp so I wanted to produce as much surface area as possible which is why I opted for six sections.
Stop Cuts
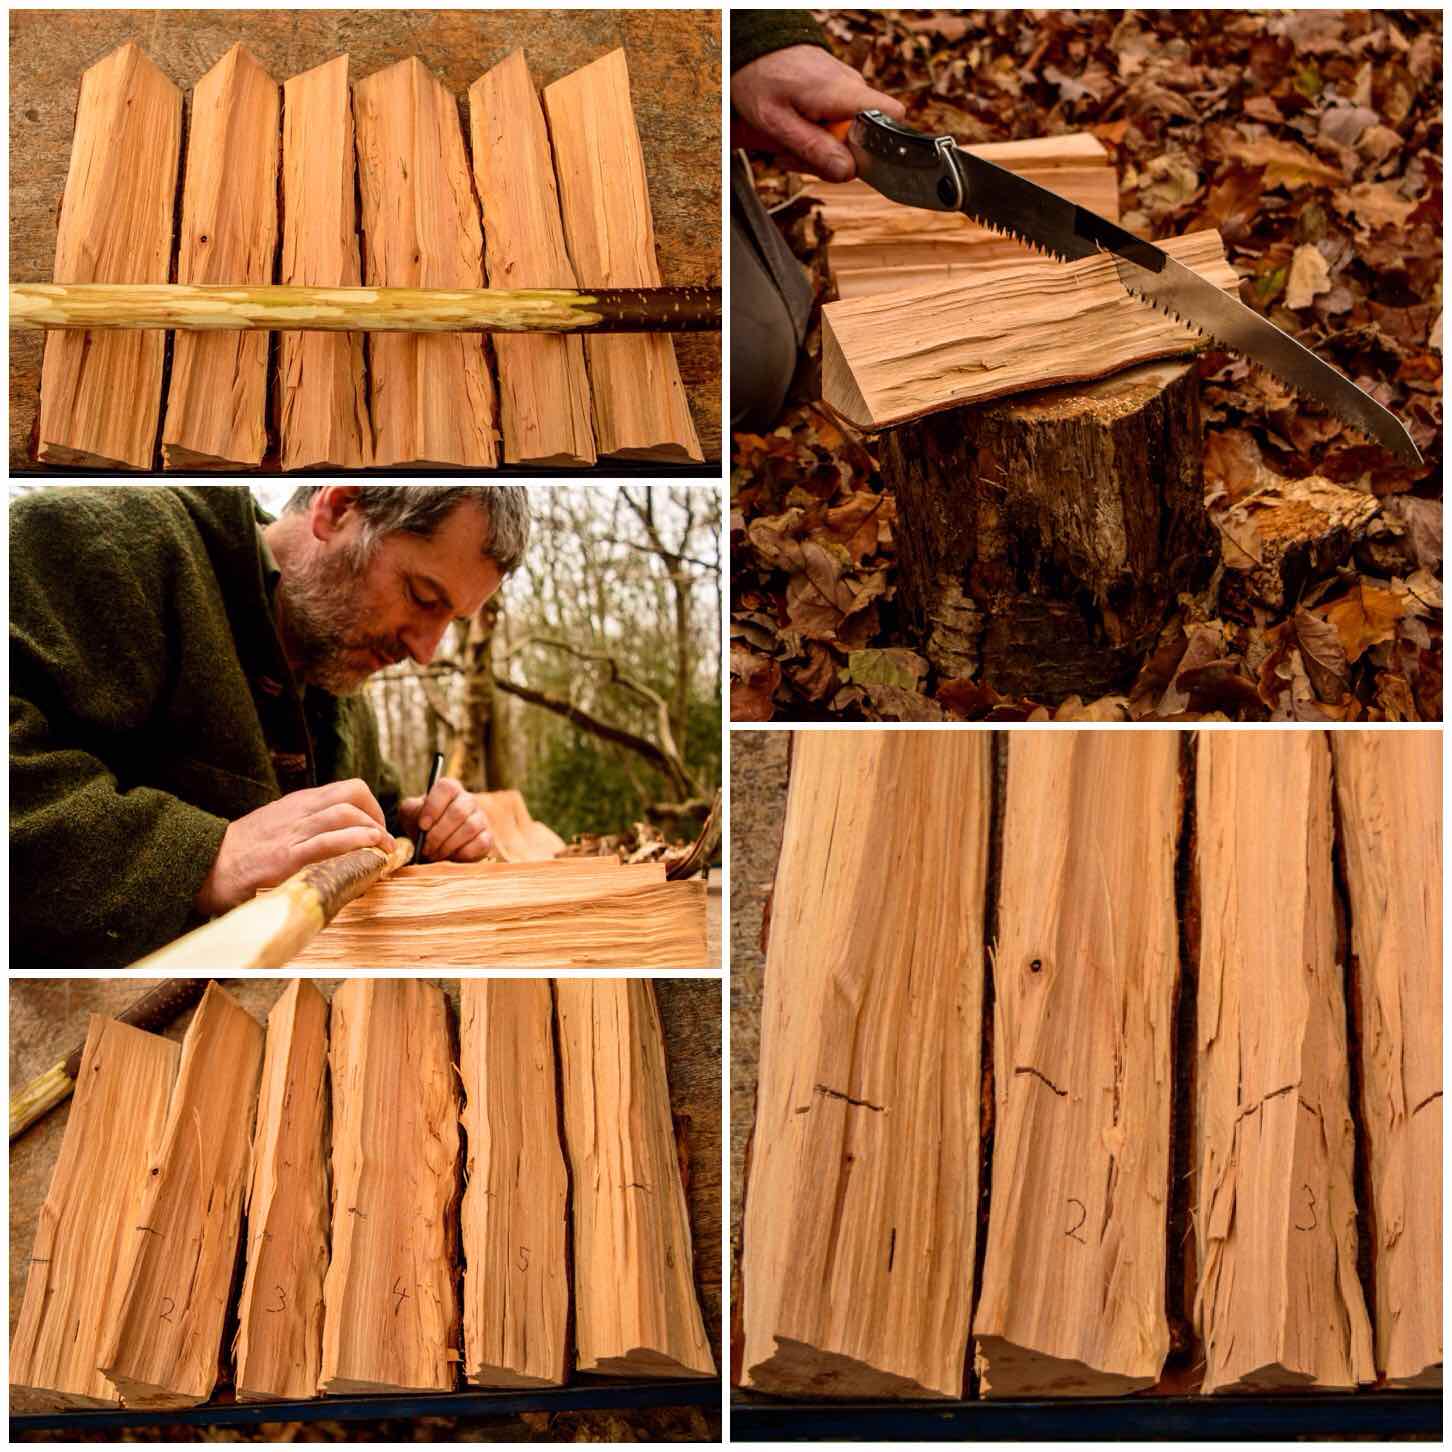
Using a stick and a pen I marked a line on each section about a quarter of the way from the bottom and also numbered each section. These marks were put in so that I could cut in stop cuts so to make it easy for me to cut out the chimney section.
My friend Keith Coleman suggested using tape as a depth gauge for this and it worked a treat, with each stop cut ending up the same depth.
Creating the Chimney
Using the tape as a gauge again I marked a line at the top of each split section and then, using my knife, battoned off the excess wood.
The stop cuts help as the split does not travel all the way to the bottom and so creates a lintel that the fire will sit in.
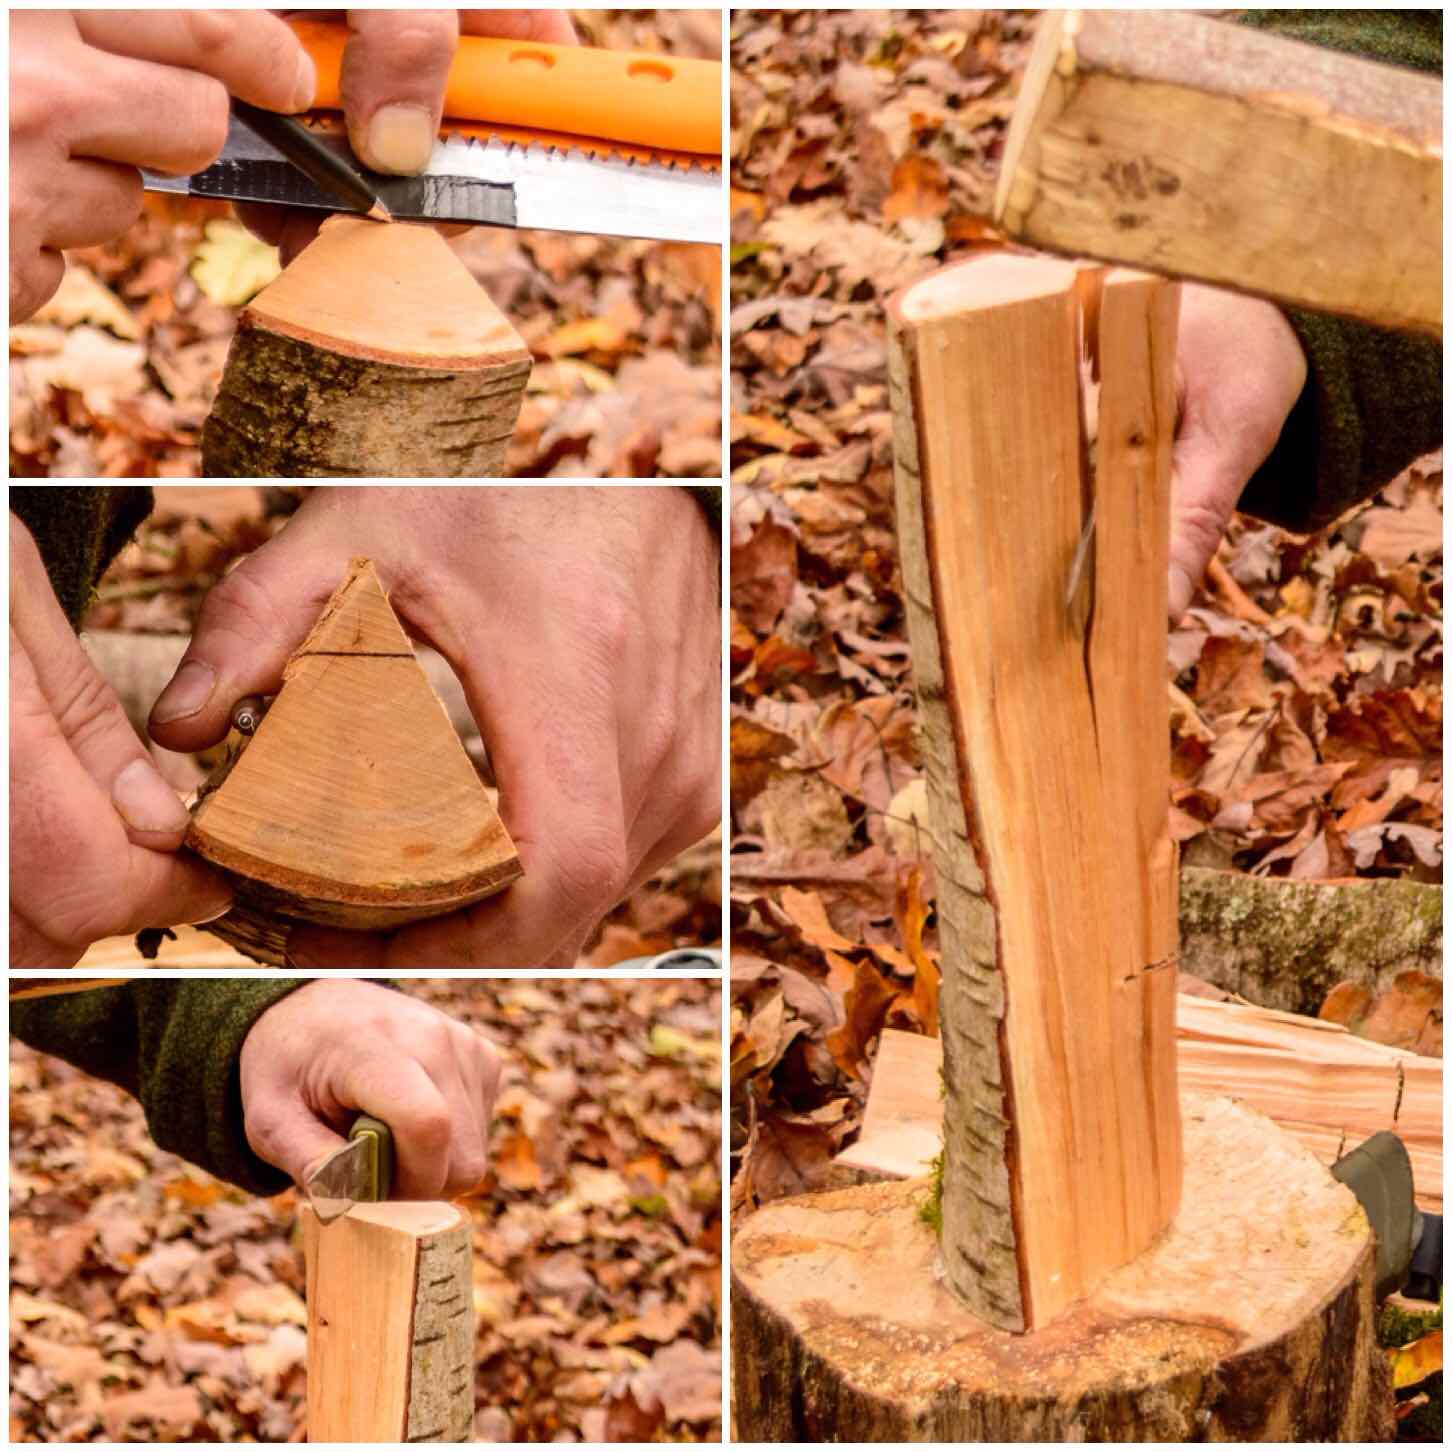
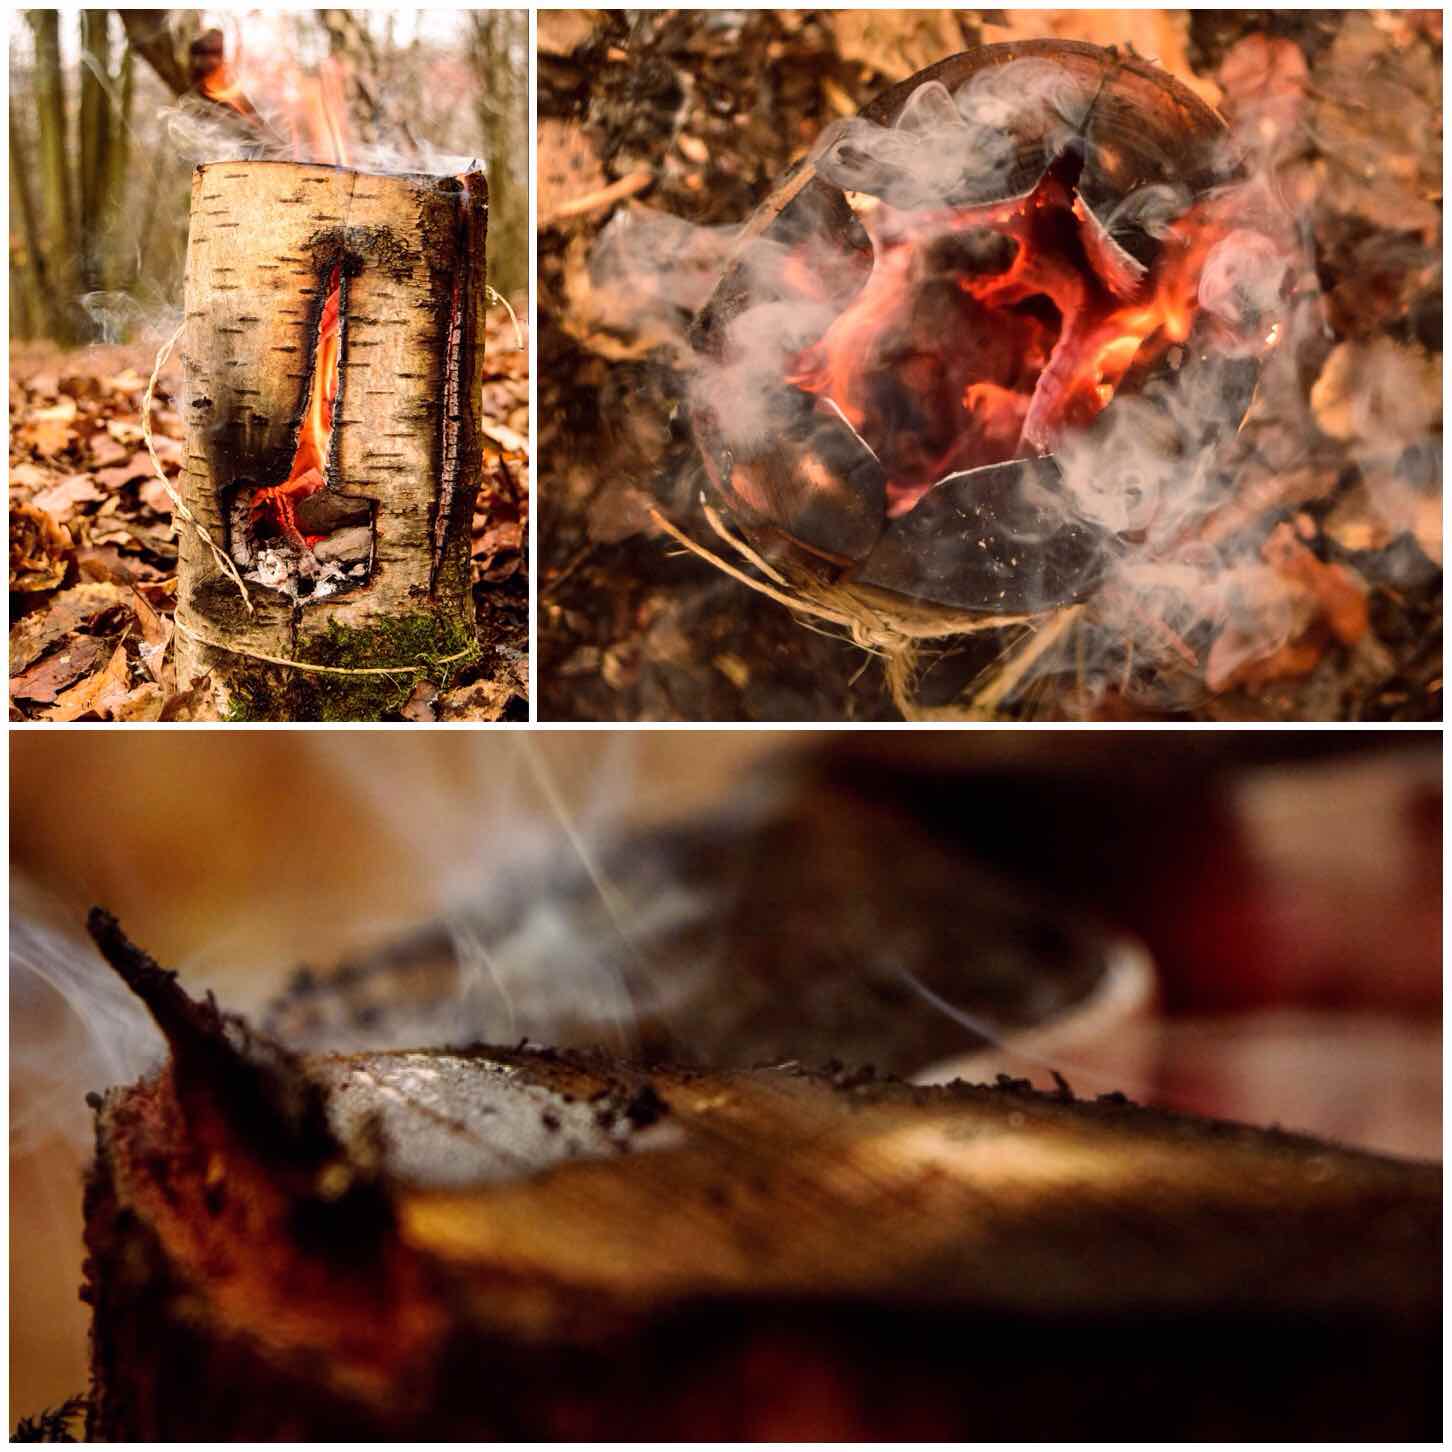
After a little bit of whittling with my knife each segment had the wood removed so that the chimney would be formed when it was all put back together.
It is important to keep all the shavings and little chunks of wood from this process as it can be used as kindling for the stove.
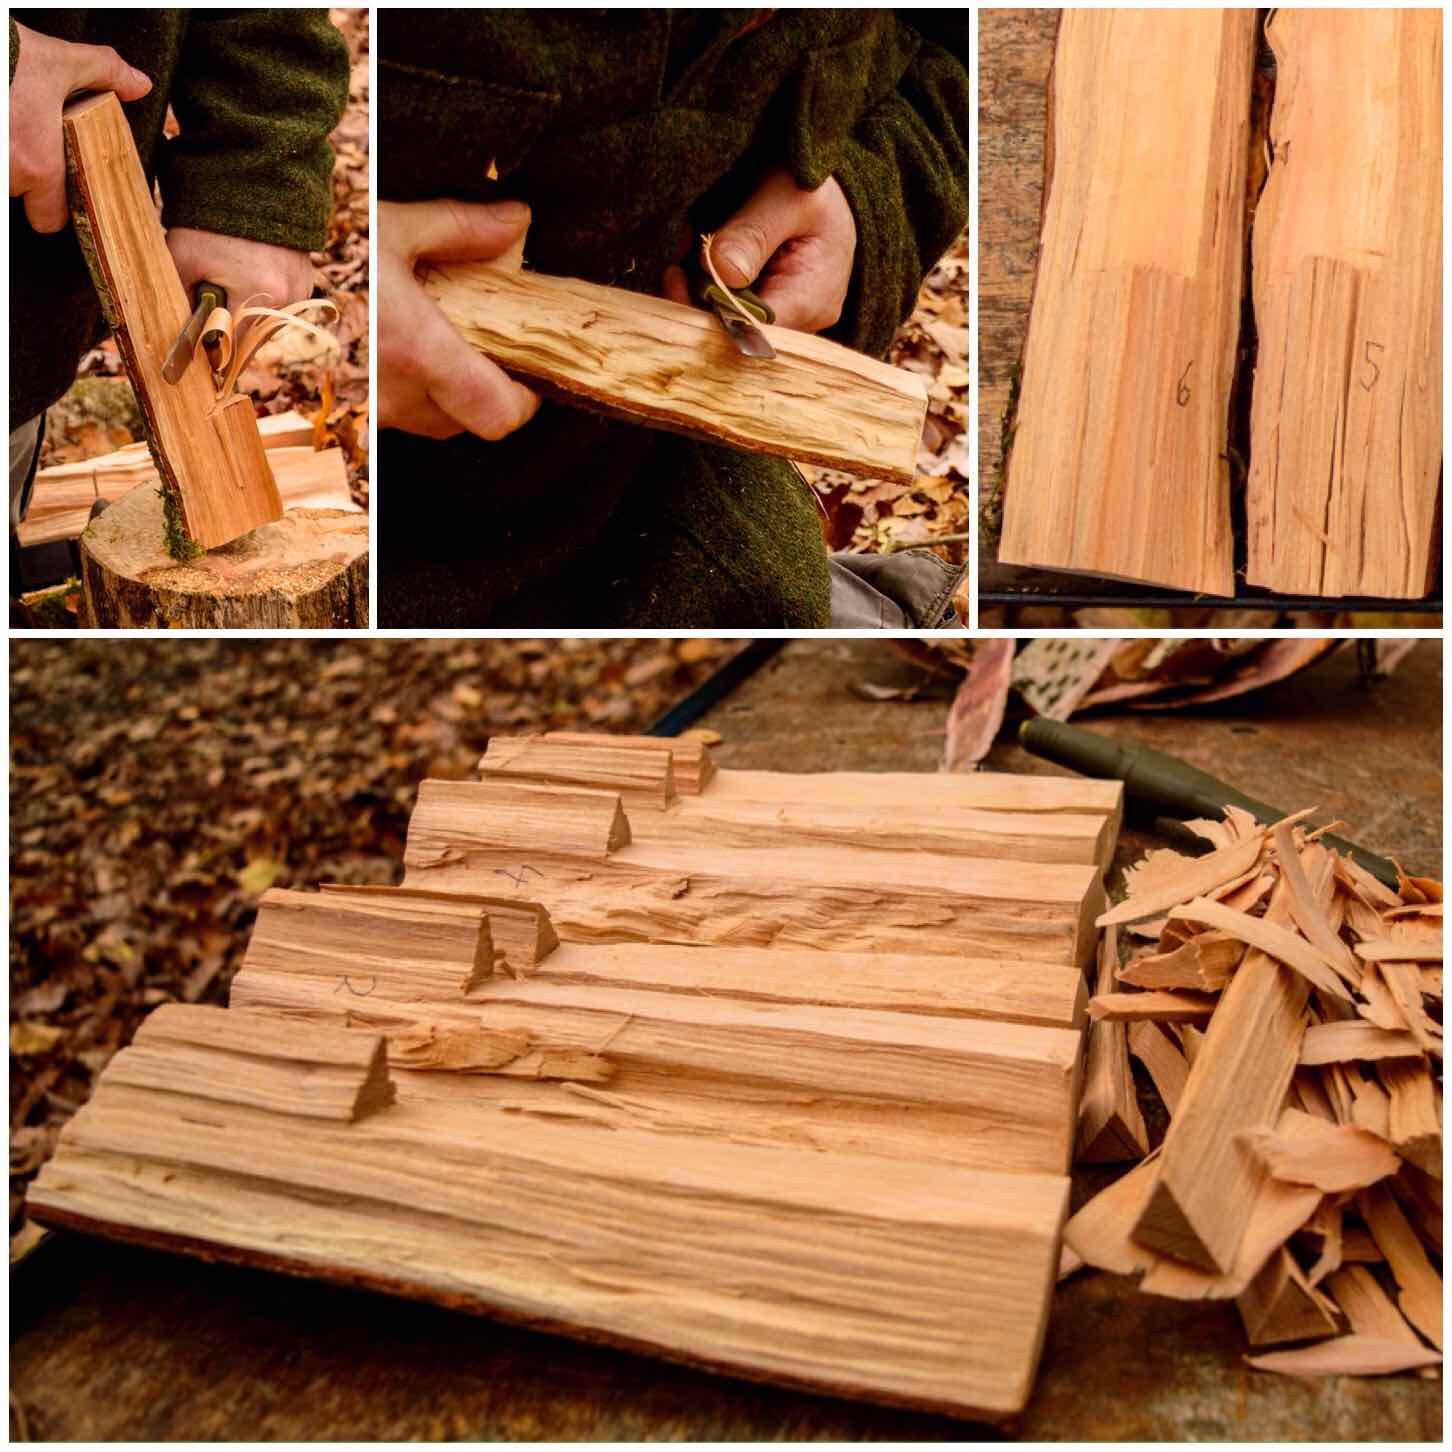
The Raappanan Tuli style
Now the secret of making damp wood burn is to produce as much surface area as possible for the flame to catch. I learnt this from researching and making the Finnish Raappanan Tuli candle.
On the inside of each segment cut as many burrs as you can so that the flame from your kindling has something to catch onto. I tried out different types of cuts here and some were easier to carve than others – your wood will soon tell you what works well.
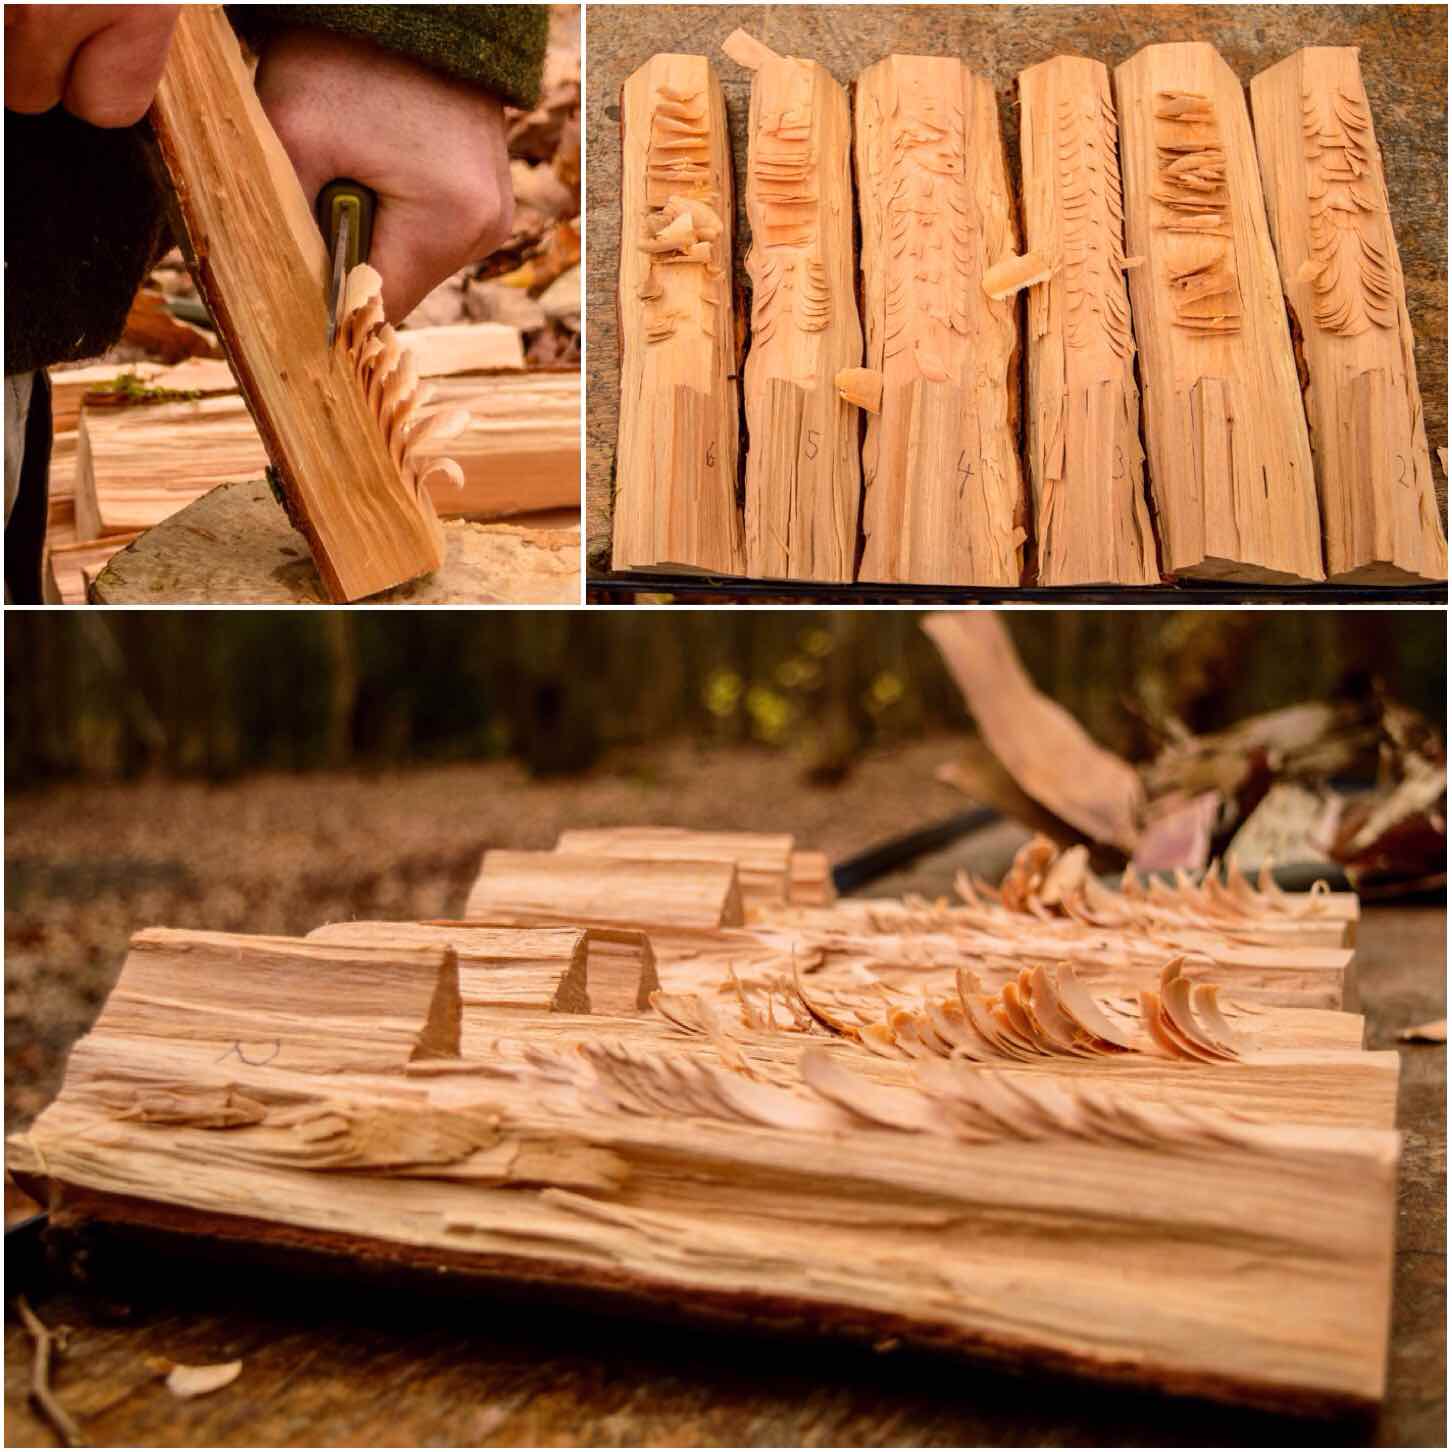
The Firebox
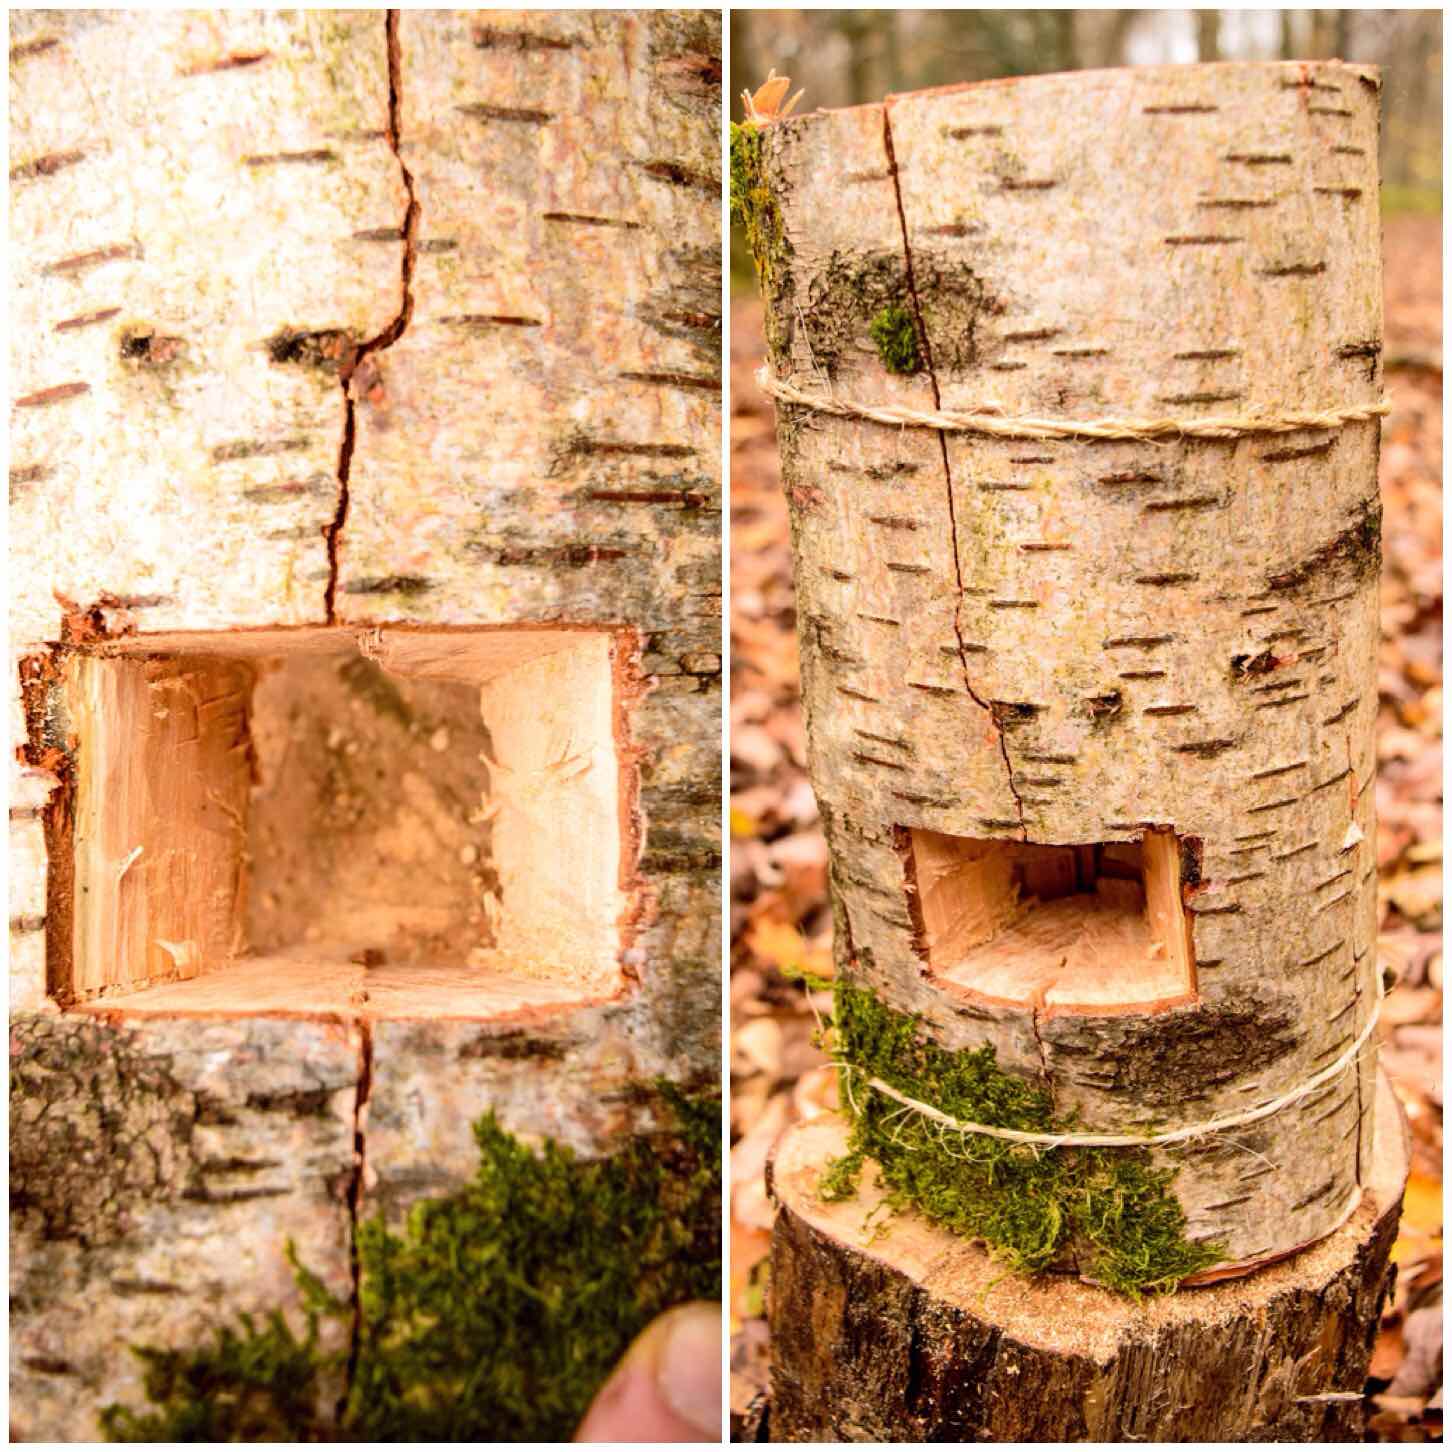
Next up is the opening for the firebox. I selected two segments that fit together (having them numbered really helped here) and marked out with a pen two rectangular areas just above the sill I’d created. I made sure the marking went all the way round to the other side of each segment.
I then used a saw to cut into the wood in the shaded area. Do as many cuts as you can as this makes it easier to remove this waste wood.
I then used my saw at an angle to cut out the wood and finished the job off with my knife.
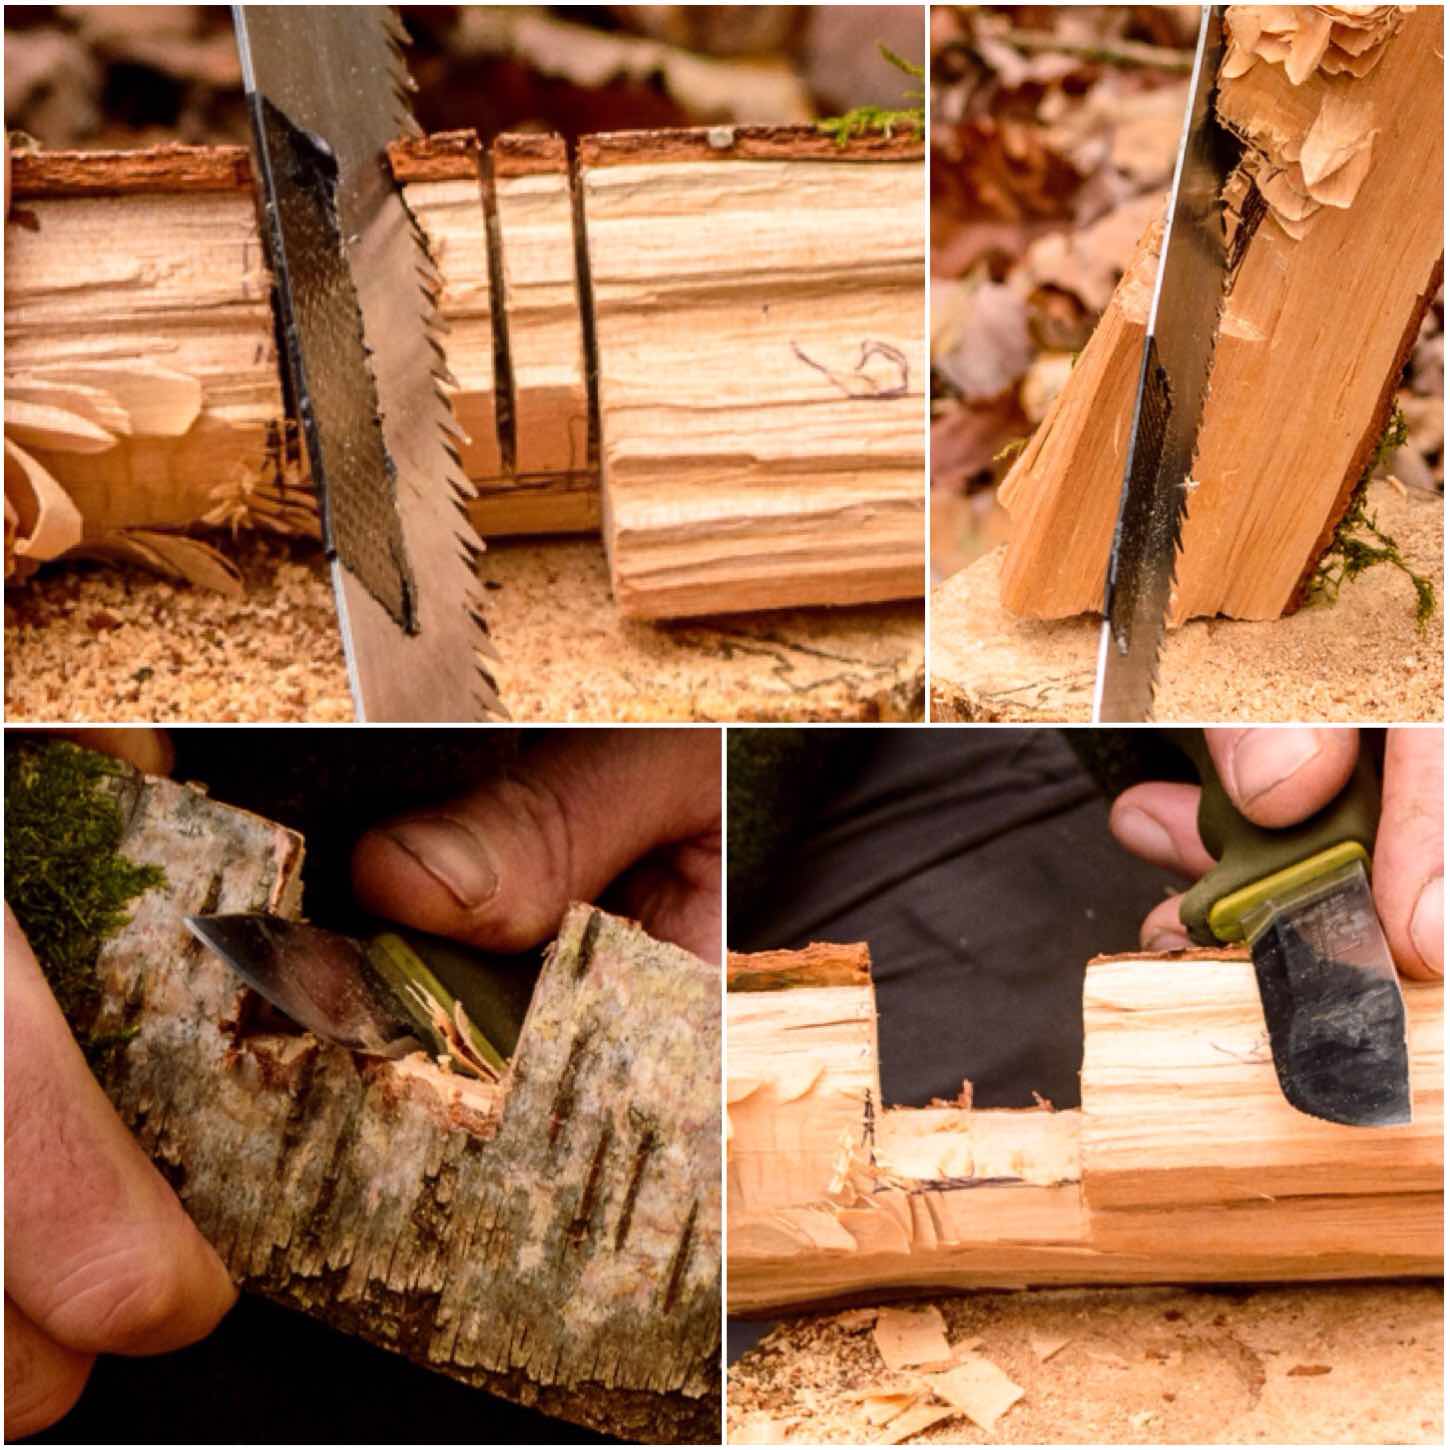
When finished the idea is that you want an access point big enough to put your kindling into the firebox area at the bottom of the chimney.
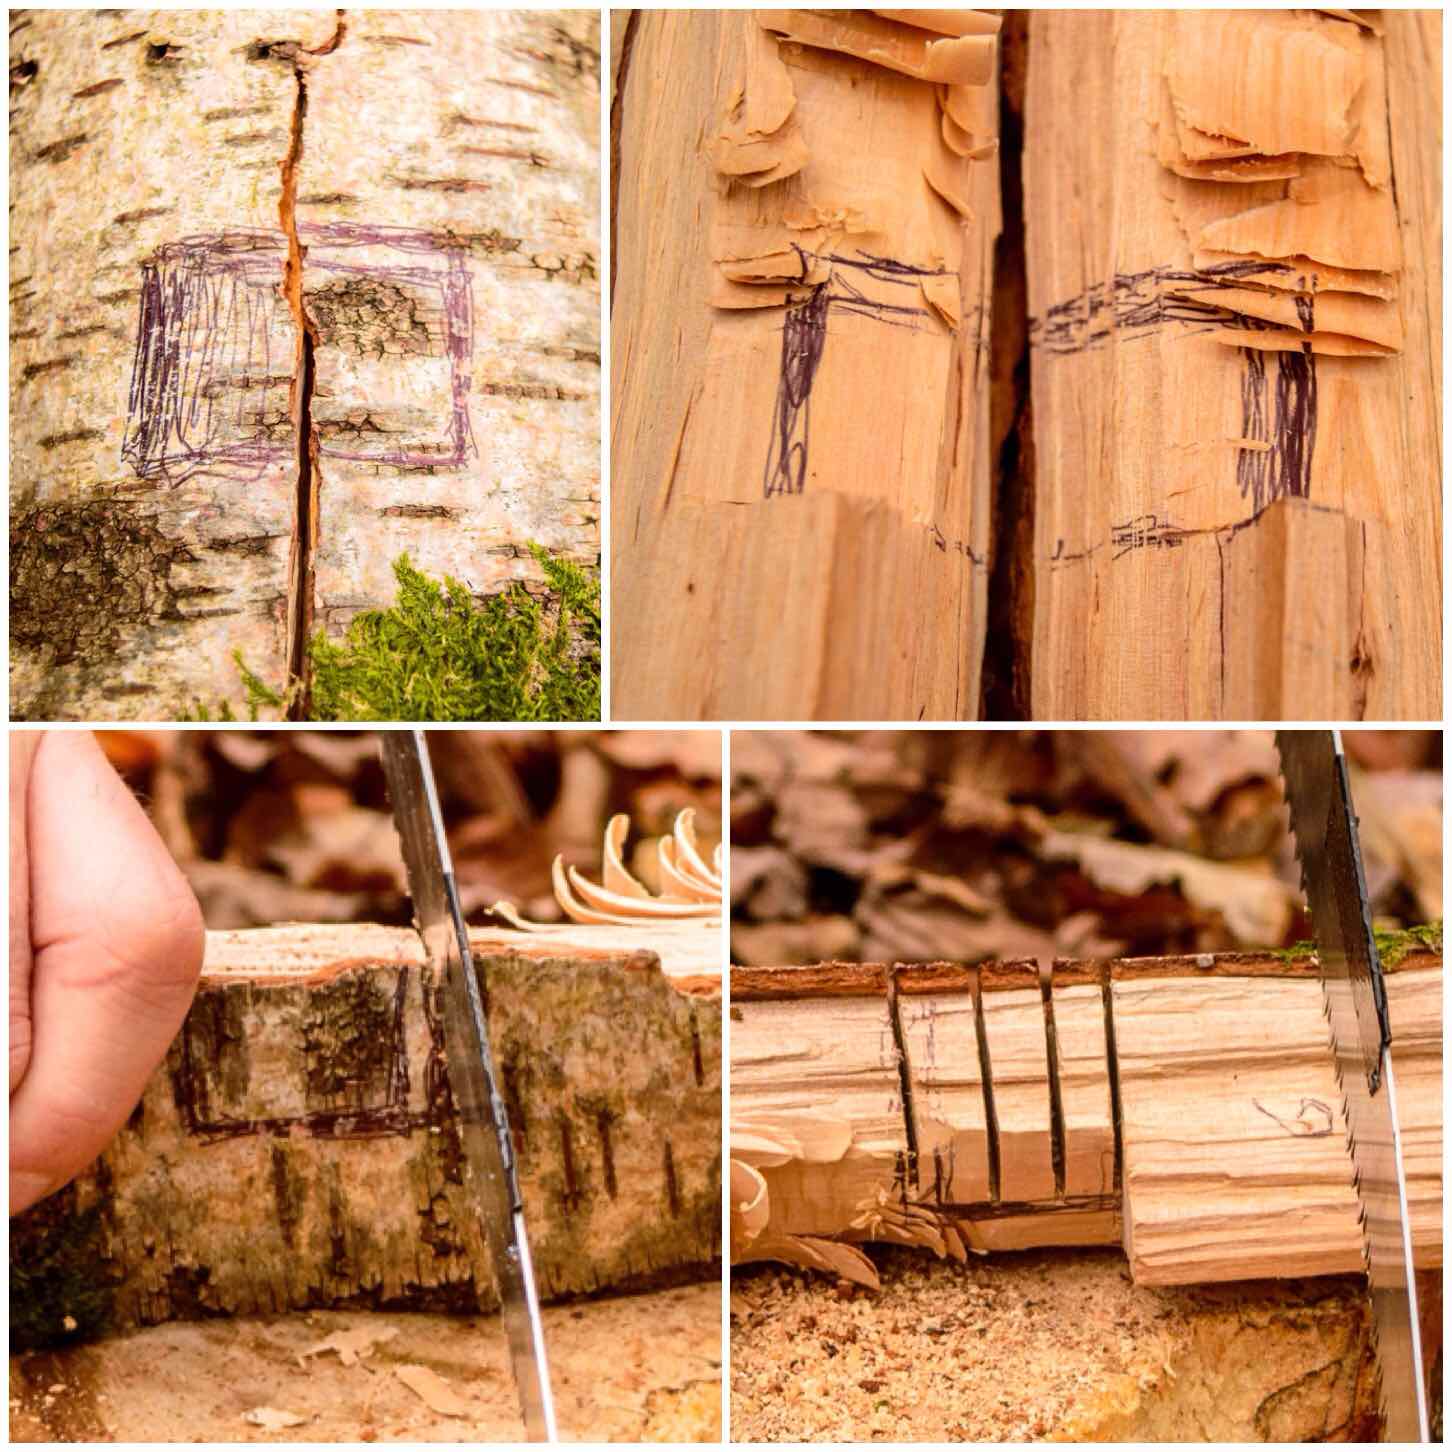
I found some old sisal string tied to a tree and used that to tie everything back together. It was pretty damp anyway and I hoped that would last longer than the copious amounts of paracord I tend to carry around with me. I think some thin wire would be the ideal thing to use though.
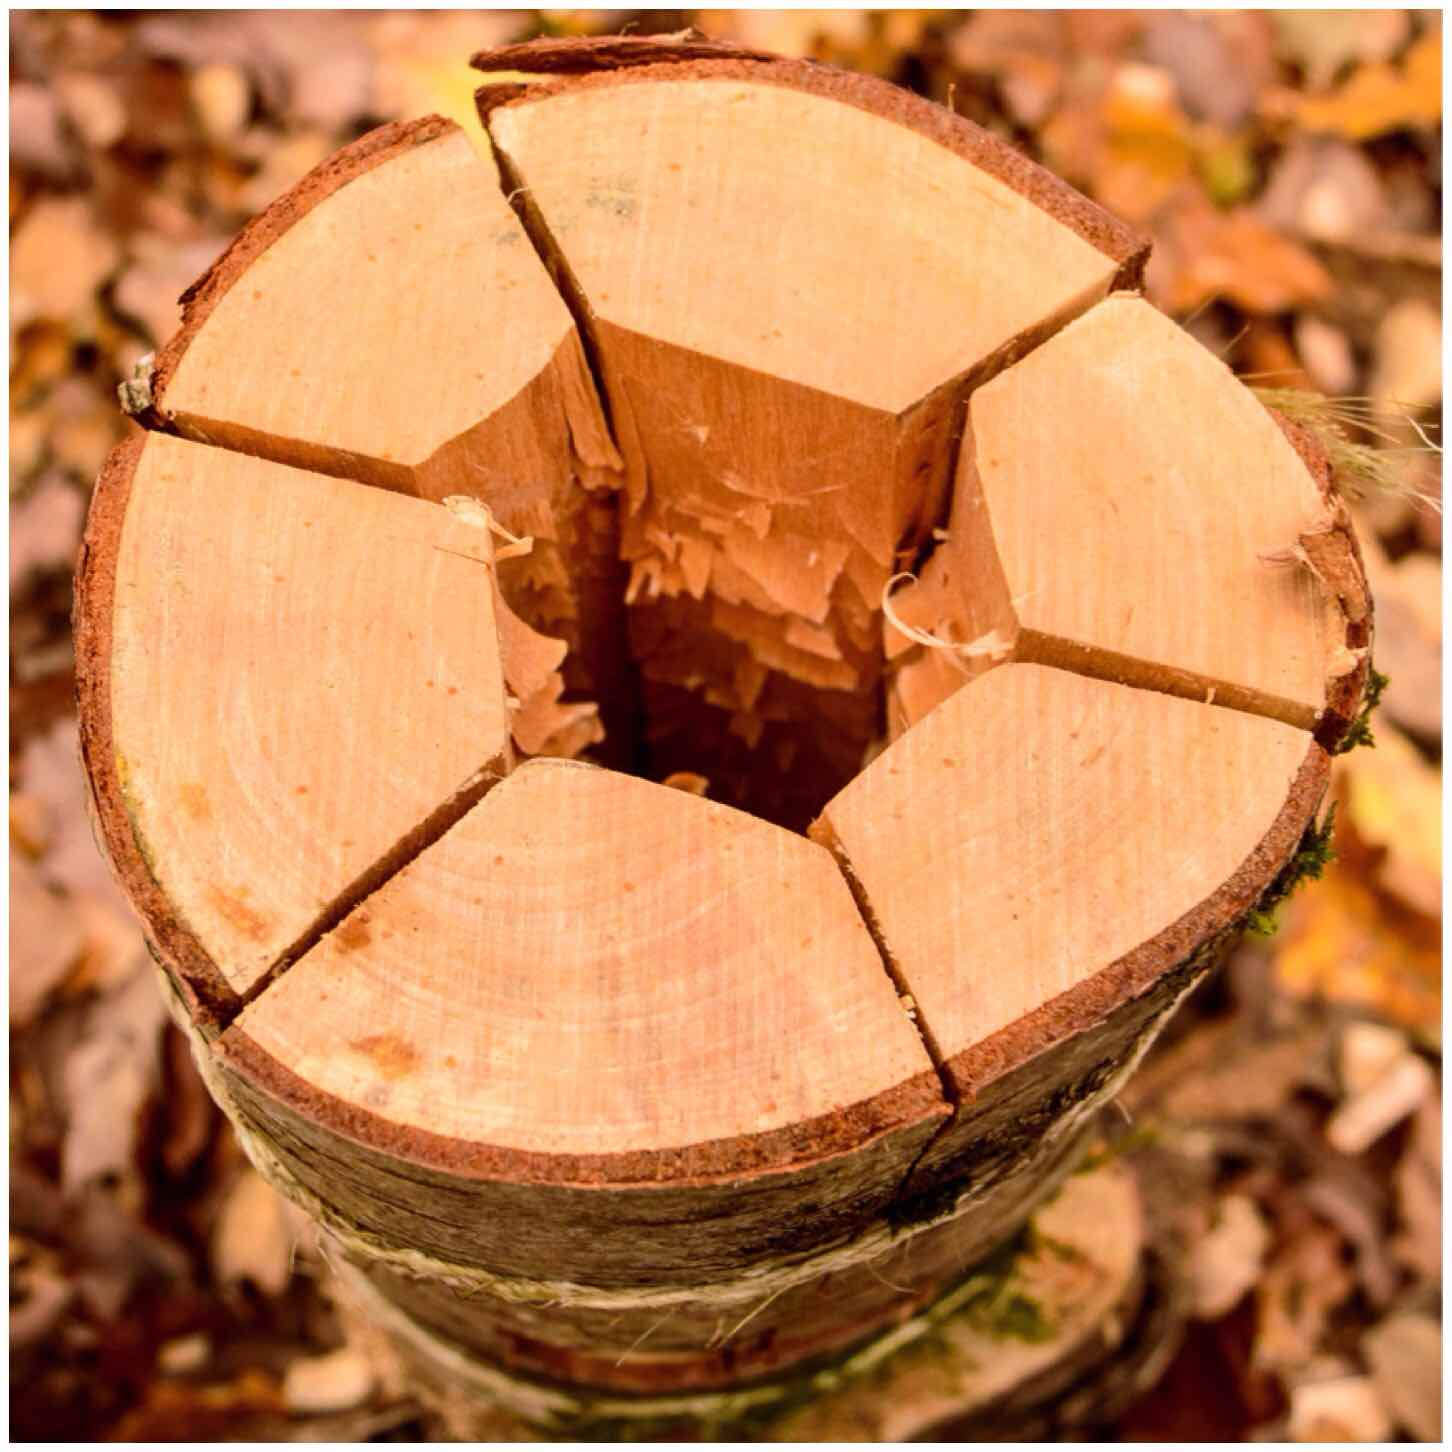
From the top you can see how wide the chimney was. I have no idea what would be the optimal size to have so you may need to experiment for yourself.
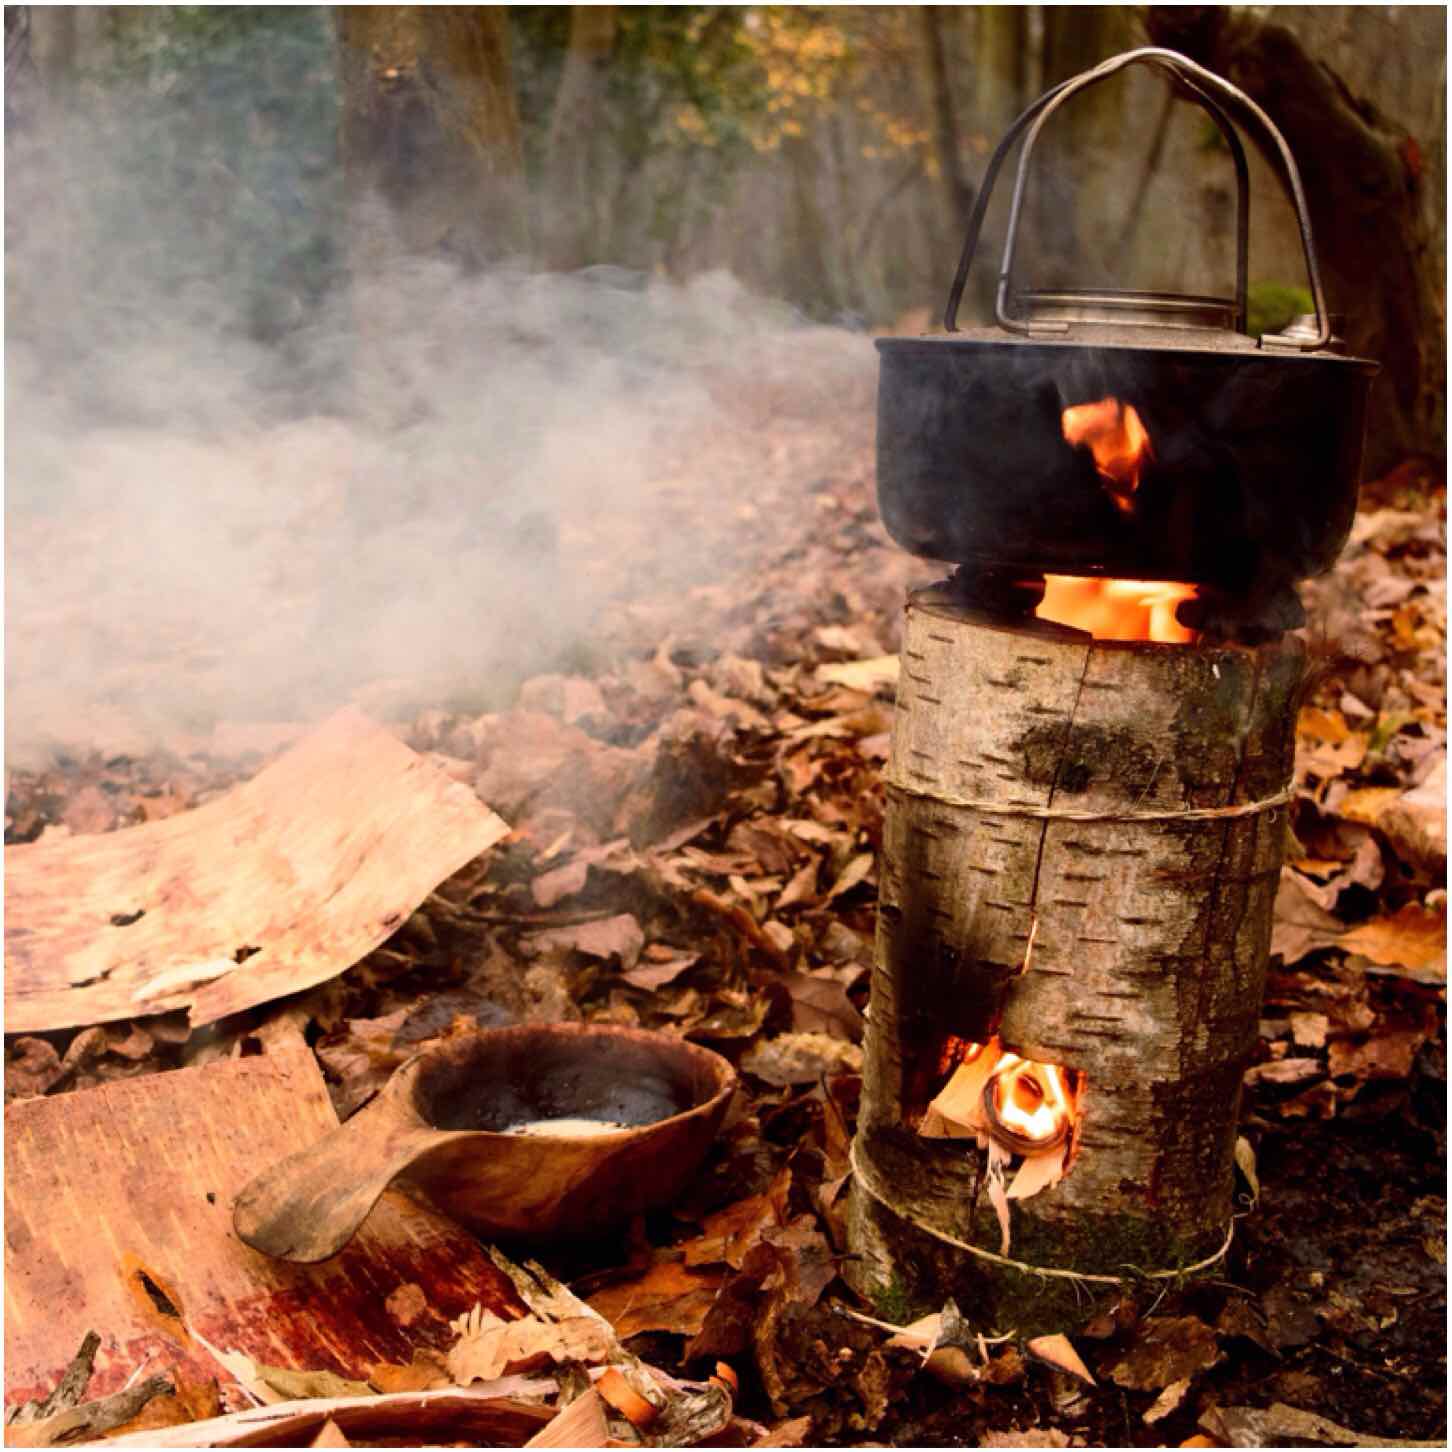
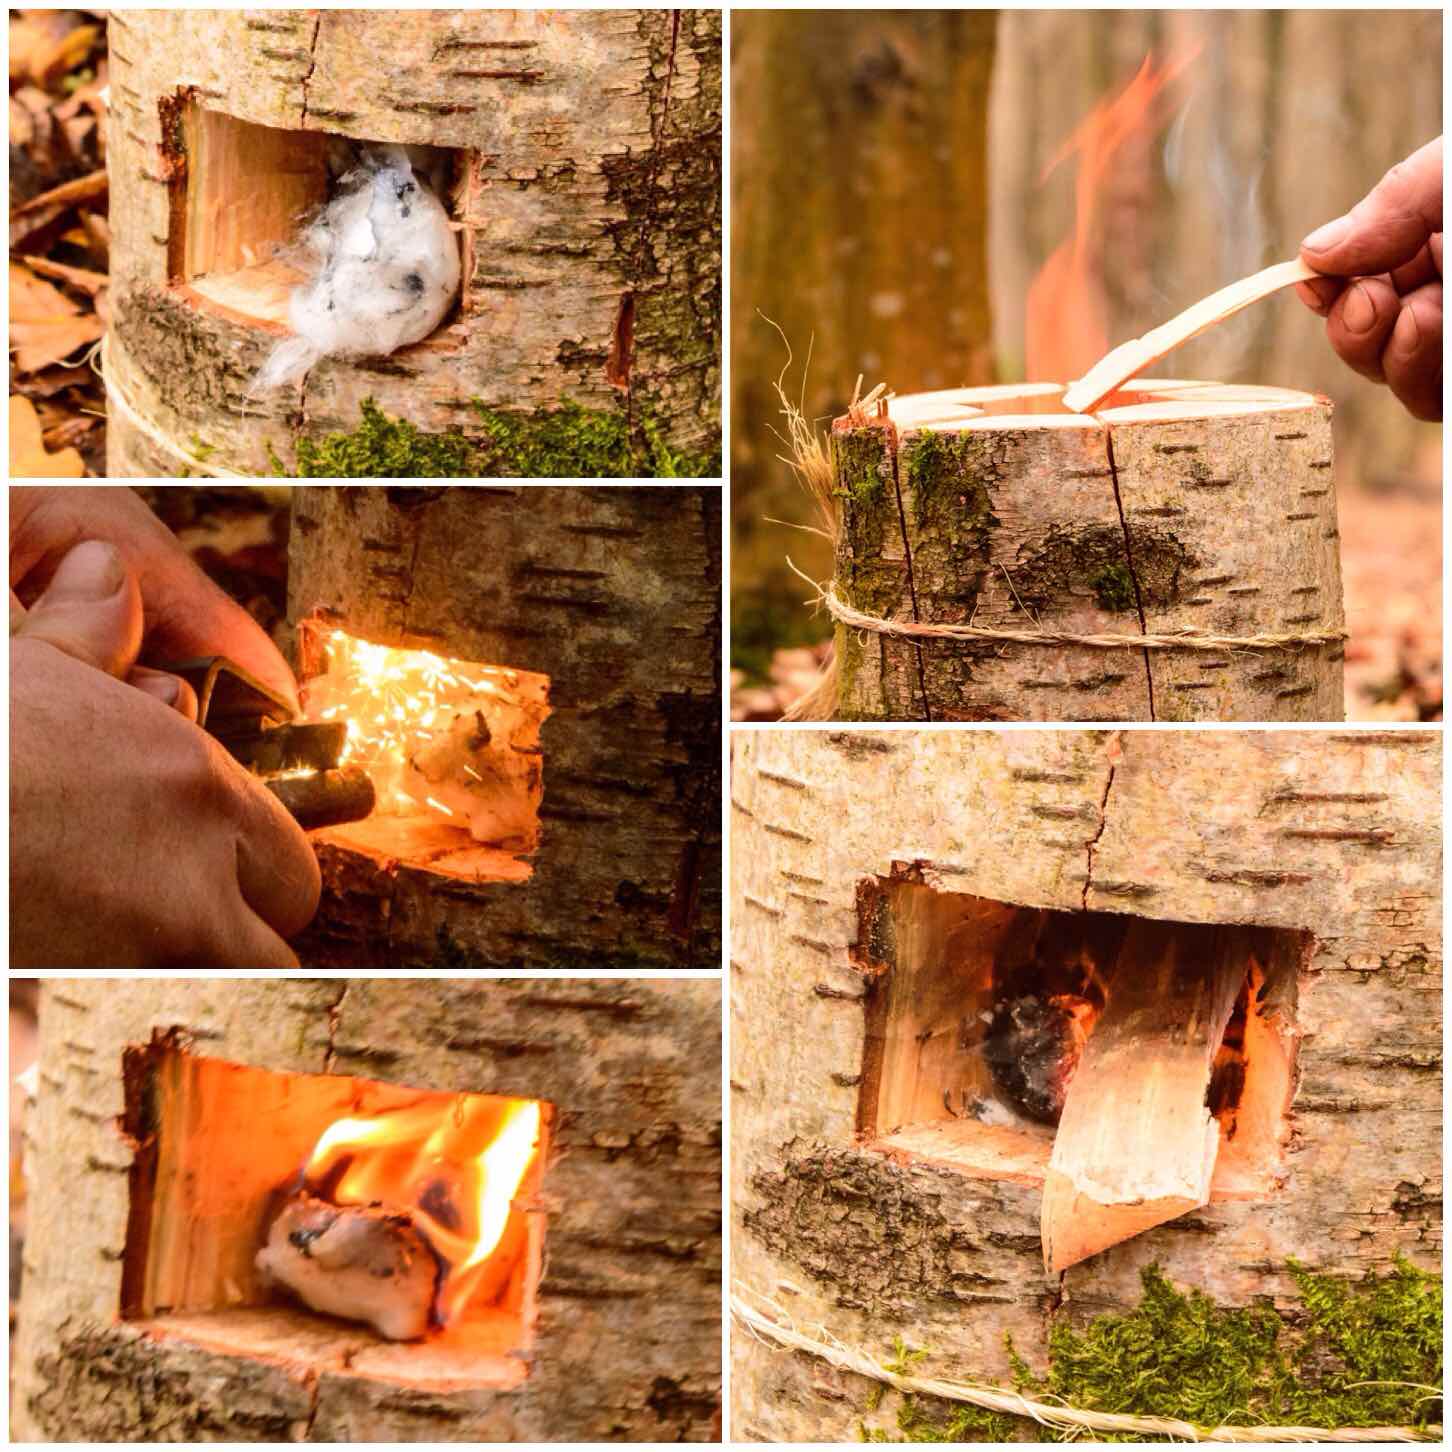
Firing Up
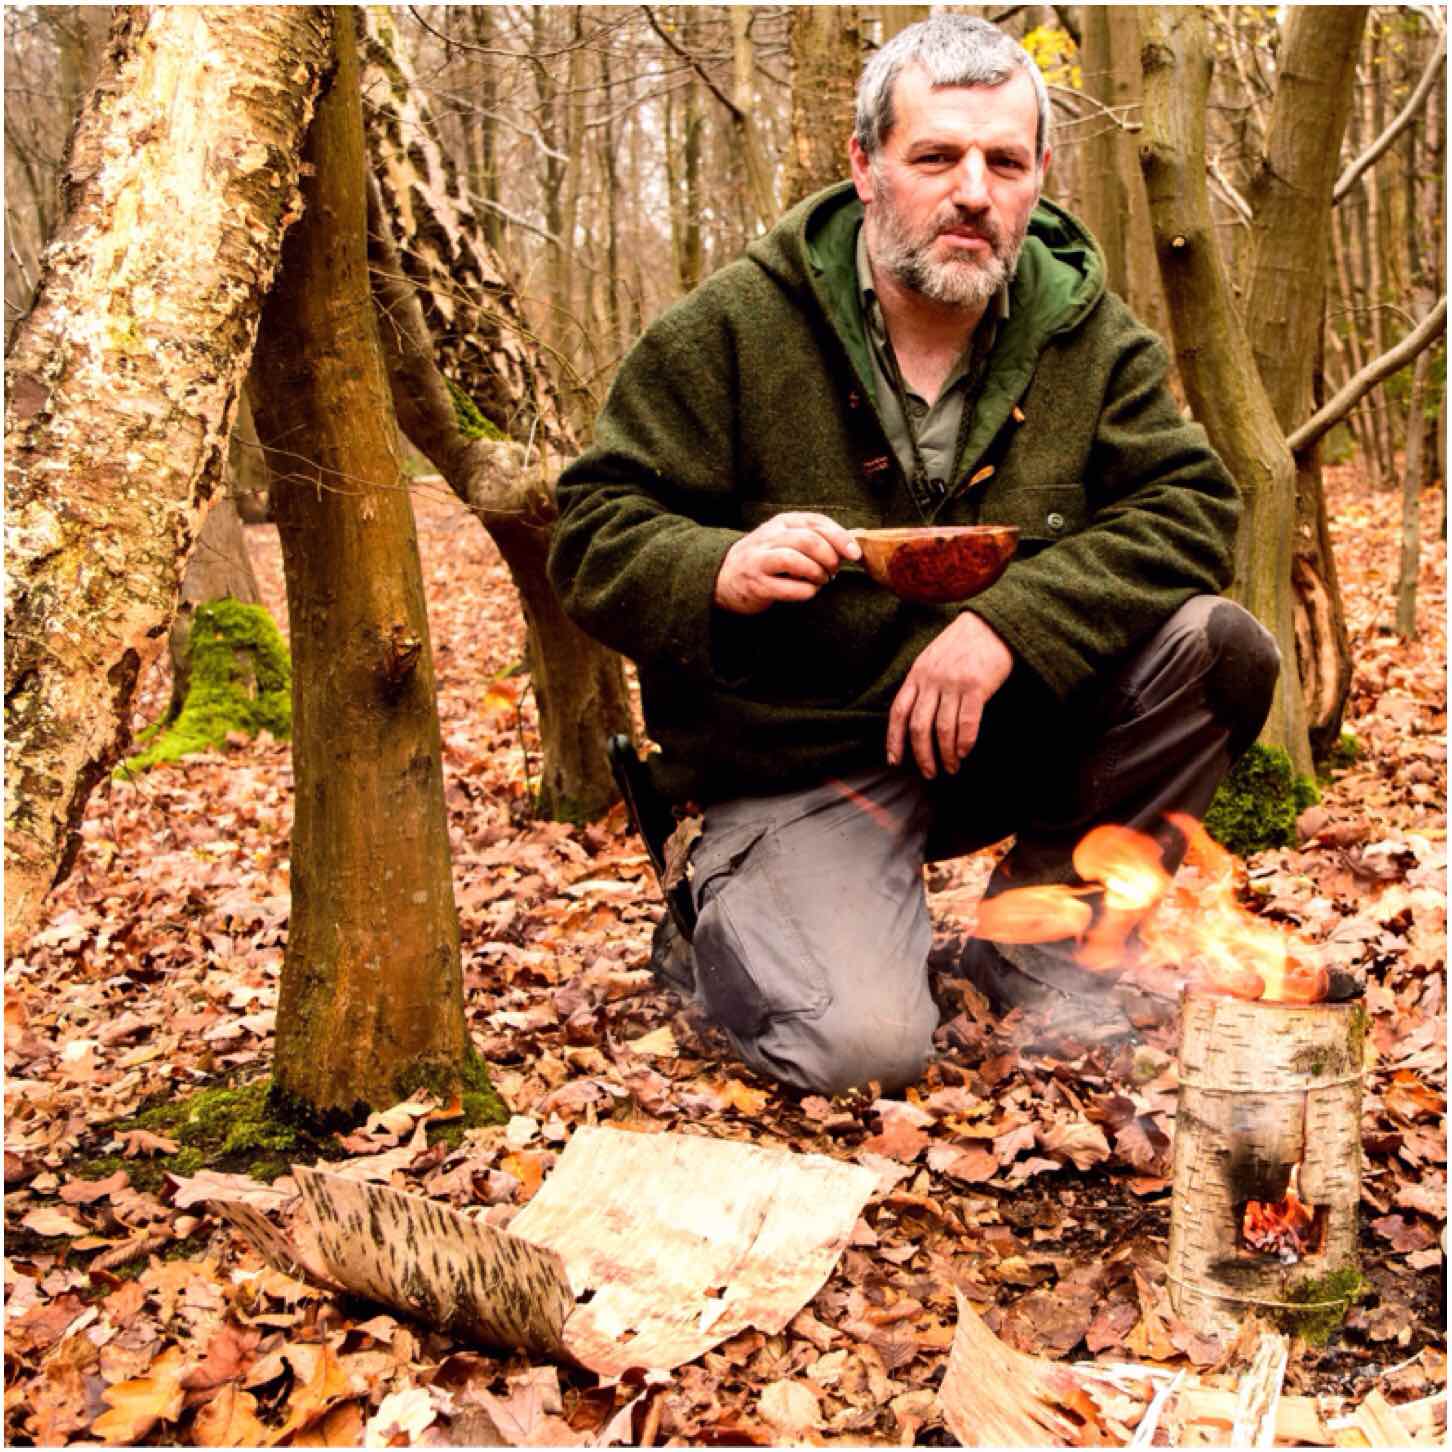
As the wood was so damp I decided to go for the sure-fire method of lighting the stove up – good old cotton wool and Vaseline. This worked well however I needed to use 4 Vaseline-coated cotton wool balls to maintain the fire.
I have used shredded birch bark mixed with spruce resin on a number of occasions to light Finnish candles before but I didn’t have the time to collect the resin this time.
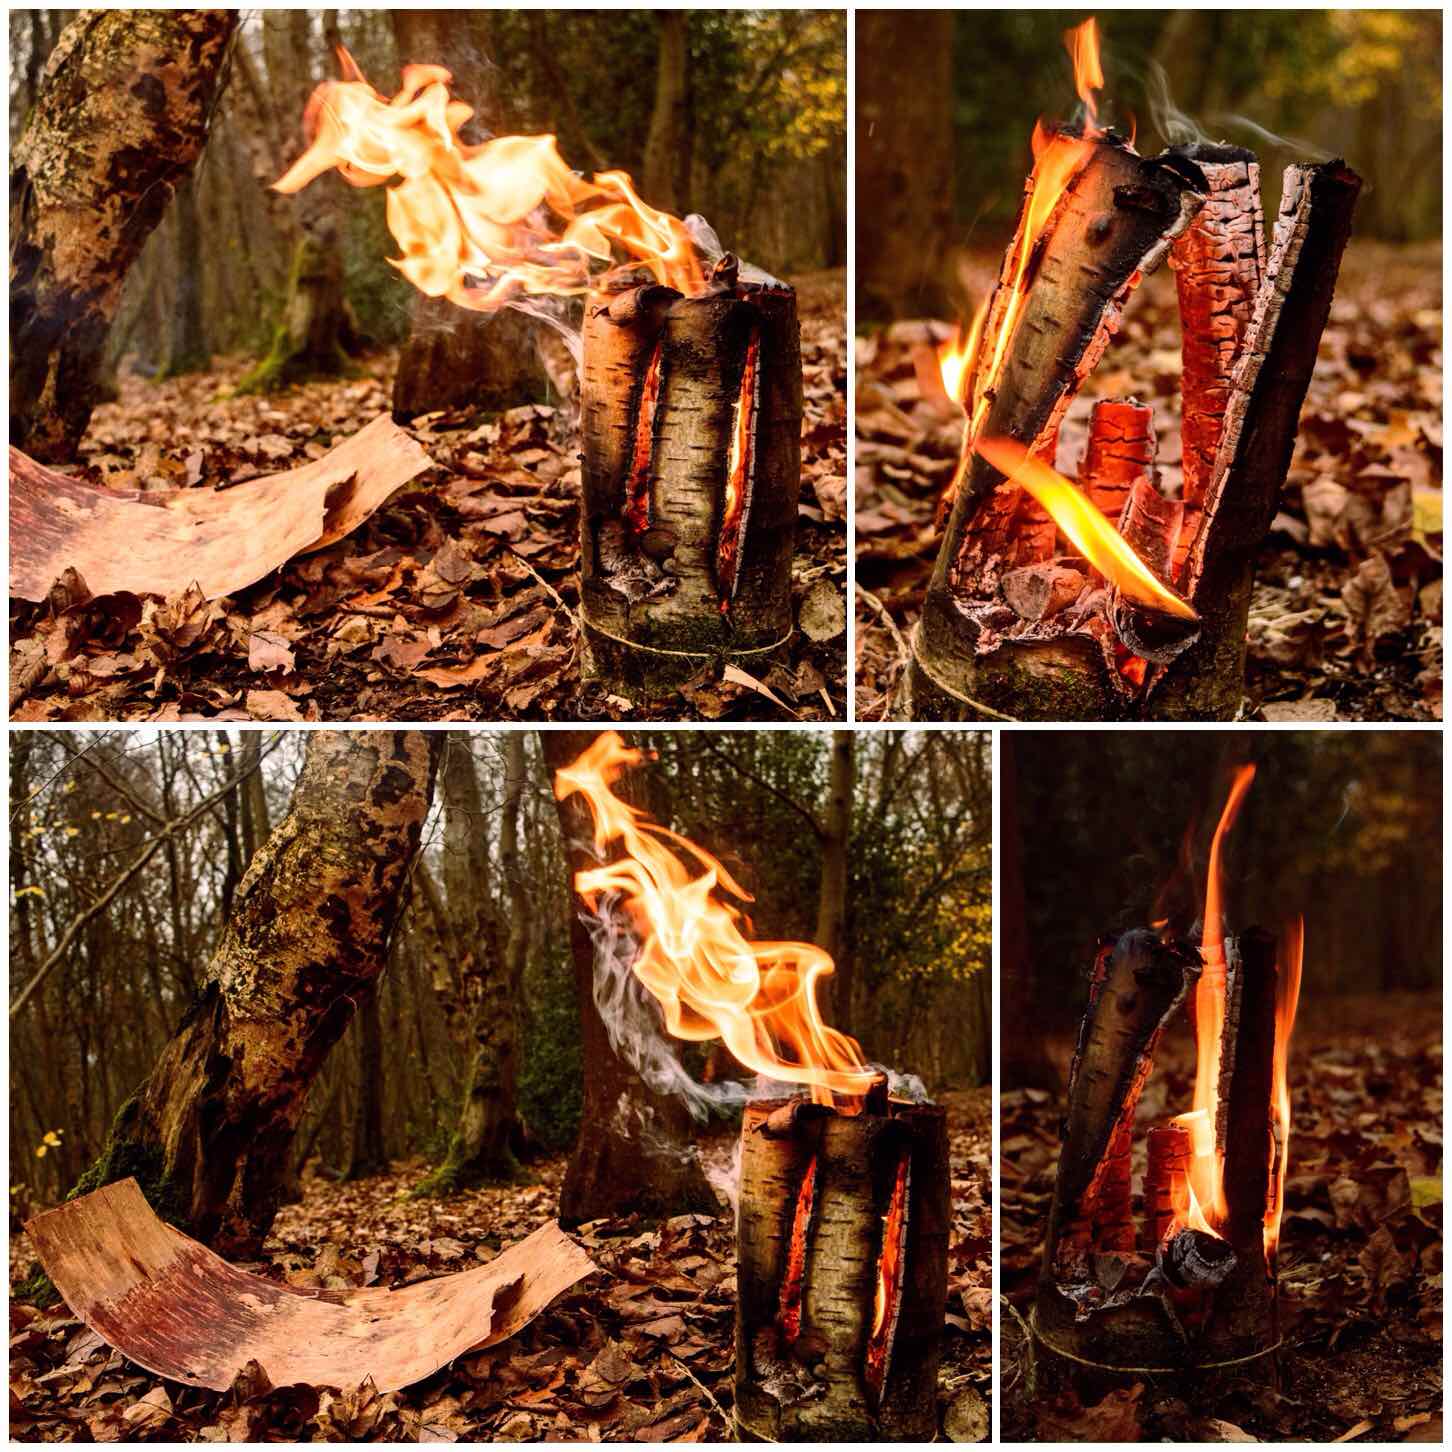
Once the fire had started I added tinder/kindling down through the chimney and in through the firebox. The main thing at this stage is to not over-fill the firebox but allow the airflow to be maintained. It means about 10 minutes of work but the damp wood inside the chimney area will dry out and the overall heat of the fire will increase.
Maintaining the Fire
I placed three pebbles on the top of the stove for the kettle to sit on securely.
The gap created by the pebbles also allows you to drop tinder/kindling down the chimney. I like to use strips of birch bark here as it is so pliable and flammable.
If the wind is low or changes direction you may need to get down low and blow directly into the firebox to keep the fire going. Once the wood has dried out a bit you will not need to do this so much.
I gave the stove about 10 minutes before putting the kettle on and then in about 15 minutes the kettle was boiling. Not as fast as modern stoves but for what is in effect a wet log not bad.

I have to thank Jess Edwards for a number of these pictures at the end. Jess is a great photographer and keen bushcrafter so it was great to concentrate for once on the tinkering and leave the photography aspect in someone else’s capable hands.
Observations
Once the coffee was made I was able to have a good look at what was happening with the stove. As I looked closely I could see the moisture in the wood boiling off. If you look in the bottom picture you can see the water boiling away on the surface.
The stove kept going for another hour before I had to put it out as we were leaving.
Overall I was very impressed with this Log Rocket stove with the Raappanan Tuli twist and I will be using it again on my courses.
Thanks again to the Scouts for documenting this stove – I hope you like my little twist on it?
Cheers
George
Amazing idea!!!!!!!!! I love it! Thank you for sharing!
Glad you liked it Mattia. Made another one tonight for one of our local Scout masters and he will be getting his group to make some.
Thanks for that wonderful post and clear explanation. Great photographs ! Looking forward to trying to make my own rocket stove, next week, on a trip to the wilds of Northumbria..merry christmas.
Hi William
Glad you liked it and have a great trip.
George
Fabulous. Thank you. I came up with the idea as people were saying you need a drill. I’ve made Swedish torches in the same way, i.e. splitting the log and then packing the pieces apart and three whipping them back together. Ideal if you have no chainsaw.
Hi Paul
Glad you like it. Your idea really caught my attention and my local scout instructors now know about it.
Like you I have been studying candles and log rocket stoves so it is nice to add a new method to my bag of tricks.
Cheers
George
who’s a clever bunny then?
Why thank you sir 🙂
Not my original idea however I just adapted it for everyday UK conditions Paul – wetness 🙂
Good skills mate. Never liked the conventional Swedish candle because of its reliance on a chainsaw but this is a really workable alternative. Could potentially be set inside a tarp shelter. It would make an excellent project for groups who had some basic tool use skills. Thanks for posting! T
Glad you liked it Tom.
Like yourself I am not a fan of using a chainsaw – but I will use one if it is available 🙂
This was another post in a whole series I did on candles and log rocket stoves. If you have ideas for others that I have not posted on please let me know as I am trying to document as many methods as possible.
Cheers
George
Hi George
I did a few vids for YouTube showing my attempt at these pucker stoves….(You did get a mention )
Hi Des
Cheers for that buddy. I will look them up mate.
Cheers, George
Glad that this is being used. The original post it put up went global and seeing it being done in Egypt, Peru , Australia to name but a few is awesome.
Did them at scouts for pancake day. They were only able to cook on these so they had to make pancake mix and a stove. They did well
Hi Paul. Glad it has gone down so well. I have been researching these for ages now and keep finding different methods.
My cadet instructors love them as well.
Cheers
George
Did these with the Scouts for pancake day. Make a stove first then you can have pancakes. Added anew extra twist to the pancake night meeting. Went well, used conifer and quarter cut.