

In my continuing research into Log Rocket Stoves I came across a Wikipedia page called the Schwedenfeuer and in it details of a type of log rocket stove I had not come across before, with a built-in fire tray and a chimney formed by simply cutting away the inner corner of one section.
Clever though it was, though, this stove still relied on string or wire to tie the sections together. As these stoves have been around for a long time I figured there must be other ways of holding them all together. I thought perhaps that green wood dovetail wedges might do the job, so I set out to test this.
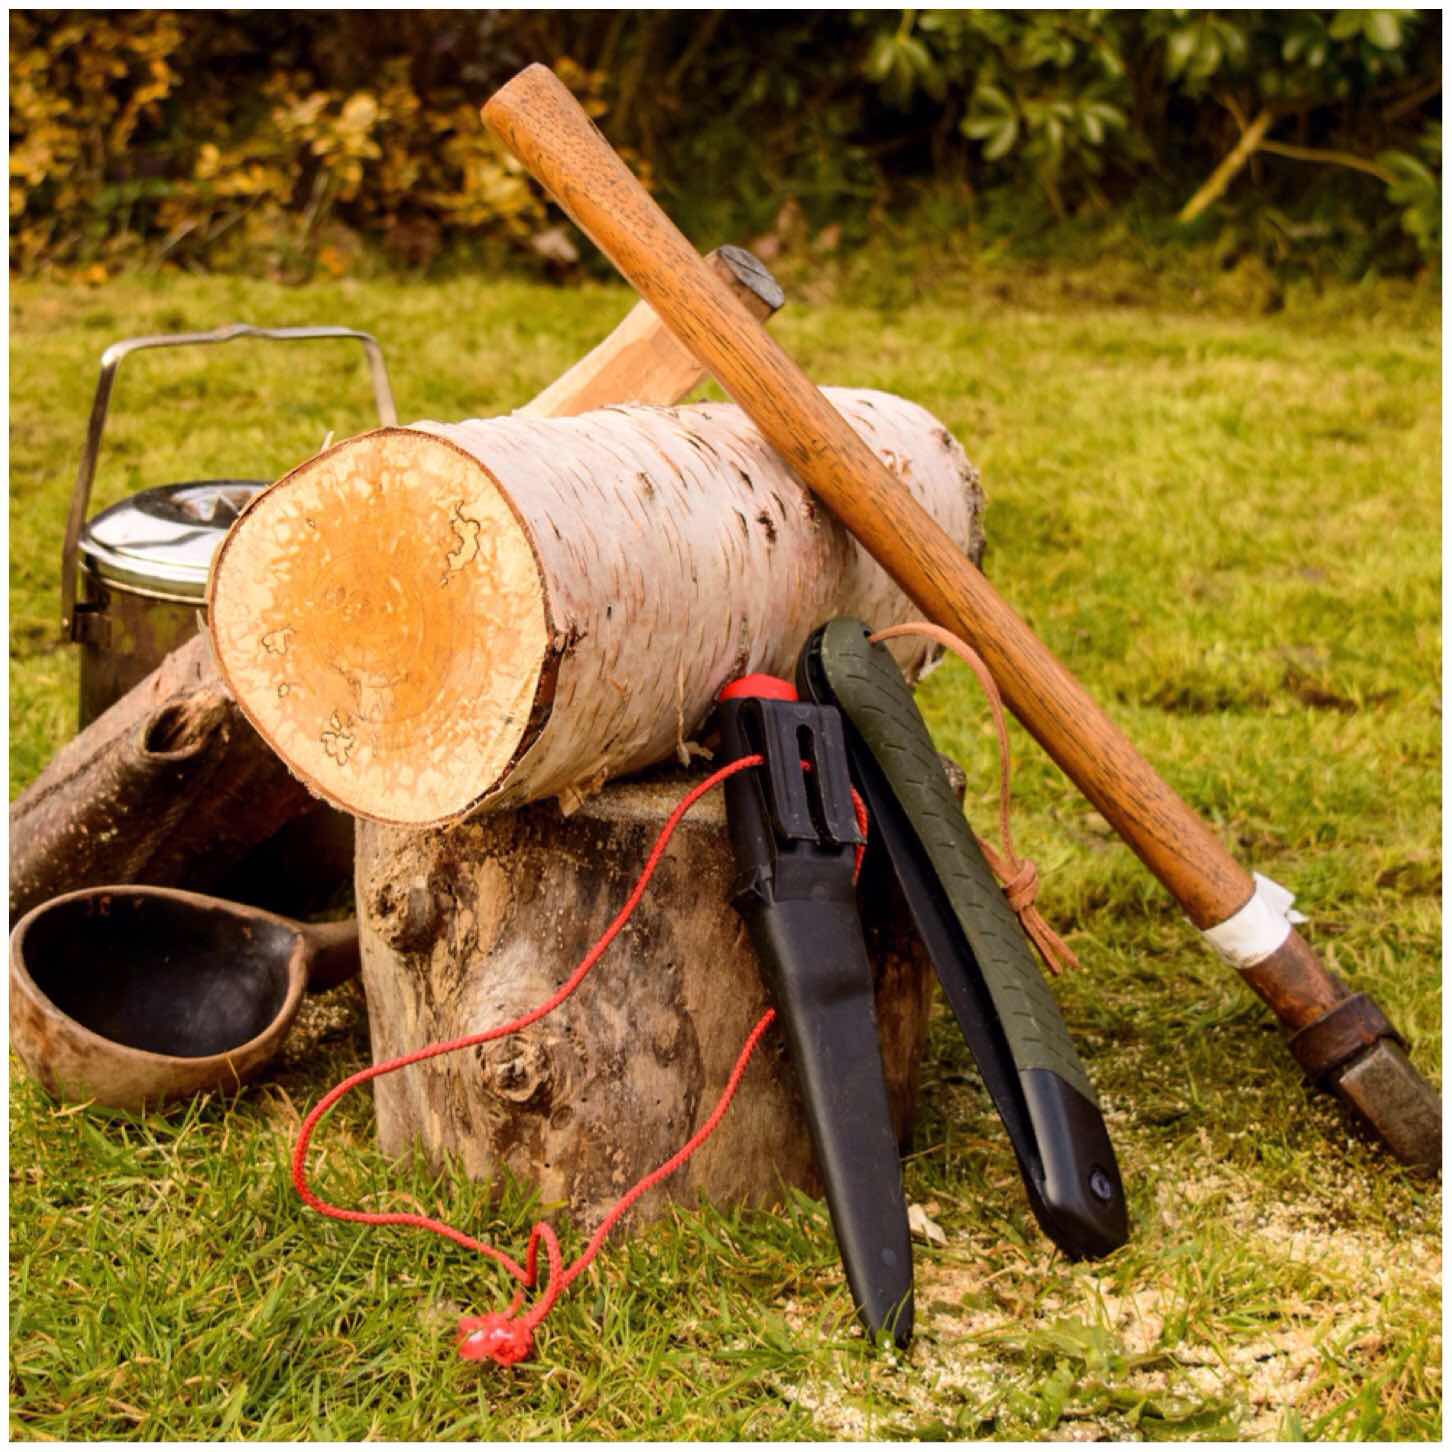
Tools and Material
As usual I limited myself to the tools I would usually carry in my backpack, including a knife, saw and axe. A pen or pencil is handy for this project as well.
I’ve had a piece of birch stored in my garage for over a year however it had absorbed moisture over the winter and was fairly damp in its core.
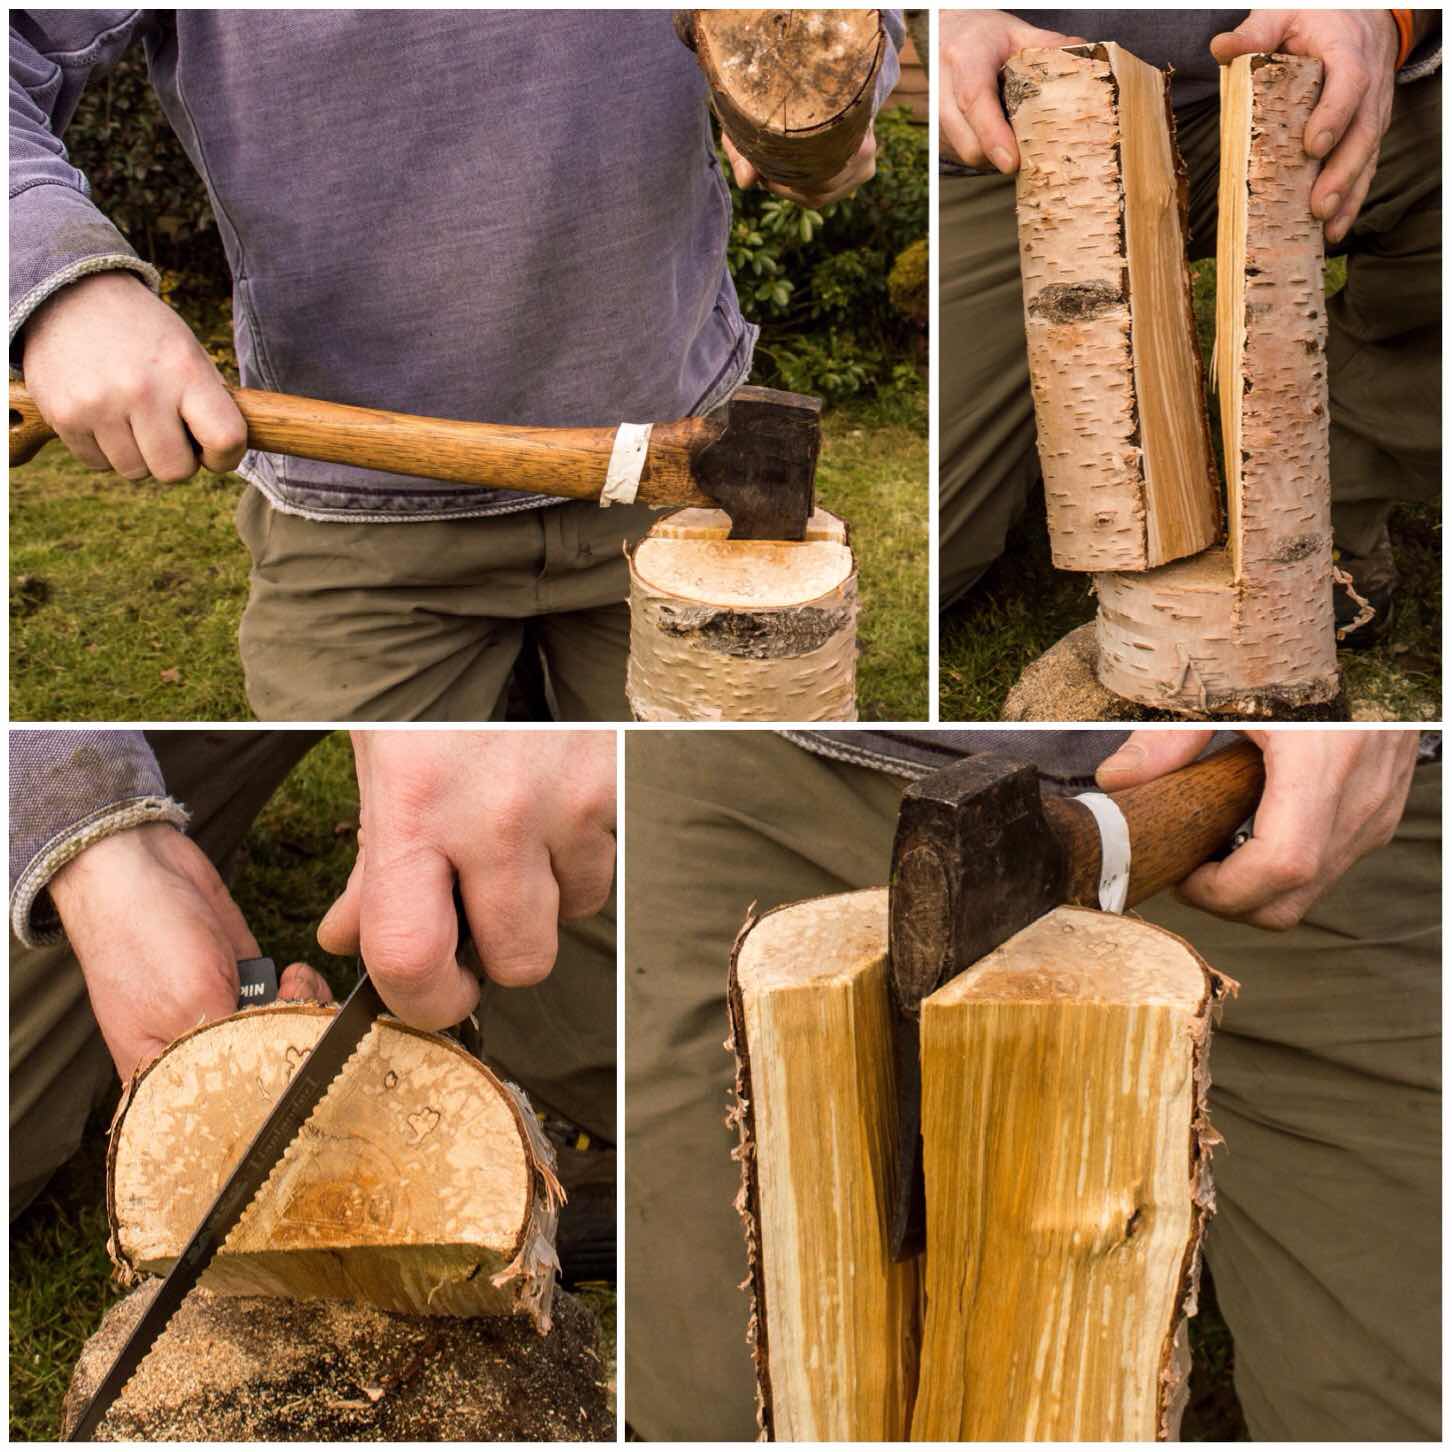
Splitting Out
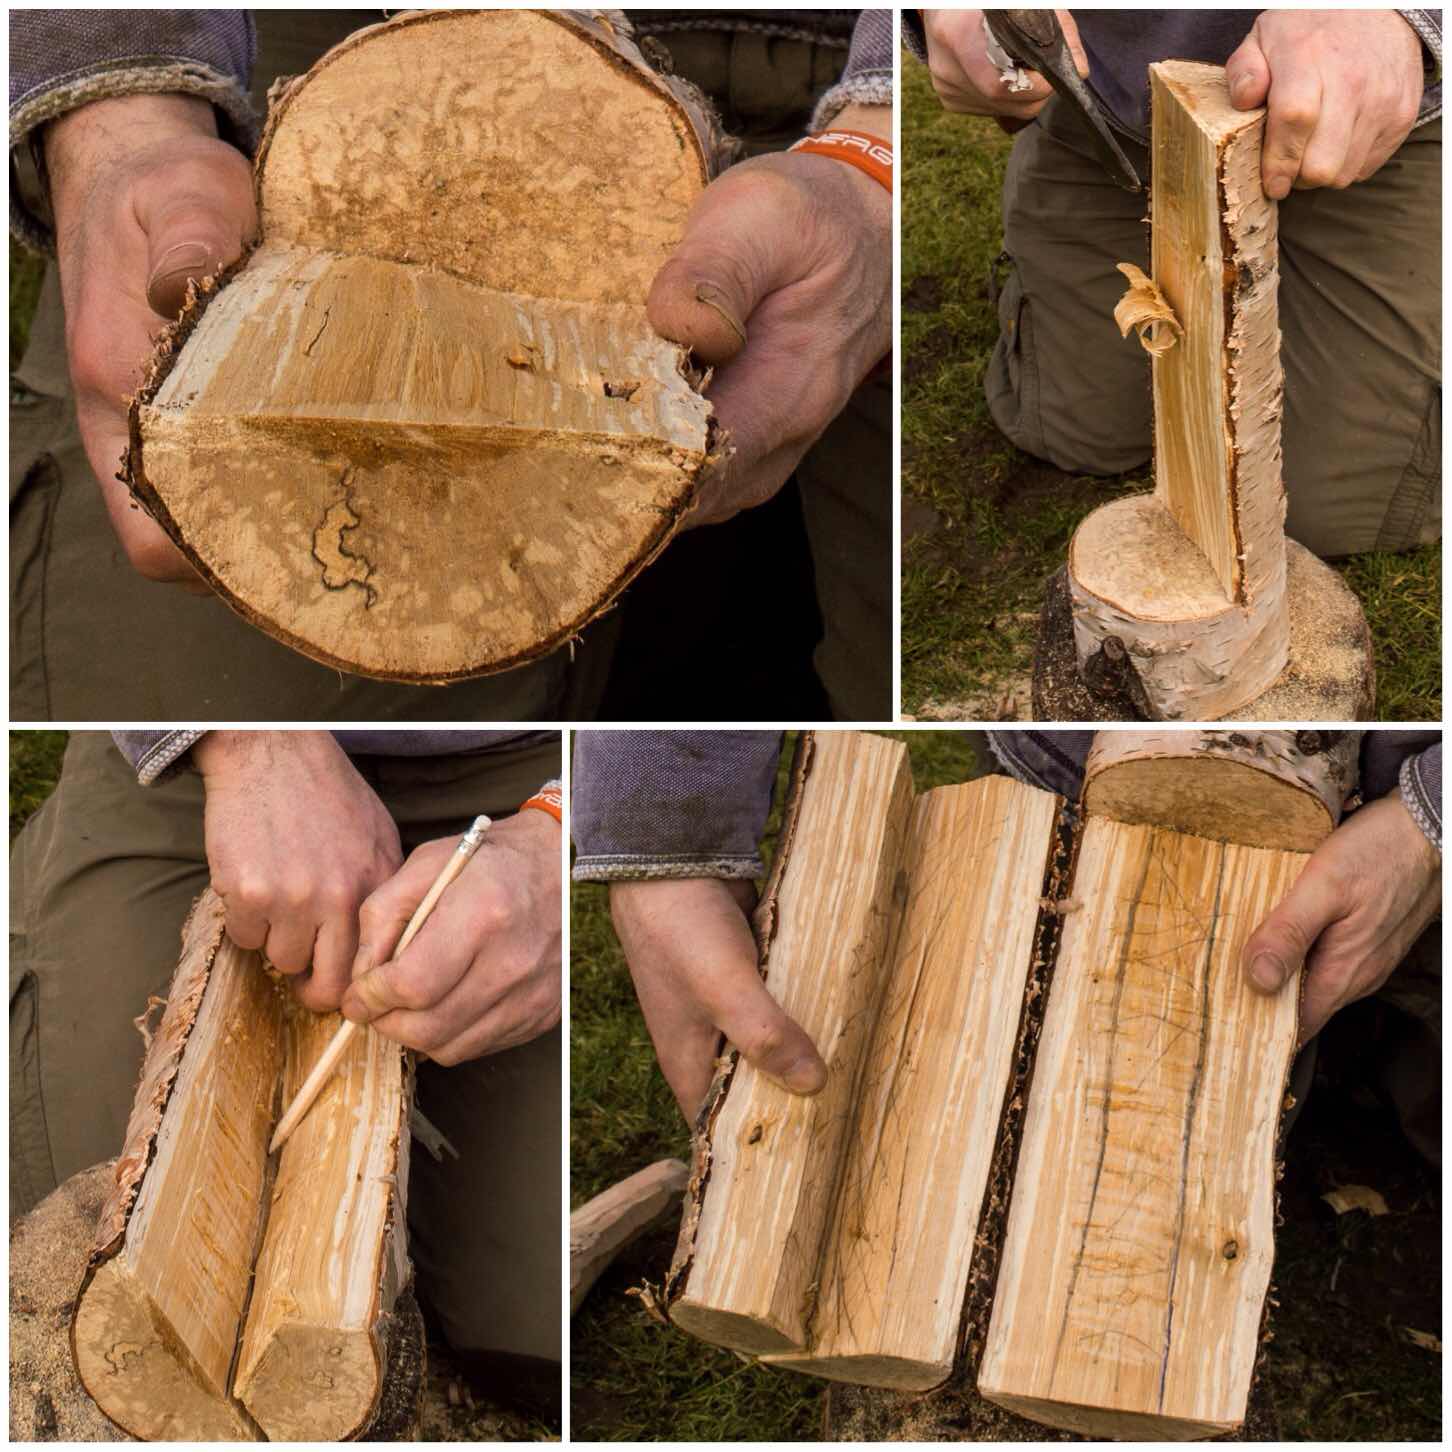
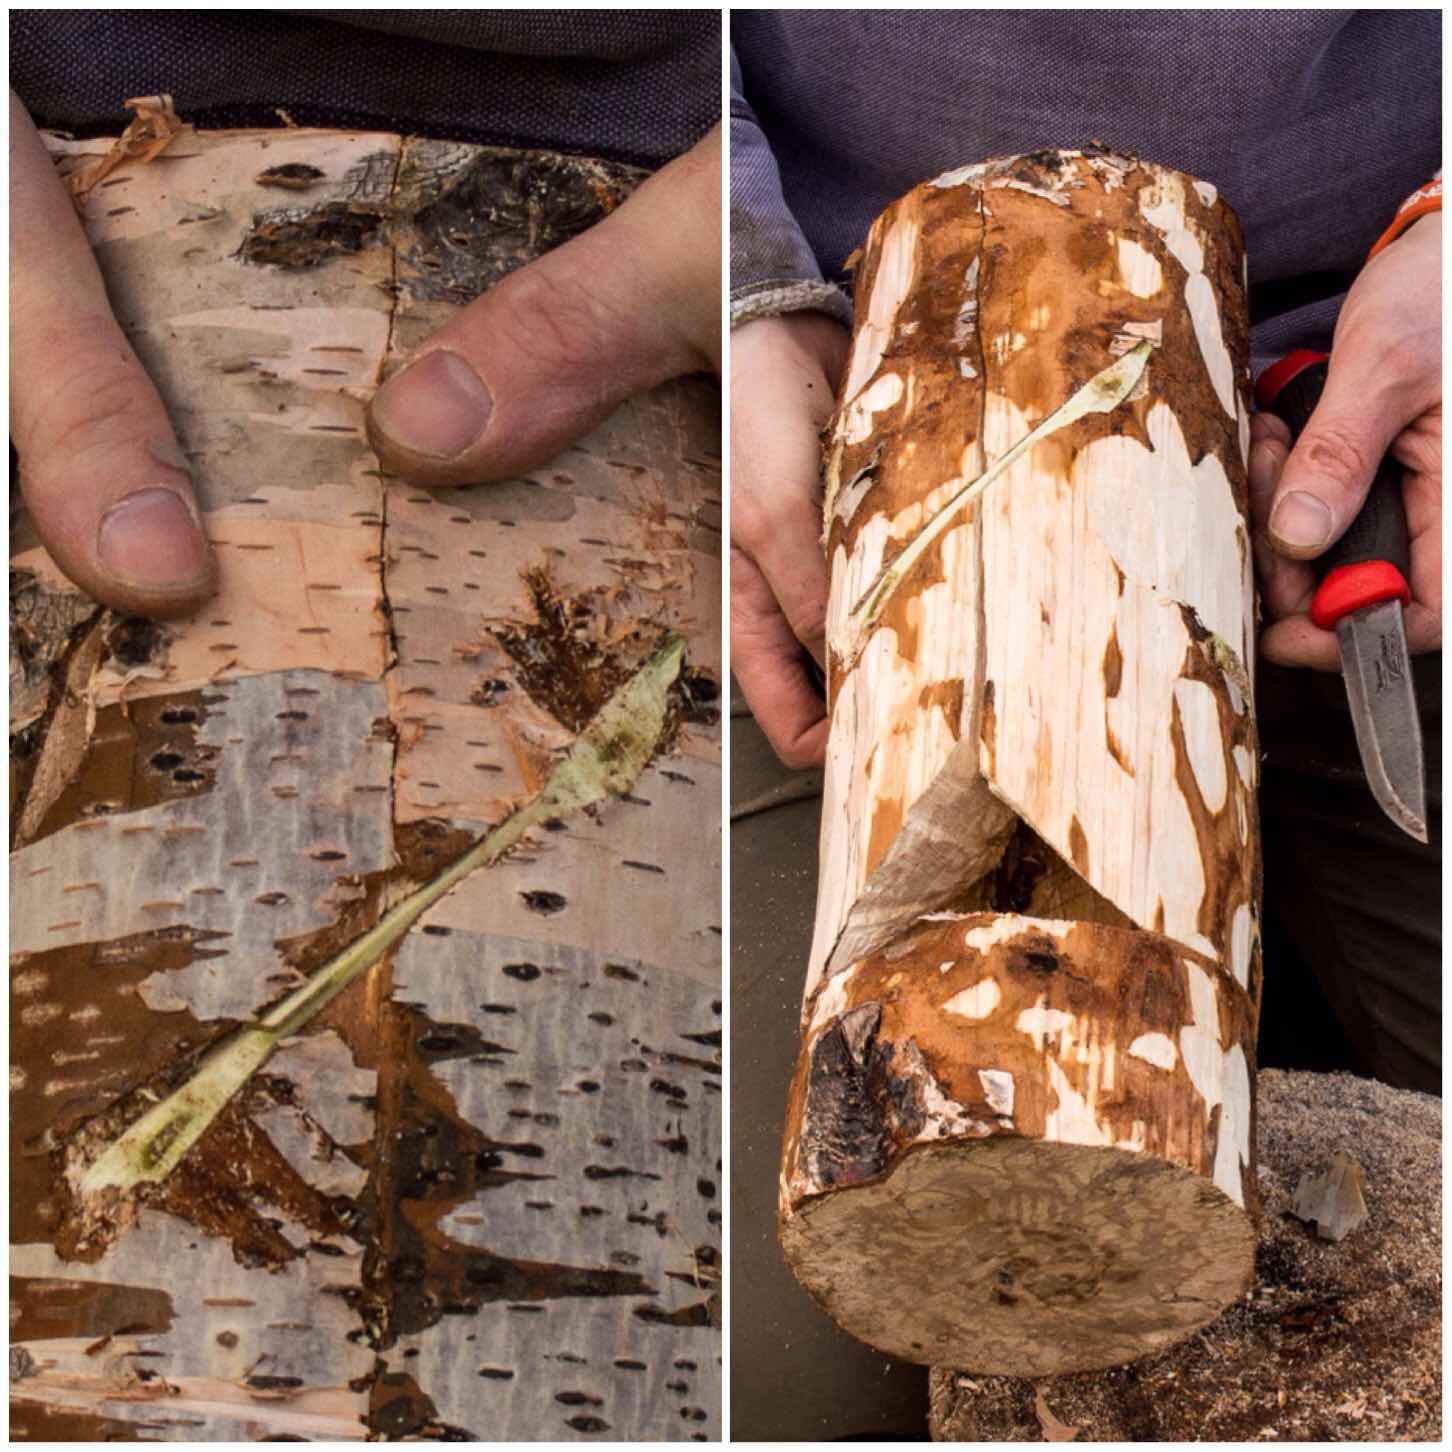
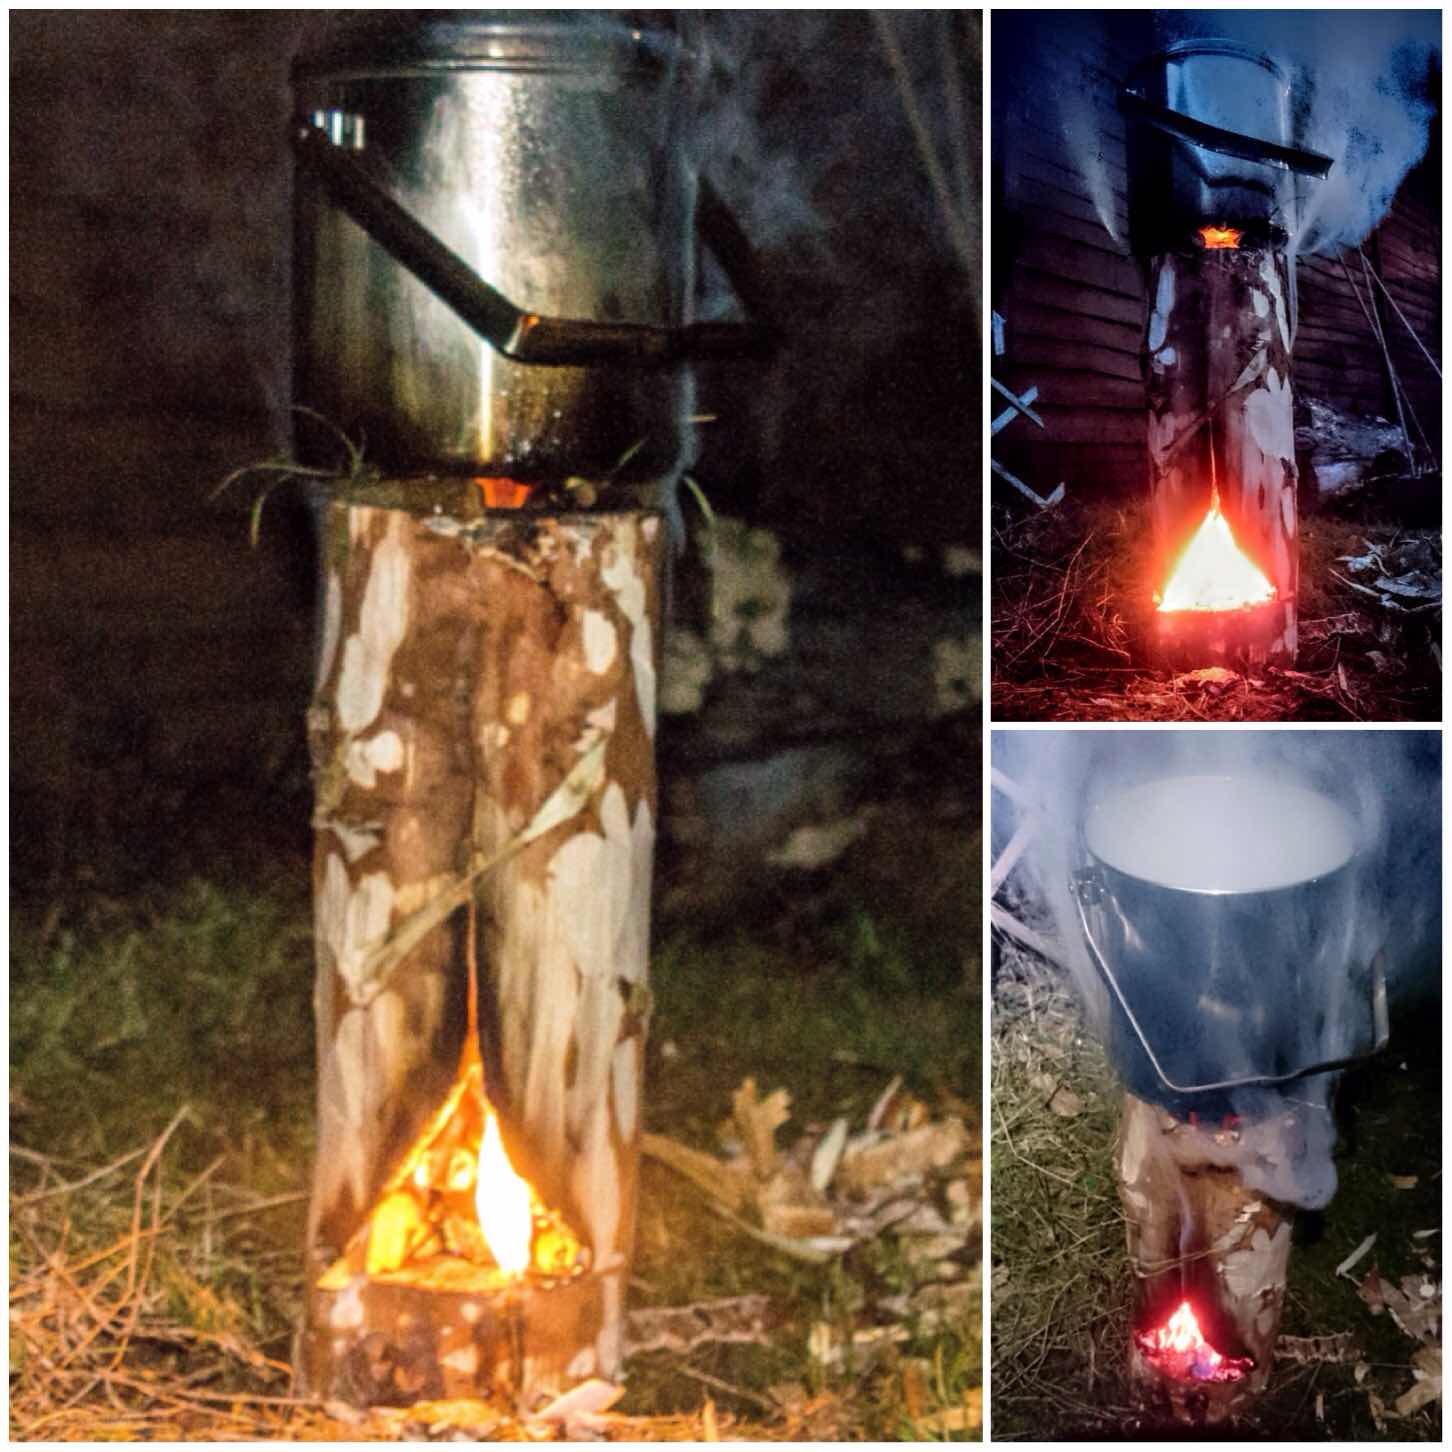
This style of log rocket requires you to put a stop cut into the bottom of the log to about two thirds of its width. You can see in the top left picture below the cut is about 10 to 15 cms from what will be the bottom of the stove.
The top right picture below shoes you how far I put my stop cut into the log. The bottom two pictures show me marking out with my saw the approximate area I would be battoning out.

I used my axe and a large piece of wood to batton out the the wood. You can see the shape of the stove at this stage with one segment in an inverted ‘L’ shape (Segment 1) and a smaller piece (Segment 2).
The bottom two photos show me marking out the smaller piece for further splitting. This piece is not split exactly in two as this configuration allows you to form the chimney very quickly.
The Chimney
Below you can see the shape of all the pieces when they are put back together . I then battoned off the tip of the larger piece from Segment 2 so that a chimney would be formed. This piece of battoned-out wood I further split into fine pieces to act as kindling for the stove.
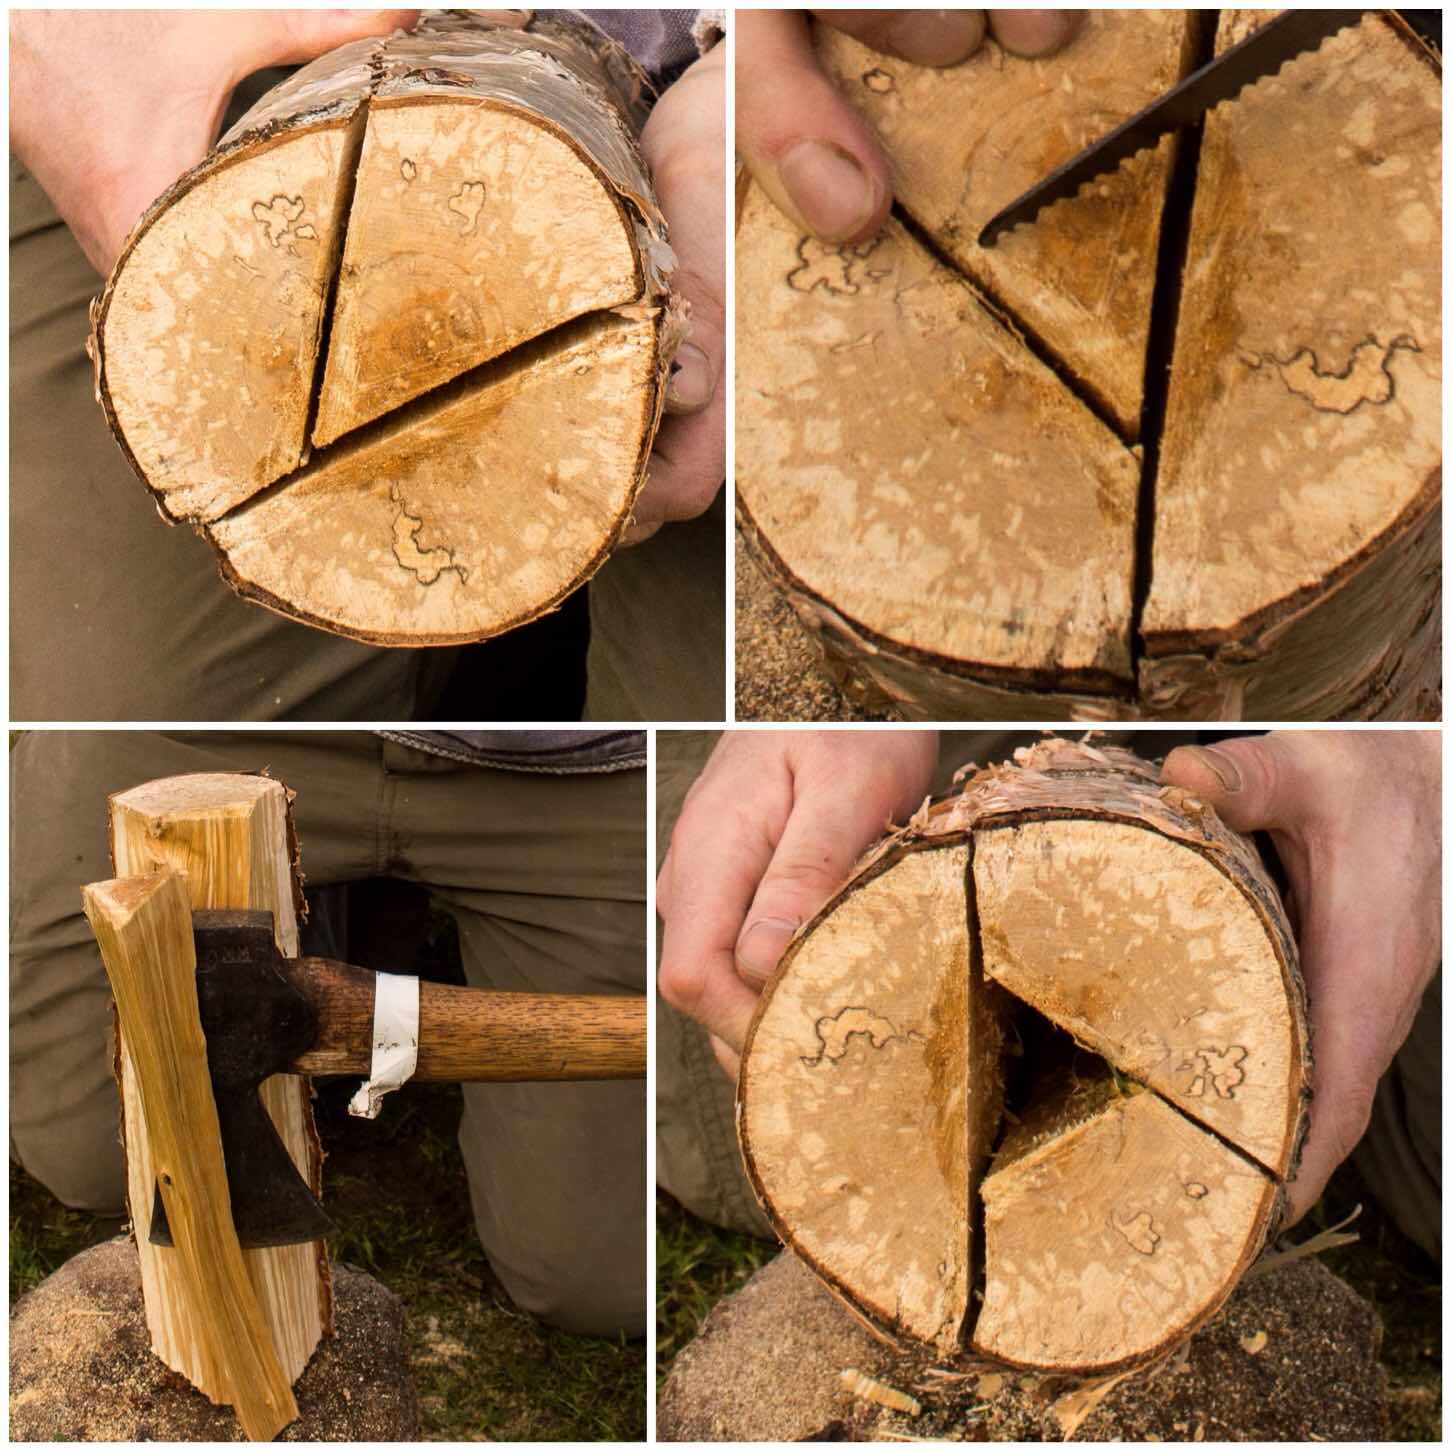
Once I had the chimney battoned out I trimmed off some excess wood from Segment 1 and then used a pencil to mark out the chimney area.
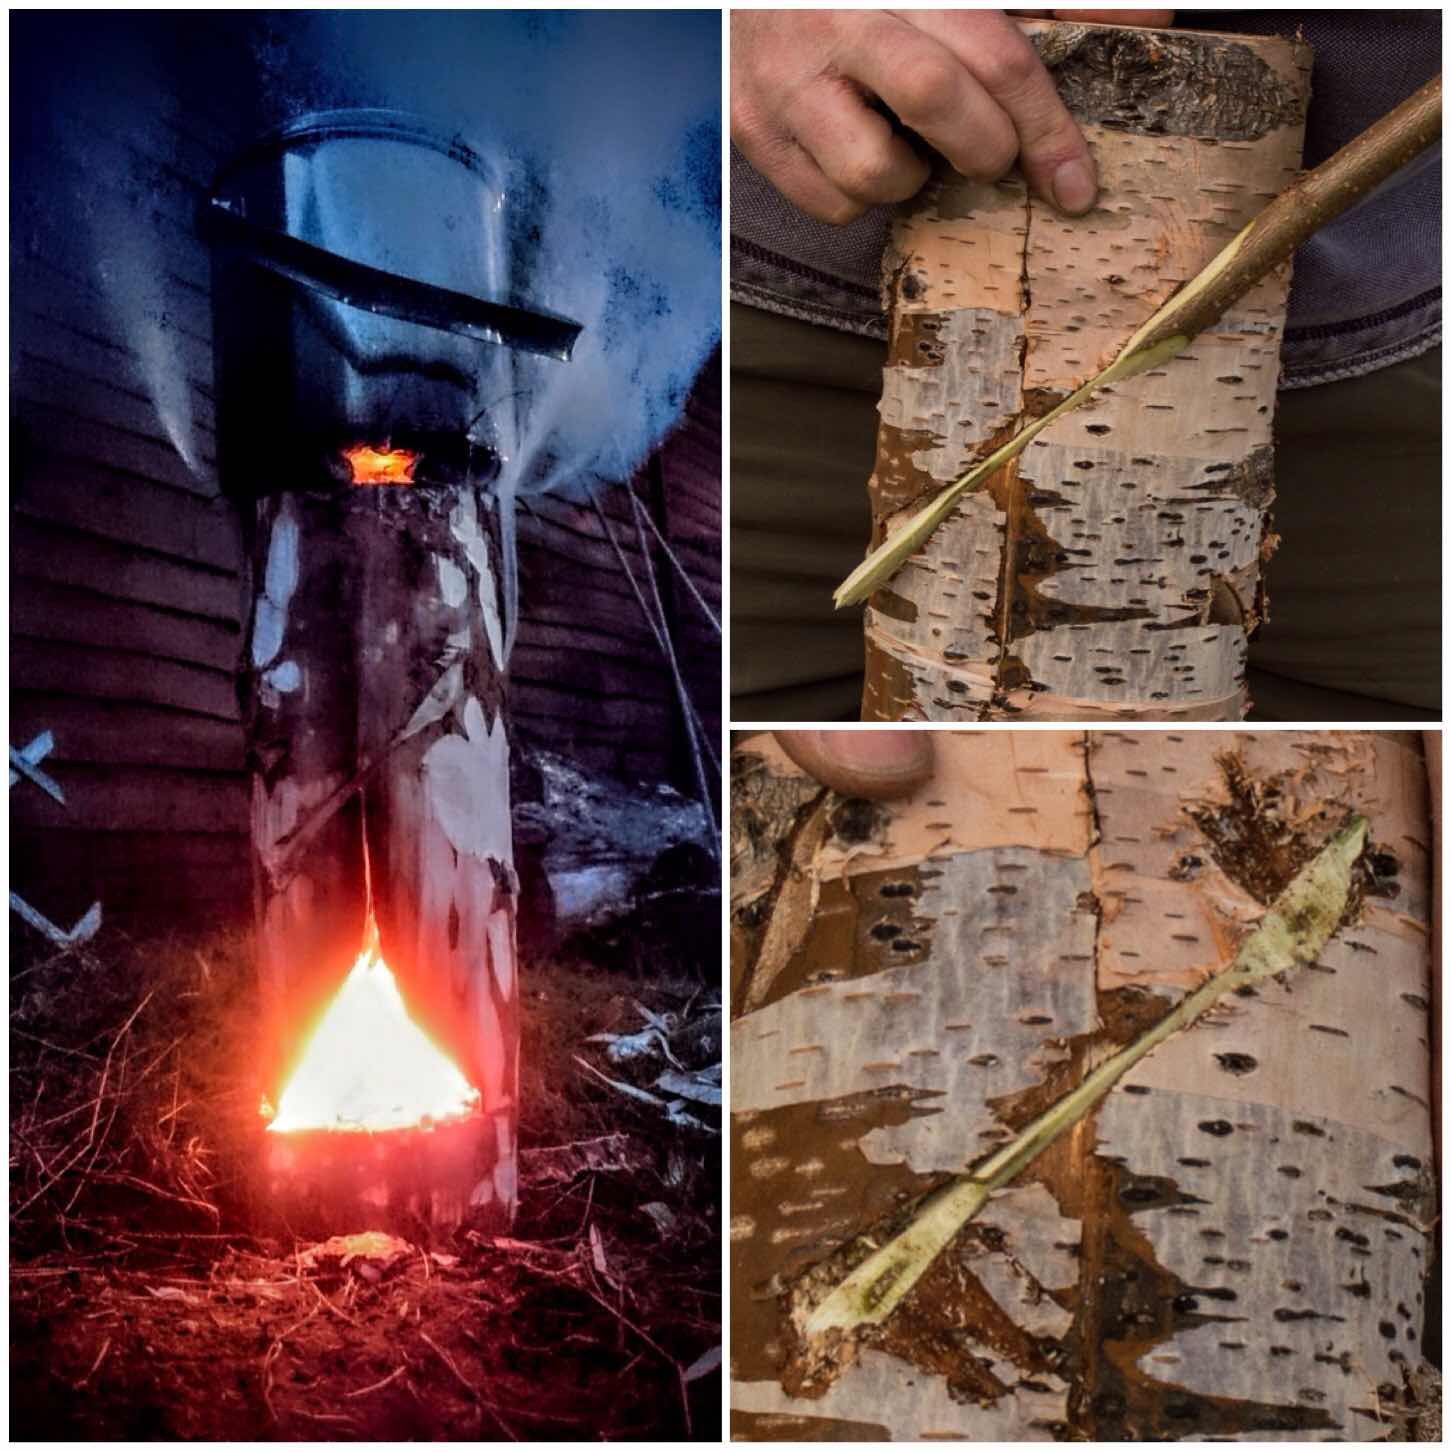
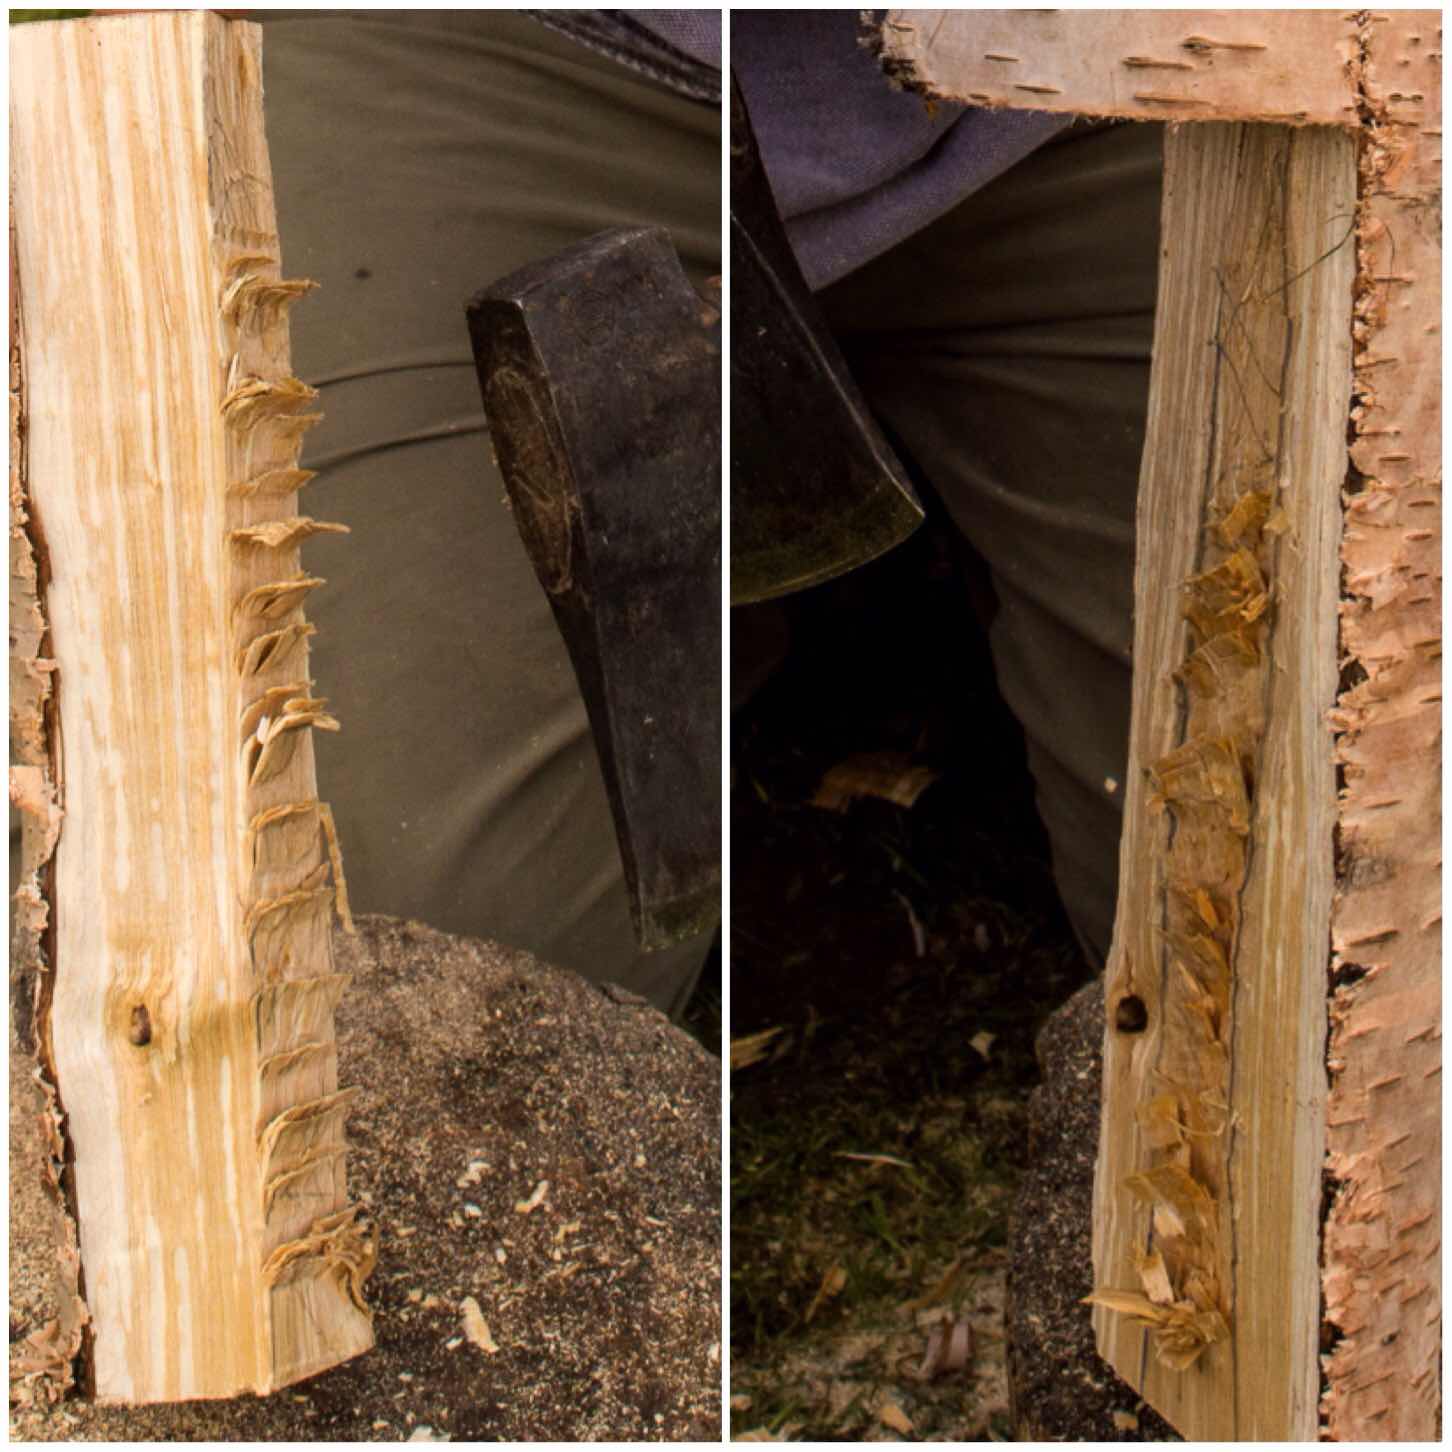
I did this so I could put some Raappanan tuli cuts into the chimney area. It is important to keep the sections of the log rocket that join together as smooth as possible for a good fit so marking out the chimney area ensures I do not cut into the wrong area.
The Raappanan tuli cuts are fairly simple to make with my axe. I just ensured I cut only into the wood in the chimney area and that the cuts were made upwards, towards the top of the chimney.
These cuts are particularly helpful when using damp wood as it offers far more surface area to the initial flame, allowing it to catch more quickly, and also it helps to dry the damp wood out.
The Firebox
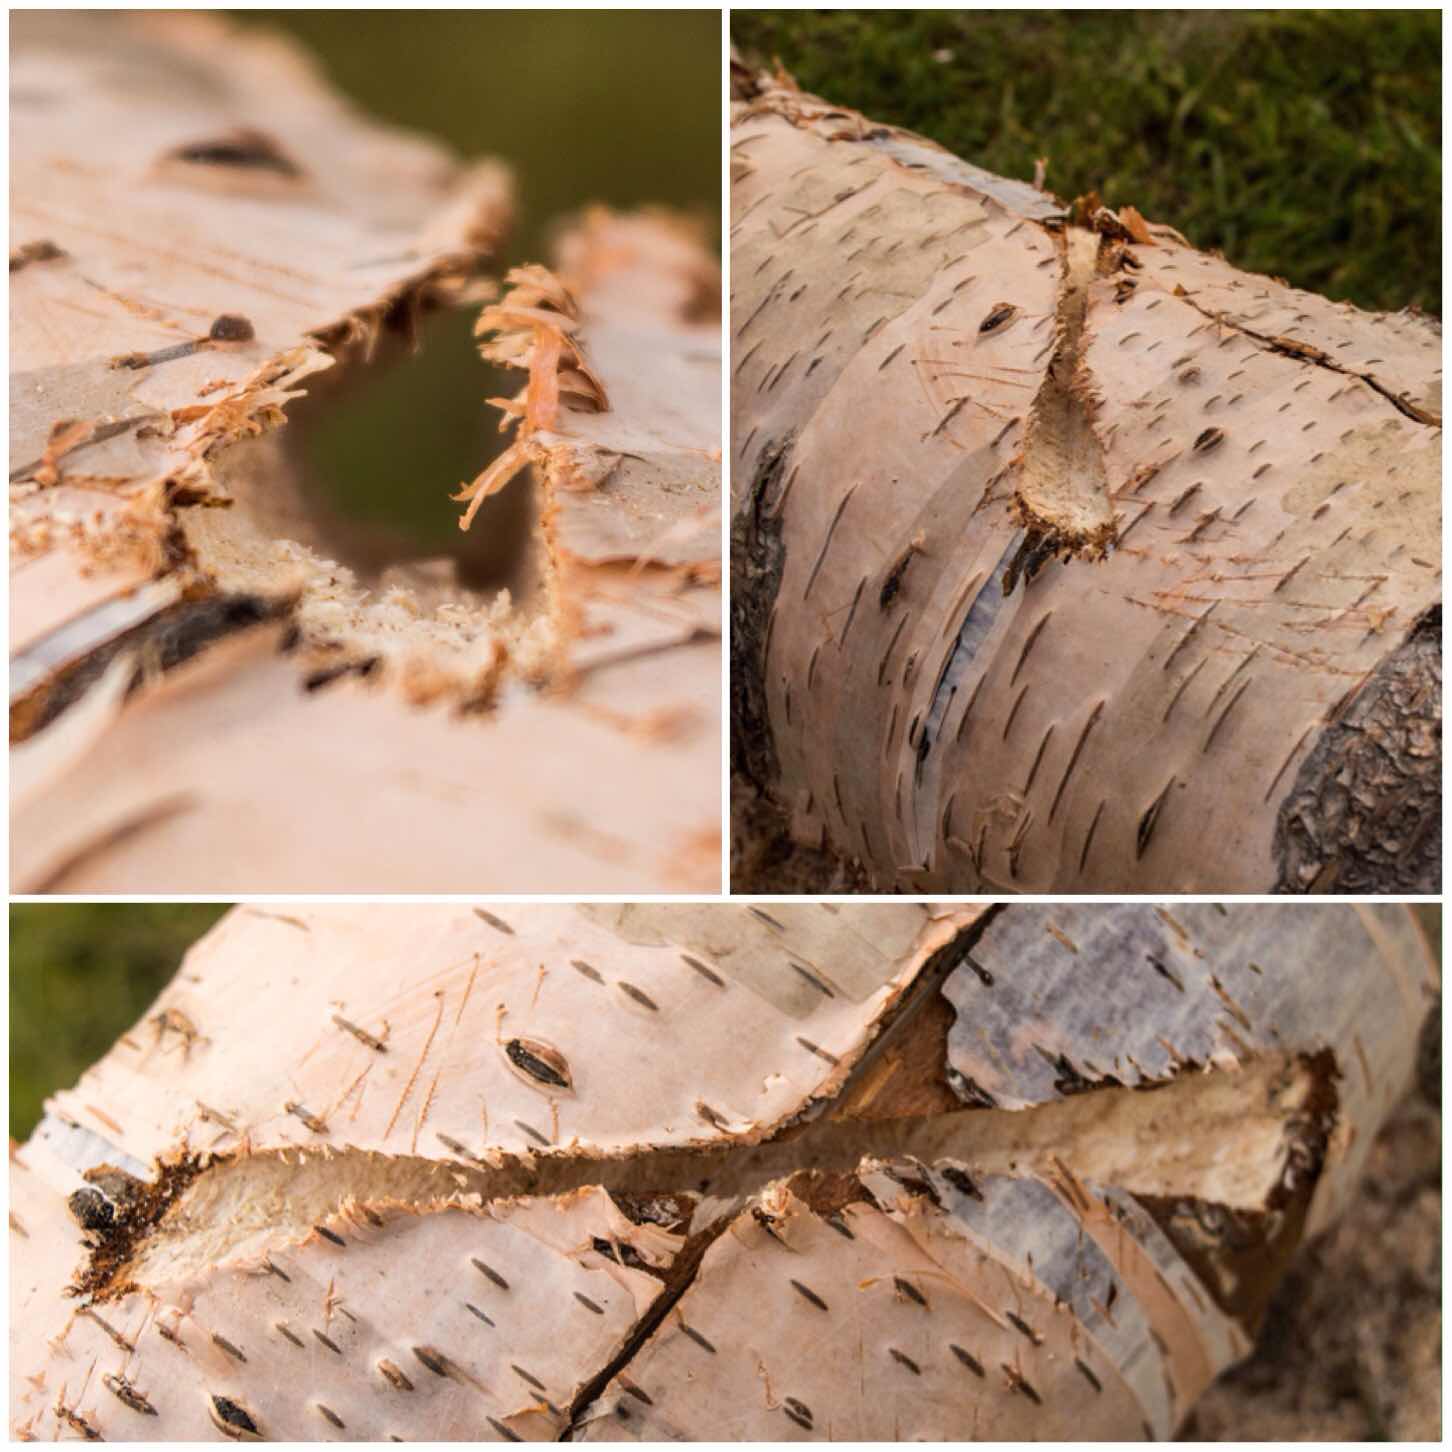
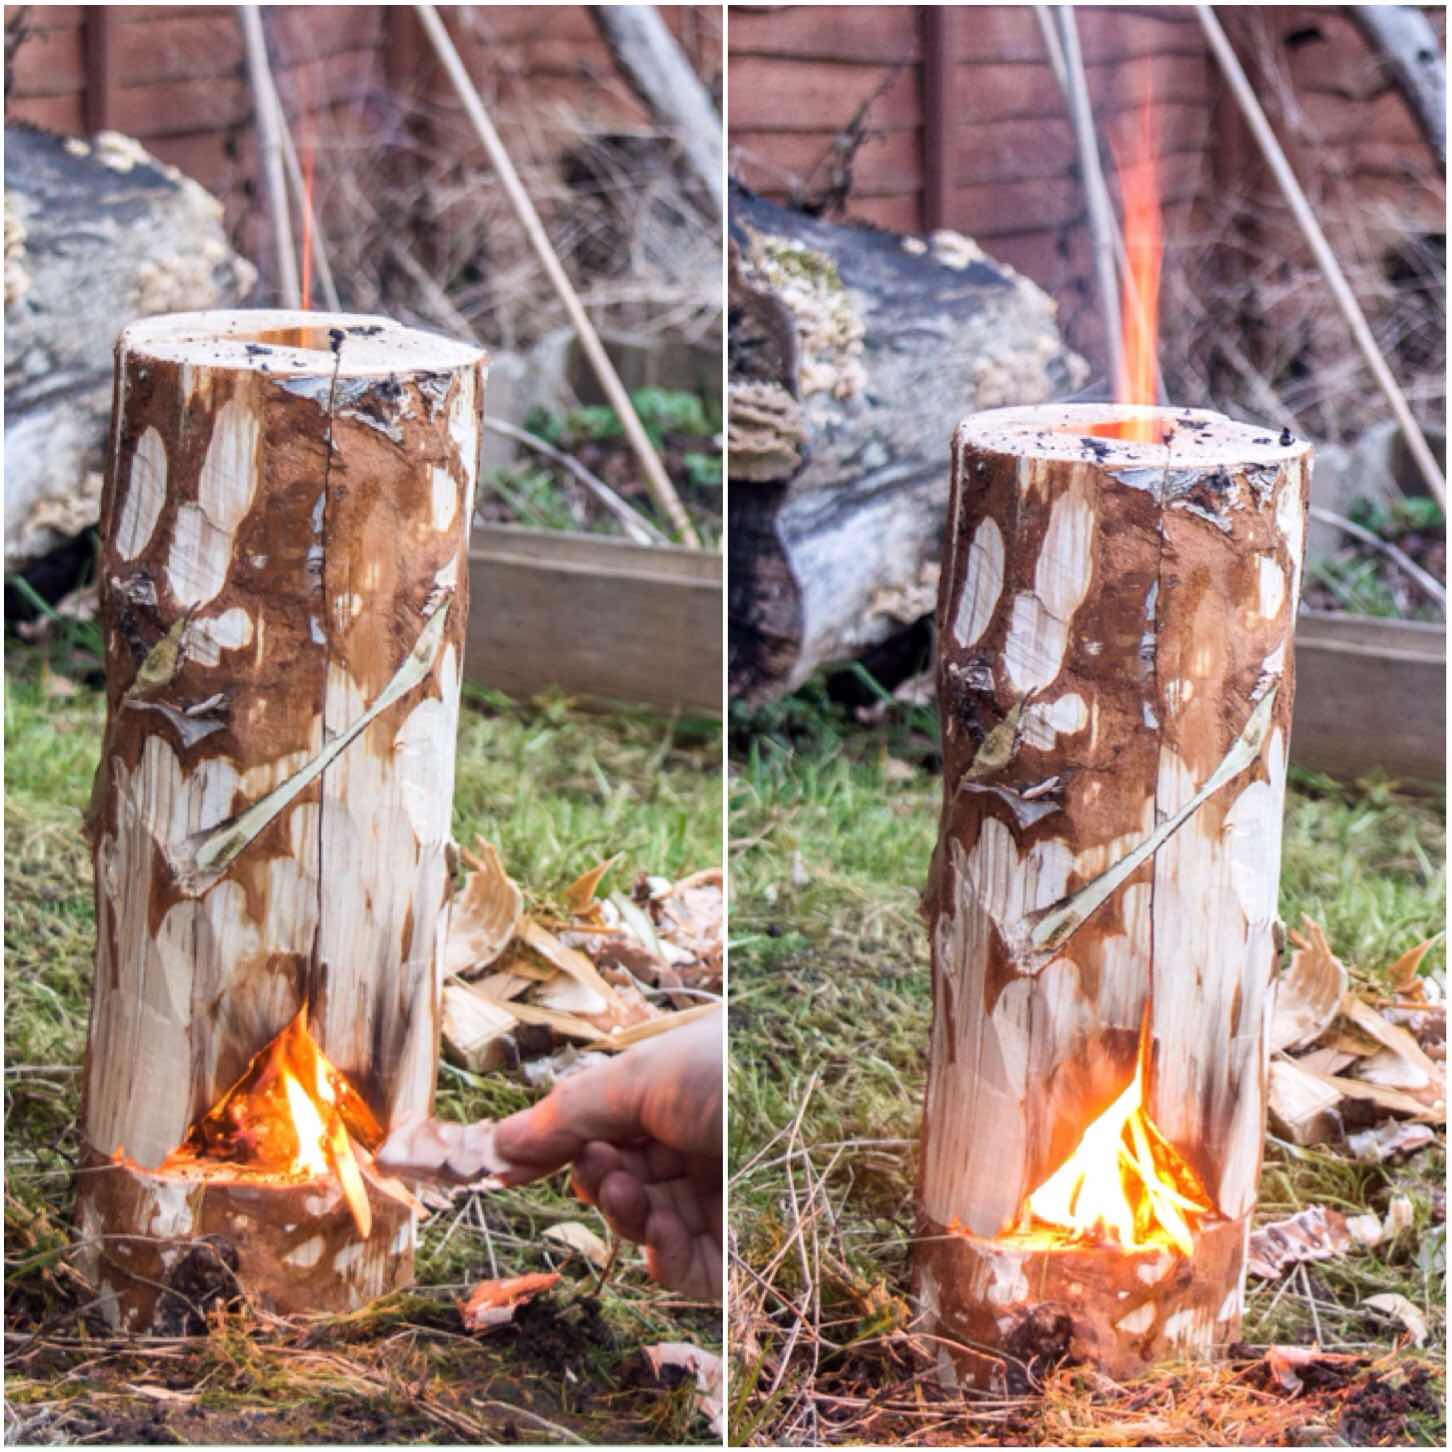
The next stage I worked on was the firebox opening. This can be done in a number of different way however I elected to go for a triangular opening.
I formed the opening by cutting a small triangle at the base of both pieces from Segment 2. I also tapered the inside of the cuts to open the firebox up a bit. I made this firebox slightly larger than normal as the wood was very damp. My thought was that the extra air intake would help to keep the fire going at the start before the insides of the stove became fully lit.

The Dovetail Joints
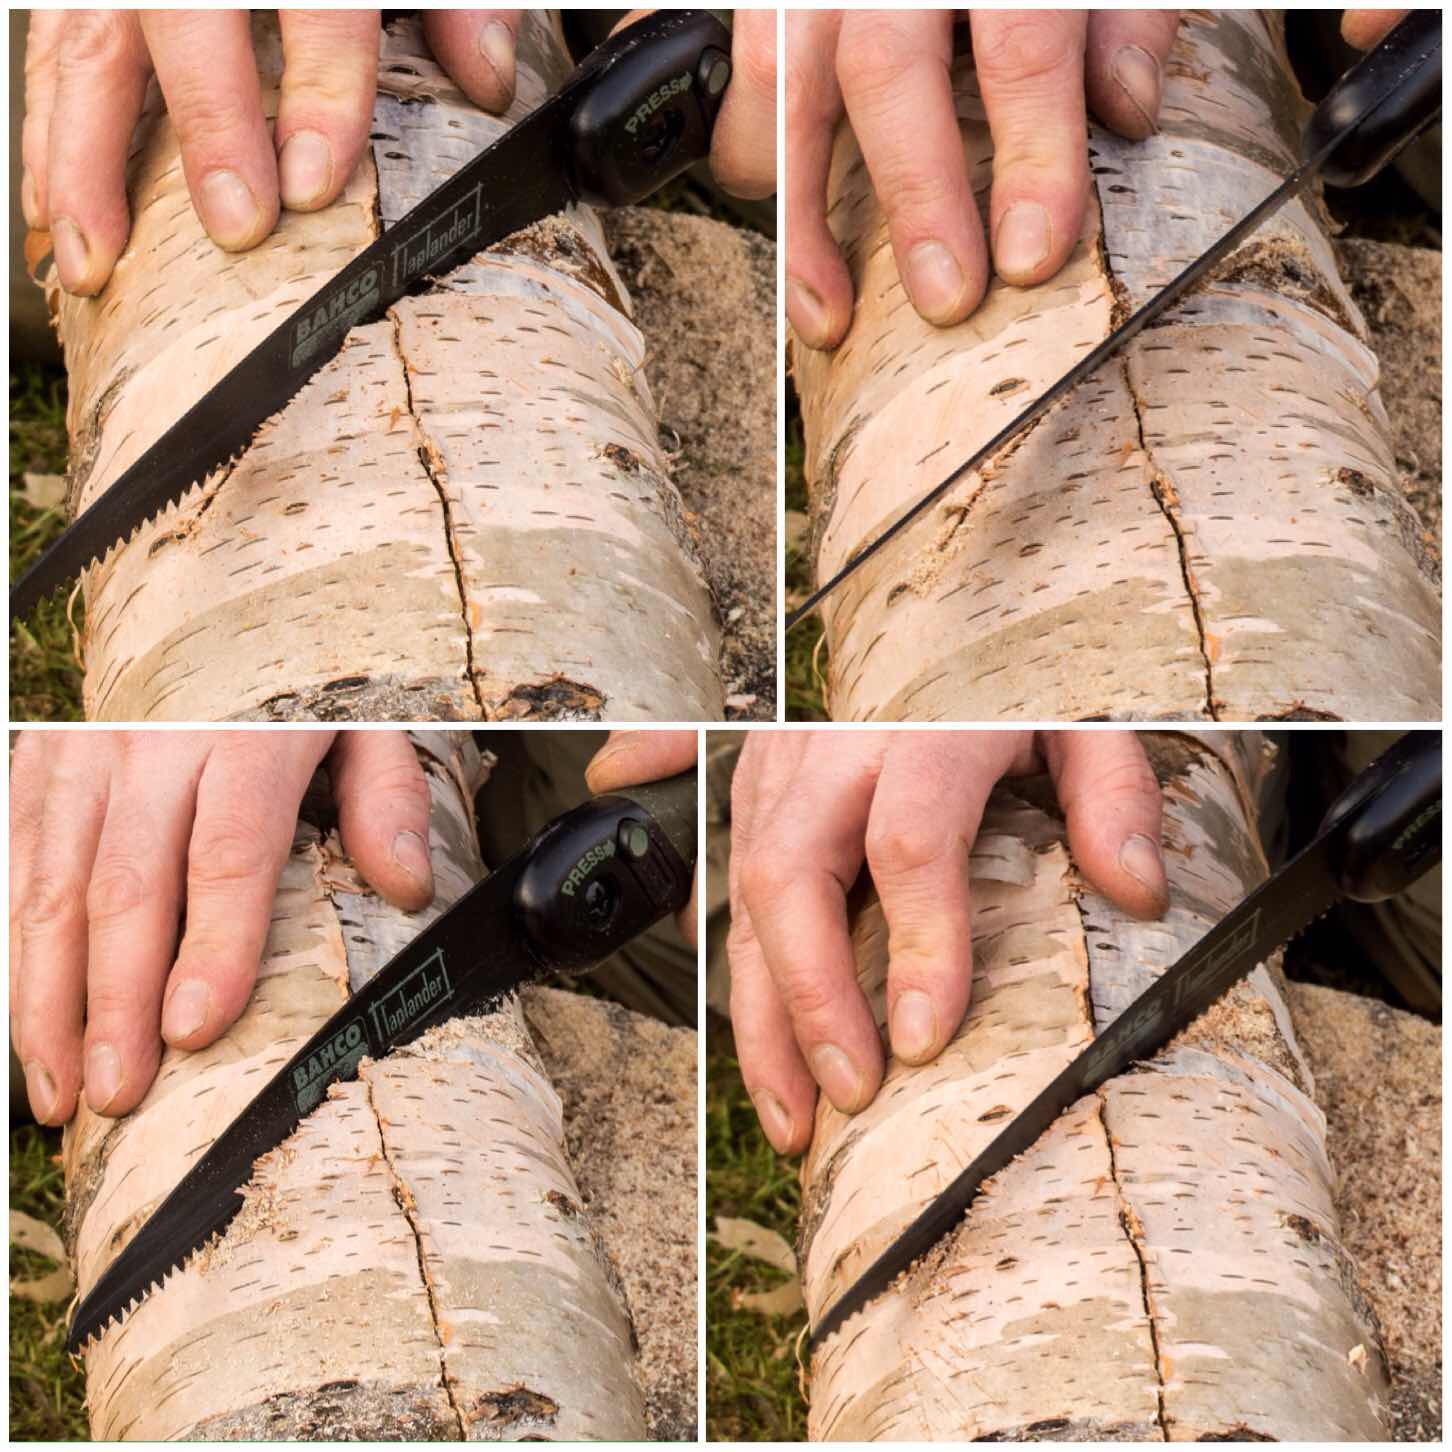
These joints were a total experiment. I put all the pieces together again and, holding them tightly, sawed a line to the depth of a centimetre across two of the joints. (I recommend you use some string or maybe a belt to hold everything together as you make the cuts – I didn’t and I wished I had.)
I then did the same cut but flared my saw out slightly (about 45 degrees) to the same depth. I then repeated the cut with the saw flared out 45 degrees in the opposite direction to the original cut to the same depth (there will be a picture of the cut further down the post).
Once that was done I used my saw like a rasp to carve out all the excess wood to form what is called the dovetail ‘Tail’.
Below you can see this ‘Tail’ part of the dovetail joint. It forms what I think of as a bow tie shape when done properly. The important point is to start each cut from the same place, saw to the same depth each time and ensure that the middle of the tail is centred over the split in the segments.
I found that as I had not strapped the segments together I had to really hold them firmly together – this is where you will appreciate your belt or piece of string. Also while sawing these ‘Tails’ in be aware at all times where the saw is in relation to your thumb and forefinger on the hand holding the stove.
I made three of these tails (one over each split) to hold all the segments together.
To hold the segments together you need to carve some ‘Pins’ to insert into the ‘Tails’. I used green hazel wood to make the pins and made sure that they were carved into a triangular shape but initially too big for the tail.
Carving in this manner allowed me to insert the pin into the tail and then progressively carve off smaller pieces from the pin until it started to slide in. I also used my large piece of wood to hammer the pins in to ensure a very tight fit.
If you find that your pin is too small just get a fresh piece of green wood and try again. They only take seconds to make. To finish the pins off I trimmed the ends with my saw.

As the bark of the birch tree is very flammable I stripped it all off and kept it to the side to use later as kindling to get the fire started. The dovetail joints if fitted snugly will keep all the segments locked together tightly.
Firing Up
I lit the stove with some Vaseline-soaked cotton wool balls (which I always carry with me) because everything was so damp. The wind was non existent that day so it took me a while to get the stove going well.
Normally these stoves fire up really easily when there’s a little bit of wind to create the rocket effect up through the chimney
Eventually the rocket effect started and I placed three pieces of green wood onto the top for my pot to sit on. These were fairly thin pieces but would last long enough to boil some water. Have a few pieces spare on standby though if needed.
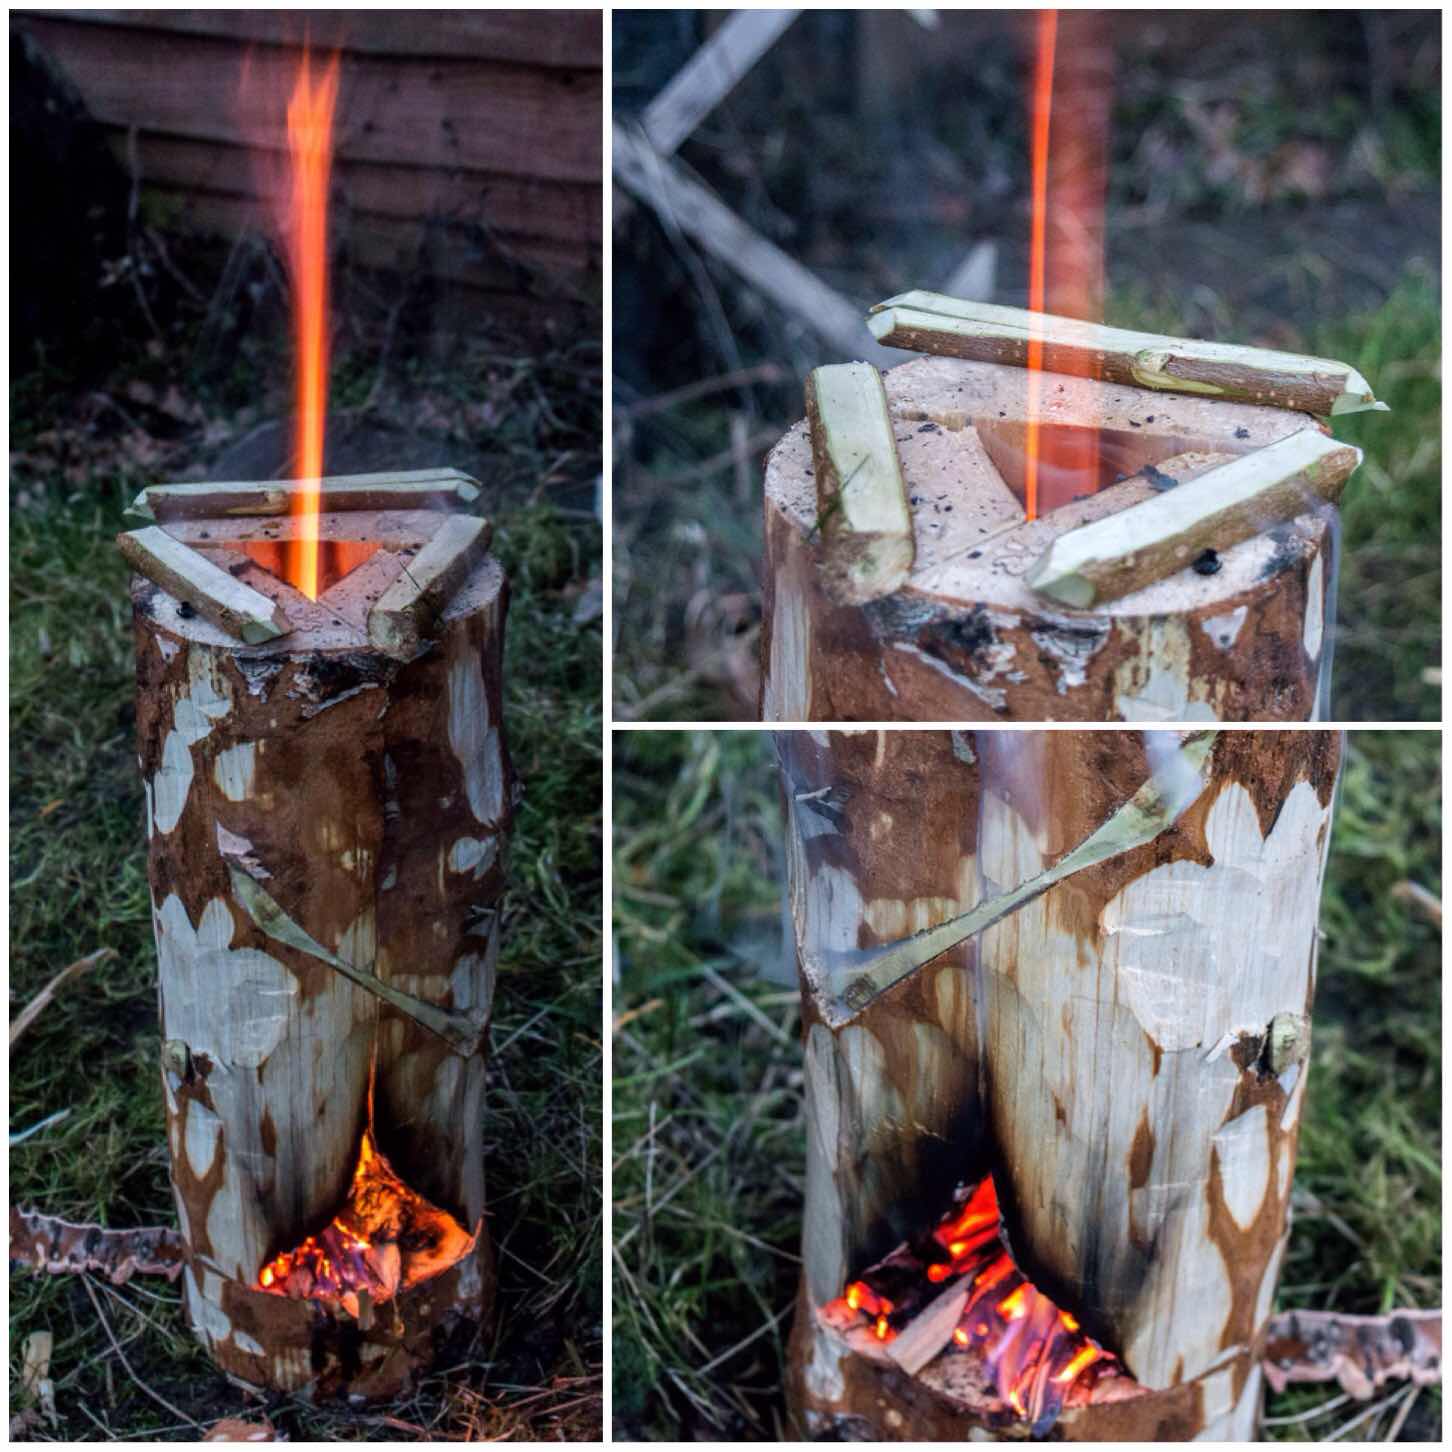
Once the pot was on (about 10 minutes after initial burn) I needed to keep popping small pieces of wood into the fire box to keep the fire going. If your wood is really dry or resinous (like spruce or pine) you may not need to keep tending the fire as the internal walls of the chimney will probably be well lit.
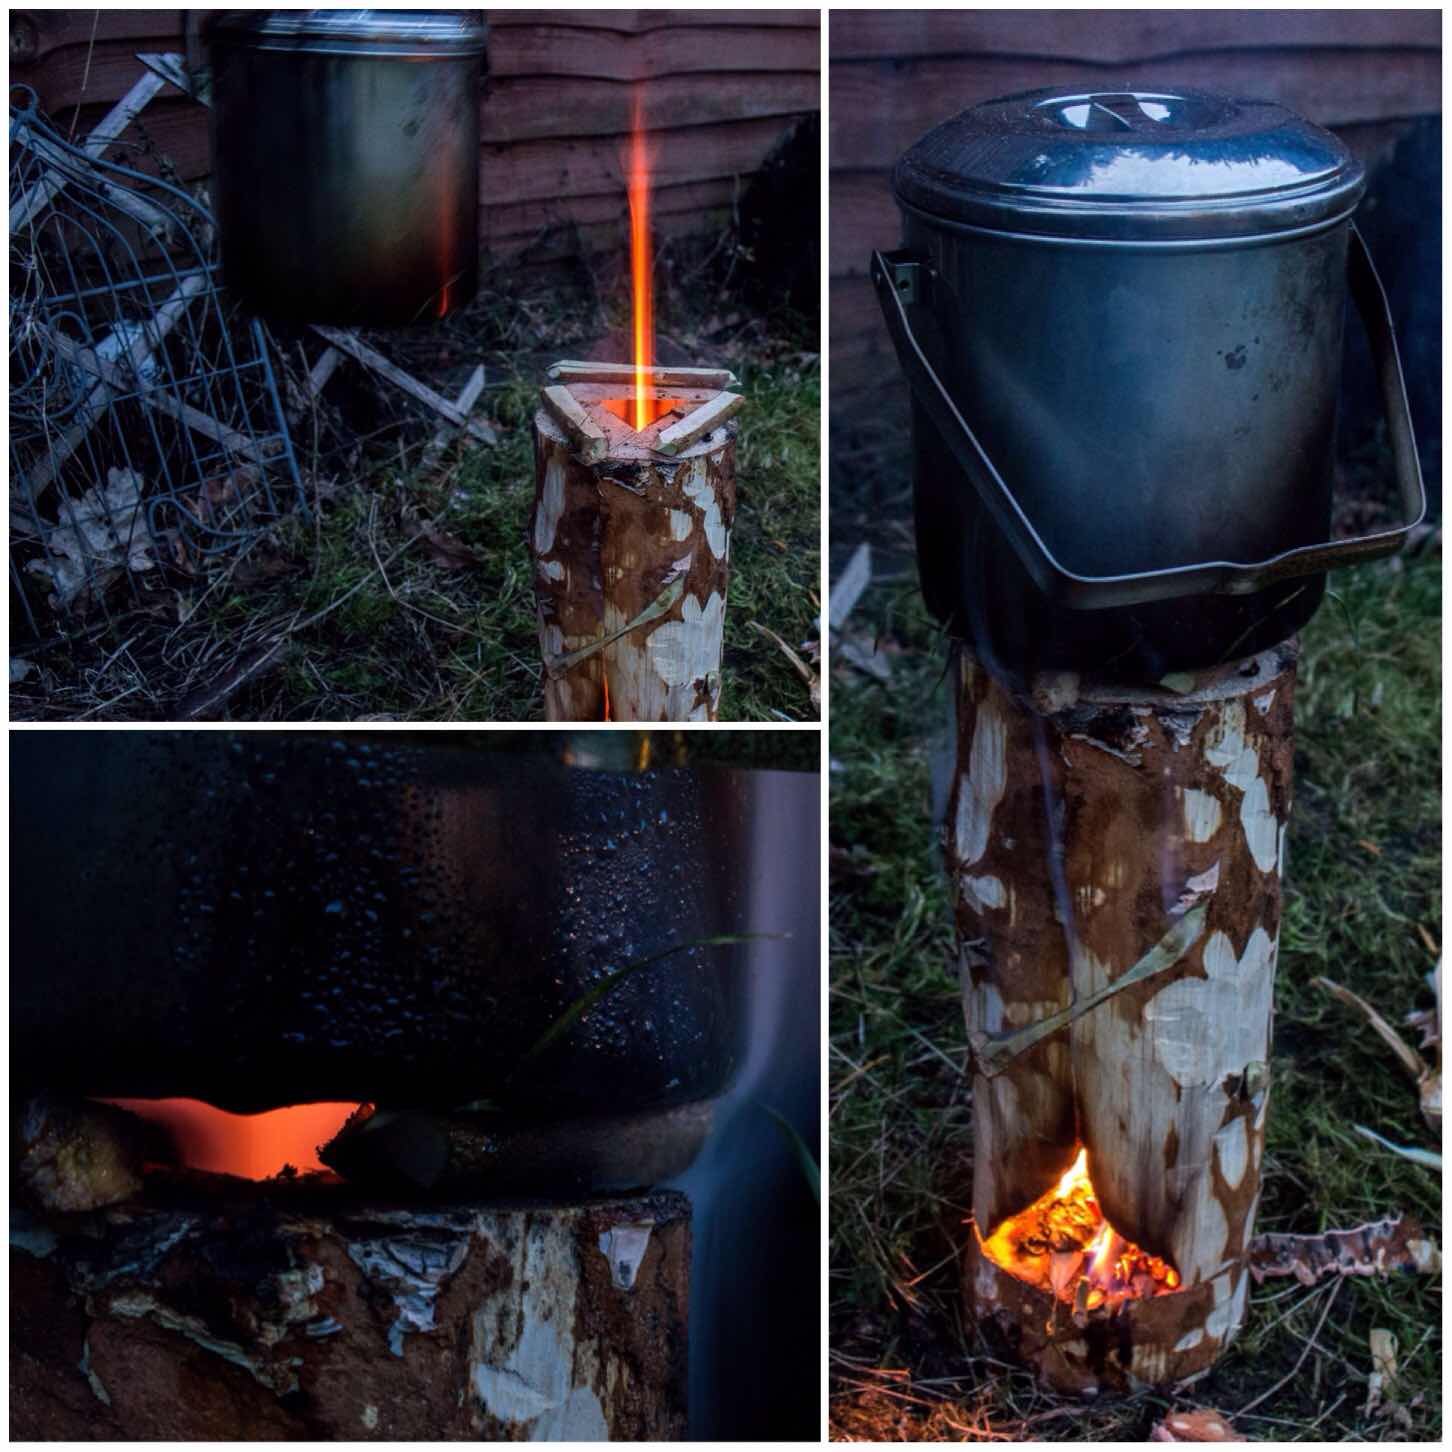
It took me just under 15 minutes to boil this pot of water (enough for approx 3 cups of coffee) and the dovetail joints remained strong throughout.
After 45 minutes the first of the joints burnt through however the stove remained standing until it burnt out. Due to the lack of wind the majority of the wood did not burn through.
I made this short video of another Dovetail Log Rocket Stove to show it in action.
I like to experiment with log rocket stoves and this reliance on using string or wire to hold them together (although you can dig the segments of some types directly into soft ground) has always bugged me.
This Schwedenfeuer type of stove lends itself well to the dovetail joints I think, and once you have practised making a couple you will be able to knock together a stove very quickly with just natural materials.
As usual I am open to ideas and suggestions on creating more log rocket stoves and Scandinavian candles. If you have not seen my other posts on this subject have a look at my summary post on this subject titled – Candles, Rockets and Long Fires.
Cheers
George
Nice George. Ingenious. Might try at Summer camp if I get the chance. That and finally get round to making the dove tail crane for cooking with!
No problem for you buddy 🙂
just thought but see no reason wy it could not be made in 4 quarters .then chamfer the inner 4 quarters back to create the central column & so on
Hi David
This is just another way to make a log rocket.
My previous two posts on log rockets detailed what you are suggesting.
Using this method you are only creating 3 pieces which makes for a more stable platform for putting in dovetails.
Cheers, George