A Bushcraft Birthday

My last trip out for 2015 was a particularly nice one as we were celebrating the 6th birthday of a little bushcraft boy called David. He loves the outdoors and his Grandfather Keith Coleman had organised to celebrate the event out in the woods at Danemead Scout camp.

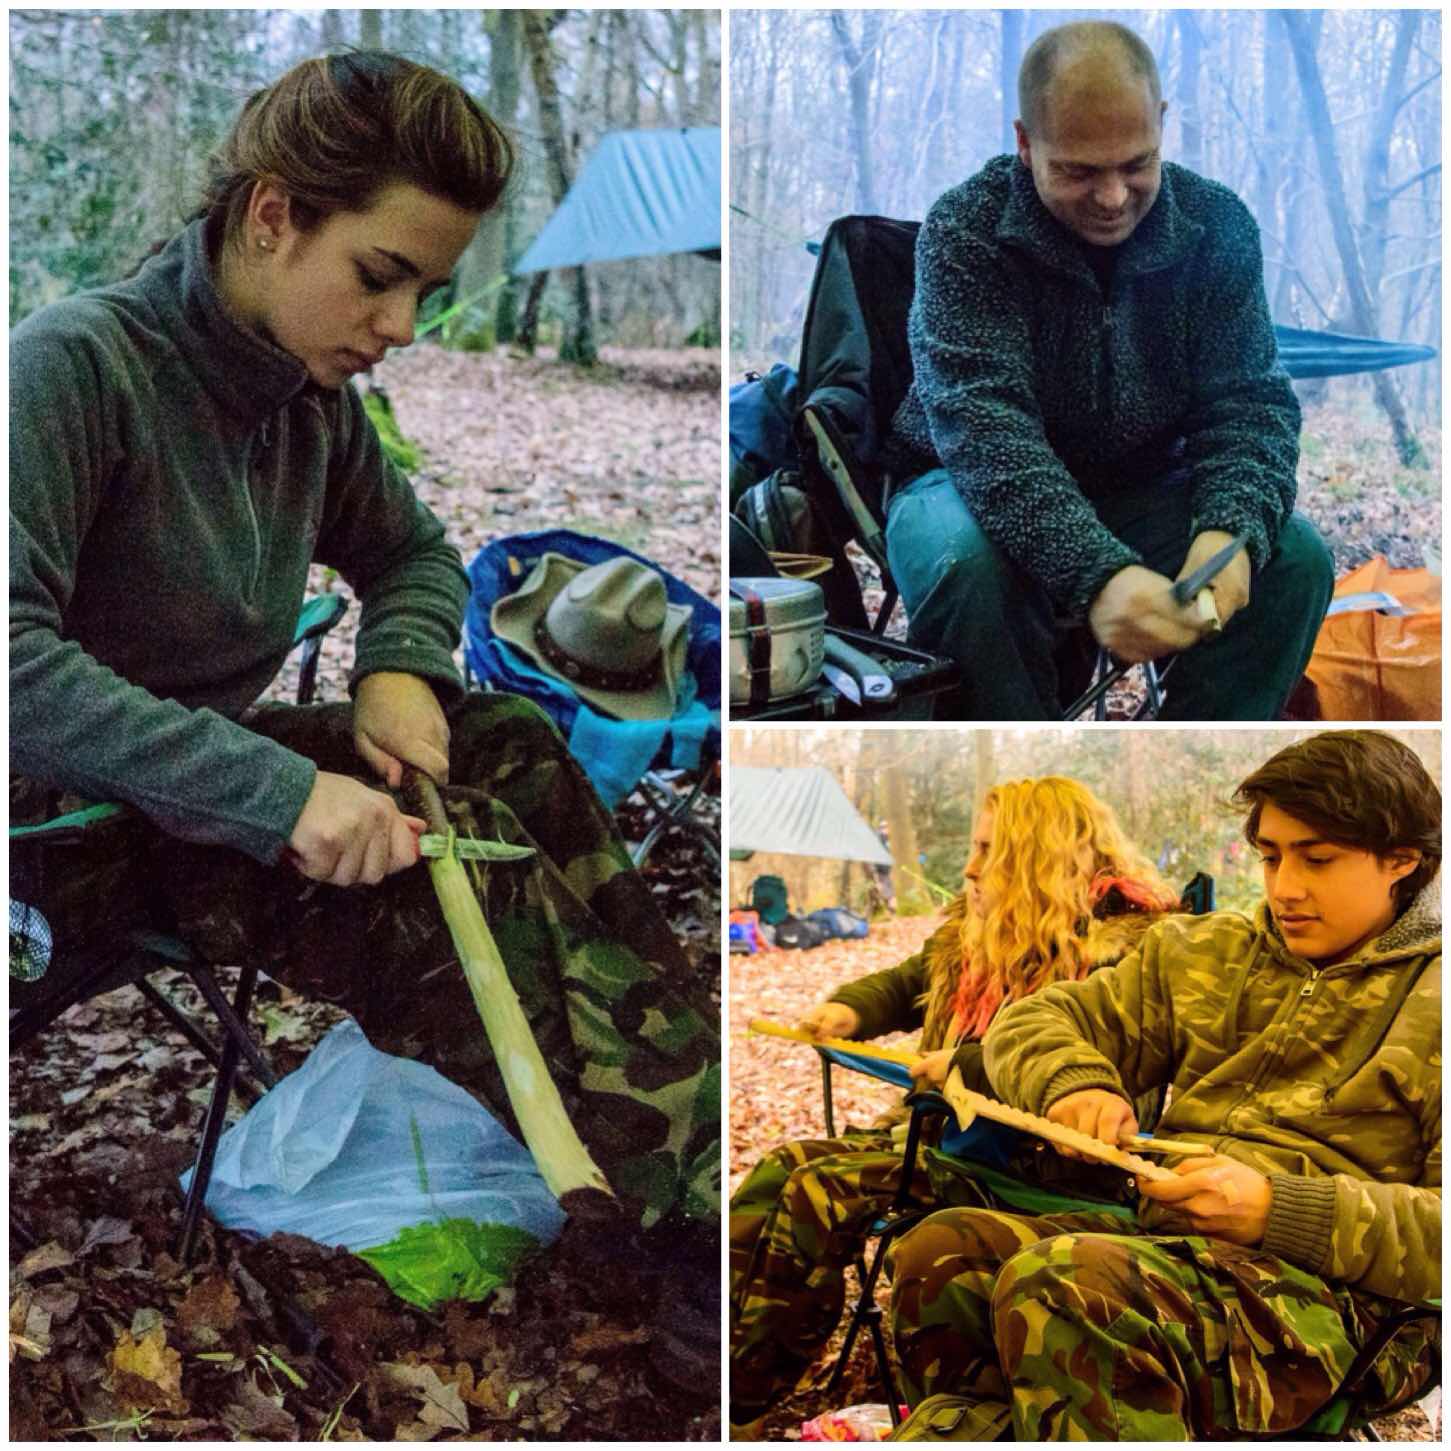
Keith was also out with a few of his cadets to practice some navigation skills and I was going to practice some bushcraft skills with my friends Dave, Alan and Jess.

image
Bushcraft Skills

David’s Mum Maria was who is a good friend of mine was also at the campsite so it was great to catch up with her as we had not met up for a long time.

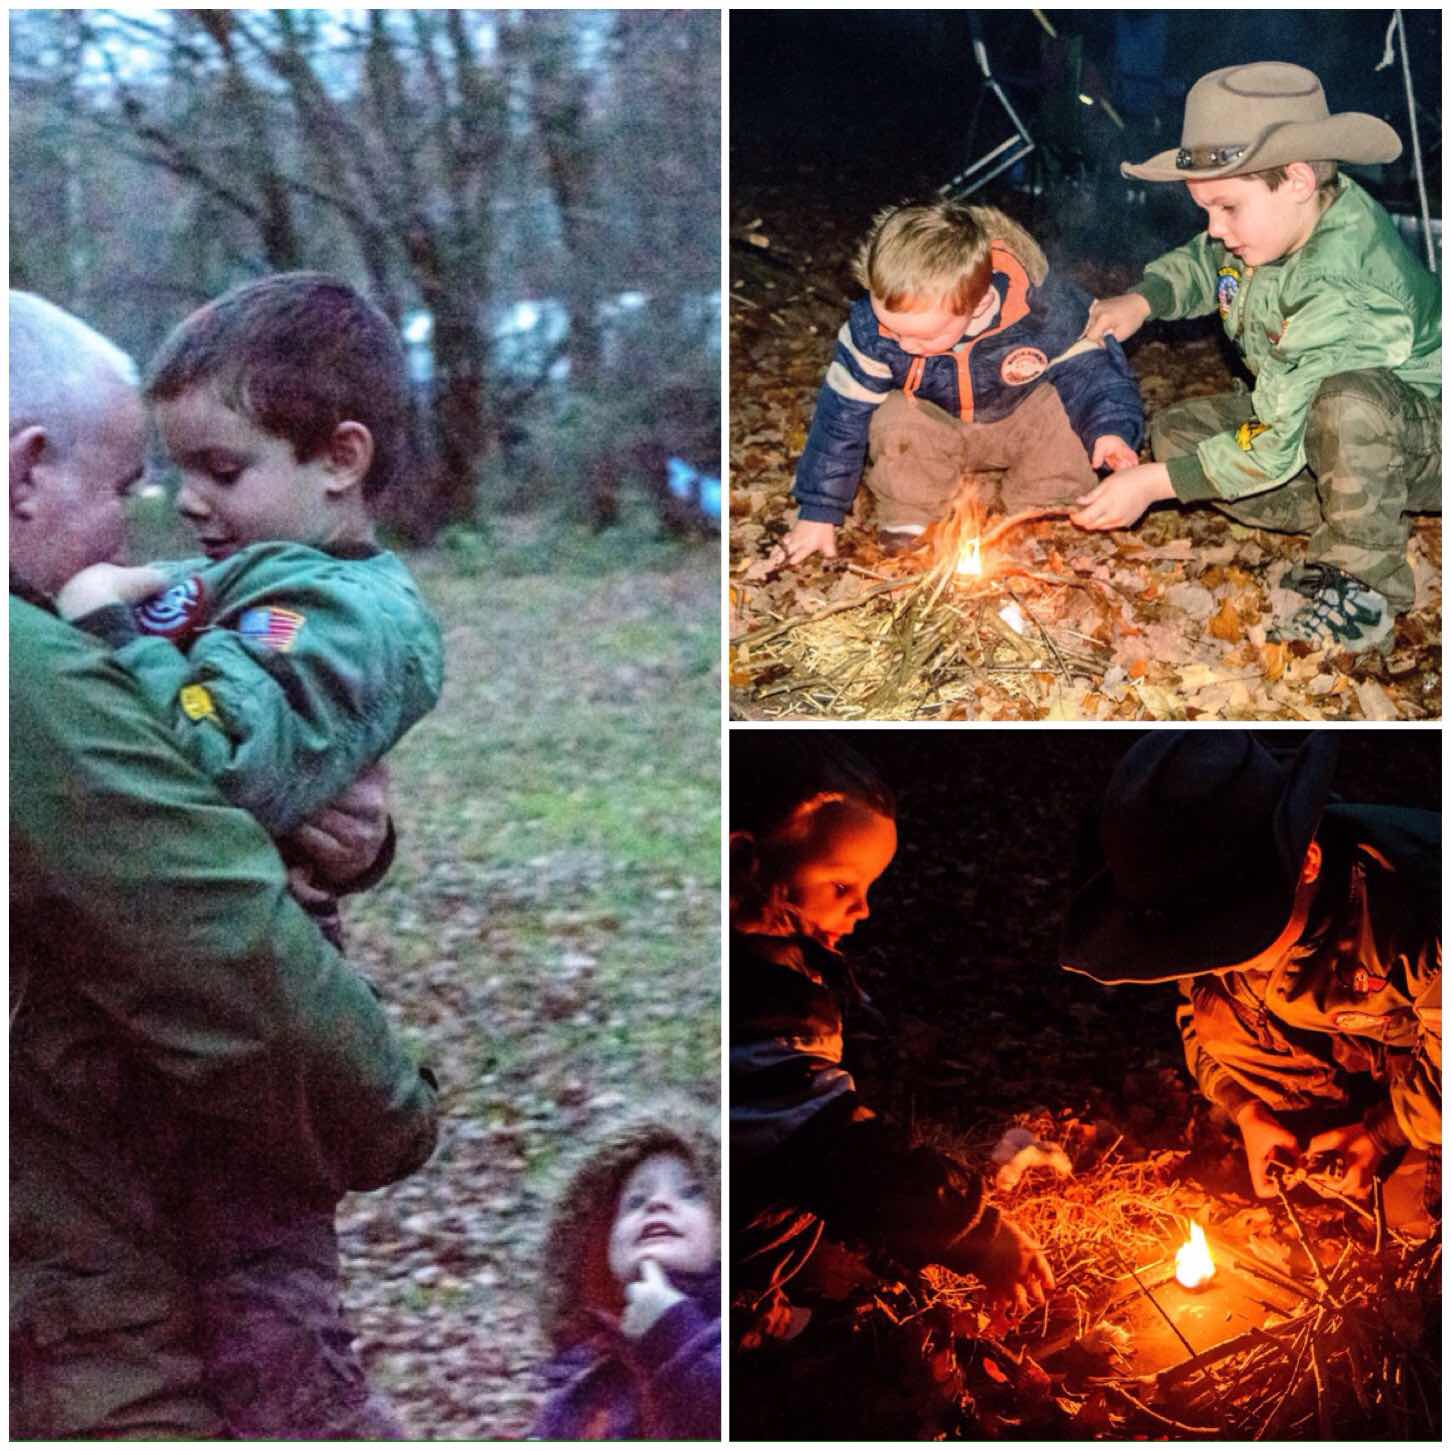
Keith soon had the candles lit with David and we were soon tucking into a slice of Birthday cake.

image
Birthday Boy

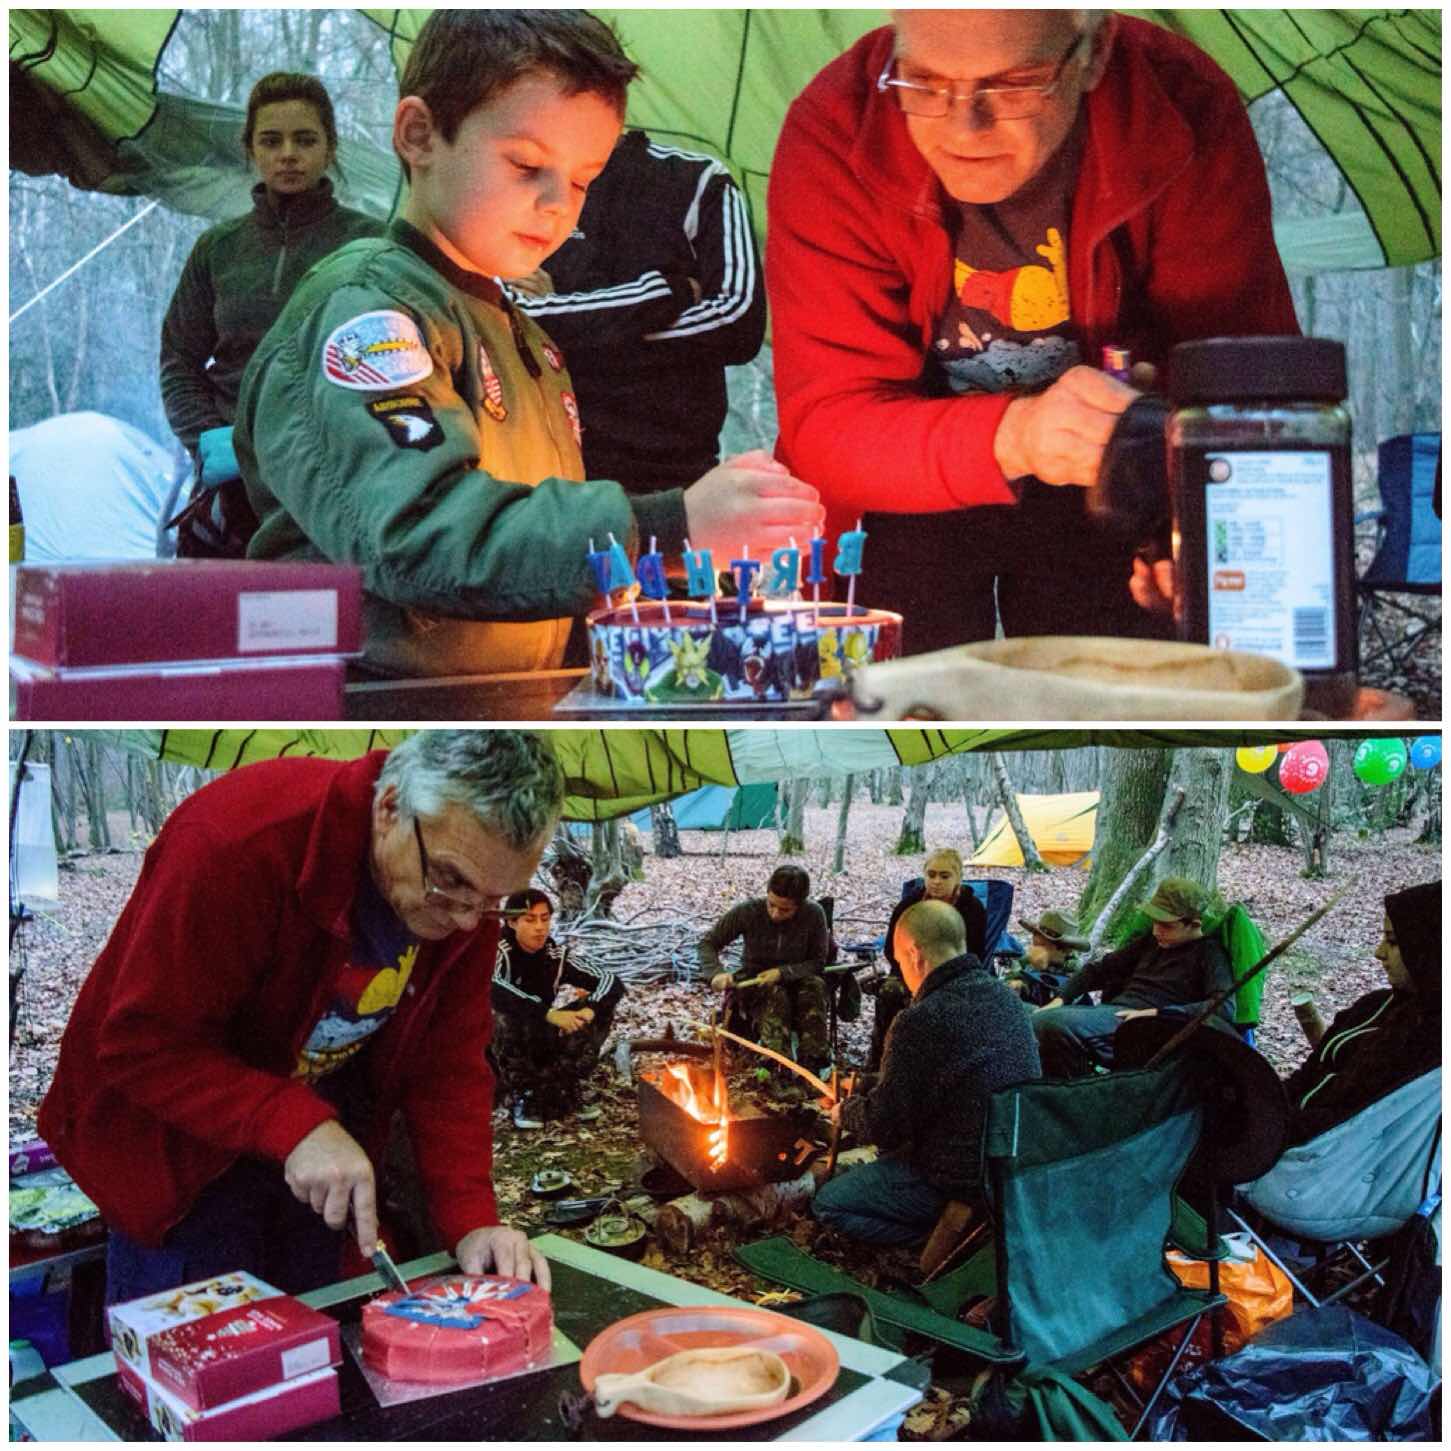
Later on the boys Dad Jim turned up with David’s little brother James. Jim has been a good friend of mine for many years so It was good to catch up on goings on again with him. While we were chatting the boys asked if they could light their own fire.

We spent a little while collecting some dry birch bark and small twigs and then got the Firesteels out. I also gave them some cotton wool and Vaseline to help get the fire going as everything was very damp.

It was great to watch the two lads sparking away and then slowly building up their fire until it was well lit. Needless to say when it was time for them to go home they were very reluctant to leave their well nurtured fire.

image
Bushcraft with the Boys

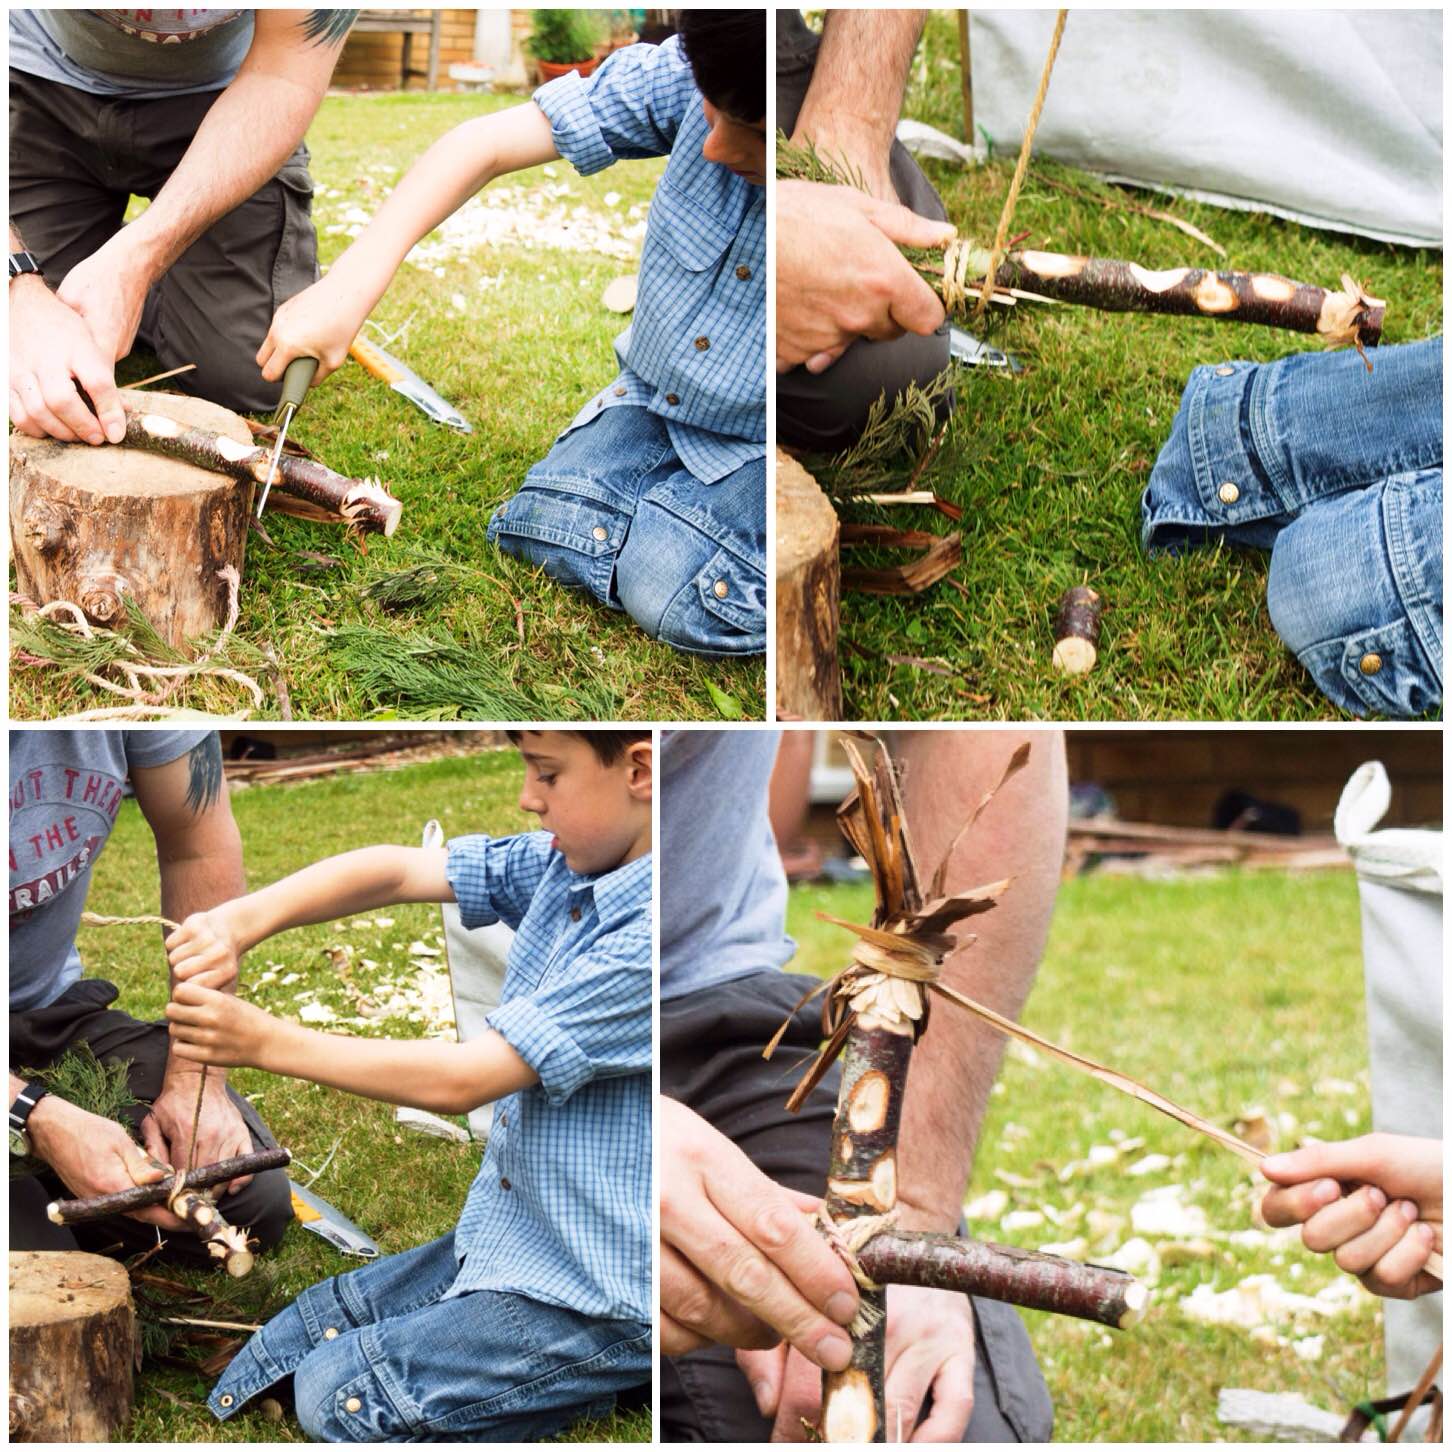
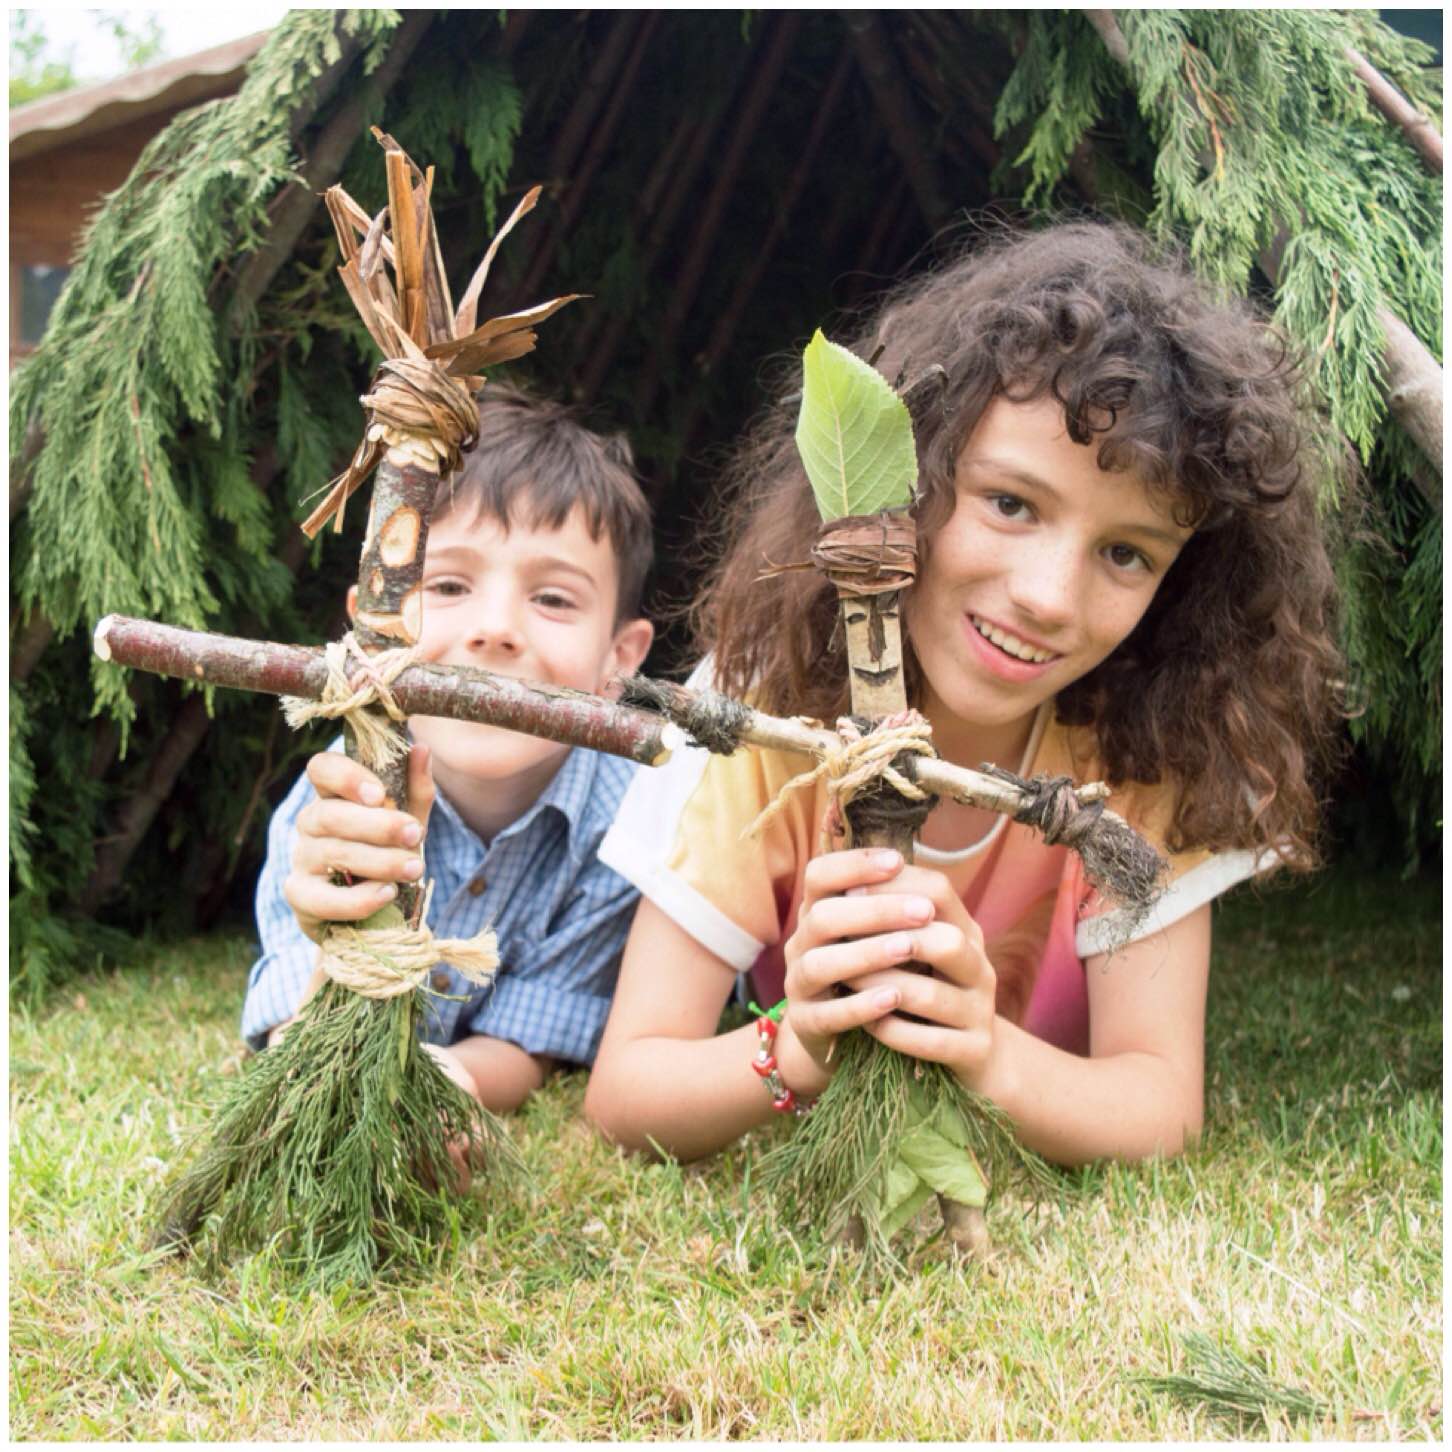
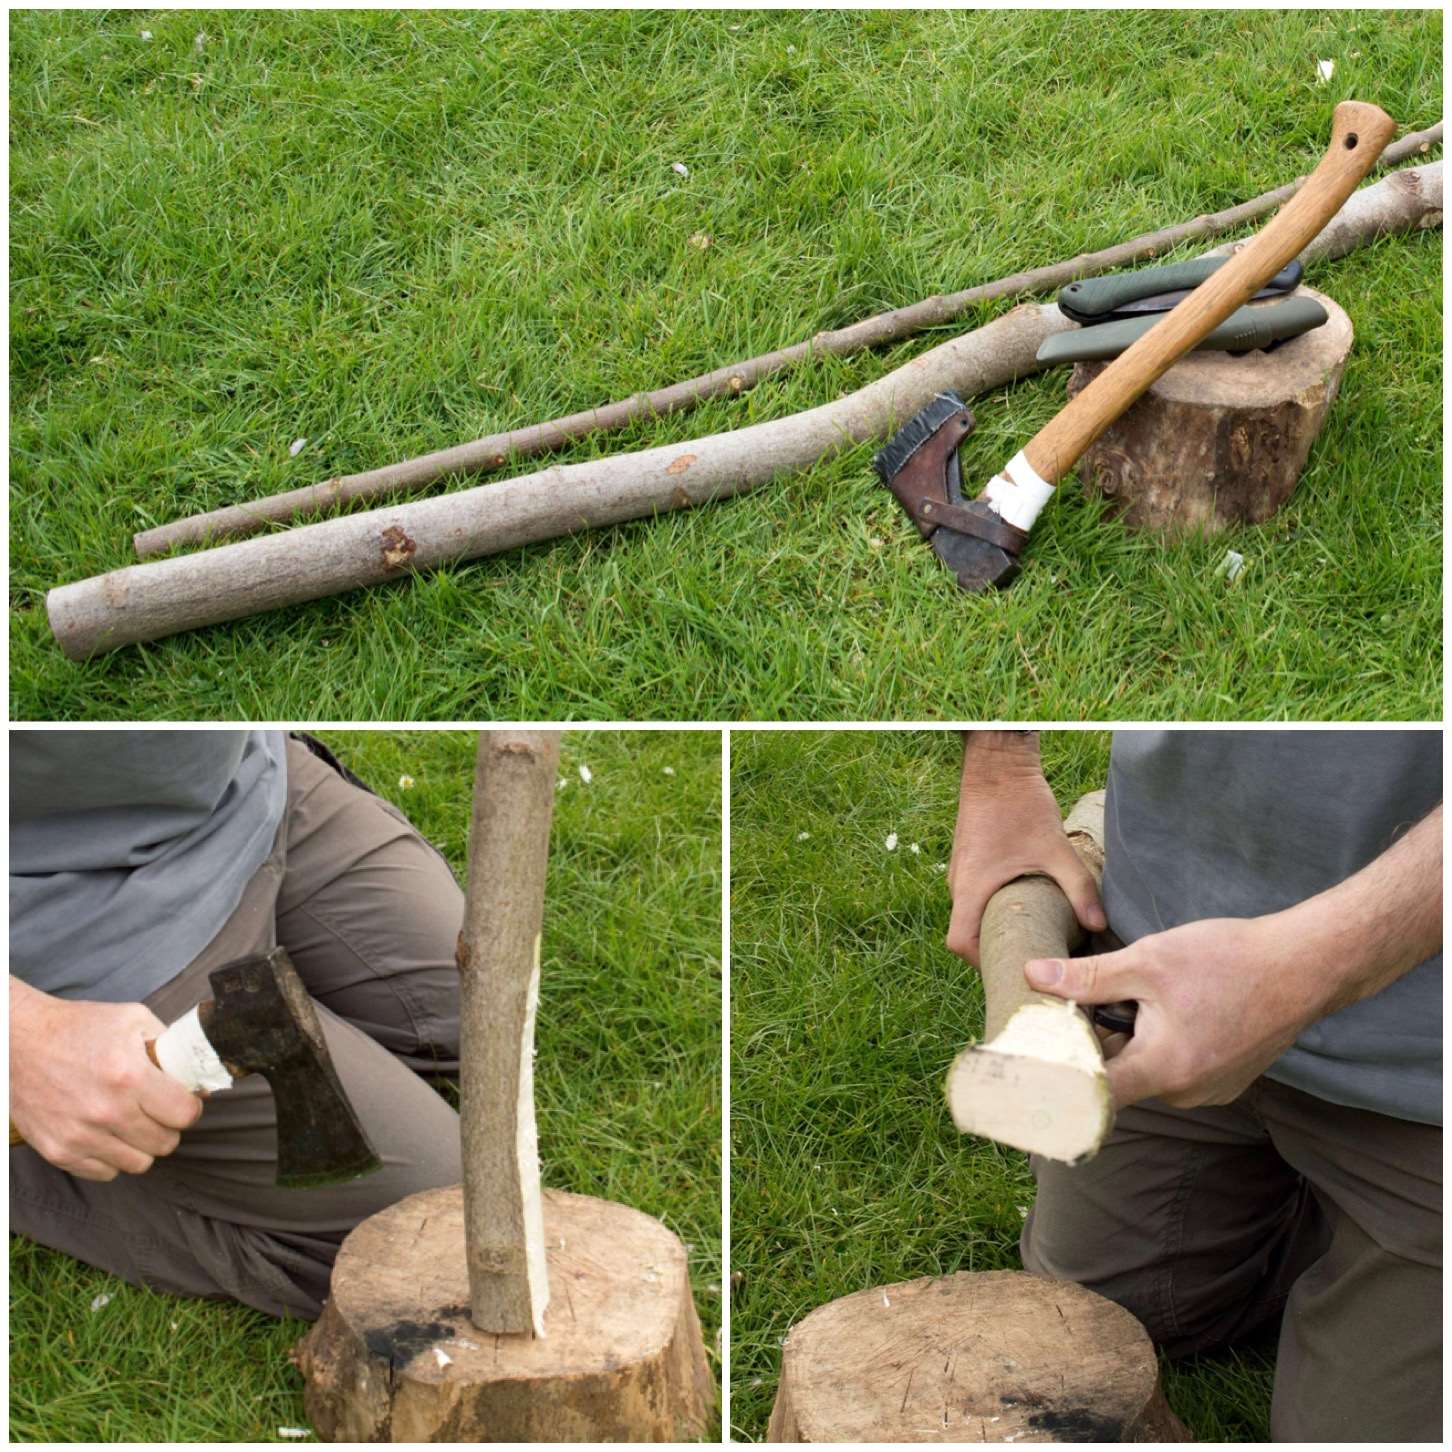
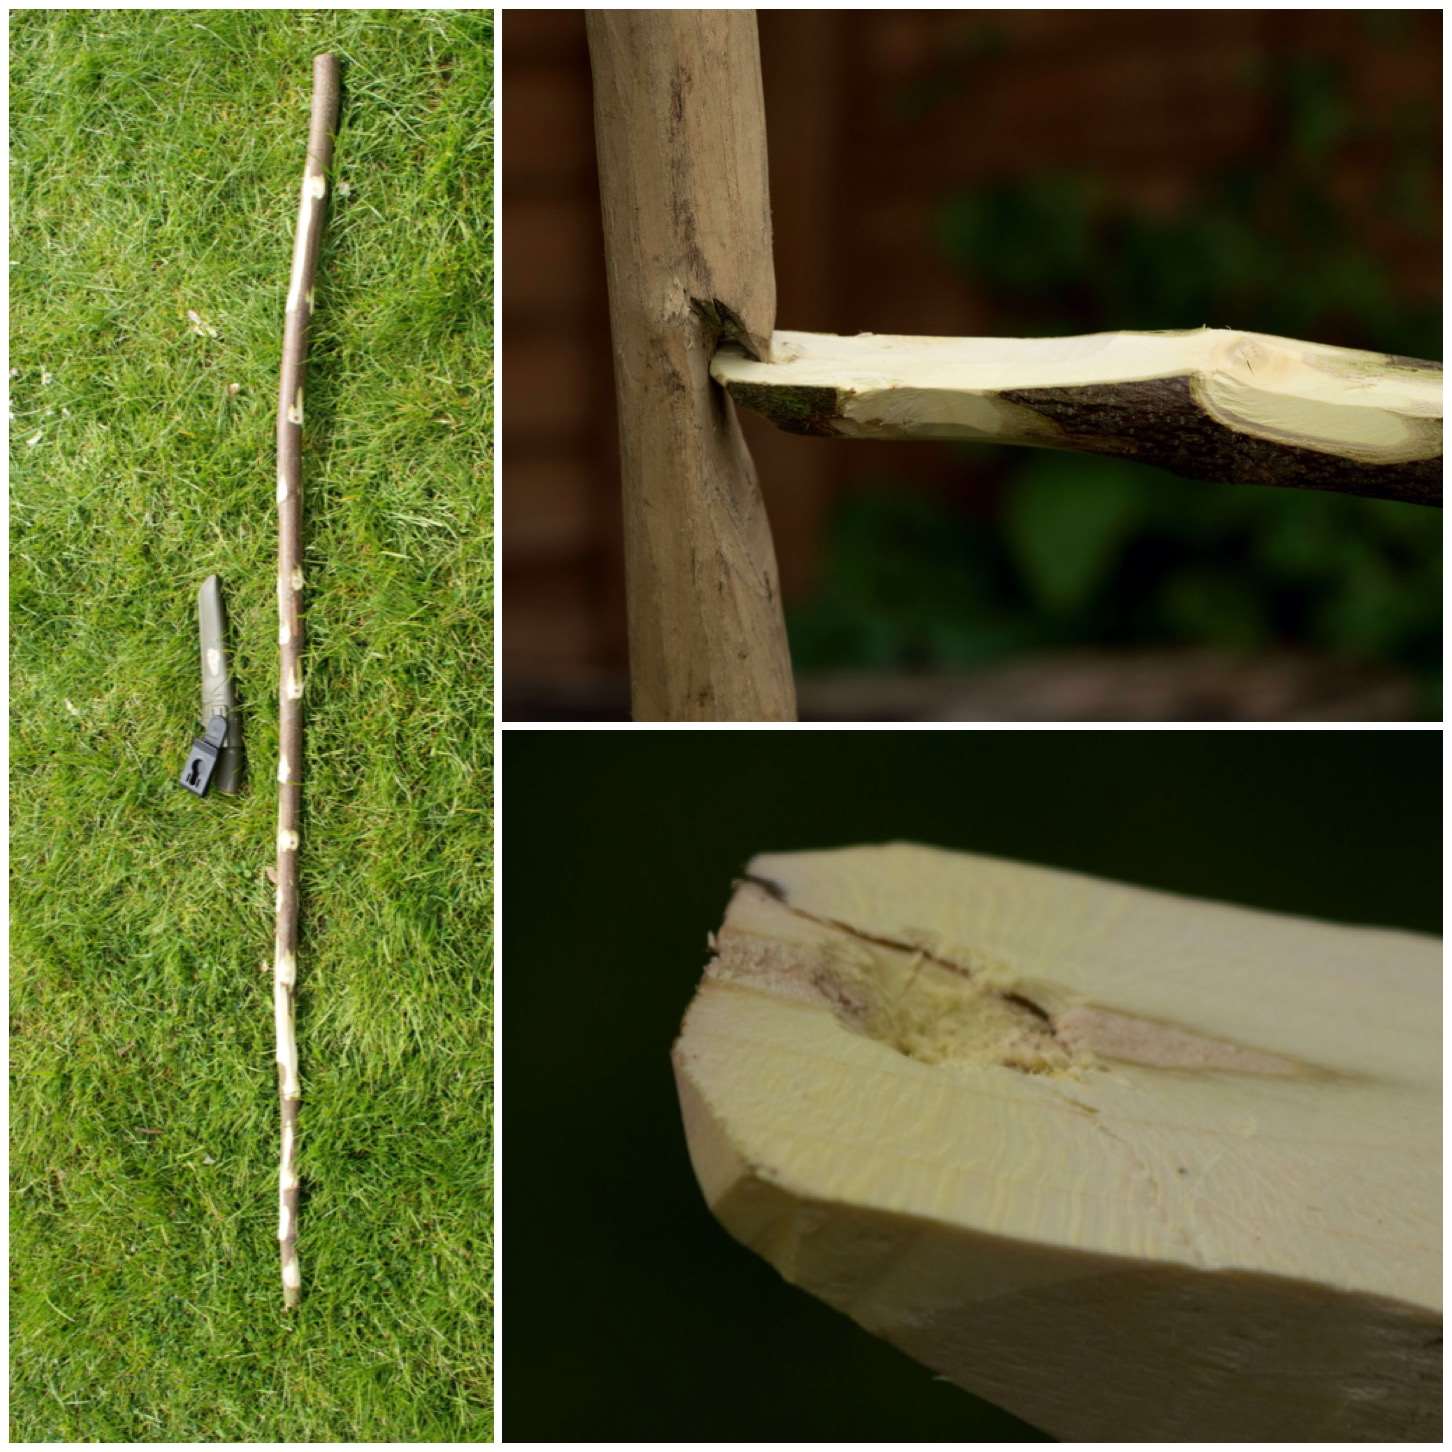
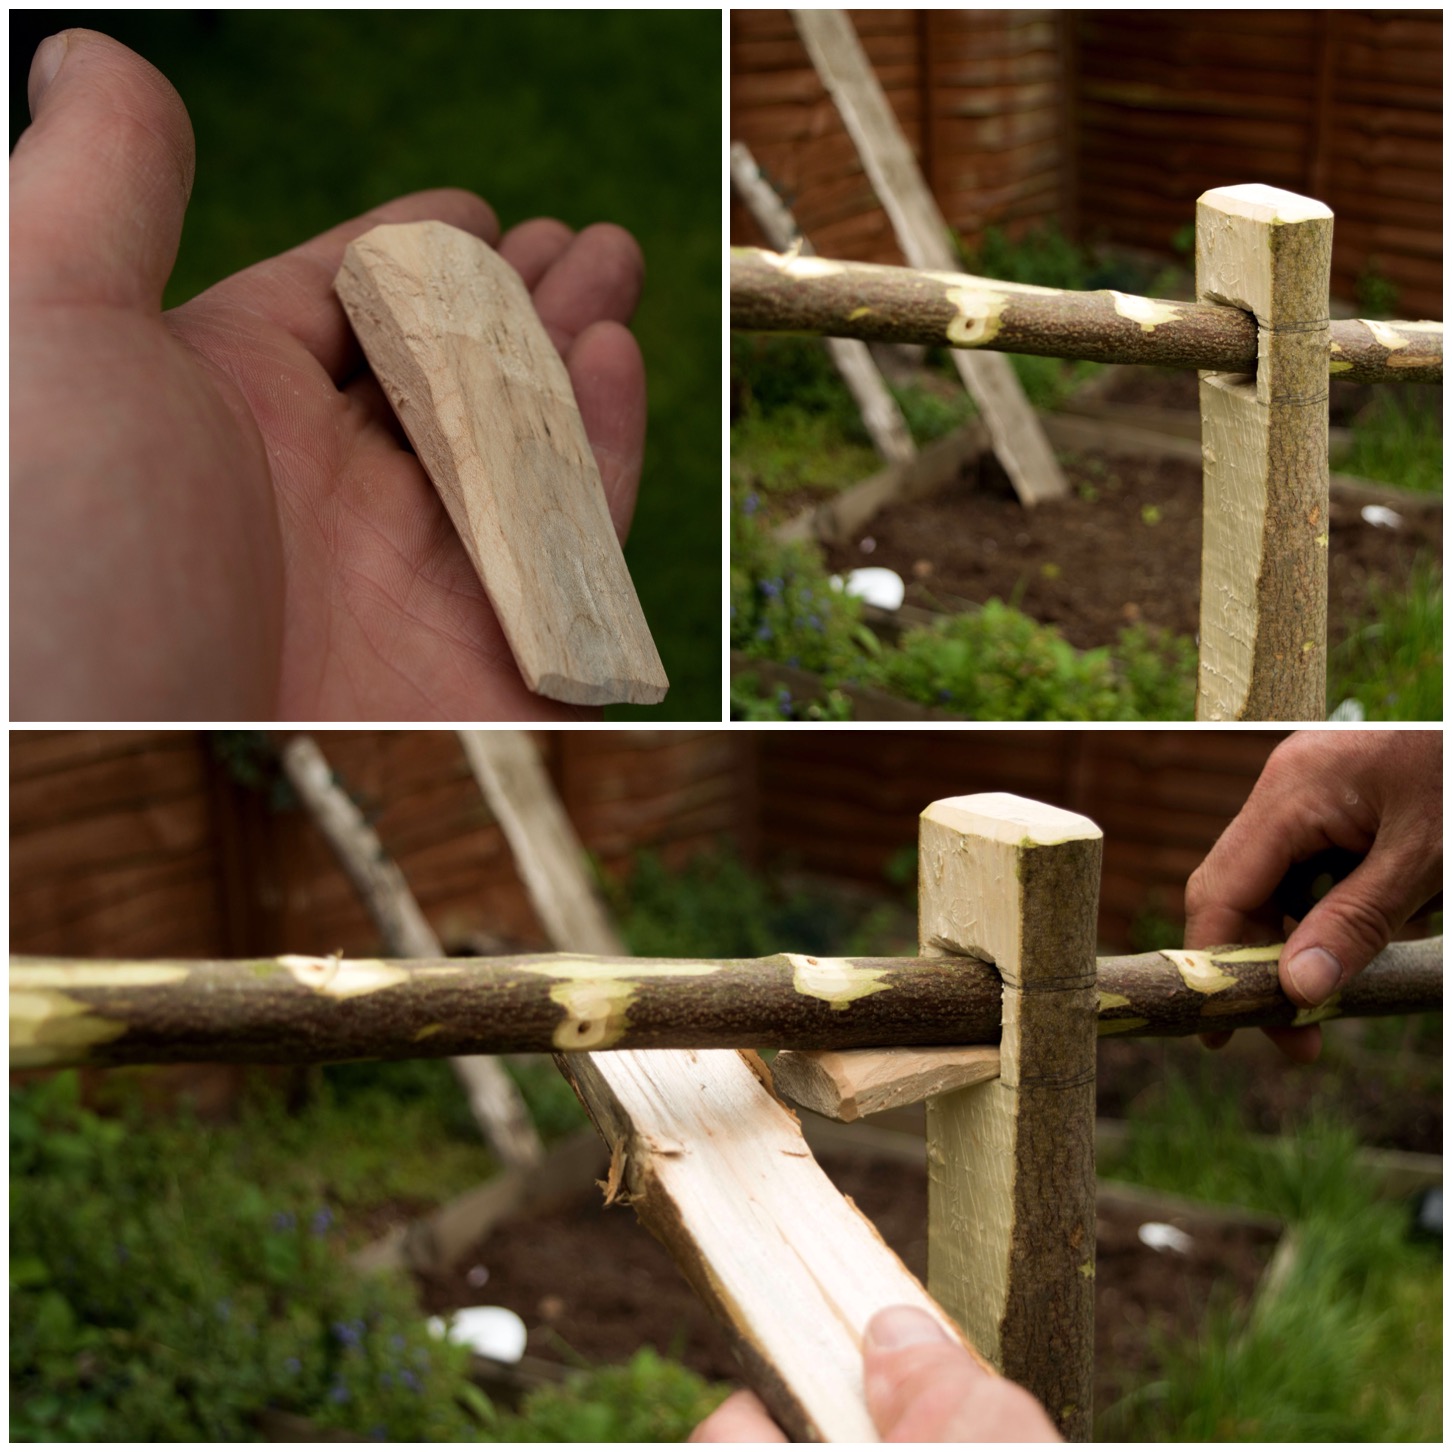
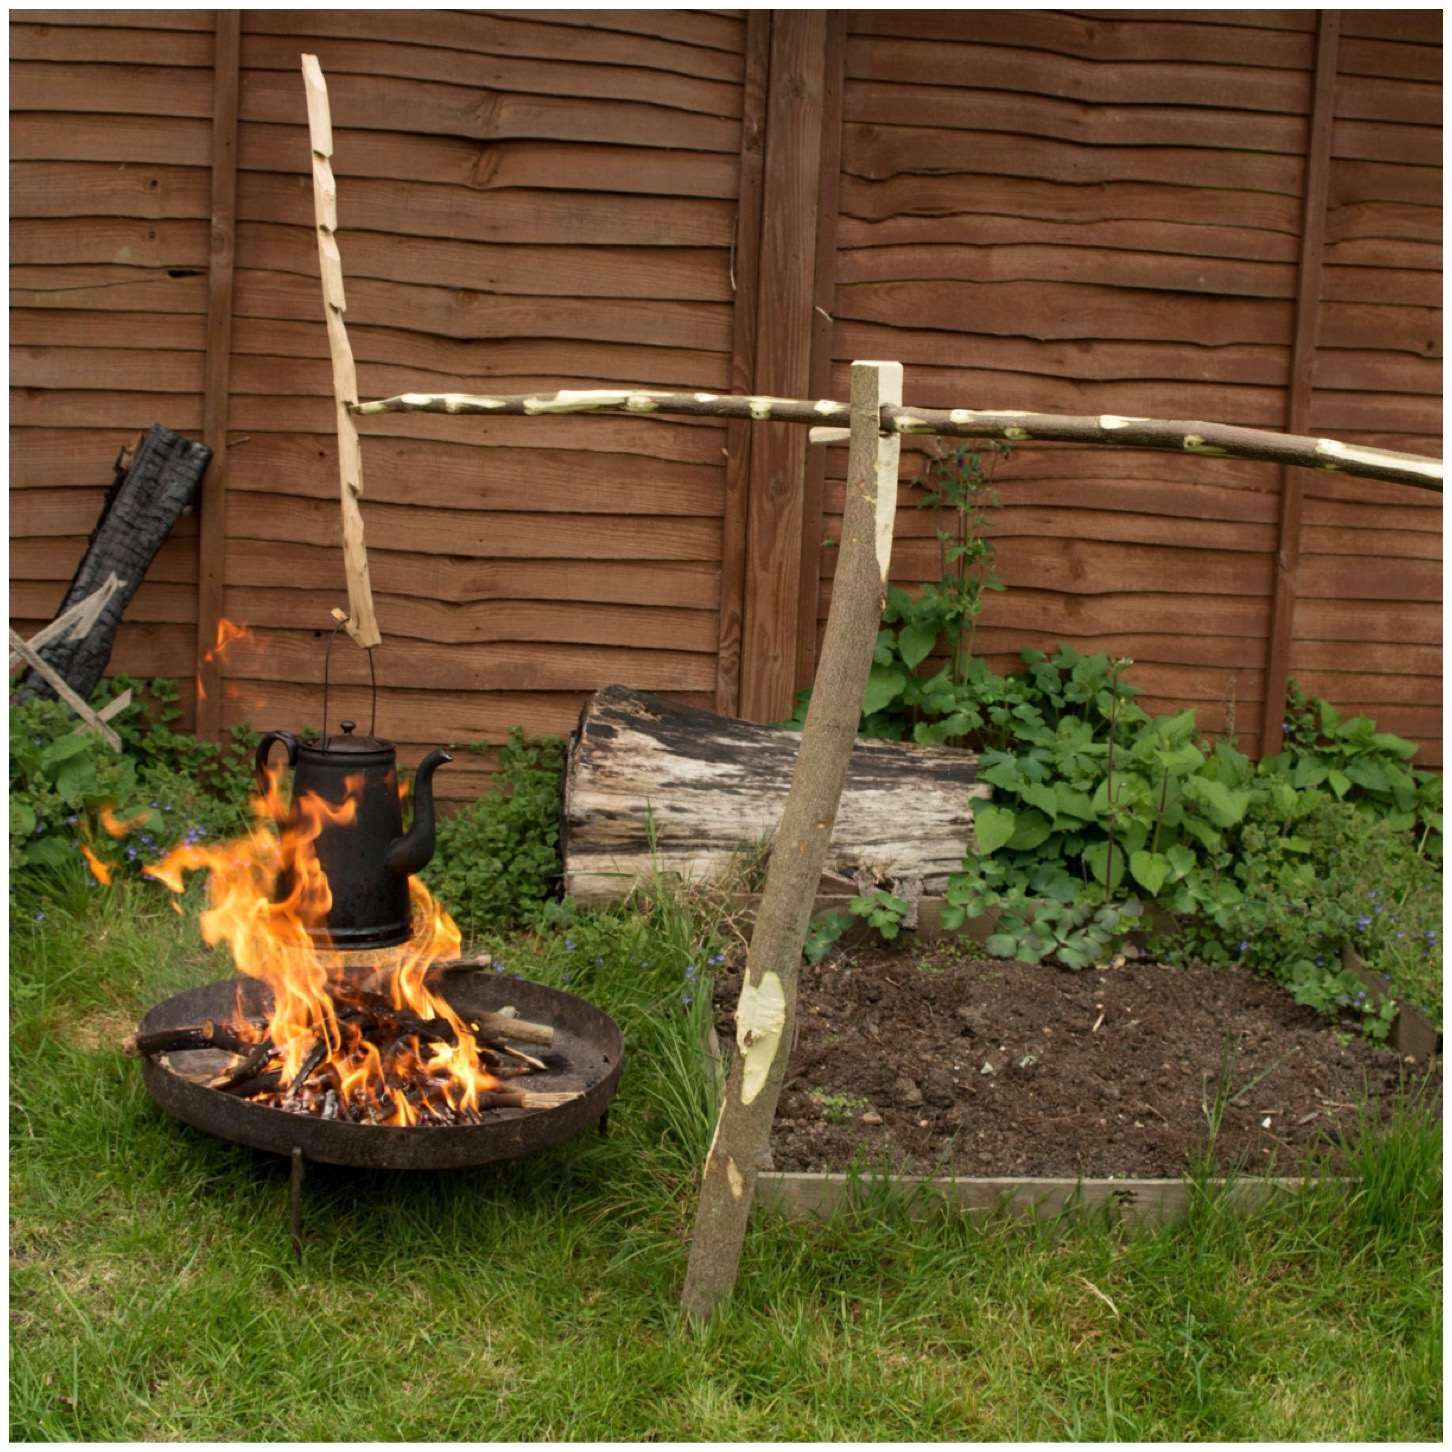
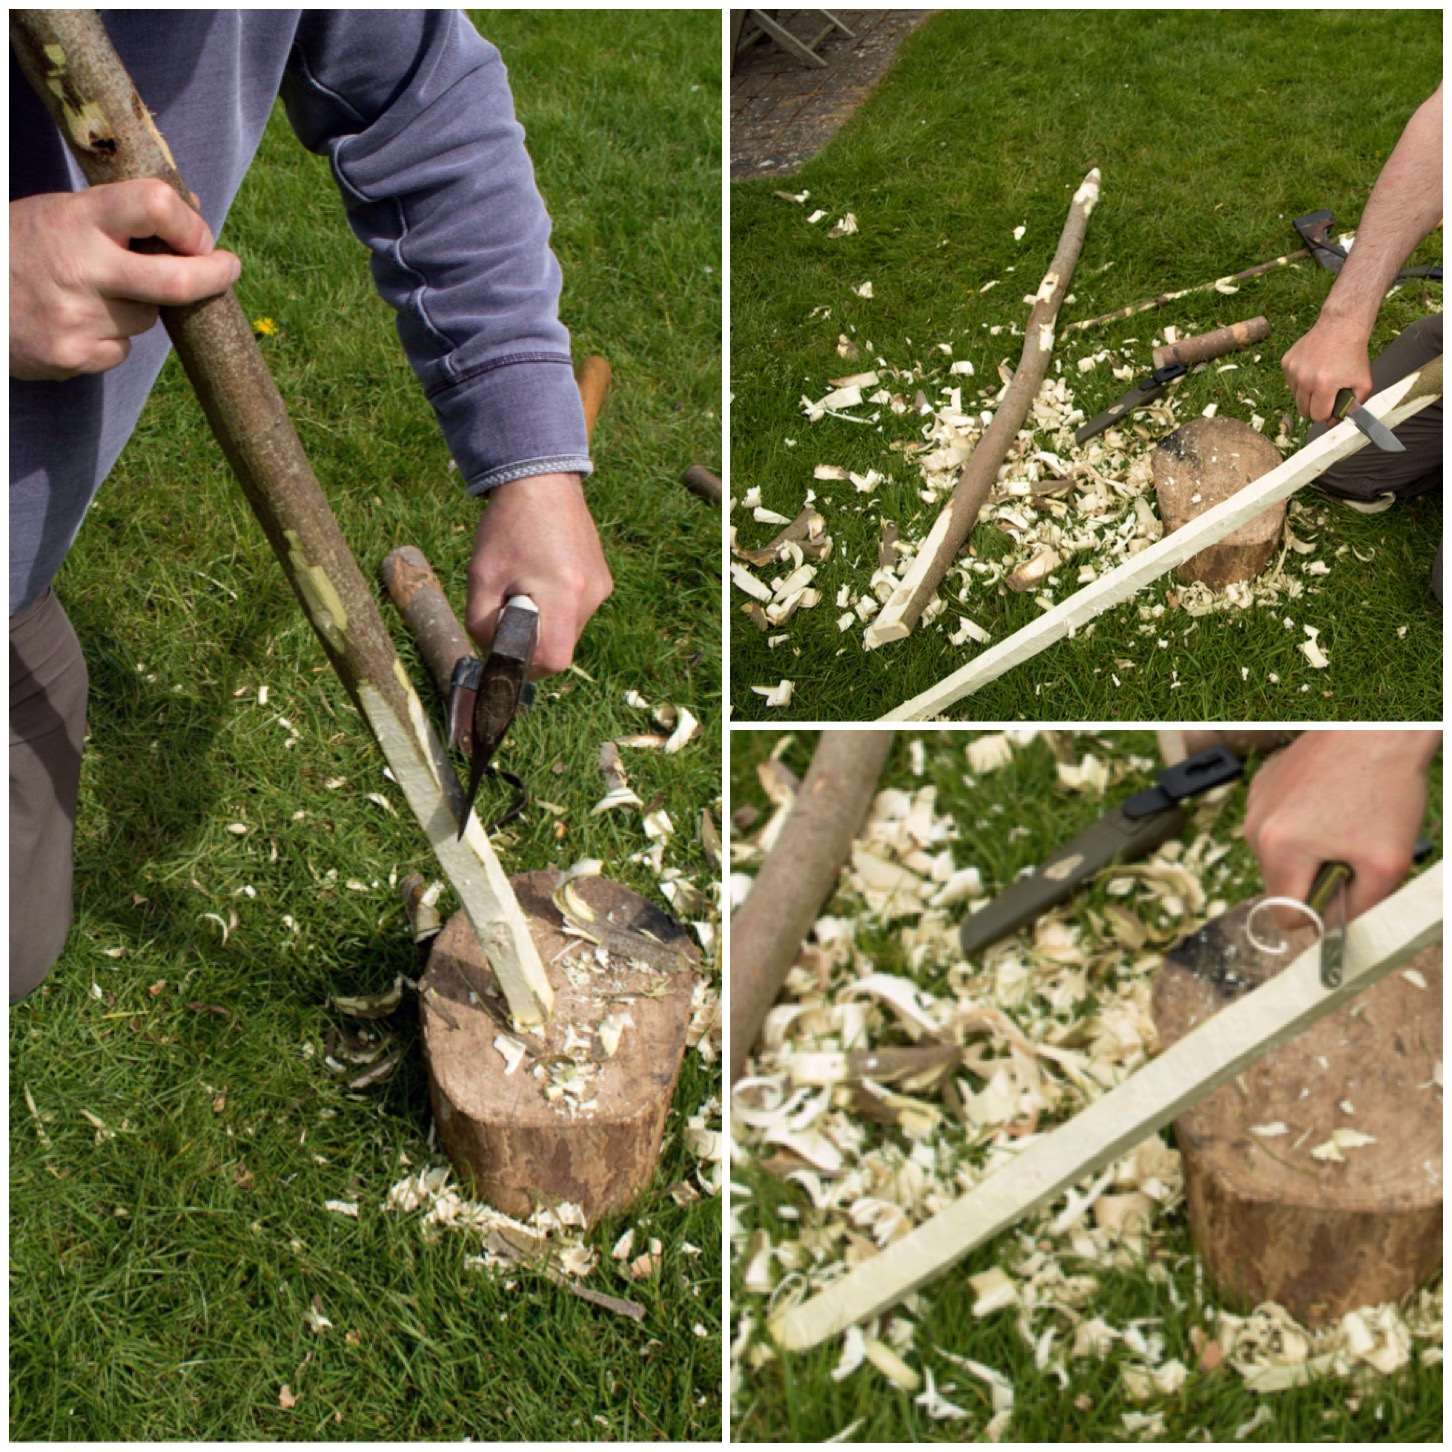
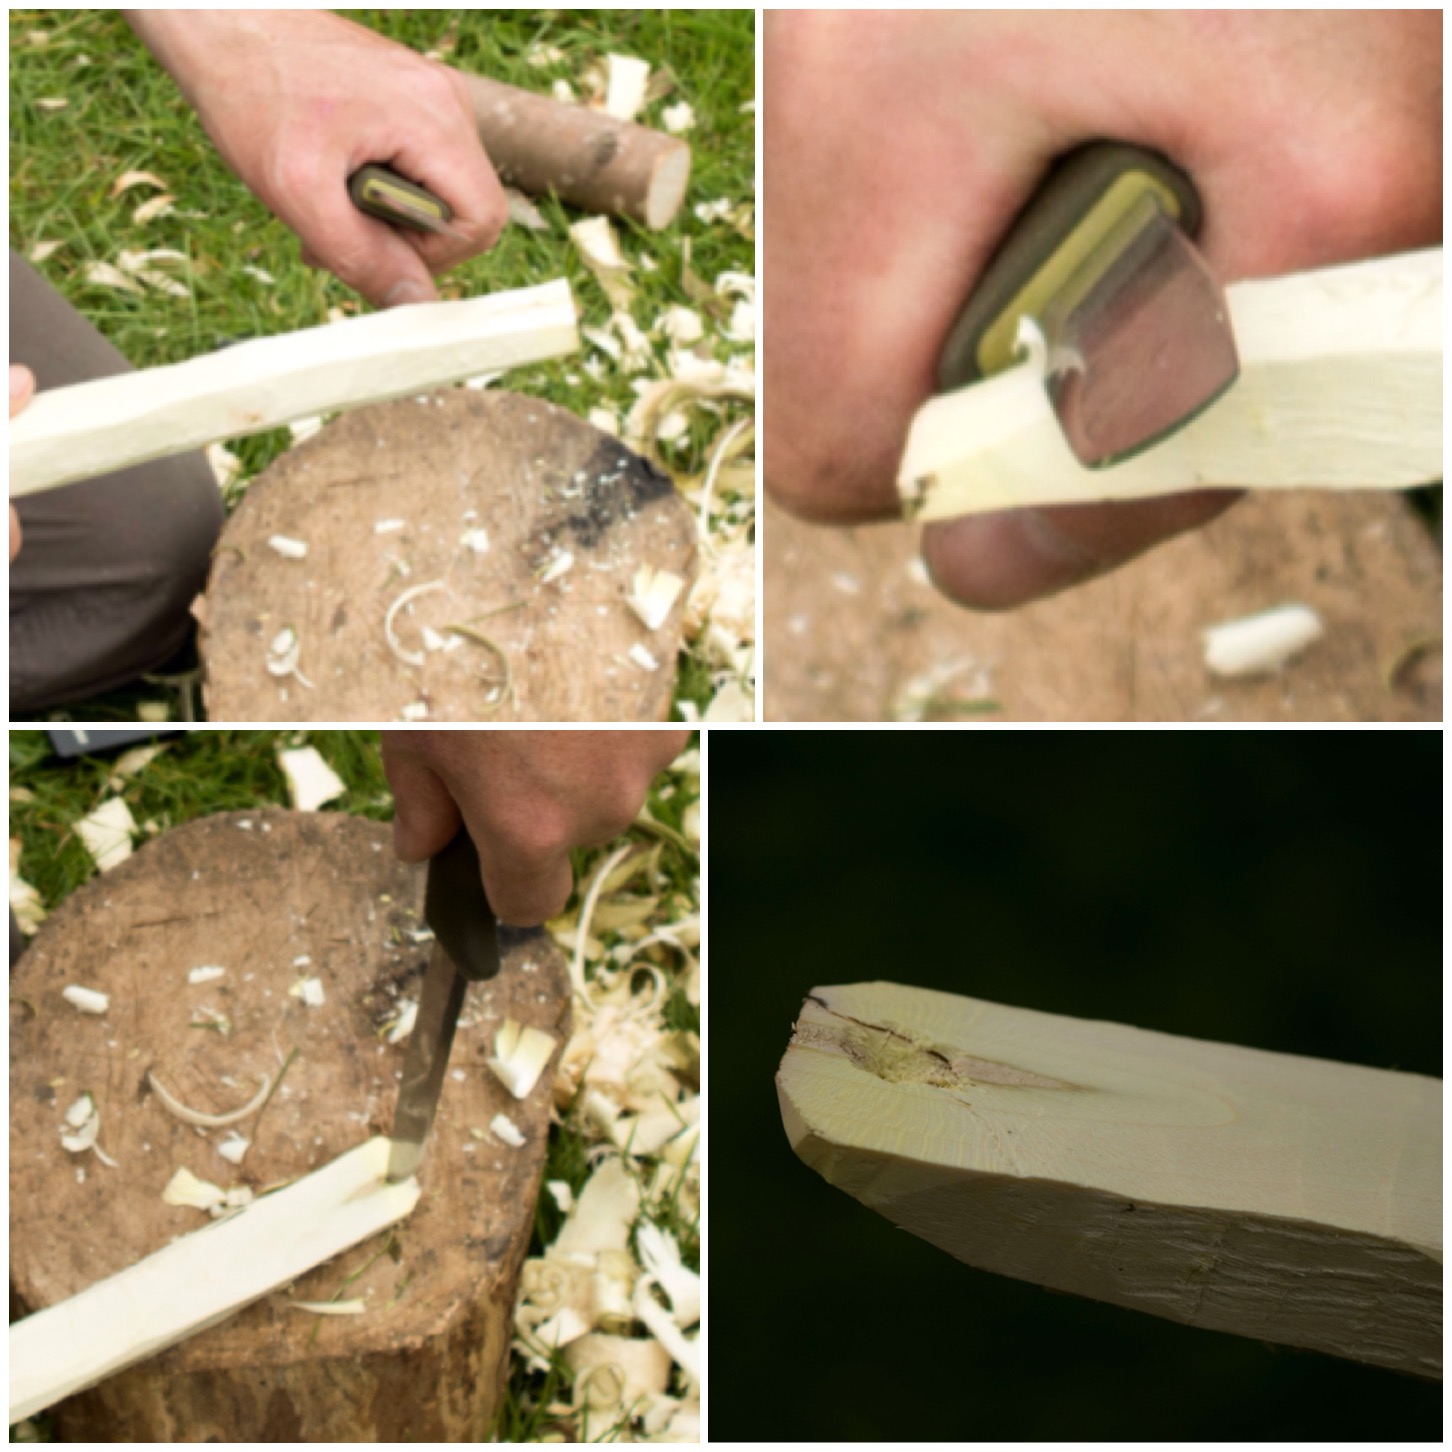
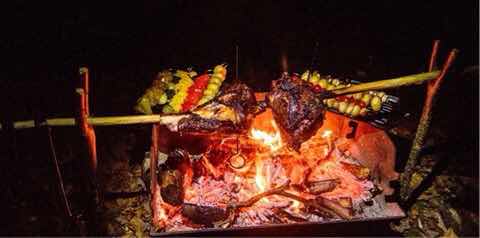
While the lads were busy making their fire Dave was busily building a spit to cook a joint of beef on. He stripped a green hazel sapling and put a split through the the middle of it with one end squared off. Then he carved a couple of flat skewers to go through the beef and the split. This method keeps the joint fixed to the hazel rod as it is turned over the fire.

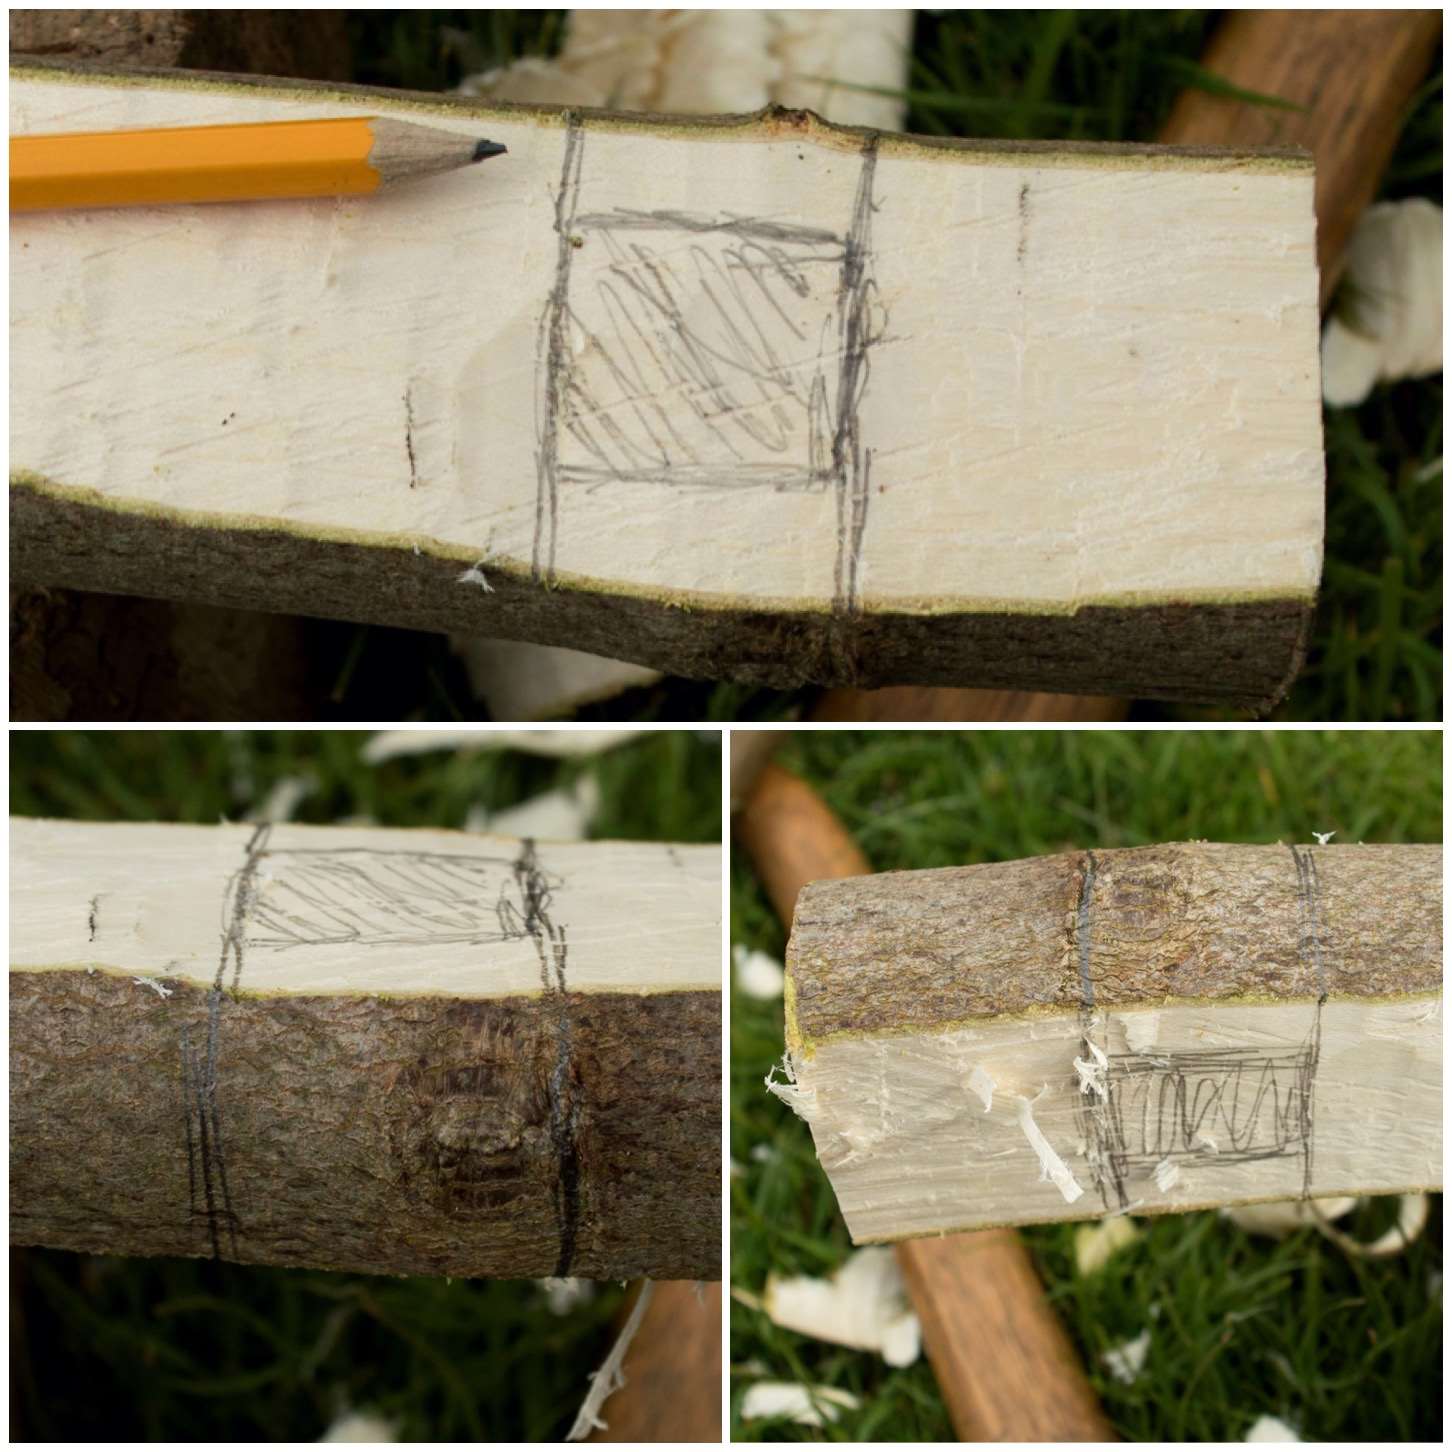
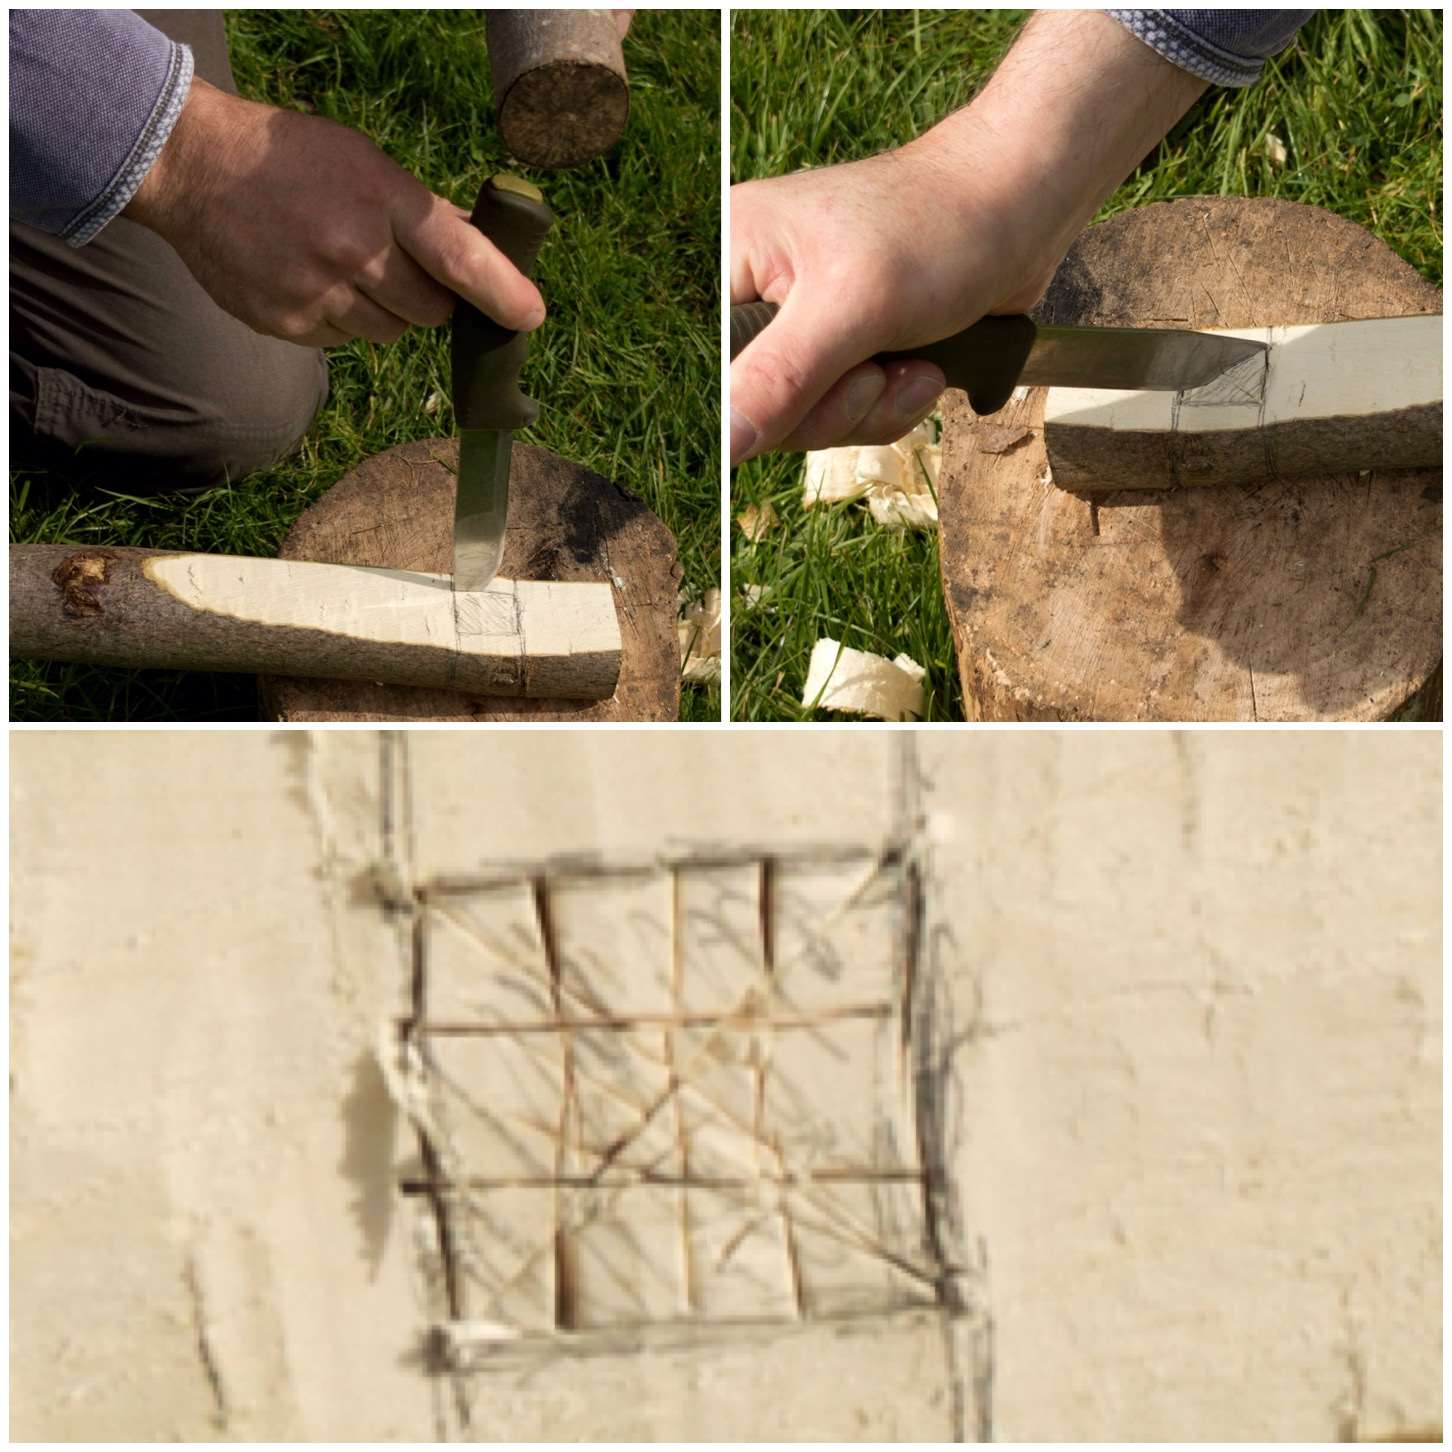
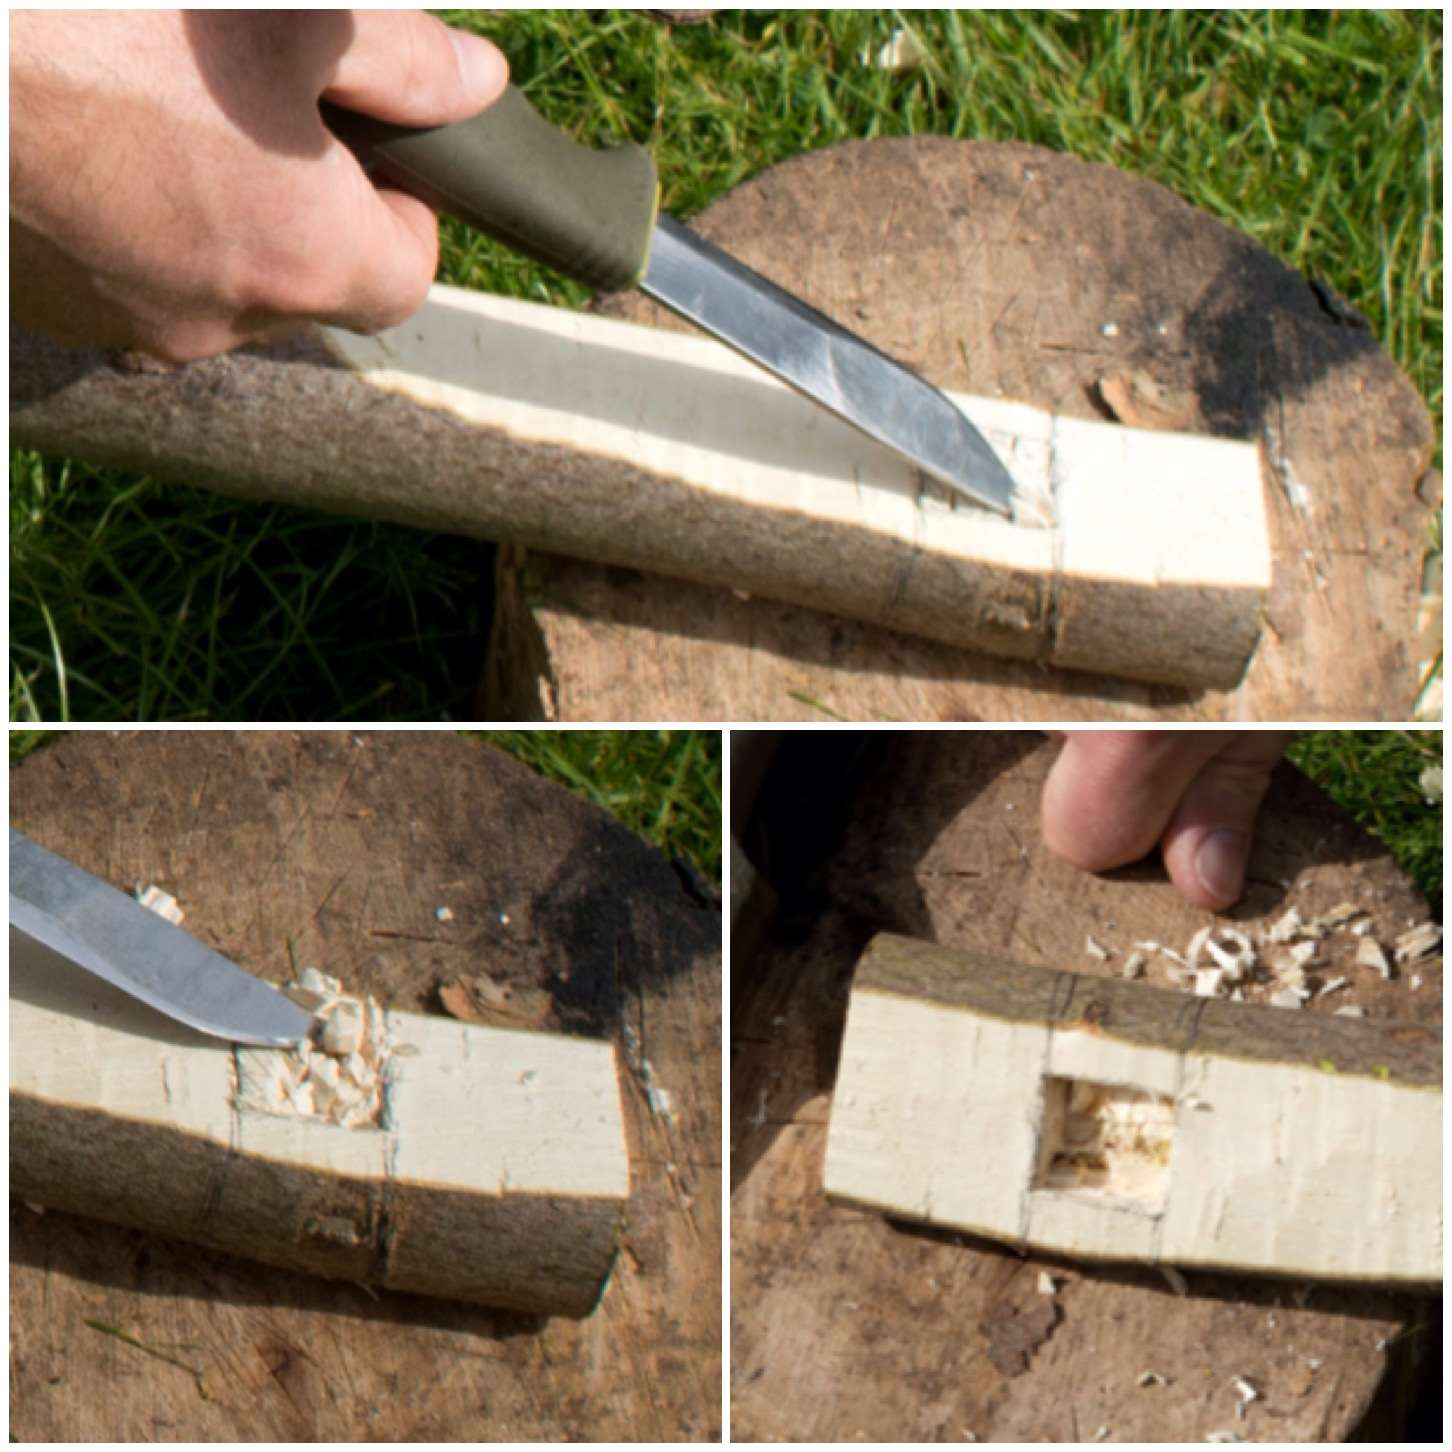
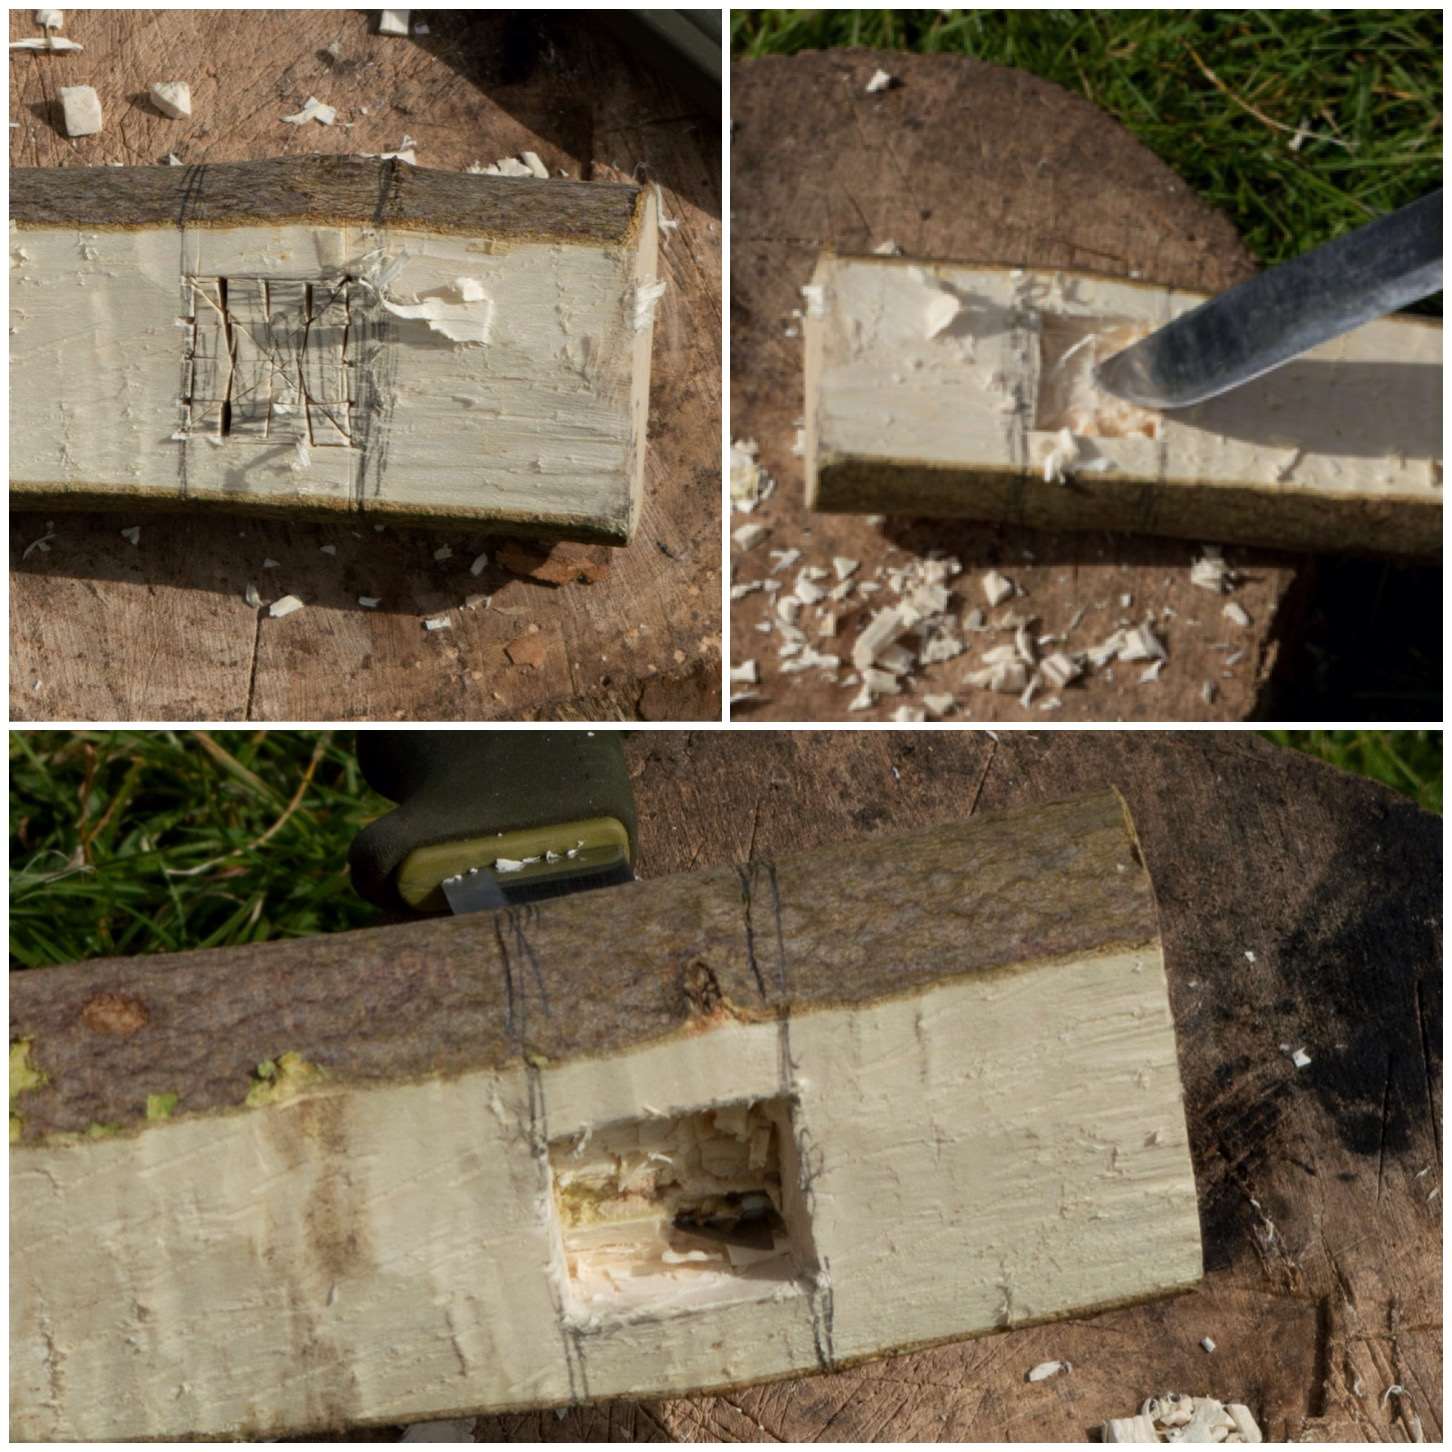
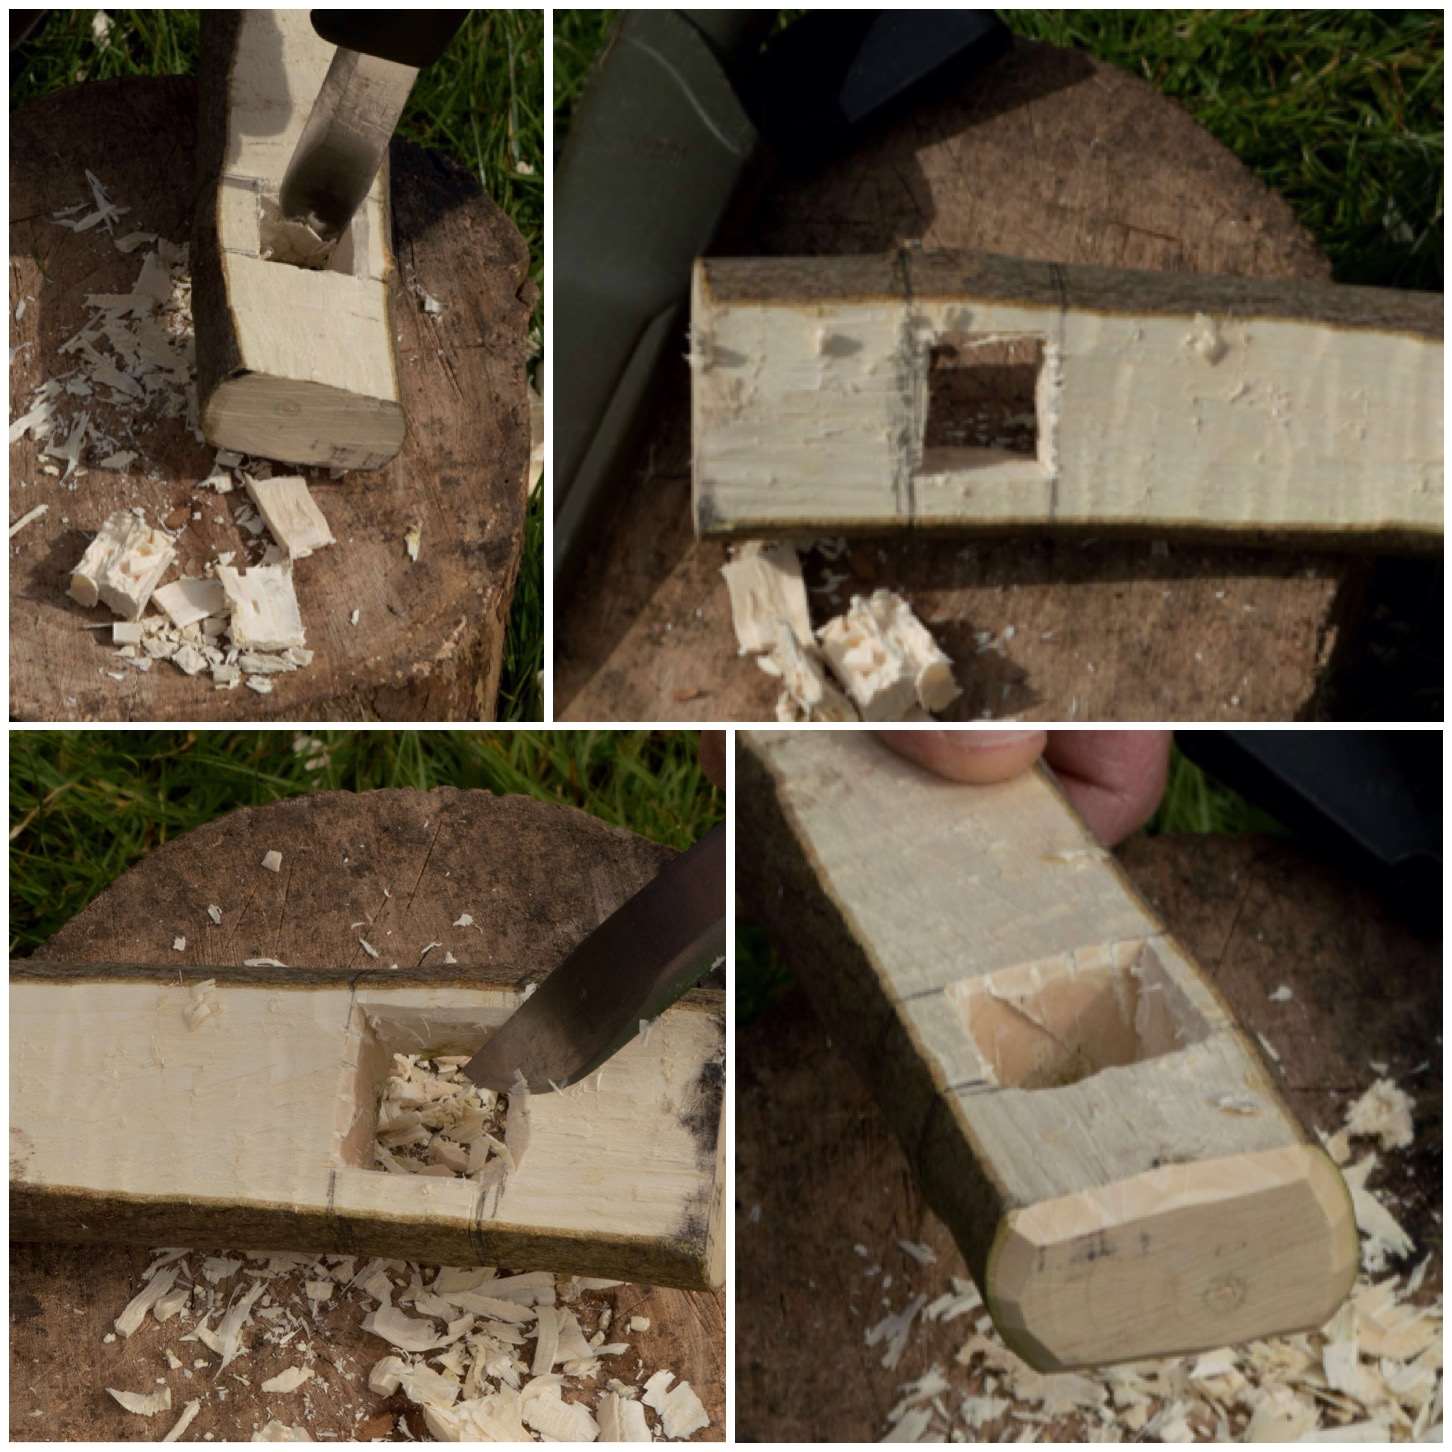
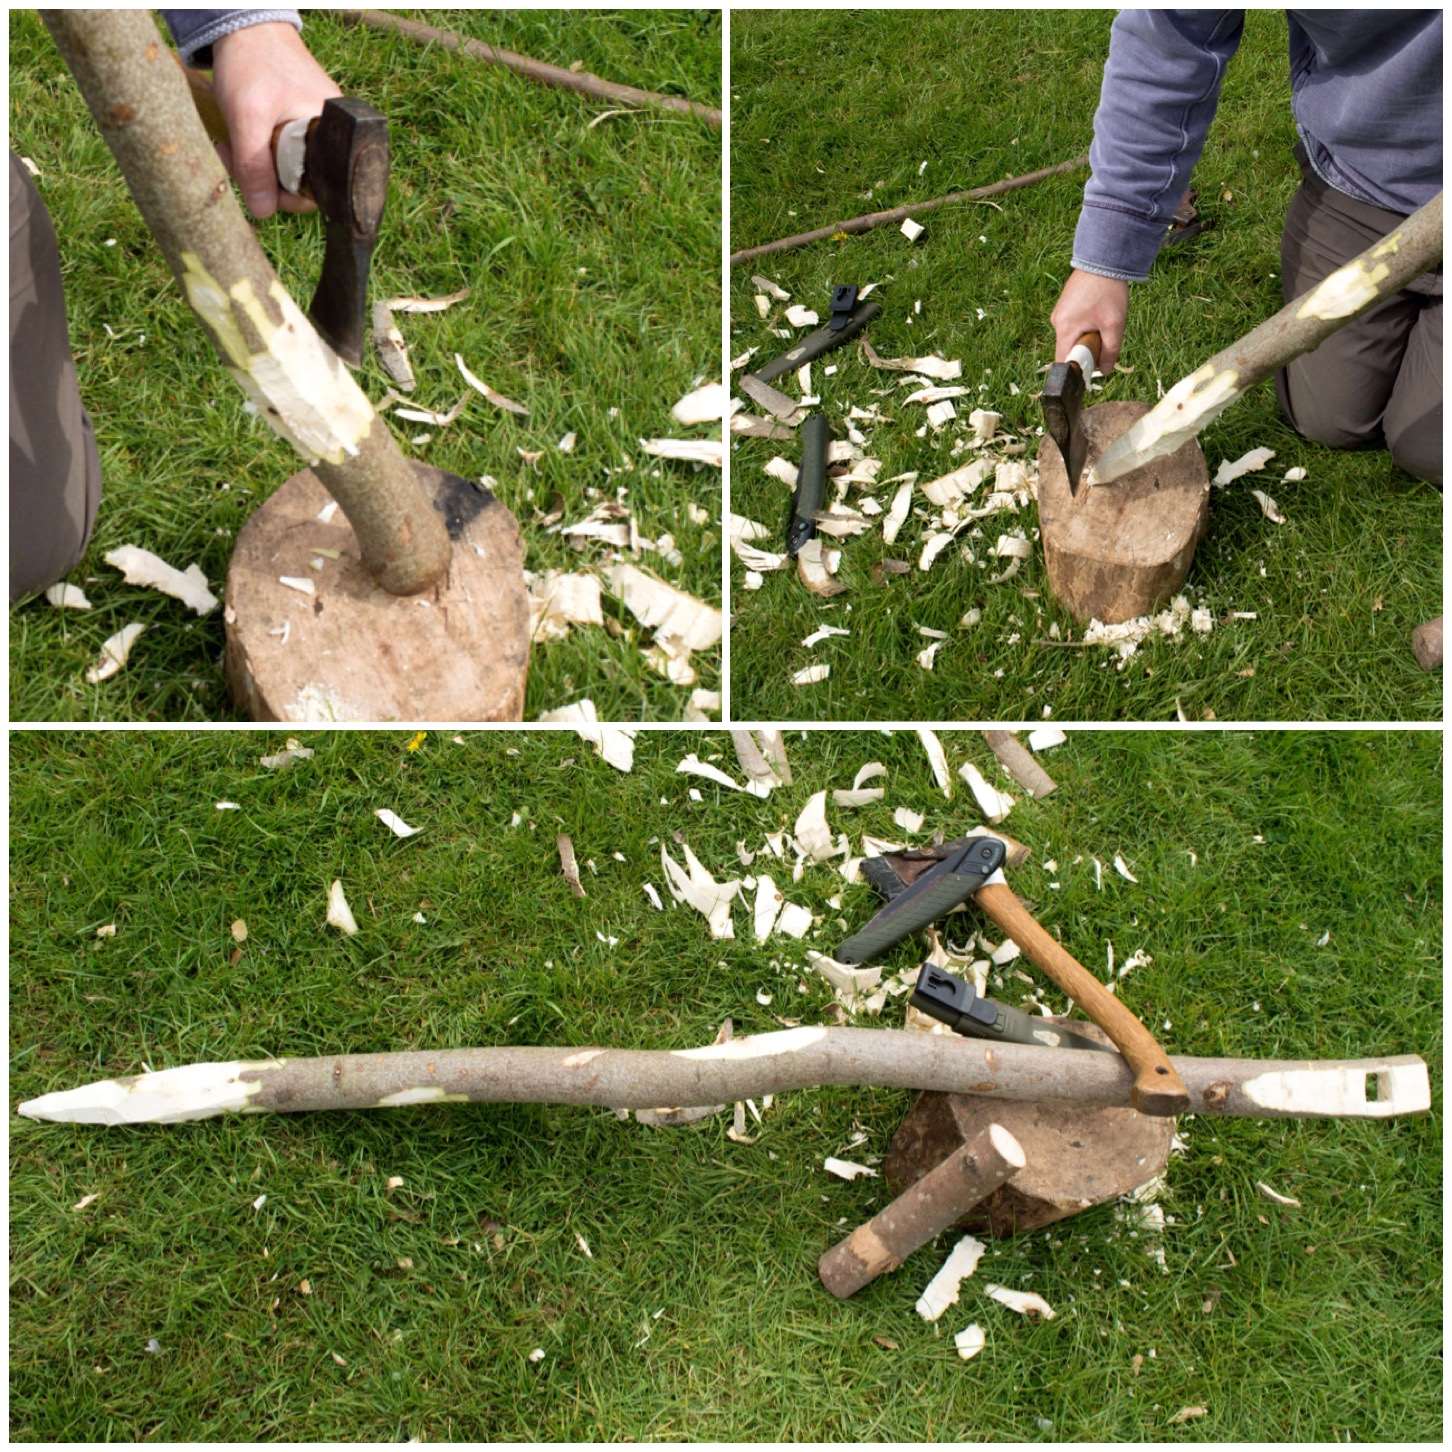
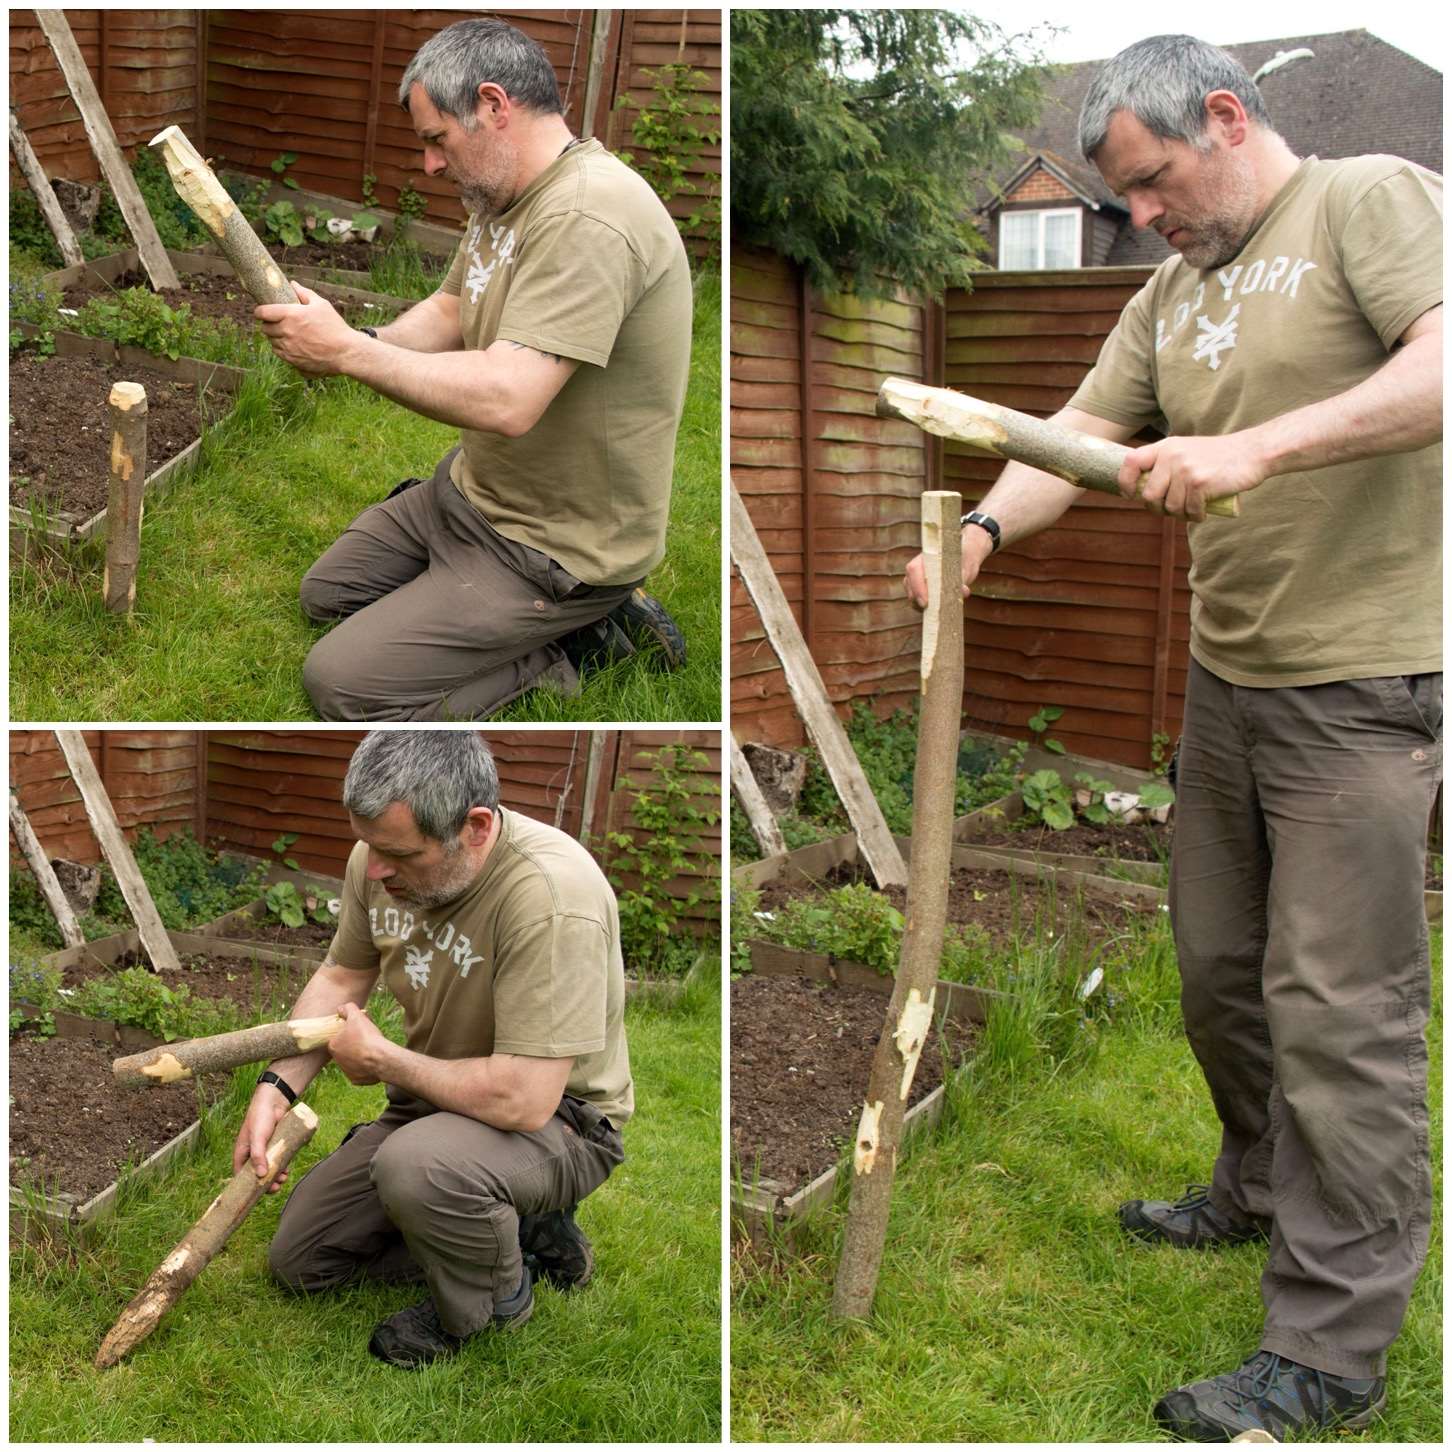
Once that was done he made two uprights to sit the hazel rod in over the fire. One of the uprights had a square notch carved into it for the squared end of the hazel rod to rest in. This ensured that as we turned the it it always remained fixed in the position we had set it.

image
Spit making

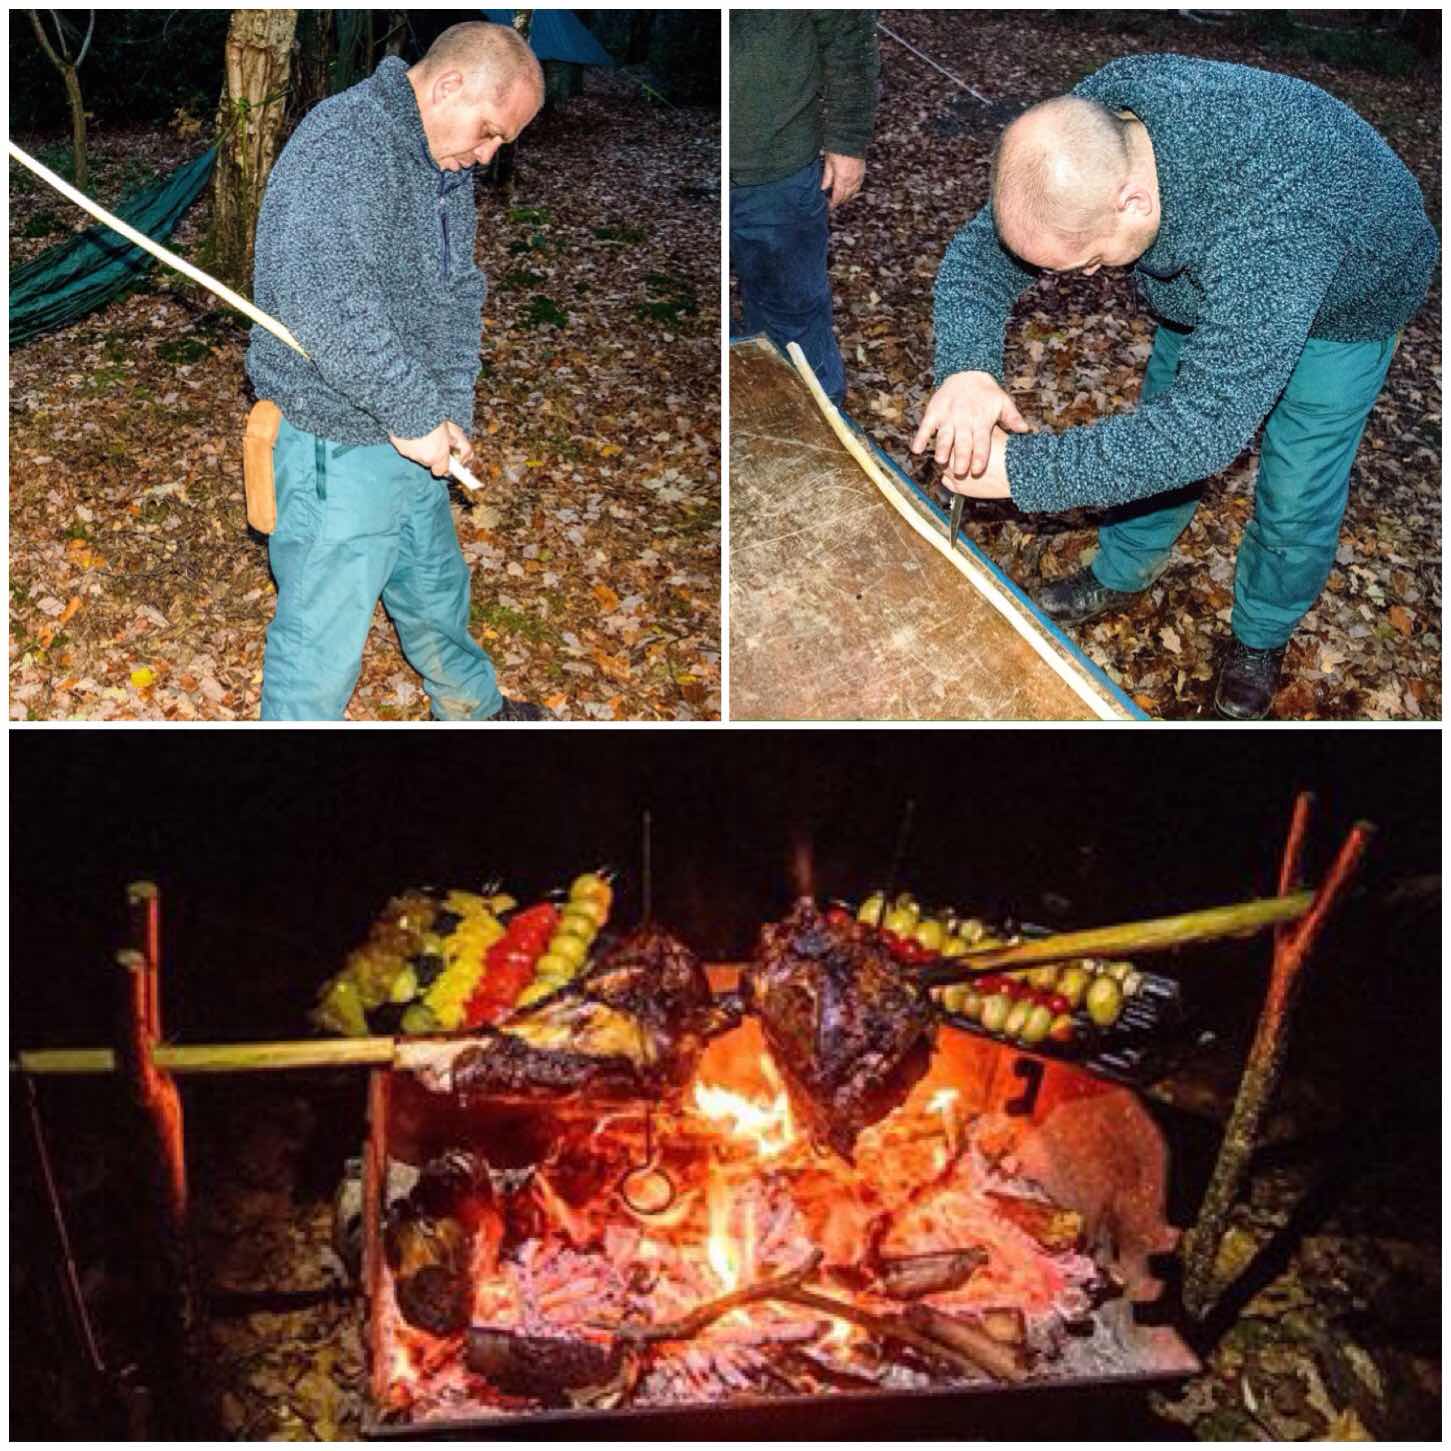
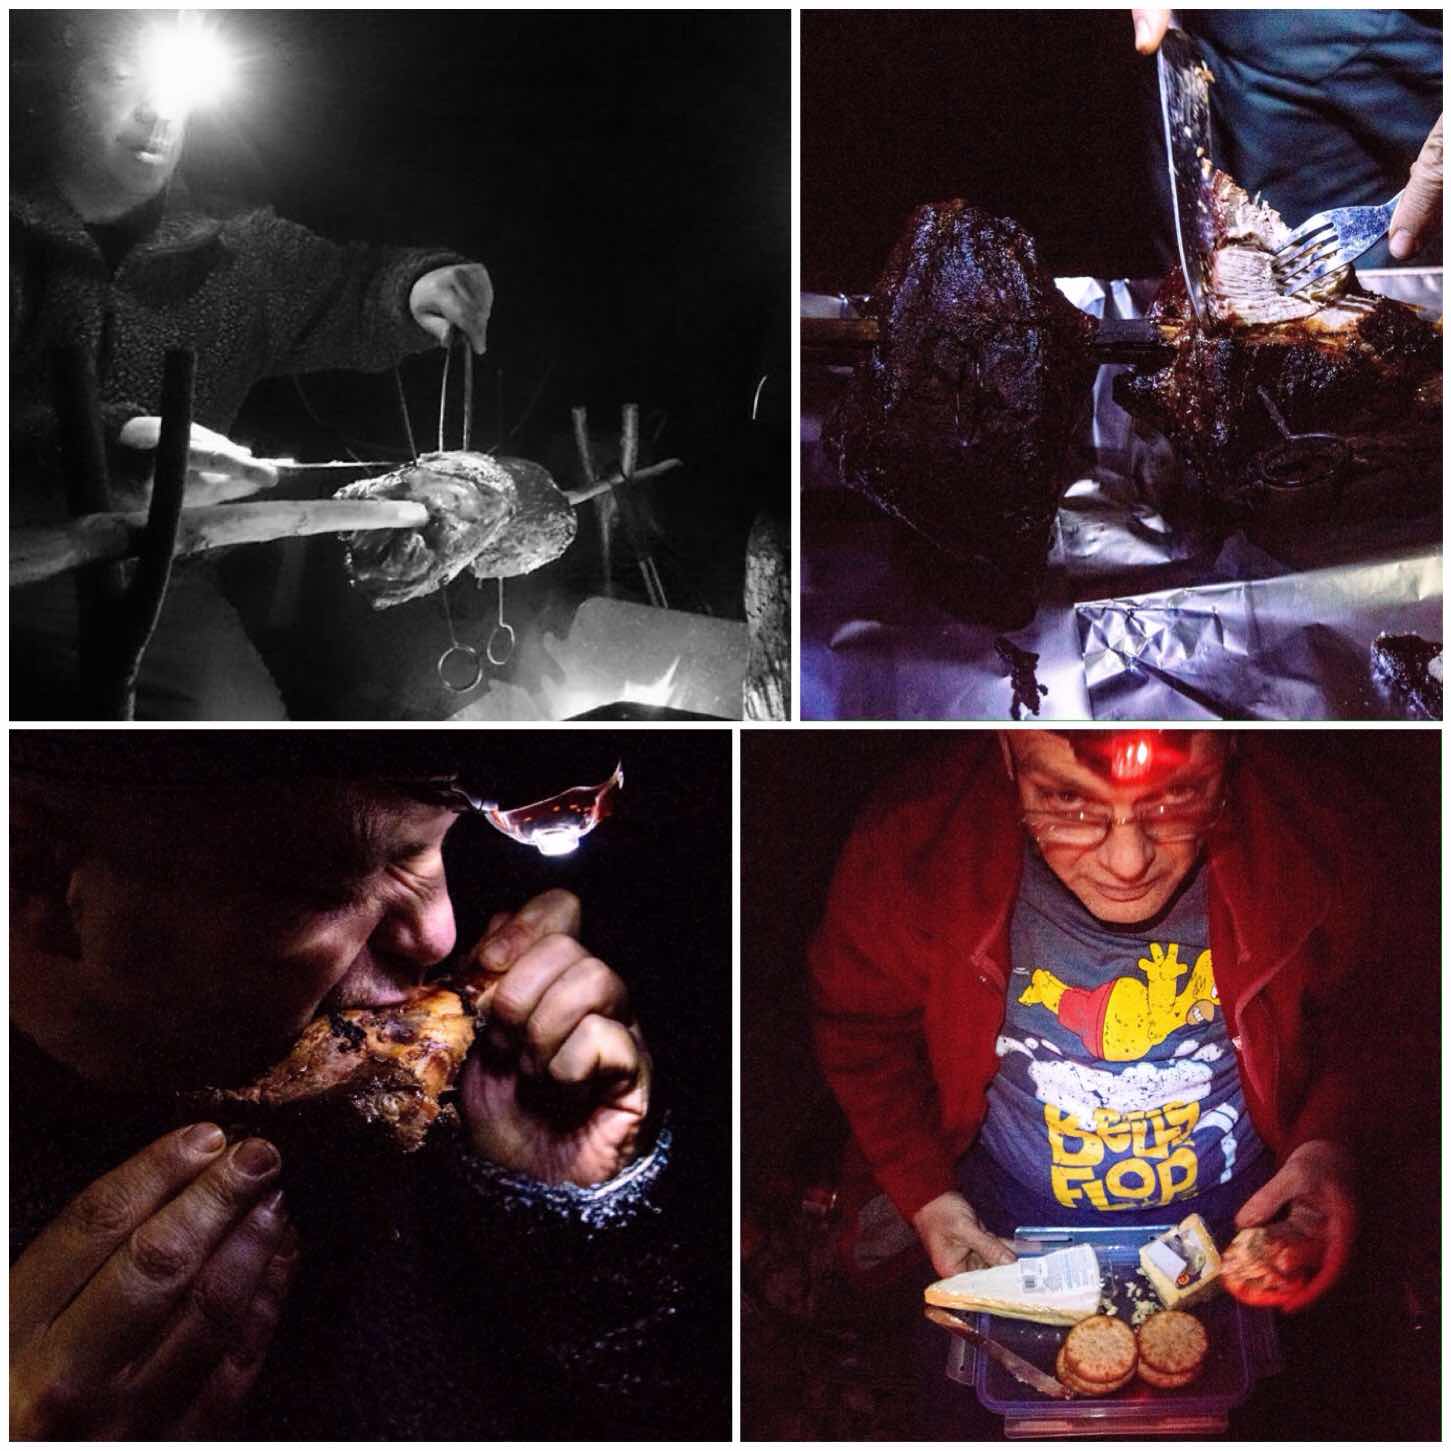
Dave’s father Alan is an excellent chef and he had been busily working away making up a whole range of different veggie kebabs. After a couple of hours turning the spit dinner was ready.

As we try to be civilised 😉 at these events the cheese board was produced by Keith and a relaxing evening was had around the fire.

image
Dinner time

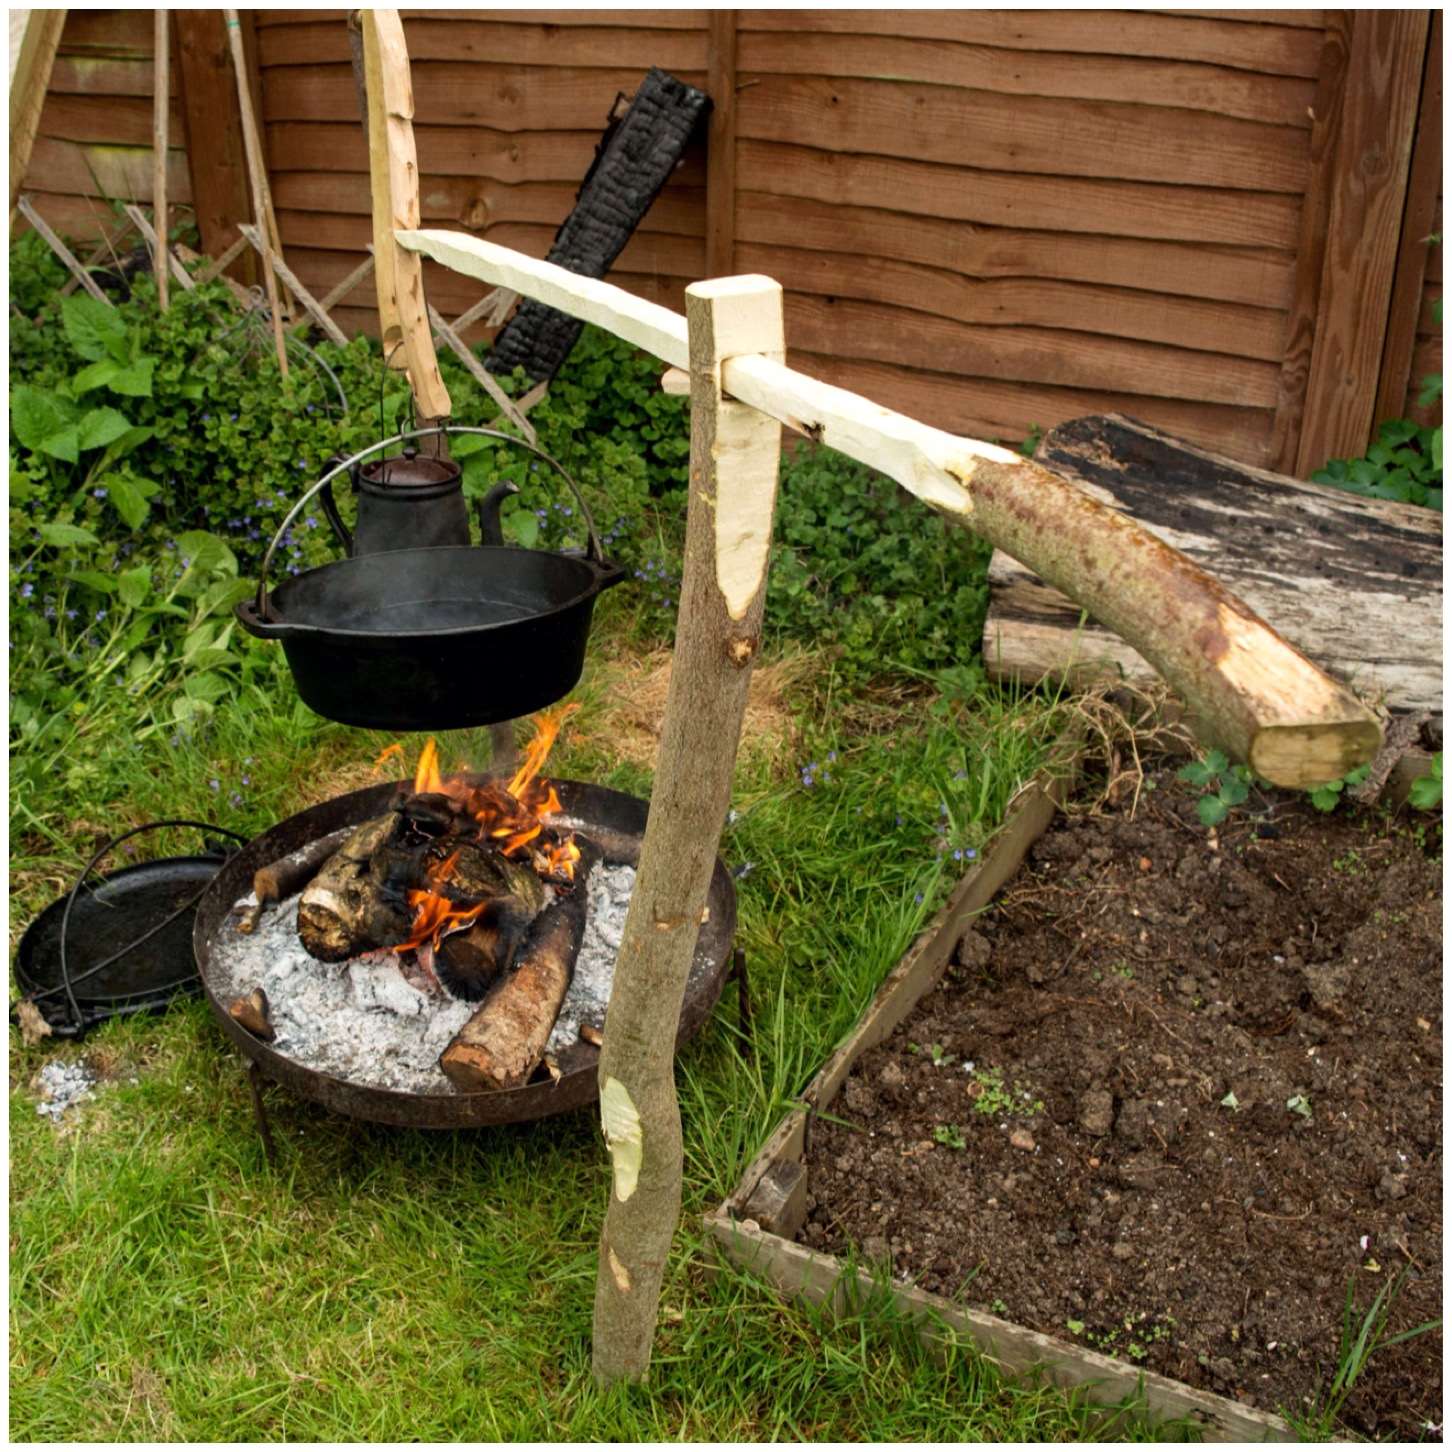
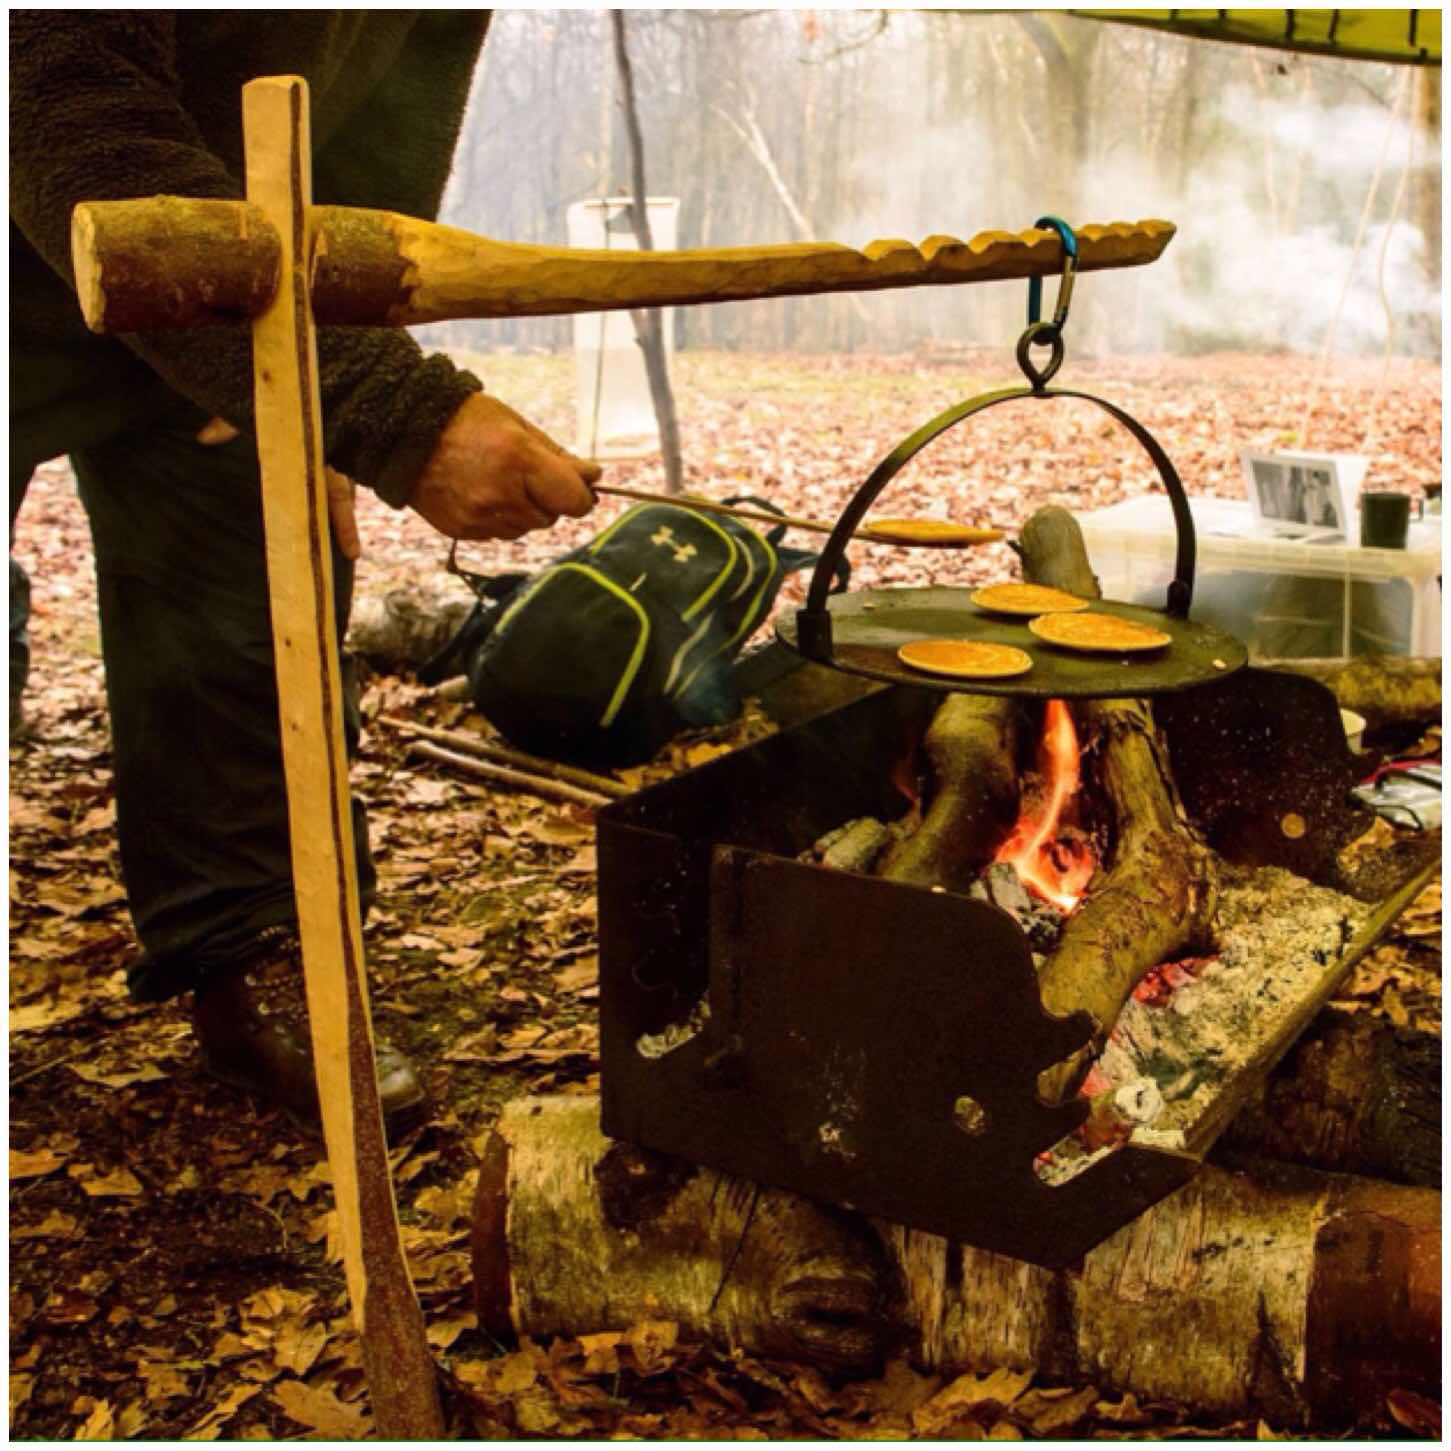
After a very restful sleep in my hammock I was awoke by our chef Alan busily working away around the fire preparing some pancakes for breakfast.

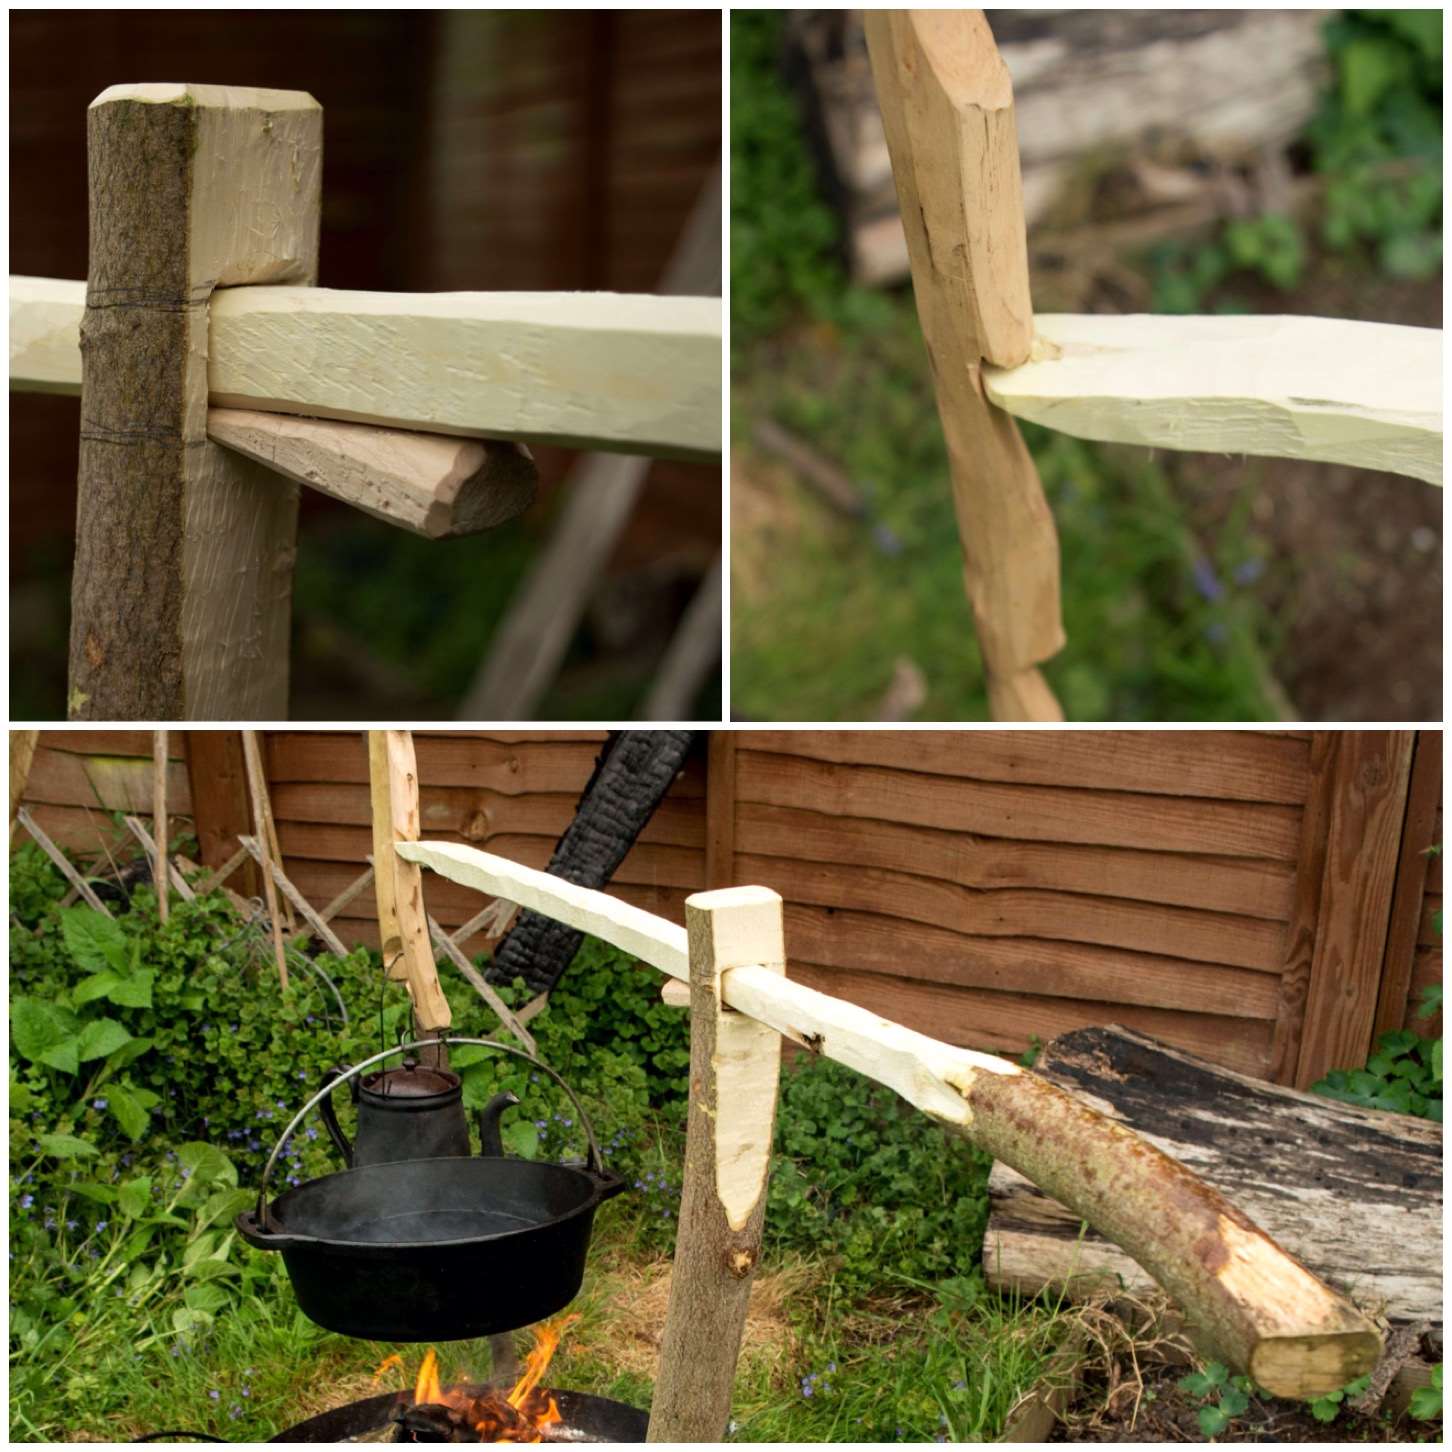
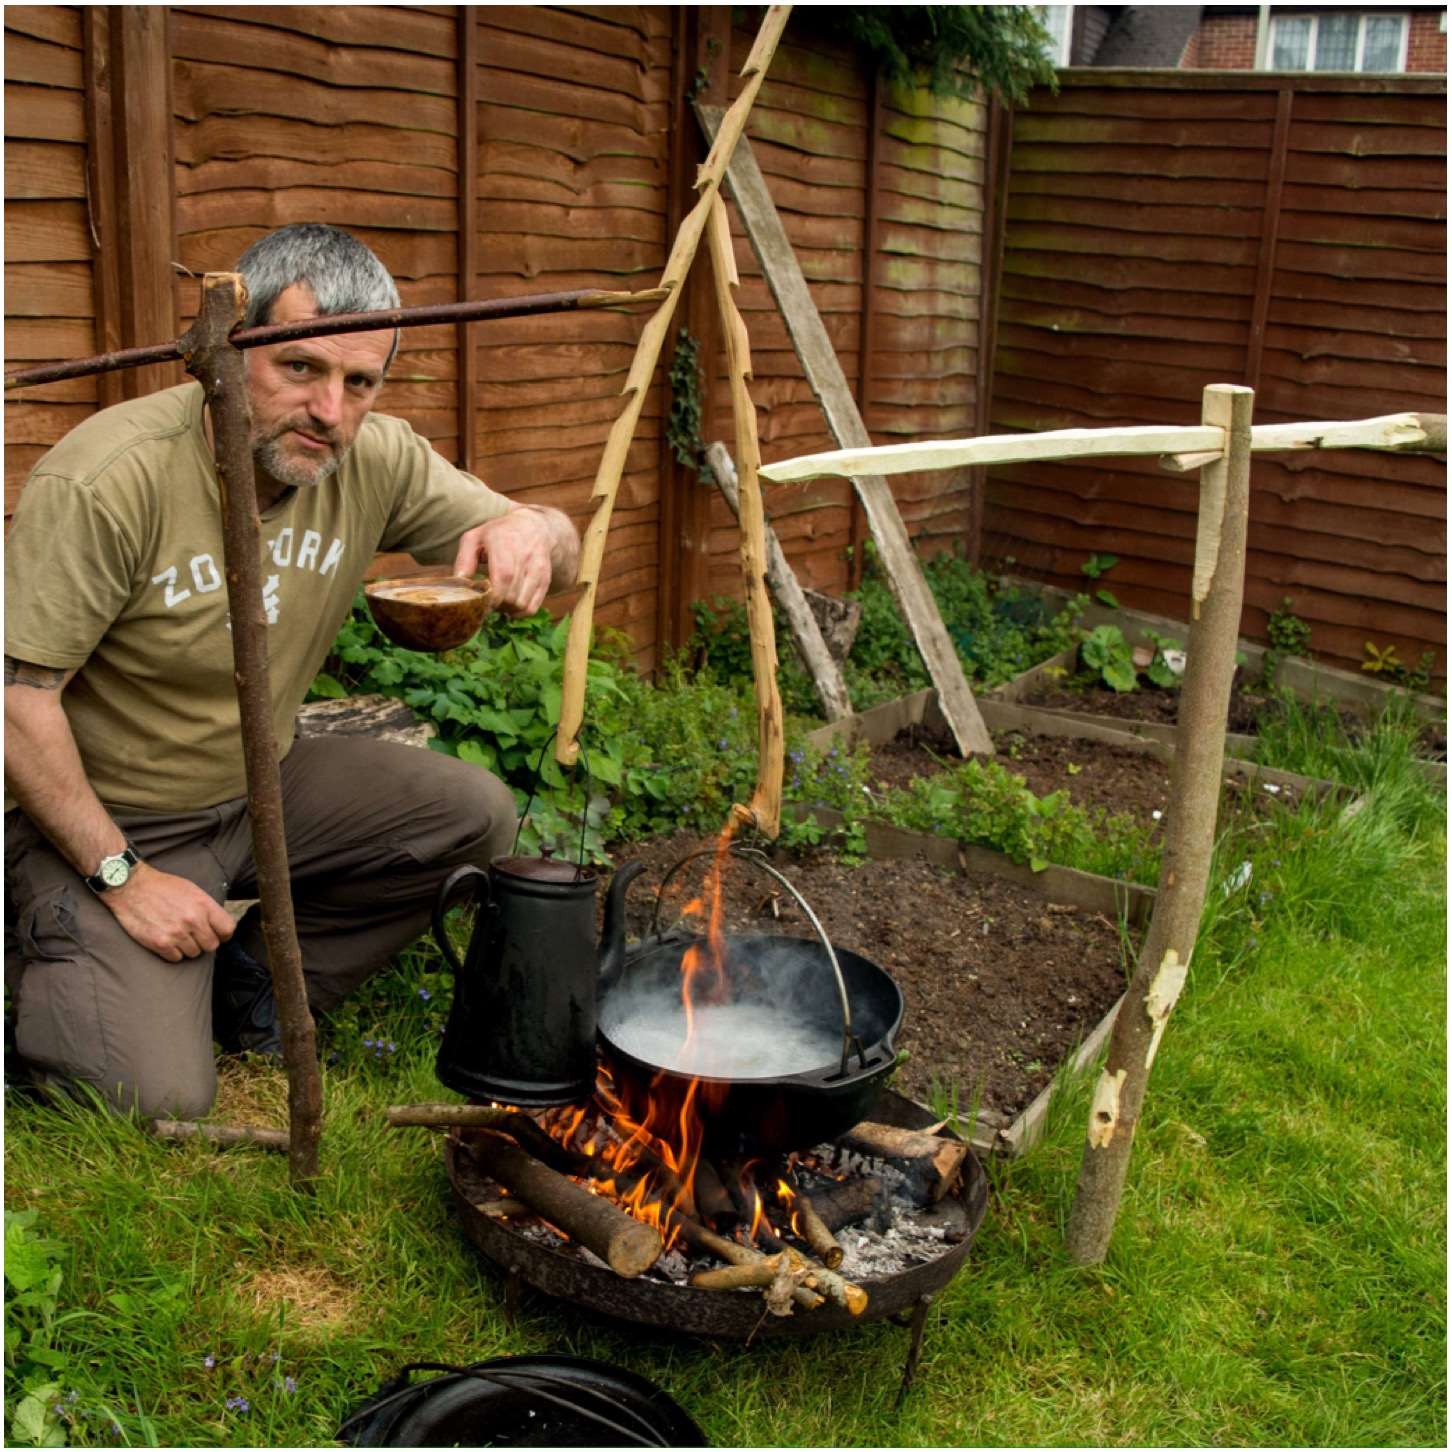
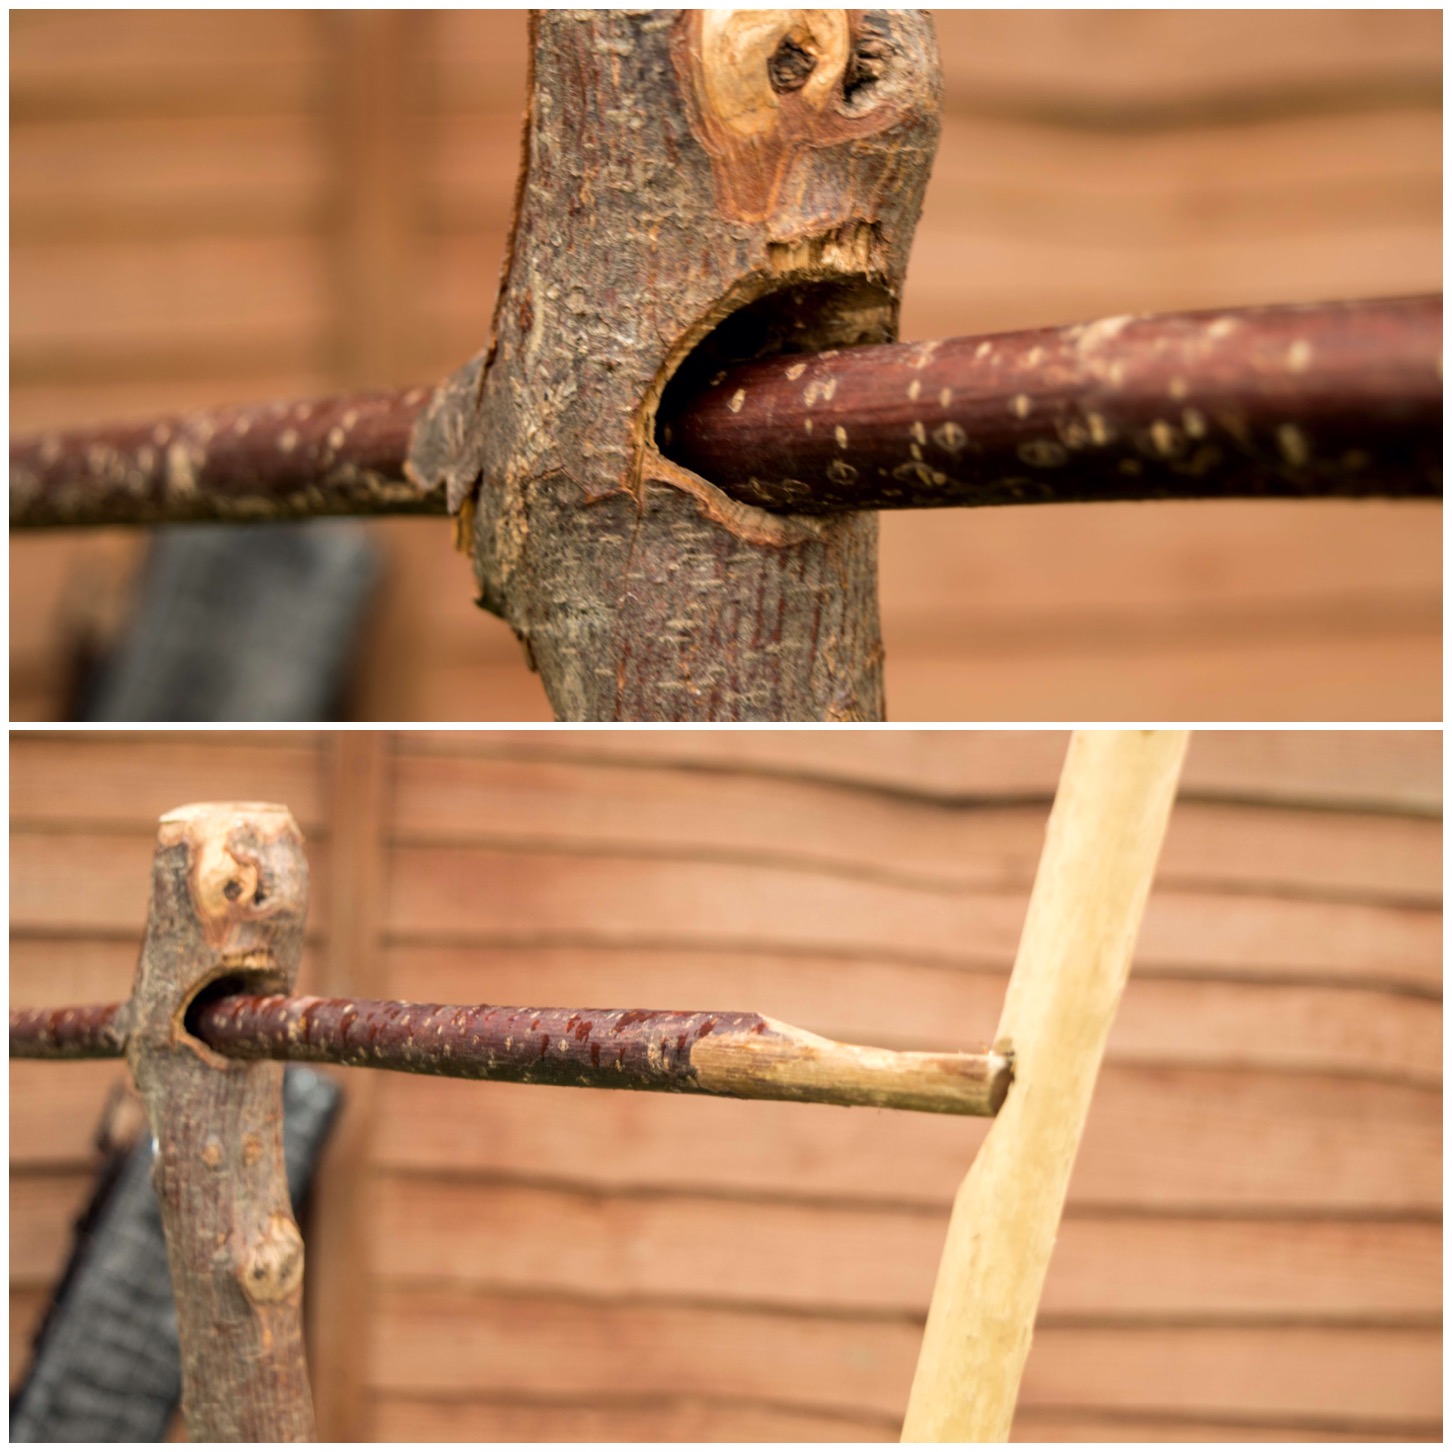
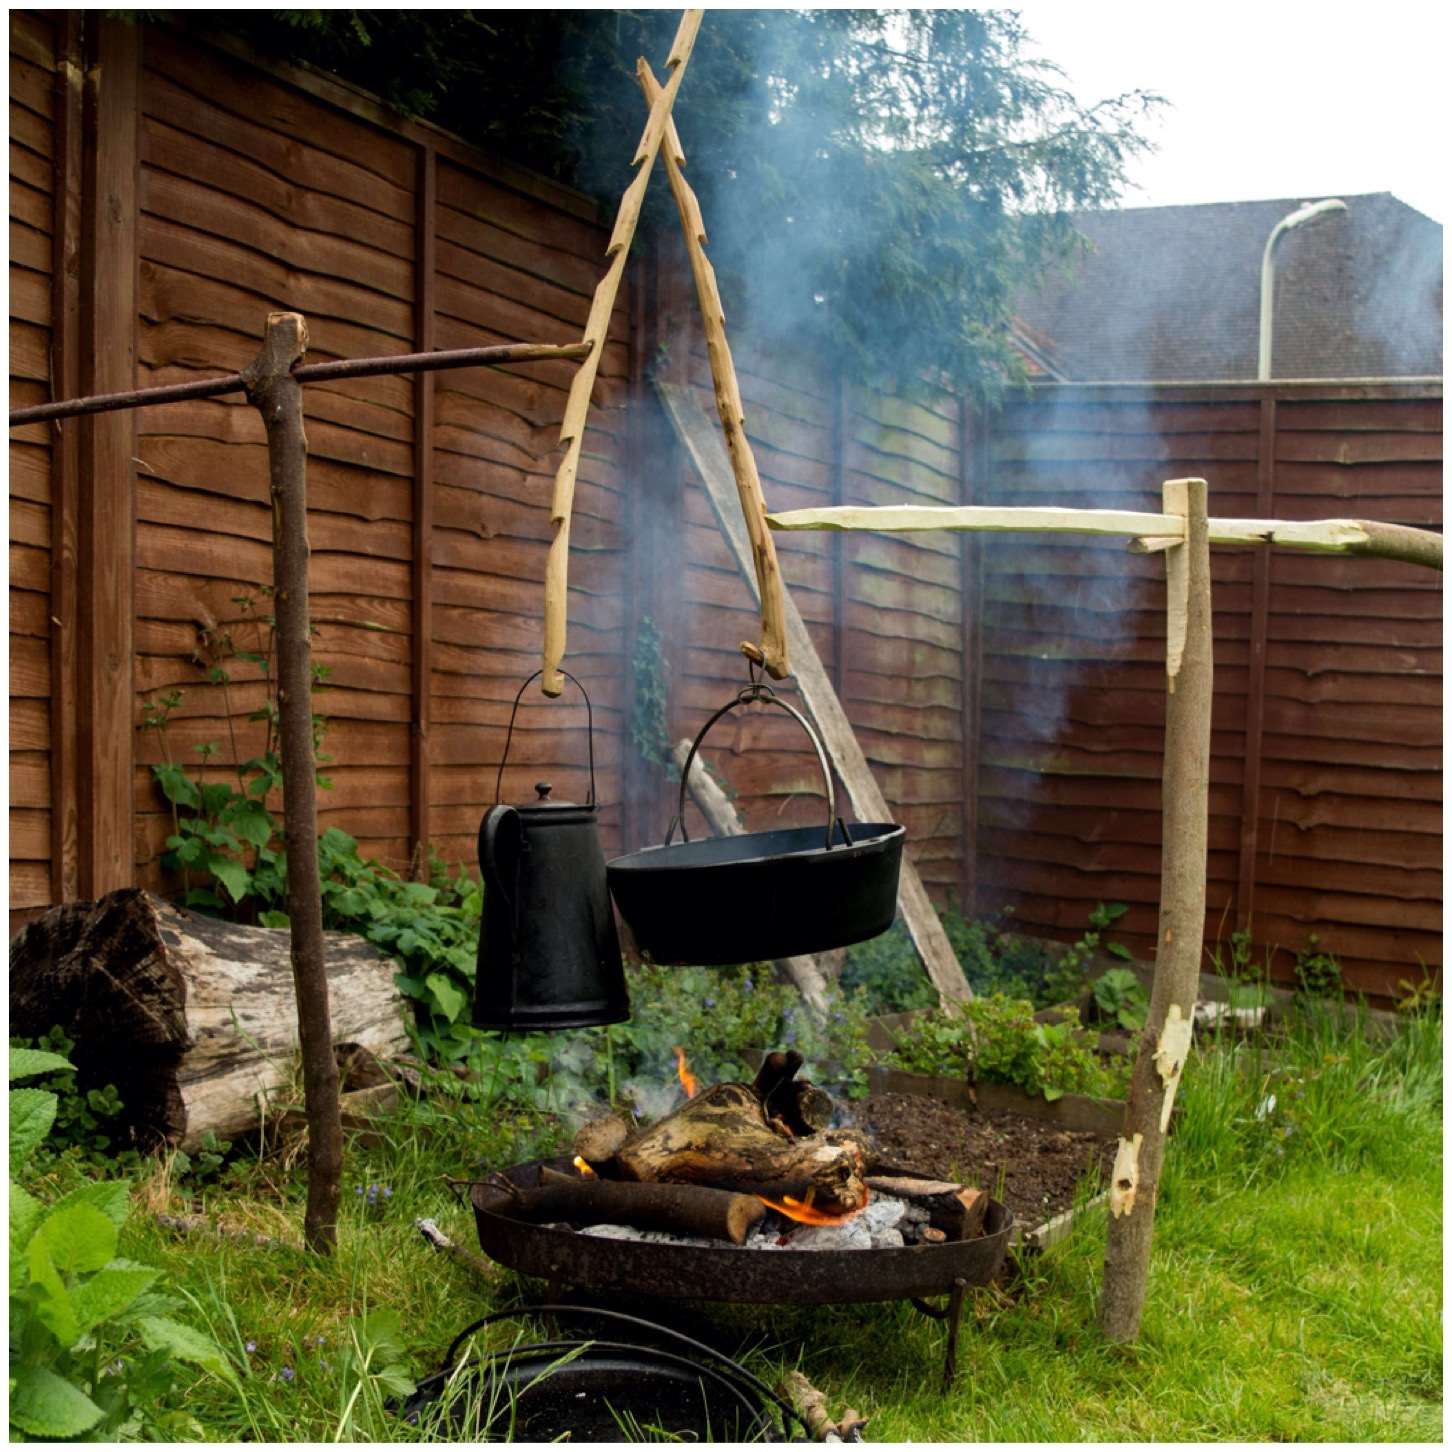
Alan was using my griddle for this job (if you do not own one I would highly recommend that you invest in one) and it was hanging off my Dovetail Crane. This crane is made out of one piece of wood, is easy to make and offers you a wide range of cooking heights.

image
Pancakes using the Dovetail Crane

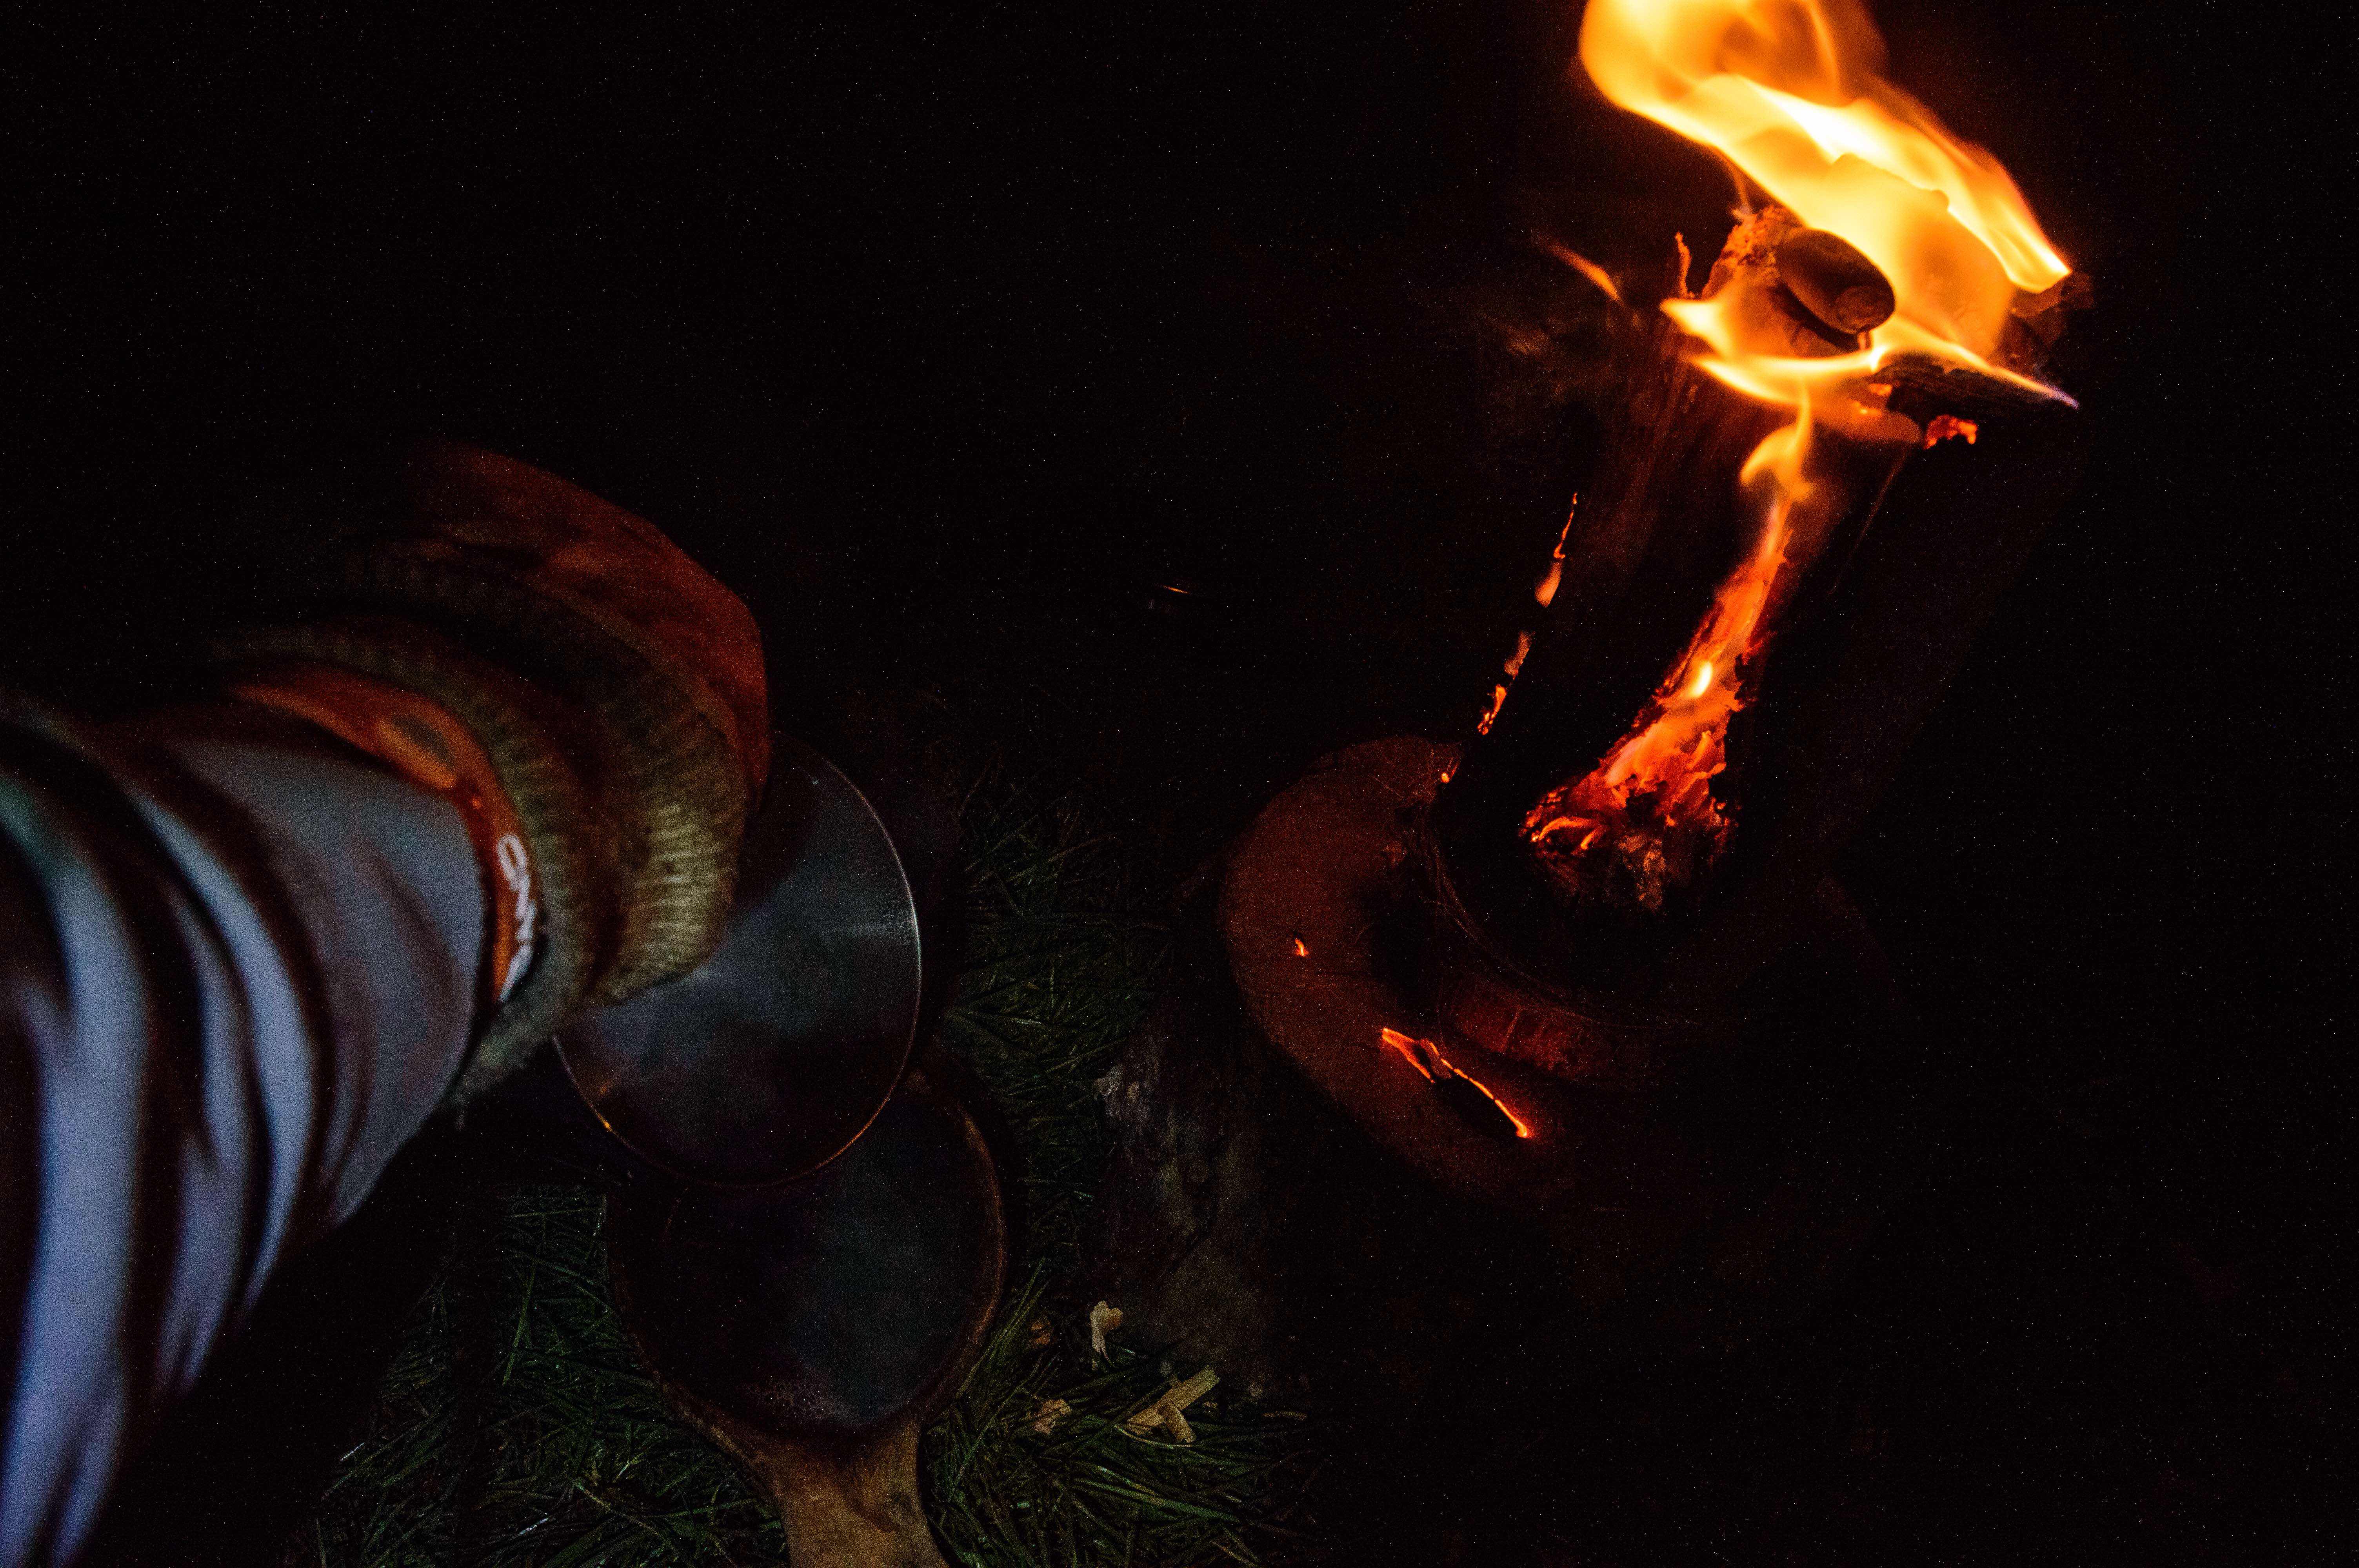
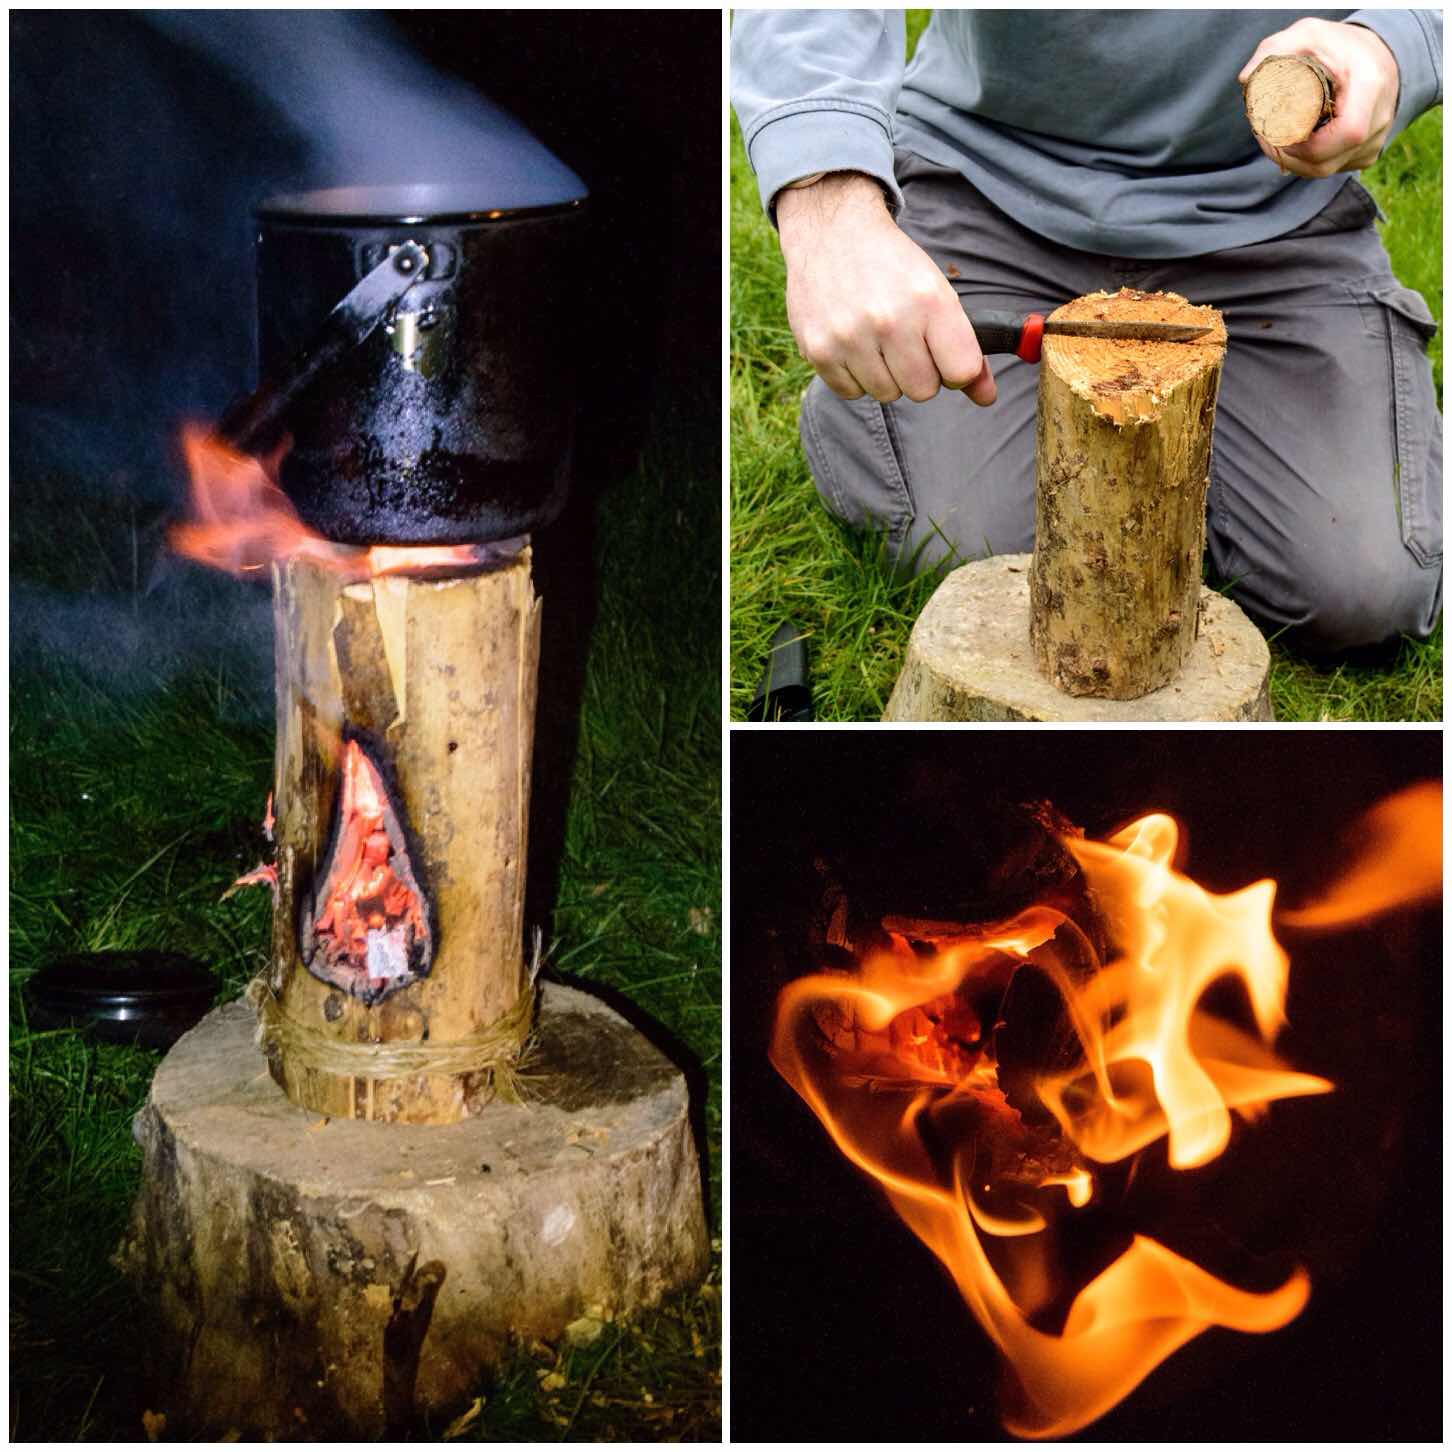
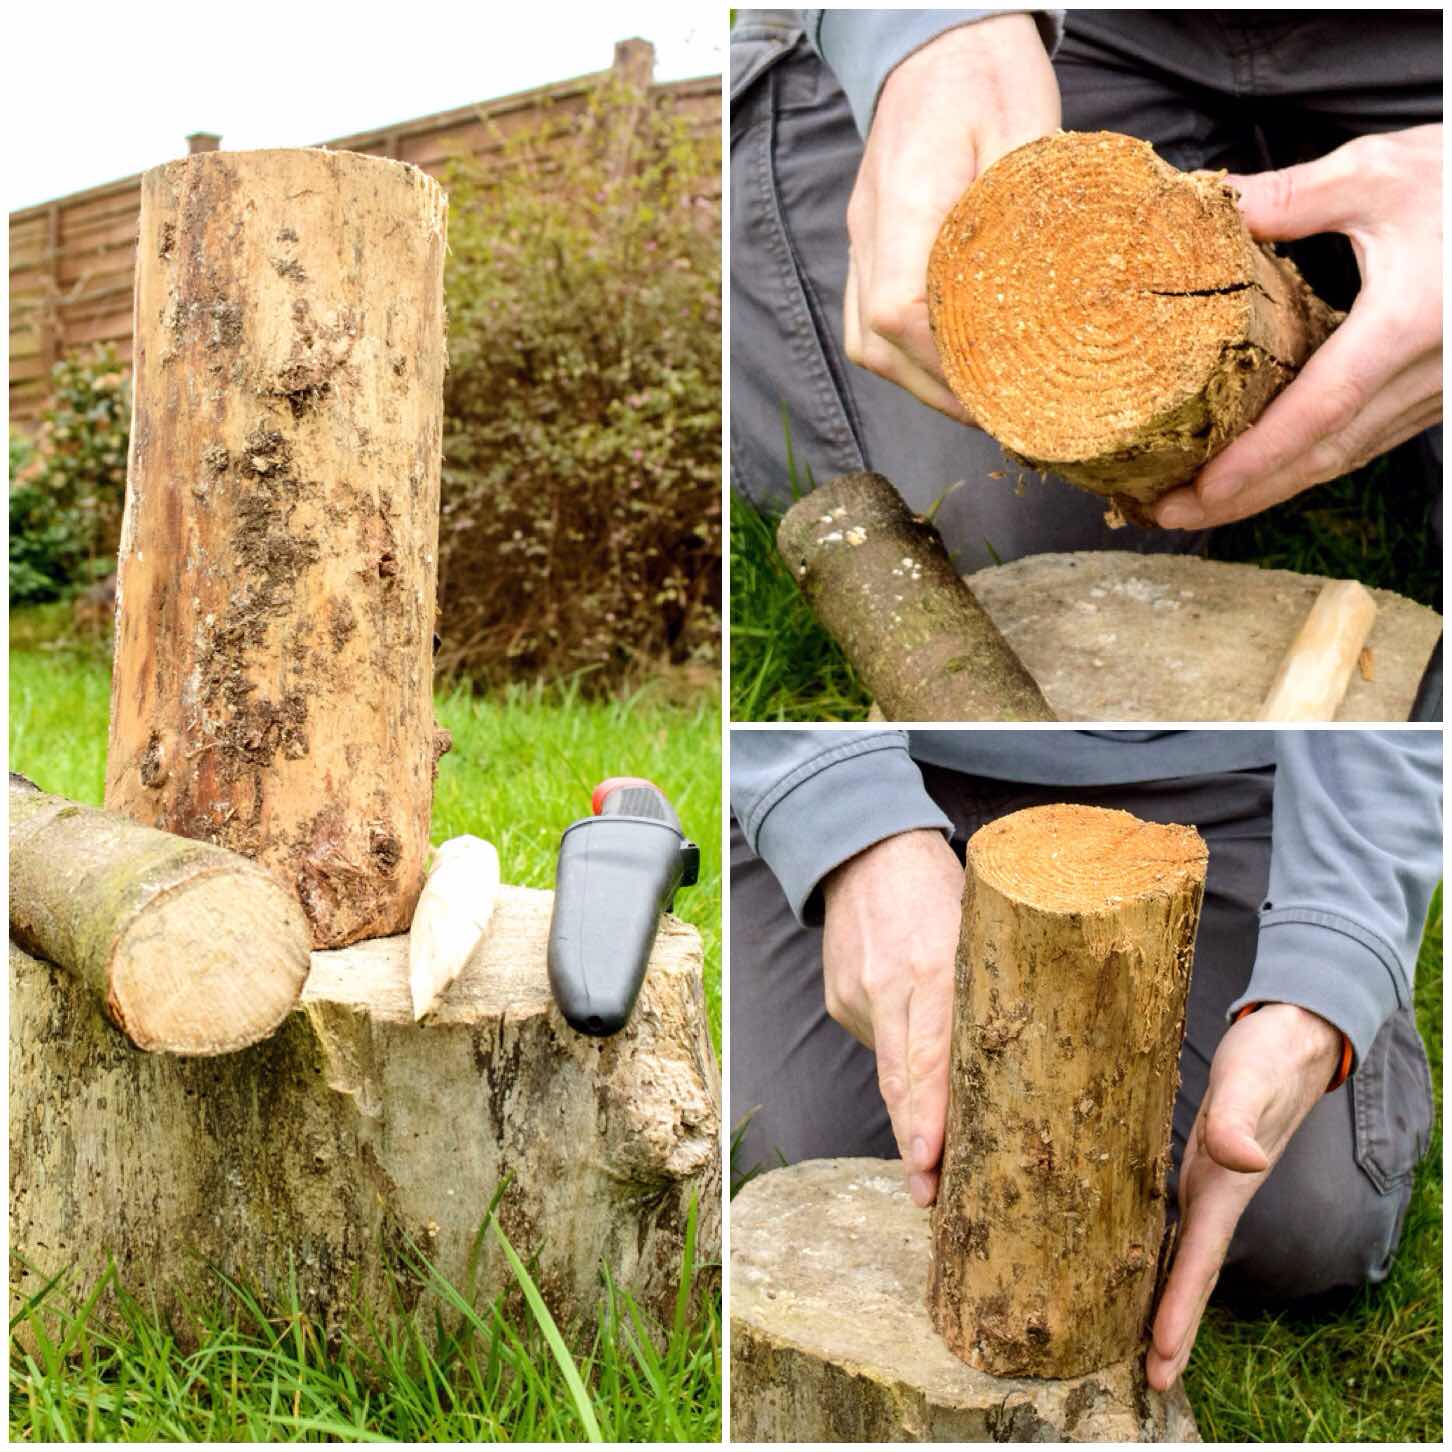
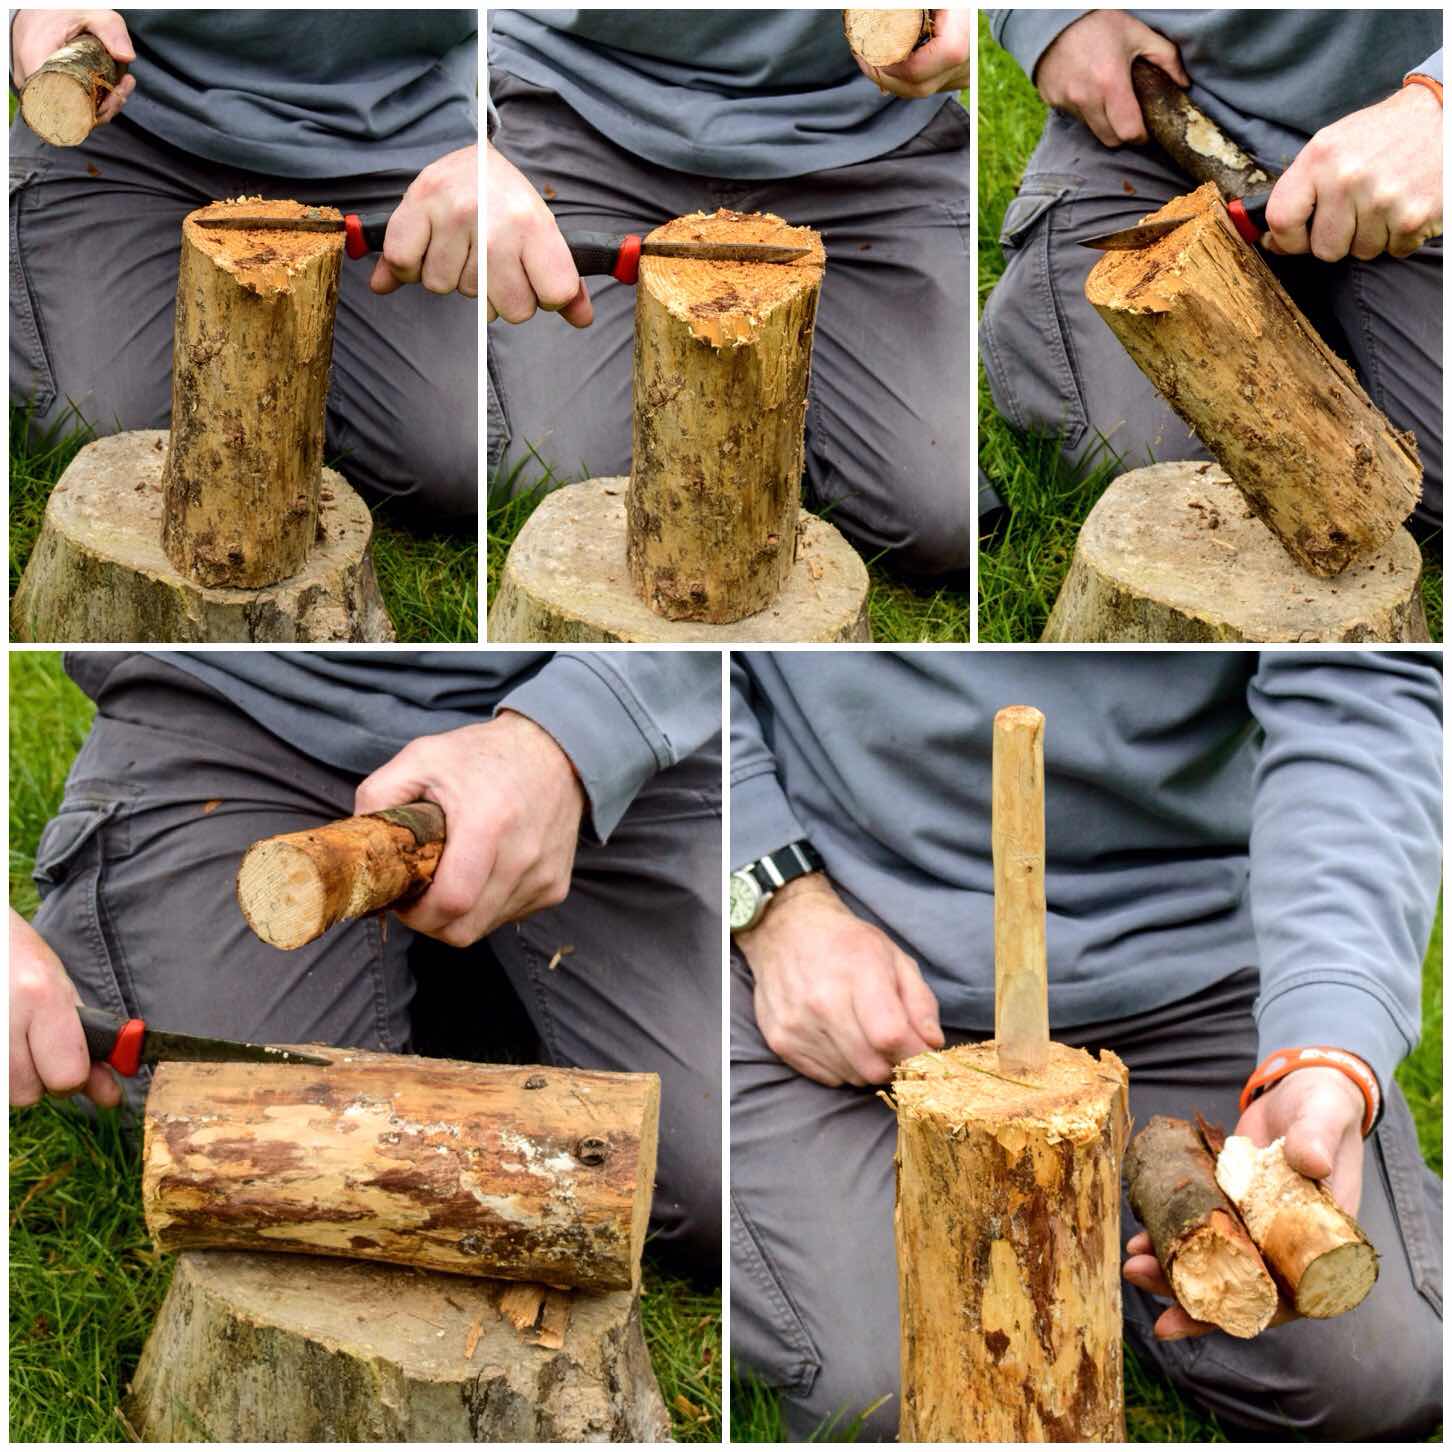
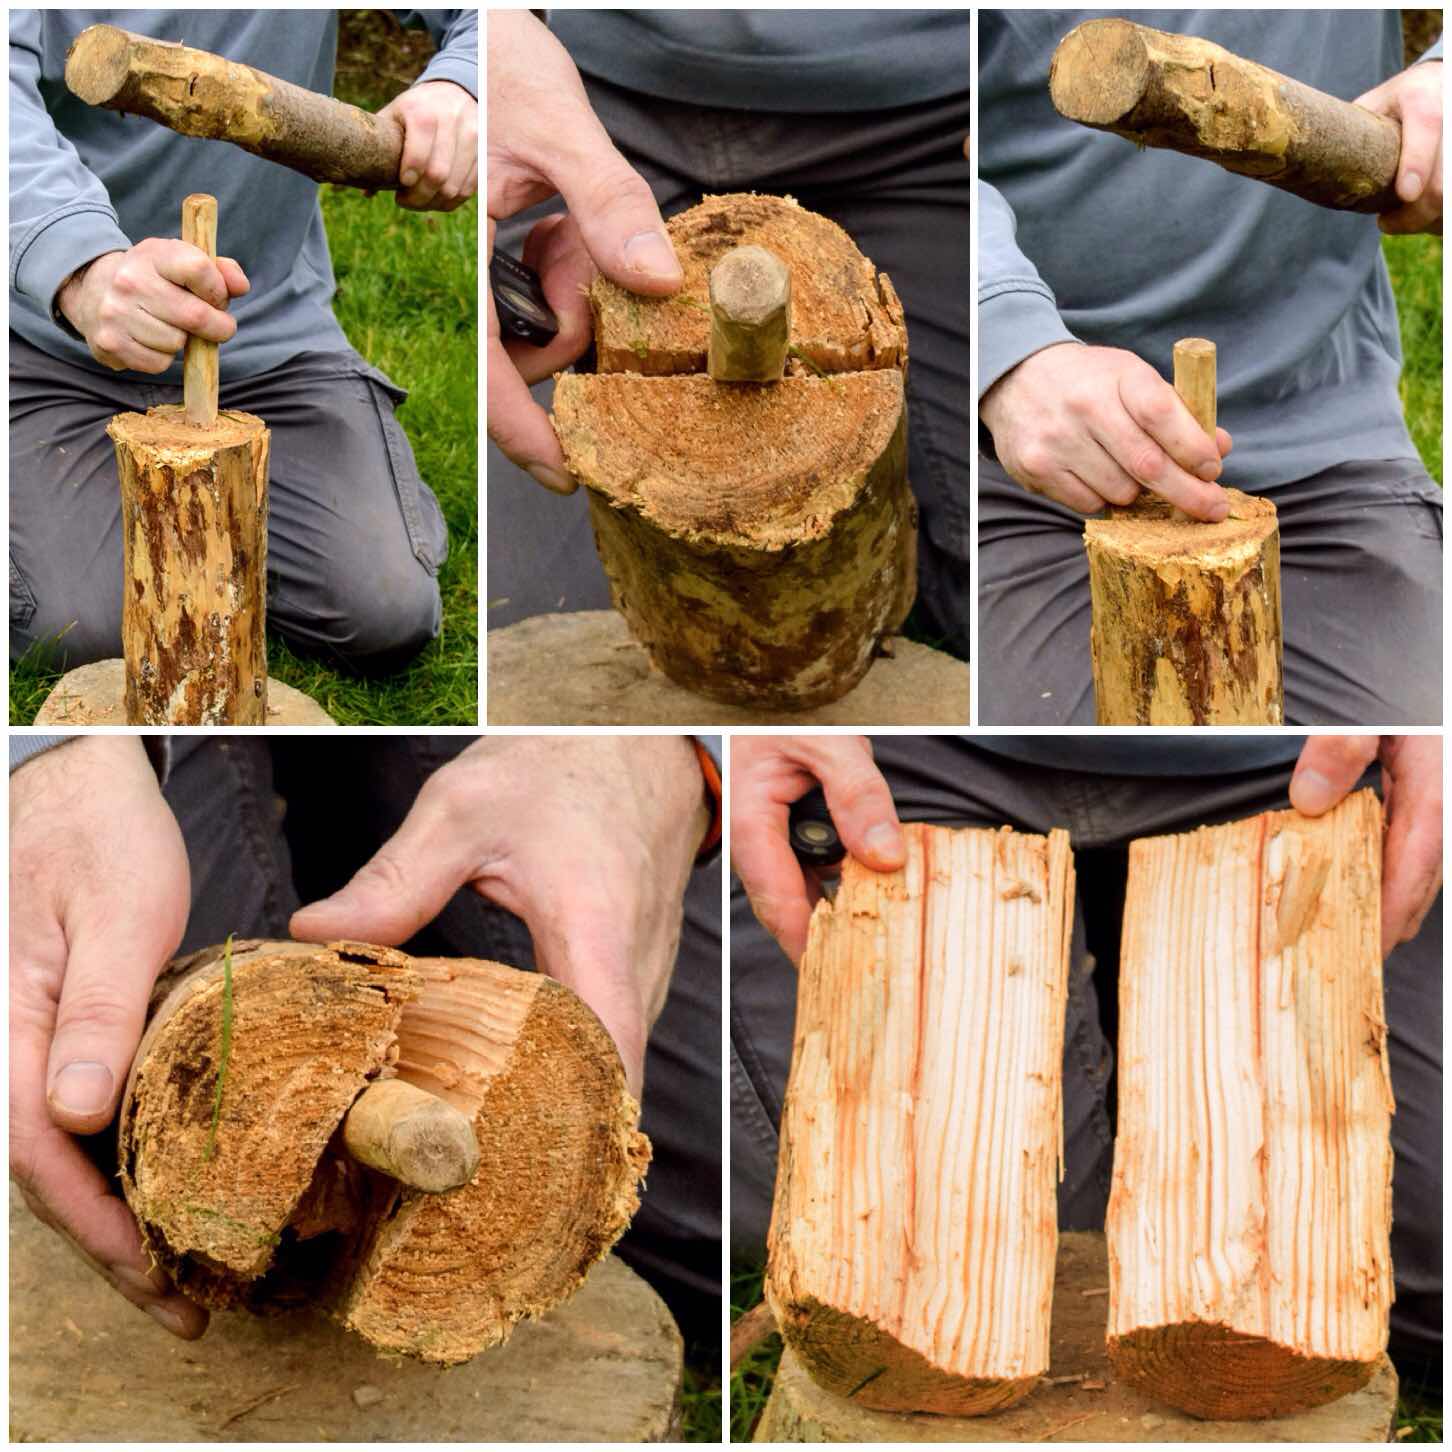
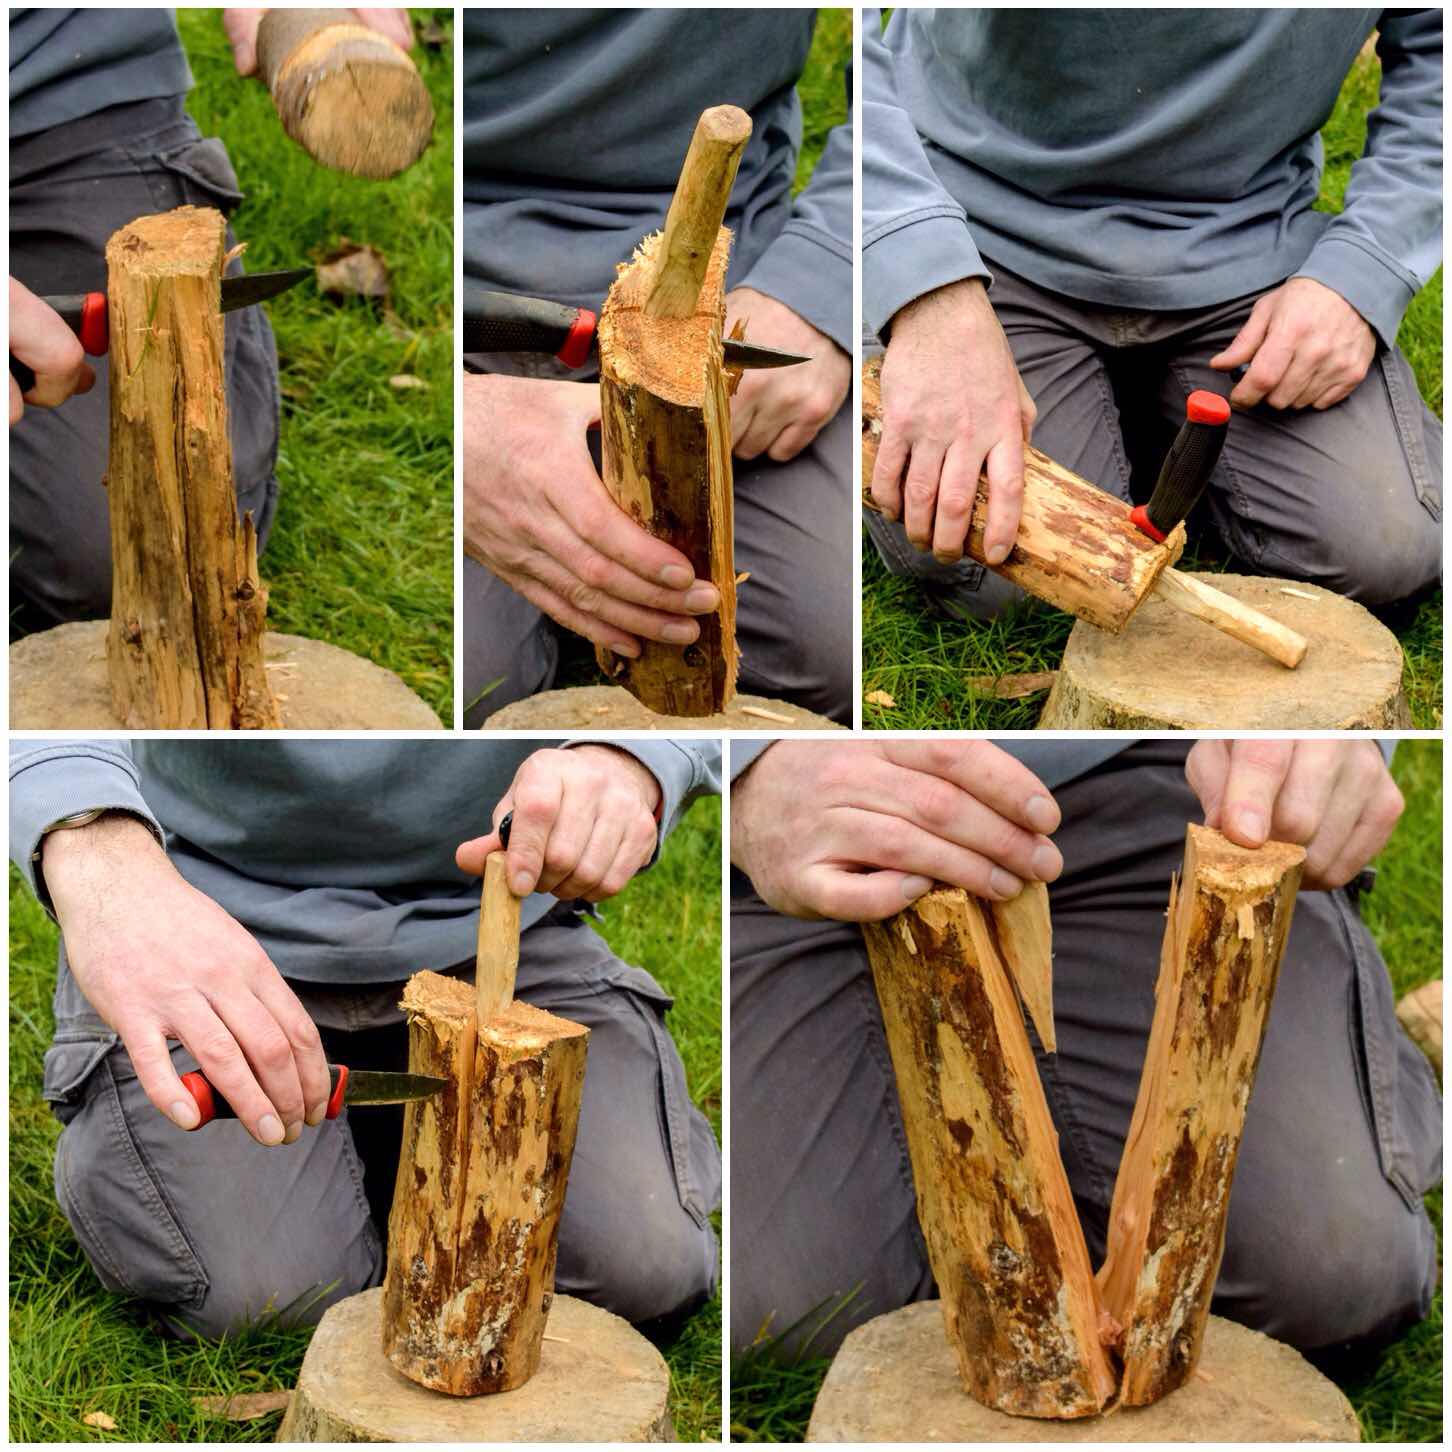
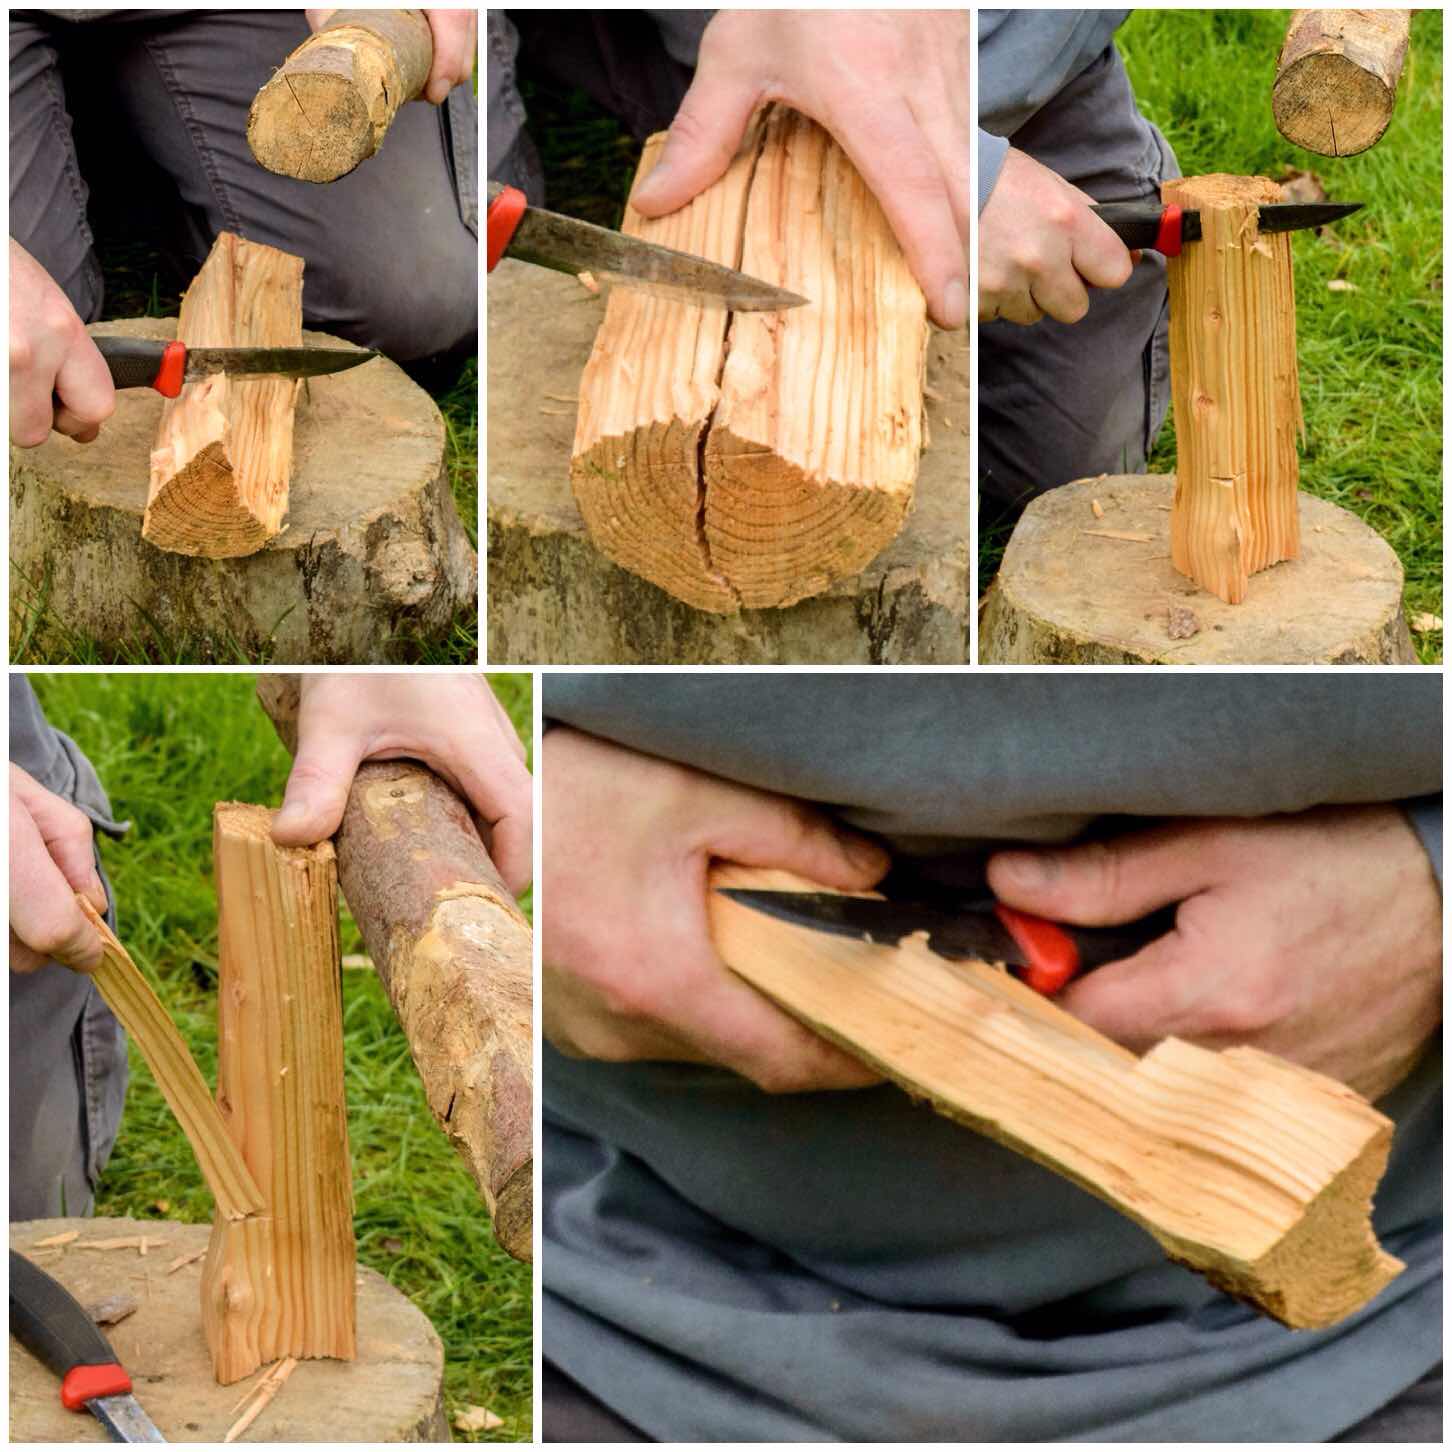
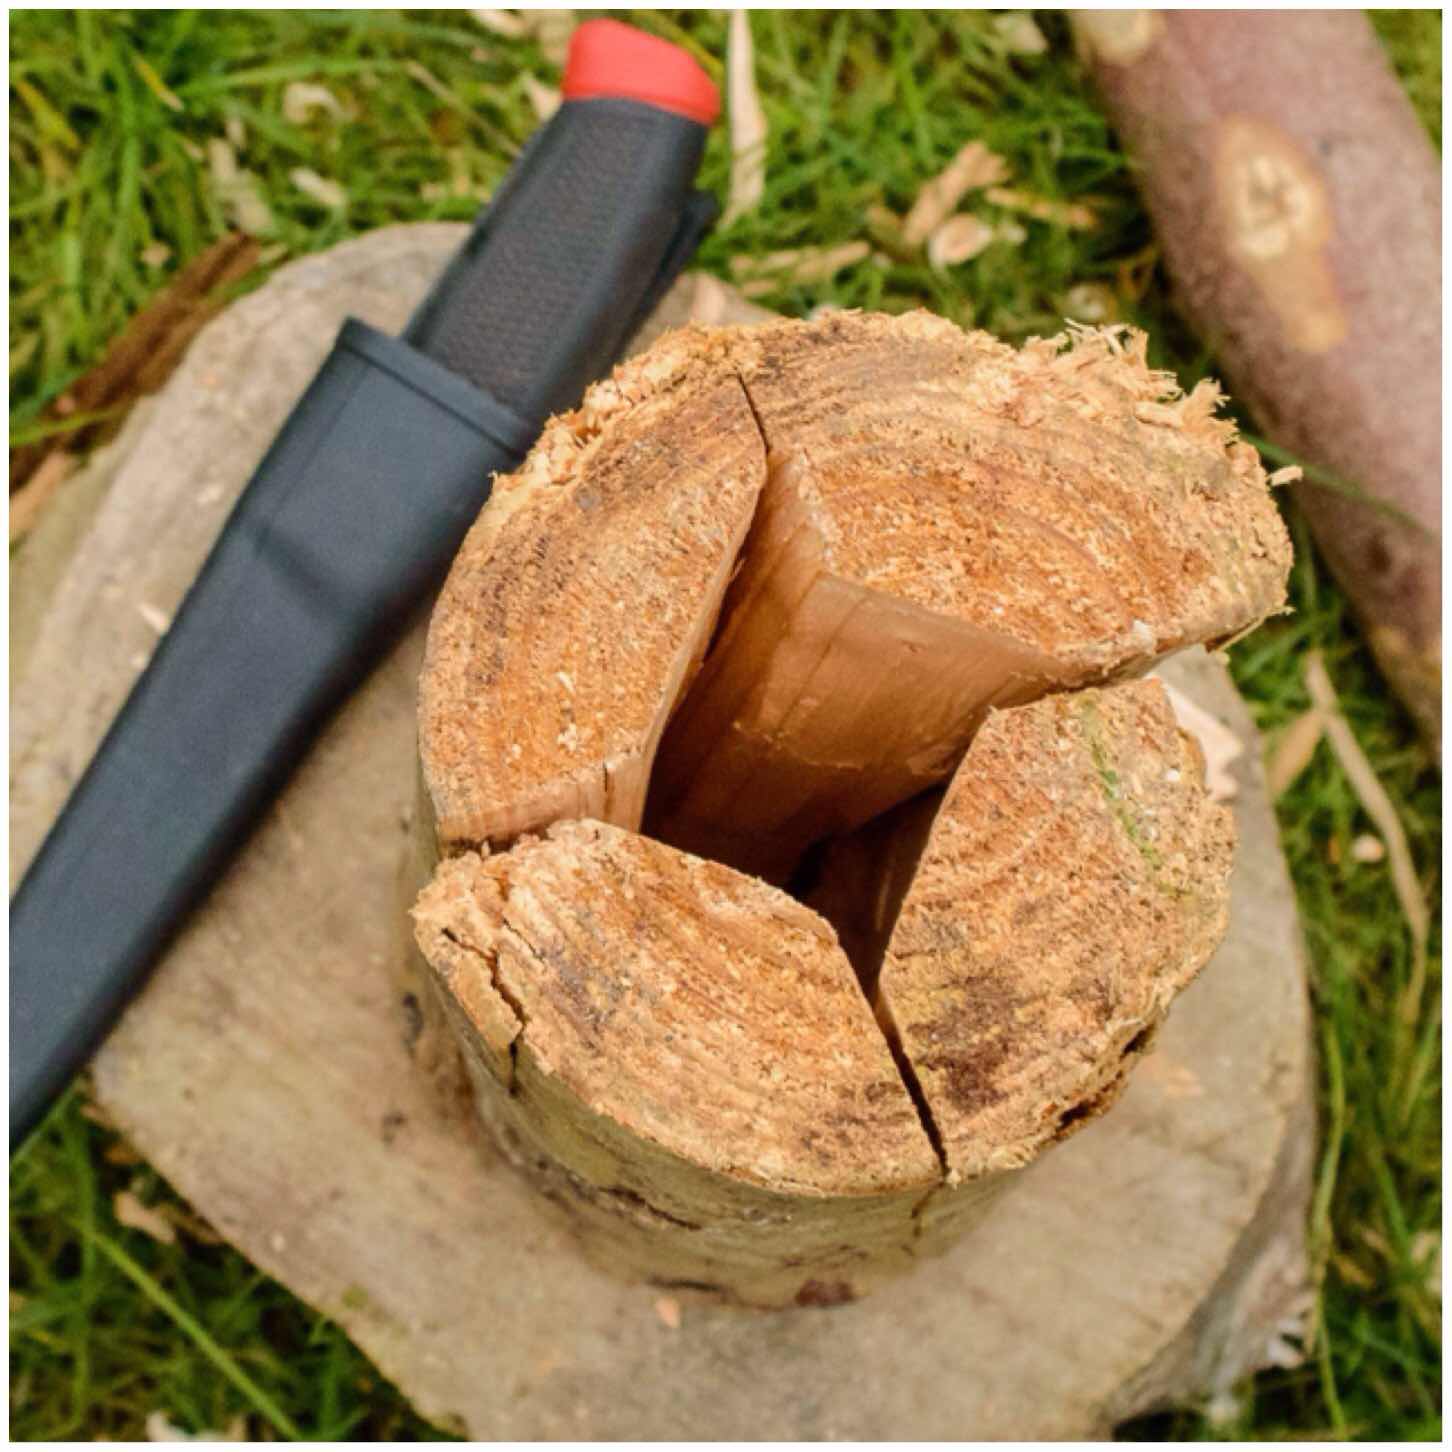
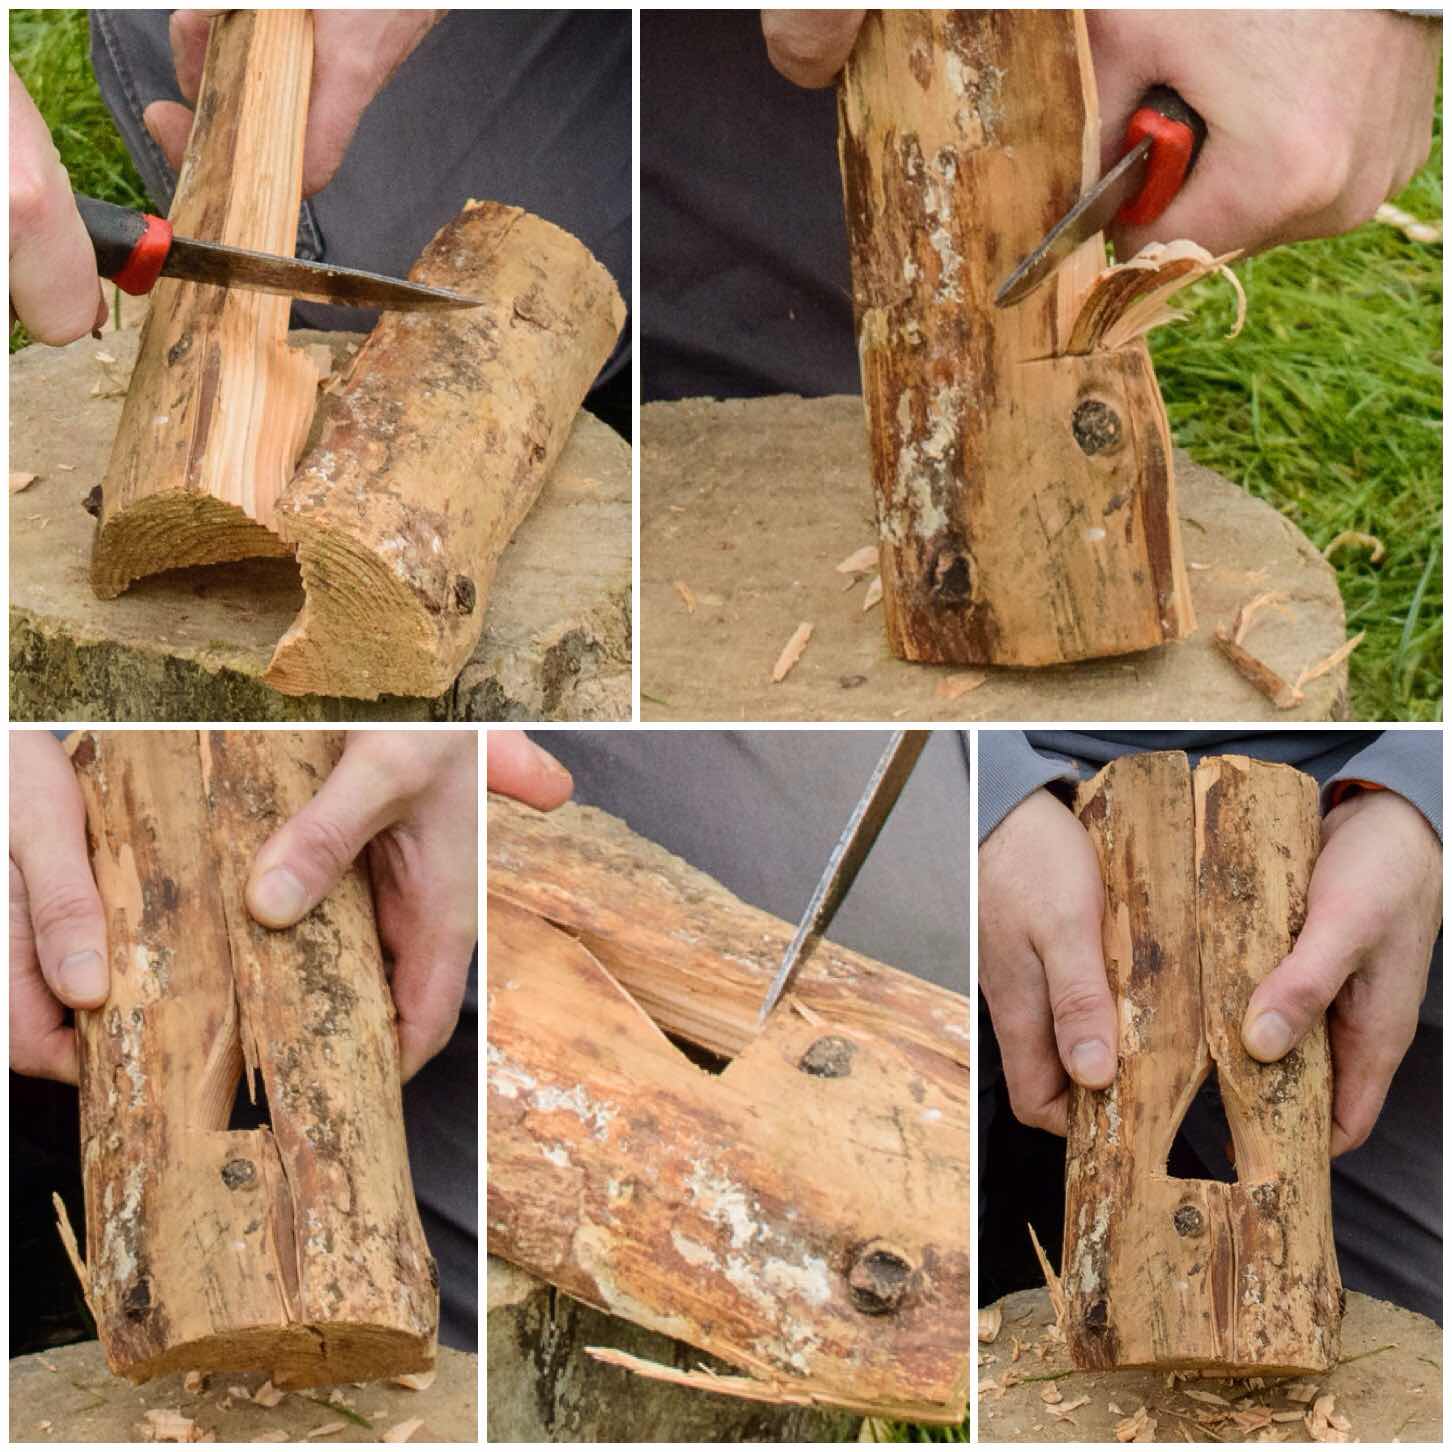
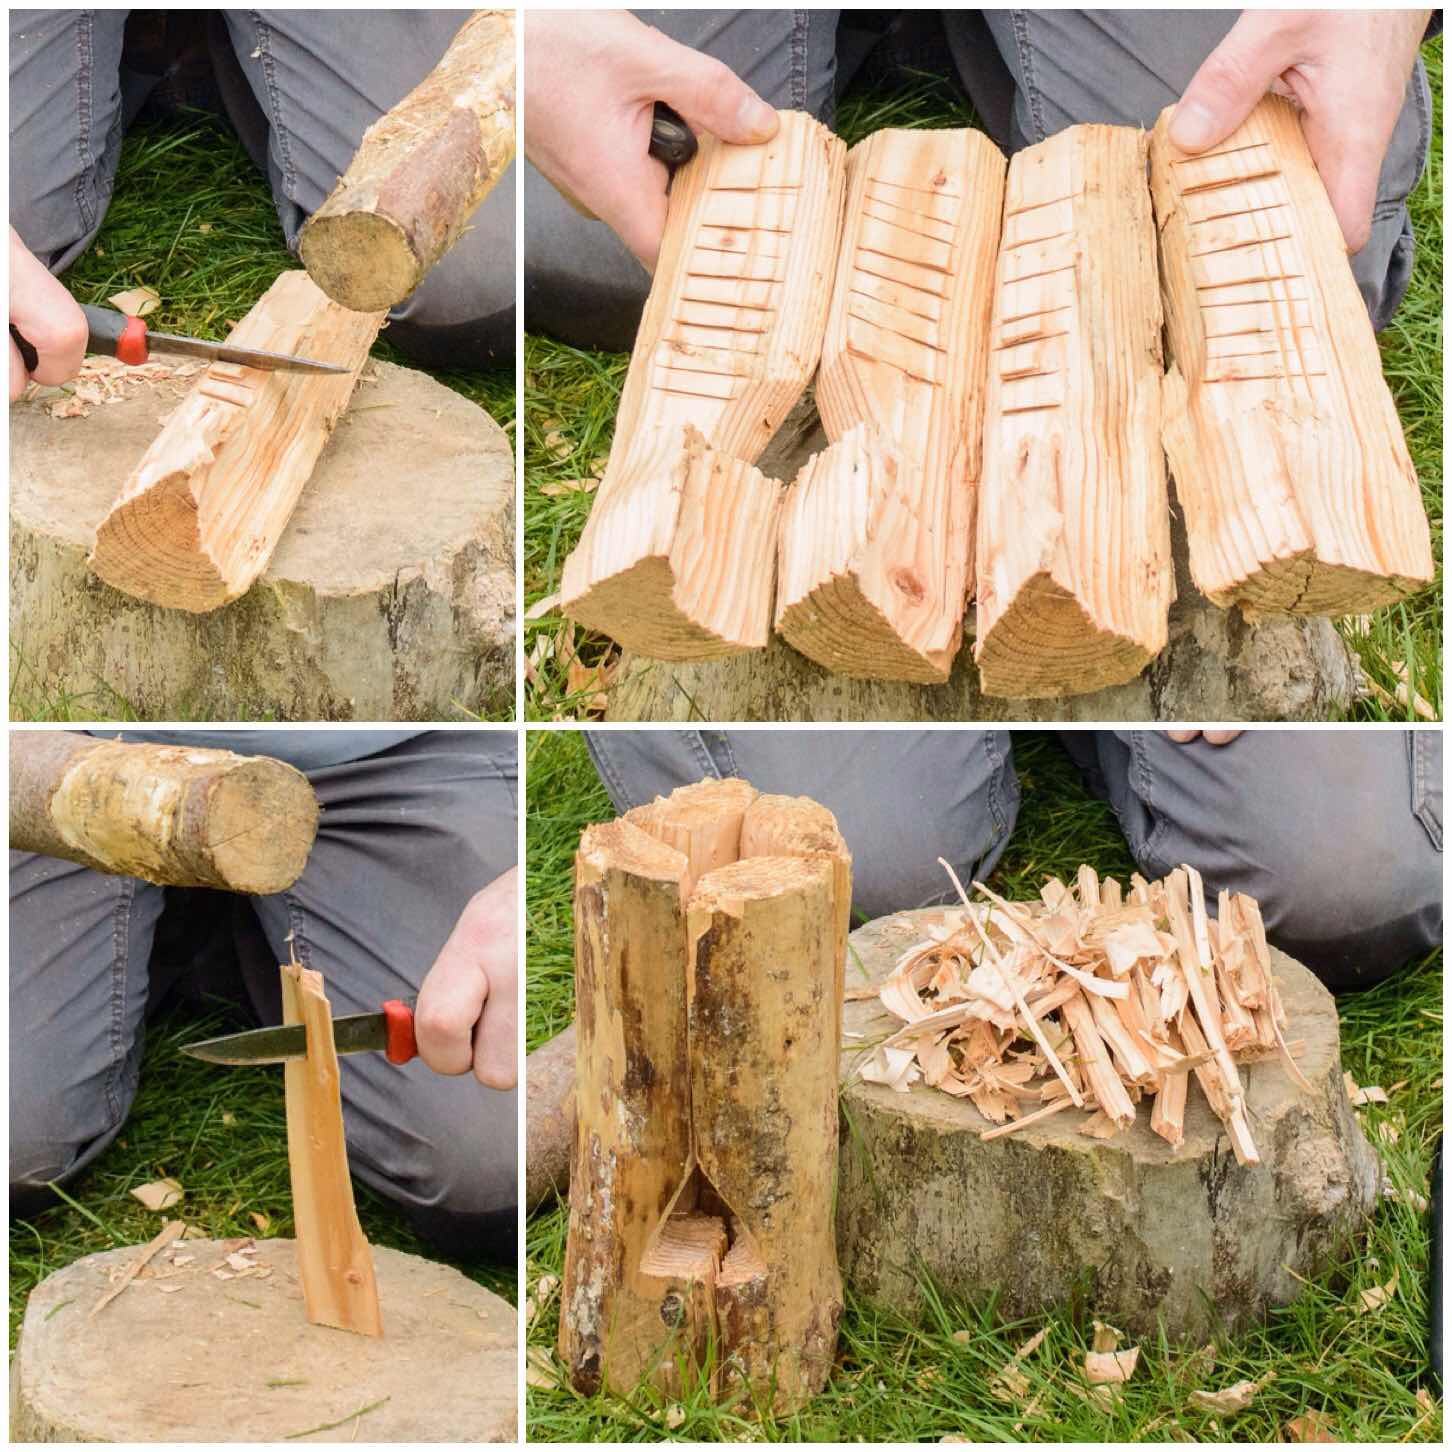
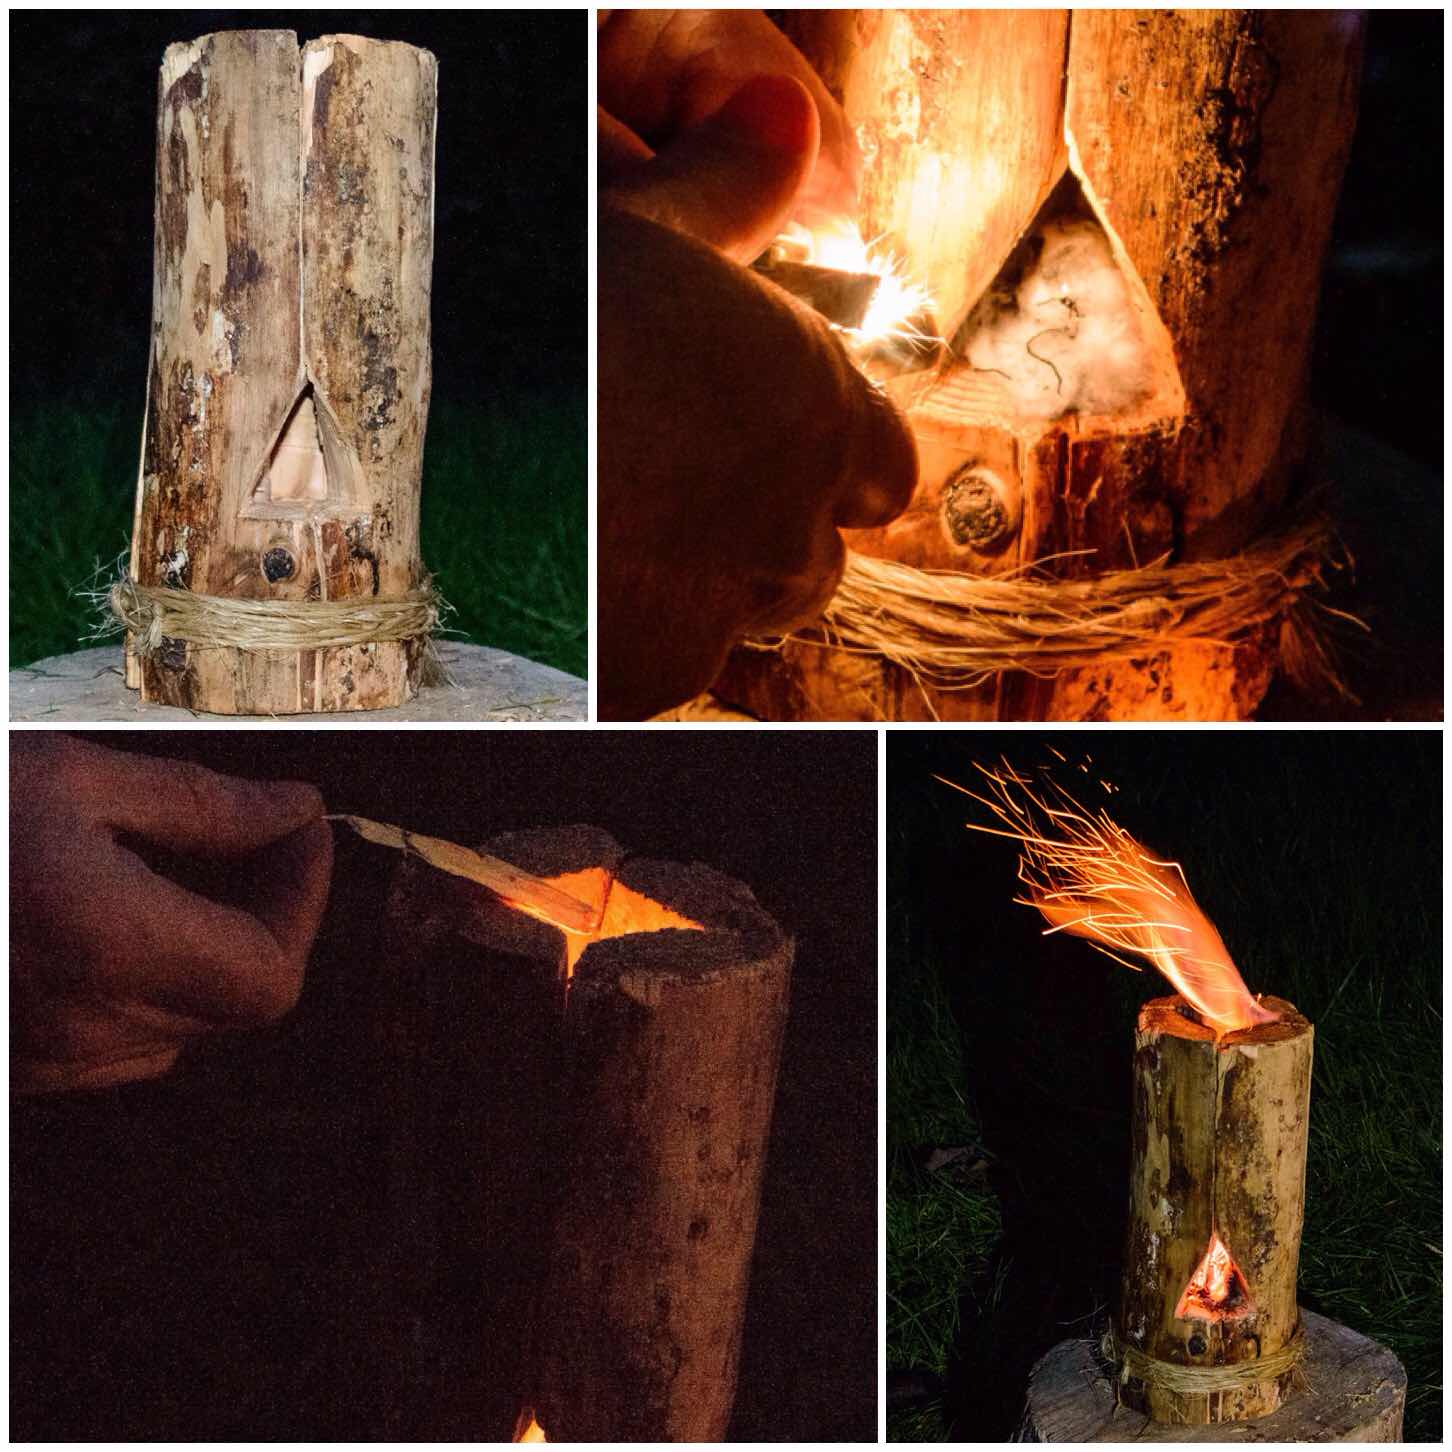
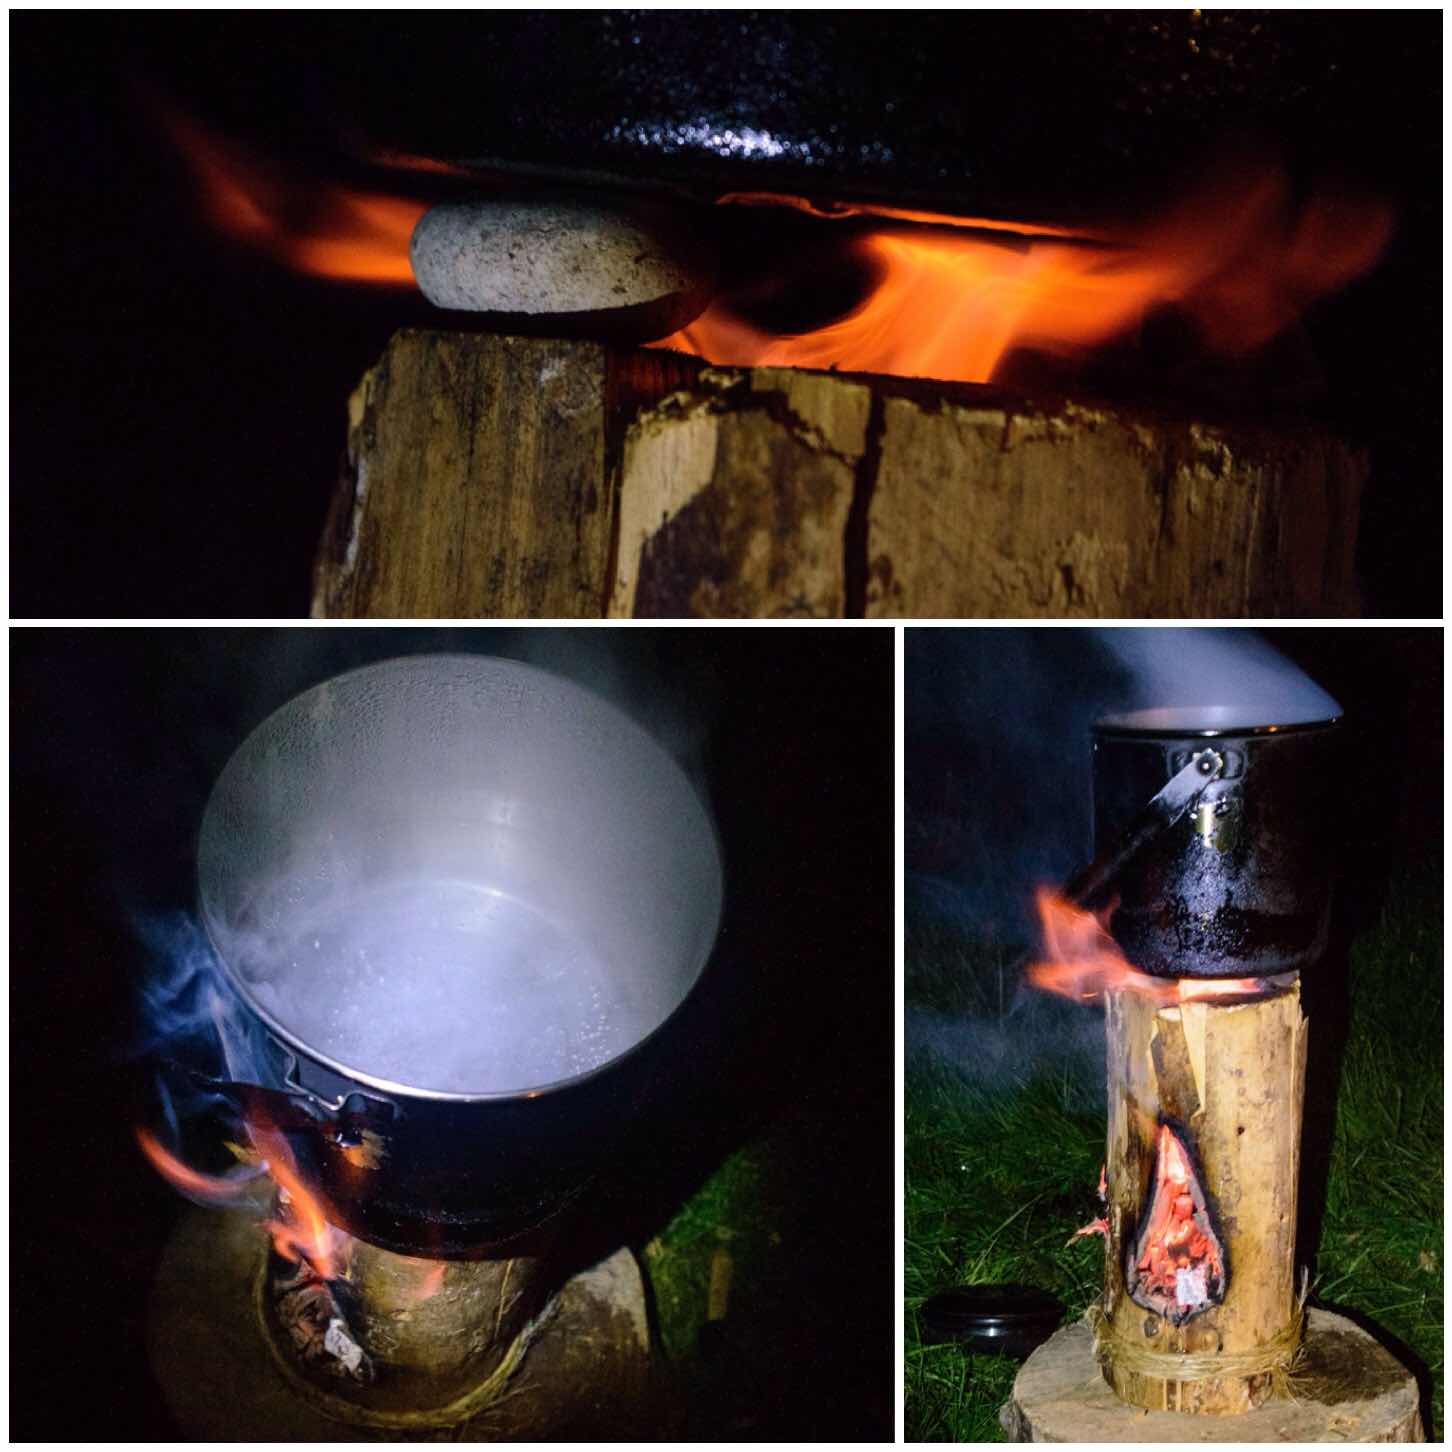
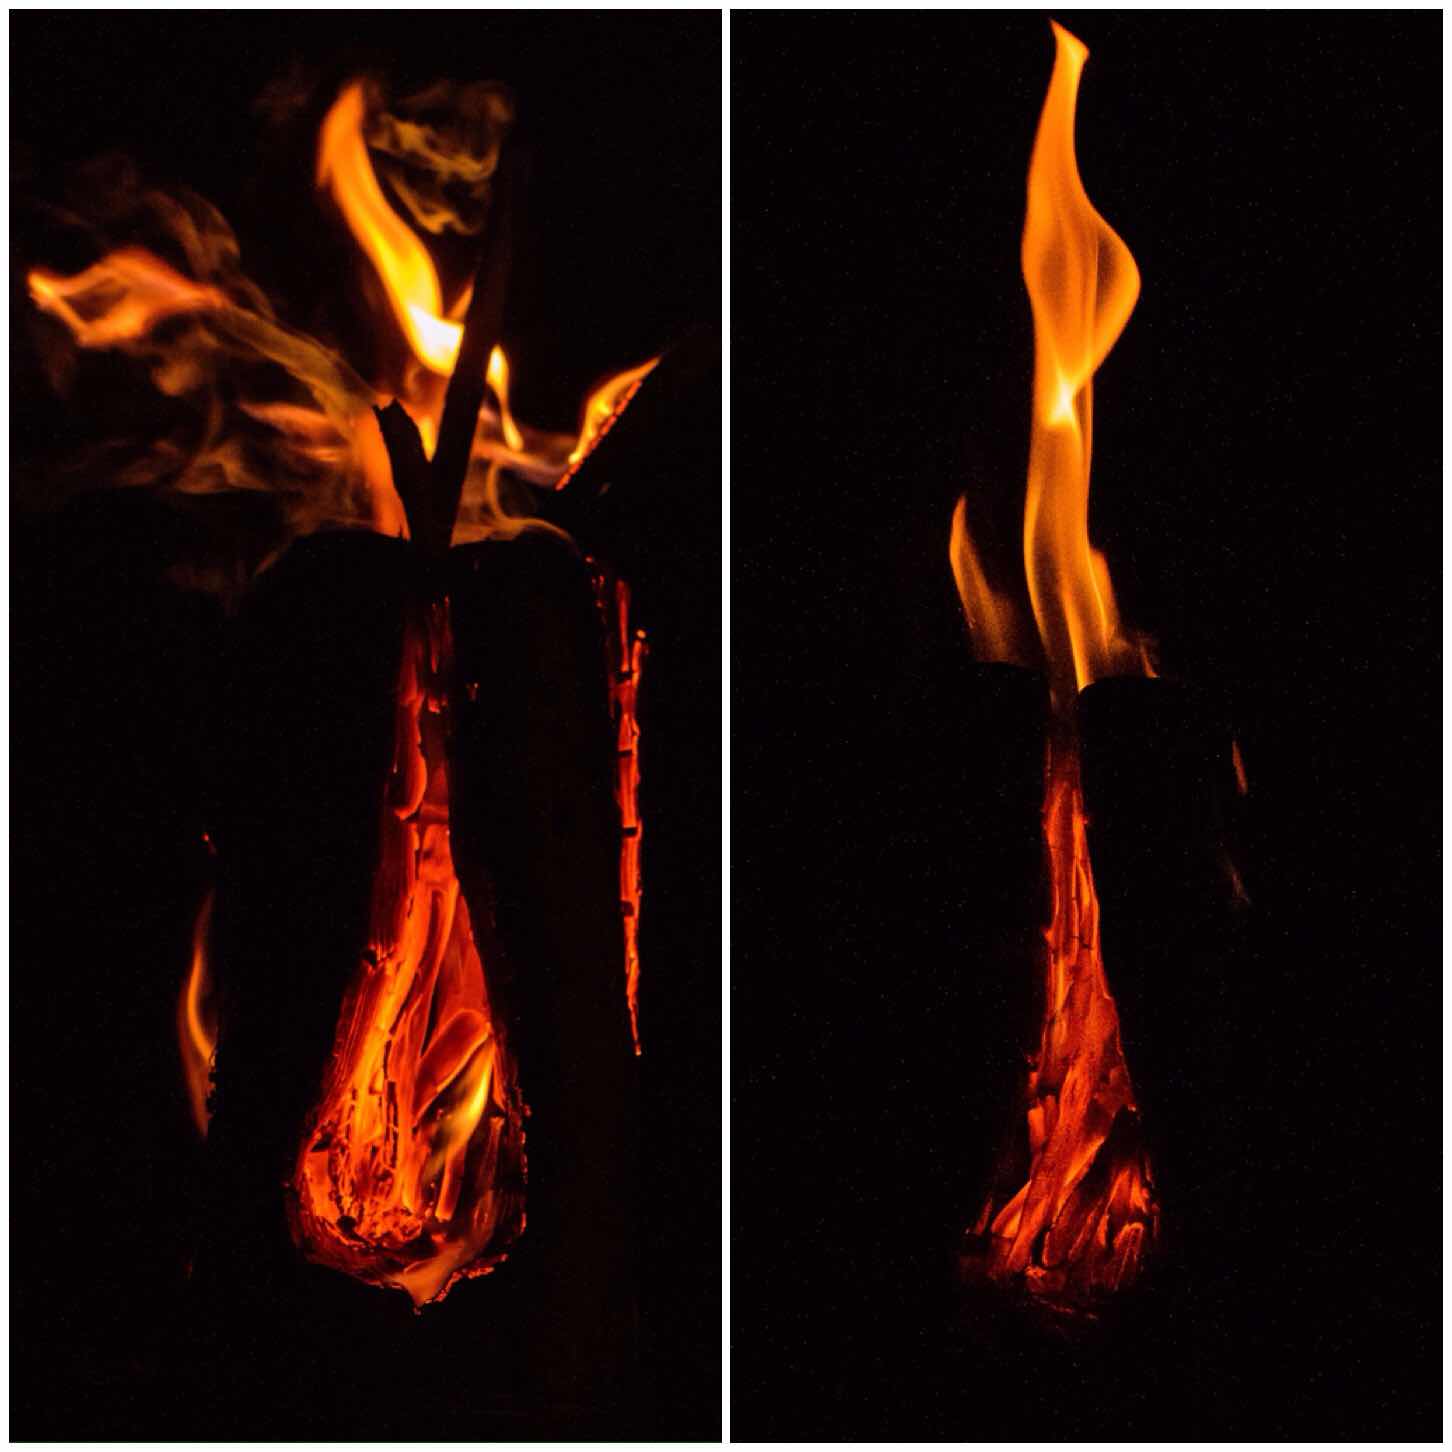
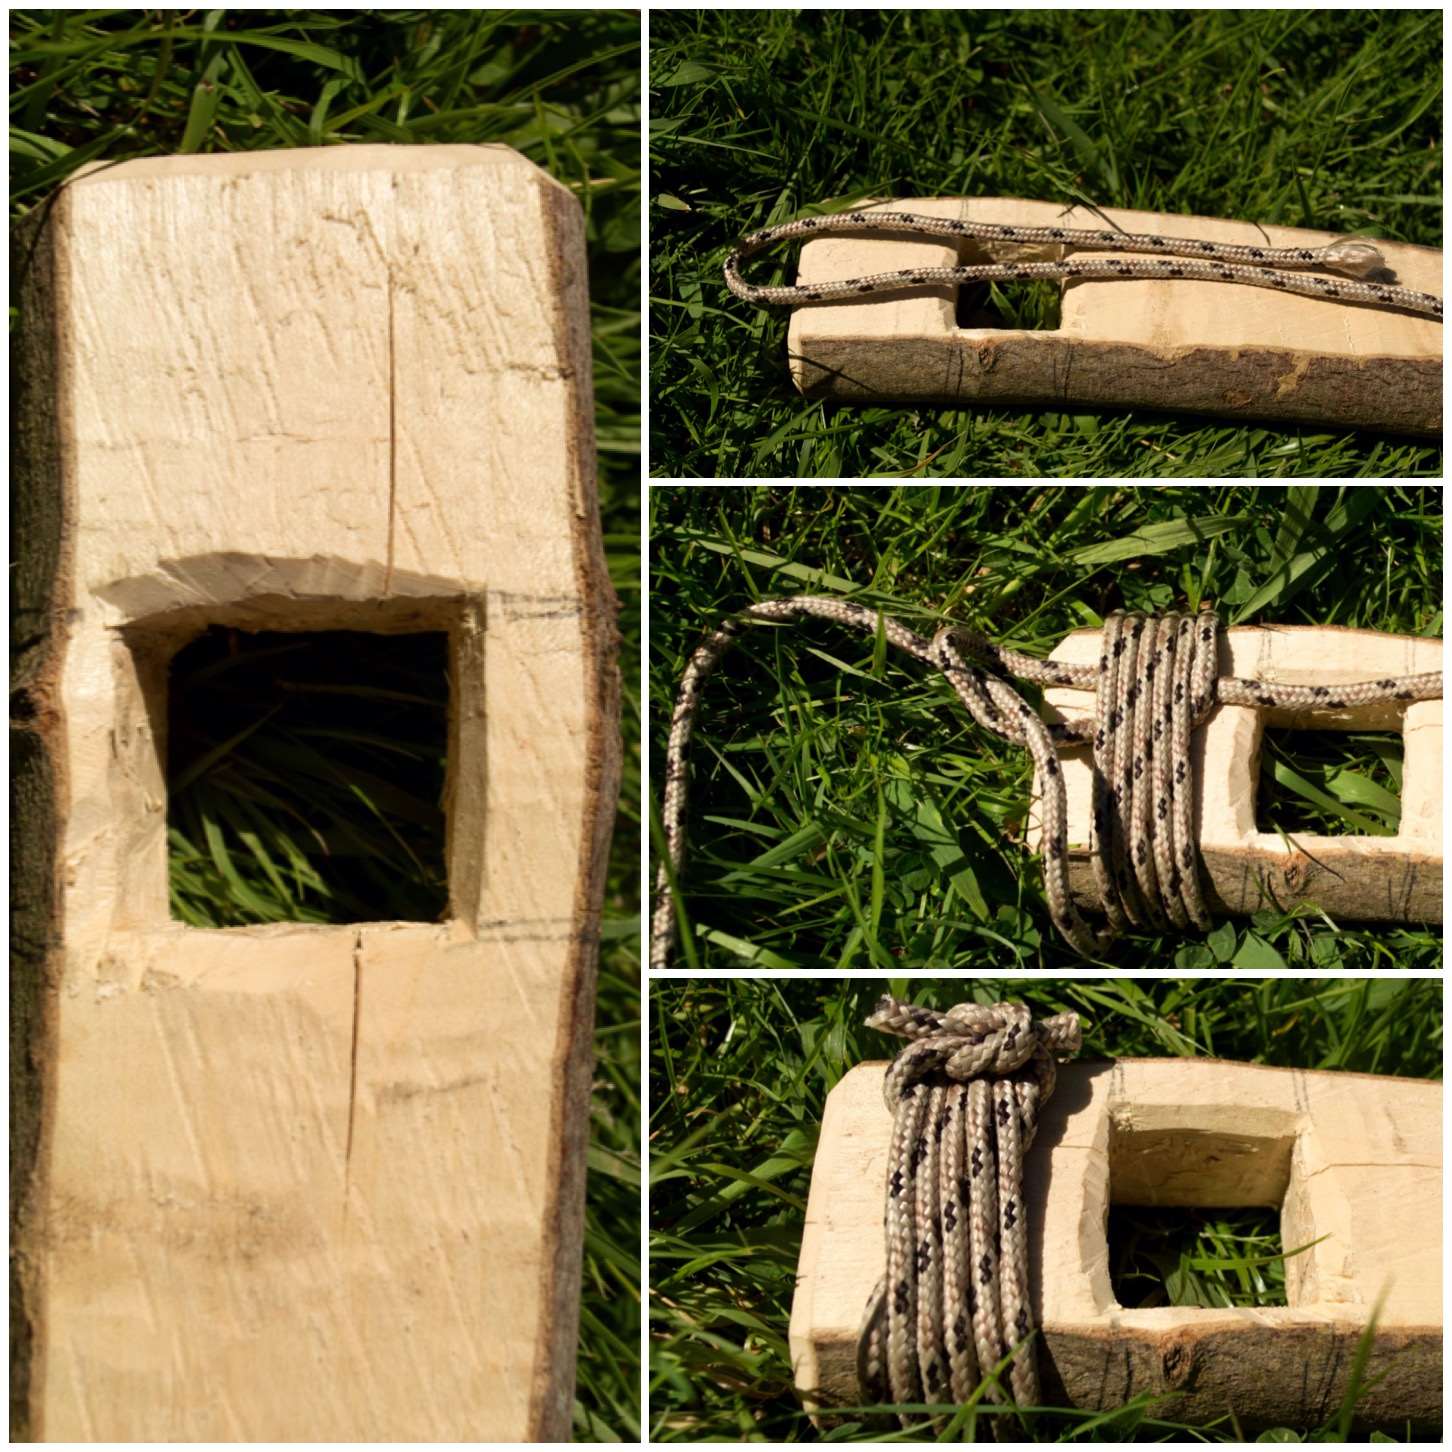
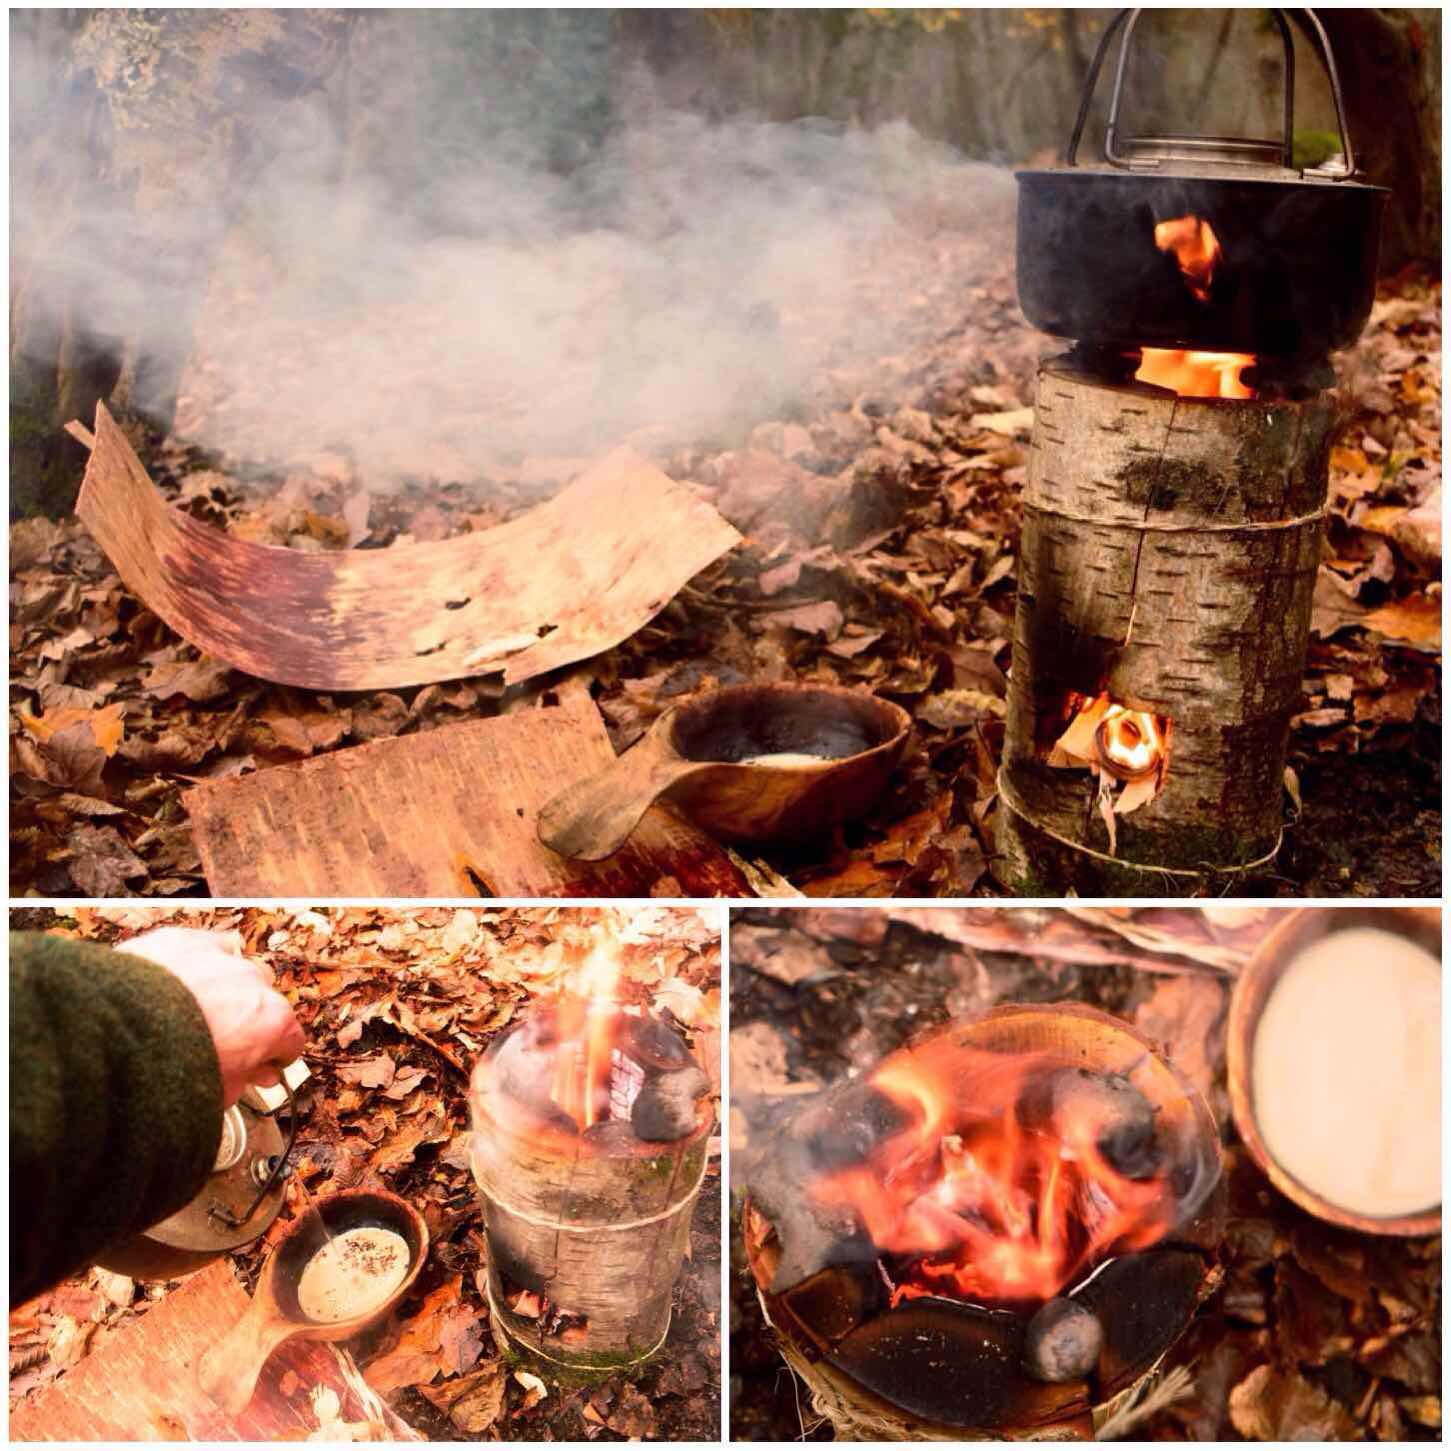
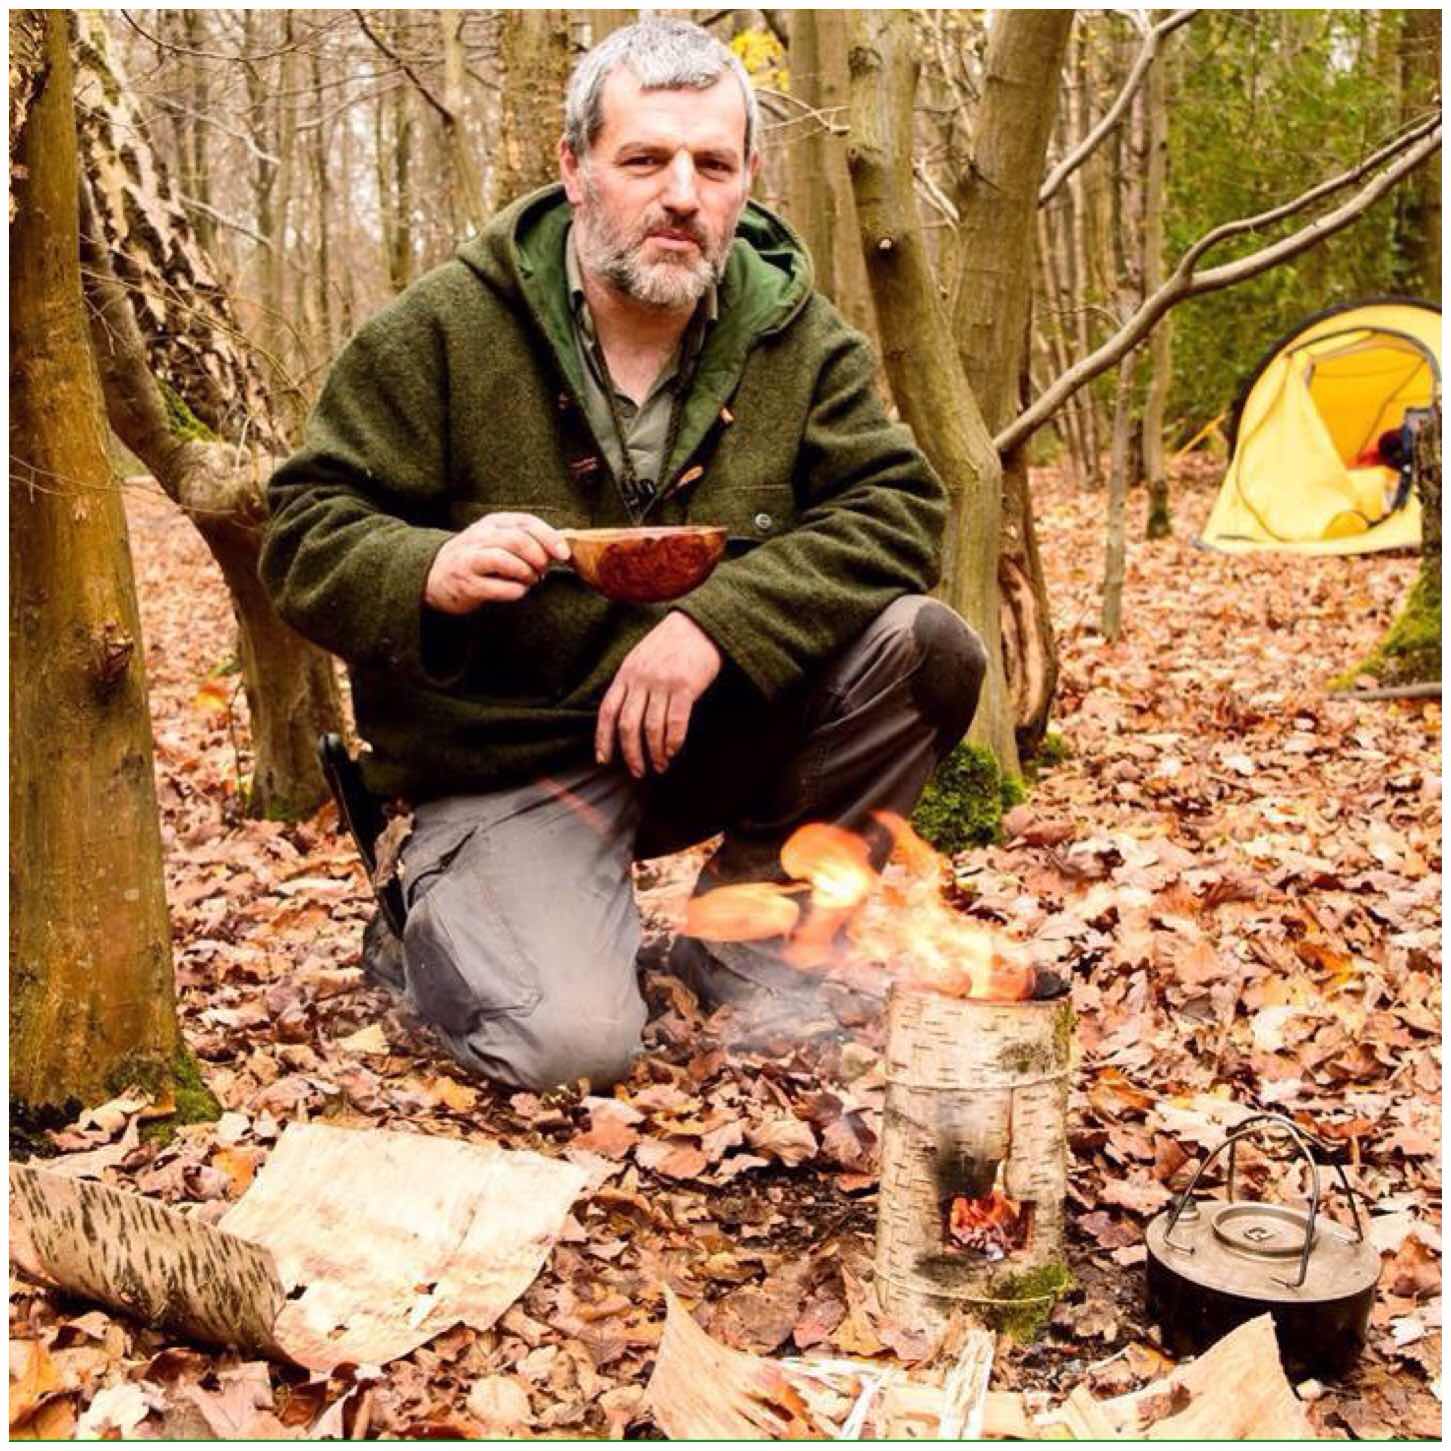
While Keith was off doing some navigation work with his cadets I spent my morning constructing a Damp Wood Log Rocket Stove. These are easy to make and great to get a fire going in damp conditions.

I must thank Jess for helping me at this stage to take a lot of my photographs as my hands were full with constructing the stove. Thankfully Jess is an excellent photographer so I did not need to worry if the right shot was being taken or not leaving me free to concentrate on the stove.

Log Rocket Stove
Log Rocket Stove

All that was left after this was to have a brew and pack up for the trip home. This was an excellent trip to round my year off amongst friends, eating well and celebrating the birthday of a budding bushcrafter.

image
Brew time

Cheers

George

How To…. Build a Log Rocket Stove – No Axe

One night recently I just could not get to sleep and my thoughts wandered onto the subject of log rocket stoves. Having written on the subject a few times with the Damp Log Rocket and the  Fire Face Candles it struck me that I always used large tools such as axes or drills to make them.

This post is about making a Log Rocket Stove with only my knife (a small pruning saw was used to trim the log). I wanted to see if I could easily produce a stove without having to rely on my axe.

Photo 26-01-2016, 22 25 06
Log Rocket Stove – Without an axe

I like log rocket stoves as they can be made quickly, work well on wet or snowy ground, produce their own kindling and come with a ready made platform for your pot. Once the stove has done its job the collapsing embers make a good start point for a bigger fire.

Set Up

I chose a seasoned piece of spruce wood from my log pile which had a diameter slightly larger than the blade on my Mora knife (do not be tempted to use a log much smaller than this as you will end up with a very small cooking surface) . I also used a larger round of wood as a work surface, carved myself a small wedge to help with splitting the wood and had a offcut of wood ready to batton with.

Photo 26-01-2016, 22 25 07
Spruce log and a stable work surface

Splitting

I started with my knife first and battoned it into the log (note that the knife blade is at 90 degrees to my body for safety). My aim at first was to create a split as deep as I could with the knife all around the middle of the log to create a weak point in it. The knife was smaller than the log so I could only batton it in a couple of centimetres.

Once I had my point of weakness battoned in all around the log I inserted the wedge into the split at the top and battoned that in as well to try and increase the split some more (upon reflection I think two wedges would have helped). It was at this point my batton decided to snap on me.

Photo 26-01-2016, 22 25 08
Batton out a split as much as you can with your knife

I went off and got a bigger piece of wood to act as a batton and soon had the log split right down the line off weakness. This line I created with my knife will help you to keep an even split on the log when you have twists and knots in your log as I had with this piece of spruce.

Photo 26-01-2016, 22 25 12
Use a wedge to split the log

I repeated the process on each split so I ended up with four roughly even sized pieces of wood.

Safety

One thing to be aware is that as you batton down on the wedge is that it will go slightly out of line at times. If this happens just tap the end of the wedge against the work surface until it lines up. This is much safer than trying to drag it back in line with your hands as it is very easy cut yourself on the knife tip.

As the split widens the knife blade will come loose. Let it drop away and only pull it out when it it is completely free. Do not be tempted to force it out as this is another time when injuries happen.

Photo 26-01-2016, 22 25 12 (1)
Quarter the log by battoning with your knife and using the wedge

The Chimney

The stove requires a chimney and it is very easy to carve one out. About a third of the way from what will be the bottom of the stove I battoned my knife into centre ridge of one of the quarters of wood. I then used this a a marker to drive in stop cuts on all the other three pieces of wood.

Then from the what would become the top of the stove I battoned off the centre ridge of wood down to the stop cut. I then used my knife as normal to carve off some more excess wood so that part of the chimney looked fairly even.  Once the first was completed I repeated the process on all the other pieces.

Keep all the offcuts and shavings as they will be needed to fire up the stove.

Photo 26-01-2016, 22 25 16
Batton out the core to form the chimney

From the top, looking down, your stove should look similar to the picture below. I have no idea how wide a chimney should be but I generally tend to take a couple of centimetres off each quarter.

The Chimney
The Chimney

The Firebox

Once the chimney is finished select two of the quarters that fit together and just at the base of the chimney on each quarter carve out a half triangle on each quarter.

I put a stop cut in first and then carved off the excess wood down to the stop cut. The whole just needs to be big enough to let air in and allow you to add slivers of wood into the fire.

Make sure your cuts are opposite each other so that when you fit the two quarters together again you form a triangle.

I used to carve out a square shape with my saw and an axe in the past but a fellow bushcrafter called Takeshi Mizumoto showed me this method by just using a knife – so much easier.

Photo 26-01-2016, 22 25 20
Carve out a triangular fire box

Raappanan tuli cuts

I like to increase the surface area of the inside of my chimney so as to give the initial flame from my tinder something to grab onto.

This is a technique from Finland and you can read more about it here in my post on the Raappanan tuli candle. To make the cuts place each quarter on the work surface and gently batton in cuts to the inside of the chimney. Ensure that the cuts are made so that the small split you create is travelling towards the top of the stove.

Finally collect up all the wood shavings you have created and split the larger off cut pieces down to nice small kindling.

Photo 26-01-2016, 22 25 21
Creating extra surface area and kindling

Firing the stove up

I found some old twine, thoroughly soaked it in water and then used it to tie the quarters together near the bottom.

To light the stove I used a firesteel to light some cotton wool smeared in vaseline. This gives me a burn time off about 5 minutes and as I always carry a supply in my rucksack am happy to use it. A more natural method that I like is to use birchbark and small lumps of spruce resin.

Once the cotton wool was well lit I added a few small pieces of wood in via the top of the chimney. At this stage it is important not to add too much kindling as this may block of the flow of air from the firebox to the top of the chimney. Also make sure your fingertips are not directly over the top of the chimney as you drop in the slivers of wood. Even at this early stage the heat is intense enough to cause injury.

Photo 26-01-2016, 22 25 21 (1)
Firing up

Three pebbles

I popped three flattish pebbles on the rim of the stove to act as a platform for my pot. As this is a small stove you need to keep a close eye on your pot as the water boils or the food cooks so that it does not accidentally fall over. I had this happen once before as I had left the handle of my pot up. The handle snapped back down eventually causing the pot to fall off the log.

All was well with this set up and after about 10 minutes of good heat my water was boiling. if you do not have pebbles to hand I find that 3 pieces of green wood work well instead.

Photo 26-01-2016, 22 25 22
Three stones and a pot

Afterwards as I was drinking my coffee the stove really came alive with some wonderful flames.

I really enjoyed making this small log rocket stove as it showed me that with a little ingenuity you can make do without an axe. It can be difficult but it is doable and a great way to test your personal skills.

Photo 26-01-2016, 22 25 23
Beauty

Cheers

George

30 Days of Wildness – Day 24 – Fire Spirits

Day 24 of the 30 Days Challenge found us back out in the woods – not for pictures of plants or animals but to collect some wood – some very special and magical wood.

A couple of years ago my good friend Mad Dave Delaney at the BCUK Bushmoot introduced me to the Fire Spirit. These little fellas are supposed to be created so that they can be burnt on the campfire and a then a wish is made upon them.

My kids love them but refuse to burn them (even for a wish). Catherine has had one now for a couple of years and it needed a make over but Finlay needed a new one altogether.

Photo 26-06-2015 20 59 23
Fire Spirits

We looked firstly for a branch with a good fork (these will be the legs) in it, trimmed it and another straight piece for the arms. Once both were trimmed we headed back home to assemble everything.

Photo 26-06-2015 20 59 24
Selecting the right wood & a bit of sawing

Needless to say we could not go to the woods without climbing a tree or two 🙂

Photo 26-06-2015 20 59 25
You gotta climb

We found lots of leaves in the garden to dress the Fire Spirits. We used hemp cord and damp reed leaves to bind everything together.

Catherine’s Fire Spirit was just a bit loose on the bindings so with a new dress and some fresh cord she was ready to go again.

Photo 26-06-2015 20 59 26
Refurbishing Catherine’s old Fire Spirit

Finlay helped me to carve a face on his Fire Spirit (the first time I have given him a knife) and then it was a case of dressing his Fire Spirit and attaching the arms.

Photo 26-06-2015 20 59 27
Finlay’s new Fire Spirit

All done – two new residents of the den.

Photo 26-06-2015 20 59 29
Two new residents for the den

Cheers

George

How To…. Build a Campfire Cooking Crane

Sometimes space around the fire is at a premium.

Sometimes you want an adjustable pot hook without a tripod set up.

Sometimes you want to pour your coffee without getting burnt by the flames.

If that’s what you want then build yourself a crane – It’s easy.

Photo 06-05-2015 13 25 33
A robust and versatile campfire crane

There are a number of different ways to build a crane set up however I decided to try just with the general tools I would carry in my rucksack. These included an axe,  a saw and a general bushcraft knife.

The wood I used was some sycamore I had recently polarded in my garden. The crane is made up of a thick upright and smaller pieces to act as the arms. I decided to make two different types of arms, one for small pots and one for bigger Dutch oven type pots.

Sizes and dimensions will vary depending on how high you want your crane to be and what weight you want it to hold.

Carving the upright

I decided which part of the upright would be the top and then flattened it to give me a working area. You do not need to do this however I find it gives me a stable working surface. You can see in the pictures below that the girth of the upright is just larger than my hand as my fingers do not fully close around it.

Photo 06-05-2015 13 33 25
Basic parts and flattening the top of the uprght

For the crane to work you need a hole at the top of the upright. The size of the hole will depend on the size of the arm you will put through it and how much wood you want left around the hole for strength.

As I was going to carve this with my knife I opted for a square hole as this style is easier for me to carve. Once I had pencilled out one side I marked up the opposite side. In this crane I made the hole at 90 degrees to the upright (makes life easy) but you can angle it if you want so that the arm will be pointing upwards more when inserted.

Photo 06-05-2015 13 34 30
Marking out the socket

I used my knife to score lines into the wood I wanted to remove. You can do this by gently tapping your knife handle with a batton or rolling the curved part of the blade. You need to do this gently so as not to cause unwanted splits in the wood. Also make sure that the work piece is secure on the ground and that your free hand (if not battoning) is well clear of the knife edge.

Photo 06-05-2015 13 36 57
Scoring

To remove the wood I just pushed the tip of my knife inbetween the scores and prised it out. Again I did this gently alternating between pushing on the handle with my hand or doing light taps with a batton. When I twisted the point I did so gently so as to not cause any unwanted splits or worse still – snap off the tip of my blade. 

I did another set of scores and chipping until I was about halfway through the upright.

Photo 06-05-2015 13 39 14
Chipping

I then repeated the exact same procedure on the other side until my knife popped through the other side.

Photo 06-05-2015 13 57 15
Repeating the scoring and chipping

Once the plug of wood was removed I trimmed the internal walls of the hole (using the wood I would use as an arm as a guide) and chamfered the edges off.

Photo 06-05-2015 14 01 36
Finishing the socket

The upright was finished off with all the knobbly/sharp bits being removed and a point was axed out at the bottom of it.

Trimming and pointing

Carving the lightweight arm

I made the arm for the lightweight pots from a thin piece of sycamore. I trimmed a flattened piece near the end and carved a small dimple with the point of my knife in it.

The small dimple is needed to keep the adjustable pot hanger in place. I have covered the making of the making of an adjustable pot hook in my post How To…. Carve and use an Adjustable Pot Hanger.

Photo 06-05-2015 14 11 56
Lightweight arm

Set up

In my previous post on making a Double French Windlass Cooking Rig I explained how to make a pile driver. I used this pile driver to make a hole for the upright to sit in.

Once you have created the hole it is just a case of gently tapping the upright into place. If you did not use the pile driver you would need to hit the upright hard to drive it into the ground and very quickly the wood around the hole would crumple or snap.

Photo 06-05-2015 14 14 12
Using the pile driver to place the upright

As I had not made the hole at an angle I carved a small wedge to hold the arm securely and also to raise the tip up slightly.

When the arm is in place in the hole just tap the wedge into place gently. Do not ram it in as this could cause undue pressure and split the wood.

Photo 06-05-2015 14 16 55
Create a wedge to secure the arm

Then it is a simple case of attaching the hanger with your pot or kettle onto the arm.

I like this system as it is easy to adjust the height of the pot and the whole crane can be swivelled to move the pot away from the fire easily.

In the picture below I have left the back of the arm overly long but I will trim it shorter eventually.

Photo 06-05-2015 14 18 53
Ready to go

Carving a strong arm

As I had made a square hole I got a bigger piece of sycamore and squared it off along its length to fit exactly in the hole. This arm was designed to take bigger pots like a dutch oven.

Photo 06-05-2015 14 22 10
Creating the heavyweight arm

The end was shaped to fit the pot hanger.

Photo 06-05-2015 14 25 27
Finishing the tip

Then set up exactly as the first arm.

This time though I tested it out with a dutch oven half full of water.

Photo 06-05-2015 14 27 57
Heavy Duty Cooking

I have a few of these cranes so I set up another one to put the kettle back on.

Photo 06-05-2015 14 30 45
Multiples

I had used an auger and a palm gouge to carve this one out so you can see it ended up with a round hole. No wedge was required as the hole was set at a slight angle.

Photo 06-05-2015 14 36 52
The crane made with an auger and palm gauge

After the water in the dutch oven had boiled it was easy to raise it all up off the heat.

Photo 06-05-2015 14 31 39
Easy to adjust the pot height

If you plan to use these cranes on a longer term basis they may develop a crack if you are using green wood. This happened to this crane about a week after I made it but I secured it with a bit of whipping. You can do this right at the beginning if you wish or when you see a split start to appear.

The whipping will be well clear of the flames so I am not worried that it will be burnt through.

Some Whipping
Some Whipping

If I had not being taking pictures along the way I would have completed this rig in about an hour or so.

There are other ways of doing this and other tools you can use so I will leave it to your imagination but if you are someone who likes to tinker around the campfire then I would give this one a go.

Cheers

George