How To… Carve a Small Noggin Cup

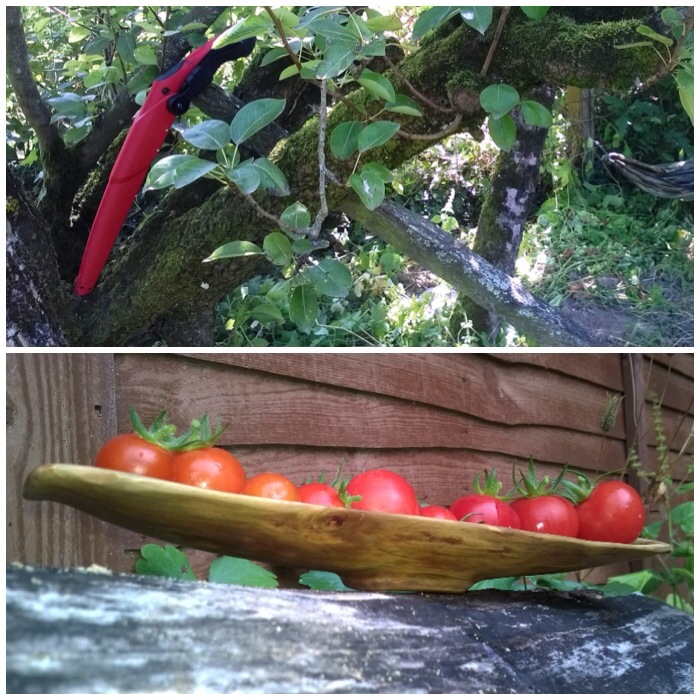
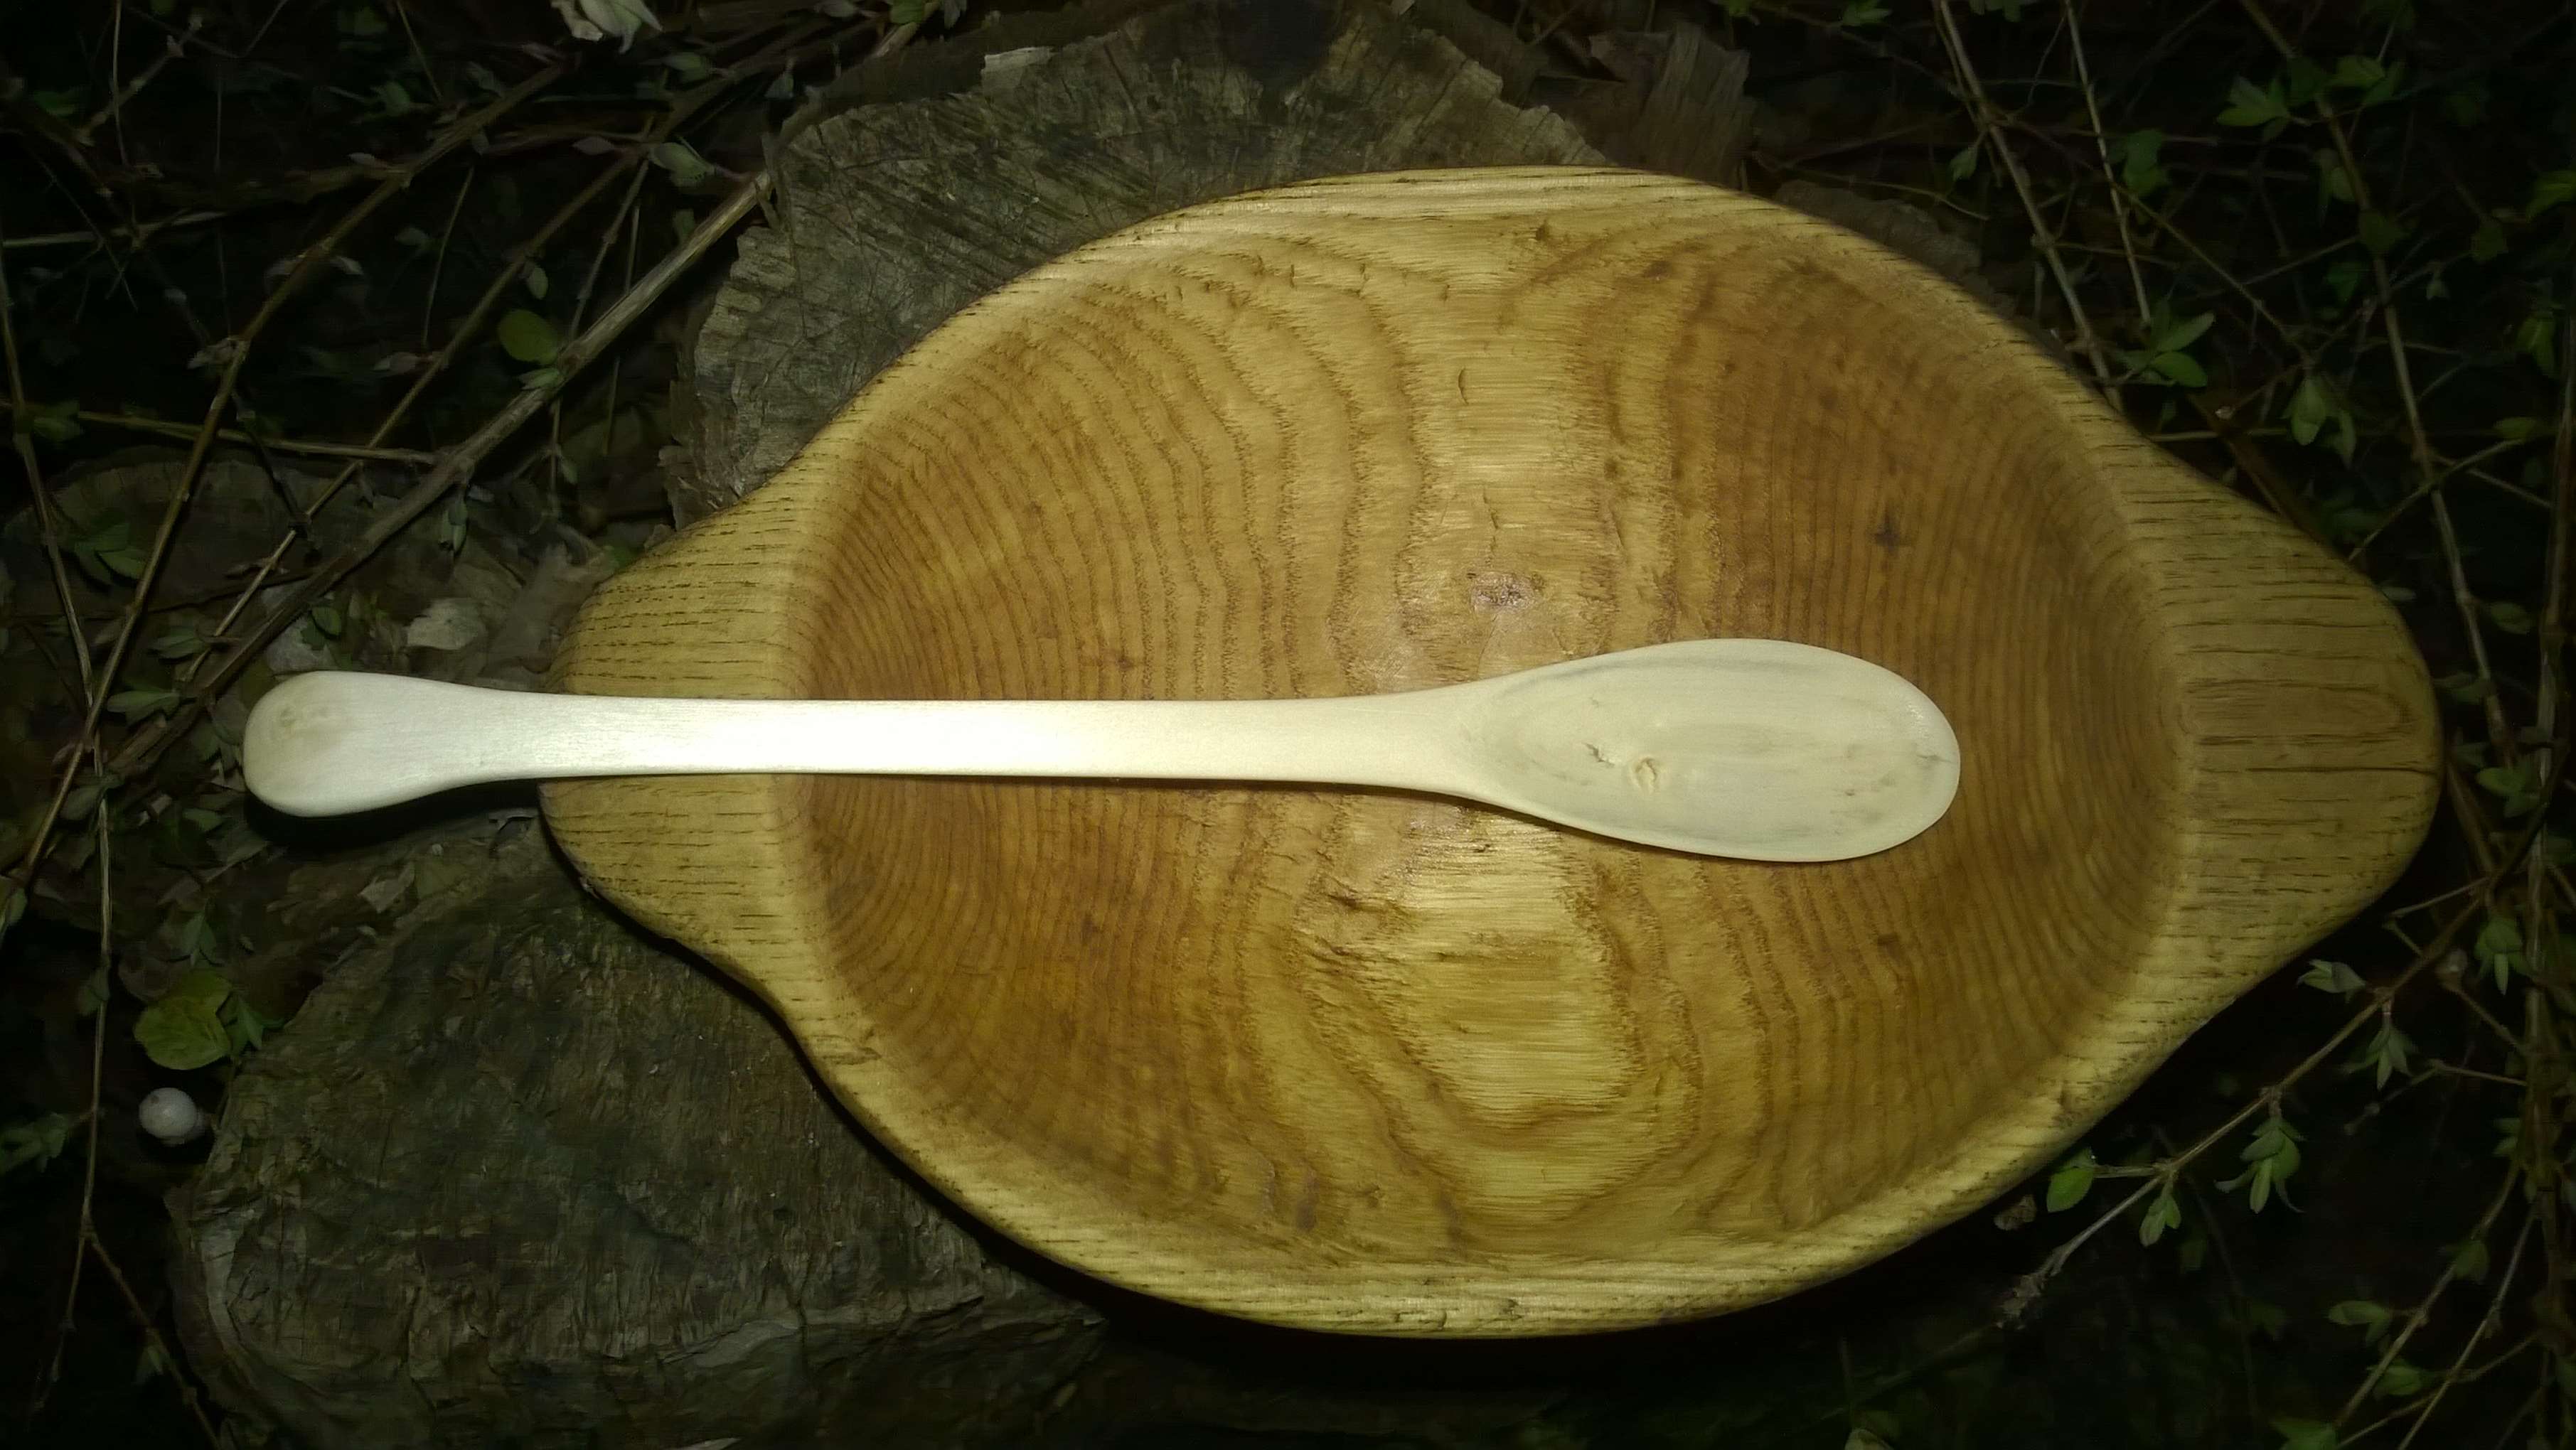
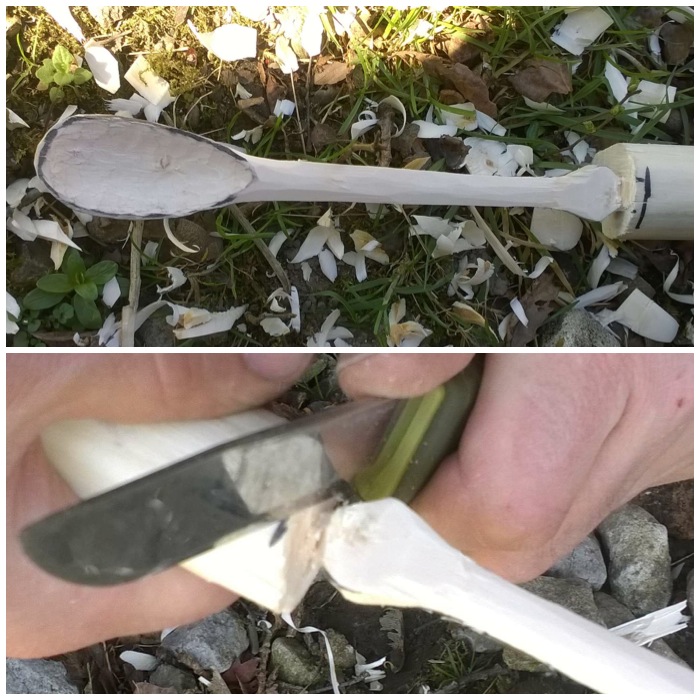
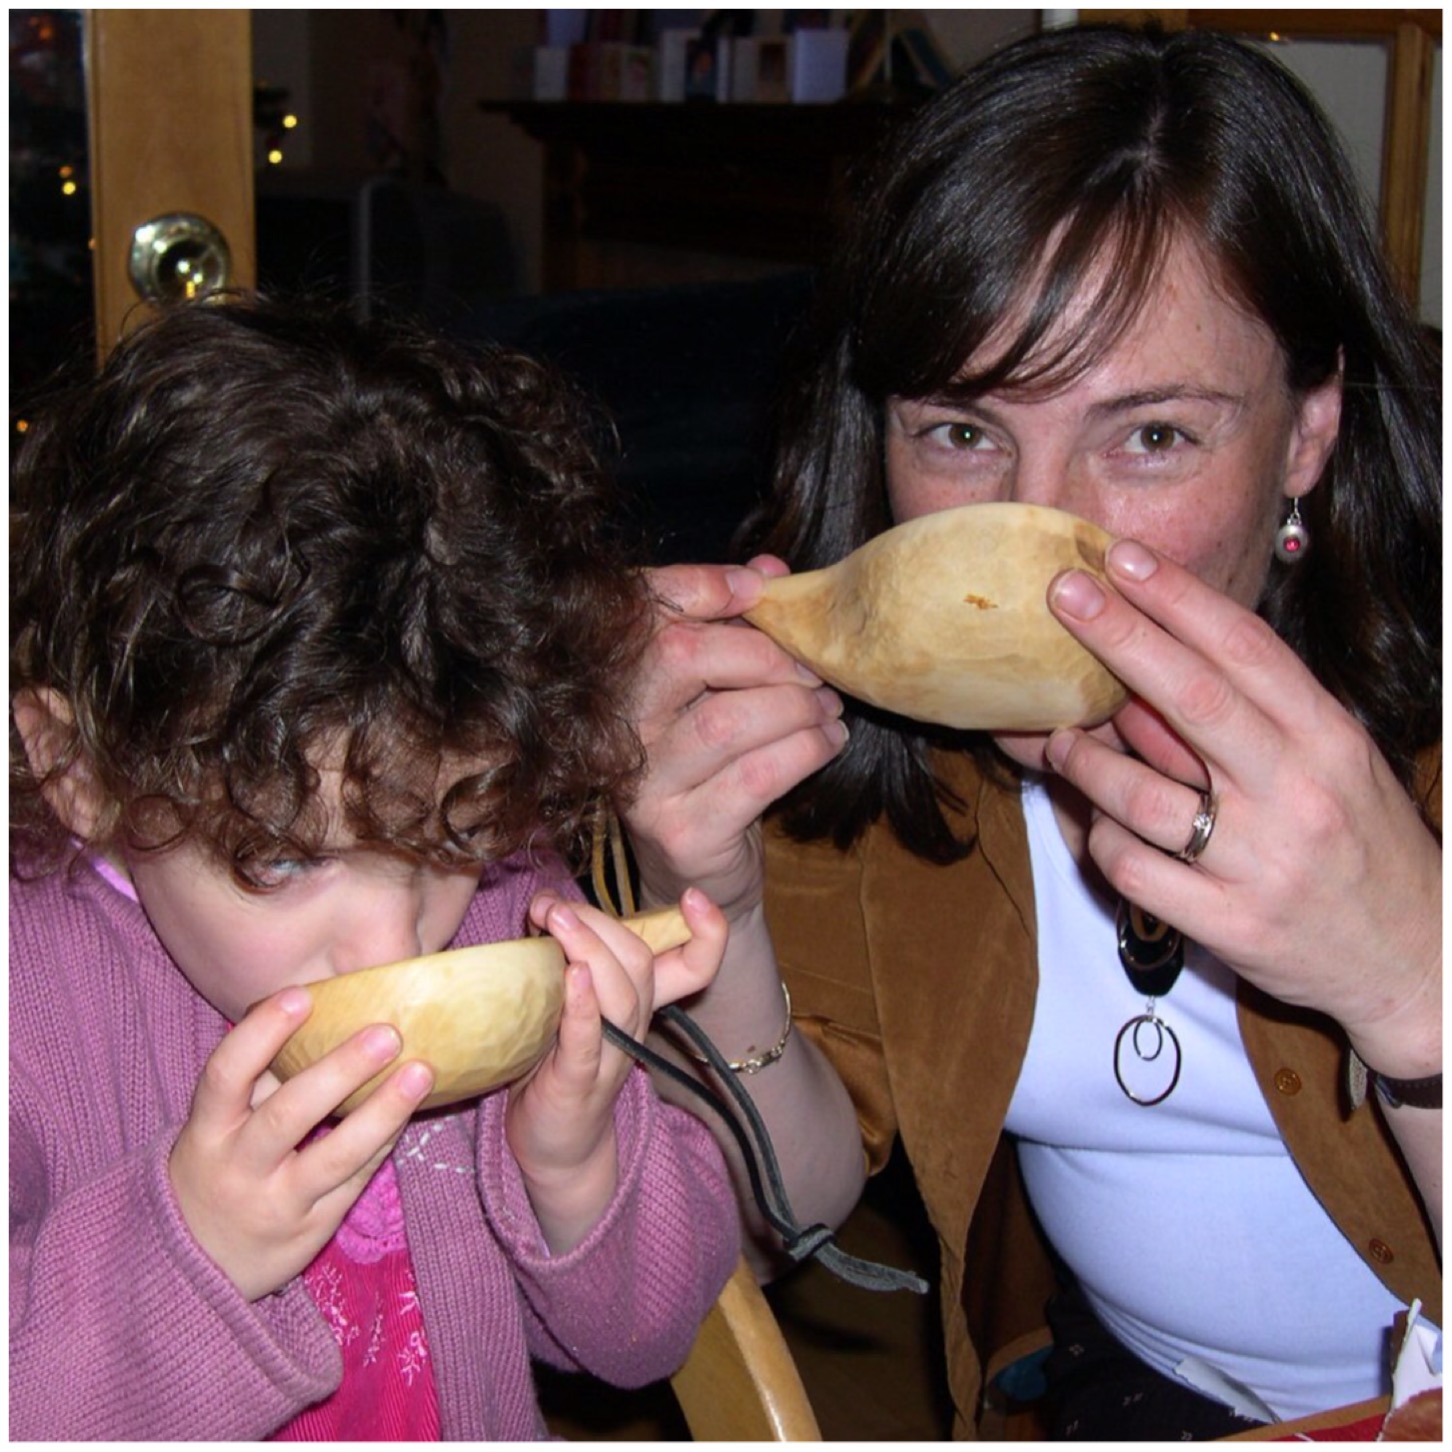
This is a How To… of a small wooden cup called a noggin (also known as noigin in Irish and noigean in Gaelic) I made as a Christmas stocking filler for my wife Alison.

Alison had always wanted a one carved for her so I thought it was time to get on with it. These cups were traditionally made out of burls (I will cover this in more detail in my next How To…) however I did not have one available at the time and used silver birch wood instead.

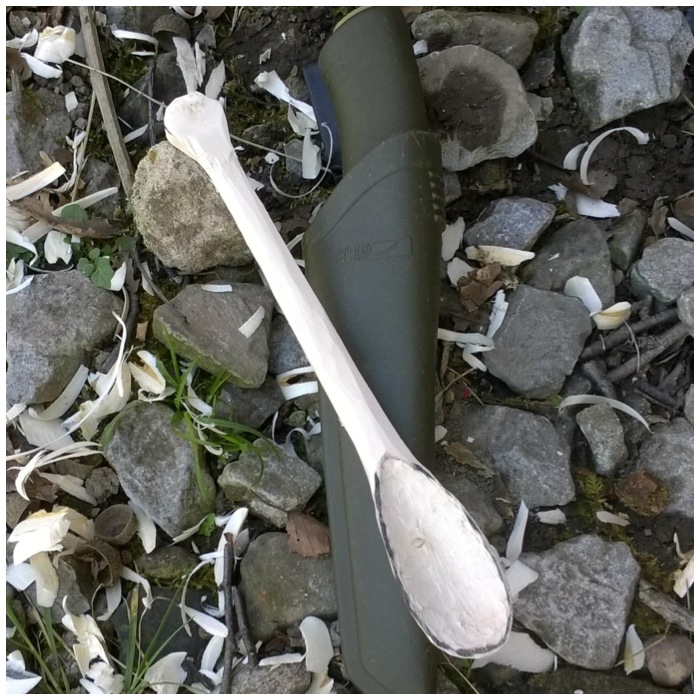
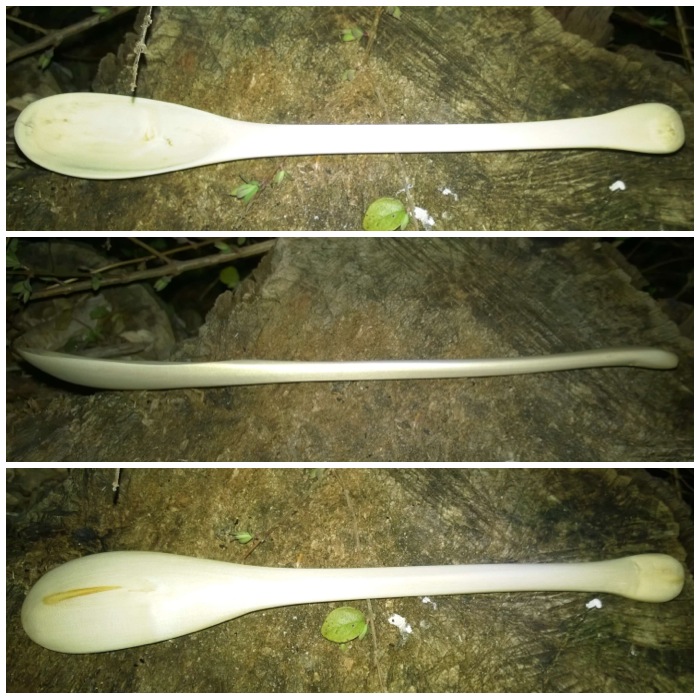
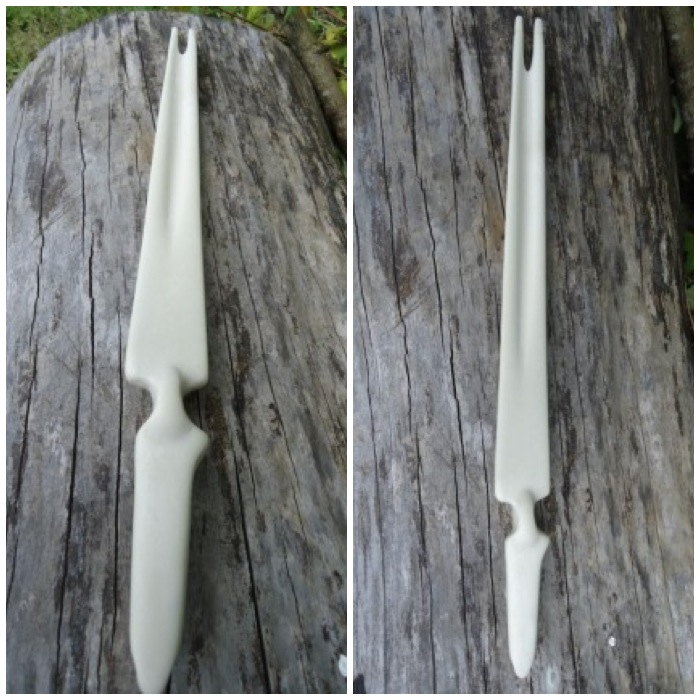
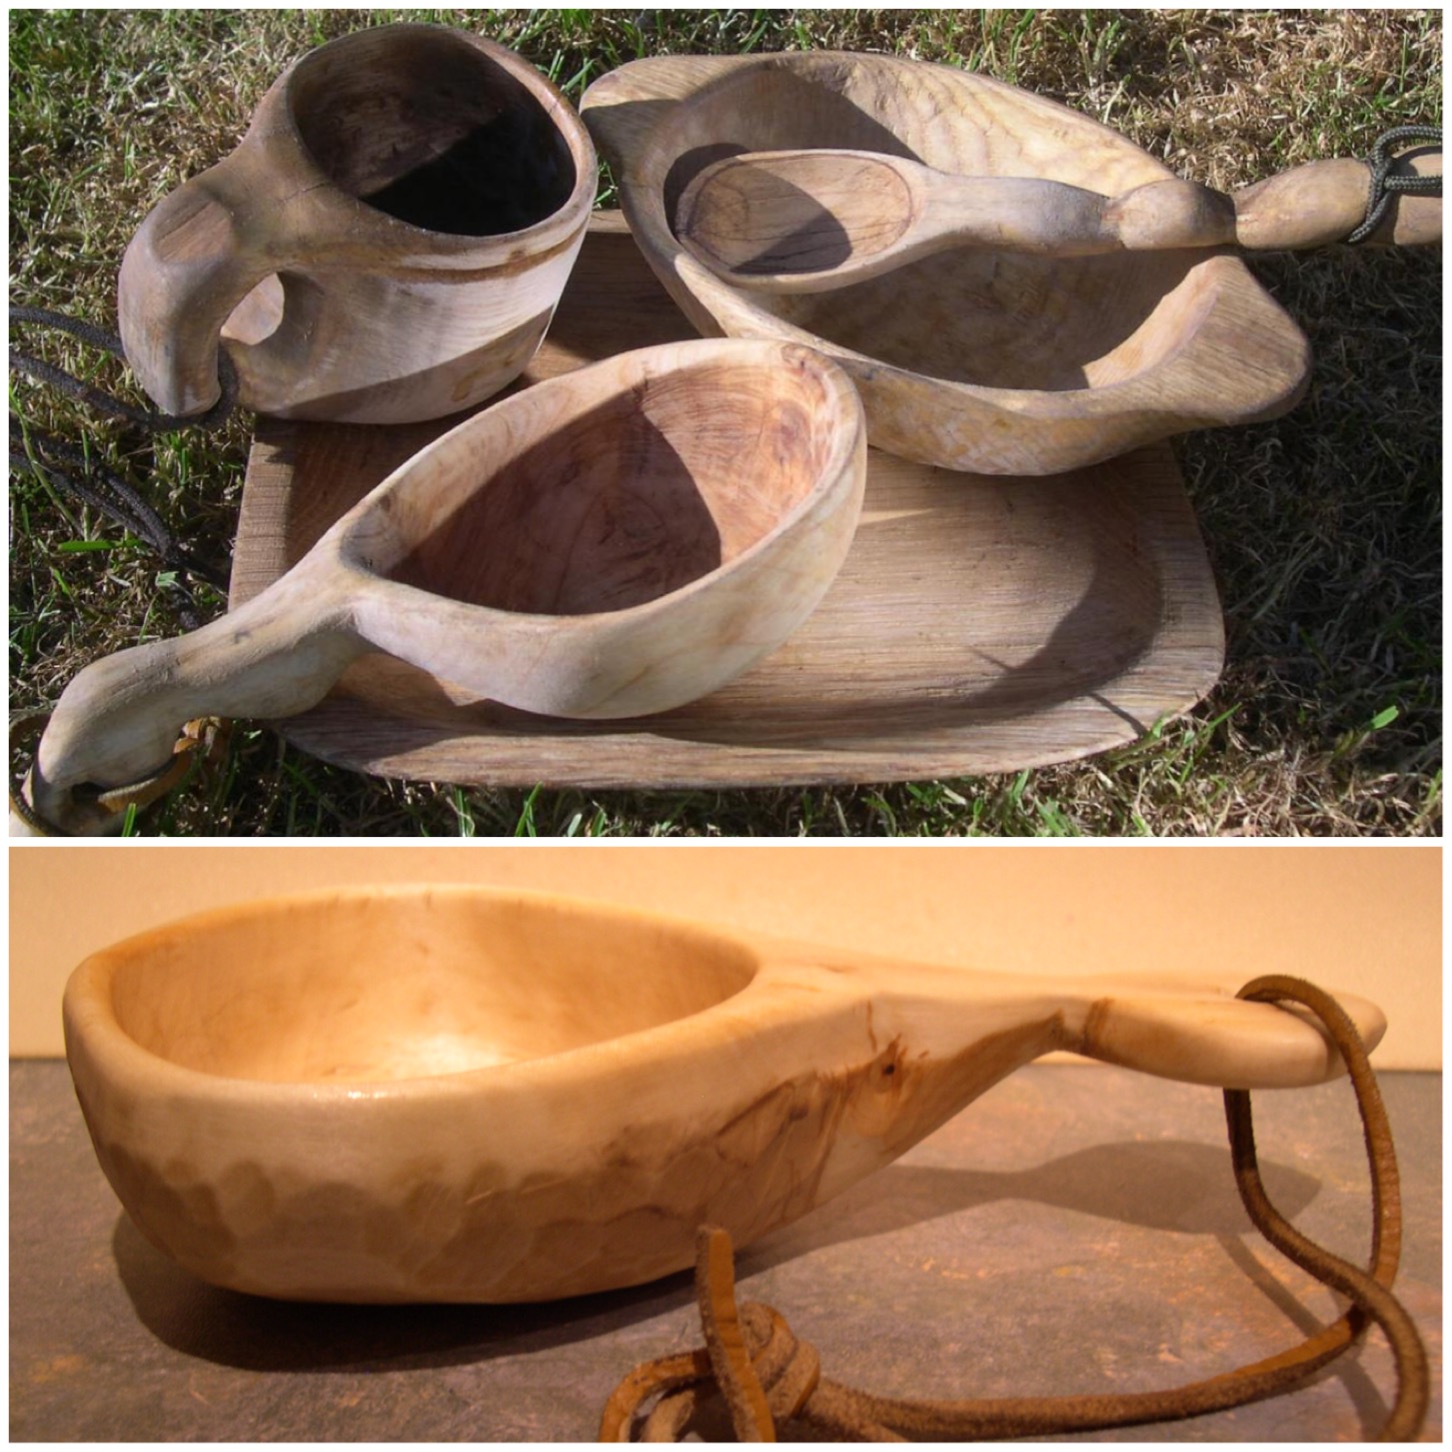
Noggin carving is a skill that has been practiced for millennia but due to modern industrial practices it is now something generally limited to green woodworkers, bowl turners and bushcrafters. These are a few of my carvings, all utilitarian and nothing fancy. The cup at the bottom is the one I made for this How To…

Photo 05-02-2015 19 43 02
Carvings

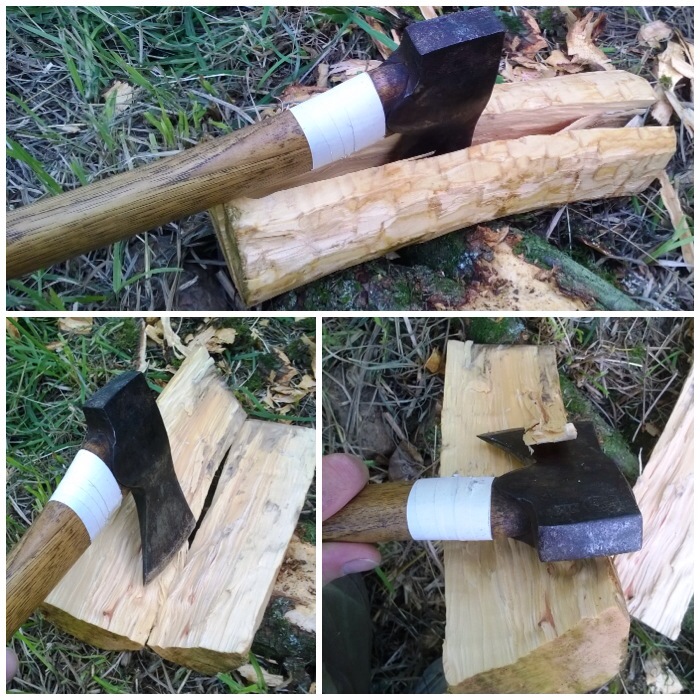
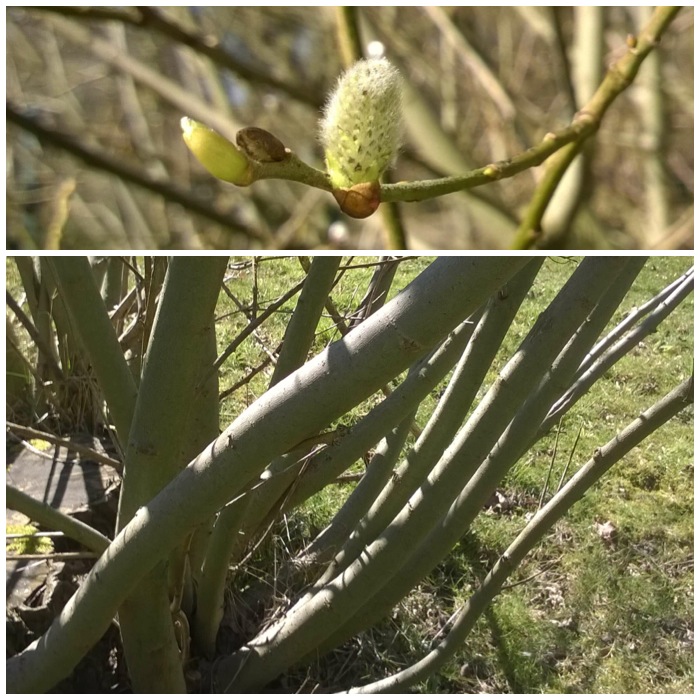
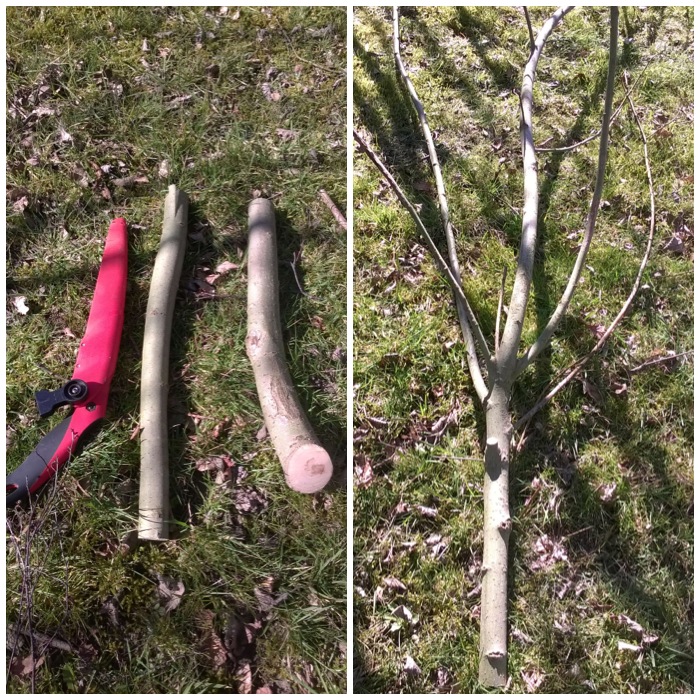
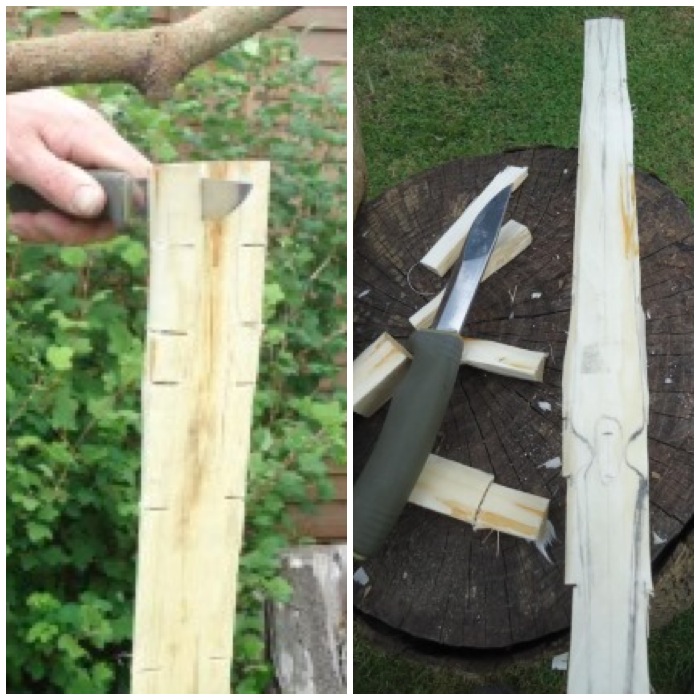
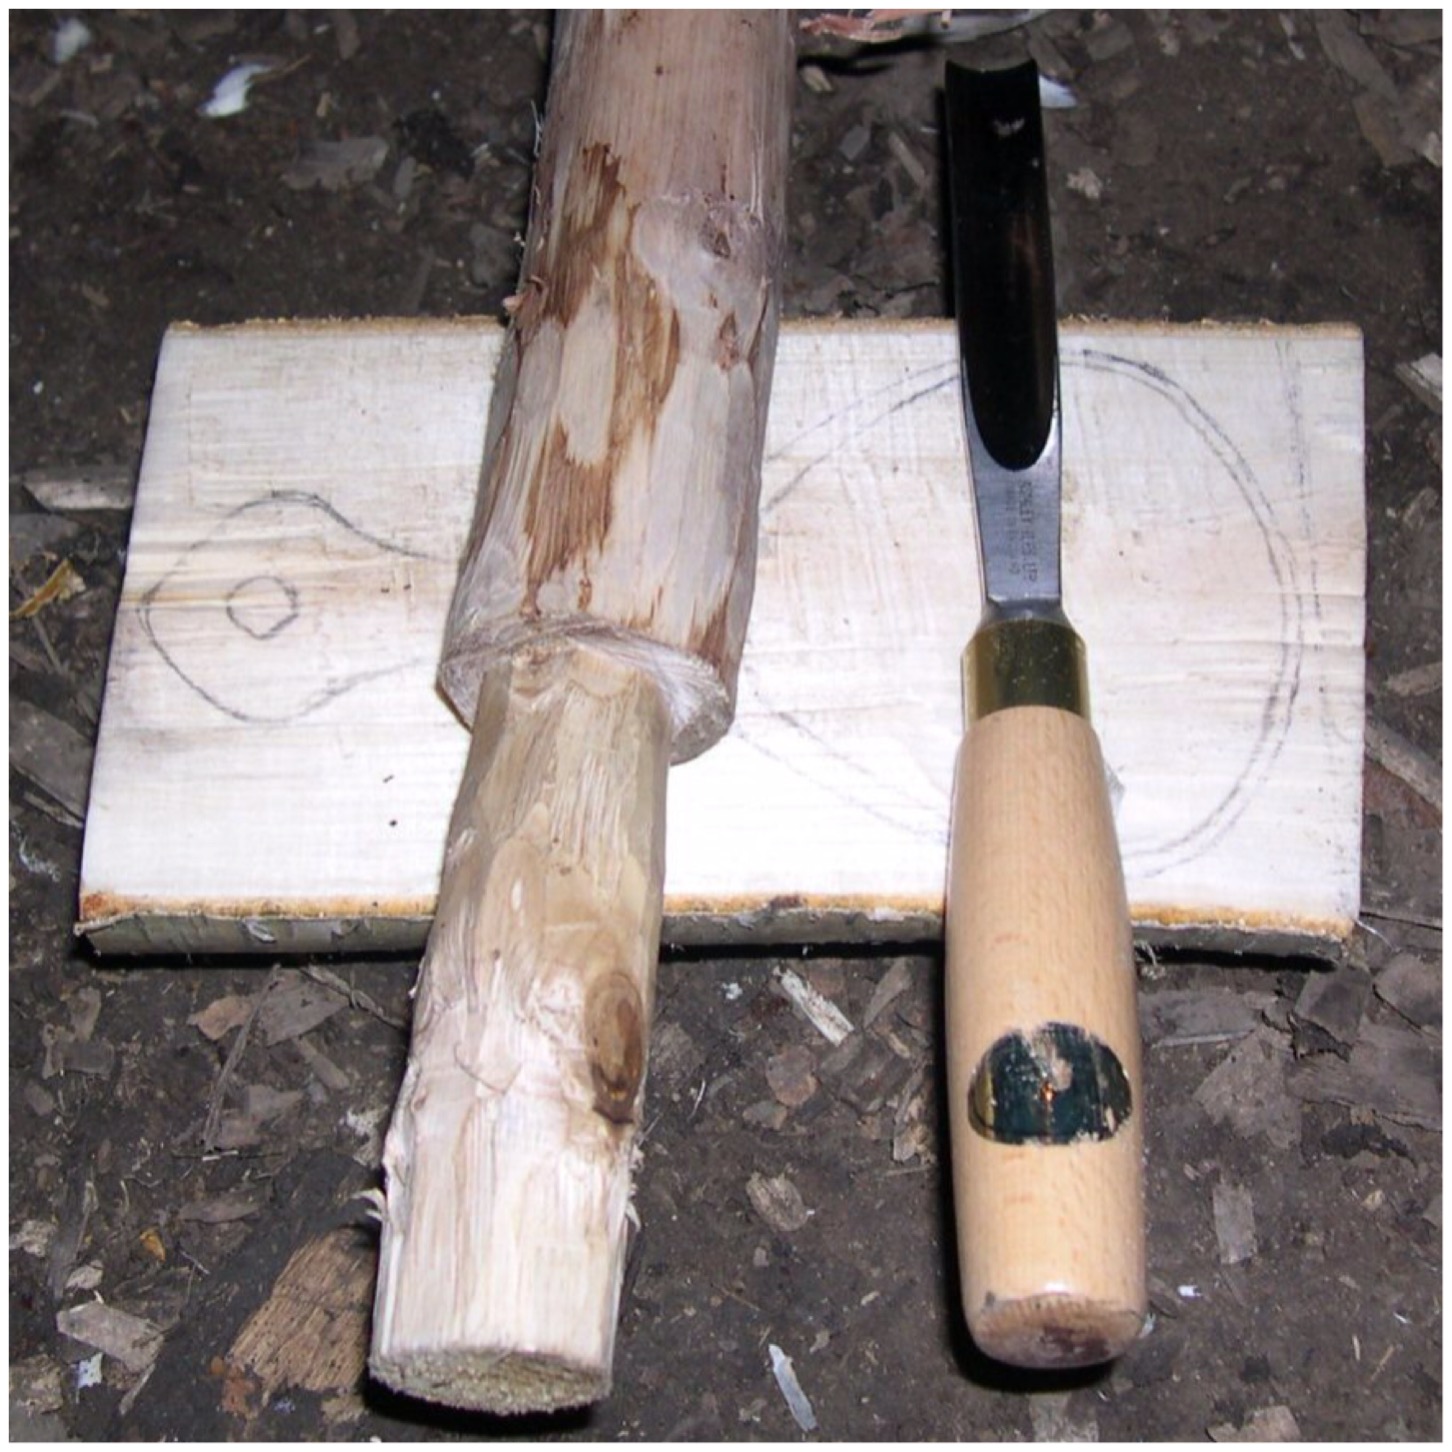
Wood selection and splitting

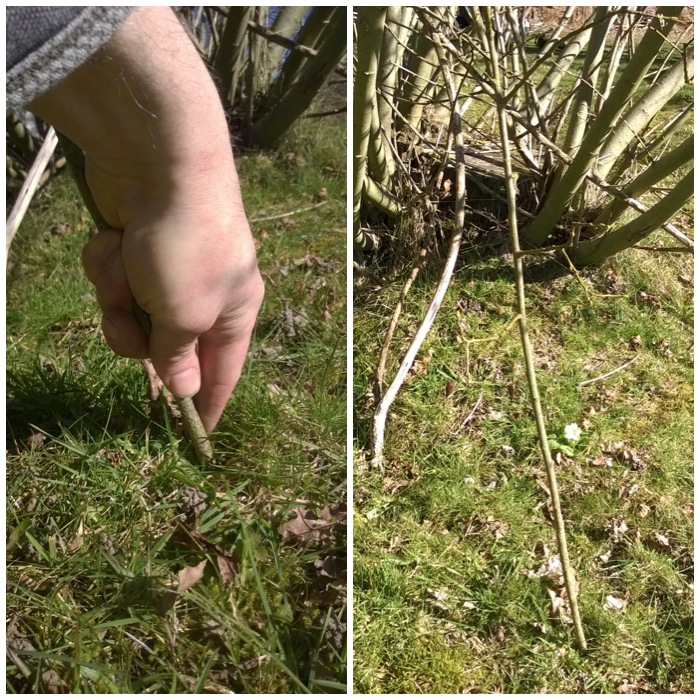
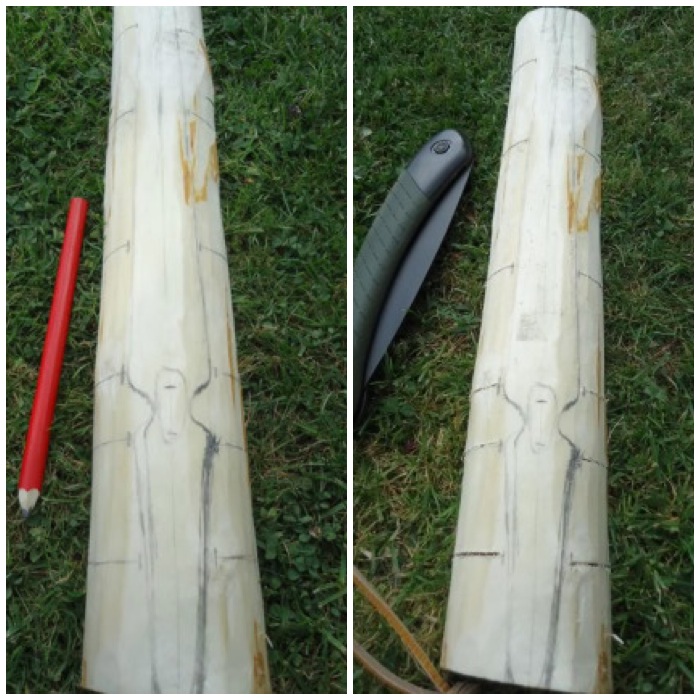
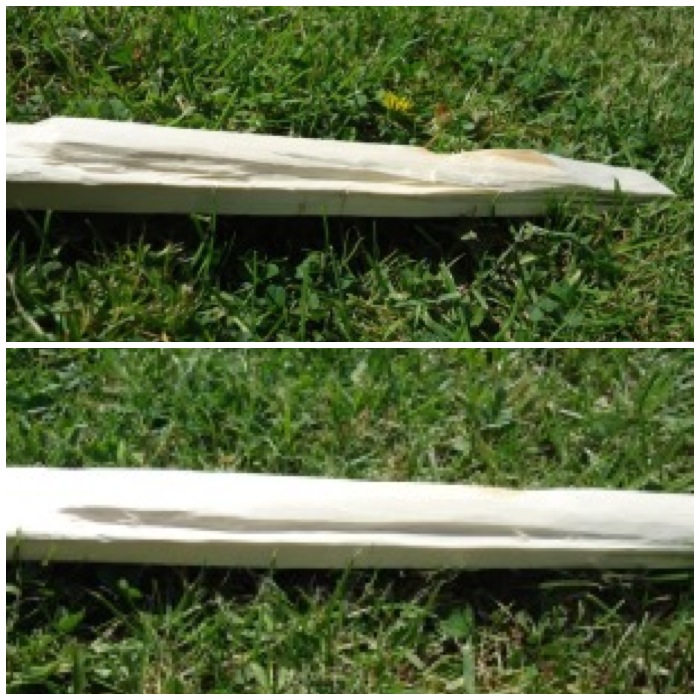
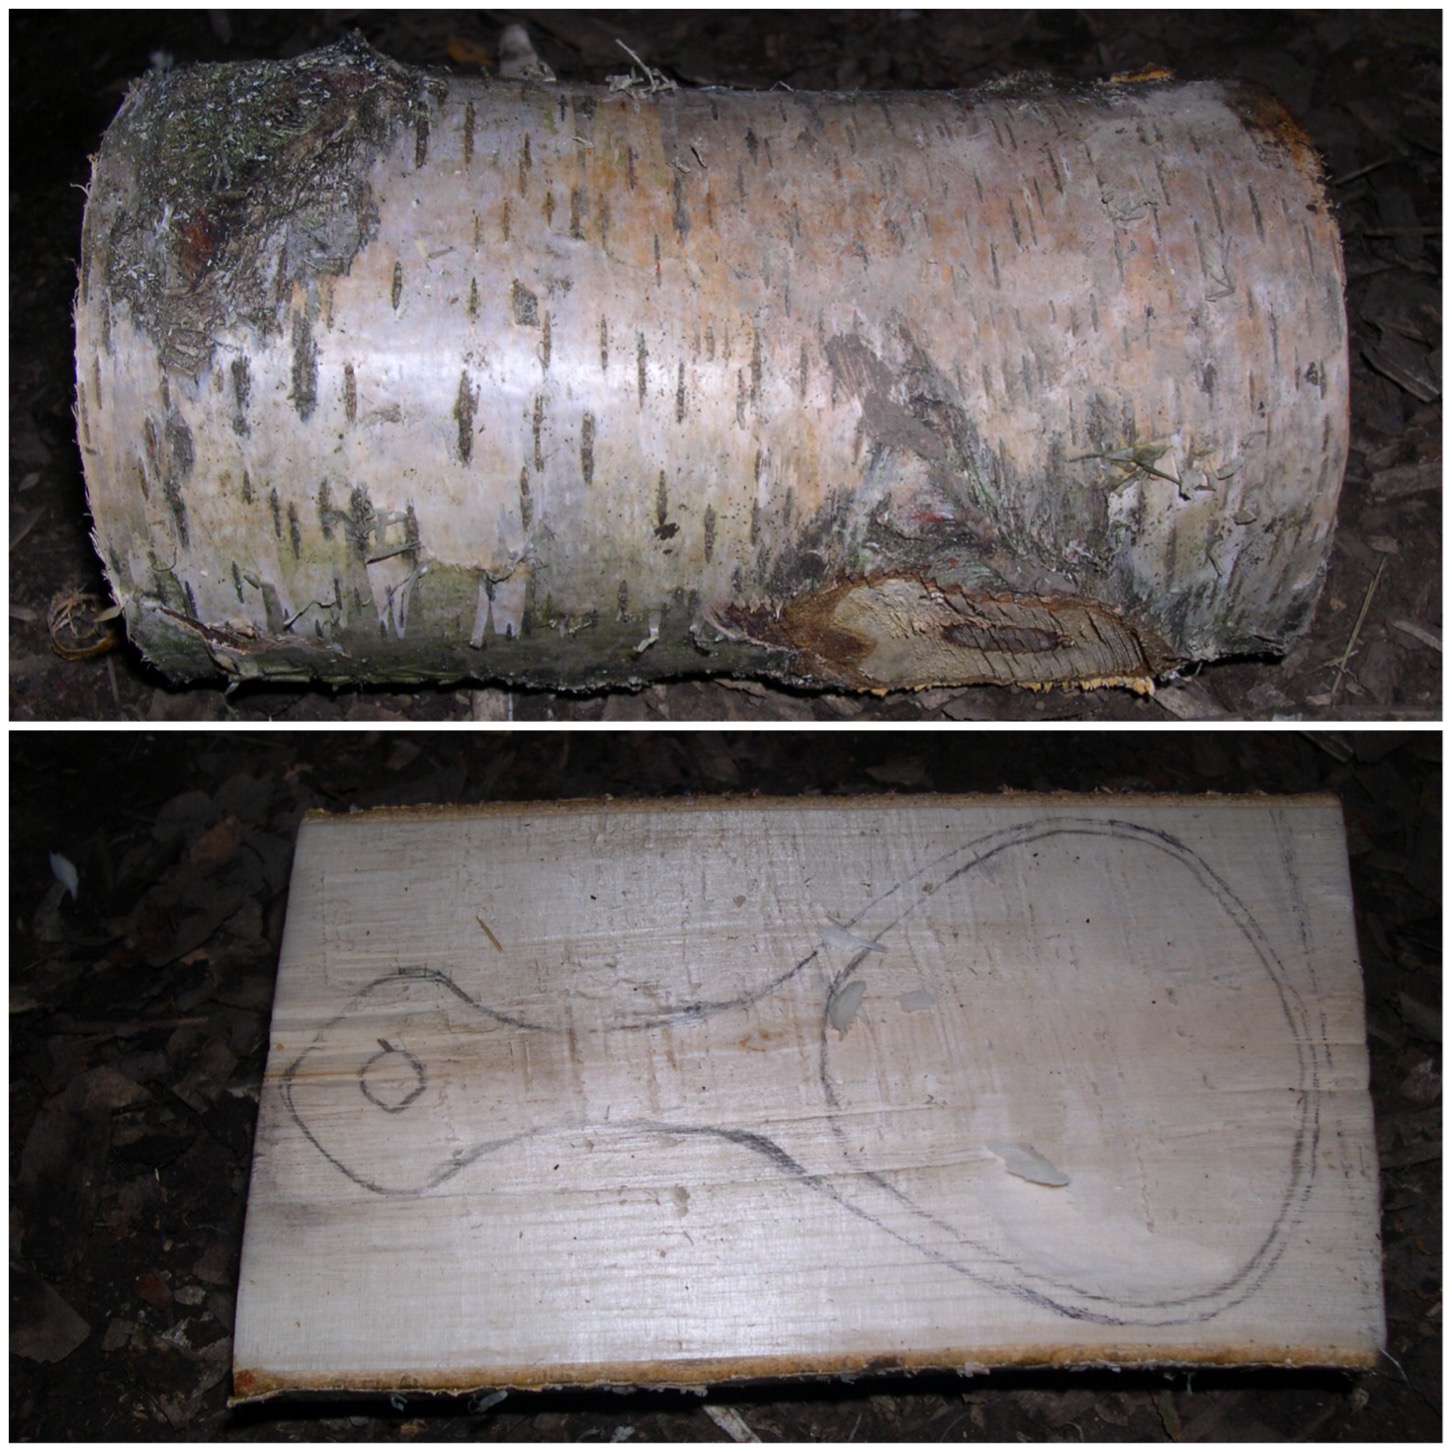
For this noggin I selected a green piece of silver birch that had no crack lines starting on either end. The log had a few knots in it but looked quite easy to carve.

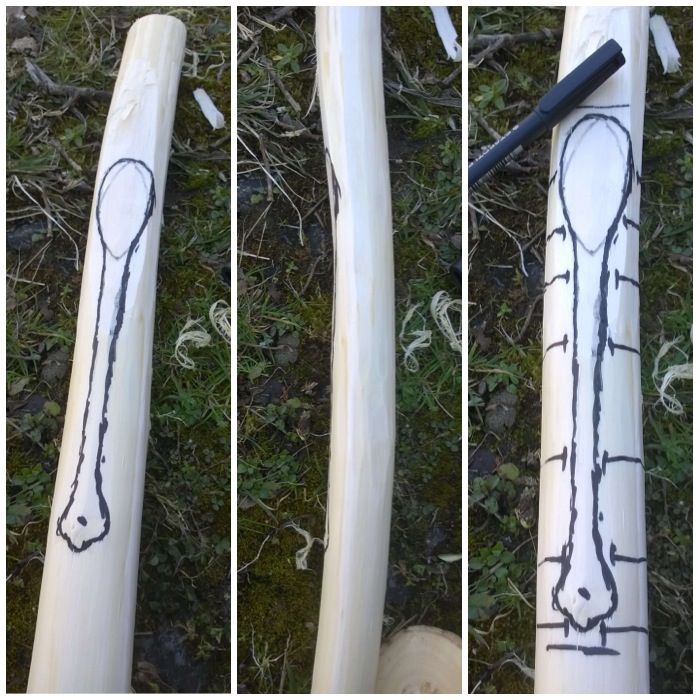
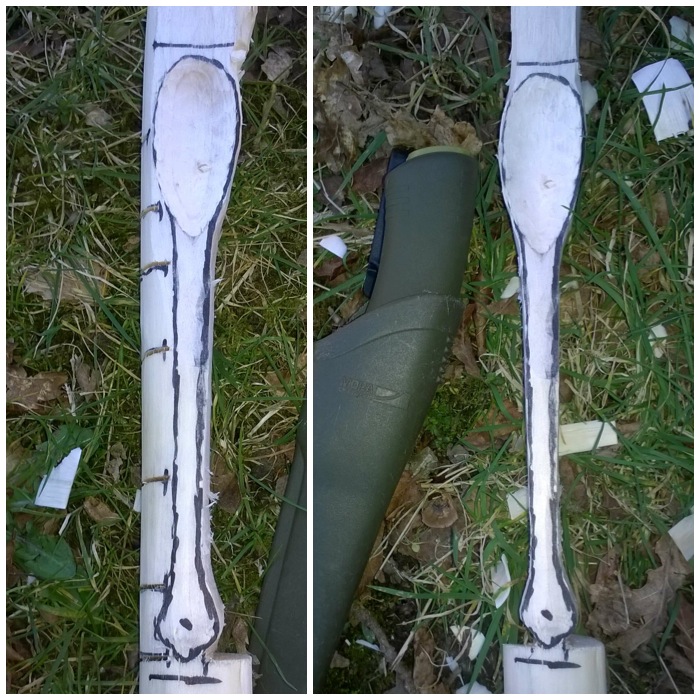
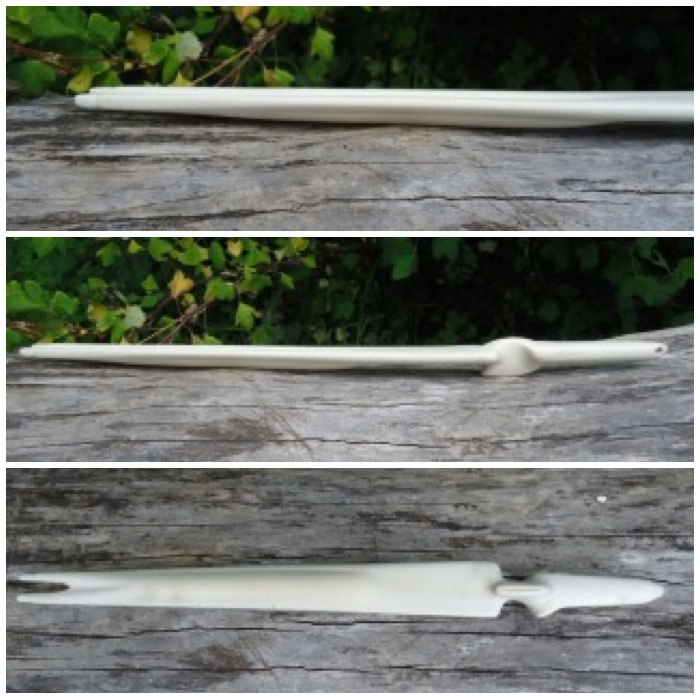
I split the log on a stump with my axe and drew out the basic shape of the noggin with a pencil. My intention was to carve a shallow flat-bottomed noggin with steep sides as the log was not that big.

Photo 05-02-2015 19 44 20
Beginnings – splitting the log and drawing

Tools & the bowl

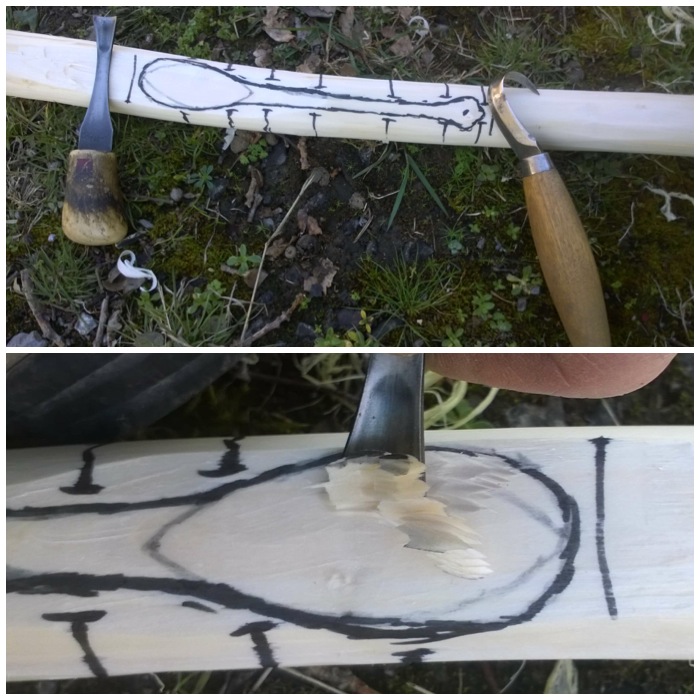
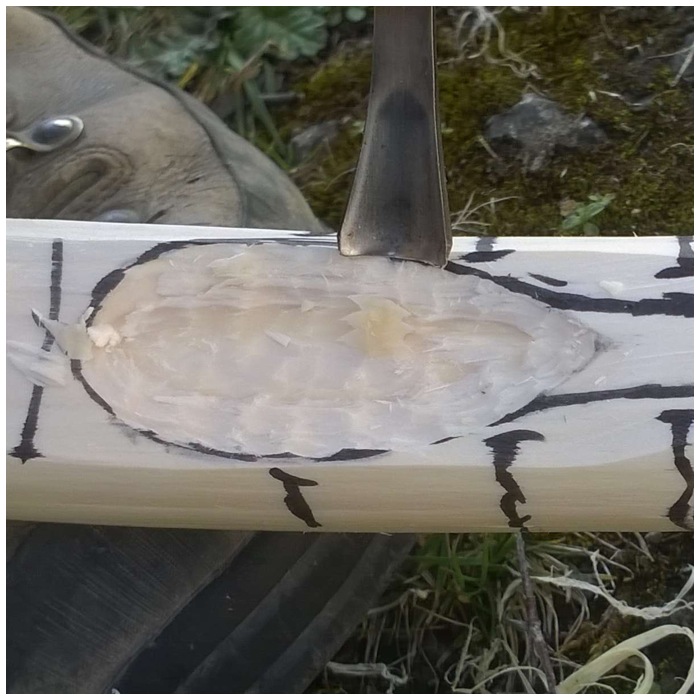
As the sides were to be steep I opted to use a curved wood chisel and a mawl. I carved out the bowl first for various reasons:

    • To locate any cracks deep in the bowl area quickly
    • Working with the whole piece makes it more stable
    • There is less chance of the side of the bowl cracking
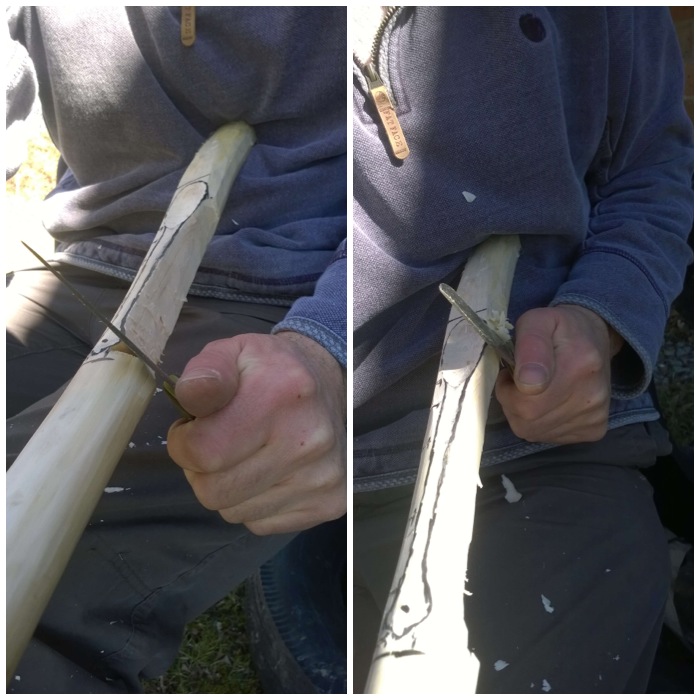
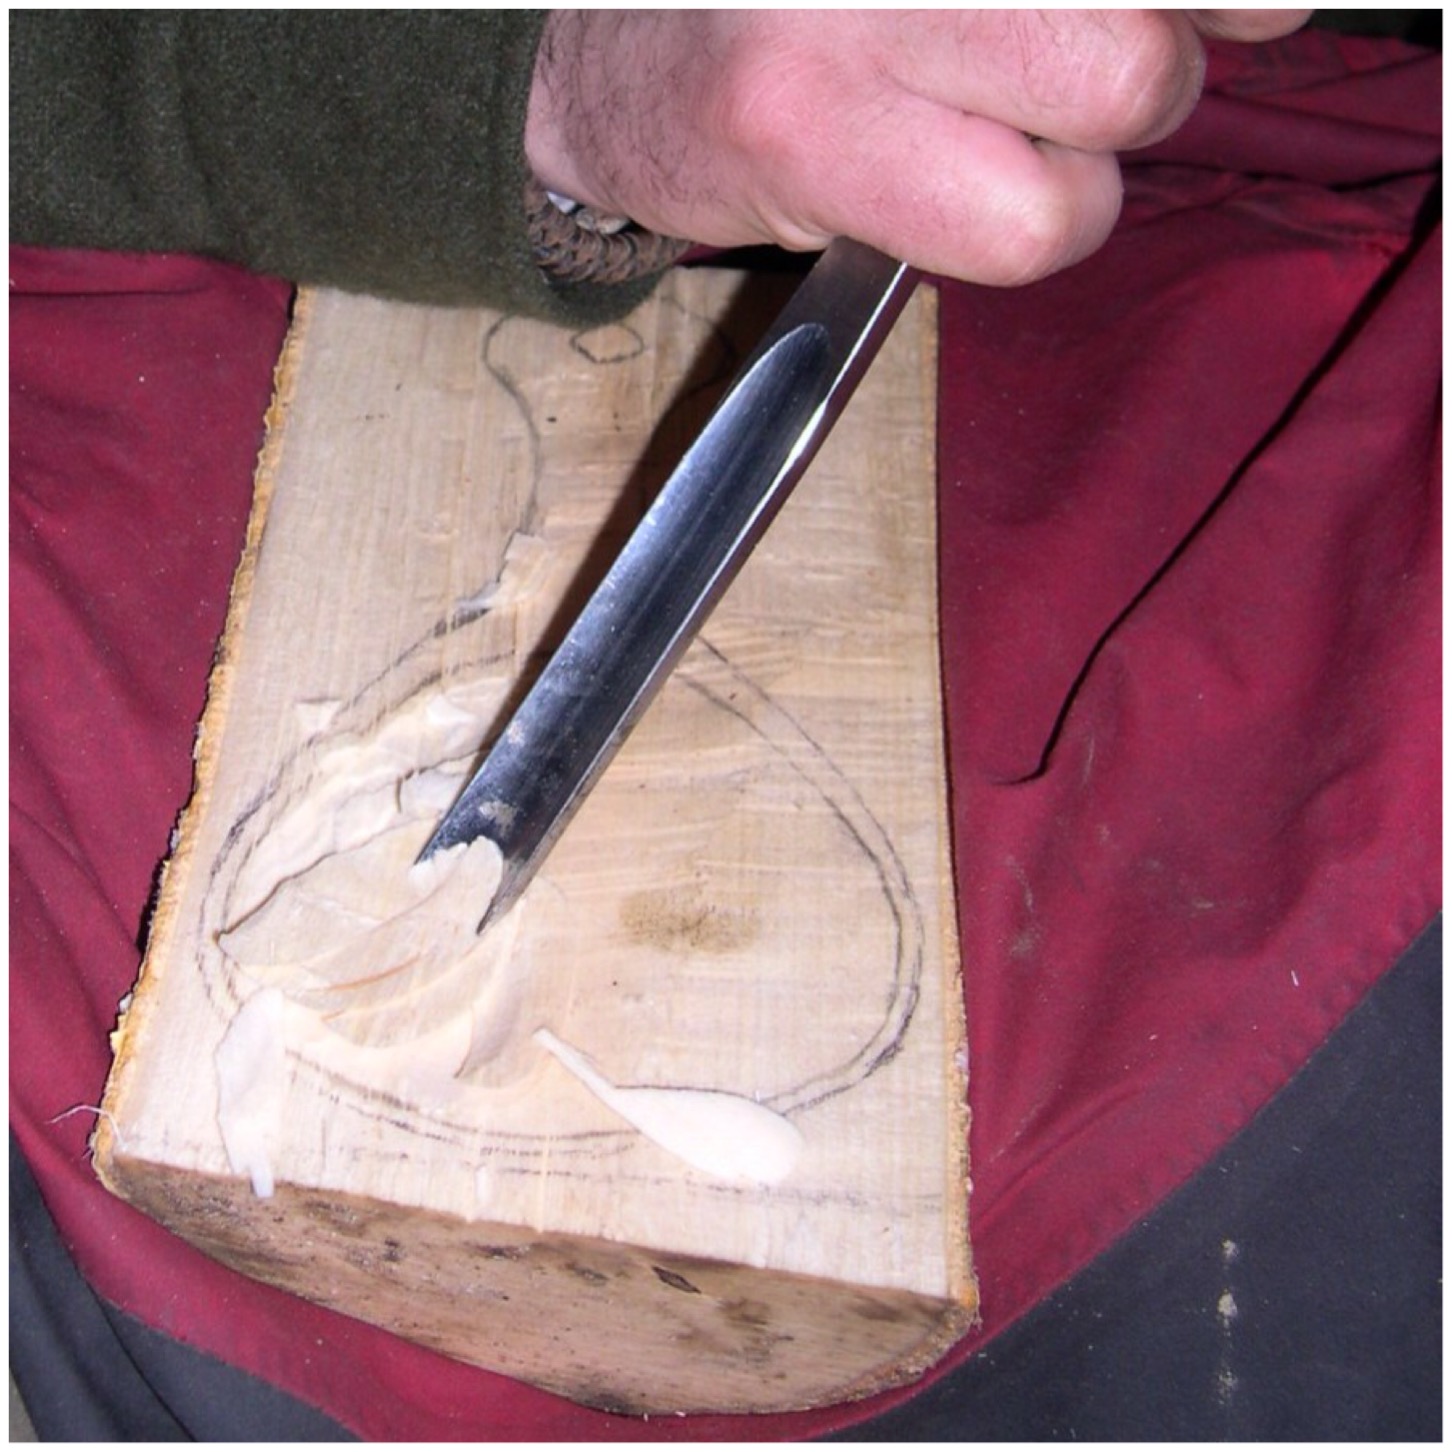
Photo 05-02-2015 19 45 26
Mawl and curved wood chisel for the bowl

Carving the bowl

To begin with I worked my way around the edge of the bowl taking out small chippings. I tapped the chisel with the mawl quite gently at this stage. The work piece was placed on my lap with 3 thick layers protecting my legs – two jackets and a small day sack.

I positioned the log so that the chisel was always pointing away from me. A work bench with a vice would have been safer but not available at the time (we were working in the winter in a small roundhouse).
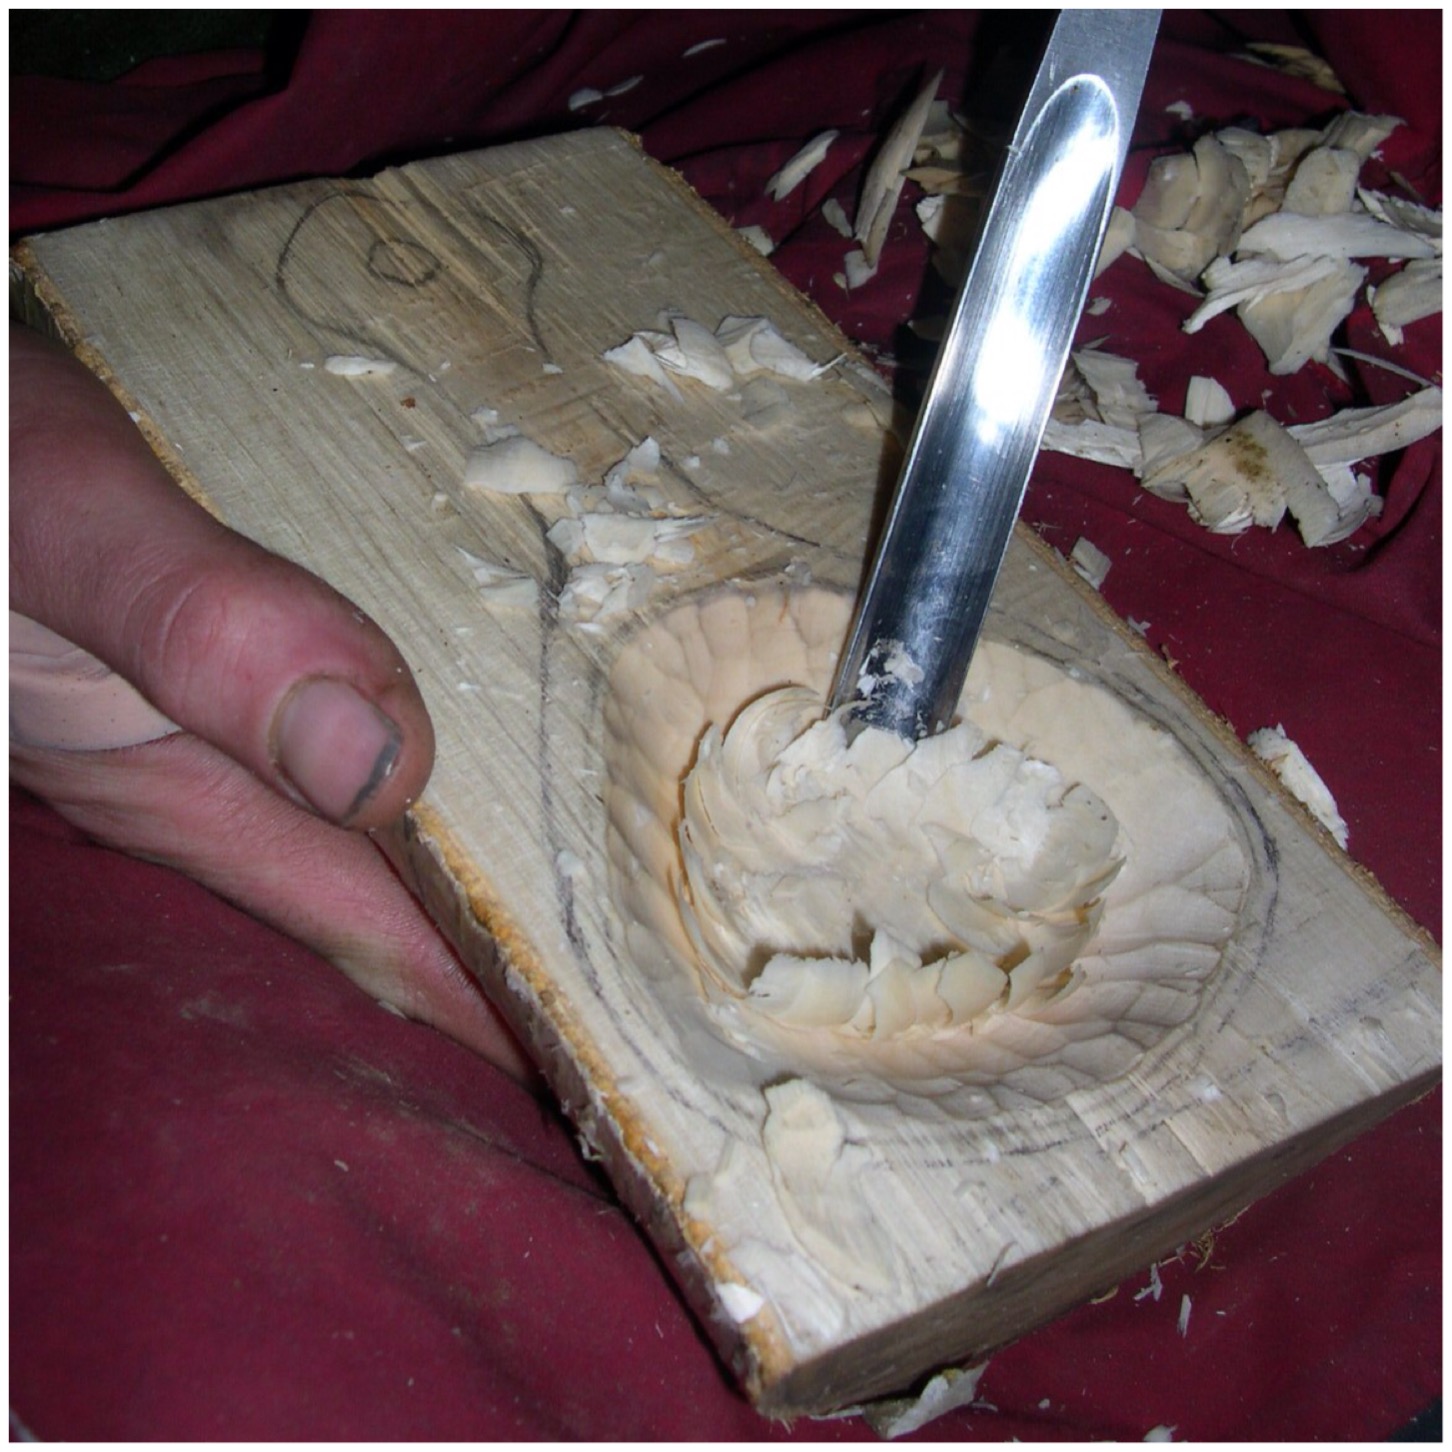
Photo 05-02-2015 19 46 47
Fine work to begin with on the bowl

Going Deeper

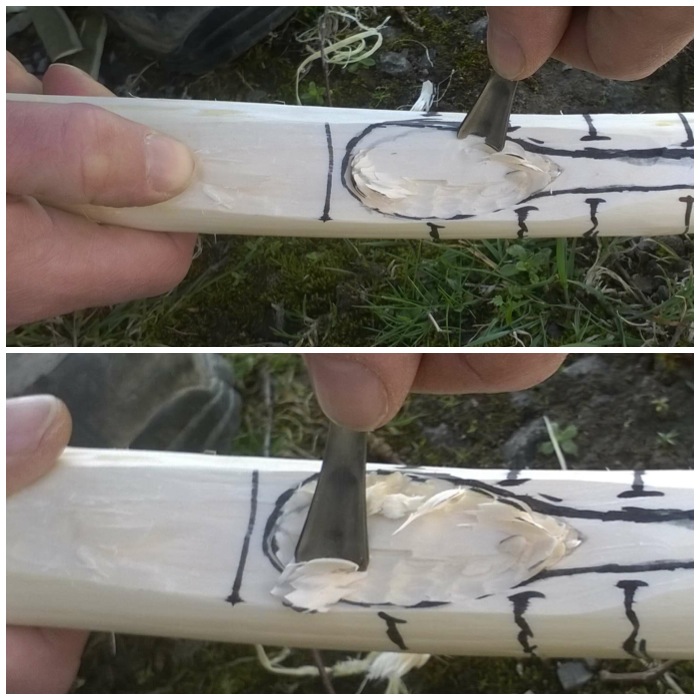
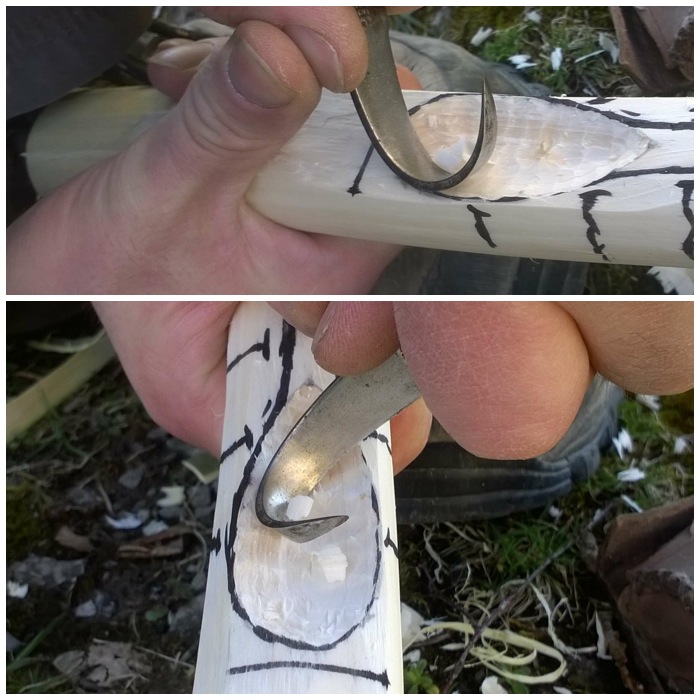
Once the initial edge area was carved out I was able to use more force with the chisel. By this time I did not need to use the mawl but cut into the wood by just pressing down with force on the chisel. This seemed to work quicker than using the mawl all the time.

Working my way around the bowl I was able to take out a lot of wood rapidly until I had the basic shape roughed out.

Photo 05-02-2015 19 47 01
Chunking out the bowl

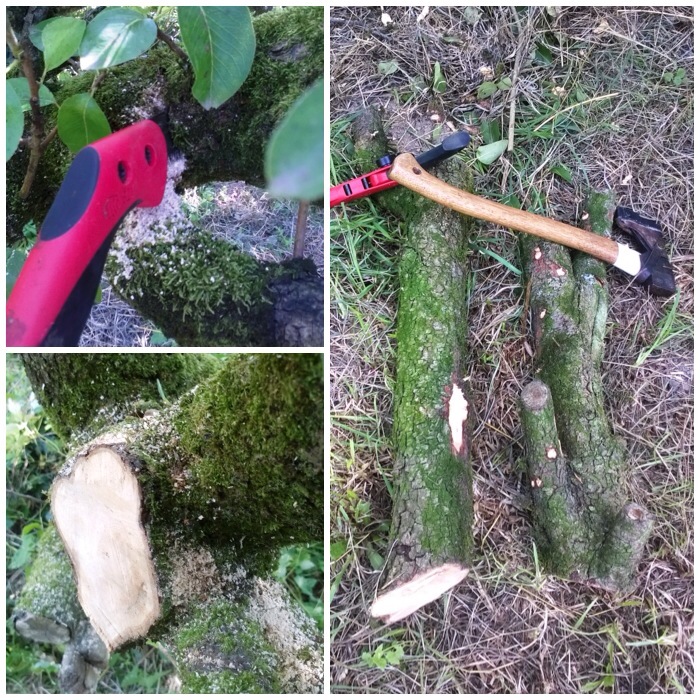
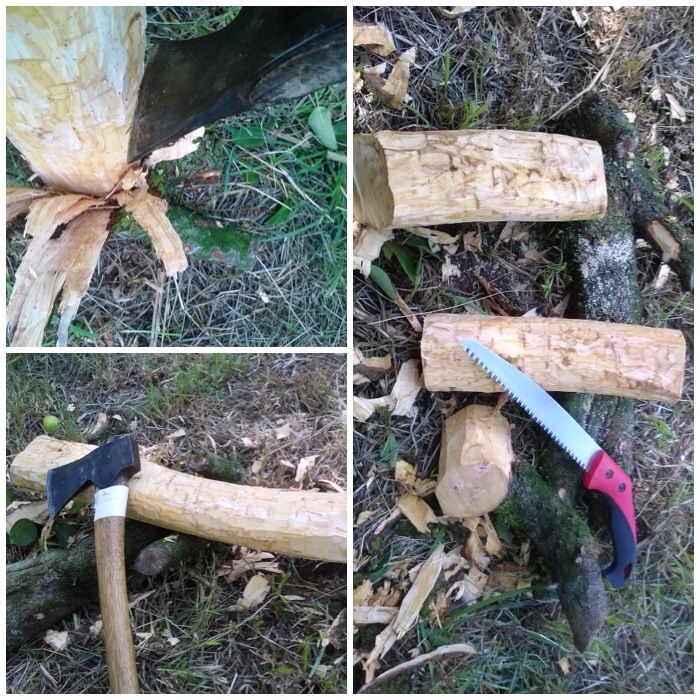
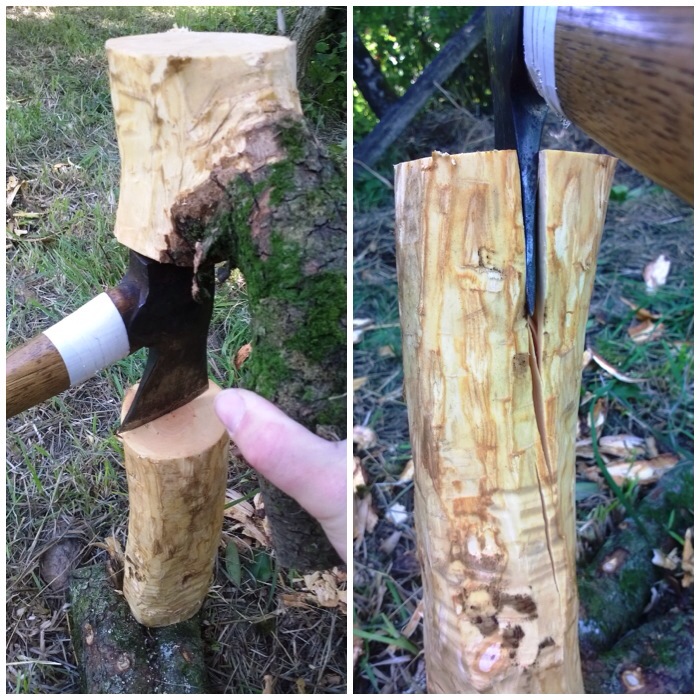
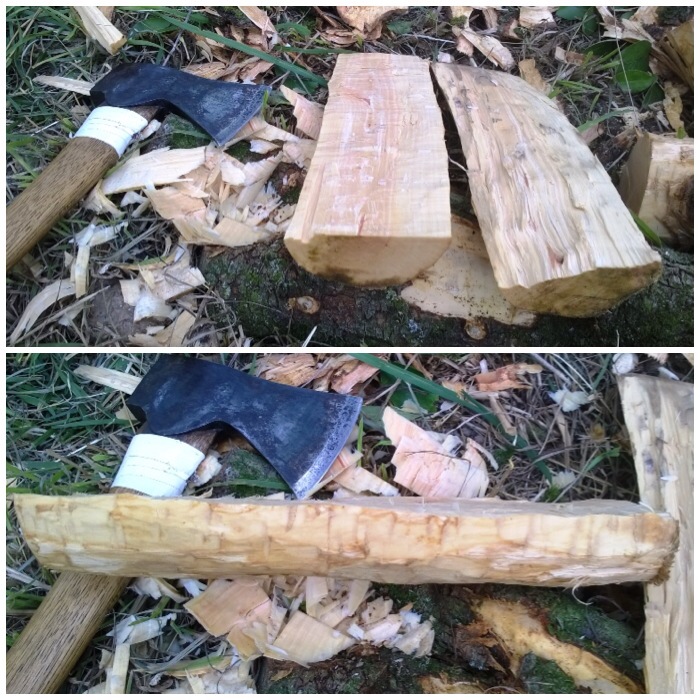
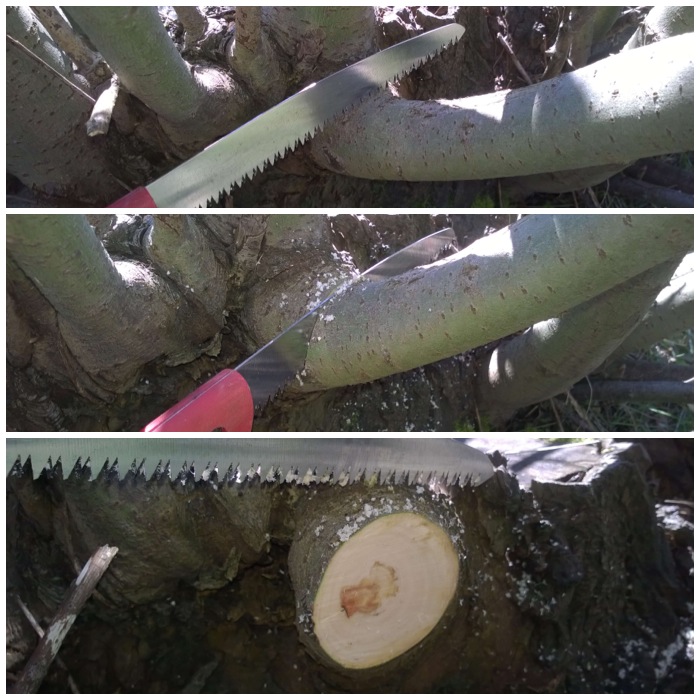
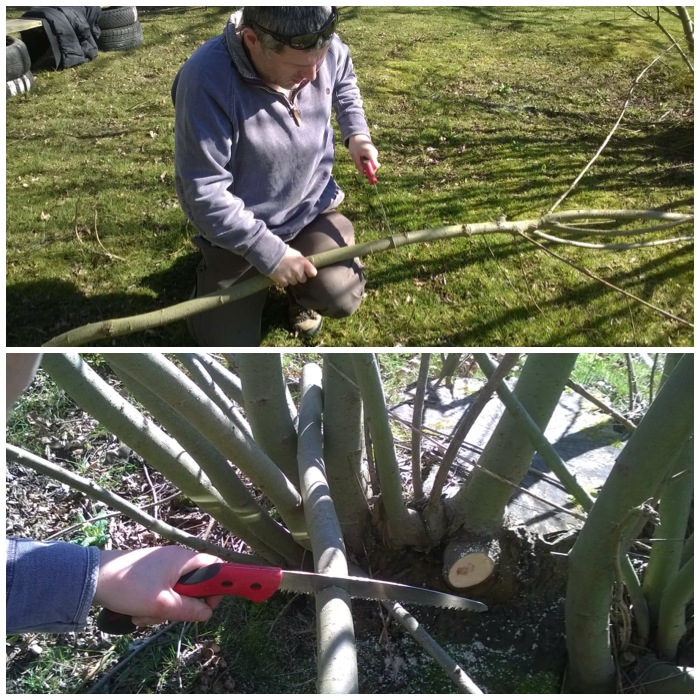
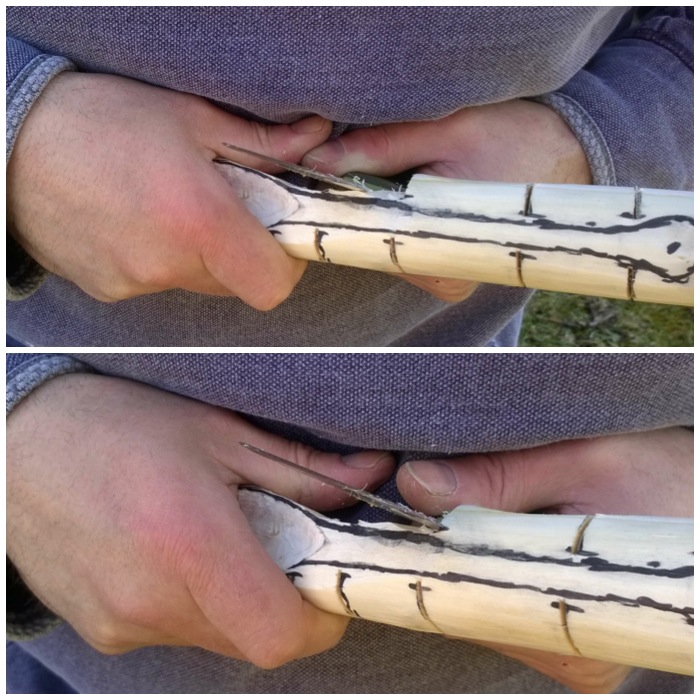
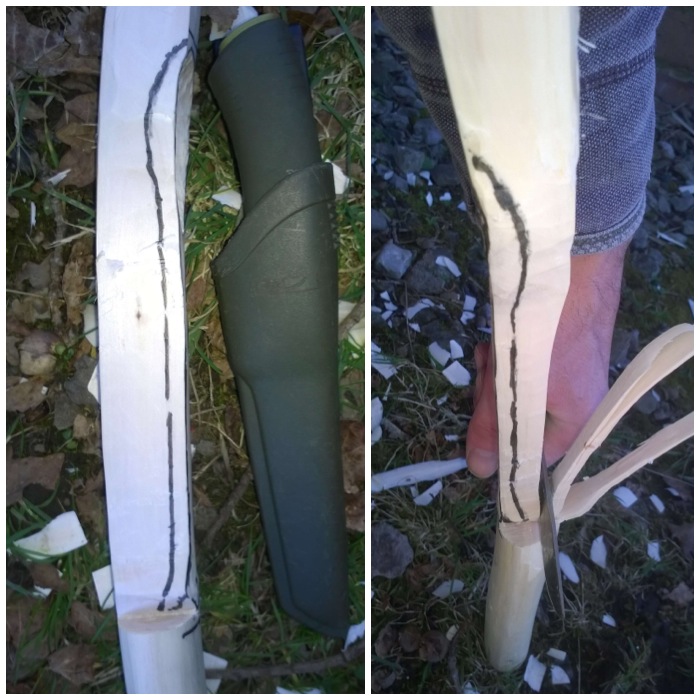
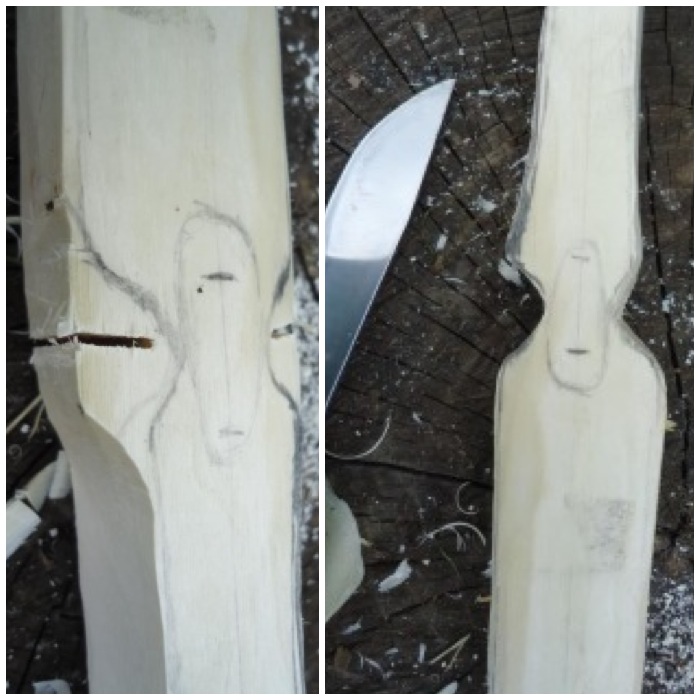
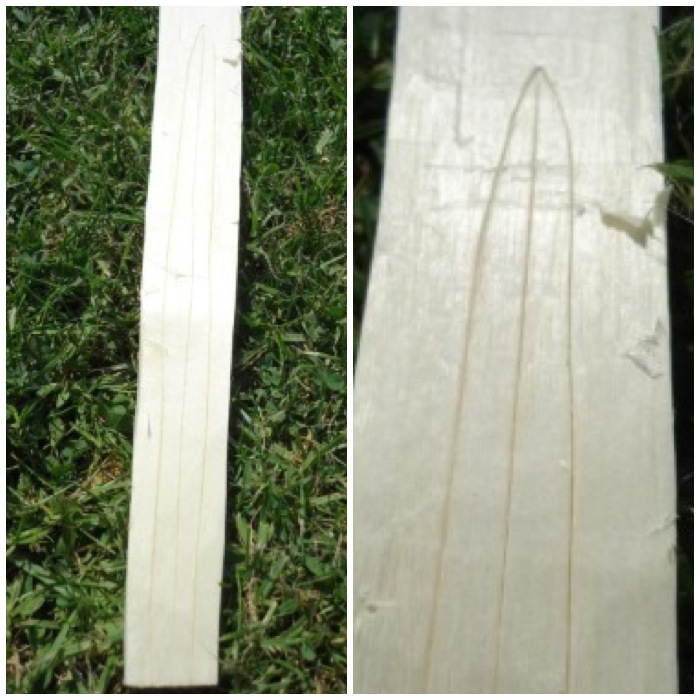
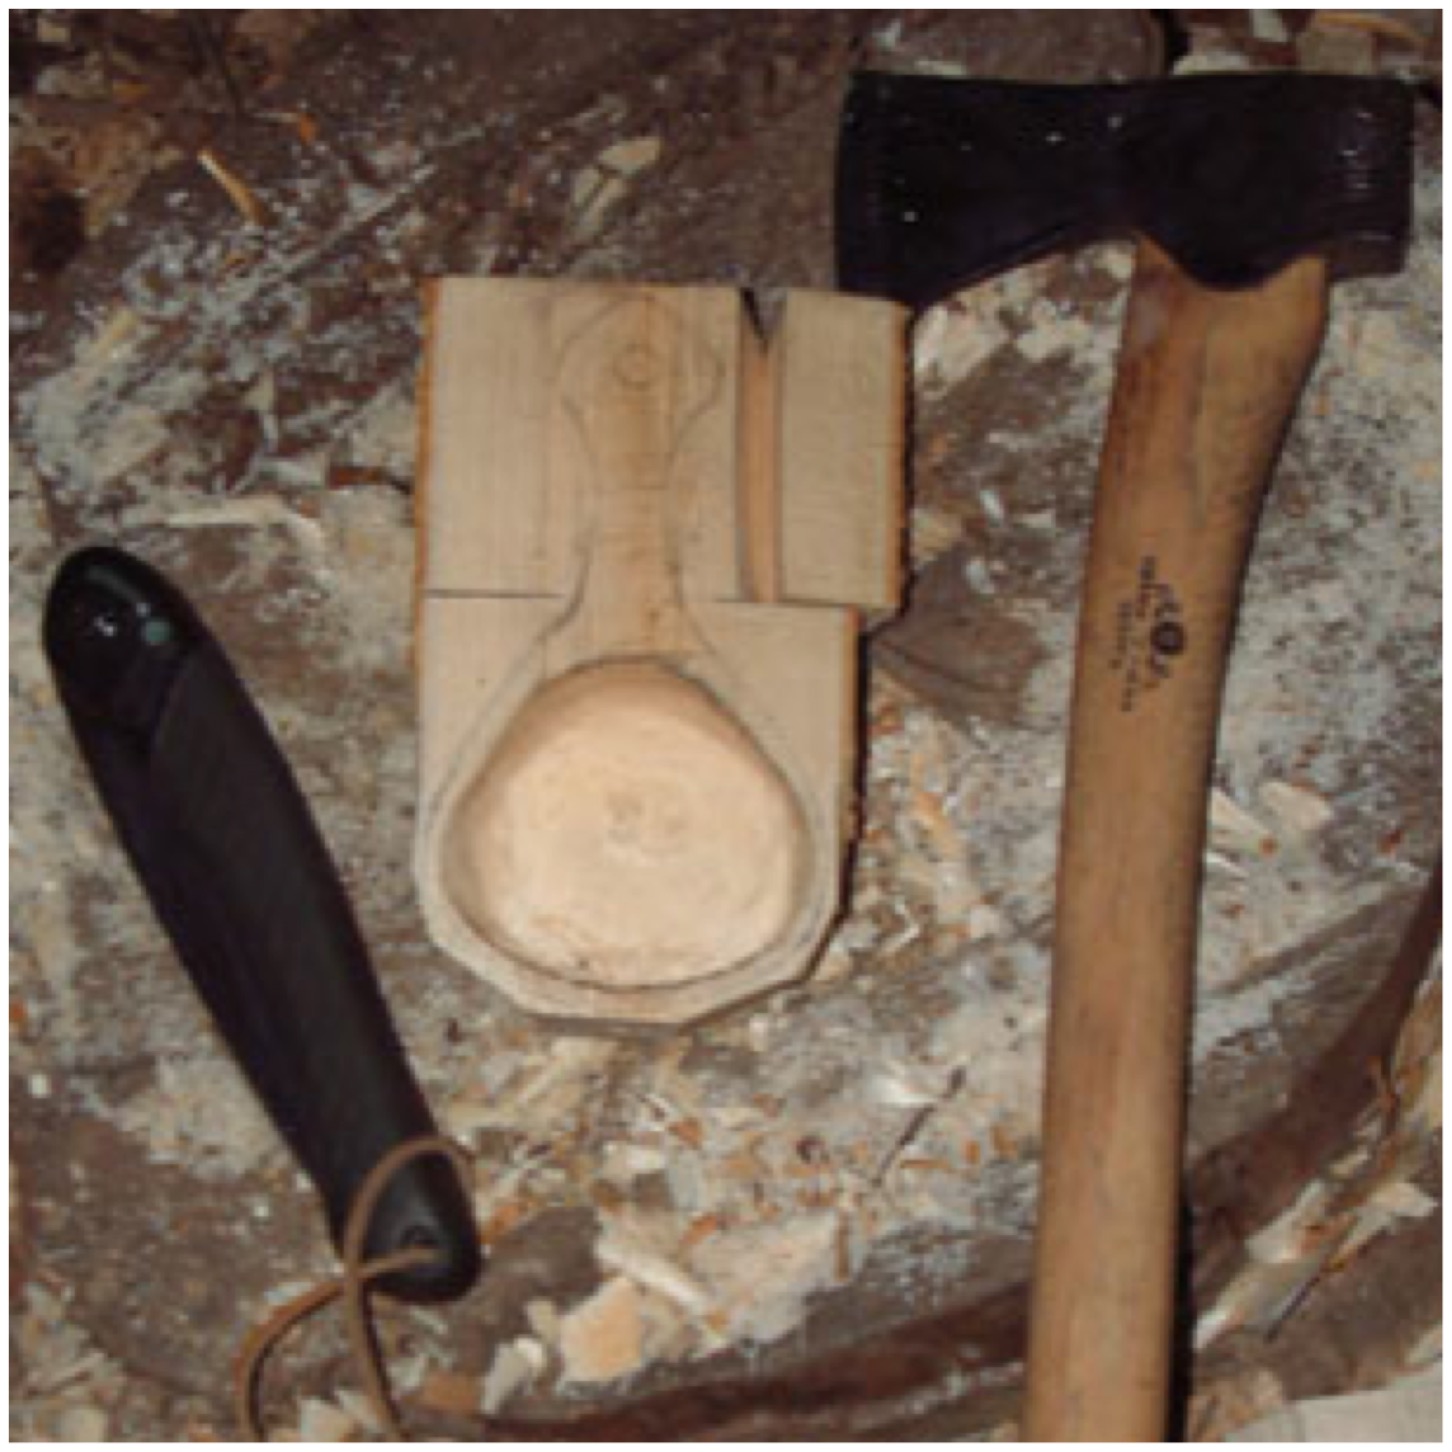
Axing out the basic shape

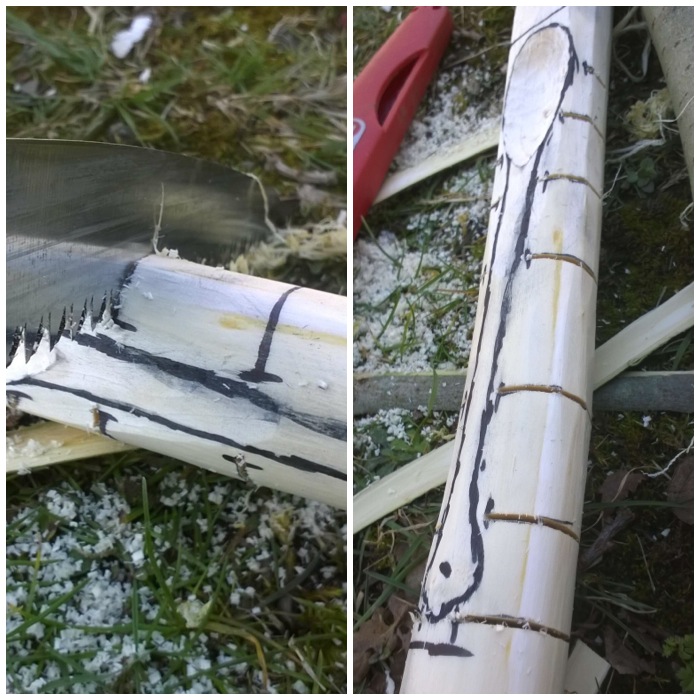
Once the bowl was created I axed out the basic shape of the noggin. I used the saw to make ‘stop cuts’ first though so that when I was using the axe I did not cut out areas of wood that formed part of the cup.

I did this work on a stump placed on the floor. The work piece was always well in front of me so that the follow through from any slippage (from the axe) went to the side of me.

Here you can see the two stop cuts created by the saw coming in at either side of the work piece. I then used the axe to cut out the areas of wood I did not require.

Photo 05-02-2015 19 47 28
Stop cuts and axe work

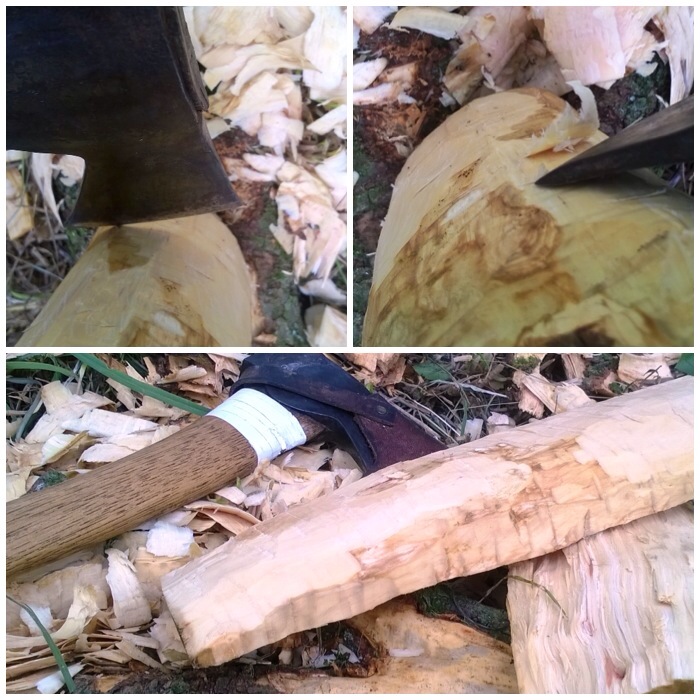
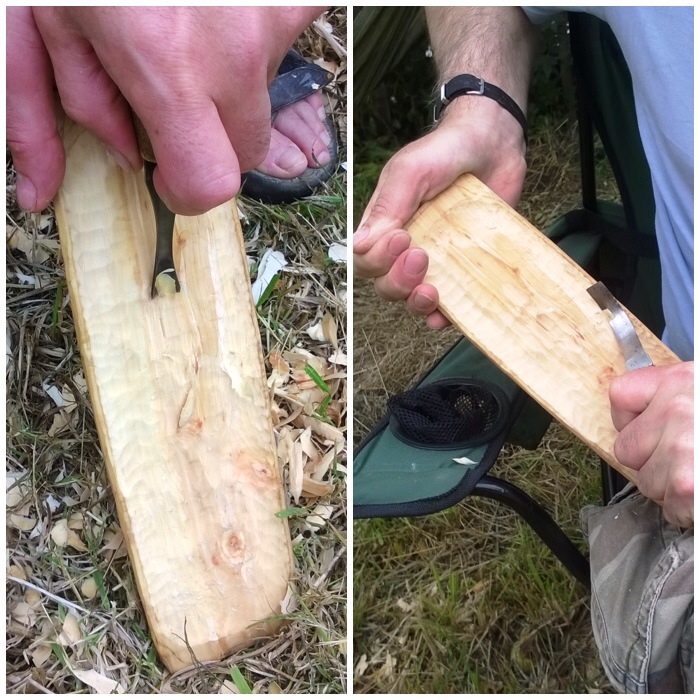
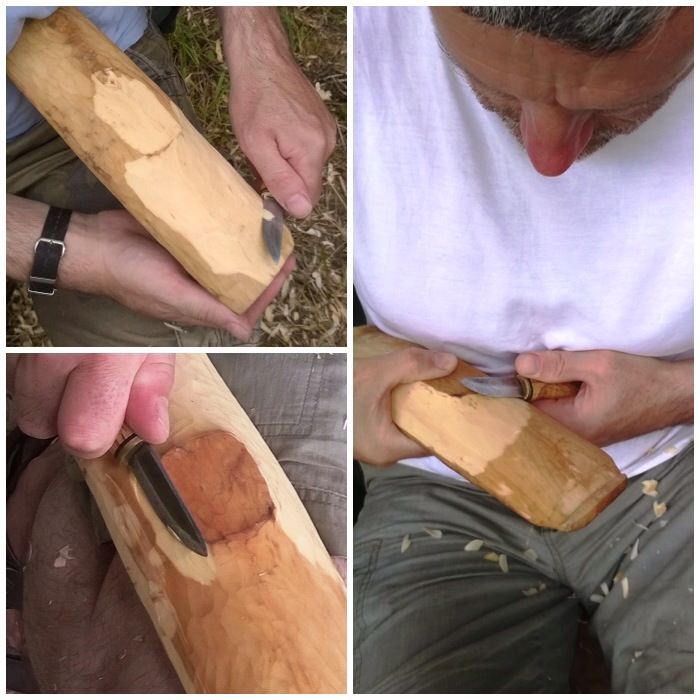
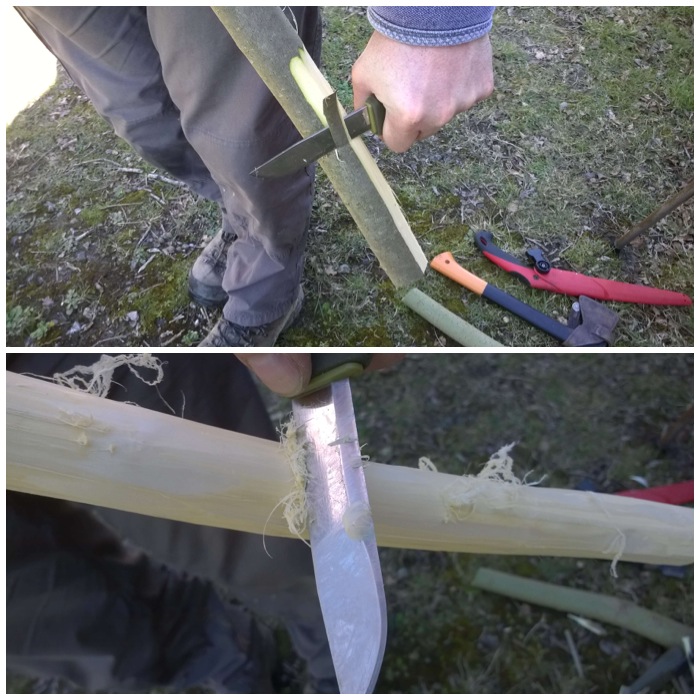
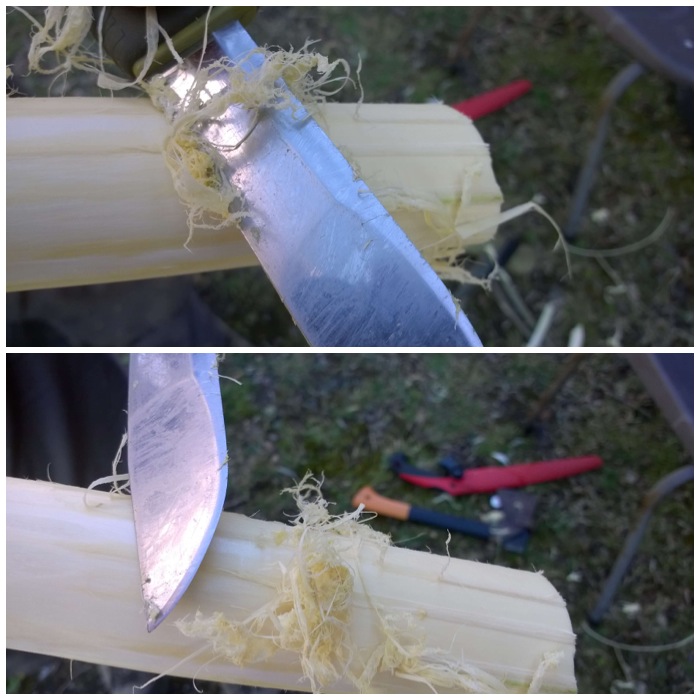
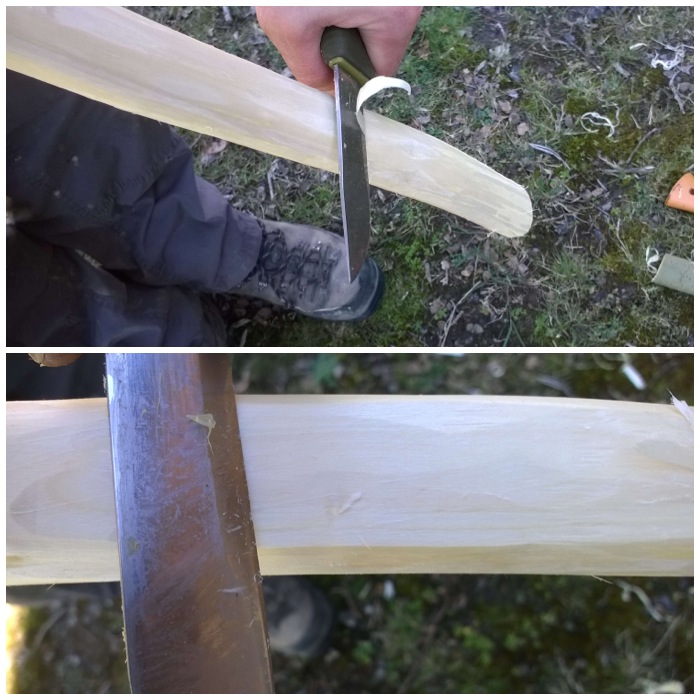
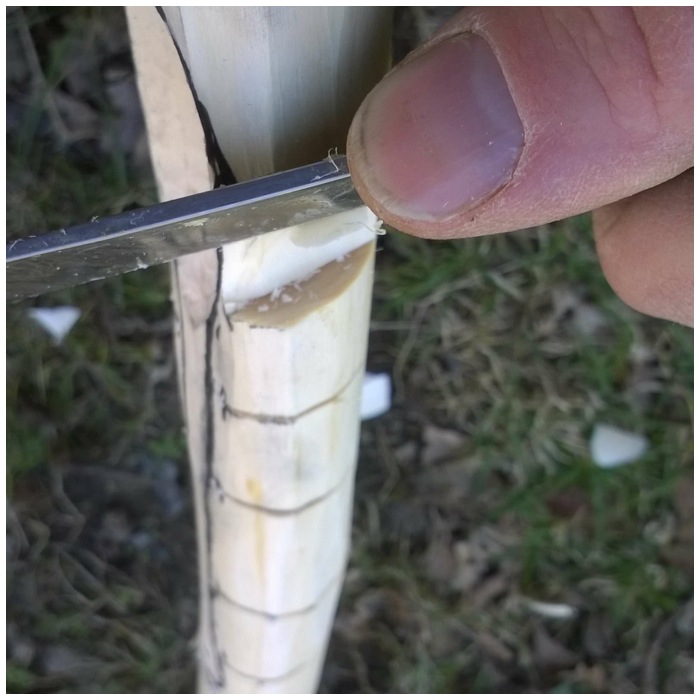
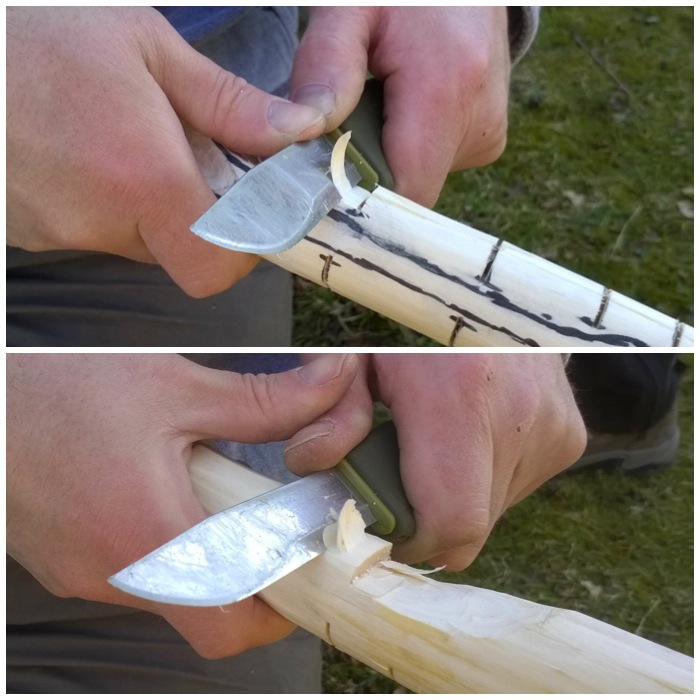
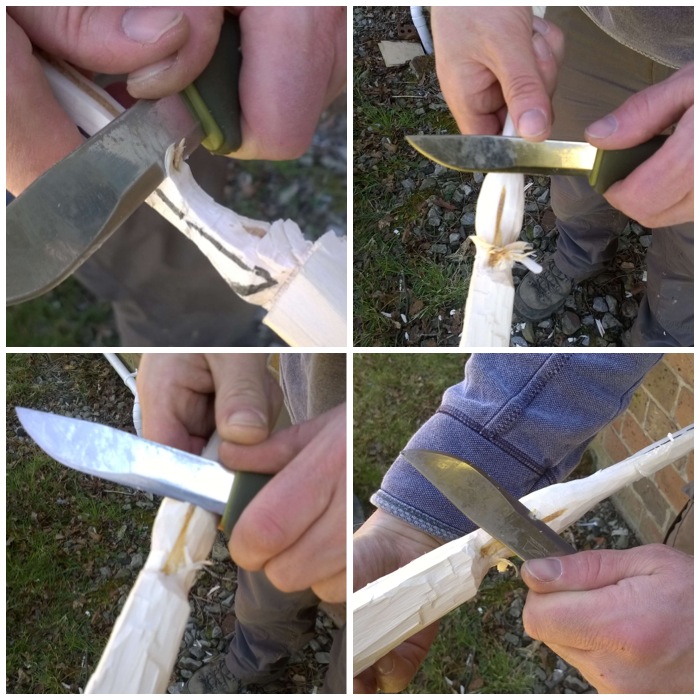
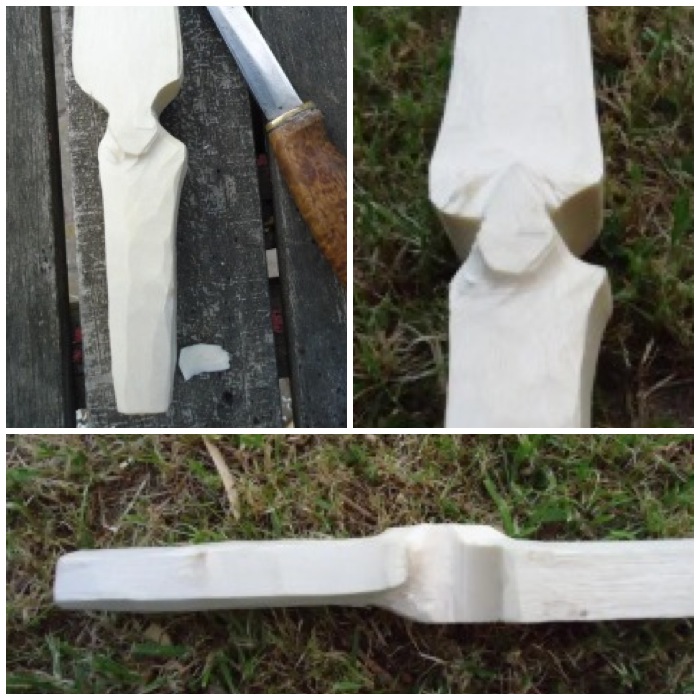
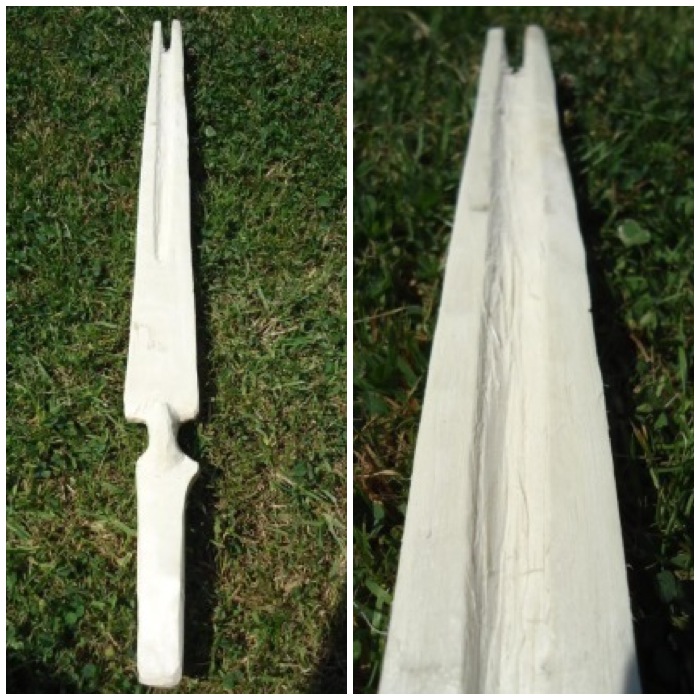
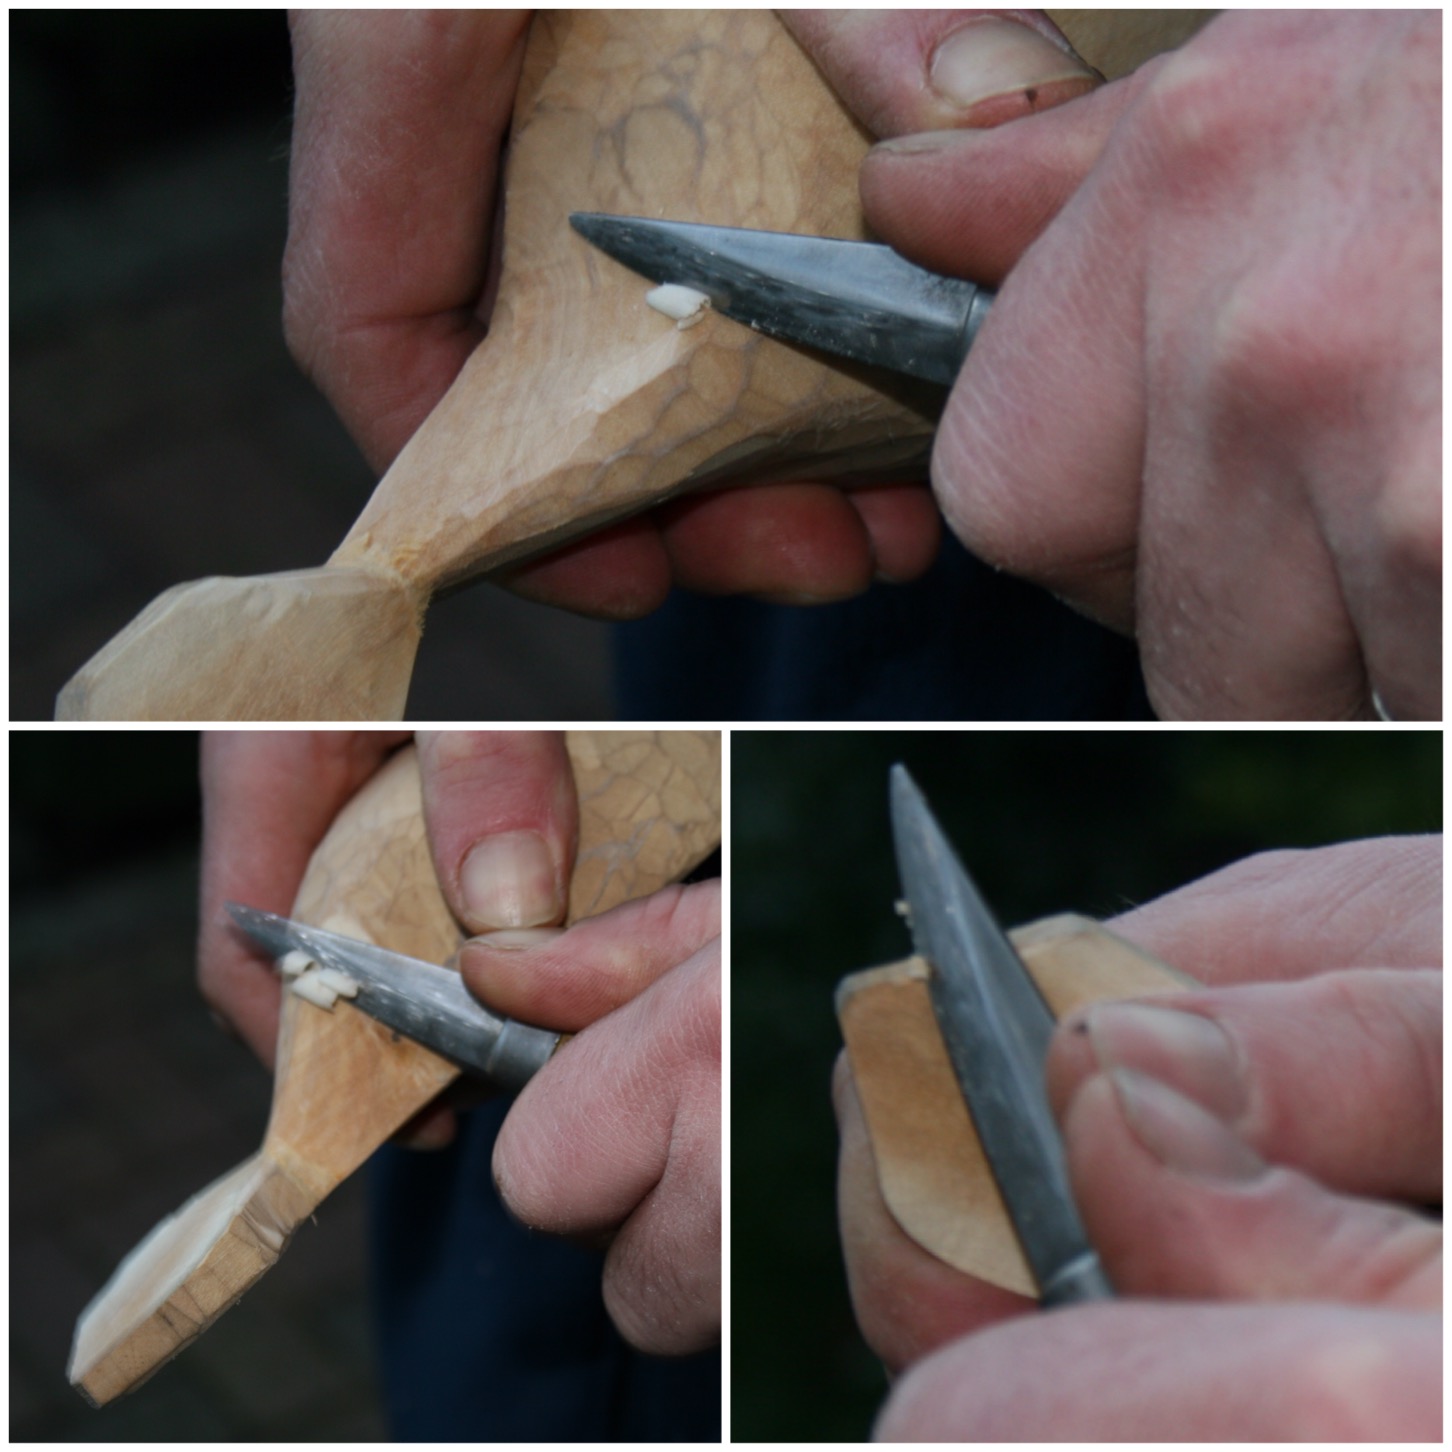
Carving with the Sloyd knife

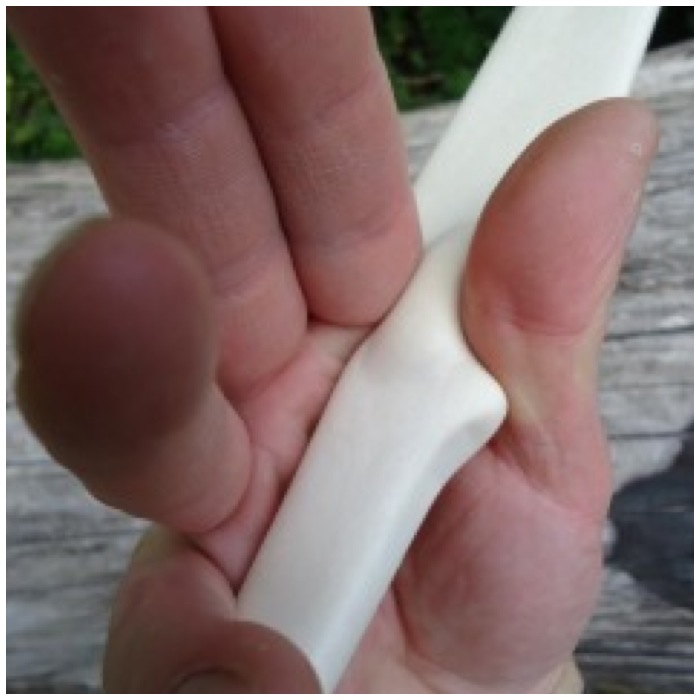
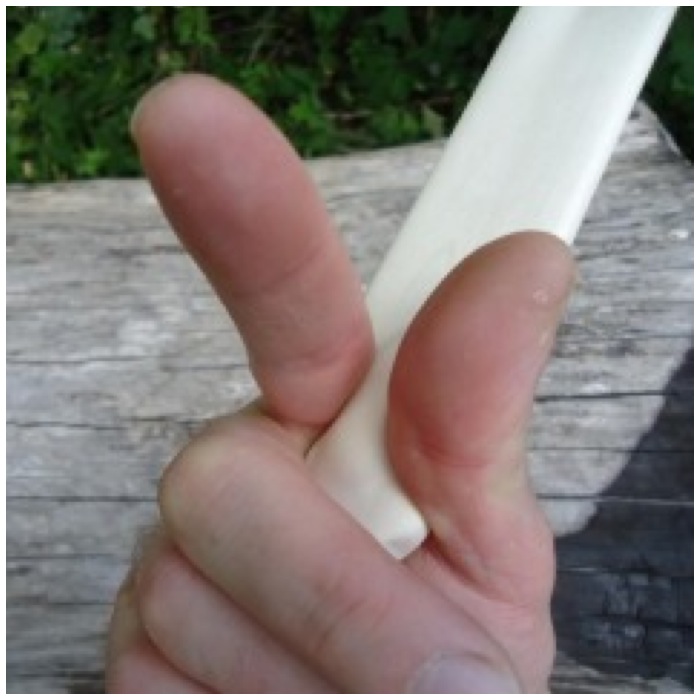
After using the axe to blank out the basic shape of the noggin I then switched to using my Mora Sloyd knife. This small knife is ideal for more detailed, controlled carving.

I was able to carve in a very controlled and safe fashion with my thumbs pressing on the back of the blade. Even though the cuts were always small it did not take long for me to fine tune the shape as the blade itself was very sharp and the wood was green.
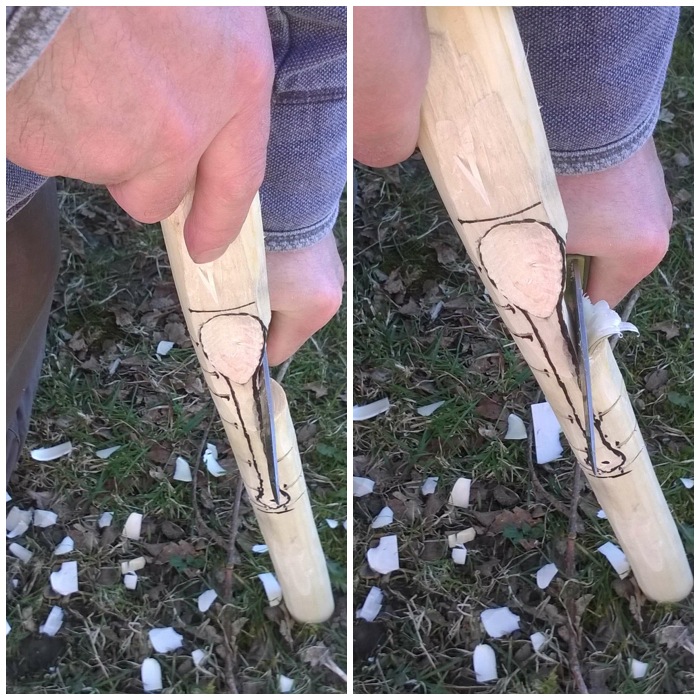
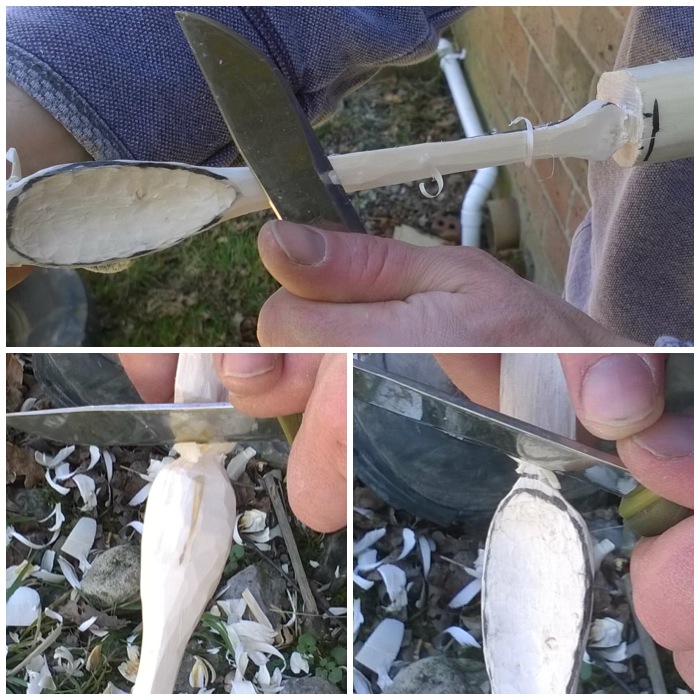
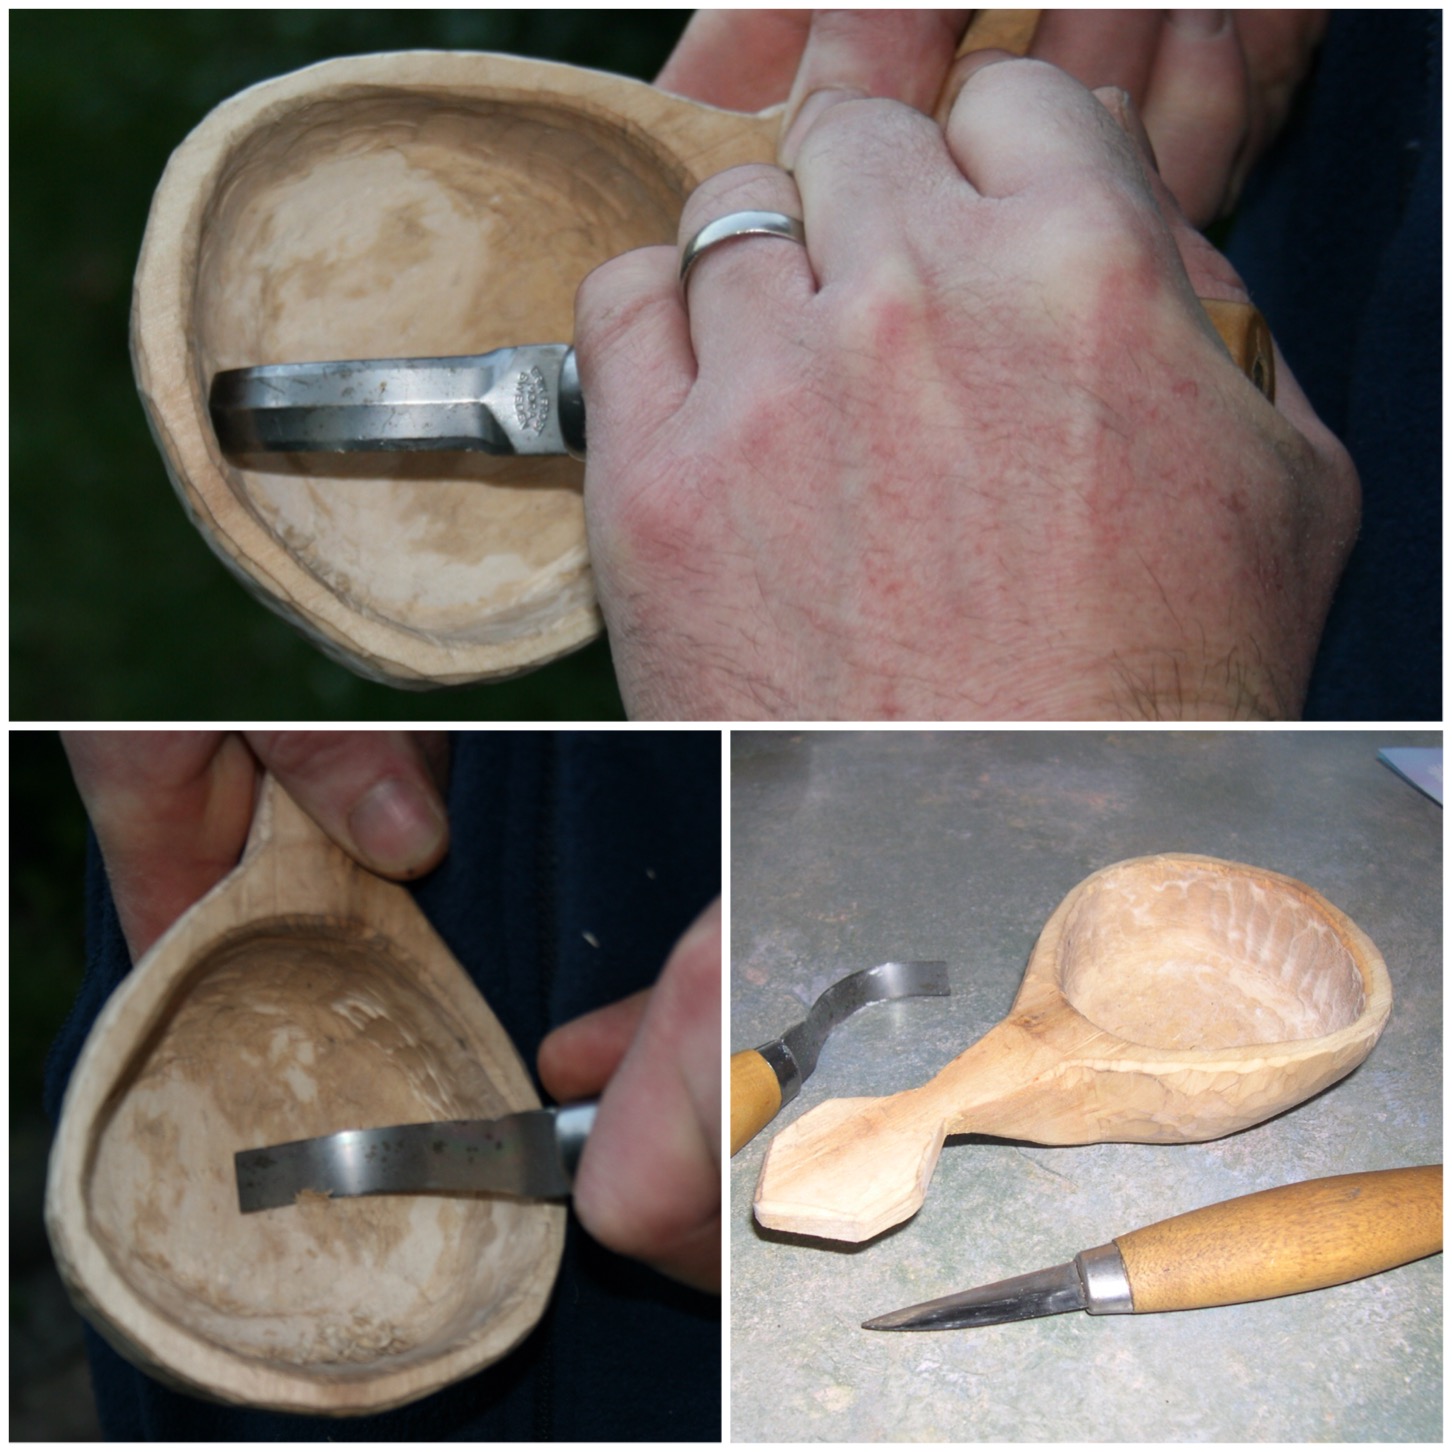
Photo 05-02-2015 19 48 53
Knife work

The crook knife

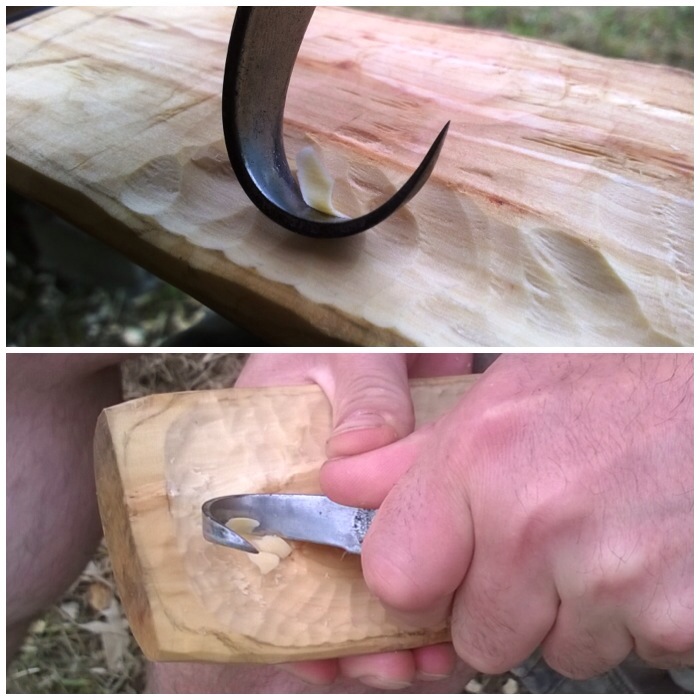
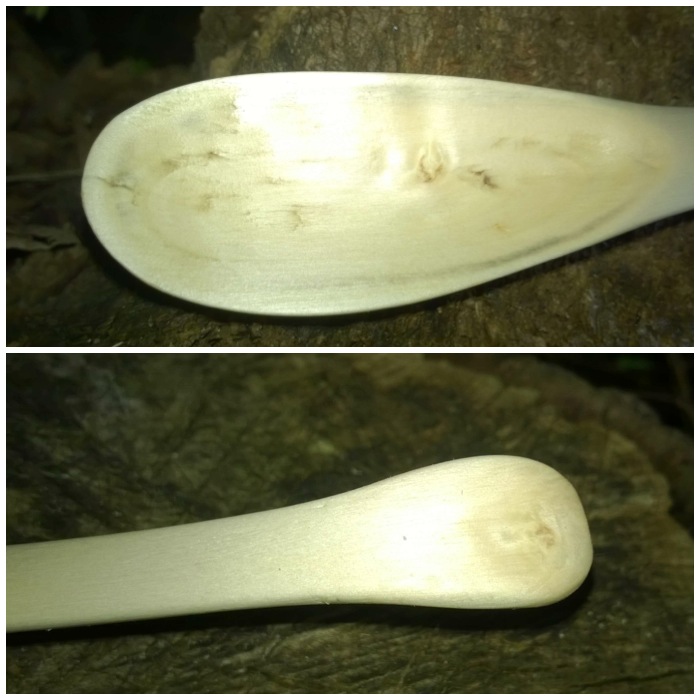
When I had the outside of the noggin ready for sanding I decided to use the crook knife on the inside of the bowl.

This was to take out as many of the small ridges produced by the chisel as possible and also to try and flatten out the bottom of the bowl some more. The crook knife enabled me to smooth out a lot of the ridges that the Sloyd could not reach.

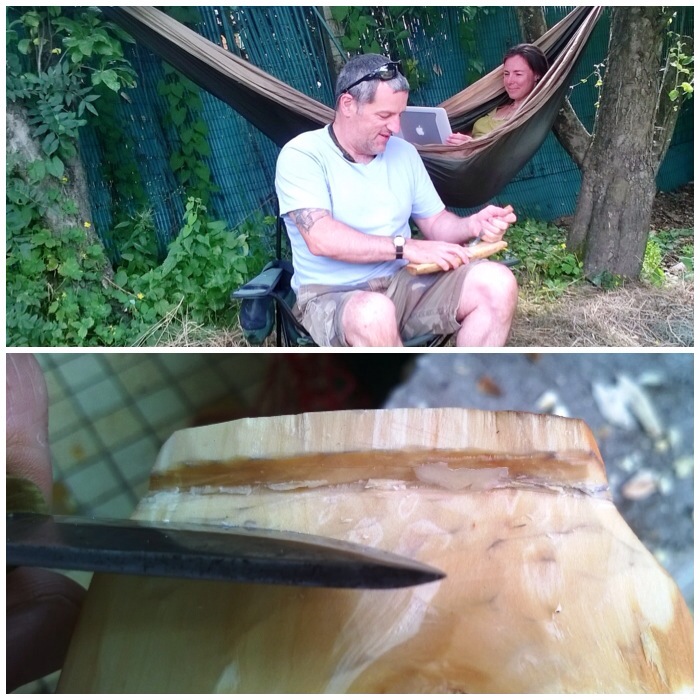
After finishing with the bowl I left the noggin in a paper bag to dry slowly over a two-week period as it is easier to sand down dry wood.
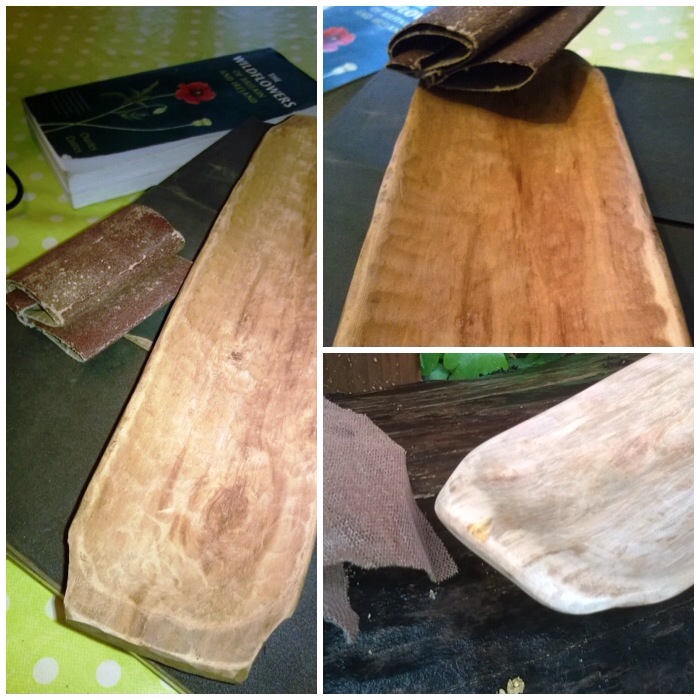
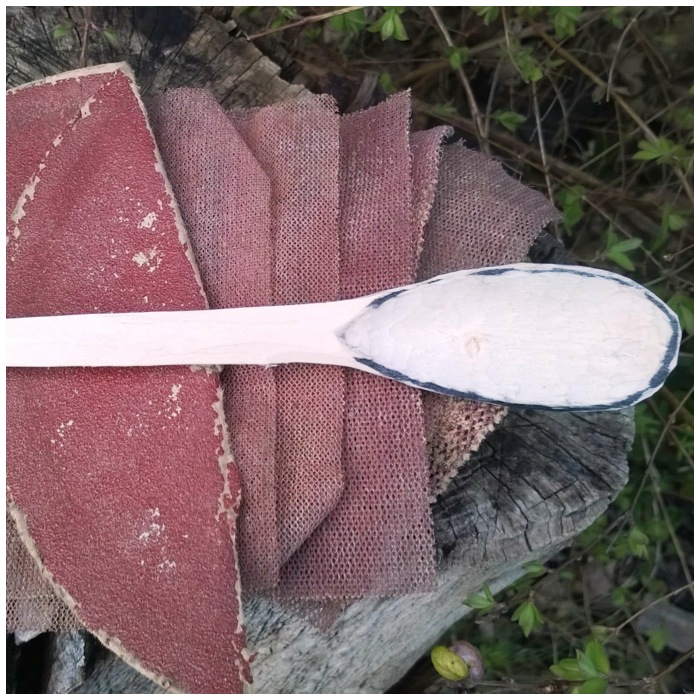
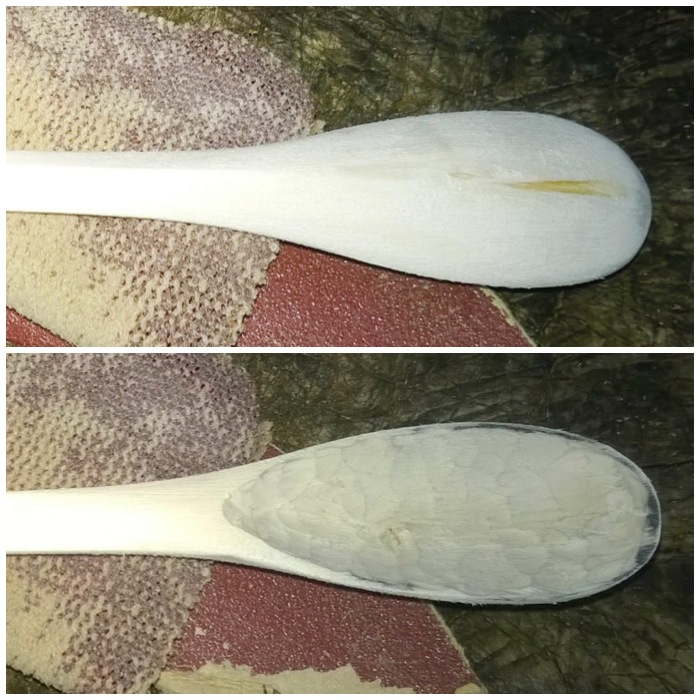
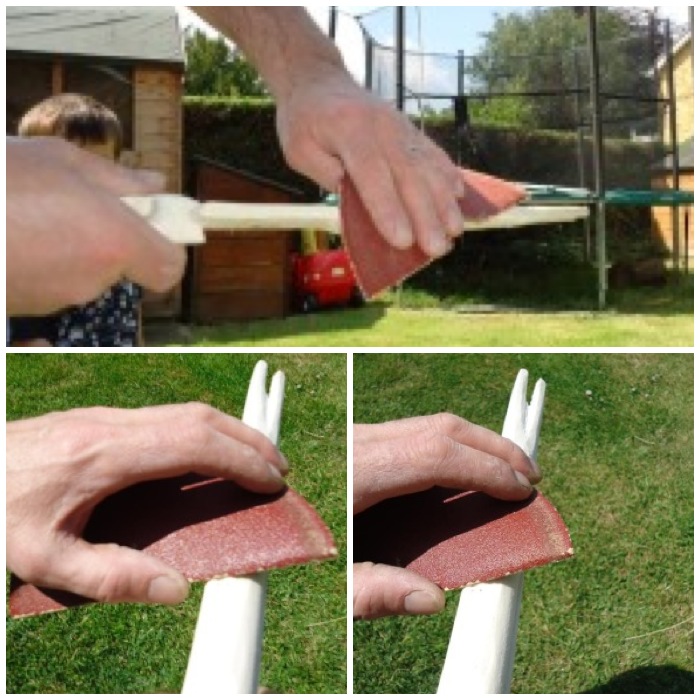
Photo 05-02-2015 19 49 32
Finishing the bowl with the crook knife

Sanding the Noggin

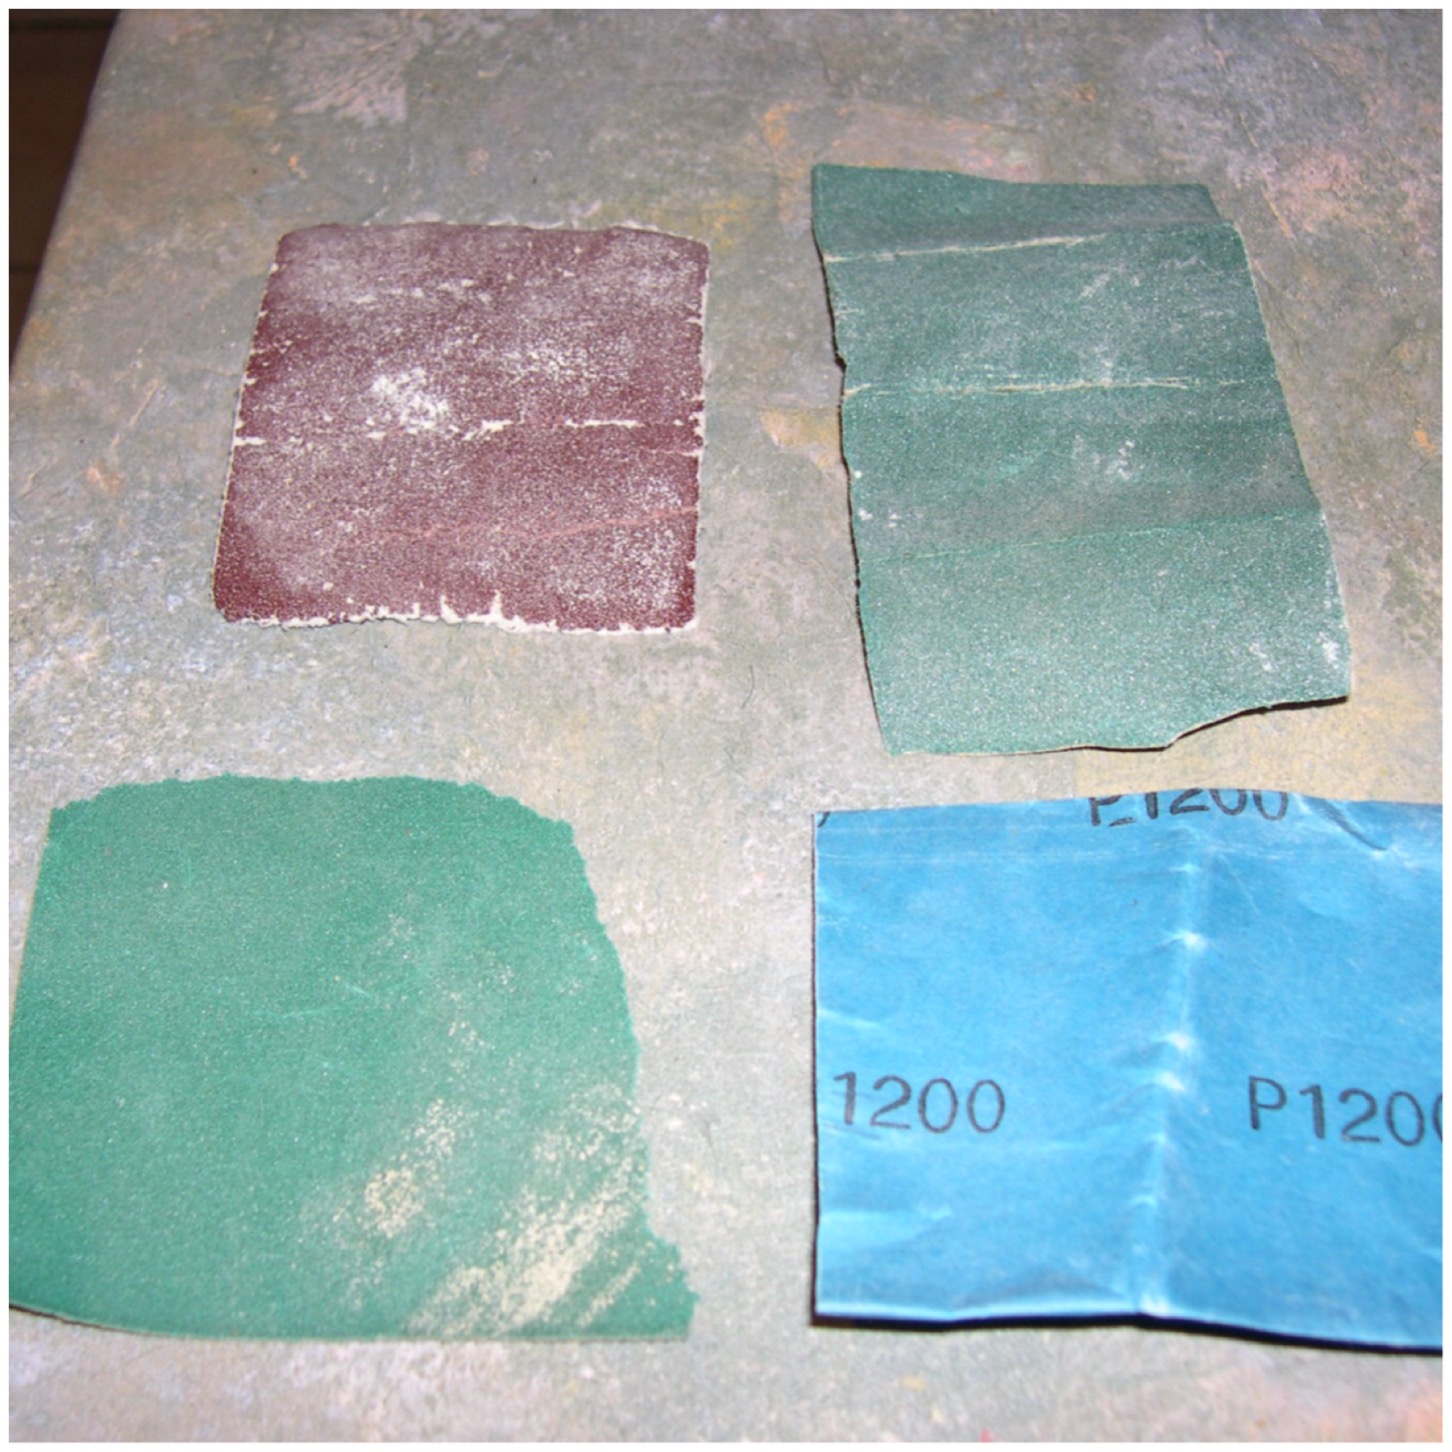
I used a variety of different sandpapers on the noggin including:

  • Top left – 80 grit
  • Top right – 150 grit
  • Bottom left – 320 grit
  • Bottom right – 1200 grit
Photo 05-02-2015 19 49 57
The sandpapers used

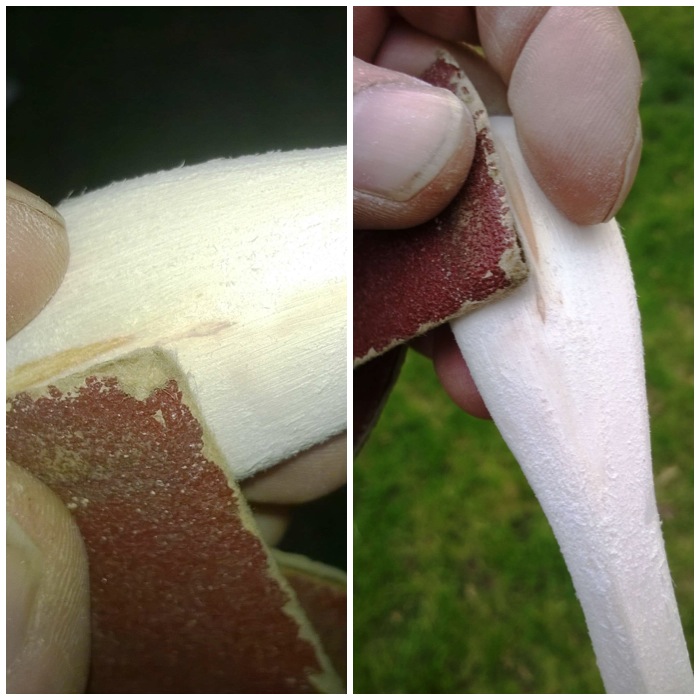
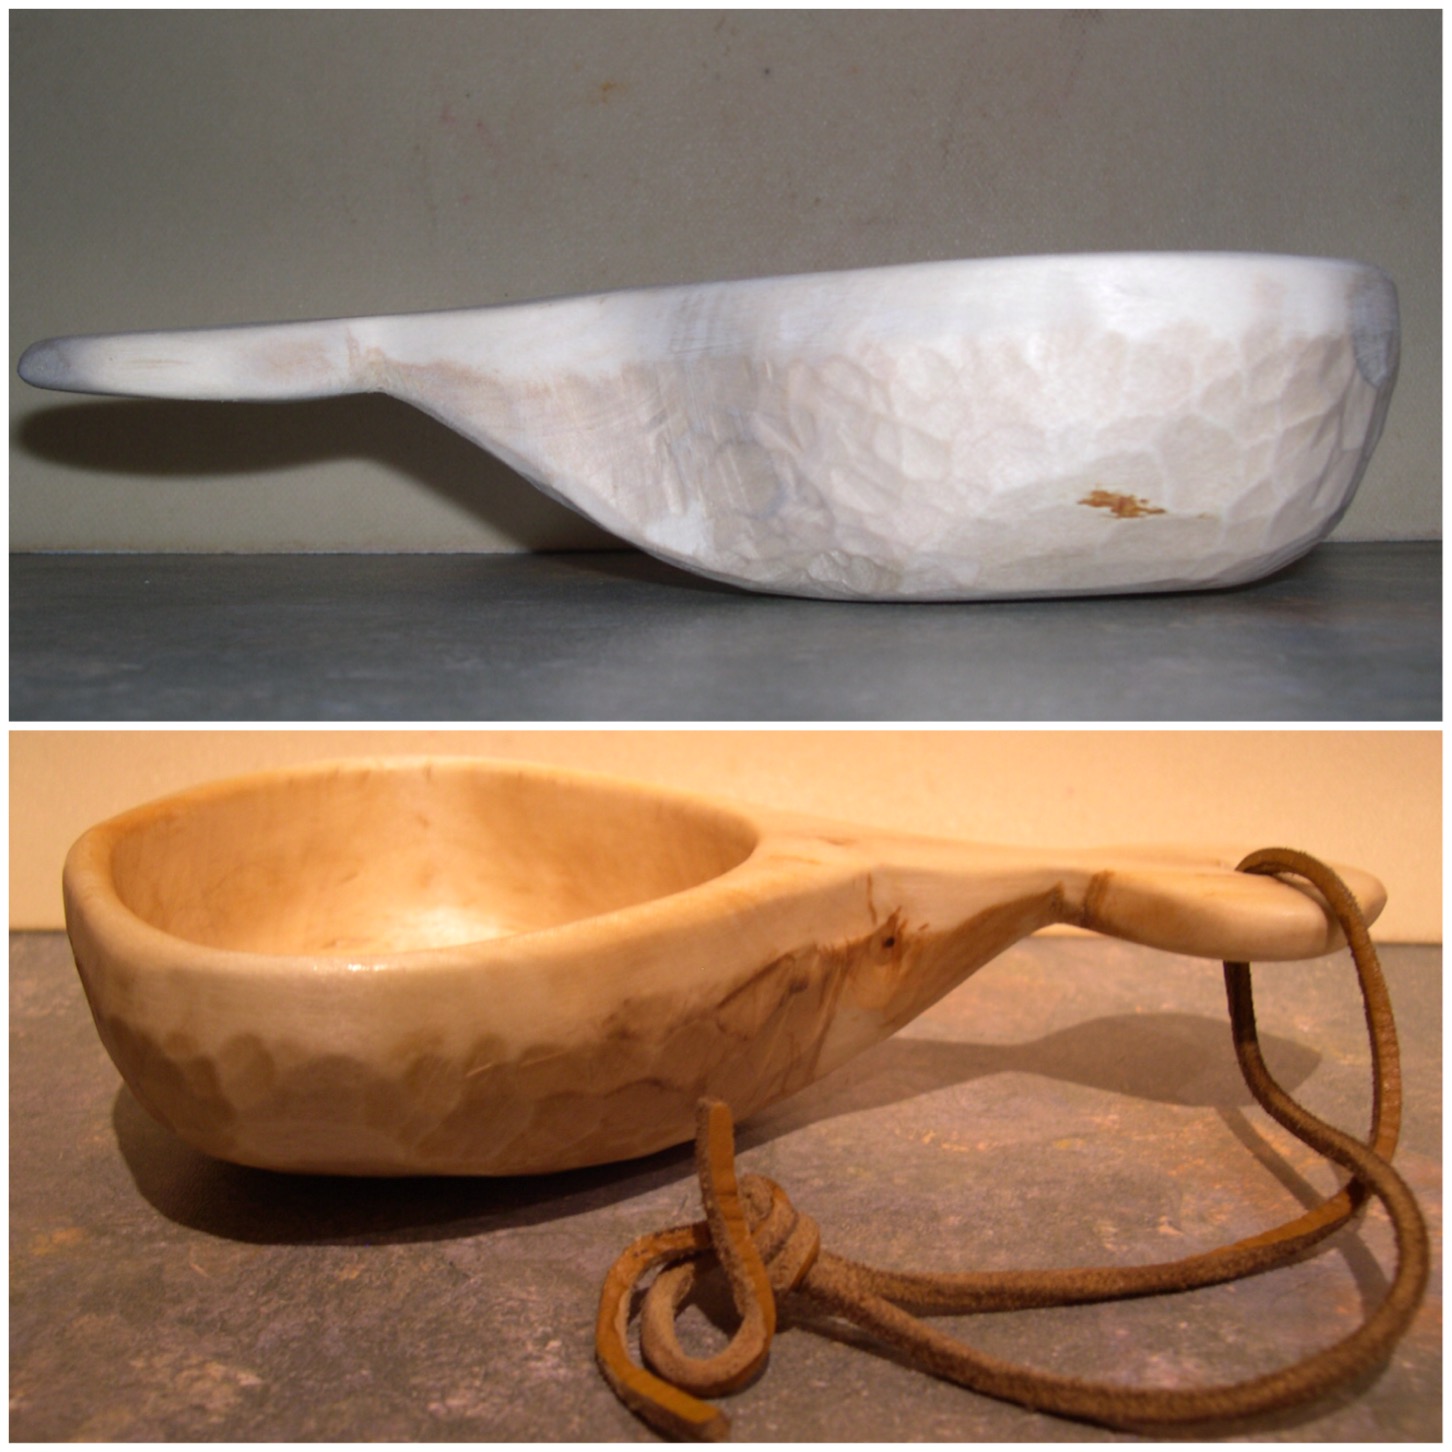
I started with the coarsest, 80 grit, ensuring I covered the whole noggin and that all the edges were rounded off. The bottom of the noggin did take a considerable period of time to roughly sand (I should probably have done more knife work) but I wanted to create a small flat area so that it would be stable when set down with liquid in it.

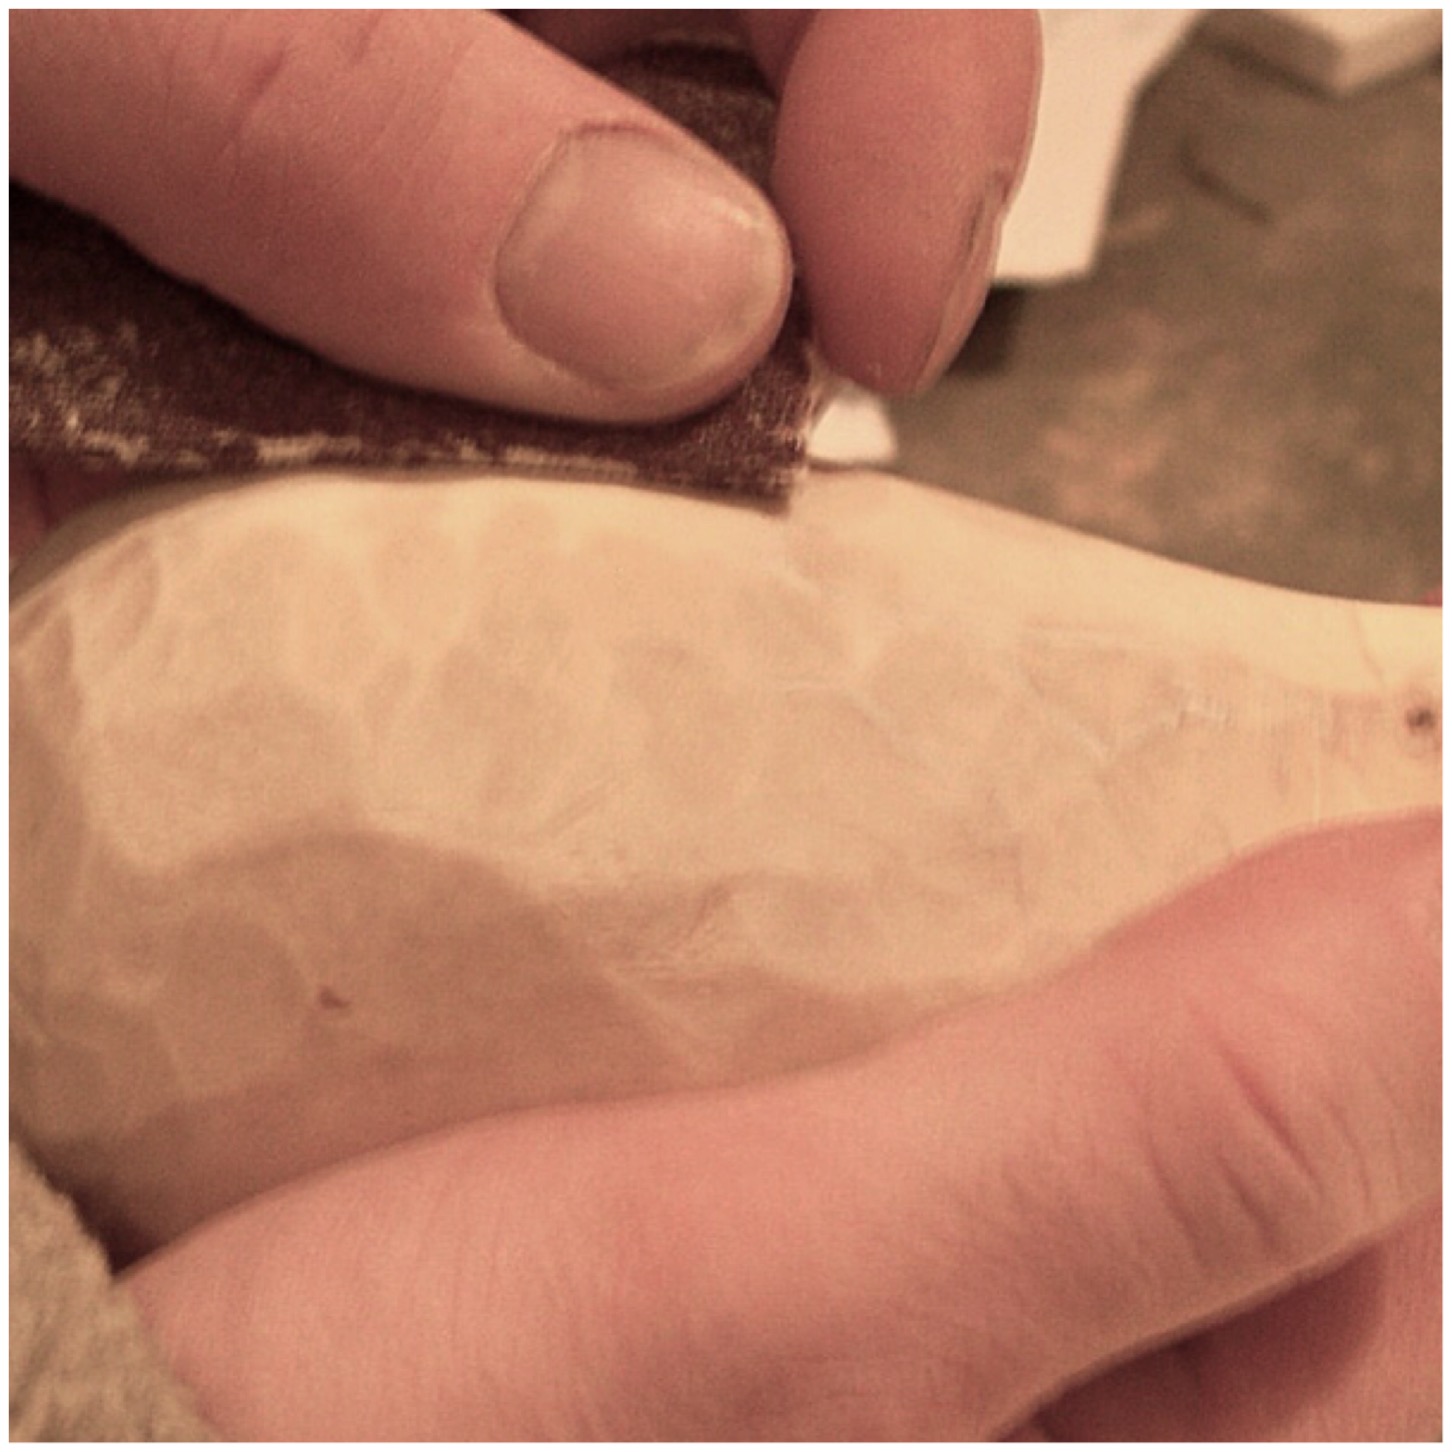
I did not sand the whole of the noggin smooth as I wanted to leave some of the tool marks showing but I did give the rim of the cup an extra bit of sanding as I wanted that bit particularly smooth.

Photo 05-02-2015 19 52 29
Sanding


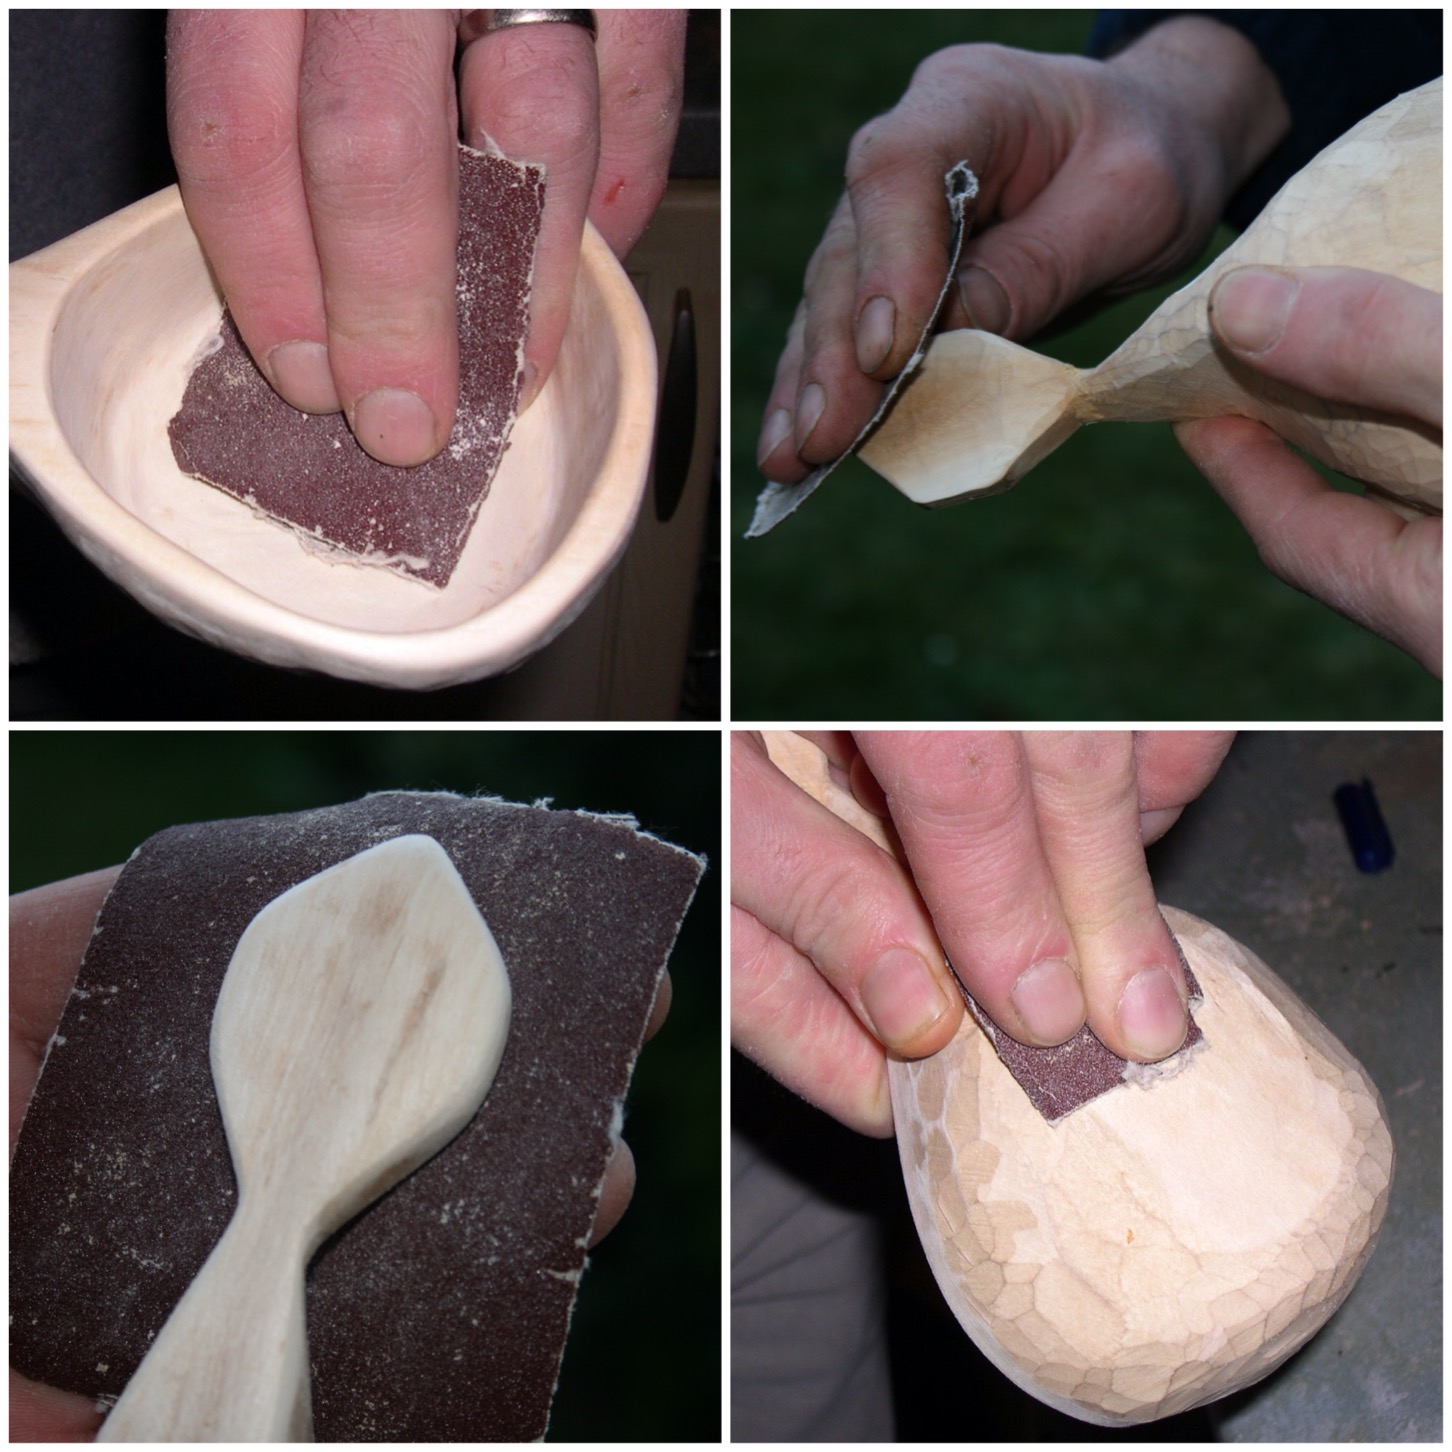
I really focused on making the rim smooth as I wanted that smoothness to contrast with the tool marks on the lower area.

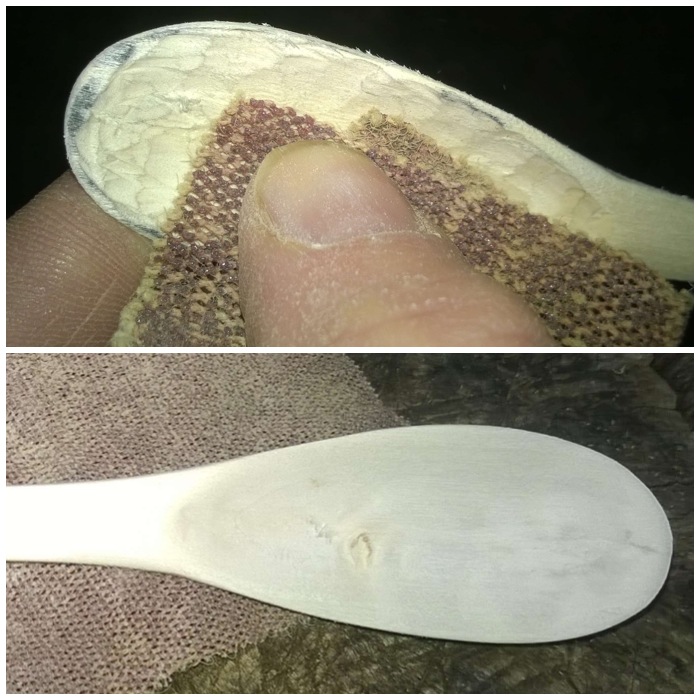
Once I had finished with the 80 grit I worked my way up through the other sandpaper slowly smoothing the noggin down until I reached the finest, 1200 grit.
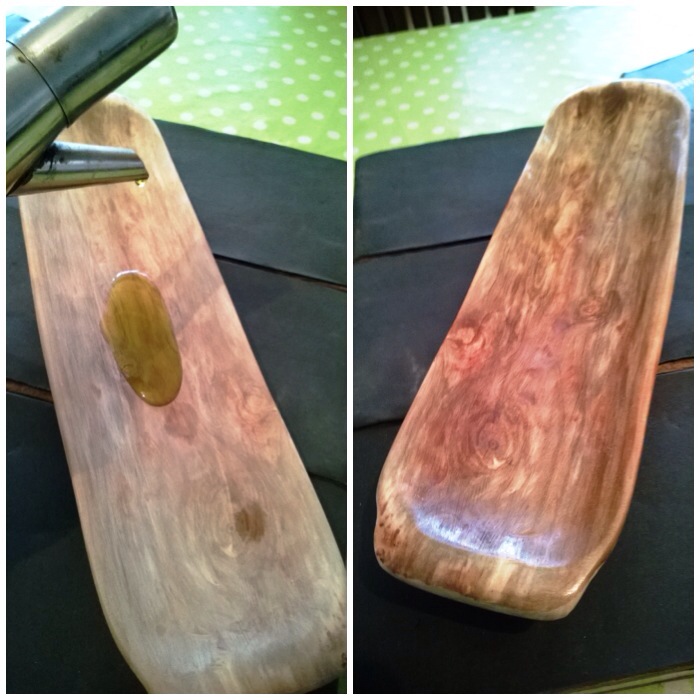
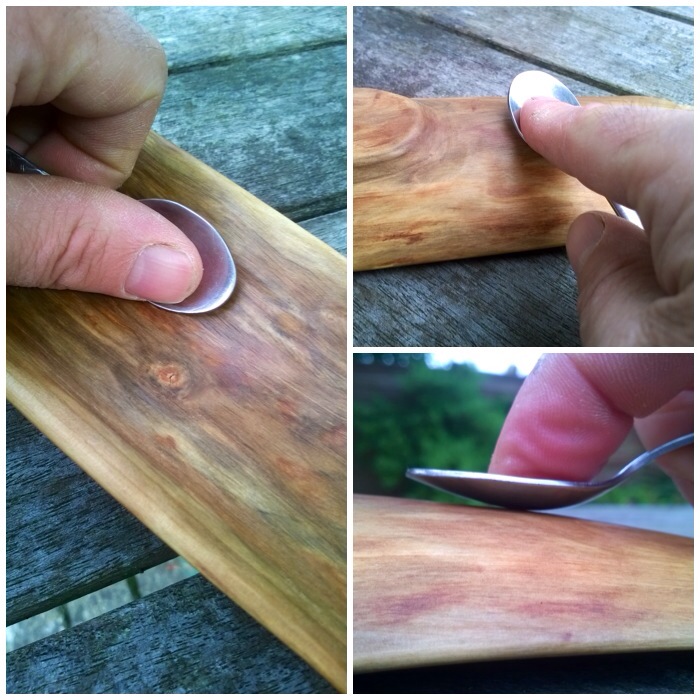
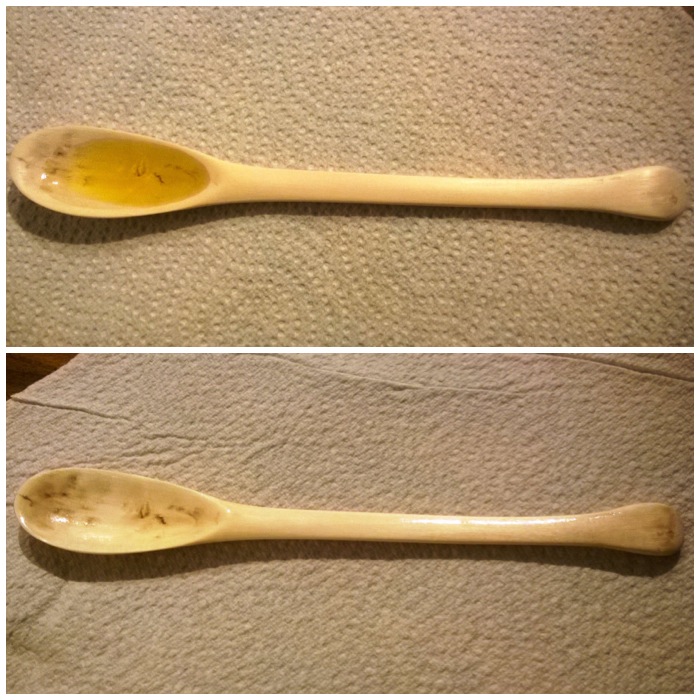
Photo 05-02-2015 19 54 21
Smoothing the rim

Boning the noggin

After sanding I oiled the noggin lightly (I used vegetable oil as that was all that was available) then used the back of a spoon to really smooth the surface. This is known as boning and as well as smoothing the surface it helps to seal the oil into the wood (a small rounded pebble works just as well).
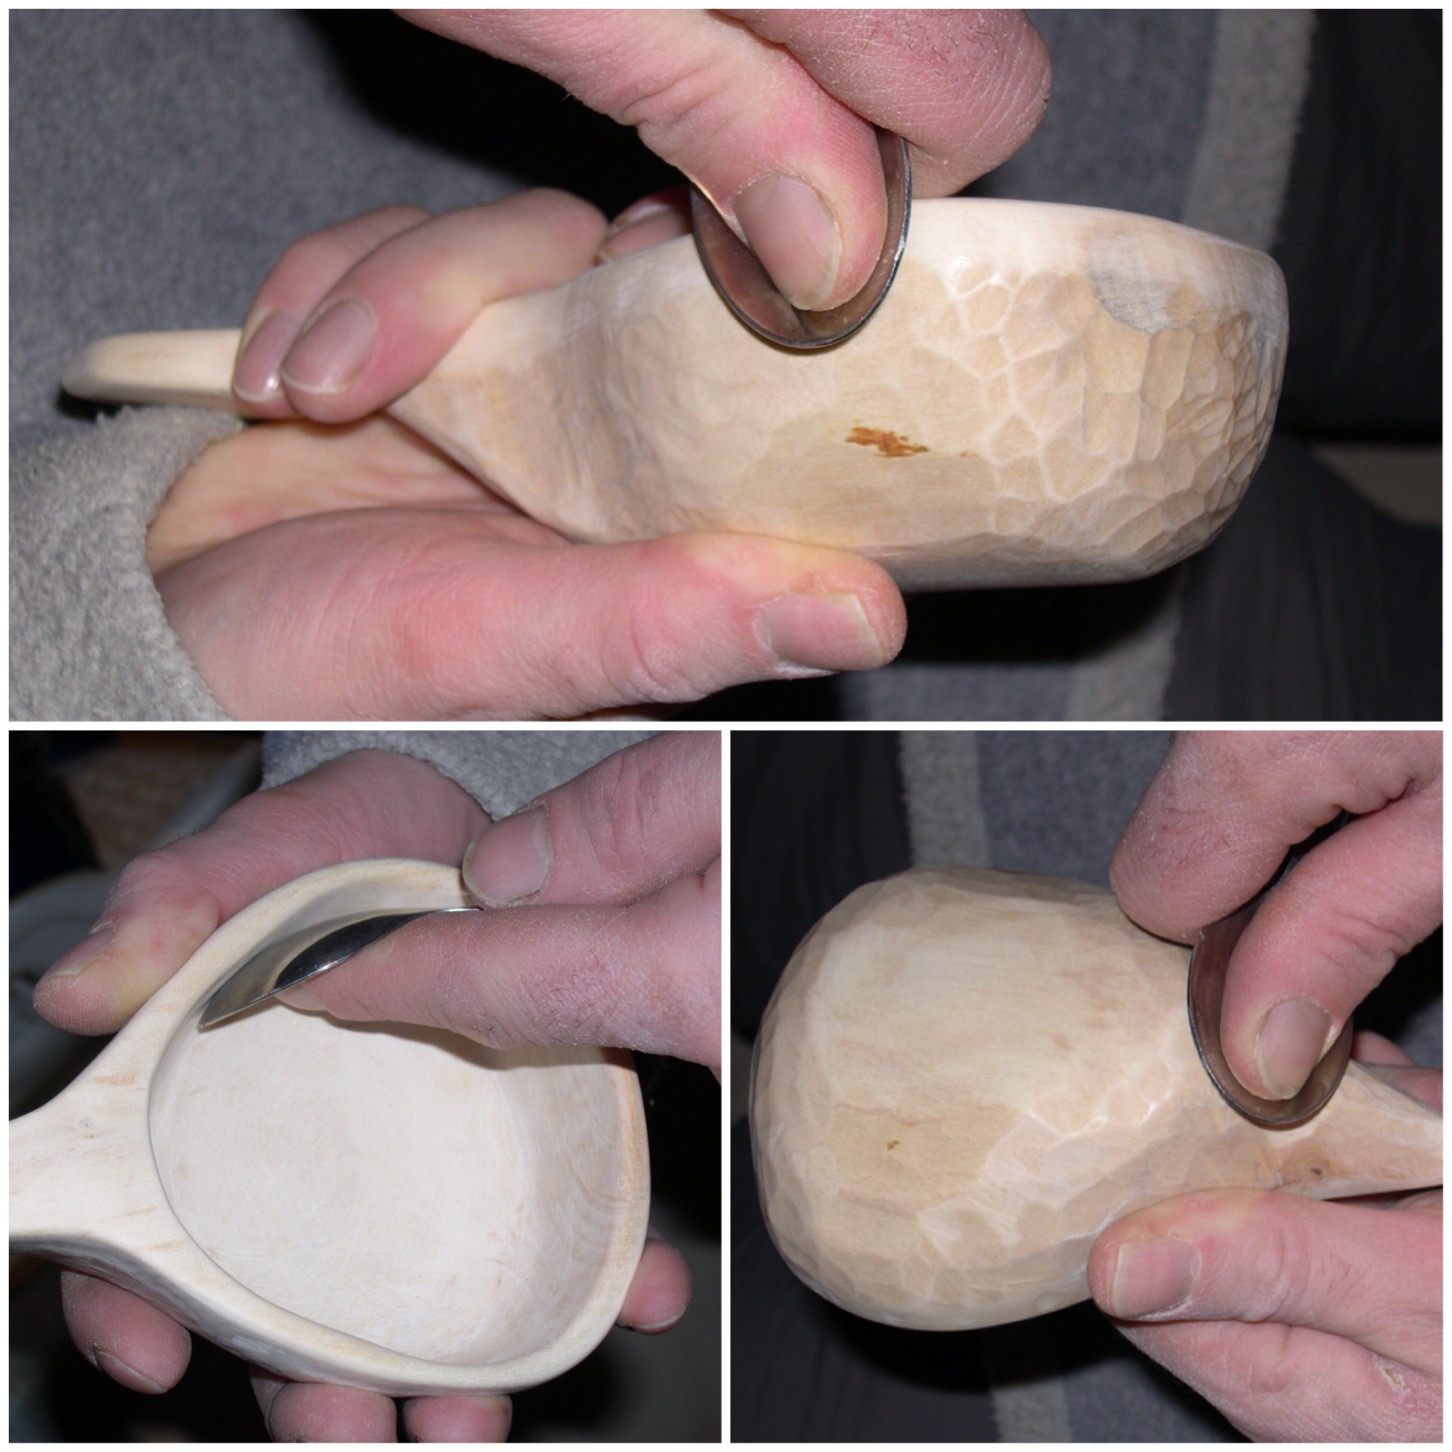
Photo 05-02-2015 19 55 30

Boning

This whole process took a couple of hours and I added more oil as I went along. I find boning quite therapuetic, and it leaves a beautifully smooth satiny finish.

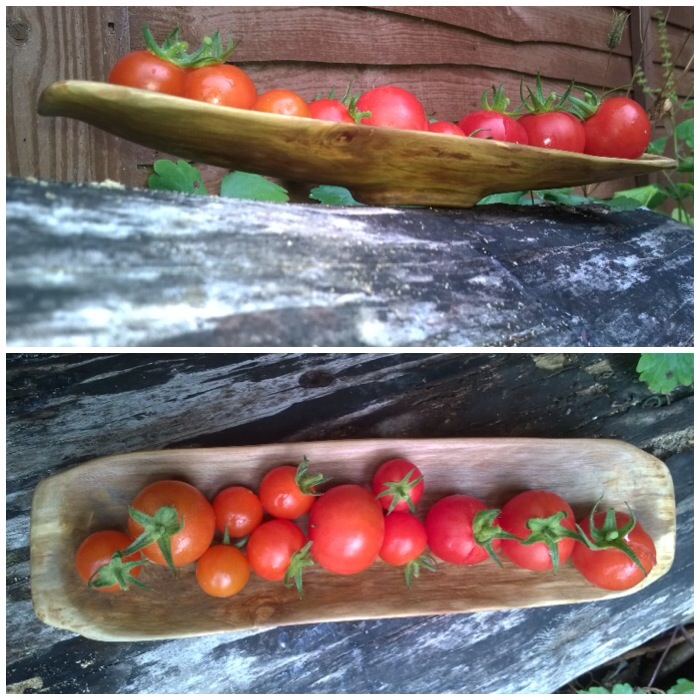
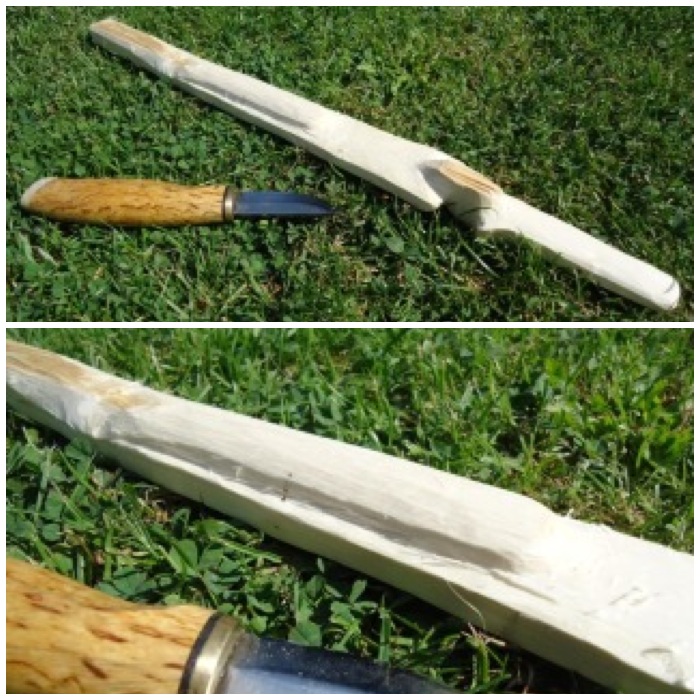
Lastly I carved a hole in the handle, fixed a leather loop and oiled the noggin once again.

Photo 05-02-2015 20 03 14
Before and after oiling

Lovely carvings for lovely ladies (although sadly Alison couldn’t christen hers with a dram of whisky on Christmas Day: she was pregnant with our son Finlay, who was born just a couple of weeks later!).

Photo 05-02-2015 20 03 35
Finished stocking fillers

Cheers

George

How To…. Carve a Pretty Pear Platter

While we were on holiday in France at my friend Rick’s cottage he was telling me about some of the trees in his garden. He has an old, gnarly pear tree currently propped up by sticks as it was blown over in a storm a few years ago. It still bears fruit, but only on one side.

Rick agreed that I could trim a branch off the non-fruiting side as that would take some of the weight off the side that was being supported. I like to carve fruit woods when they are green as the wood is easy to remove.

IMG_2845-1.JPG
Before and after

I cut the limb off very close to the trunk so as to minimise the chance of infection damaging the tree. I made a single cut as the branch was easy to support as I cut it. Also the cut was made as close to the Collar as possible so as to give the tree the best chance to heal itself.

IMG_2846-0.JPG
De-limbing

The bark was easy to strip off with my axe – being very careful where my fingers were at all times – and then I used my saw to cut it down further so I had a piece I was happy to carve.

IMG_2847-0.JPG
De-barking and trimming to size

One piece of the branch made a perfect hammer for battoning my work piece in two. I make sure that the blade of the axe is 90 degrees to my body so that if it slips the edge of the axe swings away from me.

This piece did not split evenly as the wood was quite twisted with its age.

IMG_2848-0.JPG
Battoning

To make the split more even, I put the work piece on its side and split it further. A slower method but more controlled I think.

IMG_2849.JPG
Splitting out

After splitting I cut out some wood from one of the halves to give it a flatter look.

IMG_2850.JPG
Flattening

I used my axe to take of some of the excess wood around what would be the bottom of the platter. As the shape was going to be a shallow curve I did not put any stop cuts in but just chipped away, starting from the ends and chasing the wood back to the centre.

IMG_2851.JPG
Axing out the back

To finish the flattening of the top part of the platter I finished with the axe and moved onto my knife.

IMG_2852.JPG
Final flatten with the knife

Once the work piece was as flat as I wanted I drew the shape of the bowl area and used my crook knife to start removing the wood from this area. As the wood was very green this excess was removed very easily.

IMG_2853.JPG
Using the crook knife

I also used my palm gauge and my bowl knife in this process. These are the only bowl-carving knives I have and I switch between them depending on what the wood is saying to me as I try and carve it out.

These tools make a real difference to carving the bowl area but are ones you really need to practise with a lot to be as safe and efficient as possible with when using them.

IMG_2854-0.JPG
Palm gauge and bowl knife

Once I was happy with the amount of wood removed from the bowl area, I moved onto the back. I like to take my time when working on this area as it is all too easy to cut out large chunks of wood and suddenly reveal a great big hole in the bowl. I use a variety of cuts: brake cuts towards me, small pressure cuts using my thumbs and powerful but small chest lever cuts to name just three. With all cuts, the main thing to remember is that you must always be aware where the blade will end up if the knife slips.

IMG_2855.JPG
Different knife cuts

I had a lovely time over a couple of evenings working on this carving – this is what I call relaxing.

IMG_2760.JPG
Relaxation and fine work

I had kept a lot of the chippings from the carving and when I had removed enough wood I put the platter and lots of the chippings into a plastic bag and kept it in my garage (a nice cool area) for a month to slowly dry out. I added some water to the chippings every few days for the first week to keep them and the platter slightly damp.

This slow drying process allows the whole of the platter to dry in a much more even manner. The platter would potentially crack if the outside dried at a much faster rate than the inside (caused by pressure differences).

IMG_2856.JPG
Roughed-out platter

After a month of drying I used different grades of sandpaper from rough to very smooth to get rid of most of the lumps and bumps.

IMG_2857.JPG
Sanding

I coated the platter with 3 layers of olive oil (allowing each coat to dry fully before applying the next).

IMG_2858-1.JPG
Oiling

Then over a couple of nights I used the back of a spoon to rub the surface of the platter so that it became silky smooth (known as boning). Sometimes you get a very shiny surface doing this but I think that this wood may need to season for a bit longer as although it became beautifully smooth it stayed a bit dull.

The fibres of the wood may raise up again over the next few weeks but a light sanding and boning will soon have it smooth again.

IMG_2859-0.JPG
Boning

This is my 99th blog post and I am glad it was about something  I was very happy to carve. The platter is destined to go back to France as a present to Rick for letting us use his cottage for what was a very lovely holiday – Brittany Adventures.

IMG_2860.JPG
Finished platter

Cheers

George

How To…. Carve a Simple Spoon: the double-handle technique

This How To…. illustrates some simple steps to carve a small spoon you can easily make when you are out and about.

WP_20140318_035
A simple spoon

I was training on campcraft in Crowborough (Ashdown Forest in the UK) recently and in between classes decided to carve this simple spoon. A nearby willow tree had been felled a few years ago and lots of shoots had re-grown from the stump.

Photo 17-03-2014 09 35 59
Local Willow

I selected a shoot and sawed it off near its base. Cutting the limb cleanly at the base will allow the tree to heal itself quickly and send out a replacement shoot the following year.

Photo 17-03-2014 09 36 47
Cut right back

I selected the limb because of its curves, which  help in making a strong spoon. I trimmed the limb in a safe position and used the live limbs as a vice to do the final sawing.

Photo 17-03-2014 09 37 55
Trimmed safely

I took two pieces to make a couple of spoons and then trimmed off a couple of the smaller shoots from the top.

Photo 17-03-2014 09 38 57
The spoons-to-be

These smaller pieces I re-planted around the base of the tree by pushing them into the ground, as willow has the ability to re-grow from these shoots.

Photo 17-03-2014 09 40 10
Re-planting

The next job was to strip off the outer and inner barks. I tried to strip the bark off in one piece but as the sap had not yet risen it was very difficult to do. If the bark had peeled off easily I could have made some nice cordage from it.

I used the back of my knife to scrape off the remnants of the inner bark to get right down to the wood.

Photo 17-03-2014 09 41 14
Taking off the outer bark

This inner bark does clog up on the back of the blade so you have to continually scrape it off. The whole process of stripping the bark took about 5 minutes.

Photo 17-03-2014 09 41 46
Removing the inner bark

I flattened out the area of wood that would make the bowl of the spoon to give myself a little bit more area to work with.

Photo 17-03-2014 09 43 15
Creating a working surface

I like to draw out my spoon leaving areas of waste wood at each end as these act as handles when carving. Also, I prefer to carve the spoon from the top down as this cuts through many different rings thereby making the spoon stronger. I also mark out at this stage all the stop cuts I will need. (The technique of leaving handles to work with was taught to me by my good friend Mark Beer a few years ago and I find they are particularly useful when you are teaching novices.)

Photo 17-03-2014 09 44 45
Drawing out the spoon

I like to carve the bowl of the spoon first. To do this job I usually use a palm gouge (on the left) and a crook knife (on the right).

Photo 17-03-2014 09 47 45
The bowl tools

I use the palm gouge first, tracking around the edge of the bowl to cut out the waste. Having the two handles in the wood means I can use the same hand to do this (I am left-handed). They also allow me to keep my other hand well away from the sharp edge of the gouge.

Photo 17-03-2014 09 48 51
The palm gouge

The gouge makes short work of the waste wood but it does not leave a smooth surface.

Photo 17-03-2014 09 49 26
Rough bowl

To smooth the bowl out a bit more I usually switch to the crook knife. I find that the crook knife helps to accentuate the curve of the bowl more than the gouge does. With both tools I always try and cut across the grain of the wood but this is not always possible near the ends so I need to be extra careful there not to lose wood on the edges.

Photo 17-03-2014 09 50 23
Smoothing out the bowl with the crook knife

After the bowl is roughed out I saw all the stop cuts. These stop cuts help to stop splits occurring in the wood as I carve the rest of the waste wood away.

Photo 17-03-2014 09 52 06
Creating the stop cuts

Stop cuts are particularly important when carving around the bowl; they act like small breaking points for the knife edge, stopping splits occurring.

Photo 17-03-2014 09 59 04
Removing the waste

I take my time at this stage and make small cuts to remove each piece of waste wood between the stop cuts. In these two pictures I am using my thumbs on the back of the blade to apply pressure. You can push either with both thumbs on the back of the blade or with one thumb on top of the other.

Photo 17-03-2014 09 59 56
Thumb pressure

When I am on a straight section like the handle I tend to use the chest lever grip. This is a very controlled and powerful cut. I have my hands tight against me and use my chest muscles to push my hands apart. This pushes the knife edge into the wood in small, controlled but powerful cuts.

Photo 17-03-2014 10 01 26
Chest lever grip

Another cut that can be used here is the shoulder cut. With the work piece off to your side and the bottom of it on a log or on the ground (if the handle at the bottom is long enough), keep your arm locked straight and push down with your shoulder muscles to cut into the excess wood. You can cut big or very fine pieces with this technique.

Photo 17-03-2014 10 02 09
Shoulder power cut

I learnt this technique from Mors Kochanski when he was over in the UK at the BCUK Bushmoot a few years ago. I pushed one end of the work piece (perfect when you have these handles on each end) and then, using the knife like a draw knife, cut slivers of wood towards me. This is one of the few cuts where the blade comes towards you. The key to this technique is to keep the arm that is holding the work piece bent and well away from the knife tip. Also the arm that is holding the knife is clamped against my side which stops any big movements. If my knife were to slip with this technique the blade would actually only move a few centimeters.

Photo 17-03-2014 10 02 54
Mors Kochanski style

Using these techniques I quickly removed the waste wood around the spoon.

Photo 17-03-2014 10 04 29
Top plane cut out

I then marked out the side of the spoon and started to remove the waste wood using the shoulder cut. I could have put stop cuts in at this stage but decided not to as there was not much curve to the spoon on this plane.

Photo 17-03-2014 10 13 28
Side plane

Finishing the tail and the bowl requires a lot of fine work. You have to find how the grain of the wood is flowing and just chip away at it with small cuts to form your final shape.

Photo 17-03-2014 10 16 44
Fine work

After some final work on the handle of the spoon I slowly carved around the tip of the bowl to remove one of the working handles. Take your time with this so that you get down to the last few fibres of wood before twisting the handle off. Any big cuts here can damage the bowl.

Photo 17-03-2014 10 18 33
Trimming the handle and removing one handle

I then repeated the whole process at the other end to remove the other working handle.

Photo 17-03-2014 10 20 50
Removing the other handle

The wood was green so full of moisture. Normally I would dry the wood slowly for a few weeks before sanding it down. Sanding green wood can be hard work and no matter how smooth you get it you will need to repeat the process in a few days as small fibres of wood will start to rise up again, giving the spoon a furry texture.

I accept that when making these spoons as I normally want to use it straight away. Ideally I should have used a piece of seasoned wood so that this would not happen but you sometimes have to use what is available. I left the spoon to dry out for a couple of days before sanding it down.

Photo 17-03-2014 10 21 07
A blanked out spoon

I used sandpaper of different grades and luckily have some cloth sandpaper that works well when sanding the bowl out.

Photo 18-03-2014 20 14 10
Sandpapers

I used the rough sandpaper first and you can see in these pictures how the fibres of the wood are being ripped out here rather than being sanded smooth. All the sandpaper is doing at this stage is flattening out the tool marks.

Photo 18-03-2014 20 14 42
Rough first

Eventually the spoon started to take on a more smooth appearance. The bottom picture shows the bowl untouched but the handle is now smoother.

Photo 18-03-2014 20 15 29
Taking shape

The cloth sandpaper is ideal for getting into the bowl and smoothing it out. I like this sandpaper as it does not break apart in the bowl as traditional paper-backed sandpaper tends to.

Photo 18-03-2014 20 16 19
Smoothing the bowl

After sanding the spoon down using a mixture of grades from rough to very fine (about a half hour’s work) I added some oil to the spoon. I generally use vegetable oil as that is what I usually have in my cooking kit when out in the woods.

After the first coating had soaked in I applied a second coating and left the spoon to dry out.

Photo 18-03-2014 20 17 05
First oiling

I like to add a finishing touch by boning the spoon. You can do this with the back of a spoon, a rounded pebble or with  a rounded piece of bone. I rub the spoon with the rounded surface in a circular motion covering the whole of the surface area of the spoon. I normally do this for an hour or so as this seals the fibres of the wood down and adds a beautiful shine to the spoon.

Photo 18-03-2014 20 17 32
Boning

This spoon will need to be re-sanded, oiled and boned again in a few weeks as the fibres rise up as it dries out. You can see that the bowl is not perfectly smooth and there are slight imperfections in it. Hopefully these will disappear with that second sanding but for now it is a spoon I can use.

Photo 18-03-2014 20 18 30 (HDR)
Imperfections but a working spoon

The different profiles of the spoon.

Photo 18-03-2014 20 19 42
Profiles

Ready to go.

WP_20140318_035
Ready to do its job

Have a go and try out some of these different cutting techniques.

Cheers

George

How To…. Carve a Lovelock Cave Atlatl

One of my favourite Atlatls is the Lovelock Cave Atlatl. I made this Atlatl a few years ago using modern tools including a Mora knife, a small carving knive, a flex gouge chisel and sandpaper.

WP_20140211_002
My reproduction Lovelock Cave Atlatl – Top Profile
WP_20140211_008
My reproduction Lovelock Cave Atlatl – Side Profile

The original Atlatl was found in a cave over a century ago but was soon lost; thankfully, though, not before someone had made a detailed drawing of it. Lovelock Cave was previously known as the Sunset Guano Cave, the Horseshoe Cave and Loud Site 18. A good paper on the archaeological digs on the site was written by Phoebe. A. Hearst from the Museum of Anthropology (University of California Berkeley).

Lovelock-cave06
Lovelock Cave – Humboldt Sink USA

A copy of the drawing is shown below: I found this in a post by Mike Richardson on the Split Stick Atlatl, who also writes that the original was 17 inches long. I reproduced the Atlatl as closely to the drawing as I could.

It has a fork at the rear and the drawing shows a small groove around each prong. I have read that this was where a small piece of carved wood or bone known as a spur was attached as a point to hold the Atlatl. I decided though to see if the Atlatl would work with just some cordage wrapped around it. There is no historical evidence that this was done but it does work well. A good comparison of both attachment types on this Atlatl can be read in the PaleoPlanet forum here. A further project for me on this Atlatl is to make a spur for it.

fork_atlatl7
Drawing 1

Knowing that the original was 17 inches long, I made a best guess at the other dimensions. The original Atlatl that was lost was made of Greasewood (Sarcobatus vermiculatus) but as this wood is not available in the UK I opted to use a piece of Siver Birch (Betulus pendula) as I had some available and it is easy to carve. The wood I had ready was only 16 1/2 inches long (422 mm to be exact) so using that as a starter and the drawing as a guide I scaled up all the other dimensions as shown below.

Dimensions of my reproduction

This was a beautiful Atlatl to carve as the finished lines are very smooth and pleasing to the eye. The top picture (below)  is a close up of the handle of my reproduction. The final shape gives a surprisingly good grip even when smoothed down.

Photo 10-02-2014 13 34 32
A beautiful slim design

I split my log down to a rectangular shape and then using my dimensions drew out the shape of the Atlatl. After that I marked stop cuts along the whole length of the Atlatl and cut into them with my saw, finishing a couple of millimeters from the outline. These are useful to have in place to stop any splits from running off down the length of the Atlatl when you carve it.

Photo 10-02-2014 13 29 54
Draw out the profile and place stop cuts

I battoned out the rough profile first using only my knife and a small branch as a hammer. I did the battoning with the work piece placed on a log in front of me. I kept the blade of the knife at 90 degrees to my body as I hit it so that if the knife slipped it would swing away from my body. See my post on Knife Safety Tips for more detail on this.

Photo 10-02-2014 13 36 29
Batton off the excess

Then using my knife I trimmed the excess wood down to the line, keeping the work piece well in front of me to avoid any potential cuts from the knife if it slipped.

Photo 10-02-2014 13 37 40
Tidy up the profile with a knife

Using two more stop cuts I carved out the thumb and forefinger grip area.

Photo 10-02-2014 13 43 00
Carve out the thumb and forefinger grip

Then it was a case of roughly carving the handle area down to a size comfortable for my hand. I also started to carve out the protruding areas above  and below the thumb and forefinger grip area.

Photo 10-02-2014 13 45 57
Roughly carve out the handle shape

I worked on the bottom of the tail next, carving a flat area near the handle and then carving out an elongated bowl shape to the tail. No need to worry too much about perfection at this stage as the sanding will produce the final shape.

Photo 10-02-2014 13 48 08
Roughly carve out the underside of the tail

I tapered the tail area all the way to the end making a flat section of the final 8 cms (this will form the prong).

Photo 10-02-2014 13 48 55
Taper the carving all the way to the end of the tail

On the top of the tail I marked out with my knife tip a 1 cm wide by 23 cm long spear shape that would form the bowl for the dart to rest in.

Photo 10-02-2014 13 51 21
Mark out the top slot for the dart to rest in

I used a Flex Cut Gouge for carving the bowl area and my small carving knife for carving the prongs. This is the really tricky area of carving – you have to be particularly careful as it is very easy for the knife to slip.

Photo 10-02-2014 13 52 05
Roughly carve out the slot for the dart to rest in and carve the fork out at the end

Once I’d carved the basic shape I used various sandpapers from about 40 grit to about 1000 grit to smooth everything.

Photo 10-02-2014 13 54 15
Sand the whole Atlatl down using rough paper working up to very fine grades

Before I added the false sinew to the tail I oiled the Atlatl a couple of times and then boned it with a small pebble. Using a small pebble to rub the Atlatl wood down for a couple of hours smooths the wood fibres down and traps the oil in the wood. The whole process of boning really gives a smooth finish.

Photo 10-02-2014 13 55 59
Add any oils (I used vegetable oil) and bone it smooth with a small pebble

The finished profiles of the Atlatl.

Photo 10-02-2014 13 57 20
Tail, side and bottom profiles

The handle has a very unusual shape but gives you a fantastic grip.

Photo 10-02-2014 13 59 26
Handle profiles

It is easy to flick with an open grip as the thumb and forefinger grooves keep the Atlatl fixed in the correct position in a throw.

Photo 10-02-2014 14 01 48
Works with an open grip

As I carved the handle to fit my palm it makes for a very comfortable closed grip.

Photo 10-02-2014 14 02 05
Works with a closed grip

After carving little notches around each prong I wrapped false sinew to the tail using a Constrictor knot. I kept it fairly tight but you may wish to experiment here. As I said earlier there is nothing in the archaeological record to prove this method was used but after experimenting with other Atlatls like the Split Stick method I see no reason why it could not have been used if a point was not available.

The problem with cordage however is that when you are in the act of throwing a dart, various forces are exerted on it. As you release the dart will flex/bend, and the cordage may cause the tail of the dart (fixed in place by the cordage) to go out of line with the point of the dart, thus decreasing accuracy. Having a point at the rear of the Atlatl holding the tail of the dart in place allows the tail to rotate with the point as it flexes during a throw, maintaining the dart’s accuracy. Chris from Paleoarts explains it well in a post on the Paleoplanet site.  I will be experimenting with attaching a bone or wooden spur to the Atlatl in future.

Photo 22-01-2014 18 03 01
False Sinew wrap at the tail to hold the dart

I am left handed and even though the shape of the handle is designed for a right hander (the slightly protruding piece of the handle to trap the thumb and the smoothed corner to fit in the palm) it is very comfortable still to shoot left handed.

Photo 22-01-2014 18 02 16
Cordage wrap tail – No archaeological record of this

I enjoyed making this Atlatl and shooting it over the last few years. It would be great to see some more of this style being reproduced as there are so few to be found.

Cheers

George