I had a great time constructing contraptions to use around the campfire last year so I thought a little summary post of them all was in order.
This post is not about how to construct any of the contraptions themselves (I will link to the relevant How To…. guides in the title of each section) but my personal thoughts on them. I appreciate campfire gadgets are not for everyone and they may be seen as overcomplicating the cooking process however I think they are great fun to construct.
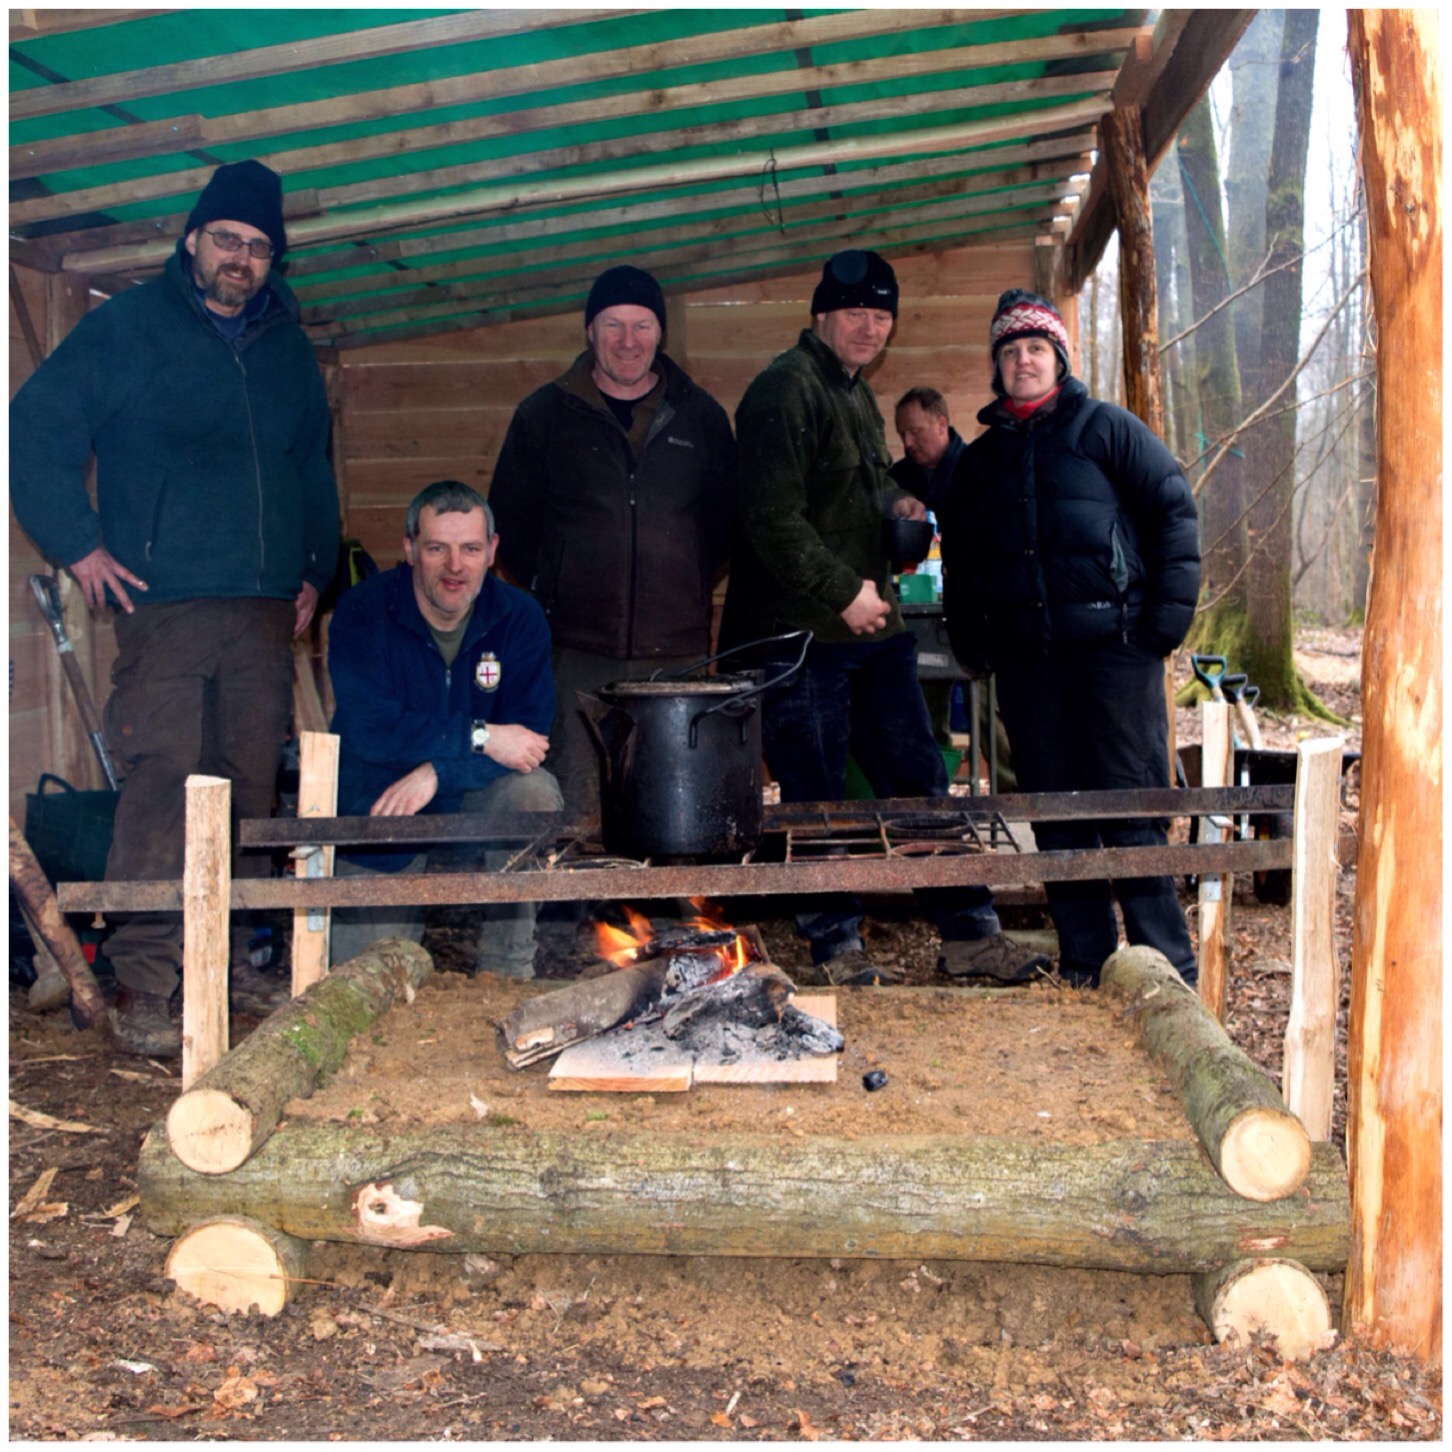
Raised Firepit/platform
Before building any gadgets it is good to have an actual fire. I was asked to help build a raised firepit/platform by my friend John Rhyder at the Woodcraft School training area. John wanted a dedicated area for his students to cook on without having to bend down too far.
After a lot of discussion with his wife Caron we opted for a rectangular shape instead of a square. Caron argued that this shape would give a large cooking area but would be safer than a square, as the students would not have to stretch too far to reach the centre of the fire. This is an ideal construction for a fixed-base camp, with plenty of room to cook on and to sit around.
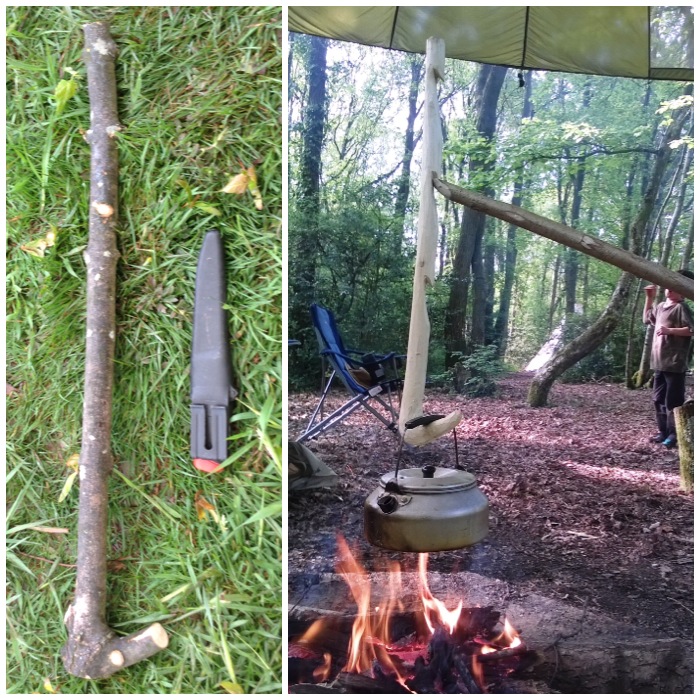
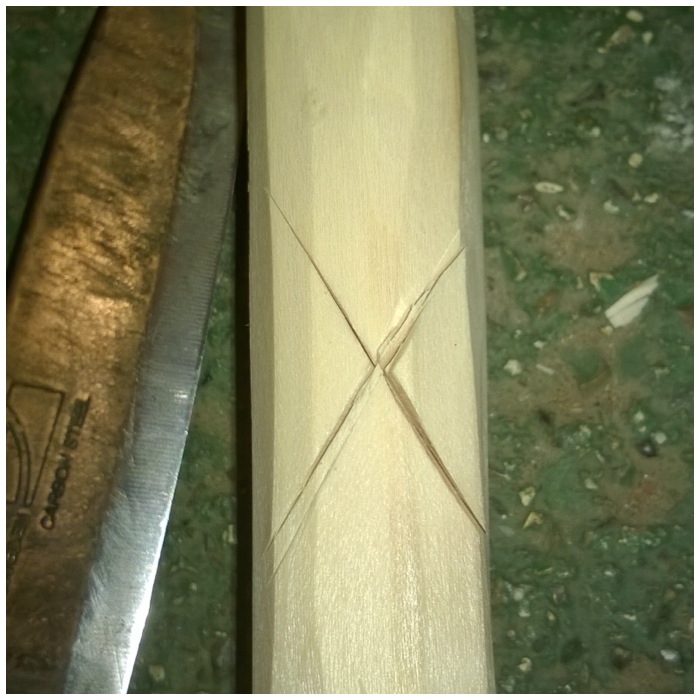
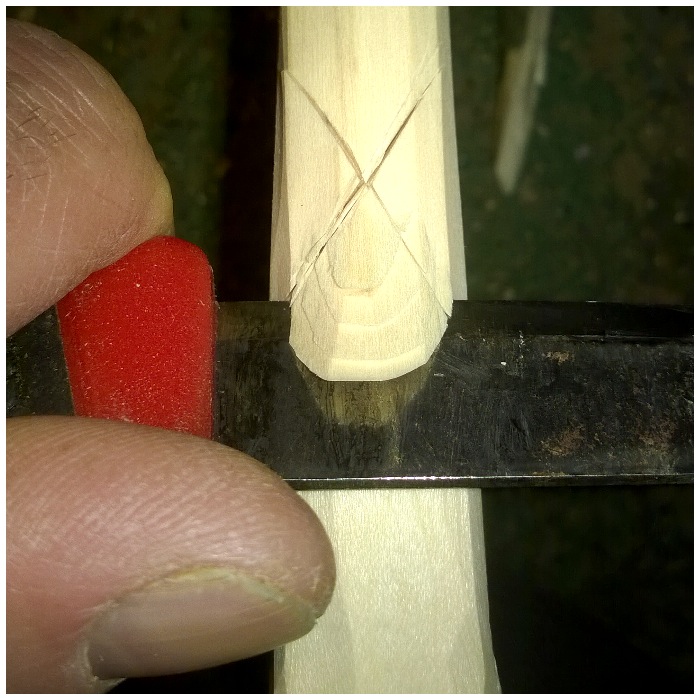
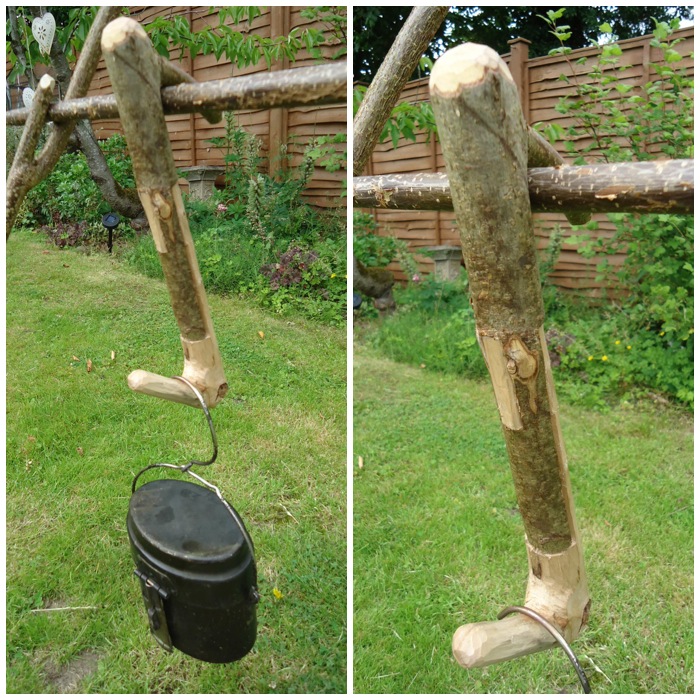
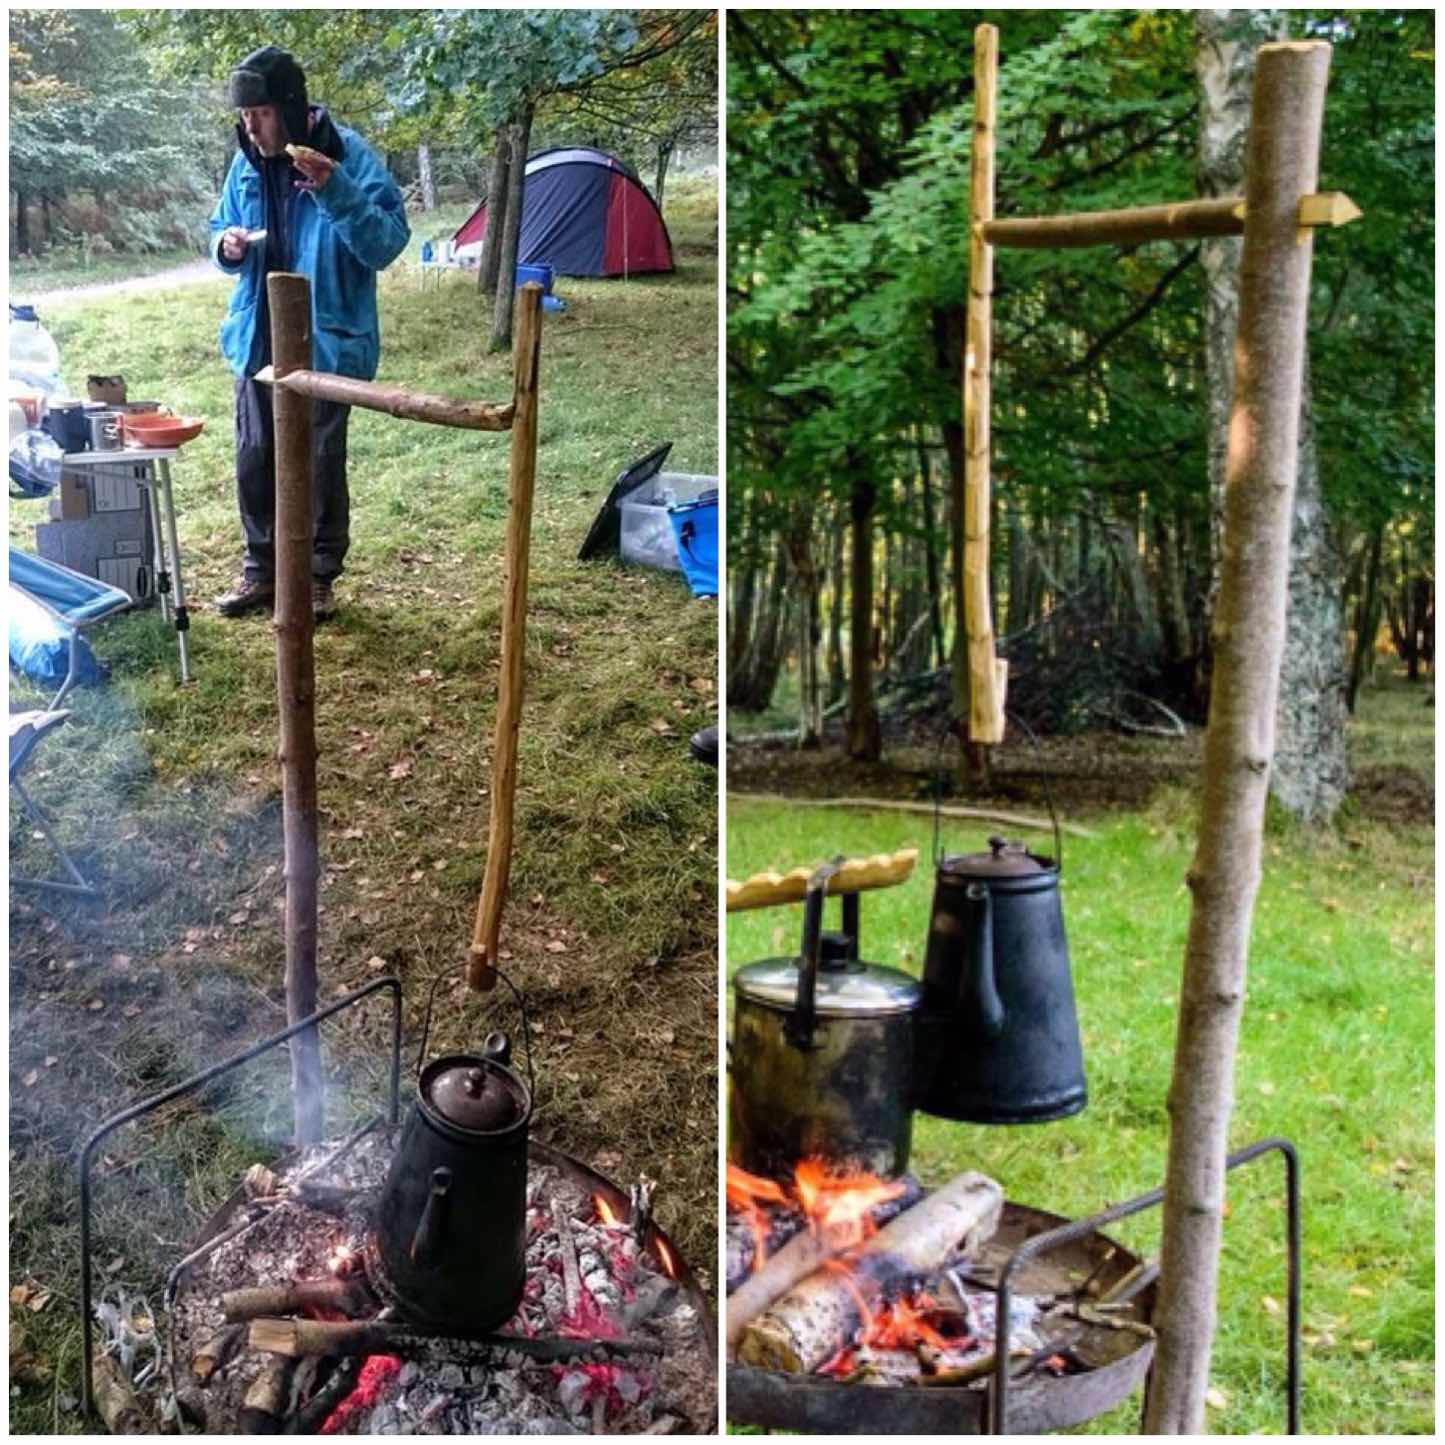
Collapsible pot hanger
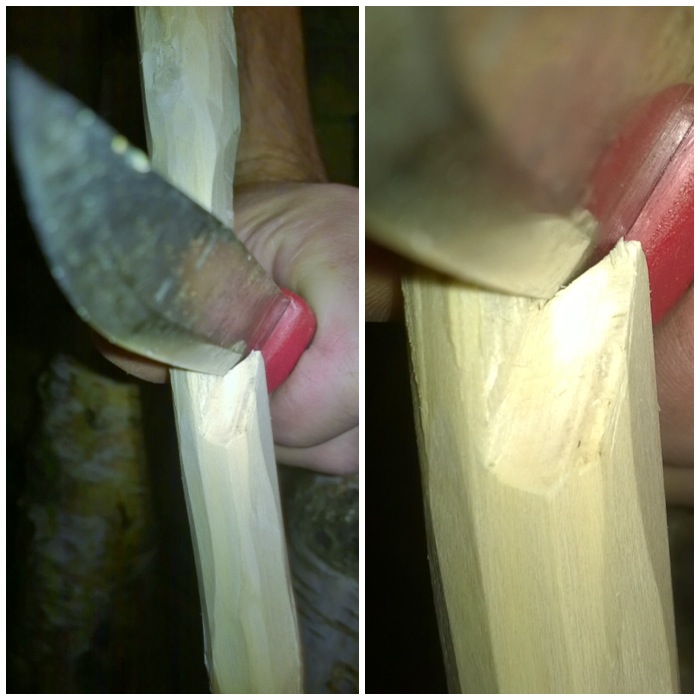
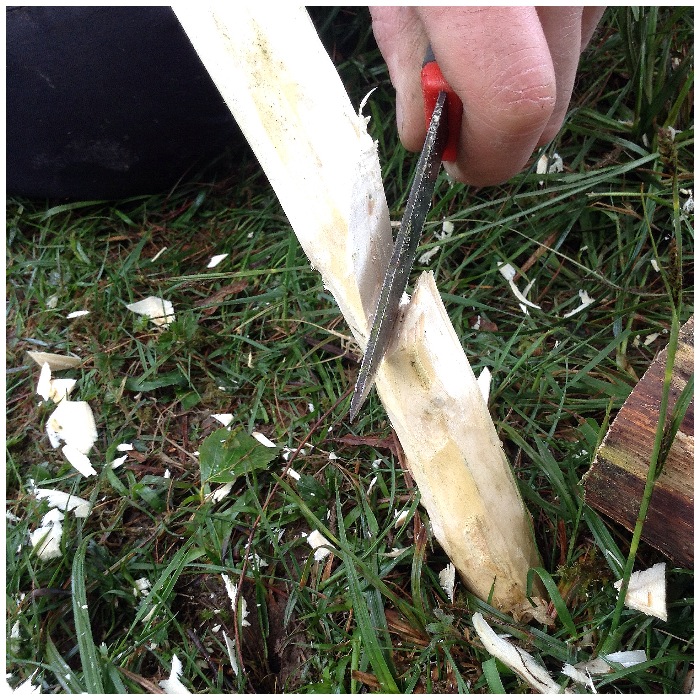
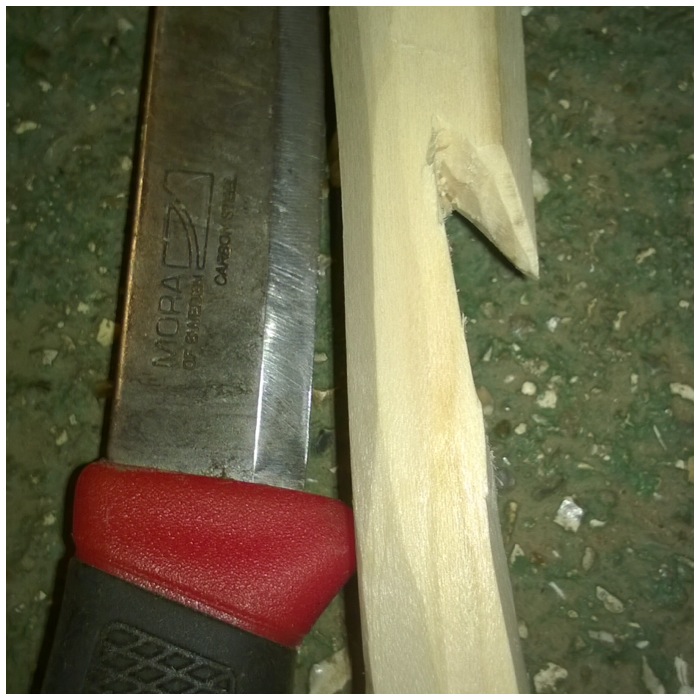
I love little wooden contraptions and these little collapsible pot hangers are ideal for the lightweight bushcrafter. They can be made in numerous different ways and are easily broken down to be stored inside your pot. One of the things I like about carving them is that the joints that hold them together are generally simple but need to be carved perfectly if the hanger is to take the weight of a heavy pot without coming apart.
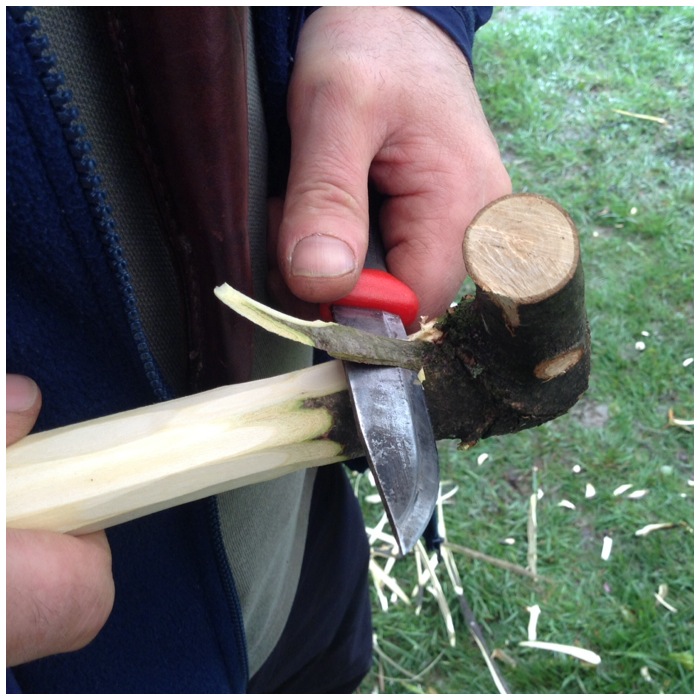
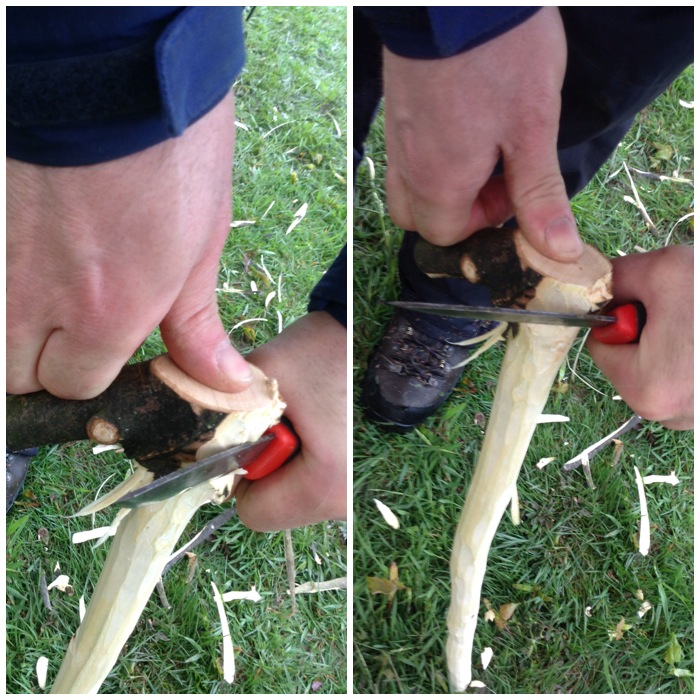
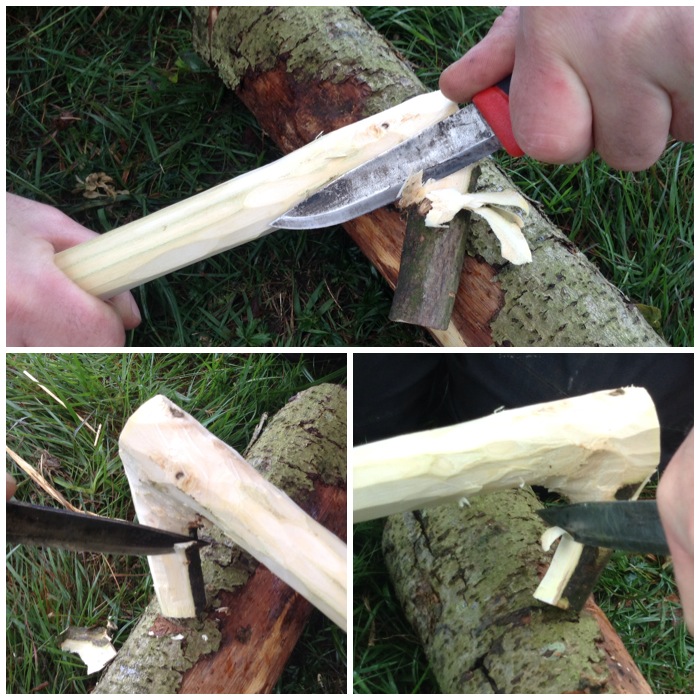
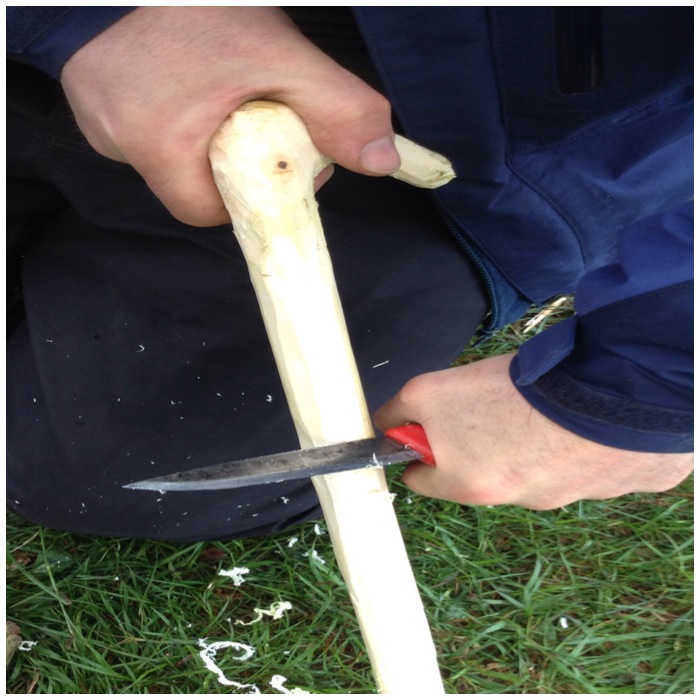
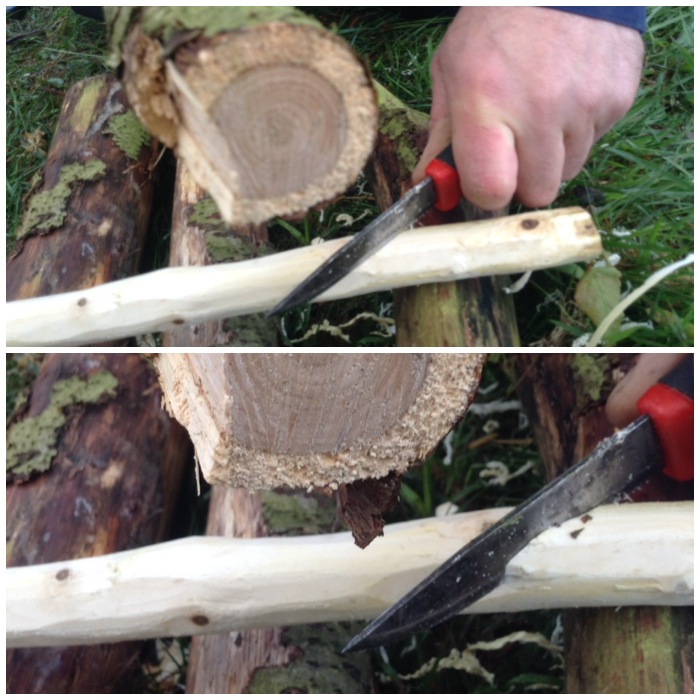
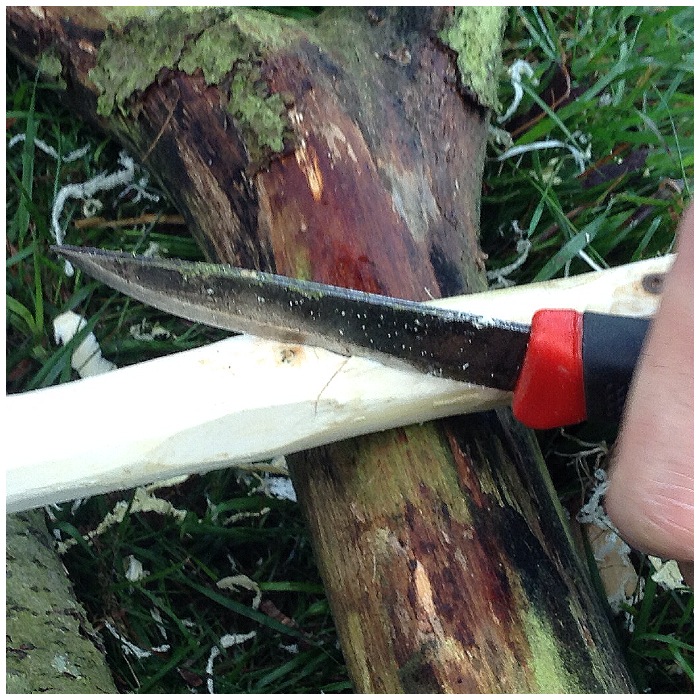
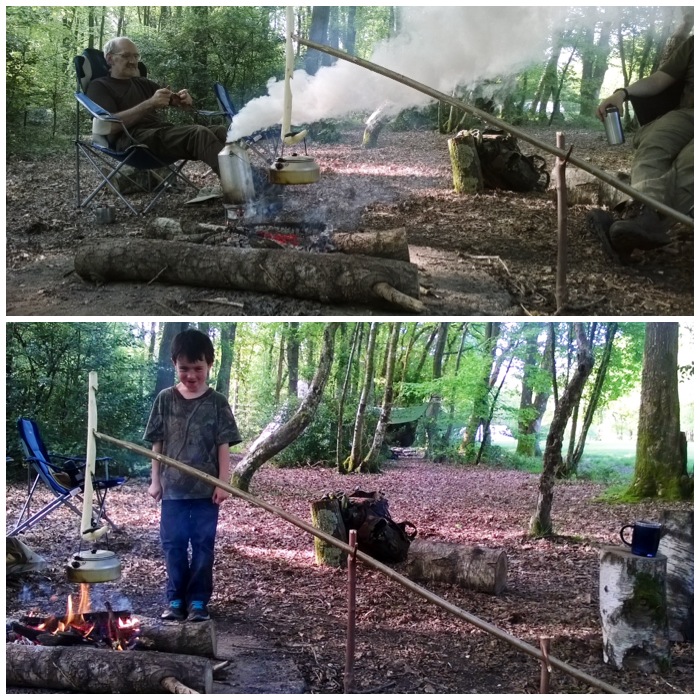
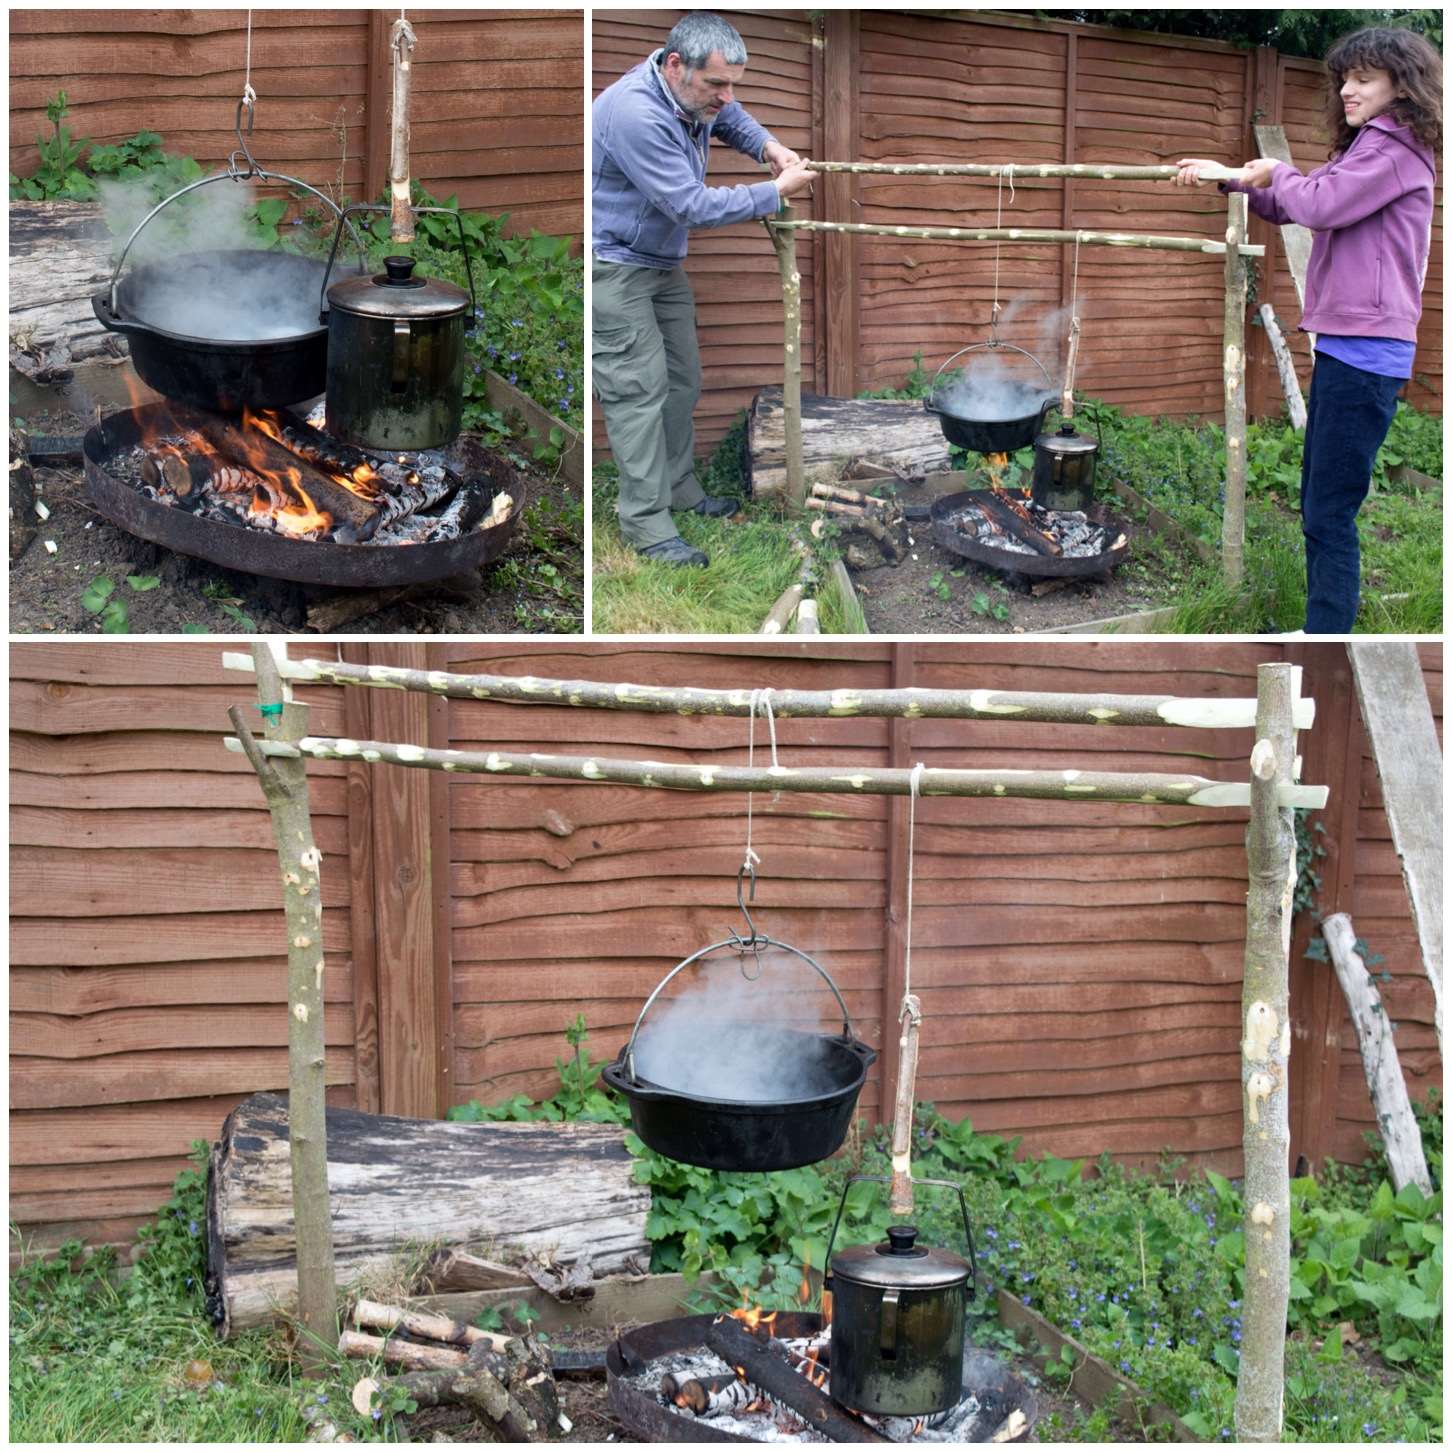
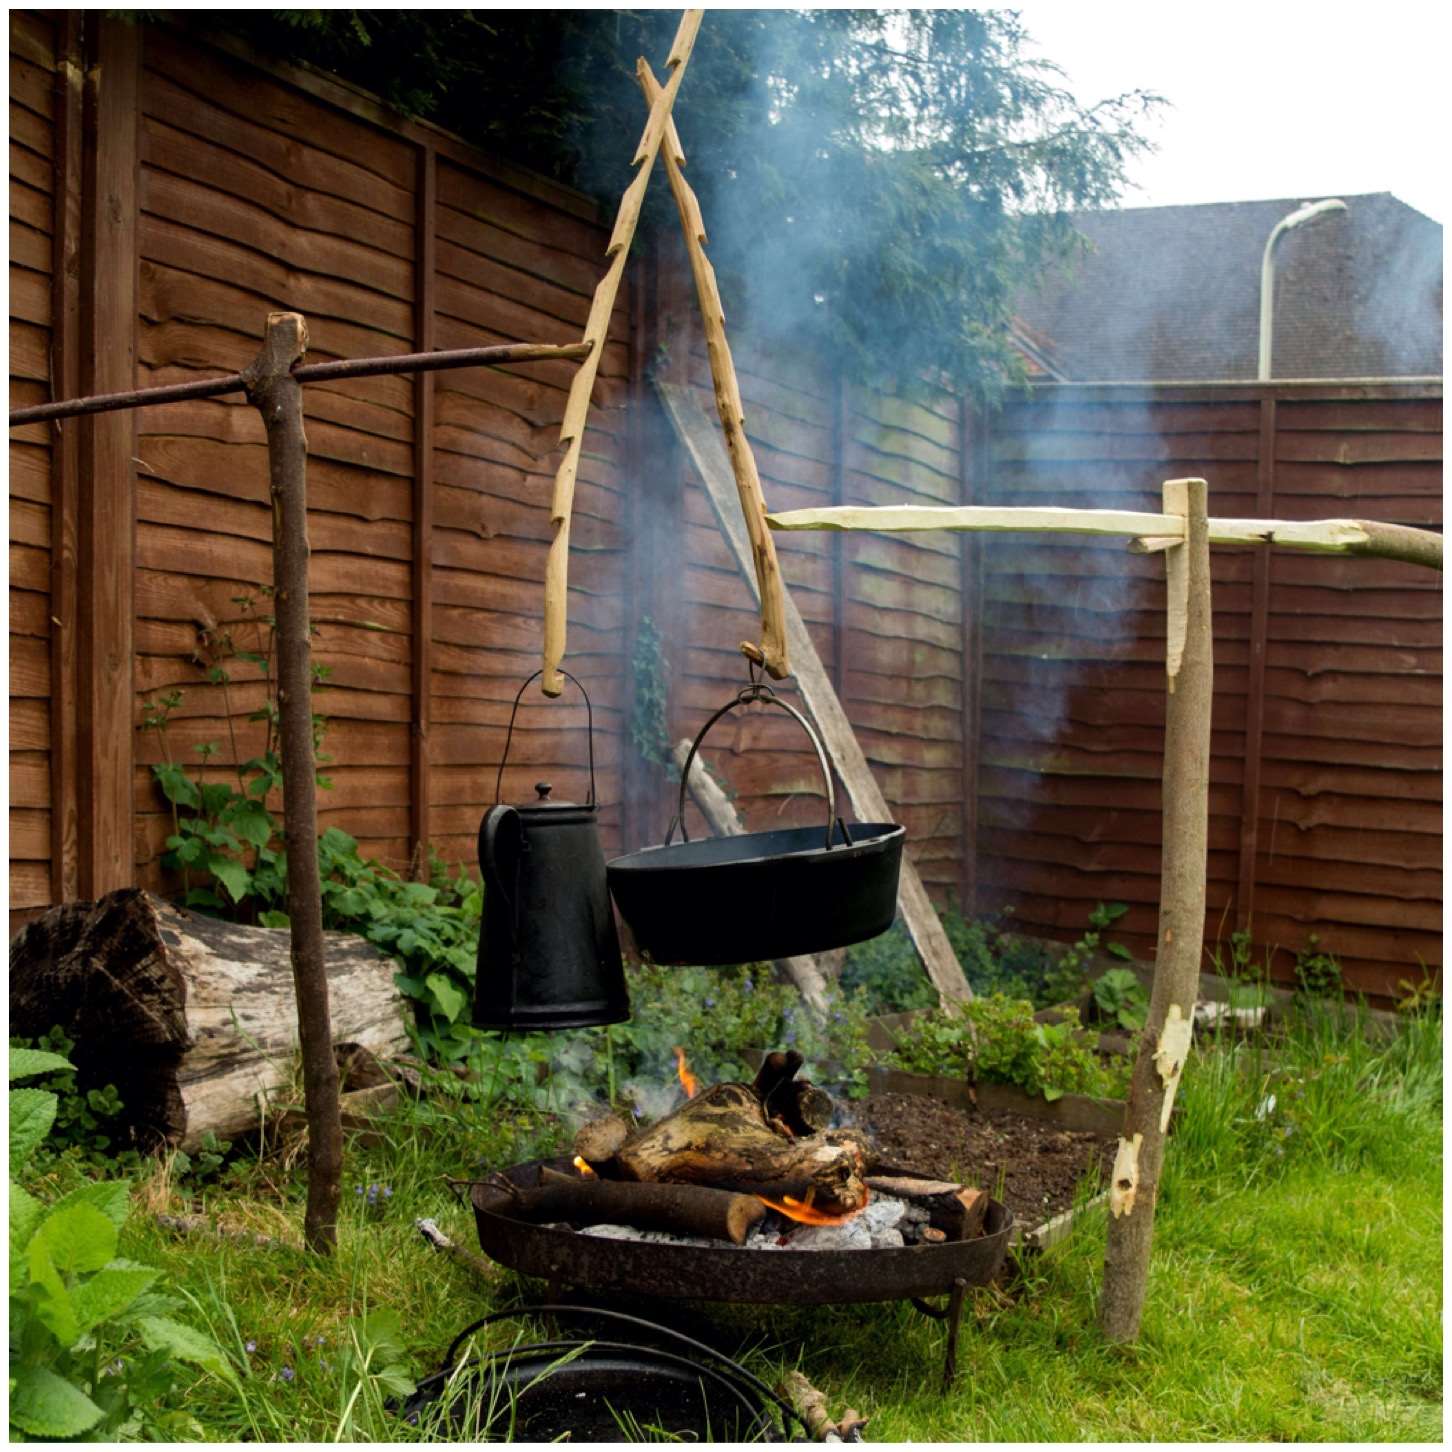
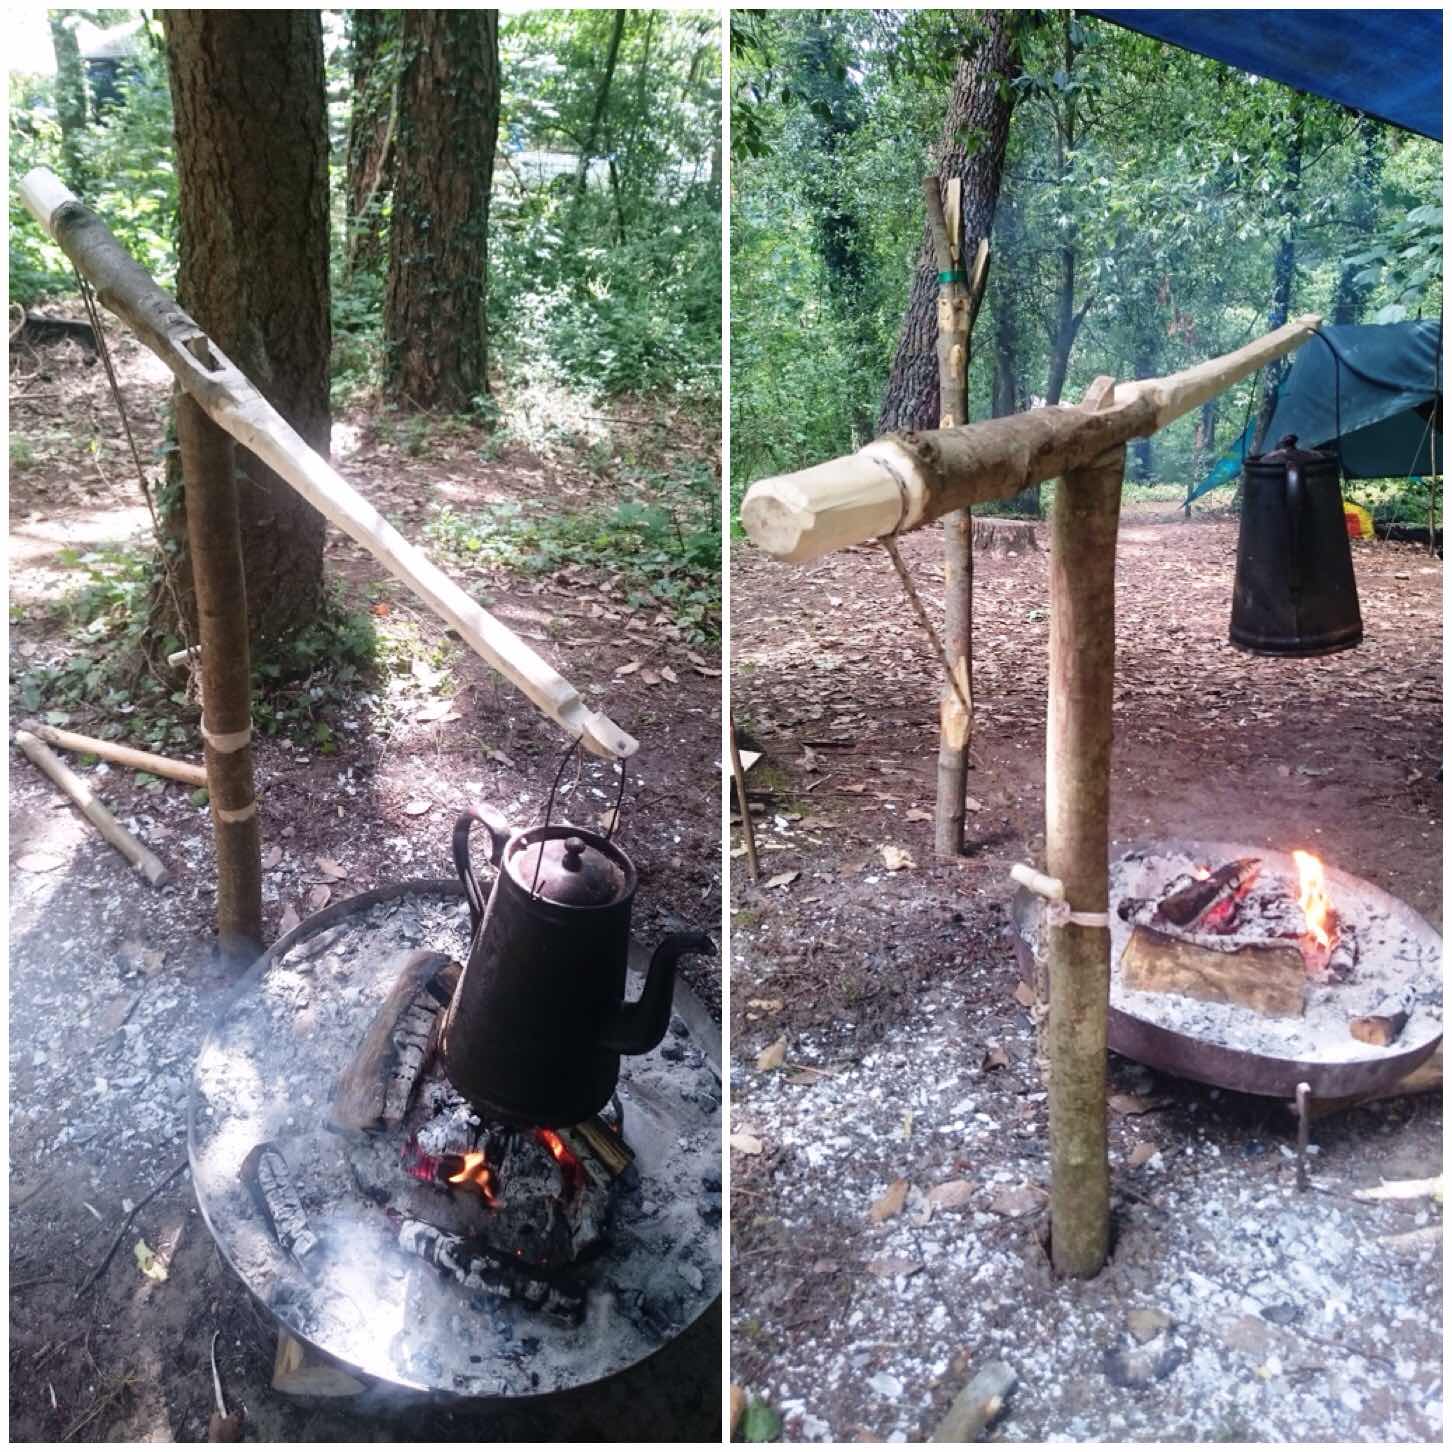
Wagon/Waugan Stick or Burtonsville Rig
This is an excellent cooking rig for bushcraft beginners to learn. It has lots of different parts and requires a number of different knife cuts to produce the hanger and the hanging poles. I have heard this set up called many different names from Waygon or Waugan stick and Mors Kochanski refers to it as the Burtonsville rig. All have their own stories behind them however the common factor is that it a very easy set up and offers the bushcrafter a wide range of cooking heights.
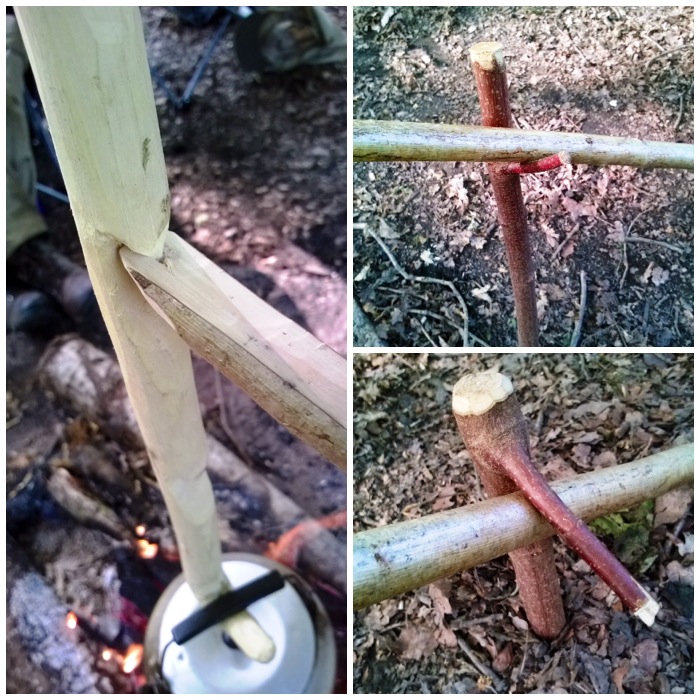
Double French Windlass
The Double French Windlass is a cracking cooking rig. I was taught this by my friend Steve ‘Mesquite’ Harral at the Bushcraft UK Bushmoot a number of years ago. I used it at this year’s Bushmoot for two weeks and it allowed me to cook with a number of different pots at one time with the ability to have them all at different cooking heights.
Single Fork Aures
I read in the Wildwood Wisdom book of a type of adjustable crane first documented in the early 20th century by a Scout Master called Victor Aures. It is a simple device however it is reliant on finding a branch with a specific set of smaller branches off it. I discovered a variation on this crane a number of years ago that required only a single fork in the branch and after a bit of splitting and splicing you have a fully adjustable crane.
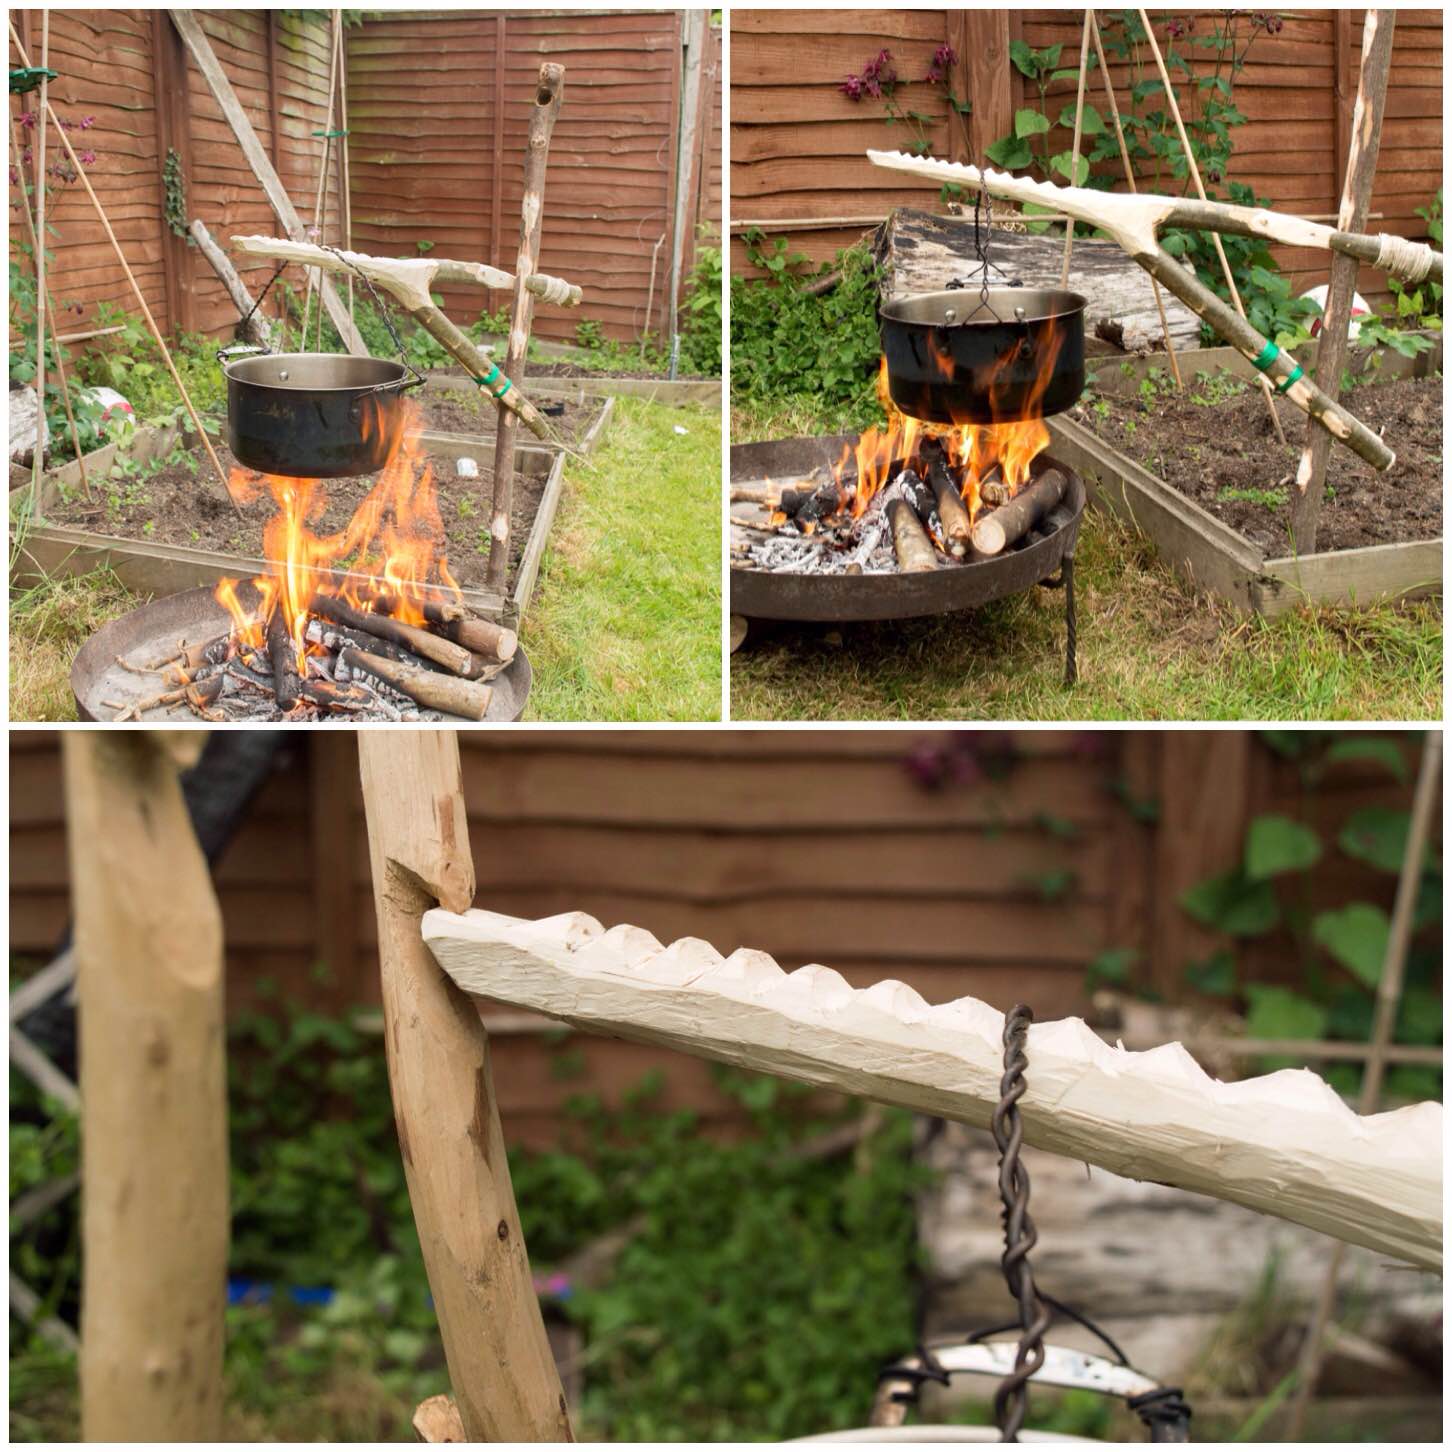
Gibbet Aures Crane
This variation on the Aures crane does not rely on splitting the wood but on the addition of other branches so that the whole thing hangs off your upright pole. It is easy to find all the parts which is probably why this is the version of the Aures cranes I most commonly see around campfires.
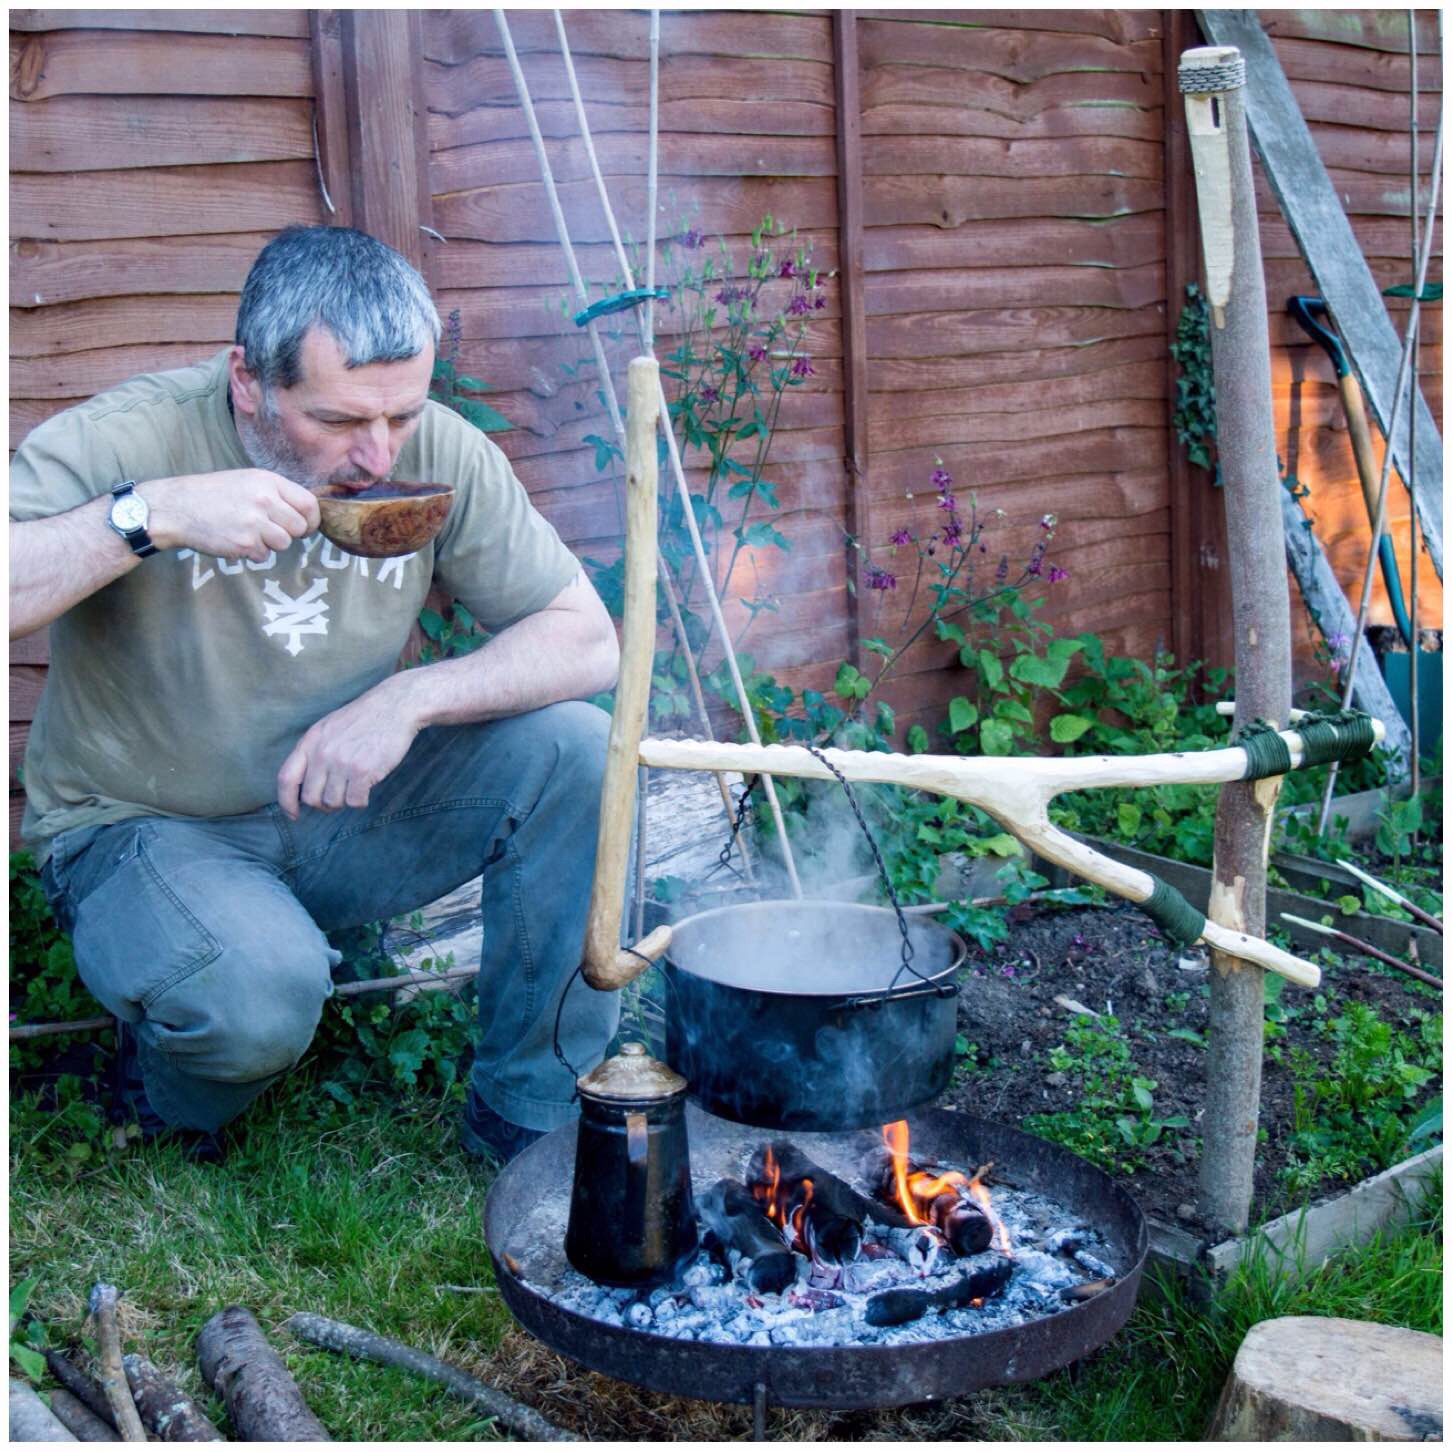
Classic Aures Crane
It took me a long time to find the perfect combination of branches for this crane. I have never seen another one before except as a drawing in the Wildwood Wisdom book. The hardest part in making this crane is the thinning of the wood to create the loop. It is a real challenge but also very enjoyable and satisfying.
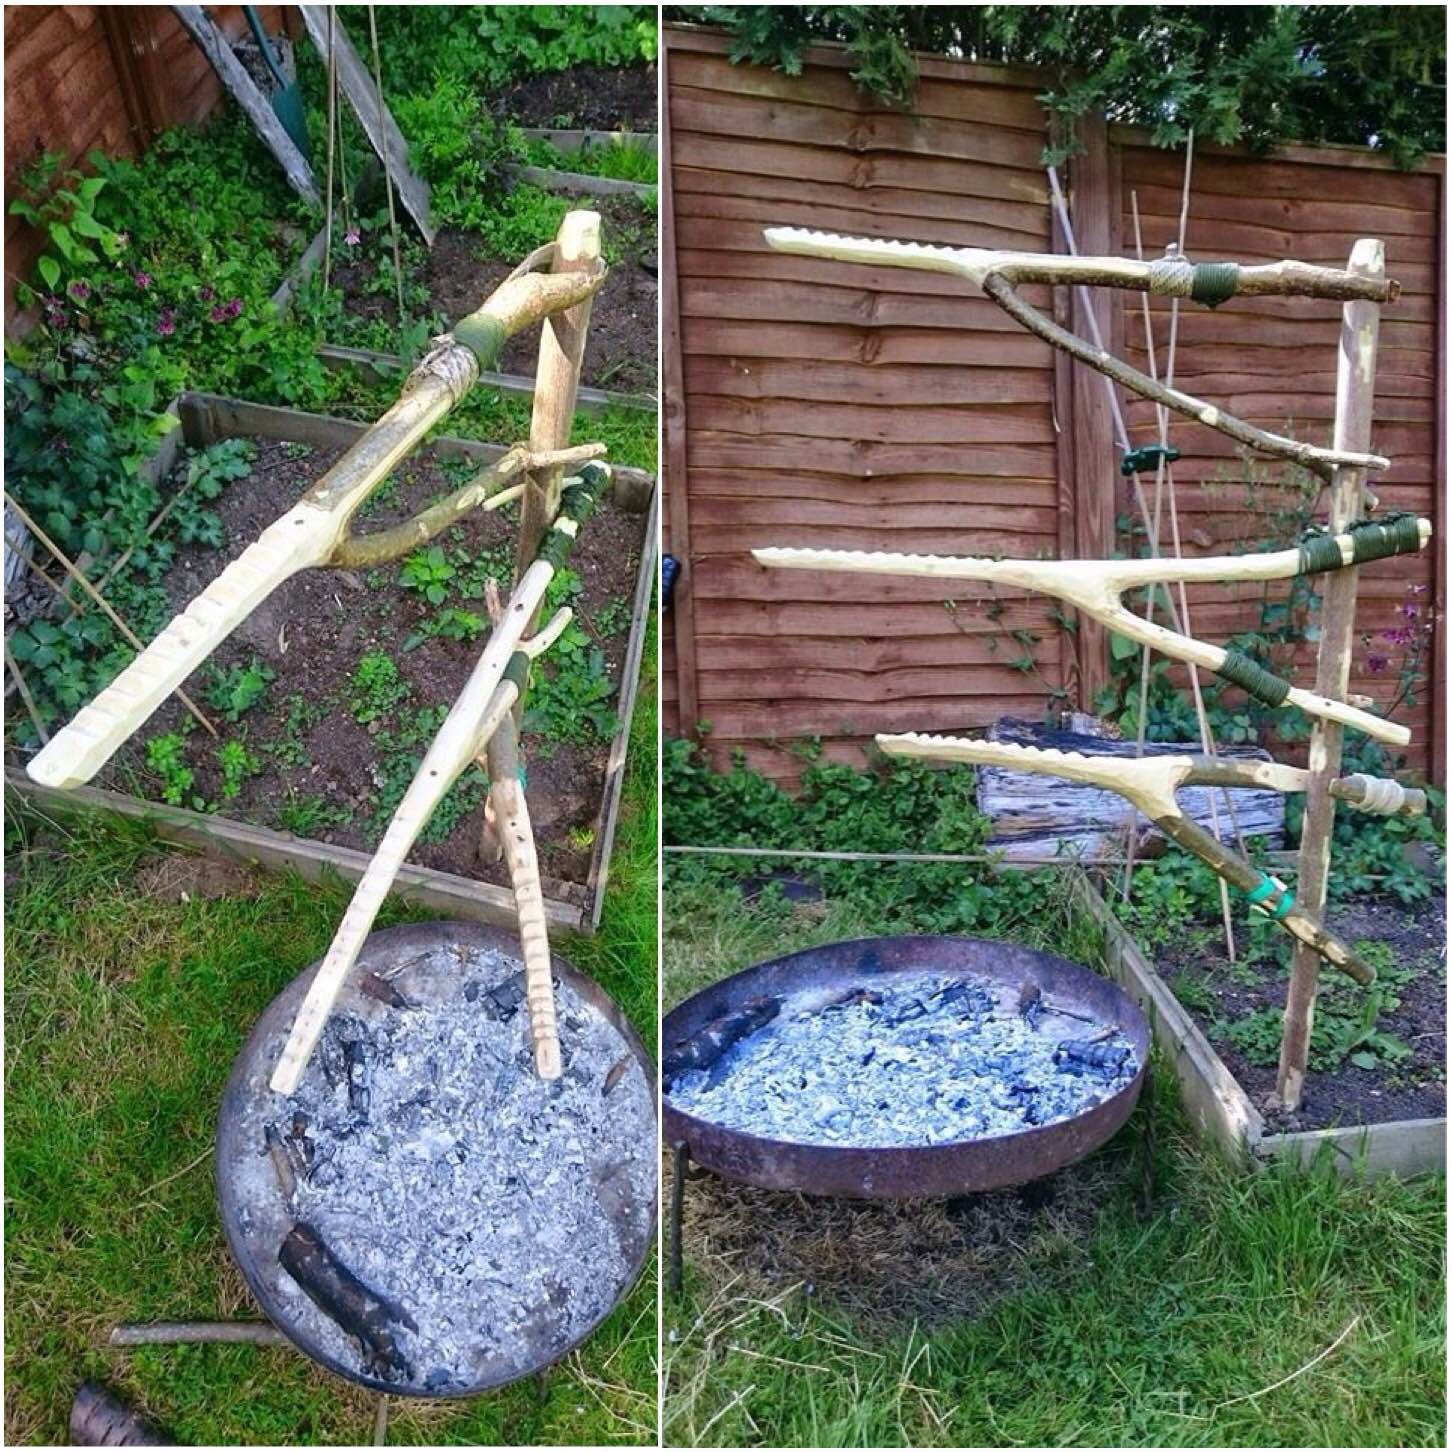
The Three Cranes
I really liked making these cranes and would encourage you to have a go at them if you like campfire projects. They are not for you if you prefer simply to put your pot on the fire, but if you like to tinker and experiment, have a go.
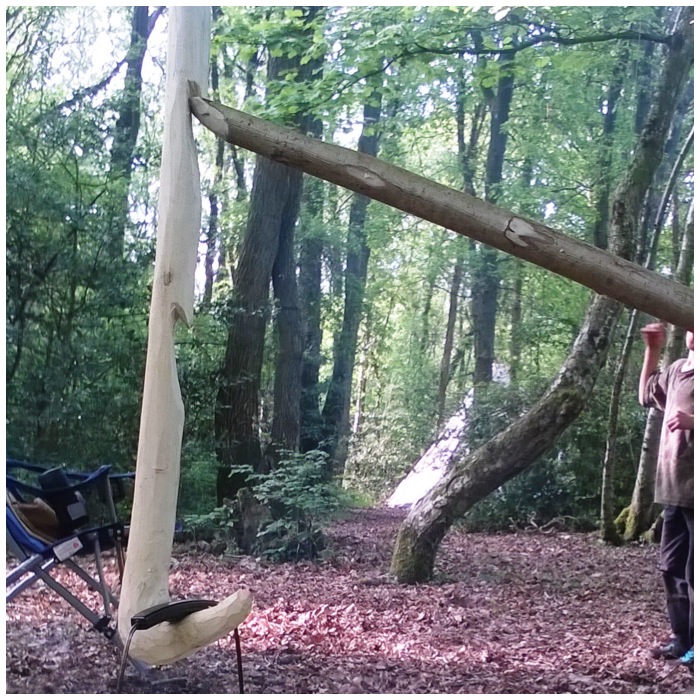
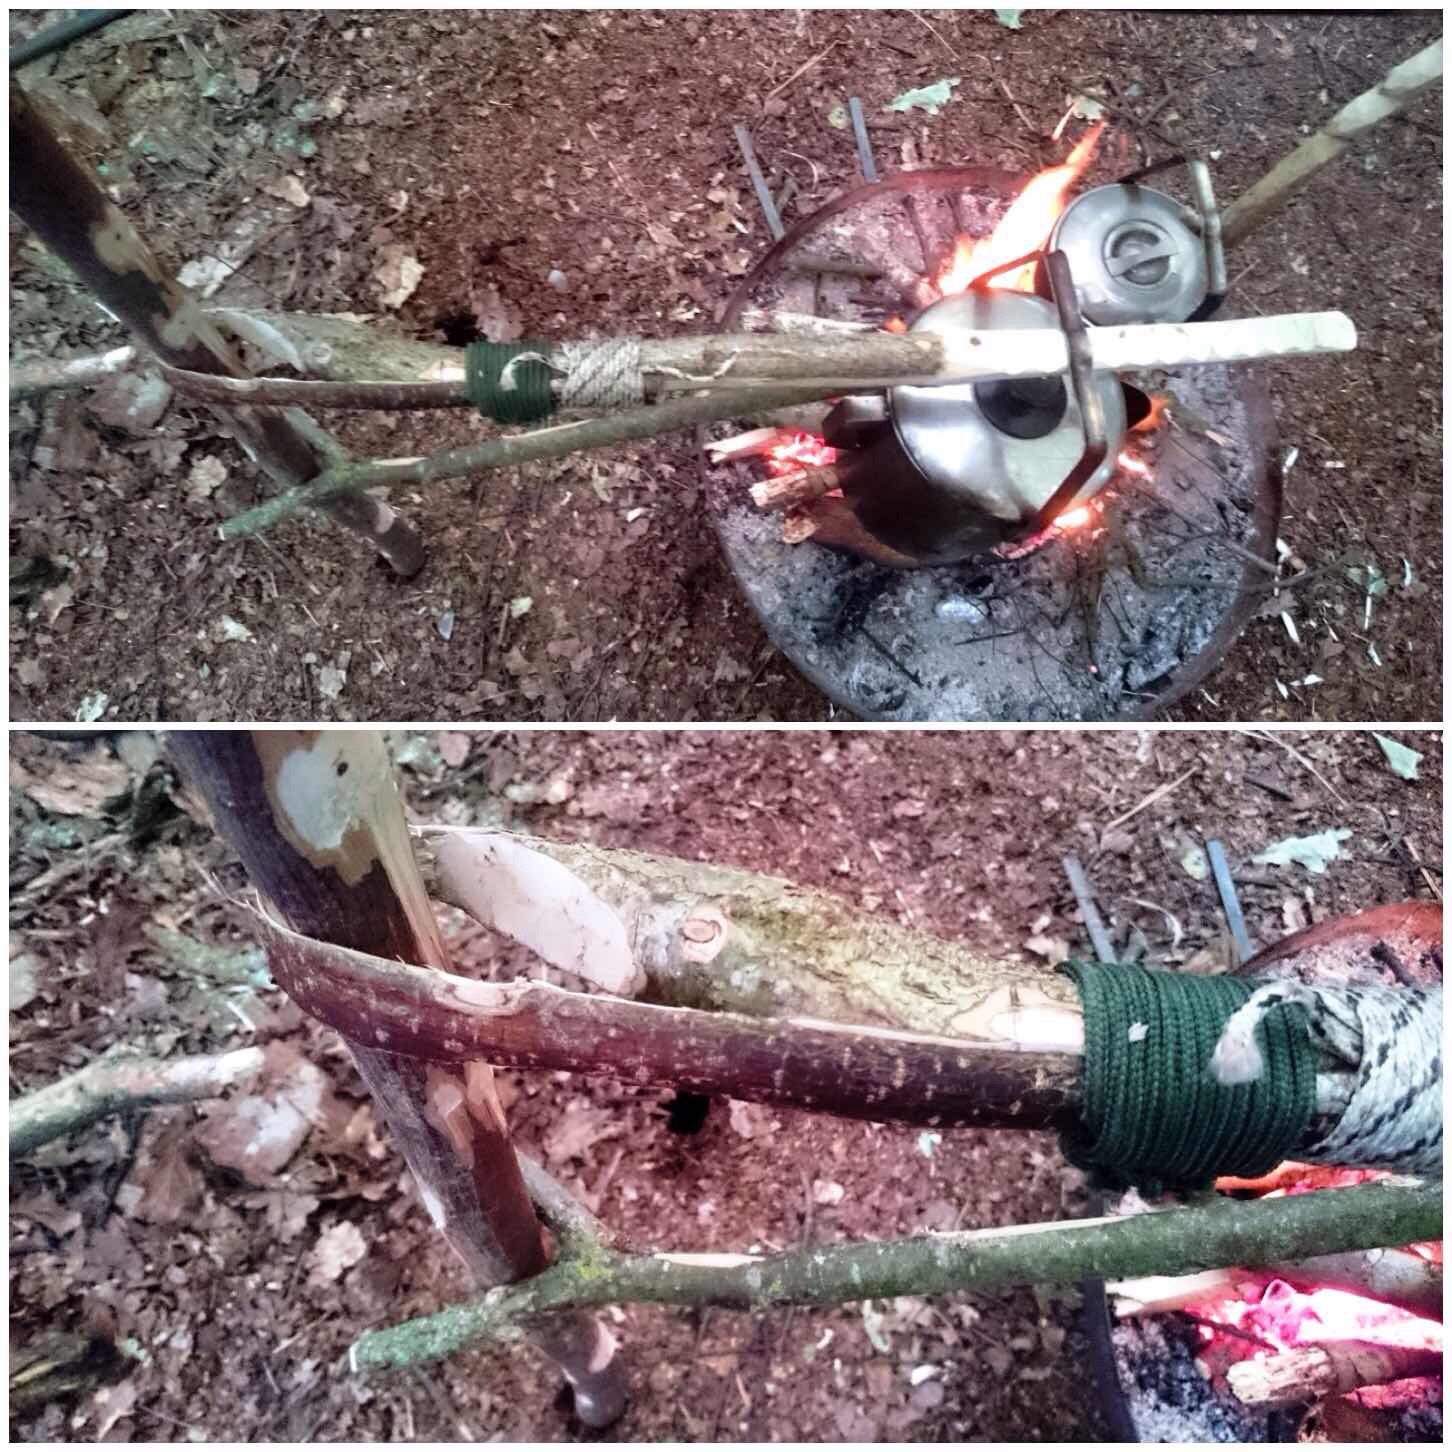
Notched Crane
The idea for this crane came to me a number of years ago while making myself up a little squirrel cooker from some metal rods. I have cut the notch out using an auger in the past but nowadays I usually just use my knife. I like this set up as you can make your crane out of one pole. With the addition of an adjustable pot hanger you have a crane that offers a variety of cooking heights without having a bulky tripod set up over the fire.
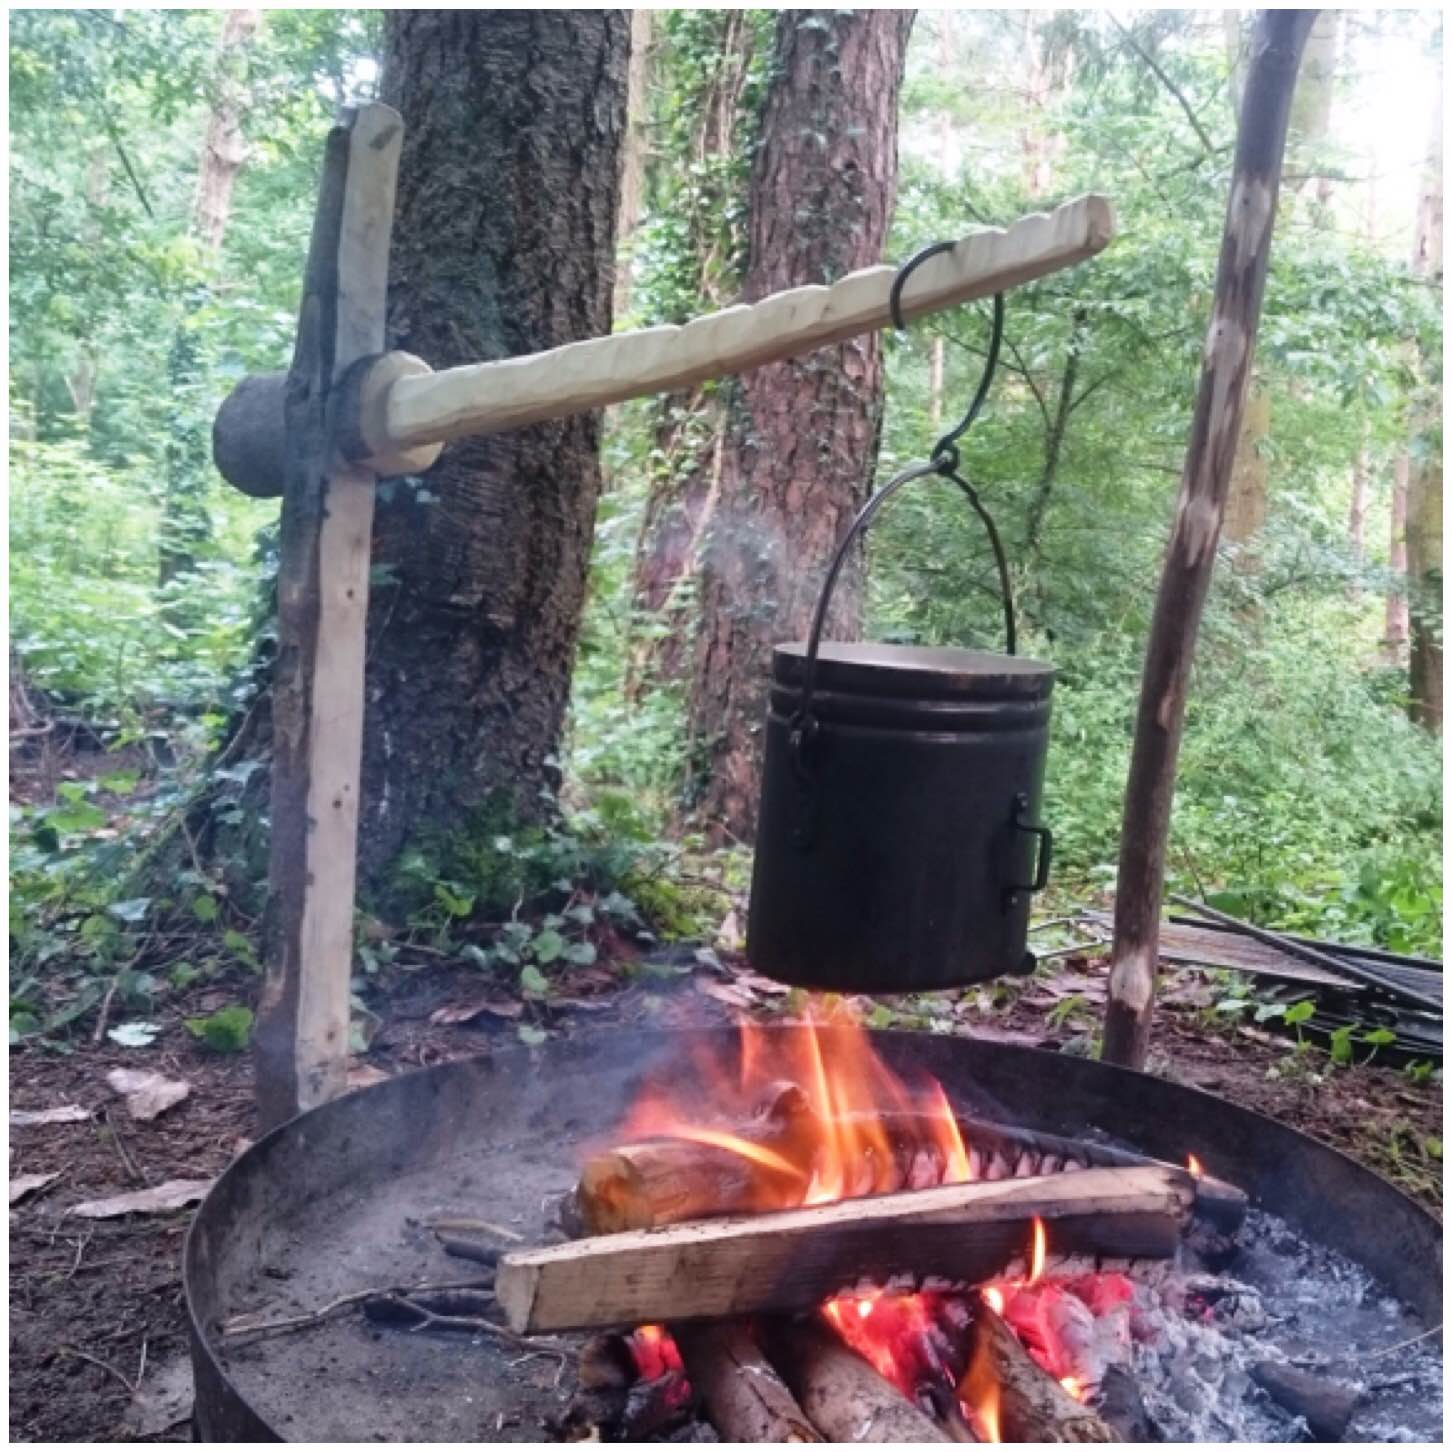
Simple Dovetail Crane
I got this idea from a Scouting page a number of years ago and it is very simple and quick to carve. The part that takes the longest to make is the adjustable pot hanger. I would recommend if you decide to experiment with making these cranes that you start with this one as the dovetail notch is so easy to cut out.
Lap Joint Crane
Still sticking with the single pole theme, another easy crane to make is the Lap Joint crane. The main thing to remember is to make sure that the squared-off fit of the upright is consistent along its length with the notch in the arm.
Once weight (eg a pot) is applied to the end of the arm, everything locks together. I have found that this crane works best when the pot is hung off the very end of the arm. I have experimented with hanging the pot half way along the arm only to find it all collapses. It is a good and simple crane to make – treat this one with respect, though.
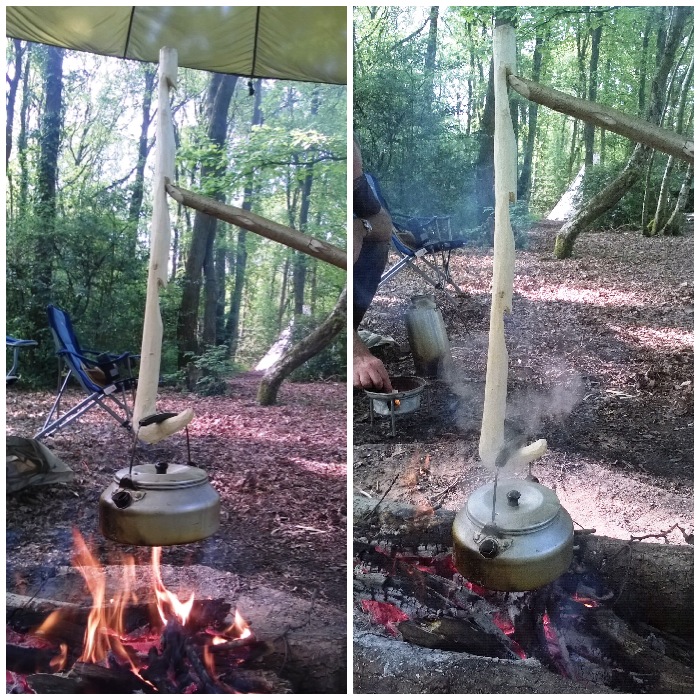
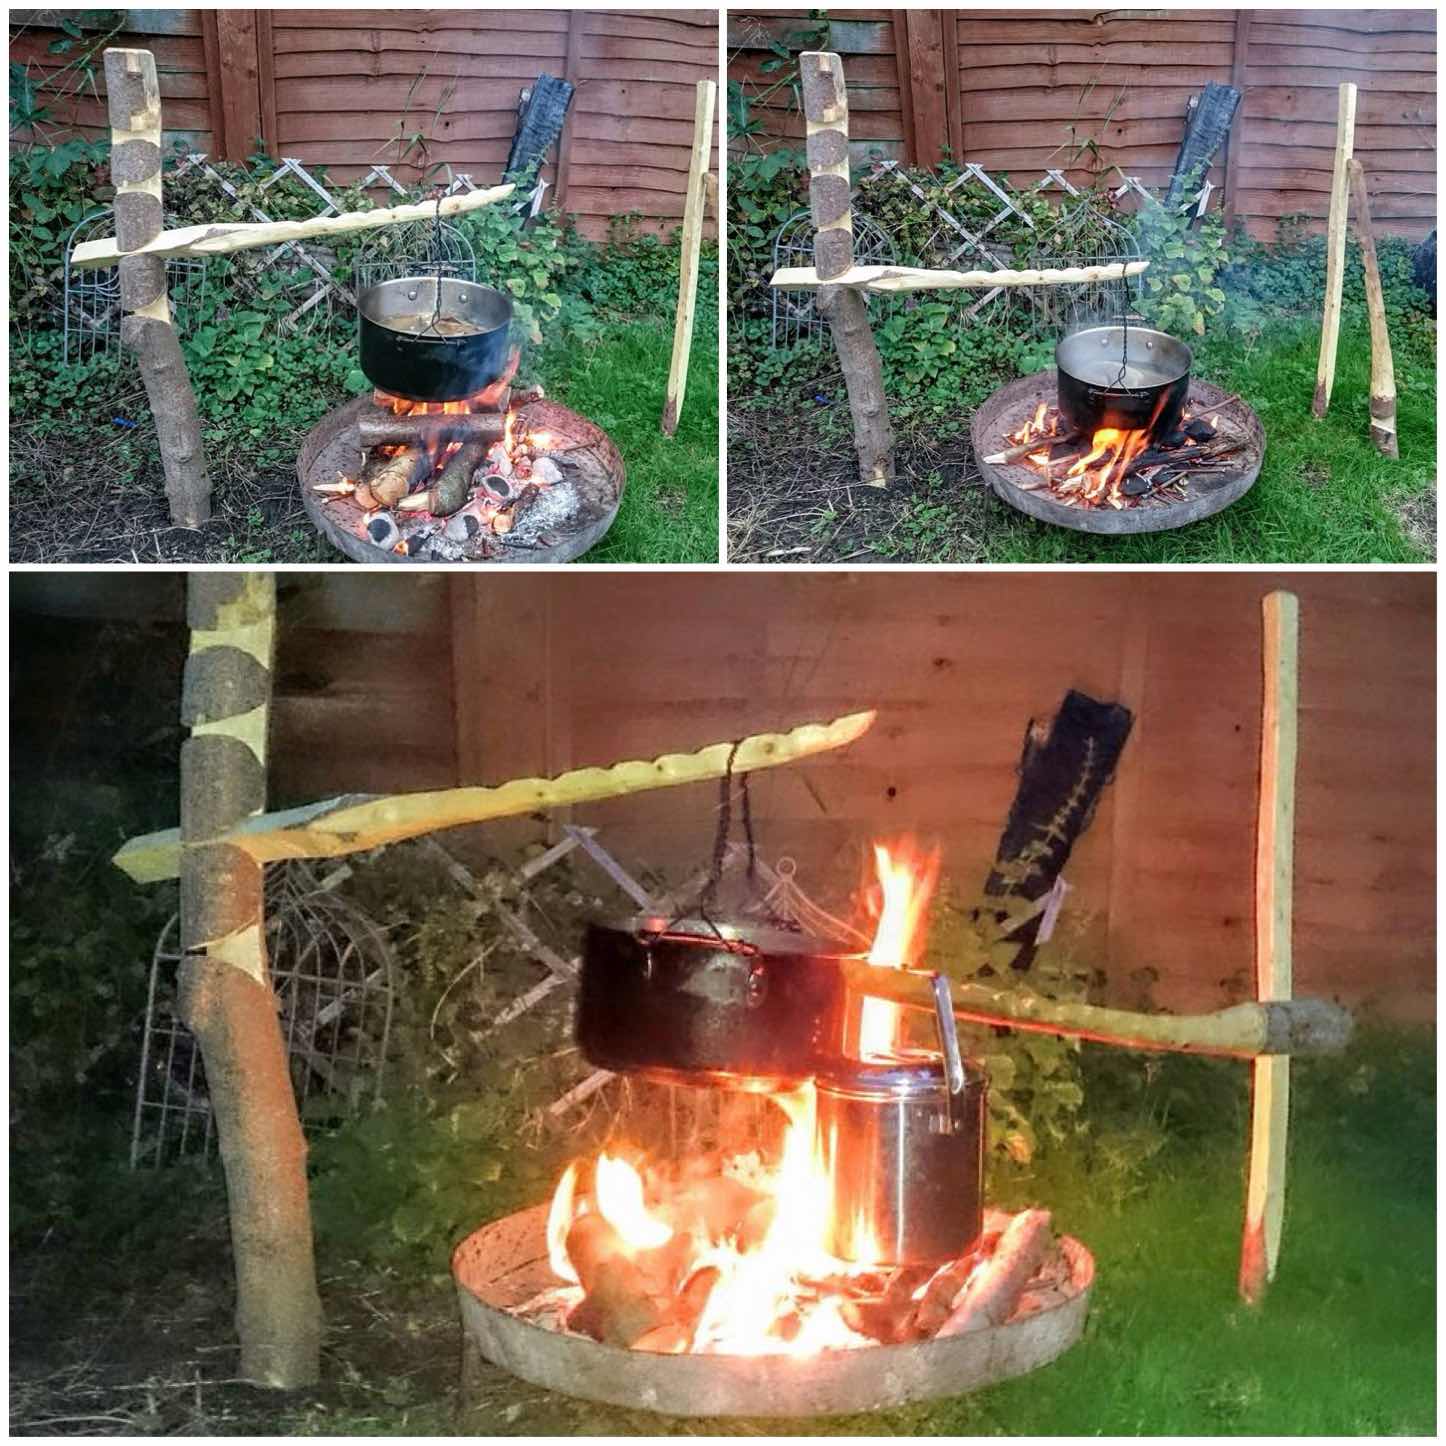
Dovetail Crane
This is my all-time favourite crane. With the dovetail notch the arm cannot fall off (unlike the Lap Joint crane) and it offers a wide variety of heights to choose from when cooking. The arm is very easy to adjust even when there is a pot attached and will take you no more than an hour to carve.

Heavy Duty Crane
This one came about from an article I spotted in a Scouting site. Some of the Dutch Oven pans I use can be extremley heavy. This crane offers a number of different cooking heights and will not bend in the slightest even with the heaviest pot attached (well, the heaviest I have, at least). I have though learned to take the pot off the arm with this one before changing the height.
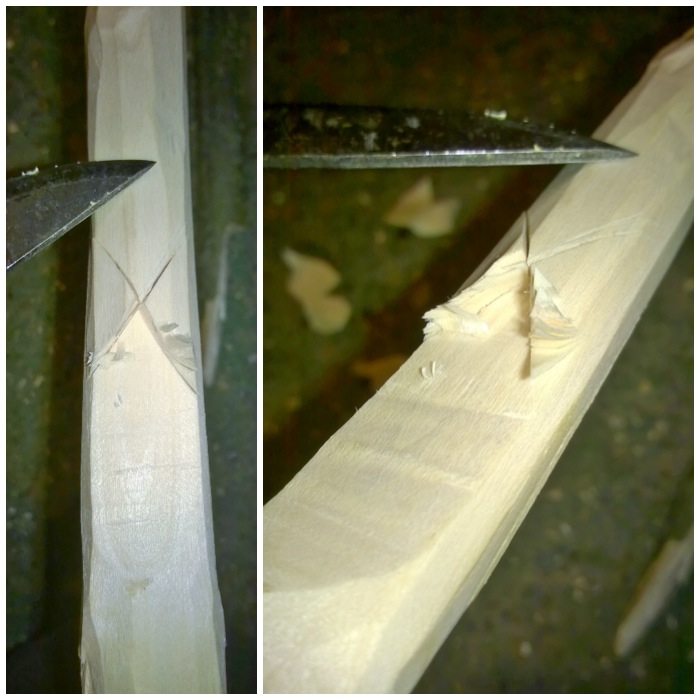
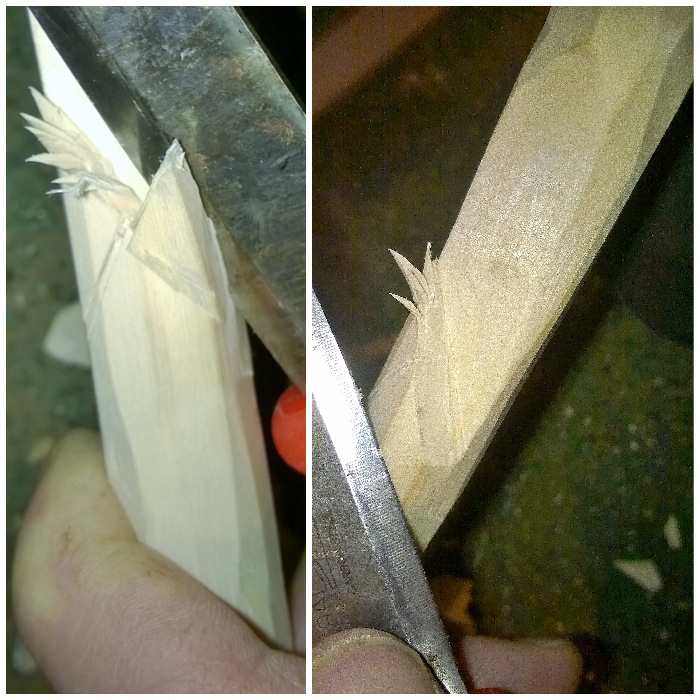
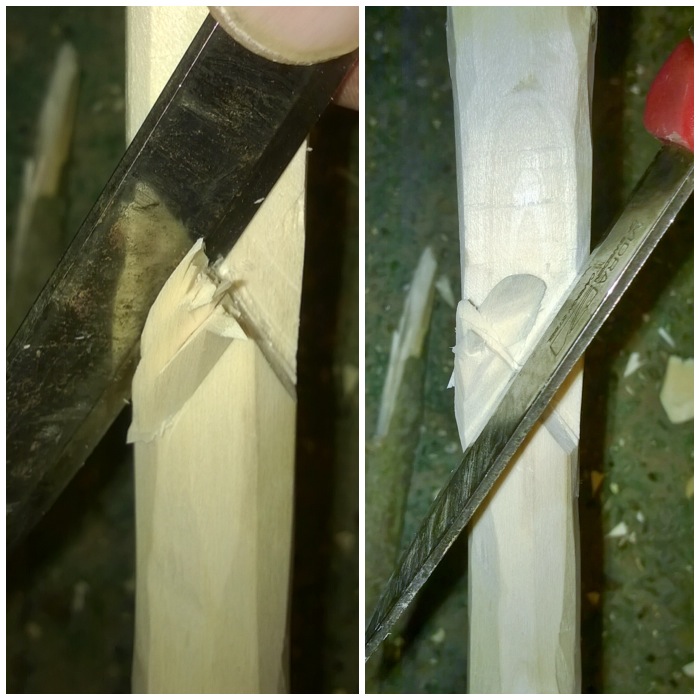
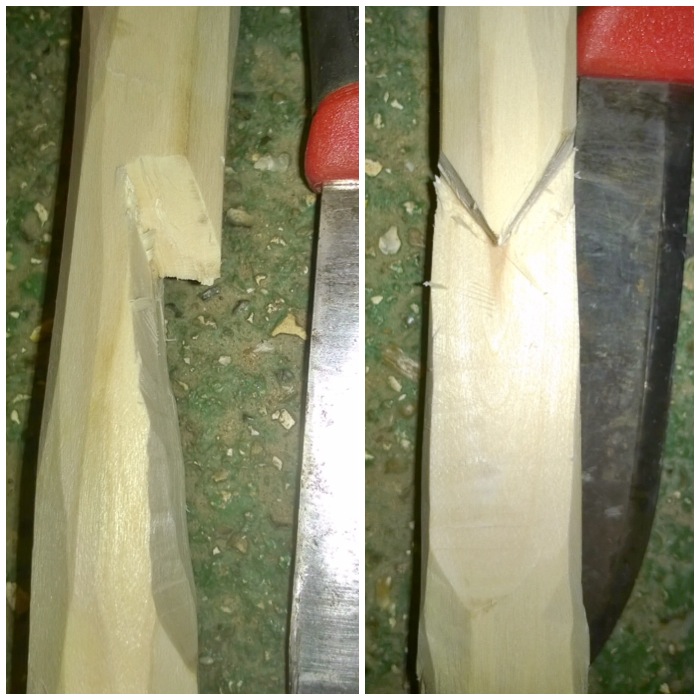
Mortice and Tenon Crane
This was the last crane I worked on last year and the one that is the most technical, I think. The joint is a simple tenon and mortice set up however there were a lot of angles to consider (I have discussed then in the article) and the string I used to adjust the height could possibly do with further development. It is however an excellent crane with lots of movement up and down and side to side.
In time I hope to add a few more How To’s…. to this series as I find the whole subject of campfire contraptions so fascinating.
Cheers
George