How To…. Make a Flint Axe and Hatchet

Sometimes a flint knife or adze is just not enough and you need something with a bit more clout. At times like these, what you need is a flint axe.
Here’s how I constructed the large flint axe you can see below, with a few pictures at the end about its little brother, the hatchet.

Photo 26-03-2014 15 33 47
Two good tools

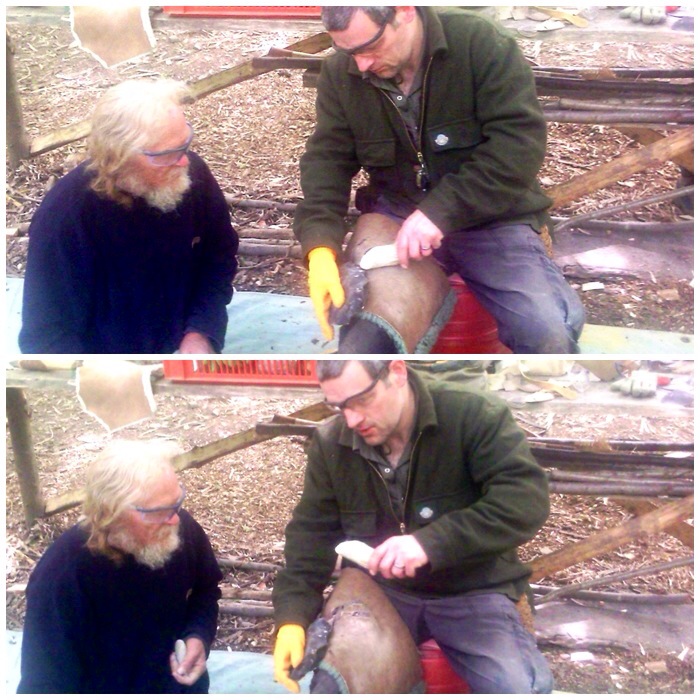
I made these tools on the Woodcraft School Primitive Technology course and had some excellent tuition from John Rhyder and John Lord.
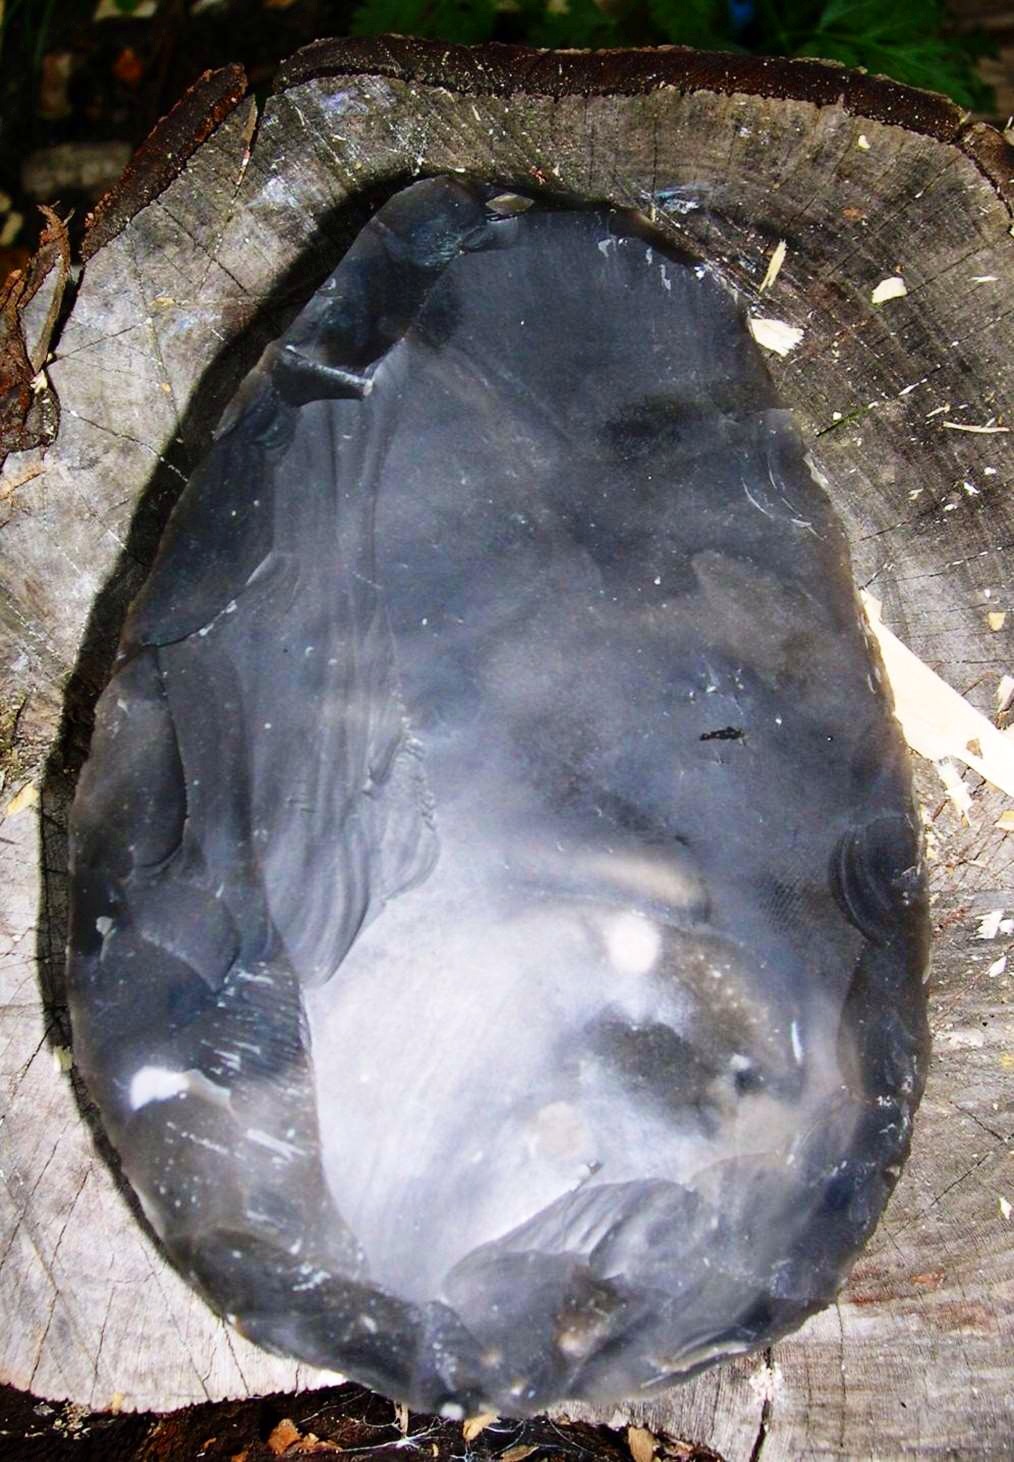
John Lord gave an excellent demonstration on knapping a flint axe head. It was a joy to watch this master take a lump of flint and transform it into a work of art.
When it came to the turn of us students to knap out our axe heads John gave everyone lots of one-to-one tuition. If it hadn’t been for this (and John knapping the tricky bits) I would have been lucky to have ended up with an arrow head, never mind a large axe head.

Photo 26-03-2014 13 58 40
Some tuition from the master Mr Lord

I like to think that this axe head has some of me in it but truth be told it’s more John Lord than me. I did however have a great time seeing this axe head appear out of the flint knowing at least part of it is me.

Photo 26-03-2014 13 04 11
One knapped flint axe blade

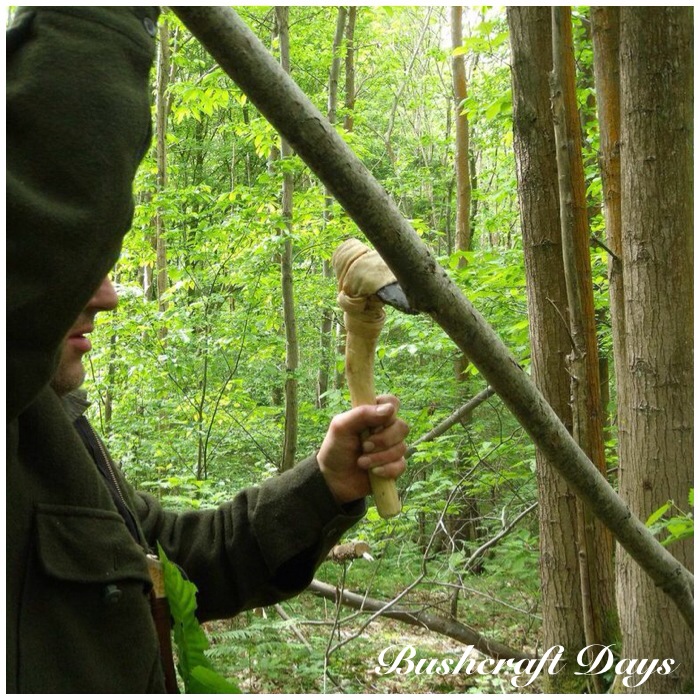
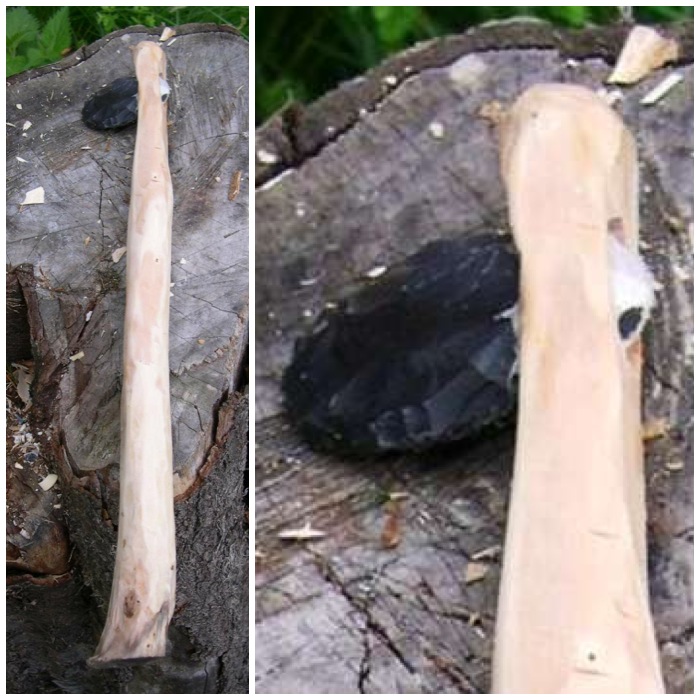
I used a well-seasoned piece of yew for the handle as that was what I had available at the time.

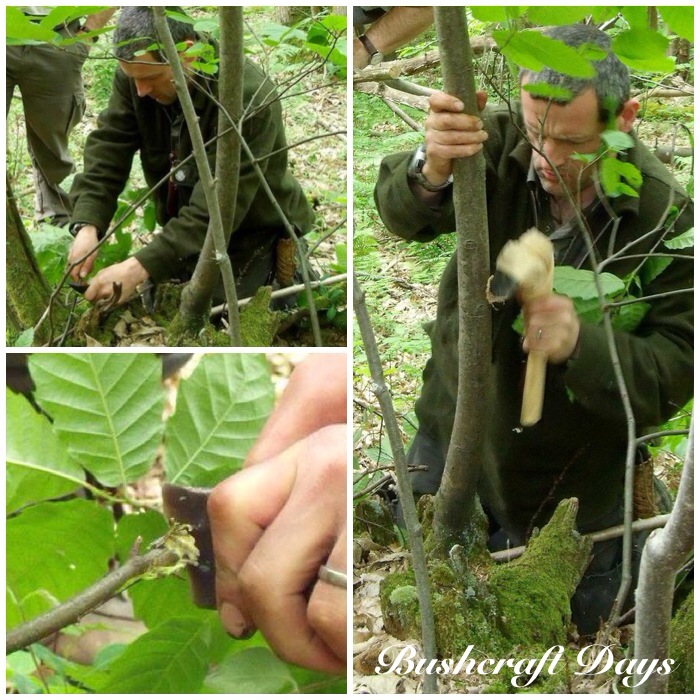
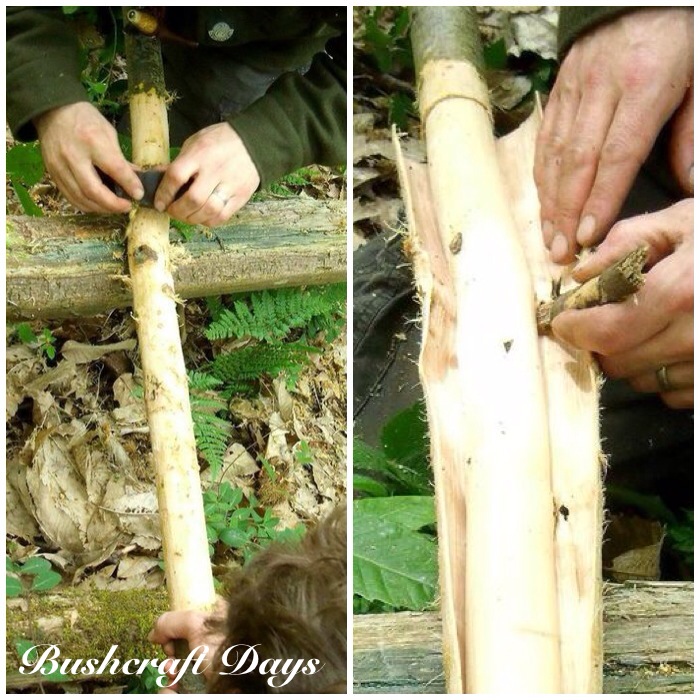
Initially I used my flint adze to  try and shape the yew, but although the bark came off easily enough it didn’t make much of an impression on the hard wood beneath.

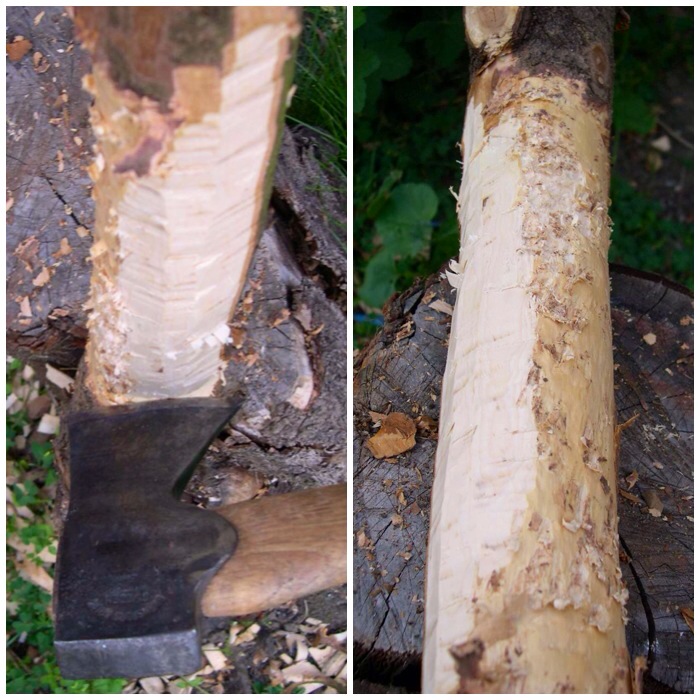
You can see the tool marks left on the wood by the adze in the right-hand picture below. As a Time Team enthusiast I have watched the archaeologists discuss such marks on many ancient pieces of worked wood they have found so it was good to see it in action for myself.

Photo 26-03-2014 13 59 38
Stripping the handle

At first I used short chopping motions to tear away at the bark and wood with the adze. Ever experimenting, I tried a few strikes with a bit more force and eventually took a chip out of the adze blade. I was able to re-sharpen the edge of the adze by pressure flaking it but decided that the yew was just too tough for the adze (notwithstanding my lack of patience and skill).

Photo 26-03-2014 14 00 01
Too tough for the flint adze

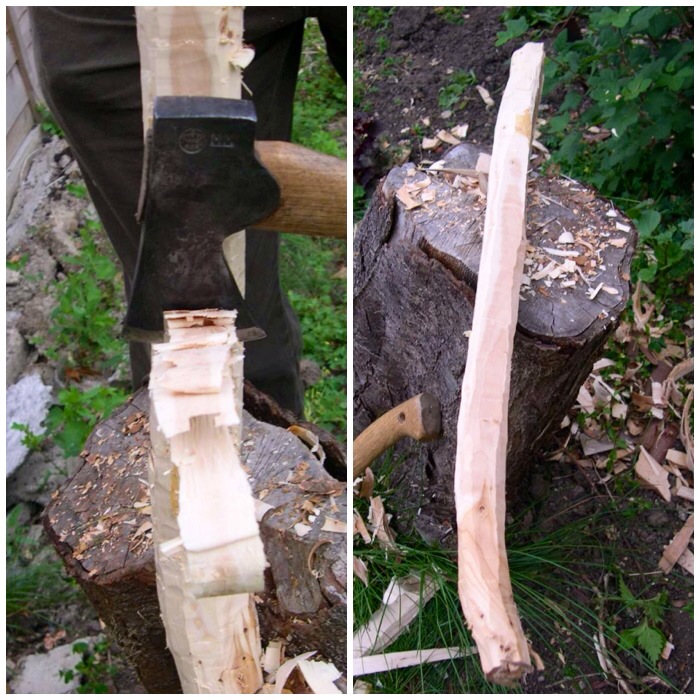
I reverted to my modern axe which took the excess wood off easily. In the picture on the right below you can see the very different tool marks left by the iron axe in comparison to the flint adze marks.

Photo 26-03-2014 14 01 05
Time for an iron axe

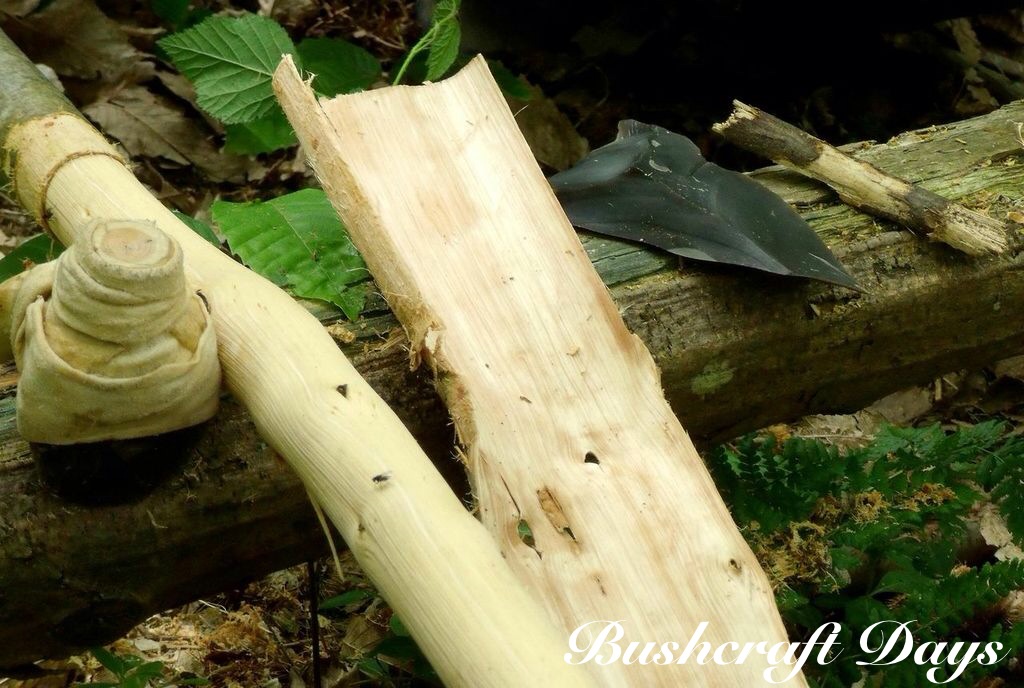
This piece of yew had a slight curve to it which I thought would give added strength to the handle. I left the handle fairly rough, just ensuring I would have a comfortable grip and not get any splinters.

Photo 26-03-2014 14 01 29
One rough handle

I initially started using a discoid all-flint knife to cut out the socket for the axe head but I did not take any pictures of this part. I did not do this for long as the yew was just too hard and the flint blade kept slipping. A few of the other students did just use flint for this stage but since the woods they were using were slightly softer they had more success. I ended up using my little palm gauge for the job and it worked very well.

I did try and burn out the wood with embers but soon got put off this with the fumes (yew wood being highly toxic).

Photo 26-03-2014 14 02 44
Carving and burning

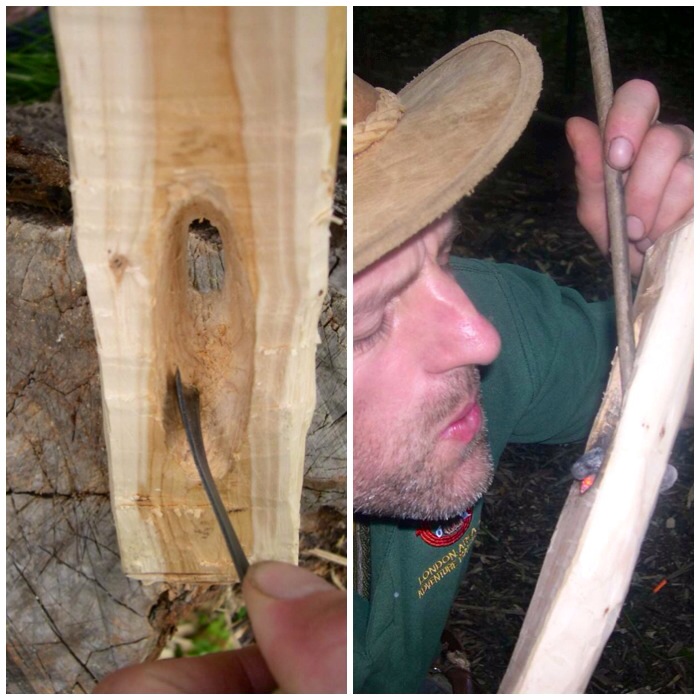
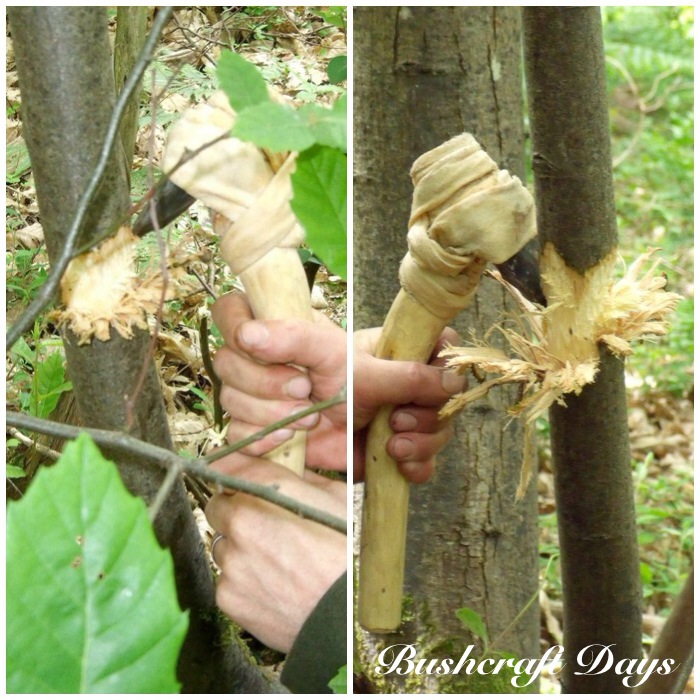
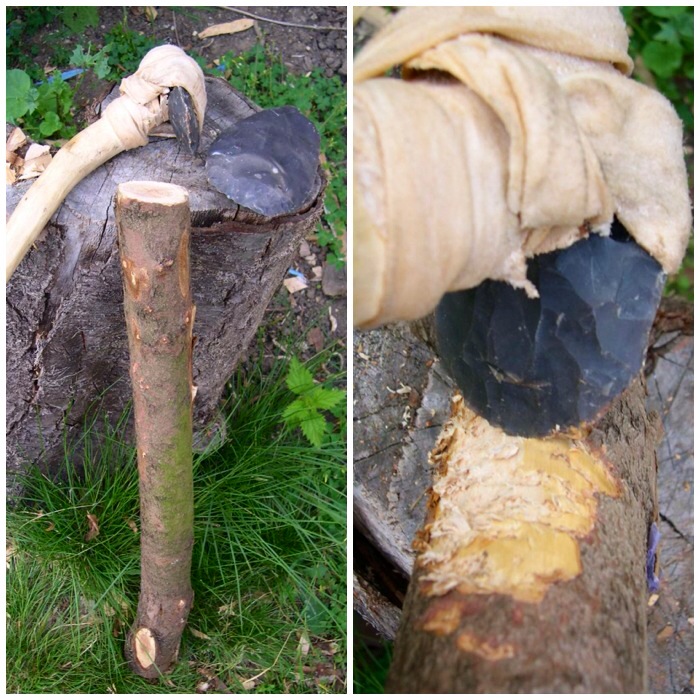
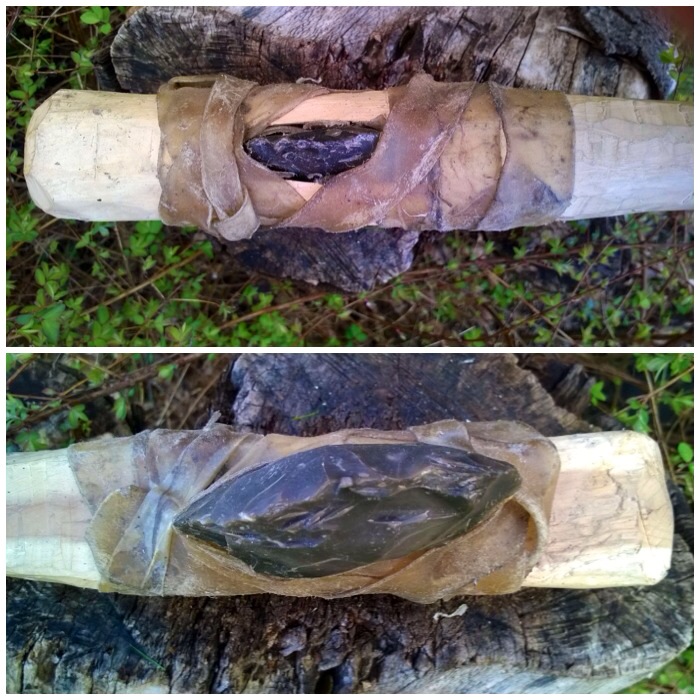
The socket finished – front and back.

Photo 26-03-2014 14 03 07
The finished socket

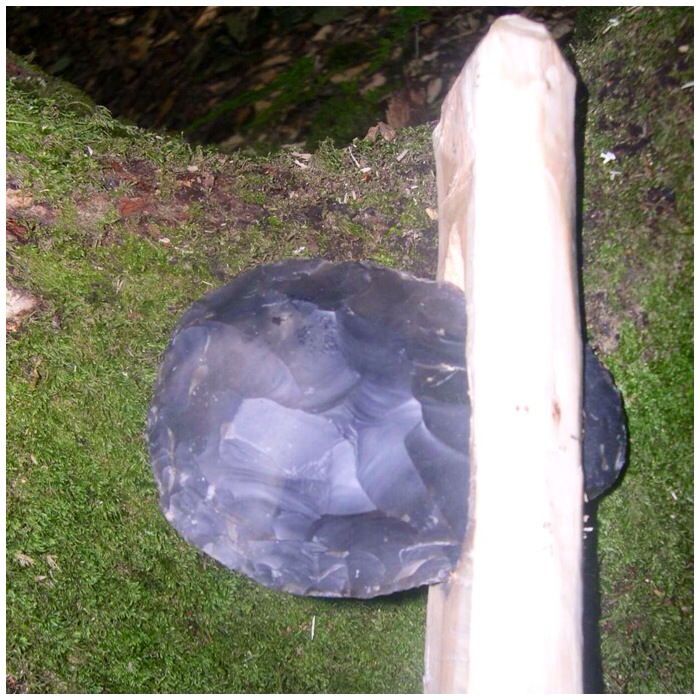
A good fit but too loose for use.

Photo 26-03-2014 14 03 41
Test fit

I wrapped the flint axe head in a piece of rawhide to see if that would secure the axe head in the socket (apologies for the poor quality of the pictures), but with one piece wrapped around it the axe head would not fit into the socket.

Photo 26-03-2014 14 05 43
Prepping rawhide

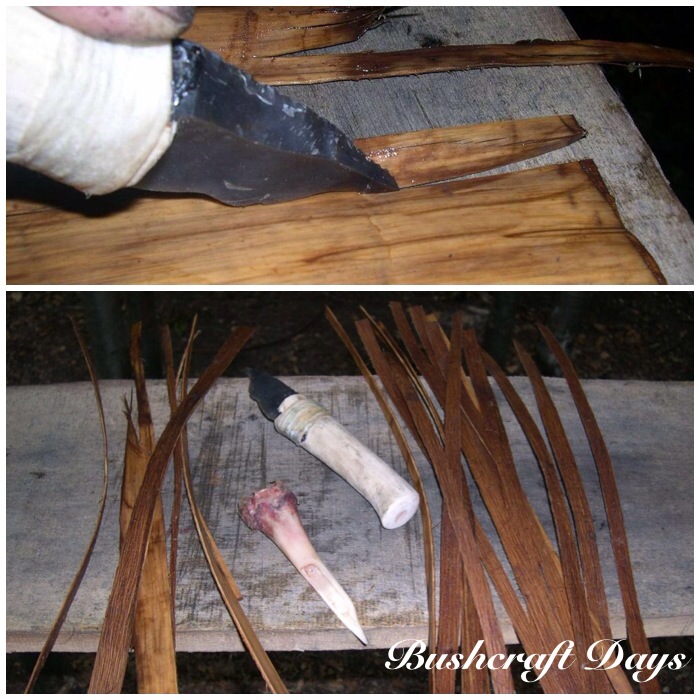
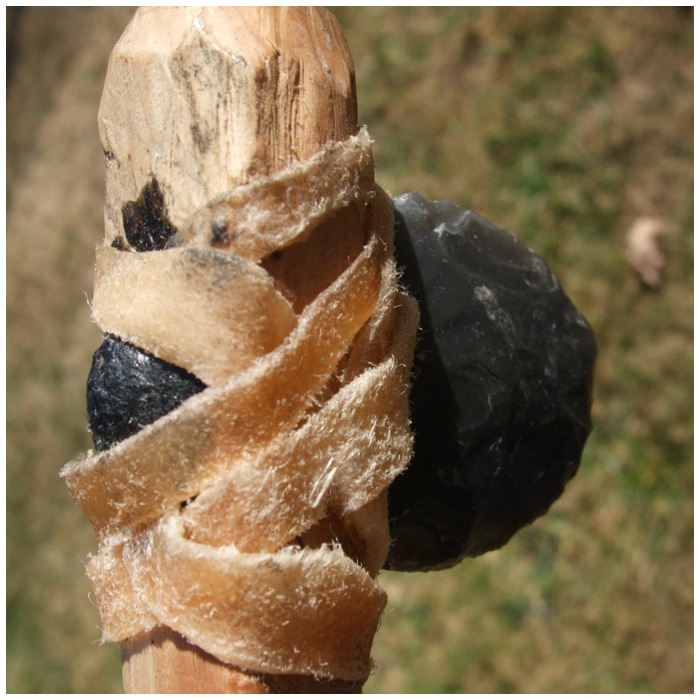
Instead I cut up some strips of rawhide and held it all in place with some string. As the rawhide dried out it really gripped the axe head and the wood of the socket.

Photo 26-03-2014 14 06 42
Securing with rawhide

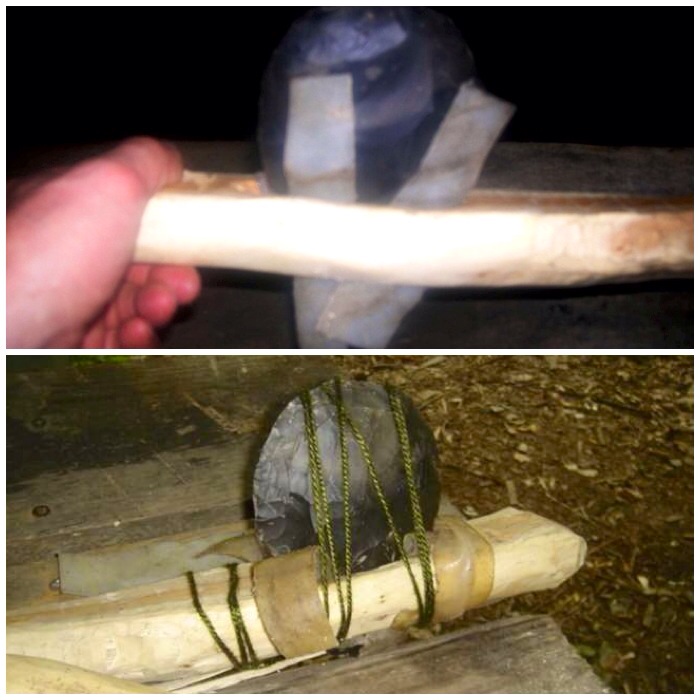
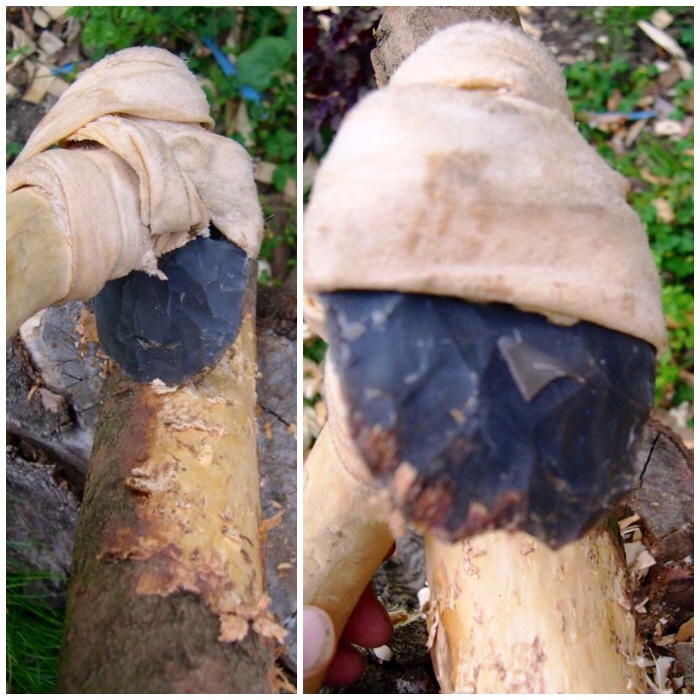
After that it was a case of wrapping a load more rawhide around the axe head and leaving it to dry for a couple of days.

Photo 26-03-2014 14 08 00
Drying and adding more rawhide

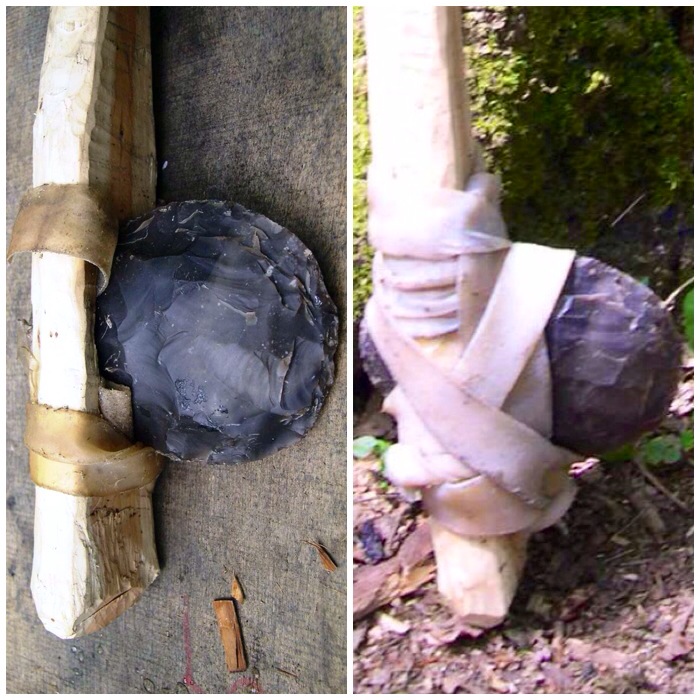
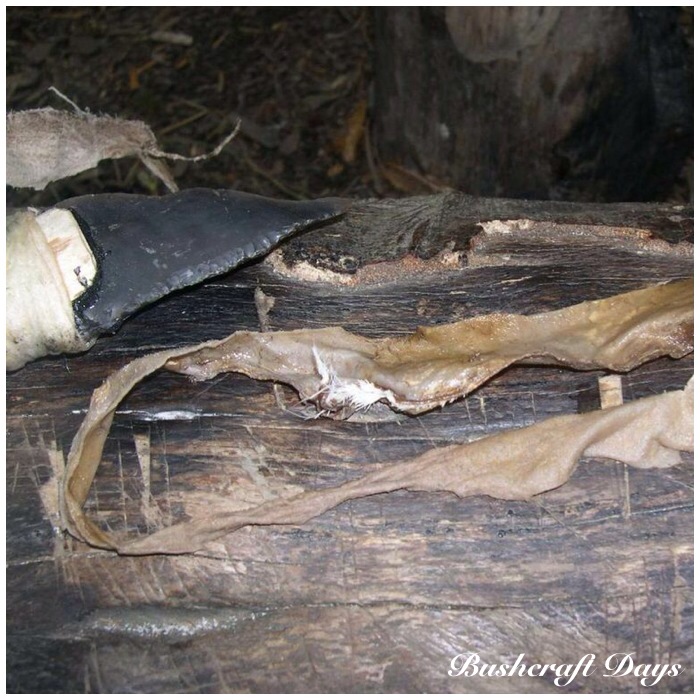
After the rawhide had dried out it became almost translucent but it was a very strong hold.

Photo 26-03-2014 14 18 03
Side profiles

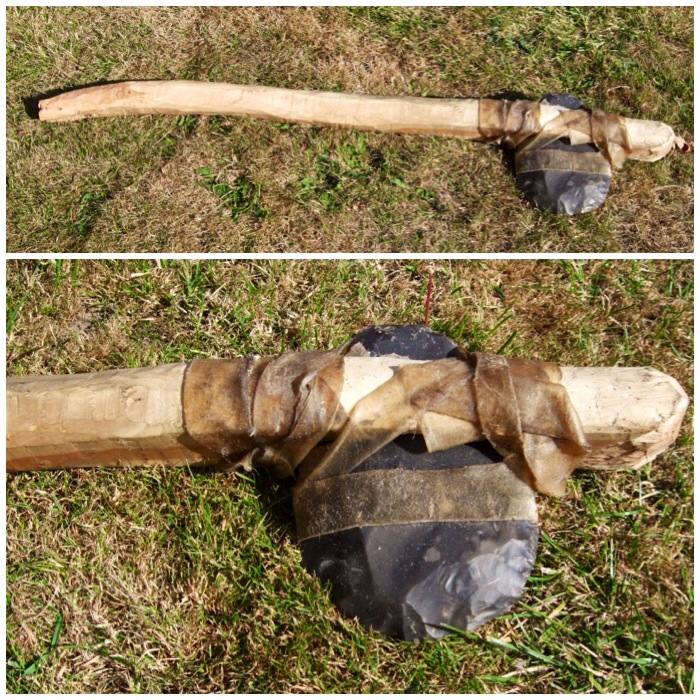
Top and bottom profiles of the axe head.

Photo 26-03-2014 14 10 41
Top and bottom profiles

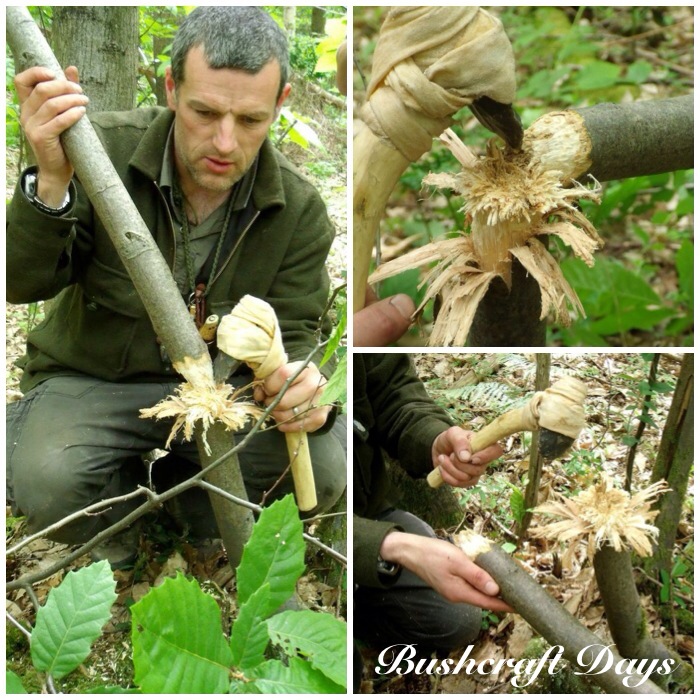
I tested the axe out on an old stump in my garden. Like the adze, the axe tears into the wood as opposed to slicing into it as a modern iron axe would do. It was still very effective in its own way.

Photo 26-03-2014 14 12 38
Leaves the wood torn

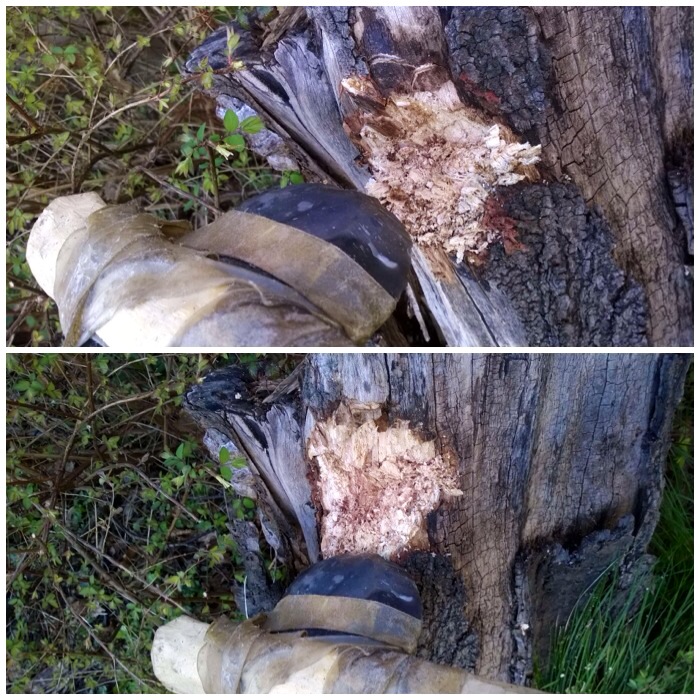
The blade edge is not particularly sharp and has a good shoulder area behind it. This shoulder area really supports the edge so that it does not break off when the axe is used.

Photo 26-03-2014 14 09 54
Up close

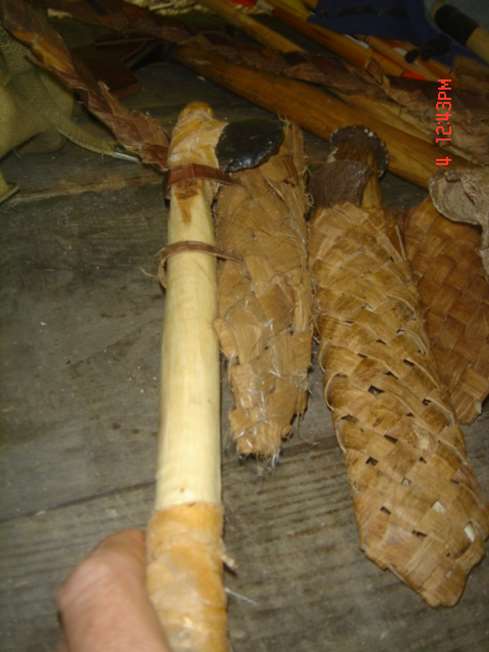
I had a small flint axe blade I had made at the same time as the larger one, so I just scaled everything down to make a hatchet.

Photo 26-03-2014 16 12 22
Hatchet blade jammed in with rawhide

As well as using rawhide I filled the socket with some spruce pitch to fill up any gaps and to help secure the head more.

Photo 26-03-2014 16 13 56
Gaps filled with resin

I have never used this tool on anything – it would have been used mostly to dispatch small game that had been caught in traps. I do like it a lot though, in some ways more than the larger axe.

Photo 26-03-2014 16 14 13
Rawhide wrap

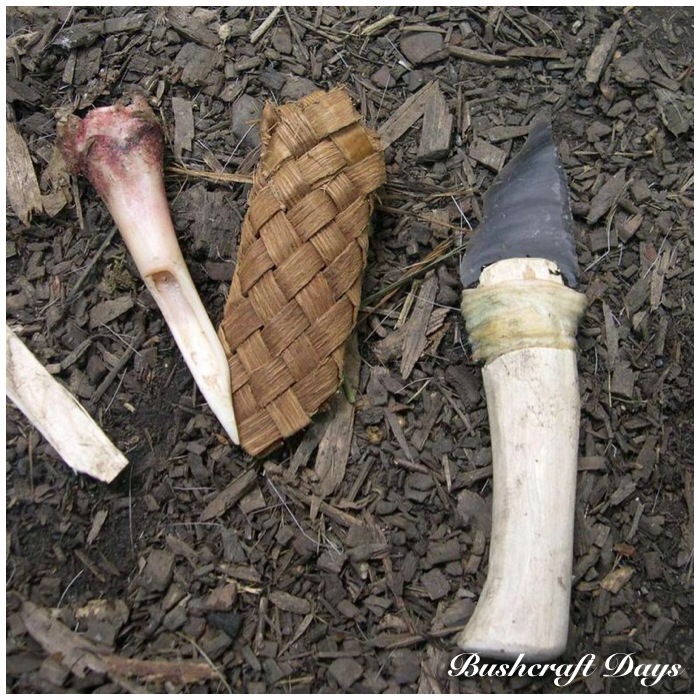
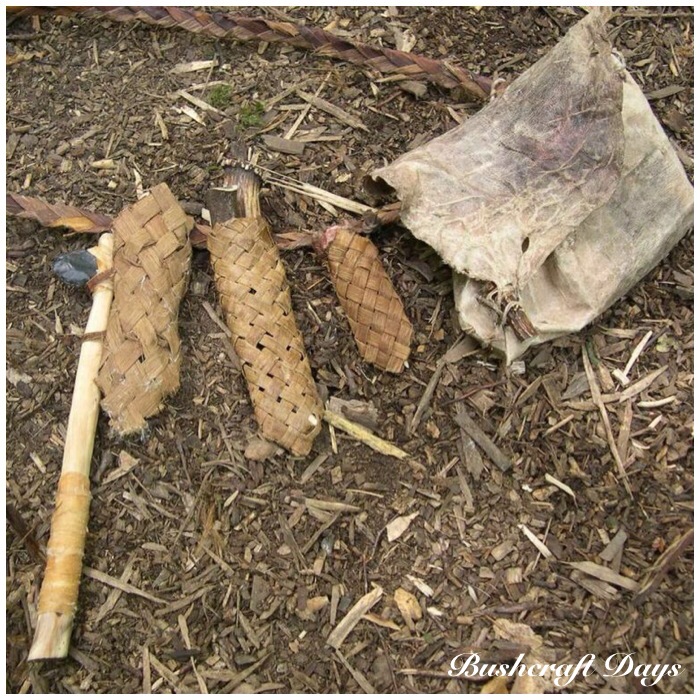
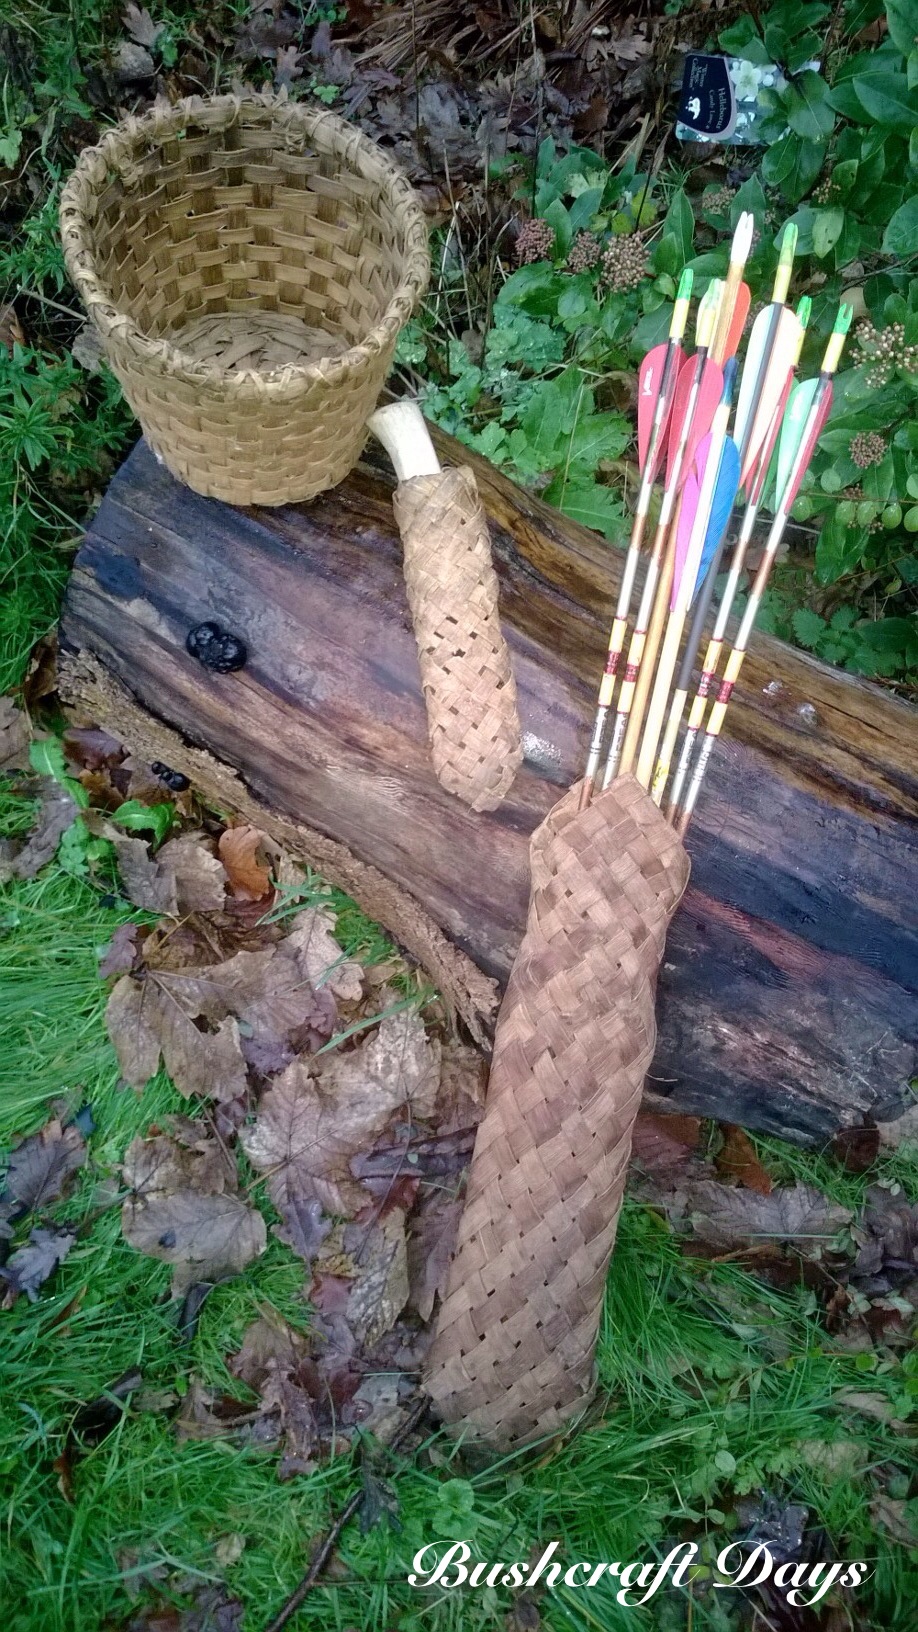
This hatchet sits nicely on my primitive belt order.

paul 12
On the belt order

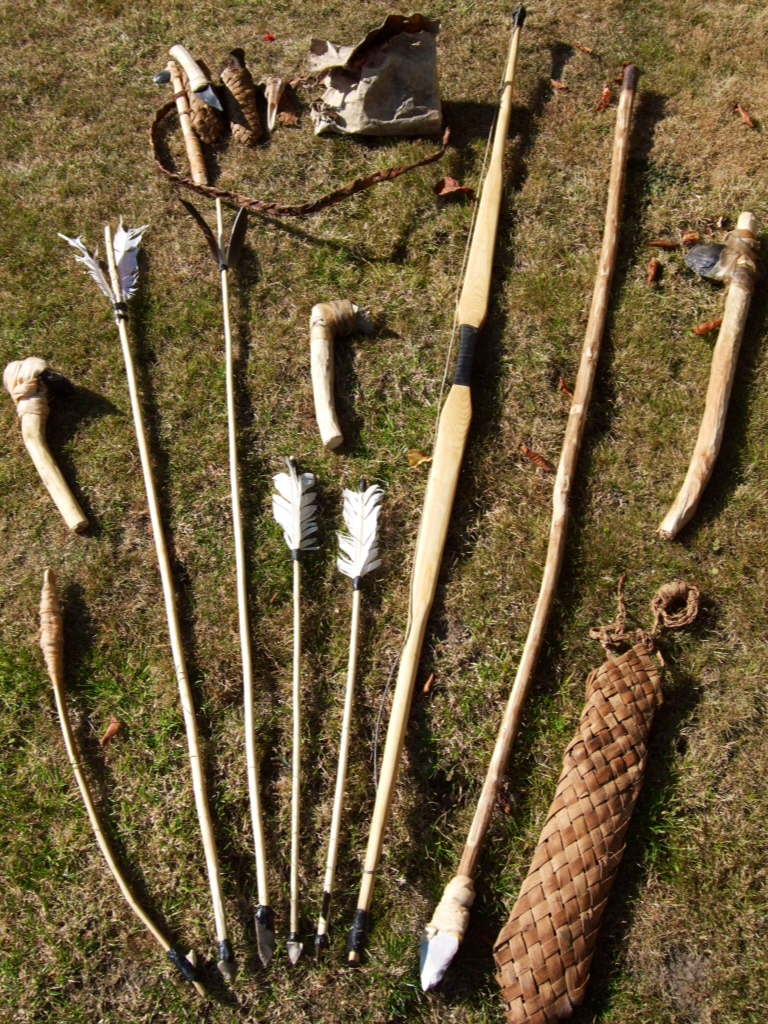
Finally, my whole primitive order kit:

Photo 26-03-2014 15 33 58
My collection

Cheers

George

How To…. Primitive Skills – Bone Knife Bark Sheath

This How To…. lays out some simple steps to make a bark sheath for a knife. I have also used this method to make a quiver for my arrows and with a sightly different method you can easily make containers.

Photo 11-01-2014 23 44 34
Sweet Chestnut Bark Sheath

I took these pictures in 2009 when I was on the Woodcraft School Primitive Technology course. The sheath was made using only primitive tools as required by the course. To do this I made for myself a flint knife, flint adze, some discoidal flint knives and also used the bone bodkin that I showed you how to make in the previous post. For more modern methods I would say you could do this job with a small saw and a small knife.

I started the project by selecting a suitable Sweet Chestnut (Castanea sativa) limb from a coppice stool to take down. After checking the tops for any dead wood I started to clear away the undergrowth using some flint. Clearing the undergrowth away ensured a safe working area around the limb. I used a large sharp piece of flint for this. Also I made sure I had clear exit routes around the limb I could use when it came down.

Photo 11-01-2014 23 28 11
Trimming and starting the cut

I had created for the job a Flint Adze. This is a piece of worked flint attached to a handle with rawhide. Unlike traditional tree felling where a wedge is created and then a back cut made I am made a rosette cut all around the tree using short chopping motions. You can see the rosette cut appearing in these pictures. The small branch you can see in the foreground got in my way so I cut this down.

Photo 11-01-2014 23 28 26
The Rosette cut

You can see that the Adze creates tears in the wood but is very effective in cutting into it. As I got into the heartwood I had to support the limb as I did not want it to fall uncontrollably and eventually I was able to let the limb to fall under control. I did not need to back out of the coppice stool as the limb was light enough to control. Had it been any heavier, my cleared exit routes would have come into play.

Traditionally the stump would have been left like this. I however sawed the stump cleanly at the base. If a stump is cleanly cut (with a little angle) then it has less chance of getting infected and will eventually have new shoots grow out of it.

Photo 11-01-2014 23 28 40
A wooden flower

Using the Adze in a safe manner away from my body I trimmed off all the brash from the limb.

Photo 11-01-2014 23 29 02
Trimming the limb

Using the flint that I had cleared the undergrowth with I scraped off all the outer bark of the limb as this is too brittle to work with. All I wanted to use was the inner bark. My friend Paul held the limb to secure it: this speeded up the process as I could use both hands.

I scored a line down the limb through the inner bark with my flint and also scored a line around the limb at the top and the bottom. Then, using a small piece of wood I’d found on the ground, I peeled away the inner bark from the limb. This was done in April so the sap was rising, making the debarking of the limb very easy.

Photo 11-01-2014 23 29 38
Scraping and de-barking

The tools I used for the job:

1) Adze

2) Flint

3) Piece of wood

I cut a further piece of bark off the limb as well.

Photo 11-01-2014 23 29 55
Fresh bark ready for drying

I left the bark to dry out overnight and then re-wet it the next day before cutting it into strips. If you use the bark straightaway after harvesting it, anything you weave will become loose as the bark will shrink slightly as it dries. This shrinkage does not happen again if you let it dry out first then just re-wet it to make it supple enough to work.

To cut the strips I had a flint knife prepared for this.

Photo 11-01-2014 23 30 07
Re-soaked pliable bark

I cut the strips by eye only but I am sure you could rig up a worktop to cut consistently wide strips. The good strips are on the right and the offcuts on the left.

Photo 11-01-2014 23 30 18
Bark strips

With practice you will be able to gauge how many strips you’ll need for your size of sheath. This was a small sheath so I estimated 6 strips.

Photo 11-01-2014 23 30 33
Chosen strips

Firstly fold all your strips in half with the inner part of the bark showing as it is the smoother side.

Photo 11-01-2014 23 30 50
Fold the strips in half

I have documented the first 12 steps of the weave in the next 3 pictures. Each numbered bullet point relates to a numbered picture below.

1)  Lock the right hand strip onto the top half of the left hand strip.
2) Lock the next right hand strip onto the bottom half of the left hand strip.
3) Lock the third right hand strip onto the top half of the left hand strip.
4) Lock the second left hand strip onto the top of the first right hand strip and weave through the other strips.

Photo 11-01-2014 23 40 09
Weave 1

5) Lock the third left hand strip onto the bottom of the first right hand strip and weave it through the other strips. The ‘point’ of the sheath is now complete.
6) Fold back the top of the first left hand strip.
7) Fold the bottom of the first left hand strip diagonally over the other left hand strips.
8) Then flip back up the top of the first left hand strip.

Photo 12-01-2014 09 45 54 (HDR) (1)
Weave 2

9) Lock the next right hand strip onto the bottom half of the left hand strip.
10) Flip the whole sheath over. There should be a single strip on the right now.
11) Now fold the bottom right strip diagonally over the other right hand strips and weave it in.
12) Starting again on the left hand side keep repeating the whole process.

Photo 12-01-2014 09 47 13
Weave 3

Soon your sheath will take shape.

Photo 11-01-2014 23 43 41
Keep weaving

Keep going with the weave and stop when you have enough to securely hold whatever will be kept in it.

Photo 11-01-2014 23 43 54
Ready to close off

The top can seem a little bit tricky at first but all you need to do is turn the ends back on themselves and weave them into the sheath. Just tuck each end in as neatly as you can: it’s tricky as each end will be different, you might need to experiment.

Photo 11-01-2014 23 44 07
Closing off

When you have closed the top off, trim all the ends so that you cannot see where the weave ends.

Photo 11-01-2014 23 44 21
Trimming the excess

All the ends were trimmed so that the ends were hidden by the weave. The sheath is ready for a dangler strap now.

Photo 11-01-2014 23 44 34
Ready for a loop attachment

I used some raw hide I had left over from making a bag. I wet it to make it more pliable and then rolled it in my hand.

Photo 11-01-2014 23 44 52 (HDR)
Re-soaked rawhide

The bodkin I had made earlier came in handy here to make a gap in the weave. I then used a small stick to push the rawhide into the gap made by the bodkin.

Photo 11-01-2014 23 45 03
Bodkin in use

Attach it as you like and it is ready. I think I used a simple Larks Foot knot here.

Photo 11-01-2014 23 45 14
Dangler attached

This sheath completed my primitive belt order (the smallest one on the right).

Photo 11-01-2014 23 45 25
My Primitive belt order

This type of weaving can make some very useful items. I have been using the quiver on a regular basis since 2008 and it shows no sign of wear and tear.

photo (1)
Let your imagination create what you want

A How To…. on making the bone knife can be found here – Primitive Skills – Bone Knife/Bodkin.

Good luck and enjoy experimenting.

George