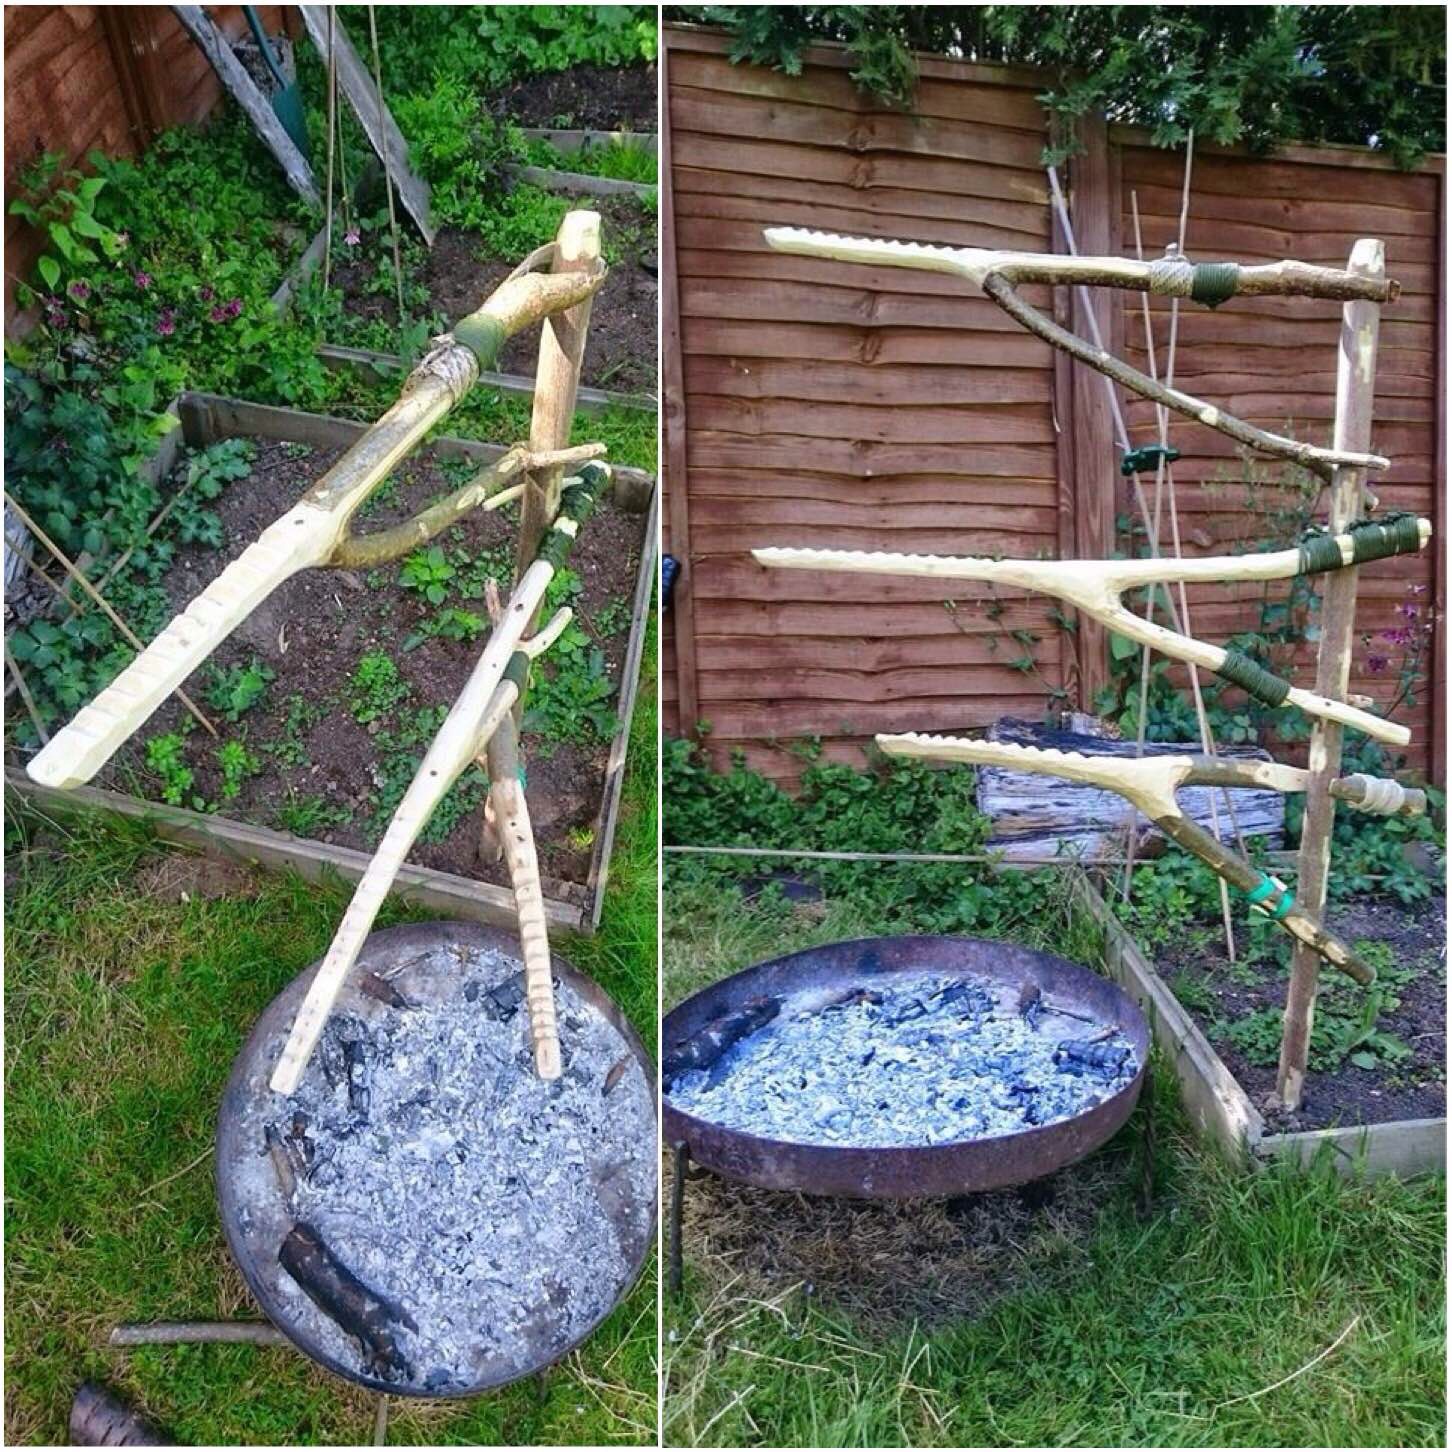
The final part of the Aures Crane Trilogy – The Classic.
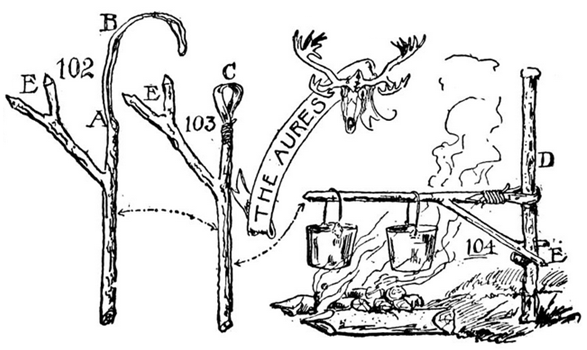
I call this one the Classic as it is the design laid out in the book Camp-Lore and Woodcraft. The author Daniel Beard called it a rustic crane fashioned along similar lines as the iron cranes found commonly over 100 years ago over open fireplaces.
The crane is named after Victor Aures, a Scout Master from Buffalo, NY. I found a good article on this from an issue of the Boy’s Life from 1915.
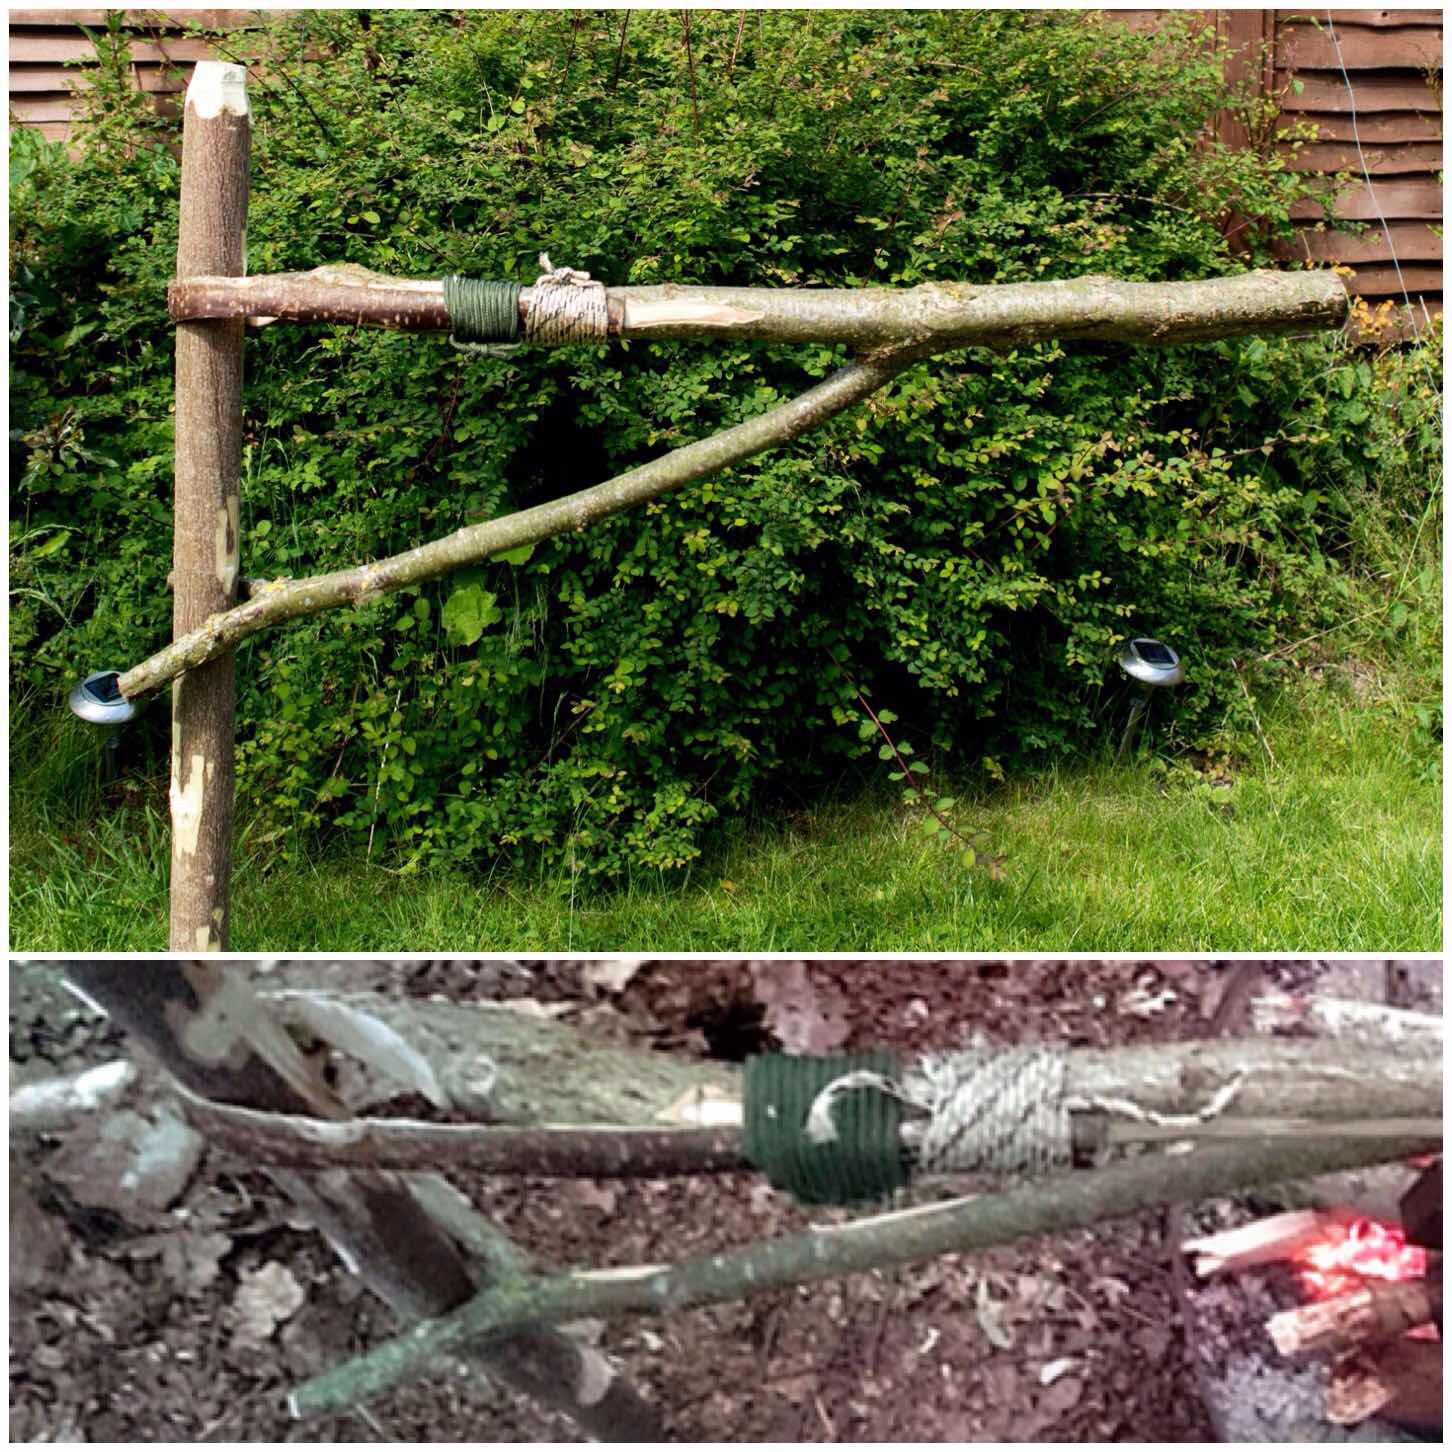
The Classic Aures Campfire Crane
You do not see the classic crane often since it requires a specific configuration of angles on the forks and it’s all too easy to cut through the thin layer of bark and sap wood needed to form the loop on one end.
The Aures – Picture from Camp-Lore and Woodcraft
Measuring
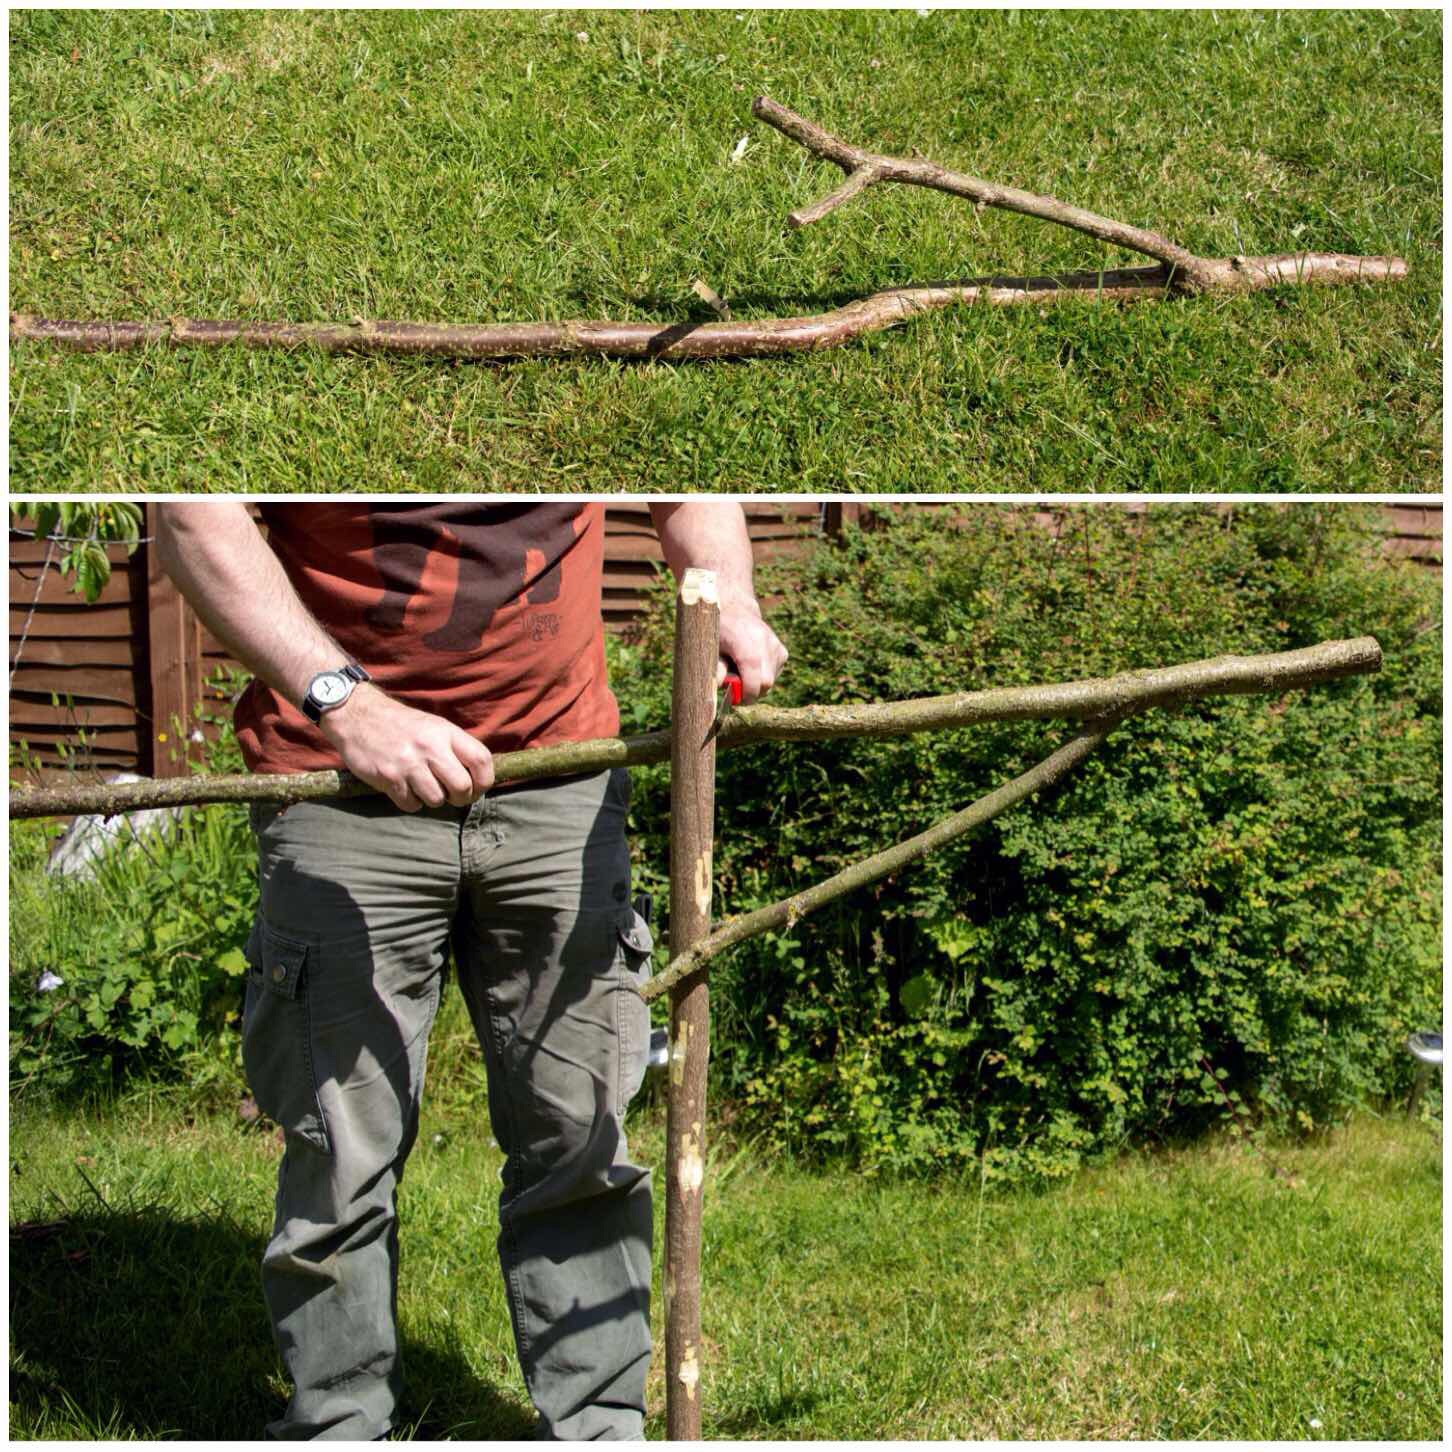
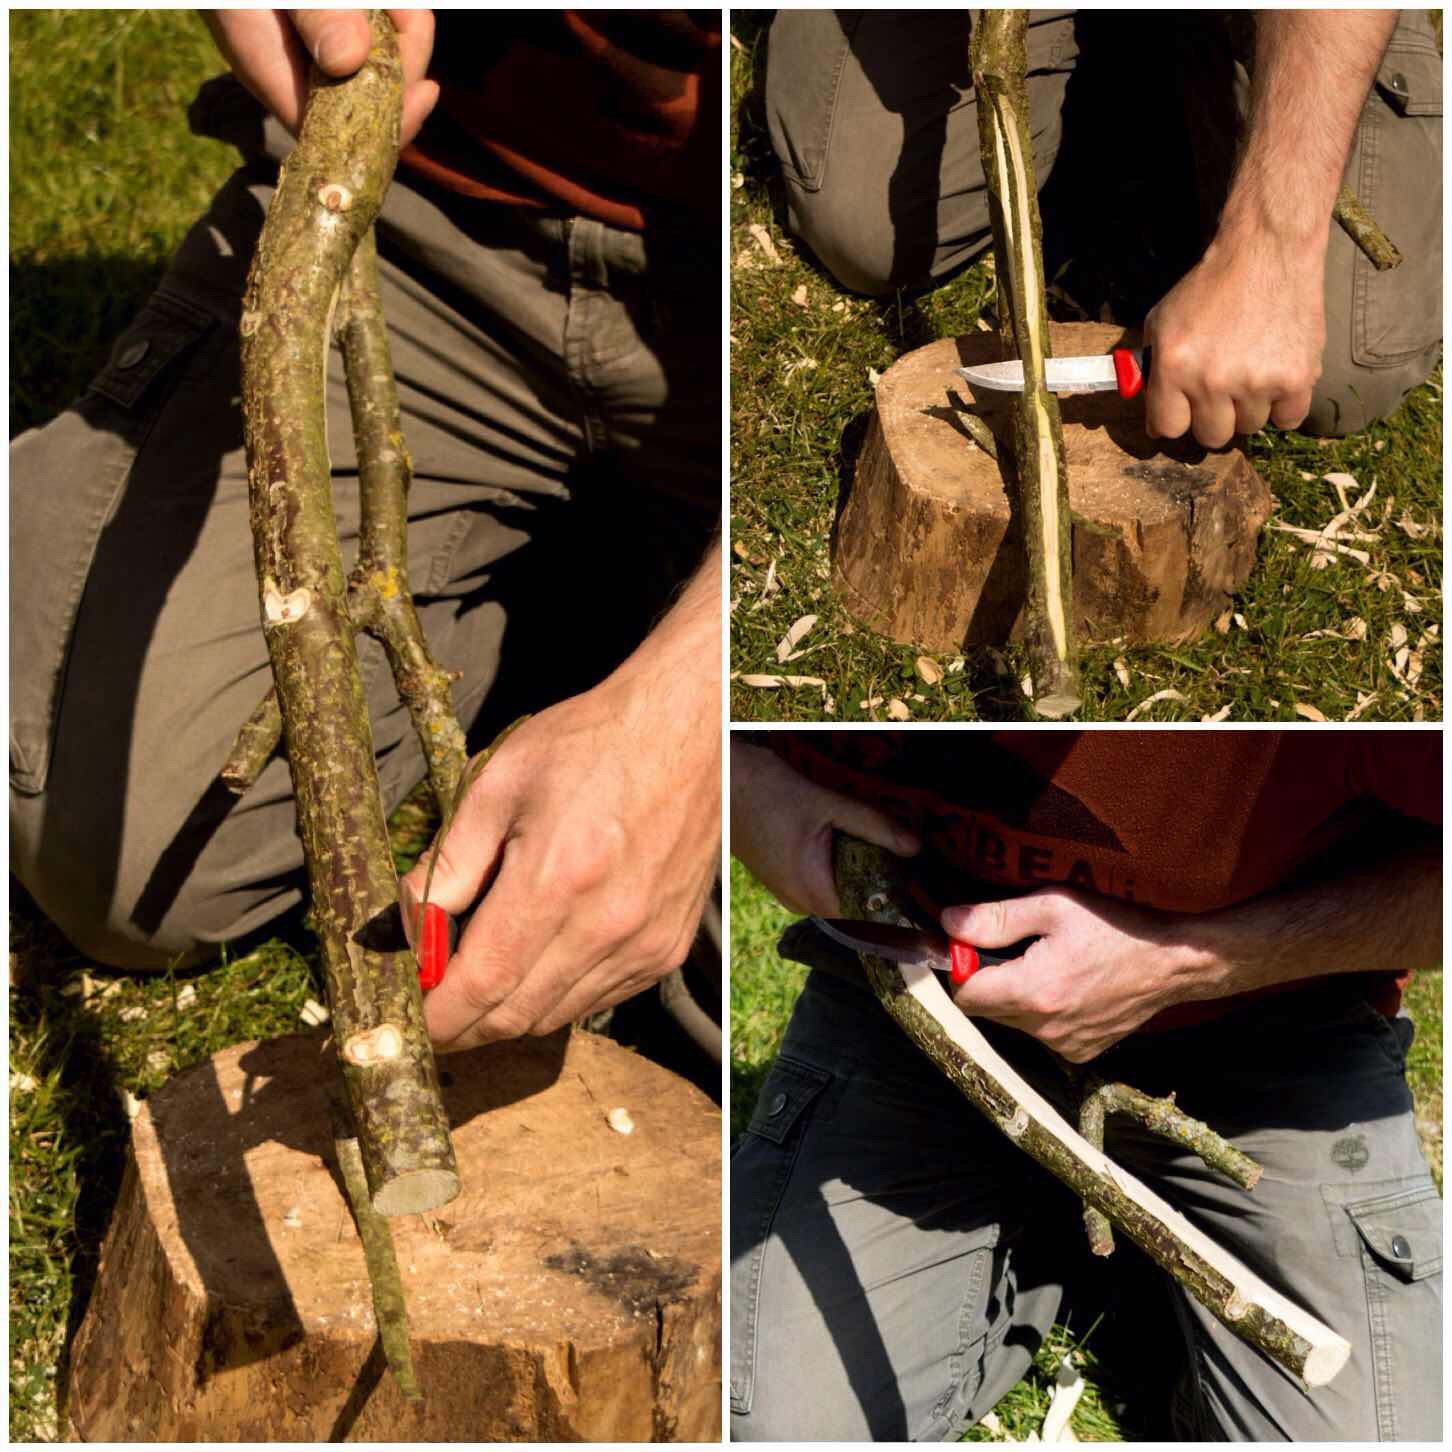
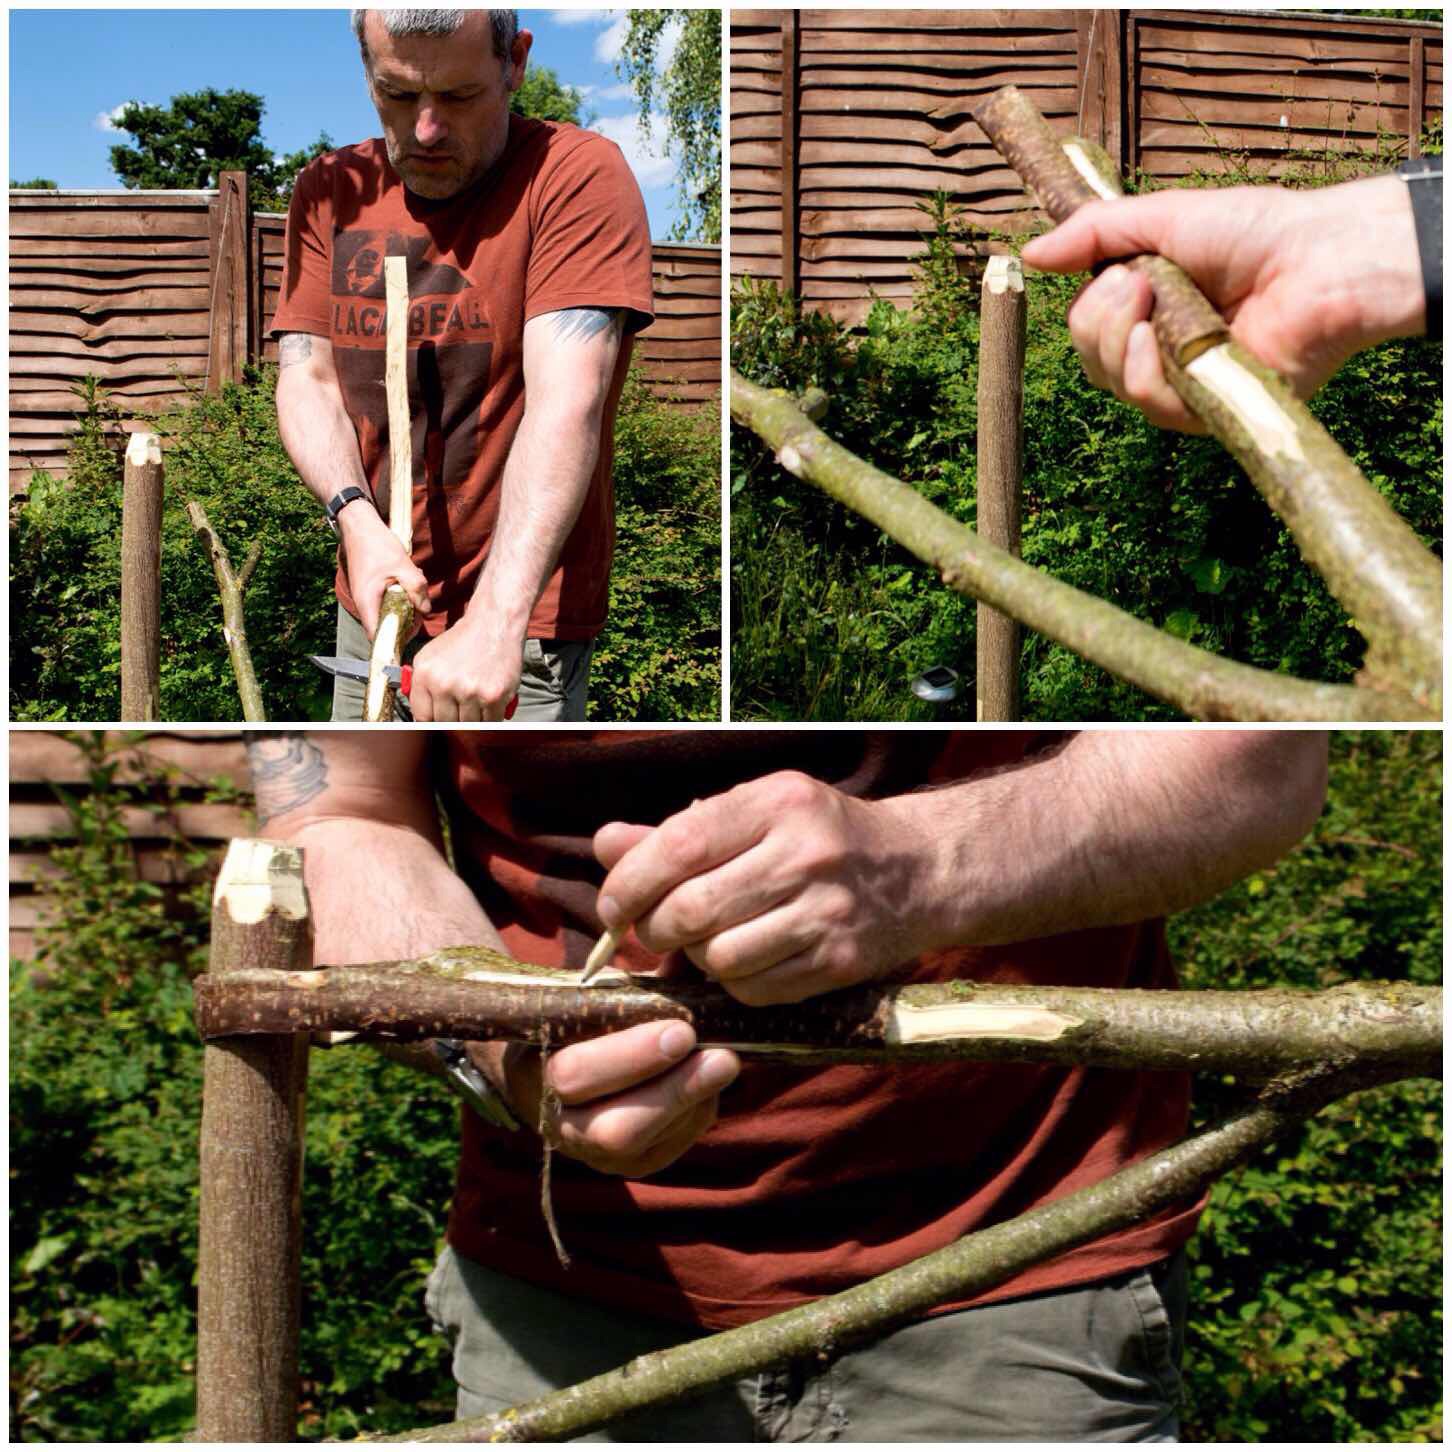
I stumbled upon a good piece of hazel recently with a strong main fork and the necessary secondary fork at right angles to the main one.
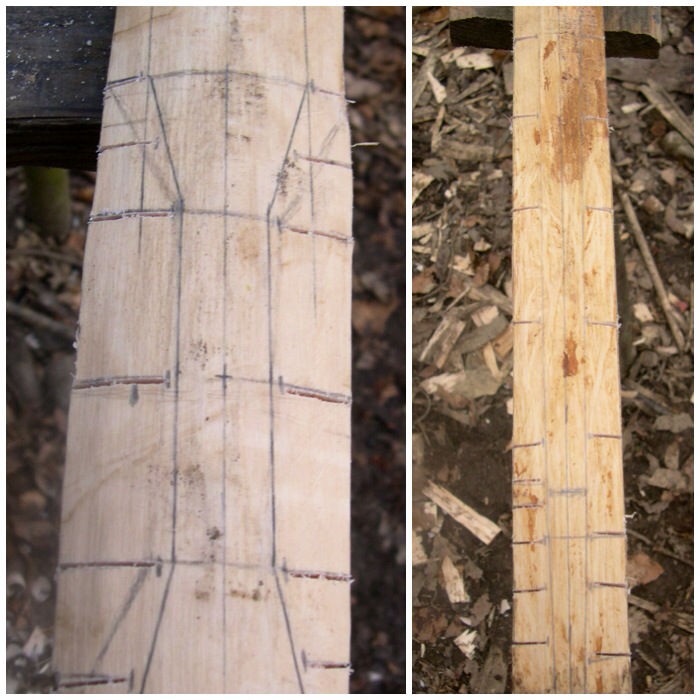
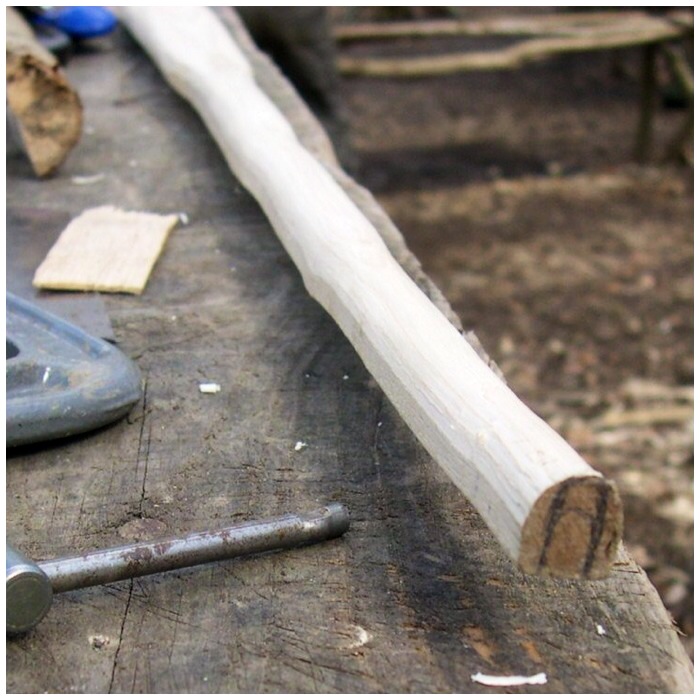
The basic parts & measuring up
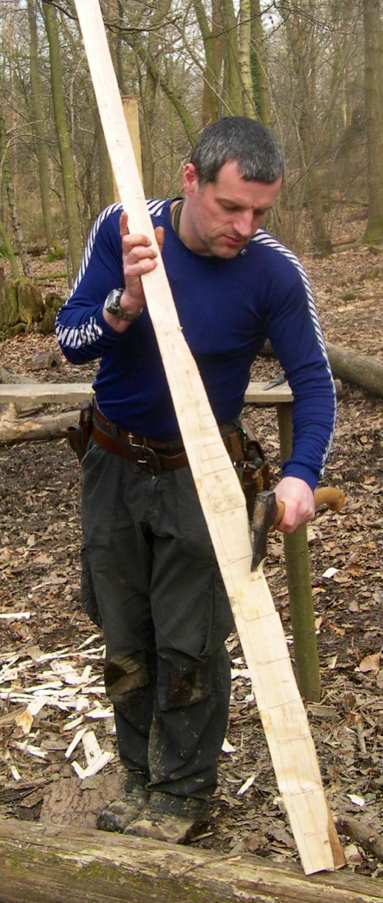
I had a good pole that I was going to use as the upright and measured the top limb for trimming. I estimated with my eye the amount of wood I would need on the top limb to form the loop (I call this section the tail before it is formed into a loop).
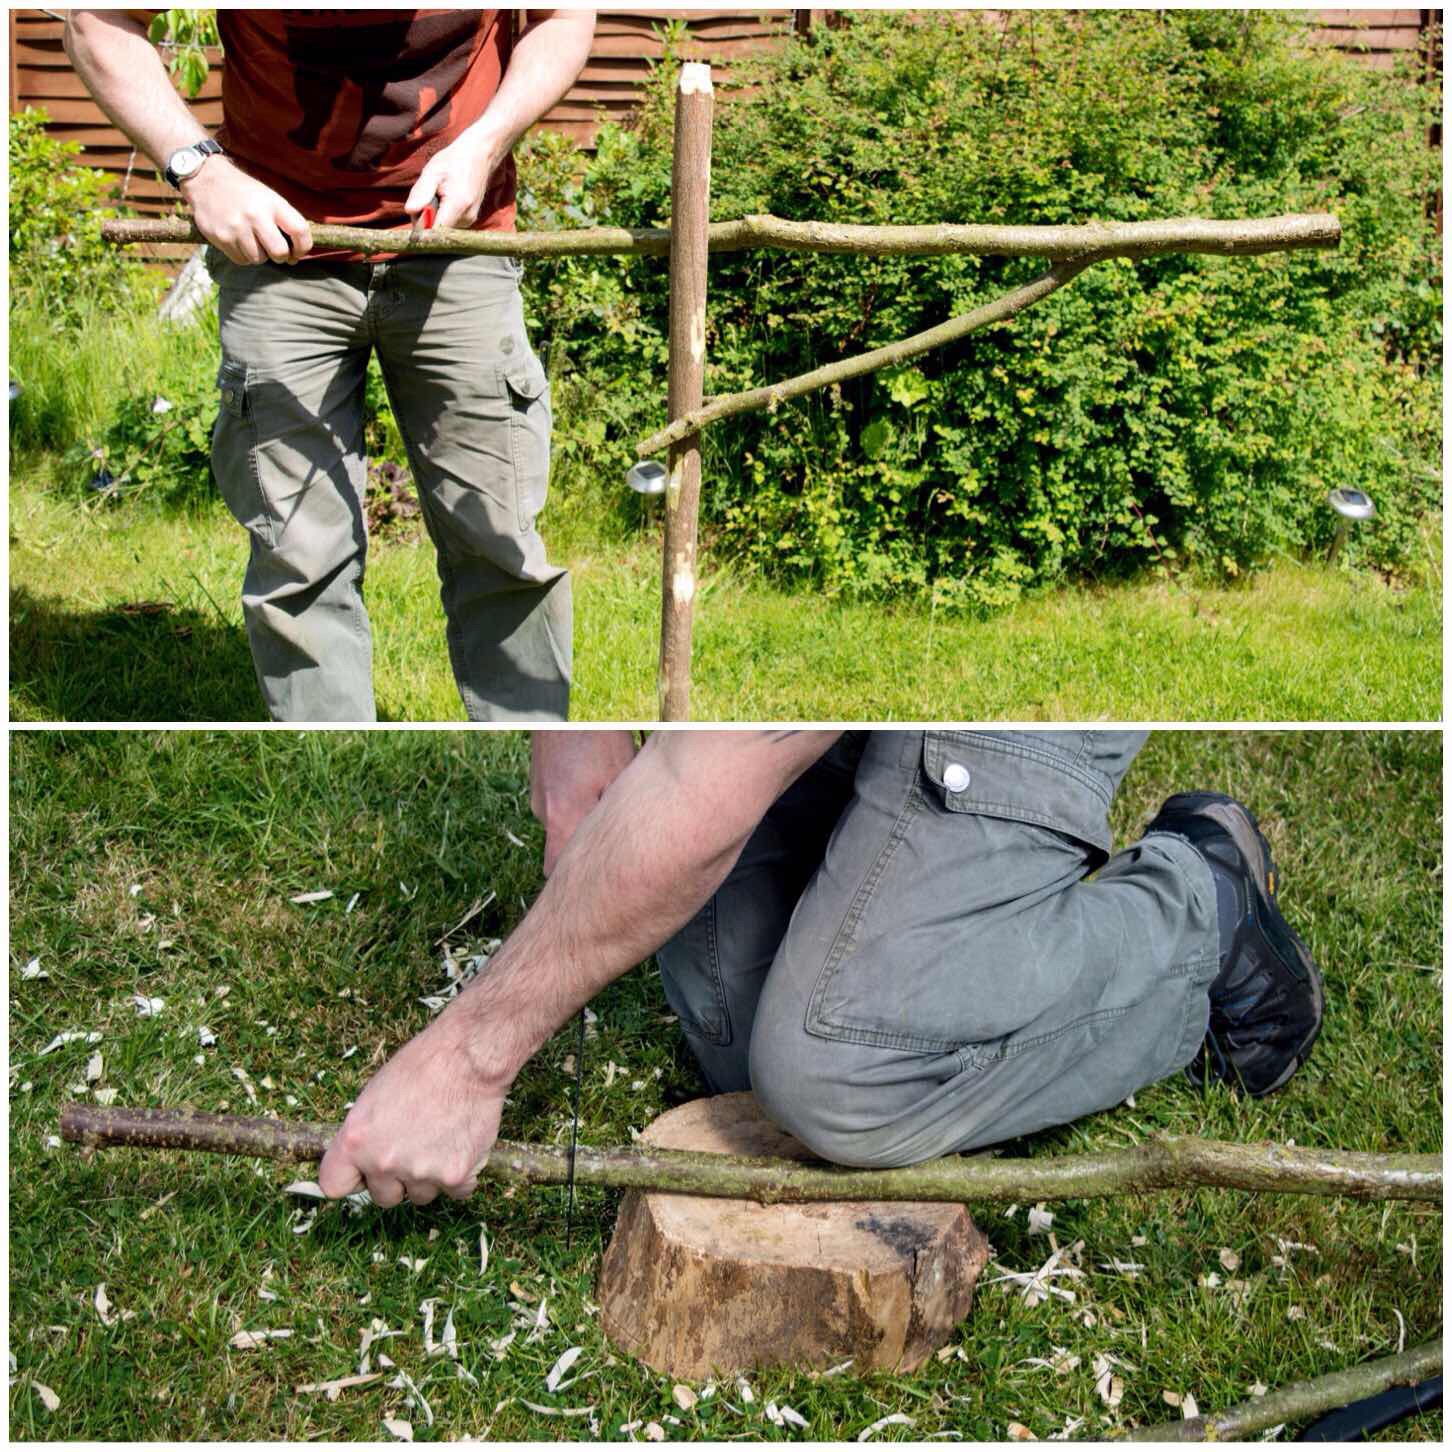
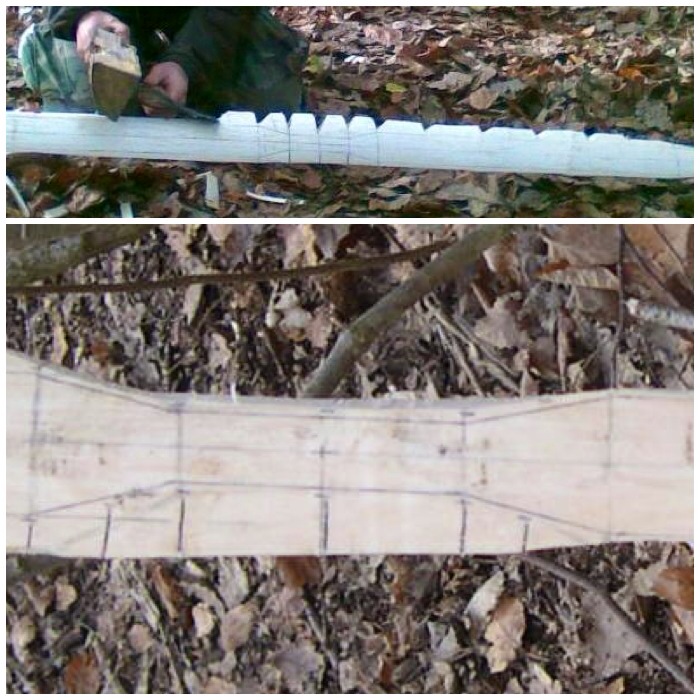
Trimming the excess
Trimming
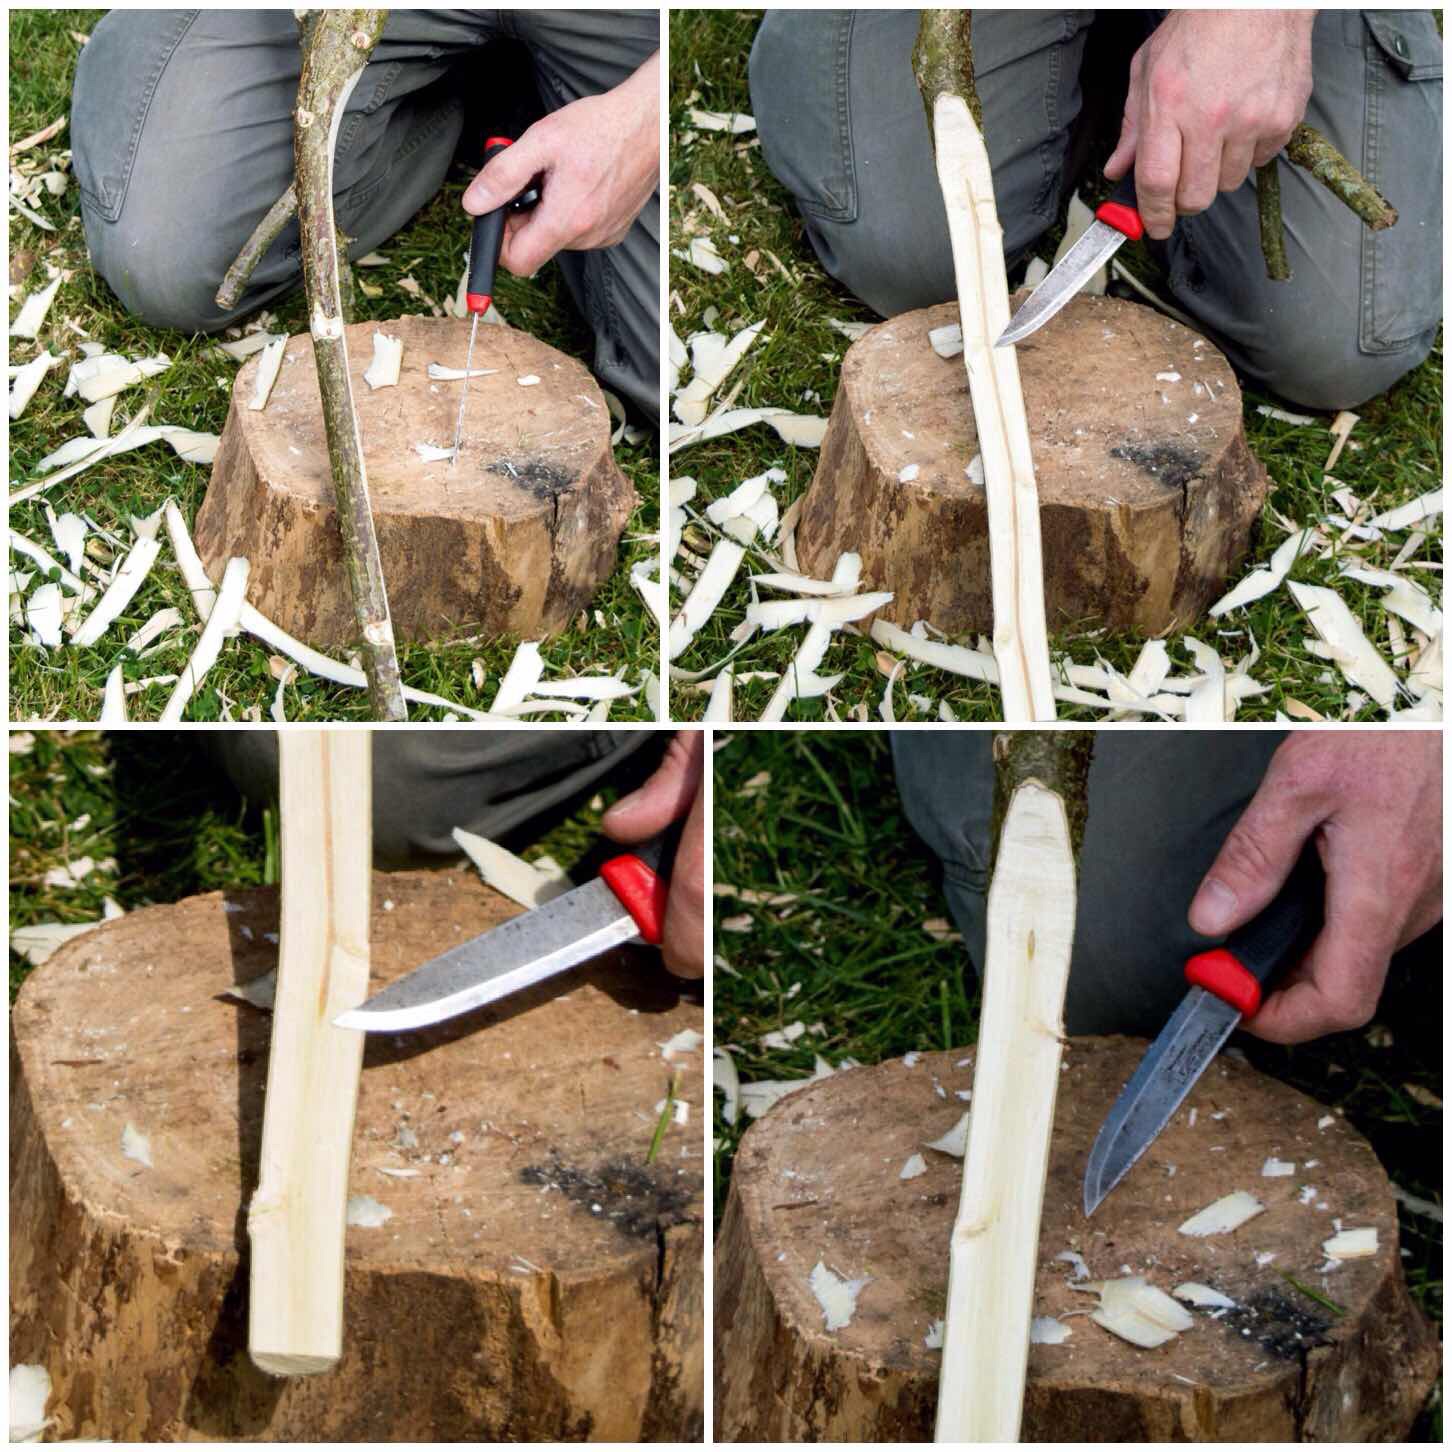
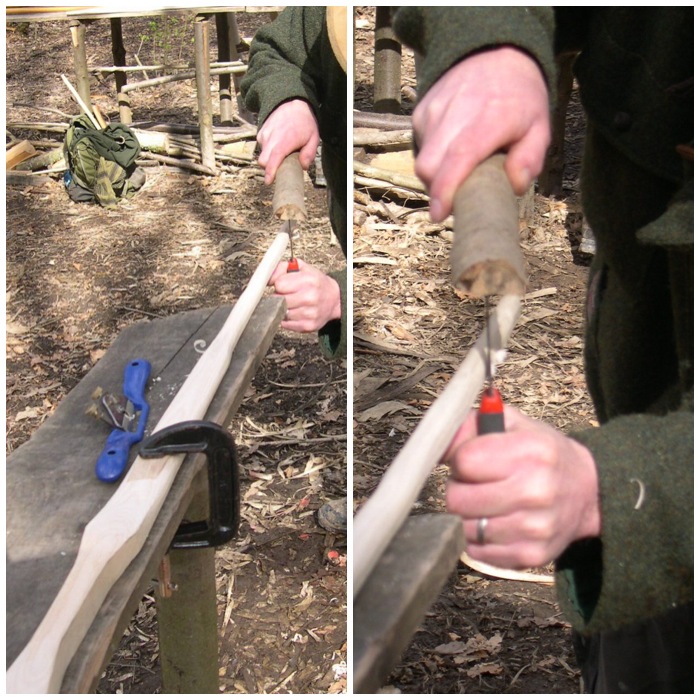
After sawing off the excess I started the slow process of removing all the excess wood on the tail. It is easy to remove the wood at first but try and remove it evenly as you work.
Removing the excess wood from the wrap
I tend to work from the end of the tail and work up the crane towards the fork. This helps in reducing the chance of chunking through the wood and destroying the crane.
In the pictures below I have worked my way down to the pith and then just passed it. I forced myself at this stage to take my time and work methodically.
Important to trim evenly from bottom to top
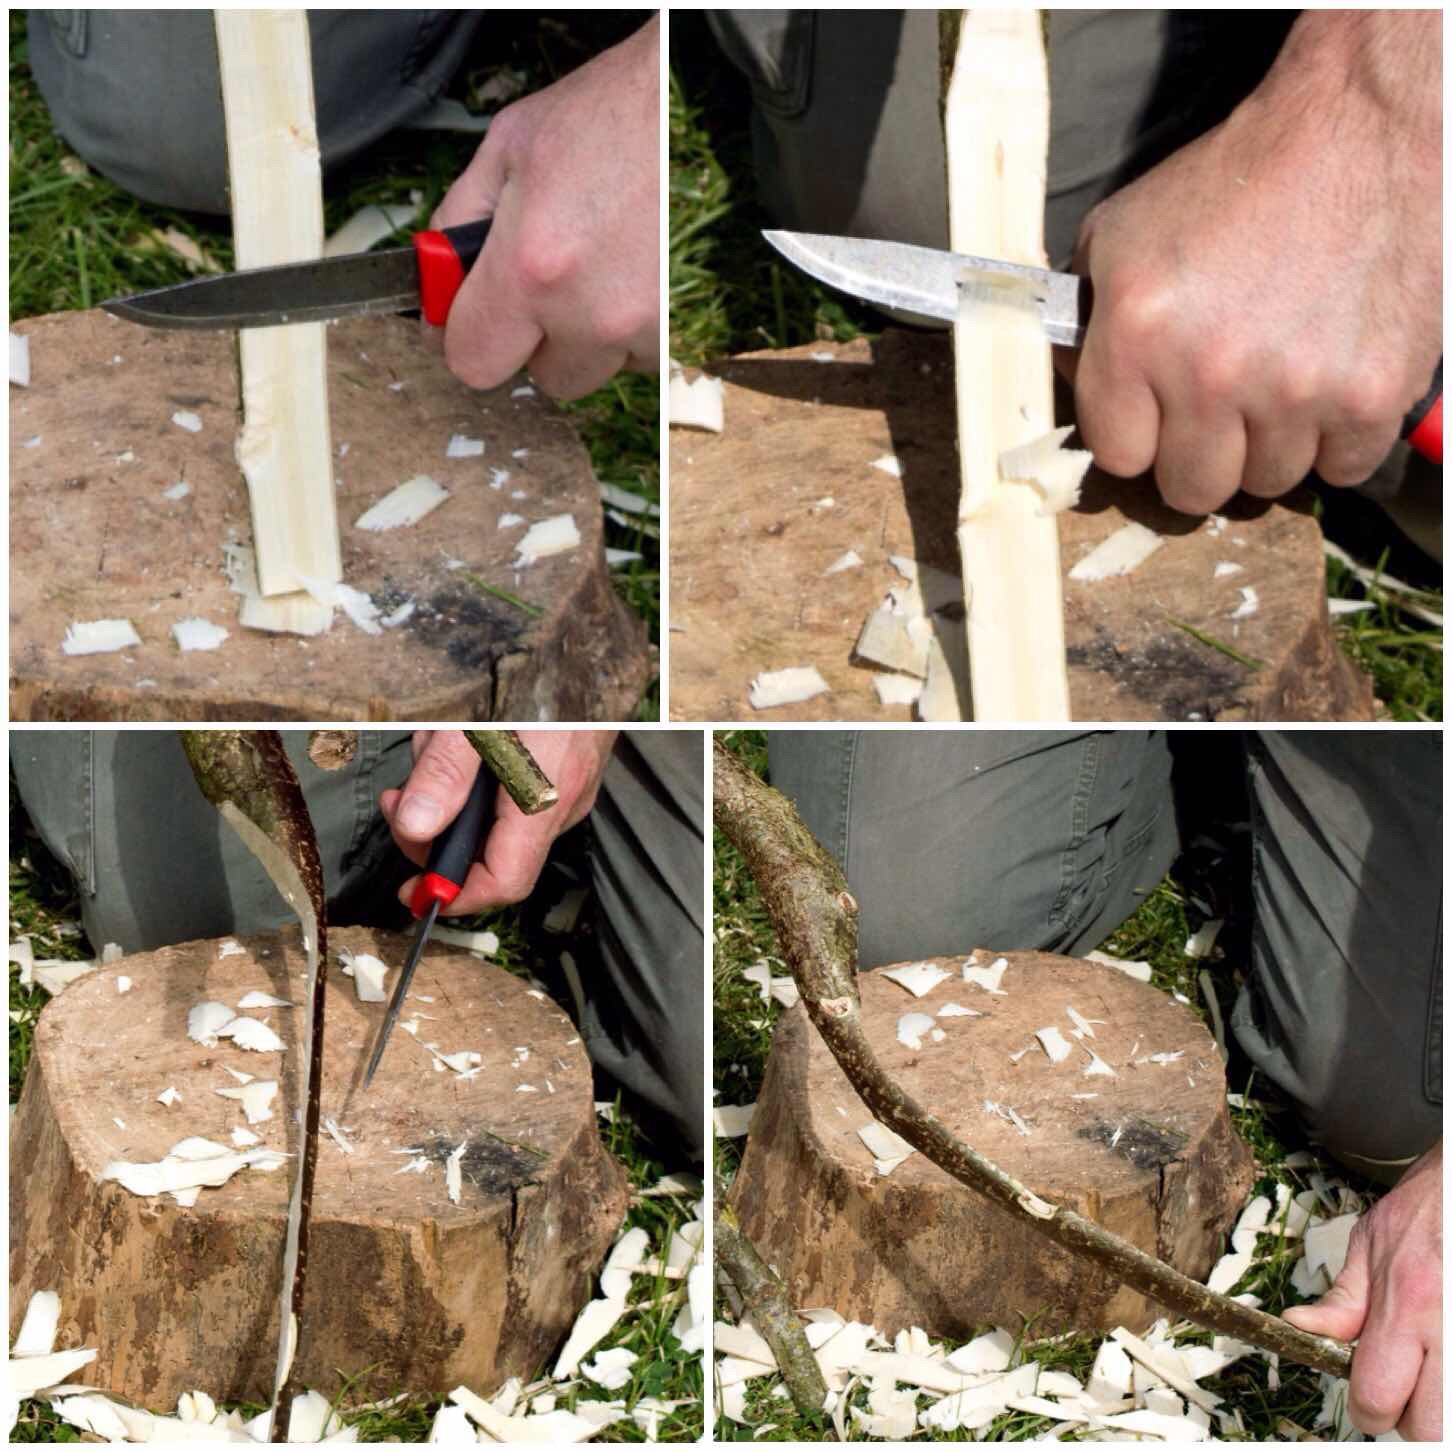
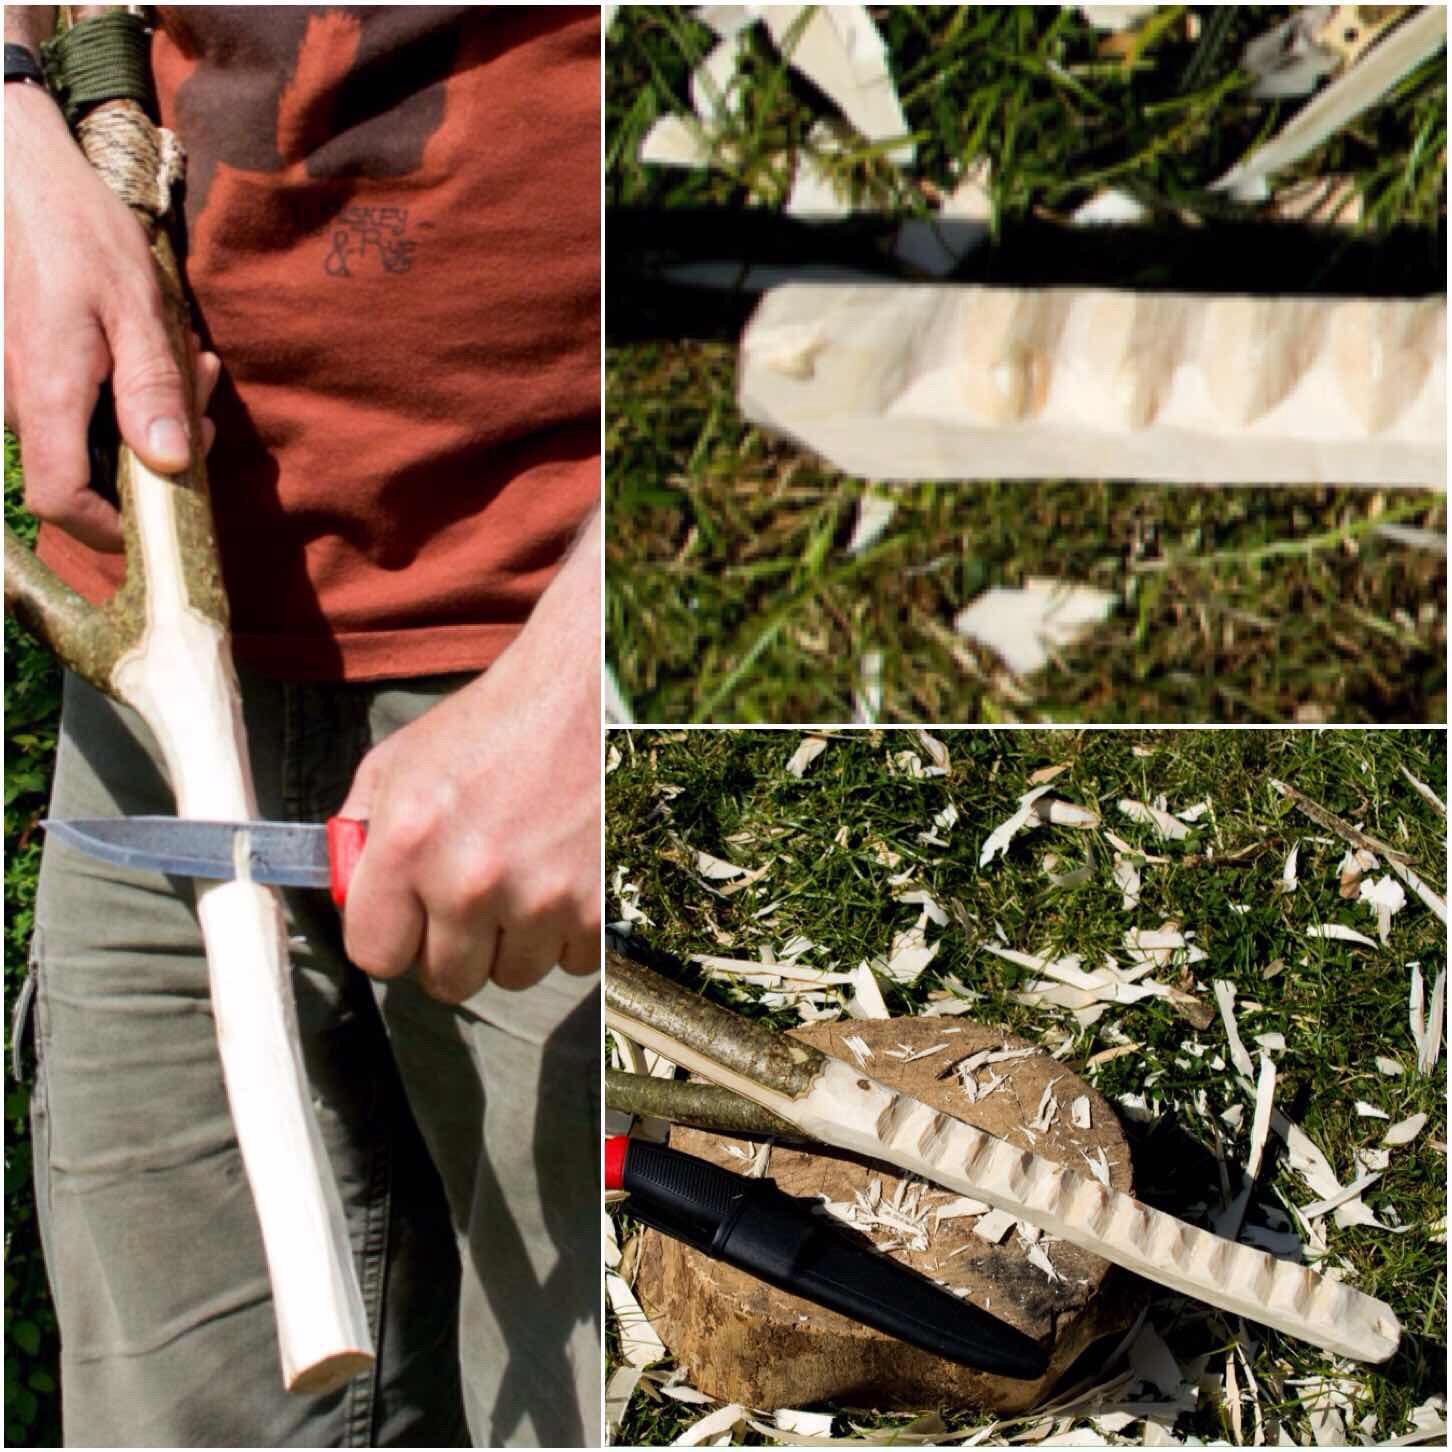
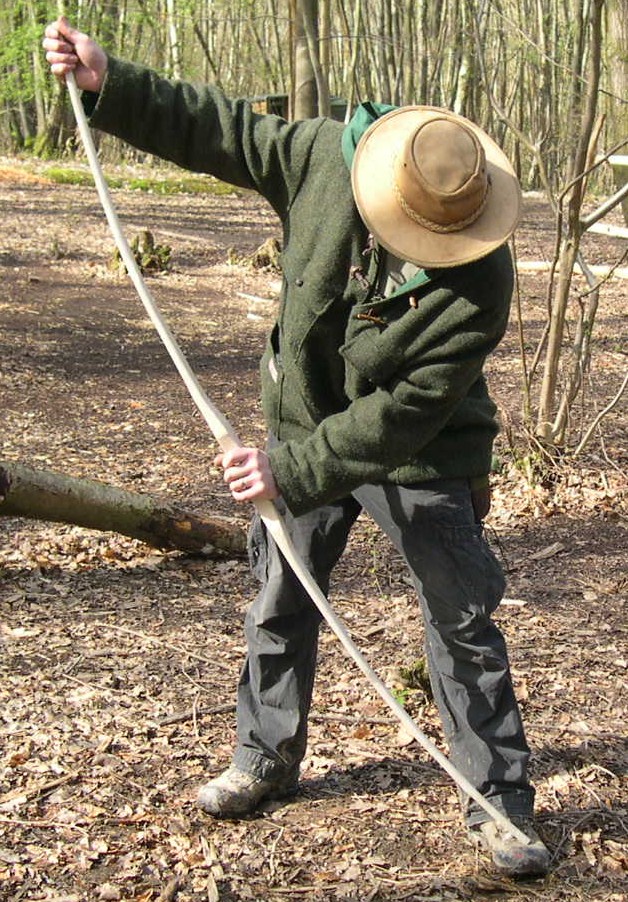
Eventually I could make the wood bend slightly (it was only a couple of centimetres wide now). I scared myself when the bark cracked but that is OK – it is the sapwood that needs to bend.
When bending down the wood do it slowly and do not try and force it.
Trimming and flexing
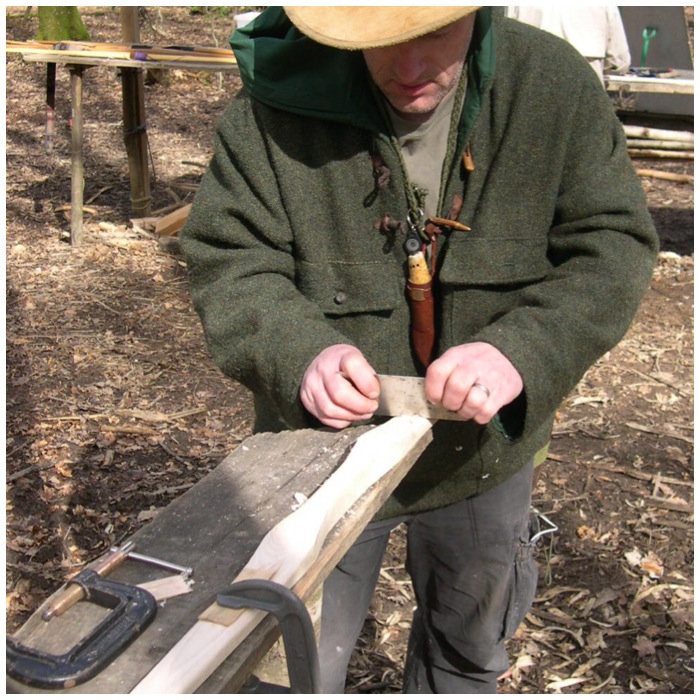
I finally had just a thin piece of sap wood left that could be bent a bit more but not fully. To help this process along I used the tip area of my knife to cut out some more of the wood without making it any thinner than a couple of centimetres.
To help the bending process I left the crane in a stream to soak up some water. If you have the tools to steam bend wood the job would be much easier.
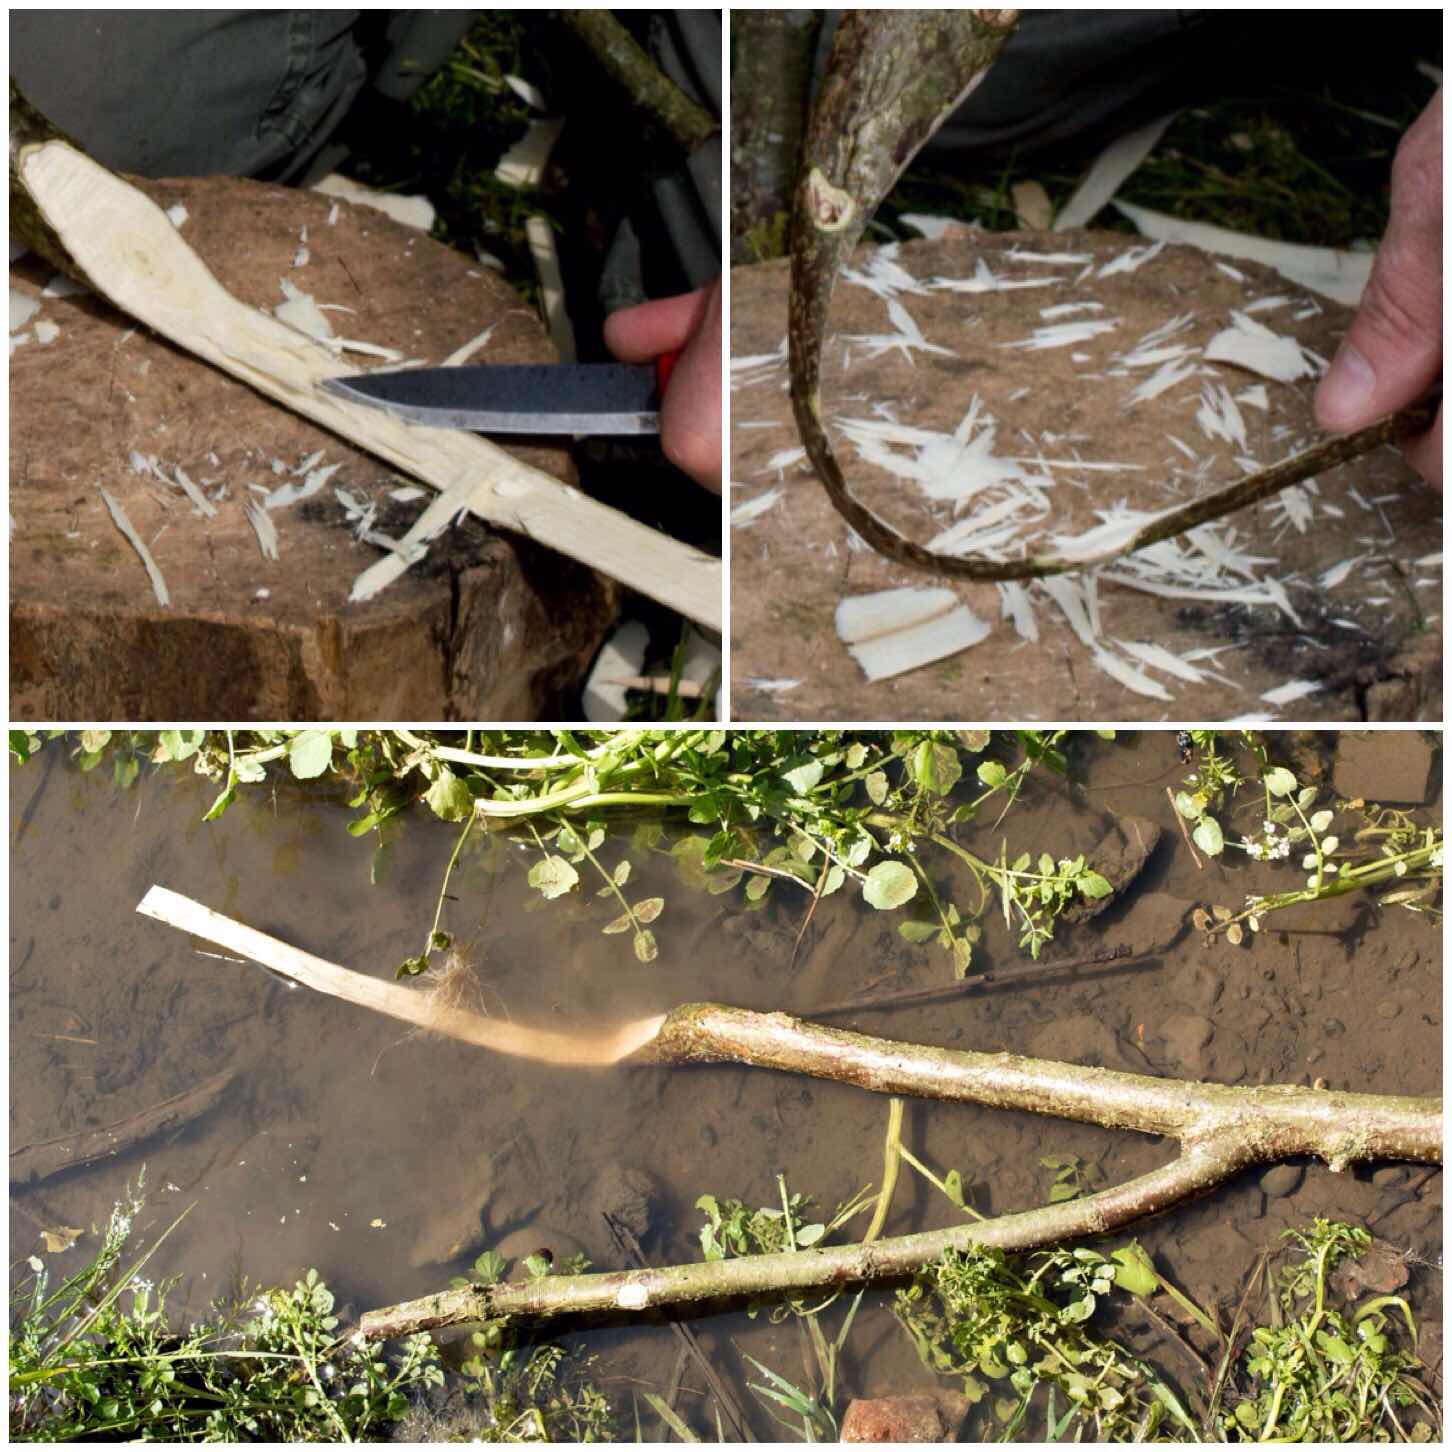
Last few scrapes and softening
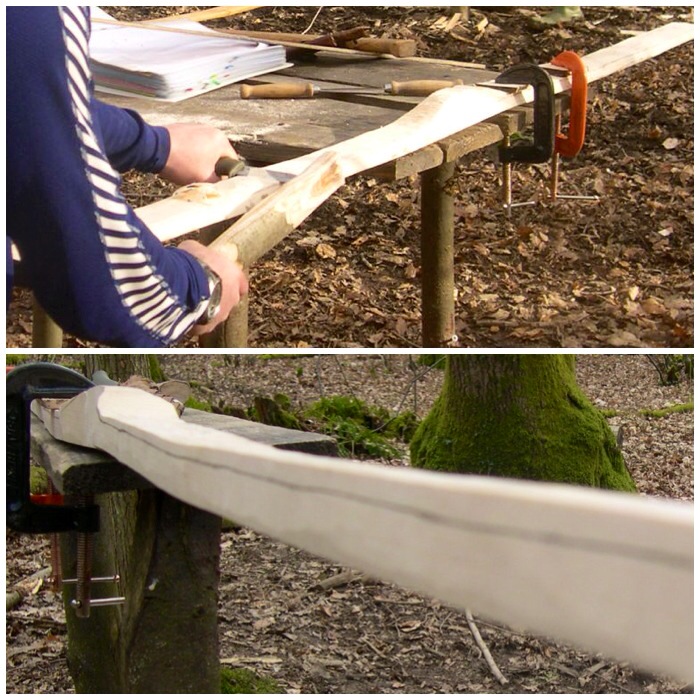
Once the tail was very pliable I flattened an area where the tail would be whipped to the crane then marked the tail and the main body of the crane with a pencil so that I retained the size of loop I wanted while I whipped it.
Prepping for some whipping
Whipping
In the book Camp-Lore and Woodcraft, Beard’s drawing shows the tail being tied off with strips of bark. I will use bark when the crane has fully seasoned (it will shrink in the process) but for now I whipped it with some old paracord. I whipped it twice with different cord as that is what I had to hand.
Whipping the wrap
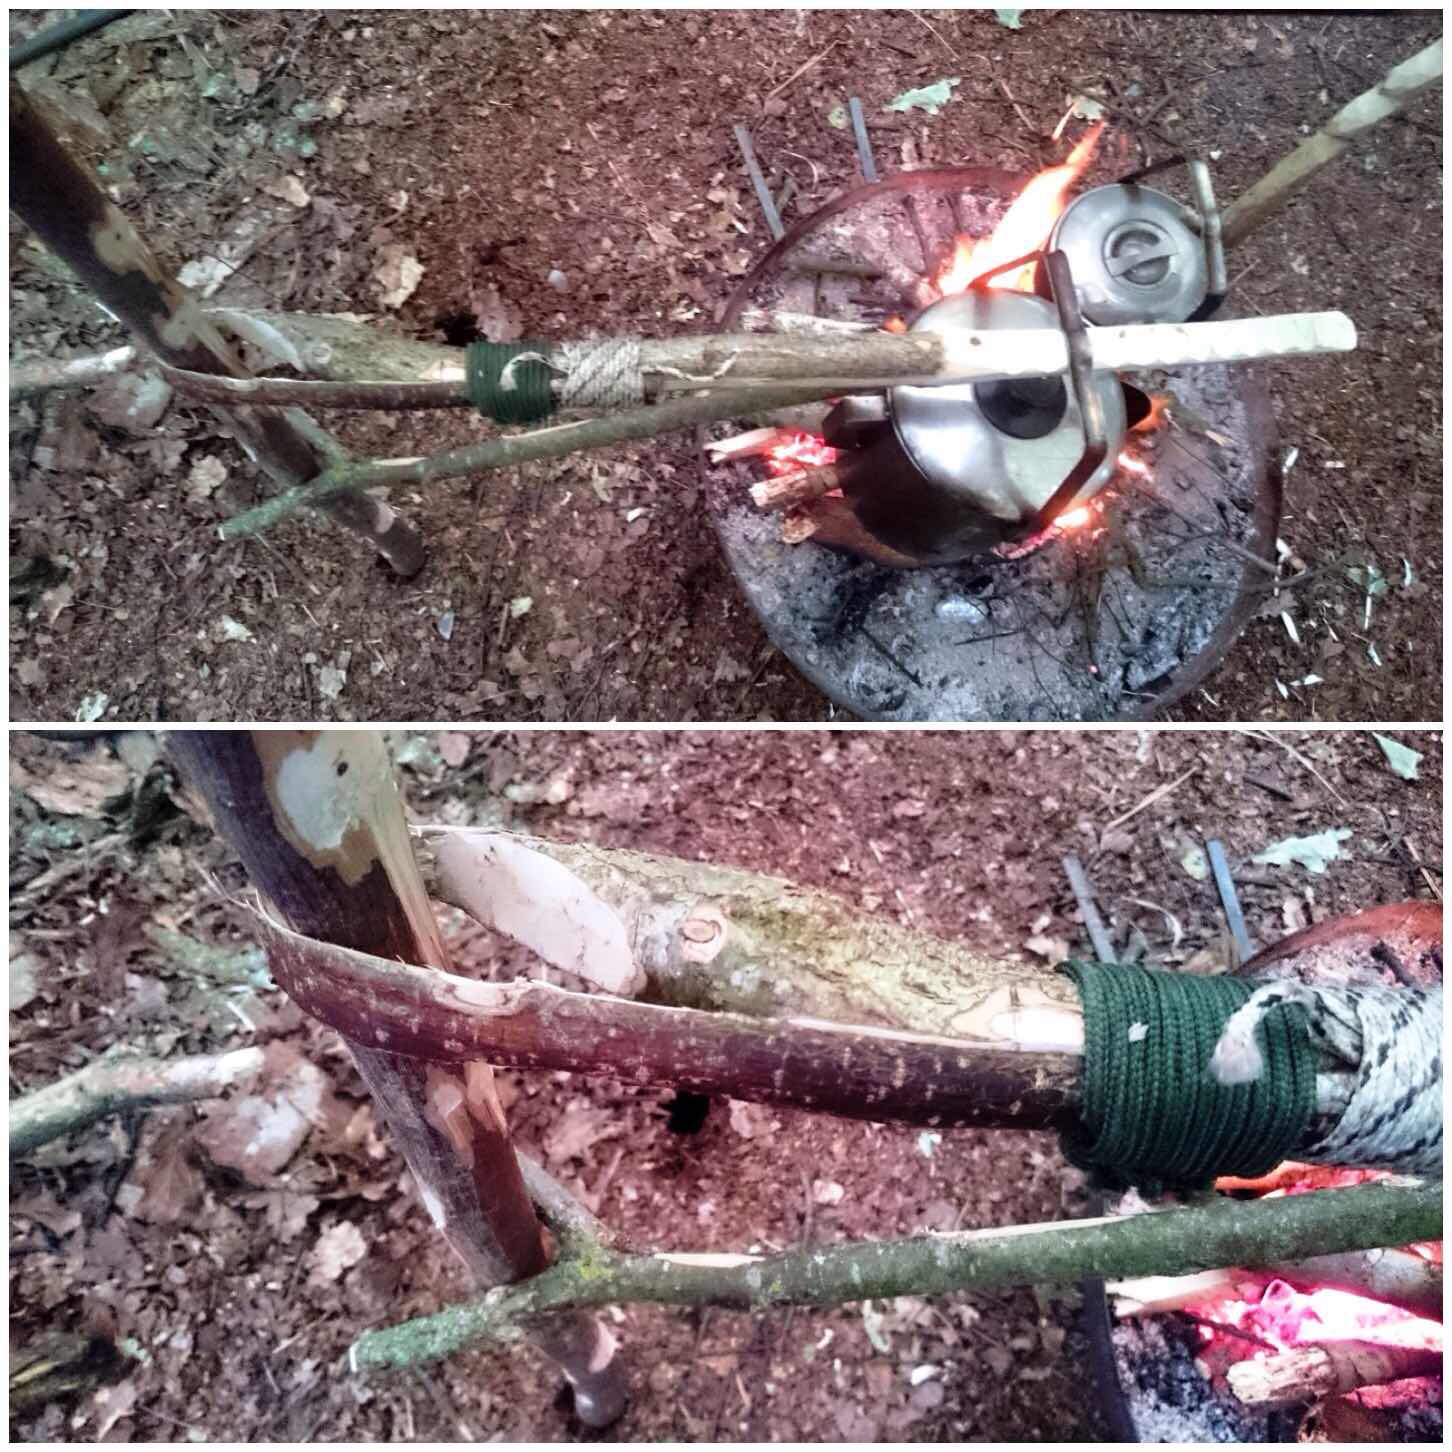
The loop should be big enough for your upright and positioned so that when the crane is hung on it and braced on the fork, the pot arm is level and pointing slightly upwards.
Hangs well
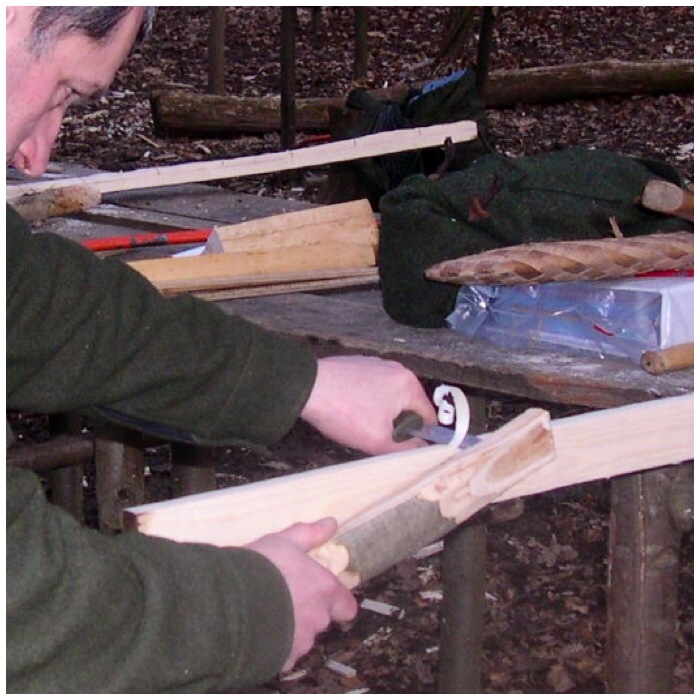
The Pot Arm
I then went to work on the pot arm, carving out little notches so that I could adjust the position of the pot easily along its length.
I also put my usual dimple on the end for hanging another adjustable pot hanger off it.
Carving the pot arm
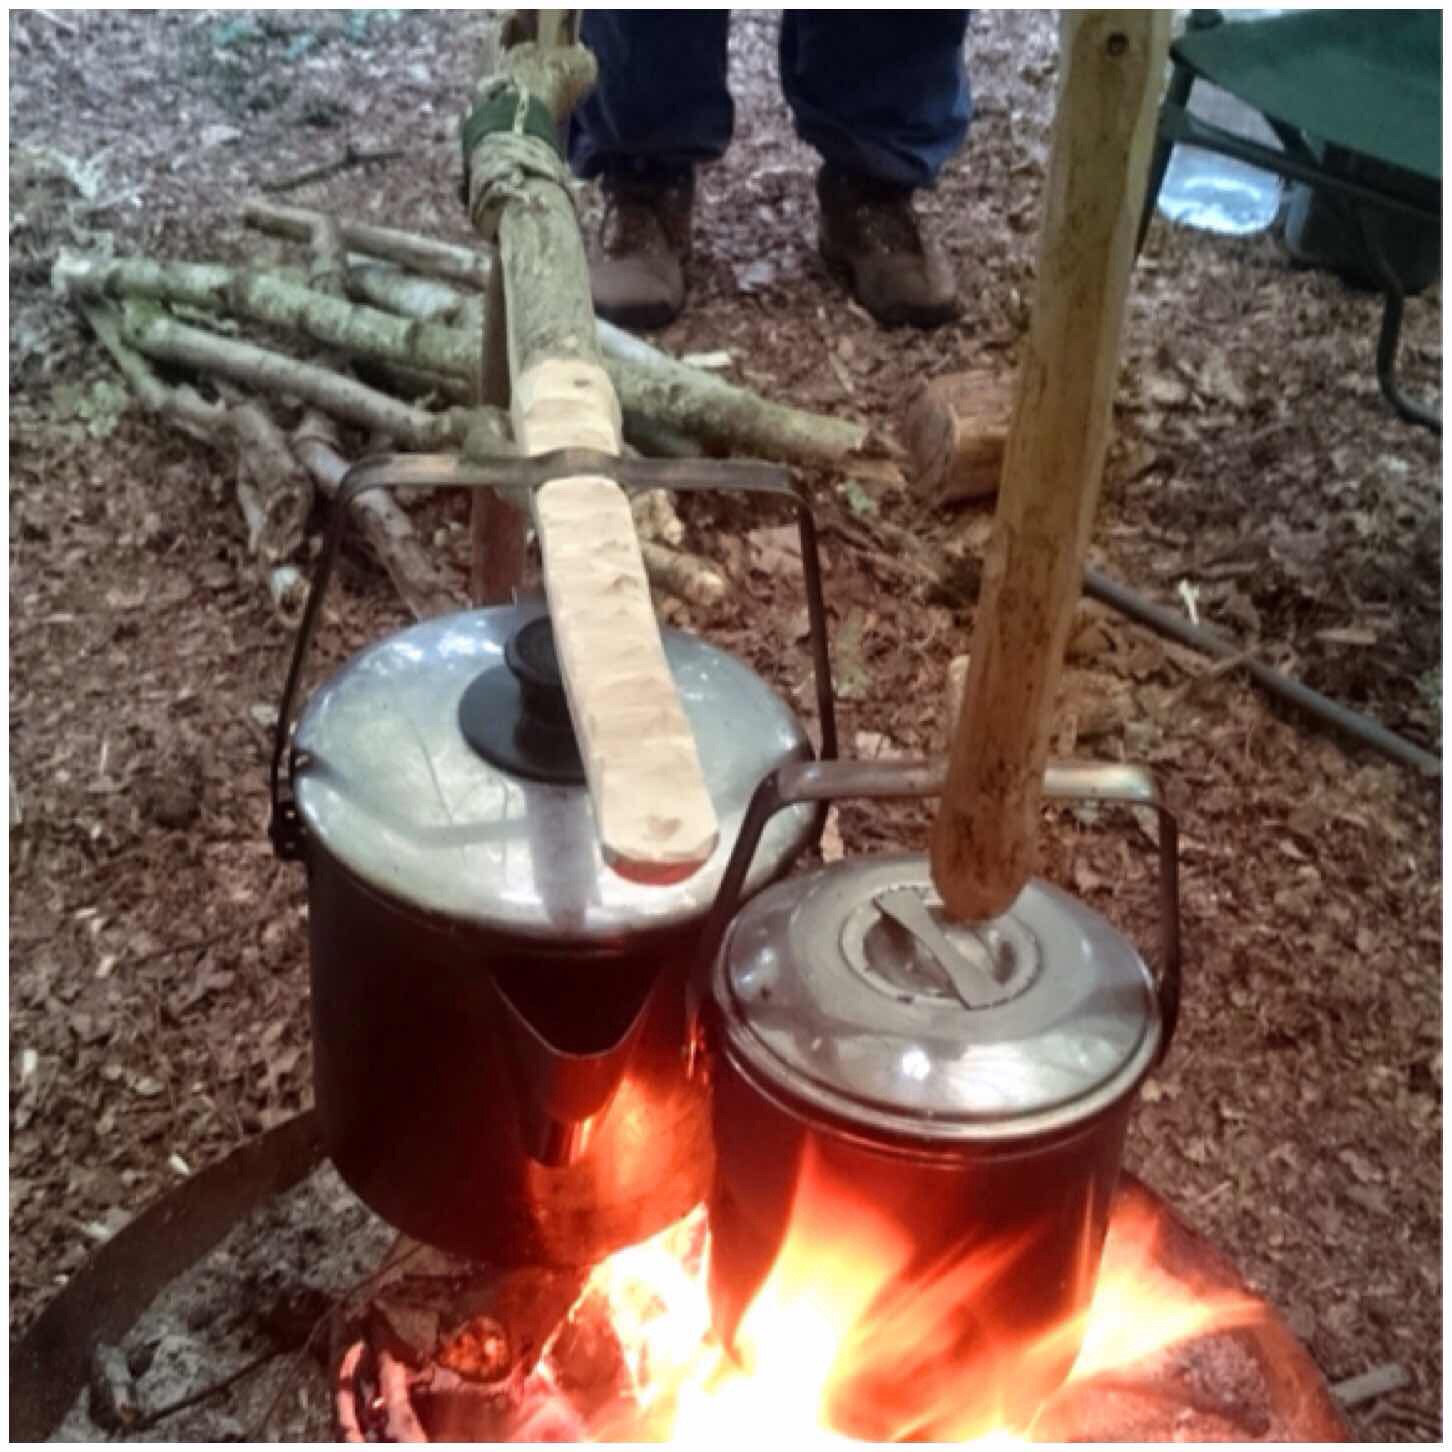
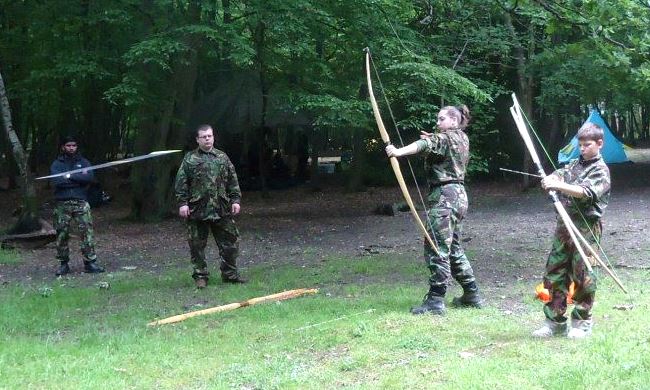
I took the crane out on a Bushcraft course with the Royal Marine’s Cadets and it was soon in action.
In use alongside another pot hanger
It is very easy to move the crane up and down with light pots (I advise removing heavy a pot from the crane before adjusting the height then replacing it).
The crane also swings easily away from the fire. If you do not trust the loop to hold a heavy pot, you can back it up with a loop of cord.
From above
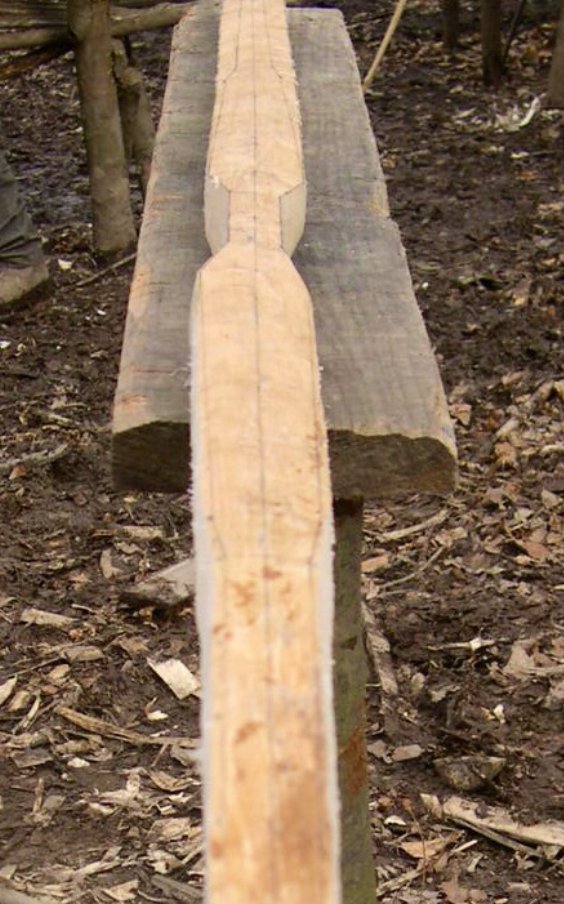
The Three
I really enjoyed making these three Aures Cranes and hope to see a few more over fires at Bushcraft meets in the future.
All three versions – Classic, Gibbet and the Single Fork
That is it for me on the Aures Crane (I am sure you can come up with some more variations on this), however in the course of my research I discovered a Single Pole Crane – that is next on the list.
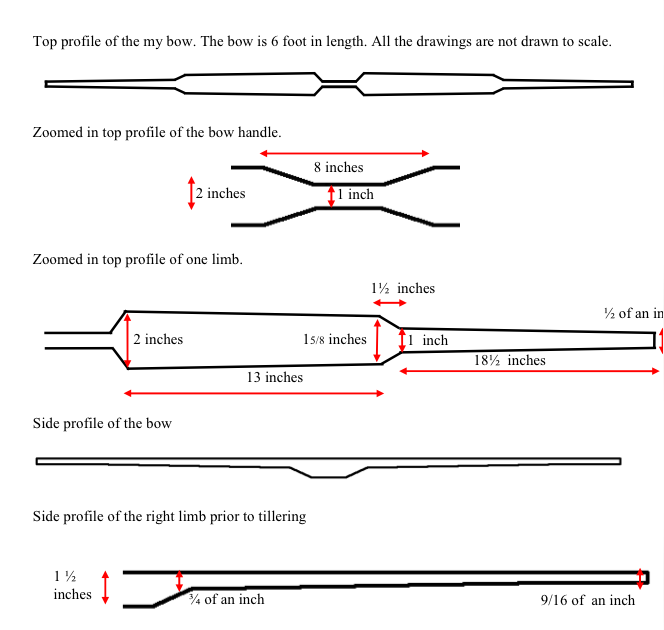
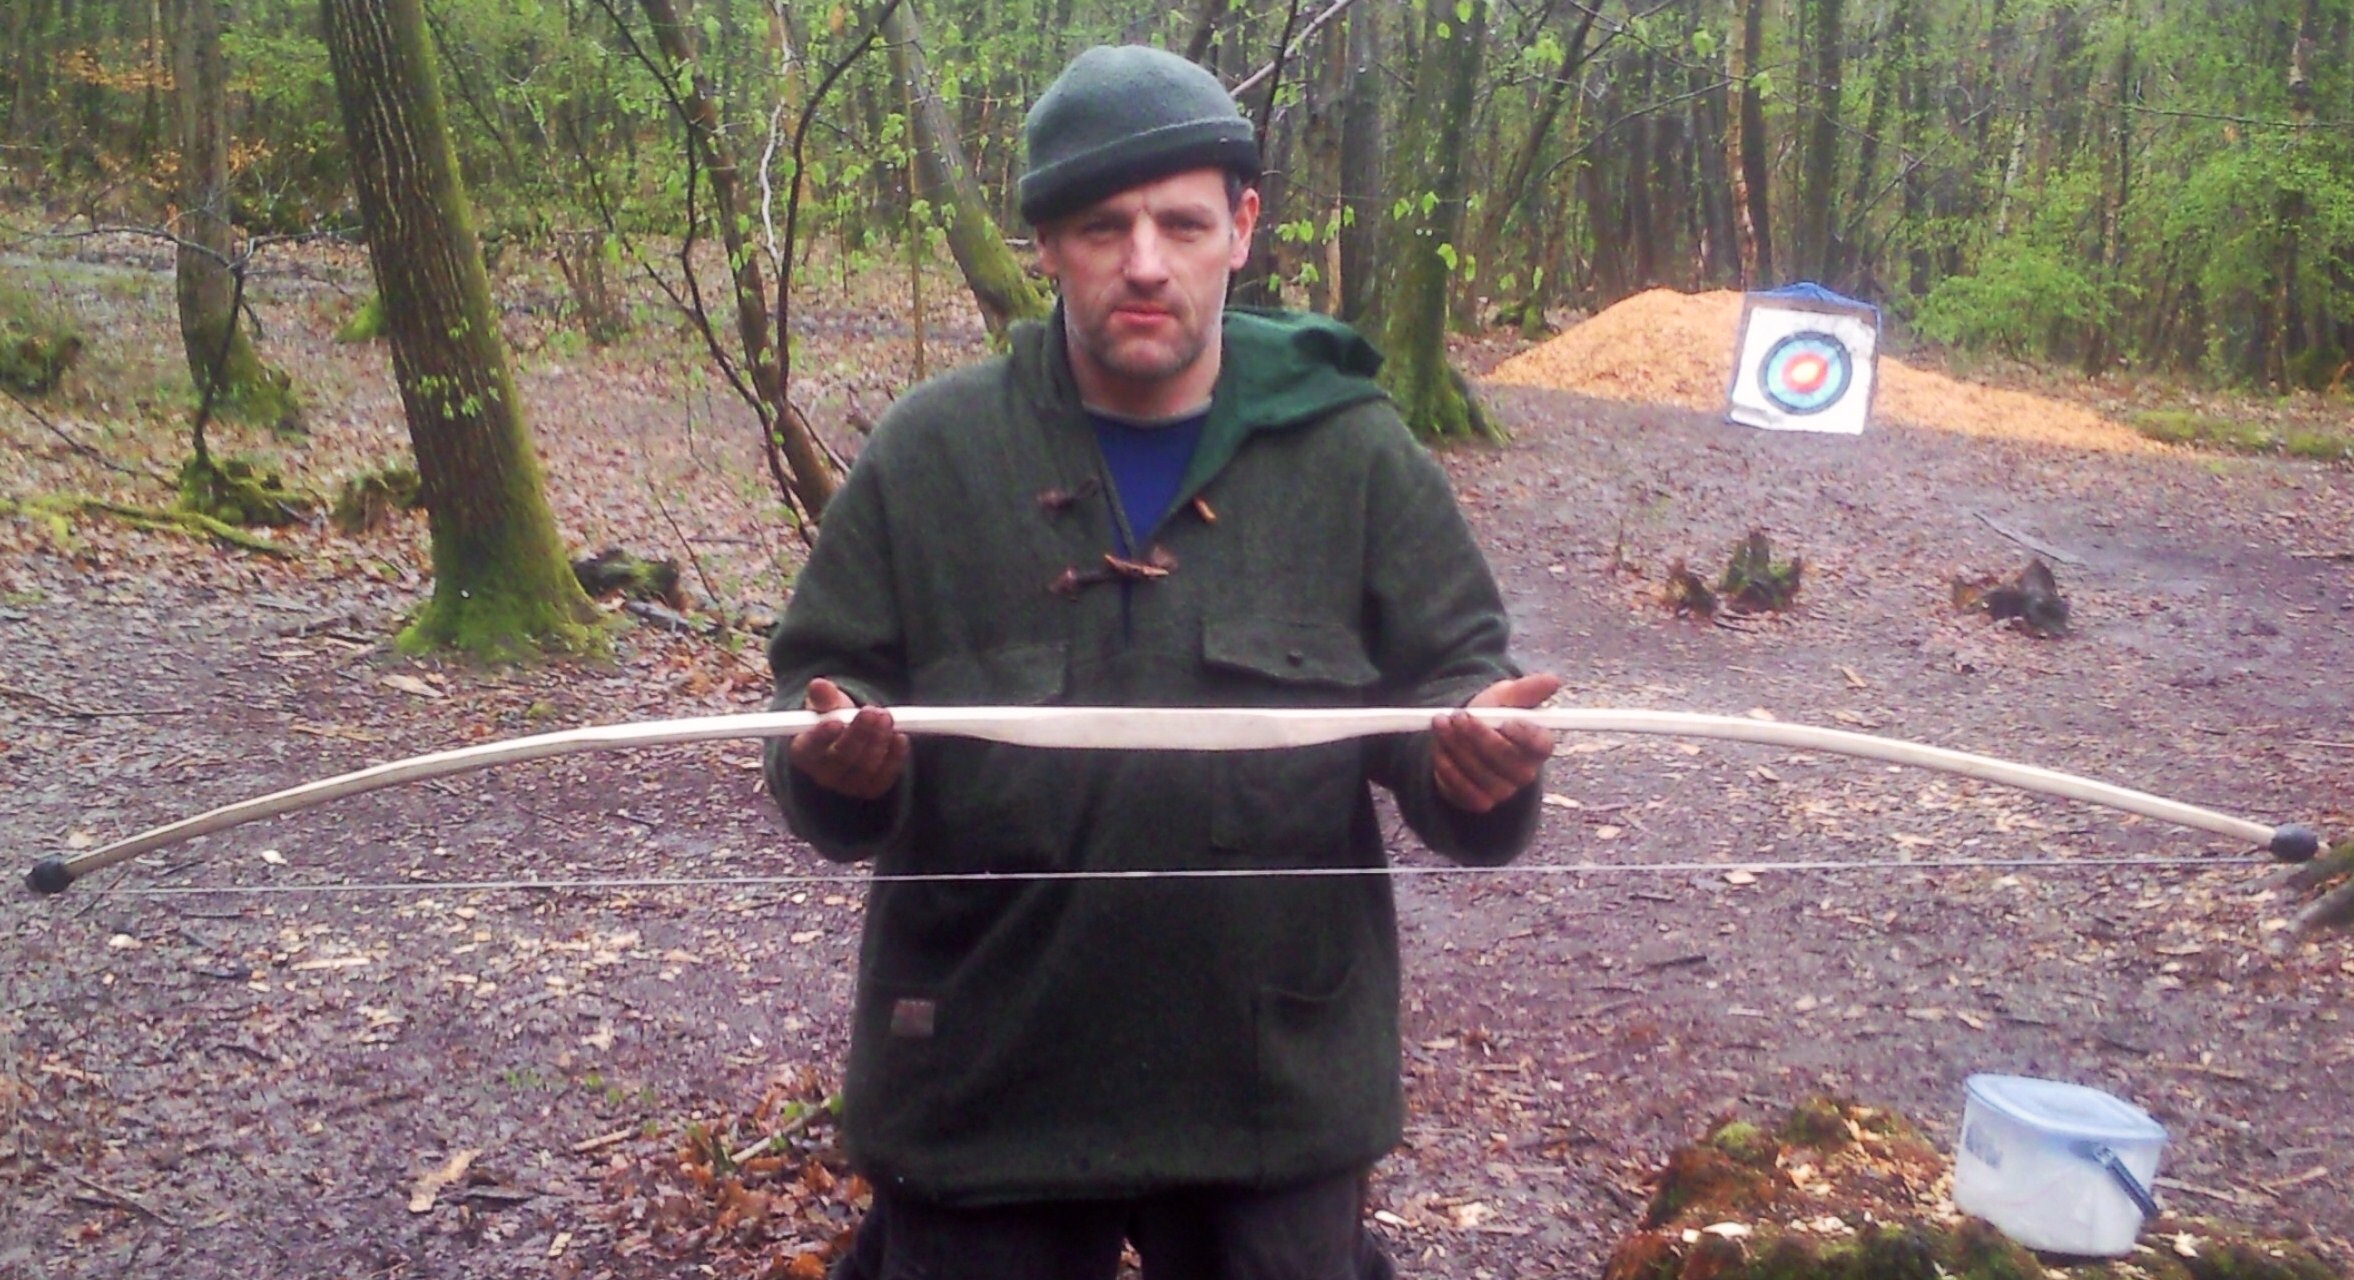
The second bow I ever carved was a Holmegaard-style bow made out of ash. The bow on which I based my replica was found in a peat bog in the Holmegaard area of Denmark in the 1940s and is thought to be over 9000 years old. I made this bow while studying at John Rhyder’s Woodcraft School doing a Primitive Technology course. The wood that was available to us at the time for bowmaking was ash but the original bow found in Holmegaard was made of elm. The bow is a mixture of styles with the limbs that have a flatbow shape for half their length and ‘D’ sectioned like a longbow on the limb tips.
The Holmegaard
I really like this bow as it is very light in terms of draw weight but fast and whippy when it shoots owing to its ‘D’ sectioned tips. I have included in my previous post on Carving an Ash Flatbow explanations on different bow terminology and the differences between flatbows and longbows. Below are the rough dimensions I made my bow to – I tried to replicate the dimensions of the original bow as much as possible.
Holmegaard dimensions
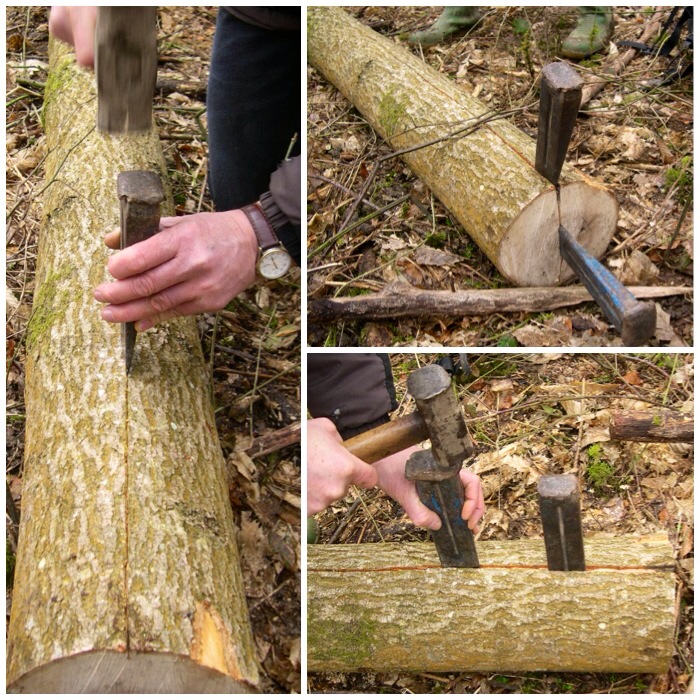
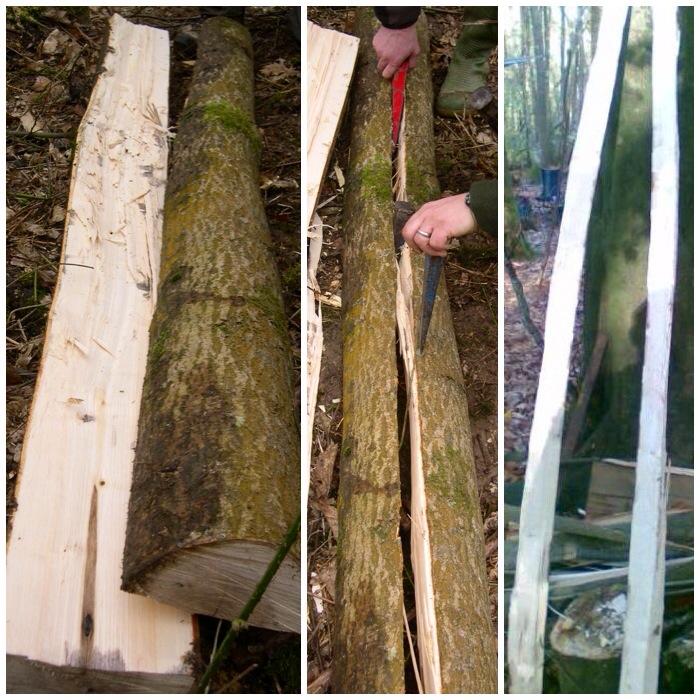
An ash tree had recently been felled and a section of the trunk cut down to just over 6 foot. I scored a line in the bark with a wedge down to the wood to help with guiding the split of the log. Note that the wedge is positioned to one side of the person scoring the line. This maintains a safe position for the worker. I then drove a wedge into the scored line to start the split at one end of the log (upper wedge in the top right picture). A second wedge was driven in at the base of the log to further split the log (lower wedge). Putting in the second wedge loosened the first wedge so I pulled it out and drove it in further down the line to widen the split.
Start of split
I just kept repeating this process of ‘leap frogging’ the wedges, and the scored line helped greatly with controlling the direction of the split.
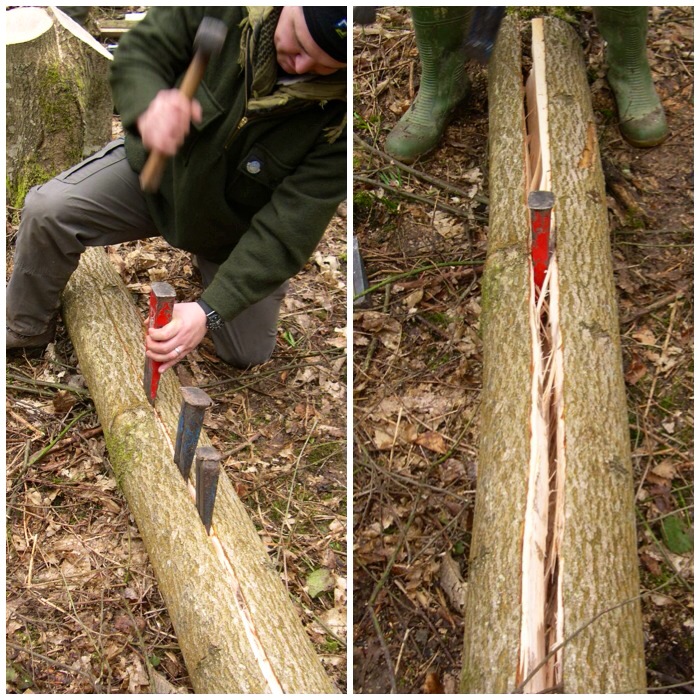
First complete split
Once the log had been split I kept repeating the process again and again until all the staves were split out.
Finished staves
Using a wooden wedge I shaved off the bark of the stave. I was very careful to remove only the outer and inner bark and not to touch any of the wood. The wood found just under the bark is the most flexible part of the bow and will form the back of the bow. Apart from light sanding this area of the bow will not be touched.
De-barking with a wedge
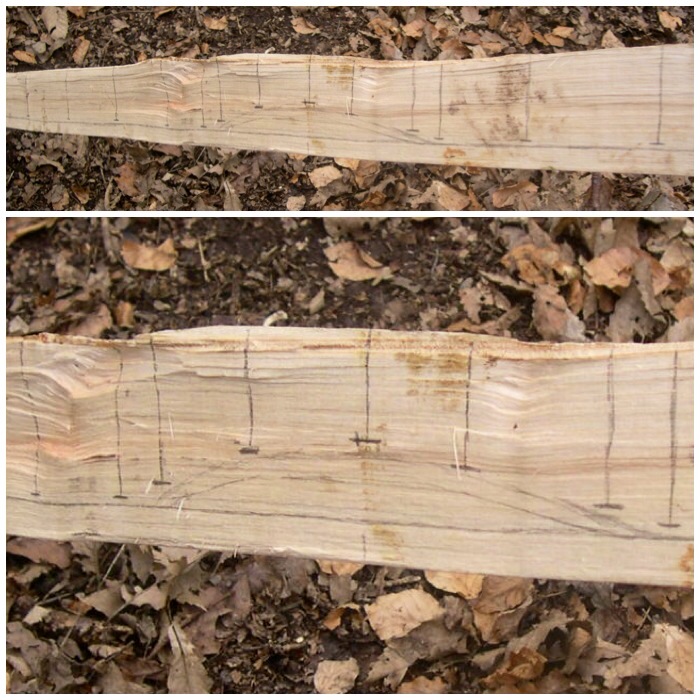
This is the side profile of the stave (top picture). The side profile has been roughly drawn out leaving plenty of room for error. A close up of the handle area can be seen in the bottom picture and the vertical lines are for the stop cuts.
Side profile
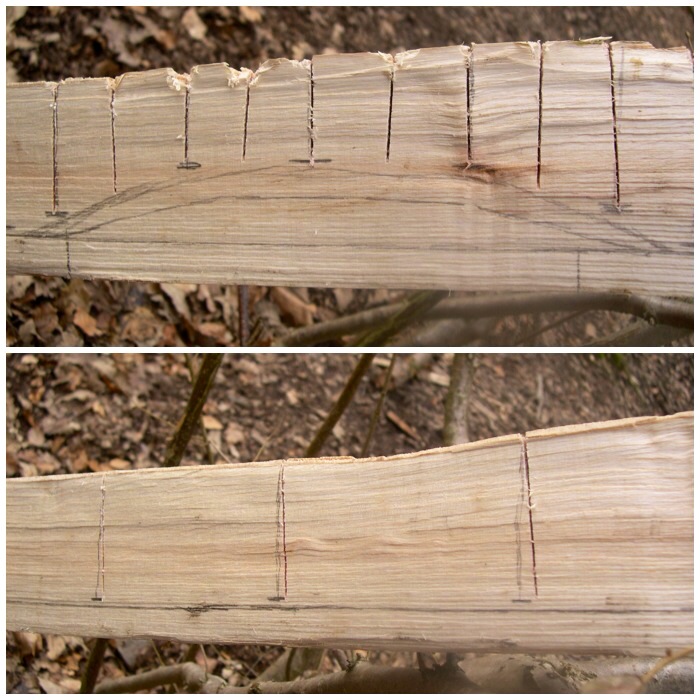
These stop cuts help greatly when getting rid of the excess wood. As the excess wood is cut out, the stop cuts prevent splits from travelling down the length of the bow. The top picture shows the area around the handle ready to be cut out and the bottom picture shows one of the limbs ready for work.
Stop cuts
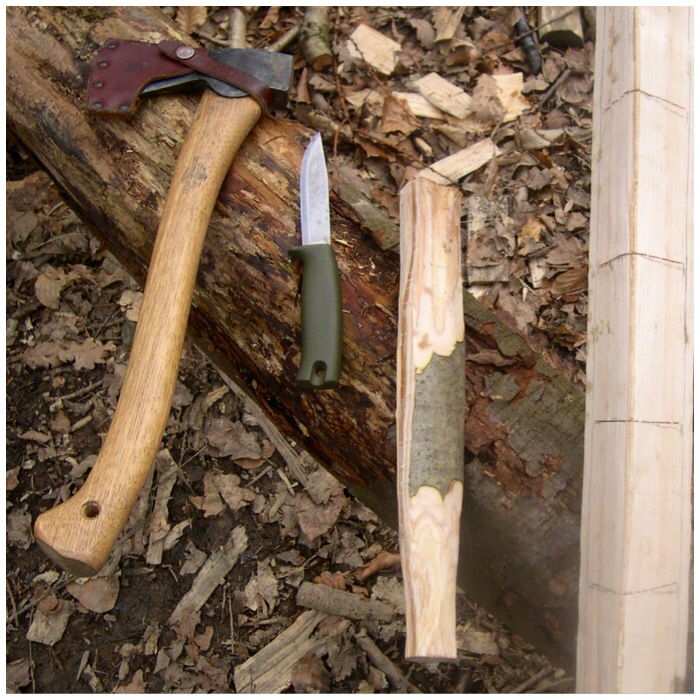
Some of the tools that are used to take off the excess wood: the axe for the start of the process and a knife and batton to finish it off.
Tools for initial shaping
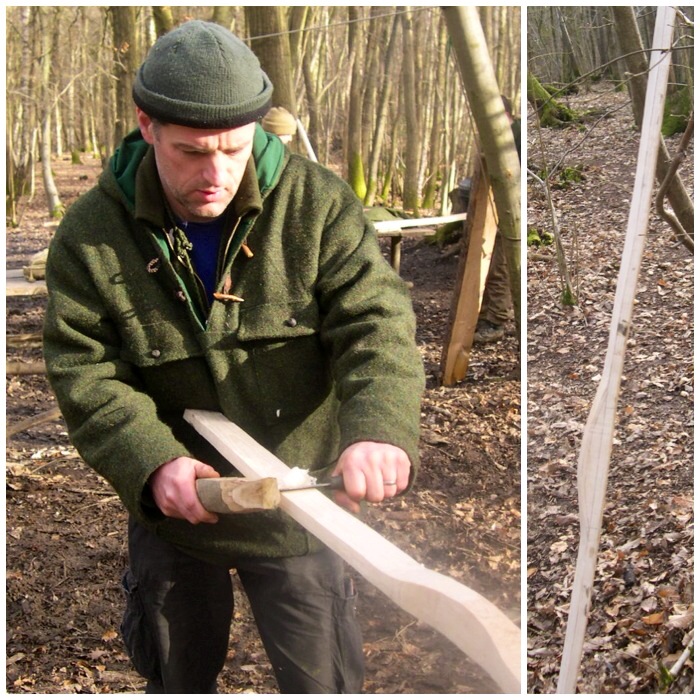
Keeping the stave off to one side of me and resting on a log, I trimmed the excess wood off. As the stave was off to one side I was in a safe position to work with the axe. If the axe had slipped its follow-through path would have been to my side.
Axing out
The tool on the left is a draw knife and can be used to finely trim the bow shape. If you do not have a draw knife you can embed the tip of a knife into a piece of wood to act as a second handle and use it as a draw knife. If you choose this method make sure that the piece of wood is on a secure flat surface before pushing the tip into it – never hold the piece of wood in your hand while you do this.
Professional and impromptu draw knives
I clamped the bow securely to a workbench and then could easily start to use the draw knife. Here you can see the impromptu method in action; it works surprisingly well if your knife is sharp enough. It does not take long to work your way down to the line.
Using the draw knife
A lot of the time I braced the tip of the bow against my stomach as I removed the excess wood. As I worked towards the tip I repositioned the bow on the workbench so that it was held securely without needing to brace it. You can see the side profile of the bow emerging on the picture of the stave propped up against the tree on the right.
Side profile blanked out
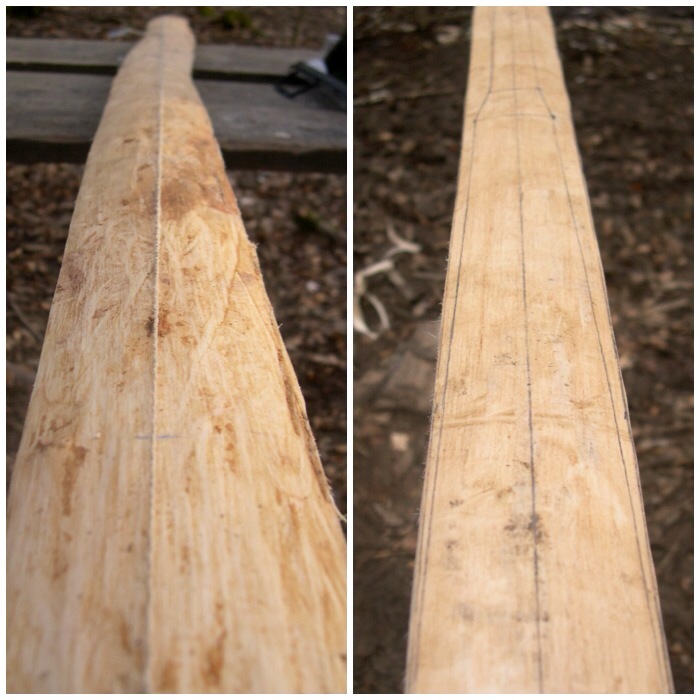
The next stage was to mark out the top profile of the bow. I used a string to mark out a centre line down the length of the stave (picture on left). Then using my measurements (shown at the beginning) I marked out the shape of the bow (picture on right).
Marking out the top profile
The picture on the left is the handle area I drew out and the one on the right is of one of the limbs. Both now have stop cuts sawn in to help with chopping out the bow shape.
Stop cuts in place
I enlarged some of the stop cuts to make sure that no split would travel very far. I find that jamming one end of the bow against a tree helps with the axing-out process and that it can be done in a much more controlled, safe manner so that the axe blade can never swing into me. It’s important too to use the axe in a safe and controlled manner. In the bottom picture you can start to see the handle shape appearing.
Axing out the top profile
As well as taking off a lot of wood quickly, the draw knife method is useful for taking off fine shavings as you get down close to the line.
Draw knife on the top profile
The top profile slowly started to appear as I finely carved the excess wood down to the line.
Top profile getting there
The draw knife was very easy to use as the angle of the limb changed from a Flatbow (near the handle) to a more ‘D’ shaped Longbow limb near the tips.
The Holmegaard shape is appearing
The ‘D’ sectioned shape of the tips soon started to appear. It was at this stage I decided to let the wood season for a month before doing any more work.
Limb tip needing trimming
I seasoned the wood for one week in my garage and for three weeks in a cool spot in my house. This allowed the wood to season enough to start the fine work. During this seasoning process I tied the bow into a frame to induce some reflex into it.
Tied back to keep the shape while drying
One month later it was time to finish the bow. I started work on the tips of the bow so that they would have more of a ‘D’ section shape to them. Making the tips smaller meant there would be less weight in them, allowing them to move forward faster when shooting an arrow. Using my knife as a draw knife I was able to finely carve the shape of the ‘D’ section on each limb. As the tip of the knife is firmly embedded into a piece of wood it is very safe to use and highly manoeuverable.
Fine draw knife work
On each tip I came right down to the line but not past it with the draw knife.
Limb tip finished
Up to this point I had tested the bow’s flexibility by floor-tillering it. This involves pushing down on the limb and checking to see if I was getting a nice curve or if there were areas of stiffness.
Lots of hand tillering
To take off excess wood from areas of stiffness I used a metal cabinet scraper. The scraper only takes off minute pieces of wood and is ideal for this part of the process. I carried on this process of scraping and floor tillering until I got a fairly good curve on both limbs.
Time for the cabinet scraper
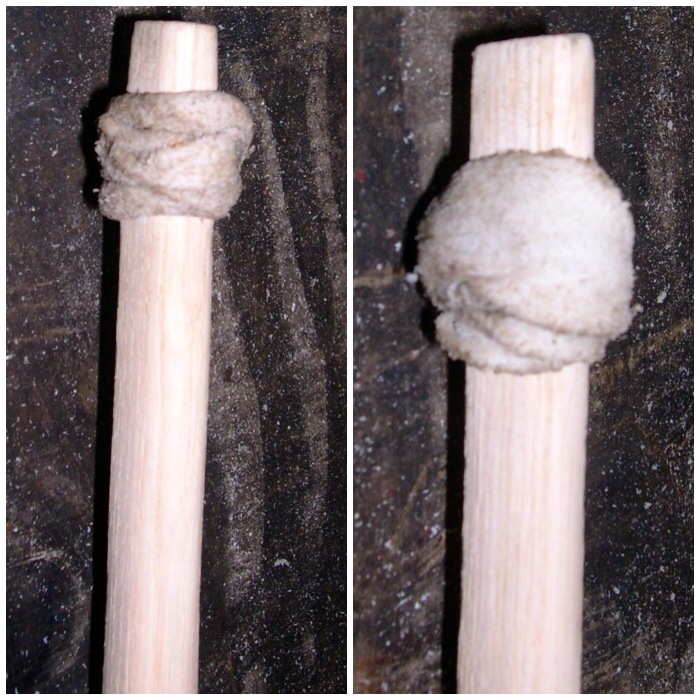
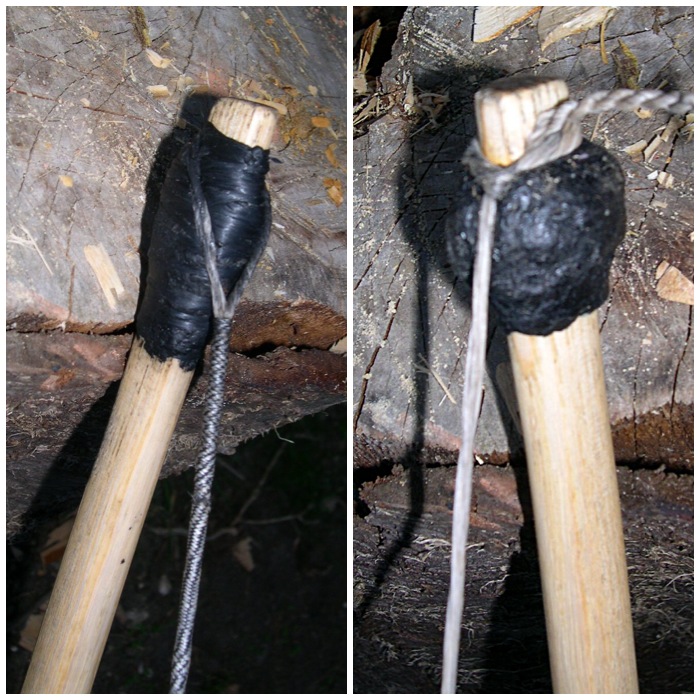
Before using the tillering pole to finely check the curvature, I had to add knocks to the bow. Some Holmegaard bows have been found without knocks carved into them and it is thought that they may have had bone-tipped knocks added, or some sort of wrap on each limb as a knock. I decided as an experiment to make a knock from some material wrapped around the tips of the limbs. I first tried cordage made from western red cedar bark, but I found that this did not grip the wood firmly enough and kept slipping.
Failed cordage knocks
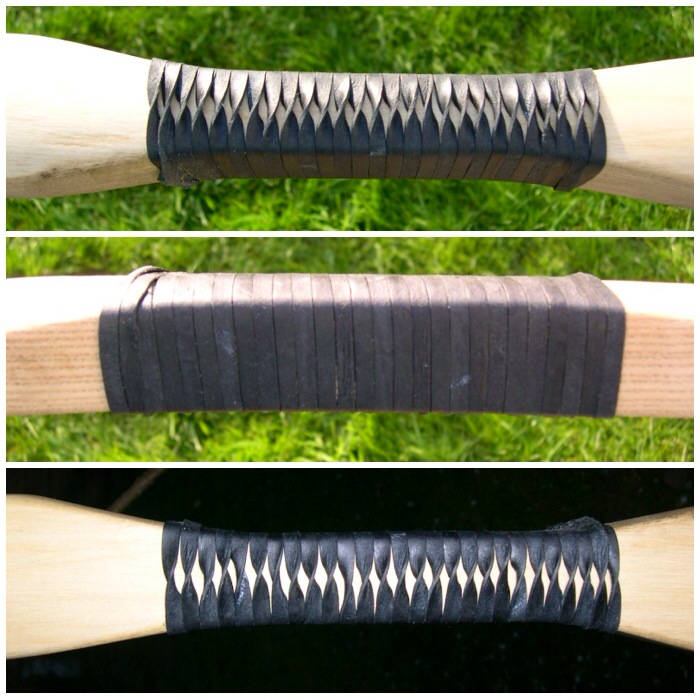
Next I tried rawhide, soaking it in hot water and then wrapping strips onto each end. This took about one and a half days to harden but allowed me to string the bow.
Successful sinew knocks
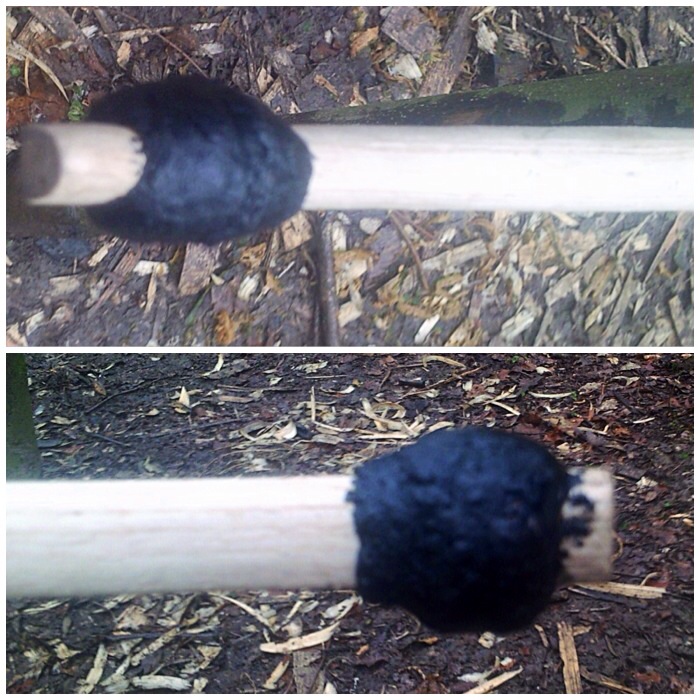
I coated the rawhide in pine pitch to waterproof it so it would not soften and slip if it got wet.
Rawhide knocks covered in pine pitch
I just used some strong nylon string at first as a bowstring before starting the tillering process, tying on one end of the string with an overhand loop and the other end with a timber hitch. The string was just tied loosely, with no brace height. This picture is from when making my ash flatbow but the principle was exactly the same. Dick Baugh wrote a good article on tillering on the Primitive Ways website that is worth a read.
Tillering string
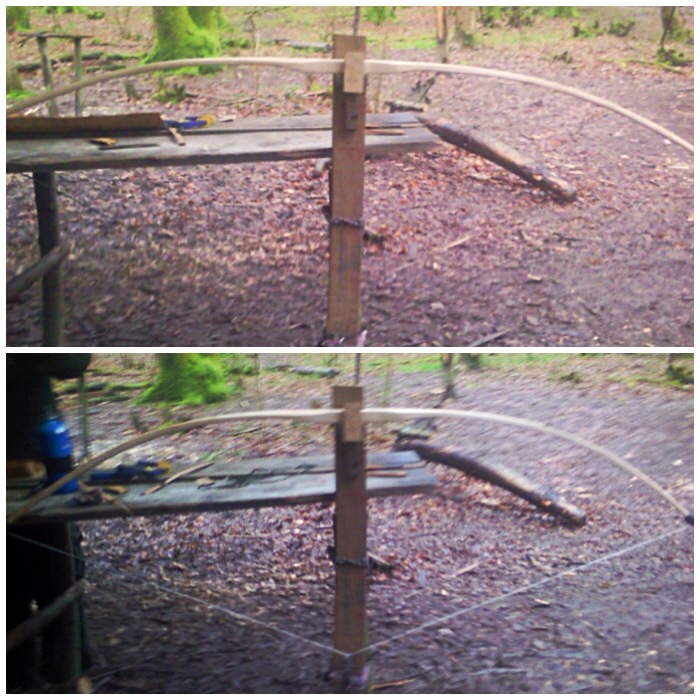
I then placed the bow on the tiller and in increments slowly bent it to view the curve on each limb. The pictures are of the bow during the tillering process. After viewing it each time I would return to the workbench to scrape wood from areas of stiffness using the cabinet scraper or spoke shave. Also I would raise the brace height a little by shortening the bow string to see how the bow reacted under pressure when braced. This whole process ensures you get a good even curve on each limb and also trains the bow to bend properly.
Tillering followed by scraping
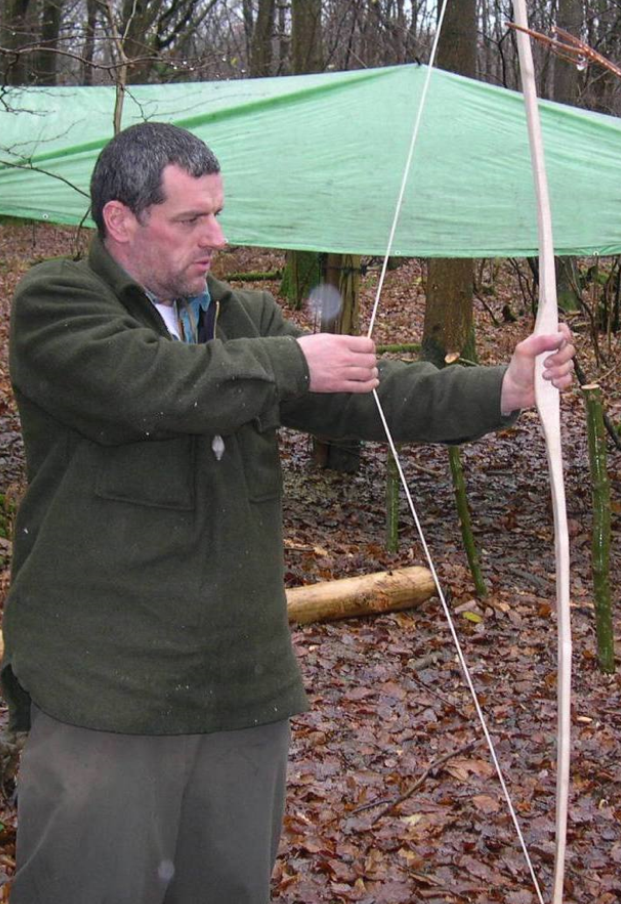
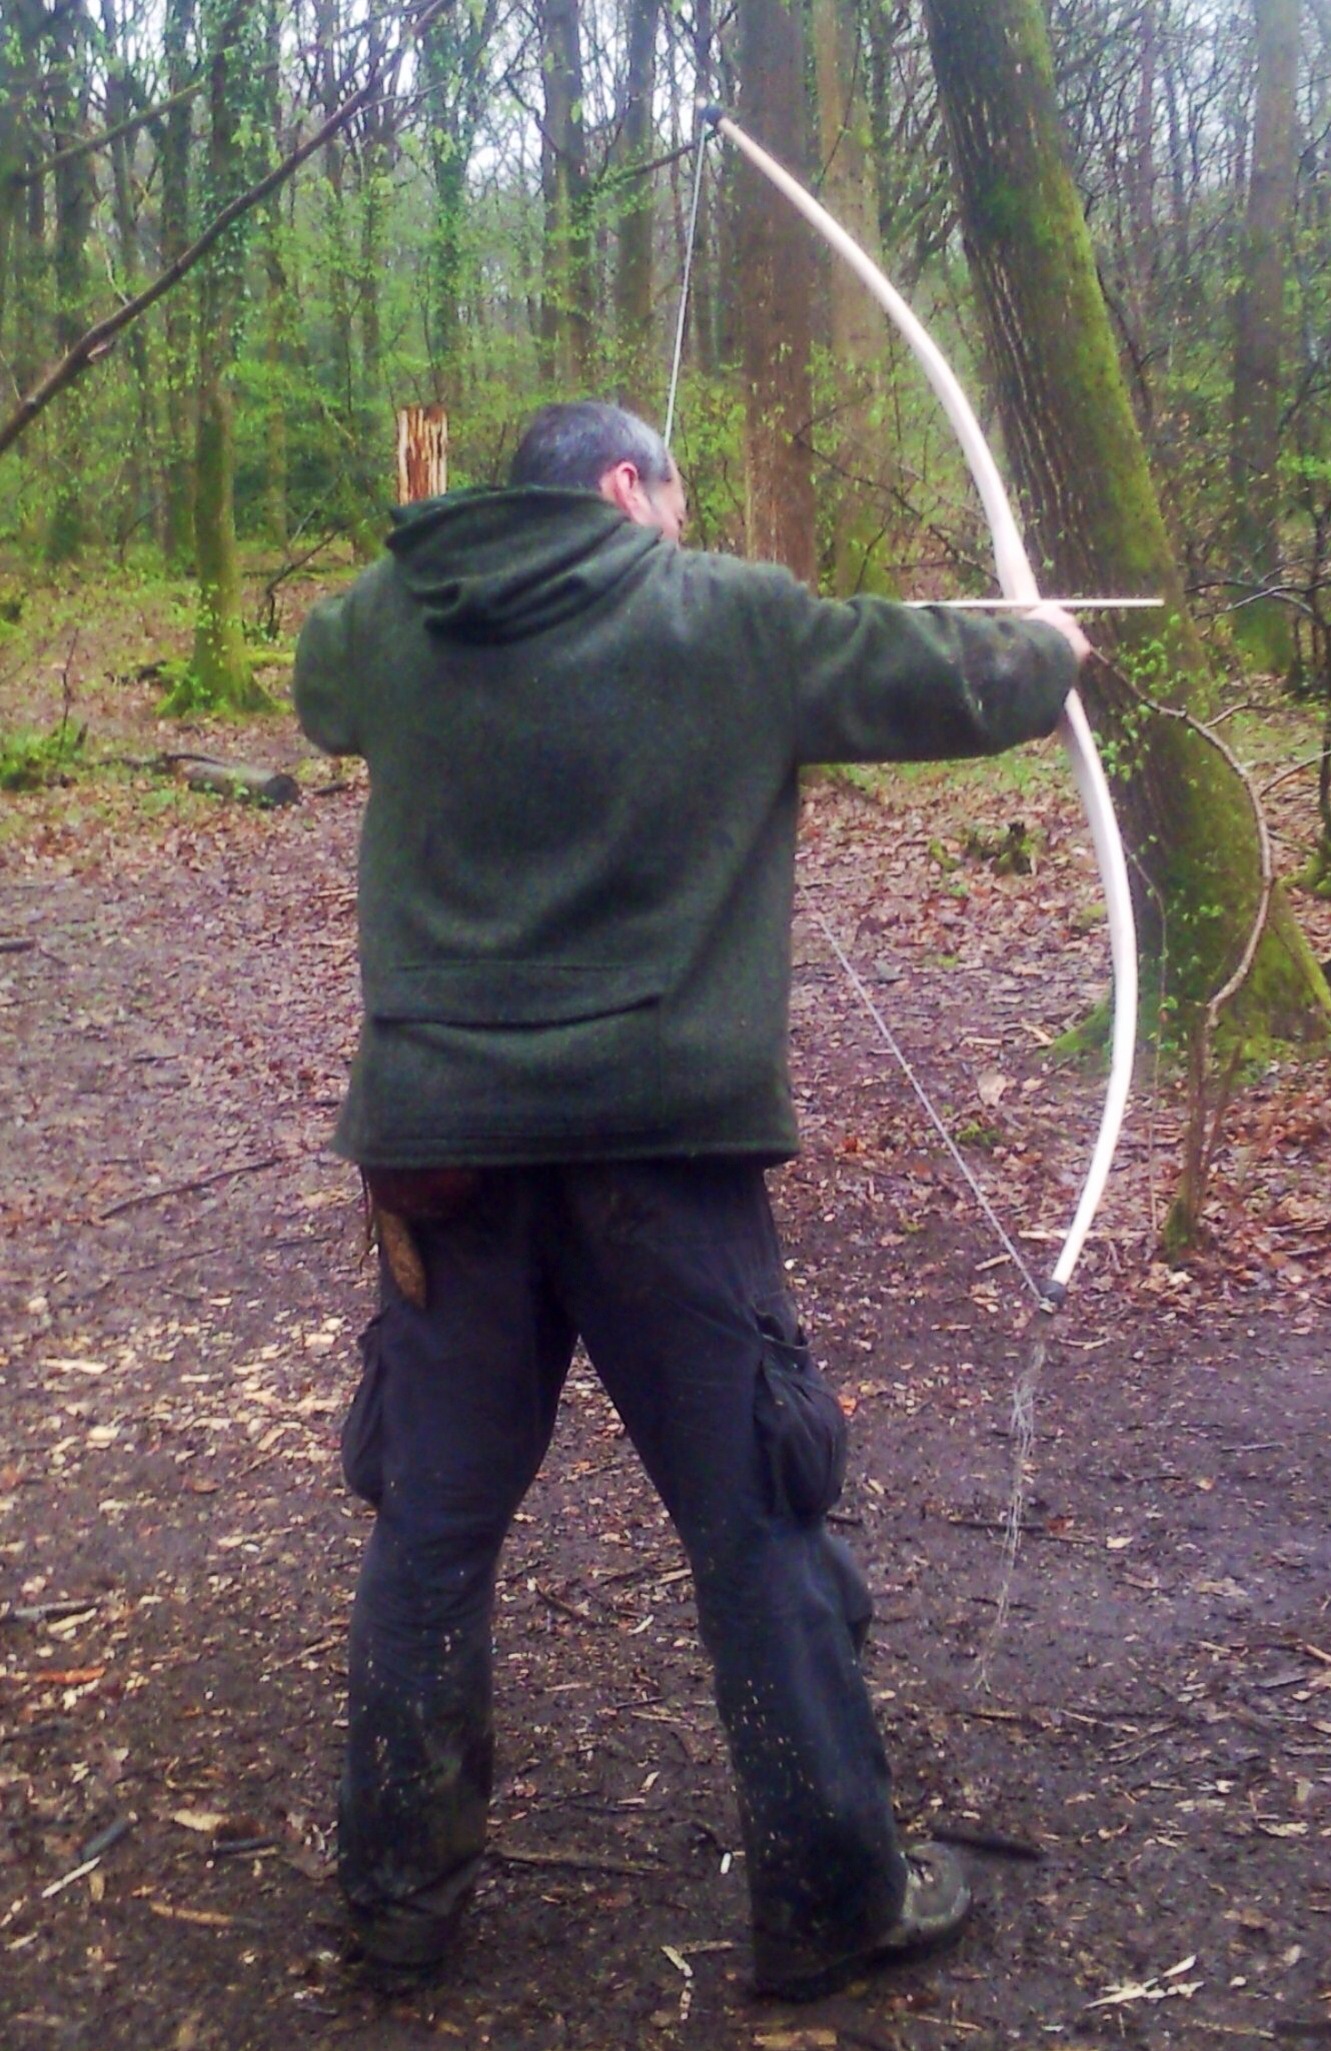
This picture was taken at the end of the tillering process with a 4 inch brace height: I was happy to take my first shot now.
Ready to shoot
Having seen a few bows in my time still fail (split) at this point, I only drew back on the string about two thirds of my normal draw length for this first shot.
First shot
I then set about making my proper bowstring, which consisted of a Flemish twist on one end, a timber hitch on the other and serving the bowstring. Two good sites on this are Sam Harper’s site Poor Folk Bows for the string making and the Archery Talk forum for serving the string.
Flemish twist and timber hitch
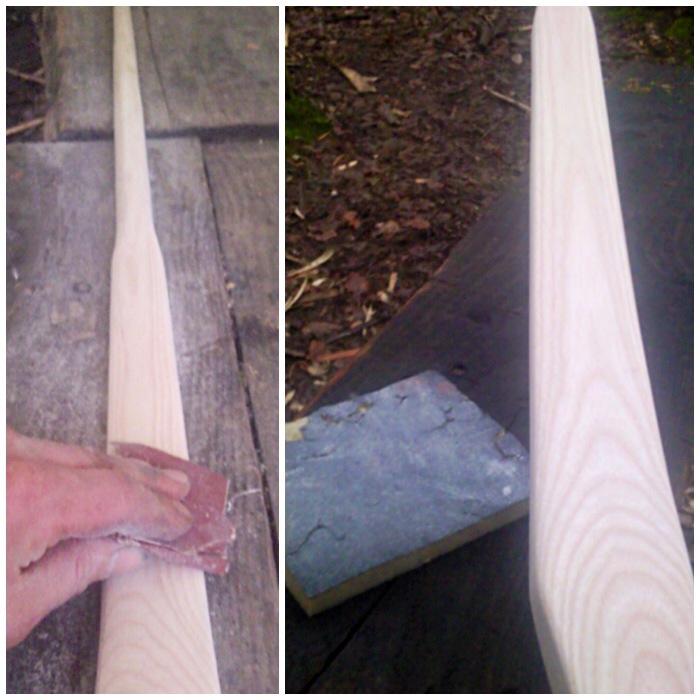
I used various grades of sandpaper to sand the bow down to get rid of any marks and sharp edges.
Hours of sanding
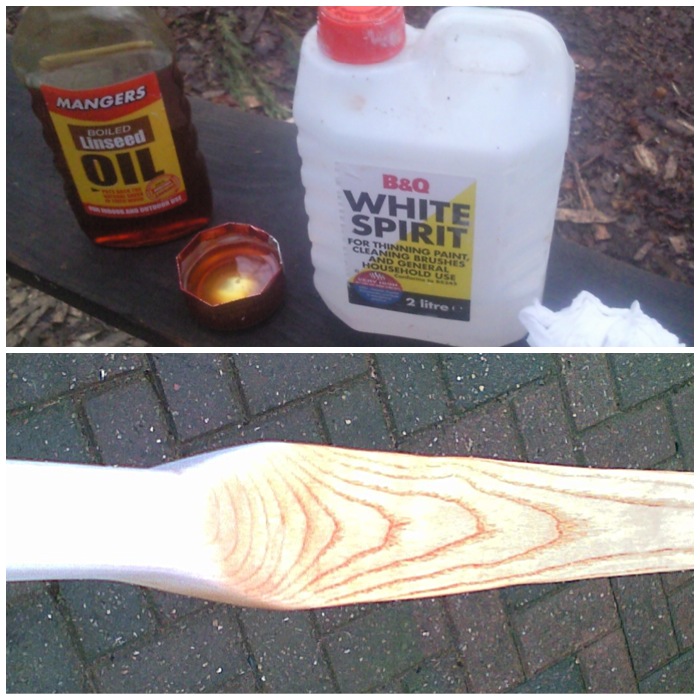
To protect the bow I stained the wood slightly. Then I applied a mixture of boiled linseed oil and white spirits (50/50 at first). After this had dried I reapplied more oil, but with less white spirits each time until by the end I was applying just oil.
Coats of linseed oil and white spirits
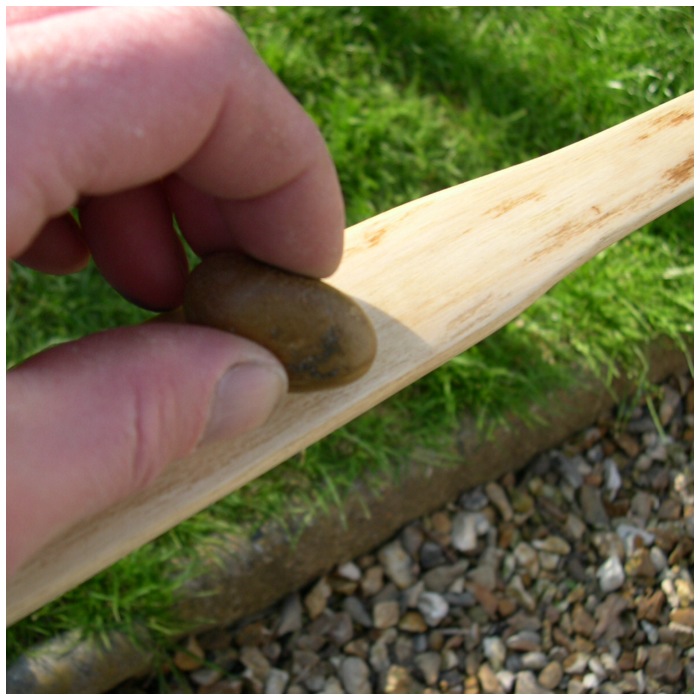
The next stage was to bone the wood by rubbing the whole bow with a small smooth pebble. This helps to close the fibres, making the bow very smooth, and also helps to lock in the oil. The whole process of boning can take a few hours but leaves a very smooth and shiny finish.
Boning with a pebble
Lastly I wrapped on a small leather handle secured with a little glue. I thought about stitching one on but felt the seams might be too uncomfortable when holding it.
Leather handle
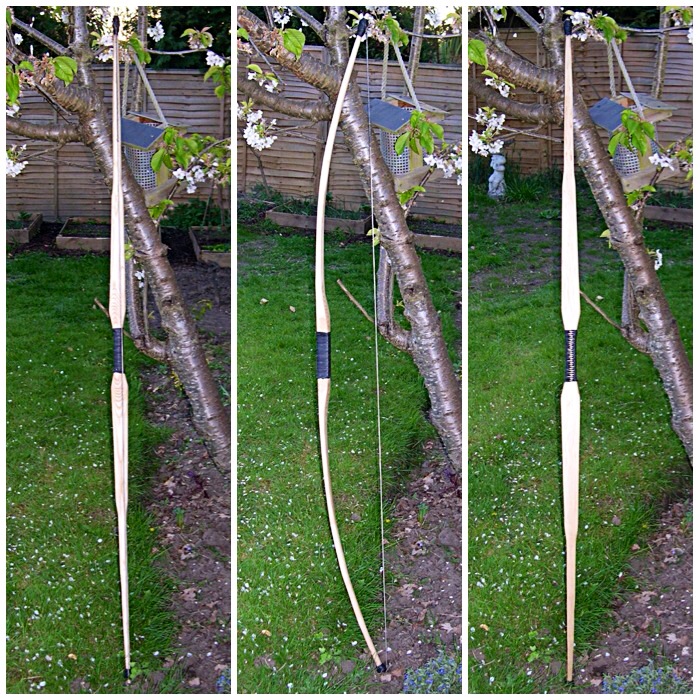
The completed bow showing the belly, side profile and the back..
One bow I am very proud of
I am so glad that the rawhide knocks worked so well on this bow as they were something of an experiment. I don’t know if the size of the knocks slows the limbs down when shooting, but she does shoot fast.
This bow is particularly liked by youngsters as it is so easy to draw but still shoots fast. I managed to capture this arrow just after it had been released by the Holmegaard bow.