
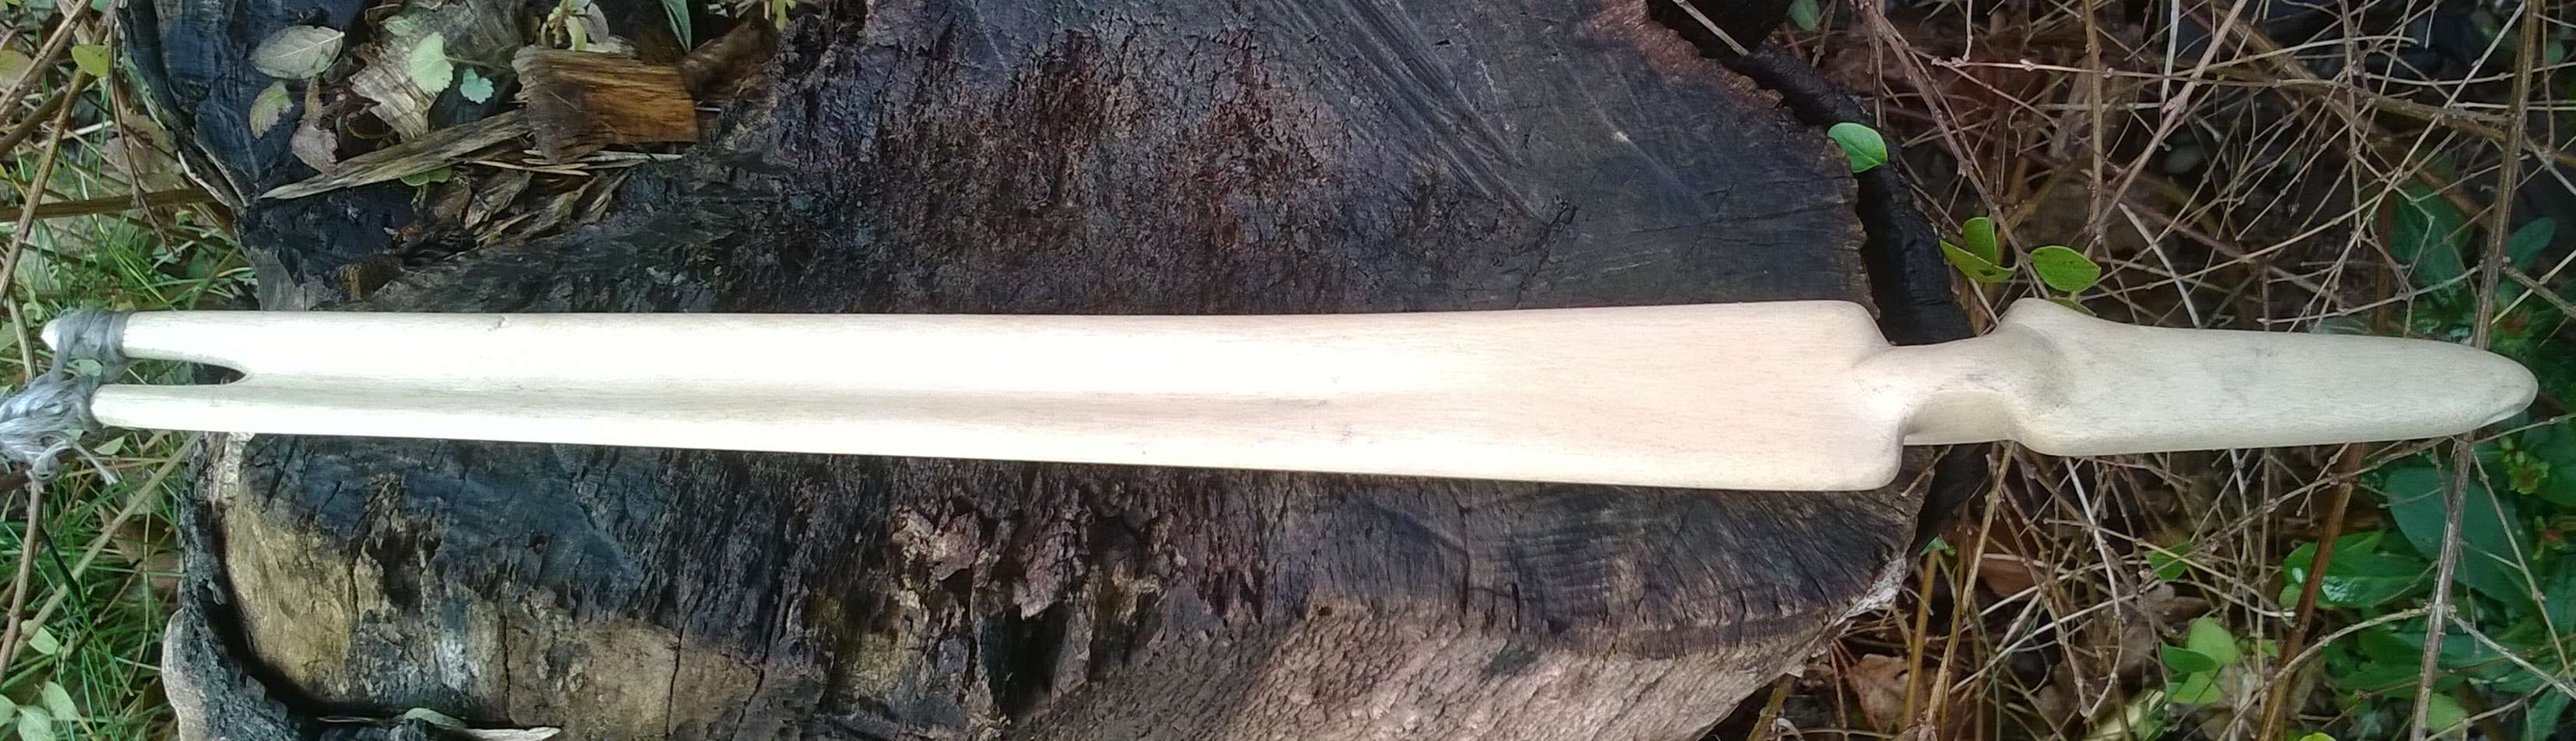
One of my favourite Atlatls is the Lovelock Cave Atlatl. I made this Atlatl a few years ago using modern tools including a Mora knife, a small carving knive, a flex gouge chisel and sandpaper.
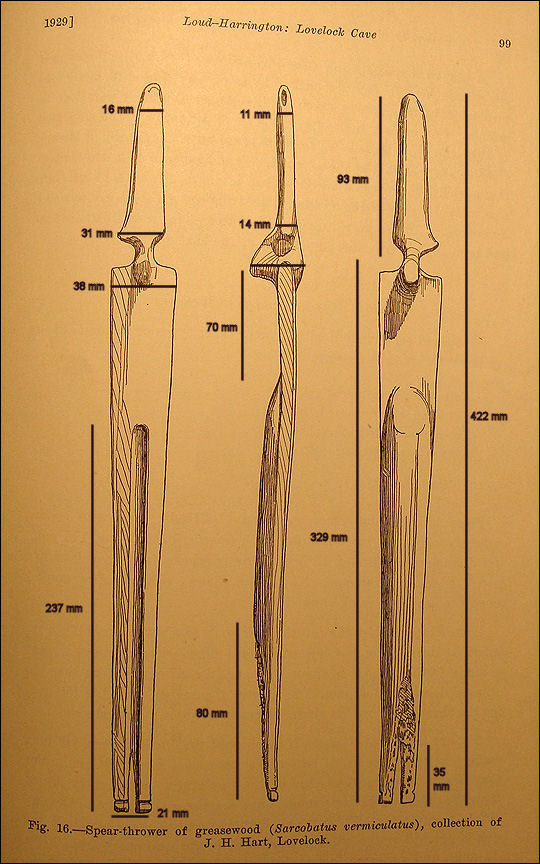
The original Atlatl was found in a cave over a century ago but was soon lost; thankfully, though, not before someone had made a detailed drawing of it. Lovelock Cave was previously known as the Sunset Guano Cave, the Horseshoe Cave and Loud Site 18. A good paper on the archaeological digs on the site was written by Phoebe. A. Hearst from the Museum of Anthropology (University of California Berkeley).
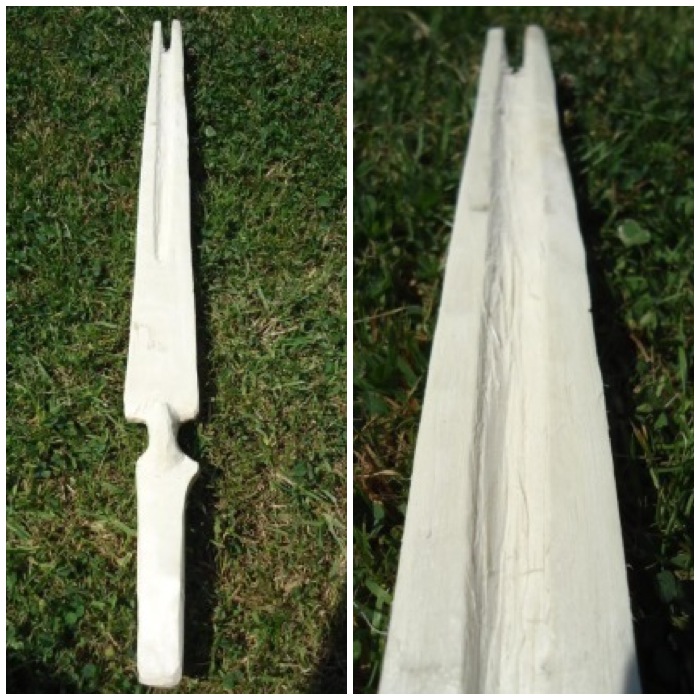
A copy of the drawing is shown below: I found this in a post by Mike Richardson on the Split Stick Atlatl, who also writes that the original was 17 inches long. I reproduced the Atlatl as closely to the drawing as I could.
It has a fork at the rear and the drawing shows a small groove around each prong. I have read that this was where a small piece of carved wood or bone known as a spur was attached as a point to hold the Atlatl. I decided though to see if the Atlatl would work with just some cordage wrapped around it. There is no historical evidence that this was done but it does work well. A good comparison of both attachment types on this Atlatl can be read in the PaleoPlanet forum here. A further project for me on this Atlatl is to make a spur for it.
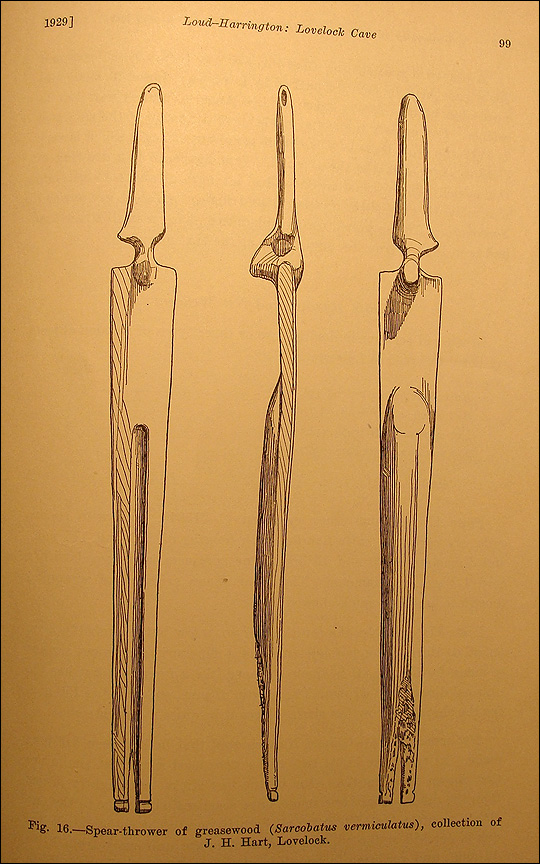
Knowing that the original was 17 inches long, I made a best guess at the other dimensions. The original Atlatl that was lost was made of Greasewood (Sarcobatus vermiculatus) but as this wood is not available in the UK I opted to use a piece of Siver Birch (Betulus pendula) as I had some available and it is easy to carve. The wood I had ready was only 16 1/2 inches long (422 mm to be exact) so using that as a starter and the drawing as a guide I scaled up all the other dimensions as shown below.
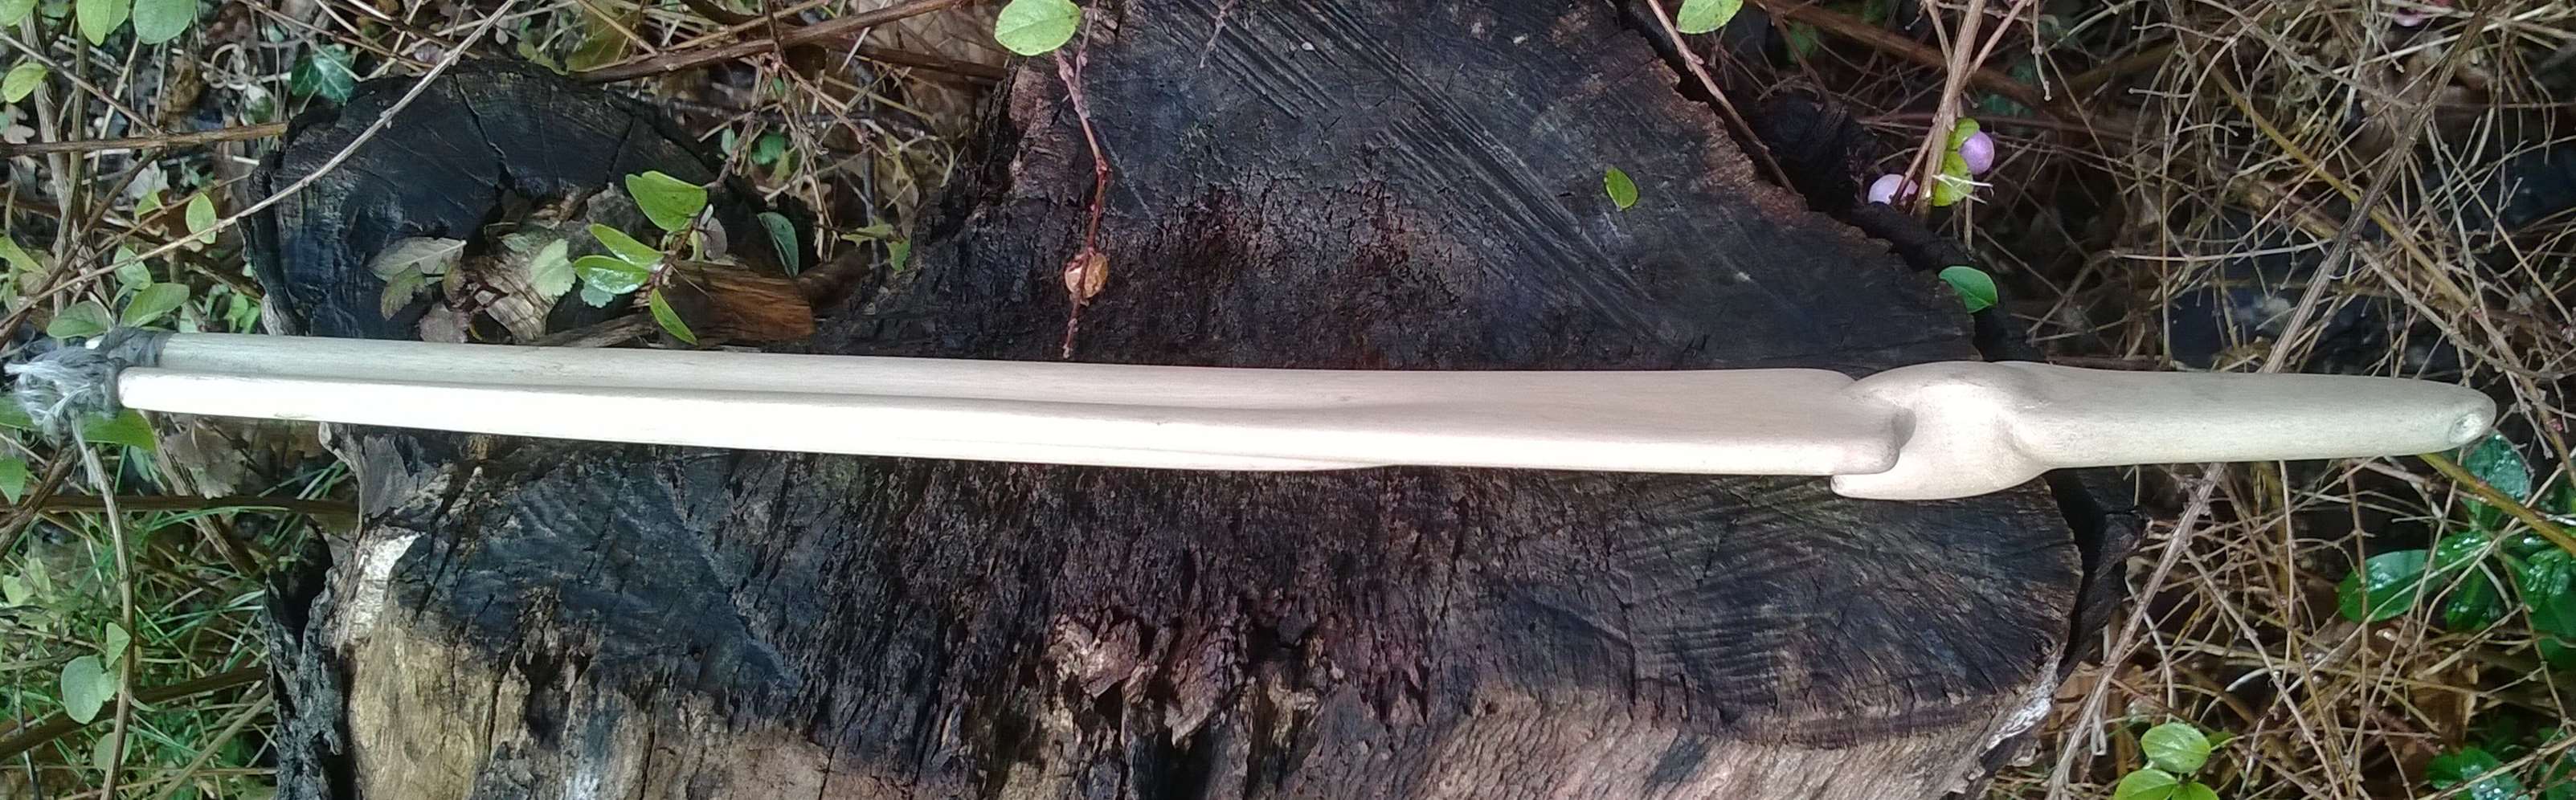
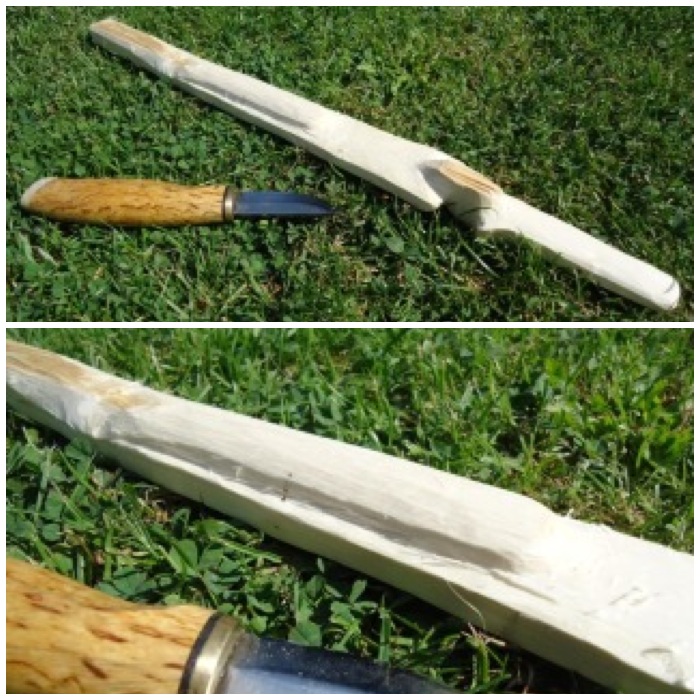
This was a beautiful Atlatl to carve as the finished lines are very smooth and pleasing to the eye. The top picture (below) is a close up of the handle of my reproduction. The final shape gives a surprisingly good grip even when smoothed down.

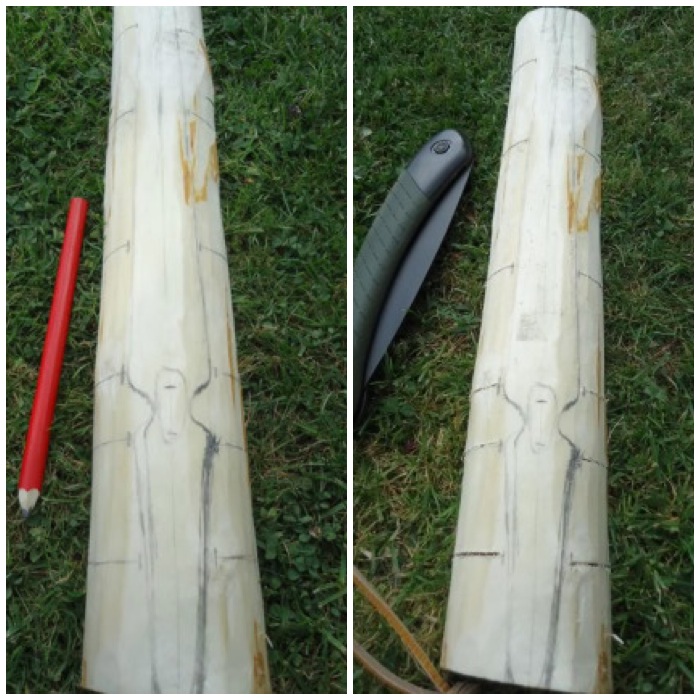
I split my log down to a rectangular shape and then using my dimensions drew out the shape of the Atlatl. After that I marked stop cuts along the whole length of the Atlatl and cut into them with my saw, finishing a couple of millimeters from the outline. These are useful to have in place to stop any splits from running off down the length of the Atlatl when you carve it.
I battoned out the rough profile first using only my knife and a small branch as a hammer. I did the battoning with the work piece placed on a log in front of me. I kept the blade of the knife at 90 degrees to my body as I hit it so that if the knife slipped it would swing away from my body. See my post on Knife Safety Tips for more detail on this.
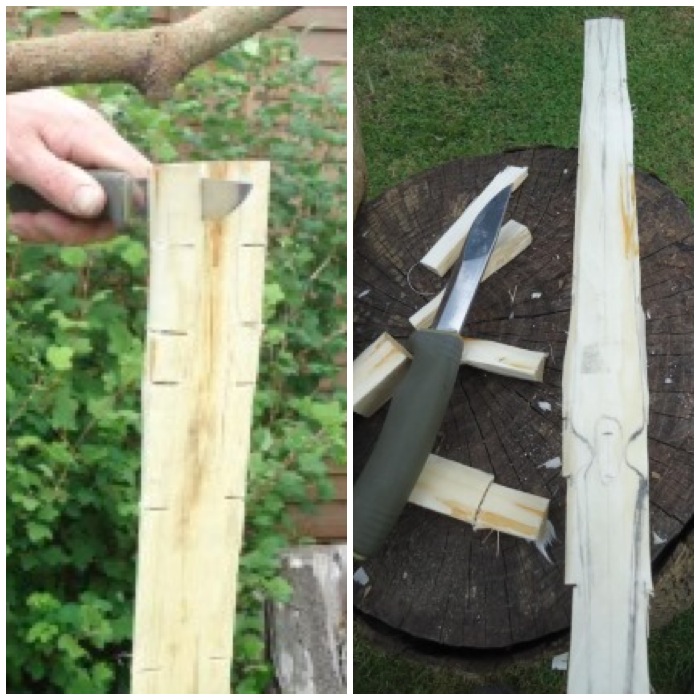
Then using my knife I trimmed the excess wood down to the line, keeping the work piece well in front of me to avoid any potential cuts from the knife if it slipped.

Using two more stop cuts I carved out the thumb and forefinger grip area.
Then it was a case of roughly carving the handle area down to a size comfortable for my hand. I also started to carve out the protruding areas above and below the thumb and forefinger grip area.
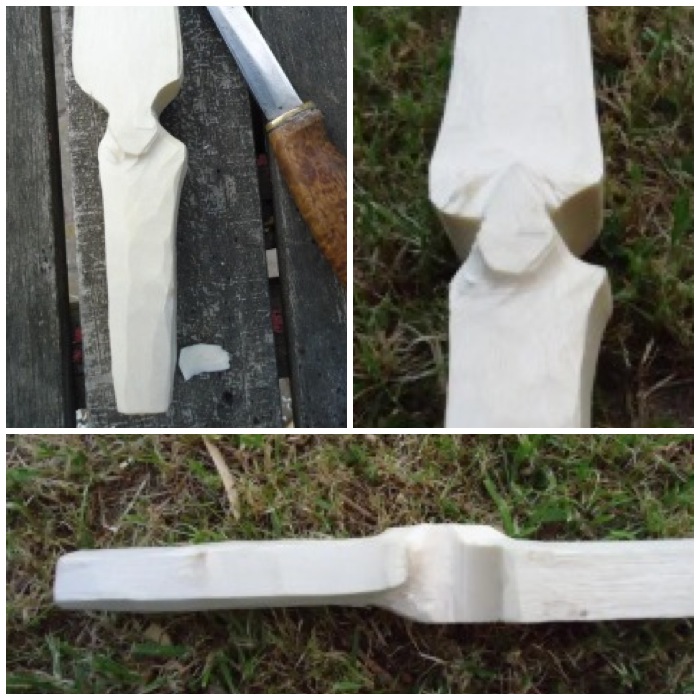
I worked on the bottom of the tail next, carving a flat area near the handle and then carving out an elongated bowl shape to the tail. No need to worry too much about perfection at this stage as the sanding will produce the final shape.
I tapered the tail area all the way to the end making a flat section of the final 8 cms (this will form the prong).
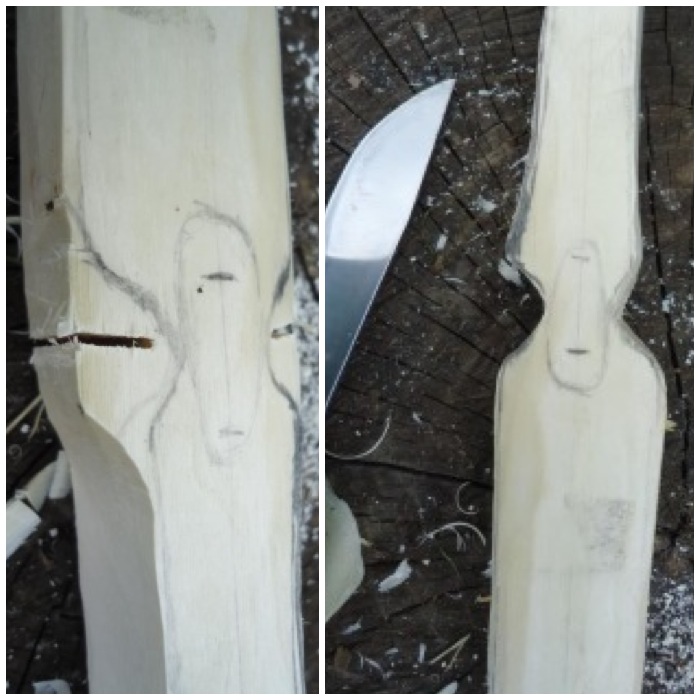
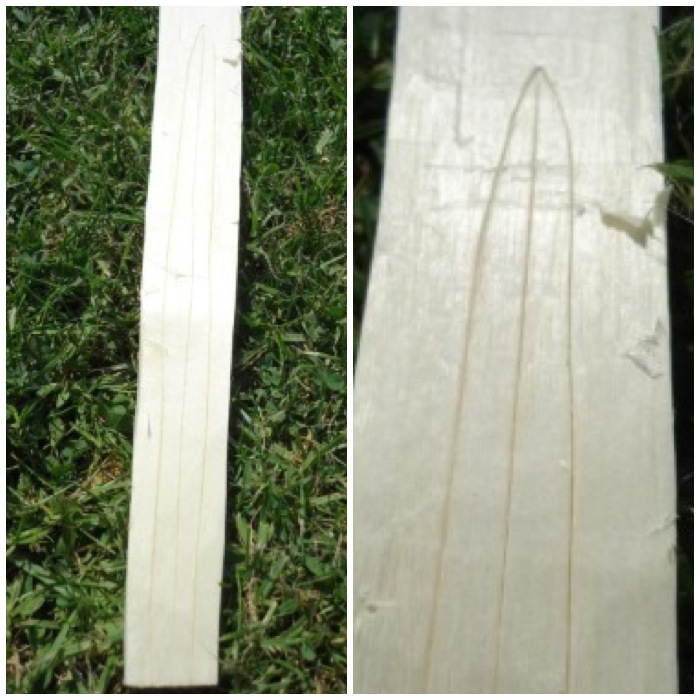
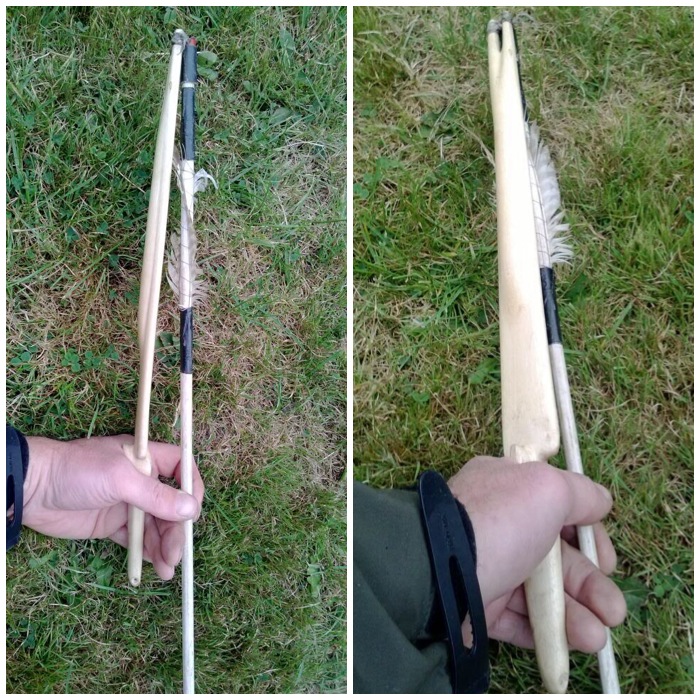
On the top of the tail I marked out with my knife tip a 1 cm wide by 23 cm long spear shape that would form the bowl for the dart to rest in.
I used a Flex Cut Gouge for carving the bowl area and my small carving knife for carving the prongs. This is the really tricky area of carving – you have to be particularly careful as it is very easy for the knife to slip.
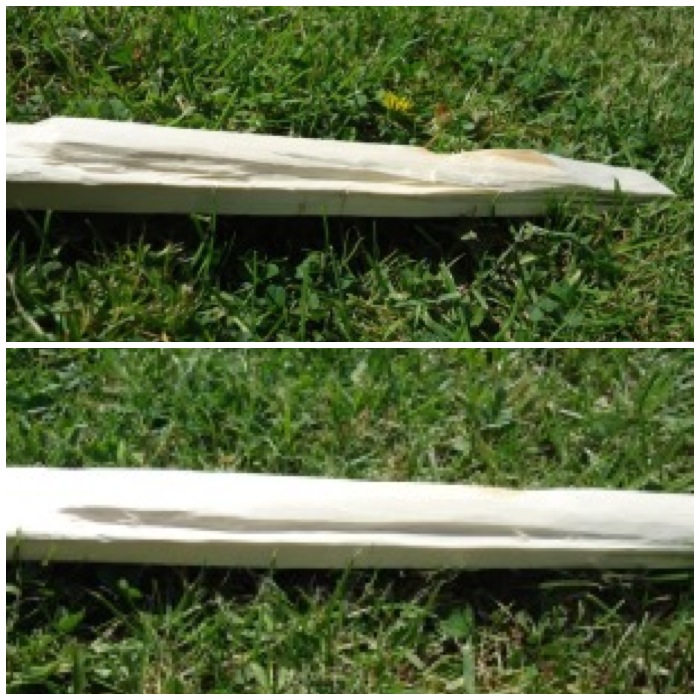
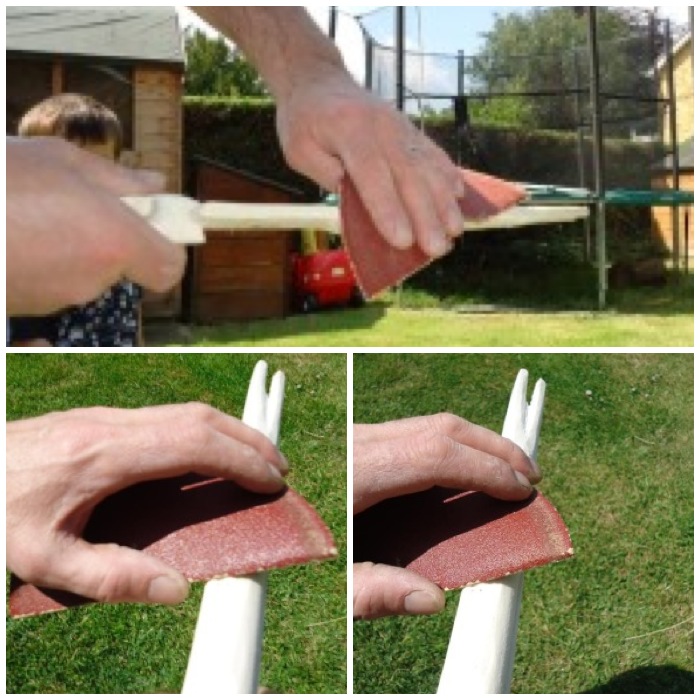
Once I’d carved the basic shape I used various sandpapers from about 40 grit to about 1000 grit to smooth everything.
Before I added the false sinew to the tail I oiled the Atlatl a couple of times and then boned it with a small pebble. Using a small pebble to rub the Atlatl wood down for a couple of hours smooths the wood fibres down and traps the oil in the wood. The whole process of boning really gives a smooth finish.
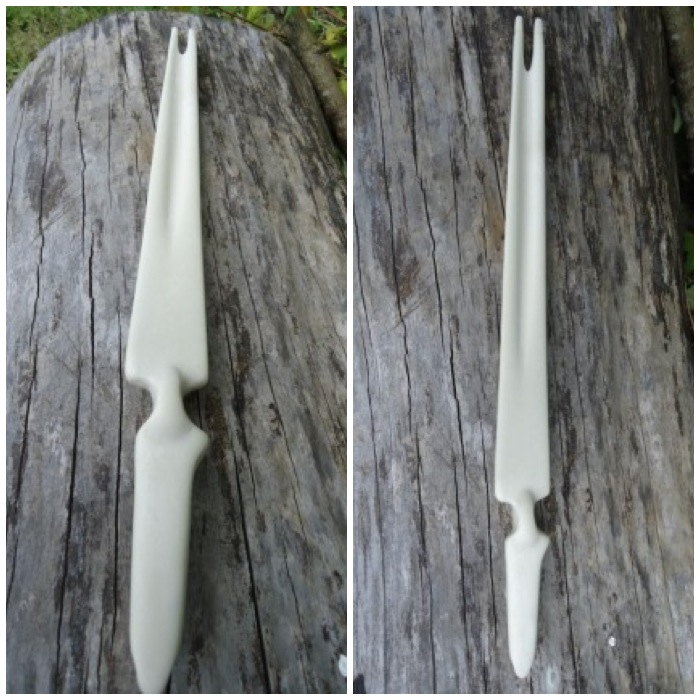
The finished profiles of the Atlatl.
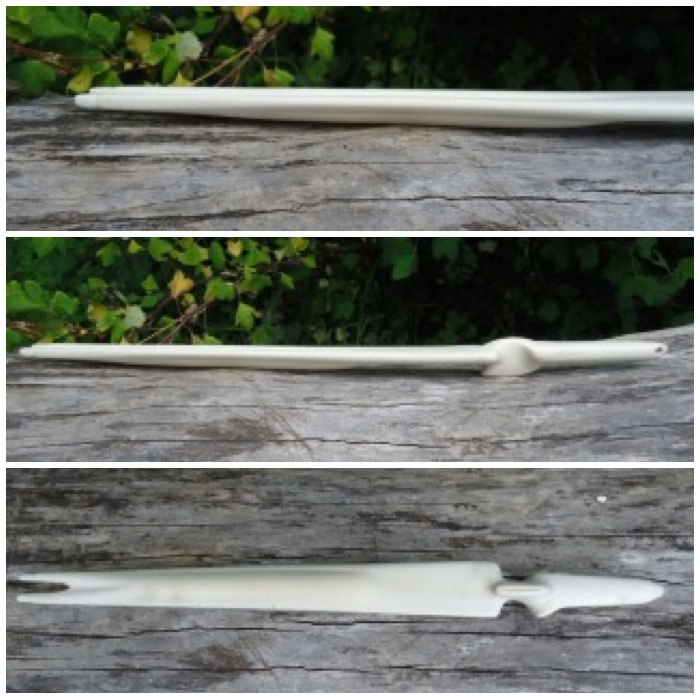
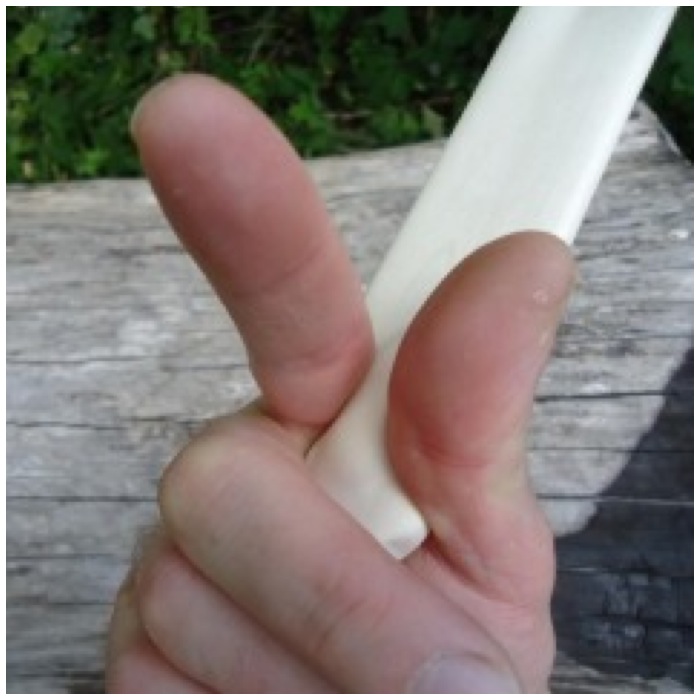
The handle has a very unusual shape but gives you a fantastic grip.

It is easy to flick with an open grip as the thumb and forefinger grooves keep the Atlatl fixed in the correct position in a throw.
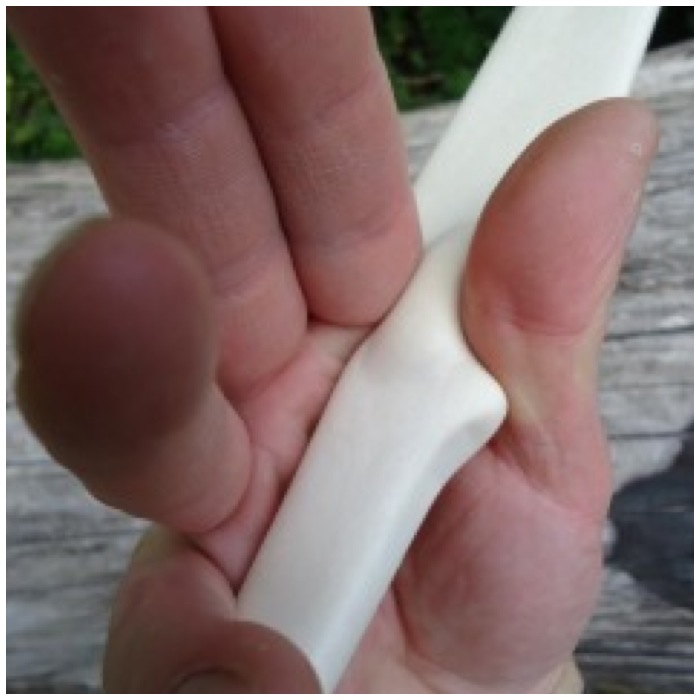
As I carved the handle to fit my palm it makes for a very comfortable closed grip.
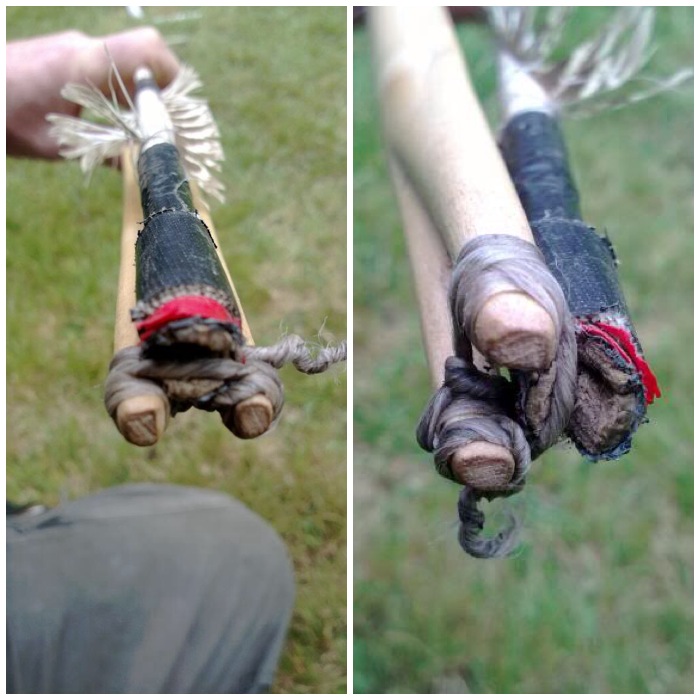
After carving little notches around each prong I wrapped false sinew to the tail using a Constrictor knot. I kept it fairly tight but you may wish to experiment here. As I said earlier there is nothing in the archaeological record to prove this method was used but after experimenting with other Atlatls like the Split Stick method I see no reason why it could not have been used if a point was not available.
The problem with cordage however is that when you are in the act of throwing a dart, various forces are exerted on it. As you release the dart will flex/bend, and the cordage may cause the tail of the dart (fixed in place by the cordage) to go out of line with the point of the dart, thus decreasing accuracy. Having a point at the rear of the Atlatl holding the tail of the dart in place allows the tail to rotate with the point as it flexes during a throw, maintaining the dart’s accuracy. Chris from Paleoarts explains it well in a post on the Paleoplanet site. I will be experimenting with attaching a bone or wooden spur to the Atlatl in future.
I am left handed and even though the shape of the handle is designed for a right hander (the slightly protruding piece of the handle to trap the thumb and the smoothed corner to fit in the palm) it is very comfortable still to shoot left handed.
I enjoyed making this Atlatl and shooting it over the last few years. It would be great to see some more of this style being reproduced as there are so few to be found.
Cheers
George