
The final project I was involved in during the working weekend at John Rhyder’s Woodcraft School Hampshire HQ was to build a raised firepit for the students to use. John wanted this placed inside the new cookhouse to protect it from the elements.
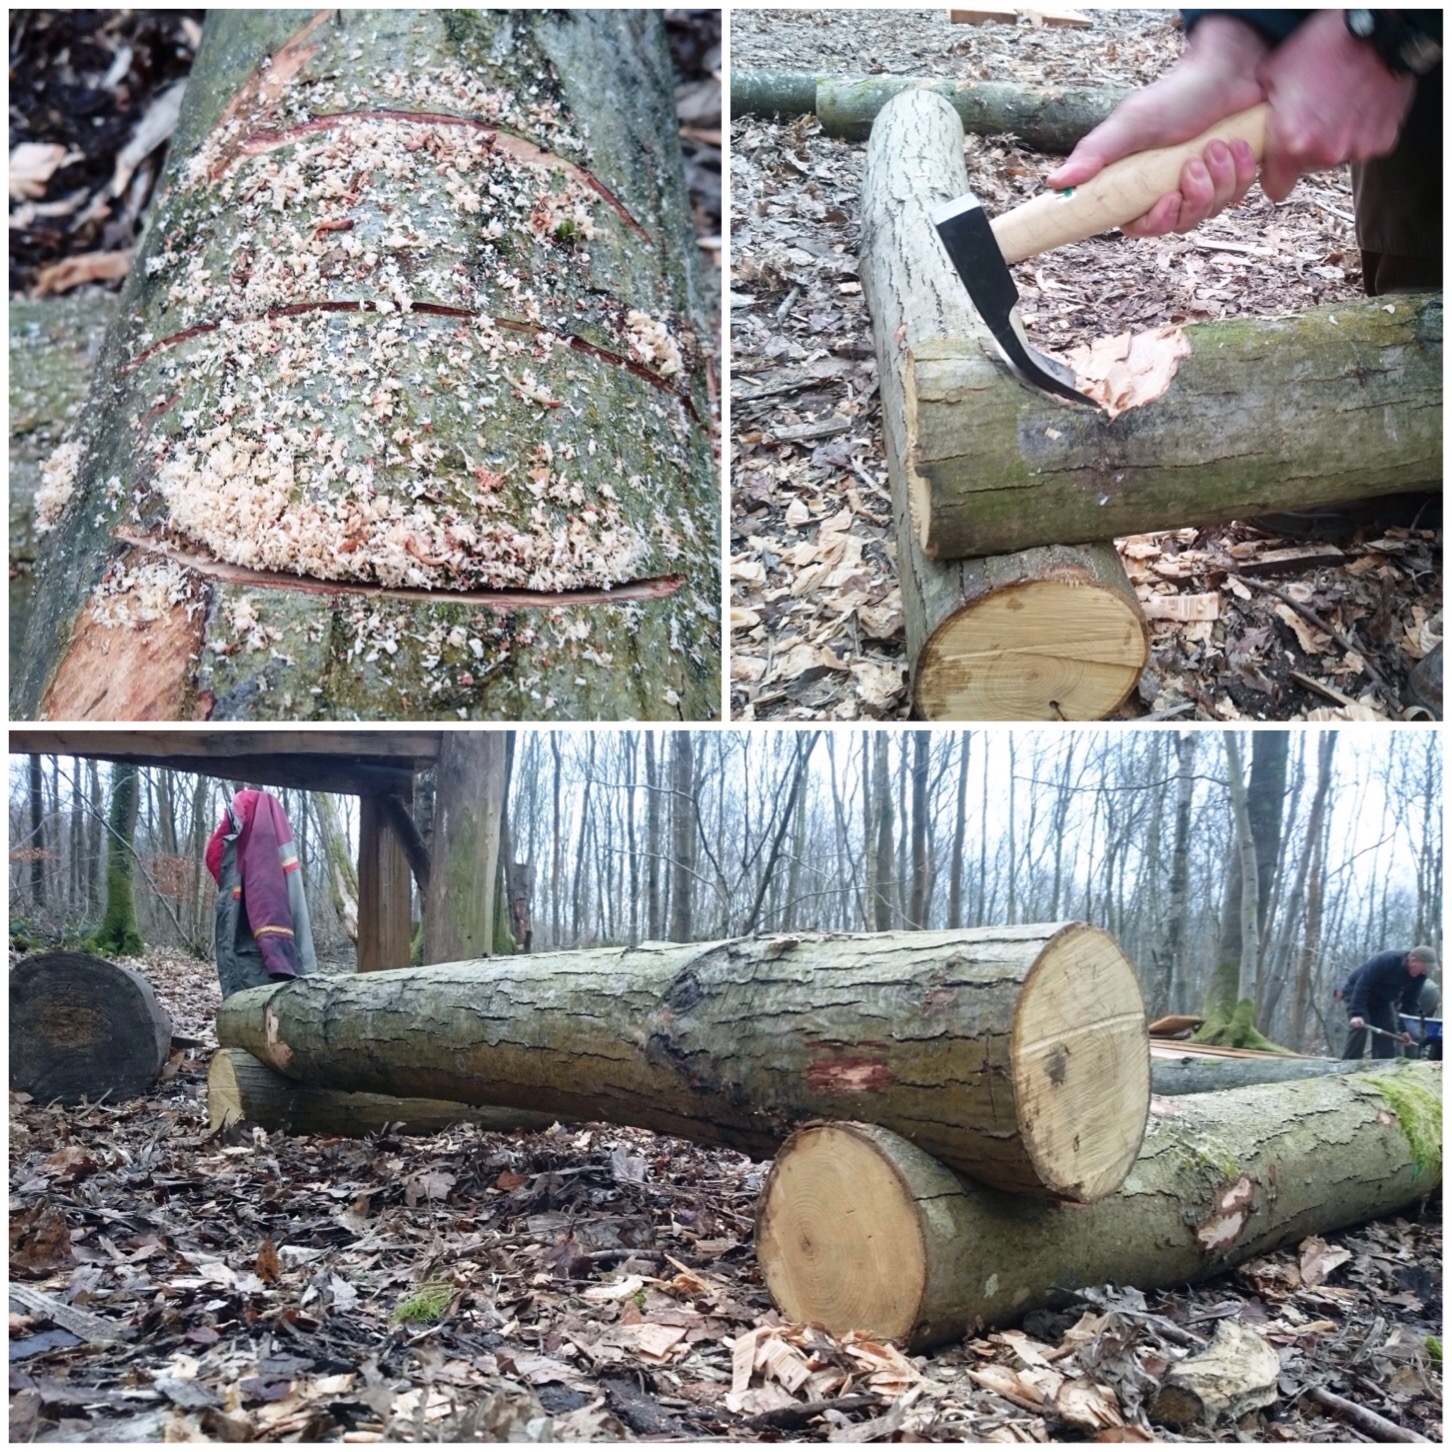
I volunteered to do this with Jumbo Jim (he flies planes) and after a bit of a chat we decided to make it out of sweet chestnut logs that had been cut down to about 5ft lengths. There were plenty to choose from so after a bit of a trimming we lugged them back to the main camp.
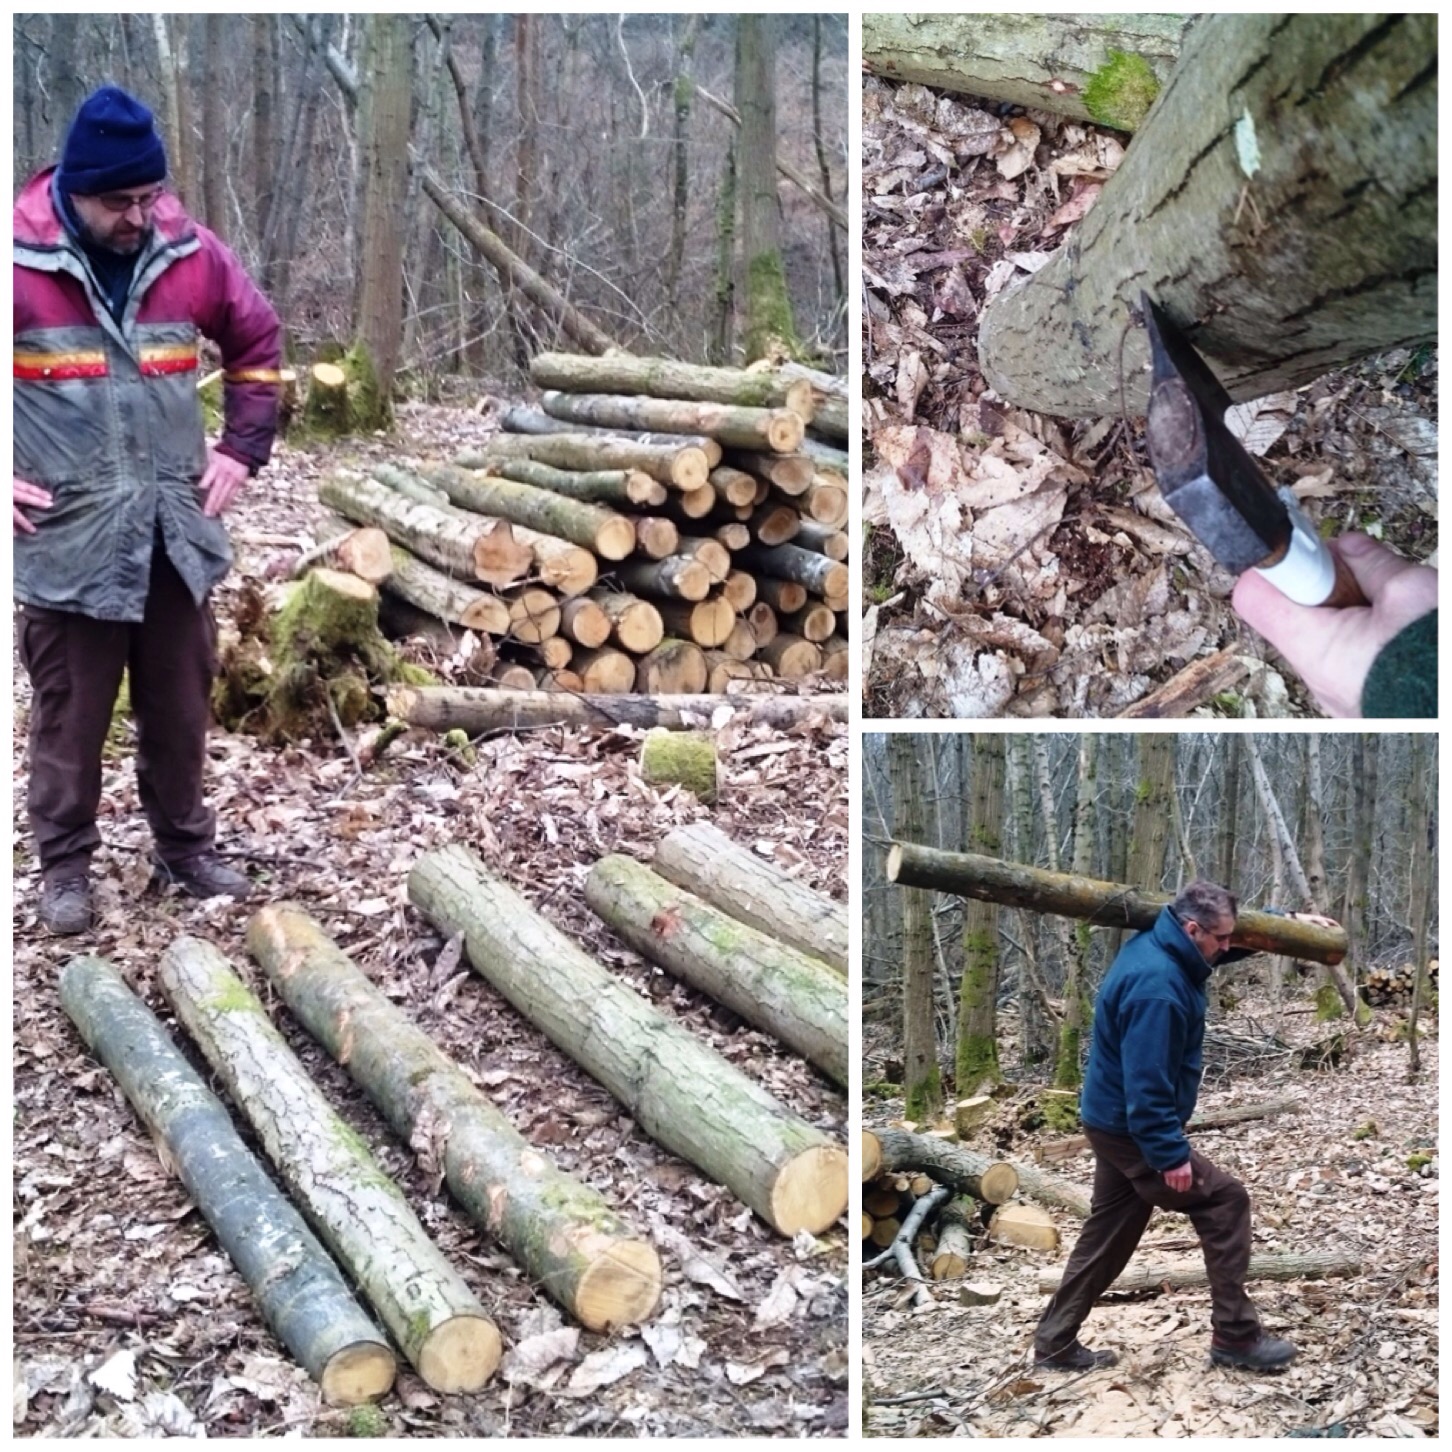
We found a flat area to work on (to make the build easier) as its final placement was to be on a slope. After we finished the build we moved everything to its final location in the cookhouse.
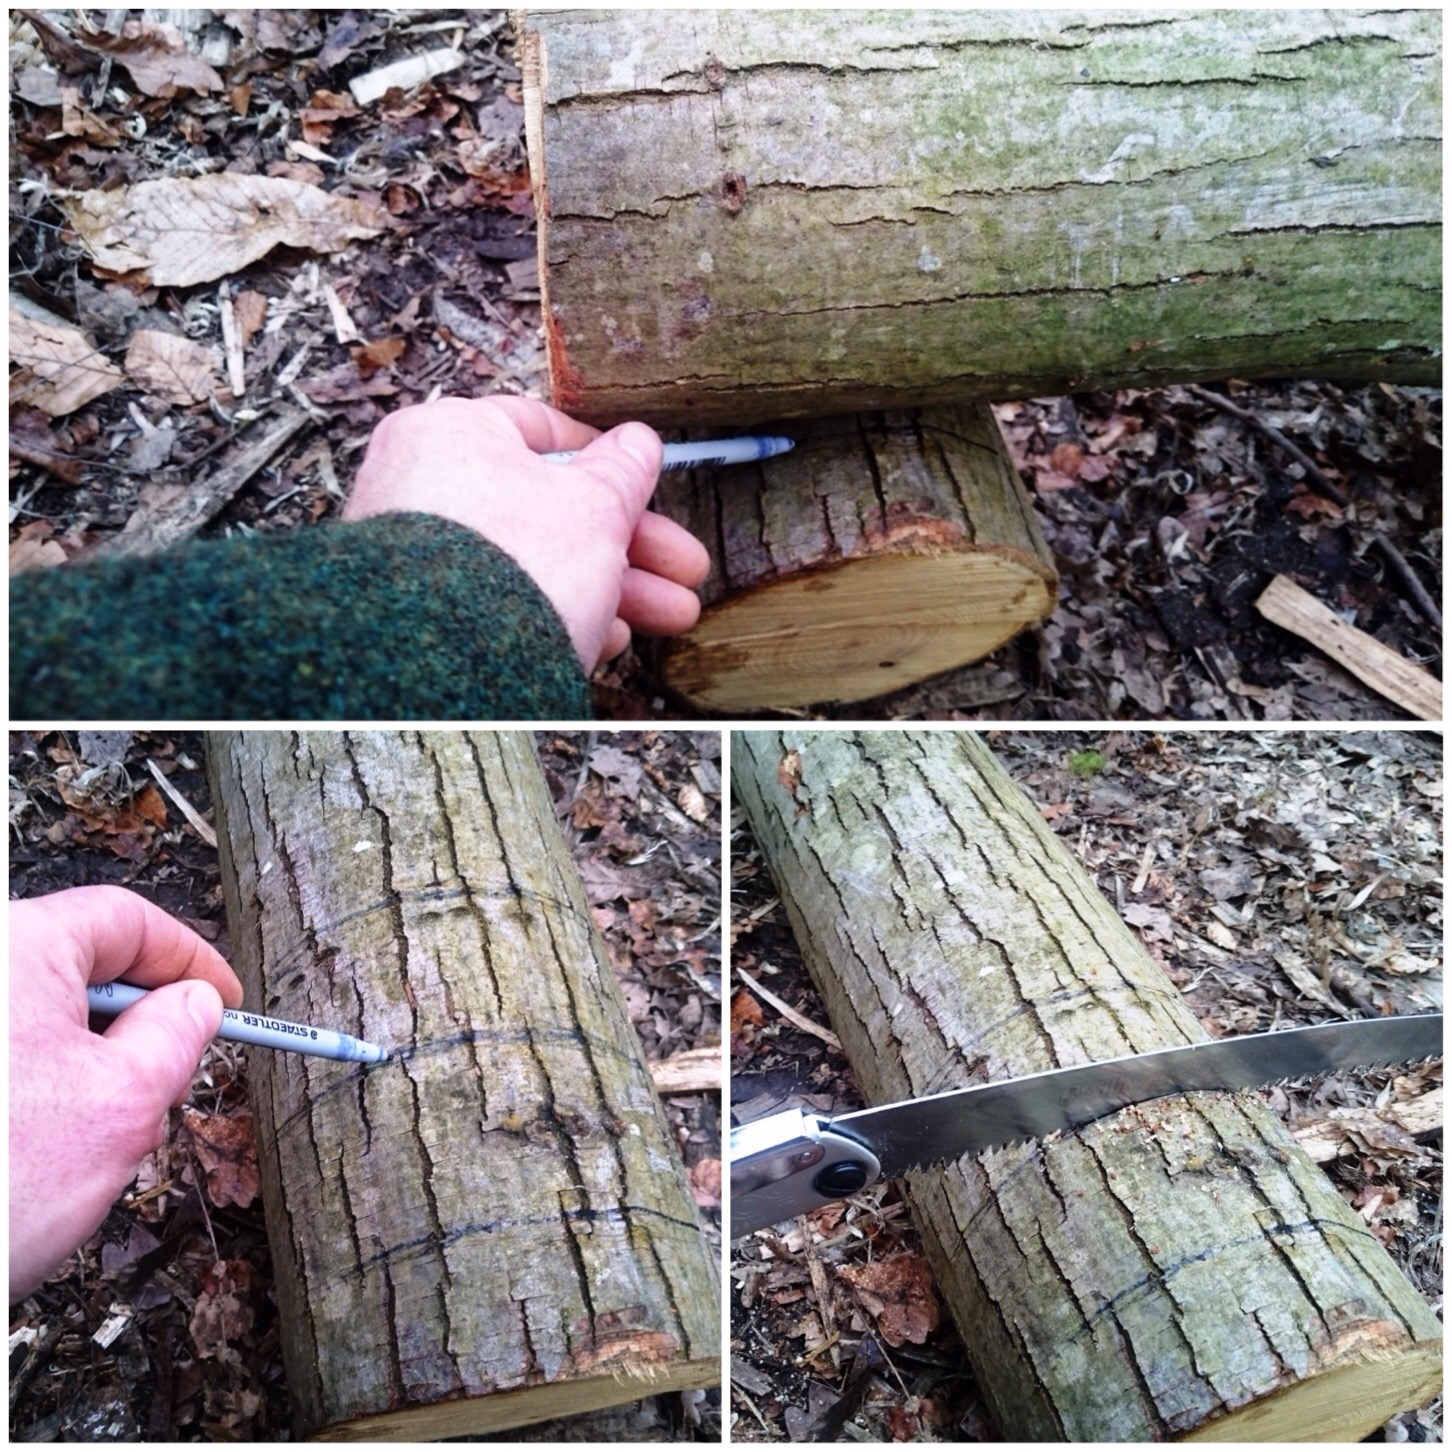
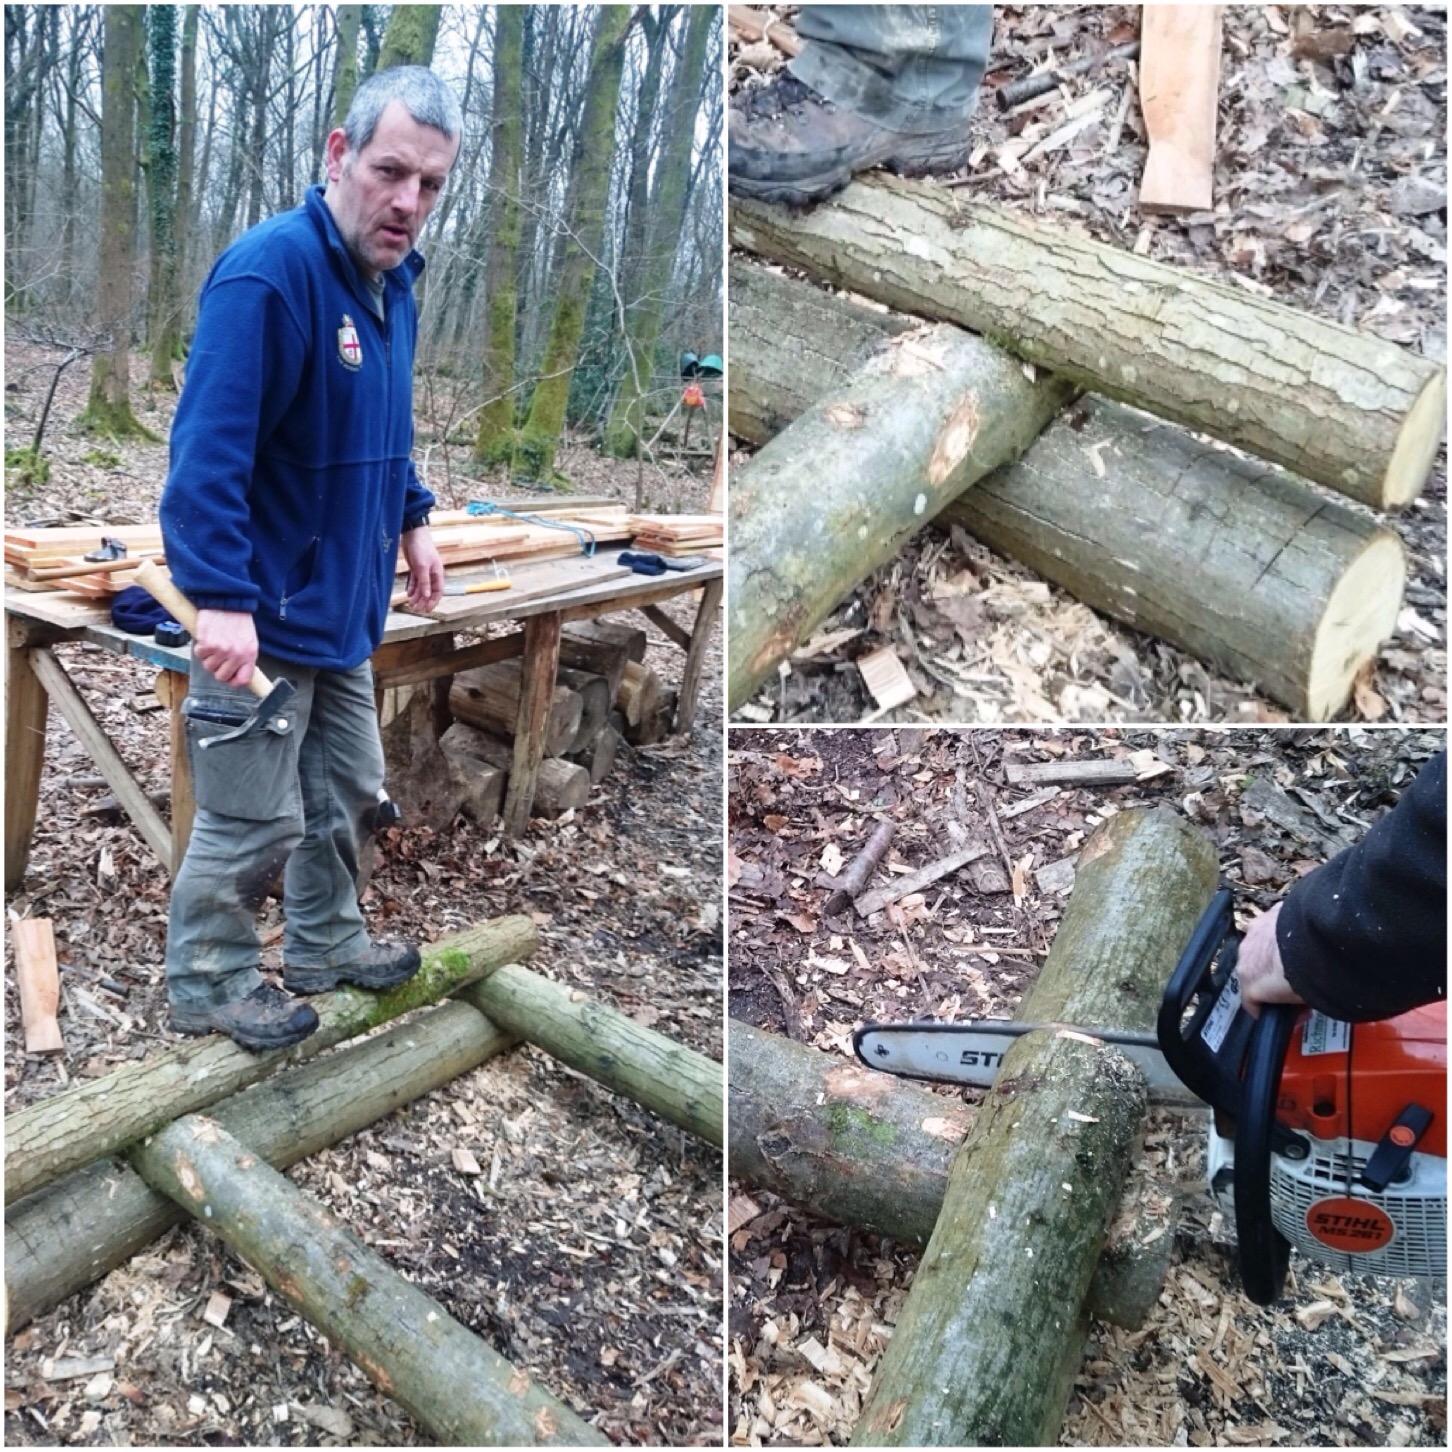
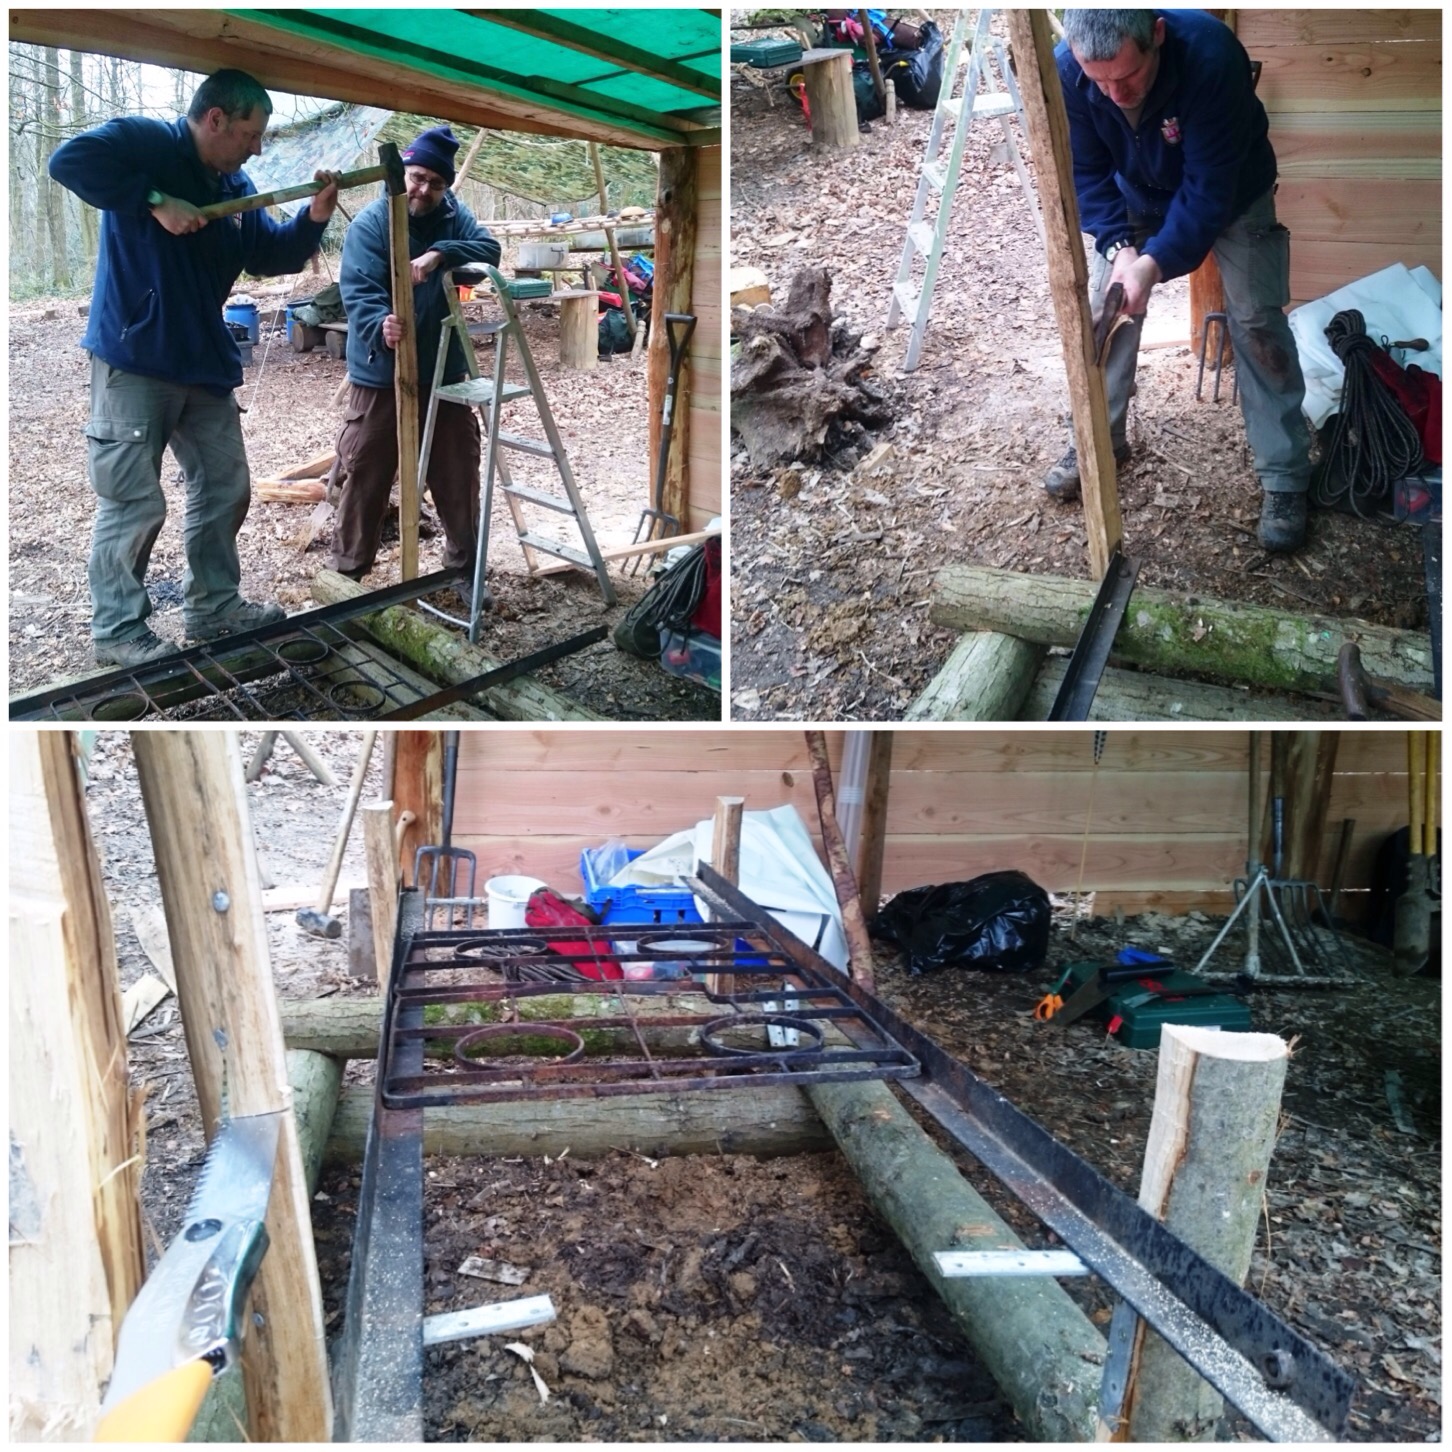
We decided to lock the logs together by carving notches out near the end of each log to form a square. We used each log as a template for marking another one out before sawing in some stop cuts.
The axing and adzing out (these were the tools we had available) did not take long. I thought we might need to go for a square cut for each notch but we decided to try a curved notch at first as they are quicker to carve. Even though the curve would not lock the logs perfectly the curved notches worked surprisingly well, with no movement on the logs when they were locked together.
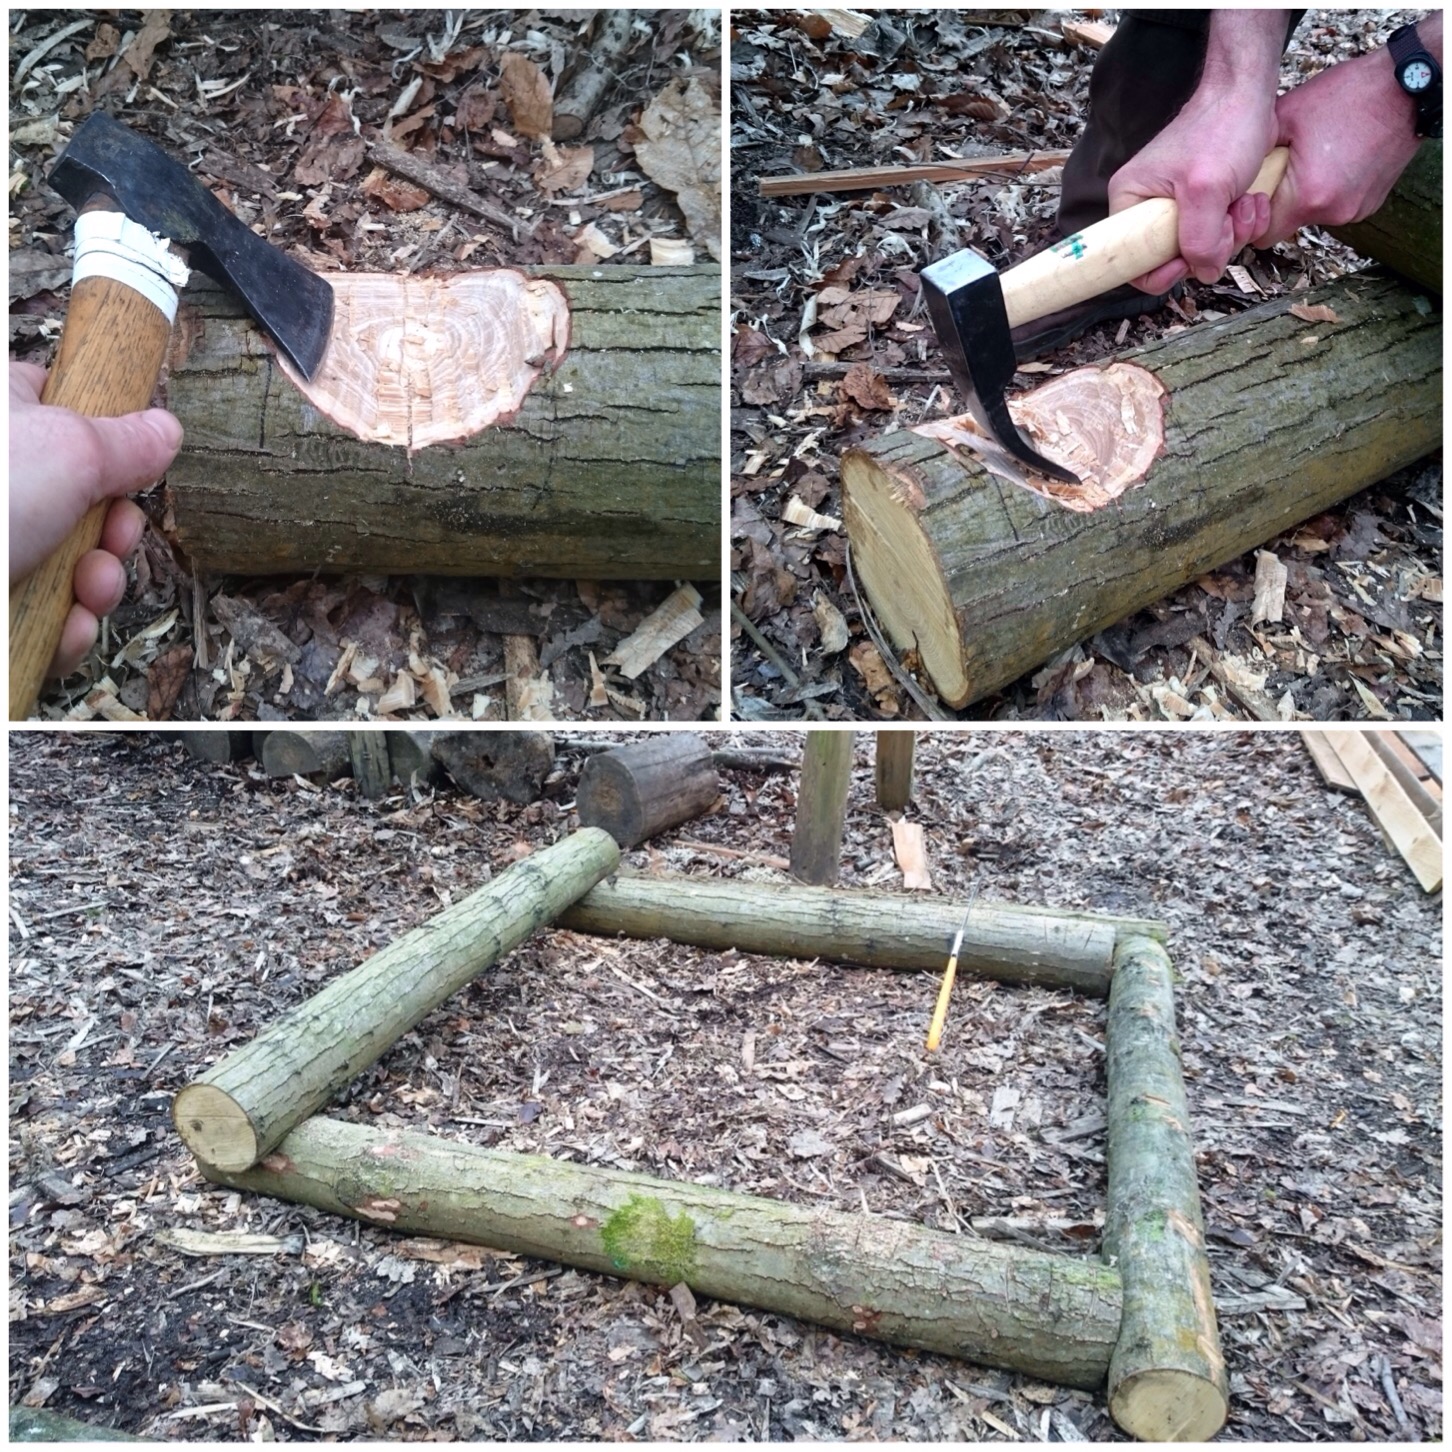
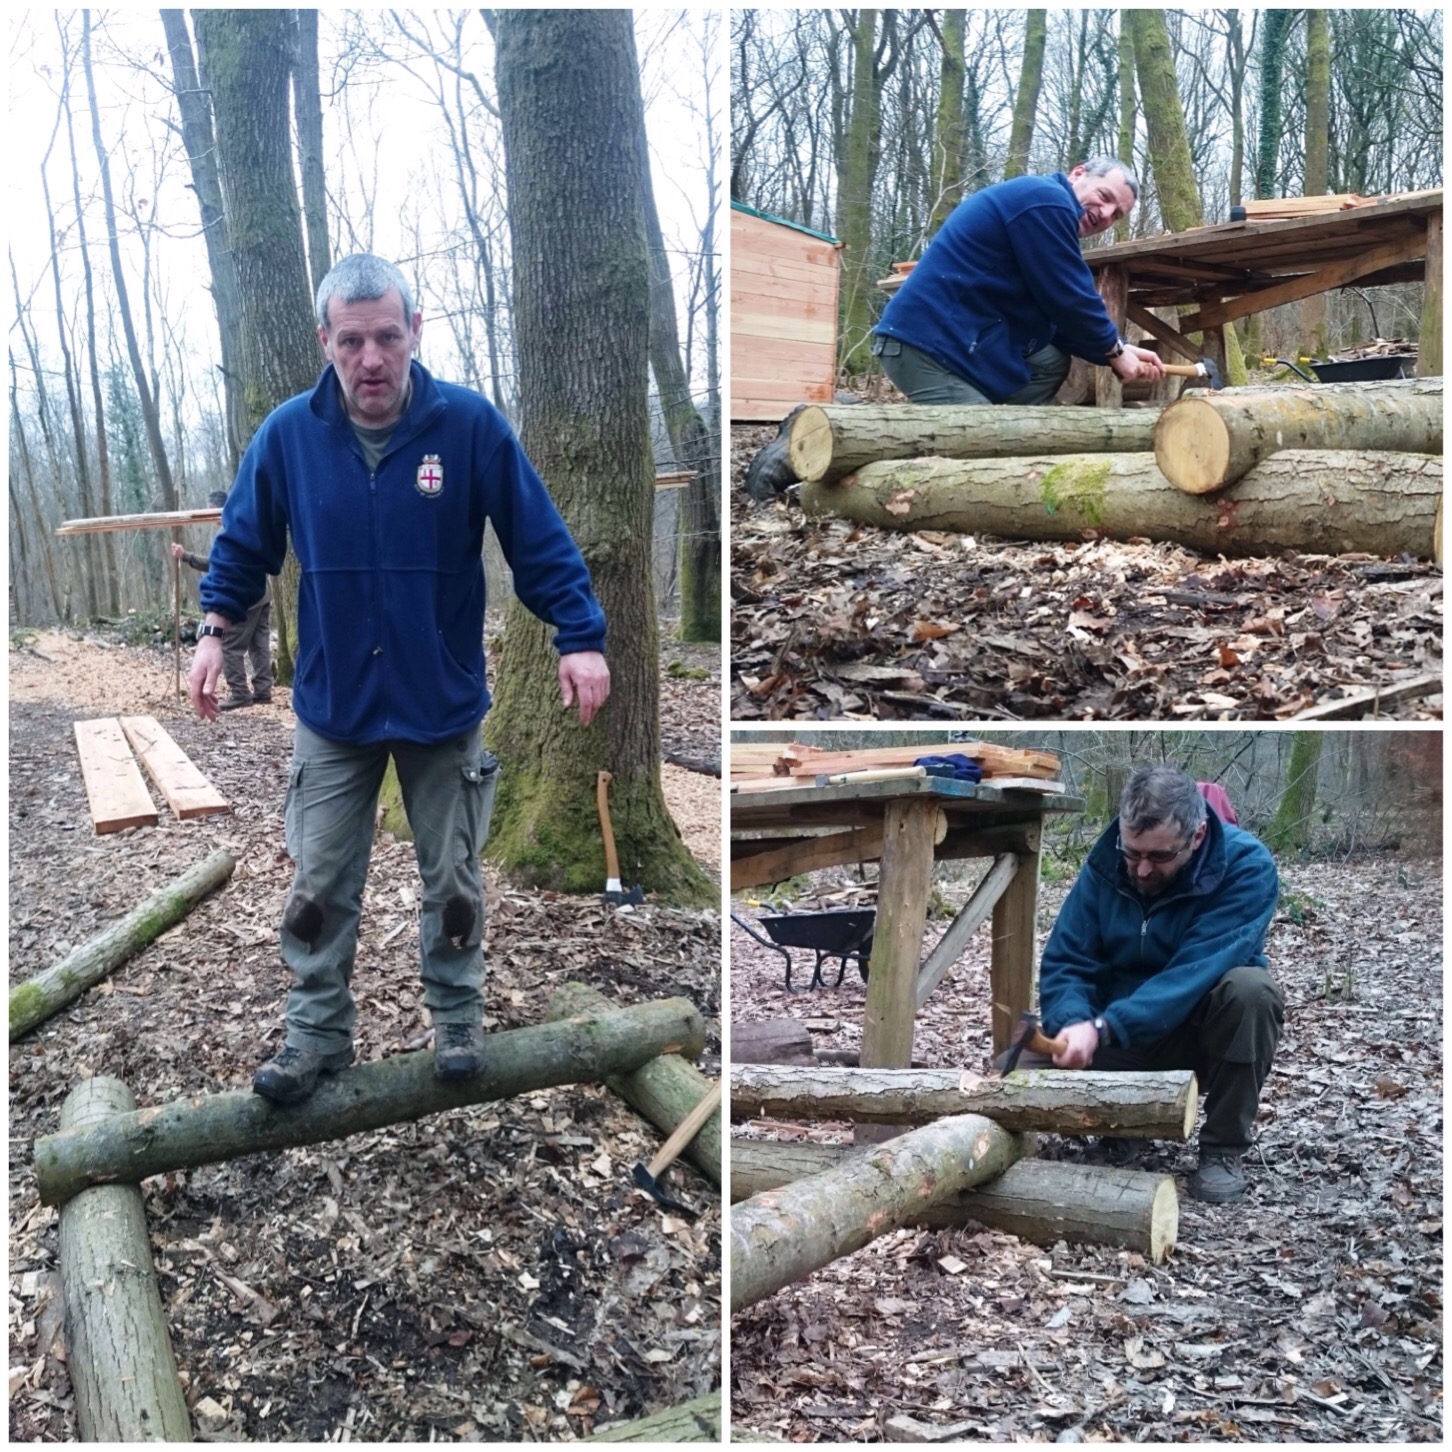
Once we were happy with the style of the notch it was then just a case of repeating this on each end of the logs so that everything locked together well.
I tested the strength of the locks between the logs by walking and jumping (with the odd jig) on each level as we built it up.
Initially we’d planned a 5ft square but after discussing this with Caron and John we went for a 5ft by 4ft rectangular shape. This was to allow the students easy access to most of the firepit without having to lean too far to reach the centre. You can see the excess wood at the ends in the bottom right picture that needed to be trimmed off.
After some more notch cutting, locking together and jumping around we got John to trim the excess wood off with his chainsaw.
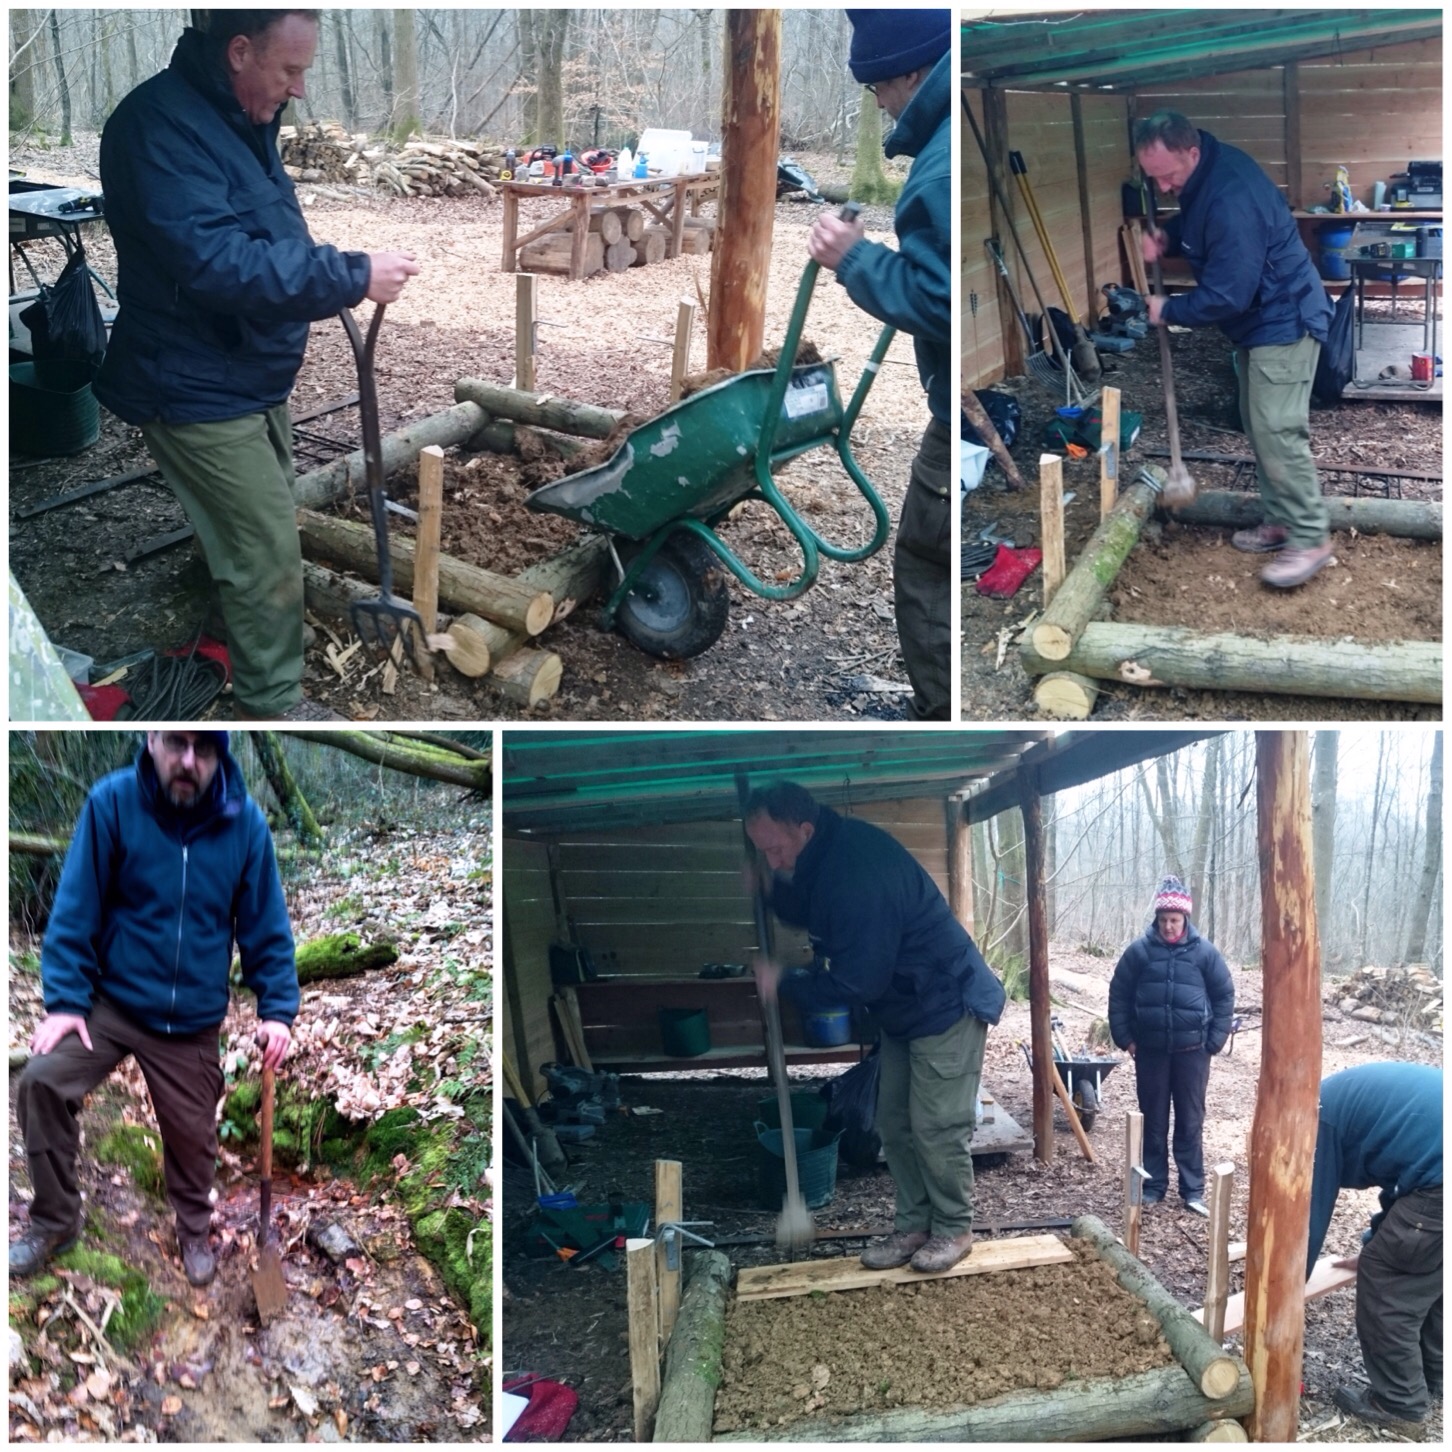
We positioned the firepit where it was to sit in the cookhouse and dug out a small trench on the upslope section to flatten the firepit out a bit and lock it in place. On reflection I think we could have dug the trench a bit deeper but the depth we dug held that top log well enough even though the firepit was not perfectly flat..
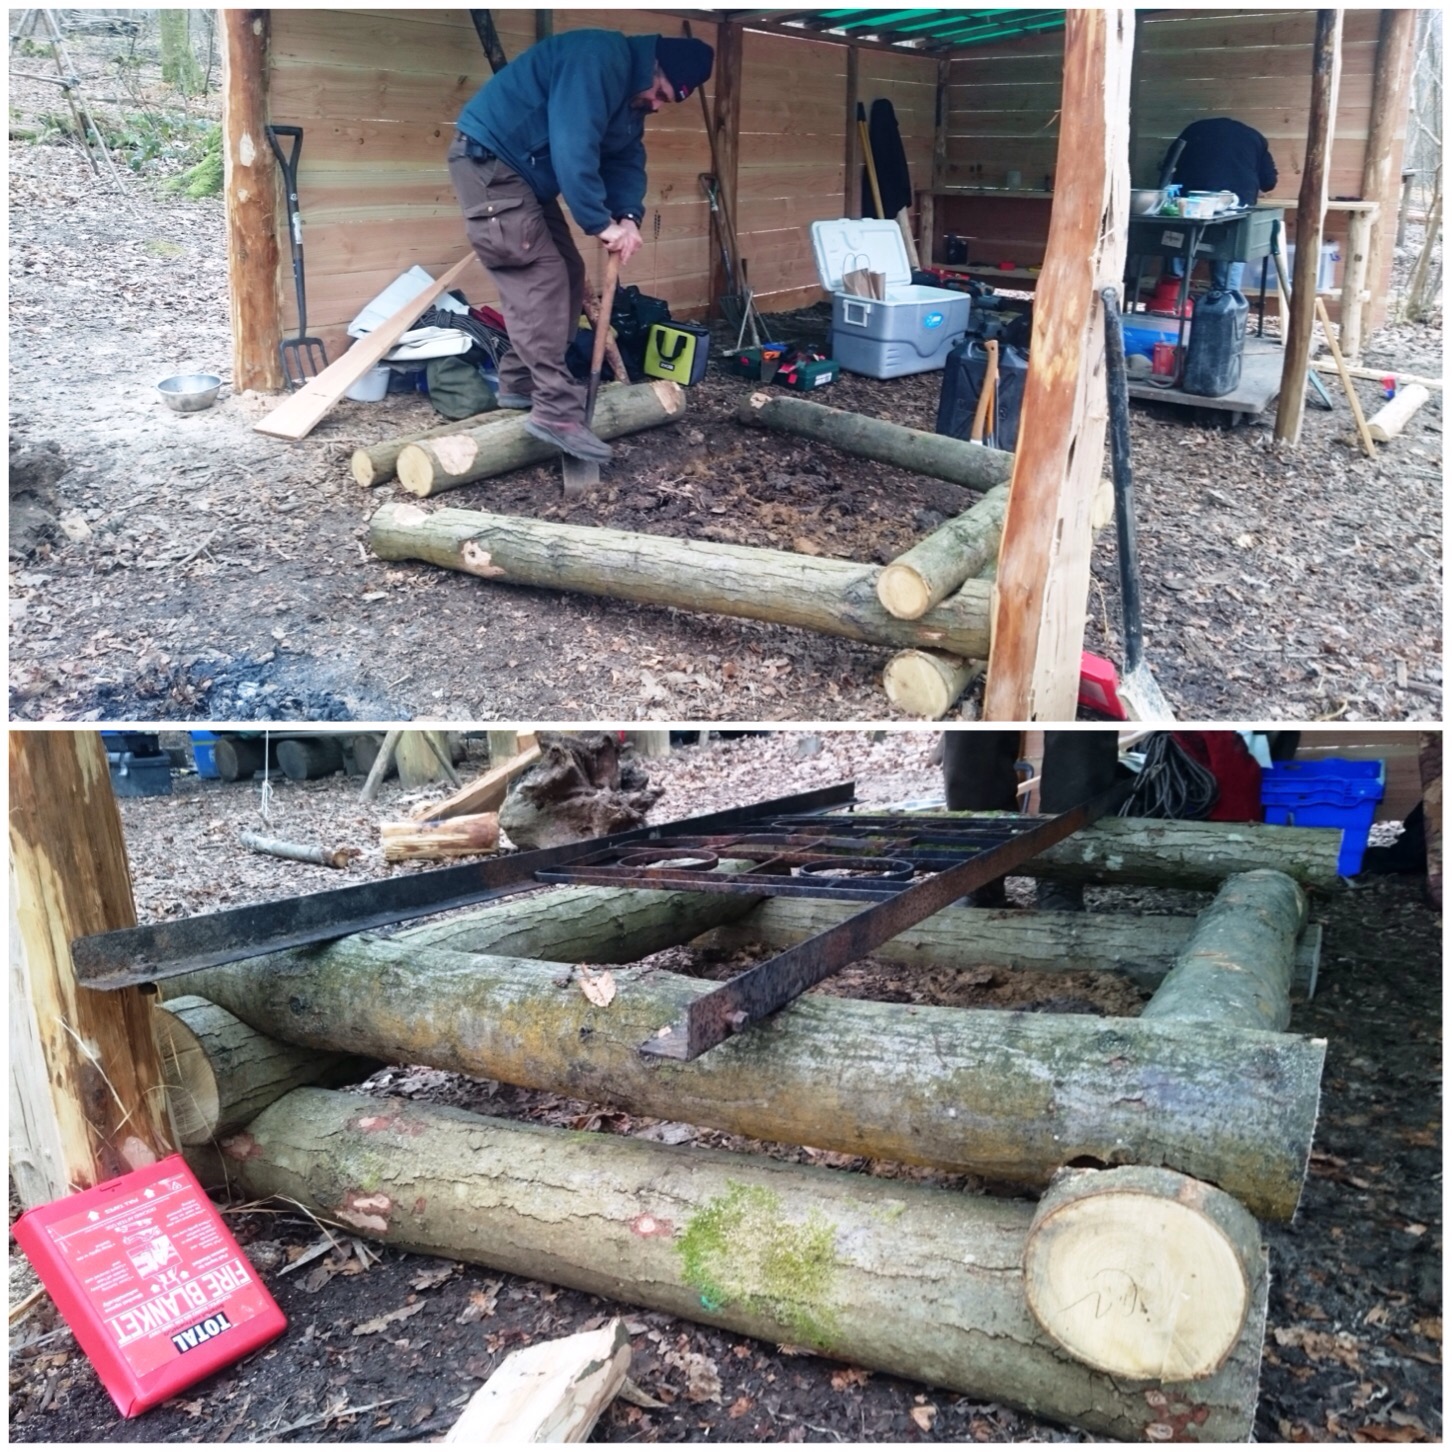
When we had locked all the logs into place we had a chat with John and agreed that we would drive in four stakes to act as supports for the grill. We found four brackets to attach to the stakes to hold the bars of the grill in place and left enough room on the stakes to add another four brackets so the grill could be raised (we left John to attach these later when he got some more brackets).
The filling in of the firepit was the easy bit as we simply dropped about 5 wheelbarrow loads of earth into it. Nigel was on hand while we dug the earth to tamp it all down.
The top layer of fill was taken from the edge of a small stream where there was a high concentration of clay. I hope that over time this layer of clay will harden and make for a good surface to light a fire. I suggested to John that as the top layer dries out he could add a few more layers of clay to build the surface up a little more to be in line with the top of the logs.
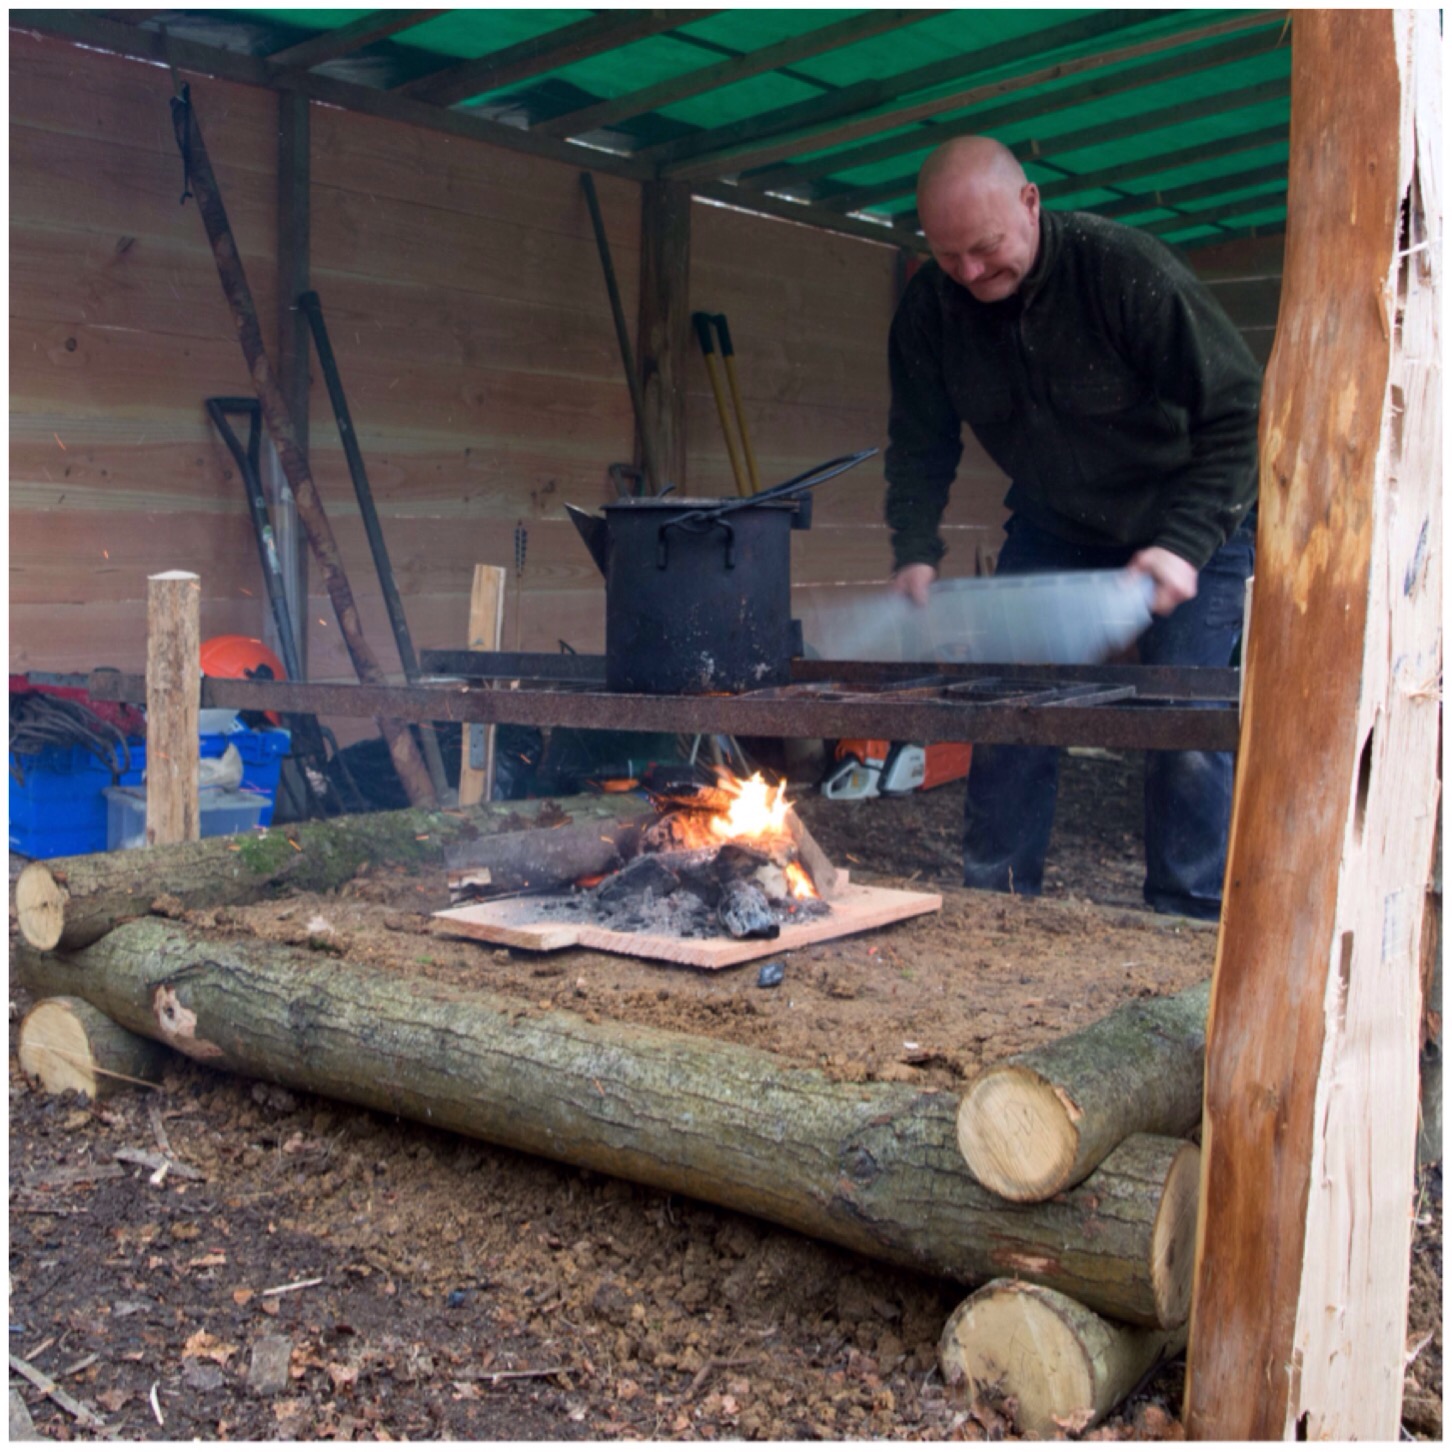
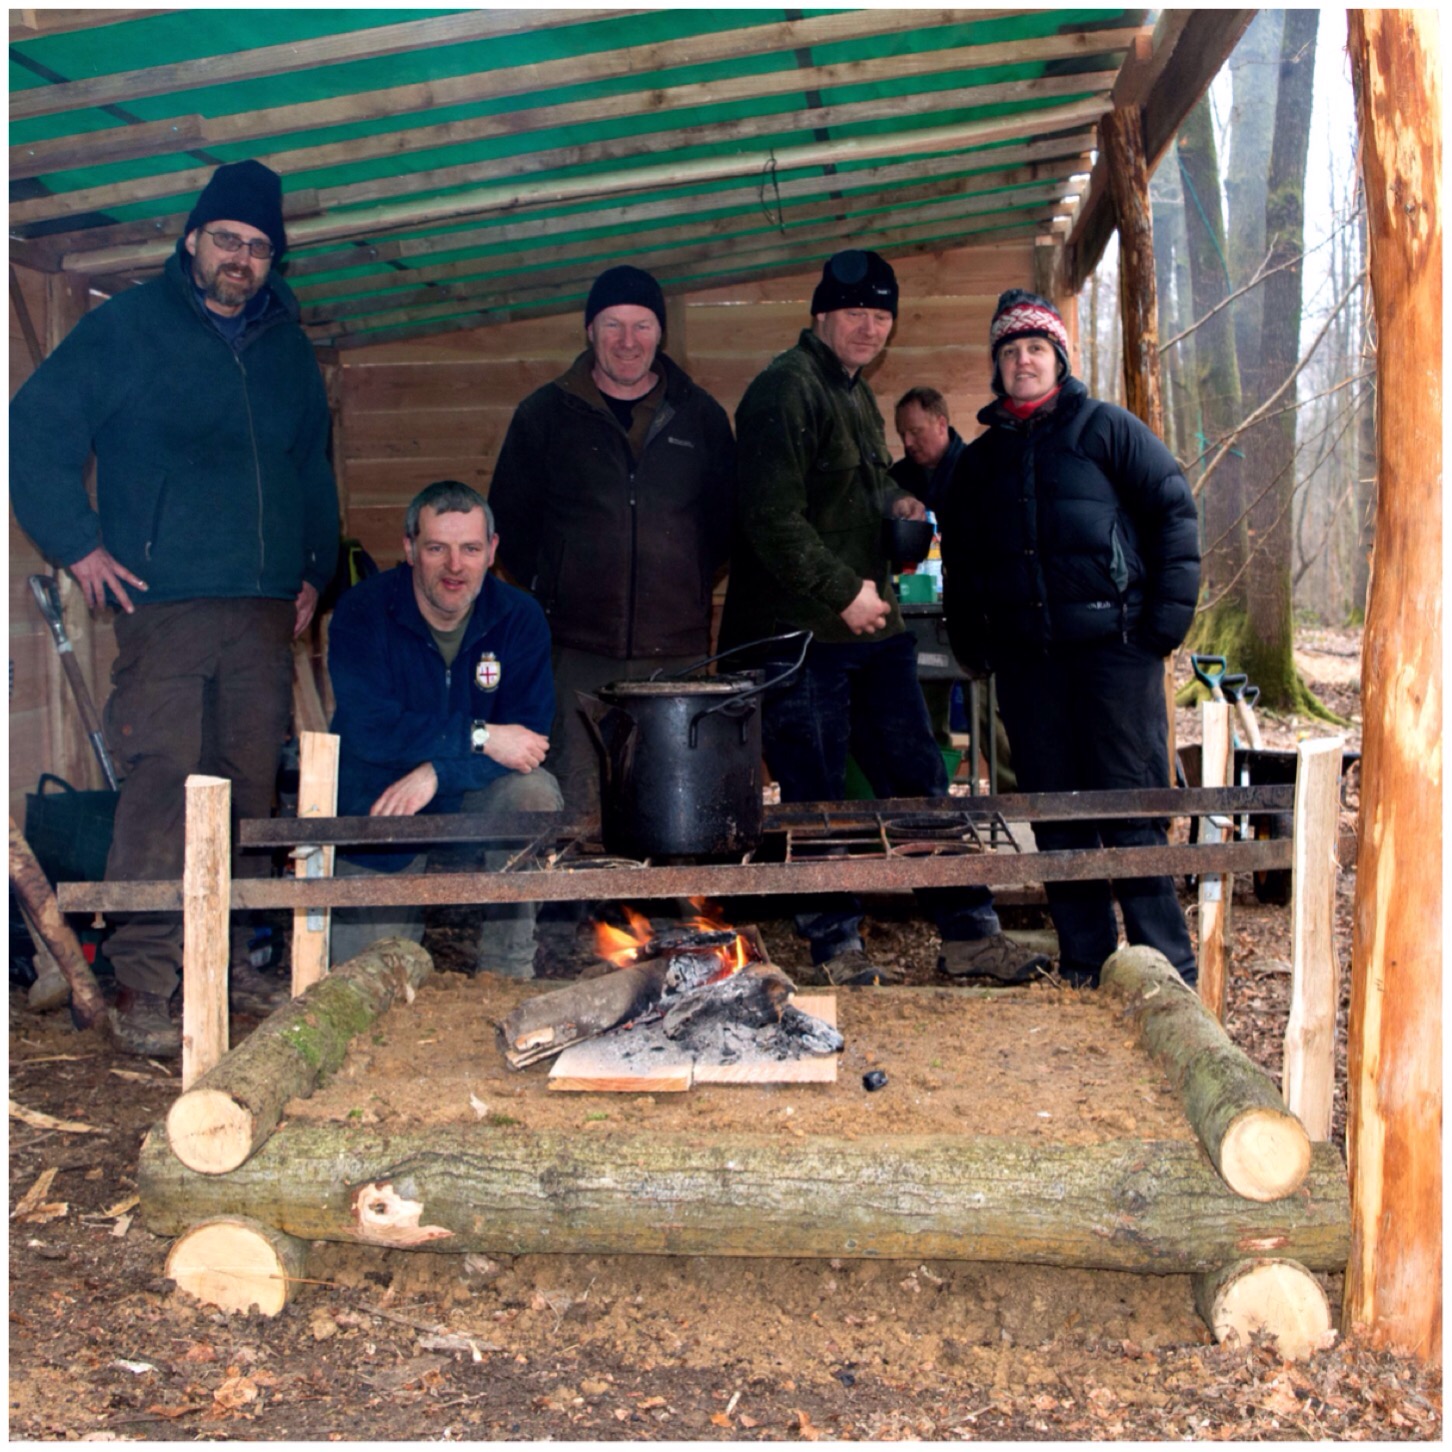
When we had finished tamping the soil down it was just a case of putting the grill back on and lighting a fire. I placed some dry off-cuts over the damp soil to give the fire a good chance to get going. With a little bit of waftage from Kev it was soon going nicely.
As soon as John adds a layer or two more the surface will get a bit closer to the grill for a fast cooking time and when the other brackets are added higher up they’ll allow for slower cooking too.
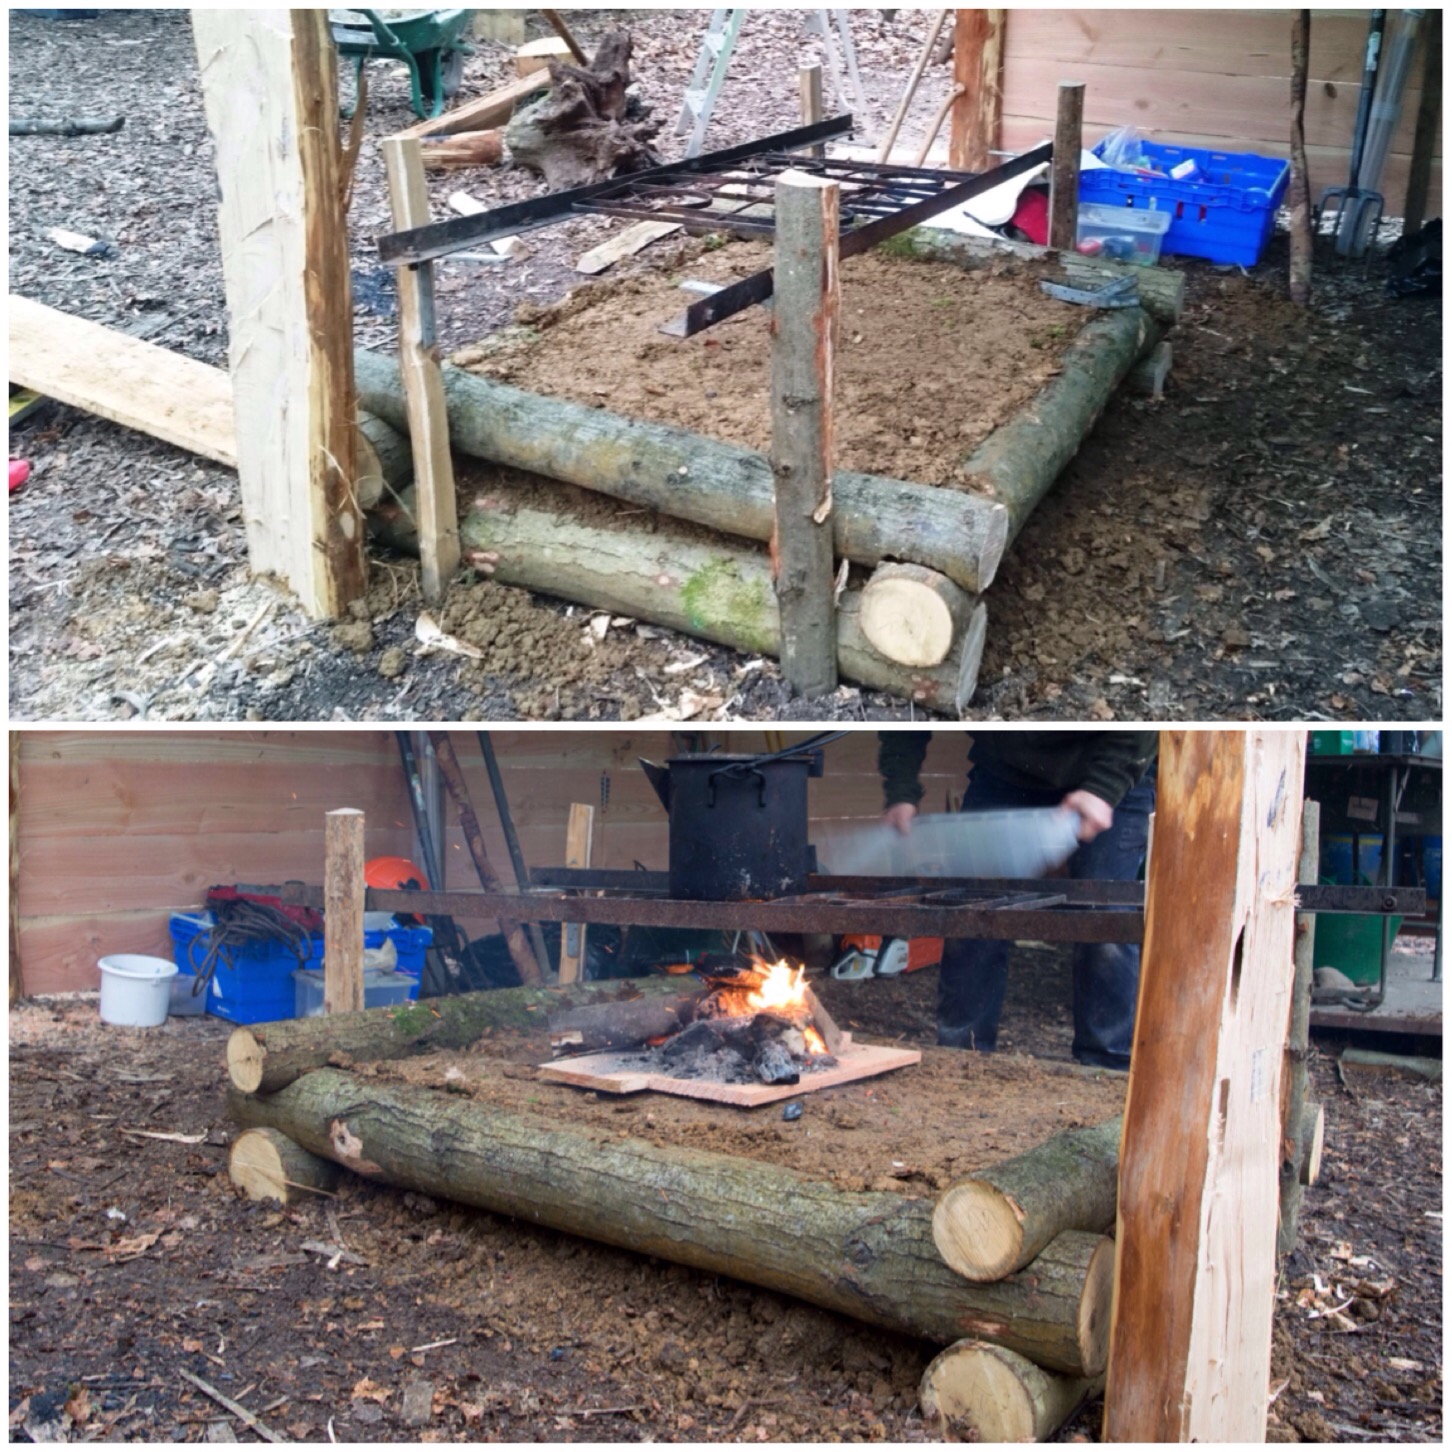
The grill is as flat as we could make it although it appears to slope, because the ground isn’t level.
I had a great time building this firepit with Jim, figuring out how it would all link together and finally putting it all in place with the grill on top.
There are two more posts on projects we did that weekend. They are:
Constructing the Camp Cookhouse
Cheers
George