Last August I had a fantastic 5 days helping my friend Fraser Christian of Coastal Survival at the 2017 Wilderness Gathering. I did a heck of a lot of video this year so here is a short film of some of our antics 🙂
I still have another video to put together of the Wilderness Gathering as a whole so will be back with some more soon.
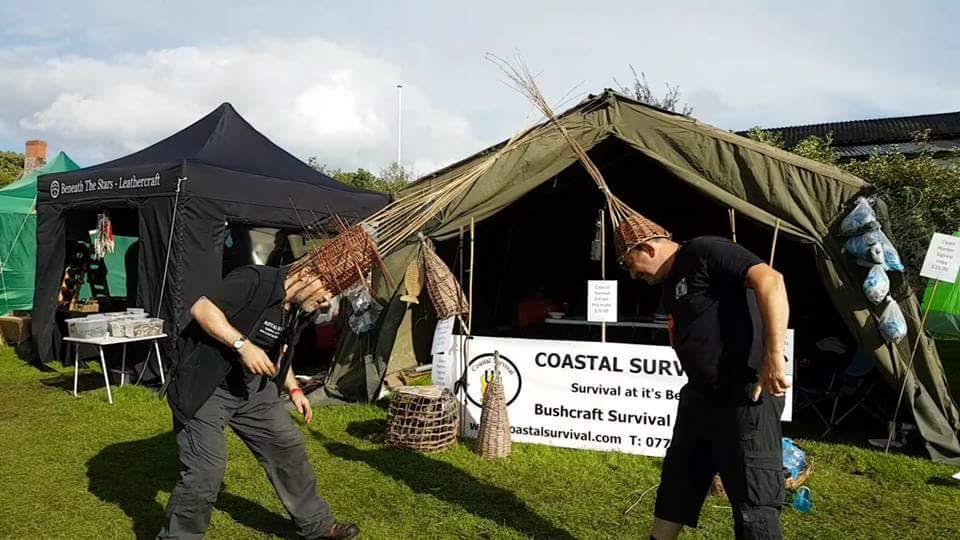
These traps are not just for show but tools for living as comfortably as you can on the coast
Last August found me at the Wilderness Gathering here in the UK with my good friend Fraser Christian of Coastal Survival. Fraser ran a Masterclass at the Gathering for about 8 people in how to make a stick fish trap.
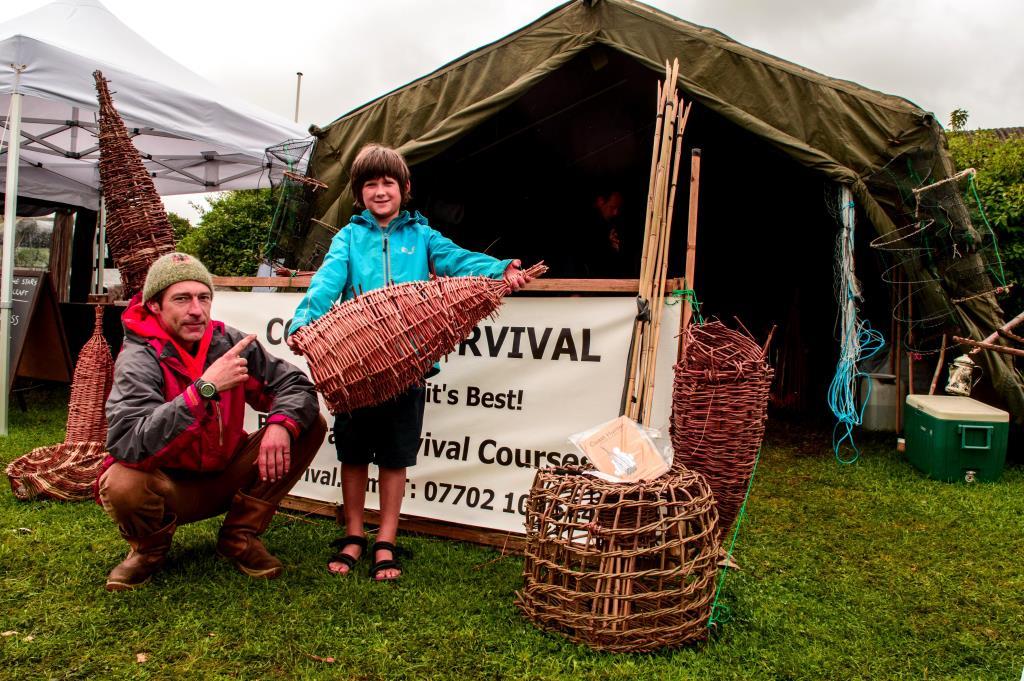
Willow Fish Trap
Fraser has a couple of books out now called Eat the Beach and Coast Hunter (he is currently working on his third book called Castaway on the Seashore). In the book Coast Hunter Fraser goes into detail on many coastal hunting techniques (including making this trap) and I encourage you to get a copy of these books if you are interested in the art of coastal survival.
Fraser uses this type of trap on the coast weighted down with stones in the inter-tidal zone to catch fish, crabs and lobsters. You can make the trap with many different woods found in the woods and hedgerows – just make sure it is pliable. As he was running a class for 8 people he brought in some commercial willow from Musgrove Willows.
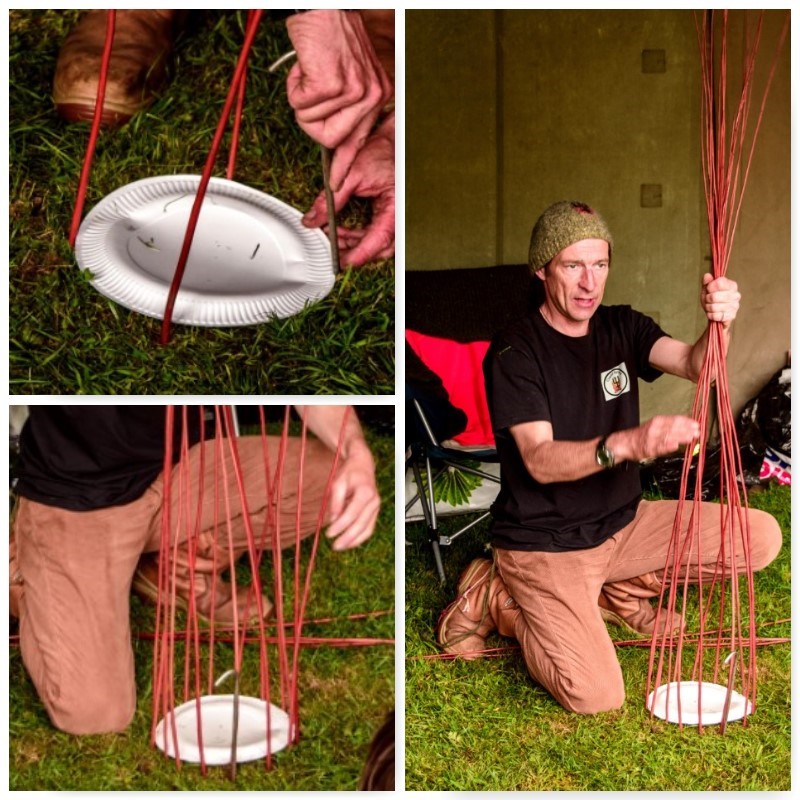
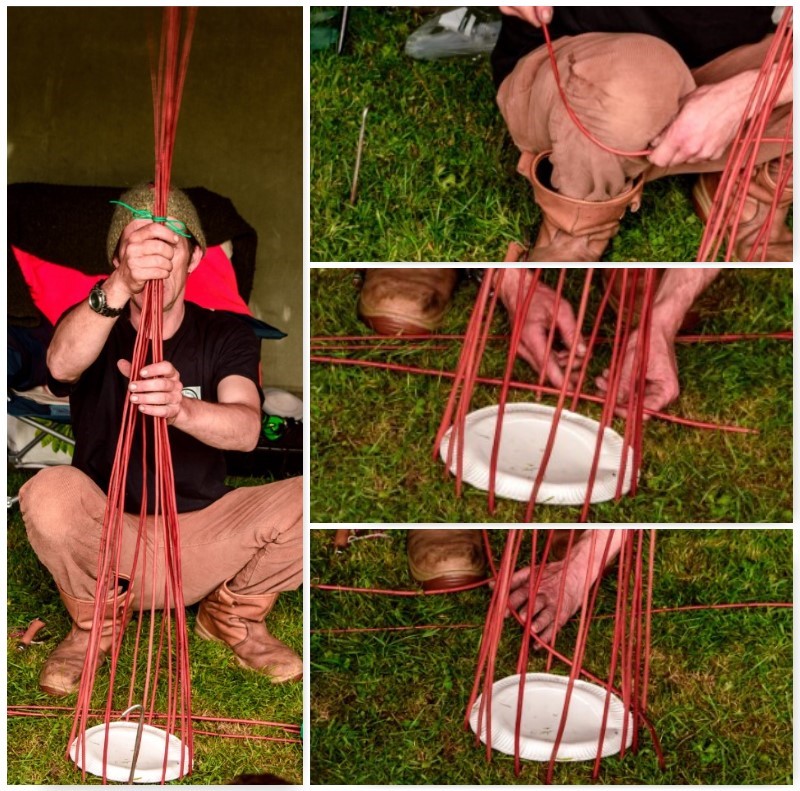
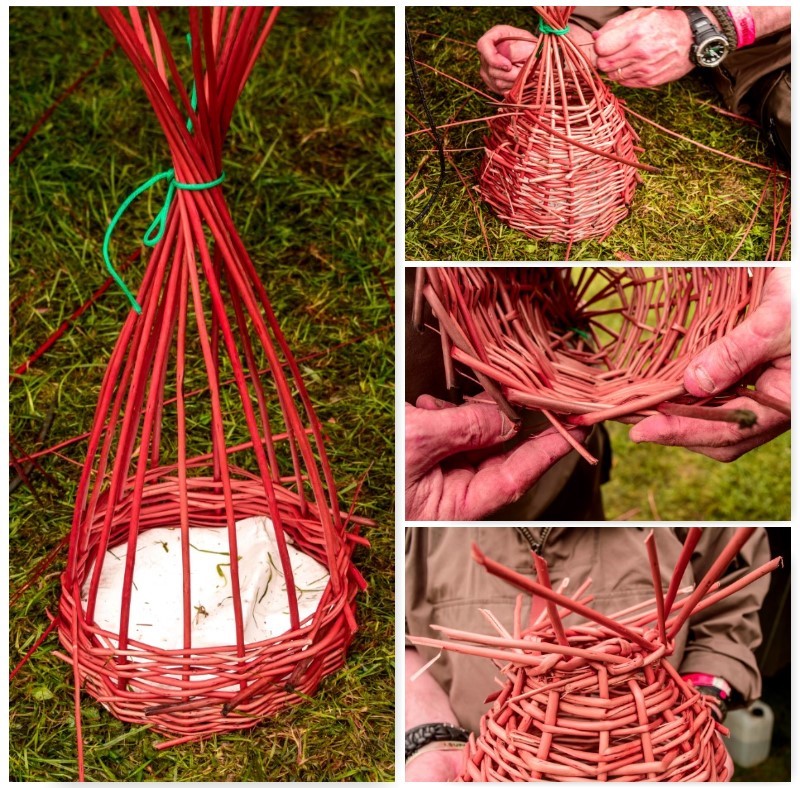
Step 1 – Set Up
I will go through the steps as I saw them on the day but for more detail on this trap have a look inside the Coast hunter book. To form the shape Fraser used a paper plate and a tent peg to create a circle of willow. He tried to maintain an even distance (about two fingers width between each piece of willow) as he inserted the willow (thick ends) into the ground, They were pushed in about 10cm’s and the tent peg really helped as the ground was hard.
Set Up
Once the willow was secured in the ground he tied of the top ensuring the willow sticks all came in at the same angle.
Step 2 – Weaving
The willow had been left overnight in a lake to ensure it was as pliable as possible however to make sure Fraser pulled each piece of willow he would weave with around his knee. This makes the weaving process so much easier and less tiring on your hands.
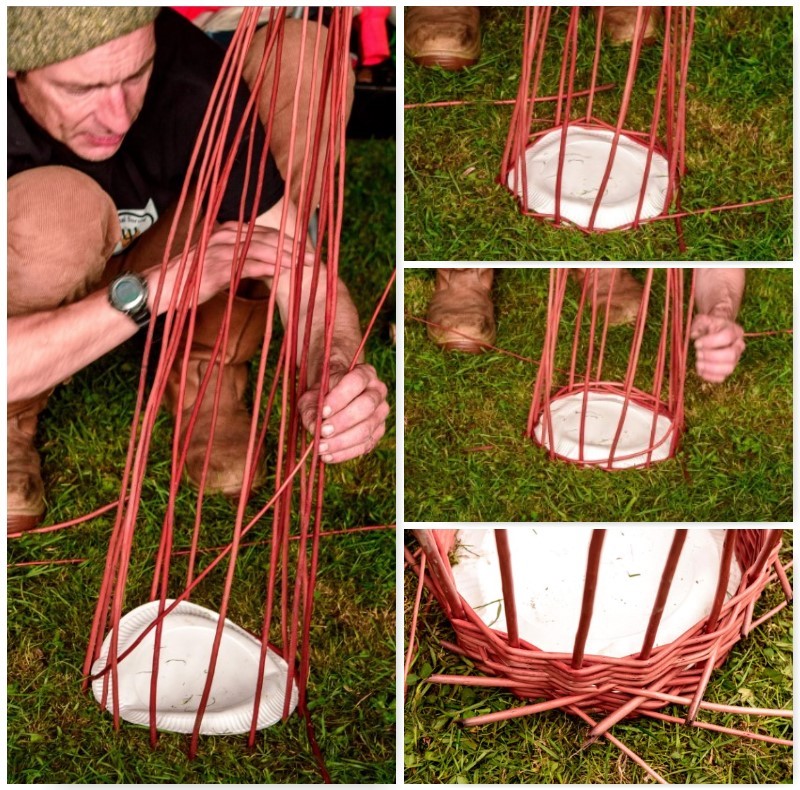
Starting with the thick end of a piece of willow he threaded it in and out between 4 or 5 uprights, Once that was secure he raised up the thinner in to carry on that in and out weave (raising the tip of the thinner end really makes the weaving easier).
Weaving
In the picture in the bottom left you can clearly see that raised thin end being woven in and out of the uprights. He stopped the weave when he judged that part was too thin (the excess would be trimmed off later).
Once one piece was finished it was a case of repeating the process with a new piece of willow but from the next upright along. You can see in the picture in the bottom right below these staggered start points. Frase ensured that the ends stuck out proud so that they would not slip off the first upright while weaving. These would be trimmed down later.
Staggered
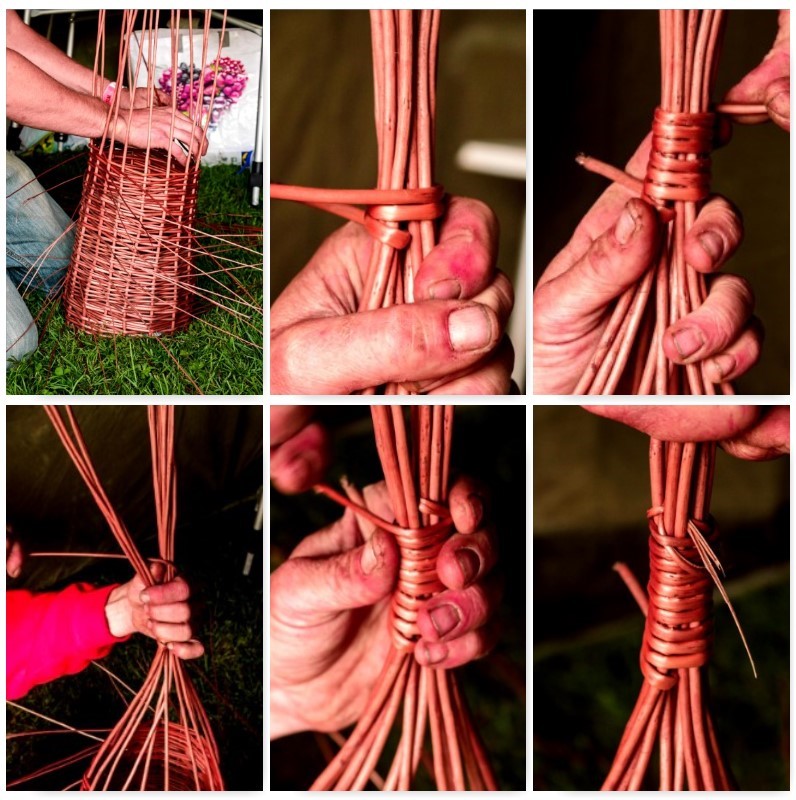
Step 3 – Wrapping the Top with willow
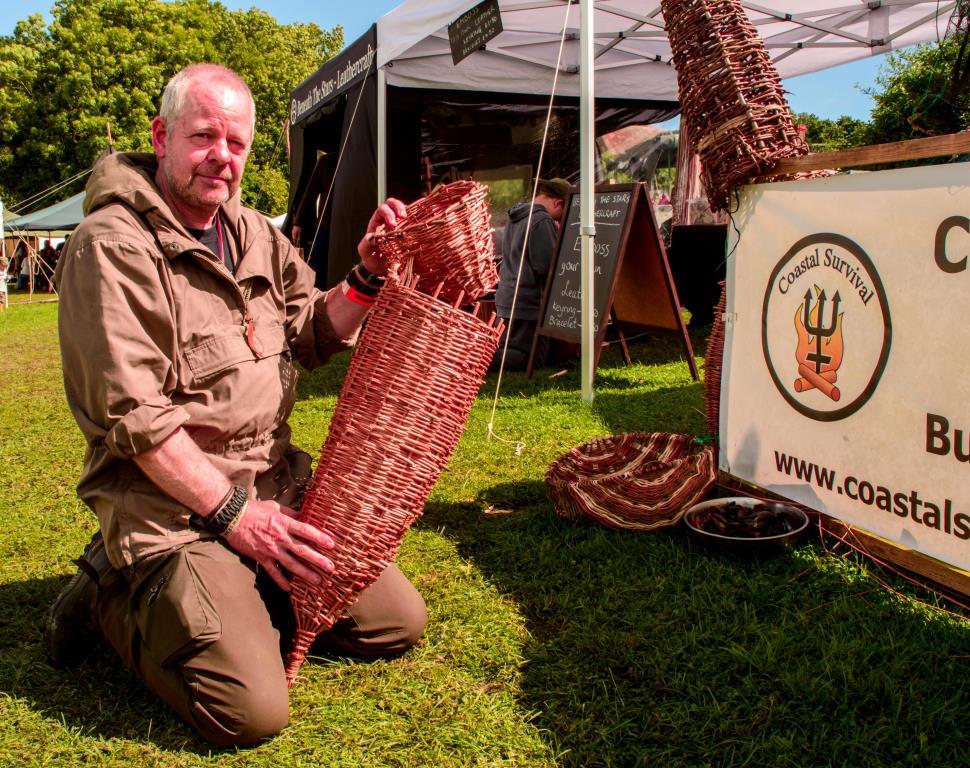
Over time the trap started to develop (a height of 50 or 60 cm’s) and the string at the top was replaced with willow. I have put the steps for you below. The thick end was slid through the middle of the uprights then wrapped tightly around the uprights for about ten turns, through the uprights again, a couple more turns and back through once more to finish.
Tying off the top
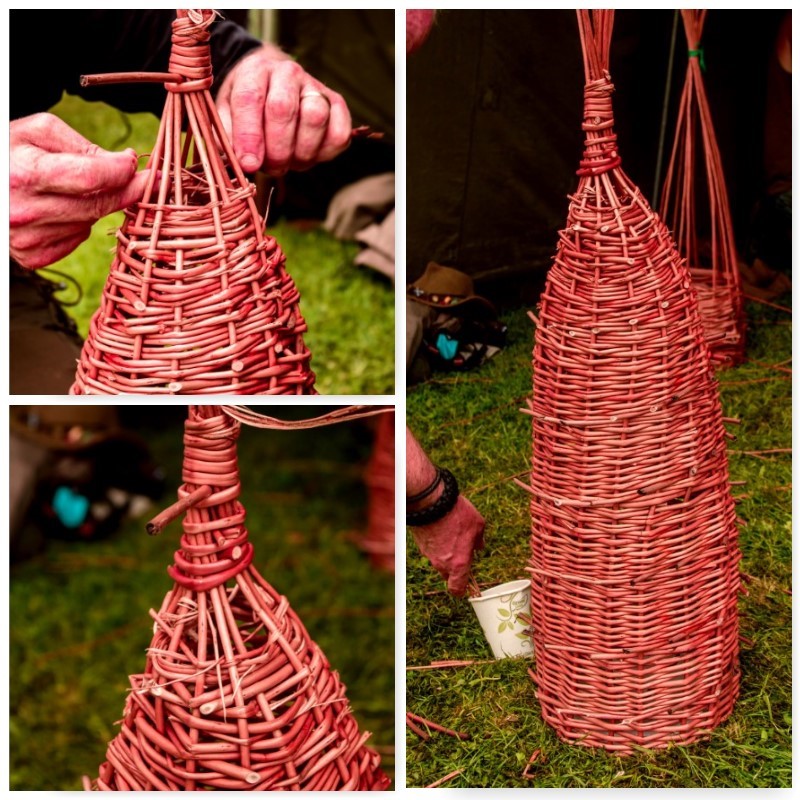
Step 4 – Closing the Gap
Finishing the top section can be quite difficult as you have less room to push the willow in and out of the uprights. Make the willow as pliable as possible and experiment with smaller thinner pieces and with starting with the thin end and threading through the thicker end.
Depending on what you are hoping to catch will decide how much of a gap to leave but ideally the gap should only be a couple of centimetres.
Closing the gap
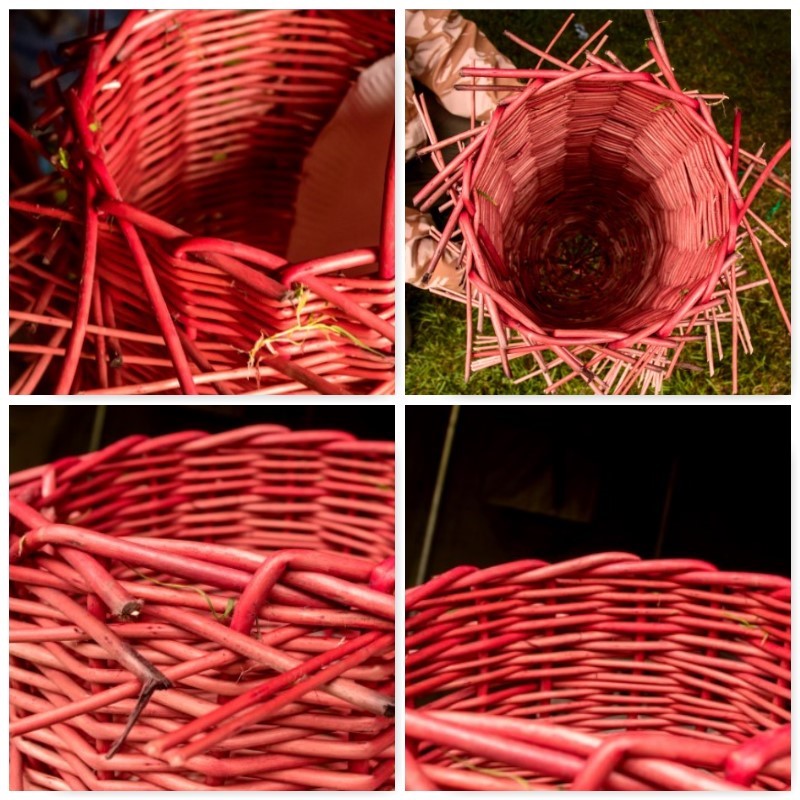
Step 5 – Locking off the Opening
When the top has been finished pull the trap out of the ground slowly and it is time to lock off the uprights around the opening.
Take one upright and bend it over in front of the one directly to its right but behind the 2nd one on the right. Repeat the process with the upright on the right and so on. Before long you will be left with just one upright standing vertically. Twist it back and forth and you can thread it easily through the laid uprights to its right.
Look closely at the pictures below and you will see how this works.
Locking off
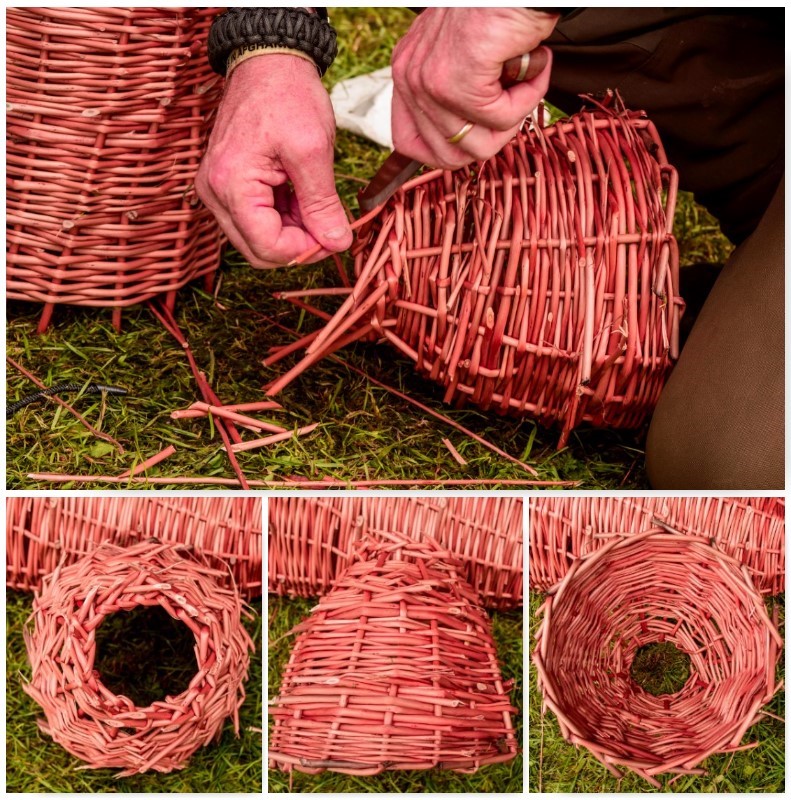
Step 6 – The Lid
The lid is about a third of the size of the main body of the trap however the opening is the same size. Use the paper plate, peg and string in the same fashion as before to set up the skeleton of the lid and weave in the exact same way as with the main body of the trap.
The difference though is that the top is not tied off but left open as this will become the opening that your catch will enter the trap through. When the hole in the top is about the size of your fist repeat the process of locking off at Step 5. You will also need to lock of the rim around the bigger opening when it is pulled out of the ground.
The Lid
Step 7 – Trimming
When you trim off the ends of any piece of willow when making this type of trap try to leave about a cm or so sticking out so that the end of the willow does not slip inside the trap. The outside should be quite prickly but the inside should be smooth.
Trimming
Step 8 – Attaching the Lid to the main body of the Trap
The lid should sit in the opening of the main body of the trap with the small opening in it well inside it. We split and soaked some willow (soaked in a cup of water) to make it really flexible and used that to tie the lid and the main body of the trap together.
They were tied together at one point only to ensure that the lid stayed attached but could be opened easily to remove any catch or to place any bait.
Attaching the Lid
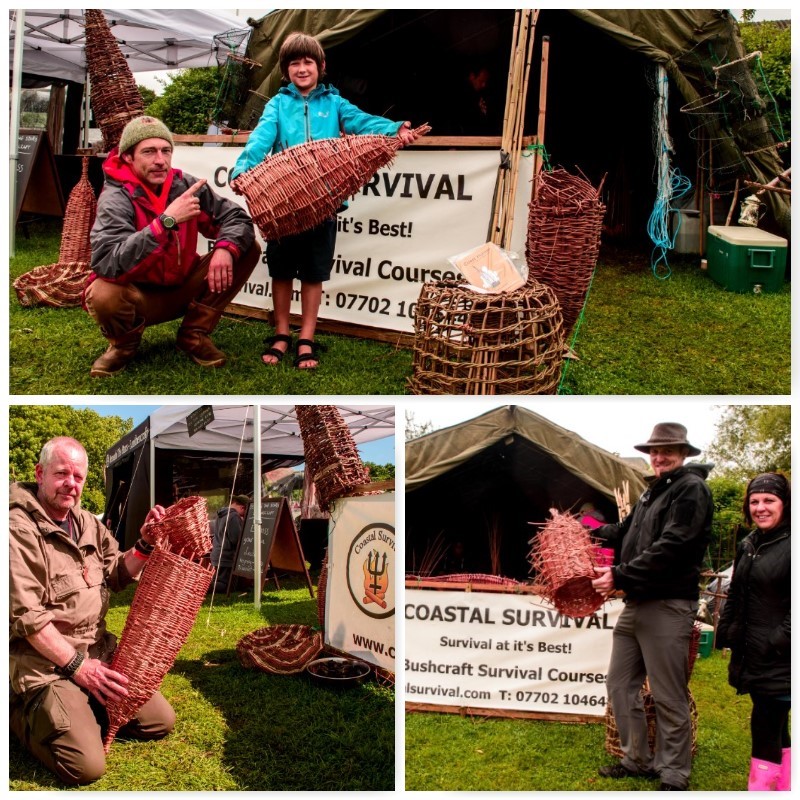
This project would take a confident weaver/basket maker a few hours to make however our students took most of the day (and one or two came back the next day to finish off) to complete theirs.
These traps are not just for show but tools for living as comfortably as you can on the coast. If you are interested in making these traps under a bit of guidance do contact Fraser at Coastal Survival.
Happy Weavers
As with any trap do check out whether it is legal to use it in the place you want to set it. In the UK check out the Environment Agency.
Over the last few months I have not done much in the way of bushcraft so there has been a slight lack of How To …. tutorials coming out. I plan to change that after the Moot (where I will be looking for inspiration) however I have been getting out on little trips recently to photograph nature.
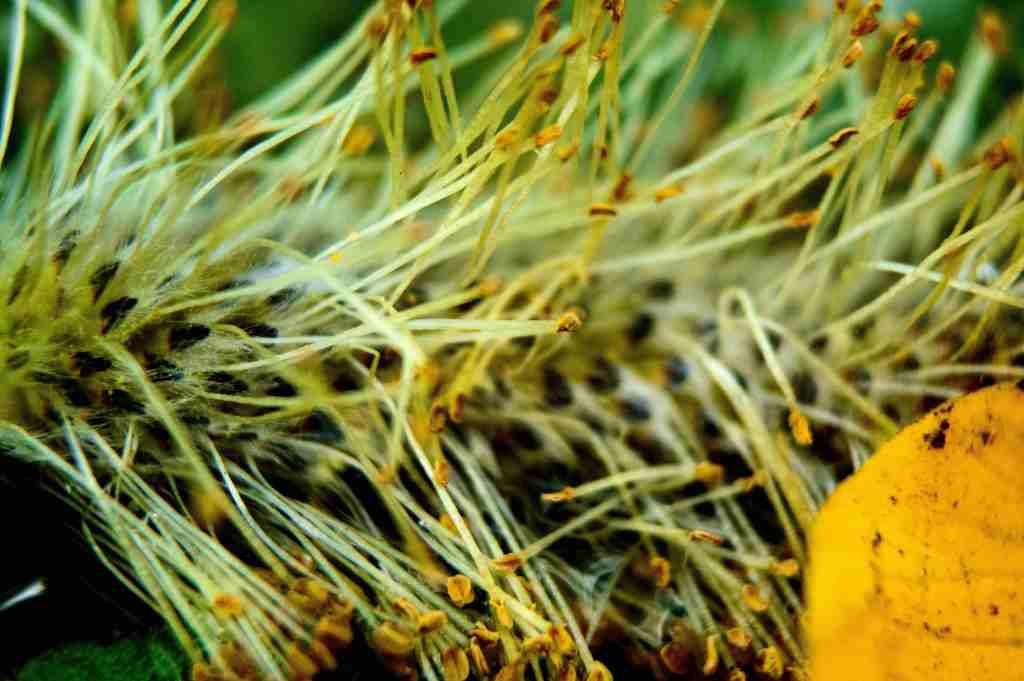
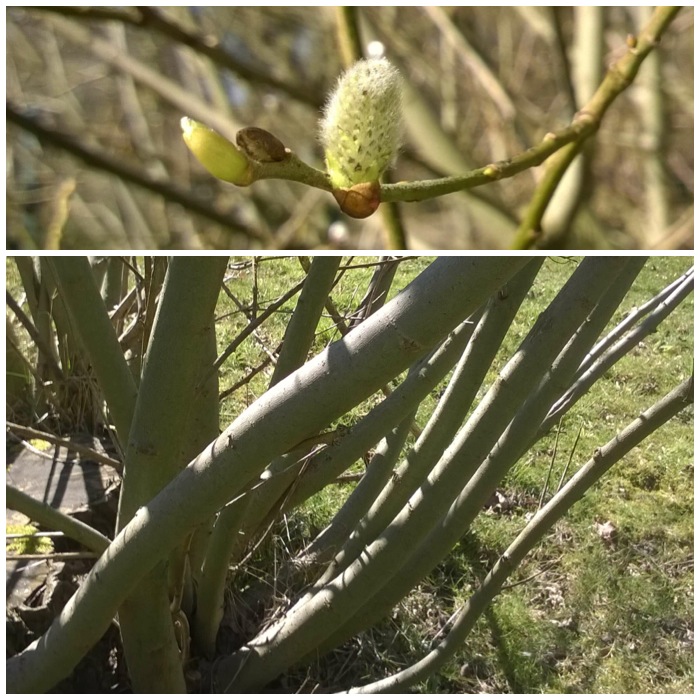
This post is just to record some of the moments I have had over the last few months. Starting with an accidental shot of a very wet and bedraggled willow catkin. It was a damp day and I was trying to get a close up of a bug but after looking at the picture found the catkin to be of more interest.
Pussy Willow
Not long after ripping a muscle in my calf I hobbled out into my garden and applied the 20 metre rule. That is stand still, kneel down, sit down and lie down but continually look around you for approx 20 metres and you should see something worth shooting. When I eventually laid down I came up close and personal to these beautiful little Forget-me-nots
Forget-me-nots
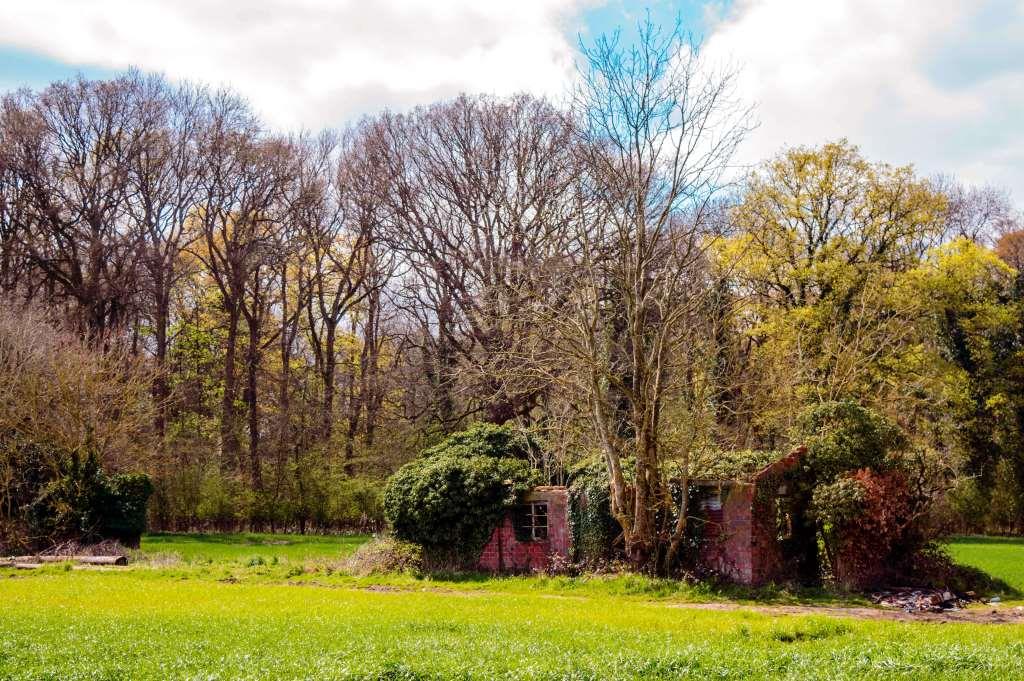
There was a re-wilding theme on the BCUK website a couple of months ago and I was stuck for ideas. Not long after the closing date I remembered this place outside our village. Proper re-wilding you could say 🙂
Re-wilding
Back in April I went out for a walk with my kids in Morgaston woods and the bluebells were just coming through. I spotted this slightly thicker patch and after getting the kids to lie down (it was a job with all the pricklies) I got this rather nice shot. The angle of the shot made the bluebell patch seem much thicker than it actually was.
Peek a boo
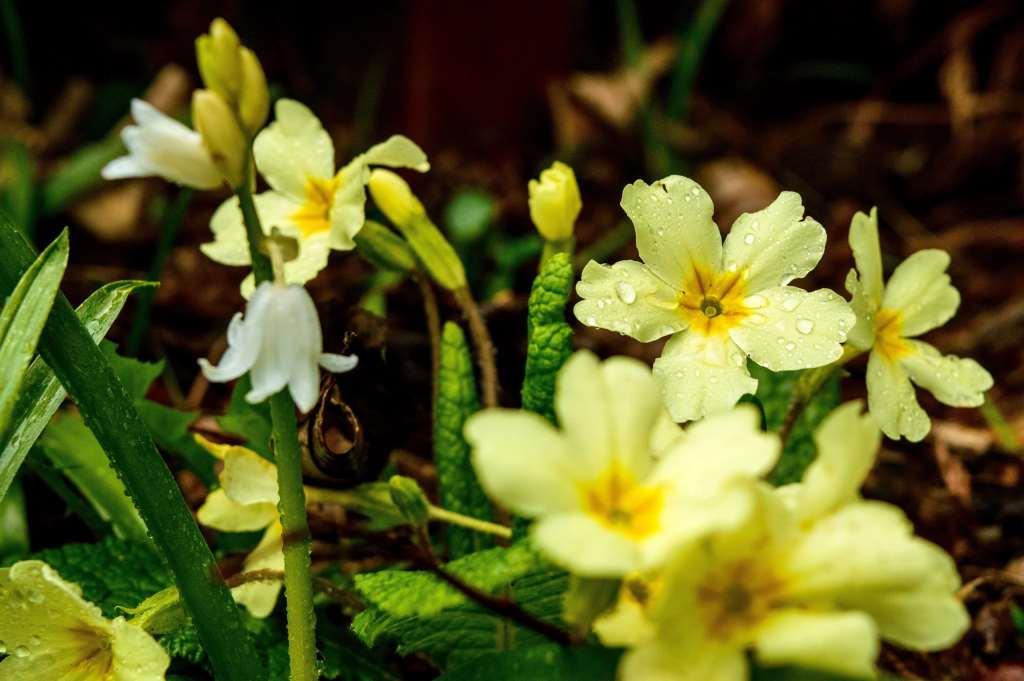
Another one from my garden during my hobbling period. I was particularly taken with the water droplets on the primroses.
Spring days
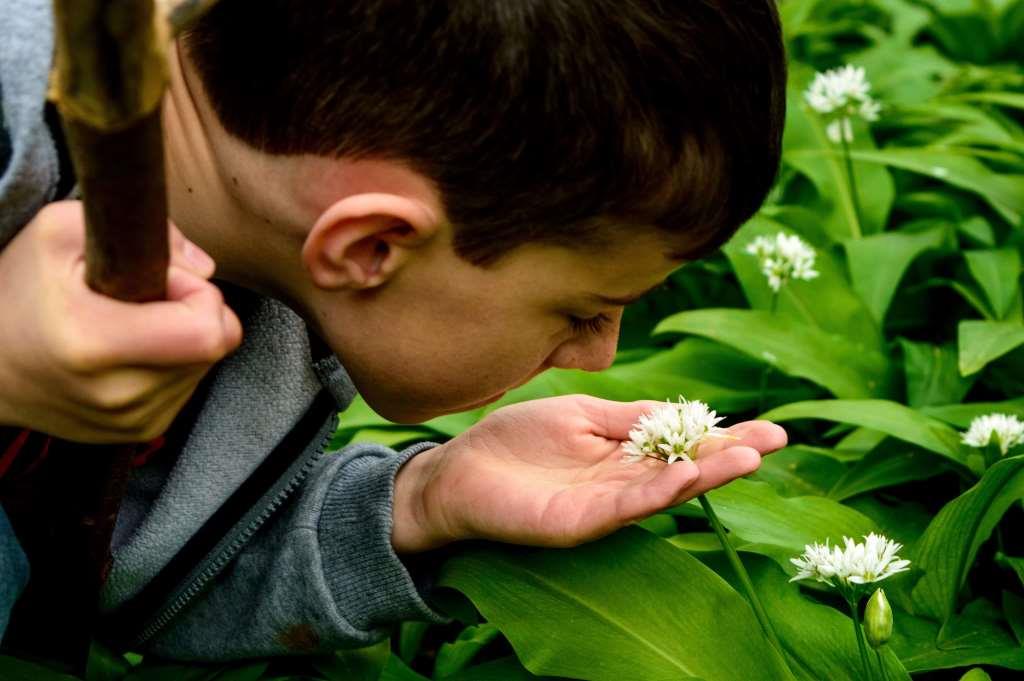
My son has been undertaking some nature observations for his naturalists badge at cubs. we have been getting out and about as much as we can identifying trees and flowers such as these lovely Ramsons.
Naturalist badge – IDing the Ramsons
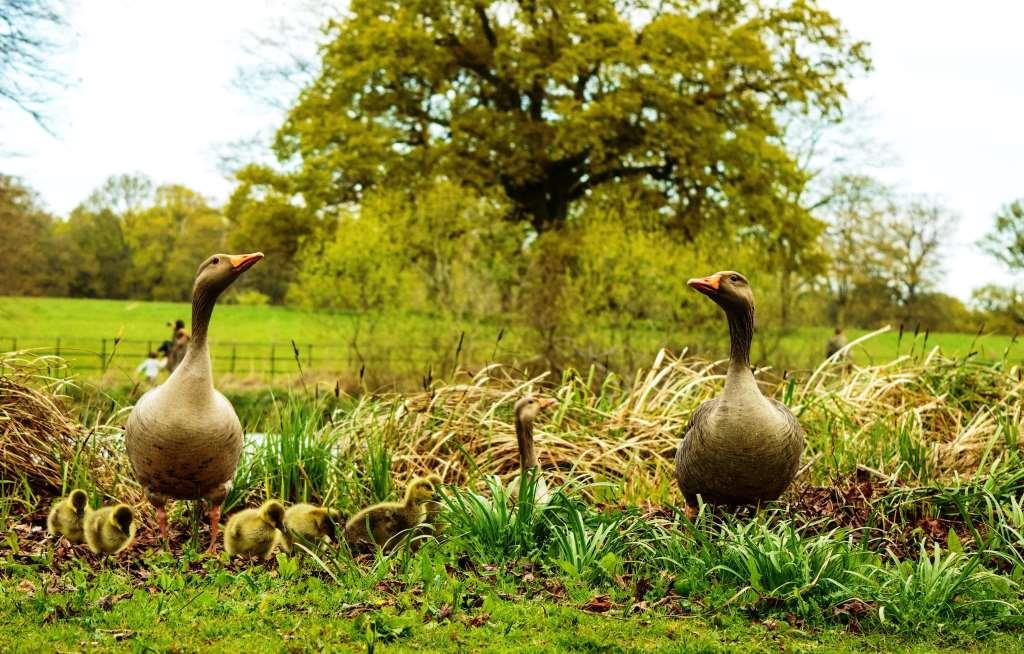
Spring would not be the same without a picture or two of some fluffy creatures. I thought this Greylag geese family looked particularly impressive at The Vyne National Trust property.
The Greylag family
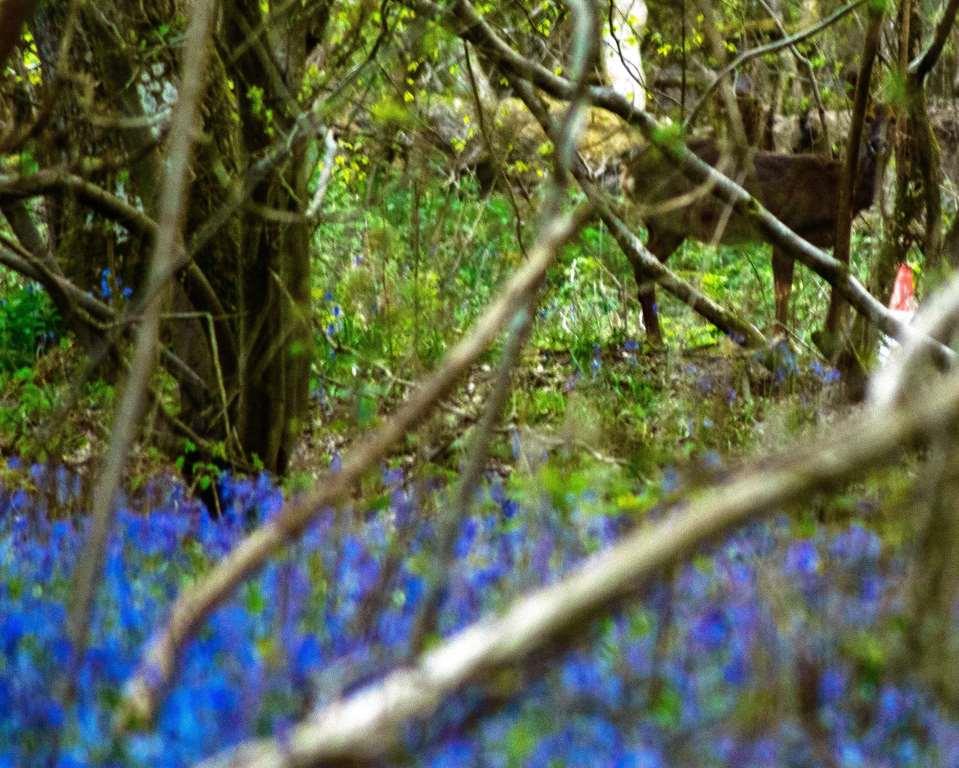
This was a ‘face off’. I spotted this deer in the shadow of the woods while out looking at the bluebells. I had to change the lens on my camera as she was a fair distance away. Normally they run off by the time I change lenses but this one kept me square in her sights the whole time.
Staring contest
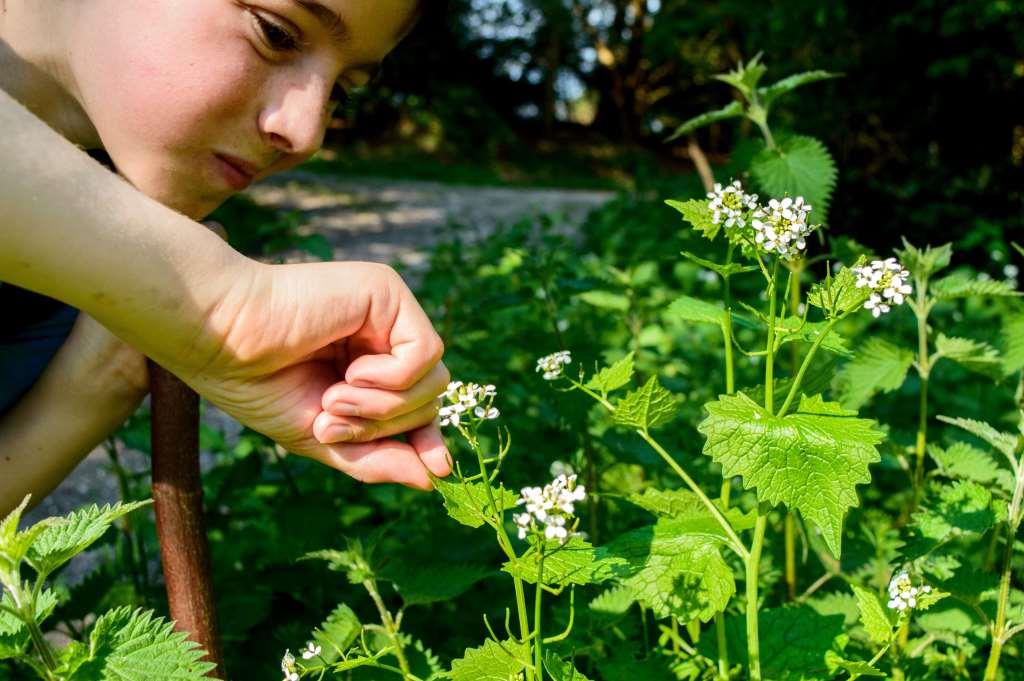
We moved on from just identifying plants for Finlay’s naturalist badge to tasting them as well. We tried out a whole range of leaves including the likes of these Jack by the hedge plants.
Naturalist badge – IDing the other garlic – Jack by the hedge
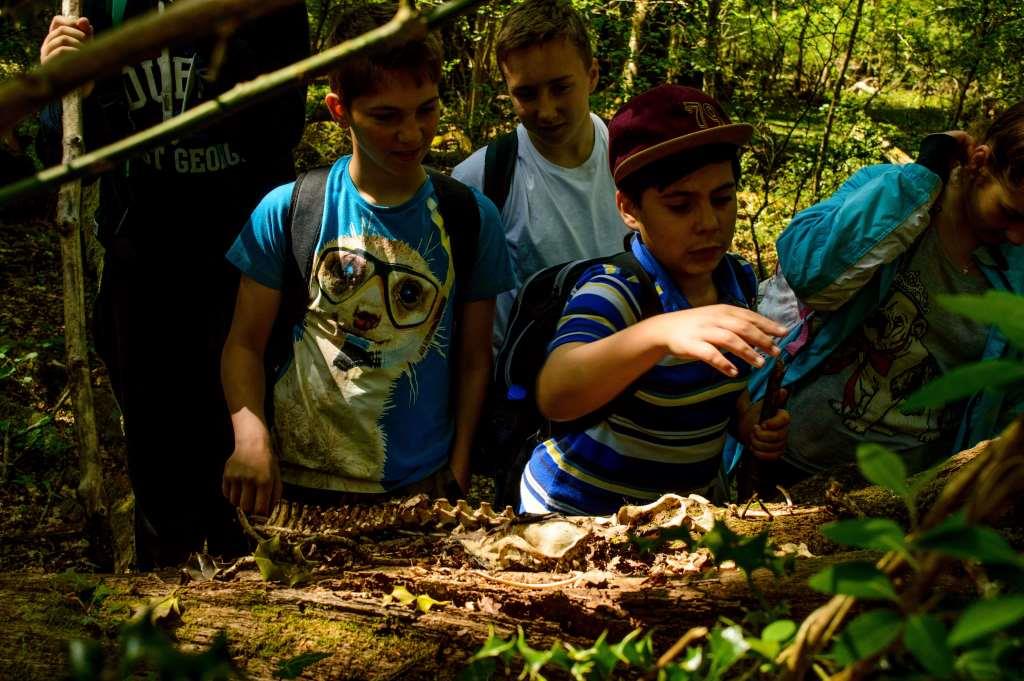
Some of the best finds were literary stumbled on like this complete fox skeleton in the New Forest. It was found by some of my Junior Sea Cadets and we laid it all out onto this log to get a real good look at it. Many of these kids have never been out of the city before so this was quite a find for them.
A Foxy find
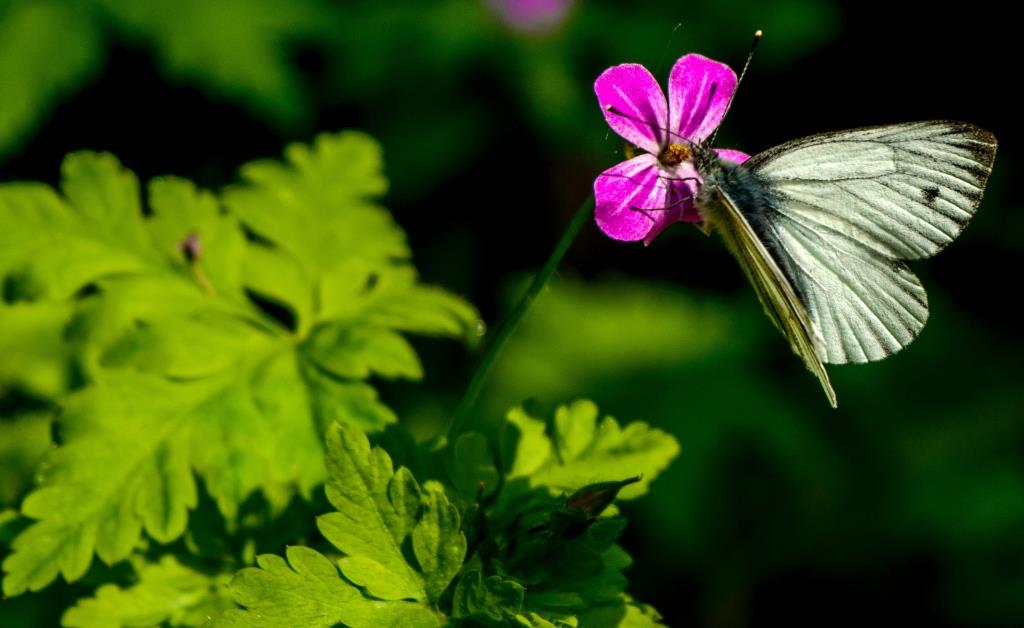
I spotted this little butterfly sitting on a Herb Robert flower while visiting my friend Fraser from Coastal Survival a couple of weeks ago. Normally these little devils are away before you can get near them but this one just seemed to be soaking up the sun.
Delicate beauty
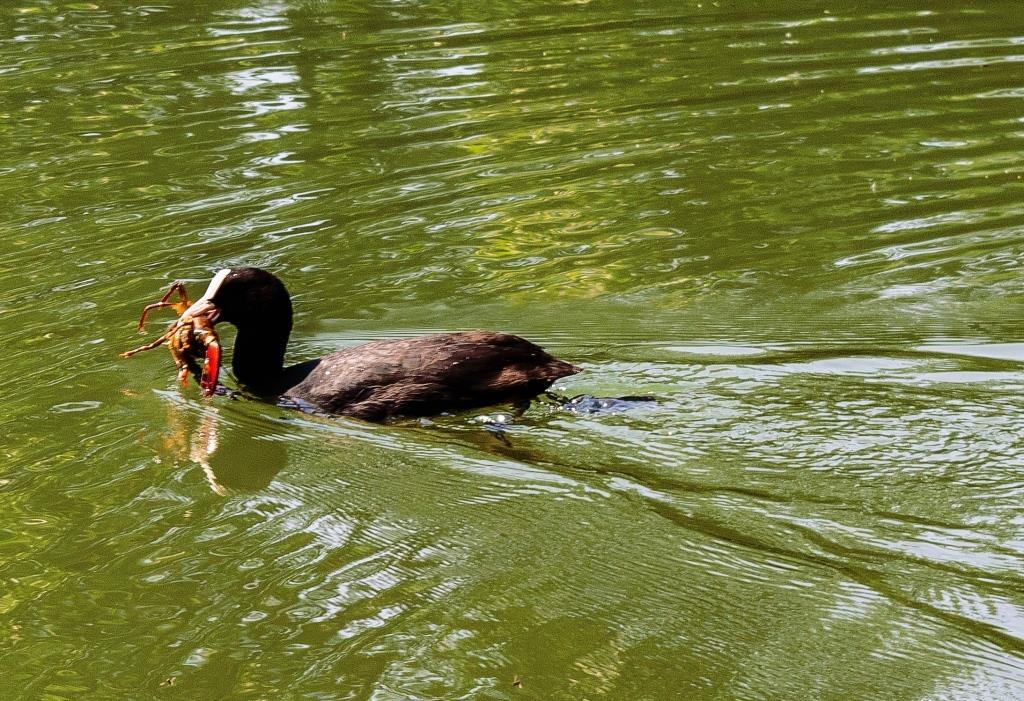
One of my favourite pictures was taken last weekend at The Vyne National Trust property. I heard a splash by the side of the lake and turned to see this Coot with a large Signal Crayfish in its beak.
The joy was not to last for the Coot though as another Coot came along and stole the crayfish away – such is nature sometimes I suppose.
A top spot
So although I have not been out doing practical bushcrafting much I have been getting out and observing nature with a keen eye – so you could say it was the more nature based side of bushcrafting.
This How To…. illustrates some simple steps to carve a small spoon you can easily make when you are out and about.
A simple spoon
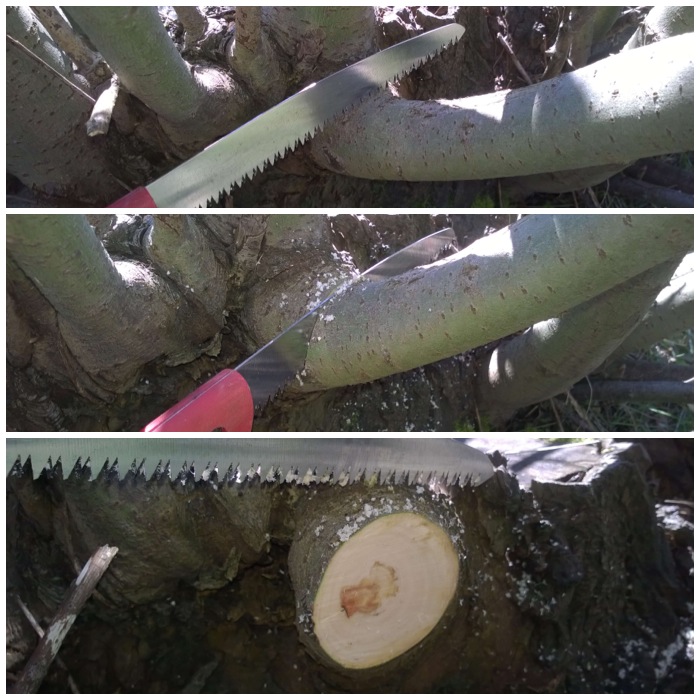
I was training on campcraft in Crowborough (Ashdown Forest in the UK) recently and in between classes decided to carve this simple spoon. A nearby willow tree had been felled a few years ago and lots of shoots had re-grown from the stump.
Local Willow
I selected a shoot and sawed it off near its base. Cutting the limb cleanly at the base will allow the tree to heal itself quickly and send out a replacement shoot the following year.
Cut right back
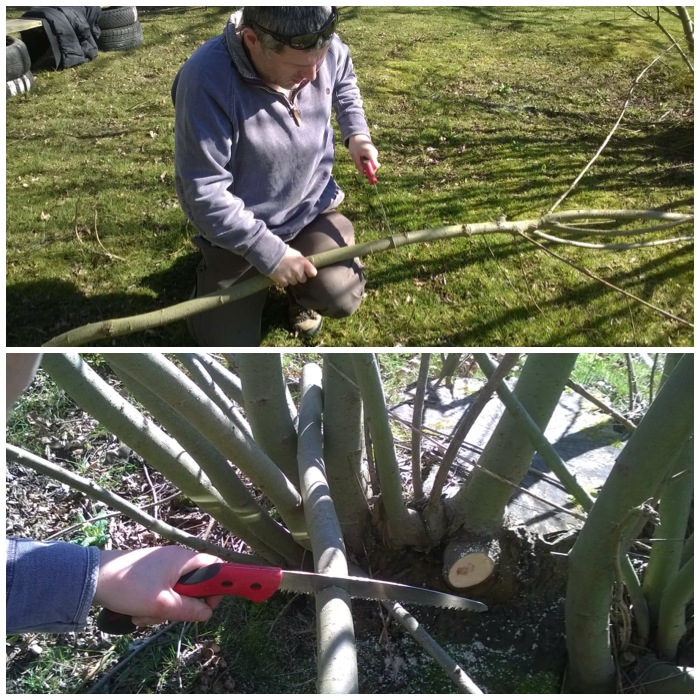
I selected the limb because of its curves, which help in making a strong spoon. I trimmed the limb in a safe position and used the live limbs as a vice to do the final sawing.
Trimmed safely
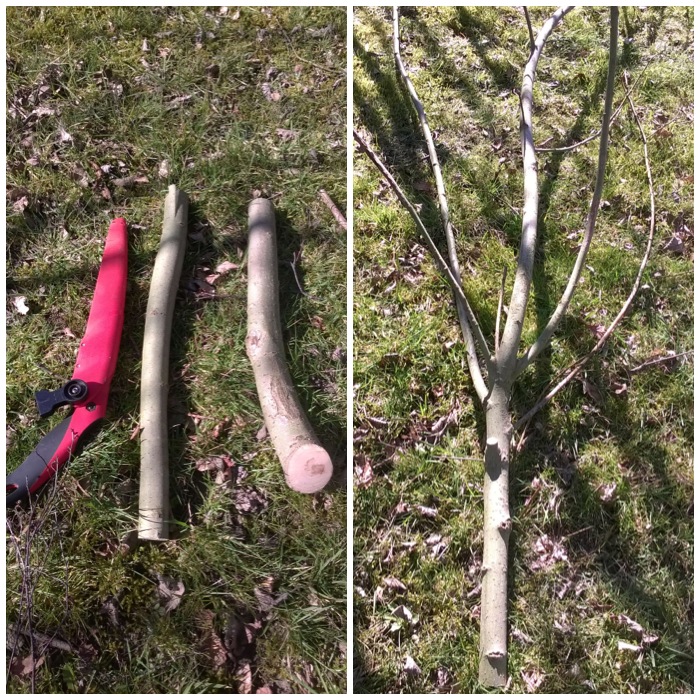
I took two pieces to make a couple of spoons and then trimmed off a couple of the smaller shoots from the top.
The spoons-to-be
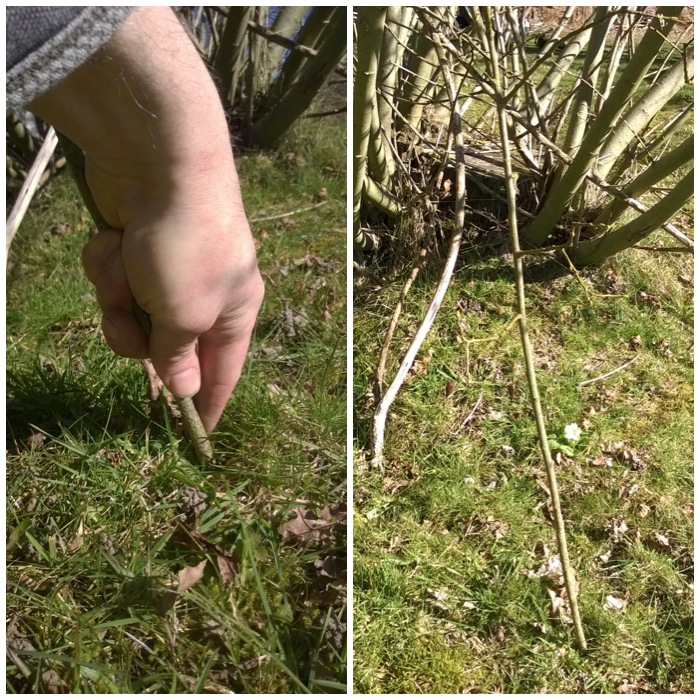
These smaller pieces I re-planted around the base of the tree by pushing them into the ground, as willow has the ability to re-grow from these shoots.
Re-planting
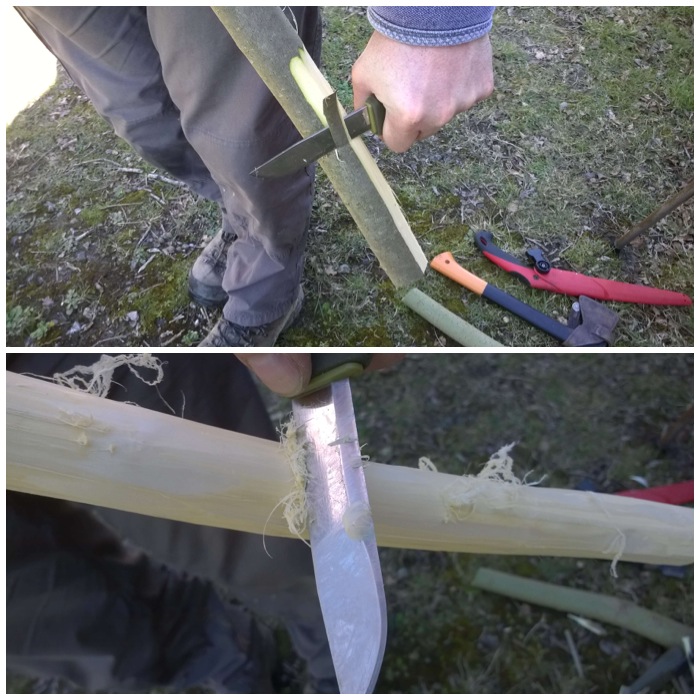
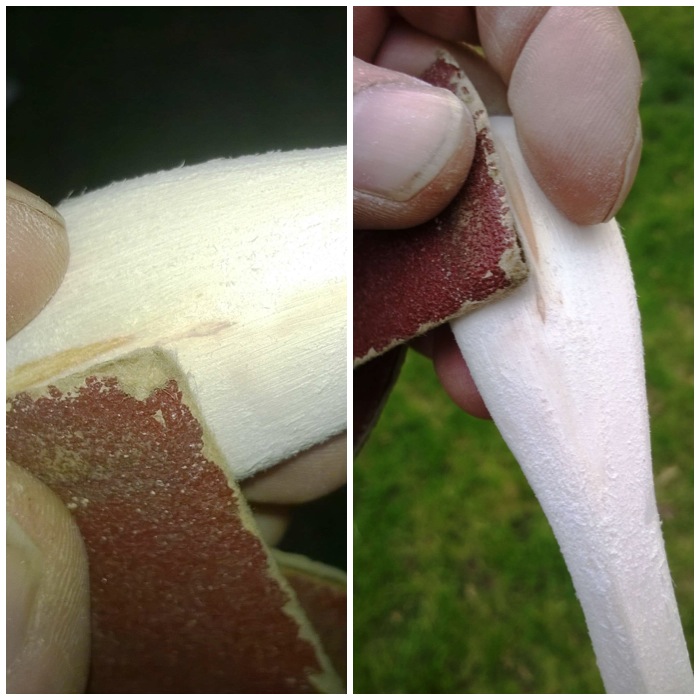
The next job was to strip off the outer and inner barks. I tried to strip the bark off in one piece but as the sap had not yet risen it was very difficult to do. If the bark had peeled off easily I could have made some nice cordage from it.
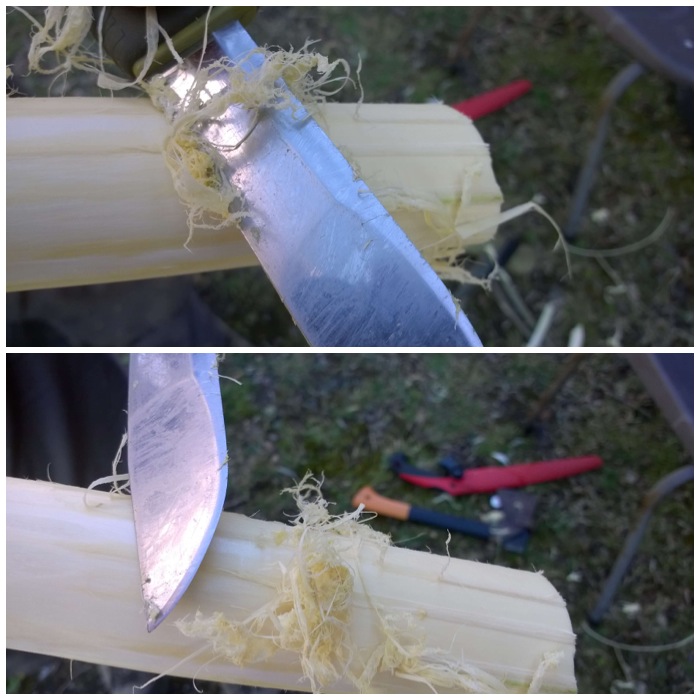
I used the back of my knife to scrape off the remnants of the inner bark to get right down to the wood.
Taking off the outer bark
This inner bark does clog up on the back of the blade so you have to continually scrape it off. The whole process of stripping the bark took about 5 minutes.
Removing the inner bark
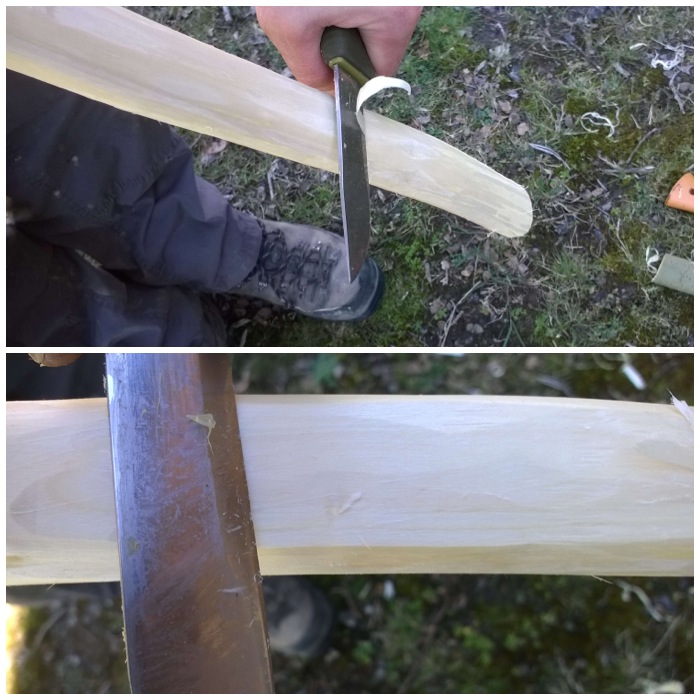
I flattened out the area of wood that would make the bowl of the spoon to give myself a little bit more area to work with.
Creating a working surface
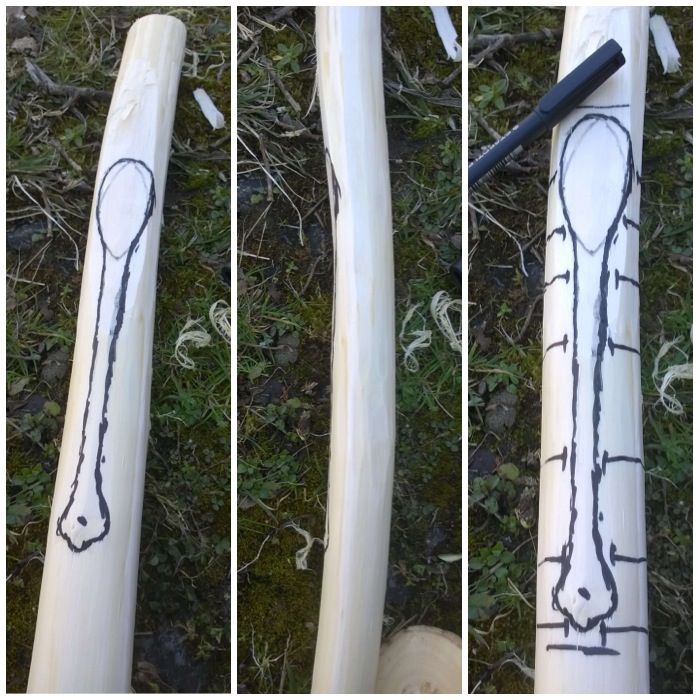
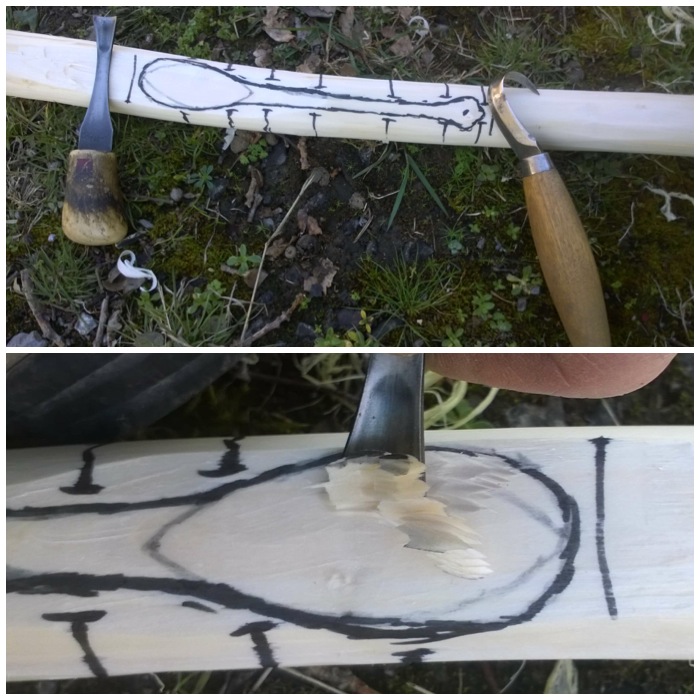
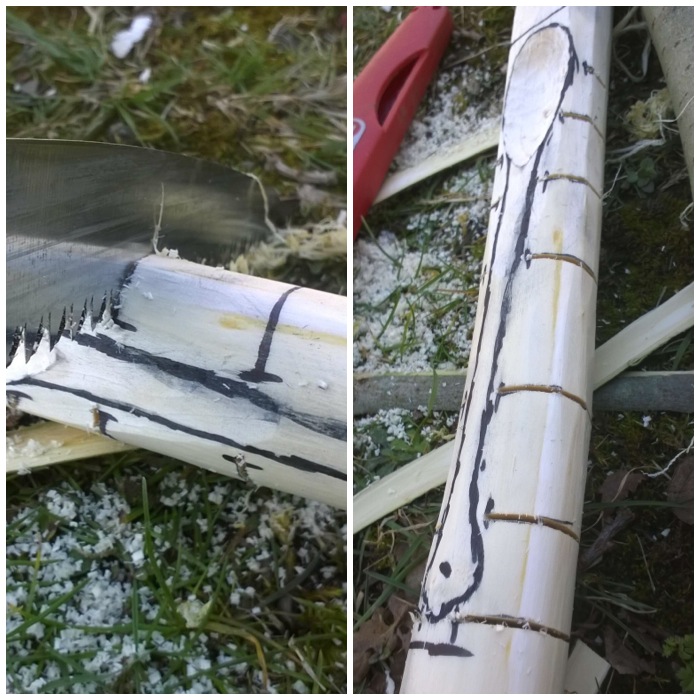
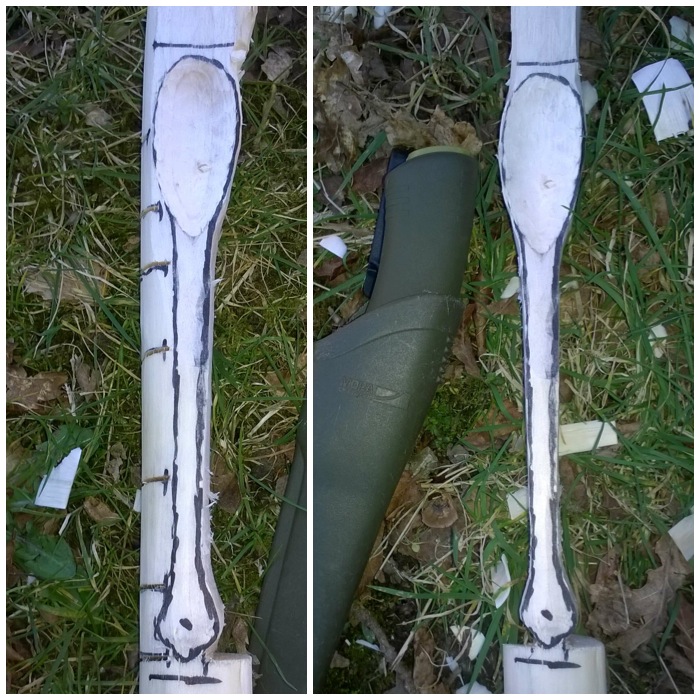
I like to draw out my spoon leaving areas of waste wood at each end as these act as handles when carving. Also, I prefer to carve the spoon from the top down as this cuts through many different rings thereby making the spoon stronger. I also mark out at this stage all the stop cuts I will need. (The technique of leaving handles to work with was taught to me by my good friend Mark Beer a few years ago and I find they are particularly useful when you are teaching novices.)
Drawing out the spoon
I like to carve the bowl of the spoon first. To do this job I usually use a palm gouge (on the left) and a crook knife (on the right).
The bowl tools
I use the palm gouge first, tracking around the edge of the bowl to cut out the waste. Having the two handles in the wood means I can use the same hand to do this (I am left-handed). They also allow me to keep my other hand well away from the sharp edge of the gouge.
The palm gouge
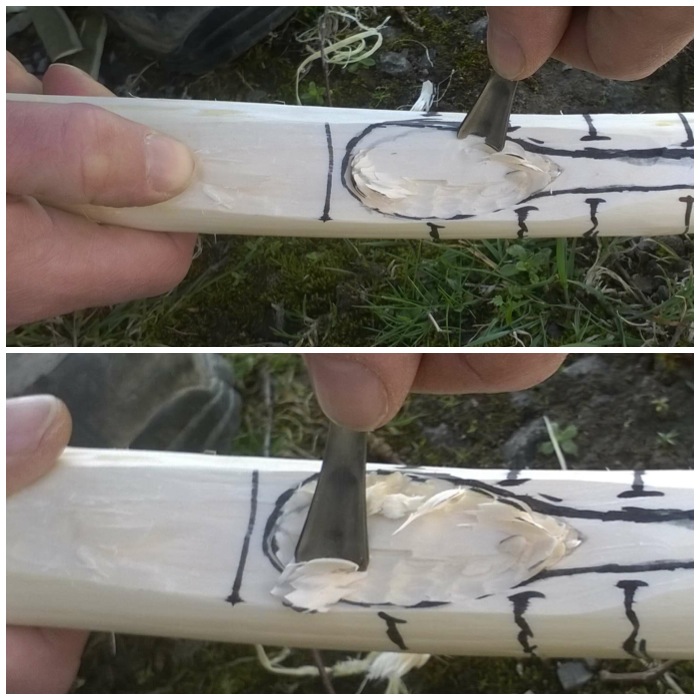
The gouge makes short work of the waste wood but it does not leave a smooth surface.
Rough bowl
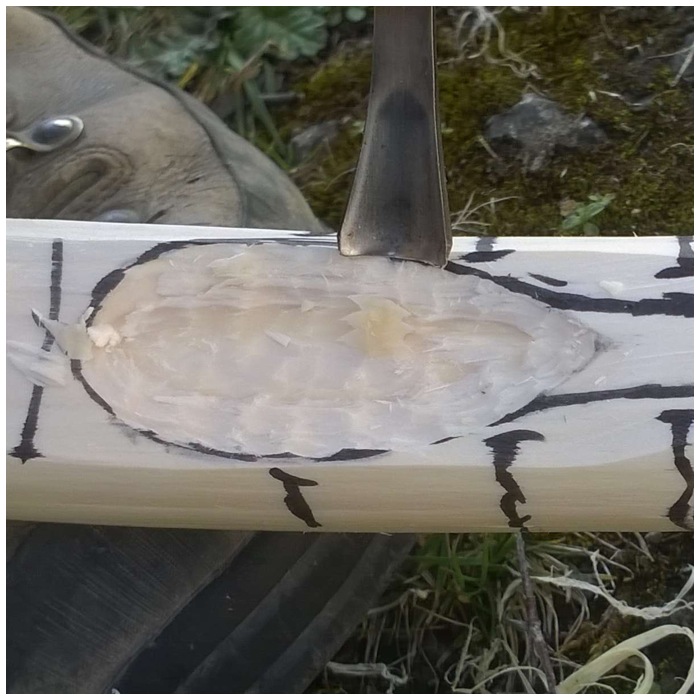
To smooth the bowl out a bit more I usually switch to the crook knife. I find that the crook knife helps to accentuate the curve of the bowl more than the gouge does. With both tools I always try and cut across the grain of the wood but this is not always possible near the ends so I need to be extra careful there not to lose wood on the edges.
Smoothing out the bowl with the crook knife
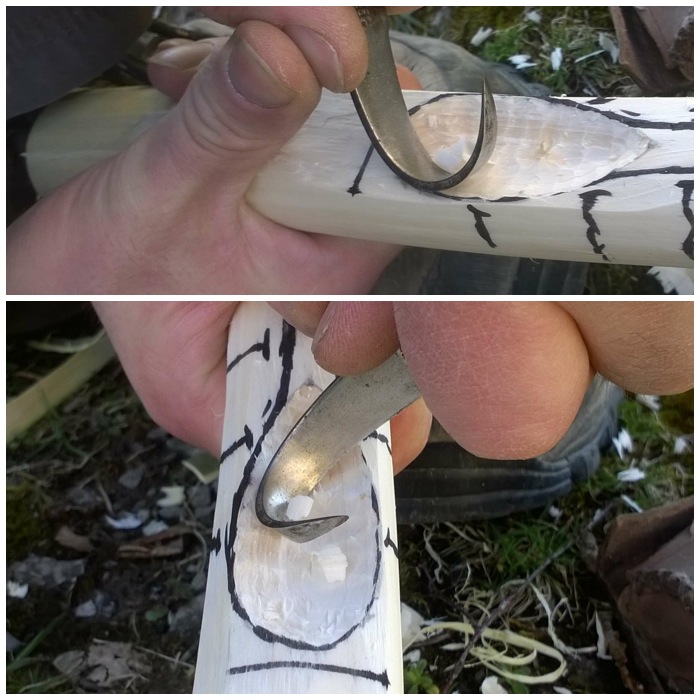
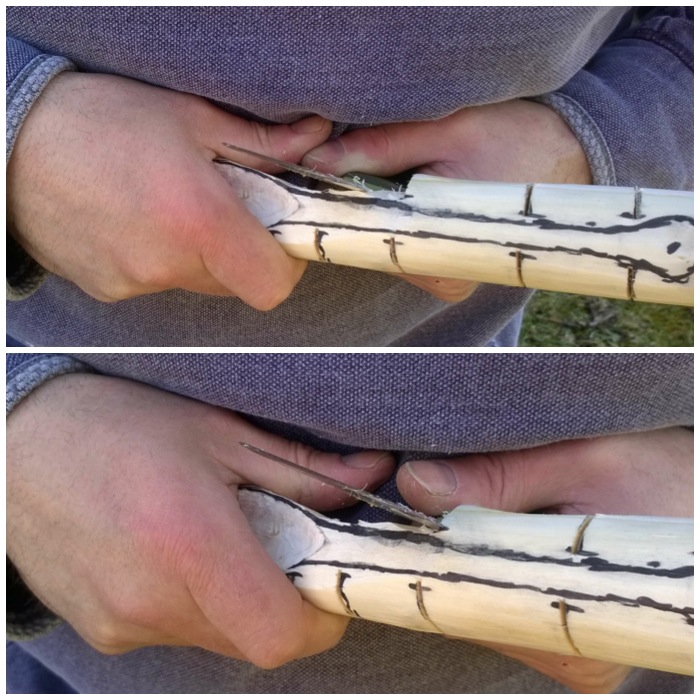
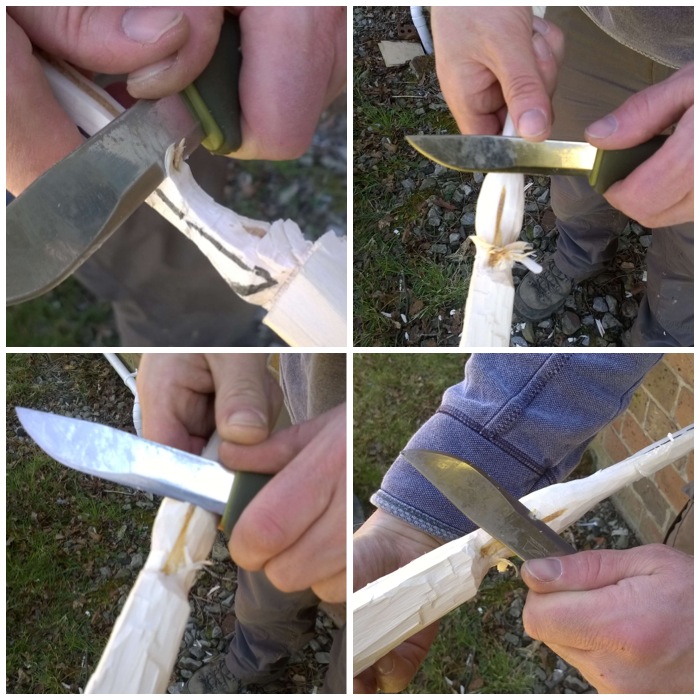
After the bowl is roughed out I saw all the stop cuts. These stop cuts help to stop splits occurring in the wood as I carve the rest of the waste wood away.
Creating the stop cuts
Stop cuts are particularly important when carving around the bowl; they act like small breaking points for the knife edge, stopping splits occurring.
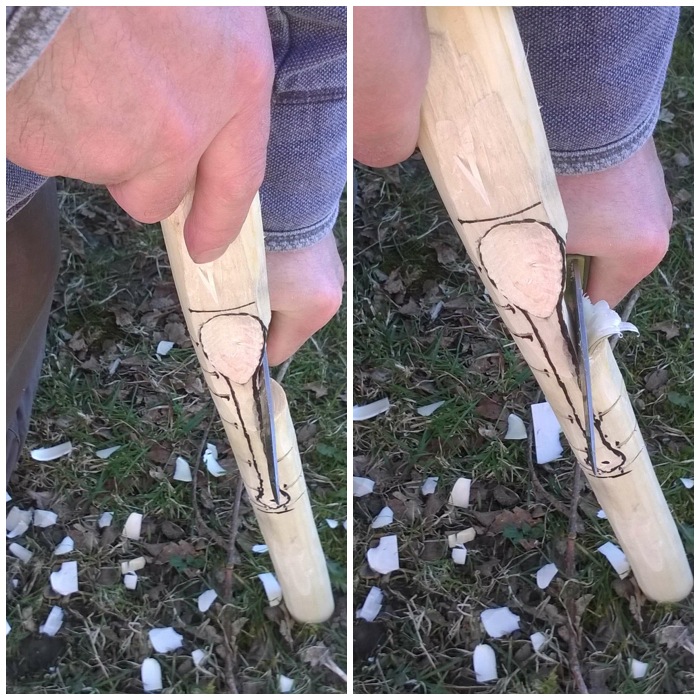
Removing the waste
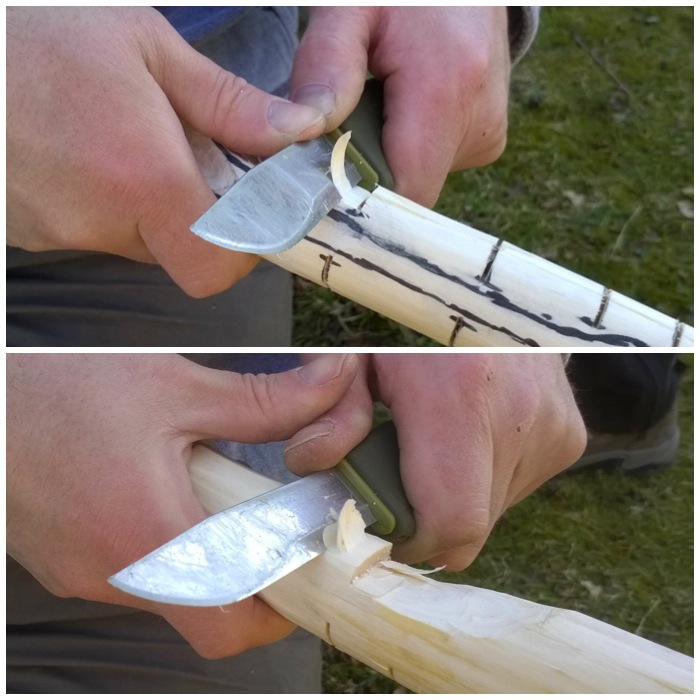
I take my time at this stage and make small cuts to remove each piece of waste wood between the stop cuts. In these two pictures I am using my thumbs on the back of the blade to apply pressure. You can push either with both thumbs on the back of the blade or with one thumb on top of the other.
Thumb pressure
When I am on a straight section like the handle I tend to use the chest lever grip. This is a very controlled and powerful cut. I have my hands tight against me and use my chest muscles to push my hands apart. This pushes the knife edge into the wood in small, controlled but powerful cuts.
Chest lever grip
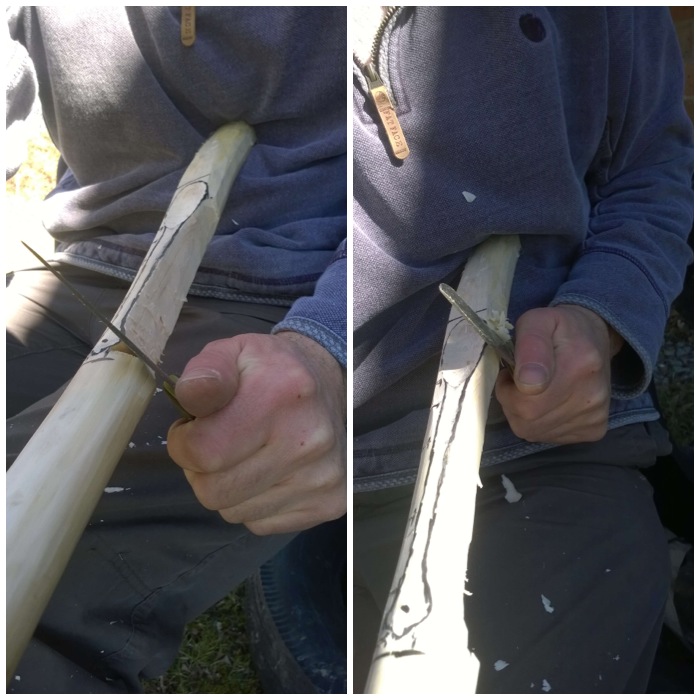
Another cut that can be used here is the shoulder cut. With the work piece off to your side and the bottom of it on a log or on the ground (if the handle at the bottom is long enough), keep your arm locked straight and push down with your shoulder muscles to cut into the excess wood. You can cut big or very fine pieces with this technique.
Shoulder power cut
I learnt this technique from Mors Kochanski when he was over in the UK at the BCUK Bushmoot a few years ago. I pushed one end of the work piece (perfect when you have these handles on each end) and then, using the knife like a draw knife, cut slivers of wood towards me. This is one of the few cuts where the blade comes towards you. The key to this technique is to keep the arm that is holding the work piece bent and well away from the knife tip. Also the arm that is holding the knife is clamped against my side which stops any big movements. If my knife were to slip with this technique the blade would actually only move a few centimeters.
Mors Kochanski style
Using these techniques I quickly removed the waste wood around the spoon.
Top plane cut out
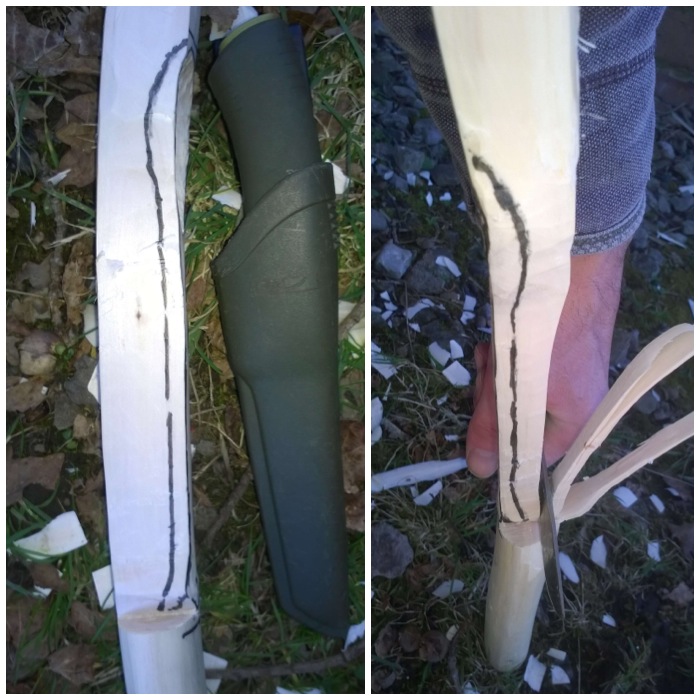
I then marked out the side of the spoon and started to remove the waste wood using the shoulder cut. I could have put stop cuts in at this stage but decided not to as there was not much curve to the spoon on this plane.
Side plane
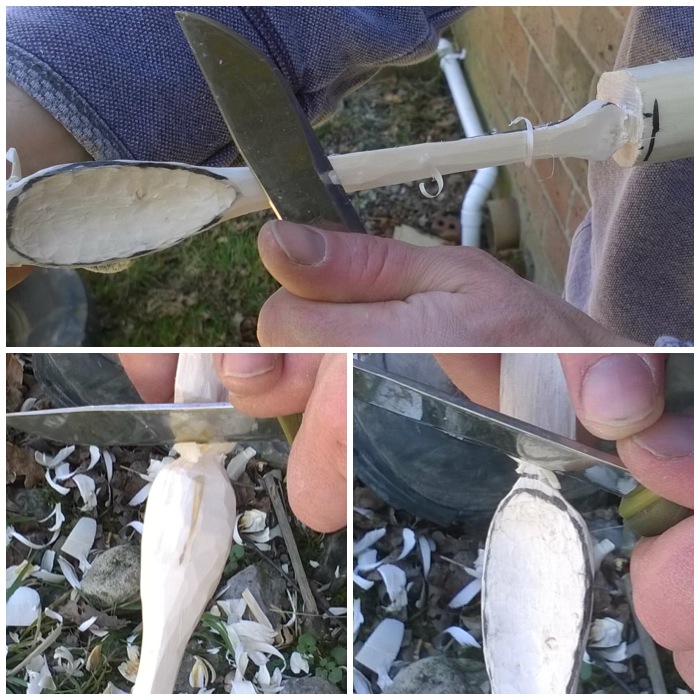
Finishing the tail and the bowl requires a lot of fine work. You have to find how the grain of the wood is flowing and just chip away at it with small cuts to form your final shape.
Fine work
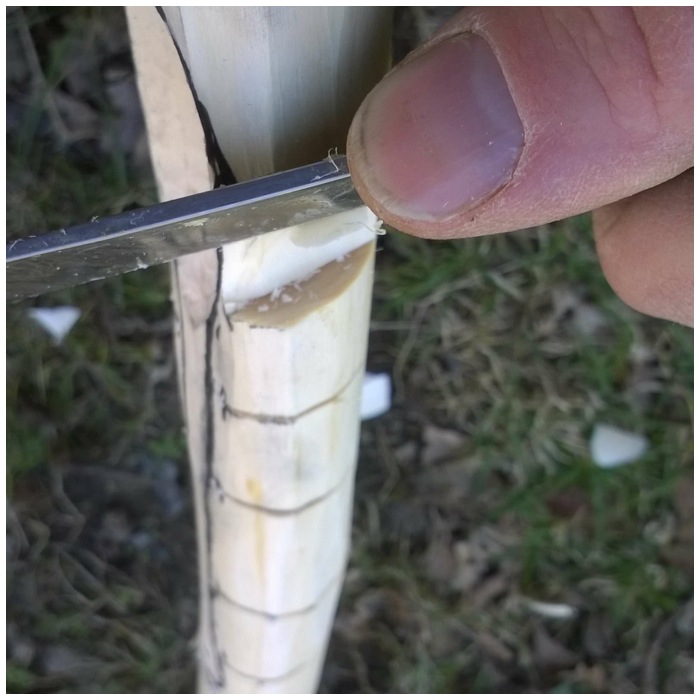
After some final work on the handle of the spoon I slowly carved around the tip of the bowl to remove one of the working handles. Take your time with this so that you get down to the last few fibres of wood before twisting the handle off. Any big cuts here can damage the bowl.
Trimming the handle and removing one handle
I then repeated the whole process at the other end to remove the other working handle.
Removing the other handle
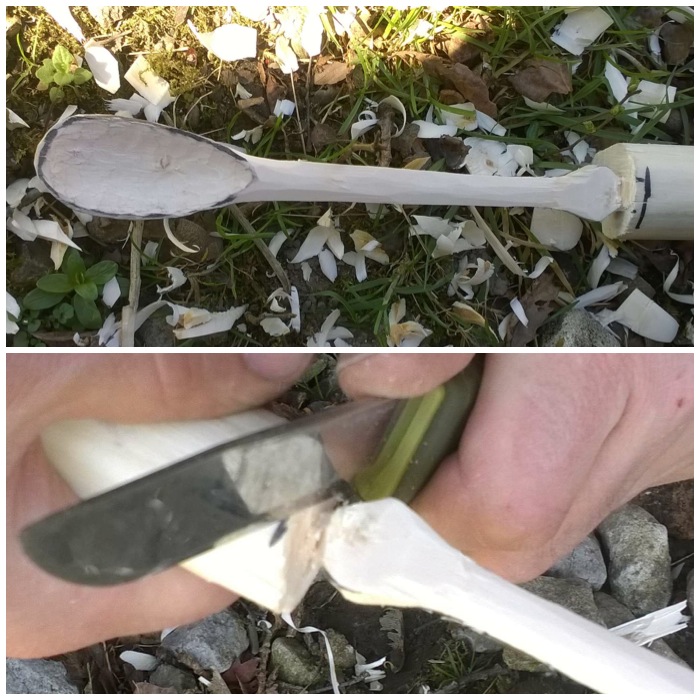
The wood was green so full of moisture. Normally I would dry the wood slowly for a few weeks before sanding it down. Sanding green wood can be hard work and no matter how smooth you get it you will need to repeat the process in a few days as small fibres of wood will start to rise up again, giving the spoon a furry texture.
I accept that when making these spoons as I normally want to use it straight away. Ideally I should have used a piece of seasoned wood so that this would not happen but you sometimes have to use what is available. I left the spoon to dry out for a couple of days before sanding it down.
A blanked out spoon
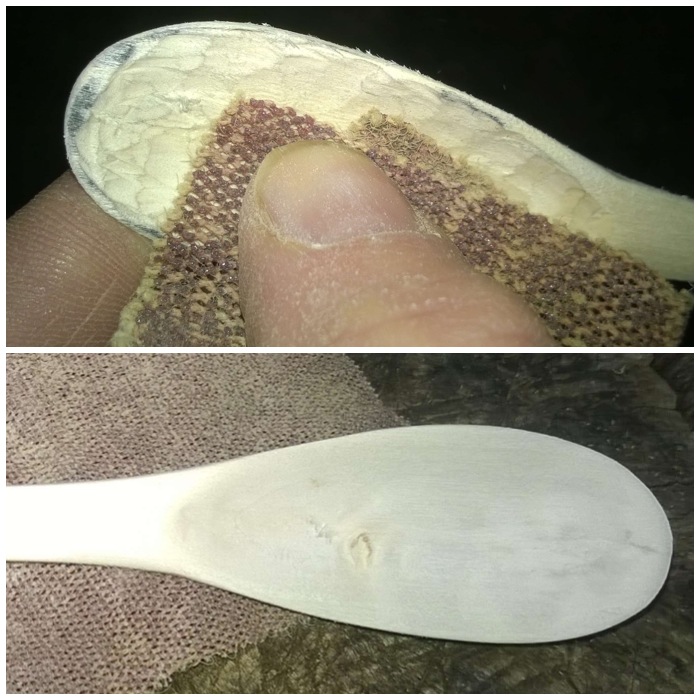
I used sandpaper of different grades and luckily have some cloth sandpaper that works well when sanding the bowl out.
Sandpapers
I used the rough sandpaper first and you can see in these pictures how the fibres of the wood are being ripped out here rather than being sanded smooth. All the sandpaper is doing at this stage is flattening out the tool marks.
Rough first
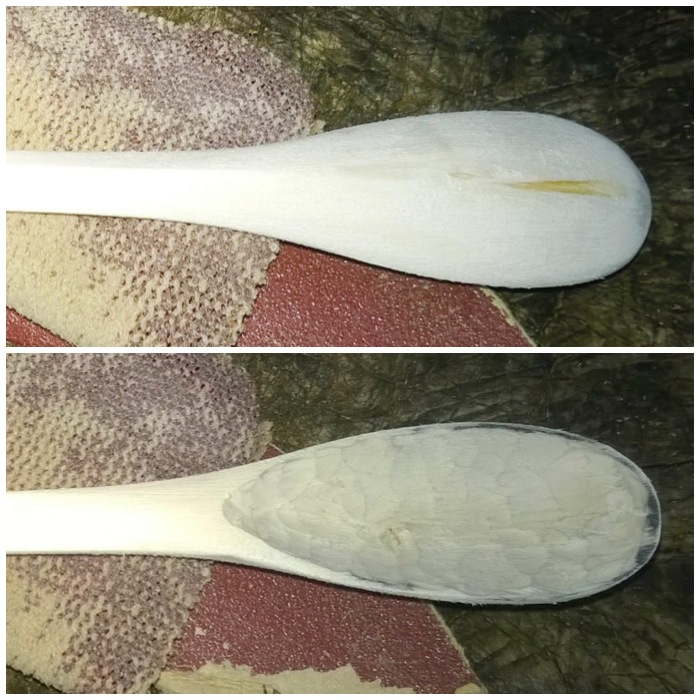
Eventually the spoon started to take on a more smooth appearance. The bottom picture shows the bowl untouched but the handle is now smoother.
Taking shape
The cloth sandpaper is ideal for getting into the bowl and smoothing it out. I like this sandpaper as it does not break apart in the bowl as traditional paper-backed sandpaper tends to.
Smoothing the bowl
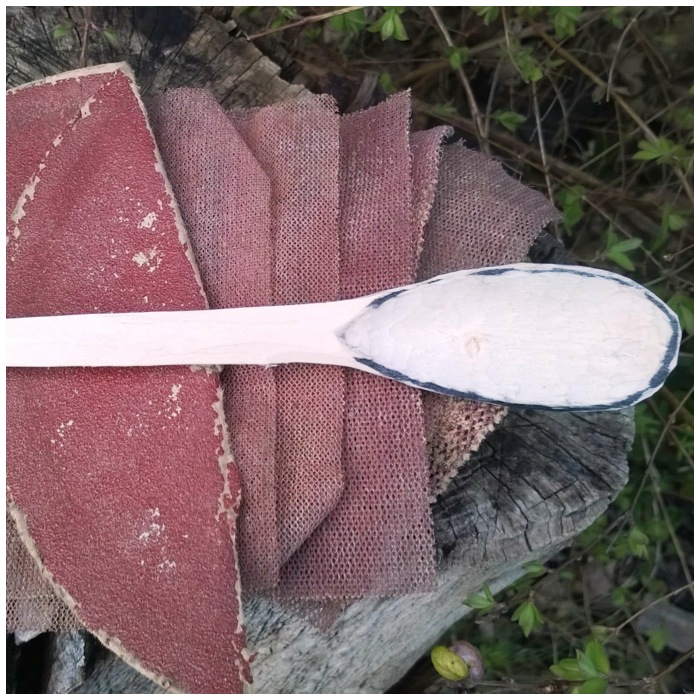
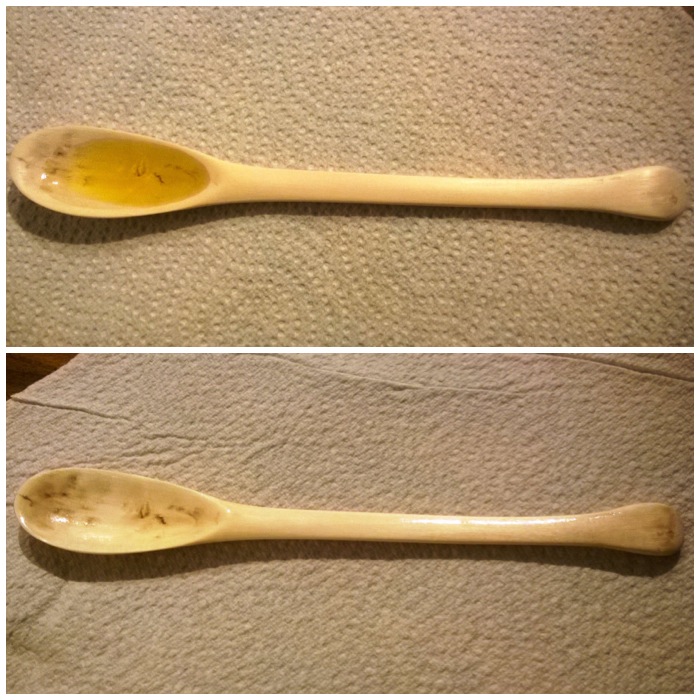
After sanding the spoon down using a mixture of grades from rough to very fine (about a half hour’s work) I added some oil to the spoon. I generally use vegetable oil as that is what I usually have in my cooking kit when out in the woods.
After the first coating had soaked in I applied a second coating and left the spoon to dry out.
First oiling
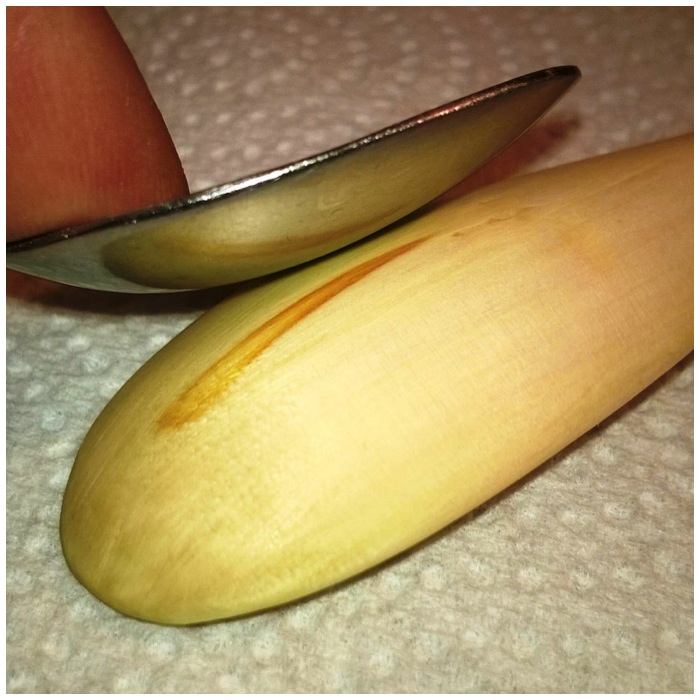
I like to add a finishing touch by boning the spoon. You can do this with the back of a spoon, a rounded pebble or with a rounded piece of bone. I rub the spoon with the rounded surface in a circular motion covering the whole of the surface area of the spoon. I normally do this for an hour or so as this seals the fibres of the wood down and adds a beautiful shine to the spoon.
Boning
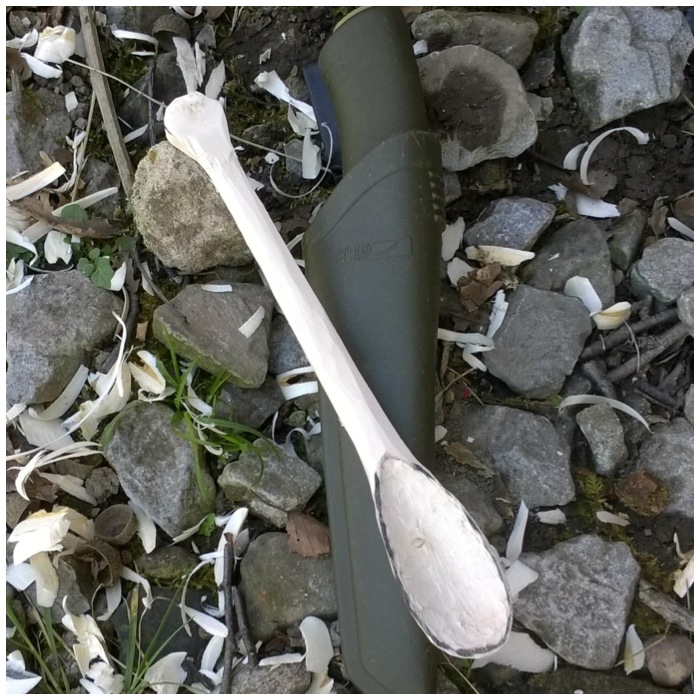
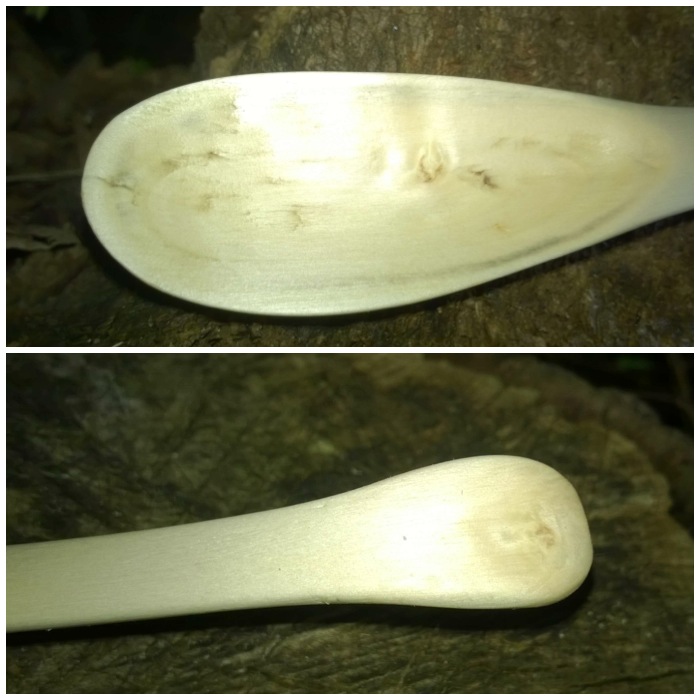
This spoon will need to be re-sanded, oiled and boned again in a few weeks as the fibres rise up as it dries out. You can see that the bowl is not perfectly smooth and there are slight imperfections in it. Hopefully these will disappear with that second sanding but for now it is a spoon I can use.
Imperfections but a working spoon
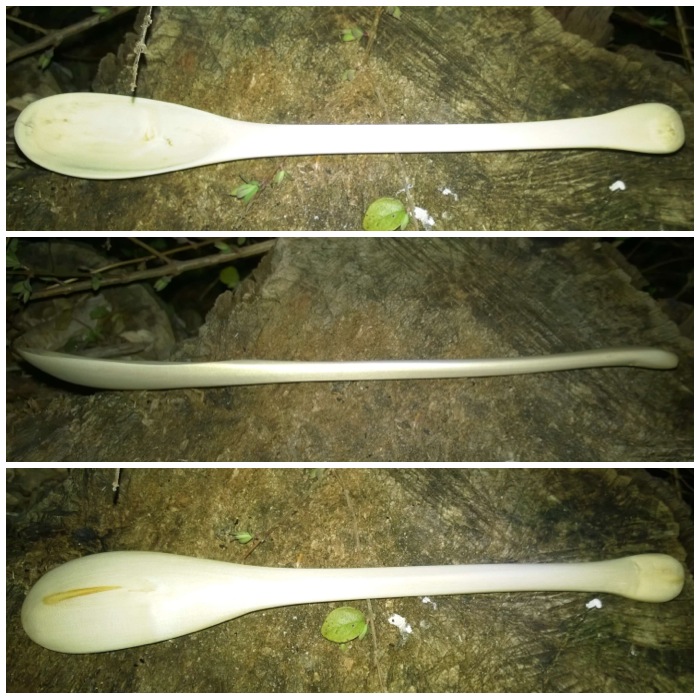
The different profiles of the spoon.
Profiles
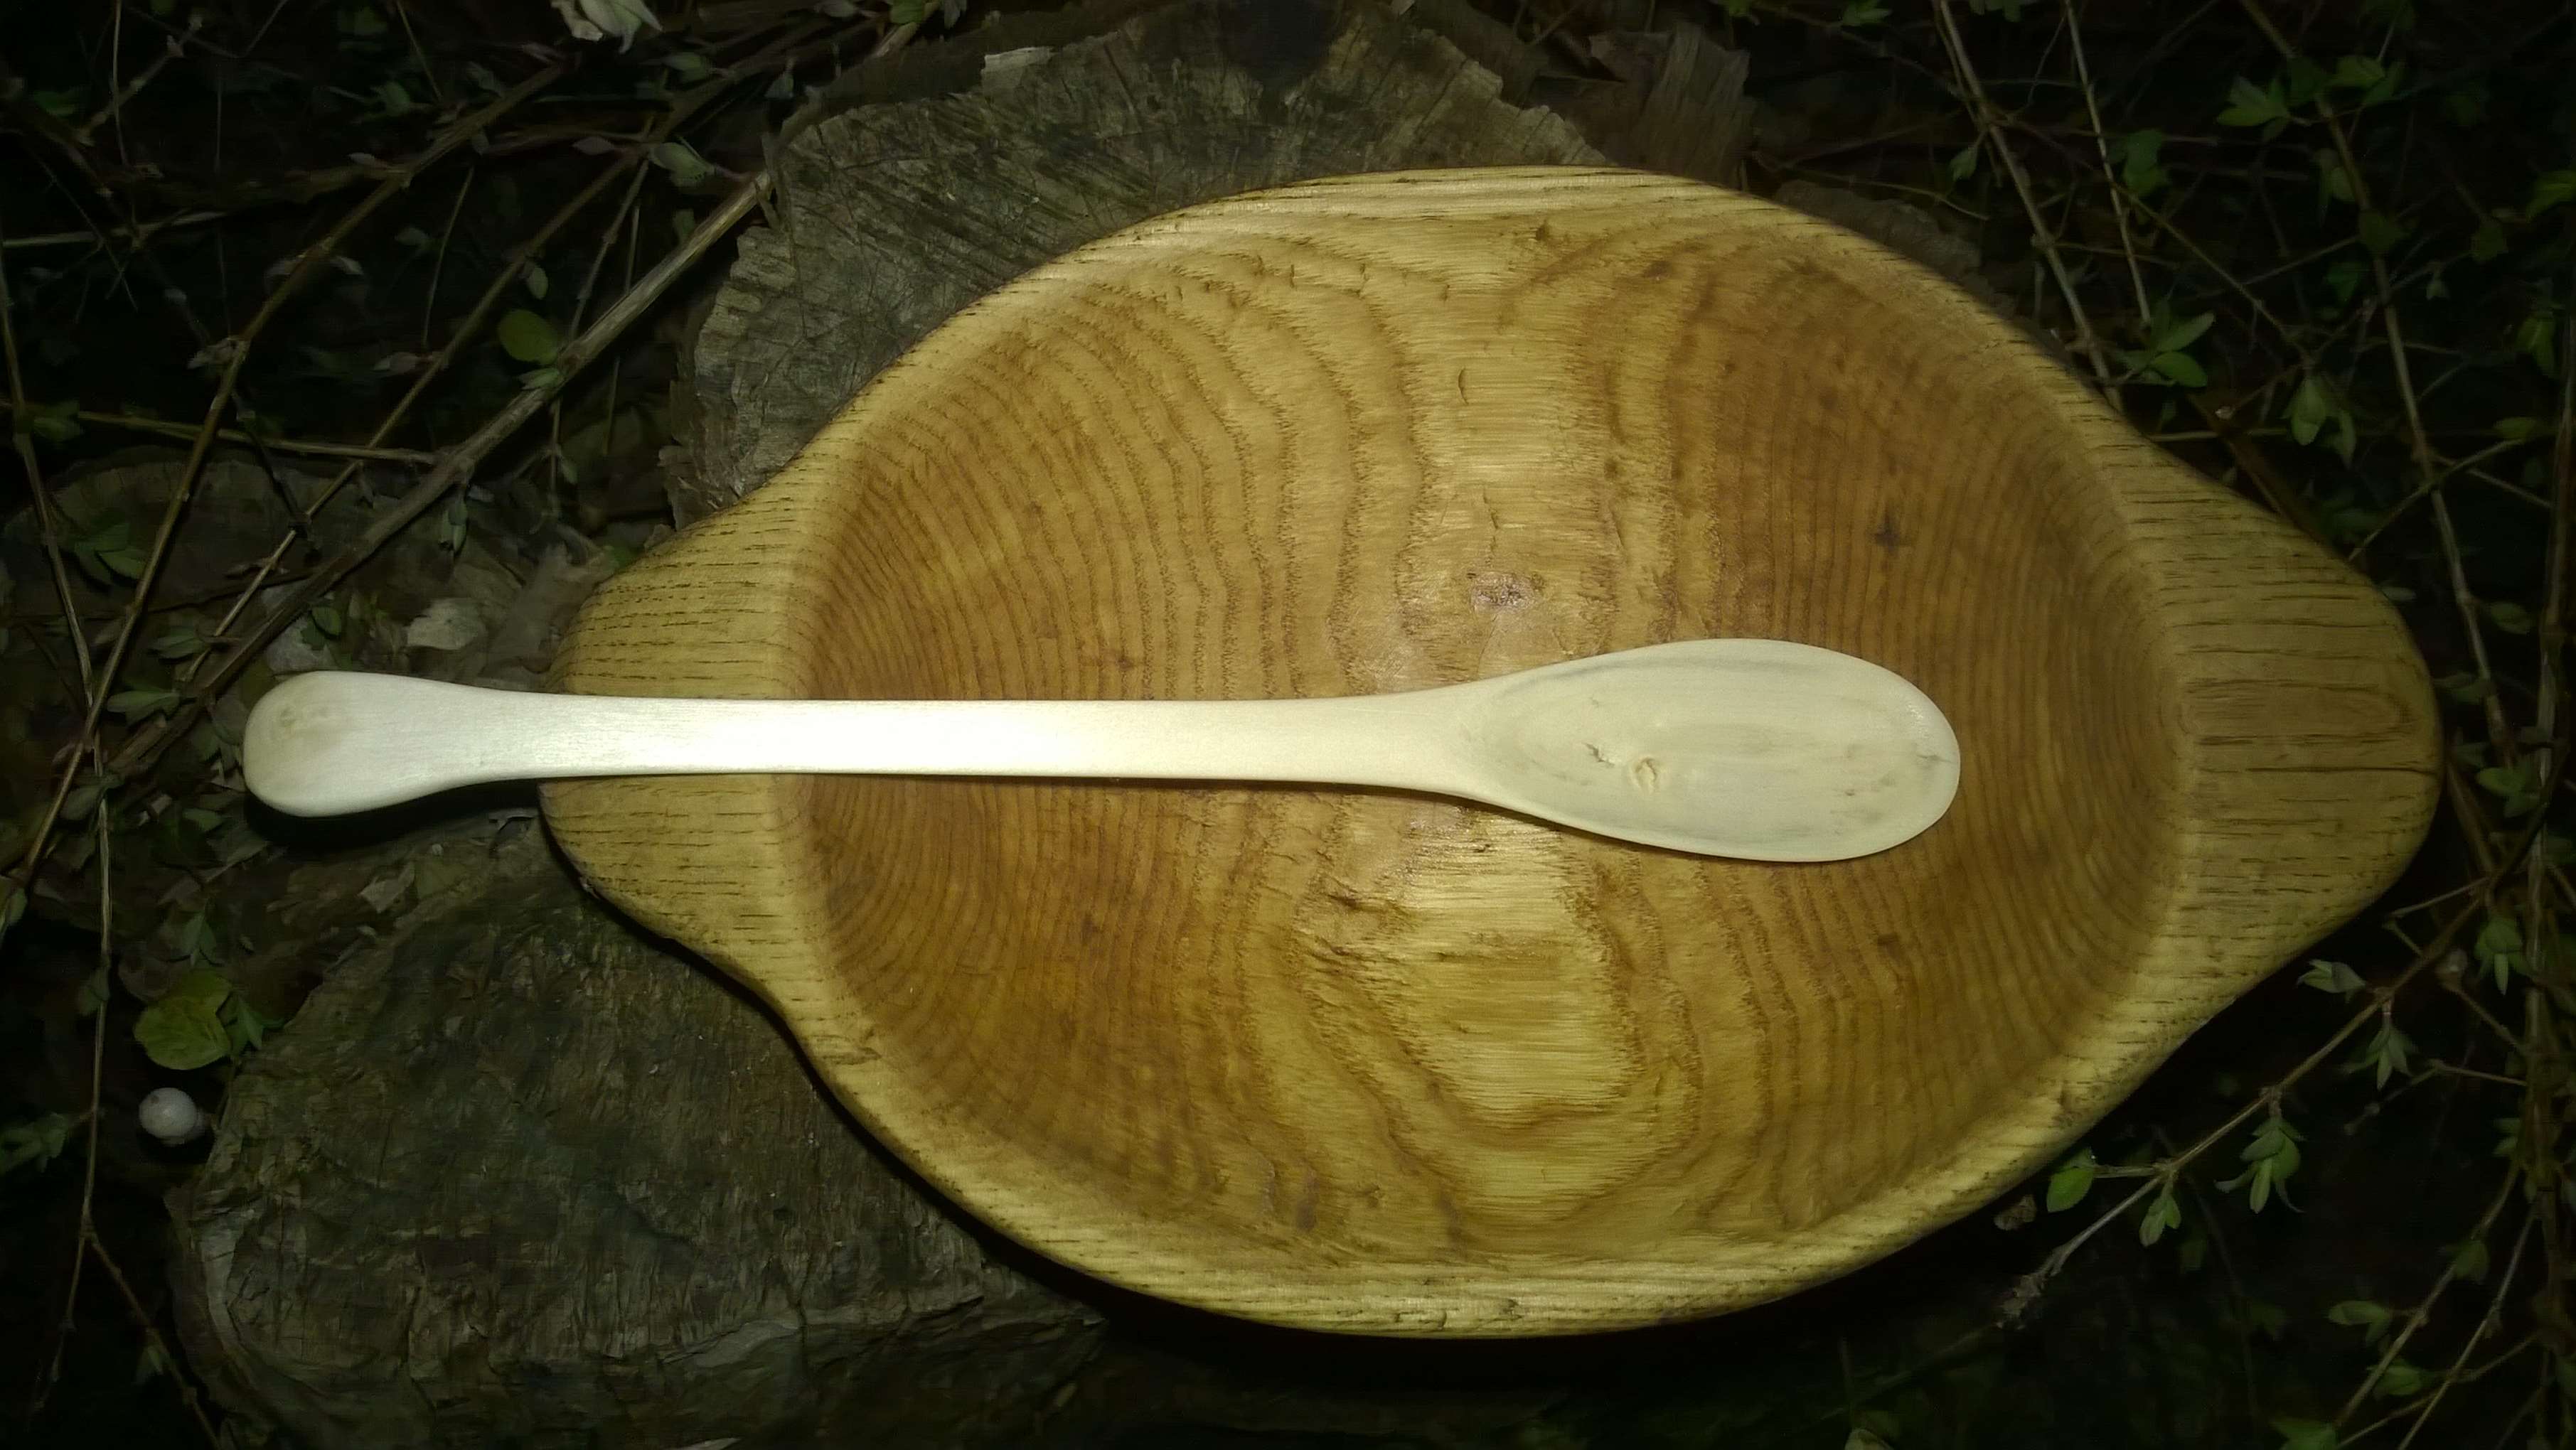
Ready to go.
Ready to do its job
Have a go and try out some of these different cutting techniques.