How To…. Build a Gibbet Aures Campfire Crane

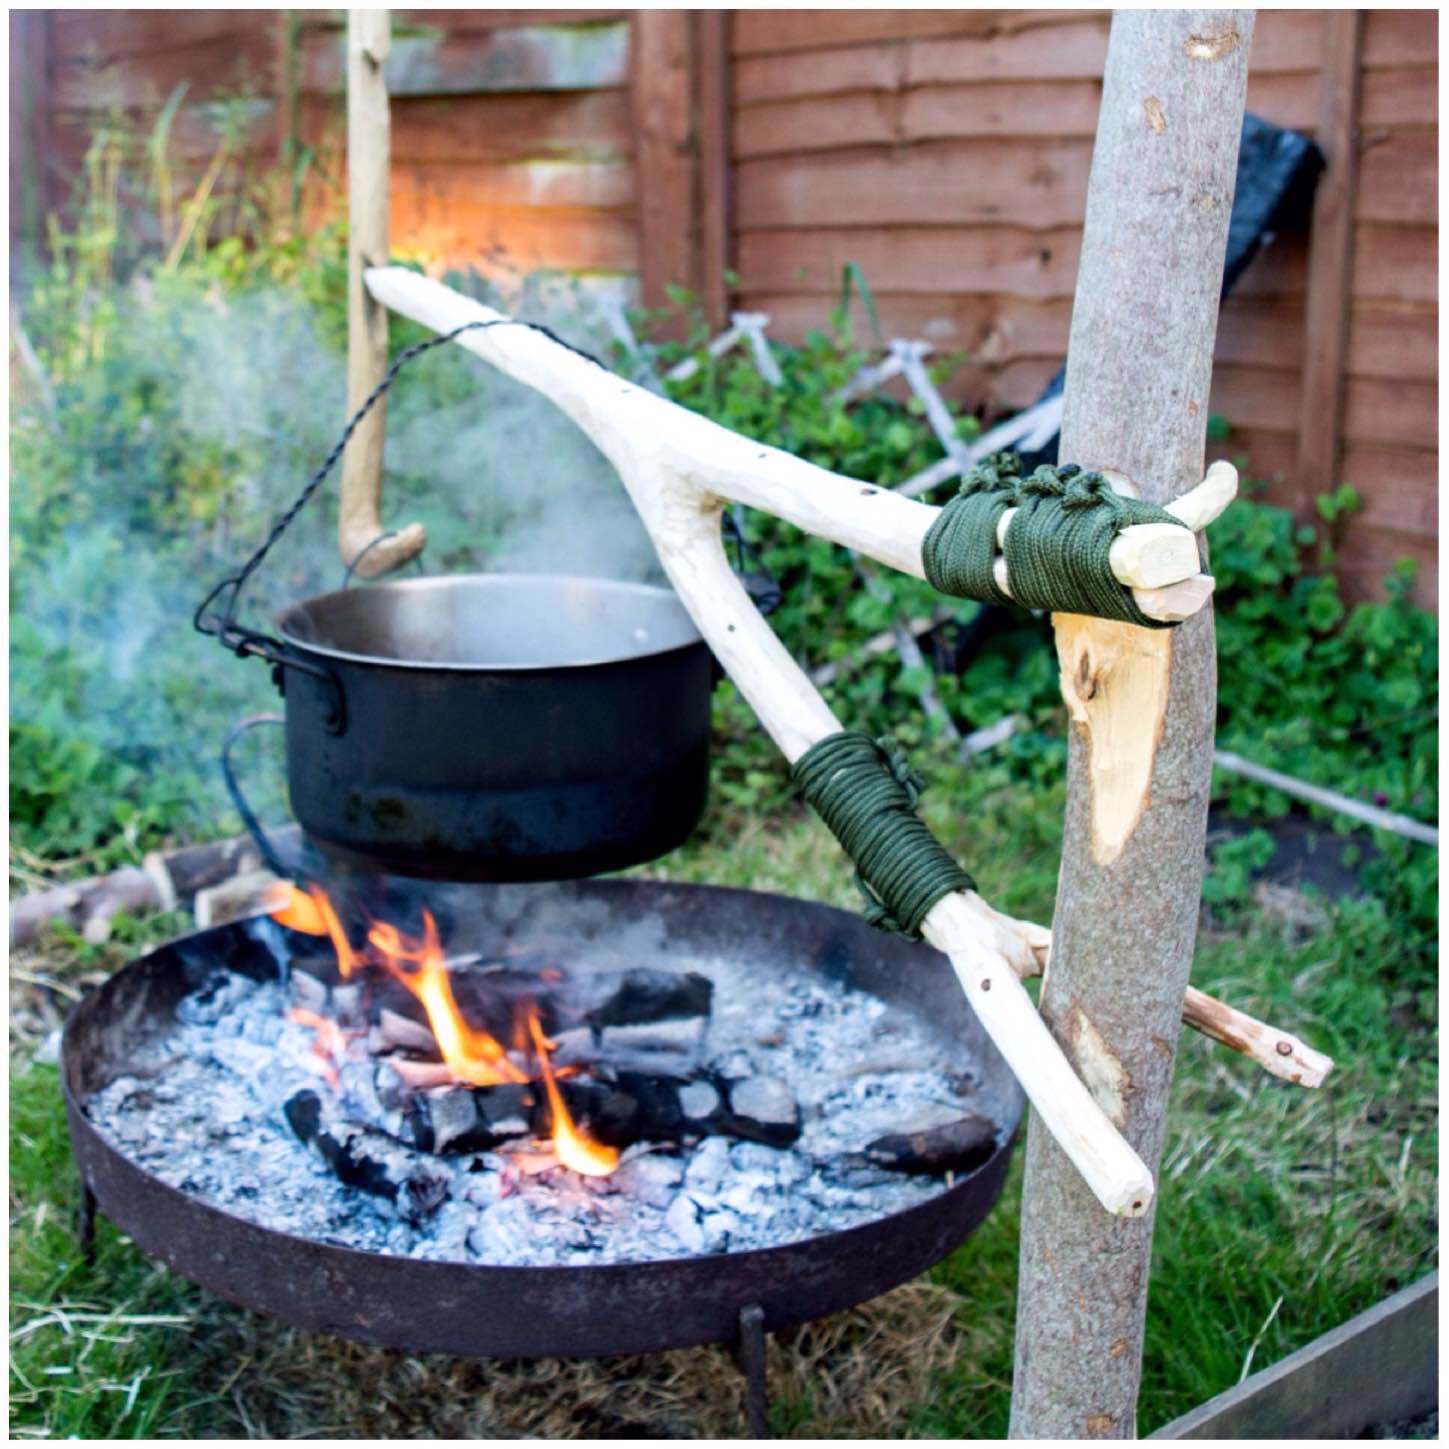
This is the second of my blog posts on the Aures campfire crane trilogy. I call it the Gibbet crane based on a pot hook I found mentioned in the book Camp-lore and Woodcraft. The crane does look a bit like a traditional gibbet but the name apparently refers to the overlapping joints used in its construction rather than its likeness to an instrument of execution.

This is a great project for the longer-term camp or if you want a bit of practice carving joints and whipping.

The Gibbet Aures Crane

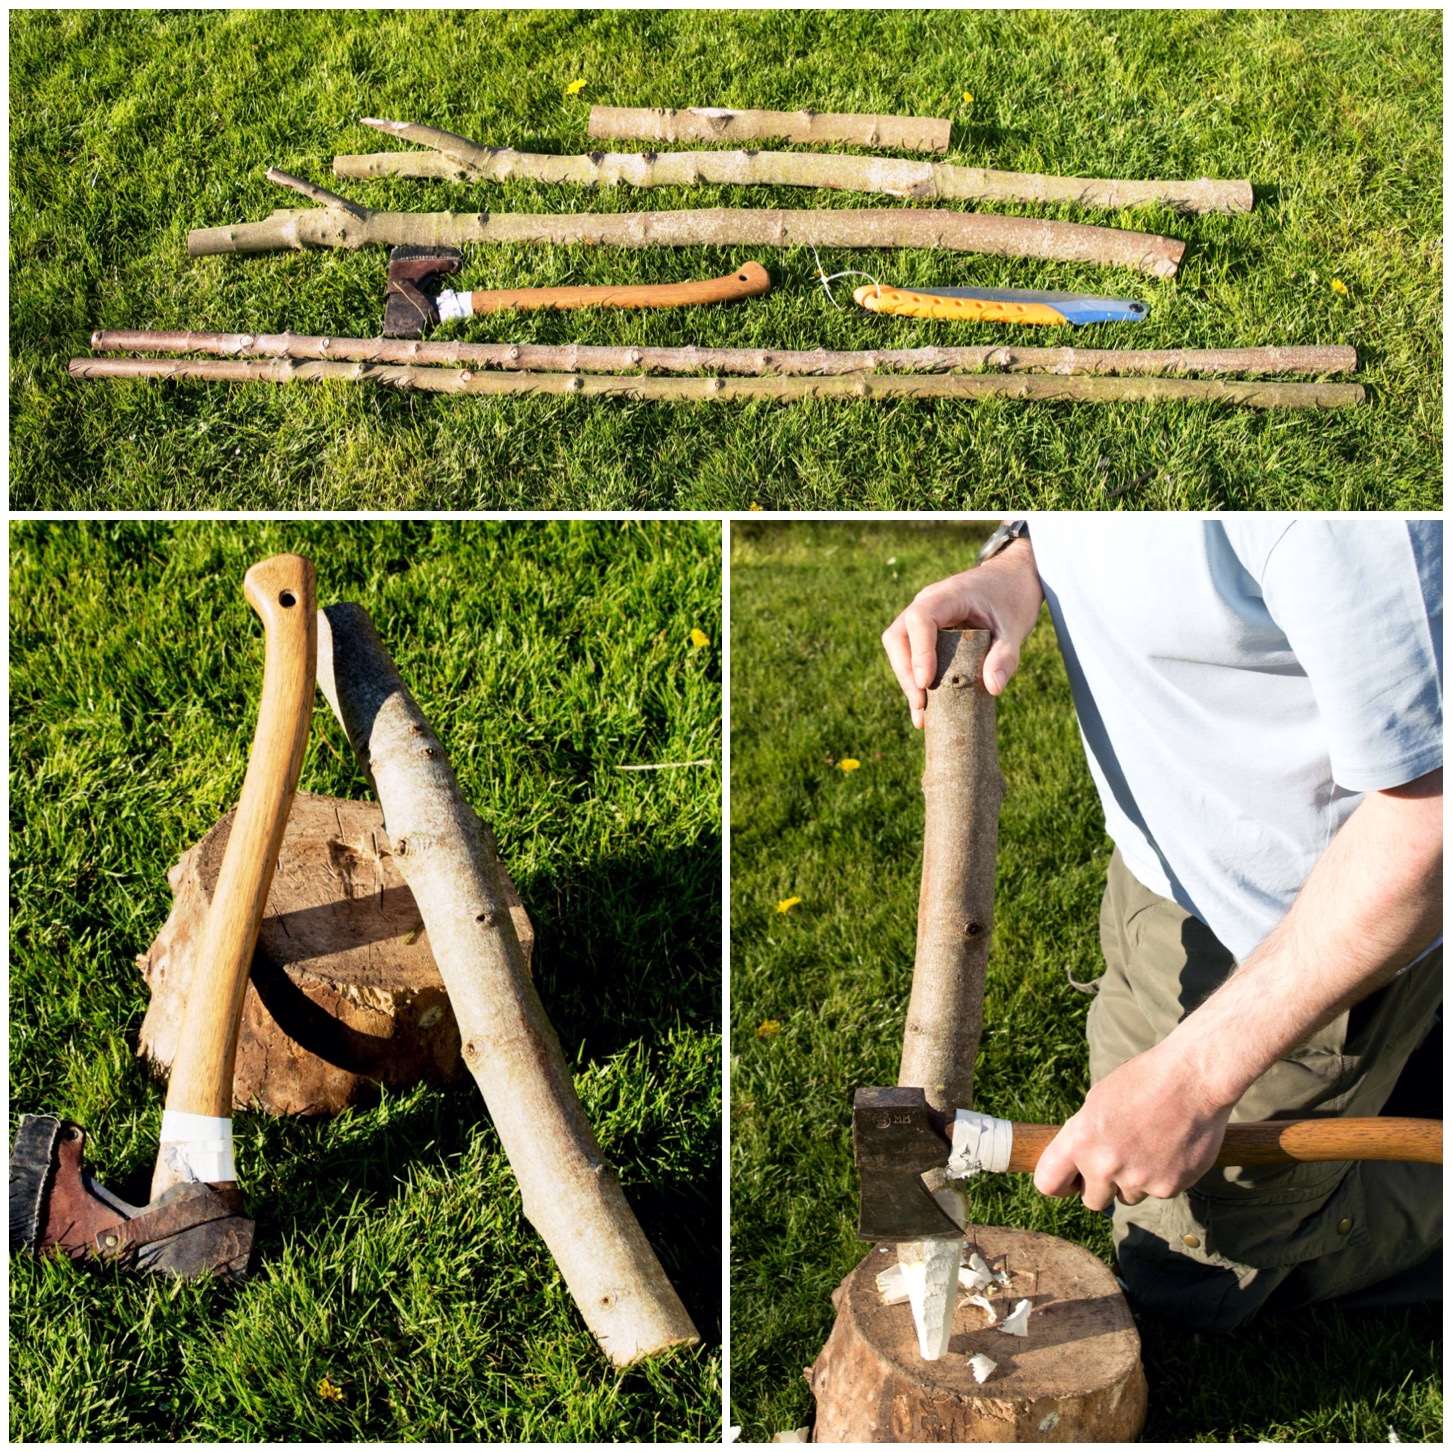
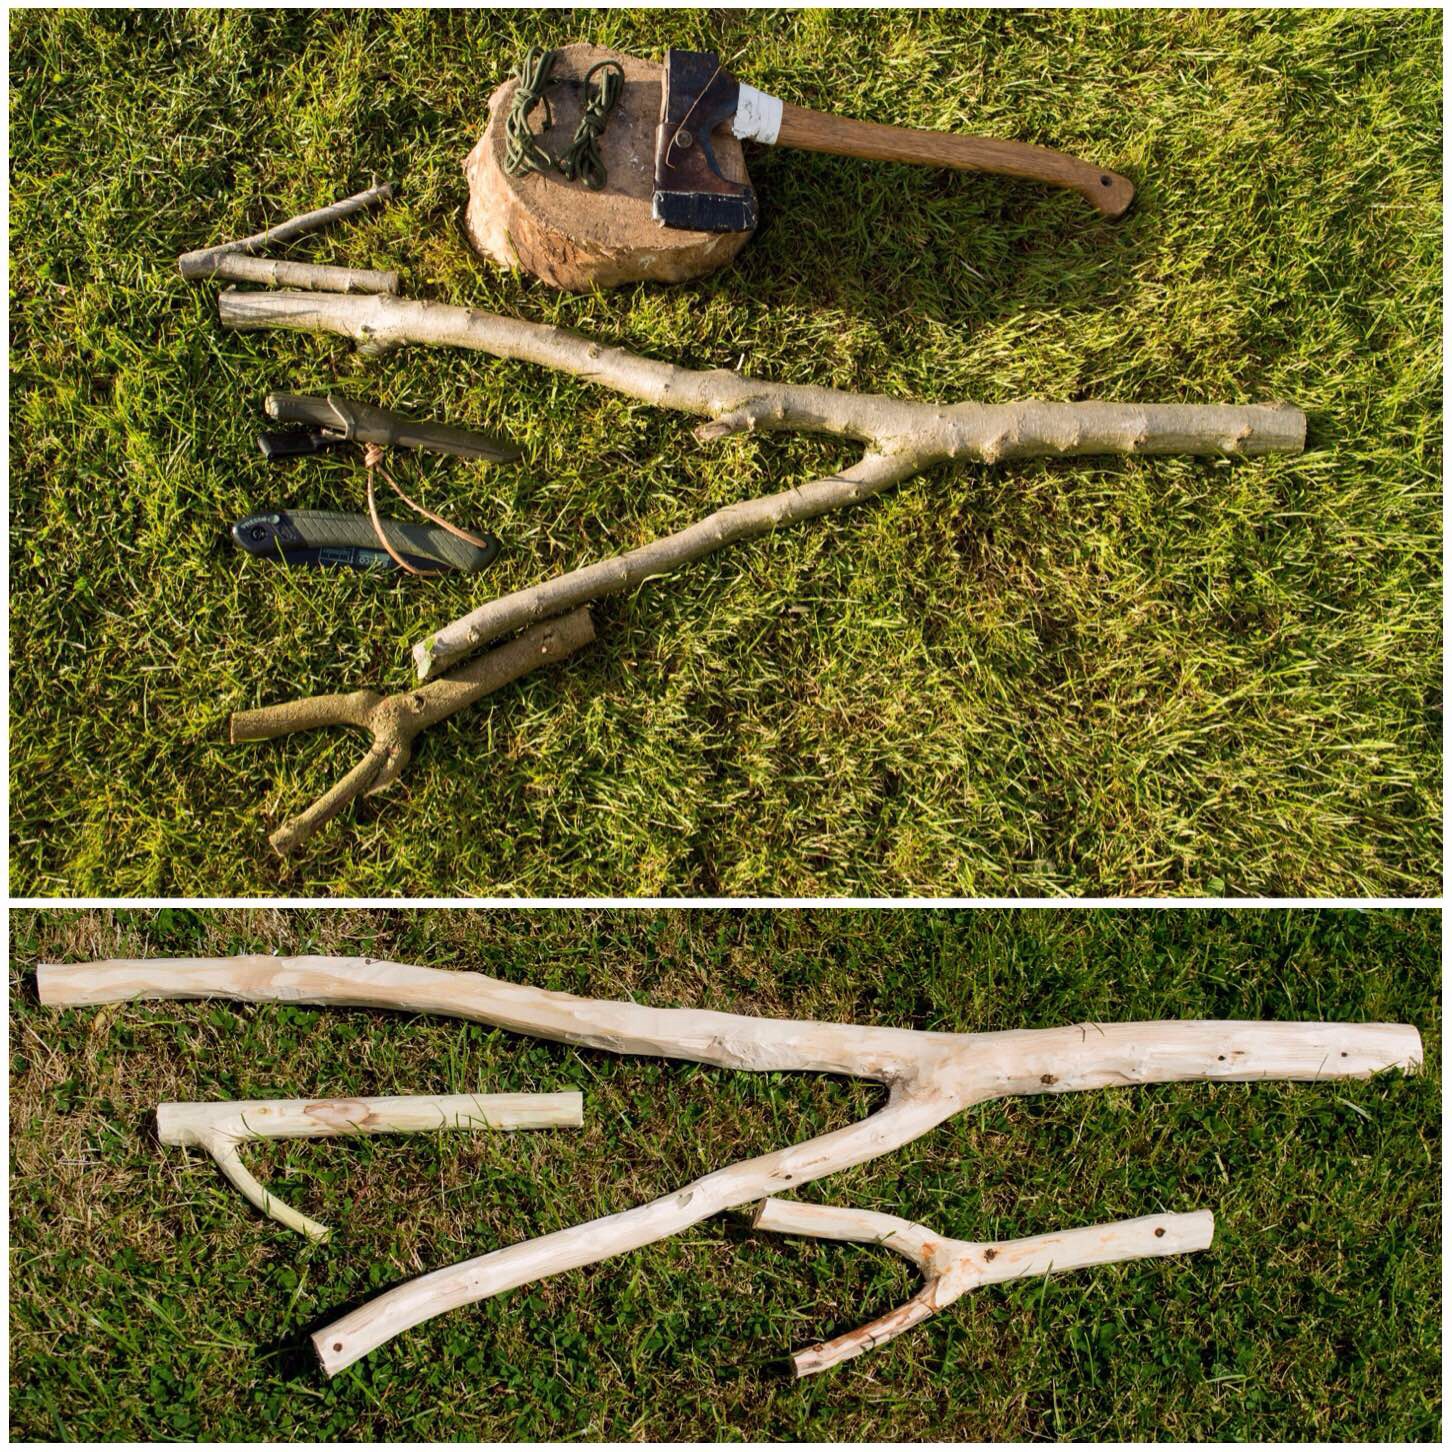
As usual the tools for making the crane are to be found in most bushcrafters’ backpacks – a knife, saw and axe. I saw this crane set up many years ago at a camp however I have seen little written up about it in books or online.

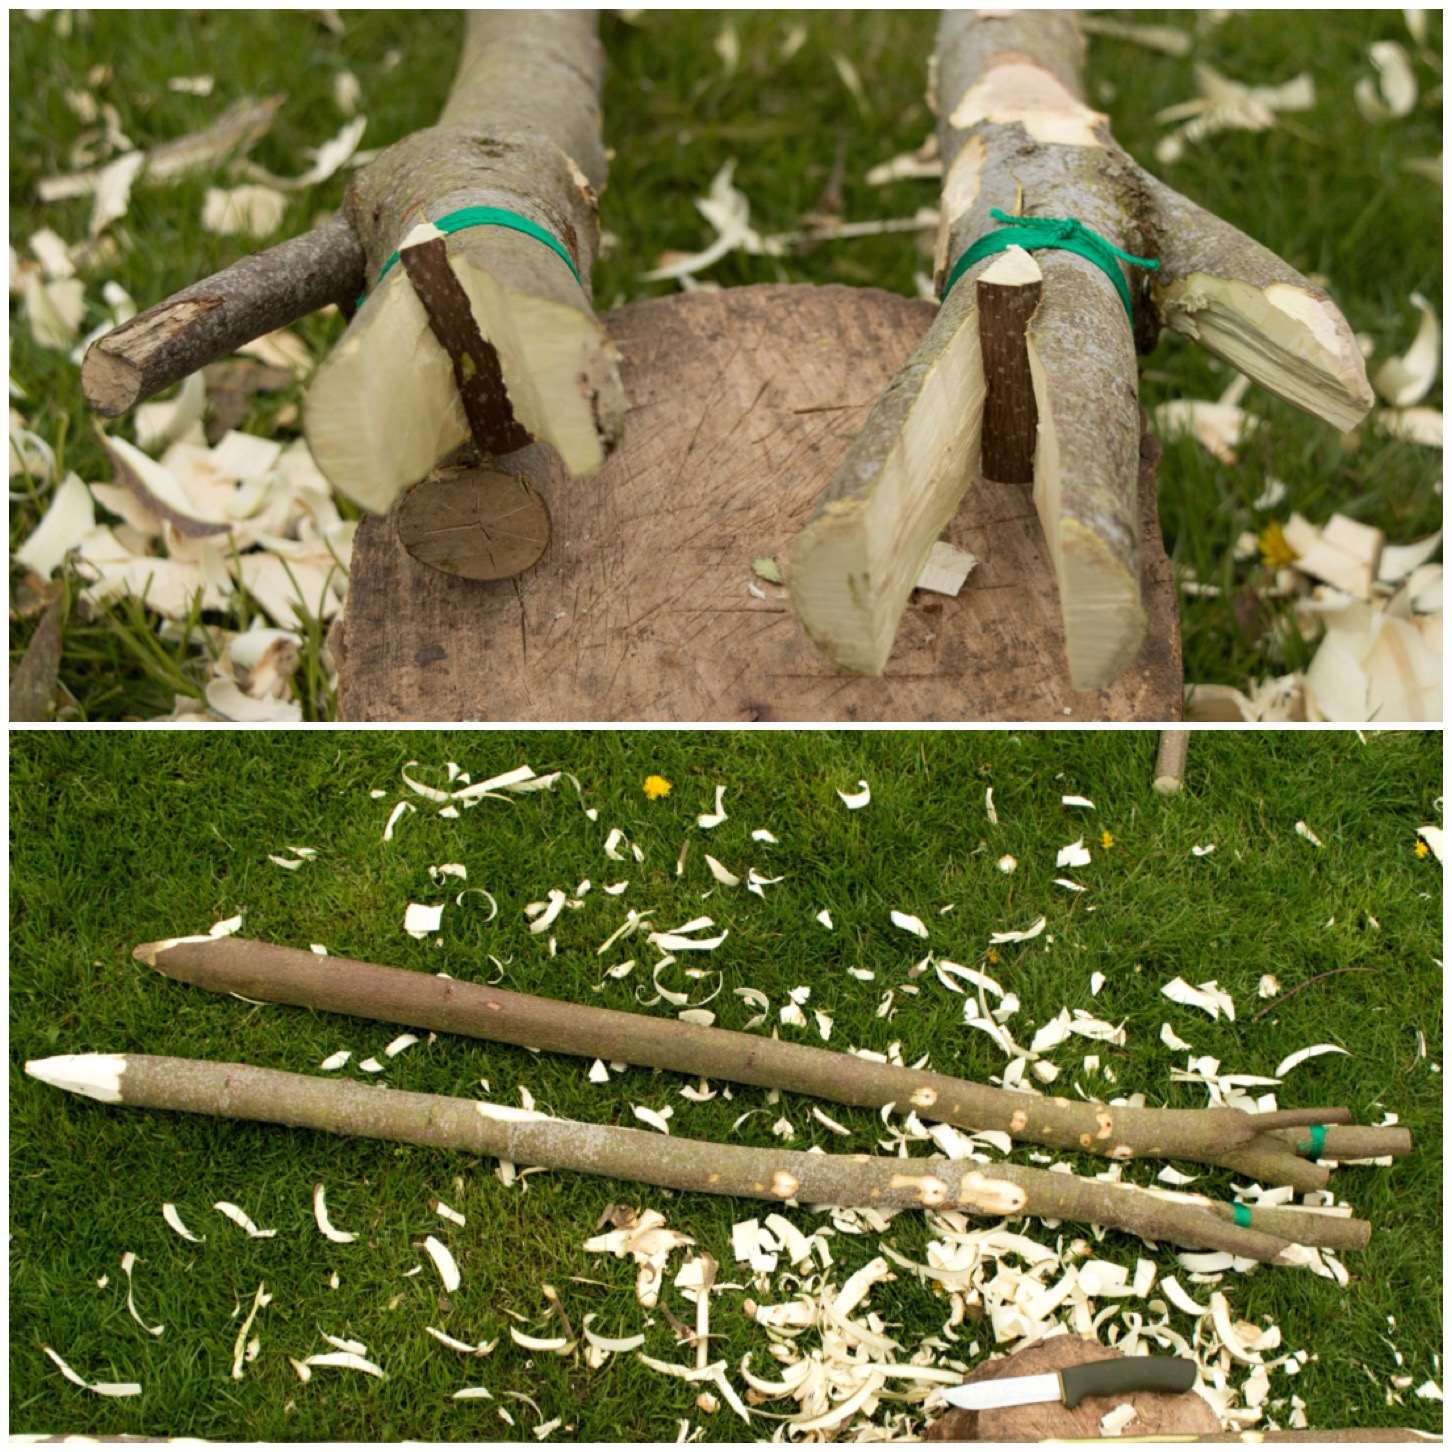
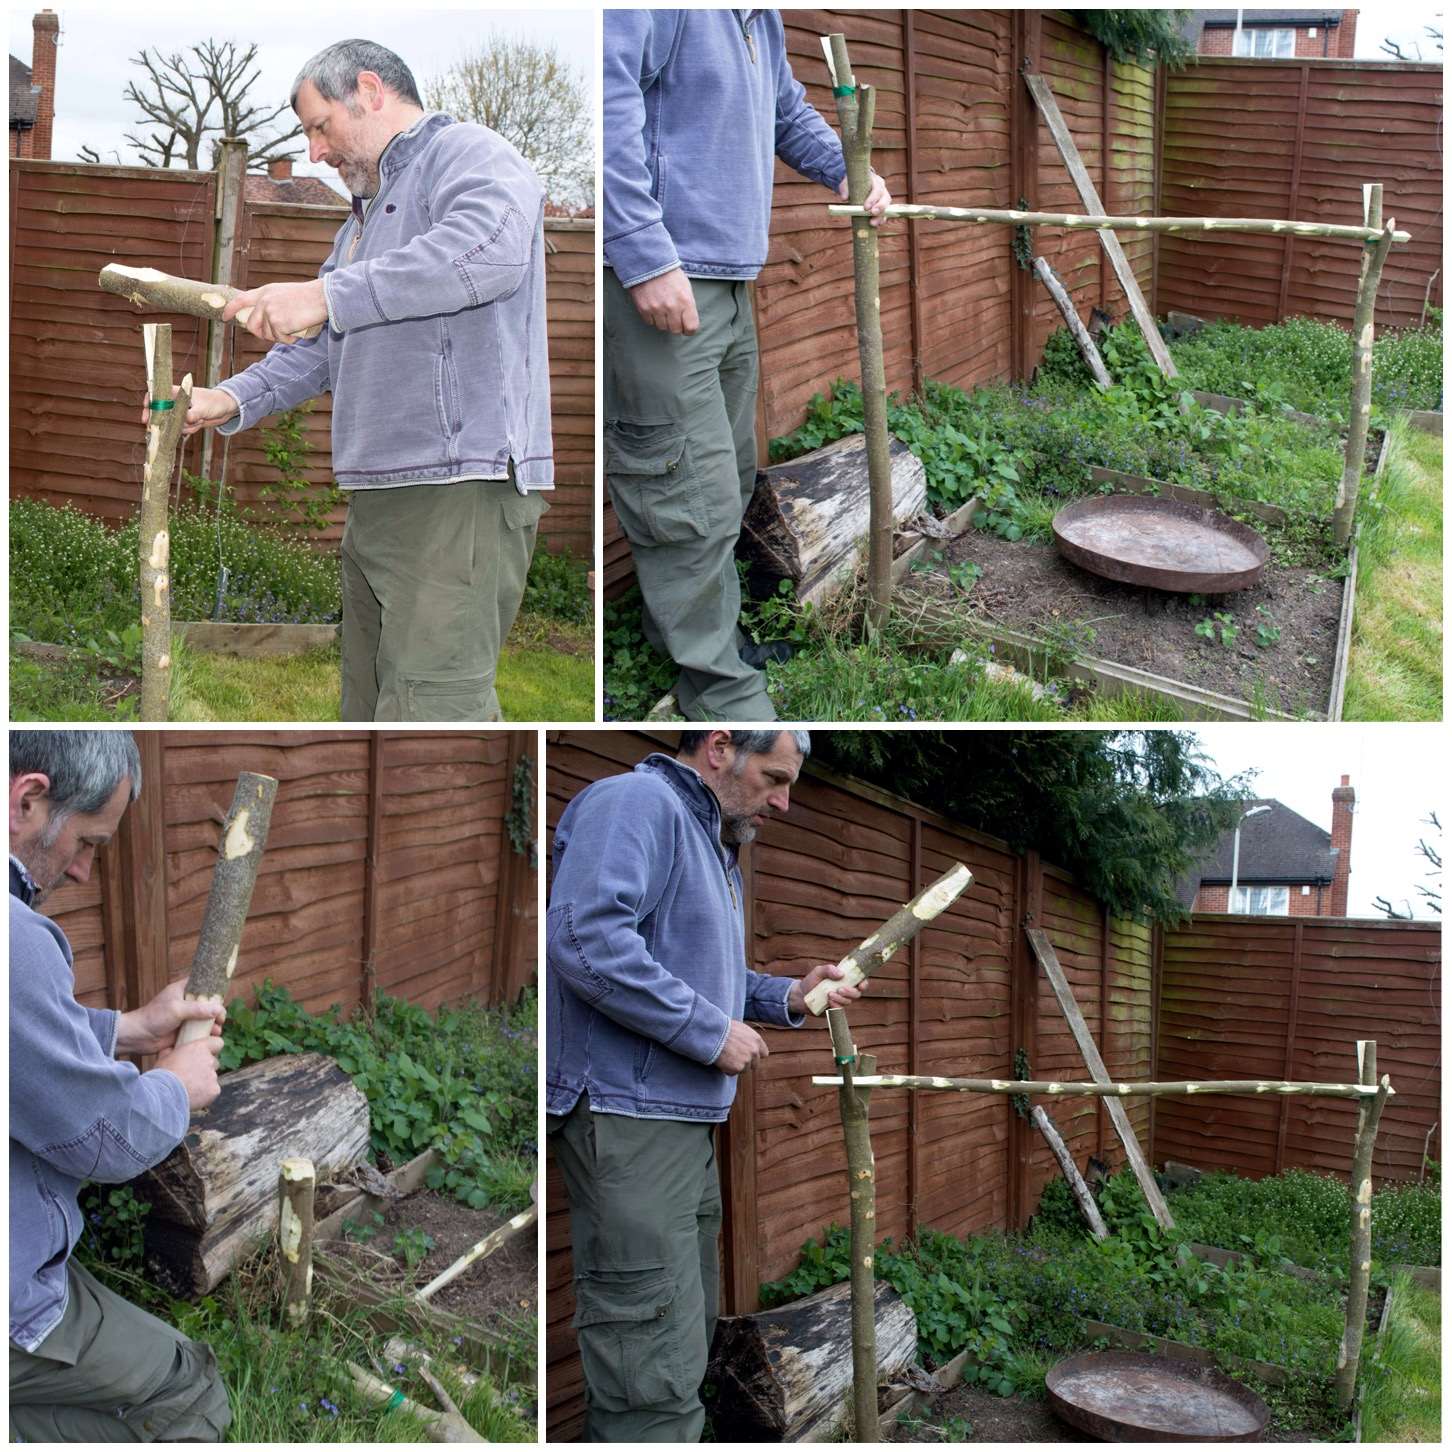
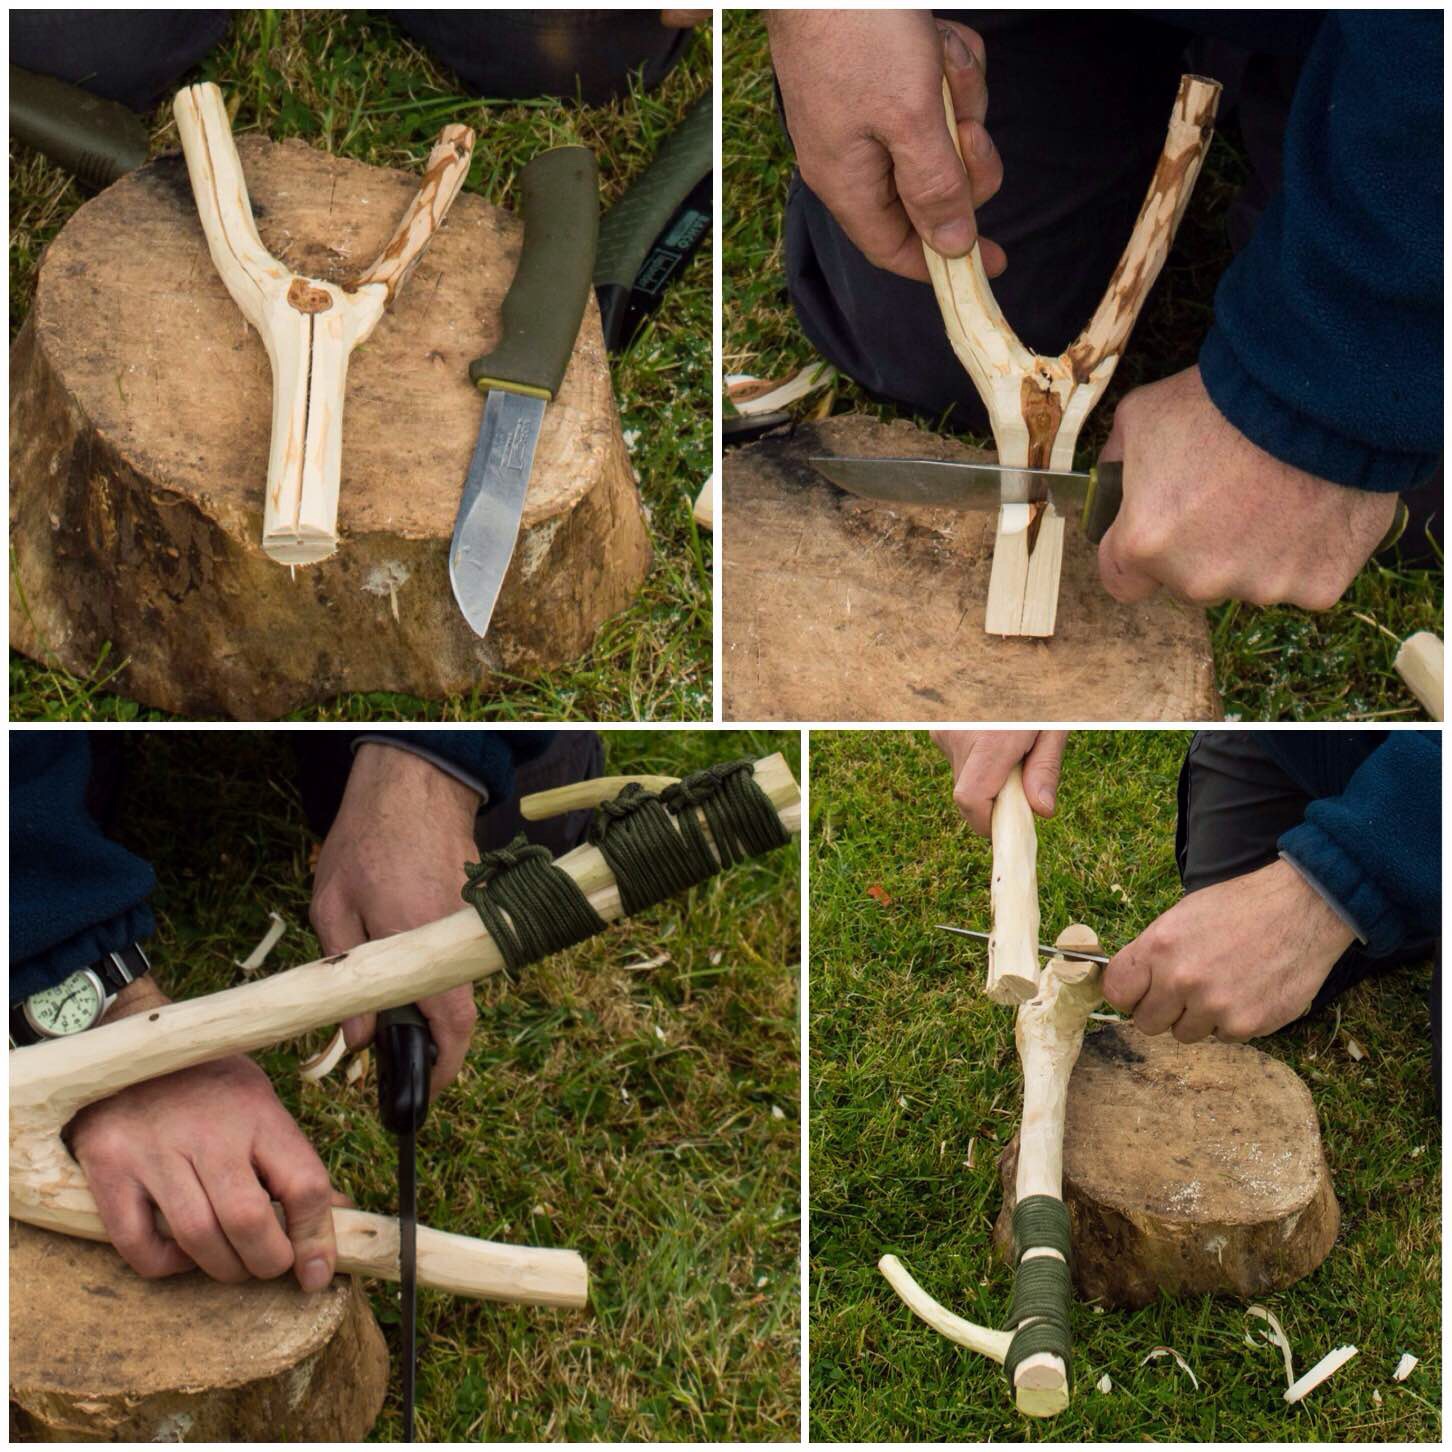
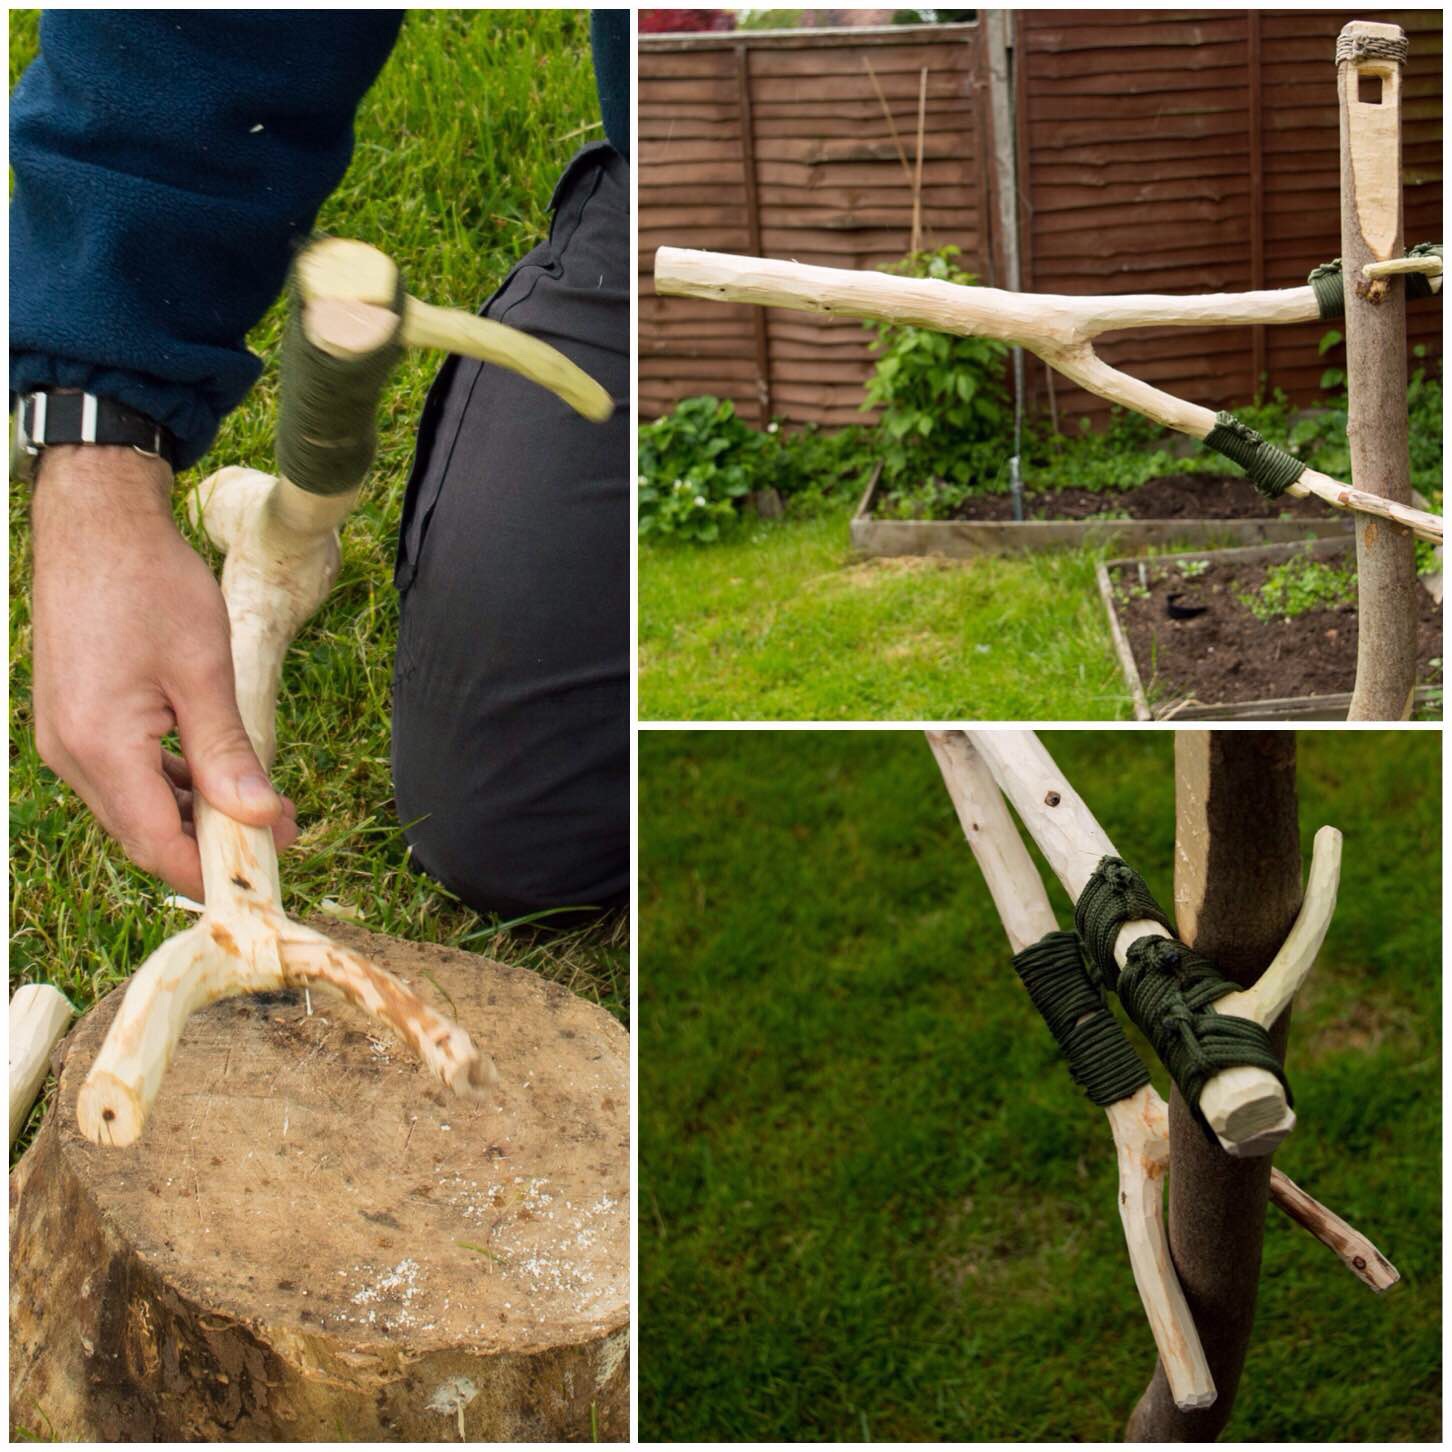
I found one piece of wood with a strong fork and a smaller catapult-shaped fork (bottom left below) and I cut a limb with a branch coming out (top left below).

The first job I did was to strip off all the bark from all the pieces.

image
Tools and basic parts

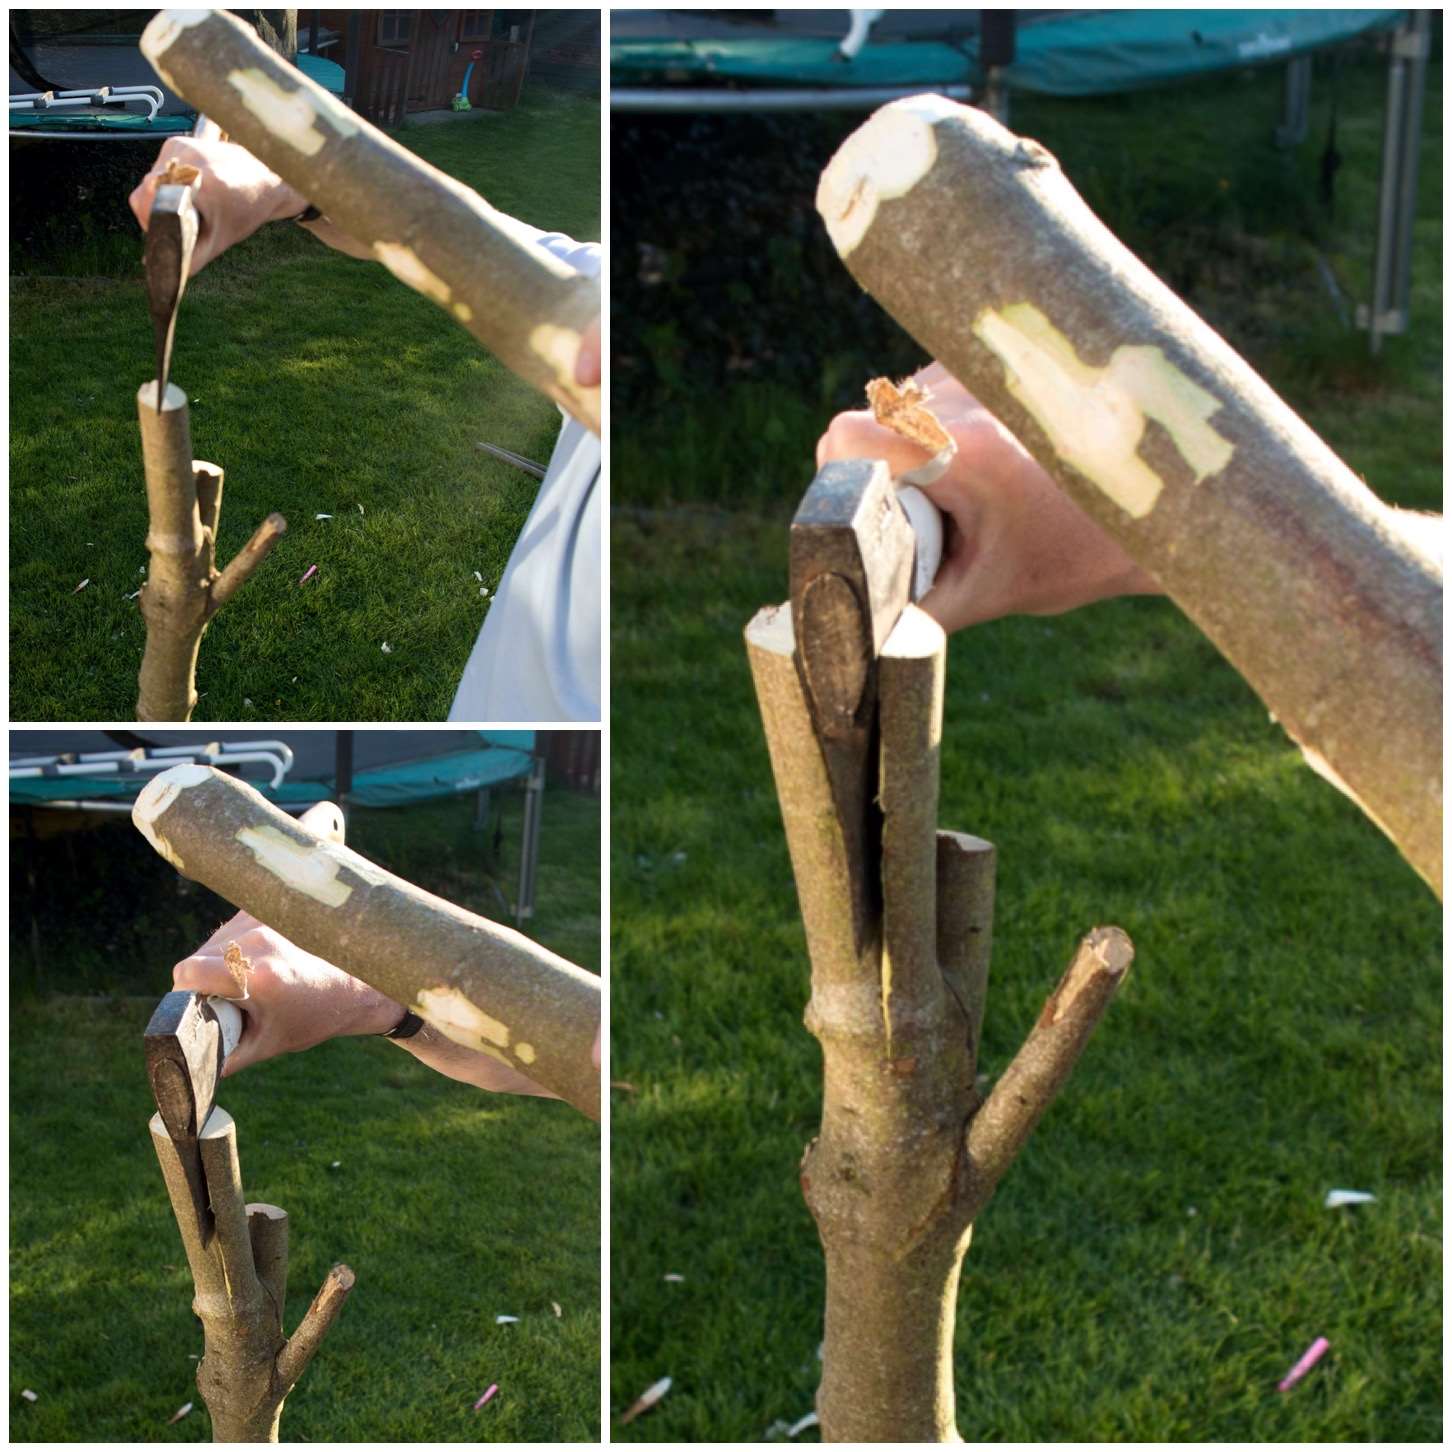
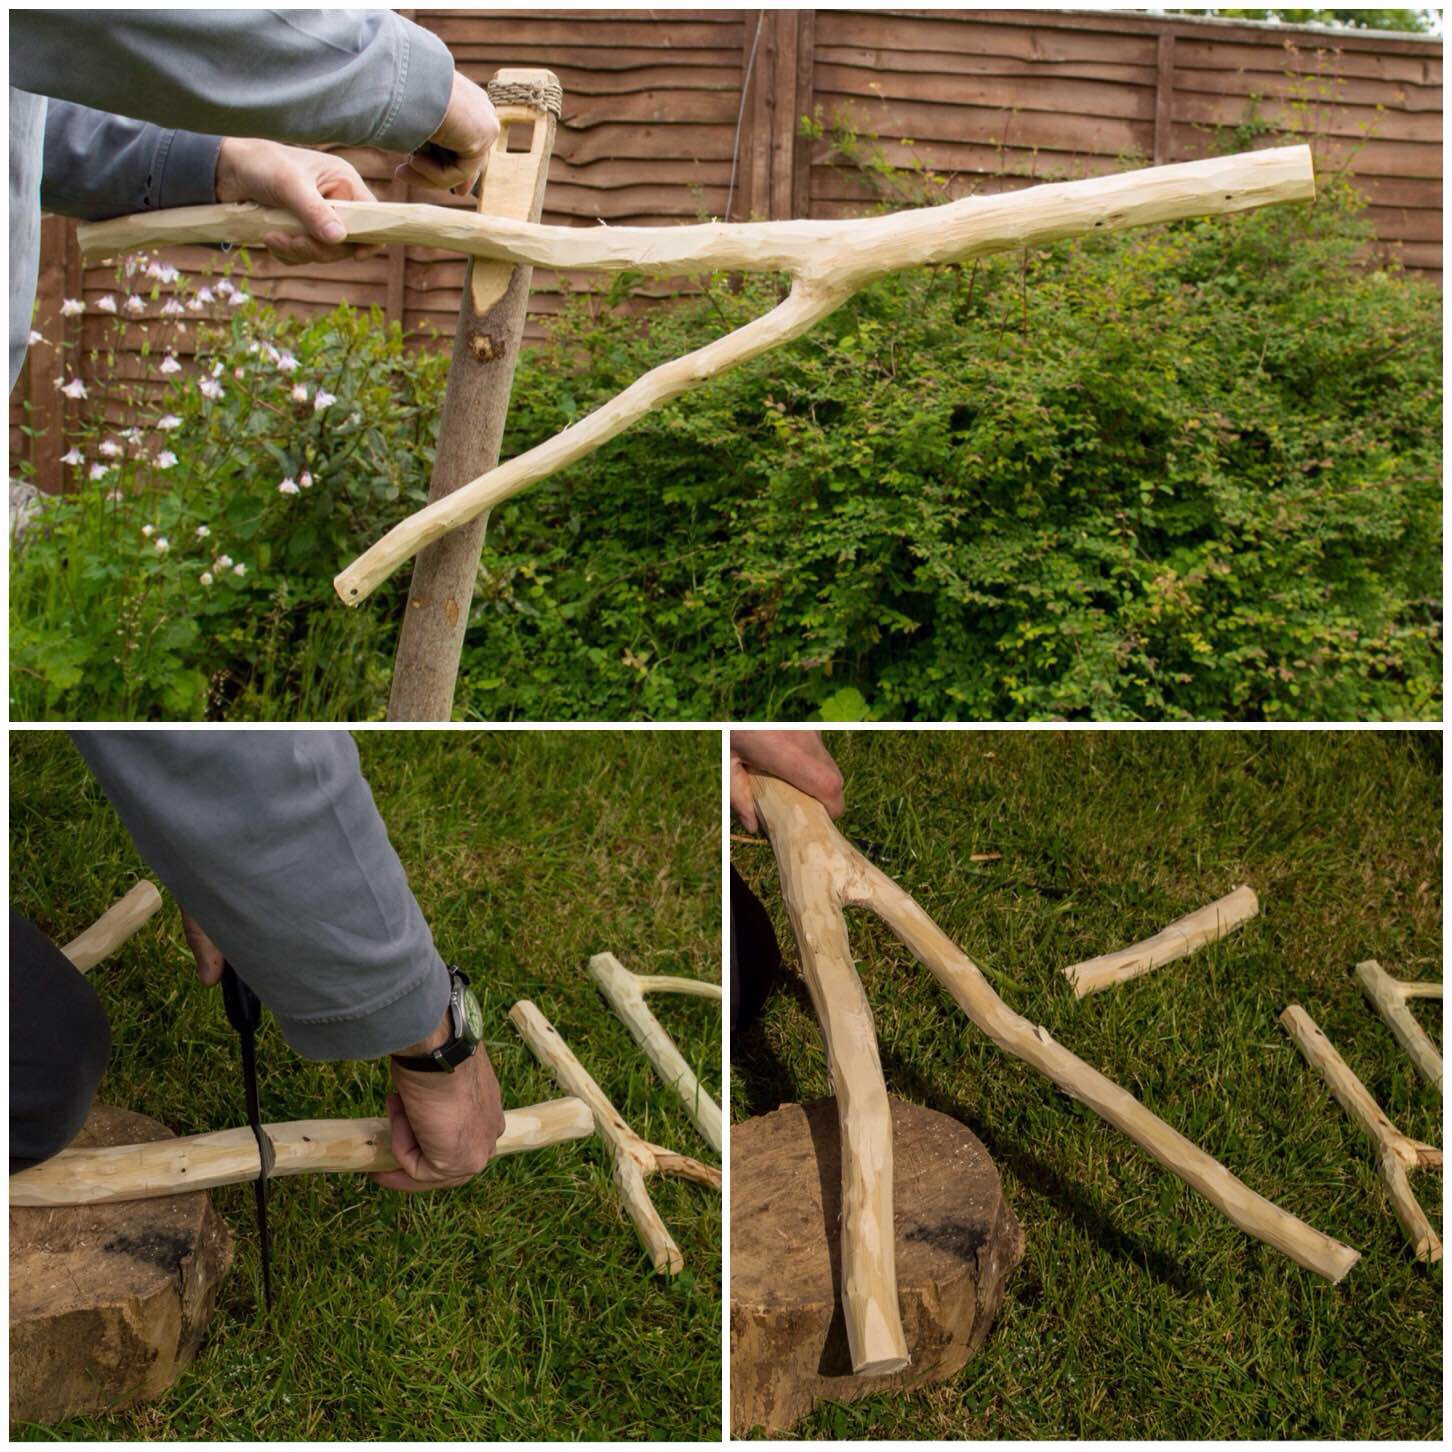
I placed the large fork up against the pole it would hang off to measure where I needed to trim each limb. To do that I just used my knife to mark the limbs. The top limb needs to be marked to the left of the pole (as you see in the picture below) and the bottom limb needs to be marked to the right of the pole as you see it below.

Carving the top limb

To begin with I trimmed the top limb at its mark with my saw, leaving the bottom one for the moment.

image
Measuring and trimming the top limb

I laid the small hook beside the end of the top limb so that the hook was pointing towards the big fork and marked where I wanted to trim it. I did not want to leave it too big – just big enough to be whipped to the big fork.

image
Measuring and trimming the top hook

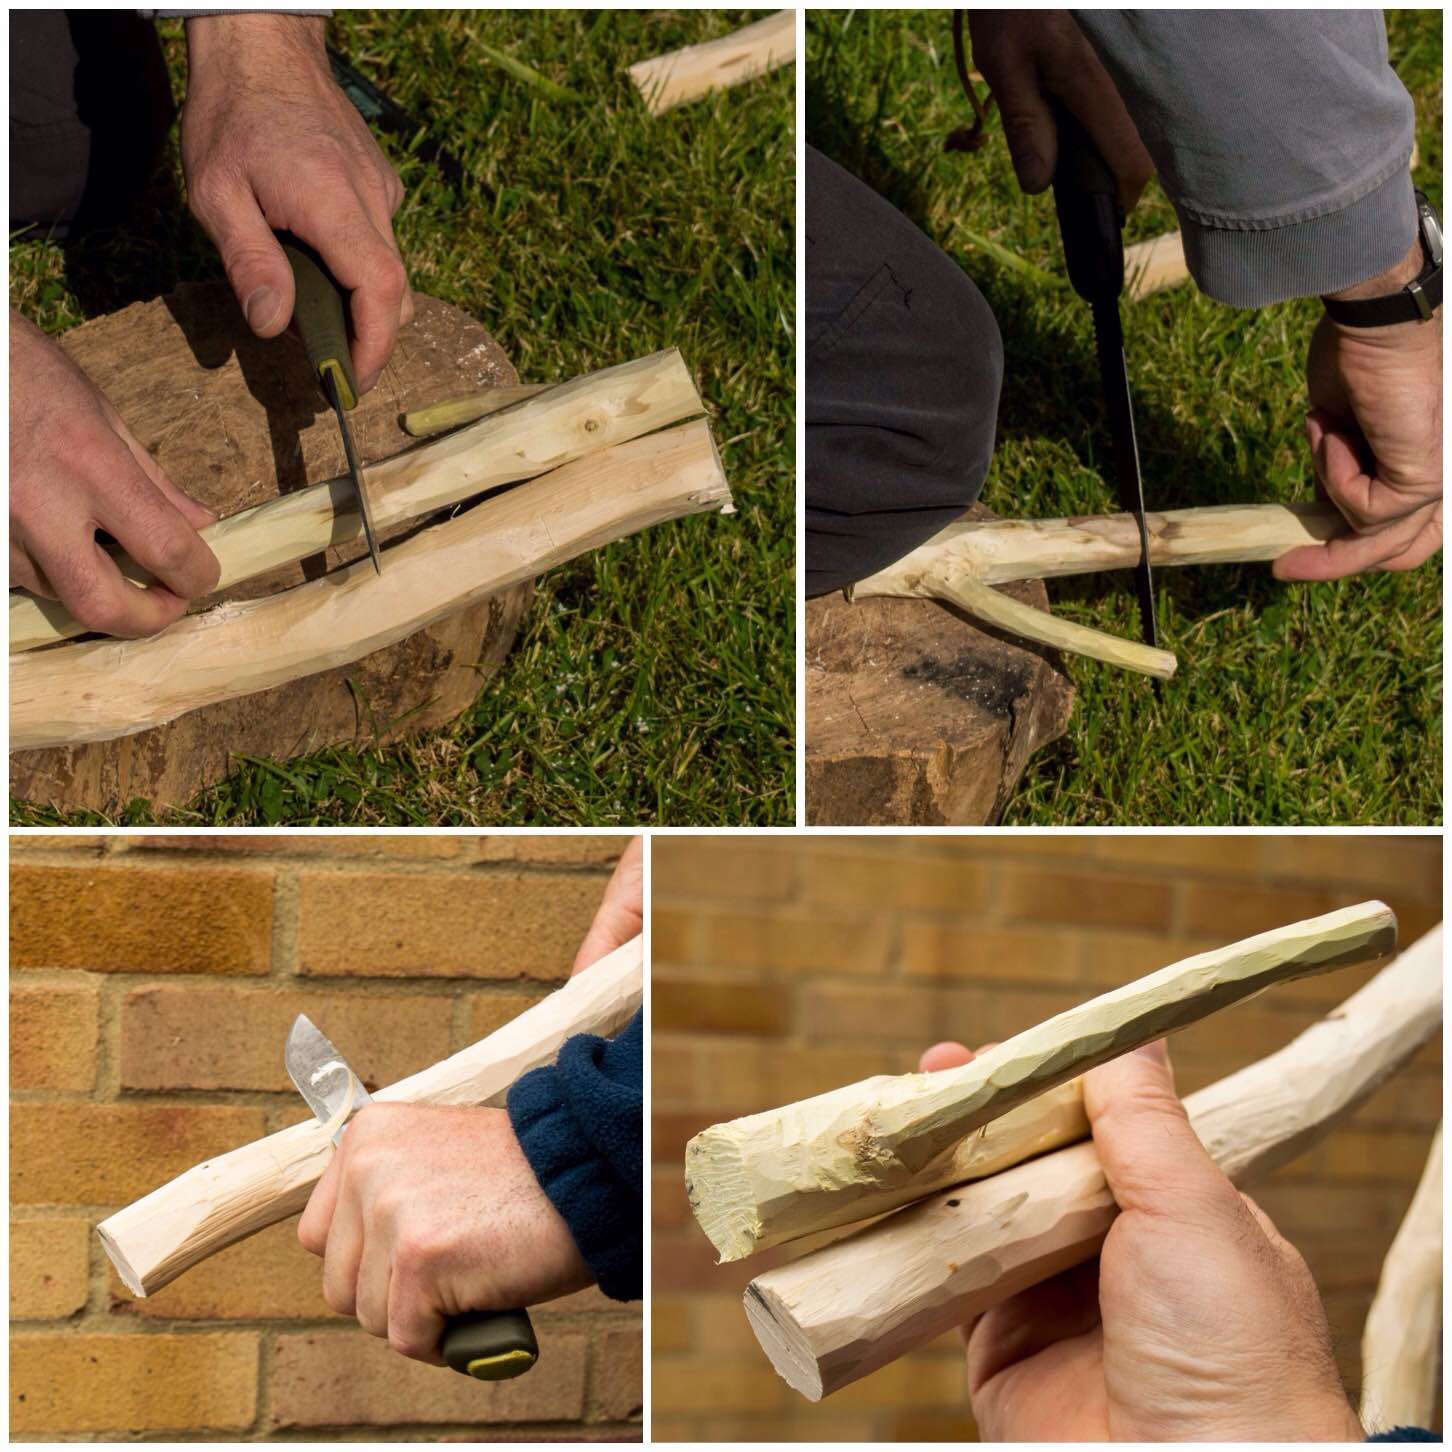
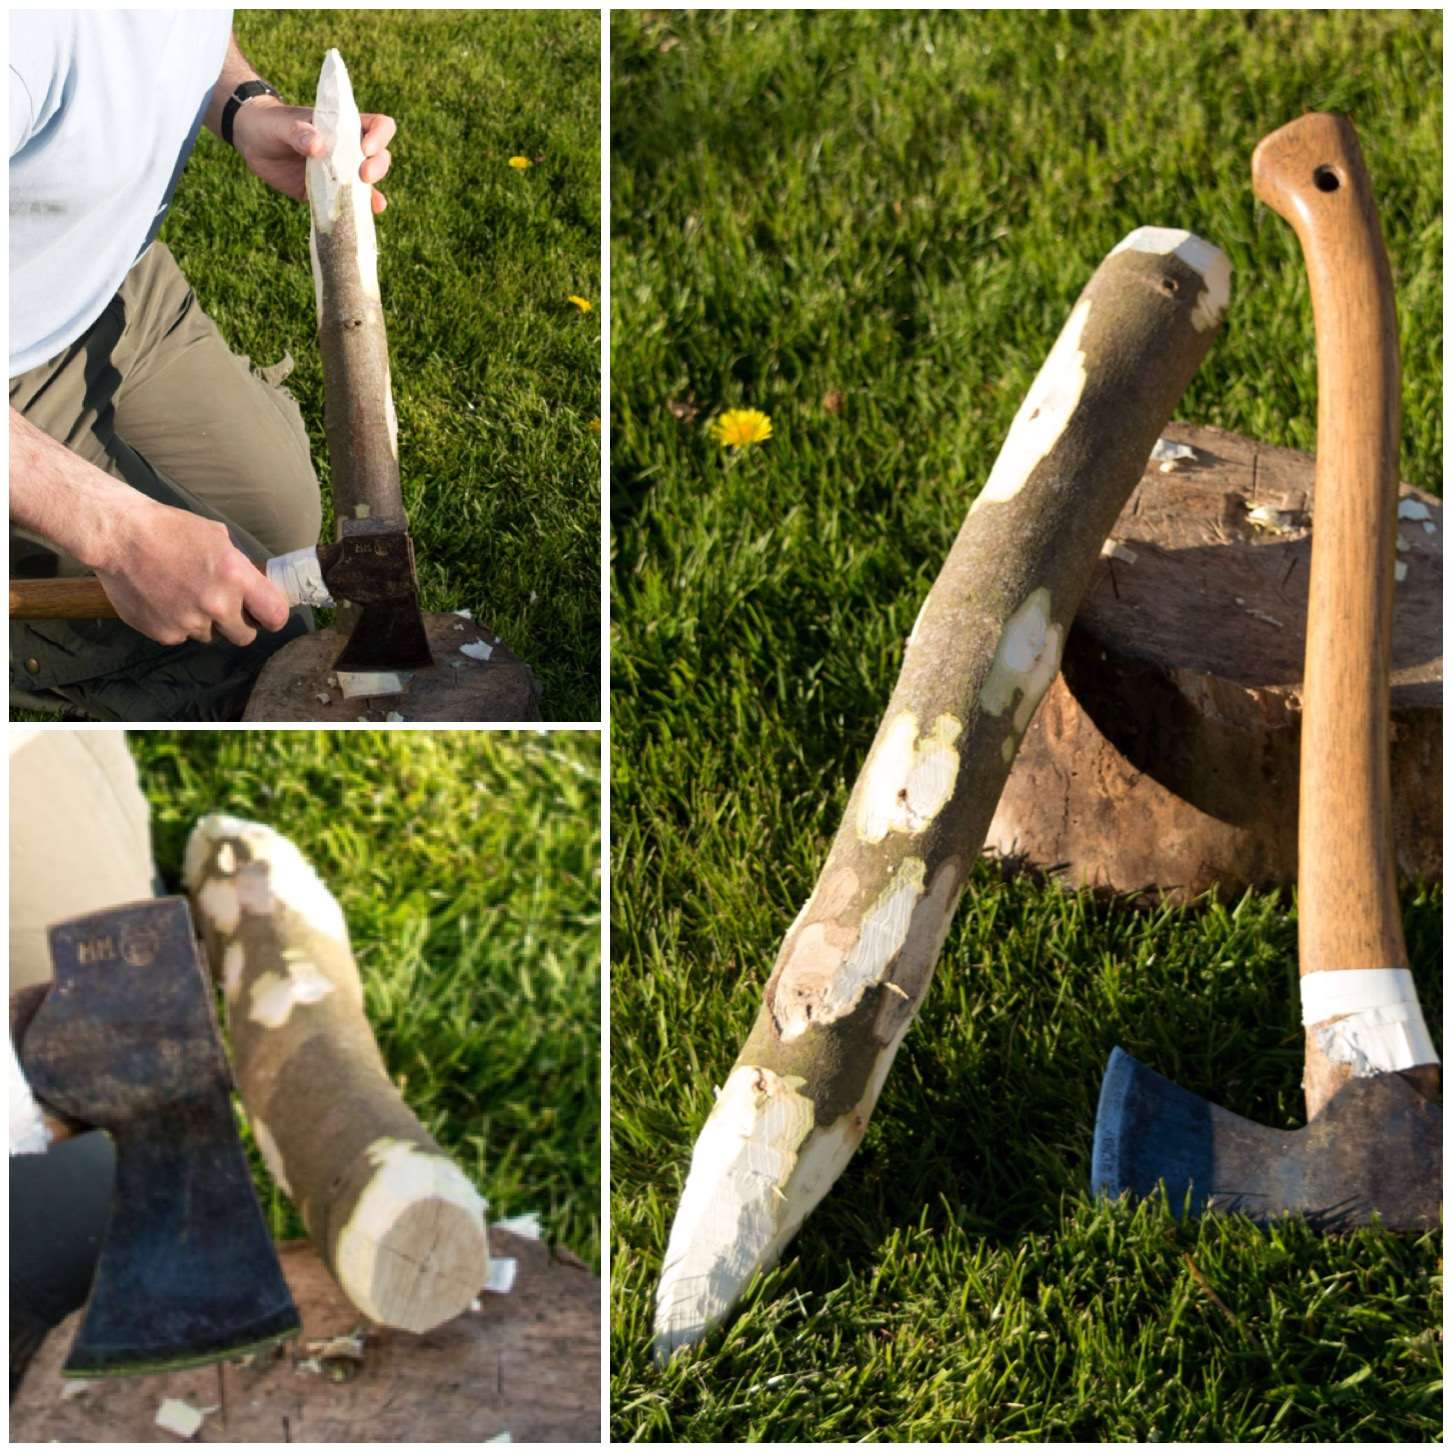
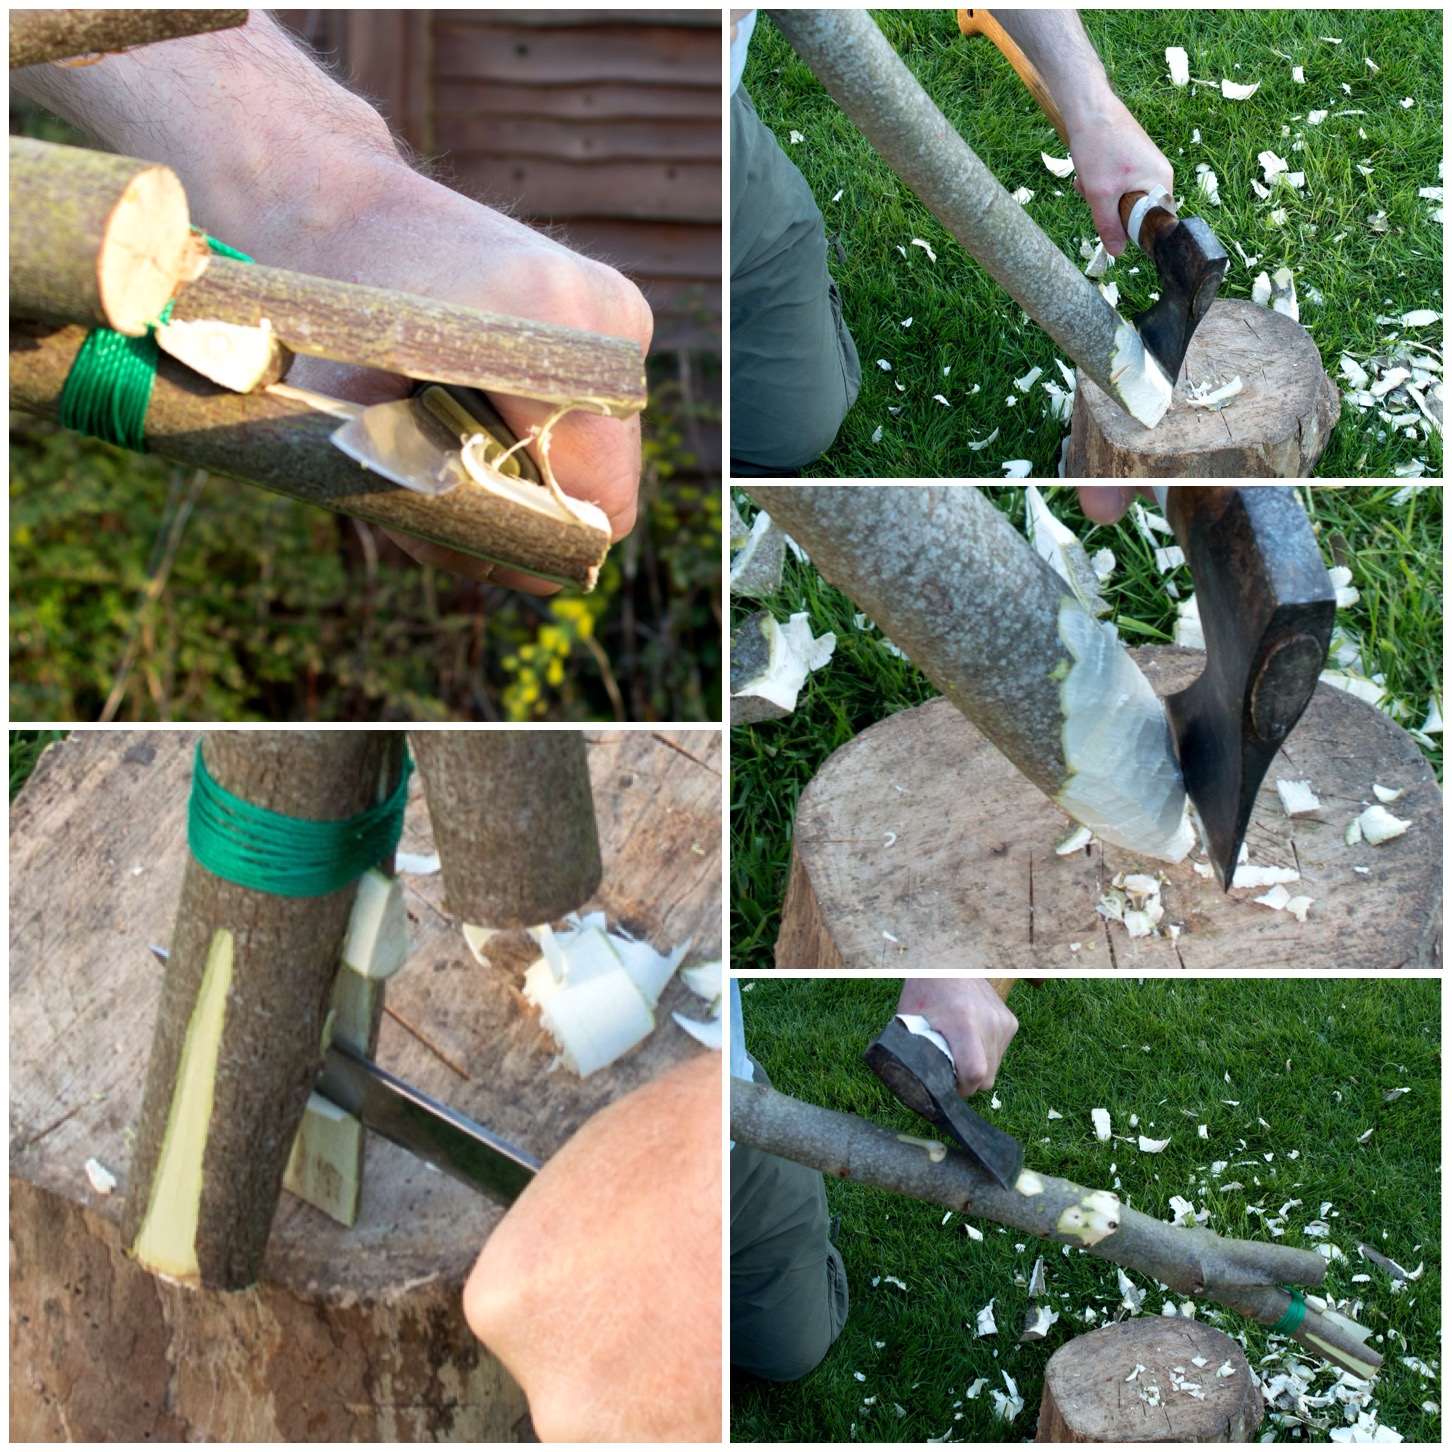
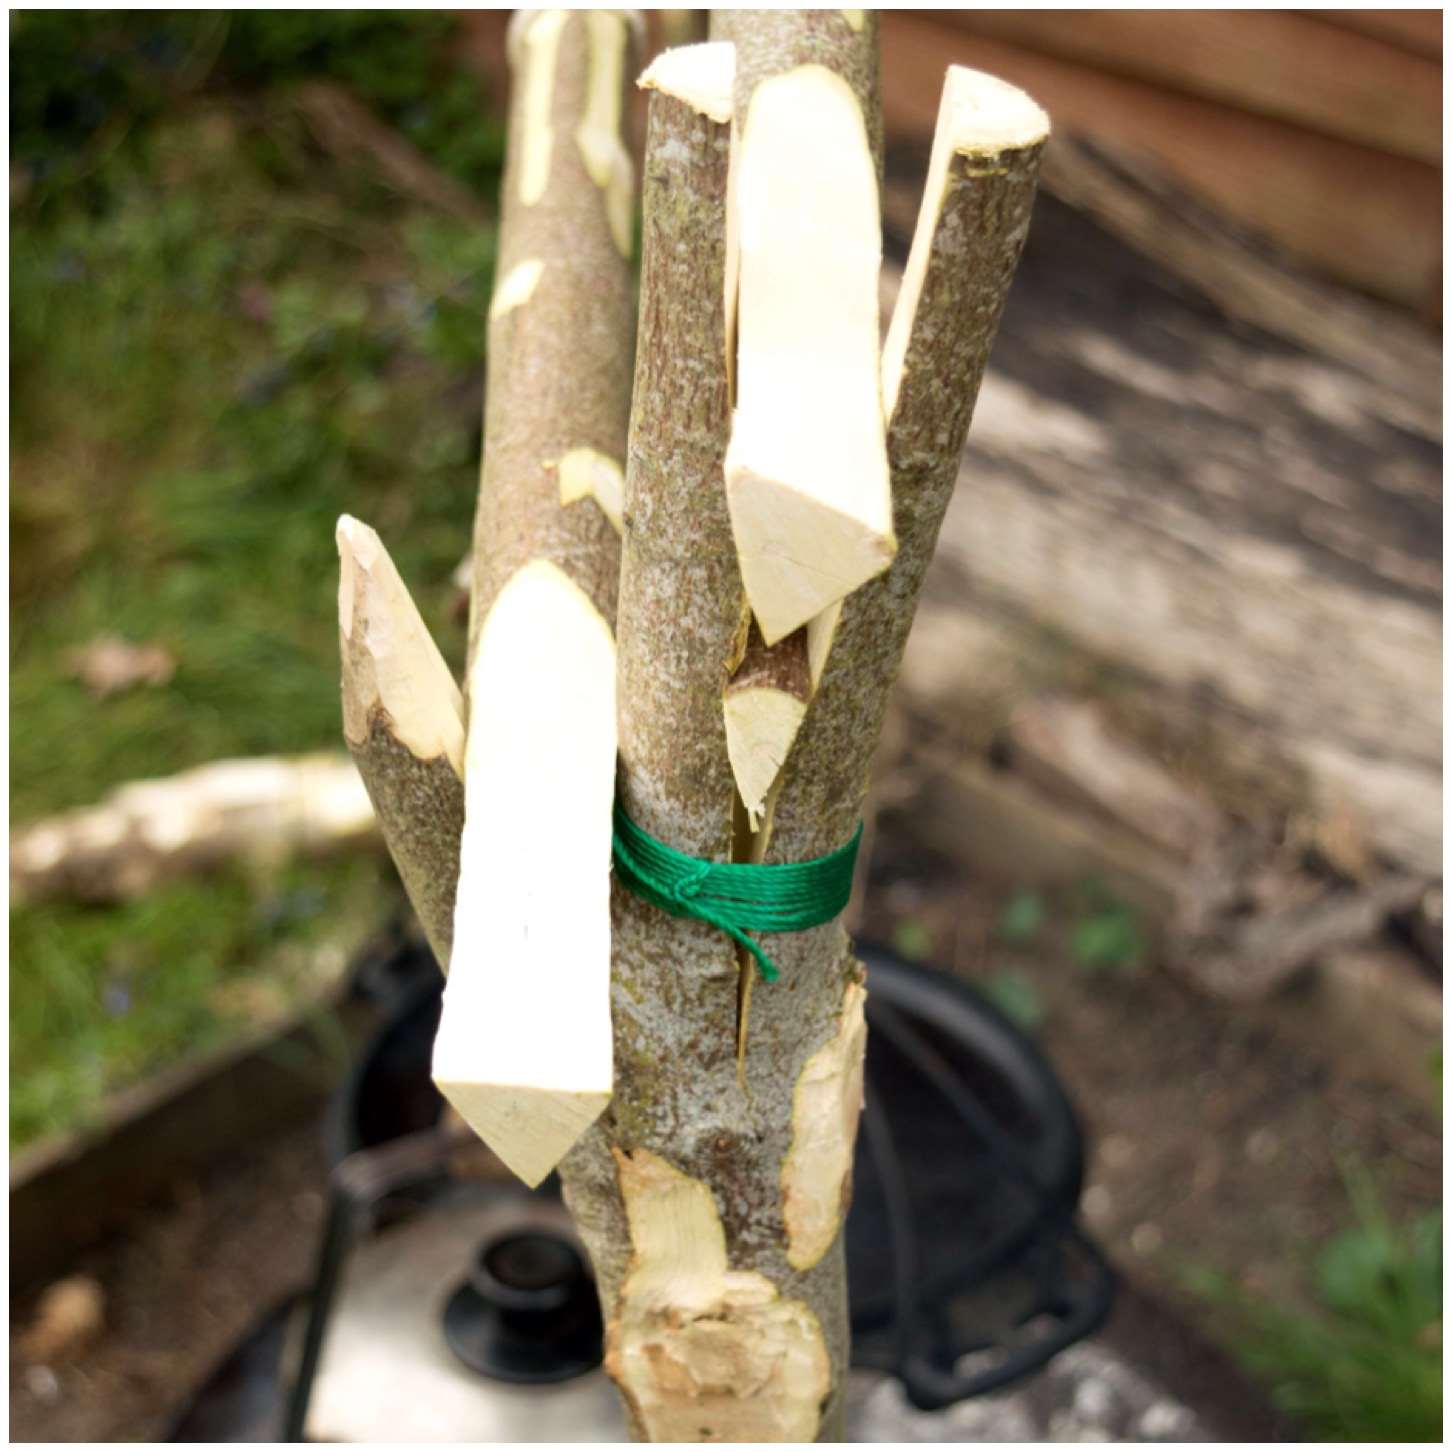
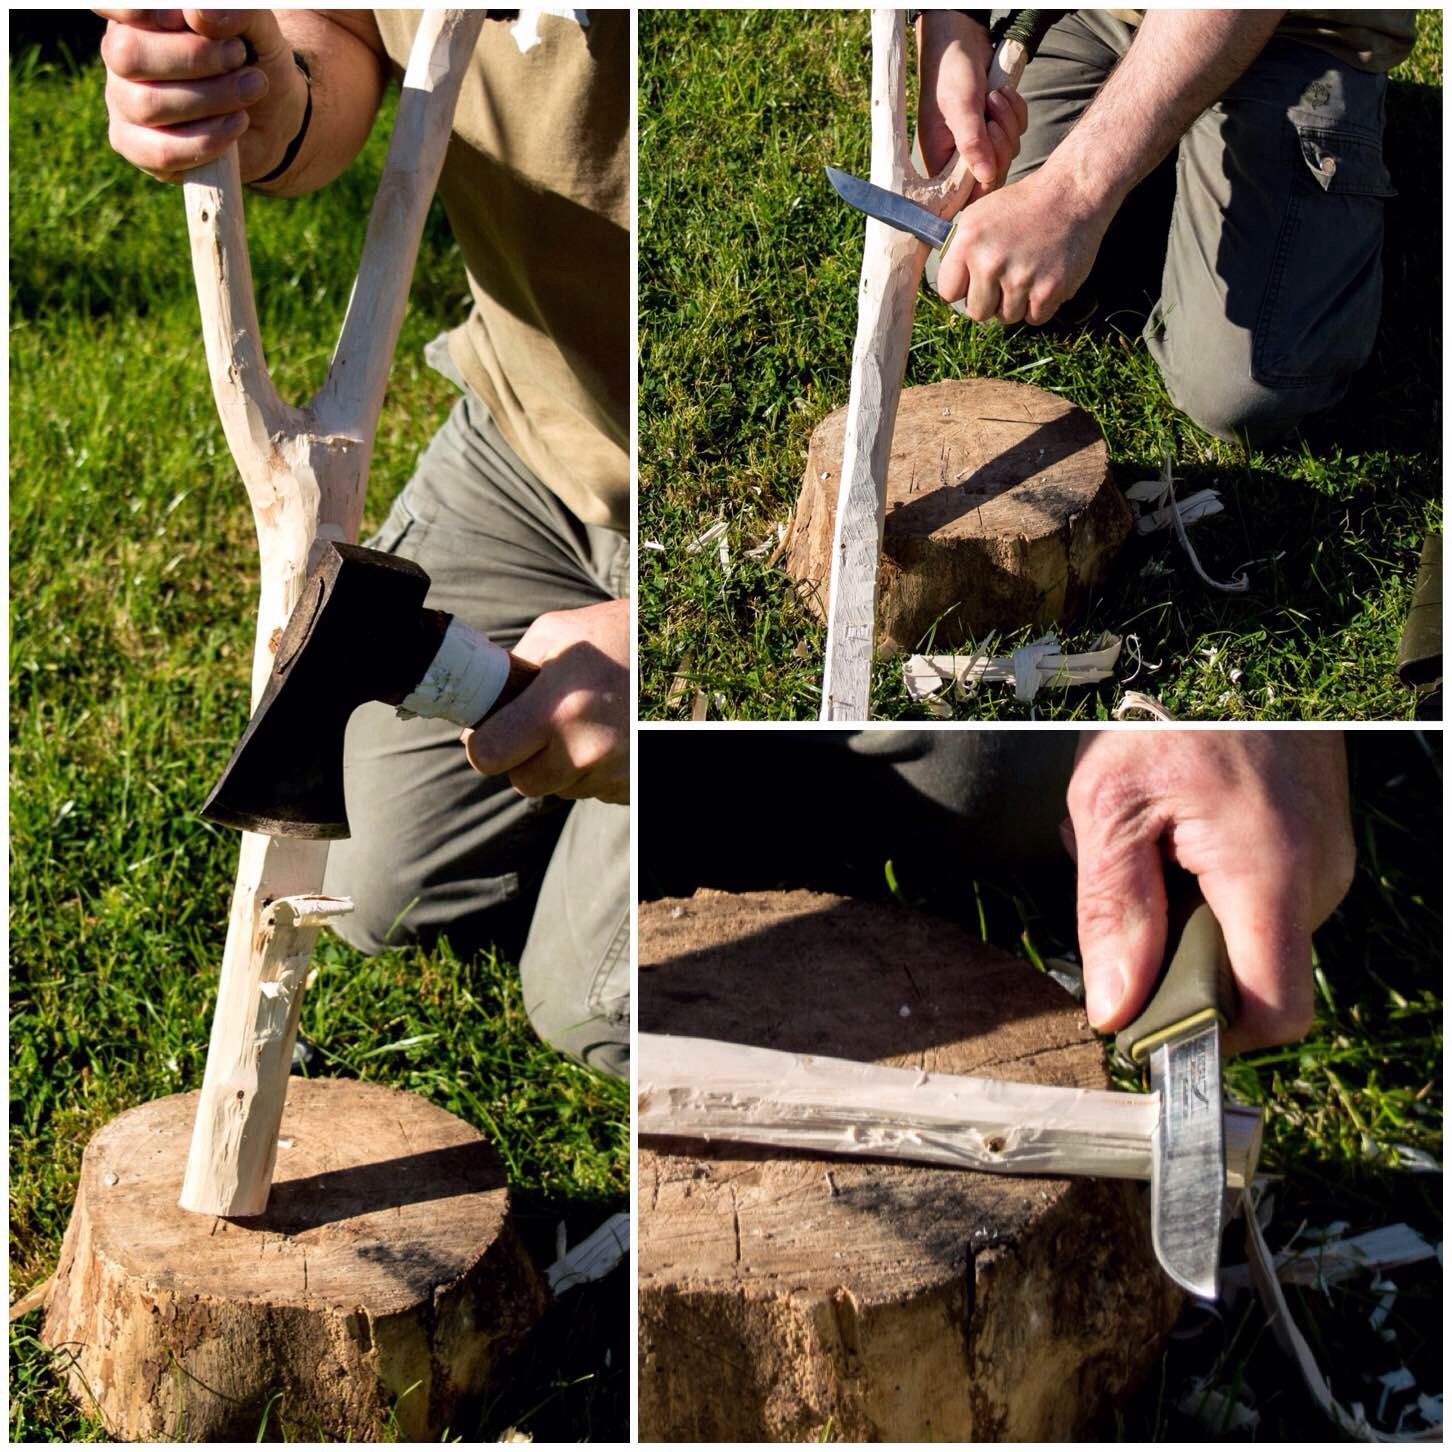
I wanted the joint to be strong so I put a stop cut into the top of the upper limb so I could cut out a lap joint (also known as a Gib joint).

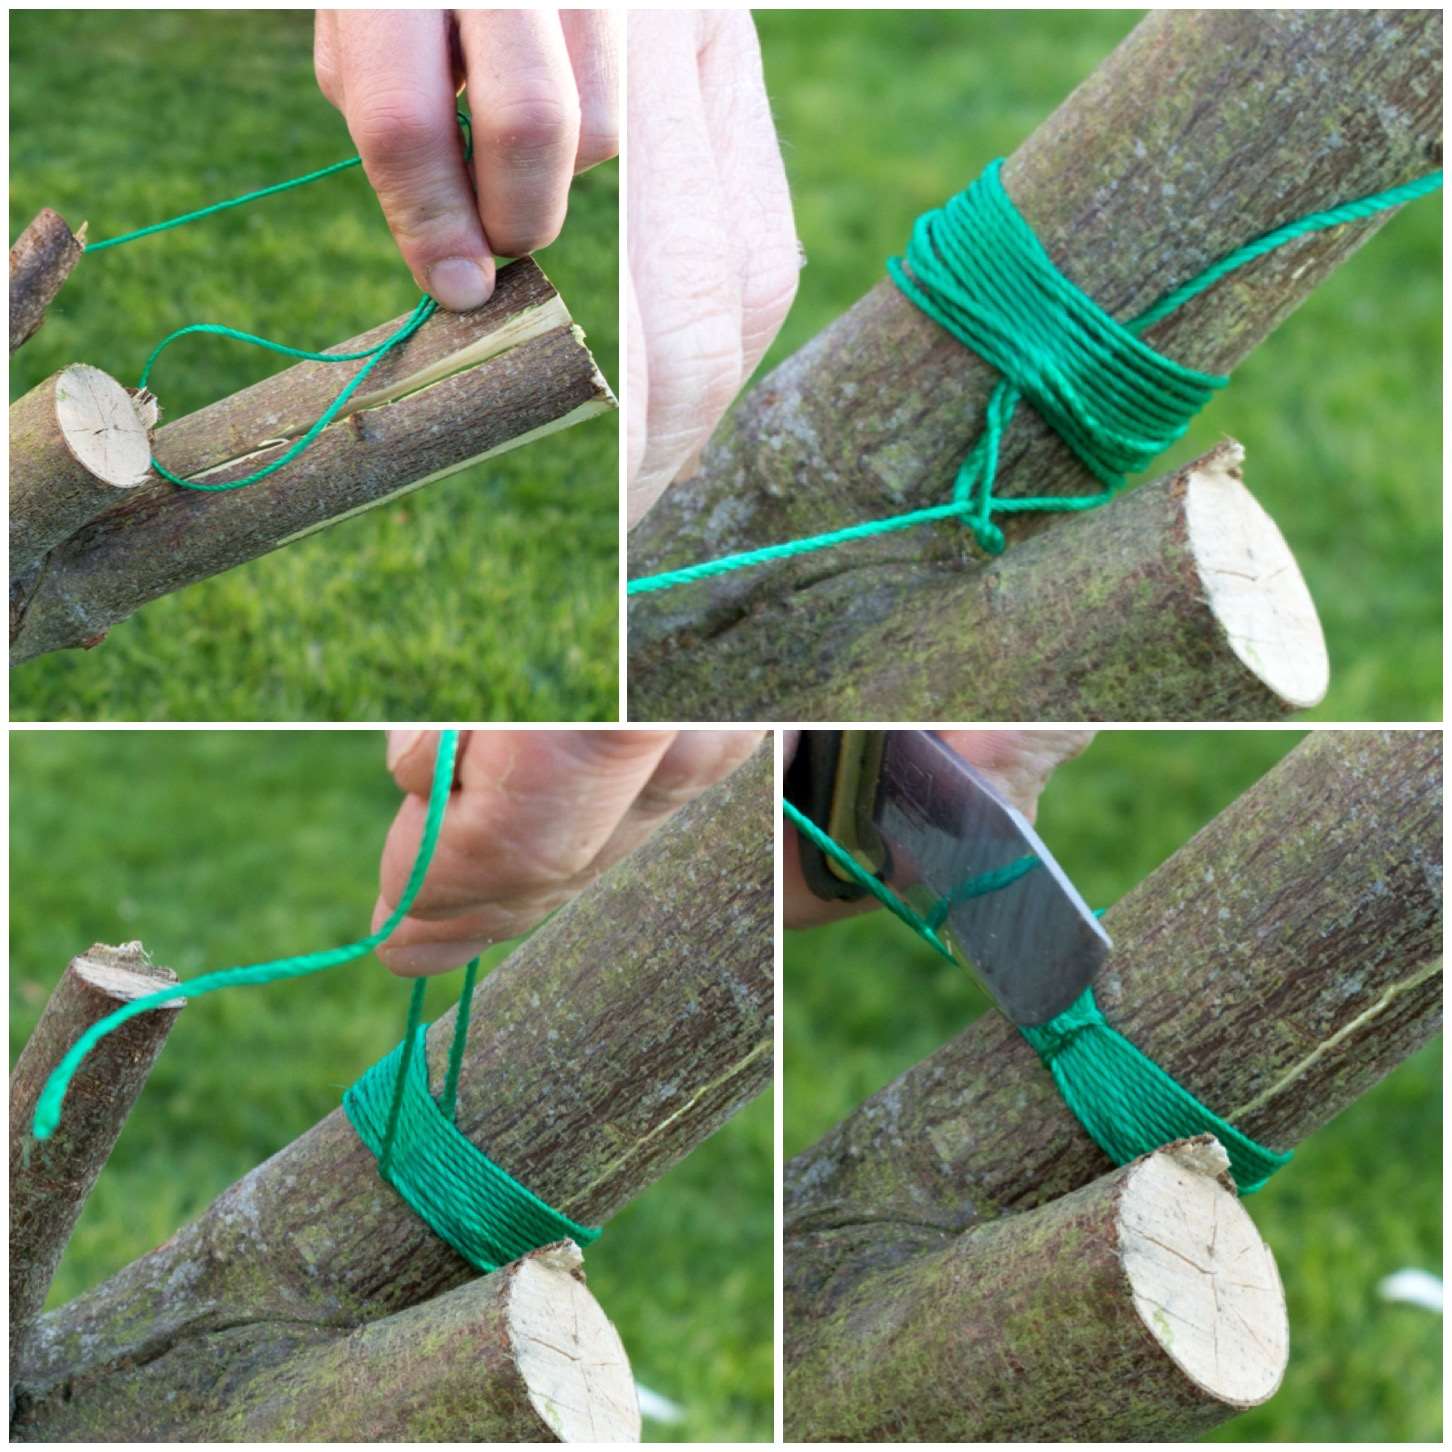
I then battoned off the excess so I was left  with one half of the lap joint, then I trimmed the bottom of the small hook flat to fit snugly against it.

image
Cutting out the Gib cut on the top limb and hook

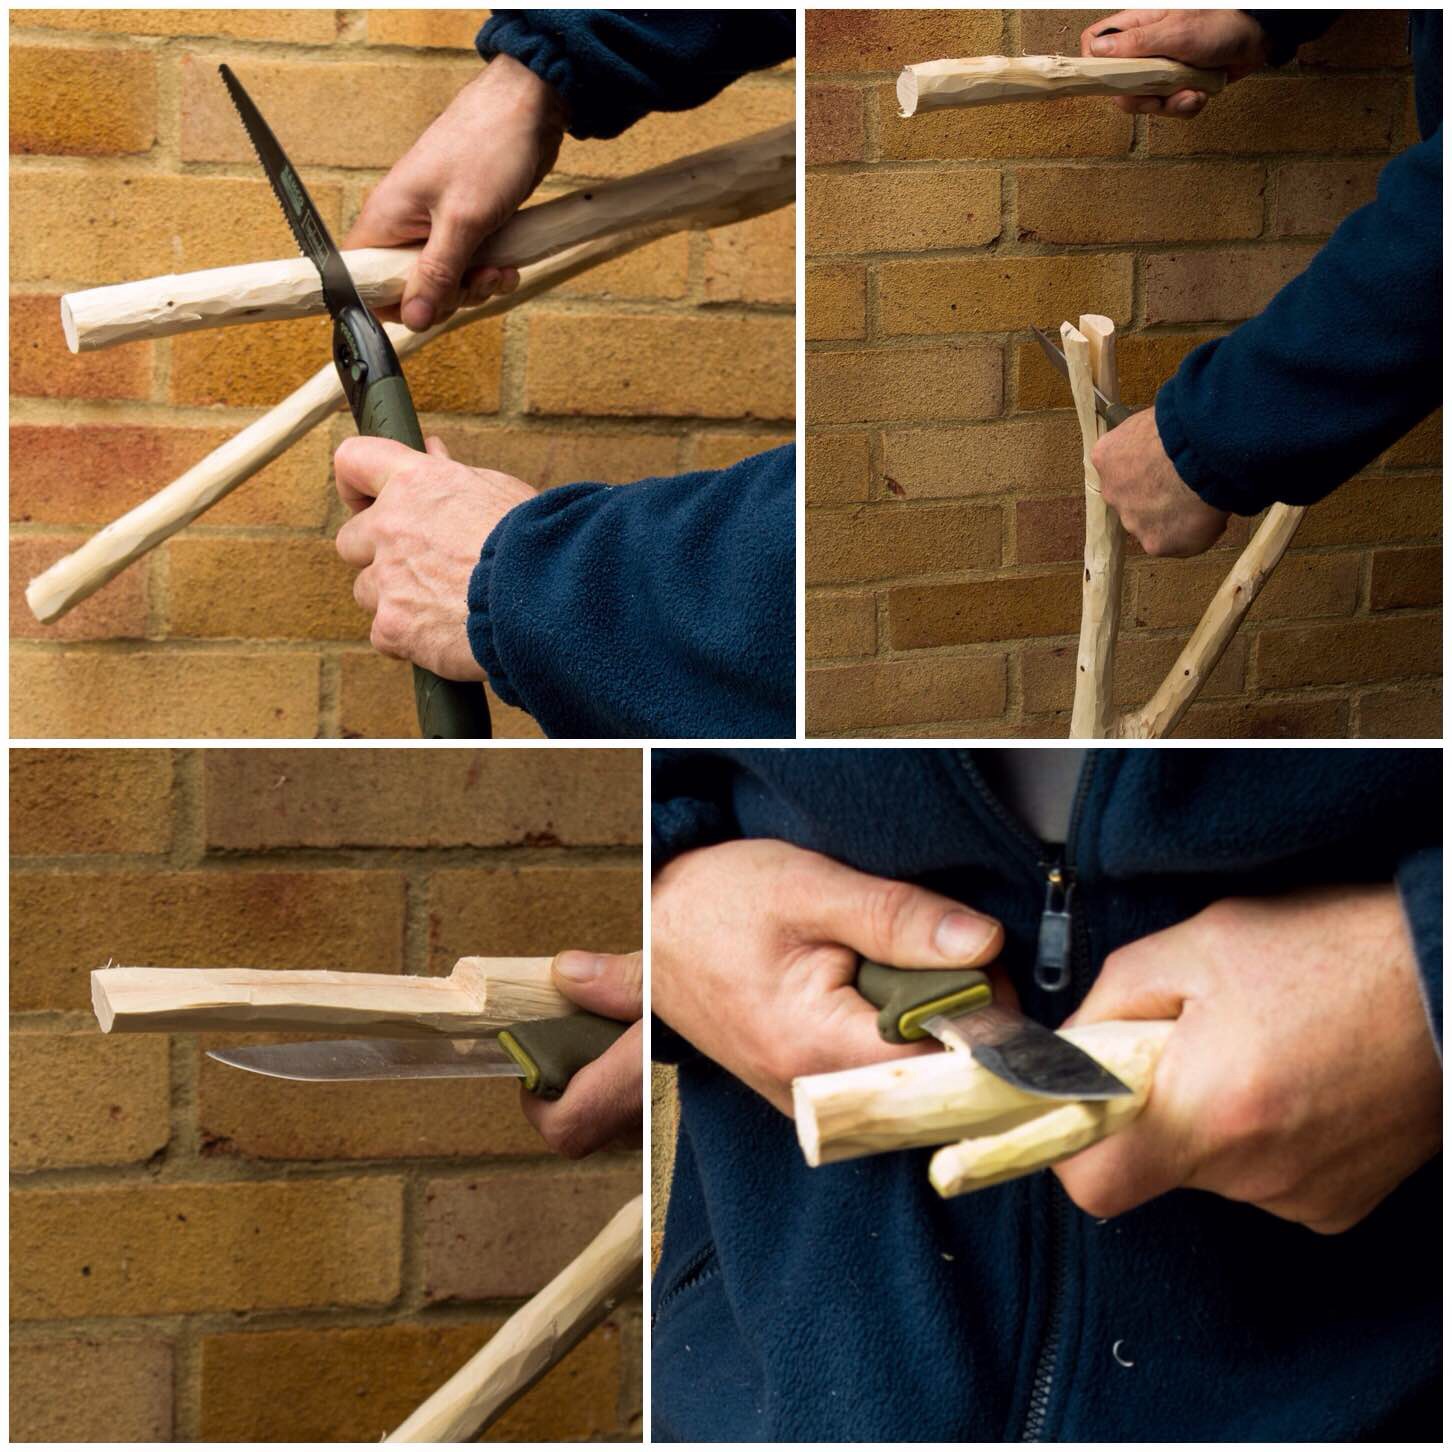
Not a perfect fit but good enough.

image
Putting them together

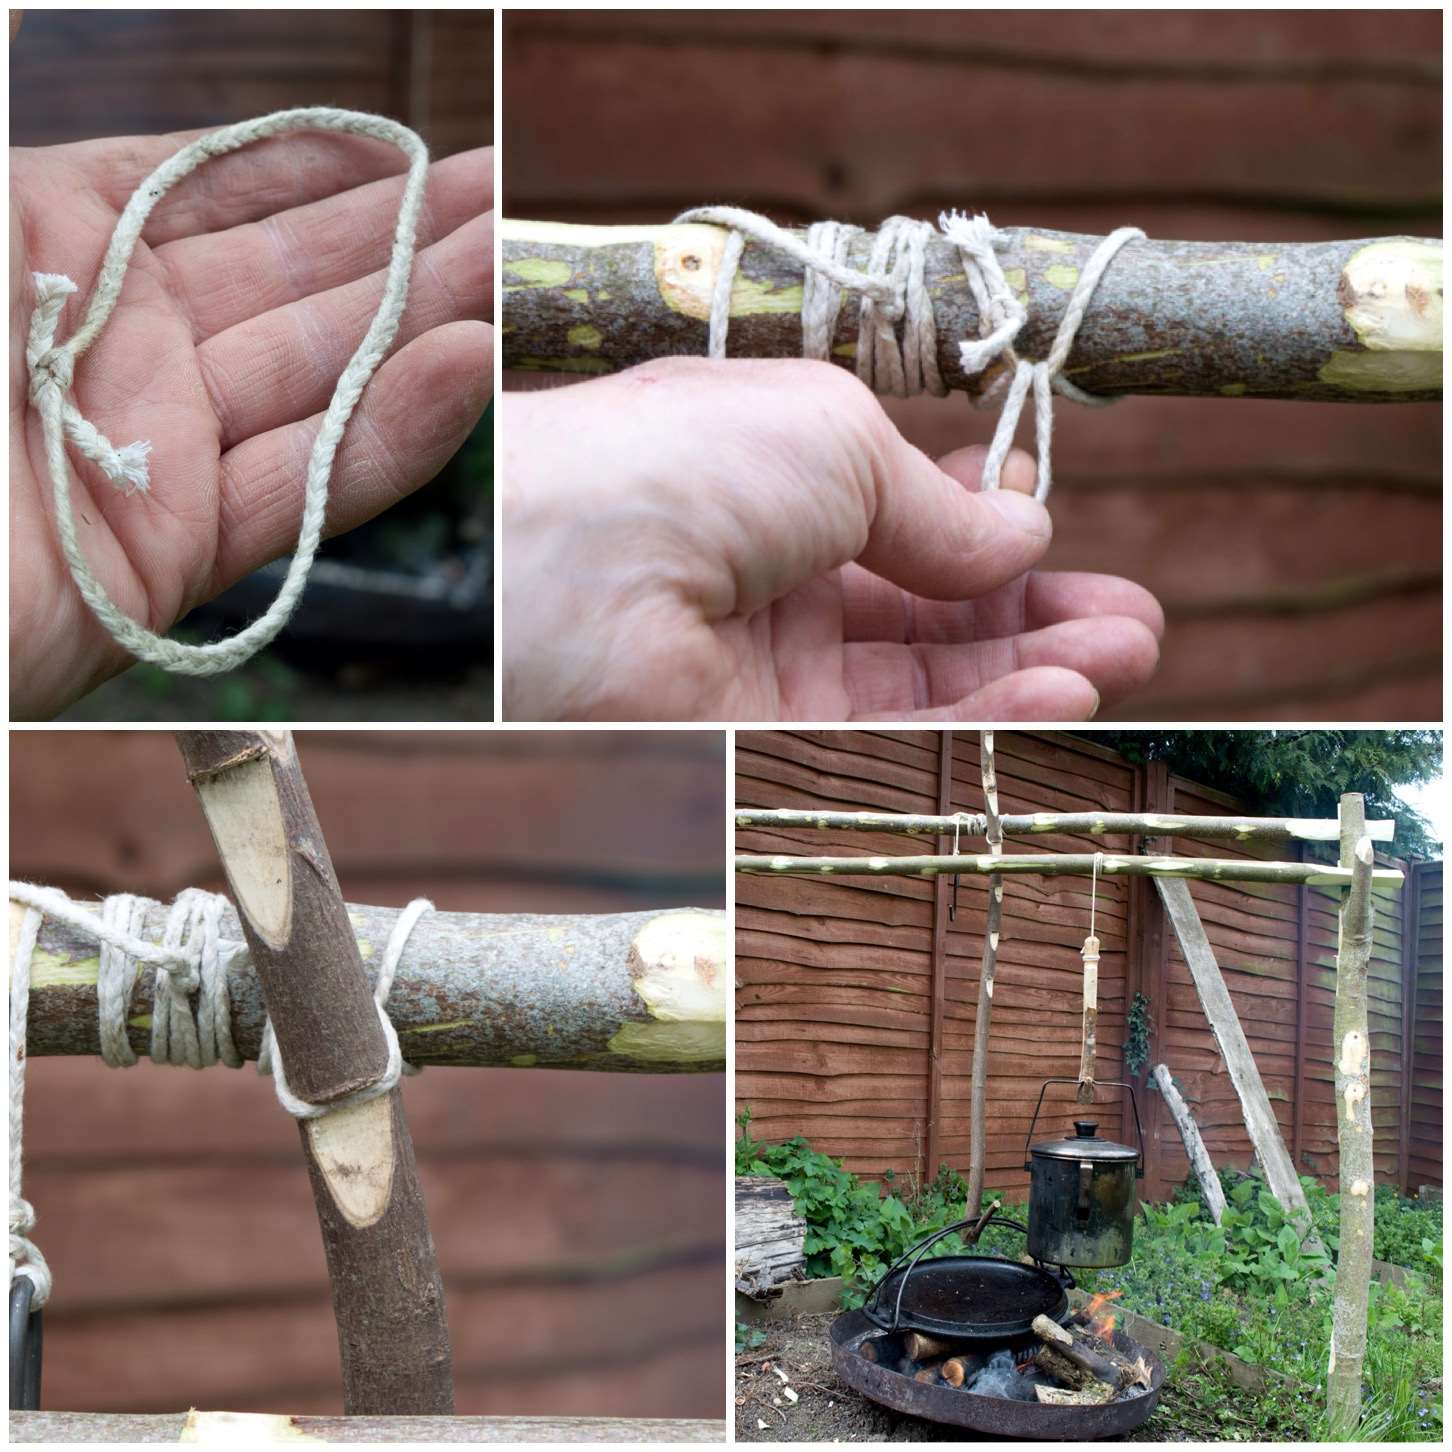
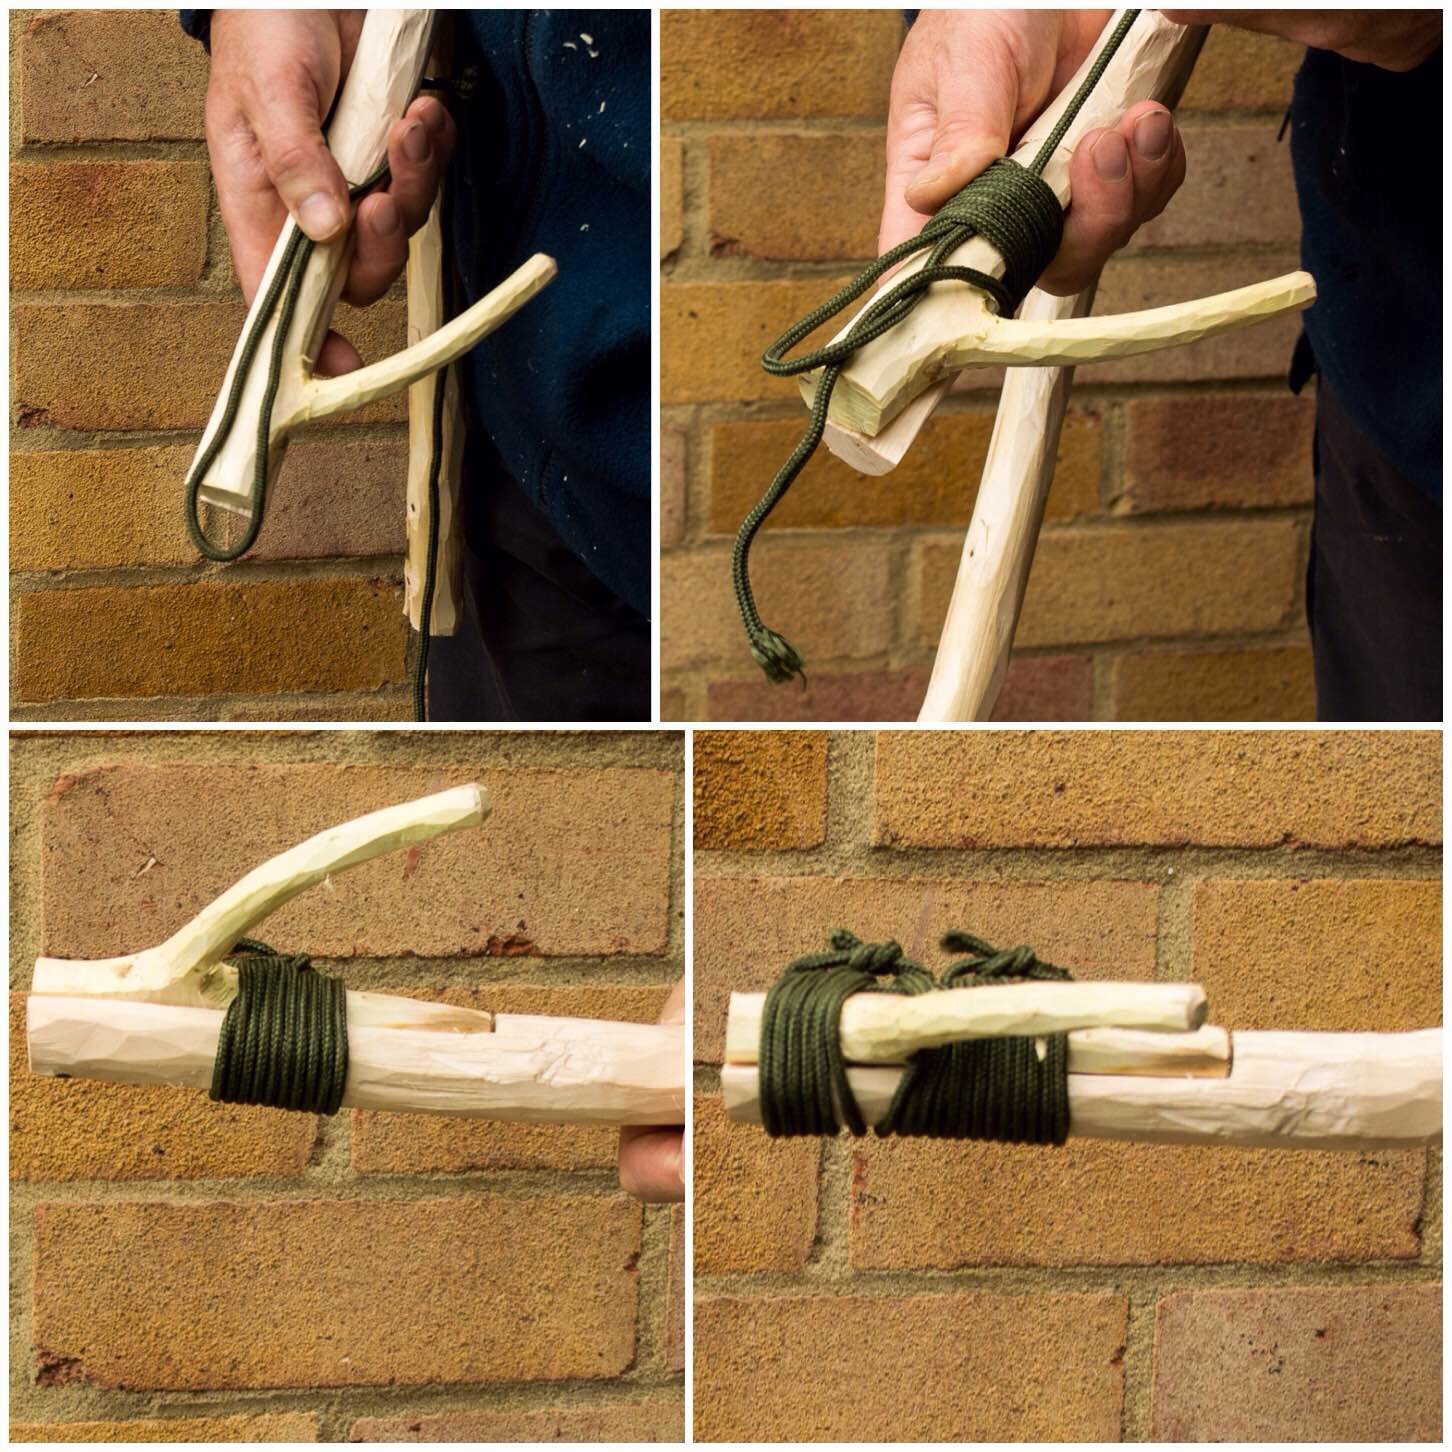
I then used paracord to whip the two together, on both sides of the hook. I left excess string tied in a knot as the wood was green. As it dries out the wood will shrink and I will have to redo the whipping.

image
Whipping The Gib joint

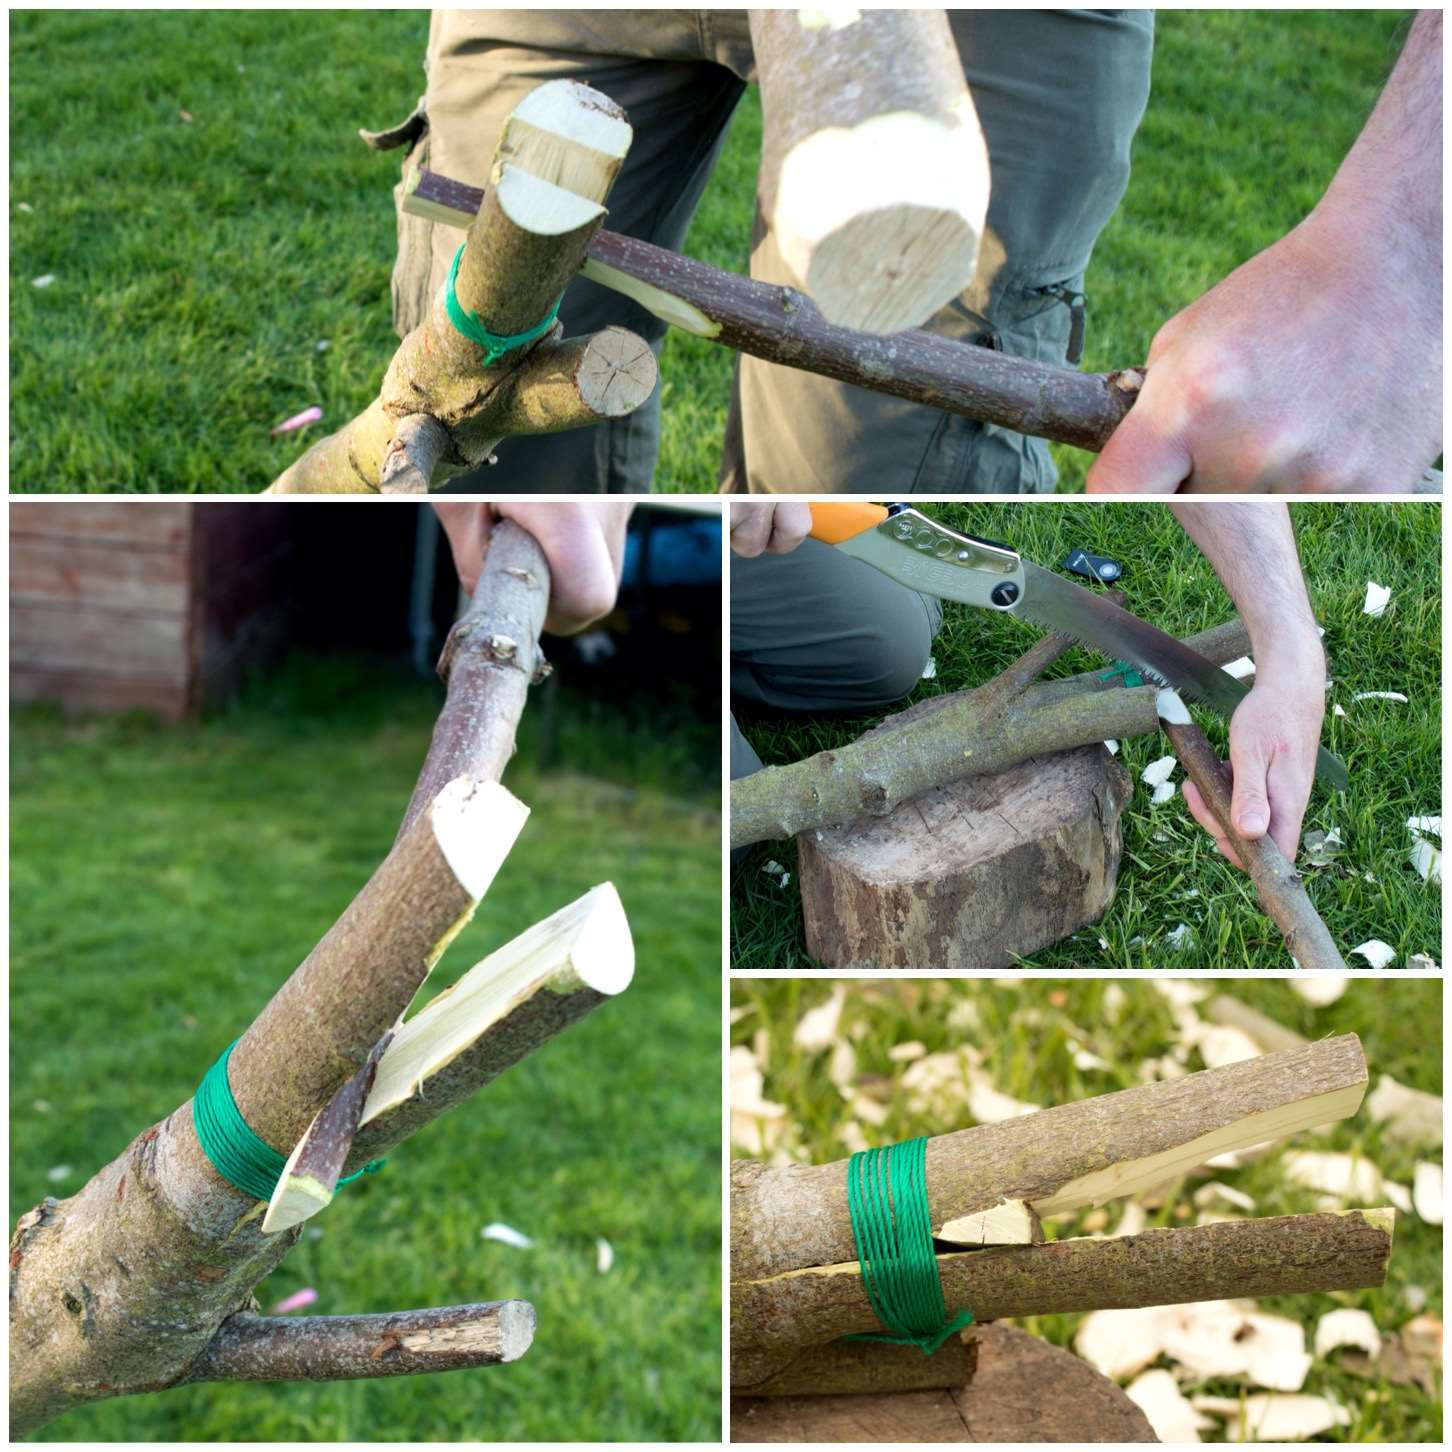
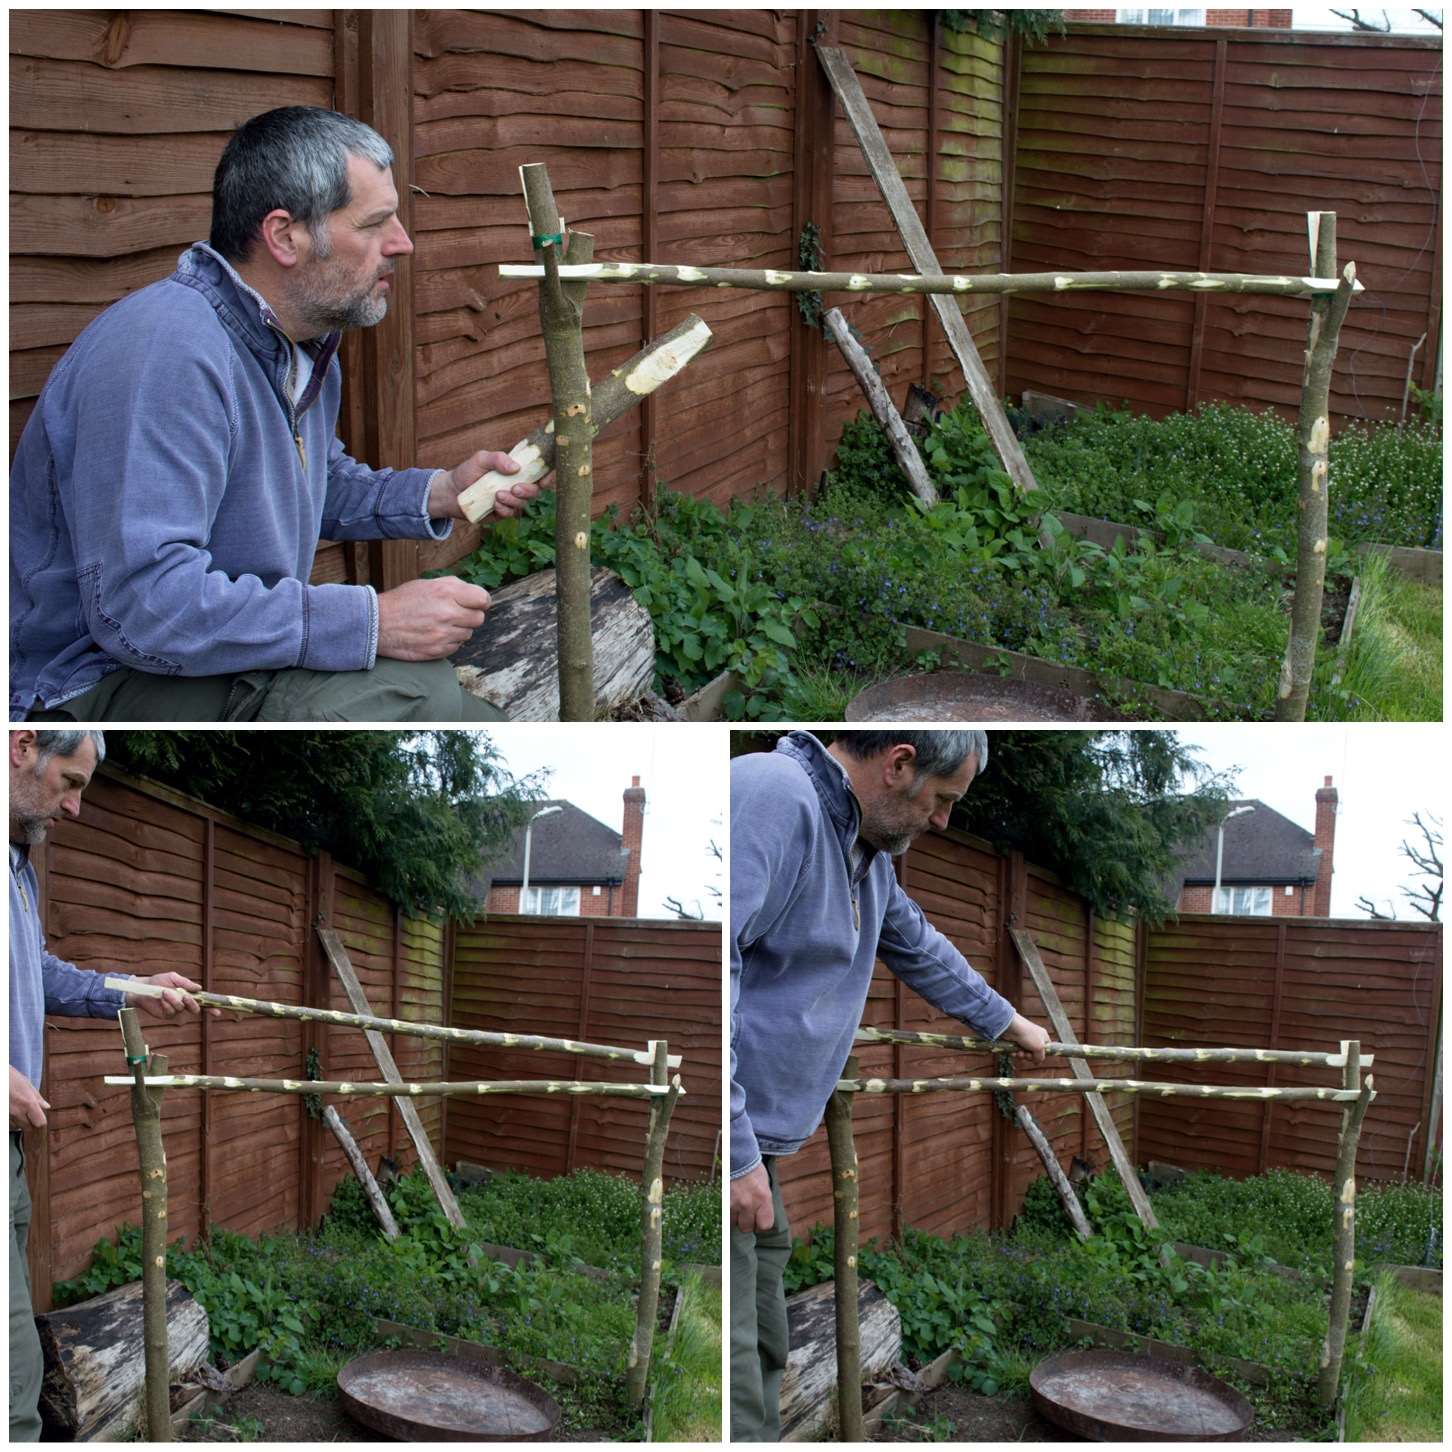
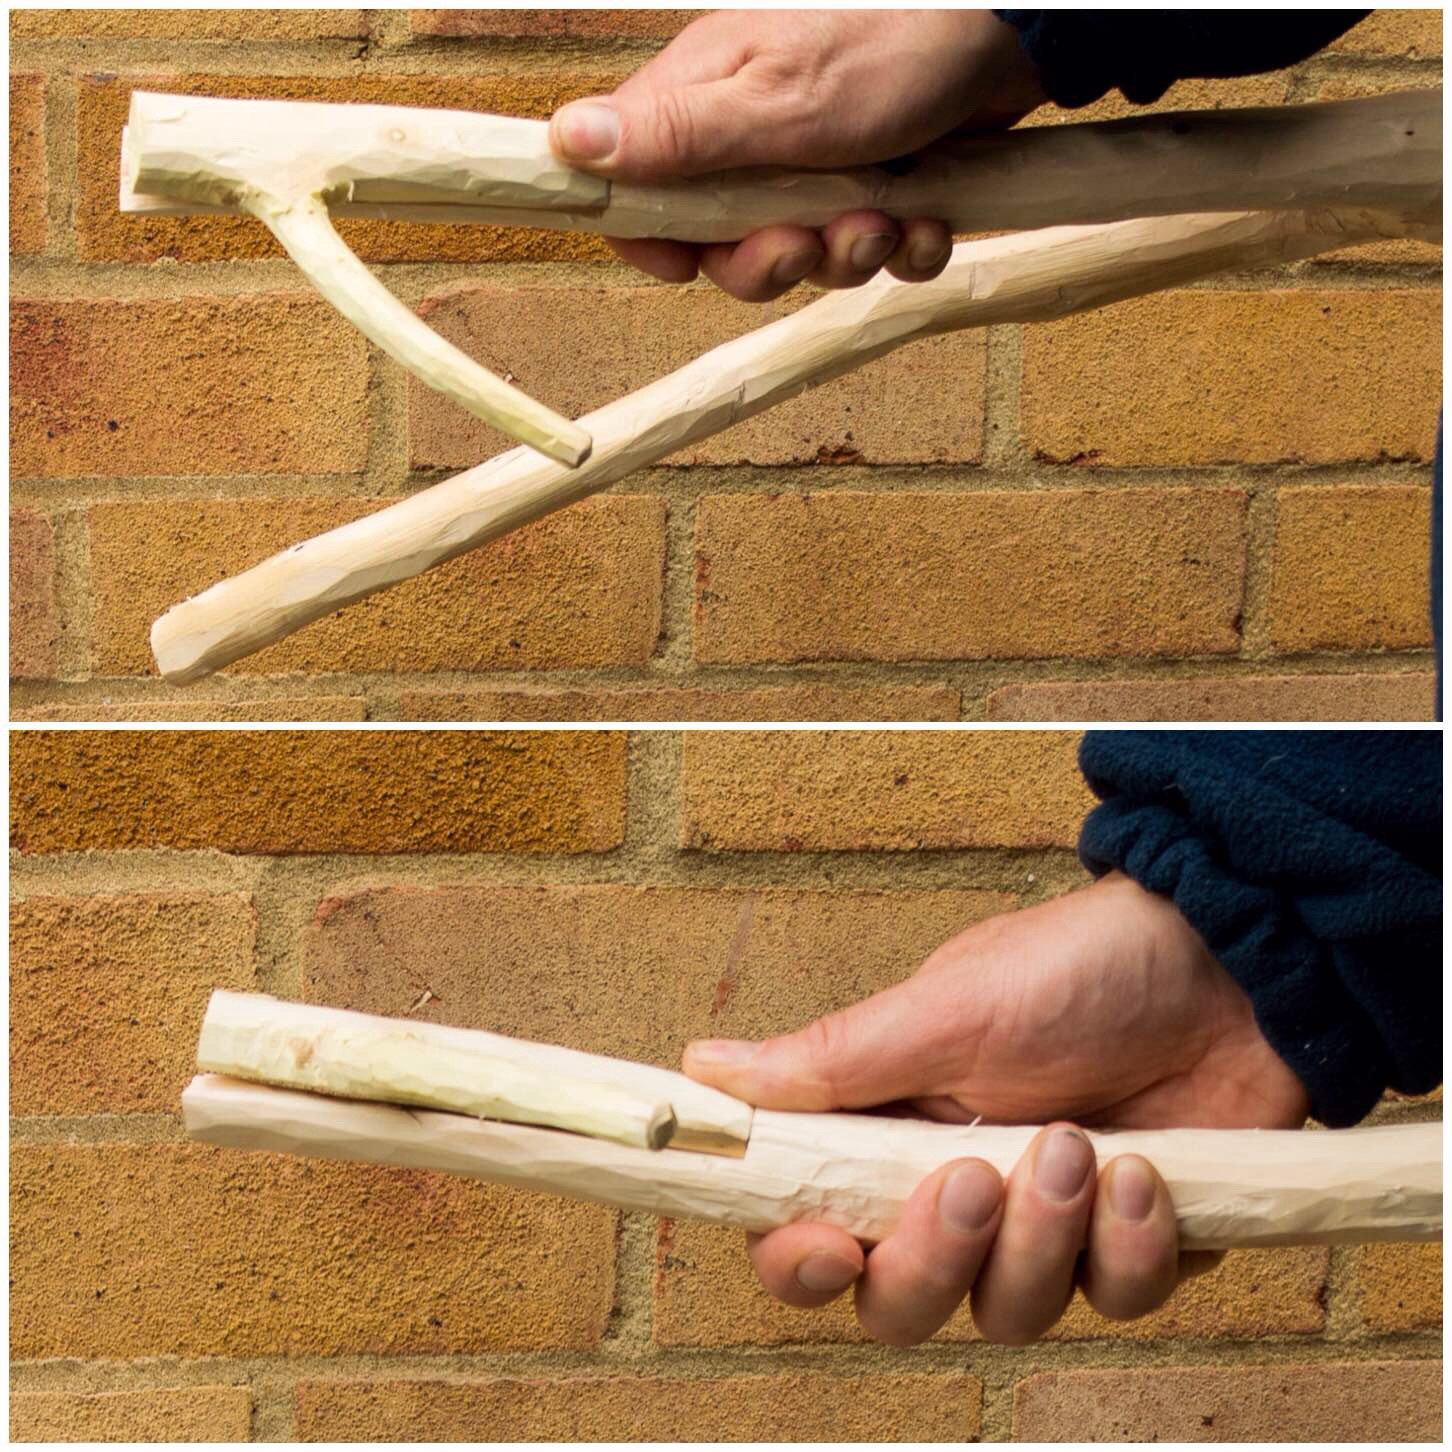
Carving the bottom limb

I flattened the upright of the ‘Y’ piece and split out a Gib joint on the lower limb. You have to make sure all the cuts are done on the correct planes so that the hanger will fit on the upright pole without twisting.

image
Cutting the Gib joint on the bottom limb and fork

After a bit of whipping it was time to set it up and make sure it worked correctly. In the bottom right picture you can see clearly how it all comes together.
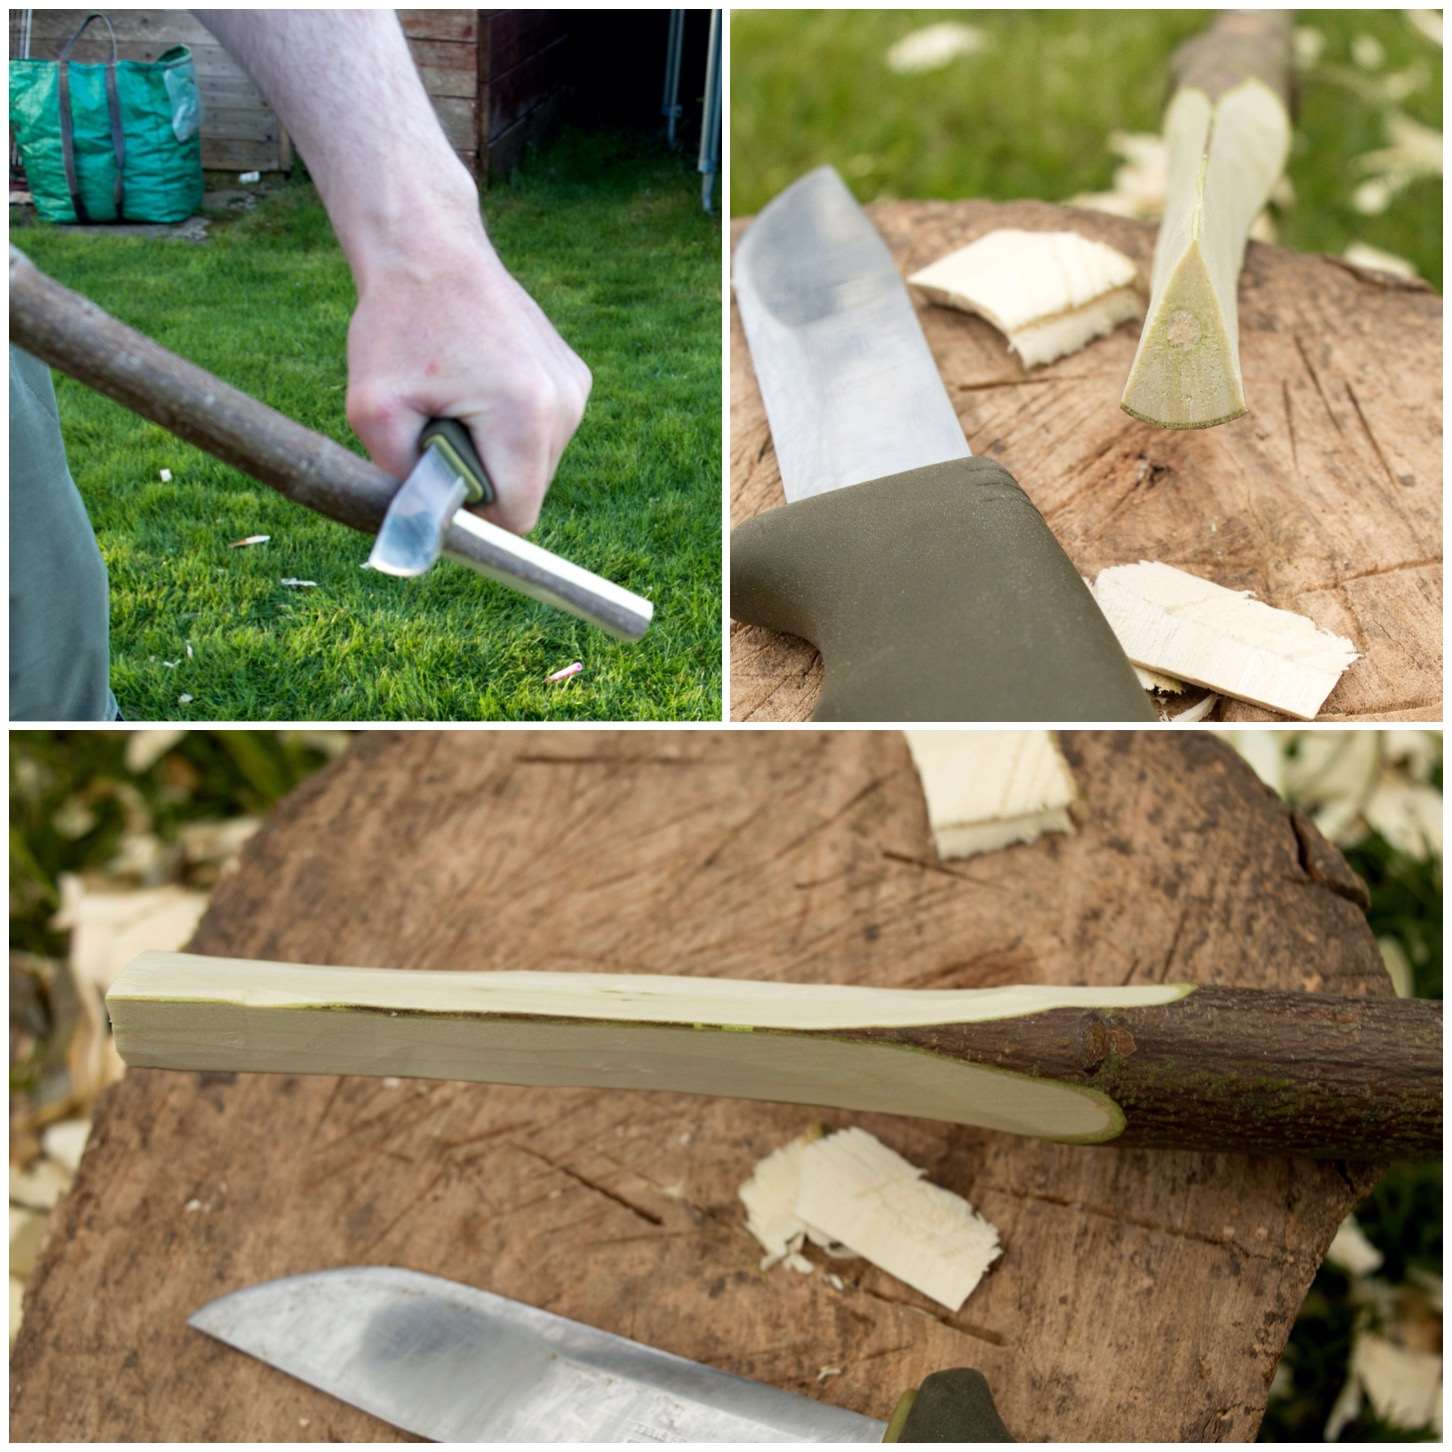
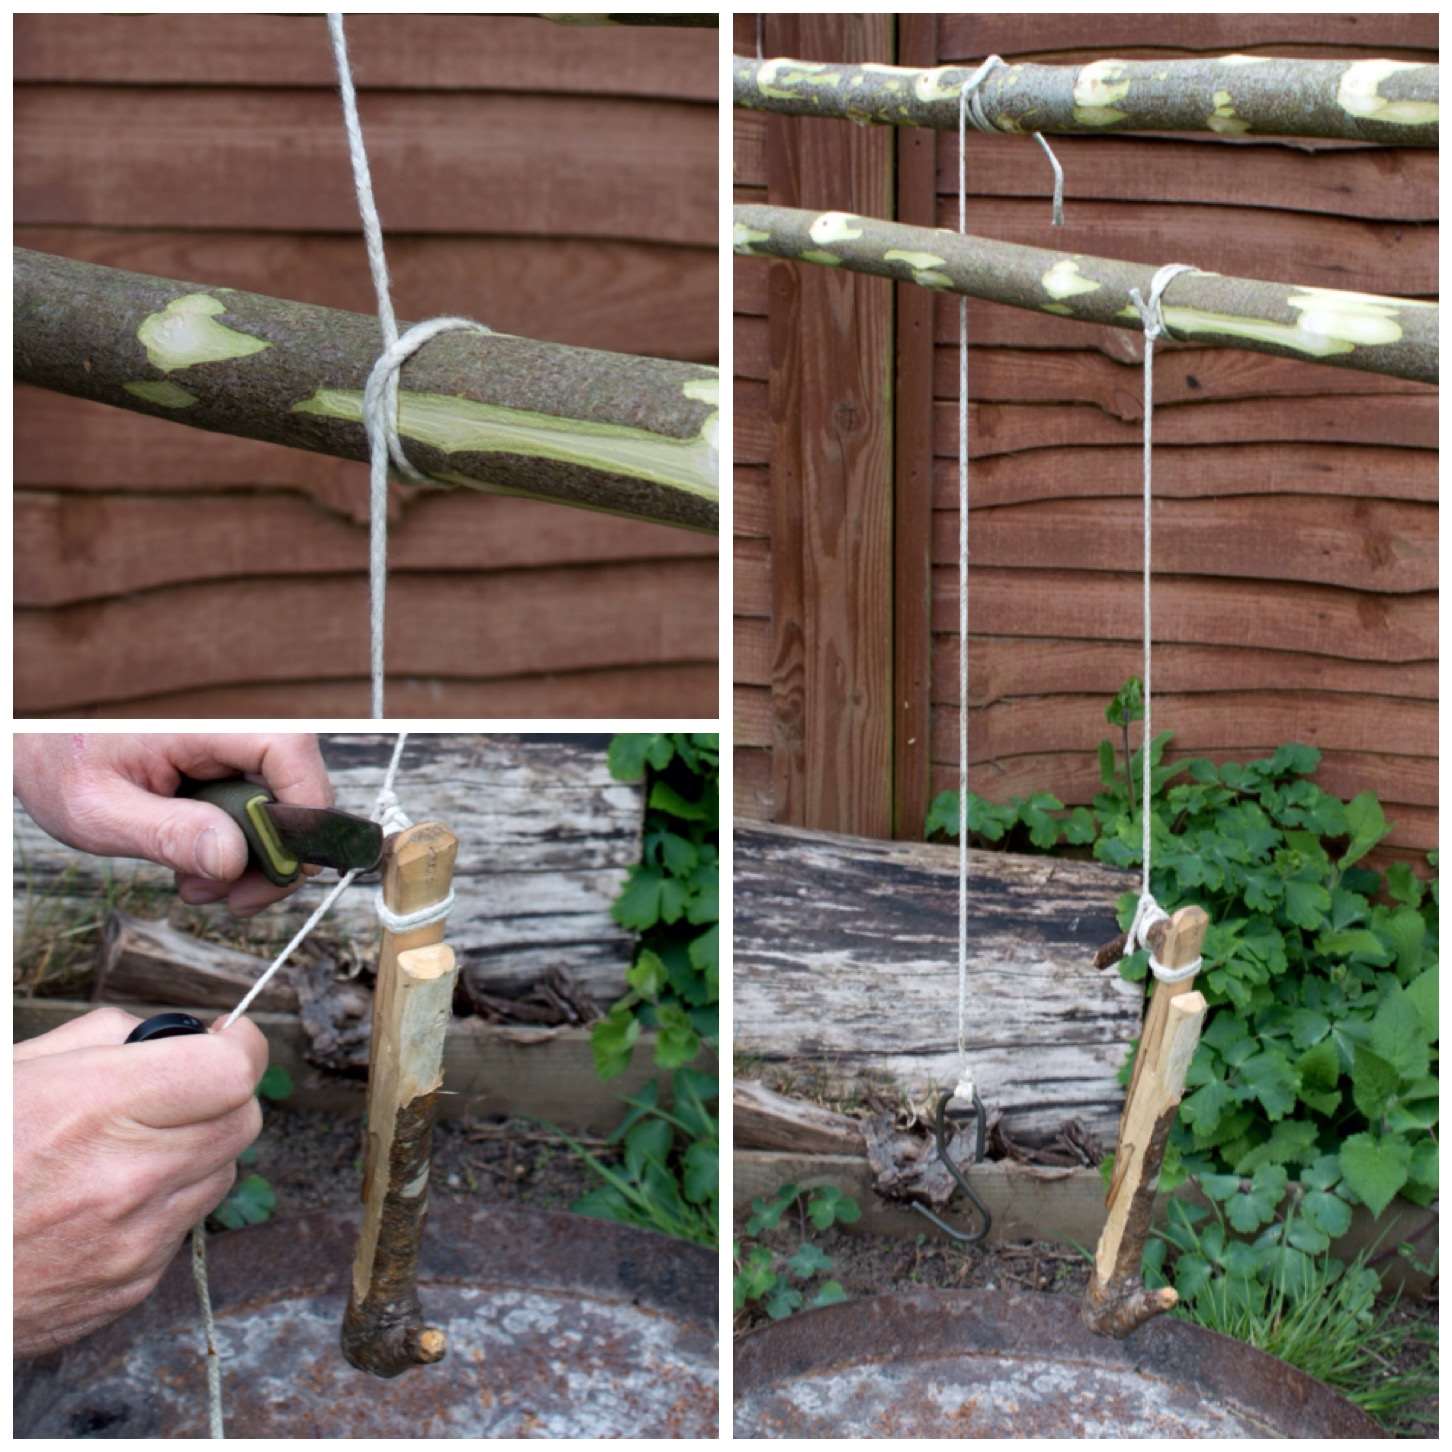
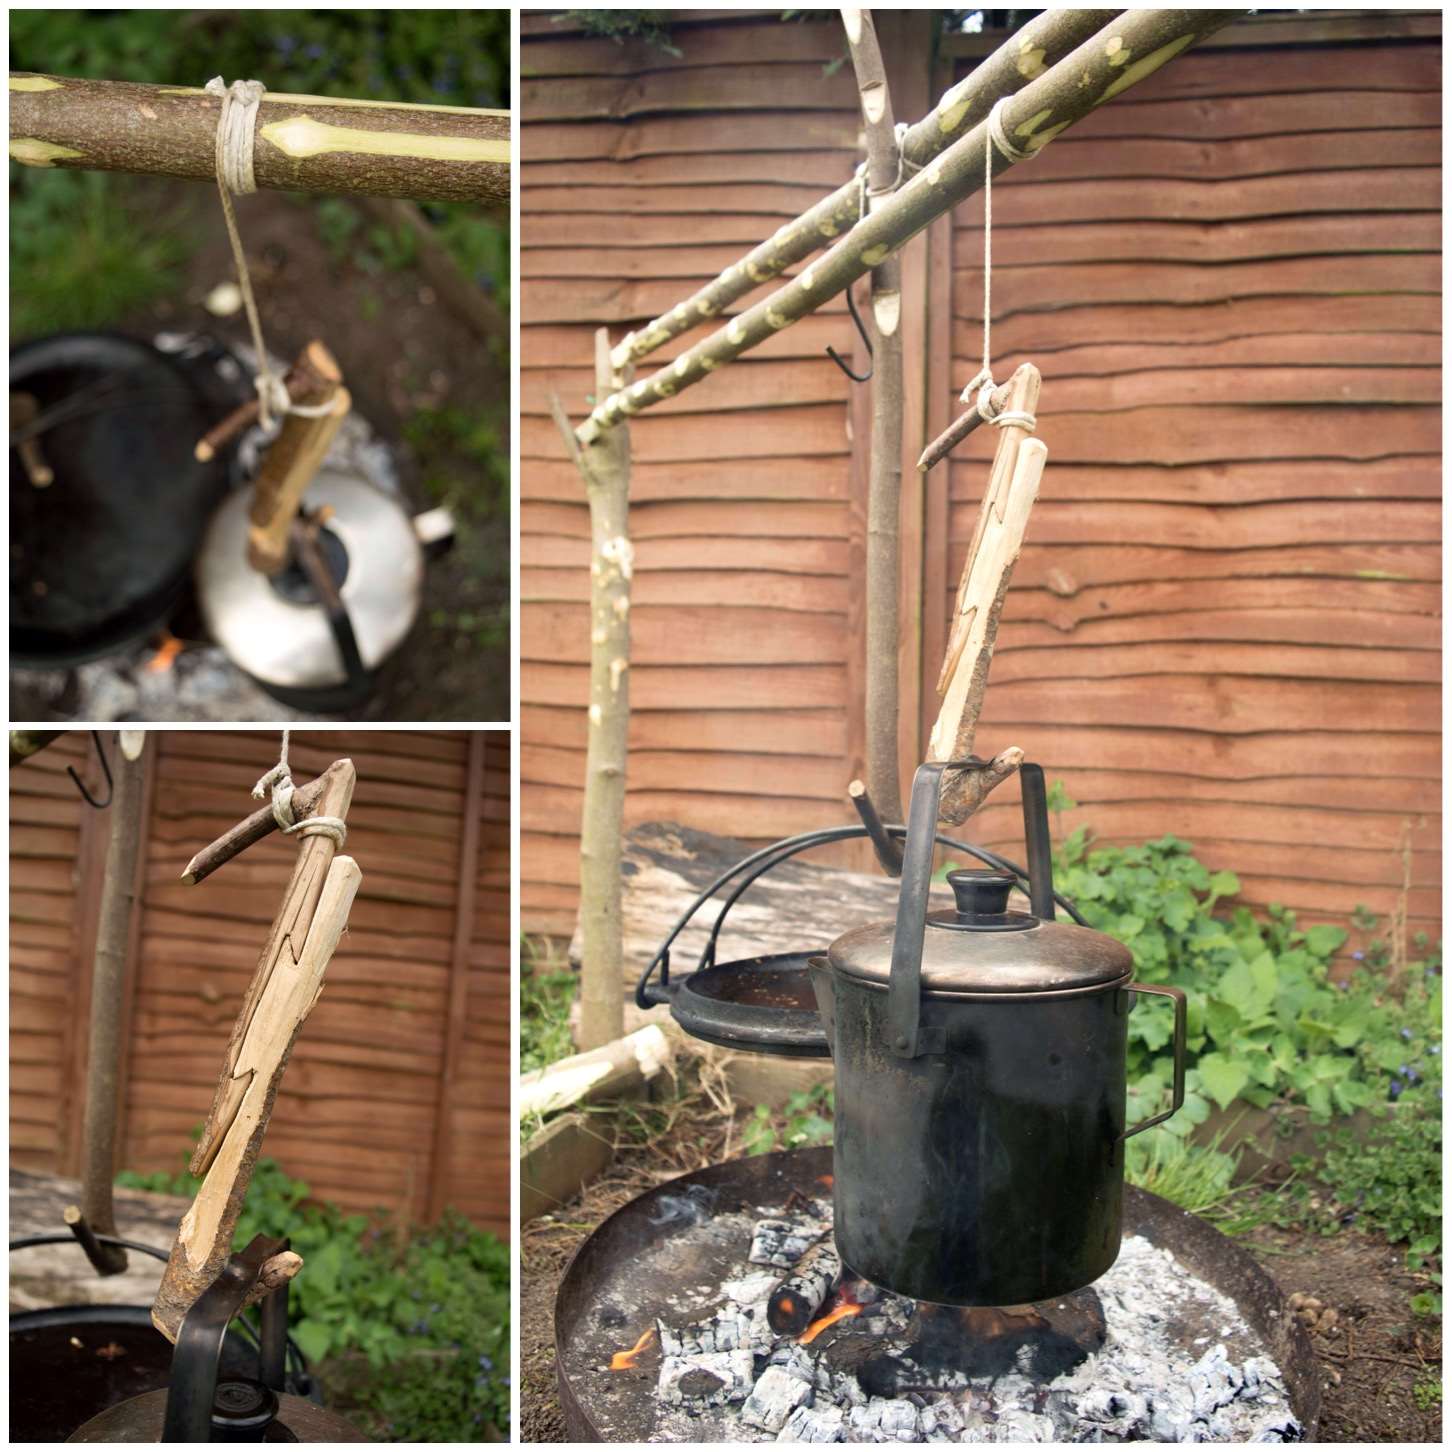
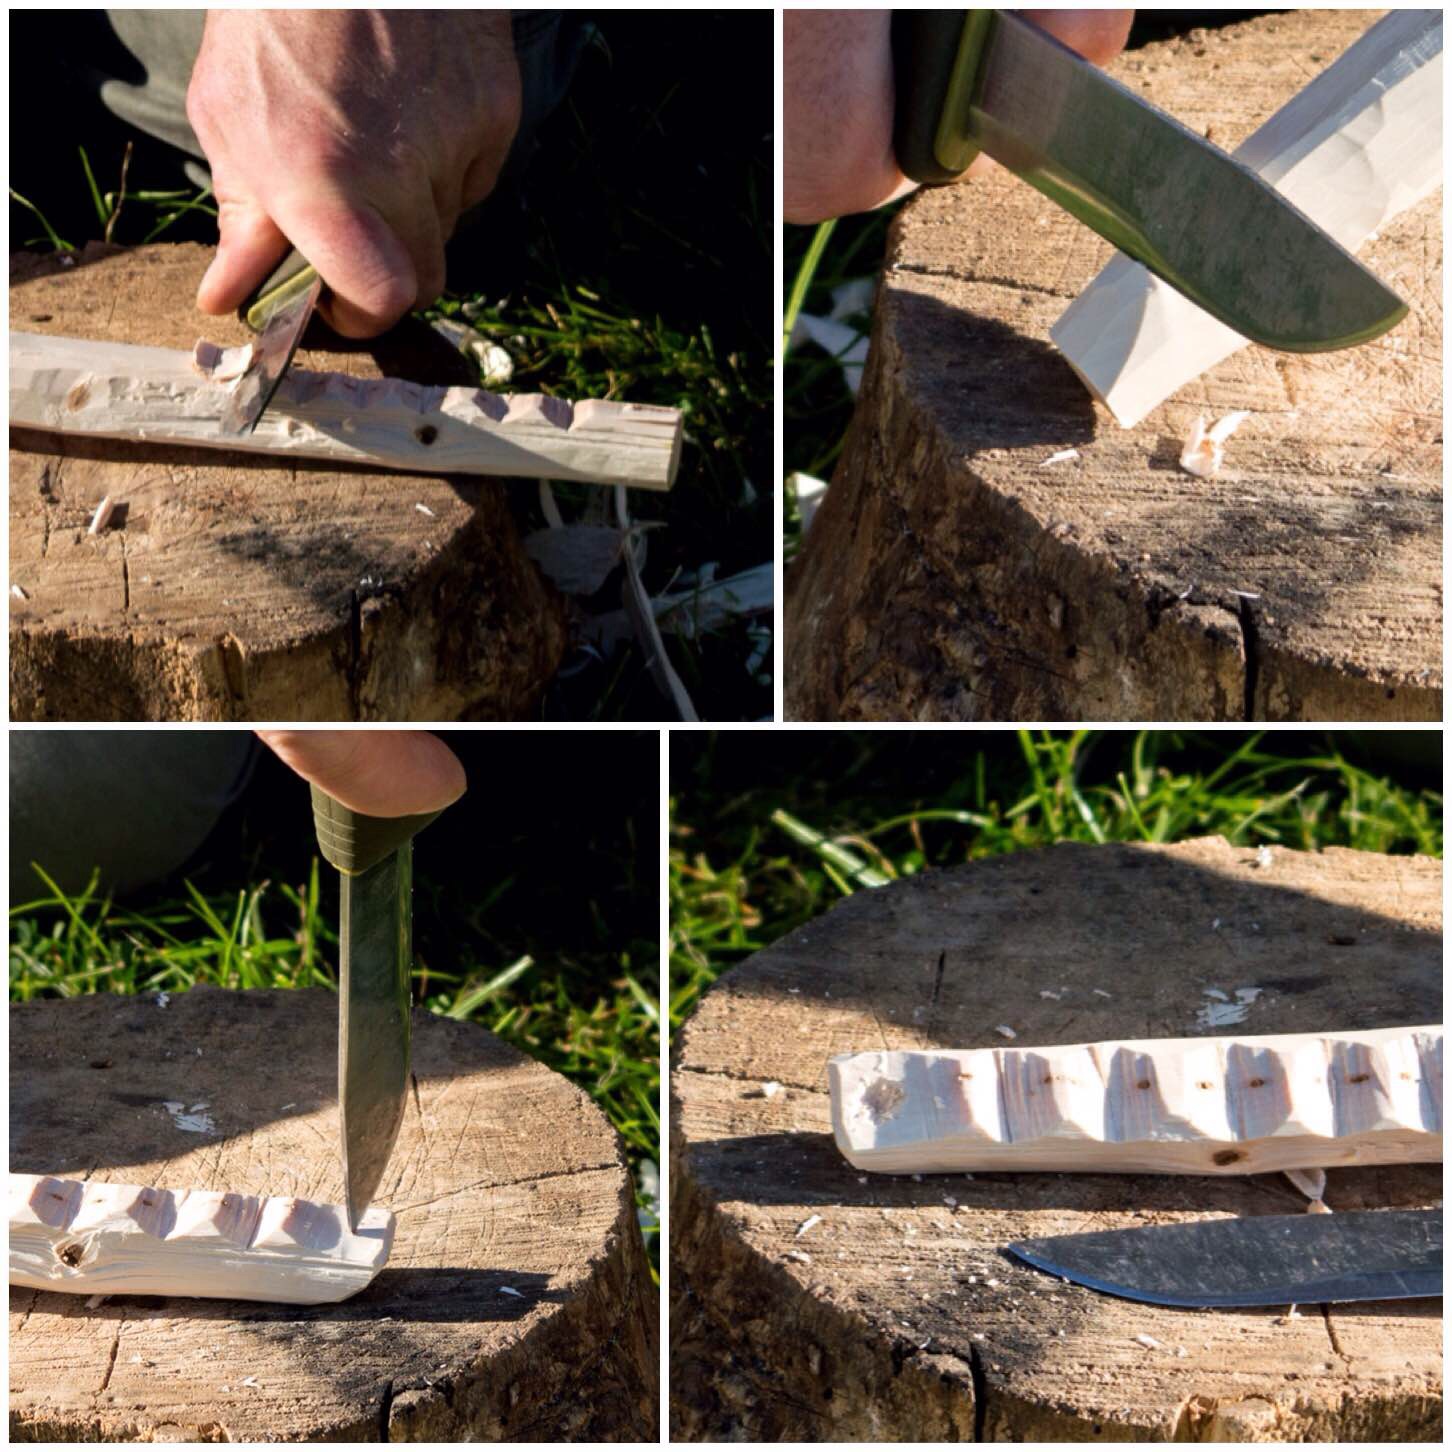
image
Fitting and splicing

Carving the pot arm

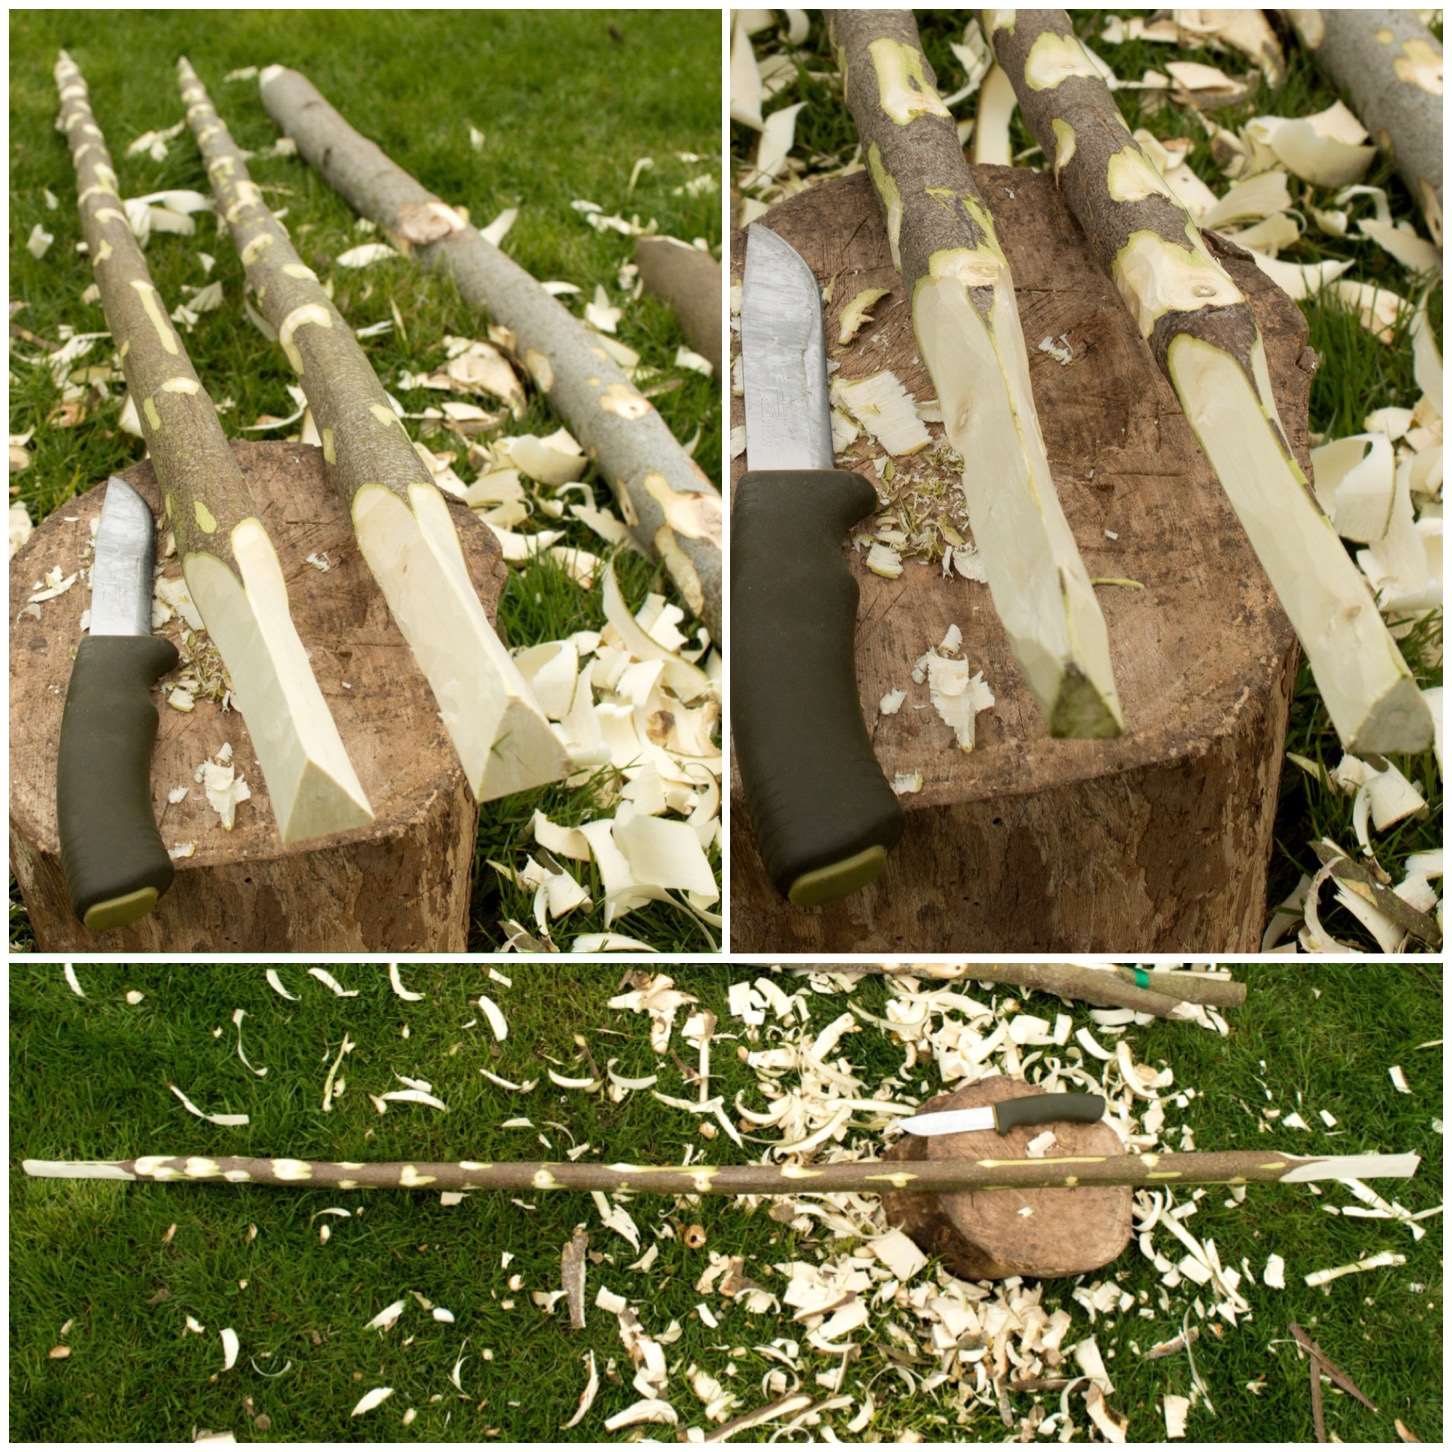
I have a particular way of carving the hanging arm (you be as creative as you like). I axe out the basic shape I want, trim it smooth with my knife and cut in lots of grooves along the upper part to allow the pot to be hung on various areas of its length.

image
Carving the pot arm

Once all the grooves are cut I tend to put a dimple in the end so I can attach an adjustable pot hook. This allows me to hang two or three pots from the crane.
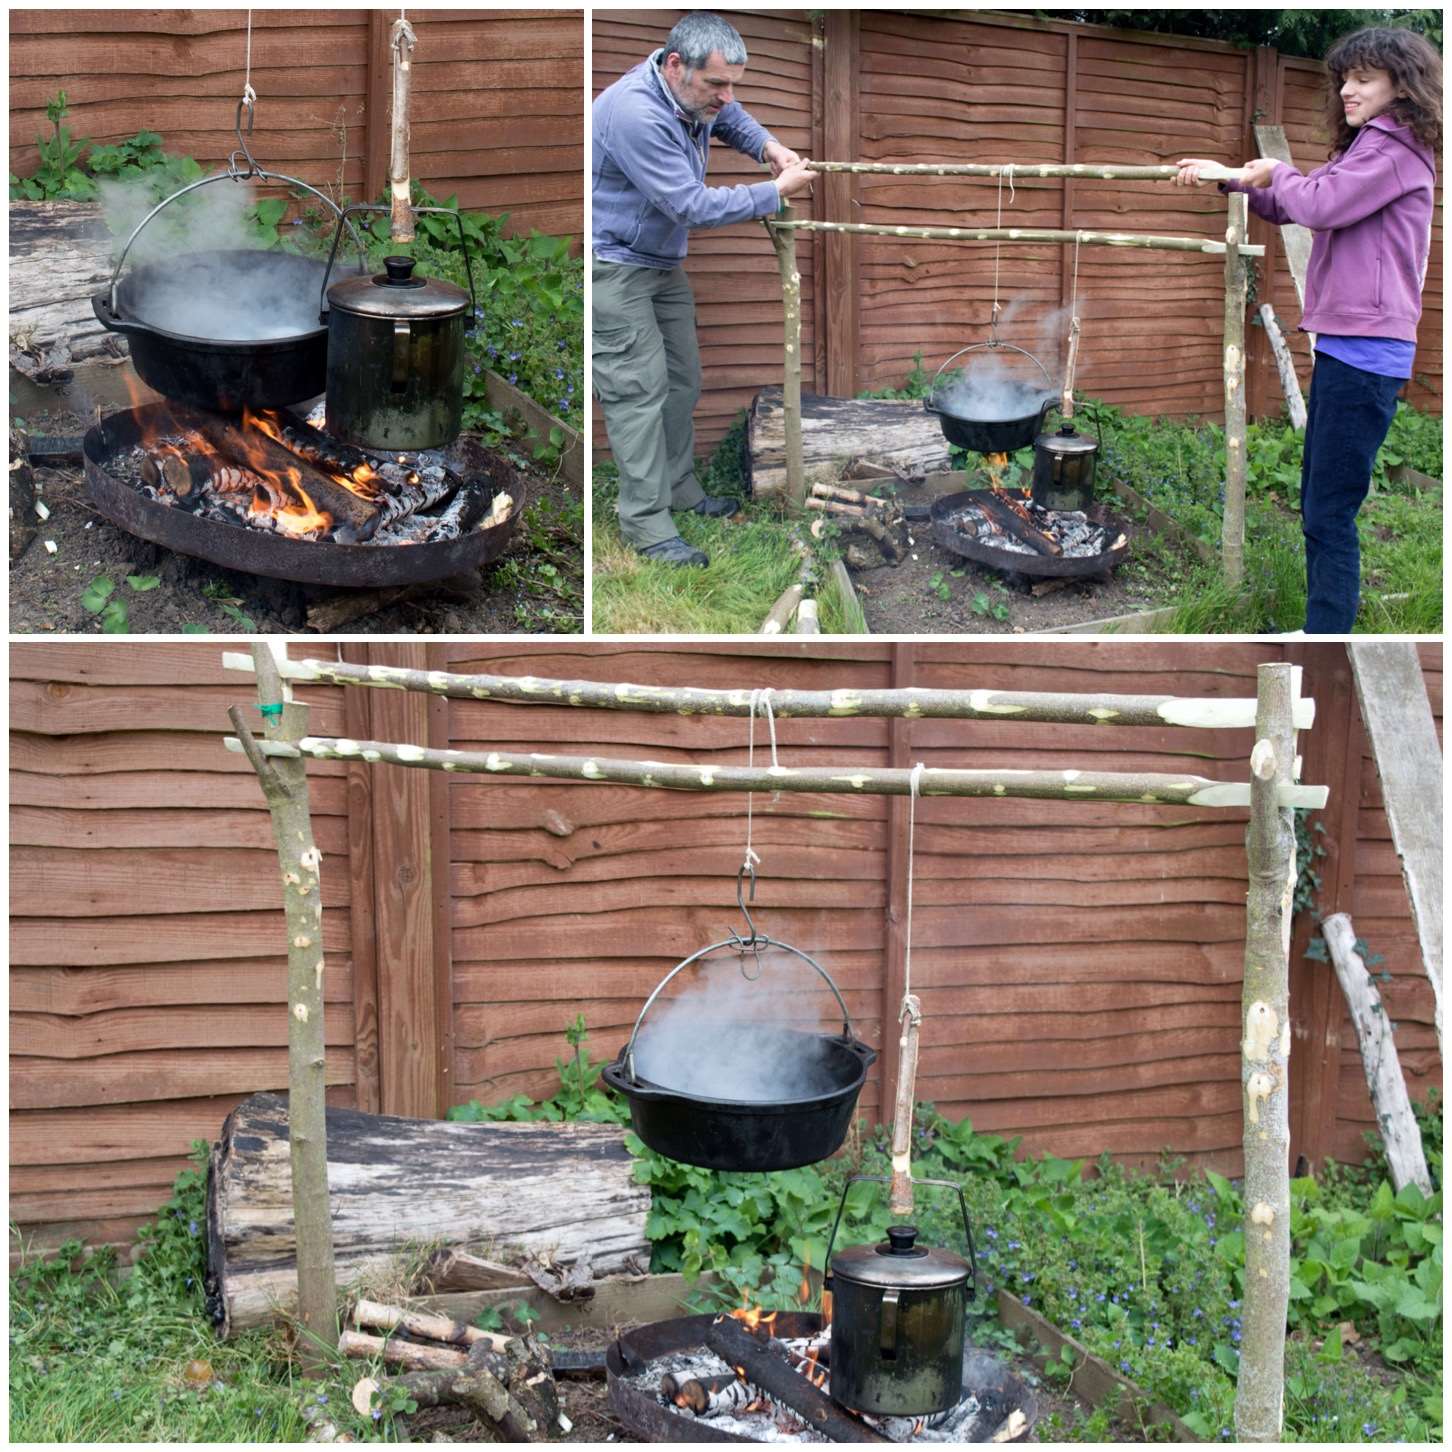
image
Finishing touches

Using the Crane

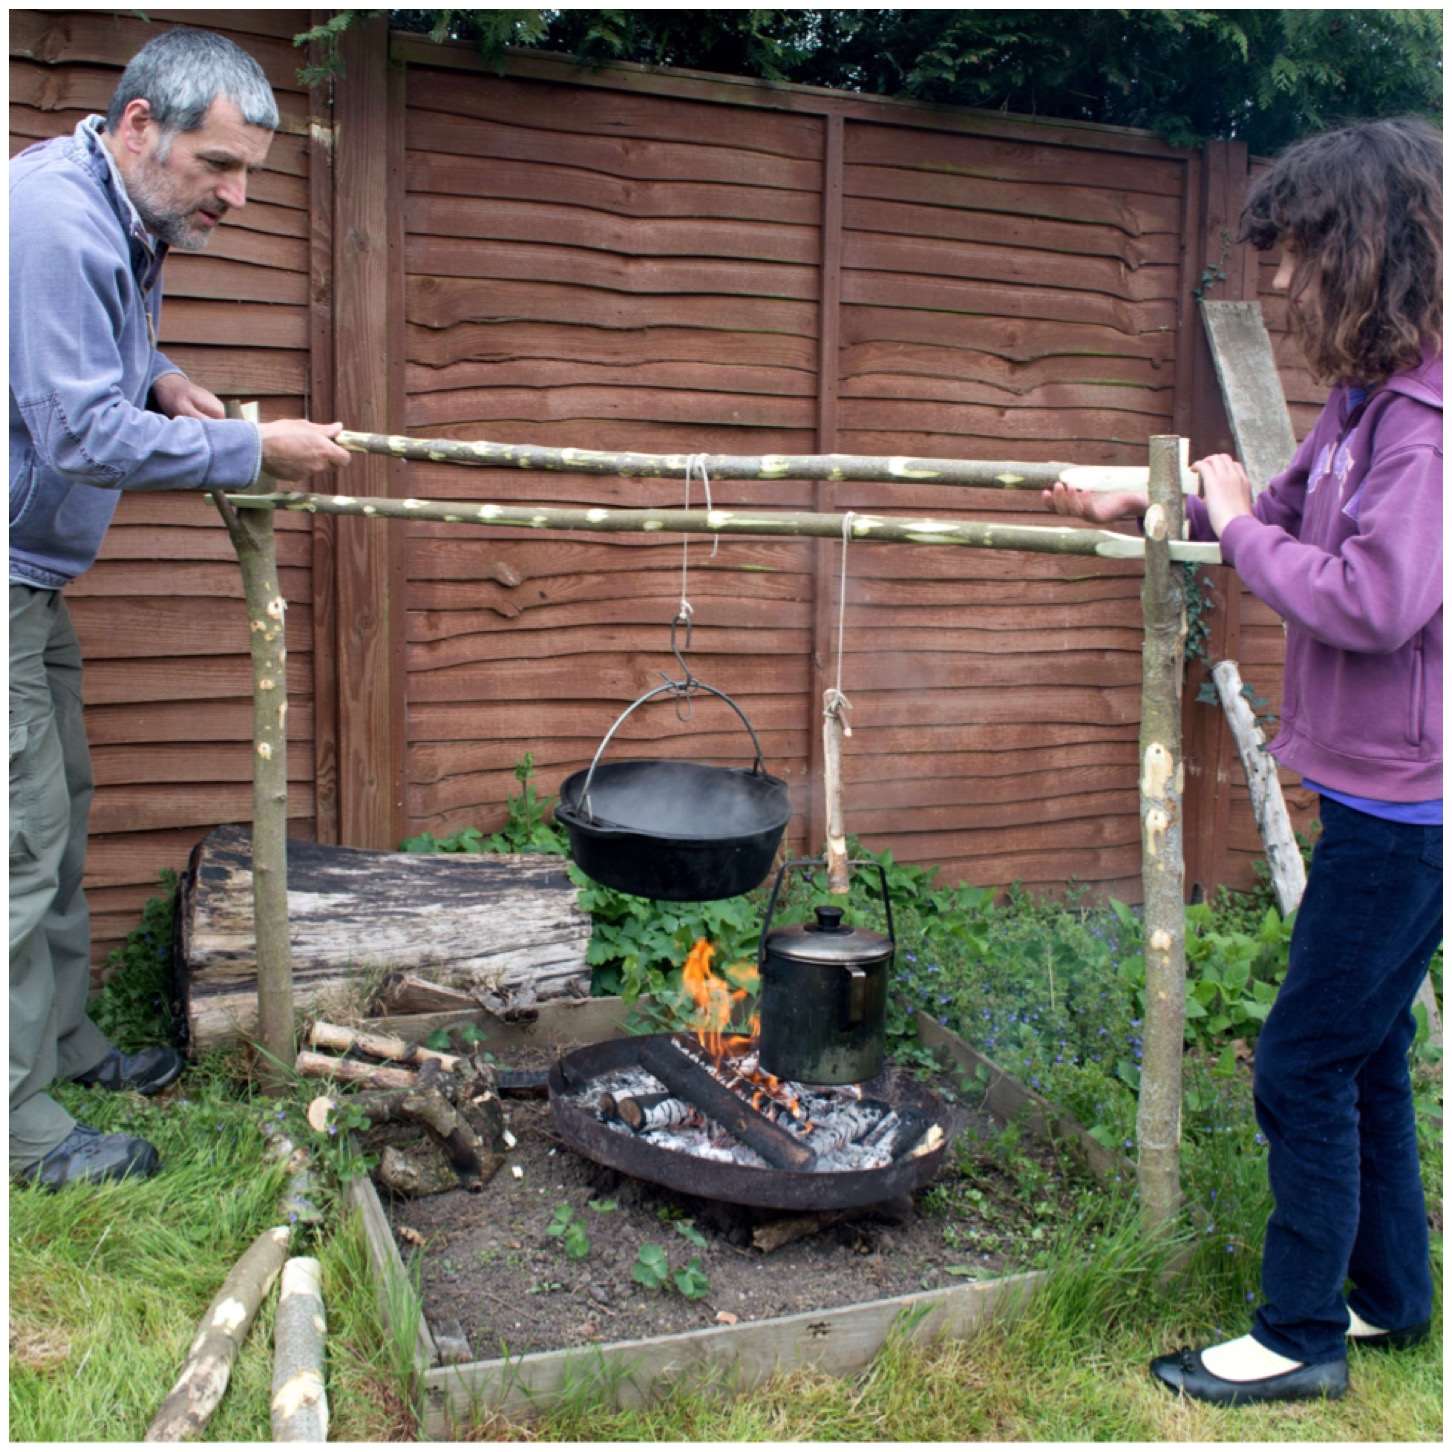
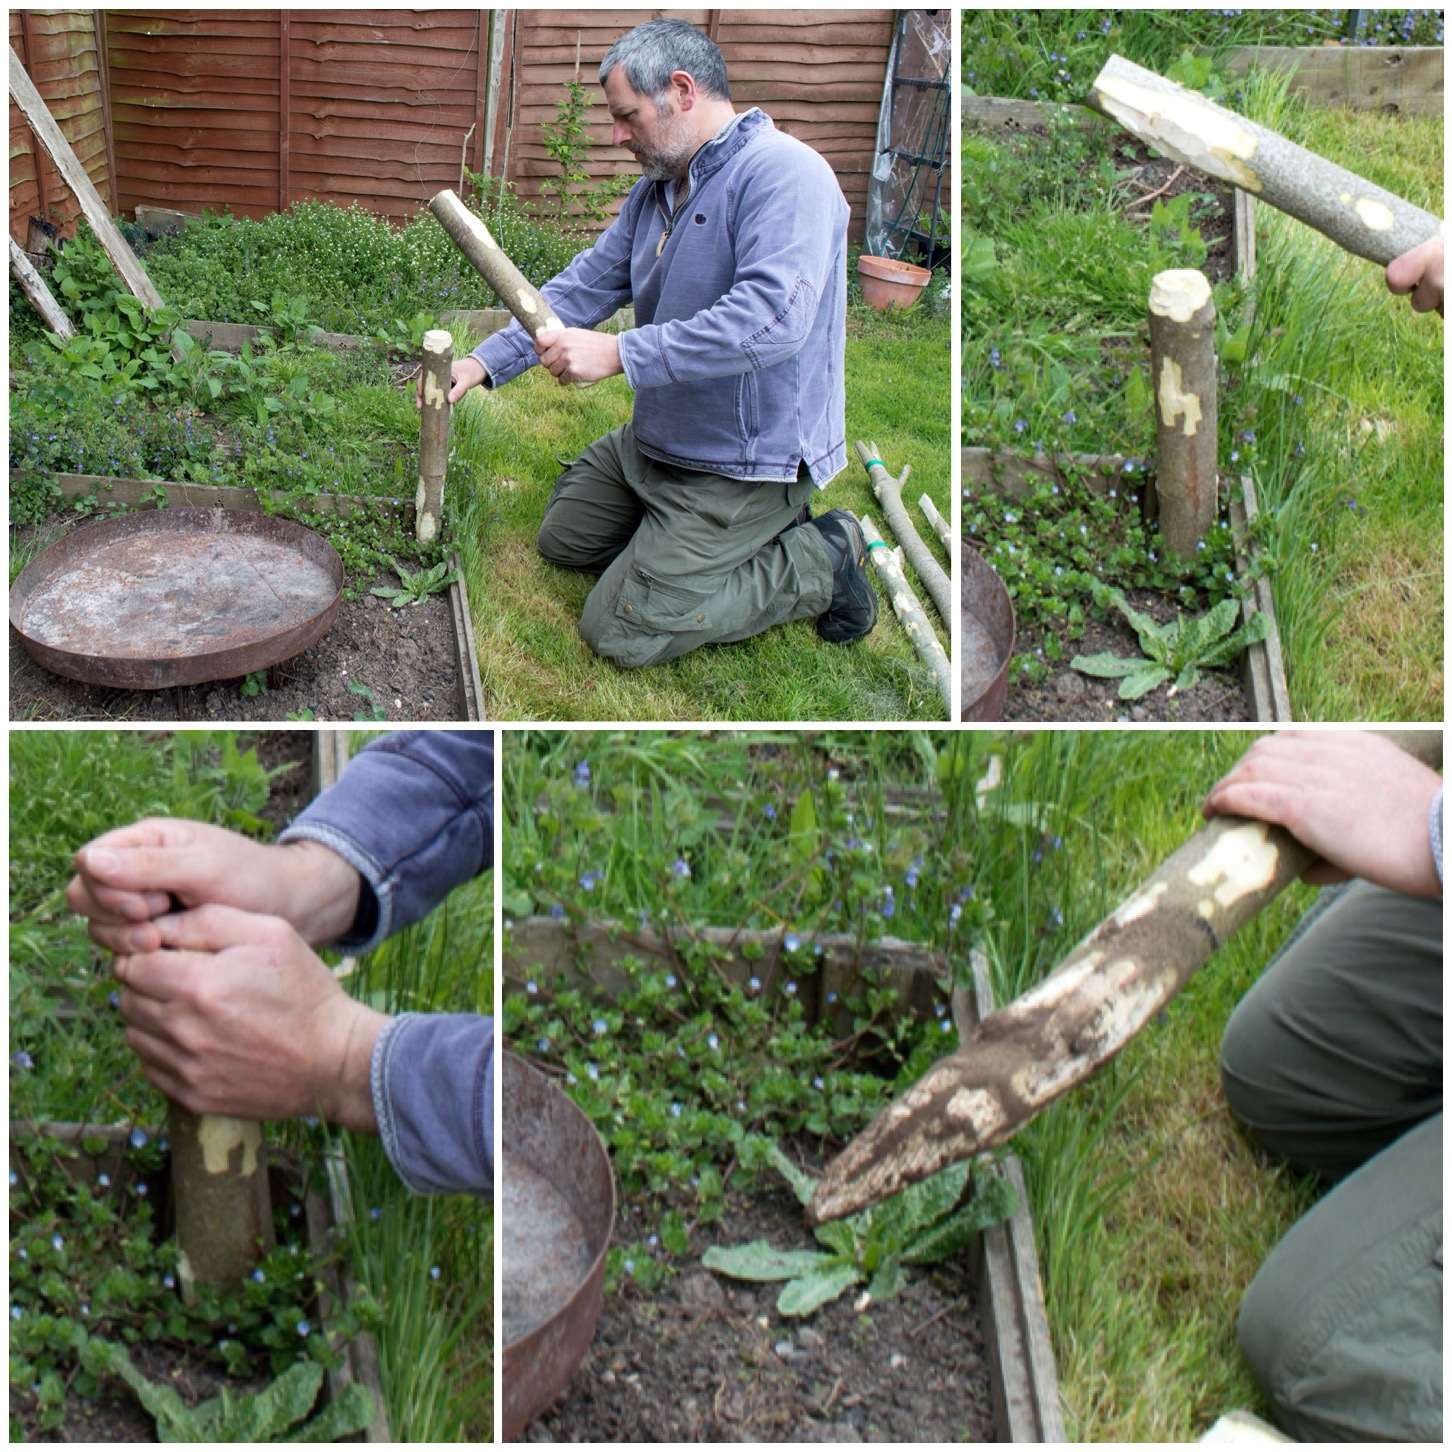
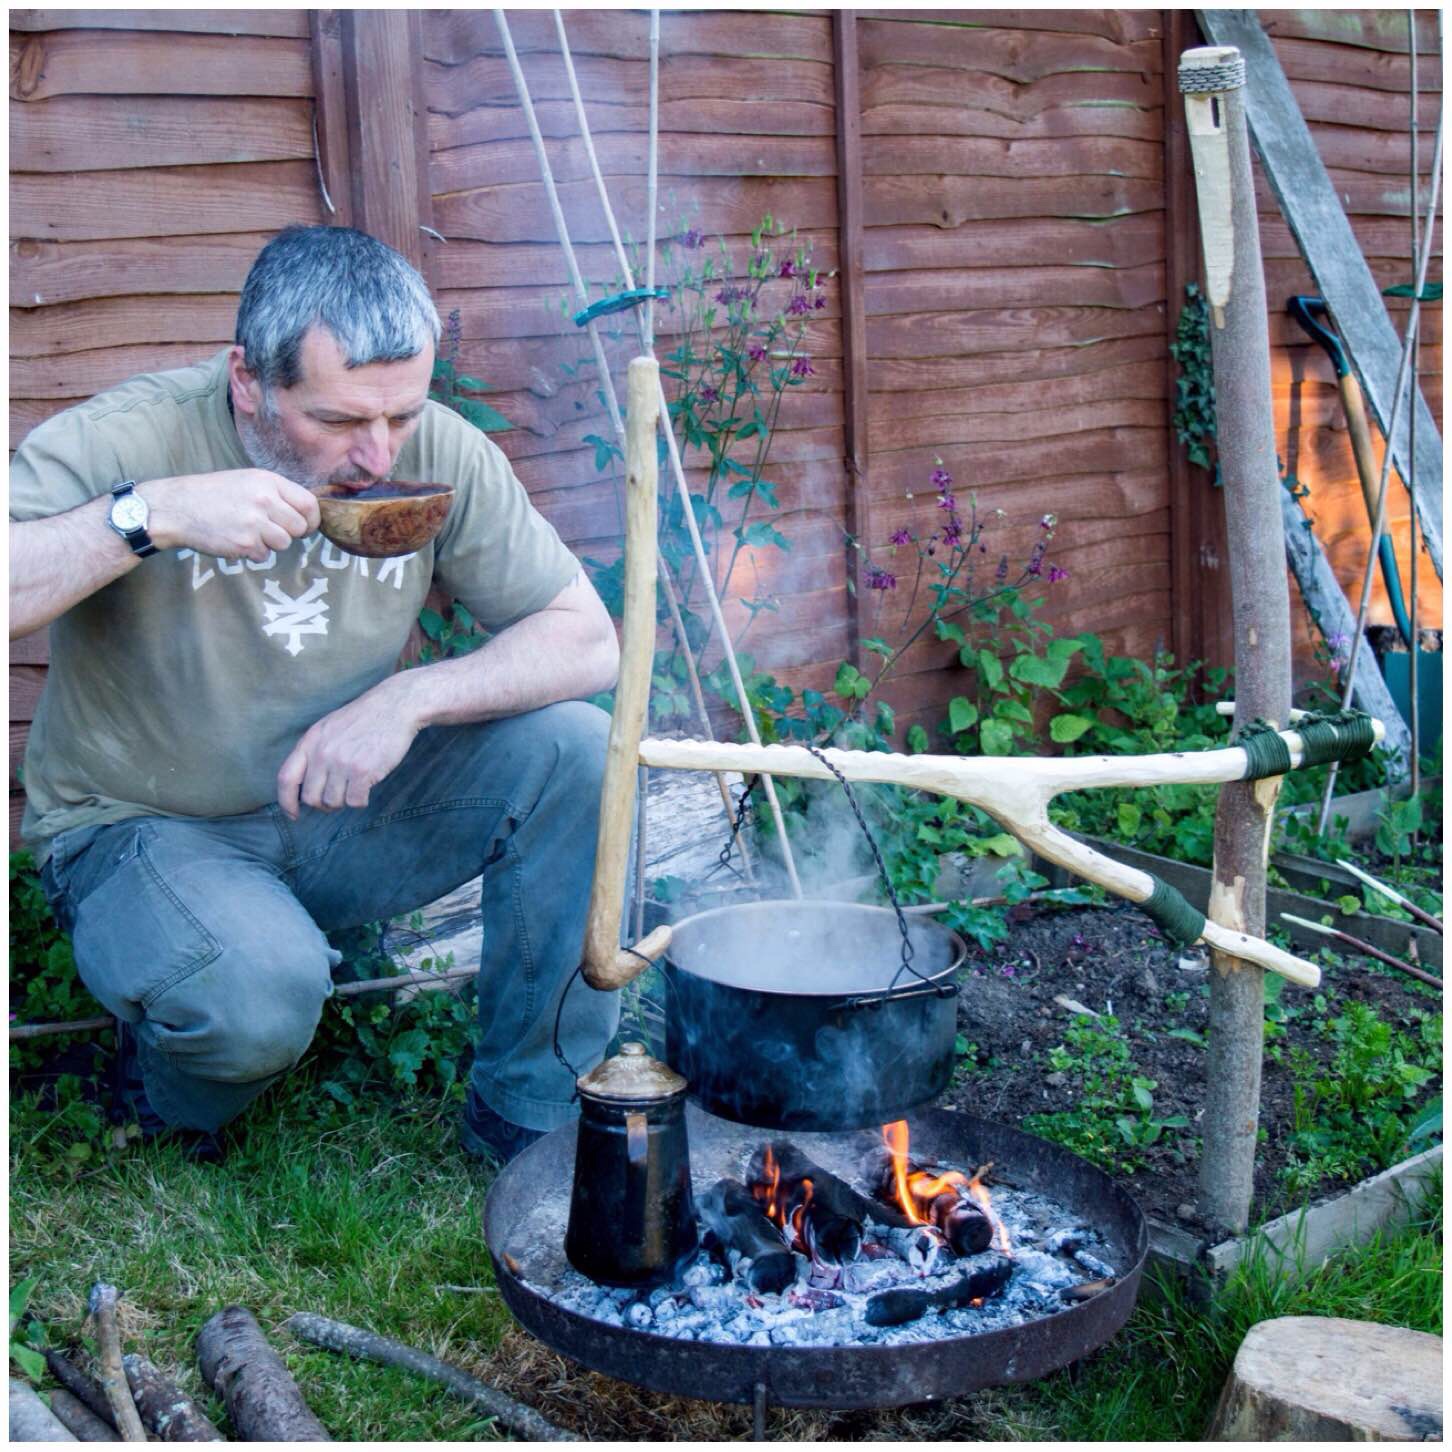
This sequence of shots shows the method I use for adjusting the height of the crane when it has a heavy pot attached to it. I swing the crane away from the fire, remove the pot, adjust the height of the crane, attach the pot again and swing it back over the fire.

With light pots you do not need to remove the pot but just lift the crane slightly so it detaches from the upright and then just move it up and down.

image
In use

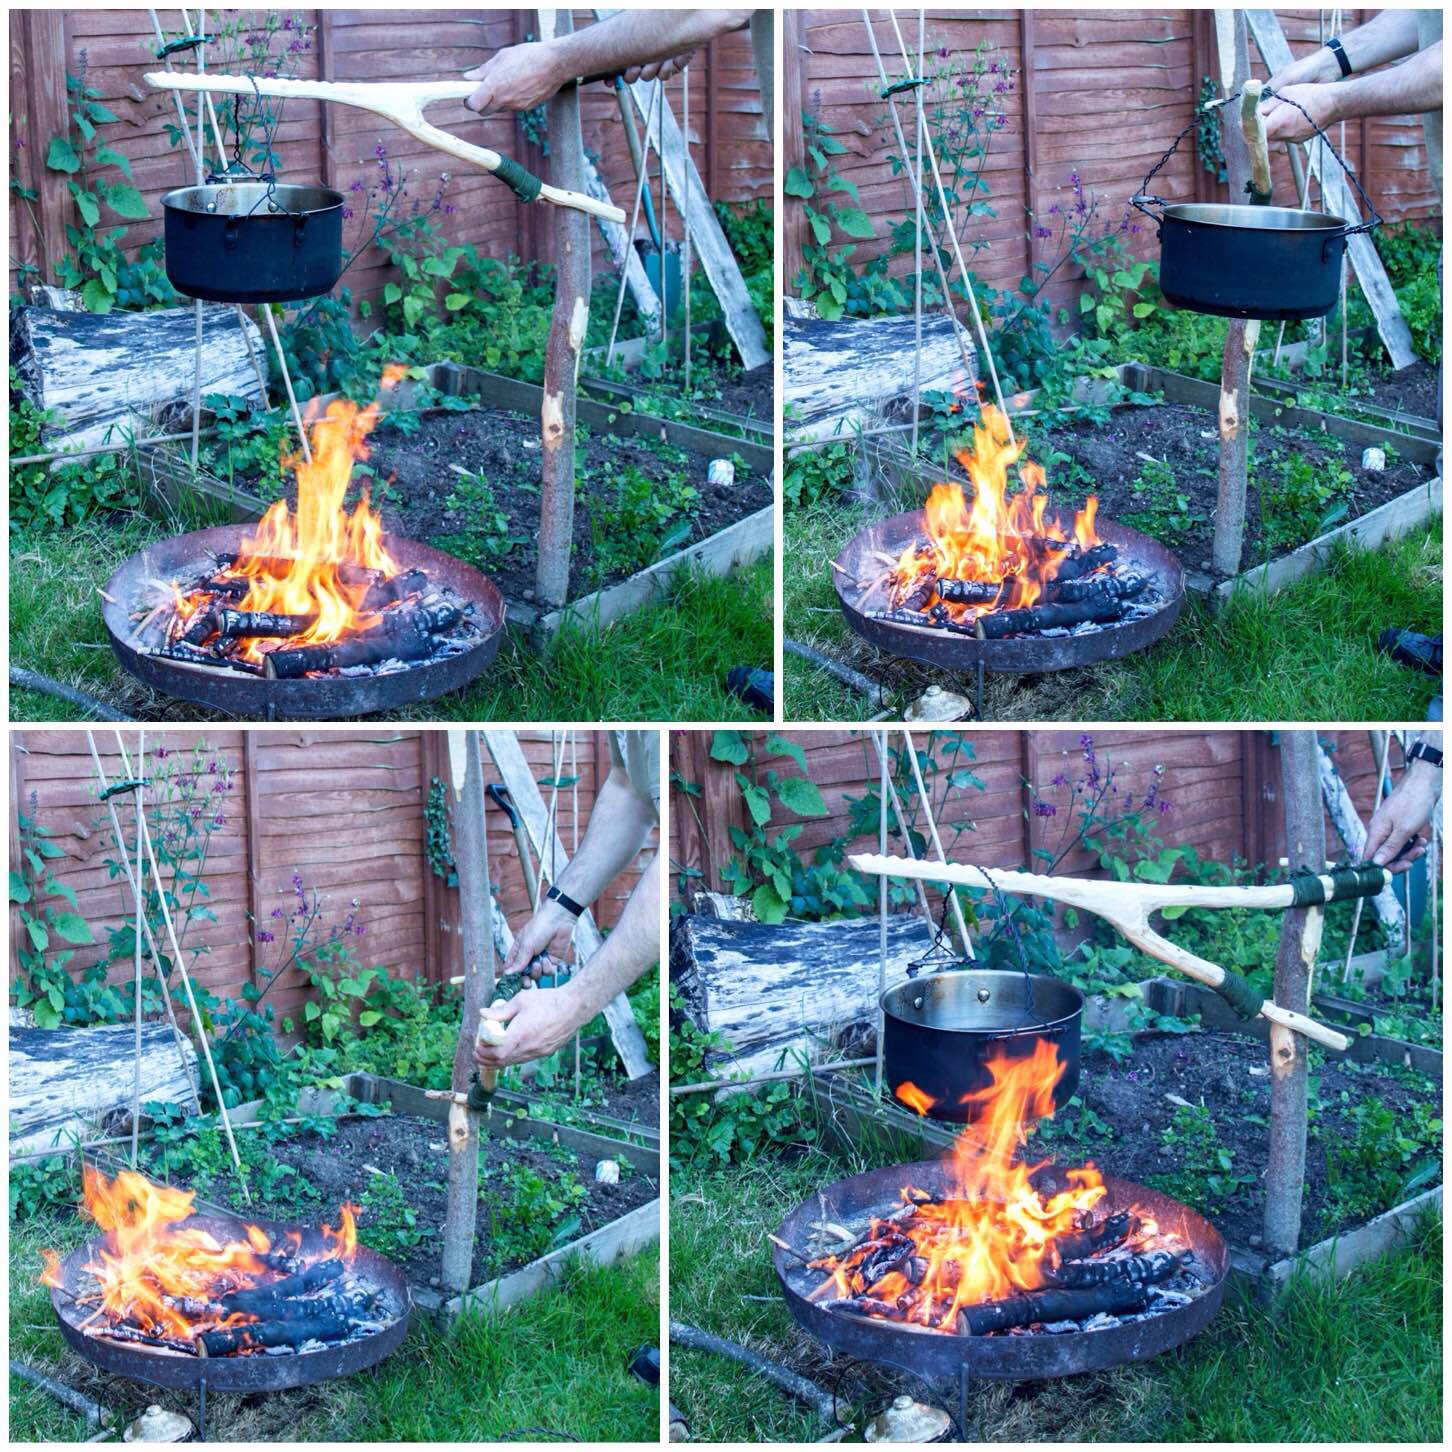
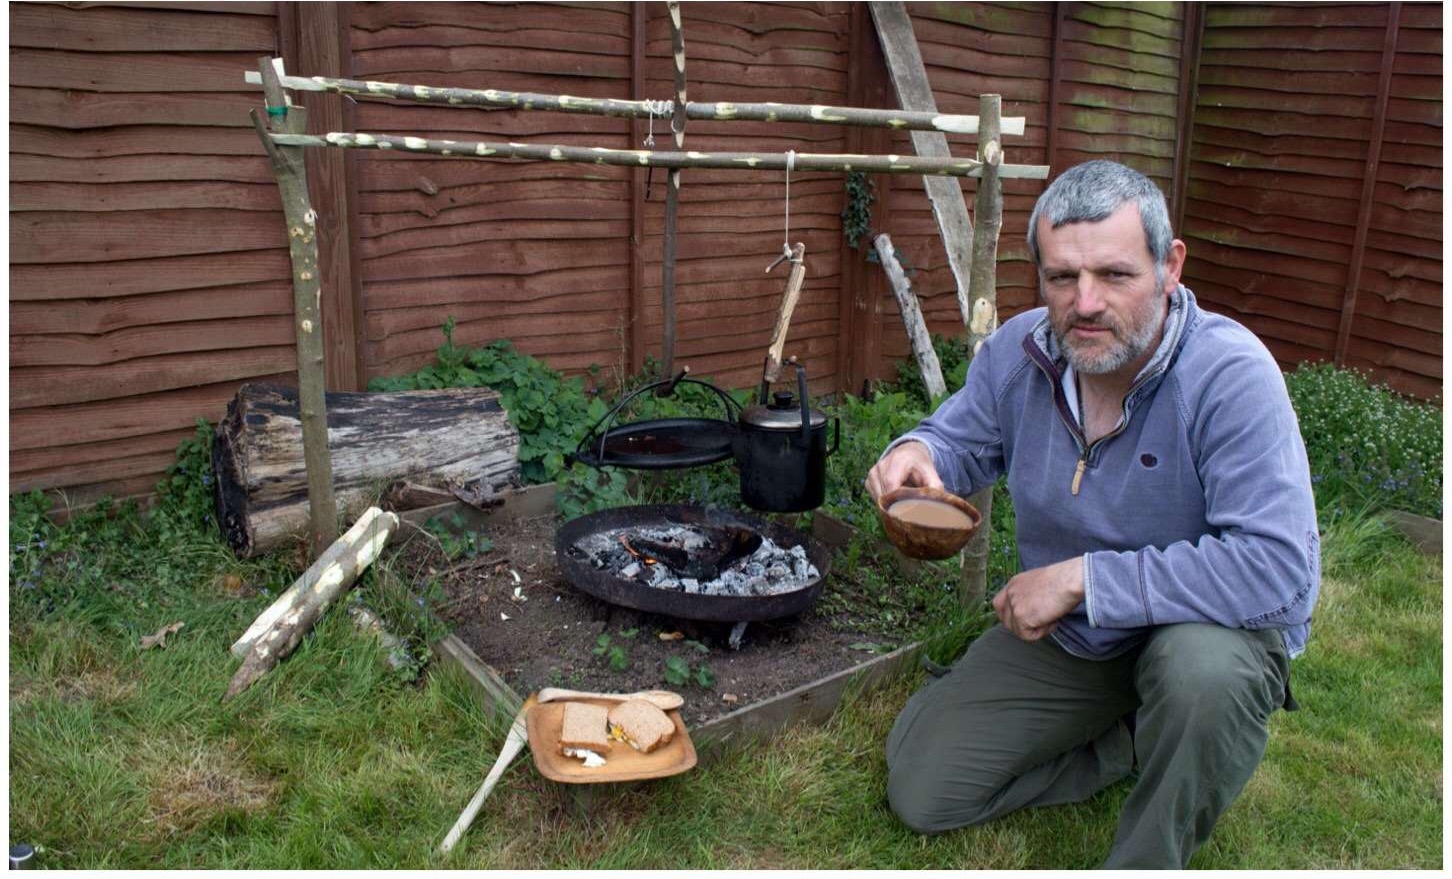
In this picture you can see how the arm works with an adjustable pot hook attached to the end of the crane arm.

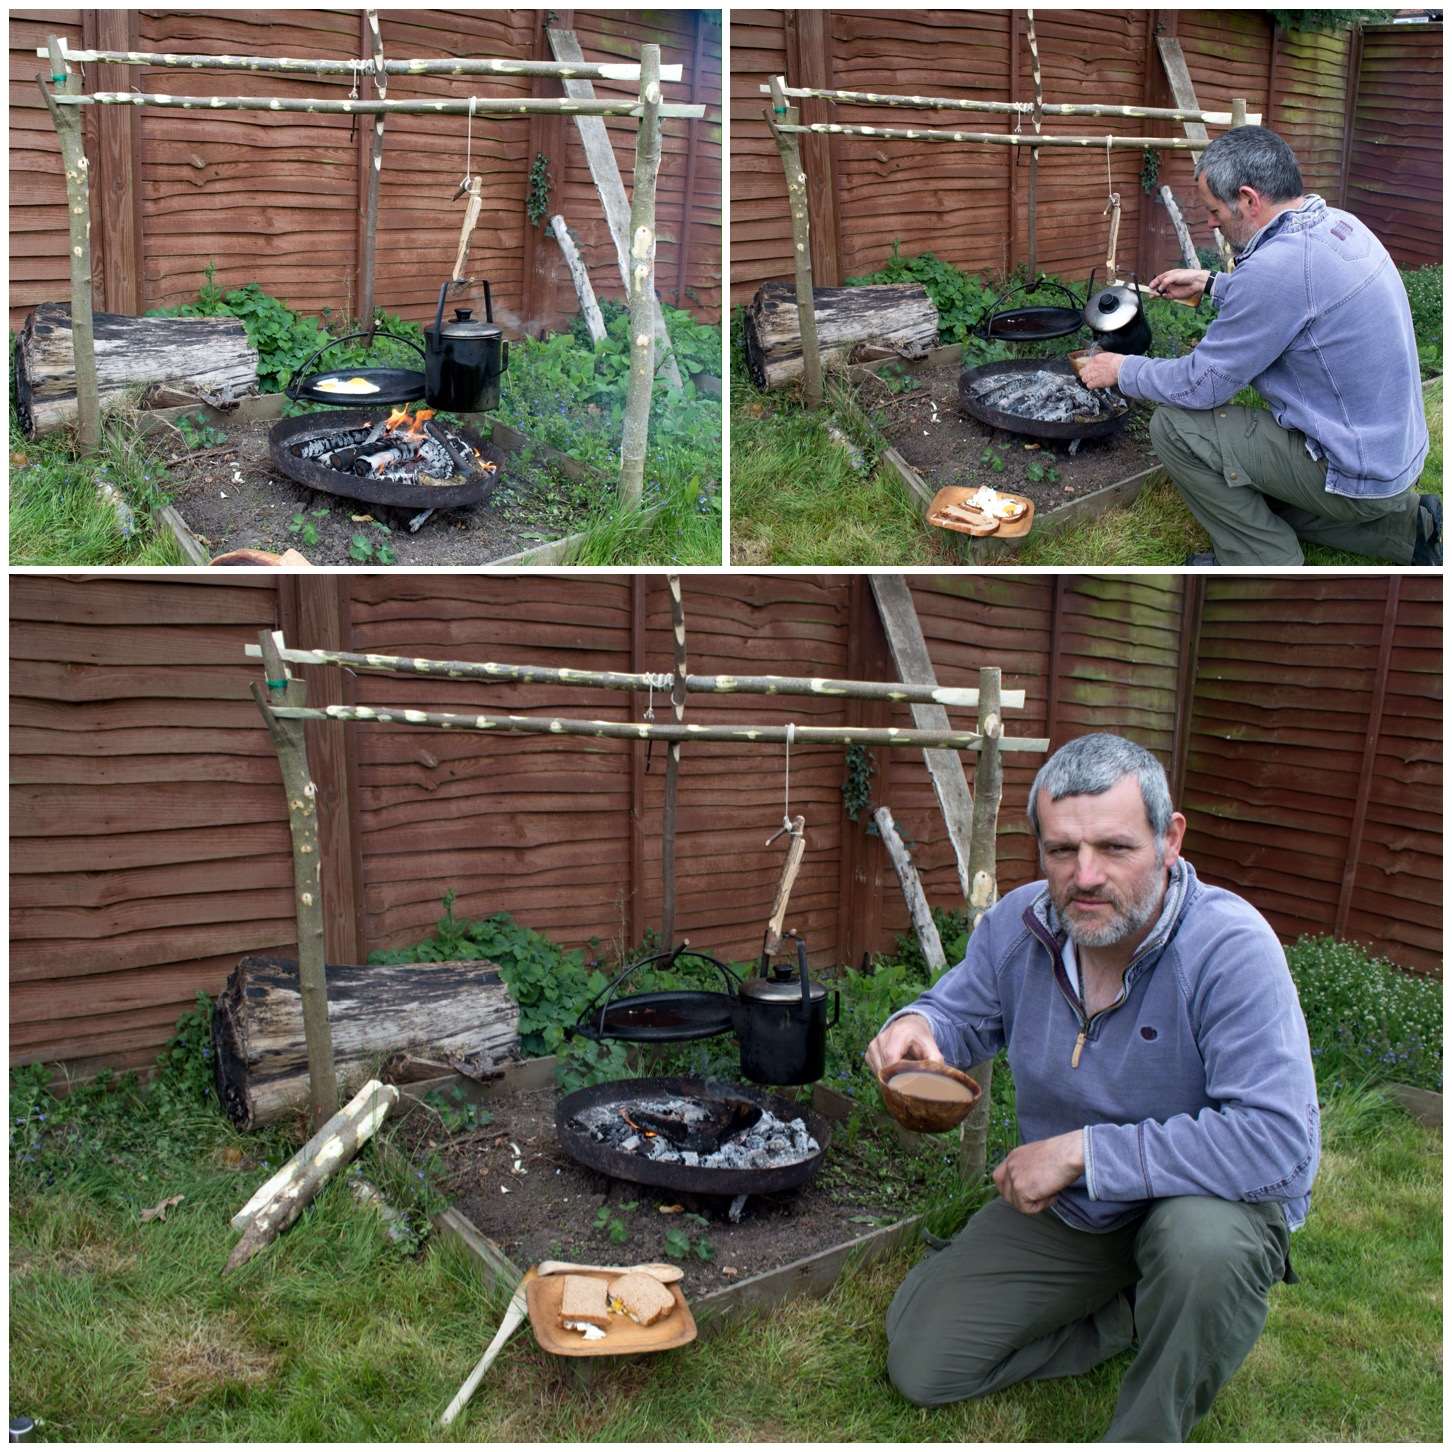
It looks precarious but with the usual level of care you take around any fire I have found this system works well.

image
Added adjustable pot hook

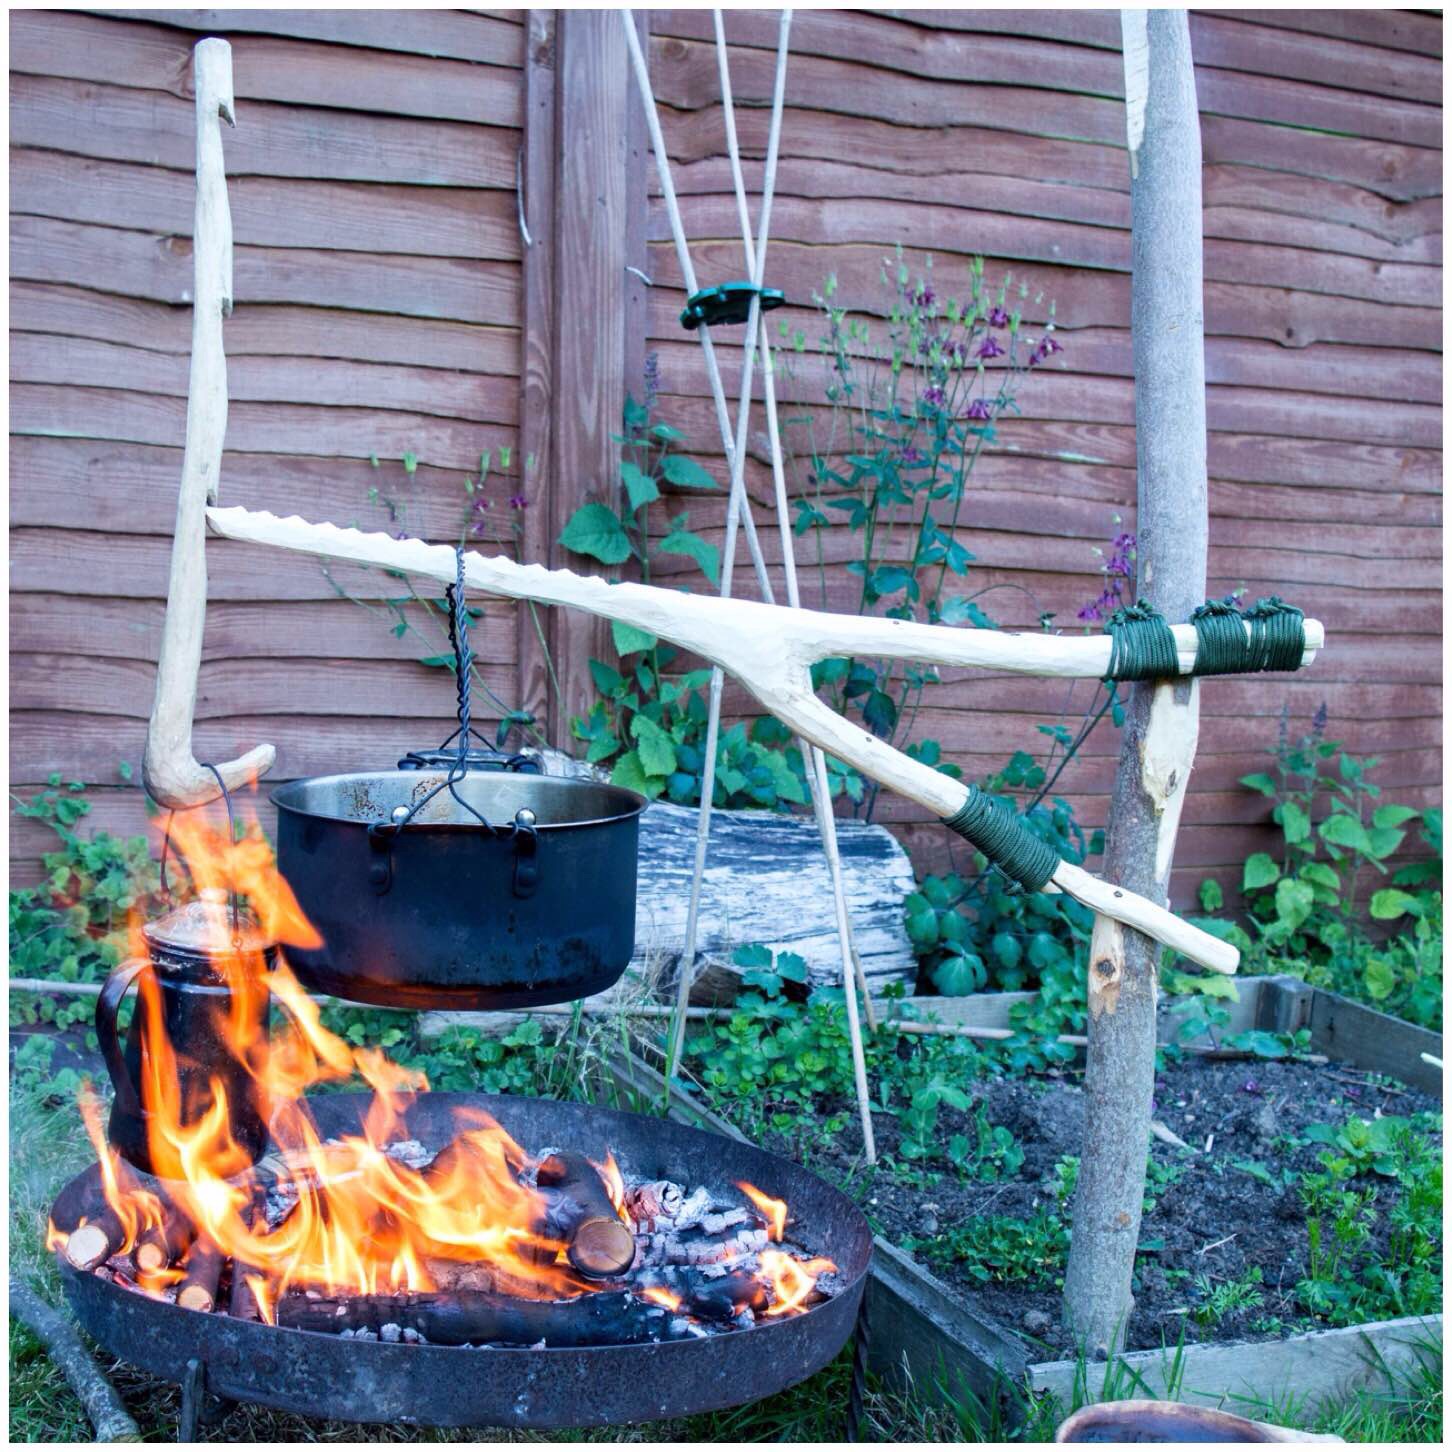
Dinner could be in one pot and the kettle on the other leaving plenty of room to sit comfortably around the fire without having lots of uprights protruding out (which can be a problem with other campfire cooking rigs).

image
Works a treat

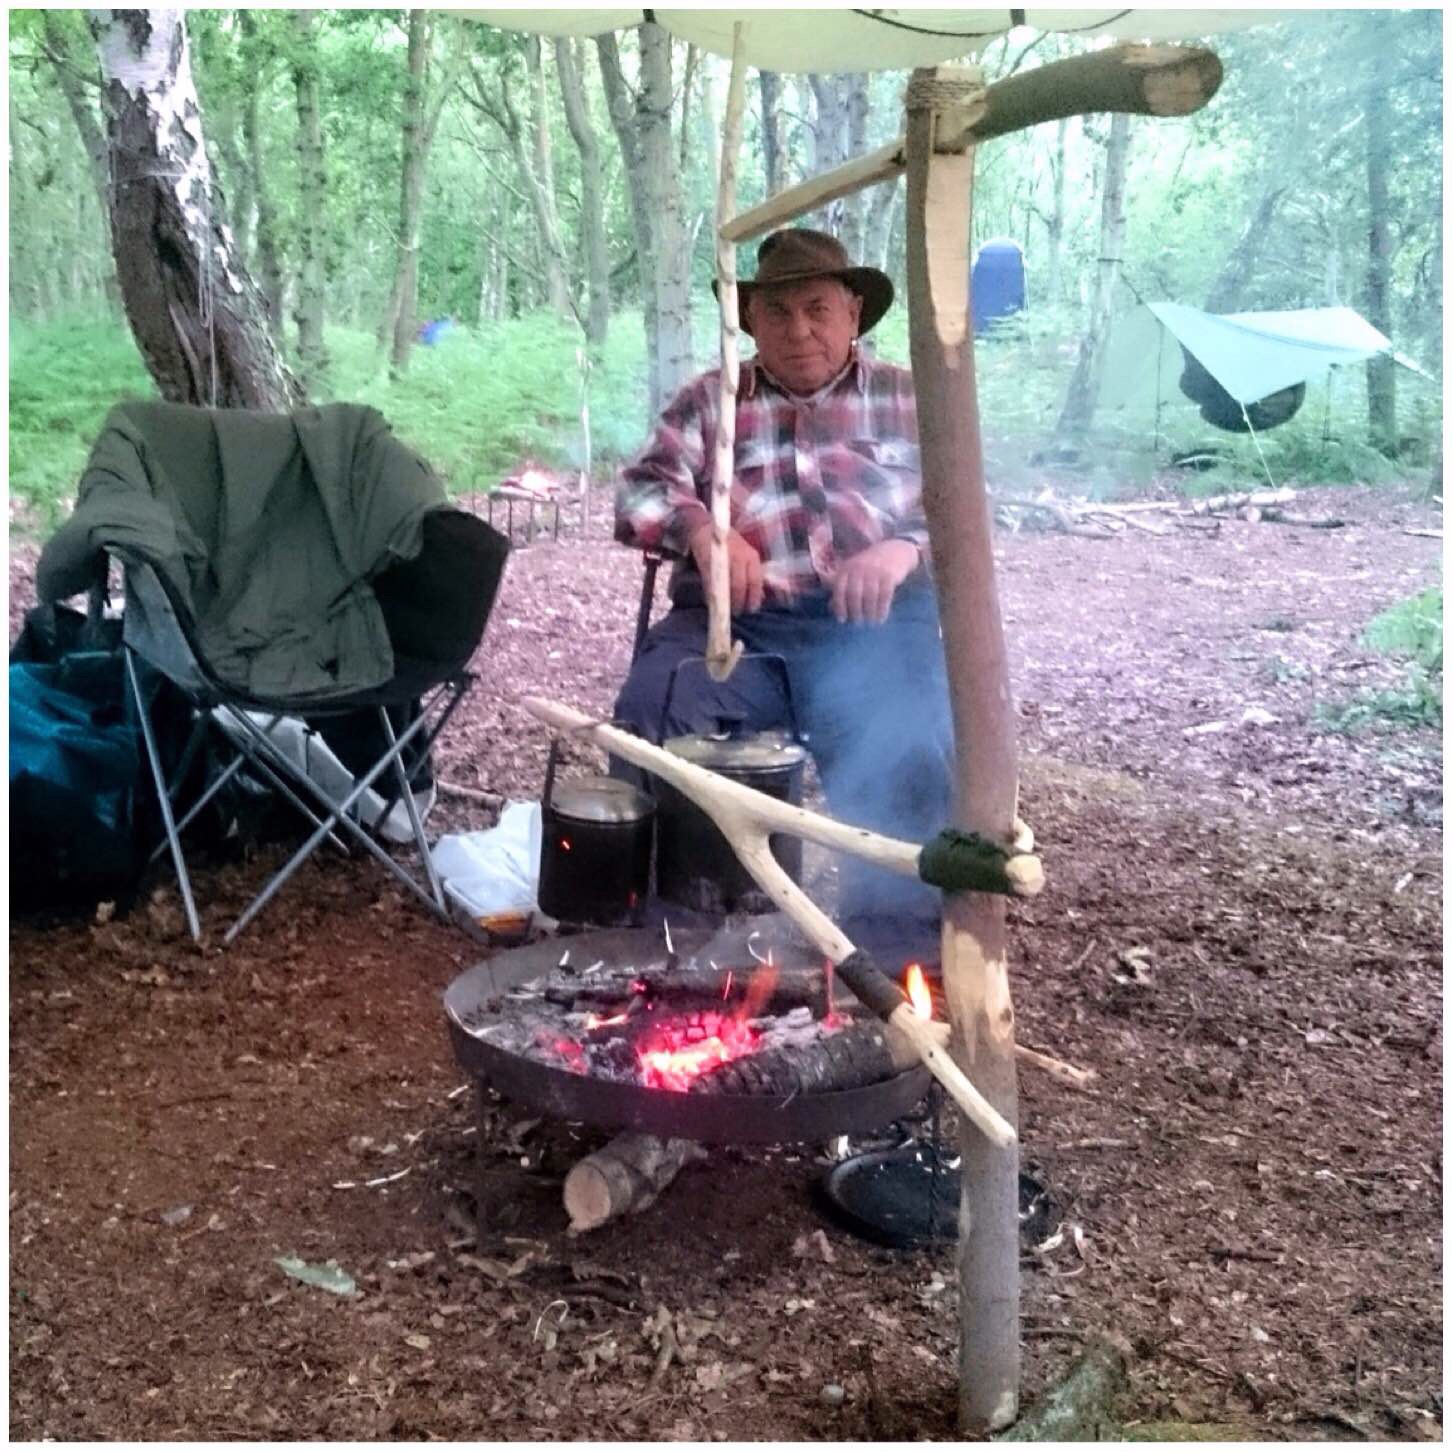
I took the set up out on a recent bushcraft course I was running to show some colleagues and set it up with a fixed crane. All in all it worked a treat.

image
In use in the field

If you have not seen it I have another post on making one of these cranes but just out of one forked stick – How To…. Carve an Aures Campfire Crane – Single Fork

Cheers

George

How To…. Build a Double French Windlass Cooking Rig

A few years ago at the BCUK Bushmoot in South Wales I ran a class looking at different campfire cooking set ups. As well as showing the students my set ups I had asked them to bring along examples of their own if they could. One that caught my eye was from my friend Steve Mesquite Harrall. It consisted of two forked uprights and a top bar that could be turned to raise or lower a pot that was suspended beneath it on a piece of string.

Steve had learned this from Wayland of Ravenlore Bushcraft and there is a good picture of the set up on Wayland’s Ravenlore site – Hang up your Billy. Wayland told me he’d got the idea from a book by the French adventurer Nicolas Vanier called ‘North’. The rig did not have a name and it was Wayland who used the term French Windlass (Windlass meaning to ‘haul or lift’). I have just added the ‘Double’ so I can cook with more than one pot.

I really liked this rig when I first saw it but soon felt the need to be able to adjust the height of more than one pot at a time. You do not easily find two decent poles with a double fork in the right place to do this so I had to come up with another idea. The solution in the end was so simple that I had to laugh at my own stupidity for not thinking of it quicker – just make a new fork by splitting the pole above the natural fork.

Photo 23-04-2015 10 59 58
Double French Windlass Cooking Rig

The basic parts I used were one small piece of wood to make a pile driver (I’ve heard this called an El Salvadorean pile driver) to create holes for the uprights, two forked uprights and two poles to act as spars.

I trimmed a point on the piece I was going to turn into my pile driver first. I used a small round of wood to act as a work surface and kept my axe work to the far side of the round for safety.

Photo 23-04-2015 11 07 06
The basic parts and the start of the El Salvadorean pile driver

Once the point was finished I put a chamfer on the top of the pile driver by cutting out little pieces of wood all around it. Doing this helps stop the pile driver from splitting as you hammer it into the ground to create your hole.

Photo 23-04-2015 11 10 17
Carving the pile driver

As the pieces I picked for the uprights were fairly thick I had plenty of wood to split to create my second fork. You need to ensure that the split you create is on the same plane as the natural fork.

To batton safely, make sure the bottom of the upright is secure and hold the axe so that the blade is at right angles to your body. I used the pile driver as a batton to create the split. Once the split reached the level of the natural fork I stopped.

Photo 23-04-2015 11 12 04
Battoning out the second fork

To stop the split going any further I whipped some twine around the upright at the base of the split. To keep the fork open you will need to add a wedge and the whipping will stop the split travelling down the upright when it is inserted.

Photo 23-04-2015 11 16 36
A little whipping

I took one of the spars and carved a triangular end to it – the thin end of this will be the wedge to hold open the split in which the spar will sit.

Photo 23-04-2015 11 58 26
Carving the wedge

I used the pile driver to batton the wedge down into the new fork until it reached the whipping. Then it was a case of just trimming the wedge to finish.

Photo 23-04-2015 12 01 47
Inserting and trimming the wedge

I felt that my fork needed to be a little bit wider still so with my knife I cut out some wood from inside the fork. Once that was done it was a case of giving the upright a pointed end and trimming off any knobbly/sharp pieces from it.

Photo 23-04-2015 12 04 20
Widening the fork, pointing and trimming

The second upright was produced in the exact same manner and they were soon both ready to go.

Photo 23-04-2015 12 09 48
Finished uprights

The rig works on the principle that the weight of the pot locks the spar into the forks on the uprights. To make this work you need to carve triangular-shaped ends to your spars (Wayland likens this to a prism shape on his blog). I ensured that the points of the triangles at each end of the spars matched up with each other. Take your time with this and before each cut ensure they are lined up.

Photo 23-04-2015 12 12 21
Carved triangular shaped ends on both spars

The ground where I was testing this out was at the back of our garden in an area that was about to be weeded and planted so it was a little soft but even so if I had just hammered the upright into the ground it would have split the top fork. The pile driver came into its own here as I was able to really hammer it into the ground (try and make your pile driver slightly smaller in diameter to the upright to get a snug fit) and create a hole for the upright.

Photo 23-04-2015 12 19 59
Use the pile driver to create a hole for the first upright

Once the first upright was in I gauged the distance to where I needed to put the other upright in using one of the spars and repeated the process starting with the pile driver and then gently tapping in the upright.

Photo 23-04-2015 12 25 38
Gently tap in the first upright and repeat the process for the second upright

Check your alignment is correct by lining up the forks and place both spars into their forks. I tested the spars were locked in place by trying to turn them gently. No need to force them as the weight of your pots will lock them down further.

Photo 23-04-2015 12 27 39
Check your alignment, place the second spar and ensure they lock well

I took this shot to show you how the spars fit into the forks. All very basic but works surprisingly well.

Photo 23-04-2015 12 28 13
Locked in

To suspend the pots I used some old string and tied it on with a clove hitch  and then a couple of overhand knots to finish. I did not make them overly tight because I wanted to be able to release them easily  to re-position them. Once that was done I attached the hooks. Use whatever knots you are comfortable with but make sure they and your string will hold the weight of your pots when full.

If you are worried that the string will burn then dampen it with some water (avoid string that will melt easily). I have never had the string burn through as when I am cooking I do not let flames grow big enough to go near it. Also when starting your fire ensure that the spars are not in place so that the initial flames do not burn the string.

Photo 23-04-2015 12 36 44
Use a clove hitch and tie on your hook. Add one to both spars.

Once you are cooking it is very easy to lift and rotate one of the spars to raise or lower a pot by winding or unwinding the string. As we were boiling some water in the Dutch oven I got my daughter to help me but if the pot is light enough then you can do this easily by yourself.

Photo 23-04-2015 12 39 24
To adjust the height lift the spar and turn it a few times

I also use another style of pot hook quite often (I learnt this from one of Ray Mears’s videos) which involves the use of a lark’s foot knot. All you need is a small loop of string that is able to go around the spar and through itself to leave a smaller loop to insert a traditional adjustable pot hook. To raise the pot all you need to do is loosen the lark’s foot and re-position it on another hook.

Photo 23-04-2015 12 42 07
Alternative method with a larks foot and traditional pot hook

This is the set up from various angles so you can see how all works in more detail.

Photo 23-04-2015 12 47 43
An angled view

I am glad I finished this little project as it has been on my list of things to do for a while now. It is a great set up that does not take long to do and it’s an easy way to cook foods that requires different temperatures at different stages.

Photo 23-04-2015 12 43 00
Egg Banjo and a Brew

Cheers

George