How To…. Primitive Skills – Build a ‘One Stick – Split Stick Atlatl’

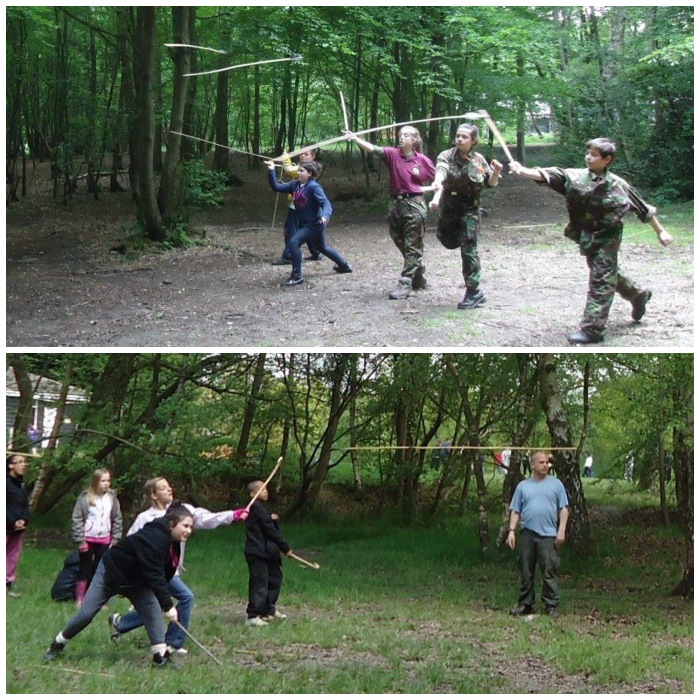
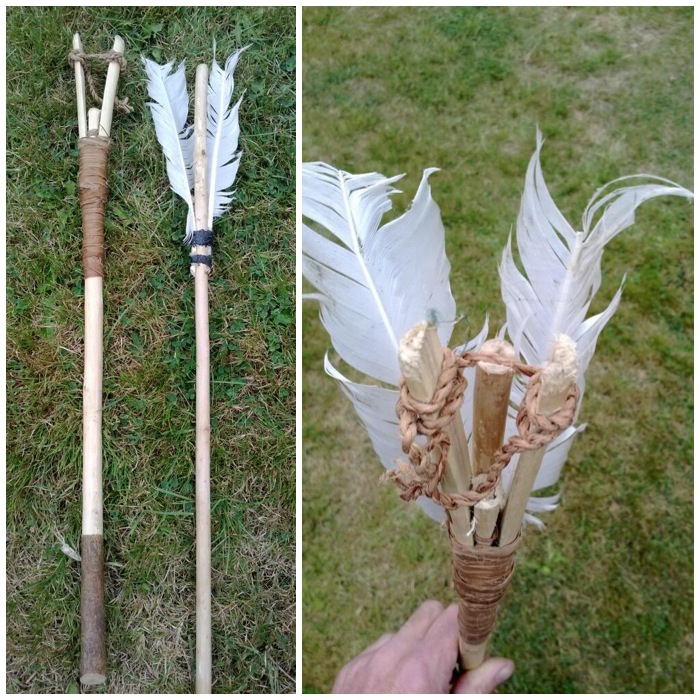
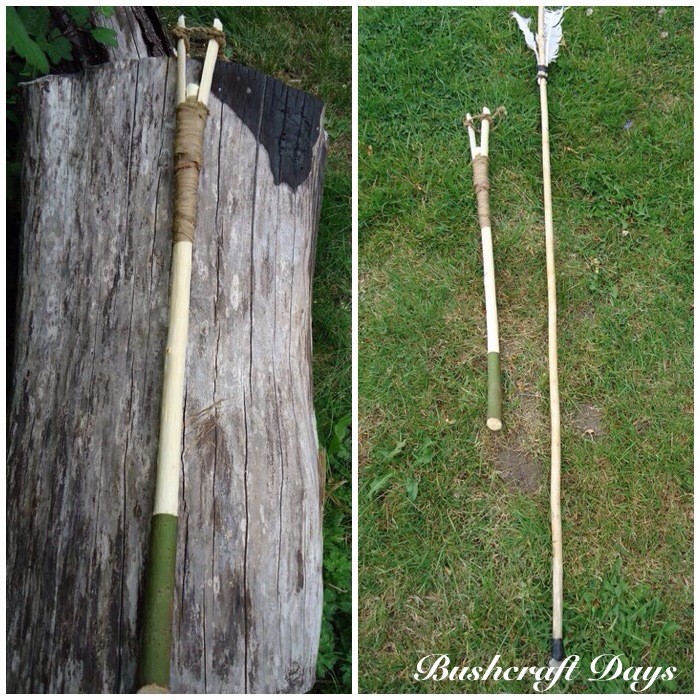
Recently I posted an article titled – Atlatls – What they are and why I love them where I said I would be publishing a couple of How To…. guides on making them. This is the first of these guides on making what I call the One Stick – Split Stick Atlatl.

Photo 30-01-2014 14 15 36
The One Stick – Split Stick Atlatl

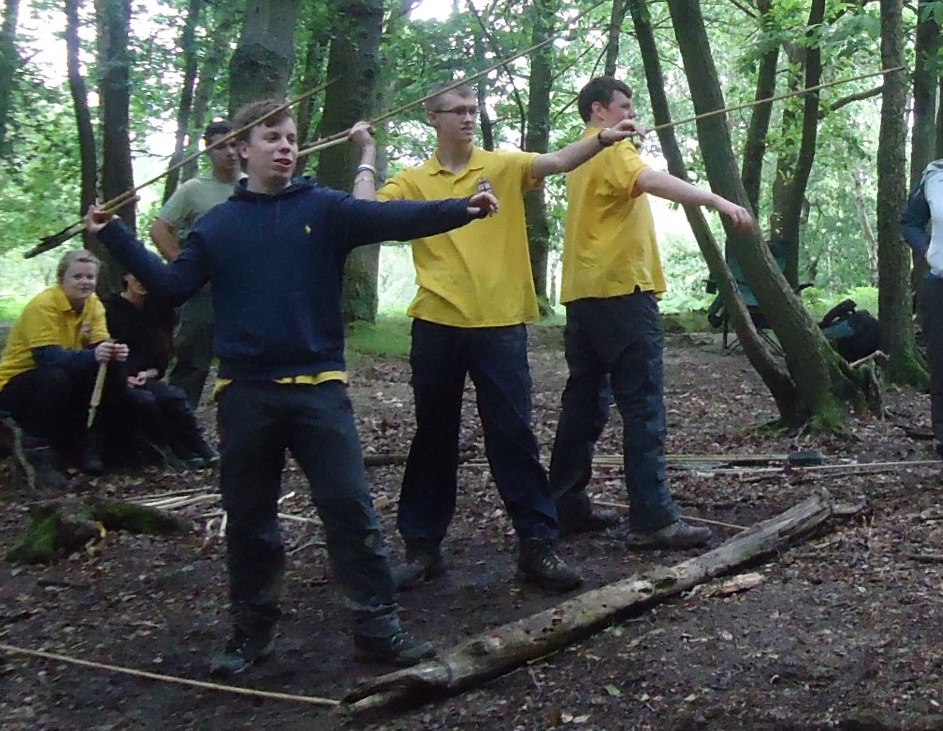
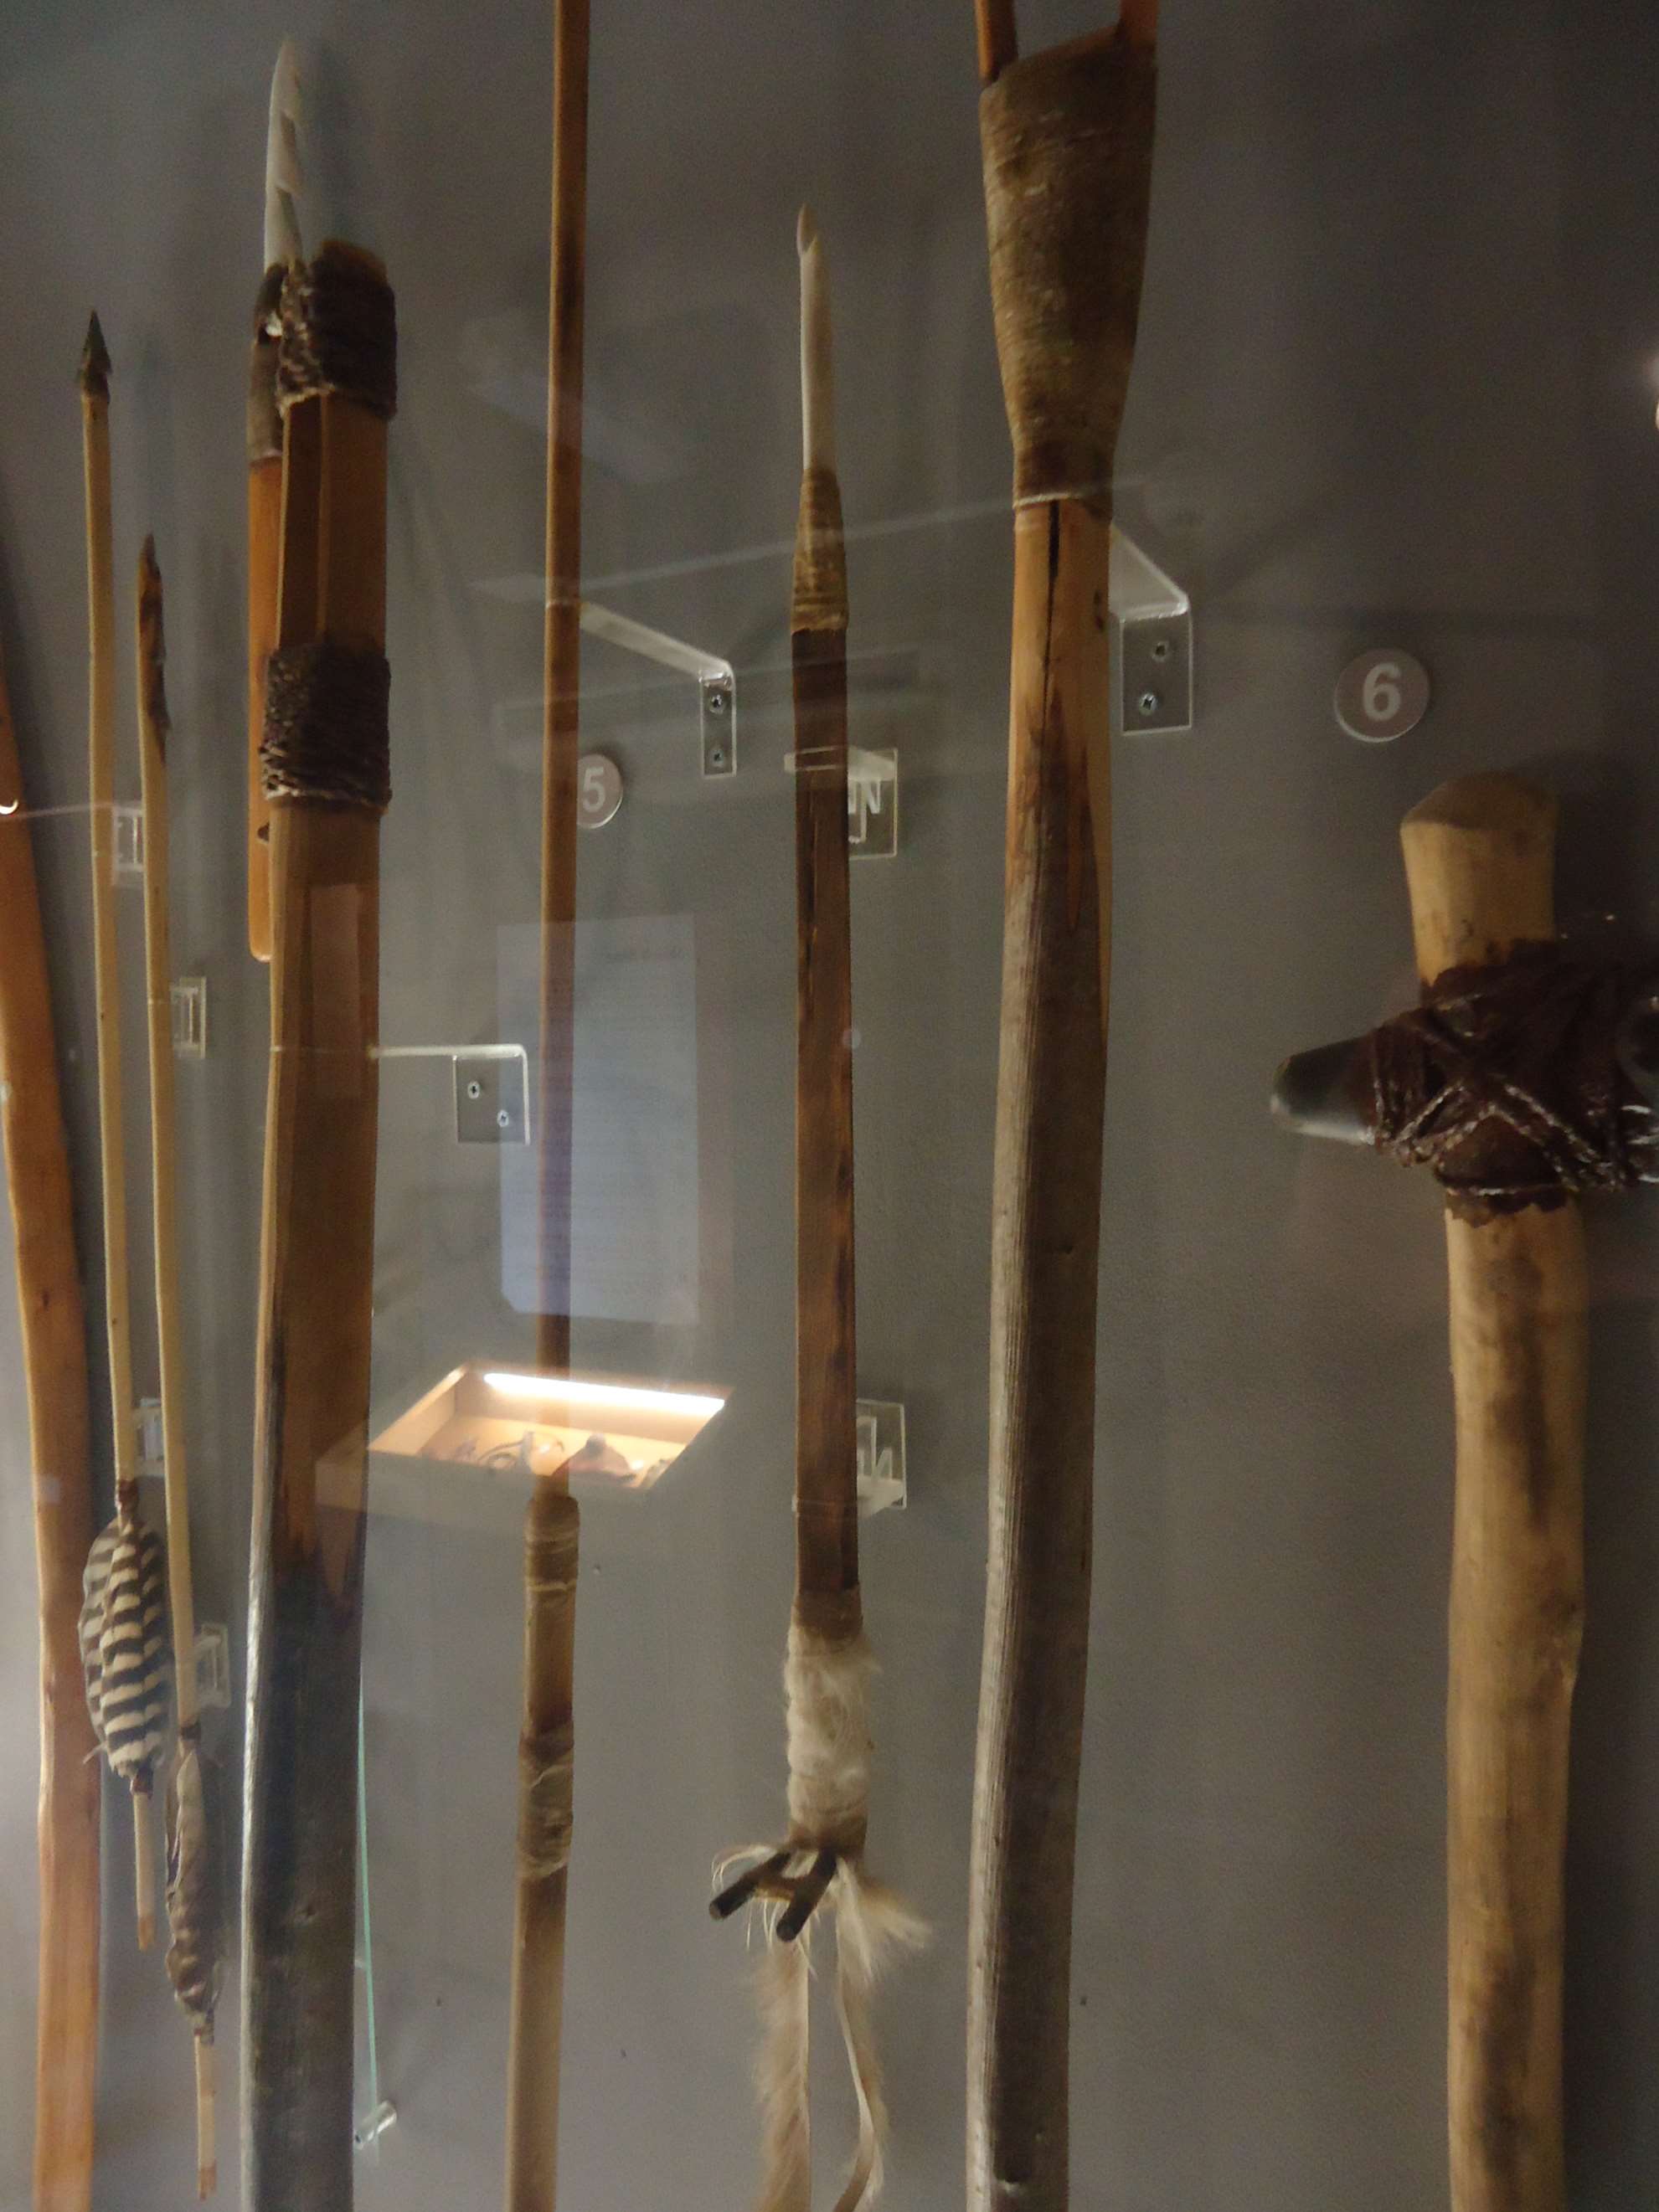
As explained in the previous article, an Atlatl is basically a spear-chucking device. Many different types have been made by different societies: there is nothing in the archaeological record (as far as I know) of this type of Atlatl, but then as it’s made completely of organic material there is no surprise there. I decided to investigate this type after researching the Lovelock Cave Atlatl. There is debate over how darts were launched by that Atlatl and whether a point was used or whether a strip of cordage was used.

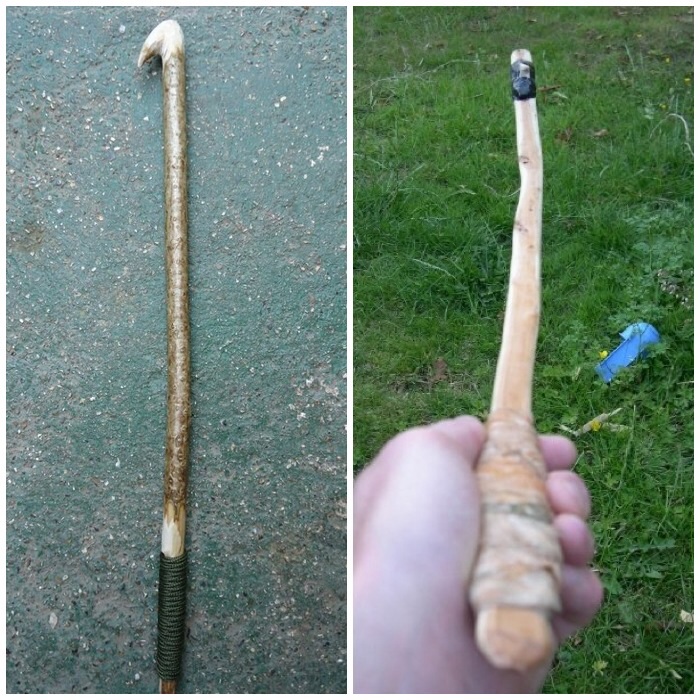
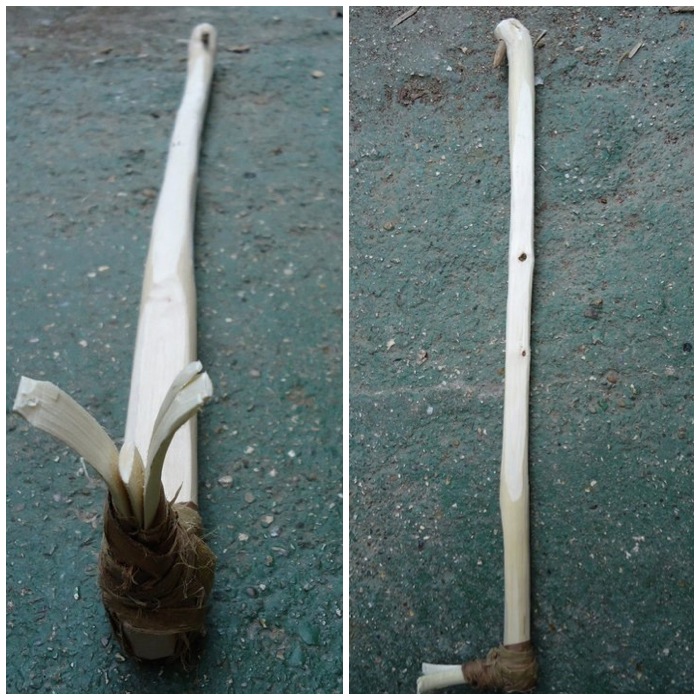
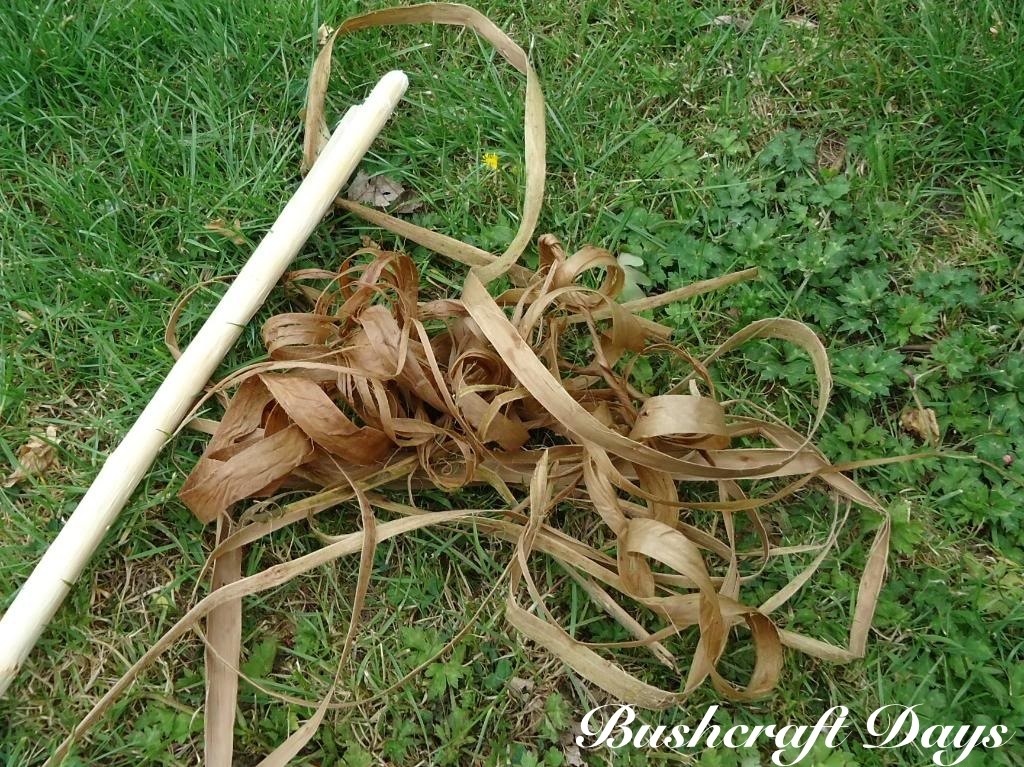
The One Stick -Split Stick Atlatl I made for this post was done using primitive tools only and a single shoot of goat willow (Salix caprea). I made the Atlatl just to prove to myself I could make one out of a single stick (shaft, wedge and cordage). All you would need to make one using modern tools would be a good sharp knife. The piece of willow I selected was about 1.5 metres long and about the thickness of my thumb. This was far longer than needed but I wanted it this length to get lots of cordage from the bark and to use part of the excess wood as a wedge (needed in making this type of Atlatl).

Photo 30-01-2014 14 11 15
Goat Willow (Salix caprea)

The first thing I did was to cut into the bark all the way around the stick about 12cms from the thickest end, leaving an area of bark slightly larger than my fist. This bark-covered end acts as a handle area.

Photo 30-01-2014 14 11 36
Cut a line through the bark around the stick

I used an old deer rib bone to scrape the dark outer layer of the bark off rest of the stick, leaving the handle untouched. If you leave this on the bark, the cordage you make from it will not of the highest quality.

Photo 30-01-2014 14 12 02
Scrape the outer bark off

After scraping off all the bark I re-cut around the stick just above the handle area to make sure all the inner bark was disconnected from the handle area.

20140130-230800.jpg
Cut again through the inner bark all around the stick

I then cut a line through the inner bark from the handle to the end of the stick to start to open the bark up.

20140130-234042.jpg
Make a cut along the full length of the inner bark

I used my thumbs to peel open the bark. Other tools that make this job easier are a small wooden wedge or the back of your knife blade. In late spring the bark comes off easily so my thumbs were all I needed.

20140130-231031.jpg
Slowly peel the bark off – use a wooden wedge if the bark does not come off easily

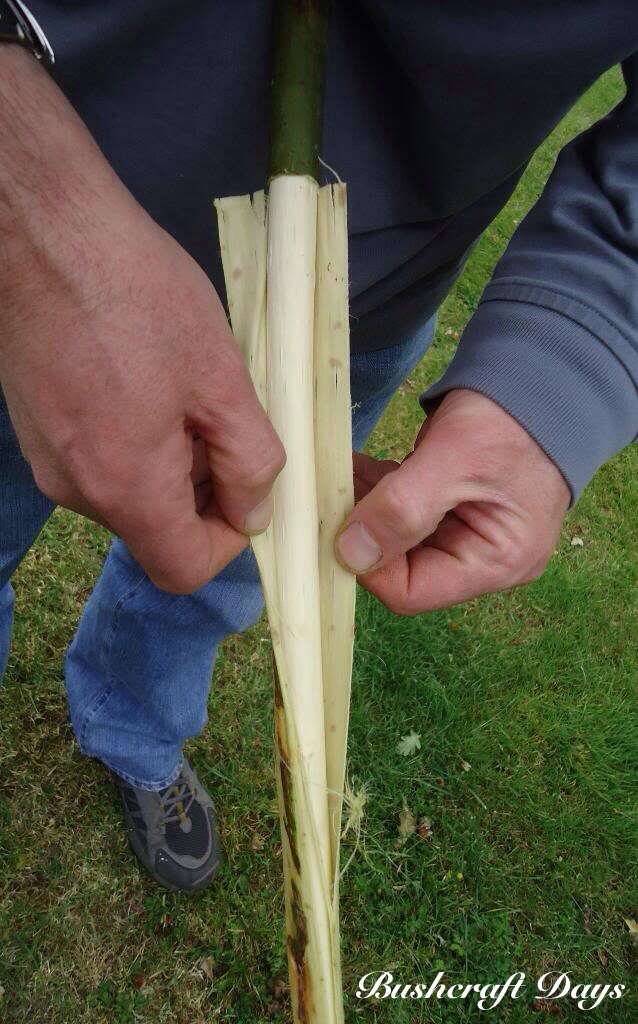
Wherever possible try and take the bark off in one piece so you can make long strands for easy cordage making. Do not worry if this does not happen, all it means is that your cordage may take slightly longer to make.

20140130-231049.jpg
Try to get it off in one piece

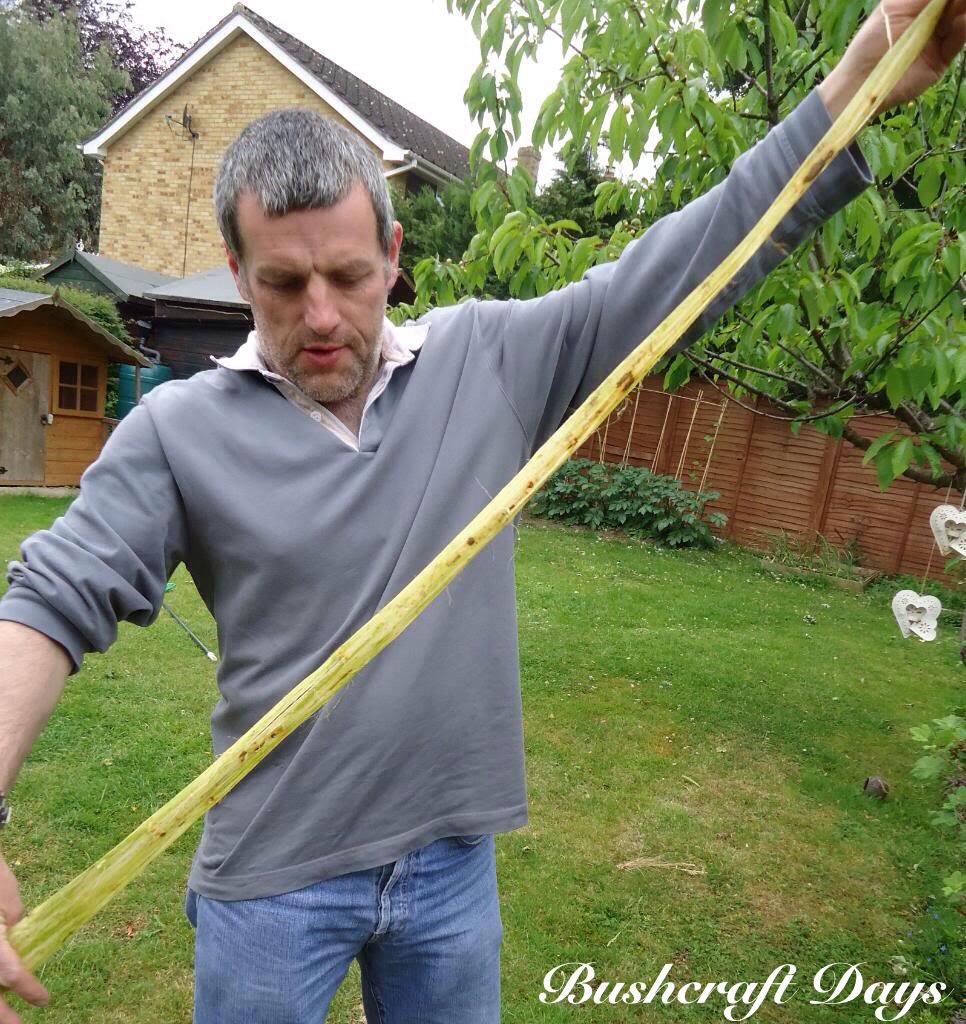
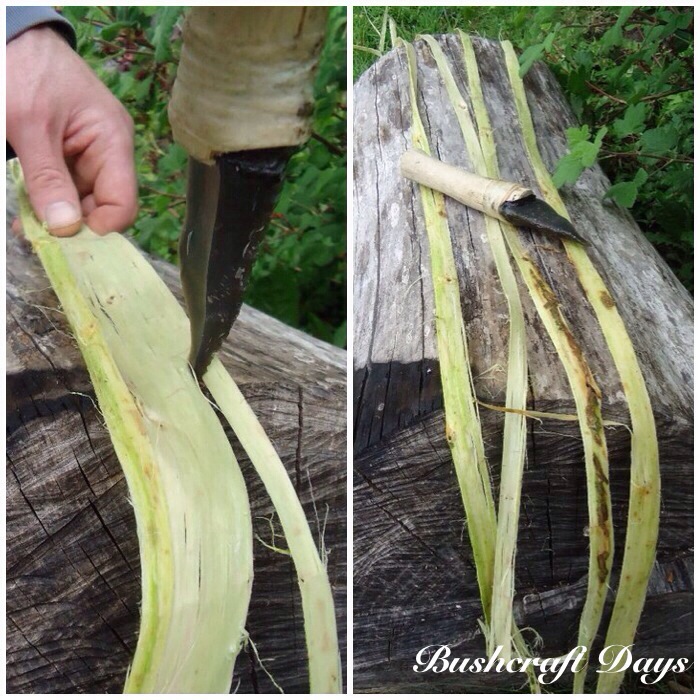
I wedged the flint knife into a groove in the log and then sliced the bark into strips. I managed to get a good amount of strips out of this one piece of bark. I then left the strips to dry out in the sun. Cordage is best made from rewetted strips of bark as the bark shrinks considerably when it is dried out for the first time.

20140130-234105.jpg
Split the bark into strands

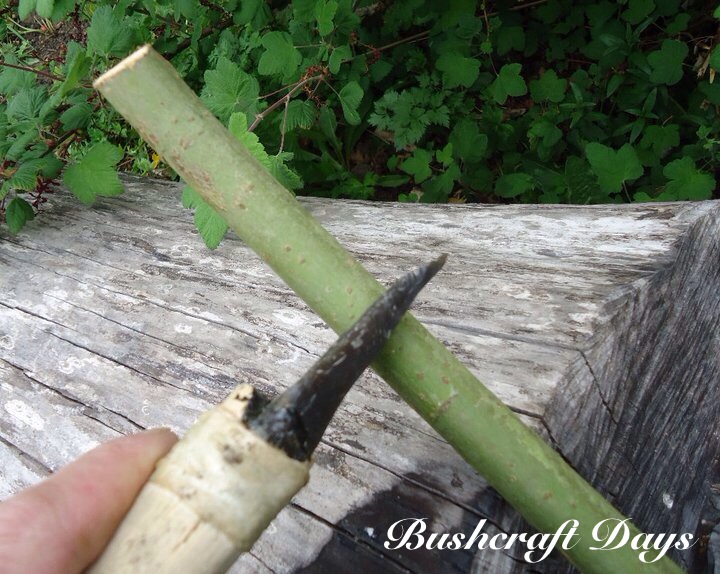
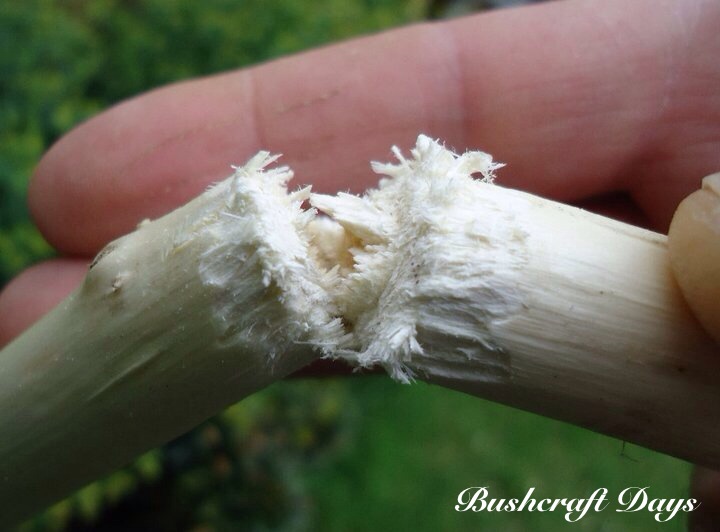
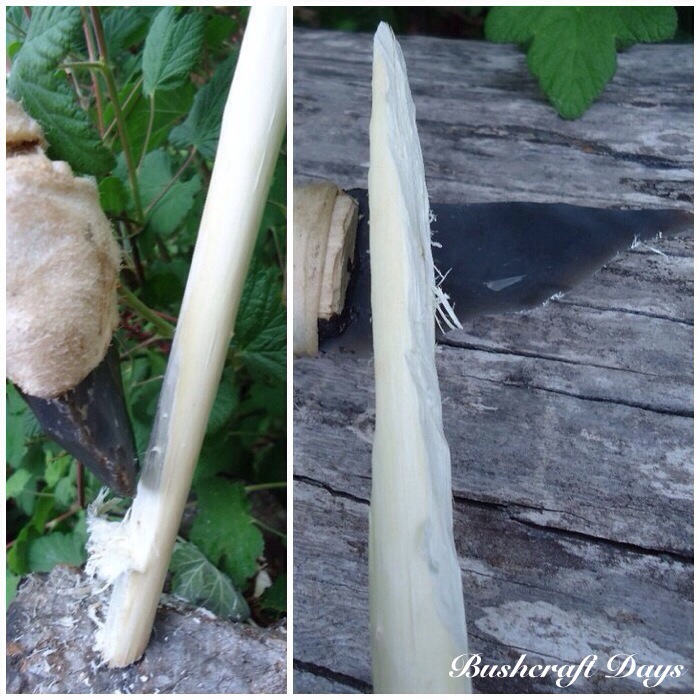
I decided that I wanted my Atlatl to be about 64cms long (fingertip to armpit for me) so I used a piece of flint knapped as a discoidal (curved) knife to saw through the stick. This takes far longer than using a modern knife but I find far more satisfying.

Photo 30-01-2014 14 13 23
Saw/cut a piece of wood from the end of the stick

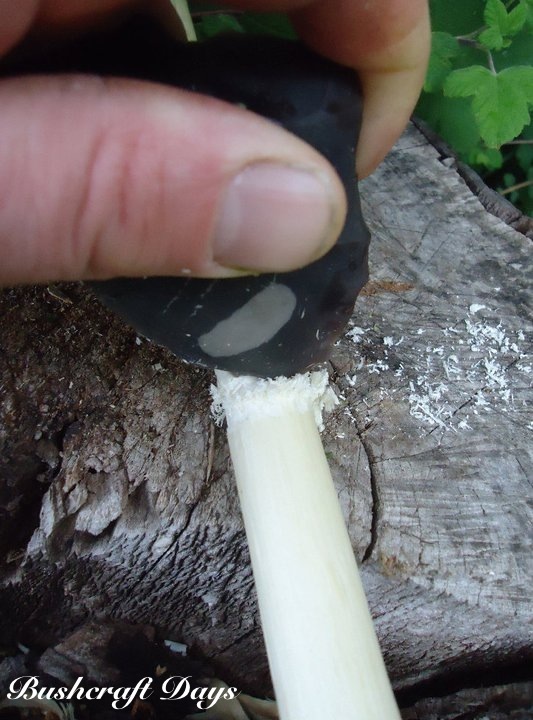
Keep sawing until you can feel you can snap the wood without splitting it down its length. Once snapped, trim the end of the Atlatl smooth.

Photo 30-01-2014 14 13 54
Primitive cut

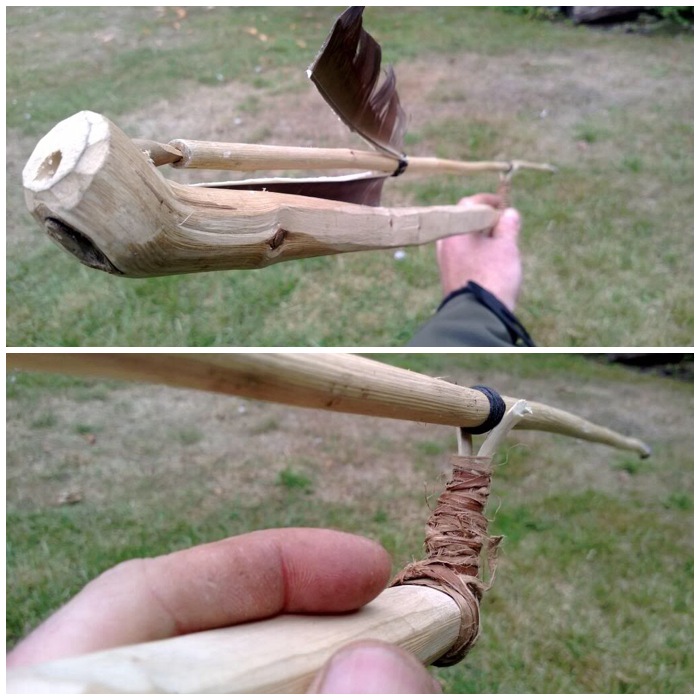
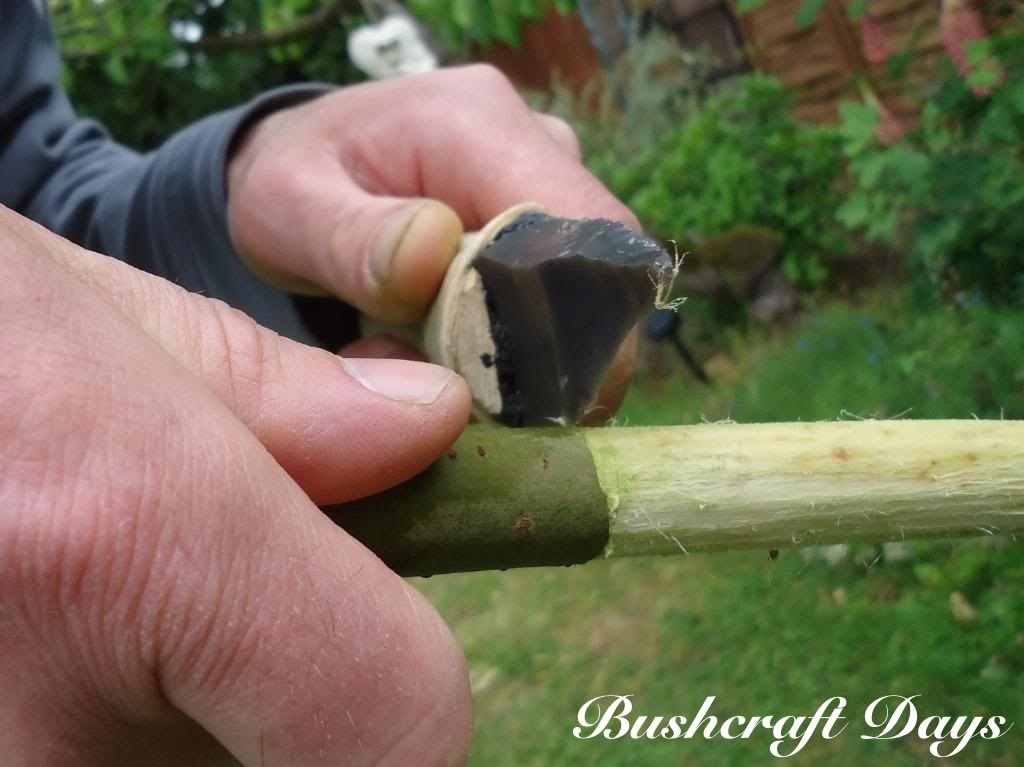
The spare piece of wood needs to be trimmed down and cut to size to make a wedge. This will be used to form the split stick part of the Atlatl.

20140130-231118.jpg
Spare piece of wood to make a wedge

I used my flint adze at first to blank out the wedge, making it about 10cms long.

20140130-234150.jpg
Create a wedge

Then I used my flint knife to trim the wedge to its final shape.

20140130-231134.jpg
Trim the wedge

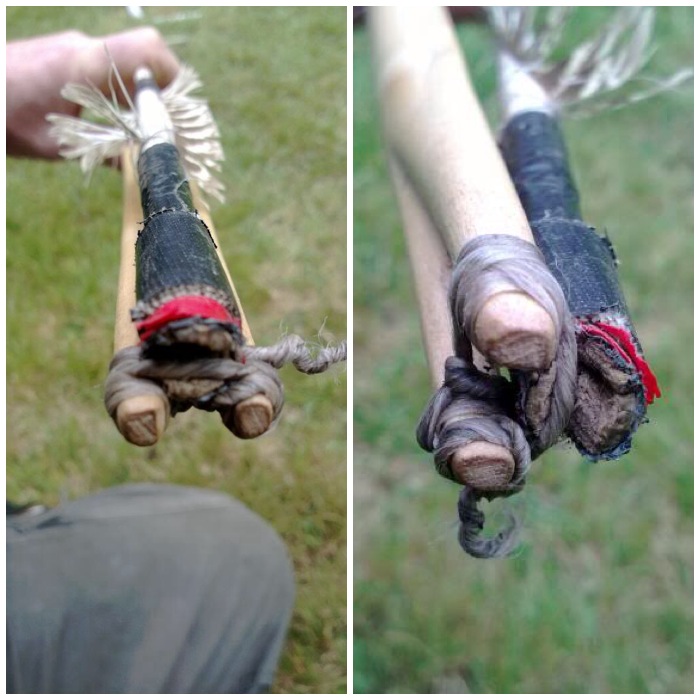
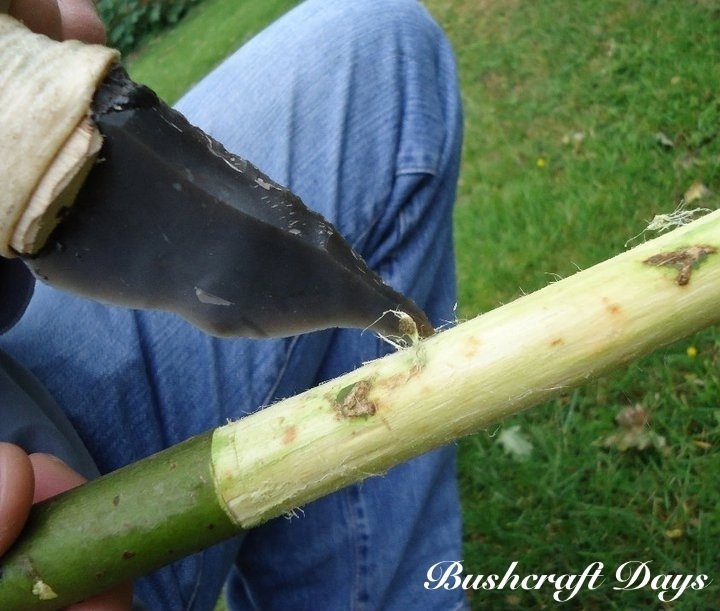
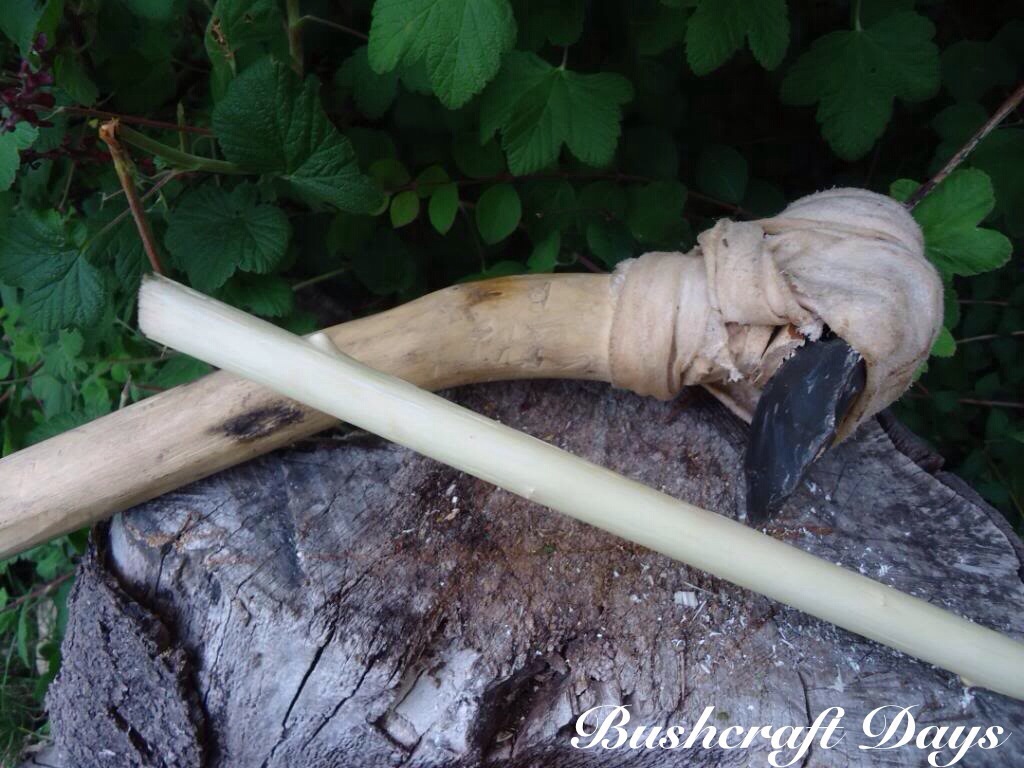
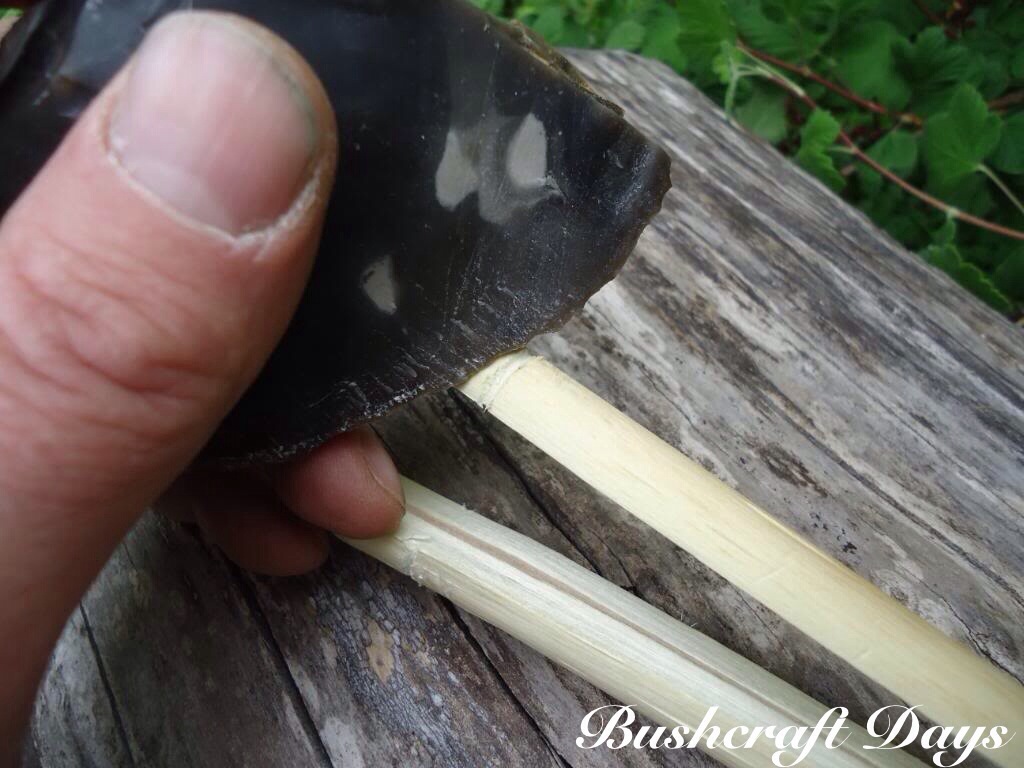
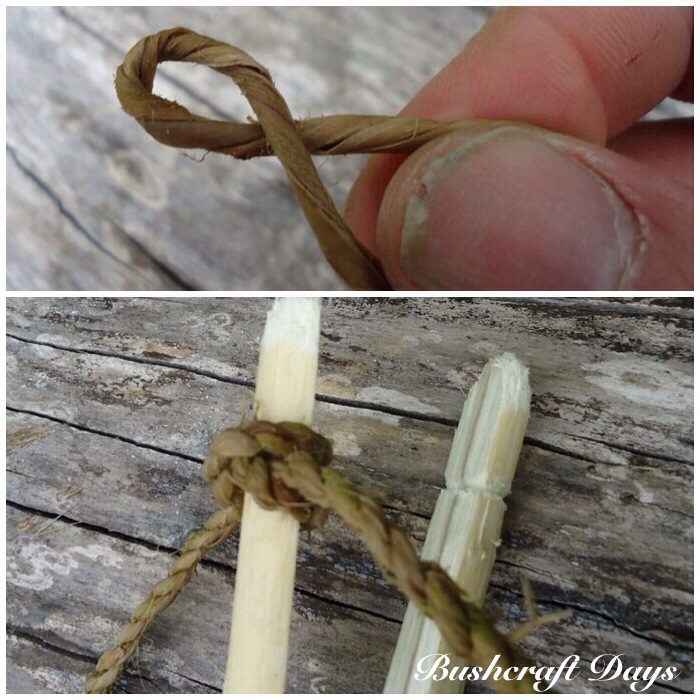
I used my flint knife to split the non-handle end of the Atlatl open. As the knife has a flat spine I just hit the back of the knife to start the split. Be careful to keep the split in the middle of the stick. A piece of cordage should really be tied off on the shaft where you want the split to stop. I forgot to do this but thankfully the split did not travel too far. I made my split 20cms long.

20140131-191815.jpg
Split the end of the Atlatl

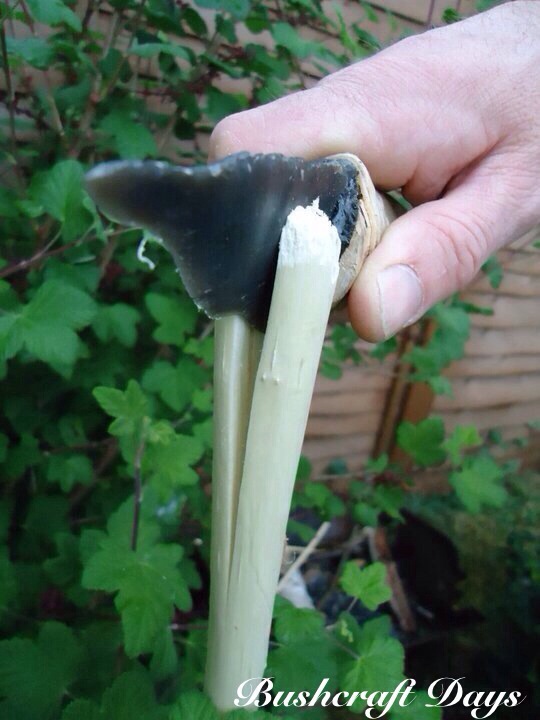
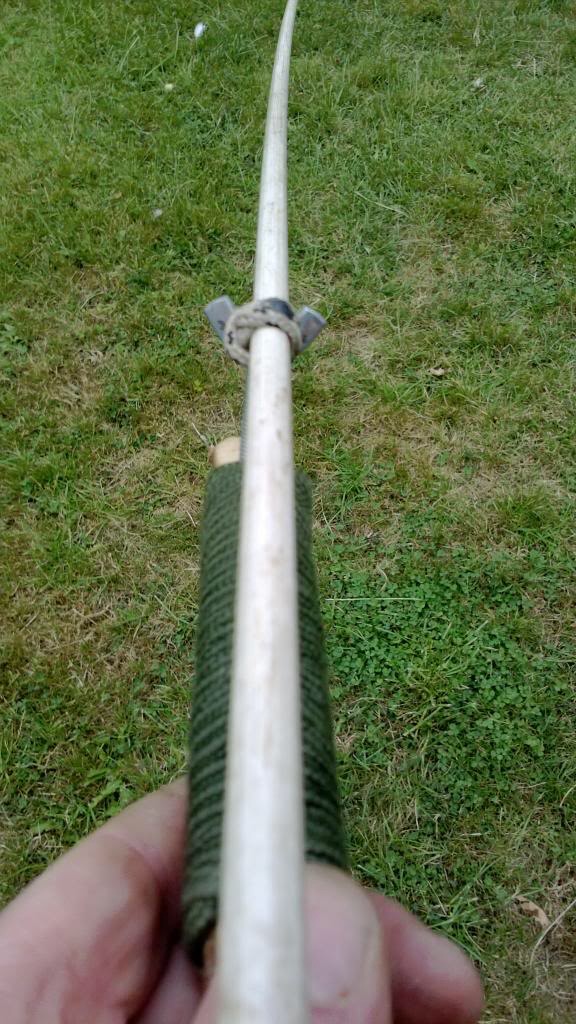
I used my discoidal knife to create a small groove around each split limb for the cordage to grip onto.

20140130-231201.jpg
Create a notch on each split

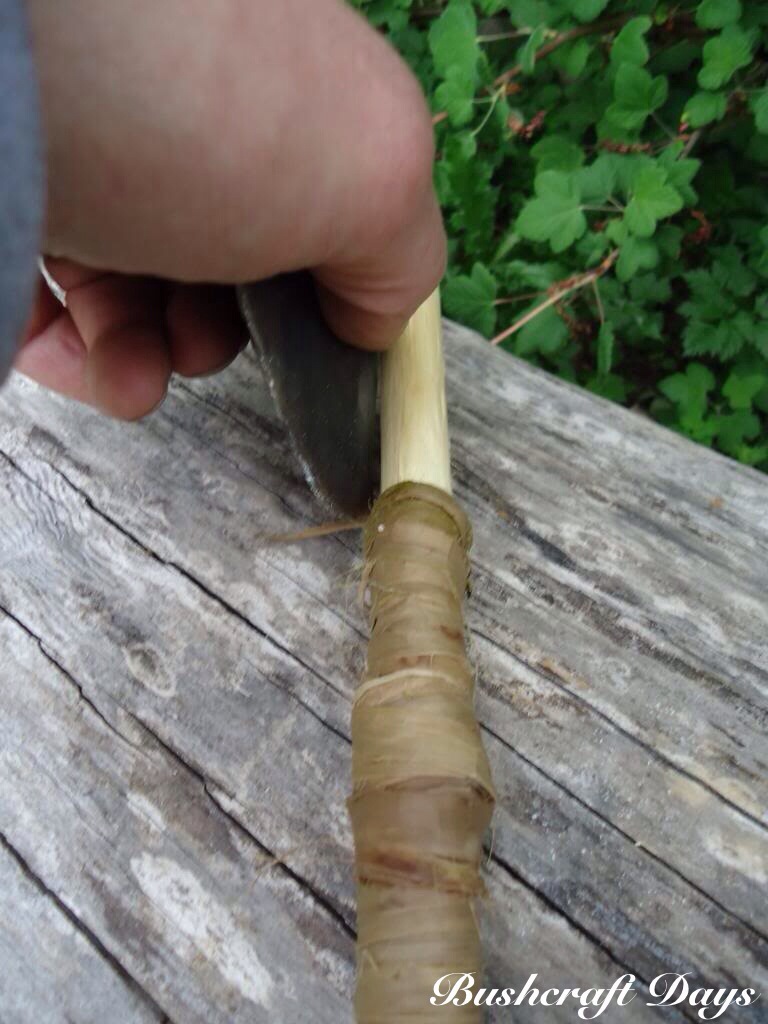
Before inserting the wedge I did tie off the split with some of the dried bark using a constrictor knot.

Photo 30-01-2014 14 14 39
Insert the wedge but with the base of the split tied off.

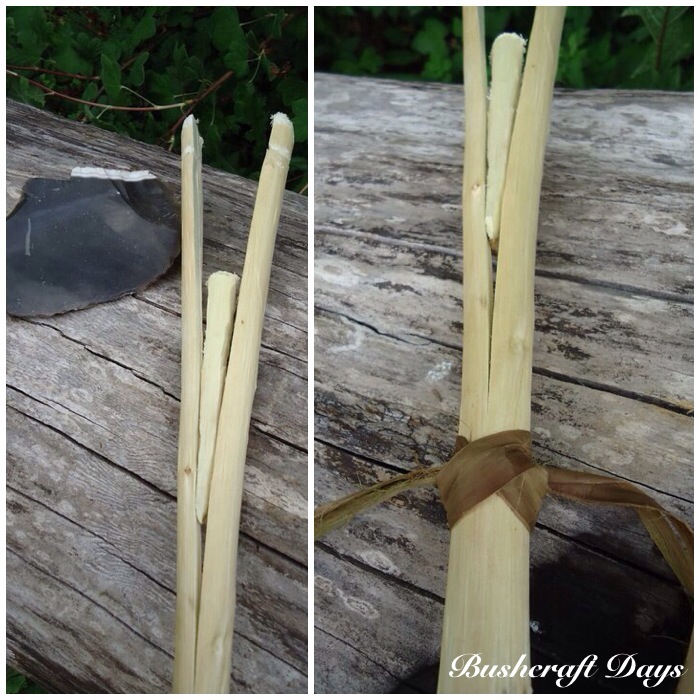
Afterwards I used more of the bark strips to secure the wedge by wrapping them around it to hold it secure.

20140130-231242.jpg
Split secured

I had plenty of bark left over after this, which was good as I wanted to make some cordage to create a strap to hold the dart in place before launching.

20140130-231218.jpg
Dried-out bark ready to make cordage

I completed a piece of cordage about 50cms long to give me plenty to tie onto the Atlatl. I used a constrictor knot on each split to hold the cord in place. Jonsbushcraft blog has an excellent tutorial on making cordage.

20140130-234215.jpg
Create cordage to attach to the splits

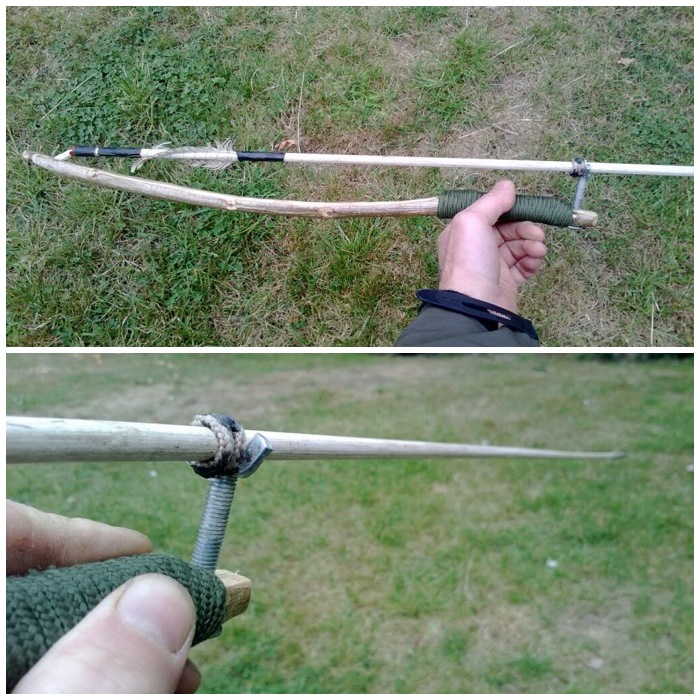
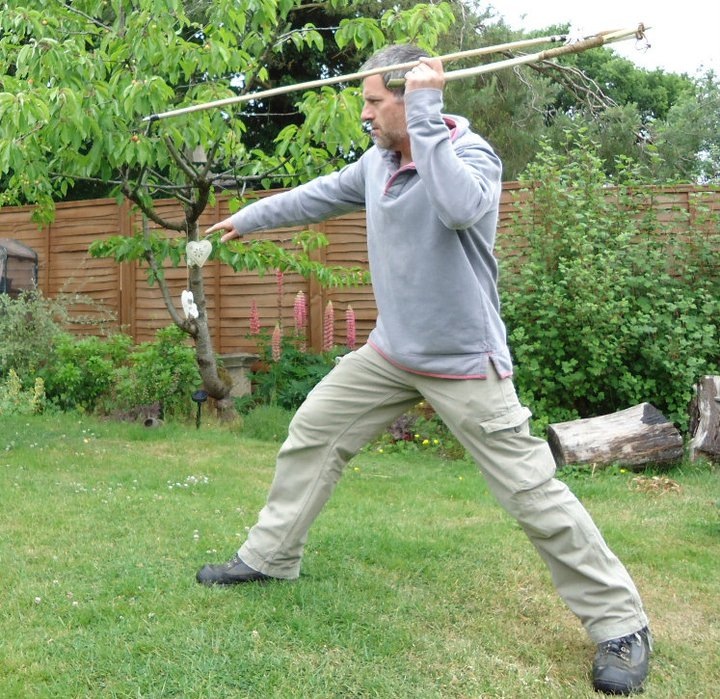
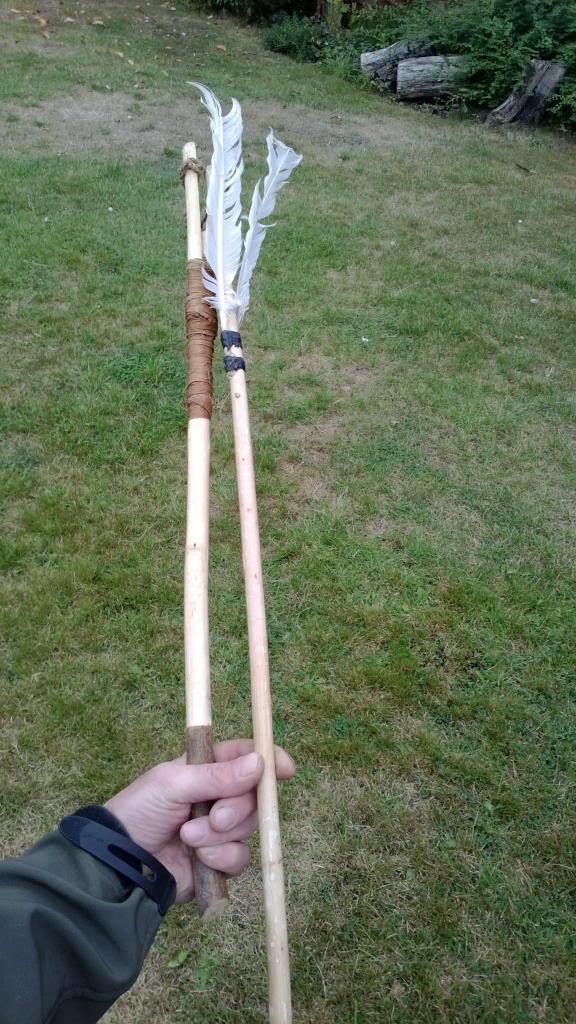
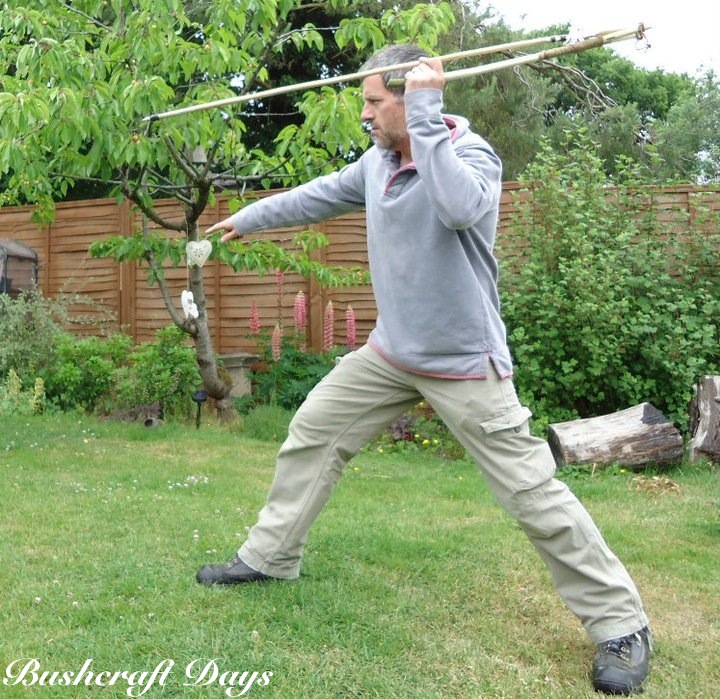
I was very happy with how this Atlatl turned out.

Photo 30-01-2014 14 15 36
Completed One Stick – Split Stick Atlatl ready to go

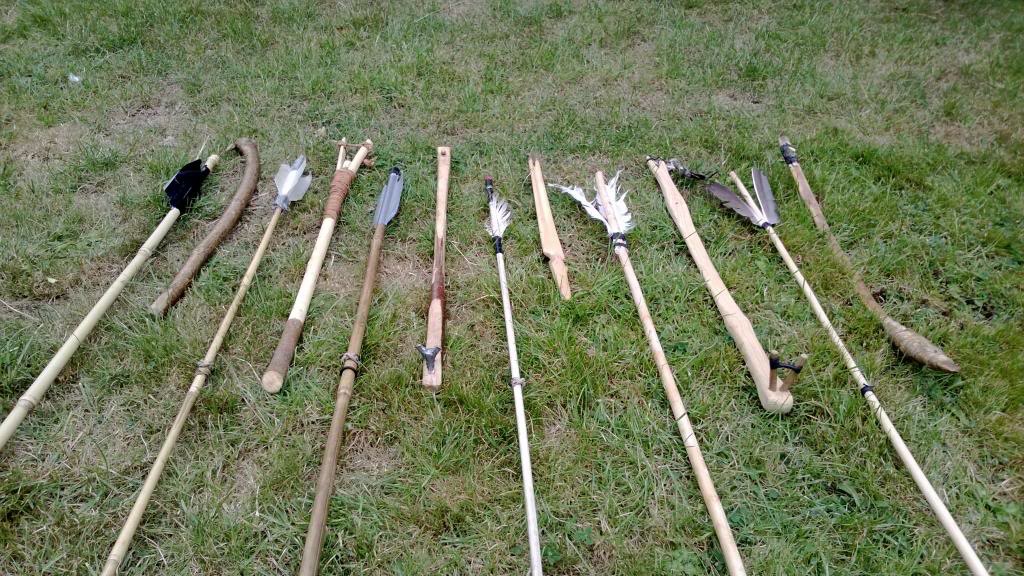
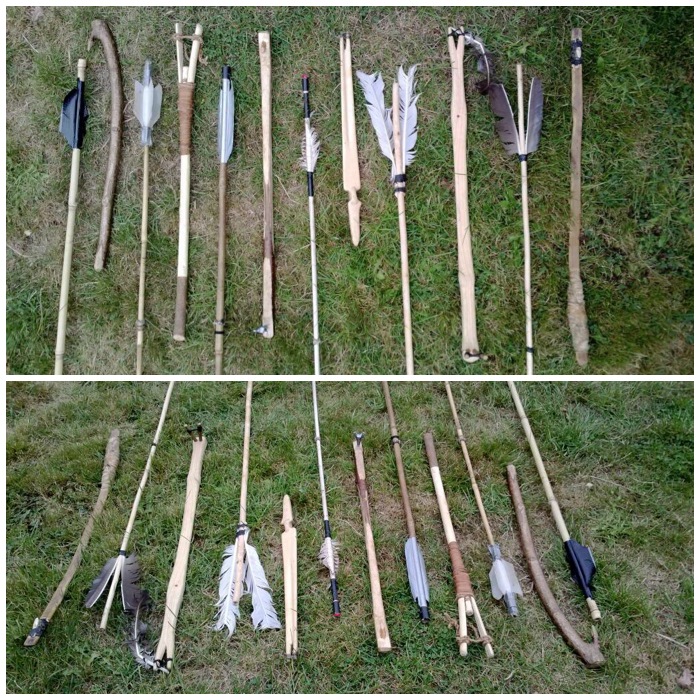
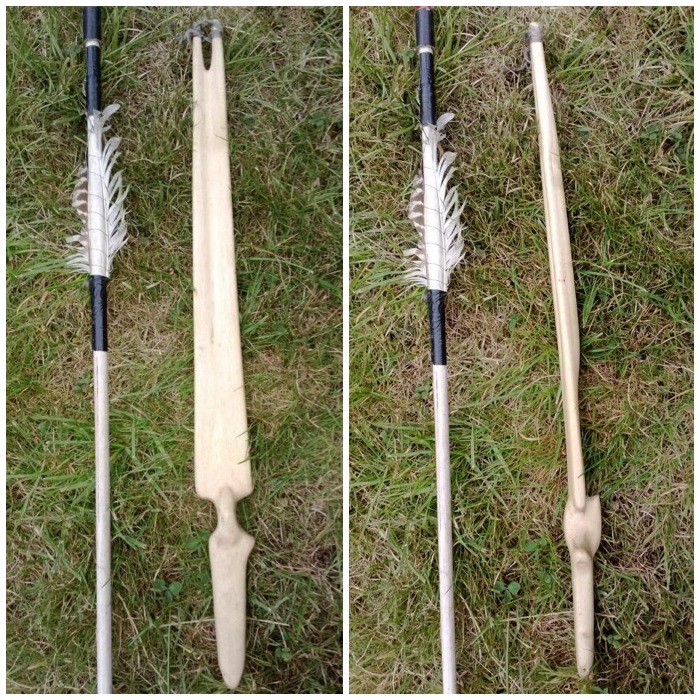
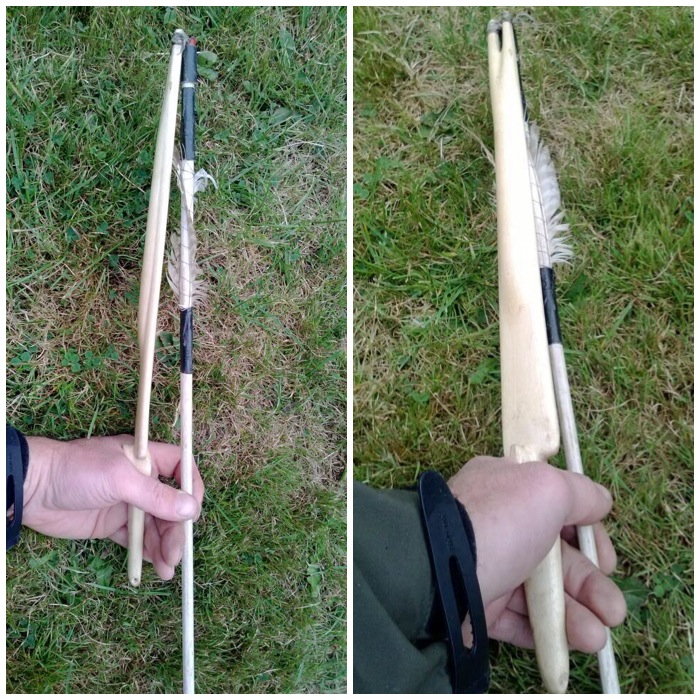
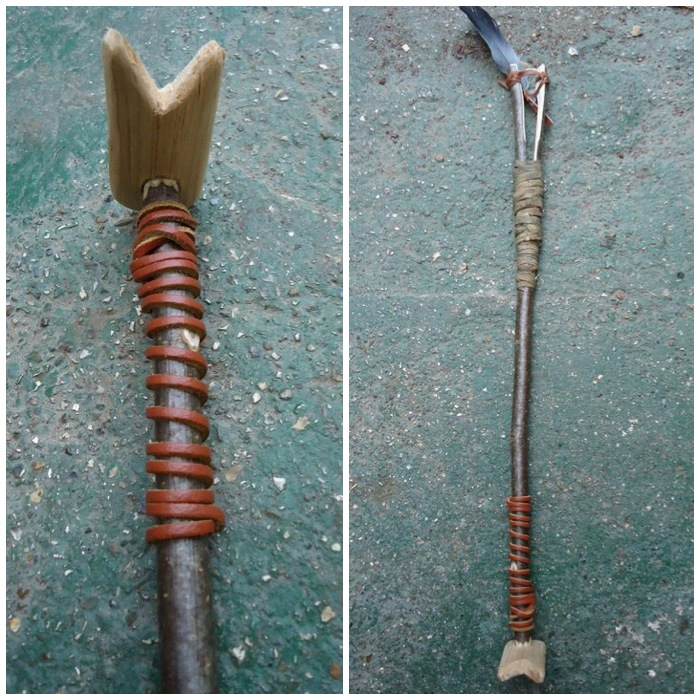
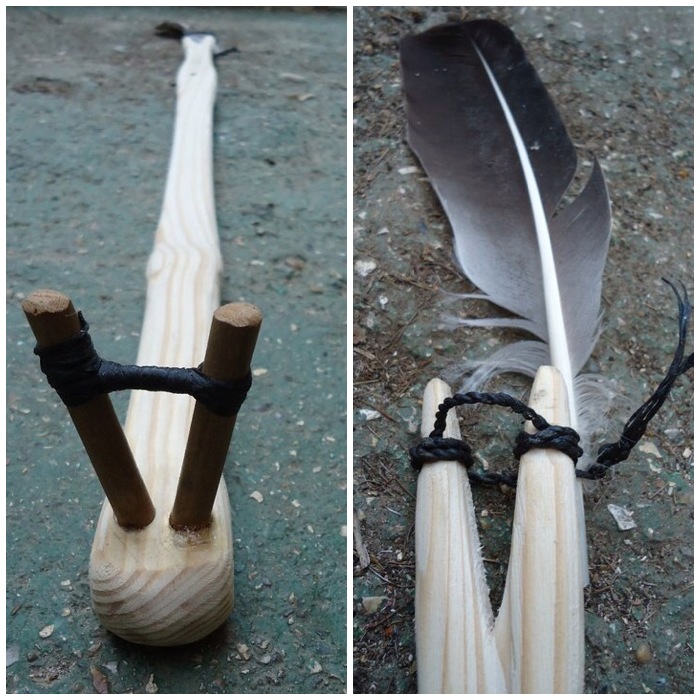
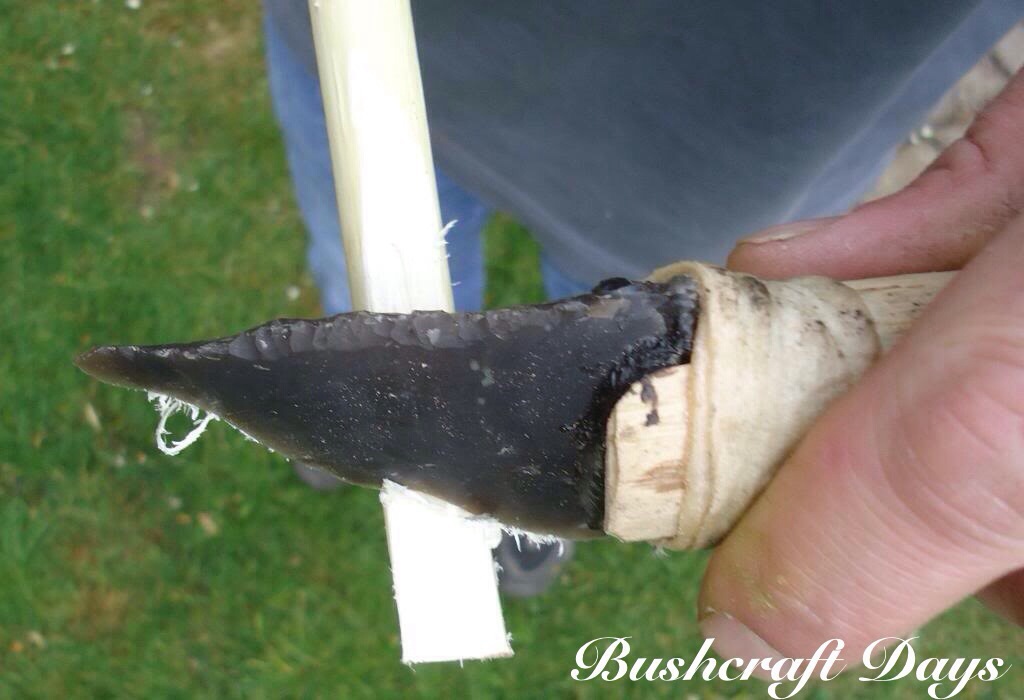
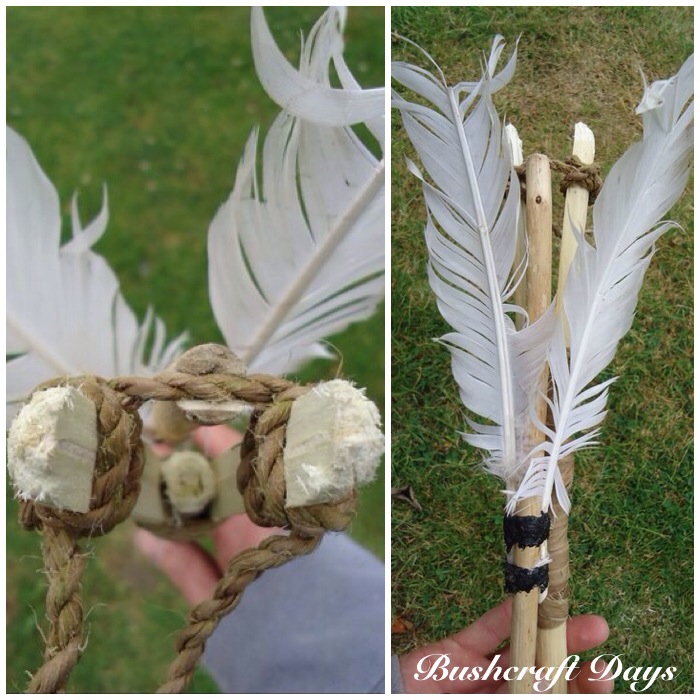
You can see the dart has a groove instead of a hole at the end. This allows the cordage to hold the dart in place before launching.

Photo 30-01-2014 14 15 53
Dart has a groove instead of a hole

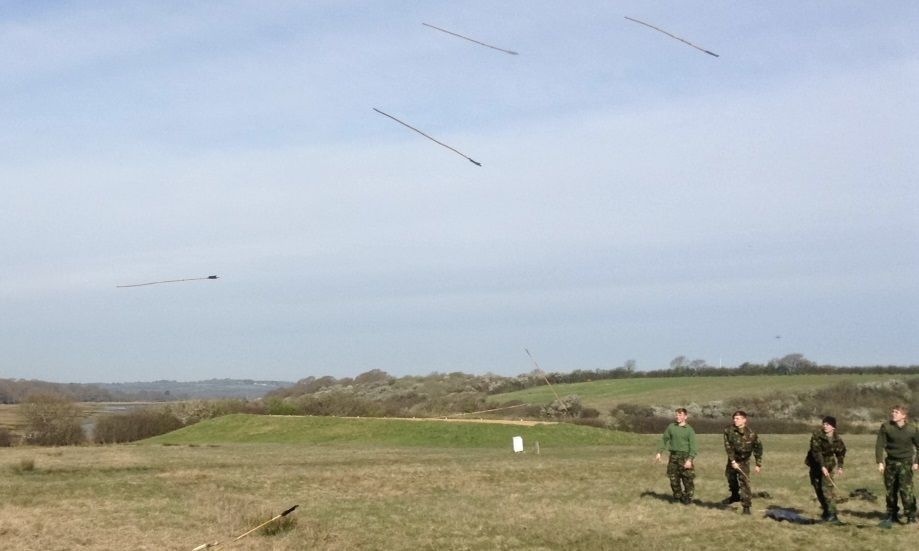
The finger pinch hold is just the same as a normal Atlatl with a point.

Photo 30-01-2014 15 06 15
Simple finger pinch hold

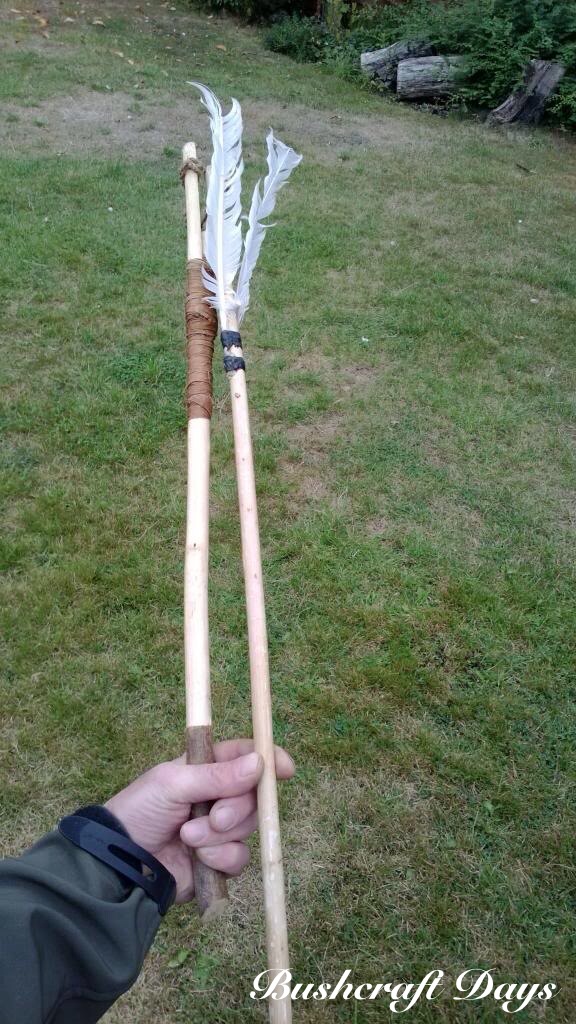
I think the launch with this type of Atlatl feels slightly different but once you get used to it I find the release is as smooth as it is with a normal pointed one.

Photo 30-01-2014 14 16 10
Perfectly good Atlatl

I made this Atlatl purely for the joy of making one with primitive tools and to see if it was possible to produce a hunting tool out of just a single stick.

I have no idea whether hunters in pre-history used this type of Atlatl but I certainly now know they would have found it the easiest thing in the world for them to make.

A good post on some other Other Types of Atlatls: Loop, Fork and Cord was written by Mike Richardson on the Primitiveways website.

Cheers

George

Atlatls – What they are and why I love them

I’ve mentioned the Atlatl several times in previous blogs, so I thought it was high time I wrote a post devoted to this, one of my very favourite bushcraft activities. I’m going to introduce you to the three different types of Atlatl I use when teaching this art, together with some historical references to them I’ve found in the course of my research. For one of my types of  Atlatl there is no historical record, and the exact makeup of other types are sometimes just a best guess, so please feel free to leave comments if you know more, as it is all a big learning curve for me. There are many different types of Atlatl but here I will concentrate on the three I regularly use.

What is an Atlatl?

An Atlatl is a spear-chucking device traditionally used for hunting or combat purposes It was developed in pre-history by many different societies. Some societies still use the Atlatl to this day, others used it alongside the bow while other societies stopped using the Atlatl after they developed bows. An excellent modern day comparison to help you understand how an Atlatl works is to watch a dog walker using a plastic tennis ball thrower. The ball travels much further than normal as the plastic ball thrower extends the thrower’s arm length and as the arm sweeps forward the plastic thrower is bent back, storing energy. This energy is released as the thrower does a final flick of the wrist. The dog is happy as it gets a longer run and the thrower is happy as he gets longer between throws :-).

The name Atlatl comes from the Aztec society but in Australia it is known as the Woomera. An excellent overview of the Atlatl can be found in Wikipedia.

Photo 22-01-2014 18 16 57
Atlatls in action with the Sea Cadets

I like Atlatls as they are relatively simple to make, cost me next to nothing to make, students can make them and learn to use them easily and will provide hours of fun for kids from the age of about three years up (I still classify myself as a big kid).

When teaching this skill I always set up a proper range so that the darts can be thrown safely. I normally work on a range of about ten to twenty metres but a good Atlatl can reach up to a hundred metres in a competent thrower’s hands.

I made a short video last year showing the Atlatls in action with some of my Sea cadets – Video of Atlatls in Action.

Here is a selection of some of my Atlatls. I will be posting in the near future a couple of How To…. guides on making some of these Atlatls.

Photo 22-01-2014 17 29 50
Some of my different Atlatls – Front View

I have simple Atlatls that just have a point at the rear to attach the dart to, Split Stick Atlatls with cordage instead of a point, and other Atlatls that have a front ‘Y’ rest for the dart.

Photo 22-01-2014 18 18 56
Some of my different Atlatls – Top and Back views

Simple Atlatls

The simple type of Atlatl shown below on the left just has a point at the rear to hold the dart in place before releasing it. You will see how this works later in the post. This is the easiest type of Atlatl to make. I generally use the base of a piece of hazel coppice (lots of other woods will work as well) for this where there is a fork in the wood near the ground. All I have to do is after cutting the shoot is to shape the smaller fork into a point with a knife and whip a para cord handle onto the main. The Primitive Ways website gives an excellent description of constructing a simple Atlatl.
The Atlatl on the right is also a simple one but made in a primitive manner, without modern tools. I used a thin yew branch, attached a rawhide handle and attached a carved antler point to the back.

Two simple Atlatls. One with modern cordage and one purely primitive

Once you have mastered the finger pinch grip these simple Atlatls are very easy to use and great fun can be had at very little cost. The Atlatl gives greater power to your throw by extending your arm length, enabling you to throw the dart faster and further.

DSC07963
Simple Atlatls being held in the finger pinch grip

Atlatls with Front Rests

I was on holiday in the Cheddar Gorge area of the UK a few years ago and spotted in the Museum of Prehistory some reproduction Atlatls on display. They had been reproduced as closely as possible to Atlatl finds in the local caves. One of them had a forked rest and I found that intriguing, as up to that point I had not found any reference to this type of Atlatl.

DSC01037
Cheddar Gorge Museum of Prehistory Atlatl (centre) with Rest

I soon found out that this style of Atlatl with a front rest is great for kids. As the dart is supported by the rest no finger pinch grip is required, making it easy for kids as young as three to use this type of Atlatl.

Photo 22-01-2014 18 25 00
Younger children prefer an Atlatl with a Rest to begin with

In my research into this type of Atlatl I also came across a post by Mike Richardson In Primitive Ways explaining how if the thrower has to wear gloves (for example in arctic environments), the normal finger pinch method of holding the dart is not an option so a rest is attached to the front of the Atlatl. This along with some cordage wrapped around the dart allows the gloved thrower to have the dart locked in place but still easily released with a flick of the wrist. I have used this method numerous times and the cordage wrap/lock has no detrimental effect on the release of the dart.

I made some Atlatls up with metal bolts as rests as I found the original wooden rests I had made were easily broken by my cadets so I had to design a ‘Squaddie-proof’ alternative. Not pretty but very effective and robust.

Photo 22-01-2014 18 04 13
The Squaddie-proof Atlatl with metal rest

In the picture above and the one below you can see that the cordage wrap on the dart is locked up against the fork of the rest, ensuring the dart does not fall off before release. After a short piece of tuition most kids (except the very young) are able to set this up for themselves.

Photo 22-01-2014 17 33 15
Locking mechanism in place

In the picture below you can see a wooden rest I made by wrapping a piece of shaved wood around the shaft of the Atlatl and tying it in place with some natural cordage. I inserted a further wedge piece in the rest to tighten the cordage wrap. This proved an interesting experiment but was too fragile for most of the cadets to use.

Photo 22-01-2014 18 06 03
An experimental rest made of a strip of shaved wood and bark cordage

Again in the picture below you can see that, as with the Atlatl with the bolt, the dart is well locked in place requiring only a flick of the wrist to release it. I have not come across any historical evidence for the cordage wrap on the dart as a holding mechanism. It may not be authentic, but I like it as it opens up the world of Atlatl to the very young who find holding the dart and Atlatl in one hand difficult.

Photo 22-01-2014 18 14 18
Dart locked in place – No finger hold required

The Split Stick Atlatl

The Split Stick Atlatl I found documented on the Primitive Ways website as well. No point is carved at the end but a piece of cordage is used instead to hold the dart in place. There is very little archaeological evidence for this type of Atlatl and much debate if it was ever used but I like it and with a little practice it is just as accurate as an Atlatl with a point. A good online discussion on this can be found in the PaleoPlanet forum.

Photo 22-01-2014 18 27 06
The Split Stick Atlatl

I call this one the ‘One Stick Split Stick Atlatl’: I made the whole thing using primitive tools and out of just one piece of willow just to prove to myself that an Atlatl could have been made just using one straightish piece of stick. I will be posting a How To…. guide on making this Atlatl.

Photo 22-01-2014 18 05 23
The ‘One Stick Split Stick Atlatl’

A sideways view of the Atlatl showing the finger pinch grip.

Photo 22-01-2014 17 34 55
Finger  Pinch Grip without a Rest

One of my favourite Atlatls is the Lovelock Cave Atlatl which I reproduced as closely to the original as possible. This Atlatl was found in a cave over a century ago but the original was lost; thankfully, though, not before someone had made a detailed drawing of it. A copy of the drawing can be seen in the post by Mike Richardson on the Split Stick Atlatl. It has a fork at the rear and the drawing shows a small groove around each fork. I have read that this was where a small piece of carved wood or bone was attached as a point to hold the Atlatl. I decided though to see if the Atlatl would work with just some cordage wrapped around it. Again there is no historical evidence that this was done but it does work well. A good comparison of both attachments to the Lovelock Cave Atlatl can be read in the PaleoPlanet forum here.

Photo 22-01-2014 18 09 25
The Lovelock Cave Atlatl

Sideways pictures showing the finger pinch method.

Photo 22-01-2014 18 02 16
The Lovelock Cave Atlatl and Alternative  Finger Grip

A couple of pictures showing the dart attached to the cord wrapped around the fork.

Photo 22-01-2014 18 03 01
The Lovelock Cave Atlatl – Dart Cordage Connection

A little experiment with a split stick and a rest. The rest did eventually split as the pine wood was quite weak with the hole drilled into it.

Photo 22-01-2014 18 12 57
Split Stick with Rest

The rest here is based on the Cheddar Gorge replica I saw but instead of a point at the end I made it into a fork with cordage. This works perfectly well with a bit of practice.

Photo 22-01-2014 18 03 29
My take on one of the Cheddar Gorge Atlatl reproductions

I really love making Atlatls and everyone I work with loves to have a go with them. I need to spend some more time on making different types of darts next to go with my shed full of Atlatls.

Photo 22-01-2014 17 58 46
An Atlatl Broadside from the Royal Marine Cadets

Cheers

George