
This post is not a full How To…. on building a adjustable stand for a solar panel as the actual steps to make one are very simple. I will not even go into the detailed dimensions of the stand as they will vary depending on the type of panel you have, instead I’ll focus on all the different parts of the stand and how it works.
I wanted my stand to keep the solar panel clear of the ground, and it had to be able to rotate, lock in place (so the wind would not move it), pack away flat and have parts that could be sourced in the woods if needed.
Over the last few years my family has come out to join me at the BCUK Bushmoot, wanting to come and explore this magical place I disappear to in South Wales for two weeks every year.
Living without any power was not an issue when it was just me (I could charge my phone up in my car) however my family’s power requirements are slightly higher. After a long day’s playing in the woods the kids like to settle down with a video on my laptop before bed, and that requires power.
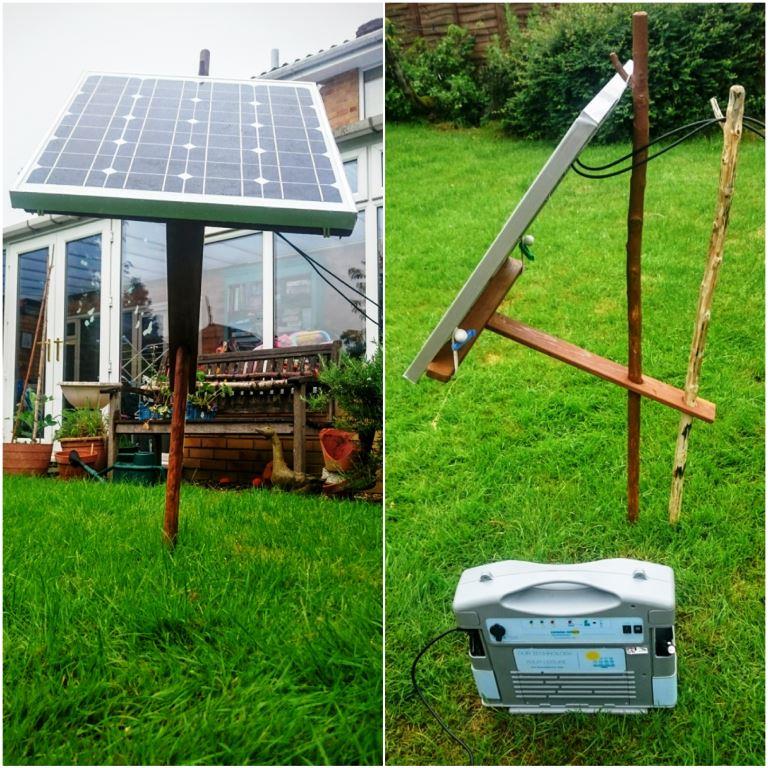
I have relied on my friends Fraser Christian (Coastal Survival) and Stephen Conway to recharge the laptop for me over the last couple of years and this year I decided it was high time to get my own set up. I had long discussions with my friend Si Parker on the different types of set ups I could go for. Si has a fantastic level of knowledge and I was soon clear about what I needed. I opted for a CLT400 solar powerpack (Si’s suggestion – with built in regulator and inverter) and a SUNDELY® 50W 12V Monocrystalline Solar Panel.
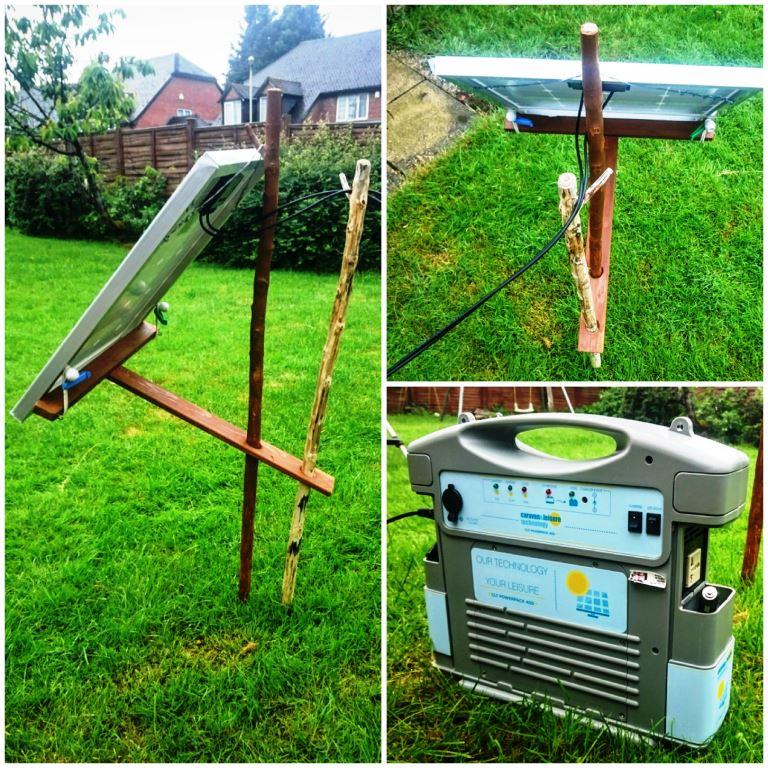
The Arm
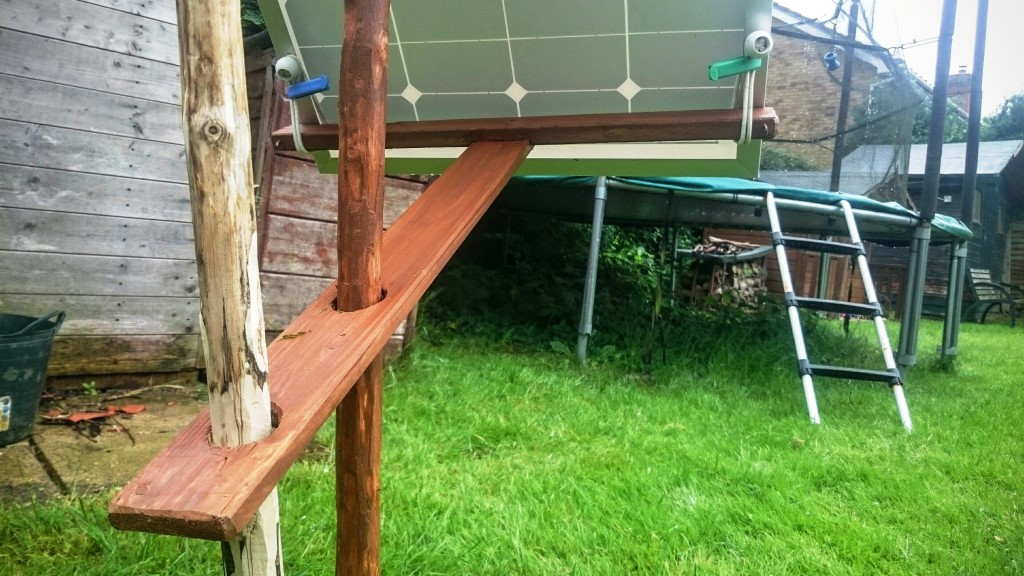
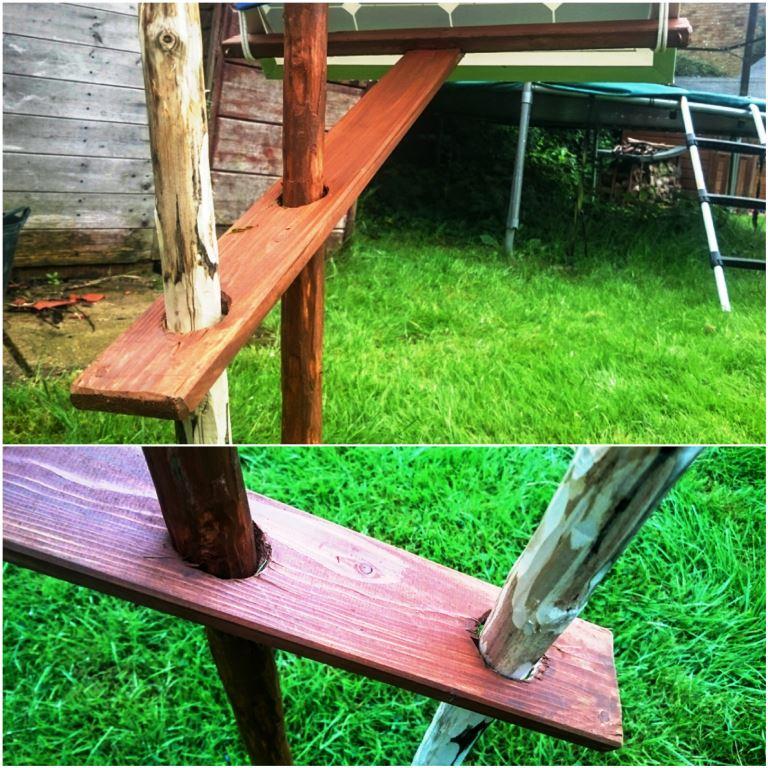
I’d seen a stand that Stephen had built a few years ago at the Moot that could rotate so I set out to build something similar. I had some scrap wood lying about (from my old hammock stand) and made this T-shaped arm to hold the panel out so it was angled correctly.
The system works on similar principles to my campfire cranes using friction to hold things in place. I worked out the length of arm I would need and drilled these two holes out (just big enough for the uprights to slip in).
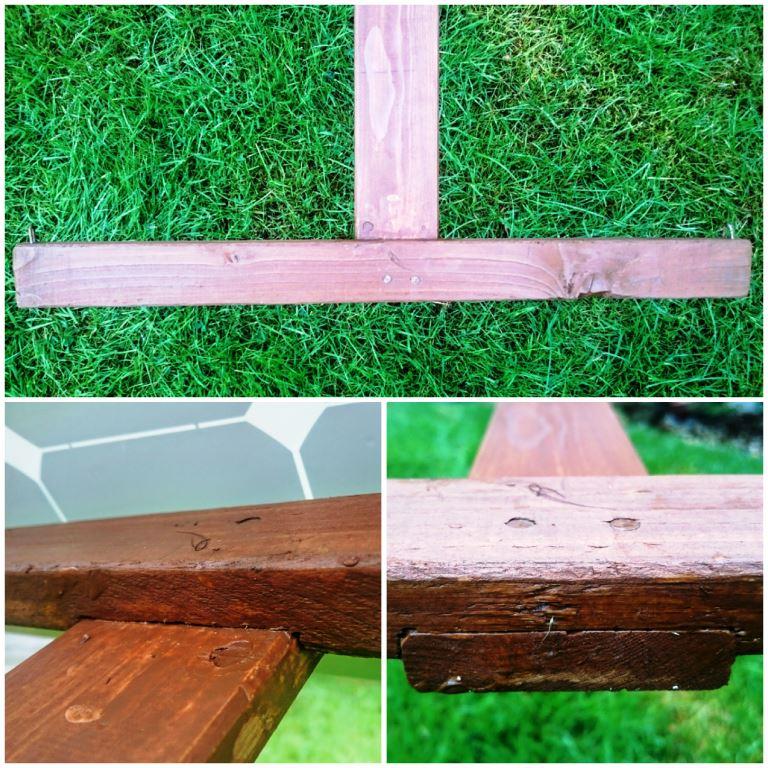
The other end of the arm I joined together with a small lap joint, some wood glue and a couple of nails.
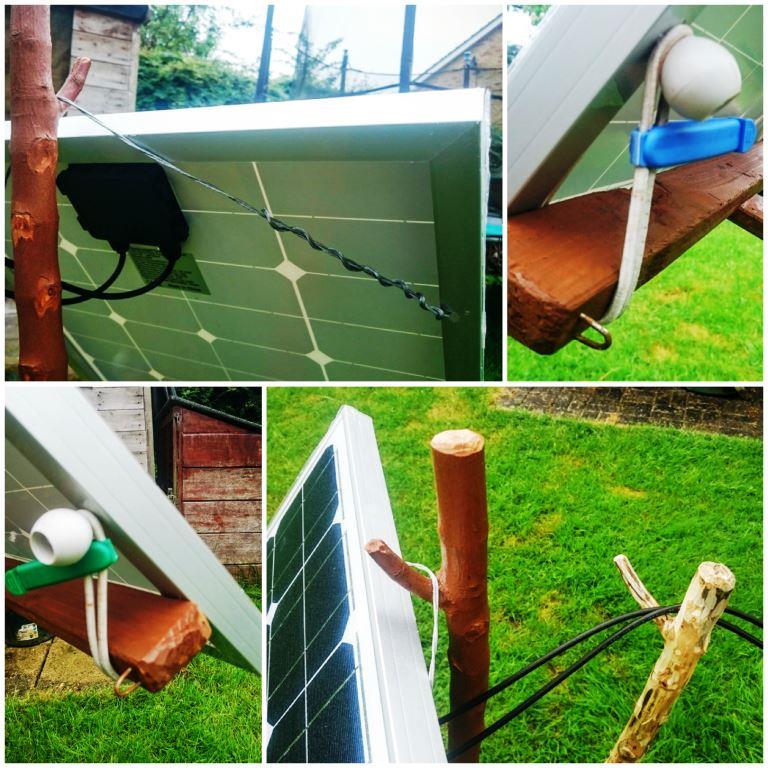
The Attachments
Below you can see the attachments on the solar panel I added. I just used some wire to hang the panel off the upright however the bottom of the panel required something more flexible.
I opted for some tent bungees, fencing nails and food bag clips. I attached the bungee to the panel by a mounting hole and then wrapped it around the T bar back onto itself. The food bag clip ensures the bungee does not slip over the plastic ball, and the fencing nail stops the bungee slipping off the side of the T bar.
Testing
I have had this out for a couple of days now and used the CLT400 to charge up my laptop and other small battery packs. Even in low light (it has been very wet over the last few days) the solar panel has kept the powerpack well charged.
I just went out every now and then and removed the back pole, rotated the panel slightly and then hammered the back pole back in. This back pole stops the panel from moving out of its set position. I had originally thought to use guy lines instead of this second pole but I prefer this method because it’s so much easier to adjust as the sun moves (the idea came to me as usual when I was trying to get to sleep).
As well as at the Bushmoot I will be using this set up at our Sea Cadet camps to charge the other instructors’ phones and radios.
Somehow though I think the family will be wanting to bring along a few more appliances to the Moot – I am hoping it will not be the hairdryer or the XBox 🙂
Cheers
George