it was about 9 years ago or so that I was coming to the end of my Bushcraft Leadership course with John Rhyder at Woodcraft School. With my fellow students we had to prepare a couple of weekends training to visitors to prove we had mastered our bushcraft skills and also that we could pass these skills onto others – in May of this year I was back down at Woodcraft School but as a visitor this time with this years students.
Fire By Friction
I had received an invite and so popped down one morning in late May. All the classes had been set up and after a quick chat catching up with John it was time to get cracking. There was a class on bowdrill by Jack which was great but I was not. I failed to get an ember – excuse – I was not allowed to use my knife to make adjustments as I had not done that class yet 🙁
There were classes on campfire cranes (a particular favourite subject of mine loyal readers will know), safe carving techniques and different methods of using a firesteel.
Cranes, Carving and Birch Bark
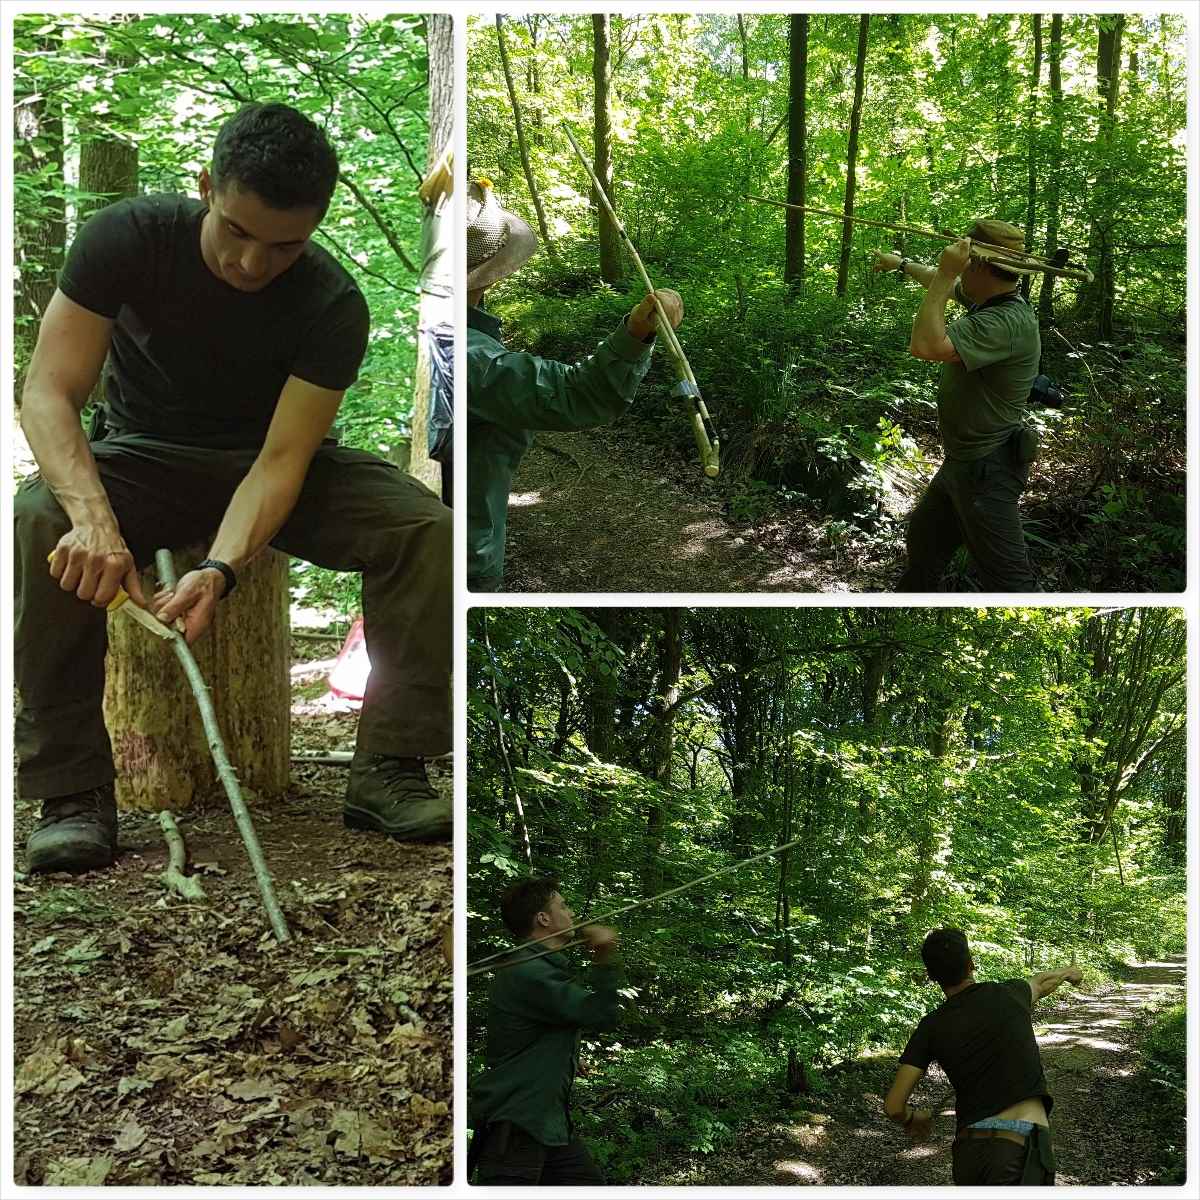
Another favourite of mine is the Atlatl (I think I was one of the first students on John’s courses to teach this). We carved our own Atlatl and were soon pinging darts down the range.
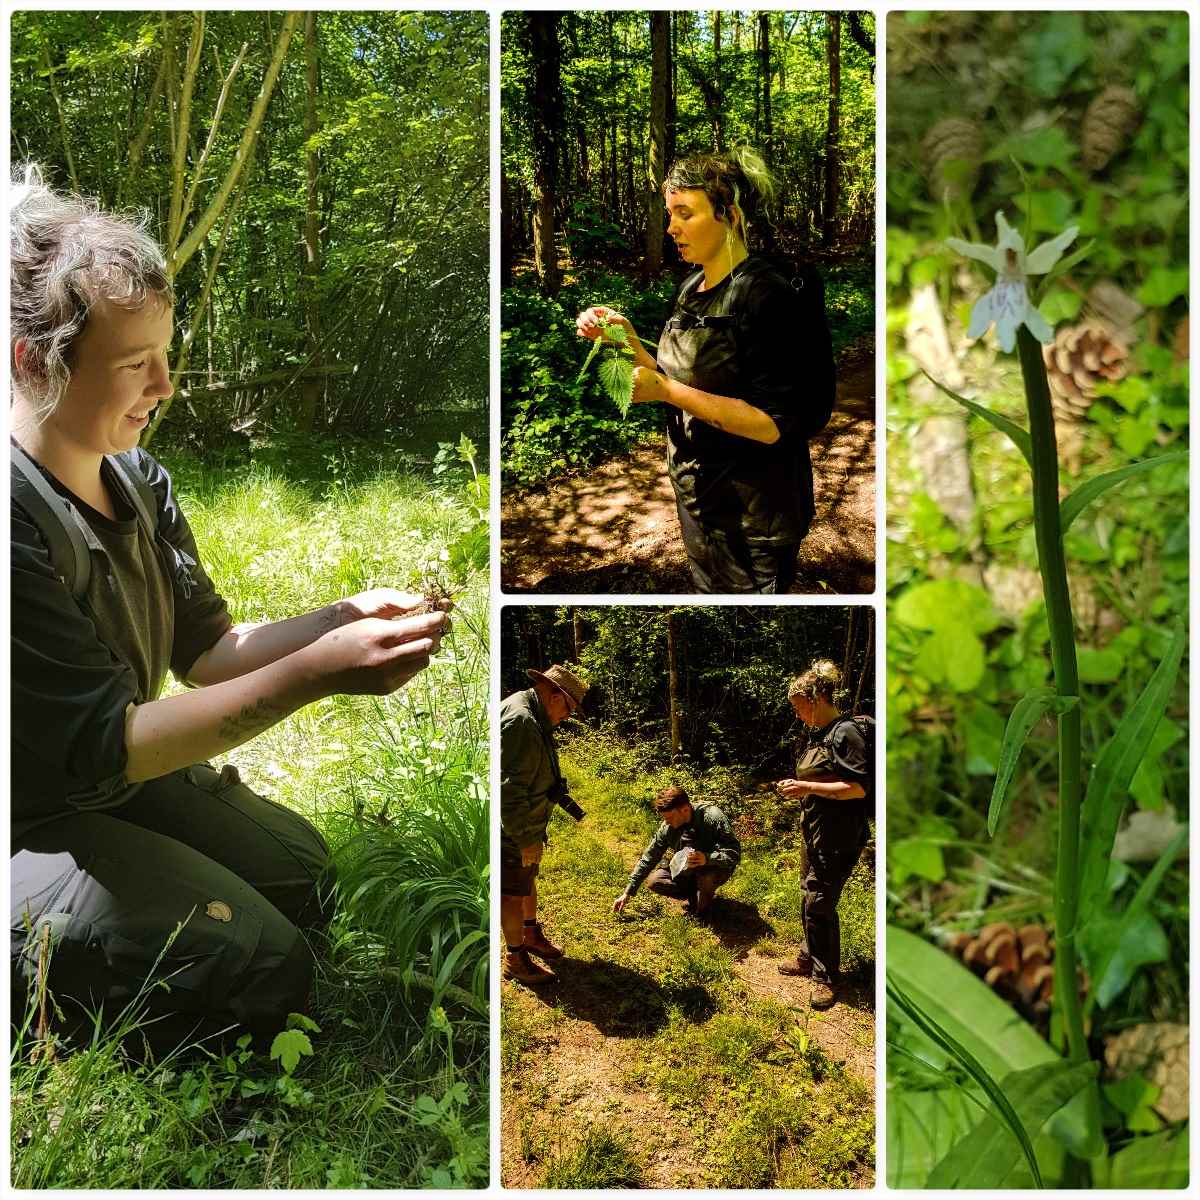
Then it was time for a stroll in the woods looking at useful plants. John runs an Ethnobotony course (which I hope to attend one day) and Lucy our instructor had completed this very in depth course previously – her knowledge on plants and their uses really came through on the day.
Ethnobotony
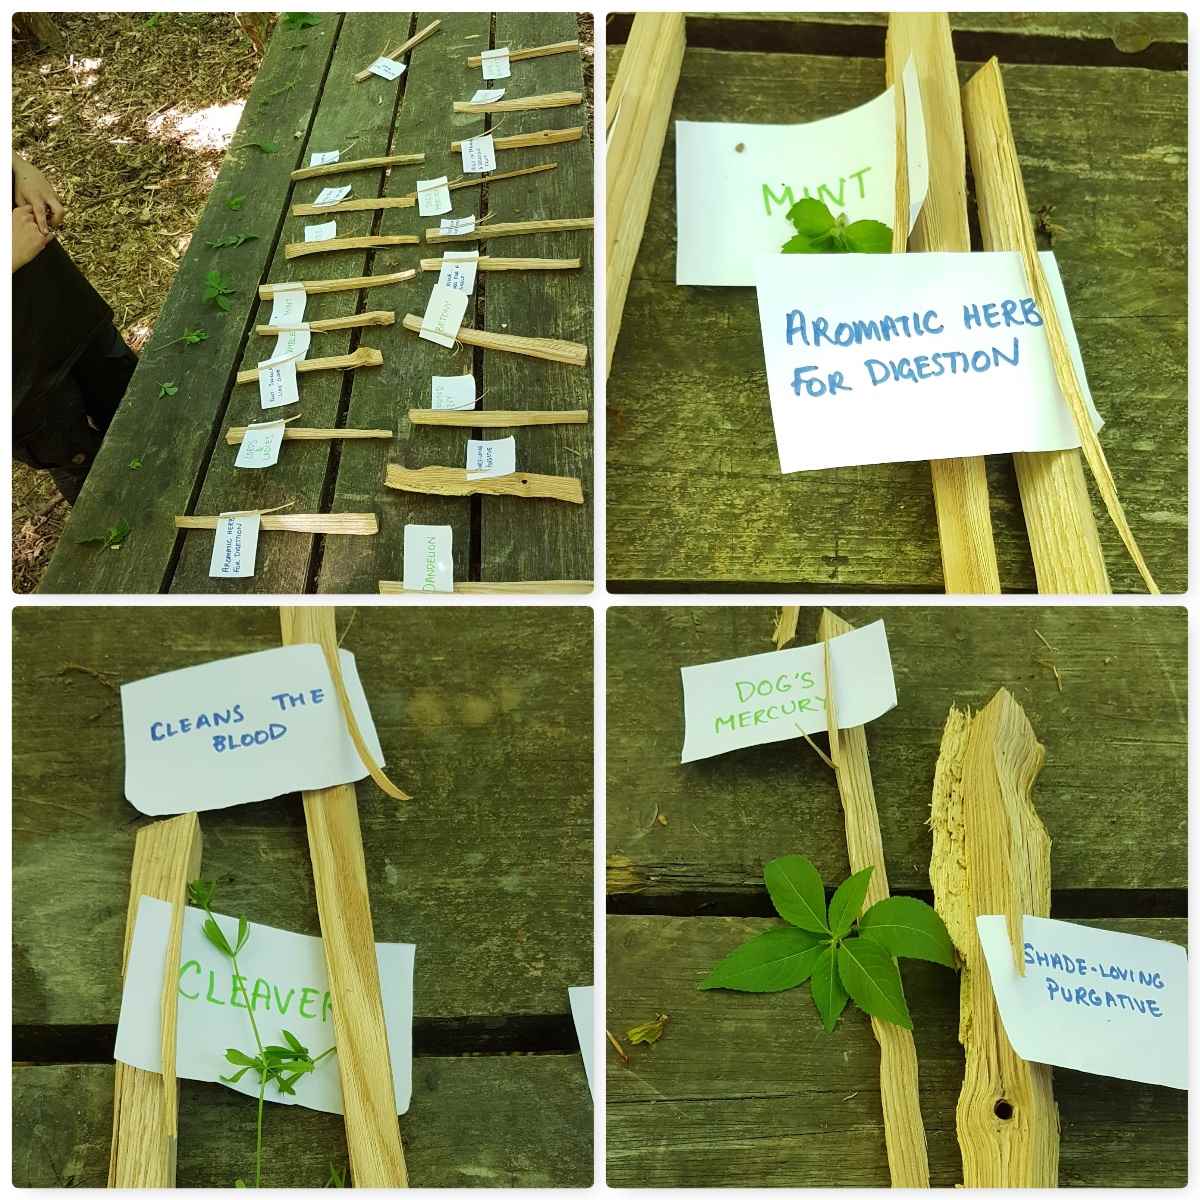
Back at camp Lucy had prepared about 15 plant specimens and we had to identify each plant and note its use correctly – tough but we got 100% after a bit of conferring 🙂
Time for a test
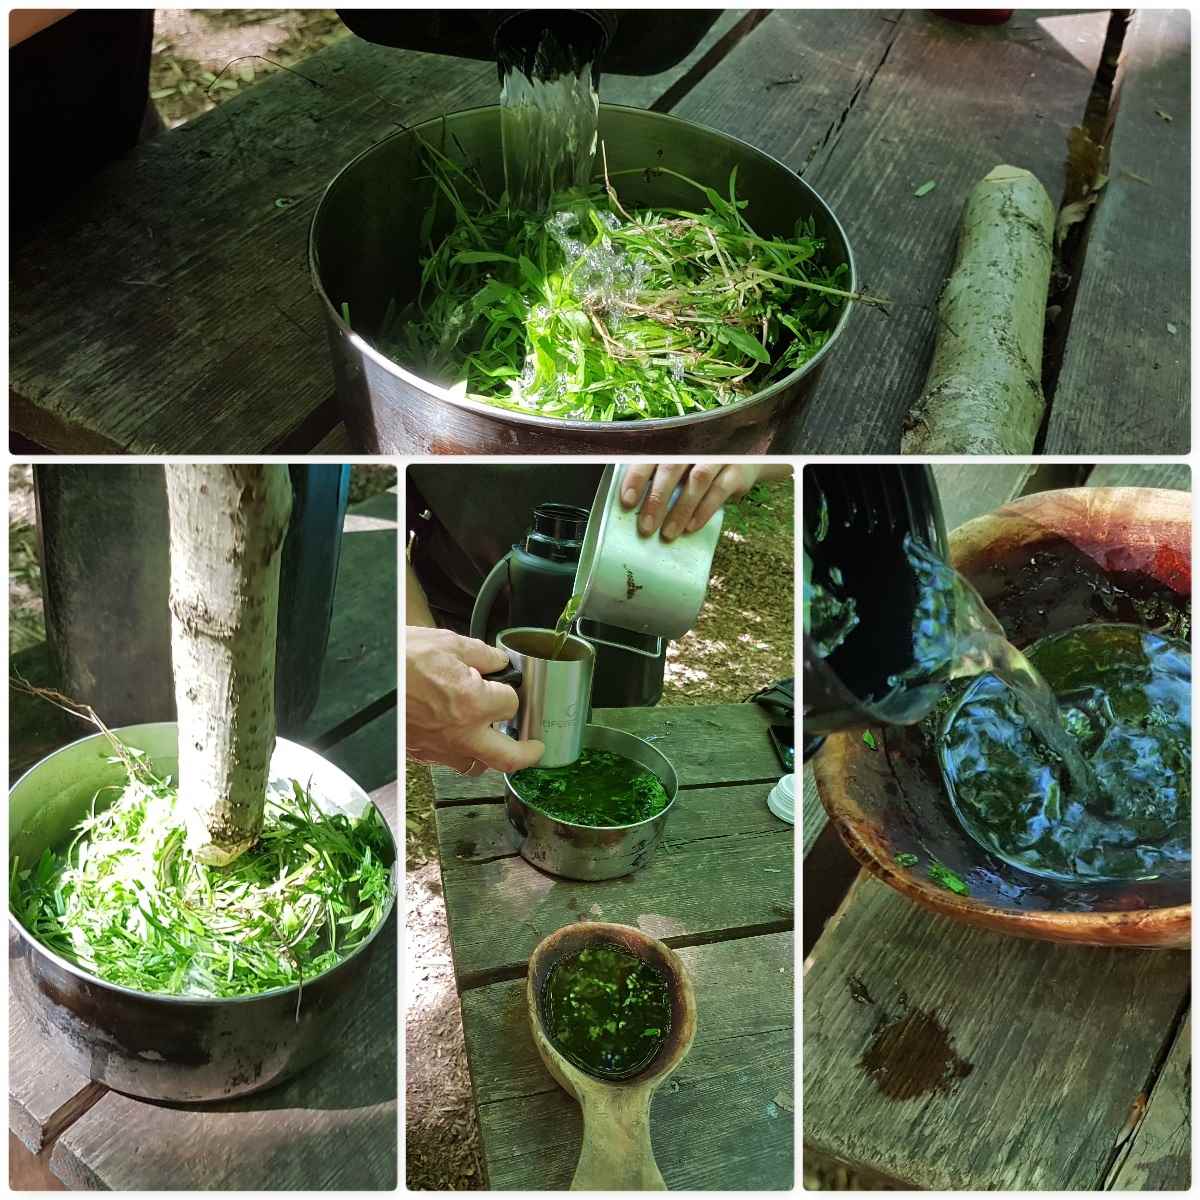
Lucy had also collected up some cleavers which she crushed up and boiled to make a green tea – this was really enhanced with some Elder flower cordial she had made earlier.
Cleaver Tea with a twist of Elder Cordial
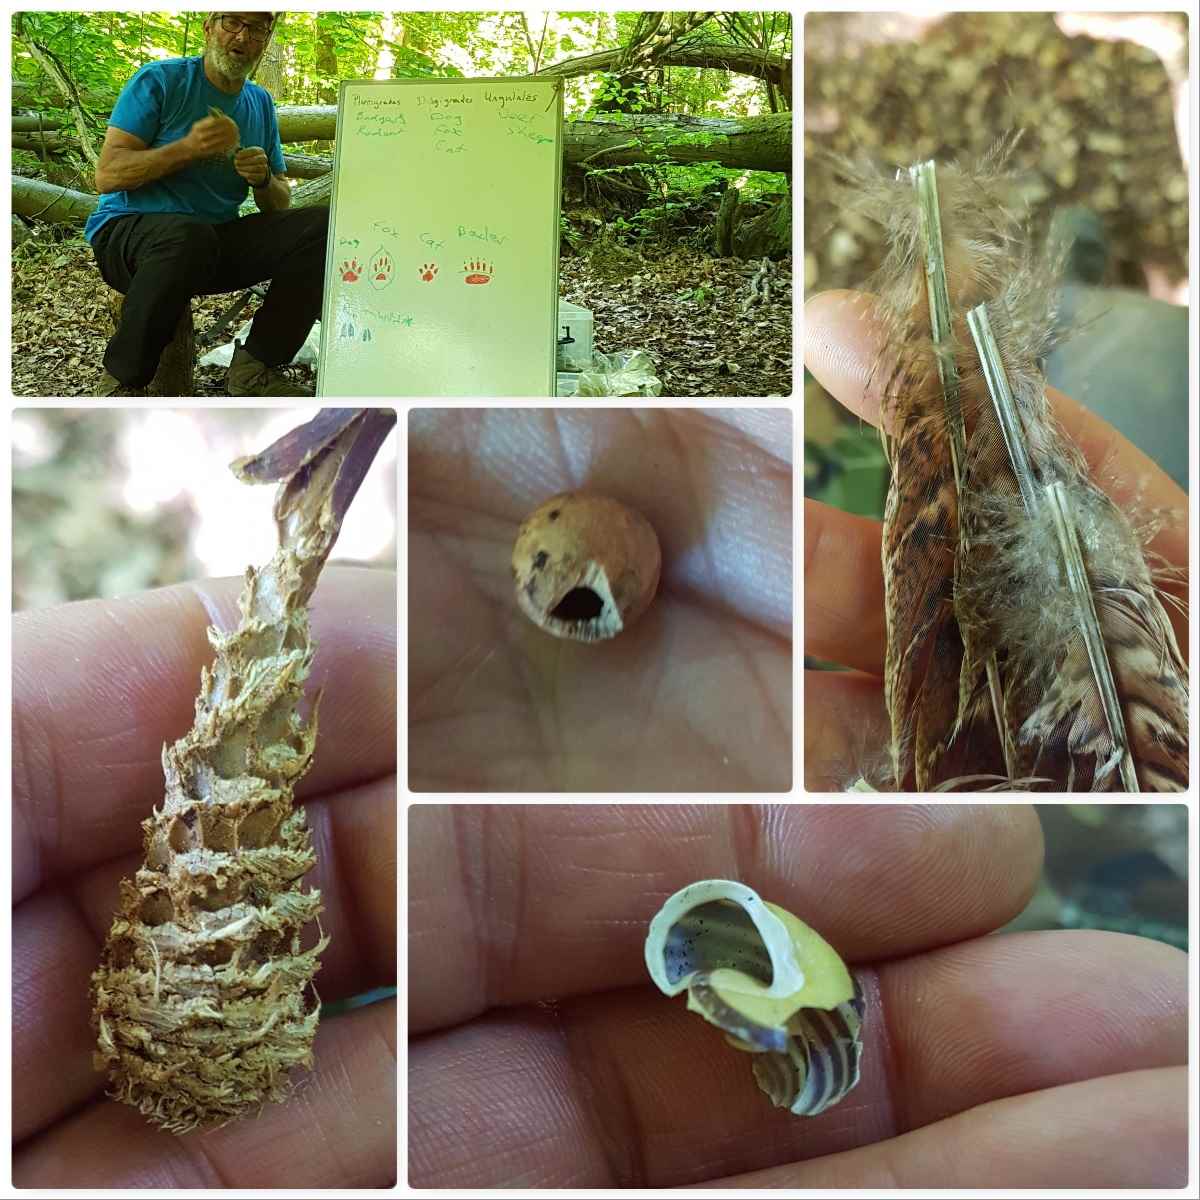
My final class was with Lee looking at animal tracks and signs. Lee certainly knew his subject however I had to leave (to run one of my own courses) early and did not get out on the tracking walk he had planned.
Tracking & Signs
It certainly was great to get down to see John and the students at Woodcraft School and I wish all the students well for the future – as to you John, thanks for the invite and as per usual a job well done I think.
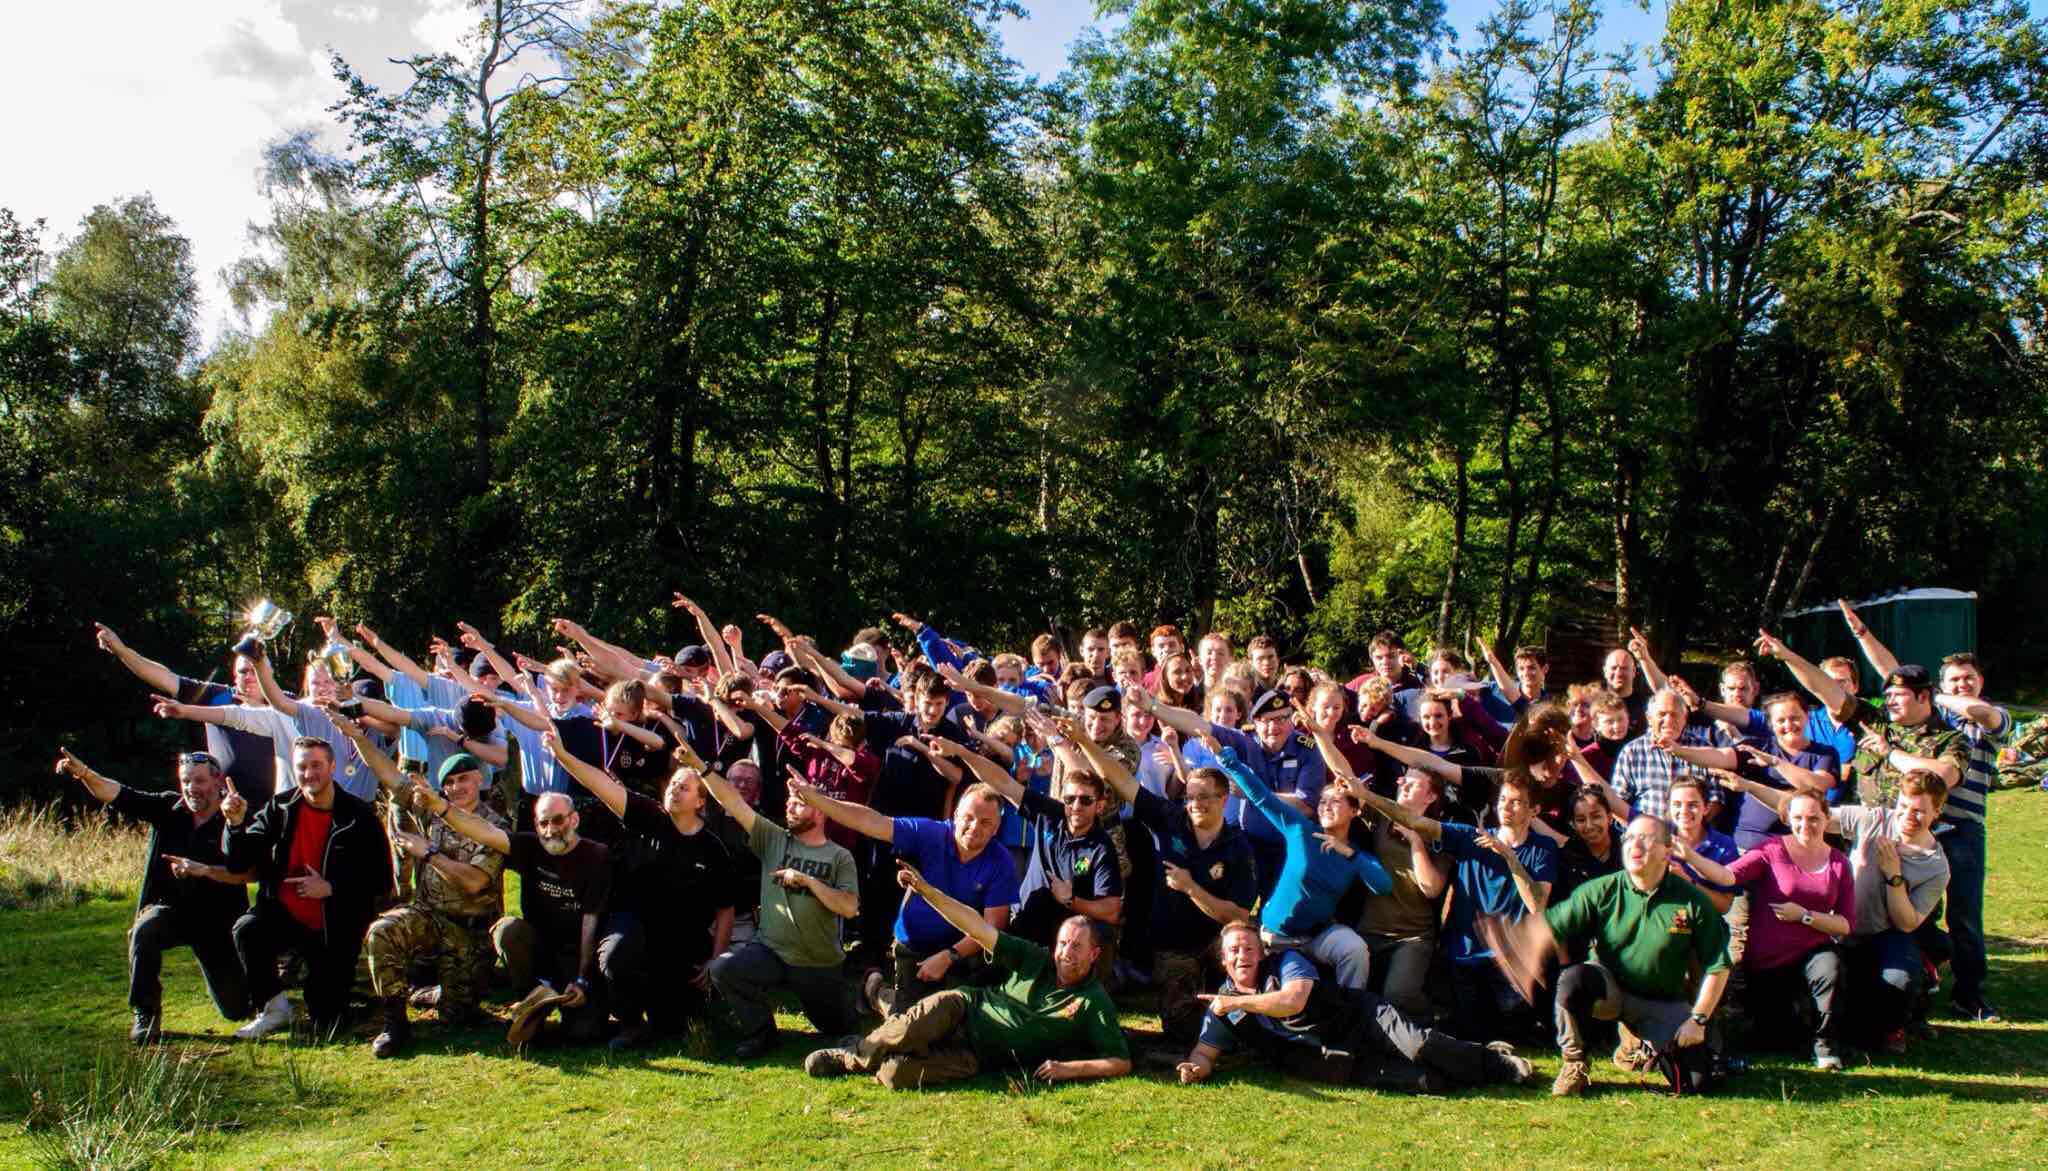
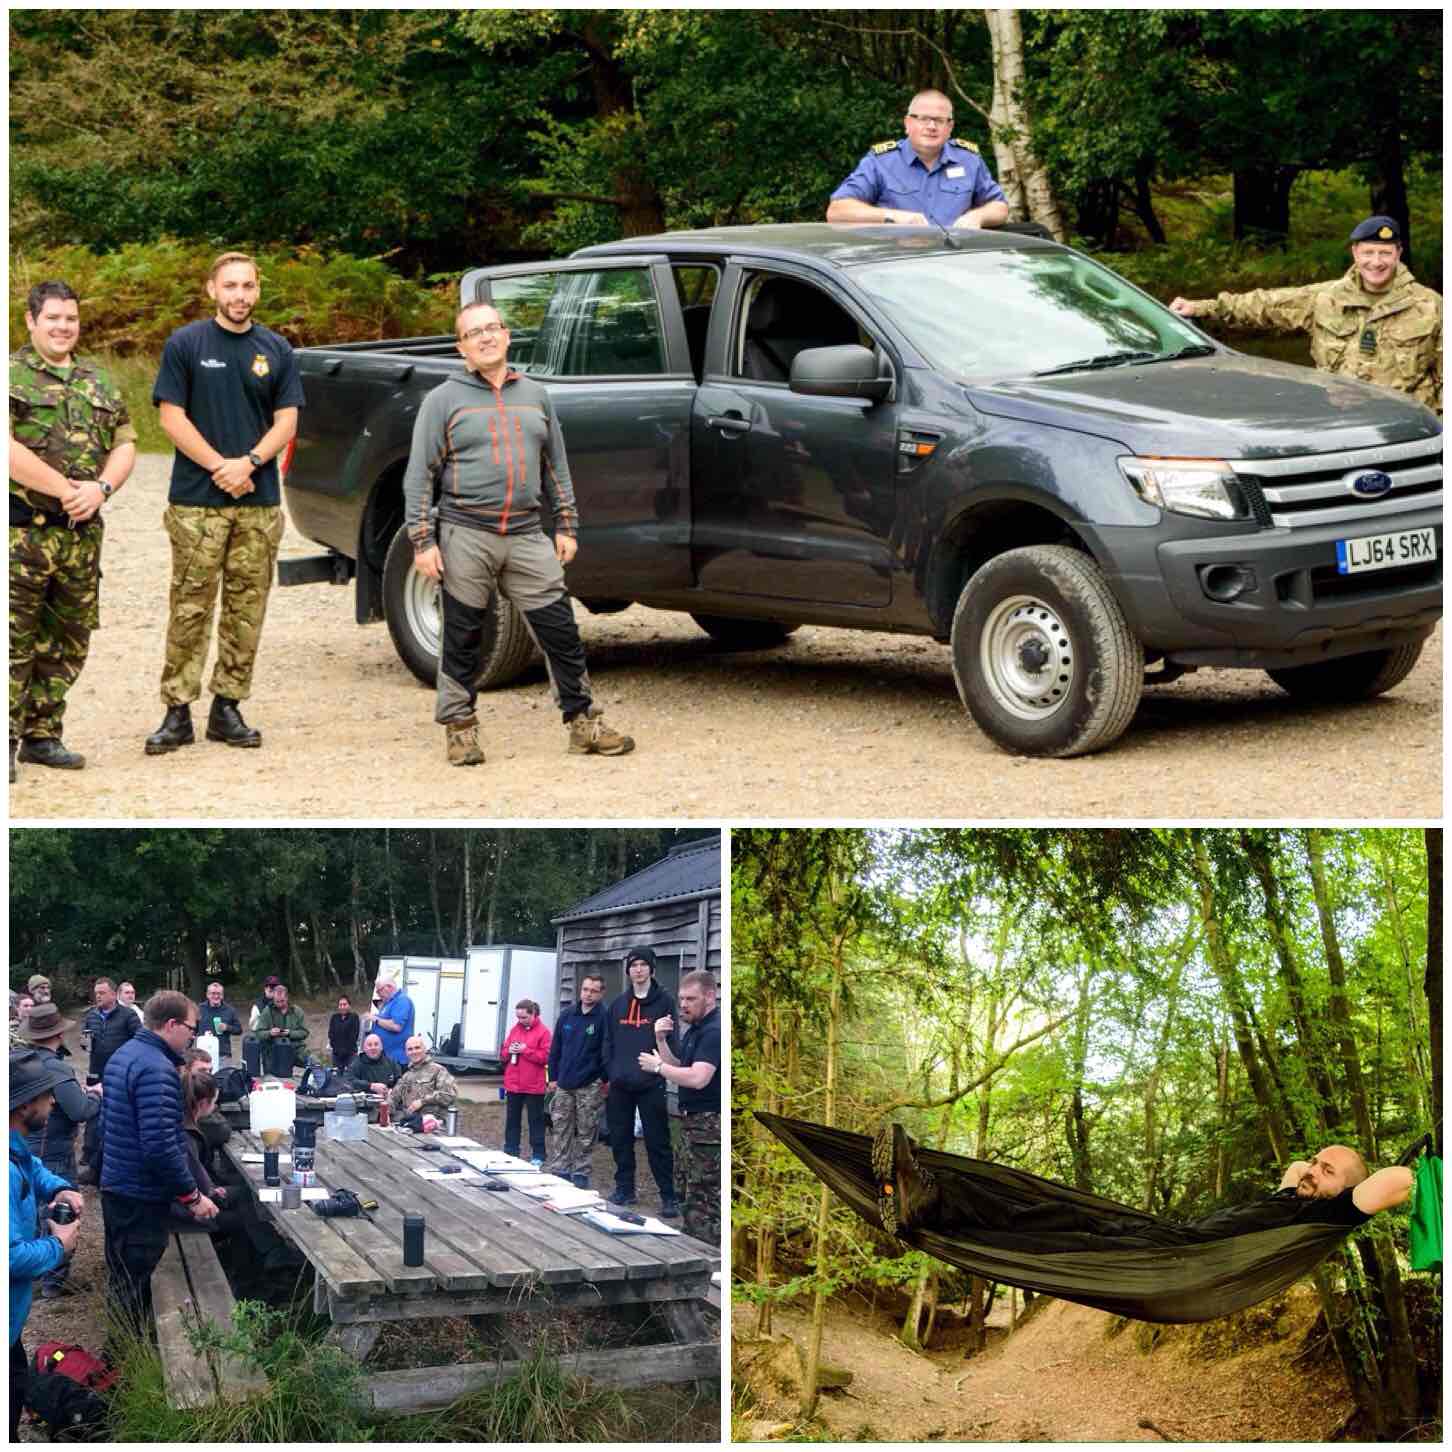
The London Area Sea Cadets annual Chosin Cup competition is one event I look forward to every year. Since 1999 I have been attending this event and this year may not have been the hardest in terms of the weather but it sure was hard due to the sheer number of different tests the cadets had to undertake.
Friday
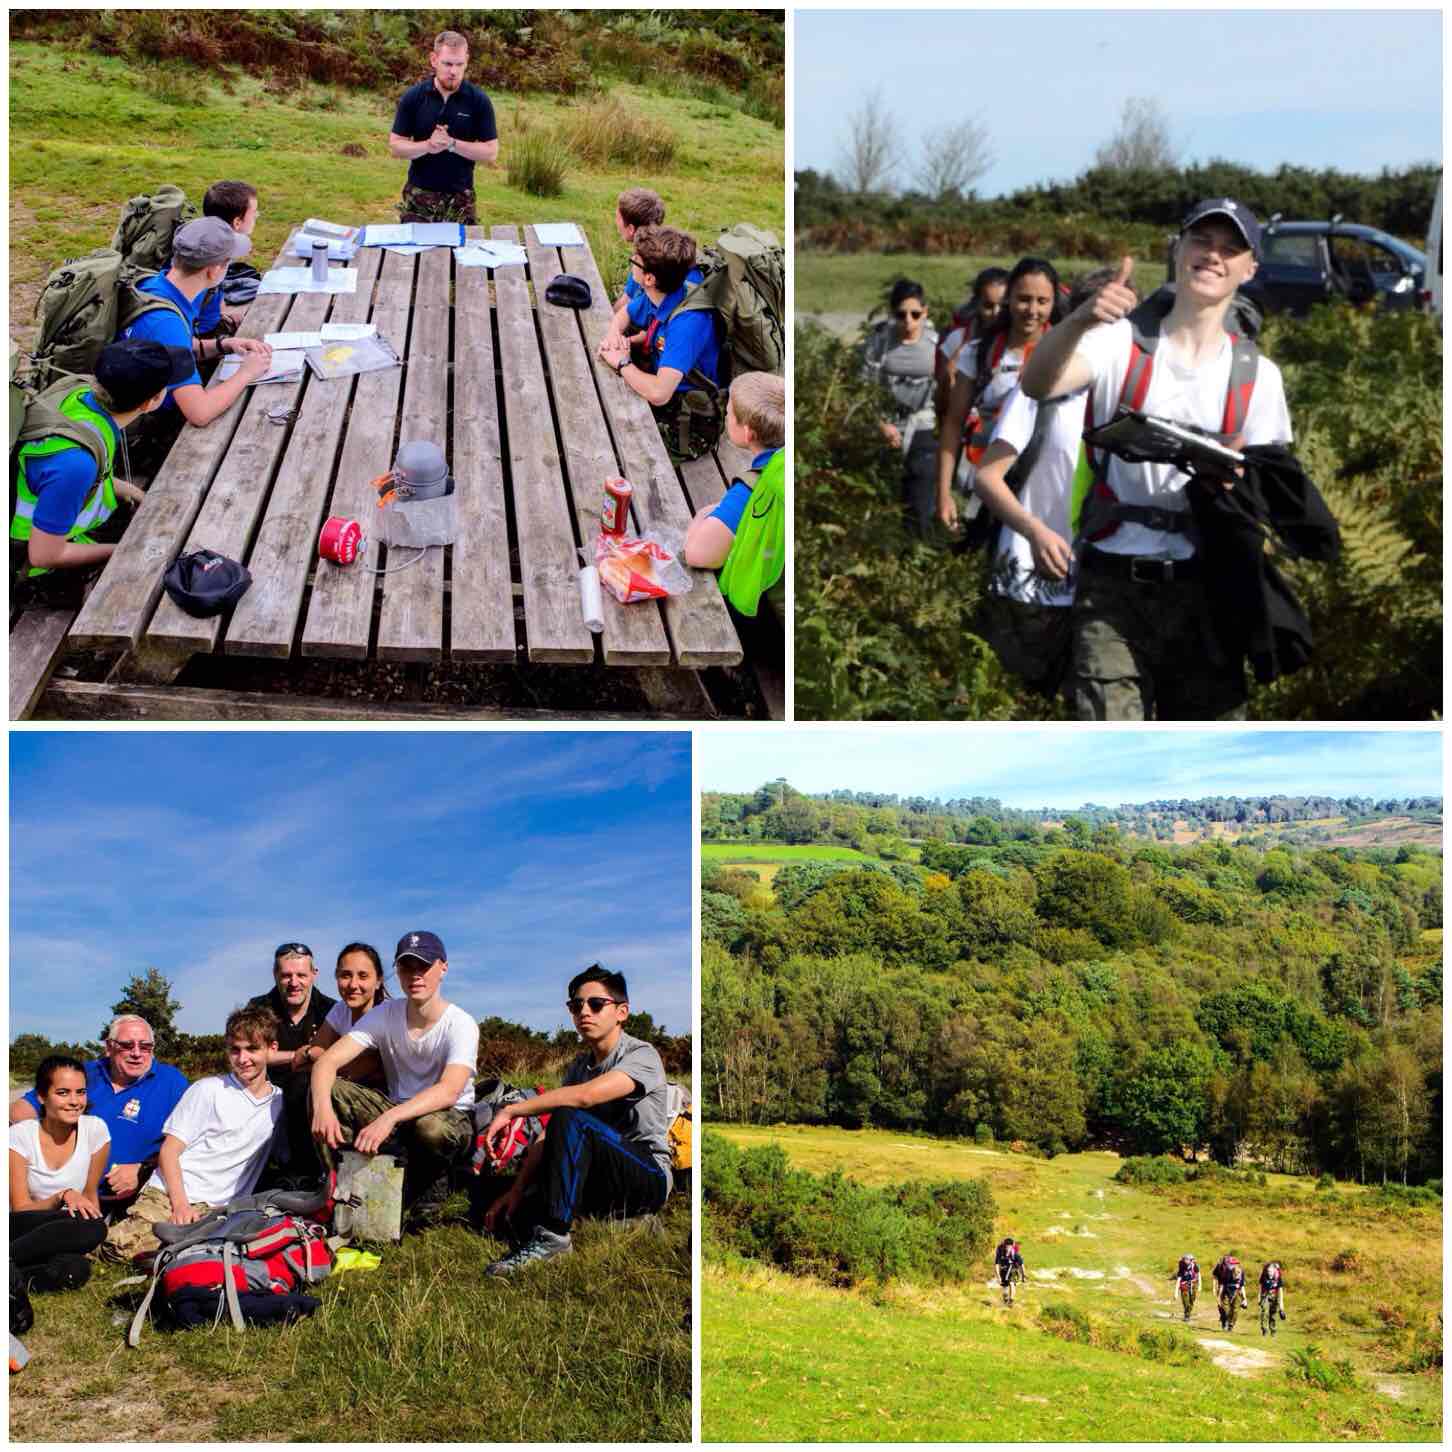
Kick off is on the Friday night (late September) with the cadets marching in to their bivvie sites and working on their route cards. The staff though were up into the early hours prepping everything for the weekend.
Saturday
First thing on Saturday morning they were briefed in their teams and then they were off. They needed to navigate a route inside and outside Pippingford Park military training area (located in the beautiful Ashdown Forest in the UK).
Out and about
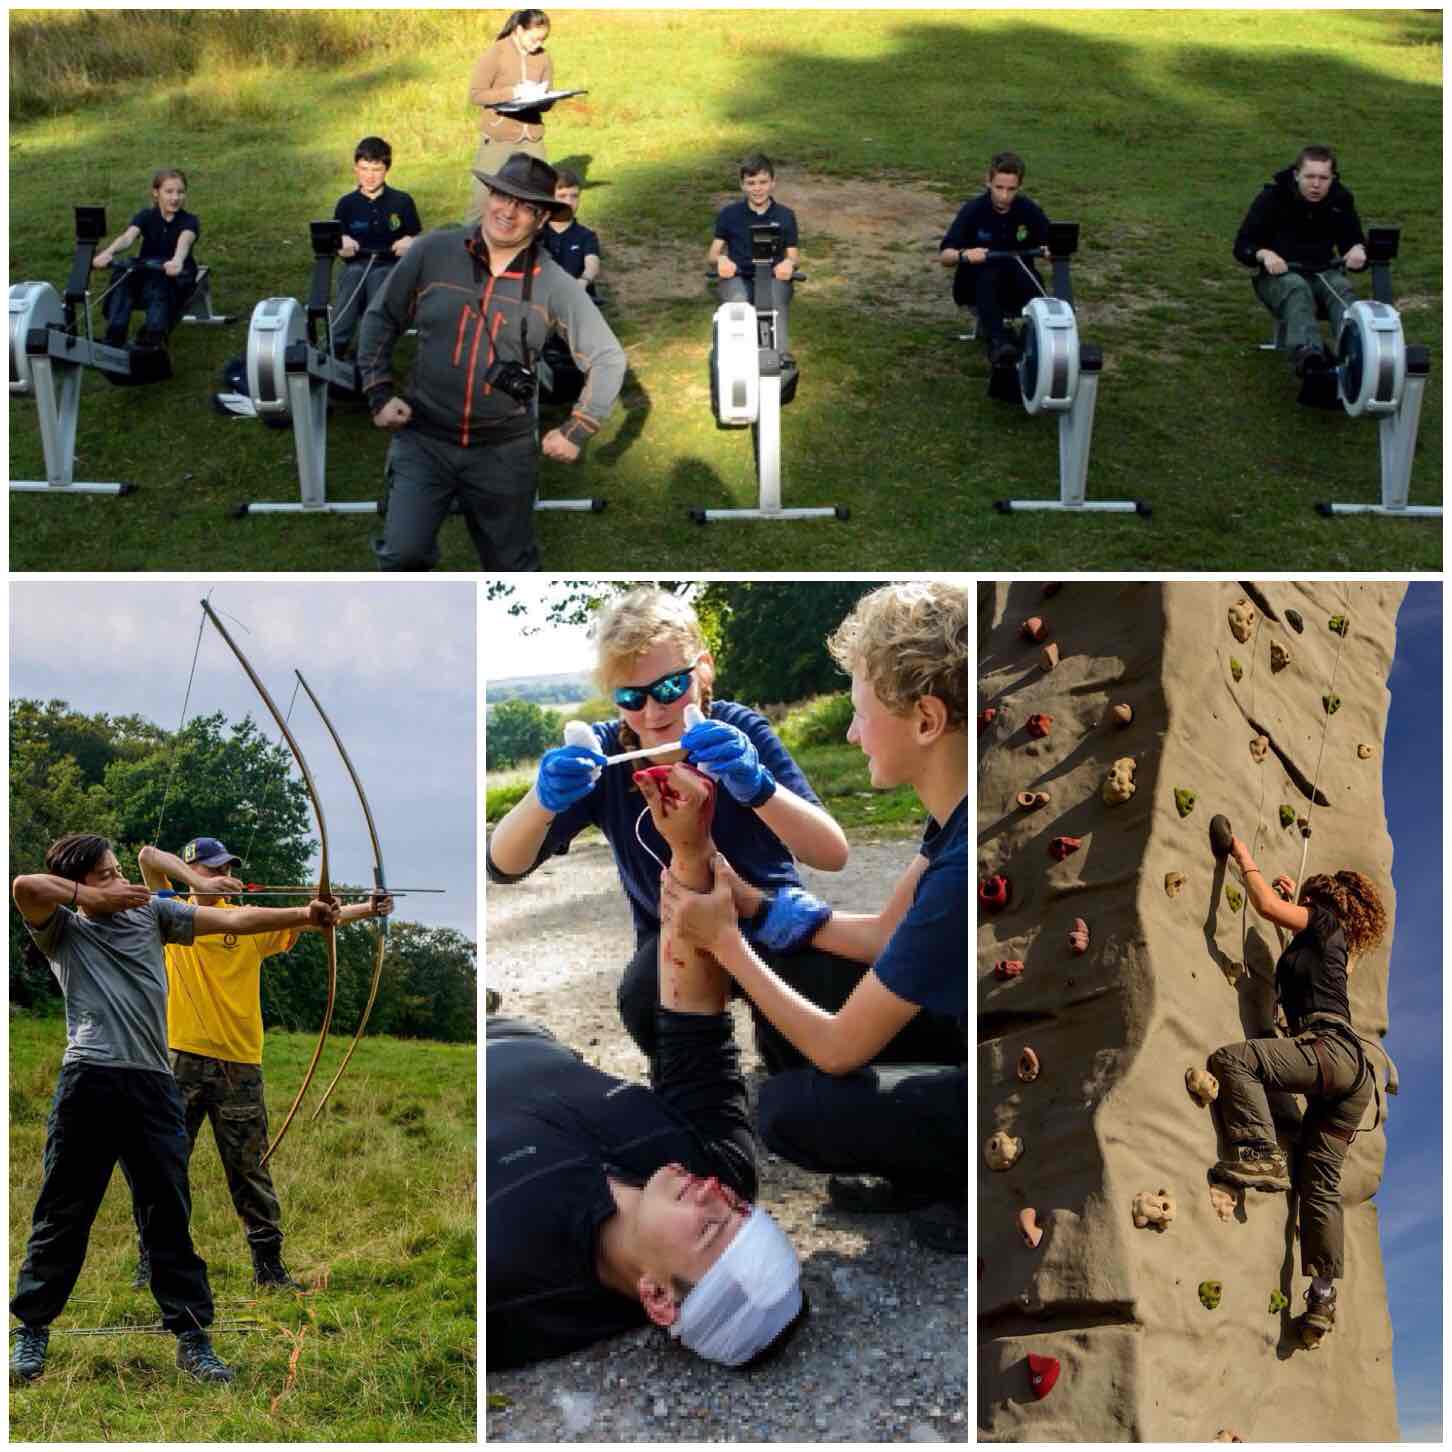
This year the Chosin Cup was run by our ‘soon to be‘ new Area Staff Officer Ben MacDonald. Ben is keen to really test the cadets and brought in some new activities for them to try out.
Cliff Lewis was in his element running the timed rowing race, there was plenty of archery to test the keen eyed ones, loads of fakeblood for the hardy at heart to stem and a fantastic climbingtower to let the cadets scurry up.
Multi activities
In between each stance the cadets had to keep navigating and pushing themselves to get to each one as quickly as possible.
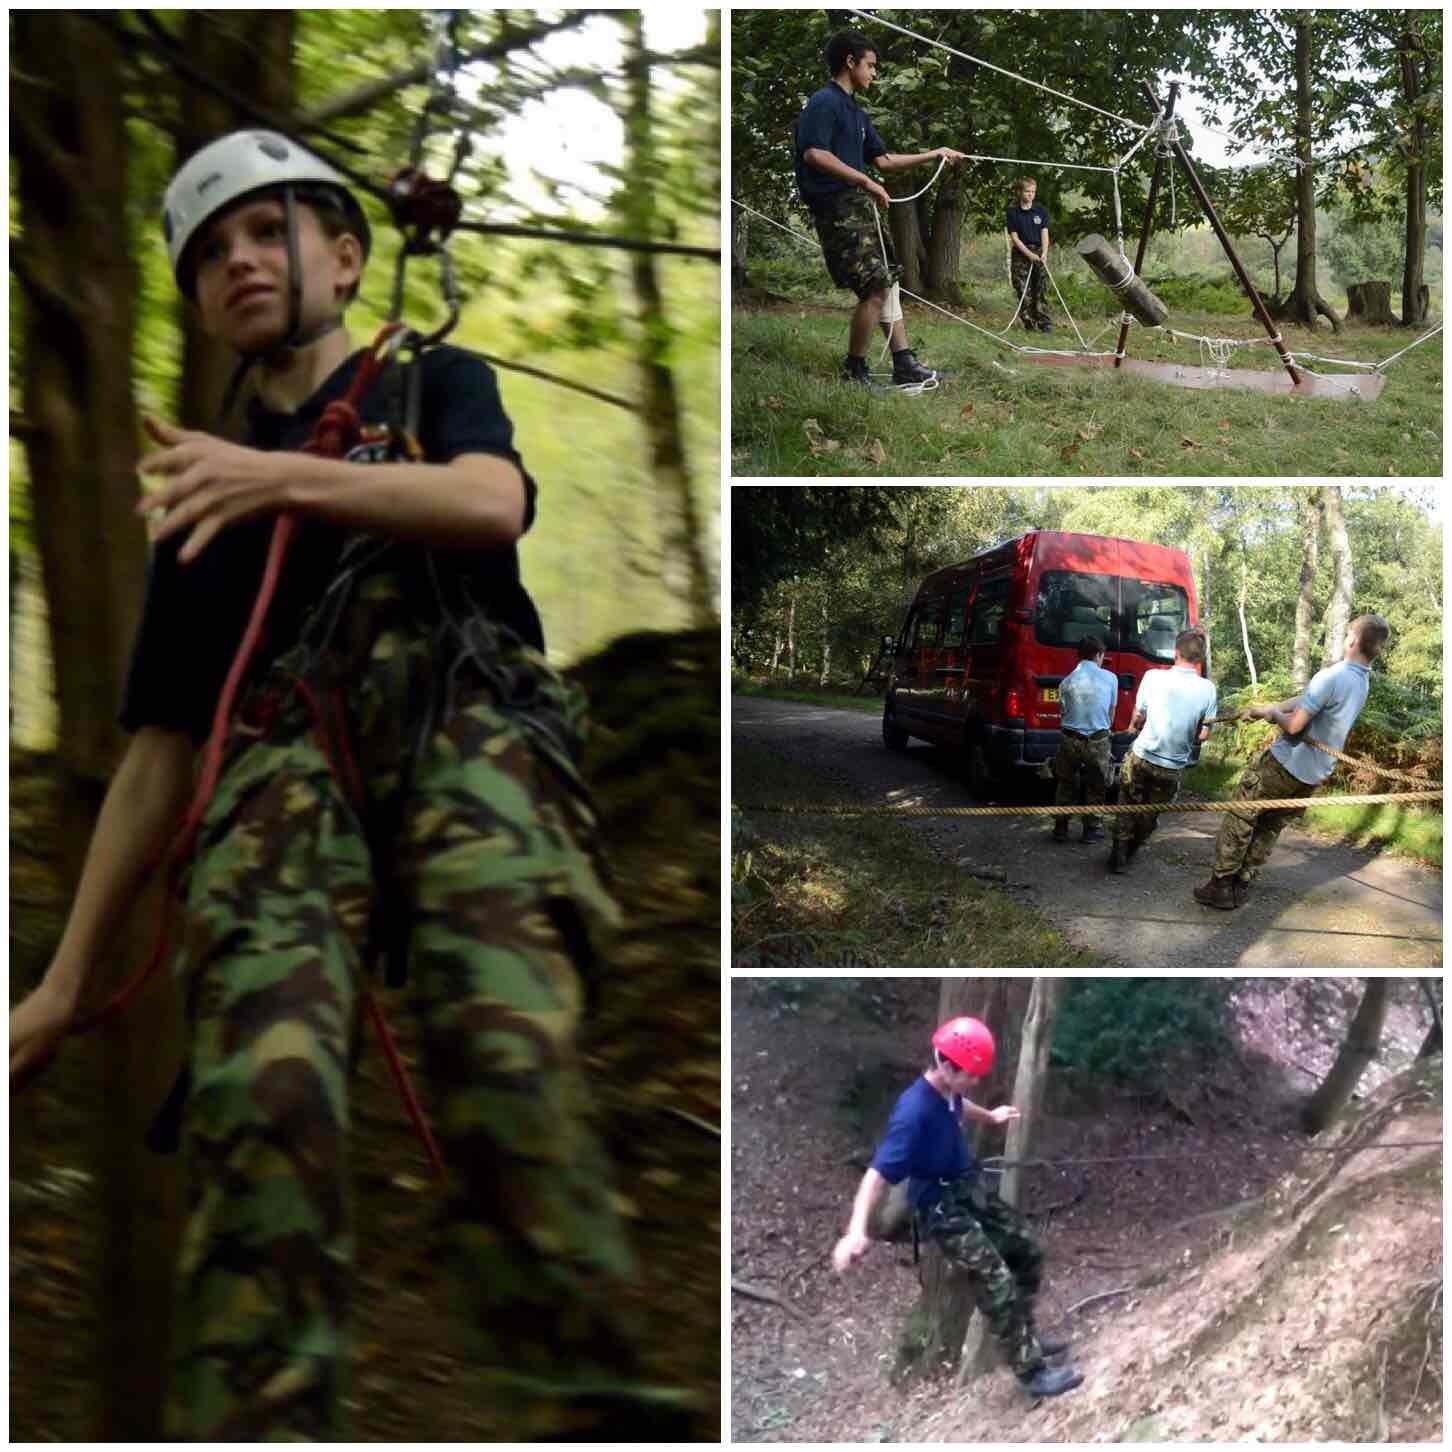
The TyroleanTraverse and the Minibuspull tested the cadets teamwork and strength while the Seamanship stance worked on their core Sea Cadet skills
Skills and Stamina
In between all this tooing and frowing of cadets the staff were busy running the stances (well some got a bit of R&R in between) and we had a visit on the Sunday from the Senior London Area officers (that kept us on our toes).
Busy Staff
As for myself I was in the enviable position of being the roving safety officer/official photographer (my car ended up totally covered in dust from all the dirt tracks).
I put together a couple of short videos of the weekend and below is the first one with snippets of the Saturdays activities.
The Saturday night was not a quiet affair, as soon as it was dark, they were off again. This time on a night navigation excercise working from point to point using compasses and maps – they all made it and were soon safely back at camp.
Sunday
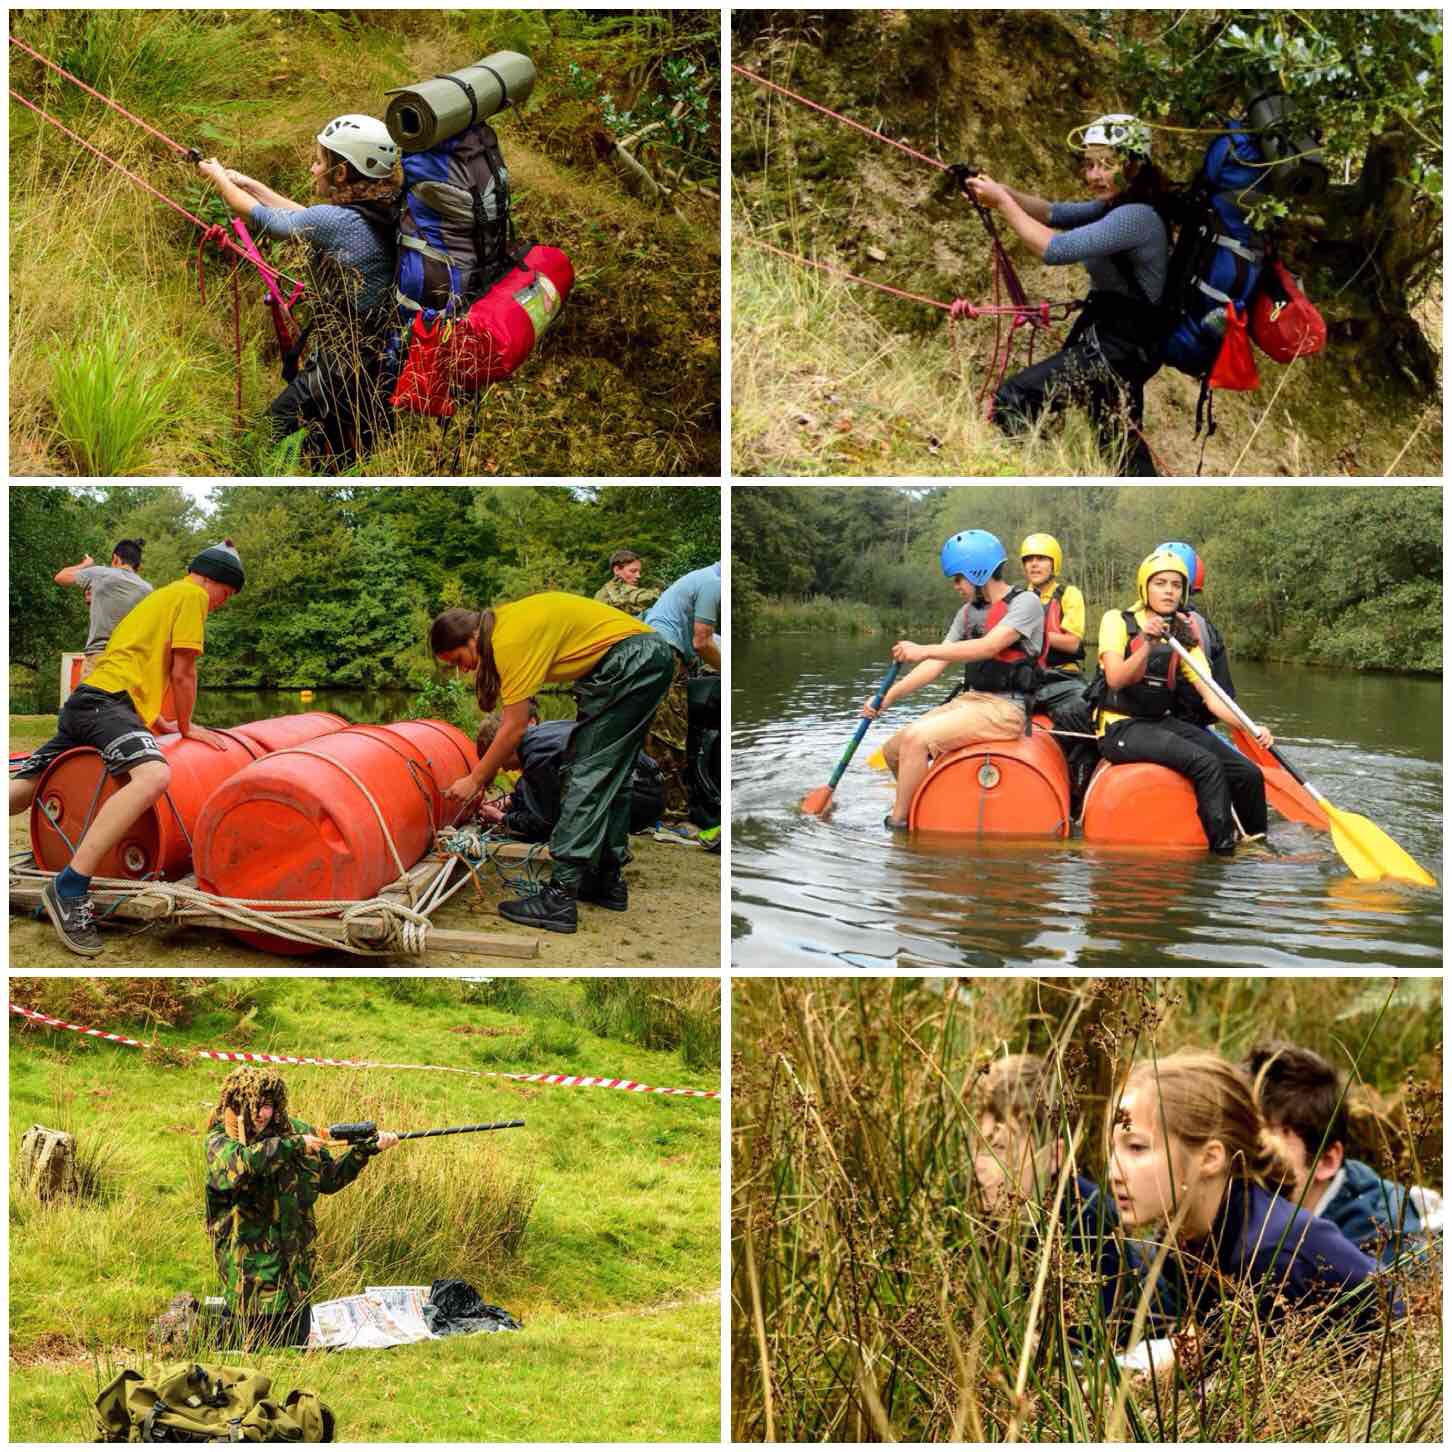
All the activities on the Sunday morning were located within the confines of Pippingford Park (no hardship there as it is a beautiful site) and so after a good breakfast it was time to get started again.
The cadets were kept busy hauling themselves and all their kit up steep inclines, building rafts (a few did come apart) and stalking the enemy 🙂
Sunday morning activities
My friend Charlie Brookes ran the Fire Race. This involves collecting different tinders and twigs then lighting them (using a firesteel) and getting the flames high enough to burn through a suspended horizontal rope – not as easy as you might think.
Fire Race
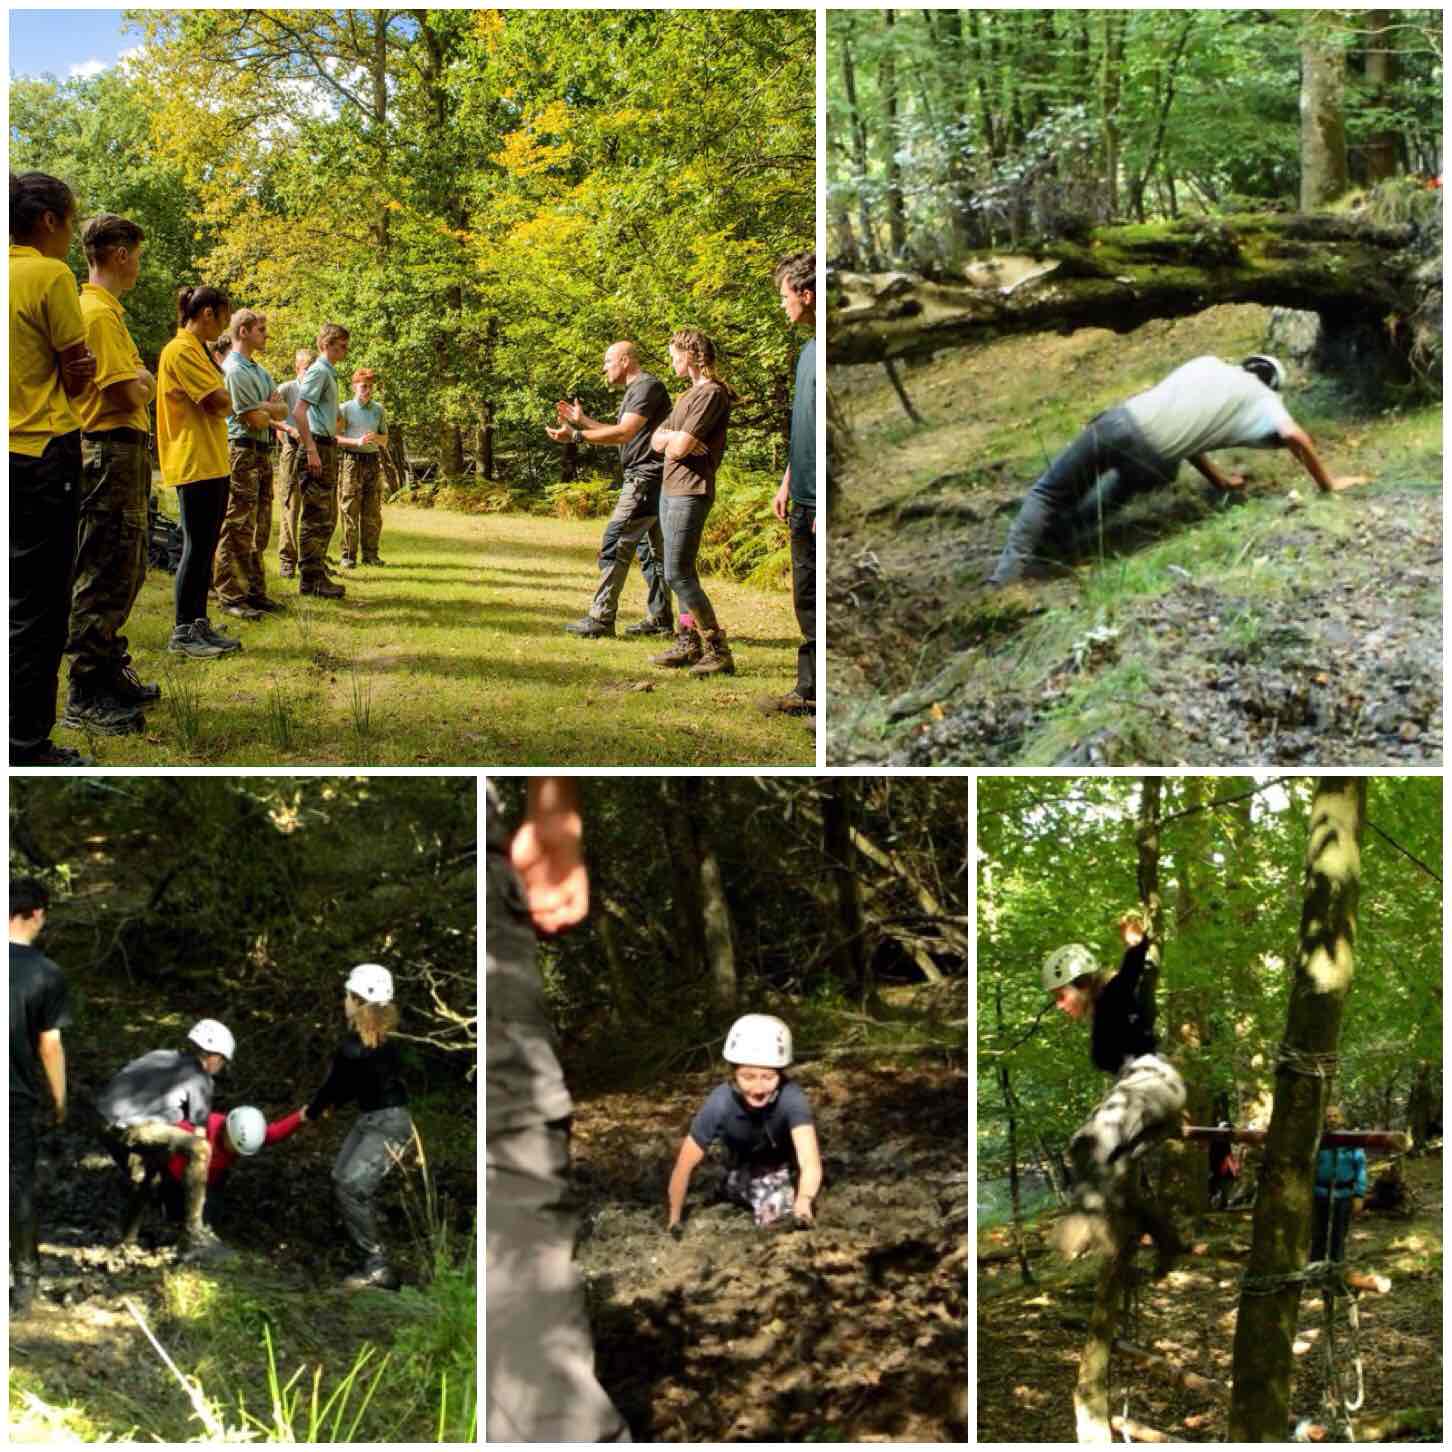
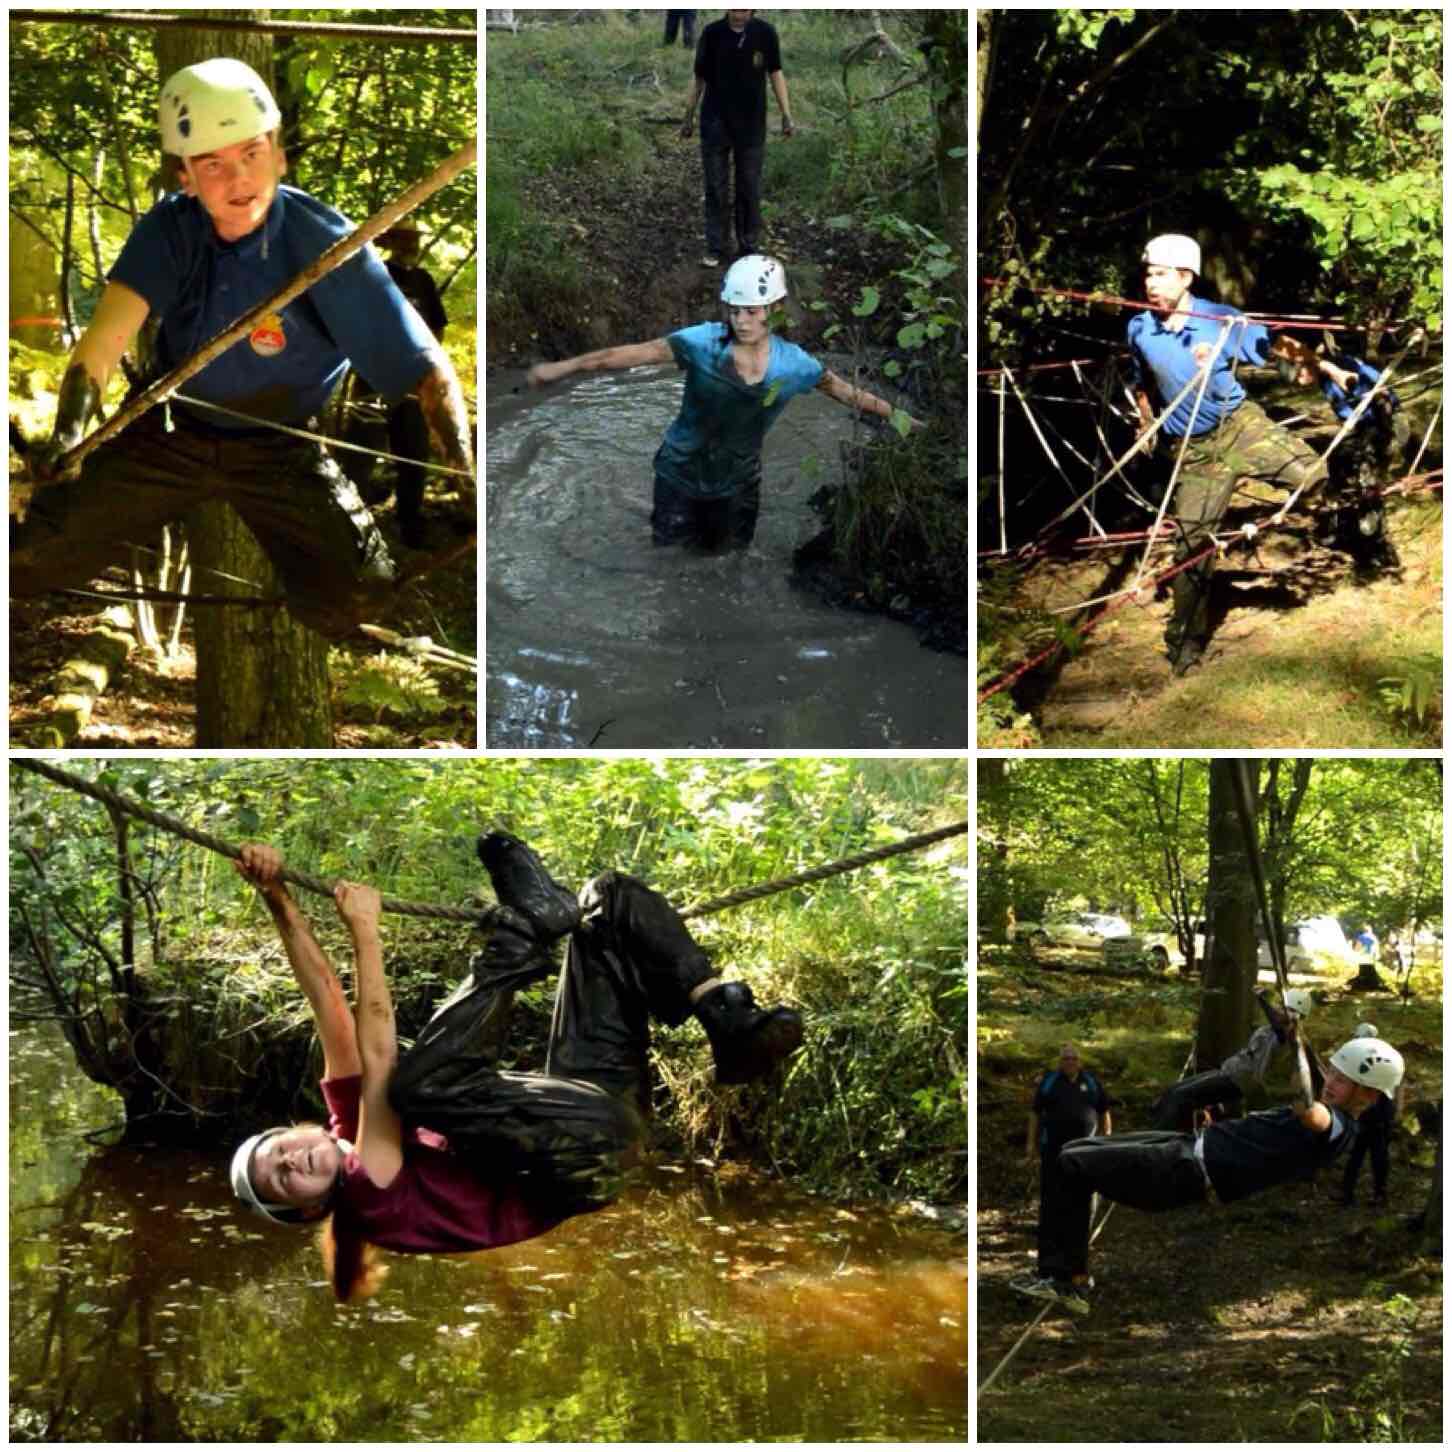
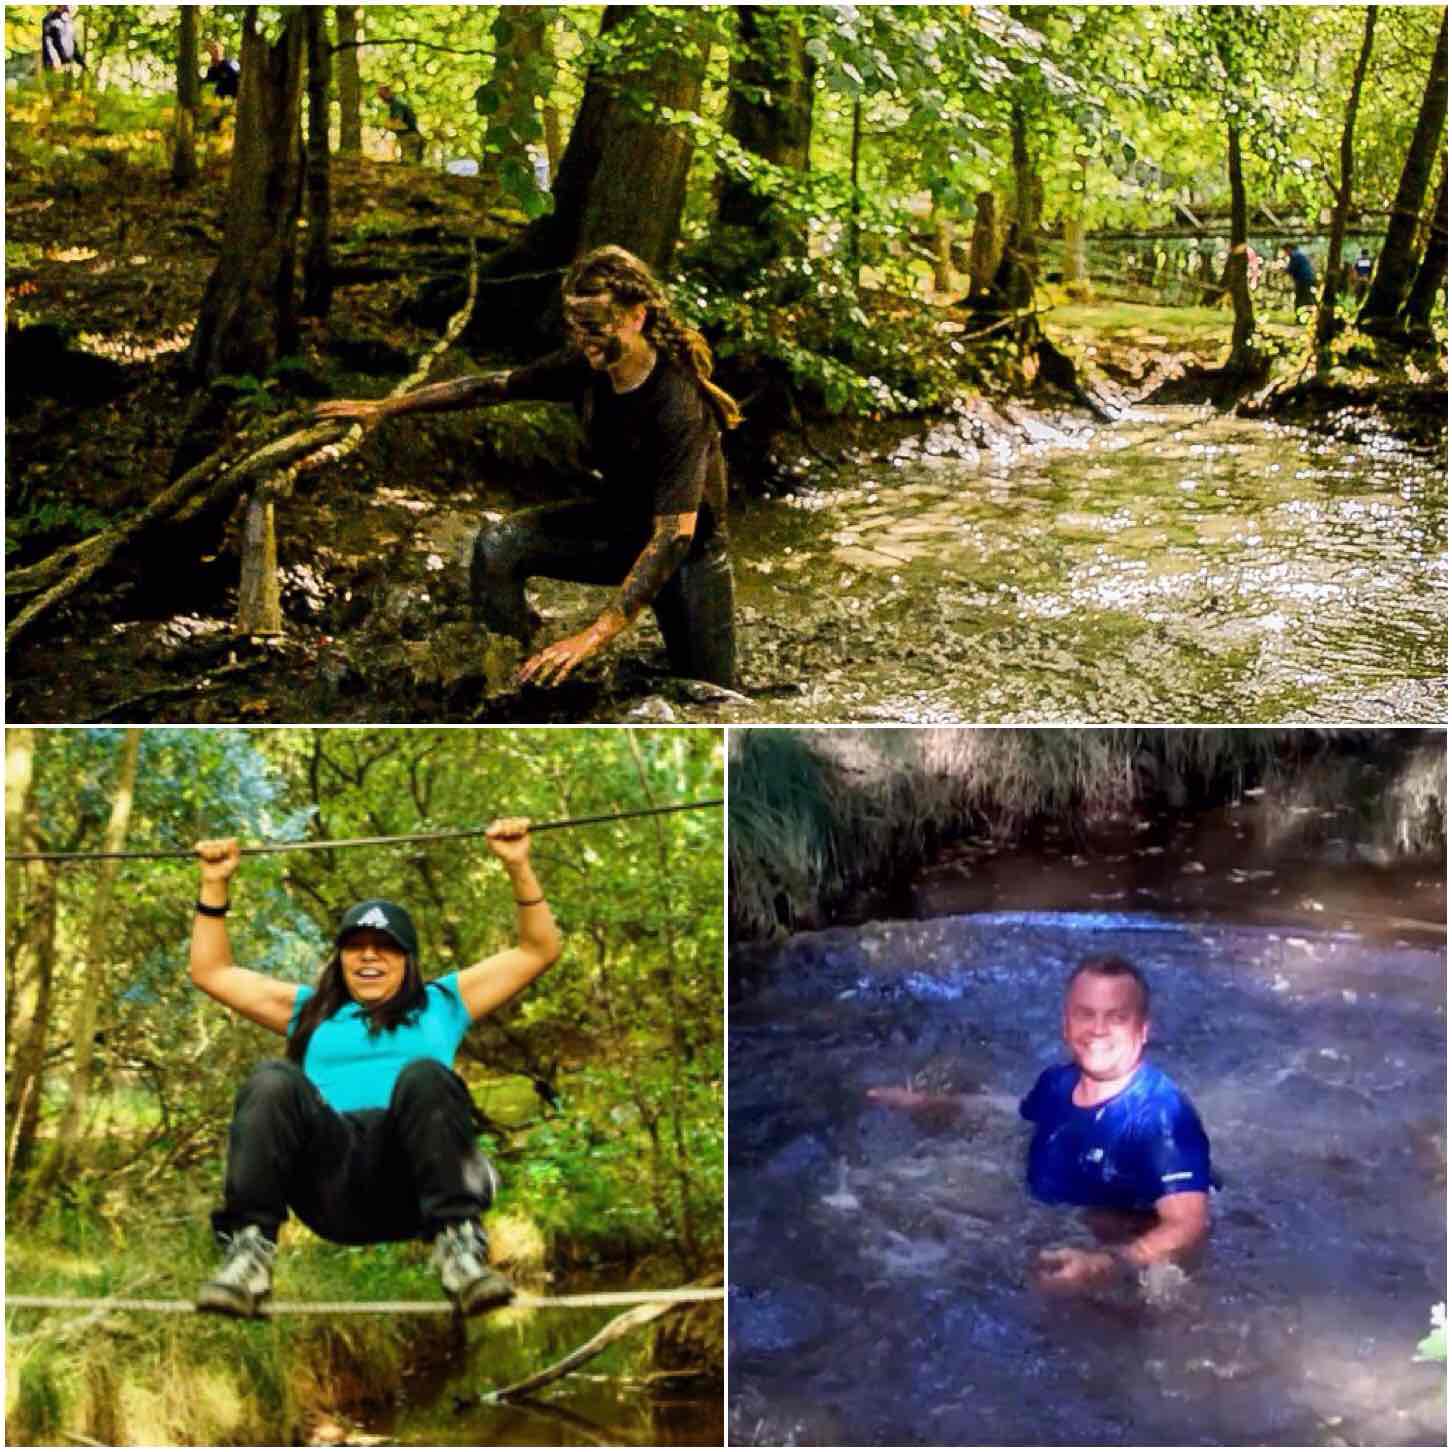
The event culminated in each team having to run the EnduranceRace. This was set up by our friend Kev Lomas from Southern Area Royal Marines Cadets and he knows how to set a tough race (he knows his stuff as he runs a company called Muscle Acre).
After a briefing they were off – each team took about 15 minutes to complete the race. It was a mixture of natural and man-made obstacles but the general theme was mud, ropes and water.
Start of the Endurance Race
It was great to watch the cadets pushing themselves over the race and really come together as individual teams. There were staff located all around the site to encourage the cadets and ensure they were always safe. It was hard for them but the looks on their faces when they finished showed that they really enjoyed themselves.
Pushing On
For many years I have run with the teams around these races however this year it was time to let others have a go and as the official photographer I encouraged/poked/prodded some of the other staff to have a go so I could film them (you have to have some sort of R&R when you reach 50!!)
The staff having a go
Below is the second of my videos showing the Sunday activities including the Endurance Race.
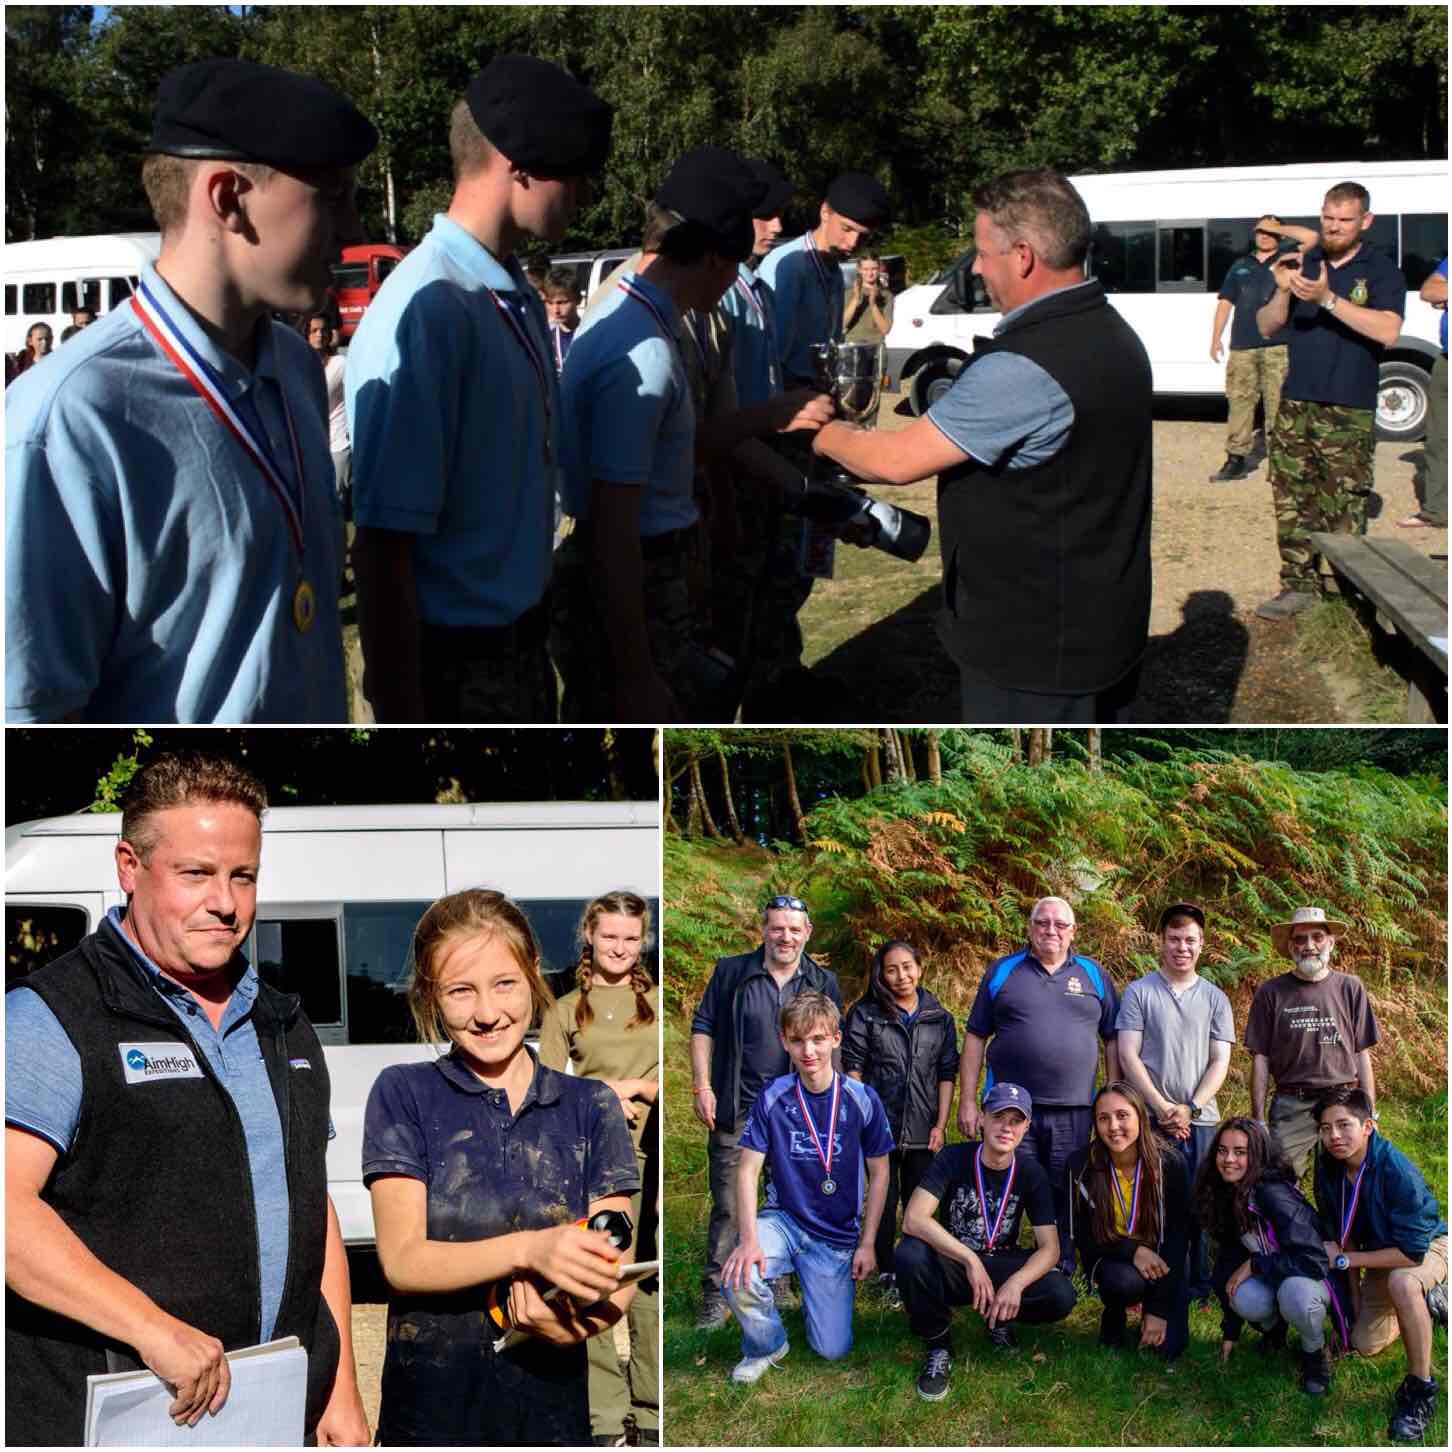
After a quick wash up it was time for the awards. There were 9 teams entered in the event this year and a close run thing it was too.
Merton Unit came 3rd, City of London came 2nd and the winners were Maldon Unit – BZ guys.
The Awards
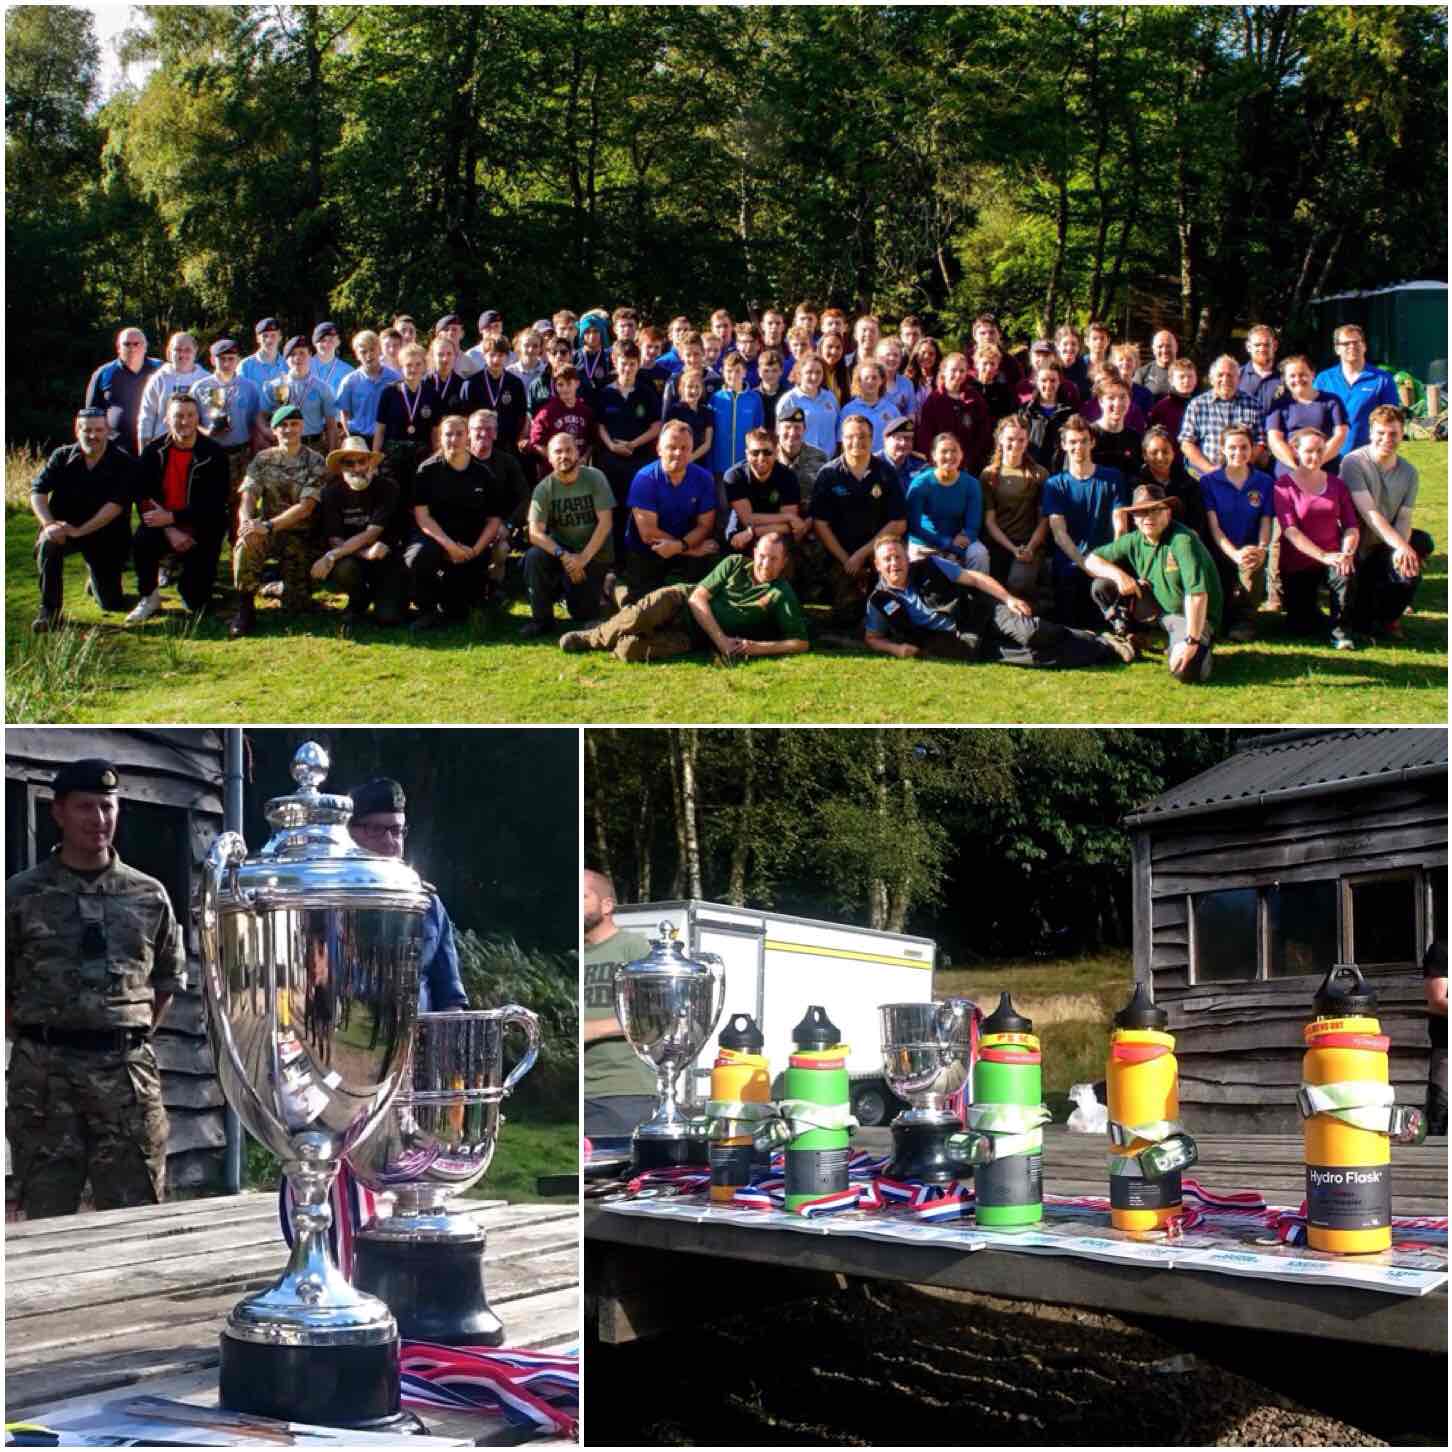
For many years the Chosin Cup has been overseen by our two Area Staff Officers Perry Symes and Graham Brockwell. They are standing down now to make way for some younger members of staff such as Ben MacDonald to take over and test themselves. This post then, I am dedicating, (like my videos) to these two stalwarts of the Adventure Training world in the Sea Cadets – Perry and Graham.
Chosin Cup
The weekend could not have been run without all the staff that volunteered to come along and run it so thank you to each and every one of you.
Thanks to all the cadets that came along and really tested themselves in what I regard as the toughest competition the Sea Cadets and the Royal Marines Cadets run.
Finally thanks must go to Ben MacDonald for putting it all together and making it a fine one for Perry and Graham to bow out on.
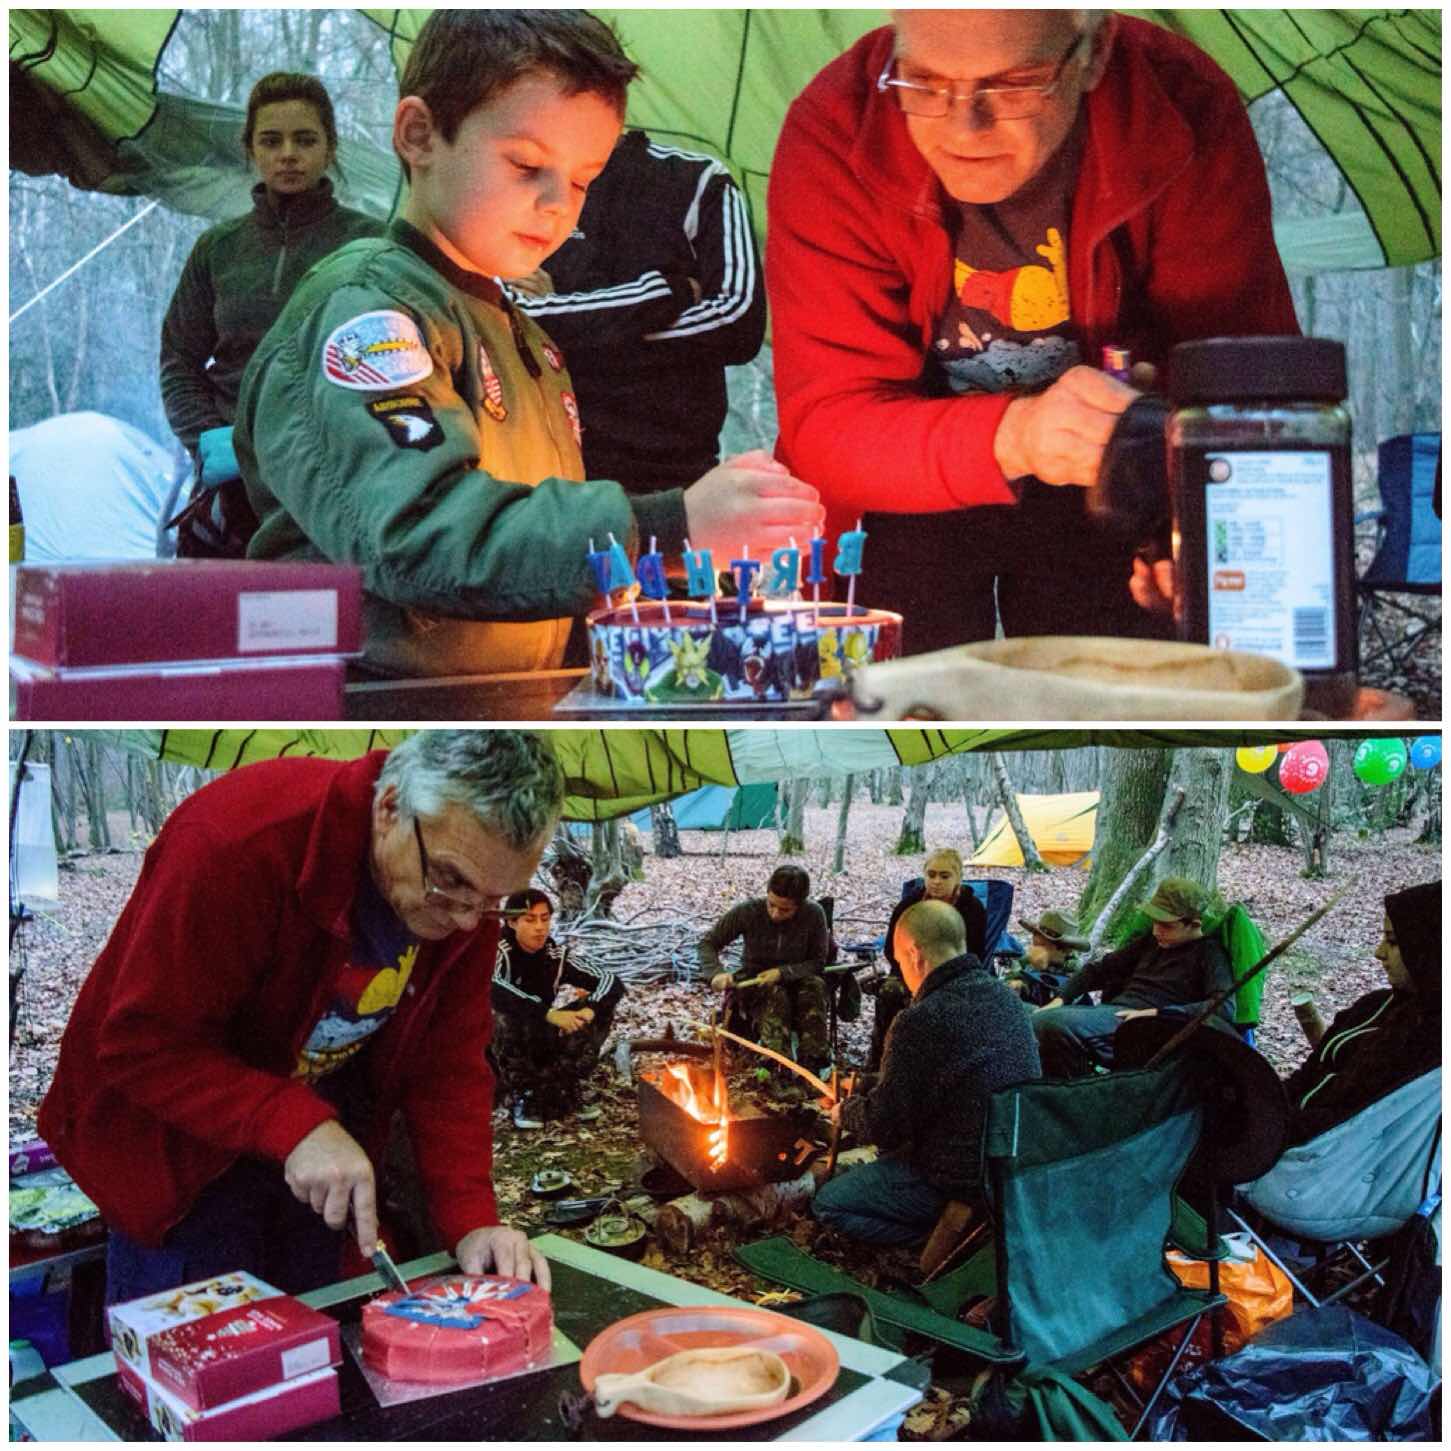
My last trip out for 2015 was a particularly nice one as we were celebrating the 6th birthday of a little bushcraft boy called David. He loves the outdoors and his Grandfather Keith Coleman had organised to celebrate the event out in the woods at Danemead Scout camp.
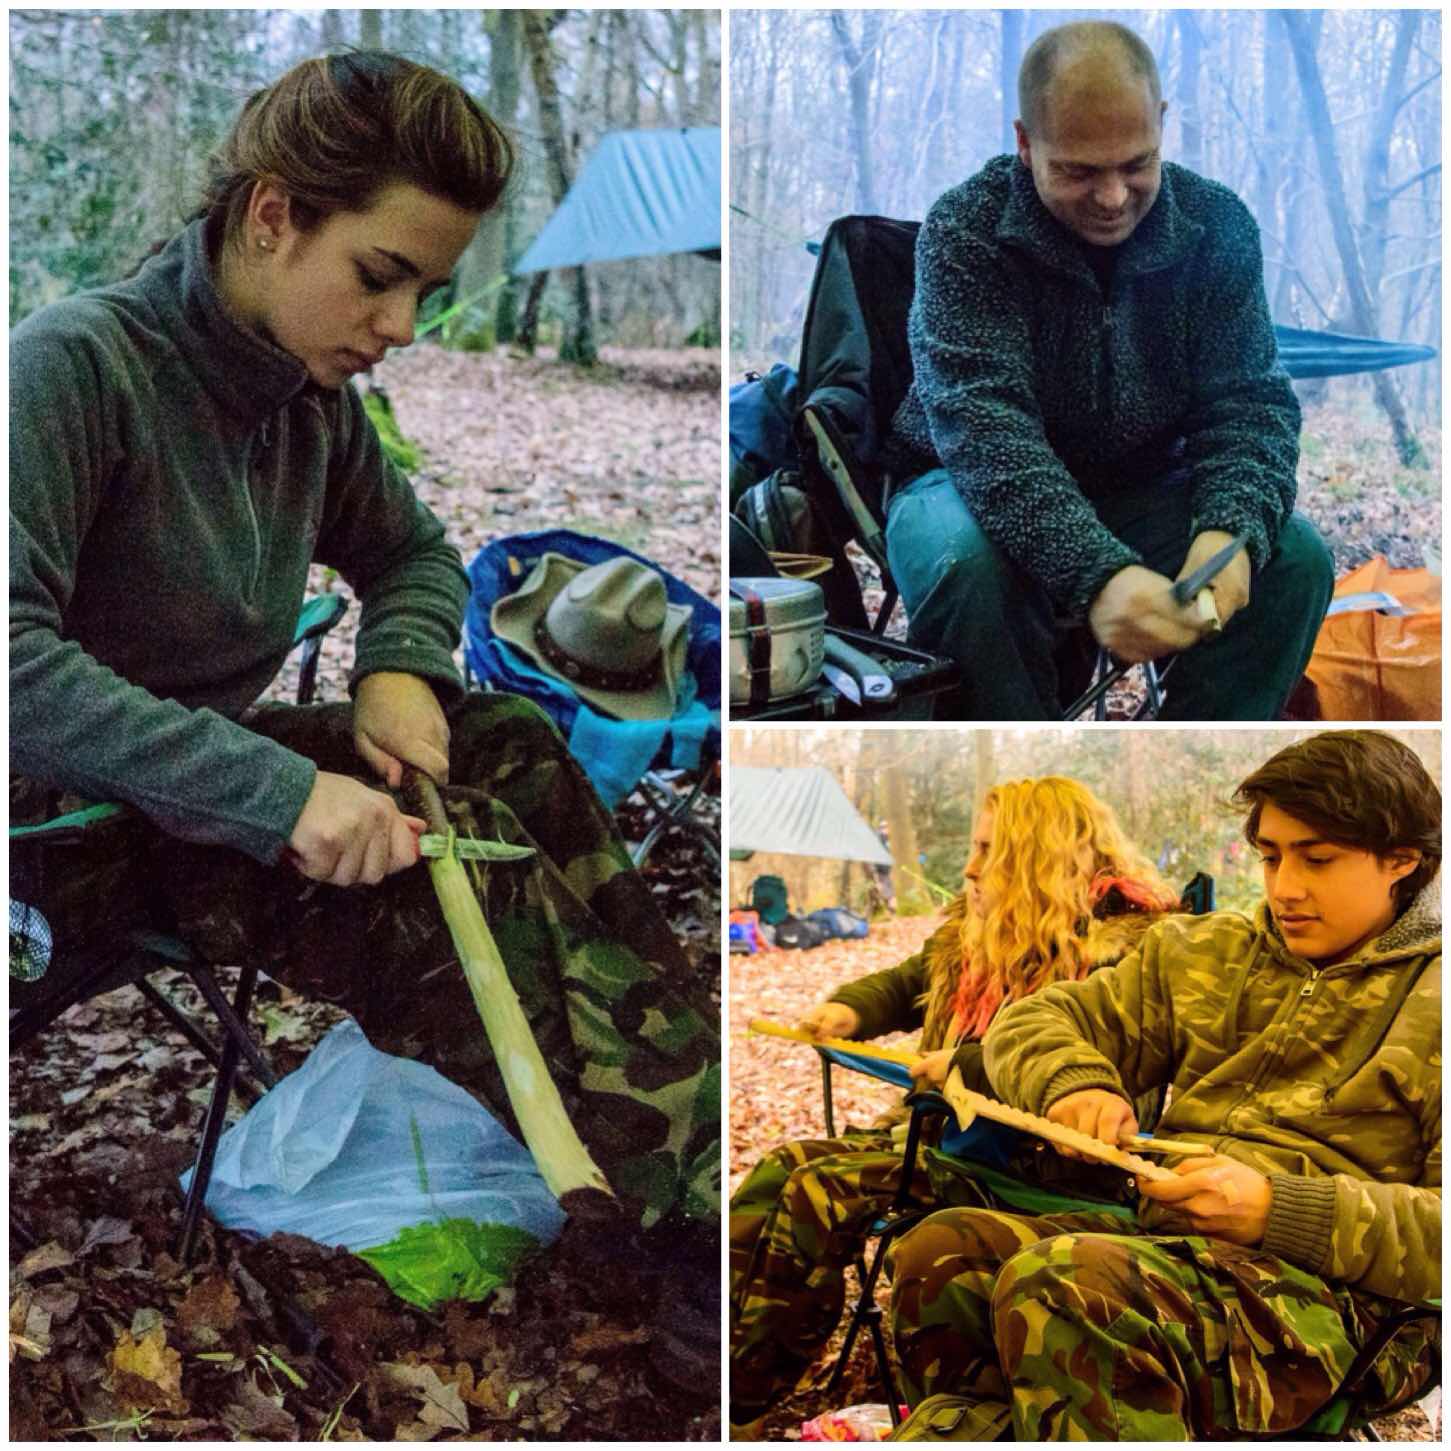
Keith was also out with a few of his cadets to practice some navigation skills and I was going to practice some bushcraft skills with my friends Dave, Alan and Jess.
Bushcraft Skills
David’s Mum Maria was who is a good friend of mine was also at the campsite so it was great to catch up with her as we had not met up for a long time.
Keith soon had the candles lit with David and we were soon tucking into a slice of Birthday cake.
Birthday Boy
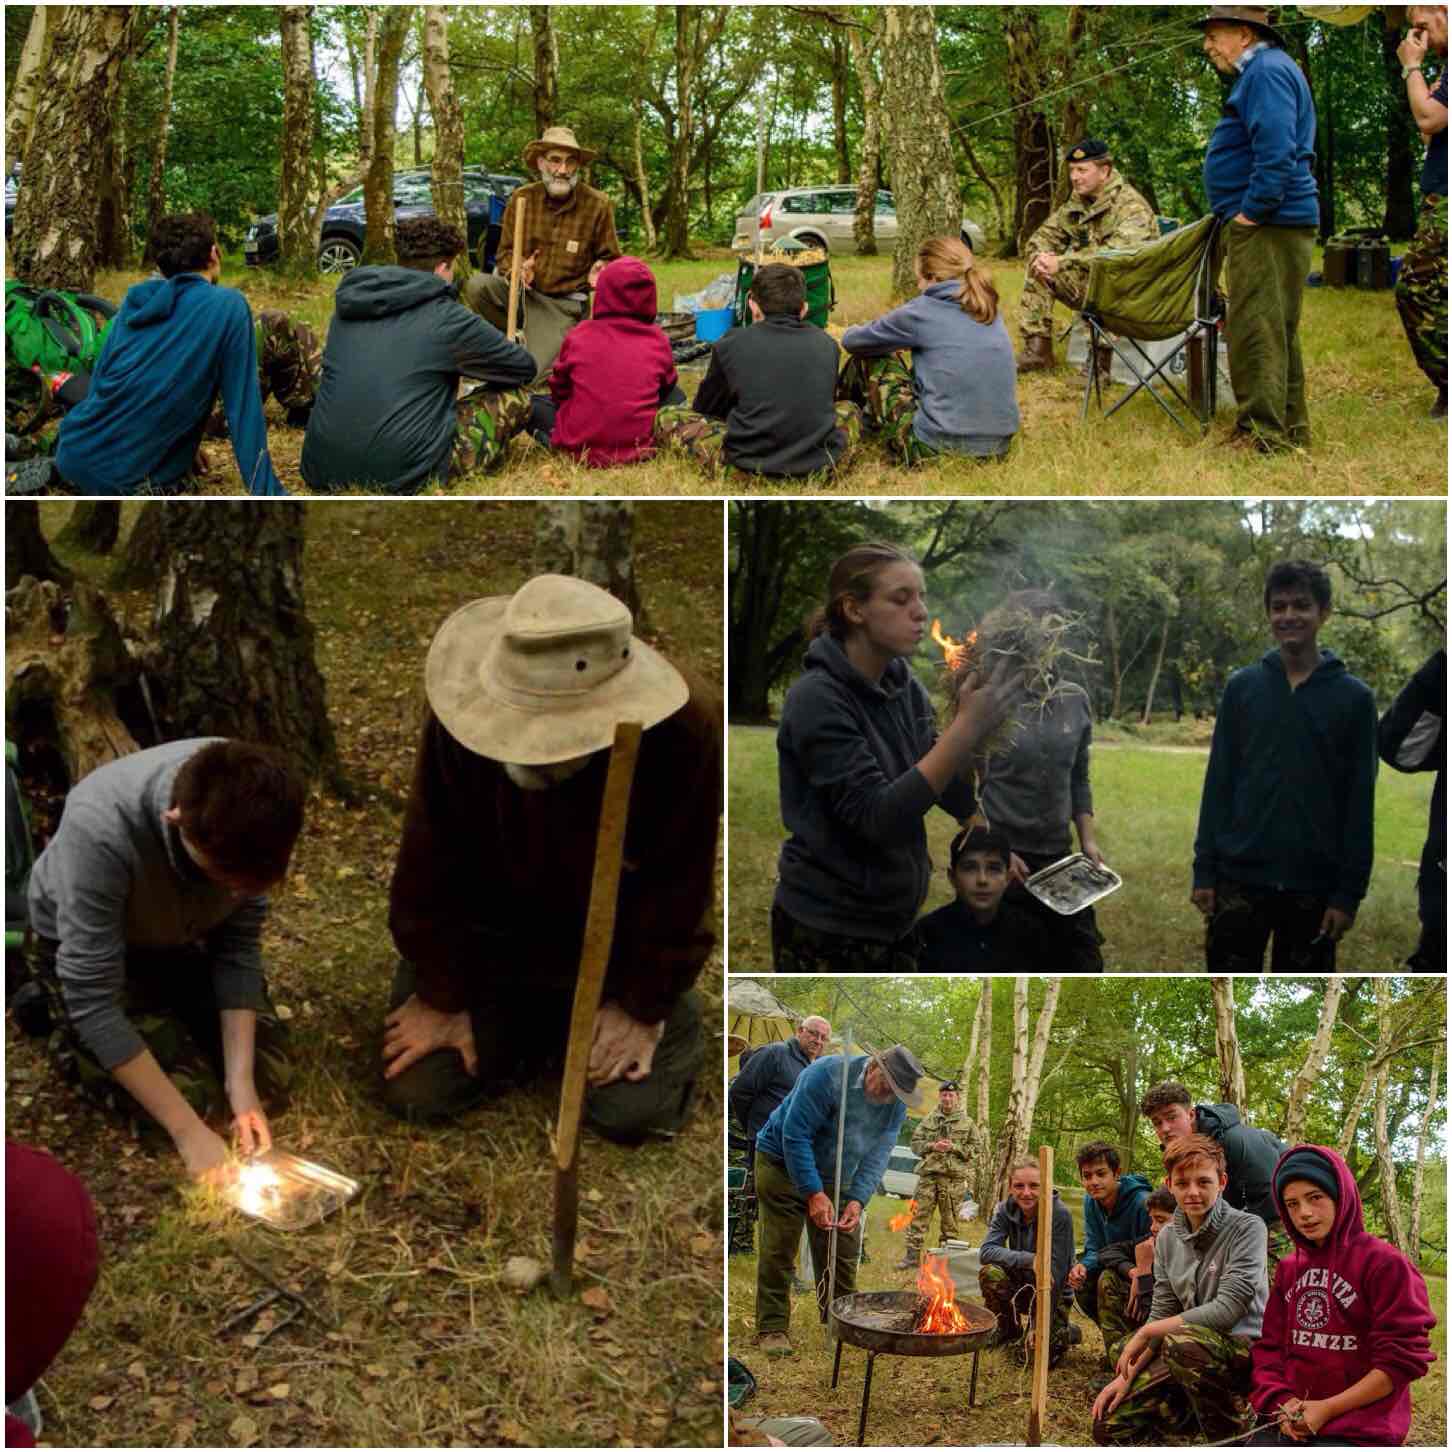
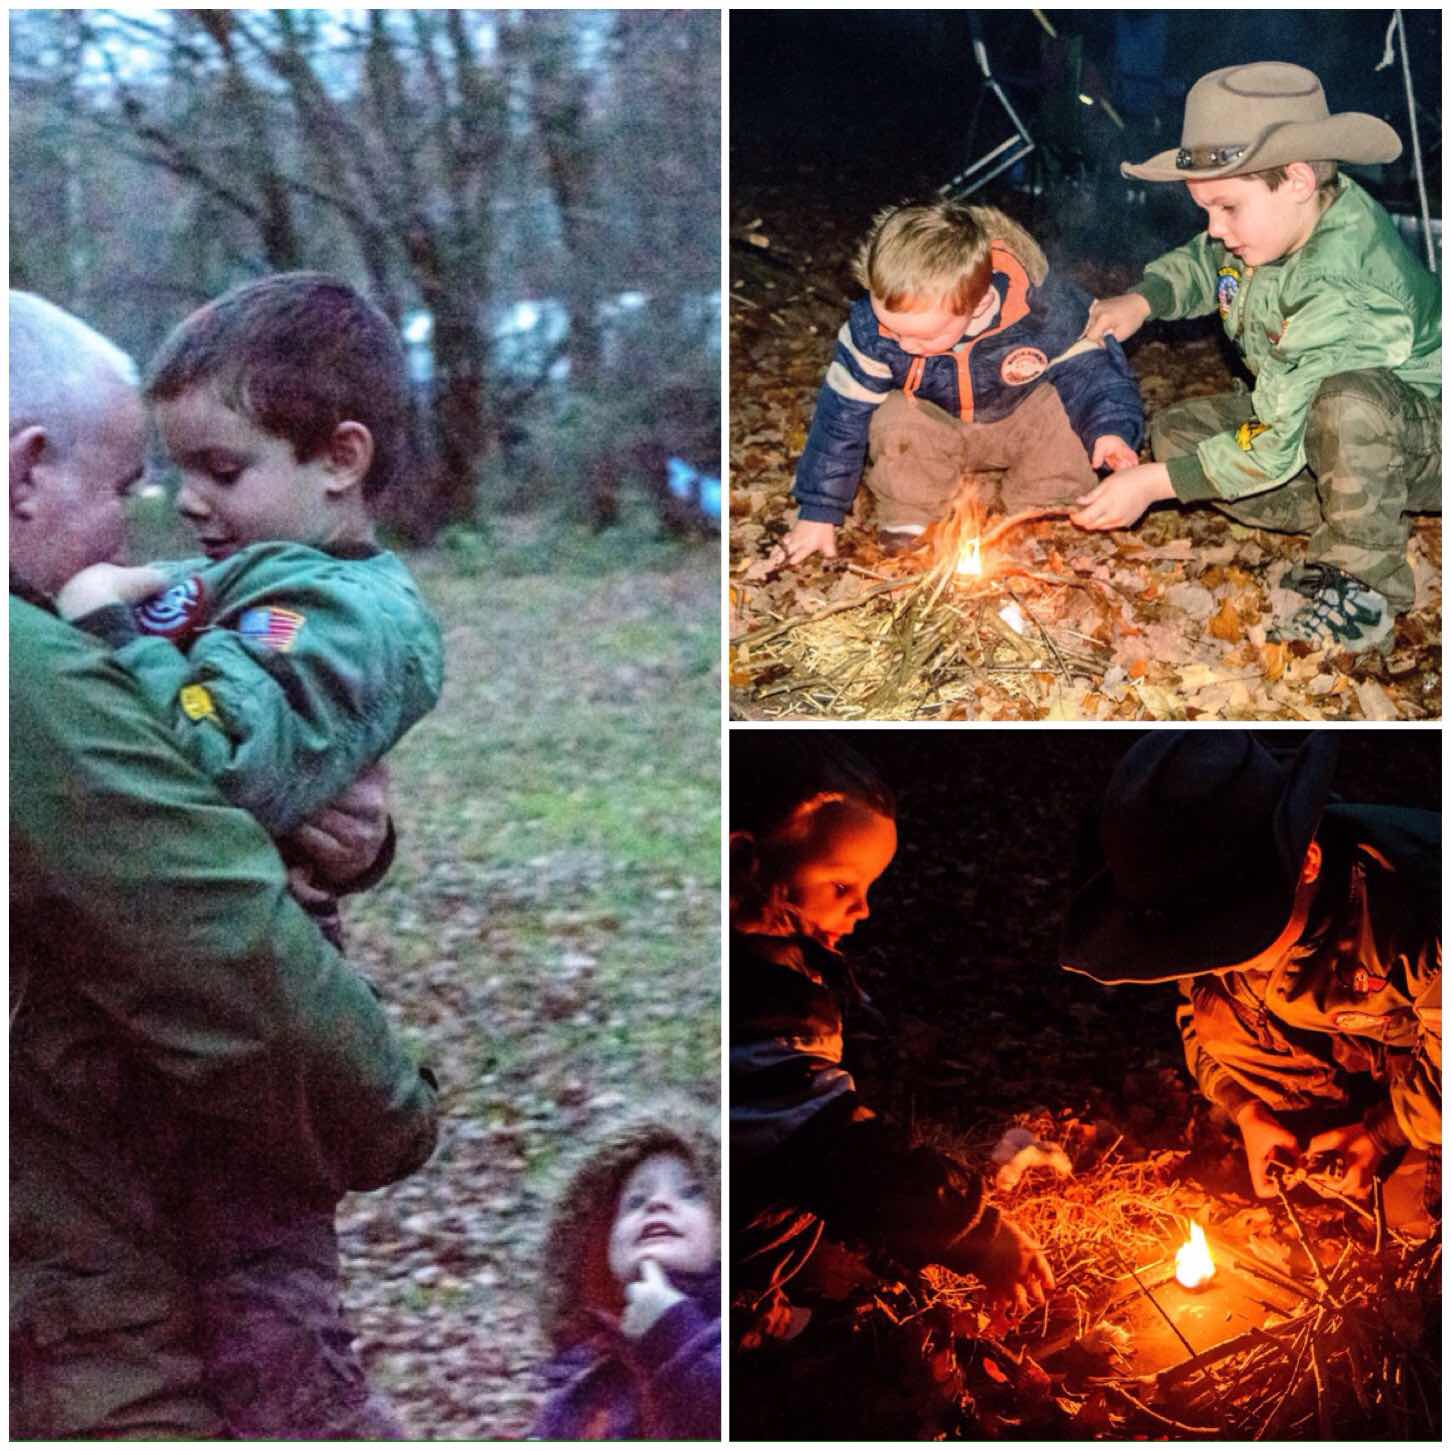
Later on the boys Dad Jim turned up with David’s little brother James. Jim has been a good friend of mine for many years so It was good to catch up on goings on again with him. While we were chatting the boys asked if they could light their own fire.
We spent a little while collecting some dry birch bark and small twigs and then got the Firesteels out. I also gave them some cotton wool and Vaseline to help get the fire going as everything was very damp.
It was great to watch the two lads sparking away and then slowly building up their fire until it was well lit. Needless to say when it was time for them to go home they were very reluctant to leave their well nurtured fire.
Bushcraft with the Boys
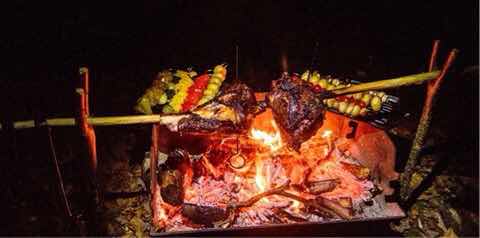
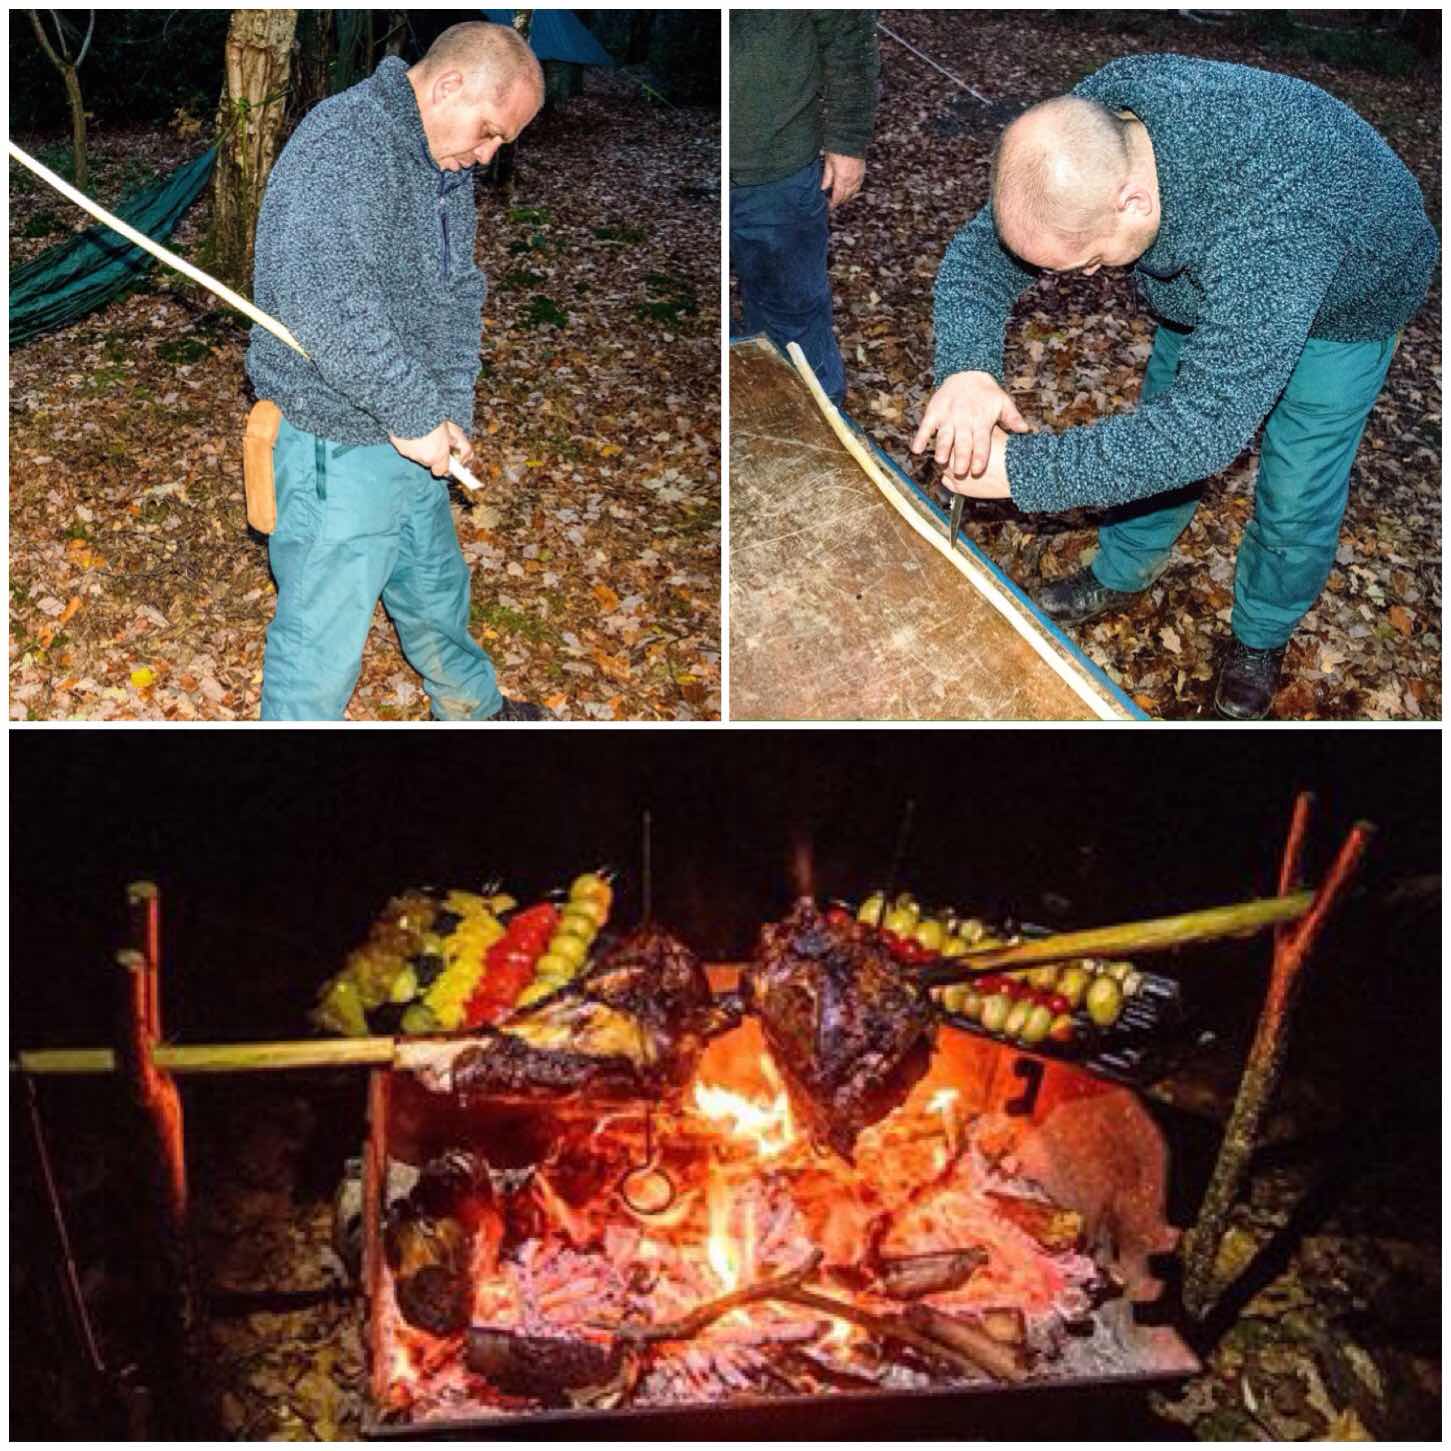
While the lads were busy making their fire Dave was busily building a spit to cook a joint of beef on. He stripped a green hazel sapling and put a split through the the middle of it with one end squared off. Then he carved a couple of flat skewers to go through the beef and the split. This method keeps the joint fixed to the hazel rod as it is turned over the fire.
Once that was done he made two uprights to sit the hazel rod in over the fire. One of the uprights had a square notch carved into it for the squared end of the hazel rod to rest in. This ensured that as we turned the it it always remained fixed in the position we had set it.
Spit making
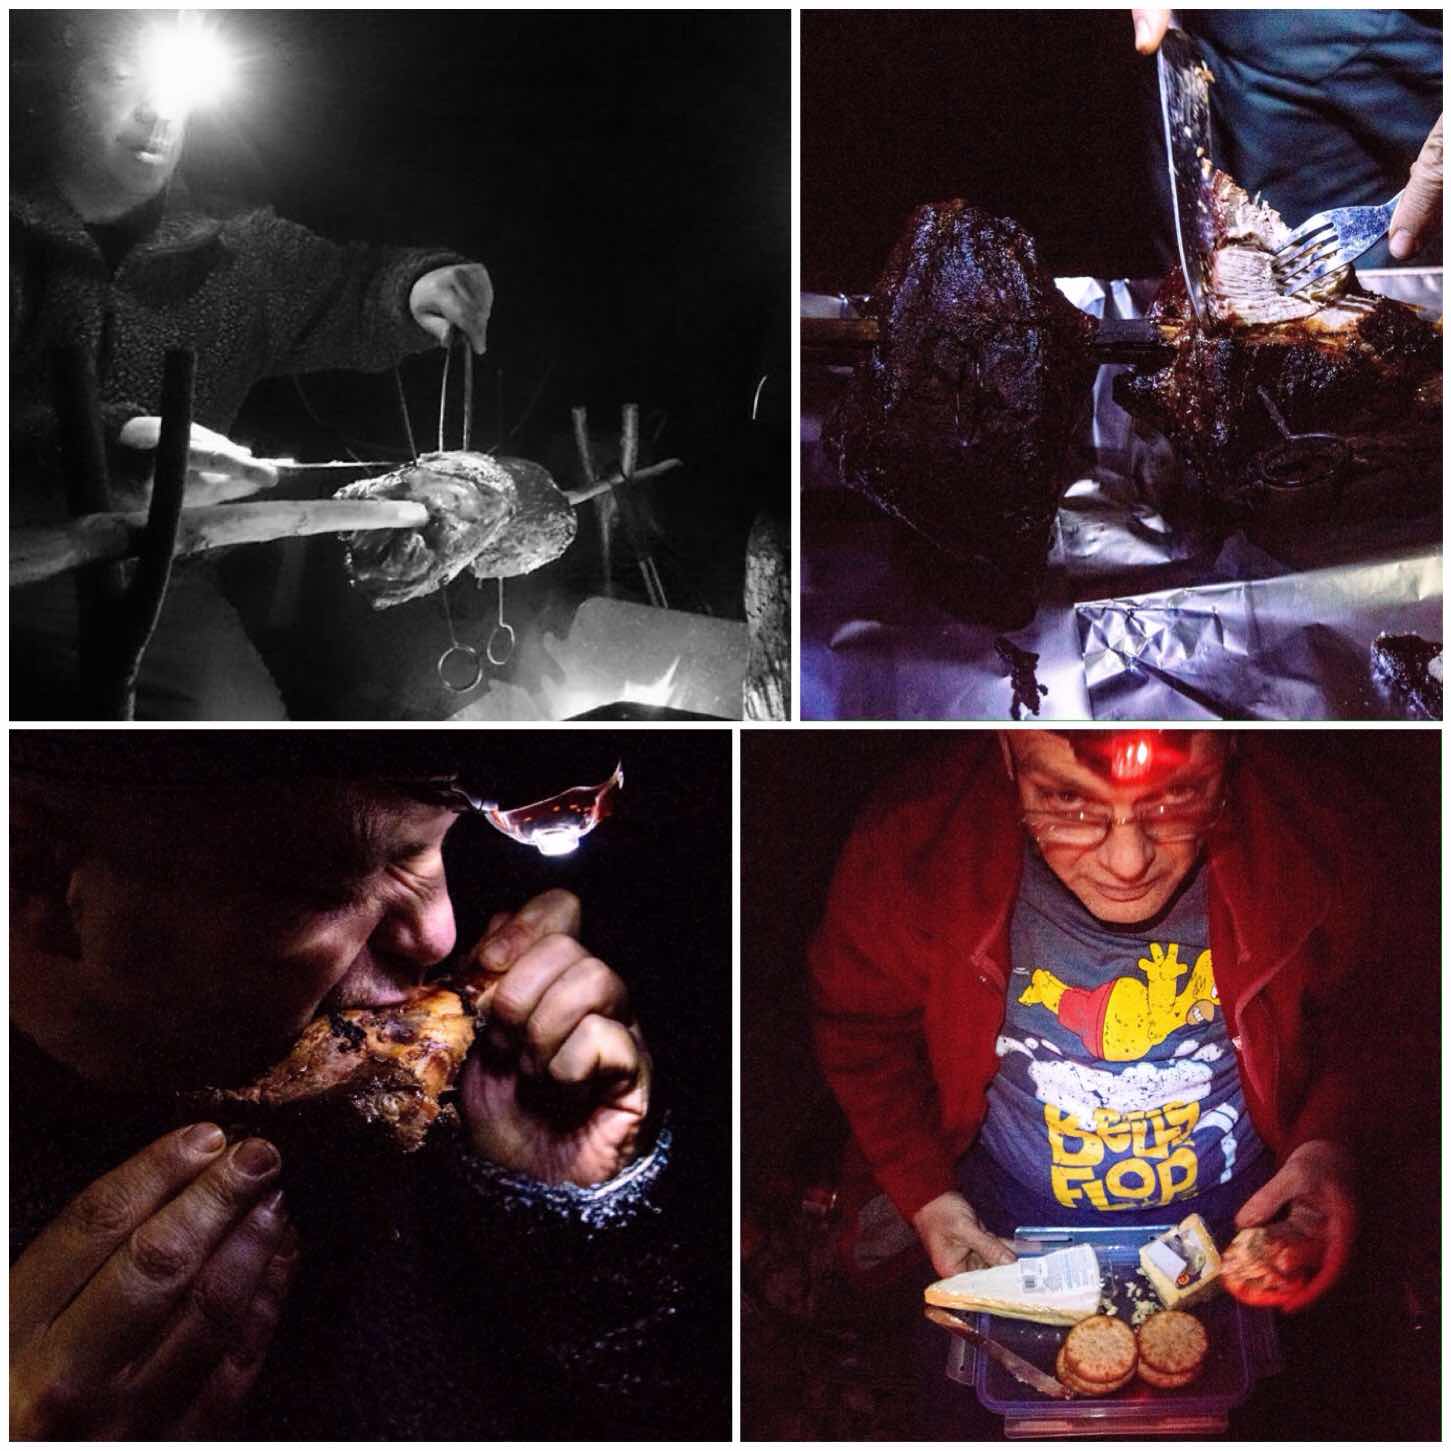
Dave’s father Alan is an excellent chef and he had been busily working away making up a whole range of different veggie kebabs. After a couple of hours turning the spit dinner was ready.
As we try to be civilised 😉 at these events the cheese board was produced by Keith and a relaxing evening was had around the fire.
Dinner time
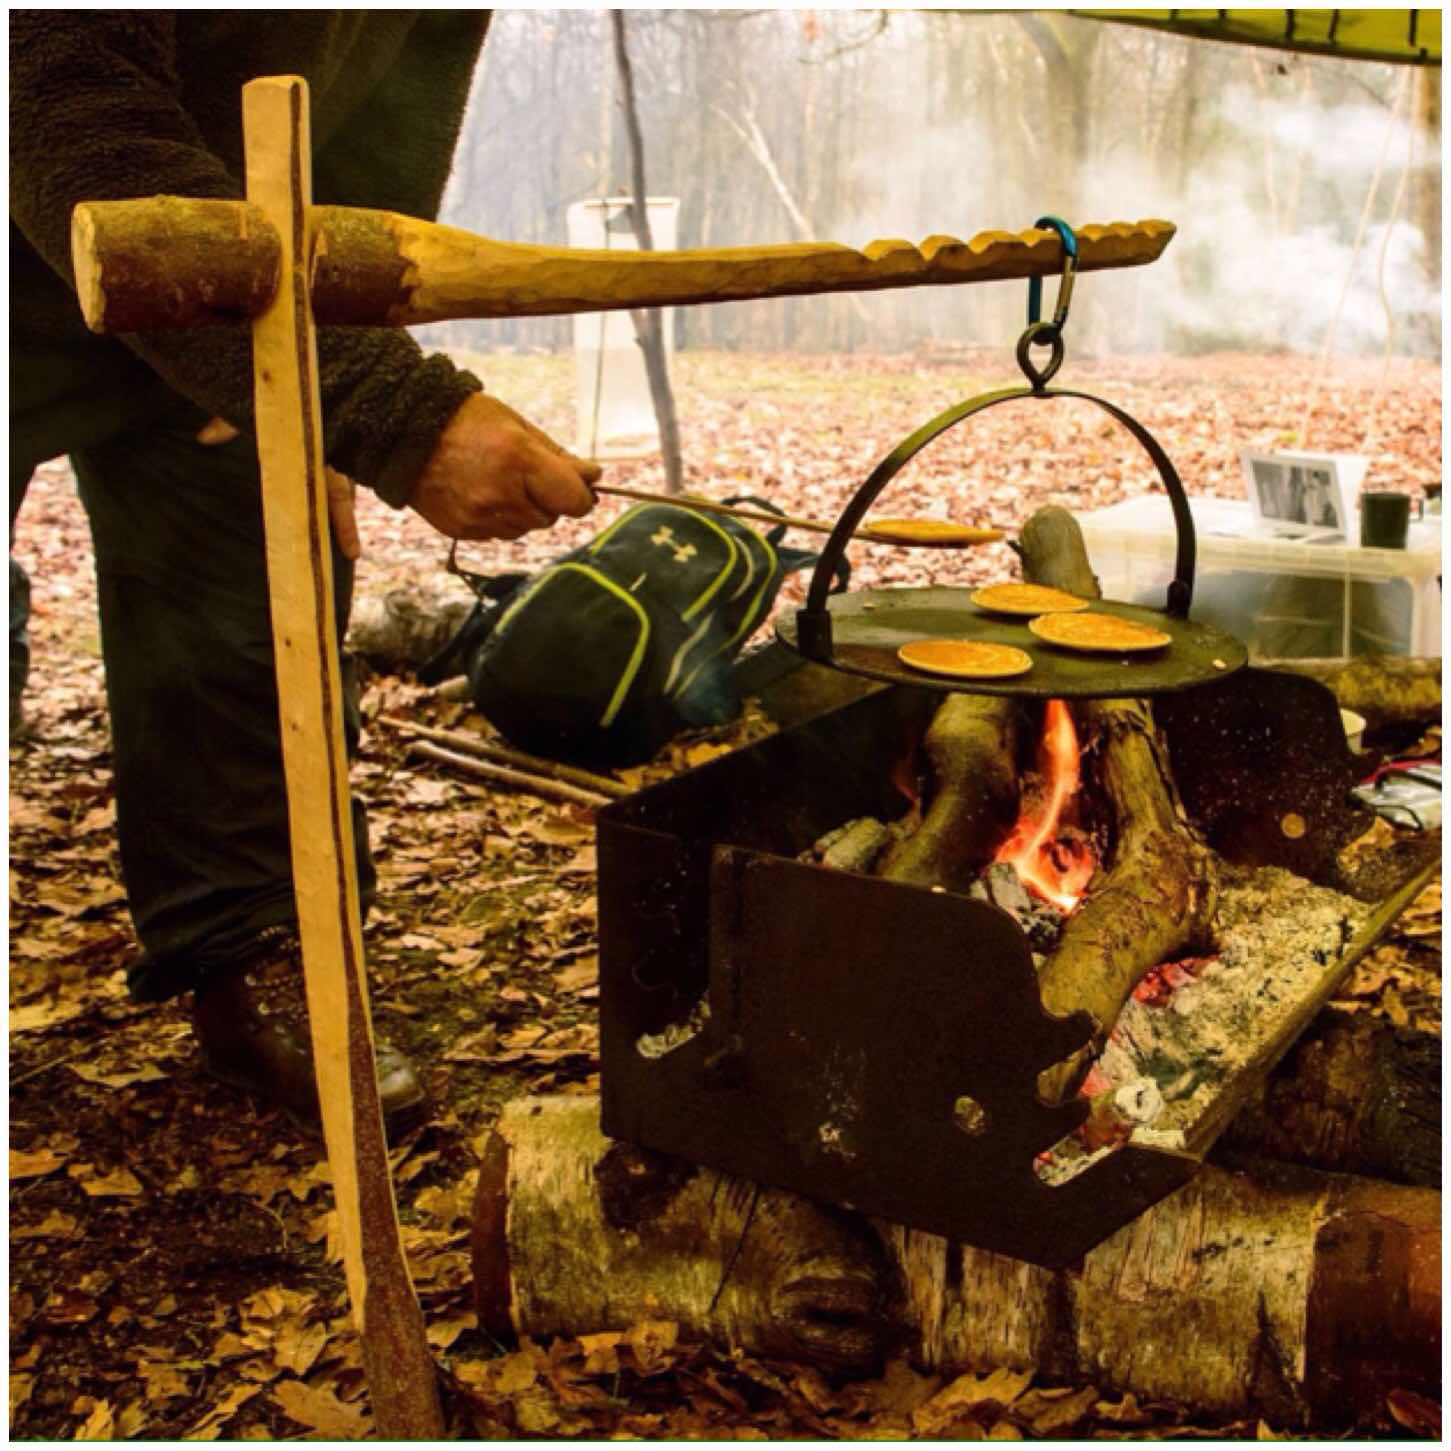
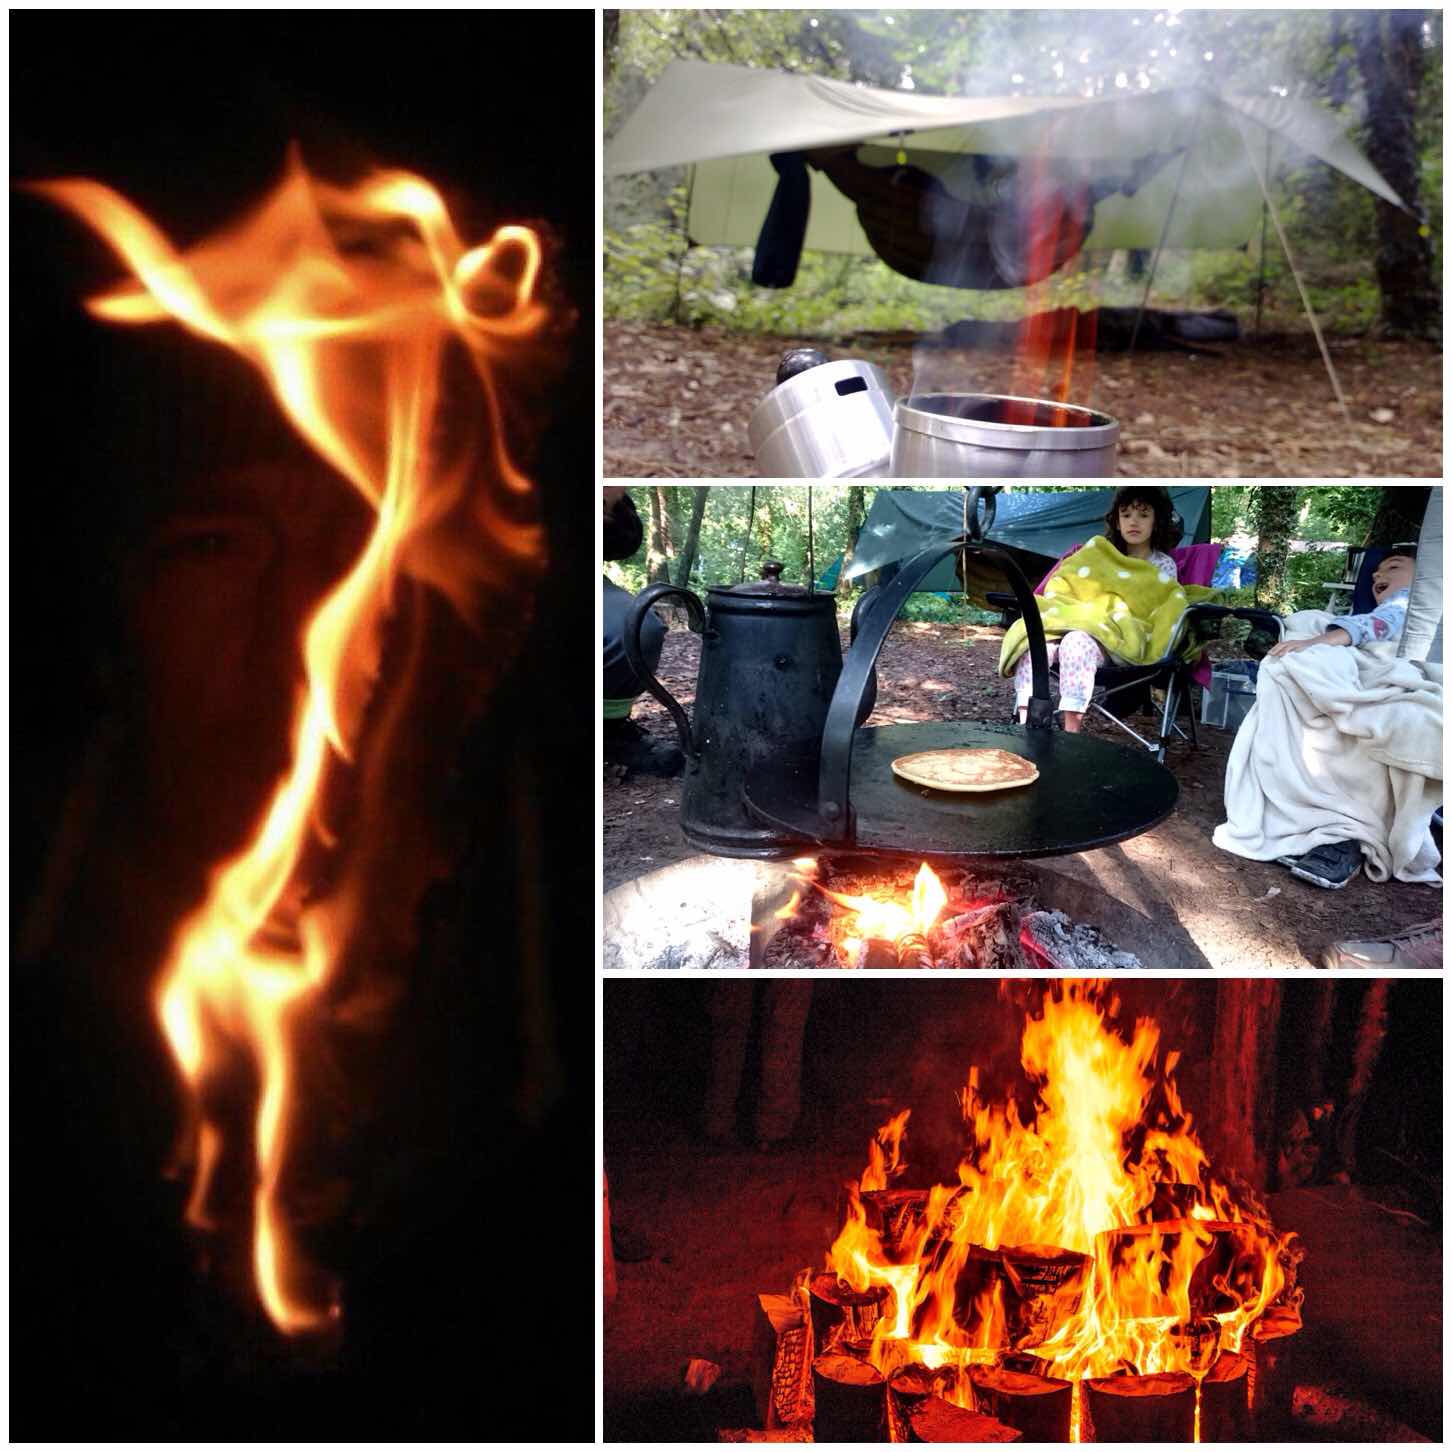
After a very restful sleep in my hammock I was awoke by our chef Alan busily working away around the fire preparing some pancakes for breakfast.
Alan was using my griddle for this job (if you do not own one I would highly recommend that you invest in one) and it was hanging off my Dovetail Crane. This crane is made out of one piece of wood, is easy to make and offers you a wide range of cooking heights.
Pancakes using the Dovetail Crane
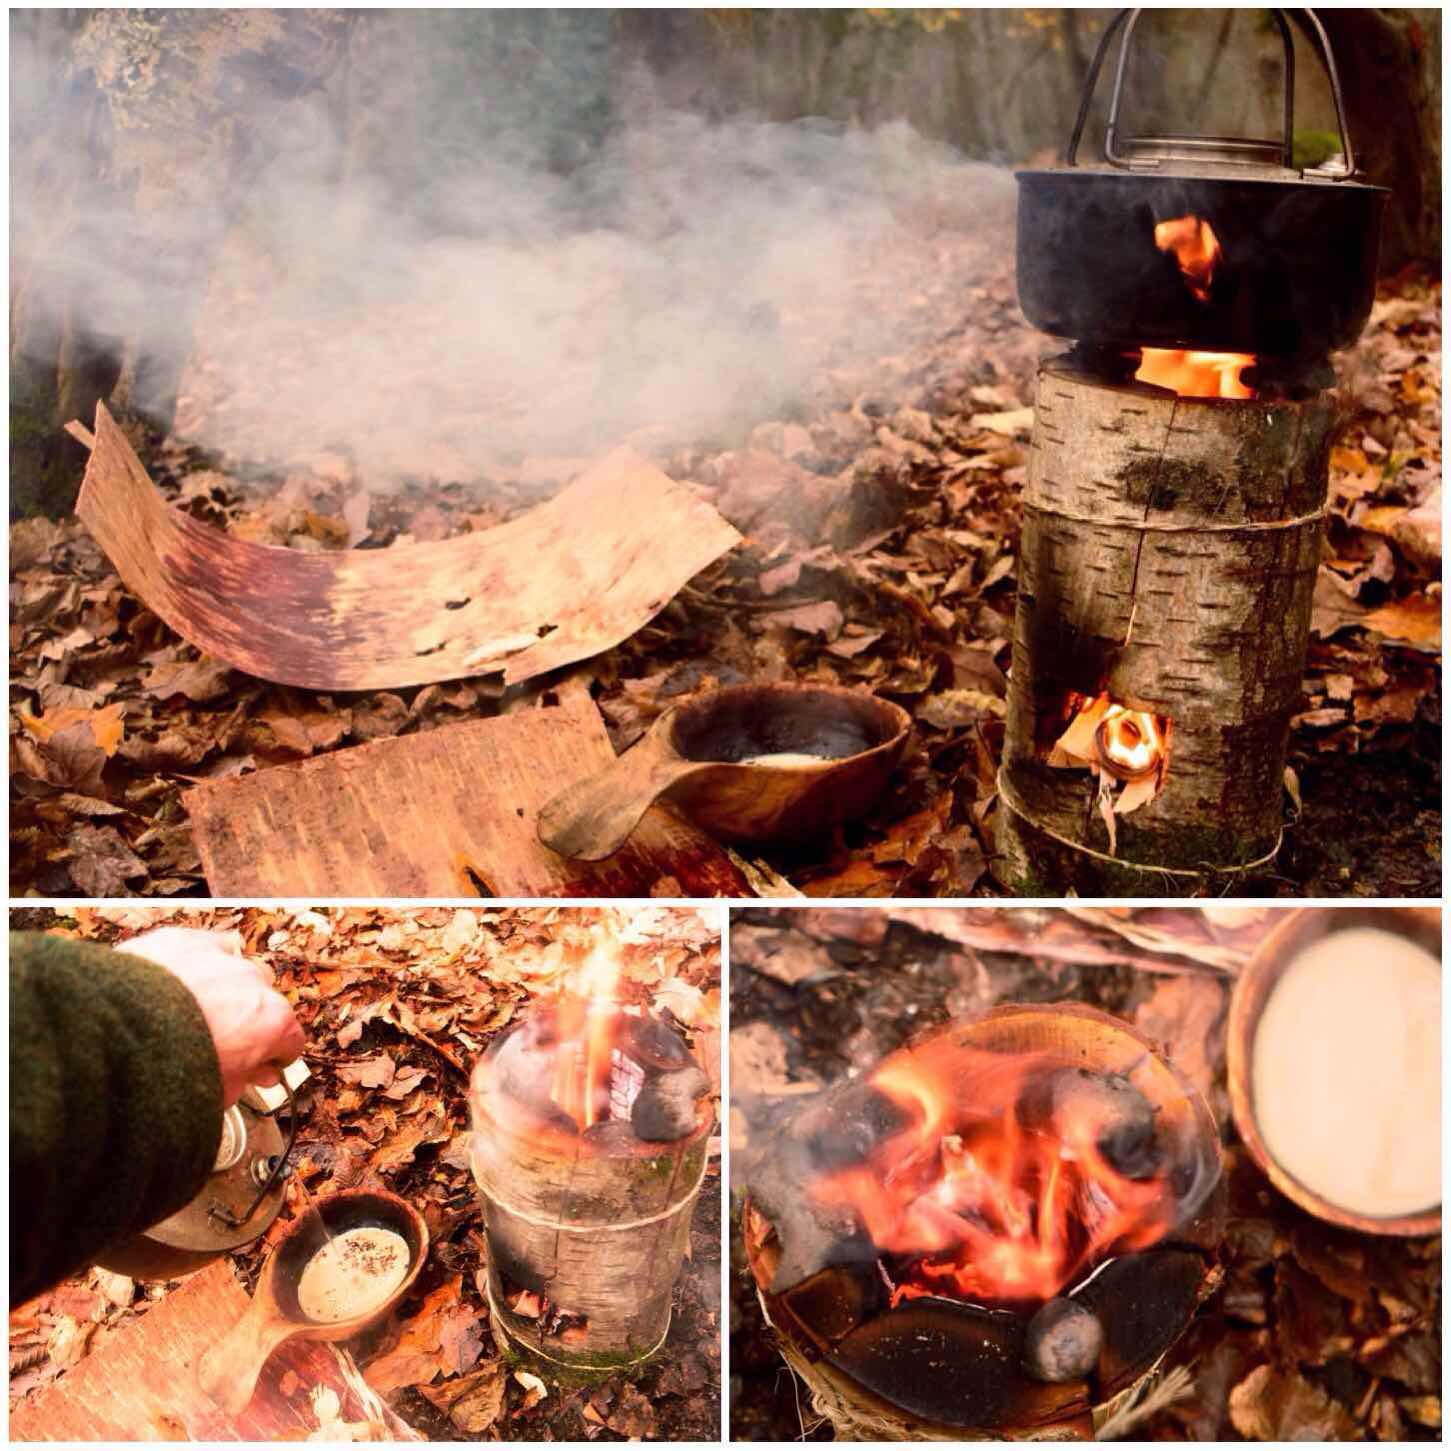
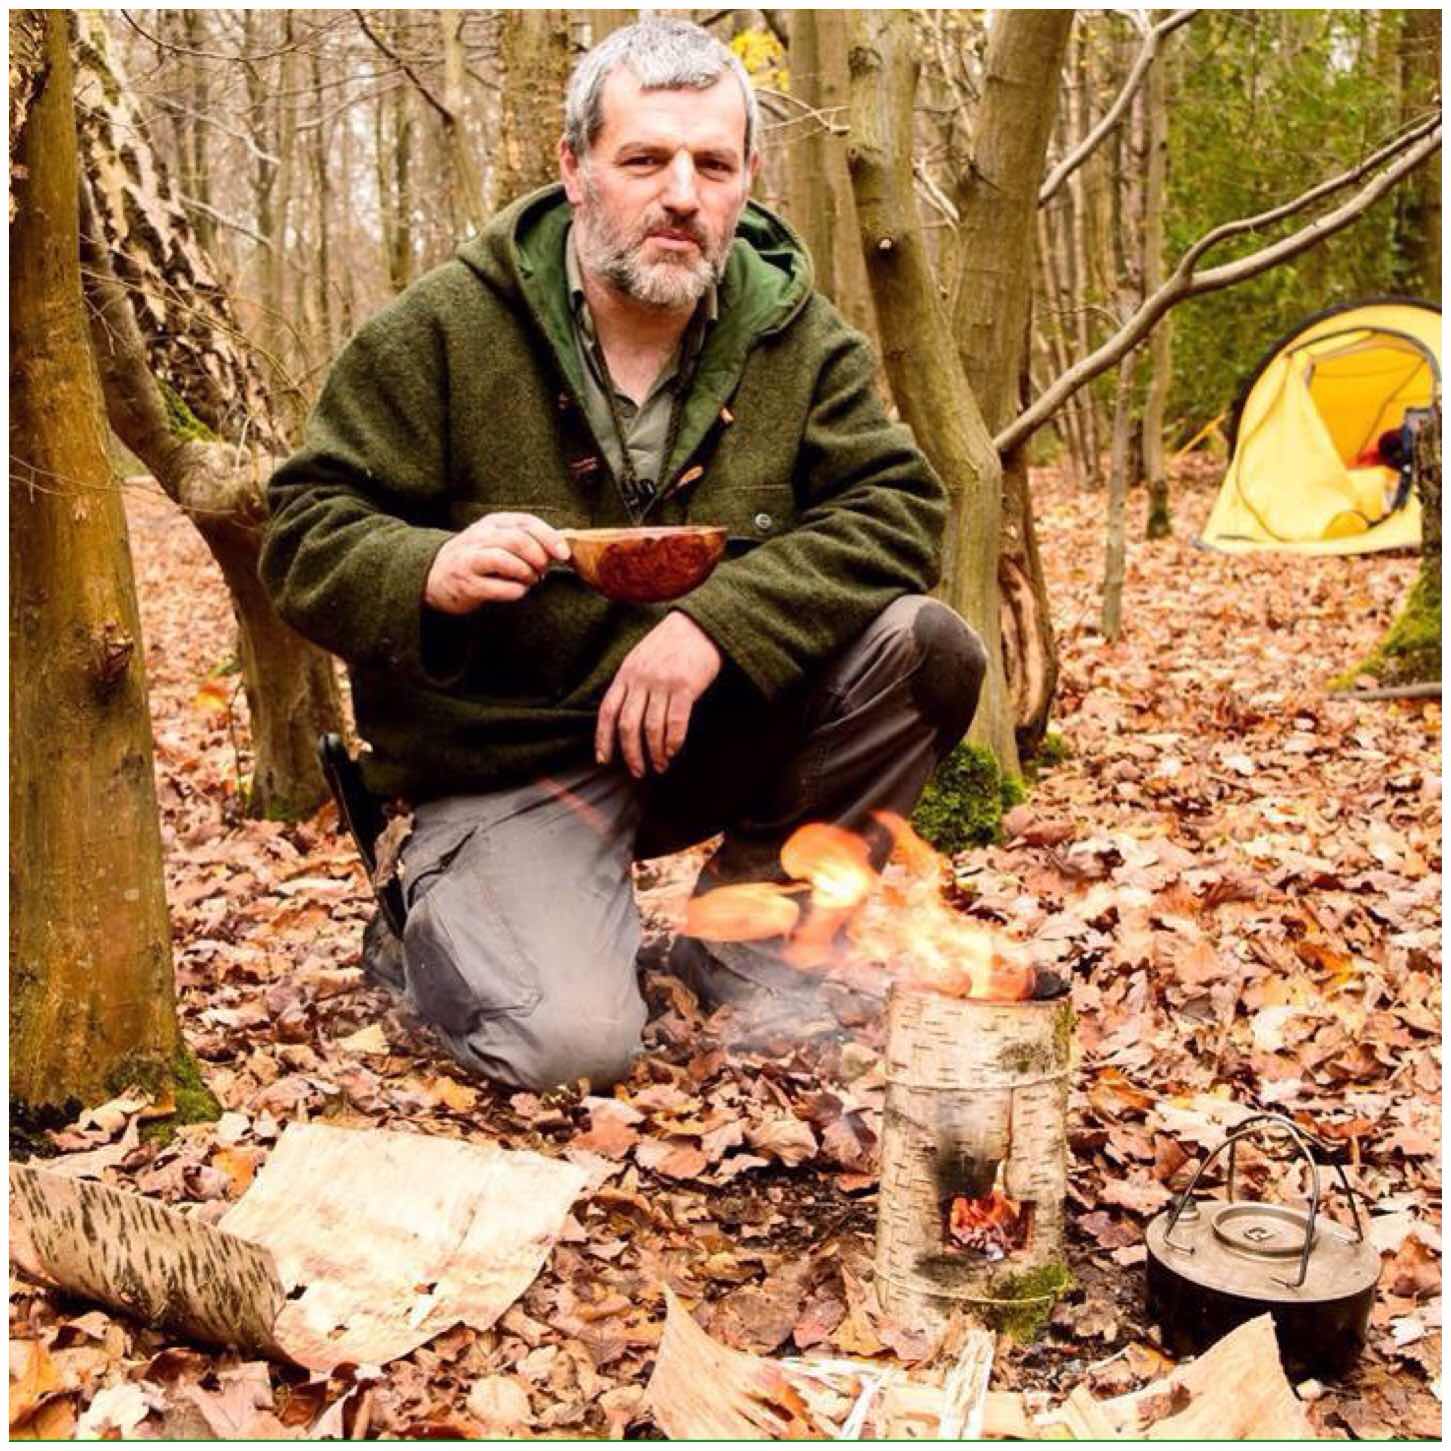
While Keith was off doing some navigation work with his cadets I spent my morning constructing a Damp Wood Log Rocket Stove. These are easy to make and great to get a fire going in damp conditions.
I must thank Jess for helping me at this stage to take a lot of my photographs as my hands were full with constructing the stove. Thankfully Jess is an excellent photographer so I did not need to worry if the right shot was being taken or not leaving me free to concentrate on the stove.
Log Rocket Stove
All that was left after this was to have a brew and pack up for the trip home. This was an excellent trip to round my year off amongst friends, eating well and celebrating the birthday of a budding bushcrafter.
The Moot will have something for you – be that firesteels, bowdrills, handrills, pumpdrills, bamboo fire saws or the secret art of lighting fire from damp tinder
Many many years ago I stumbled upon a website called Bushcraft UK and realised that there were many folk out there just like me, struggling to get to grips with all the different ways of making fire.
The results on the site only took me so far so I was even happier when I spotted a thread on the Bushmoot. This was the second Bushmoot way back in 2005.
Since then I have discovered many different ways of making fire when out and about. This post is about just some of the ways we make fire at the BCUK Bushmoot.
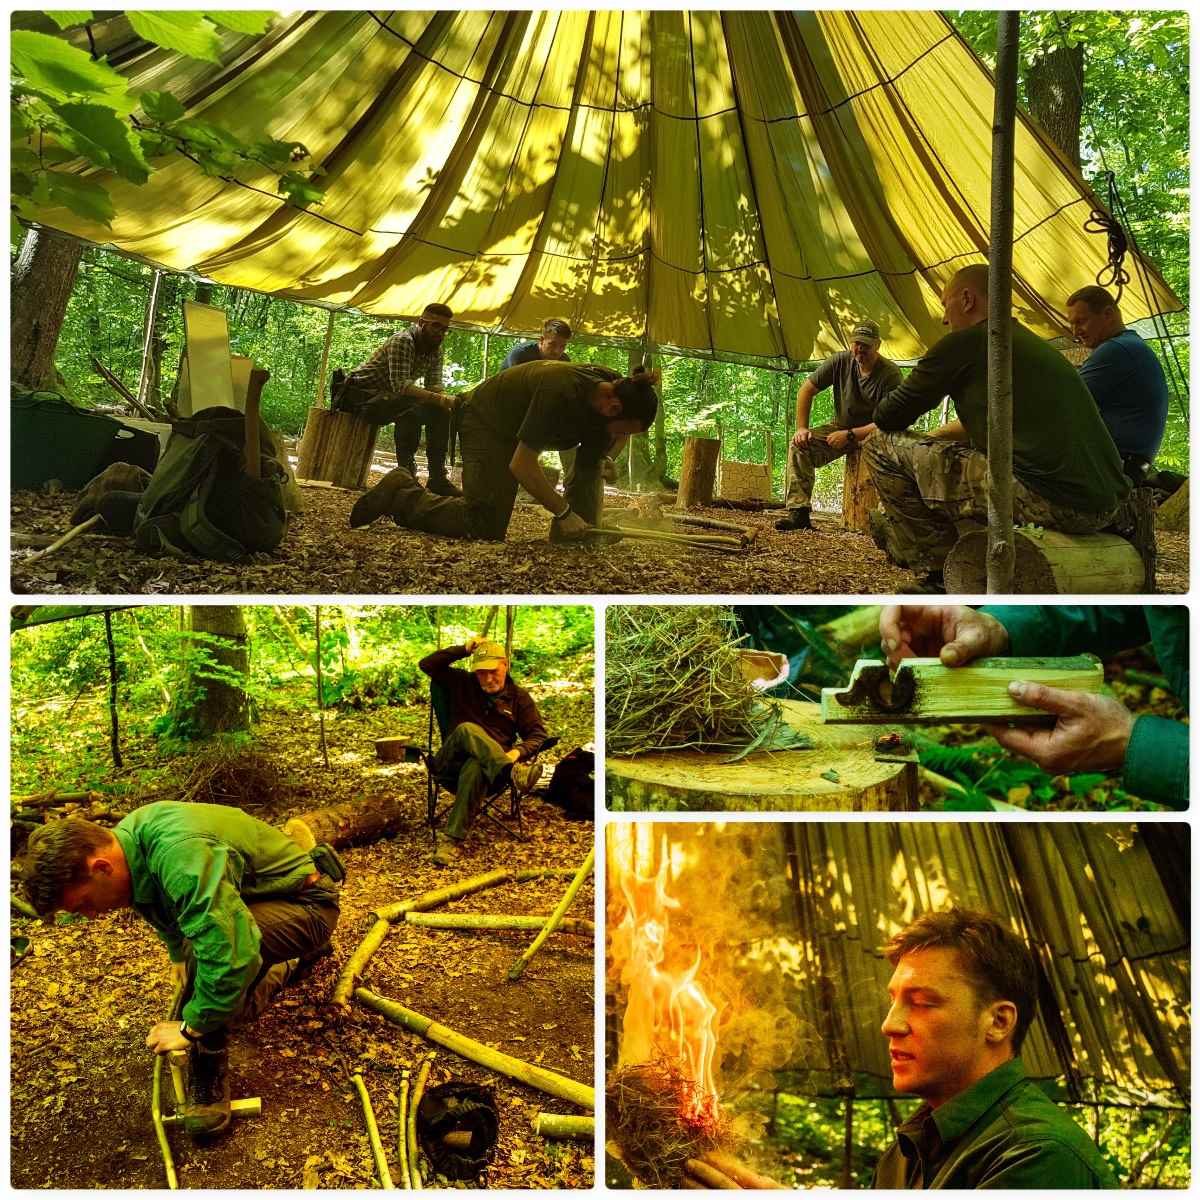
Bushmoot Fire
Firesteels
One of the most common methods a bushcrafter will use to light a fire is a Firesteel, so there are plenty of people willing to share with you how they use theirs and explain what tinders they use.
We have included the use of Firesteels into our ‘Starter Course‘ at the Moot. They are easy to use and the kids love them. When teaching very young kids (pre school) I liken them to creating Fairy lights and this seems to catch the children’s imagination.
The first person to teach me to use a Firesteel properly at the Moot was Kevin Warrington (Laplander’s Natural Lore Blog) and after I attended his bowdrill class he asked me to come back and assist him with fire-making the next year. We have been good friends ever since and I have to thank Kevin for getting me started on the road to instructing others in the world of bushcraft.
Fairy Lights
The Starter Course
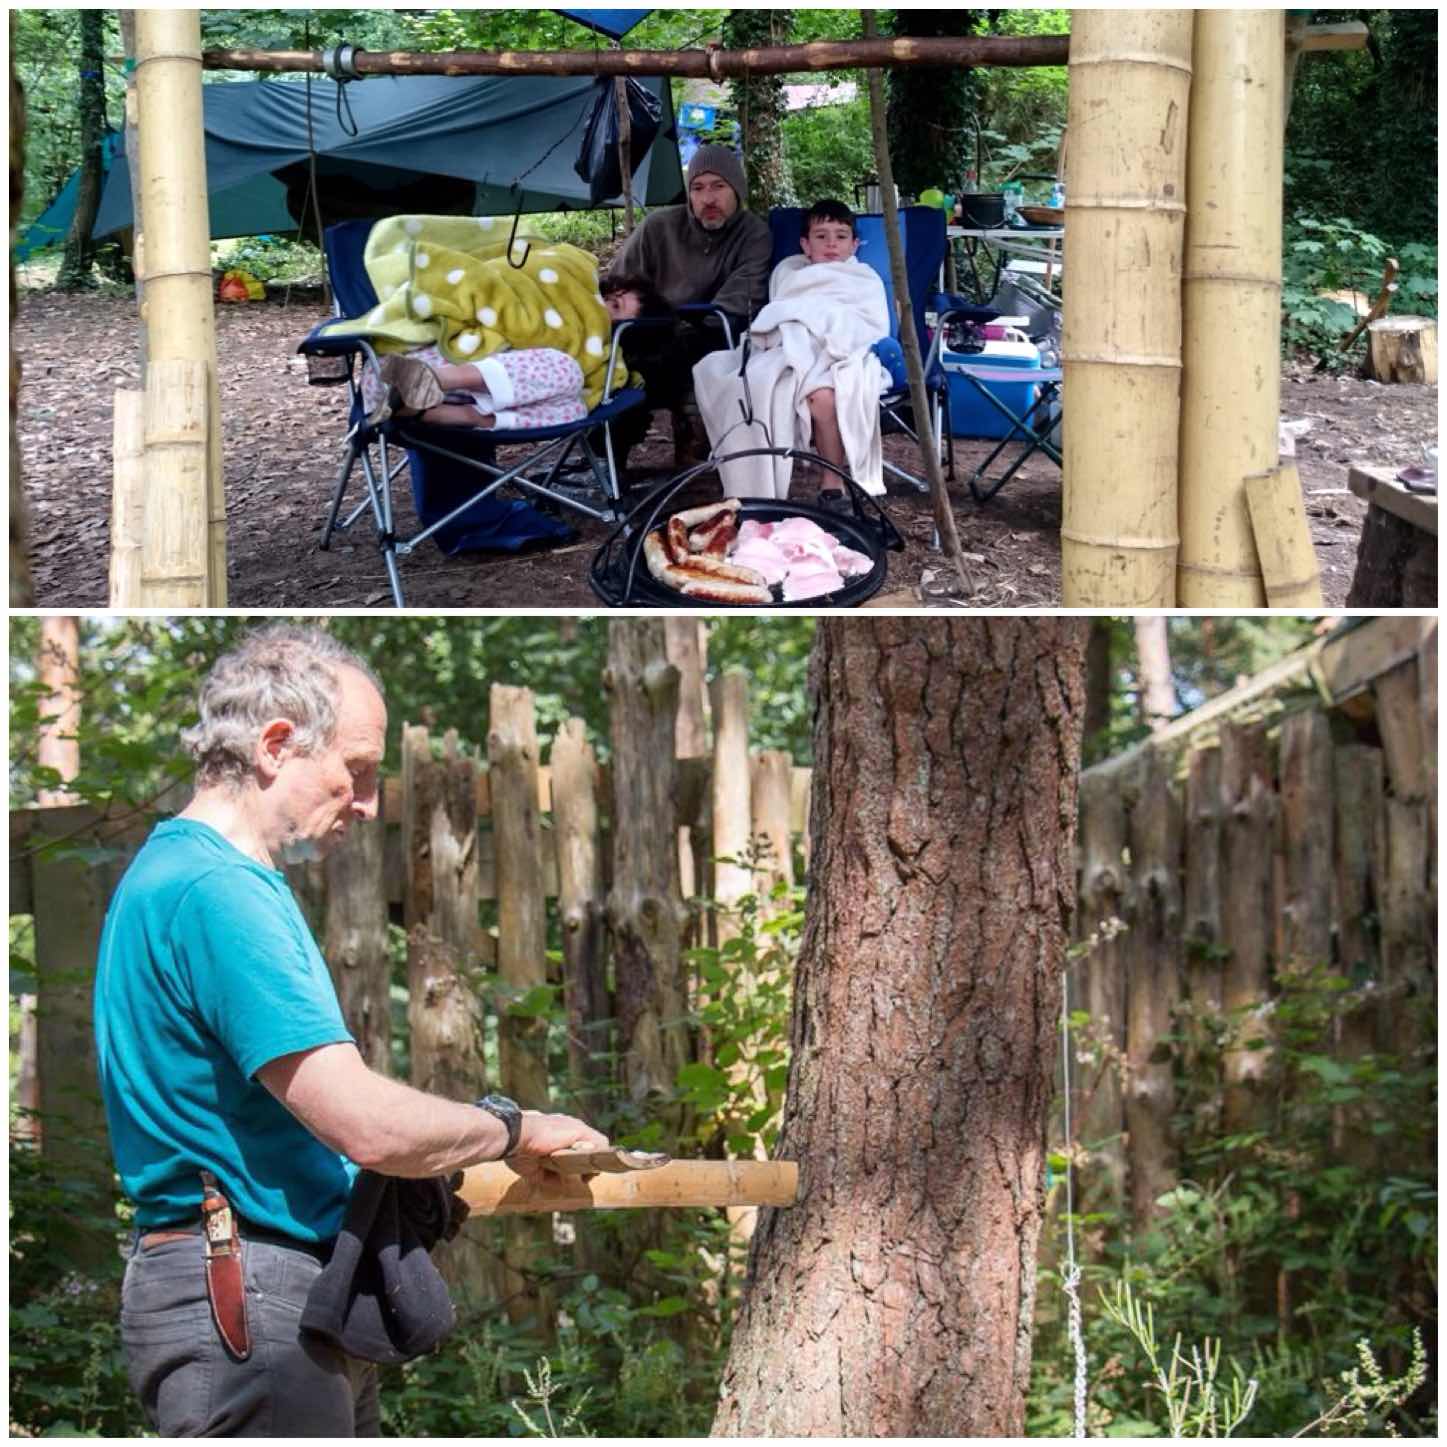
The Starter course at the Moot is not just about lighting a fire, it is also about making anyone preparing and maintaining a fire, and just as importantly it is about putting a fire out safely.
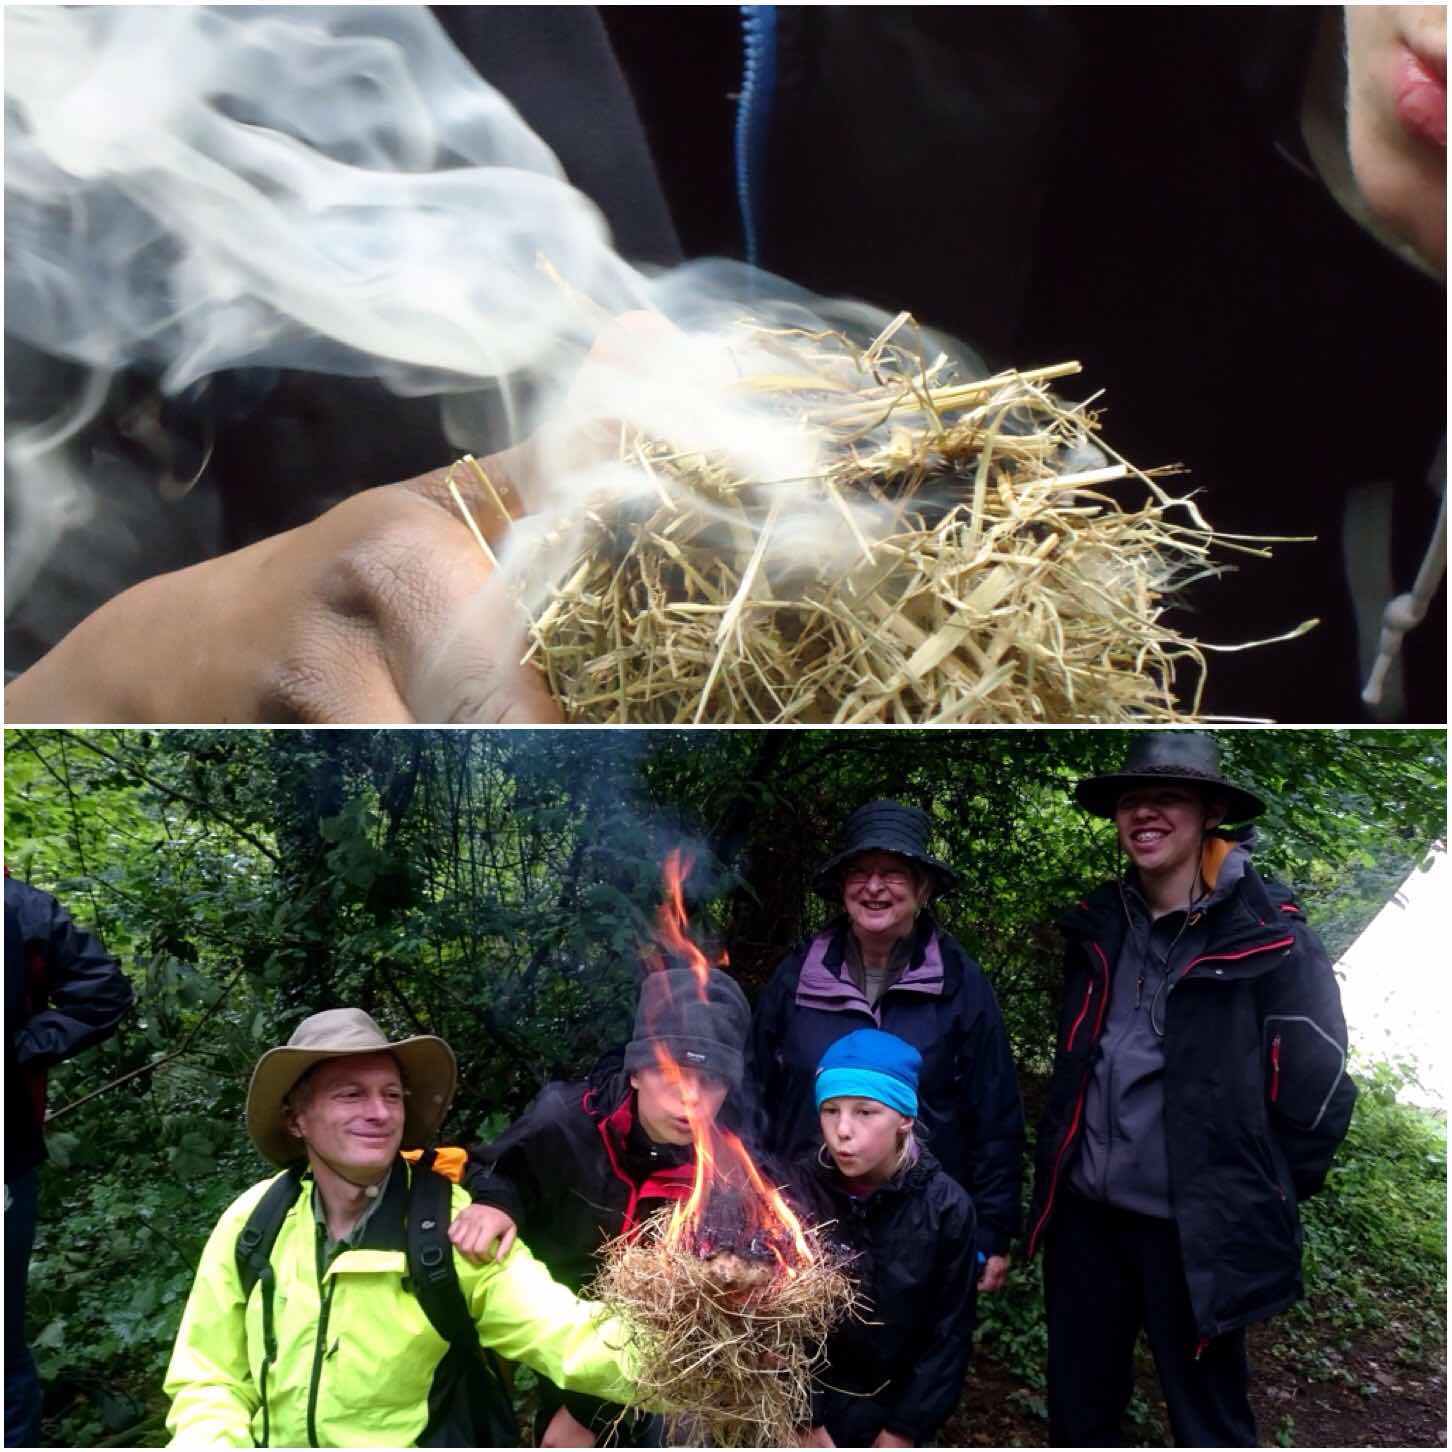
It is great to see a whole family come together to learn how to work as a team to get all the resources they need for their fire and to coax that initial burst of heat into a well-established fire.
Creating a Fire
Pump Drills
From time to time some of the instructors will bring along some of their pump drills or other similar training aids. The pump drills prove a great hit with all the kids and once they get the hang of the system they soon have them spinning madly away as they attempt to produce some smoke.
These drills were supplied a couple of years ago by Perry McGee of the National Tracking School.
Fire Drills
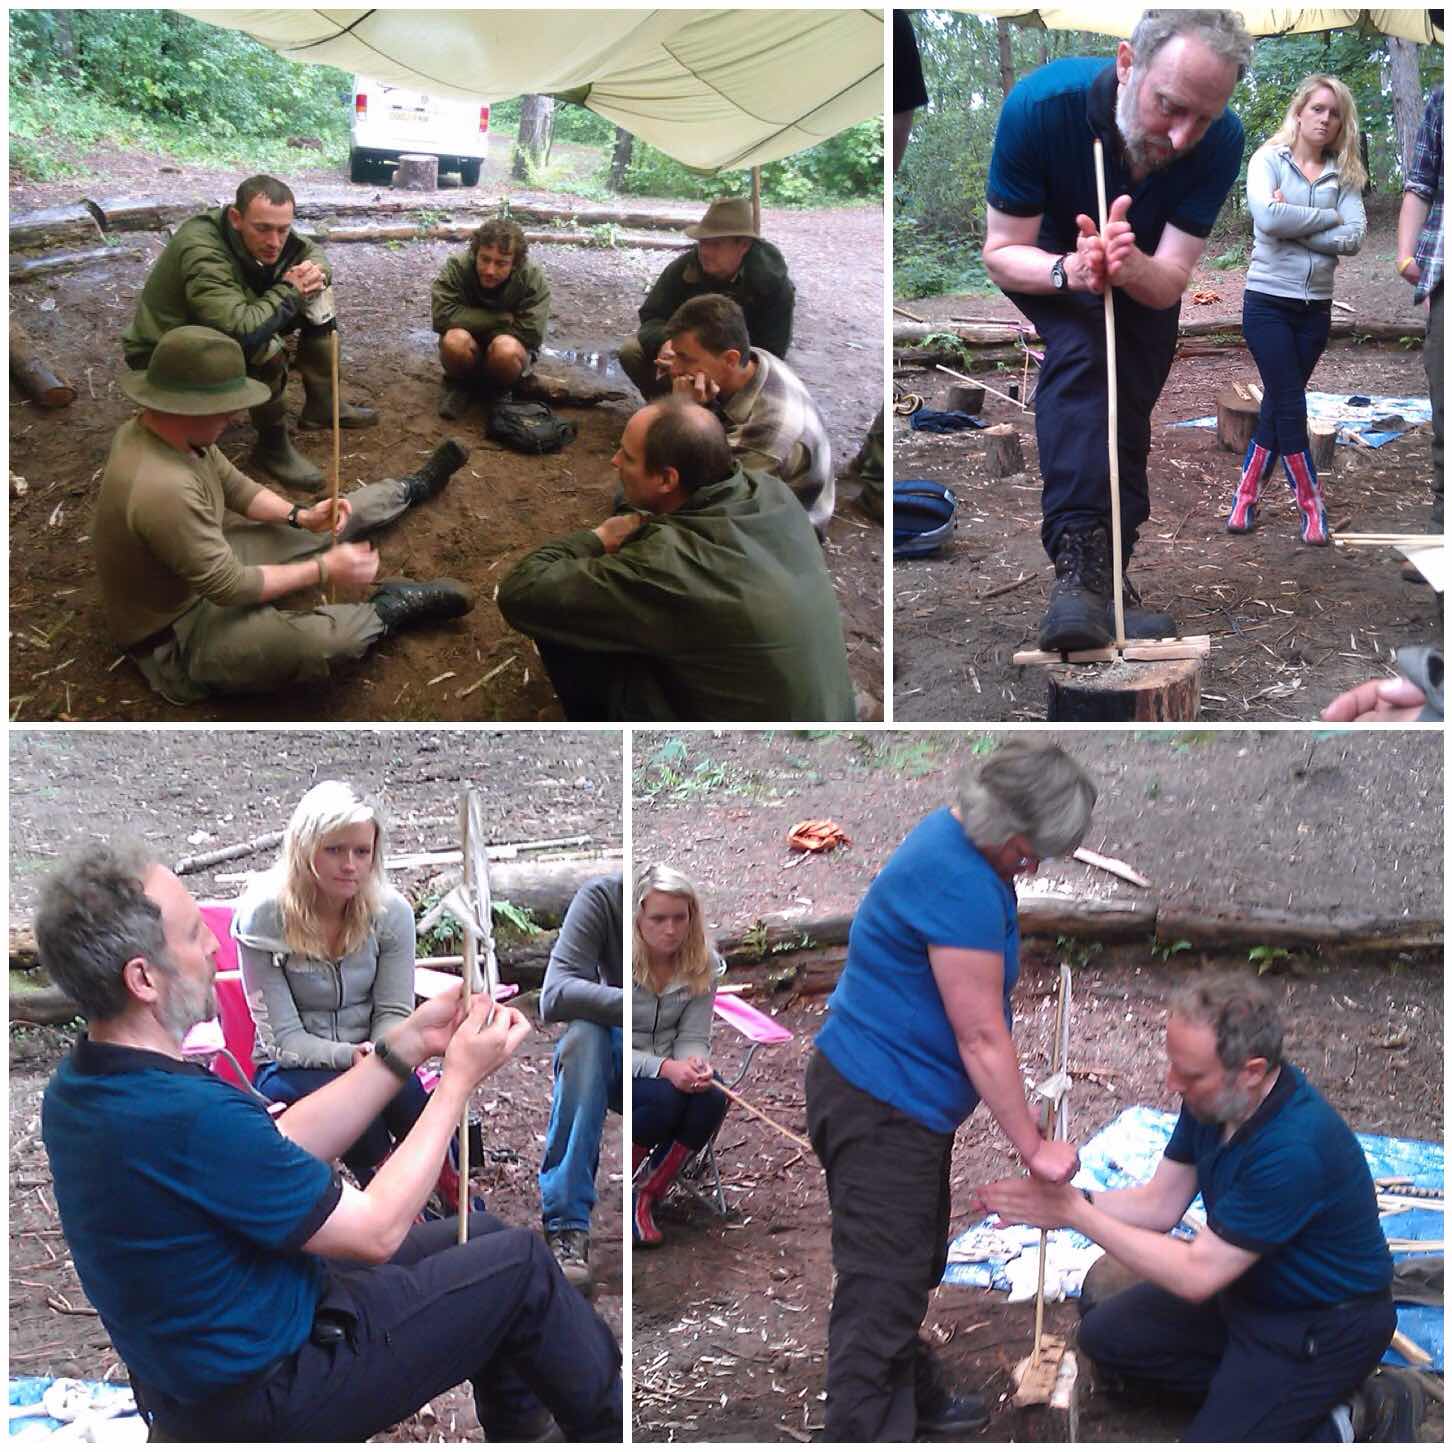
Bowdrill
A favourite of mine over the years has to be the bowdrill. I have lost count of the number of people I have helped master this skill at the Moot. One of the reasons I love teaching this skill is that there are so many factors to take into account when bowing you can easily lose a whole day when teaching it.
Recently a number of other instructors like Mark Oriel have stepped forward to teach this skill enabling me to focus on other areas to develop myself.
Bushmoot Bowdrill – Pictures courtesy of Ian Woodham
Bowdrill Methods
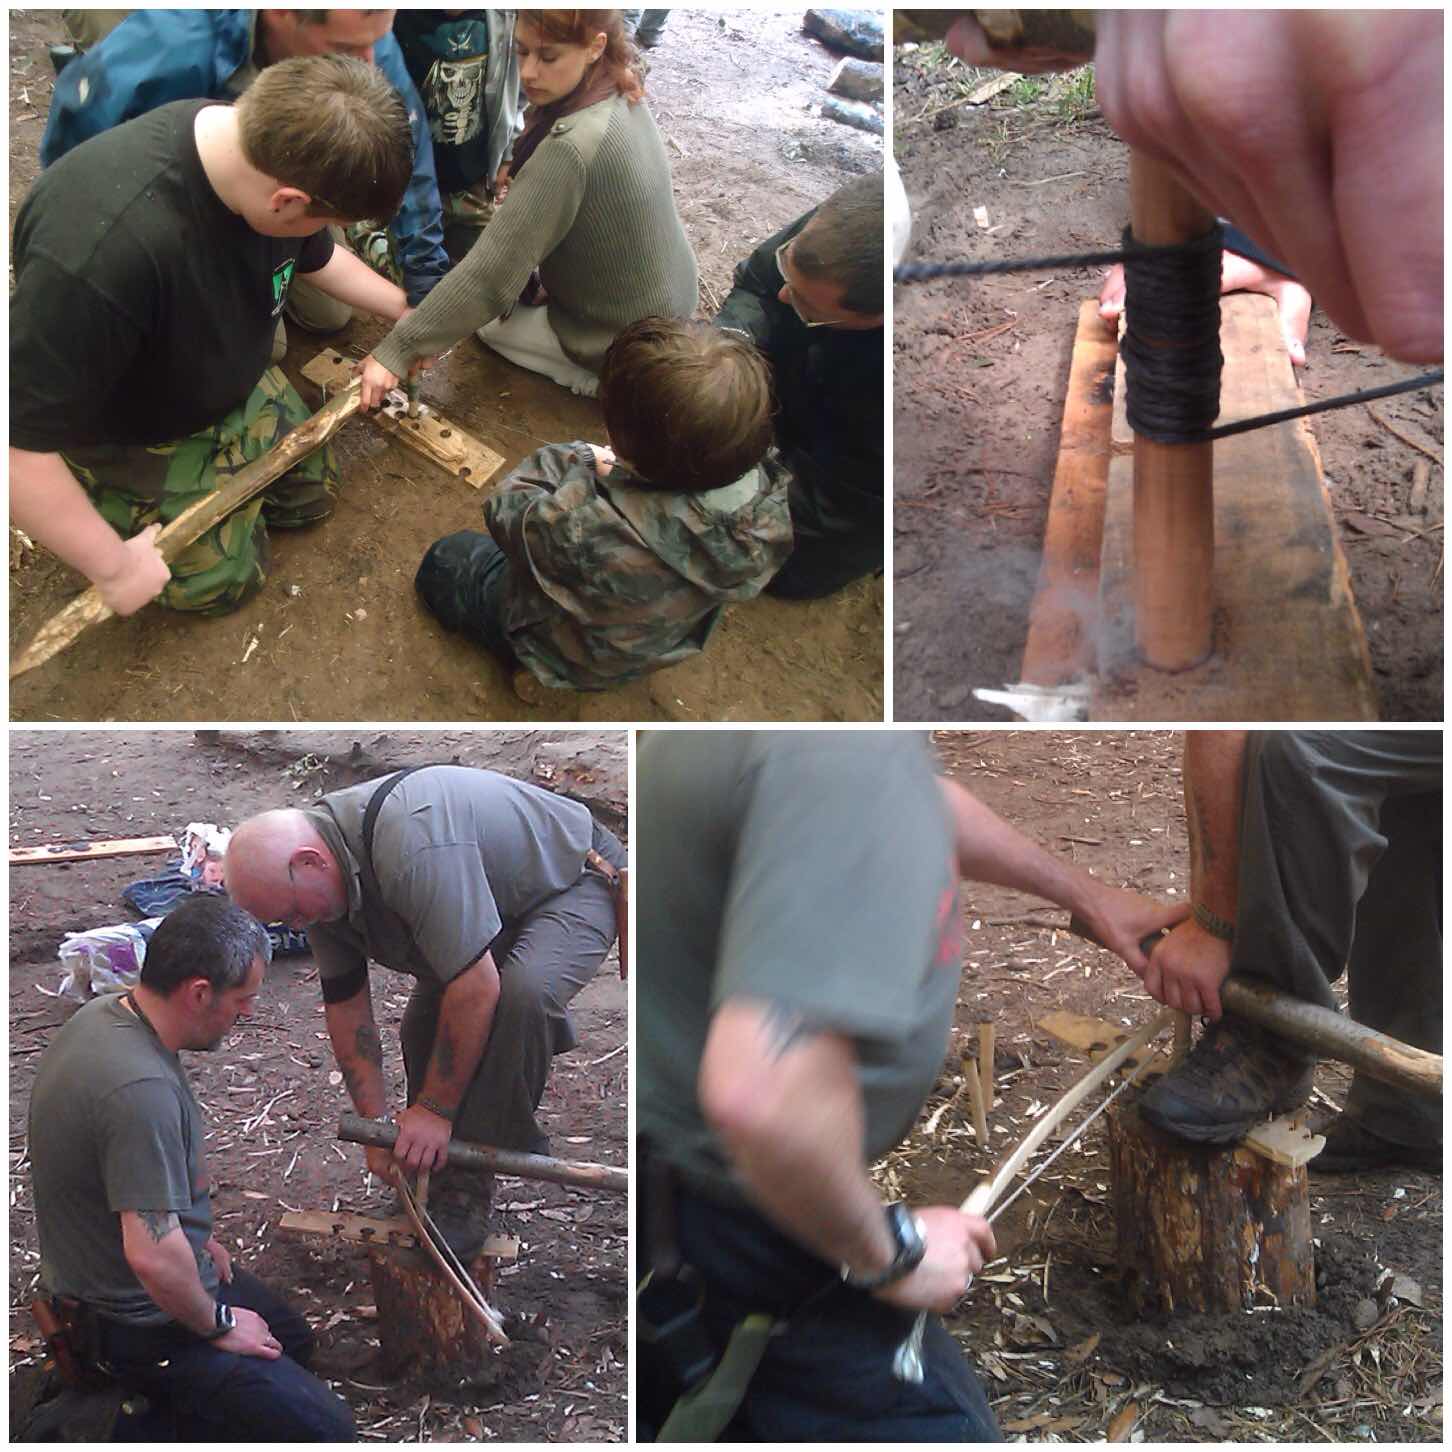
While teaching bowdrill I use two methods. One is with a single wrap of cord around the drill piece and the other is with multiple wraps (the Egyptian method).
The single wrap is easy to set up however it puts a lot of strain on the cord and if the drill and the bearing block become separated the drill piece tends to ping off to the side.
The Egyptian method relies on multiple wraps, it takes longer to set up and can be more difficult to control. It does though have the advantage of not putting so much strain on the cord and the drill does not ping off to the side when it becomes detached from the bearing block.
Single twist and Egyptian
Here is the bowdrill in action using the single wrap method.
Group Bowdrills
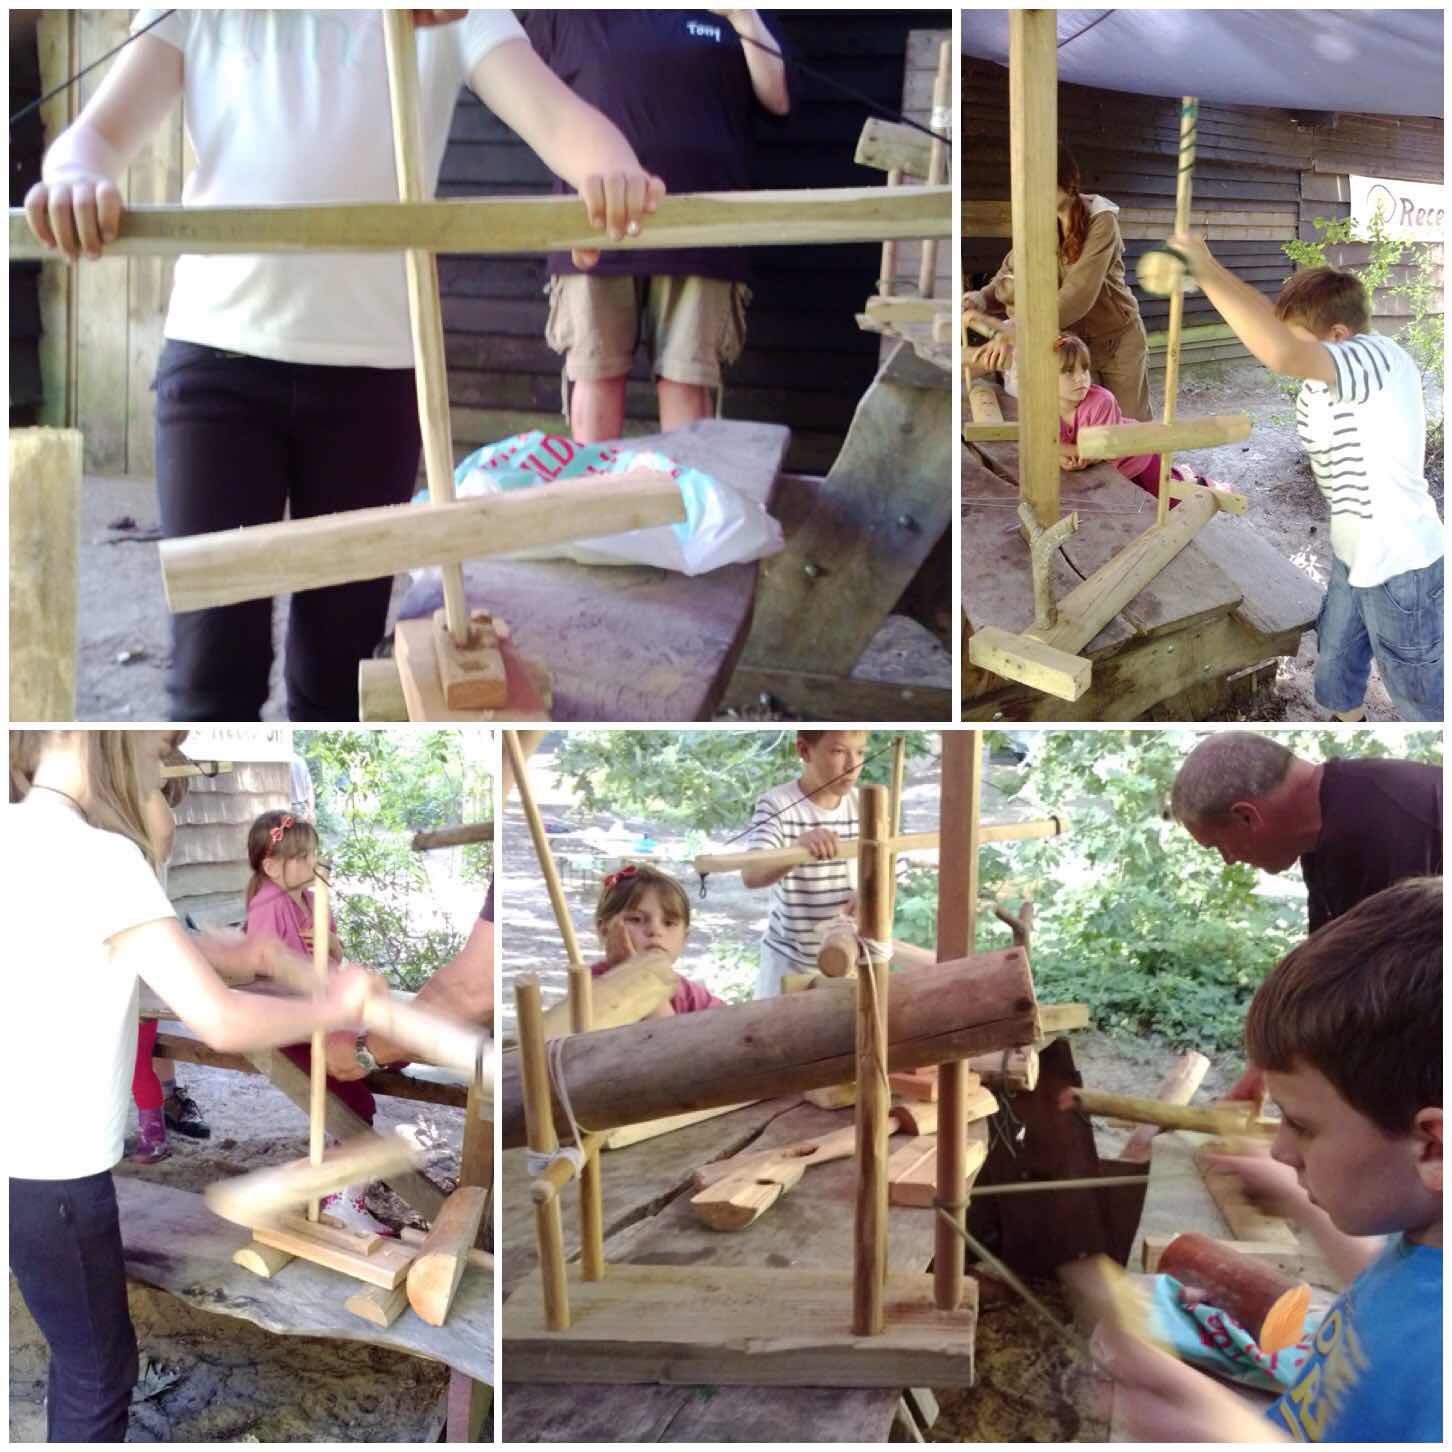
As we get a lot of children at the Moot and from time to time someone carrying an injury you need to devise other strategies for bowdrilling. Historically I believe bowdrilling was a communal affair as it requires a lot less effort from individuals to get fire when they work together.
I set up Group Bowdrill sessions for families where a couple of people can hold a large bearing block in place and a couple of others can push the bow back and forth to generate the heat required (approx 425 degrees Celsius) to produce an ember. This method usually results in a massive ember, which increases the chance of getting a flame.
Another method is to use the large bearing block with the bowyer holding one end as a bearing block with the other end dug into the ground. In the bottom two pictures you can see that Dave is also using a ’round’ of wood to raise the hearthboard making the act of bowing easier.
Teamwork
I made a short video of a bow in action with the Egyptian method at the Moot a couple of years ago. This was to show how easy it was to create an ember using this method with two people on the bow.
Handrills
A Master fire maker who has been coming to the moot for years now is Richard (Rich59 on BCUK) and what he doesn’t know about firemaking is not worth bothering about. He is an expert with the handrill and regularly brings along a range of woods such as Elder, Teasel, Buddlia, Mullein and Reedmace for students to try out.
Richard is a keen experimenter and will try out different techniques like attaching cord to the drill to see if that technique makes life easier for people.
Handrill
This is my short video on using a handrill.
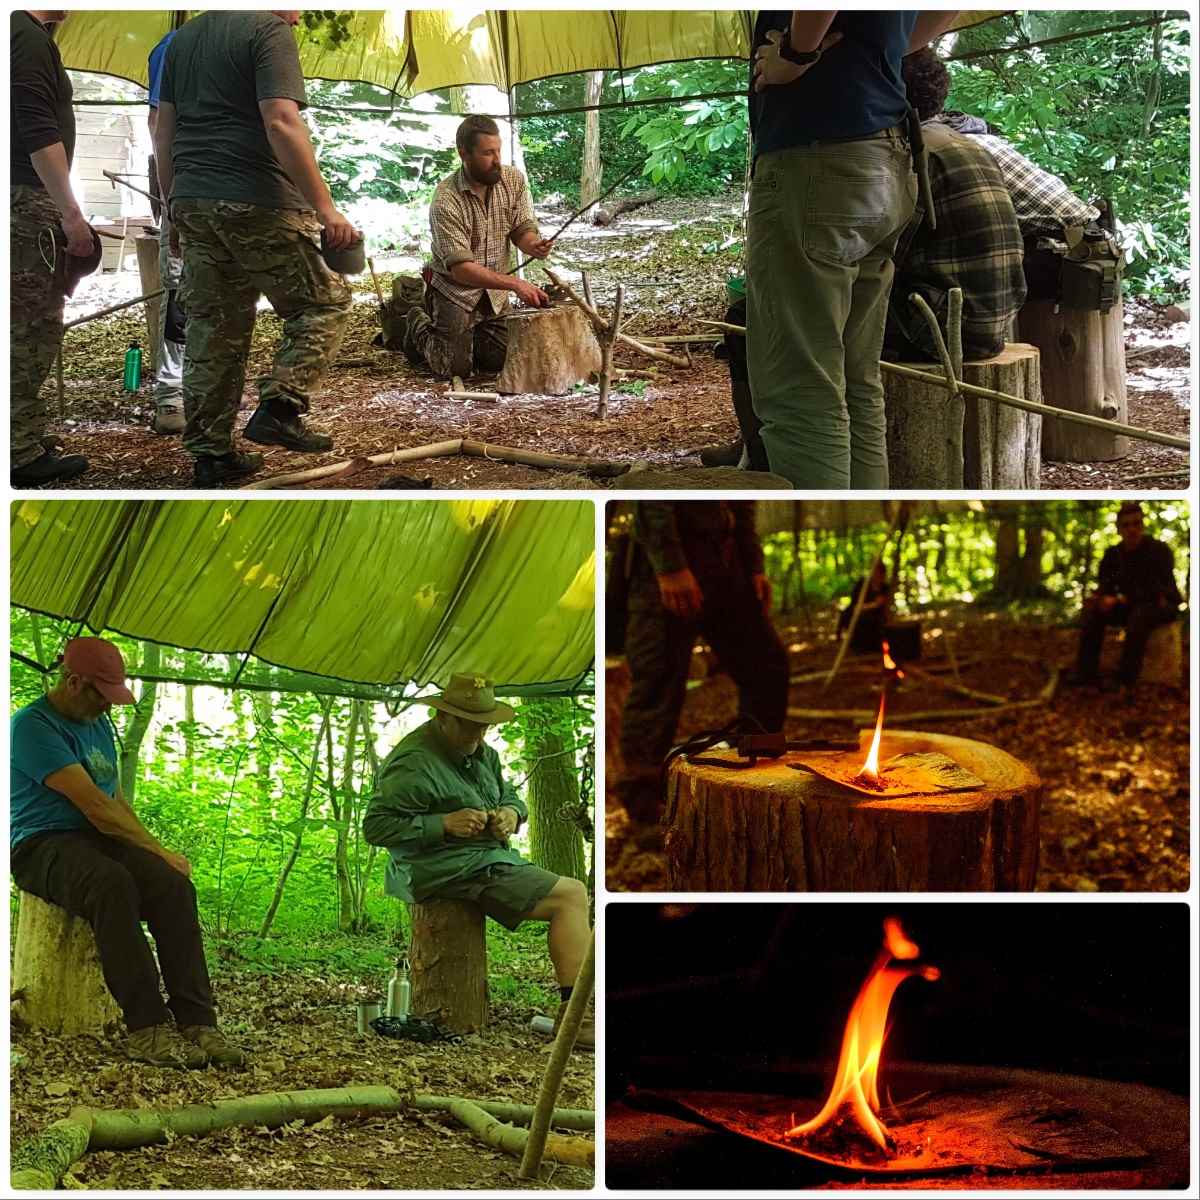
Bamboo Firesaw
This year Richard experimented with Bamboo Fire Saws. He managed to get some spare bamboo from Wayne Jones of Forest Knights (Wayne was making Bhutenese bows) and we soon had a pile prepped up around our camp.
I did not get to see Richards class as I was running one myself but the reports were all positive with successful fires being made, Maybe next year I will make time to see his class.
Bamboo Fire – Bottom picture courtesy of Andy McDonald Photography
Dry Tinder
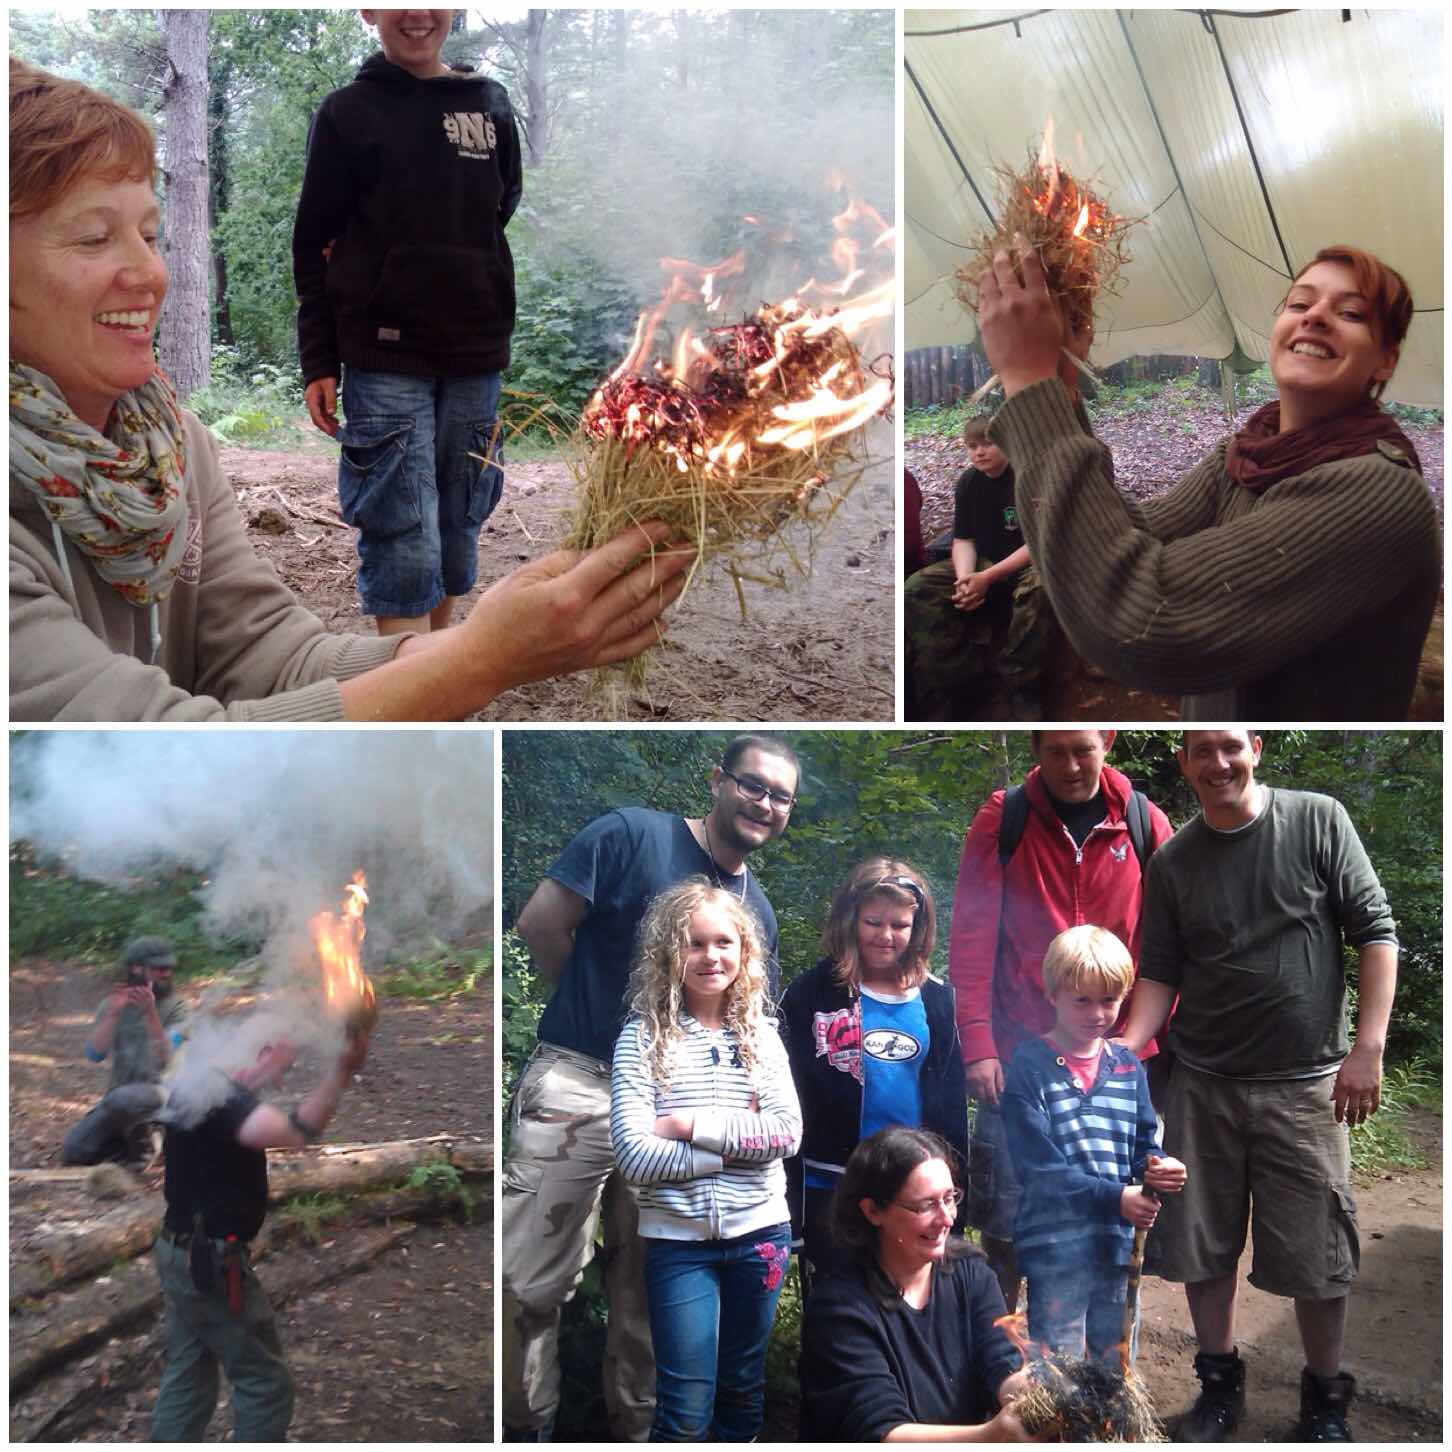
Once you have your ember created (however you do that) it is time to coax that very fragile bundle of hot dust into a fully formed ember and – with the use of whatever tinder you have at hand – to get that much sought-after flame.
It is at this stage that you can see students’ faces transform from concentration into sheer joy – one of the reasons why I love this subject.
Flamage
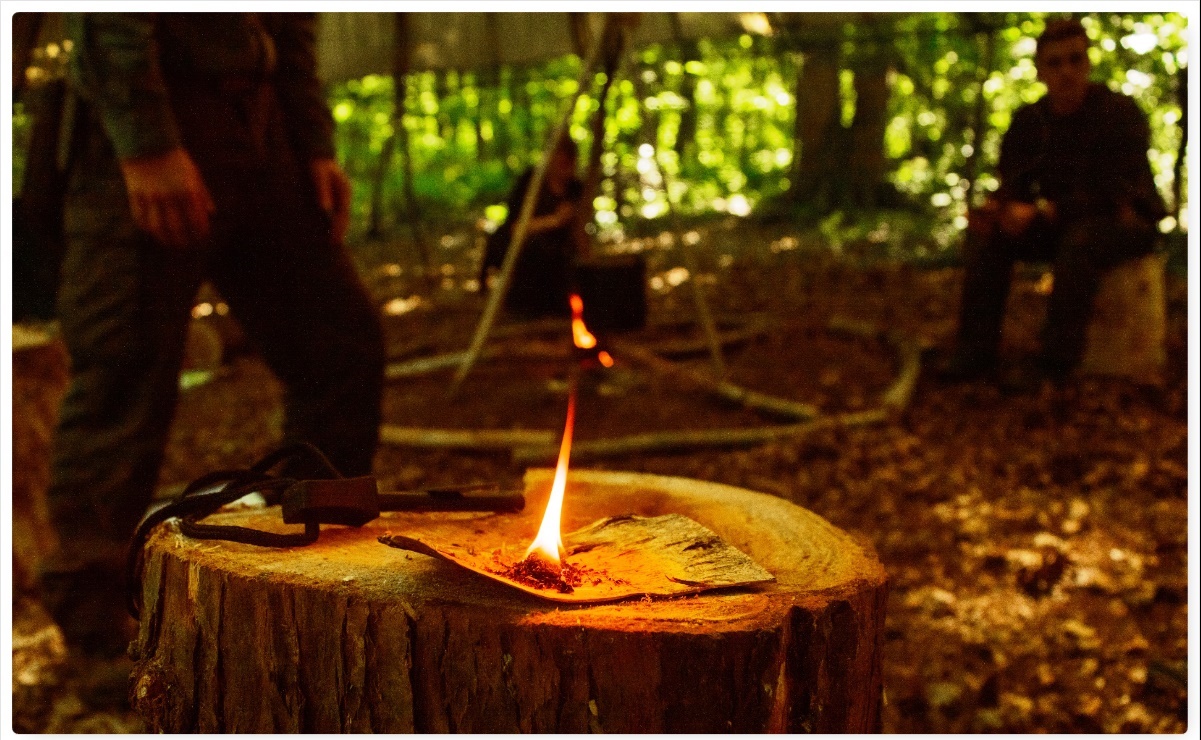
Damp Tinder
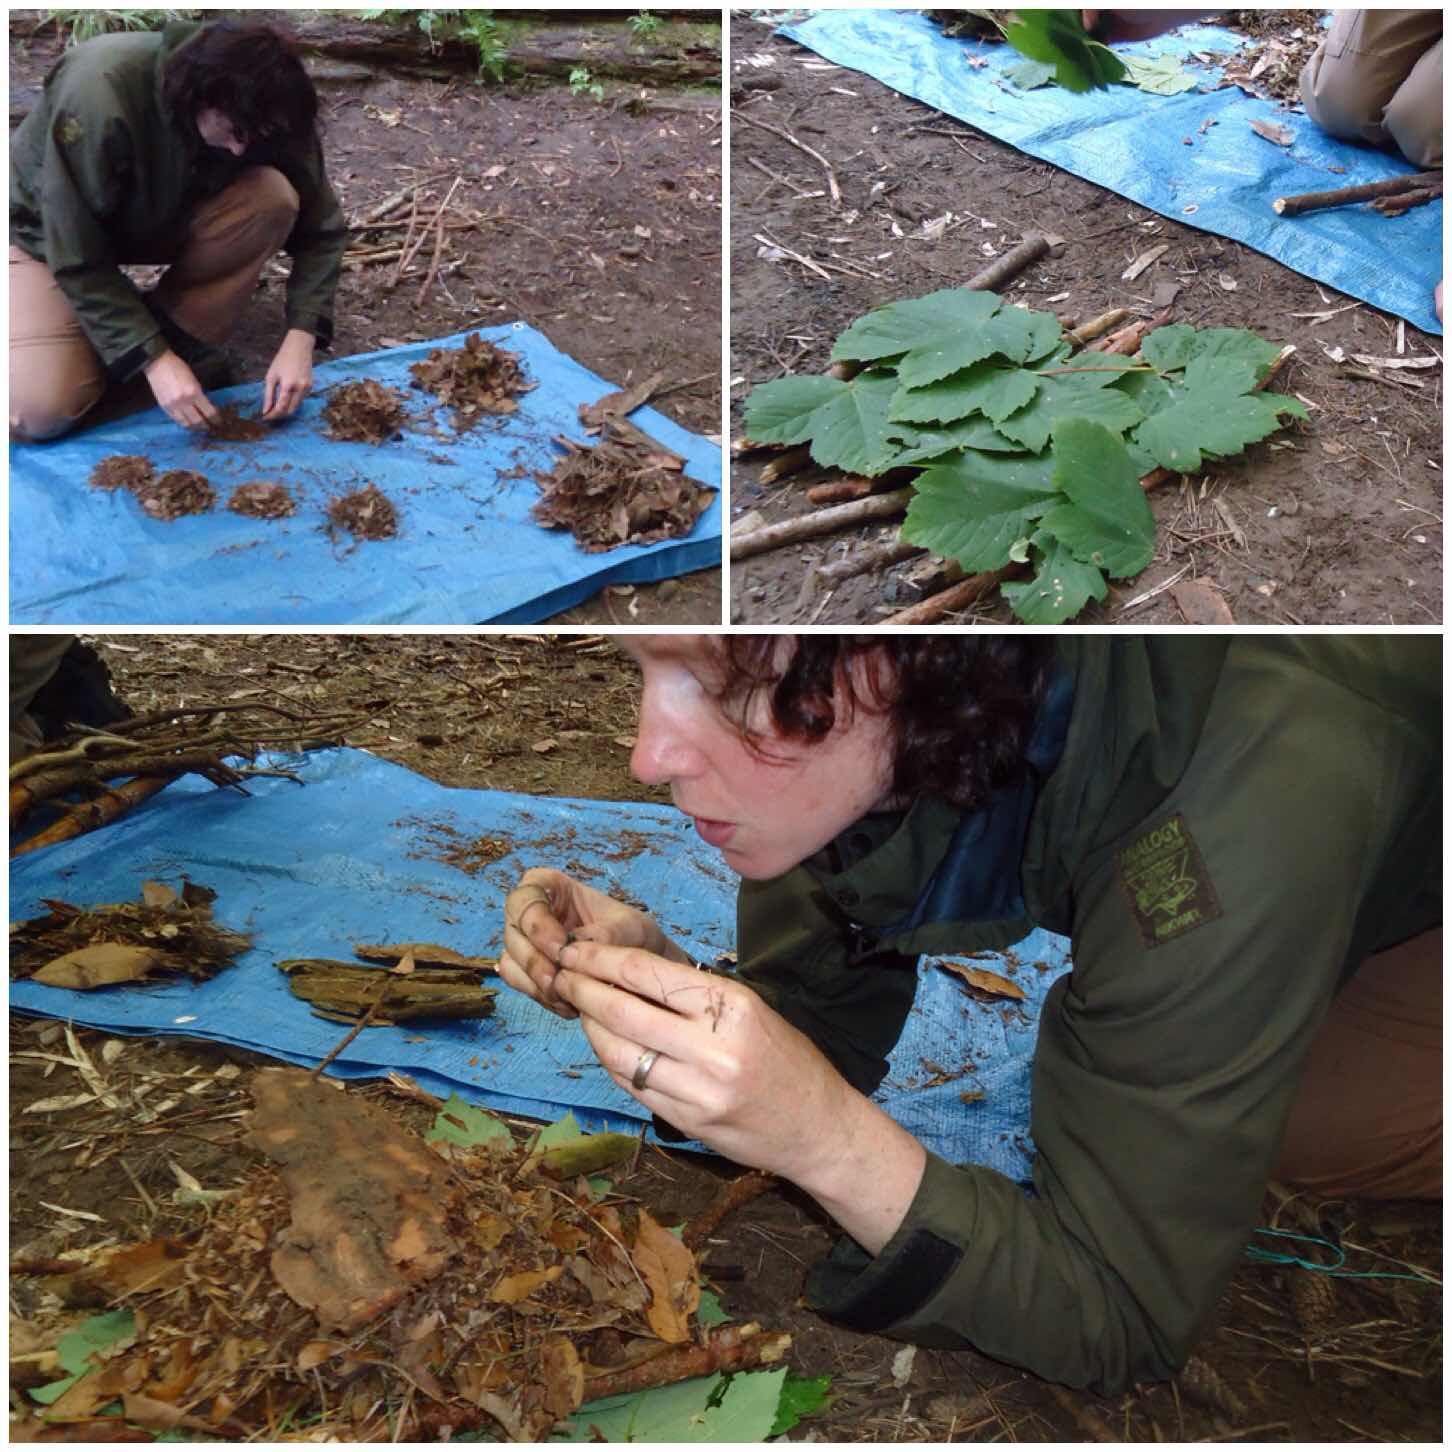
Normally you try and find the driest tinder possible to turn your ember into a flame, however Richard turned that idea upside down a few years ago. We had a chat one evening around the fire and he explained his idea to me: dimply that it was possible to walk off into the woods and pick up damp dead leaves and process them in a certain way to make tinder to start a fire.
After collecting a pile of damp leaves (take the driest ones from the top of the leaf debris) start to break them up by rubbing them vigorously. Collect the flaked pieces and grade them from minute up to piles of the skeletal remains of the leaves.
From this make a small pile wjth the finest flakes in the centre of your pile.
Damp Tinder fires – Prep
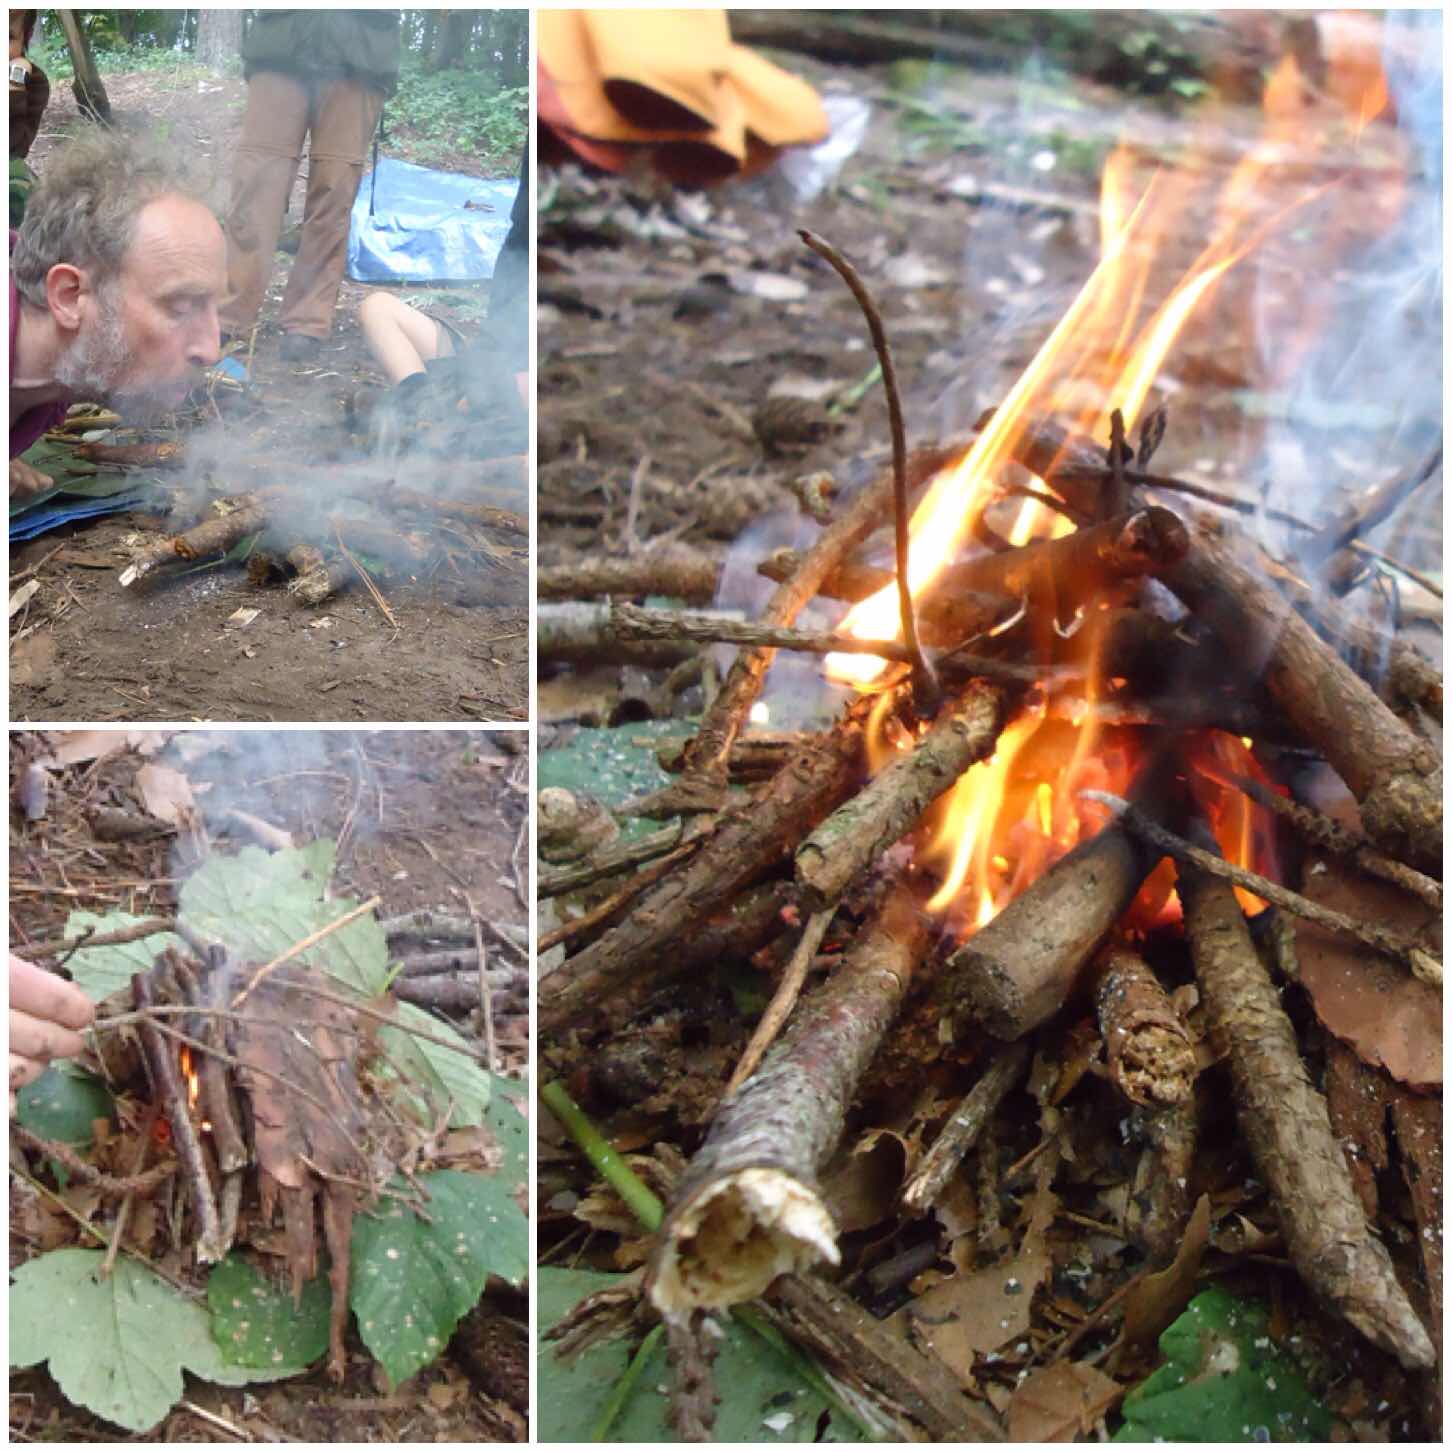
Make a small hole in the side of your pile to the centre and pop an ember (create that in whatever way you wish) and start to blow gently into the ember.
The trick is to do this slowly so that you create an ever-expanding dry area. If necessary you can place some green leaves or bark over the top to trap all the broken debris and stop it all blowing away. After about 10 to 20 minutes you usually get flame. Just shows you should always persevere with your fire.
Damp Tinder Fires – Flammage
Challenging Yourself
Whether you are a novice to fire making or an expert looking for a new challenge the Moot will have something for you – be that firesteels, bowdrills, handrills, pumpdrills, bamboo fire saws or the secret art of lighting fire from damp tinder.
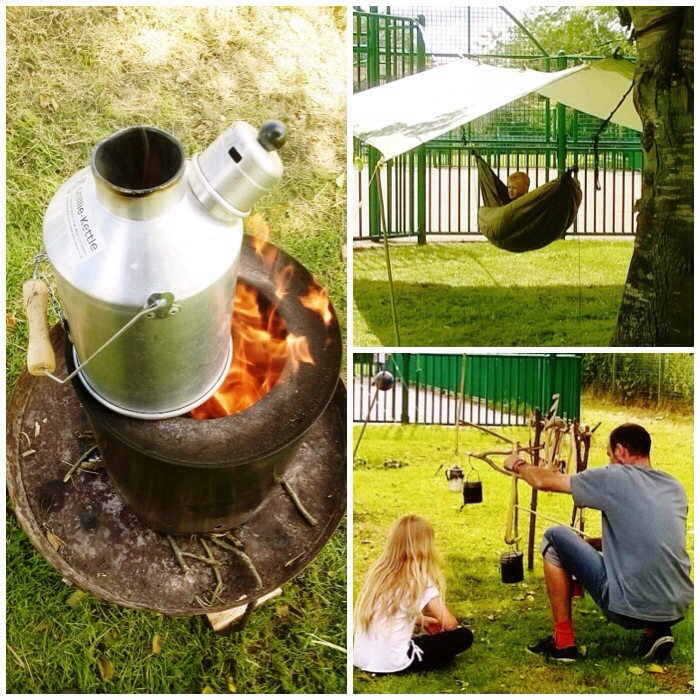
About a month ago I was asked to help out at my local village fete by running some bushcraft activities. Space on the field was quite limited so I could not set up ranges for the bows or the Atlatls– my first choice – so instead I opted for fire, hammocks, camp set-ups and the whimmy diddle.
Bramley Bushcrafting
I arrived at 8.20am to be greeted by these dramatic mammatus clouds (known as upside down clouds). They are sometimes spotted preceding a thunderstorm. In a matter of minutes the rain was lashing down and the picture on the right is a still of a lightning bolt I caught on video.
The rain carried on in bursts for the rest of the morning as I set up. I was a bit concerned that all my tinders and fire sets would be a bit damp. I set up my tipi, a fire area, some campfire cooking set ups and a hammock for folk to try out. Thankfully by the time the fete opened at midday the rain had stopped and the skies were clearing and my kit was all still dry.
Stormy Set Up
As soon as the fete opened I was kept busy. There were lots of different activities, some you paid for and some you did not pay for. I had agreed to run my activities for free partly because it was a nice opportunity give something to the community and partly because I love seeing people try out bushcraft and discover these ancient skills for themselves.
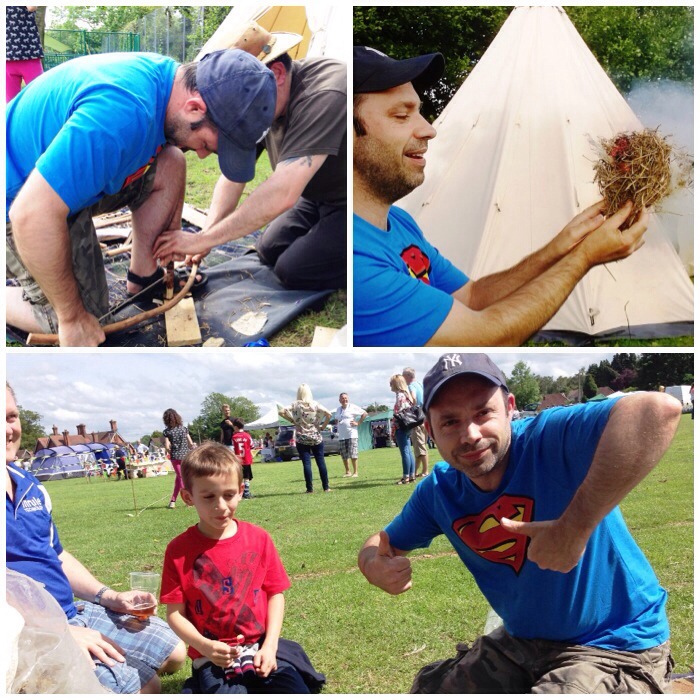
A quick and easy-to-learn activity is the use of modern firesteels. In no time at all the kids were lighting up Vaseline-smeared cotton-wool balls and using smouldering char cloth to get tinder bundles going. I try to make each of these activities into little classes that include a little discussion at the beginning around permissions and the safety of making a fire.
Busy times straight away
One of my favorite bushcraft toys is the whimmy diddle. This was taught to me a few years ago by the guru of bushcrafting Mors Kochanski. I love the way I can make the little propeller go one way and then the other as if by magic but best of all I love watching other people trying to figure out for themselves how to do it.
Introducing the Whimmy Diddle
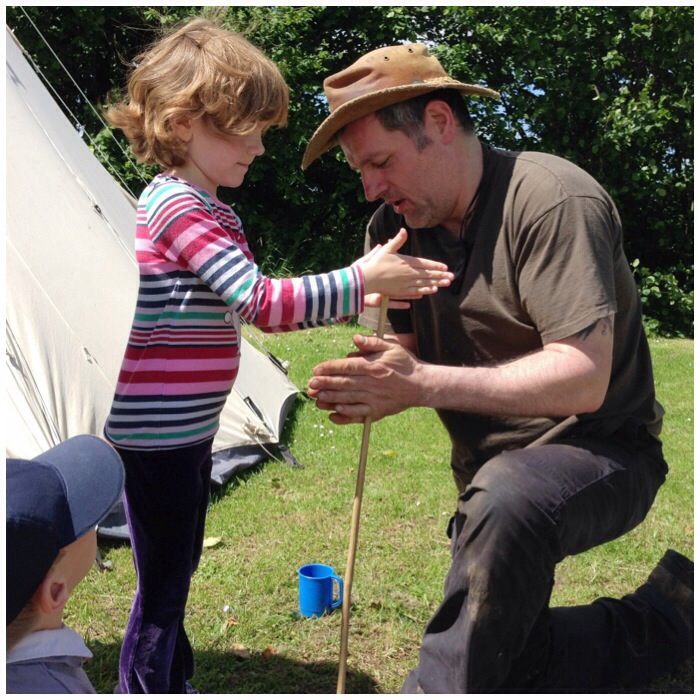
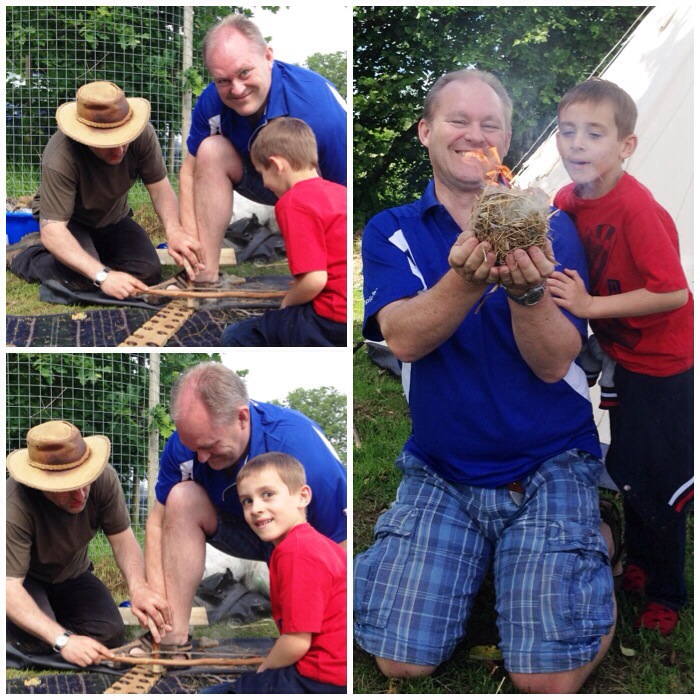
During the day a number of dads came up to me (no mums this time, for some reason) and asked me to help them make fire using the bowdrillwith their sons. I think this set of pictures kind of says it all in terms of how special a moment this can be.
Quality Father and Son time
It was not all work work work; I was able to keep the gas wood burning stove my friend Fraser from Coastal Survival gave me and so I always had a brew on the go.
While I was busy teaching, others just chilled out in the hammock (this was very popular and quite a queue formed) or studied the various campfire cooking set-ups I had put up.
Plenty of brews and chill time
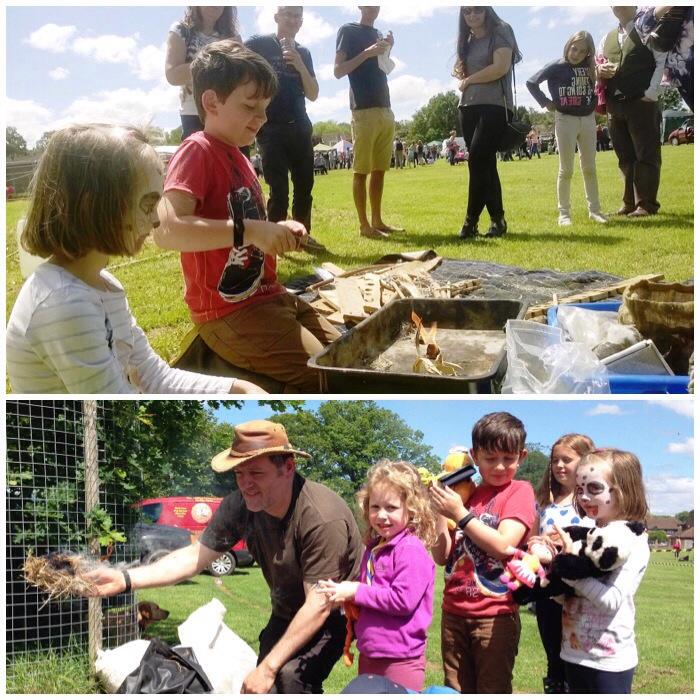
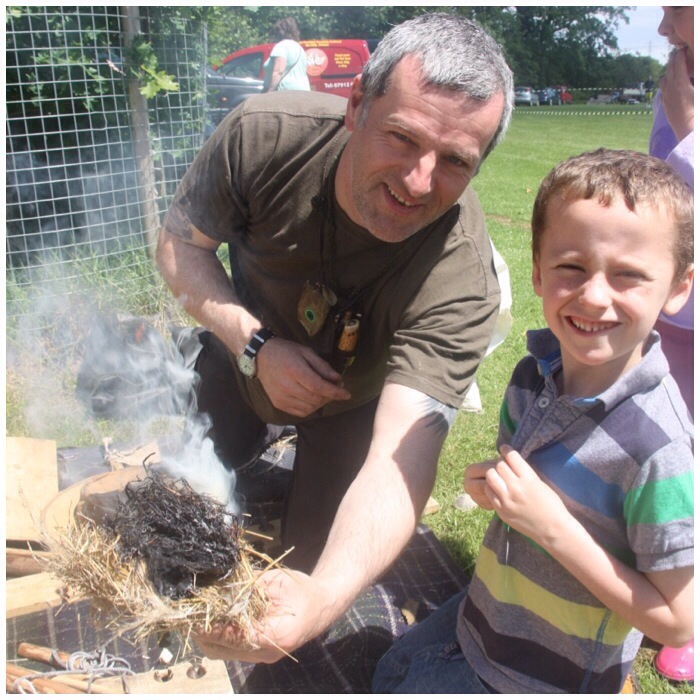
I hadn’t really planned to use the handrill but someone asked about it so I gave a demonstration (thankfully I got an ember), and then before I knew it I had loads of kids asking to have a go. I explained that this would usually be done in family groups (and in some societies still is) so to make it easier for everyone. Before long we were twirling away taking it in turns. I think we only had one failure, but we kept the dust we had produced from that one to help build up a successful ember using the bowdrill instead.
At the end of the day I lost count of the number of handrill sessions I did: I do remember having really sore hands (even sorer the next day) but it was all worth it.
Never too young to learn the handrill
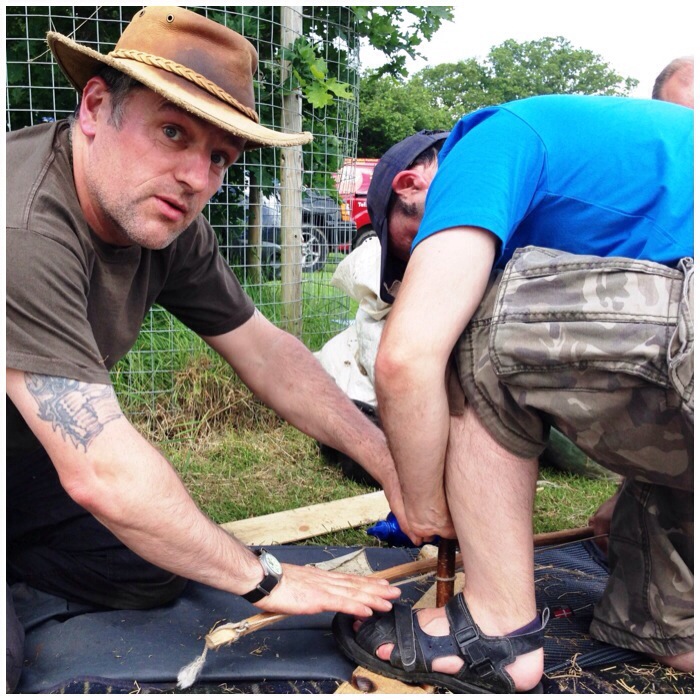
Occasionally I gave some one-to-one tuition on the bowdrill to give my hands a little rest from the handrill.
Adult to Adult teaching
As I did not have a great deal of time with each person I tried to help out where I could. In the picture below all I am doing is showing the student how to keep the bearing block still and my right hand is stopping the bow from see sawing (I am not holding it at all).
Guiding
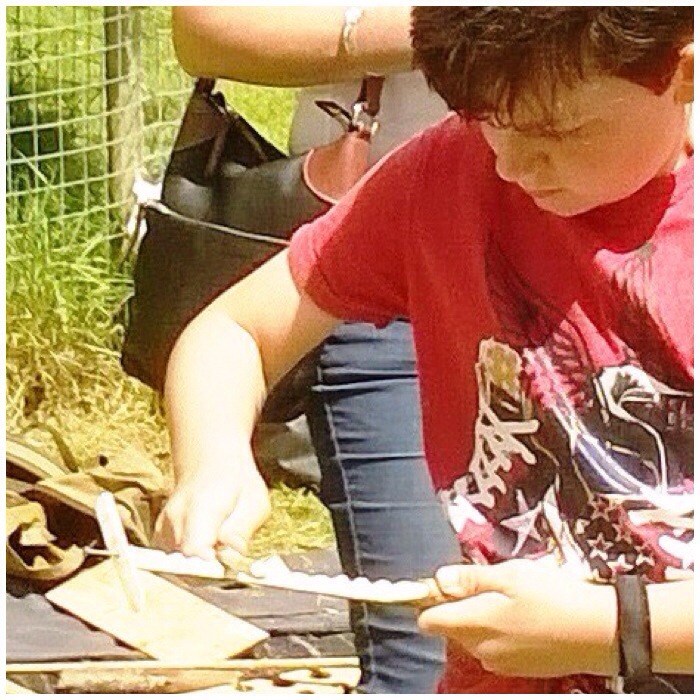
It was not all handrill with the kids – sometimes we got the bowdrill out with spectacular results.
Big kid teaching little kid
Plenty of smiles after each time.
Smilers – Picture courtesy of Ian Evett
All in all I had a fabulous day lighting fires, teaching the whimmy diddle, discussing campfire cooking set-ups and ensuring as many kids as possible got to try the hammock out.
Flamage
I am told that the rest of the fete was a success with loads of activities but I never got to see any of it. I managed to get away from the stand once to go to the toilet and my wife Alison brought me what must have been the largest pork roll ever from the hog roast stand (and for taking all these pictures).
My kids had a great time and managed to pop back to see me every now and then.
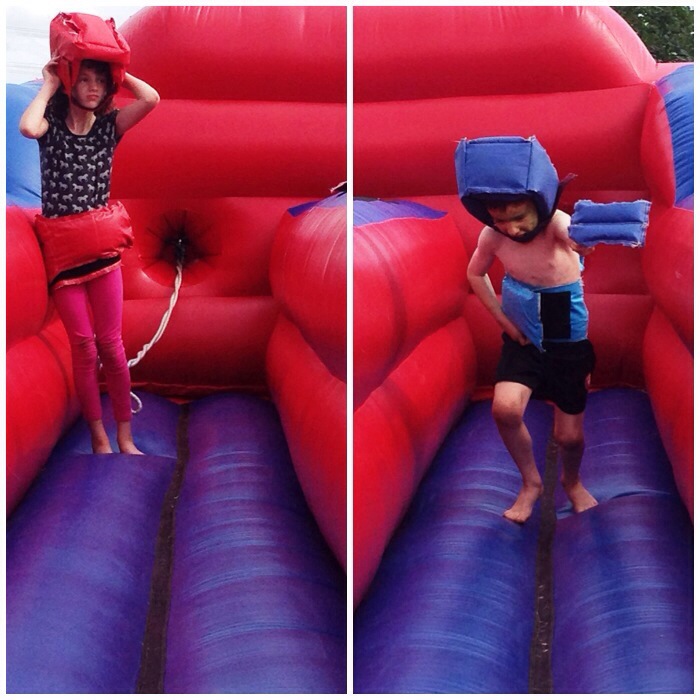
What I missed
The only problem with being part of an event like this is that you miss seeing all the other activities, such as this inflatable tag challenge which my kids obviously loved.
After the day was finished I was really struck by how many of the skills I practice under the title of bushcraft were being practiced on a daily basis on the Isle of Lewis just a few generations ago
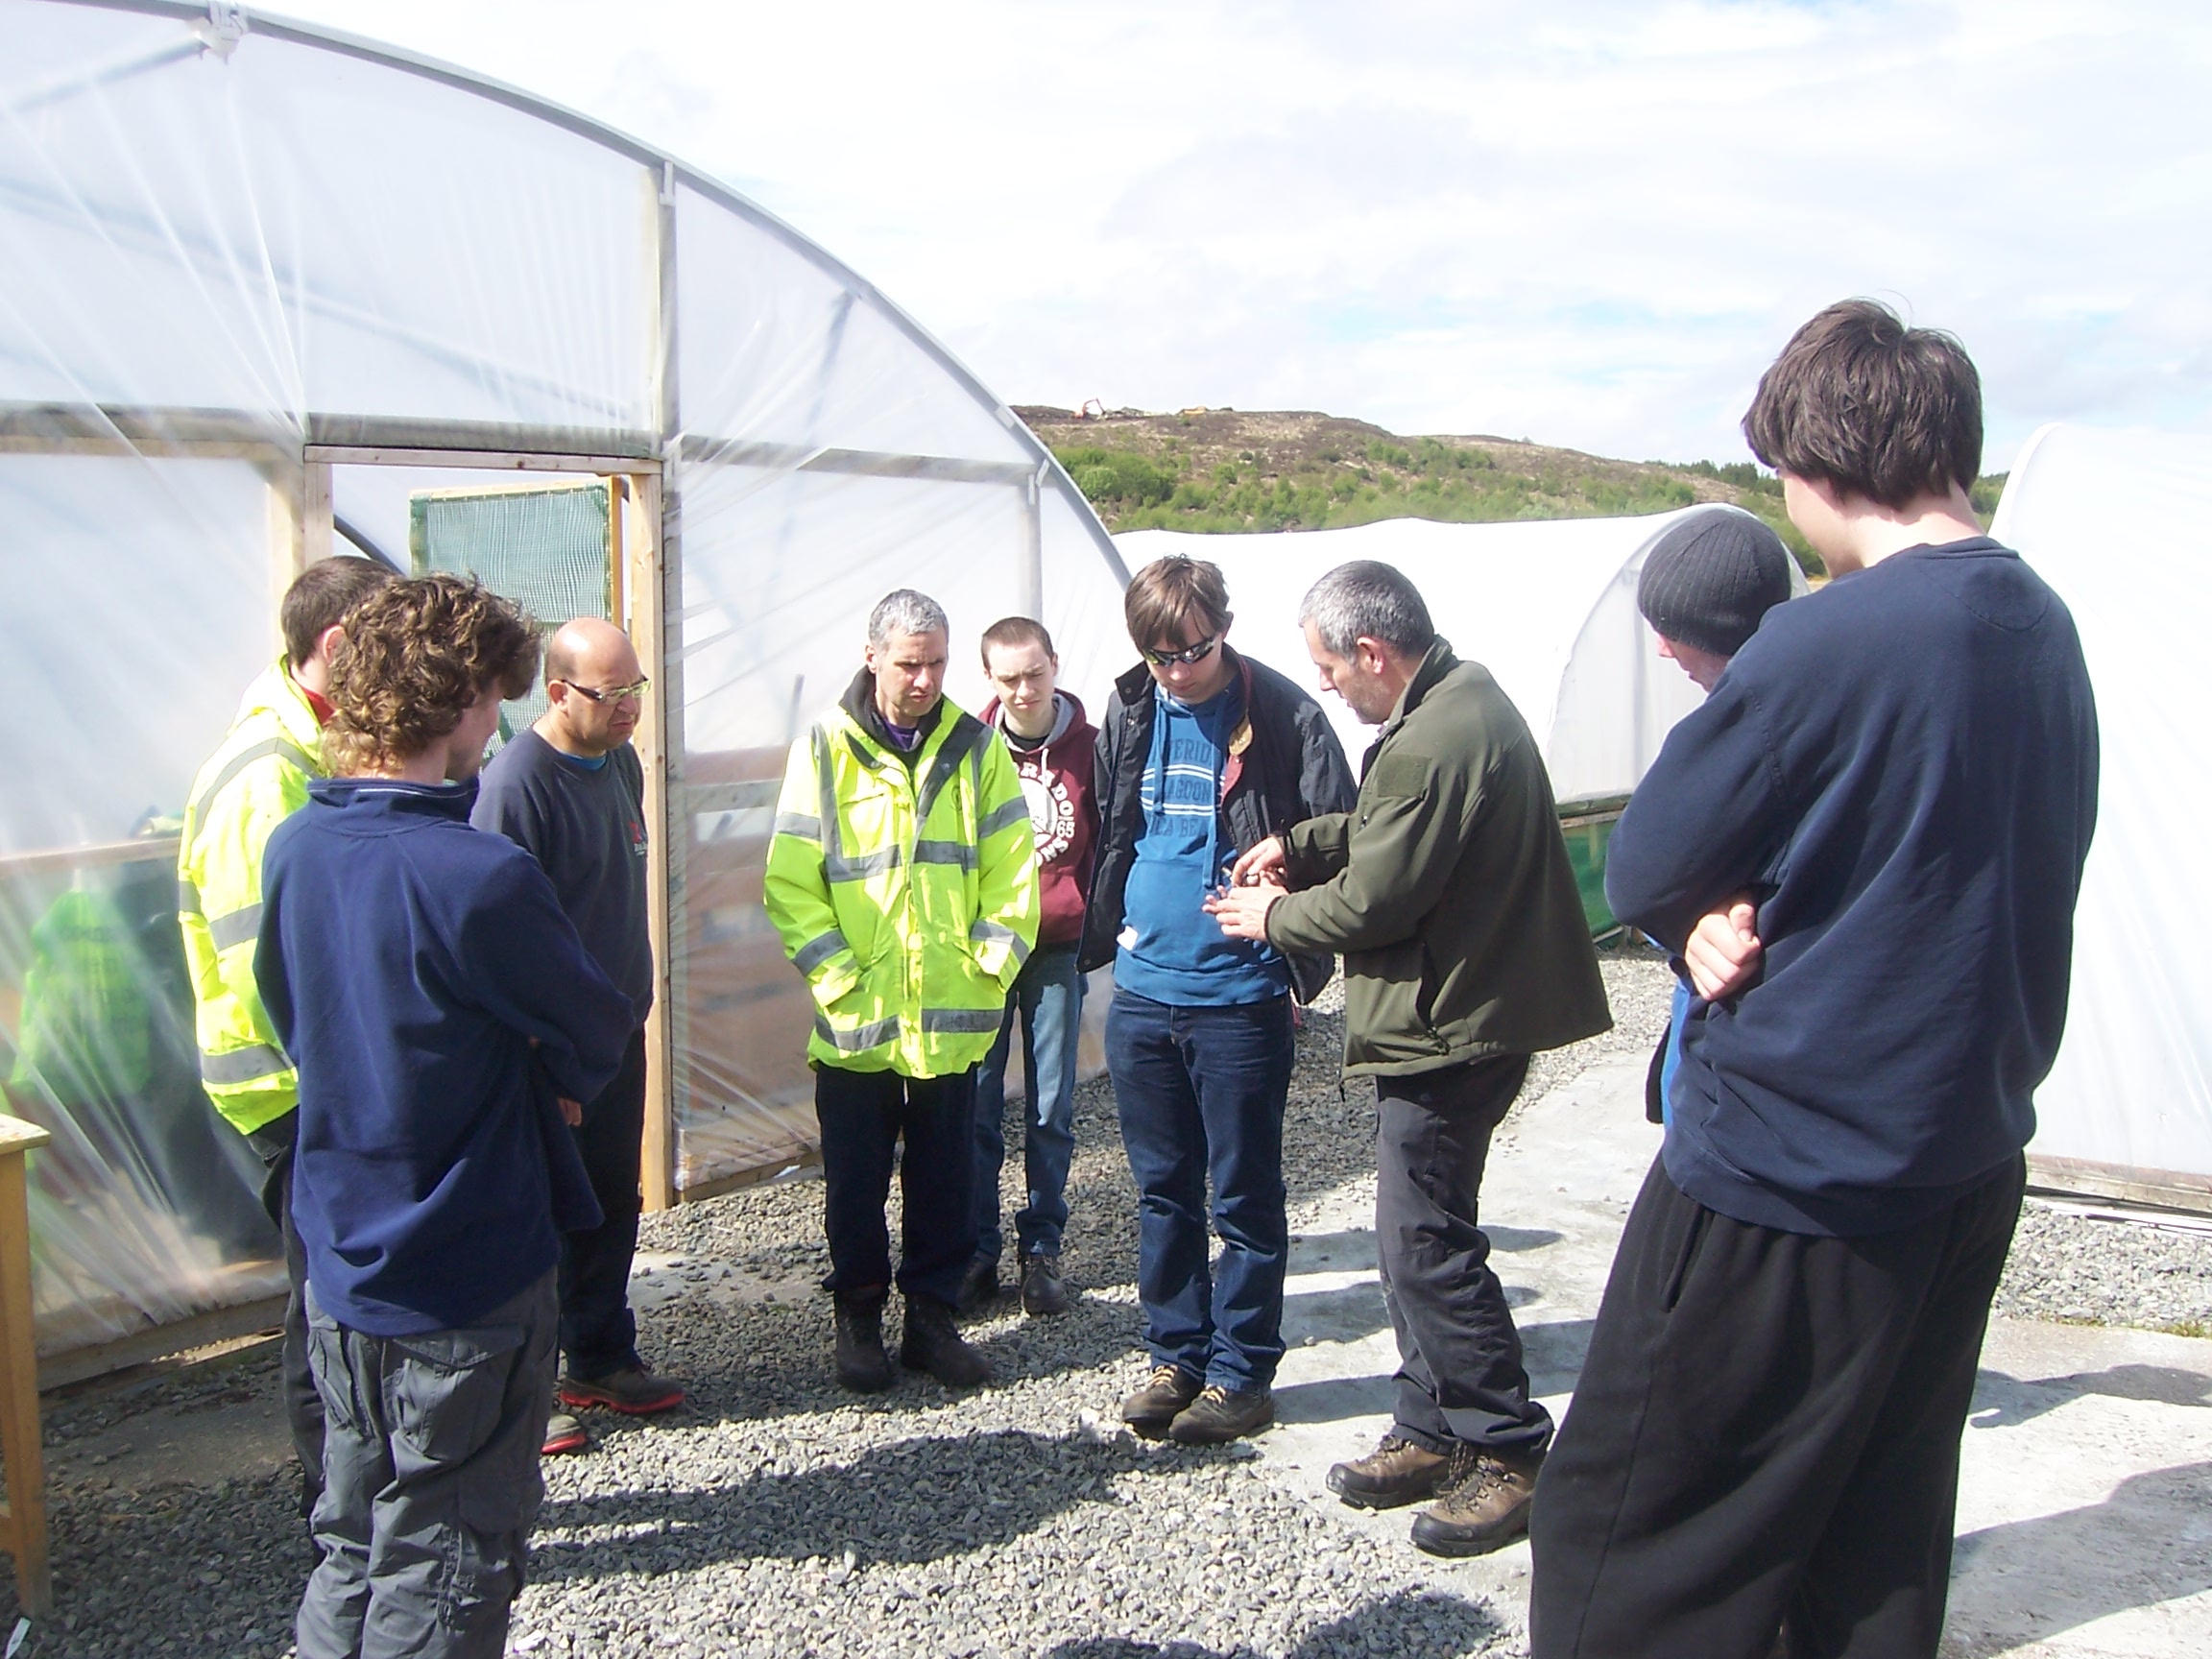
My brother Finlay has been attending Lews Castle College on the Isle of Lewis off and on now for a number of years and I was privileged recently to be asked along for a day to teach him and his fellow students some bushcraft skills. They have a great horticulture area at the college with some impressive greenhouses growing a wide range of plants. Finlay loves working with plants and the college has provided him a good place over the years to develop his skills.
The current course he is attending is called Grow2Work and its aim is to instil a work ethic within the students, giving them confidence and building their self esteem. The students develop a number of skills, such as working as part of a team and following instructions by spending time planting, harvesting vegetables and strimming plants.
A lovely day bushcrafting at my brother’s college
My Grandmother Mary passed away earlier in May this year and while I was up on the island for the funeral my sister Tina had a chat with the course director, John Maclean, and mentioned that I did teaching around wild plants and bushcraft skills. Unknown to me, Tina had volunteered me to do a day’s bushcraft tuition for the whole of Finlay’s class when I was next up at the end of May on holiday to the island with my family.
I found out eventually I was doing the course and so, not really knowing what I was going to do with it, packed an extra bag full of bushcraft and survival kit. I fully expected to have half my kit confiscated at the airport but miraculously the security folk let it all through. If I had been asked to open it up I would have been hard pressed to explain myself.
I had been asked to run the course on the Monday so I managed to do a recce of the castle grounds woodland to find good teaching areas. While I was doing this with the kids my wife Alison ran the Stornoway half marathon. I shot this little video of the day recceing the woods and supporting Alison.
I spent a lot of time as a teenager exploring these woods around the castle and it did feel rather strange to be coming back to teach bushcraft skills in one of the places that my passion for the art started.
Monday morning arrived: I went off to Stornoway with Finlay Mhor (Big Finlay – my brother) and with Finlay Bheag (Little Finlay – my son). I met the rest of Finlay’s class – Murdo, Matthew, Alistair, Josh, Mark, and John – and the tutors John and David. We had a good chat about what we could do and ended up agreeing to spending some time:
making nettle cordage
identifying some of the wild plants growing around the site
setting up a tarp and hammock to learn some bushcraft knots
trying out some different fire lighting techniques
and finally shooting some Atlatl darts in the wood.
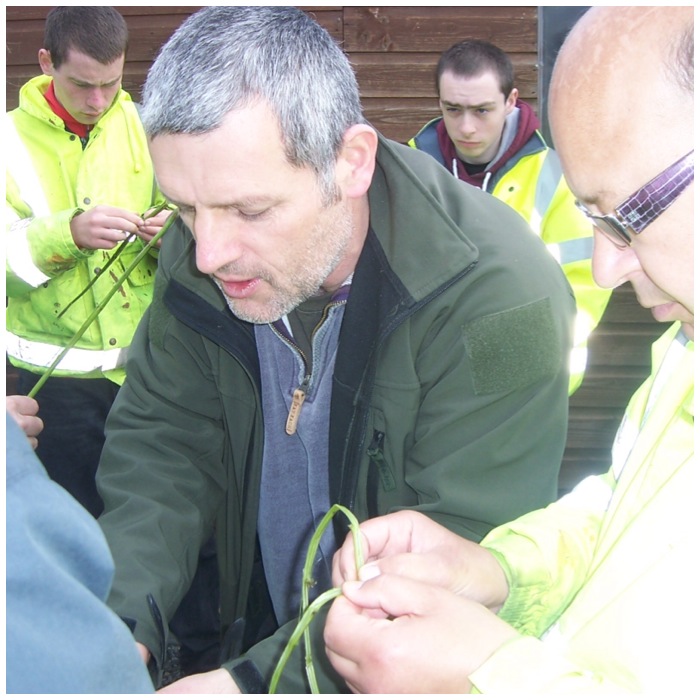
There were a few nettles growing around the edges of the gardens so after putting on some gloves I got the guys to pick some to make some cordage. I explained that it was thought the nettle was introduced to the British Isles by the Romans as a method of producing linen or as a method of keeping warm (urtification).
In Scotland historically nettle was used to make scotch cloth; the poet Thomas Campbell wrote in some of his letters, “In Scotland, I have eaten nettles, I have slept in nettle sheets, and I have dined off a nettle tablecloth. The young and tender nettle is an excellent potherb. The stalks of the old nettle are as good as flax for making cloth. I have heard my mother say that she thought nettle cloth more durable than any other species of linen.”
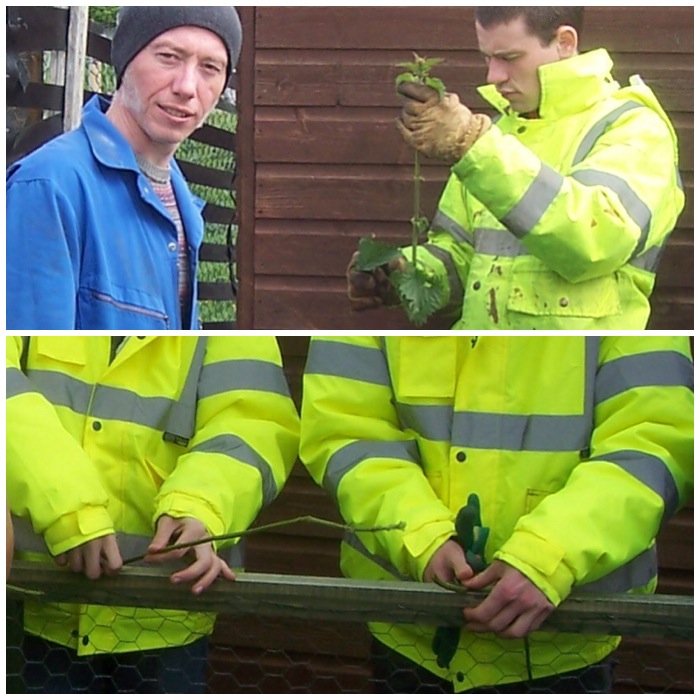
Stripping and prepping the nettles
After picking the nettles the guys stripped off the leaves and crushed all the nodules in the stalks to make them easier to split open. Nettle cordage would have been made on the island in the past as it has been common on the island for centuries. I got the class to split open the stalks of the nettles along the full length of the stems and then pulled out the hard pithy core to leave long strips of the outer nettle fibre.
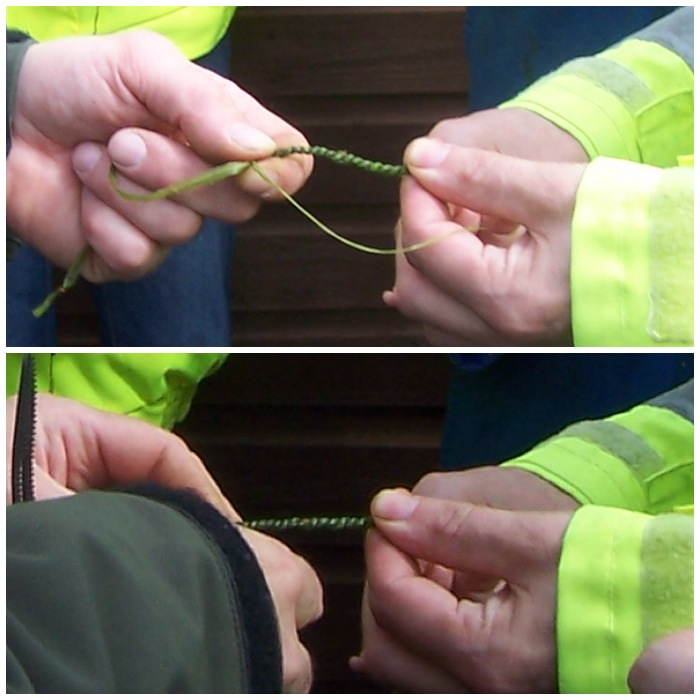
Splitting the nettles
We then wrapped the nettles into short strips of cordage. The guys liked this as they could see how they could easily make cordage from nettles in their garden if they did not have any modern cordage to hand.
Making some good cordage
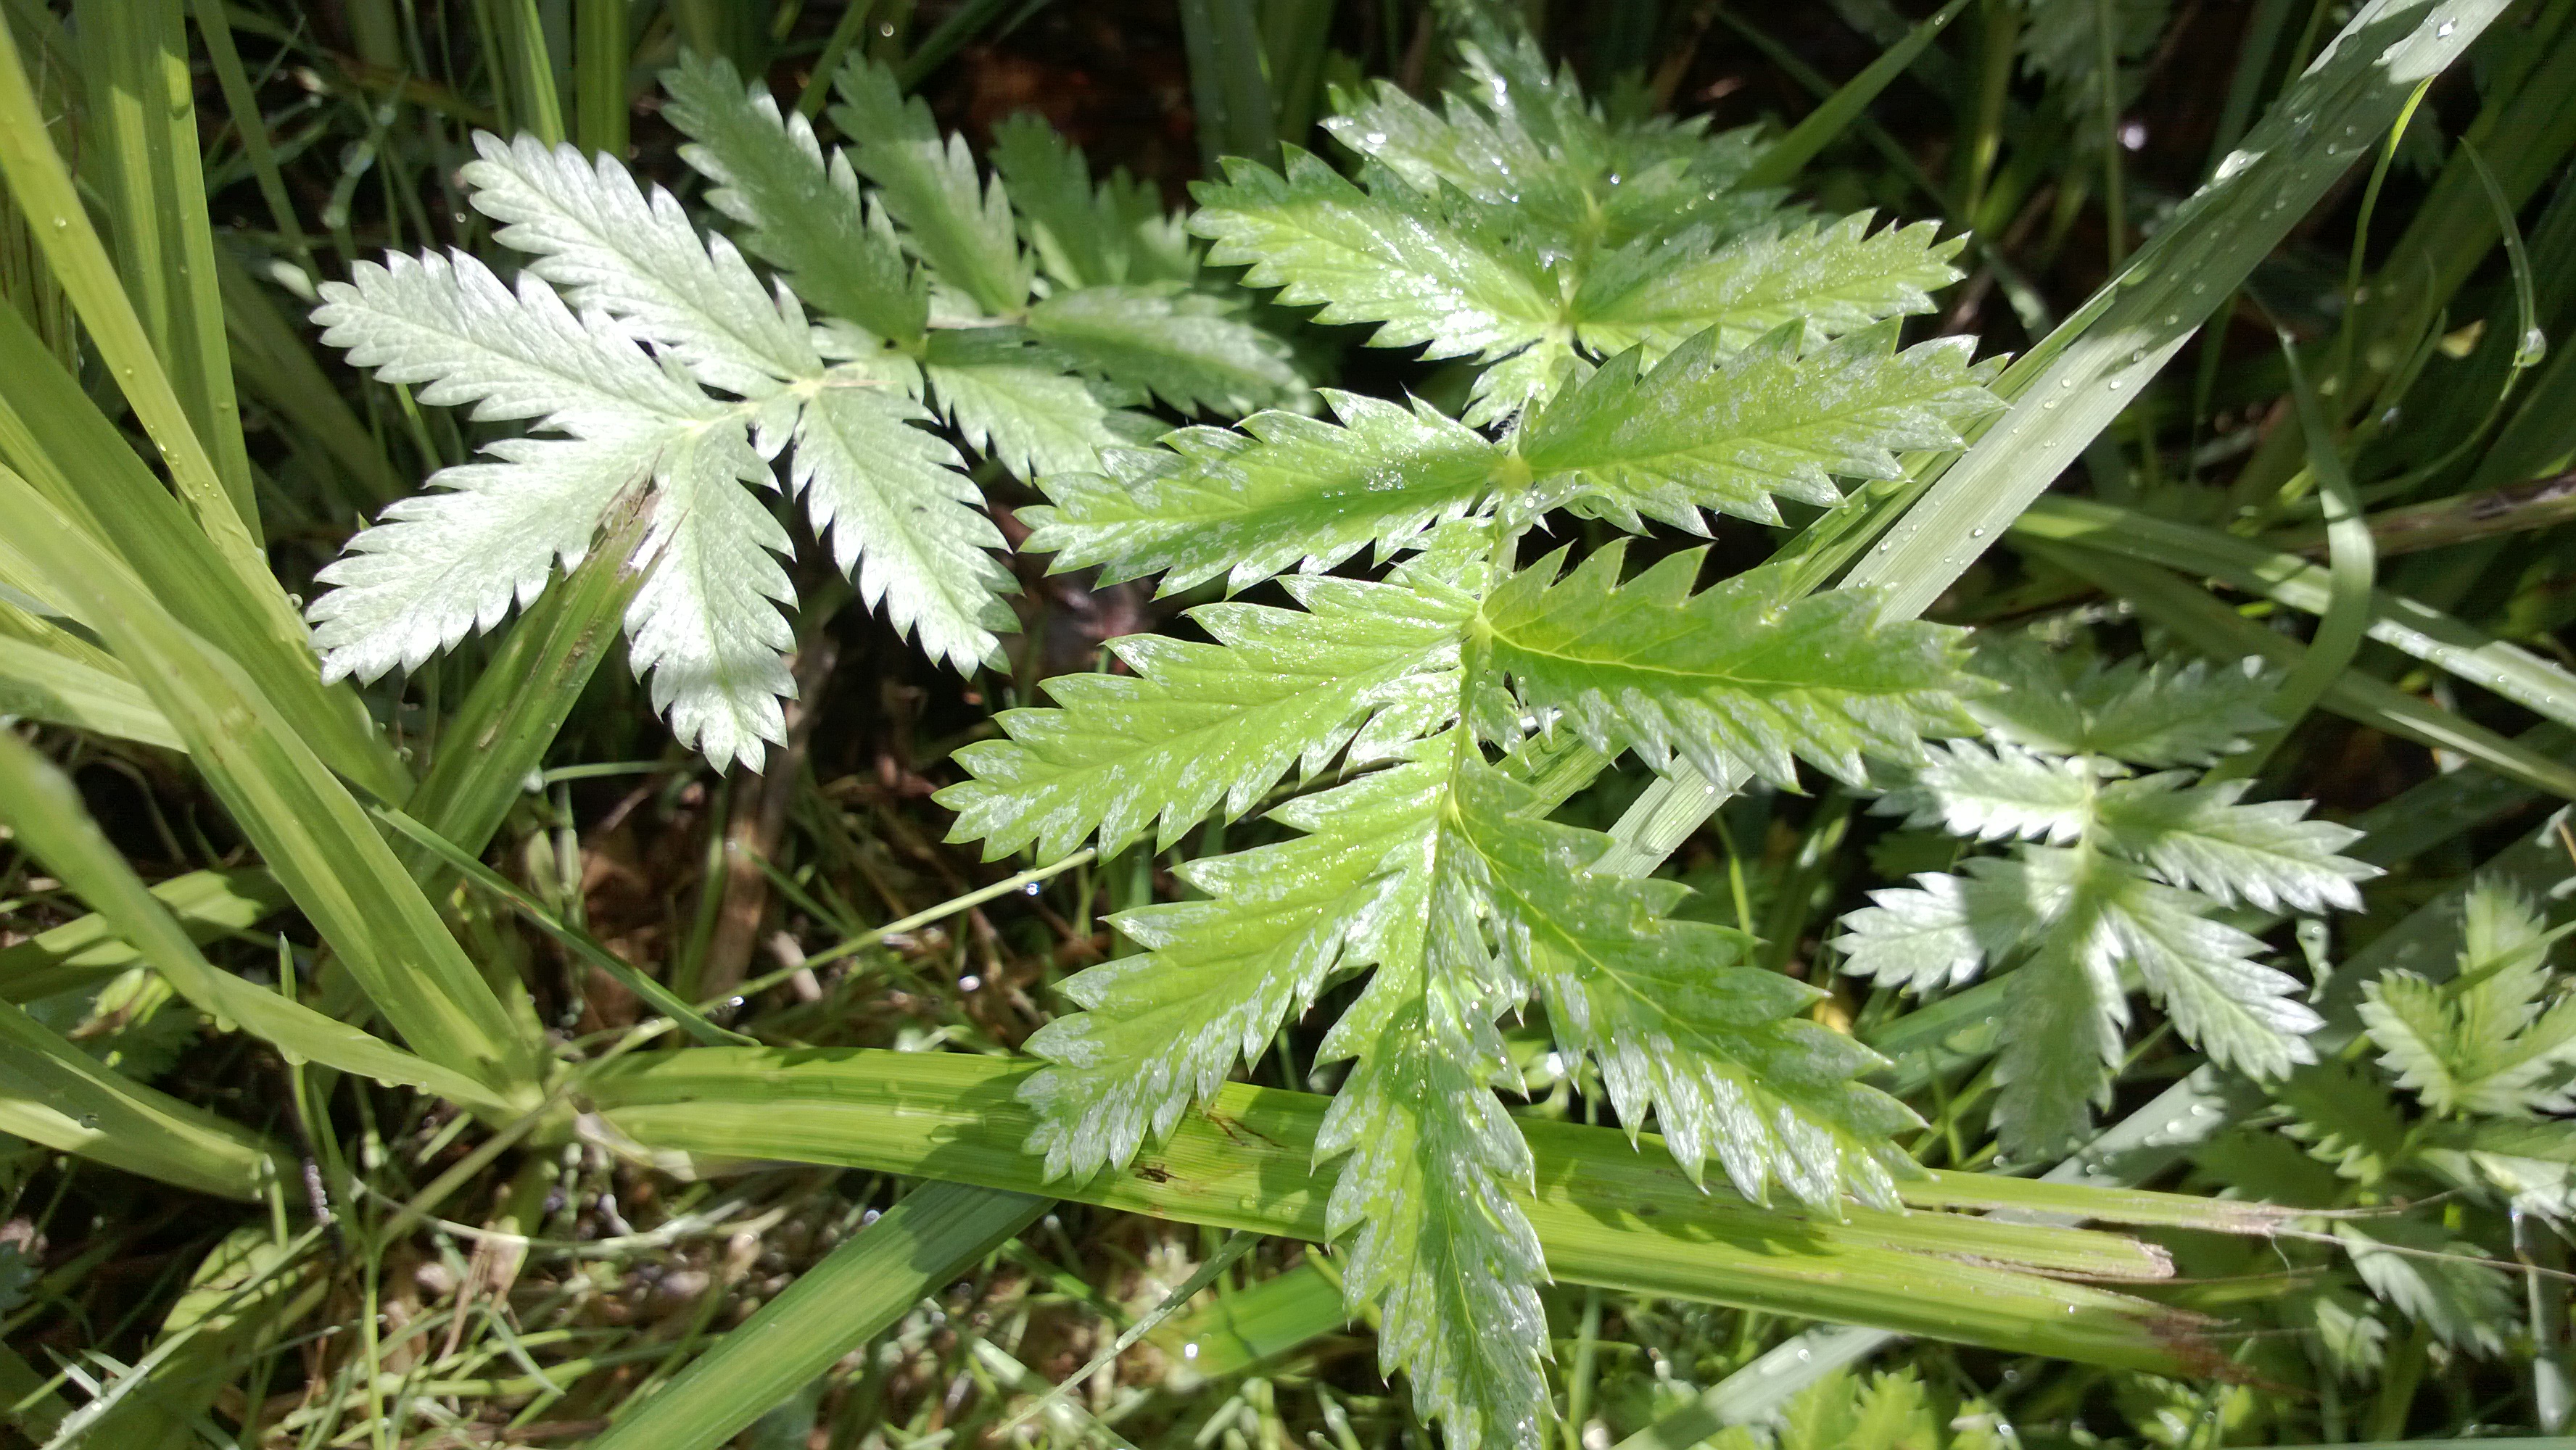
After making the nettle cordage we went for a walk up into the woods. On the way we stopped to chat about many of the wild plants growing around the college. One of the common plants was the Silverweed. I explained this plant was a staple food in Scotland prior to the introduction of potatoes in the 1500s and was known as Seachdamh Aran (the Seventh Bread). It was thought that a man could sustain himself for a year on a patch of silverweed the square of his own height. In North Uist during the clearances, homeless folk were said to be living on shellfish and on bread made from dried silverweed roots. A good document on this can be found on the BBC website.
Silverweed – The Seventh Bread
After talking about some other plants including comfrey, thistle and some different types of trees, we set ourselves up a little camp. This was to show the class some of the hammocks and tarps I use when bushcrafting. They were all keen to try out the hammocks. I had brought along two types of hammocks. One was the EDC Chair hammock and the other was the Woodsman hammock. Both hammocks are made by my friend Mat Howes of UK Hammocks. After setting up the hammocks we set up a tarp and practised some knots, including the Evenk, the Tarp Taught and the Clove Hitch.
Hammock time
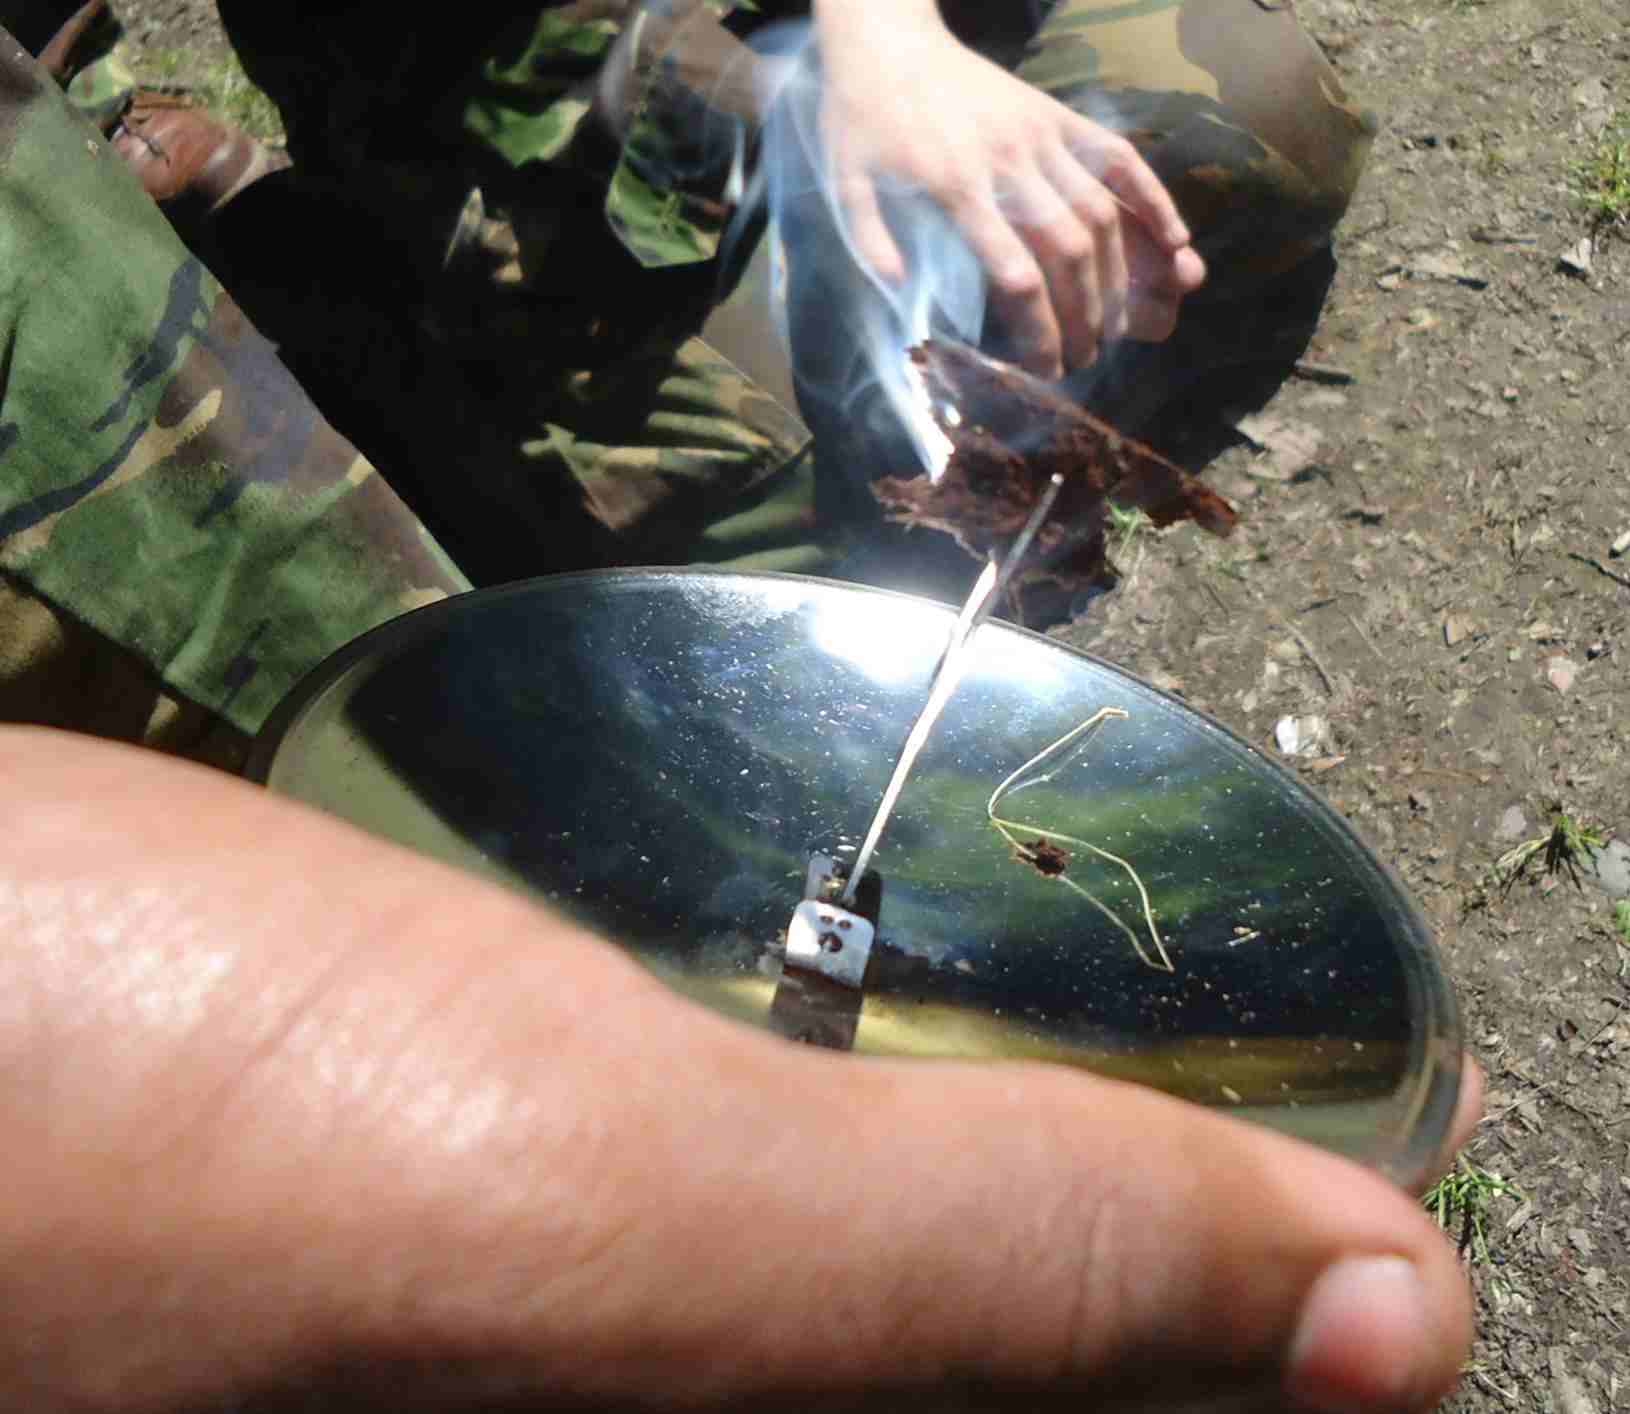
After lunch it was on with the business of making fire. We had already made fire by using a parabolic mirror earlier that morning using the sun’s rays – not often you can do that on the Isle of Lewis. Although I used a modern mirror this technique has recently been shown to have been used for thousands of years – World’s Oldest Solar Device.
Parabolic Mirror
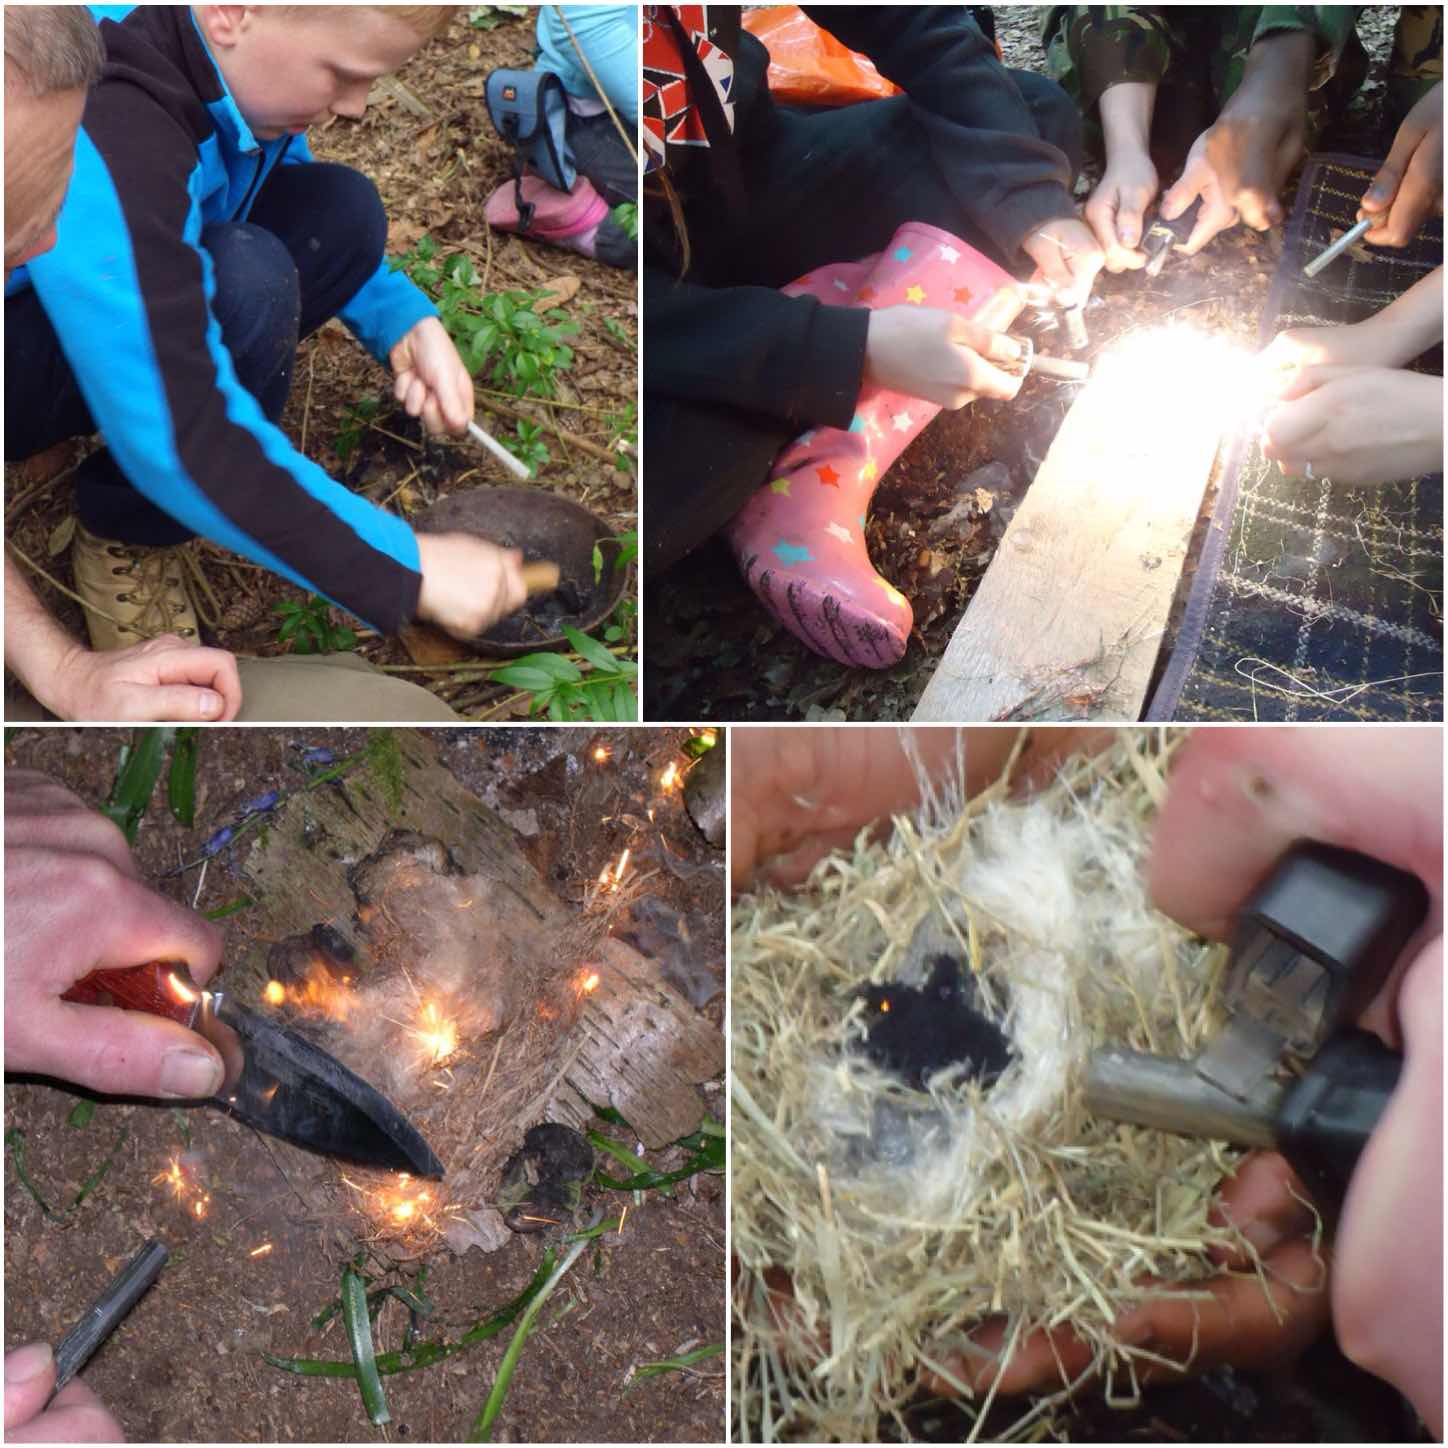
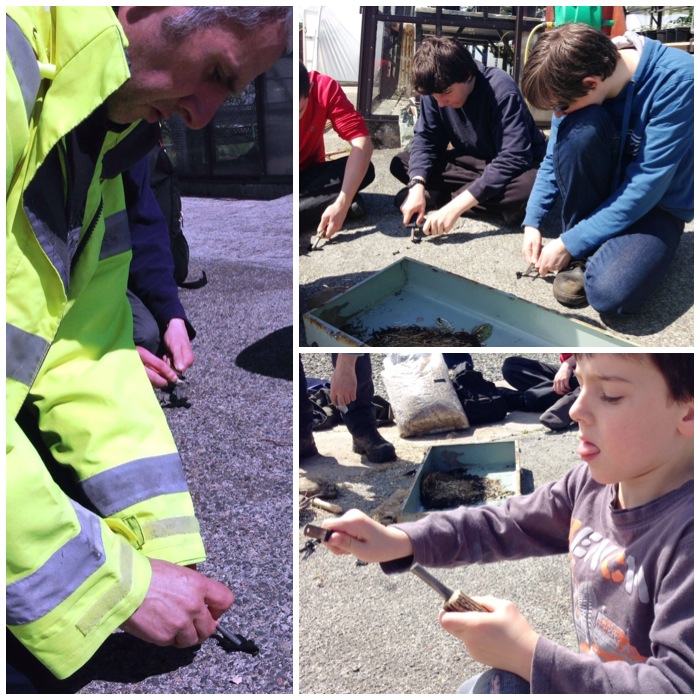
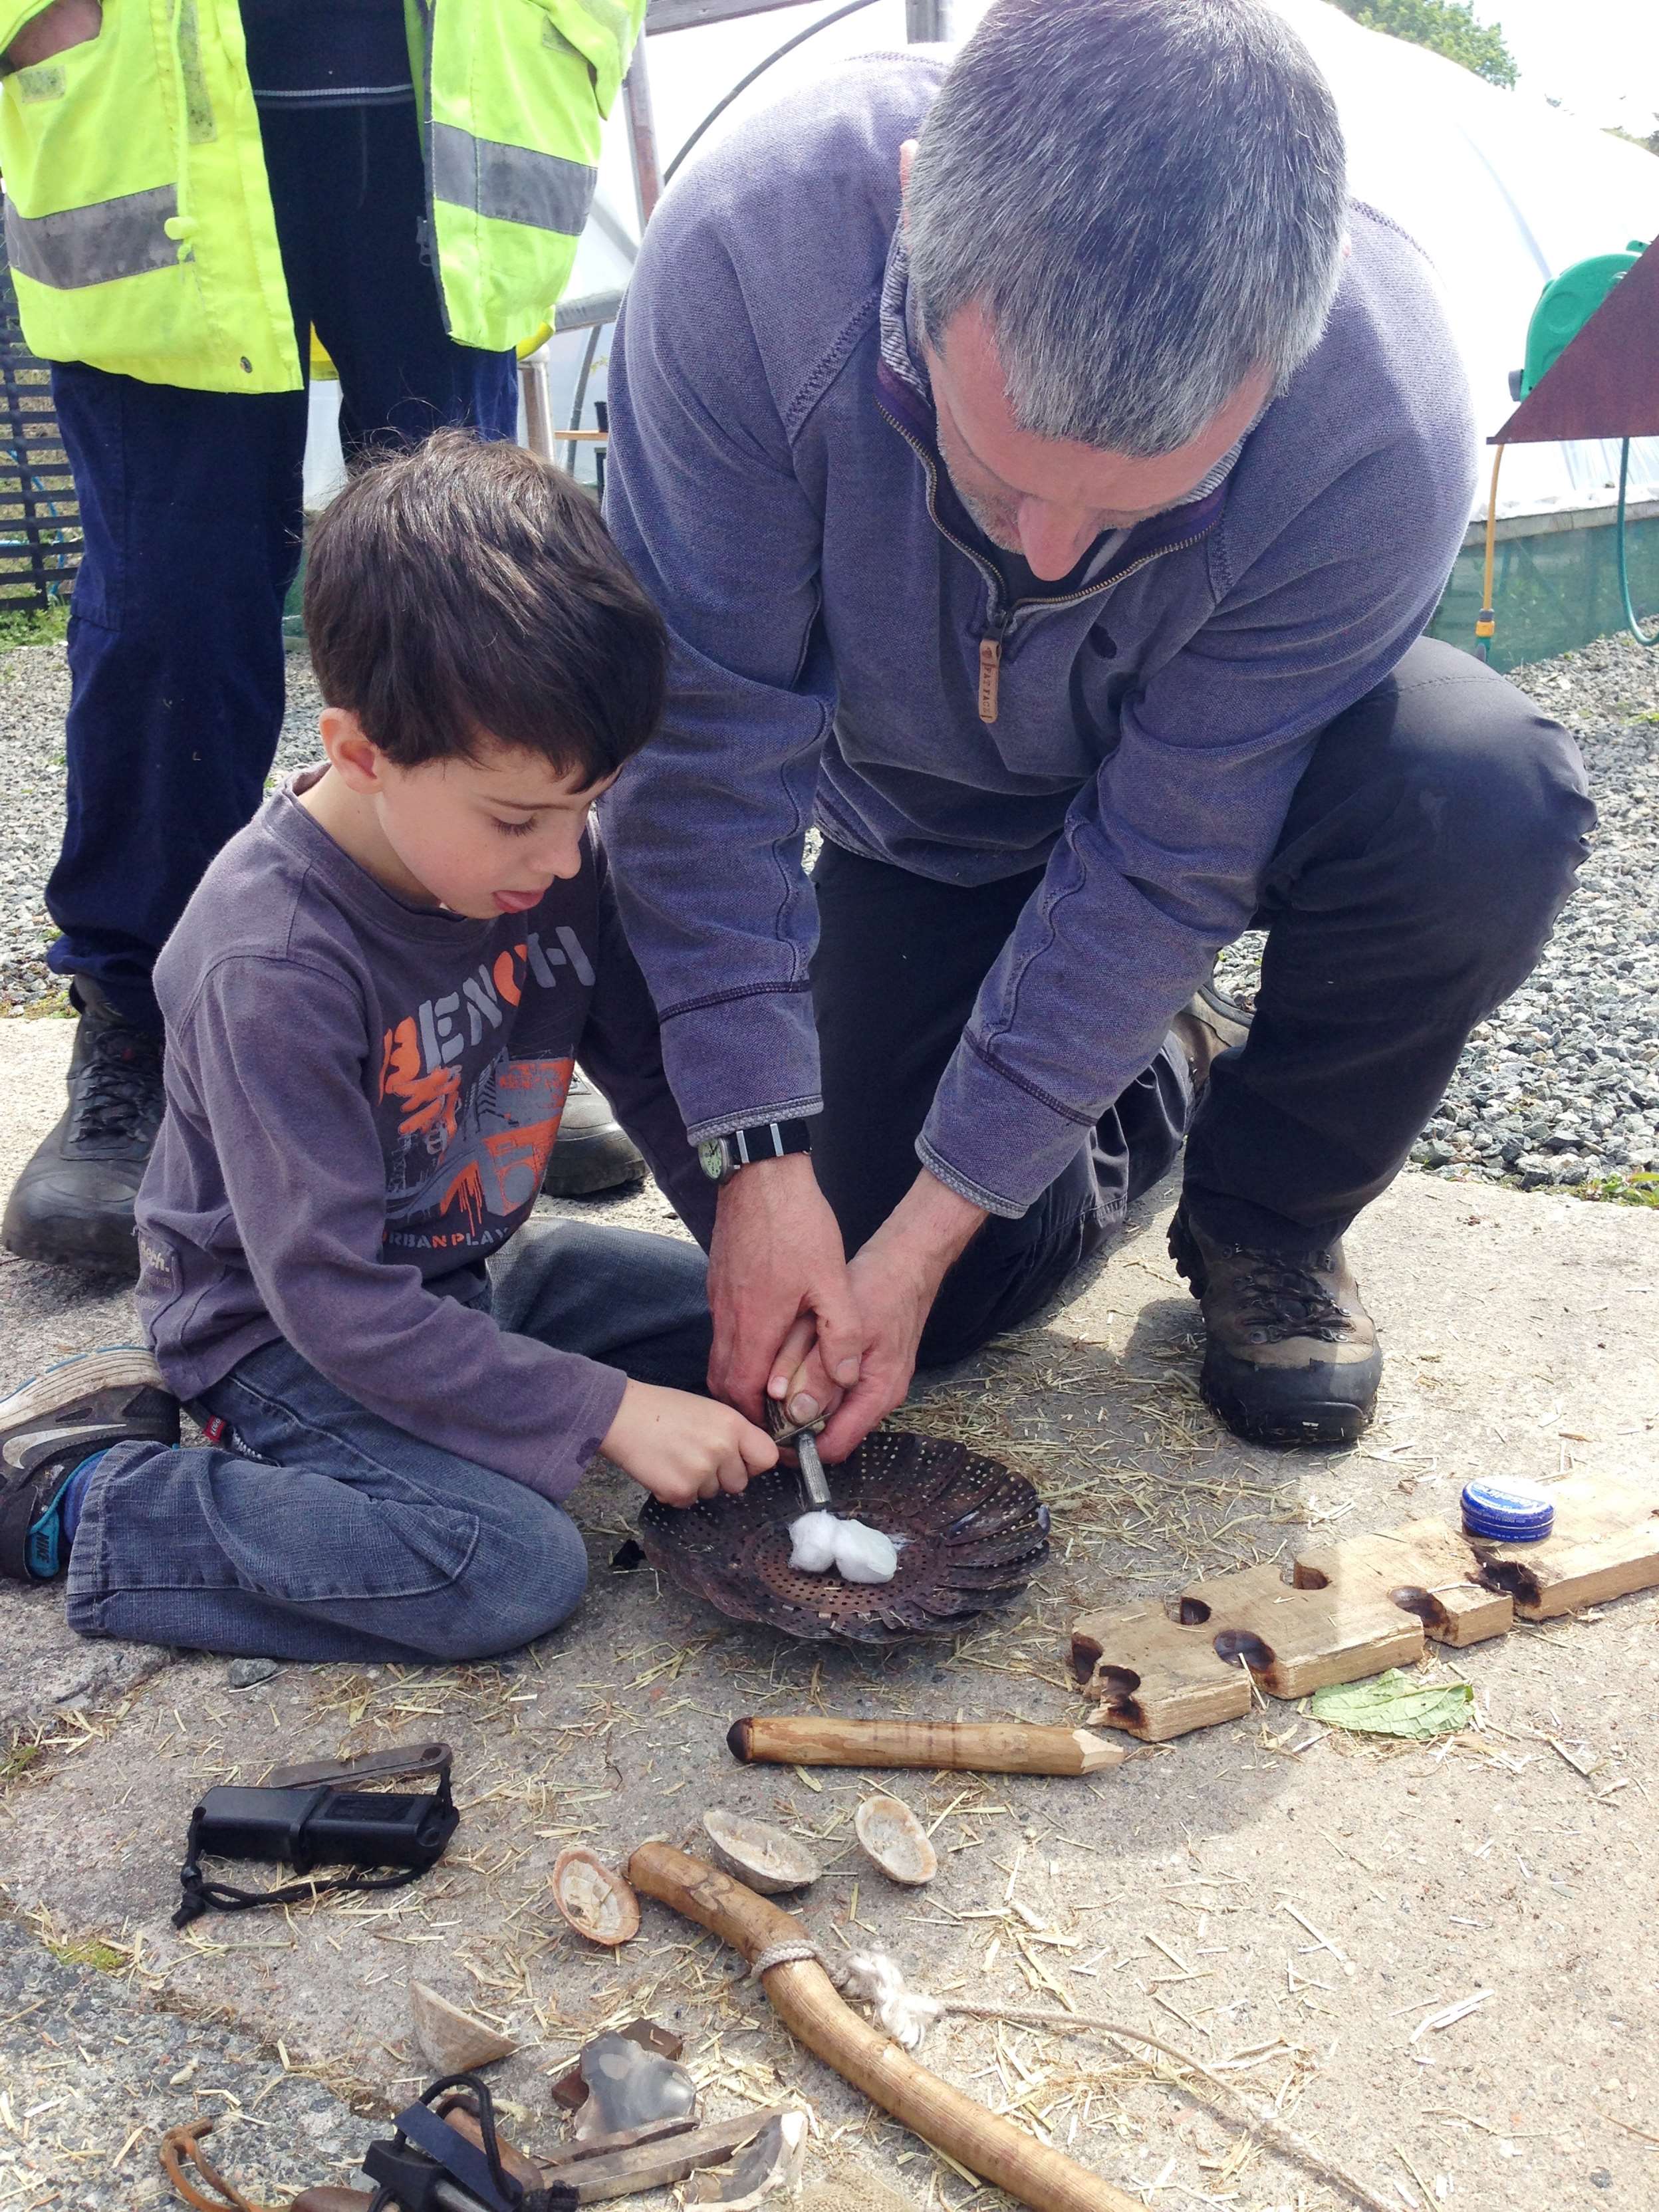
We decided for safety to light our fires on a patch of concrete within the nursery area (normally I would use raised fire pits for this). I taught the class how to use modern firesteels at first and they soon had sparks going strong.
Firesteel session
My son Finlay got in on the act as well and everyone was able to light up some cotton wool balls in no time. I have to say a big thank you to my wee boy Finlay as he was the perfect student all day, getting stuck in with all the others.
Little Finlay had a go as well
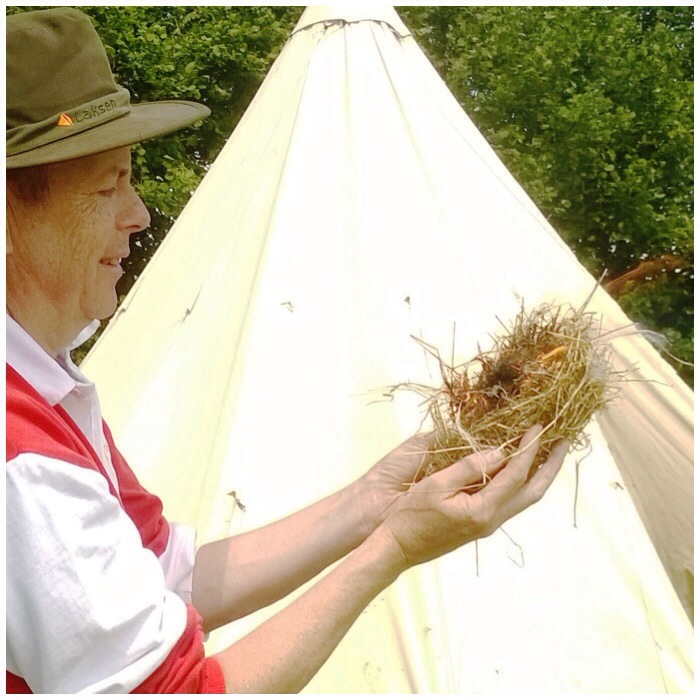
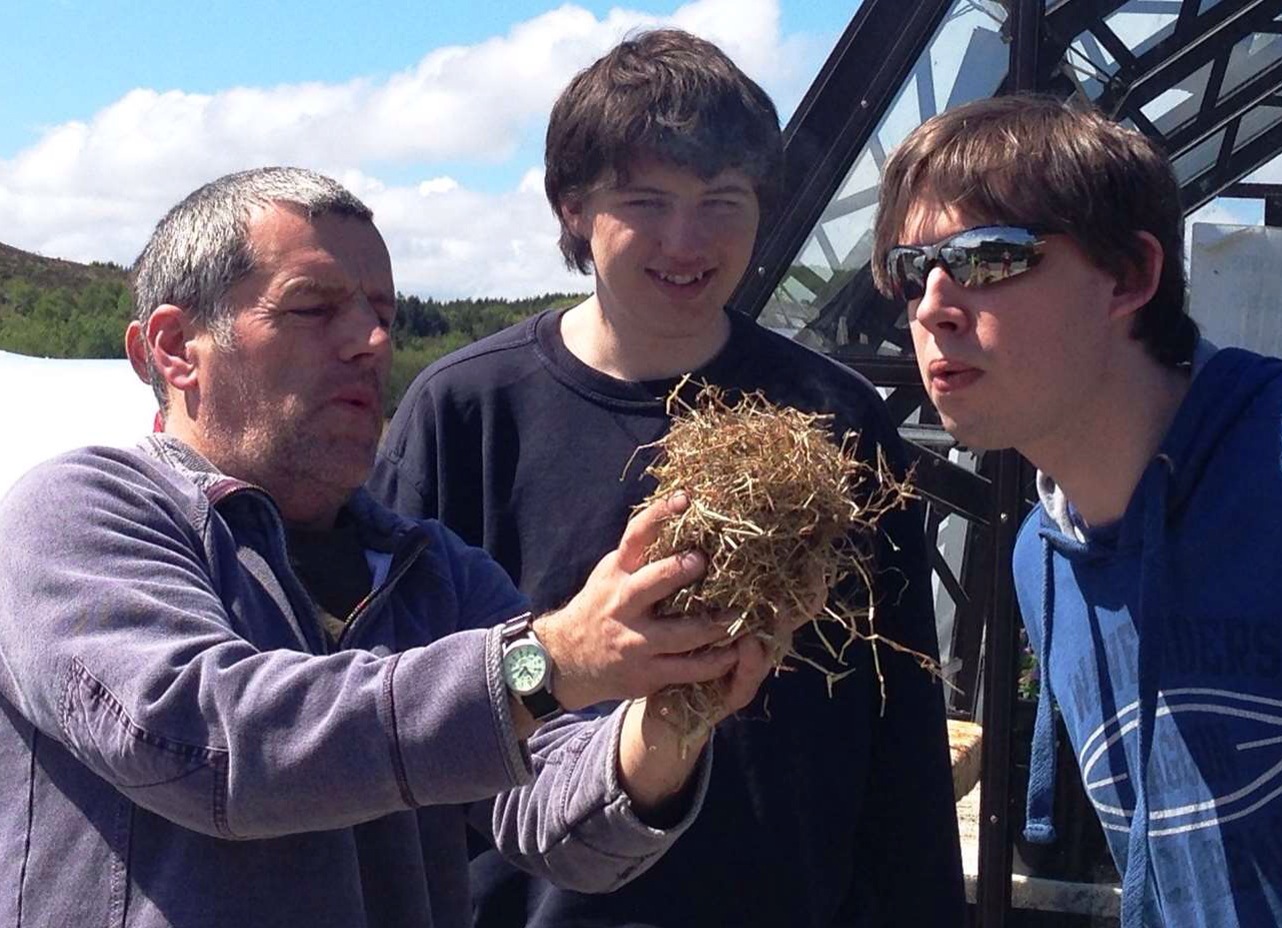
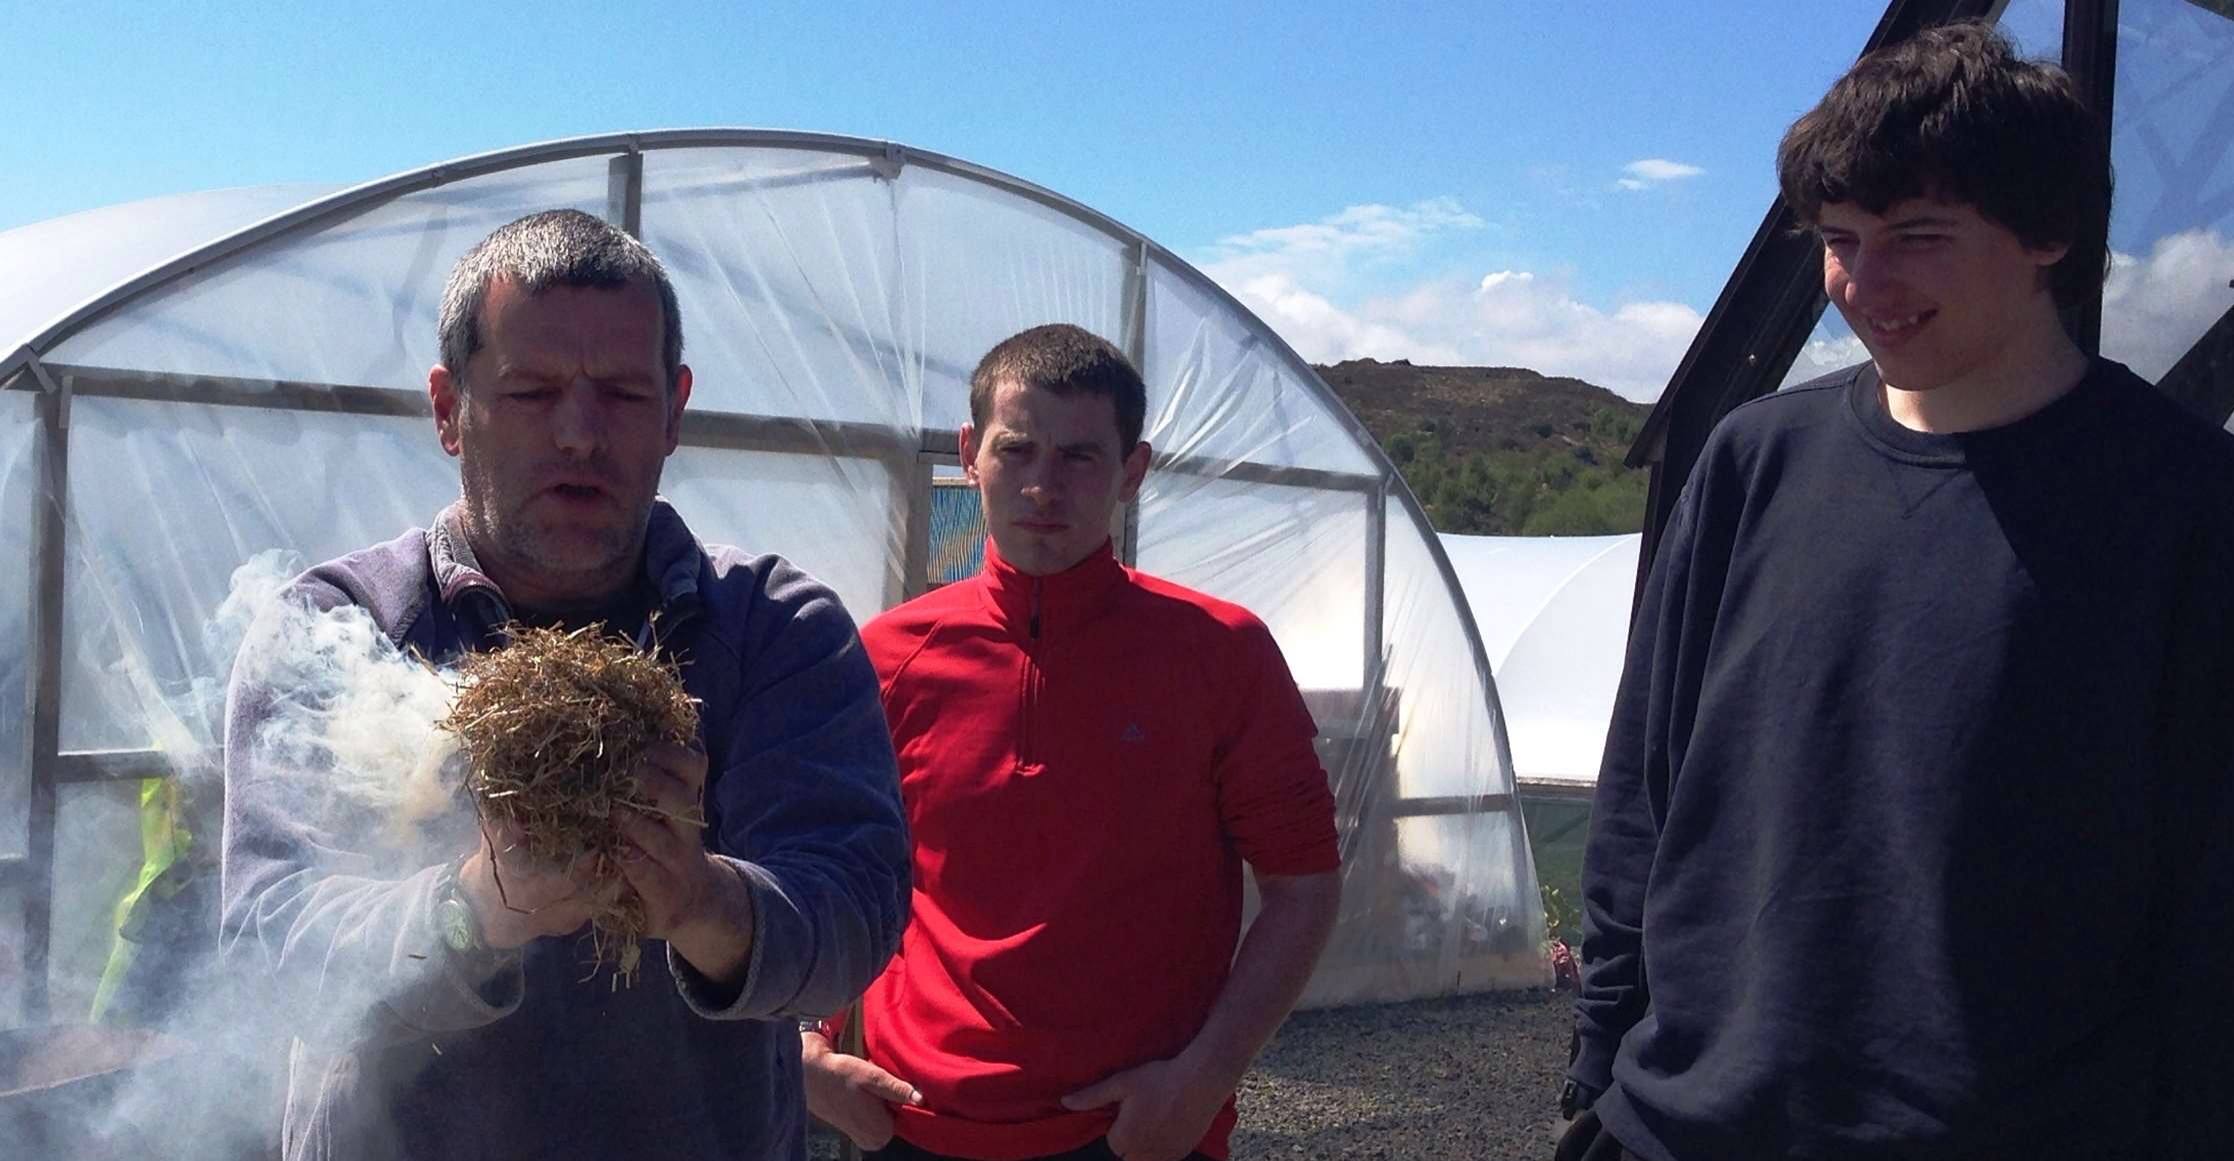
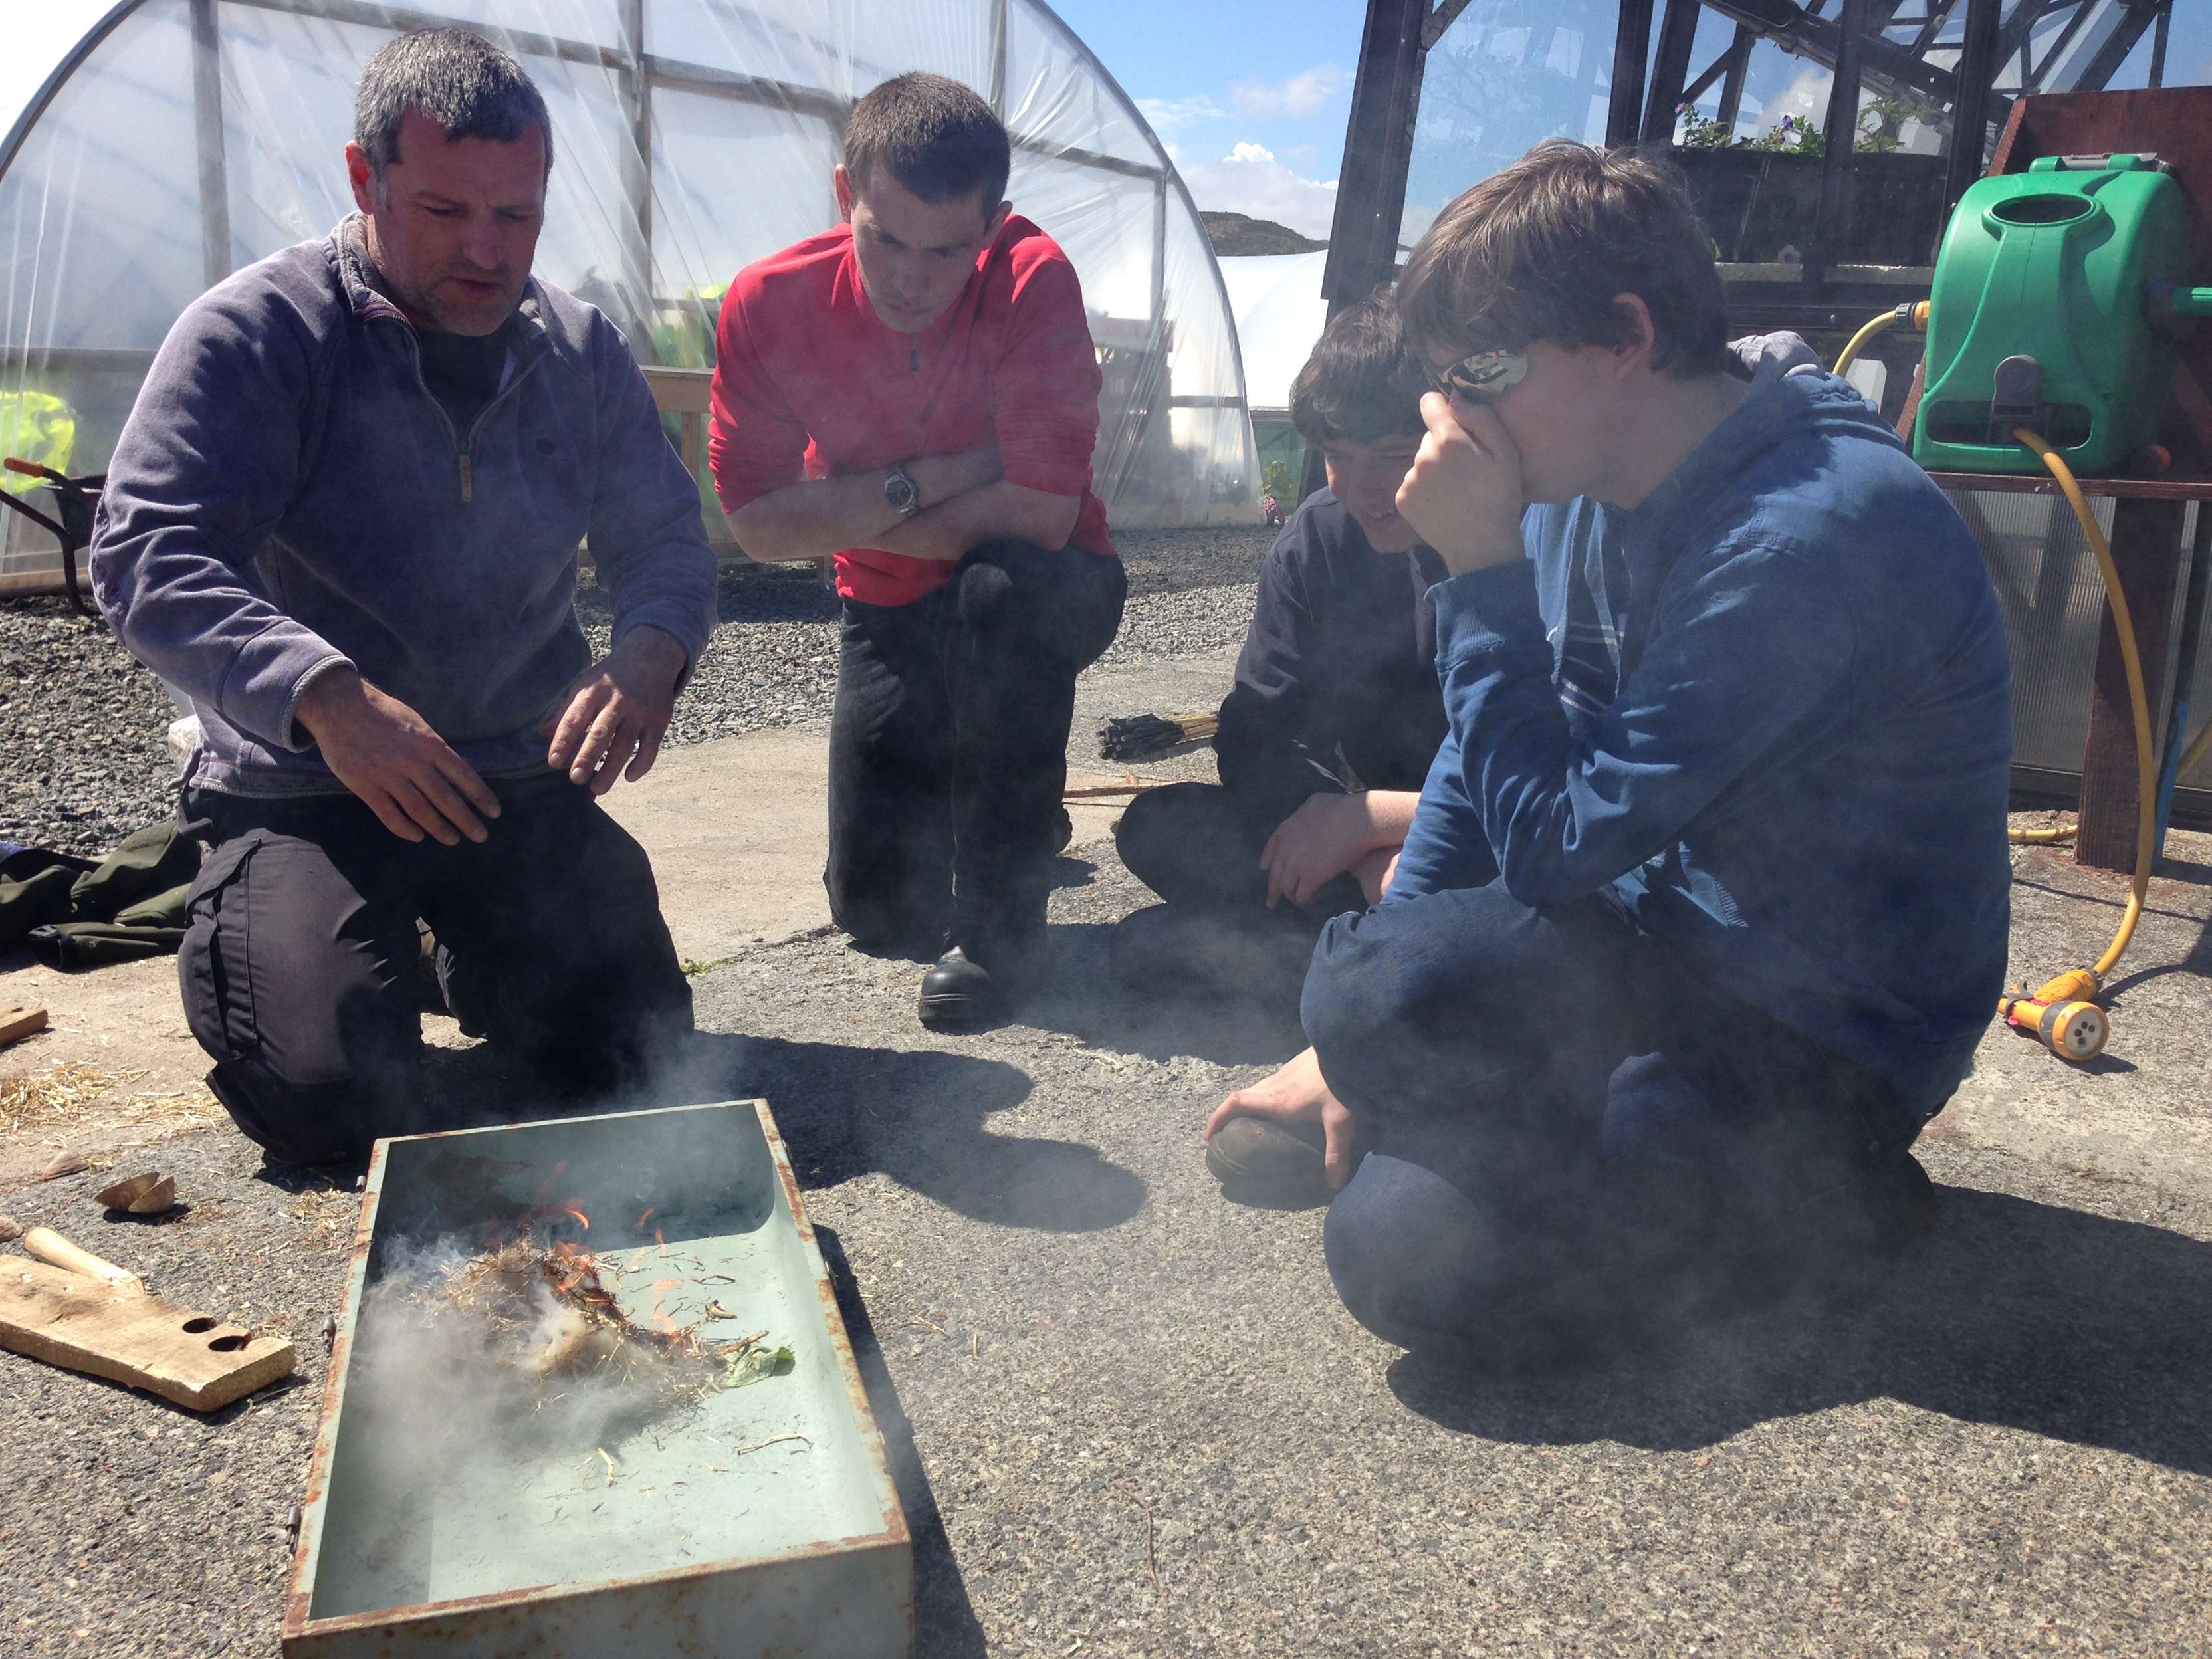
After the cotton wool balls I got the class to catch some sparks onto some char cloth that we then popped into some hay.
First tinder bundle
Everyone was happy when we got that first tinder bundle burning happily.
First flames
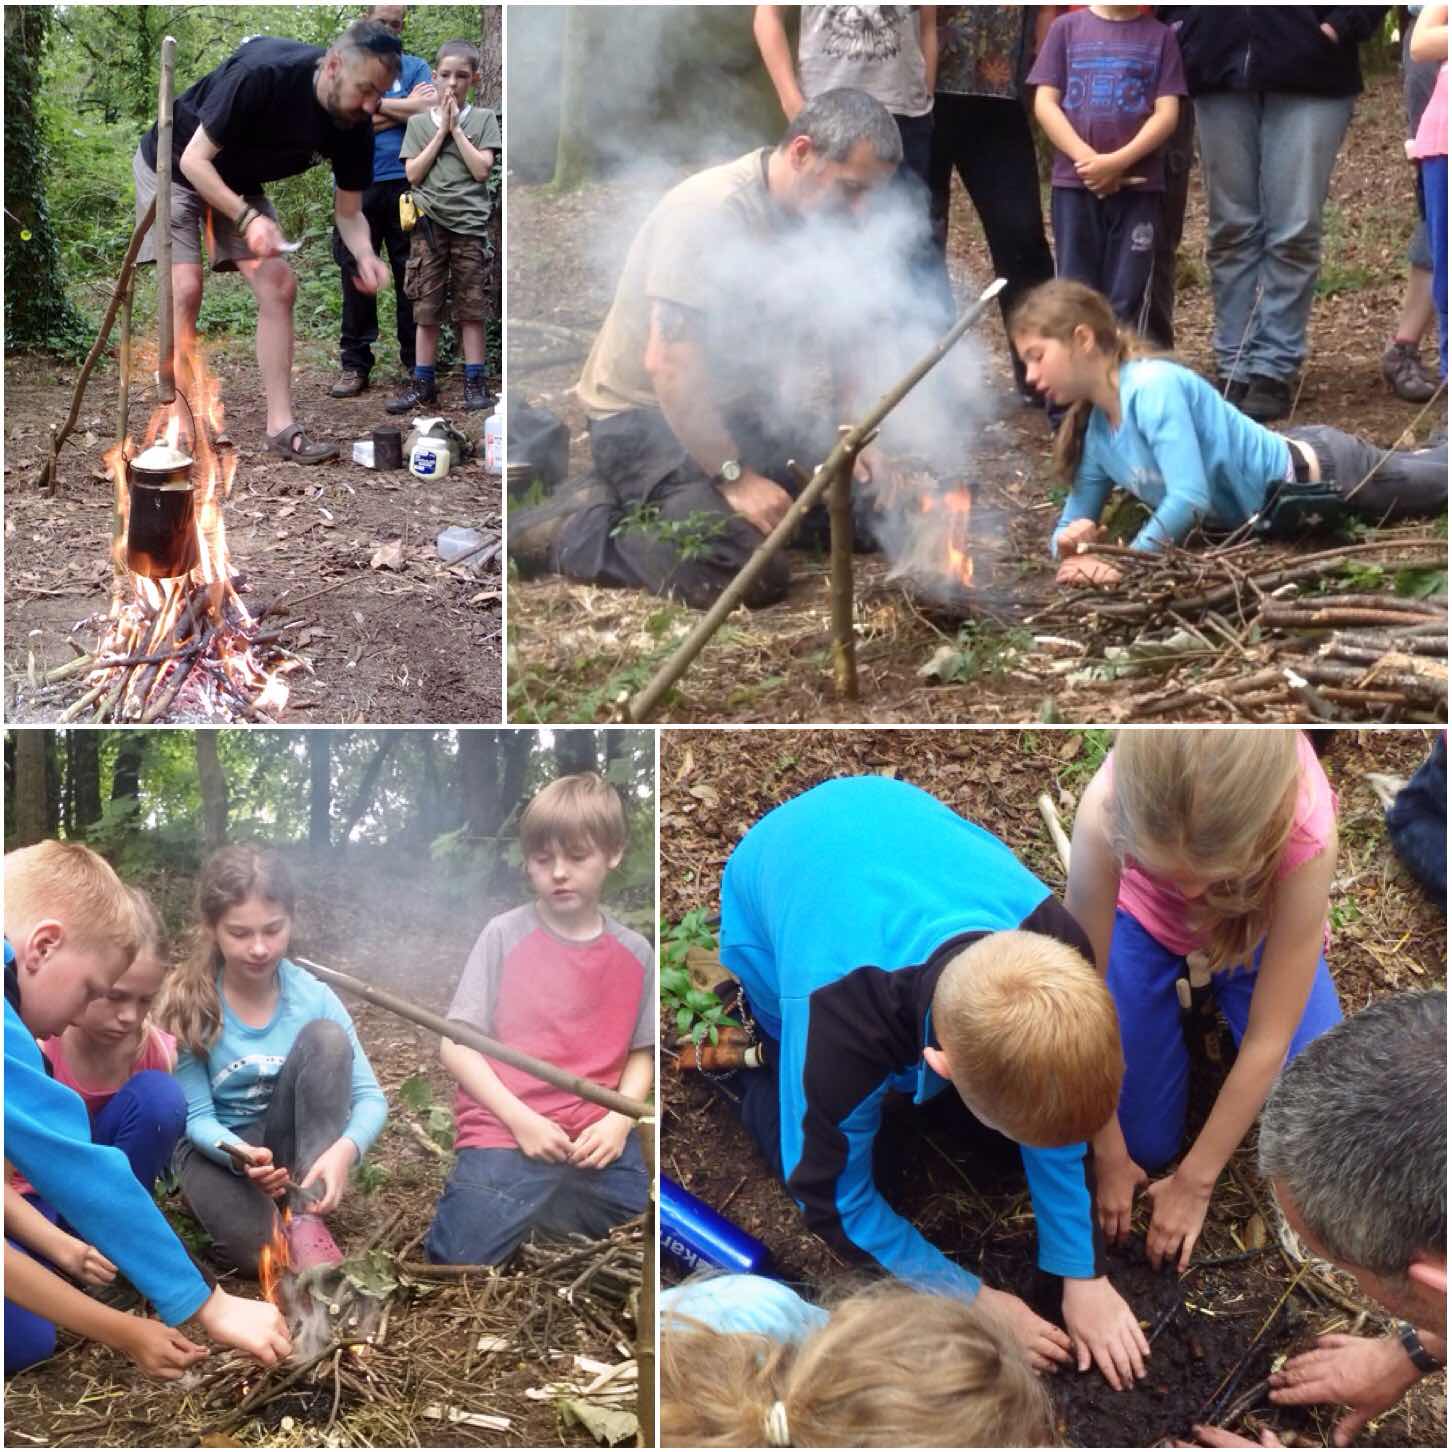
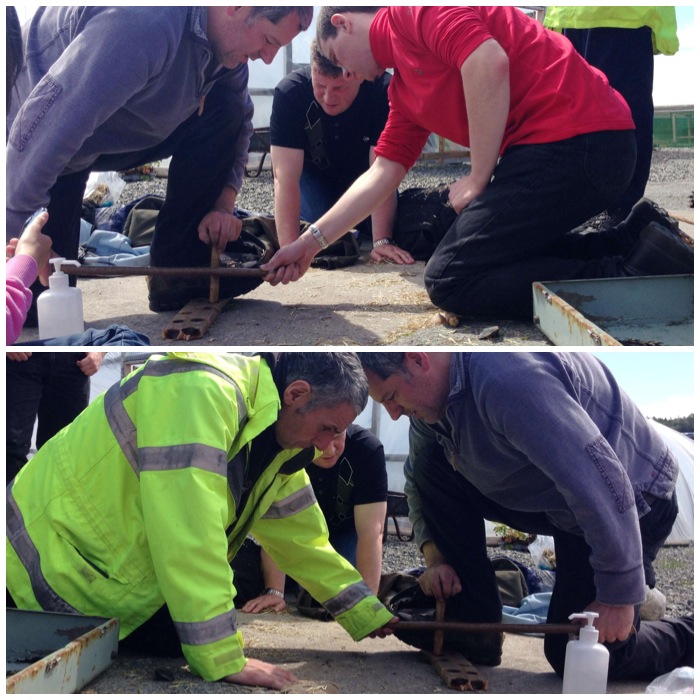
After the firesteels it was time to make some Lucky Fire, sometimes known as the Beltane, the Need fire or Forced Fire on the islands. In Gaelic it is called teine eigin (translates as ‘fire from rubbing sticks together’). Bushcrafters normally call this skill the Bowdrill but what is not commonly known is that this method of fire lighting was used in Scotland in some places to light fires up until the middle of the 19th century.
I doubled up with each of the guys to give them a feel for how it worked but due to a lack of time could not teach them to do this on their own. The wood was lovely and dry due to the sunny day and we soon had some good coals going.
Bowdrill teamwork
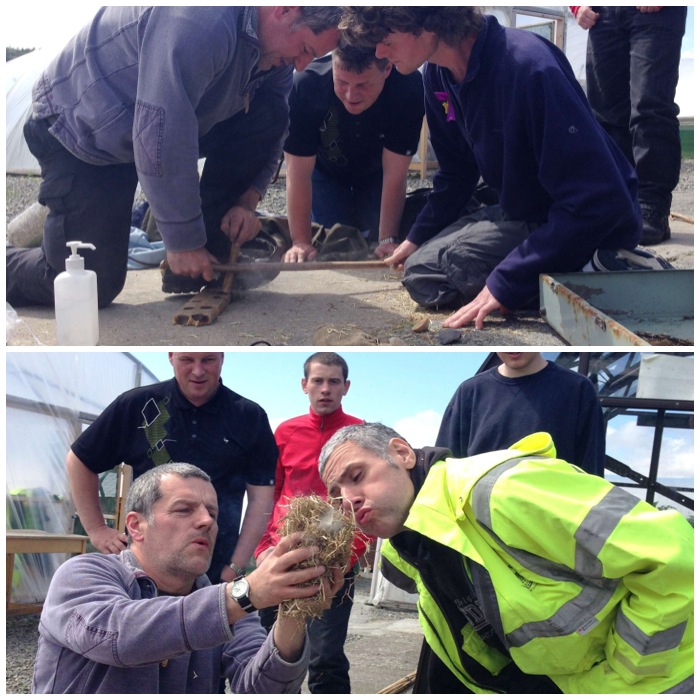
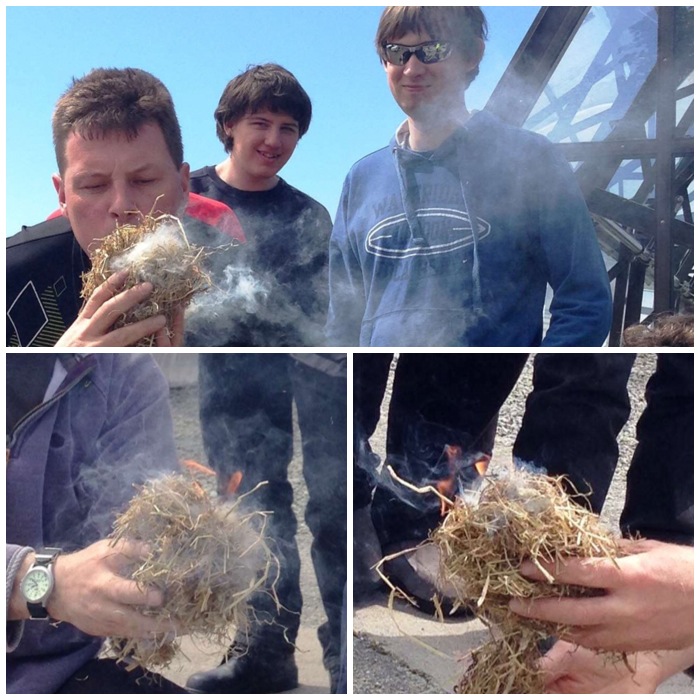
As we were bowdrilling I explained how this technique had been used on the islands until very recently and it would have been quite likely that some of their recent ancestors had used this technique to light a fire. After getting a few coals we popped one into a tinder bundle and started blowing that into flame.
Final strokes and getting the bundle going
Everyone was keen to be involved in all parts of the process of making fire.
Everyone had a go
Even the boss John got involved and before we knew it we had flame again 🙂
Even the boss John got a go – then we got flames again
As we could not keep the fire going because of the college safety rules all I could do with the class was to explain at this point how they would go about building their fire up so it became self sustaining.
Flamage
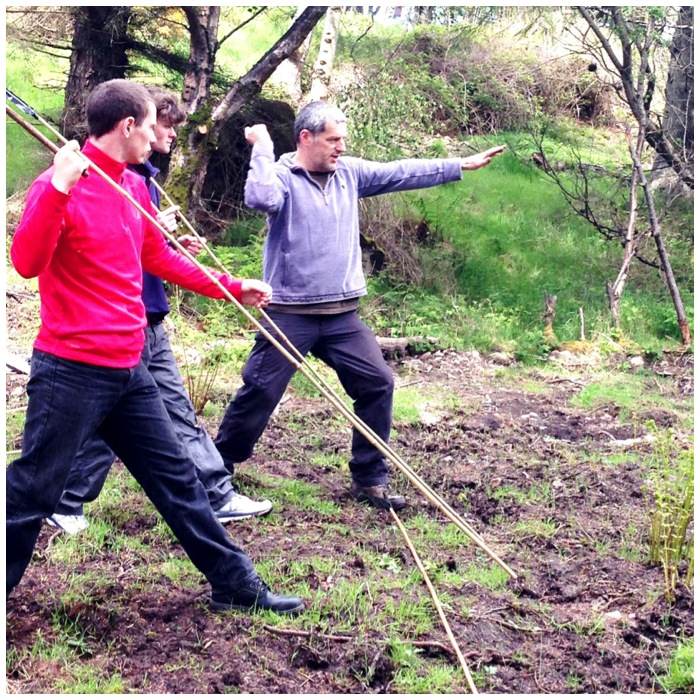
The final activity was to get the Atlatl darts out. I could not bring any with me on the plane so I just bought some bamboo canes locally and made flights out of tape. All in all the set cost me about £6.
After a bit of tuition to each pair it was time to do some shooting.
A little bit of Atlatl tuition
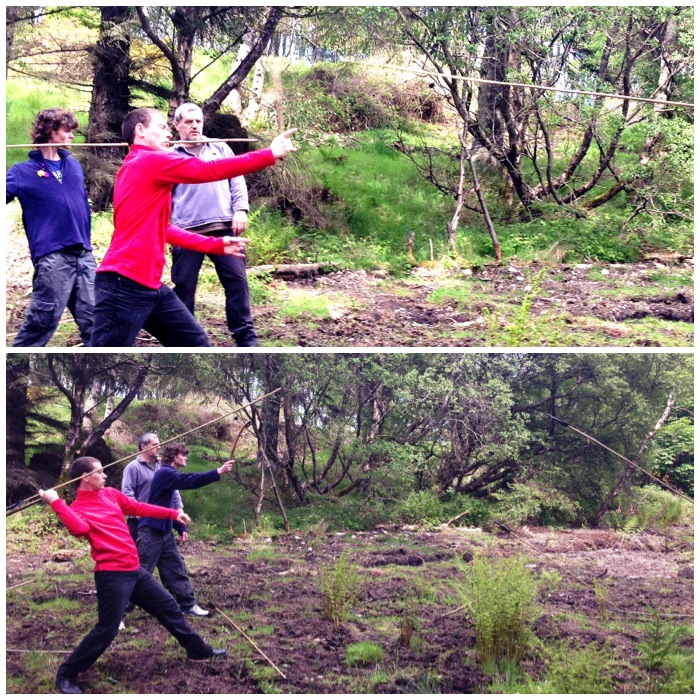
In no time they were getting the hang of it. We did though have to move our target (thanks for your ingenuity here John) as some golfers had lost a ball and were searching for it in scrubland near the target.
Boys having fun
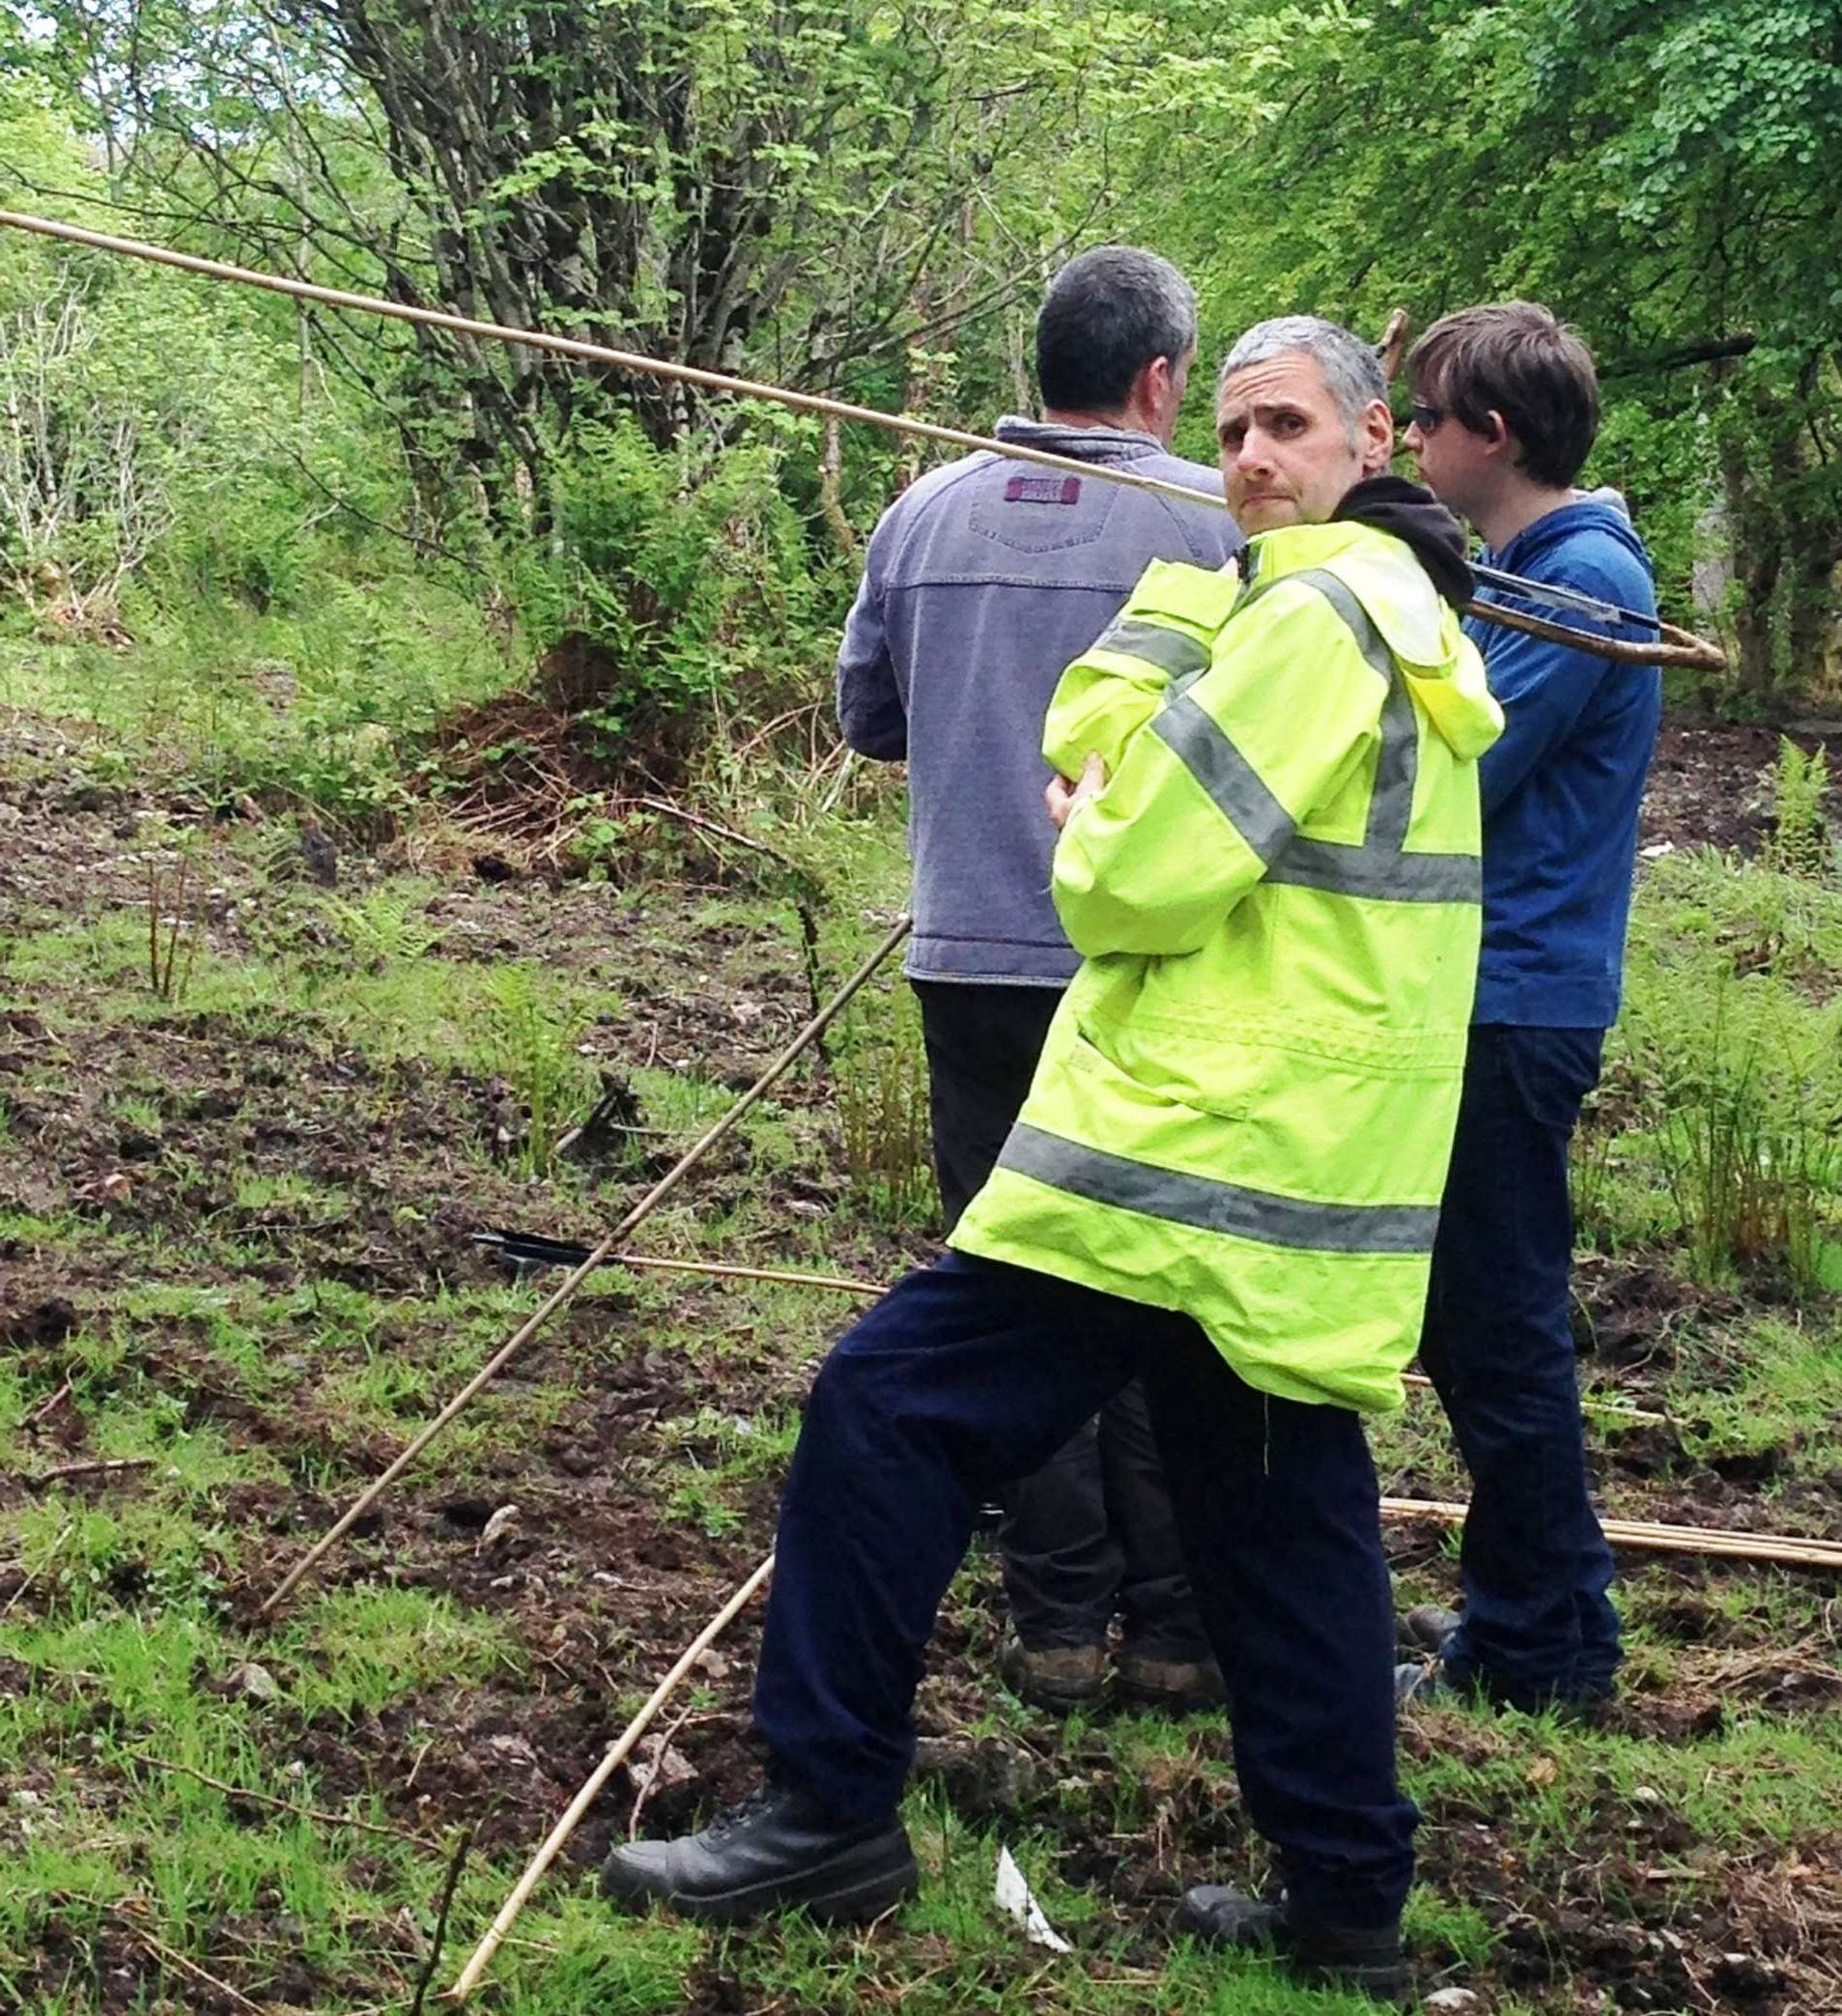
I think John is a possible convert to the Atlatl by the look of the concentration on his face.
Some good Atlatl throwing
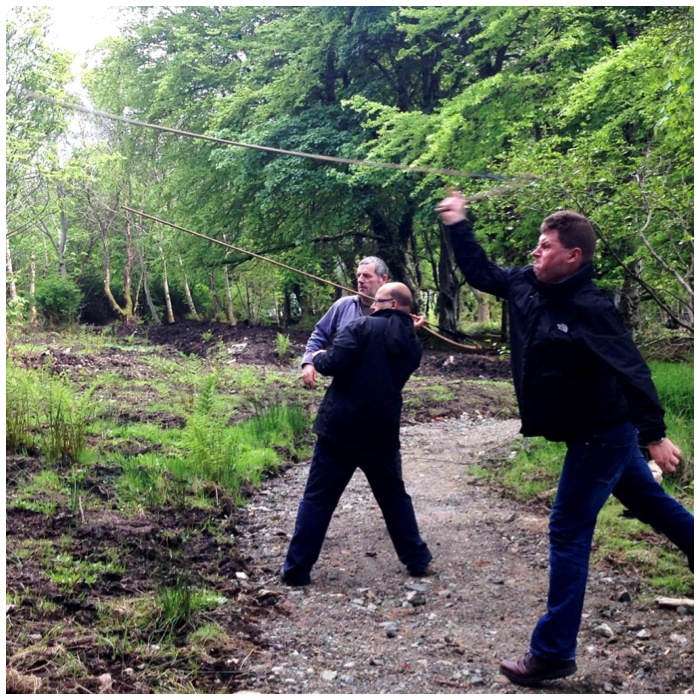
I really enjoyed teaching my brother Finlay to use the Atlatl.
My brother ready to shoot
In the end they all got the hang of it and were happy to be chucking darts down the range.
Dart away
I must in the end thank my sister Tina and John for arranging this day as I had a fabulous time working with everyone in Finlay’s class.
After the day was finished I was really struck by how many of the skills I practise under the title of bushcraft were being practised on a daily basis on the Isle of Lewis just a few generations ago.