How To…. Carve and Use an Adjustable Pot Hanger

The main benefit is – is that the tea gets made

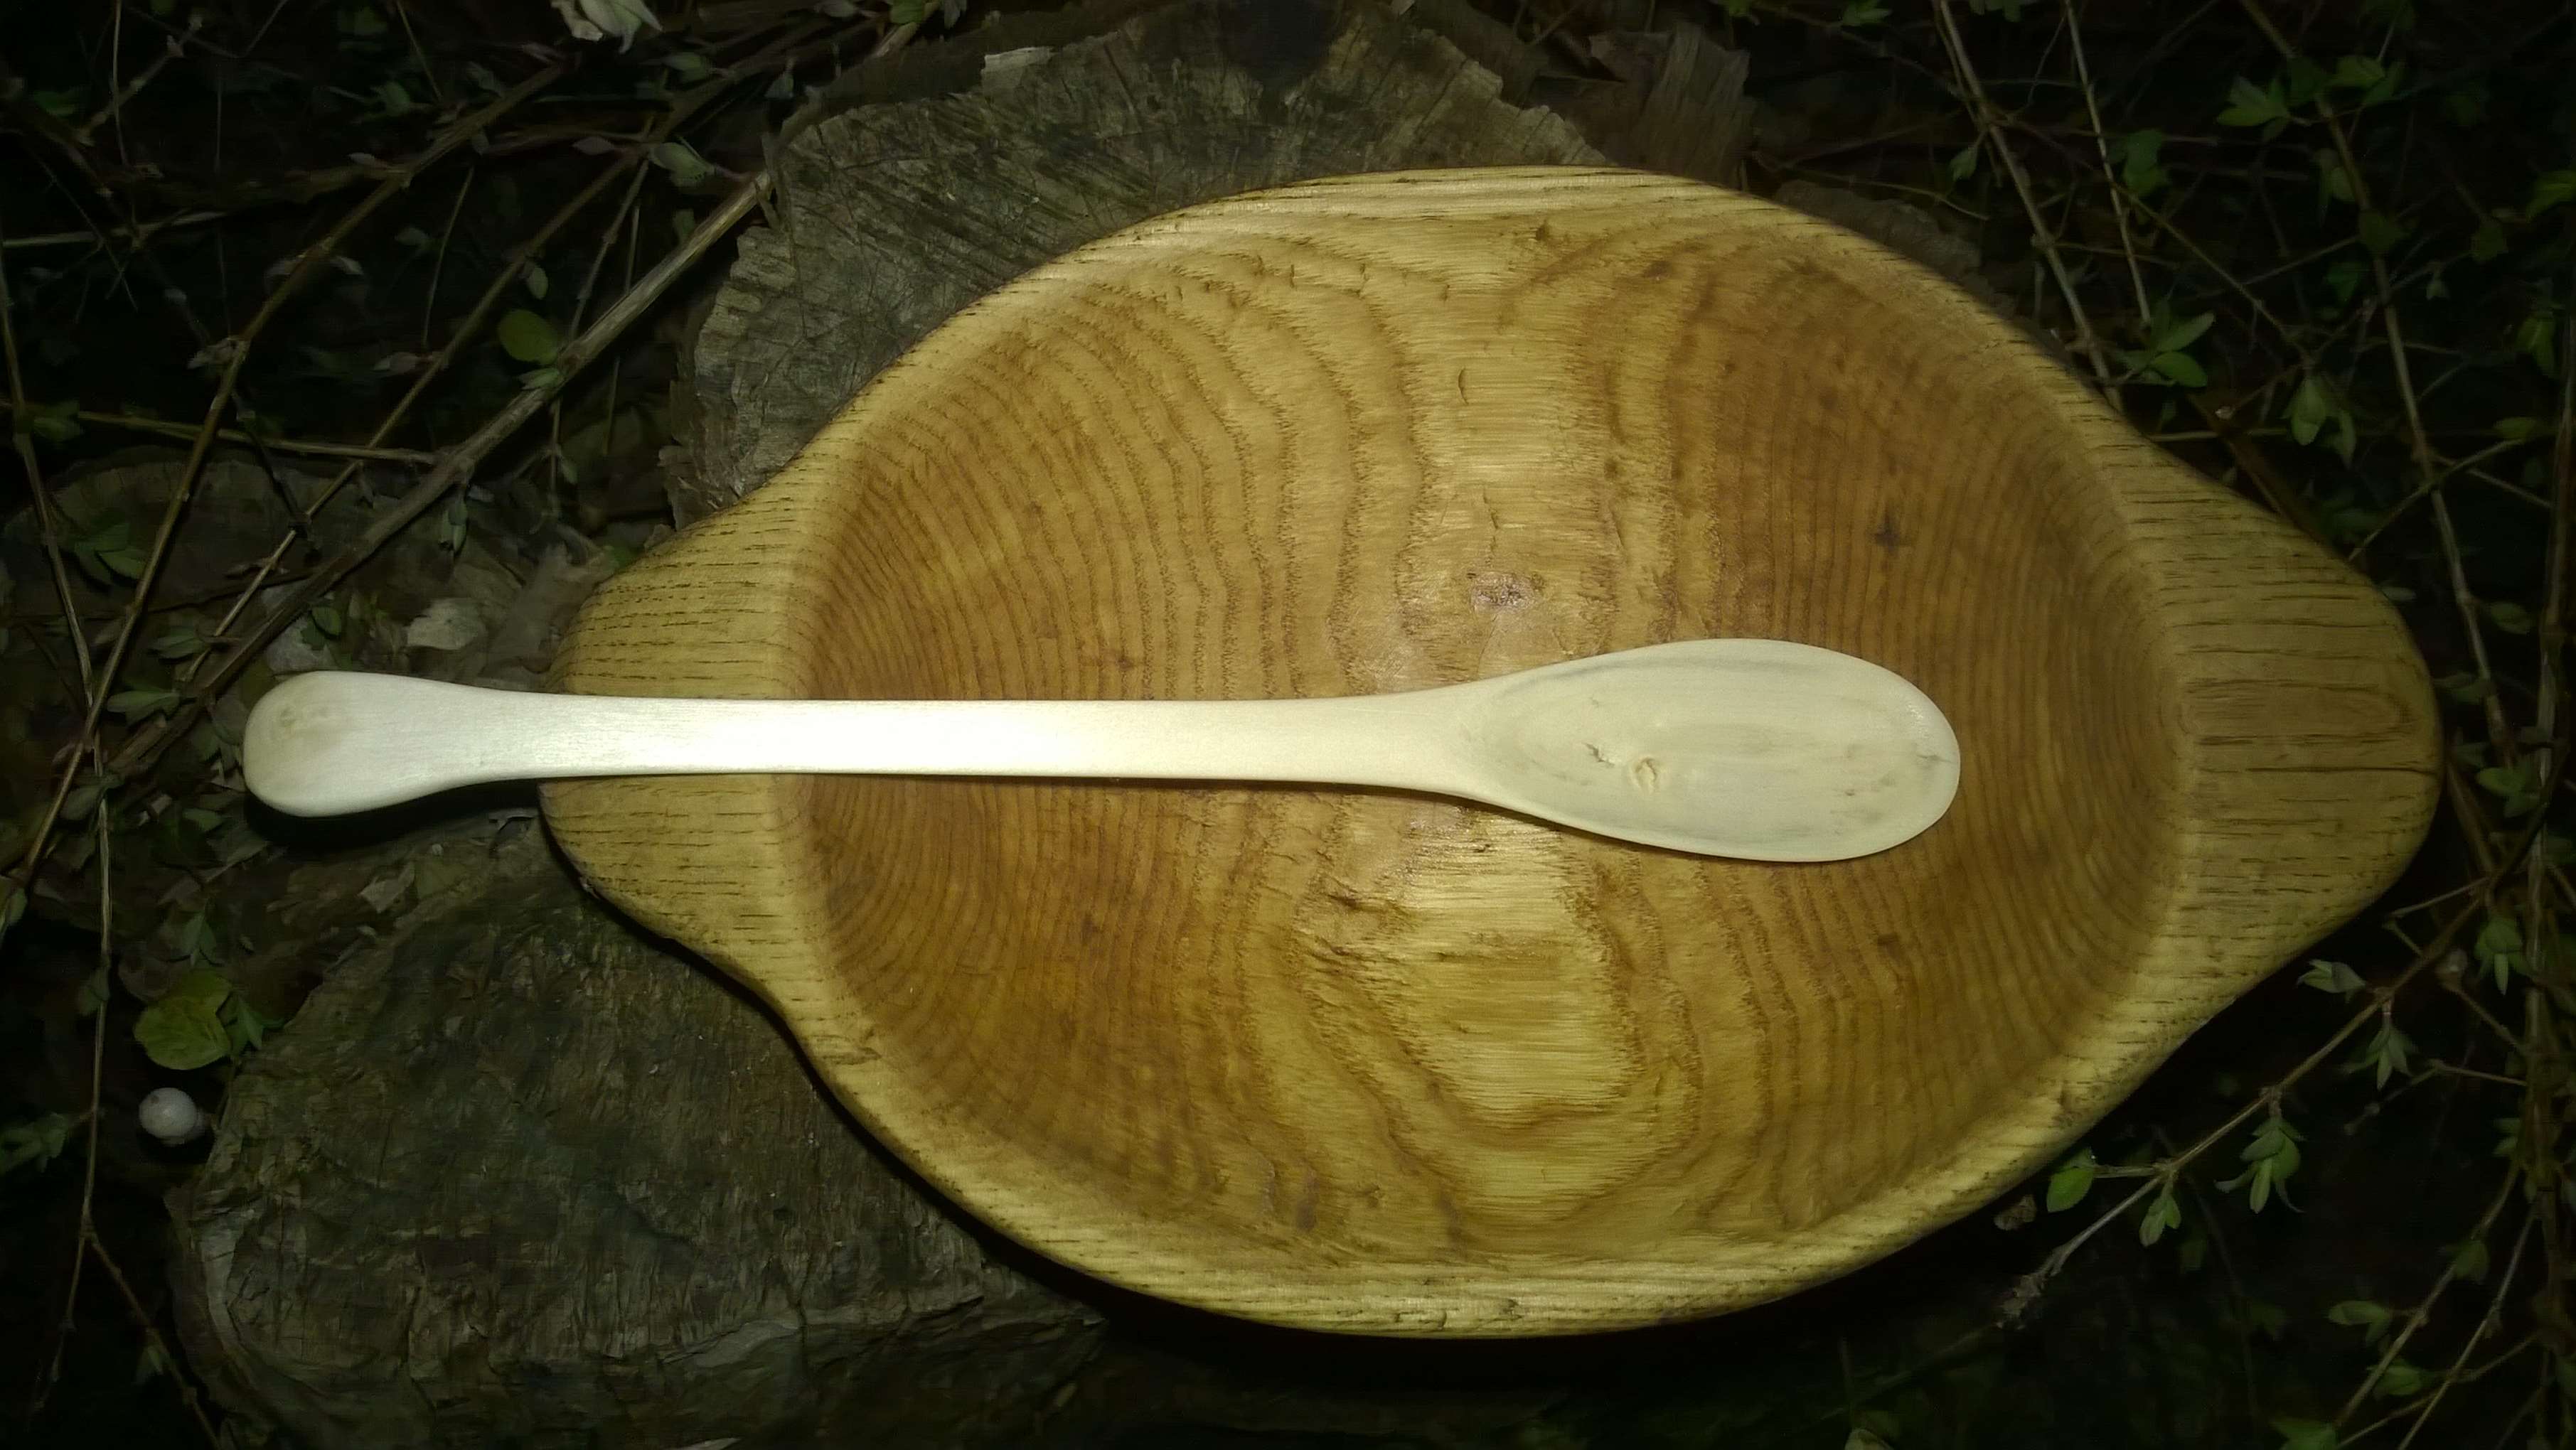
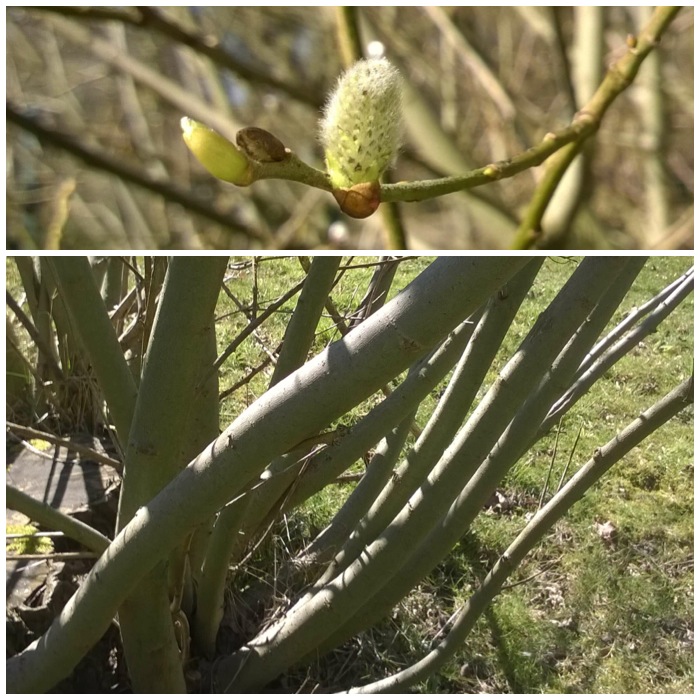
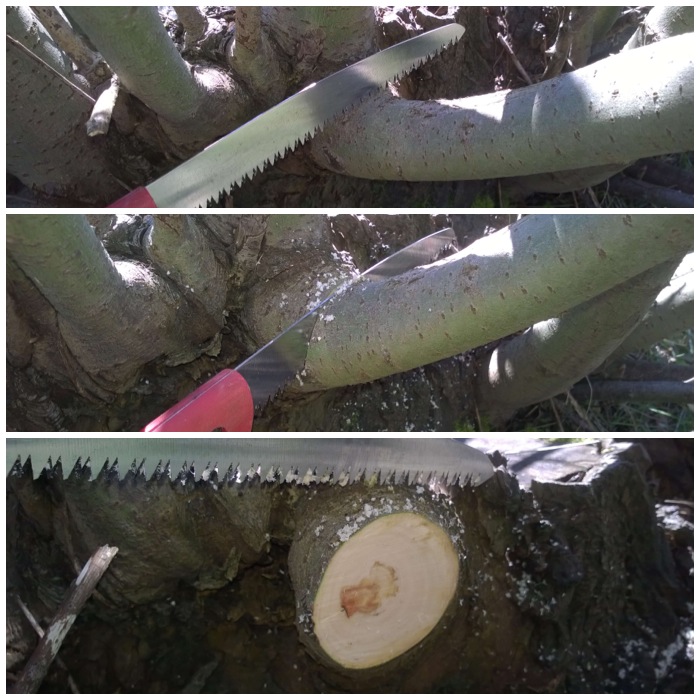
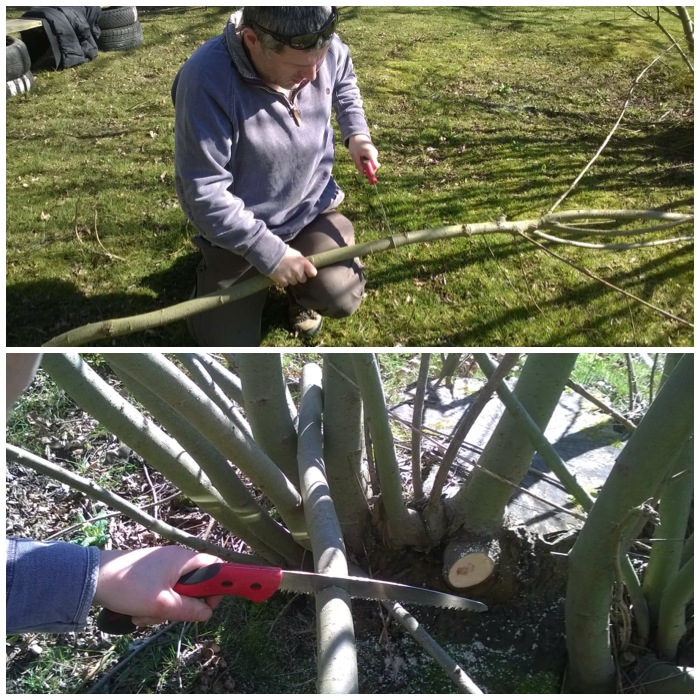
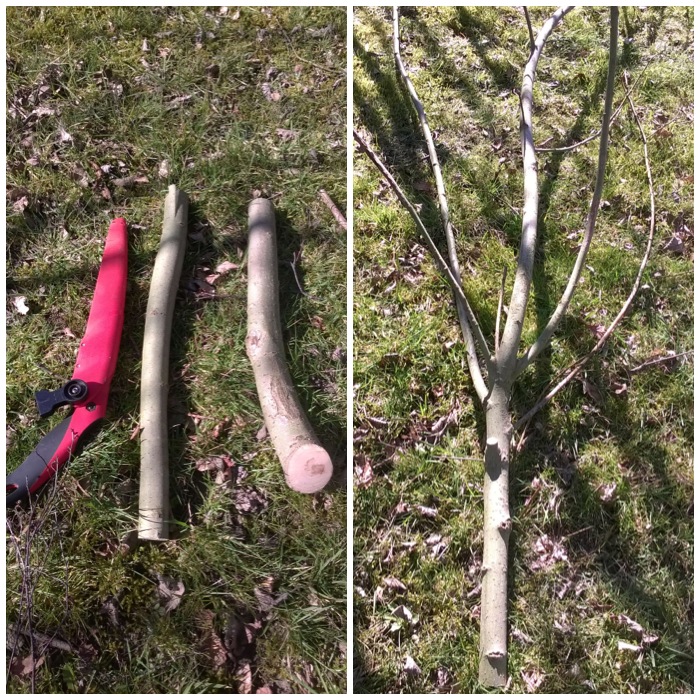
I was trimming an ash tree in my garden recently with my friend Paul and I managed to save a few pieces for Atlatls and pot hangers.

I have previously shown you how to carve a collapsible pot hanger so that it can fit into a pot when not in use but on a lot of occasions I just whittle one when I need one.

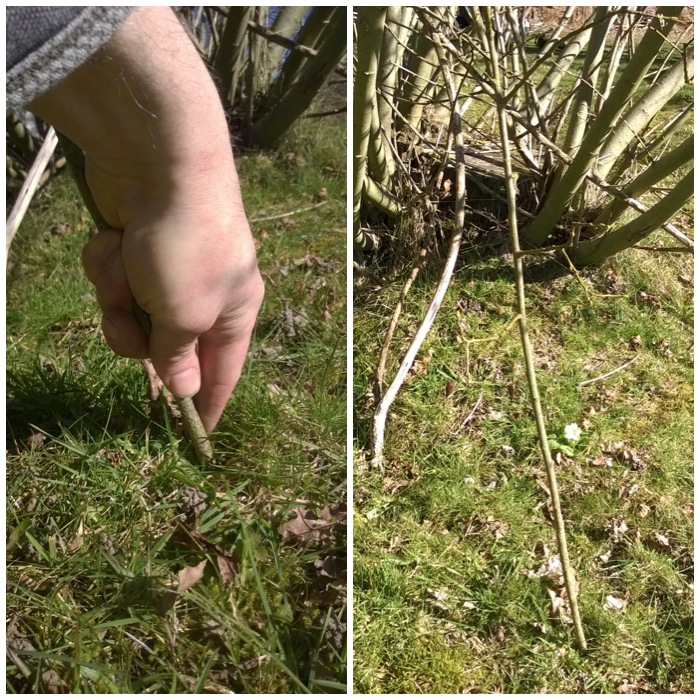
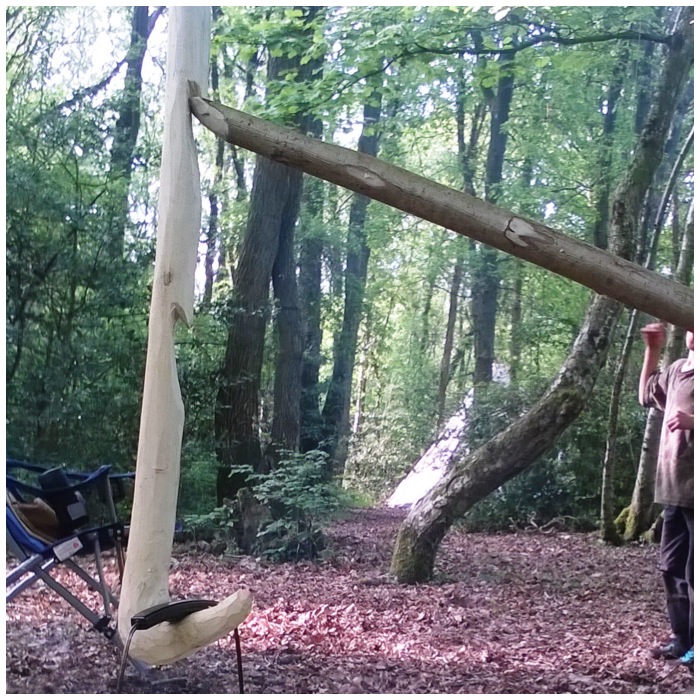
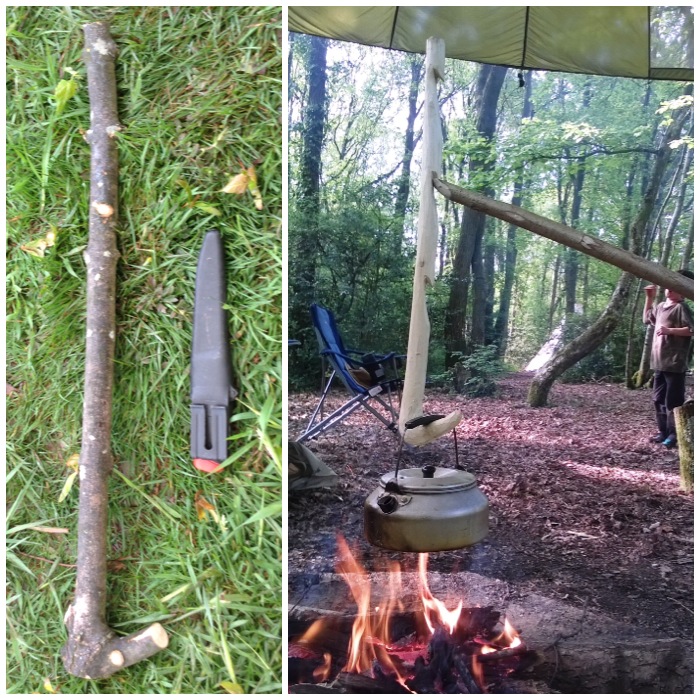
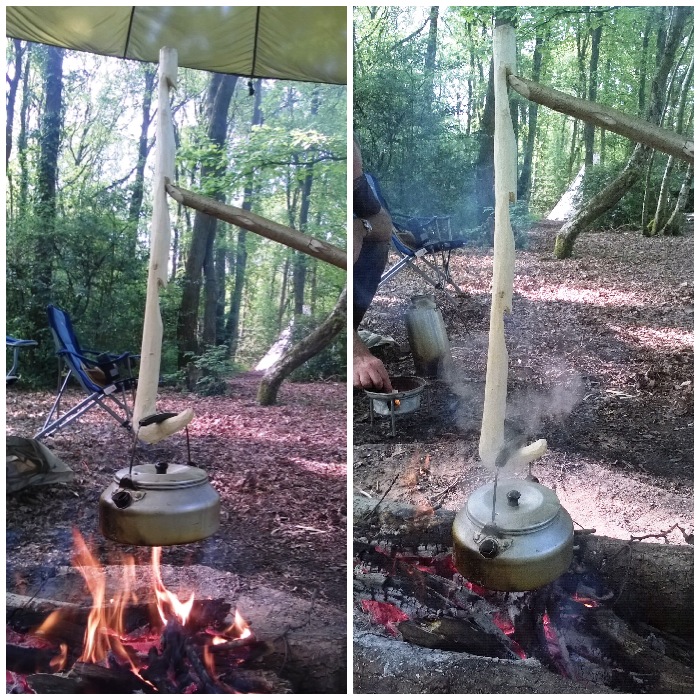
The type of pot hanger I am talking about is shown below hanging off a ‘Wagon/Waugan Stick’ (pronounced waygone or worgan – I hear different variations on this from different people) campfire  set up. The pot hook is adjustable in that the pot is easily raised or lowered by using the different hooks on the pot hanger.

Photo 22-05-2014 00 36 16
A simple pot hook

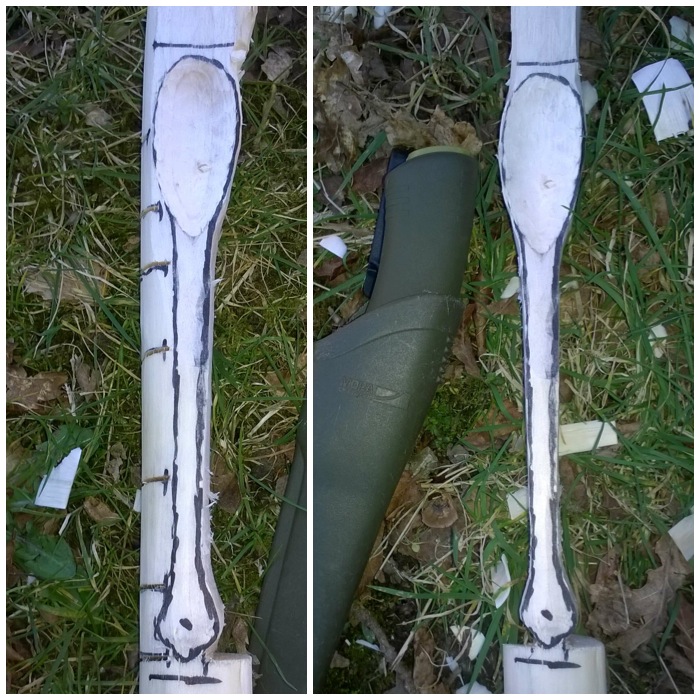
I started off with a piece of ash that had a fork in it at a good angle (to form a hook) and finished up with something that allowed me to be able to quickly or slowly cook/boil something.

On the right you can see the finished pot hanger in action. To help stop any confusion I will refer to the large hook holding the small kettle as the ‘pot hook’ and the small hooks as the ‘adjusting hooks’.

Photo 22-05-2014 00 26 15
Before and After

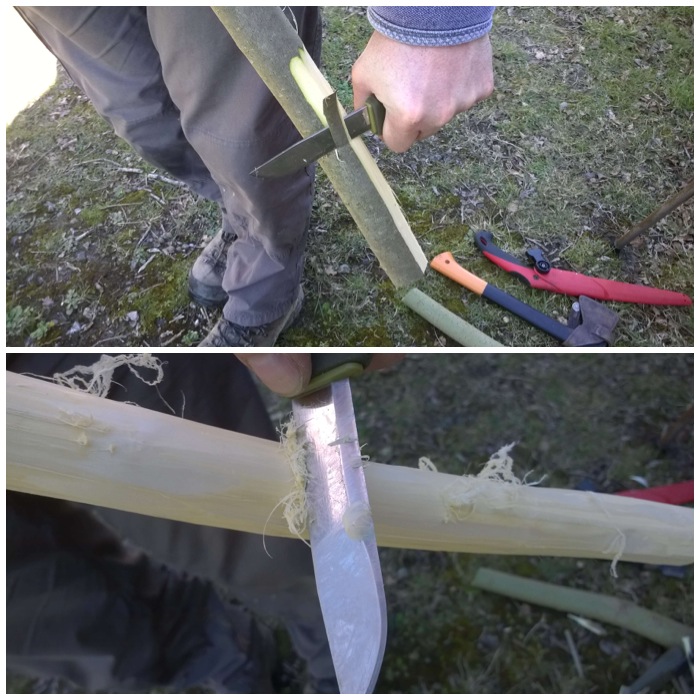
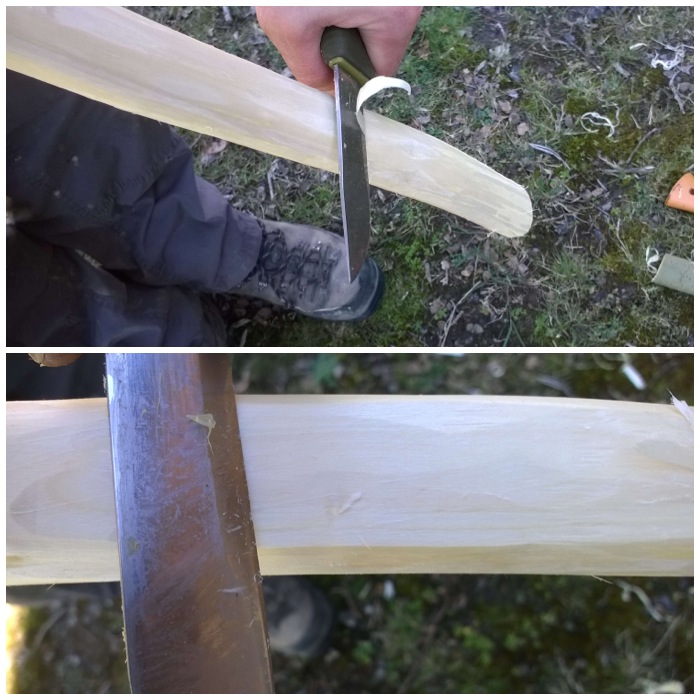
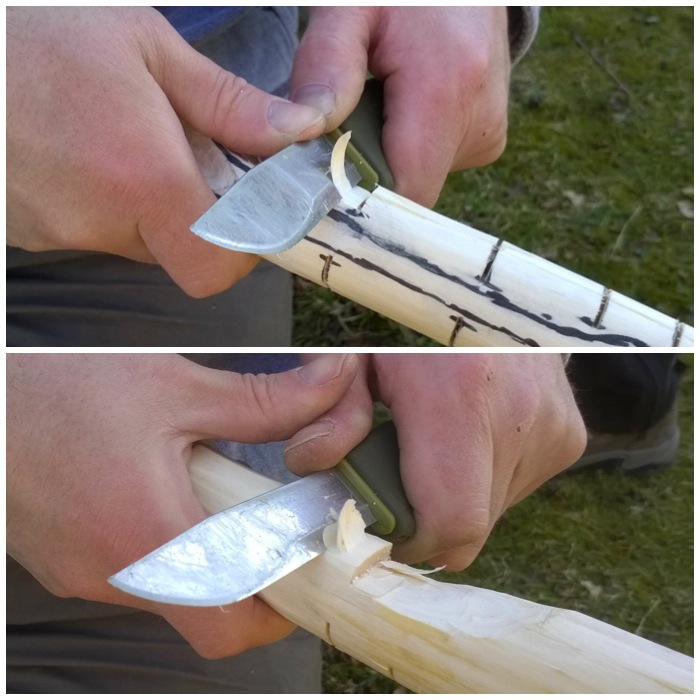
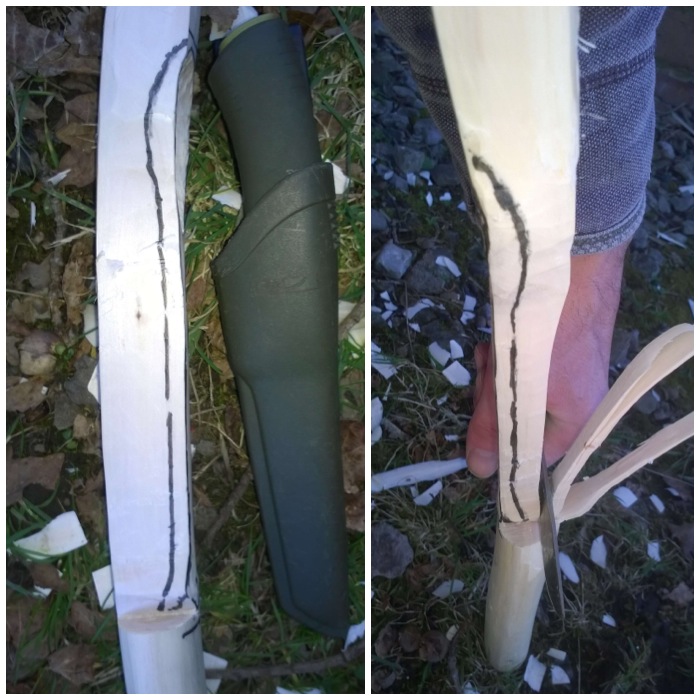
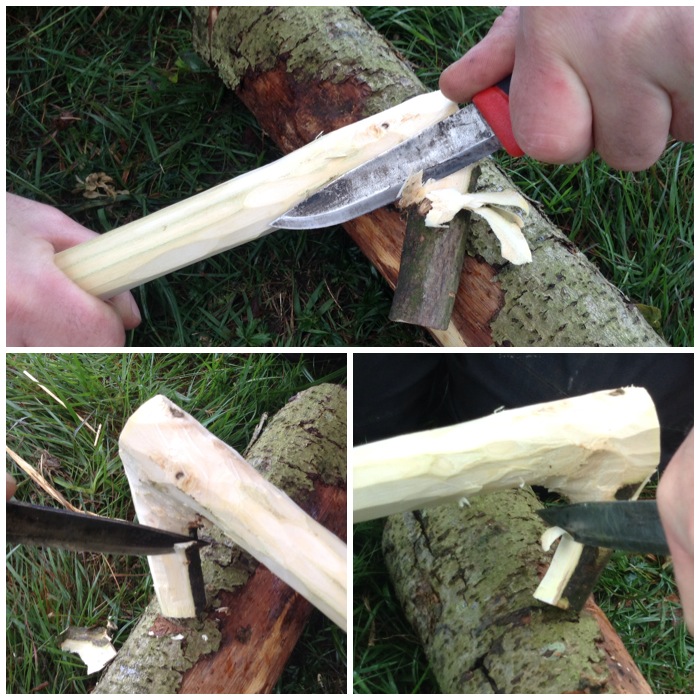
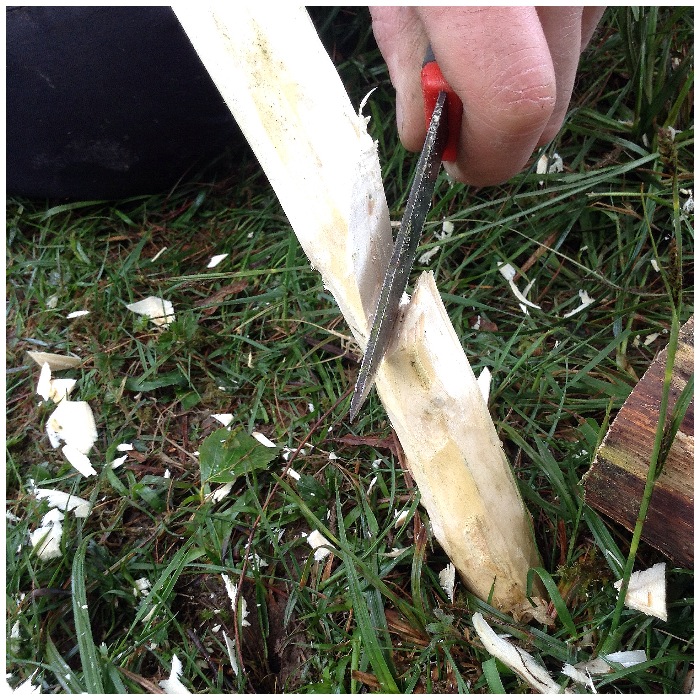
To begin with I trimmed off all the knobbly pieces using powerful chest lever and locked arm cuts. See my How To…. on knife Safety for more information on these types of cuts.

Photo 15-05-2014 15 30 23
Powerful cuts

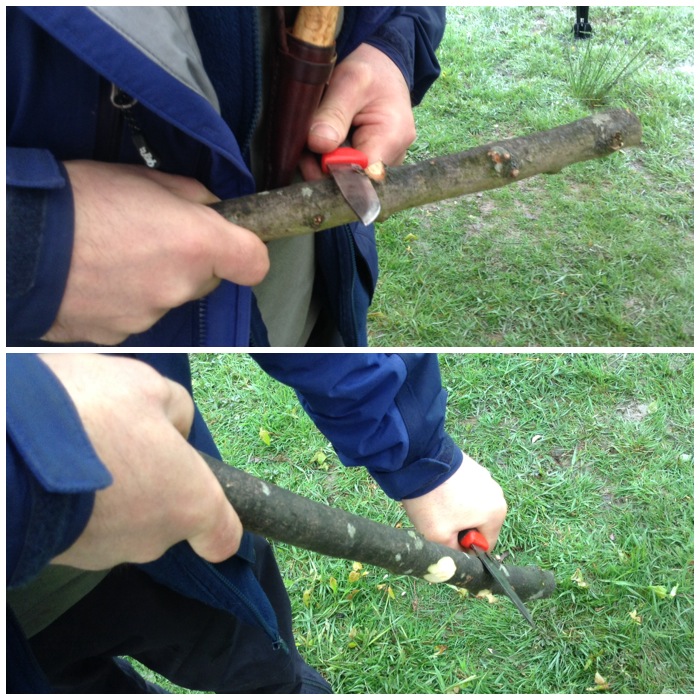
I then trimmed the bark off using a powerful shoulder cut. I had the work piece placed on the ground here off to one side so as to brace it and to work safely.

Photo 15-05-2014 15 31 31
Braced

To strip the bark around the hook area I used a gentle chest lever grip.

Photo 15-05-2014 15 35 09
Fine cuts

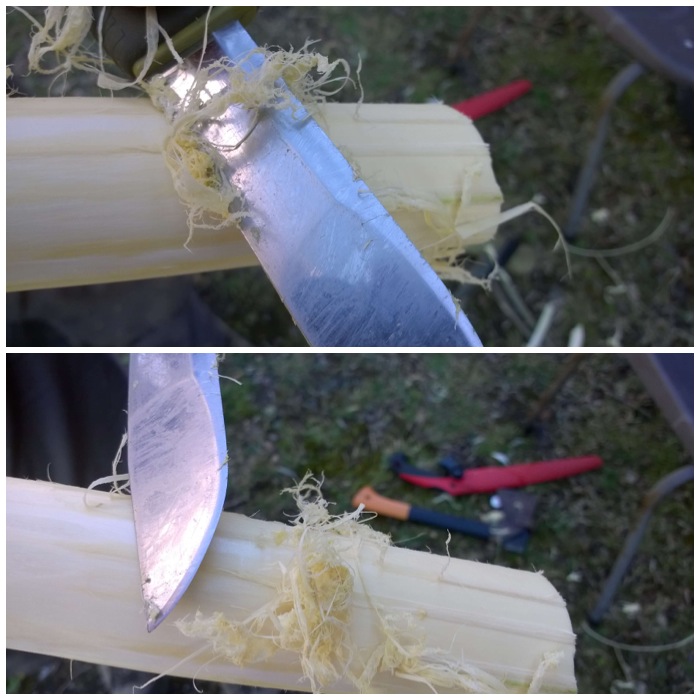
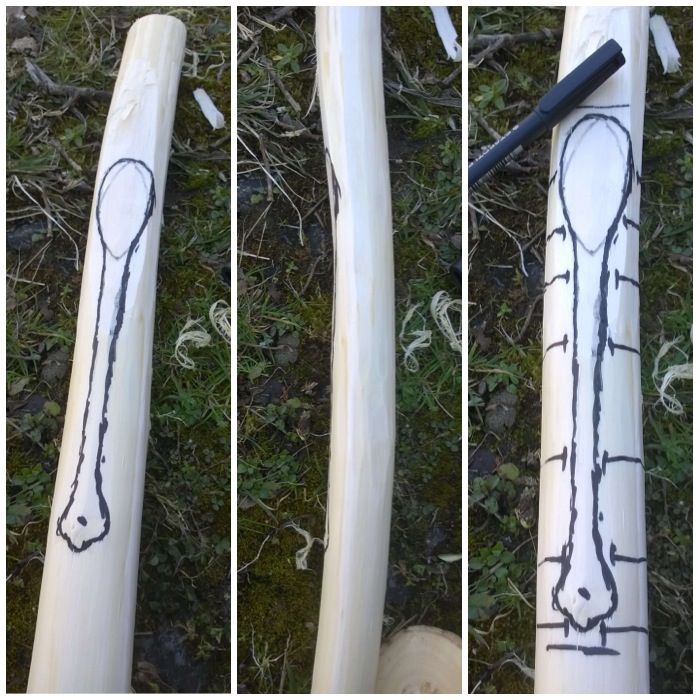
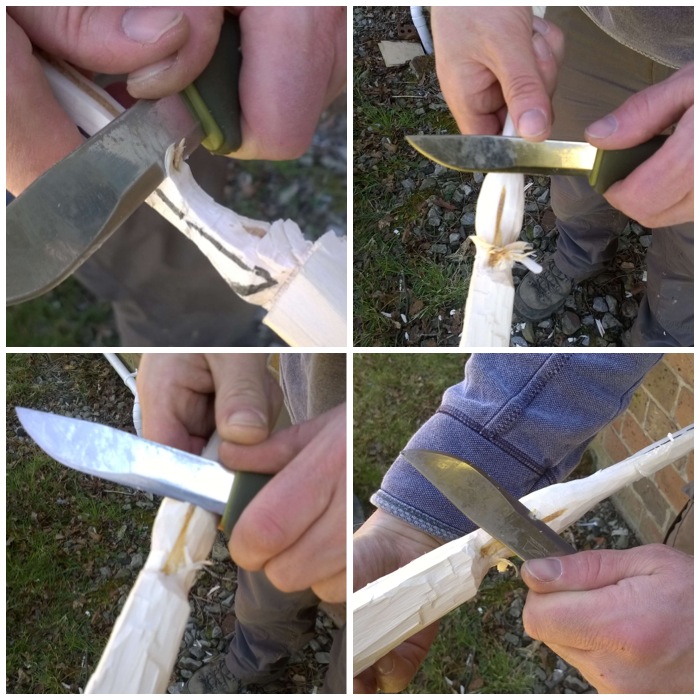
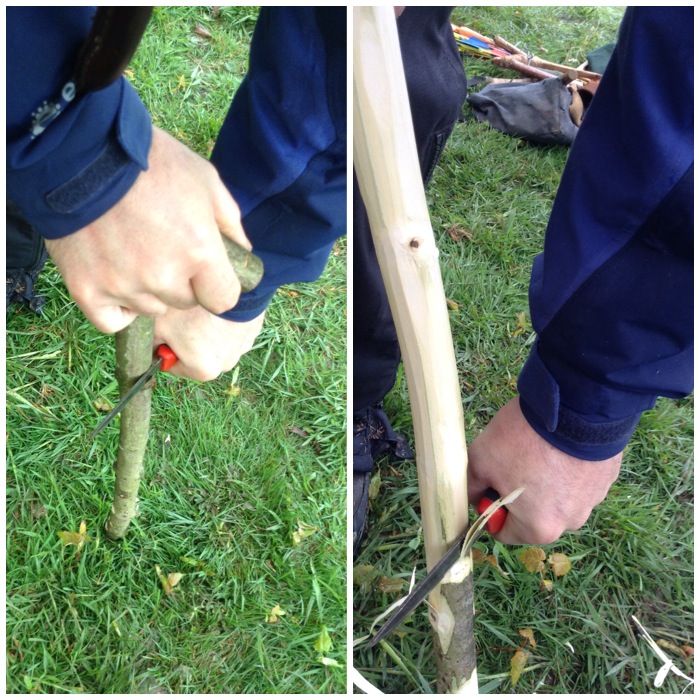
The bottom of the pot hanger was more difficult to trim as I had not left any excess wood to hold on to. The main thing I needed to consider here was keeping my eye on where my thumb was  on the hand holding the pot hanger.

Photo 15-05-2014 15 36 33
Work safely near the ends

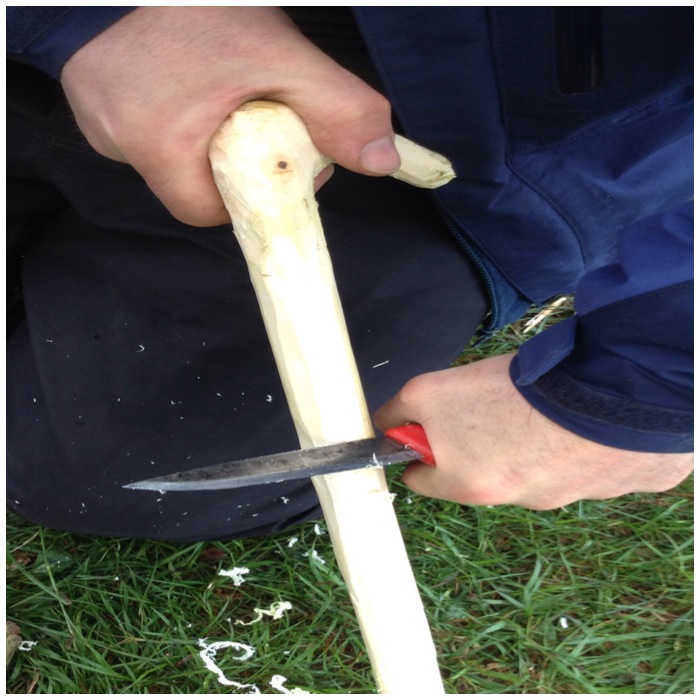
As I needed to use the point area of the blade to trim around the hook I kept the pot hook resting on a small log so that if the knife slipped it would hit the ground. My friend Charlie showed me how to use the knife and the curve of the pot hook to create a fulcrum, making the stripping of the bark safer. I tried to photograph this but they did not turn out well.

Photo 15-05-2014 15 39 40
De-barking the hook area

I also rounded the bottom of the pot hanger and then used the back of my knife to strip off the remnants of the inner bark.

Photo 15-05-2014 15 47 07
De-barking with the back of the knife

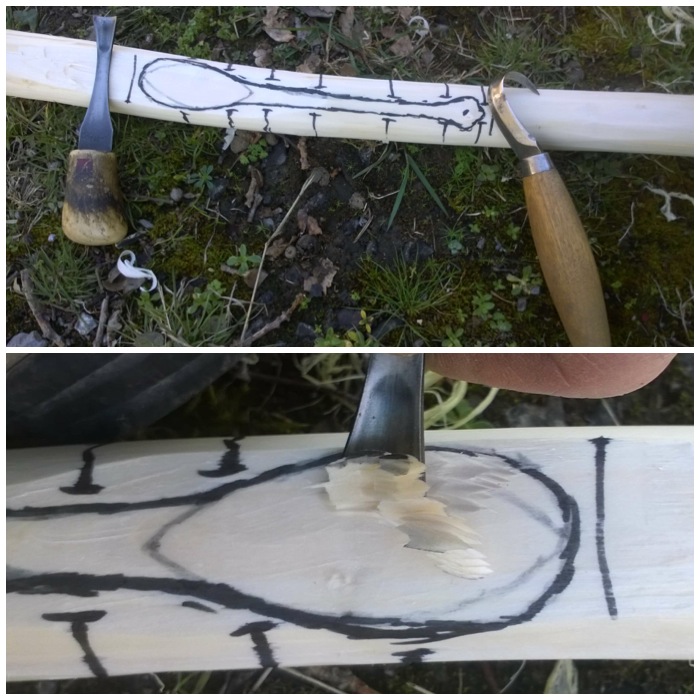
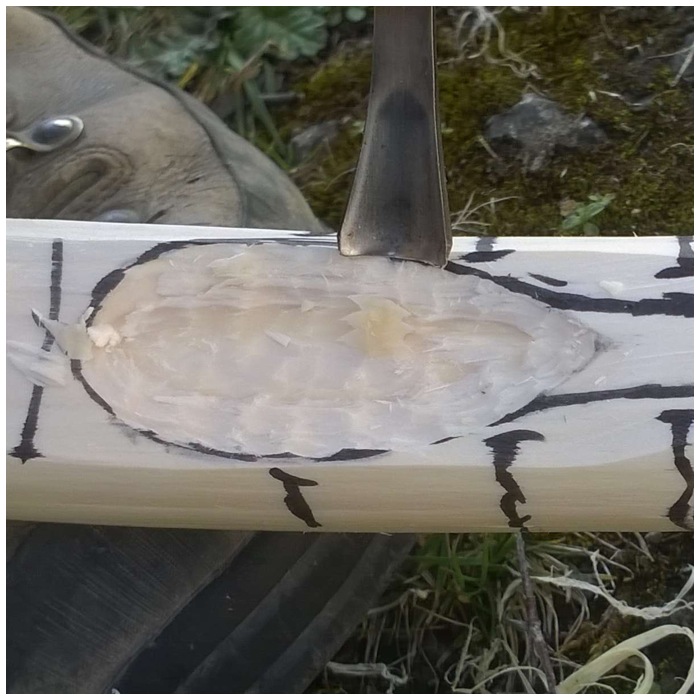
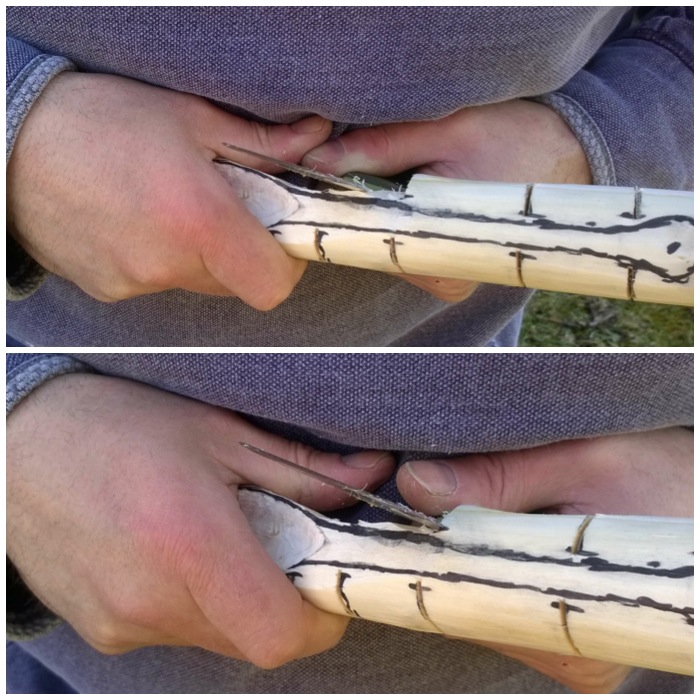
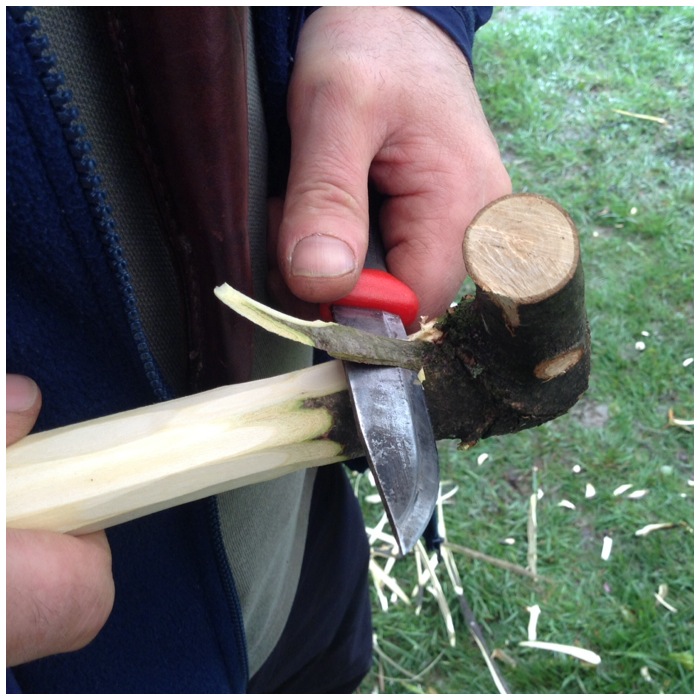
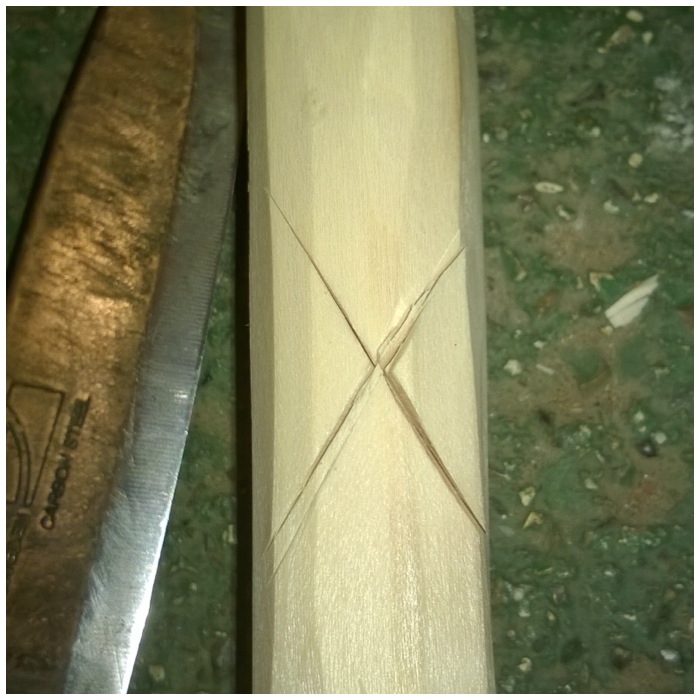
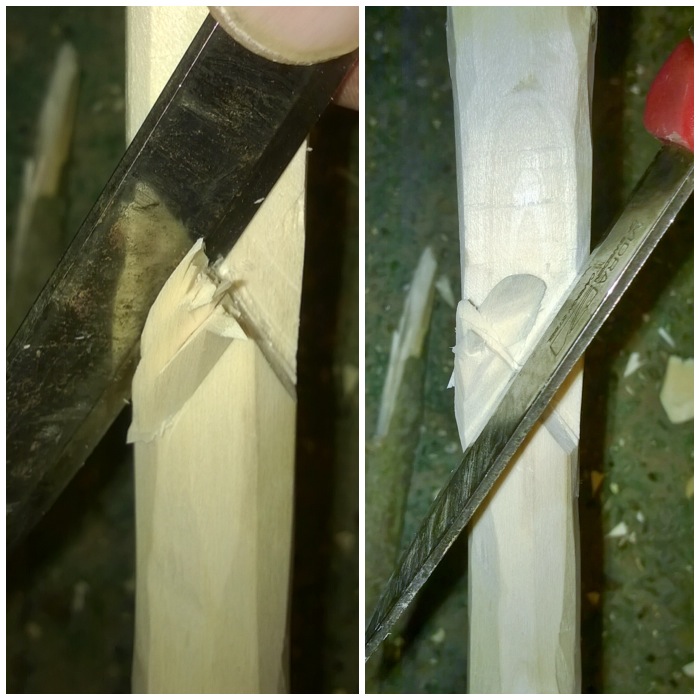
To make the adjusting hooks I used a batton (a large stick) to carve a cross into the wood – an X cut. I placed my X cuts in line with the pot hook as much as possible. After a couple of good smacks with the batton the knife had cut well into the wood.

Photo 15-05-2014 15 48 08
Batton in the first X cut

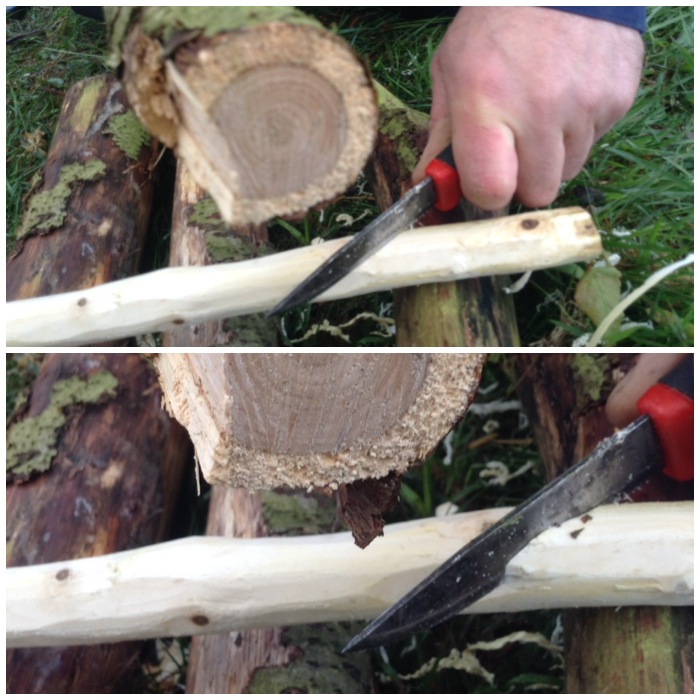
I then repeated the process for the other part of the X cut.

Photo 15-05-2014 15 49 57
Then the second X cut

A simple X cut – this cut makes the carving of the adjusting hook much easier.

Photo 21-05-2014 15 37 08
The X cut

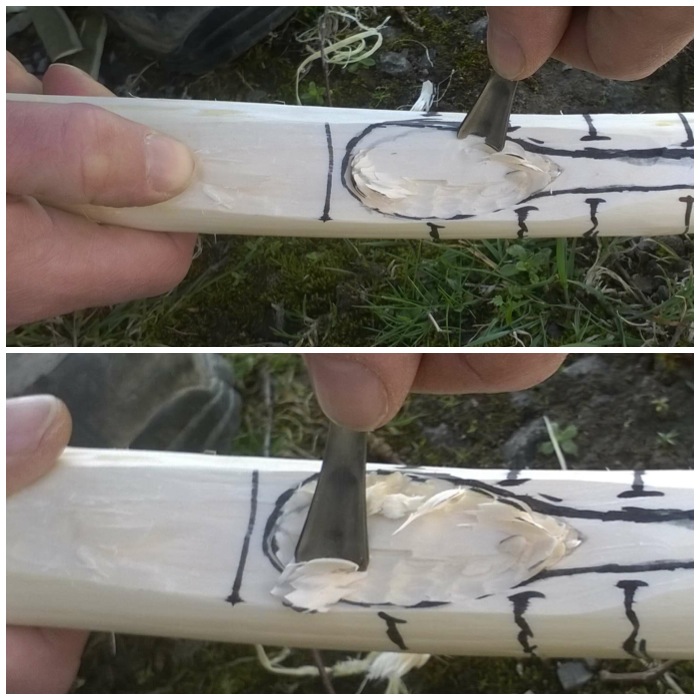
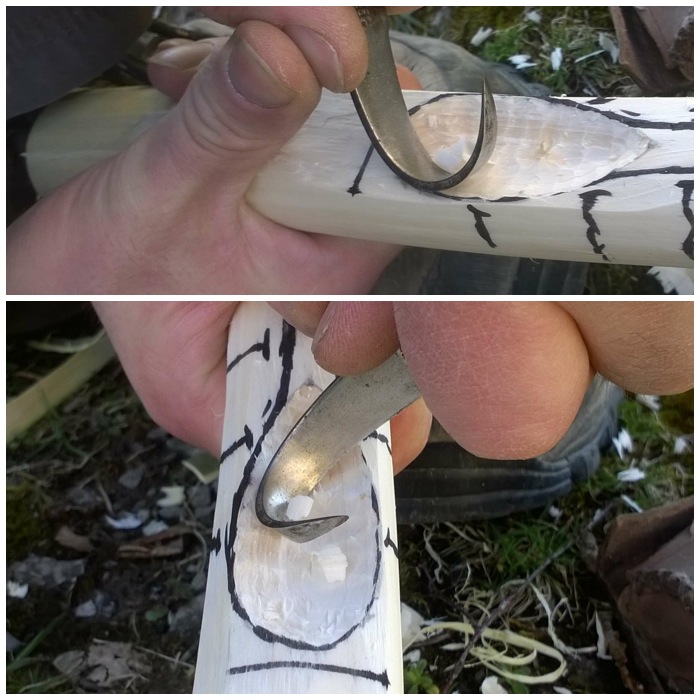
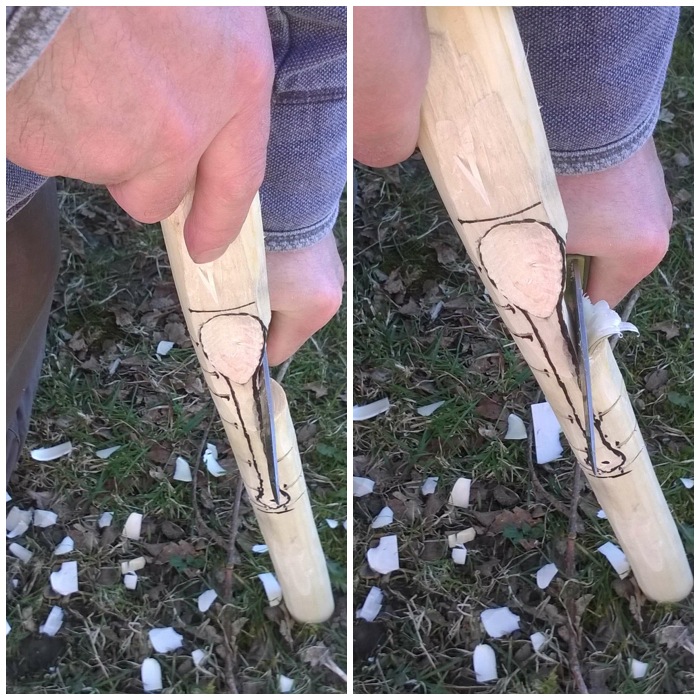
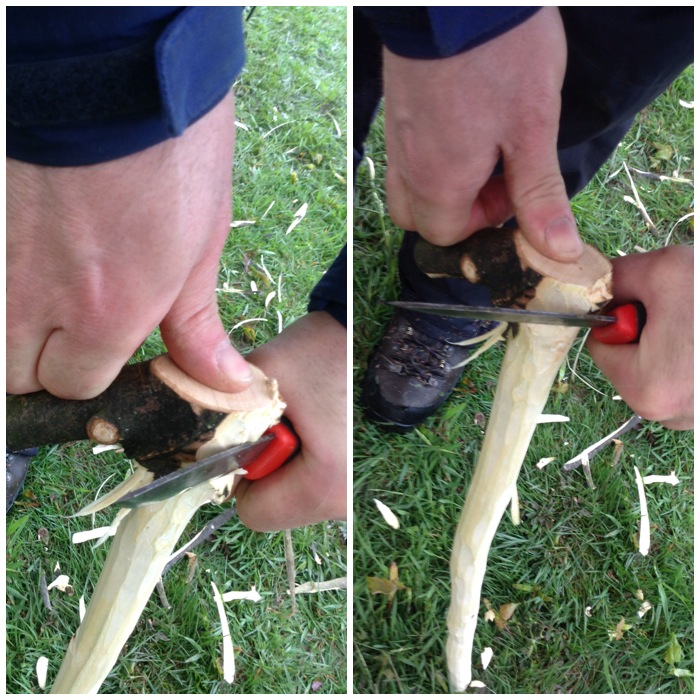
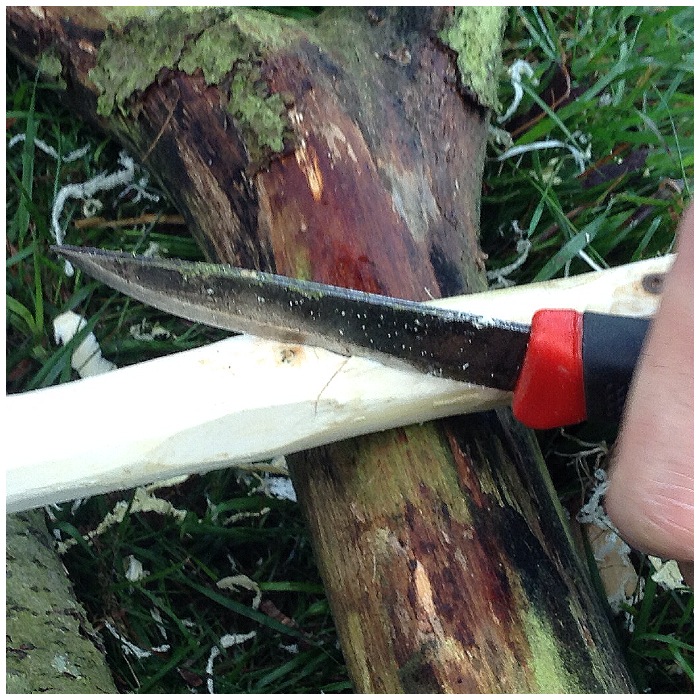
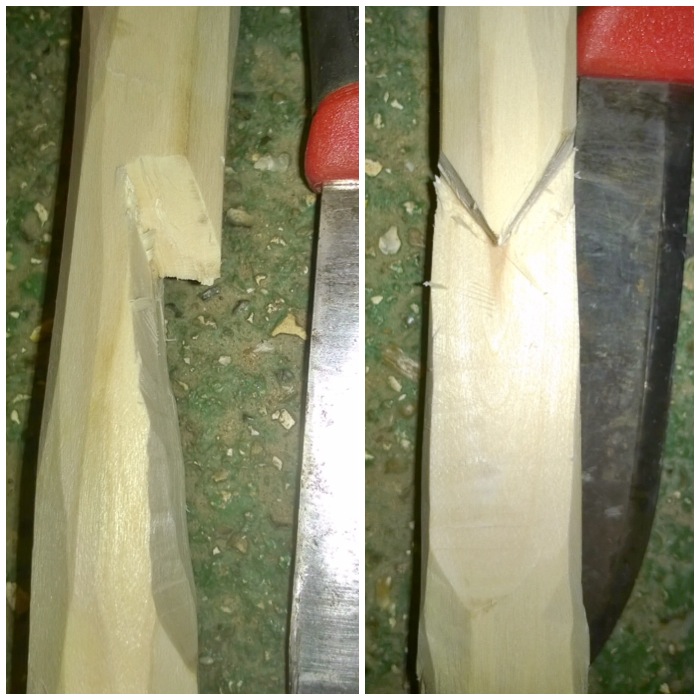
So that the pot hanger can hang properly you must remove the wood at the bottom of the X cut first (the bottom being the quarter of the X cut closest to the pot hook).

I use very fine cuts here and the original X cut acts as a stopper point so that you only cut away the wood that you need to.

Photo 21-05-2014 15 38 45
Fine cuts

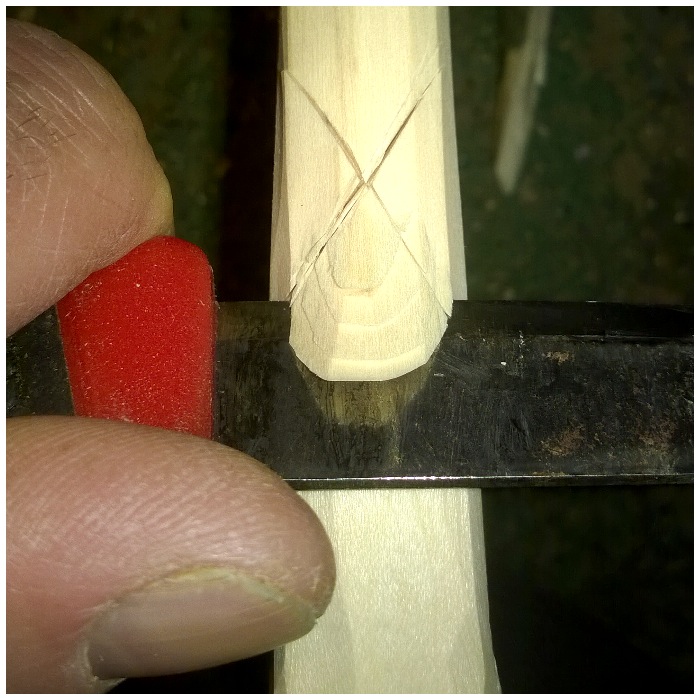
I normally remove a small area of wood just below the point of what will become the adjustable hook.

Photo 21-05-2014 15 42 08
Remove the bottom of the X first (nearest the hook)

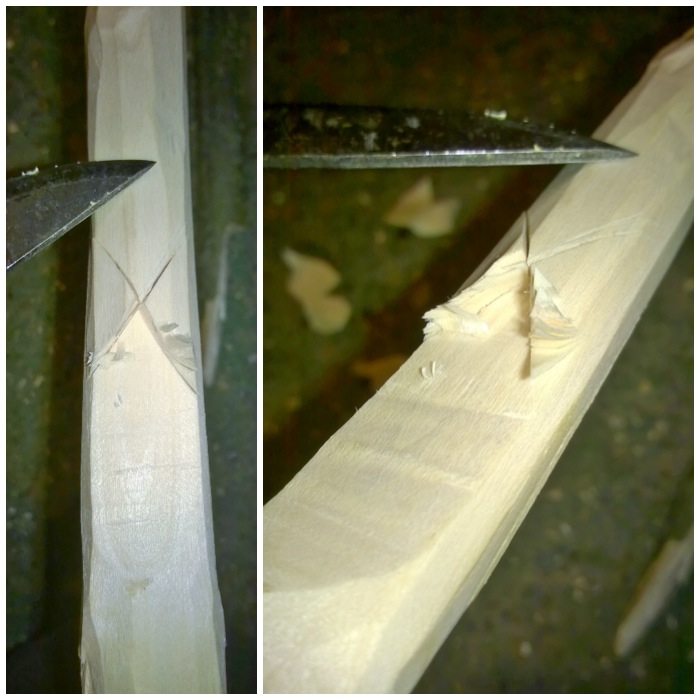
Once I’d removed the wood from the lower quarter I then removed the wood from one of the side quarters.

Photo 21-05-2014 15 45 36
Remove the sides of the X

Then I removed the wood from the other side quarter leaving only the top quarter to act as the adjustable hook.

Photo 21-05-2014 15 47 12
Deepen the sides of the X

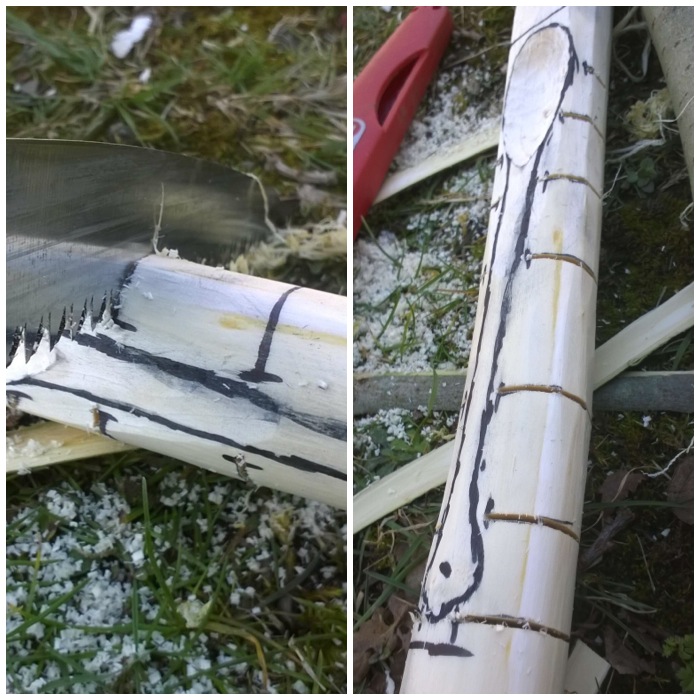
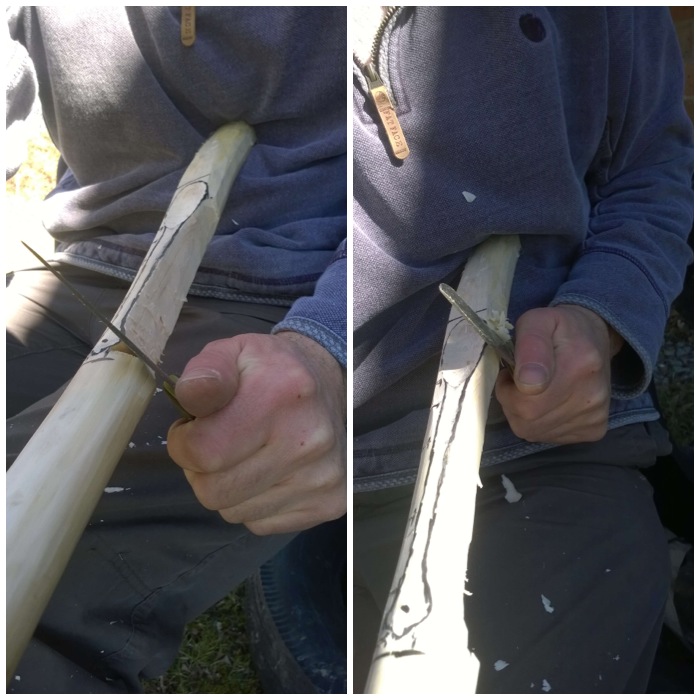
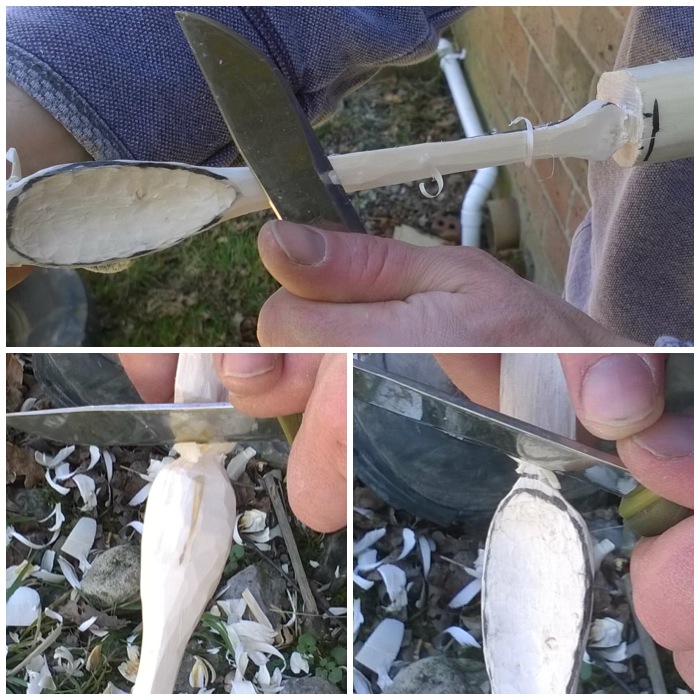
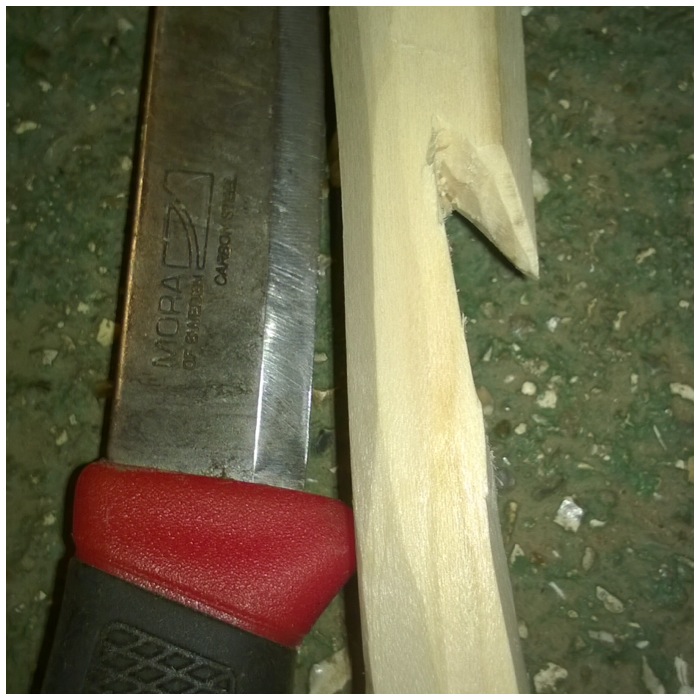
I kept carving down until I had exposed enough of the wood that I could carve out the final part of the adjustable hook.

Photo 21-05-2014 15 48 47
Ready for the undercut

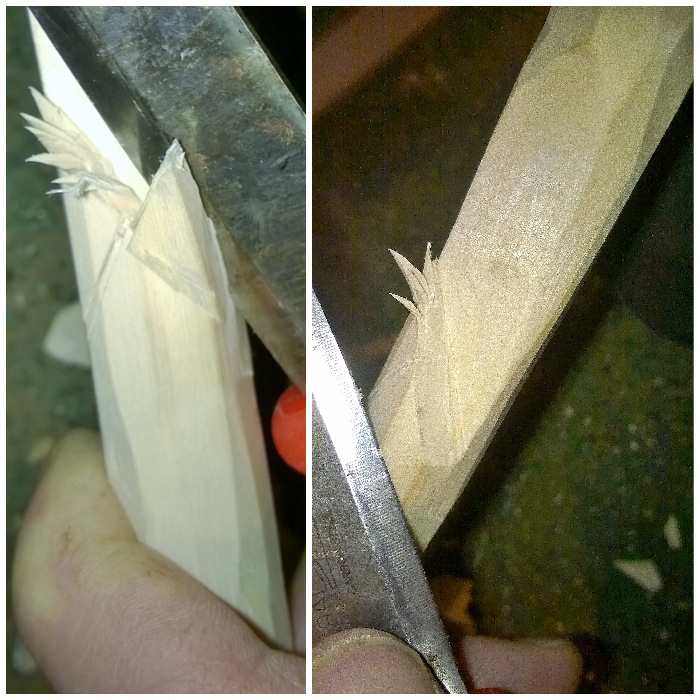
The final part I needed to do was to make an undercut below the point of the upper quarter. I kept reducing the wood until a nice point appeared.

Photo 21-05-2014 15 51 16
Fine cuts again on the point

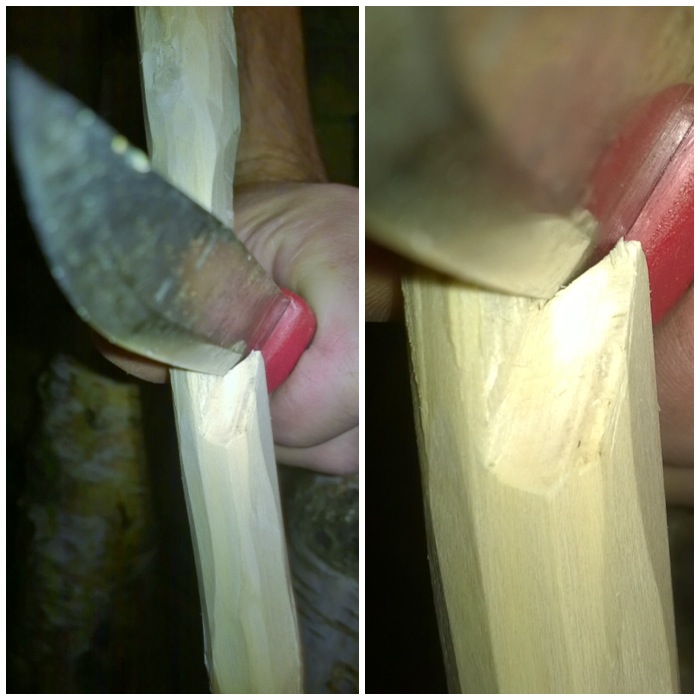
You can really see that undercut appearing in the picture below now. For safety I kept the pot hanger braced on the ground (a stump works as well) while I was carving it out.

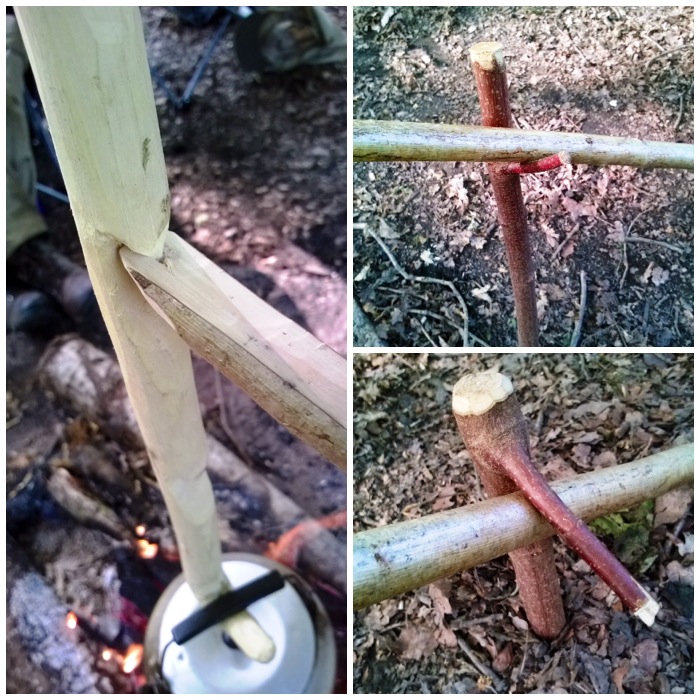
For this pot hook I carved a further 2 hanging hooks along its length.

Photo 15-05-2014 15 51 59
Carve deep but safely

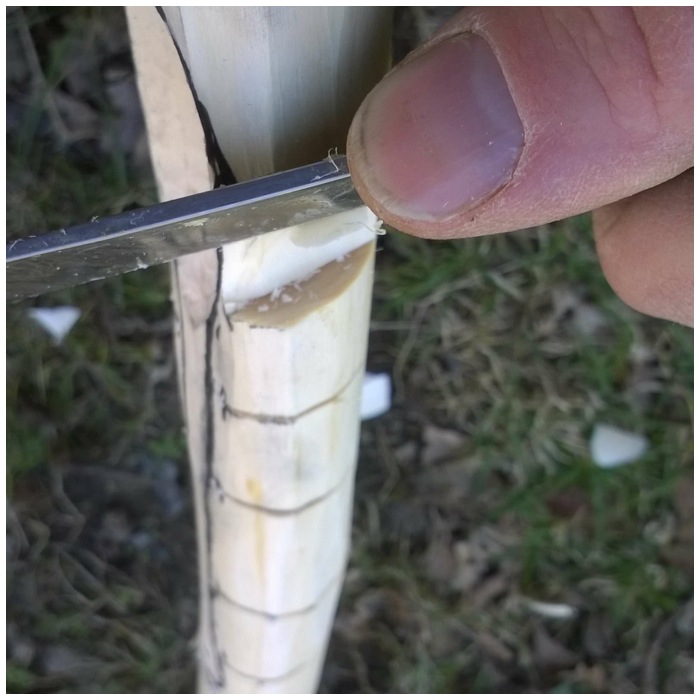
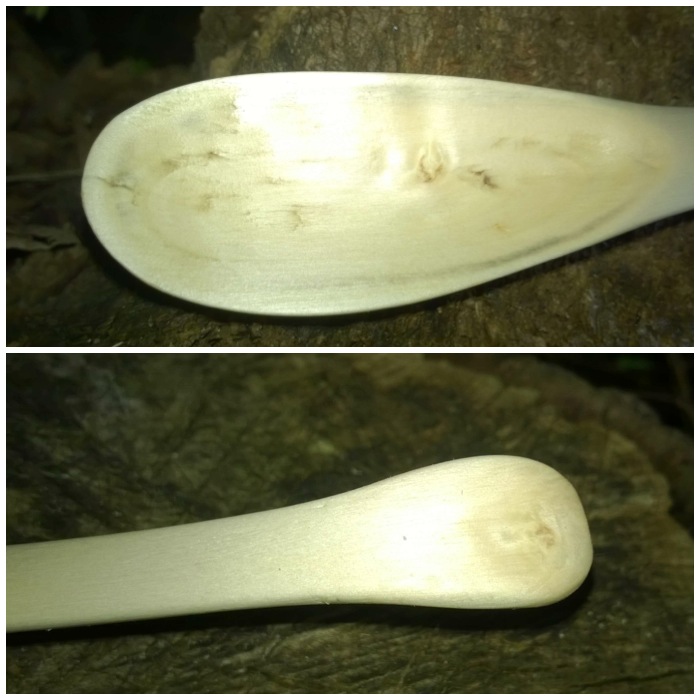
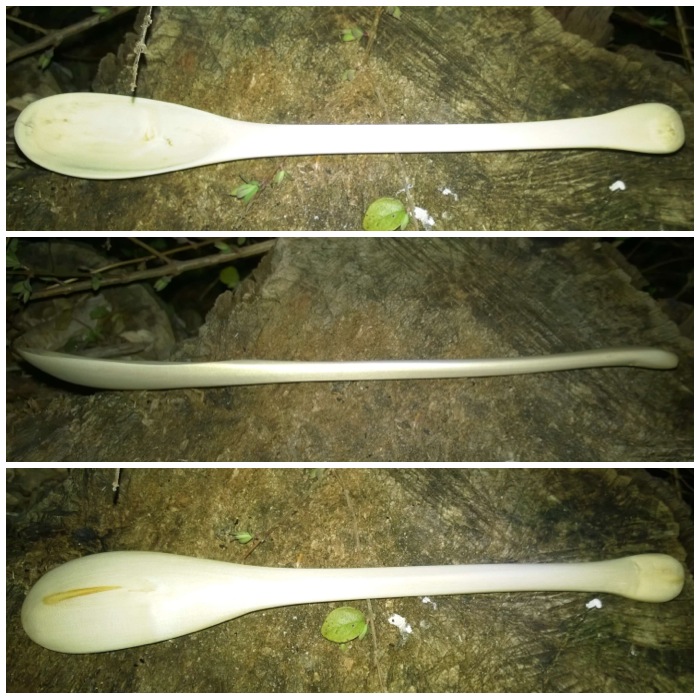
This is the final rough shape you are looking for. Any further carving or sanding would be purely for decoration only.

Photo 22-05-2014 09 42 42
A good point

This pot hanger is particularly suited to the Wagon set up – Wagon (‘way gone’) coming as far as I know from the old tale that if you leave this set up standing when you leave your camp, it points the way for the naughty wood spirits to follow you 🙂

Photo 22-05-2014 00 49 44
Side view of the Way Gone  set up

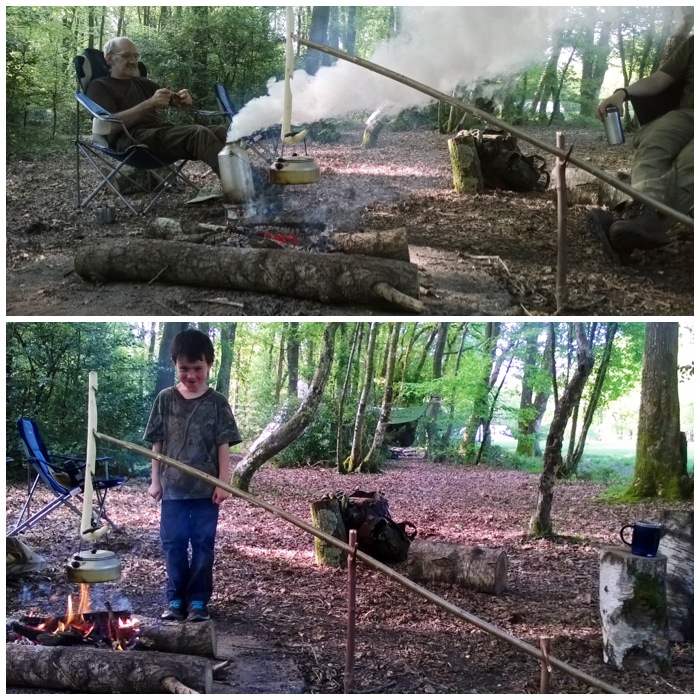
The hanging hooks attach to the Wagon stick by sitting in a small dimple on the end of it. In this set up I also used a forked stick to give the Wagon height and a smaller (Dead Man’s Finger) stick at the bottom of it to counterbalance everything.

Photo 22-05-2014 00 21 59
In detail

The whole set up is very easy to adjust for a fast or slow boil/cook.

Photo 22-05-2014 00 19 01
Adjustable height

This is a great project for any bushcrafter to keep their hand in with simple carving techniques. It looks very simple at first but there are some tricky cuts that if you are not careful can cause a nick or two but the main benefit is – that the tea gets made.

Photo 17-05-2014 17 49 15
Brew time

Cheers

George

How To…. Carve a Simple Spoon: the double-handle technique

This How To…. illustrates some simple steps to carve a small spoon you can easily make when you are out and about.

WP_20140318_035
A simple spoon

I was training on campcraft in Crowborough (Ashdown Forest in the UK) recently and in between classes decided to carve this simple spoon. A nearby willow tree had been felled a few years ago and lots of shoots had re-grown from the stump.

Photo 17-03-2014 09 35 59
Local Willow

I selected a shoot and sawed it off near its base. Cutting the limb cleanly at the base will allow the tree to heal itself quickly and send out a replacement shoot the following year.

Photo 17-03-2014 09 36 47
Cut right back

I selected the limb because of its curves, which  help in making a strong spoon. I trimmed the limb in a safe position and used the live limbs as a vice to do the final sawing.

Photo 17-03-2014 09 37 55
Trimmed safely

I took two pieces to make a couple of spoons and then trimmed off a couple of the smaller shoots from the top.

Photo 17-03-2014 09 38 57
The spoons-to-be

These smaller pieces I re-planted around the base of the tree by pushing them into the ground, as willow has the ability to re-grow from these shoots.

Photo 17-03-2014 09 40 10
Re-planting

The next job was to strip off the outer and inner barks. I tried to strip the bark off in one piece but as the sap had not yet risen it was very difficult to do. If the bark had peeled off easily I could have made some nice cordage from it.

I used the back of my knife to scrape off the remnants of the inner bark to get right down to the wood.

Photo 17-03-2014 09 41 14
Taking off the outer bark

This inner bark does clog up on the back of the blade so you have to continually scrape it off. The whole process of stripping the bark took about 5 minutes.

Photo 17-03-2014 09 41 46
Removing the inner bark

I flattened out the area of wood that would make the bowl of the spoon to give myself a little bit more area to work with.

Photo 17-03-2014 09 43 15
Creating a working surface

I like to draw out my spoon leaving areas of waste wood at each end as these act as handles when carving. Also, I prefer to carve the spoon from the top down as this cuts through many different rings thereby making the spoon stronger. I also mark out at this stage all the stop cuts I will need. (The technique of leaving handles to work with was taught to me by my good friend Mark Beer a few years ago and I find they are particularly useful when you are teaching novices.)

Photo 17-03-2014 09 44 45
Drawing out the spoon

I like to carve the bowl of the spoon first. To do this job I usually use a palm gouge (on the left) and a crook knife (on the right).

Photo 17-03-2014 09 47 45
The bowl tools

I use the palm gouge first, tracking around the edge of the bowl to cut out the waste. Having the two handles in the wood means I can use the same hand to do this (I am left-handed). They also allow me to keep my other hand well away from the sharp edge of the gouge.

Photo 17-03-2014 09 48 51
The palm gouge

The gouge makes short work of the waste wood but it does not leave a smooth surface.

Photo 17-03-2014 09 49 26
Rough bowl

To smooth the bowl out a bit more I usually switch to the crook knife. I find that the crook knife helps to accentuate the curve of the bowl more than the gouge does. With both tools I always try and cut across the grain of the wood but this is not always possible near the ends so I need to be extra careful there not to lose wood on the edges.

Photo 17-03-2014 09 50 23
Smoothing out the bowl with the crook knife

After the bowl is roughed out I saw all the stop cuts. These stop cuts help to stop splits occurring in the wood as I carve the rest of the waste wood away.

Photo 17-03-2014 09 52 06
Creating the stop cuts

Stop cuts are particularly important when carving around the bowl; they act like small breaking points for the knife edge, stopping splits occurring.

Photo 17-03-2014 09 59 04
Removing the waste

I take my time at this stage and make small cuts to remove each piece of waste wood between the stop cuts. In these two pictures I am using my thumbs on the back of the blade to apply pressure. You can push either with both thumbs on the back of the blade or with one thumb on top of the other.

Photo 17-03-2014 09 59 56
Thumb pressure

When I am on a straight section like the handle I tend to use the chest lever grip. This is a very controlled and powerful cut. I have my hands tight against me and use my chest muscles to push my hands apart. This pushes the knife edge into the wood in small, controlled but powerful cuts.

Photo 17-03-2014 10 01 26
Chest lever grip

Another cut that can be used here is the shoulder cut. With the work piece off to your side and the bottom of it on a log or on the ground (if the handle at the bottom is long enough), keep your arm locked straight and push down with your shoulder muscles to cut into the excess wood. You can cut big or very fine pieces with this technique.

Photo 17-03-2014 10 02 09
Shoulder power cut

I learnt this technique from Mors Kochanski when he was over in the UK at the BCUK Bushmoot a few years ago. I pushed one end of the work piece (perfect when you have these handles on each end) and then, using the knife like a draw knife, cut slivers of wood towards me. This is one of the few cuts where the blade comes towards you. The key to this technique is to keep the arm that is holding the work piece bent and well away from the knife tip. Also the arm that is holding the knife is clamped against my side which stops any big movements. If my knife were to slip with this technique the blade would actually only move a few centimeters.

Photo 17-03-2014 10 02 54
Mors Kochanski style

Using these techniques I quickly removed the waste wood around the spoon.

Photo 17-03-2014 10 04 29
Top plane cut out

I then marked out the side of the spoon and started to remove the waste wood using the shoulder cut. I could have put stop cuts in at this stage but decided not to as there was not much curve to the spoon on this plane.

Photo 17-03-2014 10 13 28
Side plane

Finishing the tail and the bowl requires a lot of fine work. You have to find how the grain of the wood is flowing and just chip away at it with small cuts to form your final shape.

Photo 17-03-2014 10 16 44
Fine work

After some final work on the handle of the spoon I slowly carved around the tip of the bowl to remove one of the working handles. Take your time with this so that you get down to the last few fibres of wood before twisting the handle off. Any big cuts here can damage the bowl.

Photo 17-03-2014 10 18 33
Trimming the handle and removing one handle

I then repeated the whole process at the other end to remove the other working handle.

Photo 17-03-2014 10 20 50
Removing the other handle

The wood was green so full of moisture. Normally I would dry the wood slowly for a few weeks before sanding it down. Sanding green wood can be hard work and no matter how smooth you get it you will need to repeat the process in a few days as small fibres of wood will start to rise up again, giving the spoon a furry texture.

I accept that when making these spoons as I normally want to use it straight away. Ideally I should have used a piece of seasoned wood so that this would not happen but you sometimes have to use what is available. I left the spoon to dry out for a couple of days before sanding it down.

Photo 17-03-2014 10 21 07
A blanked out spoon

I used sandpaper of different grades and luckily have some cloth sandpaper that works well when sanding the bowl out.

Photo 18-03-2014 20 14 10
Sandpapers

I used the rough sandpaper first and you can see in these pictures how the fibres of the wood are being ripped out here rather than being sanded smooth. All the sandpaper is doing at this stage is flattening out the tool marks.

Photo 18-03-2014 20 14 42
Rough first

Eventually the spoon started to take on a more smooth appearance. The bottom picture shows the bowl untouched but the handle is now smoother.

Photo 18-03-2014 20 15 29
Taking shape

The cloth sandpaper is ideal for getting into the bowl and smoothing it out. I like this sandpaper as it does not break apart in the bowl as traditional paper-backed sandpaper tends to.

Photo 18-03-2014 20 16 19
Smoothing the bowl

After sanding the spoon down using a mixture of grades from rough to very fine (about a half hour’s work) I added some oil to the spoon. I generally use vegetable oil as that is what I usually have in my cooking kit when out in the woods.

After the first coating had soaked in I applied a second coating and left the spoon to dry out.

Photo 18-03-2014 20 17 05
First oiling

I like to add a finishing touch by boning the spoon. You can do this with the back of a spoon, a rounded pebble or with  a rounded piece of bone. I rub the spoon with the rounded surface in a circular motion covering the whole of the surface area of the spoon. I normally do this for an hour or so as this seals the fibres of the wood down and adds a beautiful shine to the spoon.

Photo 18-03-2014 20 17 32
Boning

This spoon will need to be re-sanded, oiled and boned again in a few weeks as the fibres rise up as it dries out. You can see that the bowl is not perfectly smooth and there are slight imperfections in it. Hopefully these will disappear with that second sanding but for now it is a spoon I can use.

Photo 18-03-2014 20 18 30 (HDR)
Imperfections but a working spoon

The different profiles of the spoon.

Photo 18-03-2014 20 19 42
Profiles

Ready to go.

WP_20140318_035
Ready to do its job

Have a go and try out some of these different cutting techniques.

Cheers

George