Pitch can be made with many different materials and I have covered some of these in that previous post. On this occasion I used spruce resin, beeswax and charcoal dust. Instead of a nice handy tin to prepare it all though I opted to try this out using more primitive materials: hot rocks. I touched on this method previously in the post How To…. Make a Flint-Tipped Arrow but feel it needs its own stand-alone post.
Hot Rock Pitch
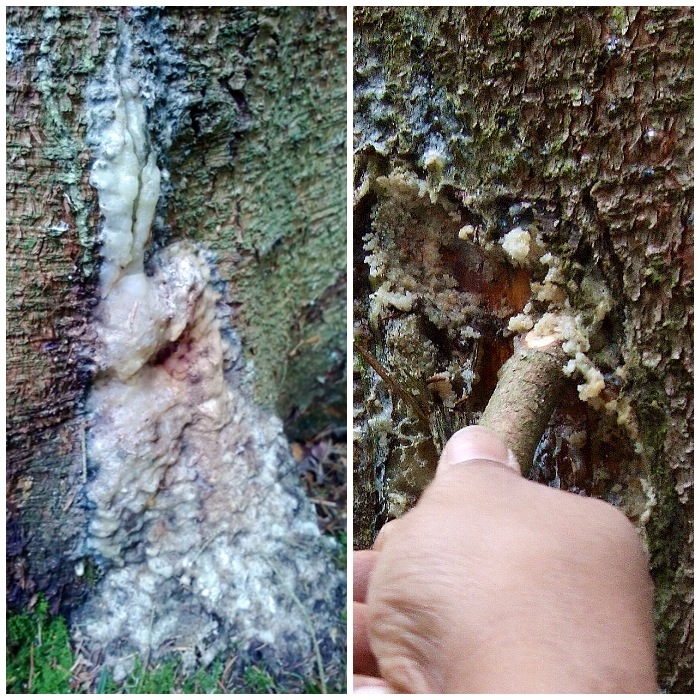
I collected a lot of resin from some spruce trees in my local area with the use of a stick as I find that this does not damage the trees as a knife would do. Also I look for areas where the resin has pooled at the base of the tree as you can collect all of this without affecting the tree.
Spruce Resin
My other ingredients are charcoal dust to give the pitch body (I used the small rock to crush the charcoal) and beeswax to make it flexible. I used the sticks to make the finished pitch stick.
Preparation
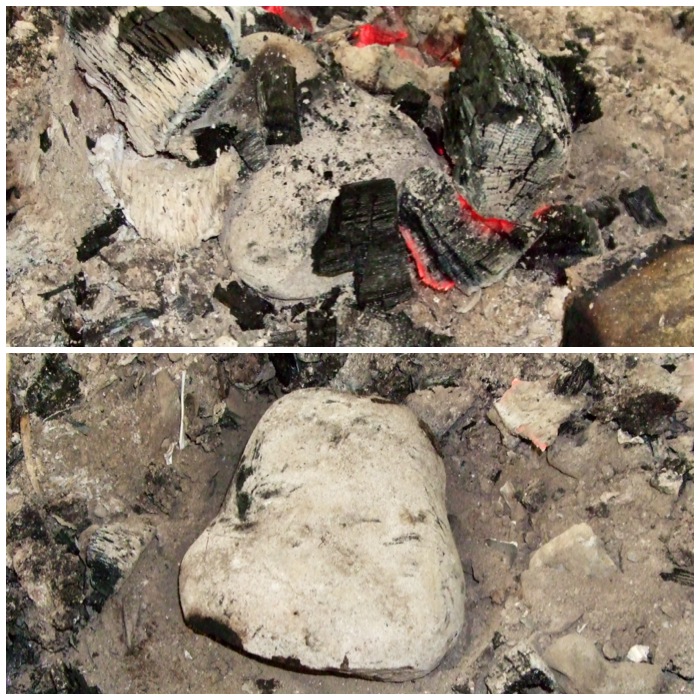
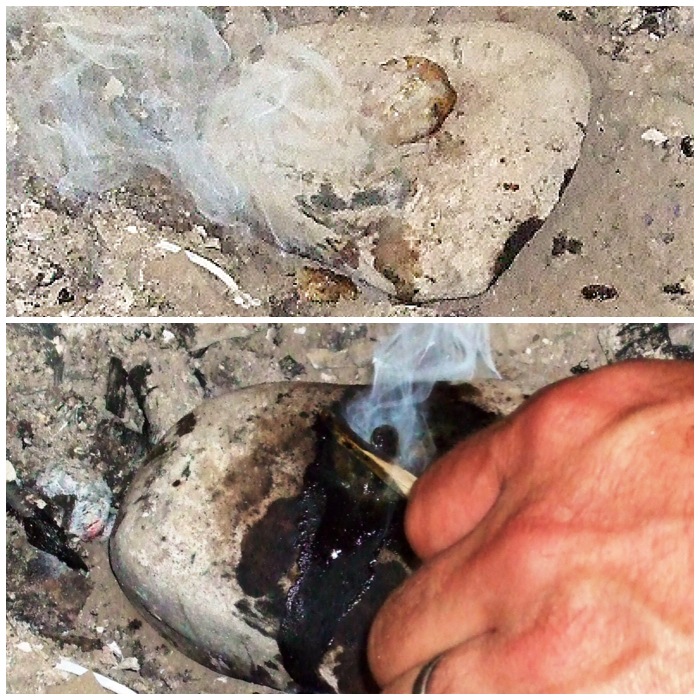
While I was out collecting resin and preparing everything else I had a rock heating up in the fire. I used a rock that had been heated before so I could be sure it would not crack. (If there is any trapped air or moisture in a rock there is a chance it will crack or, in the worst case scenario, explode.)
To handle the rock I used some wooden tongs I had made up (sorry, no photo).
Hot Rock
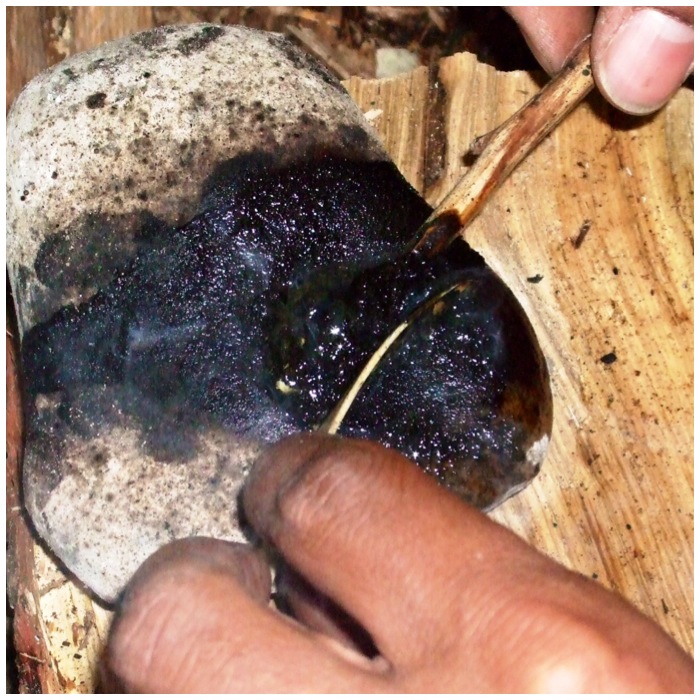
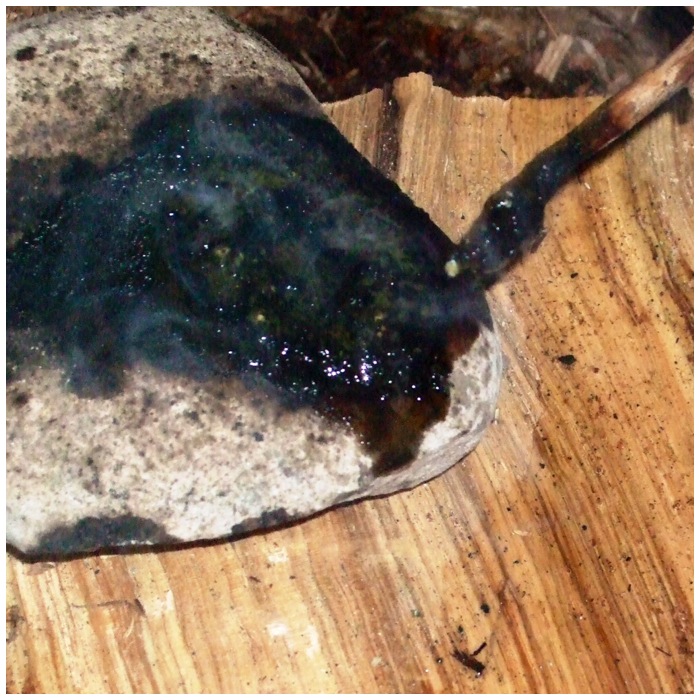
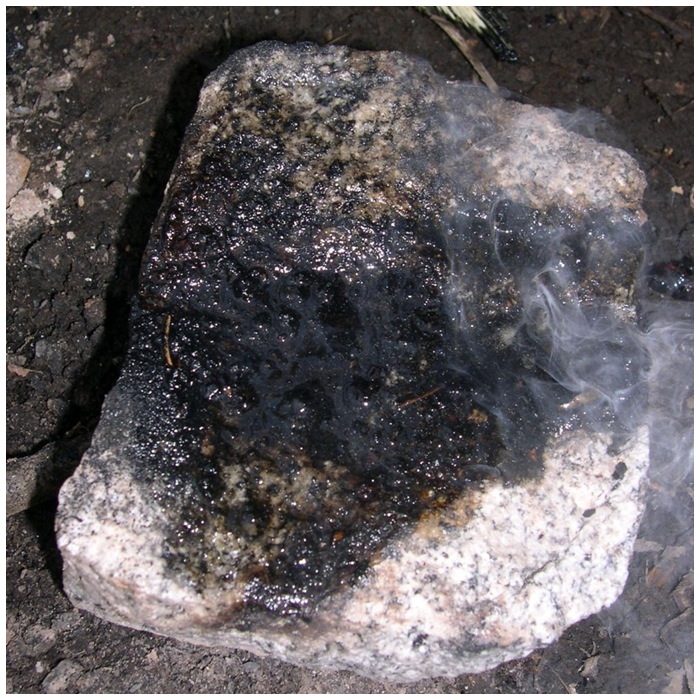
The rock I had chosen had a slight hollow in the top surface which I thought would help stop the resin from flowing away instantly as it melted. I dragged the rock to the side of the fire, popped a piece of resin onto it and with a small twig moved it around until it had all melted. Some resin did run off but enough was kept in the hollow for me to use.
Melting the resin
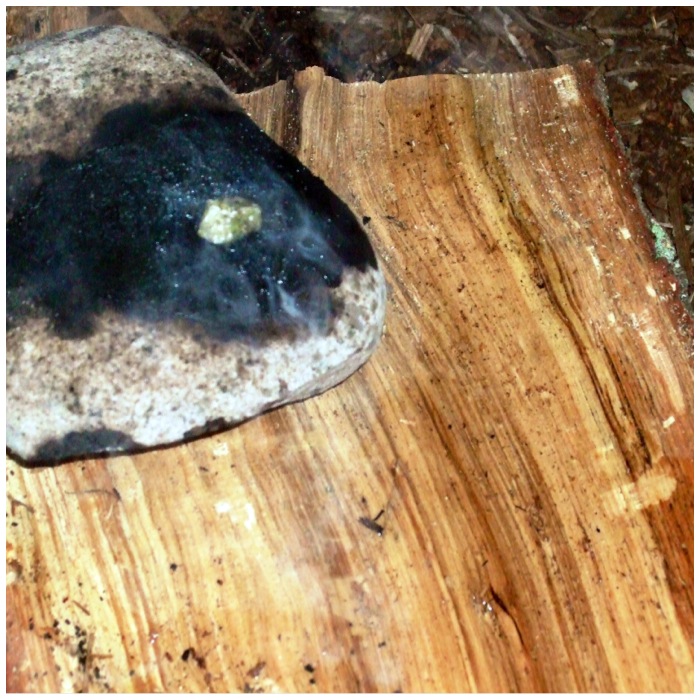
I then moved the rock onto a piece of curved bark which held some water to act as a coolant as I built up my pitch stick.
Once this was all set up I popped a piece of beeswax into the melted resin and allowed it to mix in (experiment for yourself with ratios).
Melting the beeswax
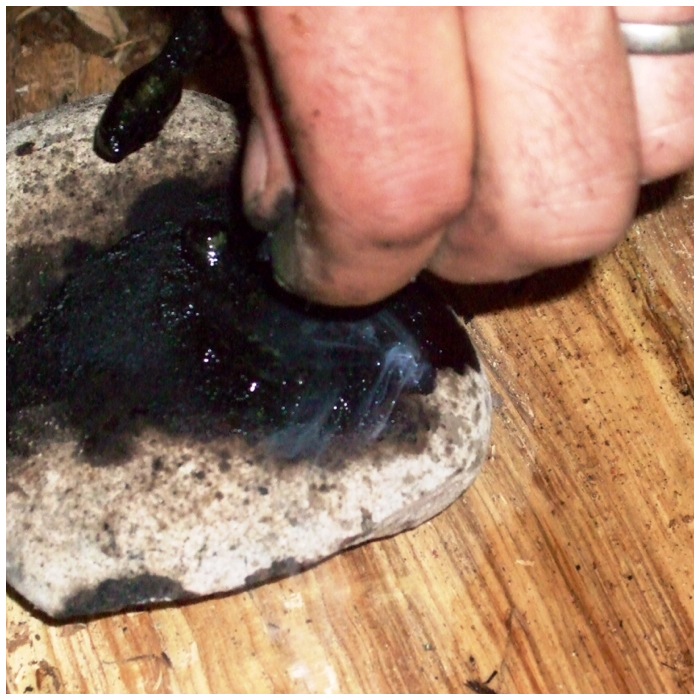
Then I sprinkled a good-sized pinch of charcoal dust into the mixture and carried on mixing it up.
Adding the charcoal dust
As the rock was quite small I could only make a little batch of pitch at a time so it did not take long to all melt and mix together.
Mix it all up
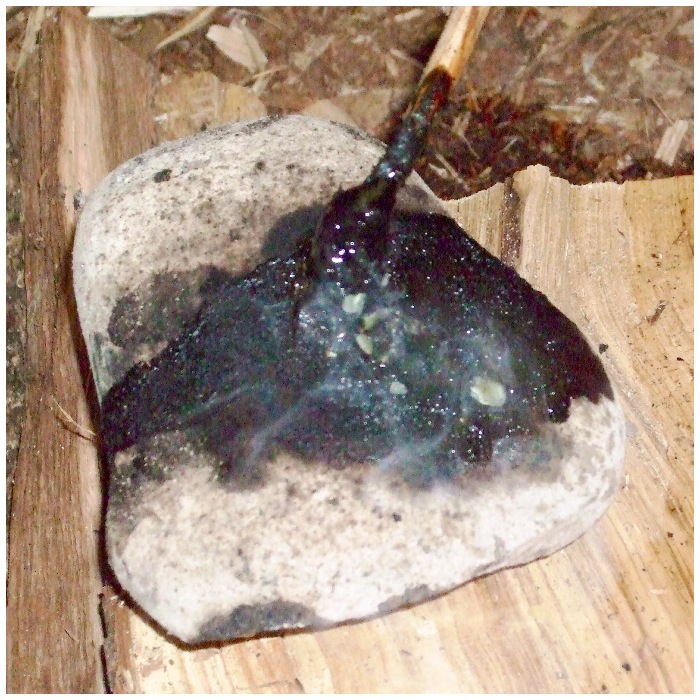
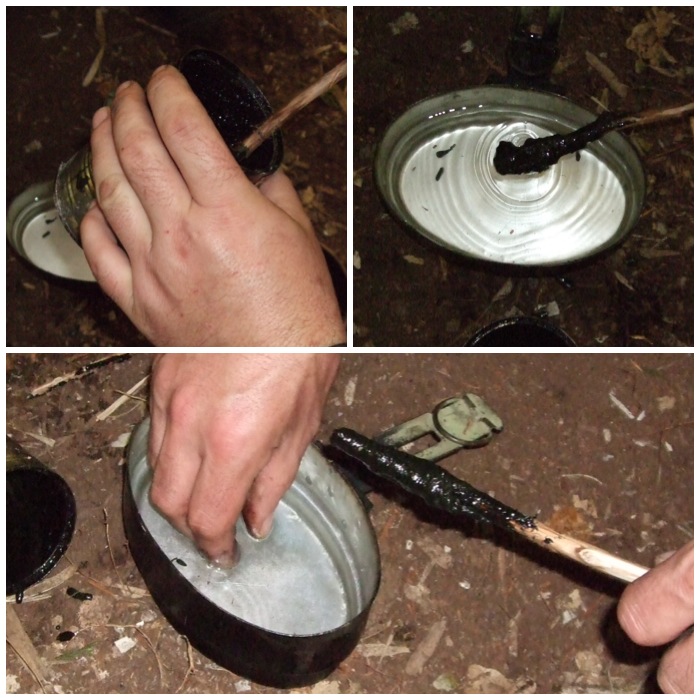
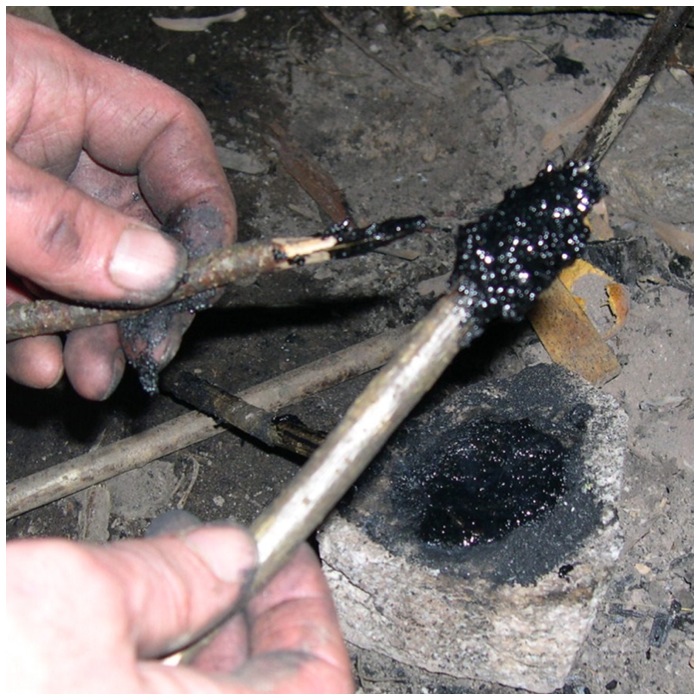
I used a sliver of wood to scrape the hot, sticky pitch onto a squared-off stick.
Scrape onto a twig
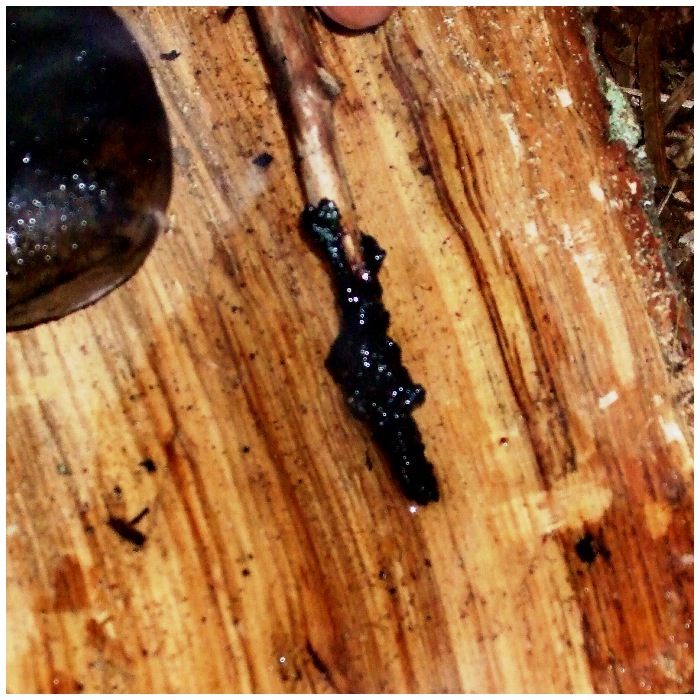
The pitch you create using this method is a bit lumpy but still perfectly useable. As soon as I had some pitch on the stick I dipped it into the water to cool it down rapidly. This cooling-down process allowed me to use wet fingers to mould the pitch and smooth it out.
I kept repeating this process until all the melted pitch was on the stick and then mixed up another batch.
Cool rapidly in water
The rock was so hot that I was able to keep melting and mixing the ingredients several times to build up the pitch on the stick.
Mix more resin, beeswax and charcoal
I found that the curved piece of bark was very effective for storing water to cool the pitch.
Scrape onto the twig and cool again
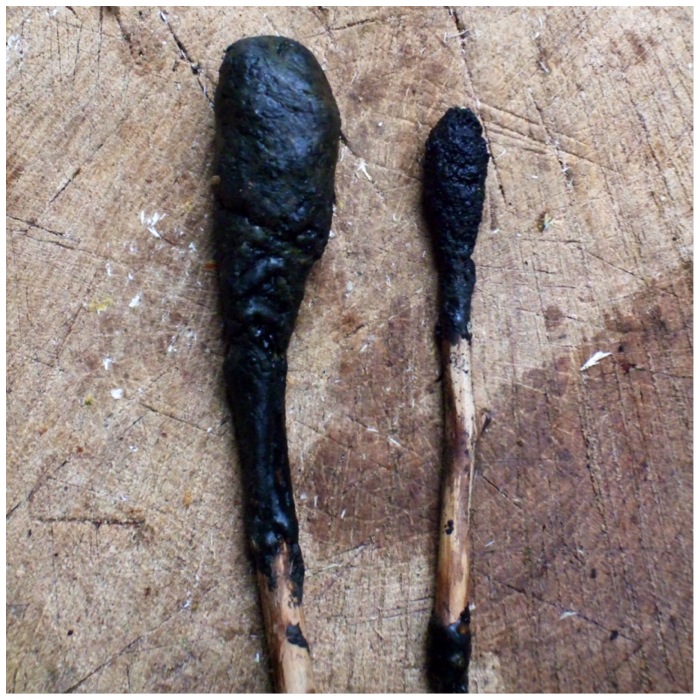
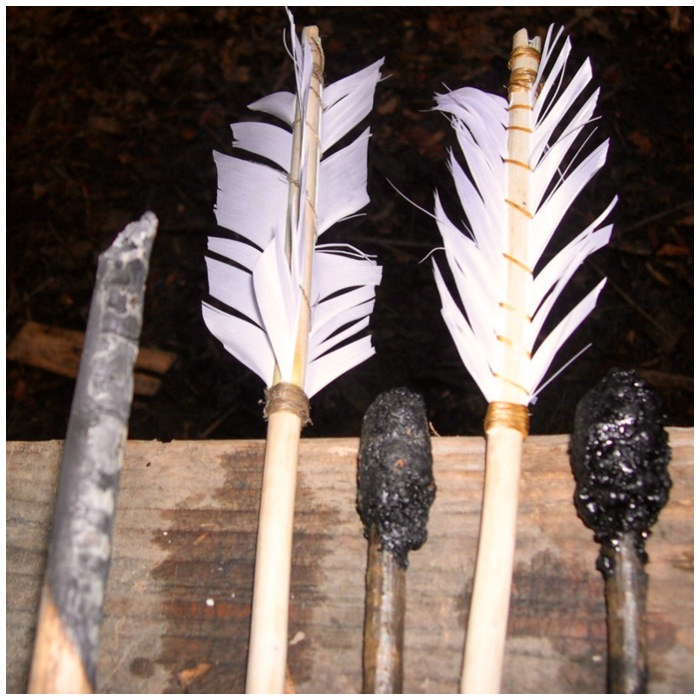
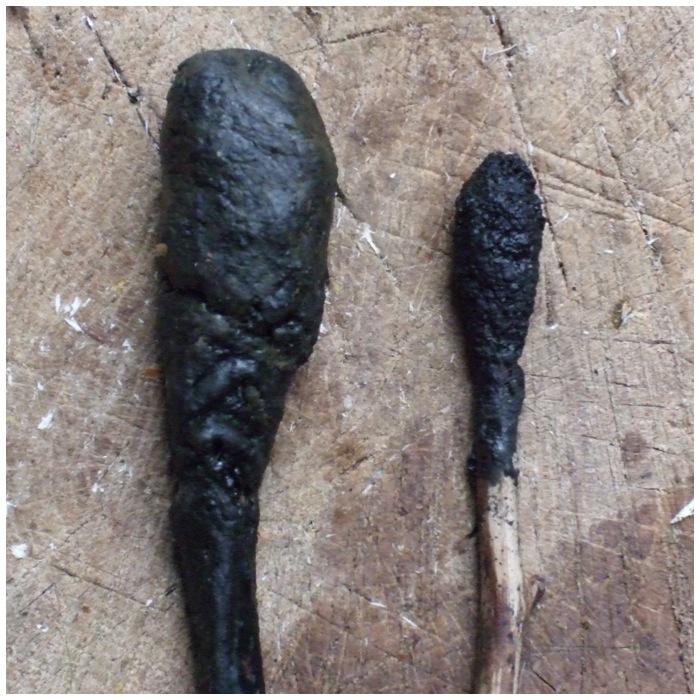
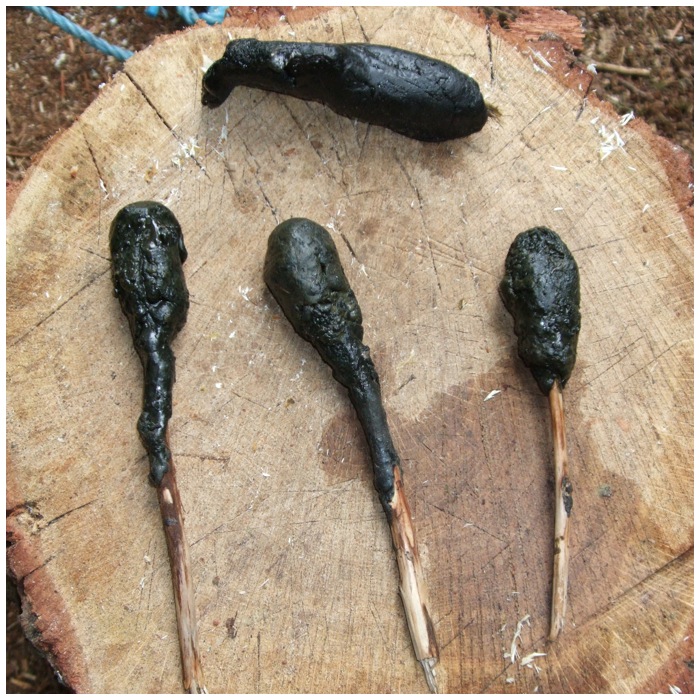
The pitch stick on the right was made using hot rocks and the one on the left using a tin can. The primitive hot rocks method takes longer and produces a coarser pitch but in my opinion was far more satisfying to make.
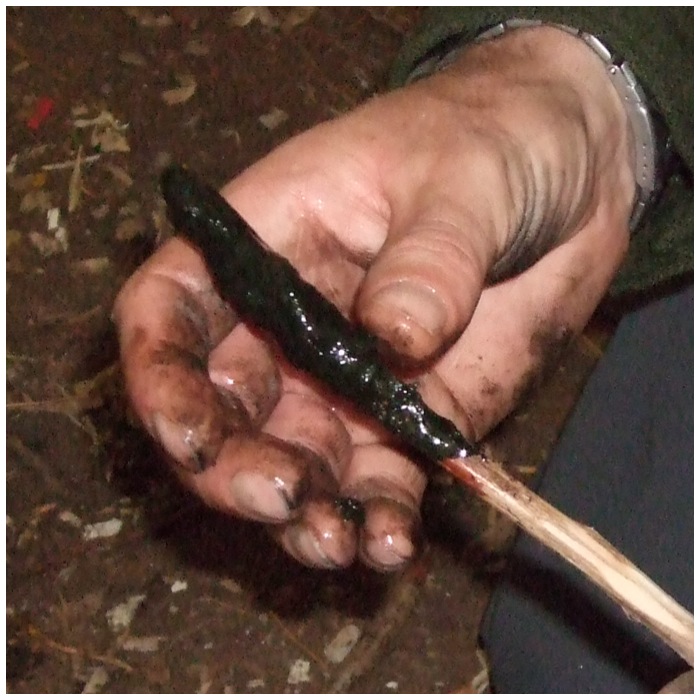
Keep repeating until you build your own pitch lollipop
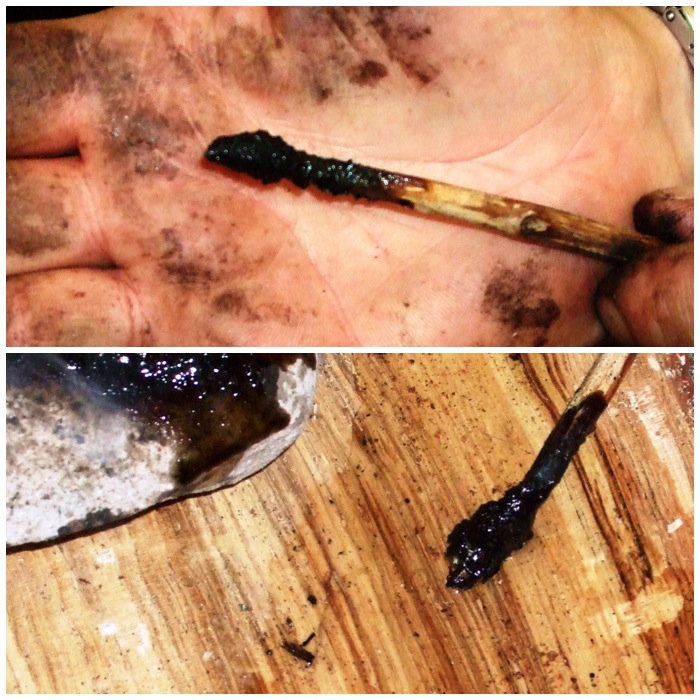
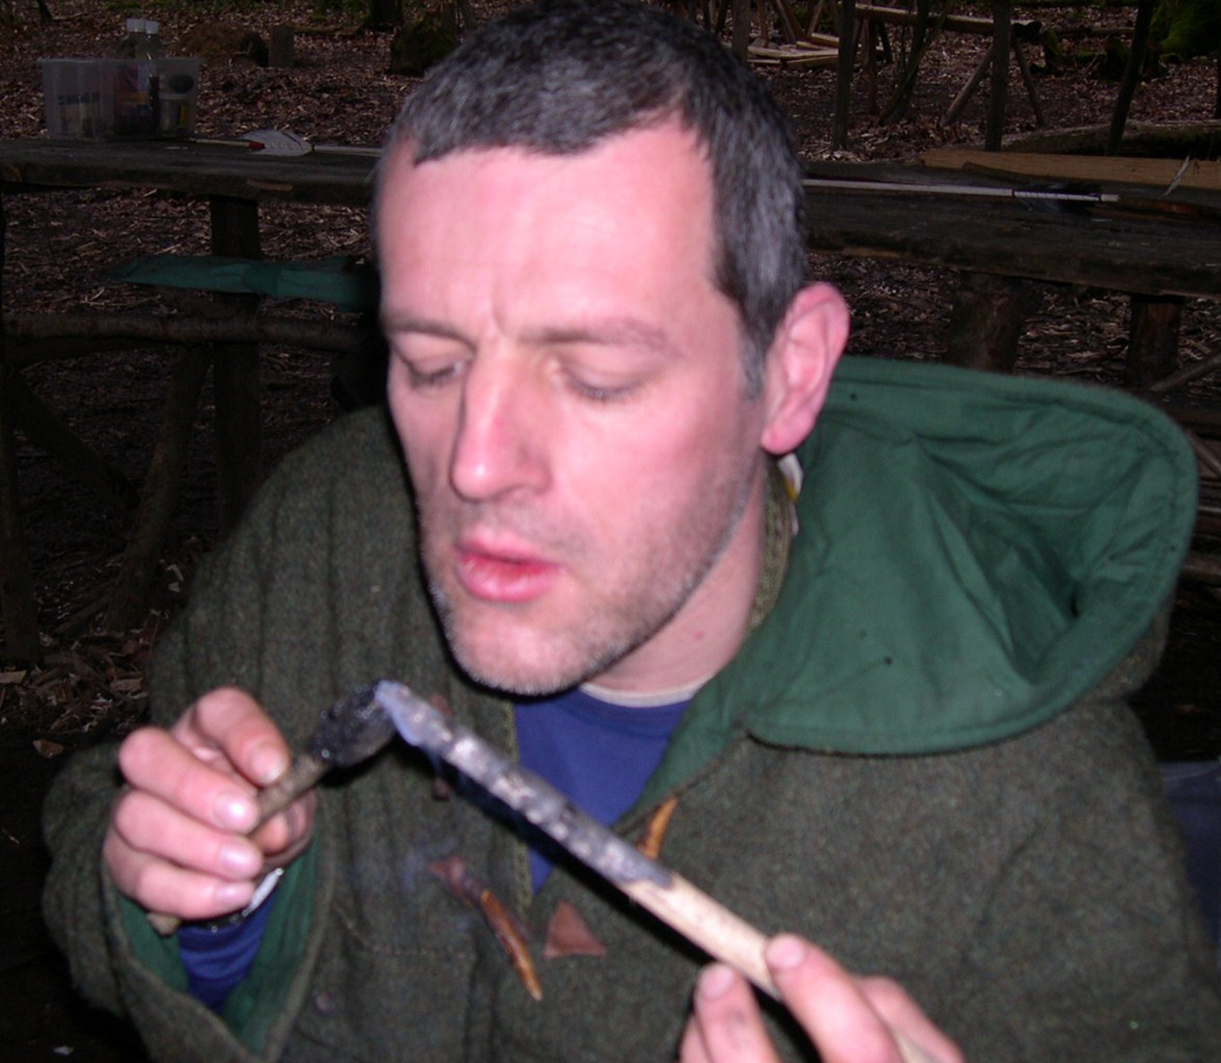
The pitch is great for waterproofing things like sinew on arrows. I prepared a ember stick to help melt the pitch so I could cover the sinew you can see in the picture below.
Ready to be used
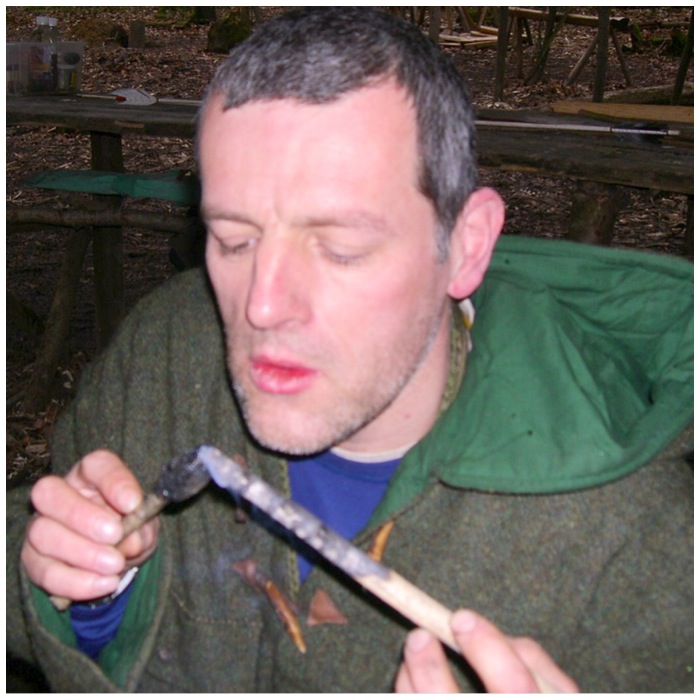
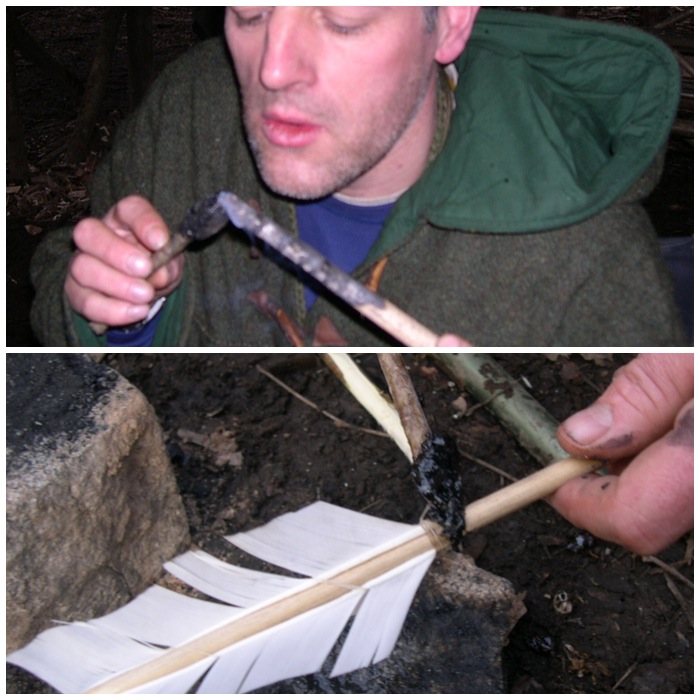
To melt the pitch, simply blow on the ember stick while holding the pitch stick close to it.
Heat the resin with an ember stick to melt it
Drip the melted pitch onto what you want to cover and with wet fingers spread it around. Keep re-applying more pitch until you are happy everything that needs to be covered is covered. I sometimes re-heat the area I have covered with the ember stick to further smooth it out.
Drip it onto whatever you want to cover, fill or attach
With a little patience this primitive method can produce some very good pitch. I have seen some master primitive technology craftsmen makes some wonderful pieces with the use of pitch.
I have written various posts now on creating primitive tools and in my article on making arrows I showed you how to make some spruce pitch using hot rocks. This How To…. will lay out all the steps I take to make spruce pitch using tin cans. I find that when I want to make a lot of pitch quickly that this method works well for me however I do appreciate that there are many other methods for making pitch.
The resin produced using this method gives you a much finer pitch than the hot rocks method as you can see in the picture below. The pitch stick on the left was made using the tin method and the smaller rougher pitch stick on the right was made using hot rocks.
I took these pictures while out bushcrafting with my friend Mark Beer in the woods around Silchester in Hampshire (UK)
Pitch – Using a tin (left) – Using hot rocks (right)
I tend to use spruce resin when making pitch as this is more readily available where I am and do not tend to use pine resin as this is not so readily available to me. I normally use pitch as a filler material, for example, when fitting a flint axe head into its socket or use it as a covering to waterproof rawhide wraps.
The knife below has had the rawhide wrap covered in the fine pitch from the tin method and is very easy to produce. I am sure that with time I would be able to produce fine pitch using hot rocks but as yet I do not have that skill level.
Spruce Pitch – a wonderful material
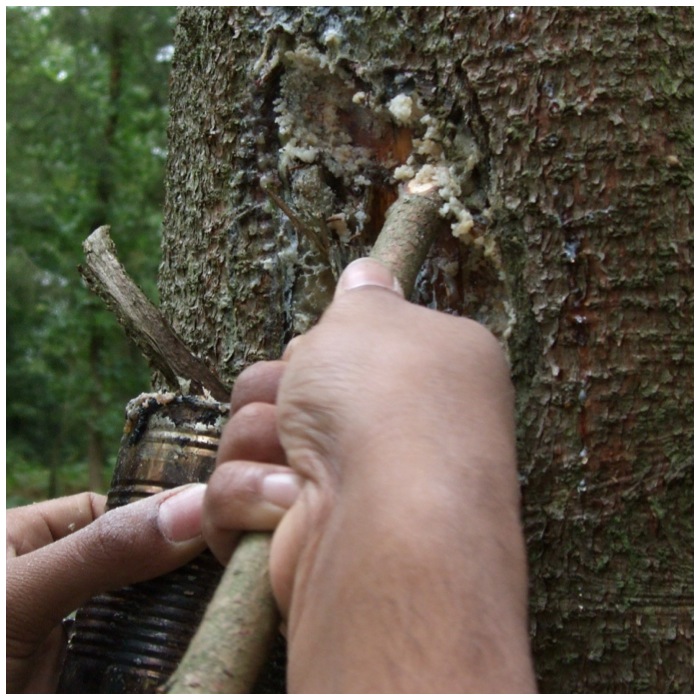
I collect spruce resin using a flattened stick and a tin (or plastic bag). I use the stick as it does not damage the tree as a knife tip would do. Also it is a messy job to clean the resin of a knife blade and the stick also saves my fingers becoming covered in resin which can be hard to clean off when you do not have access to hot running water.
I collect the resin wherever possible where branches have been broken off and the tree has excreted the resin to protect the damaged area. I do not clean out all the resin but just take a little from many different sites. If you are lucky enough to find a spot where the resin has flowed away from the damaged area and pooled into a big clump then it is fine to collect it all. A good spruce tree will keep excreting the resin so if you are careful you can return at a later date to harvest more.
Collecting stick
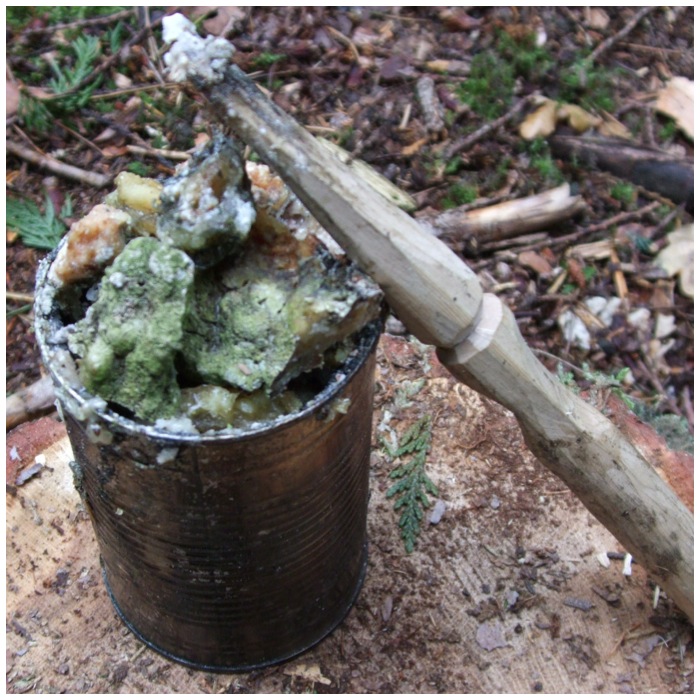
It did not take long to collect this large tinful of resin as Mark and I managed to find spots where the resin had pooled into large clumps.
A good haul
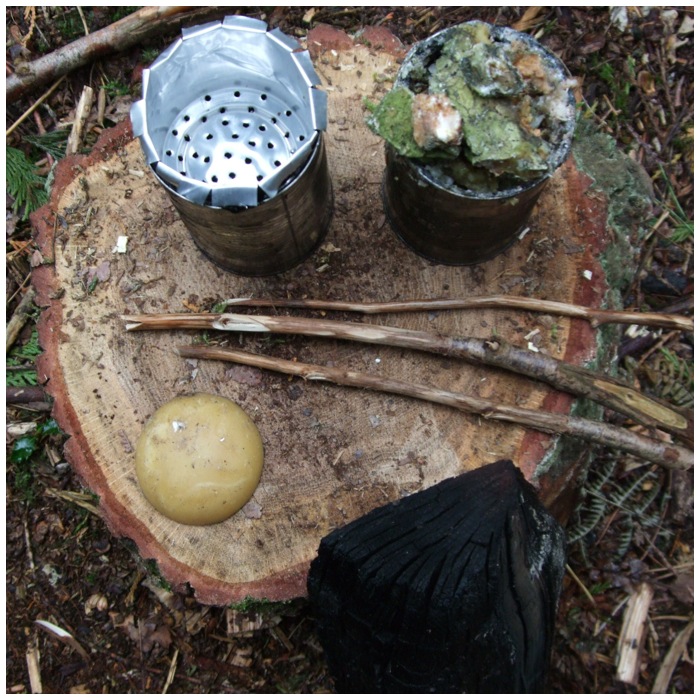
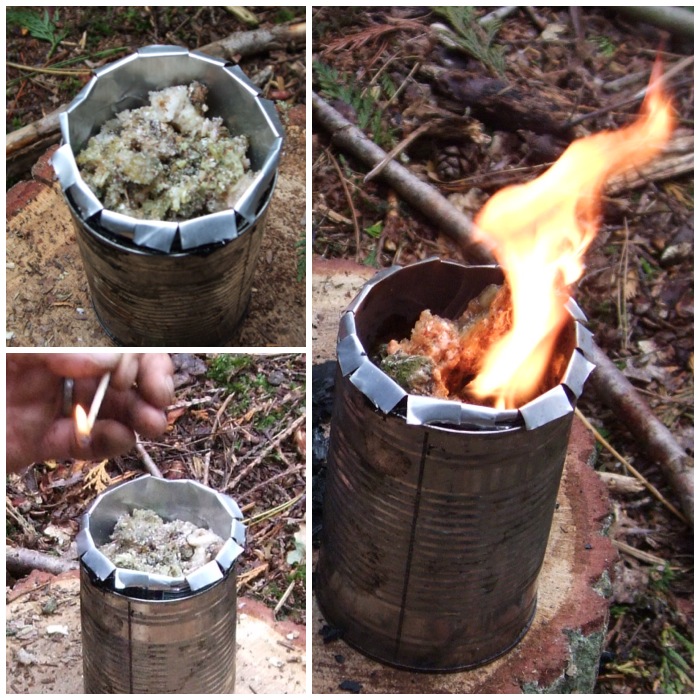
To make pitch I use two baked bean style tins with a small improvised colander in one made out of half a beer can with holes punched through the bottom.
The sticks in the picture below are ready for rolling the pitch on to when it is ready. An alternative is to use a stick like elder with the pith taken out and the pitch poured into the cavity, which makes a kind of pencil.
The charcoal and the beeswax are for binding and tempering the pitch to make it strong but flexible.
Equipment
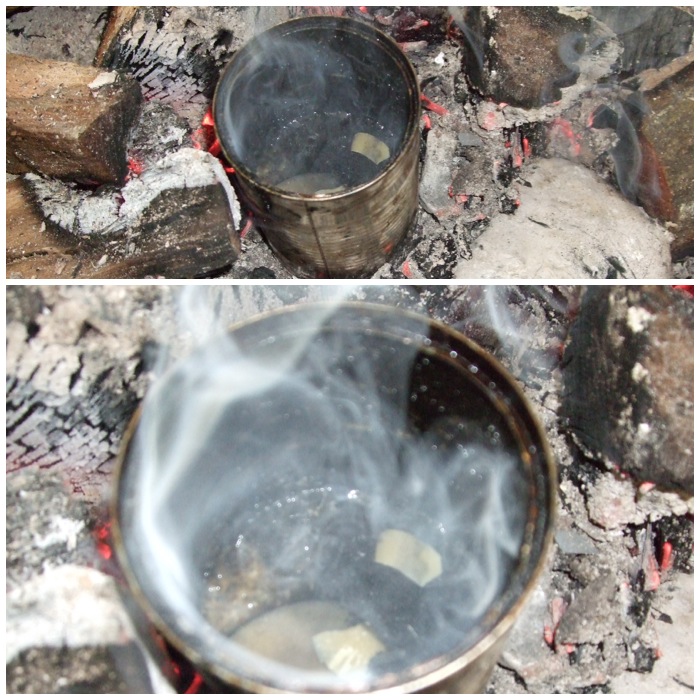
I packed the colander with resin then set light to it. The disadvantage of this method is that you lose a little of the resin but the big plus is that it melts quickly, collects quite cleanly in the bottom of the tin and leaves the detritus in the colander. Two good friends of mine Mark Oriel and Keith Coleman introduced me to this method: previously I’d just put the resin into a tin, placed it into some embers and scooped out the detritus when it had melted.
Packing and firing
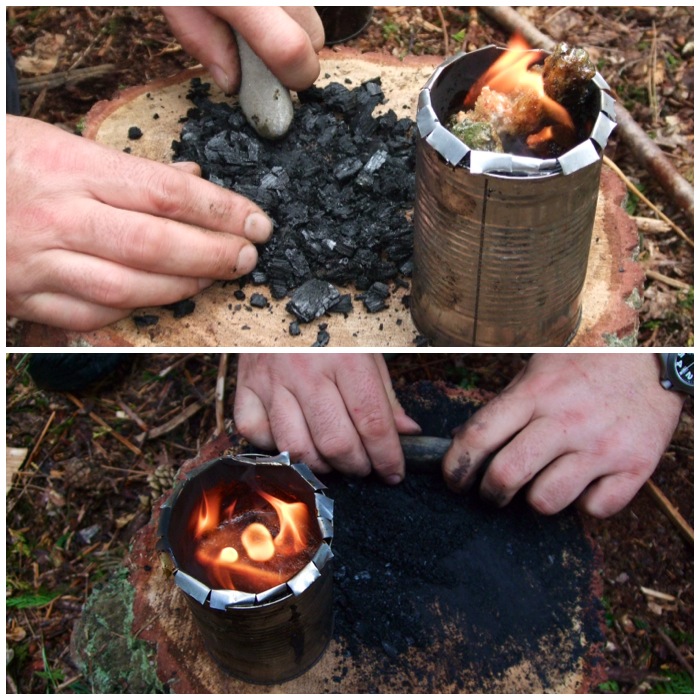
As the resin burns and melts in the tin I then take the time to crush the charcoal down to fine dust with a small stone. This fine dust acts as a binding agent that the resin can cling to and make the pitch you produce stronger. There are many other materials that you can experiment with as binding material such as ash and rabbit droppings. The Primitive Ways website has an excellent article on making pine pitch using a tin but in a different way and discusses other binding agents.
Making charcoal powder
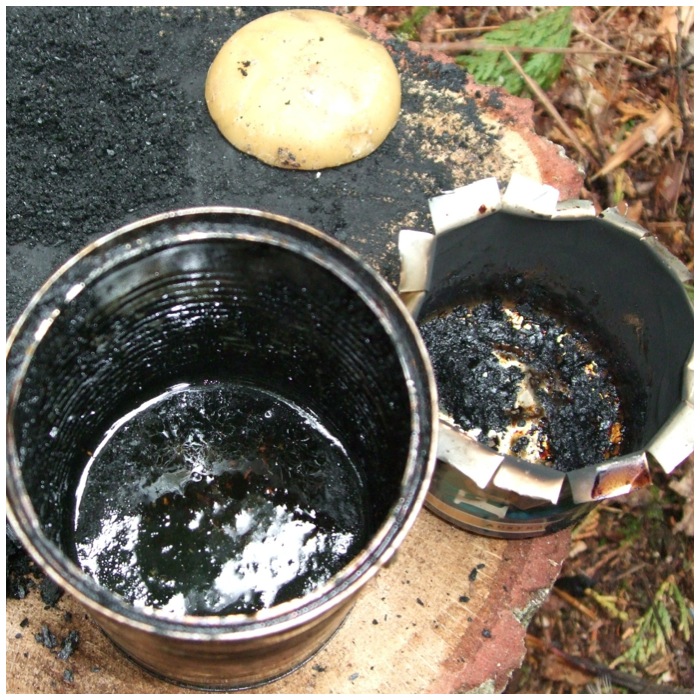
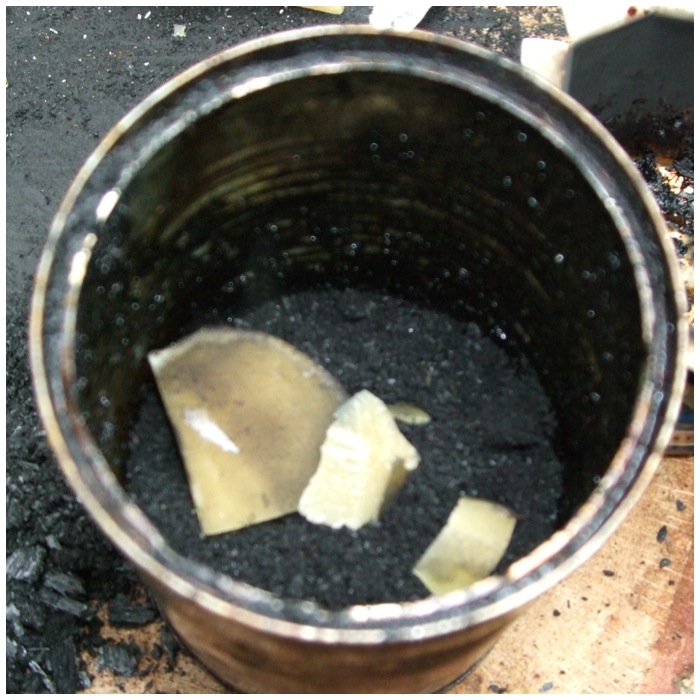
Soon all the resin had melted and dripped down into the tin (it looks black from previous pitch making). As the detritus is left in the colander the resin in the tin is very fine, which makes for very smooth pitch.
Liquid resin and remnants
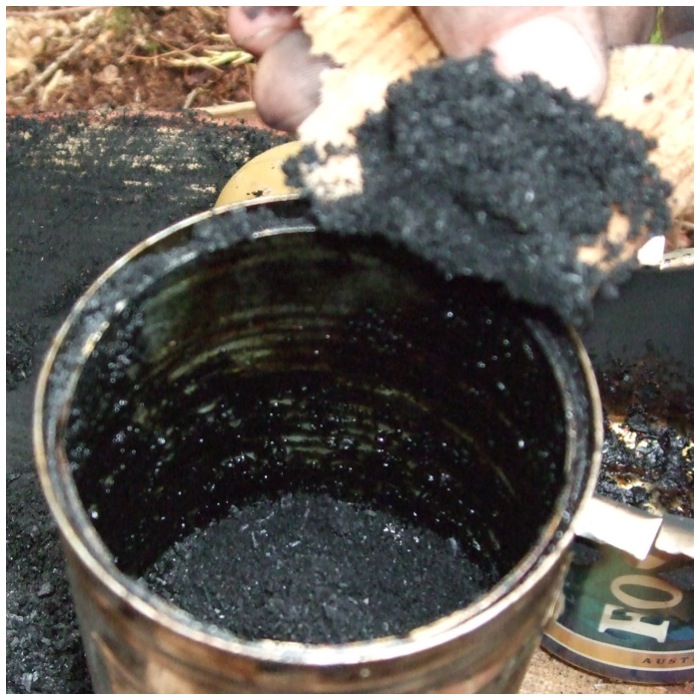
I tend to put in as much charcoal dust as there is spruce resin and mix it all together while the resin is still hot.
Add some charcoal
I then added some lumps of beeswax. I have heard some folk say that they put in the same quantities for everything but I usually just put in a small block or two of beeswax. I also use beeswax balsam as this is easy to buy in shops and it seems to work just as well as pure beeswax. Experiment for yourself with quantities to see what works for you.
Then some beeswax
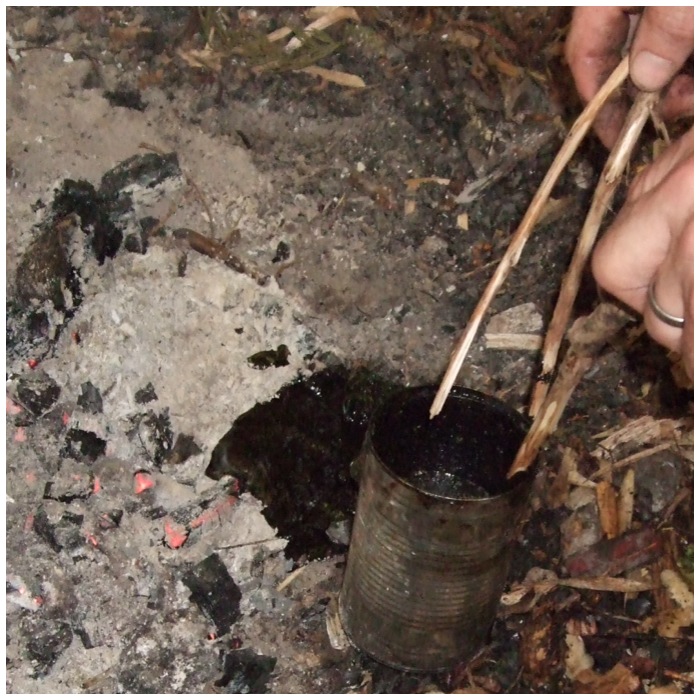
I then put the tin into the embers of my fire and mix it all up. Watch out that you don’t overheat it as it will froth up and spill over. I normally have some tongs nearby so that I can move the tin around the embers so as to better control the heat.
Melt and mix
I use the tongs to move the tin out of the embers when all the beeswax has melted and been thoroughly mixed in. The tin will be scorching hot and the liquid pitch will scald you badly if it comes into contact with your skin.
Remove from heat carefully
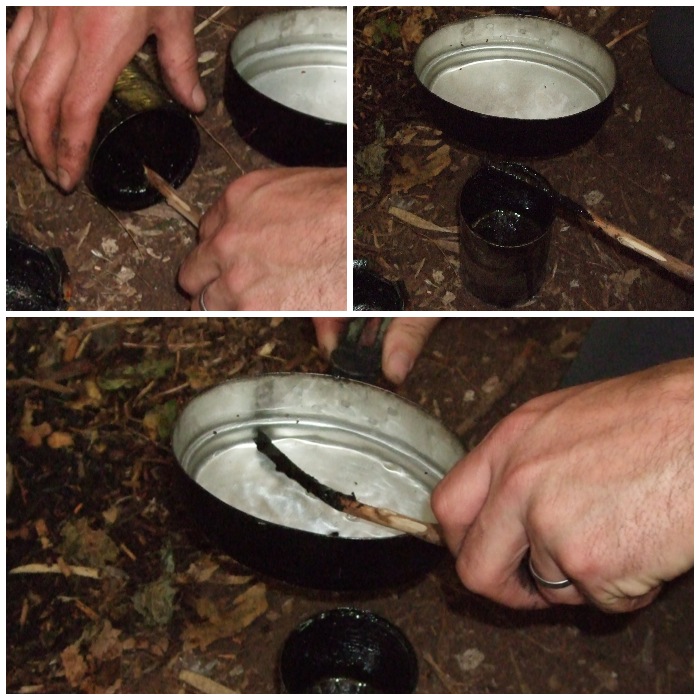
I let the pitch cool slightly and so it becomes a little bit tacky. While it is cooling down I make sure I have a little pot of water ready.
I then put one of the sticks into the mixture and roll it a few times (I try to square off the stick as this helps catching the tacky pitch) until I have some pitch on the stick. I then dunk the stick into the water to rapidly cool the pitch down. The pitch will not dissolve in the water due to the oils, charcoal and beeswax in it and but will bind to the stick.
Roll and dip
I then repeat the process again and again to build up more layers of pitch on the stick. You will find loose bits of pitch will float in the water so just fish them out and pop them back into the tin and they will melt back into the mixture.
Roll, dip and wet your fingers
After two or three times doing this you will need to use your fingers to mold the pitch into a tight blob on the end of the stick and also to smooth it out. As the pitch can still be quite warm and sticky you need to keep your fingers wet during this process. If your fingers are dry then the pitch will just stick to them.
Smooth the hot pitch down
In no time at all you will have a good amount of spruce pitch to help you with making primitive craft items.
Pitch Sticks
To use a pitch stick I just heat the end of it with a glowing ember until it starts to melt and then drip the liquid pitch onto whatever I am making.
To use just heat
I have used pitch for waterproofing bindings on arrows.
Great for arrows
It is also great as a filler as in this small hatchet. I filled the socket with pitch, inserted the flint axe head and then bound it all up with rawhide.
And great for axes
I have also published an article on making pitch in a primitive fashion using hot rocks instead of a tin – How To…. Make Hot Rock Spruce Pitch.
I put this How To…. together to show how to construct a couple of primitive arrows. I used mainly primitive tools with the exception of a few modern touches: the occasional use of a steel knife, adding false sinew when I ran out of real sinew, some sandpaper, a copper-tipped flaker and bleached feathers.
Preparing the arrow shafts
I made these arrows while on the Woodcraft School Primitive Technology course in 2009. John Rhyder the course instructor supplied us with pre-cut branches from a spindle(Euonynus europaeus) tree, which has traditionally been used for the manufacture of arrows as it is a hard wood and takes a point well. Another option that was available to us was hazel(Corylus avillana) as there was some on site. I chose to use spindle as I had never used it before to make arrows.
Flint-tipped arrows
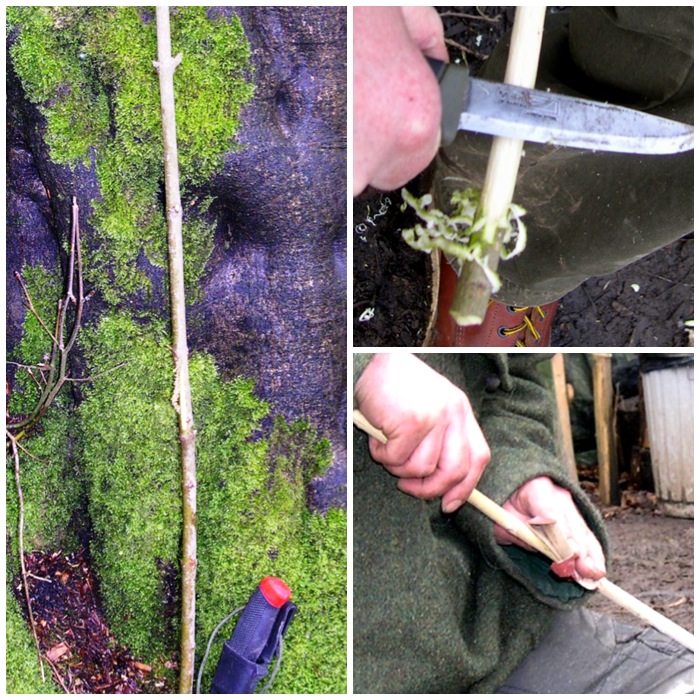
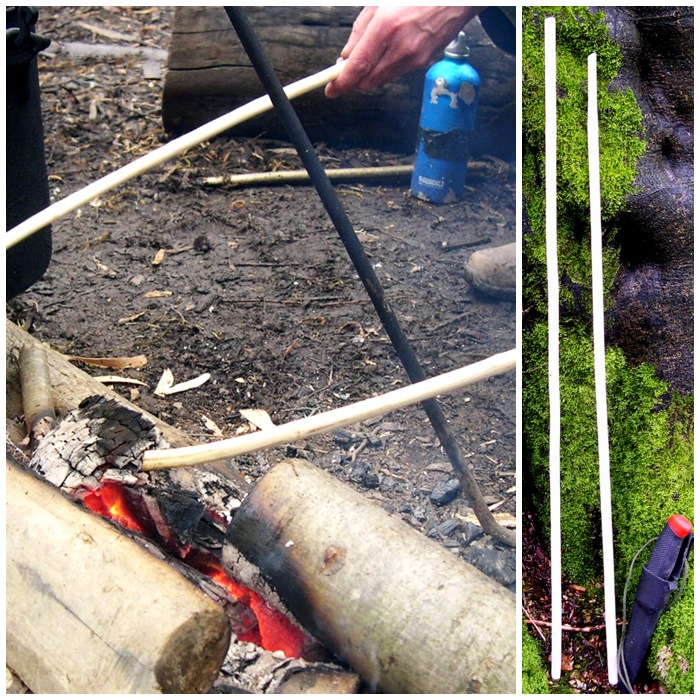
I used the back of my knife to scrape the bark off the wood but this would traditionally have been done with a piece of sharp flint or other such stone. For safety I kept the knife still and pulled the green stick backwards, scraping bark off with the back of the blade. I like this method as the blade stays still making it very safe. I then roughly sanded each of the branches with sandpaper. This could have been completed traditionally with either a handful of sand or a soft rock such as sandstone.
De-barking
I then heated the branches over an open fire. I was careful not to scorch the wood as this changes its properties and makes it brittle. The trick is to slowly turn the branch in a circular fashion, heating evenly all around the section of wood that needs straightened. This in effect creates steam in the wood as the sap heats up and so allows you to slowly straighten the arrow (this method works best on green wood). To straighten the bumps in the wood you need to hold it in position (as straight as possible) until it cools and sets into its new shape.
Heating and straightening
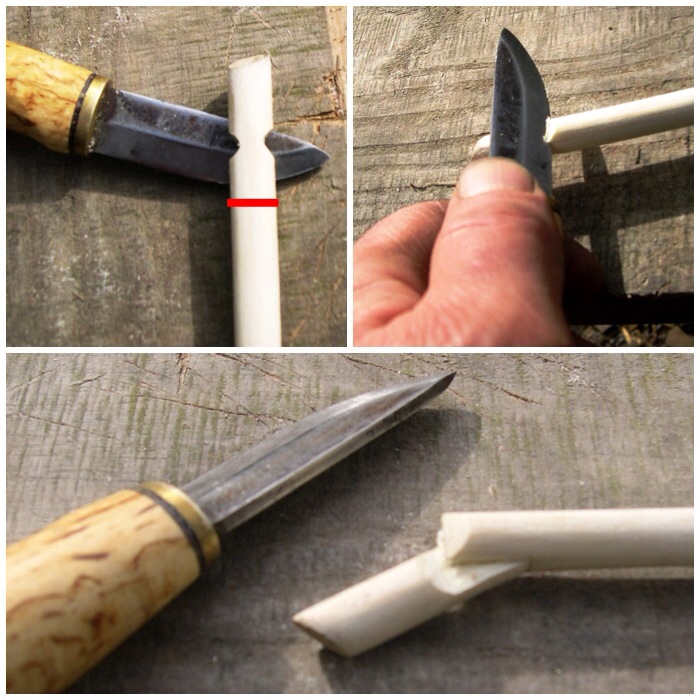
Making a Self Nock
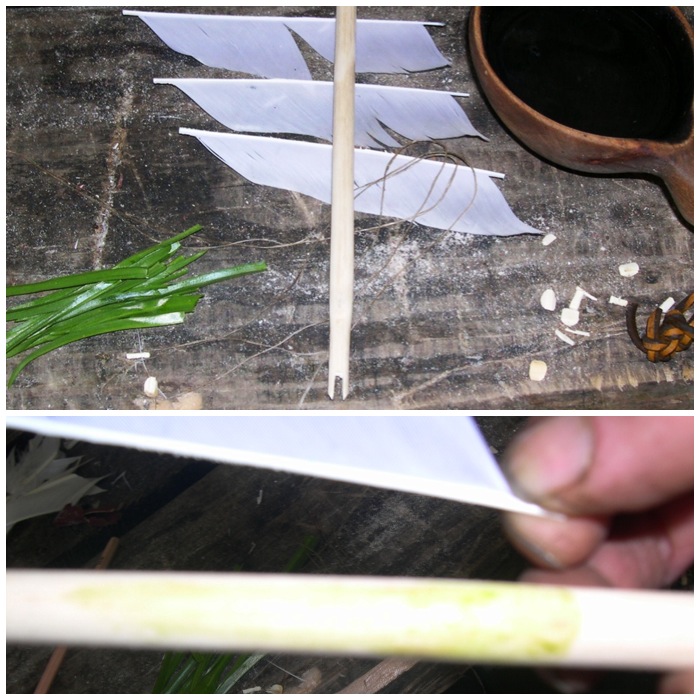
Next I needed to make the nock for the string. I cut two small grooves (opposite each other) at the thin end of each shaft. Then about a centimeter down the shaft (showed here in red) I rolled the knife edge to mark a thin line at 90 degrees to the first grooves (too fine to see in the picture).
I then placed the edge of the knife into one of the larger grooves to split the wood down to the lower line. The small cut in the wood at the lower line helps stop the split running off too far. I then repeated the procedure on the opposite groove.
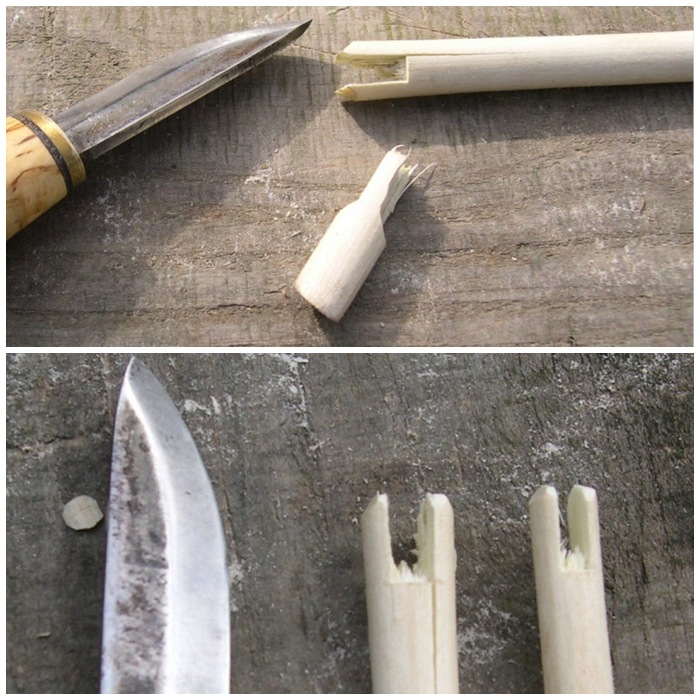
I wiggled the centre section back and forth until it started to break away from the main arrow shaft. In the bottom picture you can see the nock starting to appear.
Self Nocks
The resulting peg finally pops out after a lot of wiggling about. Freejutube has an excellent video on making a primitive nock using a slightly different method – Arrow snap self-nock – with flint and bone tools
The knocks
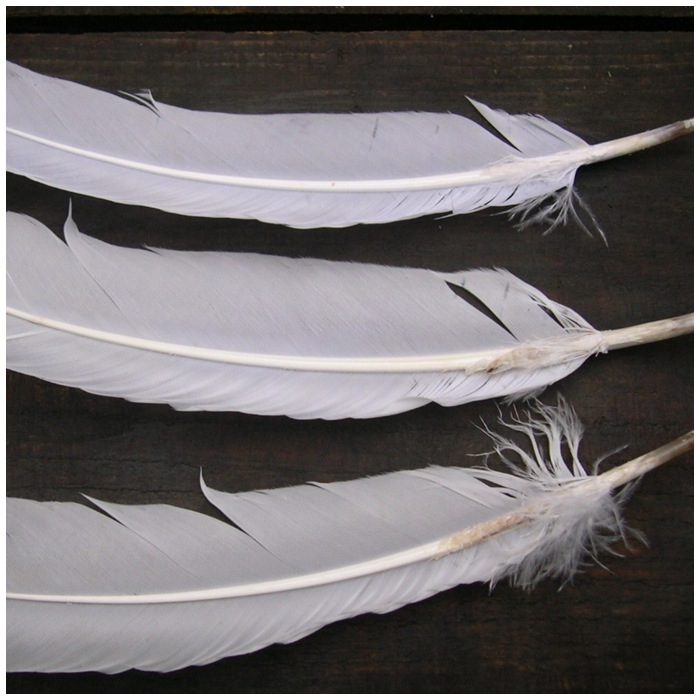
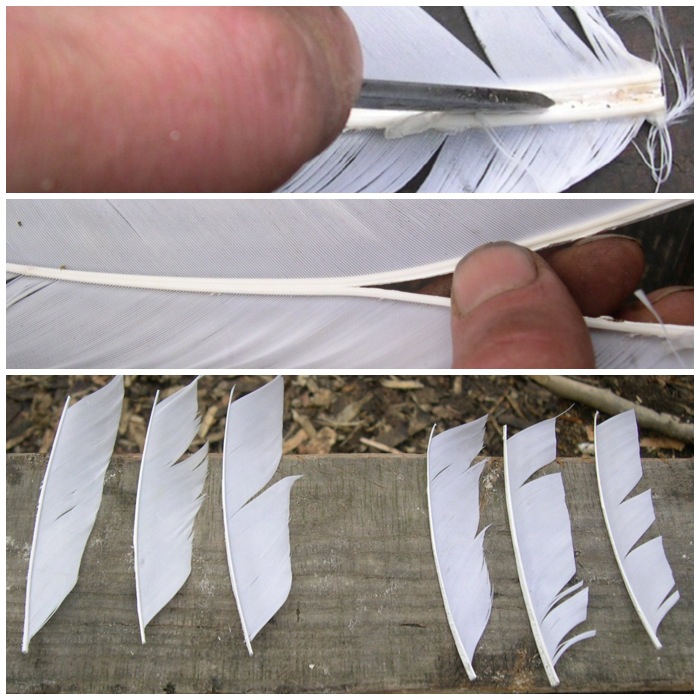
Preparing the Flights
John Ryder provided feathers for us to use. Due to health and safety requirements John had to supply his students with feathers that had been washed: traditionally of course the remnants of bird kills would have been kept and the feathers used for this job. If the feathers are from the same wing they make excellent flights, making your arrows more accurate.
The Flights to be
I used my knife tip to start the split of the feathers to create the flights – a sharp piece of flint would have worked just as well. After the initial split had been made I used my fingers to split the rest of the feather. I tried to be very careful here to keep the split in the centre of the spine of the feather all the way to the end. It gets a bit tricky as it tapers out near the end.
I split and trimmed the feathers leaving enough of the spine at each end for wrapping purposes.
Splitting out the flights
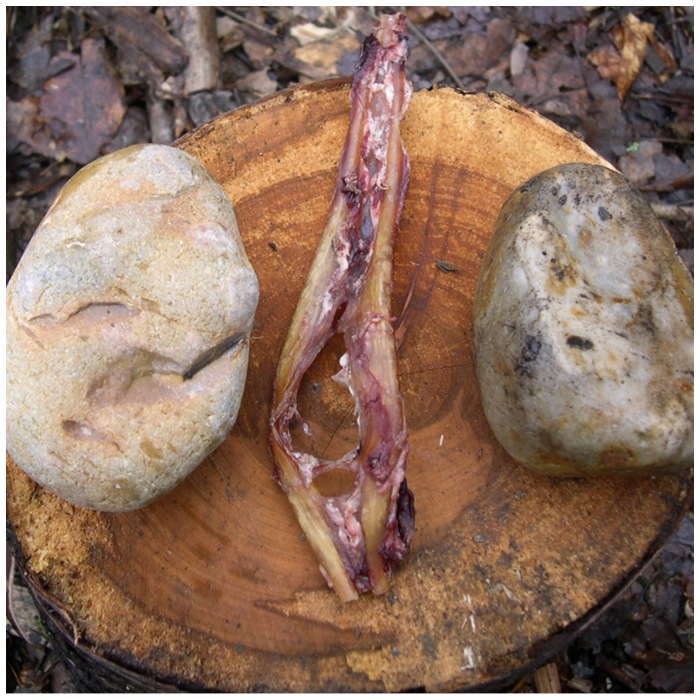
Making Sinew Cordage
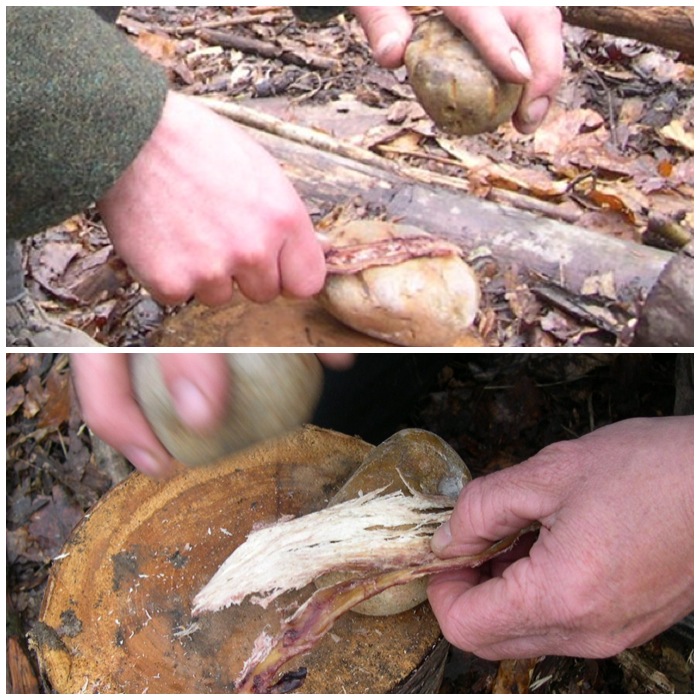
To wrap the feathers onto the shaft I used deer sinew. This needs to be pounded gently between two stones until all the sinew fibres separate.
Sinew
This takes time but it is worth it to see all the strands of sinew start to appear.
Breaking down the sinew
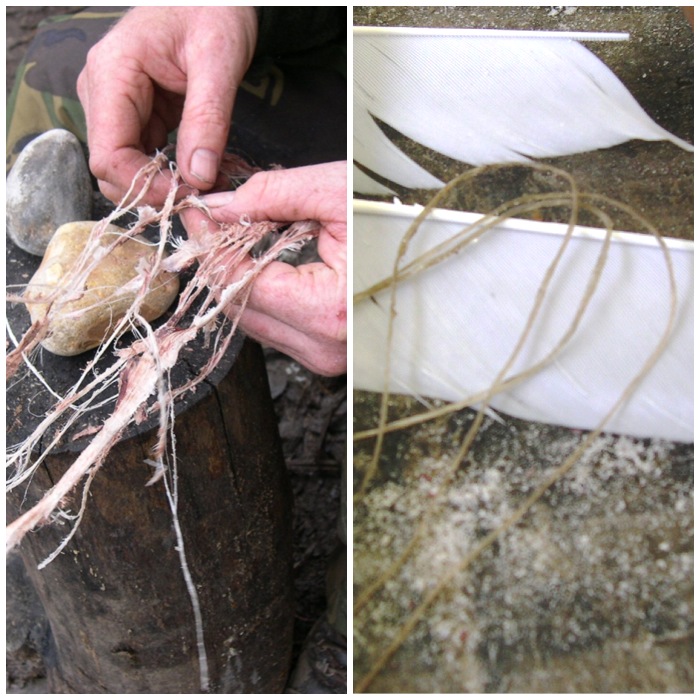
Here you can see the fibres starting to really fall apart. There wasn’t enough real sinew for everyone so I had to supplement it with some false sinew: dental floss is another possible alternative.
I rolled the sinew strands to make them stronger and wet each strand with saliva. This allows the sinew to bind to the shaft as the fats in it act like a glue when wet. On the right you can see some sinew that is ready to use as wrapping.
Finished sinew
Attaching the Flights
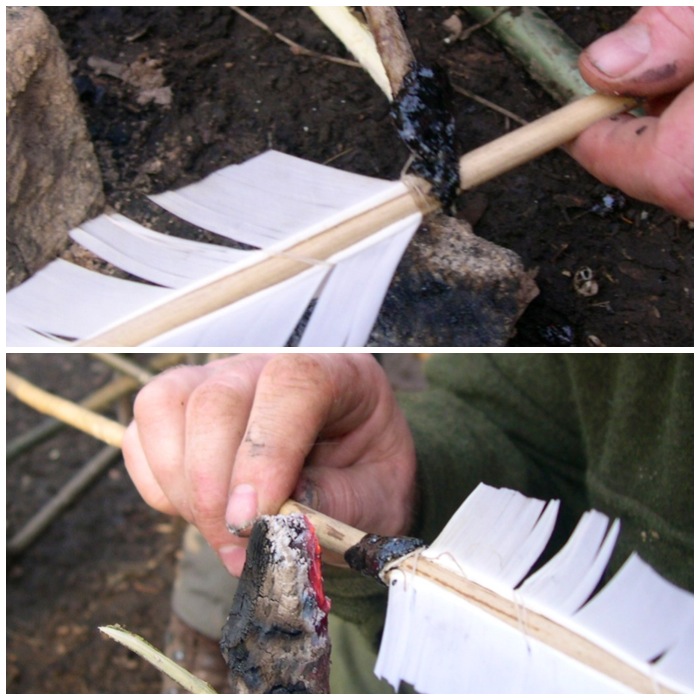
To aid in the process of attaching the flights to the shaft I tried out another type of glue made by crushing bluebell leaves to a pulp between my fingers. The resulting gloop was supposed to act as a first fixing to help keep the flights in place before wrapping; it turned out to be a little bit tacky but nowhere near strong enough to act as a glue. In the bottom picture you can just make out the shaded area on the shaft where the bluebell ‘glue’ was placed.
Bluebell glue
In the end I just used sinew to hold the flights in place. You can see the bluebell stain on the shaft in this picture.
First tie off
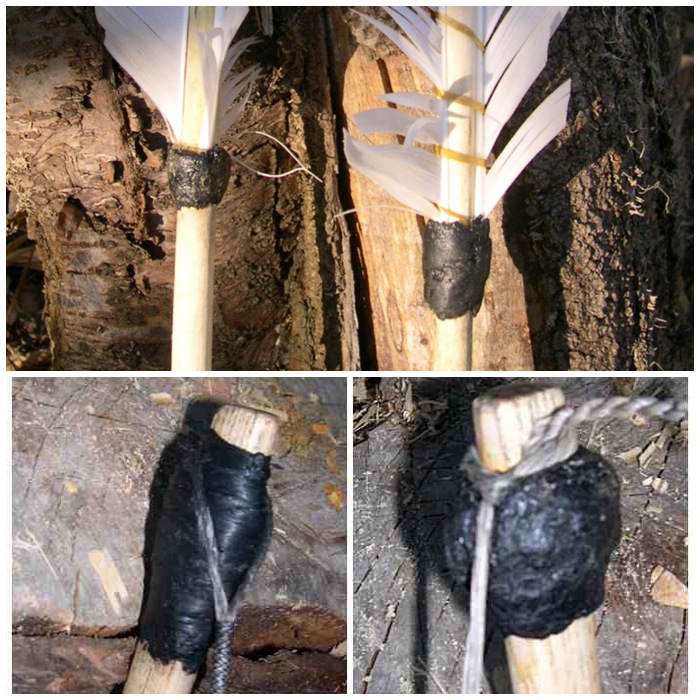
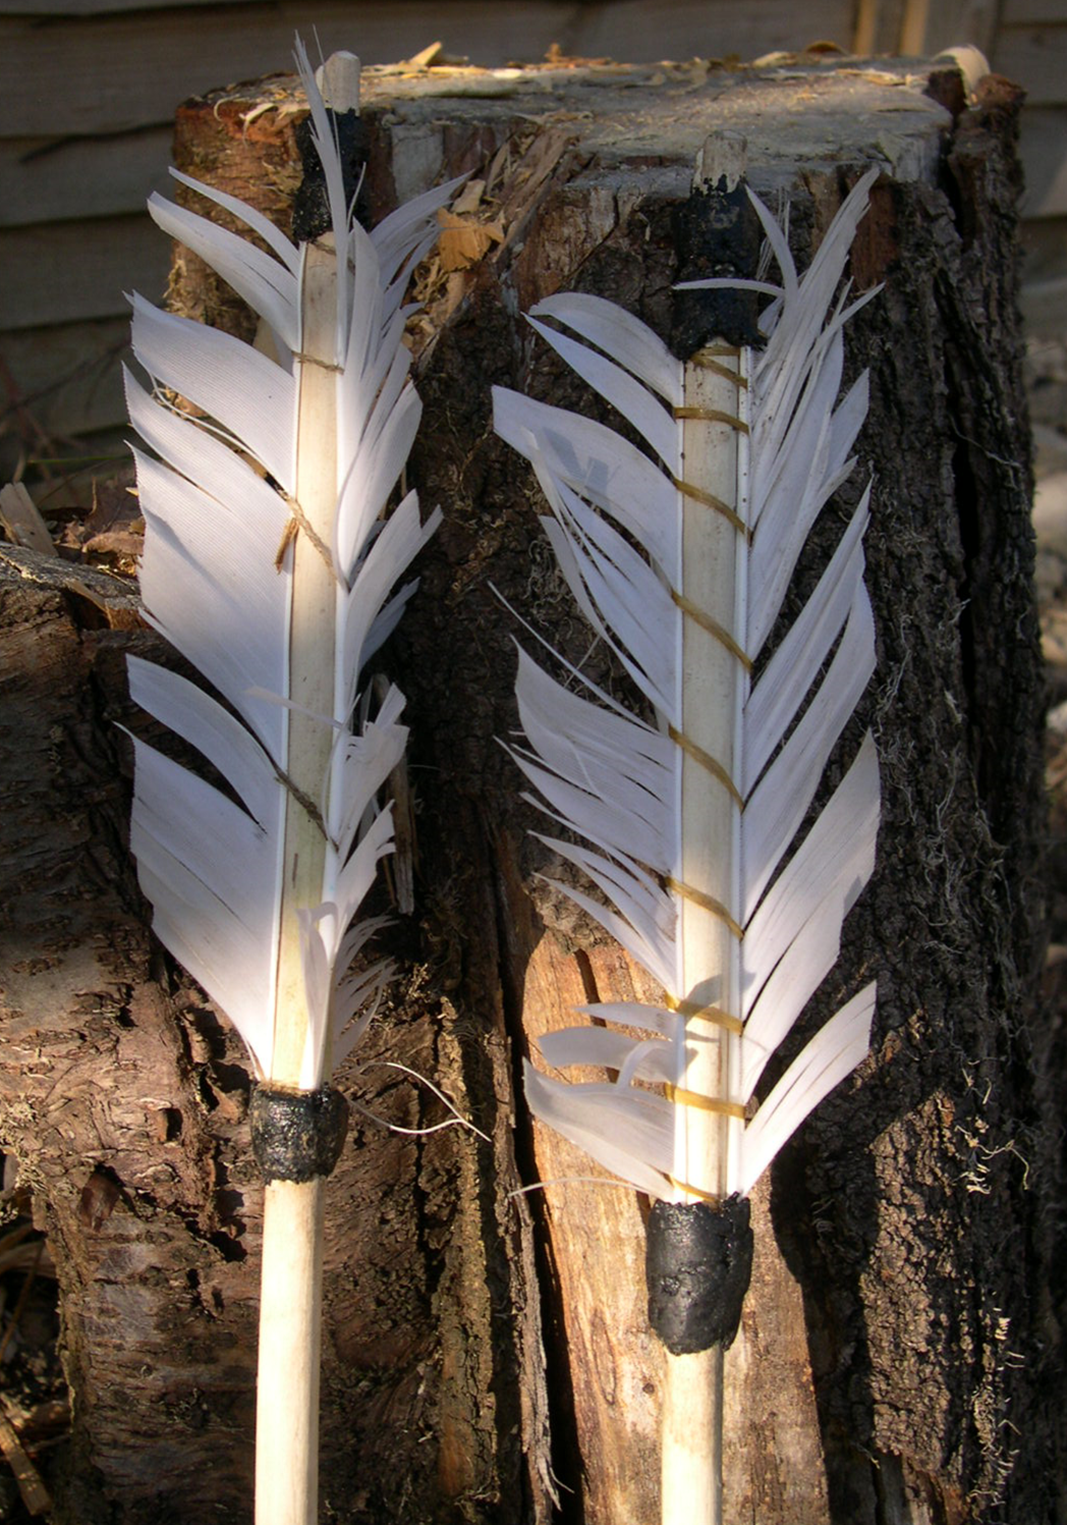
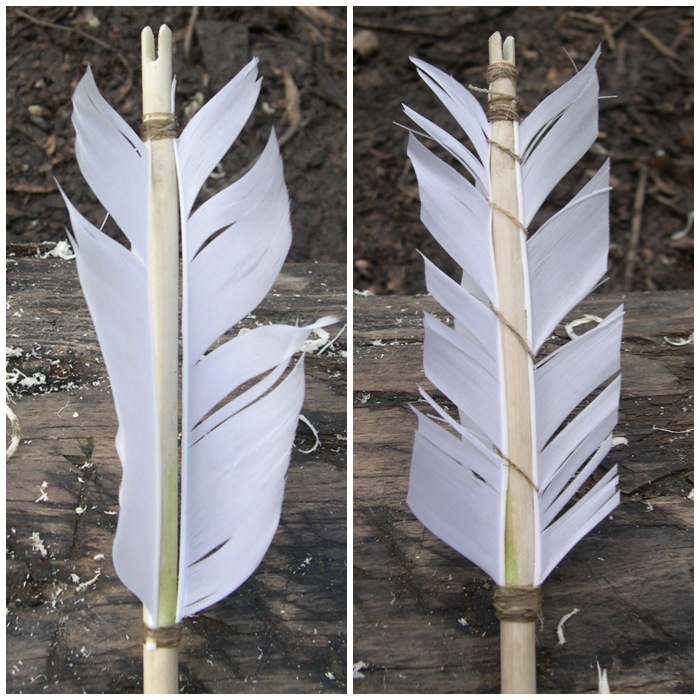
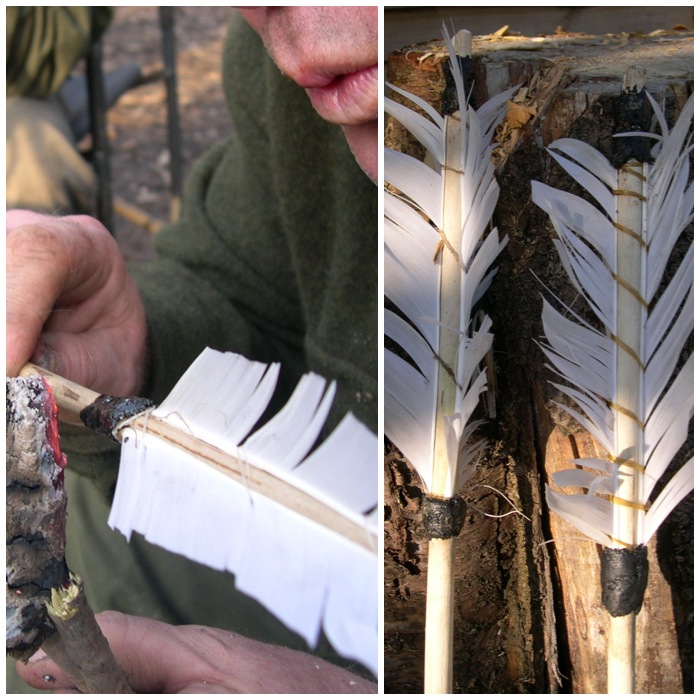
I then wrapped the flights at the top with sinew (bottom left) and then to finish this stage I wrapped the body of the flights with more sinew (bottom right).
I also wrapped sinew just below the nocks on each arrow to strengthen them. You can see this clearly in the arrow on the right. If I hadn’t reinforced the nocks with sinew they could easily have split with the forces of the bow string as soon as I shot them.
Tied off with sinew
Creating and Using Pitch
Once the sinew was attached to each arrow I decided to put together some pine pitch. This was to cover the sinew to protect it from fraying and also to waterproof it. The name pine pitch is a bit misleading as I used spruce resin, since that was what was readily available in the area. After collecting the resin that had oozed from spruce trees (the tree uses the resin to seal any damaged areas on its bark) I mixed it with fine charcoal (to give it strength) and beeswax (to give it flexibility).
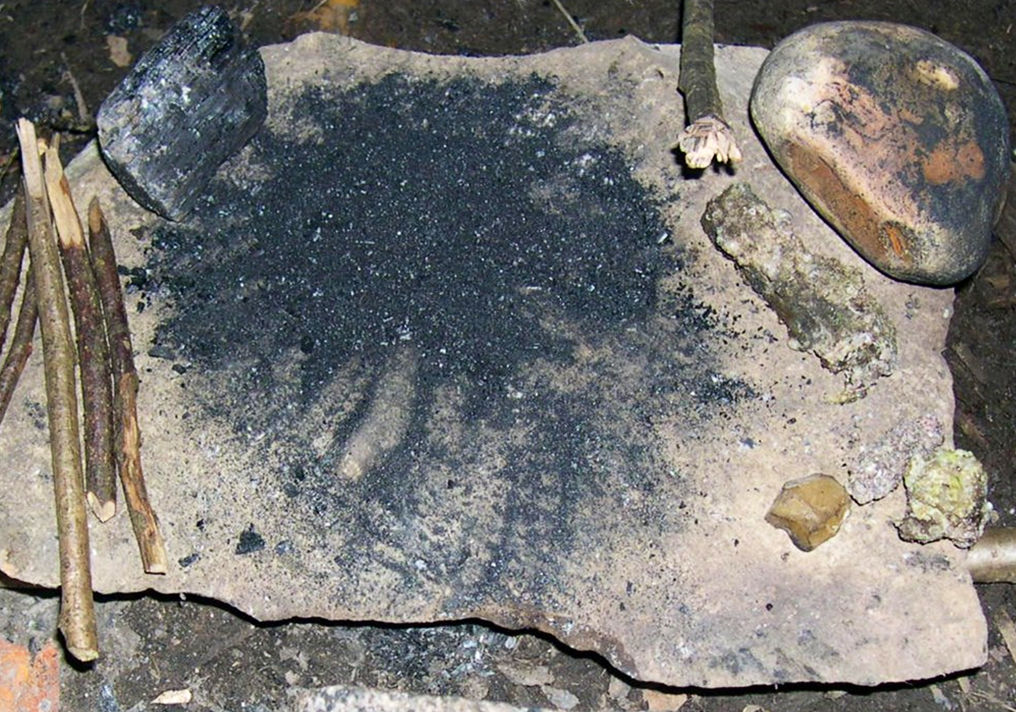
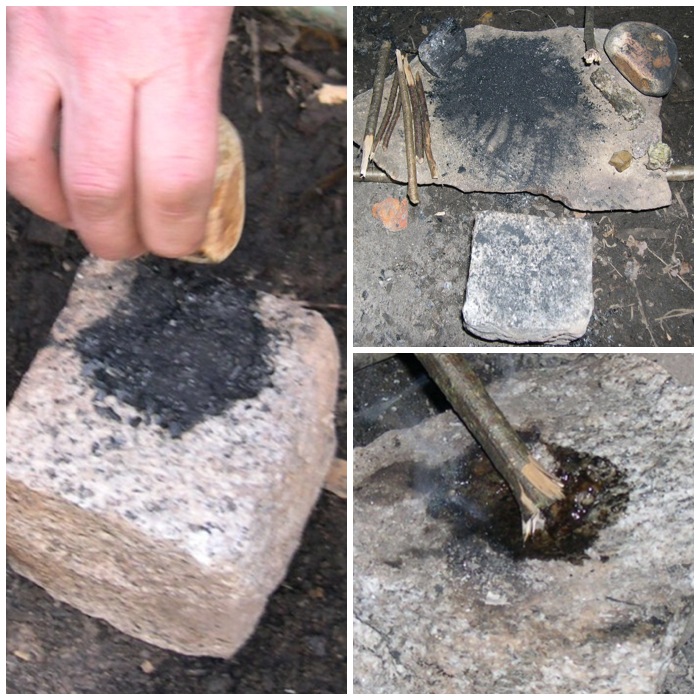
I used the small rock (left hand picture) to grind the charcoal and a large flat rock (top right) as a preparation table. I heated the square rock in the fire to help with melting and mixing everything together. The sticks were used as mixers and to store the resin (see below). The hot rock I used had been heated before many times so there was no risk of it exploding (which can happen if they contain trapped air).
On the heated rock (bottom right) I heated the first lump of resin, and as it melted I scraped off any debris such as bark.
Pine Pitch Prep
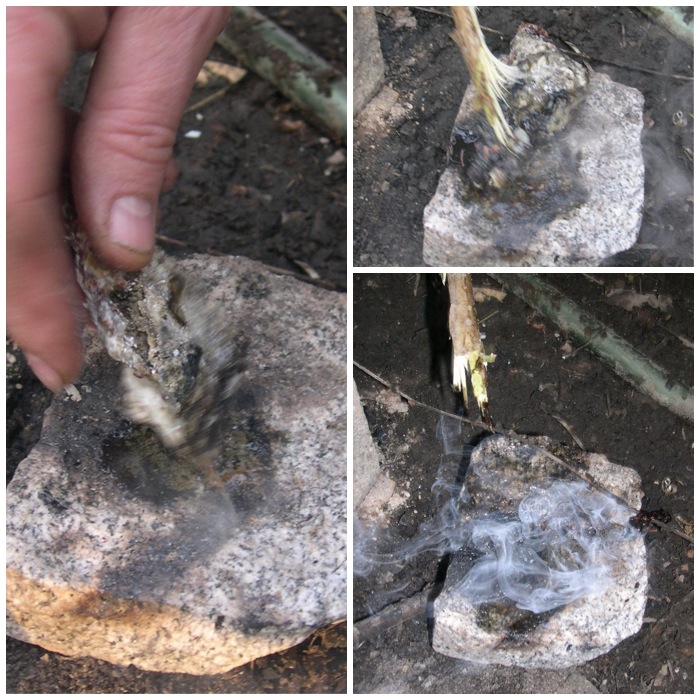
I kept adding more and more resin, charcoal and beeswax (I just added charcoal until the mixture thickened slightly and added beeswax in little lumps) until it had all melted. The rock was super-heated so I had to take great care not to burn myself.
Mixing
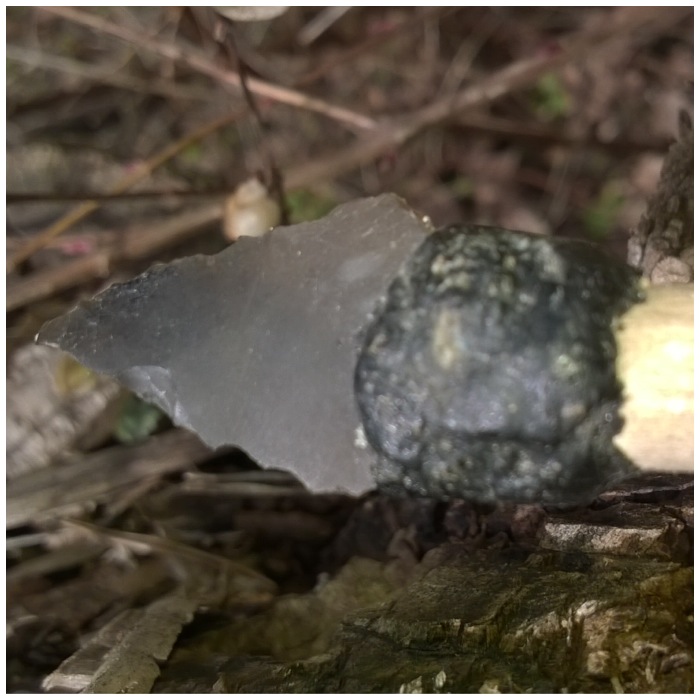
The rock had a slight indentation to collect the melted resin. It doesn’t look like there is much resin here but it was enough for what I had to do.
Hot Pine Pitch
Using two sticks, one to scrape the pine pitch up and one to hold the cooling pitch, I coated the holding stick with the pitch mixture then submerged it in a pot of cold water to harden it. I would then repeat the process adding more and more layers. Using cold water speeded up the whole process.
Here you can see the pine pitch building up on the stick. This primitive method does not give you very fine pitch as you would get using a modern method but it does work surprisingly well
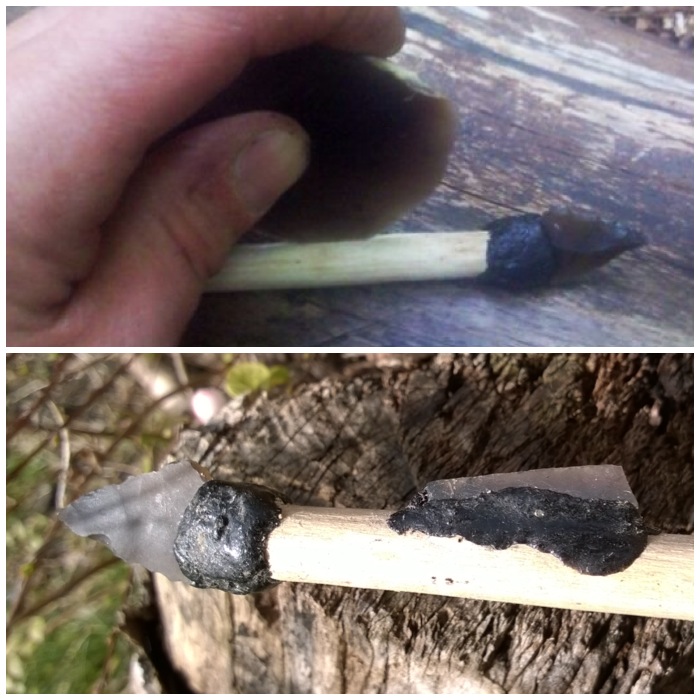
Creating a Pine Pitch Stick
I made up two pine pitch sticks in the end. The stick on the far left has been charred and can be re-ignited quickly by dipping it into a fire to create heat to melt the pine pitch again to coat the sinew on the arrows. This protects the sinew and gives the arrow a nice finish
Prepping to coat the sinew
After re-lighting the charred stick I used it to to re-melt the tip of a pitch stick (top picture). I found it fairly easy to drip the melting pitch onto the area of sinew on the arrow I wanted to cover (bottom picture).
Heat and coat
As I dripped the pine pitch onto the sinew I wet my fingers so that I could smooth the resin out and spread around evenly (John the course instructor is in the left hand picture demonstrating this). If you do not wet your fingers the hot pitch could burn you and also it will stick to your fingers (out in the woods without hot running water this is a pain to clean up).
Re-heat and smooth out
Knapping the Arrow Tips
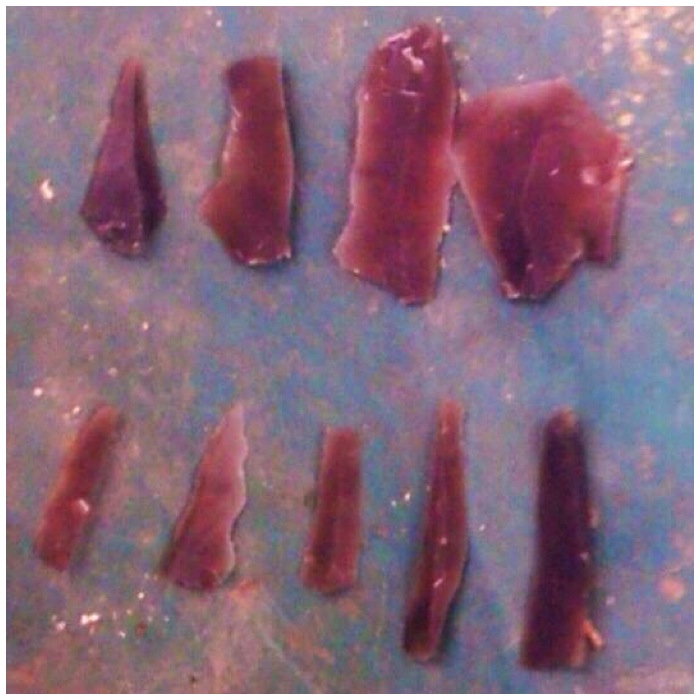
The next stage in the process was to make some arrow tips. I had collected up some shards of flint left over from the course we had with John Lord. Thankfully there was a mass of leftover flint for me to look through and choose from. All of the pieces shown below I thought could be made into decent arrow tips or barbs with the minimum of effort.
Possible points
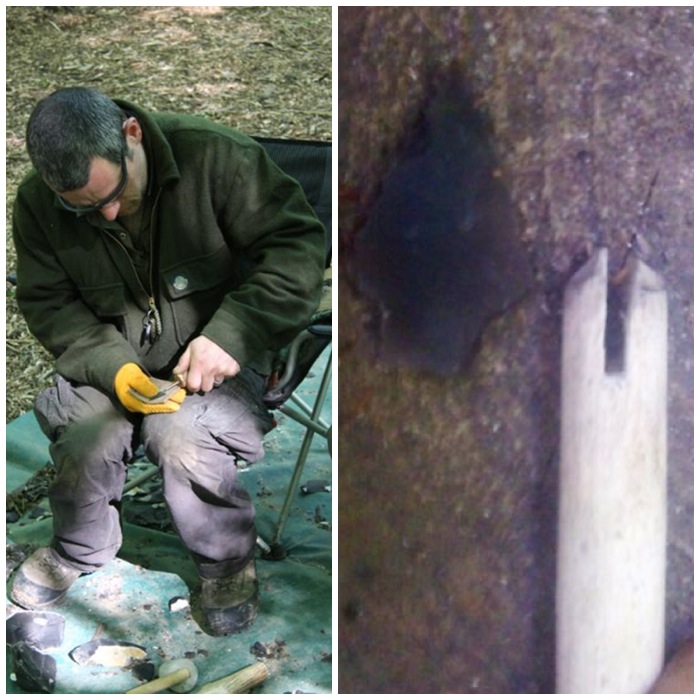
The next stage was to pressure flake the pieces with a copper tipped pressure flaker and an antler tine (I wanted to try both tools) into usable arrow heads. The glasses were worn to protect my eyes from flying pieces of flint and the glove protected me against cuts. I placed under the flint a strip of leather to give support and further protect my hand.
The picture on the right did not turn out very clear (a smear on the lens of my camera) but I soon had an arrowhead ready to insert into my arrow shaft. Using the same method as I used to make the knock, I created a groove at the arrow tip.
A bit of knapping
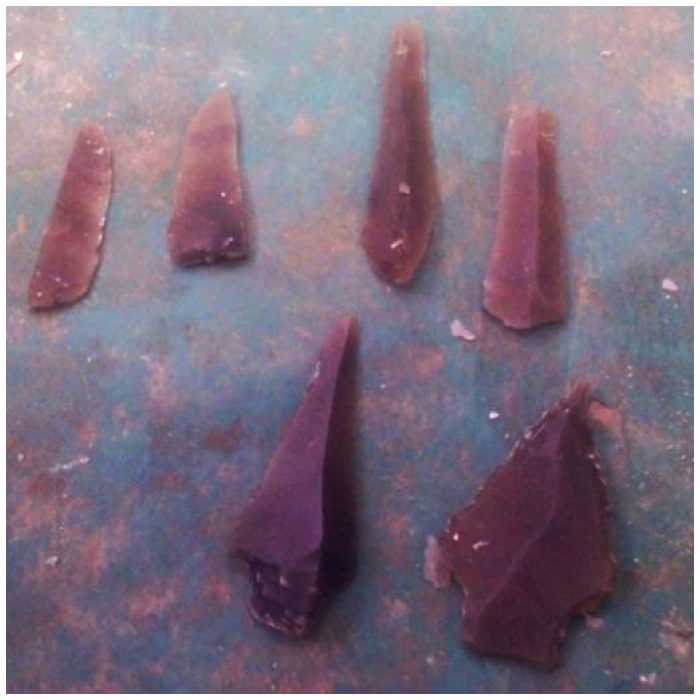
I re-worked the other pieces and after a little touching up these other flint points were ready to be used.
The rest of the finished points
Attaching the Tips
I then coated the arrowhead with some pine pitch and placed it into the groove on the shaft. I then coated the tip of the shaft in more pitch and wrapped sinew round it to keep the arrowhead secure.
Update 13/03/2014 – I have been advised by one of the Primitive Arts Society members David Colter that it is very important to securely bind the shaft immediately below the point for a length of about a centimetre to prevent it from splitting on impact and failing to drive the point into the target. There is a very good experiment showing this in the Traditional Bowyers Bible Vol 3. I did not bind it for a full centimeter in my example (thanks for the update David).
Attaching points
I finally added more pitch to cover the sinew to waterproof it all.
Well attached
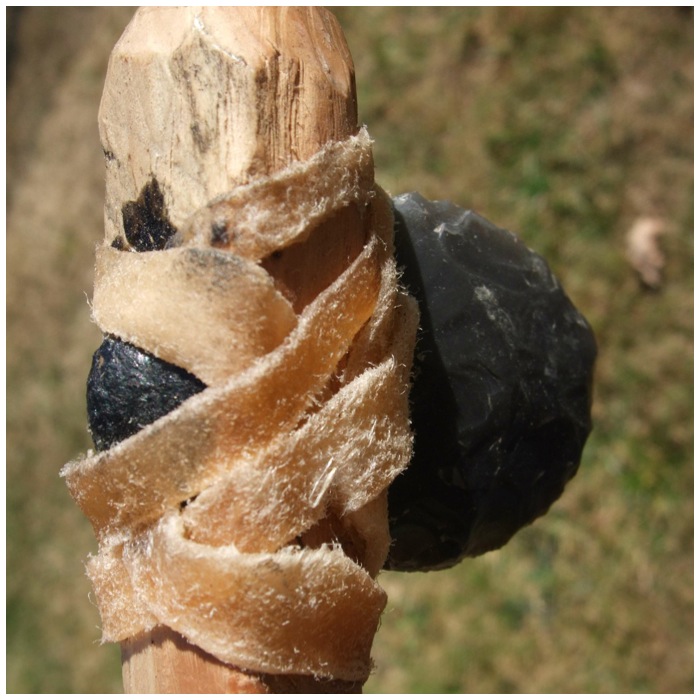
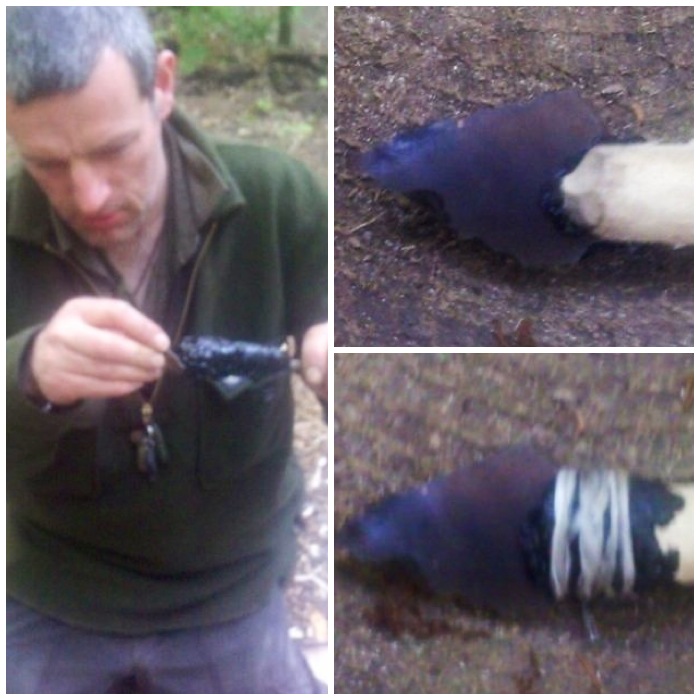
Based on archaeological evidence I decided to add a barb to the arrow. I firstly scraped a groove along the arrow shaft then put some pine pitch into it.
I then placed a long thin piece of sharp flint onto this pitch and coated more around the base of it (bottom picture) The barb is designed to cause maximum damage to the prey animal as the arrow enters its body.
Attaching a barb
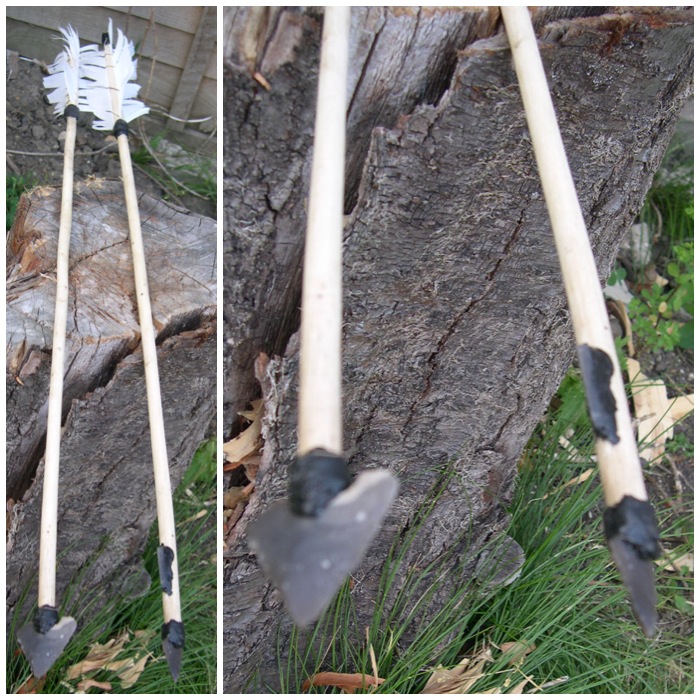
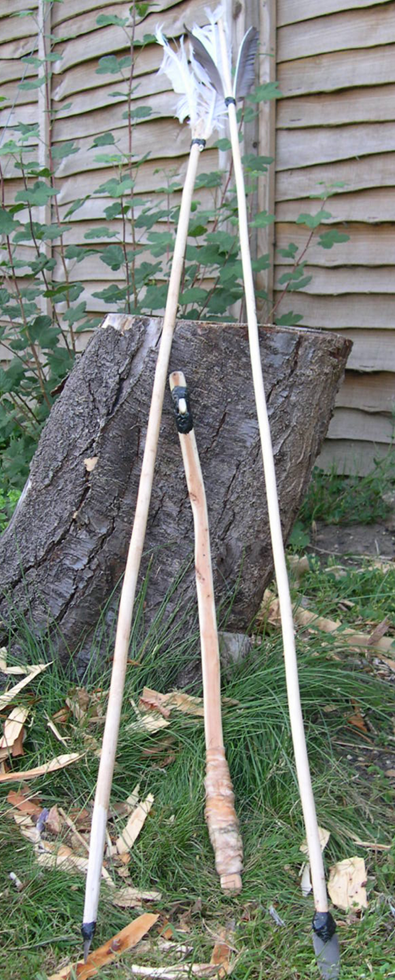
I finished two arrows in this project. The one I completed for this tutorial is the one on the right.
Finished arrows
Using similar techniques I was able to produce an Atl atl set as well.
Atlatl extras
I have never shot these arrows at a modern target as I don’t want to break off the tips but I did shoot them into some bales of loose hay and was very impressed with their accuracy.
This was a great project as it introduced me to some primitive but very effective techniques in arrow making.