
These traps are not just for show but tools for living as comfortably as you can on the coast
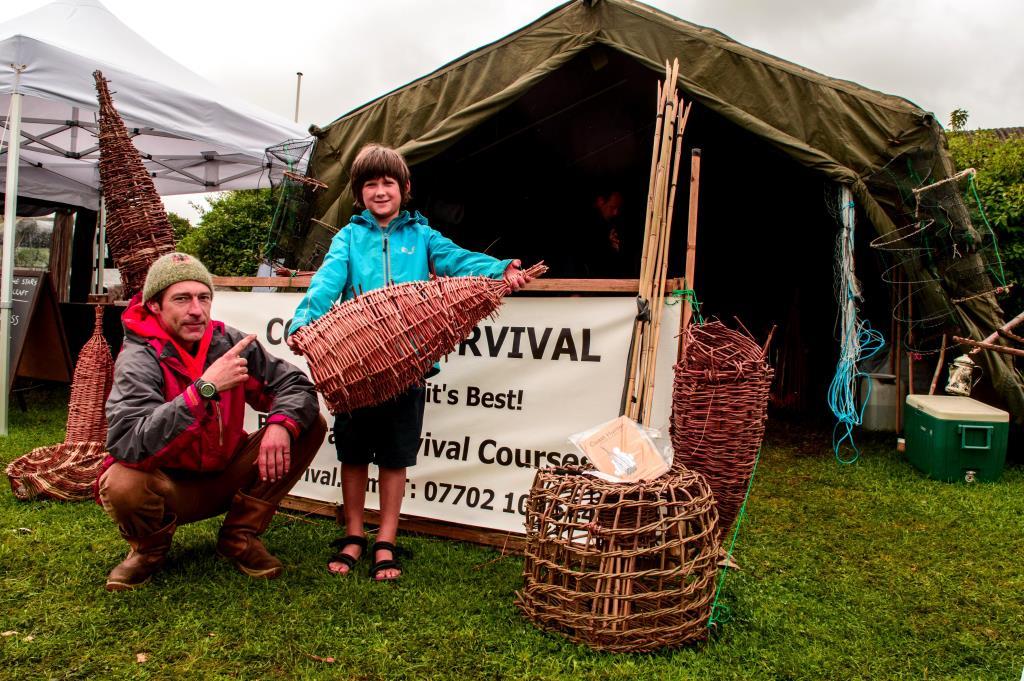
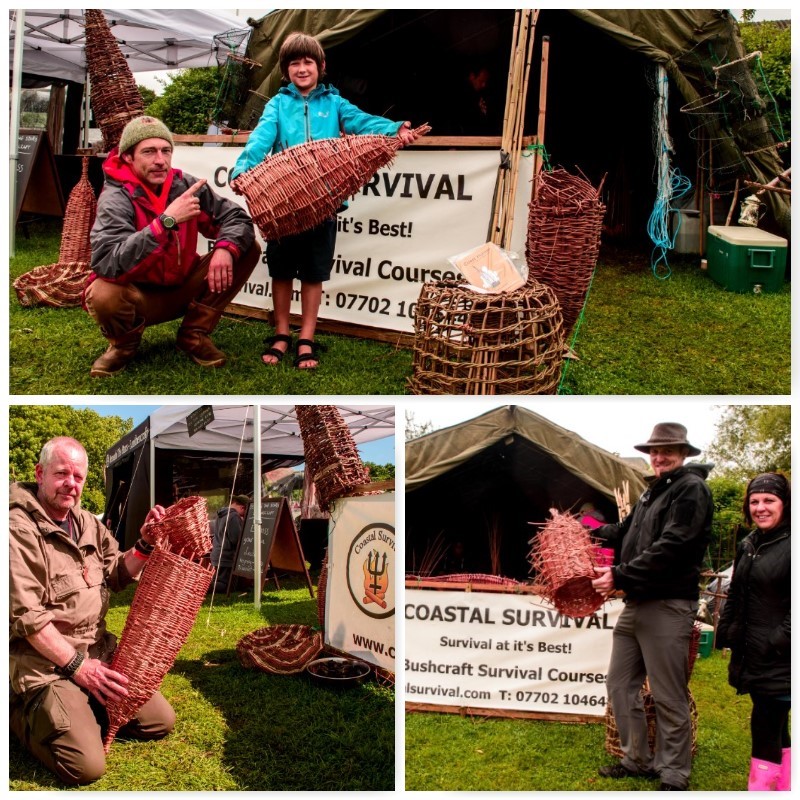
Last August found me at the Wilderness Gathering here in the UK with my good friend Fraser Christian of Coastal Survival. Fraser ran a Masterclass at the Gathering for about 8 people in how to make a stick fish trap.
Fraser has a couple of books out now called Eat the Beach and Coast Hunter (he is currently working on his third book called Castaway on the Seashore). In the book Coast Hunter Fraser goes into detail on many coastal hunting techniques (including making this trap) and I encourage you to get a copy of these books if you are interested in the art of coastal survival.
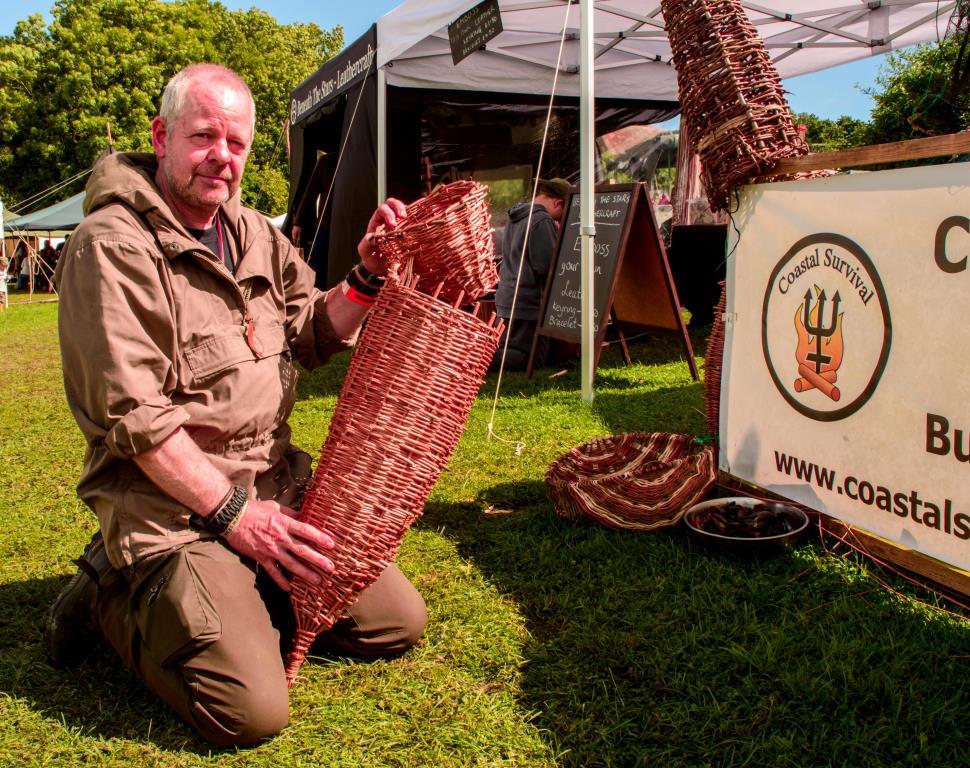
Fraser uses this type of trap on the coast weighted down with stones in the inter-tidal zone to catch fish, crabs and lobsters. You can make the trap with many different woods found in the woods and hedgerows – just make sure it is pliable. As he was running a class for 8 people he brought in some commercial willow from Musgrove Willows.
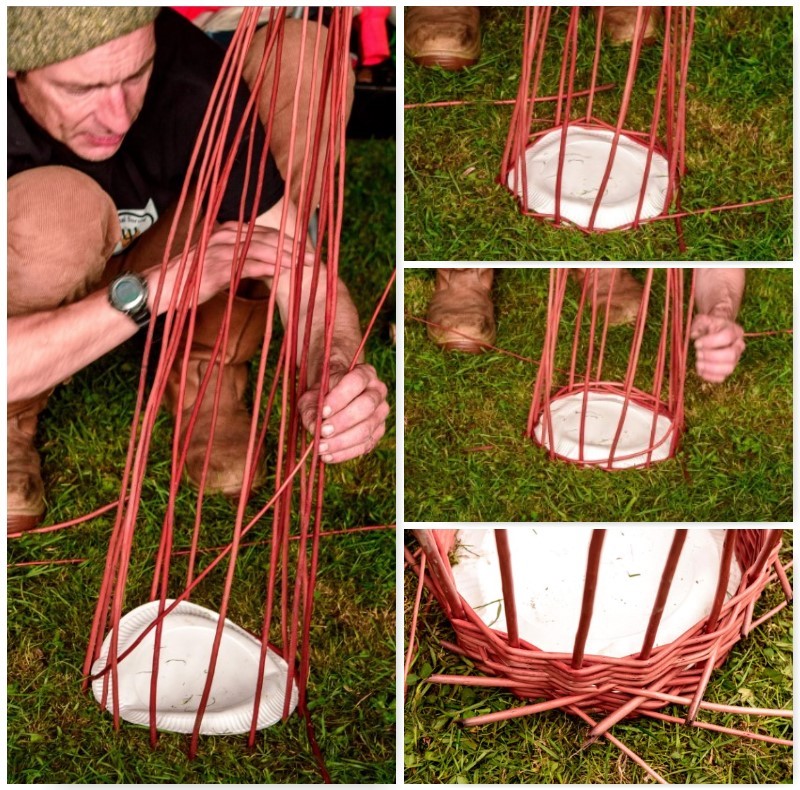
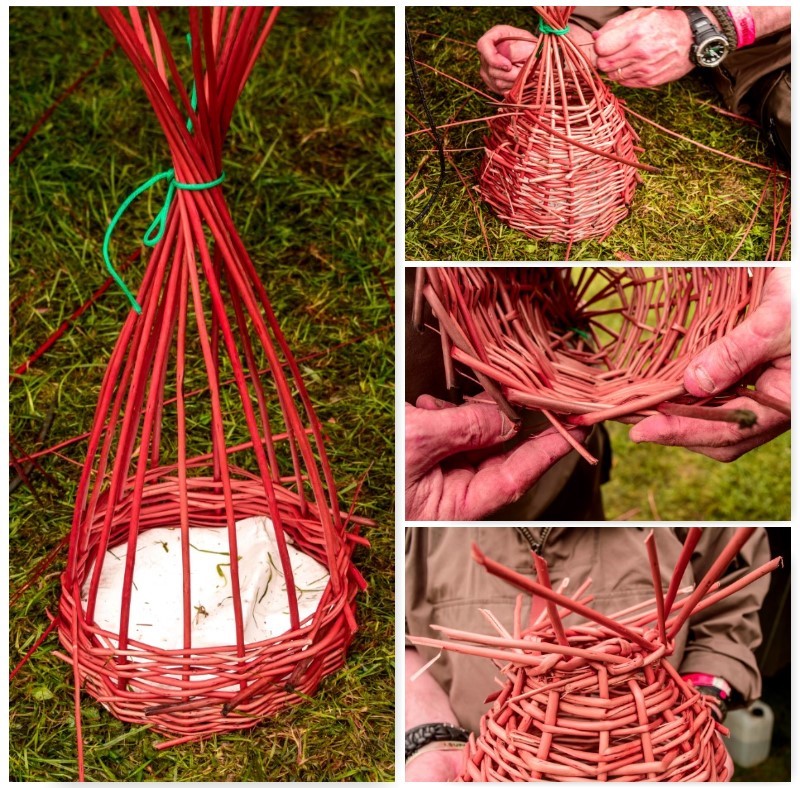
Step 1 – Set Up
I will go through the steps as I saw them on the day but for more detail on this trap have a look inside the Coast hunter book. To form the shape Fraser used a paper plate and a tent peg to create a circle of willow. He tried to maintain an even distance (about two fingers width between each piece of willow) as he inserted the willow (thick ends) into the ground, They were pushed in about 10cm’s and the tent peg really helped as the ground was hard.
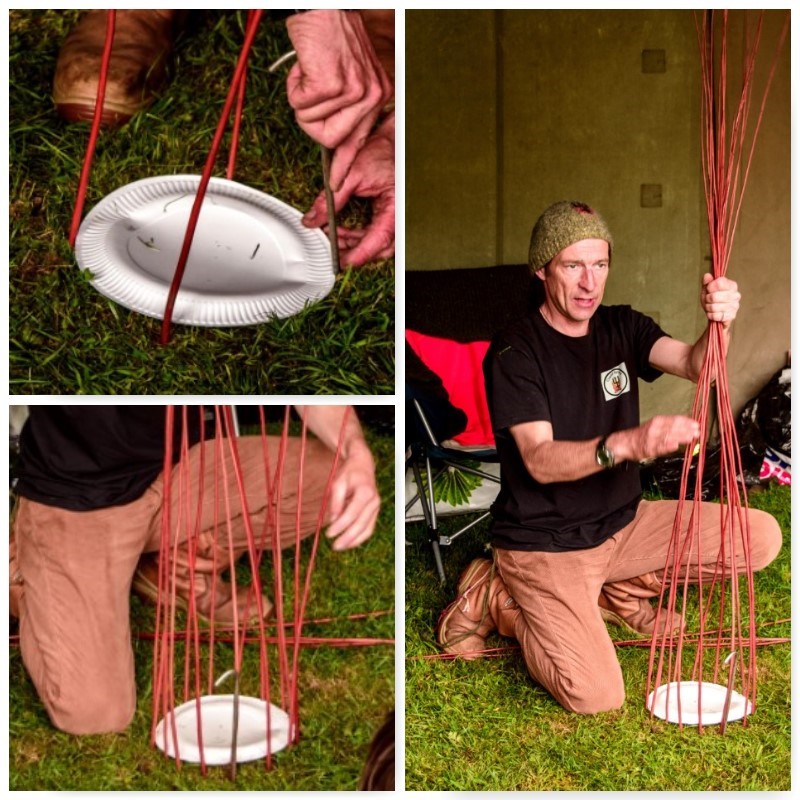
Once the willow was secured in the ground he tied of the top ensuring the willow sticks all came in at the same angle.
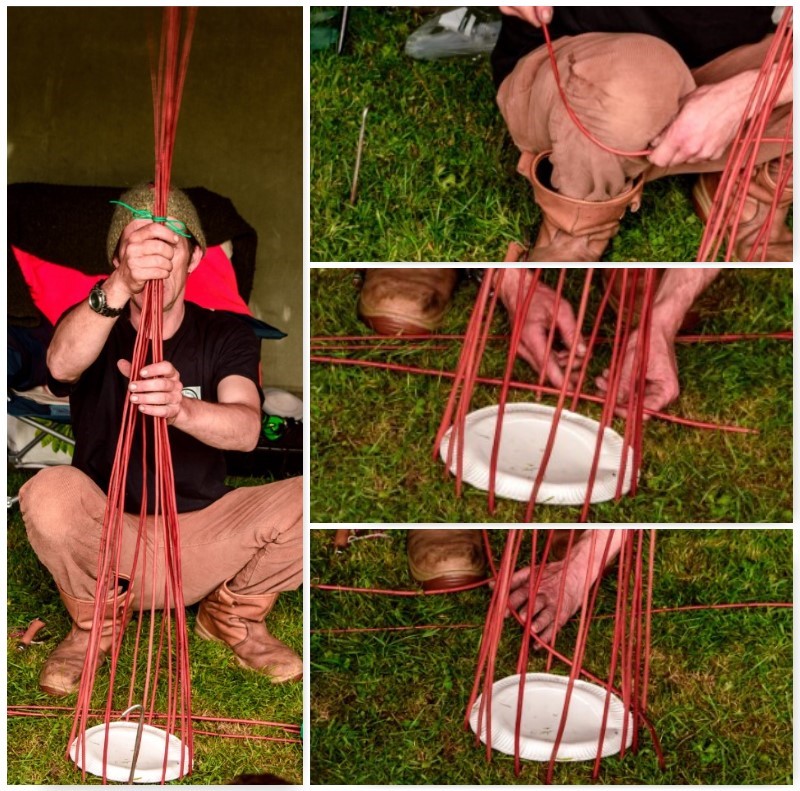
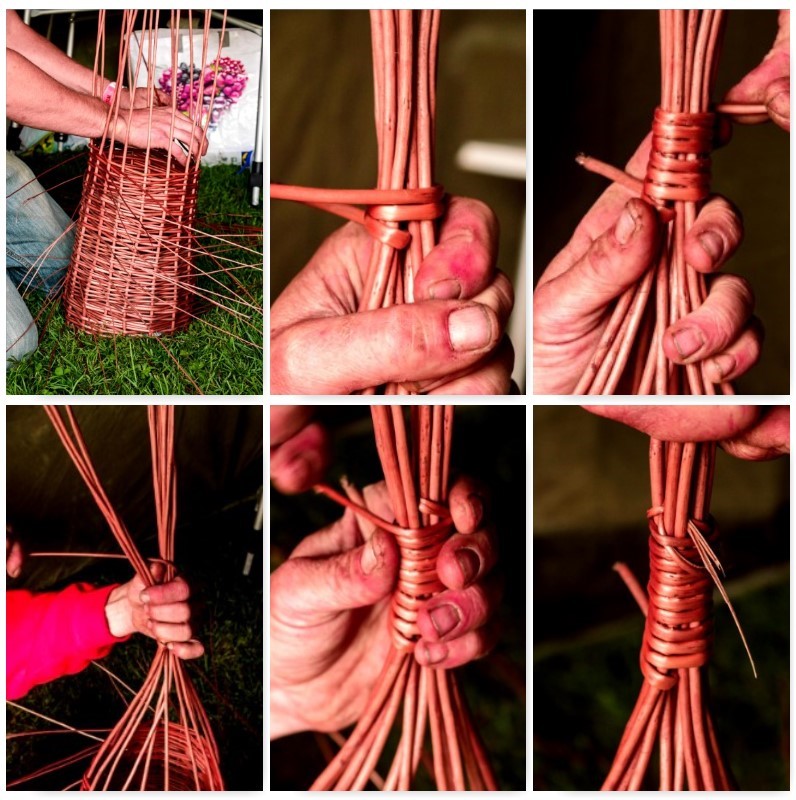
Step 2 – Weaving
The willow had been left overnight in a lake to ensure it was as pliable as possible however to make sure Fraser pulled each piece of willow he would weave with around his knee. This makes the weaving process so much easier and less tiring on your hands.
Starting with the thick end of a piece of willow he threaded it in and out between 4 or 5 uprights, Once that was secure he raised up the thinner in to carry on that in and out weave (raising the tip of the thinner end really makes the weaving easier).
In the picture in the bottom left you can clearly see that raised thin end being woven in and out of the uprights. He stopped the weave when he judged that part was too thin (the excess would be trimmed off later).
Once one piece was finished it was a case of repeating the process with a new piece of willow but from the next upright along. You can see in the picture in the bottom right below these staggered start points. Frase ensured that the ends stuck out proud so that they would not slip off the first upright while weaving. These would be trimmed down later.
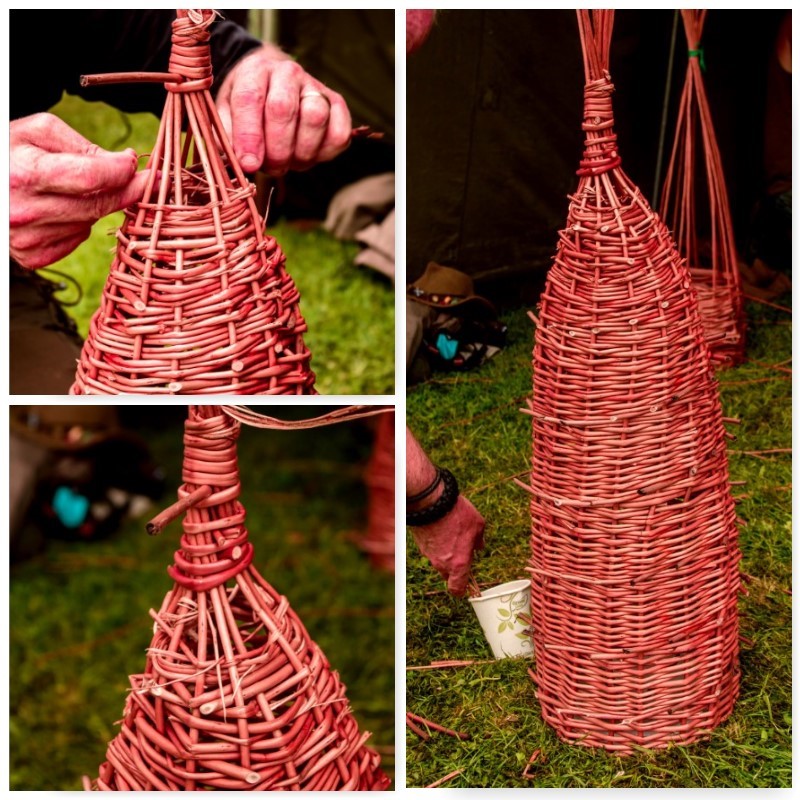
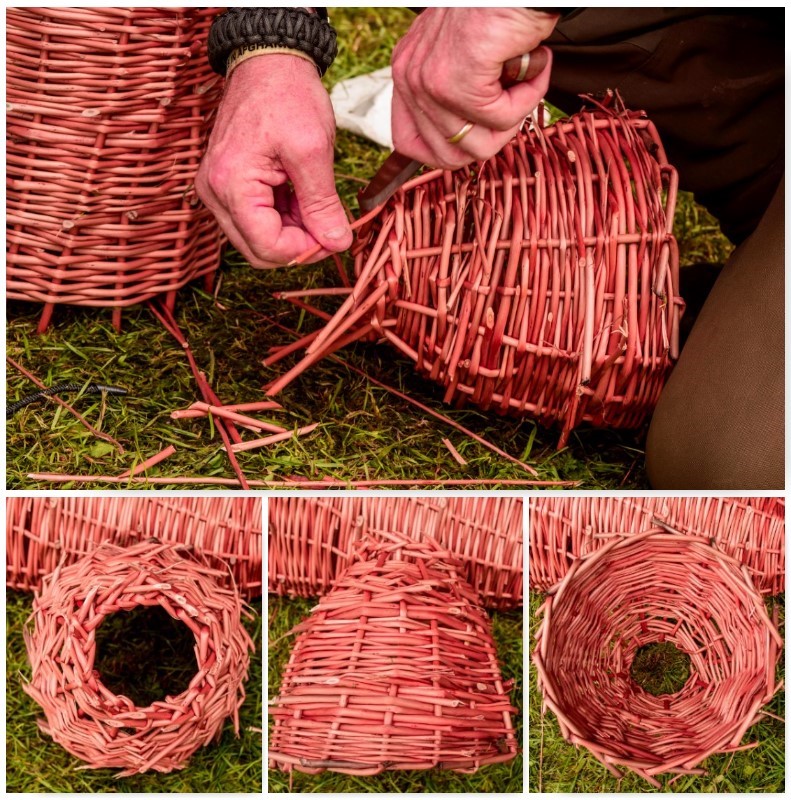
Step 3 – Wrapping the Top with willow
Over time the trap started to develop (a height of 50 or 60 cm’s) and the string at the top was replaced with willow. I have put the steps for you below. The thick end was slid through the middle of the uprights then wrapped tightly around the uprights for about ten turns, through the uprights again, a couple more turns and back through once more to finish.
Step 4 – Closing the Gap
Finishing the top section can be quite difficult as you have less room to push the willow in and out of the uprights. Make the willow as pliable as possible and experiment with smaller thinner pieces and with starting with the thin end and threading through the thicker end.
Depending on what you are hoping to catch will decide how much of a gap to leave but ideally the gap should only be a couple of centimetres.
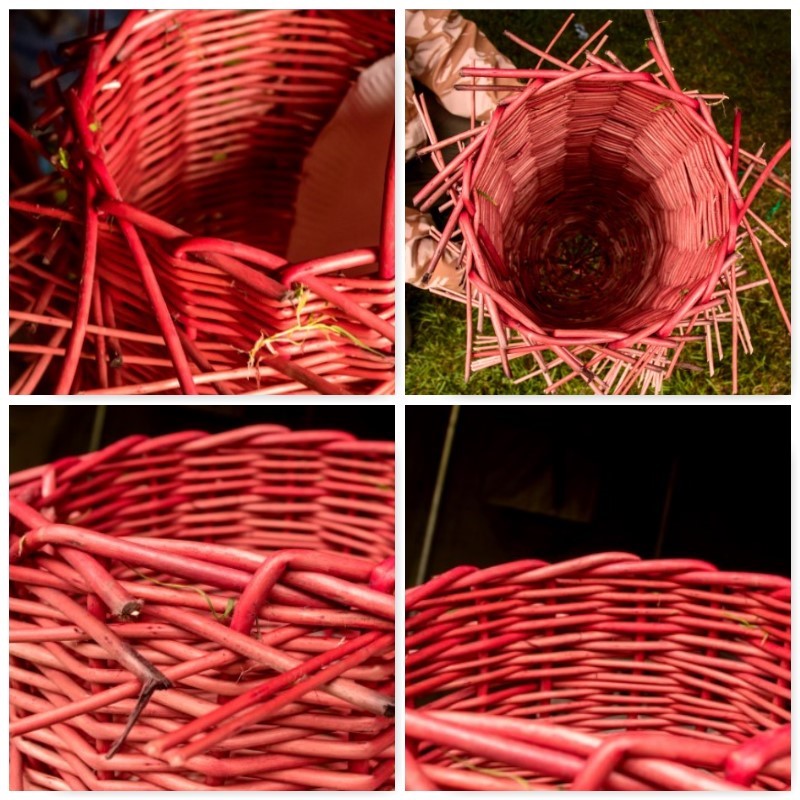
Step 5 – Locking off the Opening
When the top has been finished pull the trap out of the ground slowly and it is time to lock off the uprights around the opening.
Take one upright and bend it over in front of the one directly to its right but behind the 2nd one on the right. Repeat the process with the upright on the right and so on. Before long you will be left with just one upright standing vertically. Twist it back and forth and you can thread it easily through the laid uprights to its right.
Look closely at the pictures below and you will see how this works.
Step 6 – The Lid
The lid is about a third of the size of the main body of the trap however the opening is the same size. Use the paper plate, peg and string in the same fashion as before to set up the skeleton of the lid and weave in the exact same way as with the main body of the trap.
The difference though is that the top is not tied off but left open as this will become the opening that your catch will enter the trap through. When the hole in the top is about the size of your fist repeat the process of locking off at Step 5. You will also need to lock of the rim around the bigger opening when it is pulled out of the ground.
Step 7 – Trimming
When you trim off the ends of any piece of willow when making this type of trap try to leave about a cm or so sticking out so that the end of the willow does not slip inside the trap. The outside should be quite prickly but the inside should be smooth.
Step 8 – Attaching the Lid to the main body of the Trap
The lid should sit in the opening of the main body of the trap with the small opening in it well inside it. We split and soaked some willow (soaked in a cup of water) to make it really flexible and used that to tie the lid and the main body of the trap together.
They were tied together at one point only to ensure that the lid stayed attached but could be opened easily to remove any catch or to place any bait.

This project would take a confident weaver/basket maker a few hours to make however our students took most of the day (and one or two came back the next day to finish off) to complete theirs.
These traps are not just for show but tools for living as comfortably as you can on the coast. If you are interested in making these traps under a bit of guidance do contact Fraser at Coastal Survival.
As with any trap do check out whether it is legal to use it in the place you want to set it. In the UK check out the Environment Agency.
Cheers
George