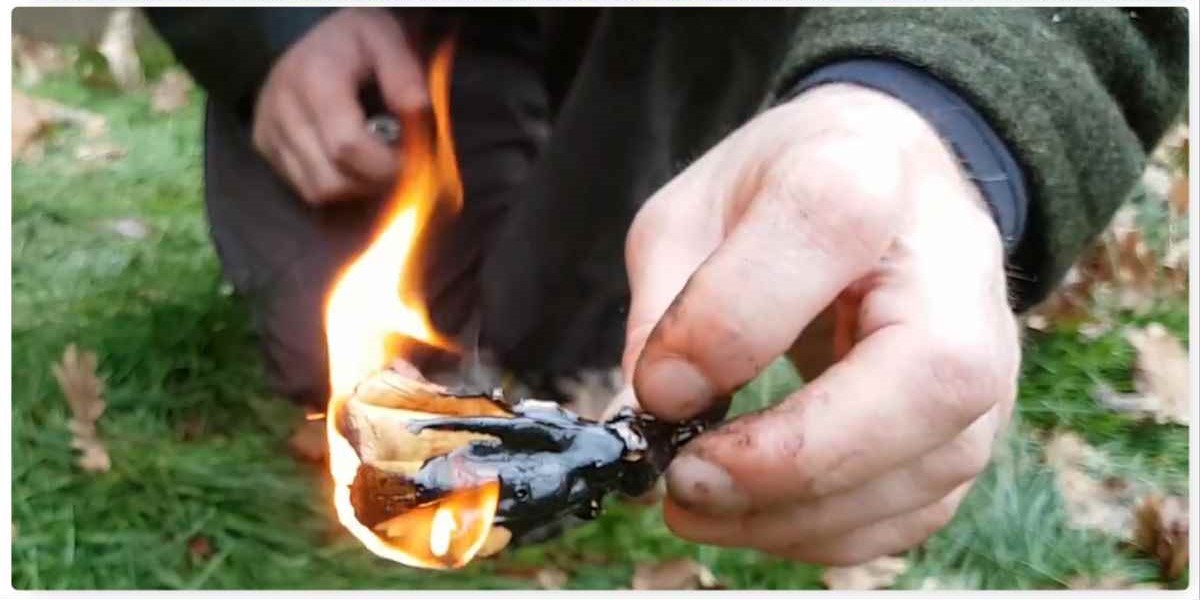
A number of years ago my friend Rich59 from BCUK taught me how to get a fire going using damp tinder found on the forest floor. This short video goes through the process – I will post a detailed How To…. on this shortly.
Cheers
George

"to adventure"
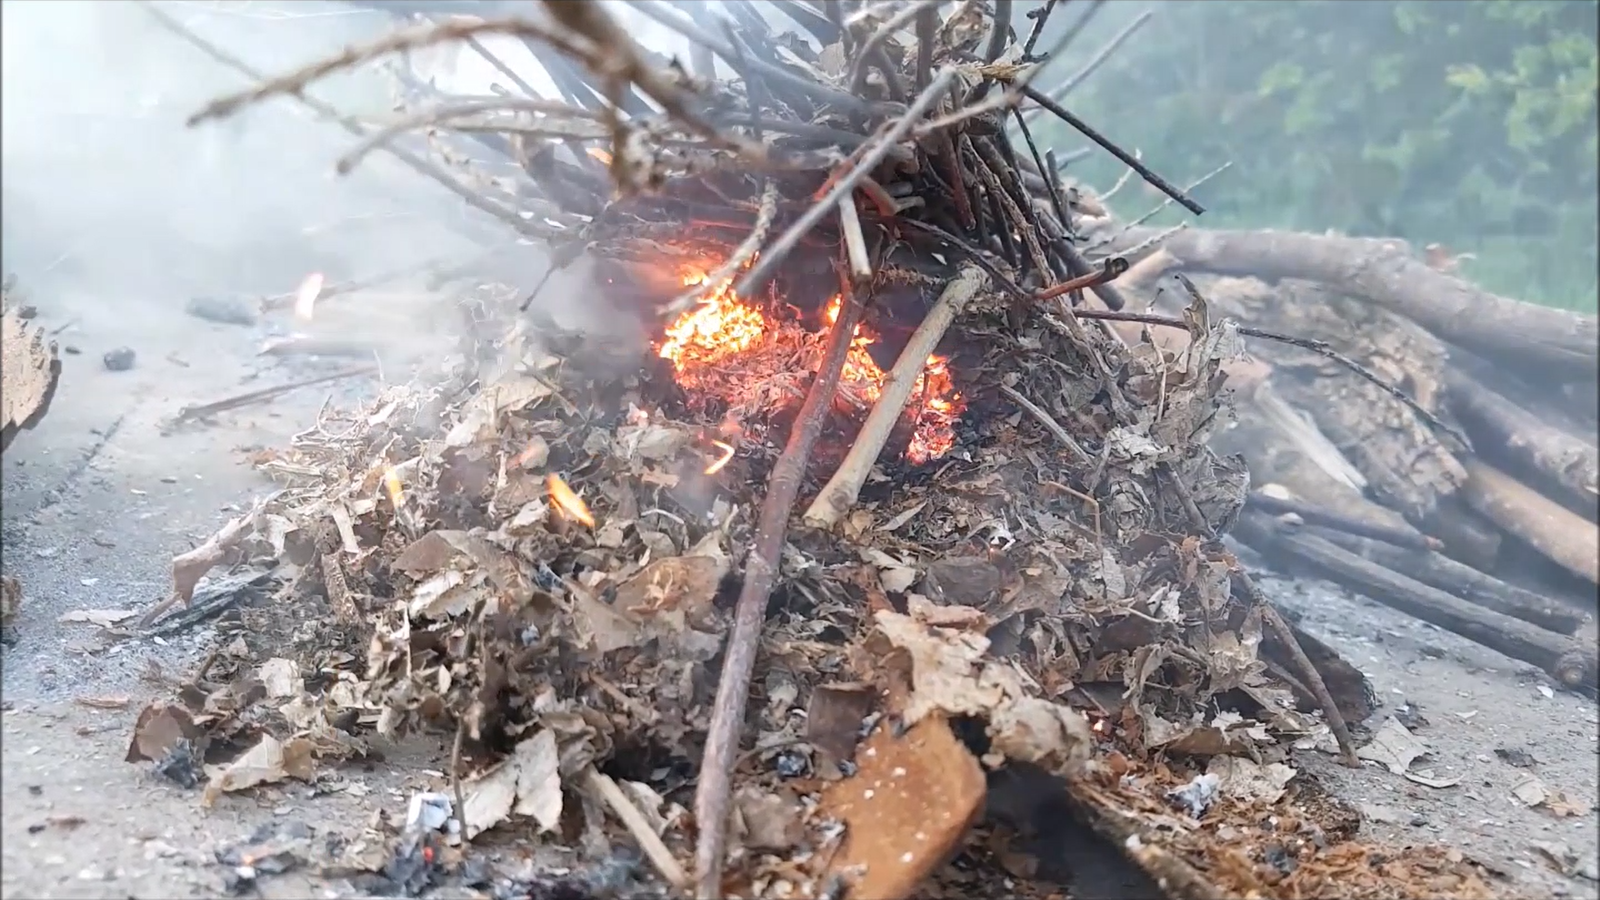
A number of years ago my friend Rich59 from BCUK taught me how to get a fire going using damp tinder found on the forest floor. This short video goes through the process – I will post a detailed How To…. on this shortly.
Cheers
George
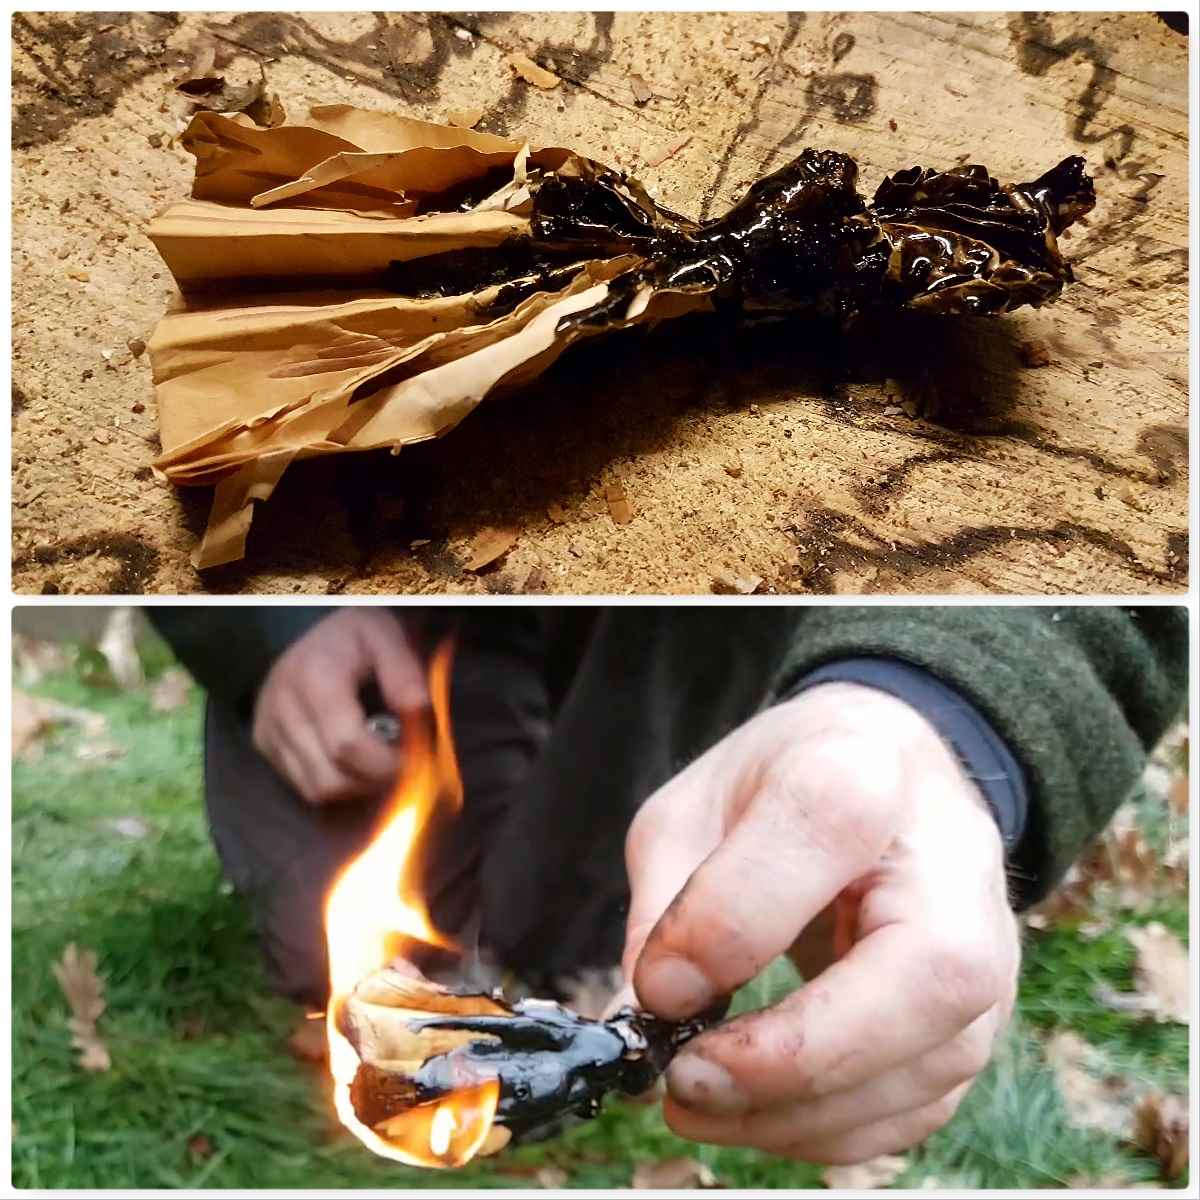
they burn long and fierce
Apart from making baskets and sheaths out of bark I have been experimenting these last few years with weaving bark into natural firelighters. I came across a post on Bushcraft UK by a member called Woodwalker on these firelighters from 2010 – he called them Woven Kindling.
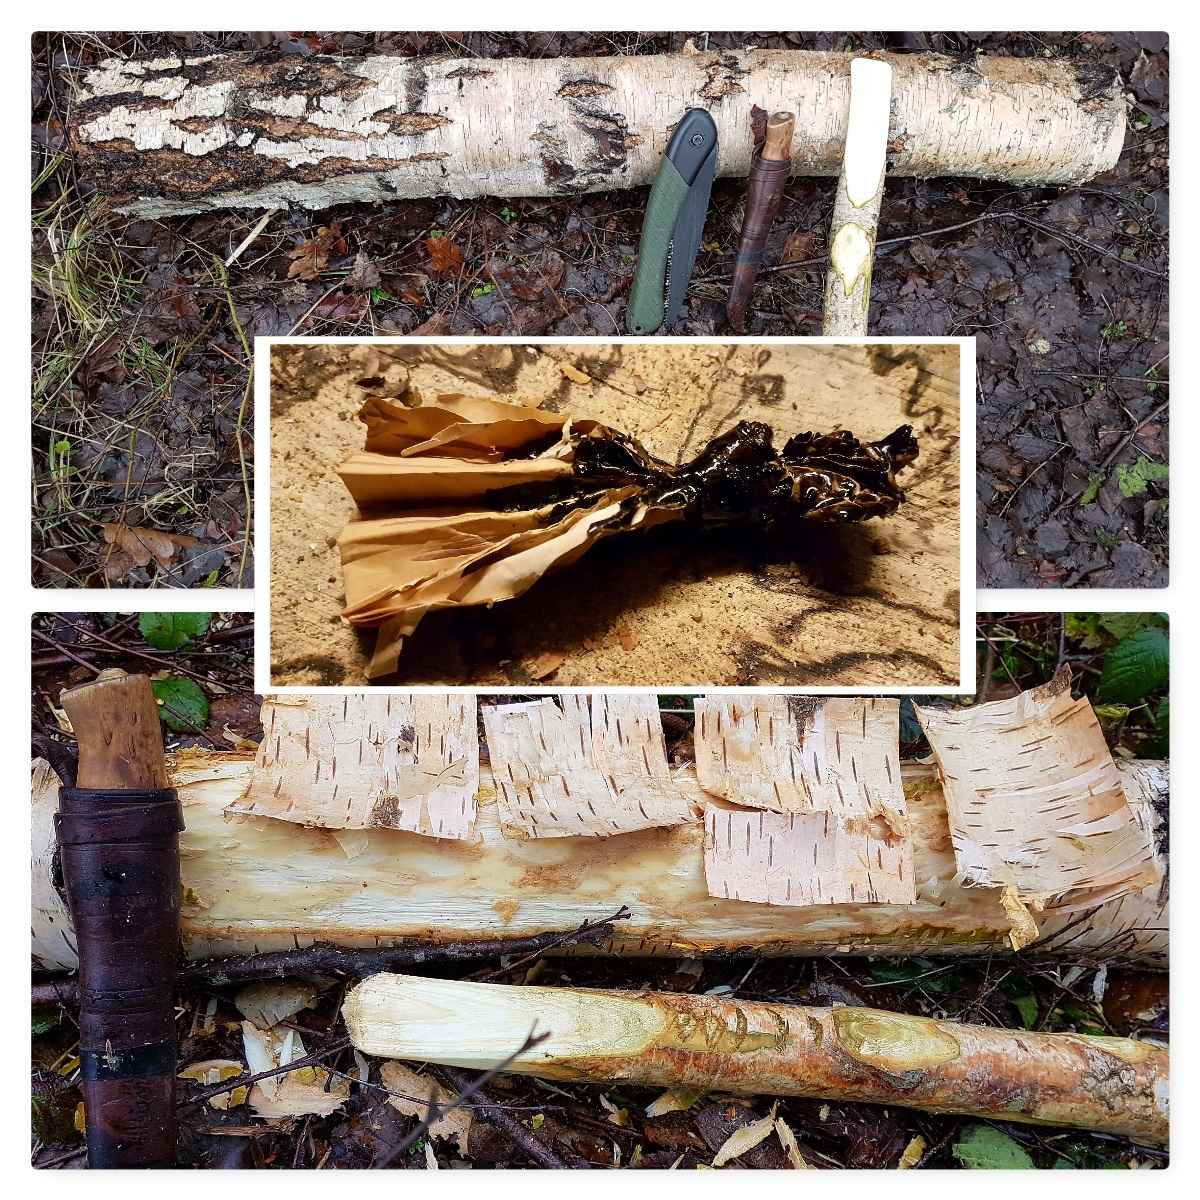
I have since added spruce resin to mine and liken them more to Natural Frelighters as they burn long and fierce. This is the second part in my two part series on natural firelighters – the first being my post on Birch Bark Fire Fans.
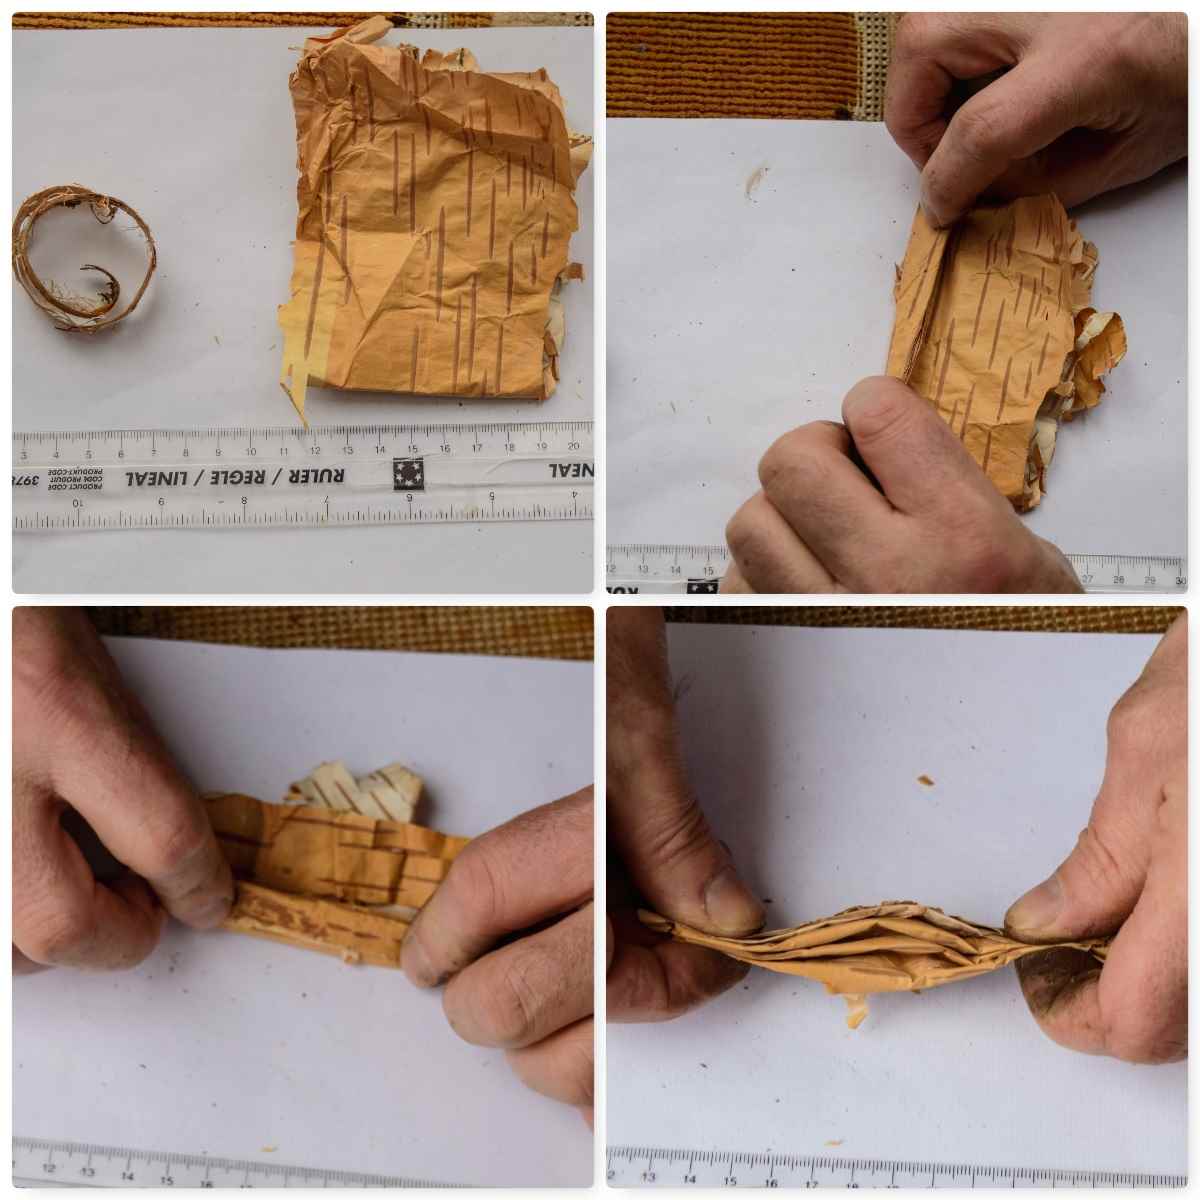
Removing the bark
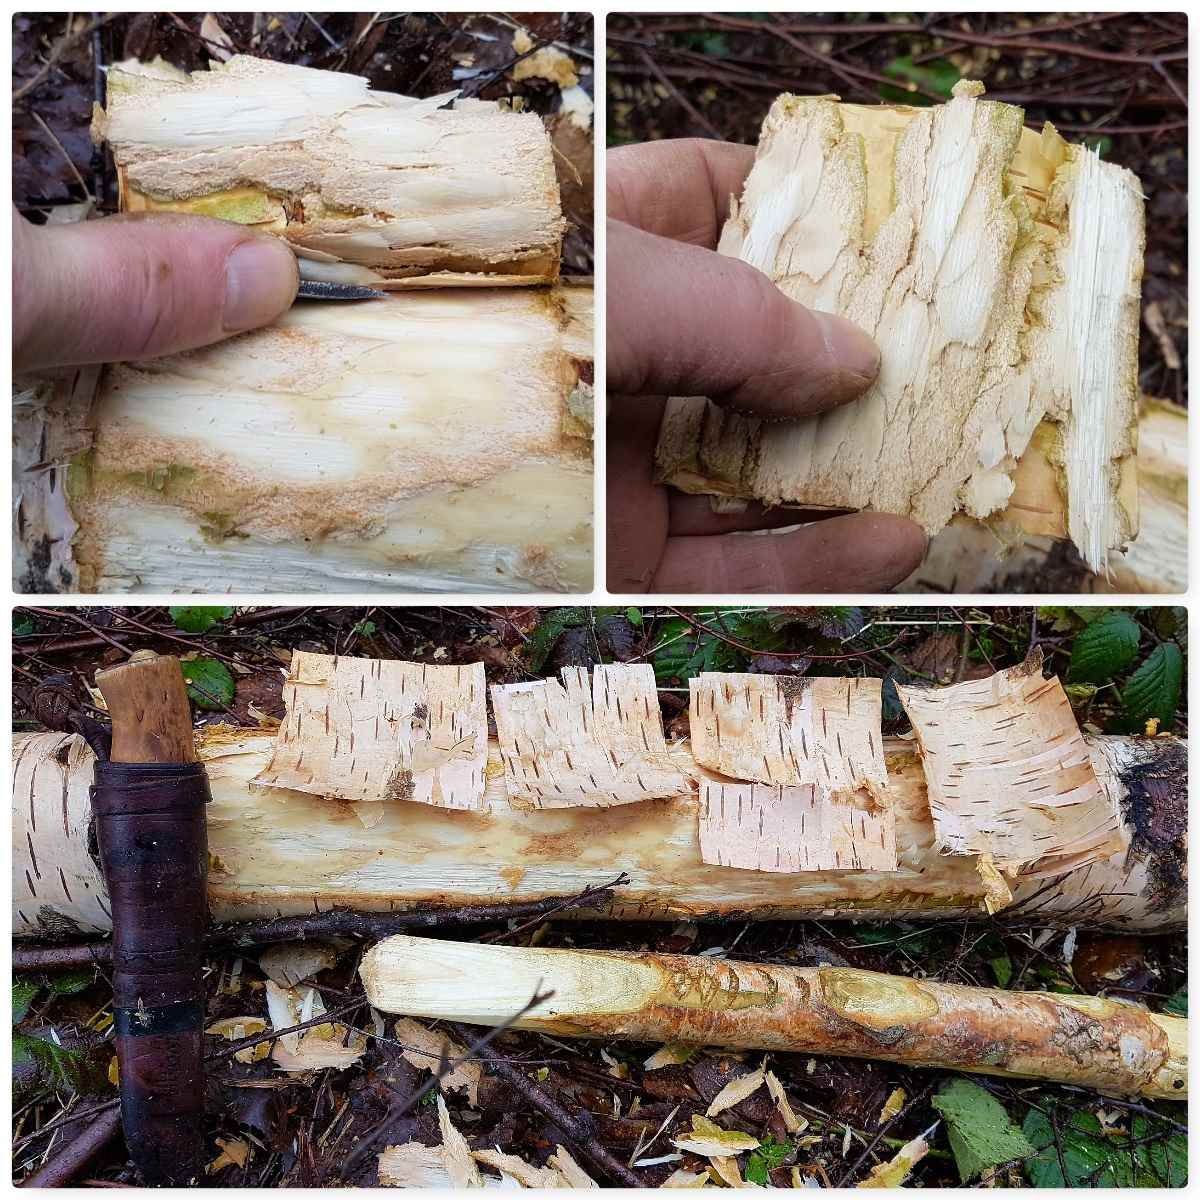
If you can find a semi rotten fallen birch log the bark tends to come of easily so just pull of the what you need. If you use semi rotted logs just take a little piece from as many different logs as you can as these logs are home to many different invertebrates.
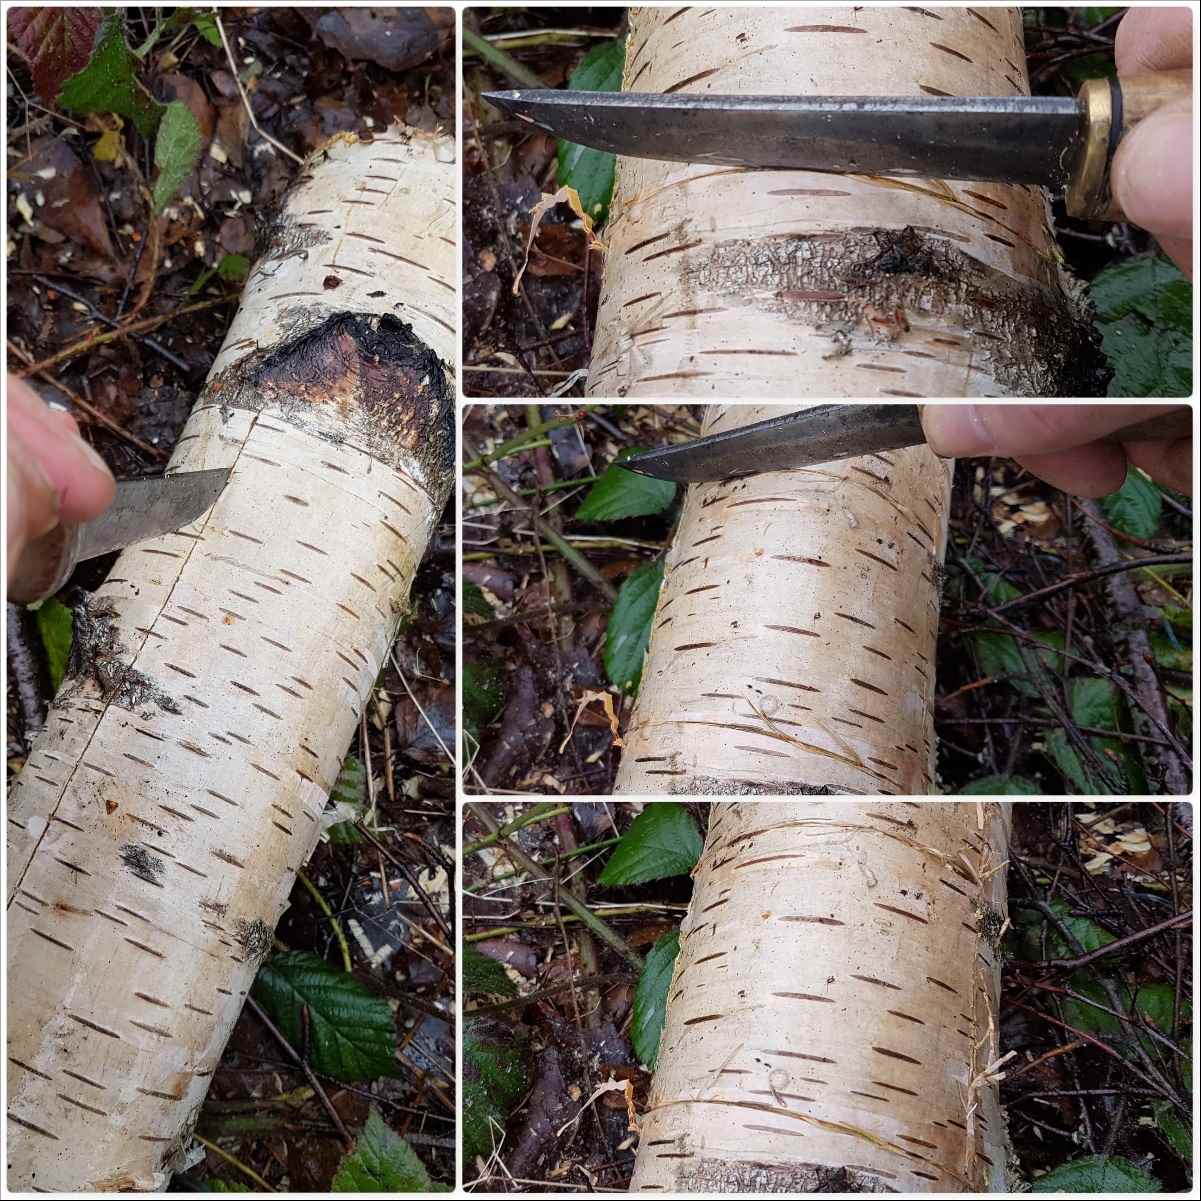
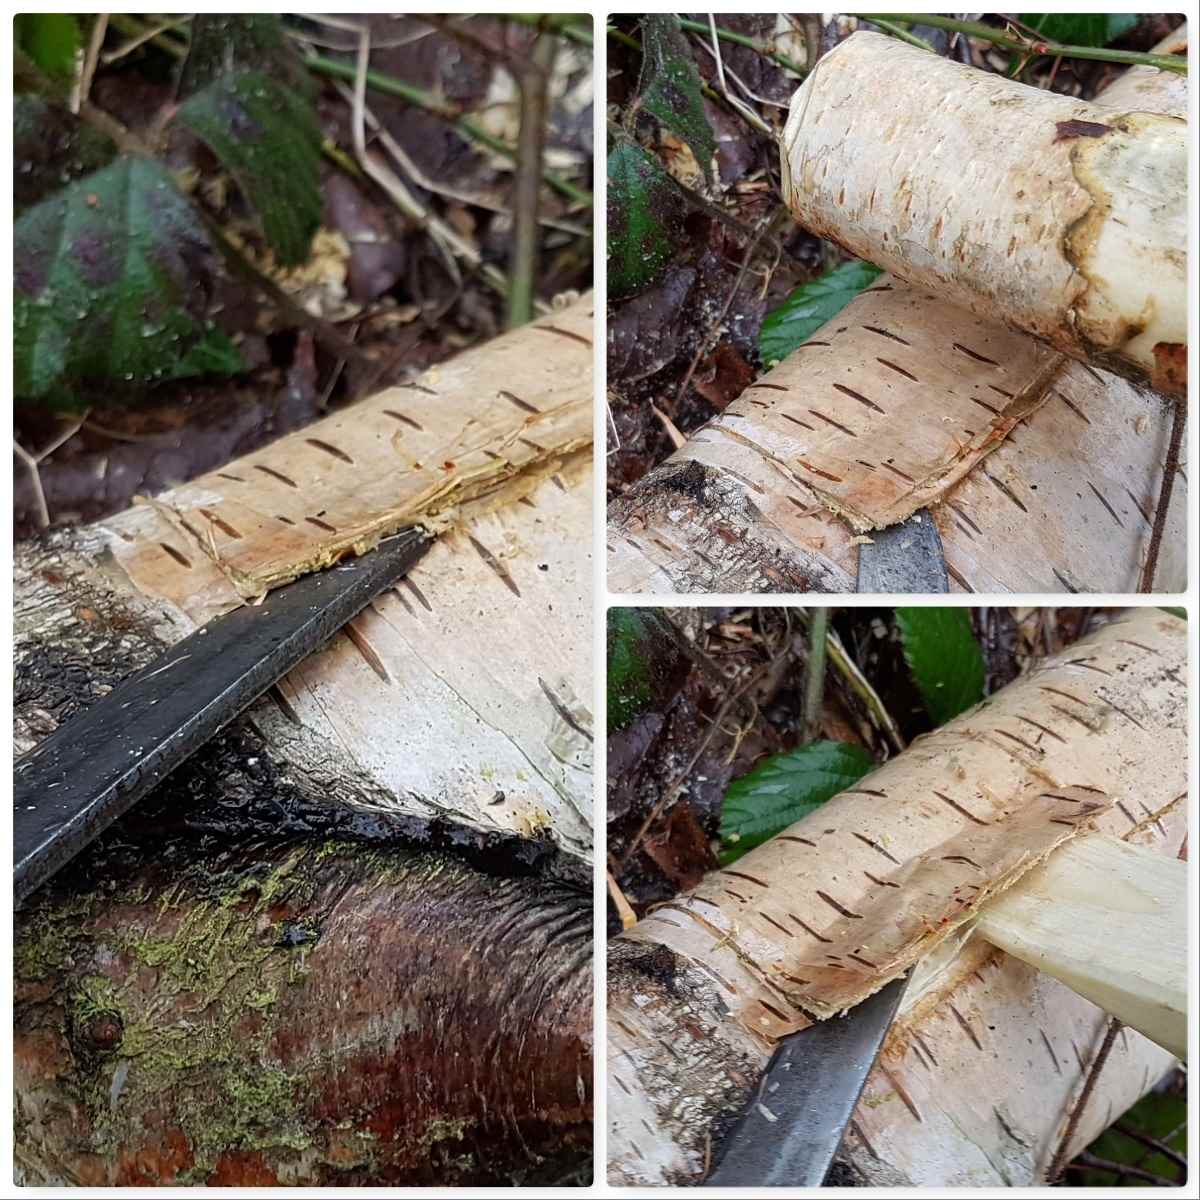
If the logs are freshly fallen then I use my knife to score out the area I want to cut out (ensure it is a smooth an area as possible). If the bark does not peel off easily I batton it with a small log to loosen everything up before prising it off with my knife. I go into the specifics of removing the bark in more detail in my post on the Birch Bark Fire Fan. The main thing is to take your time when the bark does not come off easily.
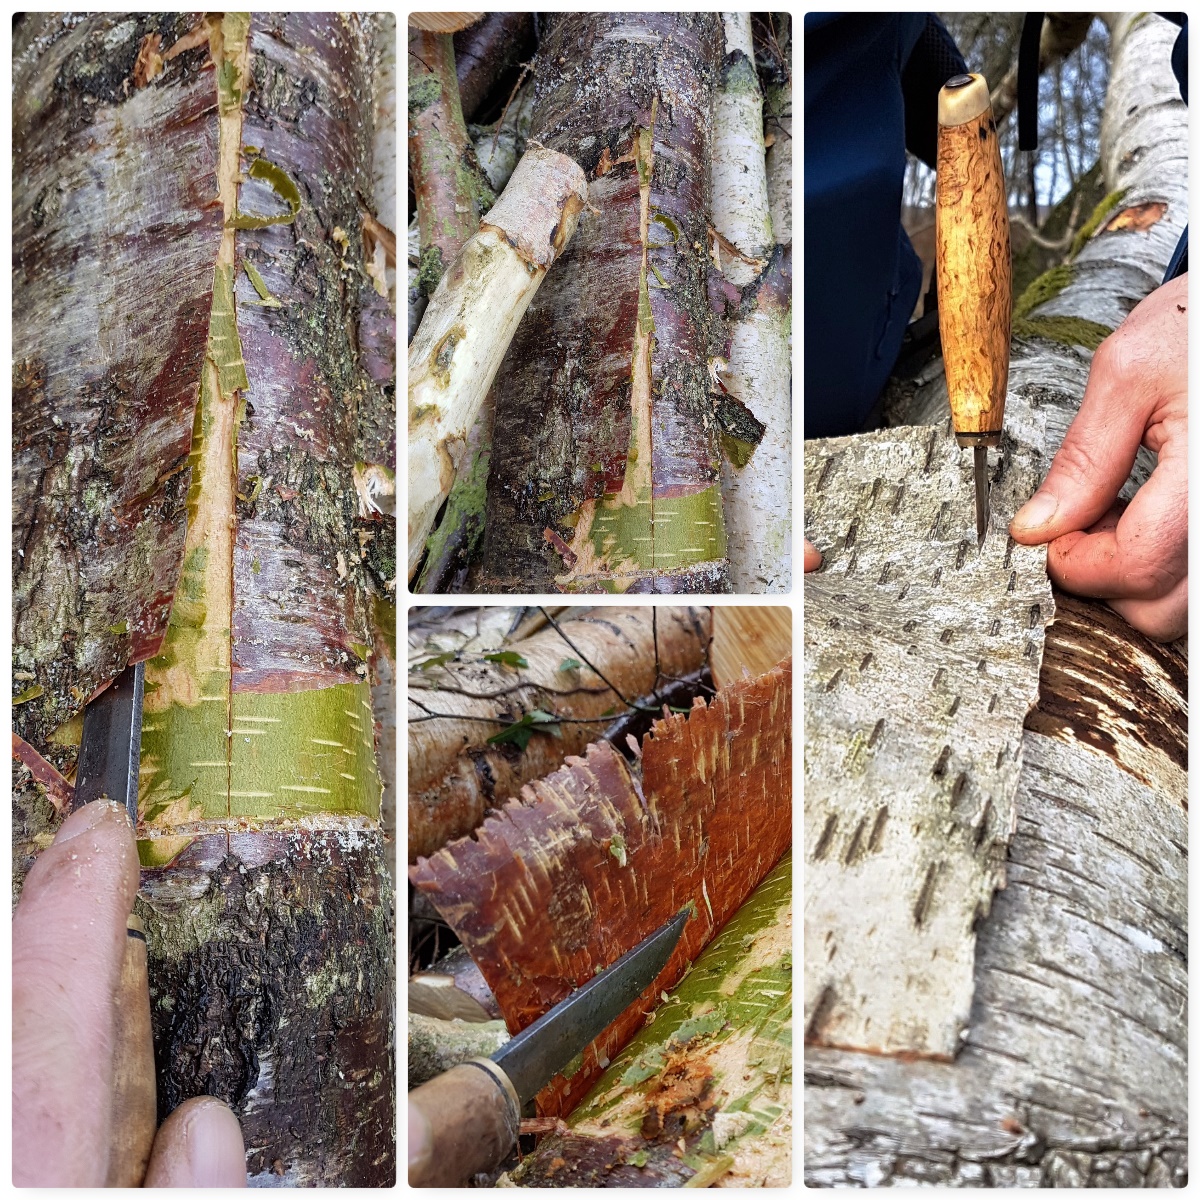
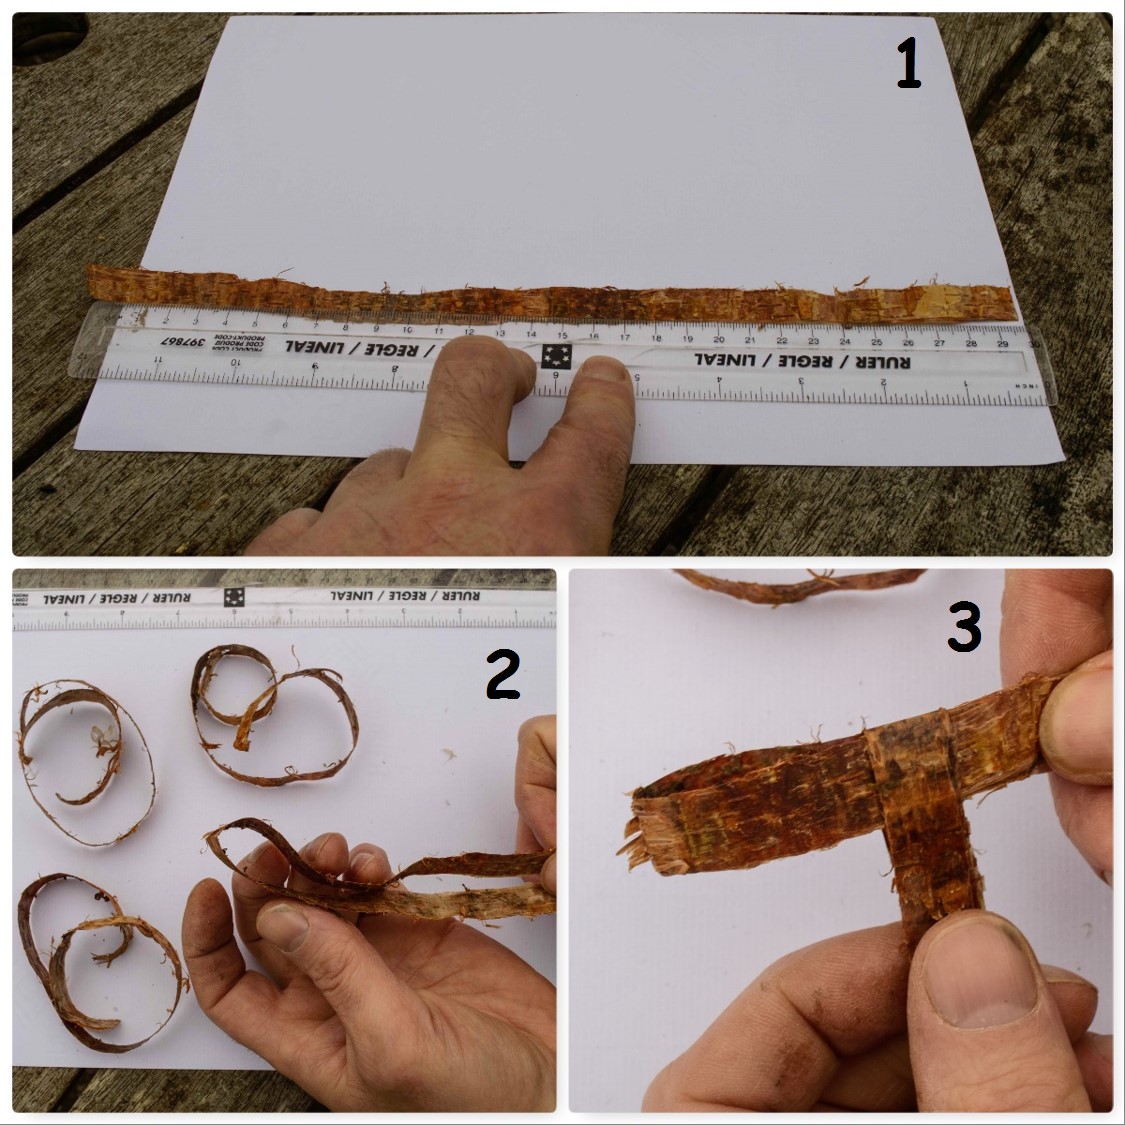
Once I have my section of bark I will either peel it by hand into strips of about 1 cm in length or if I am feeling the need to be very accurate I will tap my knife into a log and use that as a tool to cut the bark into even strips.
Locking the strands together
1. To make one firelighter you need four strips of birch bark. I use strips about 30 cm’s in length and 1 or 2 cm’s width.
2. Fold each strip in half – the folded end is called the closed end and the end with the two tails is called the open end.
3. Slide one closed end between the open end of another strip so it sticks out by 2 or 3 cm’s. In the picture below in section 3 you can see a T shape is formed.
4. The closed end of a third folded strip is added to the upright part of the initial T shape to lock it off.
5. A fourth folded strip is added to the third strip to lock it off and the tails are threaded through the protruding loop of the first strip.
6. All the strips should now be locked off.
7. Pull everything in tight.
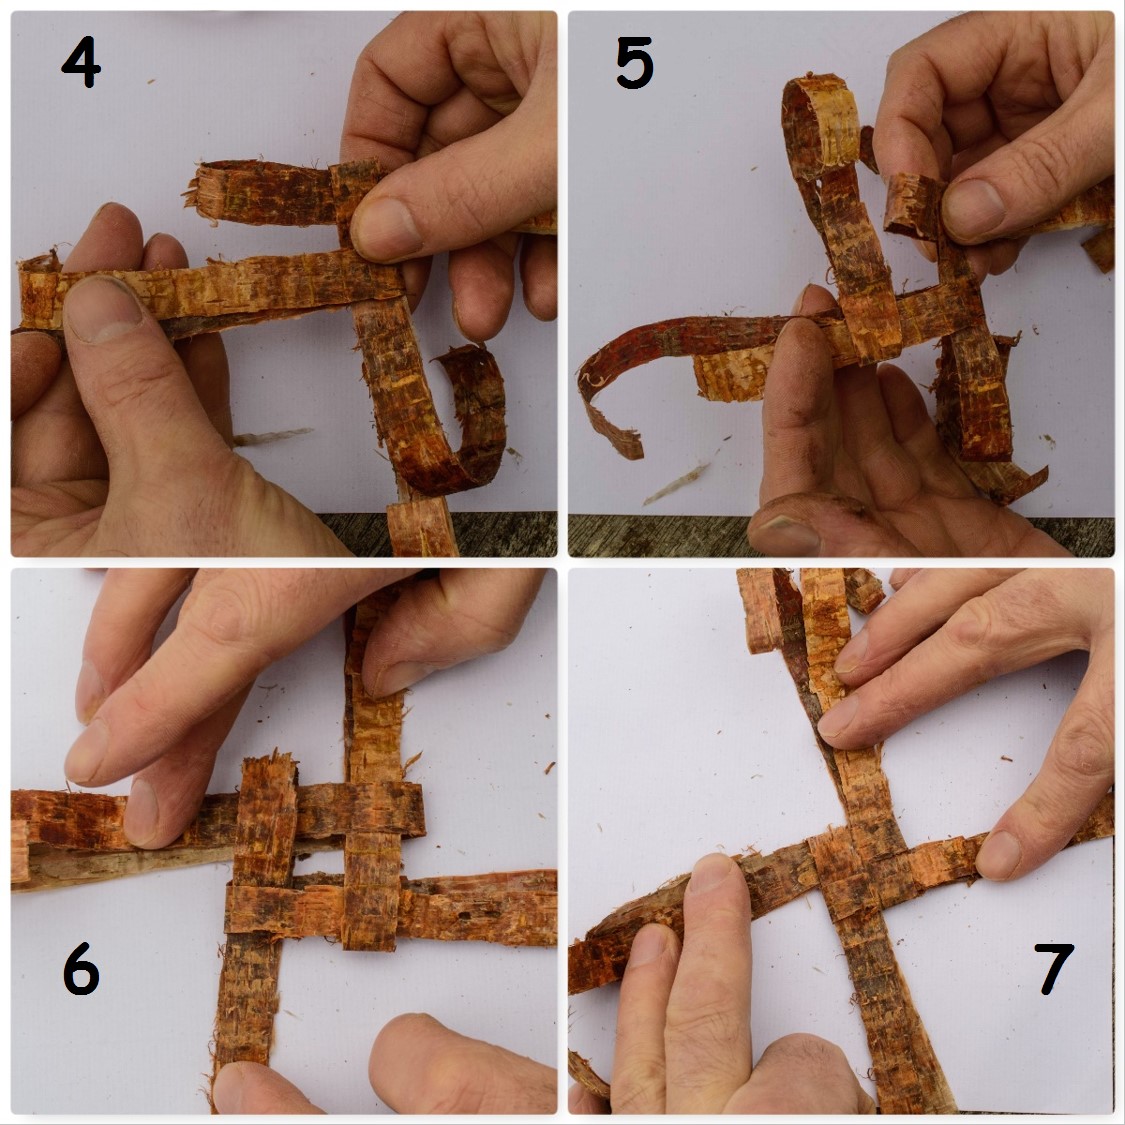
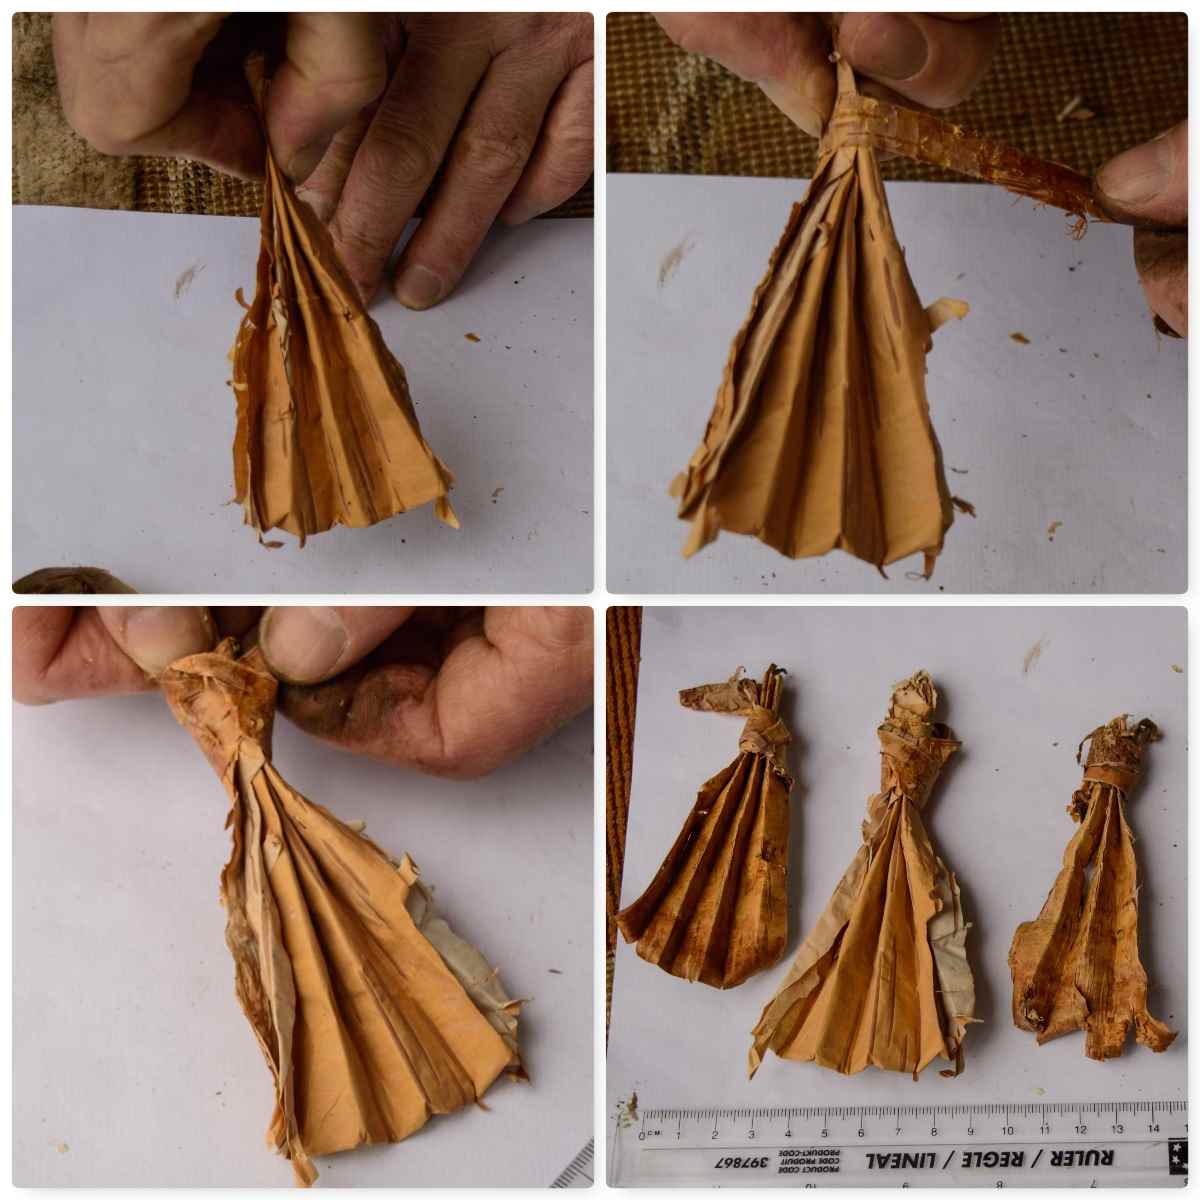
The Four Strand Crown
The firelighter is formed by weaving a Four Strand Crown knot. I have added the arrows to help you visualise what I am doing. Important – There will be two strips of bark at each open end. Only use the top strip of each open end when you begin the weave
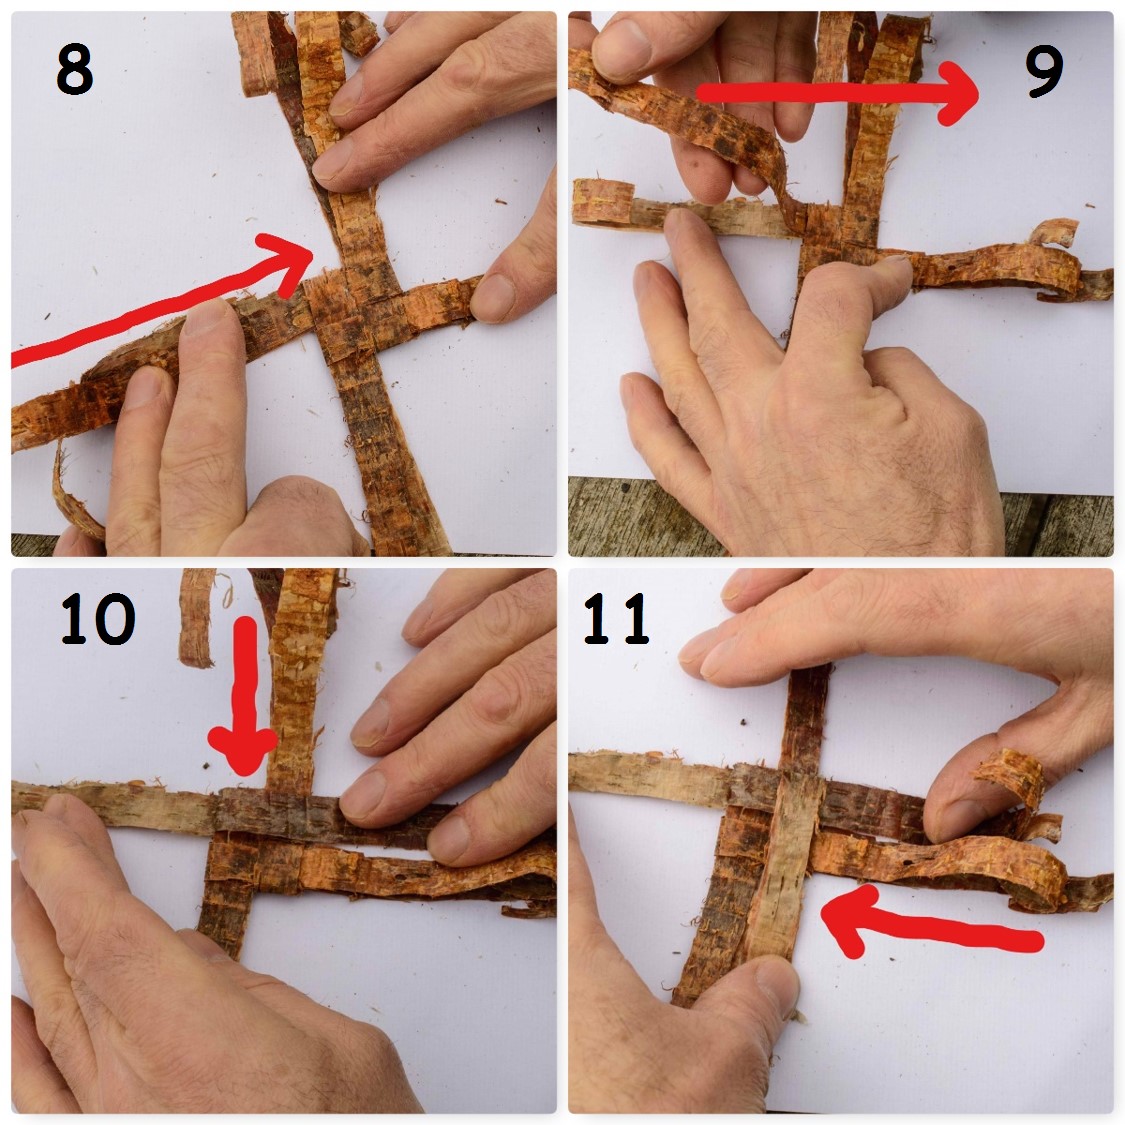
8. To begin the knot fold one of the strips over. In section 8 I chose to fold the top strip on the left over first.
9. The strip is folded over to the opposite side.
10. To secure that strip in place I folded the strip at the top over this first strip to secure it in place.
11. This top strip (now at the bottom) was secured in place by folding the right hand strip over it.
12. To secure the fourth strip loosen the first strip slightly so that it forms a small loop by its fold – known as an eye.
13. Feed the tail of the fourth strip into this eye.
14. Pull the tail of the fourth strip in tight.
15. Repeat from step 8 to 14 again to form another layer of weave.

Flip the whole piece over and begin the weave on what were the bottom strips. Once you run out of bark to fold over tuck in the ends into a suitable slot or trim them off with your knife.
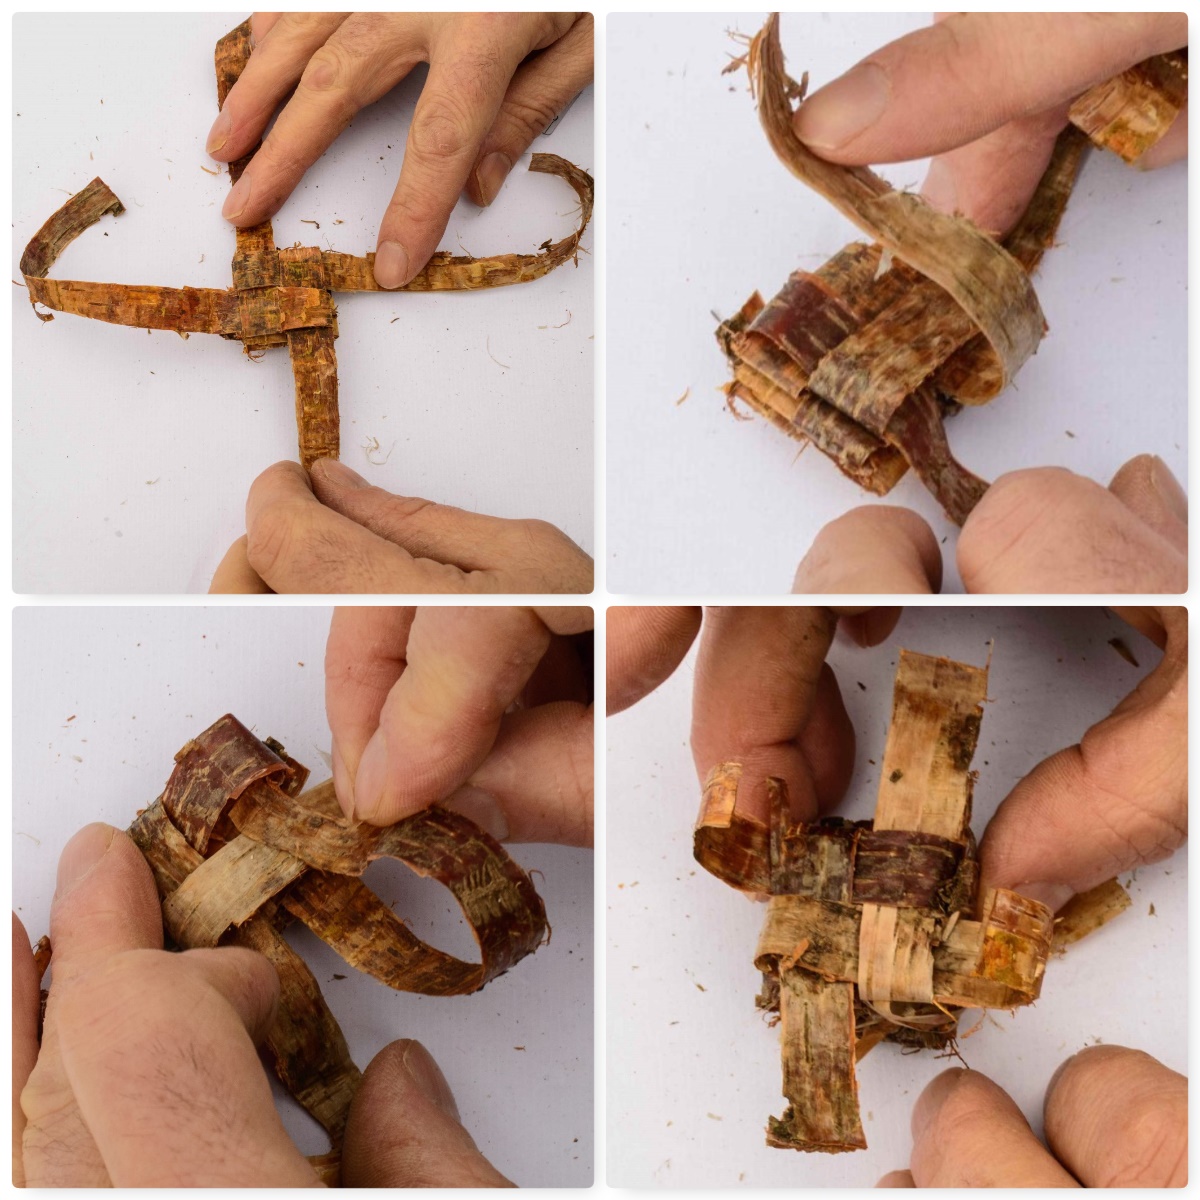
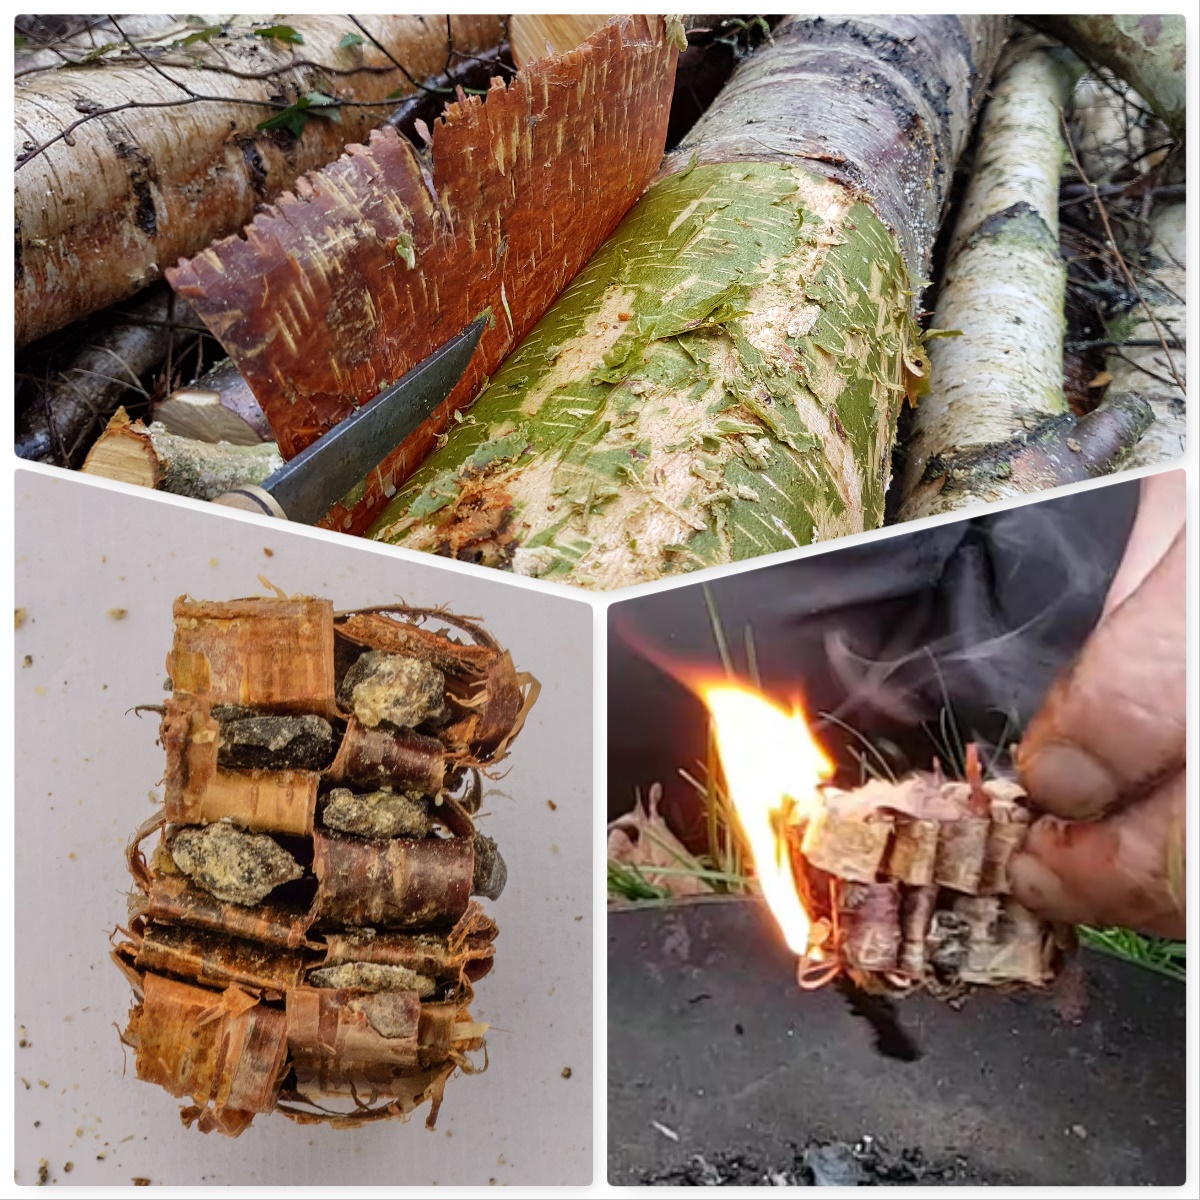
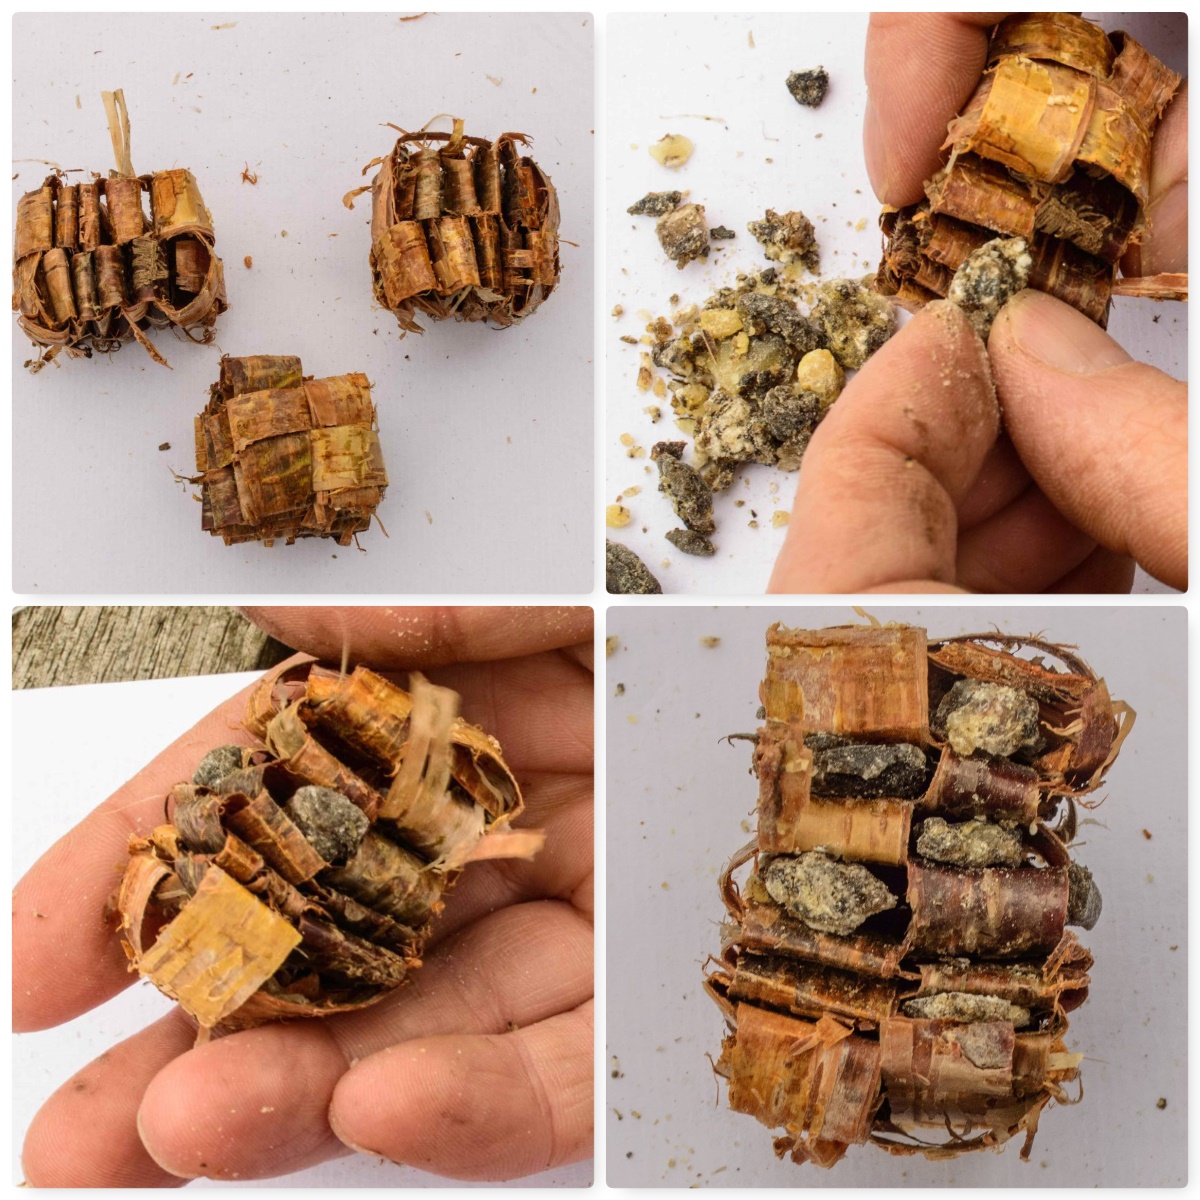
The Resin
These little firelighters take only a minute or two to make but they can burn for far longer if you add some resin to them. I use spruce resin as it is plentiful here in the UK (again I discuss harvesting resin in my post on the Birch Bark Fire Fan in more detail).
I break of little blobs (it can get messy if the resin is runny) of resin and insert them into the little slots formed by the weave and that is basically it (use as much resin as you can).
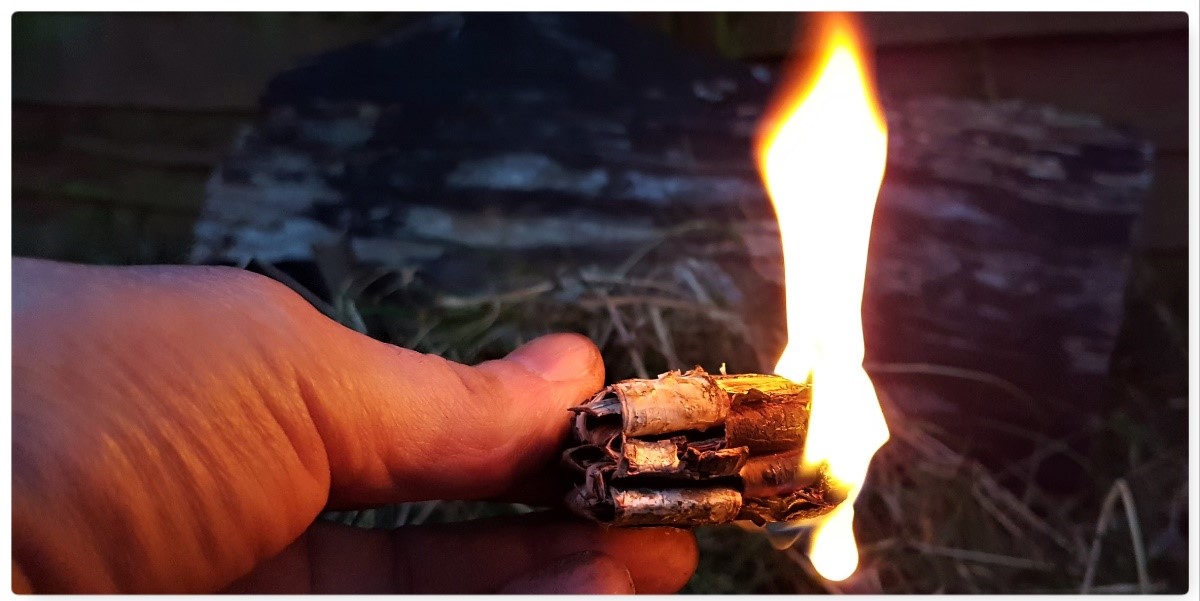
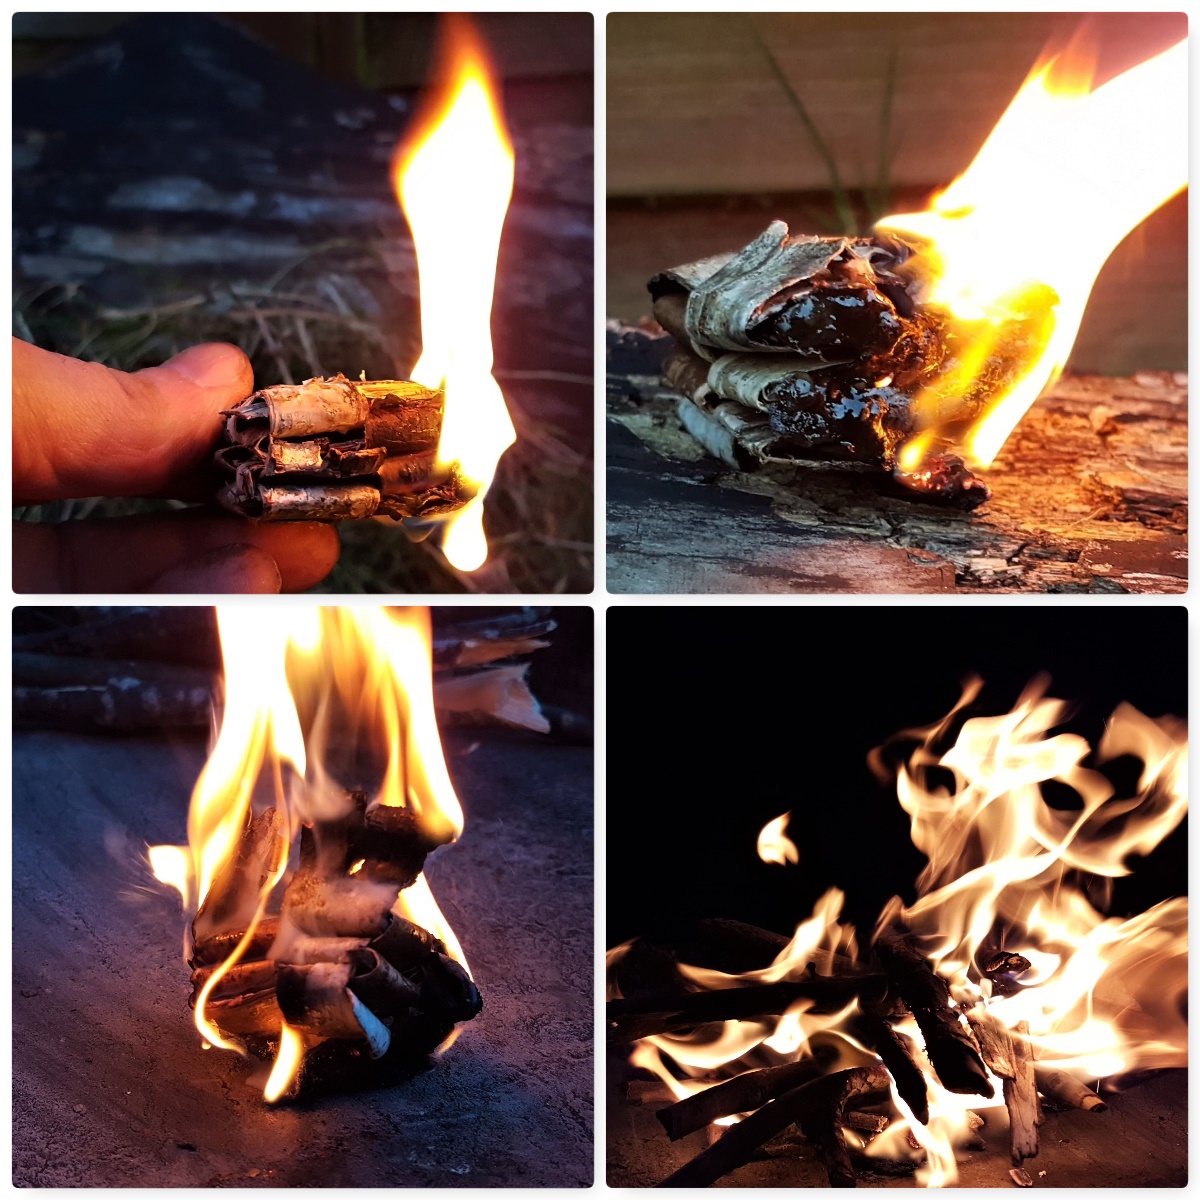
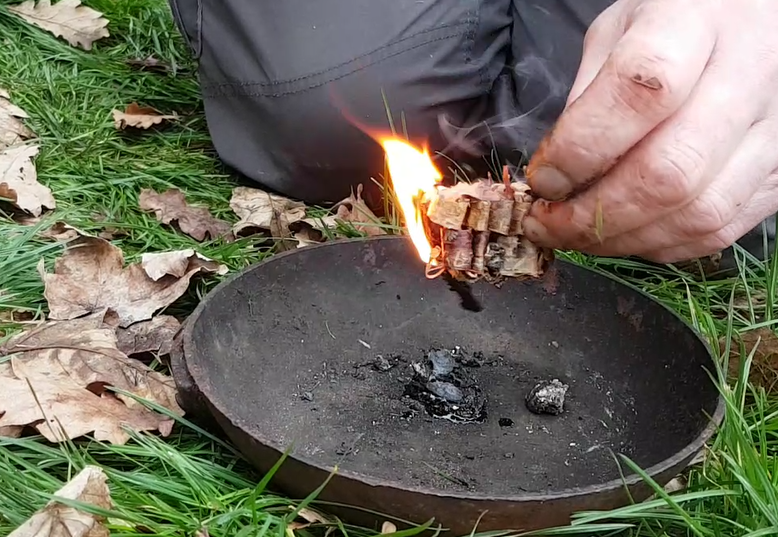
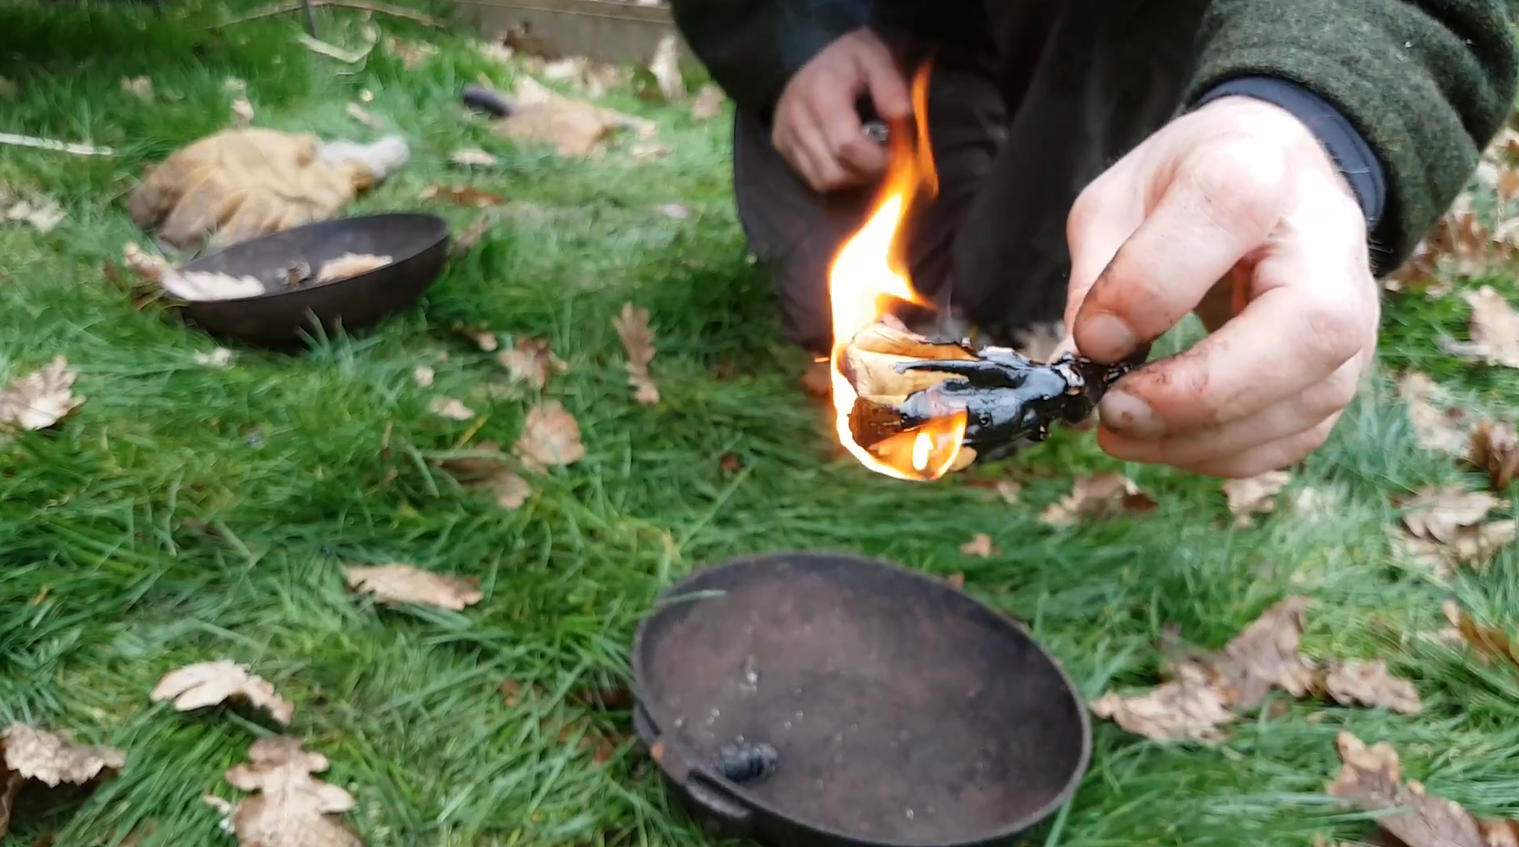
When lit these firelighters burn easily for over 5 minutes so giving you time to build your fire without resorting to using fine tinder and just small twigs. I can easily hold the firelighter for the first minute before it becomes to fierce to hold.
Once it gets going and the resin is well lit then it I go no where near it with my fingers. I like to use them first thing in the morning when I do not want to faff about with collecting tinders and just get a brew on.
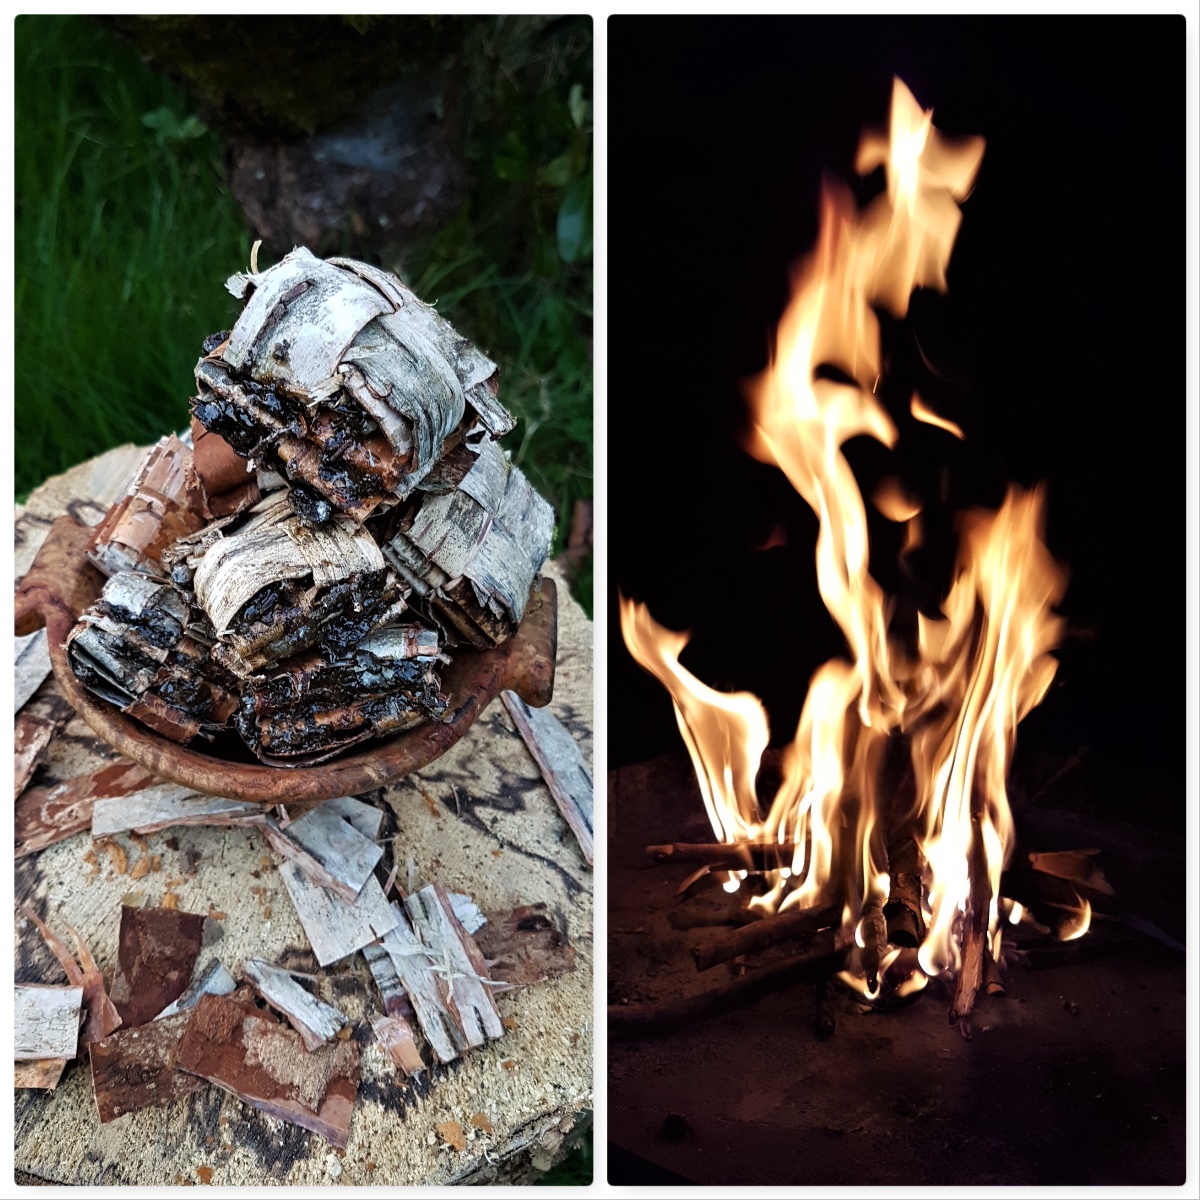
I prep mine in the evening while sitting around the fire and pack them away for when I need them. If you are looking for a viable alternative to modern firelighters then these are ideal – if you are always a purist and insist on foraging for your tinders every time you light a fire then maybe they are not for you.
For those that like a video intead of the step by step I put this short video together to explain the process.
Cheers and happy weaving.
Geprge
Ever find yourself relying on using non-natural firelighters a lot due to their convenience? I do as I normally have a lot to organise before courses and using natural methods every time when I have a class can be time consuming when things are damp.
This is the first of two blogs on natural firelighters I like to use and how to make them. I like to prepare them well in advance of trips, pack them away in my bergen and use them instead of the likes of cotton wool and Vaseline (my usual non-natural method).
I came across a number of years ago a small section in Ray Mears book Essential Bushcraft on using a Birch bark fan. Ray recommended folding pieces of bark into a fan shape to stop the bark curling up quickly and becoming impossible to handle when it was lit.
I teach this method to my cadets however if I have time I like to add some melted spruce resin to these fans. This really extends the life of the fan giving me a better chance to get my fire going (great for these damp days) and because the resin soon hardens the fans they do not fall apart or deform so much when carried in a bag.
Removing the Bark
If you have a semi rotted birch log then the bark should come off easily however if it is a freshly felled log things may get a little more difficult for you. Here in the UK the birch bark can be quite thin and more difficult to remove than the thicker bark of birch trees you would find in more northern climes.
I mark out small squares with my knife and if the bark does not peel off easily I use a small batten to gently hammer the bark. This gentle hammering helps to loosen the inner bark from the sapwood.
Also having a wooden wedge helps to peel the bark of but mostly I tend to just use the curved part of my knife. Some folk say it is better to use the back of the tip of your knife but I find the curved part works well for me. The main thing is to take your time and remove the inner and outer bark from the sap wood.
Remove the Inner Bark
When I have removed a small square I gently remove the inner bark. Again do this job slowly removing the inner bark in small pieces. It is very easy when using thin bark to rip the outer bark.
Folding the Fan
To make your fan start folding your square as if you were making a very small fan – not much more you can say about that 🙂
Keep a hold on one end and with a strip of bark tie off the other end. They do not take long to make and are soon ready for the resin.
Spruce resin
Here in the UK a handy and plentiful resource is Spruce resin. There are lots of conifer plantations where I live and a common tree in them is the Spruce. I keep an eye out for areas where the foresters have been using tractors to thin out the spruce as they tend to damage lower branches on trees they pass by.
To help heal itself the trees produce copious amounts of resin and this is full of oils that are flammable. By taking a little from different sites (I use a stick to scrape the resin) I can soon have plenty to melt and coat the Birch bark fans and leave plenty for the trees.
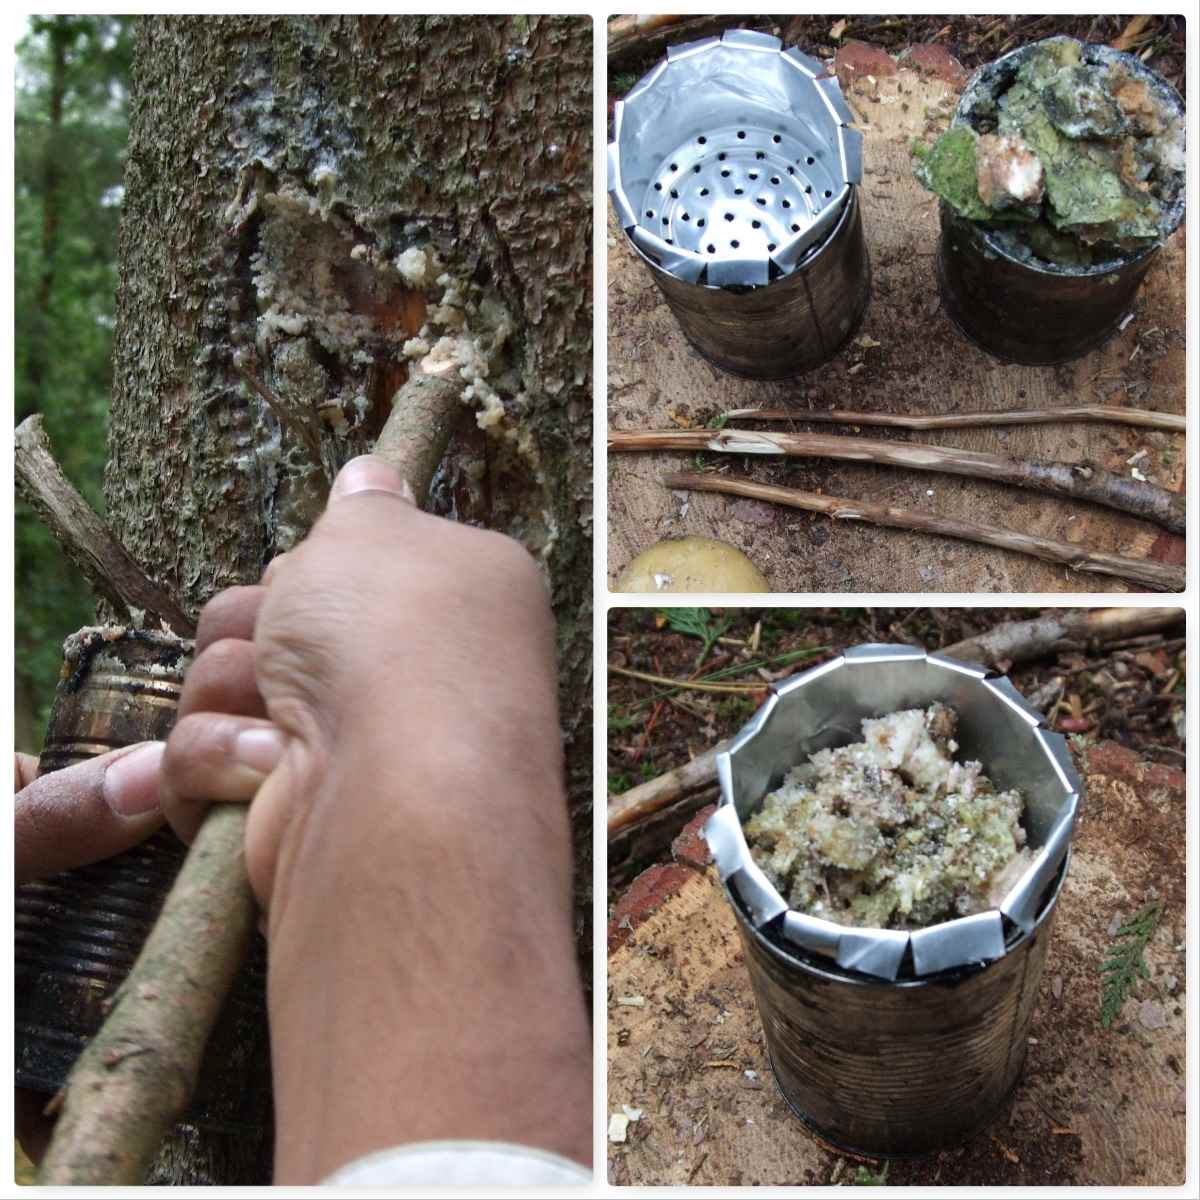
I just use a couple of tins (the inner tin has lots of little holes) to melt the resin by my campfire (I have documented this process in How To…. Spruce Pitch in a Tin Can) and dunk the tail of the fan into this hot liquid (good gloves or tongs are required here).
Once the tail is covered I pour some of the resin onto the area of the fan by the tail leaving the top of the fan clear of resin.
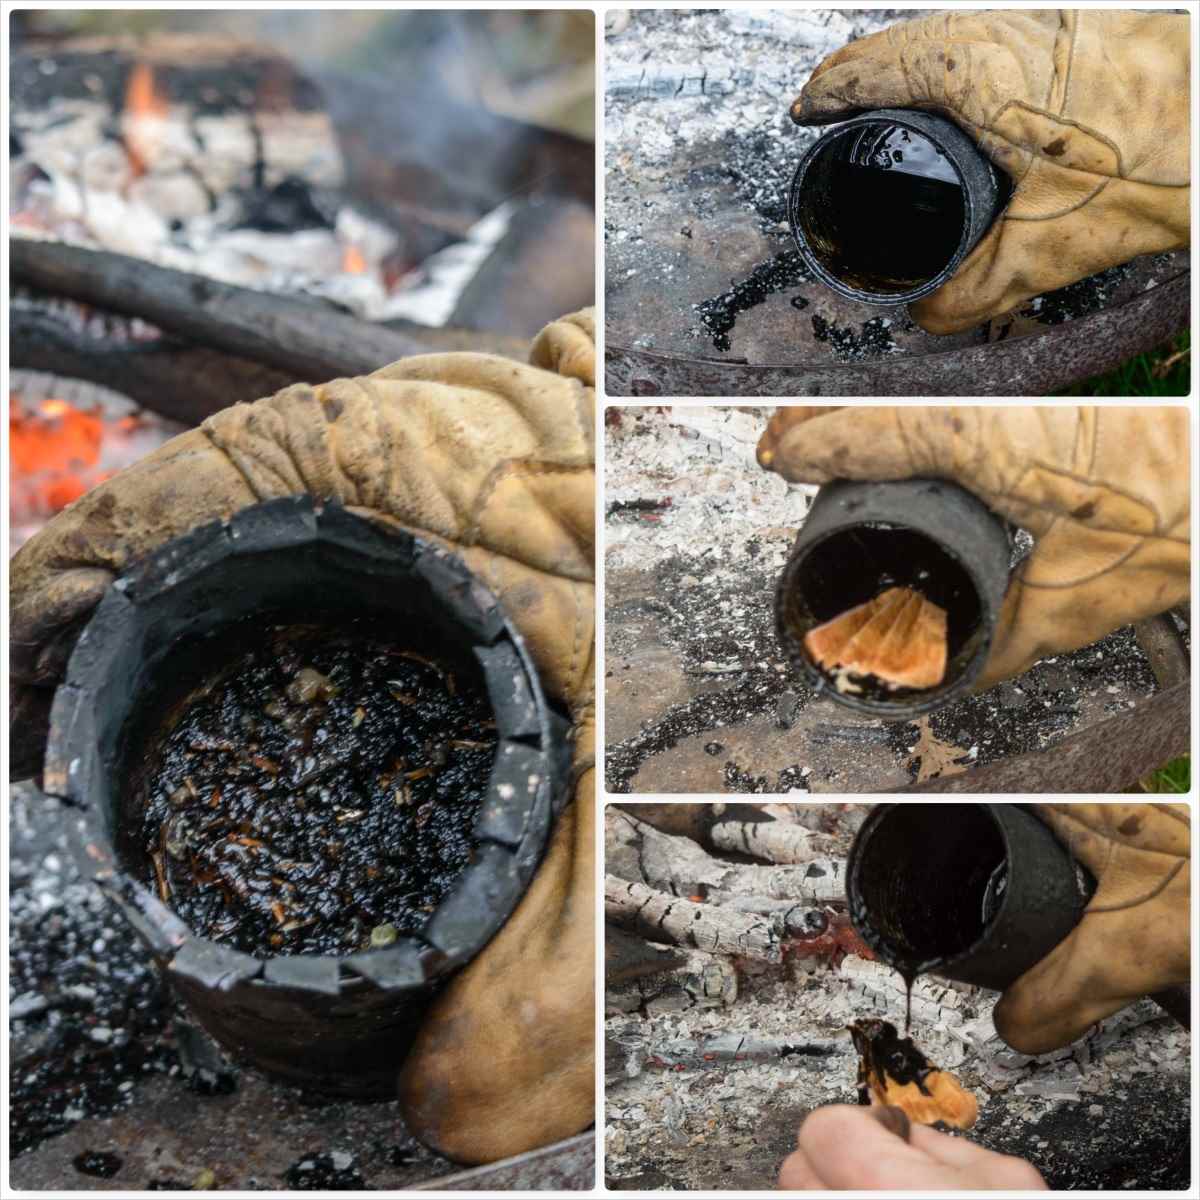
I find this combination works for me as the folds stop the bark from curling straight away and when the flame reaches the resin it burns for far longer.
I put a little video together on this to show you the process from start to finish.
The next post in this short series will be on making a woven Birch bark firelighter (again with Spruce resin).
Cheers
George
I will post a full How To…. on weaving this totally natural firelighter soon but for now here is a video on making one.
Cheers
George
I will post a full How To…. on harvesting the Birch Bark and making the fans but for now here is a short video post on an excellent bit of homemade bushcraft kit.
Cheers
George

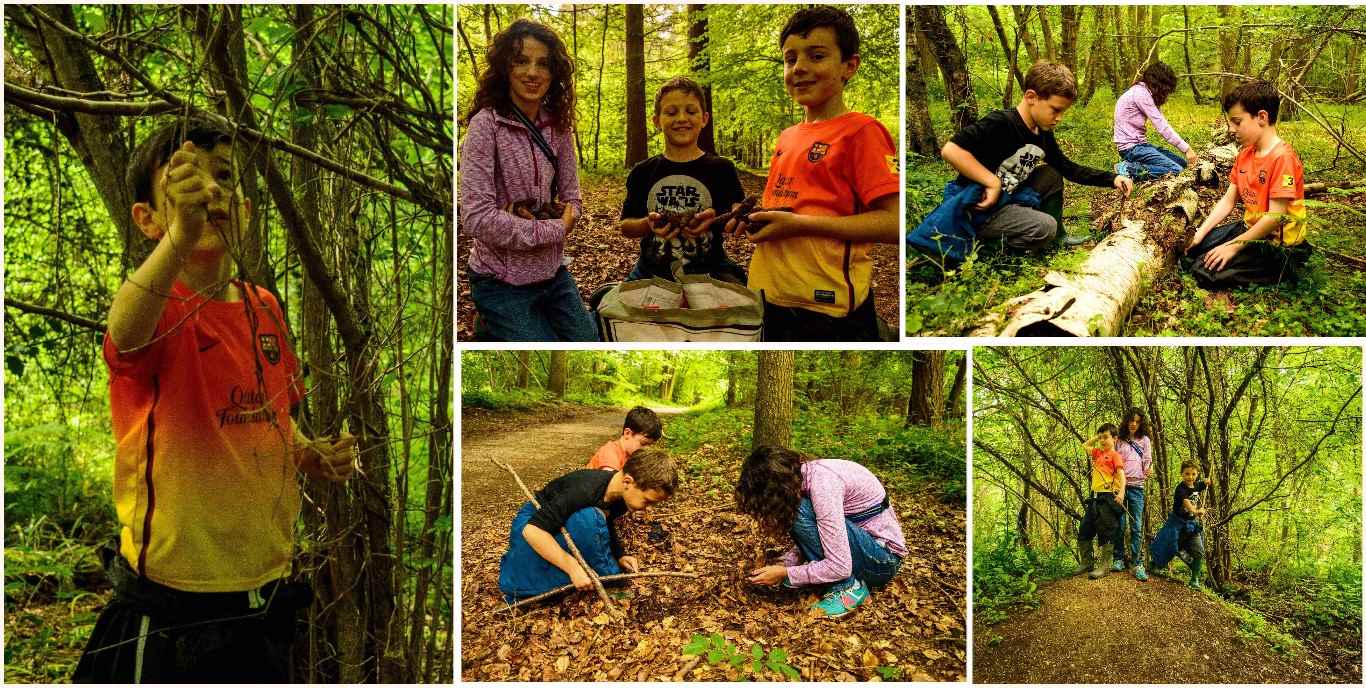
One of the requirements for Finlay’s Naturalist badge at Cubs was to build a Bug Hotel. So off to the woods we went with his friend Finlay (yep, two best friends called Finlay) and his sister Catherine to get supplies.
We collected a range of material including twigs, spruce cones, elder shoots and bark. We only took a little from each area we visited but we did visit a lot of different areas and soon had a good haul.
I had prepared some extra material including bricks, timber, drilled logs, plastic plant pots and grass. I got some good ideas from the RSPB Giving Nature a Home project and also from the blogs shown on the 30 Days Wild site.
To begin with the kids dug up a load of dirt to help build up the base and then set to building the base of the hotel.
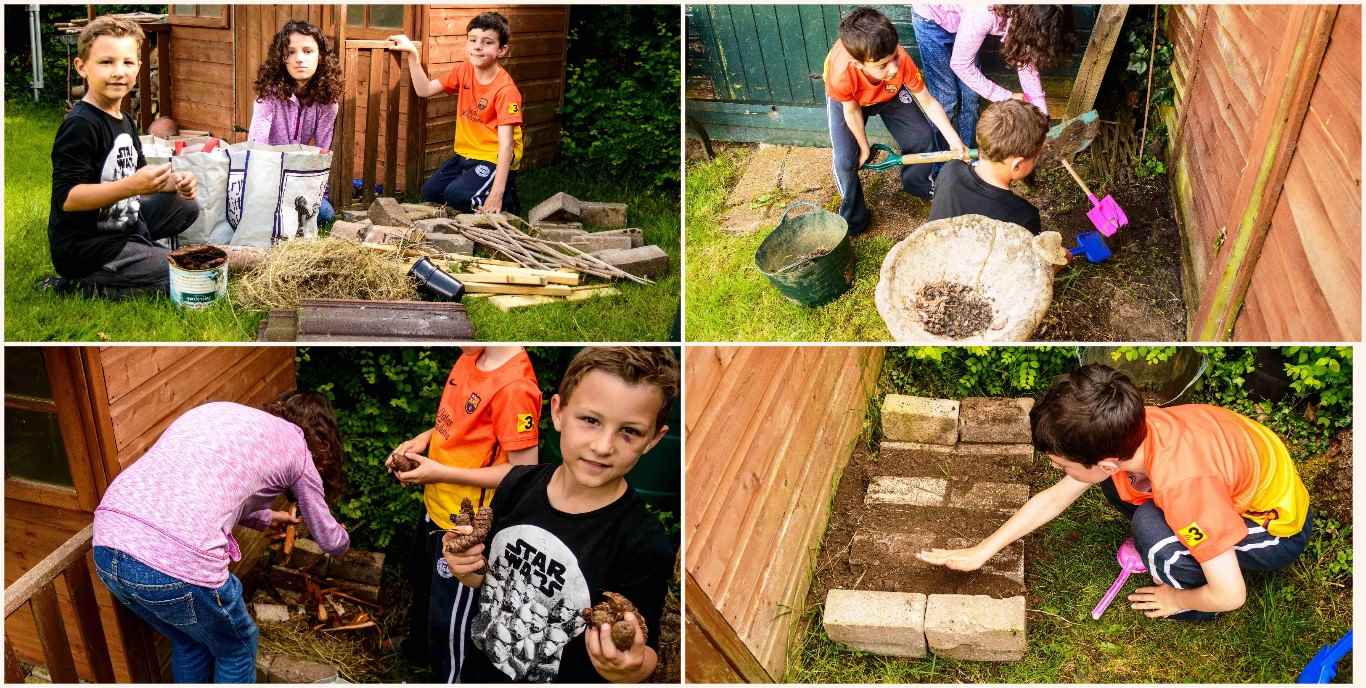
They built two layers of material to attract different insects. I got them to hollow out the pith from lots of elder sticks and they also stuffed grass inside some plastic plant pots. The plant pots have holes in the bottom of them so the hope is they will make good bug nests.
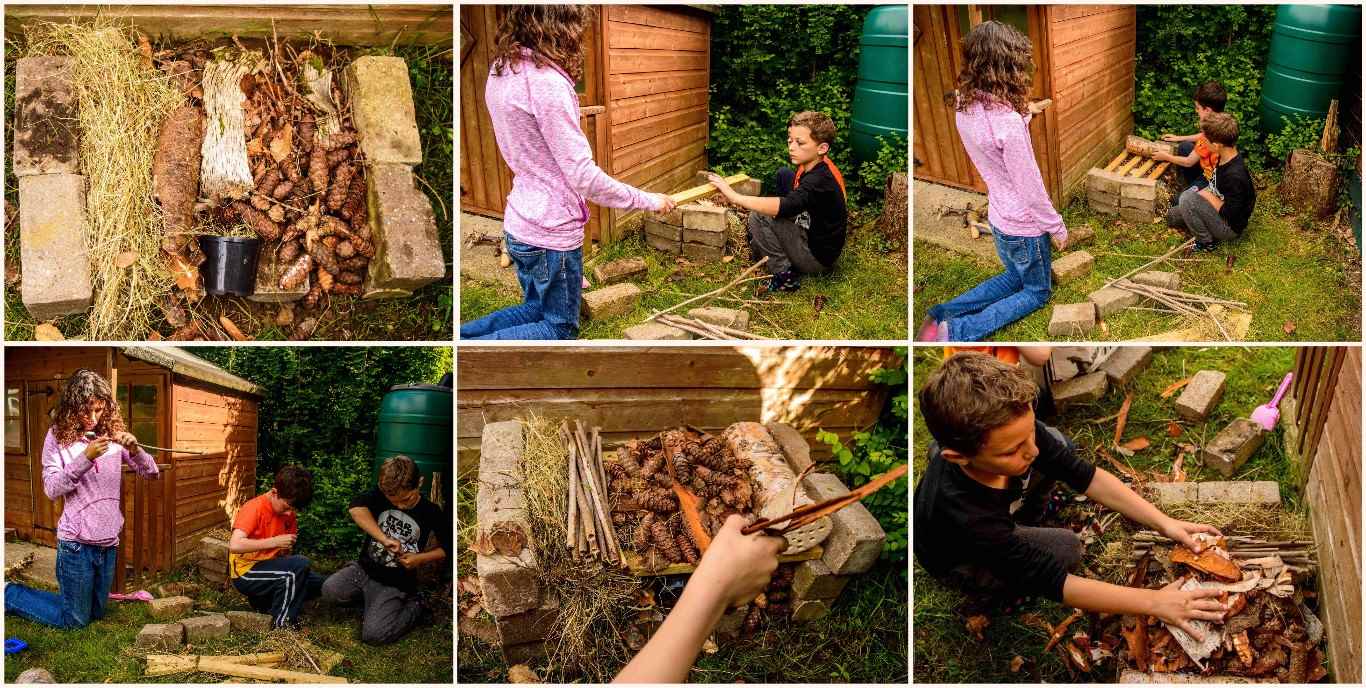
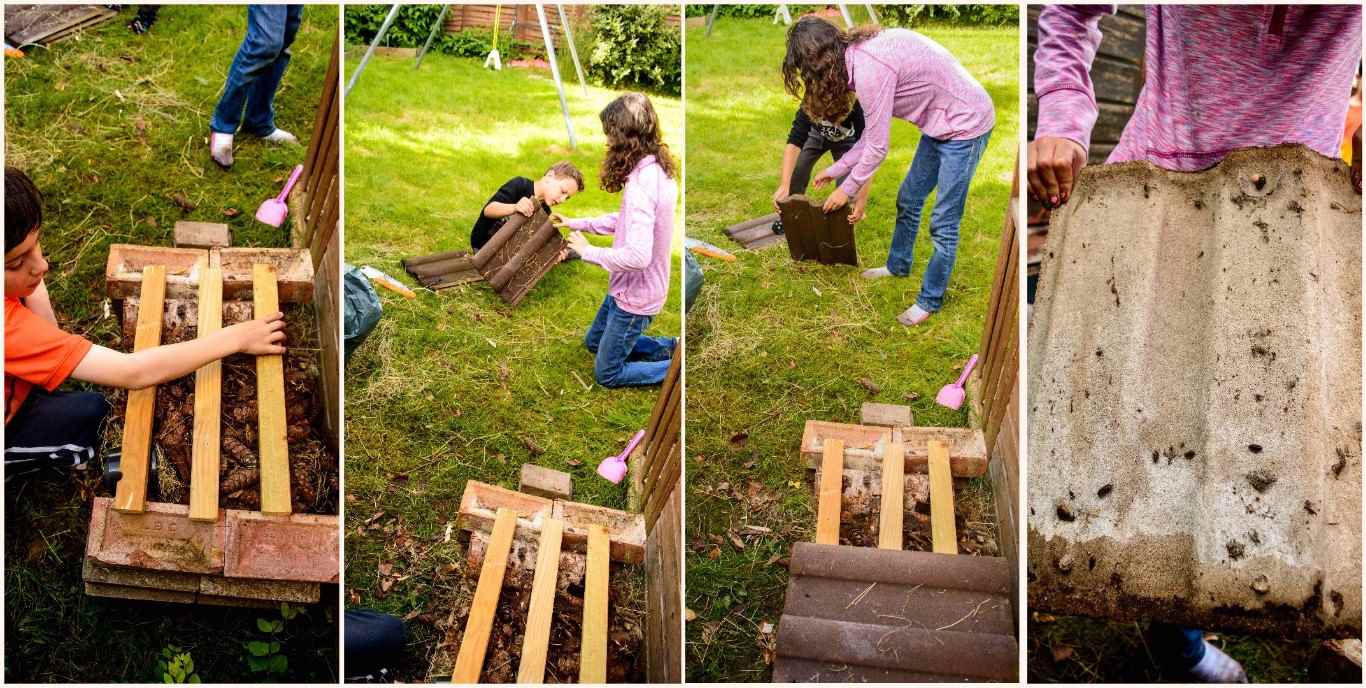
I had found some old roof tiles at the back of the shed and we used four of them to create an overlapping roof to keep the rain out. These heavy tiles also helped lock the rather wobbly bricks into place.
Each of the tiles though had some residents already in place on their undersides 🙂
To finish off they stuffed more material into the hotel and tidied it all up a little.
The longest part of this whole process was the collecting of the material however combining it with a good walk in the woods worked well. I did a little bit of work in the garage sawing the timber to length and drilling holes into the tops of two birch logs. Other than that the kids did most of the work.
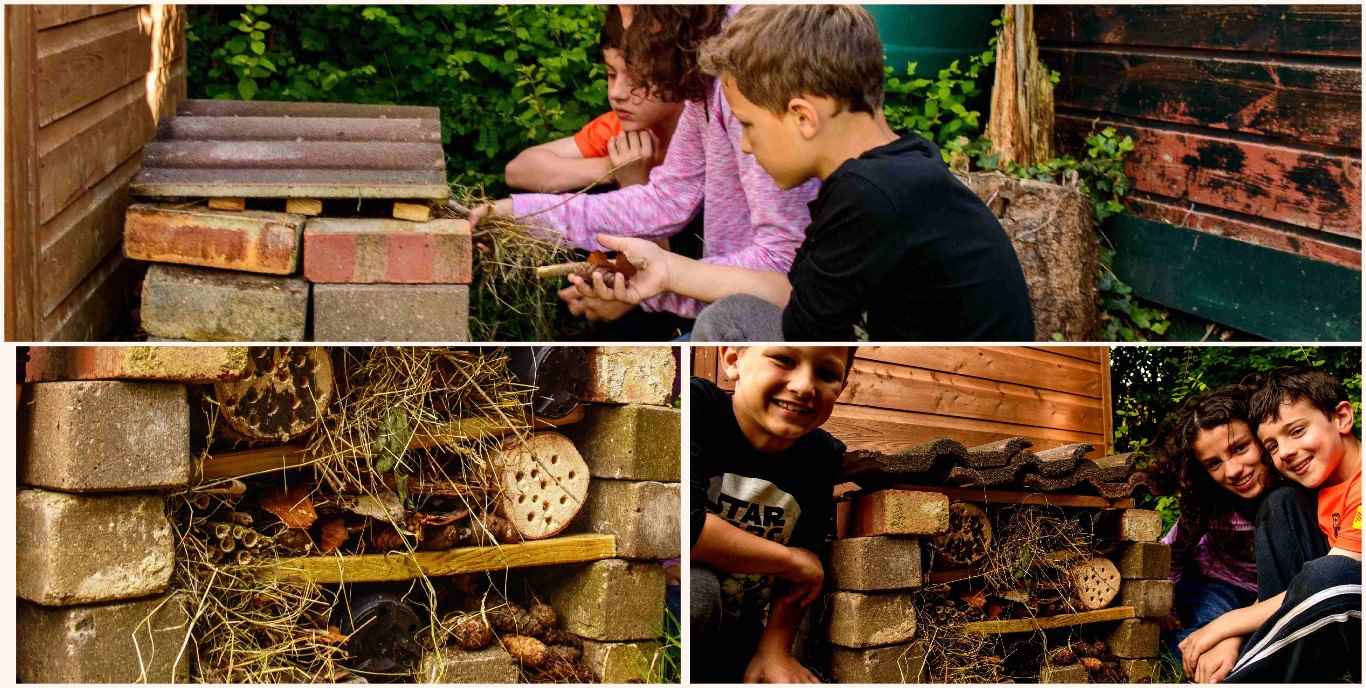
I am looking forward to seeing if we get any residents over the next few months. I do hope the hotel provides a snug over-wintering spot for our local bugs and that it is teeming with life next year.
Cheers
George