How To…. Make Hot Rock Spruce Pitch

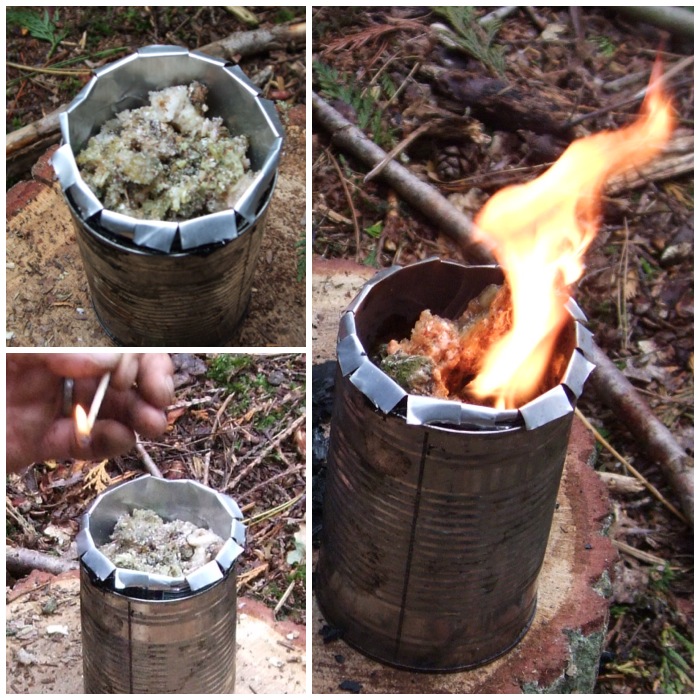
After writing the post How To…. Make Spruce Pitch in a Tin Can I promised I would write up one on making pitch using a more primitive method.

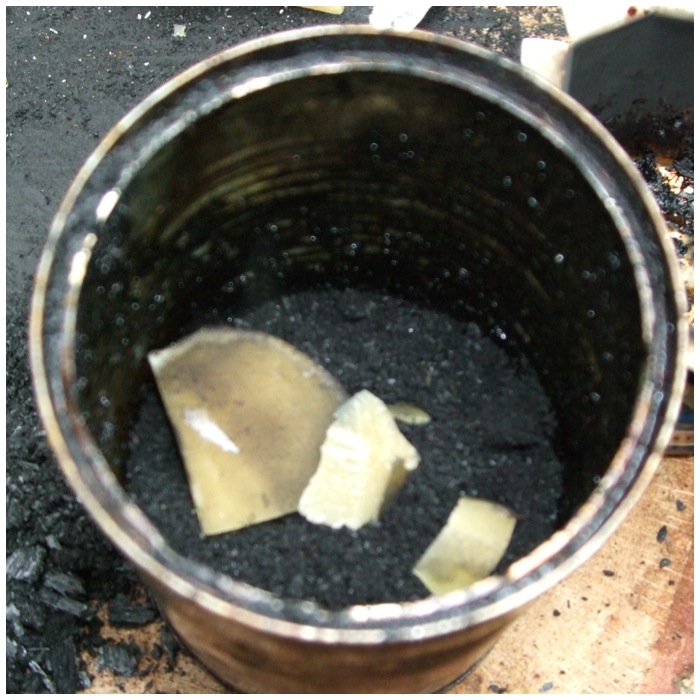
Pitch can be made with many different materials and I have covered some of these in that previous post. On this occasion I used spruce resin, beeswax and charcoal dust. Instead of a nice handy tin to prepare it all though I opted to try this out using more primitive materials: hot rocks. I touched on this method previously in the post How To…. Make a Flint-Tipped Arrow but feel it needs its own stand-alone post.

Hot Rock Pitch
Hot Rock Pitch

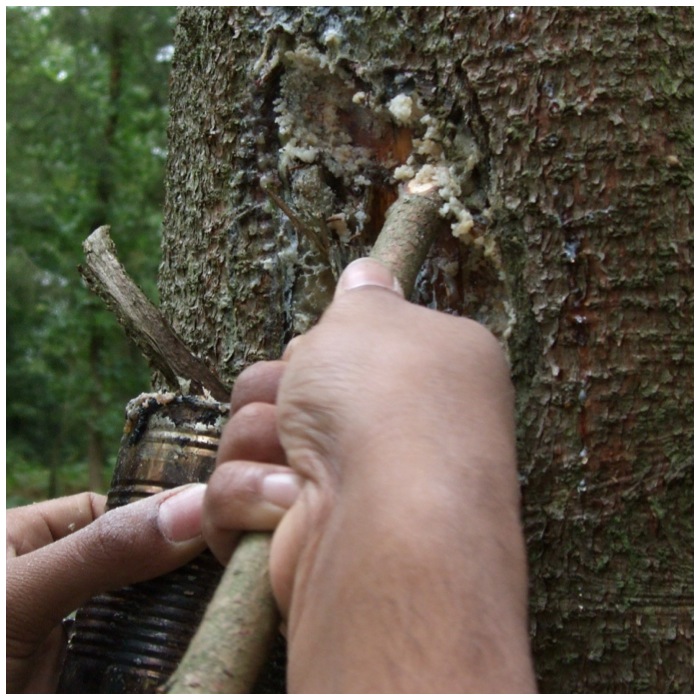
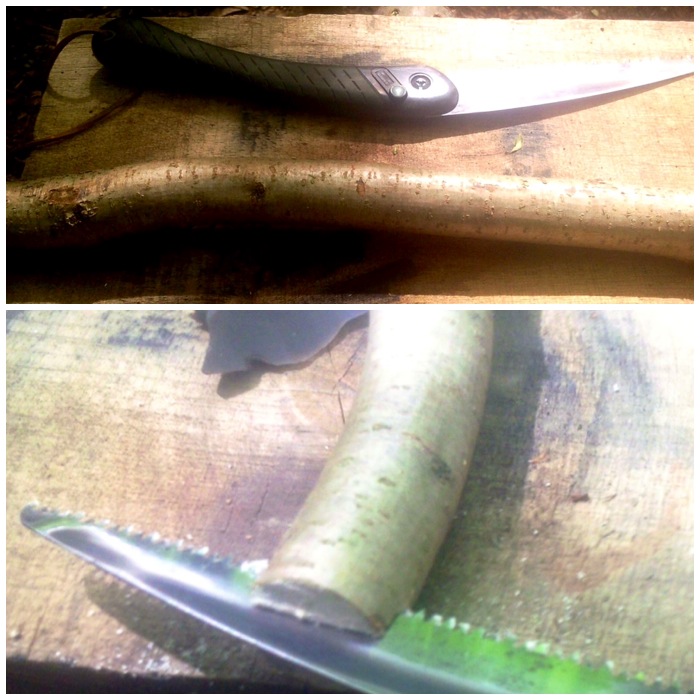
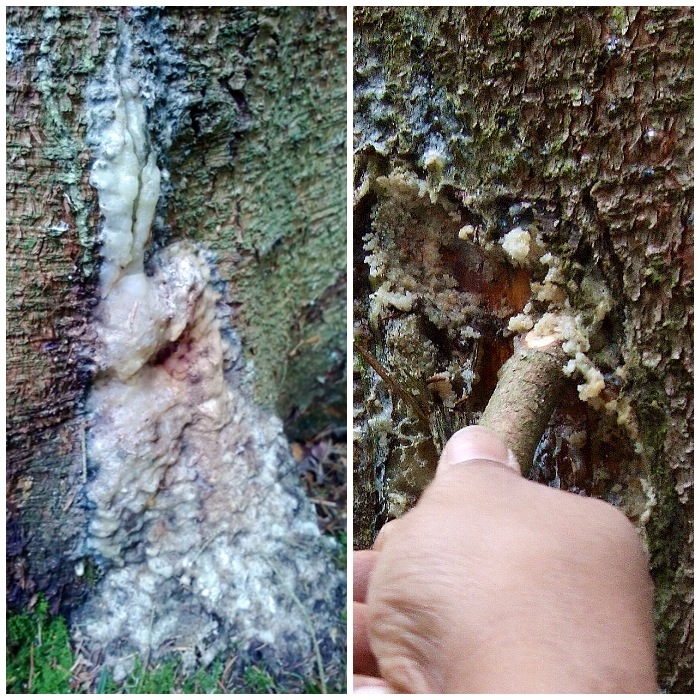
I collected a lot of resin from some spruce trees in my local area with the use of a stick as I find that this does not damage the trees as a knife would do. Also I look for areas where the resin has pooled at the base of the tree as you can collect all of this without affecting the tree.

Photo 24-04-2014 16 11 37
Spruce Resin

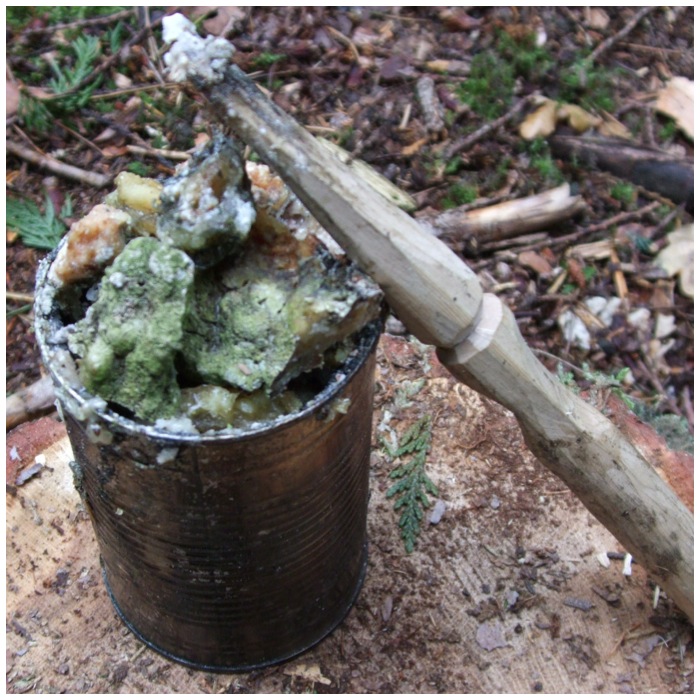
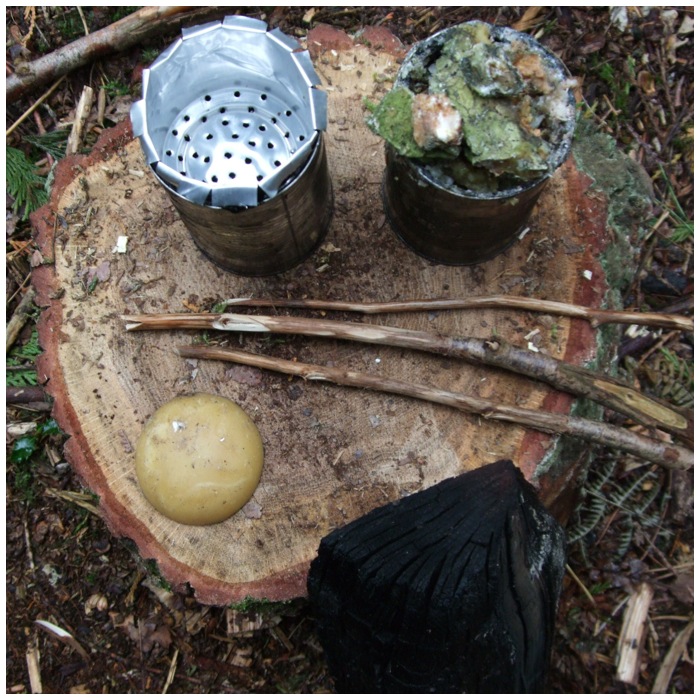
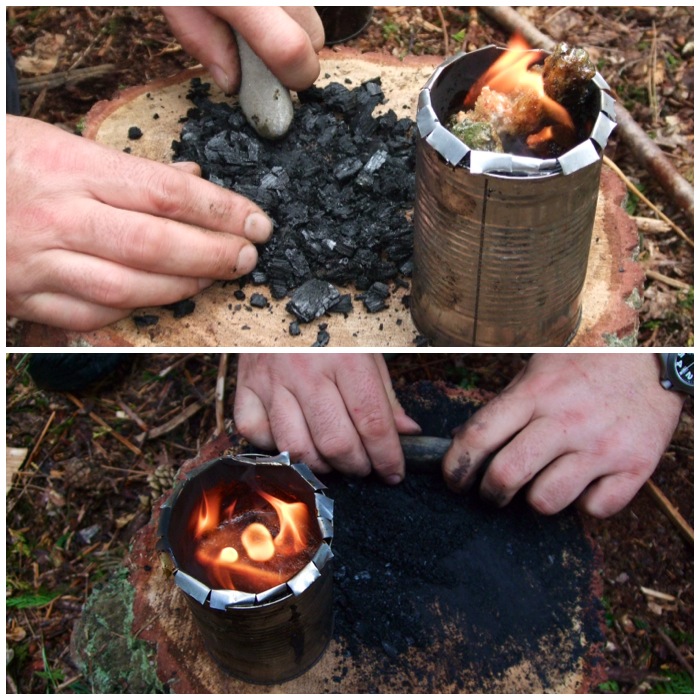
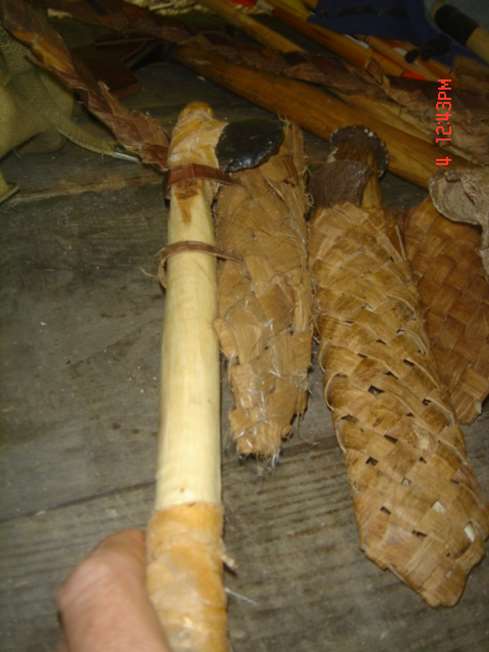
My other ingredients are charcoal dust to give the pitch body (I used the small rock to crush the charcoal) and beeswax to make it flexible. I used the sticks to make the finished pitch stick.

Photo 24-04-2014 14 47 40
Preparation

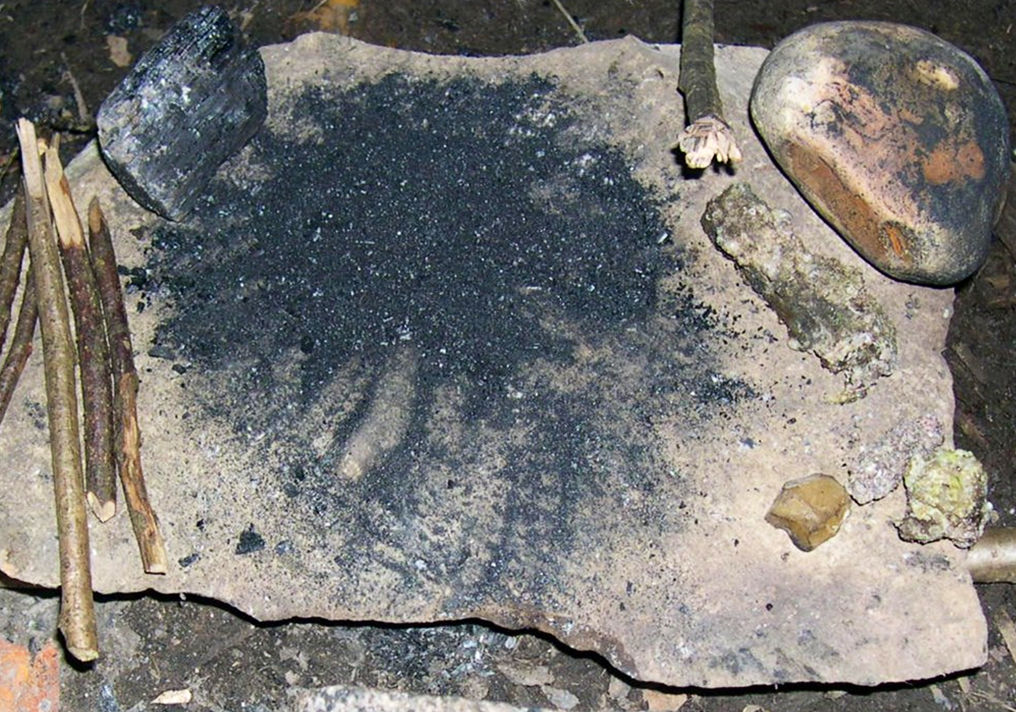
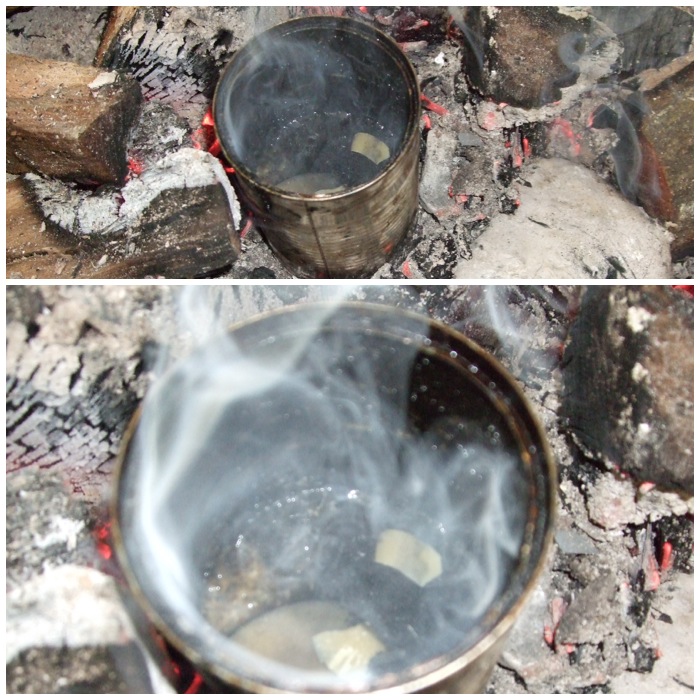
While I was out collecting resin and preparing everything else I had a rock heating up in the fire. I used a rock that had been heated before so I could be sure it would not crack. (If there is any trapped air or moisture in a rock there is a chance it will crack or, in the worst case scenario, explode.)

To handle the rock I used some wooden tongs I had made up (sorry, no photo).

Photo 24-04-2014 16 31 00
Hot Rock

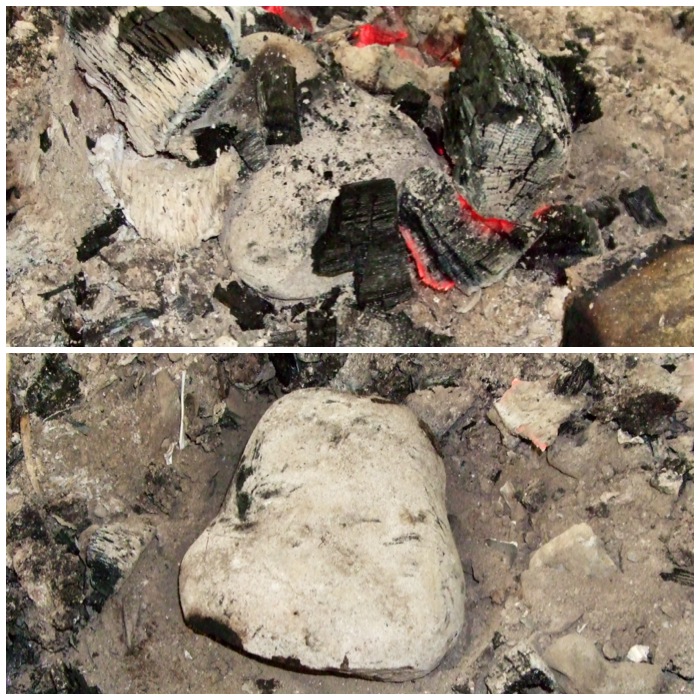
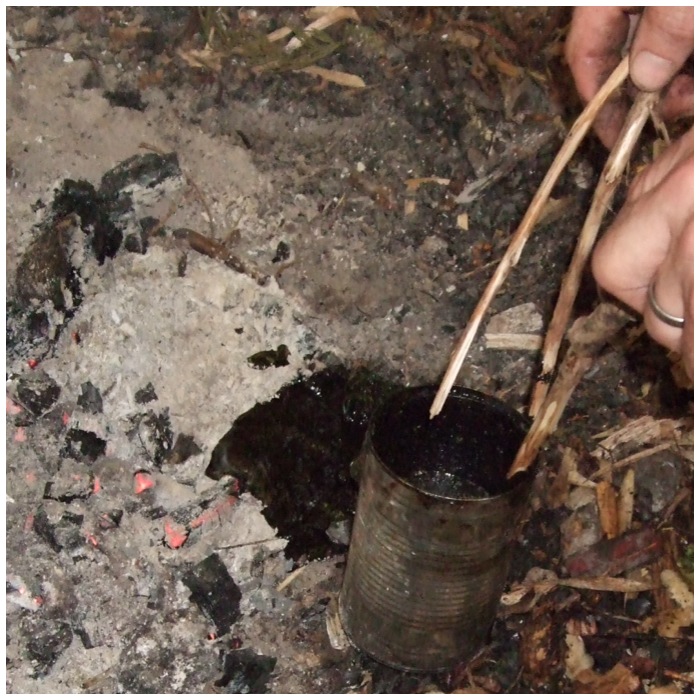
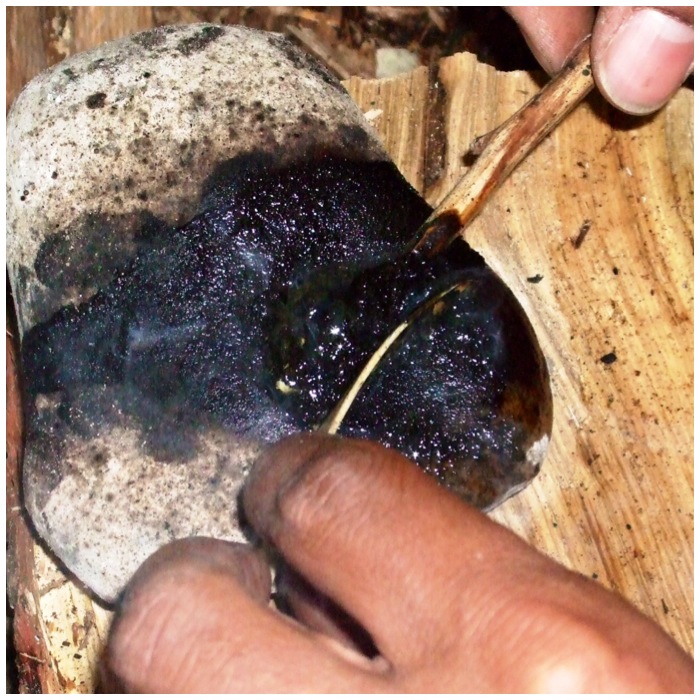
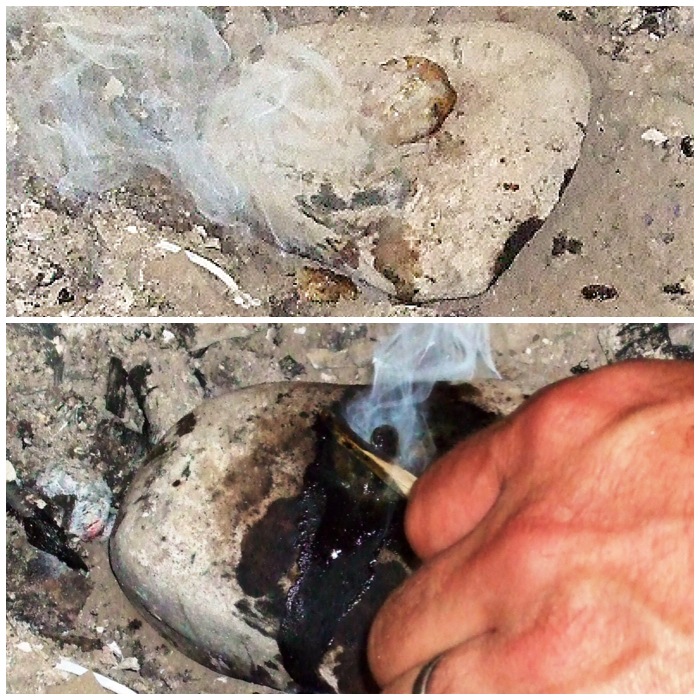
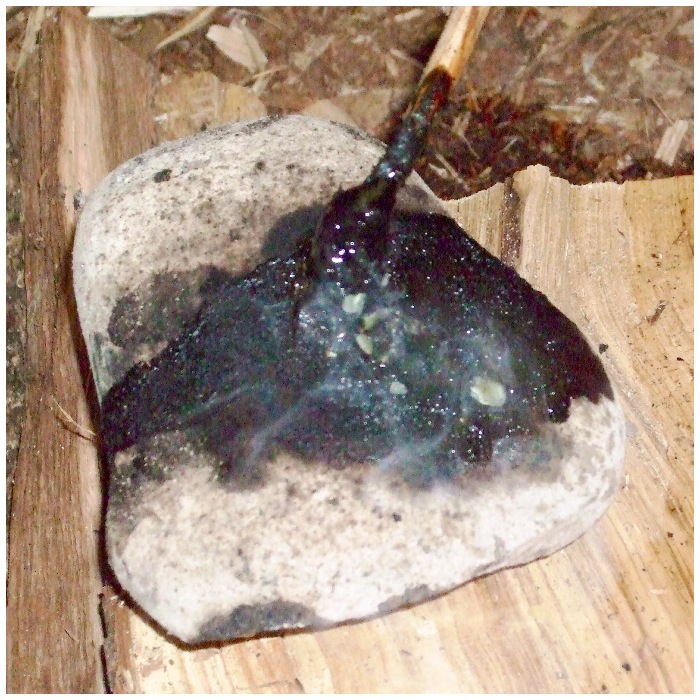
The rock I had chosen had a slight hollow in the top surface which I thought would help stop the resin from flowing away instantly as it melted. I dragged the rock to the side of the fire, popped a piece of resin onto it and with a small twig moved it around until it had all melted. Some resin did run off but enough was kept in the hollow for me to use.

Photo 24-04-2014 16 38 41
Melting the resin

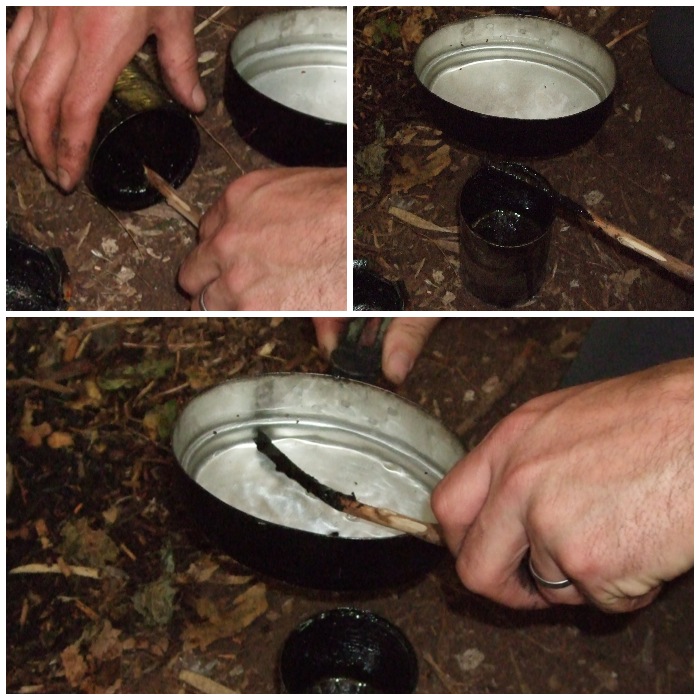
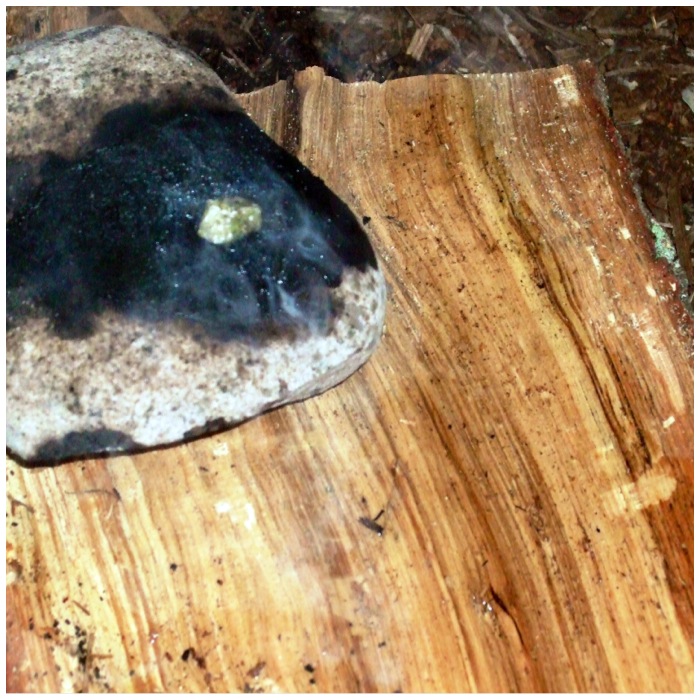
I then moved the rock onto a piece of curved bark which held some water to act as a coolant as I built up my pitch stick.

Once this was all set up I popped a piece of beeswax into the melted resin and allowed it to mix in (experiment for yourself with ratios).

Photo 24-04-2014 16 39 10
Melting the beeswax

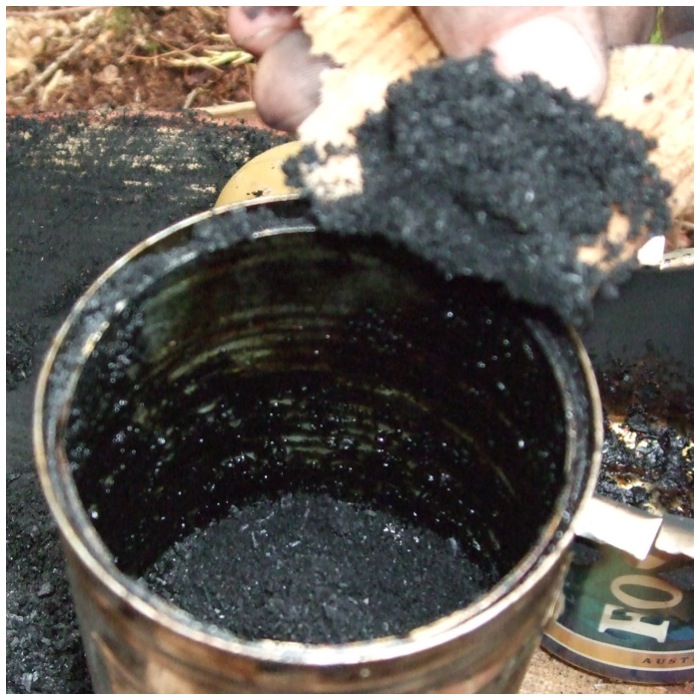
Then I sprinkled a good-sized pinch of charcoal dust into the mixture and carried on mixing it up.

Photo 24-04-2014 16 39 26
Adding the charcoal dust

As the rock was quite small I could only make a little batch of pitch at a time so it did not take long to all melt and mix together.

Photo 24-04-2014 16 44 32
Mix it all up

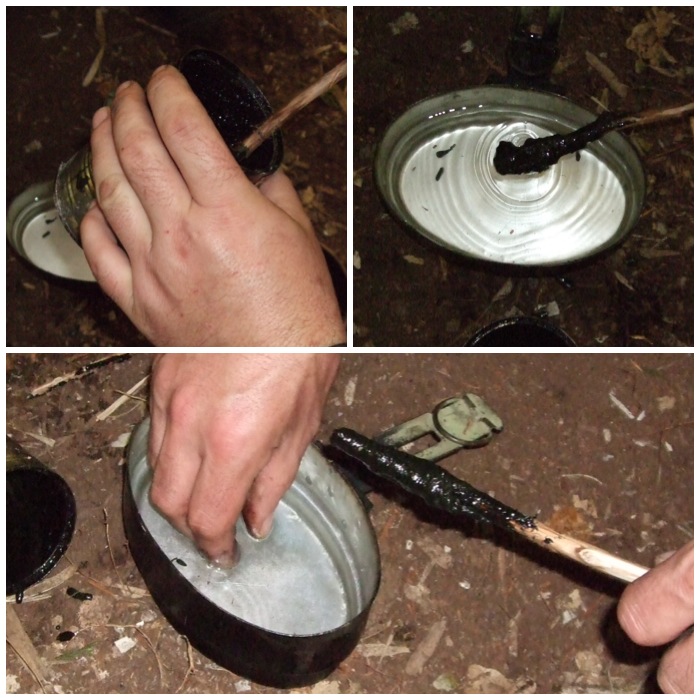
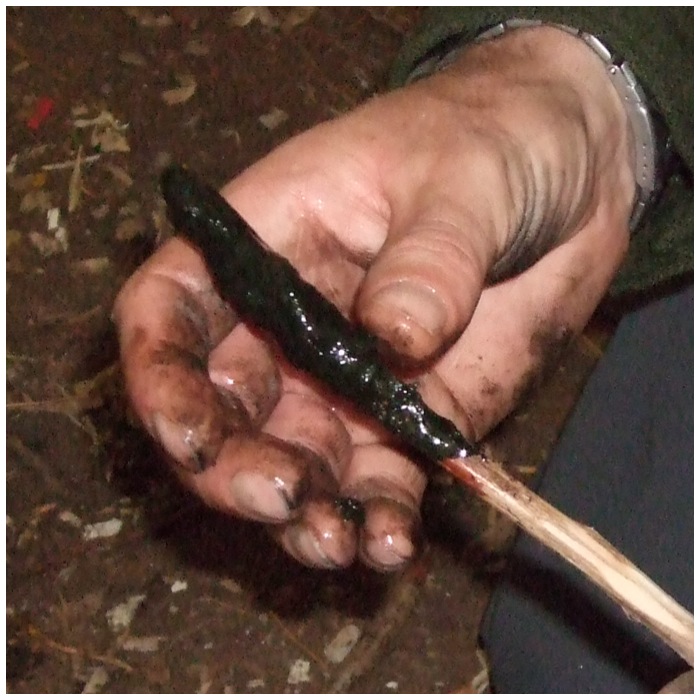
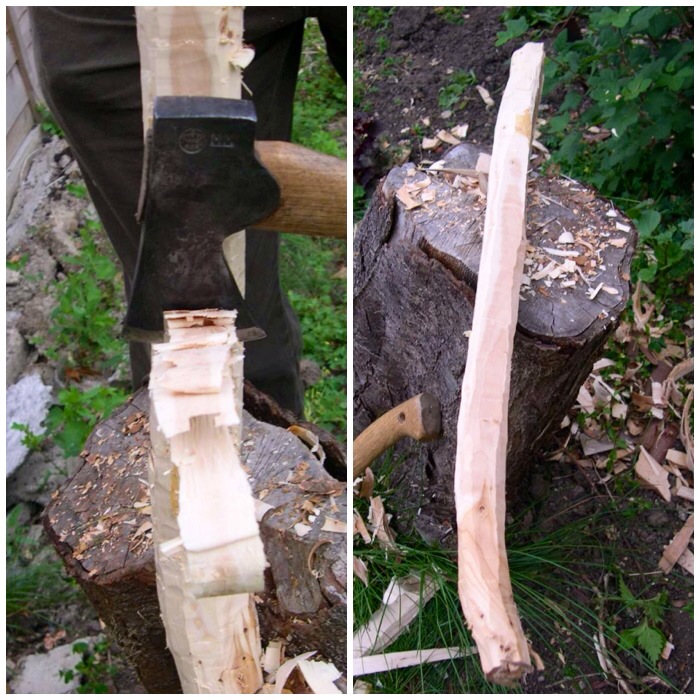
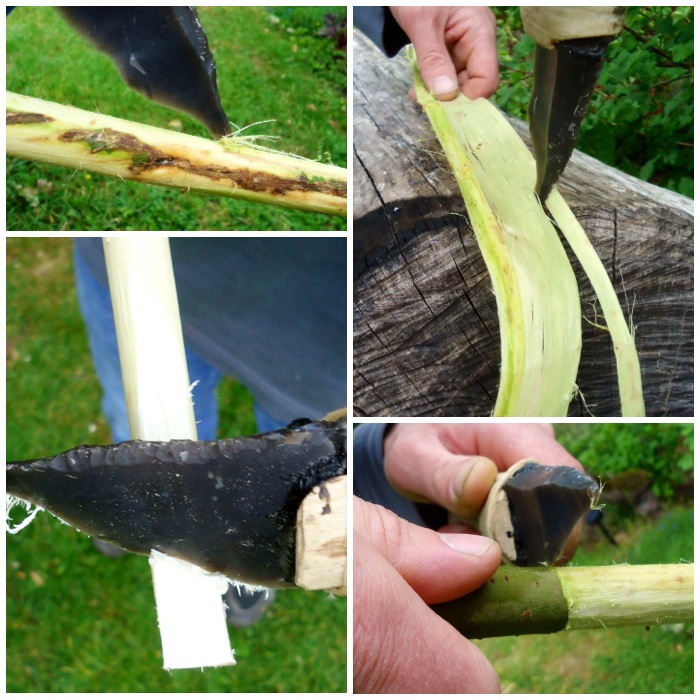
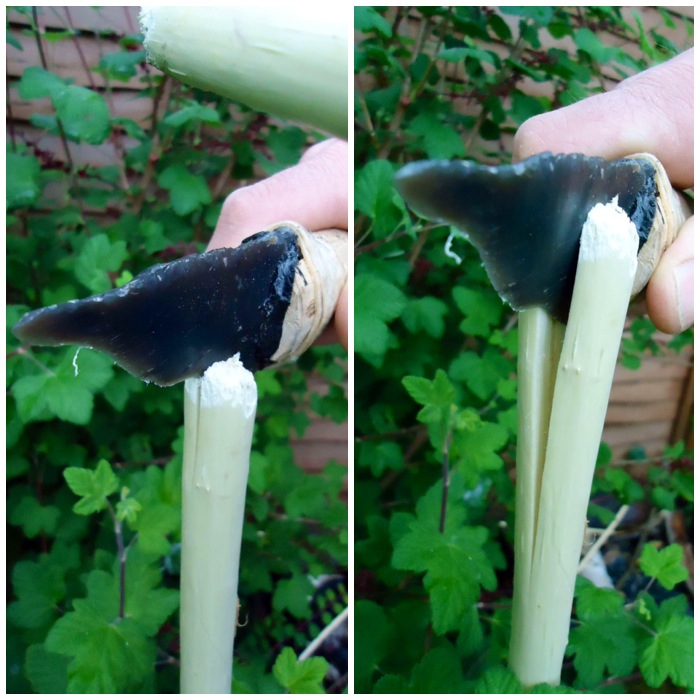
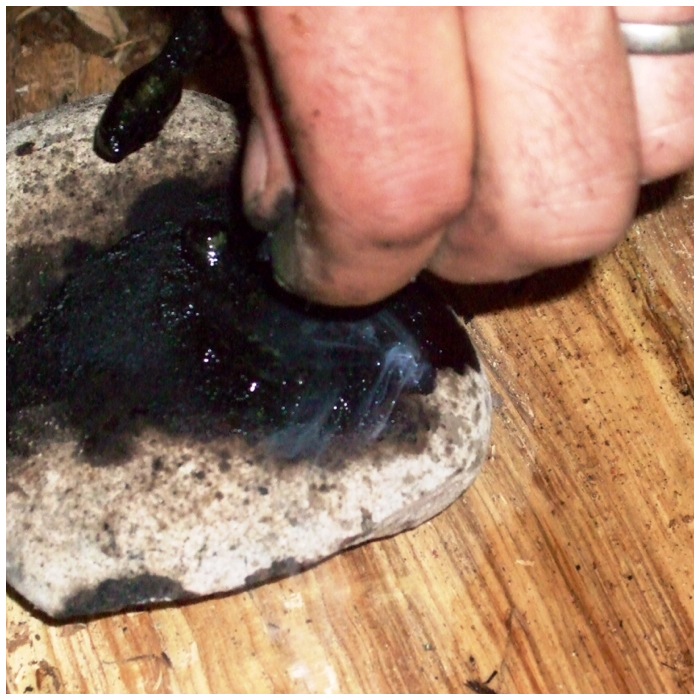
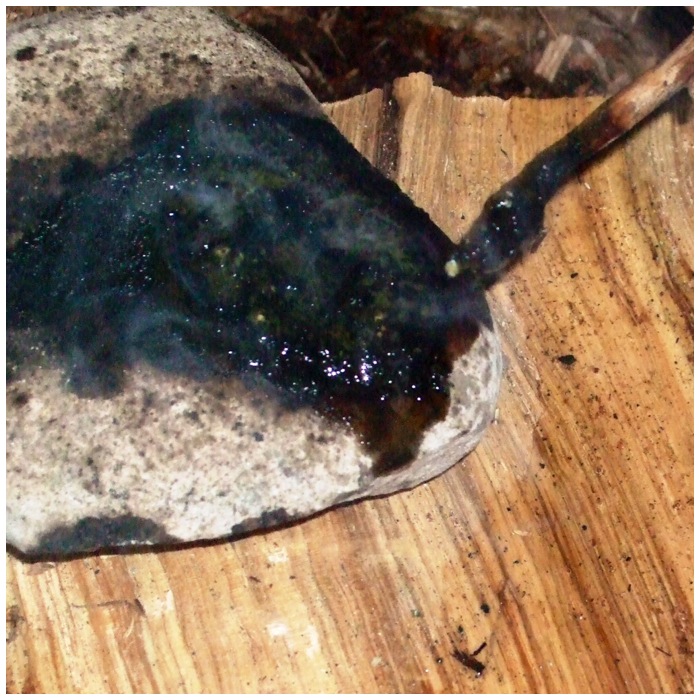
I used a sliver of wood to scrape the hot, sticky pitch onto a squared-off stick.

Photo 24-04-2014 16 44 56
Scrape onto a twig

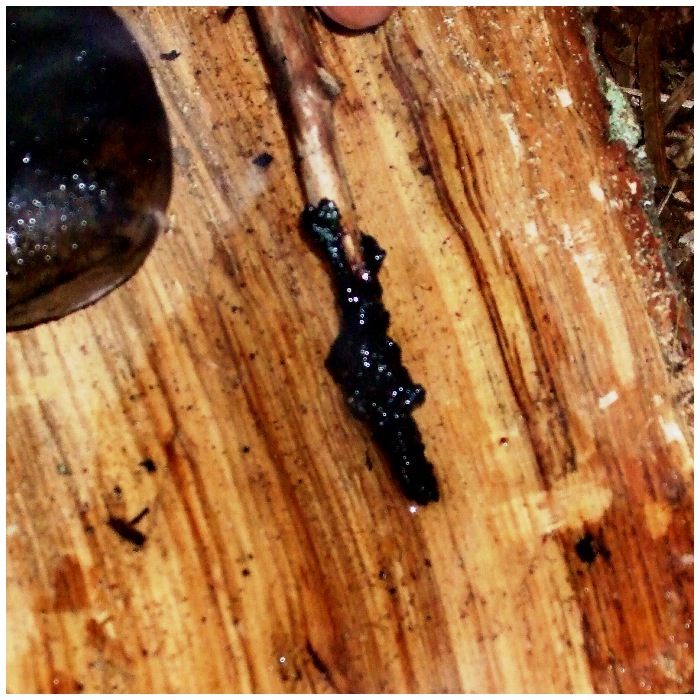
The pitch you create using this method is a bit lumpy but still perfectly useable. As soon as I had some pitch on the stick I dipped it into the water to cool it down rapidly. This cooling-down process allowed me to use wet fingers to mould the pitch and smooth it out.

I kept repeating this process until all the melted pitch was on the stick and then mixed up another batch.

Photo 24-04-2014 16 46 14
Cool rapidly in water

The rock was so hot that I was able to keep melting and mixing the ingredients several times to build up the pitch on the stick.

Photo 24-04-2014 16 54 46
Mix more resin, beeswax and charcoal

I found that the curved piece of bark  was very effective for storing water to cool the pitch.

Photo 24-04-2014 16 52 53
Scrape onto the twig and cool again

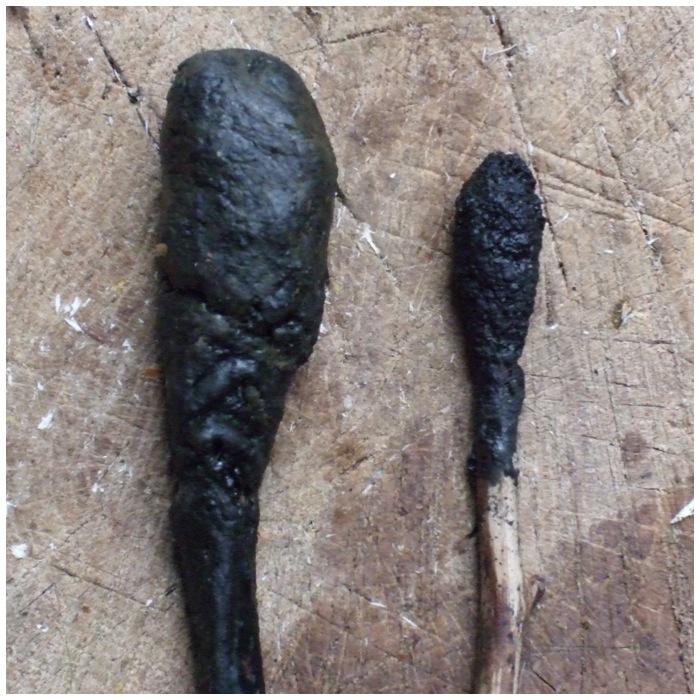
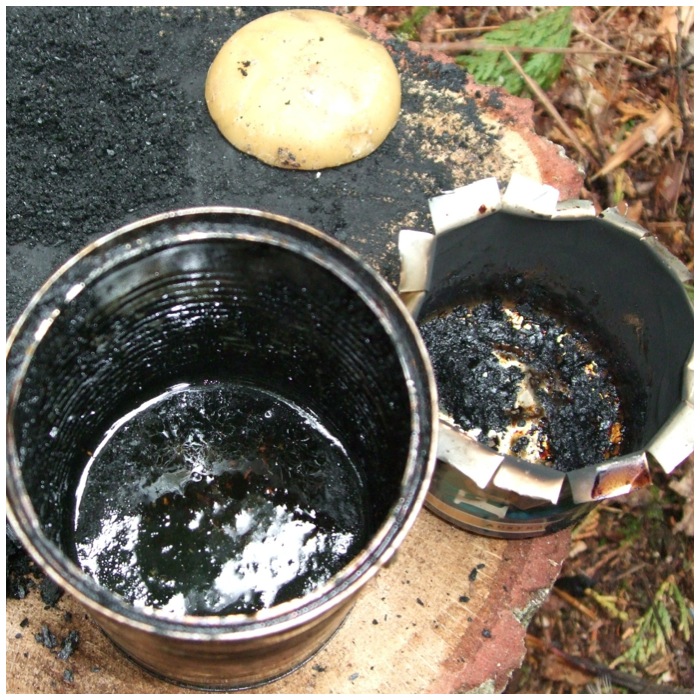
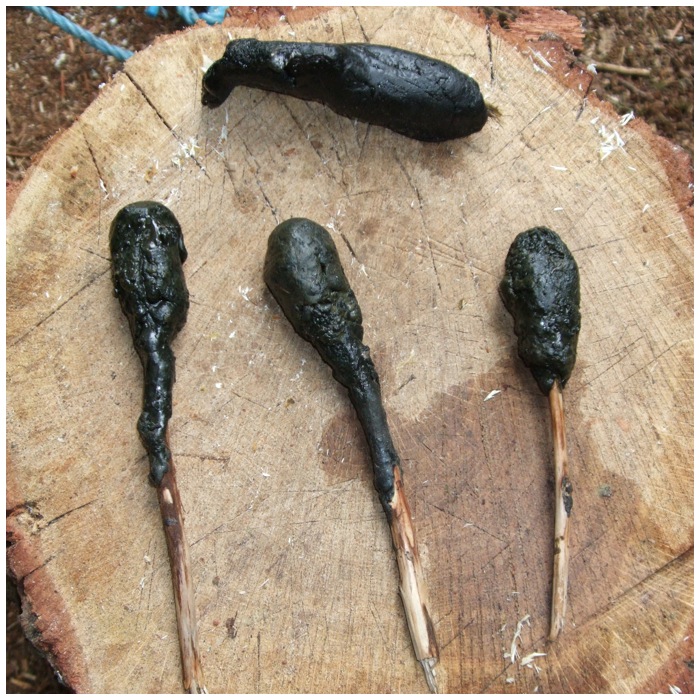
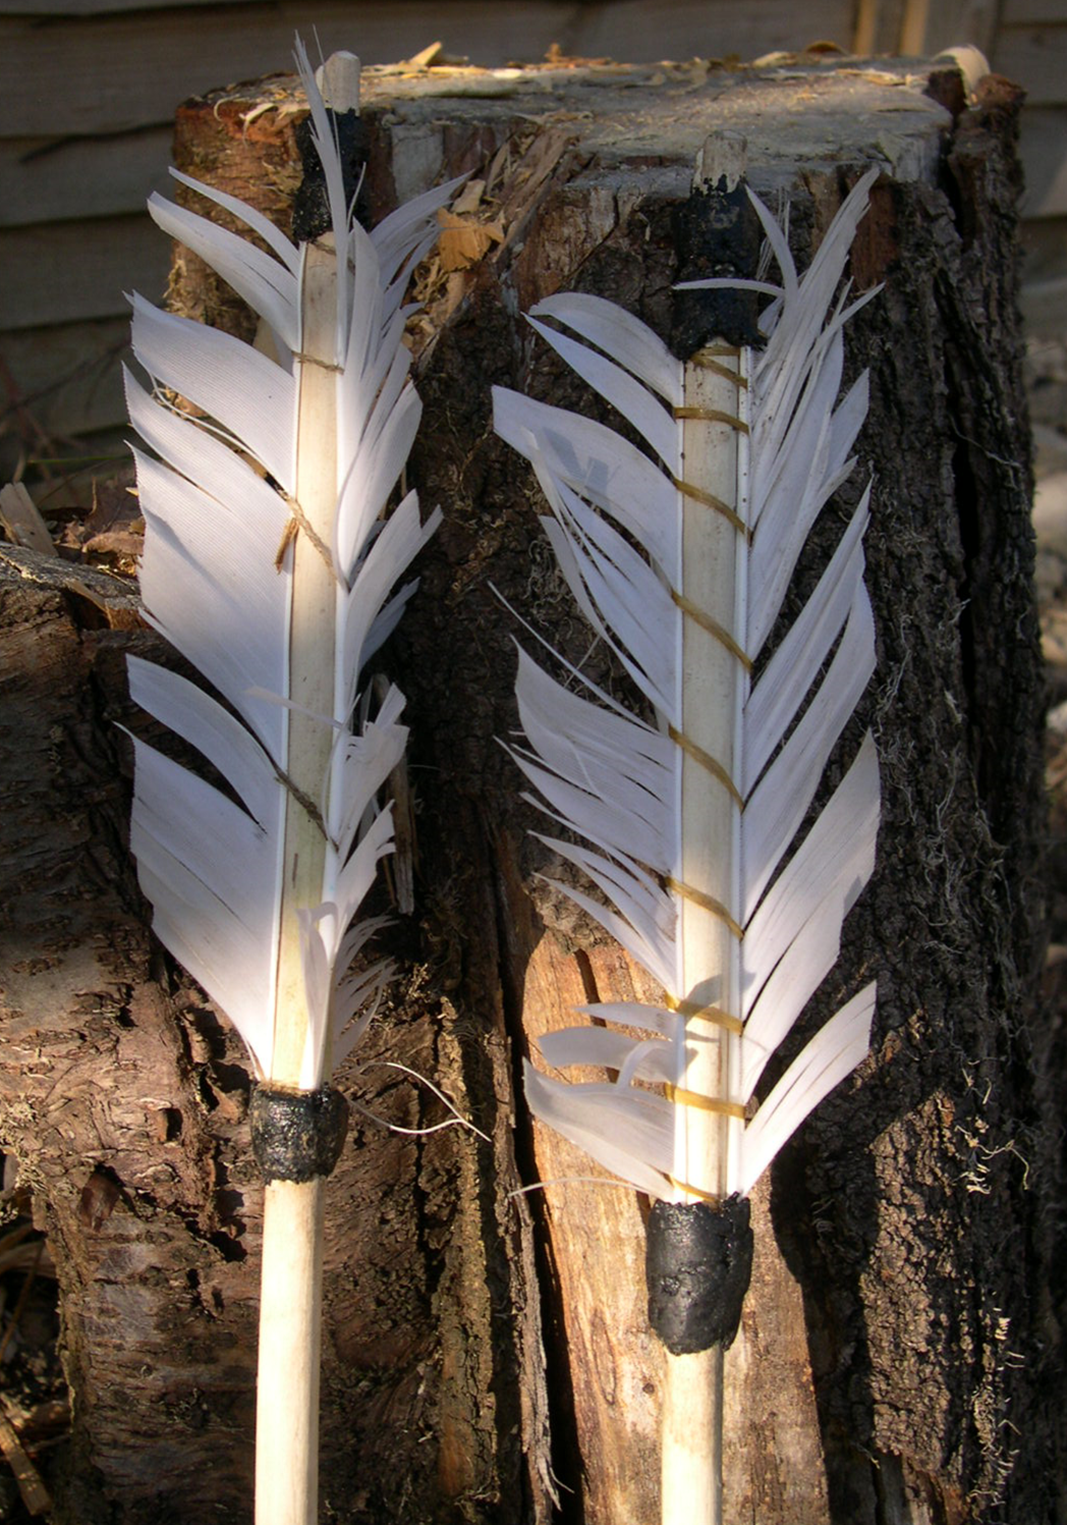
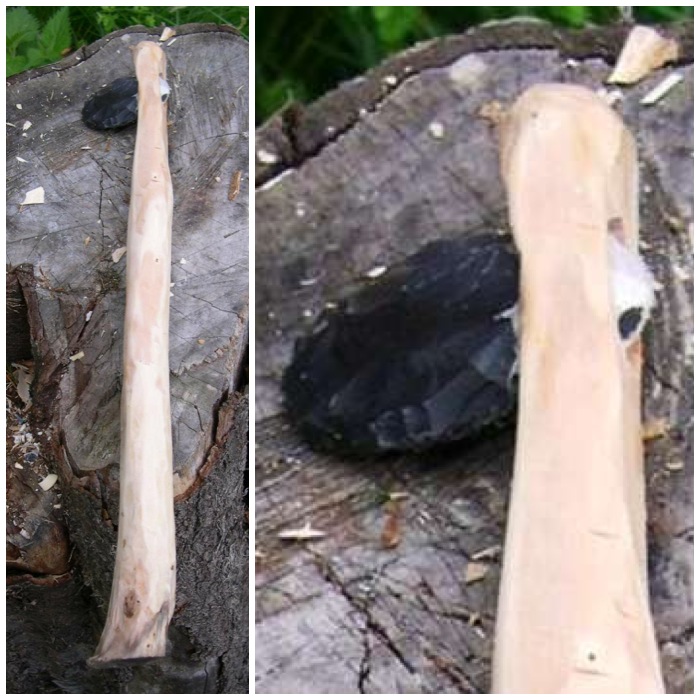
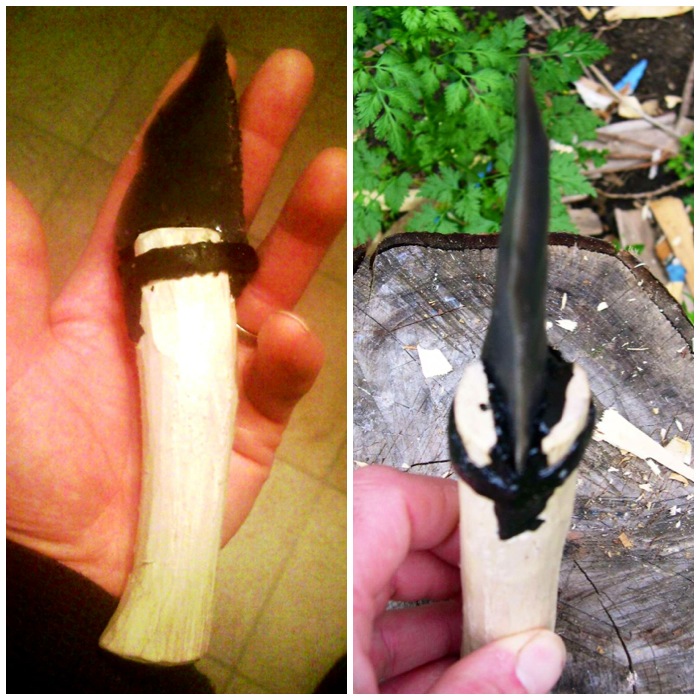
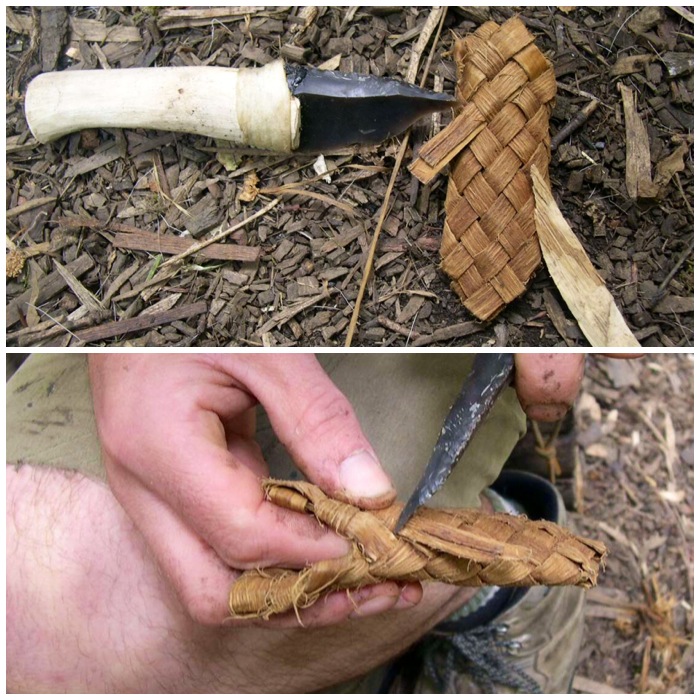
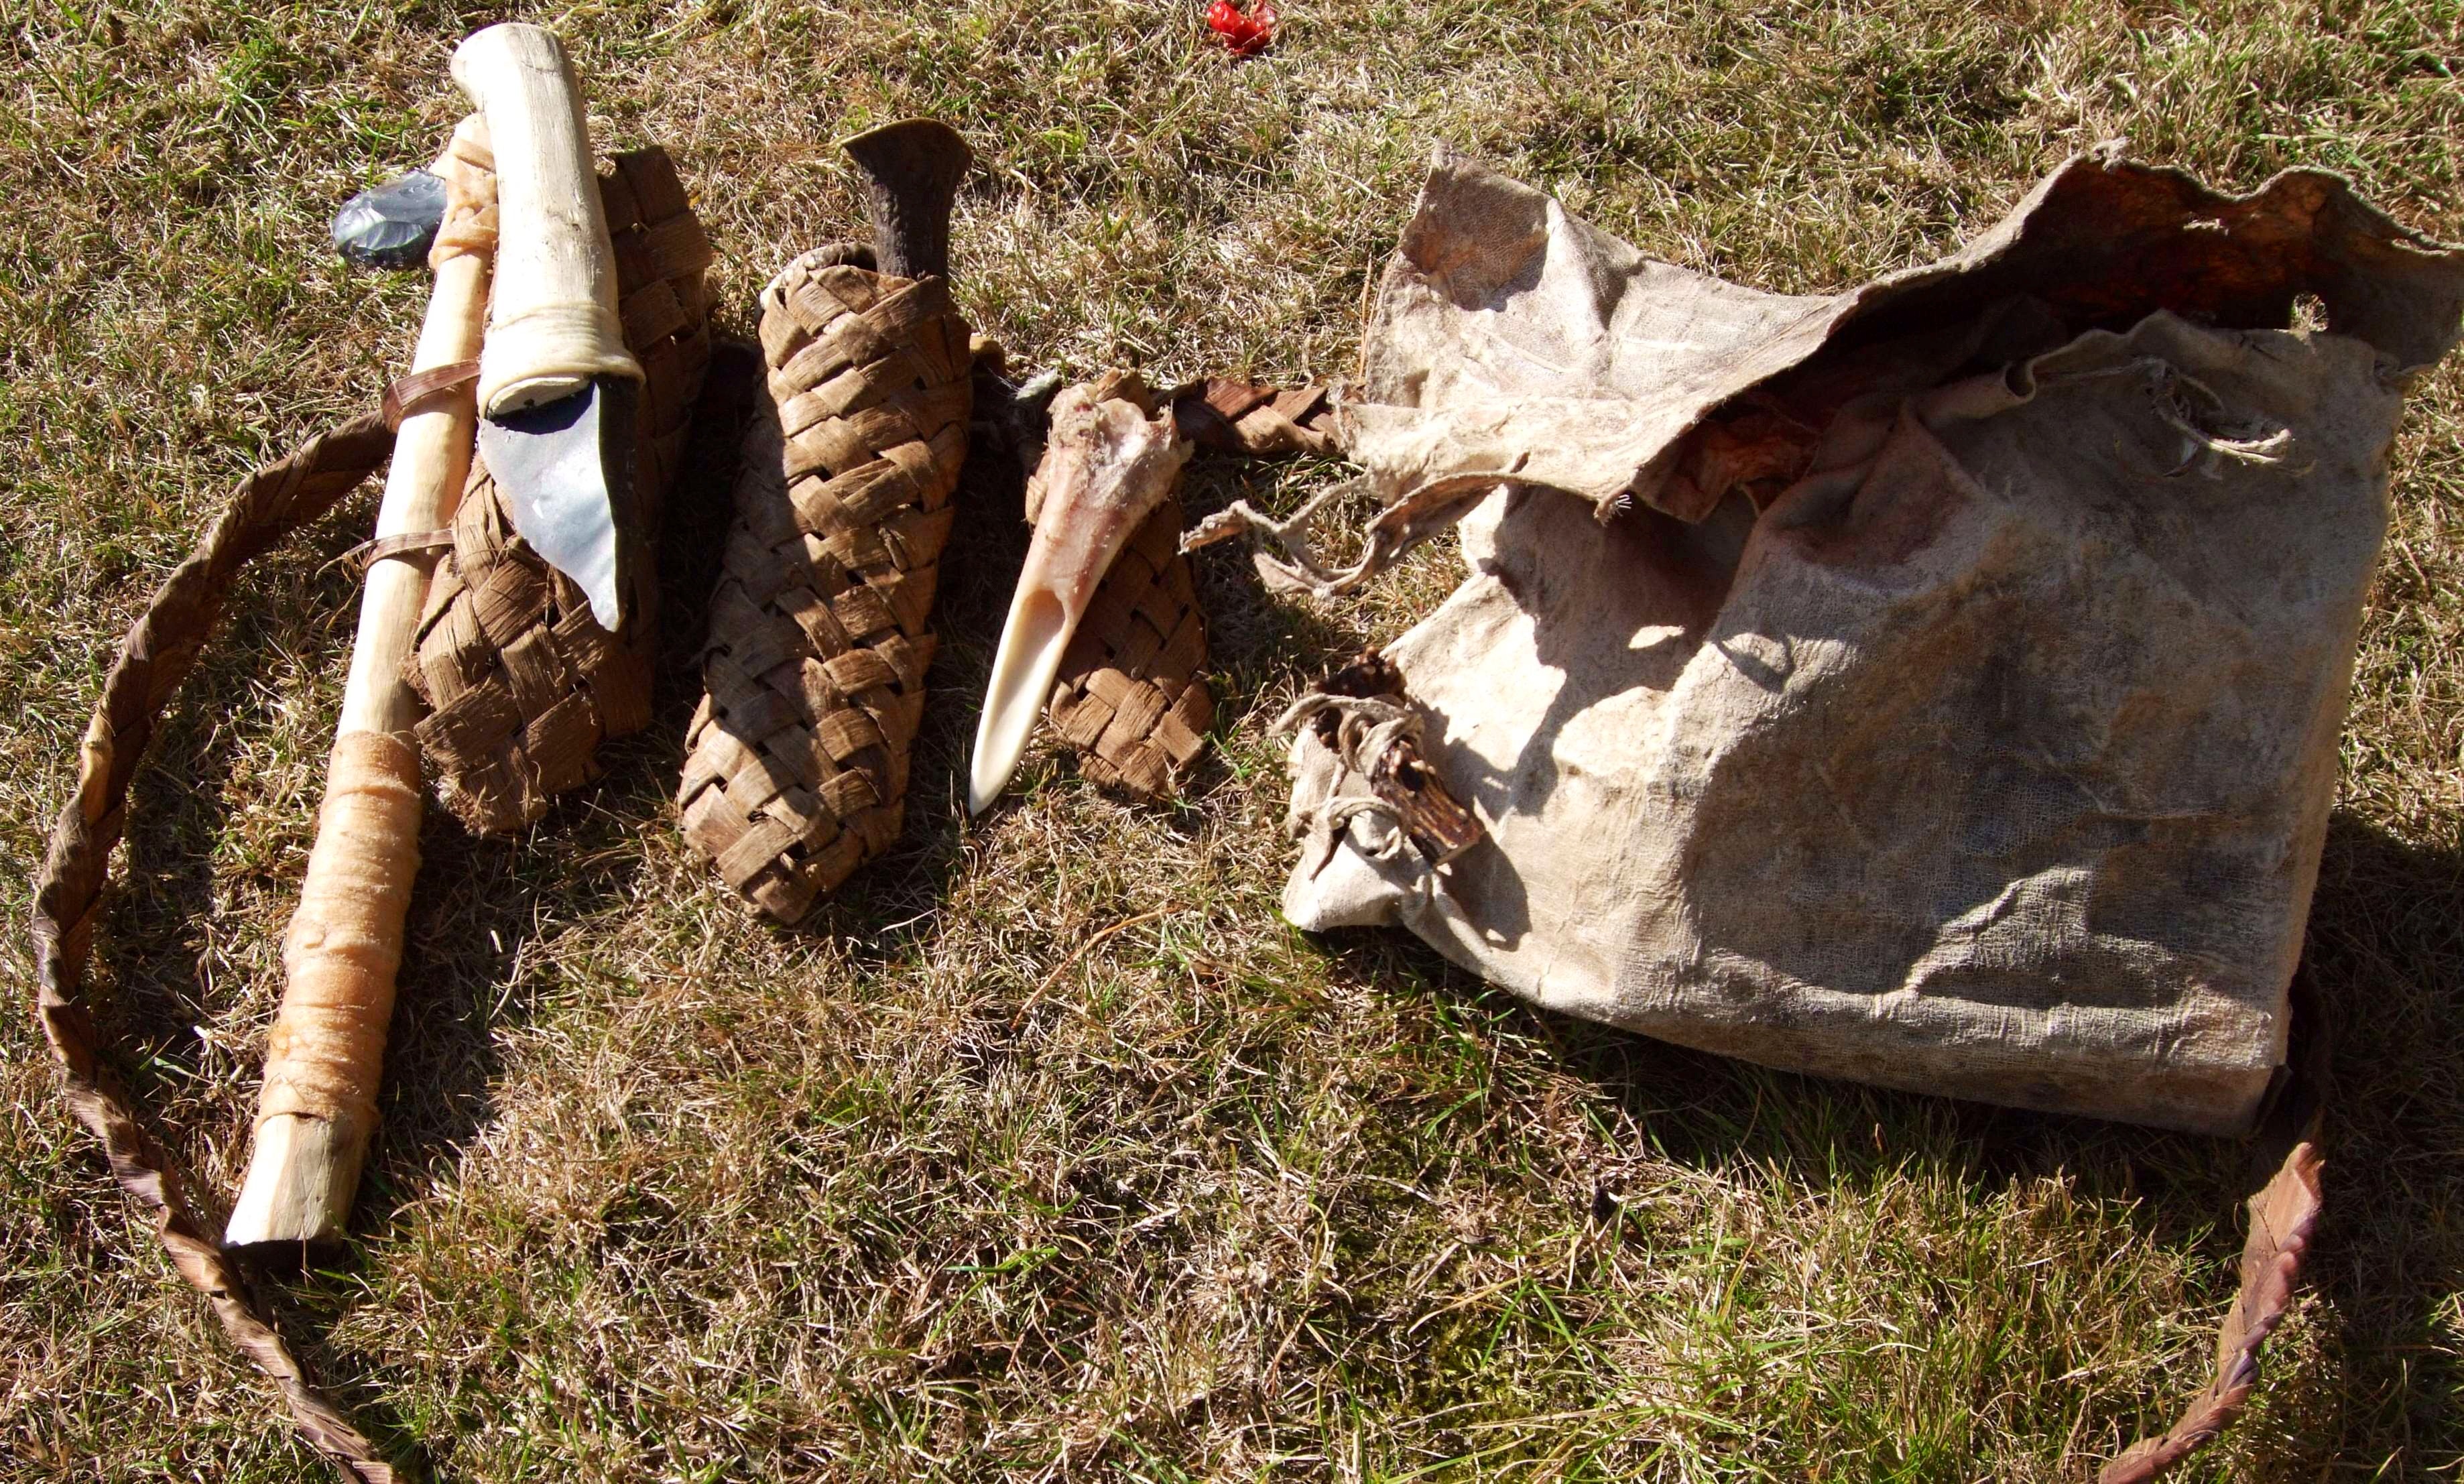
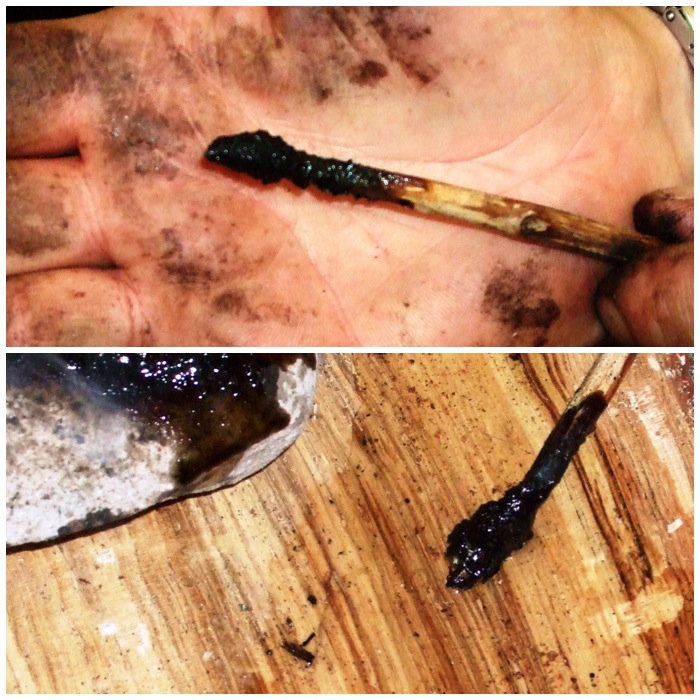
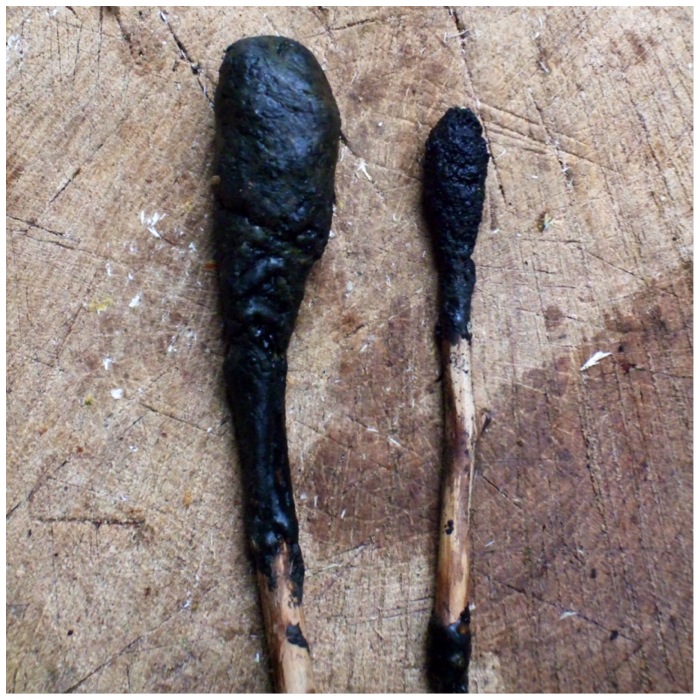
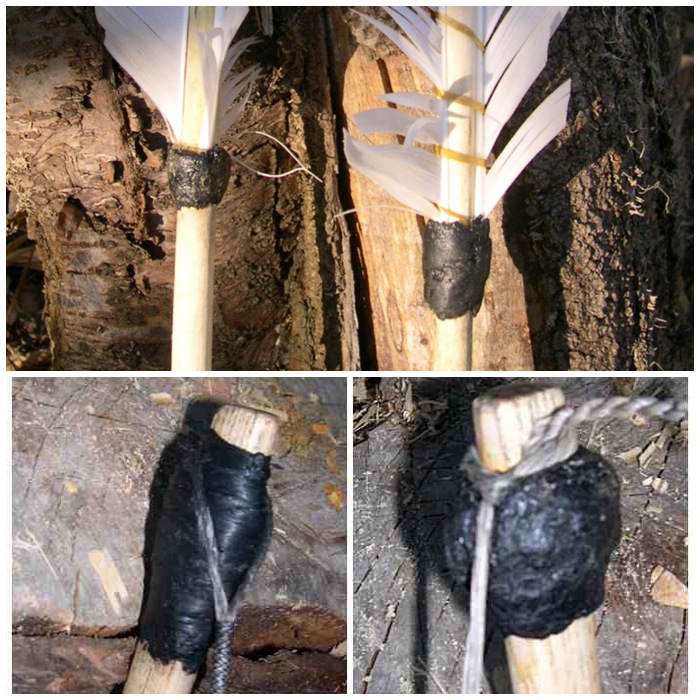
The pitch stick on the right was made using hot rocks and the one on the left using a tin can. The primitive hot rocks method takes longer and produces a coarser pitch but in my opinion was far more satisfying to make.

Photo 24-04-2014 16 51 09
Keep repeating until you build your own pitch lollipop

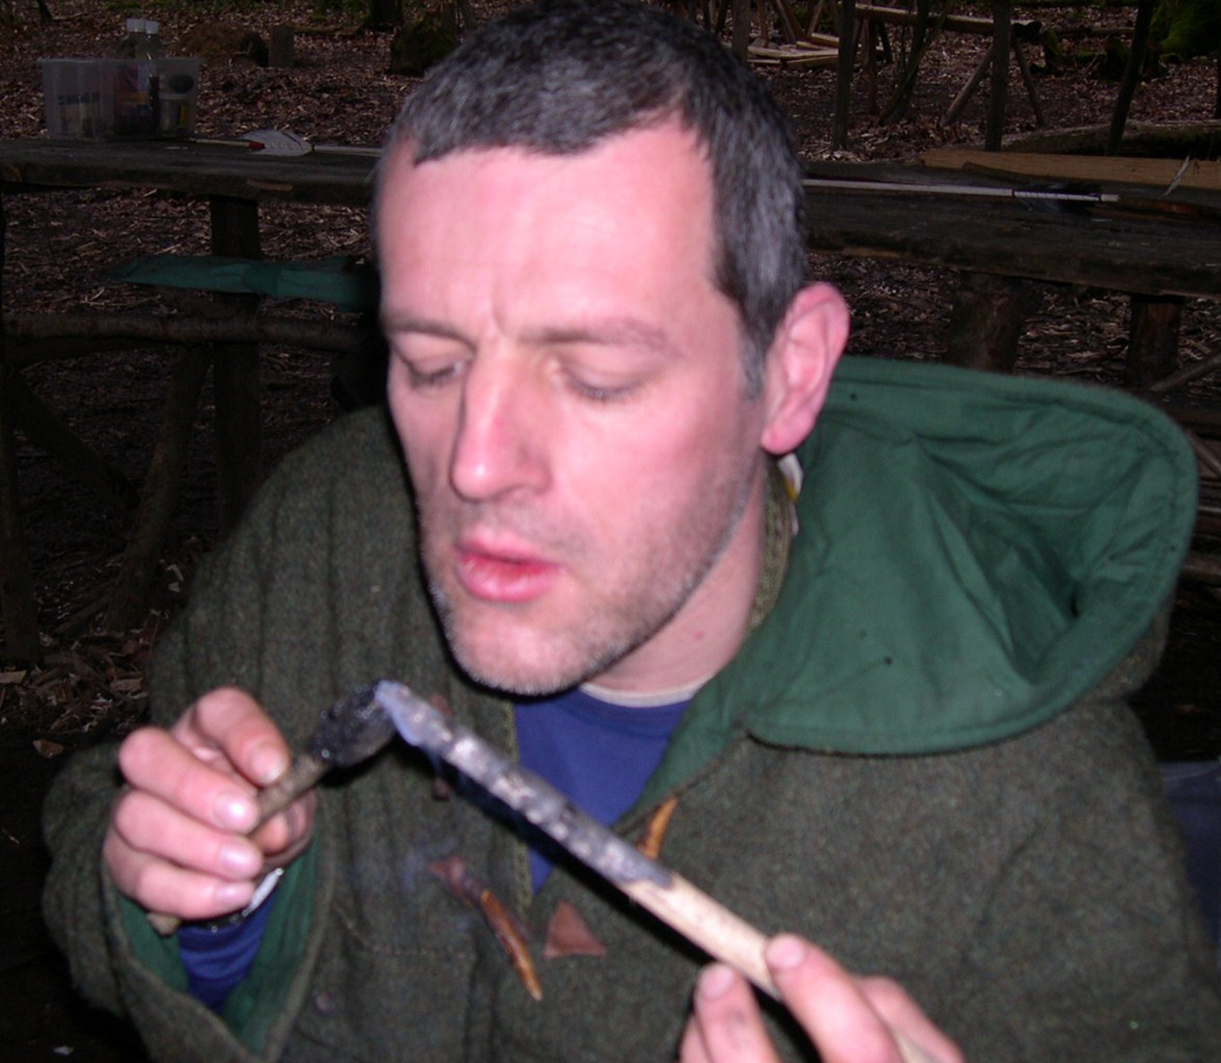
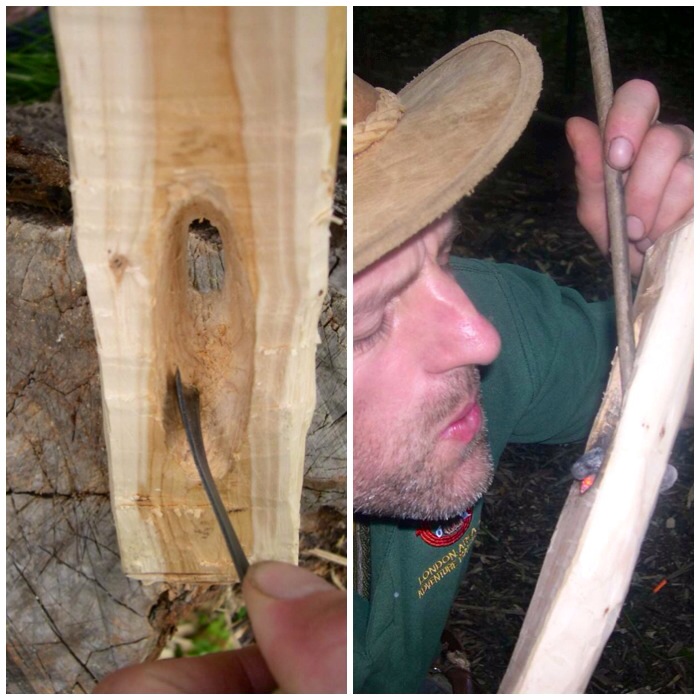
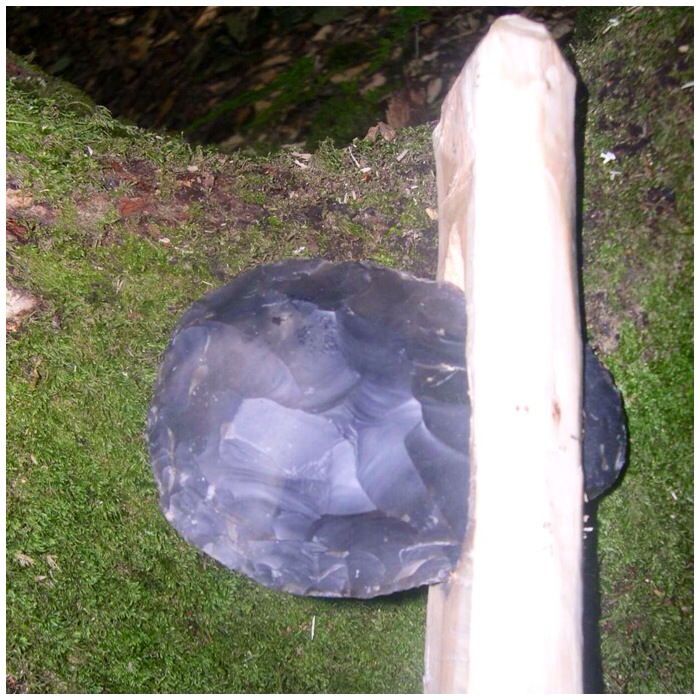
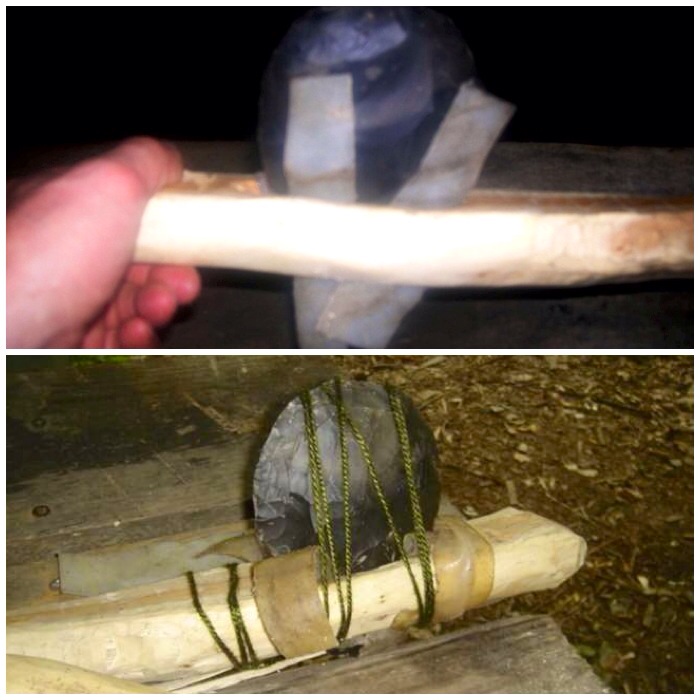
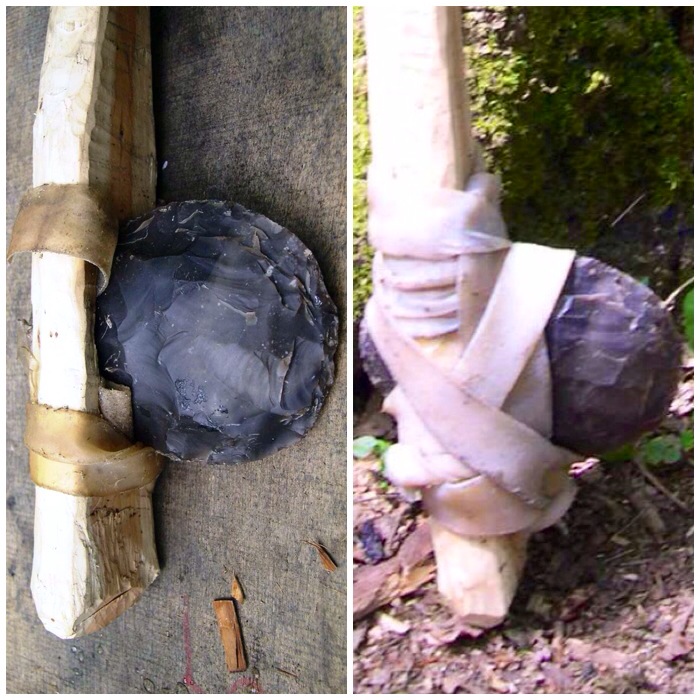
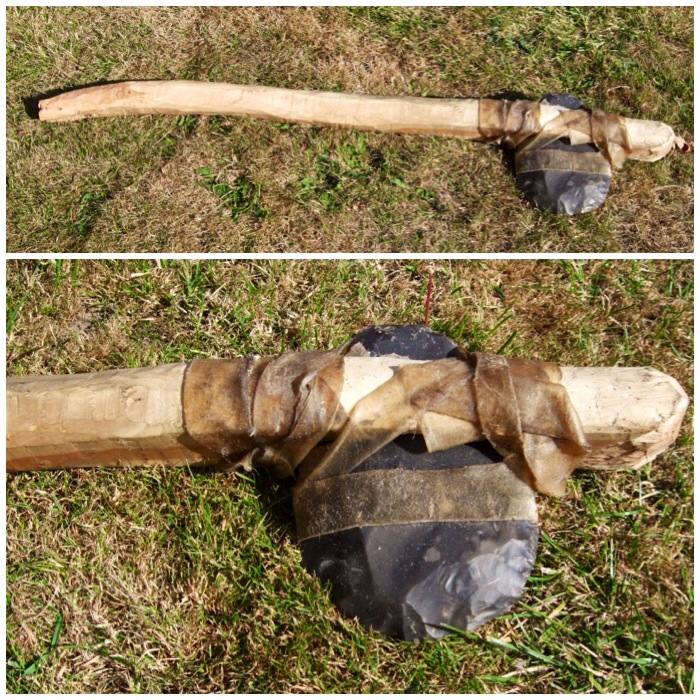
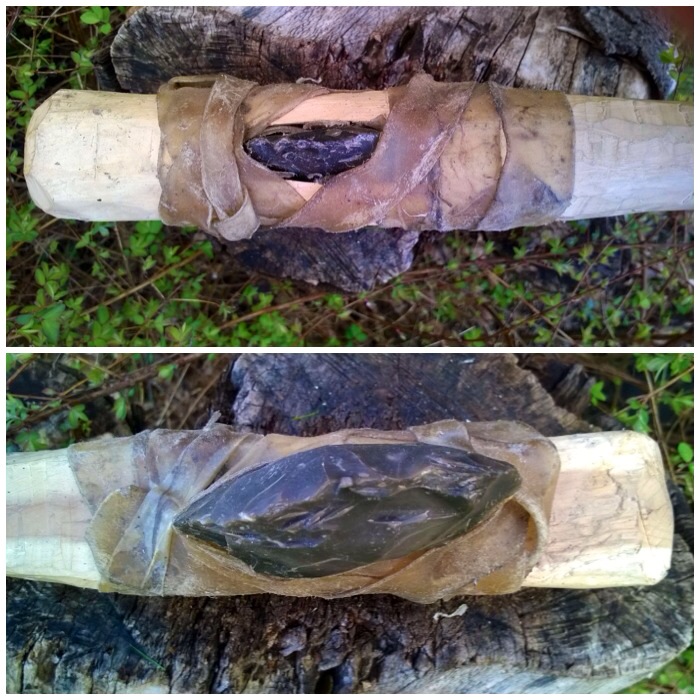
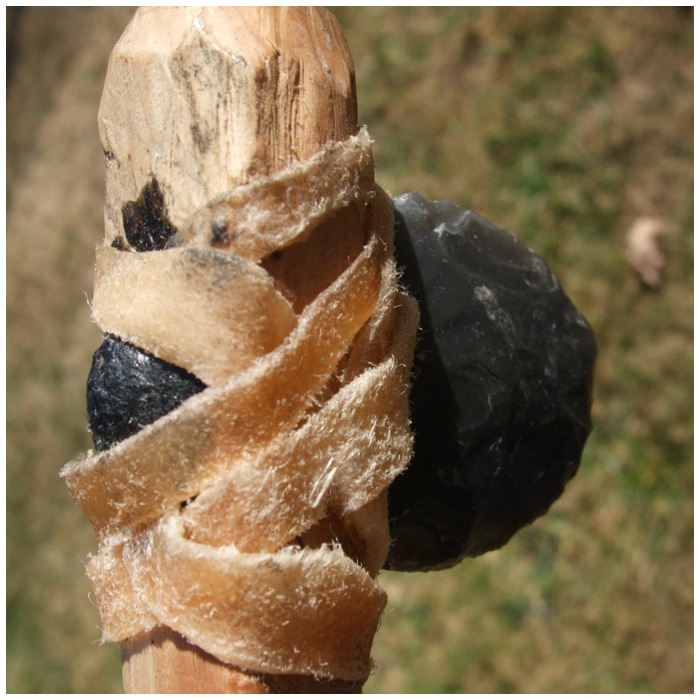
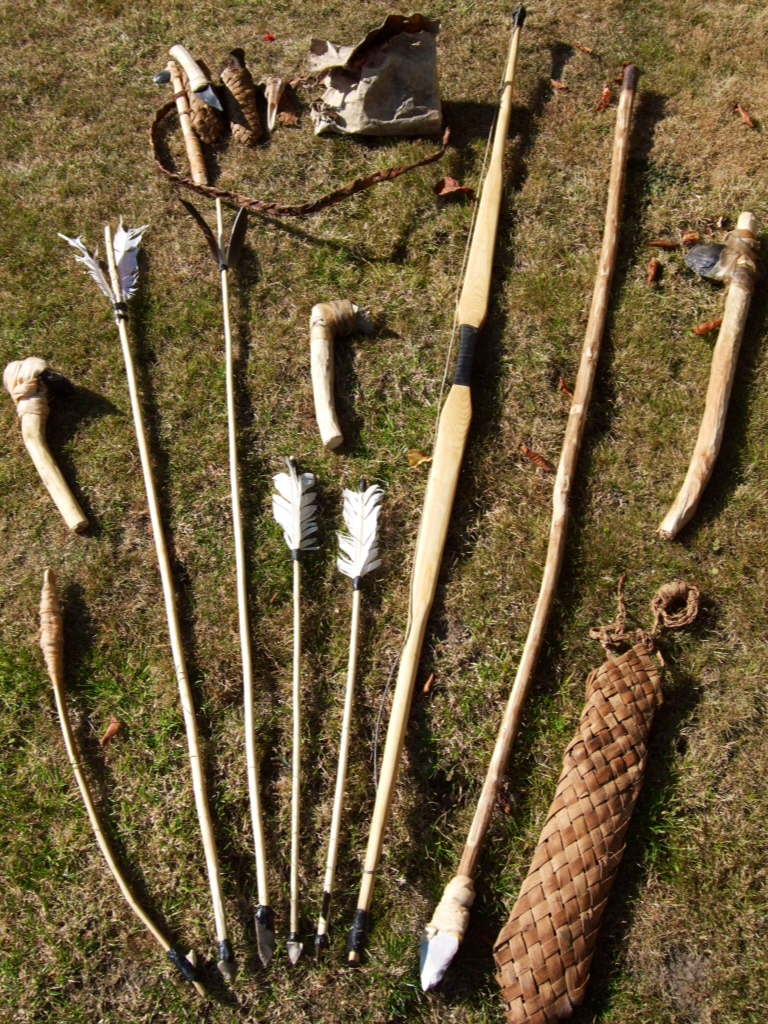
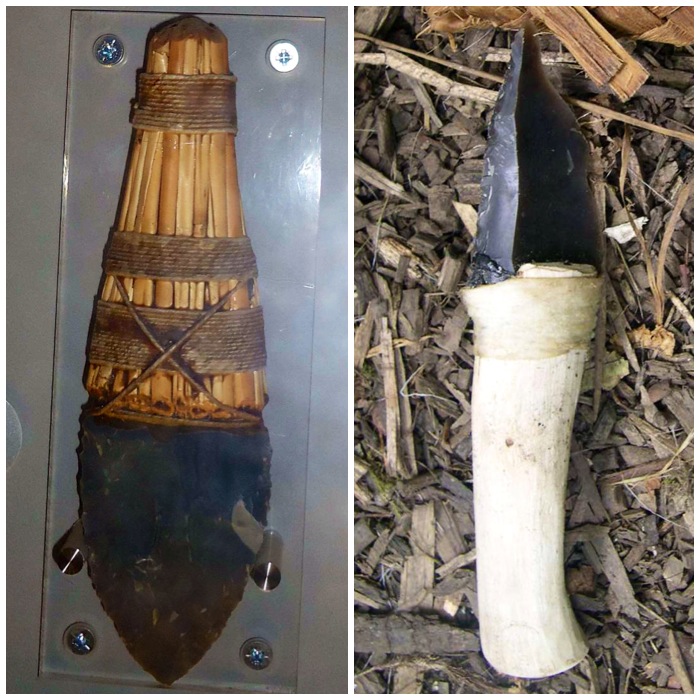
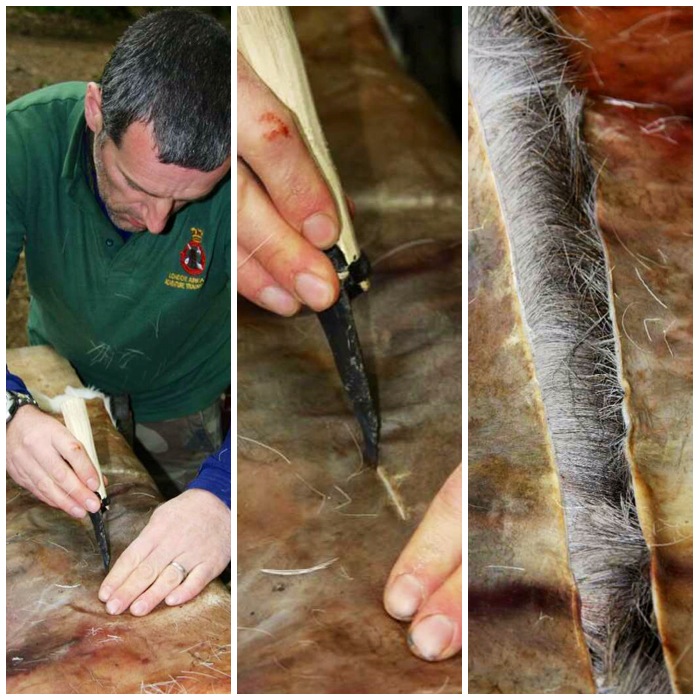
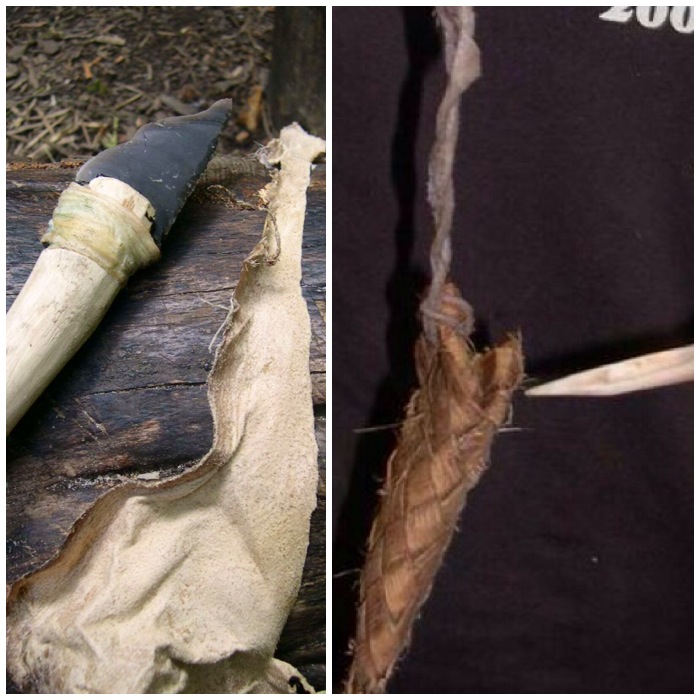
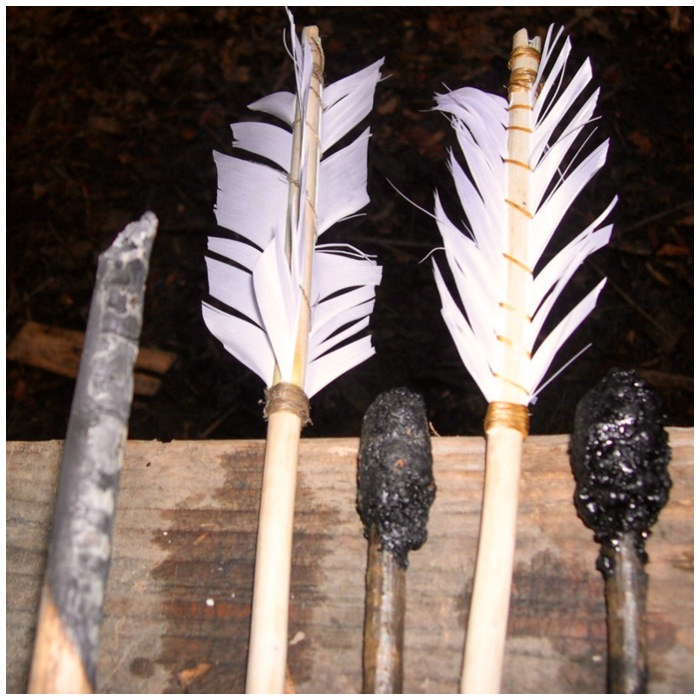
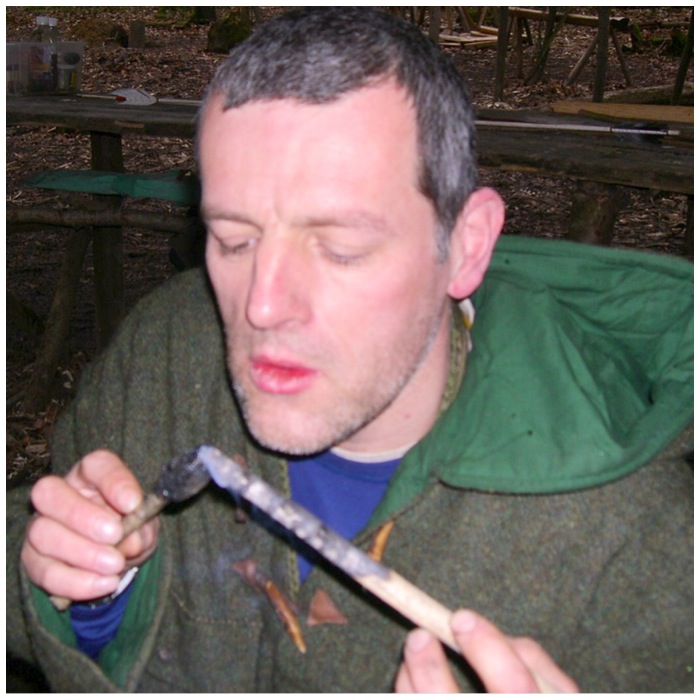
The pitch is great for waterproofing things like sinew on arrows. I prepared a ember stick to help melt the pitch so I could cover the sinew you can see in the picture below.

Photo 24-04-2014 16 56 58
Ready to be used

To melt the pitch, simply blow on the ember stick while holding the pitch stick close to it.

Photo 24-04-2014 16 57 24
Heat the resin with an ember stick to melt it

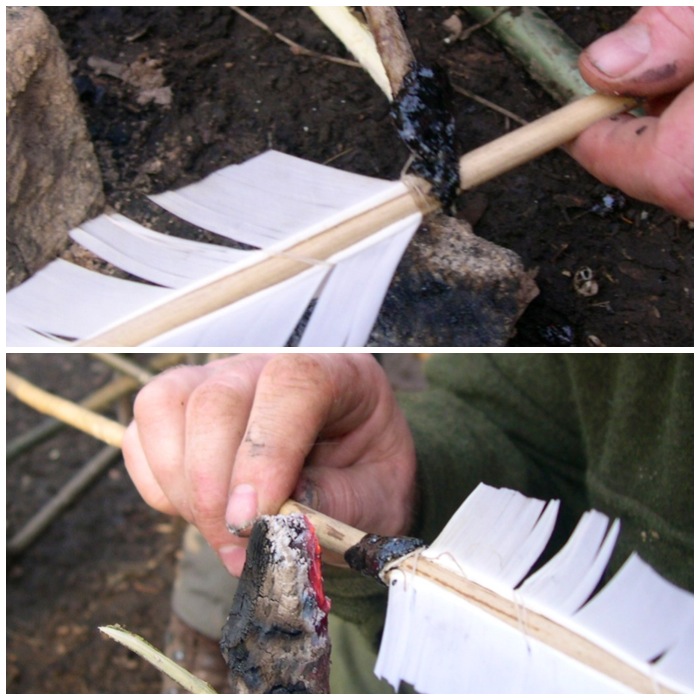
Drip the melted pitch onto what you want to cover and with wet fingers spread it around. Keep re-applying more pitch until you are happy everything that needs to be covered is covered. I sometimes re-heat the area I have covered with the ember stick to further smooth it out.

Photo 24-04-2014 16 57 56
Drip it onto whatever you want to cover, fill or attach

With a little patience this primitive method can produce some very good pitch. I have seen some master primitive technology craftsmen makes some wonderful pieces with the use of pitch.

Photo 24-04-2014 16 10 07
All covered up

I have also made a post showing you how to make pitch in a more modern method using a tin – How To…. Make Spruce Pitch in a Tin Can.

Cheers

George

How To…. Make Spruce Pitch in a Tin Can

I have written various posts now on creating primitive tools and in my article on making arrows I showed you how to make some spruce pitch using hot rocks. This How To…. will lay out all the steps I take to make spruce pitch using tin cans. I find that when I want to make a lot of pitch quickly that this method works well for me however I do appreciate that there are many other methods for making pitch.

The resin produced using this method gives you a much finer pitch than the hot rocks method as you can see in the picture below. The pitch stick on the left was made using the tin method and the smaller rougher pitch stick on the right was made using hot rocks.

I took these pictures while out bushcrafting with my friend Mark Beer in the woods around Silchester in Hampshire (UK)

Photo 08-04-2014 16 50 21
Pitch – Using a tin (left) – Using hot rocks (right)

I tend to use spruce resin when making pitch as this is more readily available where I am and do not tend to use pine resin as this is not so readily available to me. I normally use pitch as a filler material, for example, when fitting a flint axe head into its socket or use it as a covering to waterproof rawhide wraps.

The knife below has had the rawhide wrap covered in the fine pitch from the tin method and is very easy to produce. I am sure that with time I would be able to produce fine pitch using hot rocks but as yet I do not have that skill level.

Photo 24-03-2014 09 55 42
Spruce Pitch – a wonderful material

I collect spruce resin using a flattened stick and a tin (or plastic bag). I use the stick as it does not damage the tree as a knife tip would do. Also it is a messy job to clean the resin of a knife blade and the stick also saves my fingers becoming covered in resin which can be hard to clean off when you do not have access to hot running water.

I collect the resin wherever possible where branches have been broken off and the tree has excreted the resin to protect the damaged area. I do not clean out all the resin but just take a little from many different sites. If you are lucky enough to find a spot where the resin has flowed away from the damaged area and pooled into a big clump then it is fine to collect it all. A good spruce tree will keep excreting the resin so if you are careful you can return at a later date to harvest more.

Photo 07-04-2014 20 52 29
Collecting stick

It did not take long to collect this large tinful of resin as Mark and I managed to find spots where the resin had pooled into large clumps.

Photo 07-04-2014 20 52 42
A good haul

To make pitch I use two baked bean style tins with a small improvised colander in one made out of half a beer can with holes punched through the bottom.

The sticks in the picture below are ready for rolling the pitch on to when it is ready. An alternative is to use a stick like elder with the pith taken out and the pitch poured into the cavity, which makes a kind of pencil.

The charcoal and the beeswax are for binding and tempering the pitch to make it strong but flexible.

Photo 07-04-2014 20 53 17
Equipment

I packed the colander with resin then set light to it. The disadvantage of this method is that you lose a little of the resin but the big plus is that it melts quickly, collects quite cleanly in the bottom of the tin and leaves the detritus in the colander. Two good friends of mine Mark Oriel and Keith Coleman introduced me to this method: previously I’d just put the resin into a tin, placed it into some embers and scooped out the detritus when it had melted.

Photo 07-04-2014 20 59 57
Packing and firing

As the resin burns and melts in the tin I then take the time to crush the charcoal down to fine dust with a small stone. This fine dust acts as a binding agent that the resin can cling to and make the pitch you produce stronger. There are many other materials that you can experiment with as binding material such as ash and rabbit droppings. The Primitive Ways website has an excellent article on making pine pitch using a tin but in a different way and discusses other binding agents.

Photo 07-04-2014 22 16 14
Making charcoal powder

Soon all the resin had melted and dripped down into the tin (it looks black from previous pitch making). As the detritus is left in the colander the resin in the tin is very fine, which makes for very smooth pitch.

Photo 07-04-2014 22 19 18
Liquid resin and remnants

I tend to put in as much charcoal dust as there is spruce resin and mix it all together while the resin is still hot.

Photo 07-04-2014 22 22 11
Add some charcoal

I then added some lumps of beeswax. I have heard some folk say that they put in the same quantities for everything but I usually just put in a small block or two of beeswax. I also use beeswax balsam as this is easy to buy in shops and it seems to work just as well as pure beeswax. Experiment for yourself with quantities to see what works for you.

Photo 07-04-2014 22 22 29
Then some beeswax

I then put the tin into the embers of my fire and mix it all up. Watch out that you don’t overheat it as it will froth up and spill over. I normally have some tongs nearby so that I can move the tin around the embers so as to better control the heat.

Photo 07-04-2014 22 23 44
Melt and mix

I use the tongs to move the tin out of the embers when all the beeswax has melted and been thoroughly mixed in. The tin will be scorching hot and the liquid pitch will scald you badly if it comes into contact with your skin.

Photo 07-04-2014 22 24 47
Remove from heat carefully

I let the pitch cool slightly and so it becomes a little bit  tacky. While it is cooling down I make sure I have a little pot of water ready.

I then put one of the sticks into the mixture and roll it a few times (I try to square off the stick as this helps catching the tacky pitch) until I have some pitch on the stick. I then dunk the stick into the water to rapidly cool the pitch down. The pitch will not dissolve in the water due to the oils, charcoal and beeswax in it and but will bind to the stick.

Photo 07-04-2014 22 30 04
Roll and dip

I then repeat the process again and again to build up more layers of pitch on the stick. You will find loose bits of pitch will float in the water so just fish them out and pop them back into the tin and they will melt back into the mixture.

Photo 07-04-2014 23 16 54
Roll, dip and wet your fingers

After two or three times doing this you will need to use your fingers to mold the pitch into a tight blob on the end of the stick and also to smooth it out. As the pitch can still be quite warm and sticky you need to keep your fingers wet during this process. If your fingers are dry then the pitch will just stick to them.

Photo 07-04-2014 23 17 26
Smooth the hot pitch down

In no time at all you will have a good amount of spruce pitch to help you with making primitive craft items.

Photo 07-04-2014 22 33 37
Pitch Sticks

To use a pitch stick I just heat the end of it with a glowing ember until it starts to melt and then drip the liquid pitch onto whatever I am making.

Photo 09-03-2014 14 14 30
To use just heat

I have used pitch for waterproofing bindings on arrows.

Photo 09-03-2014 14 15 28
Great for arrows

It is also great as a filler as in this small hatchet. I filled the socket with pitch, inserted the flint axe head and then bound it all up with rawhide.

Photo 26-03-2014 16 13 56
And great for axes

I have also published an article on making pitch in a primitive fashion using hot rocks instead of a tin – How To…. Make Hot Rock Spruce Pitch.

Cheers

George

How To…. Make a Flint Axe and Hatchet

Sometimes a flint knife or adze is just not enough and you need something with a bit more clout. At times like these, what you need is a flint axe.
Here’s how I constructed the large flint axe you can see below, with a few pictures at the end about its little brother, the hatchet.

Photo 26-03-2014 15 33 47
Two good tools

I made these tools on the Woodcraft School Primitive Technology course and had some excellent tuition from John Rhyder and John Lord.
John Lord gave an excellent demonstration on knapping a flint axe head. It was a joy to watch this master take a lump of flint and transform it into a work of art.
When it came to the turn of us students to knap out our axe heads John gave everyone lots of one-to-one tuition. If it hadn’t been for this (and John knapping the tricky bits) I would have been lucky to have ended up with an arrow head, never mind a large axe head.

Photo 26-03-2014 13 58 40
Some tuition from the master Mr Lord

I like to think that this axe head has some of me in it but truth be told it’s more John Lord than me. I did however have a great time seeing this axe head appear out of the flint knowing at least part of it is me.

Photo 26-03-2014 13 04 11
One knapped flint axe blade

I used a well-seasoned piece of yew for the handle as that was what I had available at the time.

Initially I used my flint adze to  try and shape the yew, but although the bark came off easily enough it didn’t make much of an impression on the hard wood beneath.

You can see the tool marks left on the wood by the adze in the right-hand picture below. As a Time Team enthusiast I have watched the archaeologists discuss such marks on many ancient pieces of worked wood they have found so it was good to see it in action for myself.

Photo 26-03-2014 13 59 38
Stripping the handle

At first I used short chopping motions to tear away at the bark and wood with the adze. Ever experimenting, I tried a few strikes with a bit more force and eventually took a chip out of the adze blade. I was able to re-sharpen the edge of the adze by pressure flaking it but decided that the yew was just too tough for the adze (notwithstanding my lack of patience and skill).

Photo 26-03-2014 14 00 01
Too tough for the flint adze

I reverted to my modern axe which took the excess wood off easily. In the picture on the right below you can see the very different tool marks left by the iron axe in comparison to the flint adze marks.

Photo 26-03-2014 14 01 05
Time for an iron axe

This piece of yew had a slight curve to it which I thought would give added strength to the handle. I left the handle fairly rough, just ensuring I would have a comfortable grip and not get any splinters.

Photo 26-03-2014 14 01 29
One rough handle

I initially started using a discoid all-flint knife to cut out the socket for the axe head but I did not take any pictures of this part. I did not do this for long as the yew was just too hard and the flint blade kept slipping. A few of the other students did just use flint for this stage but since the woods they were using were slightly softer they had more success. I ended up using my little palm gauge for the job and it worked very well.

I did try and burn out the wood with embers but soon got put off this with the fumes (yew wood being highly toxic).

Photo 26-03-2014 14 02 44
Carving and burning

The socket finished – front and back.

Photo 26-03-2014 14 03 07
The finished socket

A good fit but too loose for use.

Photo 26-03-2014 14 03 41
Test fit

I wrapped the flint axe head in a piece of rawhide to see if that would secure the axe head in the socket (apologies for the poor quality of the pictures), but with one piece wrapped around it the axe head would not fit into the socket.

Photo 26-03-2014 14 05 43
Prepping rawhide

Instead I cut up some strips of rawhide and held it all in place with some string. As the rawhide dried out it really gripped the axe head and the wood of the socket.

Photo 26-03-2014 14 06 42
Securing with rawhide

After that it was a case of wrapping a load more rawhide around the axe head and leaving it to dry for a couple of days.

Photo 26-03-2014 14 08 00
Drying and adding more rawhide

After the rawhide had dried out it became almost translucent but it was a very strong hold.

Photo 26-03-2014 14 18 03
Side profiles

Top and bottom profiles of the axe head.

Photo 26-03-2014 14 10 41
Top and bottom profiles

I tested the axe out on an old stump in my garden. Like the adze, the axe tears into the wood as opposed to slicing into it as a modern iron axe would do. It was still very effective in its own way.

Photo 26-03-2014 14 12 38
Leaves the wood torn

The blade edge is not particularly sharp and has a good shoulder area behind it. This shoulder area really supports the edge so that it does not break off when the axe is used.

Photo 26-03-2014 14 09 54
Up close

I had a small flint axe blade I had made at the same time as the larger one, so I just scaled everything down to make a hatchet.

Photo 26-03-2014 16 12 22
Hatchet blade jammed in with rawhide

As well as using rawhide I filled the socket with some spruce pitch to fill up any gaps and to help secure the head more.

Photo 26-03-2014 16 13 56
Gaps filled with resin

I have never used this tool on anything – it would have been used mostly to dispatch small game that had been caught in traps. I do like it a lot though, in some ways more than the larger axe.

Photo 26-03-2014 16 14 13
Rawhide wrap

This hatchet sits nicely on my primitive belt order.

paul 12
On the belt order

Finally, my whole primitive order kit:

Photo 26-03-2014 15 33 58
My collection

Cheers

George

How To…. Make and Use a Simple Flint Knife

As part of a primitive technology course I was taking with Woodcraft School back in 2009 I had to make various craft pieces. The aim of the course was to slowly take away our modern tools so that by the end of the course we would only be using primitive tools to make our craft items.

I was using hand-held flint tools such as discoidal knives in the beginning but about halfway through the course I decided something a bit better was required. This How To…. is designed to show you the simple steps I took to make my flint knife and show you some of the uses I have put it to since.

Photo 14-02-2009 20 15 08
A simple flint knife

During the course (spread out over 5 months) I came across the knife you can see below left in the Museum of Prehistory at Cheddar Gorge. Not only was the knife beautifully constructed it also looked strong and practical. I knew I was to be taught on the next part of the course by top flint knapper John Lord so was keen to keep my eye out for a suitable piece while I was knapping flint with him. The knife I made on the course is on the right, not as strong or anywhere near as beautiful but for my needs very practical.

Photo 24-03-2014 10 33 31
My inspiration

It was while I was knapping my flint axe head that I saw this piece pop off. The piece had a strong back, a sharp edge with good curves and a perfect point. I re-touched the back to smooth it down a bit and pressure flaked a groove where the sinew wrap to the handle would be.

Photo 22-05-2009 13 20 23
The blank blade

I’m afraid I didn’t take many pictures of the handle preparation as it wasn’t going into my portfolio: I used a modern saw and knife for this part to save time. (As I said at the beginning of the post the course was designed to introduce me to primitive crafts by gradually reducing my reliance on modern tools.)

I selected a piece of dead standing wood that was well seasoned and had a slight curve in it, to make for a more comfortable grip and also to reduce the amount of carving necessary. I then used my saw to cut two stop cuts in a ‘V’ shape into the end of the wood. Since finishing the course I now know that a piece of serrated flint would have done this job just as well, if a bit slower.

Photo 24-03-2014 09 54 32
The handle-to-be: starting the slot

Once I had the stop cuts in place I used the tip of my steel knife to cut out the centre of the ‘V’ for the tang part of the flint blade to fit into. Then using my steel knife I carved the wood down into the final handle shape.

Photo 24-03-2014 09 55 02
Stop cuts in place

I filled the ‘V’ notch with some spruce pitch (see my article on arrow making for making spruce pitch) and slid the tang of the flint blade into the notch. I then bound the hilt of the handle with sinew to secure it and covered the sinew with more pitch to protect it. Within 24 hours this knife was ready to use.

Photo 24-03-2014 09 55 42
Rawhide and pitch wrap

Not the best pictures I am afraid but as you can see this knife was the perfect size and shape to use on many of the jobs I would normally use a steel knife for.

Photo 24-03-2014 09 56 30
A perfect size and very sharp

The purpose for which I created the knife was tanning some deer skin on the course. When splitting the hide of the deer the knife was comfortable to use and the top curve near the tip cut through the hide like a knife through butter.

Photo 24-03-2014 09 57 32
First job – cutting a deer hide

My final craft item was to make a bark sheath for the small bone bodkin you can see on the right. The knife allowed me to easily cut out many strips of bark in a very controlled manner so that the strips were all of the same width. I added a wrap of  rawhide at this stage to protect the pitch and sinew from general wear and tear.

Photo 24-03-2014 09 58 35
Creating bark strips and a new rawhide wrap

When I was finishing the sheath I found the knife edge was brilliant for trimming off all the excess bark.

Photo 24-03-2014 09 59 06
Perfect for trimming

Finally, to hang the sheath on my bark belt I cut up lots of buckskin with the knife to make some rough cordage.

Photo 24-03-2014 10 28 09
Good for cutting up buckskin

Since the course I have used the knife on a few other projects. So long as I am respectful of the fragility of the flint edge, the knife has produced some wonderful results. It’s great for scoring lines in bark, shaving pieces of green wood down to points and for making rosette cuts in small branches to snap them.

Photo 24-03-2014 10 30 04
Scraping, point work and splitting

When I was making my Split Stick Atlatl and had to batton open a piece of green wood I found that the thick back of the blade was able to withstand a lot of force from my wooden hammer, which was a pleasant surprise, although I was very nervous throughout the process.

Photo 24-03-2014 10 34 37
Robust enough for battoning

Eventually I made the knife its own bark sheath and it now sits proudly as a well-used tool on my primitive belt order.

Photo 14-02-2009 20 26 05
My primitive belt order

Cheers

George