
The itch that would not go away
While testing out the Lap Joint crane last July at the BCUK Bushmoot I started to formulate this design of a Dovetail crane in my mind.
It started in a conversation about the shortcomings of the Lap Joint crane with my friends Ian Woodham and Charlie Brookes, I don’t remember who was the first to suggest the idea of a dovetail joint but it has stuck in my mind ever since.
The Lap Joint crane can become unstable if the pot is not hung at the end of the arm and the whole thing can come apart when the tension is removed, for example when you’re adjusting the height. A dovetail joint is triangular so the crane arm becomes locked to the upright.
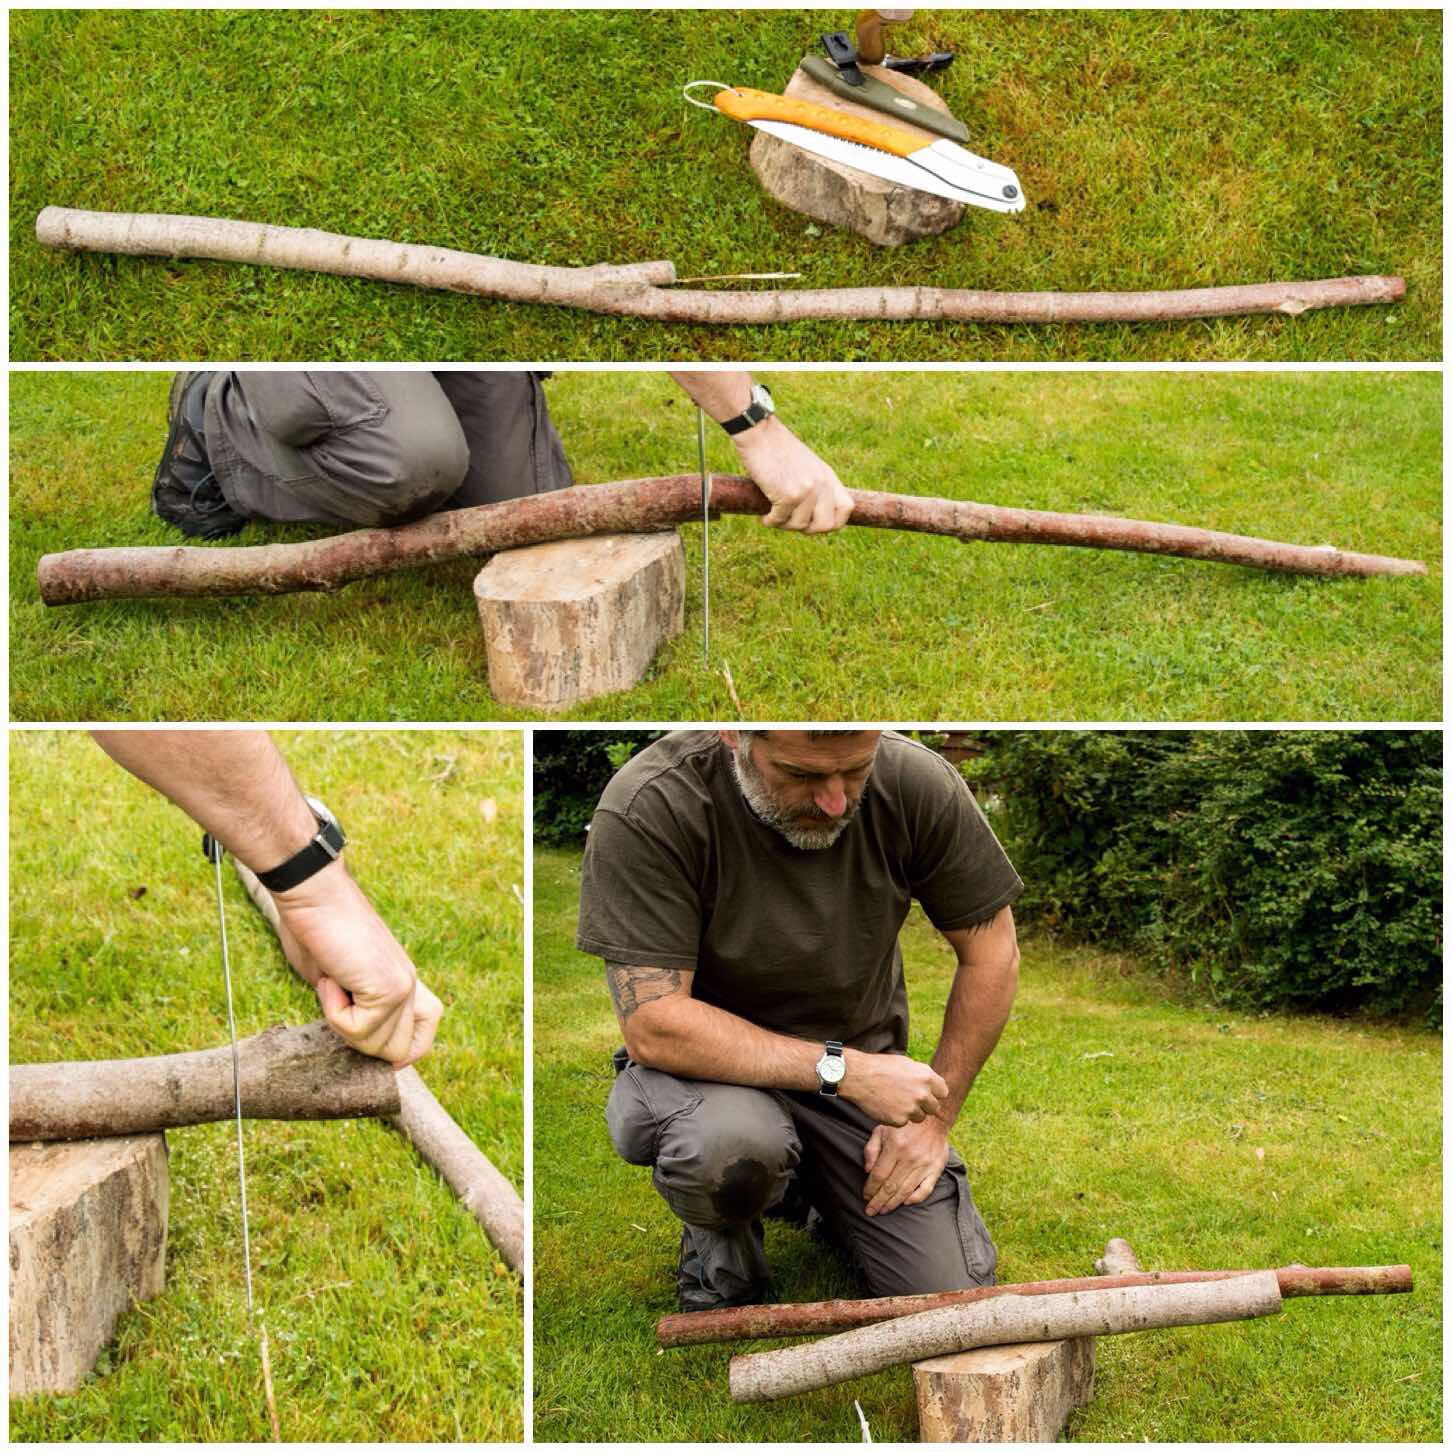
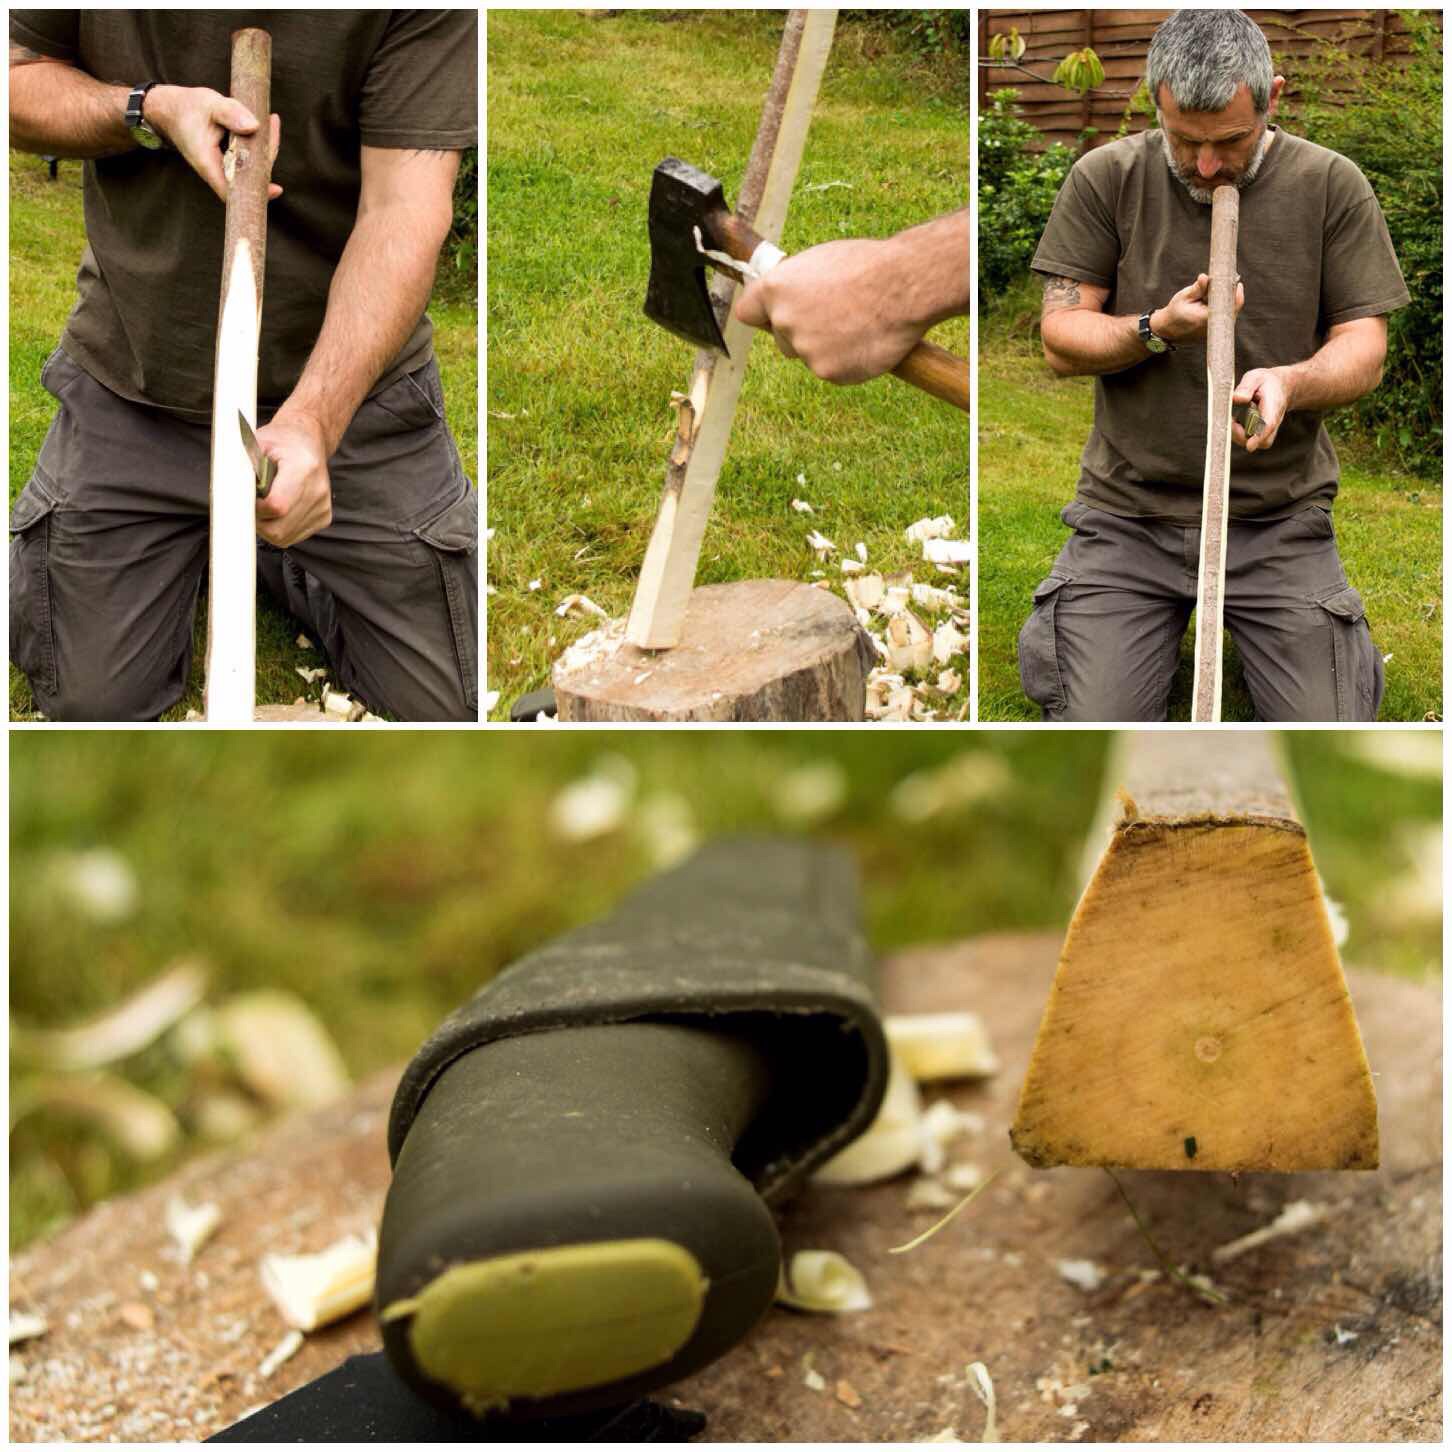
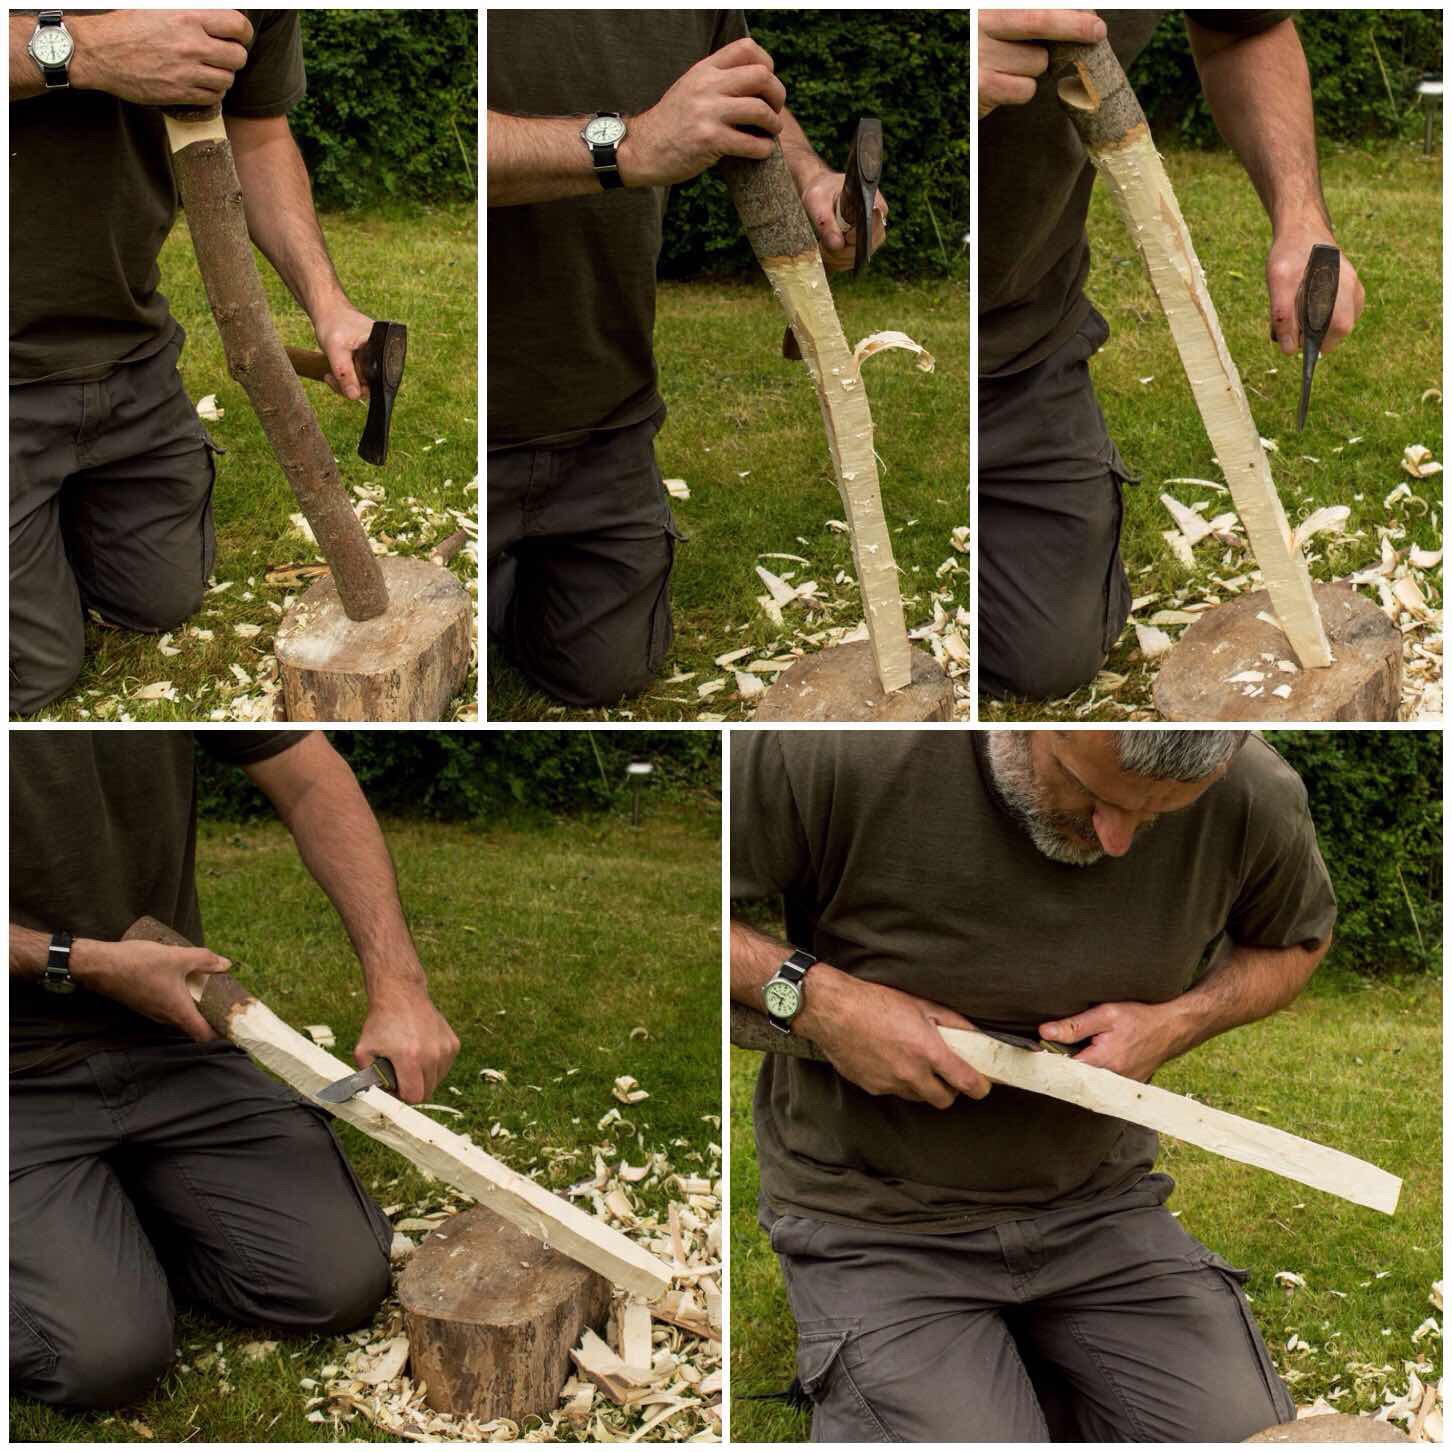
I built this prototype using only the axe, saw and knife I usually carry in my backpack and restricted myself to one pole of sycamore.
I quickly trimmed the wood into two main parts – the arm and the upright. The shorter, thicker part you can see in the picture below would eventually become the arm.
The upright
I started with the upright pole first (the thinner and straighter of the two). The upright would have a triangular shape on the top two thirds and a rounded, pointed bottom third.
I figured out which side of the pole would become the back of the upright, the slightly wider side, and flattened it off before starting on the other two sides. I took my time throughout so as to try and avoid mistakes – you can always take wood off but you will find it difficult to put it back on again.
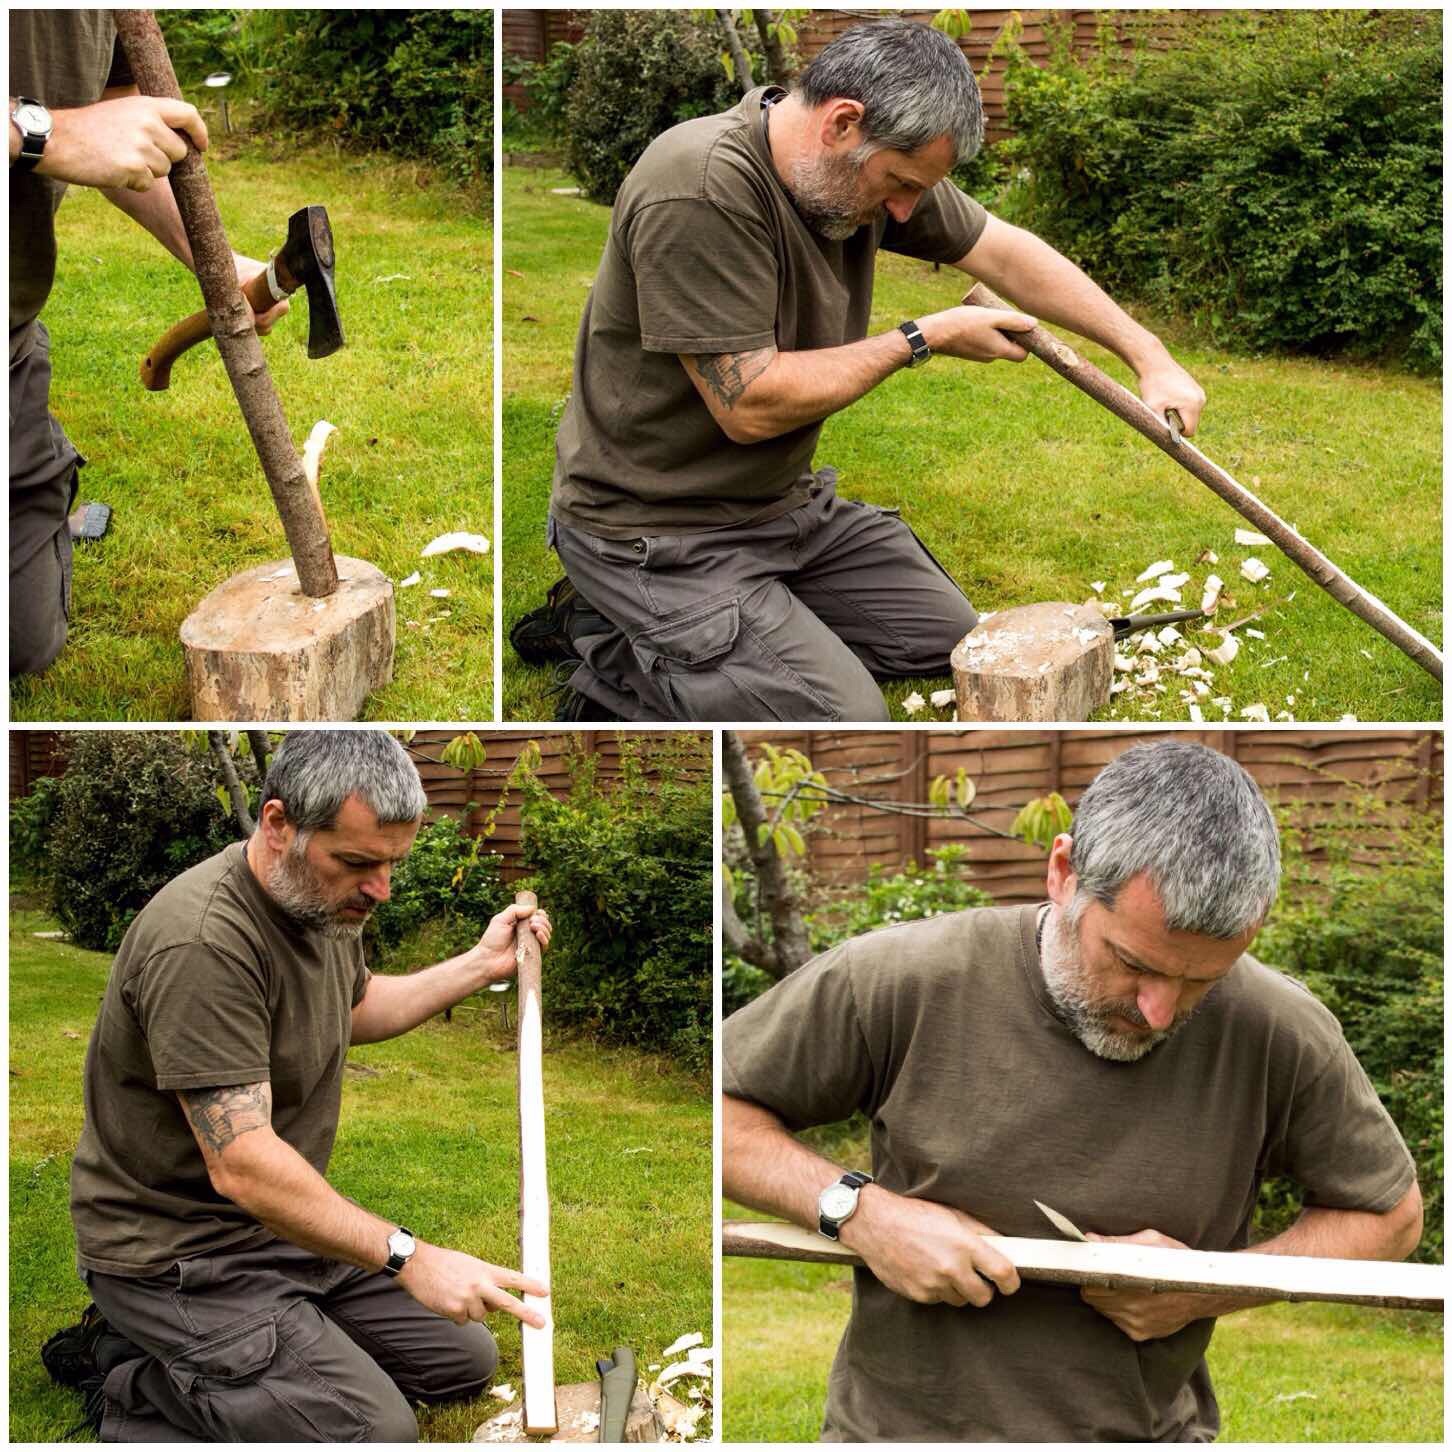
This crane takes longer than the Lap Joint crane to carve and is a real test of your patience levels. In the bottom picture you can see the triangular shape of the top two thirds of the upright emerging.
The final shape would be more triangular as I knew I would have to trim it further to mate with the female notch I would carve on the arm.
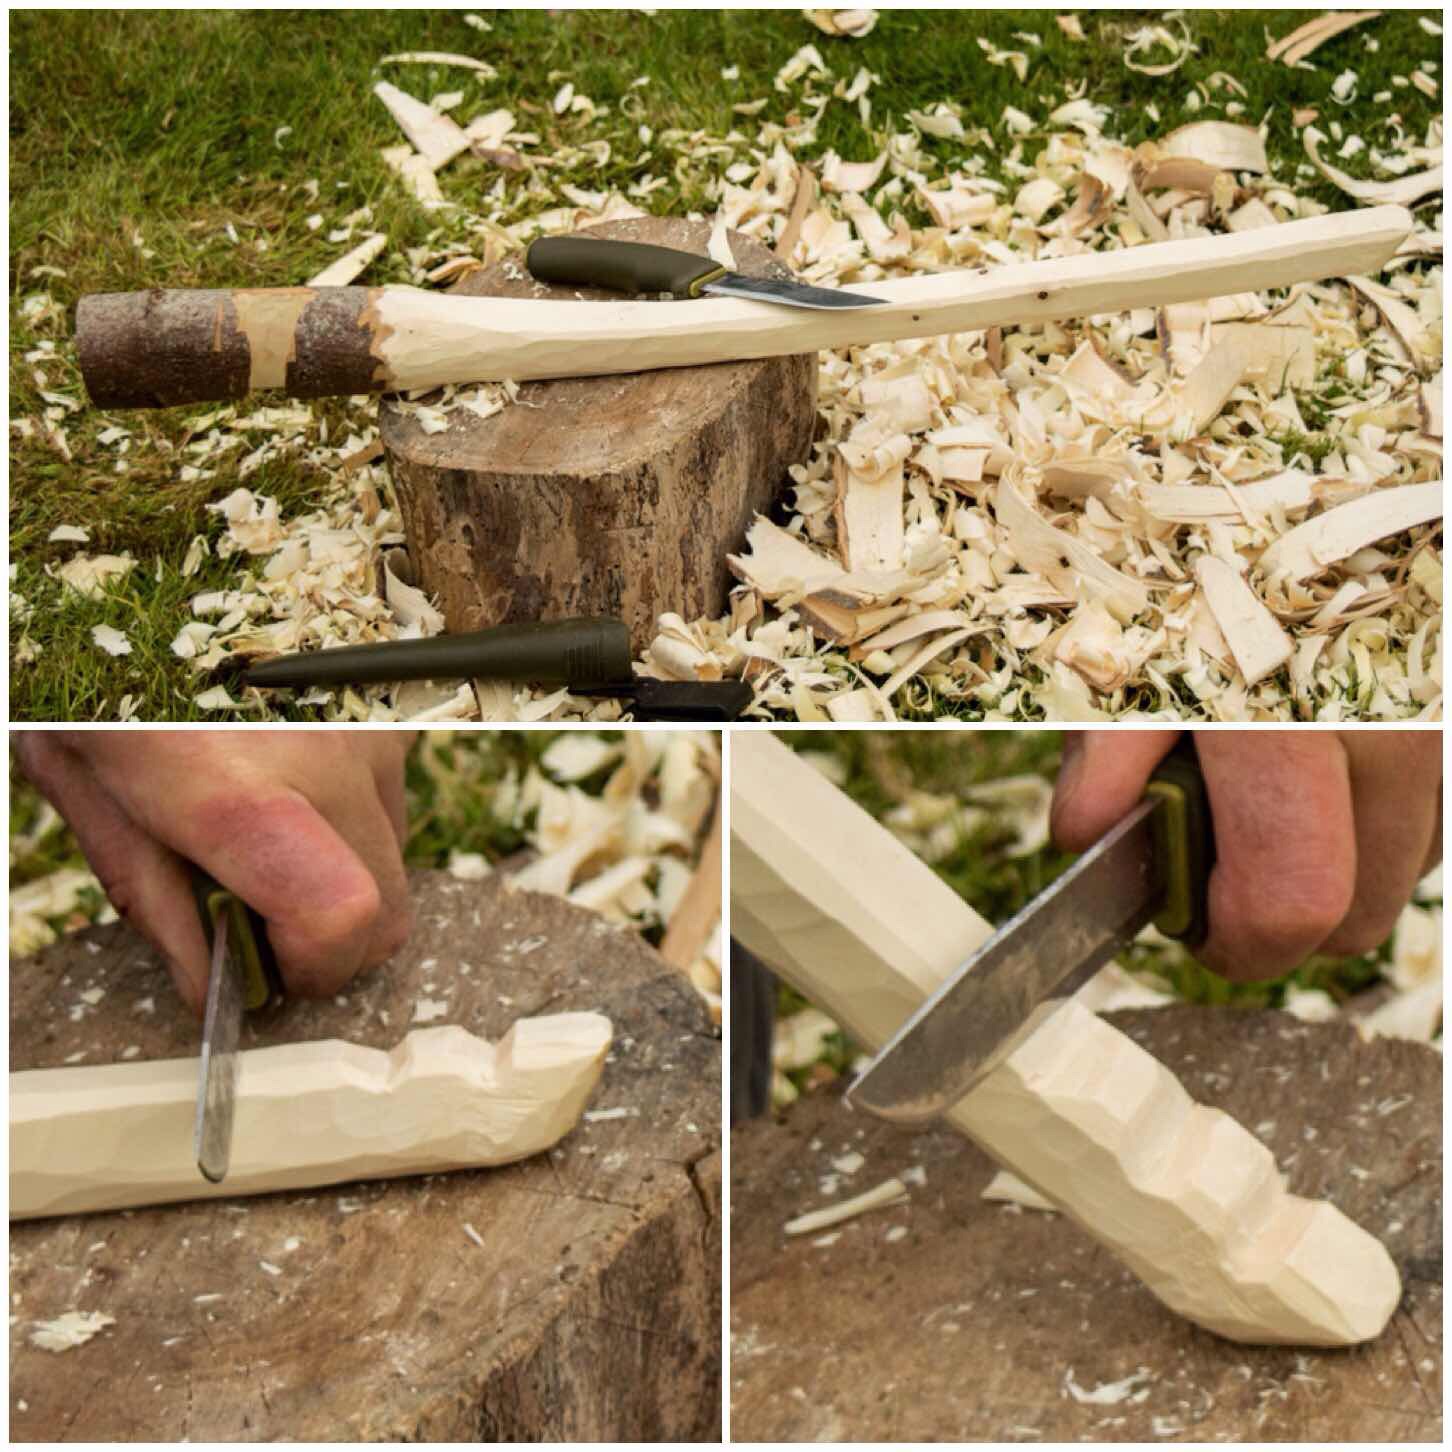
The notch
In the picture below (top left) you can see the finished notch – the other pictures show how it took shape. I used the end of the upright as a gauge for the dimensions of the notch.
Once I had a rough shape marked out I used my saw to cut out the notch (lots of cross cuts – practice before you commit). I deliberately made the notch a little small at this stage as I was going to finish trimming it with my knife.
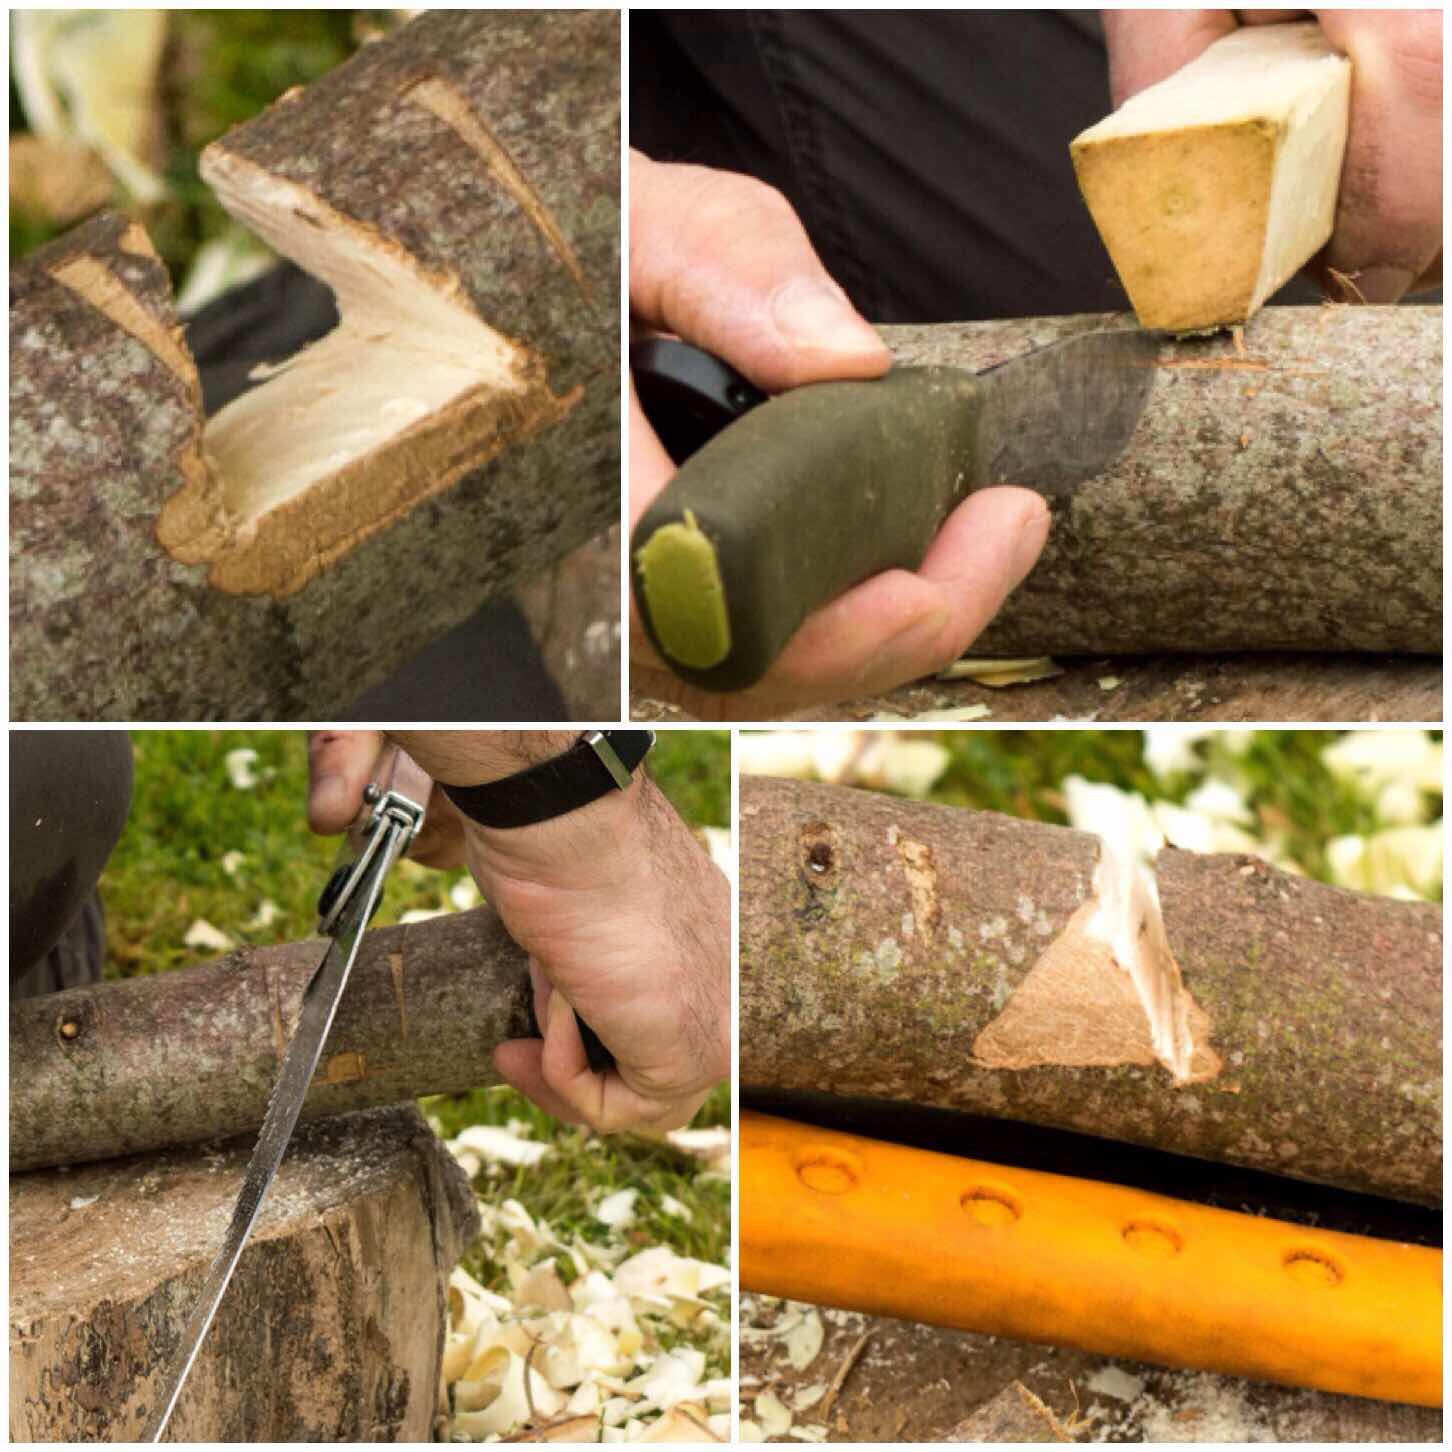
The saw left lots of excess wood (you can see the remains of the cross cuts below) so I used the point of my knife to clean it up. You need the work pieces on a stable platform for this as a slip of the knife could do you some serious damage.
I did use my saw one final time on one side of the notch, just to expand it a final 2 or 3 millimetres.

The fitting
Once I had the notch finished I inserted the upright until it became jammed. Then it was a case of trimming that area of the upright so it would fit better (remembering to try and keep the sides of the upright even).
I repeated this process about 5 or 6 times until I could get the whole of the upright sliding smoothly though the notch.
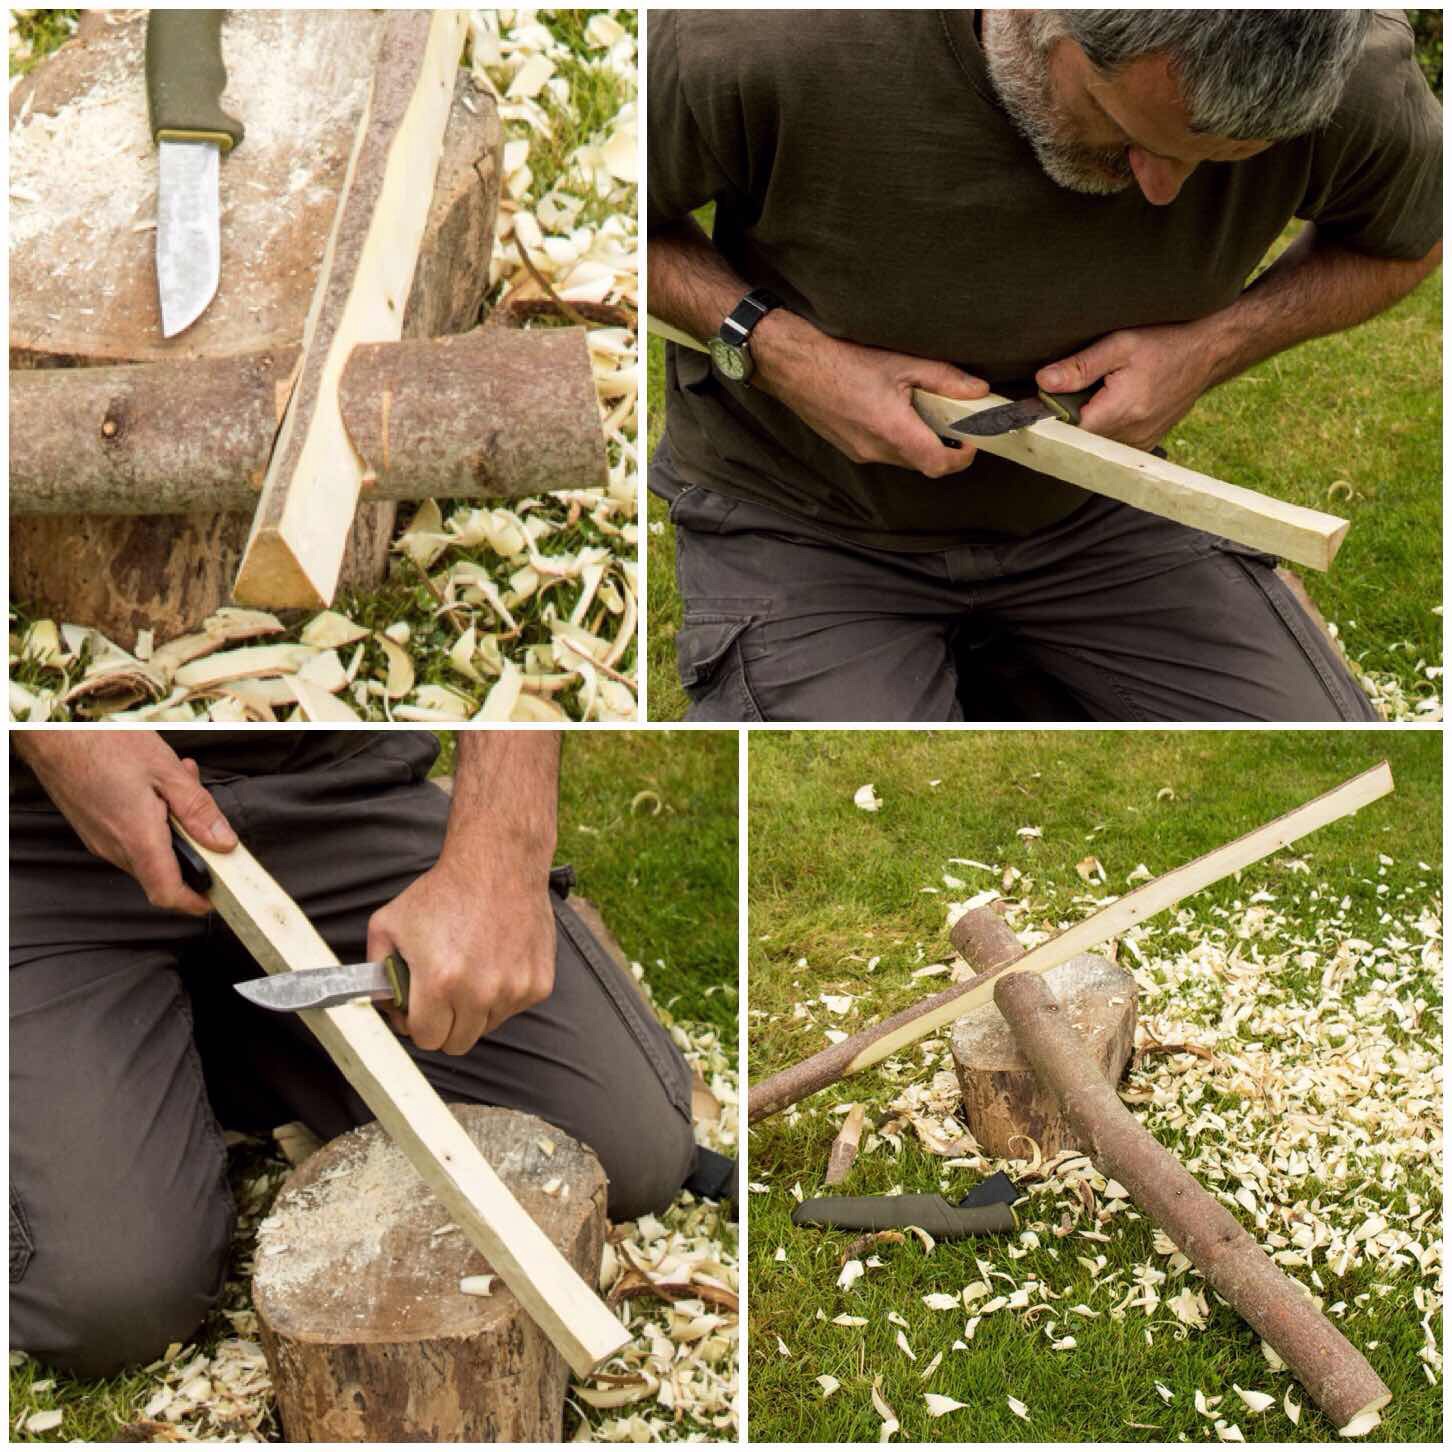
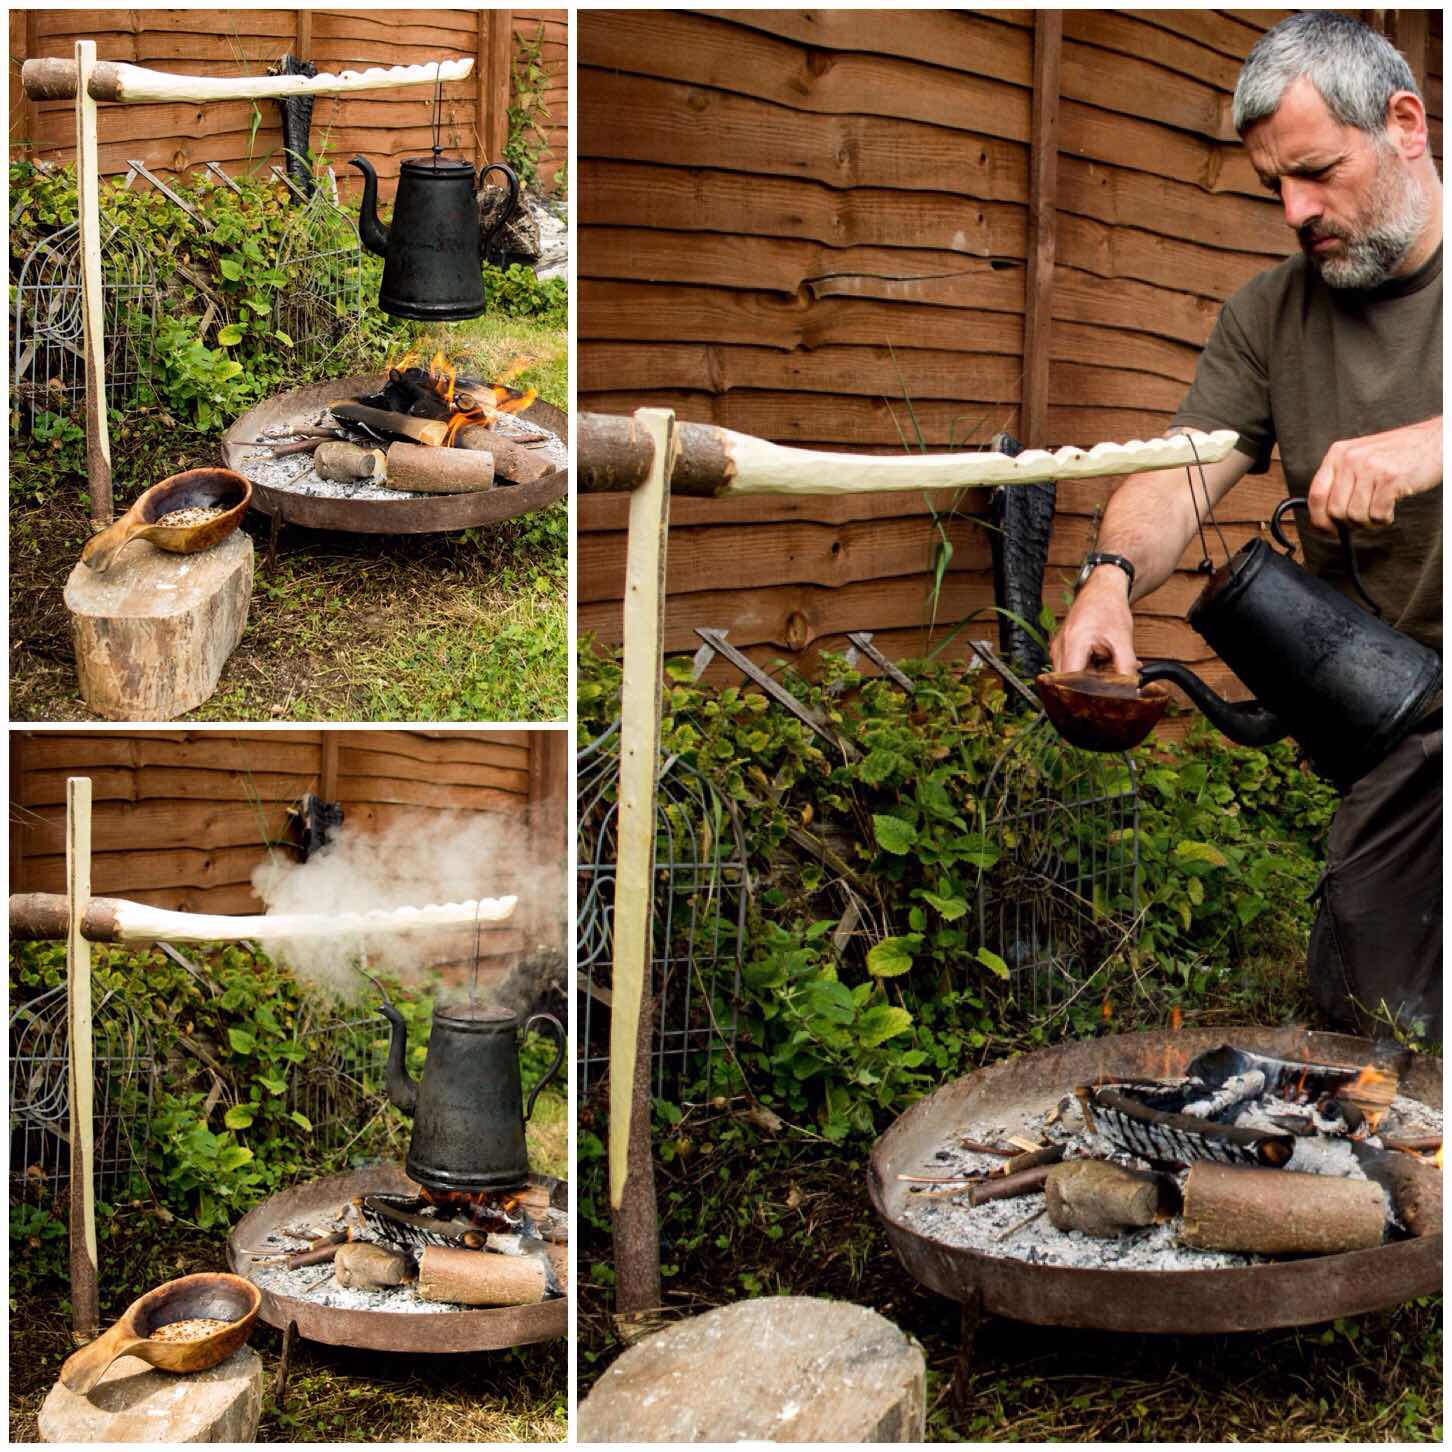
In the top two pictures below you can see the arm fitted to the upright and with its weight the friction holds it easily in place.
All that was left to do was put a point on the bottom of the upright to make it easy to insert into the ground and rotate when needed.
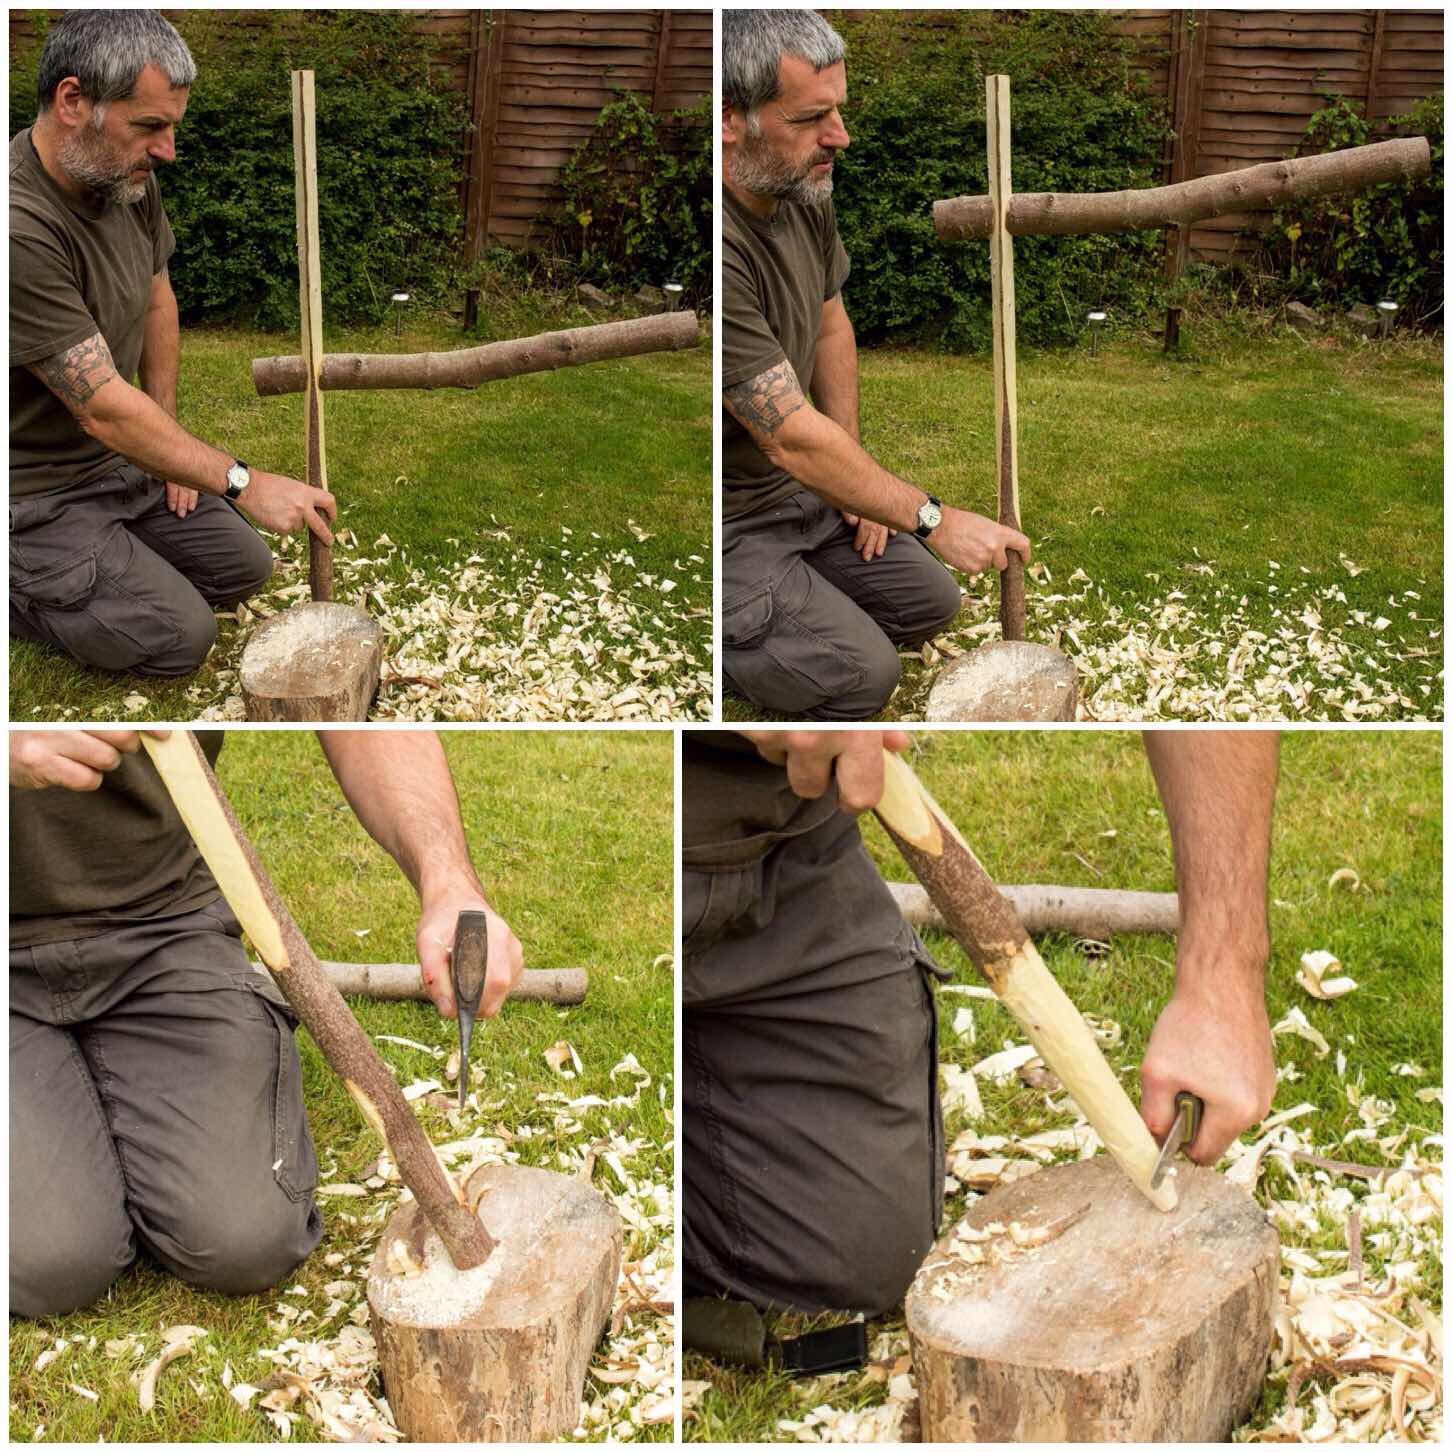
Below you can see the crane hammered into the ground and a little more detail on the connection point.
The arm can move up and down easily when needed but it cannot slip off the side of the upright.
I also chamfered the edges of the upright so that I would not catch a splinter as I moved the arm up and down.

The arm
Making the arm was fairly straight forward. I took the majority of the excess wood off with the axe and carved it (fairly) smooth with my knife.
I kept the natural bend in the wood as this meant that the arm was pointing slightly upwards (helpful for stopping your pot falling off) and added a few notches to secure the bail handles of the pots.
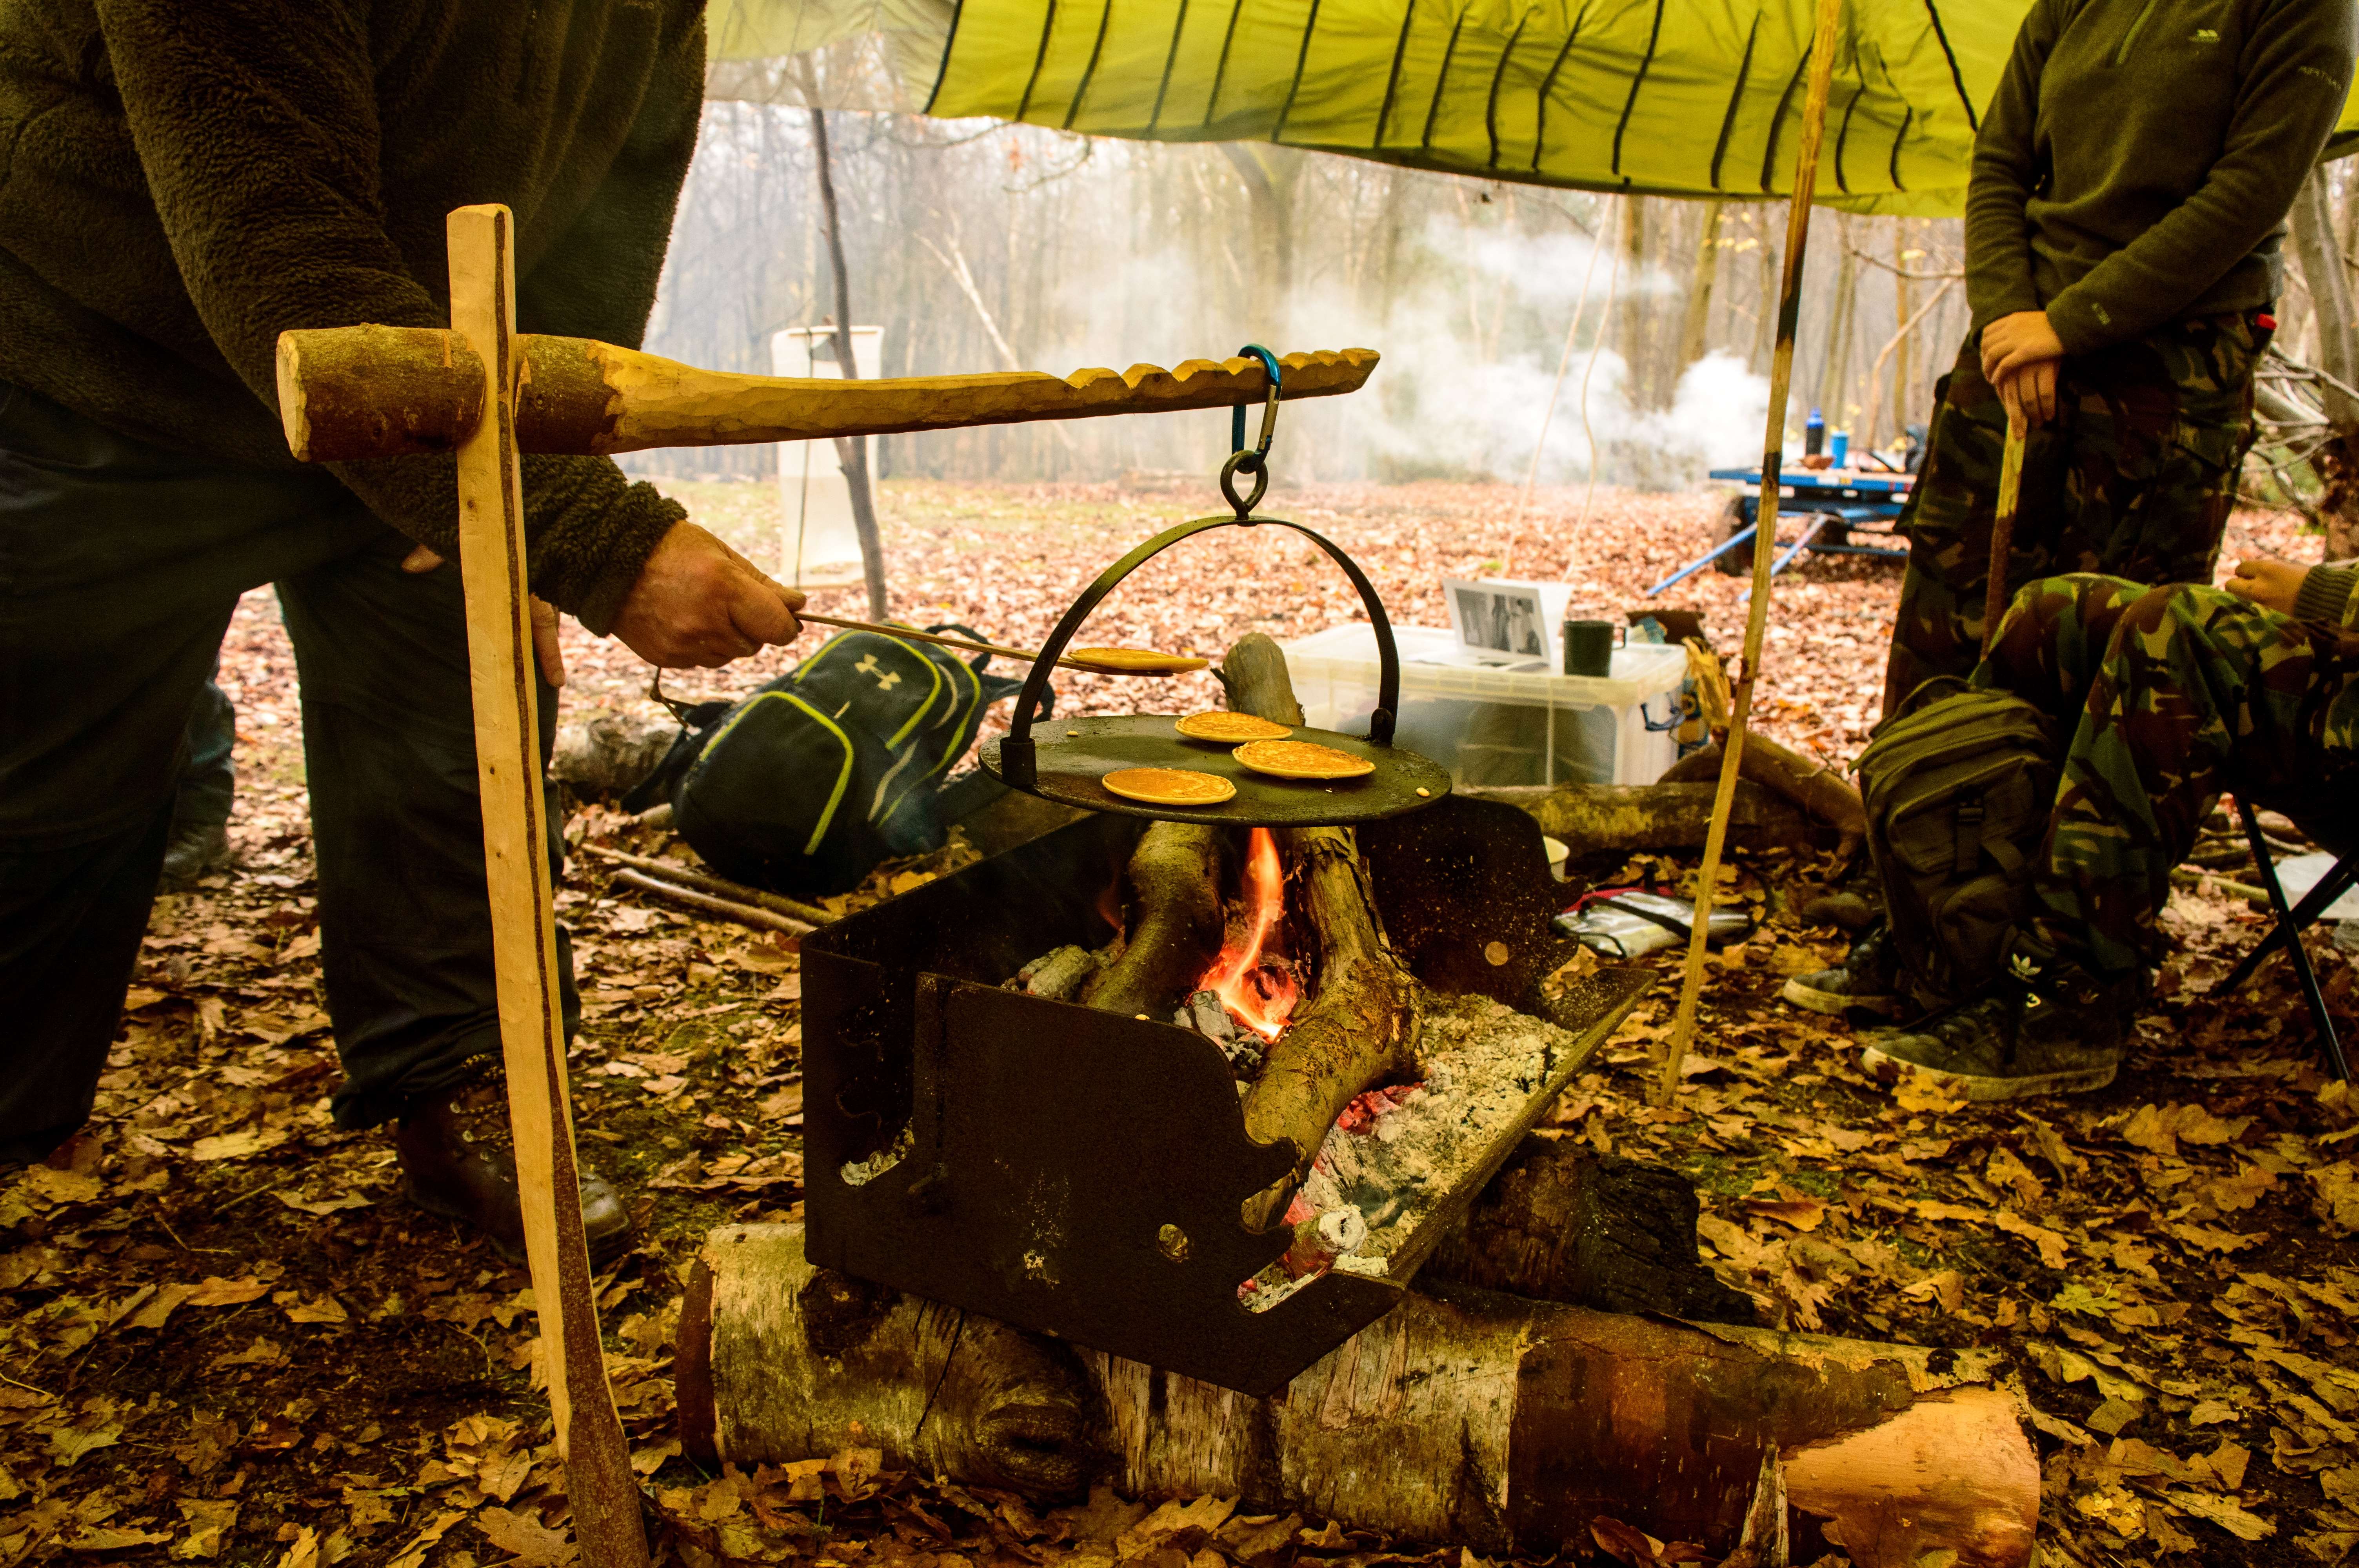
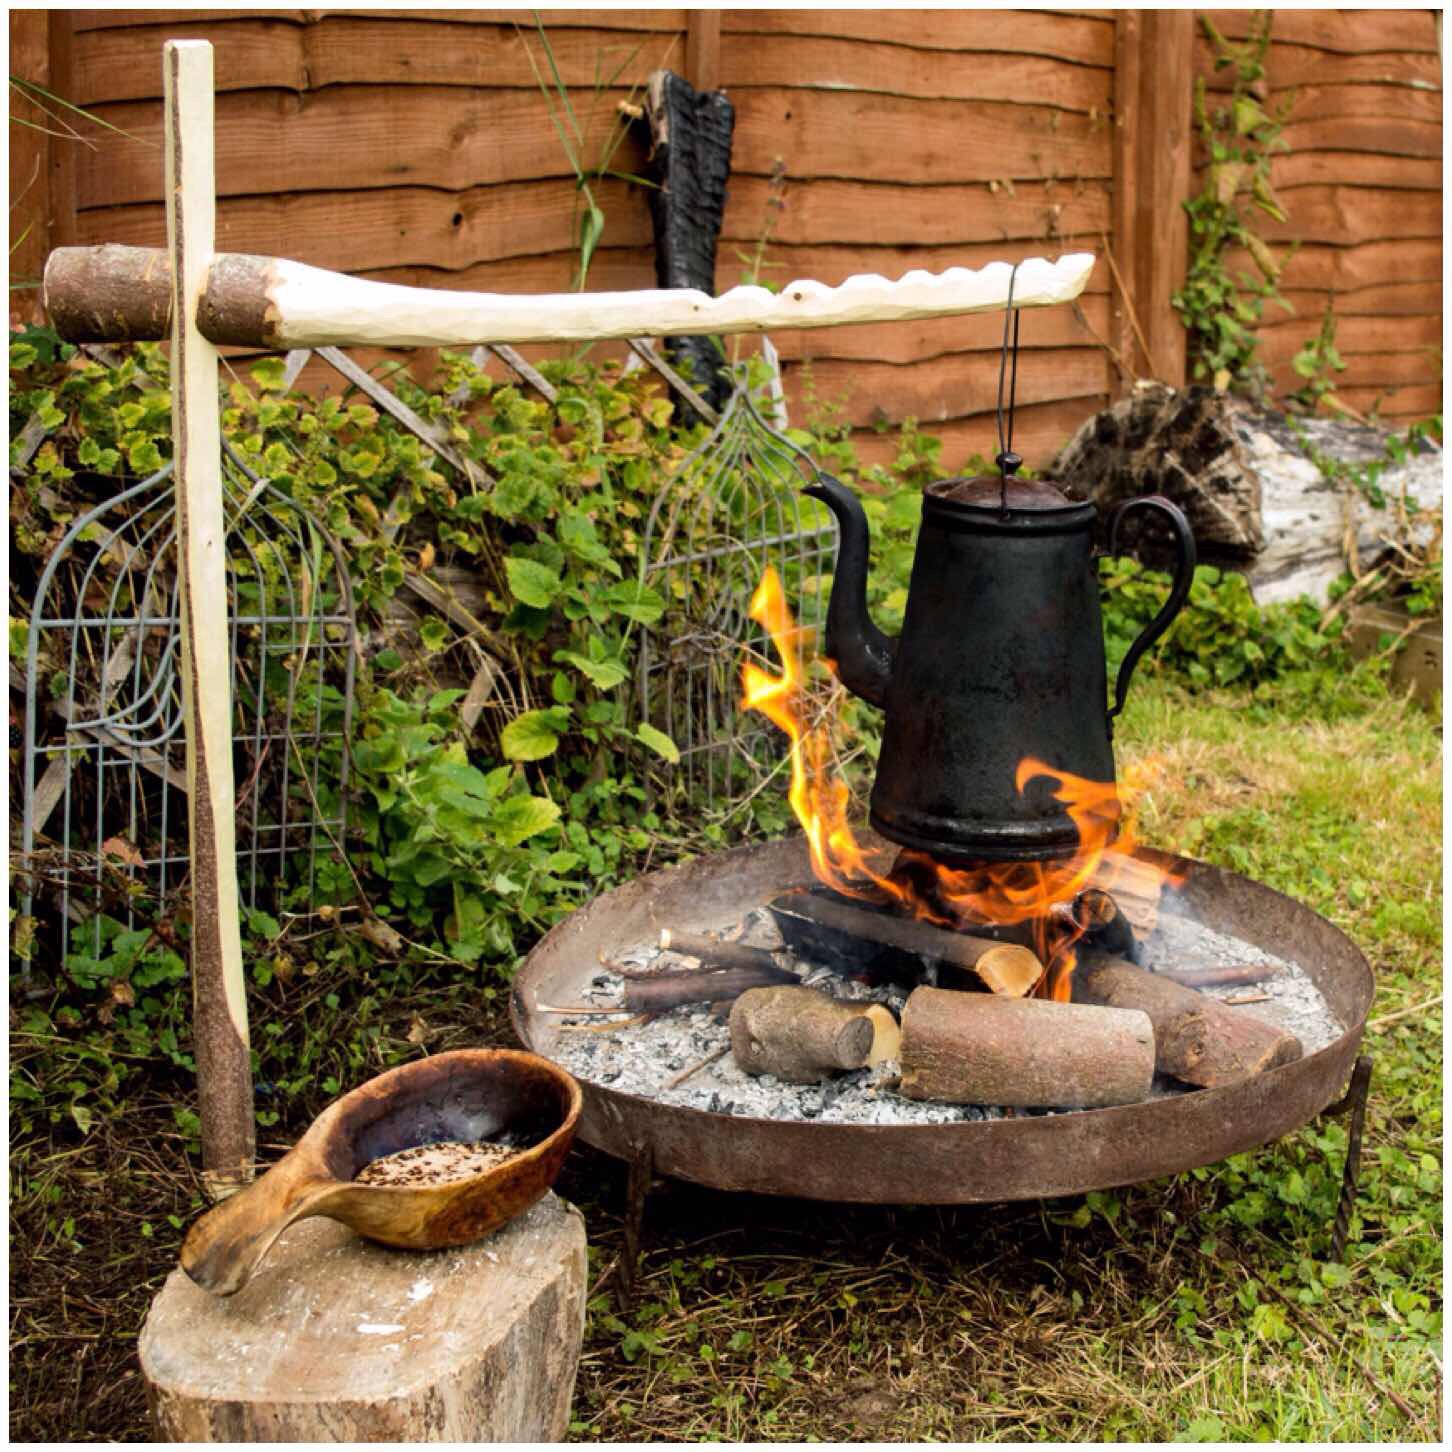
The coffee
My usual test is to get the fire going and have a cup of coffee.
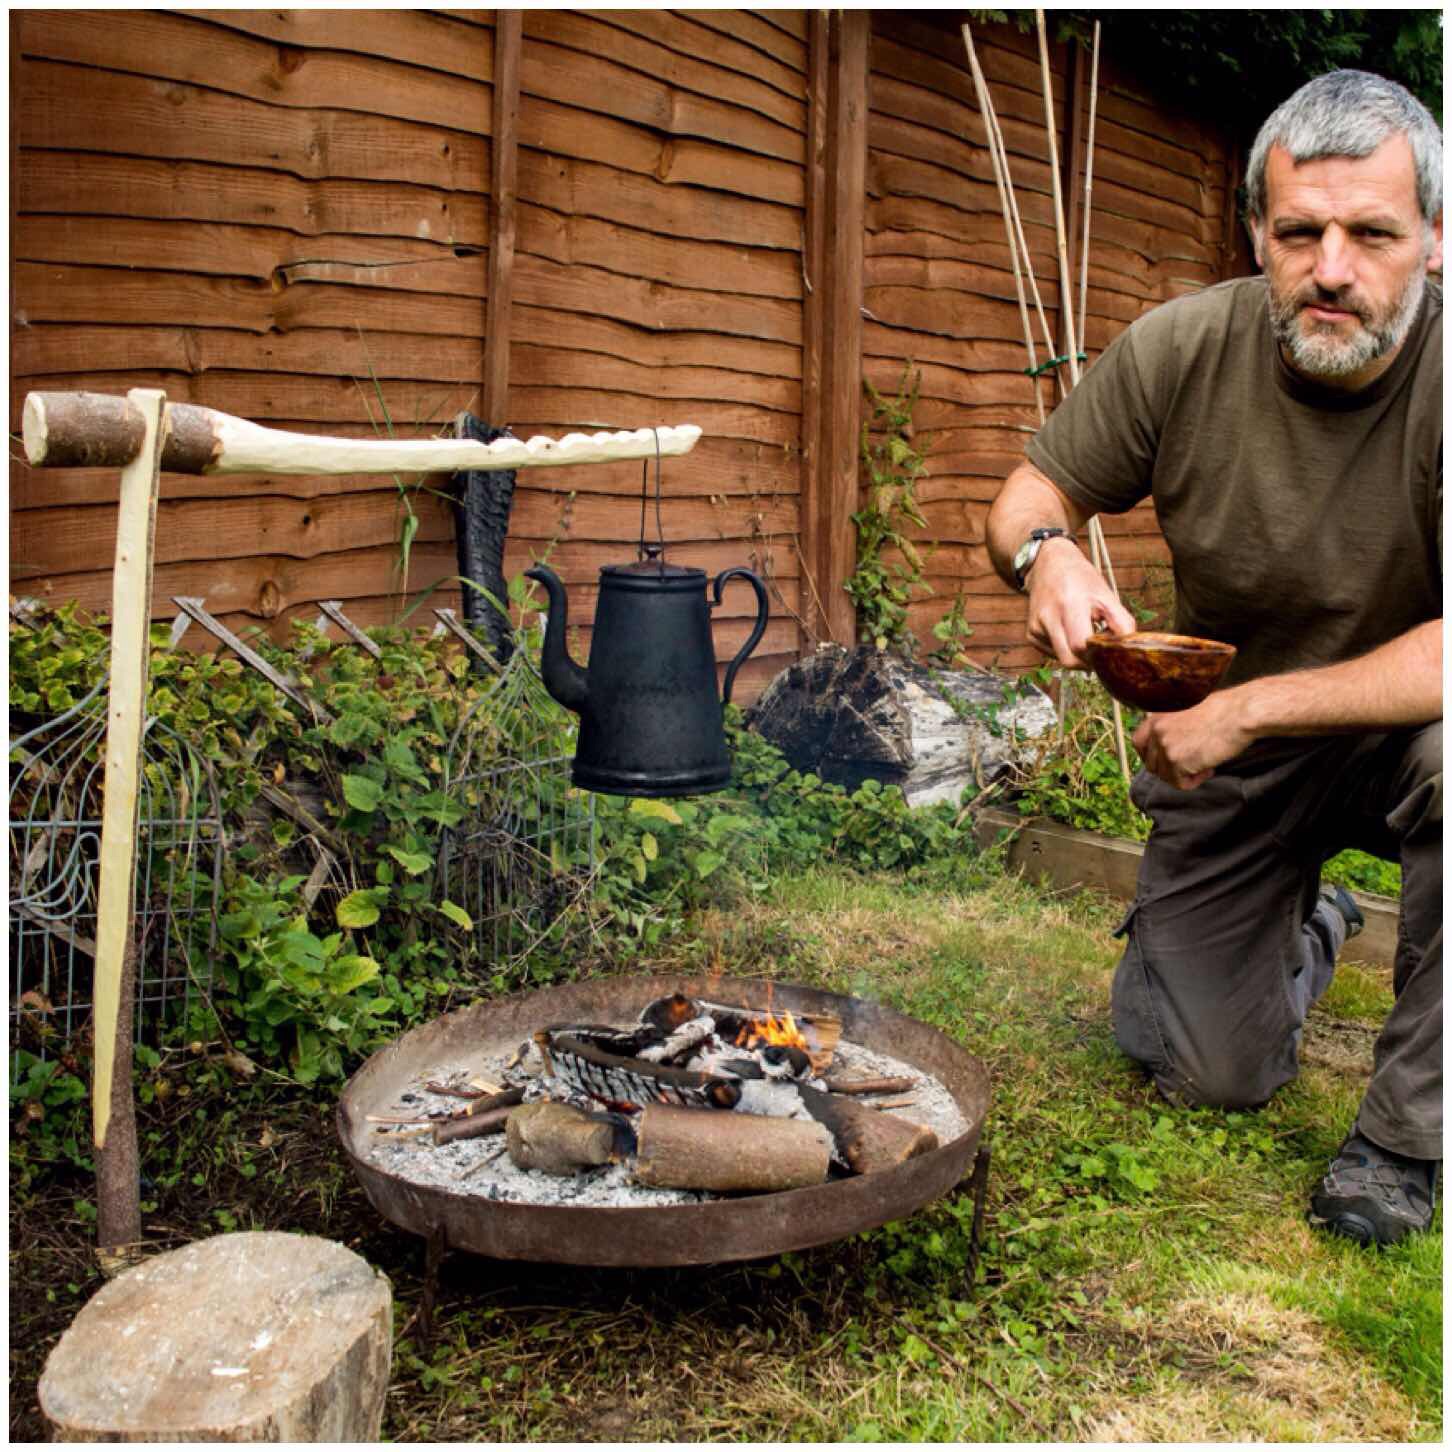
With the kettle on the arm it was still very easy to move the arm up and down and when the kettle had boiled I was able to easily rotate the upright before pouring. (I discovered that when I’d hammered in the upright, if I twisted it around a couple of times it would rotate more easily when needed.
This crane has been like a little itch that just would not go away for the last couple of months so I was glad to have finally completed it.
It takes slightly longer to construct than the Lap Joint crane however I would have no concerns about anybody using this one.
The upright on this crane is fairly slim so at some stage I will make another one with a thicker upright capable of taking something like a Dutch oven filled with stew (this one may do the job, it’s not been tested yet).
I am afraid to say that I still have the ‘crane itch’ so there will be a couple of more posts on campfire cooking constructions.
Cheers
George